Monthly Archives: April 2015

A Book Review – The Pipe Companion: A Connoisseur’s Guide by David Wright


Blog by Steve Laug

494194
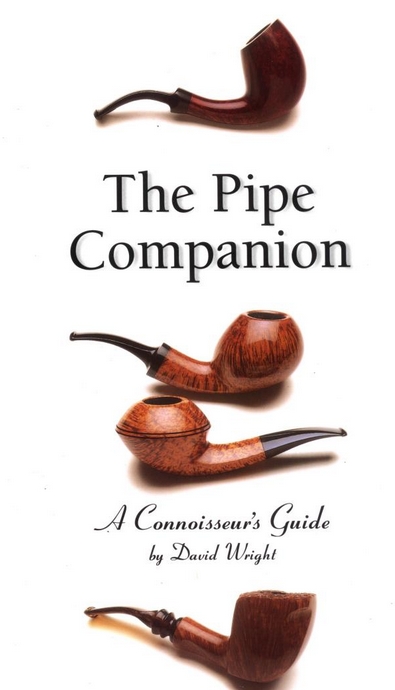
Several things about this book caught my attention when I first saw it. The first of course was the magnificent photography that graces the pages. It is literally packed with more than 125 full colour plates of pipes. The age of some of the pipes made me read the fly-leaf of the cover to know more about the author. That is when the second thing caught my attention, The Pipe Companion was written by David Wright who is the Curator of the Museum of Tobacco Art & History in Nashville, Tennessee, USA. What was interesting about that was the wealth of tobacciana that was available to the author at his work place. I was already hooked before I even read any of the text.

When I did read the fly-leaf on the cover it only solidified my commitment to purchase the book. I quote from there:

“Smoking a pipe is a refined, relaxing ritual. More than a tool for reflection, a well-crafted pipe is a work of art to be admired and appreciated. Whether made of clay, briar, or meerschaum, every pipe’s personality and history is evident I the beauty of its bowl and the style of its stem.”
“Profiling more than 50 master carvers from around the world and their elegant, yet functional creations, The Pipe Companion is the essential guide to the world of pipes. Within these pages you’ll explore the exquisite artistry of pipe making and enjoy a behind-the-scenes tour of carving styles and manufacturing techniques. You’ll also learn about the history of the pipe – from its North American origins to its spread throughout Europe and the Middle East to the wide variety of classical and freehand styles popular today (2000). Finally you’ll discover modern pipe-smoking customs and practices, as well as learn how to select, smoke, and care for your pipes.”

“Perfect for both pipe enthusiasts and anyone with a penchant for the occasional puff, The Pipe Companion provides practical advice along with a wealth of information. So lean back, fire up your pipe, and enjoy.”

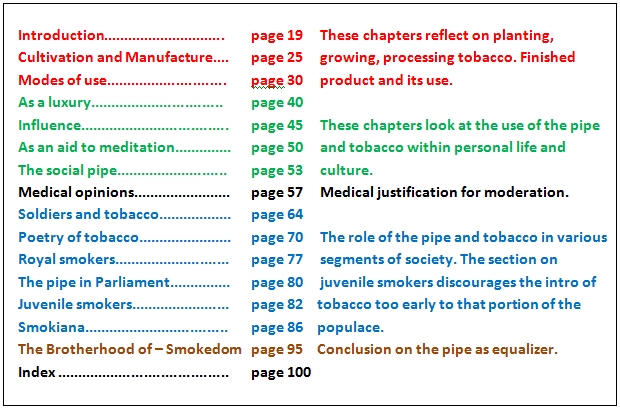
As with previous reviews I have written I include the table of contents to give an idea of how the author proceeds to do what is promised in the quotations from the preface or in this case the fly-leaf of the book’s cover. It is arranged in three parts with subsections underneath each part. It concludes with a glossary, a suggested reading list, pipe makers contact information and then ends with notes.TOC 
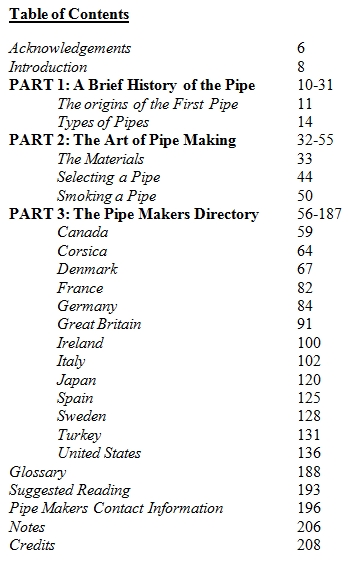
PART 1: A Brief History of the Pipe – this first section of the book uniquely presents the standard pipe history that has been repeated in a variety of descriptive ways since Alfred Dunhill’s Pipe Book. However, what makes this presentation unique among the others is the beautiful photographs of the pipes from the early periods of history. He looks at the origins of the pipe from Native American pipes to those developed later in Europe when tobacco was brought there.

After giving a very brief description of the origins with photos the author turns to the different types of material that have been used for making pipes. Again this section is graced with beautiful photographs illustrating the pipes made of each material. There are paragraphs on Clay Pipes, Wood Pipes, Porcelain Pipes, Meerschaum Pipes, and Briar Pipes. This section ends with an inserted article on Pipe Production. The interest in artisans who made these pipes sets the stage for the later PART THREE which looks at Pipe Makers.

The author’s style is engaging and enjoyable to read. You are carried forward through the chapter as he unfolds the history, interjecting stories and incidents among the photos of the pipes that illustrate his points. It is well written and flowing in style.

PART 2: The Art of Pipe Making – the second section covers pipe making from the perspective of one person shops to medium-sized factories. Again this PART 2 sets the stage for PART 3 on Pipe Makers. It does this with reference to the fact that before looking at the variety of pipe makers that it is important to understand how block meerschaum and briar are carved from their natural state into functional and artistic pipes.

The first chapter is on the materials that pipes are made from. The first section in this chapter is on meerschaum. It looks at the history of meerschaum and how it is mined and then refined and carved into pipes. There are pictures in the section that show raw meerschaum and ornate figural and design pipes carved from meer.

This is followed by a section on briar. There again the author looks at the agriculture of briar and where it grows and how it is harvested. Then the section looks at the seasoning/curing of the briar and finally how the blocks are cut and then carved into pipes.

The next section covers carving in all of its aspects. There are beautiful photos of figural pipes, carving and then finally of bending the stems that were used. Even machine-made pipes are discussed. It is interesting to note that the author says that even machine-made pipes involve a lot of hand work – sanding, shaping, finishing etc. are all done by hand.

The second chapter describes how to select a pipe. The author likens buying a pipe to buying a car. He discusses the materials that go into making a pipe, the finish and compares machine-made to handmade pipes and closes the chapter by discussing the features of a pipe. He states that the most important feature is free air passage from the bowl to your mouth – mechanics.

The third chapter discusses the how to of smoking a pipe. Truly this section should be called breaking in a new pipe and interestingly the author gives a sub-title part way through the text where he gives it that title. He discusses bowl coatings, various methods of loading a pipe including the Frank method with a brief segue into choice of tobacco. Then he moves to talking about lighting the pipe, tamping the tobacco and concludes with after smoking care and cleaning of the pipe.

PART 2 is a well written concise exposition of the pipe – materials, selection and smoking. It is written in an engaging way but always with the awareness of what is ahead in PART 3 of the book. There is a building excitement in the chapters about the various pipe makers that will be discussed ahead.

PART 3: The Pipe Makers Directory – The remainder, and by far the largest part of the book is the present one. The author has arranged his list of hand-picked pipe makers by country for ease of reference. Quoting from Wright’s introduction to this part of the book:

“As you examine the different carvers around the world and their unique interpretations, you’ll notice similarities and schools of art. The oldest briar school, for example, is centered in Saint-Claude, France. Italy has two distinct schools of carving, while the other Scandinavian countries have a look all their own. Then, there are the United States and Japan. The variety of styles and techniques in the United States reflect America as the proverbial melting pot. In Japan, styling can by very Japanese or exhibit a combination of Japanese and Danish features.” Page 57

“Modern briar and meerschaum pipe styles can be divided into two broad categories: classic and freehand. The classic style has its origins in early French and English pipes. The proportions of the bowl and the stem: length, height, and diameter are standardized in these pipes. Many of the names of classic pipe shapes and styles were chosen many generations ago and reflect the shape or appearance of the pipe… Freehand was a term coined for the “wild” or “organic” designs of Danish pipes that first appeared in the late 1950s. Freehand implies that the pipe carved at the whim of the carver. A truer definition is that the pipe design is governed by the grain of the wood. No two freehand pipes are carved alike, nor do they conform to any one style.” Page 58

Following the short introduction, from which the two quotes above are taken, the author proceeds to move through the various countries he has chosen. In each country he has chosen pipe makers to highlight and includes photographs of their work. This catalogue of pipe makers is the highlight of the book to me and a section I turn to repeatedly. I will list each country as the author has organized them and then give a list of the pipe makers he covers in each one. I don’t know what your thoughts will be but I was surprised by the listings and found there were several I had not heard of previously.

Canada: J. Calich (p.59-61), Julius Vesz (p.62-63).

Corsica: L.J. Georges (p.64-66).

Denmark: Bang’s Pibemageri (p.68-69), Jess Chonowitsch (p.70-72), Lars Ivarsson (p.72-74), Jorn (p.74-75), Anne Julie (p.75-77), W.O. Larsen (p.77-79), Nording (p.79-80), Stanwell (p.81).

France: Butz-Choquin (p.82-83).

Germany: Holger Frickert (p.84-86), Karl-Heinz Joura (p.86-88), Manuel Shaabi (p.88-90).

Great Britain: Ashton (p.91-94), Castleford (p.94-95), Dunhill (p.95-98), Ferndown (p. 98-99).

Ireland: Peterson (p.100-101).

Italy: Ardor (p.103-104), Paolo Becker and Becker & Musico (p.104-106), Brebbia (p.106-108), Castello (p.108-110), Il Ceppo (p.110-111), Mastro de Paja (p.111-113), Radice (p.113-115), Savinelli (p.115-118), Ser Jacopo (p.118-119).

Japan: Shizuo Arita (p. 120-121), Jun’ichiro Higuchi (p.121-122), Tsuge Pipe Company (p.123-124).

Spain: Joan Saladich y Garriga (p.123-127).

Sweden: Bo Nordh (p.128-130).

Turkey: Ismet Bekler (p.132), Yunas Ege (p.133), Sevket Gezer (p.134), Huseyin and Mustafa Sekircioglu (p.133-134), Salim Sener (p.134), Sadik Yanik (p.135).

United States: E. Andrew, Briars (p.136-138), Alfred Baier (p.138-140), Boswell’s Pipe & Tobacco (p.140-142), J.T. & D. Cooke (p.142-144), Cristom (p.144-147), Jody Davis Princeton Pipes (p.147-149), Dr. Grabow (p.149-151), Fairchild Pipes (p.151-153), David Jones Briar Pipes (p.153-155), Kaywoodie (p.155-157), Kirsten Pipe Company, Inc. (p.157-159), Sam Learned (p.159-161), Lucille Ledone (p.161-162), Andrew Marks (p.163-165), Mr. Groum Pipes (p.165-167), Clarence Mickles (p.167-168), Elliott Nachwalter Pipestudio (p.168-170), Denny Souers (p.170-172), Trever Talbert (p.173-174), Mark Tinsky American Smoking Pipe Company (p.175-176) Von Erck’s Pipes & Repairs (p.176-178), Roy Roger Webb (p.178-180), Steve Weiner (p.181-182), Tim West (p.182-186), Randy Wiley (p.186-187)

From the above information it is obvious that the largest portion of the pipe makers included is from the United States. I am assuming that this is because of the author’s location. However, within each section there is a concise biographical note on the pipe maker and a description of the style and where they fit within the classic/freehand division that introduced PART 3. The photos in this section are absolutely stunning and give a good idea of the style, quality and craftsmanship of the makers. I will continue to use this book as a reference to the works of the makers covered and as a wish book of pipes I want to add to the collection.

The book ends with some sections that could easily be skipped to the detriment of the reader. The Glossary gives excellent definitions of the terminology of pipe making. These definitions are concise and helpful. The Suggested Reading bibliography is a great resource and one that I use as a checklist of published materials on pipes and tobaccos – both books and periodicals. The Pipe Makers Contact Information is worth a look as well if you want to contact any of the above makers for a commission or just write them a thank you note for a great pipe you are smoking. The book ends with Notes that really are endnotes for the chapters in the book giving bibliographical notes for information used from other references.

I can heartily recommend The Pipe Companion – a Connoisseur’s Guide by David Wright to every pipe collector and collector of books and information on pipes. It is a resource that is well written, well illustrated and unusually thorough in the kind of information that is resourced in the book. It is an ongoing pleasure to read repeatedly or to just thumb through and enjoy the pipe photography that graces the pages from the beginning to the end. If you have not picked this one up you really owe it to yourself to get a copy before it too goes out of print.

“Chelsea” Birthday Gift Pipe


My youngest daughter’s name is Chelsea and she is married to a fine young man who also enjoys a pipe.  He’s received several of my restorations in the past few years.  A few months ago, I stumbled across this “Chelsea” stamped pipe and decided it would be part of his birthday present this year.  He and my wife share the same day in April, so I can never forget his special day.

The pipe is stamped “Chelsea” and “Made in France  341”.  I’ve seen references to the Chelsea brand as being an Comoy’s second and indeed the shape 341 is listed on their shape chart as a small billiard.  I was unable to find a Comoy’s version of this shape anywhere on the web.  The stem material and finish definitely have a Comoy’s feel.

The pipe was in good shape, but some light oxidation and a very mild cake.  The bowl had several ugly fills.

Chelsea_Before Chelsea_Before (2) Chelsea_Before (4) Chelsea_Before (3) Chelsea_Before (1)

After the pipe was reamed, I used a small dental pick to remove the fill material.  I put several drops of the black superglue on those spots and applied a spritz of accelerator (I still have not acquired a proper application tool for the accelerator).   I used 800 grit paper to sand smooth the glue spots, than up to 1500 wet paper.  The second picture shows the spots sanded smooth.

Chelsea_Fills_Fix

Chelsea_Fills_Fix (1)

I applied a Medium Brown Fieblings stain to the bowl and set it with a match.  After it dried, I buffed it out with some Tripoli and then White Diamond to smooth out the stain color.  This hid the fills nicely.

The stem was an easy fix, first using some 800 grit paper to remove the mild oxidation.  Then up thru 1500 and 2000 grade wet papers, followed by 8000 and 12000 grade micromesh.  The mounted on the briar, the stem was buffed with White Diamond and Meguiars Plastic polish.   The bowl was buffed with several coats of carnuba wax.

Chelsea_Finished Chelsea_Finished (5) Chelsea_Finished (1) Chelsea_Finished (2) Chelsea_Finished (3) Chelsea_Finished (4) Chelsea_Nomenclature 1 Chelsea_Nomenclature 2

My daughter and son-in-law live in New Orleans, so the pipe will be packed and sent out in the mail tomorrow.  I wish that I could be there to celebrate with him person, but we’ll see him soon.

Restoring a Monster KBB Yello Bole Imperial Rusticated Billiard


Blog by Troy Wilburn

I picked up this huge pipe from a friend of mine on the Dr. Grabow Collectors Forum. This pipe isn’t a magnum it’s a howitzer! It is 7 ½ inches long and has an almost 2 ½ inch tall bowl. The pipe was nice but had some issues. The top of the rim and the inner edge had been hacked up. The stem also has some heavy nicks and dings in it. It was really clean though and I had very little to do as far as getting the inside clean.

Here are some photos of the pipe before I worked on it.Troy1

Troy2

Troy3

Troy4 As I stated above the top of the rim and the inner edge were badly hacked.Troy5 I began by working on the rim. I topped it and made a large concave inner rim. I don’t know if it came like this from the factory or not but it has one now. I took it down with 80 grit sandpaper and then a lot of sanding with 120 grit sandpaper.Troy6

Troy7 After I had finished rough shaping the rim I did LOTS and LOTS more sanding from 400 grit sandpaper all the way up to 2000 grit sandpaper. I used mineral oil as a lubricant for the sandpaper and also to bring out the colour of the natural wood. Troy8

Troy9

Troy10 I soaked the stem in alcohol and then scrubbed it with a green scouring pad. I cleaned it out with pipe cleaners.Troy11 The stem had several tooth marks and gouges on the top and the bottom side next to the button.Troy12

Troy13 I filed out the tooth marks and reshaped the button.Troy14 Here is a little trick that some of you may know, but I came up with it in working on the last few pipes. I thought I would share it here. After filing the stem I take a lighter and work the flame back and forth across the file marks. The heat from the lighter helps to blend in the file marks and makes it easier to sand them out.

Here is a photo of the stem before I used the lighter.Troy15 Here is a photo of the stem after using the lighter.Troy16 I buffed the rim with Brown Tripoli a few times to get rid of the fine sanding marks. I could not get the pads into the concave inner rim so I waxed it by hand with paste wax several times.Troy17 With the initial sanding and cleaning of the stem done, I still had a lot more sanding to do. There were lots of scratches and dings in it. I began sanding with 400 grit sandpaper and worked my way up to 2500 grit sandpaper.Troy18 I put the stem back on the bowl and got it ready for the final buffing and waxing.Troy19 Here are photos of the pipe after it had been buffed and polished.Troy20

Troy21

Troy22

Troy23

Troy24

Troy25

Troy26

Troy27

Troy28

Troy29

Troy30

Troy31 To give an idea of the size of this pipe and put it in perspective here is a photo of it next to a Yello Bole Hand Made Poker I have. As most of you would know, a Hand Made is not a small pipe by any means. This billiard almost dwarfs it.Troy32

A Book Review – Pipes & Tobacco. A Bright and Interesting Discourse on Smokers by J. W. Cundall


Pipes and Tobacco CoverWhat attracted me to this book when I saw it on Briar Books Press was the press release that Gary Schrier posted on his website. It is a rather long opening to this review but I find that it is a great piece of writing and a simple summary of the book itself. There he wrote the following:

“What they were saying in 1901 about “Pipes and Tobacco. A Bright and Interesting Discourse on Smokers” by J. W. Cundall.Long 8vo. Cloth, 6d.”

“To-day. – Mr. J. W. Cundall has written a little volume which all lovers of the fragrant weed will read with interest and amusement. In addition to an account of the history of tobacco, and the science of it growing and blending, many entertaining anecdotes are related of famous smokers, and a large amount of odd information of use to smokers imparted. For a modest outlay of sixpence, at which price it is published, no devotee of ‘My Lady Nicotine’ need lack this latest appreciation of his goddess.”

“My how times have changed! That’s inflation for you. No longer sixpence, but then who other than Briar Books Press discovers such unusual, worthwhile, and most importantly, such entertaining literature for the pipe-smoking man. Hidden for over a century, this delightful gem is a look into our collective past for all the reasons smoking is such good medicine for the soul. Historical yet in many ways contemporary, Pipes and Tobacco is the smoking man’s guide to everything which is important to him. Author Cundall spins an entertaining read for the Englishman on so many of the topics of interest to him at the turn of the last century. From tobacco as a luxury and aid to meditation, to social smoking and as a medicinal aid, to soldiers and smoking, to poetry, to juvenile and royal smokers and smoking in parliament, to Smokiana and the Brotherhood of Smokedom, Cundall covers the subject concisely yet comprehensively. Peppered with quaint tobacco and briar-pipe advertisements, Pipes and Tobacco includes a never-before-divulged statement attesting to the origin of J. M. Barrie’s secret Arcadia mixture as written in his 1890’s novel My Lady Nicotine. A delightful and informative read that will leave you wanting for more.”

Who could resist that press bite and all for only $20USD. I ordered my copy and when it arrived sat down and read the short 103 pages with great interest.
As I often do with these reproductions of older books I turned through the pages to enjoy the layout and design before giving it a read. In this case the book is filled with lots of period advertisements for books and all assortments of items from that time. It also has great illustrations that are well worth the price of purchase in my mind. I am including a copy of the Table of Contents as I also read through that before proceeding with a general read of the book. I have grouped the topics of the chapters into related sections even though the author did not. Even before reading through a book in total I try to organize the flow of the book with a quick scan of the chapters. I look for the logic of the book and then section of the book to get an idea of the author’s direction and intent for his book. Below is a chart showing my grouping of chapters.Chapters The style of this book is very readable and timeless. Cundall’s use of language is clean and forthright and simple to read. It has some of the marks of its age such as punctuation and long sentences but the content flows very well. The design as a pocket-book full of advertisements from the time it was written give it a flavour of nostalgia that for me is refreshing and speaks to a time when things moved more slowly. I can easily see this book carried in a pipeman’s pocket and read on the train or in the evening over a pipe and drink in front of the fire. Schrier has done a great job in reprinting this old classic of pipedom.

I thought it would be helpful to a potential reader to give a quick summary of the sections that I noted above. I don’t do this to spoil the read as much as to give an idea of what you can look forward to when you pick up the book and read it for yourself.

FIRST SECTION (noted in red in the chart)

The author starts as many pipe books before and after him have started. He gives a quick overview of the history, cultivation and how the harvested tobacco is processed and delivered to smokers for use. There is nothing truly new or unique to this section but the style of writing makes it a quick overview or refresher for those who want to jog their memories of the early years and development of tobacco.

SECTION TWO (noted in green in the chart)

Cundall takes a slightly different tack than other writers on the subject have done. He acknowledges that tobacco is a luxury but one that is well worth spending your hard-earned money to procure. It provides enjoyment and community in a way that is out of proportion to its expense. To load a bowl of tobacco and enjoy a smoke enables one to be meditative and contemplative on the one hand but also invites the smoker into a society of smokers that is convivial and erudite. I include two quotes below that give an idea of his style of writing.

“All tobacco is good, only be careful to have only the best.” Page 44

“The pipe draws wisdom from the lips of the philosopher and shuts up the mouth of the foolish. It generates a style of conversation – contemplative, thoughtful, benevolent and unaffected.” Page 53

SECTION THREE (noted in black in the chart)

Cundall begins with the fact that there will always be opponents to pipes and tobacco. While it is vocal and comes from a broad spectrum of society it is contrary to the facts. While abuse and overuse of tobacco can cause physical ailments the facts are there that moderate tobacco use is beneficial. I find that this chapter sets the stage for the further sections of his book. It provides the justification of the remaining sections where he explores the use of tobacco within many settings by many different kinds of people. The quotes from medical and scientific authorities provides the rational base for his advocacy of moderate enjoyment of the pipe.

SECTION FOUR (noted in blue in the chart)

This section explores the spectrum of pipe smoking in the world of Cundall’s day. It could easily be developed by someone to include the use of the pipe in the world of our day. It covers the use of tobacco among the military, authors and poets, the politicians and royalty of his day. One of the charming features is his inclusion of a description of the Smoking Room in the House of Commons in Britain. He includes a chapter which advocates for withholding tobacco from youth until they come of age (when that is does not appear clear to me). However, it is an interesting read nonetheless. The section closes with a collection of quote regarding smoking from clergy, academics, doctors, scientists, politicians and writers that is intriguing. Each quote is singularly worth reading and reflecting on. He entitles it Smokiana – a phrase that he seems to have coined for his use.

CONCLUSION (noted in brown in the chart)

The chapter is entitled “The Brotherhood of Smokedom” and to me serves as the conclusion of the entire book. It is a concise statement of the pipe as an equalizer. Regardless of status or strata of society the pipe takes the smoker to the same place of enjoyment and satisfaction. It provides uncensored enjoyment to all who lift the bowl and sip the smoke. The quote below captures the focus of the chapter.

“When contented are not all men equal, and who can be other than contented with his pipe between his teeth and the tobacco glowing redly in the, whither it be Bird’s-eye or Returns, Shag of the mixture of Arcady.” Page 97

If you enjoy reading about your pipe and tobacco and the relaxation and pleasure that it gives then this is a book you should purchase. It is not a long book but it is one that can be best savoured with a pipe in hand, a favourite drink at your side. Sip the pipe and drink and savour the well written prose of this little book in the quiet of the zone that the pipe opens to you. I recommend that you contact Briar Books Press and order a copy for your own reading as soon as you are able. Who knows when it will once again be out of print.

Restoring Two Older Bonus Walnut Pipe Stands


Blog by Steve Laug

One of the perks I picked up in the recent lot of pipes I bought off of craigslist was a walnut pipe rest and a walnut 6 pipe rack/humidor. Both of them were in decent shape. They were scuffed and worn in spots and dusty from disuse. But they were still very functional. I have wanted a two pipe rack like the one on the left of the photo for a while now to use on my desk at the office. The other six pipe rack with the humidor now resides beside my chair in the living room. I have had pipe laying in an ash tray and tins stacked next to them. I was able to put the pipes into the rack and the tins in the humidor so it was a great addition.craig4 I took a few photos of each piece before I cleaned them up to show that they were in relatively good shape for pieces this age.rack1

rack2

rack3

rack4

rack5

rack6

rack7

rack8 I worked on eth humidor/rack first. I took it apart to clean up the pieces. The sides of the humidor had removable cedar panels on the sides of the box. The bottom and top of the humidor were milk glass and both were in great shape. There as a sliding metal plate perforated with holes that held absorbent material inside that could be wetted to keep the humidor living.rack9 I scrubbed the glass on the top and the bottom with soapy water and rinsed them before drying them. The walnut rack and case I scrubbed down with Murphy’s Oil Soap and then hand buffed with a soft cotton cloth. The wood was quite soiled as can be seen from the cotton scrubbing pads in the next two photos. I was able to remove all of the grime from the wood and bring some warmth back to the finish.rack10

rack11 I put the interior of the humidor back together. There was a cardboard piece that sat between the milk glass and the wooden bottom of the box that went in first. Then the cedar pieces that went on the sides went in next. These were beveled on the bottom and sides to make for a smooth fit with no gaps. They were well cut and fit tightly together with no gaps.rack12

rack13 I slid the metal plate out of the track in the lid and scrubbed it with a damp cloth to remove the dust and tobacco bits from the surface of the metal. I buffed it with a soft cloth to bring back some shine. After I had dried it out I slid it back into place on the lid. There is a gold label on inside of the lid that reads “Made of Genuine American Walnut”.rack14

rack15

rack16 I buffed the rack and humidor by hand and took the next series of photos.rack17

rack18

rack19

rack20 I scrubbed the two pipe rest with Murphy’s Oil Soap and hand buffed it with a soft cloth. The finished pipe rest is shown in the photo below. It looks like new and has a deep warm glow to the finish again.rack21

Rejuvenating an Italian Sitter stamped MAT


Blog by Steve Laug

I am finally working on the last of the pipes that I picked up on craigslist – a sitter that is stamped MAT and Italy. It was my least favourite shape in the lot. I left it to the very end to work on. It is shown in the photo below in the middle of the left column.craig5 It was a bit of a mess. The stem was stuck in the shank and was oxidized. It also had some tooth chatter. Once again there was the calcification on the stem that comes when a softie is left in place on the stem. The bowl had a shiny varnish finish but that was dulled with a lot of tars and oils. The rim was caked with a very hard, thick coat of tars and oil – lava over flow from the bowl. The bowl itself was caked. There were quite a few fills in the bowl on bottom and on the back side of the bowl near the shank. There was also an area of fills on the top of the rim and a small crack that had been filled on the back side of the bowl near the rim.Mat1

Mat2

Mat3

Mat4

Mat5 I put the pipe in the freezer for an hour to loosen the stem. After an hour of cooling I was able to twist the stem out of the shank. I was a little surprised to find a very short – ½ inch stinger in the end of the tenon.Mat6

Mat7 I heated the stinger with a lighter and then twisted it out of the tenon with a pair of pliers on which I had wrapped tape around the jaws. This tape prevented the jaws from damaging the aluminum stinger.Mat8 I set the stem aside and reamed the bowl with a PipNet reamer. I used three of the four cutting heads to remove the cake from the bowl. With the small crack on the back edge of the bowl I wanted to expose the interior of the bowl and check out the interior for cracks.Mat9

Mat10 To remove the hard lava from the rim I used a sharp blade pressed flat against the rim to scrape away the buildup. I scraped and then wiped it down with alcohol to soften the tars. I continue until I had removed the cake. In doing so I found that just above the crack on the back of the bowl was an area of several small fills that were on the rim.Mat11 I scrubbed the surface of the bowl with acetone on cotton pads to remove the varnish that was on the finish. I wanted to get underneath that finish so that I could do a repair on the small crack and also get to the surface of the briar. I personally do not like the thick varnish coats that are on some pipes.Mat12

Mat13

Mat14

Mat15

Mat16 I cleaned out the small crack with a dental pick and alcohol. I drilled a tiny hole at the bottom of the crack to stop it from spreading. Once it was clean I stuffed briar dust into the crack and then dripped some super glue on to the rim and the side of the bowl to fill in the crack.Mat17

Mat18 I sanded the rim and the repaired area with 220 grit sandpaper and then with a medium and a fine grit sanding sponge to smooth out the surface. I cleaned out the shank and the stem with pipe cleaners, cotton swabs and alcohol.Mat19

Mat20 I sanded the stem with 220 grit sandpaper to remove the tooth chatter and light tooth marks. I also sanded it to remove the oxidation. I followed that by sanding with a medium and a fine grit sanding sponge.Mat21

Mat22 I buffed the stem with red Tripoli to break through the oxidation. I sanded the stem with micromesh sanding pads – wet sanding with 1500-2400 grit pads.Mat23 I rubbed the stem down with Obsidian Oil and then buffed it a second time. I dry sanded with 3200-12,000 grit micromesh sanding pads.Mat24

Mat25 I used some dark cherry stain that I had on hand – this stain is a water based stain and matched the colour of the original bowl. I applied the stain with a folded pipe cleaner and once I had covered the bowl I let it sit for a few moments before wiping it off.Mat26

Mat27

Mat28

Mat29

Mat30 I wiped down the pipe with a cotton cloth to remove the excess stain and give it a light hand buff.Mat31

Mat32

Mat33

Mat34

Mat35

Mat36

Mat37

Mat38 I buffed the pipe and stem on the buffing wheel using pads charged with red Tripoli and with Blue Diamond. I gave the pipe multiple coats of carnauba wax and then buffed it with a clean flannel buffing pad to give it a shine. The finished pipe is shown below.Mat39

Mat40

Mat41

Mat42

Smoke Rings


Circumstances and events of life have had me out of the shop for too long now, something I hope to rectify very soon. Since I’ve been unable to work on any of my projects I’ve been doing a little writing again, a passion I’ve let lay dormant for a while. At any rate, I thought this particular poem might be of interest to you good pipe men and women so, without further adieu, I share “Smoke Rings” with you.

Greg's avatarPotholes in the Road of Life

A few days ago Carpe Diem Haiku Kai did an exercise on, what else, haiku: specifically form. The challenge was to stretch ourselves by doing three haiku in slightly different ways: one 3-5-3 stanza, one traditional 5-7-5, and a free form stanza. It took me a little longer than usual to get this done; I had an idea but it took several tries to get something I was pleased with. Consequently I missed the deadline but have a chained haiku that I really like.

Smoke wafts from
A burning ember
In my pipe

An animated
Enchanting dance of smoke rings
Drifting by my eyes

Lulling me into
A tranquil state of mind
Induced by rolling smoke rings

As you can see, I stayed with the guidelines using stanzas of 3-5-3, 5-7-5, and 5-6-7 for the free form ending, while, in my mind at least, chaining them into one poem. Even…

View original post 22 more words

Saving a Pipe – Restoring a Royal Danish 33 Bulldog that had seen better days.


Blog by Steve Laug

I am in the midst of a particularly labour intensive restoration of a Royal Danish 33 Bulldog. It was in very rough shape but having met the old timer who it originally belonged to I decided to make the extra effort to bring it back to life. It was obviously a favourite pipe of his and he as much as said so. I think it was the only one of the lot that he felt bad about letting go of when he sold me the lot. Often I will take time to read some of my favourite blogs during lunch break at work or even when I come home to help me unwind from a long day. I read before I pick up a pipe to work on or restore and find that it helps focus my attention. Yesterday at lunch I came across an article by Alan Chestnutt on his blog on his website Reborn Briar Estate Pipes that really resonated with what I was feeling as I worked on the particular pipe. He called the work he does as a pipe restorer – “saving the pipes”. I think that is a particularly poignant description of the work on this Royal Danish 33 Bulldog that I picked up in the lot from craigslist. It is shown in the first photo below at the bottom middle of the photo. In the second photo it is in the right hand column at the bottom of the photo.craig5

craig6 The old timer was a well loved pipe and obviously a good smoking pipe. It was in rough shape. In fact it was in the roughest shape of the lot. The photos below show the state of the pipe when I brought it to the work table. The finish was rough and dirty with lots of scratches and dents in it. The rim was shot. The front side was worn down from beating out dottle when the smoke was finished. The drop from the height at the back of the bowl to the height at the front was over ¼ inch and the surface was chewed up. The outer edge of the bowl on the front was obliterated. The rim surface was beat up as well. There were thick marks of tar or oil on the sides of the bowl and rim that were sticky. The bowl was heavily caked. The double ring around the bowl was damaged. Over ½ of the briar between the rings was broken and missing. The stem was oxidized and chewed. The topside of the stem had deep dents near the button that went up almost a half an inch. On the underside the tooth marks were even deeper and there was a hole in the stem where it had been gnawed through. Around the stem was calcification that is common pipes that have had a softie bit on the stem. I think the old timer who had this pipe slipped the softie bit over the damage so he could keep smoking his favourite pipe.Dan1

Dan2

Dan3

Dan4 The next series of photos show the thickness of the cake, the extent of the damage to the rim and the missing pieces of the briar between the double rings around the cap of the bowl.Dan5

Dan6

Dan7

Dan8 I reamed the bowl with a PipNet reamer starting with the smallest cutting head and working up to a head that was almost the same diameter as the bowl. I took the cake back to a very thin layer on the bowl.Dan9

Dan10 I decided to sacrifice some of the height of the bowl to give back some dignity to the tired bowl. I topped the bowl in stages on a topping board. The back side of the rim was significantly higher than the front of the bowl so I started by leveling out the bowl height all the way around the bowl. I brought the back side down to the same height as the damaged portion.Dan11

Dan12

Dan13 Once the height was even all the way around the bowl it was time to work on the front edge damage. At this point in the topping process I pressed the bowl down on the topping board with even pressure front and back and moved it on the sand paper in a circular motion.Dan14 I continued sanding until the damage on the front top of the rim was minimized. There was still damage on the front of the bowl that would need to be addressed to smooth out the damage to the bowl. I wiped the bowl down with acetone on a cotton pad to remove the sticky oils and tars spots on the bowl sides. I also cleaned up the damaged area on the front of the bowl so that I could repair it.Dan15

Dan16

Dan17 I dripped some super glue into the damaged surface and then pressed briar dust into the glue. I then gave it a top coat of super glue as well. In the photo below you can see the repaired edge and the repair to the gouges and damage on the bowl front. Dan18 I sanded the repaired area with 220 grit sandpaper and then with a medium and a fine grit sanding sponge to blend the repair into the surface of the briar. The next photo shows the same spot on the bowl after sanding the repair. The second photo below shows the top view of the rim repair. The dark/shiny edge at the bottom of the photo is the super glue repair.Dan19

Dan20 I tried to fill in the damaged briar between the double rings around the bowl. I filled in the areas with briar dust and super glue but when I tried to re-score the two lines the fills fell out of the ring. After several failed attempts to build up the centre I finally decided to remove the centre from between the two rings. I used a sharp knife to lift out the centre portion all the way around the bowl. With that gone I used a folded piece of 220 grit sandpaper to sand the surface smooth in the groove. I also sanded it with the sanding sponges to remove the scratching.Dan21

Dan22

Dan23

Dan24 I decided to stain the groove to highlight it rather than hide it. I used a black aniline stain and applied it, flamed it and repeated the process until I had the coverage in the groove that I wanted.Dan25

Dan26

Dan27 I sanded the bowl sides around the groove to remove the spillage of the stain. I worked on the bowl until the black was confined to the groove and the top and bottom edges. The more I sanded the bowl the more I liked the grain that I was seeing come through. There was some great flame grain, birdseye and mixed grain on the bowl and shank.Dan28

Dan29

Dan30

Dan31 I decided to do a contrast stain on the rest of the bowl to highlight the grain and contrast with the black stain in the groove. I heated the briar and stained it with a black aniline stain. I applied it and flamed it, and repeated it a second time. Once it was dry to touch I wiped the bowl down with alcohol and then with acetone on cotton pads to remove the black stain from the surface of the briar and leave it in the grain.Dan32

Dan33

Dan34

Dan35 I set the bowl aside to dry for awhile so I could work on the damage to the stem. I sanded the stem with 220 grit sandpaper to remove the oxidation and to clean up the calcification around the damaged areas of the top and underside of the stem.Dan36

Dan37 I wiped the stem down with alcohol to clean the surface of the stem so I could apply the superglue patch. I used a dental pick to remove debris and damage vulcanite. I greased a pipe cleaner with Vaseline and inserted it in the button underneath the hole in the stem. I built up the area around the hole with black super glue. I sprayed it with an accelerator to allow me to add a second and third coat to the repair to the hole. I then flipped the stem and repaired the deep tooth marks on the top of the stem. I filled them and also sprayed them with the accelerator.Dan38

Dan39 Once the stem patch was dry to touch I put the stem back in place on the bowl and sanded the bowl with a medium and a fine grit sanding sponge to remove more of the black stain. I also used a fine grit sanding block. The next four photos show the bowl with the black removed and the grain patterns highlighted.Dan40

Dan41

Dan42

Dan43 I set the pipe aside for the night and let the stem repairs cure over night. In the morning I sanded the patched areas with 220 grit sandpaper and with a medium and fine grit sanding sponge. I rubbed the bowl down with a light coat of olive oil to see what contrast would look like. I really liked the overall look of the bowl with the contrast. Seeing this I knew what contrast stain colour I would use on the next stain coat.Dan44

Dan45

Dan46

Dan47 There were still small pits in the patches on the top and bottom repairs. I find that when I use an accelerator the spray causes these bubbles that once dry pop and leave pits in the surface of the finish. I sanded the stem surface some more with 220 grit sandpaper to smooth it out and then added another coat of black super glue. When it dried I sanded it again to bring it smooth. In the next two photos you can still see some small pits in the finish.Dan48

Dan49 I repeated the process of filling in the pits and then finished by using some clear super glue which dries more quickly and brushing it over the pitted areas on the stem. Once I had that done I sanded the stem with micromesh sanding pads. I wet sanded with 1500-2400 grit pads. The surface was significantly smoother but the patches still showed through the finish.Dan50

Dan51 I dry sanded with 3200-4000 grit micromesh pads and rubbed the stem down with Obsidian Oil. Once it dried I repeated the sanding with the same pads. The patches are still visible but are gradually blending into the surface of the vulcanite.Dan52

Dan53 I buffed the stem with red Tripoli to remove the scratches in the rubber and to further blend the patches. I then took it back to the work table and dry sanded it with 6000, 8000 and 12,000 grit micromesh pads. I rubbed it down with another coat of Obsidian Oil and set it aside until it was absorbed.Dan54 I rubbed the stem down with Scratch X2.0 to polish the scratches. It is a plastic polish and blemish remover that is used on acrylic/plastic headlamps. It worked wonders in removing the remaining scratches in rubber stem material. I then buffed the stem with Blue Diamond on the buffing wheel and gave it several coats of carnauba wax. I buffed it with a clean flannel buff to raise the shine shown in the next two photos.Dan55

Dan56 After finishing the stem it was time to give the bowl its contrast coat of stain. I used an oxblood aniline stain. I applied it with a folded pipe cleaner to keep it out of the groove around the bowl. I flamed it, reapplied it to the briar and flamed it again.Dan57

Dan58

Dan59

Dan60 I buffed the stem and bowl with Blue Diamond and then gave the entire pipe several more coats of carnauba wax. I buffed the pipe with a clean flannel buff. The finished pipe is shown below. I think that Alan Chestnutt’s definition of the restoration process as Saving the Pipe accurately describes the work that went into restoring this beauty. The finished pipe ready to fire up and be enjoyed for many more years to come.Dan61

Dan62

Dan63

Dan64

Dan65

Saving the Pipes


Blog by Alan Chestnutt

I often spend a bit of time several days a week reading some of my favourite blogs during my lunch break at work. I regularly check Alan Chestnutt’s Reborn Briar Estate Pipe website and read some of his articles. I always find some food for thought and often come across kindred ideas that have been rattling around in my head. This was the case yesterday when I went through older articles that Alan had posted. It captured very clearly something I was thinking about as I worked on a particular pipe that I had bought from a pipeman who was a stroke survivor. It obviously had been his favourite pipe and I wanted to bring it back to life. The phrase that Alan used that caught my attention as I read was a simple phrase he used to describe the work he does as a pipe restorer – “Saving the pipes”. I am reblogging this here on rebornpipes as for me it captures the heart of why I work on old briar. Without further introduction here is Alan’s article. Thanks Alan.

The first time I heard the phrase “Saving The Pipes” was on a YouTube video made by TPC (Tobacco Pipe Collectors). This phrase has stuck in my mind ever since. As a pipe restorer, I feel that I am doing exactly that “Saving The Pipes” – but why is this such a vital role in the pipe smoking hobby?

An estate pipe is one that has been used and cherished by a previous pipe smoker. They may not always have been maintained to a standard that we come to expect today, but a little love and TLC can restore it to its former glory. Many estate pipes did not receive a high level of care and attention because in the heyday of pipe smoking, the pipe collection of a smoker may have been limited to one!

I remember my father with his one Falcon pipe. When the smoke was finished, the ash was knocked out and the pipe was refilled an hour later for the next smoke. Sometimes the ash wasn’t even emptied out and fresh tobacco was just loaded on top of it.

Anyone today who is a non-smoker finding a pipe like that may well throw it in the trash can and that would be a crying shame. These old pipes have a history, a story to tell. I have a pipe I am about to restore at the minute. It is a 1st World War officer’s pipe which has had the walls carved by the soldier during the war.Some might say these carvings have ruined a good Barling’s Make pipe, but I disagree. From the carvings, I have been able to establish the regiment of the soldier, where he was trained and where he fought. I am sure that pipe could tell some tales if it could talk. And despite the carvings, the bowl of the pipe is in solid condition – so now we have a smokeable Barling’s Make pipe which were considered at that time to be the best smoking pipes in the world, with a tremendous history attached to boot.Alan There is no question that the craftsmanship, and the quality of the briar, is celebrated as superior in the first half of the twentieth century. Many people will look at these old pipes and consider them junk. It is my role to take someone else’s junk and restore it to as like new condition as possible. This creates a pipe that can be passed on to a new smoker. A pipe with a history, a pipe with many stories to tell, a pipe with well dried out and cured briar that will smoke dry and a pipe from the heyday of manufacture for this great hobby.

When you buy an estate pipe, you will probably spend less than on a new pipe, so there are savings to be made. Take this pipe and have a quiet conversation with yourself. Imagine the hand of the owner that held it before you. Where did he live, what did he do for a living, what stories could he tell you? Fill the pipe with tobacco, light it, sit back and think of former owners. Raise a bowl in their honour and savour the smoke. An old estate pipe will have outlived its previous owner, and when well restored and looked after, may well outlive you also, to be passed into someone else’s hands who will be thinking about your life.

So for a value for money, good quality pipe with a story to tell, why not consider adding a few estate pipes to your collection. You will be glad you did, and I can continue to “Save The Pipes”.

Here is the link for the article above article. Be sure to wander around the site as Alan and his son Adam do stellar work. http://estatepipes.co.uk/shop/saving-the-pipes

A Bachelor’s Soliloquy for a Lovely French Camelia Bulldog


Guest Blog by Robert M. Boughton
Member, North American Society of Pipe Collectors
http://www.naspc.org
http://www.roadrunnerpipes.com
http://about.me/boughtonrobert
Photos © the Author

My oldest pipe, my dearest girl,
Alas! Which shall it be?
For she has said that I must choose,
Betwixt herself and thee.

Farewell, old pipe; for many years
You’ve been my closest friend,
And ever ready at my side
Thy solace sweet to lend.

No more from out thy weedy bowl,
When fades the twilight’s glow,
Will visions fair and sweet arise
Or fragrant fancies flow.

No more by flick’ring candlelight
Thy spirit I’ll invoke,
To build my castles in the air
With wreaths of wav’ring smoke.

And so farewell, a long farewell–
Until the wedding’s o’er,
And then I’ll go on smoking thee,
Just as I did before.

― Edmond Day, “A Bachelor’s Soliloquy,” in Bain Jr., John, ed., “Tobacco in Song & Story,” 1896

INTRODUCTION
Aware of my sometimes peculiar use of quotes to lead into blogs, I ask that you try to follow this reasoning behind the above description of a somewhat disingenuous if humorous plan. As a recovered alcoholic (which is not to say cured), I have not found it necessary to return to the certainty of the lifestyle I led until my last drink of the life-deadening liquid, for persons of my nature, 27 years and a few months ago. Still, I remember with a cringe the oft-quoted “Lips that touch wine shall never touch mine,” a slight adjustment of the popular slogan of the Temperance Movement in the late 19th and early 20th centuries, that I used to hear with frequency in certain circles.

I always recoiled from the notion as being too Puritanical for my liking. Likewise, as a bachelor, I still (or perhaps more so now, given the socio-political incorrectness of enjoying tobacco, even a pipe) encounter the ultimatum of choosing my great, sundry pleasures derived from these marvelous instruments of relaxation and contemplation, or someone with whom to share my life. Being somewhat obdurate when push comes to shove, so to speak, I have no trouble saying fare thee well to all who spur the ominous prognostication of the inevitable disaster of any proposed relationship founded upon such Draconian conditions.

Thus, coming upon the quote in an old collection devoted to the comforting qualities of fine tobaccos, I made a mental connection with the habits of many former drinkers to eschew even those who are able to enjoy liquor socially and responsibly, and their cohorts in the dating war who substitute tobacco use as the evil enemy. People of these sorts are deluded by their recruiters. And while, again, I do not condone the deceptive behavior suggested by the English-speaking but now apparently almost forgotten poet, I do understand his hunger to enjoy all of life’s appetites, and I find it somehow French in attitude, and by association à propos to my sentiments for this lovely example of the elegant Camelia straight smooth bulldog #699, originating in France of excellent lineage, being, according to Pipedia, an obsolete line of pipes once made by GBD.

[There is, by the way, an anonymous, very funny spoof on Hamlet’s famous soliloquy, called “The Bachelor’s Soliloquy,” available at http://www. monologuearchive.com/a/anonymous_001. html.]

THE RESTORATION

Cam1

Cam2

Cam3

Cam4

Cam5

Cam6

Cam7 While the stem sloughed off its inner and outer impurities in an OxiClean soak, I turned to the briar. The rim burn was removed with greater than usual ease using super fine steel wool, and the chamber cake crumbled almost as fast with a few turns of a 17mm reamer followed by 150-grit sandpaper, then 320.

I removed the stem from its soak and rinsed it before wiping off the residue and cleaning the air hole with a soft, thick cleaner. The resulting evidence made clear that a large area, on both sides below the bit, required more work before applying the micromesh.Cam8

Cam9 And so I reattached the stem to the shank and retorted the pipe before finishing the stem with light work using 320-grit paper on the scratched areas before a four-stage micromesh progression from 1500-4000.

I gave the briar a bath and saw no major scratches or other blemishes. My next step of micro-meshing the wood the same way I did the stem turned out to be a waste of a few minutes, but what the heck.Cam10

Cam11

Cam12

Cam13

Cam14

Cam15 Granted, based on the original color of the pipe, it was already prepared for polishing with the buffers. But I seem to draw over-dark-stained pipes with unnatural frequency. I don’t think I’m alone in appreciating as much of the good grain every pipe has to offer. Therefore, I got out a small piece of the super fine steel wool to ease away a shade or two of the stain. Of course, when I could see the result I wanted, I had to re-micromesh the whole outer briar again and apply a light brown stain to the shank and lower bowl up to the bulldog line and inward curve of the top. Flaming that part and letting it cool before using 3600 micromesh to remove the film of char, I applied burgundy stain to the curved top and rim of the bowl and flamed it, and after the cool-down period I wiped it gently with the micromesh also. The effect produced was subtle but still there for the discerning eye.

Ready for the electric buffers, I took the two pieces of the Camelia from my living room work substation to the bedroom/workroom proper. For the stem, I followed my former practice of buffing with white and red Tripoli followed by White Diamond, one after the other, as I incorrectly understood they were to be applied. Then I buffed the briar with the same compounds and wax except for the red Tripoli, and including a double carnauba wax. The Camelia straight, smooth bulldog was the last pipe I worked on with this procedure because of a comment by my friend and mentor, Chuck, when I showed him the pipe. He had been asked by another member of our pipe club why my pipes appeared duller than his when compared side by side on the same table. Chuck’s close inspection of the Camelia then revealed streaking of the finishes, and he was able to deduce the reason.

Armed with my new understanding of how to run the stem and briar over a clean buffer on the wheel between coats, I returned home later and began by putting both parts to an unused replacement pad to clear off the excess previous waxes and repeated the series of buffs, using the clean pad after each. After the re-buffs, I filled in the Camelia brand mark on the stem with a white china marker.Cam16

Cam17

Cam18

Cam19

Cam20

Cam21 CONCLUSION
The entire pipe, from bowl to bit, glowed with a far brighter and unyielding finish. Showing Chuck the new and improved completed Camelia, he smiled after the quick look-over that is necessary when nothing is wrong, and asked with obvious excitement, “Was I right? Doesn’t that simple step make all the difference in the world?”

Yes, Chuck, you were right. And the world is a little bit better as a result.