Another one from Mark Irwin on the Peterson Chubbies. This is Part 2 of his pieces on the Chubbies. Thanks Mark.
Peterson Chubbies, Part 2: The Old 9BC
3 Replies
Another one from Mark Irwin on the Peterson Chubbies. This is Part 2 of his pieces on the Chubbies. Thanks Mark.
Blog by Steve Laug
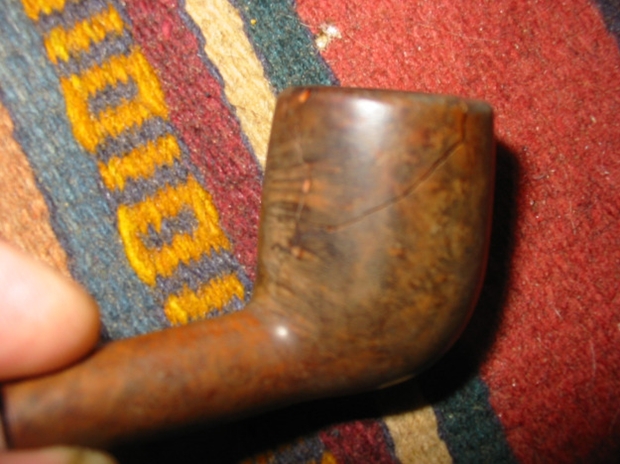
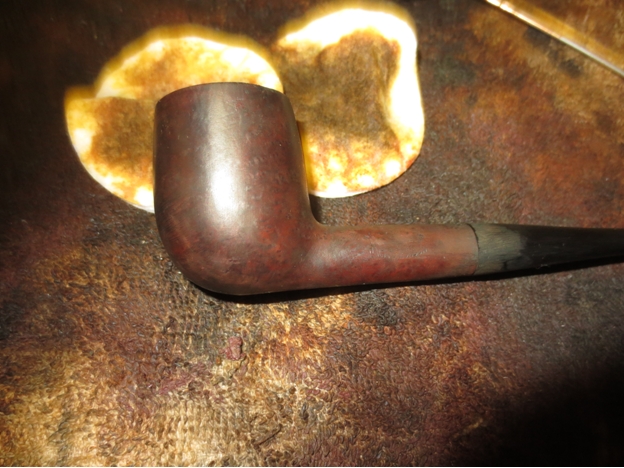
Having had a long week at work with nary a break in the busyness I needed a bit of a diversion on the weekend. I had an old Hardcastle’s Jack o’ London billiard in the cupboard that I probably should have thrown away but did not. I picked up the nice little billiard on one of my pipe hunts months ago. When I reamed it after I brought it home the bowl cracked and a large piece fell out of the right back side of the bowl. Up on examination it was on its way to being a burn out as the interior wall on the crack was charred and damaged. I took pictures of the bowl to show the damage at that time. For some reason I did not throw it away but rather put it in the cupboard and figured I could use the briar for other repairs.
But this weekend I took it out and decided to experiment with it and see what I could do with the damaged bowl. I debated whether to cannibalize it and save the parts or to rework it. I had already scavenged the stem and reused it on another Hardcastle’s pipe bowl that I restored so I only had the bowl. If the repair worked I would have to fit a new stem on the pipe before I could smoke it.
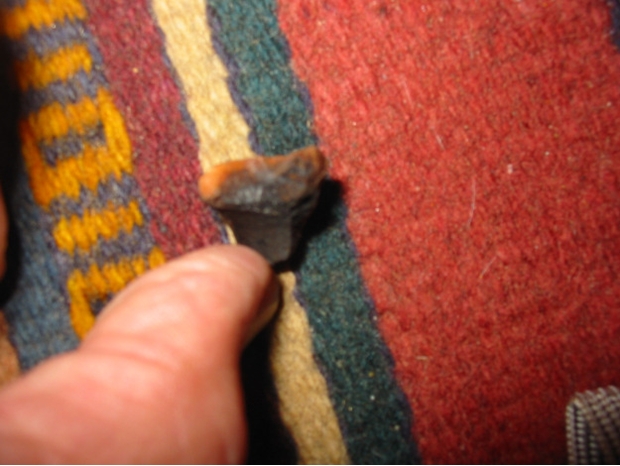
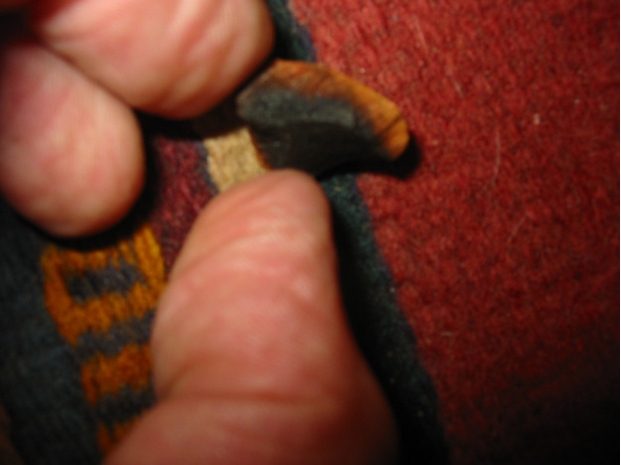
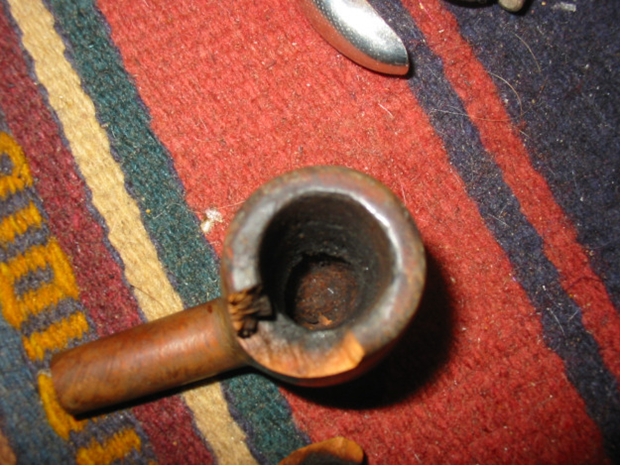
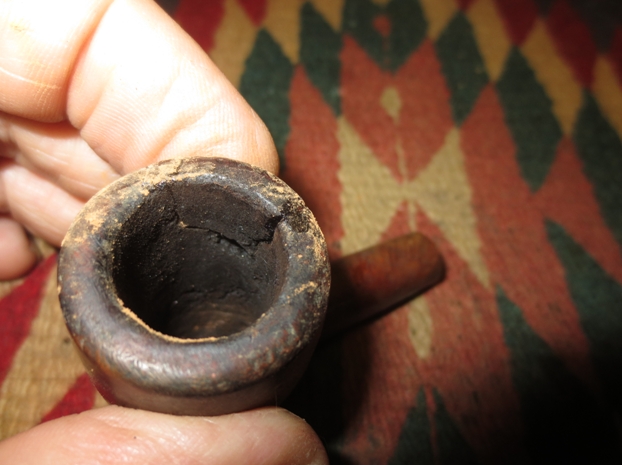
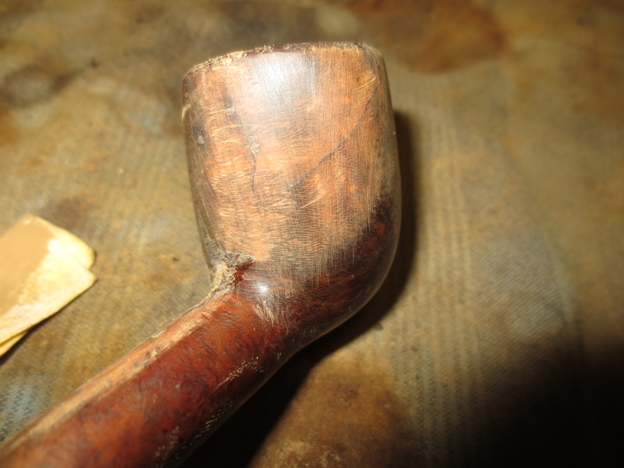
Here are some photos I took when the bowl cracked during the initial reaming. I took quite a few because I had not had that happen before in my experience. Looking at the photos you can clearly see the damage to both the remaining bowl and the chunk of briar that fell out. It was seriously damaged and one that I seriously considered throwing away that day. The rim was a mess as well besides being cracked and broken and the inner edge was out of round and the top beaten around the outer edge. The bowl was heavily caked and it looked to have been a good smoking pipe for the previous pipeman. There were even some fragments of unsmoked tobacco in the bottom of the bowl.

 Out of boredom and the need for something to keep my hands busy while my dog was being groomed I decided to experiment with repairs on the bowl. I cleaned up the broken pieces of the briar both the edges on the bowl and broken pieces with alcohol and cotton swabs and picked out any remaining loose pieces of briar or charred pieces of briar. I knew that I could easily patch the external side of the bowl and make it look acceptable but I was not sure what I would do with the internal side. I used a pen knife to scrape out the remaining cake in the bowl and to make sure there was no loose carbon that would get in the way of the repair before gluing in the piece. I applied clear super glue to both the bowl and the chunk of briar being careful to keep it out of the interior of the bowl and pressed the piece in place. In the photos below you can see how the glue ran down the exterior of the back side of the bowl but not on the inside.
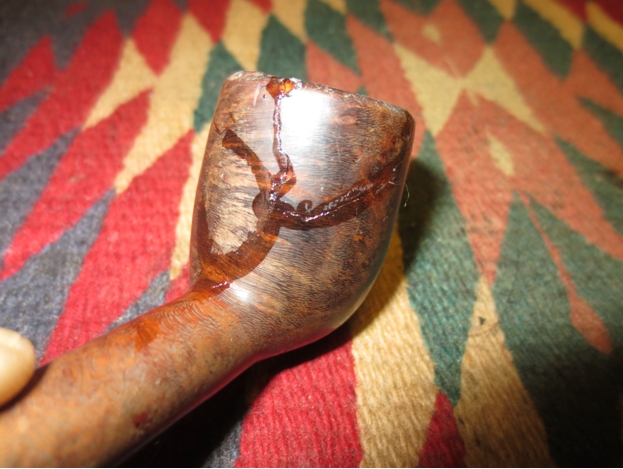
 I applied some more glue to the cracks on the outside of the bowl so that I could push briar dust into any spaces or chips in the briar between the pieces.
 With the chunk of briar glued in place and the external cracks patched it was time to look at the damage on the inside of the bowl and determine what to do. I know that in the past I have used J.B. Weld and Greg and others have used fireplace cement to repair the inside surfaces of the bowl but I had in mind a different experiment. Both the J.B. Weld and the fireplace cement dry and are neutral after curing. They are both impervious to heat or moisture but I wanted to see if I could use all natural substances and work a repair that would hold up. I knew that only time would tell if it actually worked but I figured that I had nothing to lose with this old pipe. If it did not work it would go back to the scrap yard and come back to life in repairs on other pipes. But if it did work I would have a useable yard pipe that I could smoke while working with little concern of damaging or ruining it in the process. Too me it was worth a try.
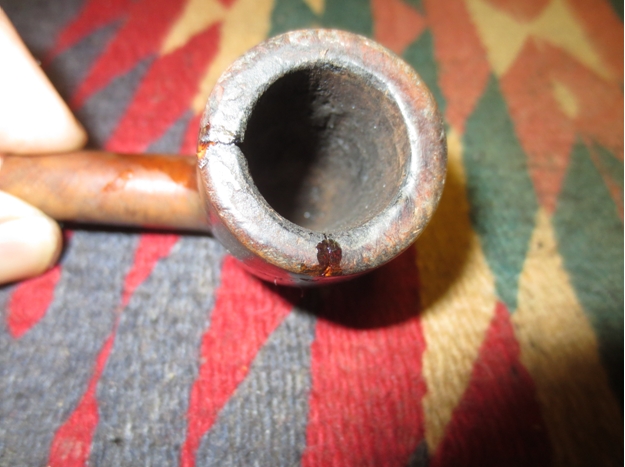
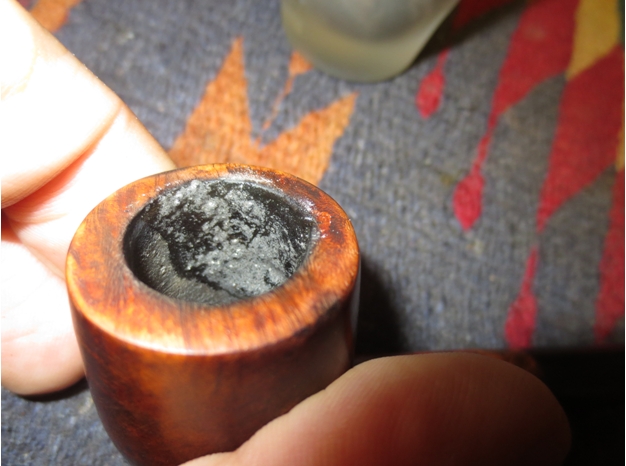
The next series of two photos show the inside of the bowl. The cracks and damage to the inside of the bowl was quite extensive. But it was still worth trying a repair.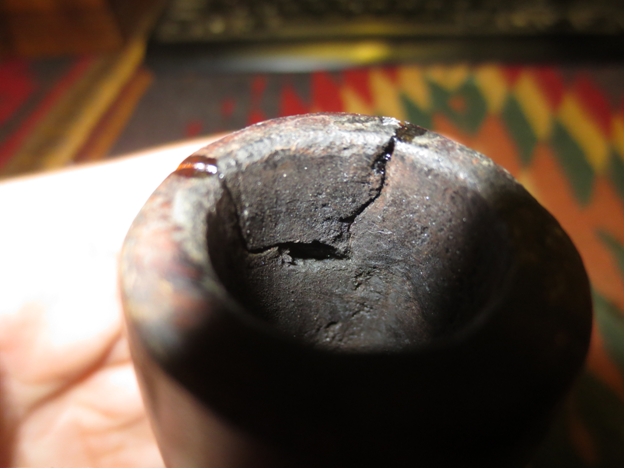
 I fit a stem on the shank from my can of stems with minimal sanding of the tenon for a good fit in the shank. The diameter of the stem would need to be adjusted but that would not be too much of a problem.
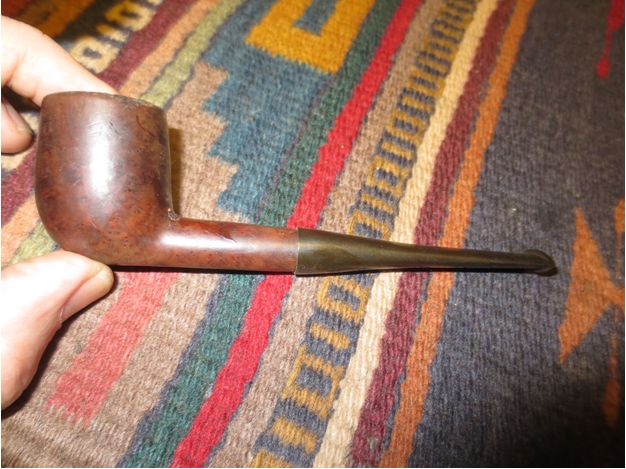

 The next two photos show the variation in diameter of the shank and the stem.
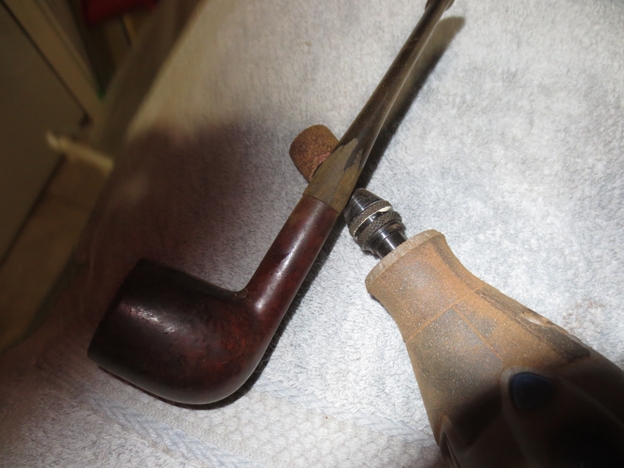
 I use a Dremel and sanding drum to take down the excess material as close to the shank as possible without damaging the shank. I also decided to use the Dremel and sanding drum on the overflow of super glue and briar dust on the outside of the bowl as I planned on sanding the bowl anyway.
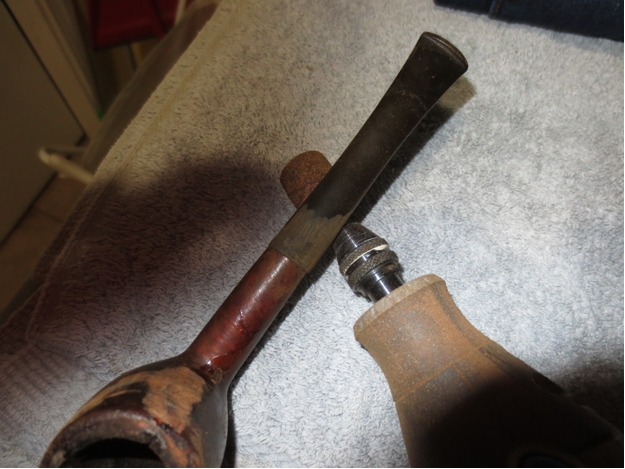

 Once I had the fit of the stem close and the majority of the glue and briar dust patch smoothed out I took it back to the work table and sanded both the bowl and the stem with 220 grit sandpaper to smooth out the scratches in the briar and the vulcanite.
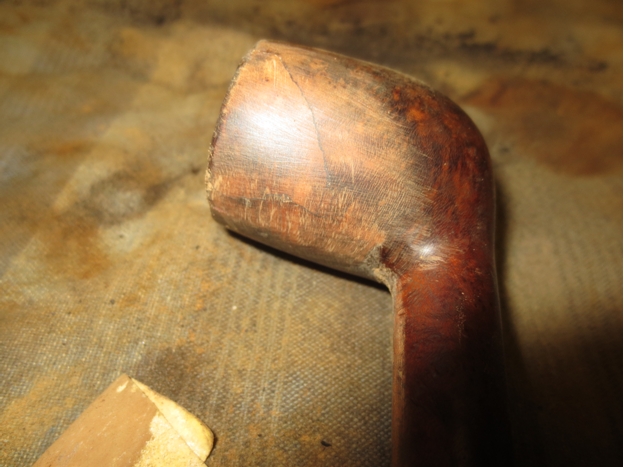
 The rim needed to be topped to smooth out the damage to the top and the outer edges. I set up the topping board with 220 grit sandpaper and pressed the bowl flat against the sandpaper. I sanded it in a circular motion until I had removed the damaged rim surface and the damaged out edge.
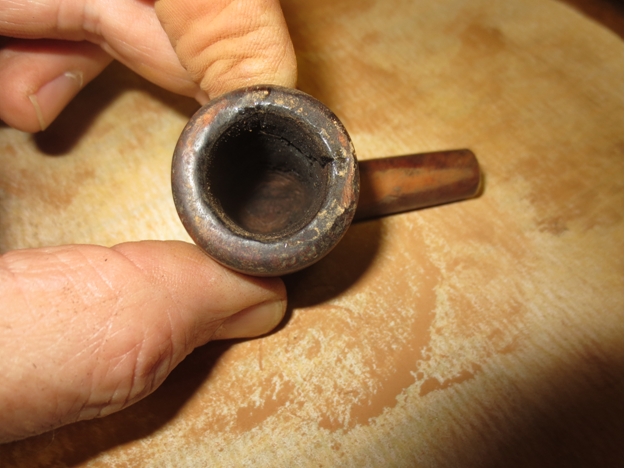
 I forgot to take a photo of the rim at this point but you can see in the photos of the staining that it is sharp and clean on the outer edge. I sanded the briar with a medium and a fine grit sanding sponge to minimize the scratches even more and then heated the bowl before I applied a dark brown aniline stain. I applied the stain, flamed it and repeated the process until I had good even coverage on the bowl.
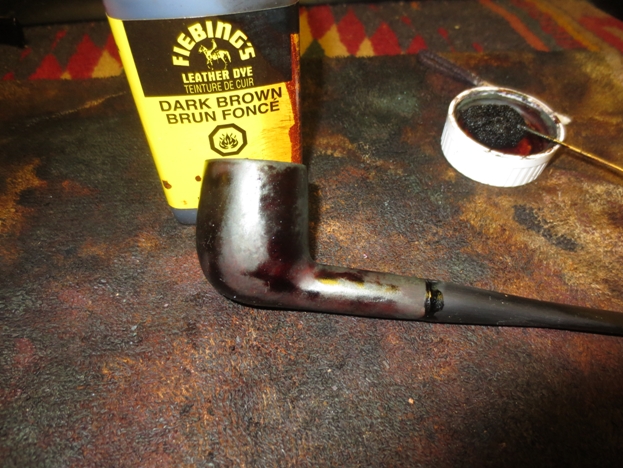
 The dark brown stain was quite opaque so I wiped down the bowl with isopropyl alcohol on cotton pads to remove and thin down the stain coat.
 The top of the rim can be seen in the next photo. The damage to the rim top has been minimized and the surface is smooth. There is still some damage on the inner edge but that will be addressed when I do the internal repairs to the bowl walls.
 I buffed the bowl with Red Tripoli and then wiped it down again with alcohol. The colour was just what I was looking for at this point in the process. It was a rich brown stain that allowed the grain – birdseye and mixed to show through the finish. It also did a decent job covering the repair to the other side of the bowl.


 I buffed it again with White Diamond to raise the shine. The stem still needed some fine tuning for a better fit against the shank and some sanding to remove the oxidation and scratches but the pipe was beginning to look good.
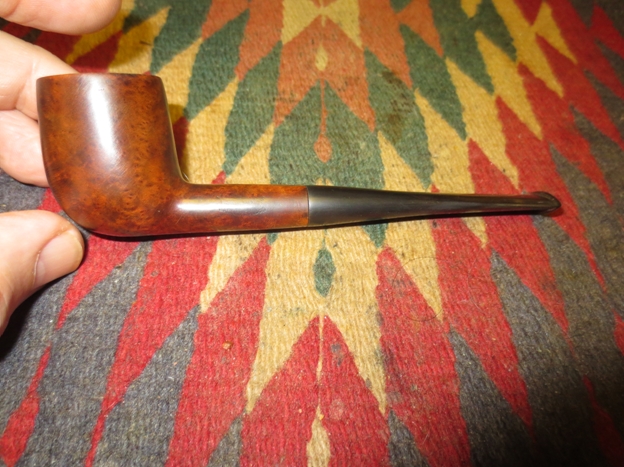

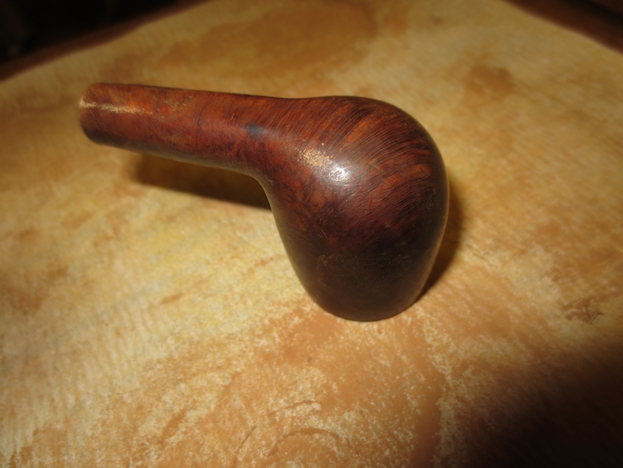
 I took the next close up photos to show the work that still needed to be done on the rim and the look of the repairs on the right side of the bowl. The bowl surface and rim surface was very smooth but still needed to be sanded with micromesh pads to take out the scratches and polish the briar to a deep shine.
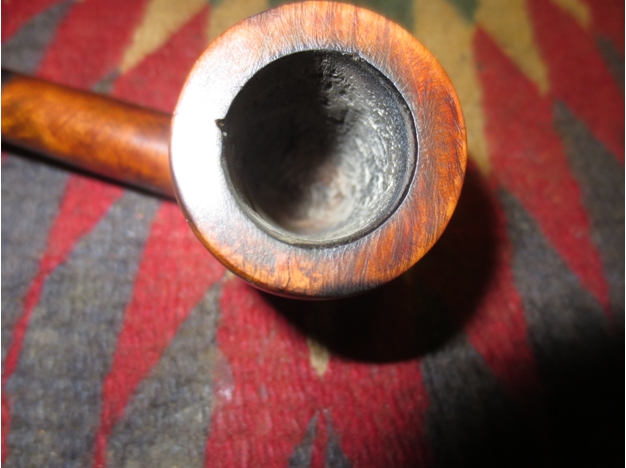
 With exterior at a good place to take a break it was time to address the inside of the bowl. I mixed a batch of pipe mud using cigar ash and water. I mixed it to a thicker than usual consistency so that I could press it into the damaged area of the bowl wall. I did not want it runny or soupy but I still wanted it wet enough that the mud was well mixed and would stick. I painted it on the wall in the damaged area with a folded pipe cleaner and pressed it into the cracks with the spoon end of a pipe nail. I also pressed it in with the end of my finger. I repeated the application of the mud until the surface of the wall was smooth and showed no pits or divots. I set the bowl aside to dry over night as I wanted the mud to harden and also wanted to see if it was solidly stuck in the damaged areas.
 In the morning, after curing over night I inspected the patch on the inside of the bowl. I used my dental pick to make sure that the patch was well set in the divots in the wall of the bowl and then smooth out the surface with a pen knife.
 I let it dry for about four more hours while I did other things and then decided to mix a batch of bowl coating to paint the bowl interior. I mix a batch of bowl coating using sour cream and activated charcoal powder. I use a finely ground powder that comes in capsules.
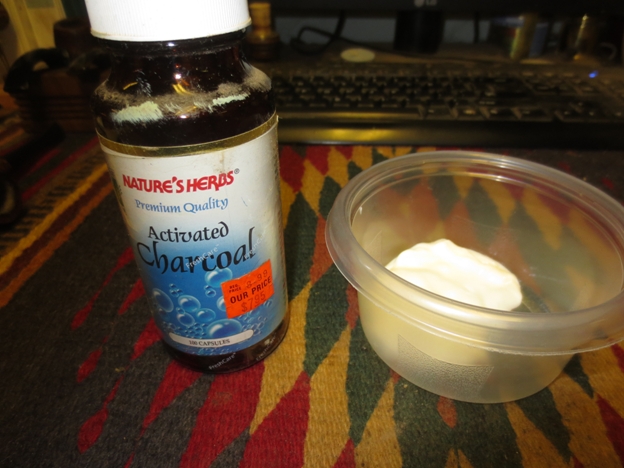
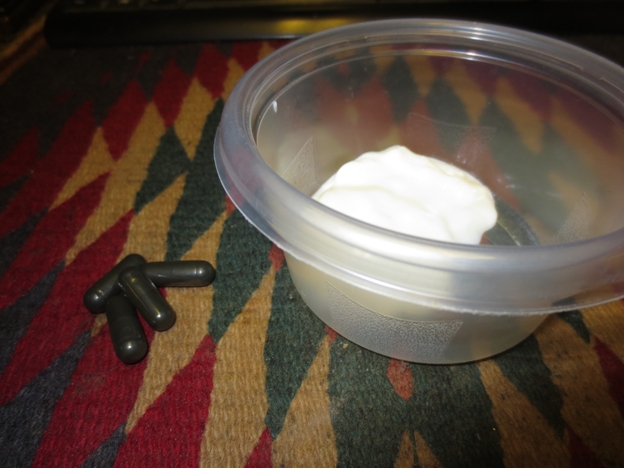 I take apart the capsules and dump the charcoal powder into the sour cream.
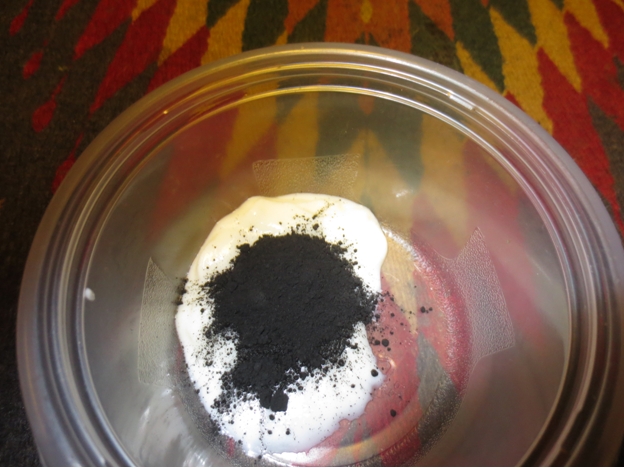 I use a dental spatula to mix the charcoal and sour cream into a black paste. I work the paste until all the sour cream and charcoal are combined.
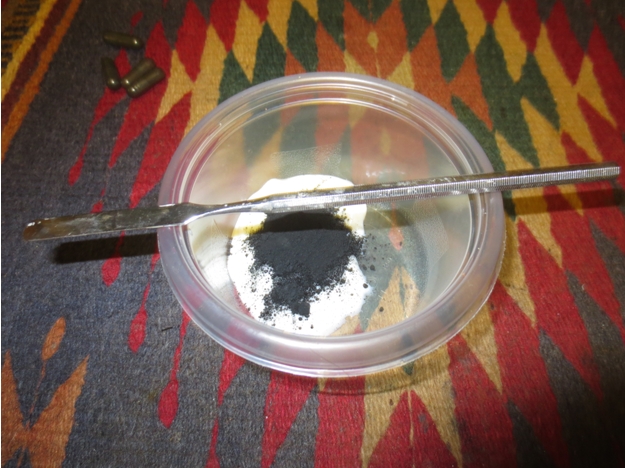
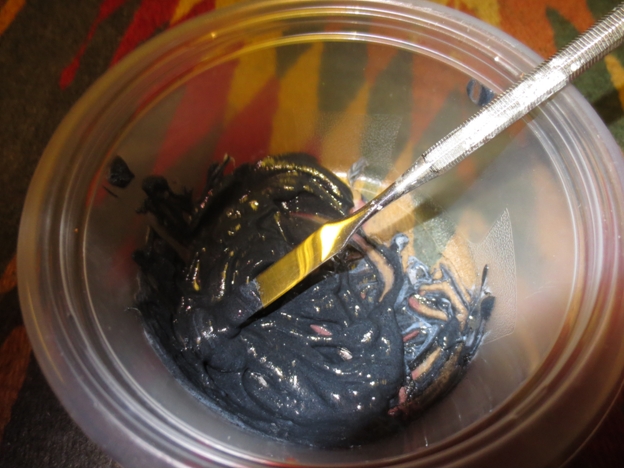 I used the spatula to apply the paste to the walls of the pipe and then smoothed it out using a folded pipe cleaner.
 The entire bowl is coated with the paste and after smoothing it out with the pipe cleaner looks like a dark grey almost black coating around the sides and bottom of the bowl. I put a pipe cleaner in the airway so that I would not get the paste in the airway when smoothing it out.
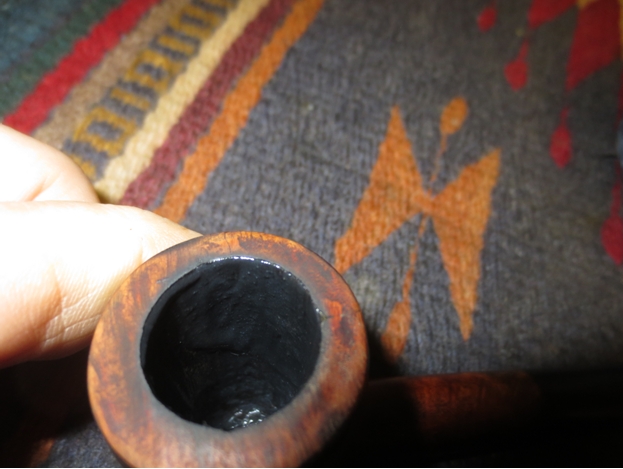

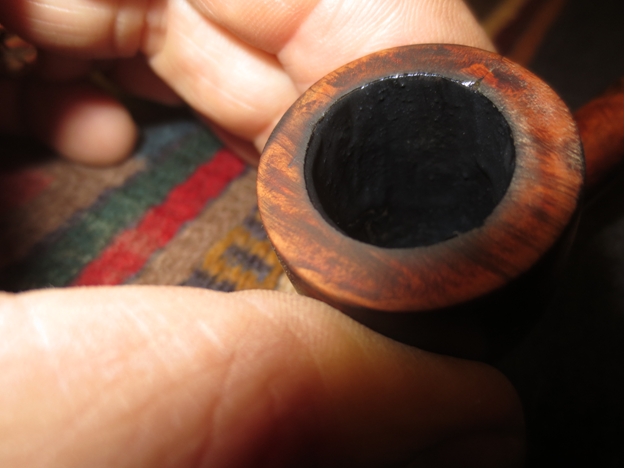 I wiped down the top of the rim with a bit of saliva on a cotton pad and then set the bowl aside to let the coating cure. Once the coating cured it would provide a protective layer over the bowl interior and facilitate the buildup of a new cake.
While the bowl coating was drying I worked on the stem. I sanded it with 220 grit sandpaper with a plastic washer between the shank and stem to smooth out the transition between the two. When I had finished sanding the stem with the 220 grit sandpaper I sanded it with a medium and a fine grit sanding sponge.


 I wet sanded the stem with 1500-2400 grit micromesh sanding pads to minimize the scratches.
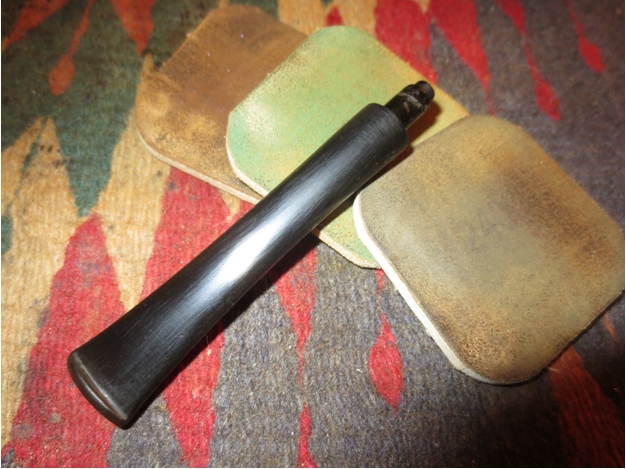 I dry sanded the stem with 3200-4000 grit micromesh sanding pads and then buffed the stem with Red Tripoli to further polish the stem.
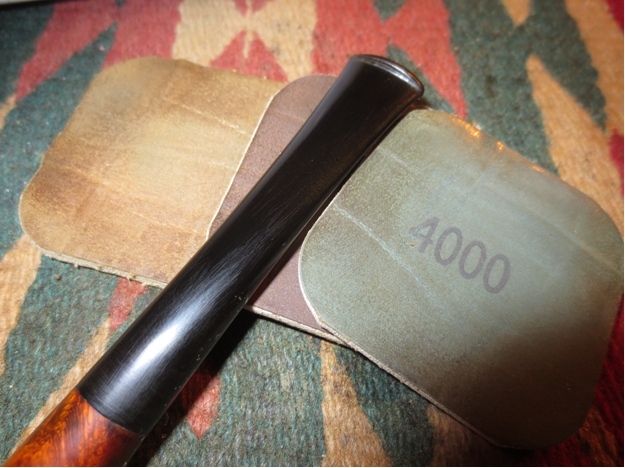 I brought it back to the work table and dry sanded it with 6000-12,000 grit sanding pads. I buffed the stem with Blue Diamond on the wheel and then rubbed it down with Obsidian Oil and let it soak in.
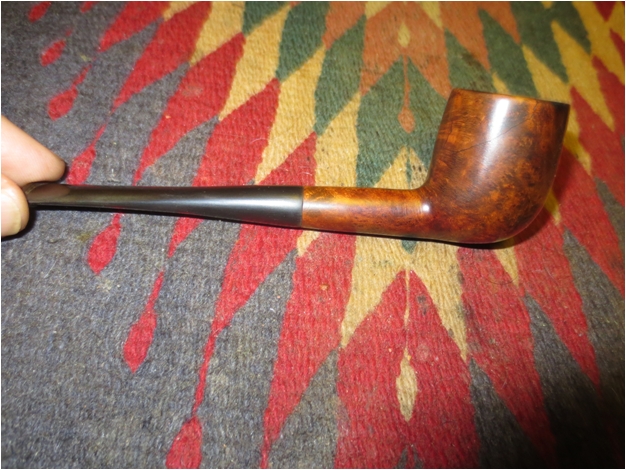
 I sanded the bowl and shank with micromesh sanding pads – wet sanding 1500-2400 grit pads and dry sanding with 3200-12,000 grit pads. I buffed the bowl with Blue Diamond to polish the briar. There are some fine scratches that seem to be around the junction of the shank and stem. I buffed it with Red Tripoli again and with White Diamond and then with Blue Diamond. I polished the stem and bowl with carnauba wax and buffed it to a shine with a clean buffing pad to raise the shine. The finished pipe is shown in the photos below.


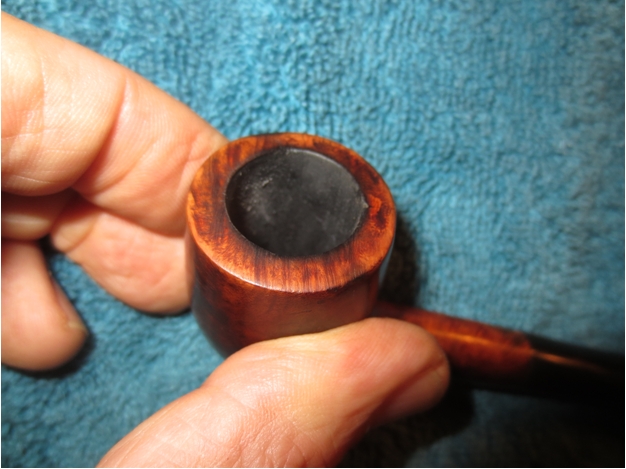
 The next photos are close up pictures of the repair. They also that the carbon/sour cream bowl coating has dried and is a dark grey colour. The cracks on the exterior are smooth to touch and do not feel like cracks. The repairs to the top of the rim still show as a red coloured spot at the back of the rim. The stain took to the patch a little lighter than the rest of the bowl. It is smooth to the touch but still shows. The internal bowl coating has dried to the touch and gives a nice coat that is cover the repairs on the bowl wall. The carbon bowl coating has small particles of carbon in the finish. These will provide something for the new cake to bind to when it is smoked. All that remains is to let the coating cure for a few days and then load a bowl and smoke it.
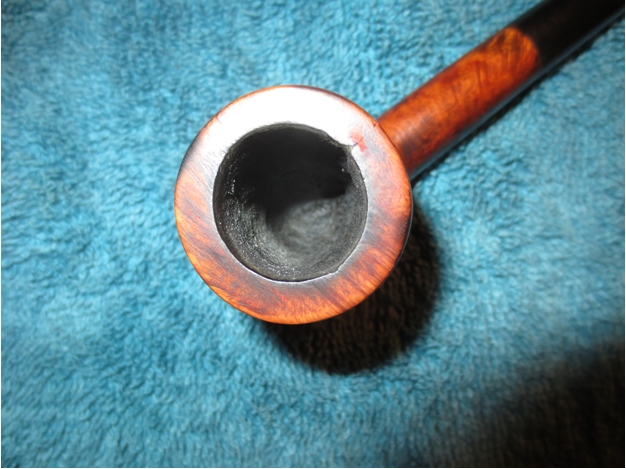


Blog by Steve Laug
 Several things about this book caught my attention when I first saw it. The first of course was the magnificent photography that graces the pages. It is literally packed with more than 125 full colour plates of pipes. The age of some of the pipes made me read the fly-leaf of the cover to know more about the author. That is when the second thing caught my attention, The Pipe Companion was written by David Wright who is the Curator of the Museum of Tobacco Art & History in Nashville, Tennessee, USA. What was interesting about that was the wealth of tobacciana that was available to the author at his work place. I was already hooked before I even read any of the text.
When I did read the fly-leaf on the cover it only solidified my commitment to purchase the book. I quote from there:
“Smoking a pipe is a refined, relaxing ritual. More than a tool for reflection, a well-crafted pipe is a work of art to be admired and appreciated. Whether made of clay, briar, or meerschaum, every pipe’s personality and history is evident I the beauty of its bowl and the style of its stem.”
“Profiling more than 50 master carvers from around the world and their elegant, yet functional creations, The Pipe Companion is the essential guide to the world of pipes. Within these pages you’ll explore the exquisite artistry of pipe making and enjoy a behind-the-scenes tour of carving styles and manufacturing techniques. You’ll also learn about the history of the pipe – from its North American origins to its spread throughout Europe and the Middle East to the wide variety of classical and freehand styles popular today (2000). Finally you’ll discover modern pipe-smoking customs and practices, as well as learn how to select, smoke, and care for your pipes.”
“Perfect for both pipe enthusiasts and anyone with a penchant for the occasional puff, The Pipe Companion provides practical advice along with a wealth of information. So lean back, fire up your pipe, and enjoy.”
As with previous reviews I have written I include the table of contents to give an idea of how the author proceeds to do what is promised in the quotations from the preface or in this case the fly-leaf of the book’s cover. It is arranged in three parts with subsections underneath each part. It concludes with a glossary, a suggested reading list, pipe makers contact information and then ends with notes. PART 1: A Brief History of the Pipe – this first section of the book uniquely presents the standard pipe history that has been repeated in a variety of descriptive ways since Alfred Dunhill’s Pipe Book. However, what makes this presentation unique among the others is the beautiful photographs of the pipes from the early periods of history. He looks at the origins of the pipe from Native American pipes to those developed later in Europe when tobacco was brought there.
After giving a very brief description of the origins with photos the author turns to the different types of material that have been used for making pipes. Again this section is graced with beautiful photographs illustrating the pipes made of each material. There are paragraphs on Clay Pipes, Wood Pipes, Porcelain Pipes, Meerschaum Pipes, and Briar Pipes. This section ends with an inserted article on Pipe Production. The interest in artisans who made these pipes sets the stage for the later PART THREE which looks at Pipe Makers.
The author’s style is engaging and enjoyable to read. You are carried forward through the chapter as he unfolds the history, interjecting stories and incidents among the photos of the pipes that illustrate his points. It is well written and flowing in style.
PART 2: The Art of Pipe Making – the second section covers pipe making from the perspective of one person shops to medium-sized factories. Again this PART 2 sets the stage for PART 3 on Pipe Makers. It does this with reference to the fact that before looking at the variety of pipe makers that it is important to understand how block meerschaum and briar are carved from their natural state into functional and artistic pipes.
The first chapter is on the materials that pipes are made from. The first section in this chapter is on meerschaum. It looks at the history of meerschaum and how it is mined and then refined and carved into pipes. There are pictures in the section that show raw meerschaum and ornate figural and design pipes carved from meer.
This is followed by a section on briar. There again the author looks at the agriculture of briar and where it grows and how it is harvested. Then the section looks at the seasoning/curing of the briar and finally how the blocks are cut and then carved into pipes.
The next section covers carving in all of its aspects. There are beautiful photos of figural pipes, carving and then finally of bending the stems that were used. Even machine-made pipes are discussed. It is interesting to note that the author says that even machine-made pipes involve a lot of hand work – sanding, shaping, finishing etc. are all done by hand.
The second chapter describes how to select a pipe. The author likens buying a pipe to buying a car. He discusses the materials that go into making a pipe, the finish and compares machine-made to handmade pipes and closes the chapter by discussing the features of a pipe. He states that the most important feature is free air passage from the bowl to your mouth – mechanics.
The third chapter discusses the how to of smoking a pipe. Truly this section should be called breaking in a new pipe and interestingly the author gives a sub-title part way through the text where he gives it that title. He discusses bowl coatings, various methods of loading a pipe including the Frank method with a brief segue into choice of tobacco. Then he moves to talking about lighting the pipe, tamping the tobacco and concludes with after smoking care and cleaning of the pipe.
PART 2 is a well written concise exposition of the pipe – materials, selection and smoking. It is written in an engaging way but always with the awareness of what is ahead in PART 3 of the book. There is a building excitement in the chapters about the various pipe makers that will be discussed ahead.
PART 3: The Pipe Makers Directory – The remainder, and by far the largest part of the book is the present one. The author has arranged his list of hand-picked pipe makers by country for ease of reference. Quoting from Wright’s introduction to this part of the book:
“As you examine the different carvers around the world and their unique interpretations, you’ll notice similarities and schools of art. The oldest briar school, for example, is centered in Saint-Claude, France. Italy has two distinct schools of carving, while the other Scandinavian countries have a look all their own. Then, there are the United States and Japan. The variety of styles and techniques in the United States reflect America as the proverbial melting pot. In Japan, styling can by very Japanese or exhibit a combination of Japanese and Danish features.” Page 57
“Modern briar and meerschaum pipe styles can be divided into two broad categories: classic and freehand. The classic style has its origins in early French and English pipes. The proportions of the bowl and the stem: length, height, and diameter are standardized in these pipes. Many of the names of classic pipe shapes and styles were chosen many generations ago and reflect the shape or appearance of the pipe… Freehand was a term coined for the “wild” or “organic” designs of Danish pipes that first appeared in the late 1950s. Freehand implies that the pipe carved at the whim of the carver. A truer definition is that the pipe design is governed by the grain of the wood. No two freehand pipes are carved alike, nor do they conform to any one style.” Page 58
Following the short introduction, from which the two quotes above are taken, the author proceeds to move through the various countries he has chosen. In each country he has chosen pipe makers to highlight and includes photographs of their work. This catalogue of pipe makers is the highlight of the book to me and a section I turn to repeatedly. I will list each country as the author has organized them and then give a list of the pipe makers he covers in each one. I don’t know what your thoughts will be but I was surprised by the listings and found there were several I had not heard of previously.
Canada: J. Calich (p.59-61), Julius Vesz (p.62-63).
Corsica: L.J. Georges (p.64-66).
Denmark: Bang’s Pibemageri (p.68-69), Jess Chonowitsch (p.70-72), Lars Ivarsson (p.72-74), Jorn (p.74-75), Anne Julie (p.75-77), W.O. Larsen (p.77-79), Nording (p.79-80), Stanwell (p.81).
France: Butz-Choquin (p.82-83).
Germany: Holger Frickert (p.84-86), Karl-Heinz Joura (p.86-88), Manuel Shaabi (p.88-90).
Great Britain: Ashton (p.91-94), Castleford (p.94-95), Dunhill (p.95-98), Ferndown (p. 98-99).
Ireland: Peterson (p.100-101).
Italy: Ardor (p.103-104), Paolo Becker and Becker & Musico (p.104-106), Brebbia (p.106-108), Castello (p.108-110), Il Ceppo (p.110-111), Mastro de Paja (p.111-113), Radice (p.113-115), Savinelli (p.115-118), Ser Jacopo (p.118-119).
Japan: Shizuo Arita (p. 120-121), Jun’ichiro Higuchi (p.121-122), Tsuge Pipe Company (p.123-124).
Spain: Joan Saladich y Garriga (p.123-127).
Sweden: Bo Nordh (p.128-130).
Turkey: Ismet Bekler (p.132), Yunas Ege (p.133), Sevket Gezer (p.134), Huseyin and Mustafa Sekircioglu (p.133-134), Salim Sener (p.134), Sadik Yanik (p.135).
United States: E. Andrew, Briars (p.136-138), Alfred Baier (p.138-140), Boswell’s Pipe & Tobacco (p.140-142), J.T. & D. Cooke (p.142-144), Cristom (p.144-147), Jody Davis Princeton Pipes (p.147-149), Dr. Grabow (p.149-151), Fairchild Pipes (p.151-153), David Jones Briar Pipes (p.153-155), Kaywoodie (p.155-157), Kirsten Pipe Company, Inc. (p.157-159), Sam Learned (p.159-161), Lucille Ledone (p.161-162), Andrew Marks (p.163-165), Mr. Groum Pipes (p.165-167), Clarence Mickles (p.167-168), Elliott Nachwalter Pipestudio (p.168-170), Denny Souers (p.170-172), Trever Talbert (p.173-174), Mark Tinsky American Smoking Pipe Company (p.175-176) Von Erck’s Pipes & Repairs (p.176-178), Roy Roger Webb (p.178-180), Steve Weiner (p.181-182), Tim West (p.182-186), Randy Wiley (p.186-187)
From the above information it is obvious that the largest portion of the pipe makers included is from the United States. I am assuming that this is because of the author’s location. However, within each section there is a concise biographical note on the pipe maker and a description of the style and where they fit within the classic/freehand division that introduced PART 3. The photos in this section are absolutely stunning and give a good idea of the style, quality and craftsmanship of the makers. I will continue to use this book as a reference to the works of the makers covered and as a wish book of pipes I want to add to the collection.
The book ends with some sections that could easily be skipped to the detriment of the reader. The Glossary gives excellent definitions of the terminology of pipe making. These definitions are concise and helpful. The Suggested Reading bibliography is a great resource and one that I use as a checklist of published materials on pipes and tobaccos – both books and periodicals. The Pipe Makers Contact Information is worth a look as well if you want to contact any of the above makers for a commission or just write them a thank you note for a great pipe you are smoking. The book ends with Notes that really are endnotes for the chapters in the book giving bibliographical notes for information used from other references.
I can heartily recommend The Pipe Companion – a Connoisseur’s Guide by David Wright to every pipe collector and collector of books and information on pipes. It is a resource that is well written, well illustrated and unusually thorough in the kind of information that is resourced in the book. It is an ongoing pleasure to read repeatedly or to just thumb through and enjoy the pipe photography that graces the pages from the beginning to the end. If you have not picked this one up you really owe it to yourself to get a copy before it too goes out of print.
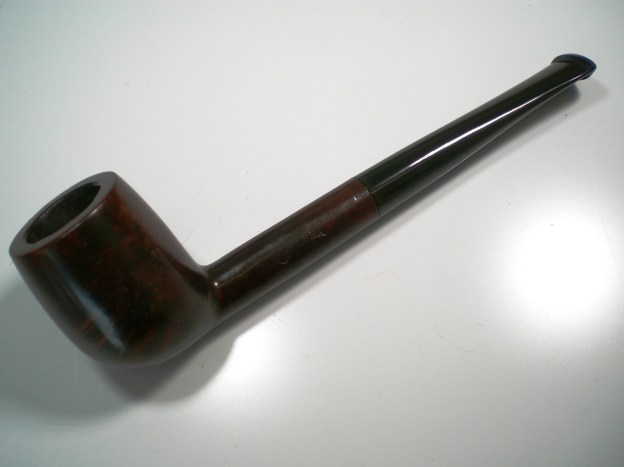
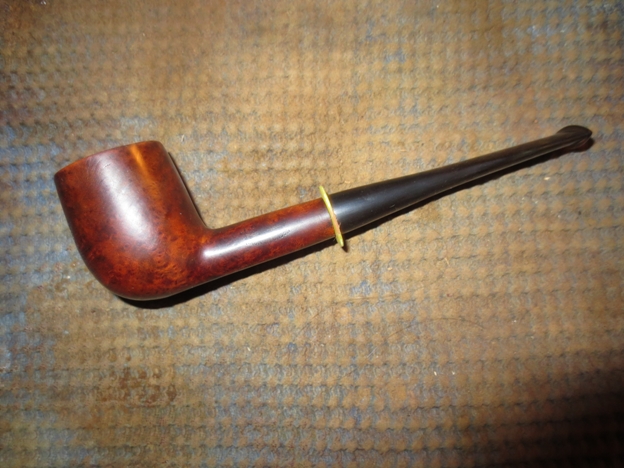
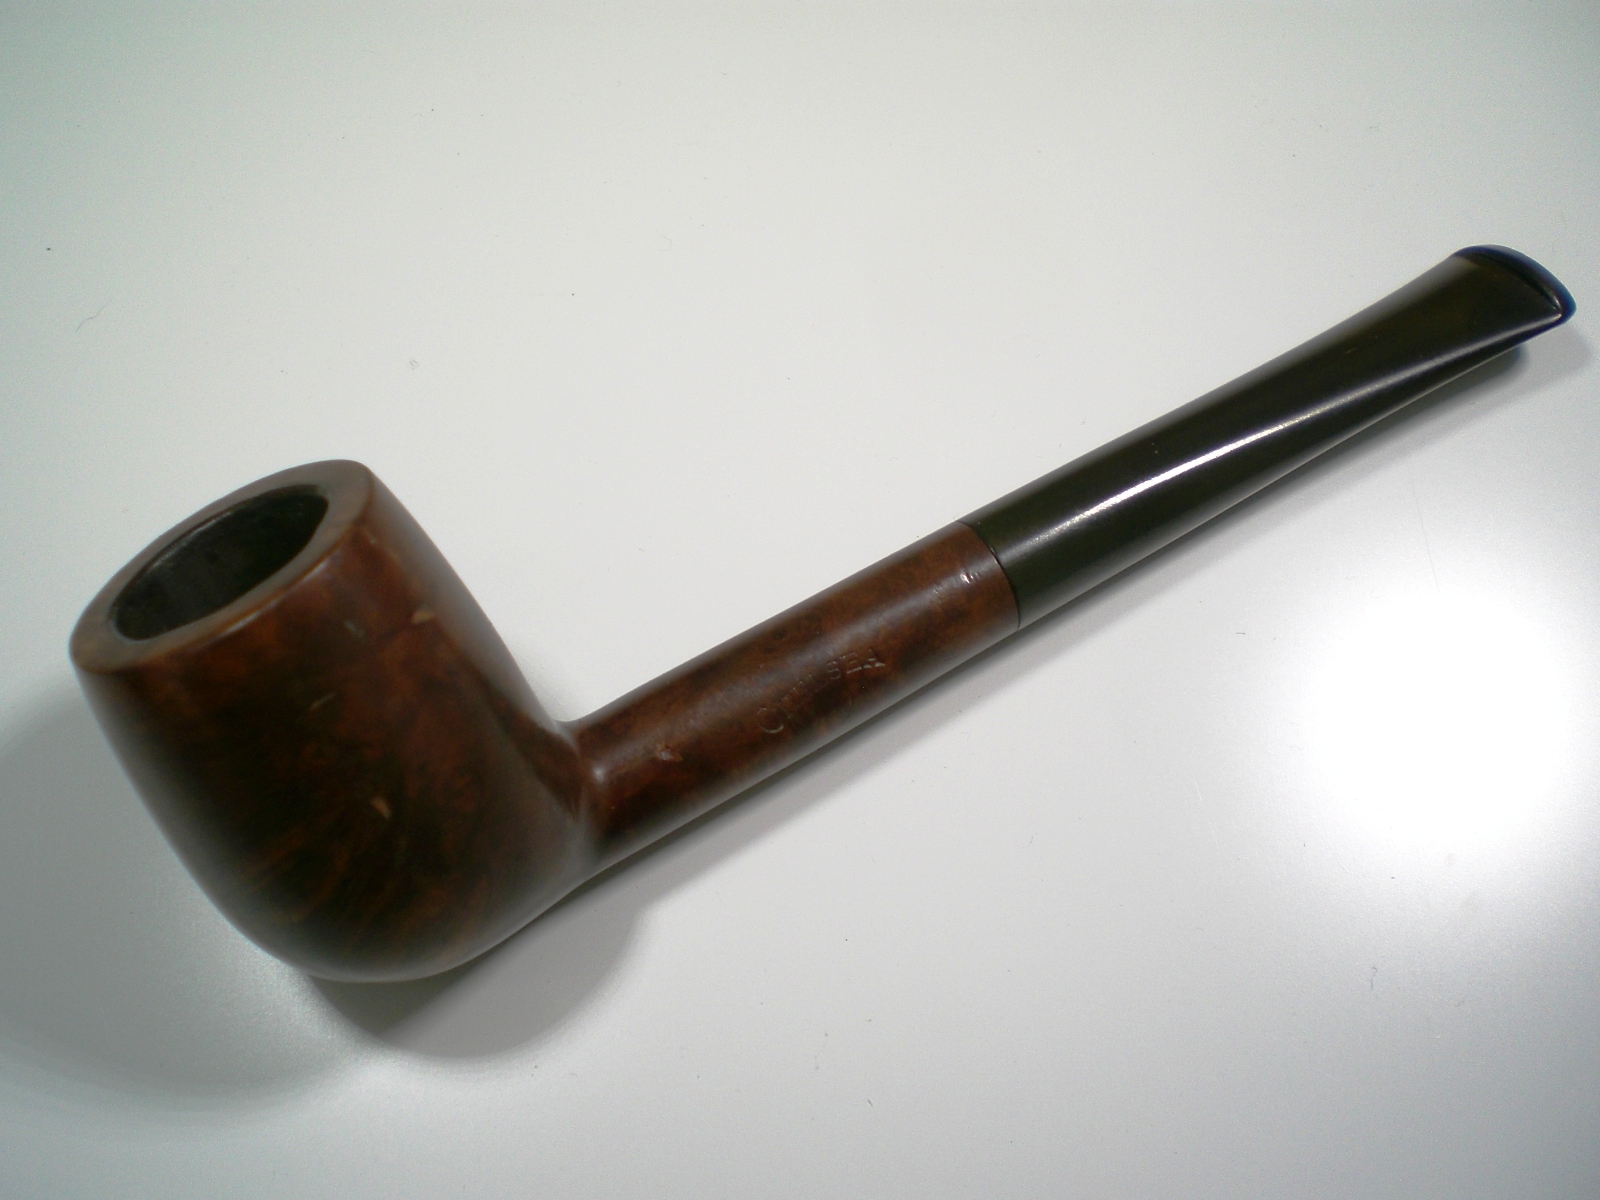
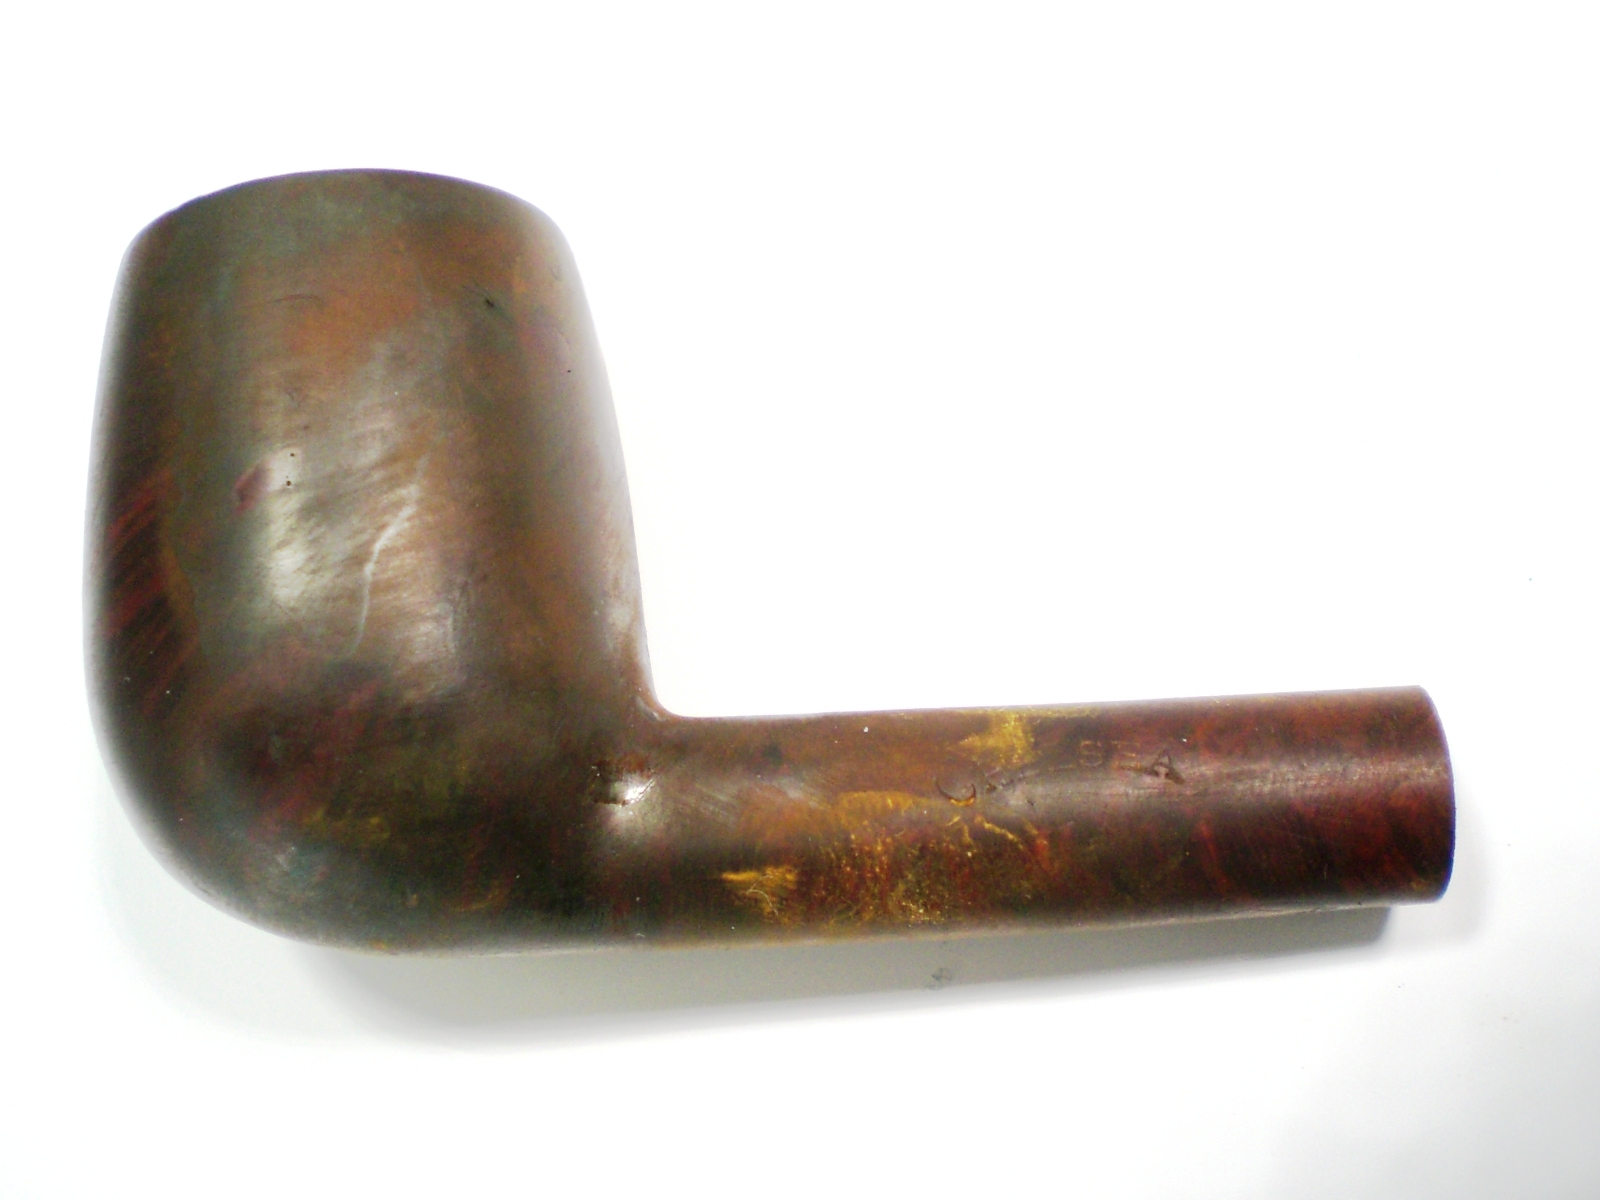
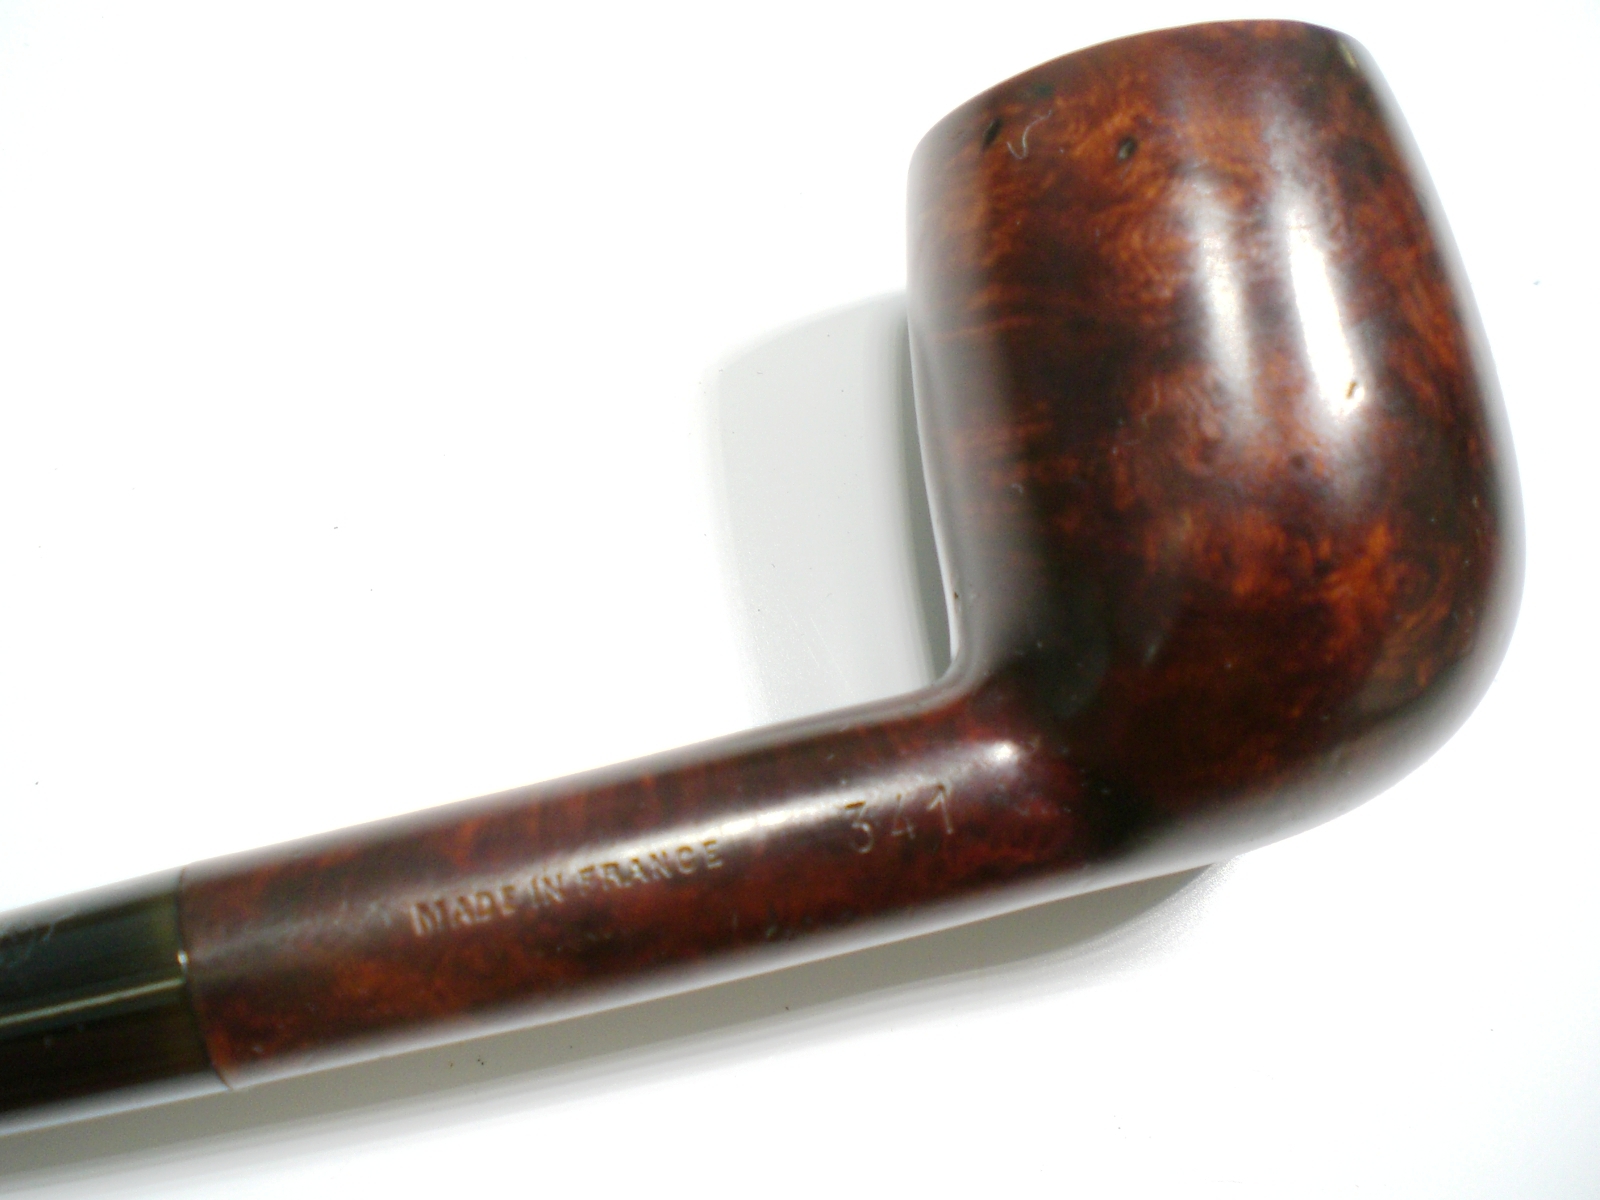
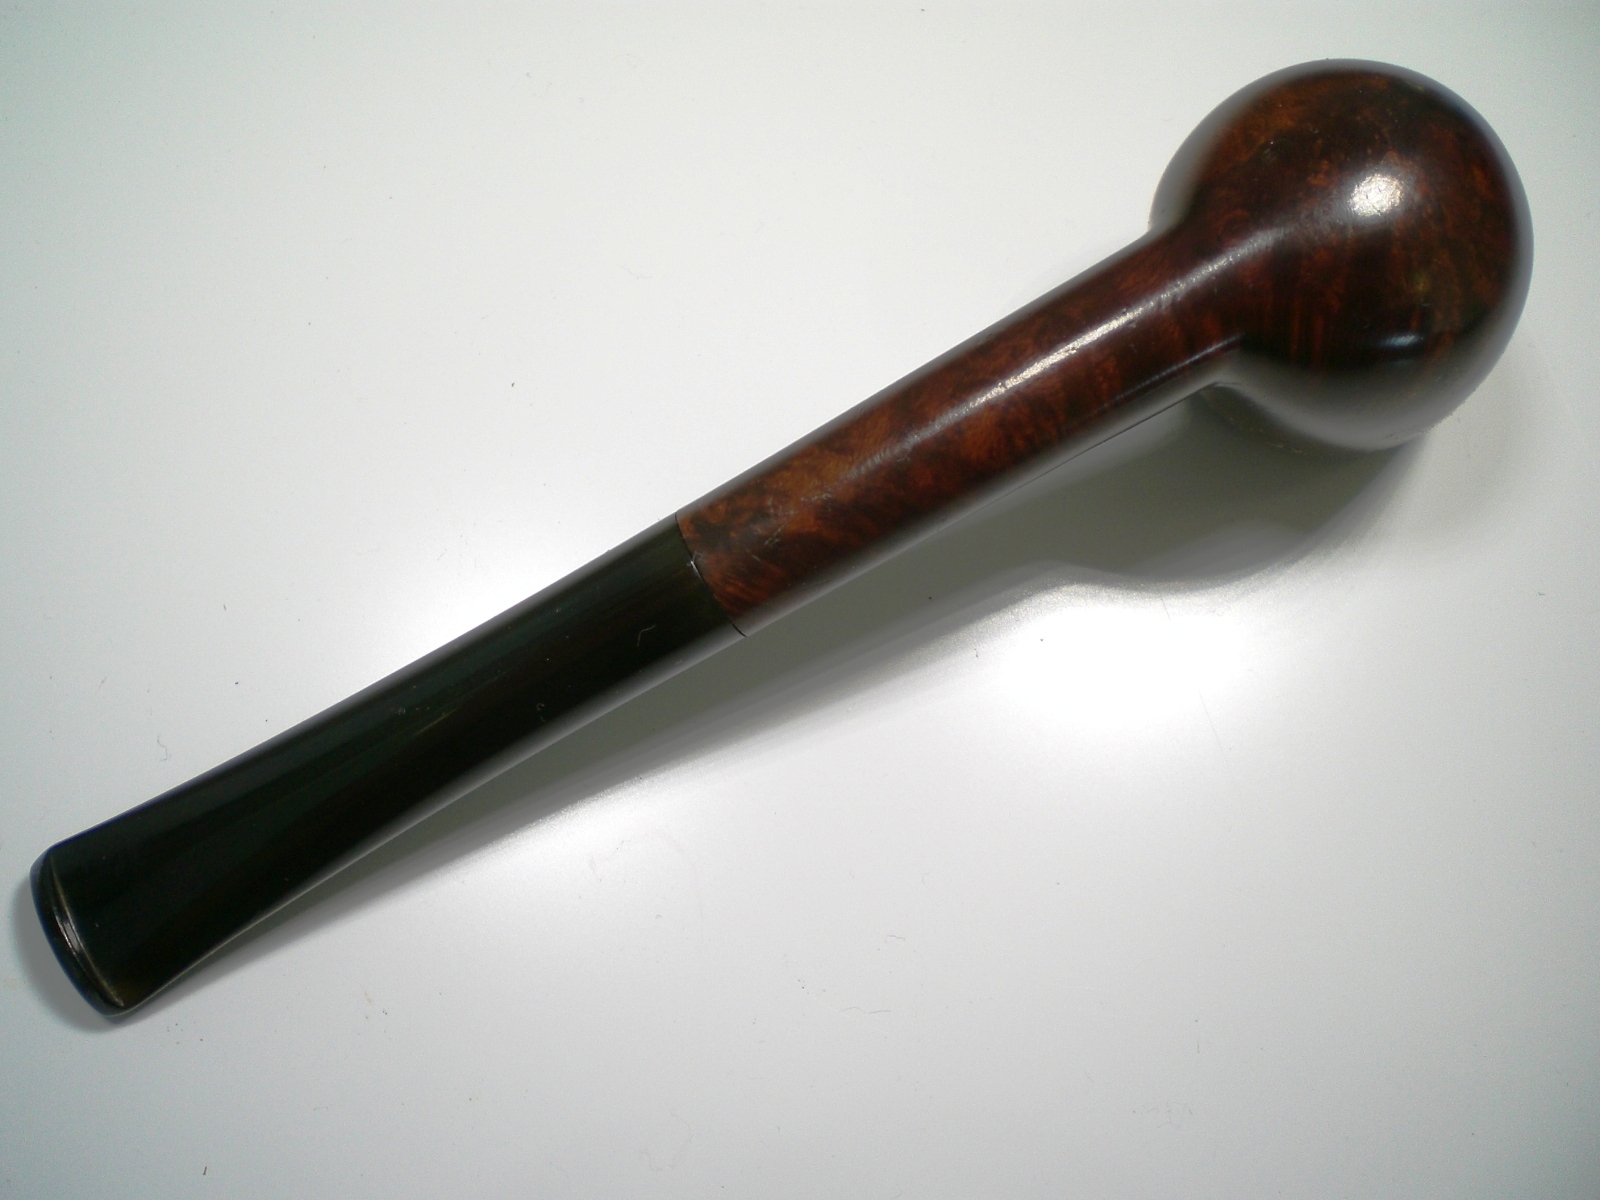
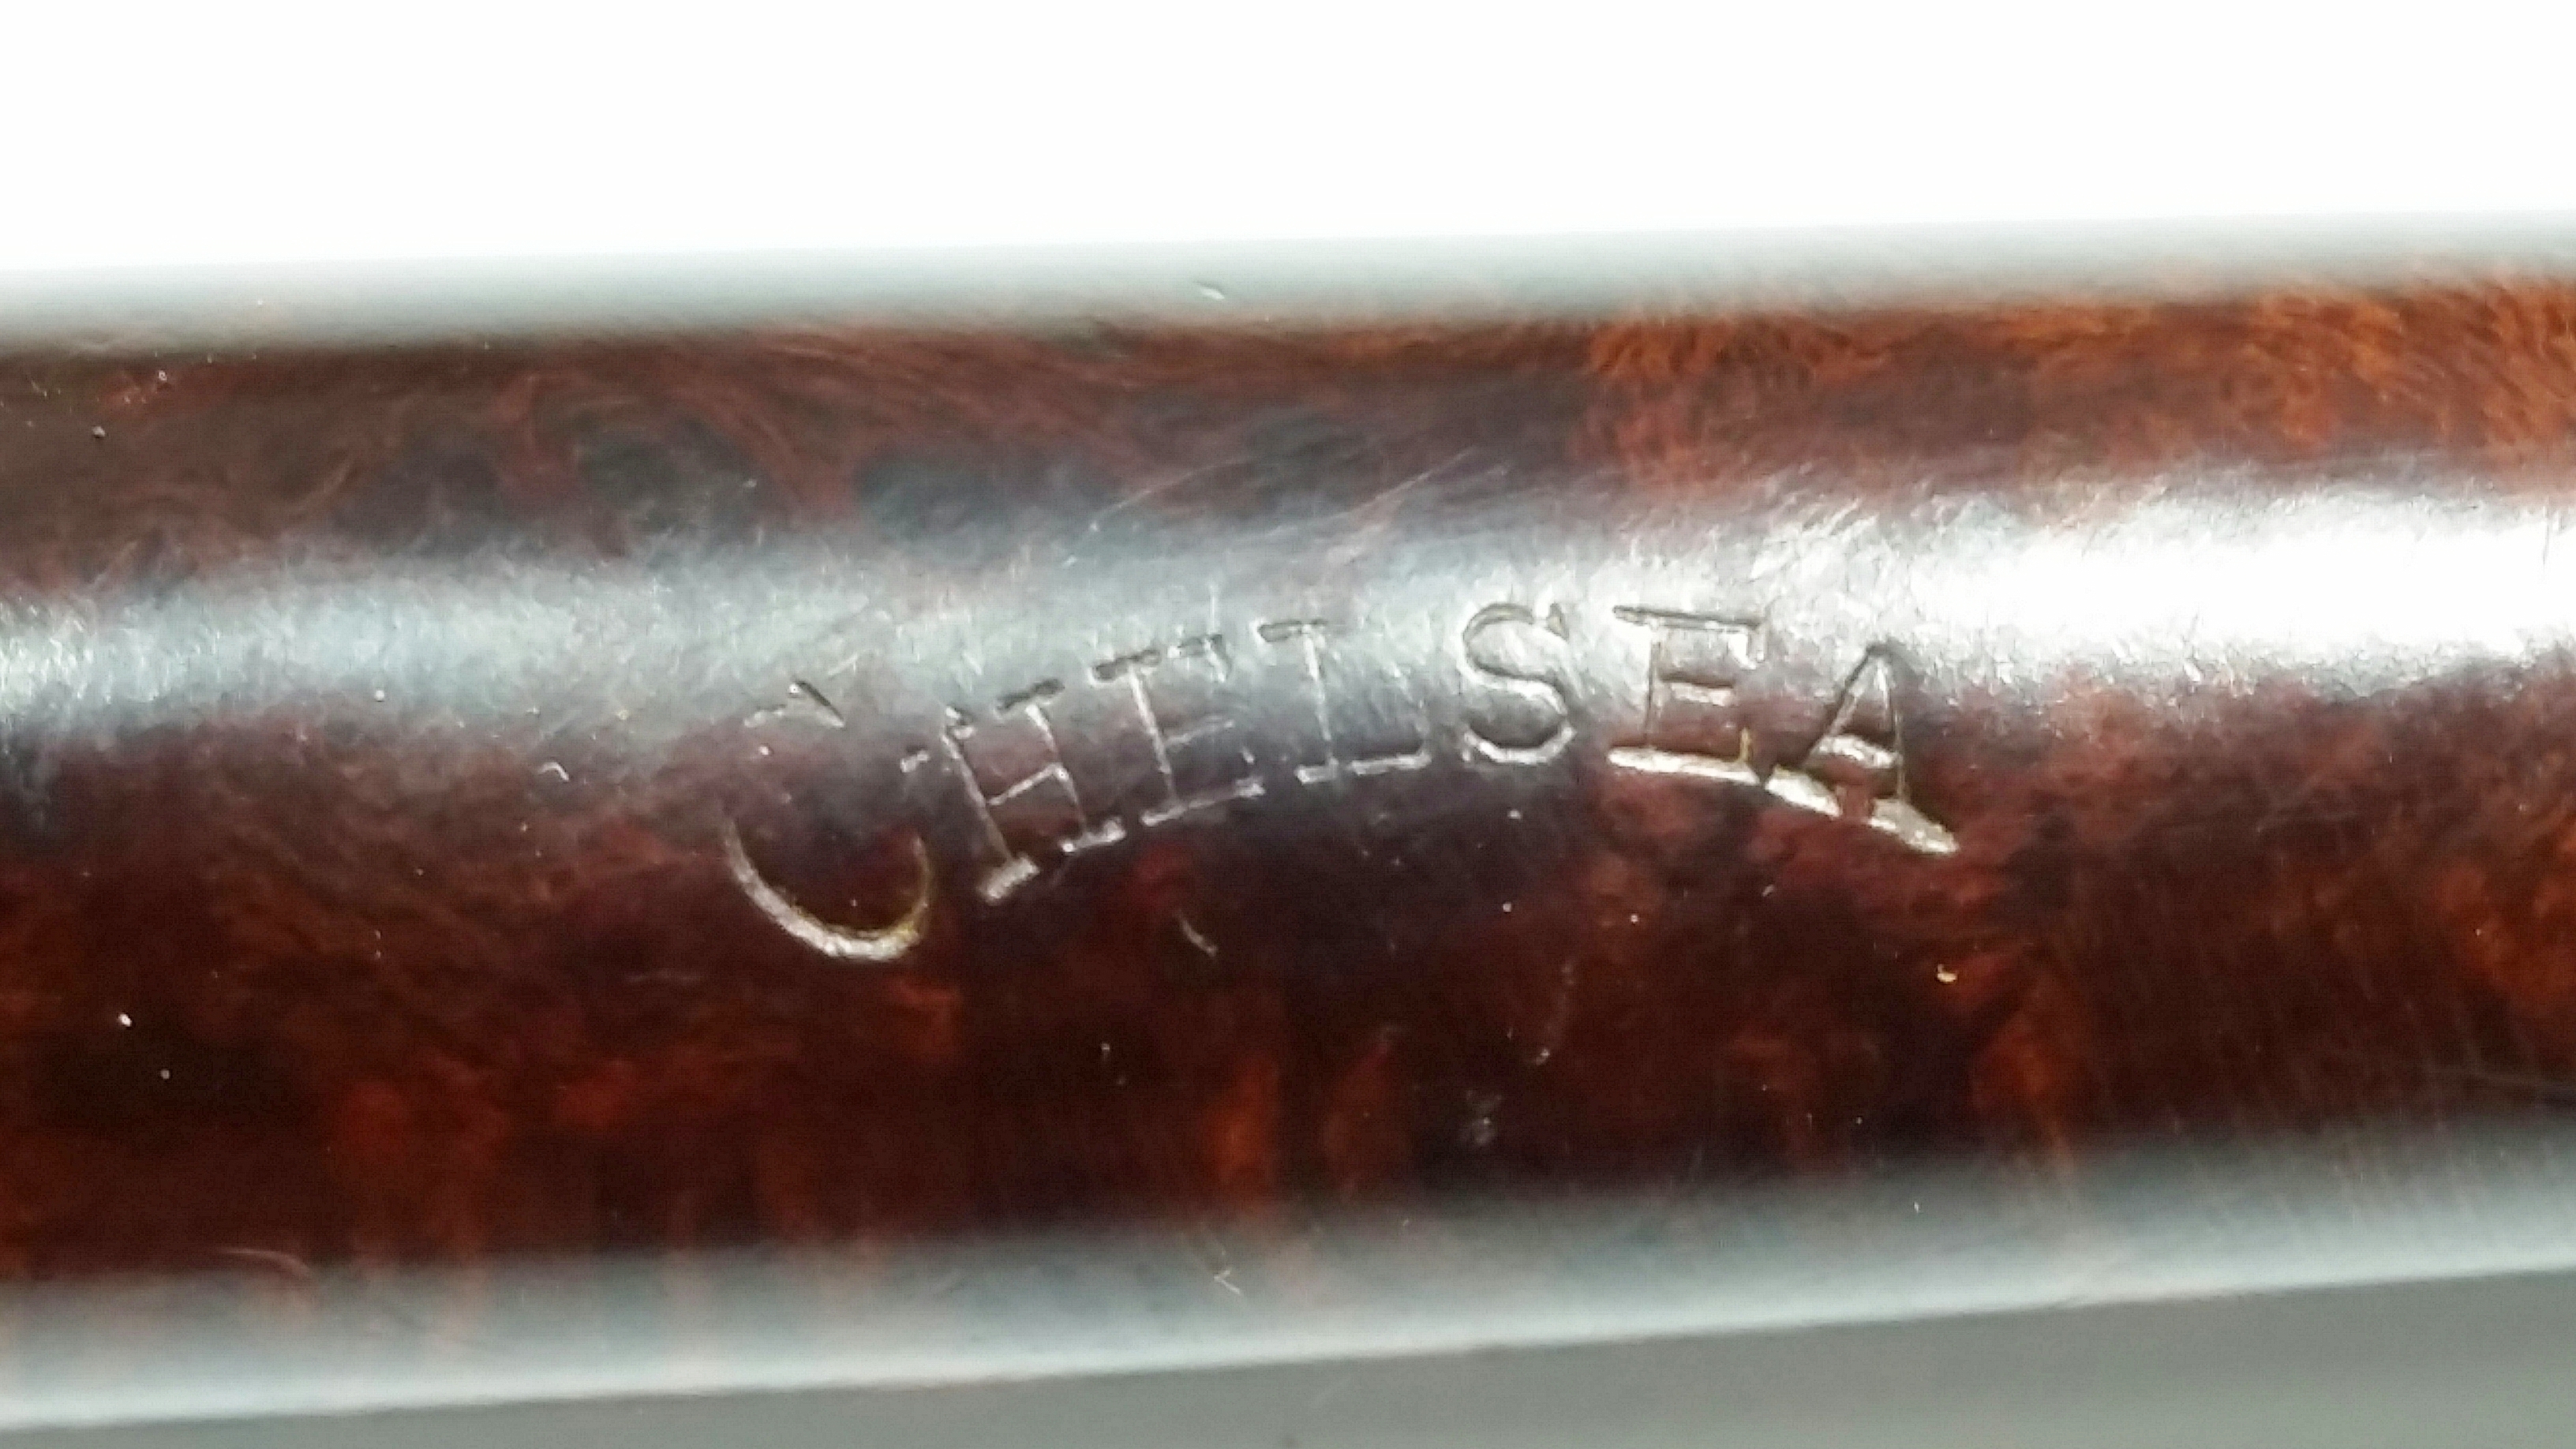
My youngest daughter’s name is Chelsea and she is married to a fine young man who also enjoys a pipe. He’s received several of my restorations in the past few years. A few months ago, I stumbled across this “Chelsea” stamped pipe and decided it would be part of his birthday present this year. He and my wife share the same day in April, so I can never forget his special day.
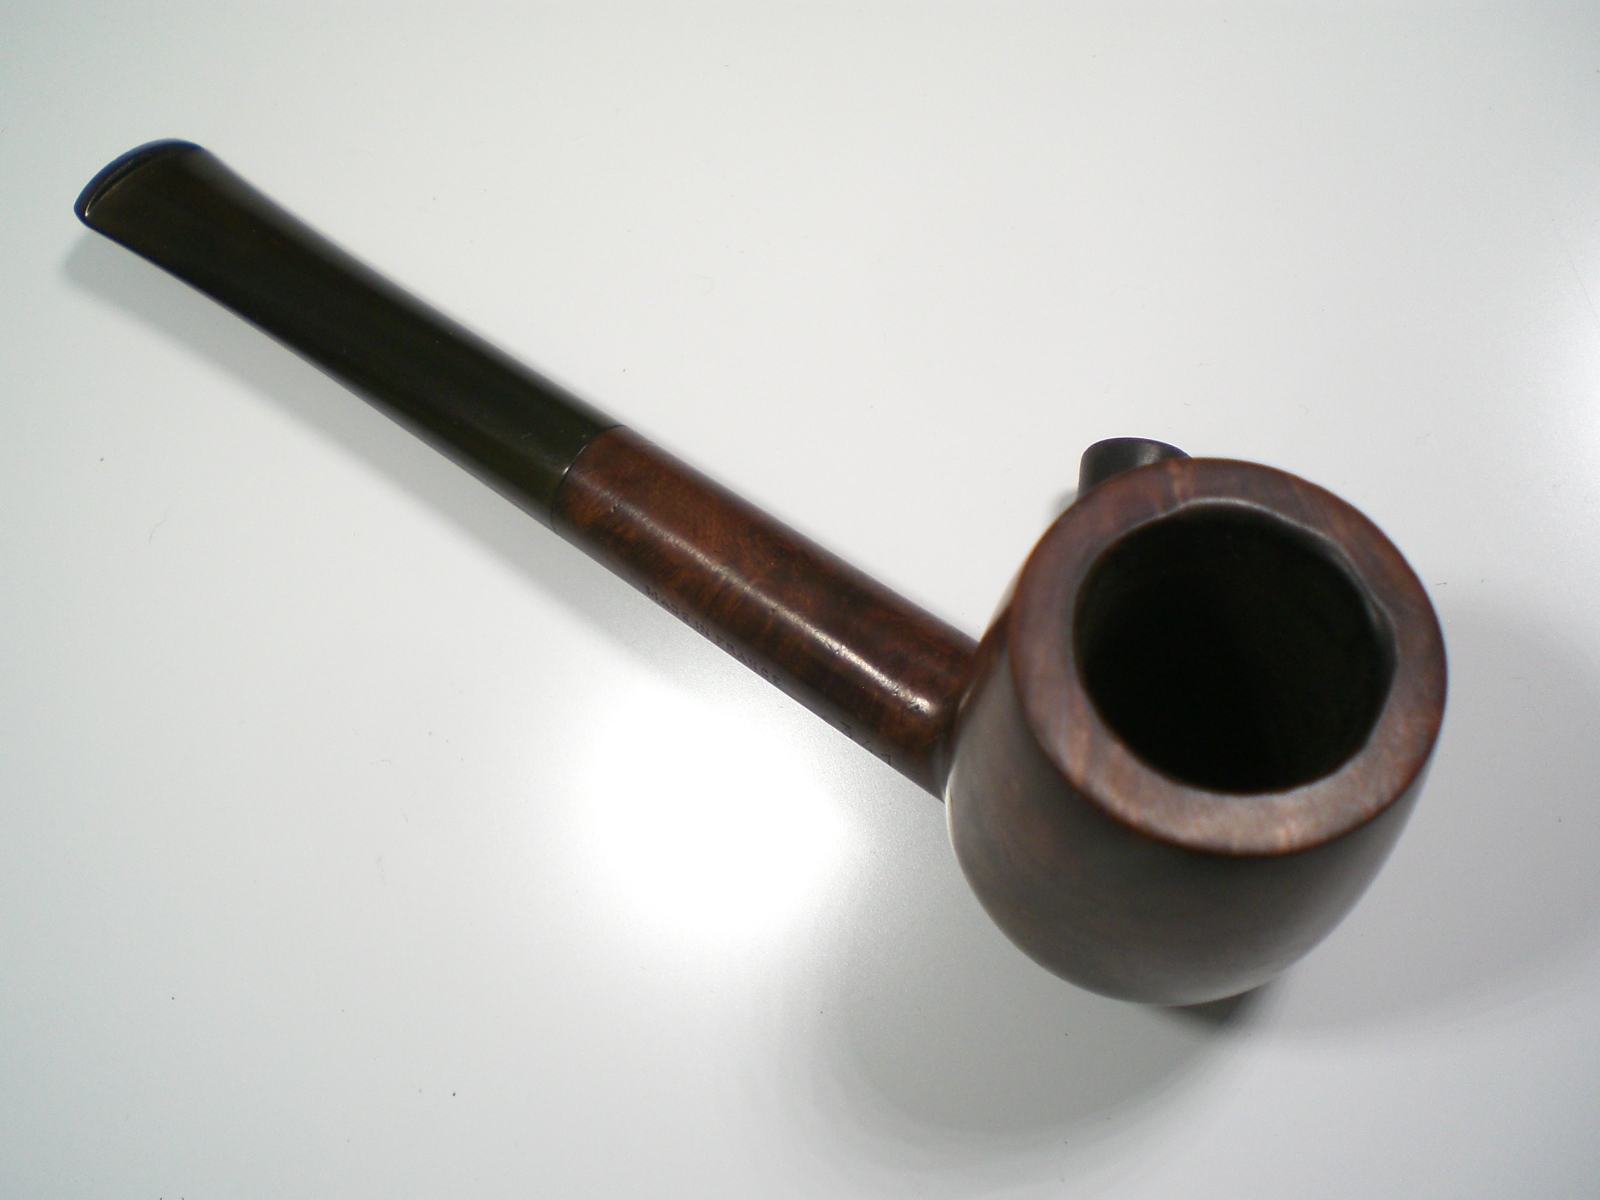
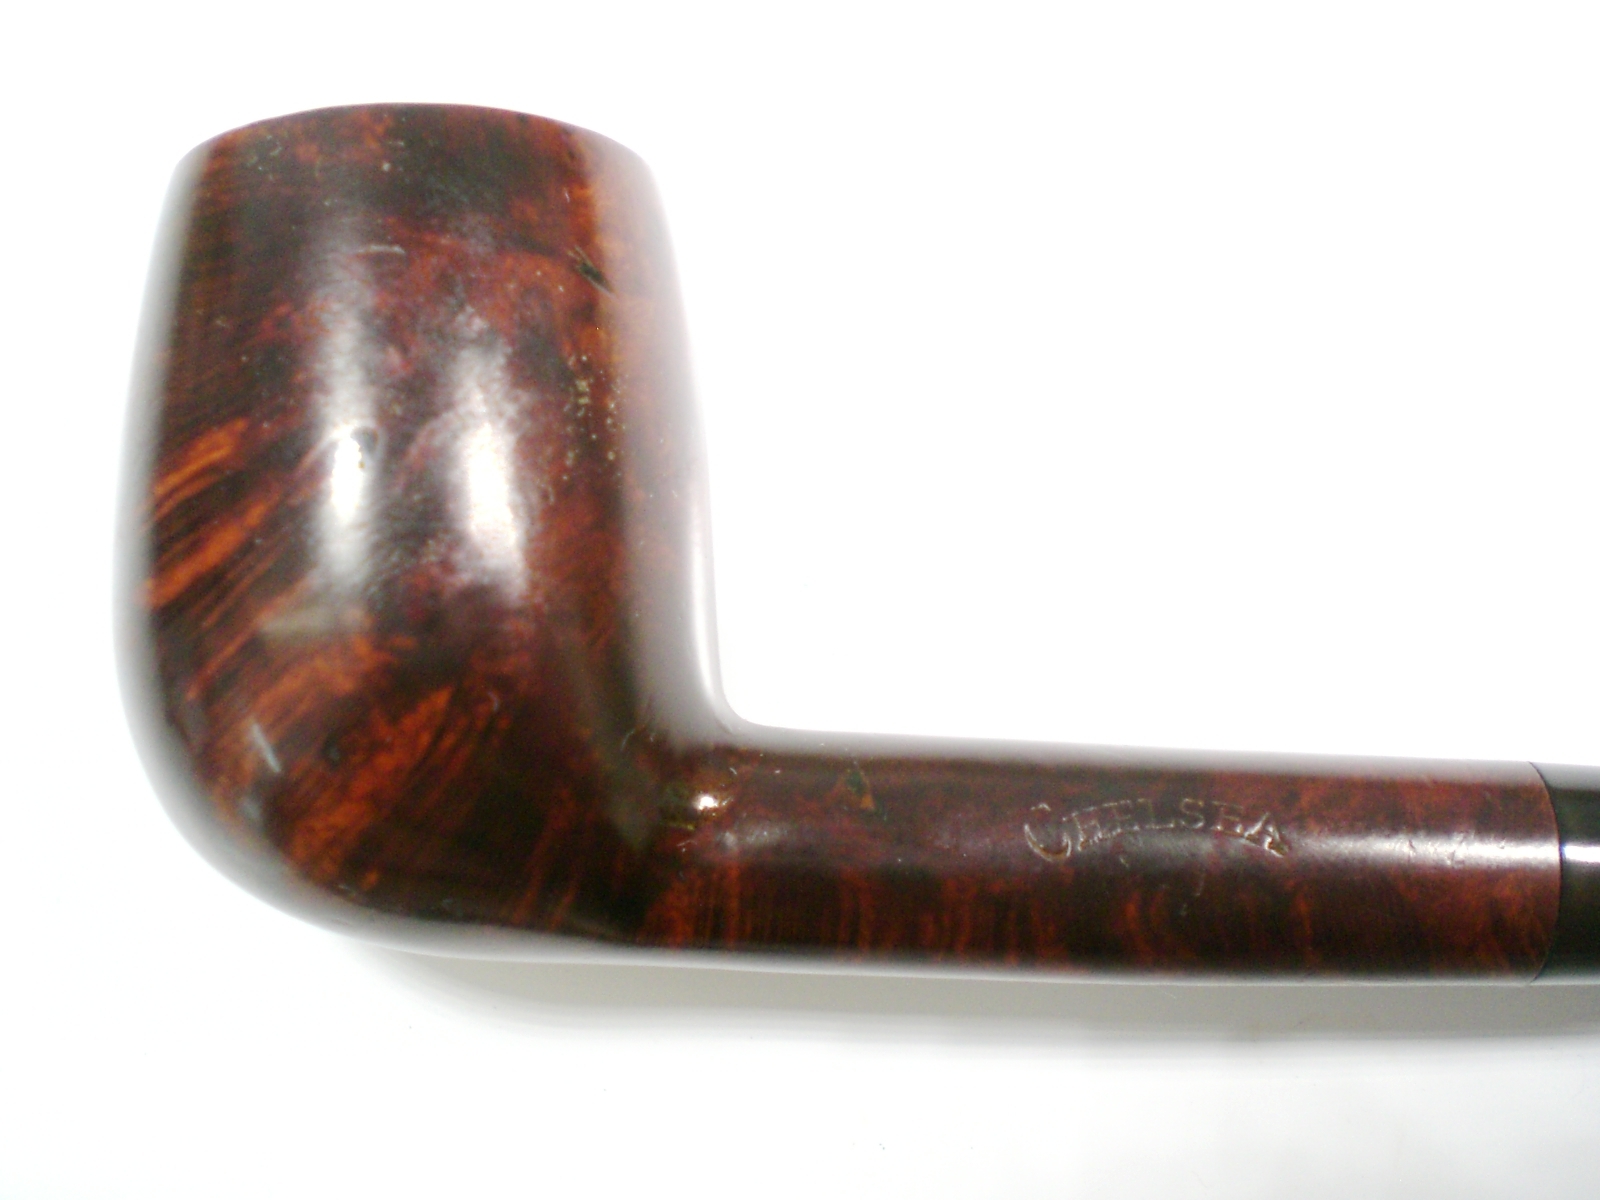
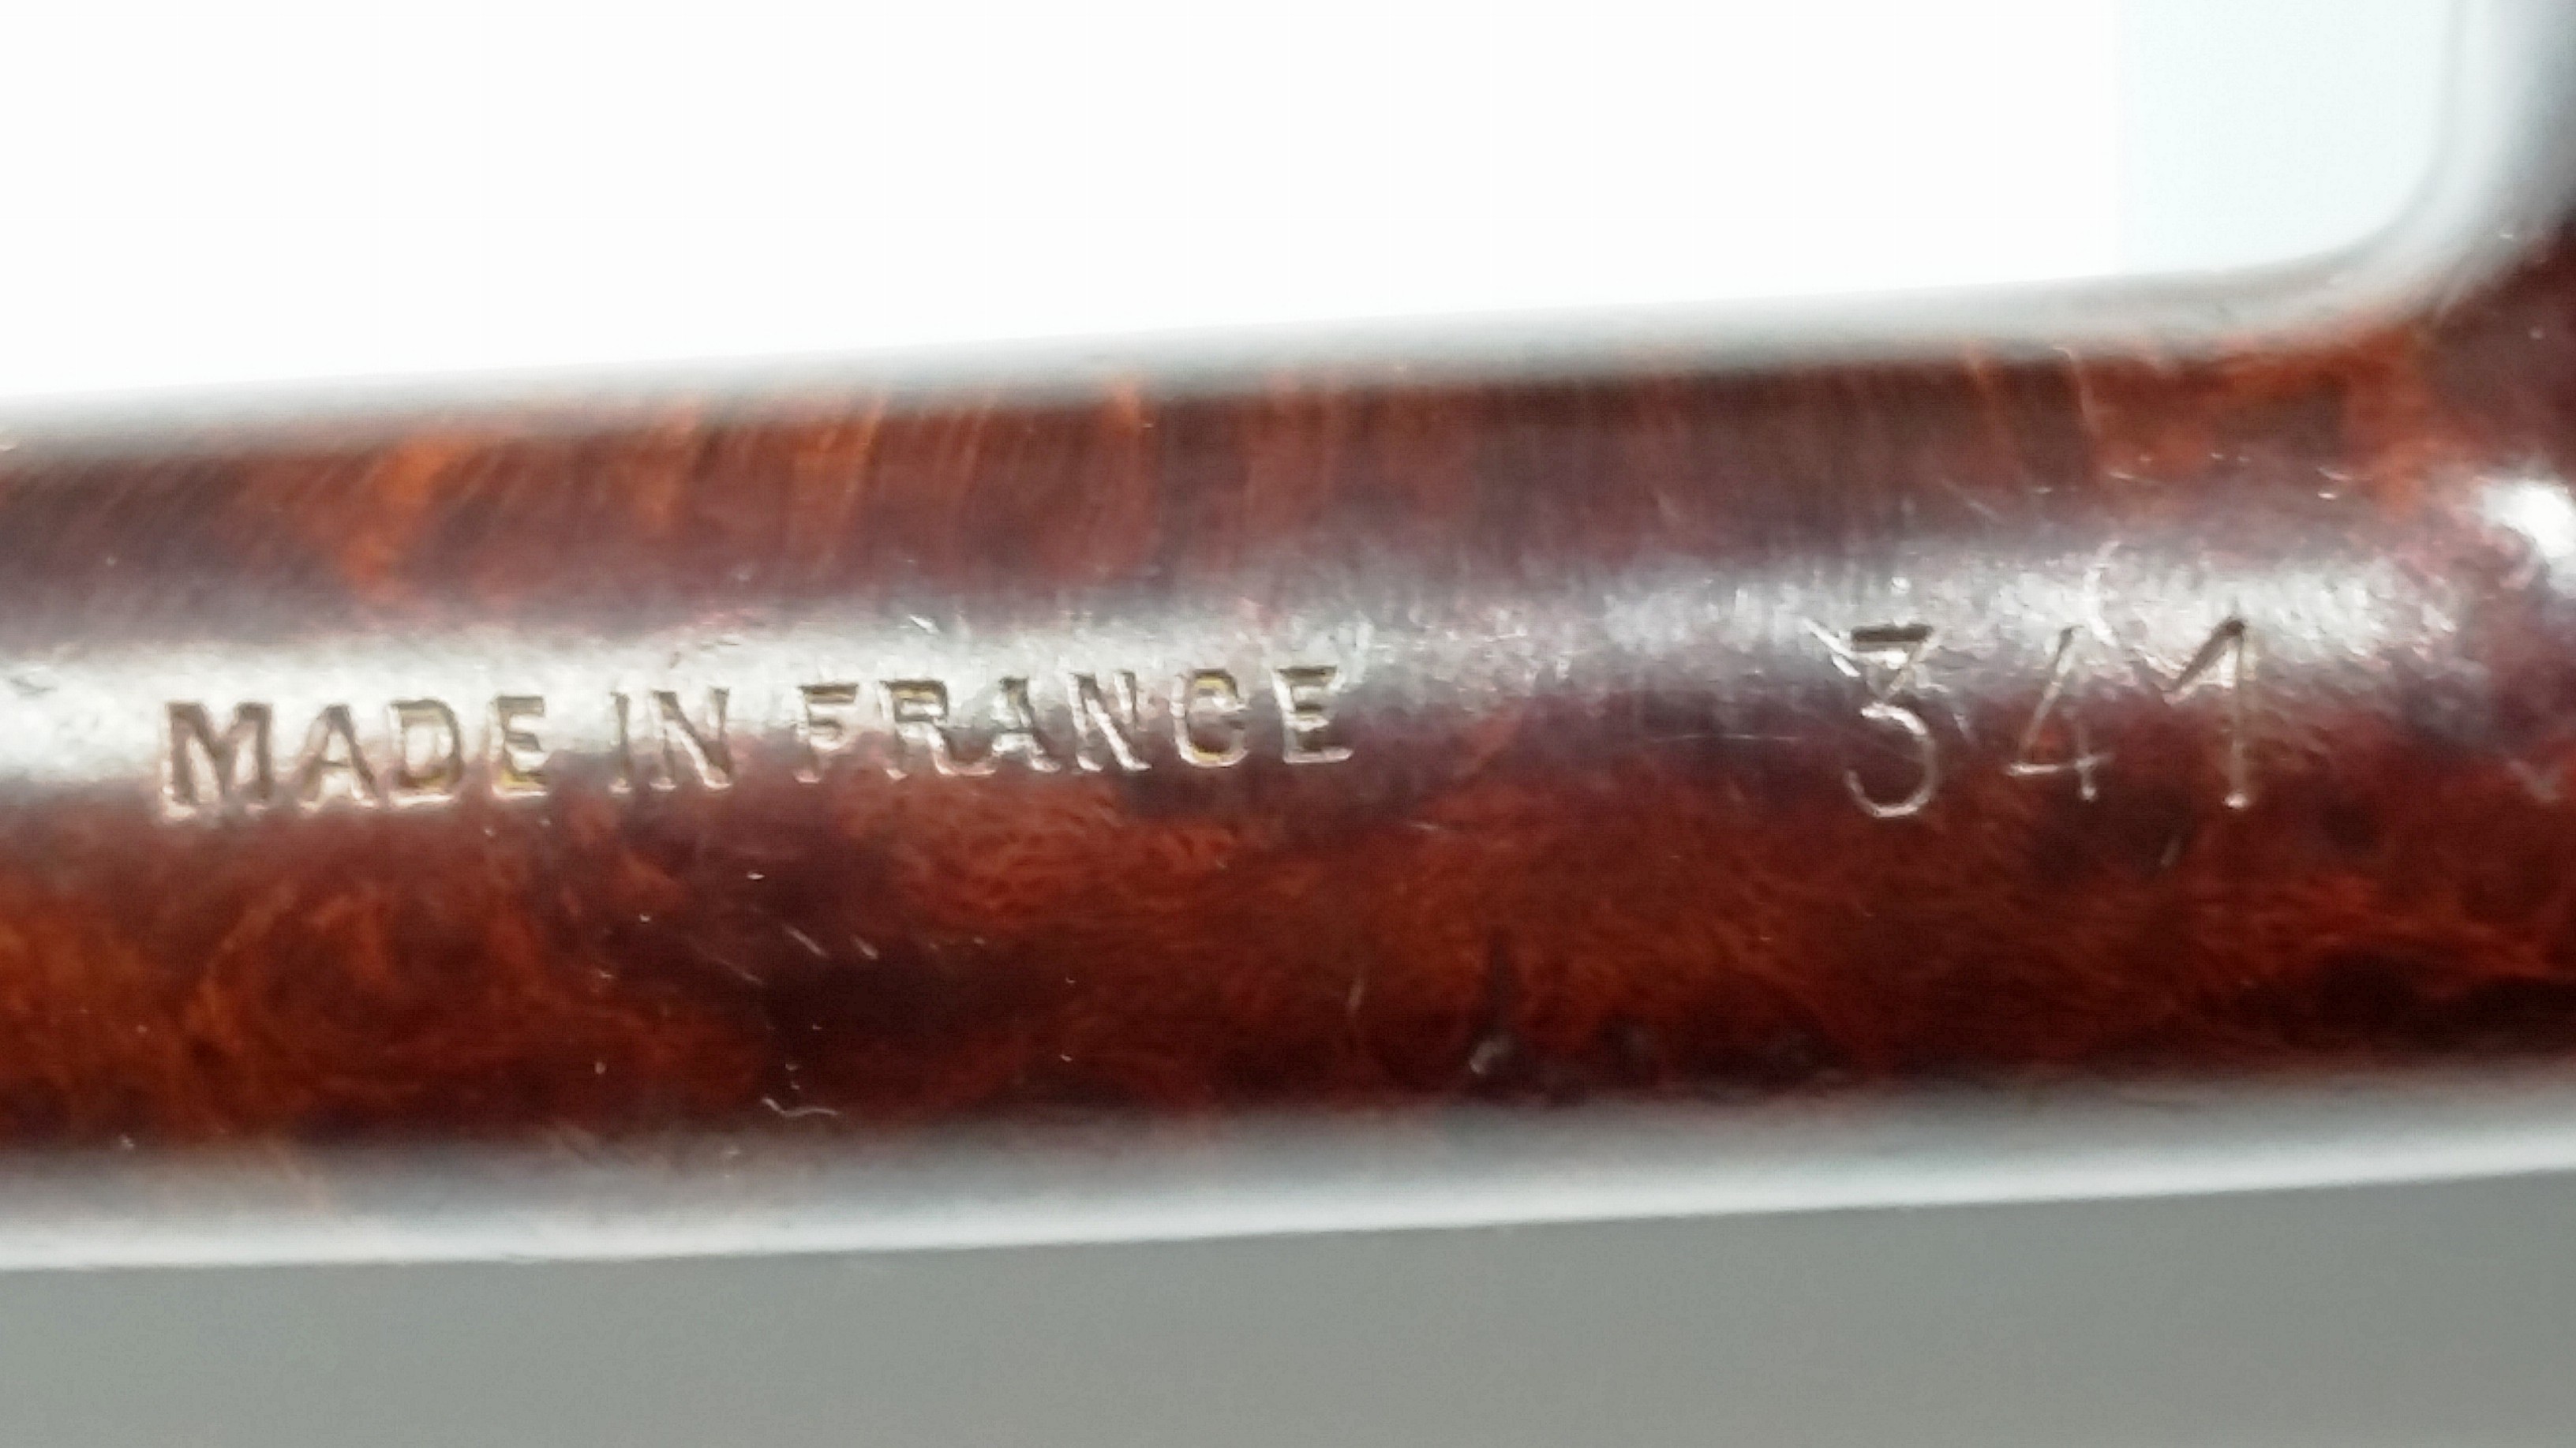
The pipe is stamped “Chelsea” and “Made in France 341”. I’ve seen references to the Chelsea brand as being an Comoy’s second and indeed the shape 341 is listed on their shape chart as a small billiard. I was unable to find a Comoy’s version of this shape anywhere on the web. The stem material and finish definitely have a Comoy’s feel.
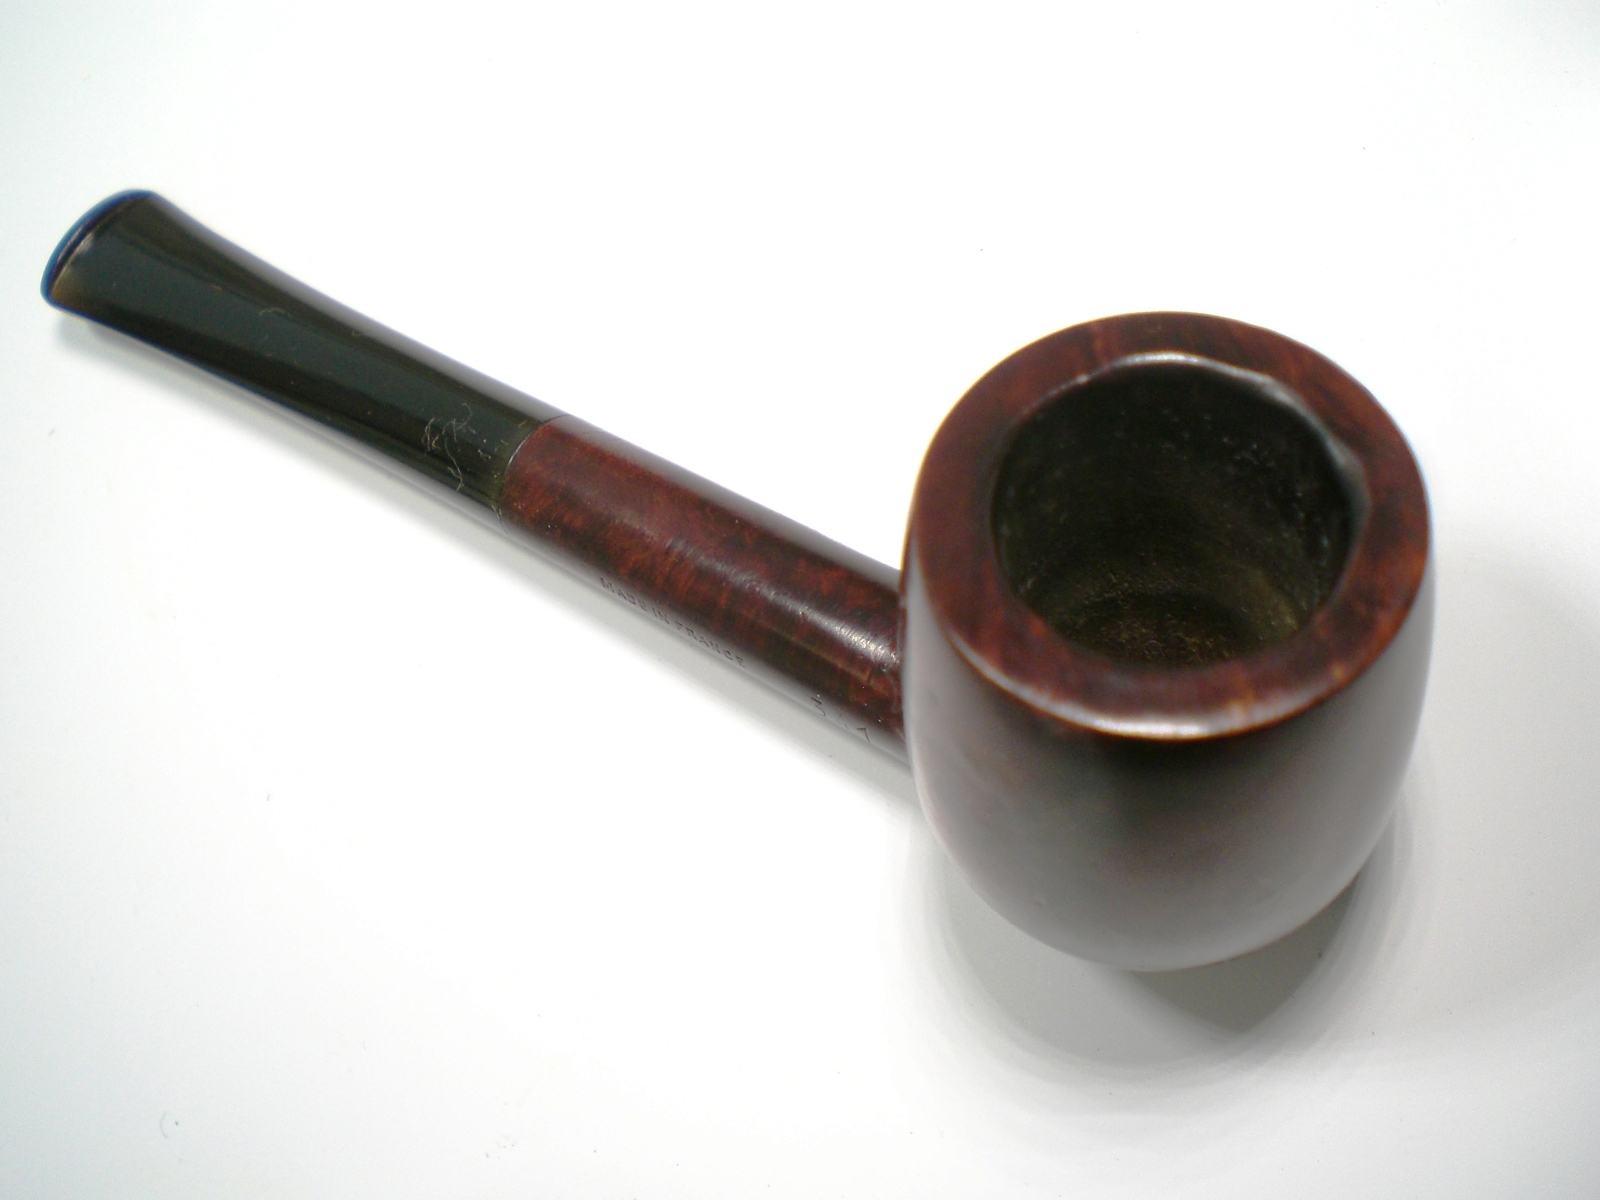
The pipe was in good shape, but some light oxidation and a very mild cake. The bowl had several ugly fills.


After the pipe was reamed, I used a small dental pick to remove the fill material. I put several drops of the black superglue on those spots and applied a spritz of accelerator (I still have not acquired a proper application tool for the accelerator). I used 800 grit paper to sand smooth the glue spots, than up to 1500 wet paper. The second picture shows the spots sanded smooth.
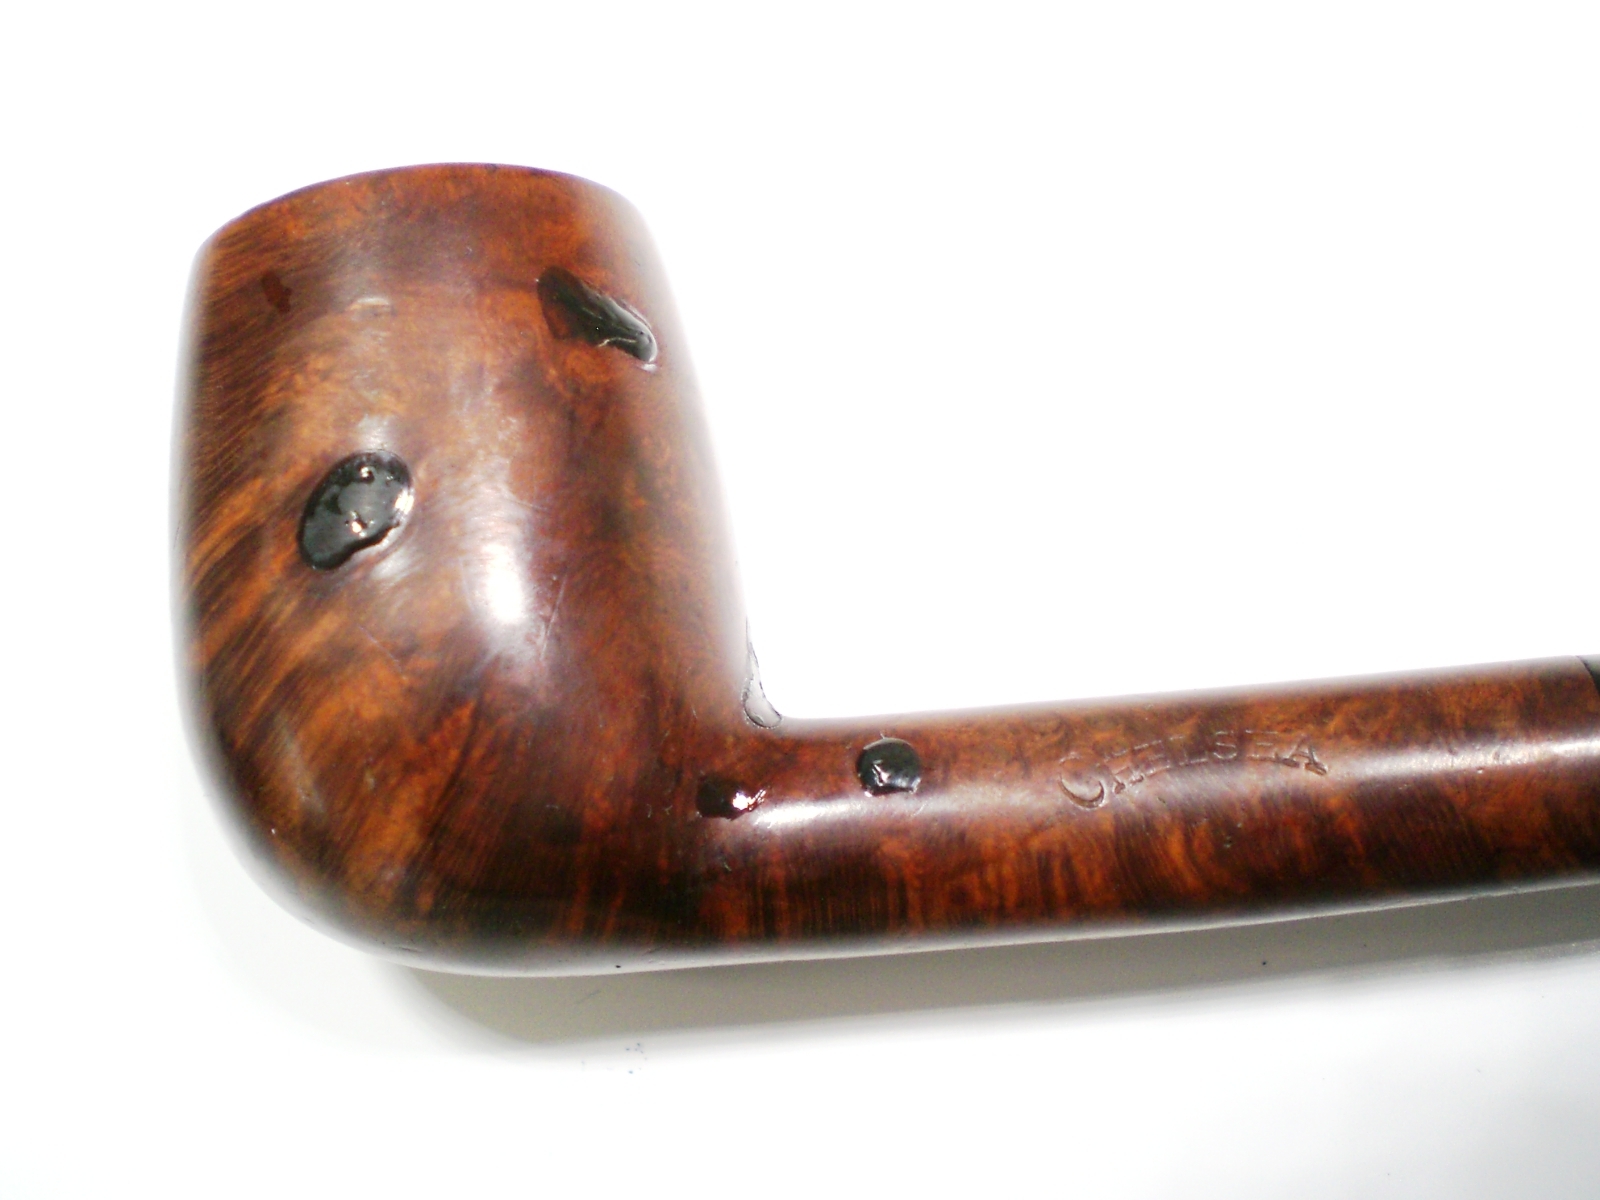
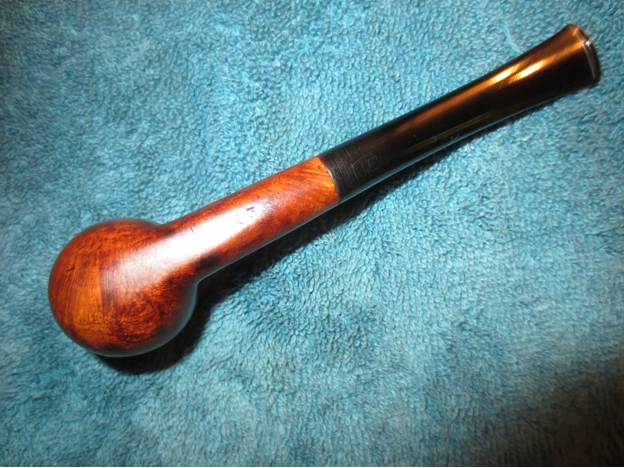
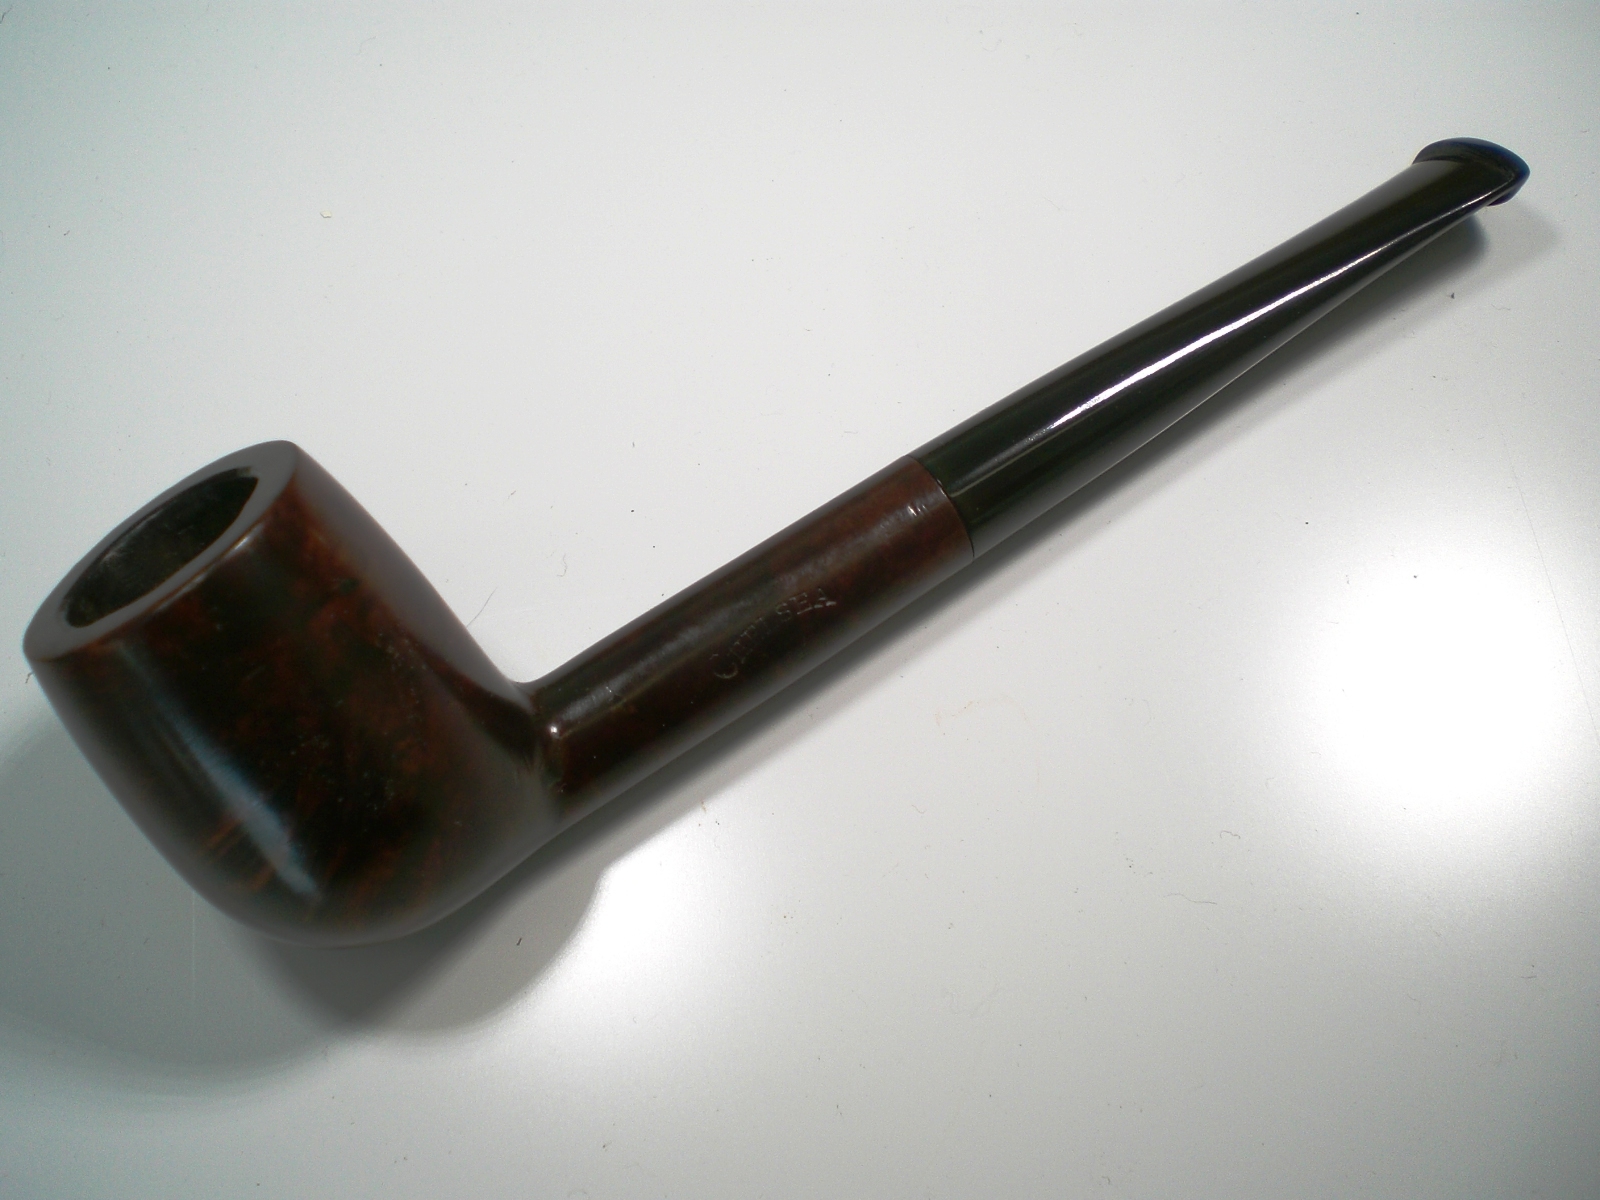
I applied a Medium Brown Fieblings stain to the bowl and set it with a match. After it dried, I buffed it out with some Tripoli and then White Diamond to smooth out the stain color. This hid the fills nicely.
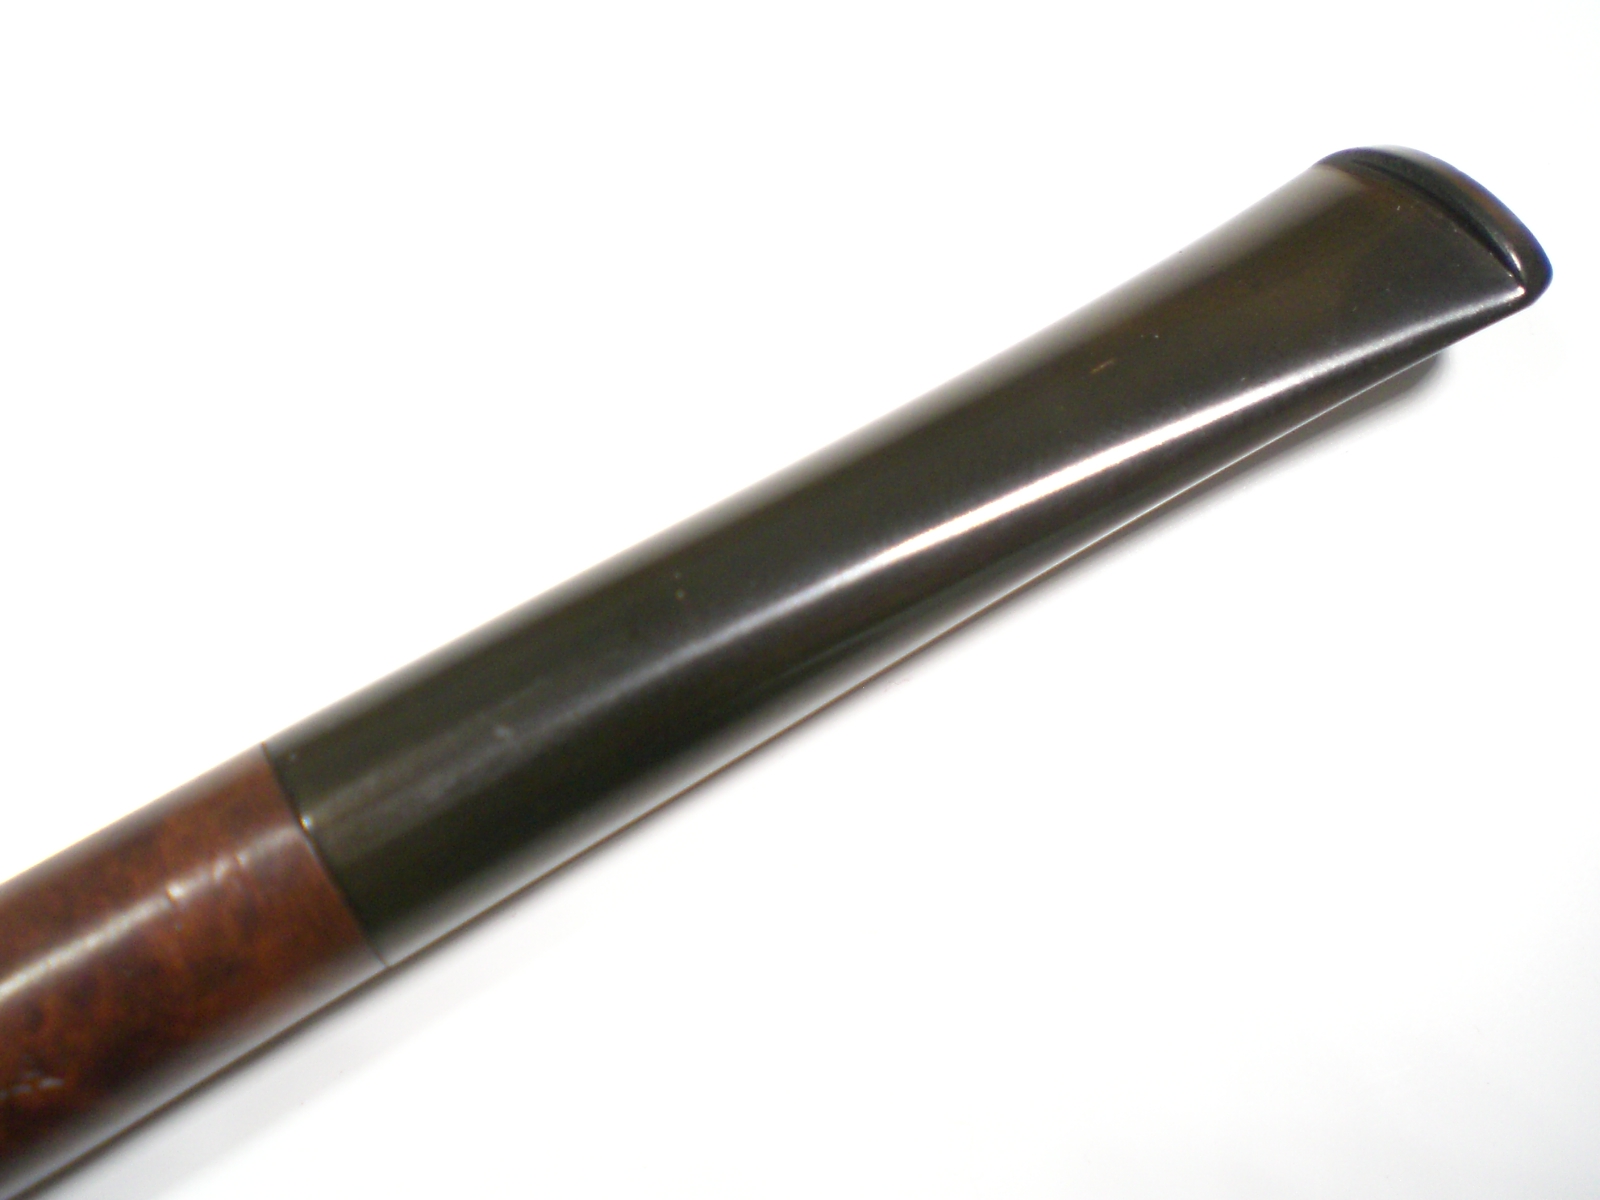
The stem was an easy fix, first using some 800 grit paper to remove the mild oxidation. Then up thru 1500 and 2000 grade wet papers, followed by 8000 and 12000 grade micromesh. The mounted on the briar, the stem was buffed with White Diamond and Meguiars Plastic polish. The bowl was buffed with several coats of carnuba wax.

My daughter and son-in-law live in New Orleans, so the pipe will be packed and sent out in the mail tomorrow. I wish that I could be there to celebrate with him person, but we’ll see him soon.
