Blog by Steve Laug
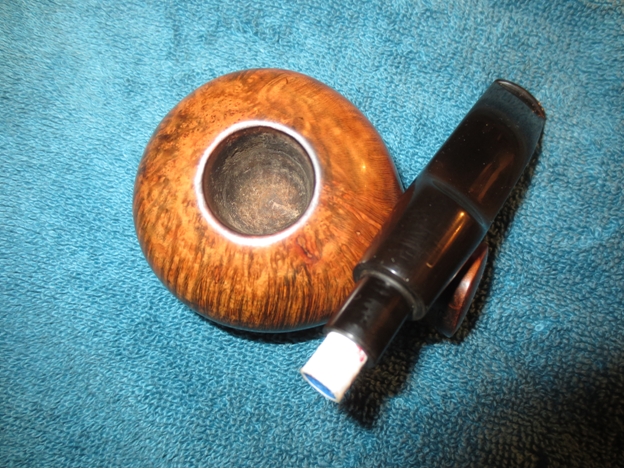
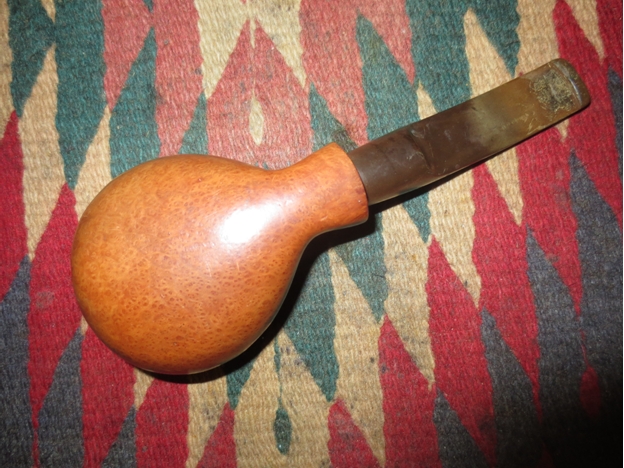
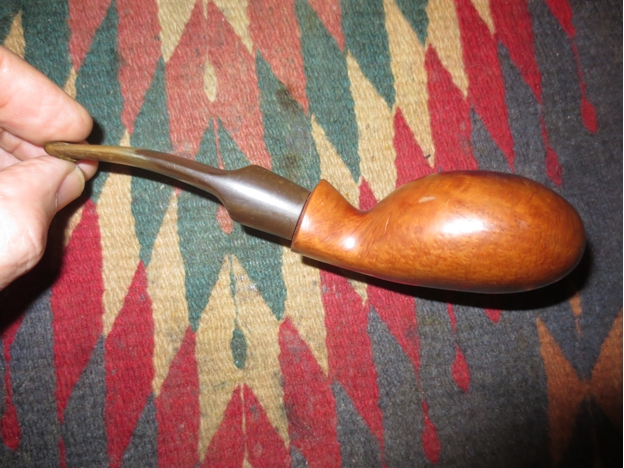
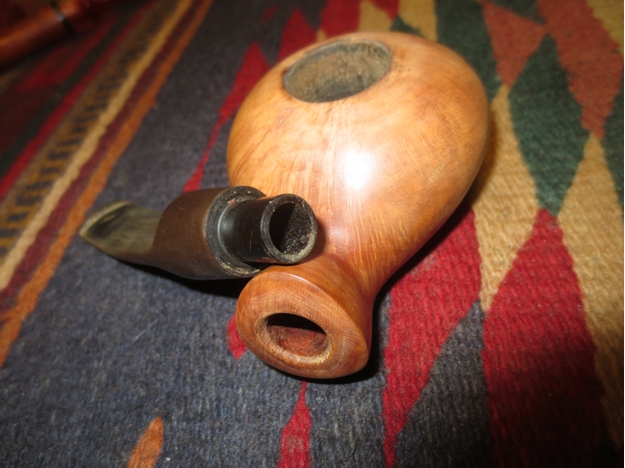
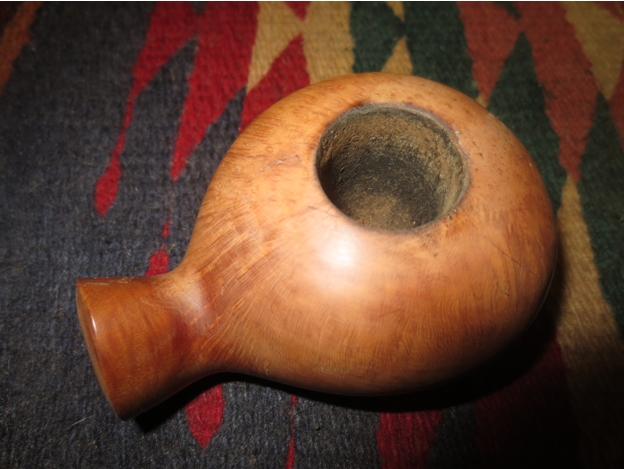
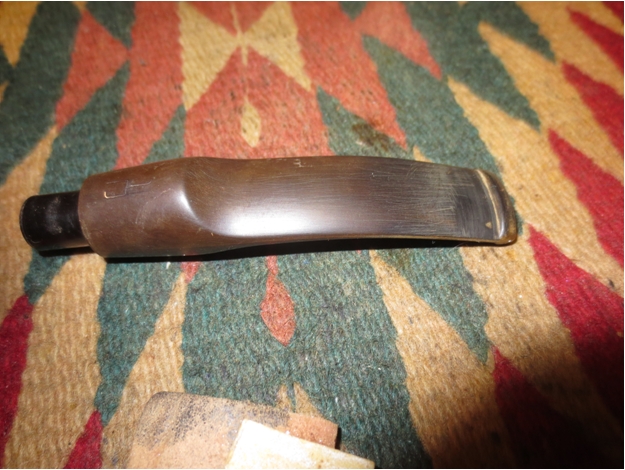
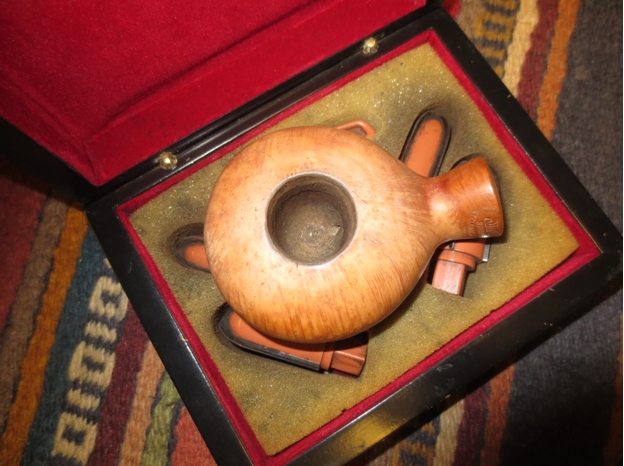
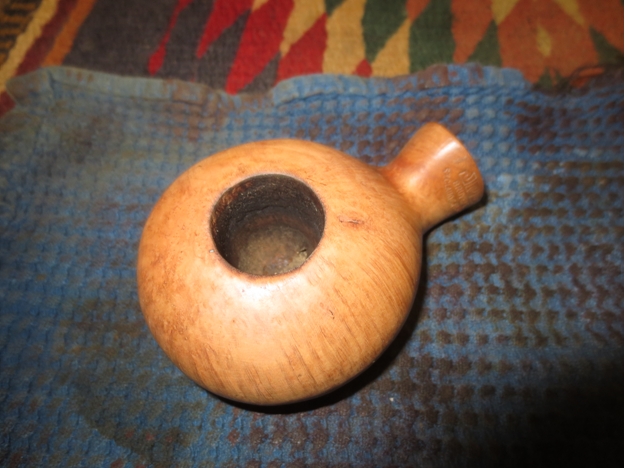
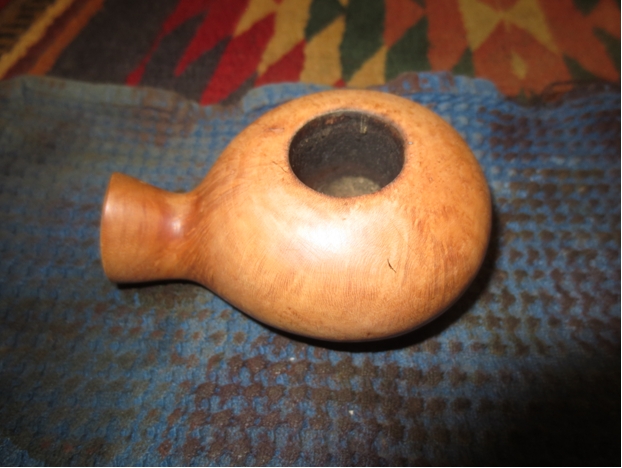
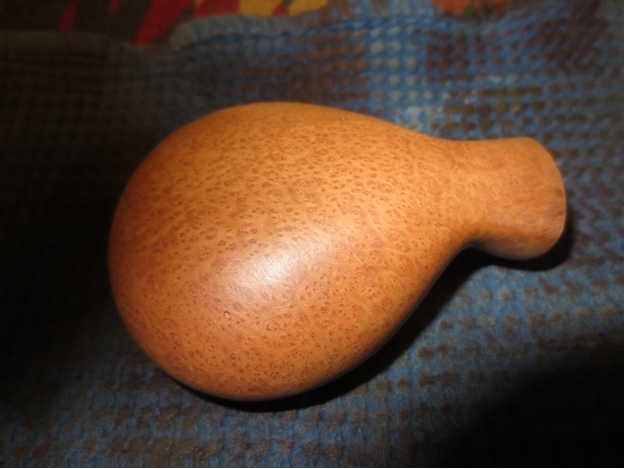
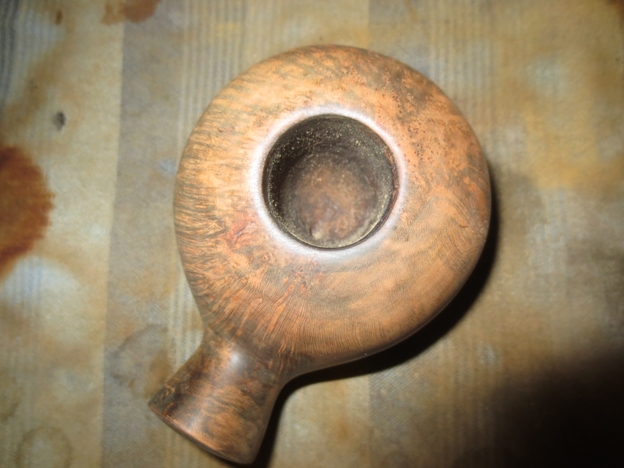
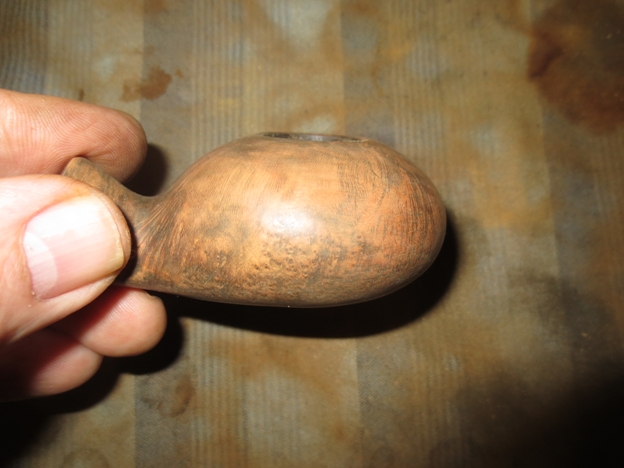
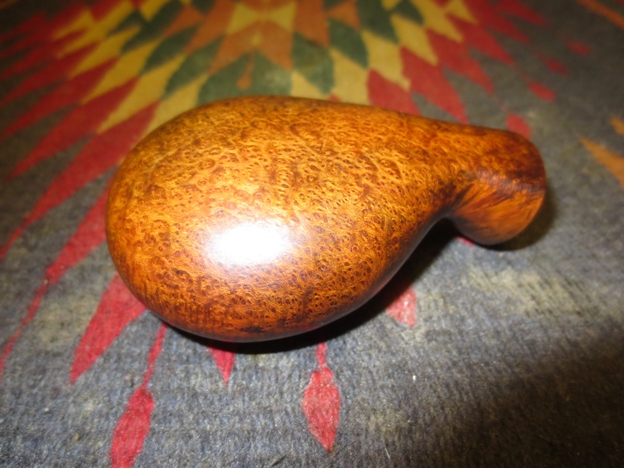
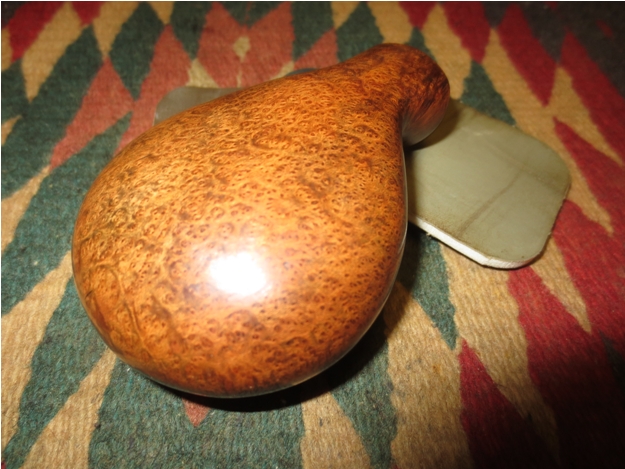
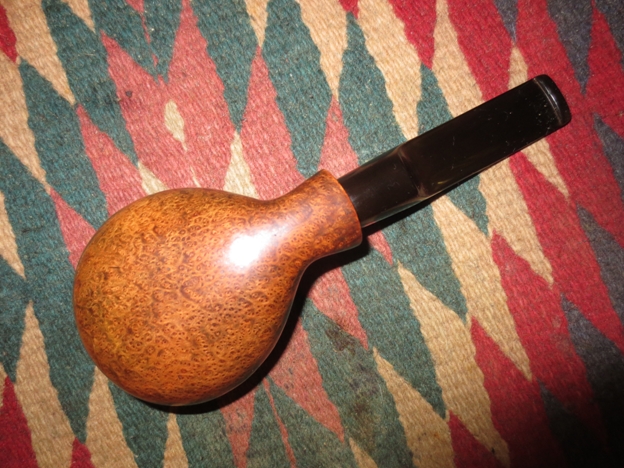
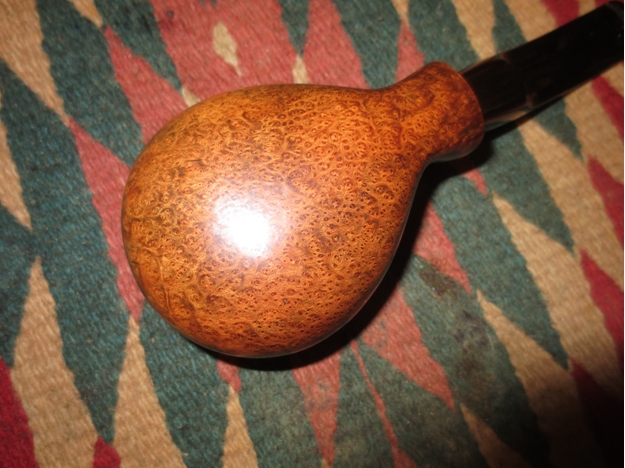
When I first saw the pipe lot on craigslist Vancouver the pipe that caught my eye was the squashed tomato that is shown in the photo below on the top right. I had no idea who the make was but it was obviously a large pipe and a unique shape that made me want to know more. It is actually the pipe that pushed me to make the phone call to the seller. I have a Rad Davis that is similarly shaped but nowhere near as large. When I got to the seller’s home and looked at the pipe I could see that it was stamped JPL over Bruyere over St. Claude France on the shank. The pipe was well smoked. The finish was pretty well dried out – I think originally it had been an oil finish over the natural briar and that was gone and in its place was a lot of grime. The top of the bowl was in the roughest shape. It had a thick coat of tar/oil that I call lava flowing over the rim. The bowl had a cake that was hard and there were remnants of tobacco stuck in the walls and bottom of the bowl. The top also had what looked like road rash on the front. There were many pin prick nicks and dents that made me think that the pipe had been dropped on concrete. The redeeming feature was that the briar had some stunning flame grain around the sides and top portion of the bowl and featured great birdseye grain on the bottom. The stem was oxidized and there were two deep tooth marks on the top and bottom sides of the stem near the button. There was also a lot of tooth chatter and it looked as if the stem had been covered at one time with a softie bit.
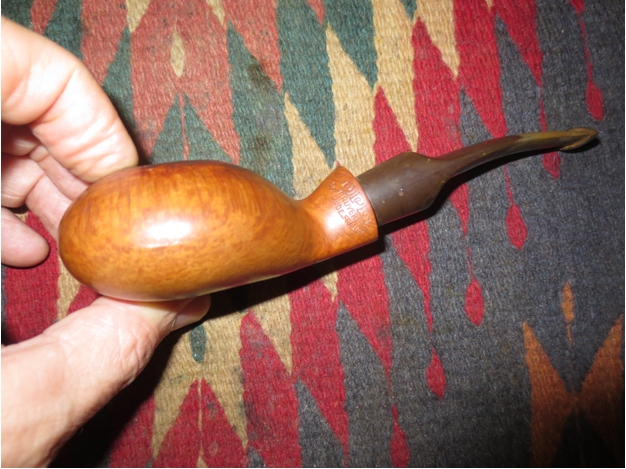
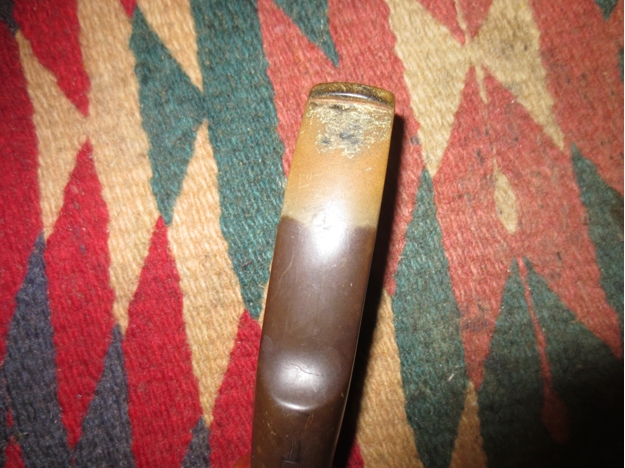
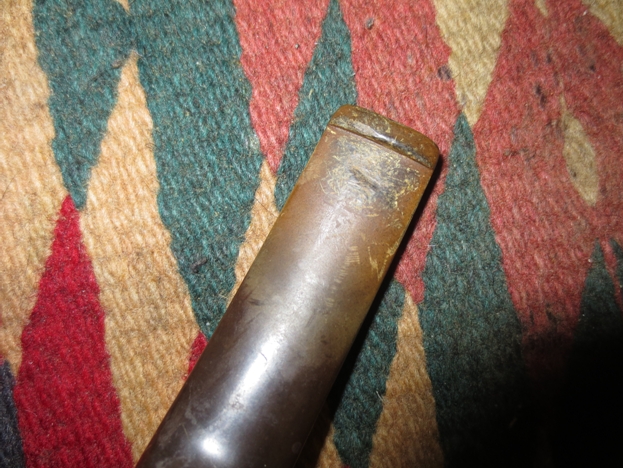
 I took the next series of three photos to show the damage to the top of the bowl and the tooth marks in the stem.
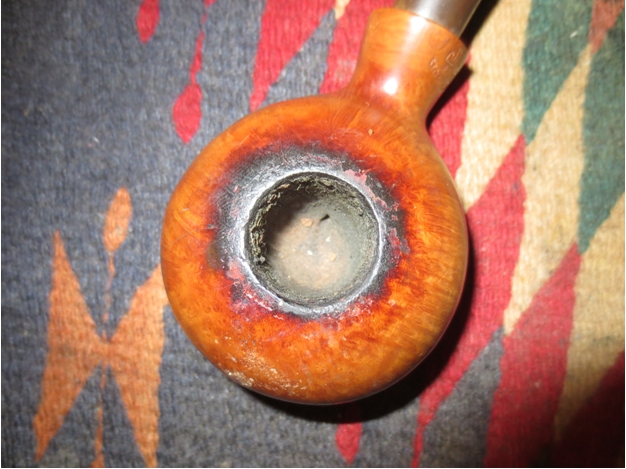
 I was unfamiliar with the stamping on the pipe as I had not seen it before. Once Googled it on the web I found that JPL stood for Jean Pierre Lacroix. That was a name I was familiar with in previous reading on St. Claude pipe making families. I looked on Pipedia and found the following information:
“Lacroix Pipes have a rich history of pipe making tradition and the brand was started in 1962. Eugine Lacroix began making pipes for the Delacour factory in the 19th century; his sons founded their own factory in 1921. Two of the grandsons (including Jean) continued on in the business, but parted ways and struck out on their own in 1962. At that time, Jean set up Jean Lacroix pipes, coincidentally in the old Delacour building his grandfather started in 85 years prior. Today, Jean Lacroix, Chacom, Jeantet, and Vuillard are all pieces of the larger Cuty-Fort Enterprises, and Jean is actively involved with the prestigious Confrerie des Maitres-Pipiers de Saint-Claude. Jean still makes pipes; his spectacular freehands are known throughout the world. The model named “Nizza” De Luxe is made by him with scripted stamp showing his name (hard to read!). Jean Pierre Lacroix sometimes marked Maitre Pipier a Saint-Claude.” Quoted from Pipedia http://pipedia.org/wiki/Lacroix
More information is available on PipePhil’s website. http://www.pipephil.eu/logos/en/infos/lacroix-en.html#split
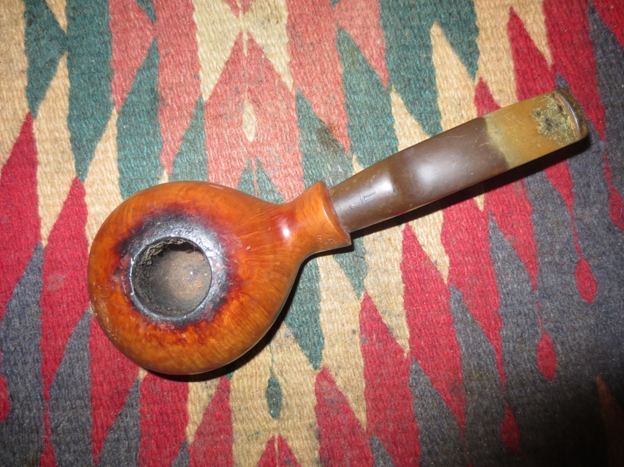
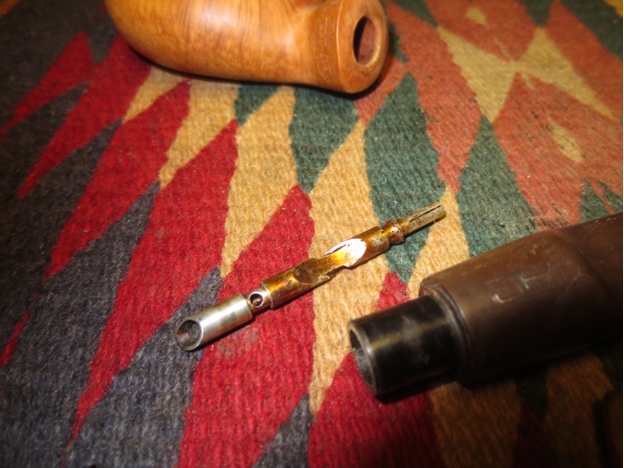
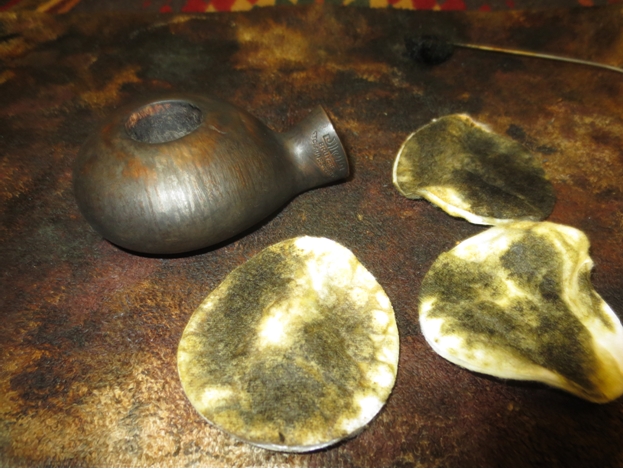
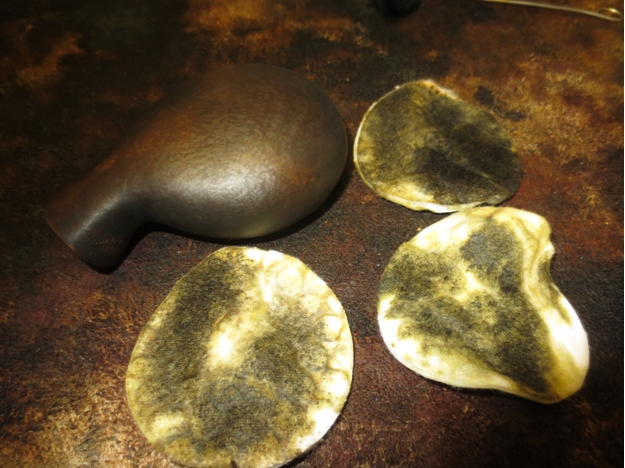
I began cleaning up the pipe by scrubbing the rim with acetone on a cotton pad. Since the pipe was unfinished and was so dirty I used acetone rather than alcohol. I scrubbed the bowl top until I had removed all of the tars and oils. I also wiped down the remainder of the bowl to remove the oils and dirt from the years of being held in the hand.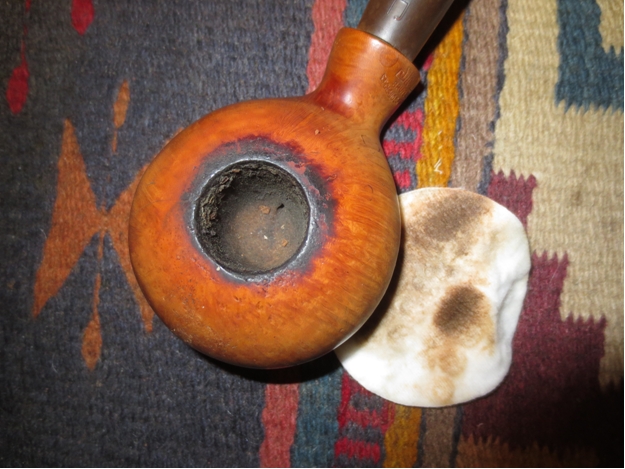 Once I had the bowl top cleaned I removed the stem to see what I was dealing with. I found that the stem and the shank was drilled for a 9MM filter but that somewhere along the way someone had inserted an ill fitting stinger apparatus in the tenon. It was pressed in place deep in the tenon and there was a lot of wiggle room around it. It did not extend very far into the shank and as such the shank was filthy. The first photo below shows the stinger in place. The second shows the length of the stinger once I removed it from the tenon.
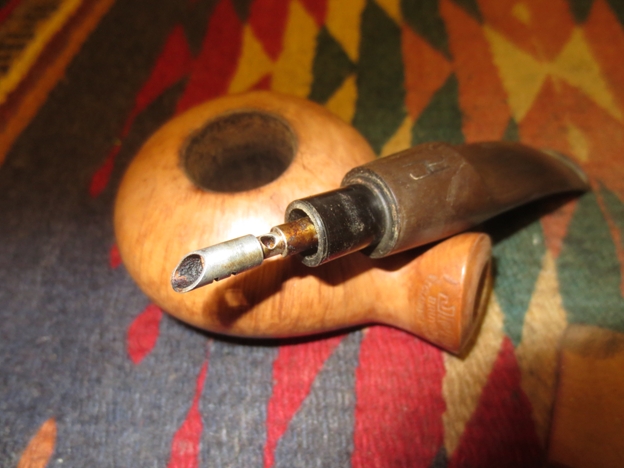
 I sanded the bowl with 220 grit sandpaper to remove the damage on the top of the bowl. I sanded until I had removed the road rash on the front edge and the damage to the back of the bowl. I sanded it further with a medium and fine grit sanding sponge to minimize the scratches left behind by the sandpaper.
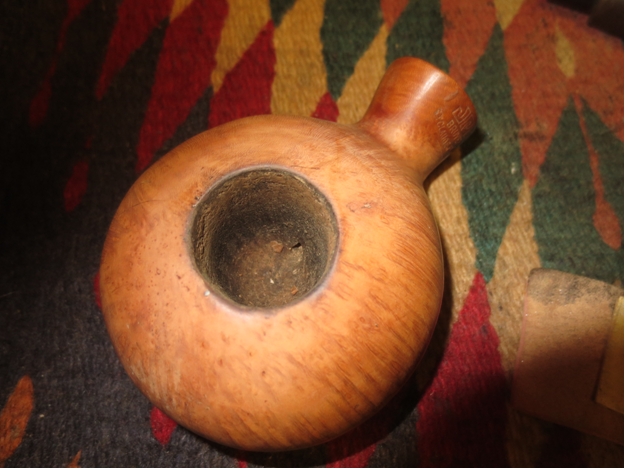
 While I had the sandpaper out I also sanded the tooth chatter and tooth marks on the stem. You can see that after sanding I still had a fairly large tooth dent on the underside of the stem and a small one on the top near the left edge.
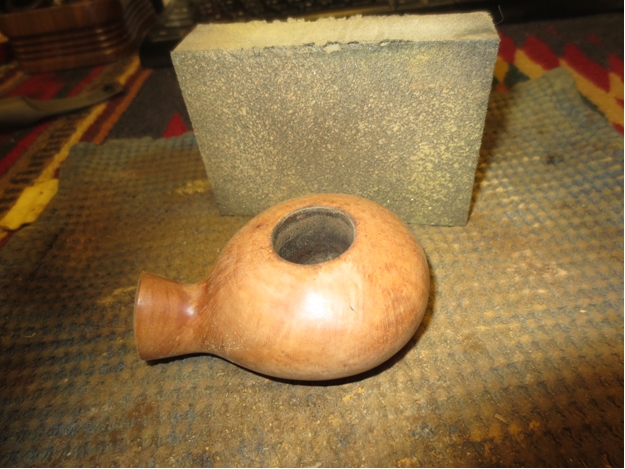
 I reamed the bowl with a PipNet reamer starting with the largest cutting head that would fit and working my way up to the largest head in the set. I took the cake back completely to leave the bare briar exposed and ready to build a new cake of my liking.
 I did some more sanding on the stem and was able to remove the damage from the top side near the button completely. The mark on the underside was still deep. I cleaned the surface of the stem with alcohol and picked the tooth mark clean with a dental pick. I filled it with black super glue and set it aside to dry.
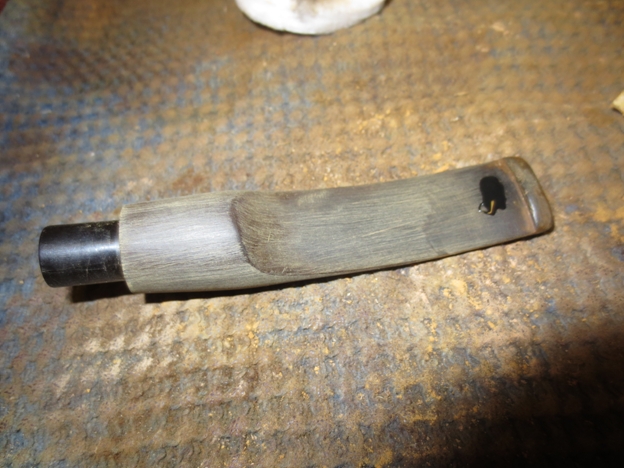 I sanded the bowl with a medium and a fine grit sanding block and worked over the damaged area on the top front and some of the more minor damage on the sides and back of the bowl. I sanded it and then wiped it clean with isopropyl alcohol on a cotton pad. After wiping it down the grain really began to show. The final photo in this series shows the birdseye on the bottom of the bowl.
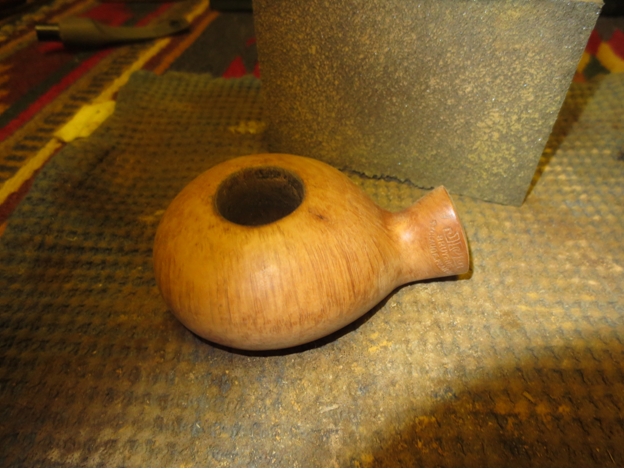
 I scrubbed out the shank of the pipe with pipe cleaners, cotton swabs and isopropyl alcohol until it was clean and the swabs came back white. I may well use a retort on it later but at this point I stopped with the swabs.
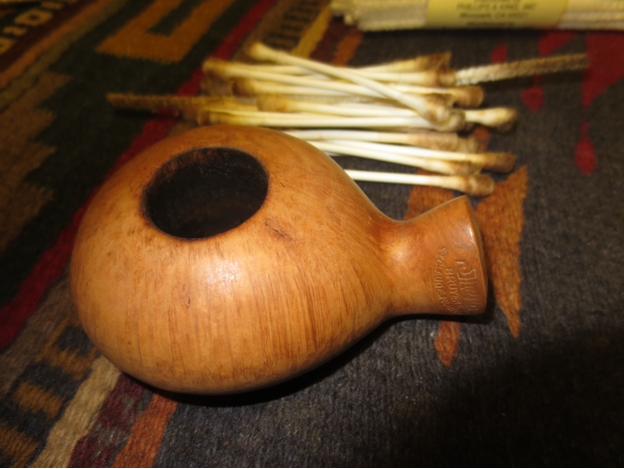 I sanded the bowl with micromesh sanding pads – wet sanding with 1500-2400 grit pads in preparation for staining the bowl.
 Though the pipe was originally unstained when it was made I decided to use a contrast stain to highlight the beautiful grain on the bowl. I heated the briar and then applied several coats of black aniline stain. I flamed the stain to set it in the grain. I wiped the briar down with alcohol on cotton pads to remove the topcoat of black stain.
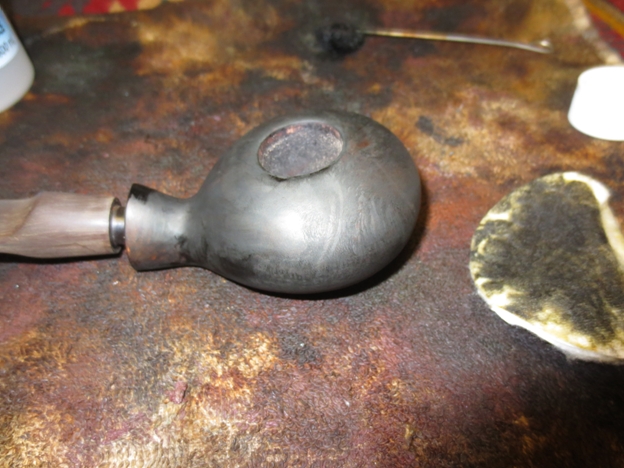
 I took the pipe to the buffer and buffed it with red Tripoli to further remove the topcoat of stain. I sanded it with a medium grit sanding sponge and the fine grit sanding block.
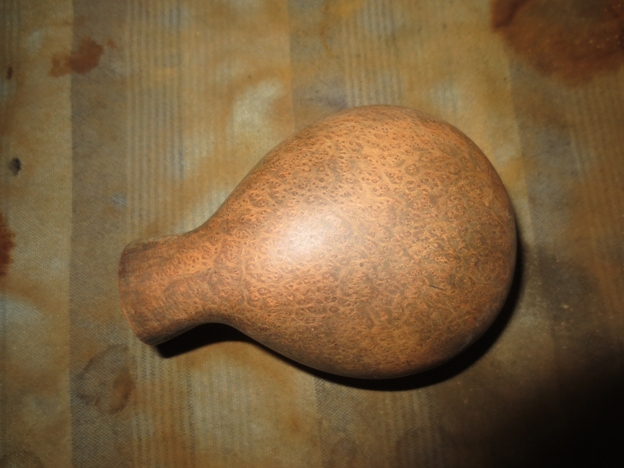
 Once I had the surface stain removed and the remaining black stain highlighted the grain I wiped the bowl down a final time with alcohol and prepared to stain it with the contrast stain. I decided to use a rich mahogany aniline stain for the contrast coat. I applied the stain and then flamed it to set it in the briar.
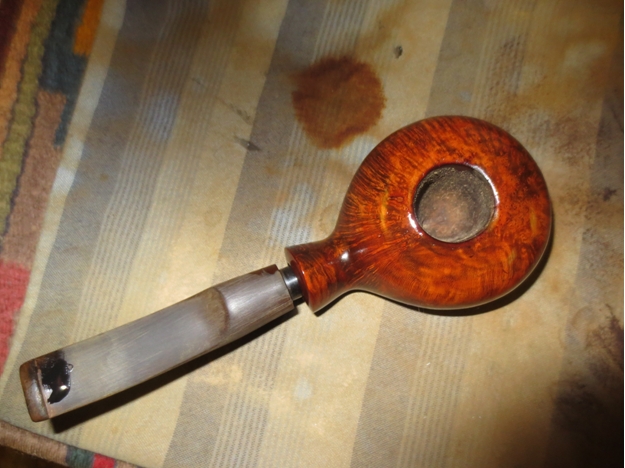
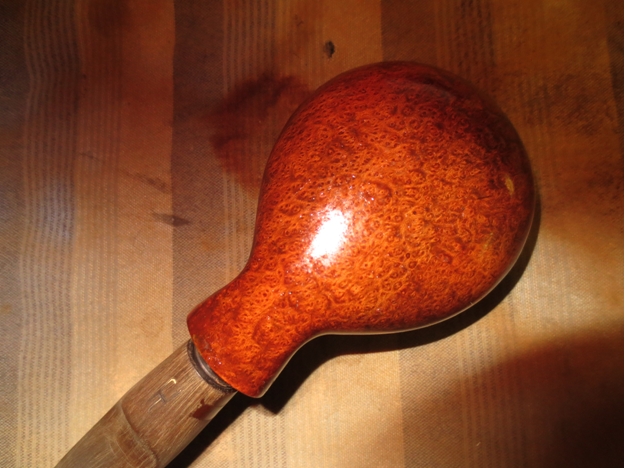 When it had dried I buffed it with White Diamond and took the following photos to show where it stood at this point in the process.
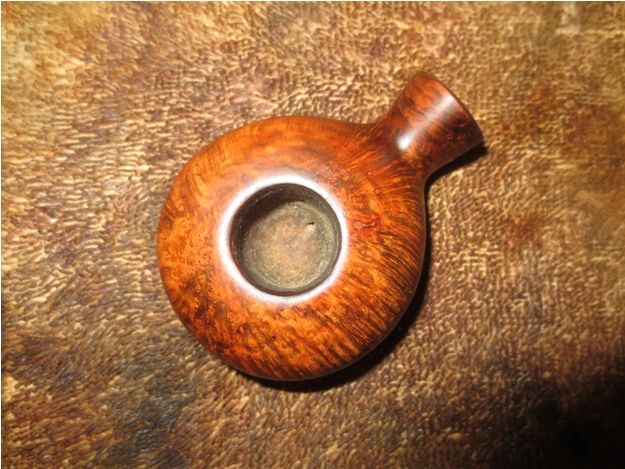
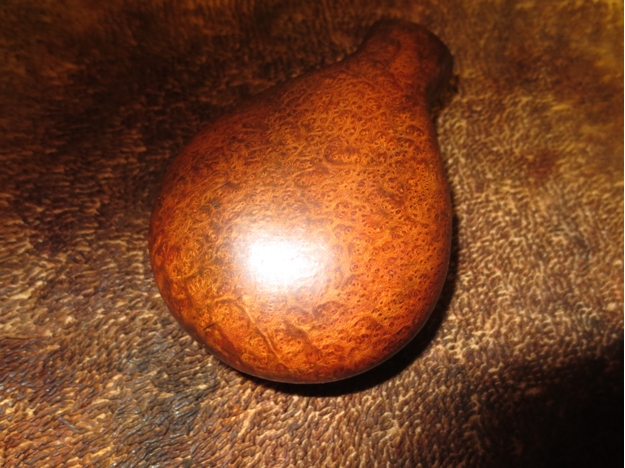 The grain really stood out on the pipe at this point. I still needed to sand it with micromesh to develop a richer sheen.
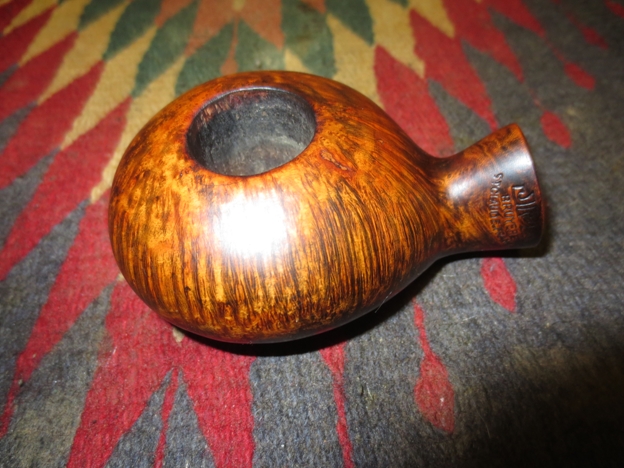

 I wet sanded the bowl with 1500-2400 grit micromesh sanding pads.
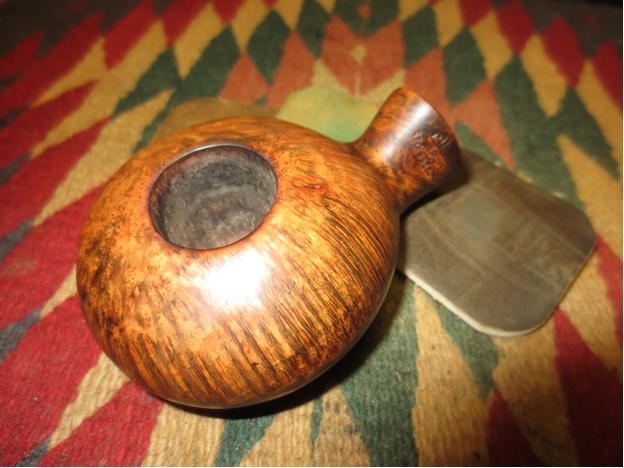
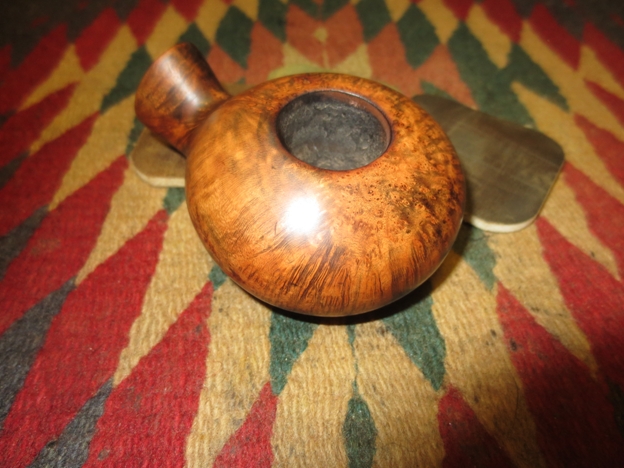 I dry sanded with 3200-12,000 grit micromesh sanding pads.

 After sanding with the 12,000 grit micromesh pad I buffed the bowl with Blue Diamond on the buffing wheel and then gave it a coat of carnauba wax. I buffed it with a soft flannel buffing pad to raise the shine. I set the bowl aside and went to work on the stem. I cleaned out the 9MM tenon with alcohol and cotton swabs and pipe cleaners. I worked until the stem was clean.
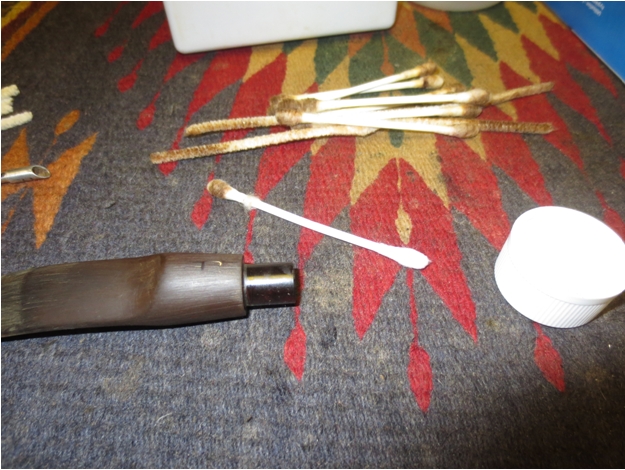
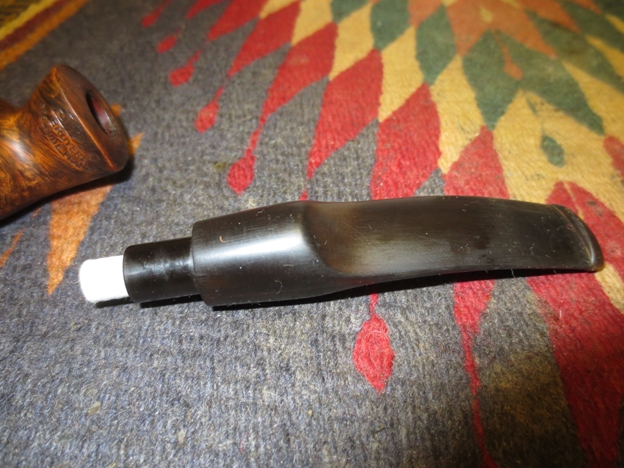
 I sanded the stem with a medium grit sanding sponge and then rubbed it down with Obsidian Oil. I had a box of 9MM filters so I took one out of the box to try in the stem. It fit well and made the draw less open.
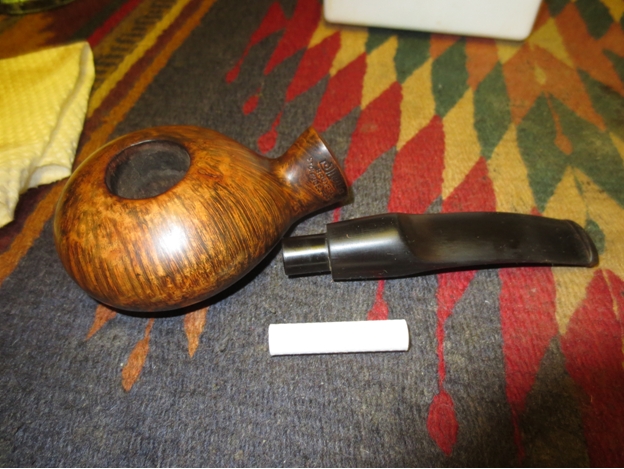
 I wet sanded the stem with 1500-2400 grit micromesh sanding pads and then buffed the stem with red Tripoli to remove the stubborn oxidation. I resanded it with the micromesh before moving on and dry sanding with 3200-12,000 grit sanding pads. I rubbed the stem down with Obsidian Oil between each set of three pads. After sanding with the 12,000 grit pad I buffed the stem with Blue Diamond and polished until the stem shone. I then gave it a coat of carnauba wax and buffed it with a soft flannel buff.
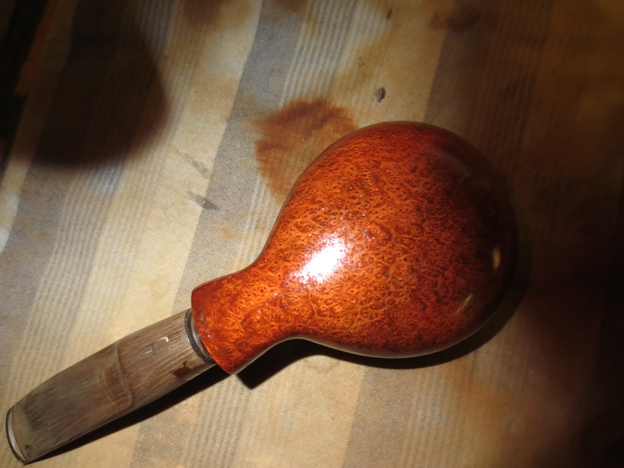
 I put the stem back on the pipe and buffed the whole pipe with carnauba wax. I gave it multiple coats of wax and then a final buff with a soft flannel buffing pad.
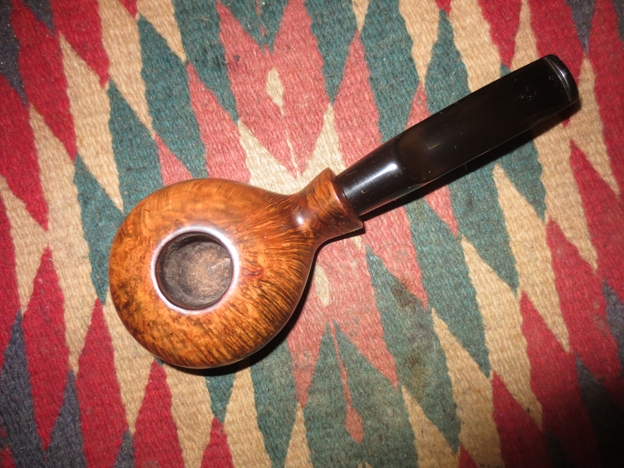
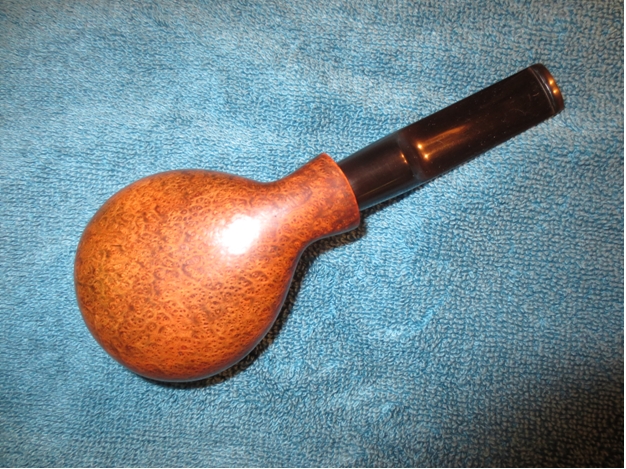
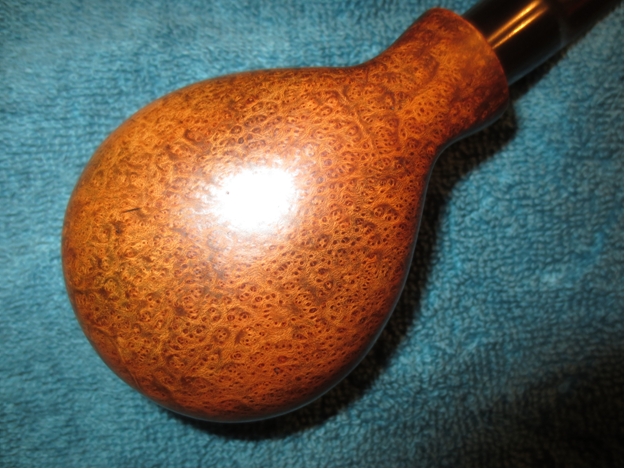
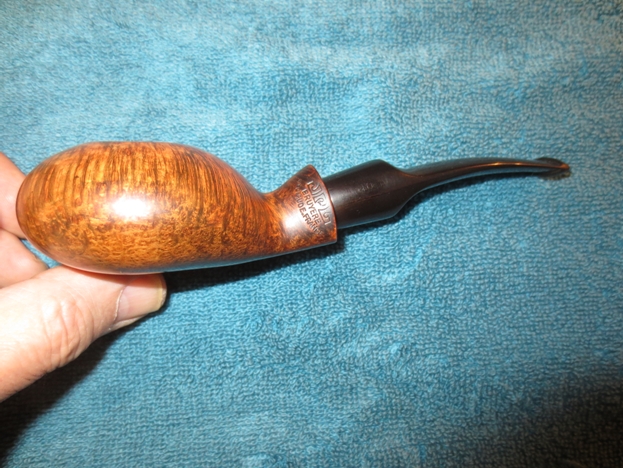
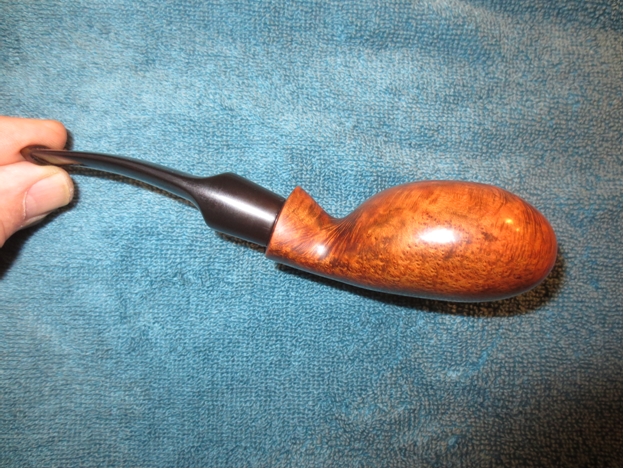
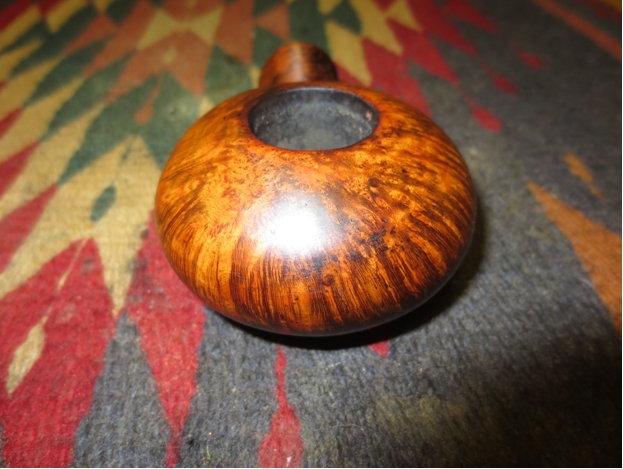
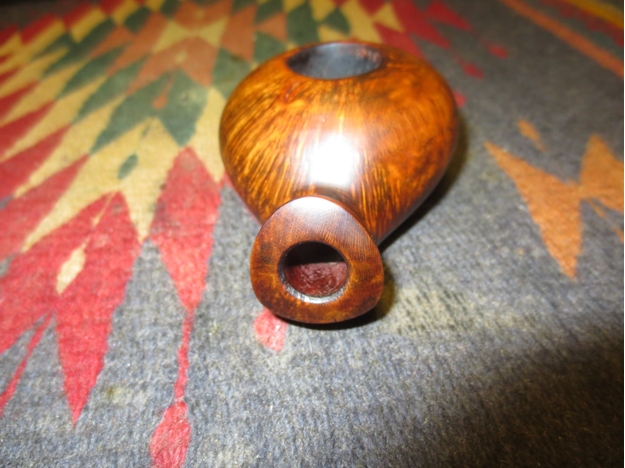
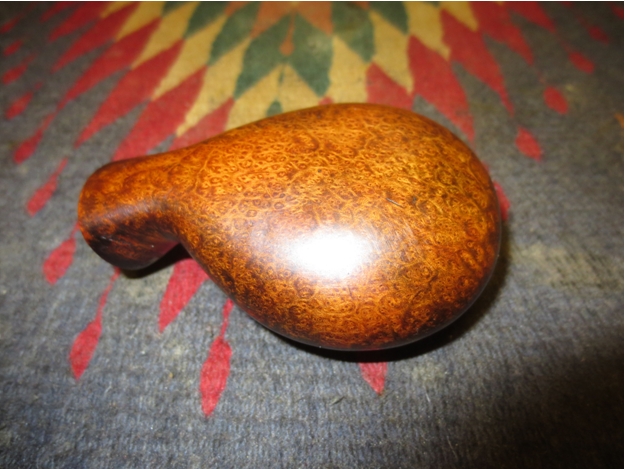
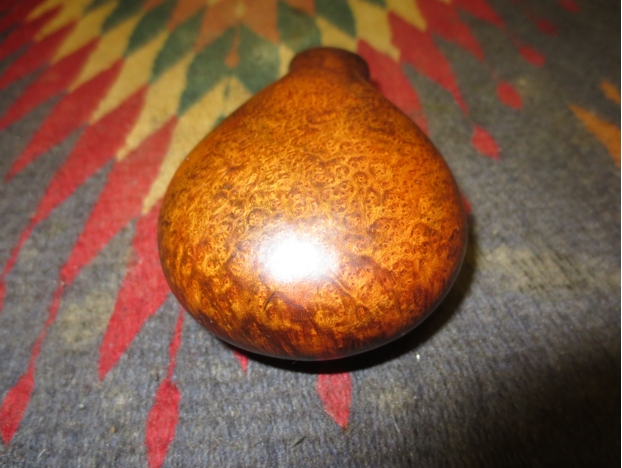
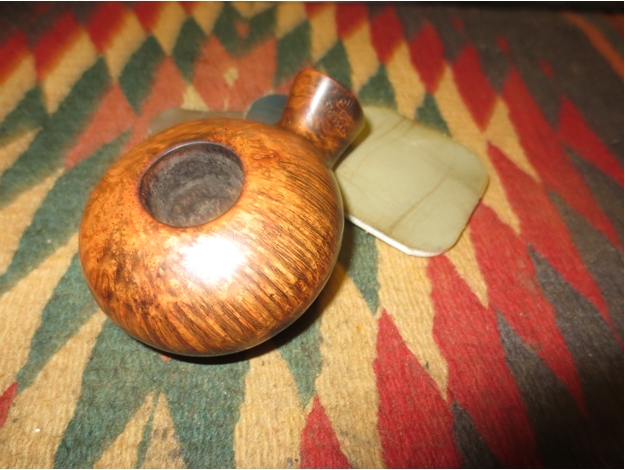
 The finished pipe is shown in the photos below. I really like the new look that the contrast stain gives the pipe. The colour makes the grain pop and stand out very well.