Monthly Archives: July 2012

Another Gift from my Binner Friend


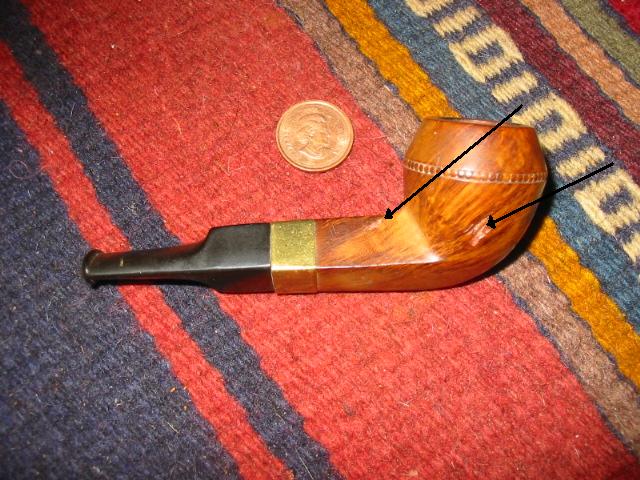
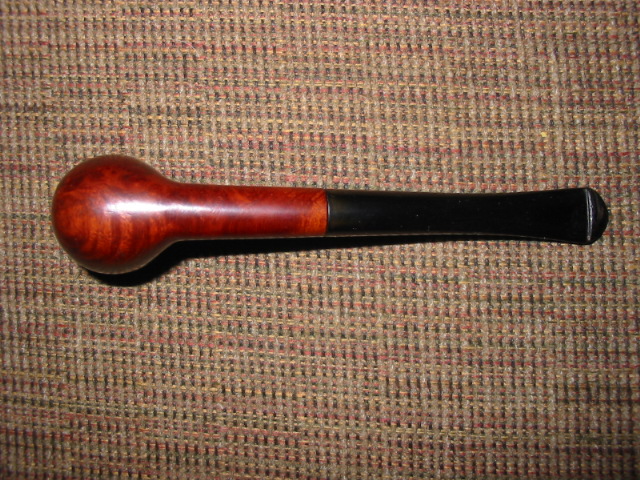
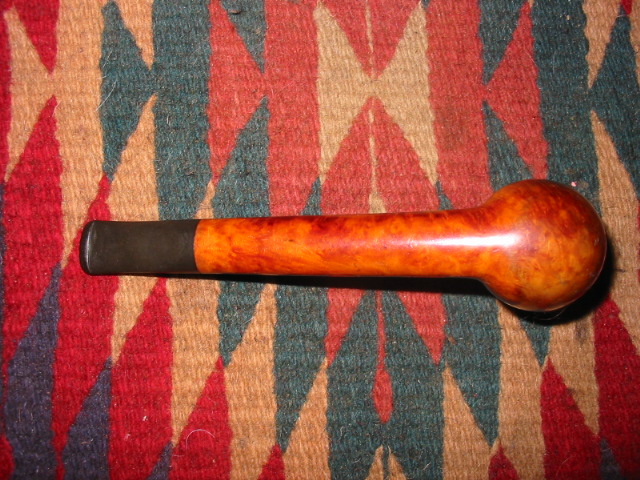
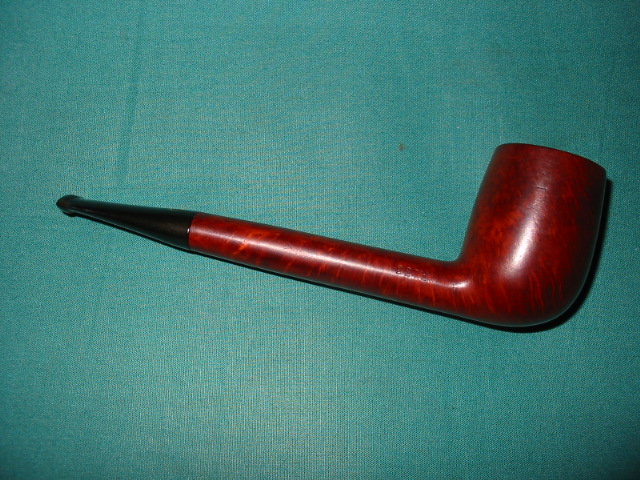
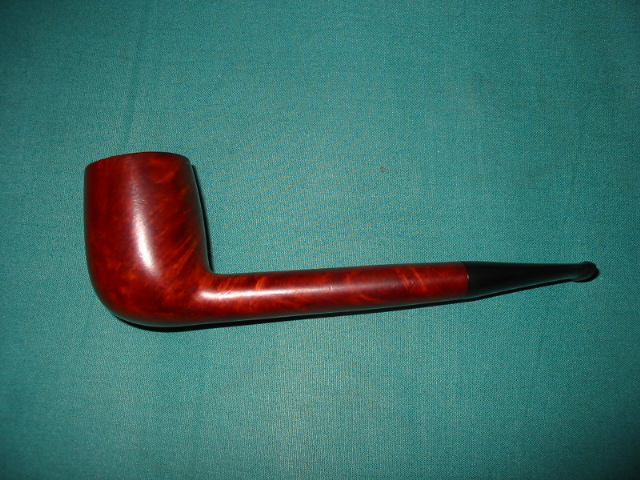
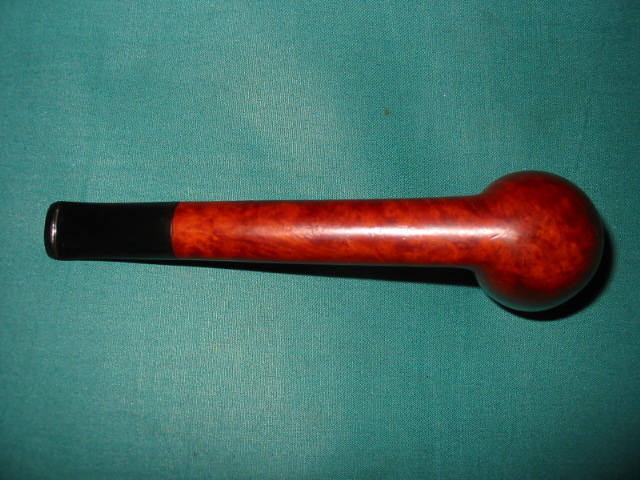
I was going through older files tonight cleaning out some old materials and came across this note regarding another gift of tobacco from my friend Don, the homeless binner that I wrote of earlier in A Surprise Gift Awaited Me at the Door (https://rebornpipes.wordpress.com/2012/05/30/a-surprise-gift-awaited-me-at-the-door/).  In Vancouver, where I live, there is a subculture of folks that makes a living out of the refuse of others who discard things, instead of repairing them. You can see them working their routes across the city diving into dumpsters/waste cans or picking through them with sticks to reclaim “valuable” throwaways. They are called dumpster divers or binners and work daily from sunrise till after dark. Over the years I have known Don, he has come by to visit often after a successful day, having found recyclables of glass, metal, wire, etc. He has shown me art work, stereo systems and televisions that still work with a bit of fiddling, which he repairs and sells in shops around the city. In the last piece I wrote about Don I told the story of a box of tobacco he brought me from his finds. He swore he got these from a pipe smoking friend but I don’t know whether to believe him or not. Actually it does not matter. The last time he left me a gift of many of GL Pease’s tobacco and others that I had not smoked before. This note describes the next gift tobacco he brought me.

Here is the piece I wrote on May 16, 2008… Man I miss Don and his mystery gifts.

I had not seen my homeless friend Don for about a month and today he came by for a visit. He walked up pushing a shopping card piled high with treasure he had found on his binning route. I could see clothes, shoes, electrical items, flashlights, coats, and other cast off items that looked to be almost new. Around and on top of these were his bags of recyclables. Tied to the push bar of the cart was his little terrier Spaz. Spaz was his partner and everyday companion. I don’t think in the years that I have known Don I ever saw him without Spaz. When Don came to eat Spaz came with him. When he came to Christmas and other holidays Spaz came with him. When I was pastoring a church here in Vancouver, he and Spaz came to church. Spaz would guard the shopping cart of treasures while Don relaxed and visited. He would always ask for some water for Spaz and would give him some treats from his pocket before taking care of himself.

Today he came by to tell me that he is heading home to Ontario and spending the summer with his Dad. He was going to hitchhike across Canada to get there. He brought me another surprise gift of tobacco to use as fuel for negotiating a ride to the edge of town on Monday morning. He had a bit of twinkle in his eye as he spoke of the swap. You have to imagine what Don looked like. He was a midsized skinny man in his late 40’s. He had lived on the street and in the bush for the past ten years so he had a weathered face and features. He had crow’s feet at the corners of his eyes that crinkled when he grinned. He had a toothless smile as most of his teeth had been pulled and he hated wearing his dentures. He had his day pack on the ground as he talked to me. He took out his trade to hand to me and watched as I took it from him. I figure he wanted to see if my reaction would be the same as it was the last time he handed me a gift.

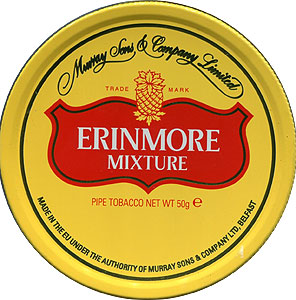
Imagine the surprise when I opened the bag he handed me and looked inside of it. I must have registered that surprise all over my face from big eyes to an opened mouth ooooohhh. I reached into the bag and pulled out six 50 gram tins of Erinmore Mixture – the old Murray and Sons tins from Ireland – five of them in a sealed carton and one extra tin for good measure. All of them but one was unopened. That one in the sealed carton had popped open and was spilled inside the box. The smell of the tobacco was amazing. I probably started salivating like Pavlov’s dogs about that time. Don started laughing as he watched me. He winked and said, “I guess that means you can take Spaz and me on Monday?”

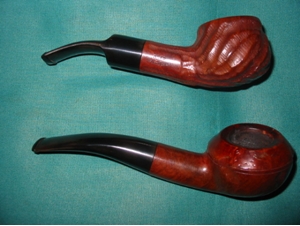
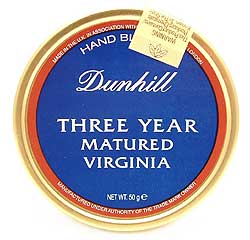
I just shook my head, too amazed to speak. Don told me to dig deeper in the bag as there was some more there that he was sure I would like. I moved the Erinmore carton and under that to sealed plastic bags of tobacco – a pound and 1/2 of Dunhill 965 and a pound and ½ of Dunhill 3 Year Matured Virginia. These were double sealed in two freezer bags and labelled with the name and the year. These tobaccos were dated 1995. Needless to say I would have given Don and Spaz a ride to the edge of town anyway but this more than sealed the deal. I have no idea where Don came by this tobacco any more than I knew where he had found the last lot he brought me. He never would tell me, just laugh and say, “I have my sources!”

ImageImageImage

What a gift. I just shake my head at my friend’s thoughtfulness. I will miss his visits this Summer.”

The note ended there and today as I read it over again, I still shake my head at my friend’s thoughtfulness. I miss his visits.  It has been four years since I have seen Don and Spaz. I have looked for them in their favourite spots without result.  I don’t know what happened to him.  I know that about two years ago he called to tell me he had found an apartment and give me the address and phone number. I called and went there but he was not to be found. I don’t know if he is still around or even still alive. But I know that he has made an indelible mark on my life and memory.

Those who have so little seem so much more giving and generous than those of us who have much. I lift a pipe of MM965 to you my friend where ever you may be. I will always remember your kindness to me and my family. Thank you!

A Nice, Older Henley Billiard Restored


This old Henley Billiard was made by Masta Pipe Company of England and came to me in pretty clean condition. It is older and the Bakelite stem has an orifice button/airway. You can see from the picture below that the bowl was a little out of round and a small burn on the rim near the shank. It also had an overturned bone tenon. The stem had several gouges and deep scratches. Other than the finish was in great shape and in need of a polish and buff.

I heated the bone tenon as I have described in other blog articles by heating it in a bowl of boiling water. I heated it and screwed it back into the shank and tried to twist it. I repeated the process until it freely turned. I lined it up straight and then ran cold tap water over it to cool it and set the glue again. I cleaned up the dents and gouges with heat to raise them as far as I could and then sanded and filled them with a small amount of clear super glue. Then I sanded them with 400 and 600 grit wet dry sandpaper until they were smooth and polished the stem using micromesh pads up to 4000grit.

I cleaned and reamed the bowl and cleaned the shank with cotton swabs, pipe cleaners and alcohol. I used a folded piece of sand paper to even out the inner edge of the bowl and bring it back into round. I did this carefully so as not to scratch the finish. When I had it back to round it was time to polish it. I put the stem back on the pipe and the entirety was taken to the buffer for a final buff with White Diamond. This one was in relatively good shape other than the stem.

ImageImage

Here is the finished pipe, ready to load and smoke.

ImageImageImage

Using Super Glue to Repair or Replace Putty Fills


Blog by Steve Laug

On one of the forums another member and I were chatting bemoaning the red putty fills that so often are a part of old time pipes. I have no idea why they choose to use the red putty but as the pipe ages and the stain mellows with age the putty sticks out in all of its awfulness! I really do not like the look of red putty fills. They have a look like pink/reddish bubble gum. On smaller ones I used to pick them out and refill them with briar dust and wood glue. I always over filled them a bit as the glue shrunk as it dried and I found that the wood glue did not take the colour of the stain well. I left that discussion behind and went to work the next day with other things on my mind. I came home that evening and a PM was waiting for me. Another member remembered that an old pipe repairman friend of his used to use superglue and briar dust to repair fills. He asserted that once the glue was dry it was invisible and the stains would cover it as well.

I had this old bulldog in my pipes to be repaired box. There were two large fills on it that had more or less fallen out over time. What remained were two rather large holes or divots in the right side of this old pipe. The top arrow points to the one on the shank about mid way between the bowl and the band. The lower arrow points to the on the lower portion of the bowl.

Image

I used a dental pick to clean out the remaining red putty from the pits. I wanted the holes to be clean of any remnant of the putty. I also used cotton swabs and Isopropyl alcohol to wash out the areas where there was any putty left. Between the pick and the swabs the holes were cleaned out and open as they appear in the picture above.

I then took a tin of briar dust I have saved from pipes I have worked on over the past months. I keep some on hand for patches like these. I wet the end of the dental pick and dipped it into the briar dust and move it around to form a ball of the dust on the end of the pick. I used my finger to move the dust ball into the hole on the shank and the bowl. I patted the dust into the hole with the tip of a knife blade as I wanted a good tight fill. I then squeezed a few drops of super glue into the dust in the hole. As I did this the dust would shrink a bit and I added more dust and more super glue. When I was done the holes were filled and both had a small bump over where they used to be. I always over fill the holes so that when I sand them down they are smooth and I can feather in the fills with the rest of the briar. I was fortunate in this case that the holes were lined up with the grain marking around them. Once the glue dried (very quickly by the way) I sanded and checked to see if I had missed any spots. I wanted the entire surface smooth to the touch and under a jewelers loop. I sanded the spots down and blended them into the bowl surface. Once that was done I wiped the bowl down with a cotton cloth dampened with Isopropyl alcohol to remove any remaining dust.

I then set up my stain area and stained the pipe with an oxblood aniline stain. In this case I did not let it dry but wiped it on and wiped it off. I wanted to make sure that I was getting good coverage on the fills. I repeated the staining until the colour was what I was aiming for. The picture below is of the same pipe after staining and buffing with White Diamond. It was finished with several coats of carnauba wax. Can you see the fills that were evident above? I assure you that in person it is just as hard to see them.

Image

Pulling a Broken Tenon


Over the years I have had my share of broken tenons to remove. Some of them came from carelessness on my part but others I purchased that way. I took pictures of the process I use on two different pipes recently. The first was a little Barling with a broken tenon and a chewed stem. I ended up restemming this one. The second one was a Peterson 999 with a broken tenon that I hope to reuse the stem by drilling/tapping and inserting a new tenon to refit it.

Image

Image

Insert a screw part way into the airway on the broken tenon in the shank of the pipe. I use a dry wall or gyprock screw. I turn the screw in by hand. I do not want to expand the tenon at all I just want the screw to have a little bite to it so that I can use it to pull the tenon out by hand or with a pair of needle nose pliers. In this case in both pipes I was not able to pull out the tenon easily. Many times I am able to pull it out in a matter of seconds using this method. But both of these were exceptionally tight and immovable. I put them both in the freezer for an hour as I know that vulcanite and briar contract at different rates with a change in temperature. After an hour I removed the Barling from the freezer and was able to pull the broken tenon out very easily. I then unscrew the broken piece and lay it aside to use for a match on the new tenon I will cut as a replacement. It helps me to eyeball the fit. I also measure the mortise and set the tenon turner as closely as possible to the measurements. I then take the broken piece and slide it on the tenon turner to check the fit.

The tenon on the Peterson however, still did not budge after an hour in the freezer. I left it in for another half hour. Still it did not budge. I then dripped Isopropyl alcohol into the exposed mortise and hoped that it would work as a solvent to break the tenon free. I repeated this several times and left the pipe sitting with alcohol in it over night. The next morning the tenon still did not move.

ImageImage

I decided to not fiddle around with trying to pull the tenon. I used my small drill bit and began to drill out the tenon. I never start with the exact size of the tenon but rather work with the size of the airway and work my way up. I have found that in the process of working through the bits the tenon inevitably breaks loose or crumbles to pieces. In this case, by the time I got to the third drill bit, when I reversed it the tenon came out with the bit. You will notice that I also flattened the broken portion of the tenon on the stem so that the surface was flat and smooth. I wanted it to be ready for when I would drill it out or tap to receive the new tenon that I have ordered.

ImageImage

As I close this essay I want to just mention a couple of reminders:

  1. Do not turn the screw into the airway to deeply as it does expand the airway and can actually crack the shank on the pipe. BE CAREFUL and go slowly.
  2. Do not use a tool to turn the screw into the airway – do it by hand so you can feel the progress and the bite before damage is done.
  3. If the tenon is stuck and immoveable in the first try put the pipe in the freezer for an hour or more to expand and contract the tenon and mortise. This usually works to break it free.
  4. Should you have to drill it out – use a bit a little larger than the airway to begin the process and work your way up to larger bits. Do not use a drill bit that is the size of the mortise lest you damage the mortise.
  5. Use a T handle hand drill not a power drill to do this as you can easily drill right through the bowl and ruin the pipe.

Refurb on a Two Point Billiard – Gnawed Stem


This is the second Two Point pipe that I had in my box to be refurbished. It obviously was owned by the same pipe man as the little Lovat as evidenced by the matching bite marks. The pipe had an uneven cake in the bowl making the bowl conical even though it was U-shaped in reality under the cake. The rim was dirty and tarred but not damaged with dents or knock marks. The finish was spotty and uneven so the bowl would need to be stripped and restained for good coverage. The biggest problem can be seen in the first two pictures below: the stem was very badly chewed. In the first picture it can be seen that the top of the stem had several deep bite marks and the button was eliminated on the left side. It was more of an upward slope to the tip than the sharp angular edge that was originally there. The round cap of the top of the p-lip button was smoothed out and no longer crowned. In the second picture you can see that the bottom tooth marks and bite throughs had been repaired with what appeared to be epoxy that was fairly caked on the stem tip to the point that the lip line and the button were gone. What remained was a working stem that had no beauty to my eye.

ImageImage

The third and fourth photos show the profile of the button and it can be seen to have been virtually eliminated with the slope of the epoxy on the bottom edge and the chewed top edge. You can also see the state of the finish on the pipe. The spottiness and grime that covered the outside of the bowl are visible. Obviously this was a good smoking pipe that the previous owner cobbed a repair on so that he could continue to enjoy smoking it.

ImageImage

The next two photos are enlarged to show the state of the stems. The first one shows the top of the stem and you can see the two large dents (interestingly they are in the same place as those on the other Two Point pipe).You can also see the wearing away of the edge of the button to a slope. The crown is also flattened. The second shows the underside of the stem and the remaining two dents – one next to the button on the bottom half of the stem and the second inward from that dent. You can also clearly see the epoxy patch that fills the bite through and the button. The usual line that separates the button on the p-lip from the stem is gone. To repair these two surfaces the dents need to be raised and the holes filled to the point where it is possible to cut a new button on the top and the bottom. The crown will need to be built up a bit and the epoxy patch hidden or blended into the black of the stem.

Image

IMG_7946
I decided to work on the top side of the stem first and heated the surface of the vulcanite to lift the dents as much as possible. Once that was finished I filled what remained of the two dents with black super glue (see the first photo below). The dent next to the button I over filled so that I could have room to recut the edge of the button. When the glue had dried I sanded it back with 240 grit sandpaper to even the surface. I also recut the button edge to give it more of a sharp distinction. The sanded top surface can be seen in the second photo below.

Image

Image

On the underside of the stem I decided to recut the button and the line with needle files before I refilled the dents and the epoxy patch. I sanded off the extra epoxy to get the surface smooth and level with the surface of the stem. I used 240 grit sand paper to bring the surface down and the needle files to cut the edge on both sides of the line. You can now see that line in the picture below and there is a definite break between the bottom of the p-lip and the stem. It is a duplicate of the button on the Two Point Lovat.

Image

Once I had that recut the button area I filled the surface of the stem with black super glue as seen in the picture below. I propped it with a pen to keep the surface level as I did not want the super glue to run and pool. I also built up the epoxy patch on the edge of the button as well. Once the glue was dry I sanded the surface and did a bit of work with the needle files to redefine the edges. The second picture below shows the sanded stem with a smooth surface.

Image

Image

I finished sanding the stem with 400 and 600 grit sandpaper and water and then moved through the micromesh pads from 1500-6000 grit. The trick was to build a black coating on the epoxy patch. This took repeated coats of the black super glue. Once that was complete then the stem could be polished by hand until I finished with the bowl refinishing.

While I had been working on the stem the bowl had been soaking in the alcohol bath. Before dropping it in the bath I had wiped it down with a soft cloth and acetone (fingernail polish remover works very well) to remove the finish and the grime. It was time for it to be removed from the bath so that I could work on it. The three pictures below show the bowl after it has dried off from the alcohol bath. It now needed to be sanded with micromesh to remove any surface scratches and the rim needed to be thoroughly wiped down in preparation for the staining. I sanded and then wiped it down with a soft alcohol soaked cloth and set up the staining area.

ImageImageImage

The next four photos show the restained bowl. I used a medium brown aniline based stain (Fiebings Leather Dye) to stain the pipe. Once it was stained I flamed it and buffed it to polish the briar and make the grain stand out. The patterns of birdseye and swirls is quite unique. This is a clean piece of briar – no fills and no problem areas.

ImageImageImageImage

I then put the stem on the pipe and buffed the entirety with White Diamond and carnauba wax to bring it back to a shine. The final four photos show the finished pipe. Pay attention to the stem and button areas as they are now very distinct in the profiles and the build-up on the top and bottom give it back its original shape.

ImageImageImageImage

Using a Buffing Wheel


Blog by Steve Laug

Using cloth buffing wheels to buff the finish on a refurbished pipe can work wonders by smoothing the surface giving the pipe a “like new shine”. However, a disclaimer needs to be stated up front – buffing will not remove scratches or imperfections and buffing can make things a mess if not done properly.

I use The Beall System buffing wheels on two bench grinders that I have stripped down. The system employs a three-step procedure using three different 8 inch buffing wheels. The first wheel uses Tripoli as a buffing compound; the second uses White Diamond (aluminum oxide). The third is used to apply carnauba wax and bring the finish to its final luster. So that I do not have to change the wheels between buffs I use the two bench grinders that I have stripped down. I removed the grinding stone wheels, the guards and left only the arbor on each side. I used the washers from the grinder stones and an extra washer to hold the pads/wheels firmly. I put the pads I use for White Diamond and Tripoli on one buffer and the carnauba and added a fourth clean felt pad on the other. I thus can work down the row – Tripoli, White Diamond, carnauba and then a clean flannel wheel to bring up the shine. The picture below shows the Beall system. It includes three buffing pads – clearly stamped for the product they are designed to apply, one bar each of Tripoli, White Diamond and carnauba. The cylinder standing in the centre is an arbor that can be attached to a single shaft motor so that the wheels can be spun on and off quickly. The long shank in the bottom of the picture is an extension that can be attached to the arbor to give some distance from the motor should you need it. If you use a bench grinder those two parts are not necessary.

Image

The photo below shows the wheels with the mounting screw that can be either screwed into the arbor unit as pictured in the one wheel on the buffer or they can be removed and the pads turned on to the spindles of the bench grinders as I picture in my setup.

Image

The kit can be purchased through the Beall Tool Company through their website at www.bealltool.com or Lee Valley Tools through their online catalogue at http://www.leevalley.com/en/wood/page.aspx?p=20092&cat=1,190,43040,43042 Both sites provide the ability to order individual components of the system. The Beall website also has a description of the system along with instructions. There are links to videos where Jerry Beall gives lessons on buffing.

In the essay below I will describe my set up and how I use it along with some quick reminders for you as you work with your buffer.

MY SETUP

I use two 6 inch bench grinders that I bought from a tool liquidator near my home for my buffers. They are both 1750 RPM motors mounted on a stand with an arbor on each end. The stand that is part of the grinder keeps the wheels above the surface of the work table and at a comfortable height. I place my buffers on my work table so that they are at waist height for ease of buffing and because I don’t want to have to stoop down to buff. I stand to buff because I have more control over the angles which I hold the pipe against the wheel. Each wheel is held in place by a cup washer on each side and a nut that threads on to the end of the arbor. The shaft is the same size as the holes in the buffing wheels so I place the first cup washer on, twist the wheel in place, put a simple washer and then the cup washer on the outside to get a good tight fit. If the wheel is loose it can move around the spindle or shaft and do damage to the wheel and allow it to shift on the spindle.

Image

The blue buffer above is my work horse – the left side holds the White Diamond wheel and the right side the Tripoli wheel. You can see from the picture that the pads have worn down and are the way I like to use them. There are no more loose strings or fabric. The wheels are charged in the picture above with the amount of both products that I use on them. I find that if I over charge them with product it just gums up on the stem and makes a mess of things rather than polishing them.

Image

The yellow buffer above is my secondary or polishing buffer. The wheels are not as worn as the ones on the blue grinder because I use them less frequently in the process of buffing. It is used for the final polishing. The left side is a clean flannel wheel with no product on it. It still loses strings when I buff with it. It is soft and gives the carnauba a real shine. The right side is the carnauba wheel. It too is charged with wax and ready to use. I am careful how much wax I load the wheels with as too much can really make a mess.

When I first mounted the wheels the recommendation that I was given was to “clean” the wheels initially by backing a sheet of 100-grit sandpaper with a small board and touching the sandpaper to the wheel. I chose not to do so, because the description of the mess deterred me. It said that the air around the buffer would be filled with fibers and lint. I decided to live with this while I broke them in with the polishing compounds.

Some people have built enclosures around the wheels to attach a dust collector to catch whatever comes off the wheels. I have added a picture below to show the shield that can be used. It is a pretty elaborate shield. I have used cardboard boxes in the past to catch the lint and dust and the pipes that occasionally fly away! I generally do not use a shield because I find that it was in the way when I work on the pipes. I want a fully open wheel to work with. Besides there was far less debris produced after the wheels were put in service and loaded with compound. I do however put a thick towel or a piece of carpet under the buffer wheel as it picks up the dust, etc. and can easily be vacuumed for cleanup.

ImageImage

The first thing to do when you set up your buffing system is to charge the wheels with buffing compound. They key to remember is that it doesn’t take much for a wheel to be fully charged. Many people overdo on the charging and gum up the wheels and make a mess of the pipes they polish. Less is more is the rule of thumb. With the wheel rotating at speed, touch the bar of compound to the wheel only for a second or two and without forcing the bar into the fabric. The Tripoli is a dark reddish-brown color so you get a visual indication of the amount that’s been applied. With the white diamond and wax, it’s harder to judge. In the picture below you can see the White Diamond on the left, the Tripoli in the middle and the carnauba wax on the right side. Those bars should last a long time. I have found over the 10 + years that I have had my buffer that I had to replace the Tripoli at about year 5, followed a year later by the White Diamond. I still am using the same bar of carnauba.

Image

My suggestion is to do a bit of experimenting with a pipe that you are not afraid to damage or have thrown across the room. Try differing amounts of charge on the Tripoli wheel and note the effect. Begin with “obviously too little” and work your way to “probably too much.”  Do a similar test with the White Diamond and the carnauba wax. If you suspect you have too much charge on the wheel, some of it can be removed by lightly touching the sharp edge of a board to the wheel.

I hold the pipe in my left hand with a thumb or finger in the bowl so that I have a good firm hold on it. Practice buffing the pipe with each of the materials to get a feel for them. Each one is on a slightly different pad so they handle differently and the materials are different in their feel on the wheel. If you happen to put too much of any of the materials on the wheel and the pipe gums up you can wipe it down with Isopropyl alcohol and restart the process. Practice until you are comfortable with the feel of the pipe in your hand.

When you are buffing use a light touch. Pressing the pipe bowl against the wheel with considerable force only increases the heat generated where the wheel contacts the bowl. Pressing it hard against the stem can cause the vulcanite to burn or melt and make more work for you rather than less. A light touch is critical to getting a good finish and polish. Keep the pipe bowl moving as you are buffing, turning it so every surface get a good buff, with the stems the same thing is true so that the heat production is not concentrated in one area. I never buff a pipe bowl and stem separately. The buffer can round edges on the stem or the shank and the junction between the two is permanently damaged and the value and look of the pipe is affected.

A FEW SIMPLE REMINDERS

  1. Pay attention carefully and focus on the work. The equipment can hurt you so be careful! In regard to personal safety, just use common sense. A buffing wheel can grab loose sleeves, long hair, or dangling jewelry very quickly, so pay attention and be careful.
  2. While your safety is a potential hazard the greater one is the wheel can grab the pipe and take it out of your hands in a heartbeat. That is why I hold it the way I do – both hands, one with the thumb or finger in the bowl. This is a real issue; do not take it lightly.
  3. Always keep a firm grip on the pipe. It takes some thought and practice to grip the pipe firmly while applying it to the wheel with a light touch. The tendency is to hold it lightly, in keeping with the light touch.
  4. Be careful when buffing a pipe around the rim and bowl opening because the wheel can grab the edge of an opening.  Also, be alert when buffing near the rim because the reddish powder from the Tripoli and a white powder from the White Diamond gets into the inside of the bowl. It will need to be wiped out carefully with a cotton swab.
  5. The wheels can grab a small-diameter stem because the strings of the fabric tend to wrap around it if you press it too far into the wheel. The safest way to present the stem is with its length pointing in the direction the surface of the wheel is moving.
  6. Don’t try buffing metal bands, stingers or metal caps or rims.  It will work but will permanently discolor the buffing wheels.

Bending Vulcanite Stems


Blog by Steve Laug

I have had several people ask me about the process I use to bend vulcanite stems. I decided to write an essay on the three different processes I have used to bend them. In each method I remove the stem from the pipe for bending. I have the pipe close at hand to check the bend on the stem. Each method has plusses and minuses to it. Each method can create a variety of other problems that need to be addressed if done improperly. For the sake of this article I refer to bending vulcanite. The same three methods can be used to bend Lucite. I have bent them both using all three methods. The methods and warnings remain the same; the potential for oxidation is not applicable.

1. Hot Water Method

METHOD: This is a simple process. I use a small ceramic microwaveable bowl that has straight sides and is about 3 inches deep. I fill it with tap water to the level I want the bend and put the bowl in the microwave. I select high and set the time for two minutes. I have found on my microwave that is where the water will boil. I have put the stem in the bowl in microwave during this heating and I have left it out. I see no significant difference in the application and no damage to the stem. The only significant difference that I can see is the time it takes to make the stem pliable.

Either way, when the stem is in the water I want it to be covered to the level of the impending bend. I put a pipe cleaner in the stem to keep the airway open and prevent kinking in the stem when I bend it. If the stem is in the microwave, at two minutes it is pretty pliable. If not, I dip it in the boiling water and leave it until it is pliable. This may take repeated dipping and reheating of the water.

Once the stem is pliable I use a small glass spice jar that is round to bend the stem over. It gives me the curve I am looking for in my bends. The jar is a common spice jar, about 1 to 1 ½ inches in diameter. I lay it on its side and bend the stem over it. I know others who use the grip on a baseball bat or a rolling pin. Use whatever works for you in terms of maintaining a smooth bend. I hold the tenon end with one hand and the button with the other and then bend it carefully. I have found out the hard way that just bending it by hand can be problematic and make a very uneven curve or a twisted curve with one side more bent than the other. Once the bend is the way you want it either dip the stem in a cup of cold water or under running water in the sink to set the bend.

PLUS: The plusses are fairly straightforward to this method. Its ease of application is very clear. The evenness of the heat and the bend makes burning the vulcanite a non-issue. The simplicity and lack of a need for special tools makes it a very practical method of bending the stems. I used this method all the time for many years until I purchased a heat gun to use for this purpose. I still find myself going back to it repeatedly particularly with Lucite or acrylic stems. I just works for me so I use it.

MINUS: The minuses are also straightforward. Hot water plus vulcanite is a recipe for oxidation. The heat and the water cause oxidation to raise its ugly head. It seems like the oxidation just leaps to the surface as soon as the water gets hot and touches the vulcanite. It means that in bending the stem, solving one issue, you create a second issue – the removal of oxidation. If you are comfortable with the process of removing oxidation then the method is very usable and it works. If you are not comfortable with that process be forewarned it will oxidize your vulcanite stems.

2. Kitchen Oven Method

METHOD: This also is a simple process. I use one of my wife’s cookie sheets, or baking sheets, to hold the stem or stems. I put the oven rack in the centre of the oven and preheat the oven to 200 or 220 degrees, both temperatures work. Once the oven is heated I place the stem (with the inserted pipe cleaner to keep the airway open) on the cookie sheet and slide it into the oven. Have some oven mitts or hot pads near at hand when it is time to remove the cookie sheet from the oven. Watch the stems so you can tell when they are pliable. It takes very little time, 5 minutes or less usually. You can tell when they are pliable when you watch them (especially after having done this before) but you can check them regularly to see if they are ready. They should be rubbery and soft, easily bent.

Once the stem is pliable I remove it from the oven and hold it with the oven mitts, or if your hands are callused with your fingers (vulcanite is hot and you can be burned so be careful). I have the same small glass spice jar at hand, just as I did in the above method, to use to bend the stem. I hold the tenon end with one hand and the button with the other and then bend it carefully. Once the bend is correct I dip it in cold water or under running water in the sink to set the bend.

PLUS: The plusses of this method are also straightforward. It again requires no special tools to do the work. It allows you to bend multiple stems quickly. It also does not increase oxidation to the stems. This is a relatively new method to me but a fellow refurbisher here in Canada uses it all the time and swears by it. I have tried it and it does work well. There is no mess and no fuss. Cleaning up the stem is very simple afterward. All of the work in removing oxidation and polishing can be done ahead of time and then when complete a simple buff will give the stem a sheen.

MINUS: The minuses are relatively few. The first I ran into was my wife – she was not keen to have me “melt” rubber on her cookie sheets in her oven. I suggest you try this when “she who must be obeyed” is out of the kitchen unless you have your own sheets and oven! Care must be exercised to not leave the stems in too long or they will indeed be a mess – or at least it would seem so. I have not done this because I am overly cautious in keeping an eye on the stems.

3. Heat Gun Method

METHOD: This also is a simple process. I have a heat gun purchased at a home improvement or hardware shop. It has two settings – high and low. For bending stems I set the gun to the low setting. The gun comes with a stand on the handle so I stand it on the worktable with the tip pointing into the air. It also comes with a variety of heads that can be used. I like to focus the heat on the stem so I use one that reduces the end of the gun to a one inch diameter circle. I hold the stem by the tenon, the side I want to bend facing downward, above the heat tip by 4-6 inches and keep it moving back and forth horizontally. You do not want to leave it in one place too long as it will burn the vulcanite or cause it to bubble. (I have used it to also bend Lucite and the same is true with that material.) I check it often to see if it is pliable. It does not take very long, maybe 3-5 minutes, and the stem is very flexible and even begins to droop.

Once the stem is pliable I remove it from the heat and bend it over the same small glass spice jar, just as I did in the above methods. I hold the tenon end with one hand and the button with the other and then bend it carefully. Once the bend is correct I dip it in cold water or under running water in the sink to set the bend.

PLUS: The plusses of this method are also straightforward. It is quick, simple and clean. It allows you to bend multiple stems quickly. The stems do not oxidize with the heat or the cooling water. Since I got the heat gun this is method that has become my default method. The stem can go from being bent to being buffed and polished in short order. All of the work in removing oxidation and polishing can be done ahead of time and then when completed it polishes very quickly with a hand buff or on the buffer.

MINUS: The minuses are relatively few but significant. It is critical that the stem be kept the recommended distance from the tip of the gun as vulcanite does burn. It also blisters and bubbles. Take my word for it you do not want to do the work to repair a blistered or burnt stem. Worst case scenario it means recutting a stem. This is the most important minus. Be very careful. The second one is not nearly as critical, but important nonetheless. The soft and pliable vulcanite can easily twist when bending it, so be sure to use a round hard surface to bend the stem over. Also make certain the stem is flat and straight on the surface of the jar so that it is not crooked when bent. This is easily repairable but a pain nonetheless.

I have used all three methods have all been to bend stems. I have used them on both vulcanite and Lucite stems. The point of pliability under heat is slightly different between the two of the materials so times may vary. I am also working at sea level so that may also influence the times and heat points for the various methods. Give one or all of the methods a try. Let us know how it works for you. Post some pictures of the process and the finished pipe. Most of all enjoy yourself in the work of taking care of your own pipe and making its story your own.

Rebuilding a chewed and dented stem with super glue


I just finished reworking this old stem from an Imperial Two Point Made in London Lovat. The stem was very unique in that it is a p-lip design though slotted in the airway. I have a second one that I am working on that has the same stem so I believe this is one of the hallmarks of the Two Point. That being the case I decided to restore the stem rather than cut a new one. You can see the state of the vulcanite from the three pictures below. The first picture is of the top of the stem. There were three major tooth dents in the surface of the stem, two chunks out of the edge of the button and a piece missing out of the edge of the lip of the slot. The second picture is of the underside of the stem. There you can see one major dent from teeth and also several smaller dents. There is also a dent in the edge of the lip of the pipe that has moved the straight line with a dip in it. The third picture shows the slot in the end of the stem, it is a bit out of focus but you can see the missing piece at the left side of the top edge.

ImageImageImage

I used my heat gun set on low to lift the dents as much as possible before working on the stem with sandpaper and superglue patches. I cleaned the surfaces of both the top and bottom of the stem after heating and then sanded them with 240 grit sandpaper to remove oxidation and anything that would prohibit the glue from sticking. In the first photo below you can see the two patches on the dents that remained after heating on the underside of the stem and the work that has been done straightening the line. I decided to work on the underside first as it needed a bit less repair. Once the glue was dry I turned the stem over and patched the top side. In the second photo below you can see the super glue patches on the surface of the stem, the two dents on the edge of the button to build up the edge. Once it was dry I planned on using needle files on both top and bottom to sharpen the edge of the button to a crisp restored look.

ImageImage

The next two photos show the top and bottom surfaces of the stem after sanding with 240 grit sandpaper to bring the glue patches flush with the surface and using the needle files to sharpen the edges of the patched button.

ImageImage

The next picture (I apologize for the blurriness but I think it still is clear enough to see the point I am making) shows the work that was needed to rebuild the lip of the button on the topside where the chip was. I carefully layered in black superglue making sure not to close off the airway. I used a greased pipe cleaner folded in half in the airway of the slot to provide a base to build on. Once the base was buildt I stood the stem on end and gradually layered in super glue to build up the top edge of the slot. The goal was to return it to a smooth rounded crown with a clean straight slot for the airway.

Image

The next two pictures show the build up area on the end of the button. It is a shiny black spot in the photo at the bottom right edge of the button. Each one shows a bit more of the build up to give an idea of the process. I would have to recut the edge of the button on the top side when the build up was complete.

ImageImage

When I had the surface filled to satisfaction I recut the edge of the button with the needle files and also sanded the surface with 240 grit sandpaper and 400 and 600 grit wet dry and water to smooth out the fill. I then proceeded to use my normal list of micromesh pads from 1500-6000 grit to finish the stem. I put the stem back on the pipe and buffed it with White Diamond. I took it back to the work desk and gave it a coat of Obsidian Oil, wiped it off when dry and gave the stem a final coat of carnauba wax. The pictures below show the finished stem. The first one shows the topside and the rebuilt crown of the button. The glare and shadows on the picture do not allow you to see clearly the recut edge but it is straight and clean. The second picture shows the underside of the stem and the crisp straight edge of the button. The final picture is an end shot to show the slot and the curve and flow of the crown of the button.

ImageImageImage

Overall I am pleased with the repair and now have a renewed pipe.

ImageImage

New Life for a Yello Bole Canadian


On a recent trip to the US to visit my parents I also visited several antique malls in their city. I have three that I usually have on my list when I go there. The one I want to focus on in this post is in an old grain elevator and has three floors of many “antiques” which always surprise me because many are the same age as I am!  Anyway, on the second floor I found a booth with two pipe racks containing over a dozen older pipes. Most were junk in that they had cracked bowls and broken shanks etc. But also in the midst of it was this old Yello Bole Canadian. It had some beautiful briar in it. Yello Bole is the grade down the line for KayWoodie, or so I am told. Pipes that don’t make the grade for KW will often be stamped with the Yello Bole brand. This one was stamped KBB in a cloverleaf on the top of the shank and next to it Yello Bole over honey cured, over imported briar. The stem has the yellow circle inlaid in the vulcanite. If memory serves me correctly this is one of the older pipes in the line.

ImageImage

The bowl was in pretty clean shape. The yellow coating was still visible in the bowl and the bottom half of the bowl was very clean with just a bit of darkening to the yellow coating. The rim was dirty and dented. There were tars on the rim and some deep scratches to go along with the dents. The bowl however, was still round, it had not been ruined by a reamer going a muck. The stem was oxidized and was slightly brown. There was light tooth chatter but no dents on the surface of the stem. The overall finish of the pipe had light spots and dark spots where the finish seems to have been exposed to light or was wiped down and finish removed. There was no over coat of varnish or of lacquer just solid clean briar with a spotty stain.

ImageImage

I broke the pipe down as seen in the pictures below. The stinger apparatus can be seen in the pictures. It is an aluminum shovel like contraption with the hole near the tenon and a long shovel like extension that extends through most of the shank. I cleaned out the bowl with an alcohol scrub on cotton swabs and cleaned out the shank with a shank brush, bristle pipe cleaners and fluffy pipe cleaners and alcohol. When they came out clean I worked on the outside of the bowl. I used cotton balls and acetone to wipe down the outside of the bowl and shank. I wanted to remove the rest of the finish so that I could prepare it for restaining. I applied the acetone until the bowl was free of the stain and finish. The pictures below show the cleaned surface of the bowl. I also used the acetone and some 400 and 600 wet dry sandpaper to clean the top of the bowl and rim. A folded piece of sand paper was used on the inner edge of the rim to clean the beveled edge. Before I stained the pipe I decided to clean and polish the stem. I used the Bic lighter method mentioned in an earlier blog post to get rid of the oxidation. In the pictures below the stem has the majority of the oxidation removed using that method. I then used 400 and 600 grit wet dry sandpaper with water and my usual list of micromesh pads from 1500-6000 grit to polish the stem.

ImageImageImage

Once the stem was cleaned and polished by hand I inserted it into the bowl and used it to hold the pipe while I restained it. I used a medium brown aniline stain on this pipe to approximate the original stain and to highlight the grain. I applied it with the dauber that came with the stain and then flamed it to set the stain. I then took it to the buffer and buffed it with Tripoli to remove some of the opacity of the medium brown stain and bring the grain to life. Once that was done it was buffed with White Diamond. Both the stem and the bowl were buffed. Care should be exercised in the buffing process to not obliterate the stamping. I use a light touch when buffing around the stamping. The four pictures below show the finished pipe – ready to load with a favourite tobacco and enjoy!

ImageImageImageImage


Refurb – A Pair of Custombilt Look A Likes


I just finished up on these two Custom Bilt look a likes. The Rhodesian shaped pipe has no stamping other than Imported Briar. The bent pot is stamped Aged Imported Briar on one side and Ben Rogers on the other side. I am not familiar with the brand. So if anyone has information on it please post it here. I would appreciate learning about the twosome.

ImageImageImage

Both pipes needed quite a bit of work to make them smokeable once more. The bowls had a thick cake and each one of them still stuffed with half a bowl of tobacco. The stems were rough and pitted from the oxidation and had a white lime like coat on them. They were very dirty inside and out. I cleaned them with a shank brush, bristle pipe cleaners and finished with fluffy ones all dipped in isopropyl alcohol until they came out clean. I buffed the stems with Tripoli after cleaning them to try and break down the coat of oxidation. It did not do much so I put them both in a bath of Oxyclean to soak. I find that though it does not remove the oxidation it does soften it considerably and makes sanding and buffing it off much easier.

Once they were soaking I turned to the bowls. First I reamed them both to remove the crumbling and uneven cake. I generally take them back to bare wood when they are in this state or at the most leave a thin bit of cake on the walls. I cleaned the rims with alcohol and a soft cloth and sanded it with 600 wet dry sandpaper to remove the tar deposits and carbon on them. Once that was done I dropped them in the alcohol bath to wet them and scrubbed them with a soft bristle toothbrush. I find that on the smooth and semi-rusticated finish of these pipes the tooth brush works very well to remove deep seated grime and loosen oils and dirt.  I then left them to soak while I went back to the stems.

After the soak the stems came clean pretty easily with 240 grit sandpaper, 400 and 600 wet dry sand paper and a finishing buff with Tripoli. I worked on them for a while with the sandpapers and Tripoli and then used White Diamond for the final polishing buff. I was careful to not buff the last bit around the stem edge that would meet the shank. I would finish it once the bowls were stained and ready. Then I would buff them together with carnauba wax.

By the time I was done with the stems the bowls were ready. I took them out of the bath and wiped them down. Once they were dry I restained them both with a medium brown aniline stain, flamed the stain and then buffed them with White Diamond to remove excess stain and give a contrast between the smooth portions and the rustication. I hand waxed them both with Halcyon wax and buffed with a soft cotton cloth.

ImageImageImage