Daily Archives: July 19, 2012

Using Super Glue to Repair or Replace Putty Fills


Blog by Steve Laug

On one of the forums another member and I were chatting bemoaning the red putty fills that so often are a part of old time pipes. I have no idea why they choose to use the red putty but as the pipe ages and the stain mellows with age the putty sticks out in all of its awfulness! I really do not like the look of red putty fills. They have a look like pink/reddish bubble gum. On smaller ones I used to pick them out and refill them with briar dust and wood glue. I always over filled them a bit as the glue shrunk as it dried and I found that the wood glue did not take the colour of the stain well. I left that discussion behind and went to work the next day with other things on my mind. I came home that evening and a PM was waiting for me. Another member remembered that an old pipe repairman friend of his used to use superglue and briar dust to repair fills. He asserted that once the glue was dry it was invisible and the stains would cover it as well.

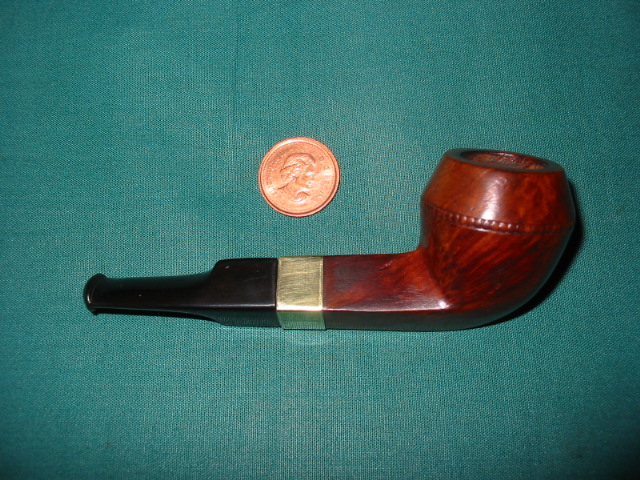
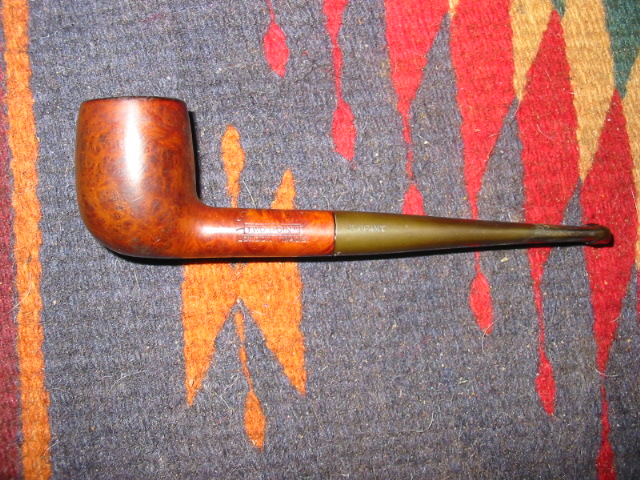
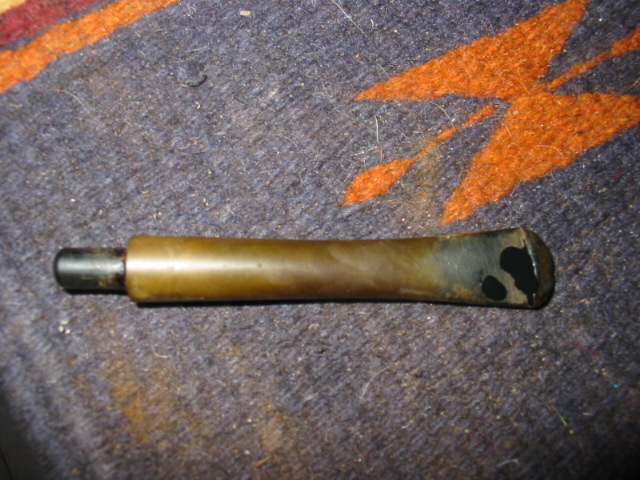
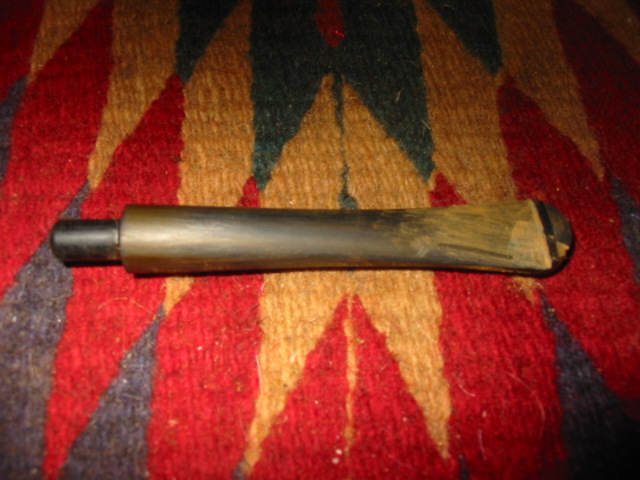
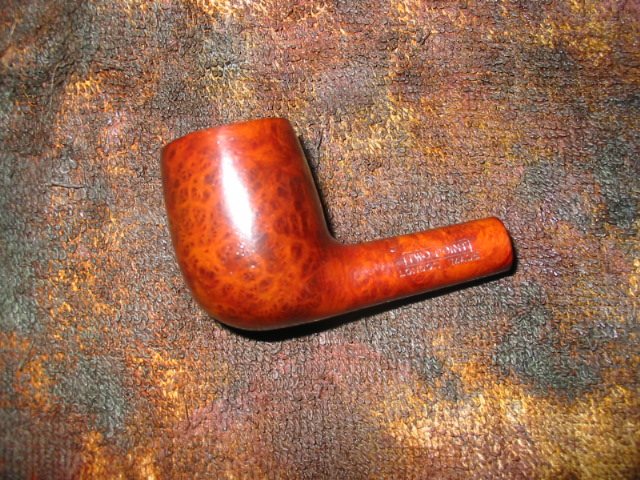
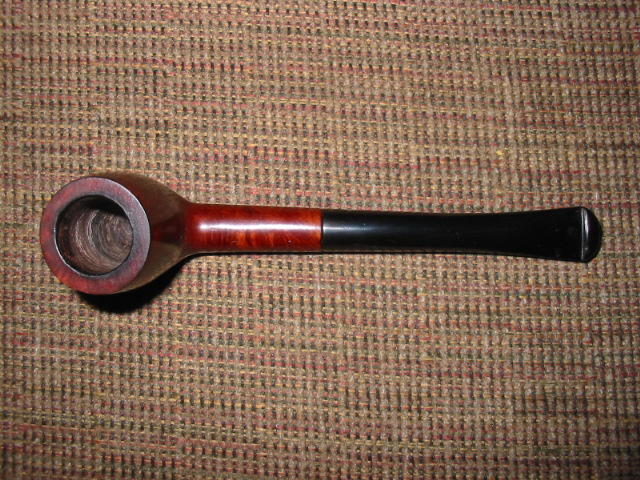
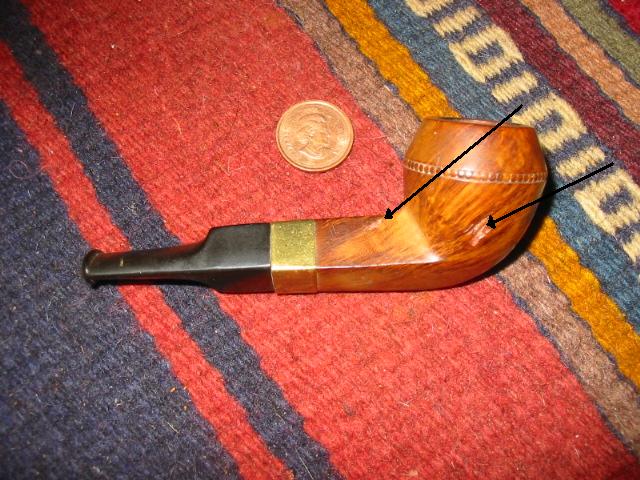
I had this old bulldog in my pipes to be repaired box. There were two large fills on it that had more or less fallen out over time. What remained were two rather large holes or divots in the right side of this old pipe. The top arrow points to the one on the shank about mid way between the bowl and the band. The lower arrow points to the on the lower portion of the bowl.

Image

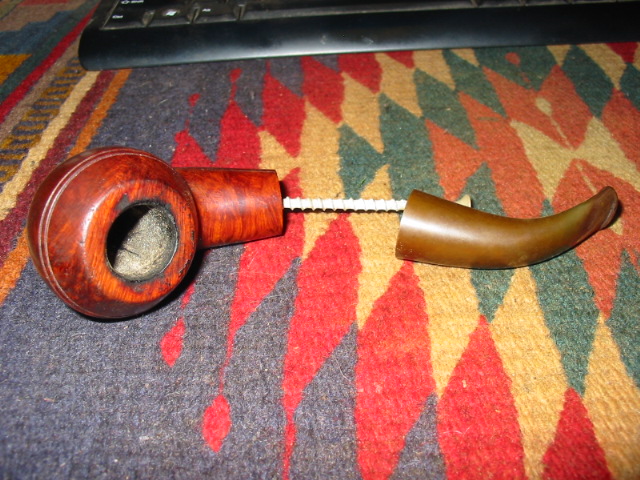
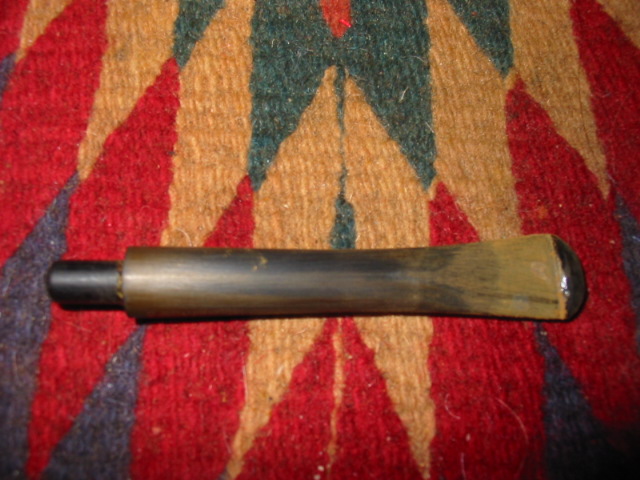
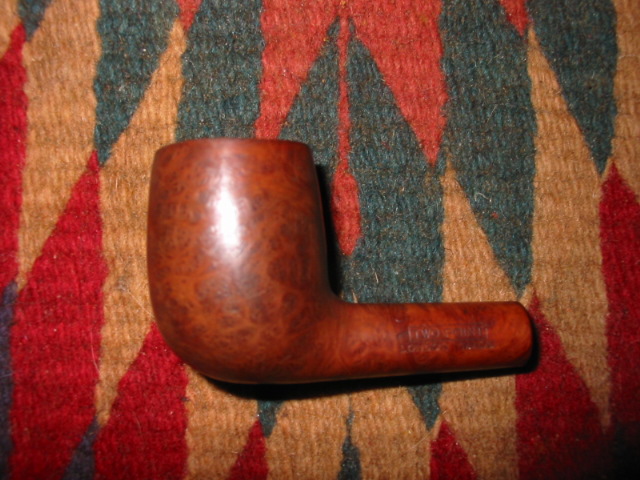
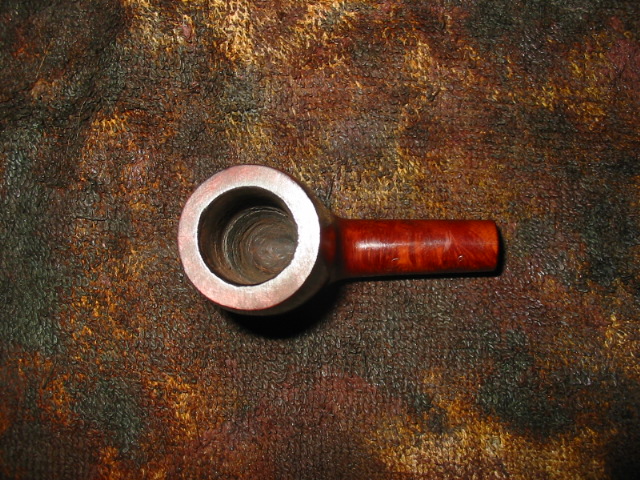
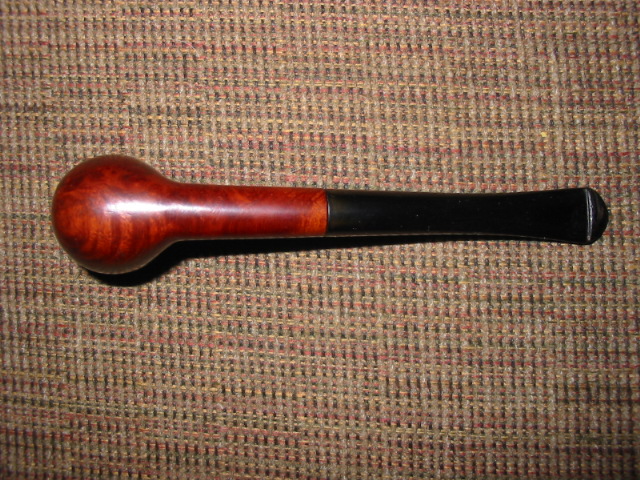
I used a dental pick to clean out the remaining red putty from the pits. I wanted the holes to be clean of any remnant of the putty. I also used cotton swabs and Isopropyl alcohol to wash out the areas where there was any putty left. Between the pick and the swabs the holes were cleaned out and open as they appear in the picture above.

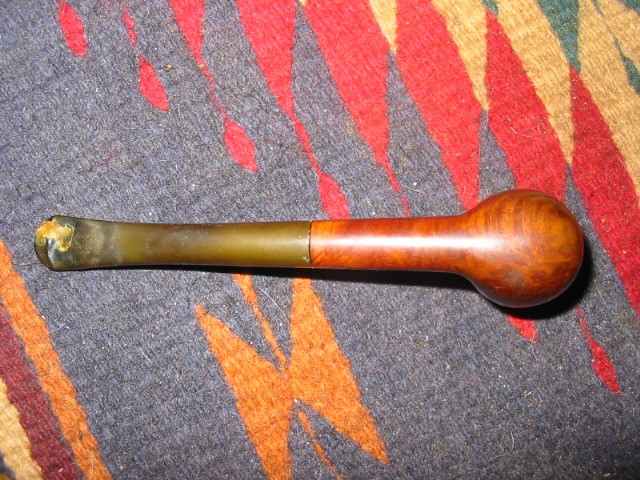
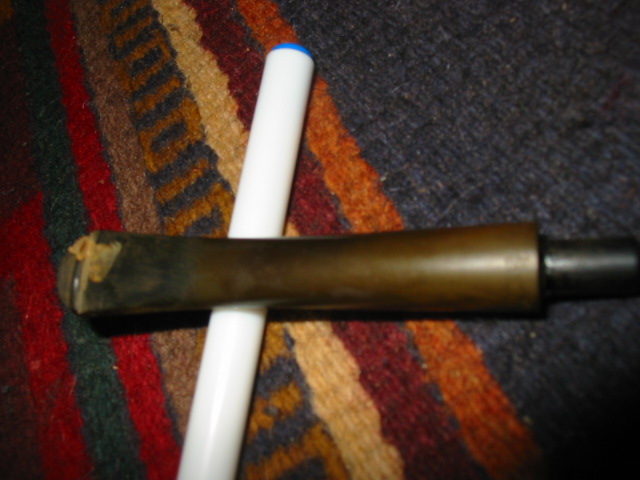
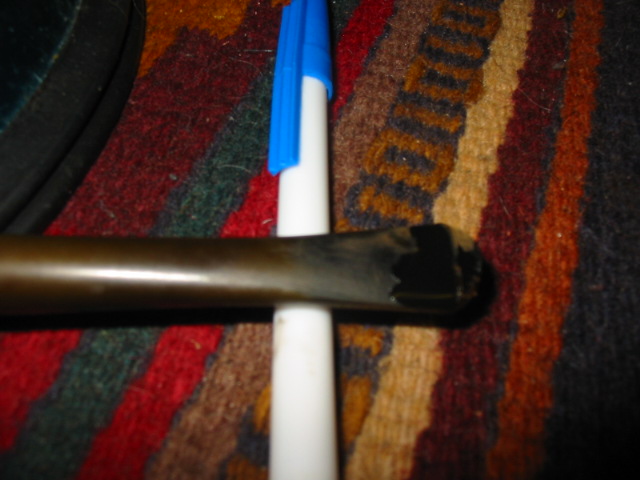
I then took a tin of briar dust I have saved from pipes I have worked on over the past months. I keep some on hand for patches like these. I wet the end of the dental pick and dipped it into the briar dust and move it around to form a ball of the dust on the end of the pick. I used my finger to move the dust ball into the hole on the shank and the bowl. I patted the dust into the hole with the tip of a knife blade as I wanted a good tight fill. I then squeezed a few drops of super glue into the dust in the hole. As I did this the dust would shrink a bit and I added more dust and more super glue. When I was done the holes were filled and both had a small bump over where they used to be. I always over fill the holes so that when I sand them down they are smooth and I can feather in the fills with the rest of the briar. I was fortunate in this case that the holes were lined up with the grain marking around them. Once the glue dried (very quickly by the way) I sanded and checked to see if I had missed any spots. I wanted the entire surface smooth to the touch and under a jewelers loop. I sanded the spots down and blended them into the bowl surface. Once that was done I wiped the bowl down with a cotton cloth dampened with Isopropyl alcohol to remove any remaining dust.

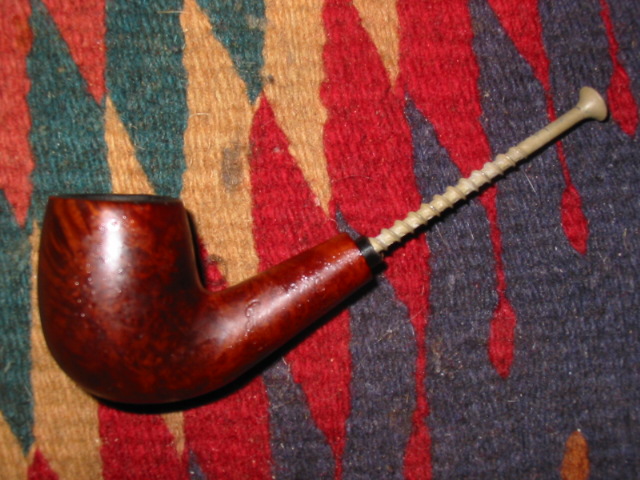
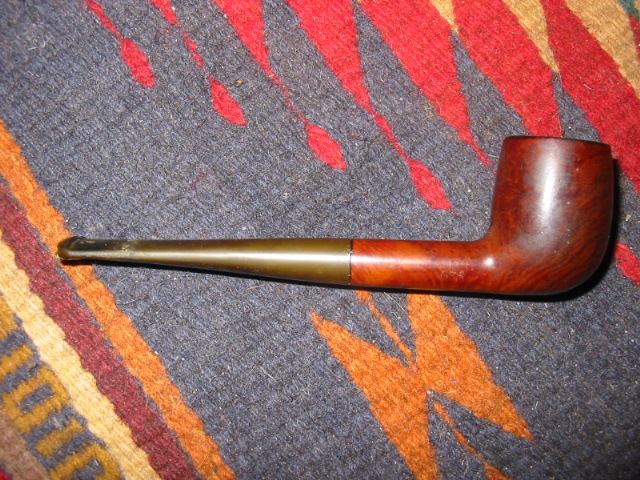
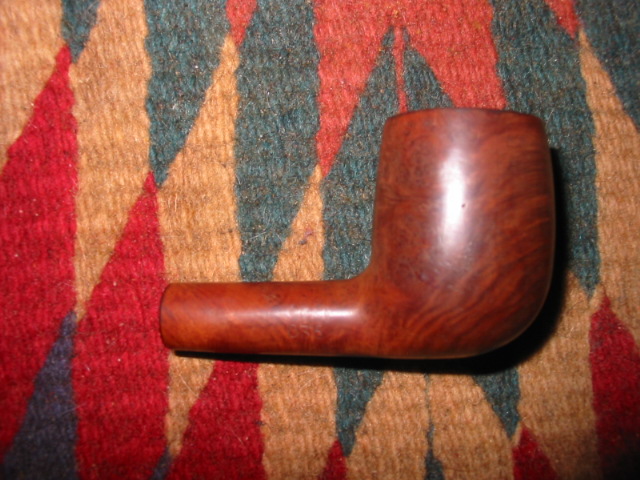
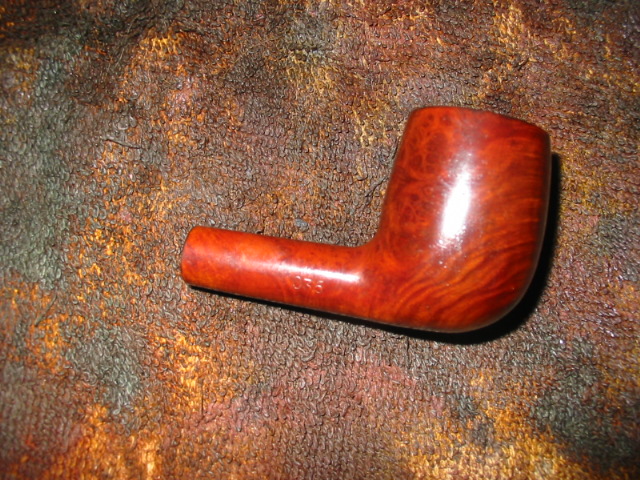
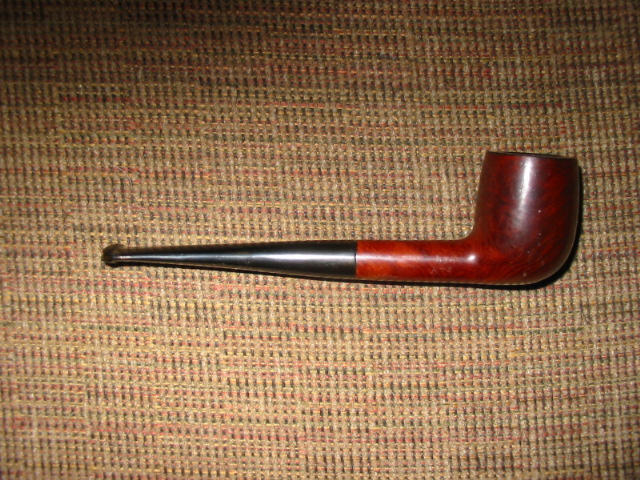
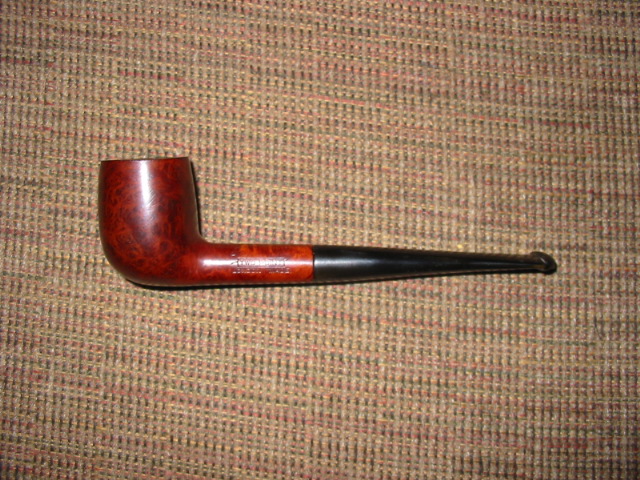
I then set up my stain area and stained the pipe with an oxblood aniline stain. In this case I did not let it dry but wiped it on and wiped it off. I wanted to make sure that I was getting good coverage on the fills. I repeated the staining until the colour was what I was aiming for. The picture below is of the same pipe after staining and buffing with White Diamond. It was finished with several coats of carnauba wax. Can you see the fills that were evident above? I assure you that in person it is just as hard to see them.

Image

Pulling a Broken Tenon


Over the years I have had my share of broken tenons to remove. Some of them came from carelessness on my part but others I purchased that way. I took pictures of the process I use on two different pipes recently. The first was a little Barling with a broken tenon and a chewed stem. I ended up restemming this one. The second one was a Peterson 999 with a broken tenon that I hope to reuse the stem by drilling/tapping and inserting a new tenon to refit it.

Image

Image

Insert a screw part way into the airway on the broken tenon in the shank of the pipe. I use a dry wall or gyprock screw. I turn the screw in by hand. I do not want to expand the tenon at all I just want the screw to have a little bite to it so that I can use it to pull the tenon out by hand or with a pair of needle nose pliers. In this case in both pipes I was not able to pull out the tenon easily. Many times I am able to pull it out in a matter of seconds using this method. But both of these were exceptionally tight and immovable. I put them both in the freezer for an hour as I know that vulcanite and briar contract at different rates with a change in temperature. After an hour I removed the Barling from the freezer and was able to pull the broken tenon out very easily. I then unscrew the broken piece and lay it aside to use for a match on the new tenon I will cut as a replacement. It helps me to eyeball the fit. I also measure the mortise and set the tenon turner as closely as possible to the measurements. I then take the broken piece and slide it on the tenon turner to check the fit.

The tenon on the Peterson however, still did not budge after an hour in the freezer. I left it in for another half hour. Still it did not budge. I then dripped Isopropyl alcohol into the exposed mortise and hoped that it would work as a solvent to break the tenon free. I repeated this several times and left the pipe sitting with alcohol in it over night. The next morning the tenon still did not move.

ImageImage

I decided to not fiddle around with trying to pull the tenon. I used my small drill bit and began to drill out the tenon. I never start with the exact size of the tenon but rather work with the size of the airway and work my way up. I have found that in the process of working through the bits the tenon inevitably breaks loose or crumbles to pieces. In this case, by the time I got to the third drill bit, when I reversed it the tenon came out with the bit. You will notice that I also flattened the broken portion of the tenon on the stem so that the surface was flat and smooth. I wanted it to be ready for when I would drill it out or tap to receive the new tenon that I have ordered.

ImageImage

As I close this essay I want to just mention a couple of reminders:

  1. Do not turn the screw into the airway to deeply as it does expand the airway and can actually crack the shank on the pipe. BE CAREFUL and go slowly.
  2. Do not use a tool to turn the screw into the airway – do it by hand so you can feel the progress and the bite before damage is done.
  3. If the tenon is stuck and immoveable in the first try put the pipe in the freezer for an hour or more to expand and contract the tenon and mortise. This usually works to break it free.
  4. Should you have to drill it out – use a bit a little larger than the airway to begin the process and work your way up to larger bits. Do not use a drill bit that is the size of the mortise lest you damage the mortise.
  5. Use a T handle hand drill not a power drill to do this as you can easily drill right through the bowl and ruin the pipe.

Refurb on a Two Point Billiard – Gnawed Stem


This is the second Two Point pipe that I had in my box to be refurbished. It obviously was owned by the same pipe man as the little Lovat as evidenced by the matching bite marks. The pipe had an uneven cake in the bowl making the bowl conical even though it was U-shaped in reality under the cake. The rim was dirty and tarred but not damaged with dents or knock marks. The finish was spotty and uneven so the bowl would need to be stripped and restained for good coverage. The biggest problem can be seen in the first two pictures below: the stem was very badly chewed. In the first picture it can be seen that the top of the stem had several deep bite marks and the button was eliminated on the left side. It was more of an upward slope to the tip than the sharp angular edge that was originally there. The round cap of the top of the p-lip button was smoothed out and no longer crowned. In the second picture you can see that the bottom tooth marks and bite throughs had been repaired with what appeared to be epoxy that was fairly caked on the stem tip to the point that the lip line and the button were gone. What remained was a working stem that had no beauty to my eye.

ImageImage

The third and fourth photos show the profile of the button and it can be seen to have been virtually eliminated with the slope of the epoxy on the bottom edge and the chewed top edge. You can also see the state of the finish on the pipe. The spottiness and grime that covered the outside of the bowl are visible. Obviously this was a good smoking pipe that the previous owner cobbed a repair on so that he could continue to enjoy smoking it.

ImageImage

The next two photos are enlarged to show the state of the stems. The first one shows the top of the stem and you can see the two large dents (interestingly they are in the same place as those on the other Two Point pipe).You can also see the wearing away of the edge of the button to a slope. The crown is also flattened. The second shows the underside of the stem and the remaining two dents – one next to the button on the bottom half of the stem and the second inward from that dent. You can also clearly see the epoxy patch that fills the bite through and the button. The usual line that separates the button on the p-lip from the stem is gone. To repair these two surfaces the dents need to be raised and the holes filled to the point where it is possible to cut a new button on the top and the bottom. The crown will need to be built up a bit and the epoxy patch hidden or blended into the black of the stem.

Image

IMG_7946
I decided to work on the top side of the stem first and heated the surface of the vulcanite to lift the dents as much as possible. Once that was finished I filled what remained of the two dents with black super glue (see the first photo below). The dent next to the button I over filled so that I could have room to recut the edge of the button. When the glue had dried I sanded it back with 240 grit sandpaper to even the surface. I also recut the button edge to give it more of a sharp distinction. The sanded top surface can be seen in the second photo below.

Image

Image

On the underside of the stem I decided to recut the button and the line with needle files before I refilled the dents and the epoxy patch. I sanded off the extra epoxy to get the surface smooth and level with the surface of the stem. I used 240 grit sand paper to bring the surface down and the needle files to cut the edge on both sides of the line. You can now see that line in the picture below and there is a definite break between the bottom of the p-lip and the stem. It is a duplicate of the button on the Two Point Lovat.

Image

Once I had that recut the button area I filled the surface of the stem with black super glue as seen in the picture below. I propped it with a pen to keep the surface level as I did not want the super glue to run and pool. I also built up the epoxy patch on the edge of the button as well. Once the glue was dry I sanded the surface and did a bit of work with the needle files to redefine the edges. The second picture below shows the sanded stem with a smooth surface.

Image

Image

I finished sanding the stem with 400 and 600 grit sandpaper and water and then moved through the micromesh pads from 1500-6000 grit. The trick was to build a black coating on the epoxy patch. This took repeated coats of the black super glue. Once that was complete then the stem could be polished by hand until I finished with the bowl refinishing.

While I had been working on the stem the bowl had been soaking in the alcohol bath. Before dropping it in the bath I had wiped it down with a soft cloth and acetone (fingernail polish remover works very well) to remove the finish and the grime. It was time for it to be removed from the bath so that I could work on it. The three pictures below show the bowl after it has dried off from the alcohol bath. It now needed to be sanded with micromesh to remove any surface scratches and the rim needed to be thoroughly wiped down in preparation for the staining. I sanded and then wiped it down with a soft alcohol soaked cloth and set up the staining area.

ImageImageImage

The next four photos show the restained bowl. I used a medium brown aniline based stain (Fiebings Leather Dye) to stain the pipe. Once it was stained I flamed it and buffed it to polish the briar and make the grain stand out. The patterns of birdseye and swirls is quite unique. This is a clean piece of briar – no fills and no problem areas.

ImageImageImageImage

I then put the stem on the pipe and buffed the entirety with White Diamond and carnauba wax to bring it back to a shine. The final four photos show the finished pipe. Pay attention to the stem and button areas as they are now very distinct in the profiles and the build-up on the top and bottom give it back its original shape.

ImageImageImageImage