Tag Archives: waxing

Refurb – A Pair of Custombilt Look A Likes


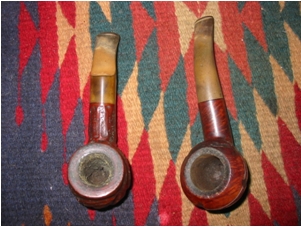
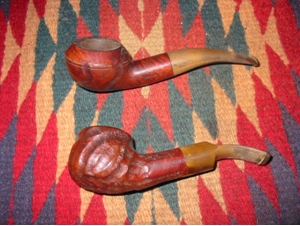
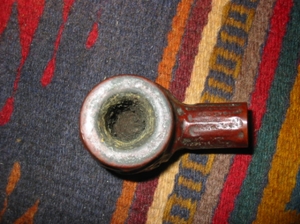
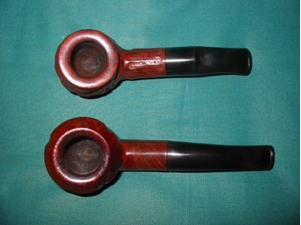
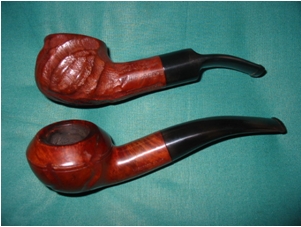
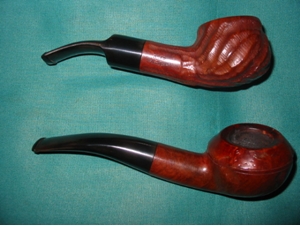
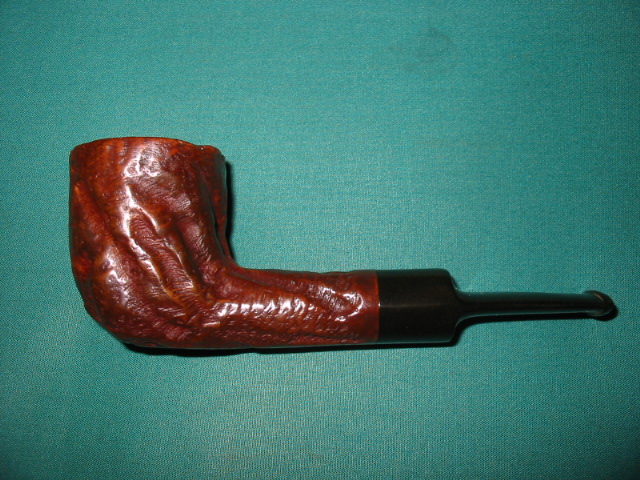
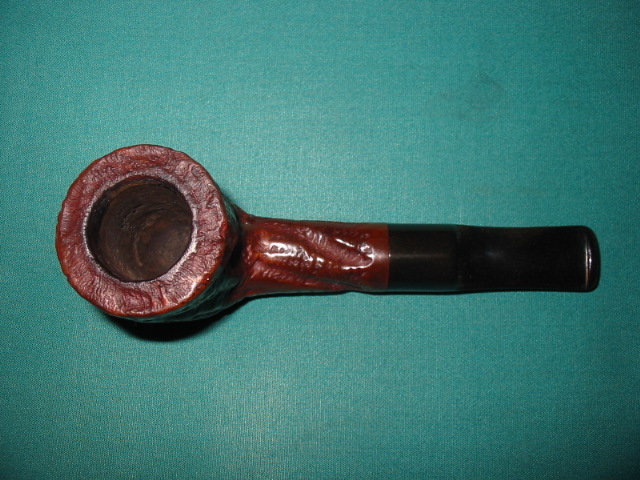
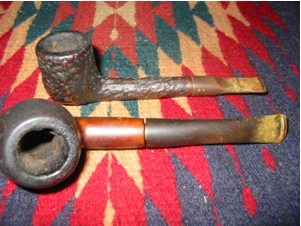
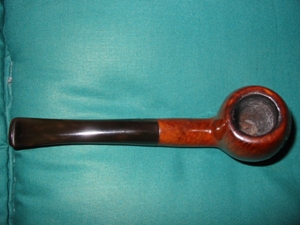
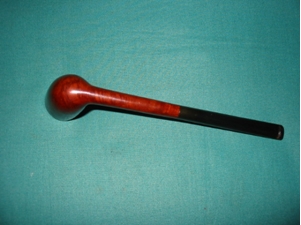
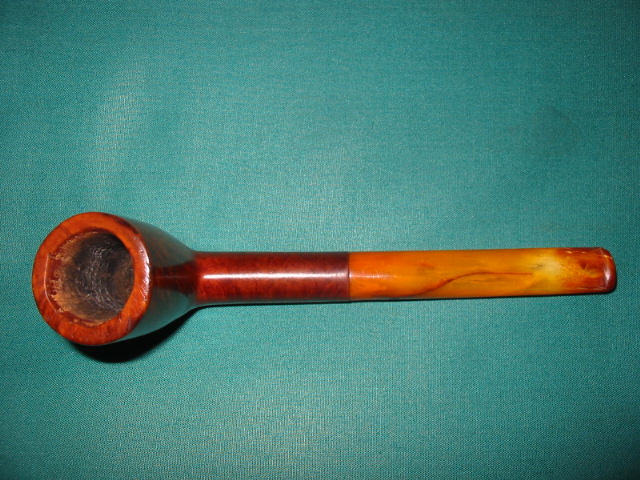
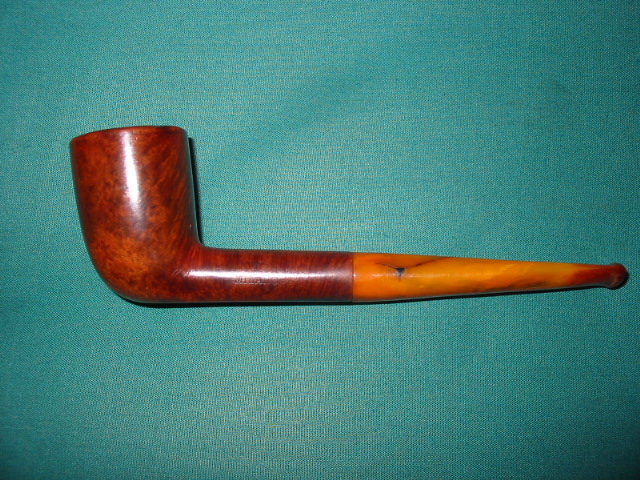
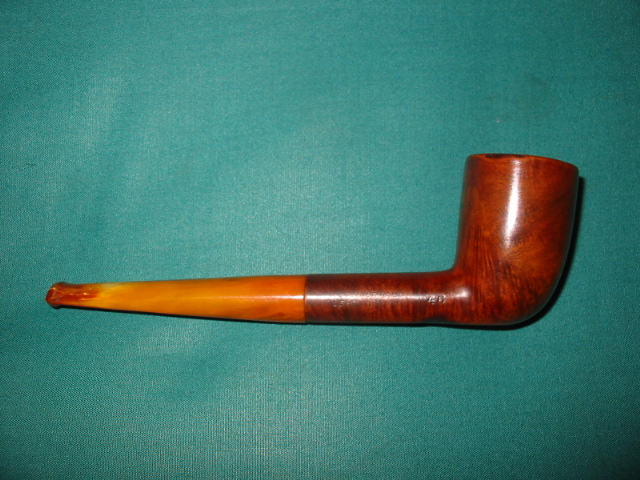
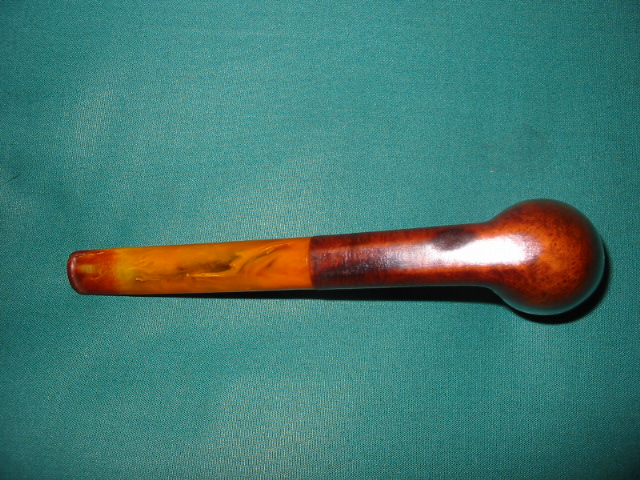
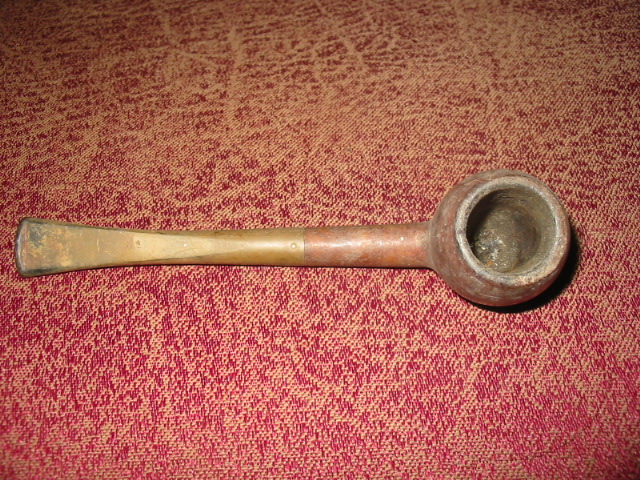
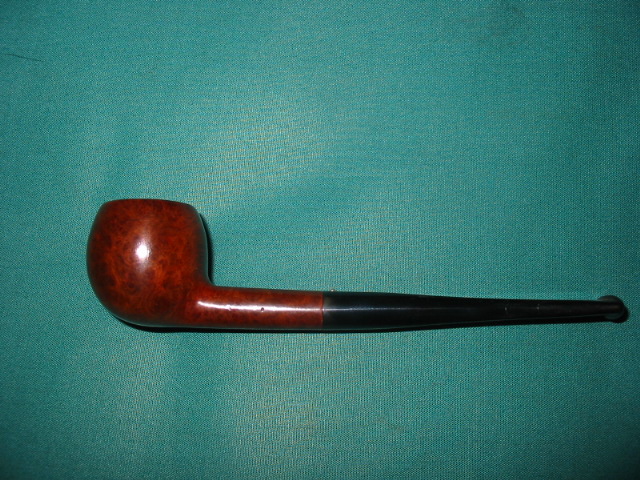
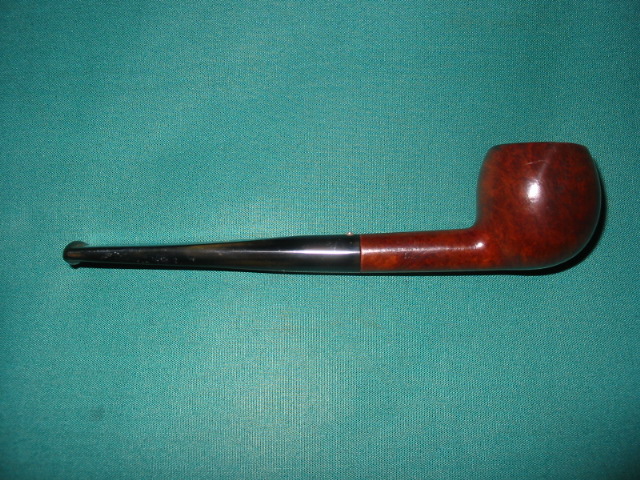
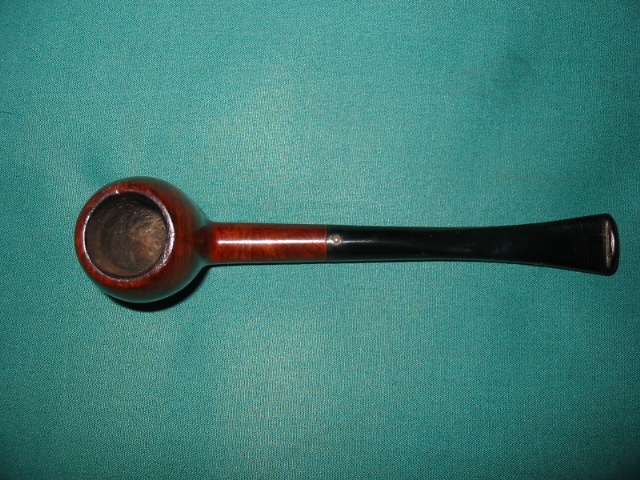
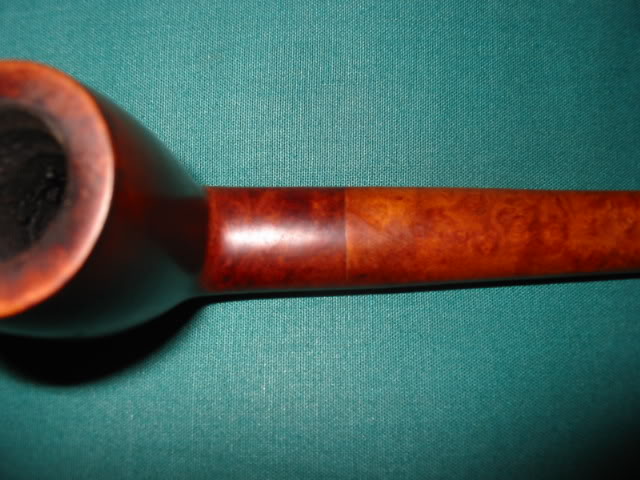
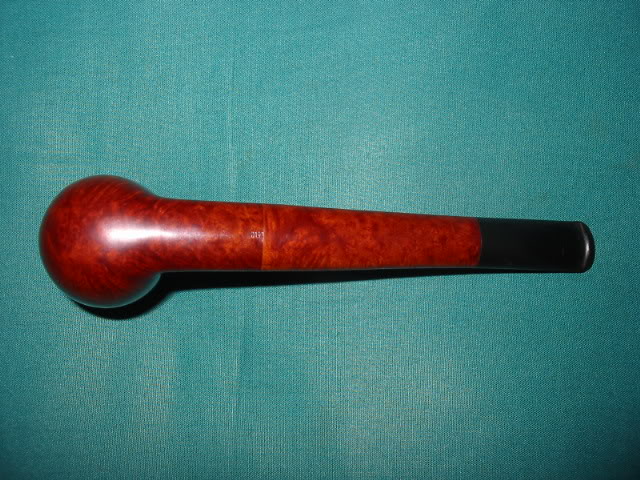
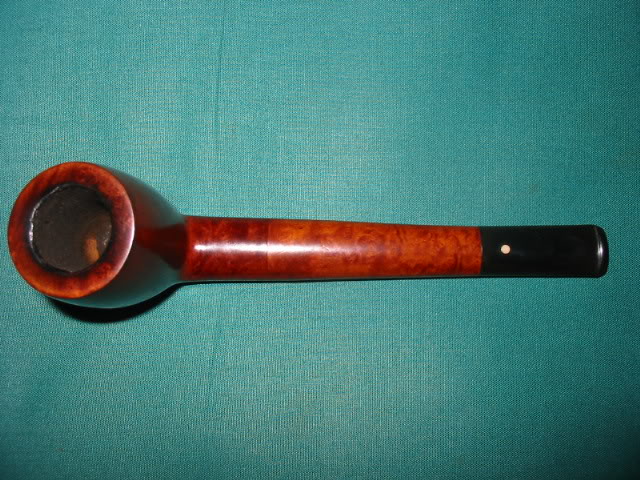
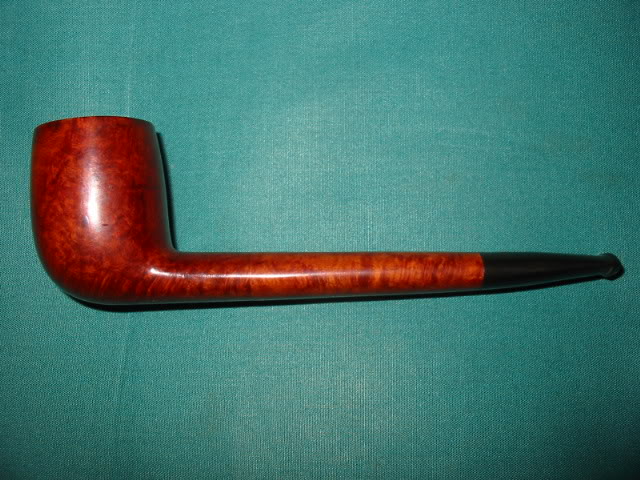
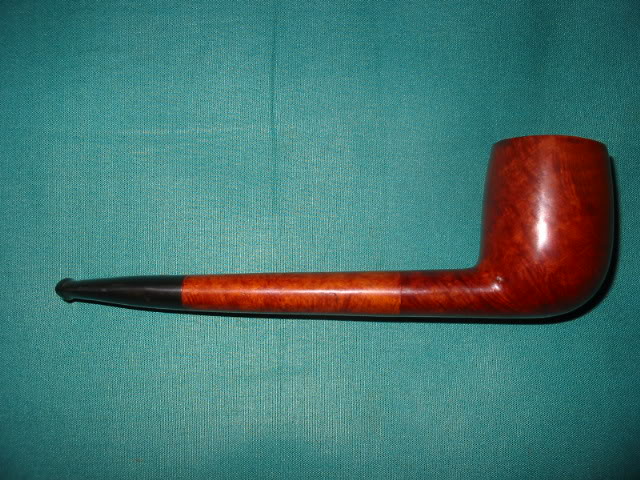
I just finished up on these two Custom Bilt look a likes. The Rhodesian shaped pipe has no stamping other than Imported Briar. The bent pot is stamped Aged Imported Briar on one side and Ben Rogers on the other side. I am not familiar with the brand. So if anyone has information on it please post it here. I would appreciate learning about the twosome.

ImageImageImage

Both pipes needed quite a bit of work to make them smokeable once more. The bowls had a thick cake and each one of them still stuffed with half a bowl of tobacco. The stems were rough and pitted from the oxidation and had a white lime like coat on them. They were very dirty inside and out. I cleaned them with a shank brush, bristle pipe cleaners and finished with fluffy ones all dipped in isopropyl alcohol until they came out clean. I buffed the stems with Tripoli after cleaning them to try and break down the coat of oxidation. It did not do much so I put them both in a bath of Oxyclean to soak. I find that though it does not remove the oxidation it does soften it considerably and makes sanding and buffing it off much easier.

Once they were soaking I turned to the bowls. First I reamed them both to remove the crumbling and uneven cake. I generally take them back to bare wood when they are in this state or at the most leave a thin bit of cake on the walls. I cleaned the rims with alcohol and a soft cloth and sanded it with 600 wet dry sandpaper to remove the tar deposits and carbon on them. Once that was done I dropped them in the alcohol bath to wet them and scrubbed them with a soft bristle toothbrush. I find that on the smooth and semi-rusticated finish of these pipes the tooth brush works very well to remove deep seated grime and loosen oils and dirt.  I then left them to soak while I went back to the stems.

After the soak the stems came clean pretty easily with 240 grit sandpaper, 400 and 600 wet dry sand paper and a finishing buff with Tripoli. I worked on them for a while with the sandpapers and Tripoli and then used White Diamond for the final polishing buff. I was careful to not buff the last bit around the stem edge that would meet the shank. I would finish it once the bowls were stained and ready. Then I would buff them together with carnauba wax.

By the time I was done with the stems the bowls were ready. I took them out of the bath and wiped them down. Once they were dry I restained them both with a medium brown aniline stain, flamed the stain and then buffed them with White Diamond to remove excess stain and give a contrast between the smooth portions and the rustication. I hand waxed them both with Halcyon wax and buffed with a soft cotton cloth.

ImageImageImage

Custom-Bilt Saddle Billiard Comes Back to Life


Blog by Steve Laug

It was a pleasure to refurbish this original Custom-Bilt (note the hyphenated title). I have always loved the rugged individualism of Tracy Mincer’s pipes. They are like none of their imitators in terms of character and sheer smoke-ability. They feel great in the hand; have and open draw and generally a comfortable stem. They are nothing pretty to look at yet there is something endearing about their “ugliness”. This old pipe was in very rough shape when I started to work on it. I apologize up front in that I forgot to grab the camera to take pictures of the pipe when I began the work. My words will have to suffice as I tell you about it. There was still a dry and almost petrified dottle of tobacco left in the bottom of the bowl. The cake that was on the walls was filled with cracks and major chunks of it were missing. The only way to remedy that was to ream it. The exterior of the bowl had a very tarred and sticky rim and the finish was gone and flecks of white paint were all over the crevices of the rustication. The stem was dull brownish green with a white crust around the button and up the stem a good half inch. This stuff was like concrete.

I always start my refurbishing process by addressing the issues of the bowl. That way as it soaks I can work on the stem. I scraped out the petrified dottle and reamed the broken cake back to bare wood. I cleaned the inside of the shank with a shank brush and bristle and fluffy pipe cleaners and isopropyl alcohol until they came out clean. I wiped down the exterior of both the shank and bowl with a rub of alcohol. When finished it was dropped in the alcohol bath for most of the morning while I worked on the stem.

I went to work on the stem. I decided to buff it with black Tripoli (coarse polishing compound) to address the hard crust on the front of the stem and the general oxidation on the blade of the stem before the saddle. I did not want to work on the saddle with it off the shank as it is too easy to round the edges and spoil the fit. After buffing it was sanded with 240 grit sandpaper to finish breaking through the white crust. Once it was gone the rest of the stem was cleaned up with my normal list of 400, 600 grit wet dry (with water), and then micromesh pads – 1500, 1800, 2400, 3200, and 4000 grit. I also used the wet dry sandpaper and the pads to careful work on the saddle portion of the stem. Upon completion the entirety was given a coat of Obsidian Oil and then waxed with carnauba.

I set the stem aside and retrieved the bowl from the alcohol bath. As I took it from the bath I scrubbed it with a brass bristle tire brush to get into the crevices on the pipe and the rustication. It was a mess with some paint in the rustication. The alcohol had removed the grime and the wire brush removed the paint flecks. Just a reminder – I use a soft bristled brass white wall tire brush in these instances as the bristles do not damage the surface of the briar. When the bowl was clean I wiped it down with isopropyl on a cotton boll. It was ready to restained with a medium brown aniline stain. I applied the stain with the dauber that comes with the Fiebings Shoe Dye (aniline stain), flamed it and set it aside to dry thoroughly. Once it was dry I buffed it with White Diamond on my buffer and then applied a coat of Halcyon Wax and buffed it by hand with a cotton cloth.

ImageImageImage

Black Super Glue Repair to a Damaged Stem


Blog by Steve Laug

Using the stem on the little Barling I repaired earlier as an example I thought I would post the process of repairing bite marks with Black Super Glue. The glue is available online at a variety of sources, though I purchased mine from http://www.stewmac.com/shop/Glues,_adhesives.html a company that is a supplier for stringed instrument repairmen. They offer super glue in several colours and viscosities. I order the black super glue from them that comes with whip tip nozzles as I find that it is easy to control the size of the drops used. I also have used the clear super glue and it works very well in several other applications including repairing and replacing fills on older pipes. They also carry a wide variety of micromesh sanding pads and papers. It is a great resource for hard to find items (at least in Canada) that I use regularly in my repairs.

I always seek to repair a stem in the least intrusive manner possible. In the case of the stem below I heated the tooth dents to try and lift them as much as possible before any other method was used. This can be done carefully with a heat gun – I stand the gun on its stand, turn it on its lowest setting and move the damaged part of the stem in the heat about 4-6 inches above the tip of the gun. If it gets too close the vulcanite is damaged through burning. The other method that I have used avoids this problem – it involves putting a cup of water in a microwave and boiling it. Once it is hot place the stem button end down in the boiling water and leave it. Repeat as often as necessary or until there is no more lift on the dents of marks in the stem. Note if the dents have sharp edges, or are cuts, the heat will not lift the dents at all. It also will not work on holes or bite throughs on the stem.

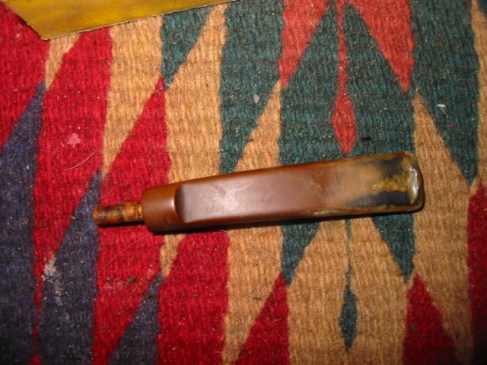
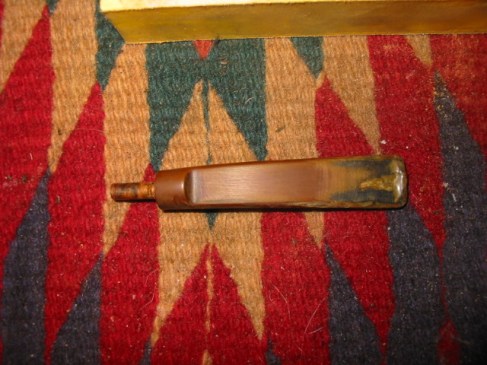
In Photos 1 and 2 the stem is pictured as I received it on the pipe. The first photo shows the top of the stem and shows the damage to the button and the surface – mostly dents. The second photo shows the underside of the stem. It was significantly worse that the top. The dents were very deep and the button was virtually destroyed. At this point it is probably pertinent to ask whether the stem should have been replaced or not. Several things went against doing that in my opinion. The first was that this is an original Transition Era Barling stem. It is hard to find replacements that have the slab look and slight taper on the saddle that are hallmarks of the Barling stem. The second was that the tenon on this one is very tiny. I did not have a tool that allowed me to turn that small of a tenon. Thus I decided to give it a repair. Then of course, if you have followed this blog for long you will understand, there was the challenge. Could I possible restore the stem to at least a semblance of its original “glory” and functionality?  
ImageImage

So with the decision made I turned to work on this stem. I used my heat gun to lift the marks as much as I could on the top and the bottom of the stem. The two pictures below show the effect of the heat on the stems. The first photo shows the top of the stem – the heat actually lifted those bit marks quite a bit. It took out the rounded edges of the dents. What is left was actually sharp edges or cuts from the teeth on the button and on the surface. You will also notice that some of the oxidation burned off in the process. I also sanded the surface with 240 grit sand paper to better see what I was dealing with on this stem. The second photo shows the underside of the stem – the heat lifted the dents significantly but not totally. The sharp edges on the dents still remain, as does the destroyed button and the hole is very visible. I repeated the heating process several times (to be honest I lost count) until there was no more visible improvement in the dents. It was time to prepare for the patching process.
ImageImage

Before I use super glue to patch a hole or fill dents in the stem I prepare the surface to be clean and debris free in order to get a good bond on the glue. I sand the surface with 240 grit to remove the oxidation as much as possible. I want the area under the patch to be black so that the glue matches. Oxidation on the edges of the patch makes that match impossible. Once I have the surface sanded I buff it with Tripoli to take a bit of the roughness out. I don’t want a glossy finish as a little roughness gives surface for the glue to bite into. But I do want it clean. I wash the stem with isopropyl alcohol to remove any debris that still remains, including any of the Tripoli. I use a dental pick to make sure that the edges of the hole are not cracked or broken. Doing this often opens the hole a bit larger but it also removes chips or cracking that will not provide a good base for the patch. I finish the cleanup with yet another wash with alcohol and a cotton swab. The surface should have solid edges to bind to and no extraneous sanding dust or debris that will be in the way of the patch.

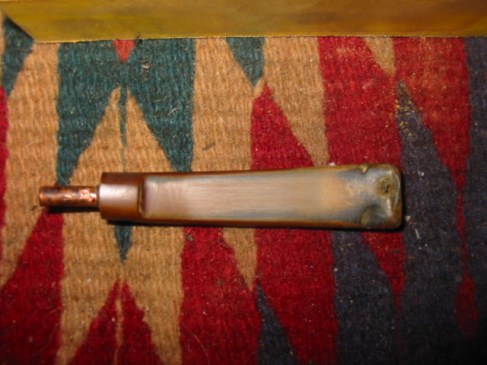
On this stem the easiest part to patch was the top of the stem so I started with that part. I used the whip nozzle on the super glue and dripped it on the stem. I smoothed the drop out with the end of the whip. I want the dent and cut to be totally filled so I moved the glue back and forth until it was all covered and then set it aside to dry with the end of the stem propped up to keep the patch level. The first picture below shows the patch after the glue had dried. It formed a solid patch on the stem. I always layer the patch doing multiple layers until I have built up the hole and dent. In this case I also used the glue to build up the button. While the picture does not show it clearly, the glue is actually level with the top of the button and small spots of glue are moved into the dent marks in the button surface itself. In the second photo the stem shows the patch after sanding with 240 grit sandpaper. The object was to get a smooth surface on the stem. The dent marks in front of the button are gone. The brown spot on the stem is some oxidation that has not been sanded out yet. The button is also repaired and you can see a bit of the bulk that is now there. The button will need to be shaped and recut with needle files once the underside of the stem is also patched.
ImageImage

Once I had the top surface of the stem to the point it is pictured above I turned the stem over to work on the underside. This part of the stem was really the challenge on this one. It had deep tooth cuts and a bite through that needed to be repaired. The first step for me was to repair the bite through. I fold a pipe cleaned to fit the flared slot on the button. I greased it with olive oil and inserted it in the slot. I wanted it to be smooth and not pucker through the bite hole, so I tucked it down with my dental pick. Once it was set I put in the first drops of black super glue. Remember at this point I am not work on the surface detail of the holes only the bite through. Once it was patched I went on to fill the other deep dents and marks on the surface and build up the button. I set aside the stem on a level surface and raise the tenon end to keep the bubble of glue level so it would dry.

Once the glue dried I removed the pipe cleaner from the slot. This is always the moment of truth for me – did I grease it well enough that the pipe cleaner did not permanently bond to the slot. In this case it worked perfectly and it came out easily! Whew! Once it was removed I filled the rest of the dent marks with the super glue and also built up the non-existent button. I forgot to take pictures of that step. So the verbal description and the picture of the topside fill will have to suffice. I set the stem aside again and leveled the glue so that it would dry and not run up the stem. Super glue dries very hard and is a lot of work to sand off the surface. Once it was dry I sanded the surface with 240 grit sandpaper once again to level out the surface. The picture below shows the stem at that stage in the process. The fills appear to be white but that is the sanding dust on the surface. You can clearly see the three large patches on the underside of the stem in this picture as well as the rebuilt portion of the button. Again I over filled the patch to the level of the top of the button to provide a solid new surface for me to work with when I recut the button with the needle files.
Image

The next two photos show the result of the sanding process with the 240 grit sandpaper on the top and the bottom of the stem. I wanted to make sure that the patches blended into the surface of the stem. You will note that in the first photo of the top of the stem, that the patch is virtually invisible. Though it is not very clear, I had also recut the button with the needle files to give it a good sharp edge against the surface of the stem. I use wedge shaped file and a rectangular file to cut that edge cleanly and the result is a button that looks original. In the second photo you can clearly see that the patches are fairly well hidden. The one against the button and the large one at the top of the photo were the deepest ones. After this sanding and recleaning the surface I refilled those two spots, let them dry and sanded them again. Once that was completed the underside of the stem looked exactly like the topside of the stem at this point.
ImageImage

I failed to take pictures of recutting the button on the underside of the stem but you can see the new button in the pictures below. I cut and shaped it with the same needle files that I used on the top of the stem. I like the clean angles of a new button so I was aiming for that with just a little wear or rounding to match the age of the pipe. I finished the sanding and polishing of the stem using 400 and 600 grit wet dry sandpaper and then used the normal list of micromesh sanding pads from 1500-6000 grit. I keep a bowl of water close by to dip both the paper and the pads in as I sand as I find it more effective in removing the scratches and remaining oxidation. Once the stem was finished I put it on the pipe bowl and gave it a buff with Tripoli and White Diamond to get a good sheen to the surface. I never buff a stem apart from a pipe as I do not want to damage the stem shank junction by rounding the clean edge of the stem. The top two photos below show the top and bottom of the stem respectively. You can see the repair is complete and the button is very clean and present. The second two photos below show the stem from the right and left profile so you can see the flow of the stem surface – uninterrupted from either side with the tooth dents as before and also the profile of the button. It is distinctive and present. The stem was finished with several coats of Obsidian Oil and then carnauba wax to protect the surface.

ImageImage

ImageImage

The Alcohol Bath and New Life for a Brigham Acorn


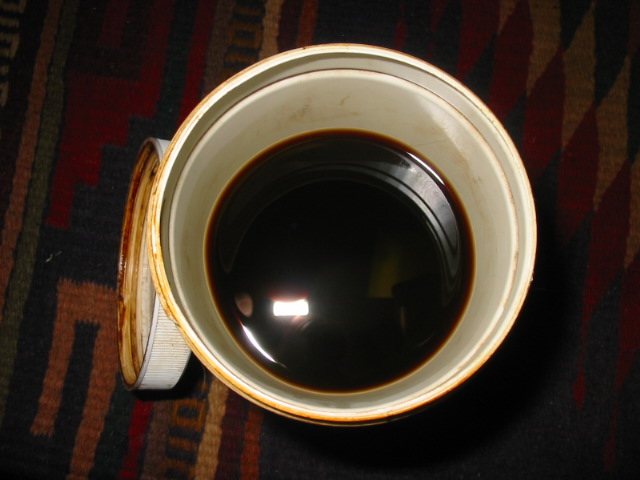
The work on this older Brigham 4 Dot Acorn gives a clear picture of how the alcohol bath can remove the grime and prepare the older worn pipe for a restain that brings it back to life. When I am dealing with this kind of wear and tear on the finish of an estate pipe, it is generally my opinion that it is easier to take the pipe back to an unfinished condition rather than try to work with the existing finish and have any hope of restoring it. It also is a shortcut method to remove the finish without the labour intensive sanding that would normally be required. I have a pint jar with a lid on it that I keep on my work bench that is full of isopropyl alcohol. It is now brown but I find that it works well in removing the finish but also it seems to add depth to the stains I use. I recycle the alcohol monthly by pouring it off slowly and rinsing and scrubbing away the sediment in the bottom of the bath. Thus it is always clear – just with a brown tint.

ImageImage

The pipe I am using to illustrate the process is a Brigham Acorn. It has the standard Brigham style rustication on the bottom edges and on the side of the bowl. It was used to give the pipe character and hide flaws in the briar on an otherwise nicely grained pipe. This one was in rough shape. The bowl was incredibly grimy inside and out. I reamed it and cleaned the bowl and shank. Then it went into an alcohol bath overnight so the alcohol would do its work cut the grime and dirt as well as any remaining finish.

ImageImageImage

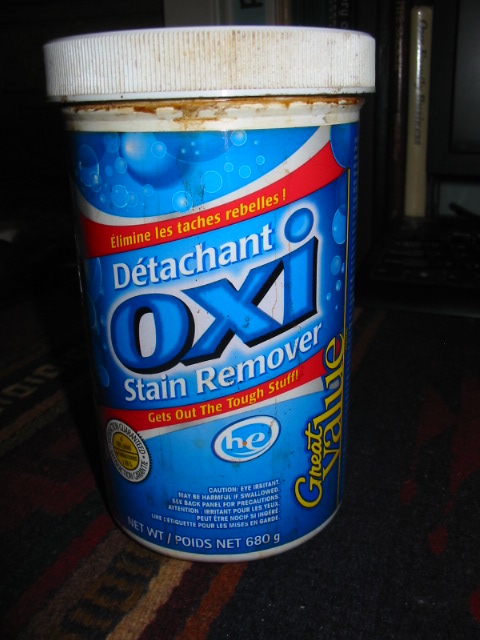
While the bowl was in the bath I turned my attention to the stem. From the pictures above you can see that the stem was another story. The first ¾ of an inch around the button was heavily caked with a lime like build up. I generally find this under stems that have used the softy bit to protect them from bites. Most folks who use them never remove them to clean them and this is the result. It is hard stuff to remove. I mixed a solution of Oxyclean and hot water – 1 scoop of the powder to a pint of water. I shook it and stirred it to get it dissolved and dropped the stem in it for several hours. I had other pipes to work on during the wait so it was not a problem. I find that the Oxyclean softens the oxidation and particularly this kind of lime scale. Once it is softened it is easily removed with the buffer and sandpapers.

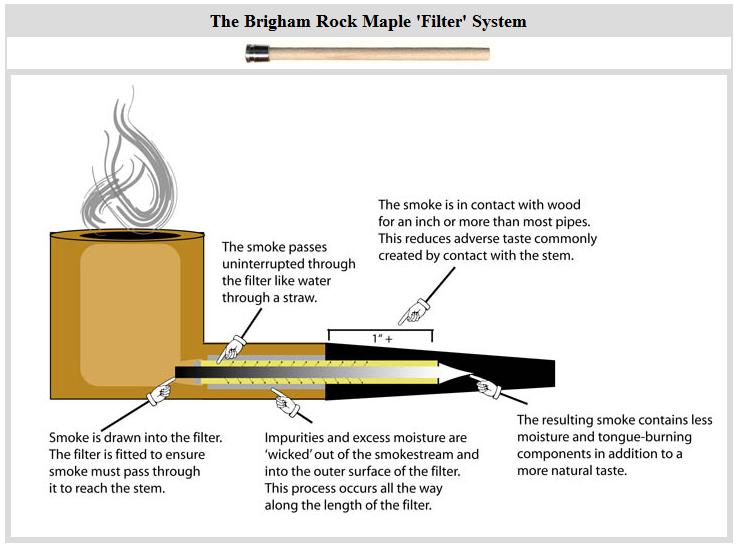
I took it from the wash and went to work on the inside of the stem. On a typical pipe this is an easy thing to do. But on a Brigham the tenon is the length of the shank and is made of aluminum. It is designed to hold the Brigham filter system which is a hard rock maple tube that fits in the tenon. 

Image

Where there was normally a Brigham filter in this pipe it was gone and the tars had built up to the point that the stem was closed off and did not fit all the way into the shank. It took a lot of pipe cleaners and alcohol to get it clean. The outside aluminum shank was sanded 0000 steel wool and with micromesh pads to remove the oxidation and darkening of the metal. The stem was sanded with my normal list of sandpapers – 240 grit to break up the oxidation on the surface, 400 and 600 grit wet dry sandpaper with water to finish removing the problem and then the micromesh pads – 1500 to 6000 grit to polish and shine the stem. Upon completion the stem was set aside to be buffed when the bowl was finished. 

I removed the bowl from the alcohol bath the next morning. I dried it and looked it over for any remaining finish or grime. I wiped it down with a soft cotton cloth and some clean isopropyl then gave it a quick buff with Tripoli to smooth the surface. I took it back to my work table and restained it. For this one I used an oxblood or cherry stain, rubbed on and rubbed off several times until I got the colour I was looking for. I let it dry and then took it to the buffer to be polished with Tripoli and White Diamond. After that it was polished with a coat of carnauba wax. Here are some pictures of the finished pipe.
ImageImageImage


Refinished Rims and Touch-Ups


Blog by Alan Chestnutt

Alan, aka Castana on SF, posted this recently and I found it extremely helpful so I asked and received his permission to post it here as well. I am ordering some of these as I speak. Nicely done Alan. I look forward to gving them a try. They are available on Ebay and also on Amazon.

When restoring pipes, I nearly always like to refinish the rim. I think a nice clean sharp rim always sets a pipe off. As well as this it is just as easy to sand and refinish a rim as to try to remove tar and staining to the old rim. One of the problems though in refinishing a rim is trying to match the stain to the rest of the bowl. I always shied away from getting leather dyes, simply because you would need to be artist to be able to correctly mix all the differing shades.

I always remember my grandfather staining shoes and the smell of the dye always lingered in my brain. In more recent times that memory was triggered when smelling a sharpie marker, so my thoughts were that it must contain a similar alcohol based dye. I used a sharpie a few years ago to restain a black sandblast bowl and it worked a treat. “If only they were available in shades of brown” I thought to myself.

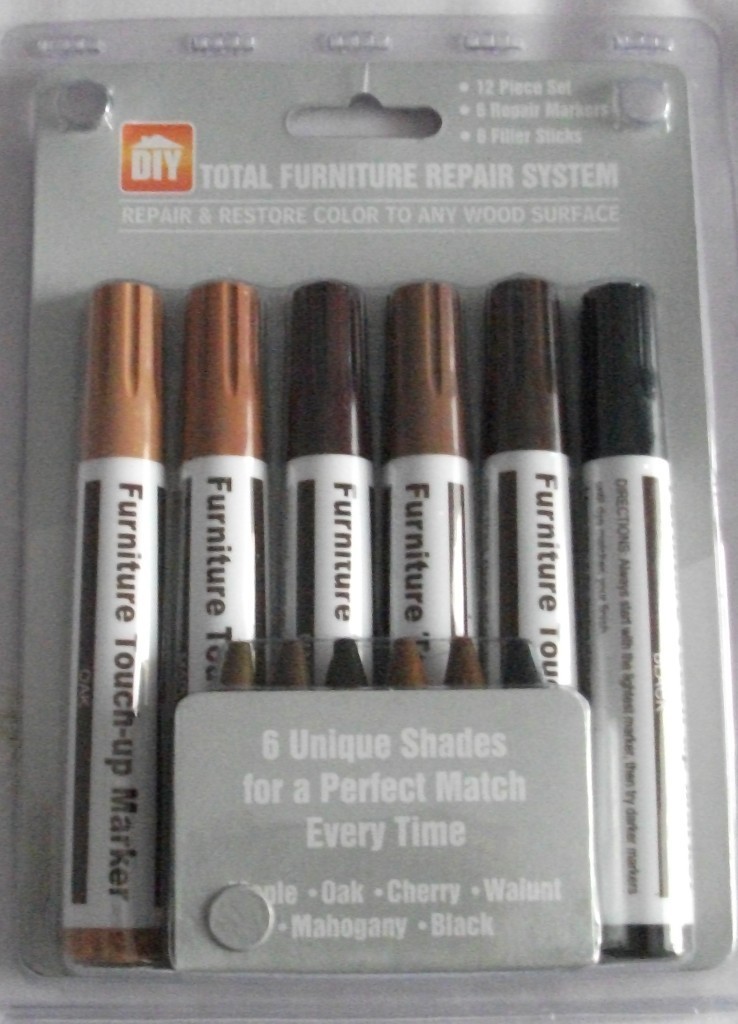
So while walking through a local discount store a few months ago, I spied furniture repair markers. Exactly what I had been thinking of.

Image

They come in 5 shades of brown plus black and cost £2 (about 3 bucks). I couldn’t wait to get home and try them. They are a chisel shape marker and apply a translucent stain exactly like an alcohol dye. Perfect! With the variety of shades a match can be made 99% of the time by application of a couple of coats or moving to the next darker shade. Simply cover the rim by wiping the marker over it and a few seconds later remove the excess with a soft cloth.

Image

A refinished Tilshead rim.

They are excellent for touch ups on other areas of the pipe and I often use them to just refinish the whole pipe to brighten up the grain. Needless to say I acquired a few more packs, but I have refinished literally hundreds of pipes and I am still on my first pack. Simple to use, no mess, a variety of shades and cheap. I class them as my best purchase ever for restoring pipes, so keep your eyes open for them. Available on eBay too, but at a premium.

Alan

The Everyman Pipe from the 1920’s Era


Blog by Steve Laug

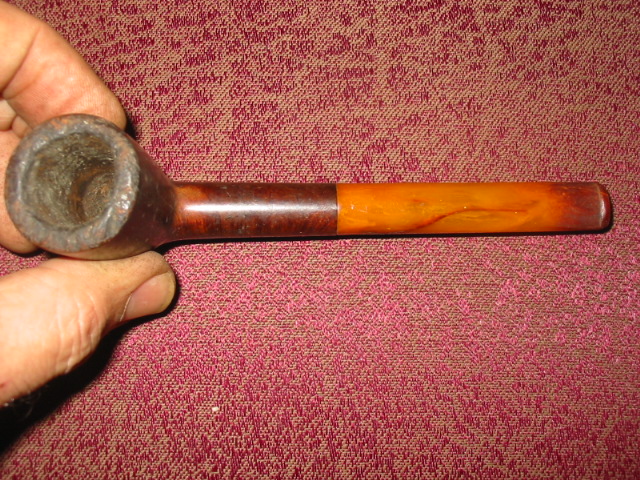
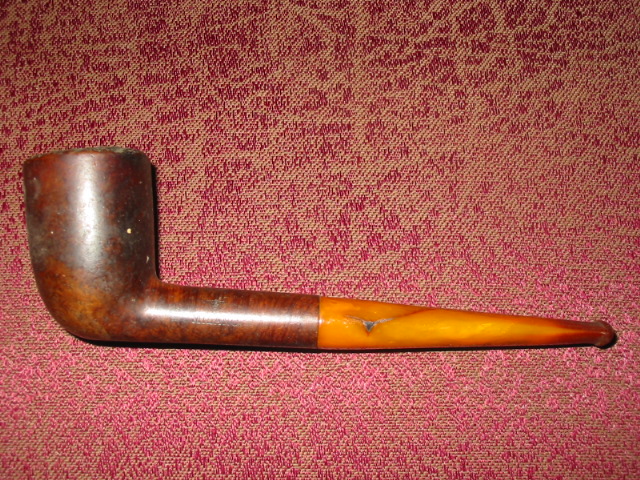
This featherweight cutty shaped pipe came from the 1920’s or earlier. I bought it in a lot of that era pipes on EBay and it arrived as pictured below. It is stamped The Everyman Pipe on the left side of the shank and Made in England in a Circle and shape number 195 on the right. When this arrived in the package of the other old timers it was pretty grimy. The bowl needed serious cleaning and the rim was dented and had rough spots. It needed to be topped as steaming it would not raise the broken spots that came from tapping it out. When the surface of the wood is actually broken and not just dented steaming will not raise the grain significantly and the only repair I know is to sand it off and make it smooth and crisp again. The challenge then is to match the stain so the bowl and rim blend.

I reamed and cleaned the bowl and the airway in the shank. The pipe cleaners came out very dark and tarry at the beginning. I decided to use a drill bit the same size as the airway to clean out the gunk before going back to the pipe cleaners. I use a T handle to turn the bit into the shank by hand to remove the tars and open the airway again. I finished cleaning the shank with fluffy pipe cleaners and isopropyl alcohol until they came out clean. I wiped down the bowl with acetone to remove the old wax and the grime from the bowl and then used my topping method – a hard, flat board and an anchored piece of 240 grit sandpaper – and topped the rim. (I have since learned from someone that a good way of doing it is to anchor the sandpaper on a Masonite clipboard and sand the rim that way. It works great.)

Image

The stem needed the most work as it was a round tube of vulcanite. I wonder if it was not made to be like a clay tavern pipe. The previous owner had notched the top of the stem to make it easier to hold with his teeth and keep it from rolling. The notch was a fairly deep V cut that was only on the top of the stem. I used needle files to cut a new button on it and then my Dremel with a sanding drum to taper the stem back to the button. The original had a slight bend in the stem so I left that. The button I shaped for the stem is rounded and crowned to fit the orific airhole like those found on pipes of a similar age. After cutting the button and shaping it, the stem needed a lot of sanding to remove the scratches and oxidation. I used 240 grit sandpaper on the entirety to clean up the deeper scratches and remove the oxidation. I then progressed through the wet dry sandpapers and the micromesh pads until I had a good smooth finish on the stem and a good clean button.

Image

I set the stem aside and restained the rim and bowl to match what appeared to be the original colour of the pipe. I used an oxblood undercoat and a dark brown top coat to get the richness of the original finish. I coated the stem with Obsidian Oil and then inserted it in the shank. Once it was dry I took the pipe to the buffer and used the White Diamond to give it a final buff before giving it several coats of carnauba wax.

The pictures below show the finished pipe with its newly shaped and polished stem:

ImageImageImageImage

Rebirth of a WDC Milano Dublin


This old WDC Milano was a challenge that I wanted to take on and see how it would turn out. In the pictures below you can see the state of the pipe when I received it. The stem was deeply darkened in the button area as well as scratched and marked with tooth chatter on the first inch of the stem. The bowl was badly caked – much of the cake had broken away in chunks and what remained was soft and crumbling. It also appeared to have been reamed with a pocket knife and had nicks and cuts around the inner edge of the rim and the resulting effect left the bowl way out of round. The finish was damaged and parts of the stain had rubbed away and what was left was underneath layers of black grime. The sides of the bowl and the bottom side of the shank both showed signs of having been laid in an ashtray and burned with a cigarette. The burn on the bowl side was not deep and would be easily addressed but the one on the shank was pretty deep. I would have to take out as much as possible without changing the integrity of the shape. That gives you a pretty clear assessment of the damages facing me as I decided to work on this old pipe.

ImageImage

I reamed and cleaned the bowl back to the bare wood in order to remove the crumbling and cracked soft cake in the bowl. My thinking was that a good clean surface would encourage the build-up of a proper cake. With a sharp knife I worked on the inner rim. I worked to get it evened out with the knife and then turned to a folded 1 inch piece of 240 grit sandpaper to smooth out the roughness of the inner rim and to bring it back as close as possible to being round. The roughness of the rim required topping to even it out as well. I used my normal procedure of sandpaper anchored on a solid flat hard surface and turning the bowl clockwise or counter clockwise into the sandpaper – exercising caution to keep the bowl flat on the surface and vertical in order to keep the rim flat and not slanted. To remove the burn mark on the bowl and on the shank took a little time. On the bowl side it was not deep so it only needed to be sanded to remove the damage. But on the shank I scraped until I got to hard wood and then sanded. Once I had solid briar under the burn I put the bowl in an alcohol bath to remove the grime and the remaining finish. I left it overnight to soak and turned my attention to the stem.

The stem has a steel tenon and insert that is the system in these old Milano pipes. It seems to be some sort of condensing chamber to collect the moisture generated in a smoke. In any case this one was filled with tars inside and coated with them on the outside. I cleaned it out with a shank brush, bristle pipe cleaners and then fluffy ones until they came out clean. The outside of the condenser I scrubbed with 0000 steel wool to polish and remove the grime and tars. The aluminum polished up nicely and the tenon looks like new. The Bakelite stem took a bit more work and creativity. I cleaned the inside of the stem scrubbing it with soft scrub and bristle cleaners. I was able to remove much of the interior stains. I sanded the exterior of the stem to remove the tooth chatter and external discolouration. I sanded it with 400 and 600 grit wet dry sandpaper and then the usual course of micromesh pads from 1500-6000 grit. I finished by buffing the stem with Tripoli, White Diamond and carnauba wax.

I put the stem aside and removed the bowl from the alcohol bath and dried it off. I sanded the bowl with 1500 and 1800 grit micromesh to remove any remaining finish. I also sanded it with 3200 and 4000 grit micromesh to polish the bowl. I restained it with an oxblood stain. I flamed the stain and then took the pipe to the buffer and buffed the pipe and stem with White Diamond and carnauba wax. Below are the pictures of the finished pipe.

ImageImageImageImage

Refurb on a London Made Dainty Prince


This was a refurb I did last August while I was laid up with a couple of cracked ribs. I wanted to post it here because it gives a good idea of the process of refurbishing and taking grimy old pipes and bringing them back to life.

I am a bit laid up after a fall so I am sitting quietly in my shop instead of doing painting and trim on the house (original plan for the holidays). The great part of this is no guilt about not working on the house or yard. Because of that I am getting a bunch of old pipes I have in boxes cleaned up and finished.

The first one today (Aug. 1) is a nice little London Made Prince with a patented Flat Grip Stem. (I cannot remember who made these but I have had a few over the years). The stem is stamped Flat Grip and has a nice raised silver spot on the stem. The bowl is stamped London Made. It is a small pipe – 5 1/4 inches long but about a group one sized bowl.

From the pictures below you can see the state it was in after the reaming. I got into a groove and forgot to take pictures before I reamed it. But it was really dirty and caked – to the point that a pencil could not stand in the bowl. It always amazes me that in these small pipes, which hold very little tobacco any way, people let them get to the point where they hold even less tobacco. Just a few minutes of work and they would have had a clean bowl.

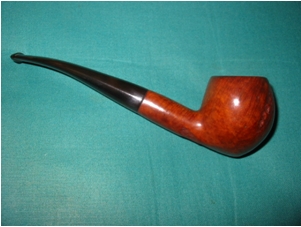
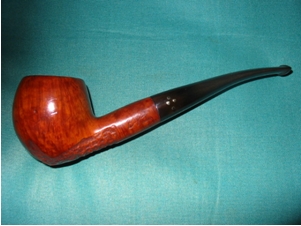
I reamed and cleaned the bowl and shank and put it in my alcohol bath for the morning. I have a pint jar filled with Isopropyl alcohol that serves as the bath for filthy bowls. In this case it sat in the bath for 3 hours before I got to work on it. It is a nice sized jar in that I can drop 4 or 5 bowls in it at the same time and work on the stems while they soak. Once it came out and dried I sanded the bowl all around and cleaned it once again to get any residual grime out. The airway was clogged so a paper clip took care of that and then a good scrub with a bristle pipe shank brush and repeated pipe cleaners. Once clean I stained it with a cherry stain that works with these old timers and brings out the colours of the briar. It was then buffed with Tripoli and White Diamond and waxed it with carnauba.

The stem was rough so I buffed and sanded and buffed and sanded and got the oxidation off and then sanded a bit more to get the teeth chatter off of the surface of the stem near the button. I always start with a 220 or 240 grit sandpaper in removing the oxidation and tooth chatter and then progress through 400 and 600 grit wet dry sandpaper before finishing the progress with micromesh sanding pads – 1500, 1800, 2400, 3200, 4000 and 6000 grit. Once the sanding is finished I took the pipe to the buffer for a final buff with White Diamond before polishing the whole pipe with carnauba wax.

Before shots: (I reamed out the cake prior to this photo set)

ImageImage

Photos of the finished pipe:

ImageImageImage

Refurb LHS SEC system pipe – strange one


Blog by Steve Laug

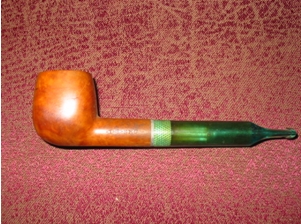
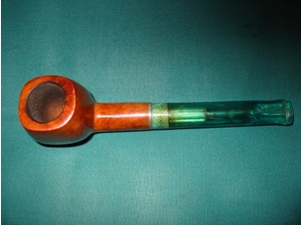
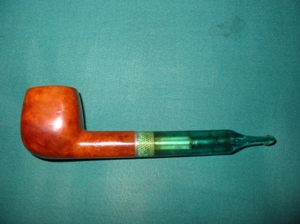
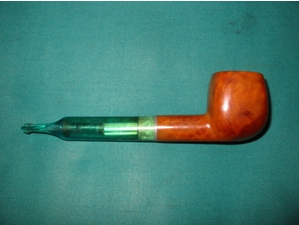
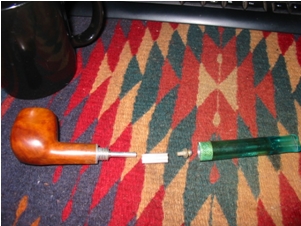
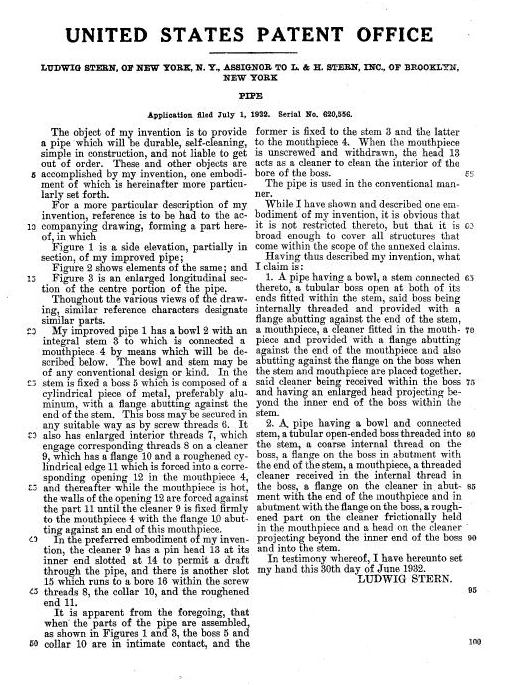
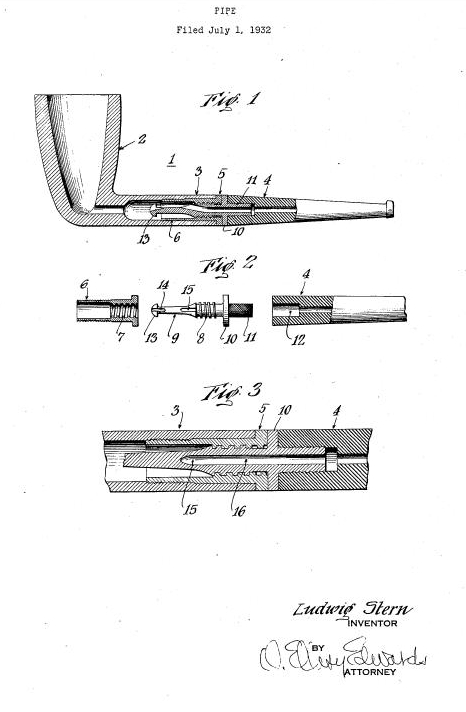
In my ongoing quest to collect pipes that are unique and give a picture of the history of interesting inventions and modifications to the simple smoking pipe I wanted to post this refurb that I finished. It is a LH Stern (LHS) SEC pipe. It is a system pipe as can be seen from the blown out pictures and the diagrams from the patent office. It is an interesting piece of history. The apparatus inside is quite elaborate. The stem is green perspex that serves as a collection chamber for sediments before the smoke goes to your mouth. I cleaned and reamed the bowl and polished it with carnauba wax. The stem had some tooth marks and cuts. I lifted the majority of them with my heat gun and finished by sanding them  and buffing them smooth.
Here are pictures of the pipe when it arrived:

ImageImage

Here are pictures of the pipe after I cleaned it and polished it:

ImageImageImage

Here is the pipe taken apart – it has an amazing assortment of parts. I have also included a copy of the patent information for those interested in the background of this pipe.

ImageImageImage

This One is a Mystery Pipe – Is it a ?Dunhill?


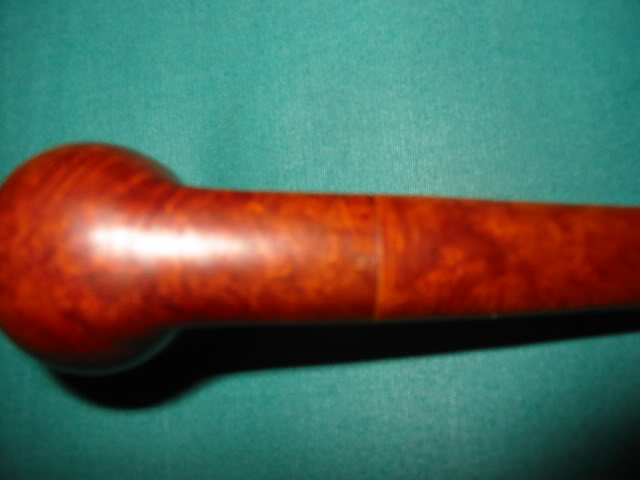
You will notice from the title of this blog piece that the Dunhill title is framed with question marks. The pipe is a mystery to me all the way around. There is nothing straightforward with it in terms of stamping or composition. It is composed of three distinct pieces (stem, shank and shank/bowl) that have been joined together at some point in the pipe’s history. From the pictures below you can see the junction of the bowl and the shank. The stem on the shank is a white dotted Dunhill stem. How did this pipe come to be and how did it incorporate at least two different pipes? It would be great if this old timer could tell its story because I am sure that it would be an interesting tale. Did the original owner break the shank on his pipe and then have a repair man do the fix? If so, did the repairman use a second pipe shank to add to the bowl for the repair or did the original owner take two of his pipes (both broken) and have them put together in this creative fashion? Did he take the bowl from one and the longer shank and stem from another and join them to form a new third pipe? Was the original of both pipes a Canadian or was the one that the bowl came from a billiard? I don’t think I will ever know the answer to those questions and even others if I took the time to think it out. But I do know that this is part of the pleasure I derive from working on estate pipes. I enjoy trying to put together the story of an old pipe.

I picked this one up from EBay. I was the only one bidding on it. I think the seller had marked it a Dunhill Canadian for sale so it had many viewers but no other bidders. I knew from a quick look at the pictures the seller provided that it was probably not a Dunhill. I could not be certain but the shape of the bowl did not quite measure up to other Dunhill Canadians that I have and the flow of the stem and bowl was different to my eye. Others may be able to point out other inconsistencies that they see but that is what I felt as I looked at the pipe. What caught my eye though and caused me to put in a minimal bid were the shank construction (reconstruction) and the flow of the pipe. I liked the looks of it. I was also curious to see how it was done. It looked like a well done repair, if indeed it was one. I wanted to see it close up and study it. The white spot on the stem was a bonus though I could see from the photos that it was not likely a Dunhill.

When it arrived I took it from the box and did a quick field dress cleaning of the pipe. Reamed the bowl, wiped down the outside with an alcohol damp cloth so that I could see the stamping or remnants of stamping that remained. The bowl portion (the section from the front to the union on the shank) has stamping on the bottom of the shank that looks to be what remains of a Sasieni stamp or at least the last few letters “ieni”. That is a bit mysterious to me in that the other Sasieni Canadian I have has the stamping running in the opposite direction. So my guess is that this one is upside down – not unheard of but interesting nonetheless. The shank and stem portion (from the junction backward to the stem) are definitely from the same pipe. The fit of the stem to the shank is absolutely perfect with no sanding or shaping marks, no gap and no change of profile to the stem. Under a bright light is possible to make out faint stampings on the shank remnant – and I do mean faint. They appear to be the last four letters of Dunhill – “hill” and under that there are the four letters “land” which could be then end of the word England. From that I would conjecture that what I have is a combination of a Sasieni and a Dunhill pipe. The Sasieni contributed the bowl and part of the shank and the Dunhill the rest of the shank and the stem. Whoever did the union of the two old pipes did a superb job as the joint is very well done. The grains of the two parts of the shank are very different and the staining does not match. But other than that it is a flawless union.

ImageImageImage

With the mystery still unsolved I went to work on the ?Dunhill?/Sasieni. I gave it a better reaming and also cleaned it. The bowl had been very caked when I initially cleaned it so I did a deeper reaming taking it back to the wood. It had a very heady smell of Lakeland style tobaccos so I wanted to remove the remnant of that in the cake and prepare it for the tobacco that I would smoke in it. The shank and stem were tarry and restricted by the gunk inside them. I used a shank brush and many pipe cleaners to clear out the airway. I also tried to shine a light down the bowl to see if there was any evidence of how the repairman had done the union of the shank pieces. But the light would not shine that far down the shank. From the ease with which the pipe cleaners slid down the shank and the smoothness of the airway it was clear that the job was very well done. I also used a drill bit on my KleenReem reamer and ran it through the shank with no catches.

Obviously this was a favourite pipe for the previous owner. It was well cared for, repaired and put together and well smoked. I cleaned it with Isopropyl 99% and then sanded out the tooth chatter on the mouth piece. I wiped down the bowl and shank with undiluted Murphy’s Oil Soap and scrubbed it with a tooth brush. It removed the grime from the bowl and the rim. Once dry I cleaned off the remaining lava on the rim with 400 and 600 grit wet dry sandpaper. Once the bowl and shank were clean I wiped the entirety down with acetone. I wanted to get as much of the stain out so that I could try to get a bit better match on the two parts. I re-stained it with a cherry stain I have in the shop as it seemed likely that it was that colour from what was under the grime. The union of the two is still very visible even with a re-stain. The two parts took the stain very differently. I finished by buffing it with Tripoli and White Diamond before giving it multiple coats of Carnuba wax. I am happy with the results. I have smoked it quite often since the refurbishing and find that it is a great smoker. It is lightweight and comfortable in the mouth and the hand. The only thing that would make it even better in my opinion is to have the whole story behind this pipe. Ah well… I am going to go and fire up a bowl of good Virginia and enjoy adding my story to this pipe.

ImageImageImageImage