Tag Archives: waxing a stem

Restemming a Beautiful Savinelli Classica 812 Canadian


Blog by Steve Laug
Class1
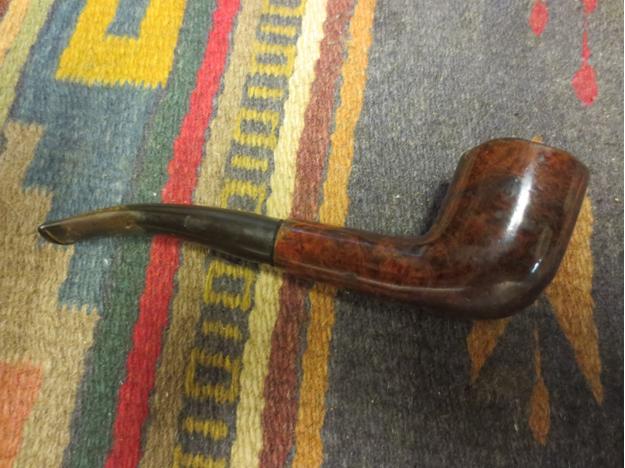
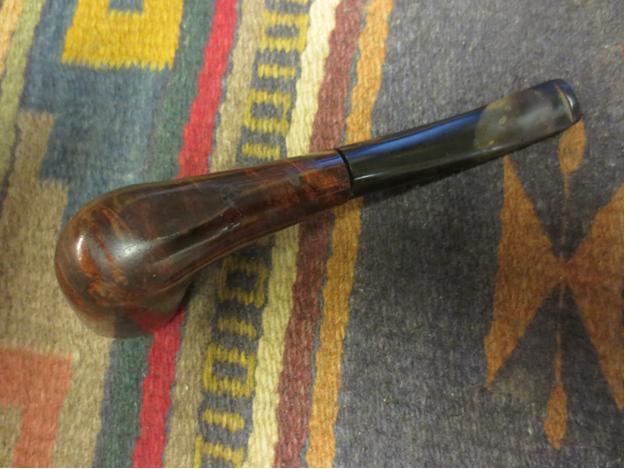
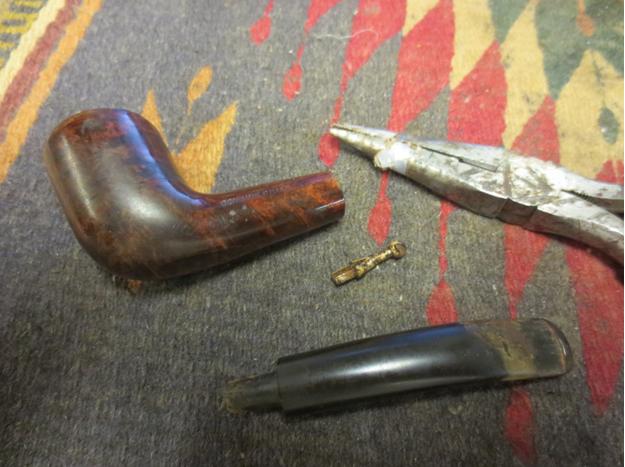
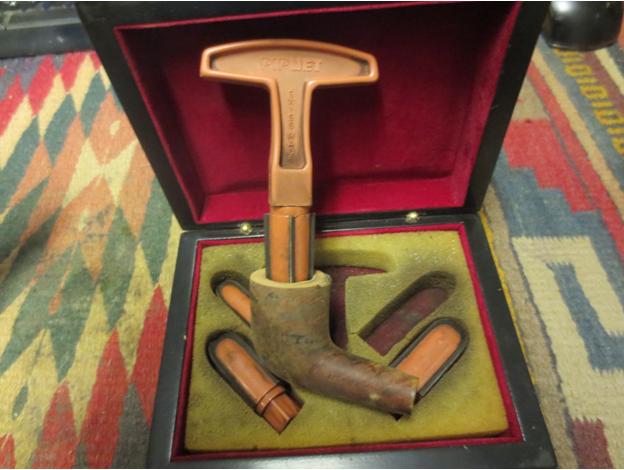
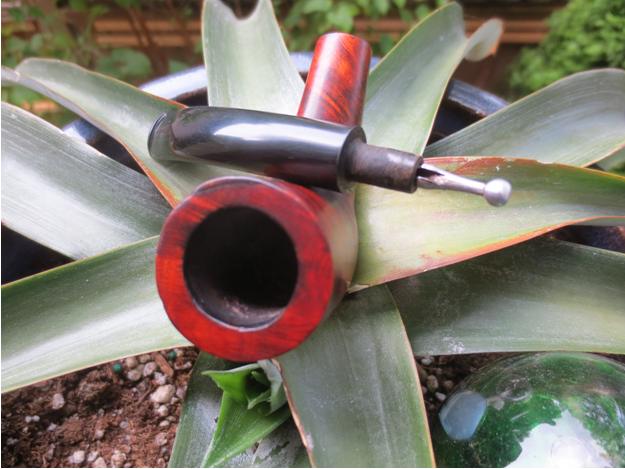
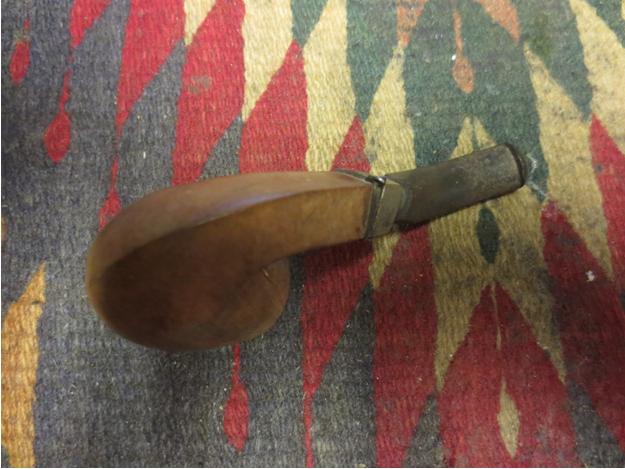
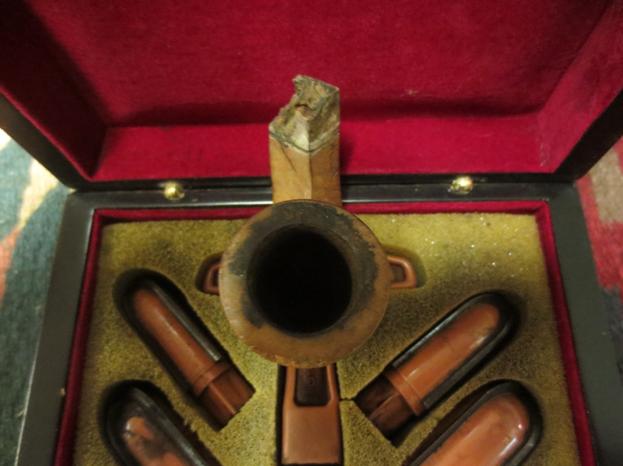
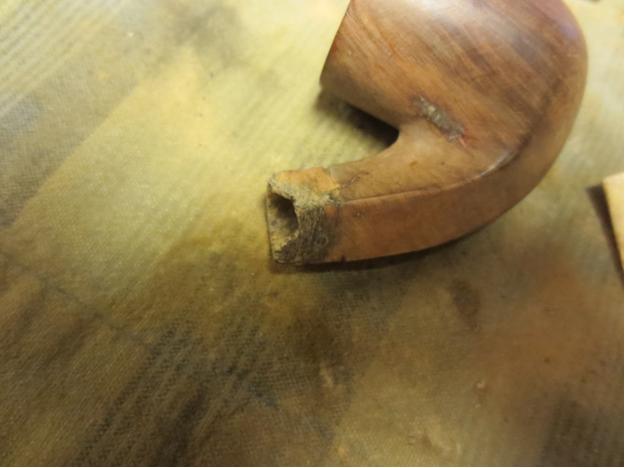
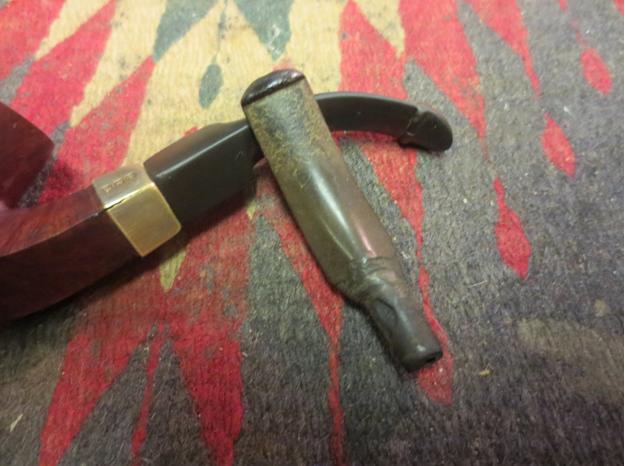
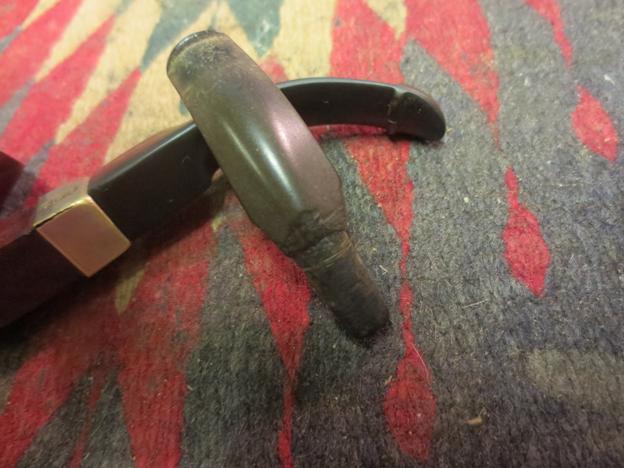
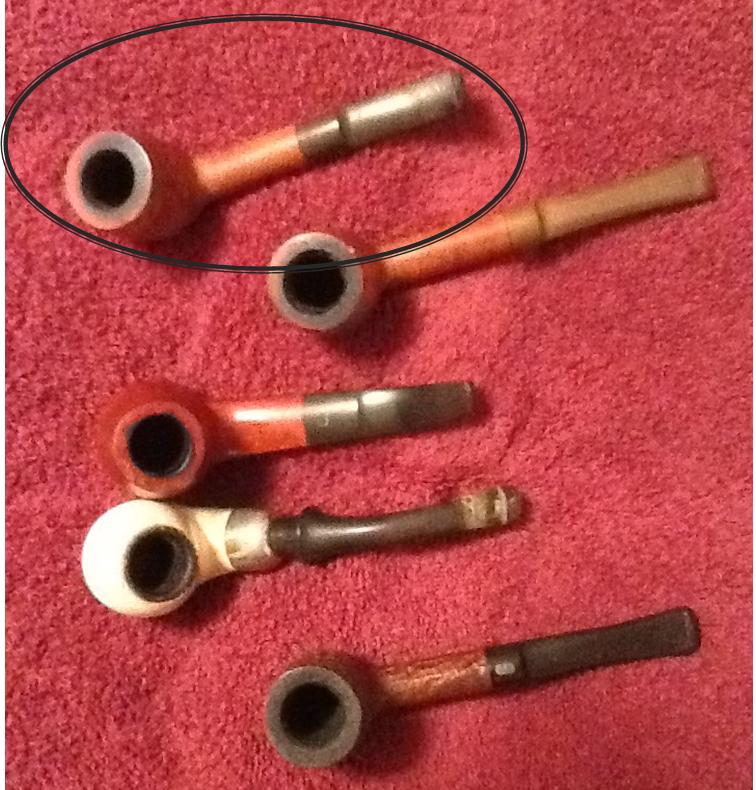
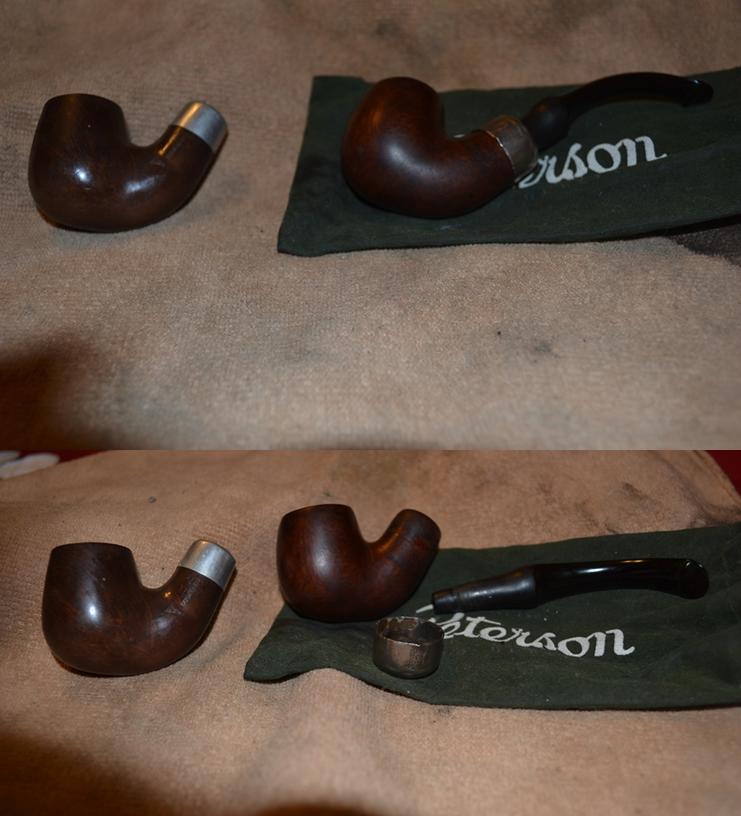
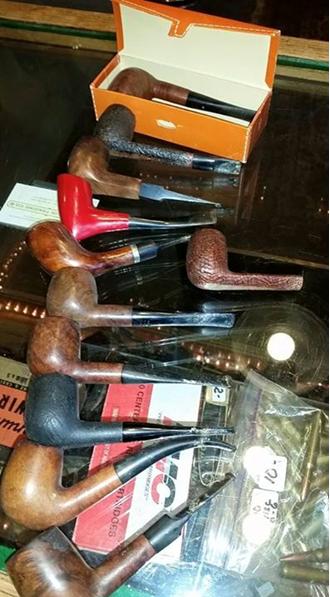
In the pipes that my brother Jeff sent me from his Montana find was a pair of Savinelli made 812 shape pipes. The first is the second pipe down from the top in the picture to the left. That pipe is stamped Citation 812 and made in Italy on the underside of the shank. The stem is a refit and is poorly done. Fortunately it is beat up and missing a large chunk on the underside near the button. The second one is shown in the picture in the second column and is a sandblast without a stem. It is stamped Savinelli Classica with the Savinelli shield and 812 Italy on the underside of the shank. The first is a two toned dark brown and the second is a lighter two toned medium brown.

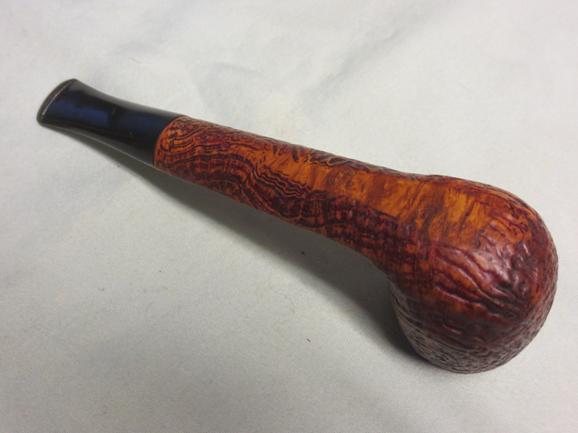
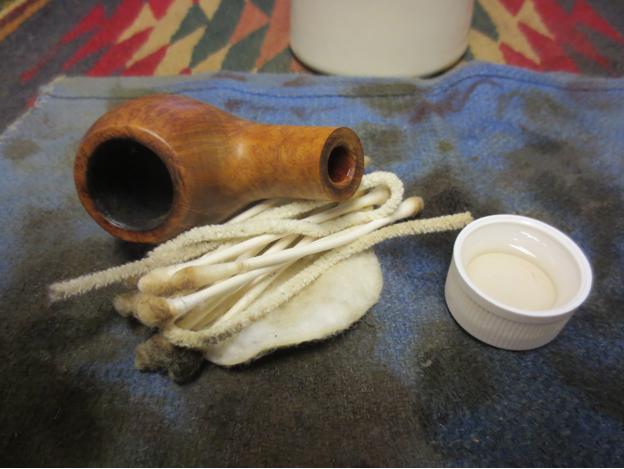
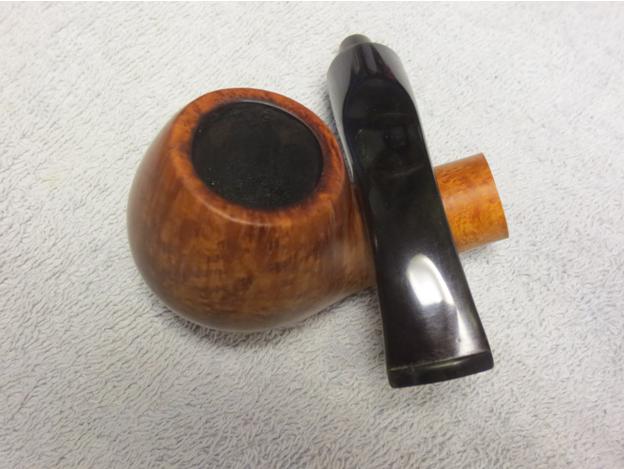
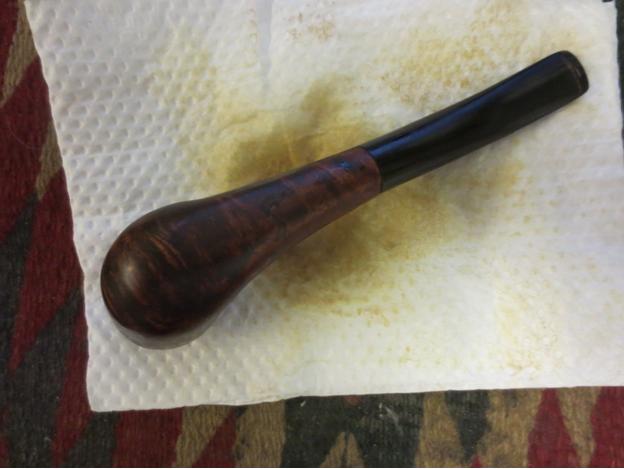
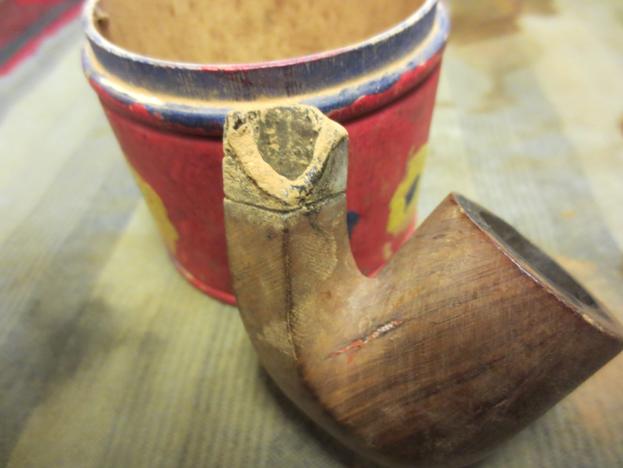
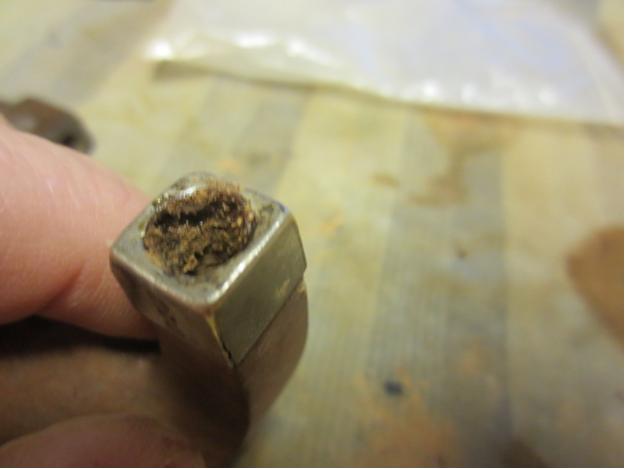
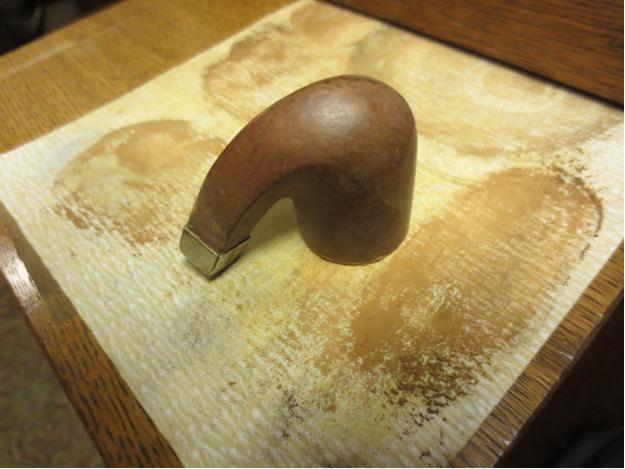
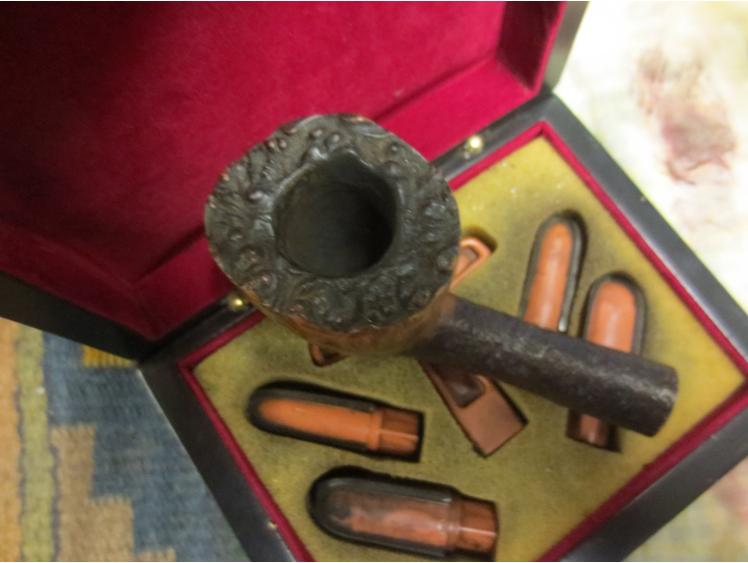
The pipe I chose to work on first was the Savinelli Classica – the stemless one. It was in pretty decent shape. The finish was dirty but was not worn. It had a great sandblast. The left side of the bowl had a circular grain pattern and the right side was blasted birdseye. The shank had long swirls on the top and sides. The rim had some build up on it and the bowl had a thick cake that plugged the airway and closed off the lower portion of the bowl.

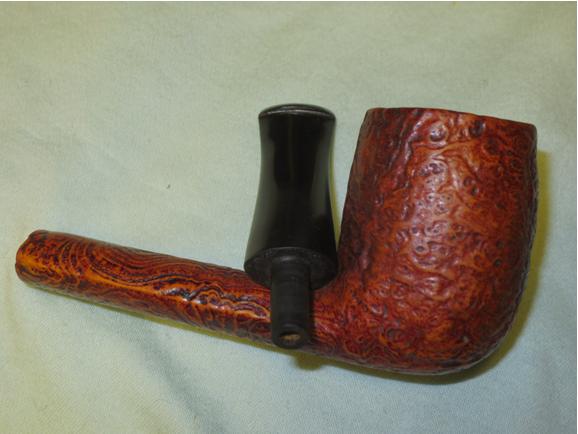
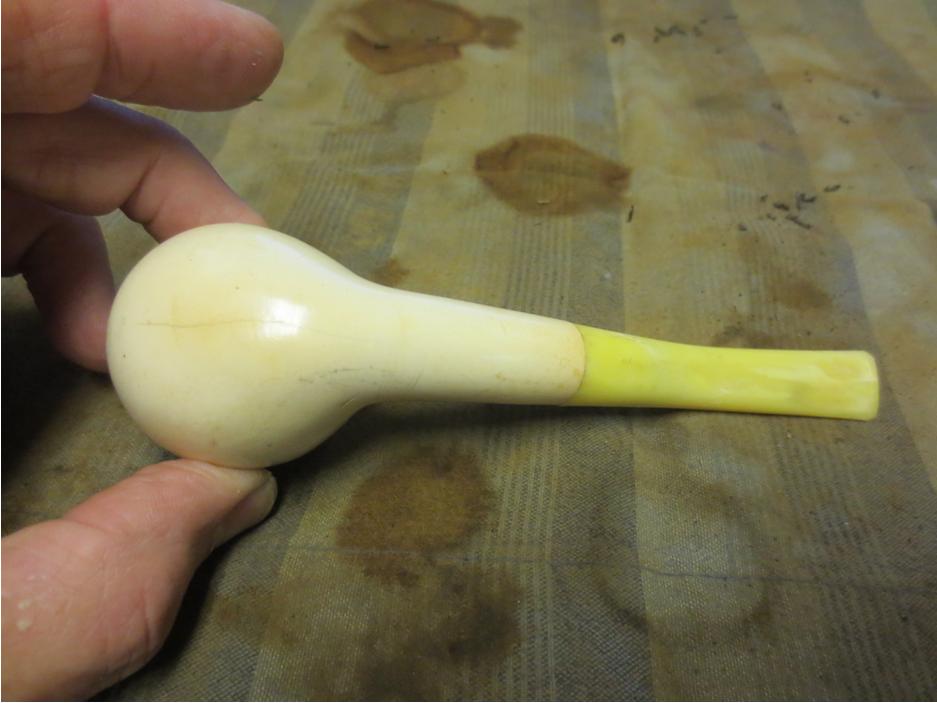
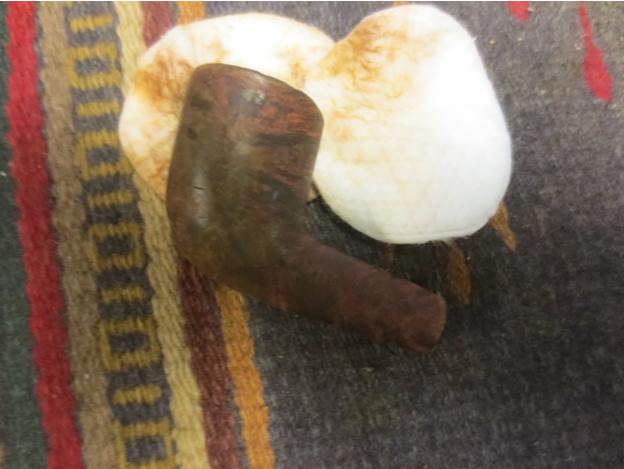
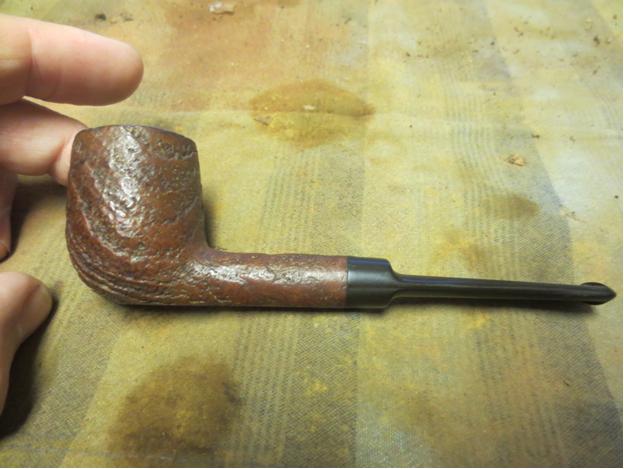
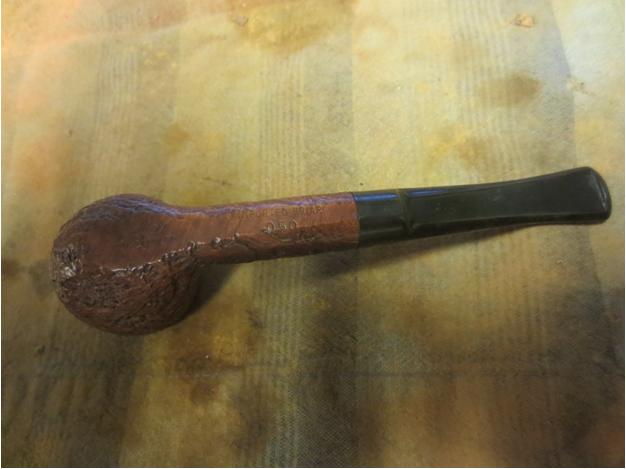
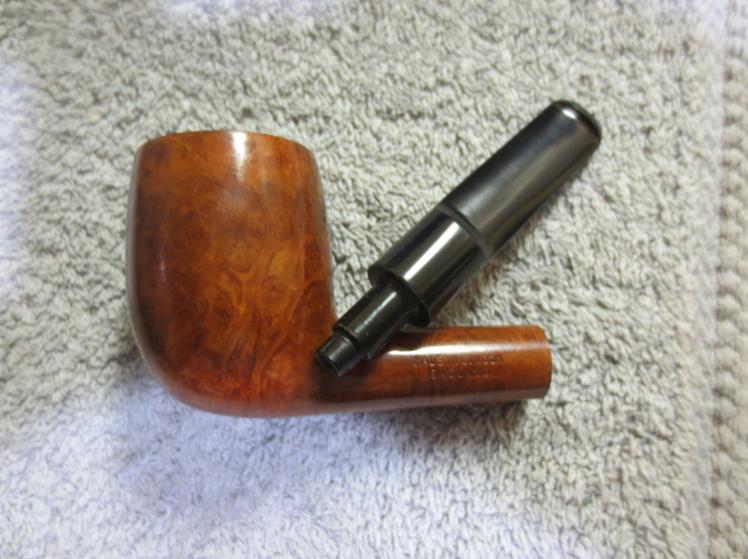
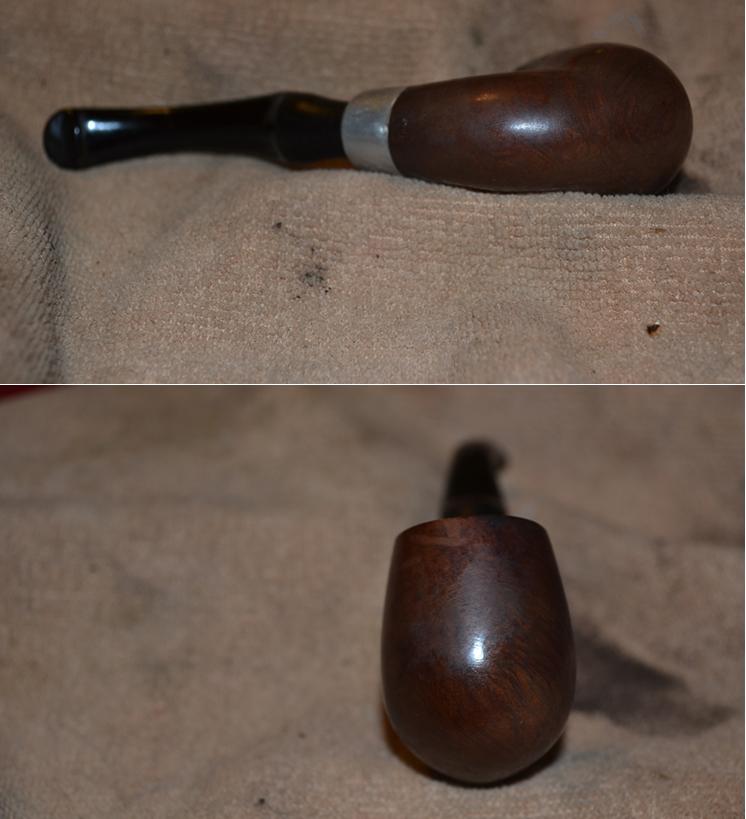
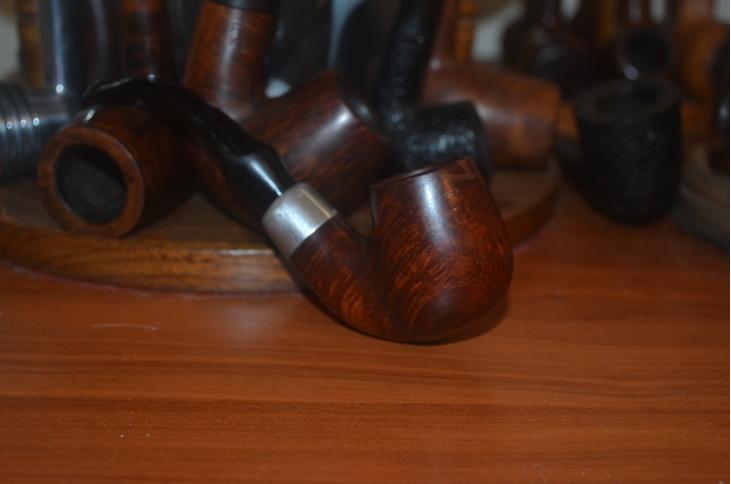
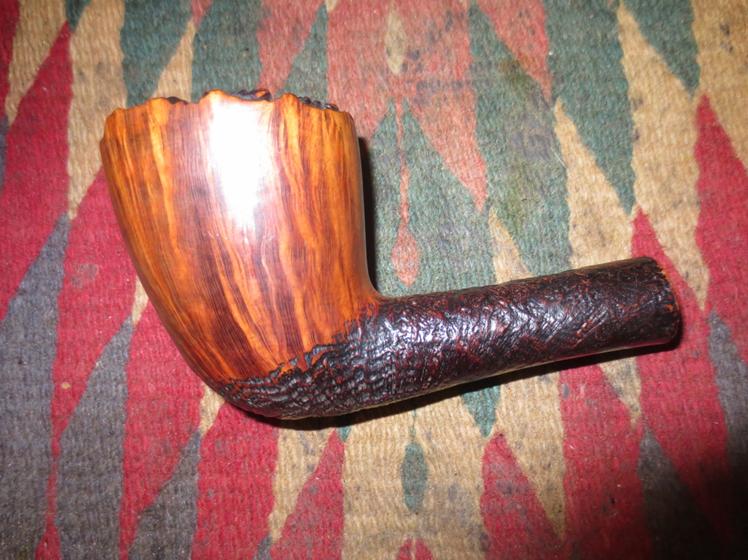
I took a photo of the two pipes together to show the similarities and the differences. The Classica is a bit shorter in terms of shank length and the finish is much more distinctive. The Citation had a nice blast on it but when compared with the Classica it had nothing to compare. Both pipes were the same height. The bowls were the same diameter and the mortise of both held the broken stem with no trouble.

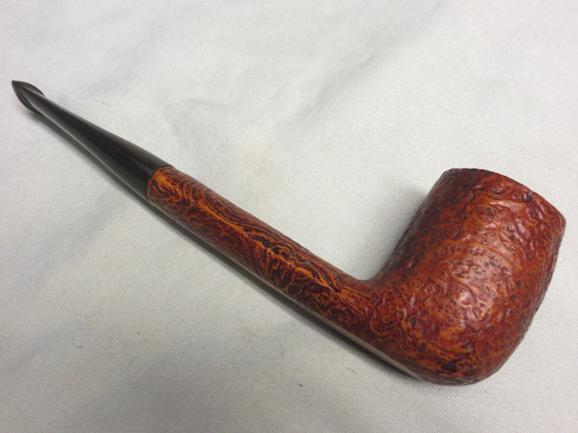
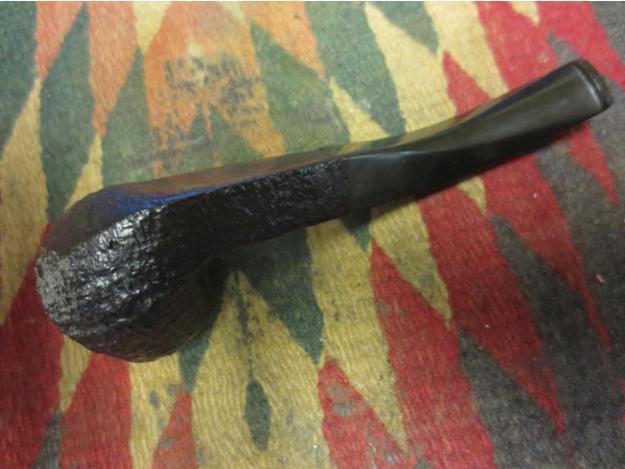
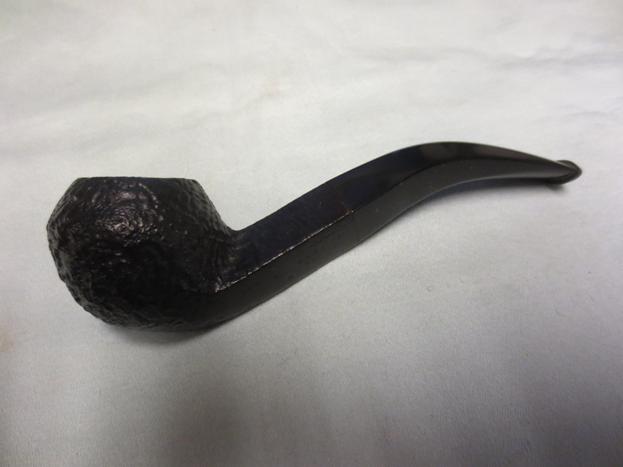
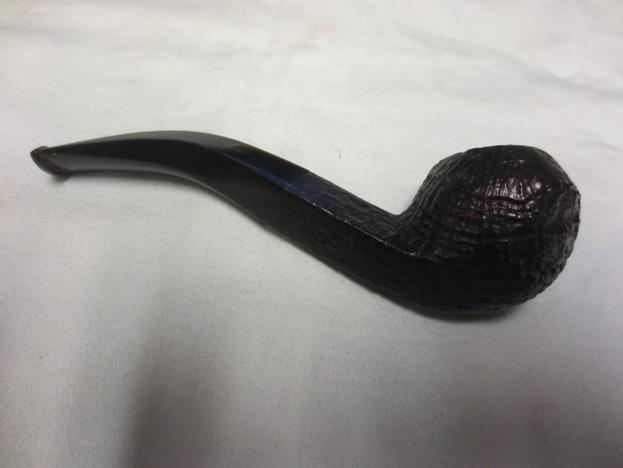
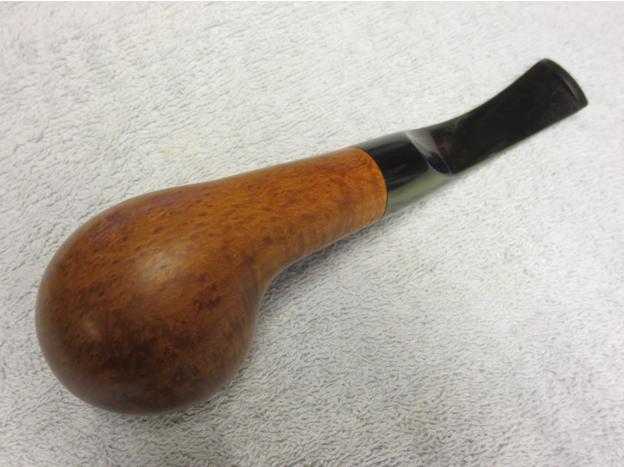
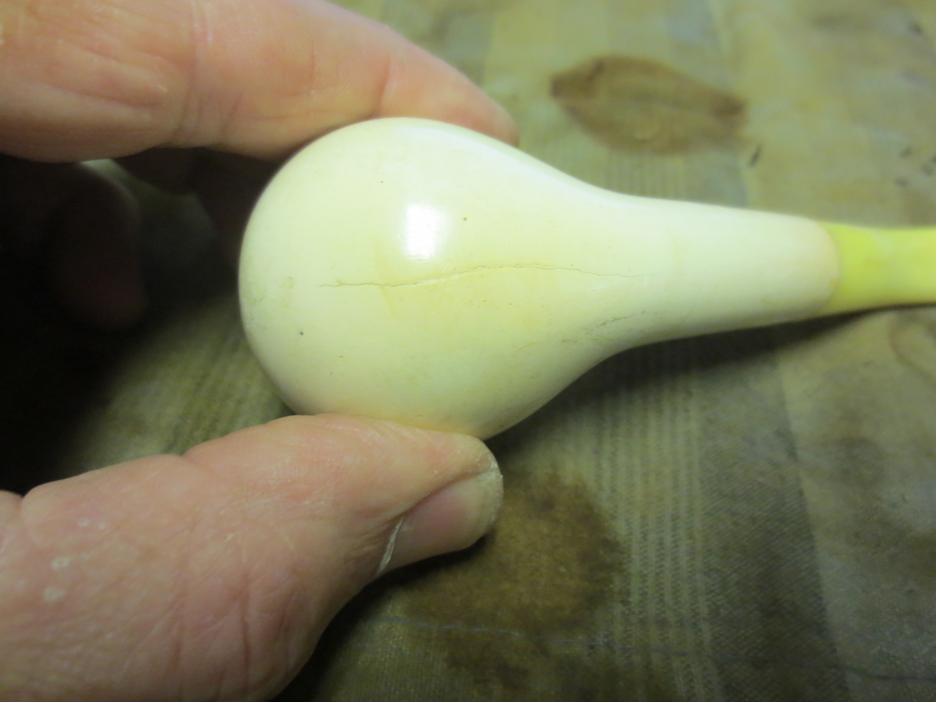
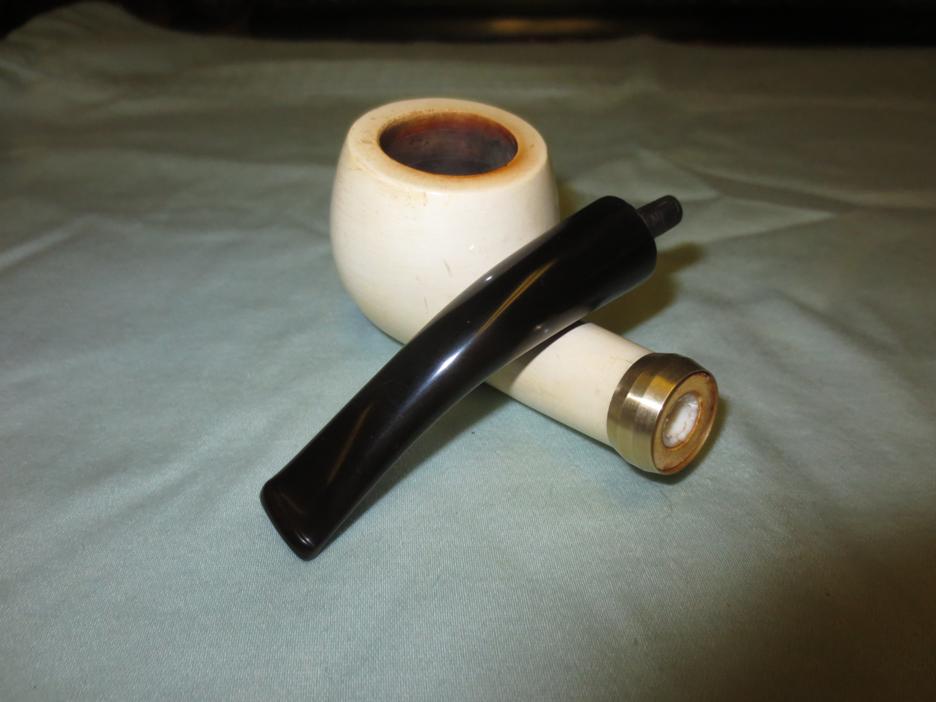
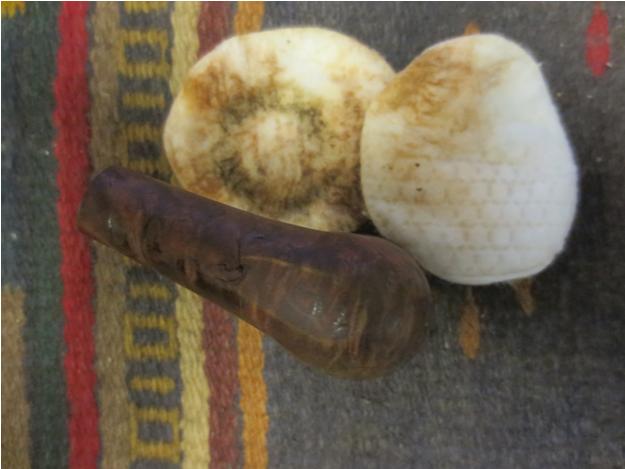
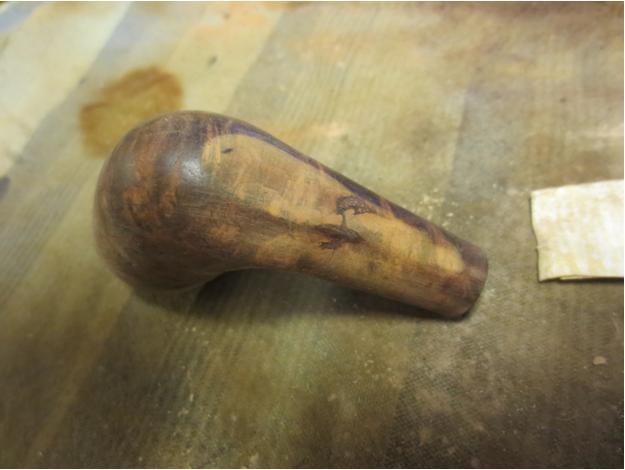
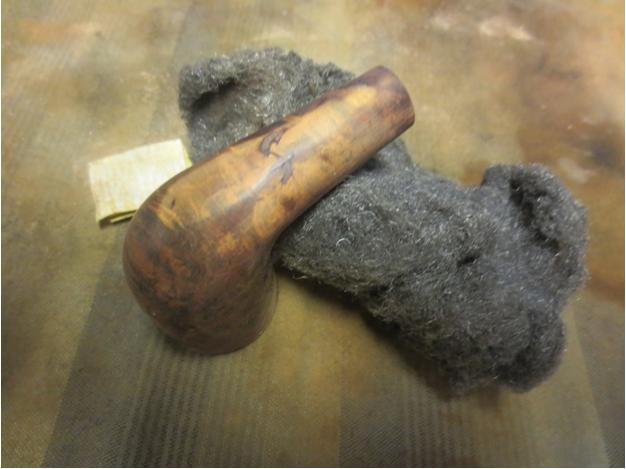
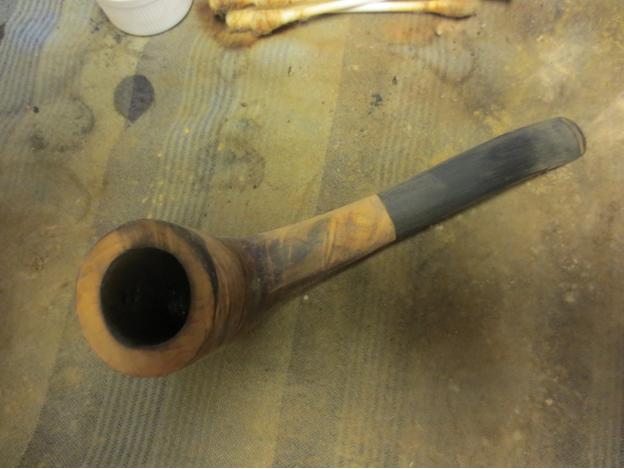
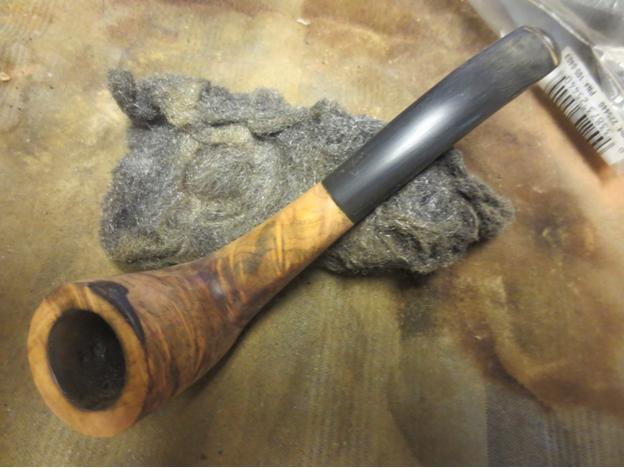
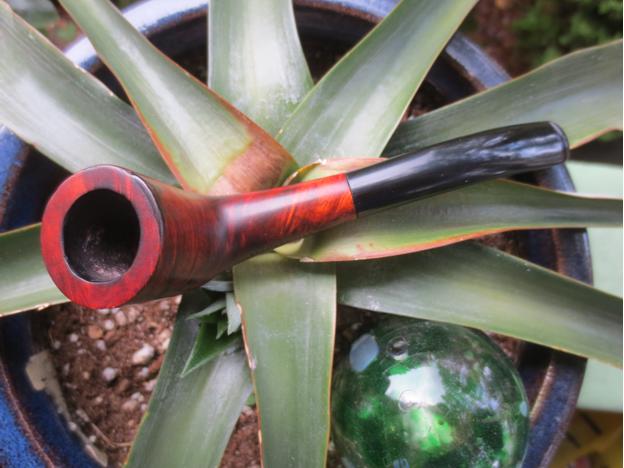
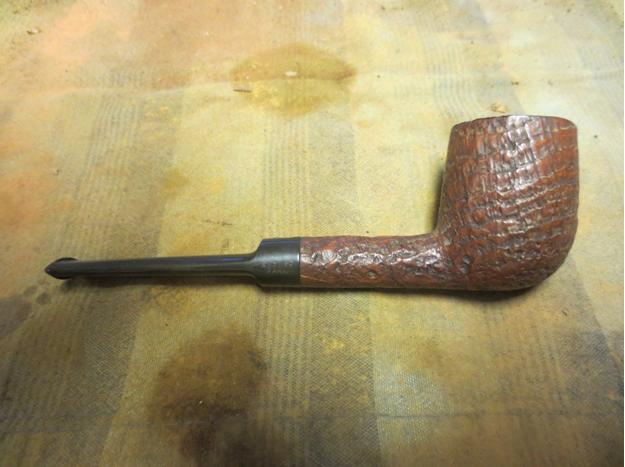
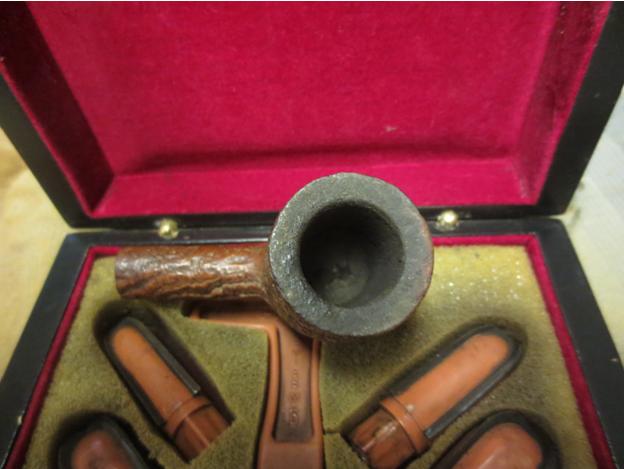
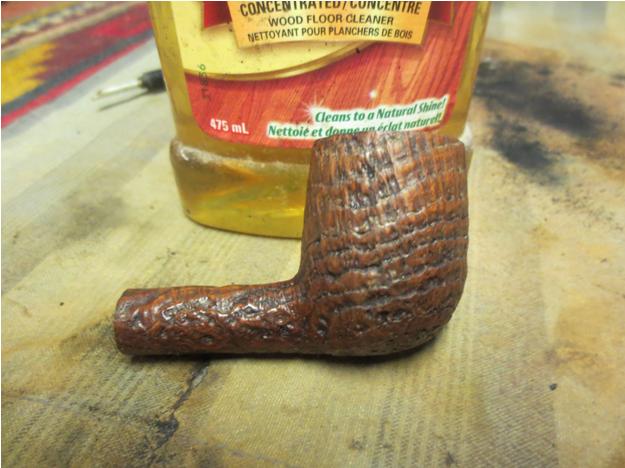
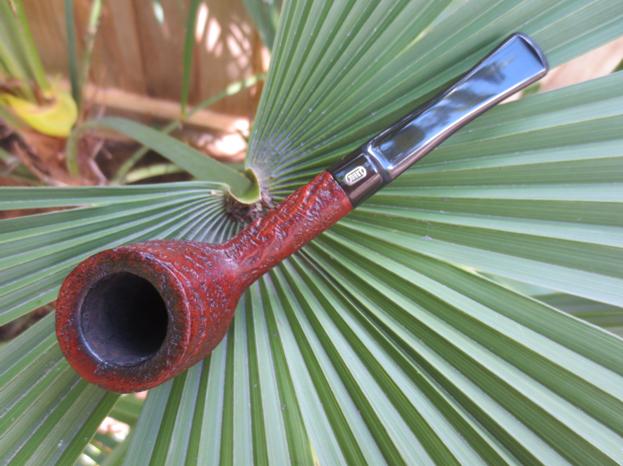
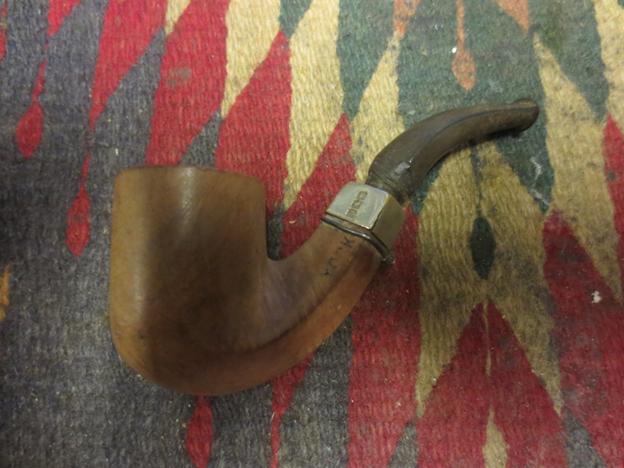
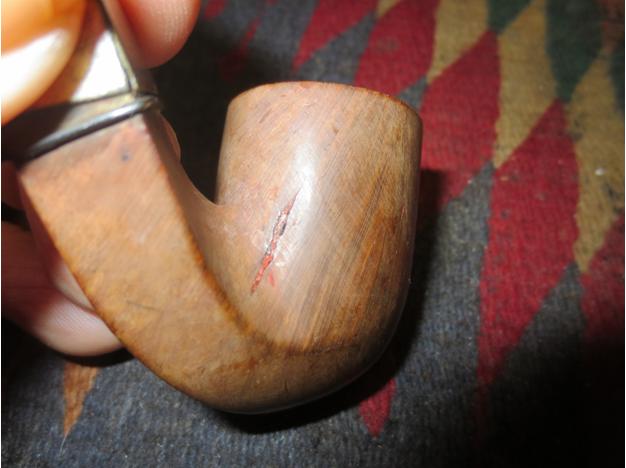
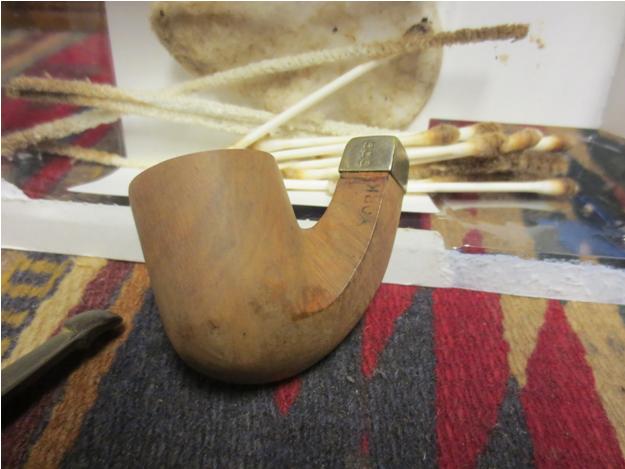
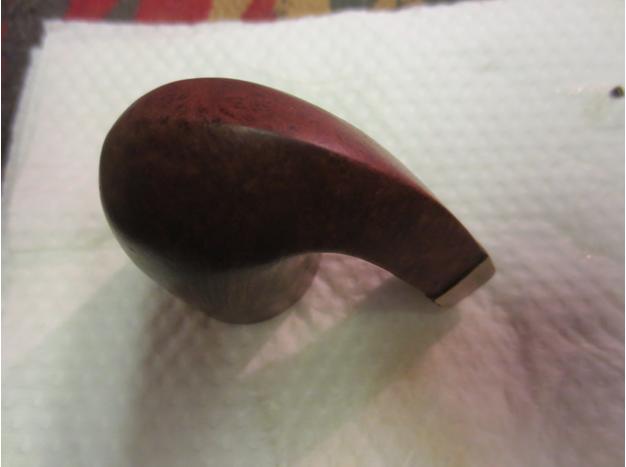
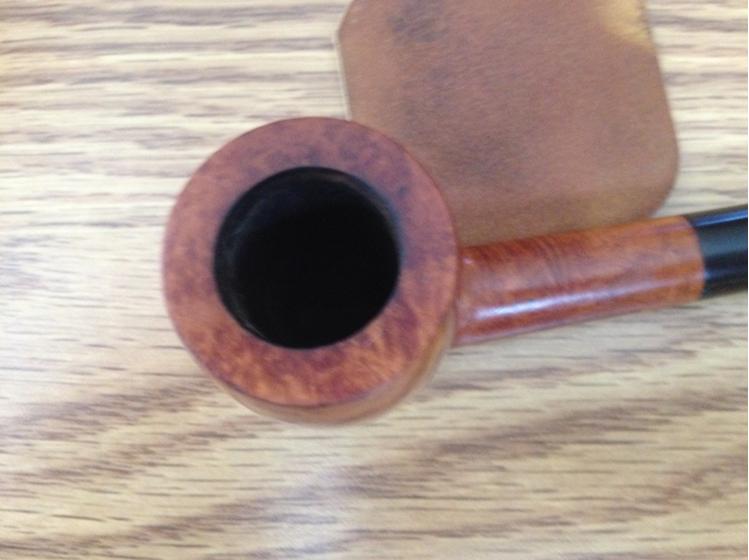
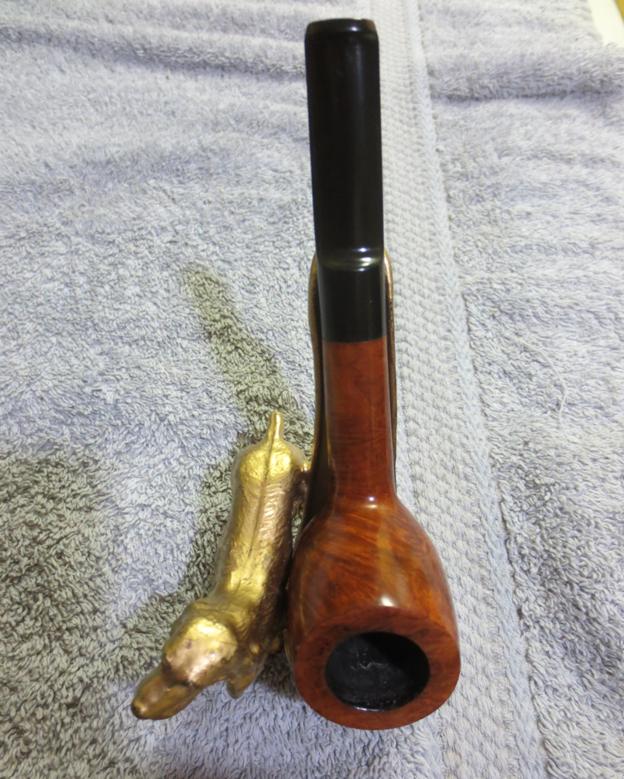
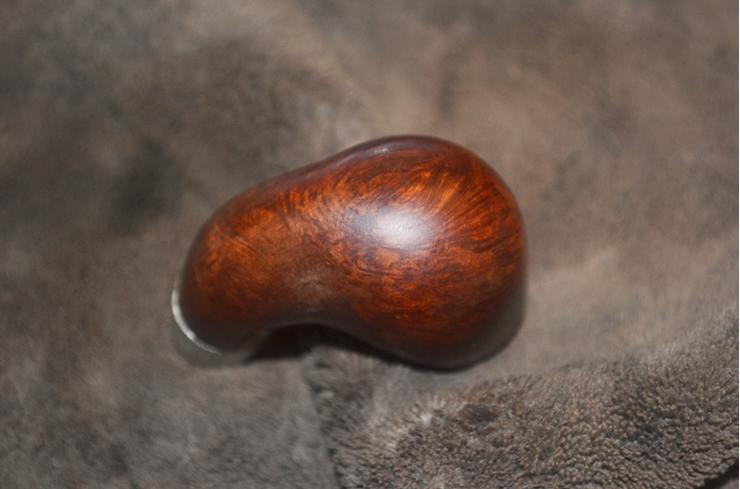
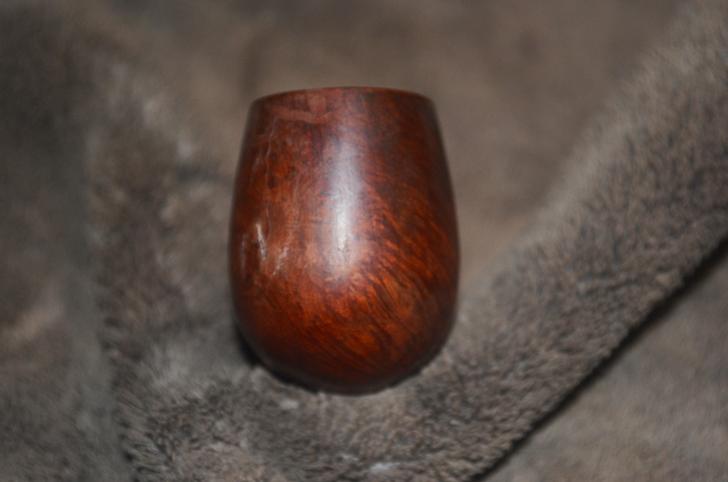
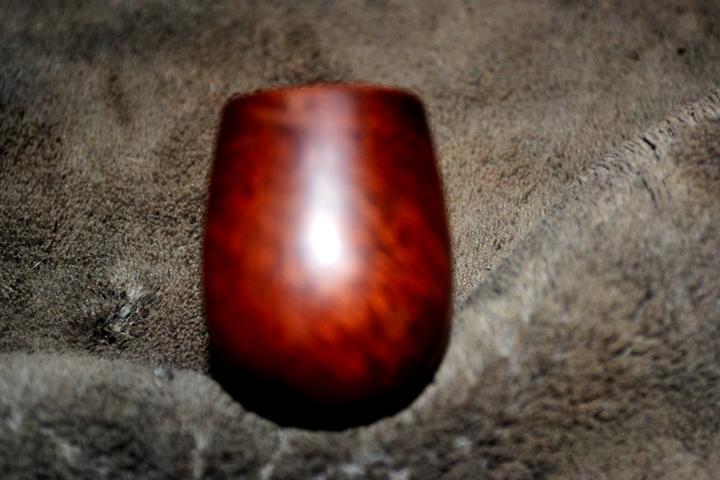
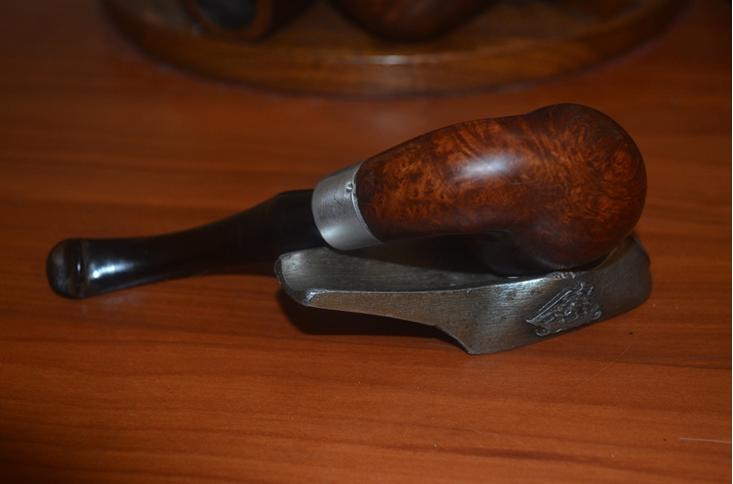
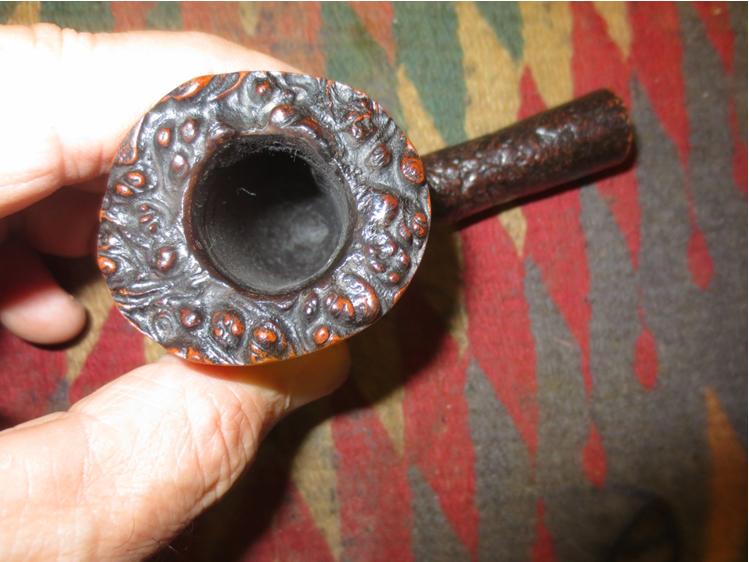
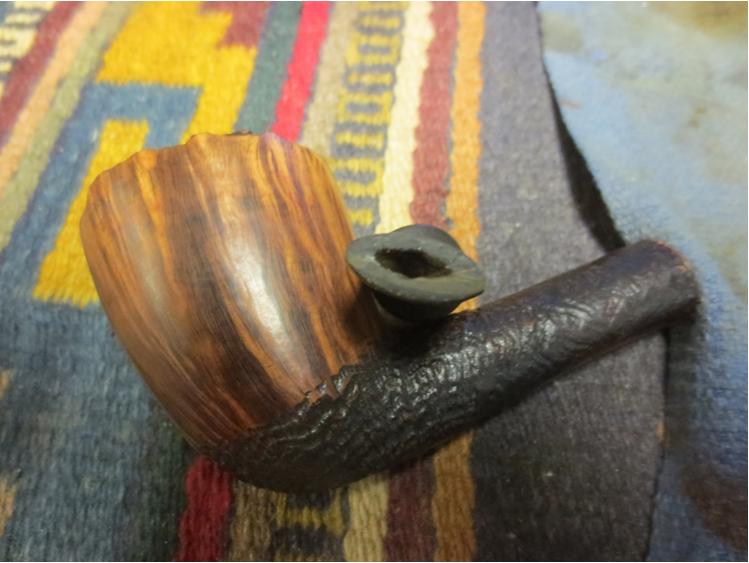
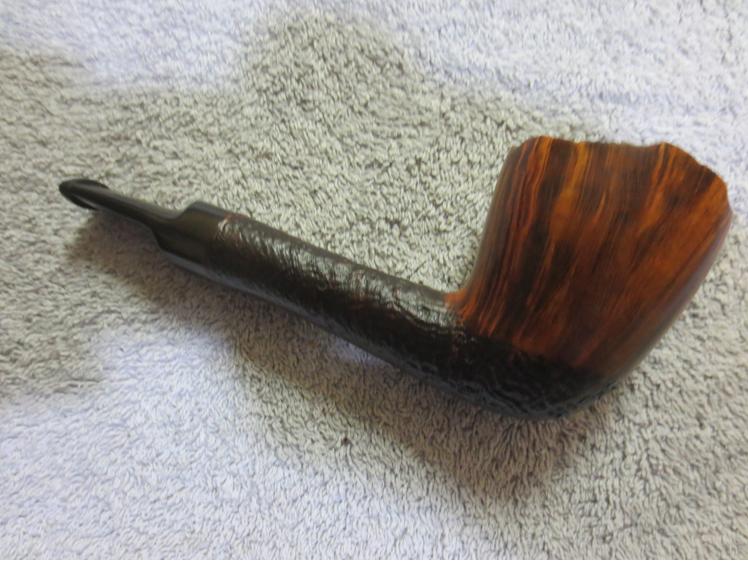
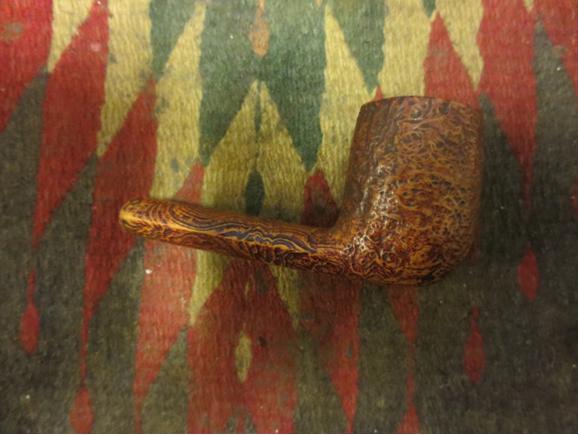
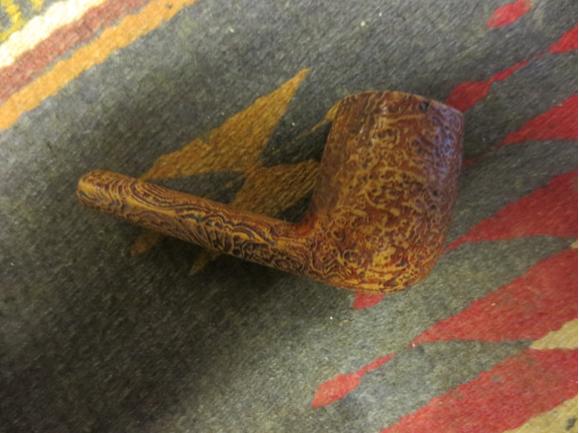
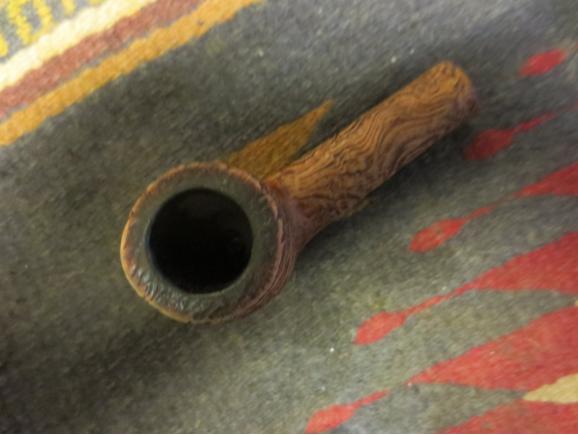
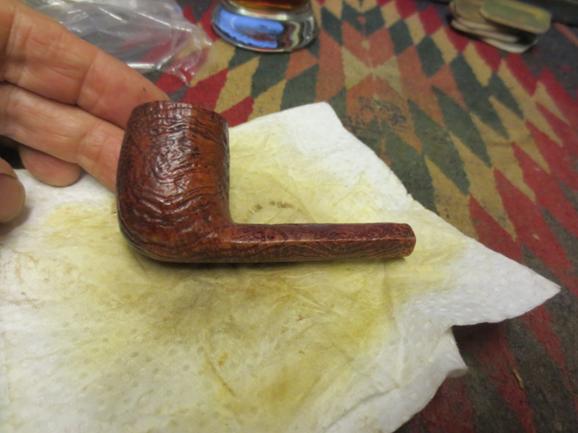
I looked up the Savinelli 812 shape online and found that it originally had a taper stem and that the stem had a slight bend in it at the button. I am not sure if I like the look of it on the Canadian but will think about it as I restore the Classica.Class2 I took the next photos of the bowl to show the distinctive sandblast on the bowl. It truly is a beautiful piece of work. The way the bowl was stain highlighted and emphasized the blast rather than muted it. Once I cleaned it up I would need to maintain that look.Class3

Class4 
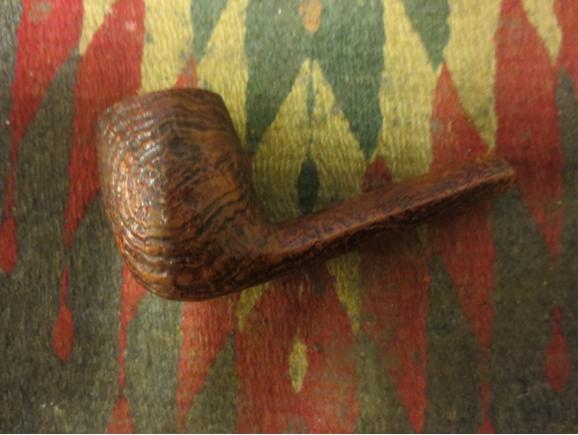
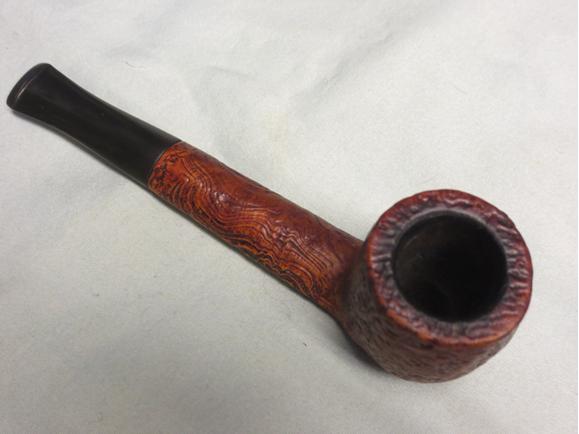
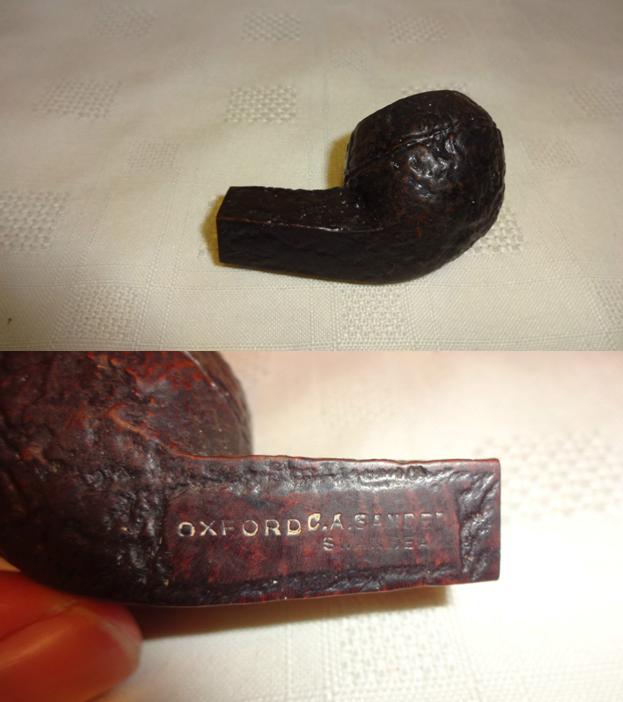
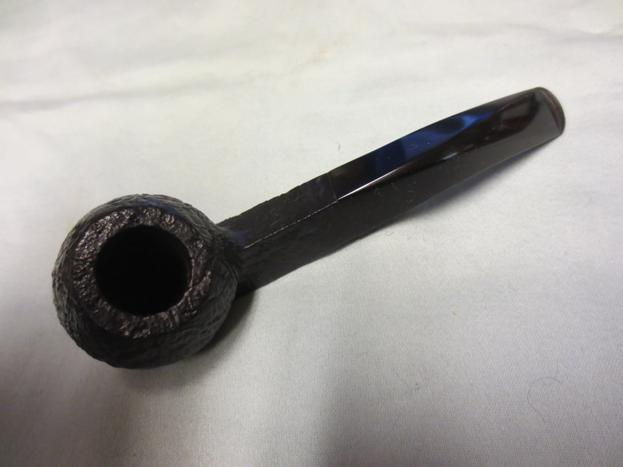
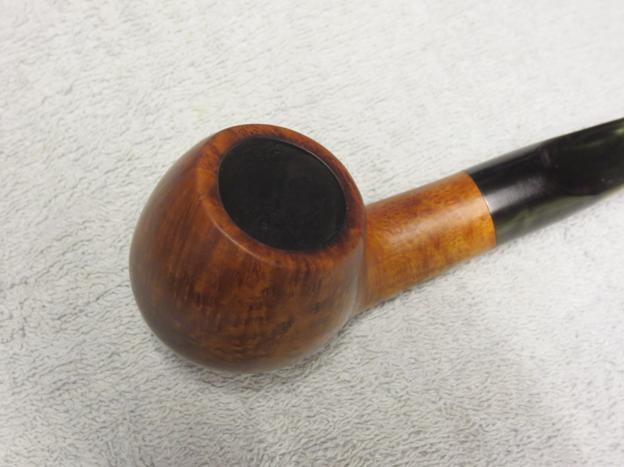
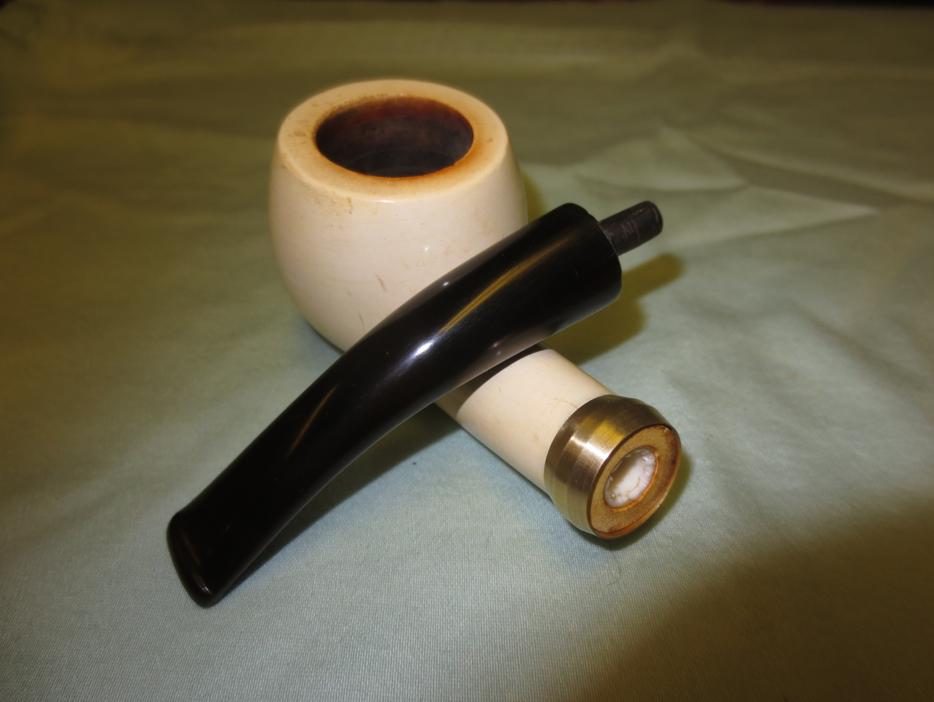
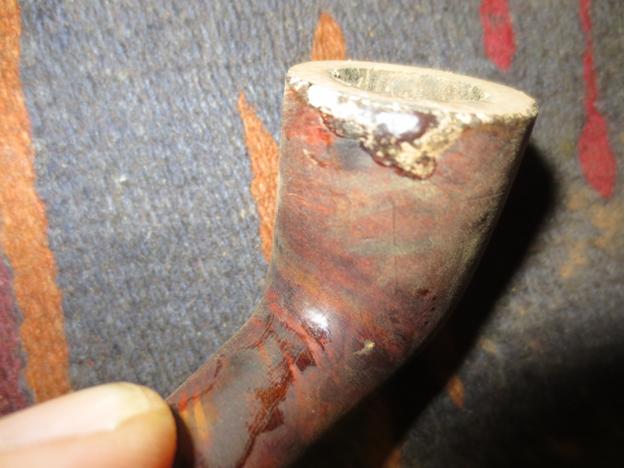
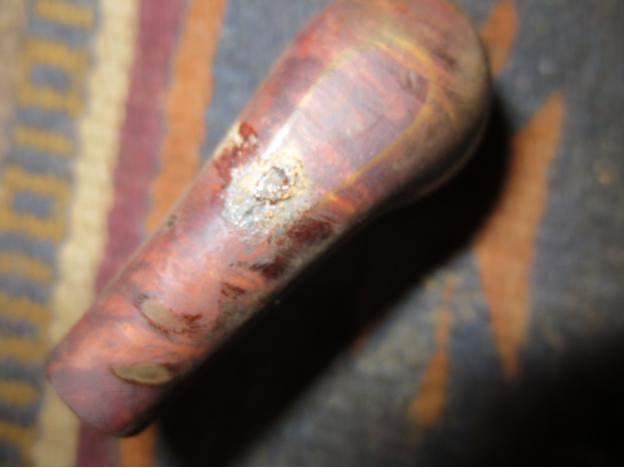
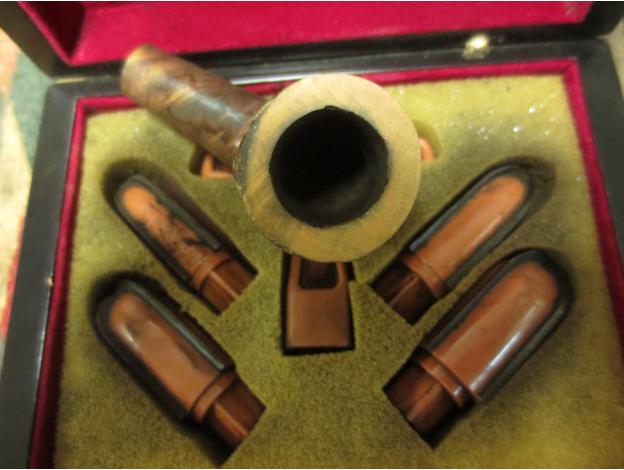
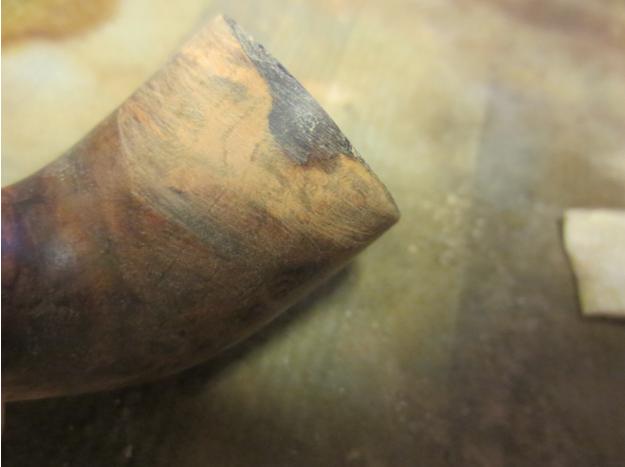
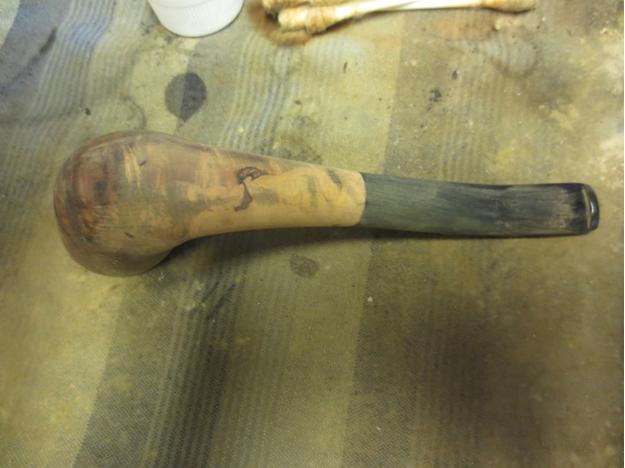
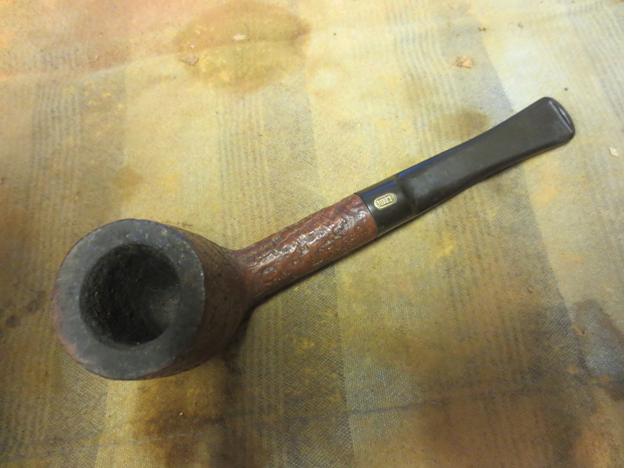
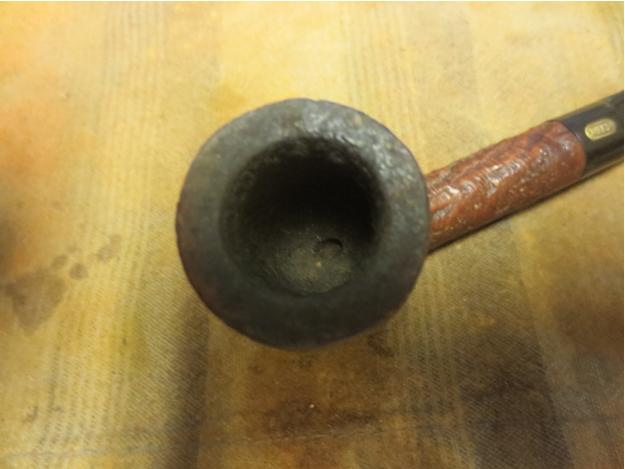
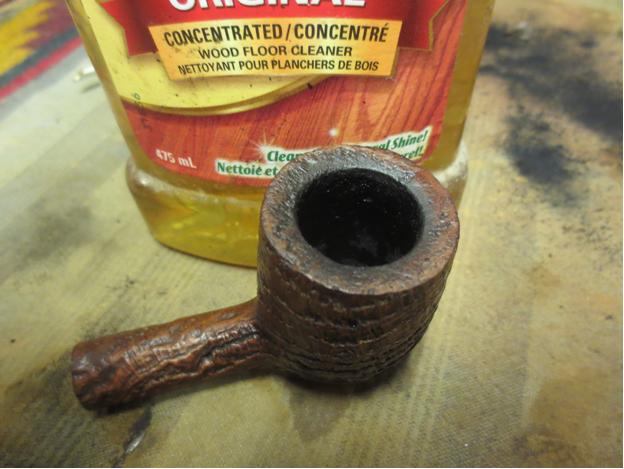
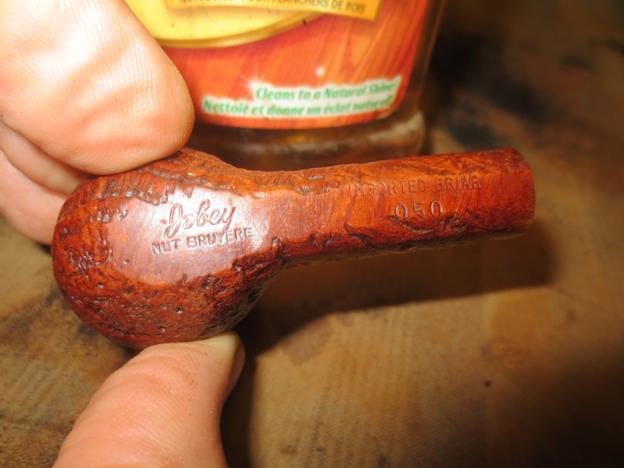
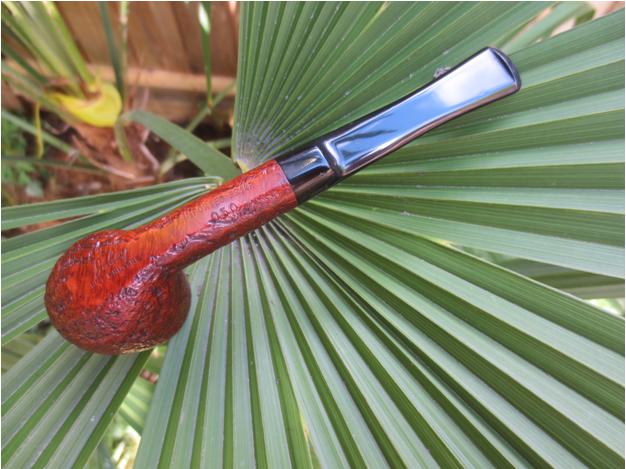
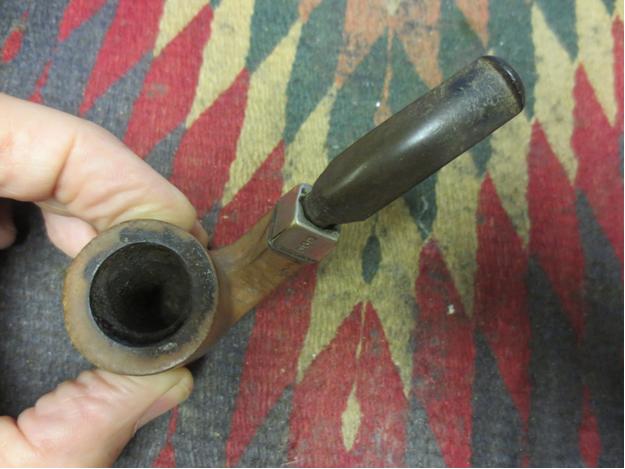
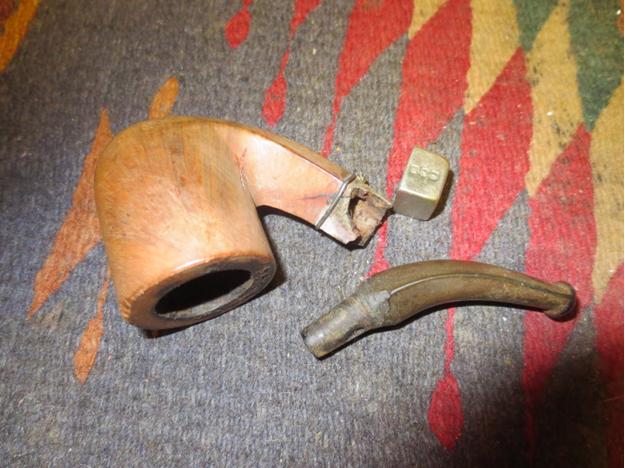
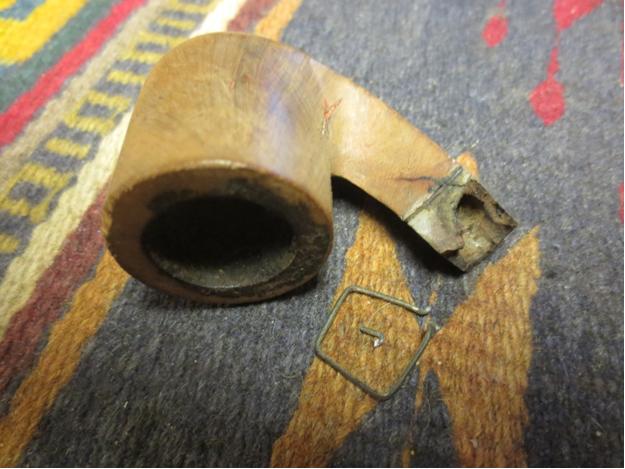
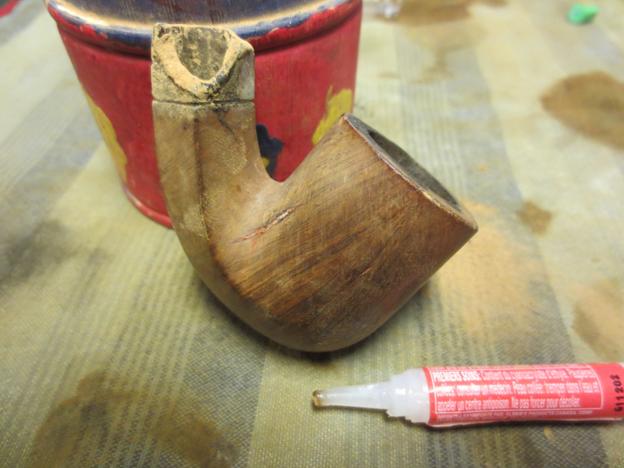
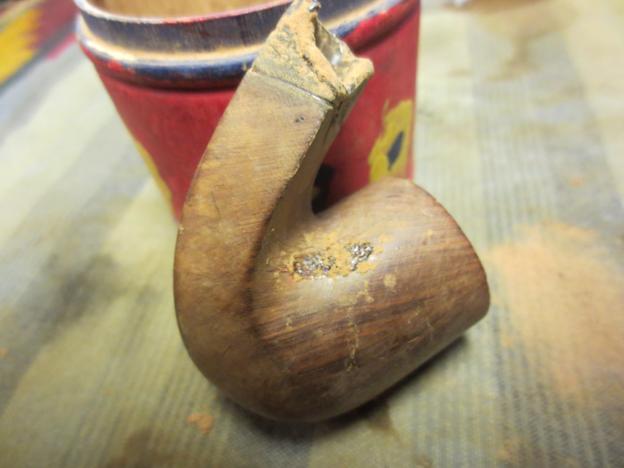
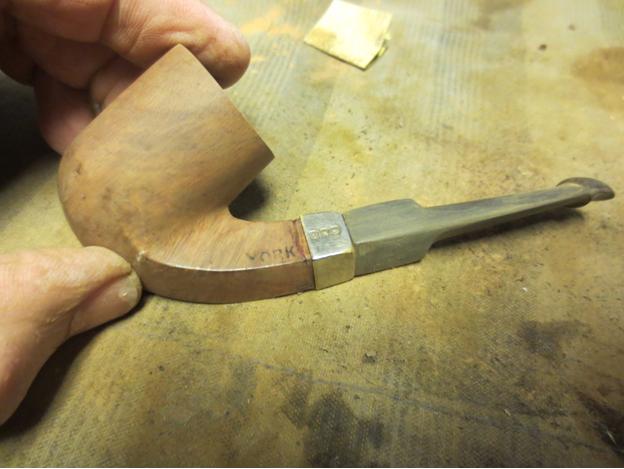
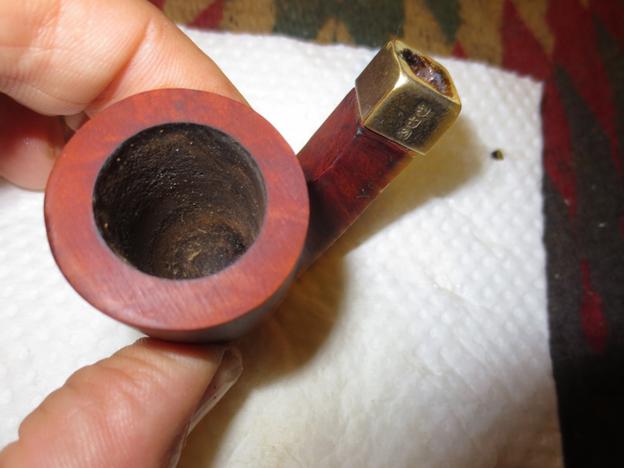
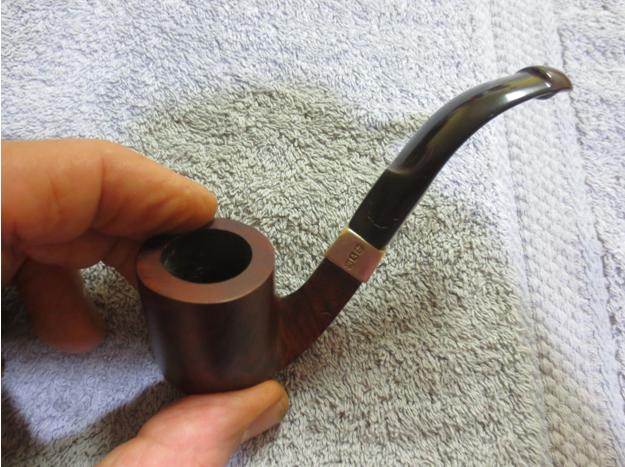
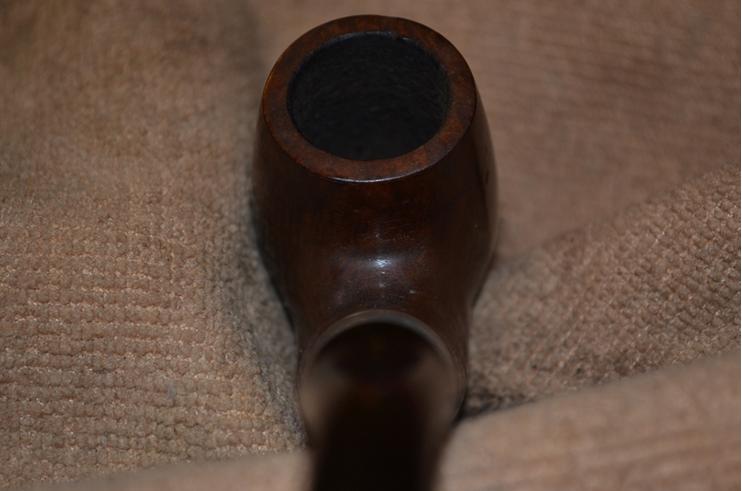
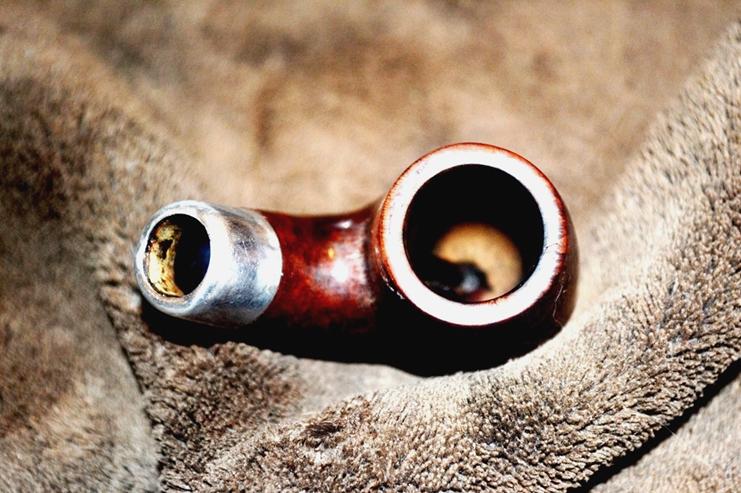
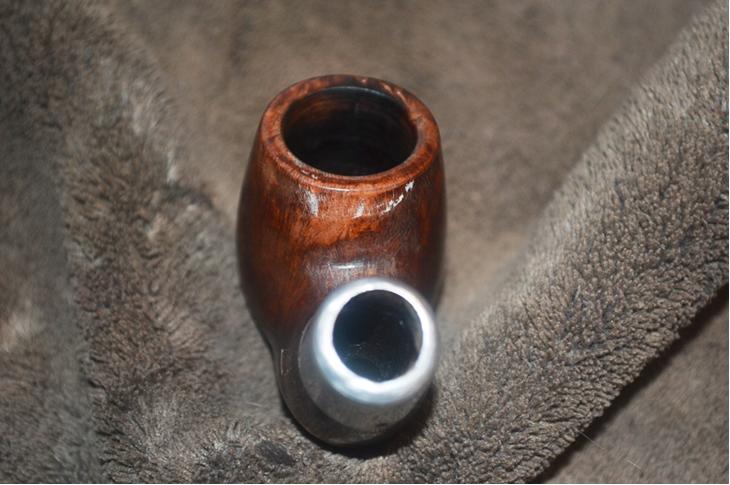
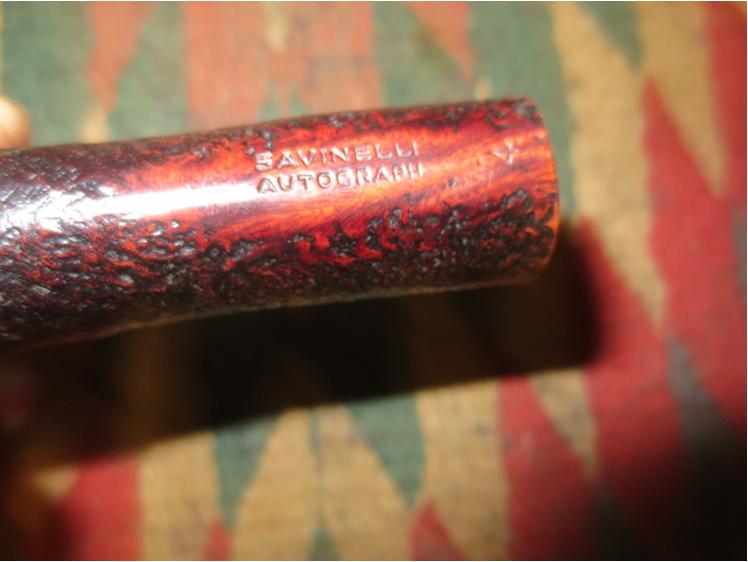
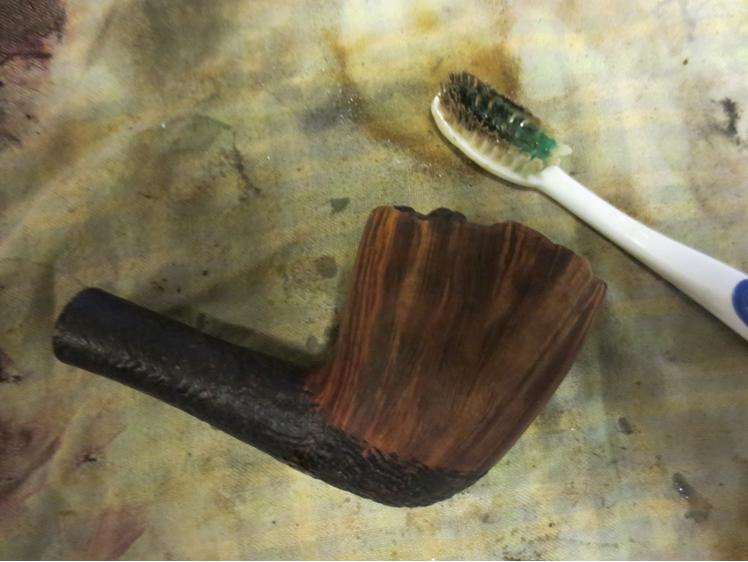
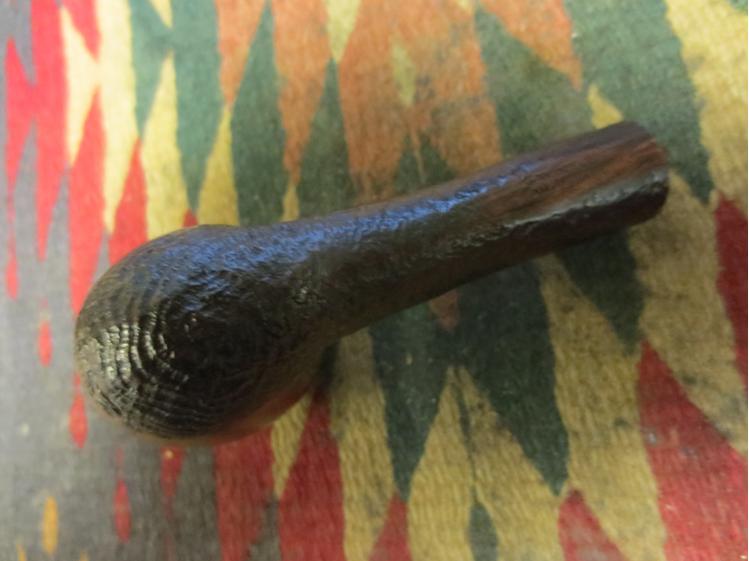
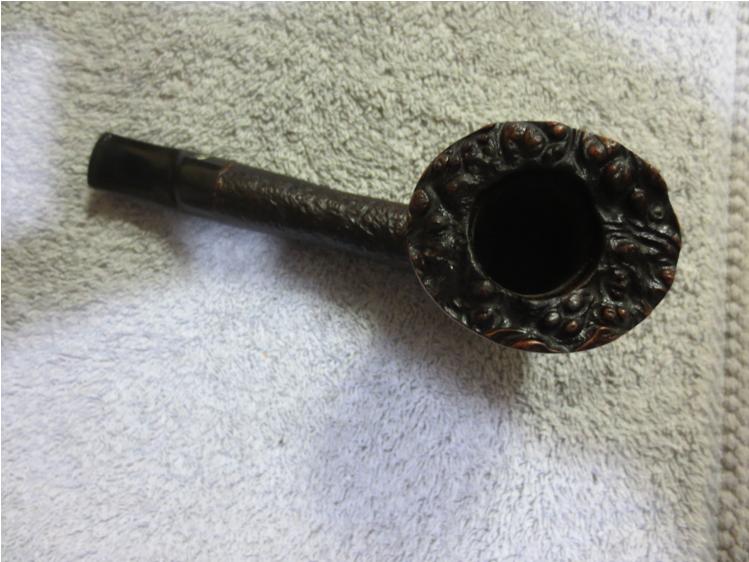
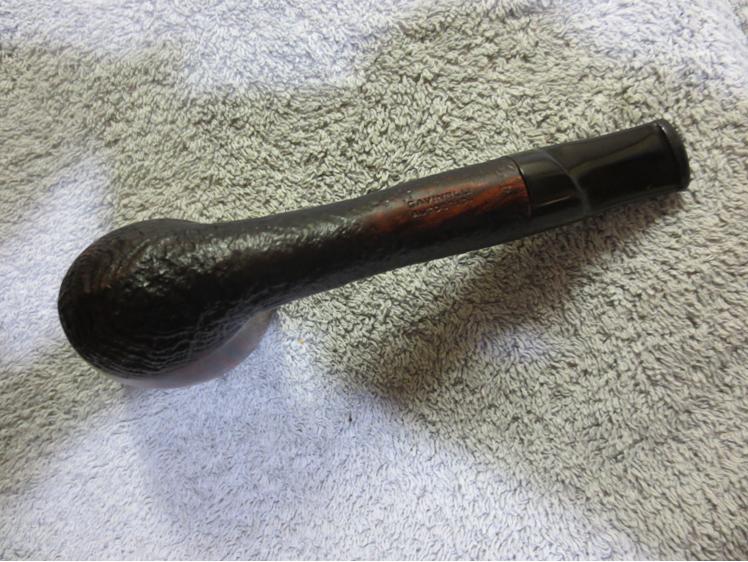
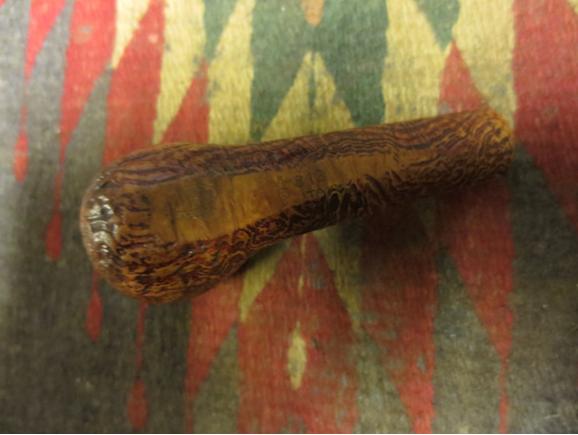
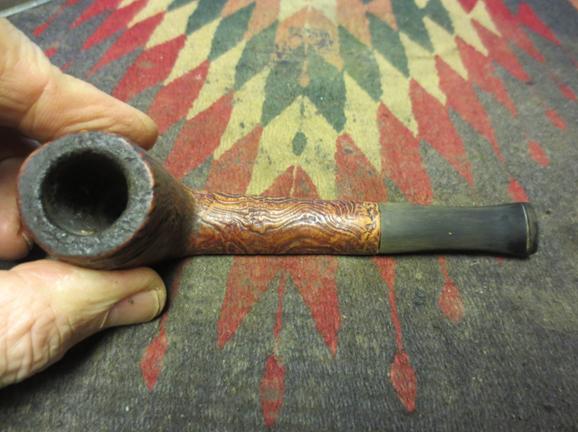
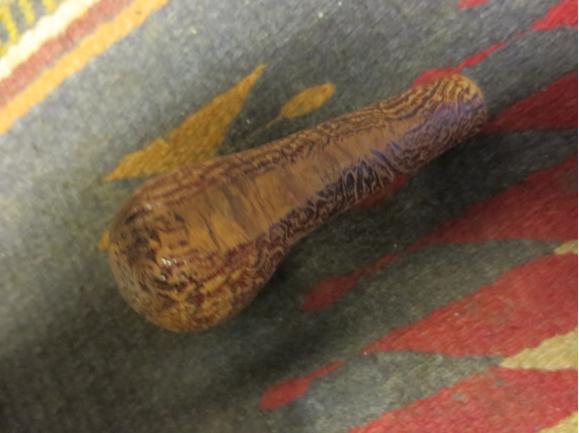
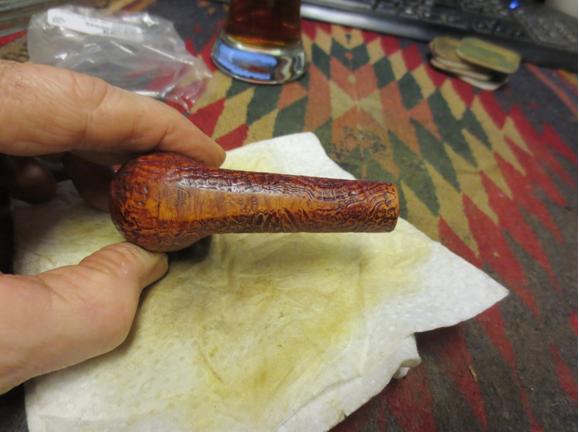
The next two photos show the grain on the shank and the tar buildup on the rim. I am pretty sure that the blast is underneath the tars and will look good once it is scraped off. The third photo shows the underside of the shank and the smooth portion that bears the stamping.Class5

Class6

Class7 
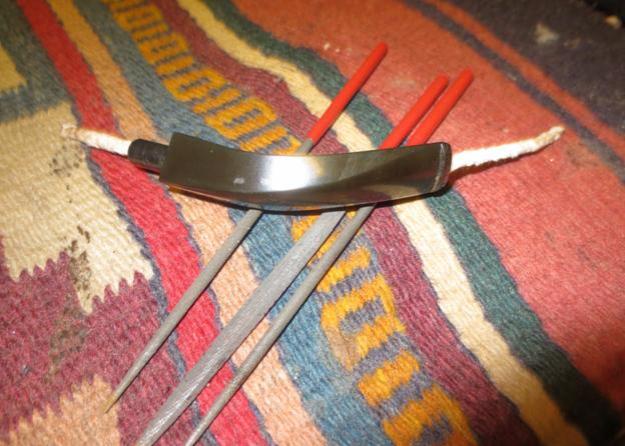
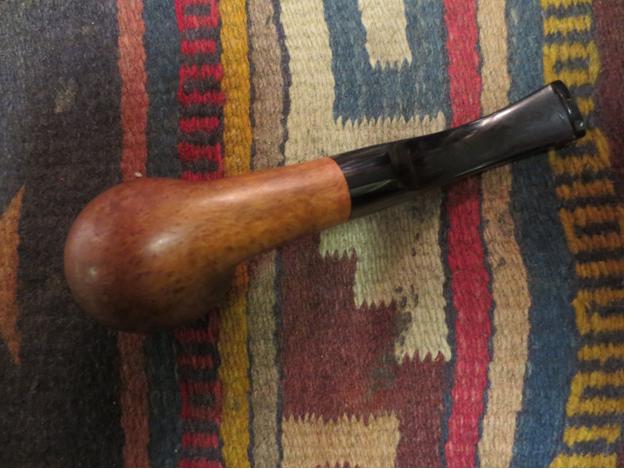
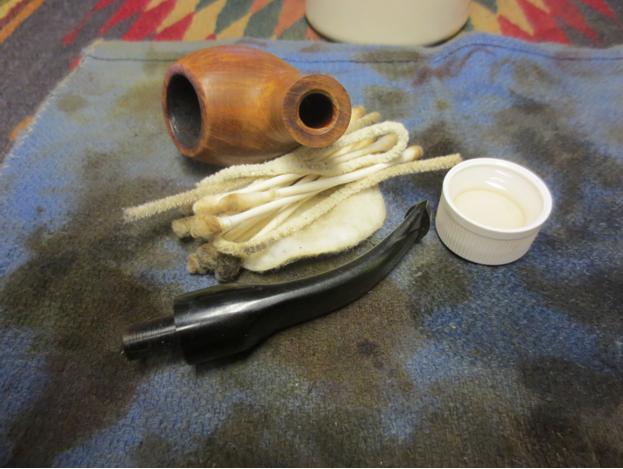
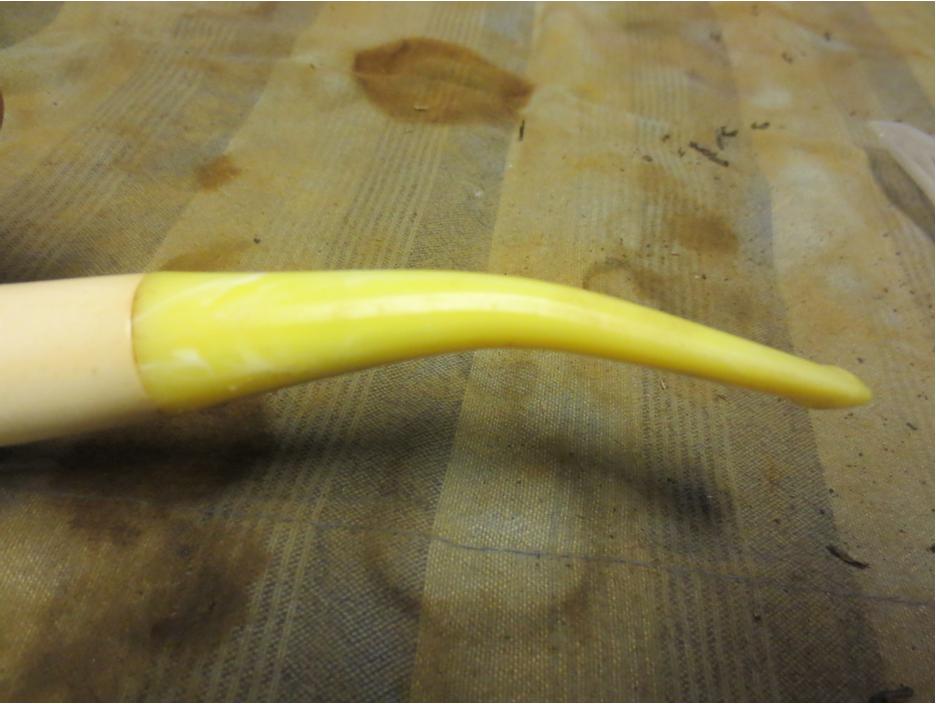
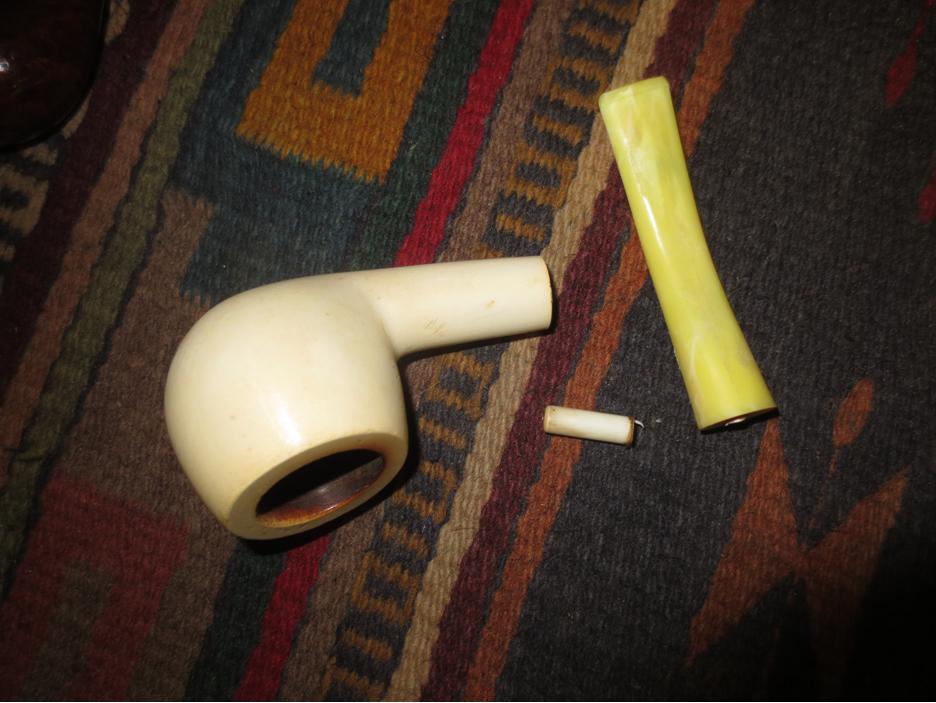
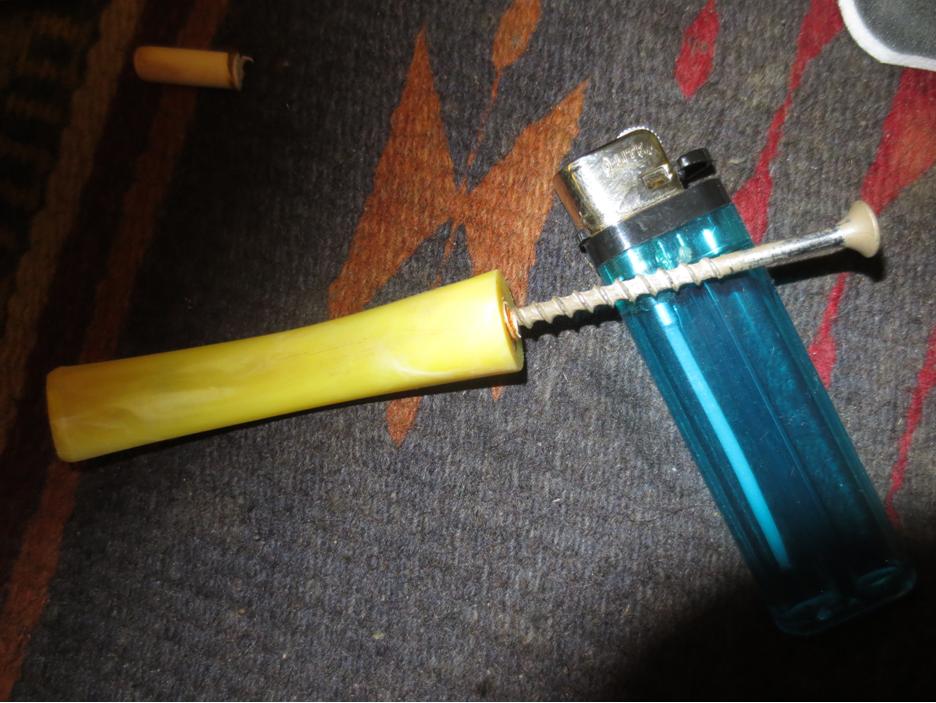
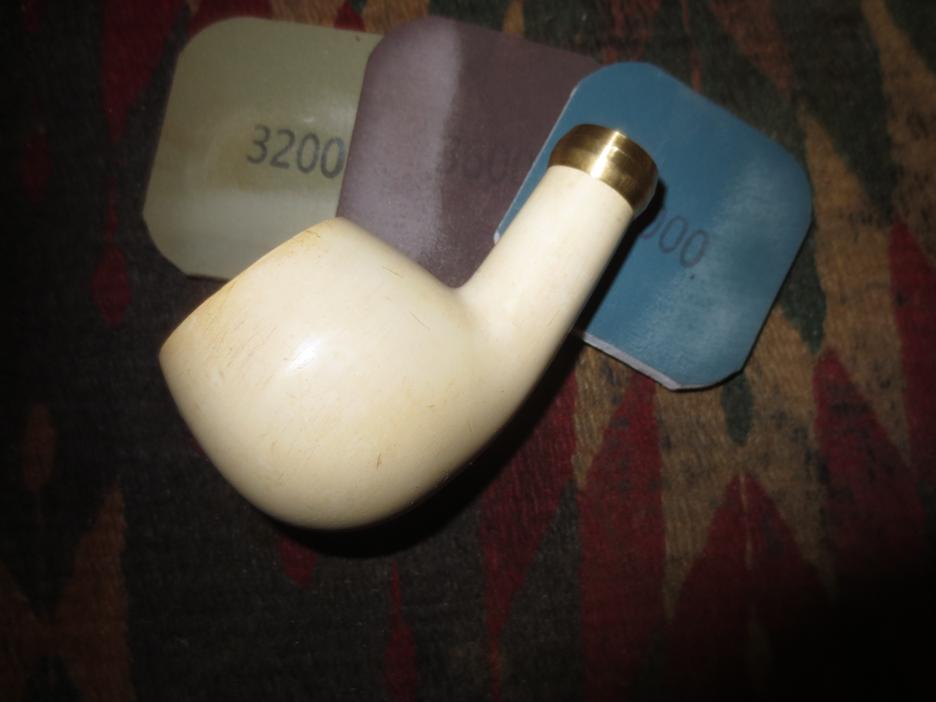
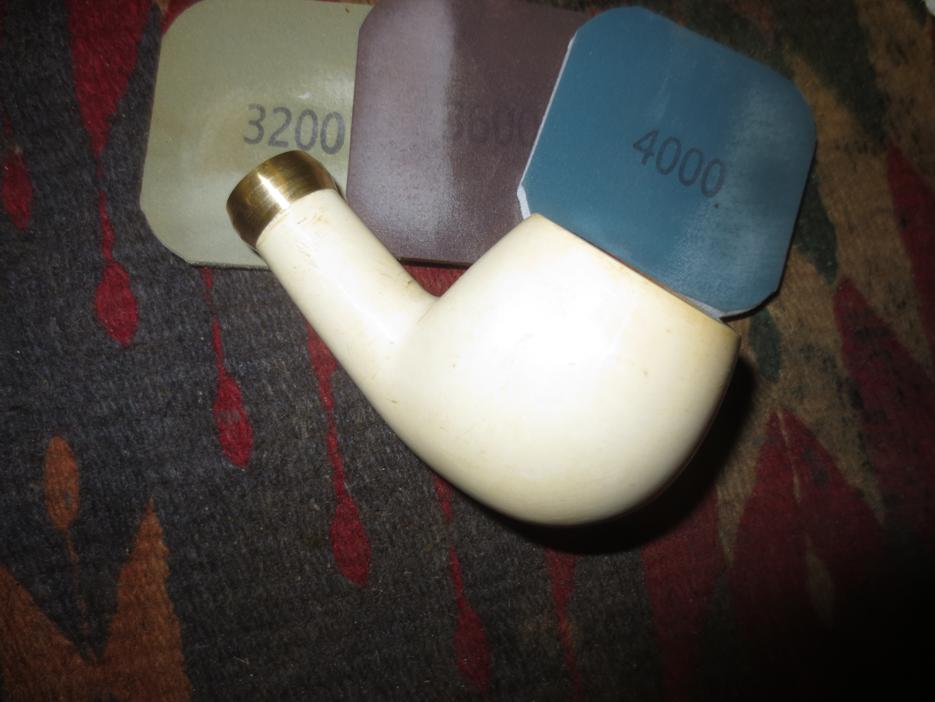
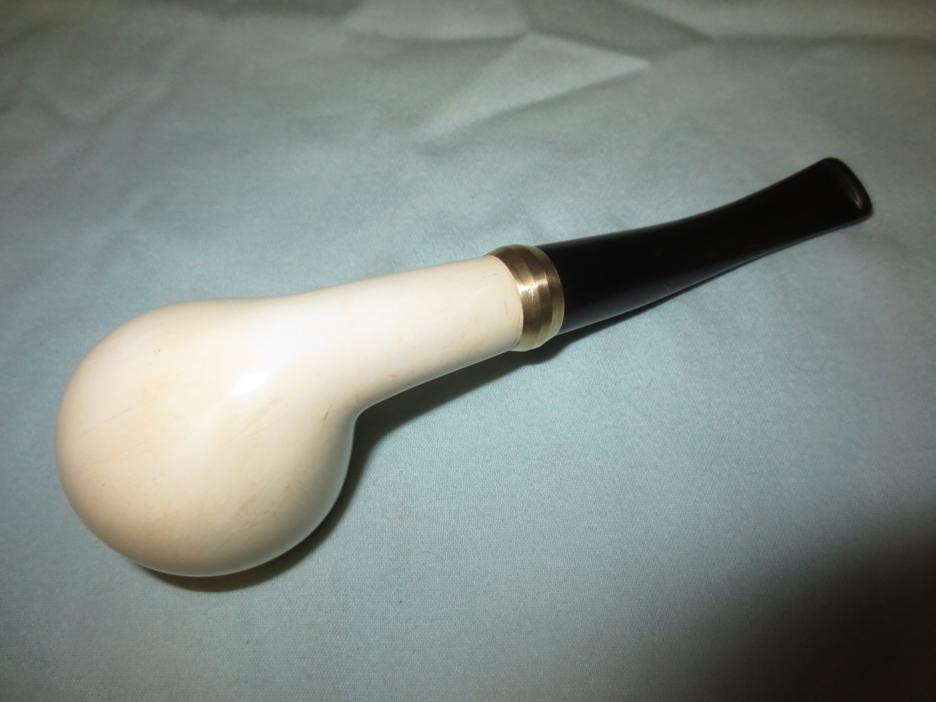
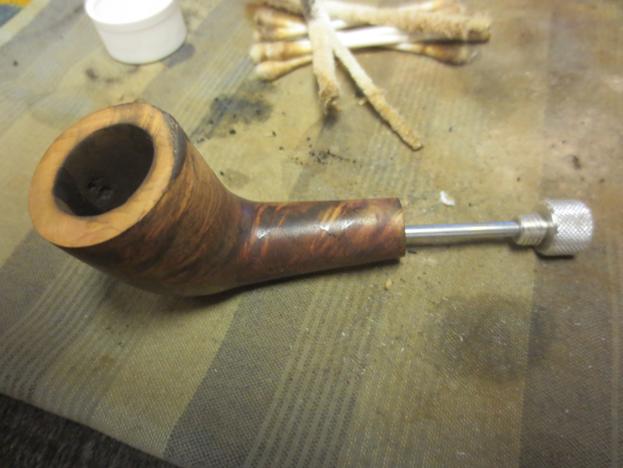
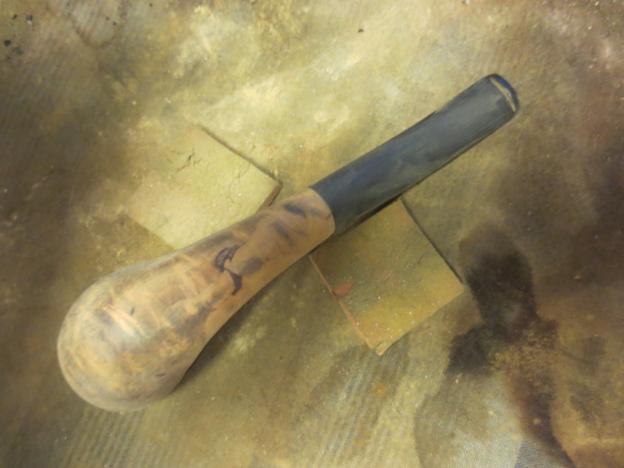
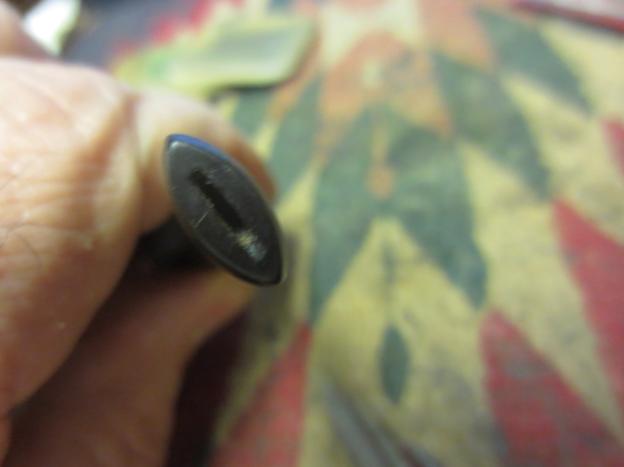
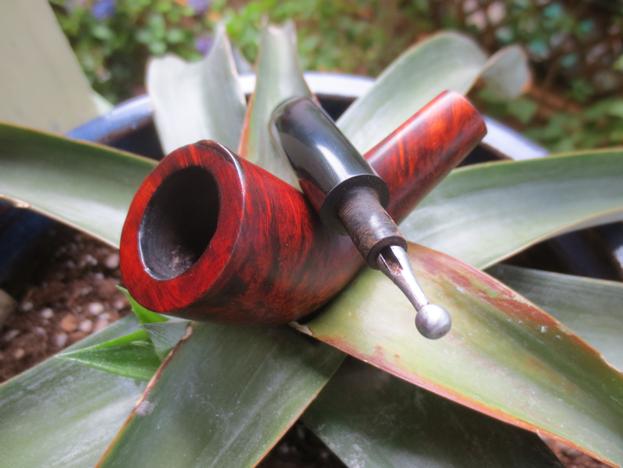
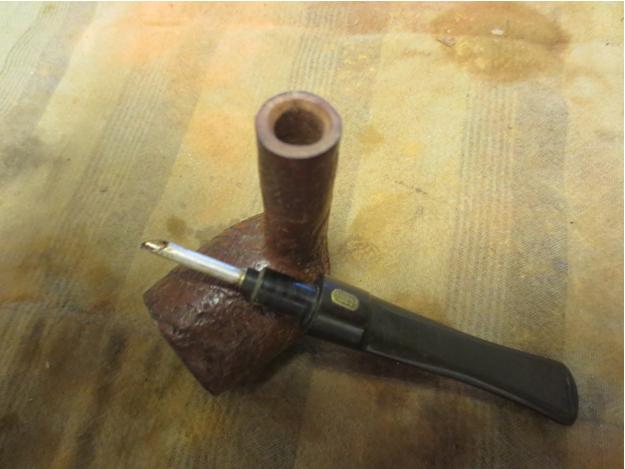
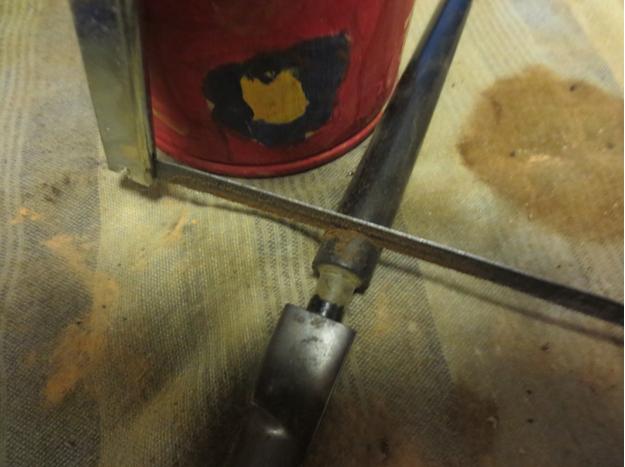
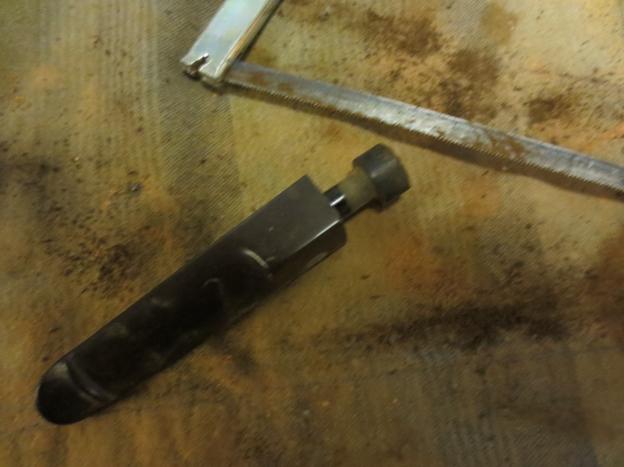
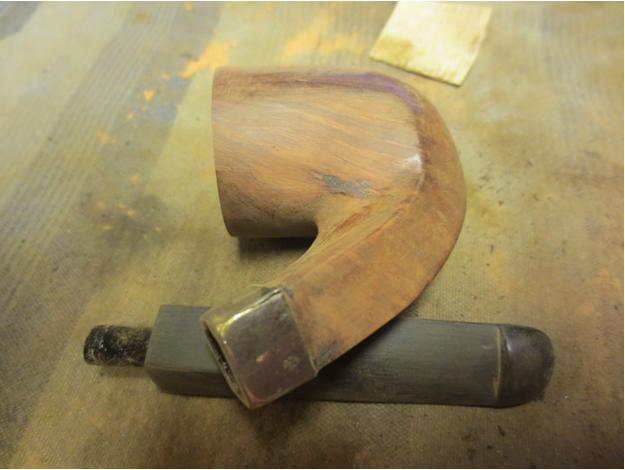
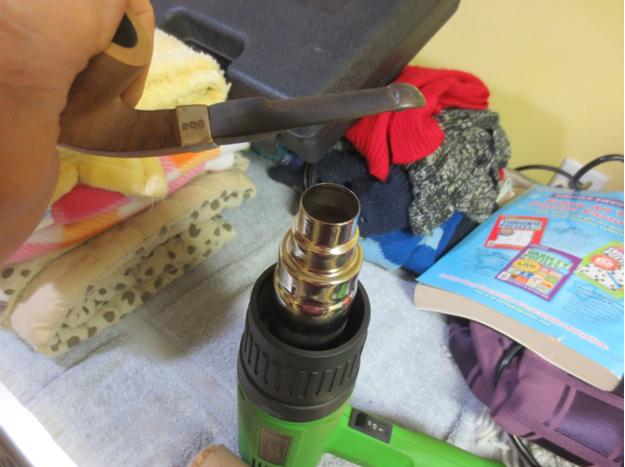
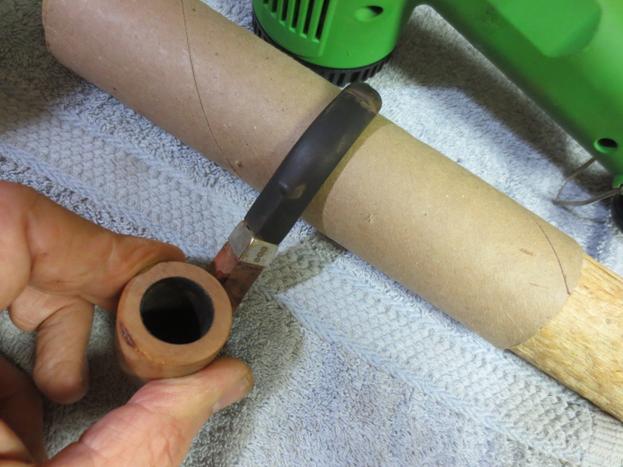
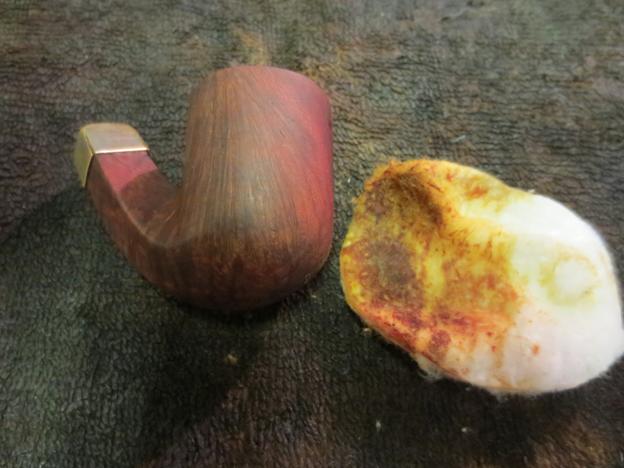
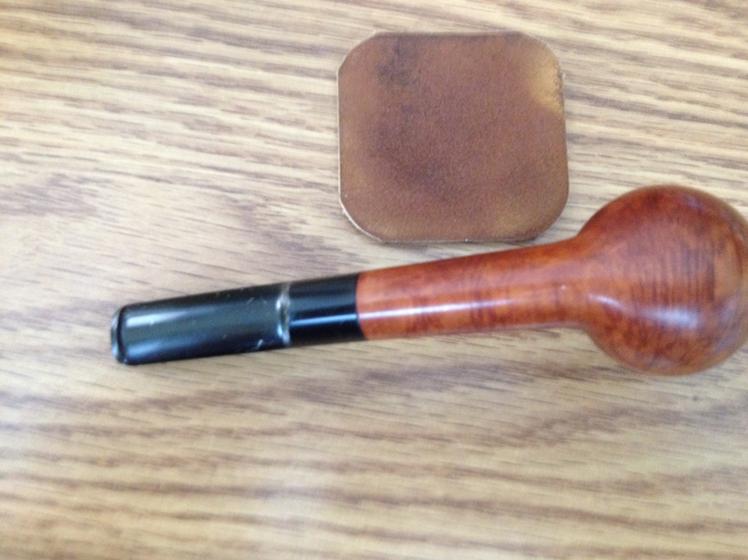
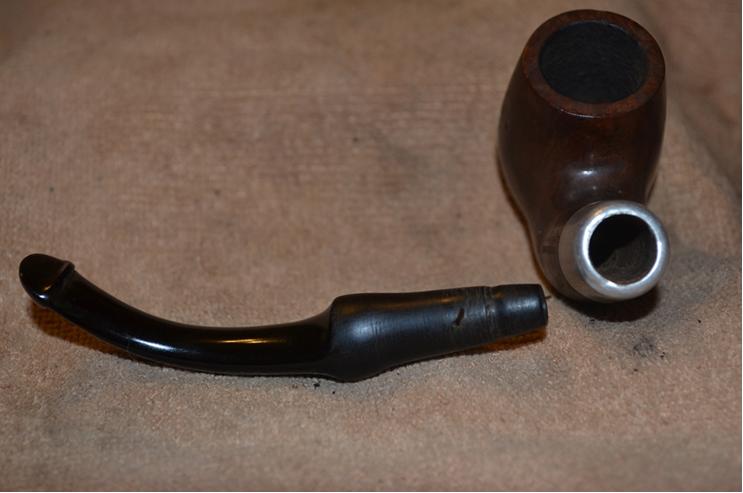
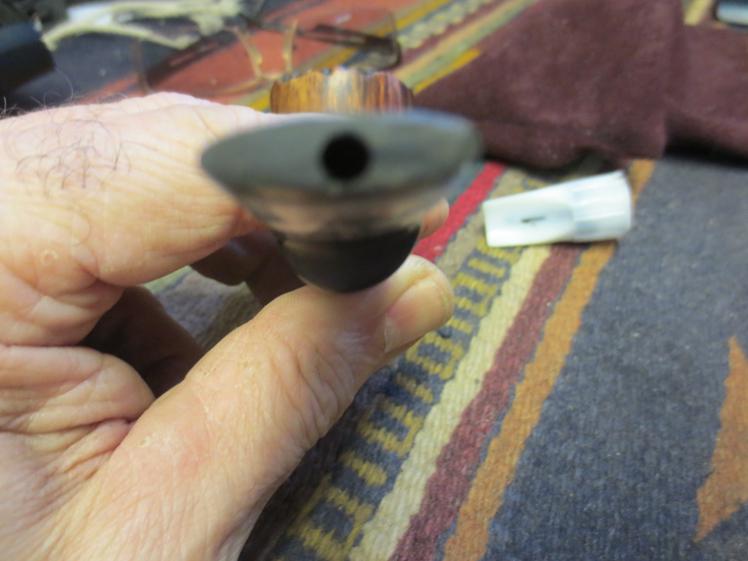
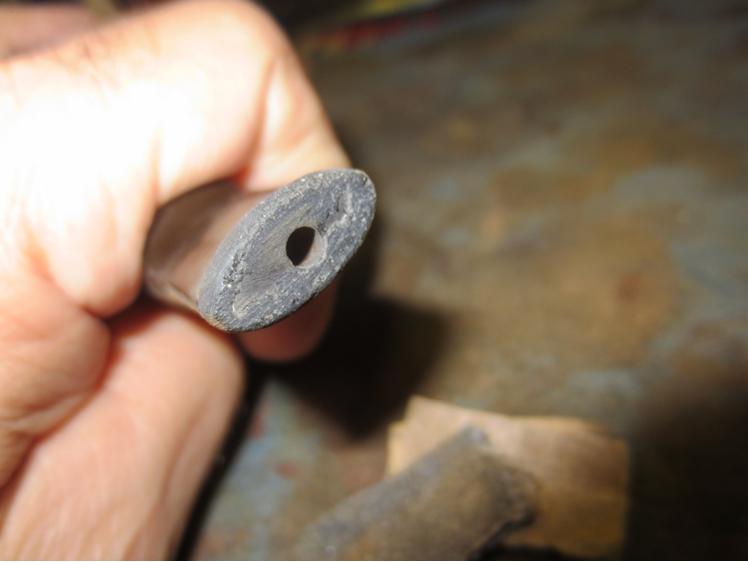
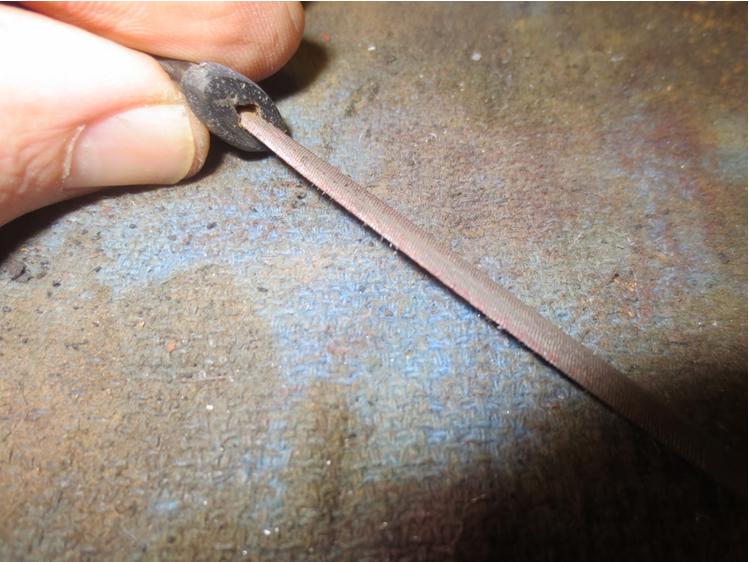
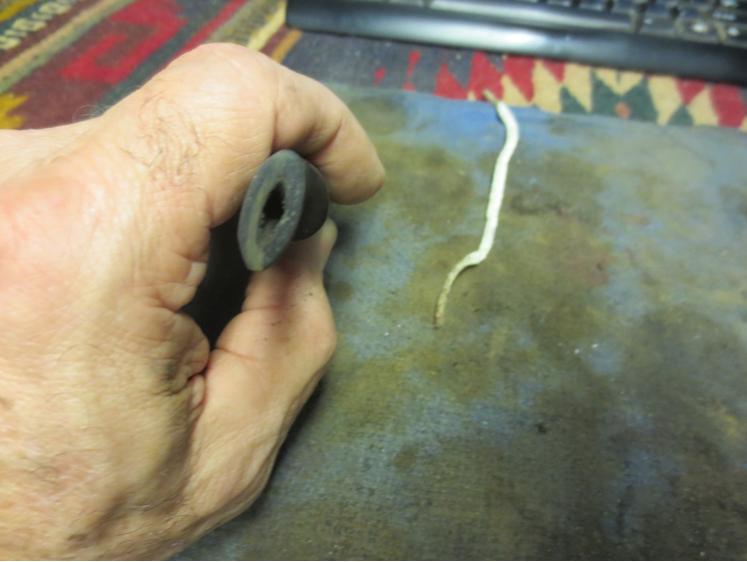
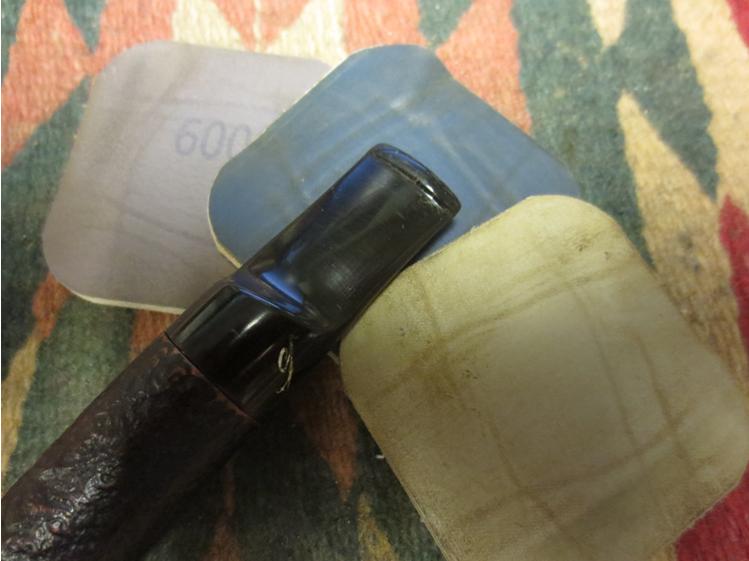
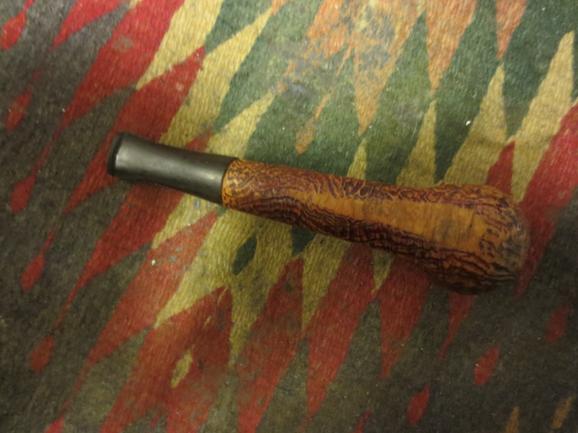
I went through my stem can and found the candidate for the tapered Canadian stem for this pipe. I used the PIMO tenon turning tool to take down the tenon to the point that it almost fit the shank. I hand sanded it with 220 grit sandpaper to bring it to the correct size. I did not want to crack the shank so I went slowly, checking for the fit often.Class8 
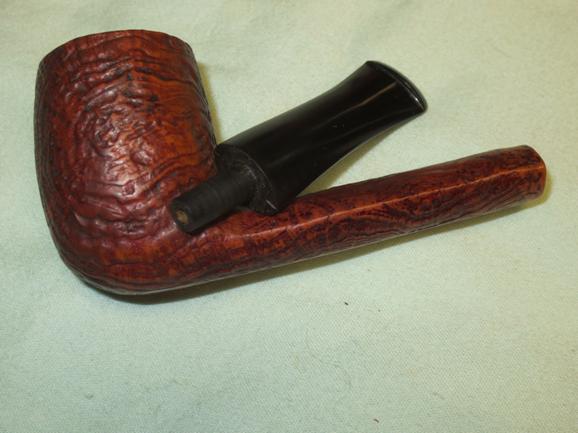
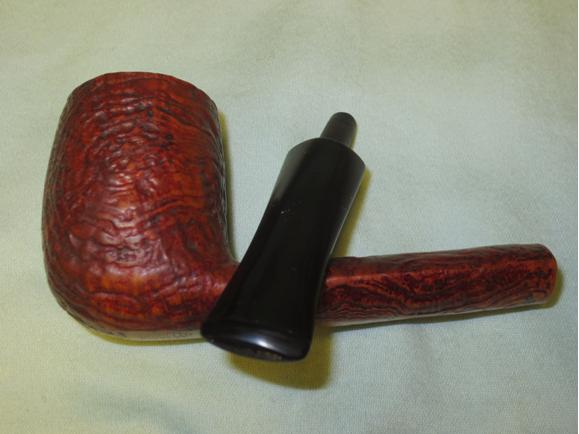
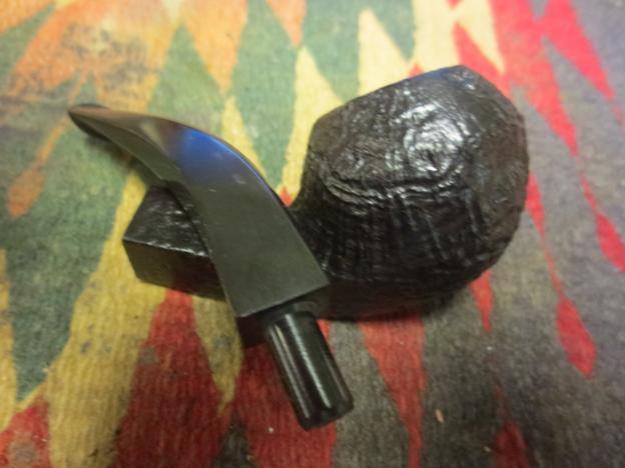
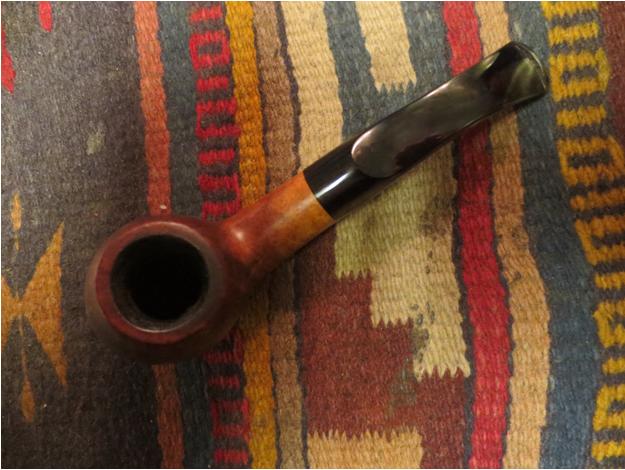
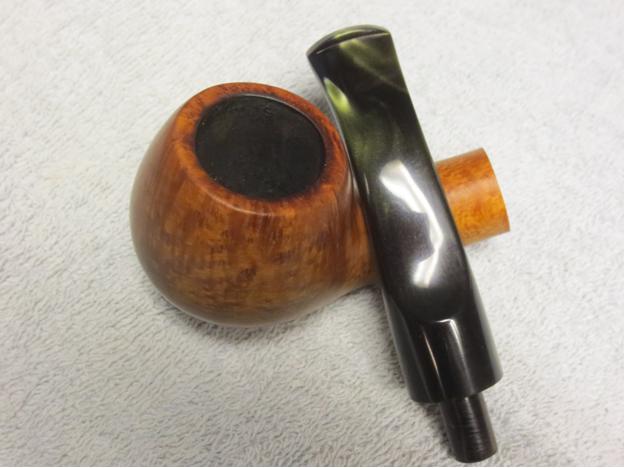
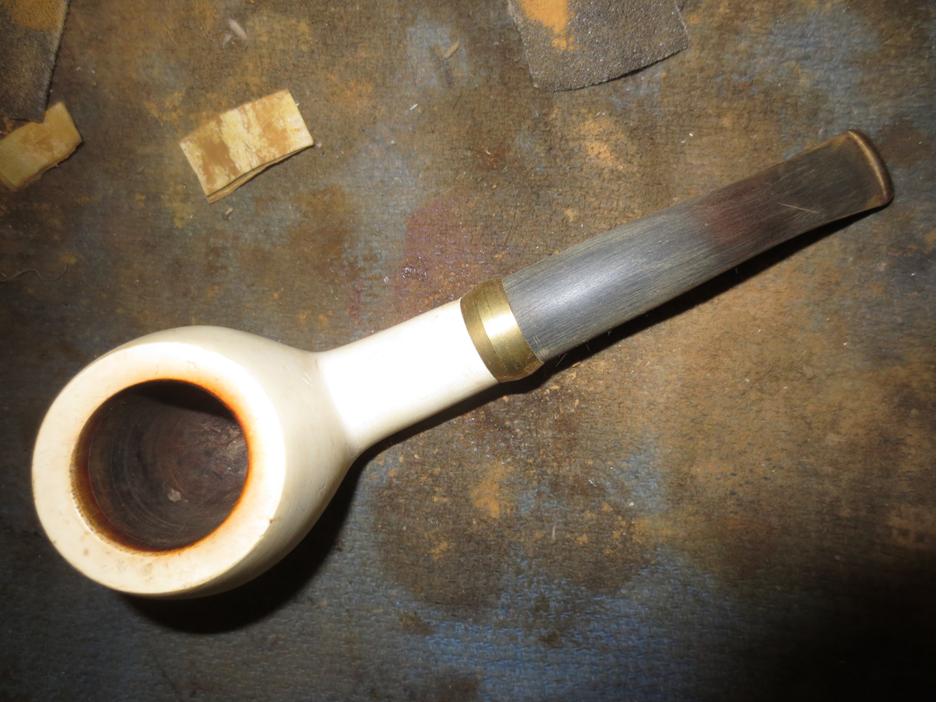
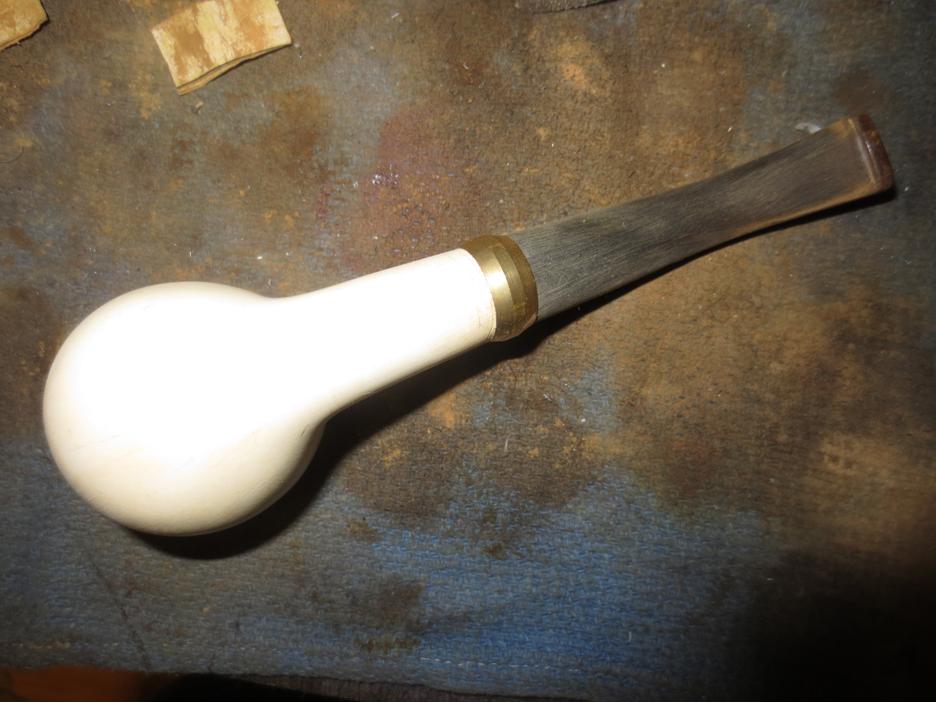
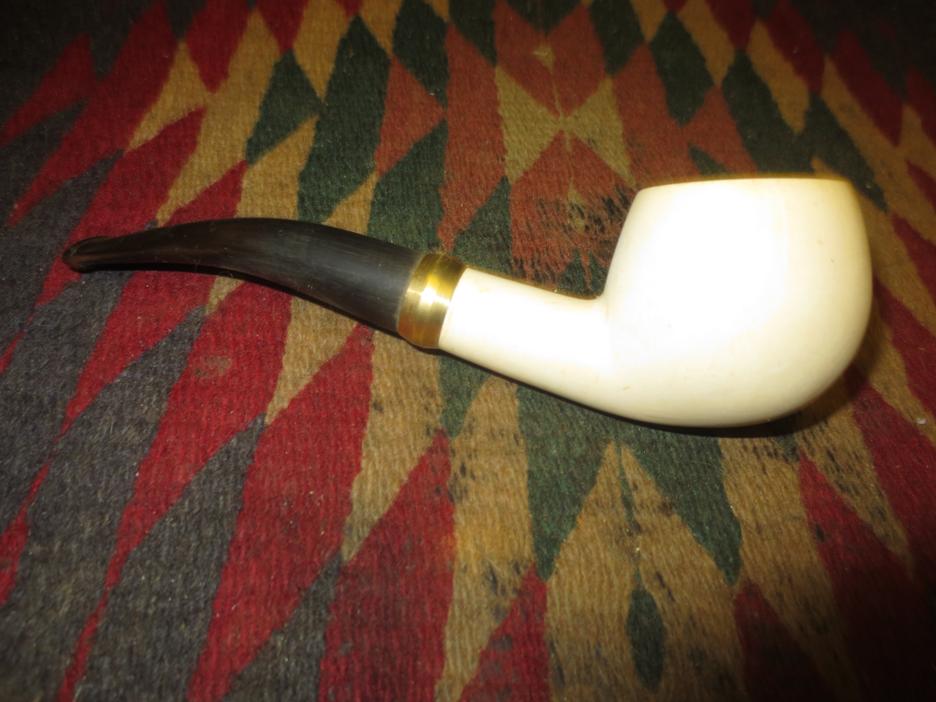
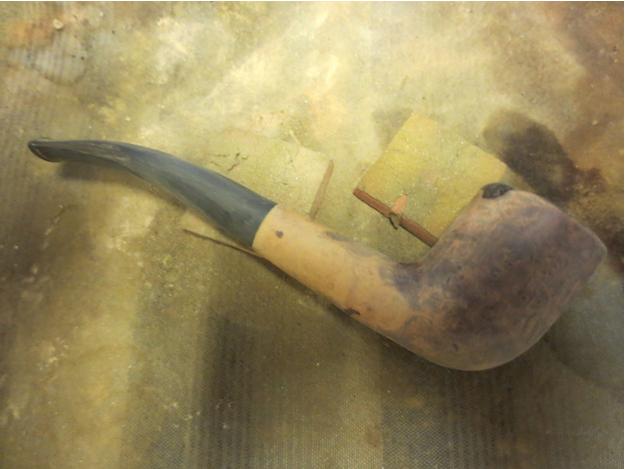
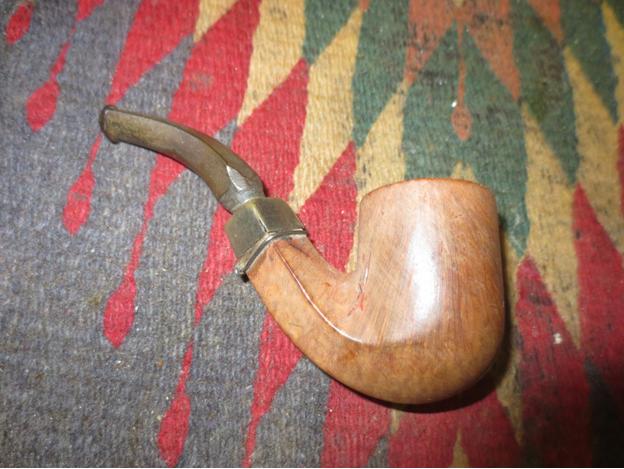
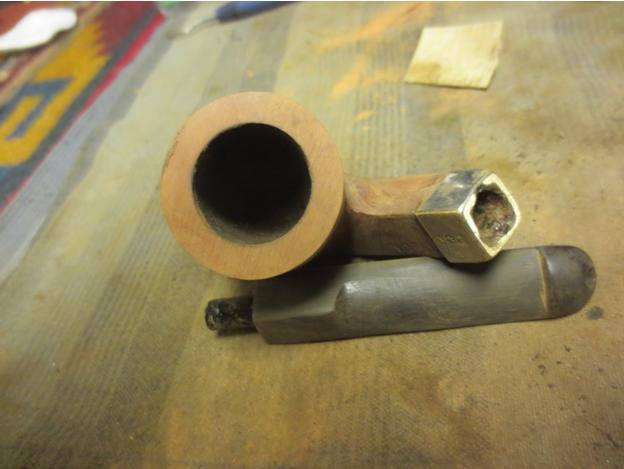
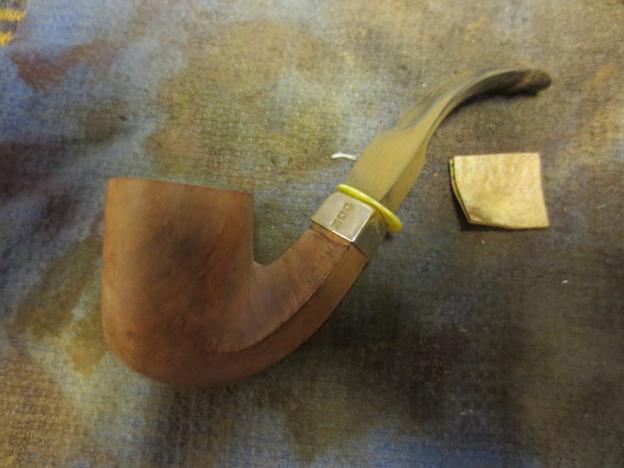
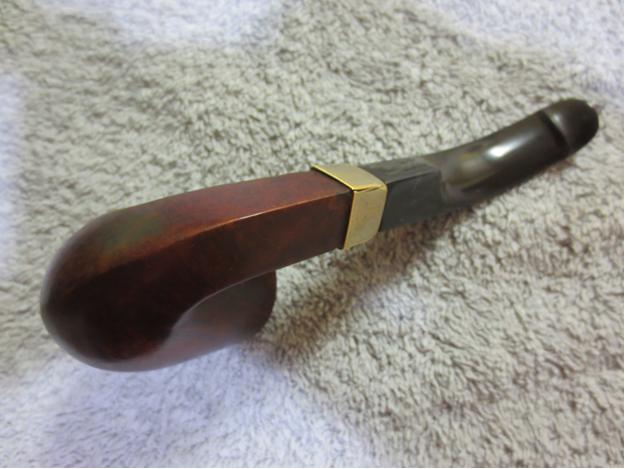
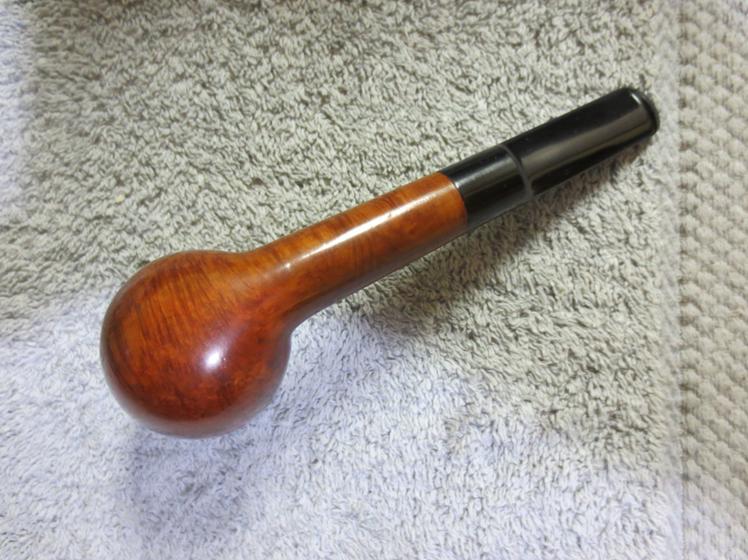
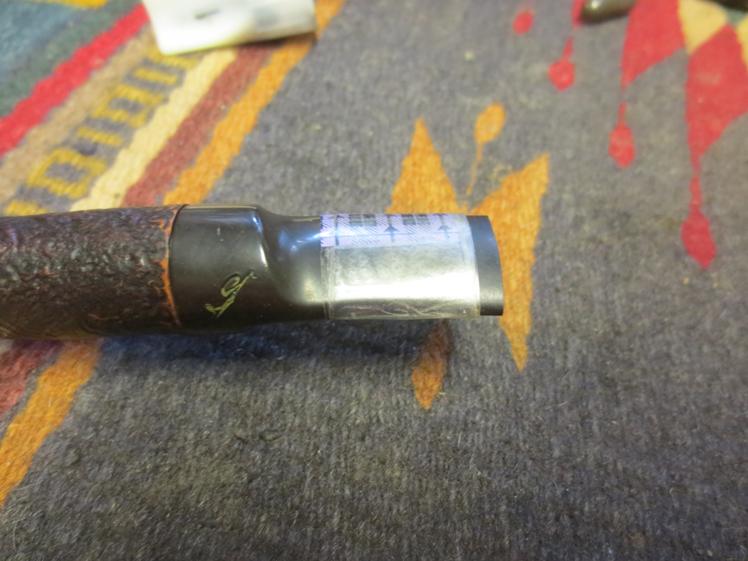
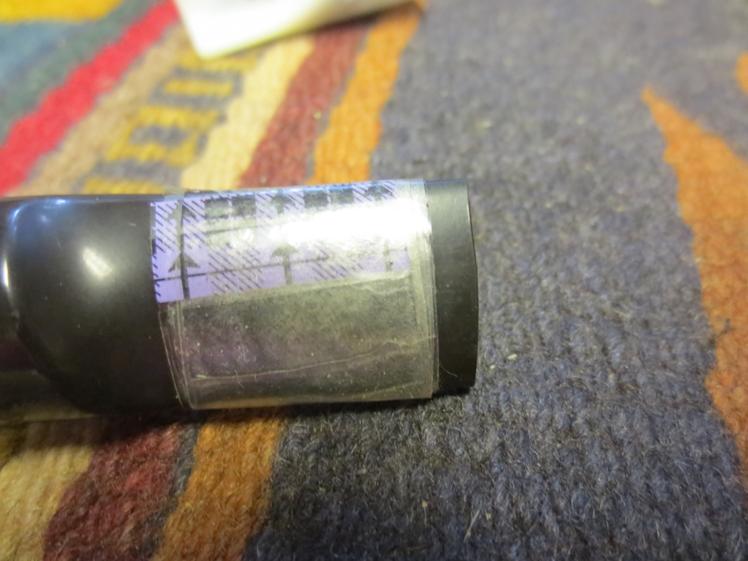
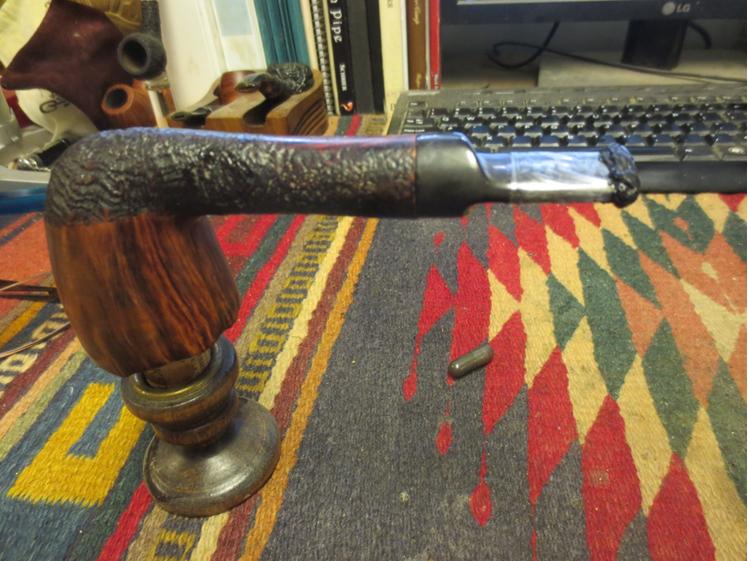
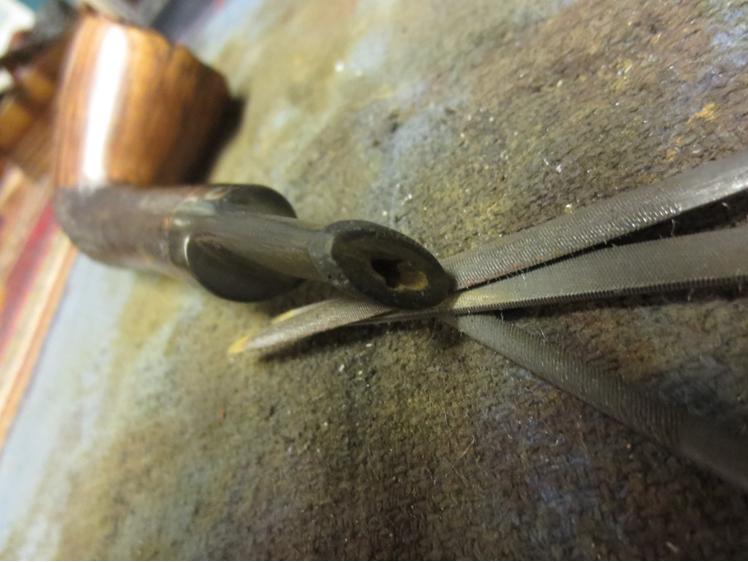
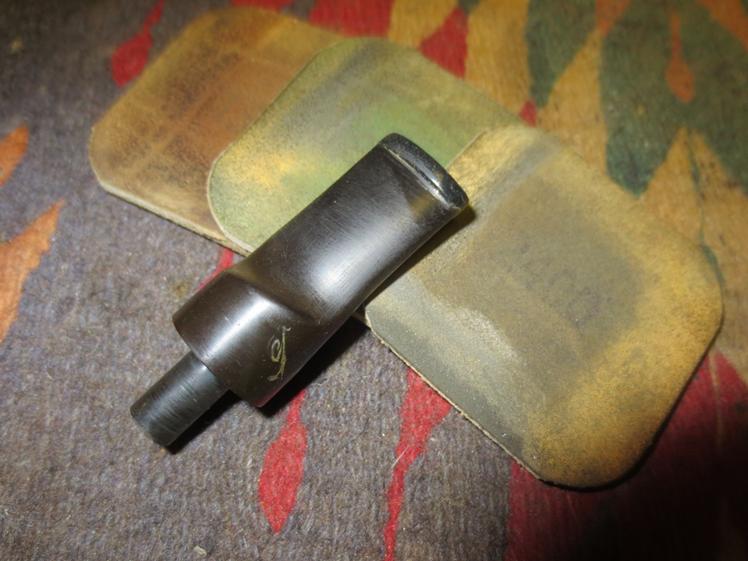
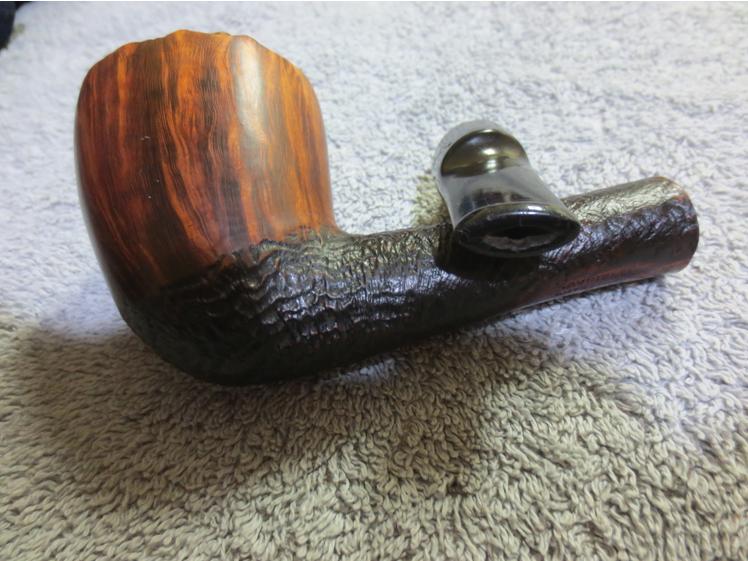
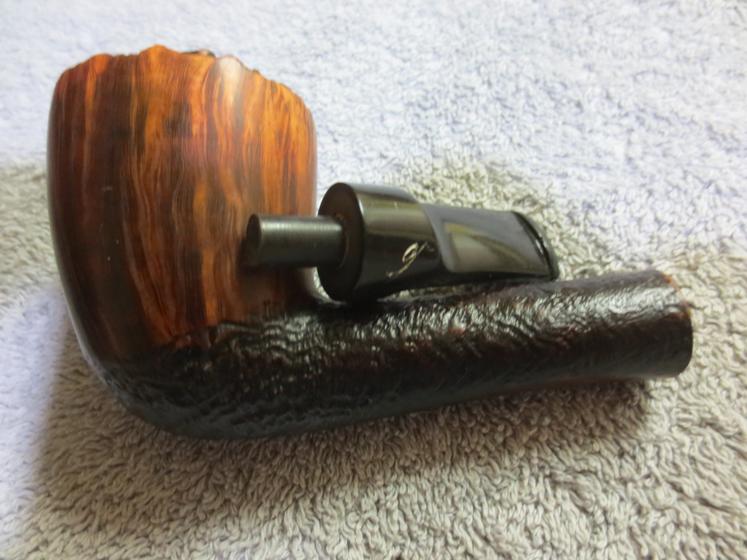
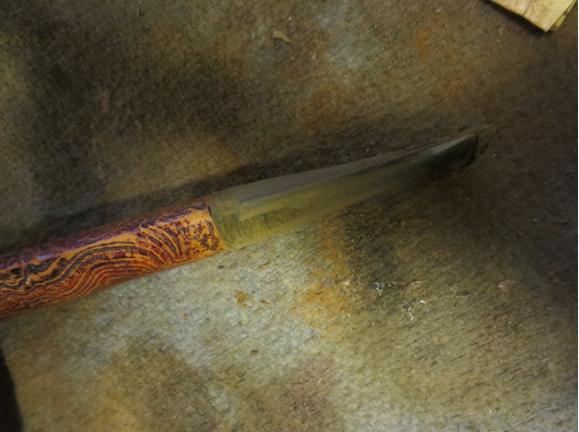
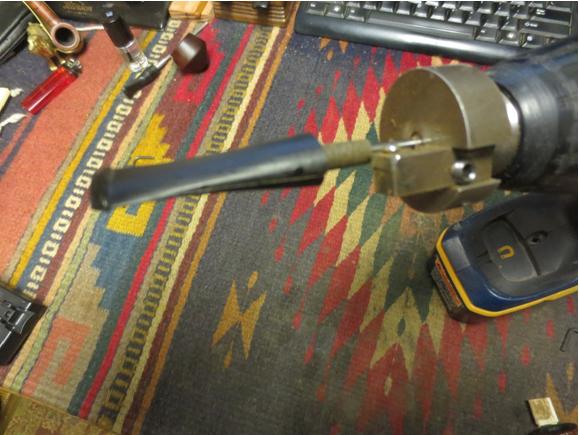
Once the stem was in place I took some photos to show the excess in diameter on the top and sides and the shaping that would need to be done to get a good match to the shank.Class9

Class10 
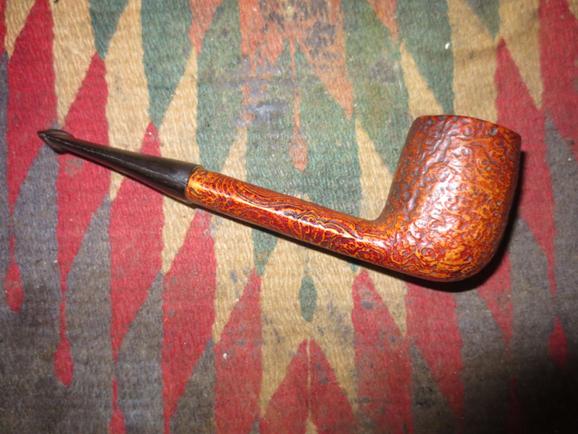
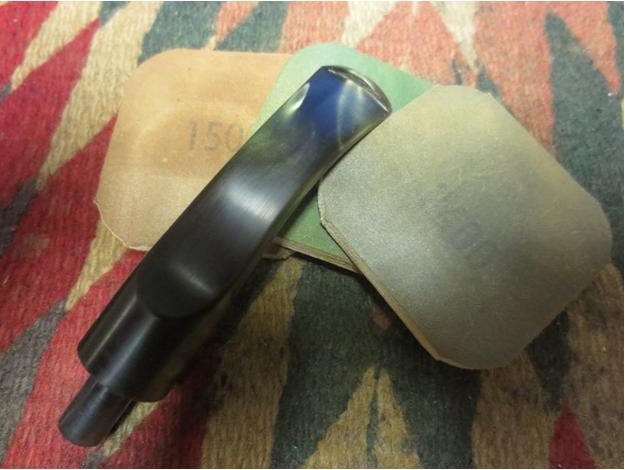
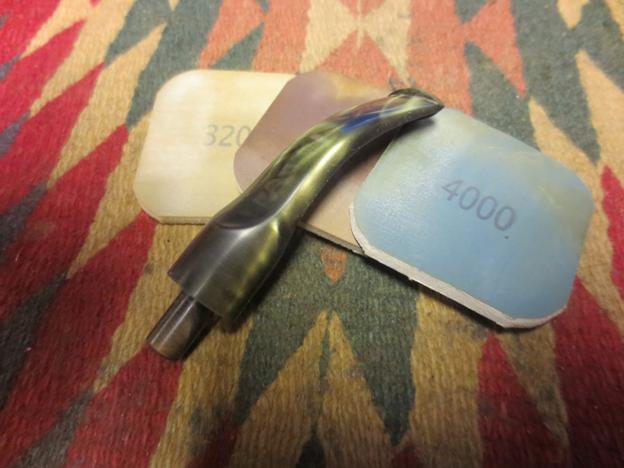
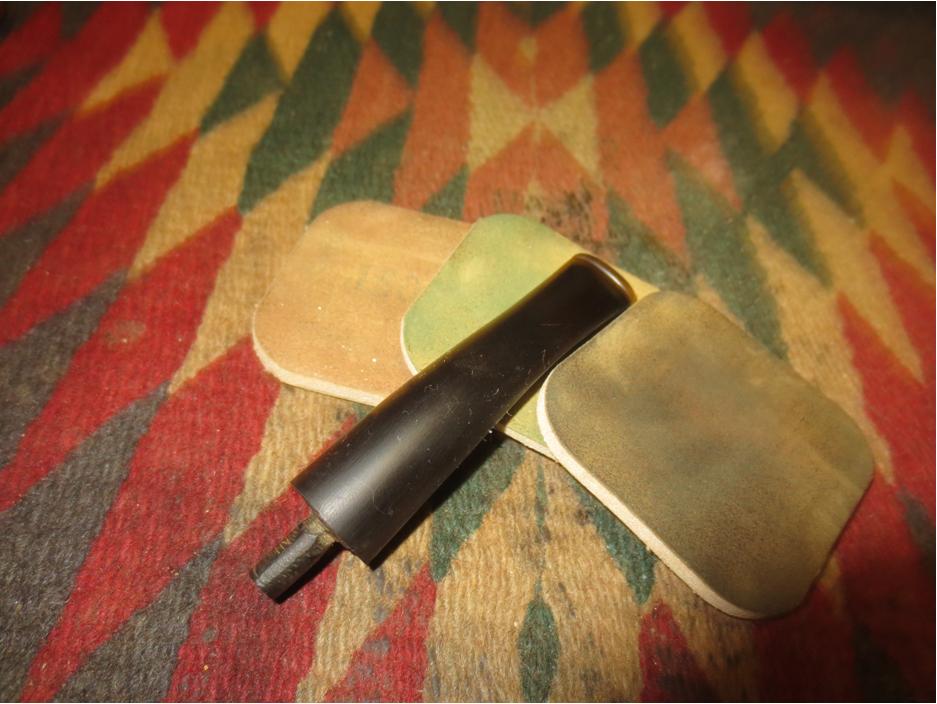
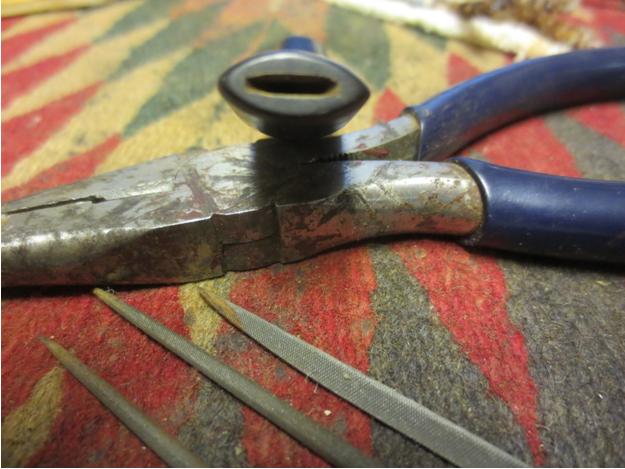
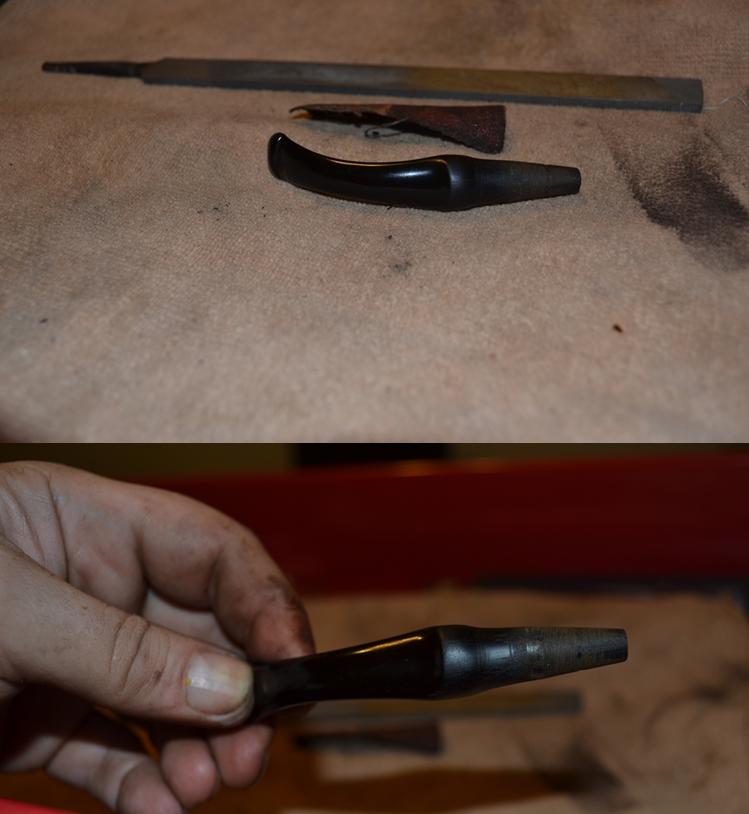
I rough shaped the stem fit with a sanding drum on a Dremel to get it close to the shape of the shank. I have found that if I move slowly and carefully with the Dremel it saves a ton of hand sanding on the stems. Once I had it rough shaped I did the rest of the shaping by hand.Class11

Class12

Class13

Class14 
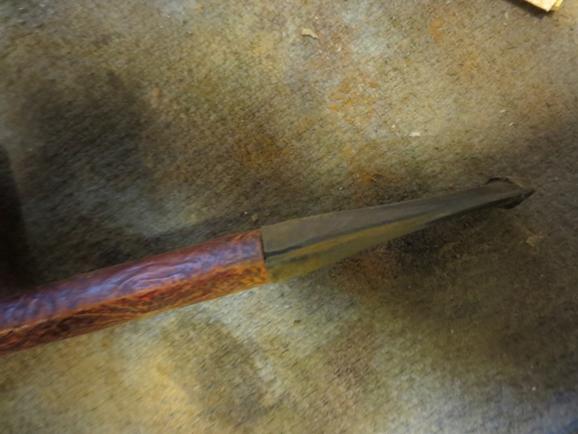
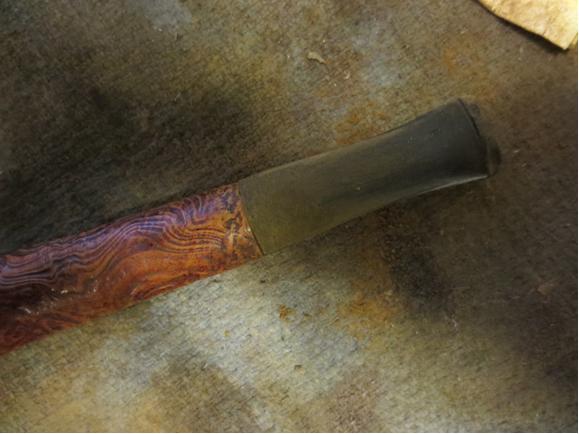
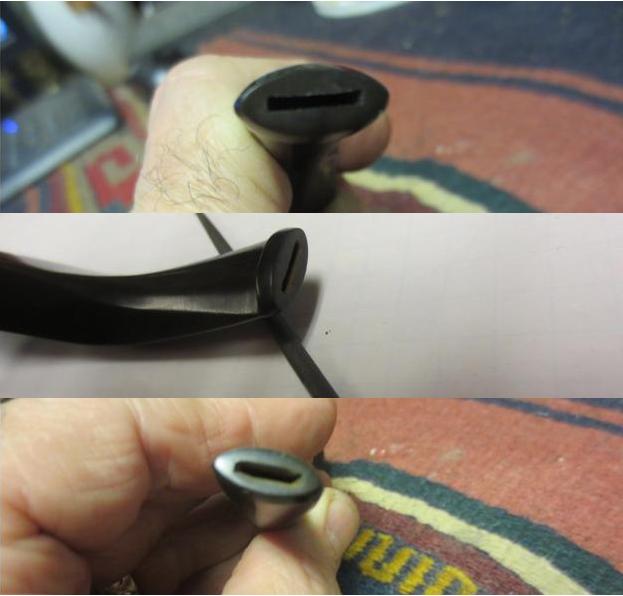
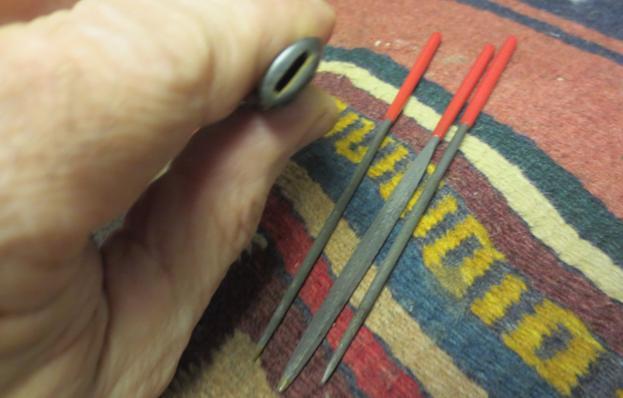
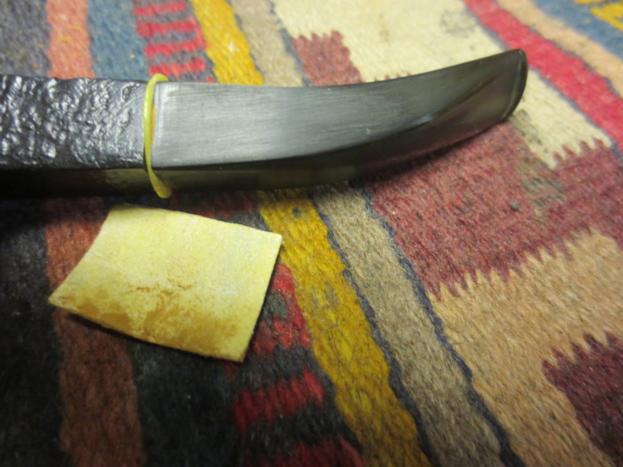
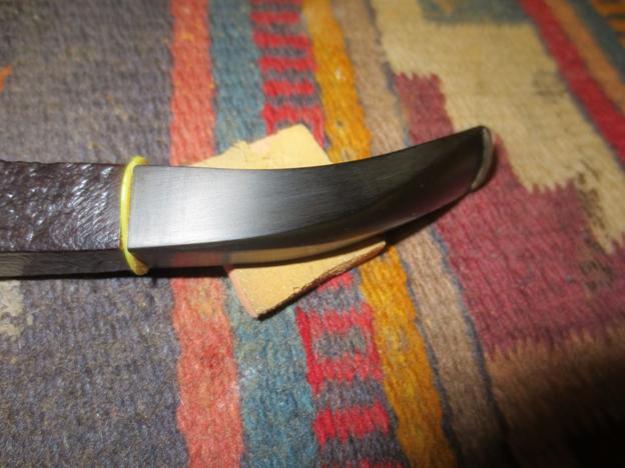
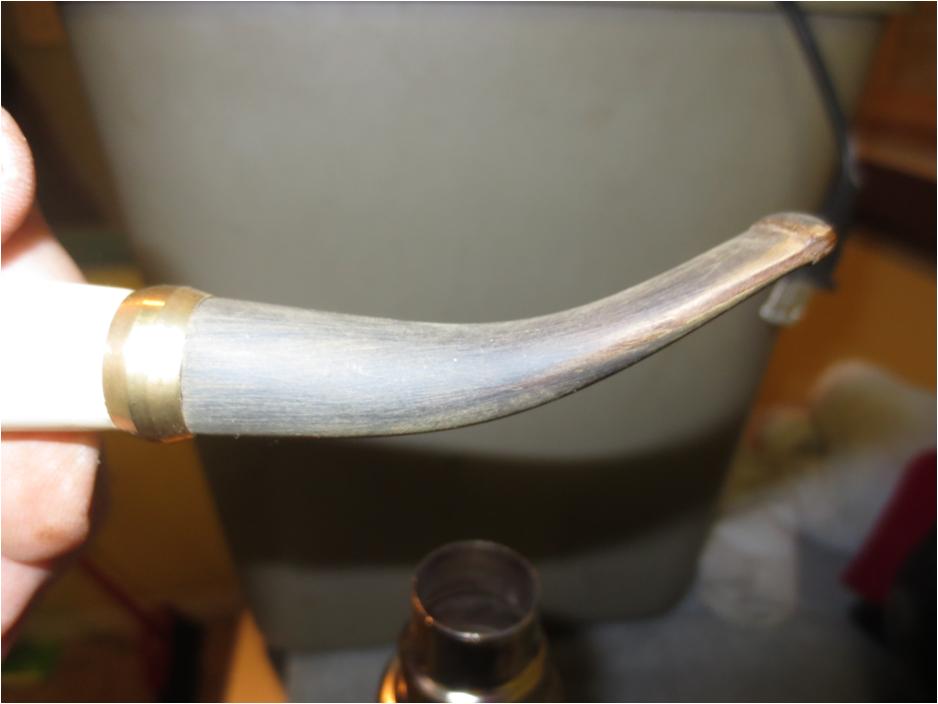
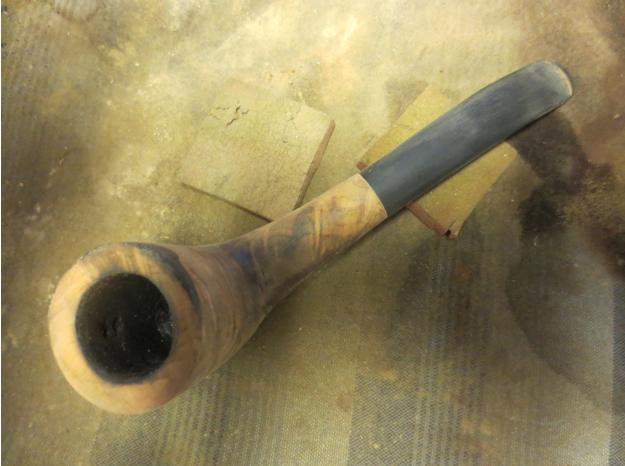
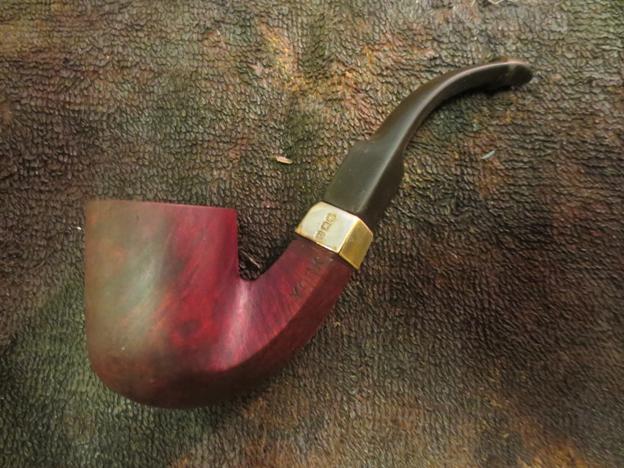
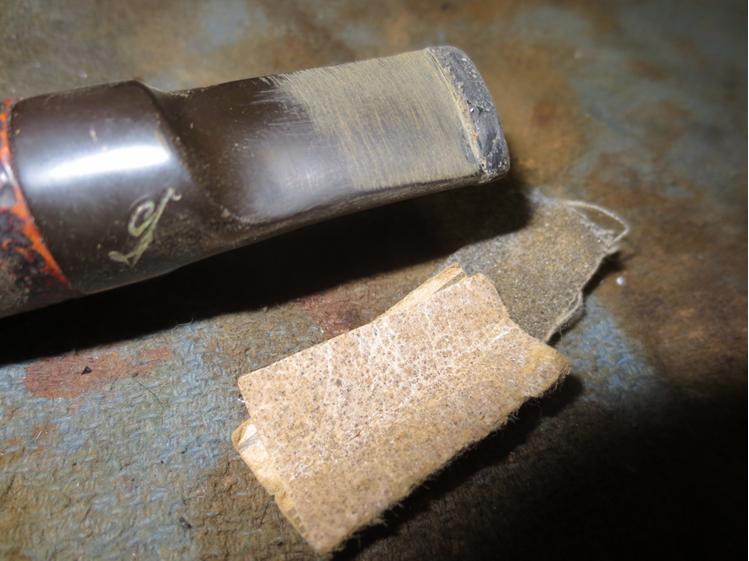
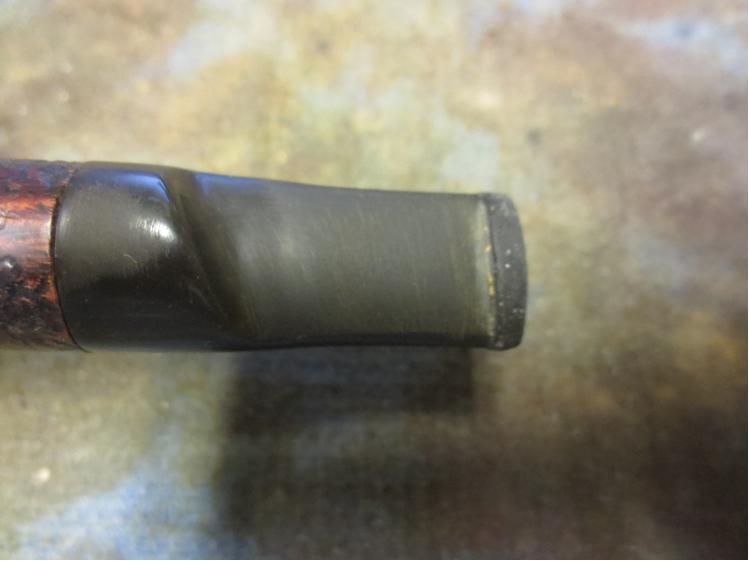
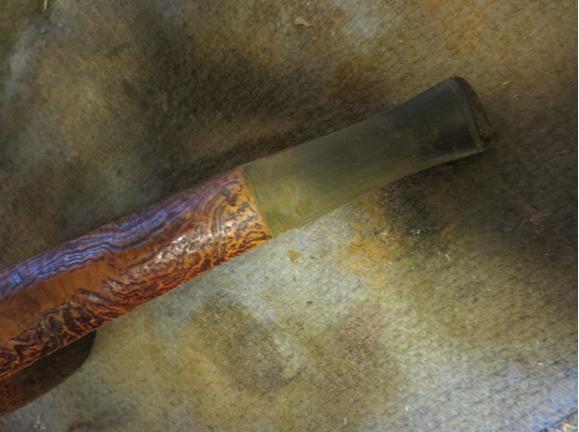
I fine tuned the shape with 220 grit sandpaper and brought it to a smooth transition between the shank and the stem all the way around. I worked on the button area and cleaned up the castings and marks on the slot and the button edges with the sandpaper.Class15

Class16

Class17

Class18 
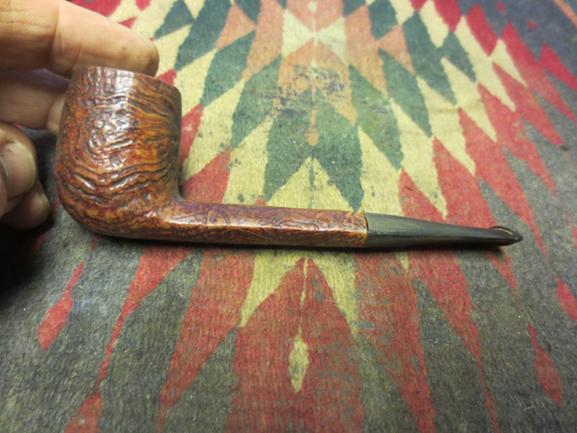
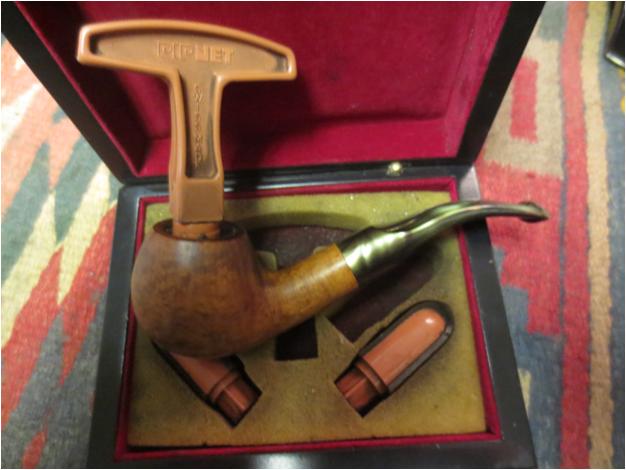
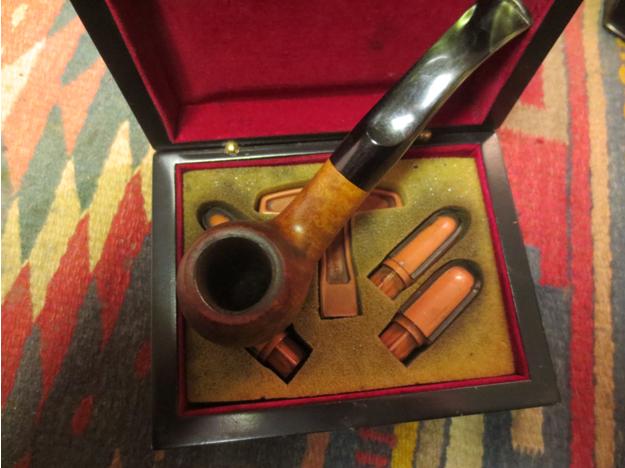
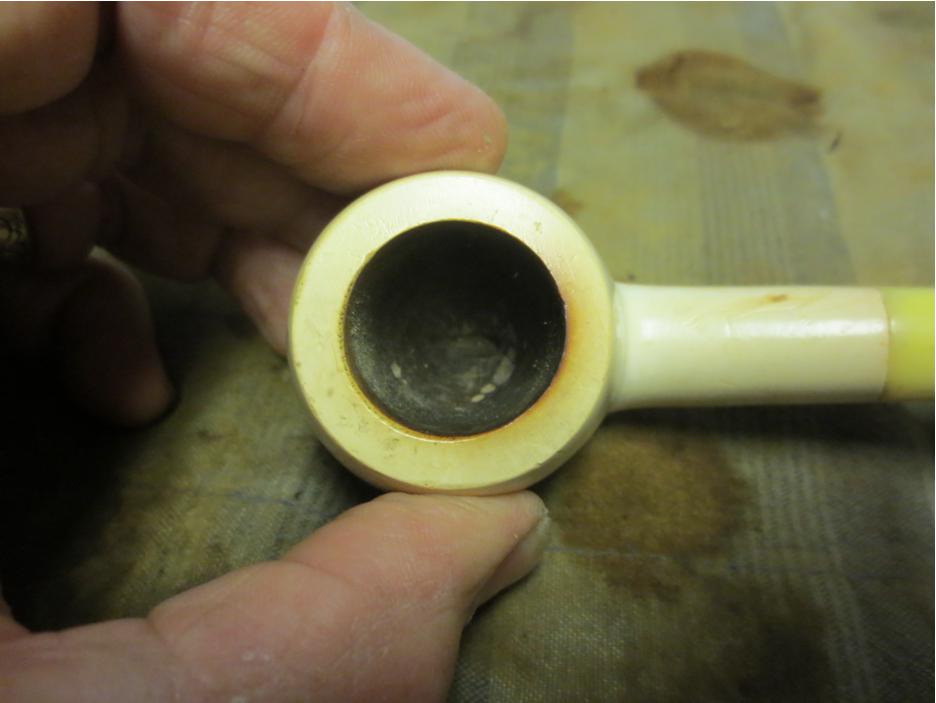
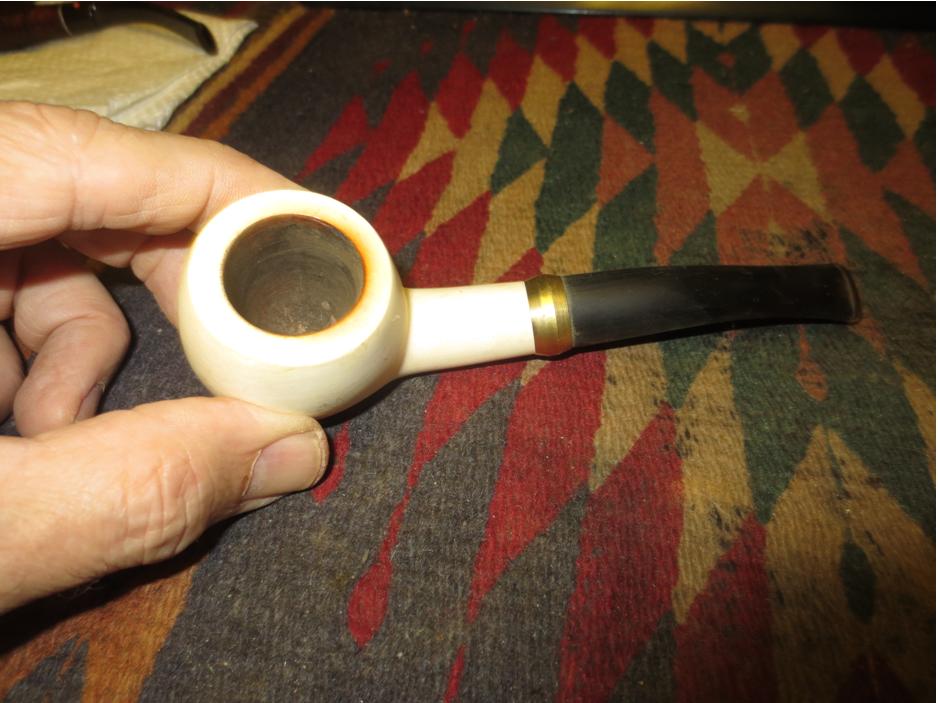
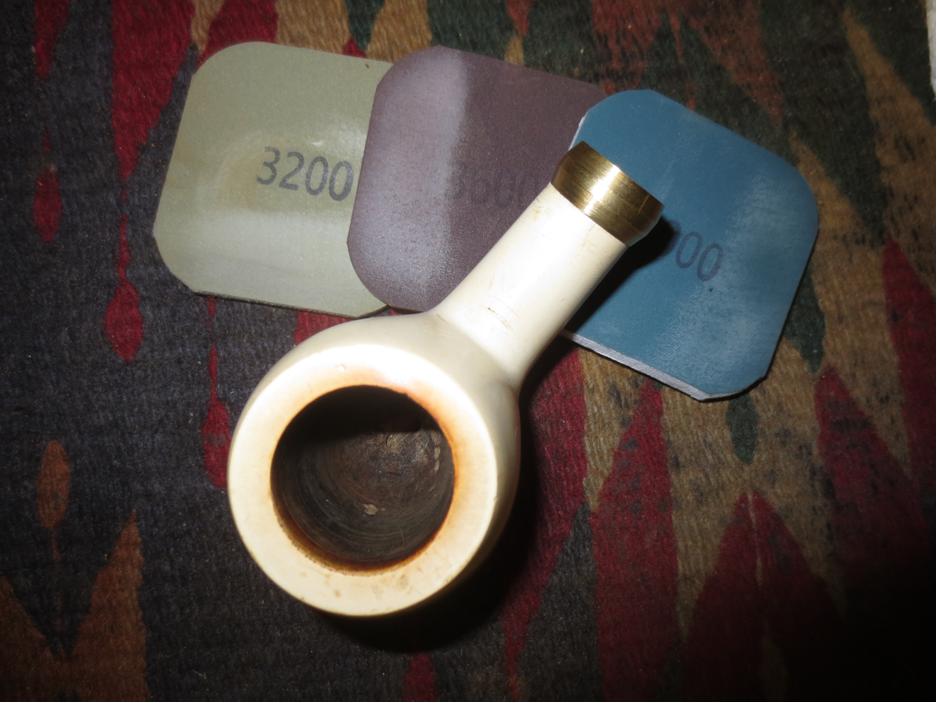
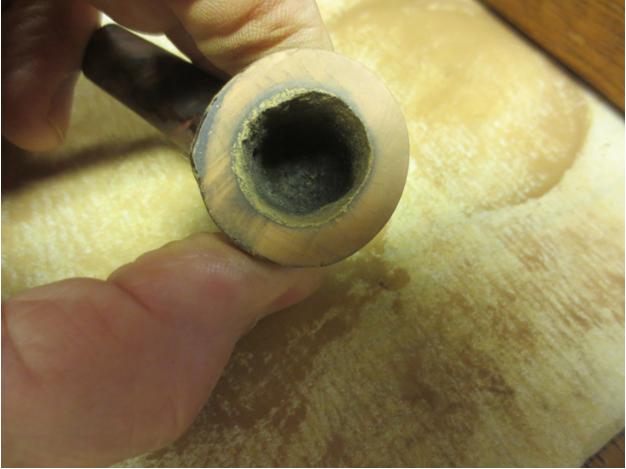
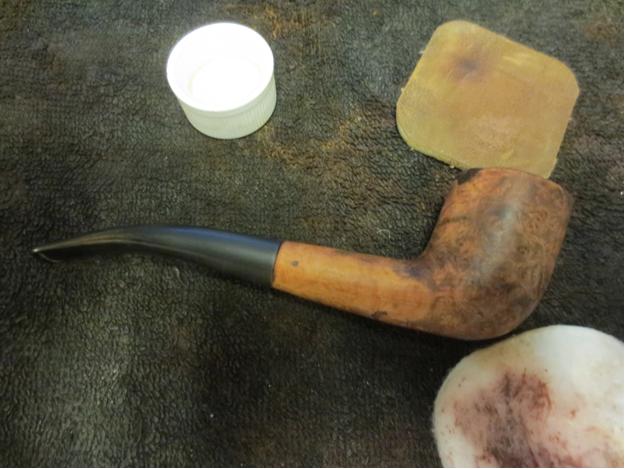
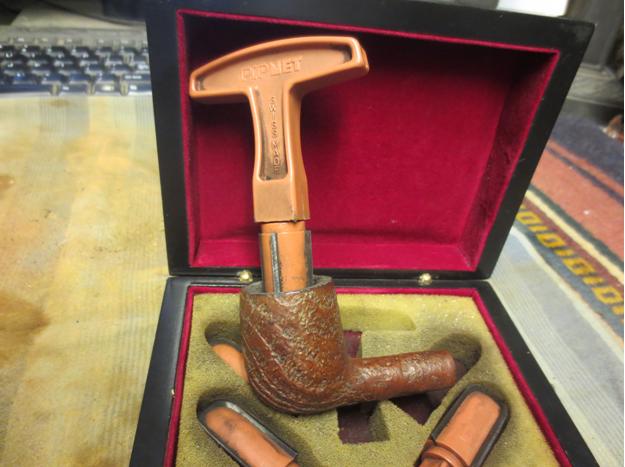
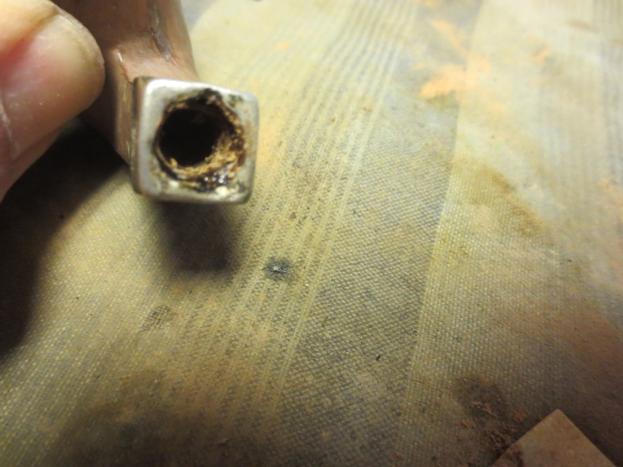
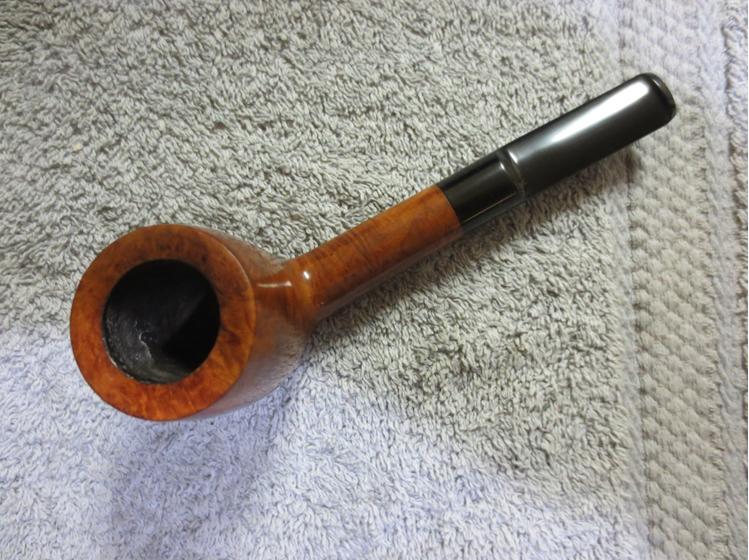
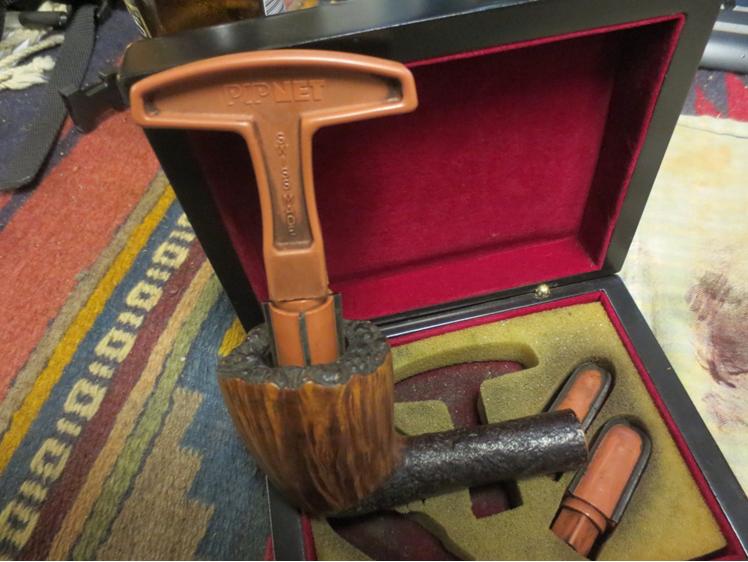
With the new stem fitting and only needing more fine tuning and polishing I decided to ream the bowl and work on the rim. I used a PipNet reamer and a KLEENREEM reamer and a pen knife to cut away the cake in the bowl. It was as hard as the cake in the other two bowls that my brother sent me.Class19

Class20 
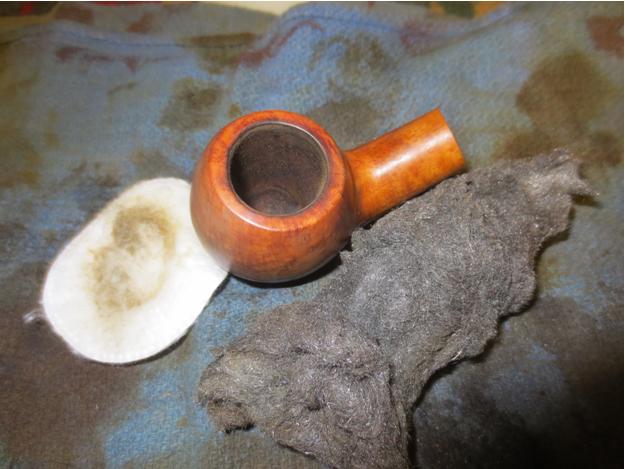
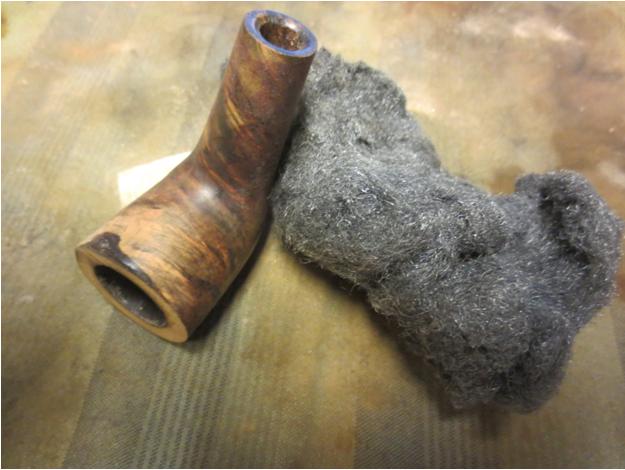
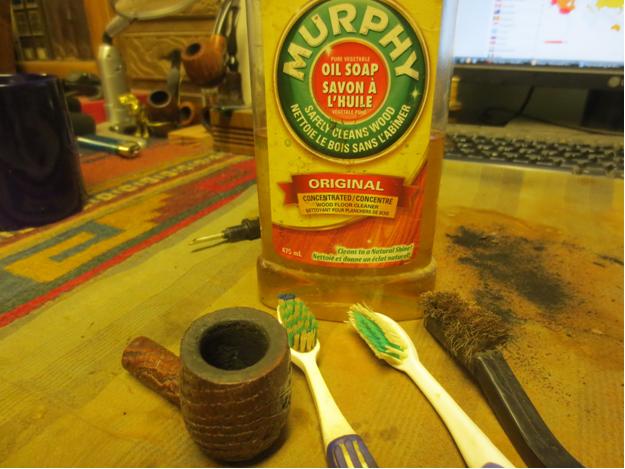
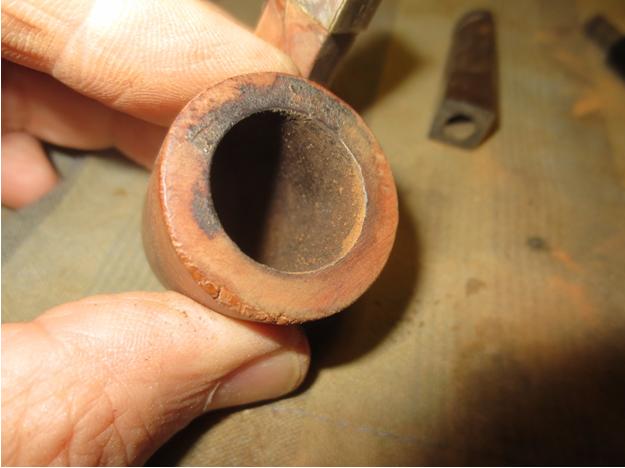
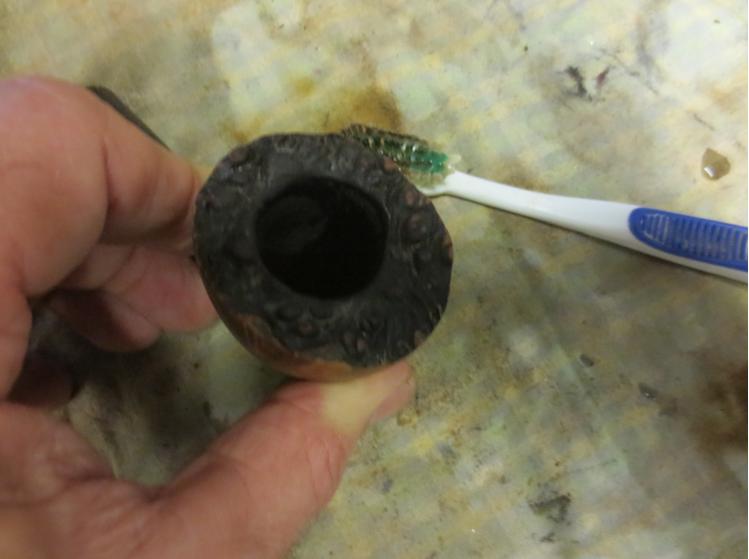
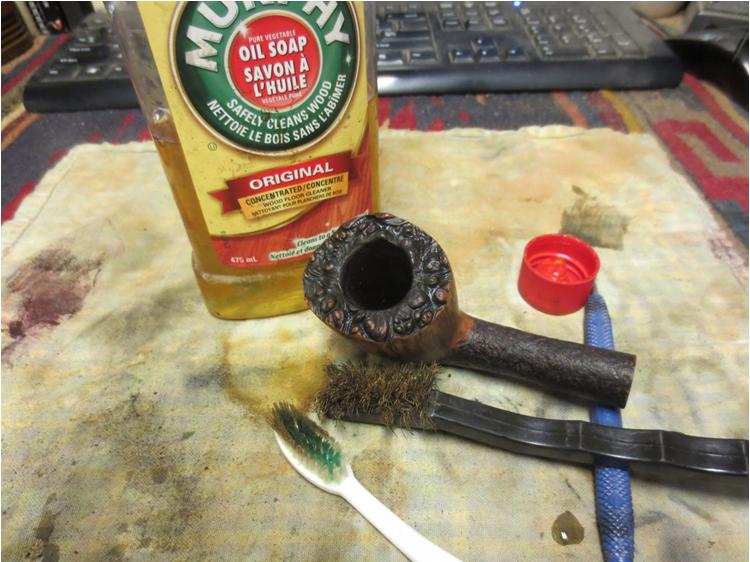
I scrubbed the sandblast with Murphy’s Oil Soap and a tooth brush and the caked rim with the soap and a brass bristle tire brush.Class21 
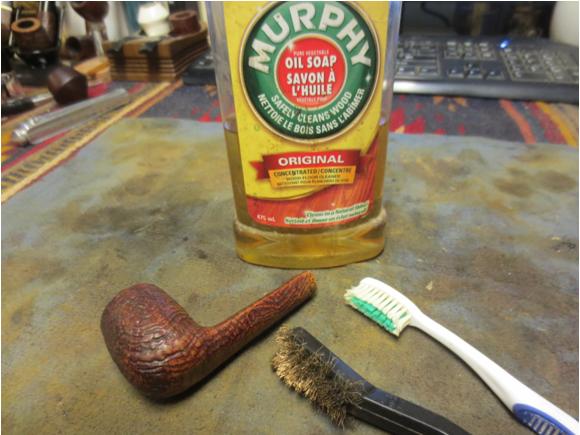
Once the grime was scrubbed off I rinsed the bowl in warm running water and cleaned out the brushes. I dried off the bowl with a towel.Class22

Class23

Class24

Class25 
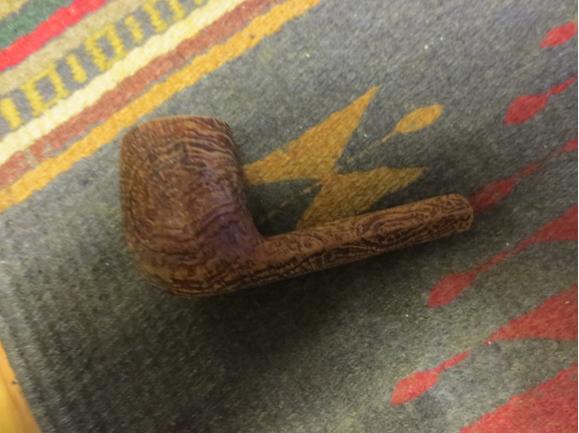
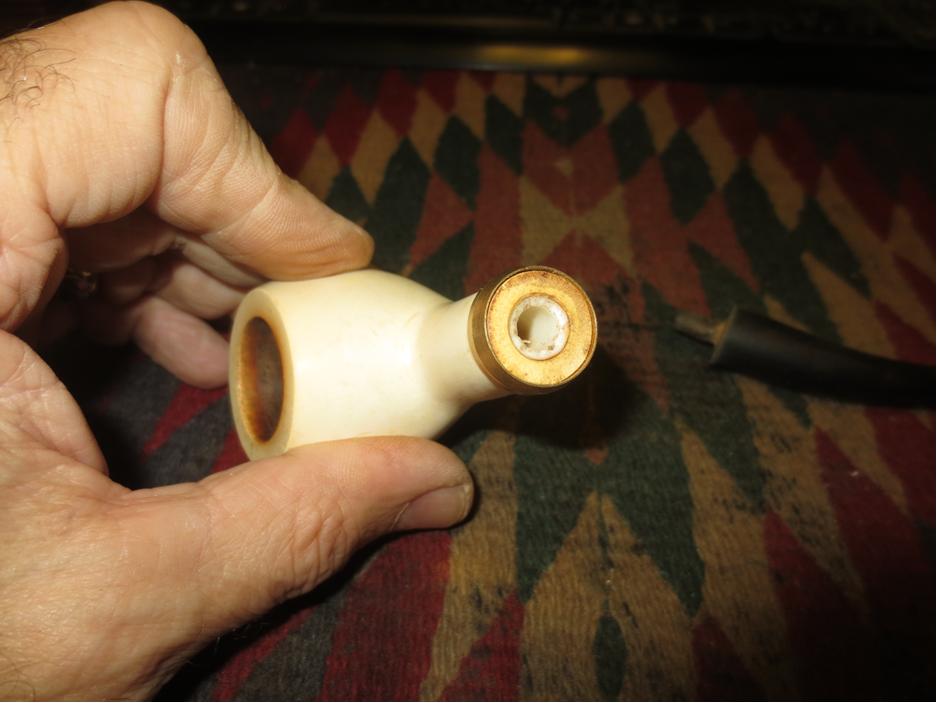
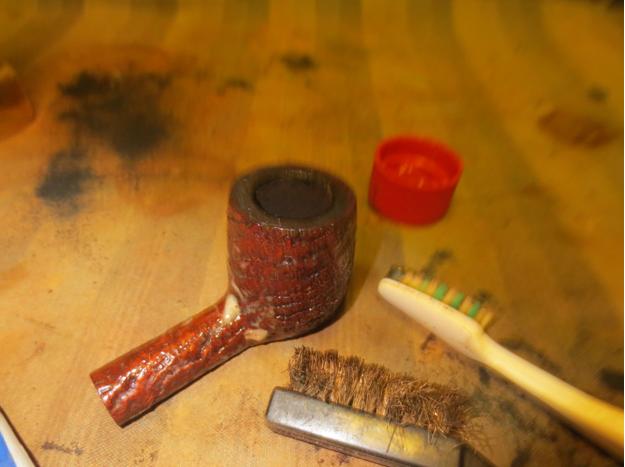
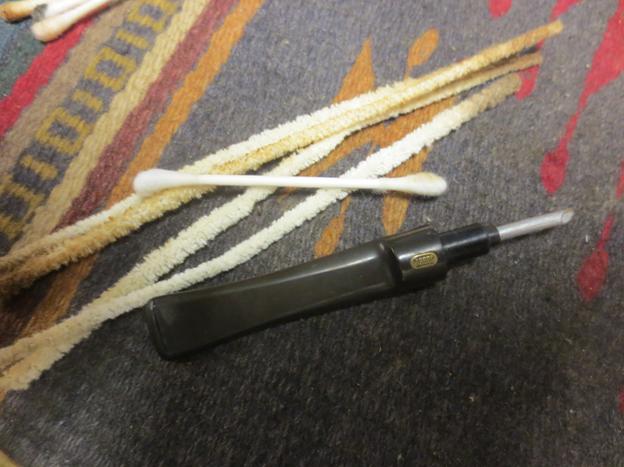
I cleaned out the shank with pipe cleaners, alcohol and cotton swabs. It was plugged in the airway to the bowl so I used the drill bit on the KLEENREEM tool and was able to clear out the gunk in the airway and open it up all the way to the bowl.Class26 
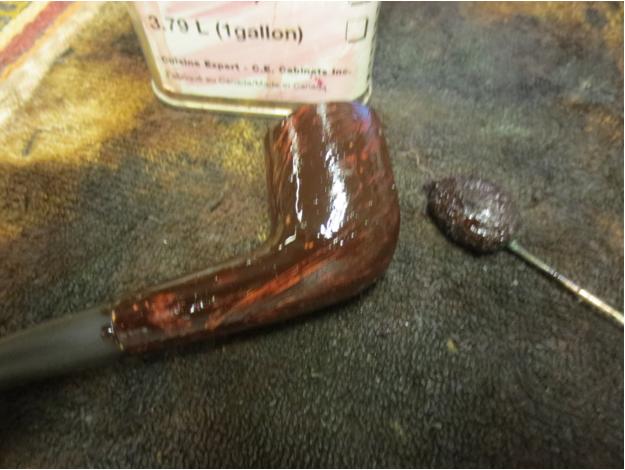
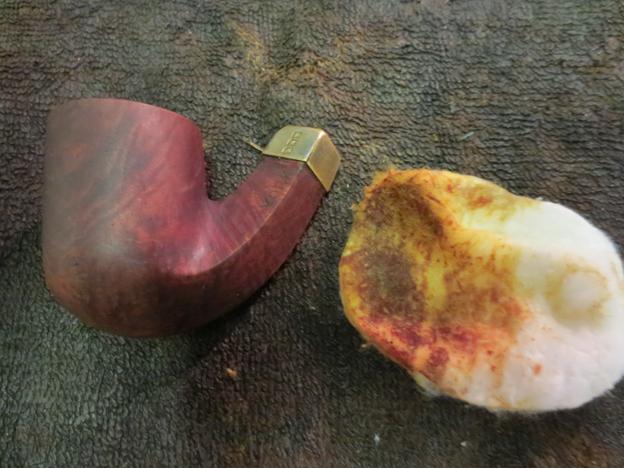
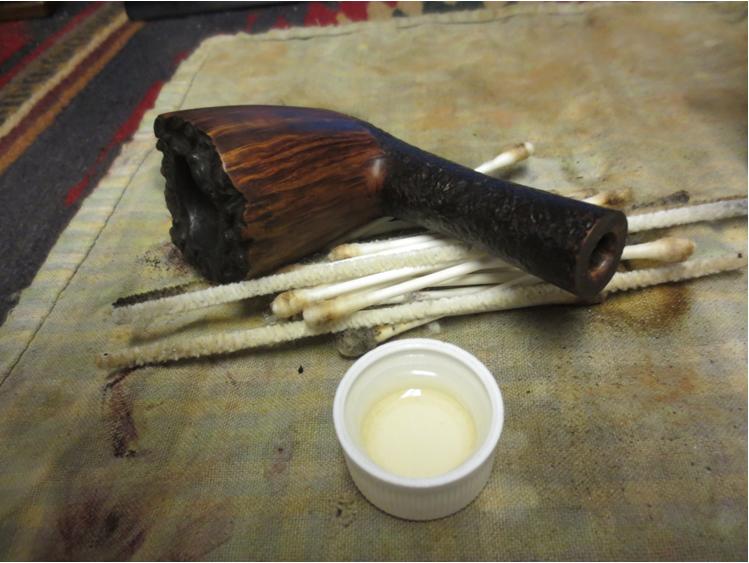
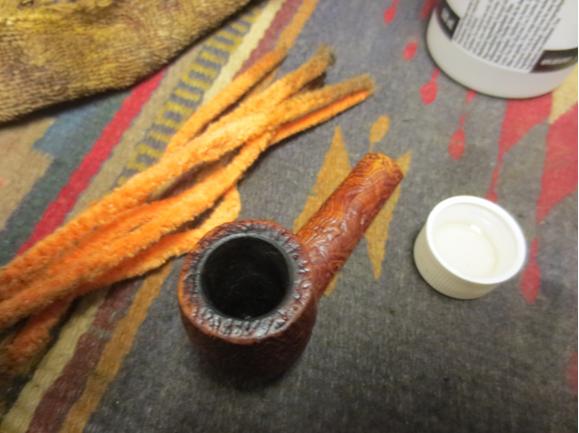
I wanted to keep the contrast stain on the pipe and not restain it so I gave it a light coat of olive oil to bring life back to the wood. I have found that dry briar absorbs the oil quite quickly and that the oil gives it some colour and life back without masking the original stain.Class27

Class28

Class29

Class30 
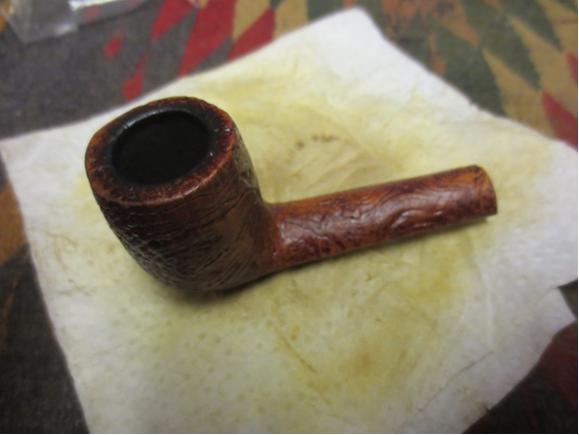
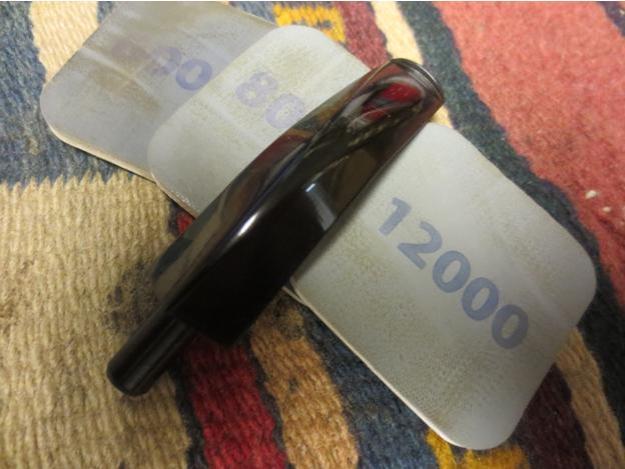
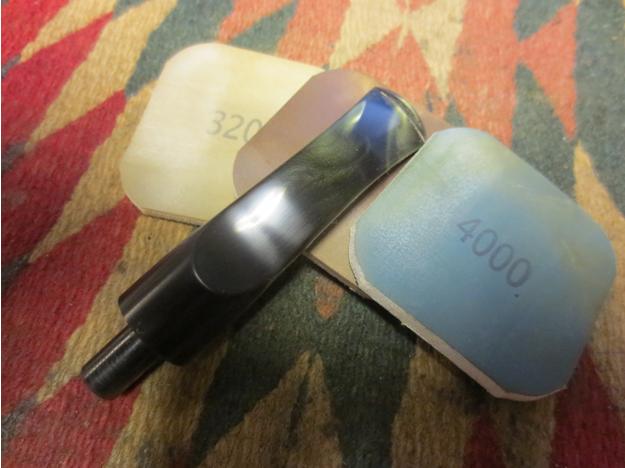
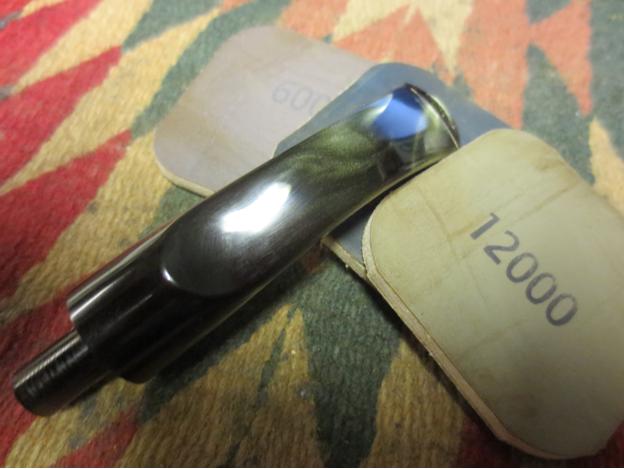
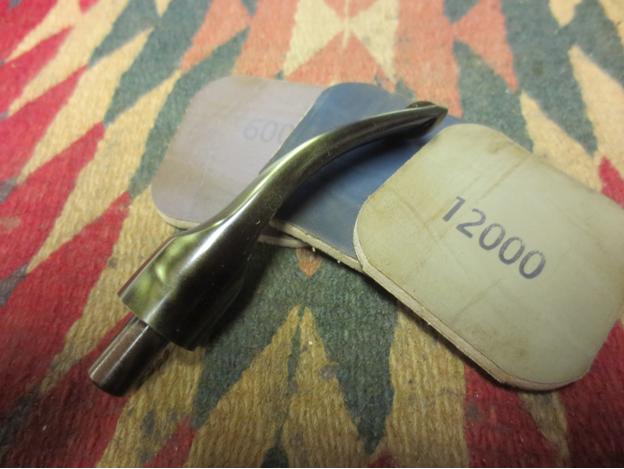
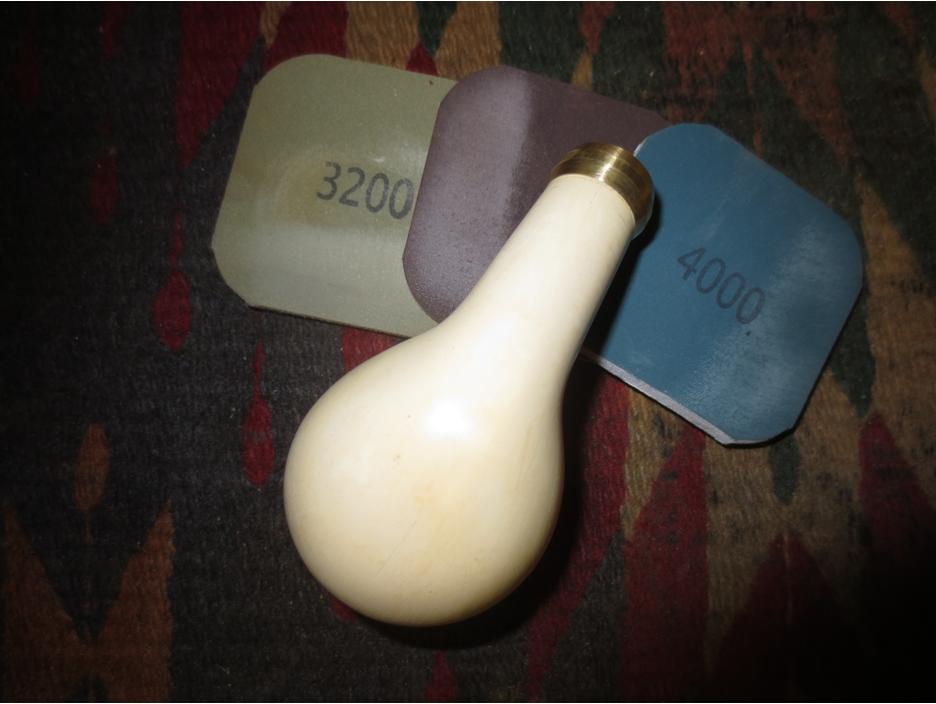
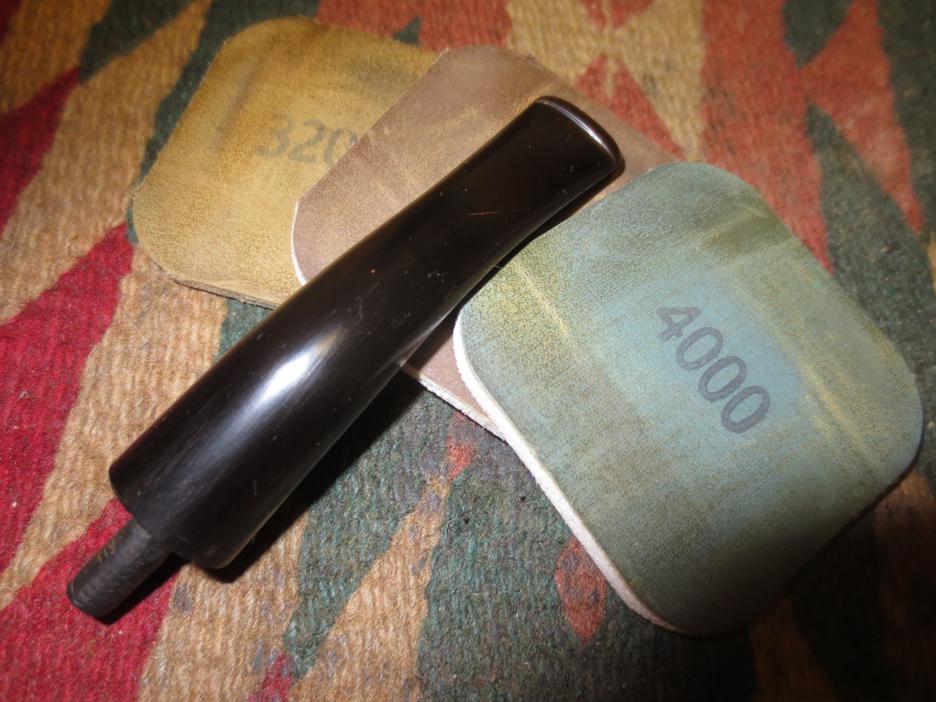
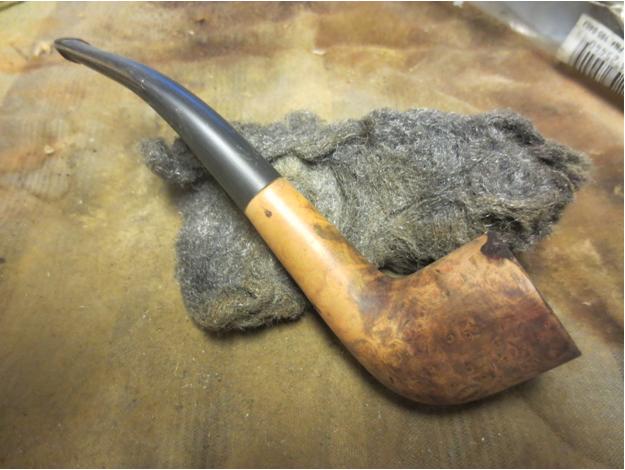
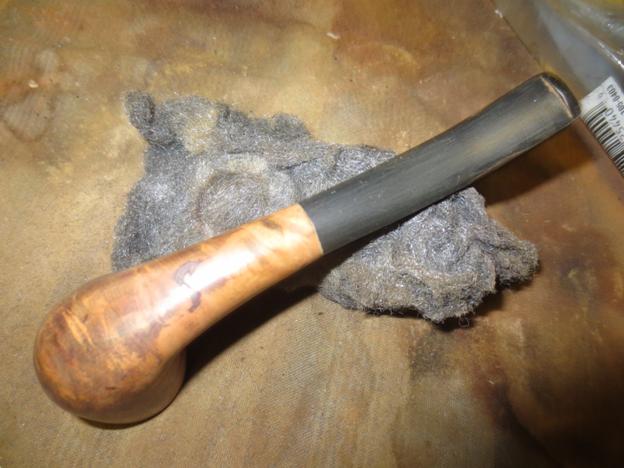
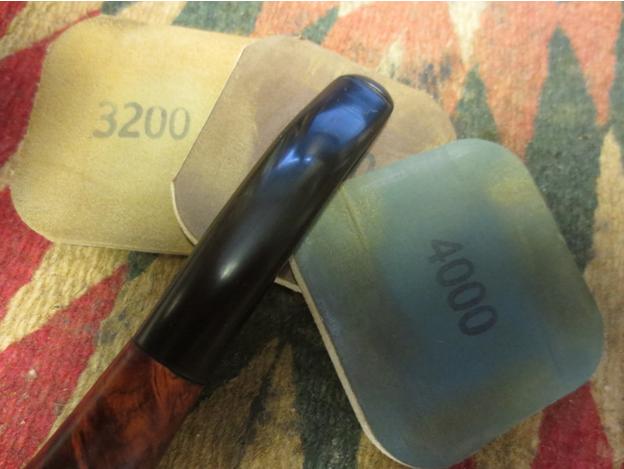
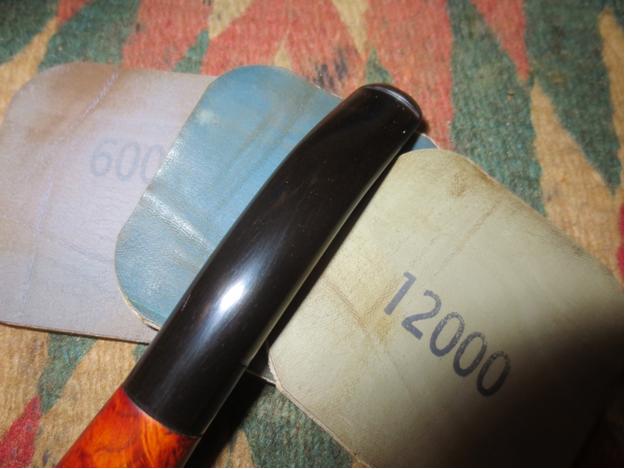
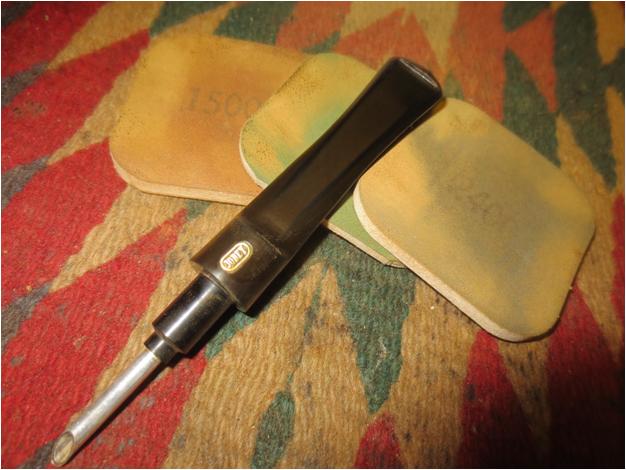
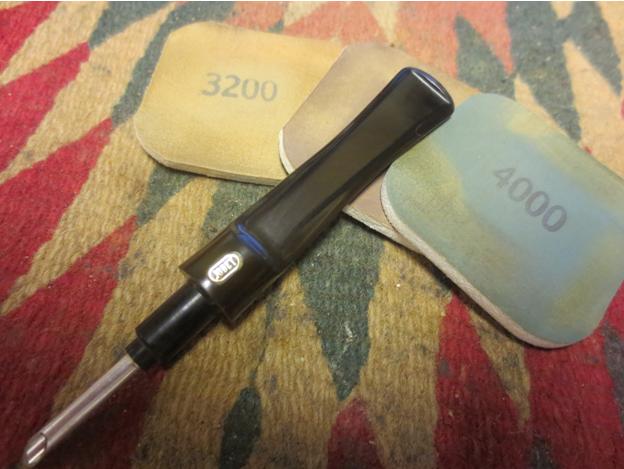
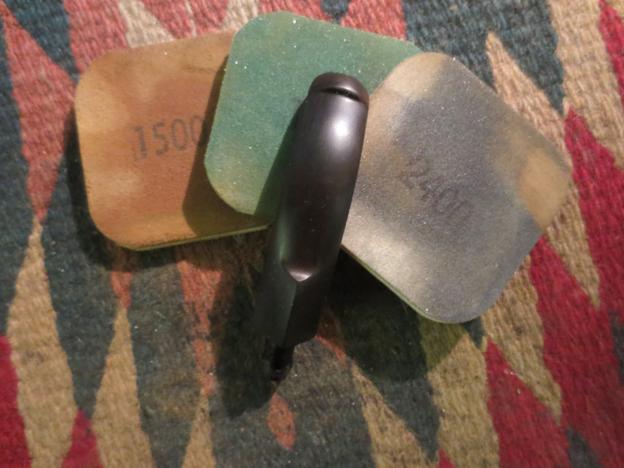
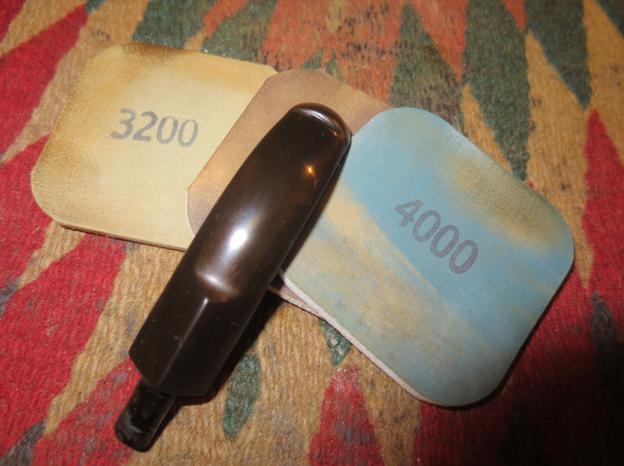
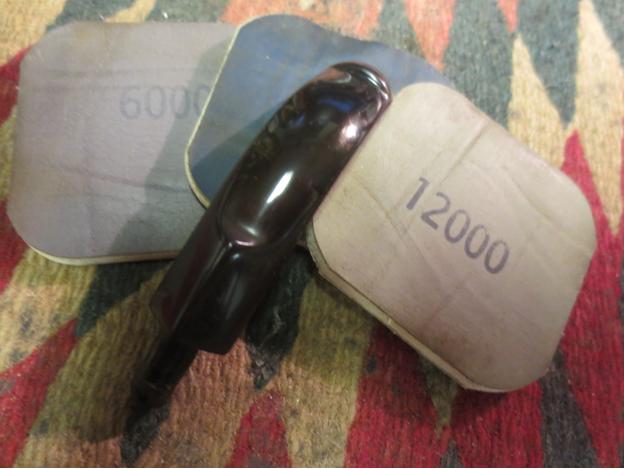
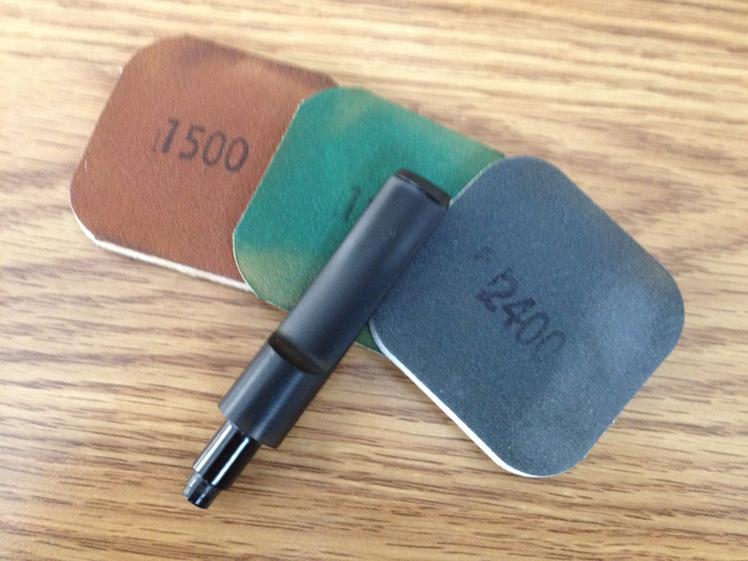
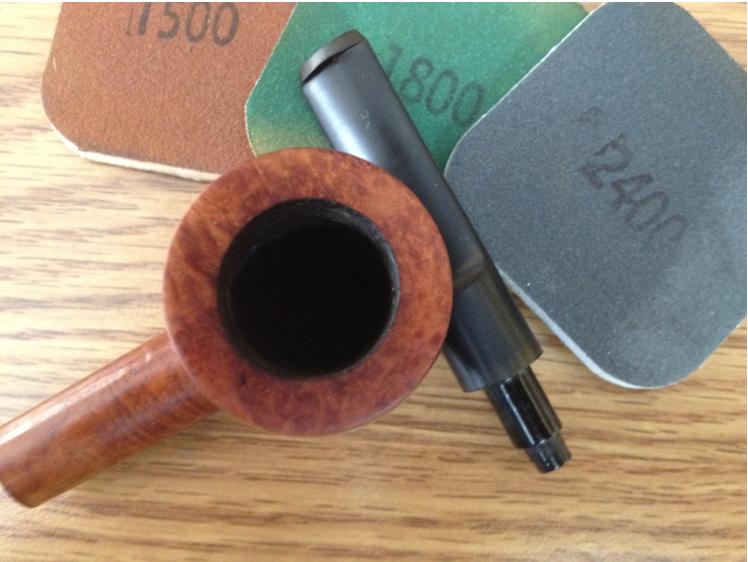
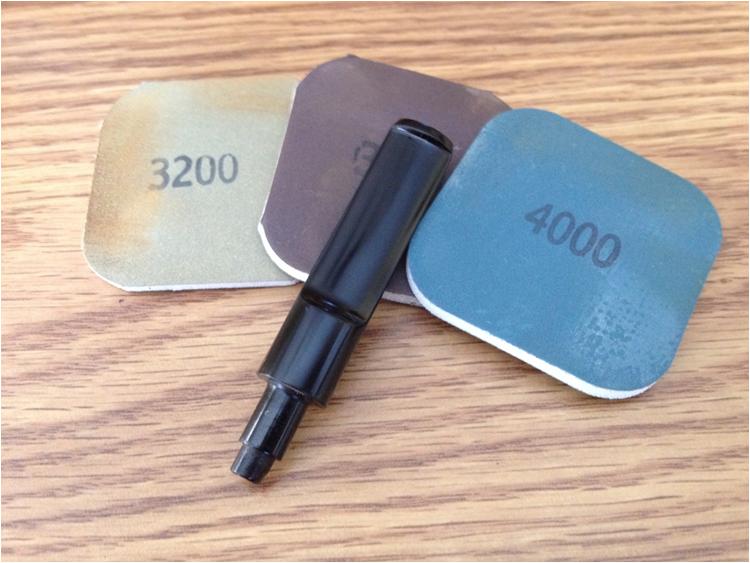
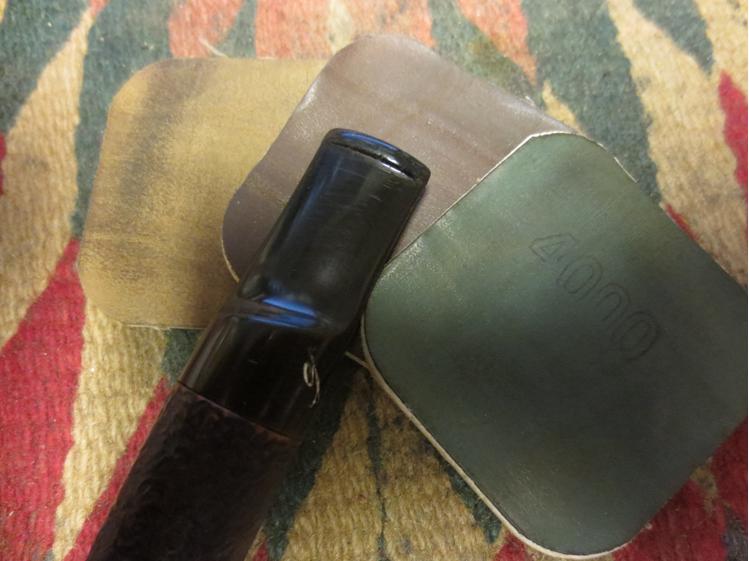
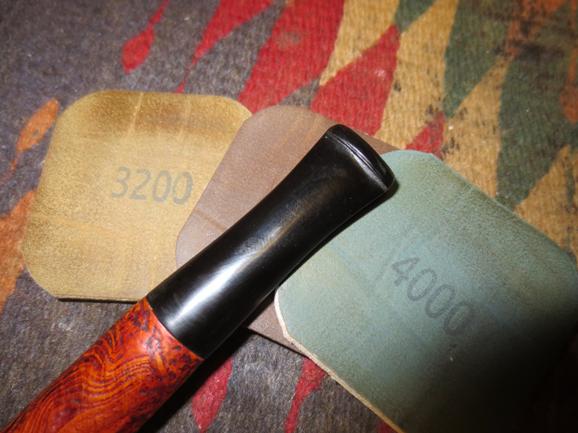
I wiped the bowl down and rubbed it vigorously with a clean soft towel to remove any of the surface oil and to give it an initial buff. I went to work fine tuning the stem fit. I used micromesh sanding pads – wet sanding with 1500-2400 grit pads and rubbing the stem down with Obsidian Oil. I dry sanded with 3200-400 grit pads. I gave it another coat of oil and finished sanding with 6000-12000 grit pads. I gave it a final coat of Obsidian Oil and let it dry.Class31

Class32

Class33 
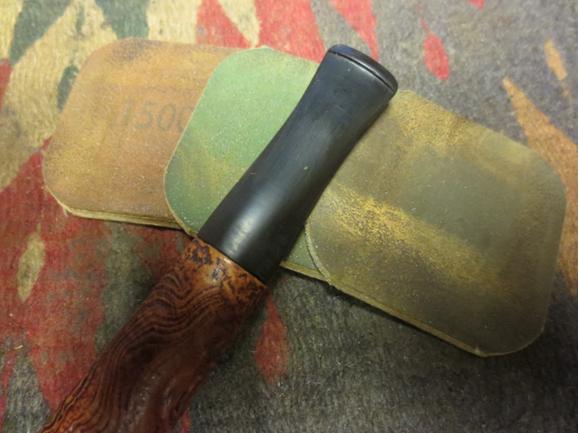
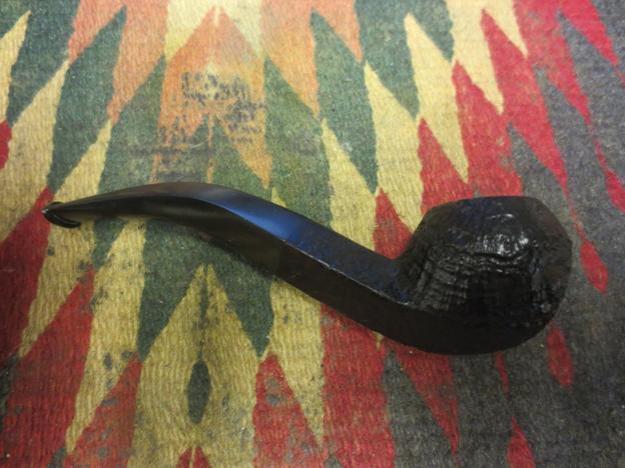
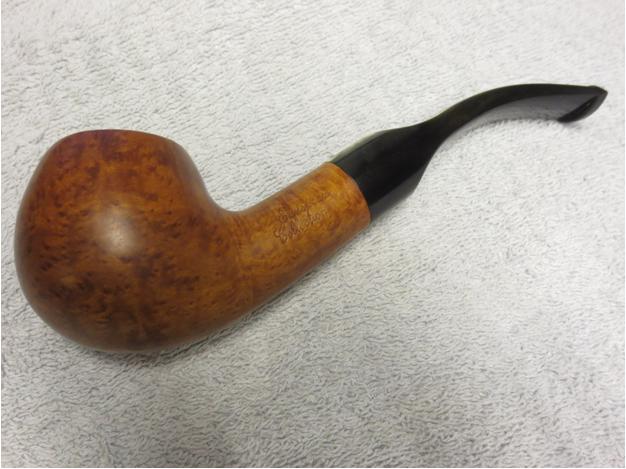
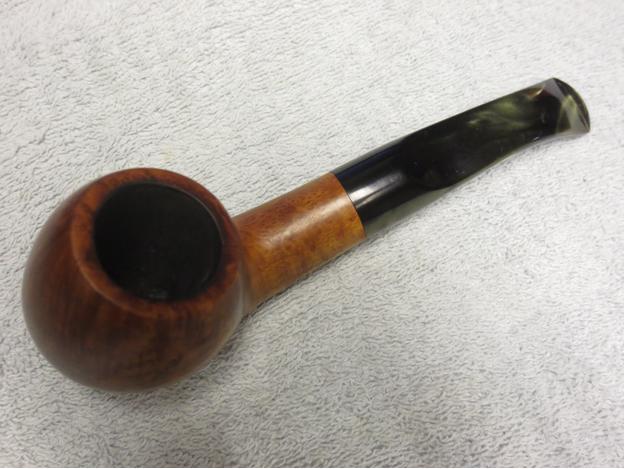
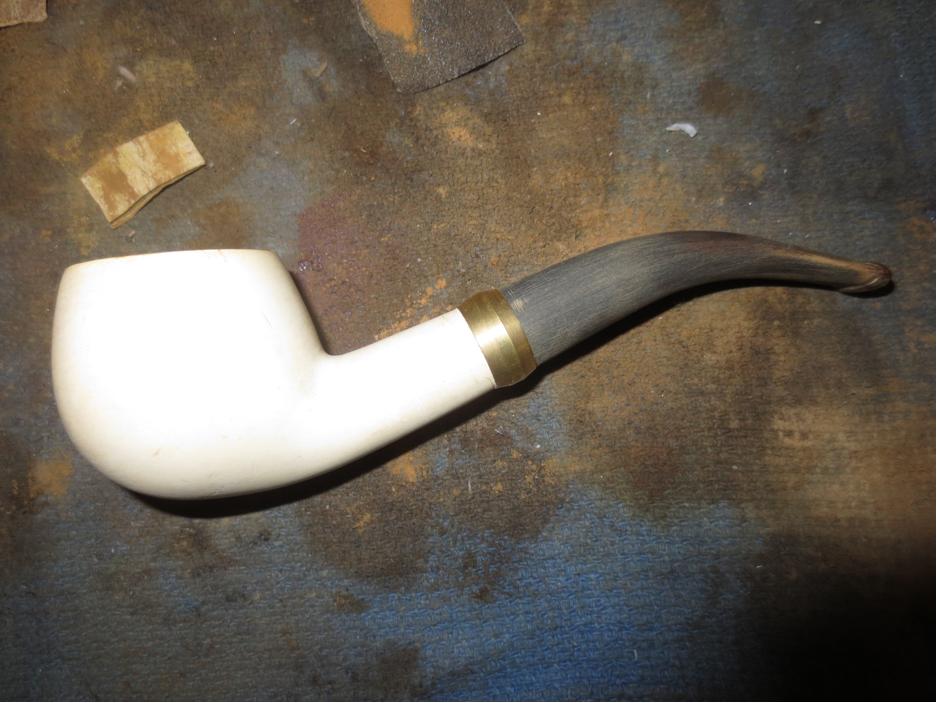
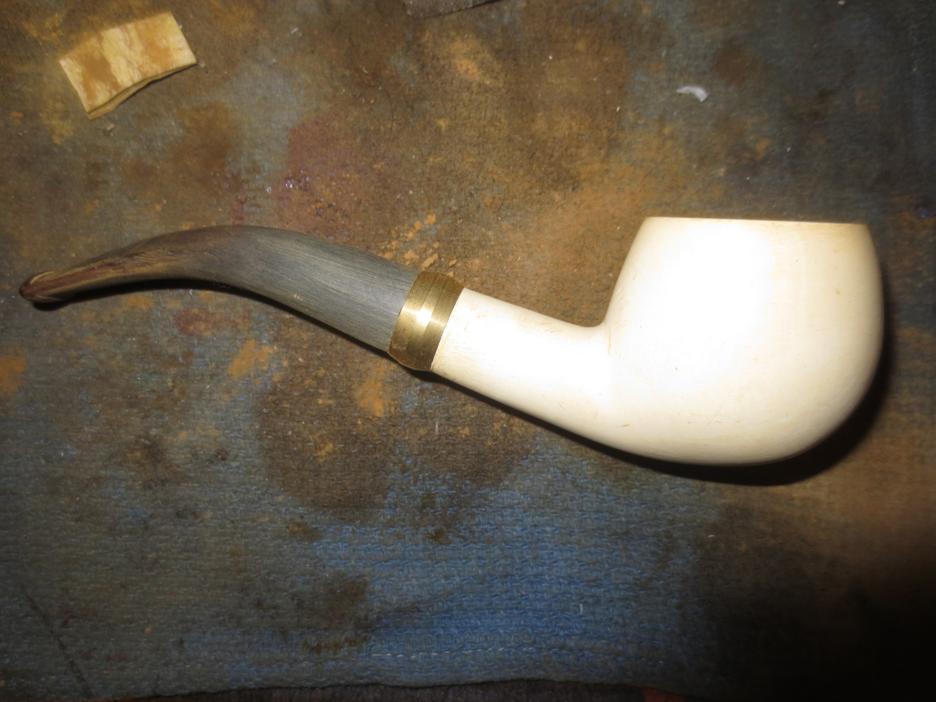
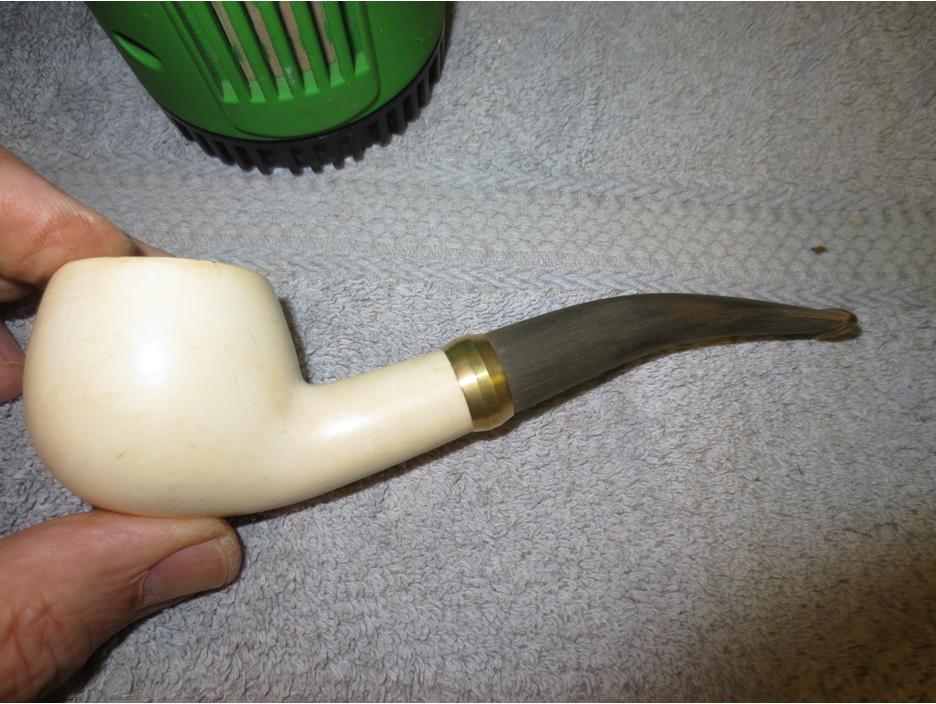
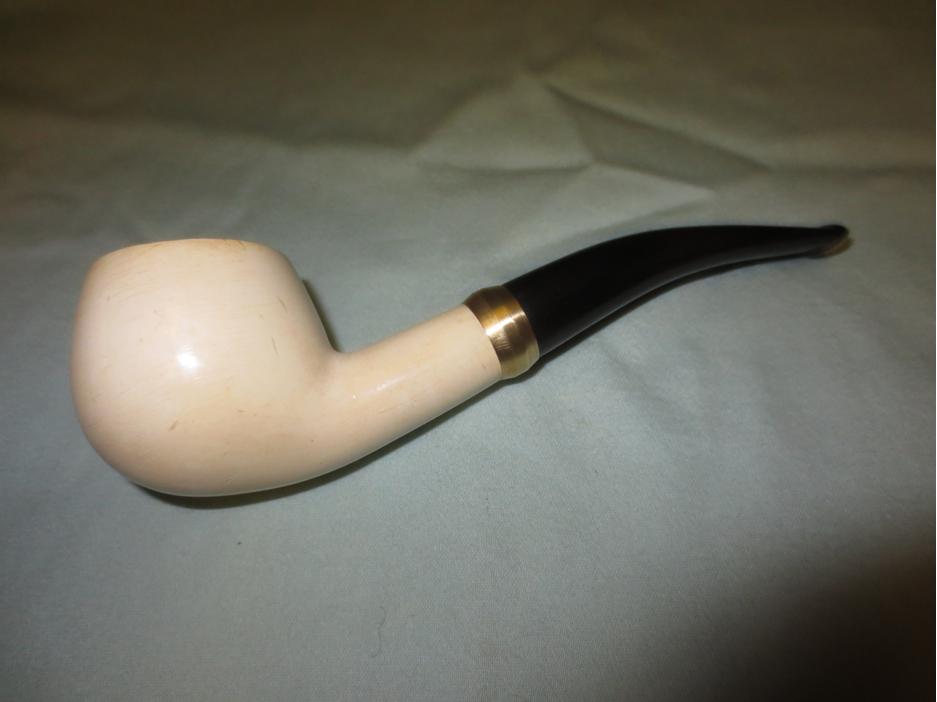
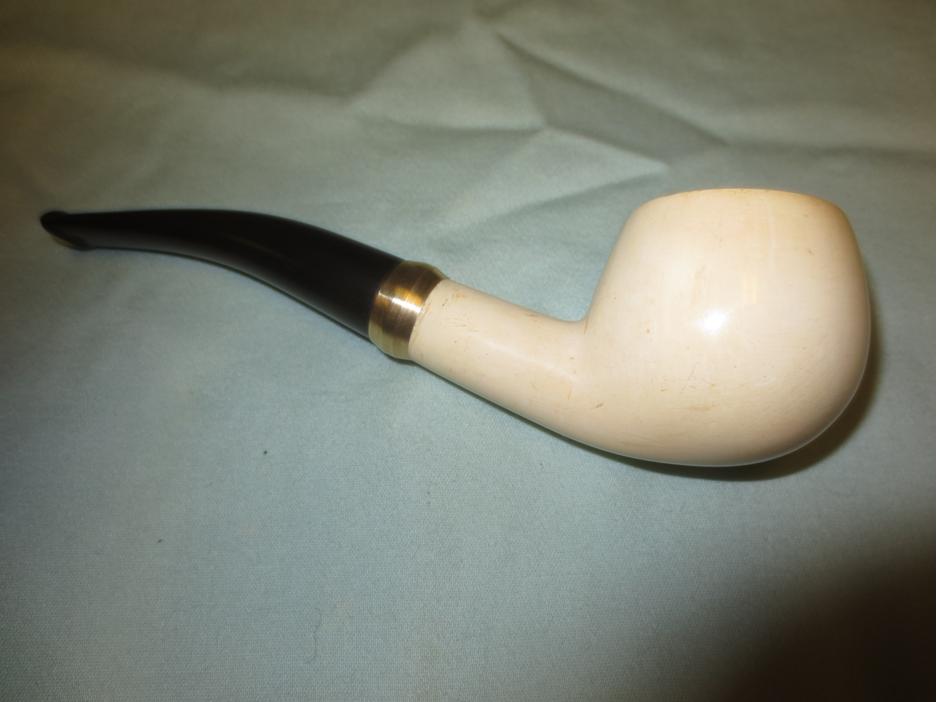
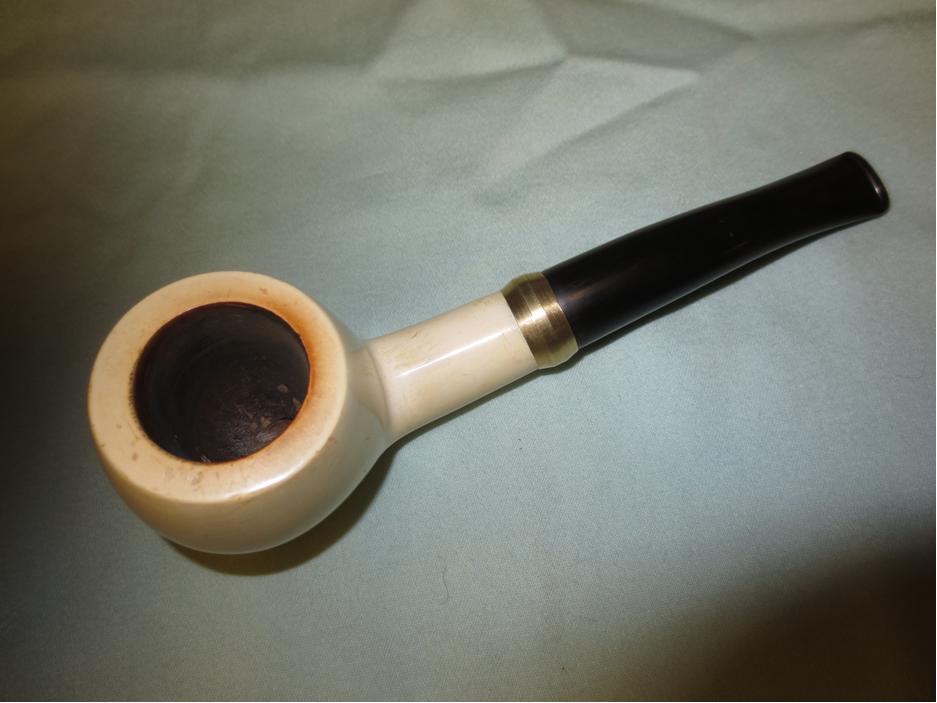
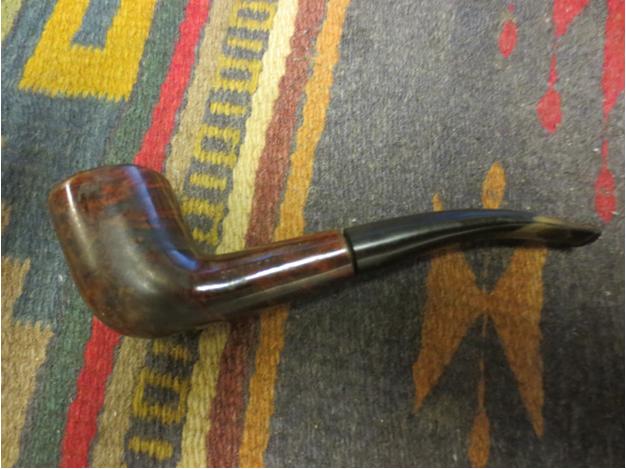
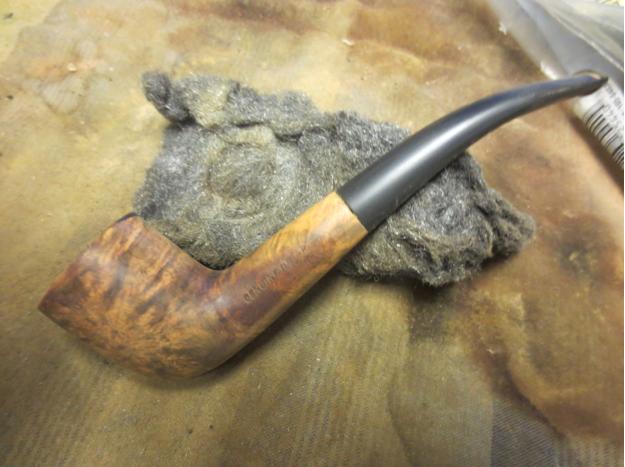
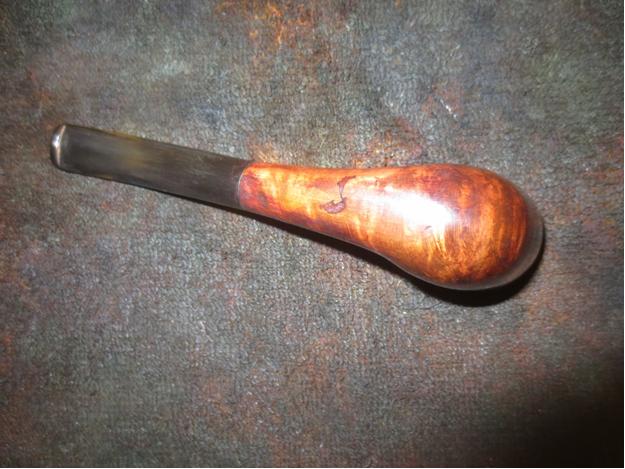
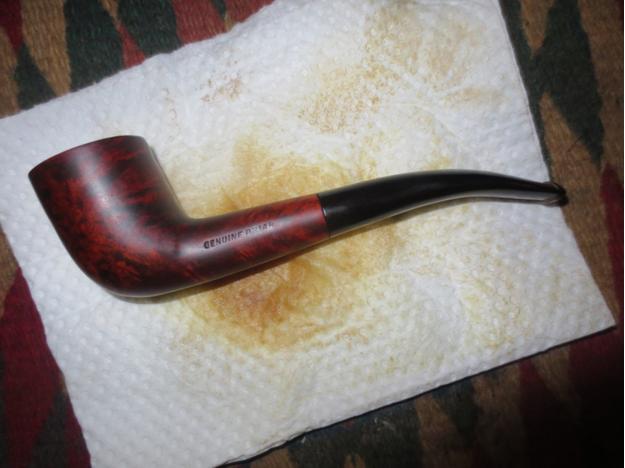
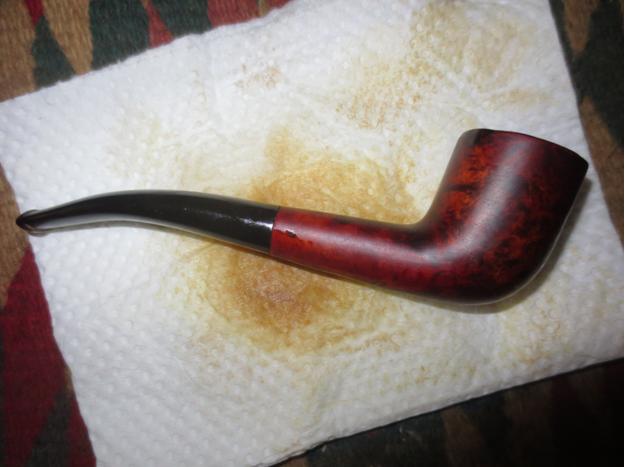
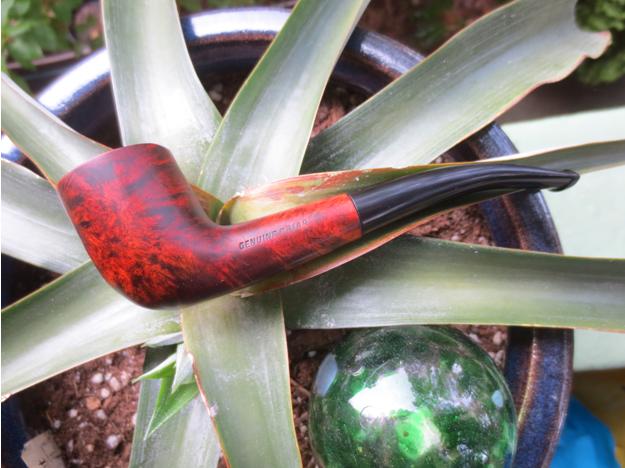
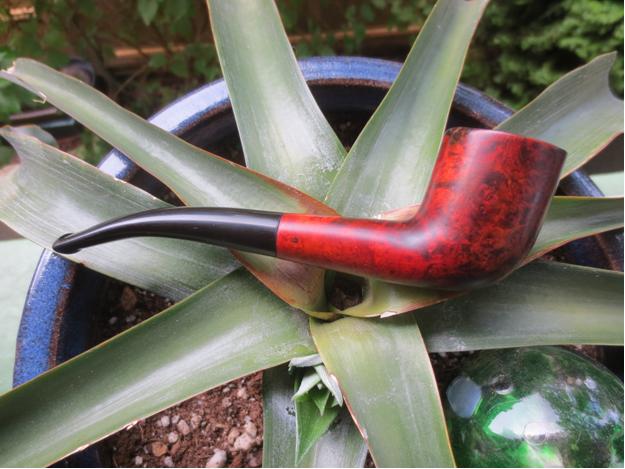
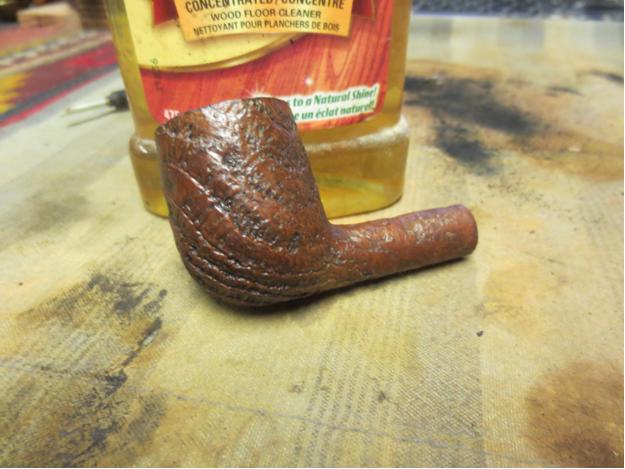
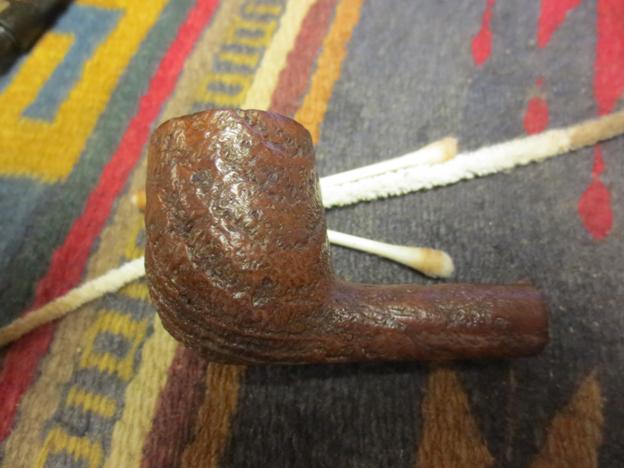
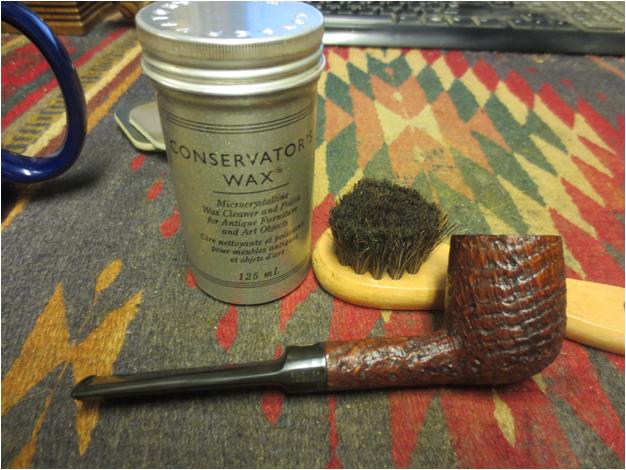
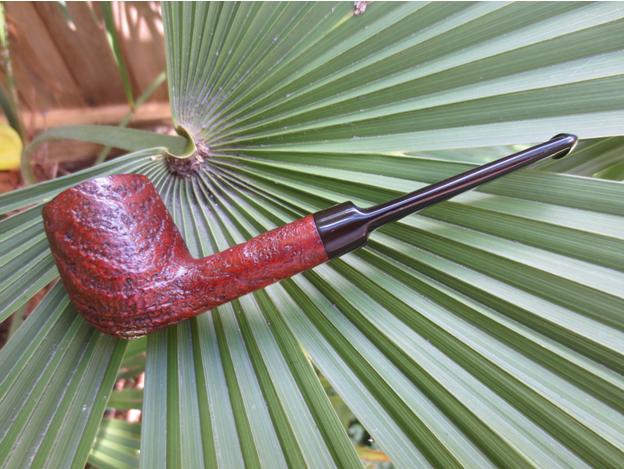
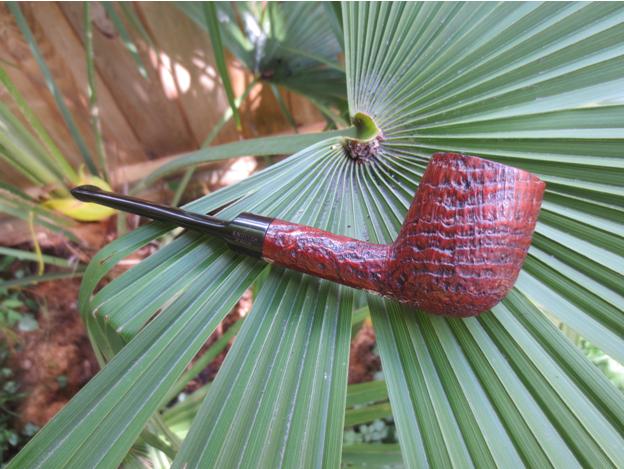
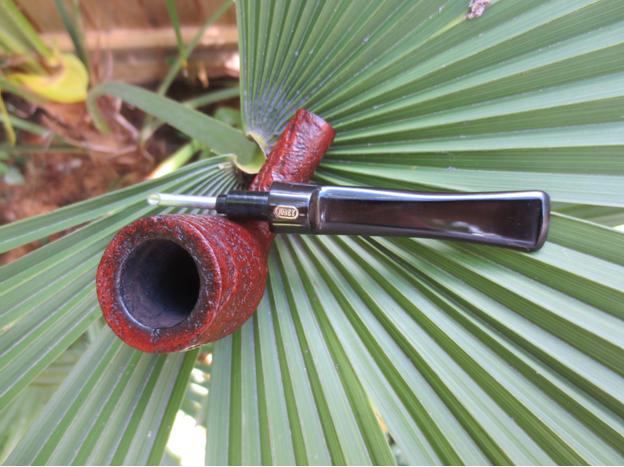
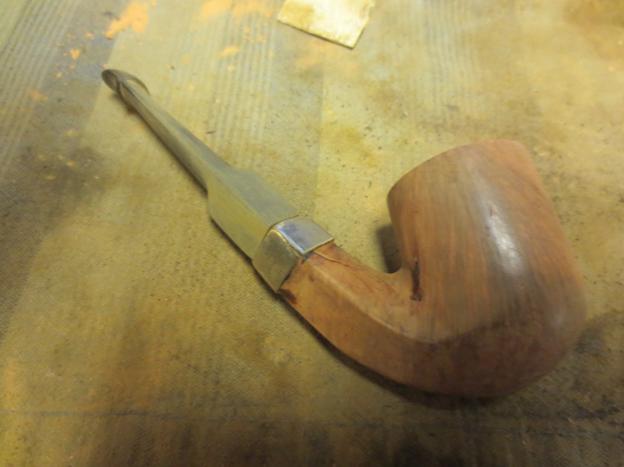
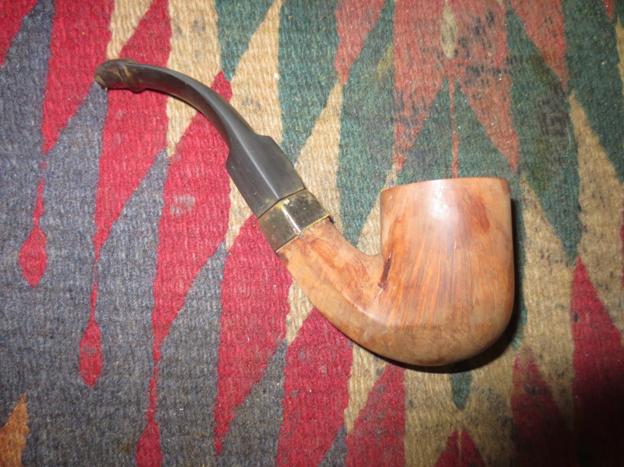
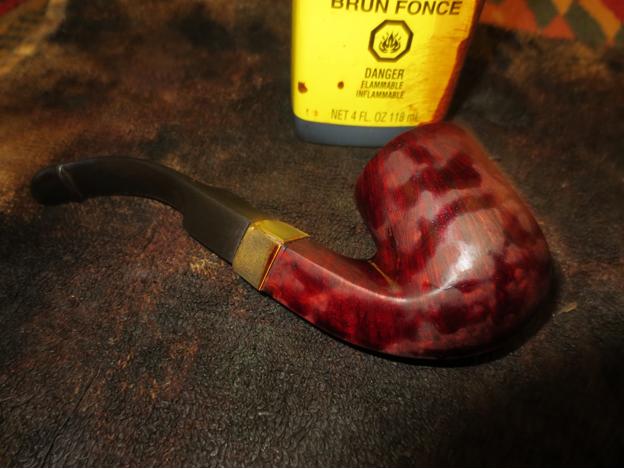
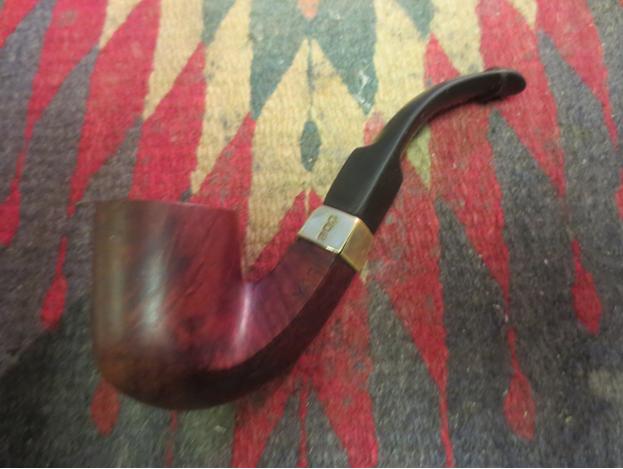
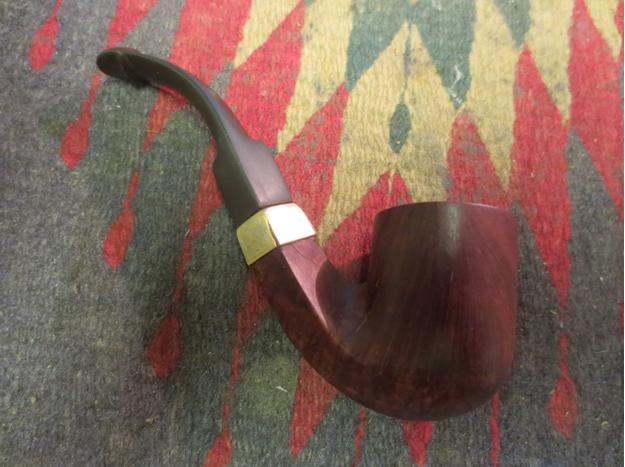
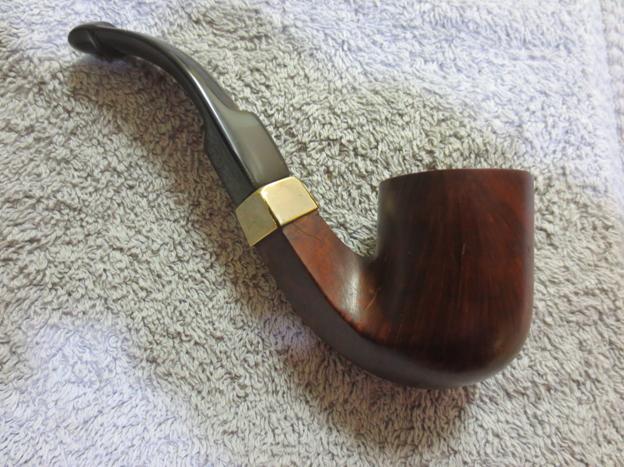
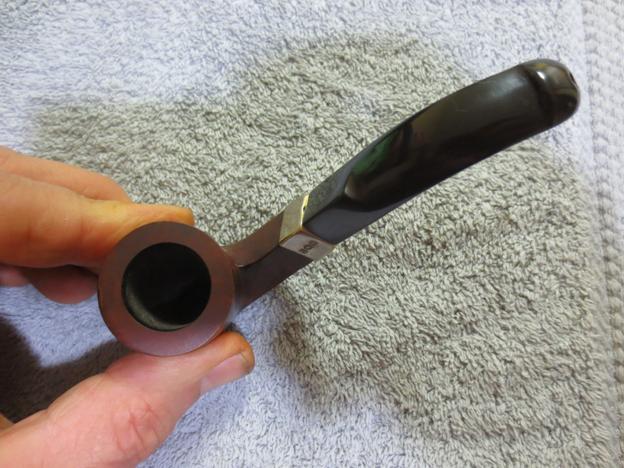
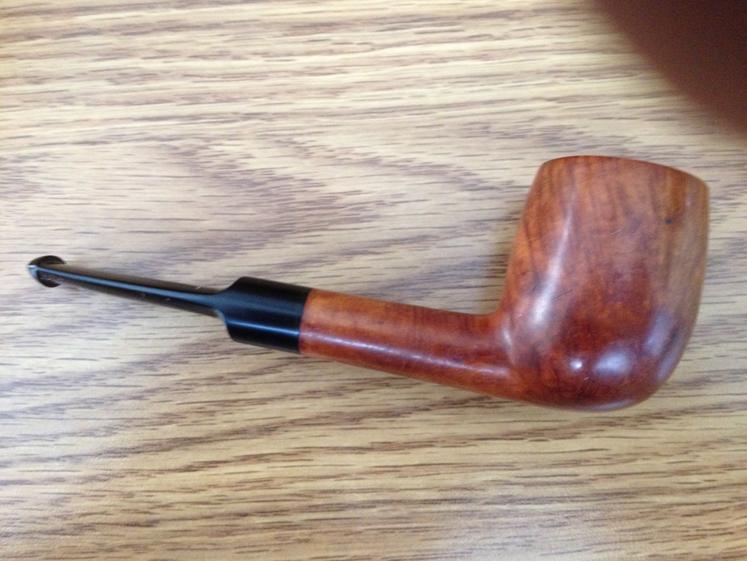
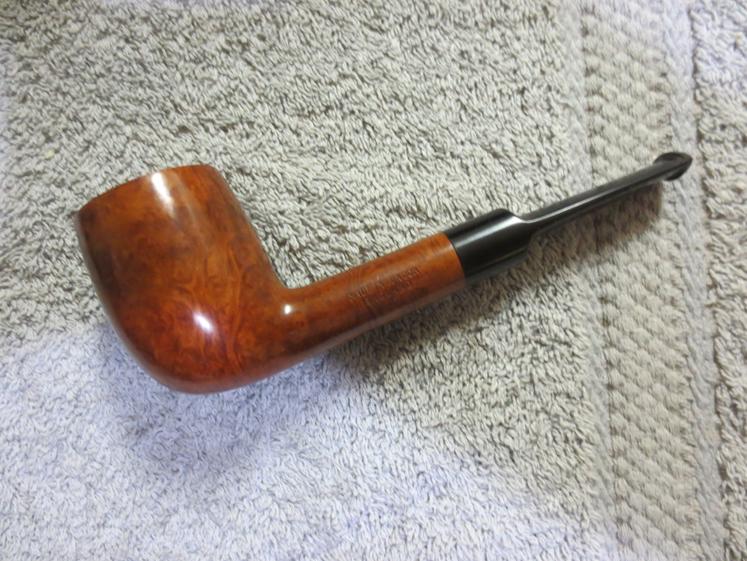
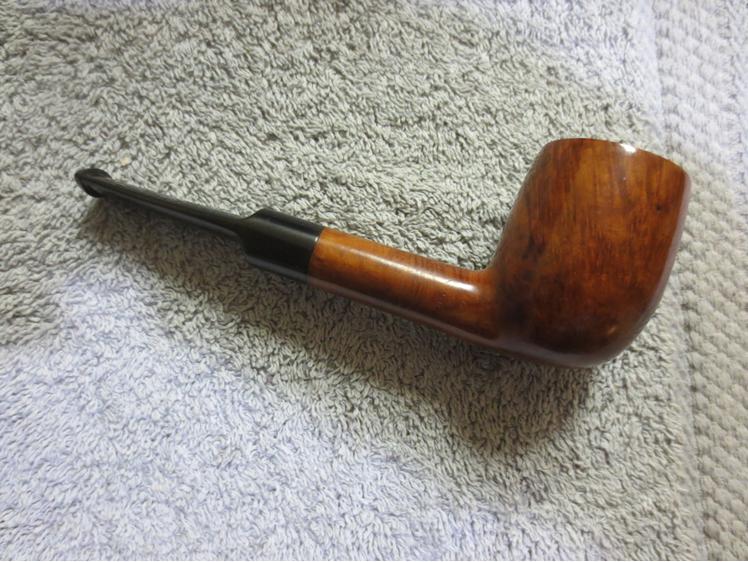
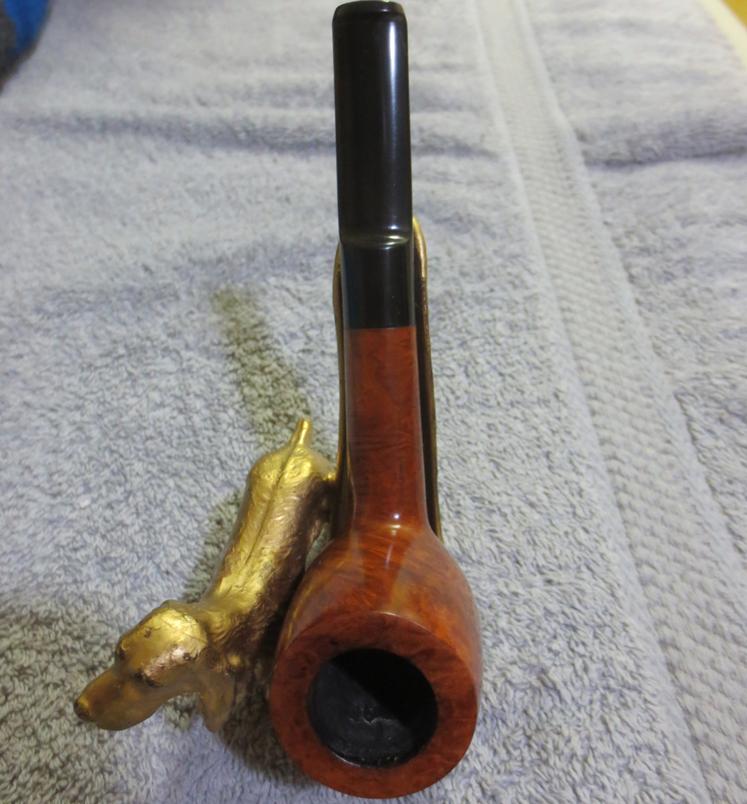
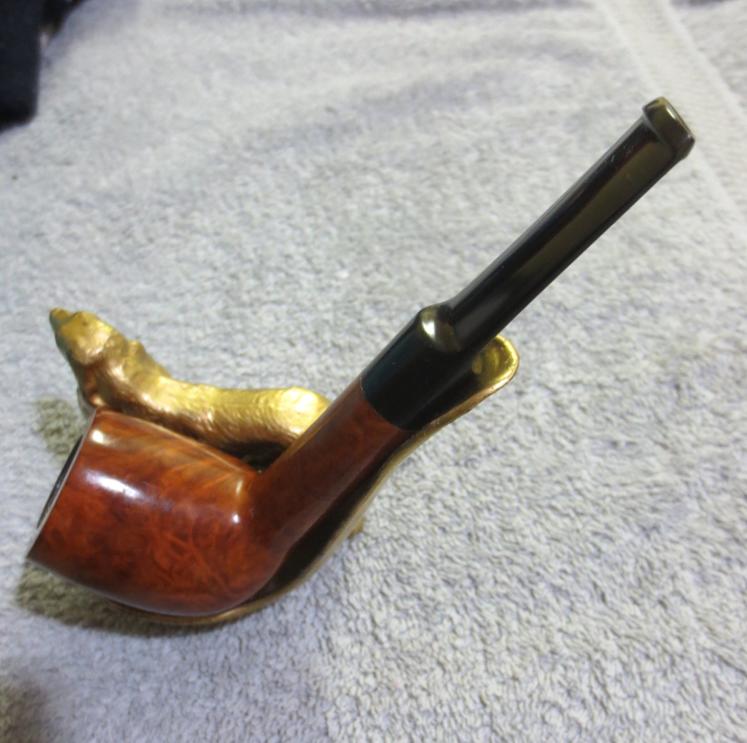
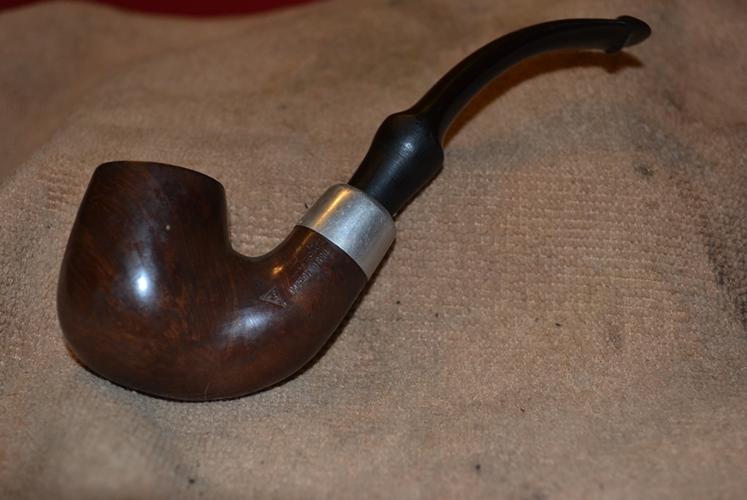
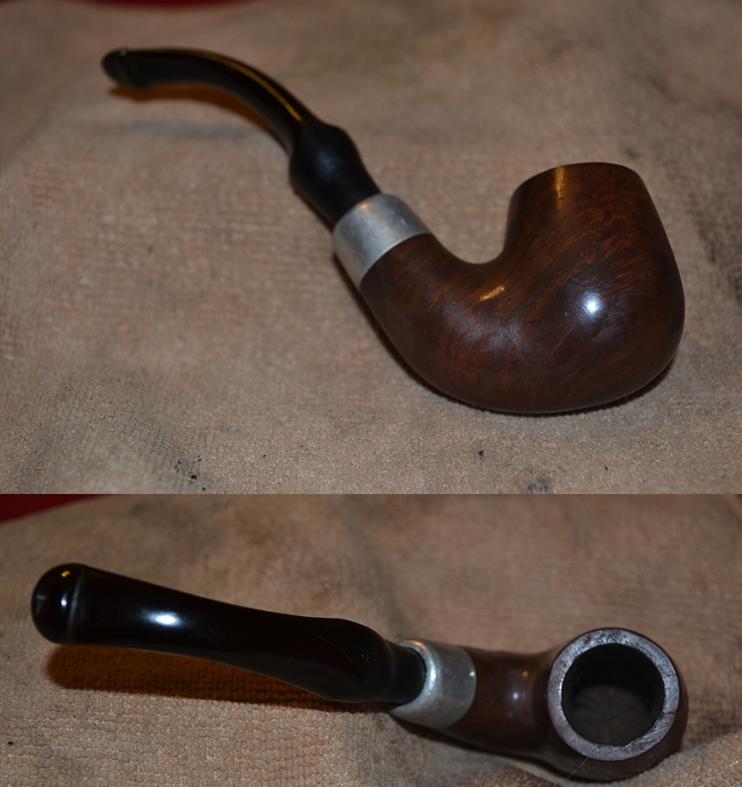
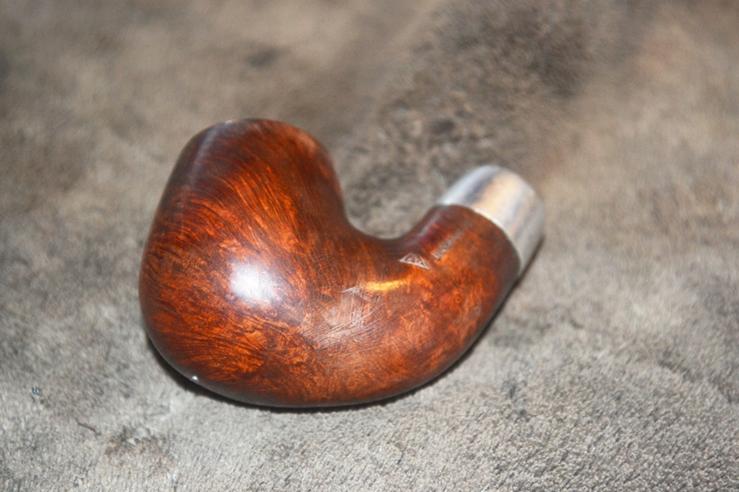
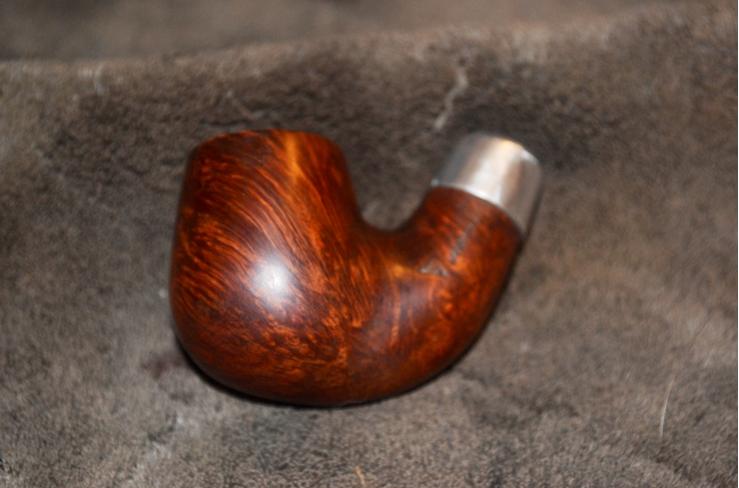
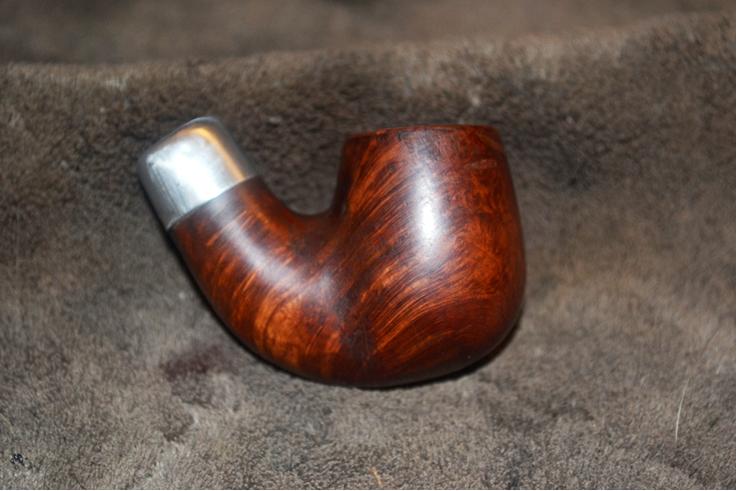
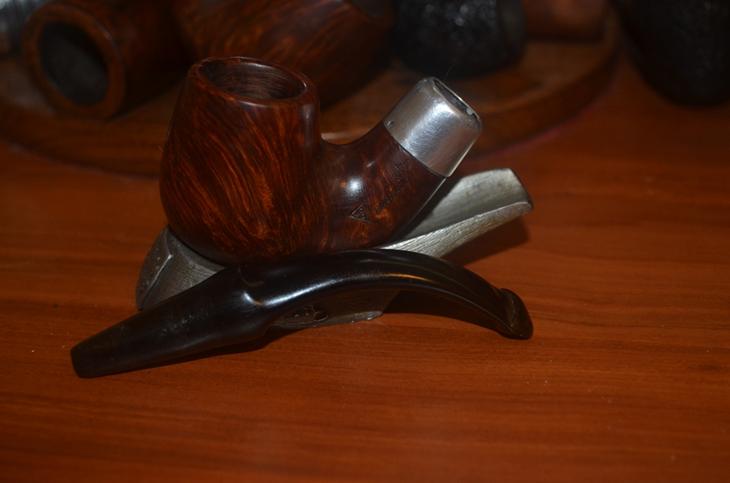
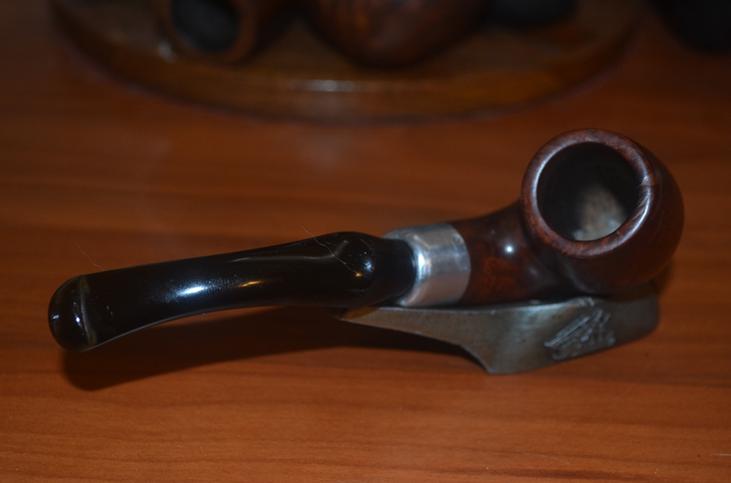
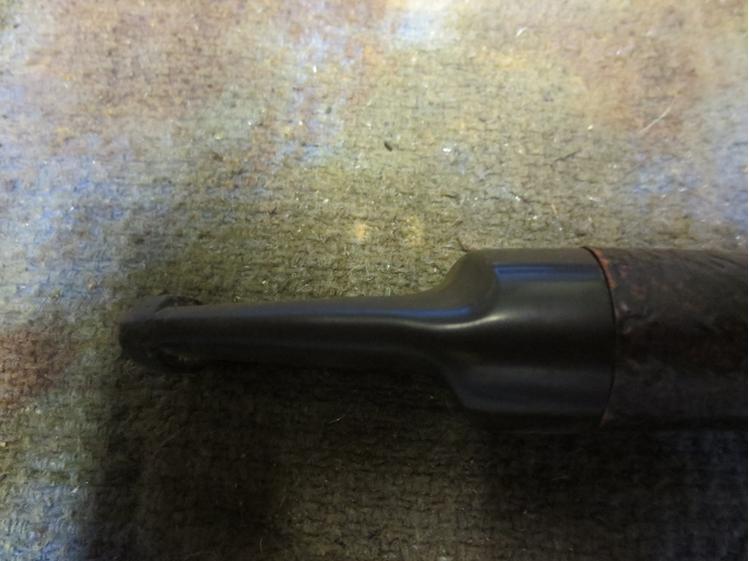
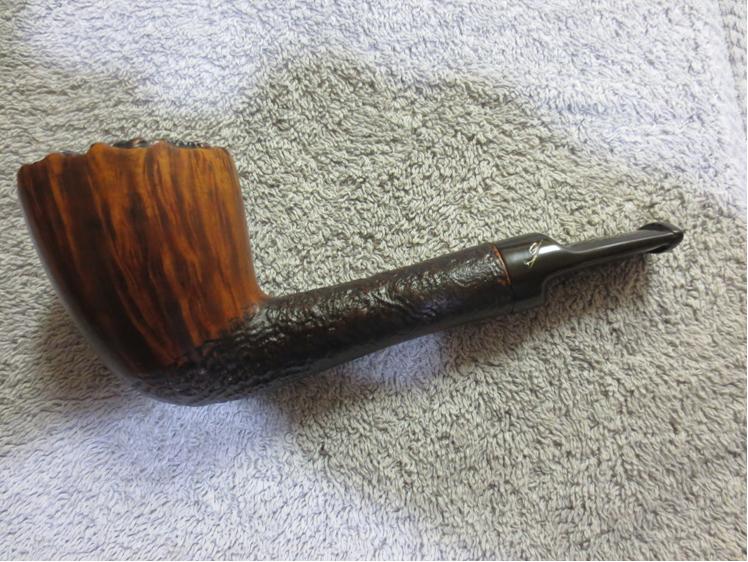
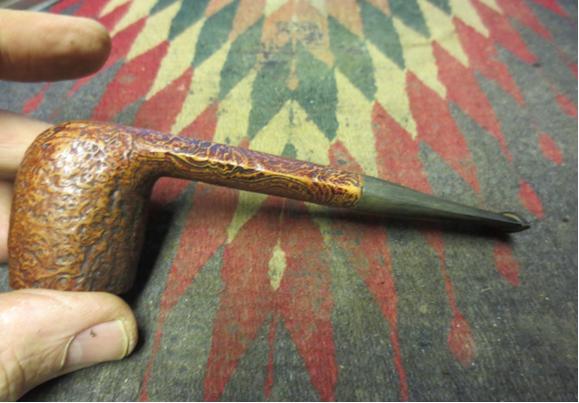
I buffed the stem and lightly buffed the bowl with Blue Diamond and then gave the stem multiple coats of carnauba wax. I hand buffed the bowl with Conservators Wax and a small shoe brush to bring out a shine to sand blast finish. The finished pipe is shown in the photos below. The straight new stem works for me. The pipe is once again a work of beauty. Thanks for looking.Class34

Class35

Class36

Class37

Class38

Class39

Class40

Class41

An Interesting Welsh Pipe Find: A C.A. Sander Sandhurst Bent Bulldog


Blog by Steve Laug

I came across this beautiful sandblast bent bulldog on Ebay and put a bid in for it. I was the sole bidder and won it for a decent price plus reasonable shipping from Great Britain. The pipe is stamped on a smooth spot on the bottom left side of the shank. It reads SANDHURST #16 and next to that it is stamped C.A. SANDER over SWANSEA. The seller stated that the pipe was in a good used condition, and had some wear. He also said that the measurements of the pipe are 135mm or 5.5 inches long, bowl size 35mm or 1.4 inches x 28mm or 1.10 inches. From the photos he included in the sale the finish on the bowl looked to be in excellent shape. The rim was very clean. I could not see the inside of the bowl but the way the rim looked I was guessing that it was very clean. The sandblast was nicely done with some deep craggy ring grain. There was no ring around the cap on the bowl. The stamping on the shank was clear but was weak in spots. The stem was lightly oxidized but had no tooth chatter or bite marks.Swan1

Swan2

Swan3

Swan4

Swan5 I knew next to nothing about the maker of the pipe. I could ascertain from the stamping that the pipe was made by a C.A. Sander in Swansea. I remembered that Swansea is in Wales so I had something to start with. I looked in Who Made that Pipe and also in Lopes book and could find nothing listed for that maker. I used Google to see if I could find any information on the company and looking a company of that name in Swansea, Wales. I actually found out that the company started in 1977 and closed in 1998. It appears from the information that I found to have been a family owned and operated company with broad interests. There was no mention of pipes in any of the company documents that I could find. I wonder if the brand was not just one of many avenues for the company to expand its horizons. I found two pipes online with the CA Sander stamping these included the Oxford and the Sandhurst. Both the Oxford and the Sandhurst are sandblast finish pipes with a dark stain. There was no other information available that I could find listed online. Does anyone have any information on the brand? (I have included a photo of the stamping on a stemless Oxford Bulldog that I just purchased on eBay for comparison.)Swan6 When the pipe arrived it was in far better shape than the seller intimated. The bowl was lightly smoked if at all. There was no cake and the darkening did not extend to the bottom of the bowl. I ran a pipe cleaner through the shank and the stem and it came out clean. There was dust in the shank that came out but no tobacco oils or tars. The stem was actually less oxidized than I expected and would clean up very easily. There were some tiny tooth chatter next to the button on the top and the bottom side of the stem. There were some small nicks in the vulcanite on the top right side midstem.Swan7

Swan8

Swan9

Swan10 I took a close up photo of the rim and bowl to show the excellent condition of the rim and bowl. The second photo below shows the nicks in the stem that I spoke of above. This should be an easy clean up.Swan11

Swan12 The slot in the button was very thin and I was unable to get a pipe cleaner into the airway from that end. I used three different needle files to open it wide enough to take a thick pipe cleaner easily. Once it was open I sanded the inside of the slot to make it smooth. The draw on the pipe is much better after opening the slot. The narrowness of the slot makes me wonder if that is why the pipe was not smoked more.Swan13

Swan14

Swan15 I sanded the stem with 220 grit sandpaper to remove the oxidation, smooth out the tooth chatter and the two nicks on the right side. Once they were gone and the stem was smooth I used a medium and fine grit sanding sponge to begin to minimize the scratching. I put a plastic washer between the stem and the shank to keep the shoulders sharp and protect the shank while I was sanding.Swan16

Swan17

Swan18

Swan19

Swan20 I wet sanded the stem with 1500-2400 grit micromesh sanding pads and then rubbed the stem down with Obsidian Oil. The oxidation is disappearing and the dark black of the rubber is beginning to stand out. I dry sanded it with 3200-4000 grit micromesh pads, gave it another coat of oil and finished sanding it with 6000-12000 grit pads. I gave it a final coat of Obsidian Oil and then set it aside to dry.Swan21

Swan22

Swan23 I buffed the pipe and stem with Blue Diamond on the wheel and then gave them multiple coats of carnauba wax. I polished the pipe with a clean flannel buff and then gave it a final buff by hand with a microfibre cloth. The stem cleaned up amazingly well. The pipe is ready for a inaugural smoke. The draw is wide open and easy! Thanks for looking.Swan24

Swan25

Swan26

Swan27Addendum: 06/06/18 I received an email from Andrew  in answer to a question I asked in my two blogs on CA Sander pipes. I quote in full his email because of the information that it includes.

Comment: You asked about C A Sander

C A Sander were tobacconists based in Wind Street Swansea. I don’t know exactly when the business started but it it passed to my Grandfather from his father (both were C A Sander) and by the 1920 was a successful and well established retail business with shops all over south wales. They were importers and blenders (if that is the term) of tobacco and the shops sold smoking paraphernalia. At my grandfathers retirement late 60’s to business went to my uncle again C A Sander but known generally as Jim. He developed a business supplying cigarette machines around South Wales and moved out of retail he eventually sold the business to Rothermans and went into other business ventures, I expect that was when the limited company you found was formed. Uncle Jim has now retired but still lives in the area.

Hope this helps with your research.

Andrew I received this followup email from someone who would like to get in touch with you. Here is her email

Hi there – I stumbled upon your website when looking for anything to do with C.A. Sander tobacco shop and I saw the pipe you restored – which is amazing! and then saw the comment below left by Andrew. Since that shop was owned by my grandfather, and Andrew’s grandfather – it would seem that we are cousins – but we have never met. I would love to get into contact with Andrew. Would you be able to assist in that? If possible, could you ask him to contact me at my email address pianokey88@hotmail.com?
Many thanks for your help! Georgina

Cleaning up an Edward’s European Collection Apple


Blog by Steve Laug

The second Edward’s pipe from the box I received to clean up and sell to support Smokers was a beautiful smaller sized apple with an acrylic/Lucite stem. It is stamped Edwards in script on the right side of the shank and European Collection on the left side. There is no shape number on this pipe. The finish was dirty, the rim had less lava overflow than others that came with this collection but it was present. The bowl had a thick crumbly cake. All of these pipes tended to have stickiness to the cake that makes me think that the pipes were used for aromatics. The shank was dirty with tars and oils. The stem is black acrylic with dark green swirls throughout that are accentuated in the light. It is a bit thick which leads me to believe that the pipe came from the 70’s or 80’s era. It is a saddle stem with an integral tenon turned from the Lucite. It was dull from the oils and disuse. It would be interesting to see the colours once it was shined up.Paddy1

Paddy2

Paddy3

Paddy4 I took a close-up photo of the bowl to show the cake and the state of the rim. Fortunately the rim had no damage on the outer or inner edge.Paddy5 I reamed the bowl with the PipNet pipe reamer and took the cake back to bare wood. Whatever the previous tobacco was the cake was soft and crumbly.Paddy6

Paddy7 I dampened the rim and scrubbed it with 0000 steel wool to remove the lava that was on the top edges. It worked really well and the rim was clean in no time at all. I wiped down the bowl with alcohol on a cotton pad to remove the grime and oil that was in the finish. It took off all of the grim and left me with some beautiful mixed grain around the bowl.Paddy8

Paddy9 I scrubbed out the interior of the bowl and the shank with pipe cleaners, cotton swabs and alcohol to remove the tar and oil. I did the same with the stem and the chamfered tenon end.Paddy10

Paddy11 With the interior clean I turned my attention to the acrylic/Lucite stem. It had some light tooth chatter on the top and underside but was in pretty decent shape. The finish was dull and no longer smooth to the touch. I worked on it with micromesh sanding pads – wet sanding with 1500-2400 grit pads and dry sanding with 3200-12000 grit pads. I buffed it with Tripoli and White Diamond after I finished with the 4000 grit pad and then finished with the last three pads. As I polished it with the pads you could begin to see the colours come through the stem. It is a beautiful piece of Lucite.Paddy12

Paddy13

Paddy14

Paddy15

Paddy16

Paddy17 I buffed the bowl and the stem with Blue Diamond Plastic polish on the wheel and was amazed at the shine. I then gave the bowl and stem several coats of carnauba wax to protect it and give it a shine. I buffed it with a clean flannel buff and then hand buffed it with a mircrofibre cloth to raise depth to the shine. The finished pipe is shown in the photos below. I have to tell you that so far I really like the two Edward’s pipes that I have cleaned up out of this lot. They seem to be ringing all of my bells. It will be hard to part with either of them 😉Paddy18

Paddy19

Paddy20

Paddy21

Paddy22

Paddy23

Paddy24

Prom Night – Dressing up a Cheap Meerschaum Apple


Blog by Steve Laug

I was given a batch of pipes from a friend on one of the forums that he had lying around a long time. He was pretty certain that they were not worth much but he thought they might be fun for me to fiddle with. One of them was a meerschaum apple-shaped pipe with a plastic stem. The draw on it was awful, like sucking air through a coffee stirrer. The bowl had a few issues at first glance. There were some gouges in the meer on the sides of the bowl and the shank. There were some small cracks in the shank from the end forward near the top. There was a Delrin sleeve so these may or may not be a problem. The tenon itself was small and rough. The stem had some damage from what appeared to be melting at some point in its life. But it was barely smoked and there was something about it that caught my eye. I could see some promise in it so it would be worth the fiddle.band1

band2

band3 On the bottom of the exterior of the bowl there looked like there was a crack that ran for the length of the bowl. I examined it with a lens and it turned out to be a gouge in the surface of the meerschaum. It may be a crack but it did not go deep in the material so it was salvageable.band4

band5 I took a close-up photo of top and inside of the bowl. You can see that it is barely smoked and the crack does not appear to go into the bowl.band6 The plastic stem just bugged me. I could find nothing redeeming in the shape of it at all. The taper was wrong and it was pinched at the shank joint. The faux amber look of it was really fake looking. The material was very soft and I could scratch it with a fingernail.band7

band8 Everything about the way the pipe looked when it arrived made me think it would be one that I would clean up, polish and turn around and get rid of. I probably would not sell it but would pass it on to someone wanting a meerschaum pipe. I cleaned the inside of the bowl with a cotton swab and water. I cleaned out the airway in the shank and stem with cotton swabs, pipe cleaners and alcohol. I had finished the cleaning and had lightly sanded the bowl with 400 and 600 grit sandpaper to minimize the scratches and dings in it. I was done with the pipe and took it to the buffer to lightly polish the stem and bowl.

It has been a long time since a pipe got away from me when buffing but this one did. The Blue Diamond polishing wheel is a bit touchy and it grabbed the plastic stem and took the pipe out of my hand. It hit the tile floor right in front of the buffer and the stem snapped off at the shank. The tenon was stuck in the shank and the other end was glued in the stem. I was very fortunate as the pipe hit directly on the stem and not on the meer bowl or it might have been ruined. As it was it meant I had a good excuse to throw away the plastic stem and make a vulcanite one. I pulled the tenon out of the shank with a screw. It came out easily. I tried to pull the glued end out of the stem but putting in a screw and heating the screw but the glue held. I put the stem away and went on a hunt in my stem can for a suitable vulcanite stem for the pipe.band9

band10 I found just the right donor stem. It was a bent round stem that came from an old-timer somewhere along the way. It was thick and the diameter was close to that of the shank. I took the tenon down with the Dremel and sanding drum and finish it by hand with sandpaper to make a snug fit in the Delrin sleeve in the shank. I used the Dremel and sanding drum to take off the excess diameter of the stem and then hand sanded it with 220 grit sandpaper to make the shank and stem match. While I was working on it I examined the two small cracks in the shank. They bothered me. While they would not go anywhere as the Delrin sleeve was glued and held them together, they still bothered me. I used a small micro drill bit on the Dremel and put a hole in the end of both cracks on the shank. I put a drop of super glue in the holes to seal them. I then remembered that I had some brass plumbing pressure fittings that make interesting bands. I heated the brass with a lighter and pressed it onto the shank to cover the cracks and give the pipe a little more bling.

I finished shaping and fitting the stem and took the photos below to give an idea of what the pipe would look like when finished. The bend in the stem is a little too much at this point and I would need to take some of the bend out. The bowl looks good with the brass fitting and the stem length works with this bowl.band11

band12

band13 I was able to sand out the gouge on the bottom of the bowl and it looks smooth and fresh now. I will need to sand the entire bowl with micromesh to polish the meerschaum and give it a shine.band14 I heated the stem with a heat gun to take out some of the bend. When the stem was flexible I pressed it against table surface with a towel to take out some of the bend. I cooled it with water to set the new bend. The second photo below shows the newly bent stem.band15

band16 I sanded the stem with a medium and a fine grit sanding sponge to take out the scratches and work on the oxidation that was deep in the edges of the button.band17

band18

band19

band20 You can see in the photos above that the stem did not quite seat properly in the shank. I used a sharp knife to bevel the inner edge of the mortise so that the stem would sit properly against the shank.band21 I sanded the bowl and shank with 3200-4000 grit micromesh sanding pads to minimize the scratches.band22

band23

band24

band25 I wet sanded the stem and the tenon with 1500-2400 grit micromesh pads and then rubbed them down with Obsidian Oil. I continued by dry sanding the stem with 3200-4000 grit micromesh pads and the giving it another coat of oil. I finished by sanding with 6000-12000 grit pads and gave it a final coat of Obsidian Oil. When it dried it was ready to buff.band26

band27

band28 I buffed the bowl and stem with Blue Diamond Plastic polish on the wheel and then gave the stem several coats of carnauba wax. I gave the bowl two coats of white beeswax and the buffed it as well. I buffed both with a clean flannel buff and then by hand with a microfibre cloth. The finished pipe is shown in the photos below.band29

band30

band31

band32

band33

band34

band35

Rebirth – A Genuine Briar Zulu


Blog by Steve Laug

I am working on yet another Idaho find. This one comes from a small shop in Victor, Idaho. I had a great visit with the shop keeper who has traveled the world. We talked about travels and pipes. She had a small jar of pipes behind the counter and I purchased all of them. I love the Zulu shape and this one is a good example of it. The pipe is in rough shape. The finish is worn and is peeling off on the sides of the bowl. The rim is damaged. The cake had been reamed with a knife and the bowl was out of round. The top was rough and the back outer edge was beat down and had a large nick on the back right side. The stem did not fit in the mortise all the way. It had some oxidation and a band of calcification toward the back near the button. The slot was almost closed off with grit and when I removed it from the shank it had a very grimy short stinger. Not sure but I think I will lose the stinger. I am not sure the stem is the original as the diameter of the shank and the stem are not quite the same.Gen1

Gen2

Gen3

Gen4 I took a close up photo of the rim to show the damage to the top and the back side of the rim. It was truly a mess.Gen5 I took the stem off the pipe and pulled the stinger with a pair of pliers.Gen6 I scrubbed down the exterior of the bowl and the rim with acetone on cotton pads to remove the peeling varnish and the grime as much as possible before I worked on the rim and the backside of the bowl.Gen7

Gen8 There was a large fill that had crumbled on the underside of the shank about mid shank. It would need to be picked out and repaired.Gen9 I picked out the crumbling fill with a dental pick and then topped the bowl on the topping board using 220 grit sandpaper.Gen10 When I had flattened out the majority of the rim damage I repaired the damaged back side of the bowl using super glue and briar dust. I also replaced the fill in the bottom of the shank at the same time.Gen11

Gen12 When the patch dried I did some more topping of the rim to blend the repair into the flat surface of the rim.Gen13 I reamed the bowl with a PipNet reamer using the first two cutting heads. I took the cake back to bare briar to check for damage to the inside of the bowl.Gen14

Gen15 I sanded the repairs on the underside of the shank and the back of the bowl to blend it into the briar around it. I wanted the transition to be smooth and seamless. The top and the backside of the bowl took some effort to clean up. You can see from the photos the size of the repairs. They had dried hard as a rock and were very stable but they were quite large.Gen16

Gen17

Gen18 I sanded the bowl and shank with 0000 steel wool to smooth out the scratches and polish the repairs. I used it on the entire bowl to help remove the previous finish.Gen19

Gen20 I used the KleenReem drill bit to clean out the air way between the mortise and the bowl. It was constricted from the build-up of the grime. I could not get a thin pipe cleaner into the airway before I used the bit to open it up.Gen21 I cleaned out the shank and airway in the bowl with pipe cleaners, cotton swabs and alcohol. I scrubbed it until they came out clean and white. It was incredibly dirty. I tried to get a pipe cleaner down the stem but the slot in the button was too constricted to get even a thin cleaner through it.

I sanded the transition between the stem and shank. The stem did not fit properly in the shank. I worked on the tenon to even it up the fit in the shank. It was almost conical at the end next to the stem so I used a Dremel and sanding drum to even it up. It was also sanded at a bit of an angle so there was a gap on the right side of the shank. I even out the tenon and made it round again. When I was finished the gap was gone and the stem fit. Now all I had to do was adjust the diameter of the shank on the right side and top as it was slightly larger than the diameter of the stem. I sanded the shank with 220 grit sandpaper until the transition was smooth and the diameter the same on both the shank and stem. I sanded the stem at the same time and removed the tooth chatter and calcification on the button end.Gen22

Gen23

Gen24

Gen25 I sanded the inside edge of the bowl with a folded piece of 220 grit sandpaper to smooth out the roughness on the back edge.Gen26 I sanded the bowl and stem with a medium and a fine grit sanding sponge to remove the scratches left behind by the sandpaper.Gen27

Gen28

Gen29

Gen30 I sanded it with 0000 steel wool to take out the next level of scratches on the briar.Gen31

Gen32

Gen33

Gen34 With all of the sanding completed I stained the bowl with the oxblood alcohol based stain to highlight the grain. It would be the first coat of stain that I used. I wanted to make some of the birdseye and cross grain standout and chose the oxblood colour to be the undercoat.Gen35 I flamed the stain and then buffed it to remove the excess stain.Gen36

Gen37

Gen38

Gen39 I wiped the bowl down with alcohol and sanded it with 1500 grit micromesh to further remove the excess stain.Gen40

Gen41 I then stained it with the top coat – a dark brown aniline stain thinned 50/50 with alcohol to make it more of a brown wash coat. I applied it with a cotton swab and then flamed it. I repeated the process until it gave a good coverage. I applied heavily around the top of the rim and on the underside of the shank over the repairs.Gen42 I buffed it with White Diamond on the buffer and then rubbed down the bowl with a light coat of olive oil to bring life and depth to the finish.Gen43

Gen44

Gen45

Gen46 At this point I set the bowl aside to work on the stem. The slot was so tight that I could not get a thin pipe cleaner through it. That had to change so that I could easily clean it. I used small needle files to open it up. I started with a flat oval file and worked on the bottom and top edge of the slot. Once I had them opened I used a thicker oval to give the top and bottom edge more depth and the sides more of a taper inwards to the airway. I finished with a round file and folded sandpaper to smooth out the opening.Gen47

Gen48

Gen49 I wet sanded the stem with 1500-2400 grit micromesh sanding pads to remove the scratching and oxidation that remained. I rubbed it down with Obsidian Oil and continued by dry sanding with 3200-4000 grit micromesh pads. I gave it another coat of oil and finished with 6000-12000 grit micromesh pads. I gave it a final coat of oil and let it dry.Gen50

Gen51

Gen52 I buffed the bowl and the stem with Blue Diamond Plastic Polish on the buffing wheel and then gave the bowl and stem multiple coats of carnauba wax. I buffed the pipe with a clean flannel buff and then hand buffed it with a microfibre cloth to add depth to the shine. The finished pipe is shown below. The contrast stain worked well and the birdseye grain stands out on both sides of the bowl. The cross grain on the front and back also looks great. The repairs are still visible but less so than they were before the two coat stain process. It came out pretty well considering where it was when I started on this old timer. Now it should continue to deliver good smokes for a long time to come. I put the stinger in for the photos but it is easily removed and I am pretty sure that I will remove it once I smoke it!Gen53

Gen54

Gen55

Gen56

Gen57

Gen58

Rejuvenating an English Made Sandblast Jobey Nut Bruyere Push Stem Billiard 050


Blog by Steve Laug

This is another pipe find from the Idaho Falls antique mall. I am pretty certain it comes from the era that Jobey made pipes in Britain. It is a very proper British looking sandblast saddle stem billiard. The blast is quite nice revealing some great swirls and crags. It is not a deep blast but it is a medium one that stands out well. The pipe is stamped on the underside of the flat shank with Jobey over Nut Bruyere toward the front of the pipe. Moving back toward the stem it is stamped Imported Bruyere over 050. The stem has the Jobey insert on the top of the saddle and it is stamped on the right side – English Para.Jobey1 The pipe is solid but dirty. The stem is not badly oxidized at all bearing testimony to the quality of the vulcanite. The stem also has an inner tube insert in the tenon. This pipe was in the same lot as the White Flame billiard that I just finished and posted early. The stem is dirty but not oxidized. The sandblast finish is also dirty with dust and grime in the valleys of the blast. The rim is almost flat with the build-up of tars. The bowl is still round with no damage to the inner or out edge of the rim. There is slight cake build-up in the bowl. Internally the shank and mortise area are very clean – pristine is the proper word. The inner tube inserts into the airway in the shank so the mortise is fresh briar. The fit of the stem in the shank is tight and inserts with a click. This pipe is in pretty decent shape other than the cosmetics I have noted above.Jobey2

Jobey3

Jobey4 I took a close-up photo of the bowl rim and the cake to show the state of both when I started the cleanup.Jobey5 The shank and mortise appeared to be pristine and clean as I mentioned above. I took a photo of the mortise and the inner tube on the stem.Jobey6 I started the cleanup with a gentle reaming of the bowl. I took the cake back to bare briar. I like to start with a clean bowl on the pipes I refurbish. I know others leave a thin cake but I have chosen the “cakeless” route.Jobey7

JObey8 I scrubbed the blast and rim with Murphy’s Oil Soap. I used a short bristle tooth brush and a brass bristle tooth brush to scrub the briar. When I had finished and rinsed the bowl I used the long bristle tooth brush to polish it a bit.Jobey9

Jobey10 The next series of pictures show the bowl after the scrub and rinse with running water. The briar looks really good. The blast is clean and the rim looks like new – just a wee bit of darkening.Jobey11

Jobey12

Jobey13

Jobey14 With the outside clean it was time to swab out the shank airway, mortise and bowl. I used alcohol, pipe cleaners and cotton swabs. The seemingly pristine mortise actually was quite clean. Just a few cotton swabs and a pipe cleaner took care of the little bit of tars that were there.Jobey15 I used a dental pick to clean out the slot in the button. I scrubbed the internals of the inner tube and the externals with alcohol, cotton swabs and pipe cleaners. The stem was not too dirty and it did not take too much to clean it out.Jobey16 I sanded the stem with a medium and a fine grit sanding sponge and then moved on to working over it with the micromesh sanding pads. I wet sanded with 1500-2400 grit pads and then rubbed the stem down with Obsidian Oil. I continued by dry sanding, before the oil dried, with 3200-4000 grit pads. I lightly buffed the stem with red Tripoli and White Diamond and then finished dry sanding with 6000-12000 grit micromesh pads. I gave it a final coat of Obsidian Oil and set it aside to dry.JObey17

JObey18

JObey19 I tried a new wax on the sandblast. I have used it before on other pipes but never on a blast. It is called Conservator’s Wax which is a microcrystalline cleaner and wax product. I applied it to the blast by hand rubbing it in lightly, making sure it did not clump up in the grooves. Once it dried I buffed the bowl with a shoe brush. The picture below shows the buffed briar.Jobey20 I lightly buffed the stem with Blue Diamond on the buffer and gave the stem multiple coats of carnauba wax. I buffed the bowl and stem with a clean flannel buff and then hand buffed the pipe with a microfibre cloth to give the polish depth and a deeper sheen. The finished pipe is shown below. It is clean and ready to fire up!Jobey21

Jobey22

Jobey23

Jobey24

Jobey25

Repairing and Restemming a York (KBB) Diamond Shank Bent Billiard


Blog by Steve Laug

When I was traveling in Idaho my brother and I took the family for a trip to Jackson Hole, Wyoming. On the way we stopped in a little town called Victor, Idaho. There was an antique shop there in the town and I found four more old pipes. The first of these reminded me of an old WDC Diamond shank billiard that I have. This one was stamped YORK on the left side of the shank and from research it may have been made by KBB. It was in rough shape. The shank had been cracked and repaired with glue and a piece of twisted wire. The stem obviously had a broken tenon and the previous owner had carved it down to fit in the shank anyway. The bowl had a thick cake and the finish was gone. The rim was damaged on the front outer edge and there was some tar on the rim.York1

York2

York3

York4 On the right side of the bowl near the shank junction there was a pink putty fill that was coming out. Most of the putty had fallen out of the briar. This would need to be repaired.York5 When I got back home I took the pipe out of the bag to have a look. The silver end cap had some hallmarks but they were the faux hallmarks that I have found on older American made pipes to give them a touch of class. All four edges of the band were split. I removed the stem and looked inside the mortise and could see that a major part of the briar was missing on the right side of the shank under the cap. With little effort I removed the cap and sure enough a huge chunk was missing out of the briar. In fact the whole right side under the cap was gone. There was a small crack that had been repaired earlier. There was a small hole in the shank to stop the crack and the crack was glued and clamped with the wire. This was going to take a bit of work to bring it back from the brink of destruction. York6 I clipped the wire with a pair of wire cutters so that I could work on repairing the broken portion of the shank. This repair would take some careful and time consuming work to rebuild the missing portion of briar.York7 I reamed the bowl to clean out the thick cake. It was crumbling so I wanted it removed so that the repair of the shank would be less dirty. I use a PipNet reamer to take the cake back to the bare briar.York8

York9 The first step in rebuilding the broken area was to clean up the damaged ends of the remaining briar. Once it was clean I put clear super glue on the raw edge of the broken spot and tamped the end into some briar dust. I repeated the process until the edge was repaired as much as possible with this method.York10

York11 During the process I also picked out the broken putty fill and replaced it with briar dust and super glue.York12 I sanded the flat surface of each of the four sides of the diamond shank smooth with 220 grit sandpaper until the cap slid easily over the shank. I also faced the end of the shank on the topping board.York13

York14 The next step in the process of rebuilding the shank and the mortise was a little more difficult than the briar dust and super glue rebuild. It involved working on the internals of the shank. I glued the end cap in place with wood glue and clamped it in place to take care of small splits in the edges of the metal cap. Once that dried and set, I mixed white wood glue with briar dust to make putty. I tamped the mixture into the remaining areas of the shank with a dental pick and dental spatula until the area was filled solid looking once again. The next two photos show the rough repair on the inside of the mortise and shank. The broken area is gone! The holes are filled in and the repair is complete. Once the glue set I would have to clean up the mortise and make the walls smooth. The edges of the metal cap, looking at it from the end are damaged and I will not be able to repair them.York15

York16 While the shank repair cured I worked on the rim. There was a thick tar build up that was like rock on the back edge and the front edge of the rim had been knocked against something hard and was rough.York17 I decided to top the bowl to remove the rock hard tar and also minimize the damage to the front of the bowl. I used a topping board with 220 grit sandpaper and worked the rim against the sandpaper until the damage was minimized. Once I had it smoothed out I put some briar dust and super glue on the remaining divot on the front edge of the bowl as a fill. When it dried I sanded it smooth and lightly topped the rim once more to even out the repair with the rest of the rim. (That picture will be shown shortly.)York18 The stem that came with the bowl was damaged beyond repair. It had been repeatedly been cut off by the previous owner and hacked at until it fit in the damaged tenon. It was not a stem I would use again on this pipe. I went through my can of stems and found a faux p-lip stem – the airway came out the end of the button rather than on the top. It was old enough to work on this pipe and with some modification I thought it would look just right. The problem was that it did not have a tenon. When I found it the tenon was missing and the end of the stem had been drilled out to receive a replacement tenon. I am currently out of Delrin tenons so I used a thin vulcanite stem as the sacrificial tenon. I glued the tenon on the donor stem in place in the diamond shaped stem with super glue and then cut off the stem with a hacksaw. I left a piece of vulcanite that was longer than necessary so that I could work it to a proper fit in the repaired shank.York19

York20 The next photo shows the repaired stem and tenon and the topped bowl before I put the two parts together. I used a Dremel to remove the excess material on the new tenon and shortened it to the depth of the mortise in the shank.York21 The next photo shows the repaired fill on the bowl side with another photo of the new stem.York22 Once the shank repair was dry I used a needle file to clean up the rough areas and smooth out the inside of the mortise. I gave it several more coats of glue and briar dust to buildup the areas that had shrunk as the glue dried. I continued to work it with the files and sandpaper until the fit was correct. I cleaned out the airway to the bowl and the inside of the mortise with alcohol, cotton swabs and pipe cleaners in preparation for putting the new stem in place.York23 The next two photos show the newly fit stem. There was still work to do to fine tune the flow of the diamond stem sides to match the flow of the diamond shank but the look is clear at this point in the process.York24

York25 I sanded the stem with 220 grit sandpaper and with a medium and a fine grit sanding sponge to fine tune the fit. When I had it the way I wanted, it was time to bend the stem. I used my heat gun to do the work. In this case I quickly set it up on the dryer in our laundry room (shh don’t tell my wife I did this) and heated the stem. I bent it over an old rolling pin that I use for this purpose until the bend in the stem matched the curve of the bottom of the bowl. I set the bend by holding the stem under cool running water.York26

York27 The next two photos show the newly bent stem and give an idea of how it will look with the pipe once it is finished.York28

York29 With the easiest part of fitting a stem completed I went on to do the laborious and tedious part of sanding and more sanding to get the fit just right. To do this without rounding the edges of the stem at the shank stem junction I use a plastic washer placed between the two areas. I sanded the stem with 220 grit sandpaper to smooth out the transition and make the angles square (or at least as square as possible on these old pipes where every side has a different angle and width).York30 When I had the fit of the stem correct it was time to polish it. I wet sanded with 1500-2400 grit micromesh sanding pads and rubbed the stem down with Obsidian Oil.York31 I needed a break from the stem work so I turned my attention to the bowl. I rubbed it down with a light coat of olive oil to highlight the grain. I took a few photos to show what it looked like at this point. It is certainly looking far different than it did when I started working on it. There is a deep richness in the red tones of the briar.York32

York33

York34

York35 I decided to highlight those tones with a dark brown aniline stain thinned by 50% with some isopropyl alcohol. I applied it and flamed it to set it in the grain.York36 I hand buffed it with a cotton cloth to get an idea of the coverage. It was still too dark to my liking so I would need to address that.York37

York38 I wiped the bowl down with some acetone on a cotton pad to remove some of the stain and make the grain show through better.York39

York40 I buffed the bowl with White Diamond and then gave it the first of many coats of carnauba. I don’t know about you but by this point in a long refurbishment I get a bit anxious to see what I have accomplished. It always seems that it is going to go on forever so I rewarded myself by putting the stem in place and taking a few photos to see what I had achieved.York41

York42 For comparison purposes I took the next two photos of the pipe with the old stem next to the new one. You can see how badly hacked the vulcanite was from the previous owners salvage work on his broken pipe. The pipe is beginning to look like a very different pipe than when I started. That always encourages me!York43

York44 Now it was time to finish up with this long project and get the stem done. I dry sanded it with 3200-4000 grit micromesh sanding pads and then rubbed it down with Obsidian Oil once again. I then dry sanded it with 6000-12000 grit pads and gave it a final coat of oil and let it soak into the vulcanite.York45

York46 I buffed the stem and bowl with Blue Diamond and then gave them both multiple coats of carnauba wax. I buffed them with a clean soft flannel buff to raise the shine and then hand buffed the pipe with a microfibre cloth to finish. The completed pipe is shown below. It has come a long way from the pipe I started on this morning. I had a quiet day at home and between reading and napping finished the work on this old timer. From what I can find out in my research and from Who Made That Pipe, the pipe may well be from the old KBB pipe works. Thanks for looking.York47

York48

York49

York50

York51

York52

Restoring a Made in London England Saddle Billiard Shape 195


Blog by Steve Laug

I found this small saddle billiard on a recent trip to Idaho Falls. My brother and I went on a pipe hunt in some of the antique malls in the city and the surrounding area. It was one of five that I picked up on that first day. I have circled it in the photo below so that you can see which pipe I am talking about. I apologize for the blurry photo I took with my iPad, but it gives a basic idea of the way the pipe looked. The bowl was caked, the rim was tarred and darkened, the stem was oxidized but in relatively good shape. The stamping on the left side of the shank reads Made in London over England. On the right side is the shape number 195. I have looked in the catalogues for Comoy’s, Barlings and Orlik to see if I can identify the English maker of this pipe but the shape number does not match any of the numbers in the catalogues.Bill1

Bill2 It was one of two pipes that I worked on at my mom and dad’s house. I bought a set of micromesh pads from a local hobby shop that included pads from 1500-4000 grit. I started by sanding the stem with micromesh sanding pads – wet sanding with 1500-2400 grit pads. I scrubbed the bowl and rim with a paper towel and cool water to remove the tar buildup. Then I sanded the rim and the bowl with the same grit pads. I was able to remove the tars and darkening quite easily. The rim was undamaged on either the outer or inner edges. I carefully reamed it with a small sharp blade until the inner walls were bare.Bill3

Bill4 I dry sanded the stem and bowl with 3200-4000 grit micromesh sanding pads.Bill5 I did not have any higher grit micromesh pads with me. I gave the bowl and stem a light coat of olive oil and hand buffed it with a microfiber clothe to raise a shine and took the next series of photos to show where it stood after this process. Once I took it home and gave it a buff on the buffer and several coats of carnauba wax this would be a beautiful little billiard in the English tradition.Bill6

Bill7

Bill8

Bill9

Bill10 I brought the pipe back to Vancouver and gave it a quick sanding with 6000-12000 grit micromesh pads and then buffed the stem and bowl with Blue Diamond on the buffing wheel. I gave it several coats of carnauba wax and then a quick buff with a clean flannel buff. I finished by trying out what Dave Gossett spoke of and buffed it by hand with a microfibre cloth until the finish glowed. The finished pipe is shown in the next series of photos.Bill11

Bill12

Bill13

Bill14

Bill15 I took a few photos in a pipe rest that my daughters found on a second trip to the antique malls. It is a golden coloured cocker spaniel similar looking to my dog Bailey that died a year ago after 14 years as a member of our family. The photos give a good view of the grain on this beautiful little billiard.Bill16

Bill17

Bill18

Bill19

WDC Wellington Bent System – Restoring a Mainstay Pipe of the Celebrated Maker


Guest Blog by Robert M. Boughton
Member, North American Society of Pipe Collectors
http://www.naspc.org
http://www.roadrunnerpipes.com
http://about.me/boughtonrobert
Photos © the Author

Bruno Antony: Each fellow does the other fellow’s murder. Then there is nothing to connect them. The one who had the motive isn’t there. Each fellow murders a total stranger. Like you do my murder and I do yours…For example, your wife, my father. Criss-cross.
― from “Strangers on a Train” (1951), directed by Alfred Hitchcock, screenplay by Raymond Chandler and Czenzi Ormonde, starring Farley Granger and Robert Walker [Bruno]

INTRODUCTION
The movie was one of Hitchcock’s greatest and a favorite of mine. How could it not be, with the legendary detective novelist Raymond Chandler as the top word-man? But this is not a blog about swapping murders. It does concern the swapping of a bit, however, or to be more accurate, the removal of one from a basic Peterson’s System Standard in my collection of pipes awaiting more extreme repair, and which won’t be missed before it can be mended, to use for the William Demuth Co. Wellington System Billiard.

But first, let’s play Find the Pipe in the Lot.Robert1 No doubt you have spotted it without trouble, or will soon deduce the answer from following photos.

Now for the criss-cross: watch as the bit, at first loose but in place in the shank of the Peterson’s Standard System to the right in photo one, without warning falling to the trademark green sleeve along with the battered band in photo two. Look long enough, and I guarantee you’ll see the moment of selfless sacrifice for the blighted, bit-less predicament of the once proud, near-twin WDC close by. And then, in photo three – the miraculous transplant to the WDC after the donated organ has embraced its new host body, at least tentatively.Robert2

Robert3 A few words concerning the William Demuth Co. are in order, for those not familiar with its illustrious history. Demuth (1835-1911) entered the U.S. as an emigrant from Germany with no money when he was 16 and worked a number of odd jobs. His break came when he attained the position of clerk for a tobacco products trade company. Demuth founded his own company in Brooklyn, New York in 1862, two years into the Civil War, when he was only 27.

Success was rapid, leading to friendships with such prominent figures as James A. Garfield. [Garfield was inaugurated as the twentieth U.S. president in 1881 after winning by the narrowest popular vote margin in history, a mere 9,464 ballots, but with an extra 59 Electoral College votes. He served only four months before he was gunned down by a single shot aimed by Charles Julius Guiteau, an American lawyer denied an ambassadorship to France(evidently for good cause, as shooting the president on July 2, four months into his term, was not very diplomatic). Although Garfield lingered for about two and a half months, the assassin’s bullet caused the blood poisoning to which he succumbed. Guiteau was hanged several days short of a year after the ultimate assassination.]

At the Presidential Inauguration, Demuth presented Garfield with two meerschaum pipes, one in Garfield’s image and the other in the new First Lady’s. The friendship of the two men led to Demuth’s commissioning of a partial presidential line of pipes. But the linchpin WDC pipe was the Wellington, which lasted beyond the company’s own lifetime. Having become a subsidiary of S.M. Frank & Co. in 1937, WDC continued until the final day of 1972. The Wellington, however, was still offered in Frank’s catalog until 1976 and even had a brief reprise in the mid-1980s by way of consumer-direct sales.

Here are two other Wellington’s, the first courtesy of pipephil.eu and the second from pipedia.org.Robert4 RESTORATION Robert5

Robert6

Robert7

Robert8 In a sentence, this restoration was more about the stem than anything else. I had decided to go with a perfect replacement from a Peterson’s Standard System pipe in my personal collection. Then, when I donned my Dollar Store 3.75X glasses for a “final” close inspection, I cringed at the sight of the faint black outline of the Peterson’s P, shown below, now filled in with a white china marker.Robert9 Note the correct shape of this bit from lip to tenon. My next brainstorm was to sand off the P, and in fact set out to do so when I came to my senses. What can I say? Sometimes I have the stupidest ideas. And so I opted to let the buck stop here and repair the bit I took off of the Peterson’s System Standard shown in the criss-cross photos of the Introduction. That System Standard needs serious work, also; not only a new, genuine bit but a replacement matching band. I will tackle that one when I have the new bit and band and am up to speed on the process of banding.

With a happy glow of contentment in the pit of my belly, I replaced the above bit, with the P filled in at last, on its rightful pipe in the stand-up, two sided bookshelf with doors where I store most of my collection, and opted to proceed with this restoration by doing the long, tedious work of applying layers of black Super Glue to build up the thinner, bottom section of the bit that lacks a tenon. As a result, while the rest of the Wellington has been finished for about ten days, the old bit, mangled by some wannabe pipe fixer, took days of patient layering, sanding and micro-meshing each phase, then polishing on the buffers, and was only completed moments ago.

I started the bit on its way, which I knew would take some days, by filing it to a uniform tapering roundness and sanding with 150- and 320-grit paper before micro-meshing from 1500-4000.Robert10

Robert11 After that I gave the entire surface of the bit below the bulge the first of four thick coats of black Super Glue. Aware of the risk, I then stripped the old finish with as short as possible of an Everclear soak.Robert12

Robert13

Robert14

Robert15

Robert16

Robert17 Leaving the bowl and shank for about 10 minutes in the alcohol and time enough to dry, I reamed and sanded the chamber to the smoothness of a chamois cloth and retorted the pipe using the bit from my own Peterson’s System Standard. Starting with super fine 0000 steel wool, then micromesh every step from 1500-4000, the wood and steel band had a nice natural sheen.Robert18

Robert19

Robert20

Robert21

Robert22

Robert23 Without stain, using the natural rich color of the briar, I prepared the bowl and shank for the coming test to see if the bit worked out, the likelihood of which I had doubts, by buffing it with white Tripoli, White Diamond and two coats of carnauba, using the plain cloth buffer between each, of course.

The following days seemed to drag with each successive layer of black Super Glue and the long drying time followed by sanding with 200-grit paper and micro-meshing up the scale each time. But in the end, the result was worth the time and effort, considerable and somewhat unnerving as they were.Robert24

Robert25

Robert26

Robert27

Robert28

Robert29

Robert30

Robert31 CONCLUSION
Again, this battle was far more about trying to recover an available bit, so that it would fit and lock in the shank, rather than any problems I faced with the bowl and shank. As the bit was when I received the Pete System Standard with which it came, well, the bit was the tip of the iceberg with that future project. In fact, my friend and mentor, Chuck, recommended that I send it to someone he knows in Denver – not so much because the task was beyond my skills but that it was what he would do if he needed a new Peterson’s bent system pipe stem with the right measurements as well as a replacement band of the appropriate type. I was fortunate with the WDC in that it called for a bit designed after the Pete System variety.

Of course I would have preferred to place a perfect, like-new bit in this great WDC Wellington, but the personal reward came in finding out that I could take what I had and make it work.

I think I’ll do the same with the estate Peterson’s Standard System that gave its bit for this pipe, after I’ve received the new parts in the mail.

Building a New Button on the Cut off Stem of a Savinelli Autograph 4


Blog by Steve Laug

I decided to tackle another button rebuild. A friend brought over a cut off Savinelli Autograph long shank plateau Dublin that he had picked up. The shank was stamped Savinelli Autograph 4 on the underside and there was a signature stamp on the stem.Auto1 I have no idea how the stem got cut off but my guess would be that someone removed the damaged part of the stem and button and then saw how close to the surface the airway was and decided to abort the mission of cutting a new button on the stem. I have been working with developing my mixture of medium viscosity black cyanoacrylate glue and charcoal powder to rebuild/craft new buttons. I have used it on quite a few repairs of my own and on a few for friends. It definitely dries harder than the glue by itself and seems to be very strong once it has cured. I thought this pipe would be a good candidate for that process.Auto2 I wrapped the end of the stem with a band of cellophane tape to make a straight edge to work against for the glue and charcoal powder mixture. It works to keep a semi-straight edge but I find it is more of a guide than anything else. It gives me an edge to work with when I build up the layers of patch material.Auto3

Auto4 I mixed a batch of glue and charcoal powder on a card that I use for that purpose. That way when I have finished the mix and repair I can fold the card and throw it away without getting the glue all over the place.Auto5 I stirred the powder and glue together with a dental pick until I had a thick paste mixture that was still workable.Auto6 I applied it to the end of the cut off stem with the dental pick and shaped it roughly to match the kind of button shape I was aiming for when finished.Auto7

Auto8 I put the pipe on a cork and candle stick holder that I use for drying bowls when I stain them or stems when I have done this kind of repair and set it aside to cure for two days. This kind of patch is a long haul project. It is not a quick repair. If you start reshaping the button too soon the repair breaks off in chunks that are still soft underneath the surface. So, having learned that I left it alone and did other work while the days passed.Auto9 After two days of curing the repair was solid all the way through. I would still need to be careful as the longer it cured the harder it would become. I used emery cloth and 180 grit sandpaper to shape the button into an oval and to face the end of the button. You can see in the photo below how much more material there was to work with now in terms of shaping the airway and the slot in the button thanks to the build-up of material.Auto10

Auto11 I worked over the edge of the button with the sand paper as well to clean up the sharp edge next to the blade of the stem. I moved on to sand with 220 grit sandpaper and also with a medium and a fine grit sanding sponge to further define the new button and to clean up the scratches.Auto12 After the initial shaping and sanding I put the stem to the side to cure longer and addressed the bowl and shank. I reamed the bowl with a PipNet reamer and took the cake back to a very thin layer.Auto13

Auto14 I cleaned the interior of the airway and mortise with pipe cleaners, cotton swabs and isopropyl alcohol until they were clean.Auto15 I scrubbed the bowl and the plateau rim with a tooth brush and Murphy’s Oil Soap to clean off the grime and dirt in the plateau and the sandblast shank.Auto16

Auto17 I scrubbed the plateau with a brass tire brush to dig out the built up tars and oils that had clogged the crevices in the finish there.Auto18 I put my thumb in the bowl and carefully rinsed off the soap with cool running water. I dried the bowl with a cotton rag and took the next series of photos to show what the bowl looked like clean.Auto19

Auto20

Auto21

Auto22 The next day I decided to work on the slot in the button and open it up with a flare to create a Y shape. I used needle files to work on the airway. The next series of photos show the files and the progress of opening the airway.Auto23

Auto24

Auto25 With the airway/slot roughed in it was time to continue shaping the button and the face of the slot. I sanded it with 220 grit sandpaper to refined the shape and to smooth out the end of the stem.Auto26

Auto27

Auto28 I used a folded piece of sandpaper to smooth out the interior of the slot and further shape it. The photo below shows the state of the slot and the shape of the button.Auto29 With the shaping completed it was time to work on fine sanding of the stem and new button. The charcoal bits in the mixture are hard and coarse and need to be refined with fine sanding. I worked over the stem and button with micromesh sanding pads, wet sanding with 1500-2400 grit pads to remove the majority of the coarseness. It is only this first step in the process of polishing the stem but it is amazing to see the transformation as I work through the various grits of micromesh. I rubbed the stem down with Obsidian Oil when I had finished with the 2400 grit pad. I will still need to refine the inner edge of the button with files but the overall shape of the stem and button are clearly visible.Auto30

Auto31 I wet sanded the stem with the 2400 grit micromesh until I had minimized the scratches and polished the button. I then rubbed it down with another coat of Obsidian Oil and then sanded it with 3200-4000 grit micromesh pads. I gave it another coat of oil and then sanded it with 6000-12,000 grit pads. I gave it a final coat of oil and let it dry.Auto32

Auto33 I buffed the stem and the bowl with Blue Diamond and then lightly buffed the blast with the same. I gave it multiple coats of carnauba wax and buffed it with a clean flannel buffing pad to raise the shine. The finished pipe is shown below. The new button looks like it belongs. The shape of the slot is open and it accepts a pipe cleaner with ease. It should provide years of service to the pipeman who is holding it in trust. He should enjoy smoking it with much more ease. Thanks for having a look!Auto34

Auto35

Auto36

Auto37

Auto38

Auto39