Blog by Steve Laug
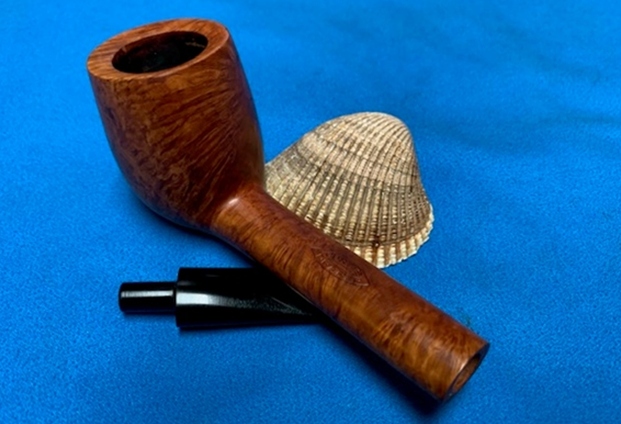
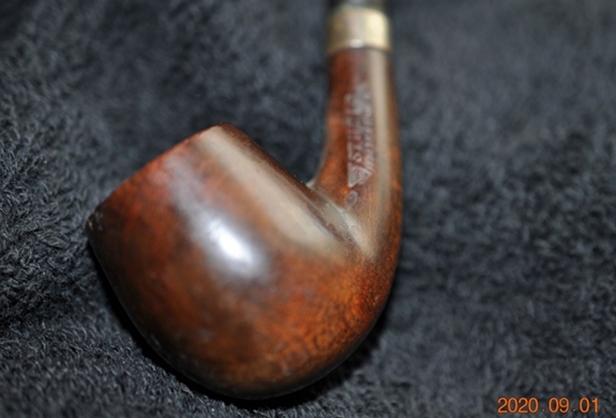
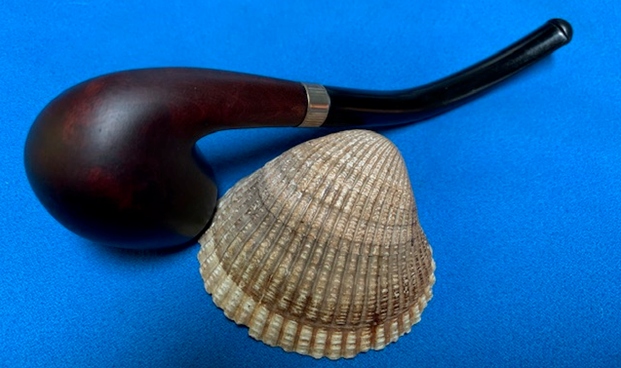
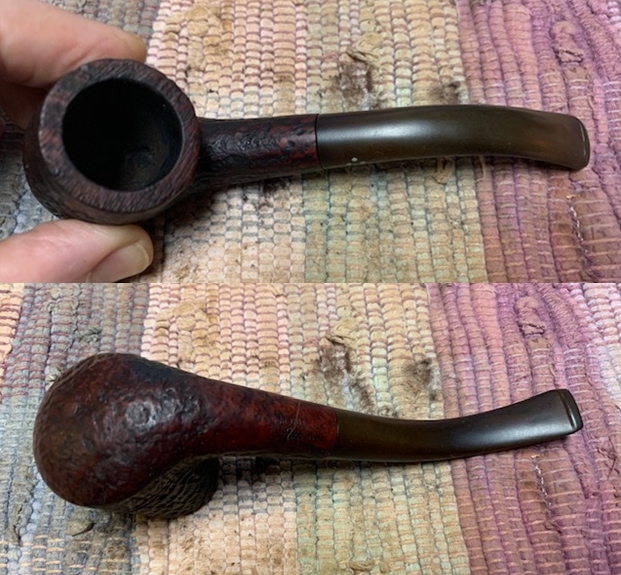
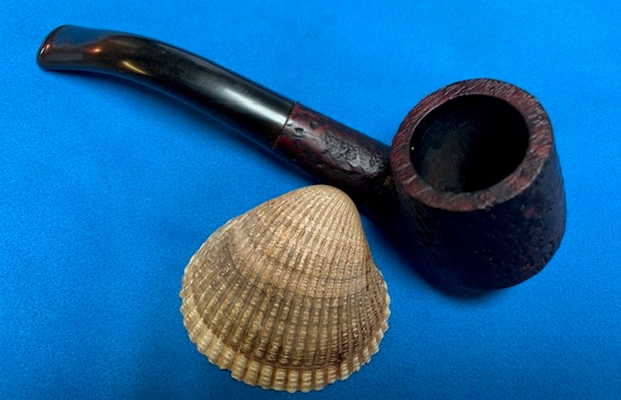
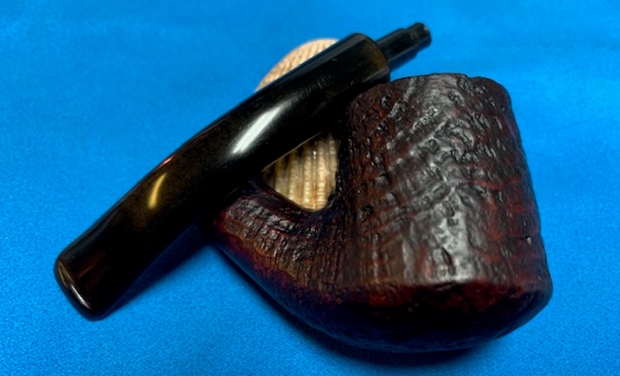
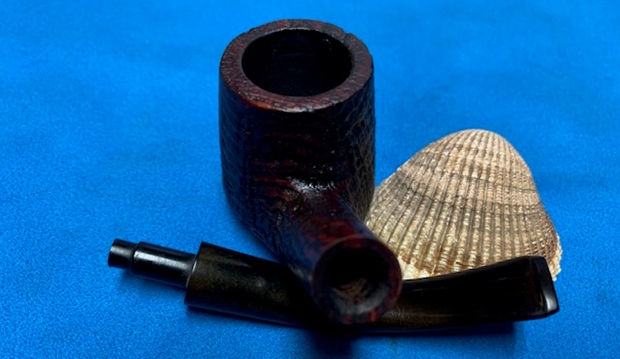
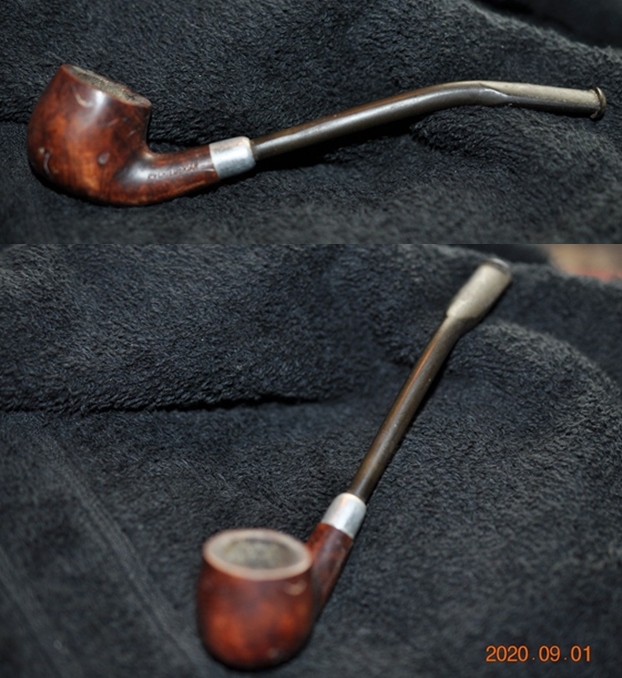
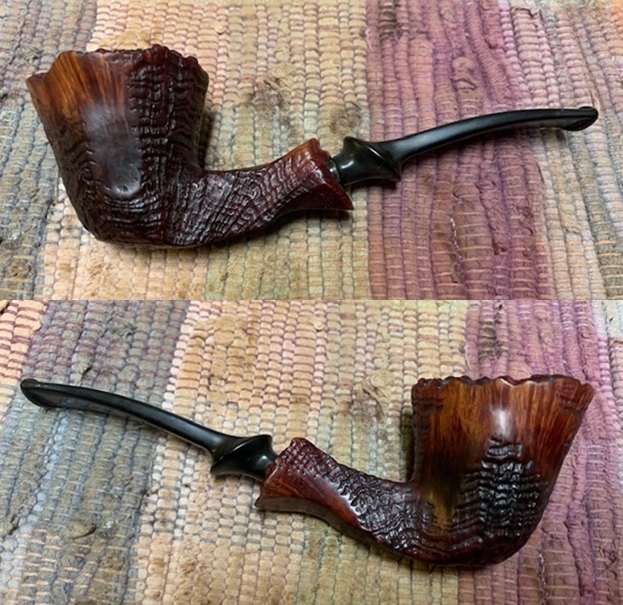
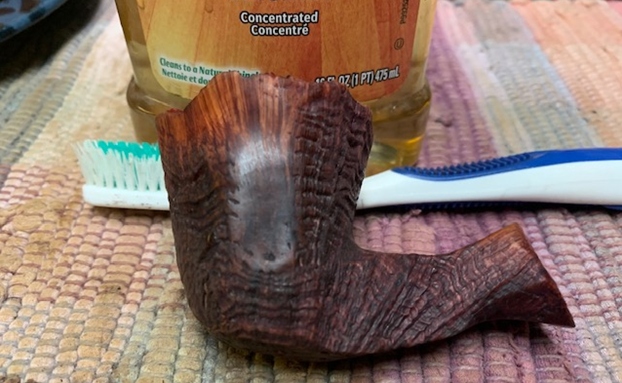
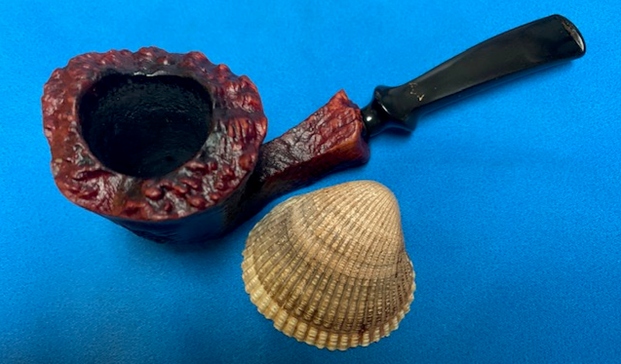
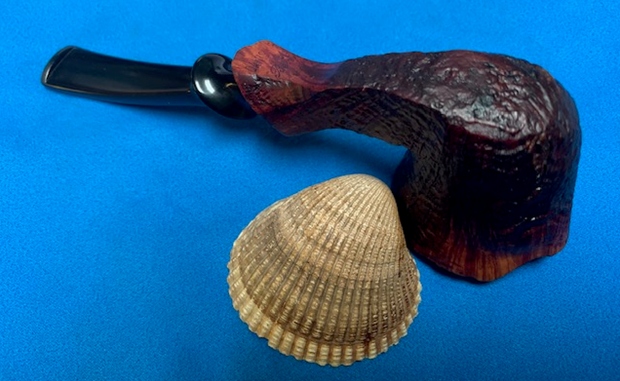
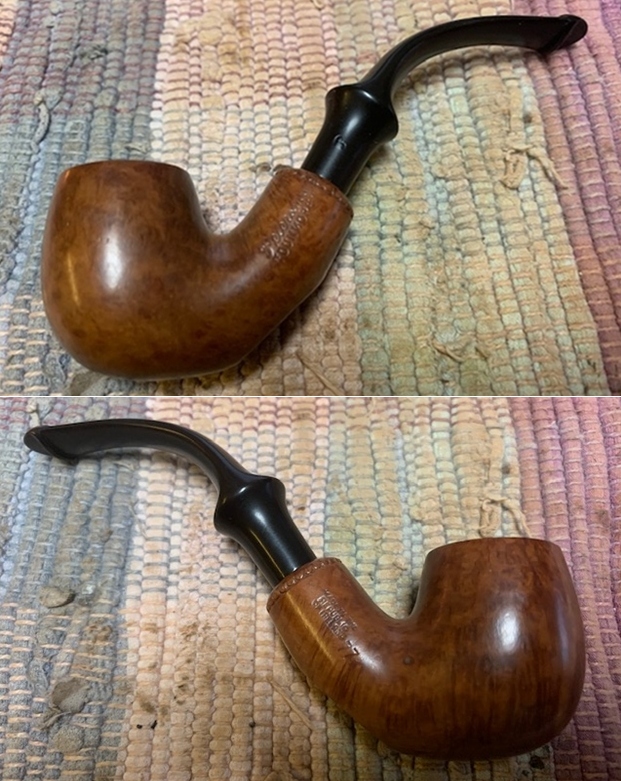
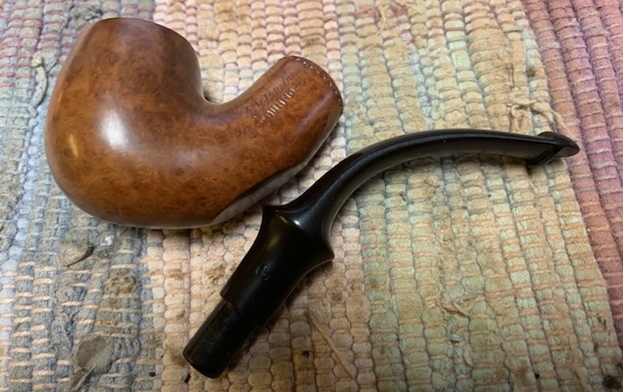
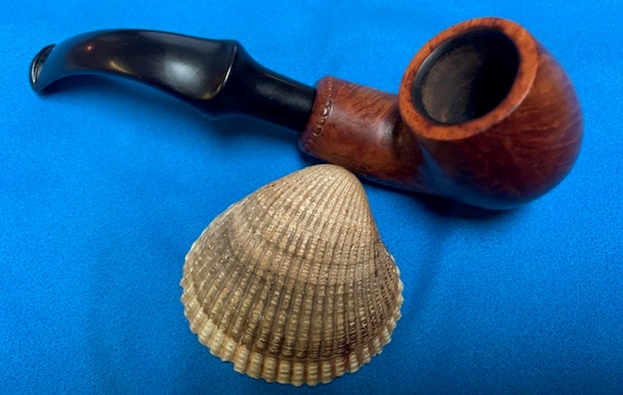
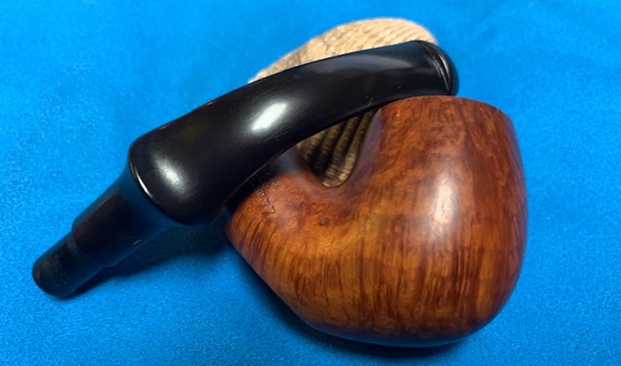
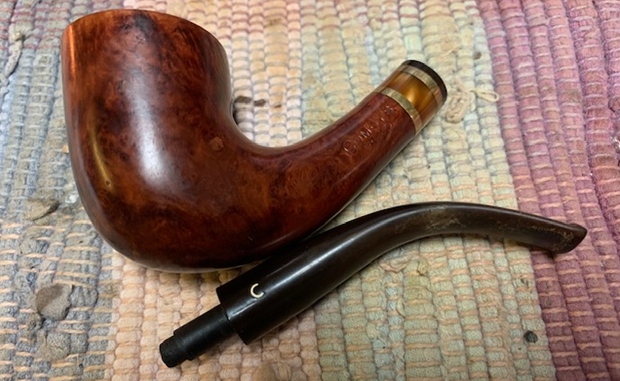
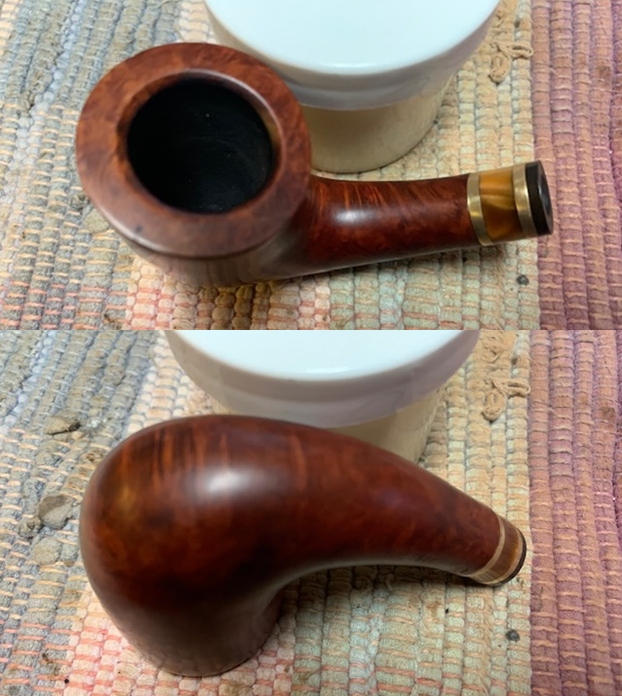
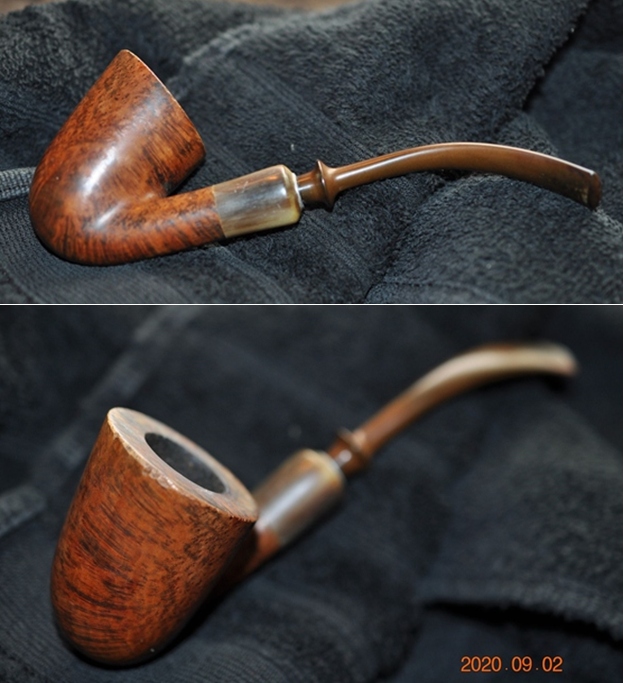
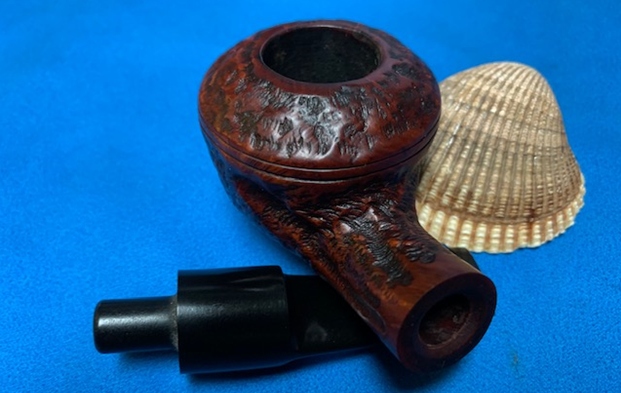
 The next pipe on the work table came to me from one of our estate purchases. Between us we pick up quite a few pipes for restoration. I try to work them into the restoration queue so that I can keep them moving. We picked up over 120+ Bertram and a few other pipes from an estate that a fellow on the east coast of the US was selling. This next one is from that estate – a beautifully grained Curtis Draper Canadian with a tapered vulcanite stem. The pipe is stamped on the topside of the shank and reads Curtis Draper in a football shaped stamp. On the underside it is stamped Imported Briar. The finish had a lot of grime ground into the smooth finish on the bowl and some darkening around the sides of the bowl. The bowl was caked with an overflowing lava coat on the top of the rim, heavier toward the back of the bowl. The edges looked okay other than some potential burn damage on the back inner edge. The stem was lightly oxidized, dirty and had light tooth chatter and marks on the top and underside near the button. There were not markings or a logo on the taper stem. Like the rest of the pipes in this lot this one showed promise but it was very dirty. Jeff took photos of the pipe before he started his cleanup work.
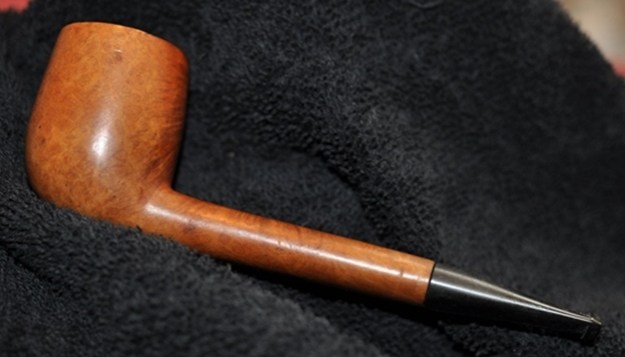
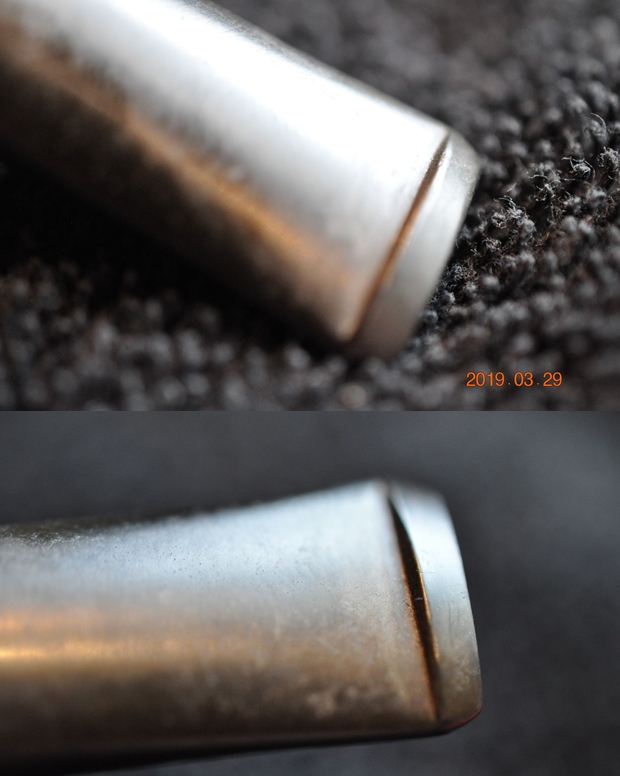
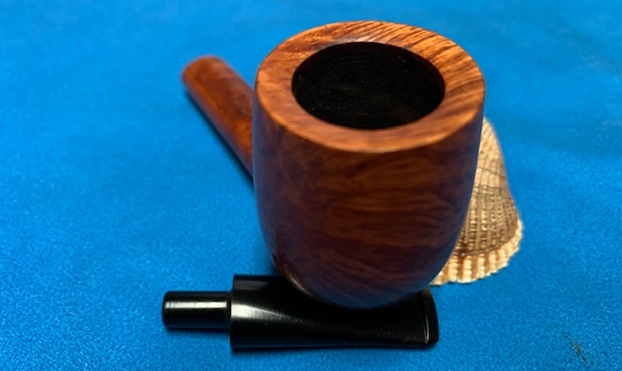
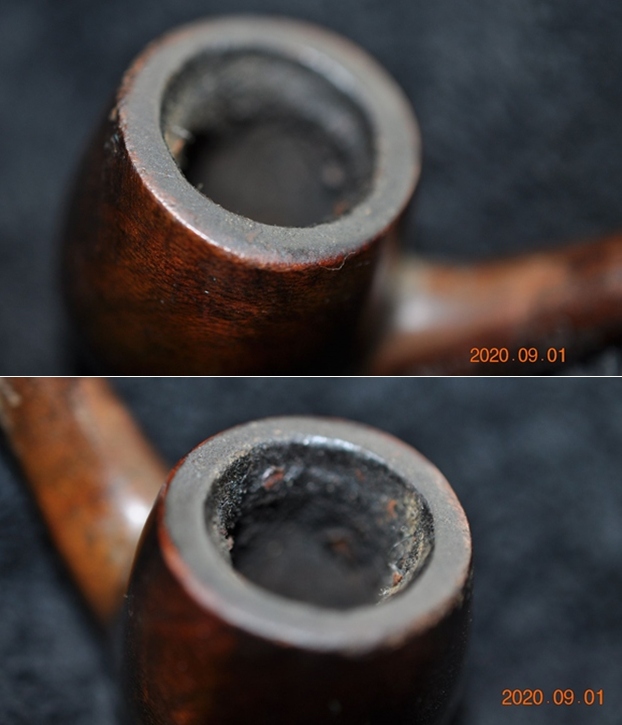
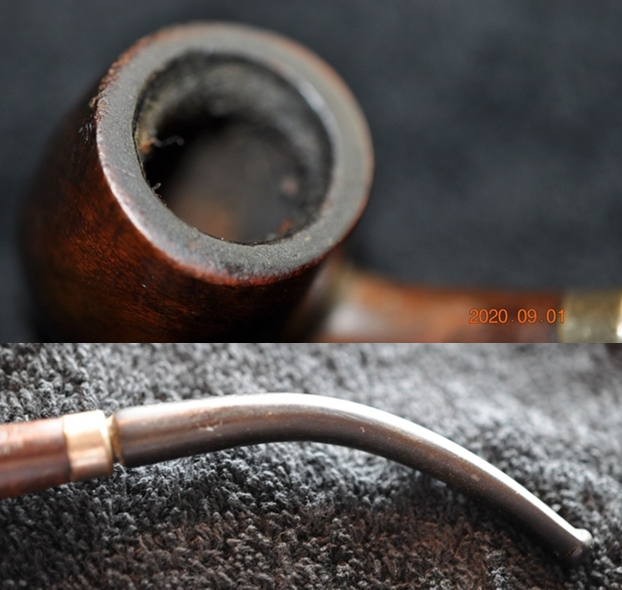
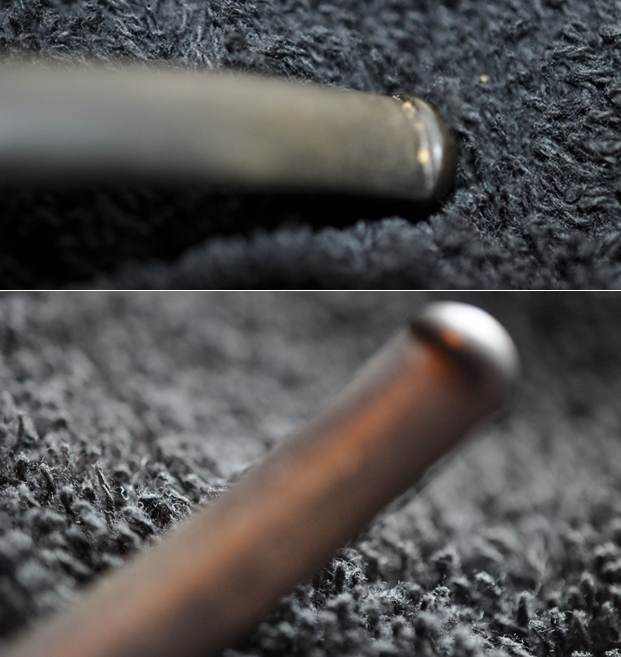
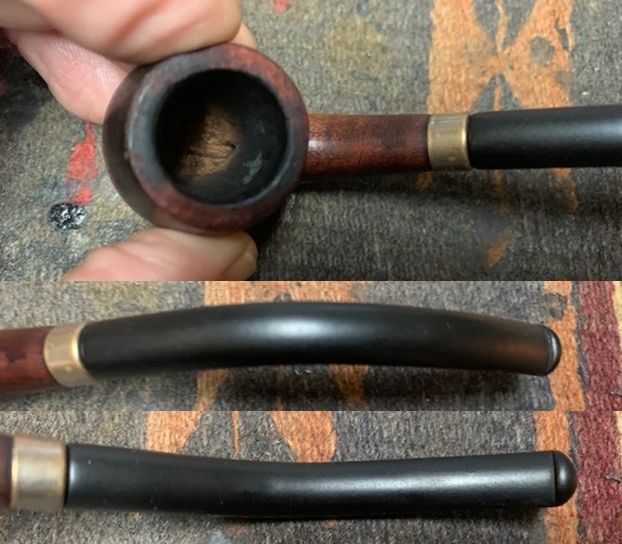
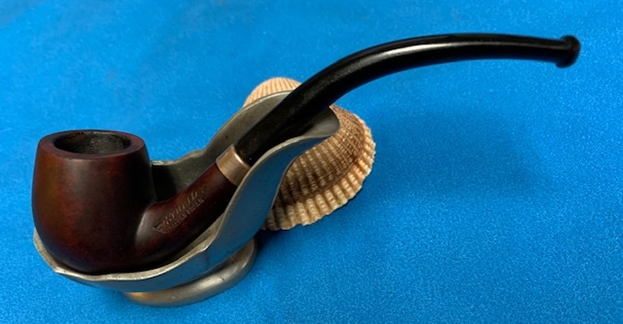
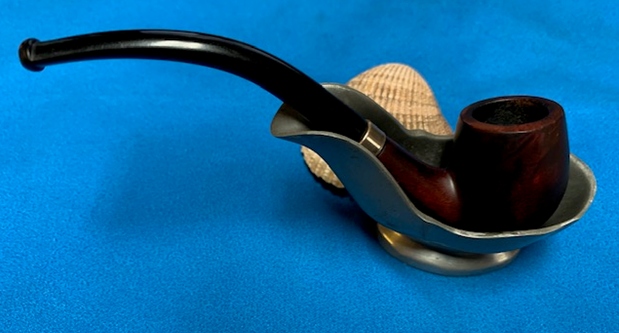
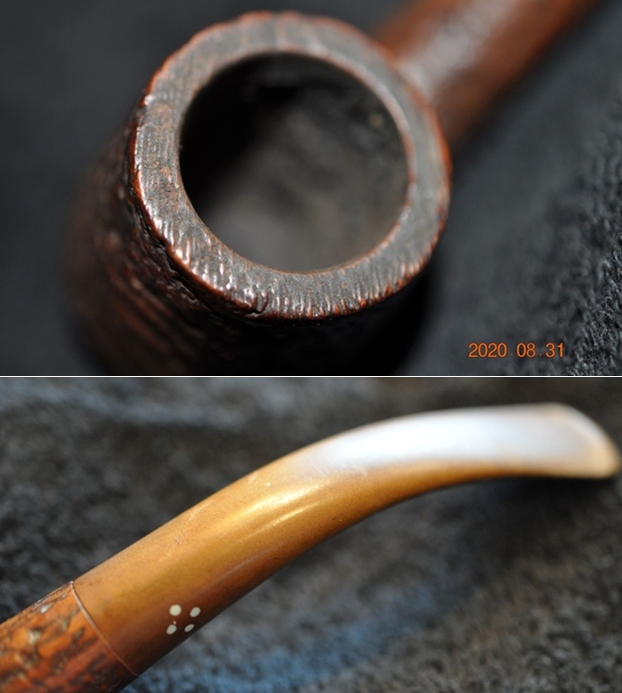
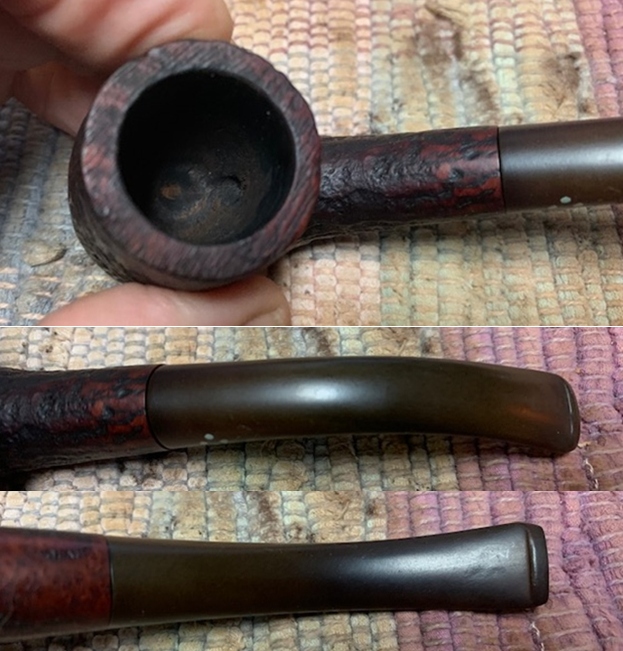
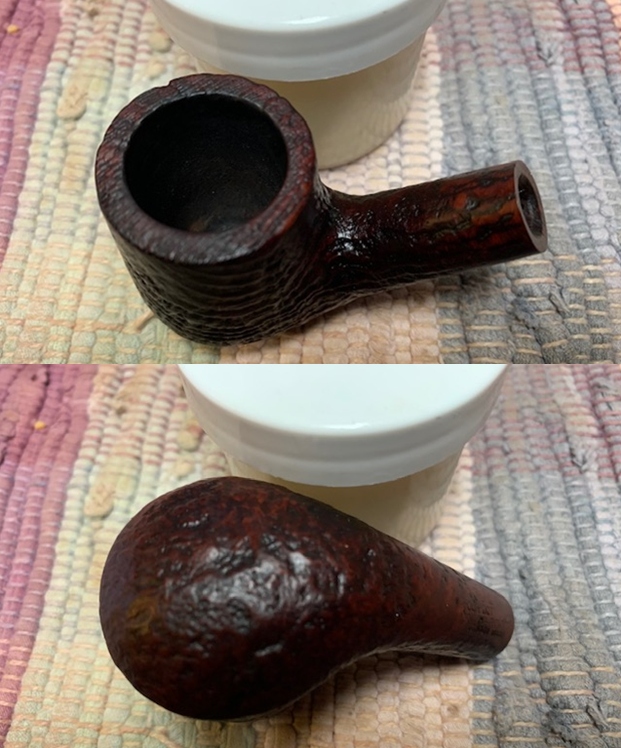
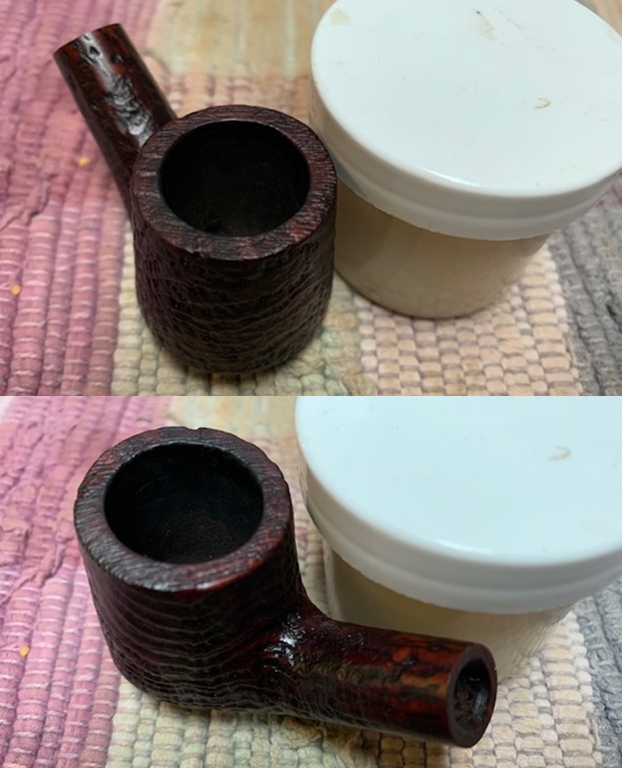
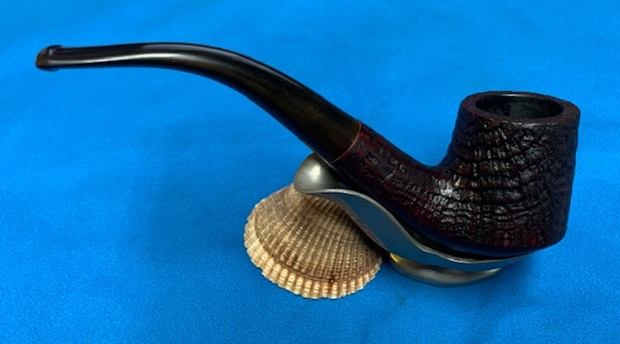
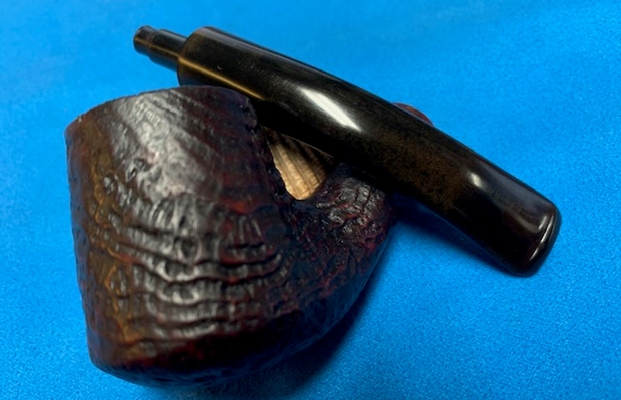
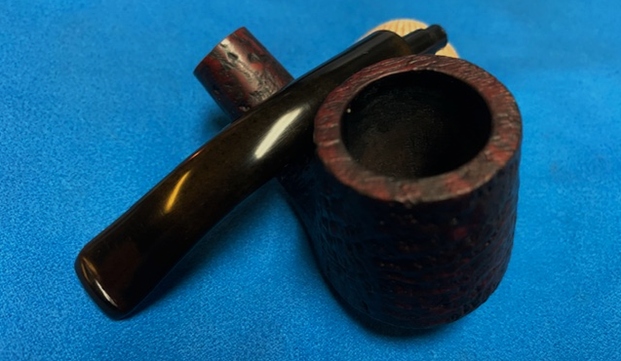
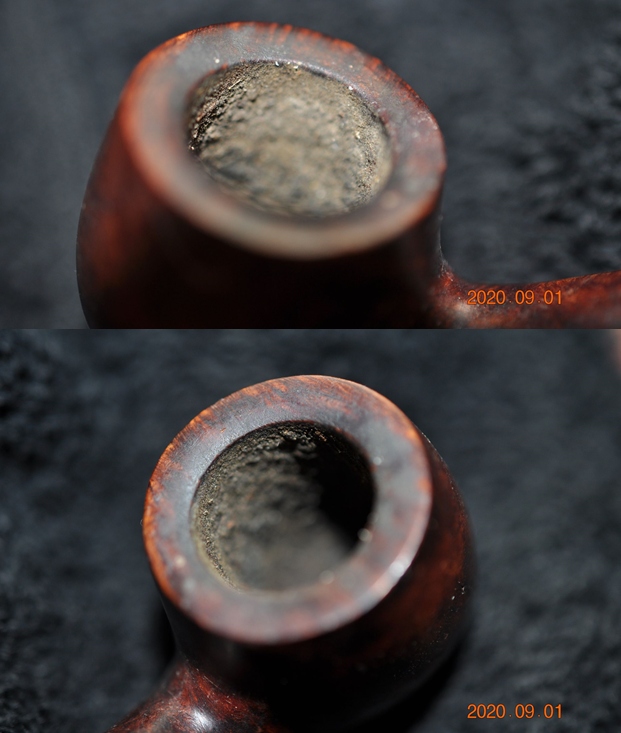
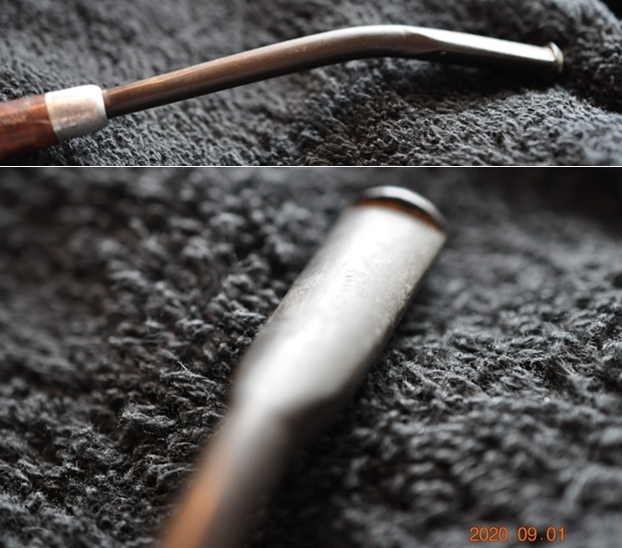
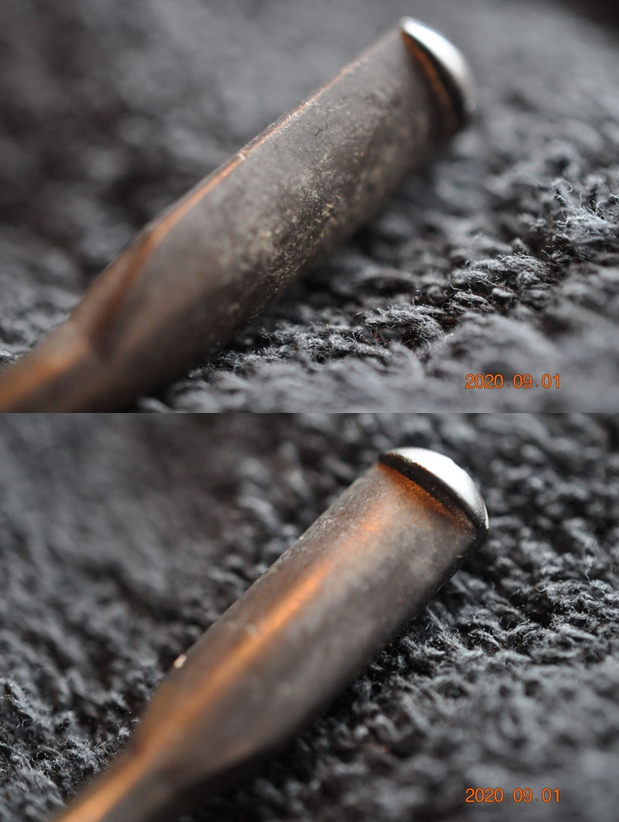
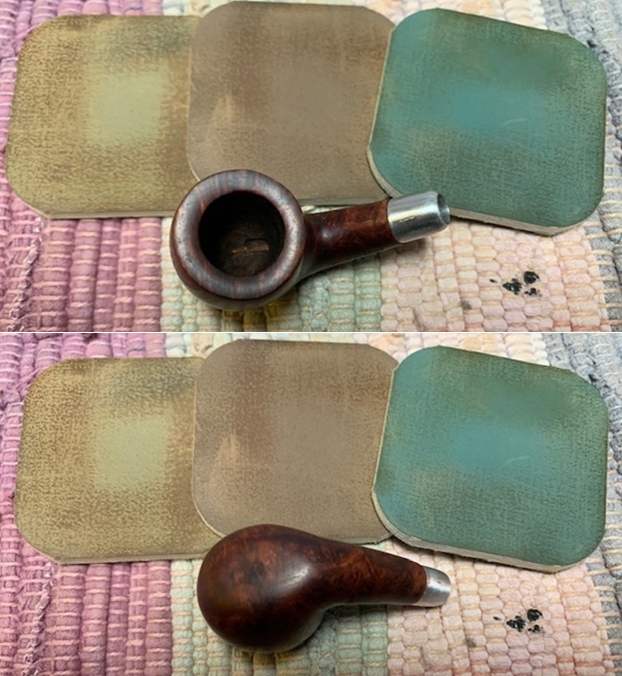
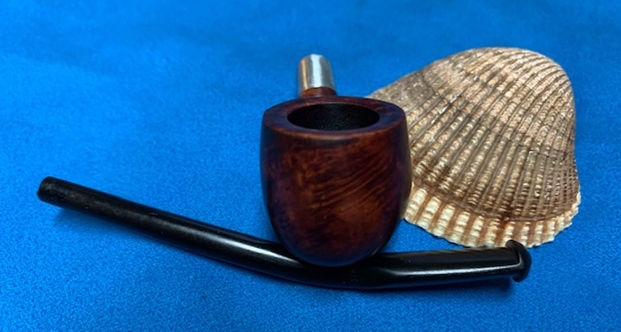
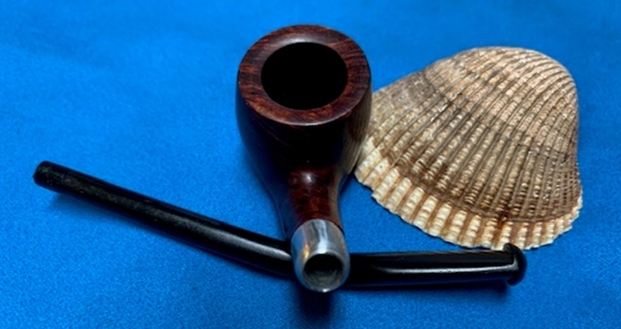
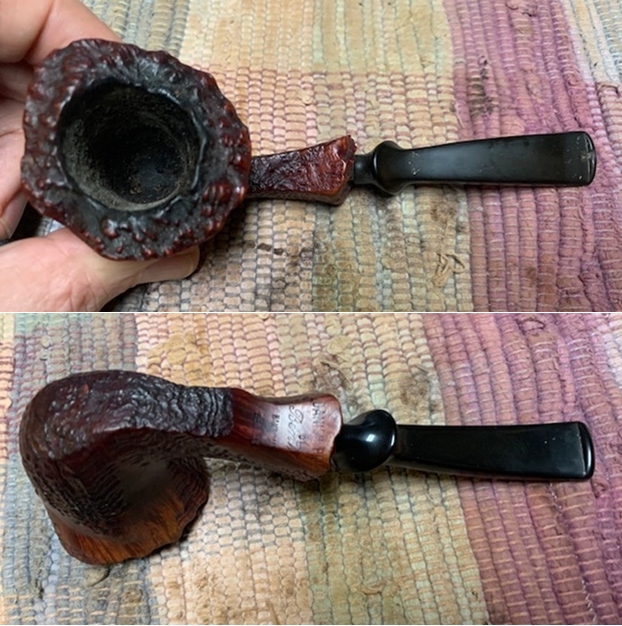
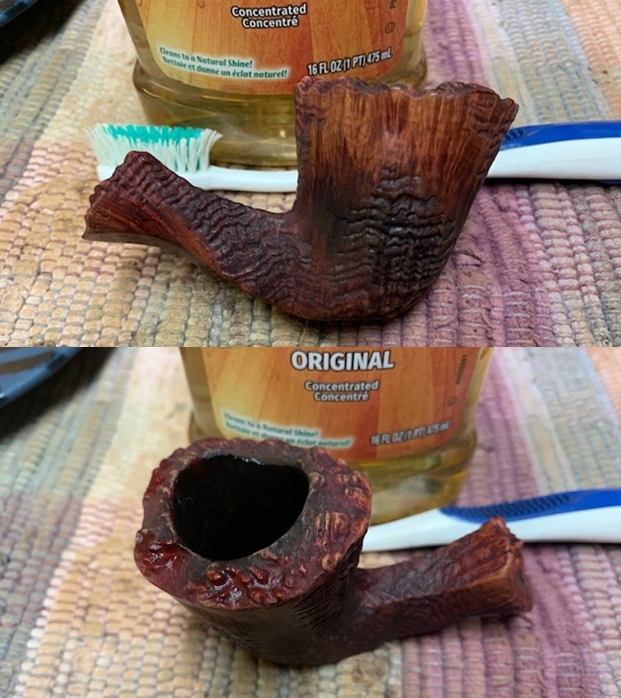
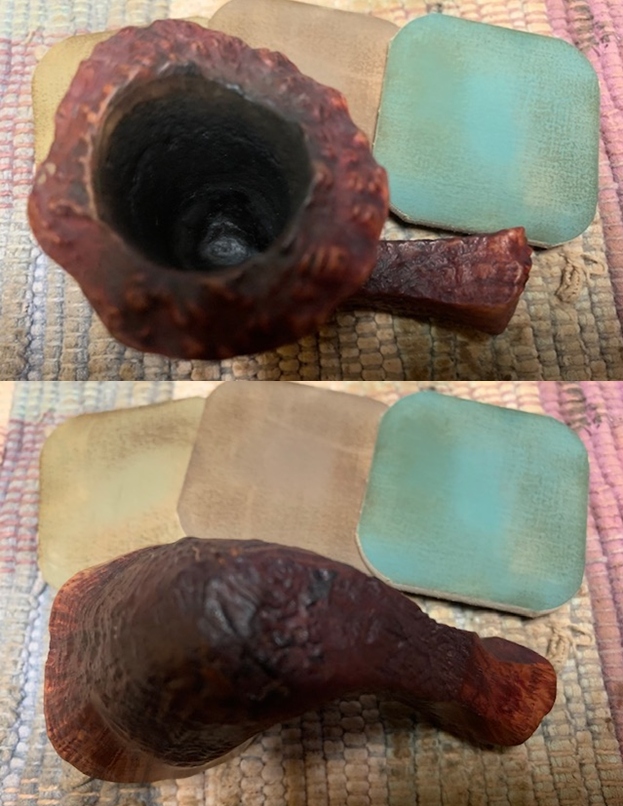
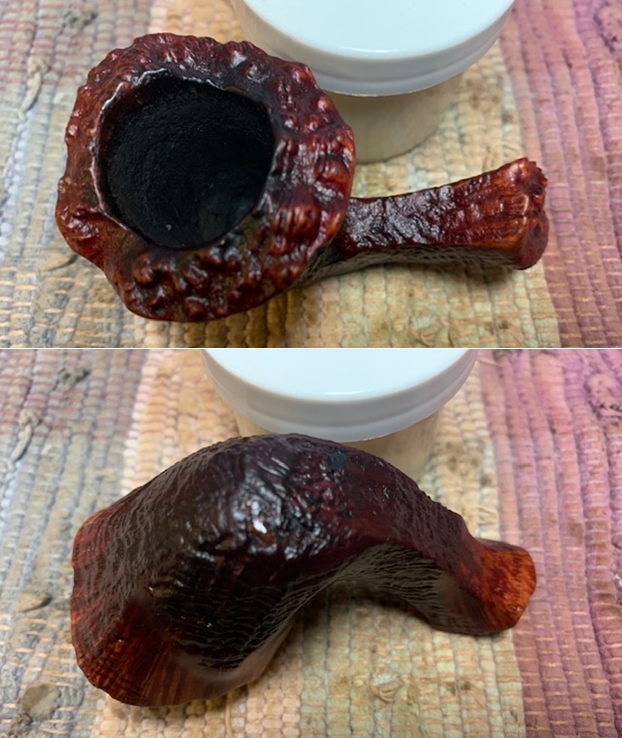
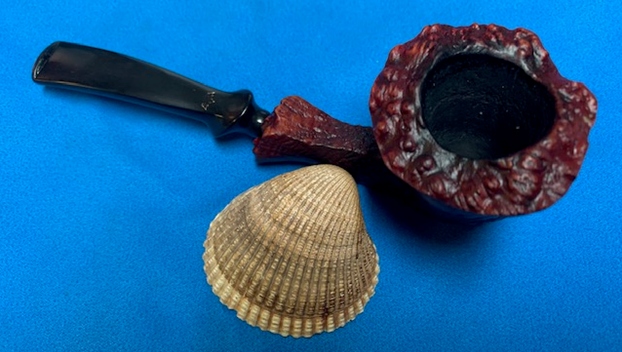
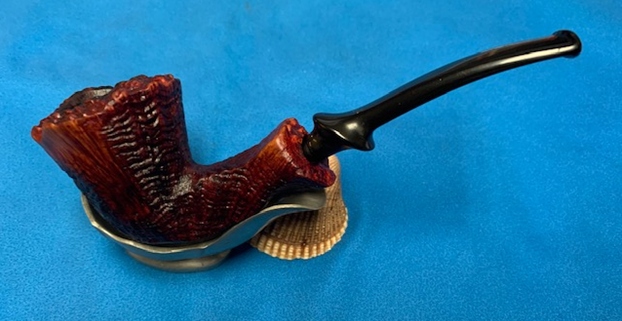
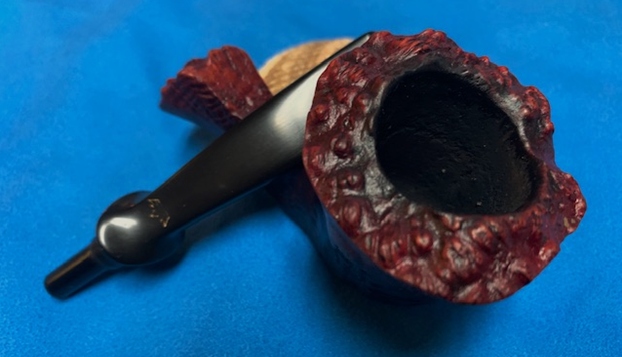
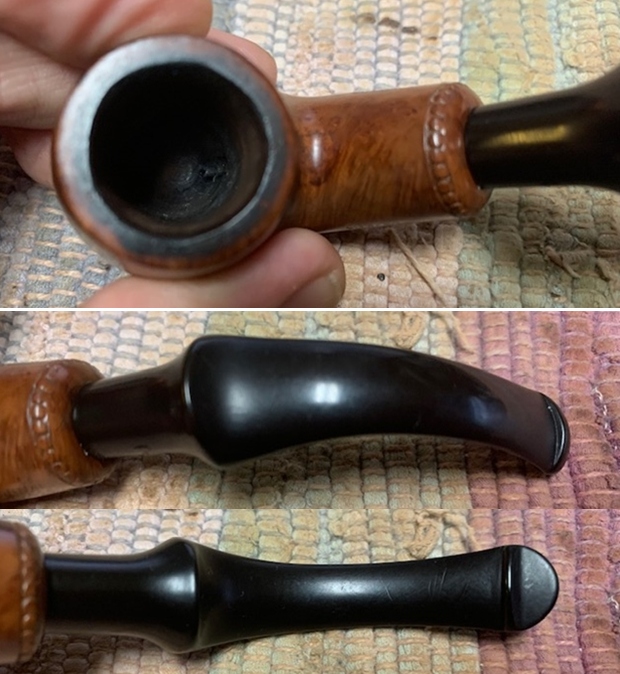
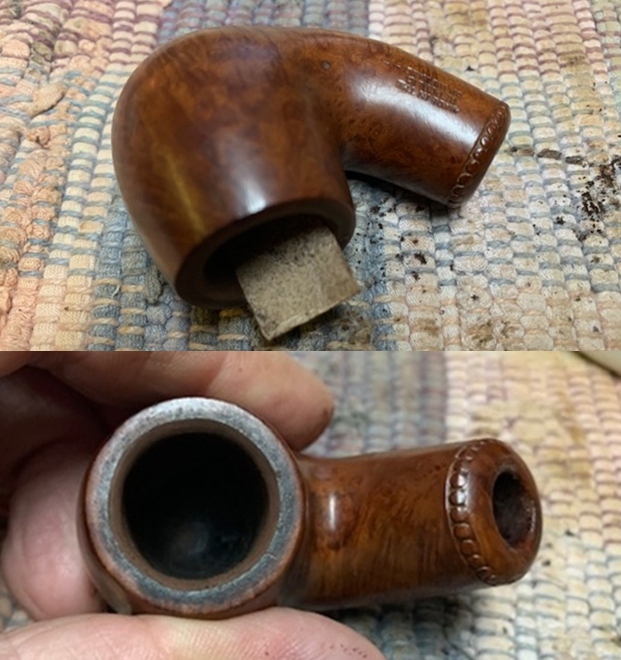
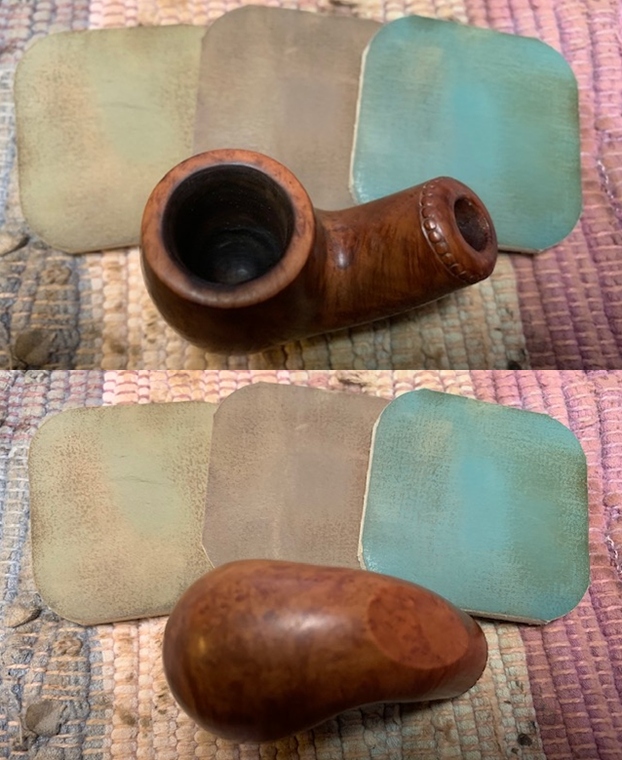
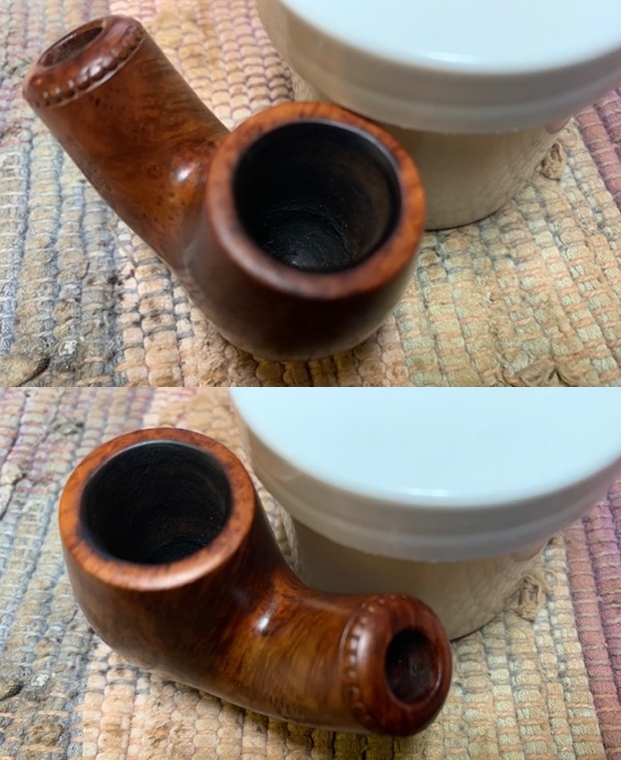
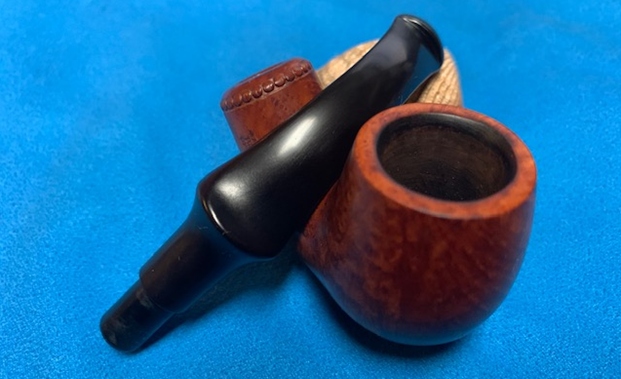
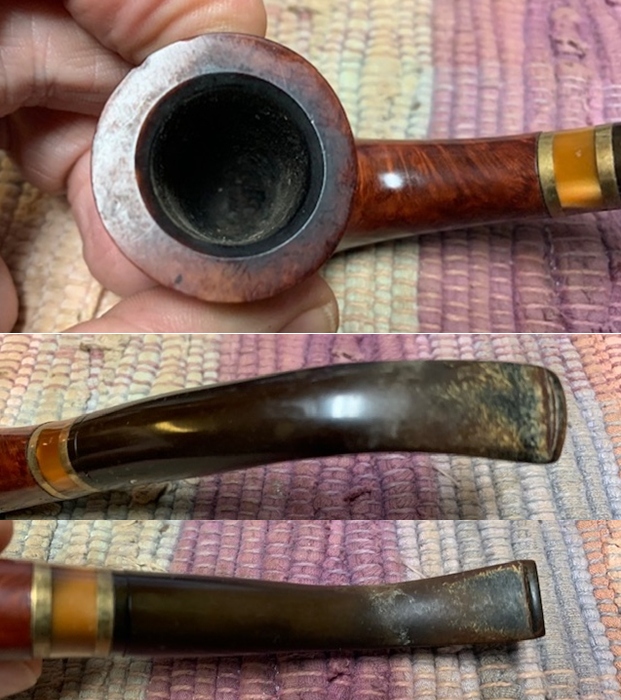
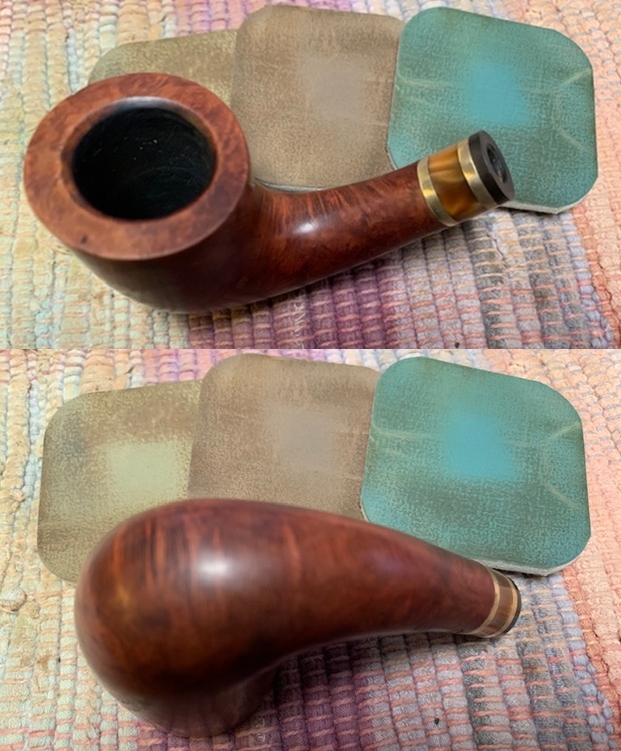
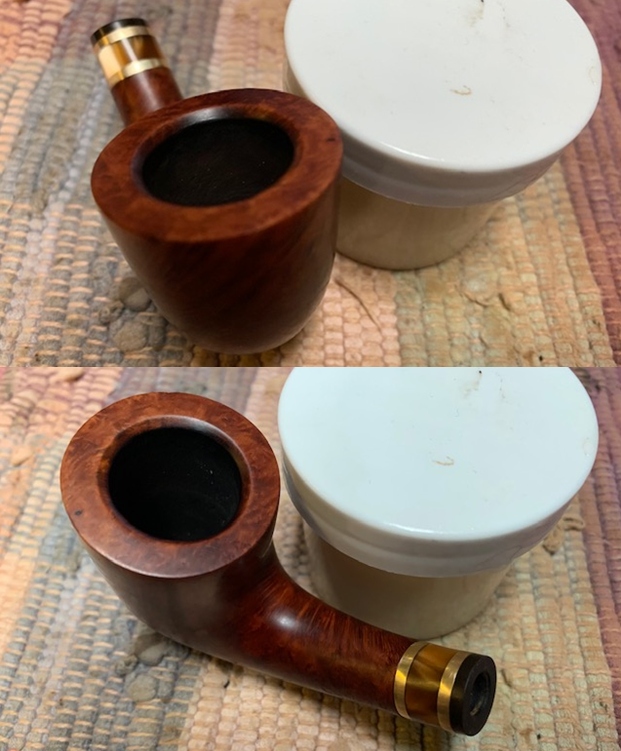
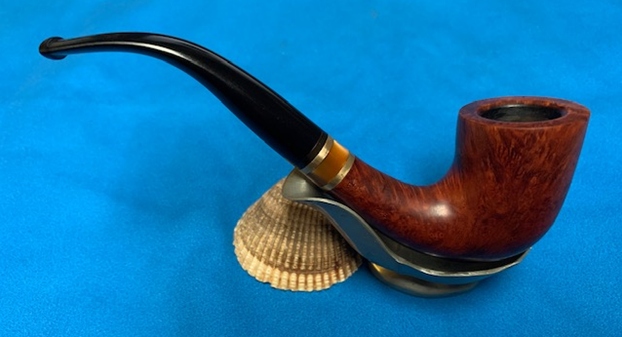
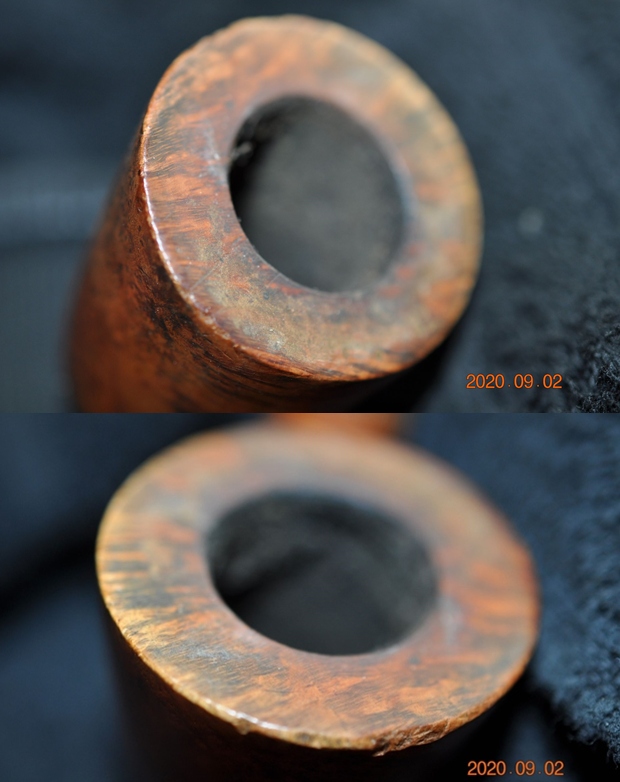
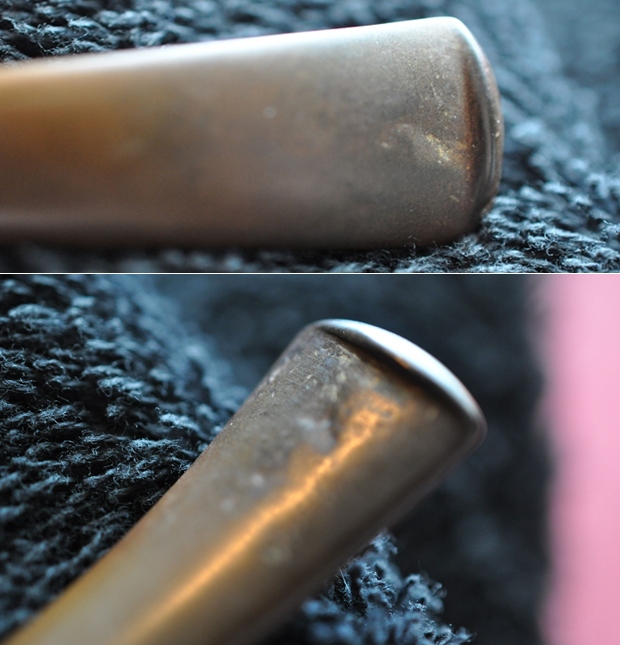
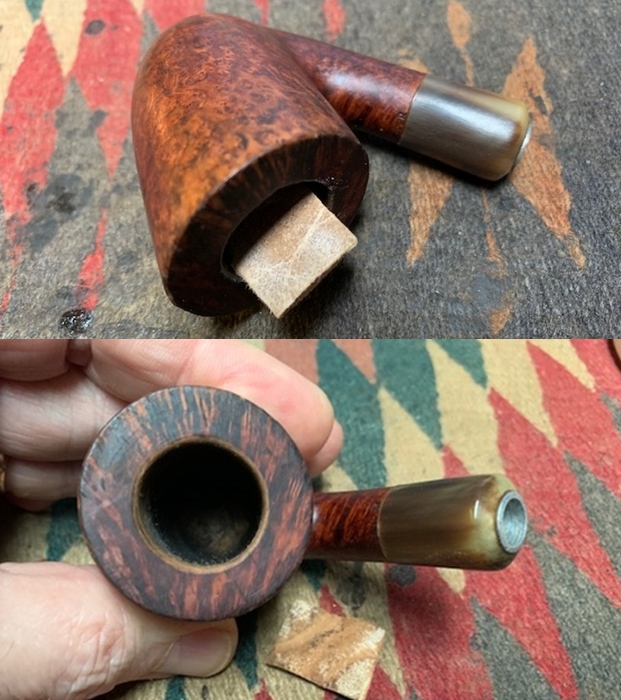
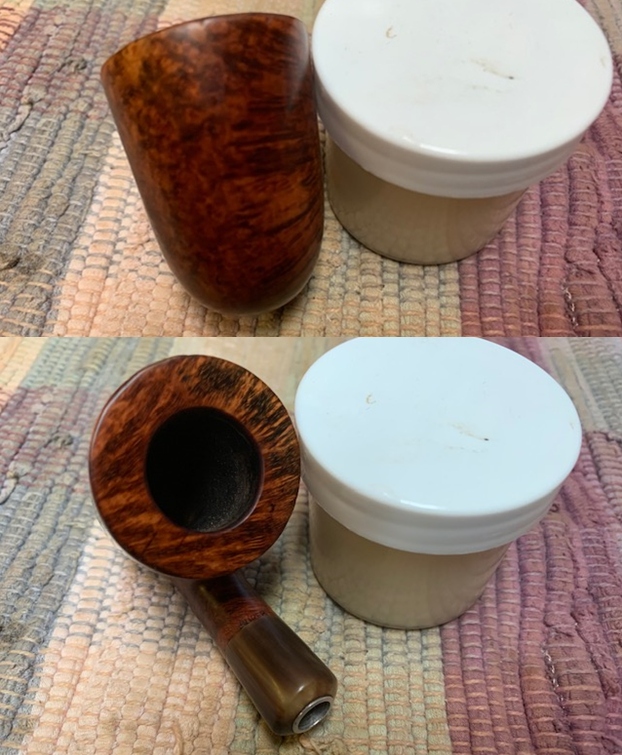
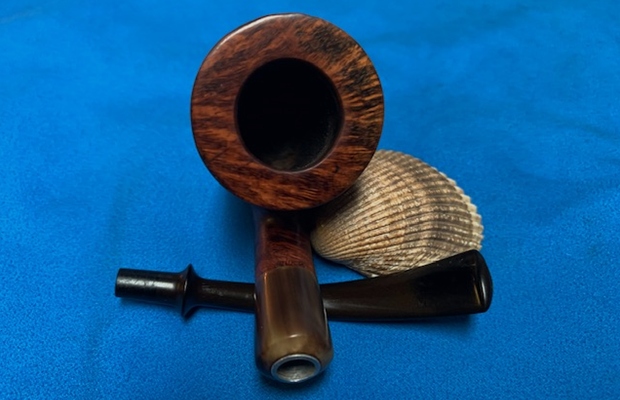
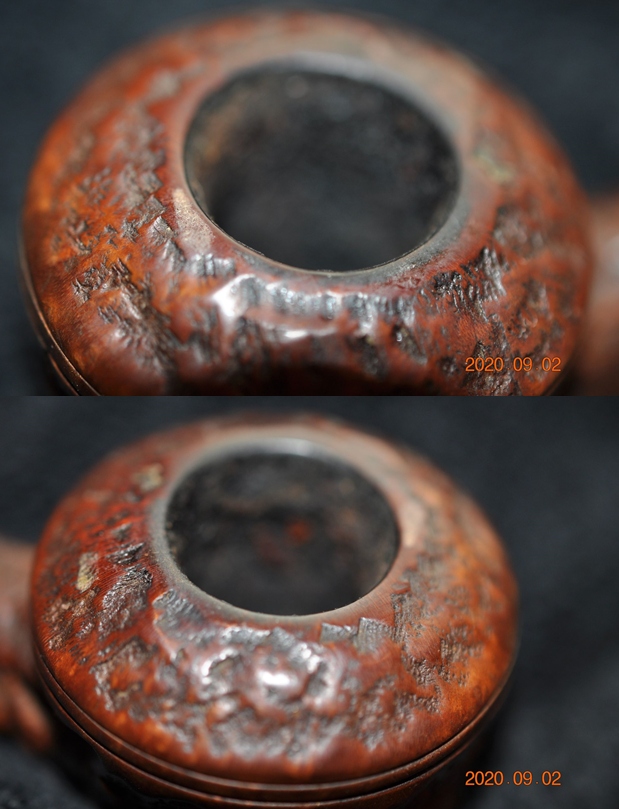
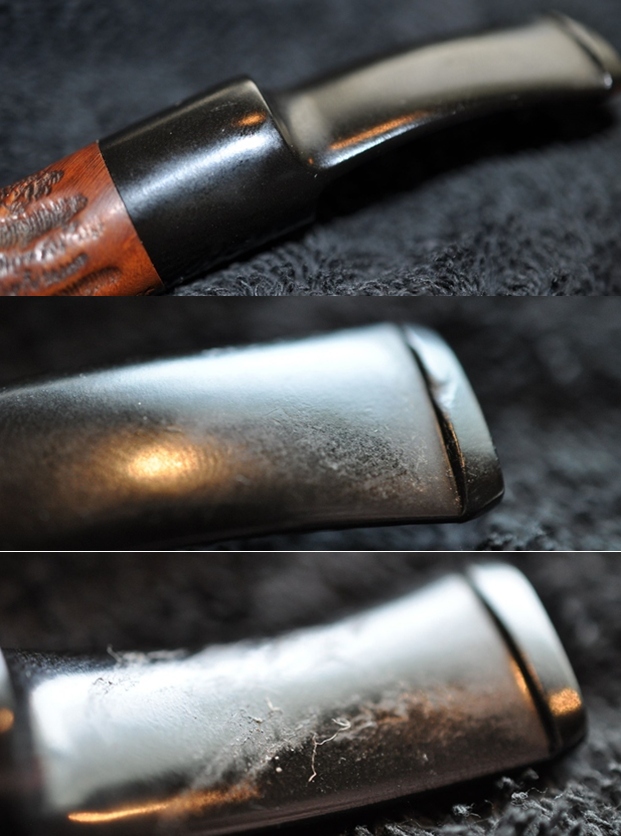
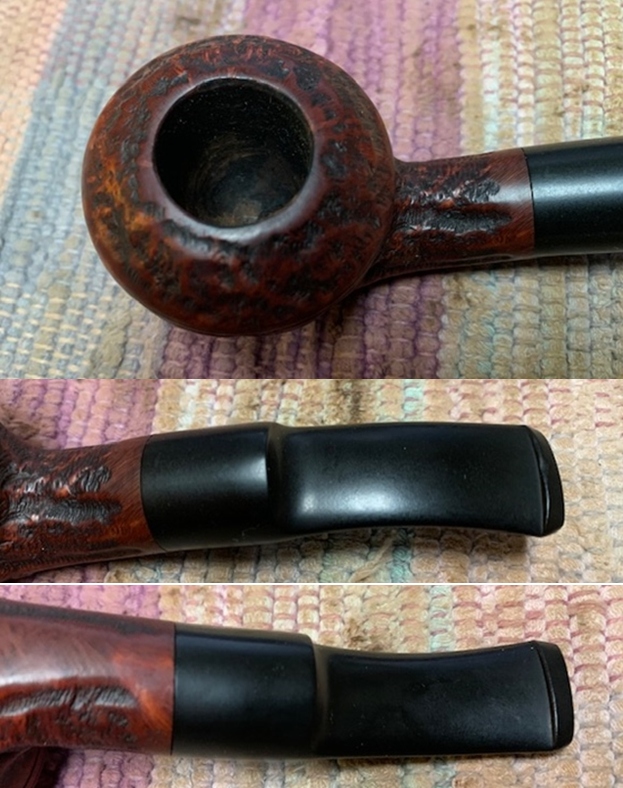
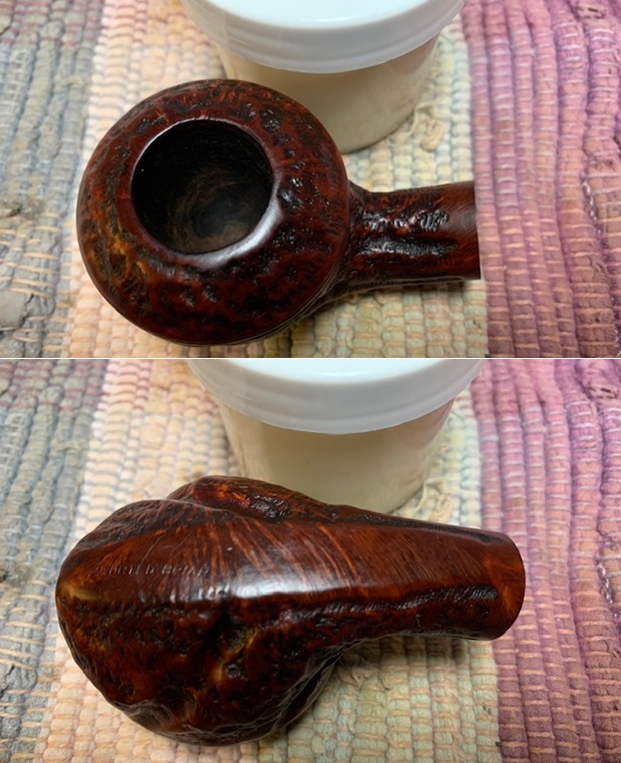
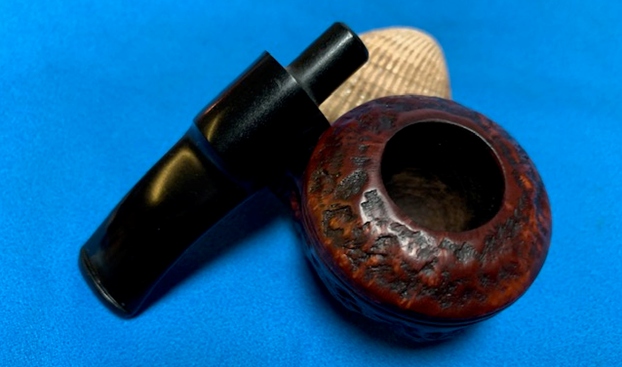
 He took photos of the rim top and bowl to give a clear picture of the thickness of the cake and the lava on the rim top. The lava was thicker toward the back of the rim and there were remnants of tobacco on the walls of the thickly caked bowl. He also took photos of the top and underside of the stem to show the chatter and tooth marks. Otherwise the stem is quite clean.
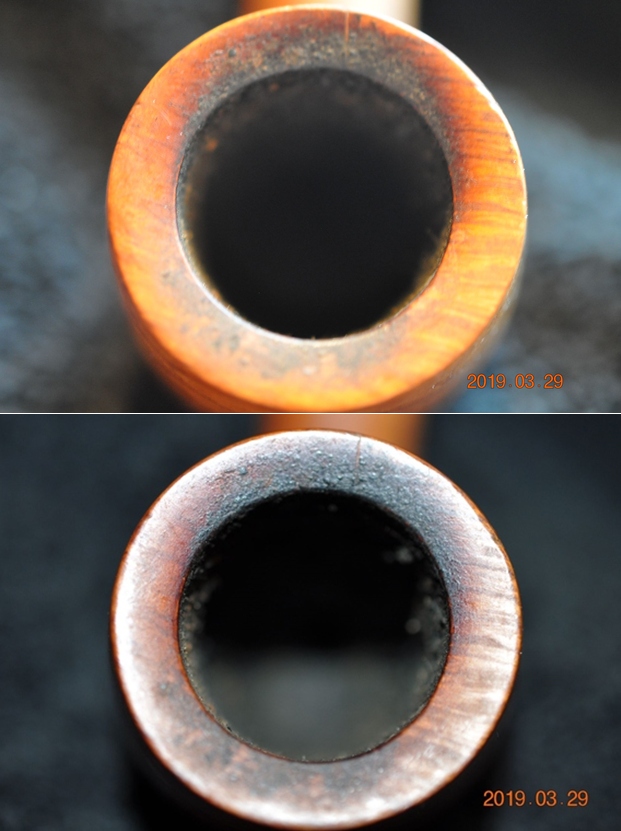
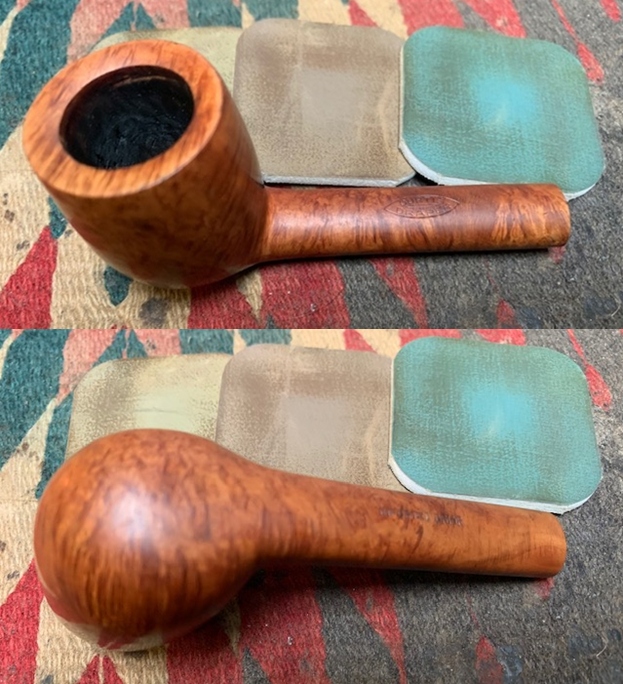
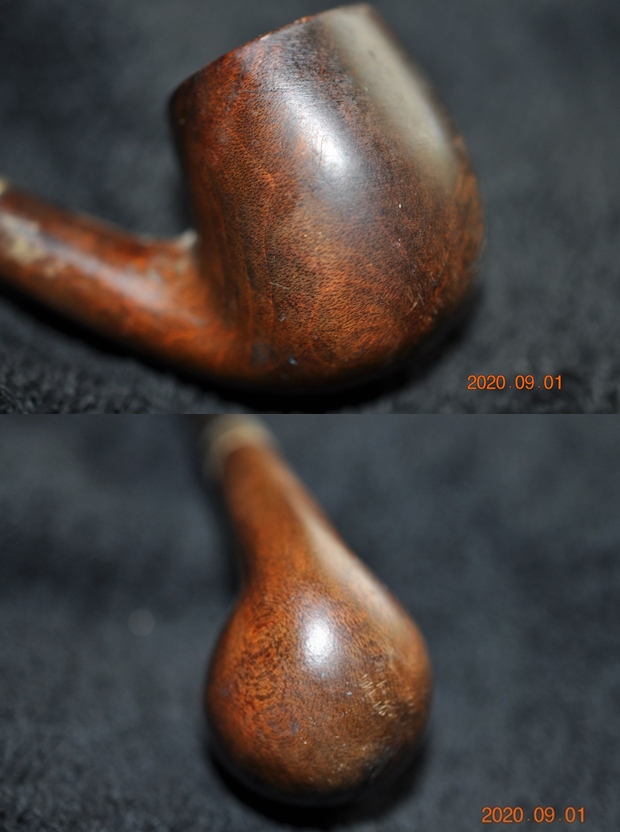
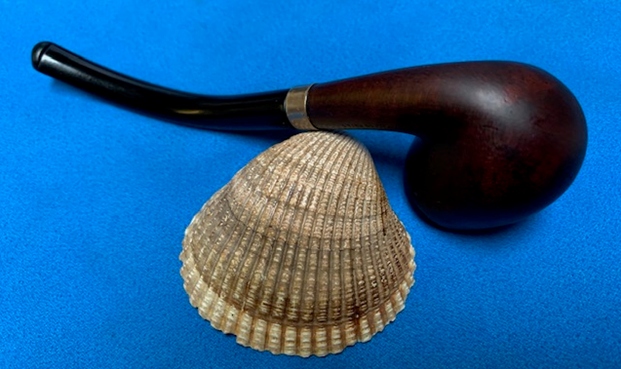
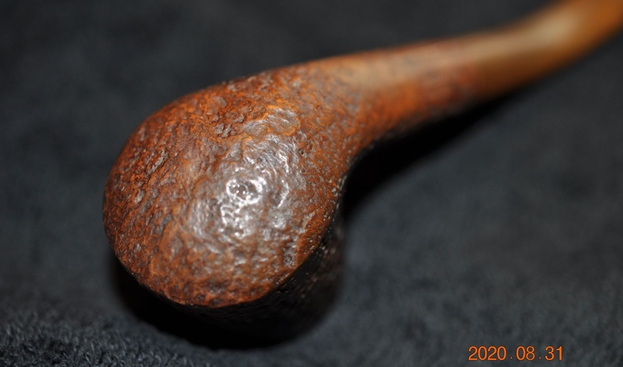
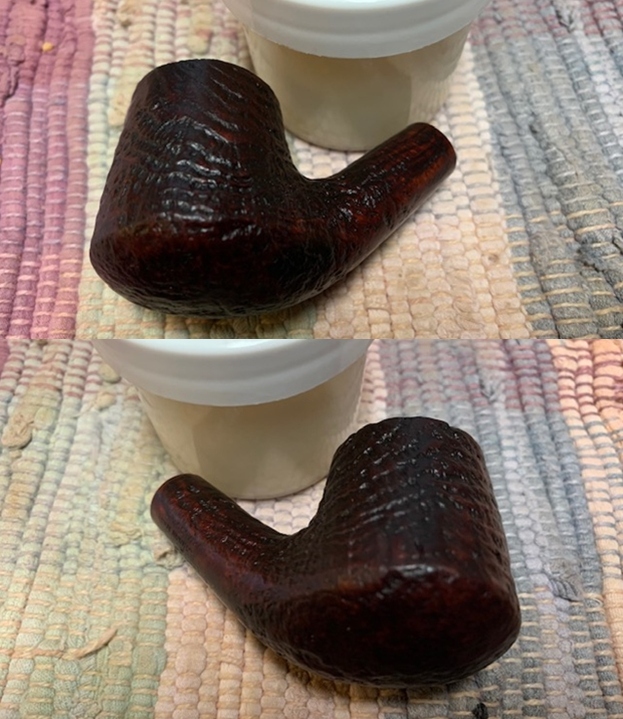
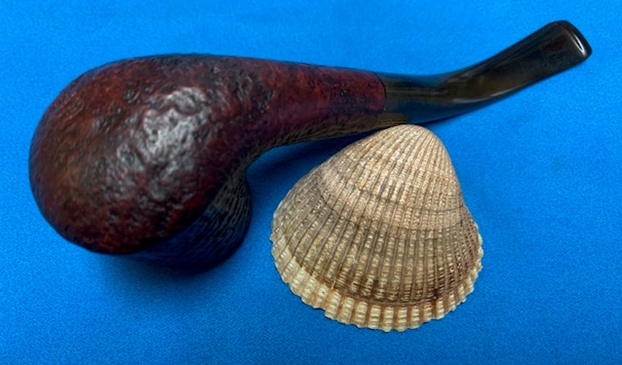
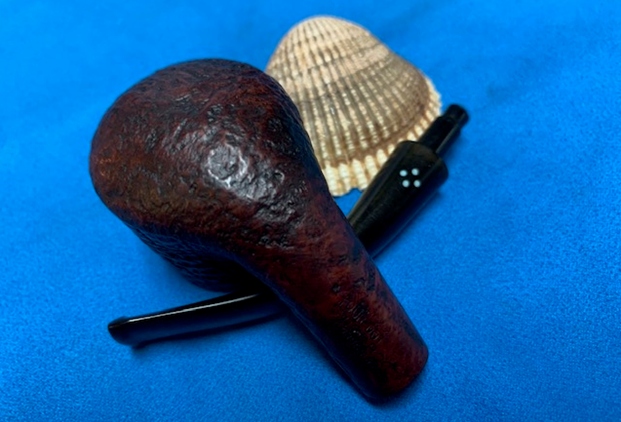
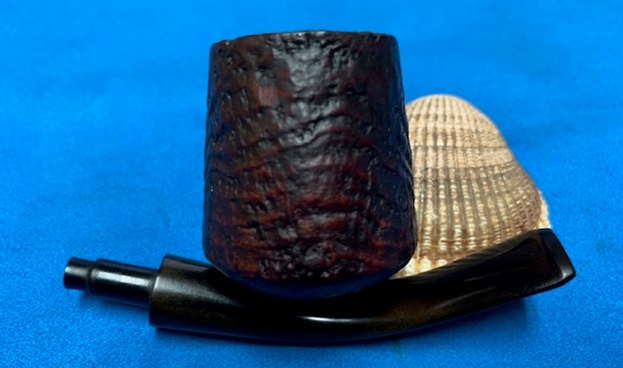
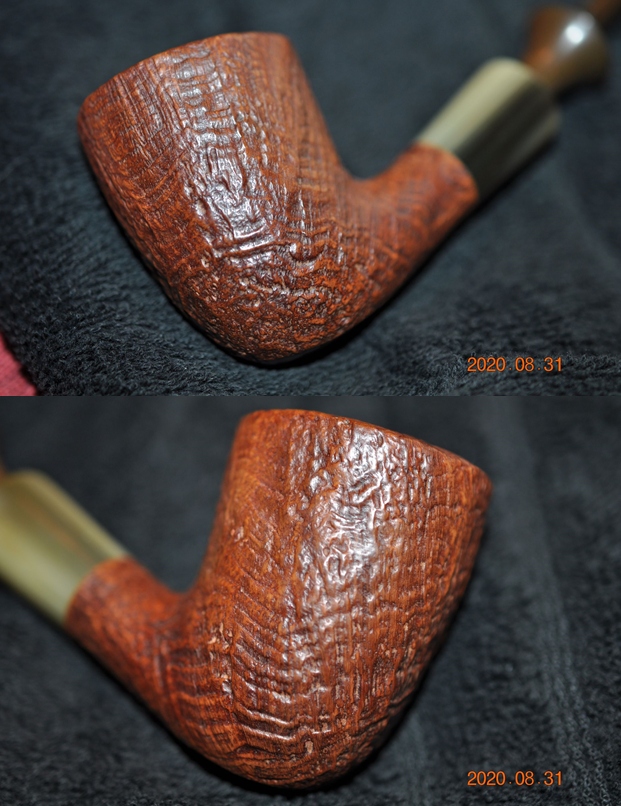
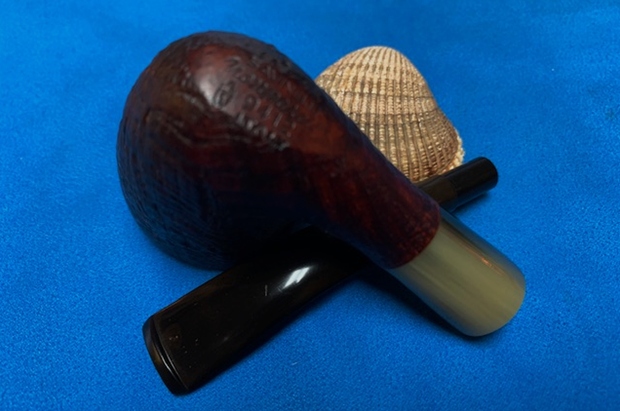
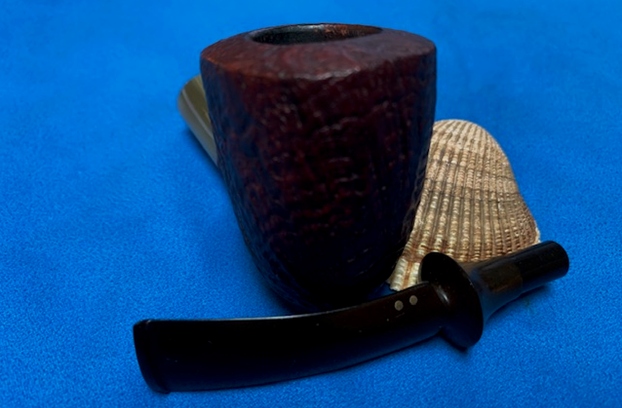
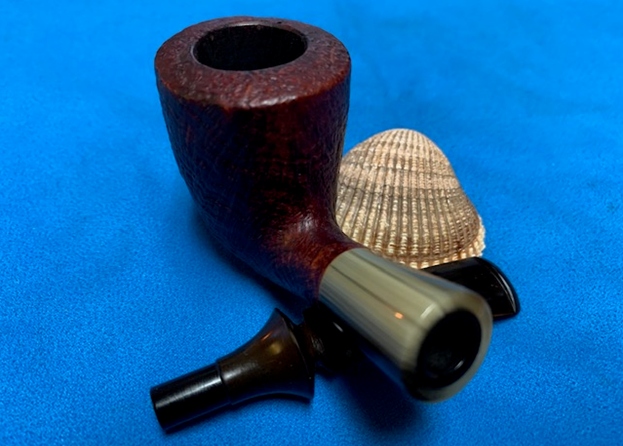
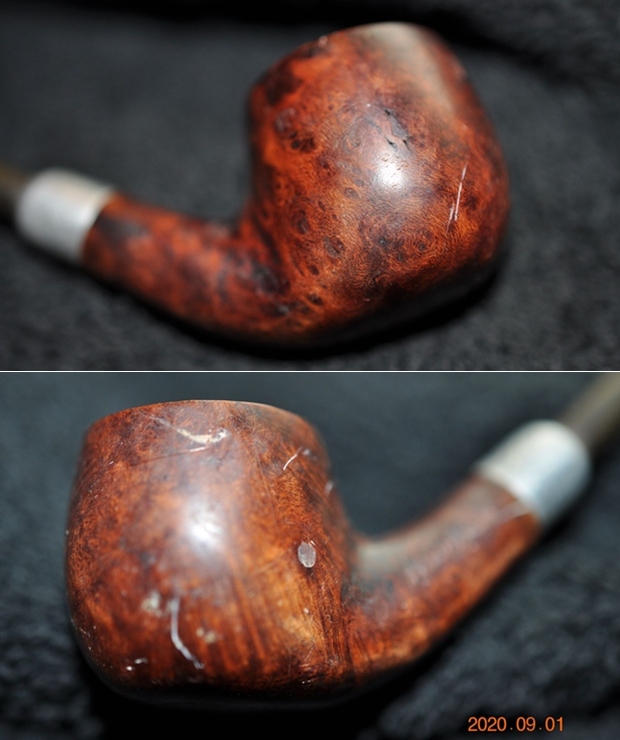
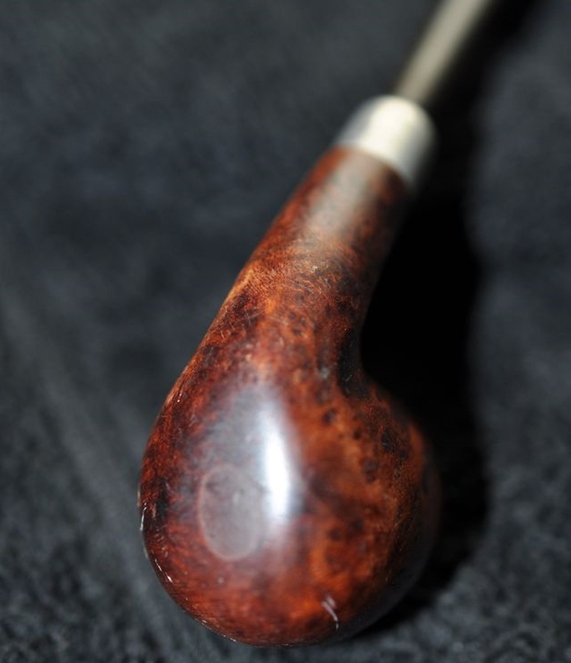
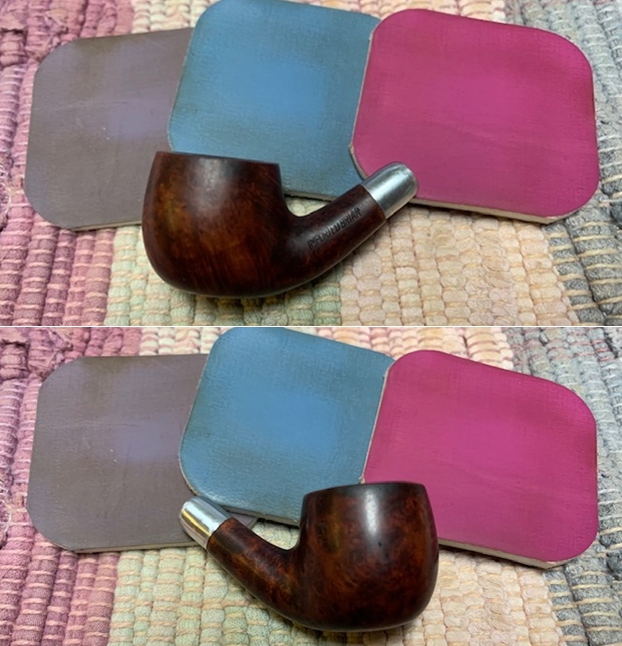
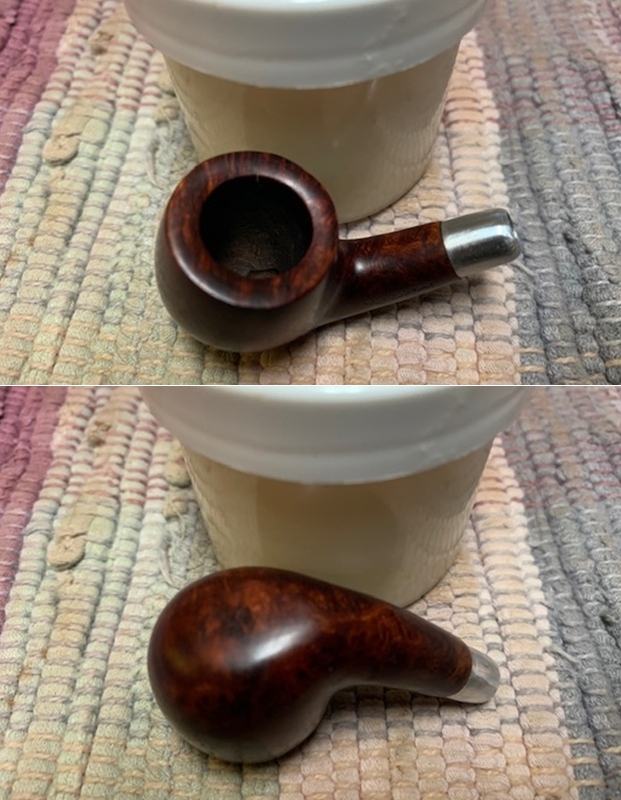
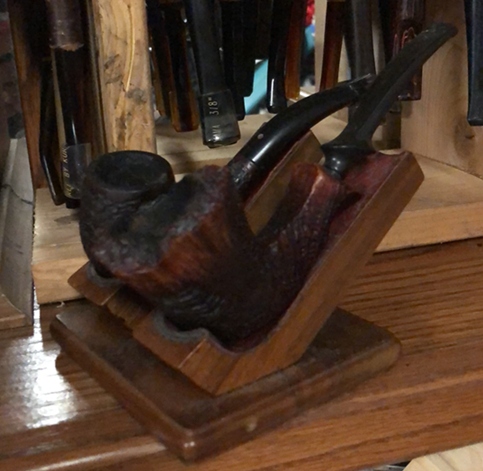
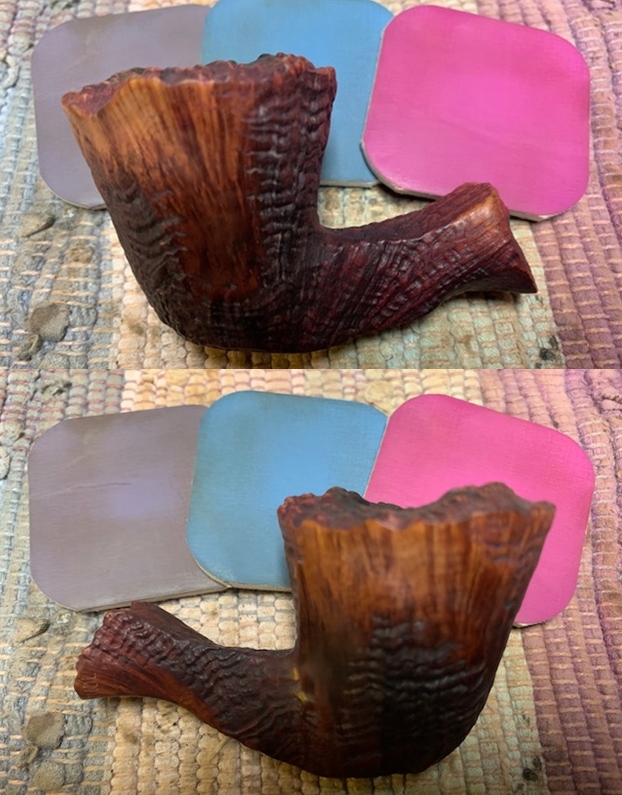
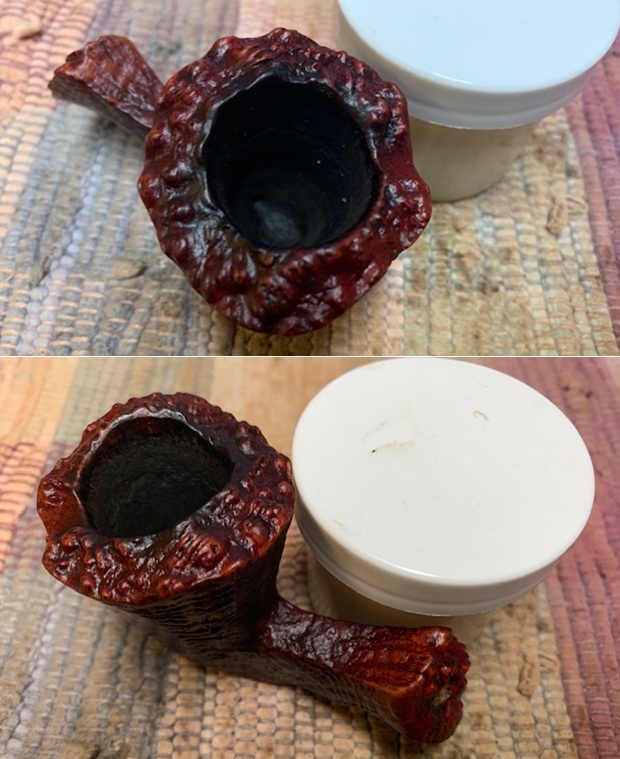
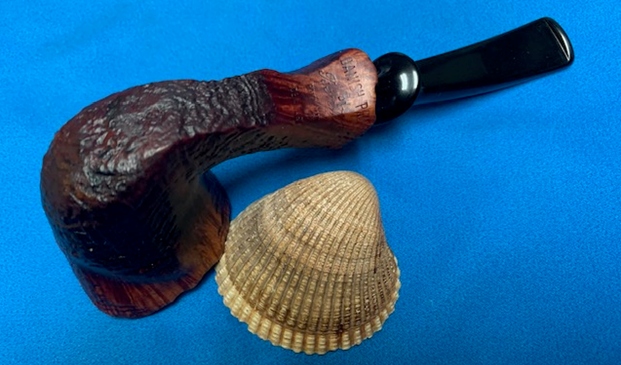
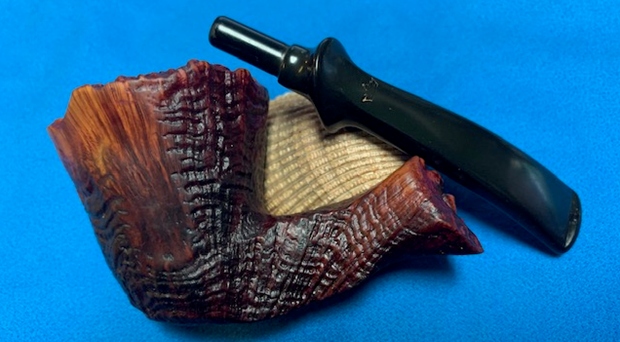
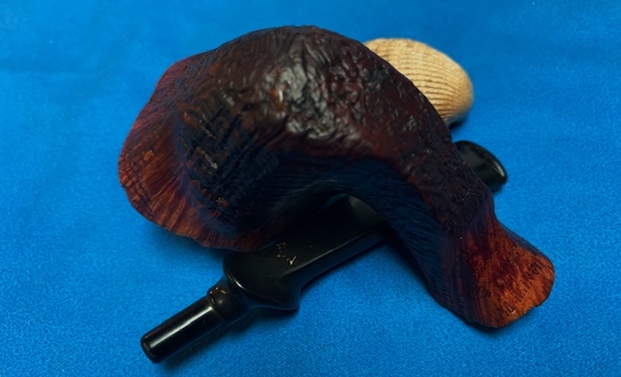
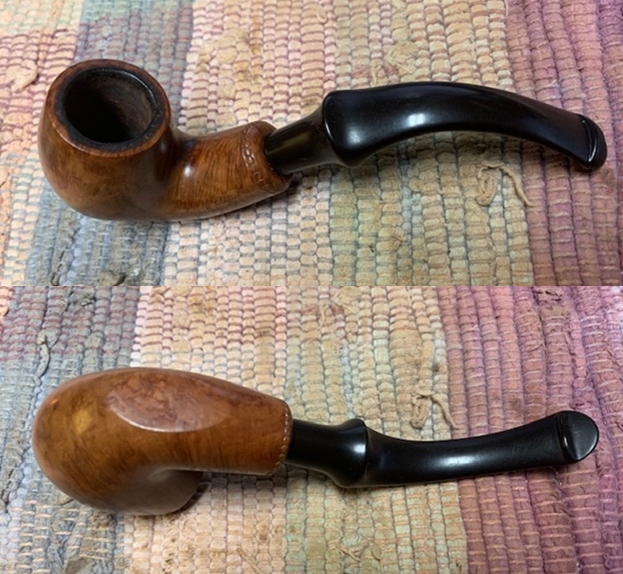
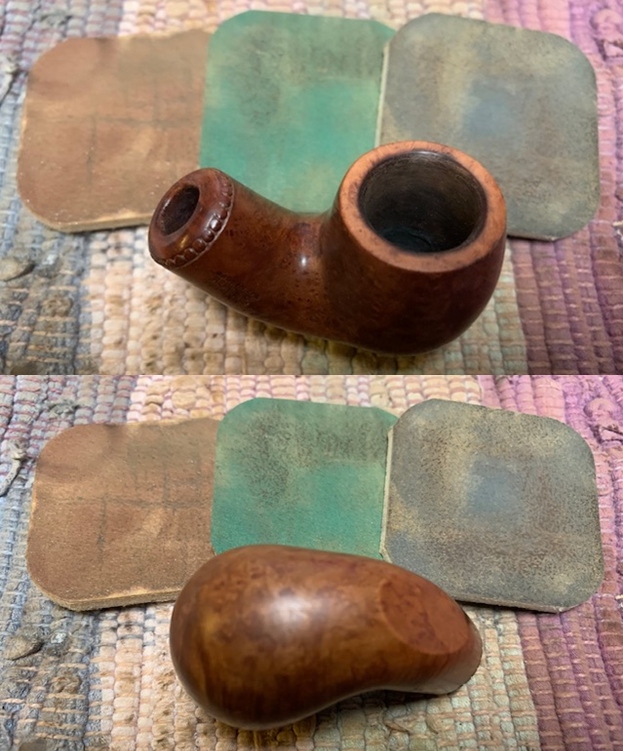
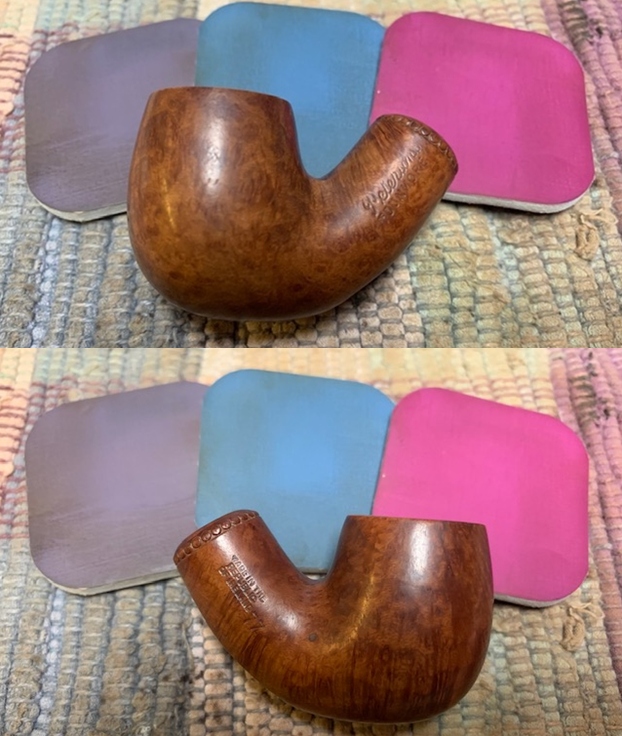
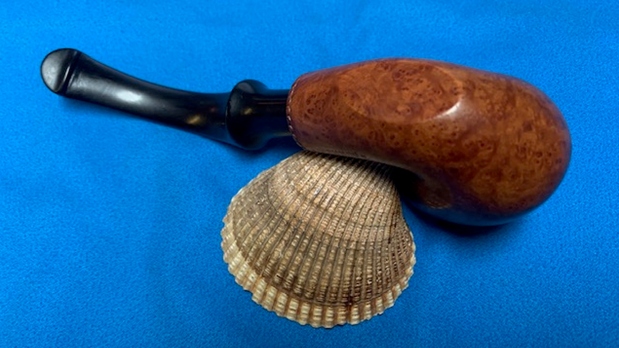
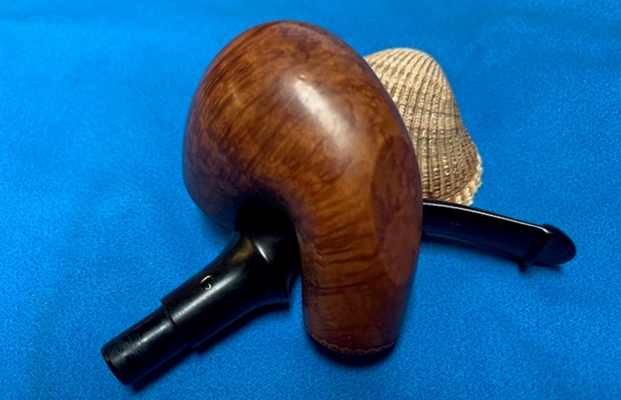
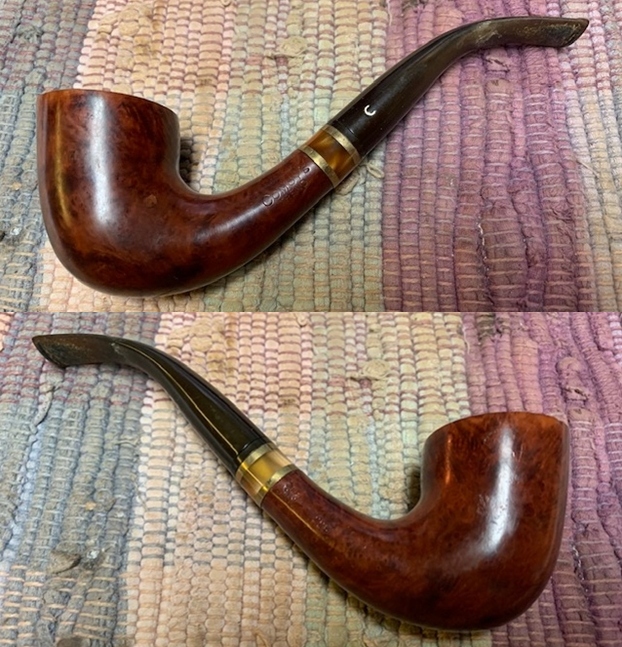
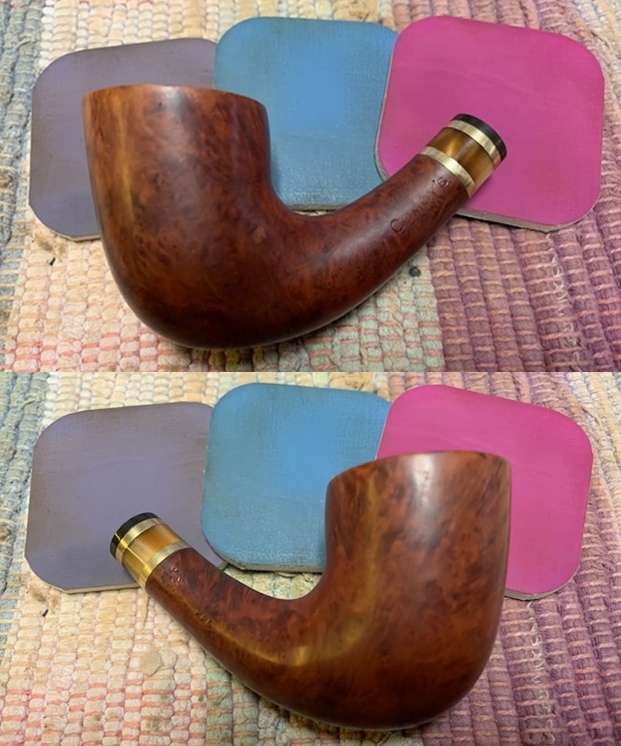
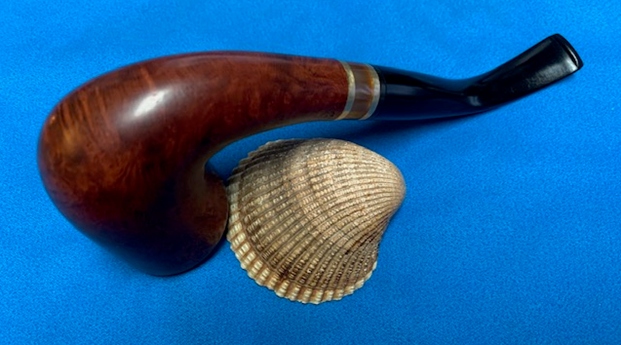
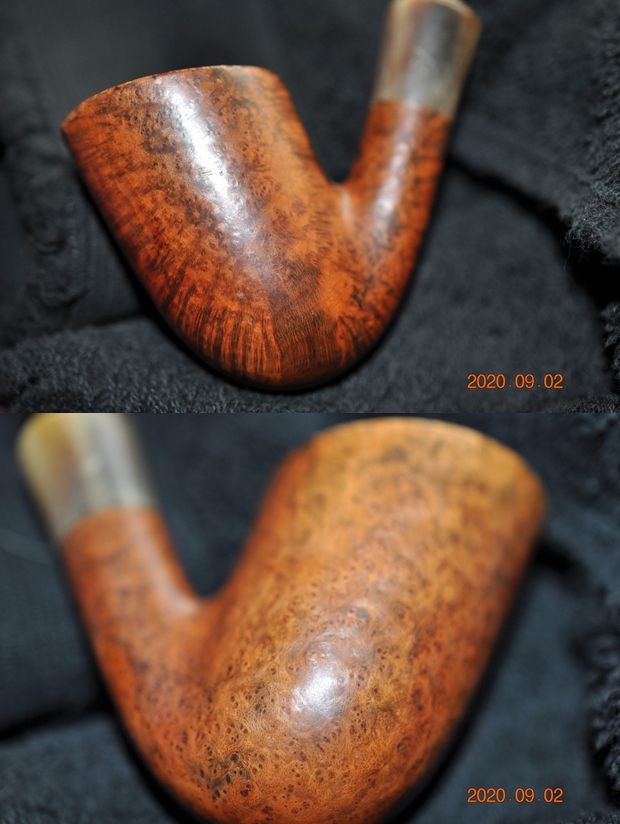
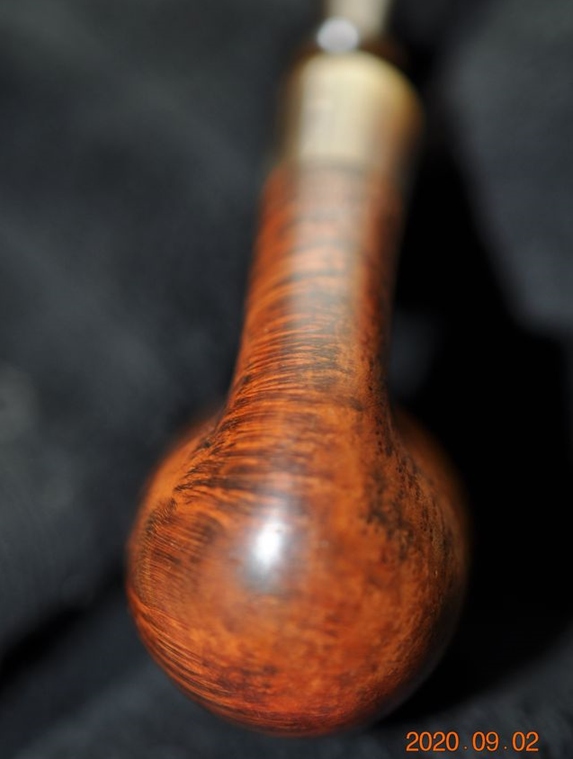
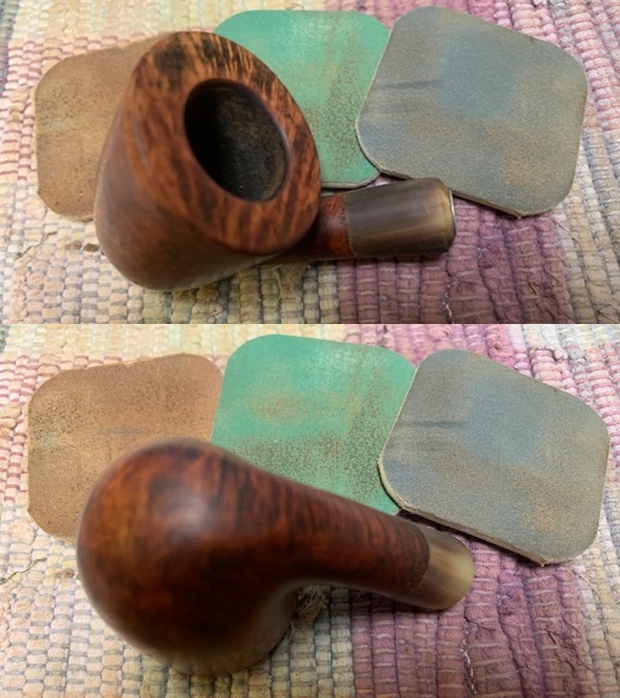
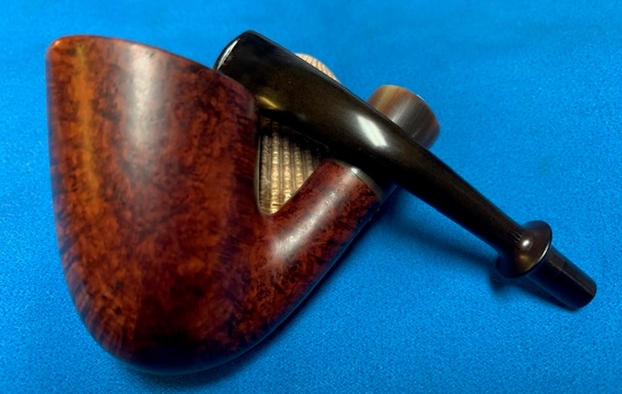
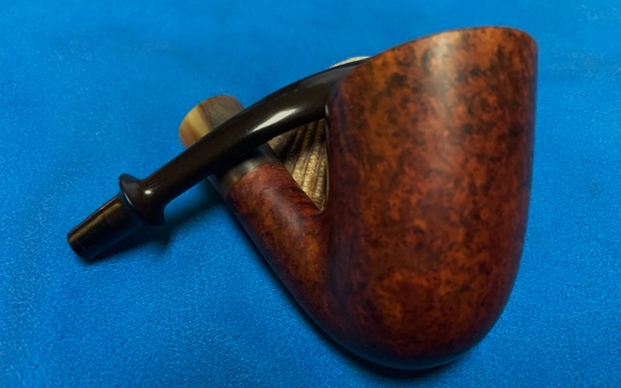
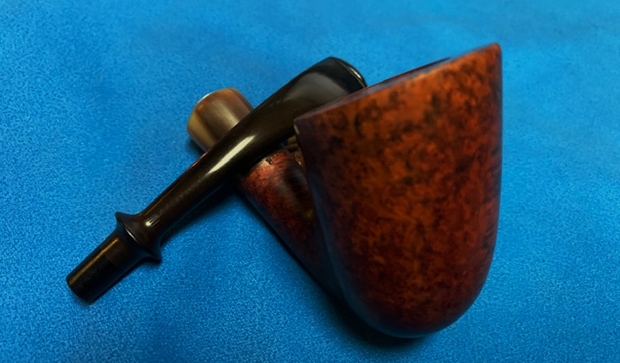
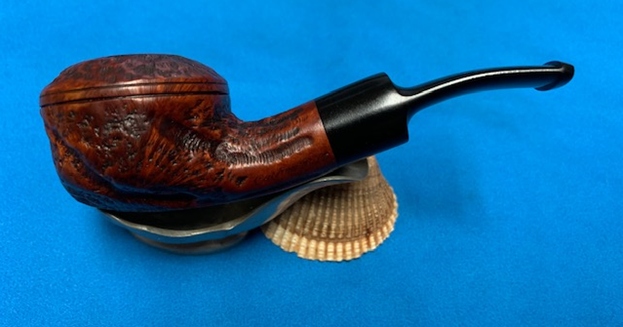
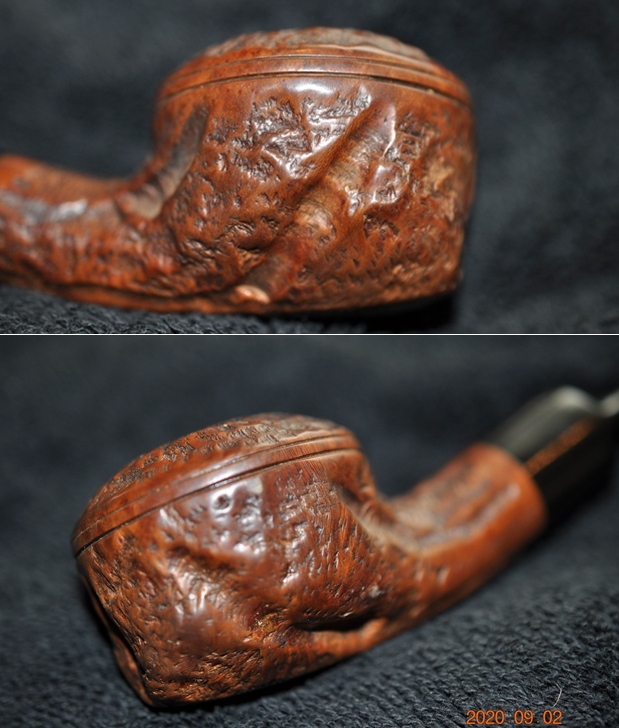
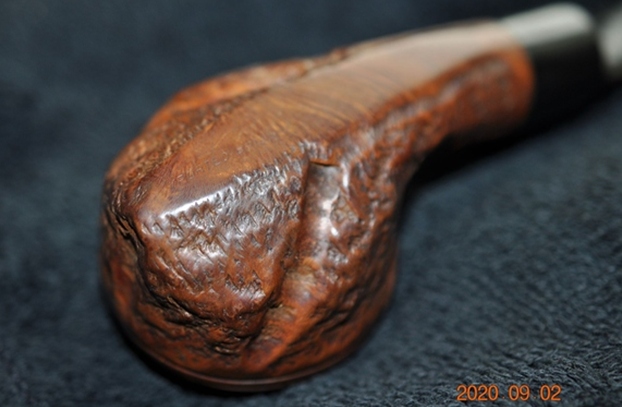
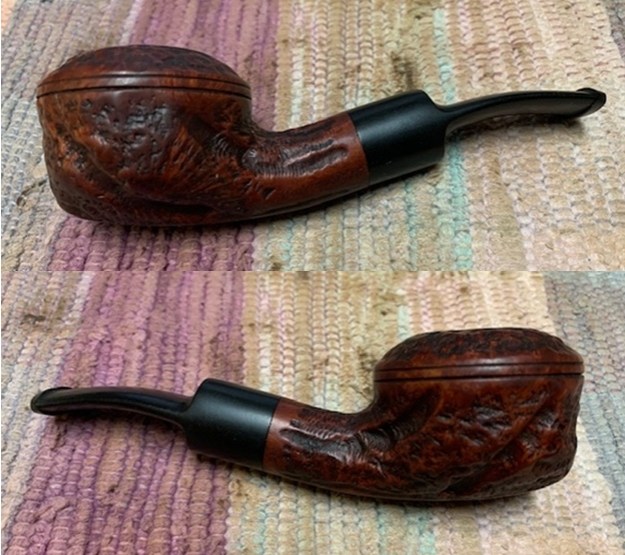
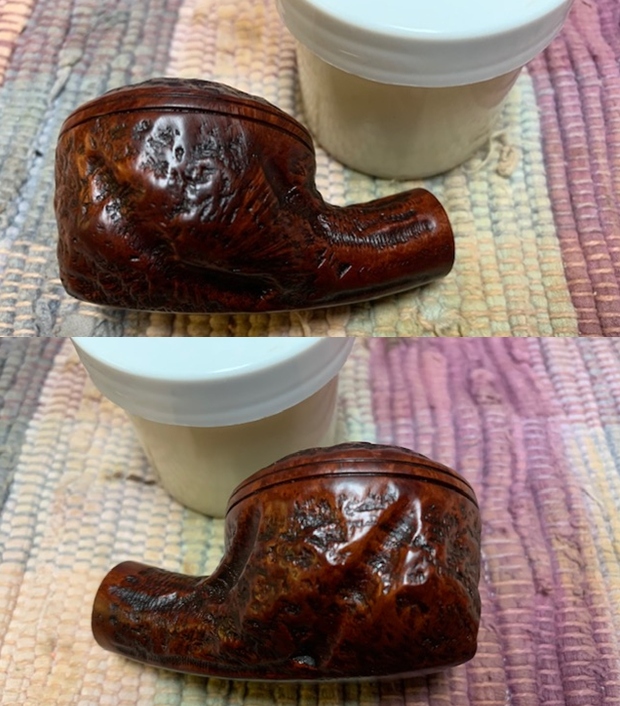
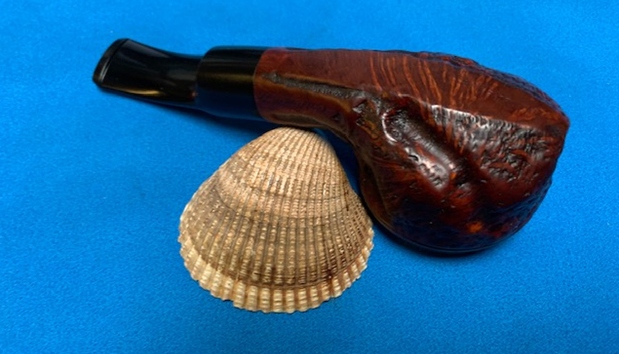
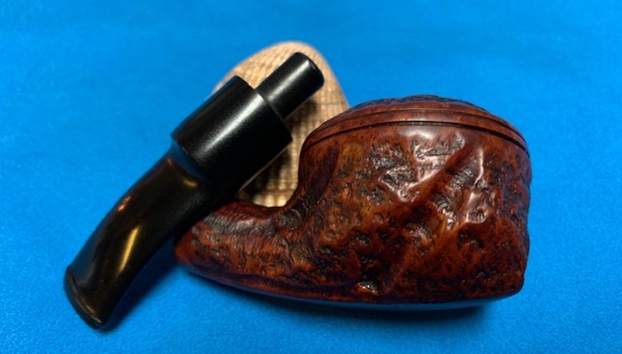
 Jeff took photos of the sides and heel of the bowl to give a picture of what the briar around the pipe looked like. There is some stunning grain under the grime.
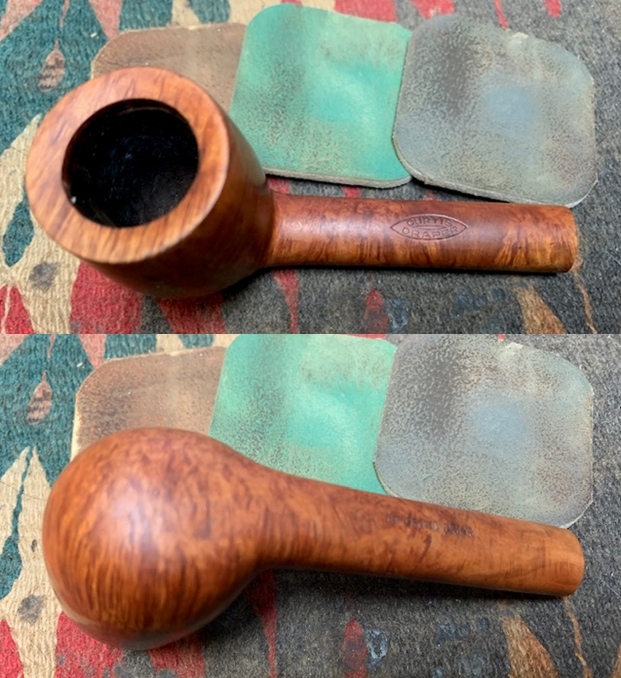
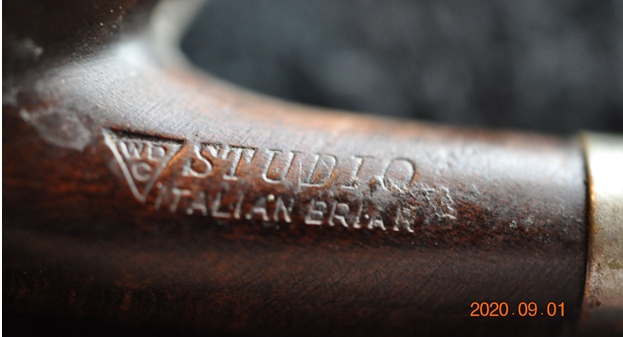
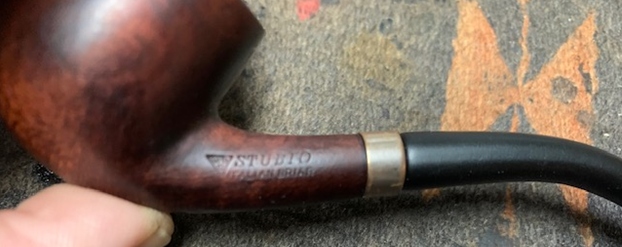
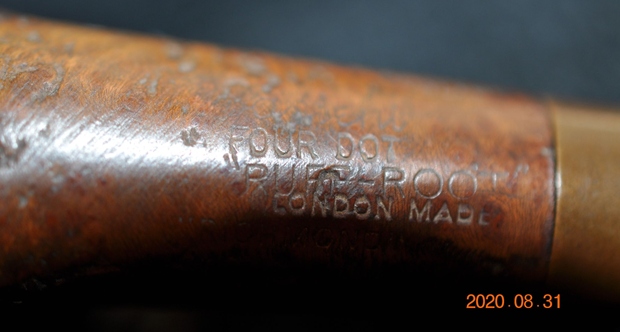
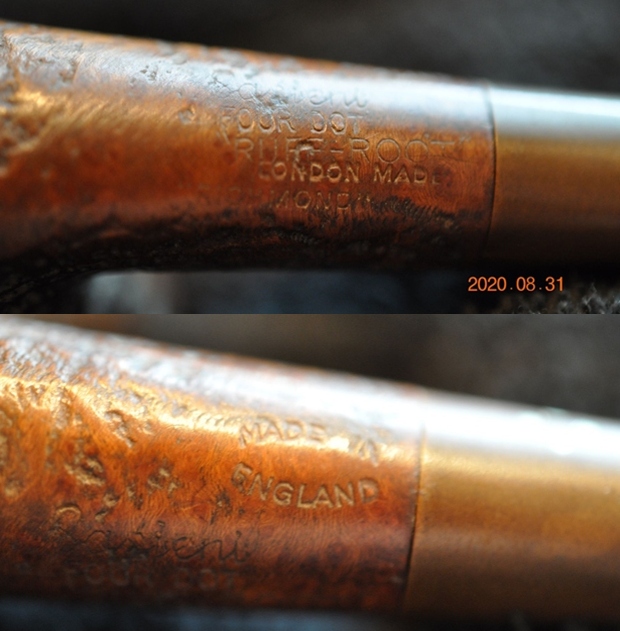
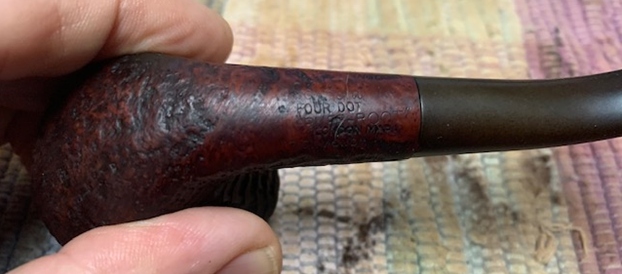
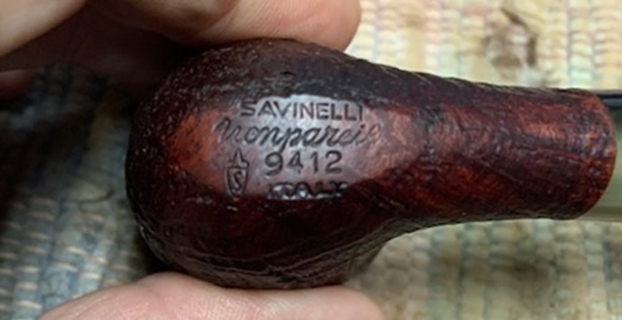
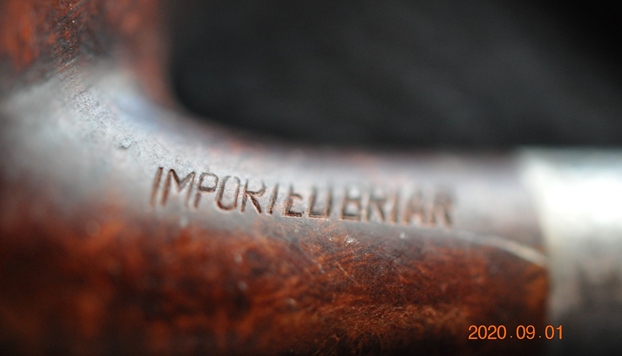
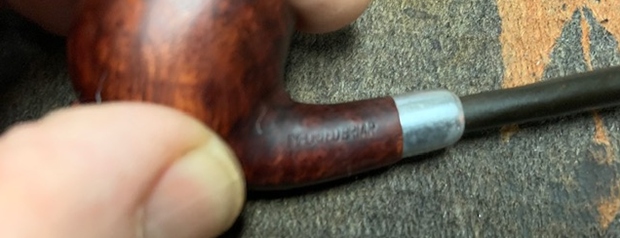
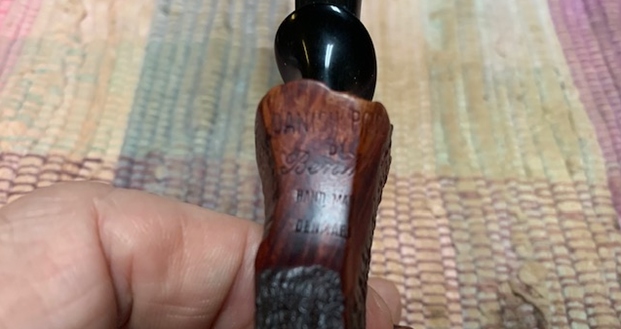
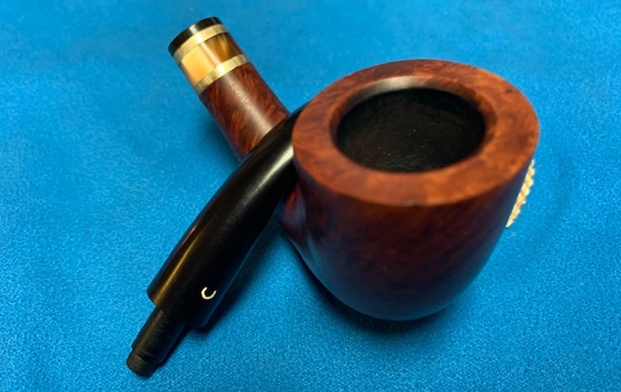
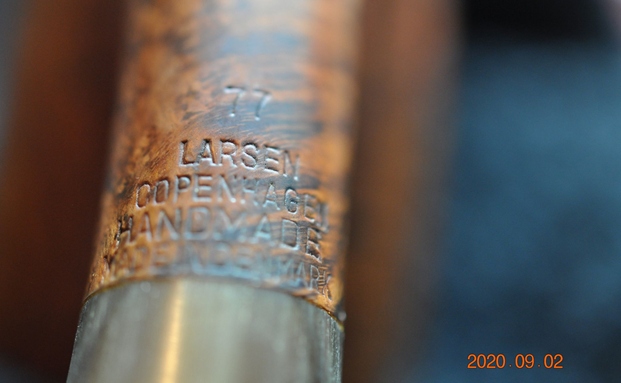
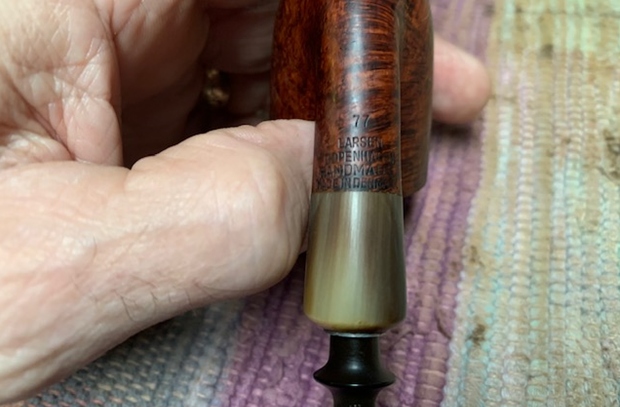
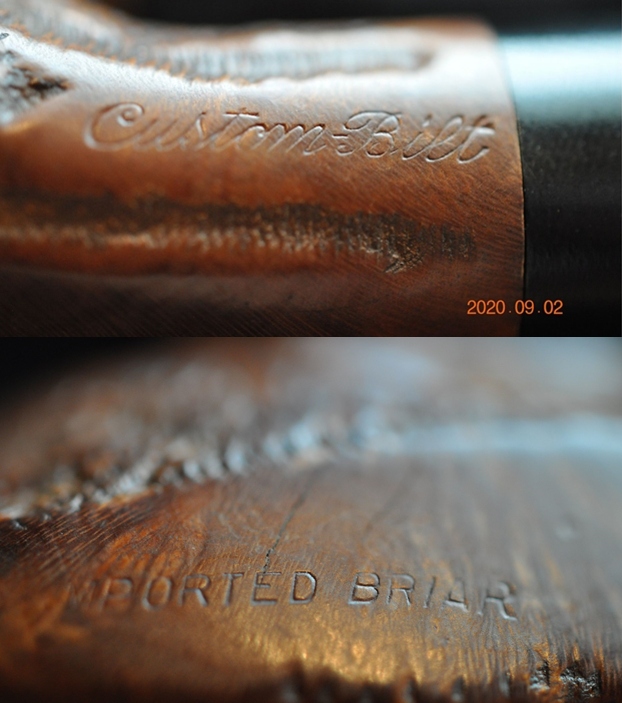
 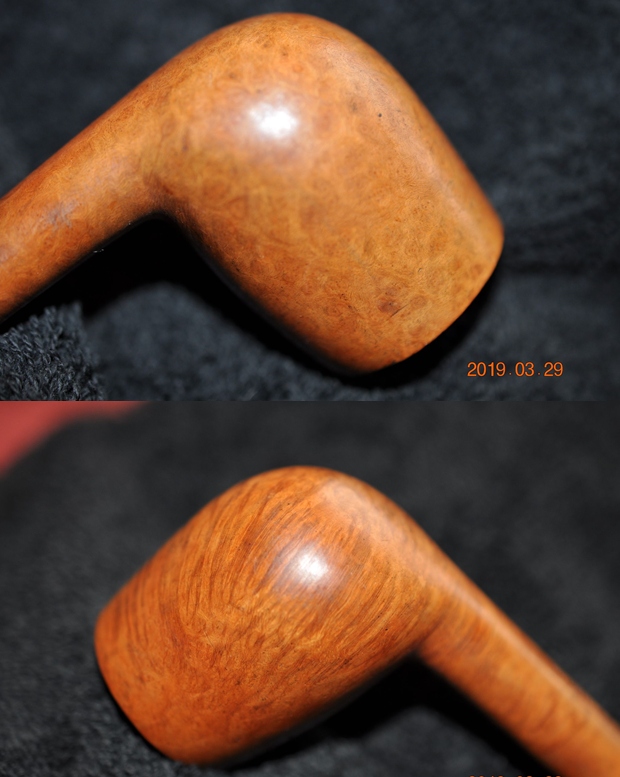 He took photos of the stamping on the shank. It reads as noted above and is clear and readable.
 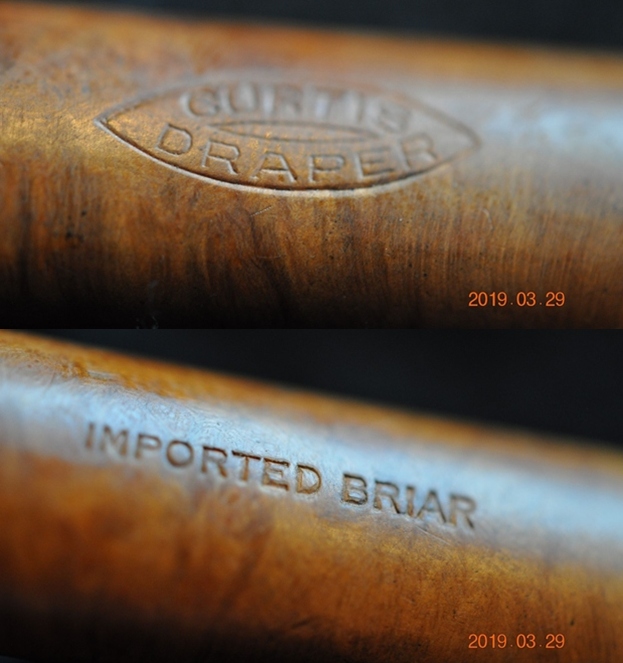 I looked on Pipedia for the Curtis Draper brand and only found it listed in the section of the wiki on American Pipe Brands (https://pipedia.org/wiki/American_Pipe_Brands_%26_Makers_C_-_D). I quote the brief entry there:
Curtis Draper is a brand of a Washington DC tobacconist.
I searched for the brand on Google and found a link to their website that gave an excellent history of the brand (http://www.wcurtisdraper.com/history/).
Curtis Draper Tobacconist, has been a Washington DC, institution for over 127 years. Draper’s, the third oldest tobacconist in the U.S., was founded in 1887 by William Curtis Draper. Mr. Draper remained owner of the shop until 1946, when he sold it to an employee, Mr. William Martin. Mr. Martin was an accountant by profession, but had been helping around the shop for a number of years. Bill Martin was owner until 1990, when he passed away, leaving the business to his wife and an employee of over 20 years, John “Duke” Cox.
In 1999 John Anderson, an employee of Drapers, and Duke bought the remaining shares and become the owners. 2004 Matt Krimm joined the Drapers family as an employee and subsequently in 2005 he and John Anderson became owners upon Duke’s retirement. In 125 years Draper’s has only known five ownership groups, a small number in this era.
The most important ingredient to our longevity, is our dedication to customer service, along with the ability to provide a relaxed and friendly environment for our patrons. We have been called on more than one occasion, one of the last gentleman’s tobacconists.
This business is still about forming relationships. That philosophy extends, not only to our customers, but also to the cigar manufacturers and their representatives as well. We were chosen in 1970 to introduce the Macanudo line, to the U.S. market. We also worked very closely with the Fuente family, helping them get their products out, thereby creating demand and recognition. We were one of the first shops to carry the Fuente Hemingway Signature cigar. The Signature was the only size made in that line for a few years. This cigar did not initially sell well, so we gave them away as samples. The rest is, well, history. Now people all over the world, search, in vain, at times, to find these cigars. Drapers was also one of the original Davidoff appointed merchants.
We have always offered a full array of accessories for all smoking needs. We were one of the first shops in the country to feature Savinelli pipes. Draper’s is a full-service tobacconist offering cutters, lighters, humidors, loose tobaccos, tinned tobacco, rolling tobacco, and many other hard to find items.
Being in DC has been exciting and rewarding for us. Where else can you be in a shop with Congressmen, FBI agents, visiting dignitaries, Supreme Court Justices, lobbyists, heads of business and bike couriers? All of them sharing a passion for a few minutes of camaraderie and peace during a busy day.
Much of our success has been derived from Bill’s foresight. He implemented a mail order program, which made the Draper name well recognized throughout the country and expanded the business. Fifty four years later we are starting our own new program, an internet site, that we hope will not only grow our business, but be a fun and informative site for our customers and friends. We hope not only to welcome you to this site, but at some point welcome you into our store. If you plan on being in the Washington DC area, please click on the locator icon for directions. We hope you enjoy our latest venture. – John Anderson & Matt Krimm
From this information I learned that all of these Curtis Draper is a Washington DC, USA tobacconist and has been around since 1887. The pipe I am working on is a beautiful pipe that bears the stamp of the store on the top of the shank. Since it came to me in the lot of Bertrams I am wondering Bertram did not make the store pipes for Draper’s.
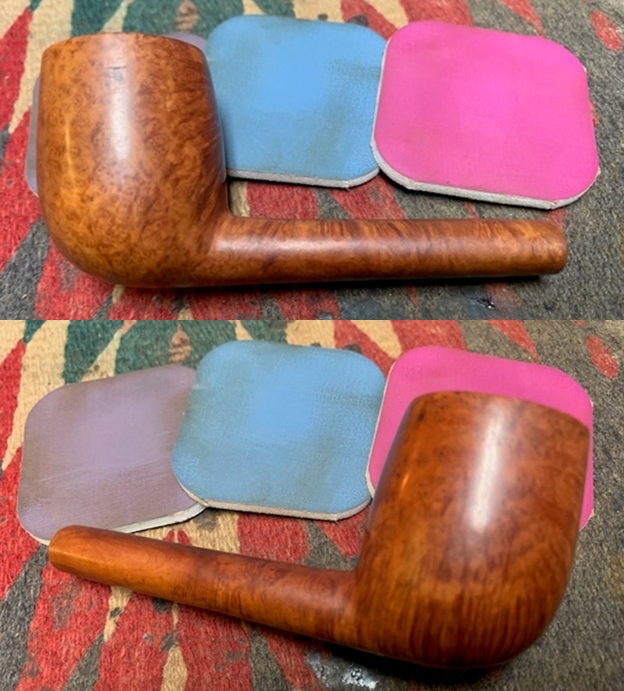
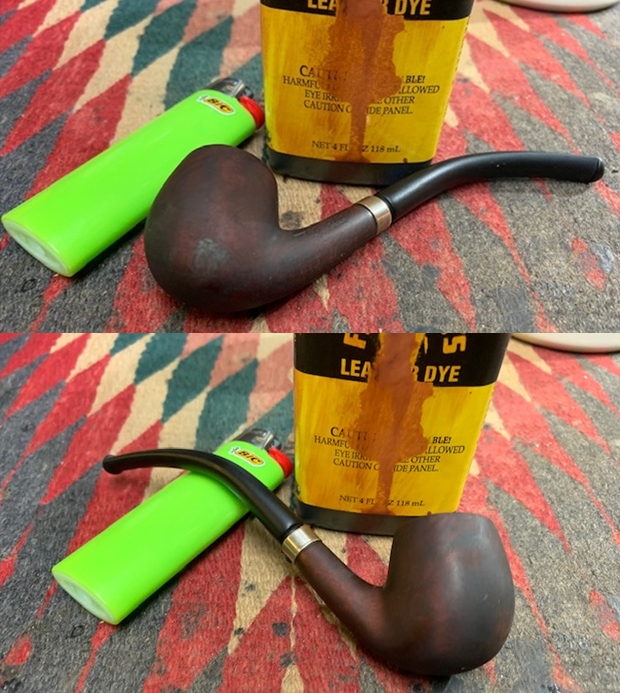
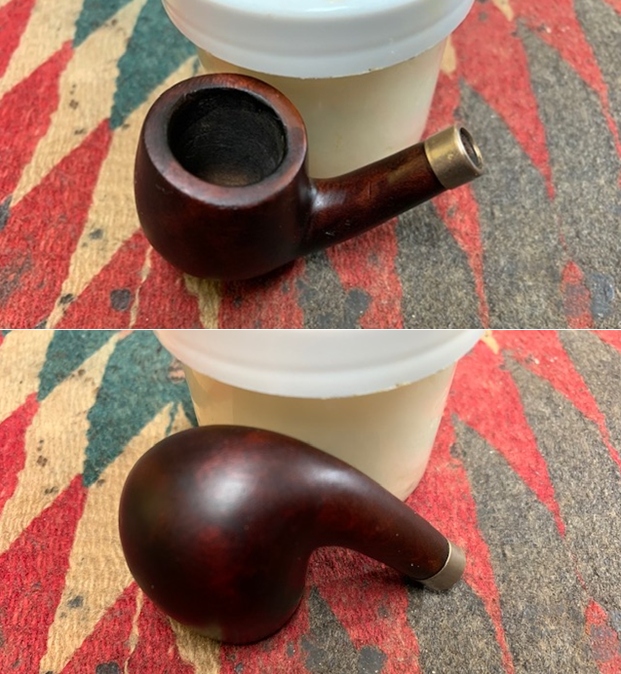
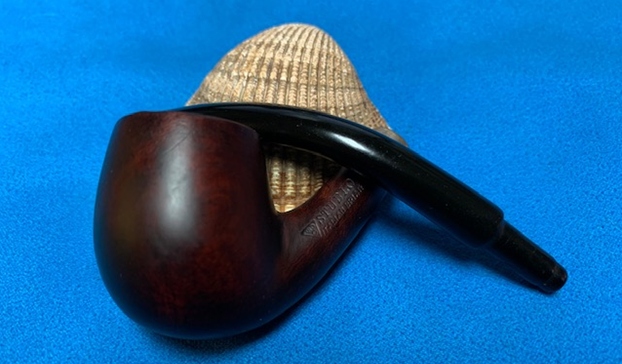
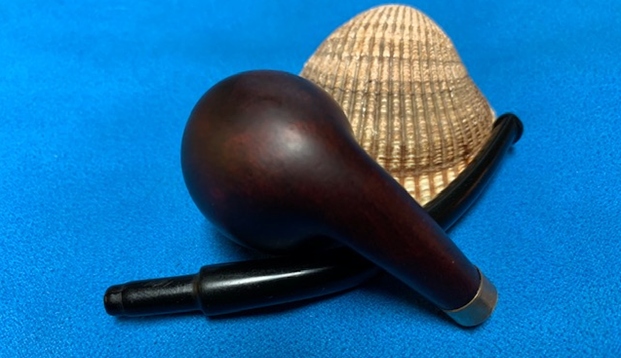
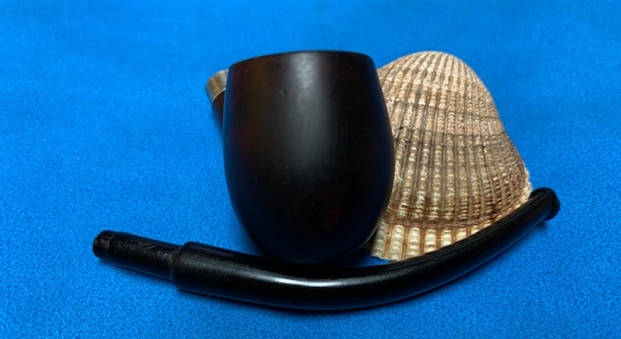
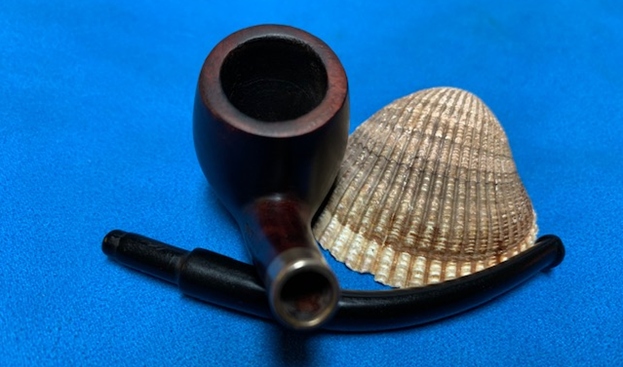
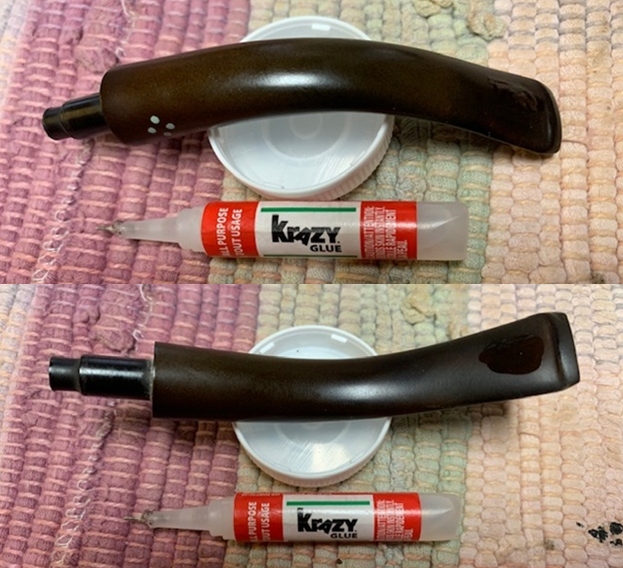
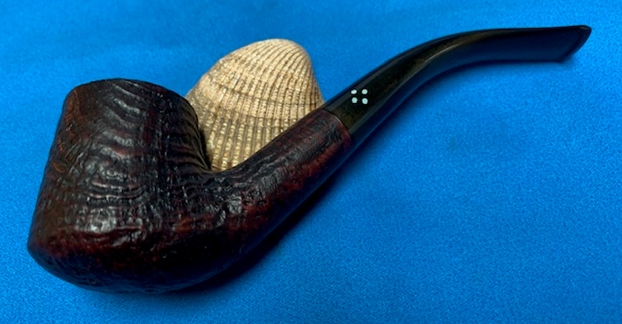
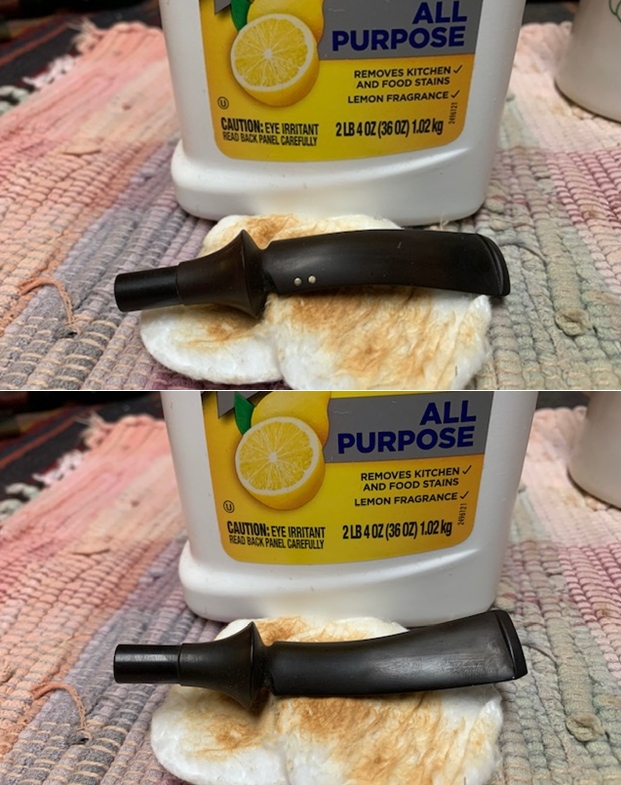
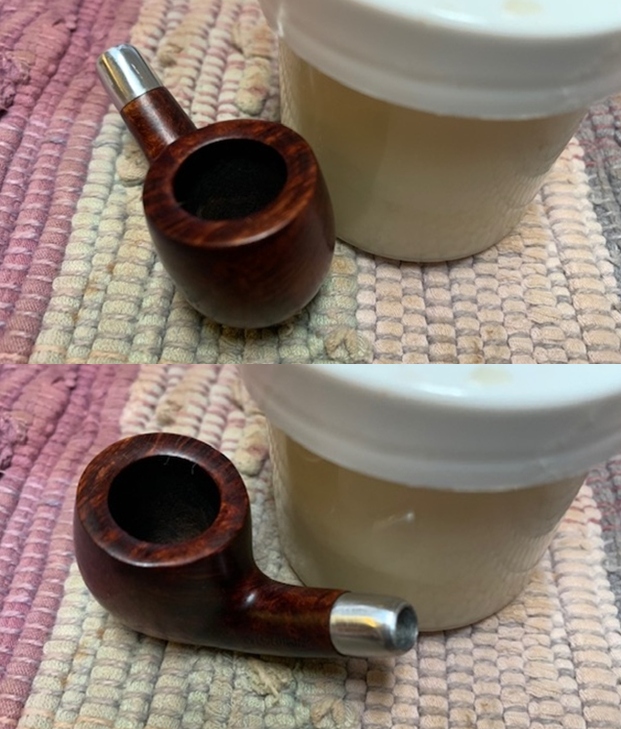
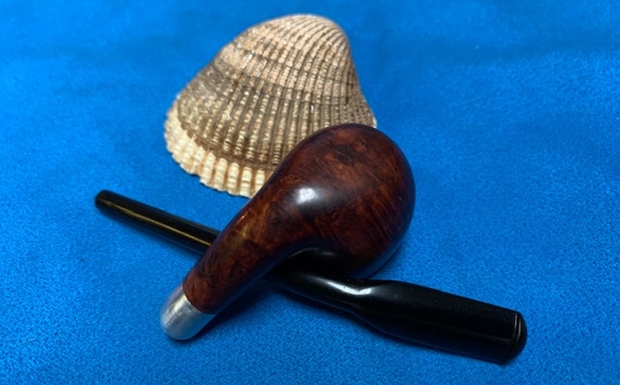
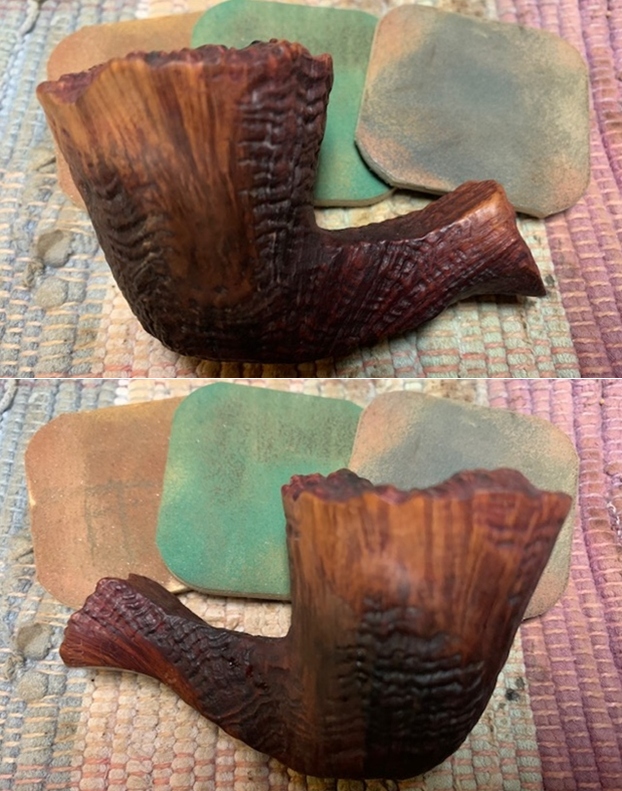
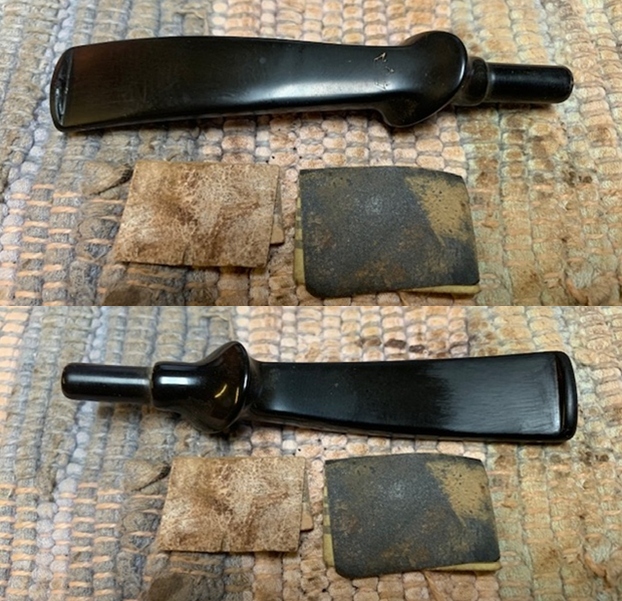
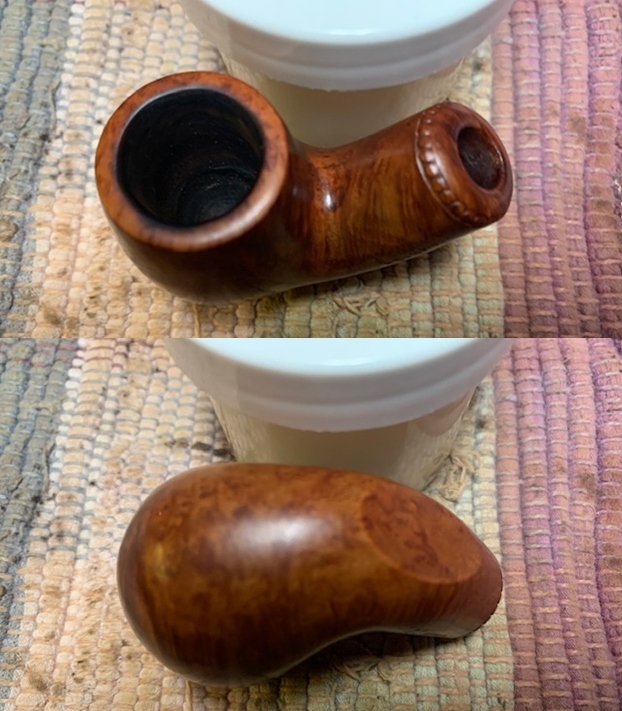
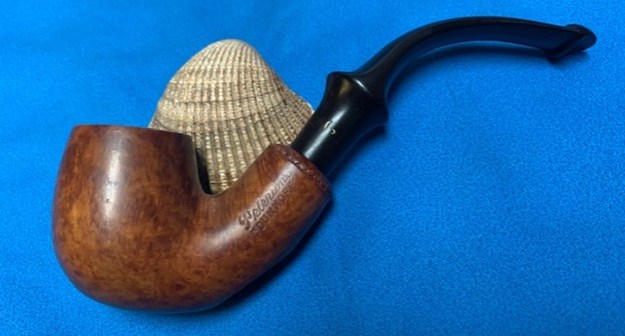
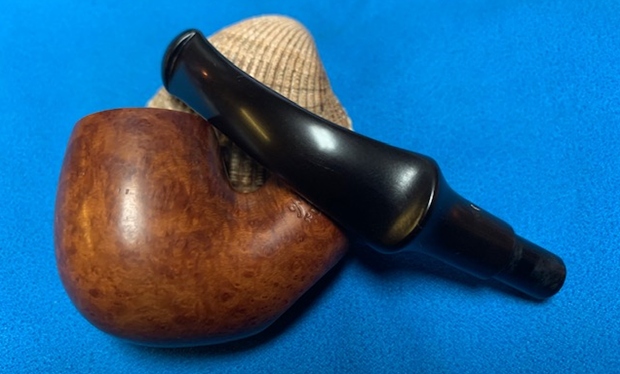
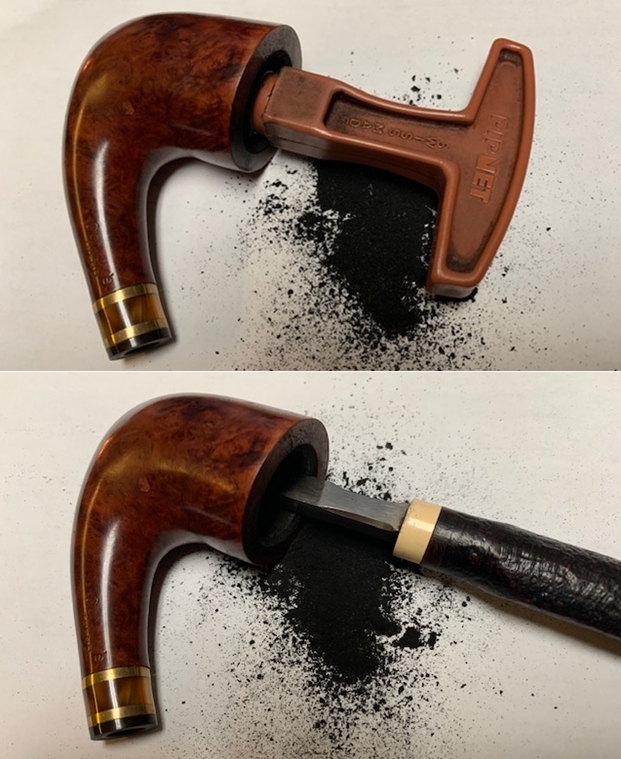
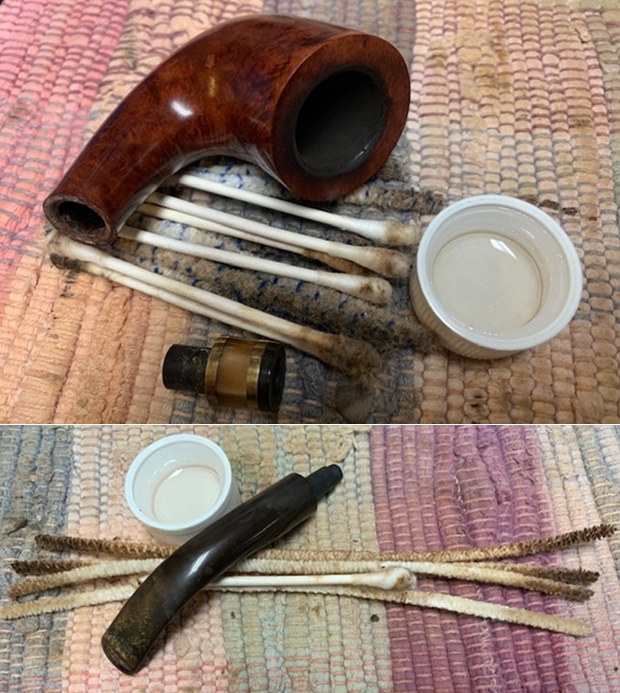
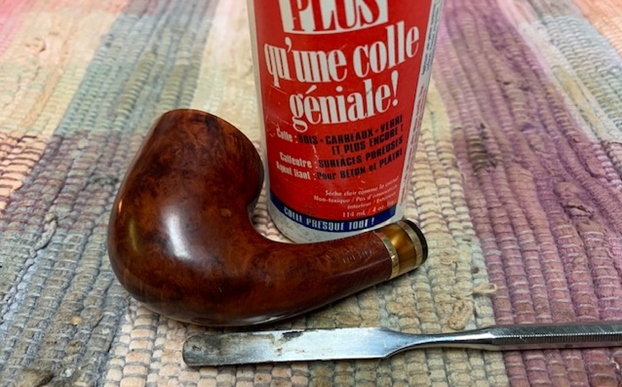
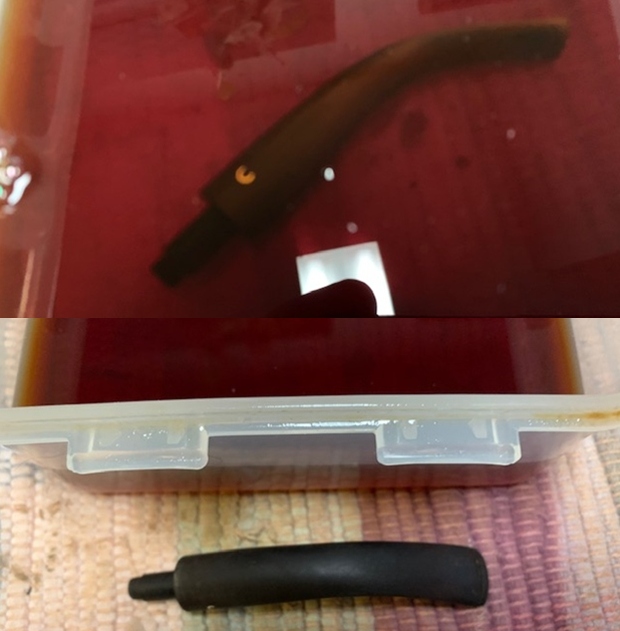
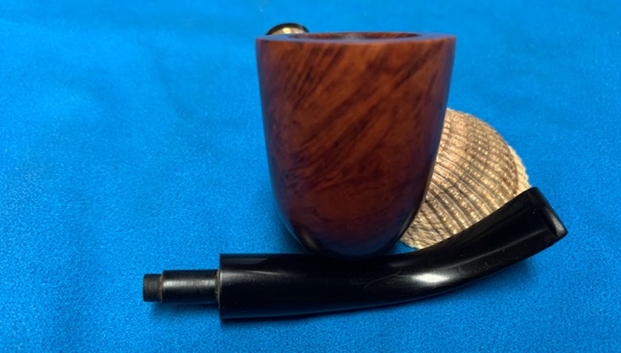
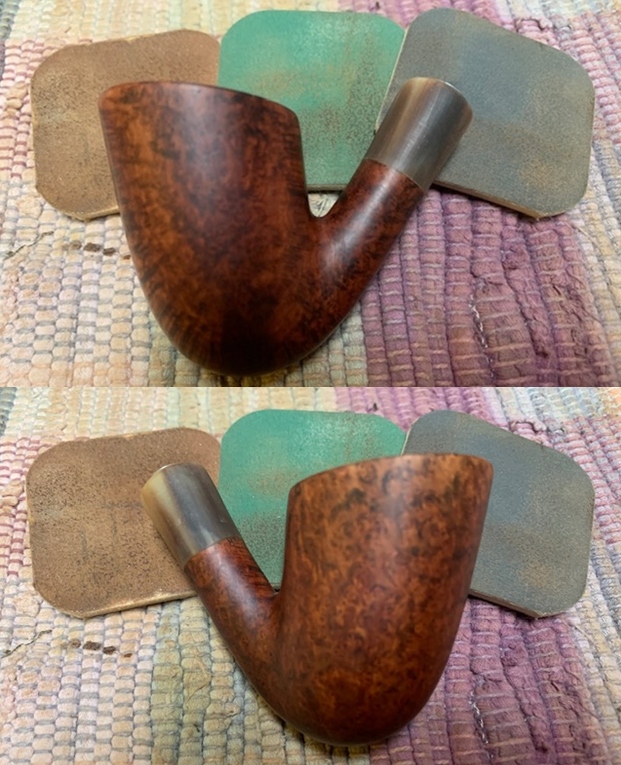
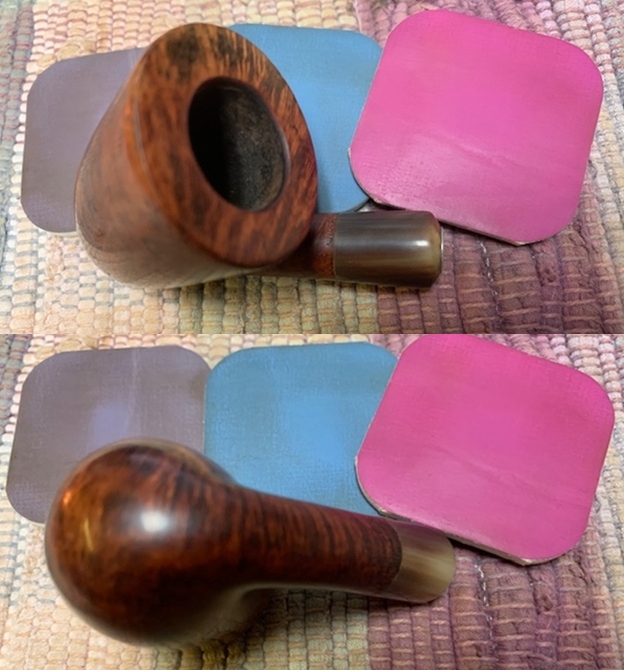
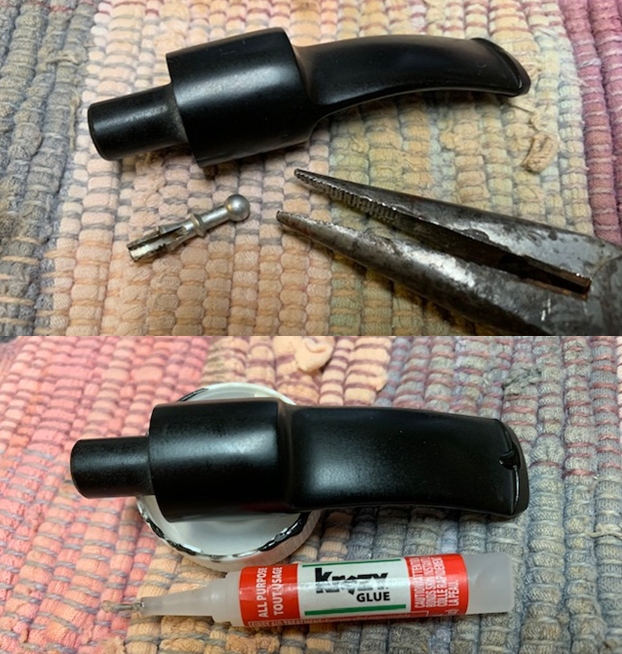
Jeff had cleaned up the pipe with his usual penchant for thoroughness. He reamed the pipe with a PipNet Pipe Reamer and cleaned up the remnants with a Savinelli Fitsall Pipe Knife. He scrubbed the bowl with undiluted Murphy’s Oil Soap with a tooth brush. He rinsed it under running warm water to remove the soap and grime. He cleaned out the inside of the shank and the airway in the stem with alcohol, cotton swabs and pipe cleaners. He soaked the stem in Before & After Deoxidizer and rinsed it off with warm water. I took photos of the pipe once I received it. 
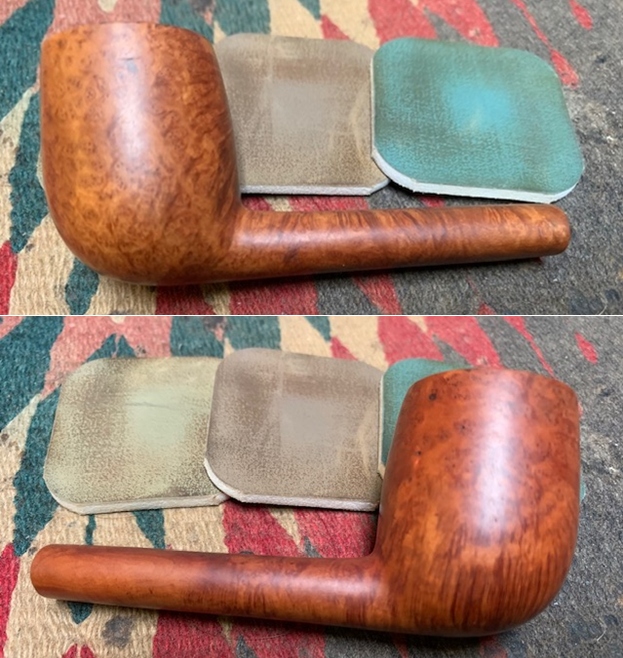
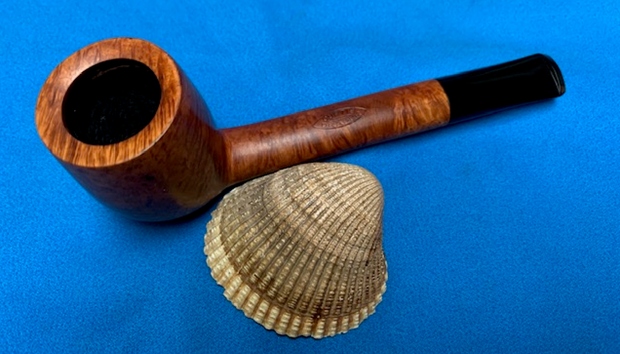
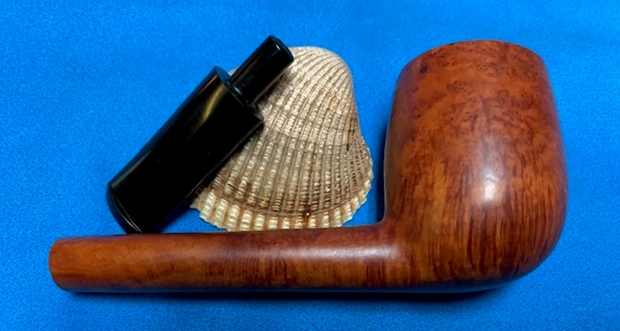
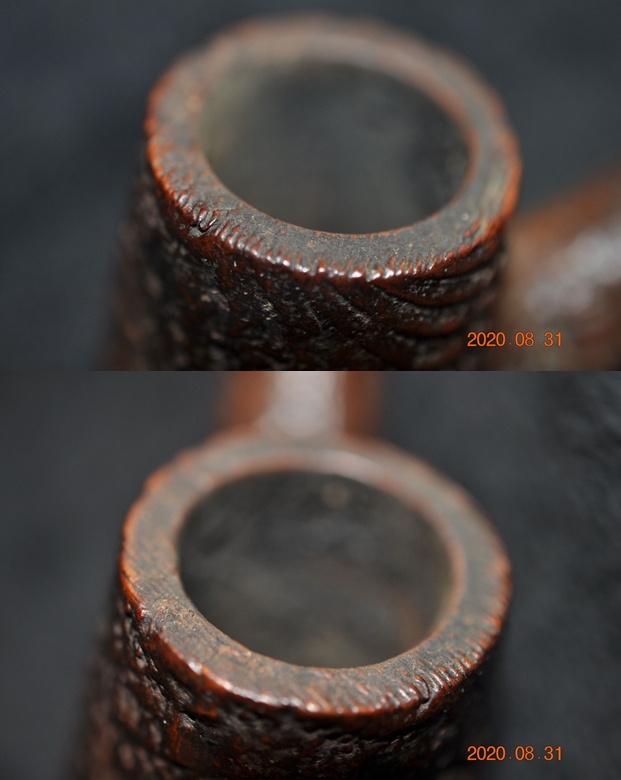
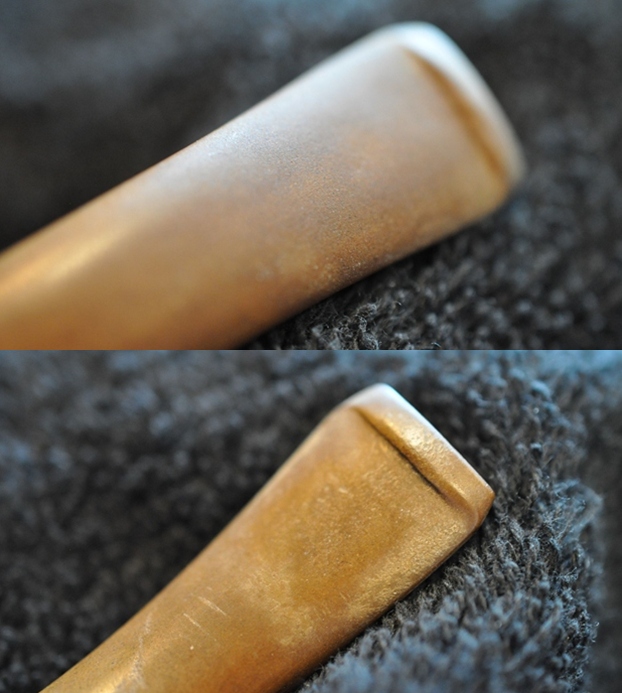
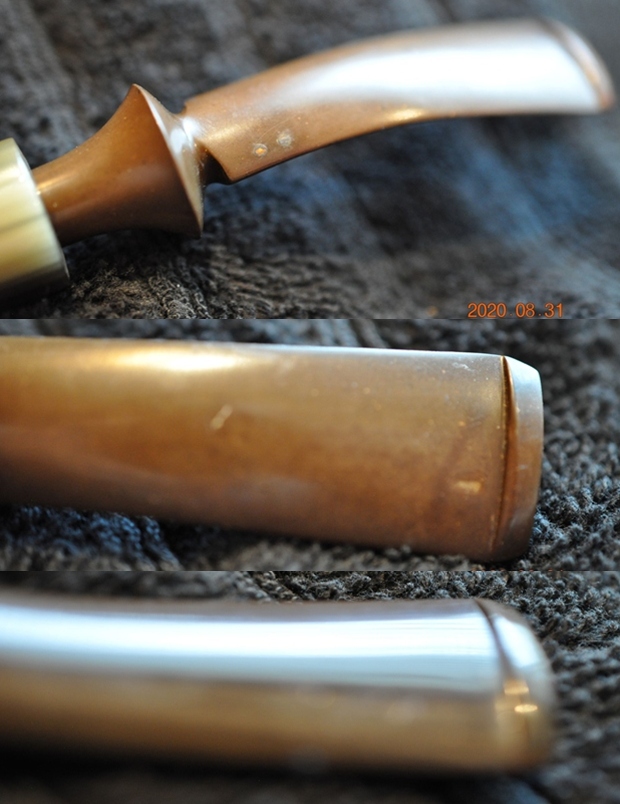
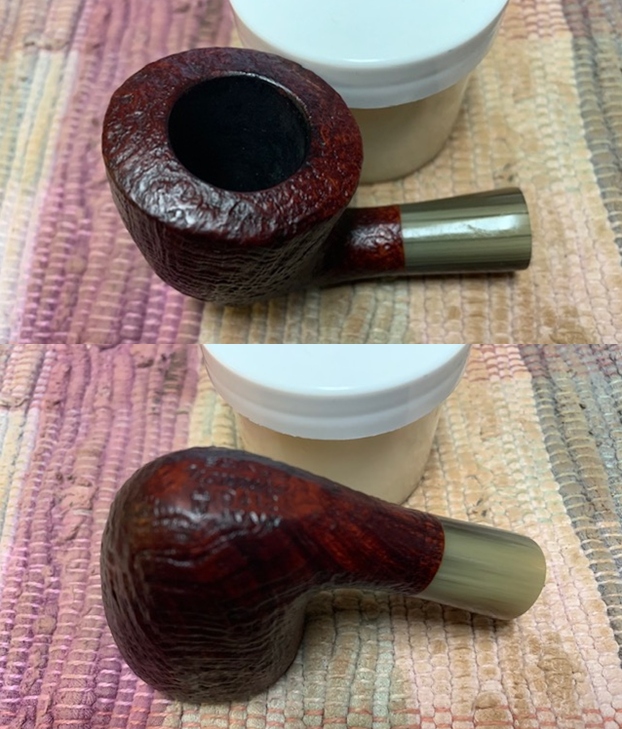
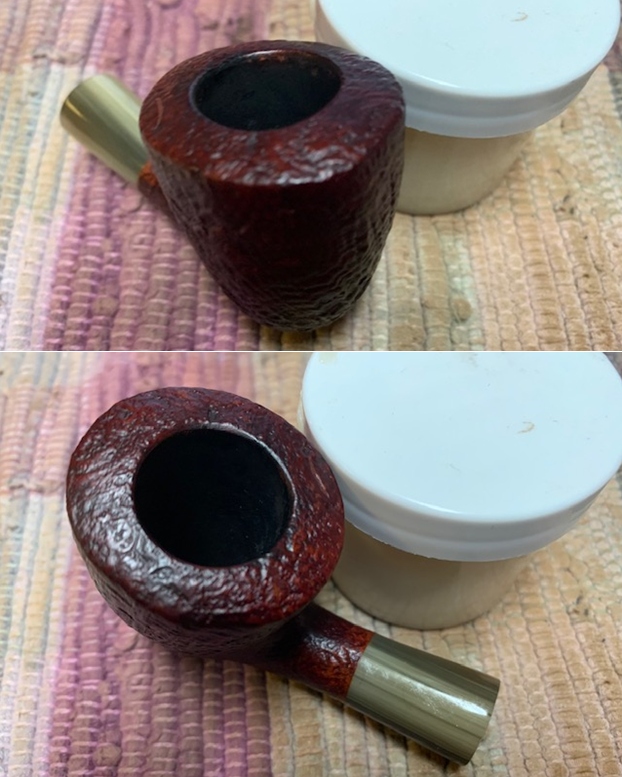
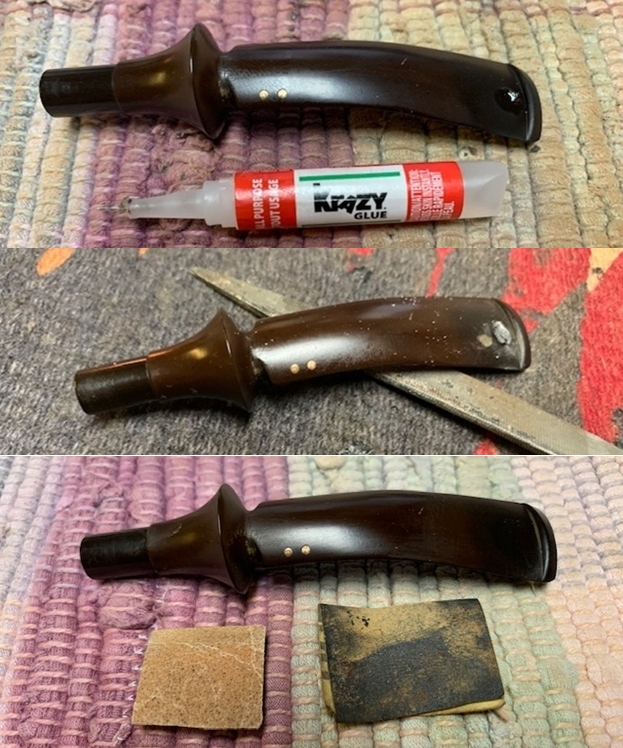
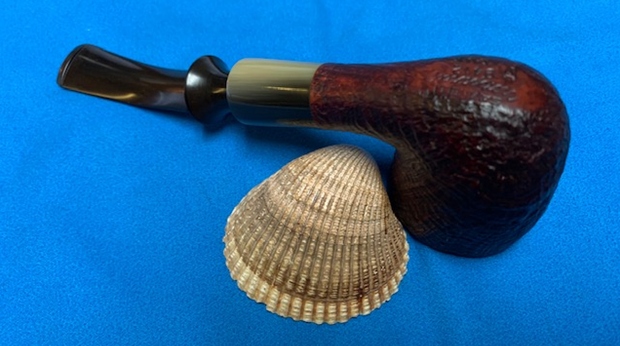
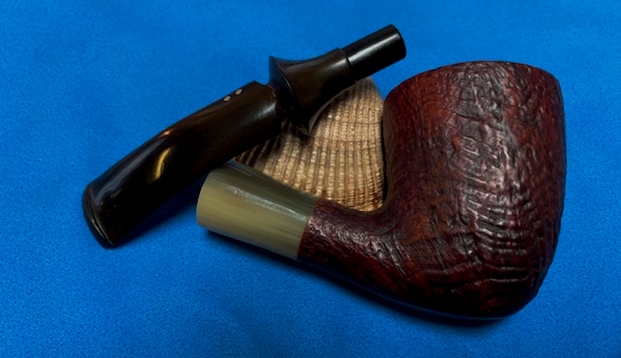
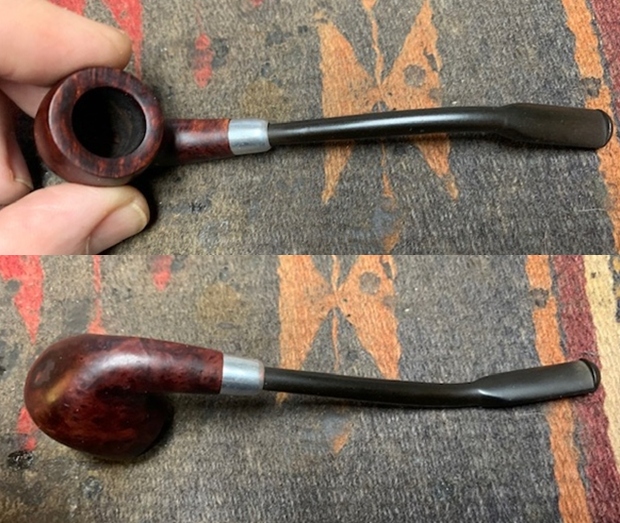
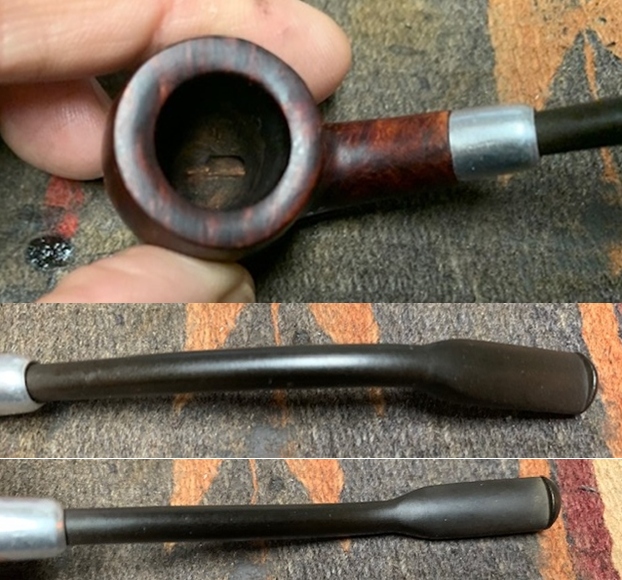
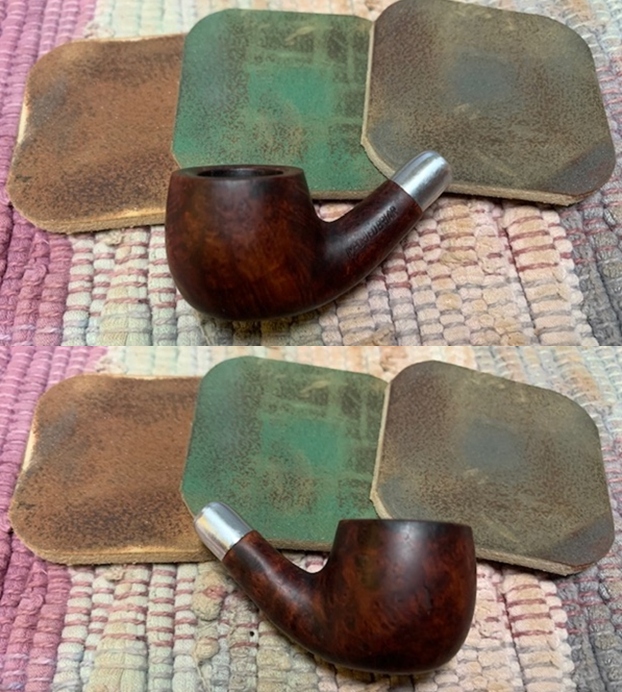
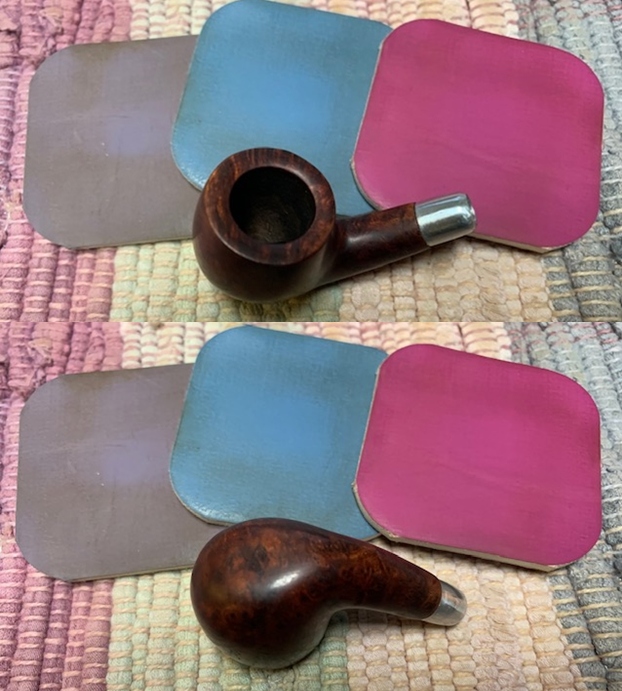
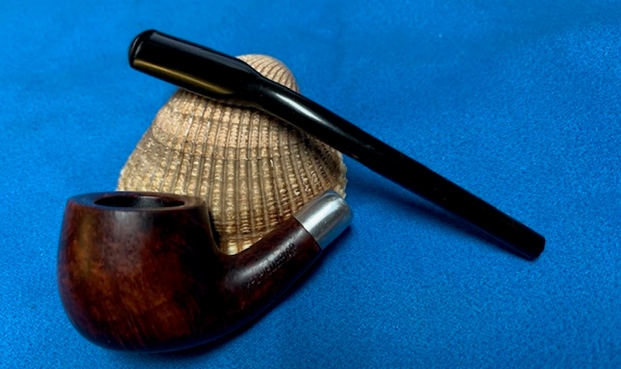
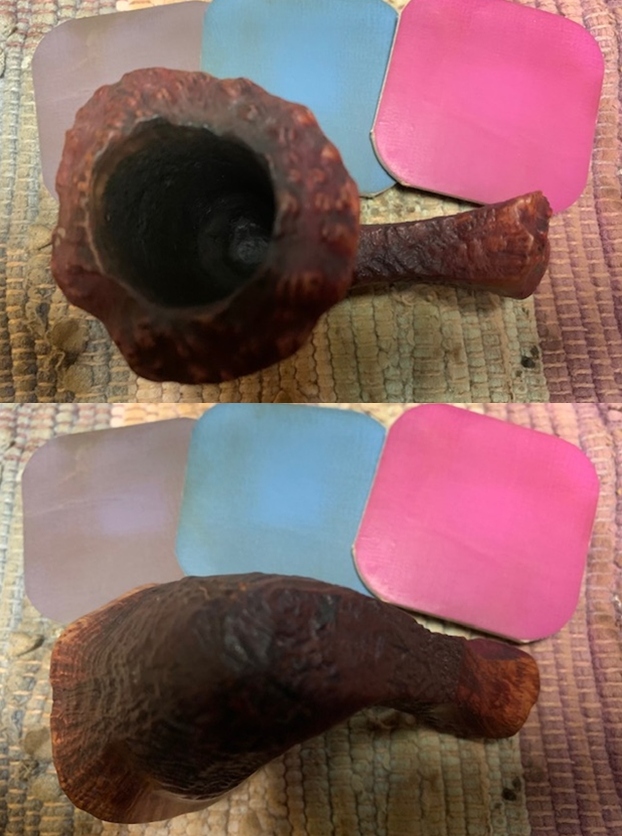
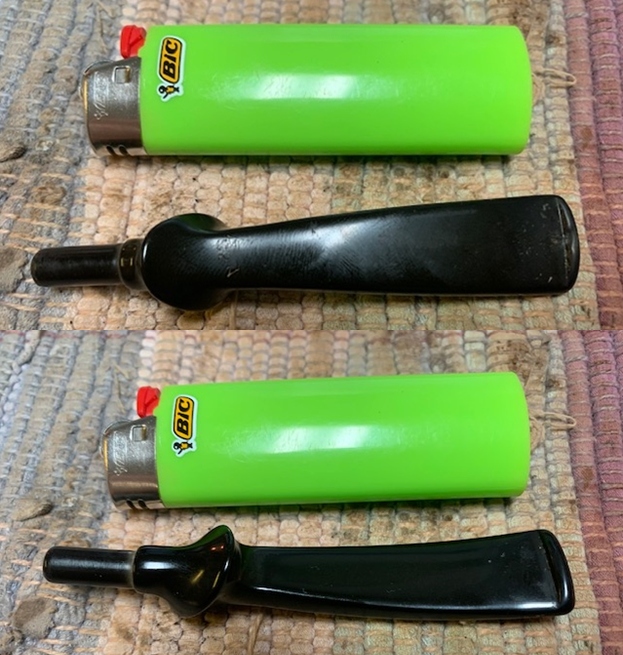
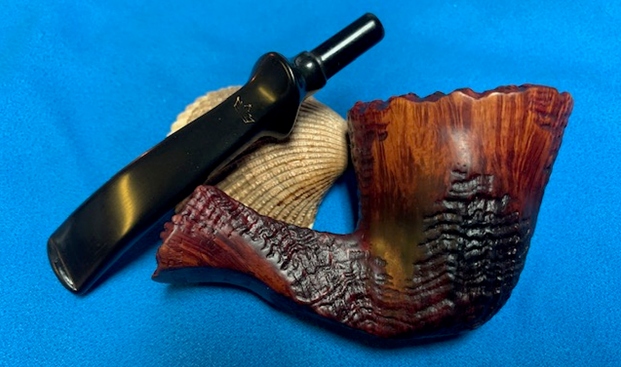
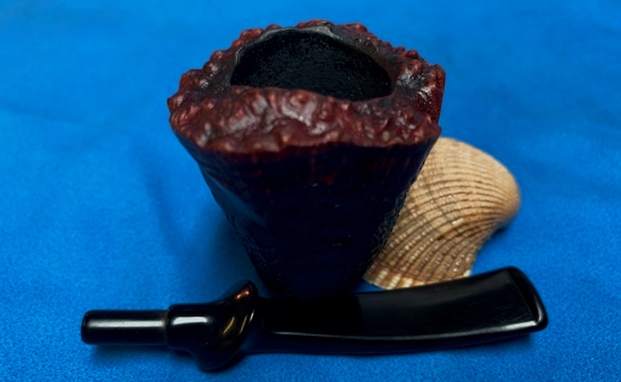
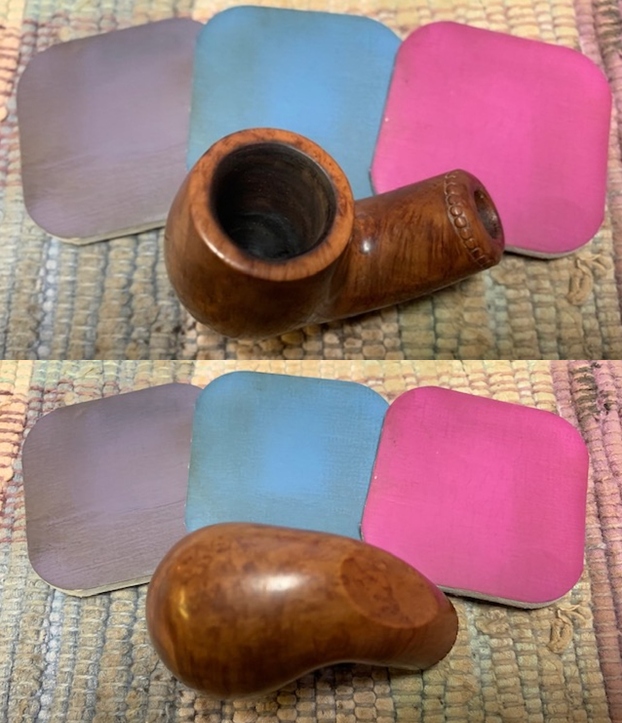
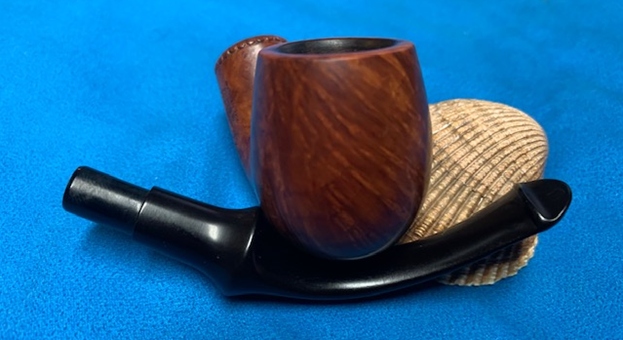
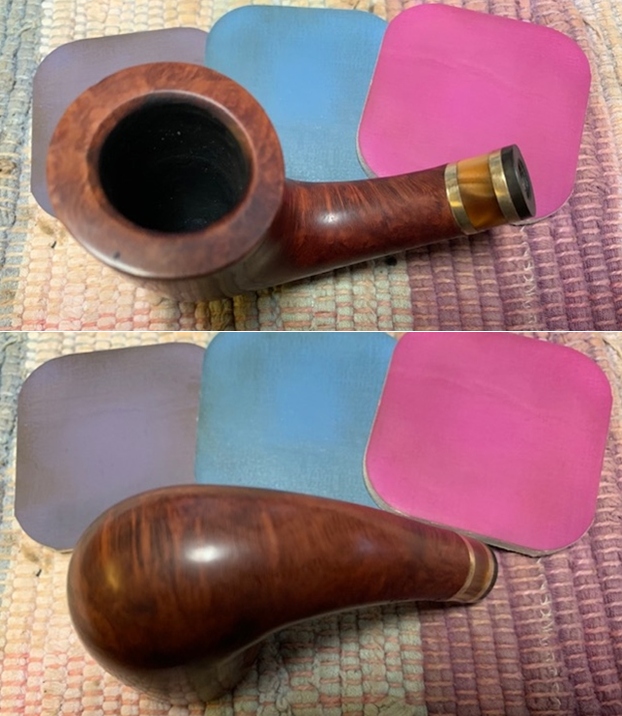
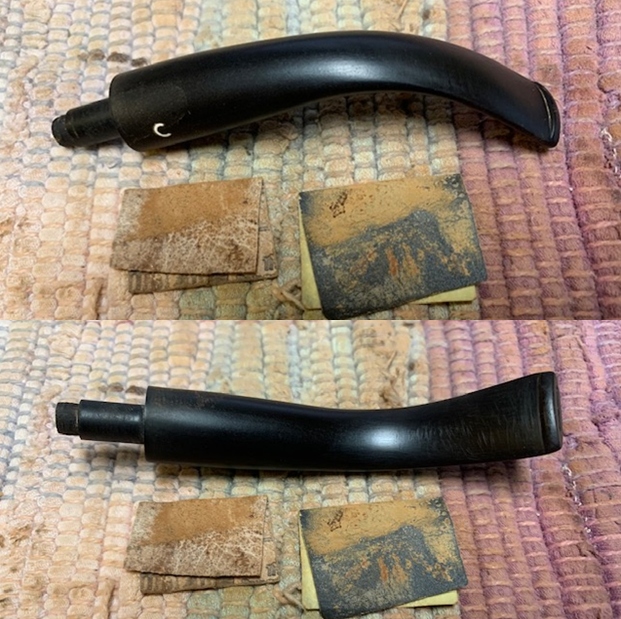
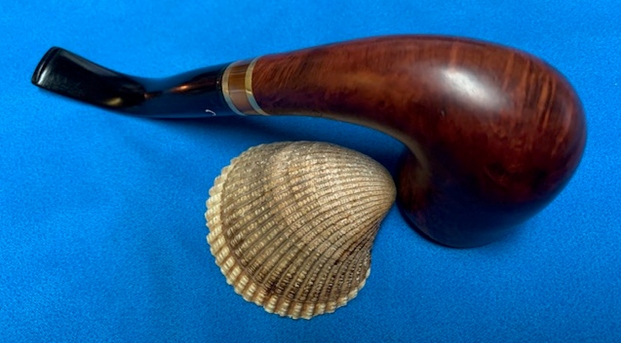
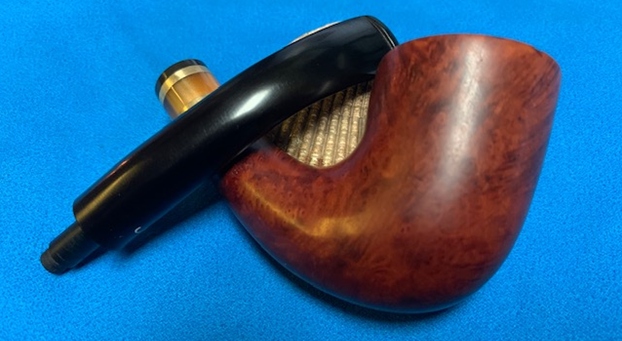
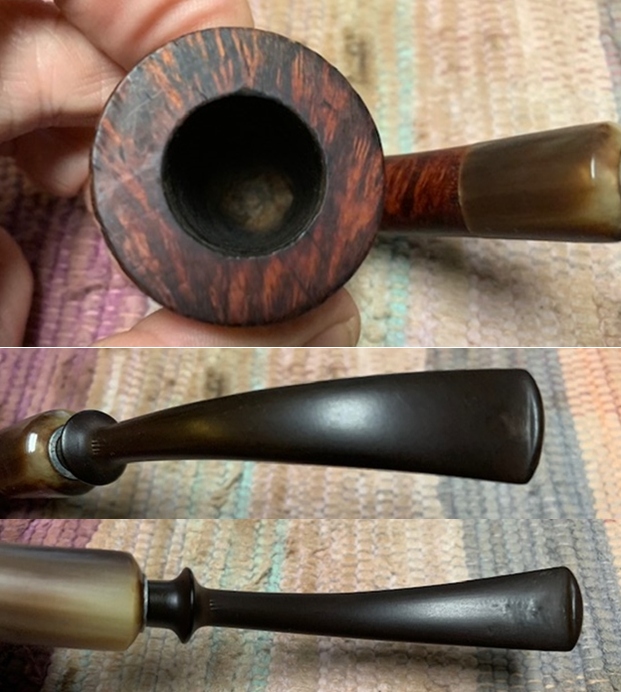
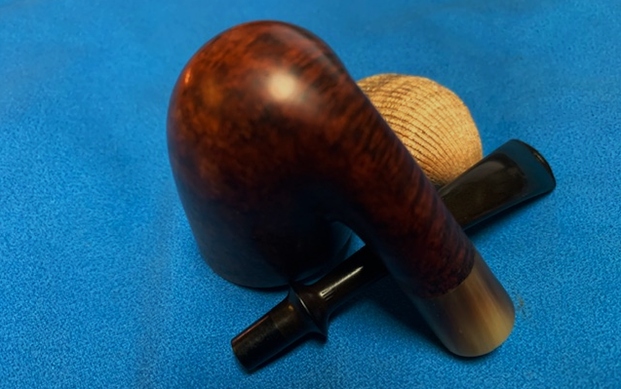
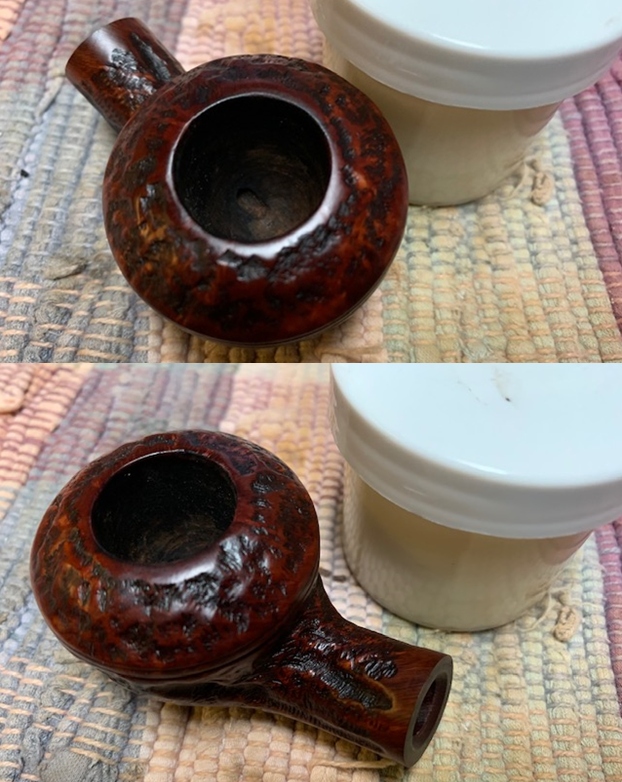
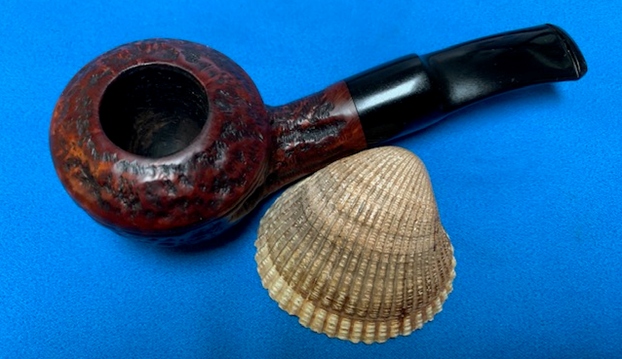
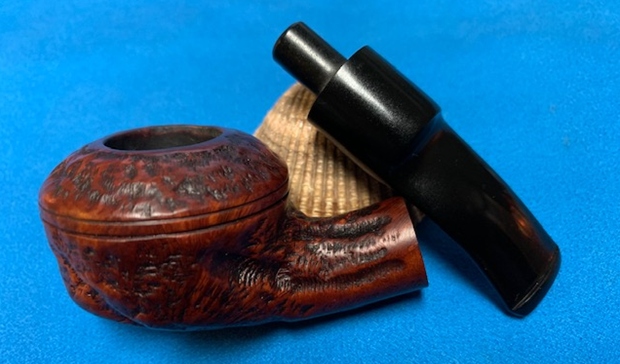
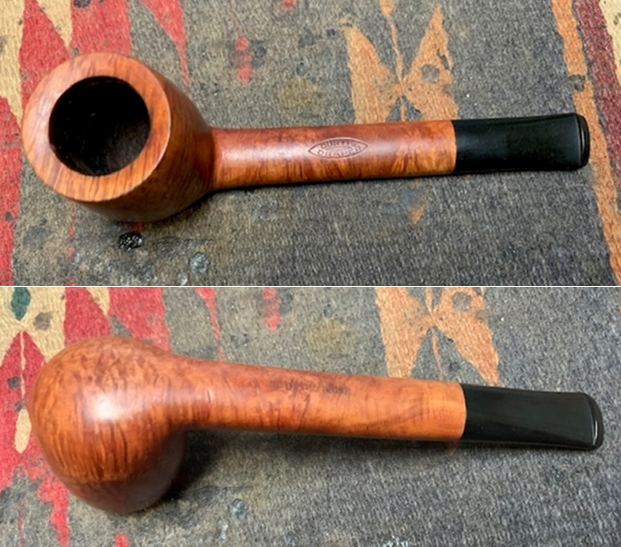 The rim top and inner edge of the rim looked very good with minimal damage. The stem surface looked very good with a few small tooth marks and chatter on both sides near the button.
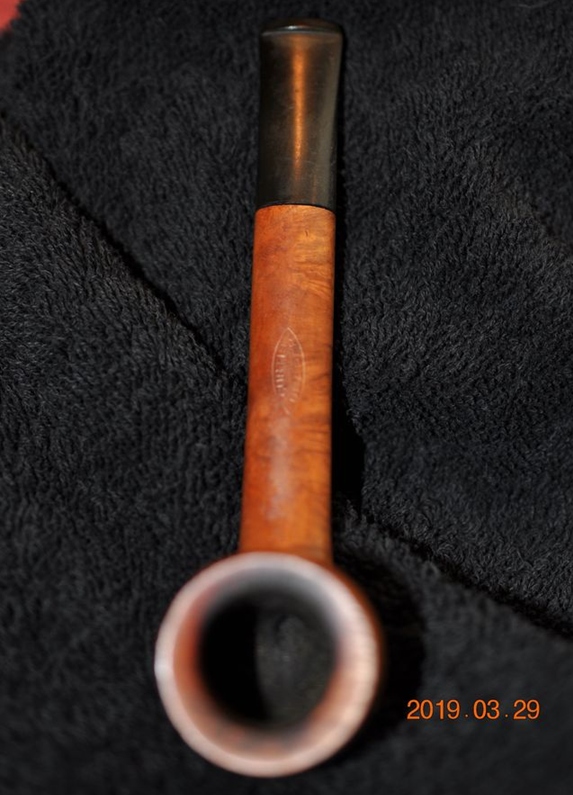
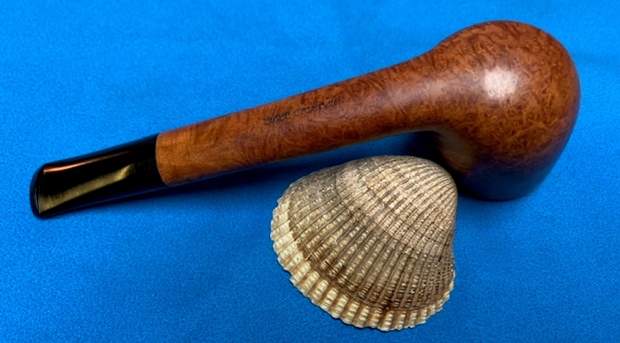
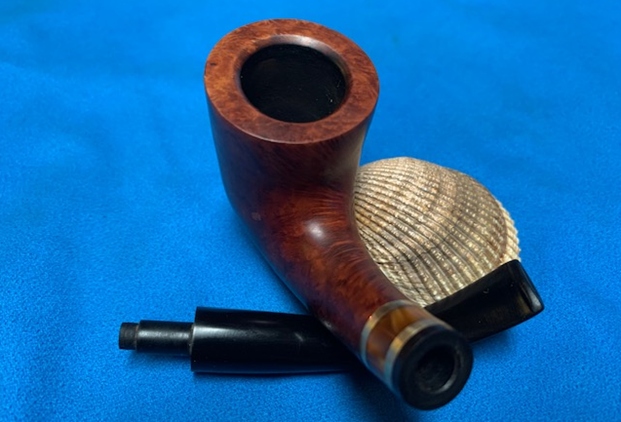
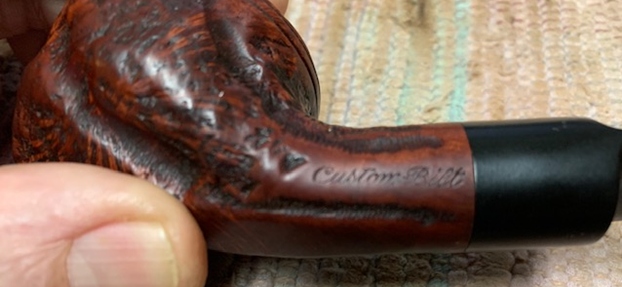
 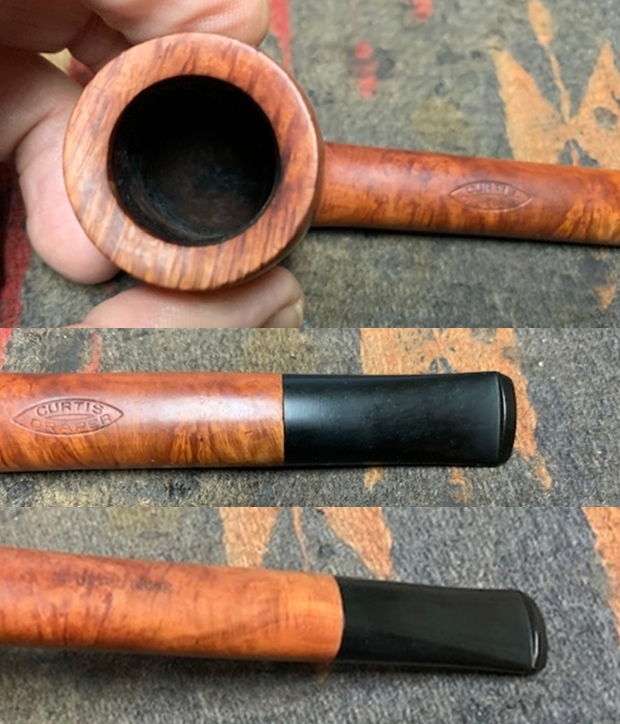 I took a photo of the stamping on the shank. It is clear and readable as noted above.
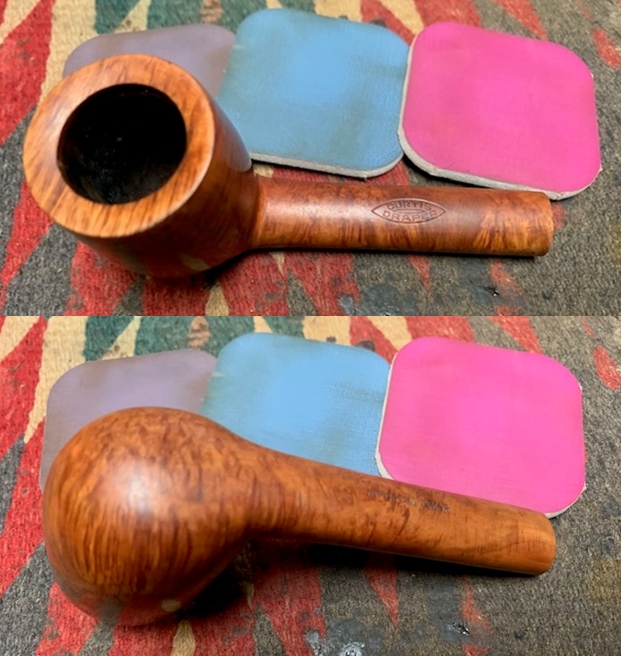
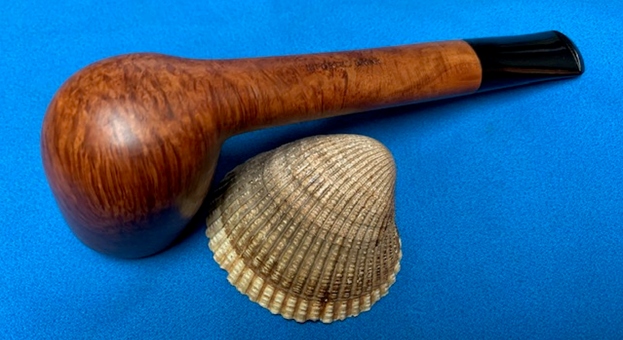
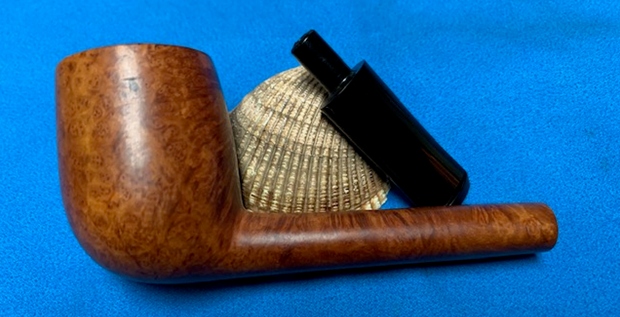
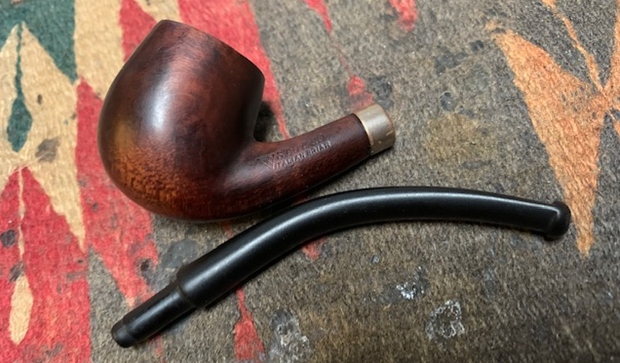
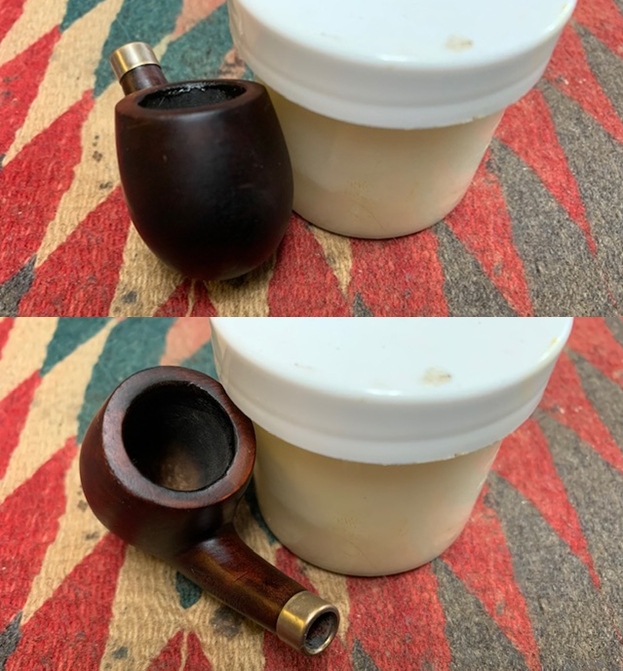
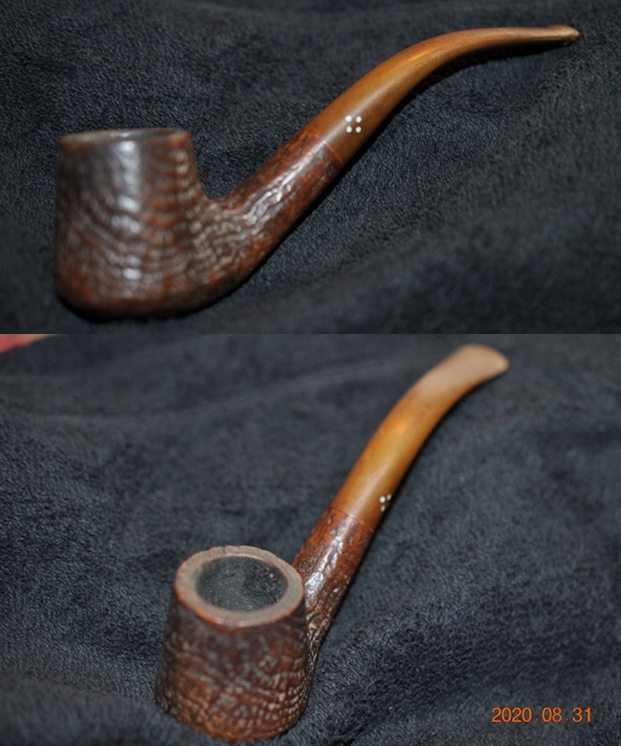
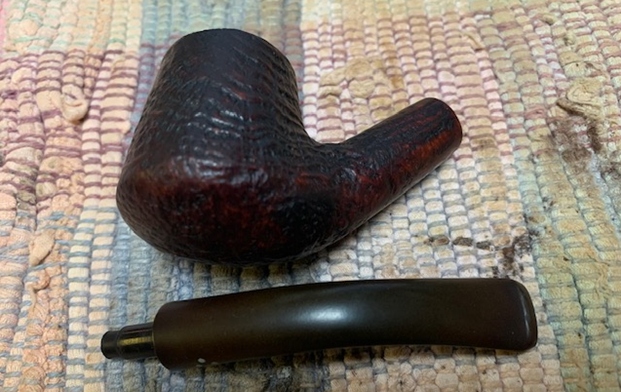
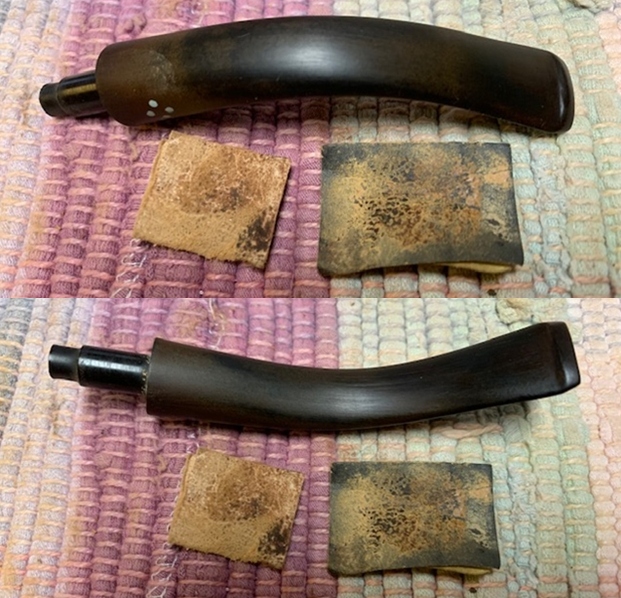
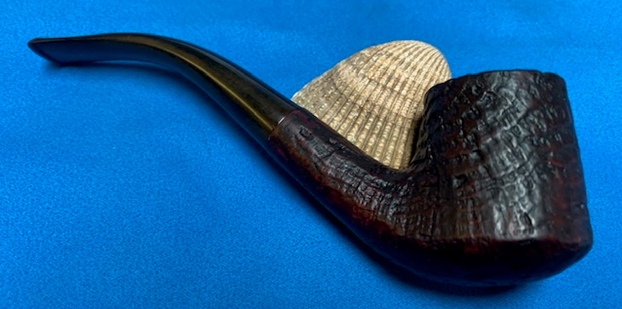
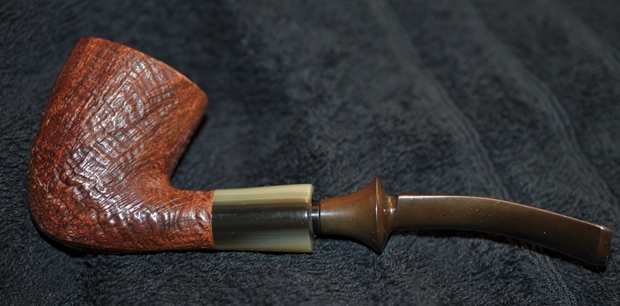
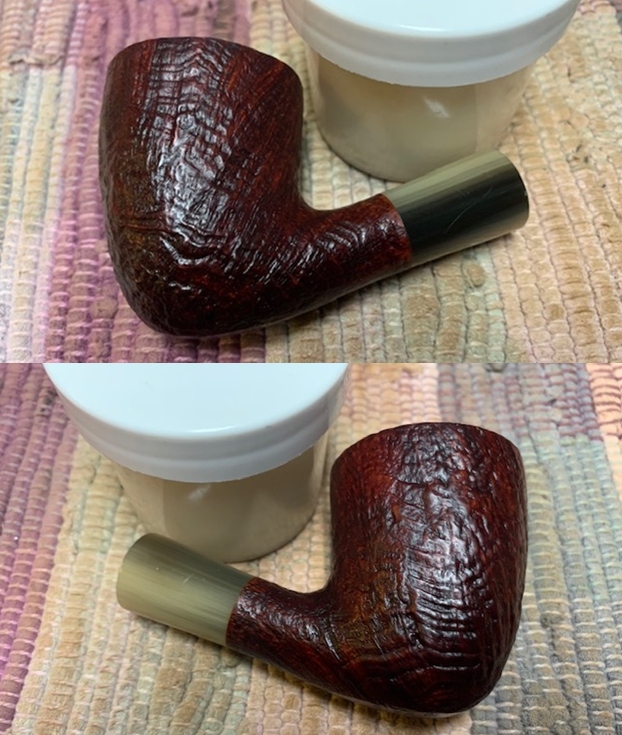
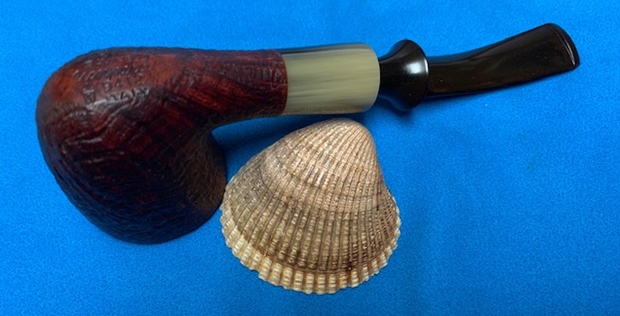
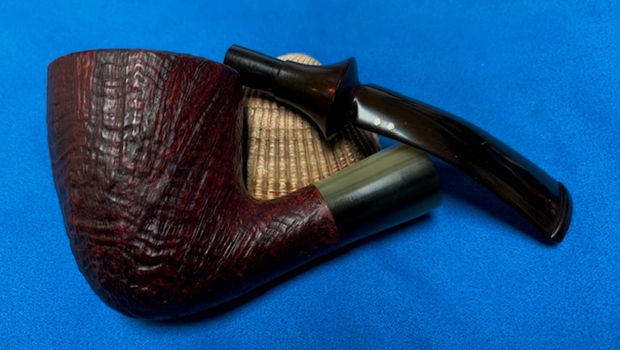
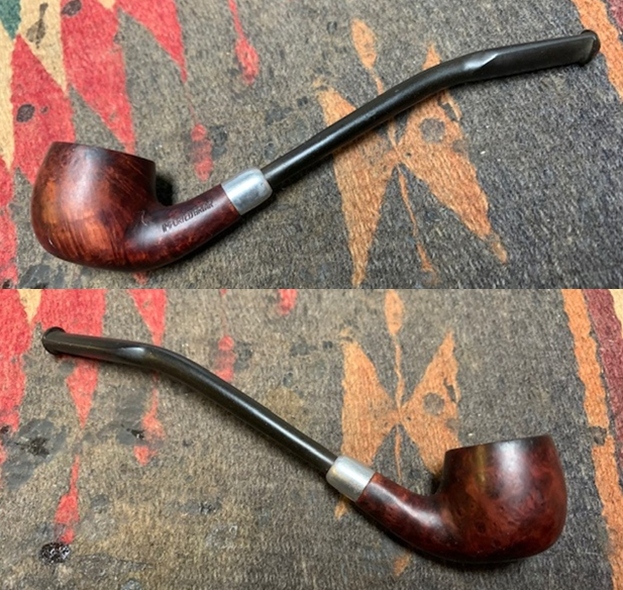
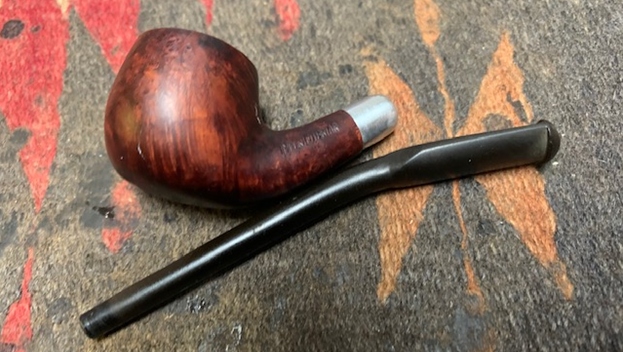
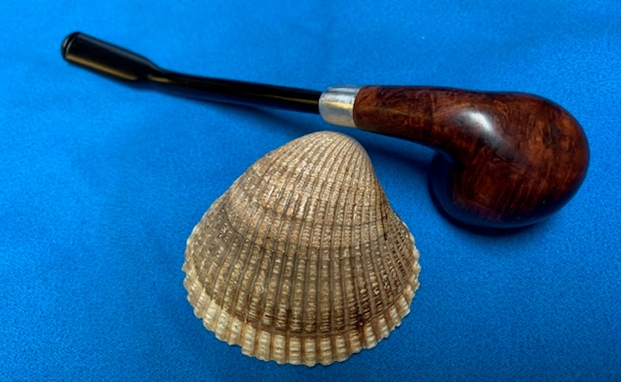
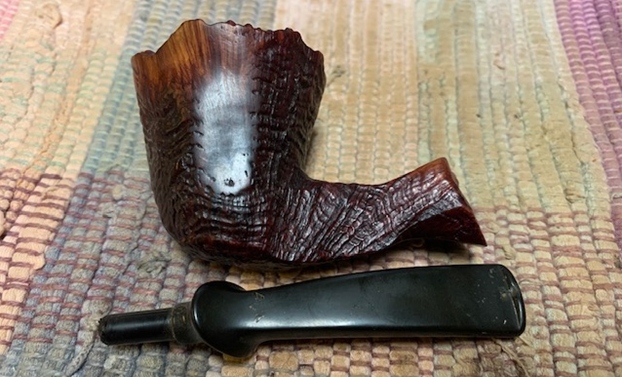
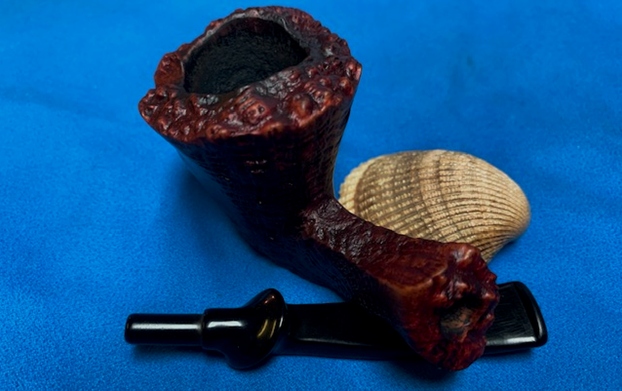
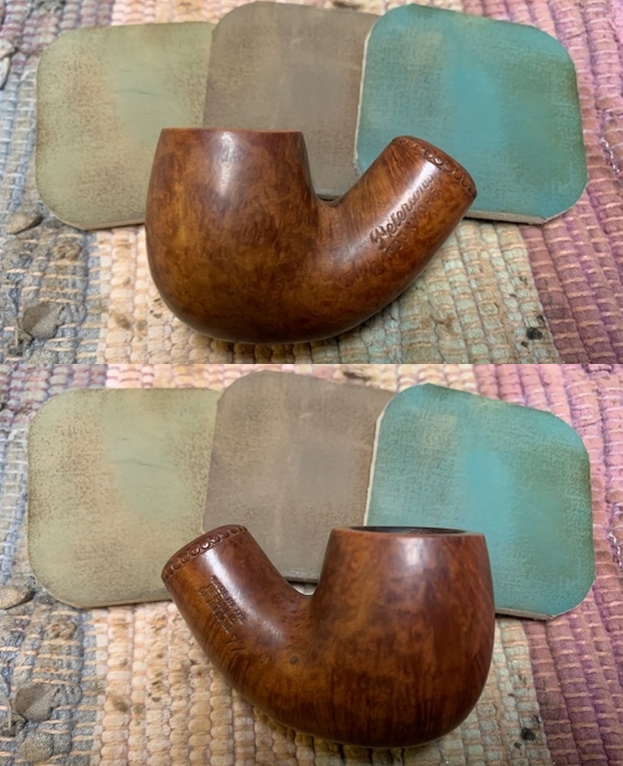
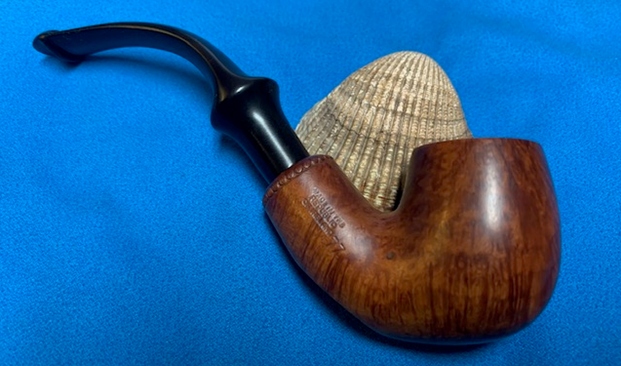
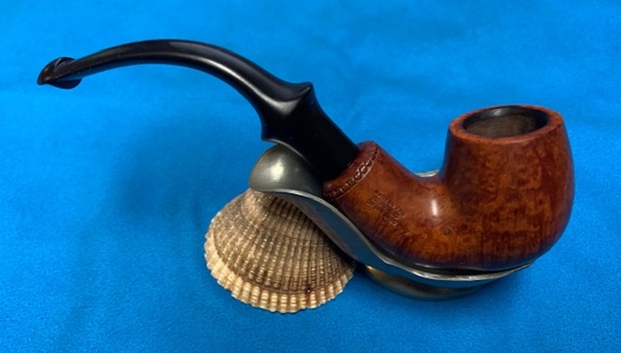
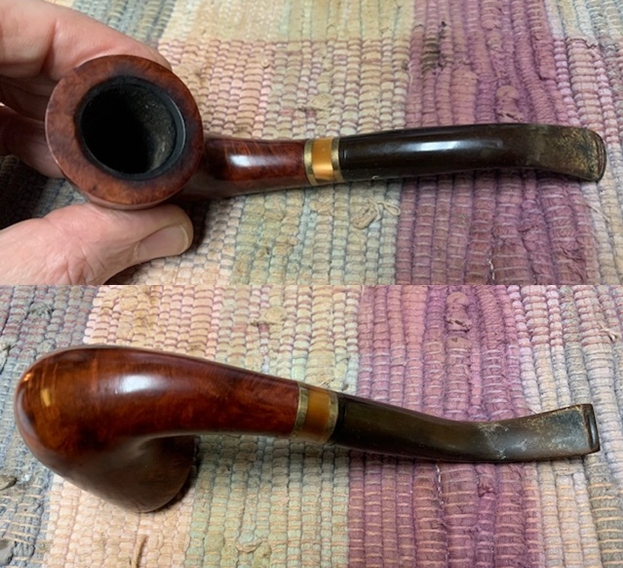
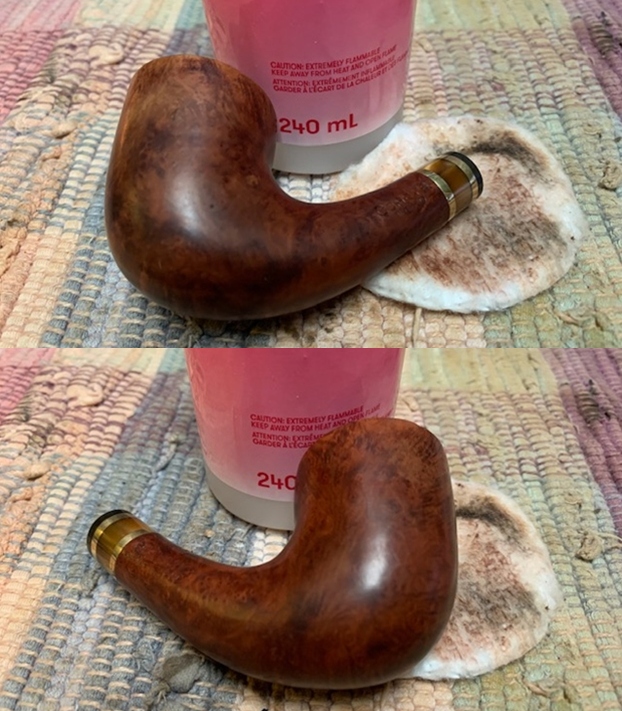
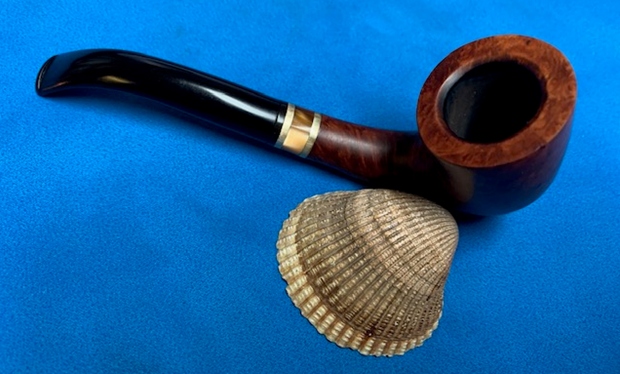
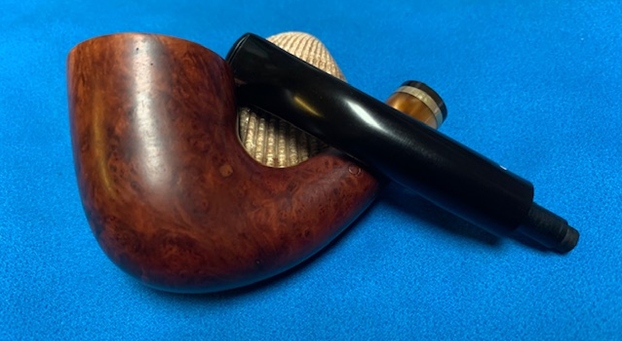
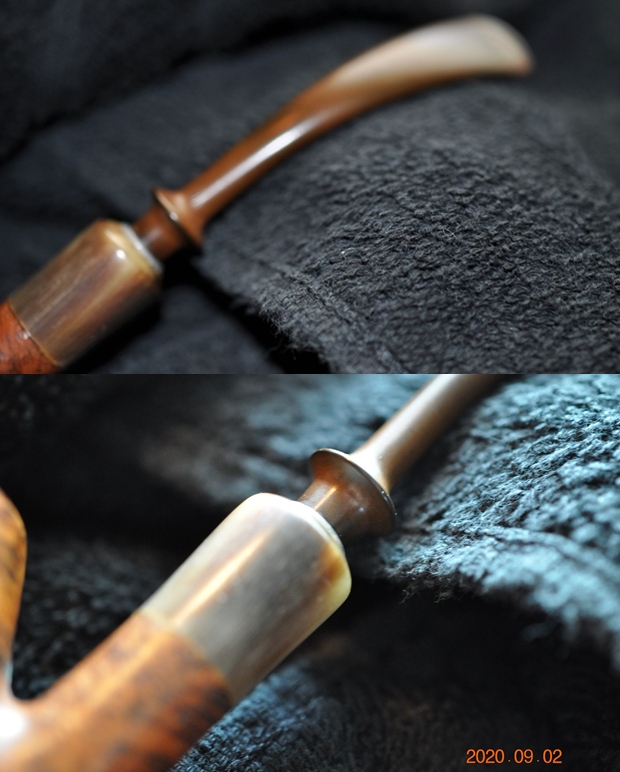
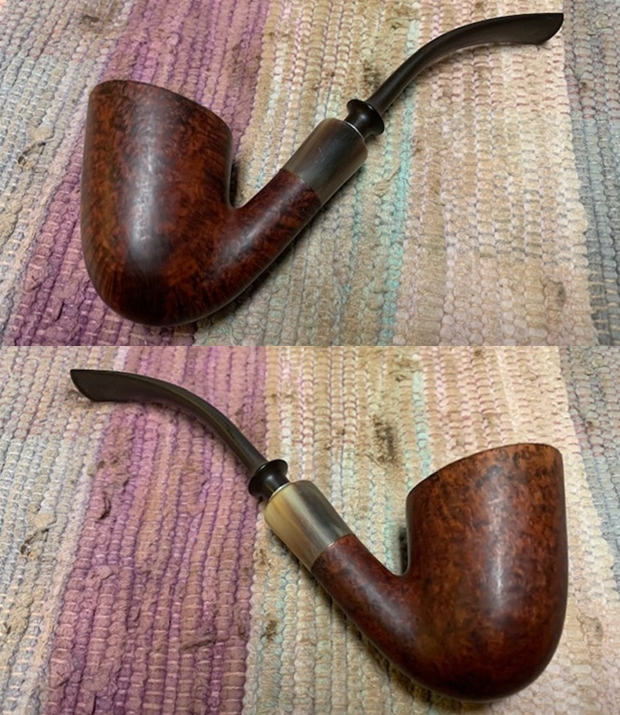
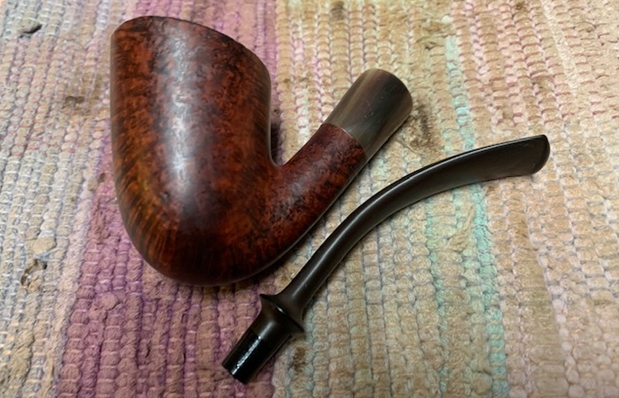
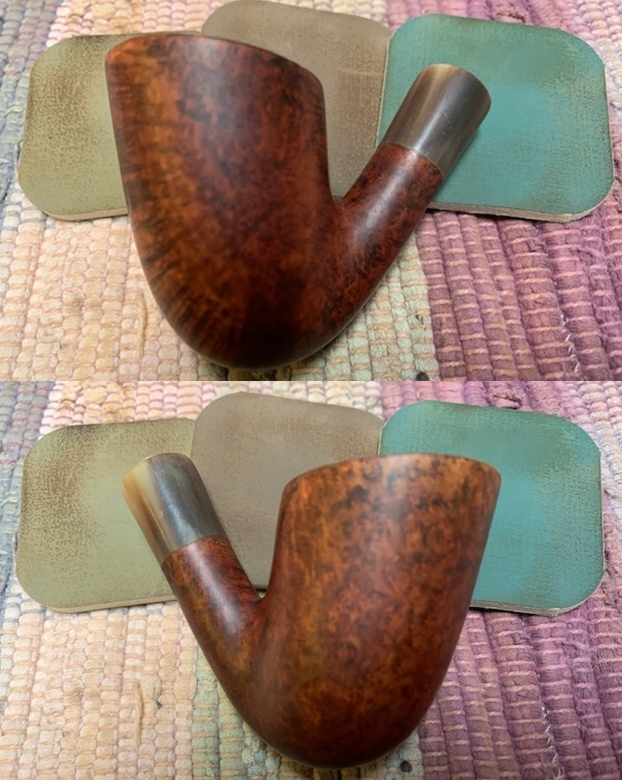
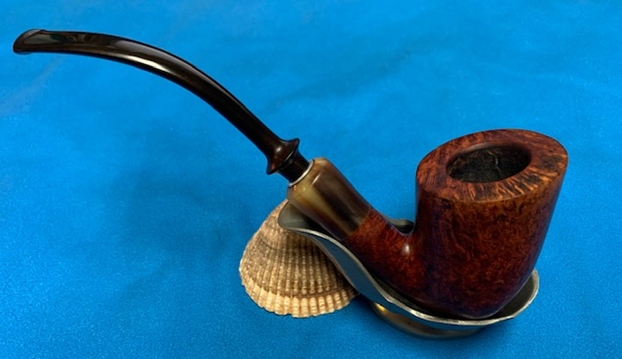
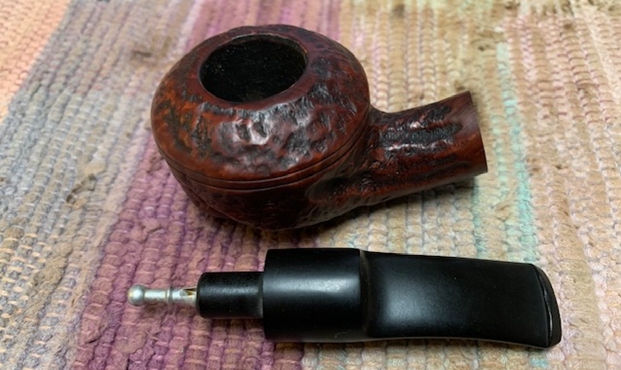
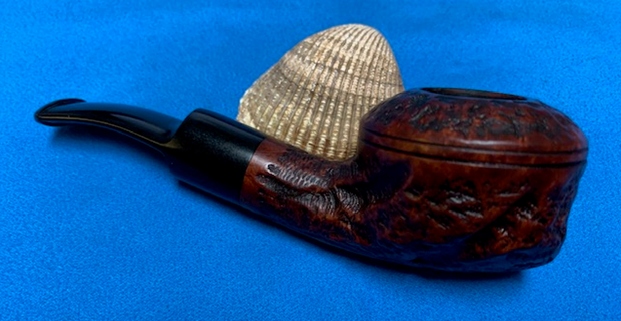
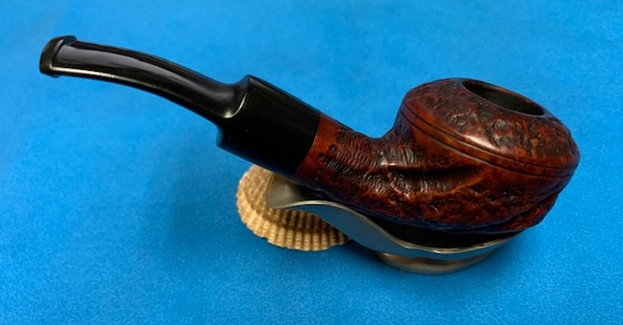
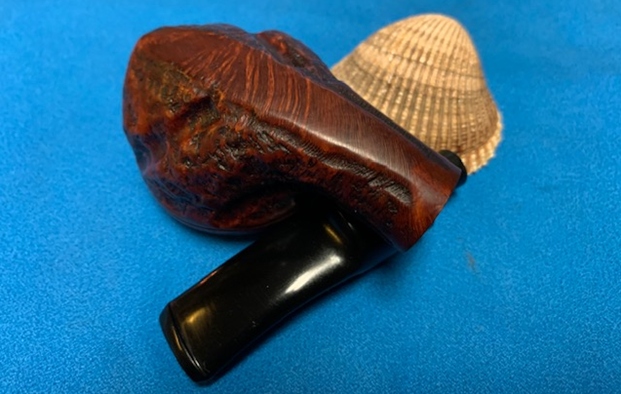
 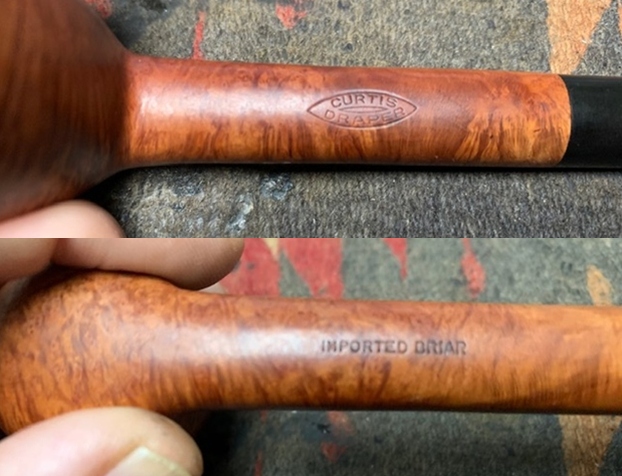 I removed the stem and took a photo of the pipe to give a sense of the whole. The stem is short and tapered.
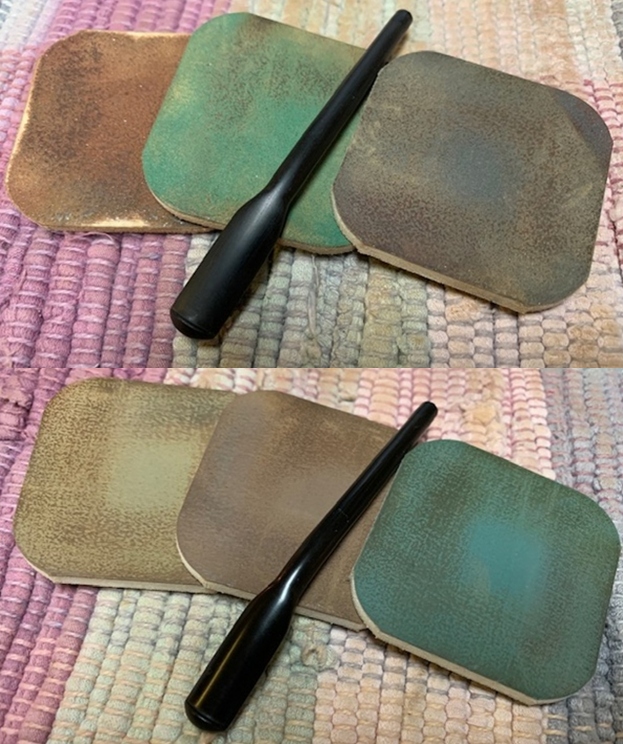
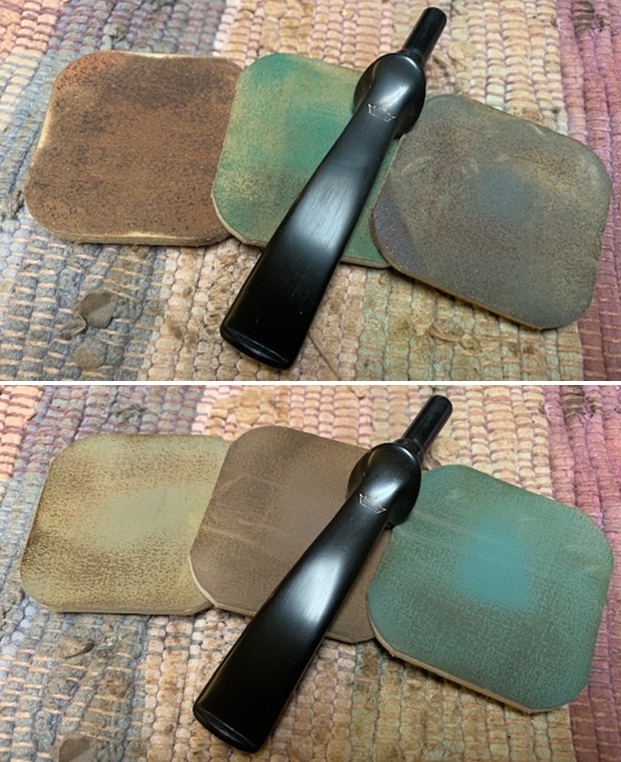
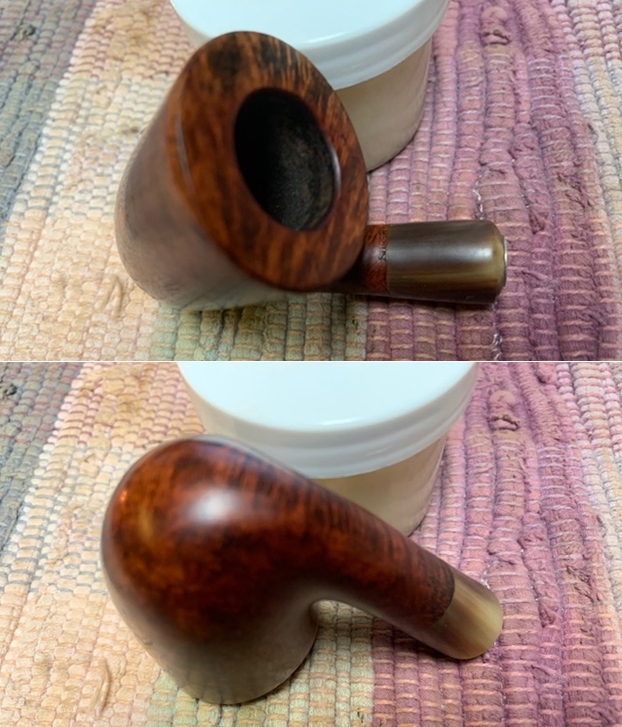
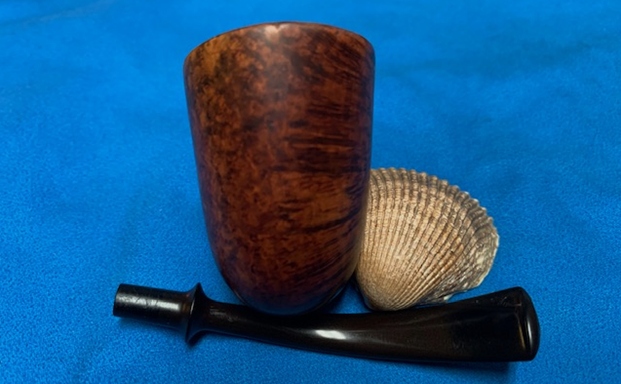
 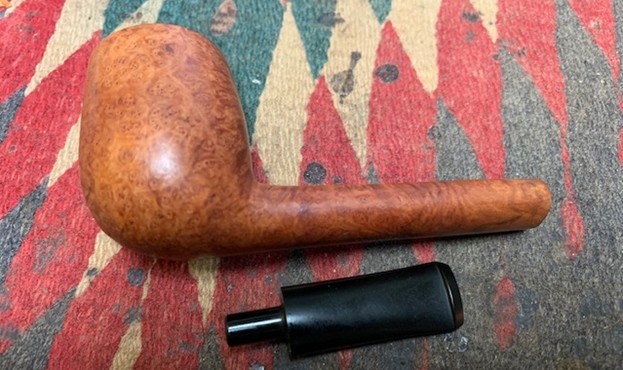 I polished the bowl and the rim top, sides and shank with micromesh sanding pads – wet sanding with 1500-12000 grit pads and wiping it down after each pad with a damp cloth.
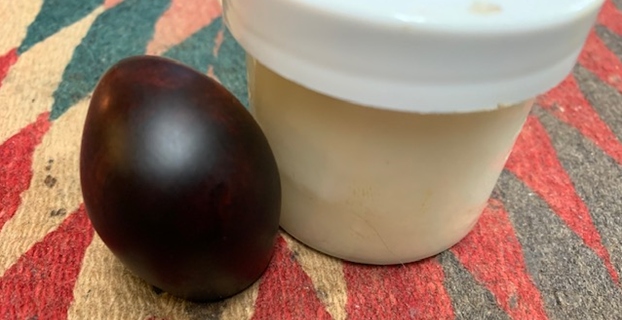
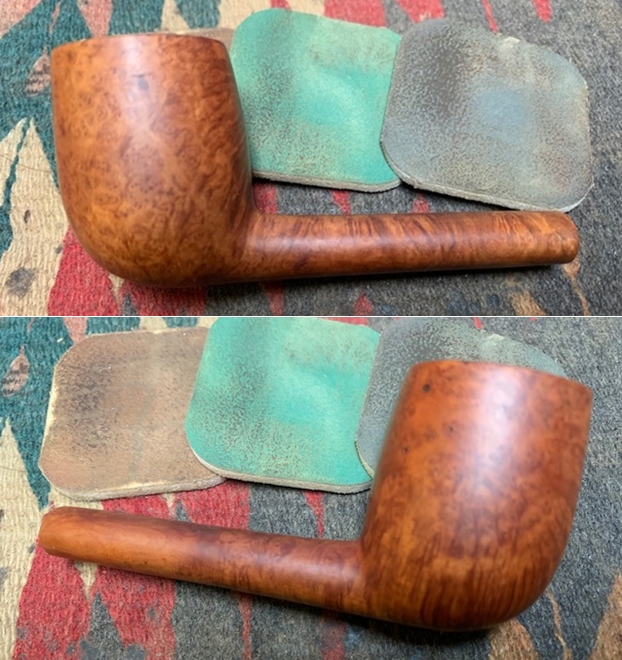
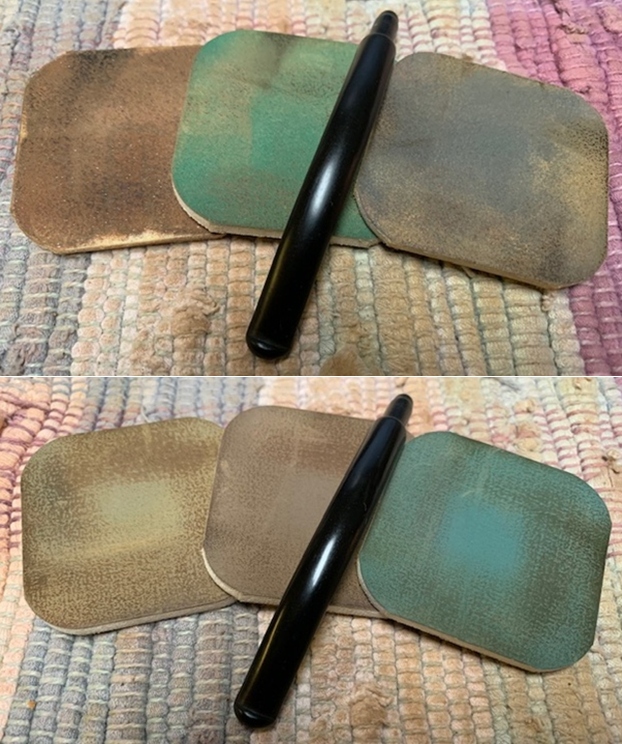
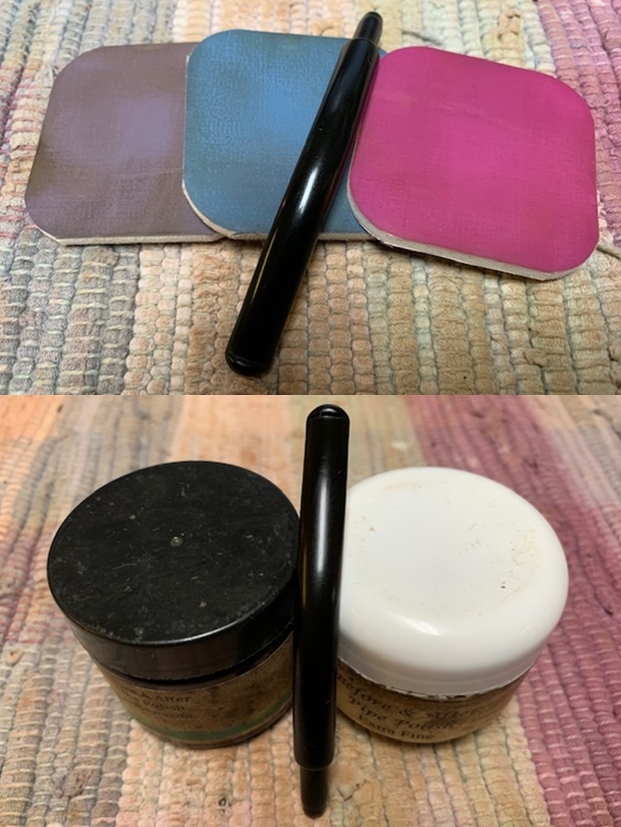
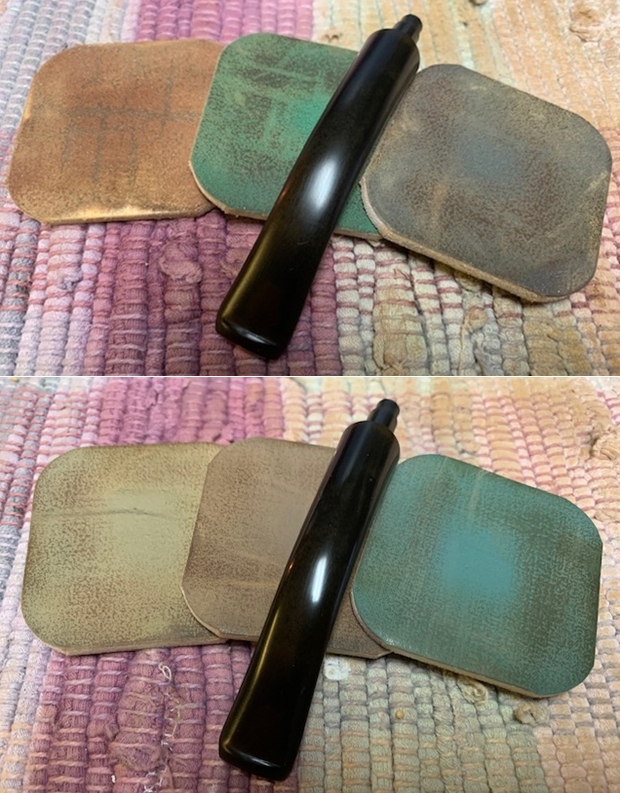
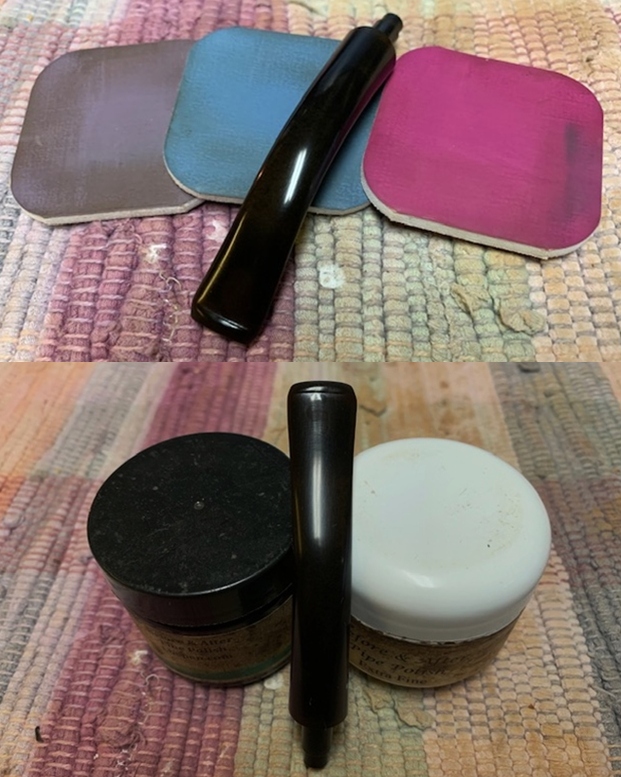
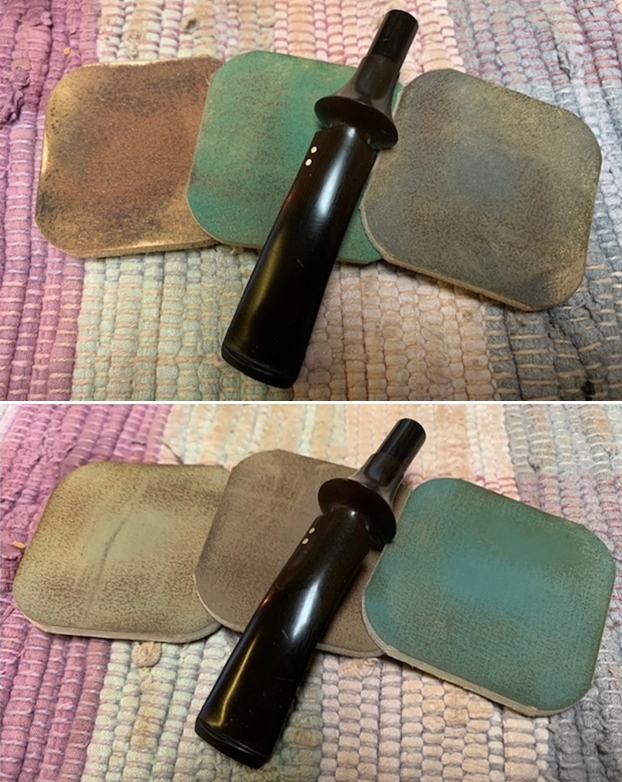
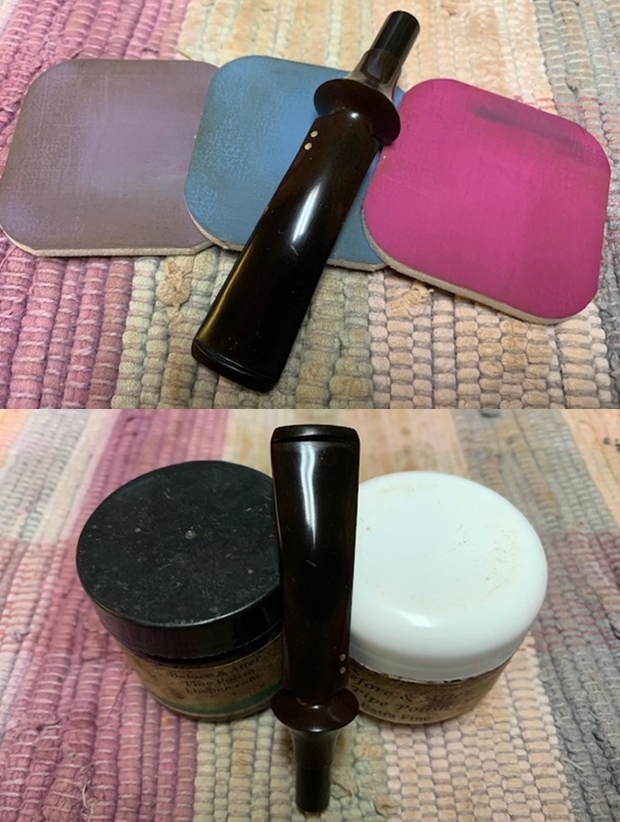
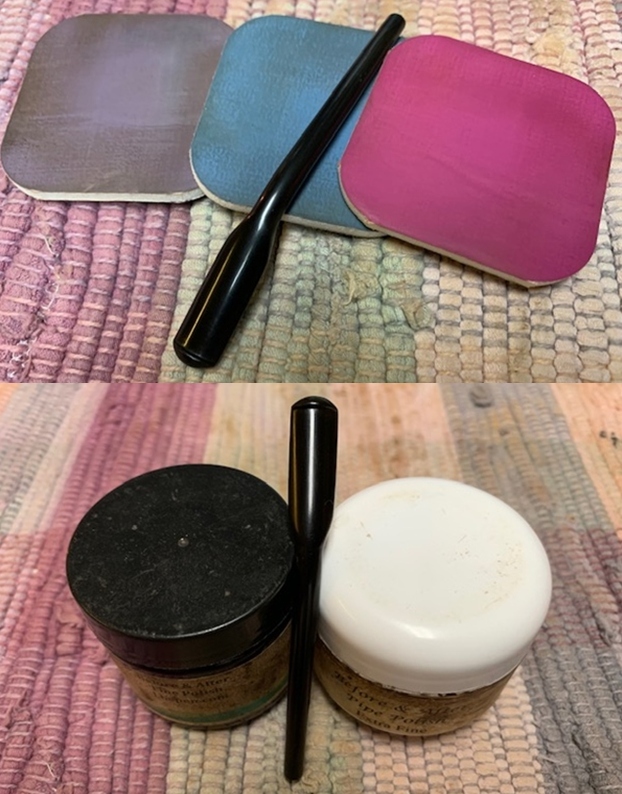
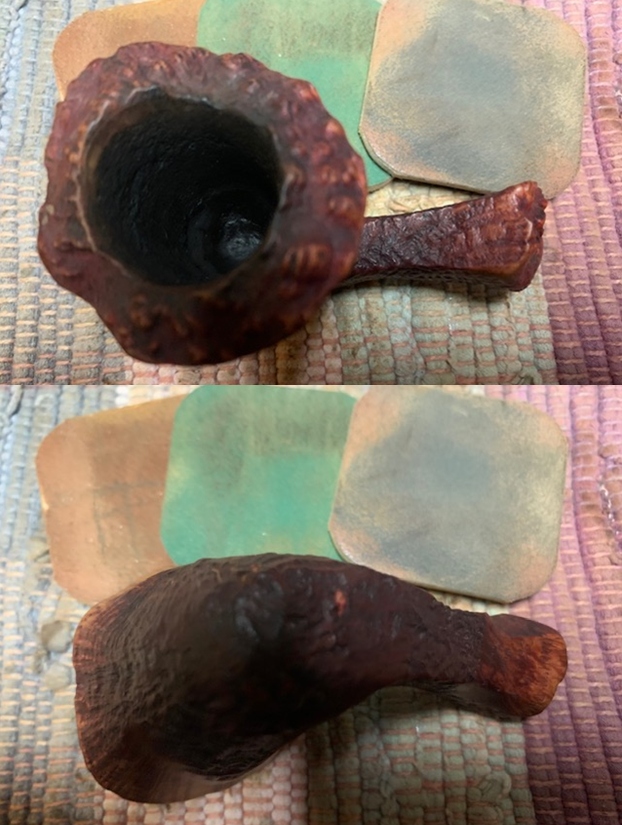
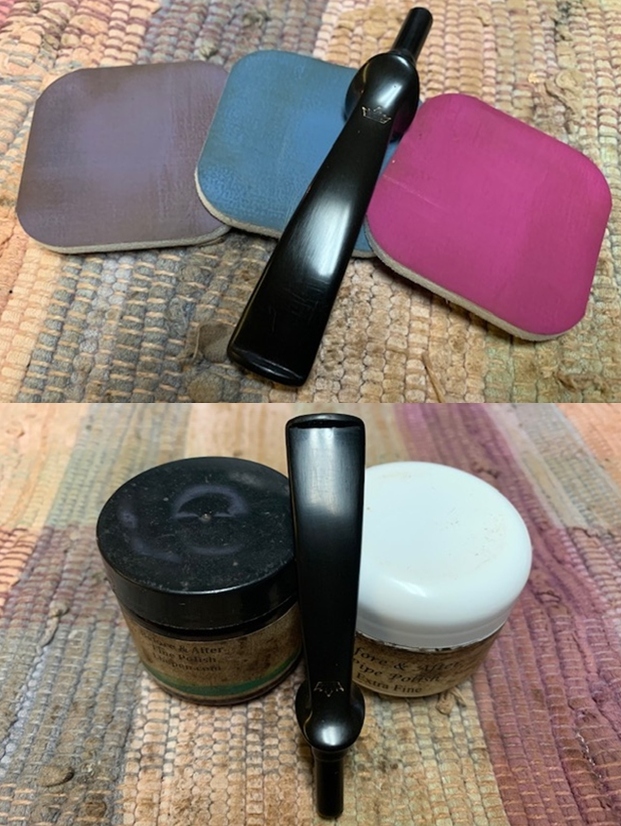
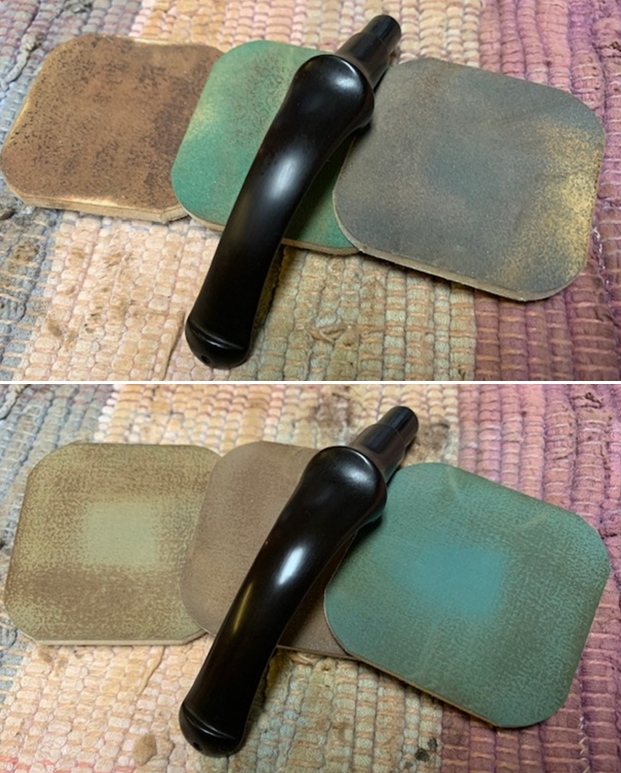
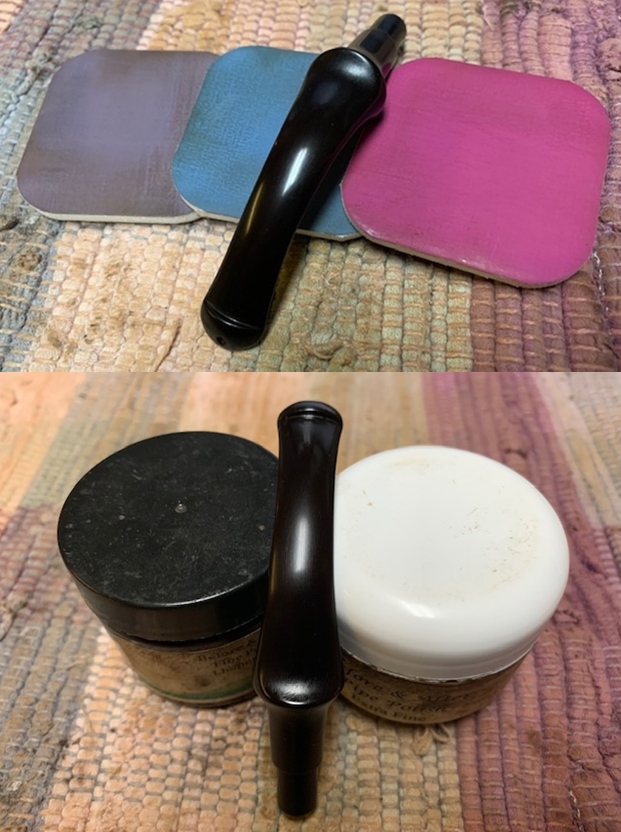
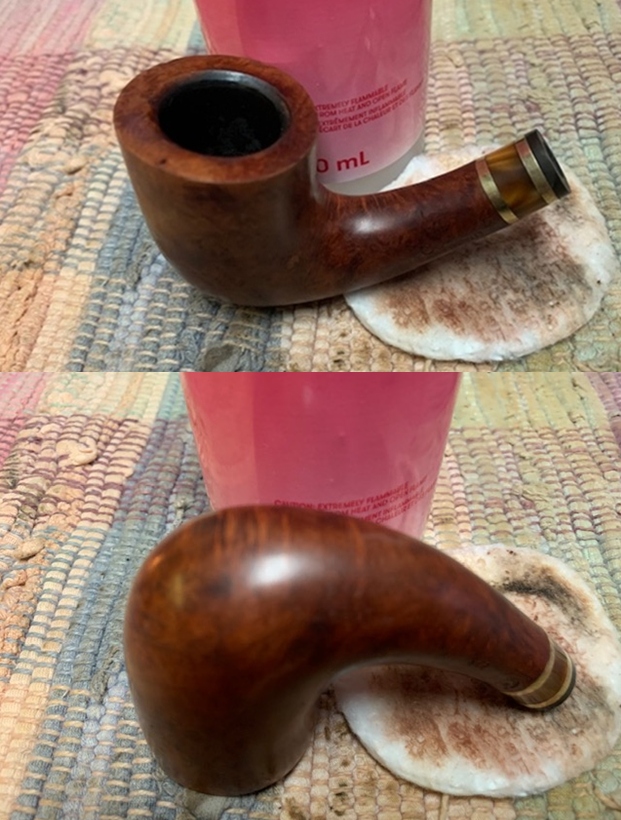
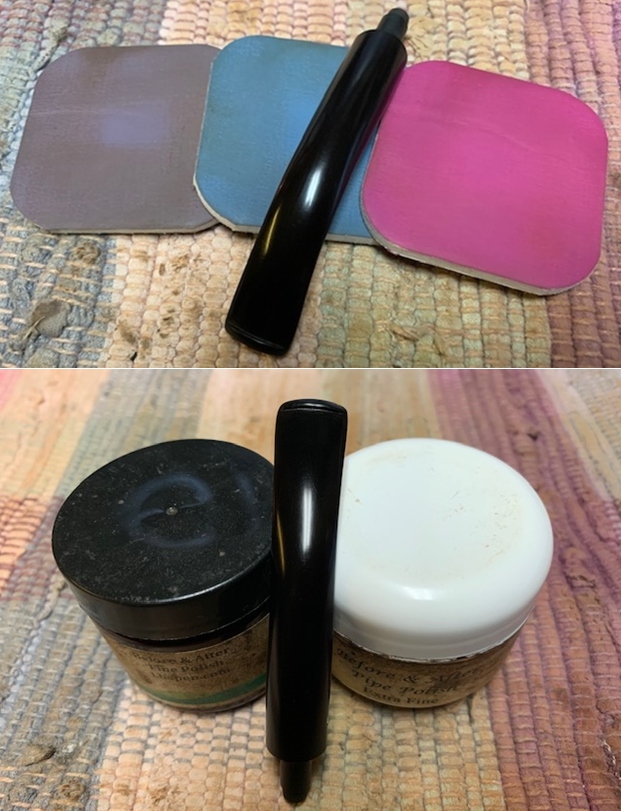
 I set the bowl aside and turned to work on the stem. It was in very good condition so I polished the vulcanite stem with micromesh sanding pads – 1500-12000 grit pads. I wiped it down with a damp cloth after each sanding pad. I used Before & After Pipe Polish – both Fine and Extra Fine to further polish the stem.
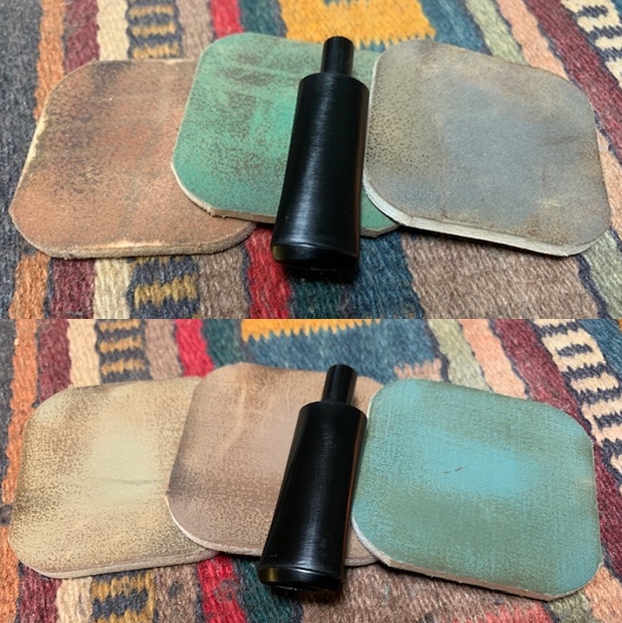
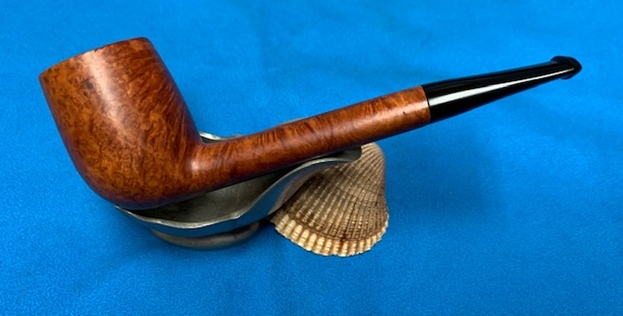
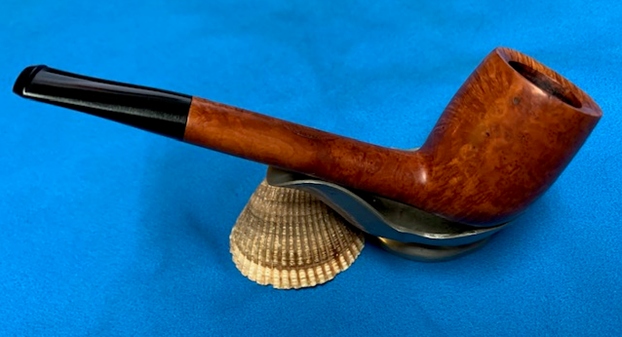
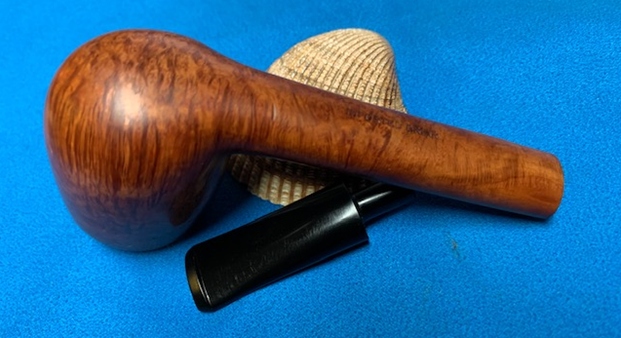
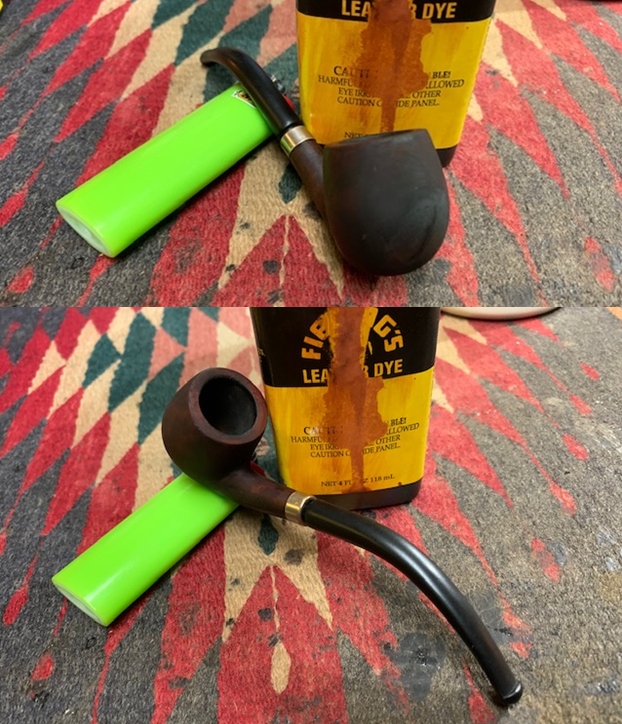
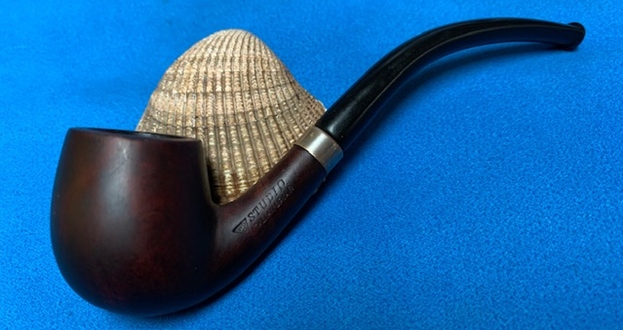
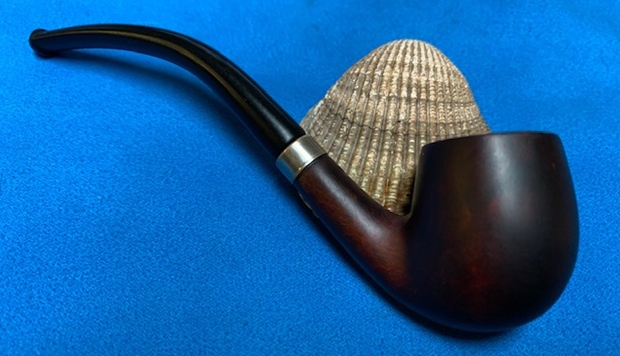
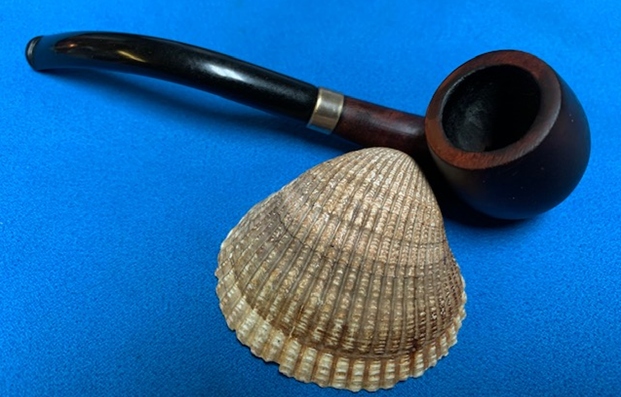
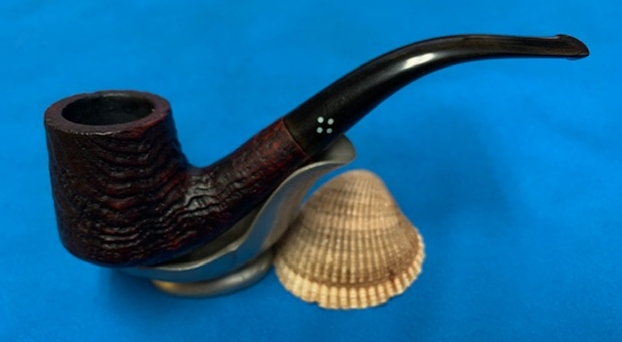
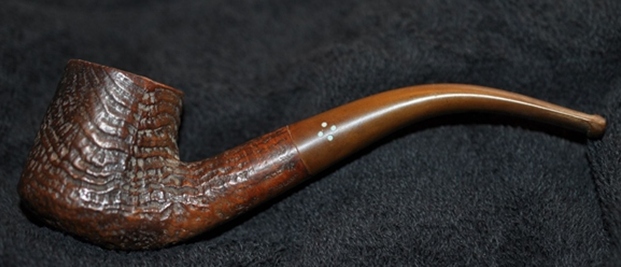
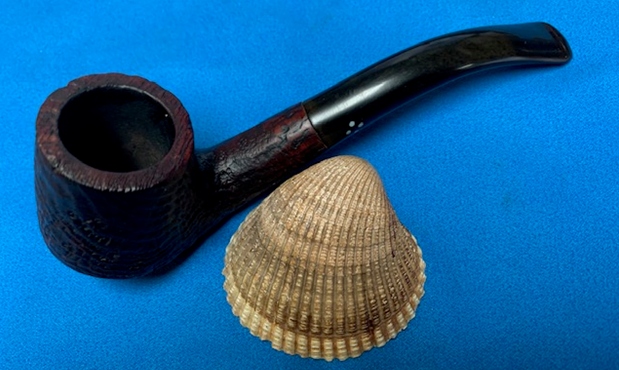
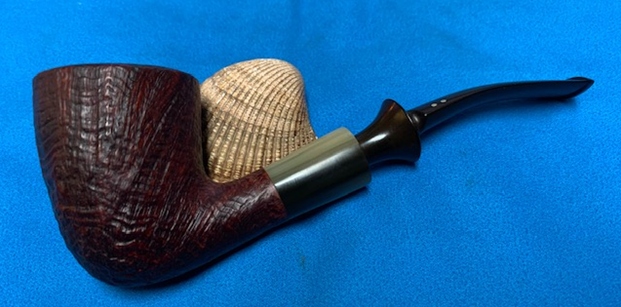
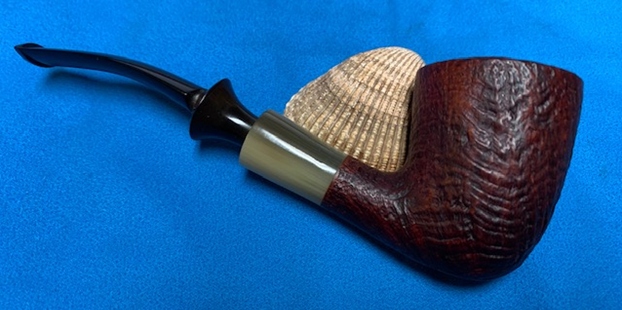
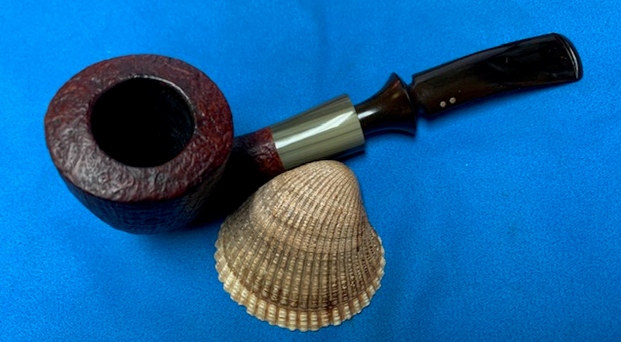
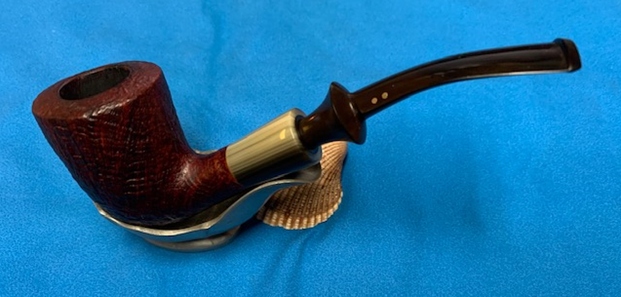
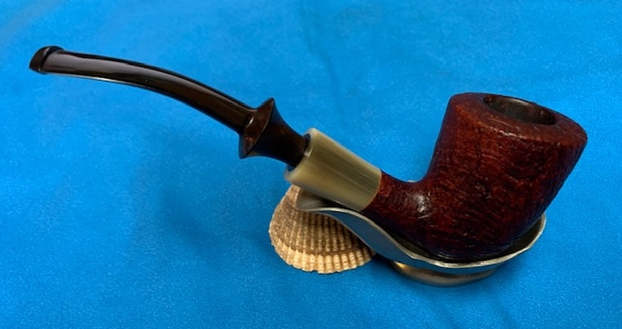
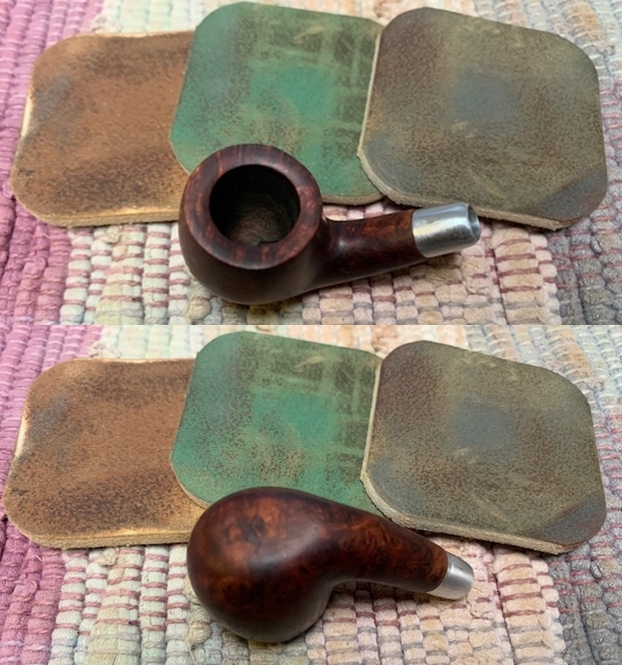
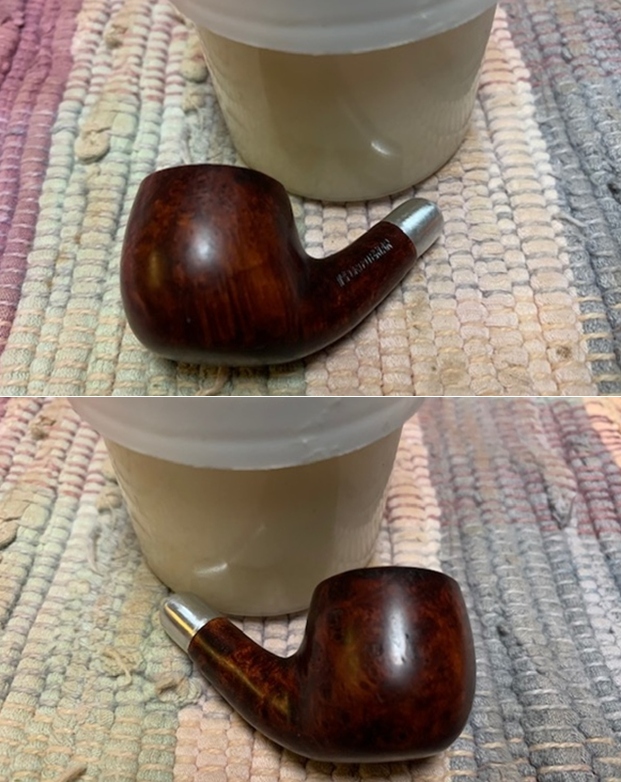
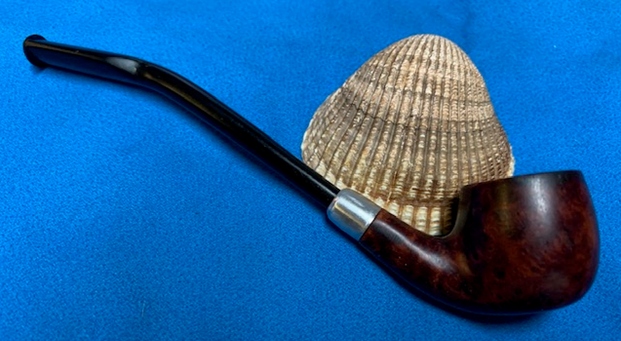
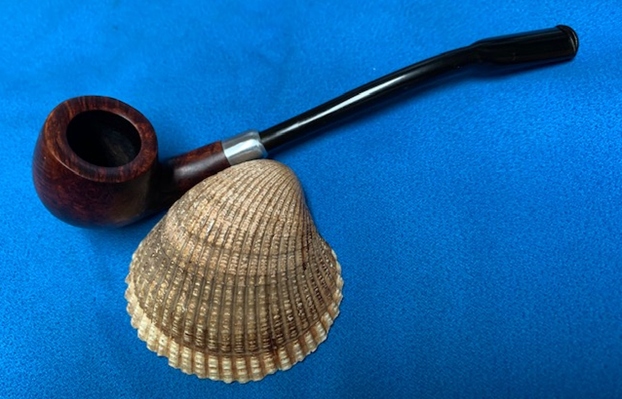
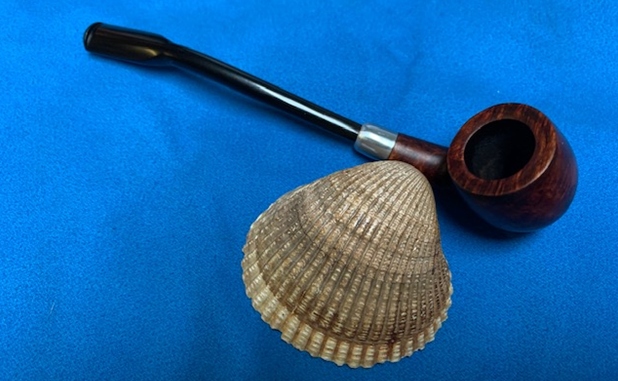
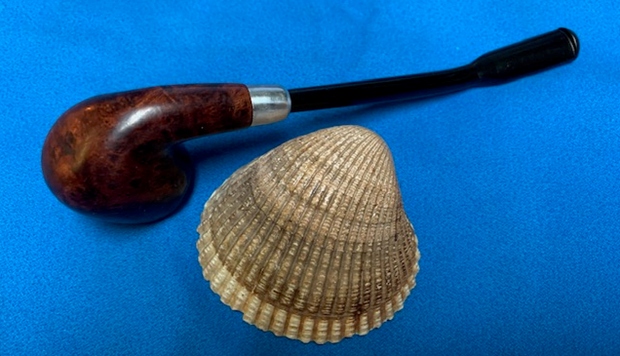
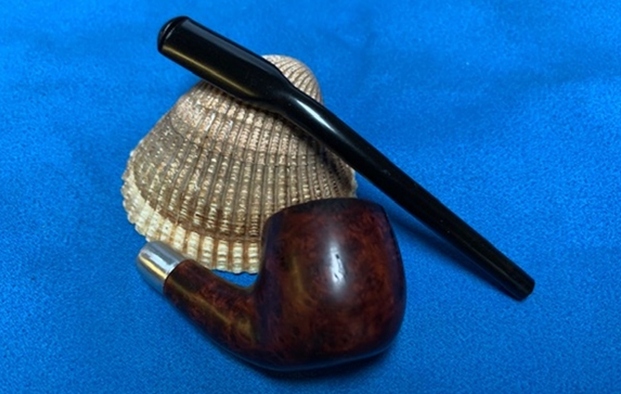
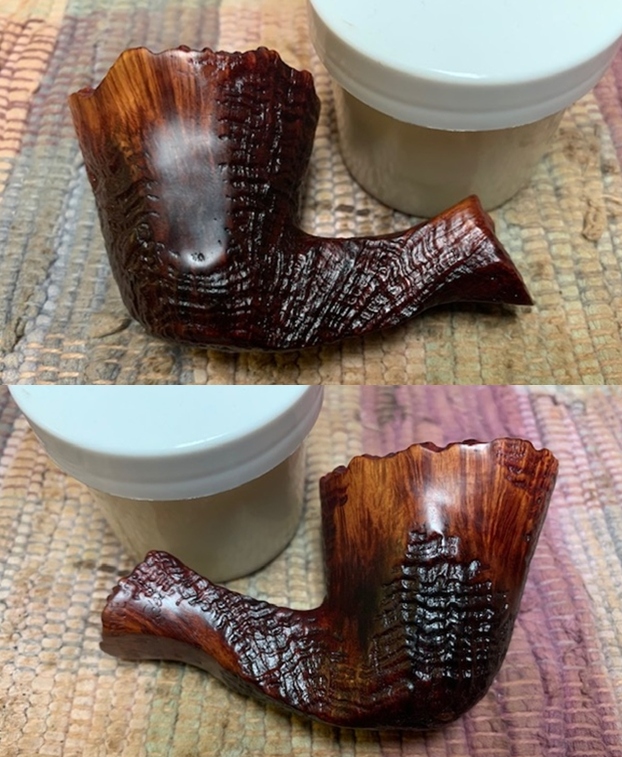
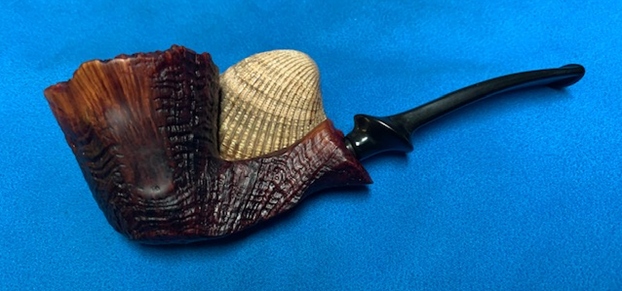
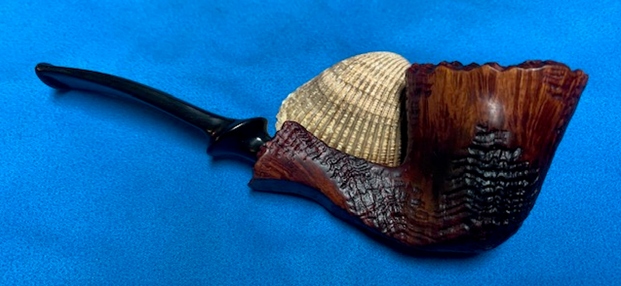
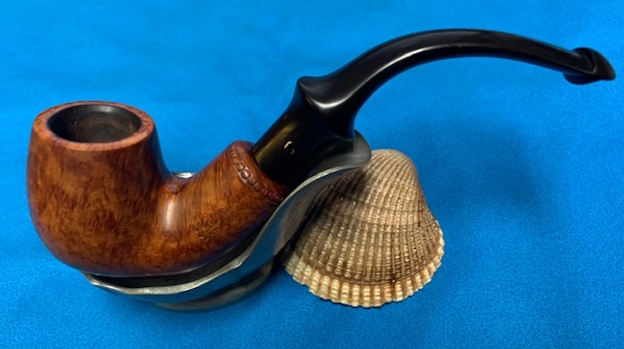
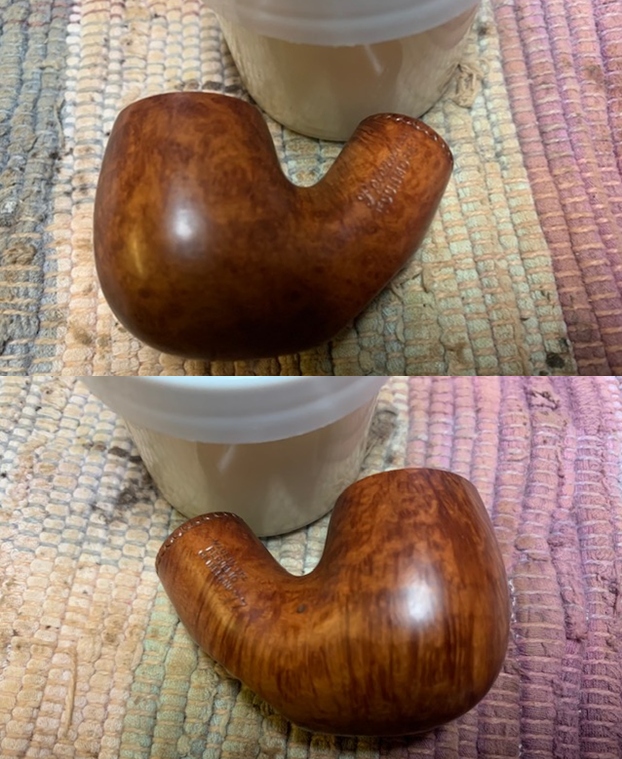
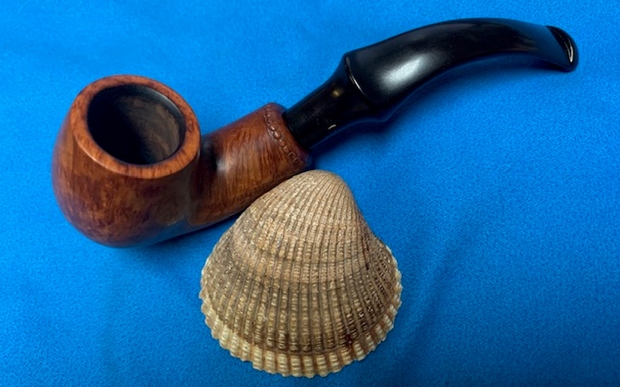
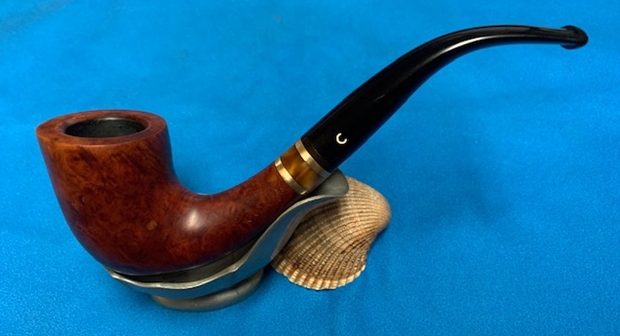
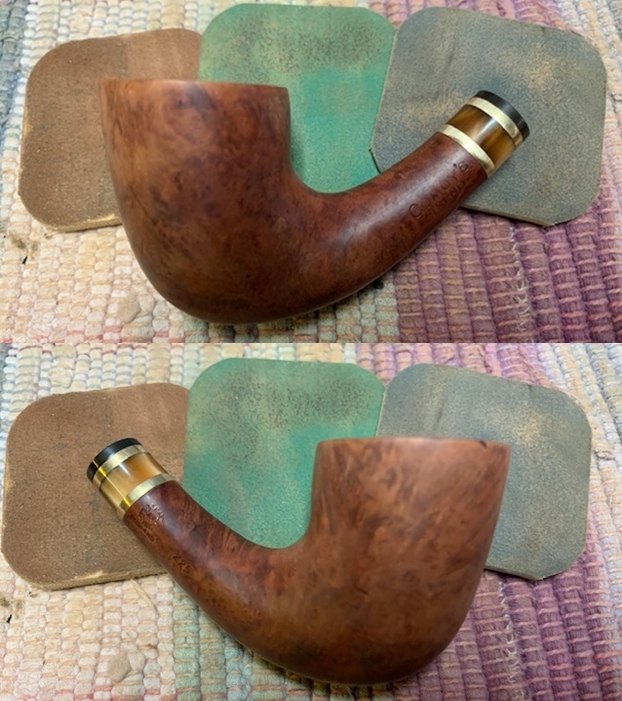
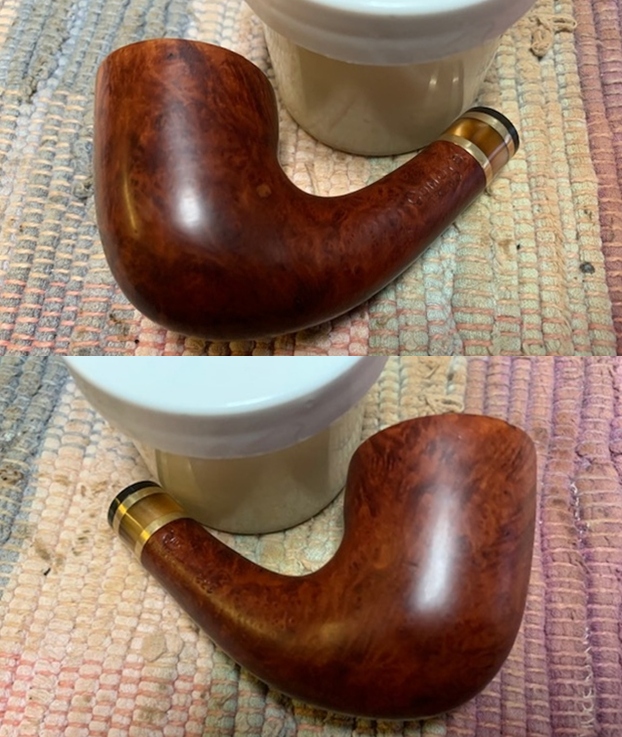
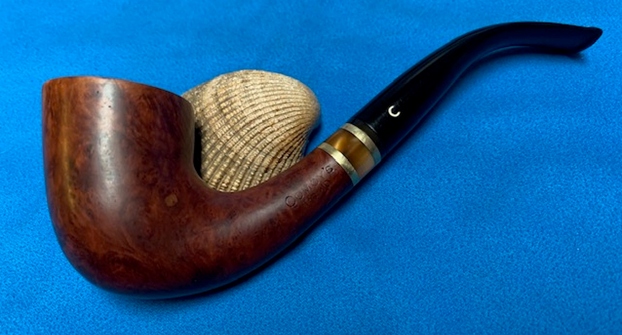
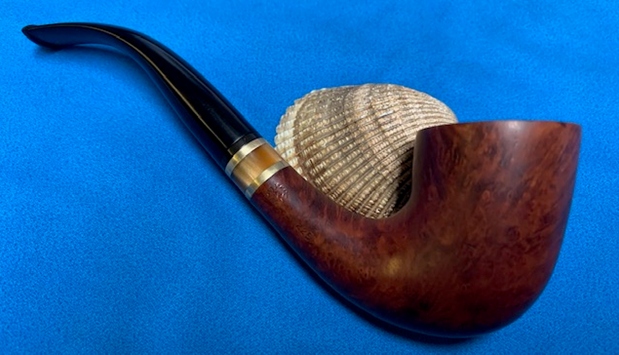
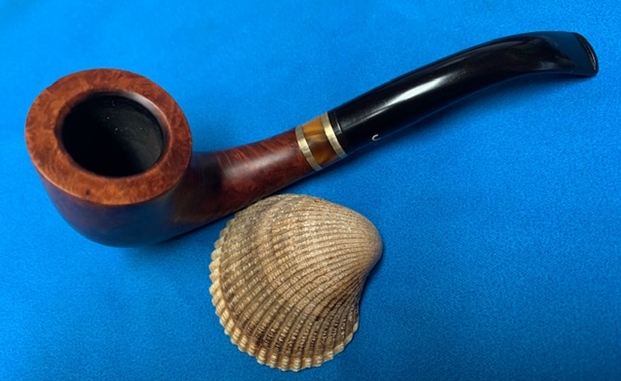
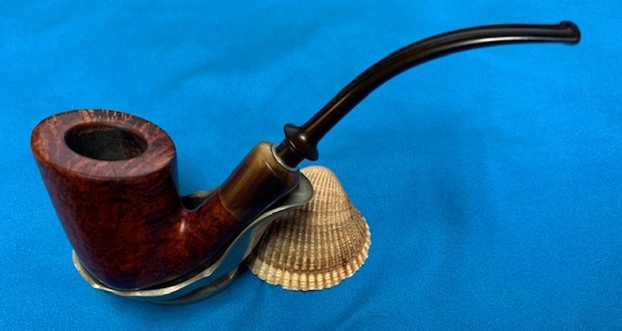
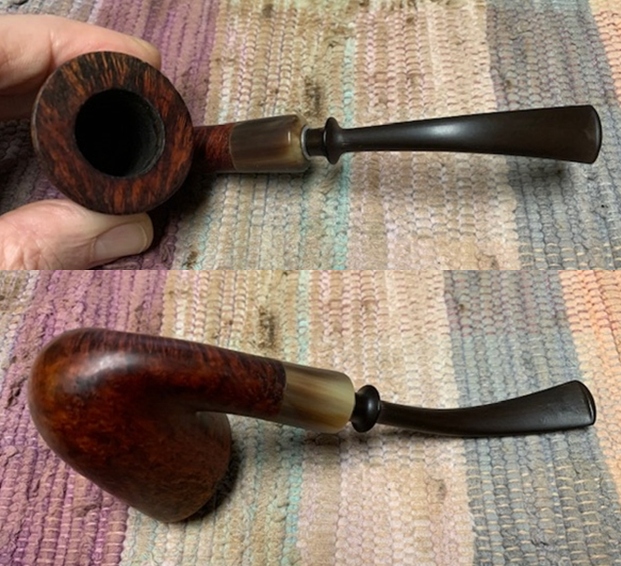
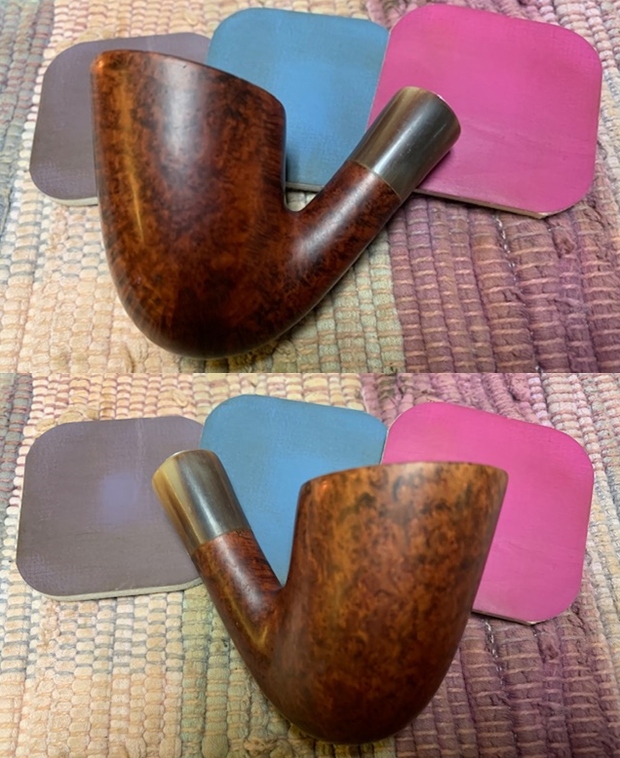
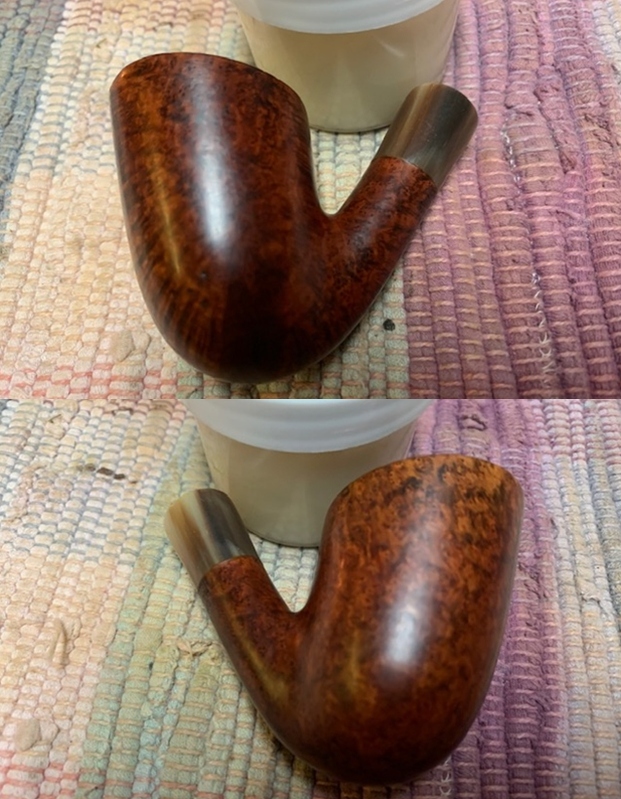
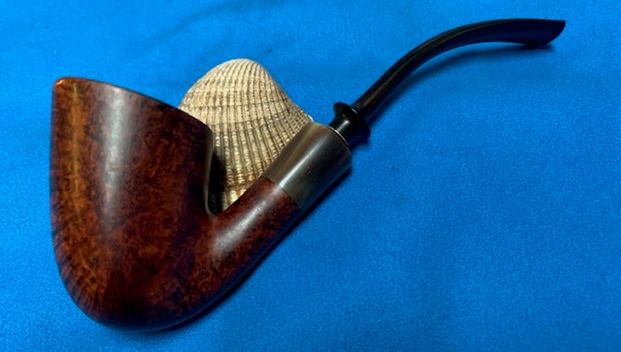
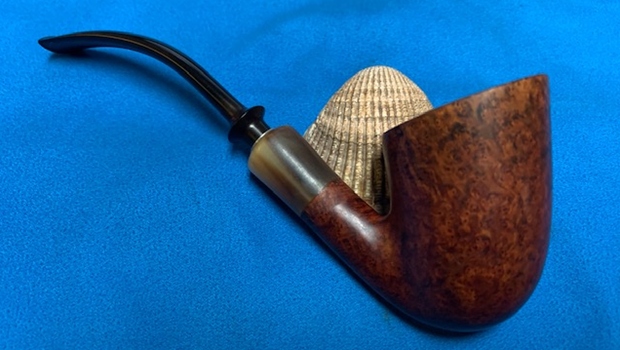
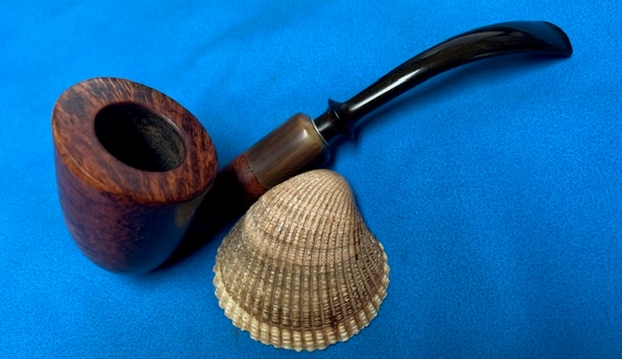
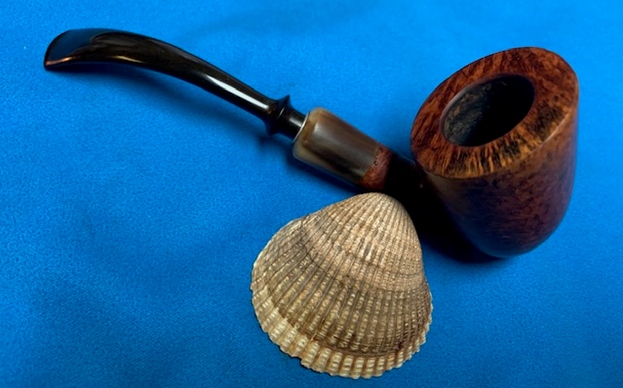
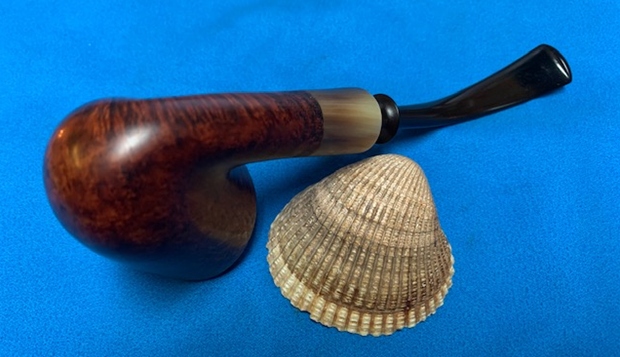
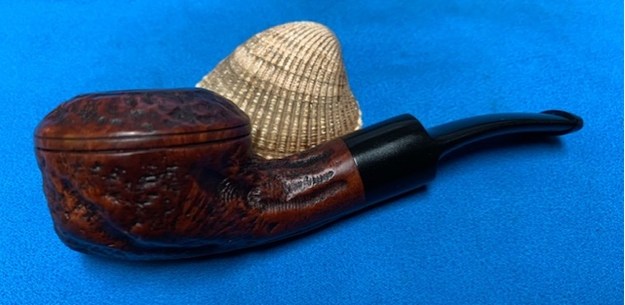
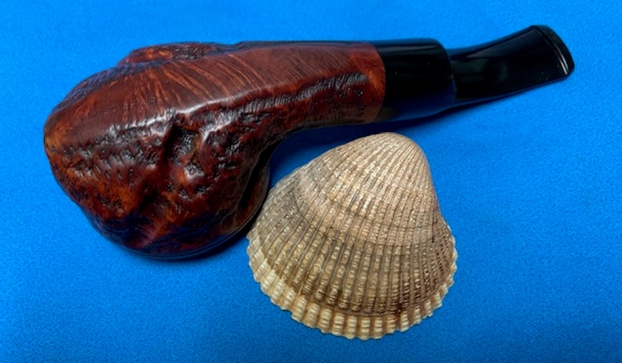
 This Curtis Draper Imported Briar Canadian with a vulcanite taper stem is a great looking pipe now that it has been restored. There is some great grain around the bowl and shank. I put the stem back on the bowl and carefully buffed the pipe with Blue Diamond on the buffing wheel using a light touch on the briar. I gave the bowl and the stem multiple coats of carnauba wax on the buffing wheel and followed that by buffing the entire pipe with a clean buffing pad. I hand buffed the pipe with a microfiber cloth to deepen the shine. The finished Draper Canadian fits nicely in the hand and feels great. Give the finished pipe a look in the photos below. The dimensions of the pipe are Length: 5 ½ inches, Height: 1 ¾ inches, Outside diameter of the bowl: 1 ¼ inches, Chamber diameter: ¾ of an inch. The weight of the pipe is 29gr/.99oz. If you are interested in adding this pipe to your collection send me a message or an email. Thanks for reading this blog and my reflections on the pipe while I worked on it. There are many more to come!


