Blog by Dal Stanton
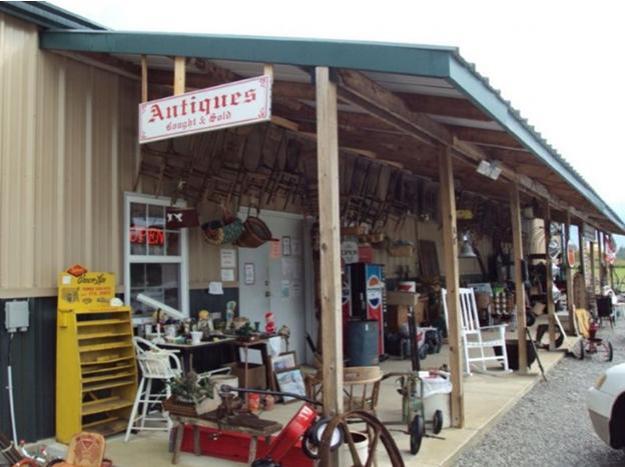
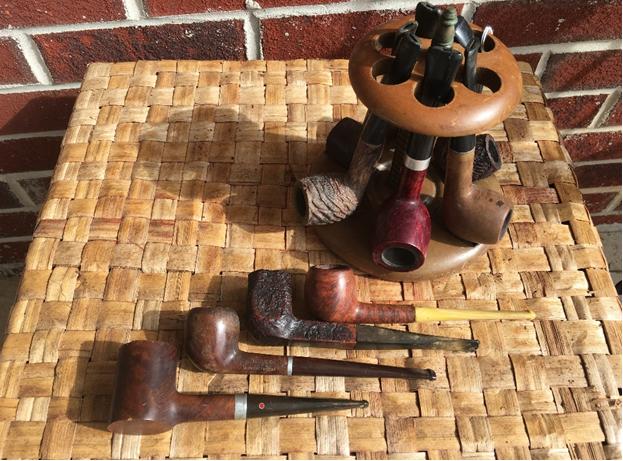
I purchased the Savinelli Capitol in June of this year, at the Hole in the Wall antique store near Zhenski Pazar (Women’s Market) located in downtown Sofia. Steve was visiting Bulgaria from Vancouver in the context of our work and we went to the Hole in the Wall for a mini pipe hunting sortie. I’d remembered on other occasions the vendor producing a 4-pipe pouch that he kept behind the counter and I asked about it and he still had it with pipes intact. The leather bag itself was a find. The 4 pipes revealed after unzipping the bag were a Savinelli Tortuga 628, Danske Club Vario 85 (both occupying a place in my rotation), a Butz-Choquin Rocamar (which became a wedding gift for my new son-in-law), and the Capitol (that I learned was a Savinelli second) now before me. Above, I linked the restorations of the Tortuga and BC Rocamar to their respective postings.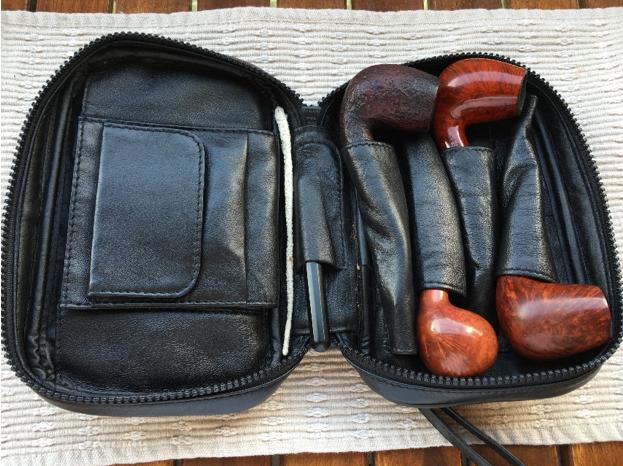 Honestly, when I first acquired the Bag of Four, my sights were fixed on the 3 big brothers of the Capitol which I identified as a Prince shape from Pipedia’s shapes chart. Per Bill Burney’s description,
The prince, named after the Prince of Wales (Prince Albert, later King Edward VII), has a squat, rounded bowl with a long, usually very slightly bent stem and a short shank. Compared to other pipes, the shank and stem are thin and delicate, though not necessarily fragile. This makes for a light and comfortable pipe (Link).
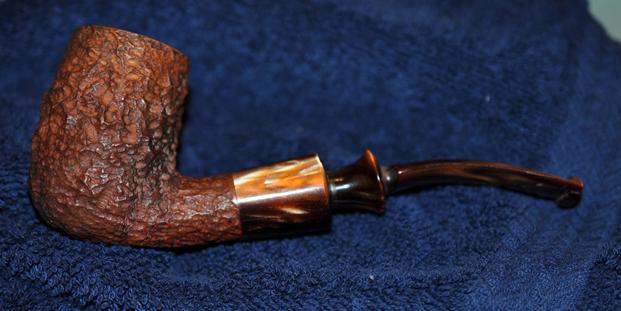
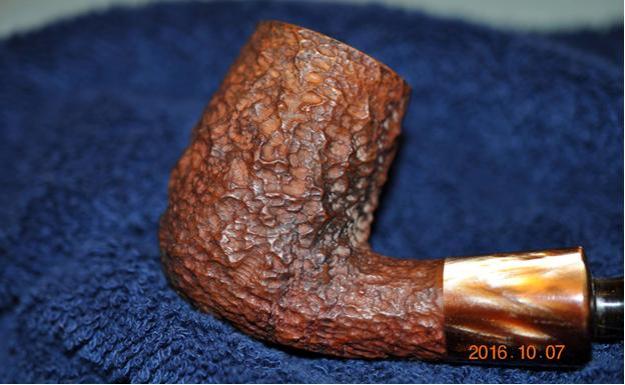
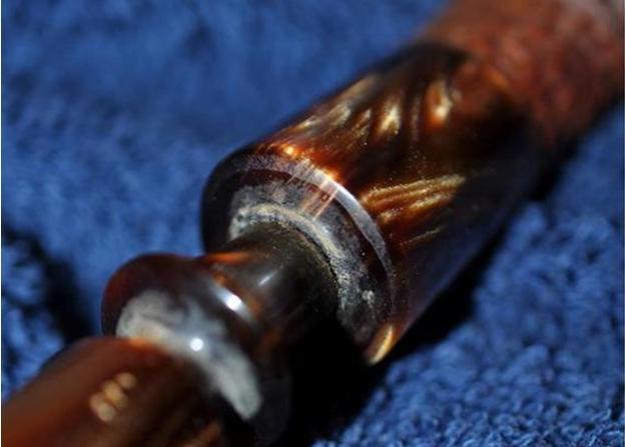
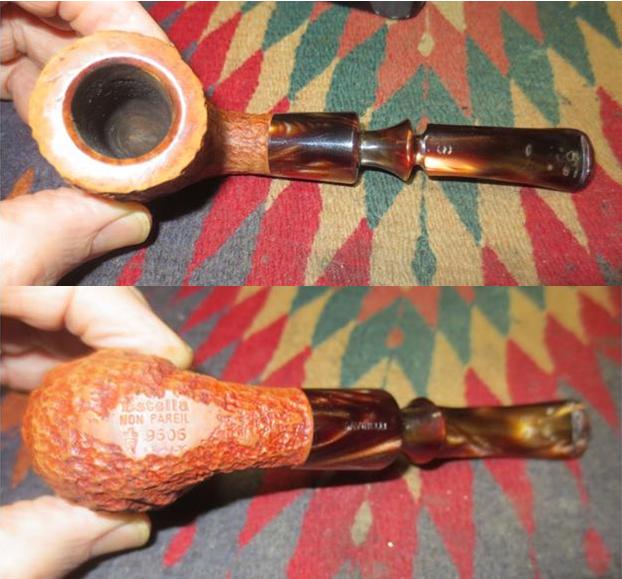
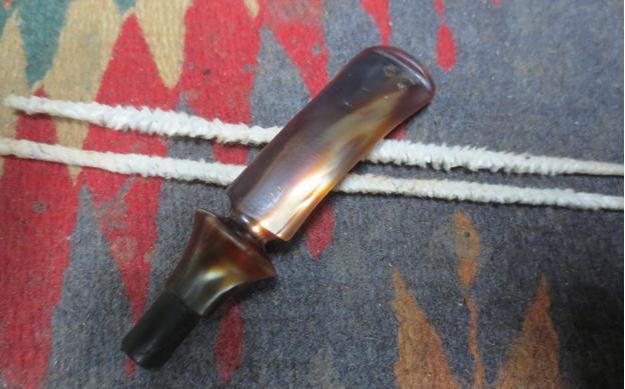
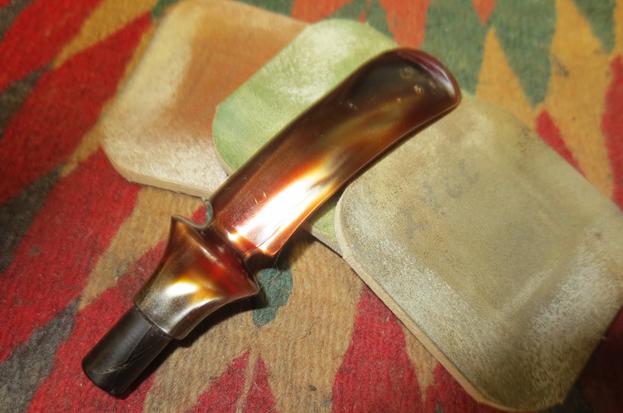
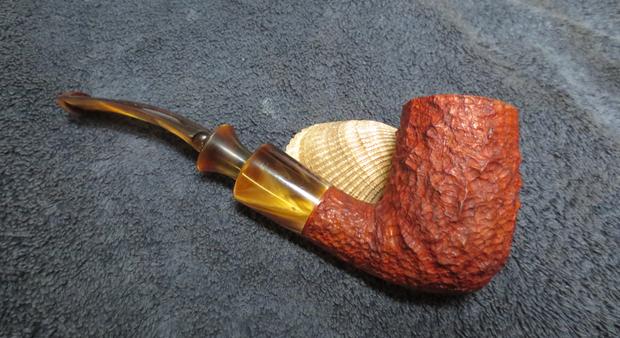
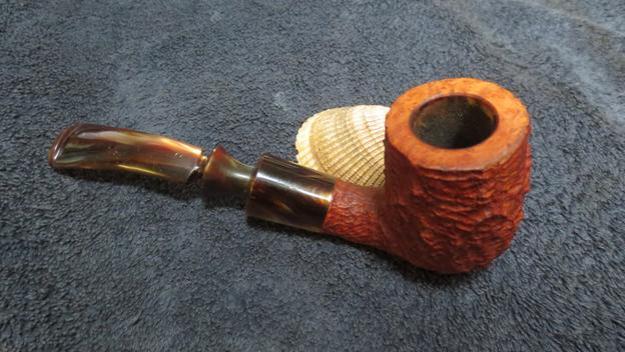
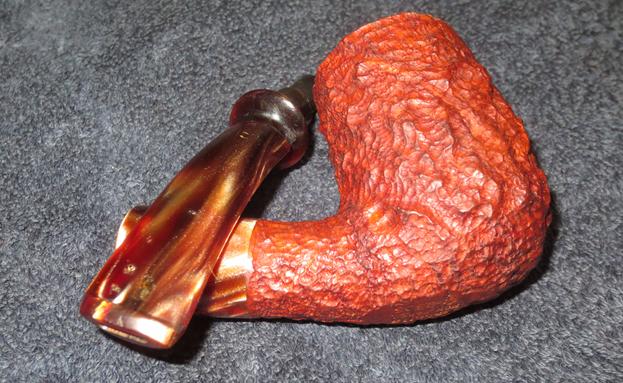
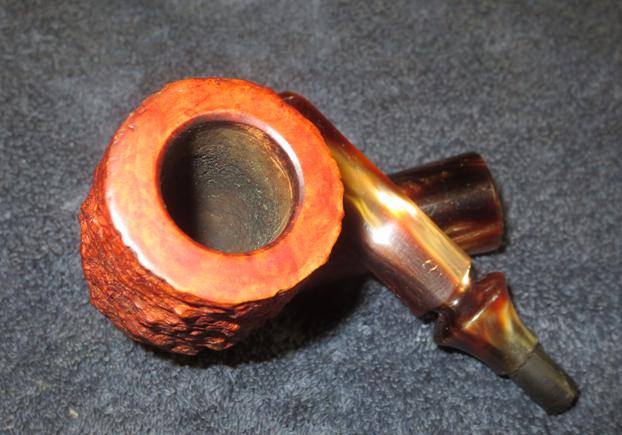
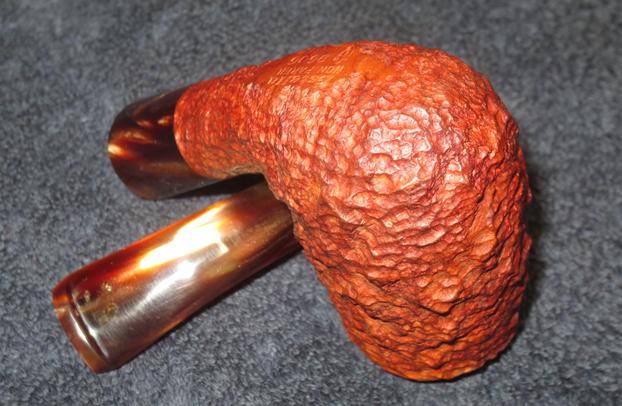
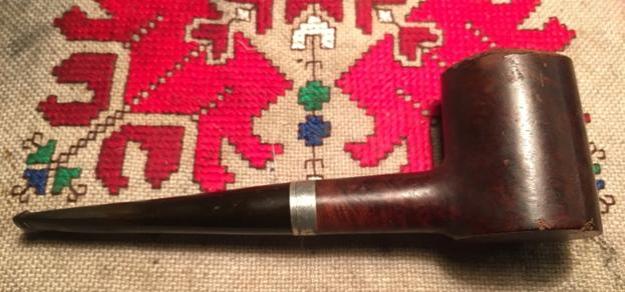
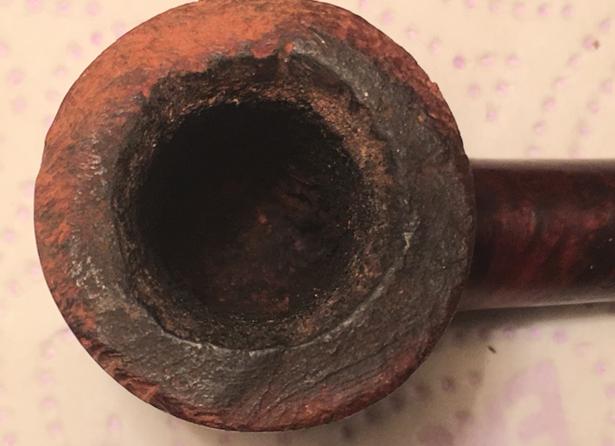
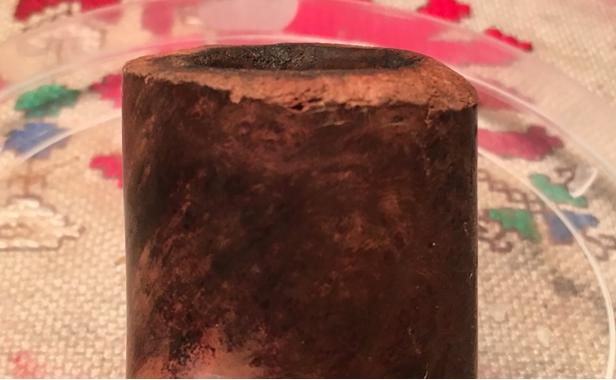
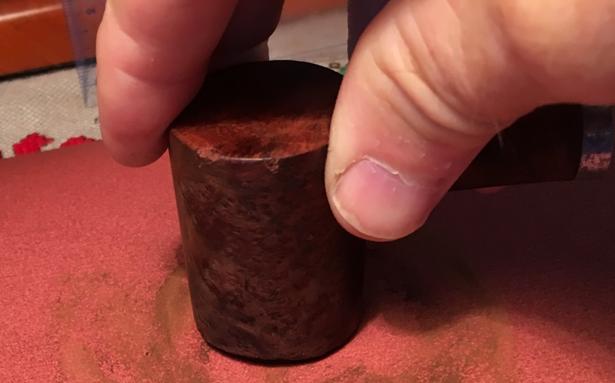
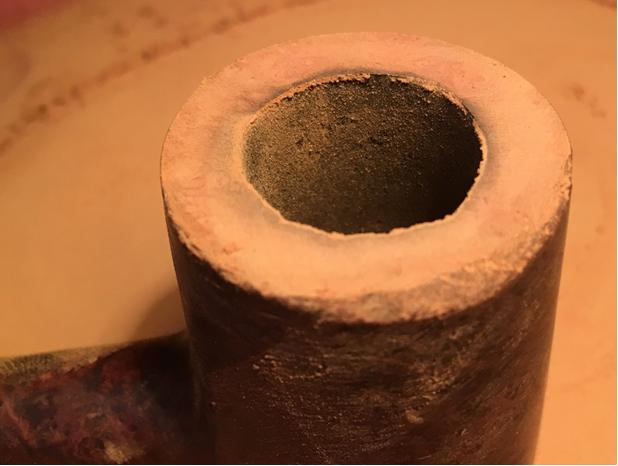
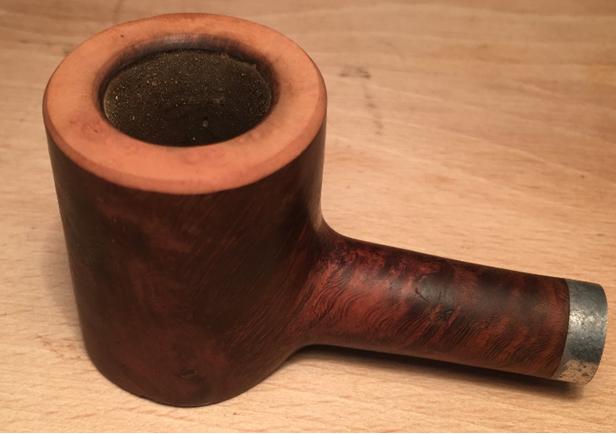
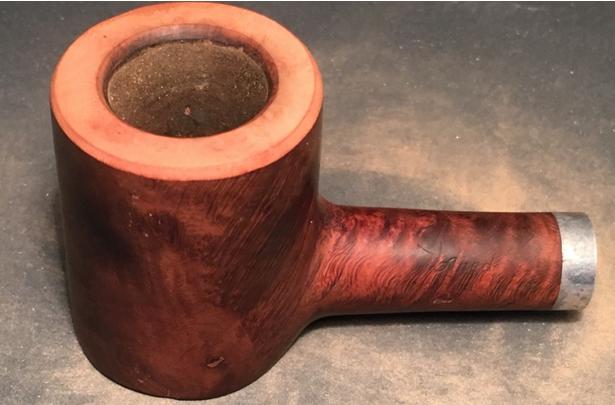
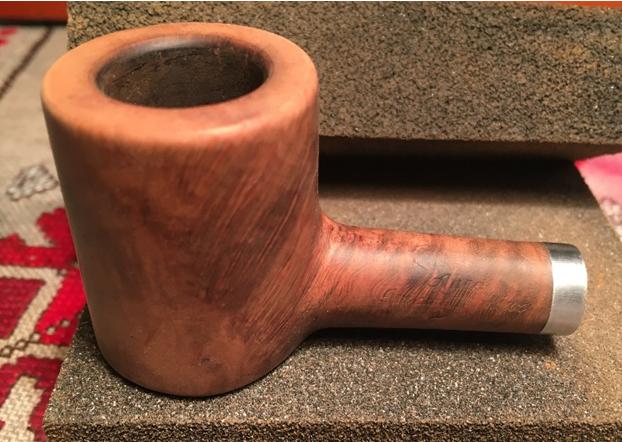
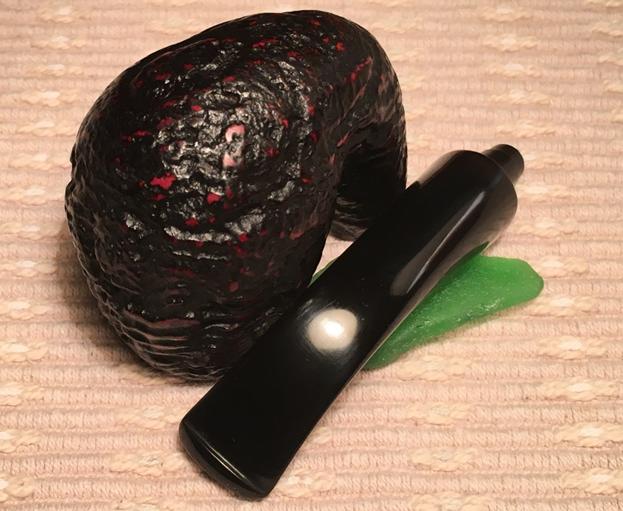
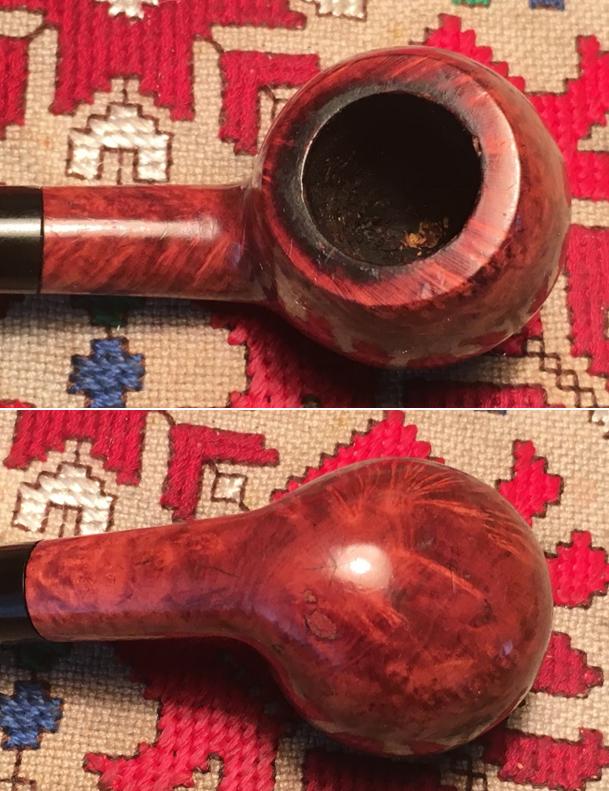
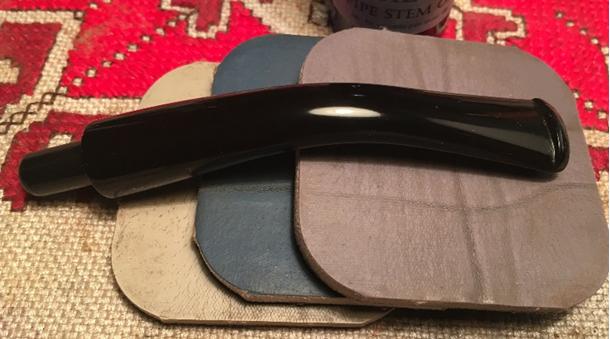
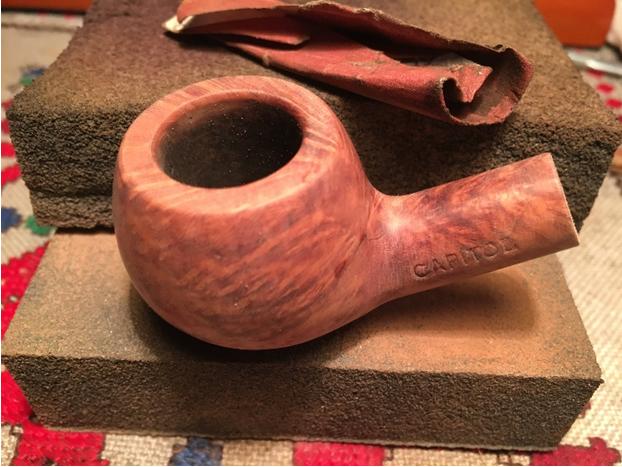
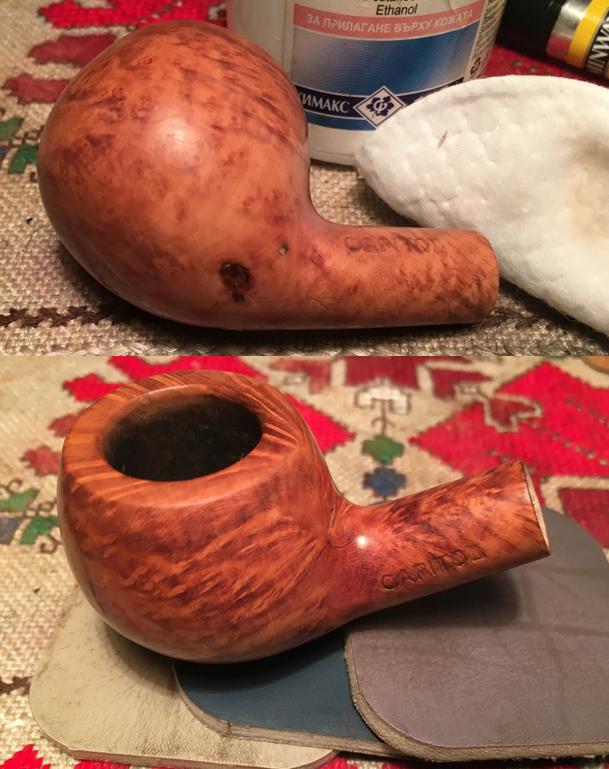
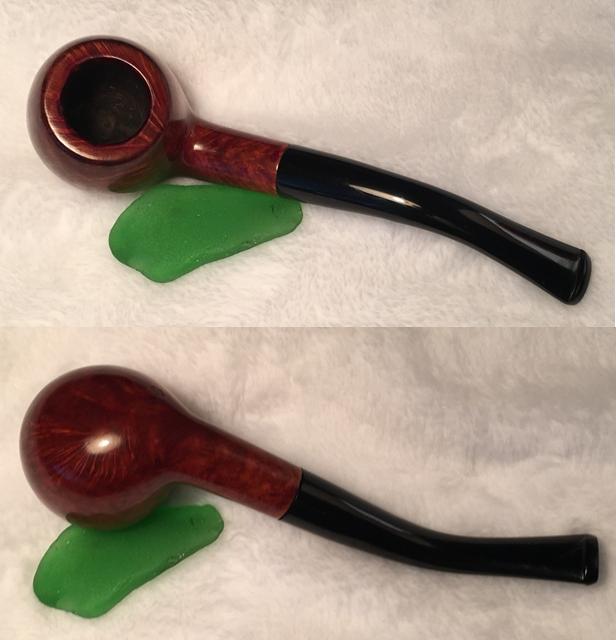
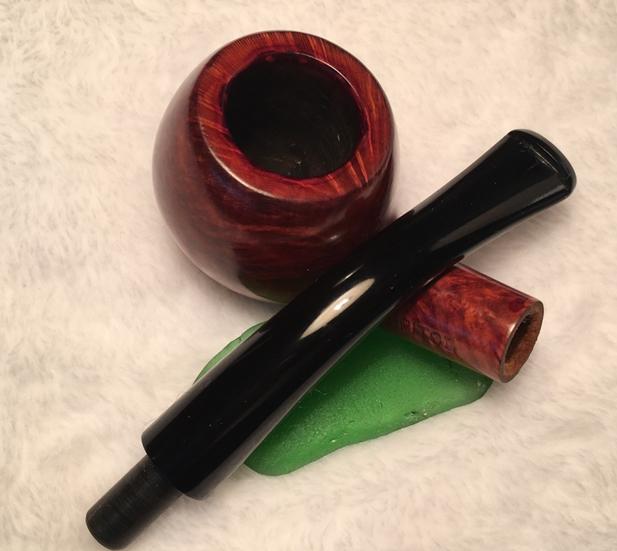
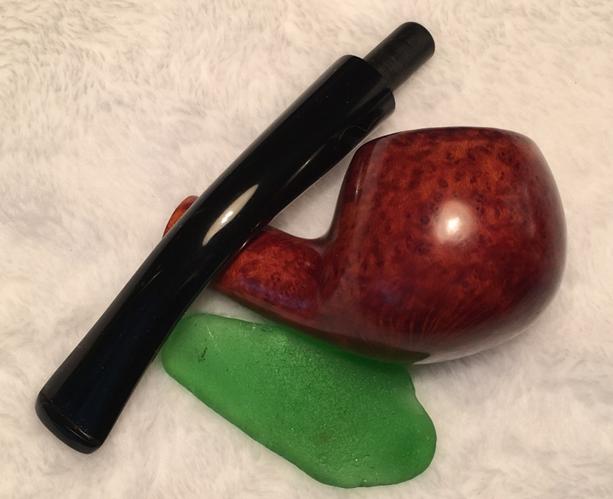
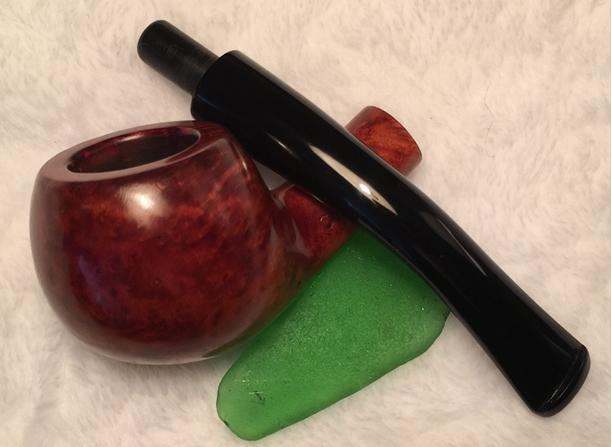
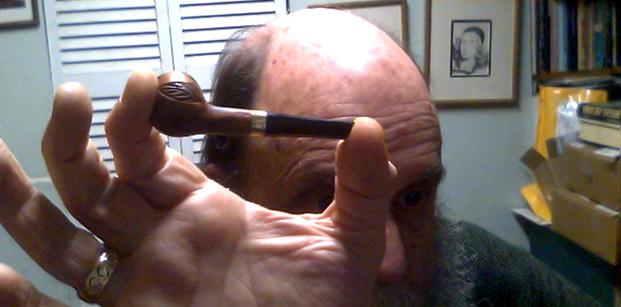
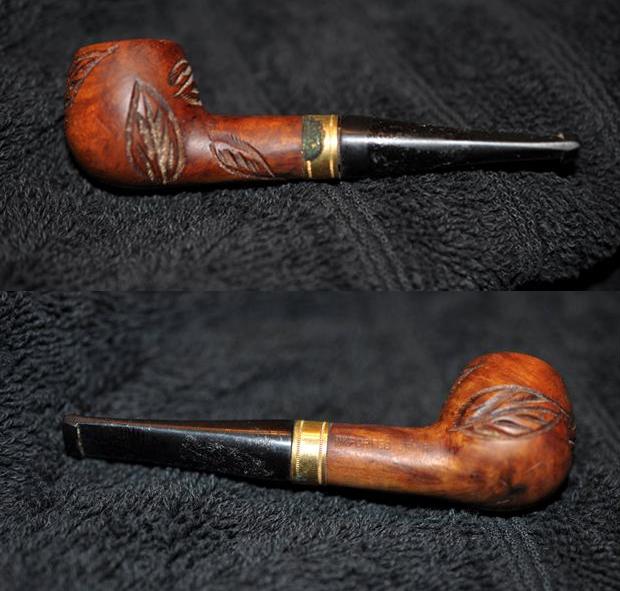
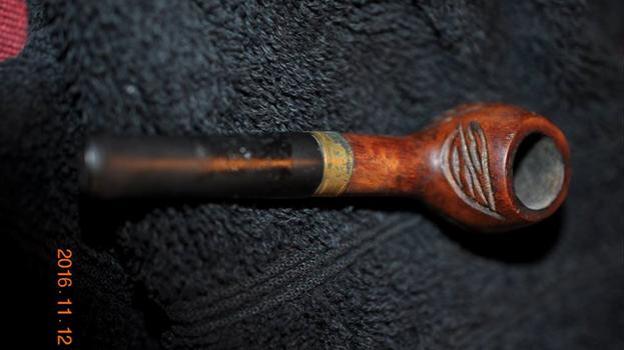
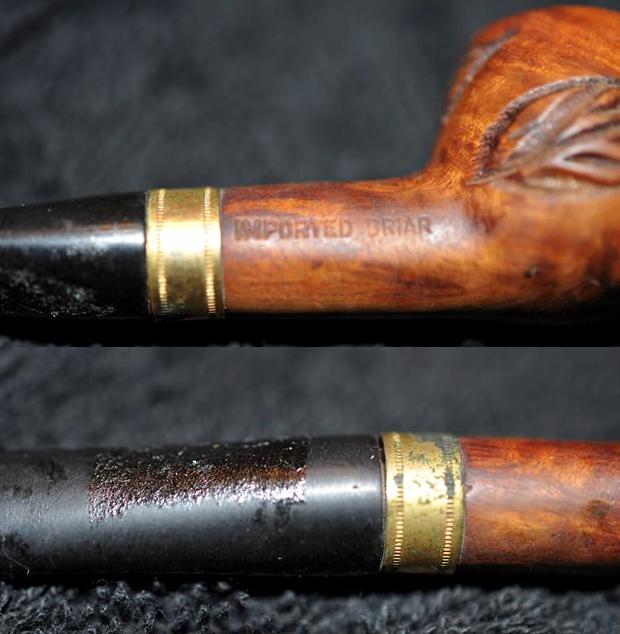
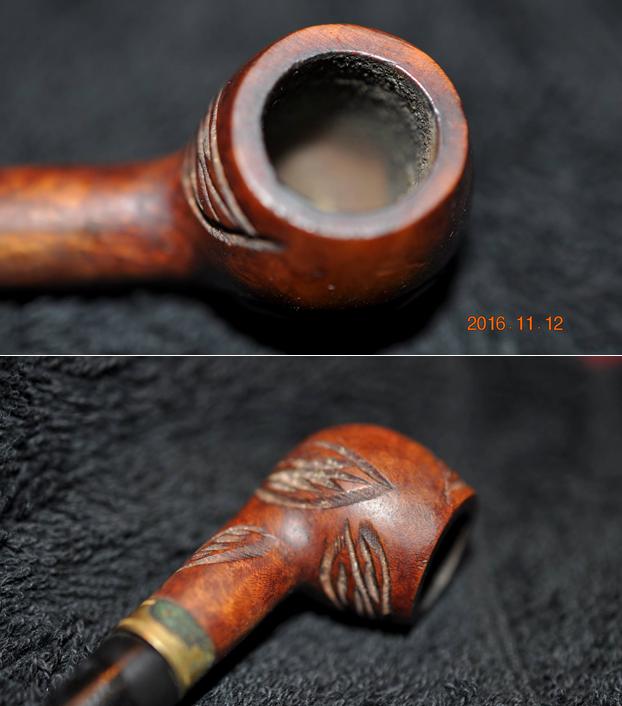
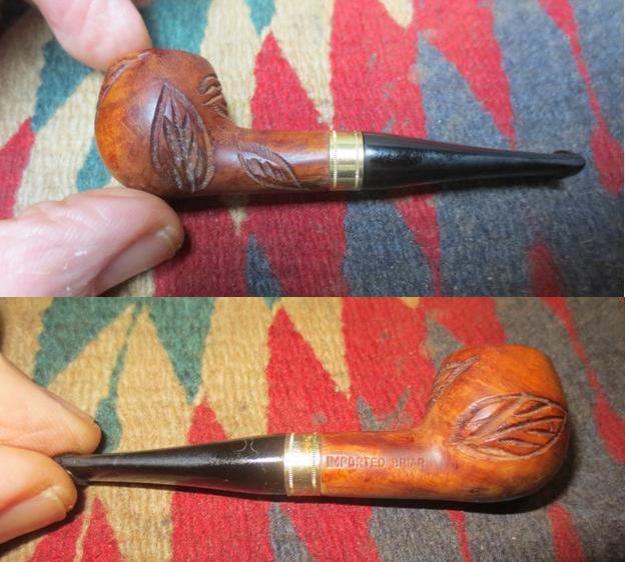
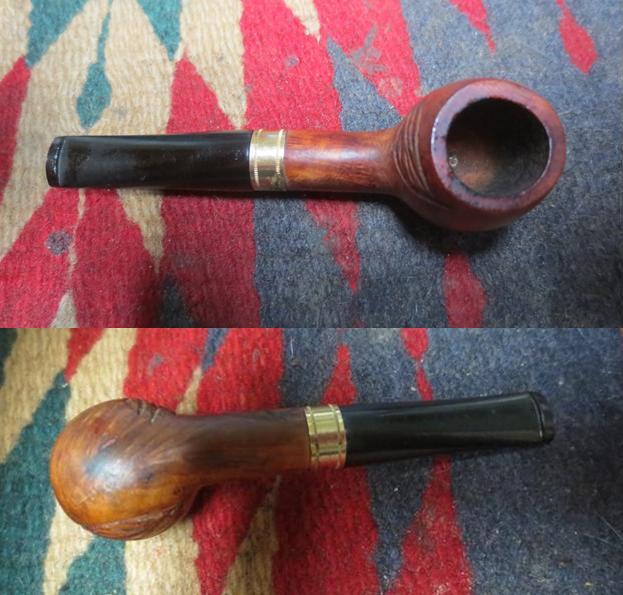
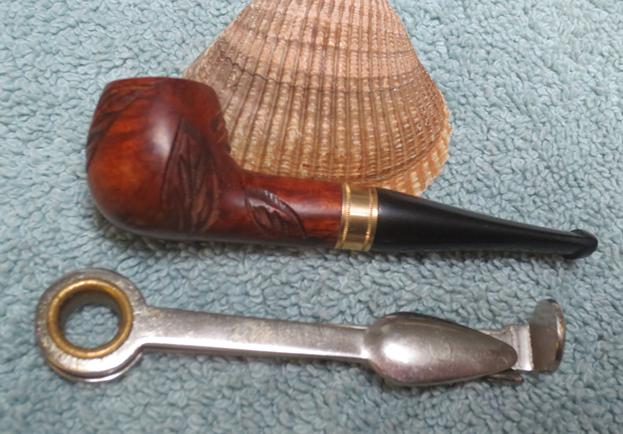
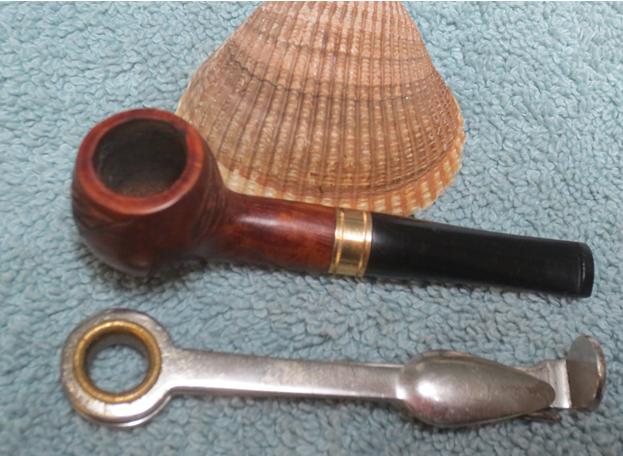
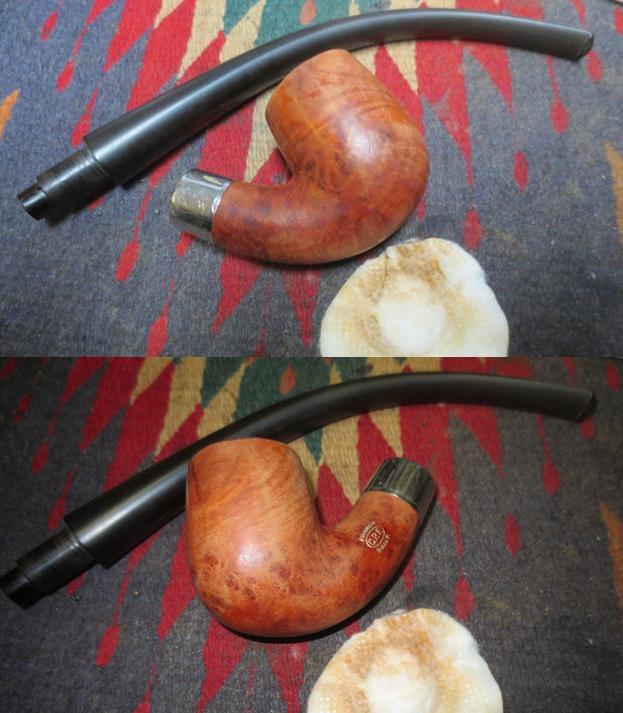
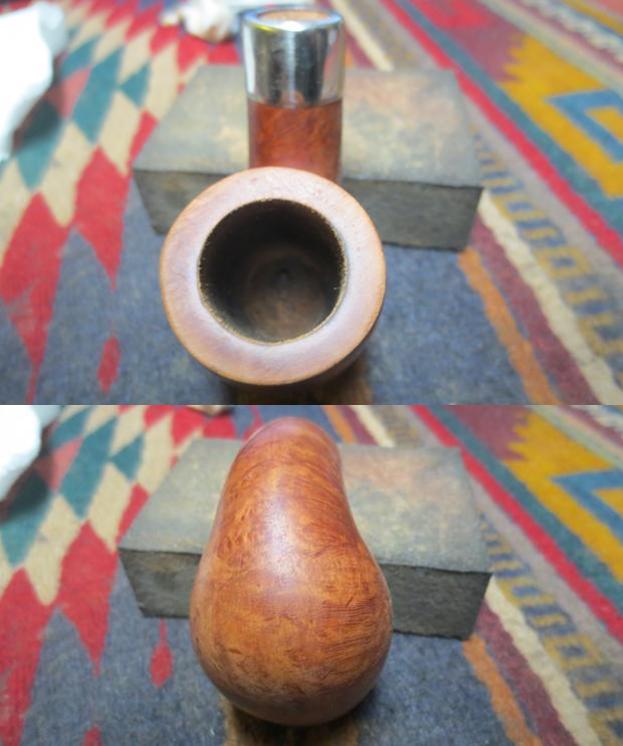
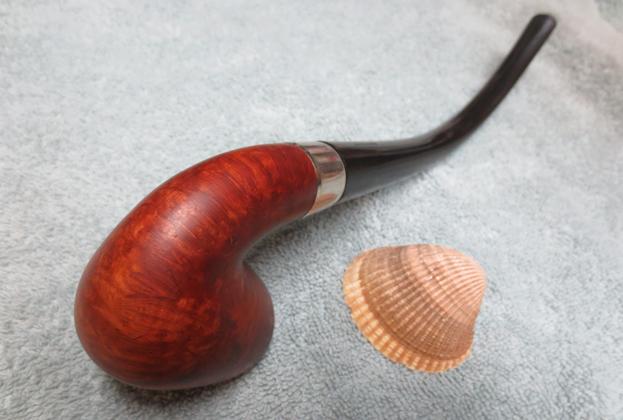
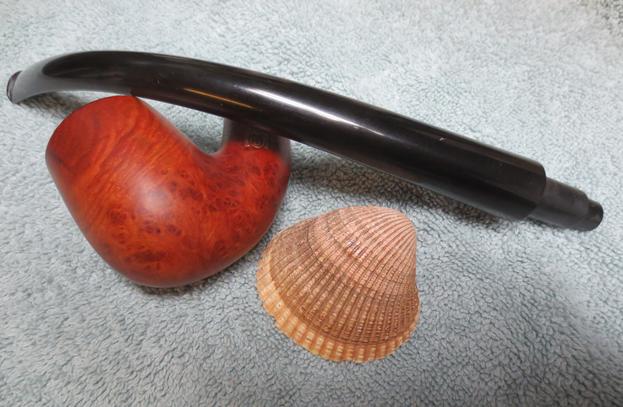
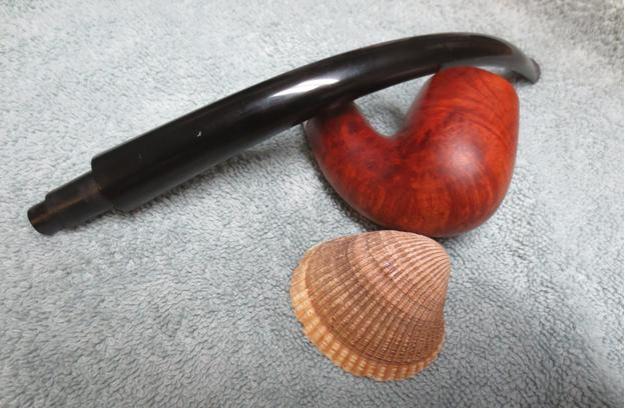
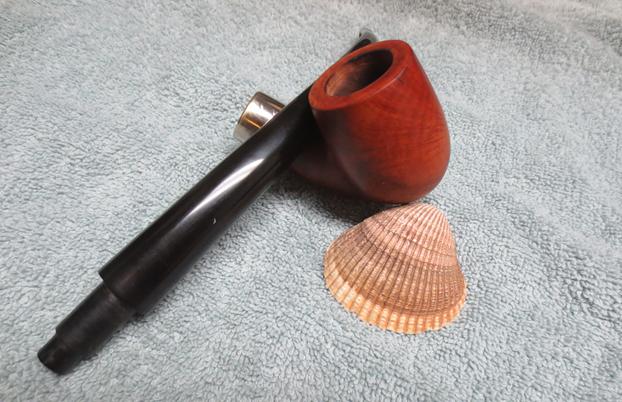
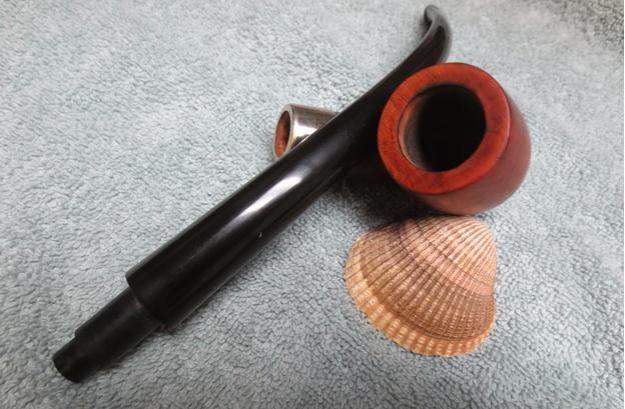
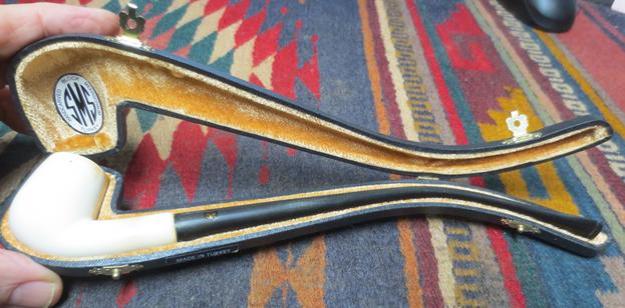
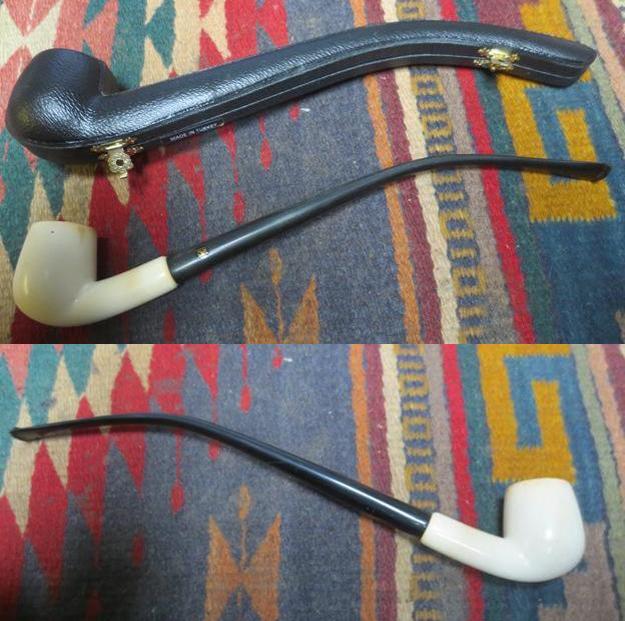
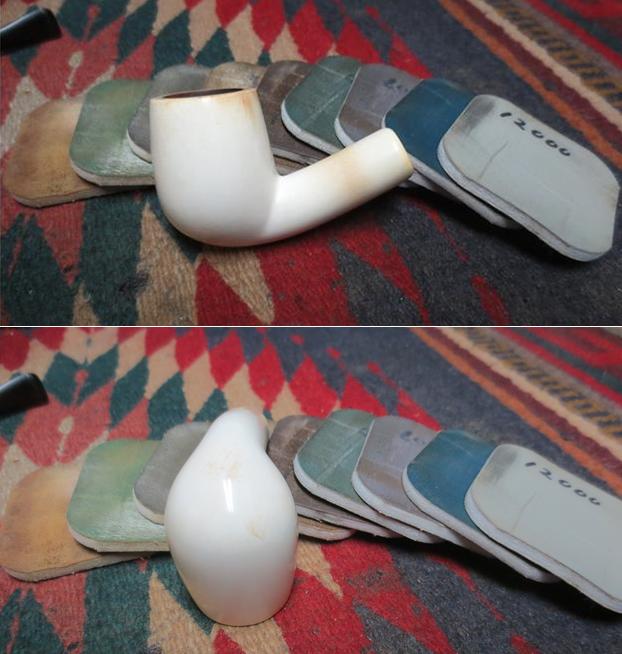
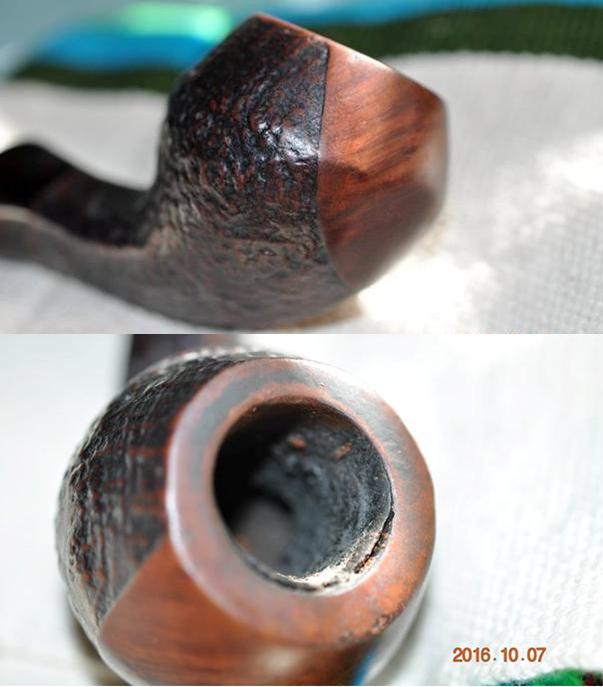
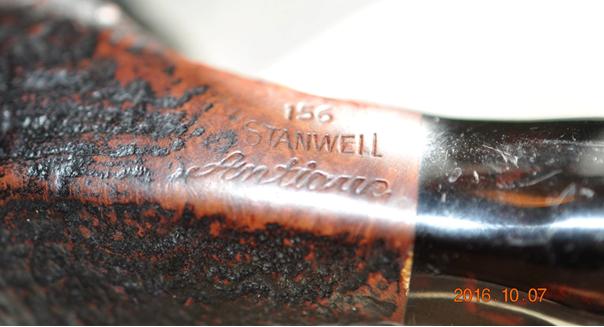
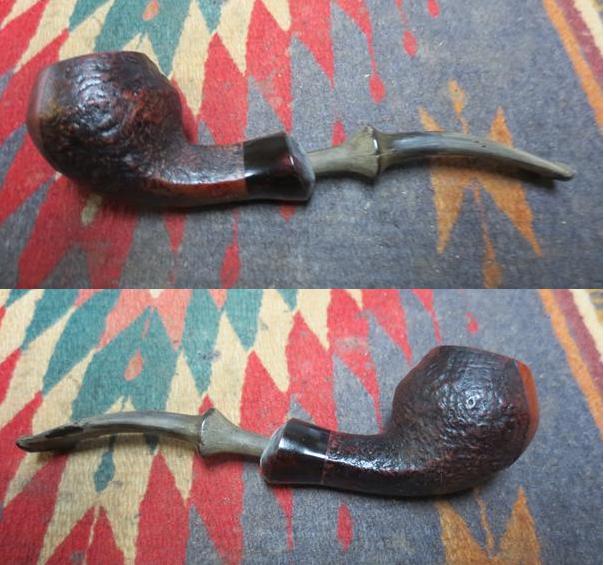
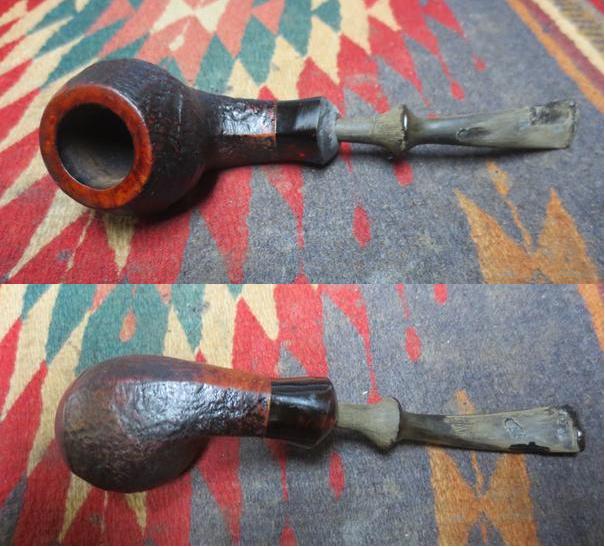
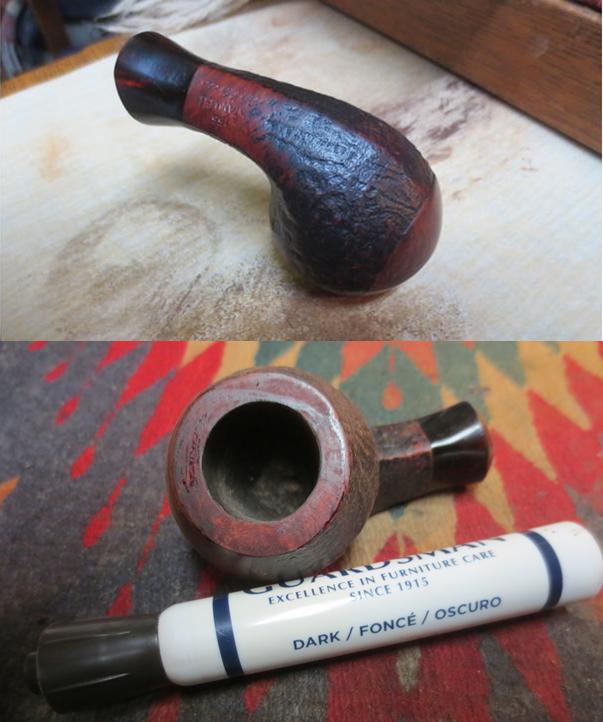
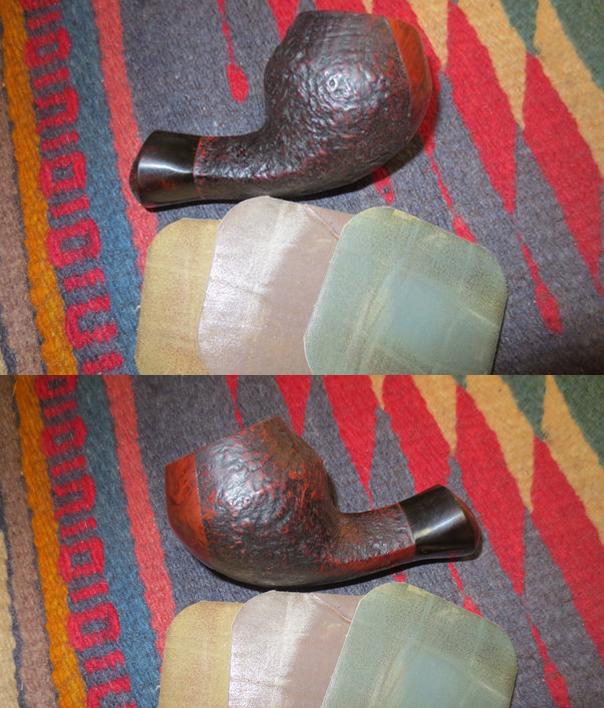
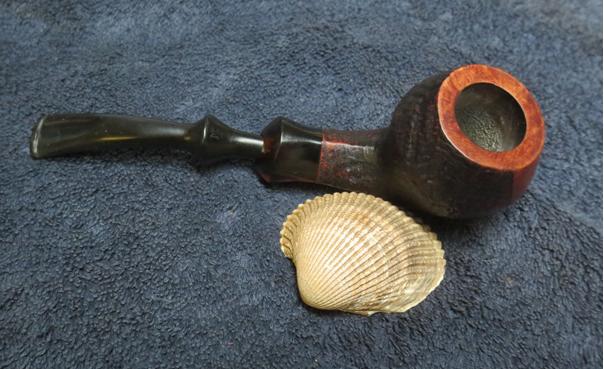
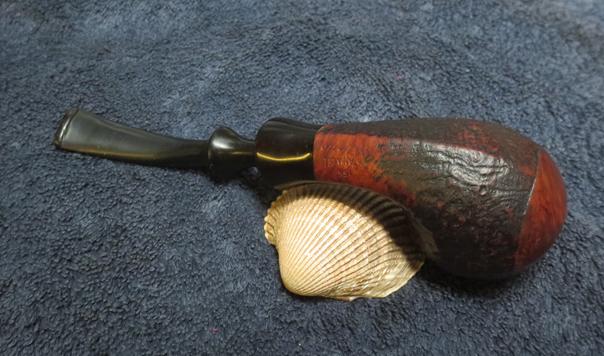
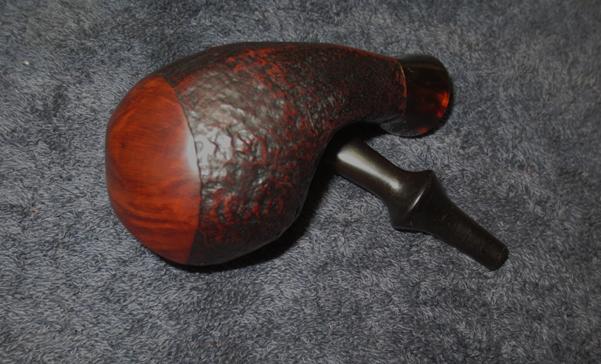
On the internet, I searched high and low through images of Prince Albert (1819-1861) and found no images among the 100s visually linking the prince with the shape now associated with him. The photo below, one could imagine, has his pipe waiting for him just to his right, reluctantly removing it from the eventual public view of the old ‘sit-still’ camera recording the moments. Yet, in my search on the internet, one can find 100s of pictures of happy, confident men smoking their pipes with adoring women looking on. How is this possible? – a man would be quick to ask. Well of course, their pipes are packed with Prince Albert’s tobacco! So, the secret is out – PA not only stands for Prince Albert but also, and more importantly, Pipe Appeal! Good to know as Christmas gift lists are being created for this holiday season! With Christmas music playing in the background the ambiance is perfect. The CAPITOL is stamped on the left side of the shank with no other markings. When I search Pipedia, I discover that Capitol is listed among a robust inventory of other Savinelli made sub-brands, seconds and order productions. At Pipes Website store, I found several Savinelli Capitol shapes for sale. At The Danish Pipe Shop I discovered several Savinelli Capitols listed and a bit pricy at that! So, it would seem, the Capitol line of Savinelli has some depth and quality to it. Unfortunately, I could find no Savinelli listing that brought the entire Capitol line inventory together. This Capitol Prince has an elegant, slim appearance, boasting a length of 5½ inches, a petite bowl width of 1½ inches and a fire chamber diameter of ¾ of an inch. The rim has some clunk dents along the edge and the backside shows darkening from oils and perhaps rear-end tobacco lighting over the edge. The fire chamber has a light cake build up but I will bring it to the briar for a clean, fresh start. I detect a larger fill on the heel of the bowl near the left junction of the shank. The stem is in great shape with minor teeth chatter on the bit. I detect a dent in the vulcanite at the shank junction and note that there is day-light between the junction of shank and stem – the mating is not flush, but a good cleaning may take care of this. Interestingly, I also notice that the stummel is encased in what I call a ‘Candy Apple wrapper’ which I also saw in the Savinelli Tortuga restoration acquired at the same time as the Savinelli Capitol. I didn’t like the Candy Apple wrapper around the Tortuga then and this Capitol Prince’s natural briar will be liberated as was his big brother’s! The following pictures on my work table here in Sofia, Bulgaria, show these areas of need and a very handsome pipe.
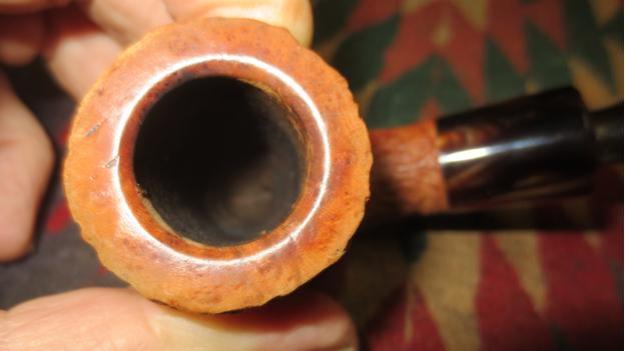
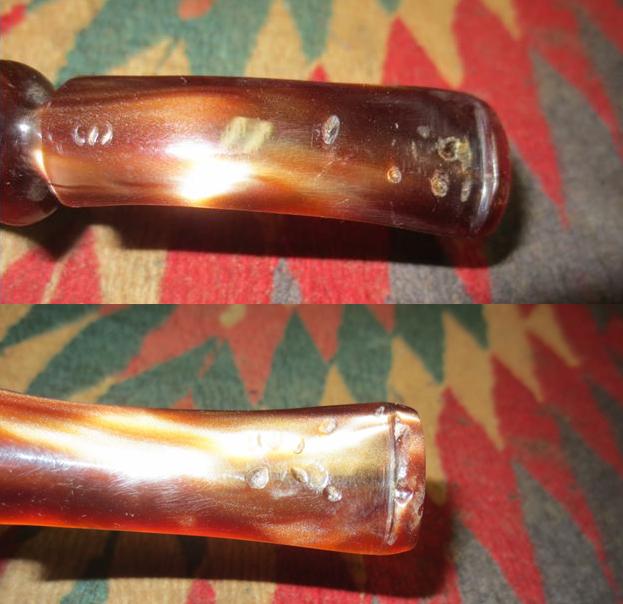
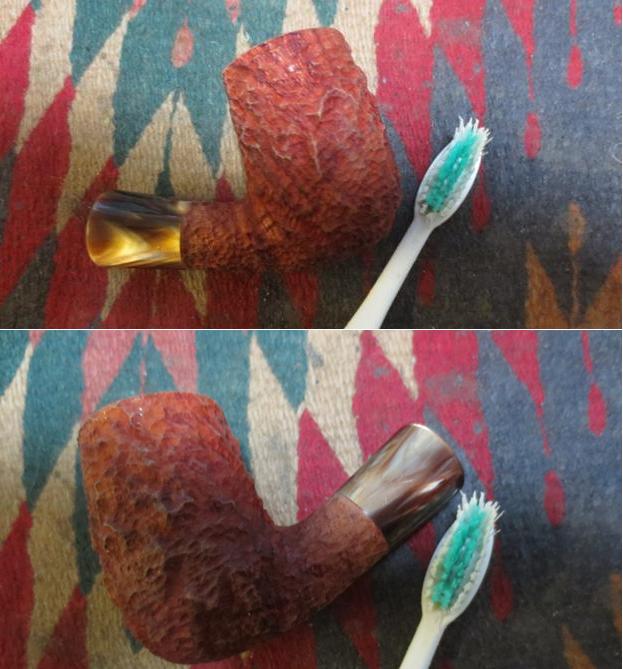
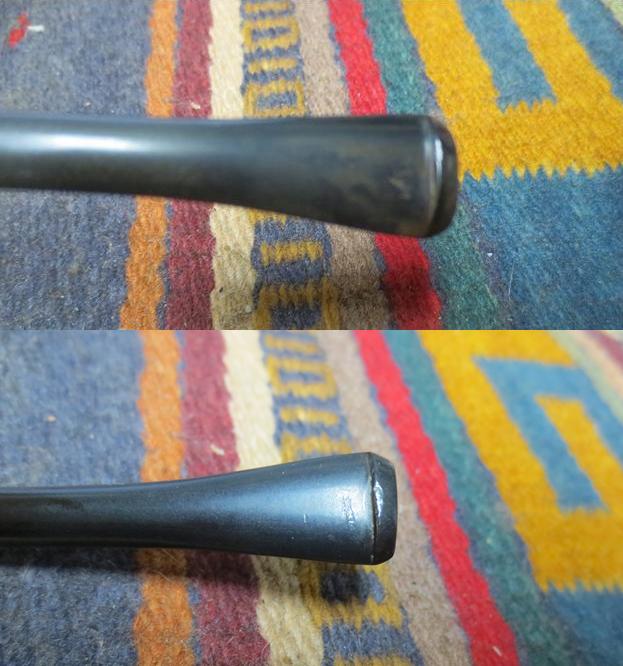
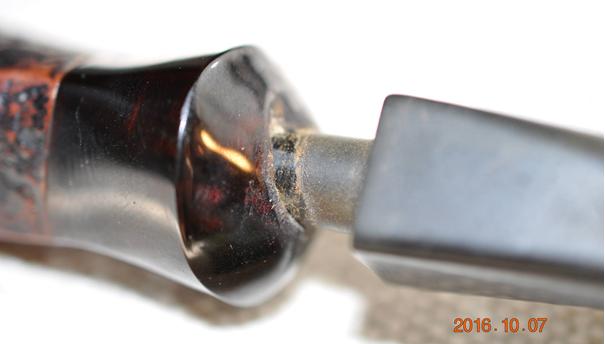
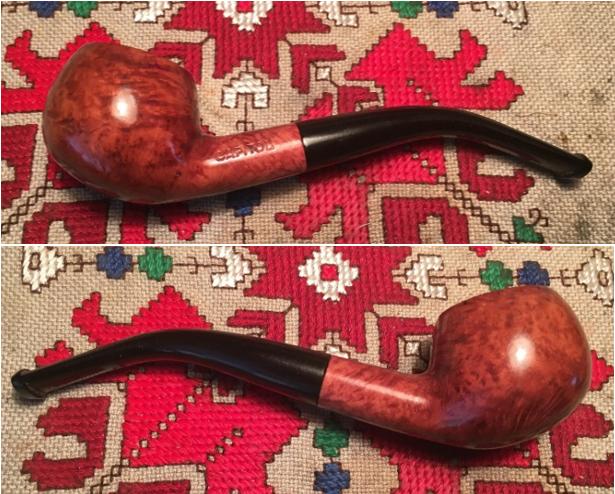
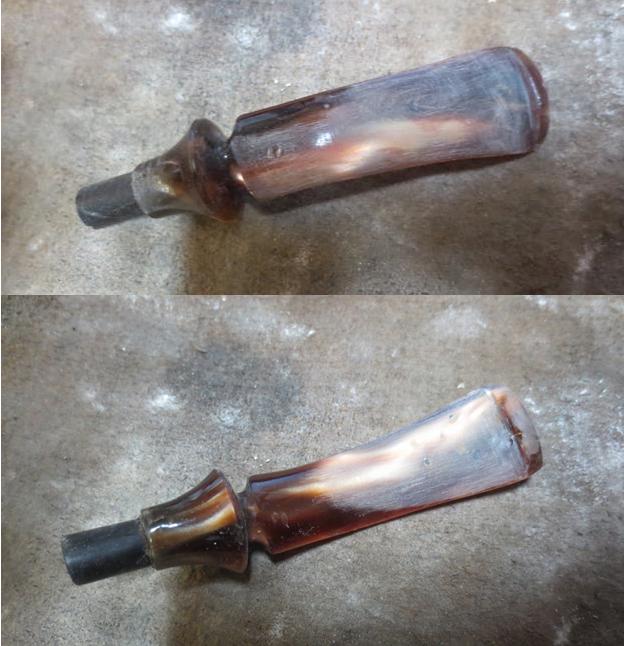
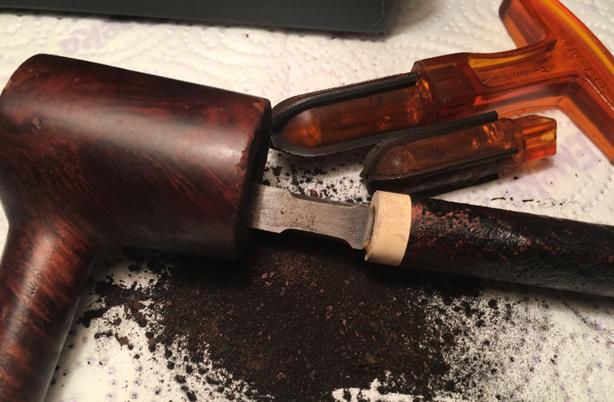
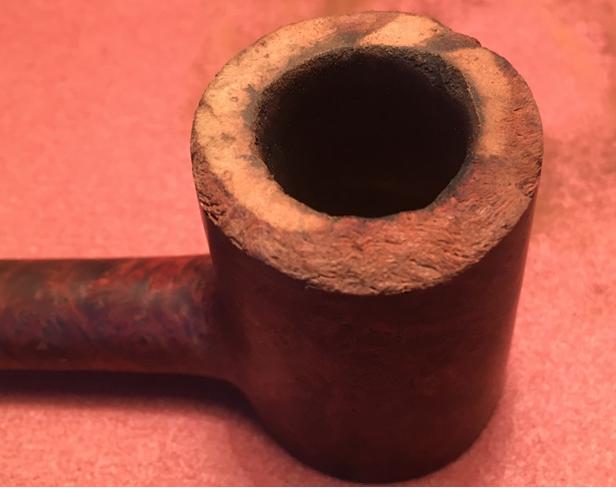
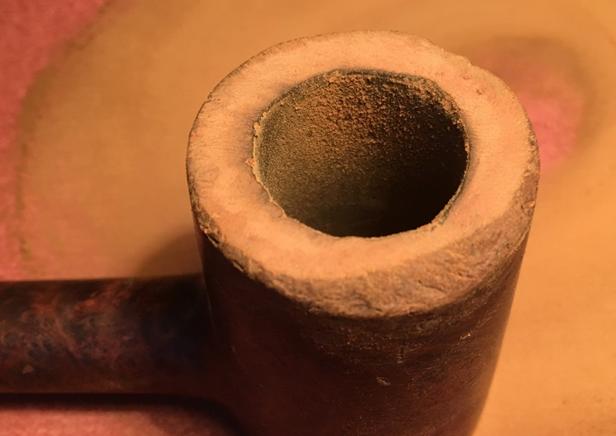
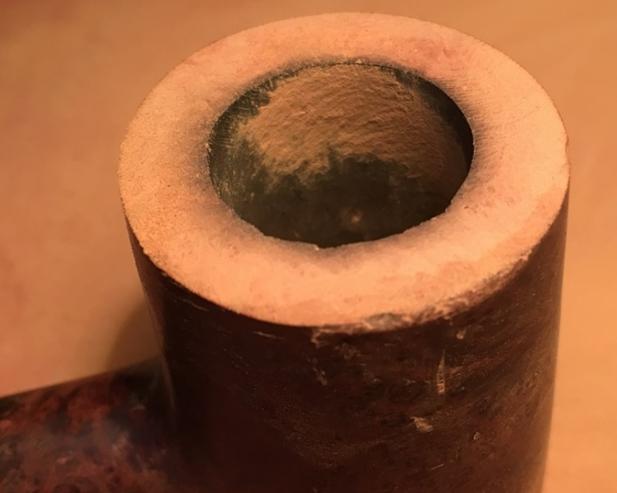
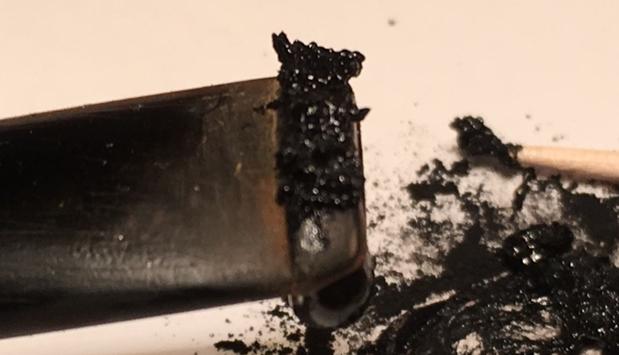
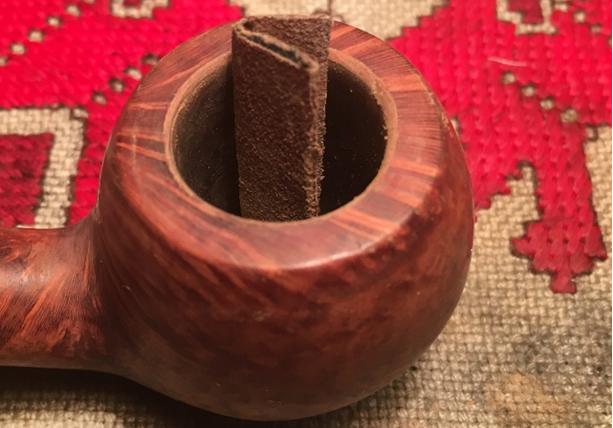
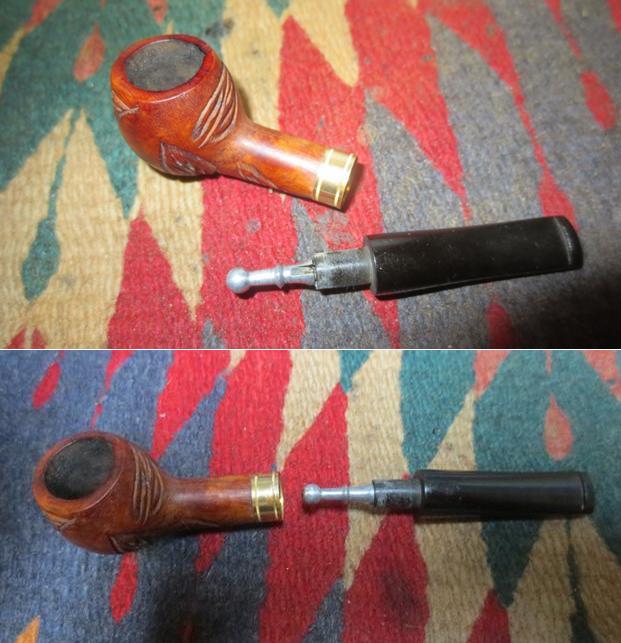
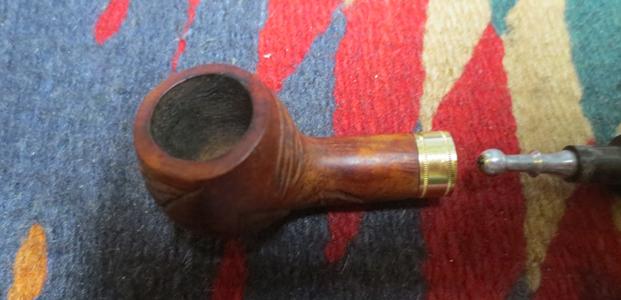
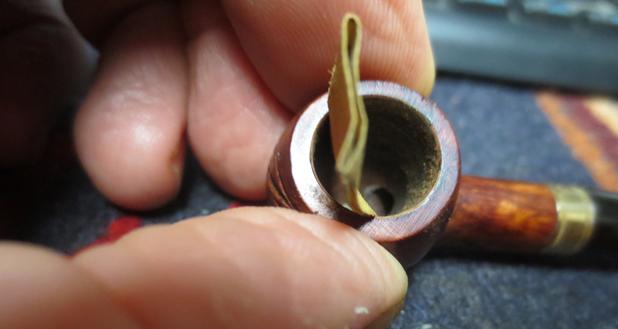
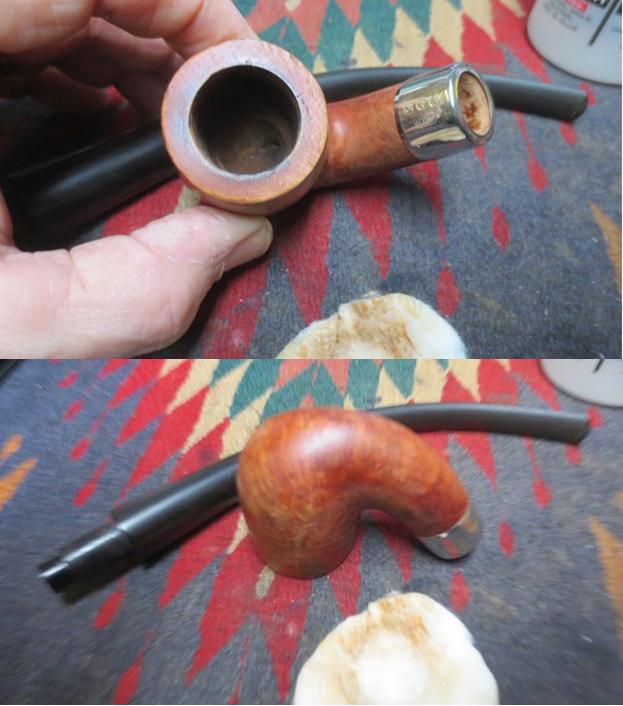
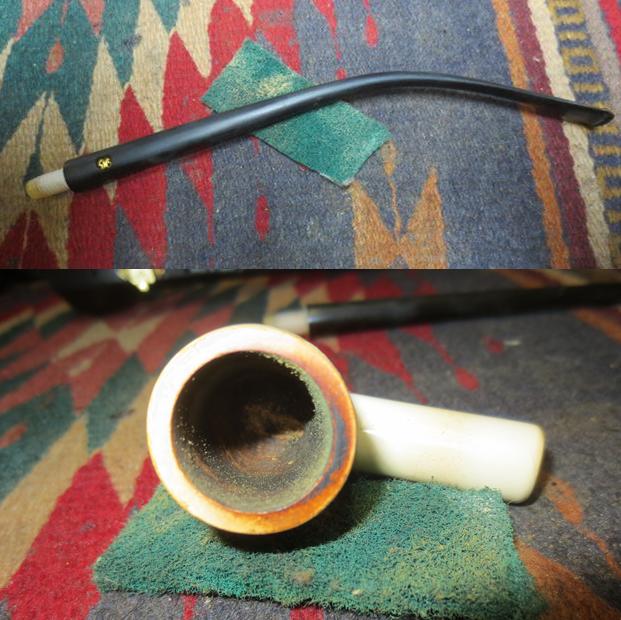
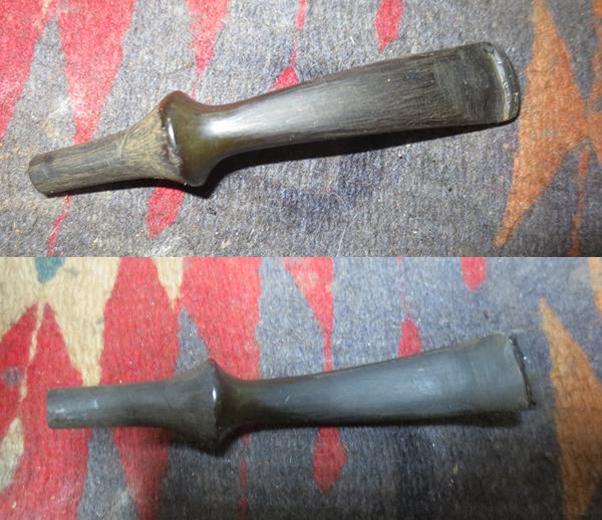
 With the stem showing no oxidation, I skip the Oxiclean bath which may be a first for me! The twisty stinger extending from the tenon is extracted unceremoniously and added to the Lonely Stingers Bottle and is officially retired from active service. I give my initial focus to the stummel clean-up starting with reaming the bowl. I use the Pipnet reaming kit camped over a paper towel which enables me to quickly catch and dispose of the powdered carbon – this makes my wife happier as my work table shares our bedroom space in our 10th floor flat! Often, I go out onto the balcony to do this dirty work but winter has come in Bulgaria. I use the two smallest reaming blades and I do not use them aggressively – I do not want to dig into the briar. I follow the reaming blades with the Savinelli pipe knife to scrape and fine tune the cleaning of the cake residue. I remove what appears as dried dottle at the floor of the bowl. I finish by using 240 grit paper wrapped around a dowel rod and my index finger to clean and smooth the wall. Finally, I take a cotton pad with alcohol and wipe the bowl removing the carbon dust. The pictures show the progress.
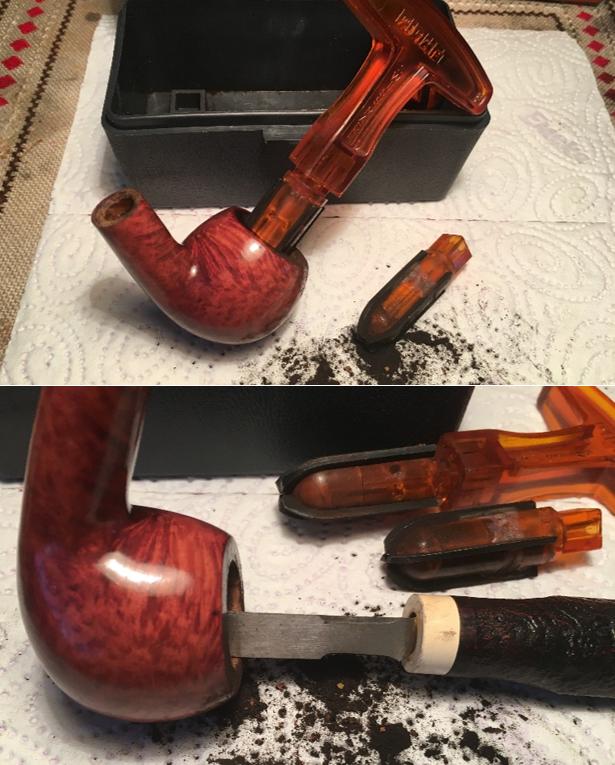
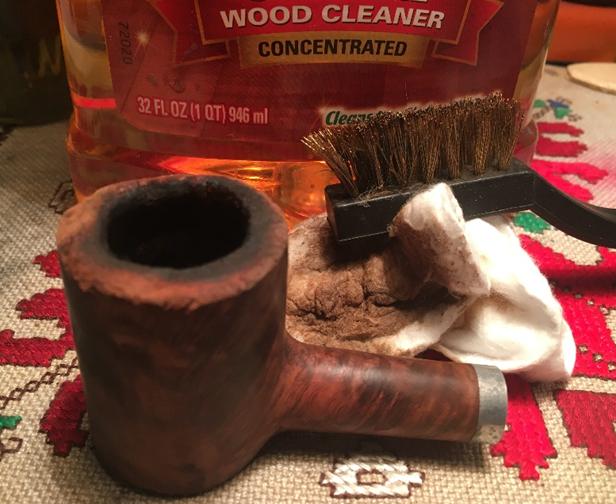
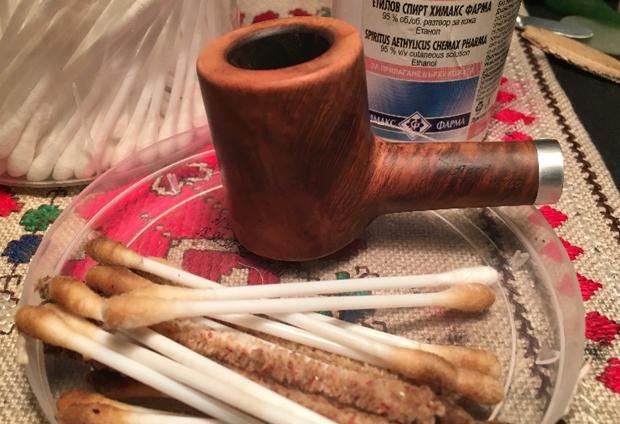
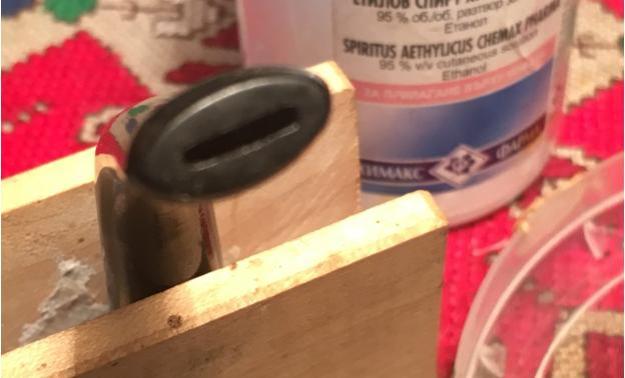
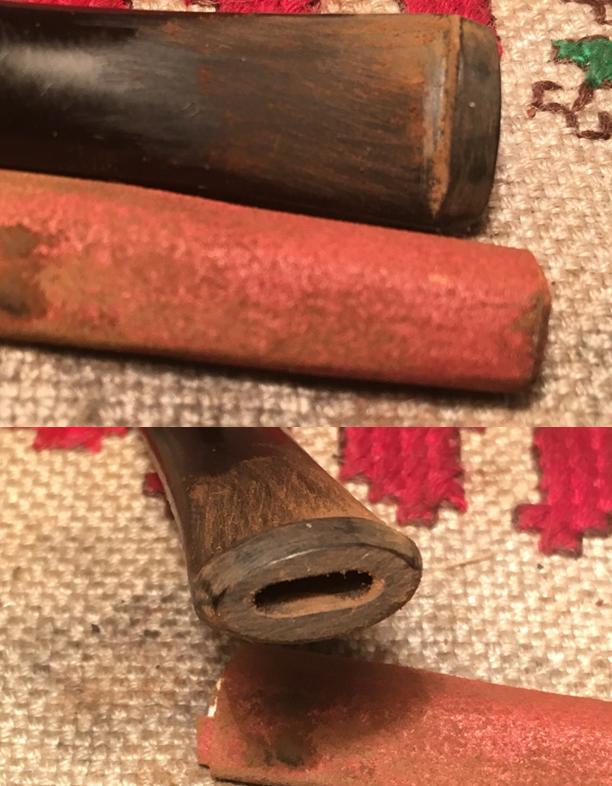
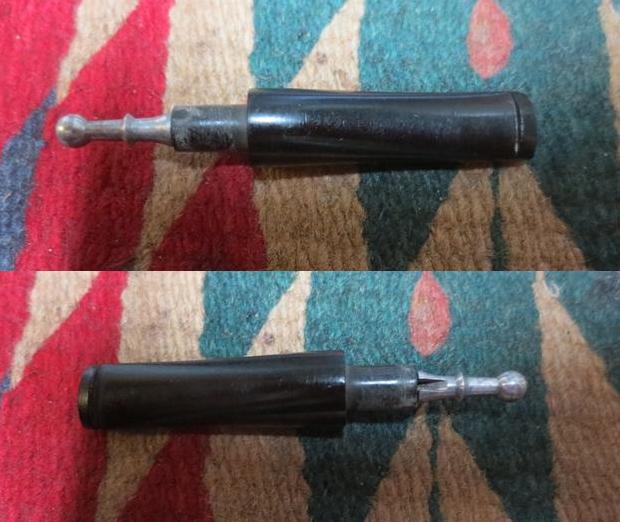
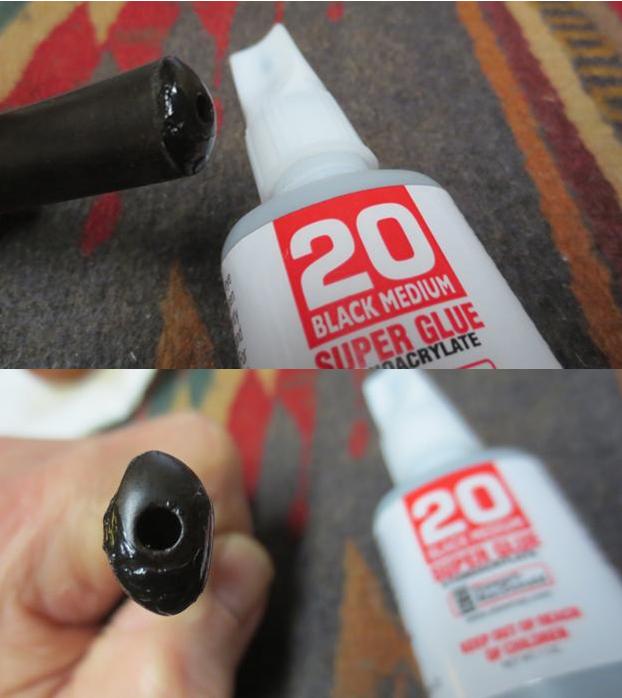
 With the isopropyl 95% on the work table, I clean the internals of the stummel. Using pipe cleaners (bristled and smooth) and Q-tips I go to work. Dental probes are also helpful to reach into the mortise and scrape the surface dislodging muck. It was dirtier than I expected, but finally Q-tips start re-emerging ever whiter from the mortise plunges. Done. Now, I take the stem and go to work on its airway with pipe cleaners. I discover very quickly that a reason for lack of cleaning on this stem is that I am not able to move a pipe cleaner through the airway. The button airhole is too tight and needs to be enlarged to accommodate pipe cleaners. No one likes fighting with pipe cleaners that refuse to pass through cramped quarters. I take a round, pointed needle file and begin gradually to enlarge the button airhole. My method is to insert the file point into the airhole but only as far as the expanding file diameter will allow to enable me to move the file back and forth easily, gradually removing the upper and lower button airhole surfaces. If I jam the needle file down the airhole too aggressively, not only will it get jammed, it will also damage the vulcanite contours around the airhole. After some time, the airhole gradually expands allowing the needle file to file more deeply opening the airway. After some time and testing, pipe cleaners are able successfully to navigate the passage and the stem airway cleans up very quickly. When I work on the teeth chatter later, I’ll smooth out this work with 240 grit paper. The pictures show the cleaning and button airhole enlargement processes.
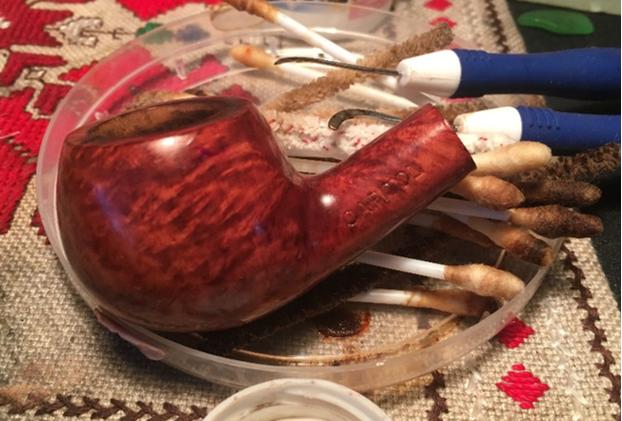


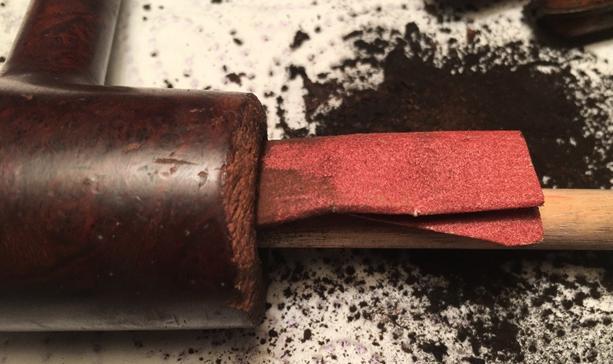
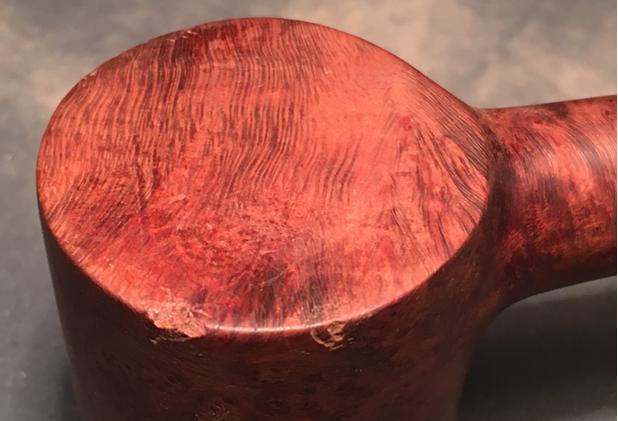
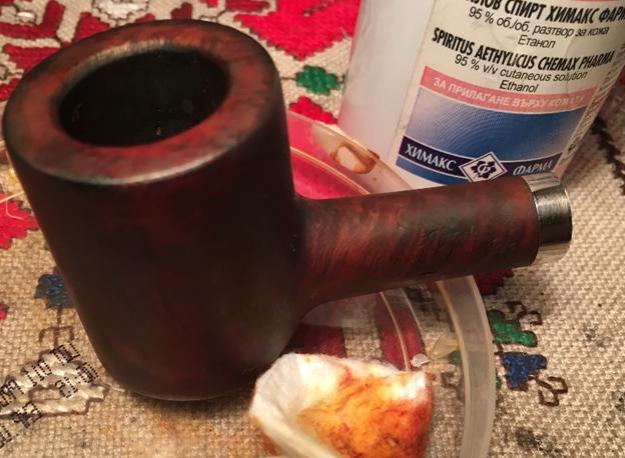
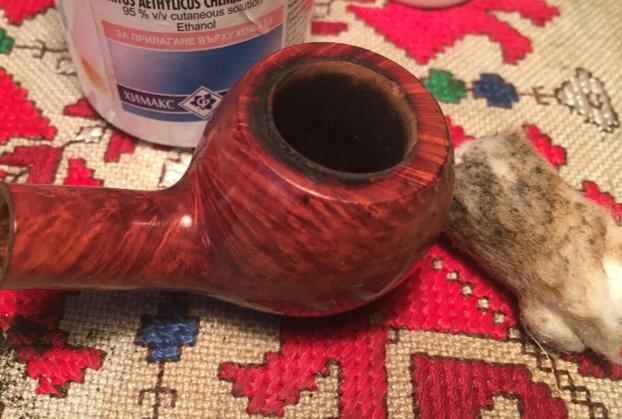
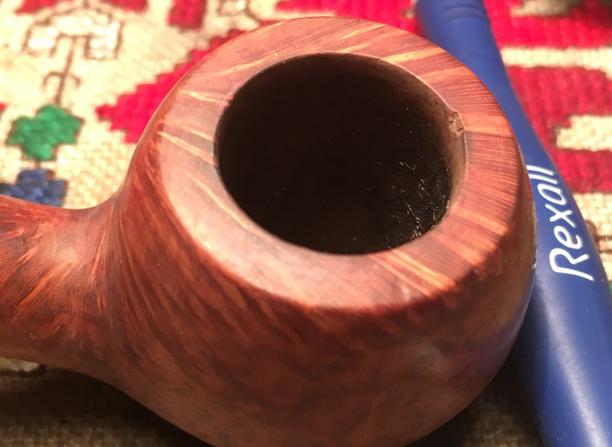
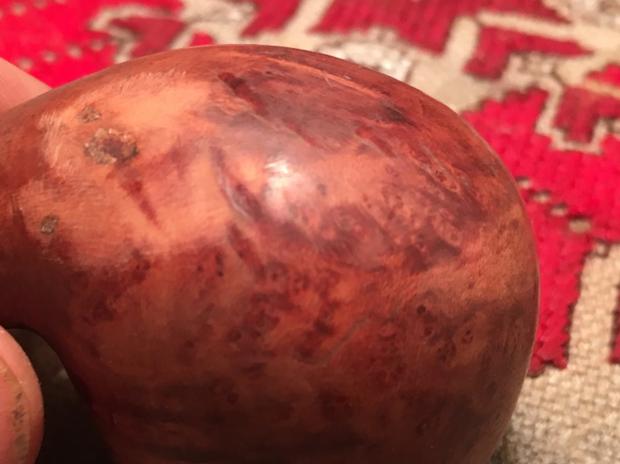
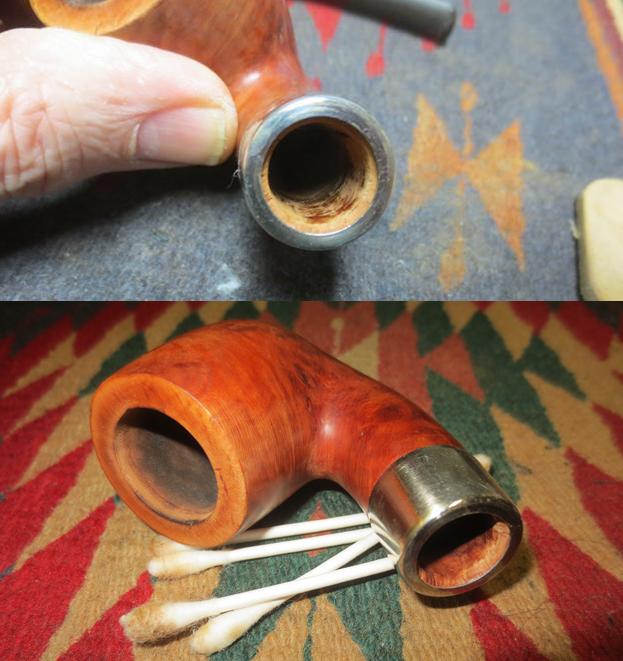
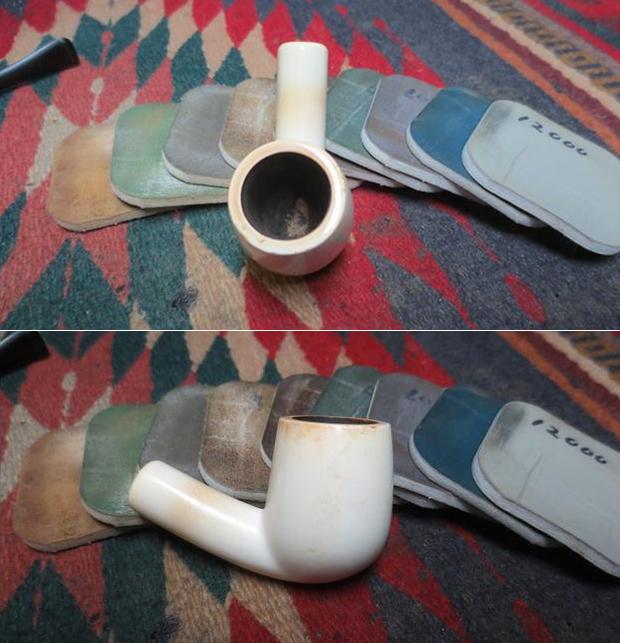
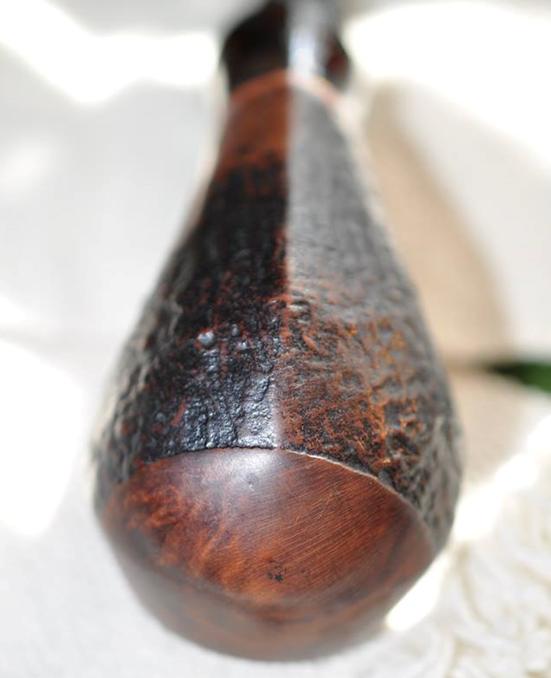
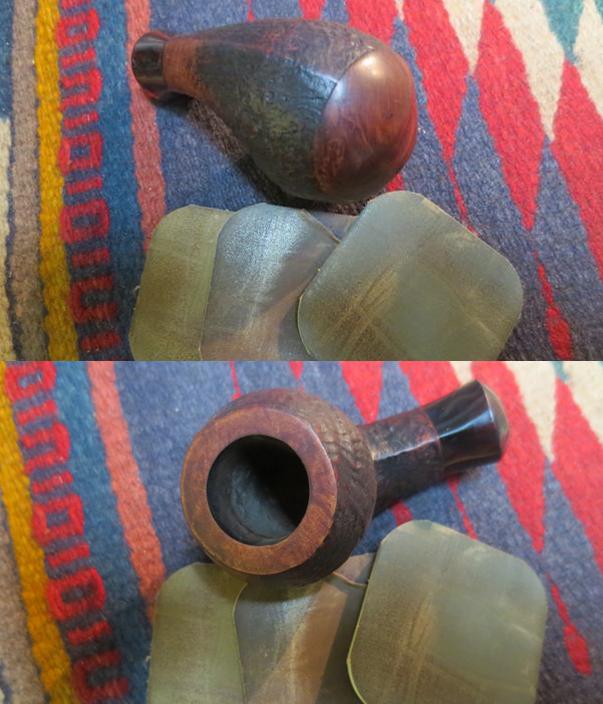
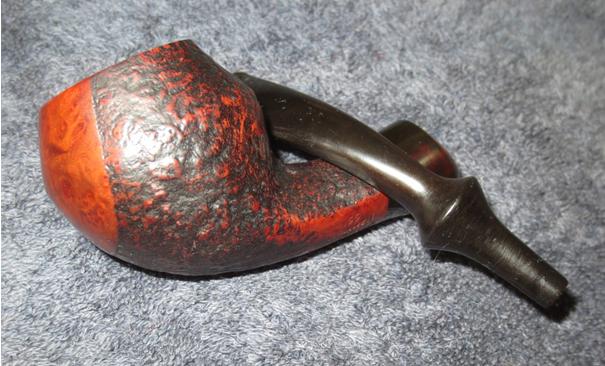
 I love working on clean pipes! With internals clean I know shift my attention to the stummel surface. I first attack the Candy Apple varnish-like surface. I start conservatively by first using cotton pads with undiluted Murphy’s Oil Soap to work on the rim and bowl surface. With the aid of a brass brush, the Murphy’s Soap does a good job cleaning the rim, but it is probable that the surface is an acrylic finish which is difficult to remove. Next, I use acetone with cotton pads to attack the Candy Apple surface. As I scrub, and I scrub a good while, it gives me time to study the briar grain on this stummel and on the heel, I find what looks like a spider pattern – beautiful. I’m ever amazed at God’s gift to us in the design and intricacy of this piece of briar – a ragged bush of a plant that would be called scrub if you saw it on the side of the road as you passed. As the pictures below reveal, even after acetone scrubbing the shine of the acrylic is still very visible. To see if I can soften it, I plop the stummel into an acetone bath. The pictures show the progress.
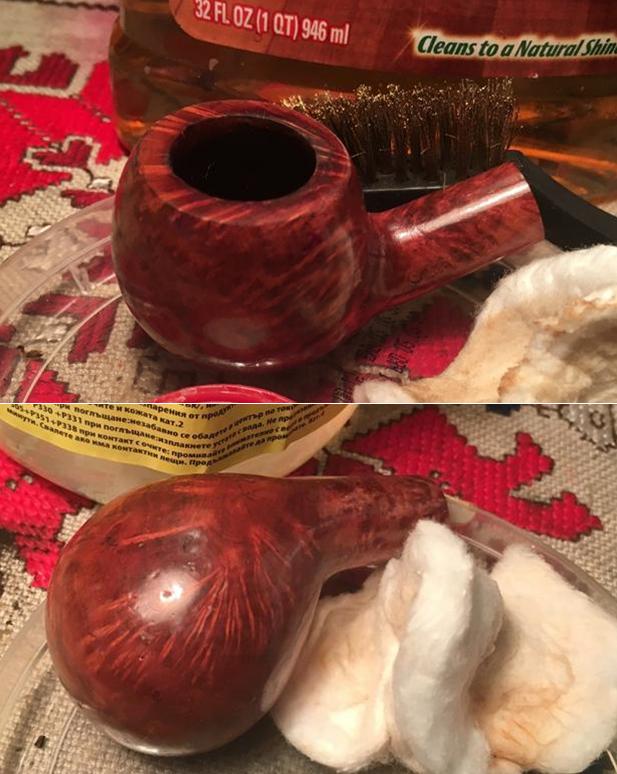
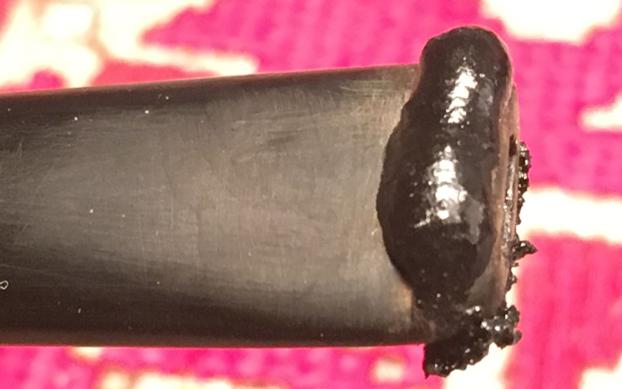
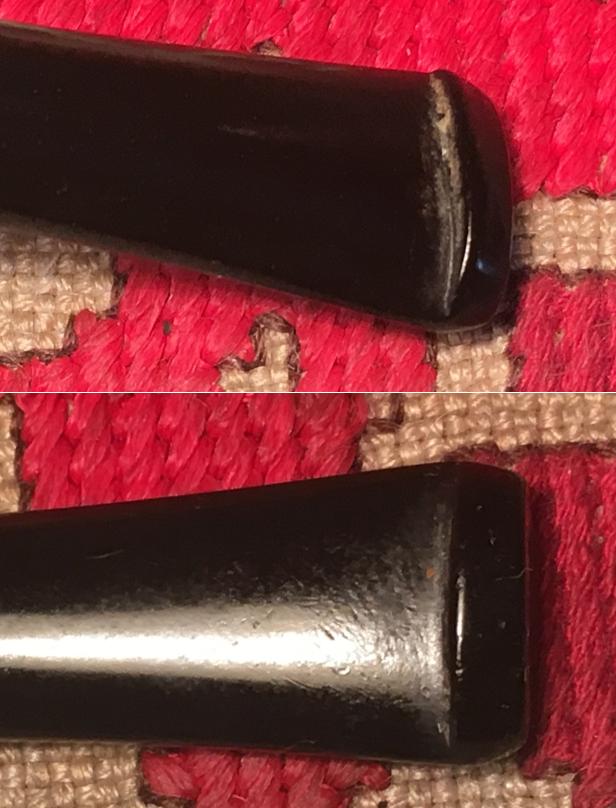
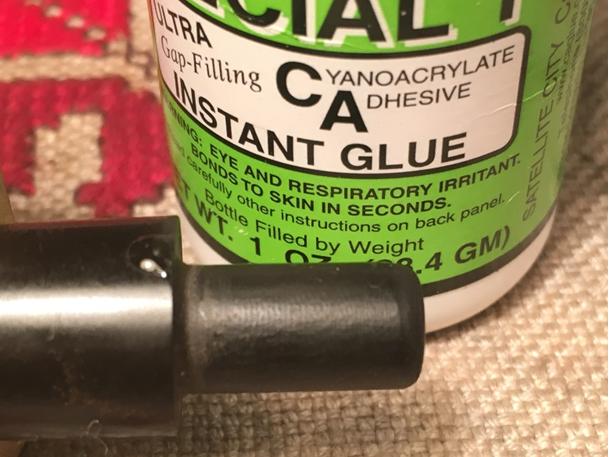
 With the stummel in the acetone bath, I return to the stem and take 240 grit sanding paper and work on the teeth chatter on the lower and upper bit. I also sand the button airhole to remove file markings and to smooth the surface. Then I apply a dot of Hot Stuff “T” CA glue to the small dent on the shank-side edge of the stem. I like to use the “T” for thicker, because it beads up on the divot and doesn’t run. I wait for the superglue to cure before proceeding with more work on the stem. The pictures show the progress.
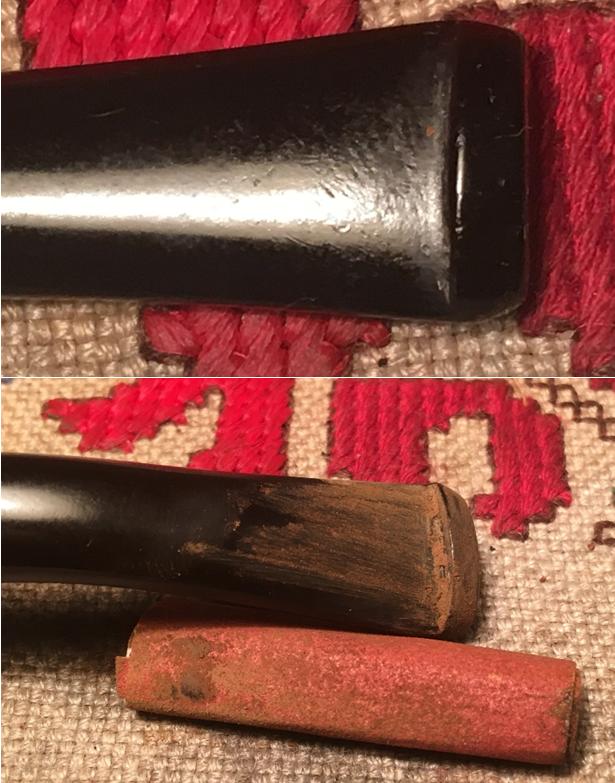
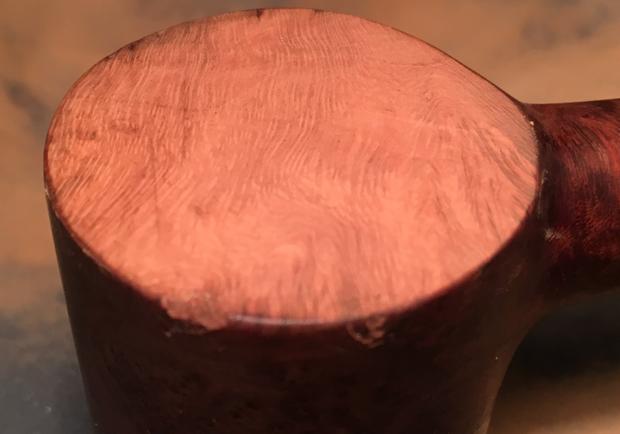
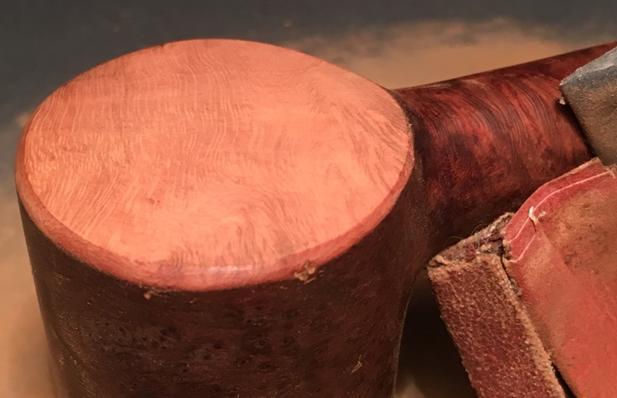
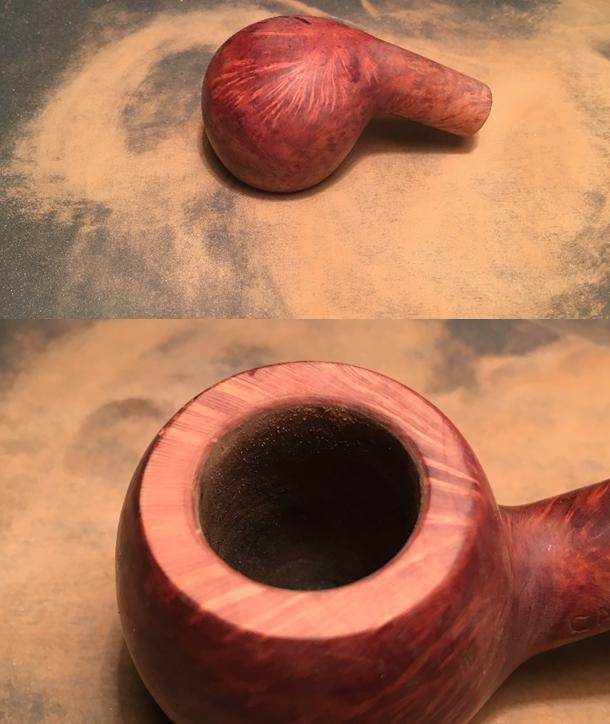
 Taking the stummel out of the acetone bath after about 6 hours, I place it on the desk and as the acetone evaporates I can see that the bath will need help. With the surface softened by the acetone bath, I take 0000 steel wool and dip a small portion in the acetone and rub the steel wool over the shiny surfaces. This finally does the job of bringing the natural briar to the surface. Now I can see the true condition of the surface and where I may need to sand and repair.
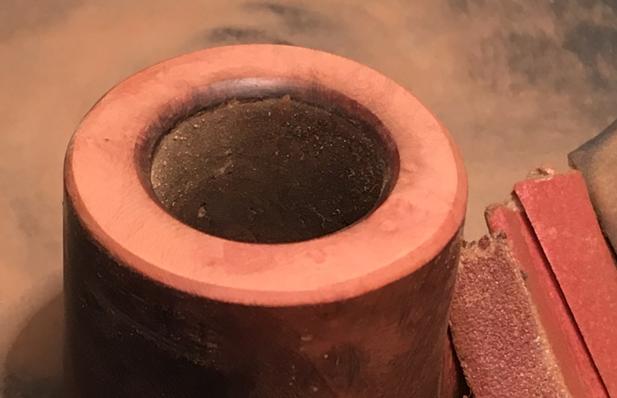
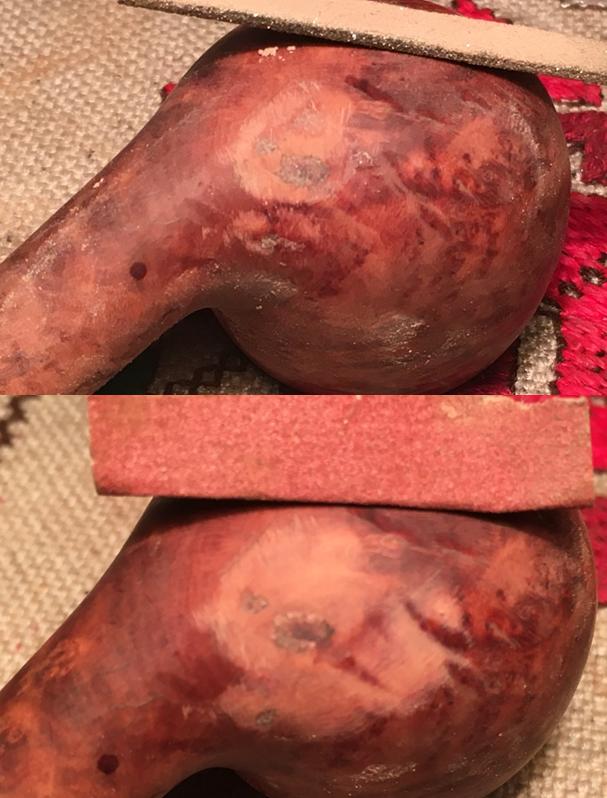
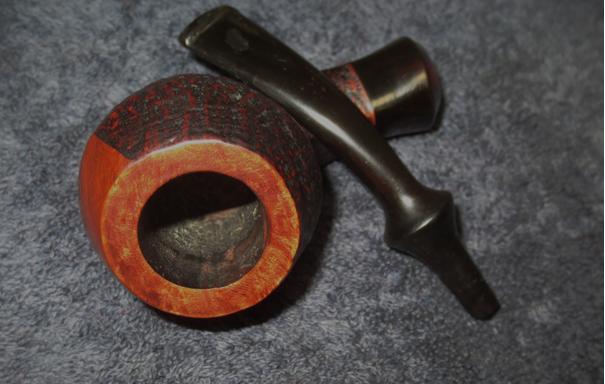
 I examine the stummel and invert it looking more closely at the large fill I identified earlier. I picked at it with a sharp dental probe and dig out the loose fill. I will need to mix a briar dust and superglue putty to refill this pitting as well as ‘top-off’ some smaller pits around the area. The heel of the stummel is banged up good and I need to sand those out after applying the briar dust putty patches and after they cure. I flip the stummel and study the rim. The briar in this Capitol Prince will be beautiful at the end of the restoration because it already is! I decide to first take a coarse 120 grit paper rolled up tightly to cut a bevel on the inner rim. I do this to remove the damaged areas along the edge but also the Prince will look even classier with a gentle bevel enhancing an already handsome bowl. I follow this initial cut of the bevel with 240 grit paper to smooth the surface further. I want to apply a very gentle topping to the rim with 600 grit paper. I take the chopping block out and place a sheet of 600 grit paper, with rim down, in a circular motion, gently I rotate the stummel over the surface. I check the rim as I proceed to make sure I only take enough surface off to give a clean fresh look and remove minor nicks. I follow the topping by using rolled up 600 grit paper to finish the bevel matching the smoothness of the rim. The pictures show the progress. I’m pleased with the look of the rim.
 Time to mix briarwood dust and superglue to make a putty to apply patches to the hole and pits on heel of the stummel. I take my briar dust can and with a pipe nail, scoop out some dust placing it in a little pile. Using regular clear super glue, I put a little puddle next to the briar dust. Using a toothpick, I start adding some briar dust to the glue until it gradually reaches a putty/toothpaste-like consistency and then I apply a small dollop over the fill area. I mash it down to make a tight patch and I leave some excess over the areas to sand down later.
 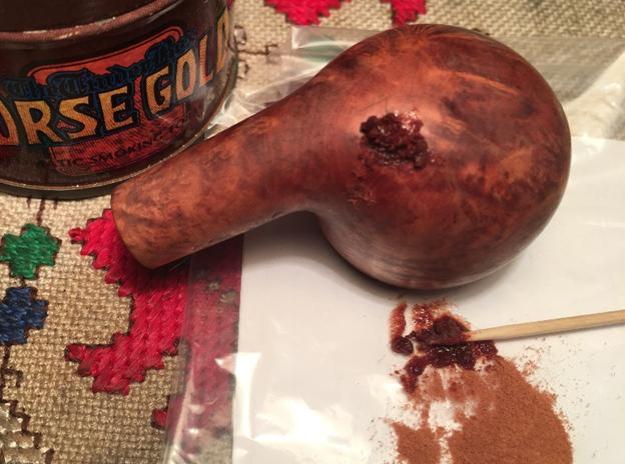 With the stummel now out of action for the night, I turn to the stem again taking the flat needle file and freshen the button – upper and lower. I then flip the stem and again taking the flat needle file I remove the excess superglue from the patch I did on the edge of the stem – shank-side. When the filing brings the excess superglue nearly to the surface level of the vulcanite, I use 240 grit sanding paper to blend the patch further with the vulcanite. I follow the 240 with 600 grit paper doing the same. I complete the patch repair by using 0000 steel wool to smooth the patch area as well as the entire stem in preparation of the micromesh polishing process. The pictures show the progress.
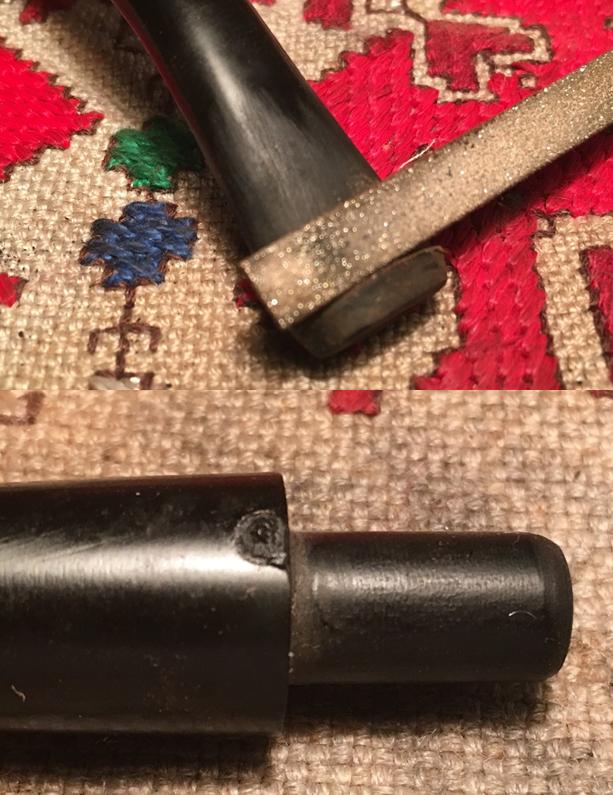
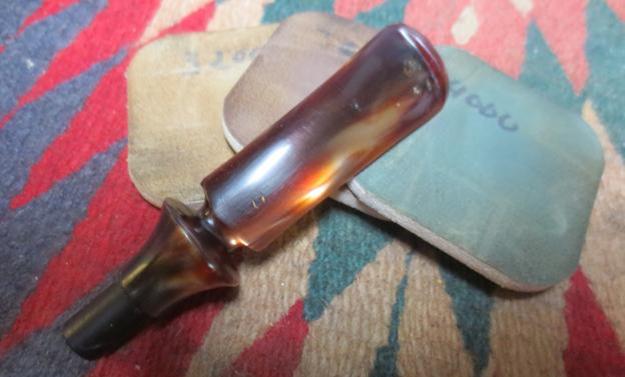
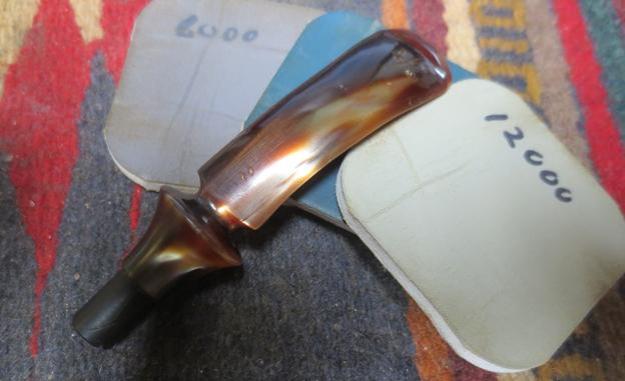
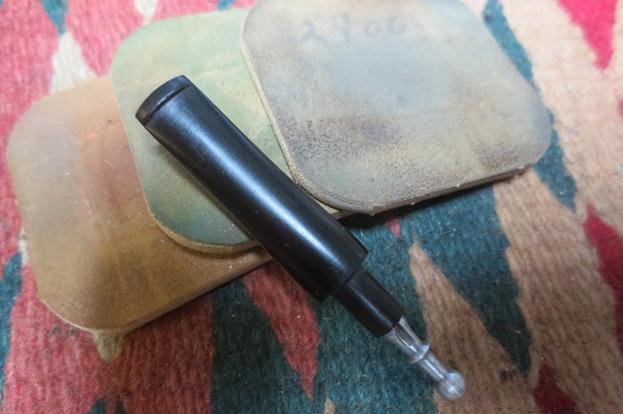
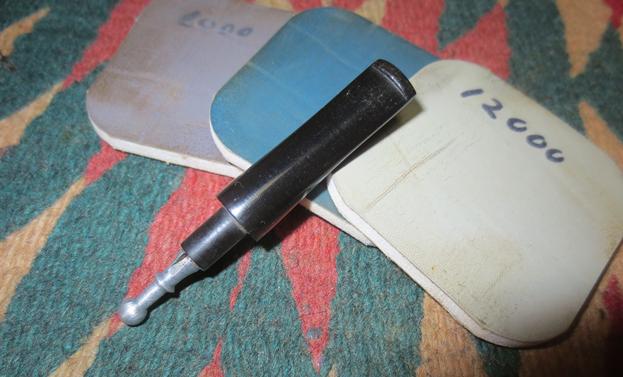
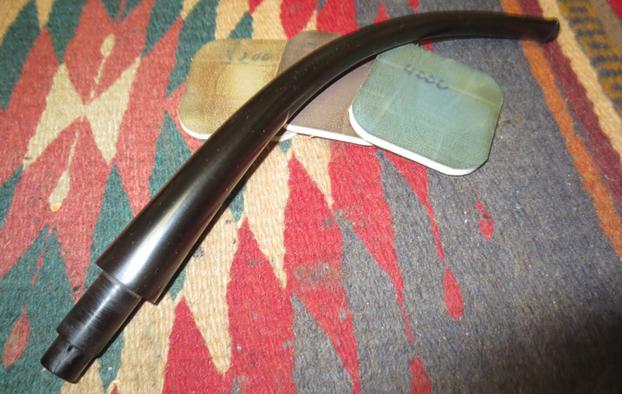
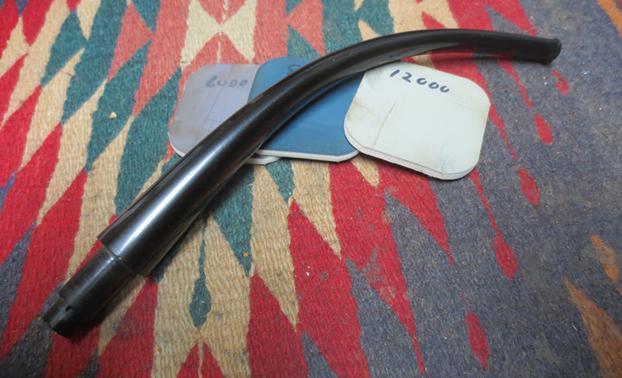
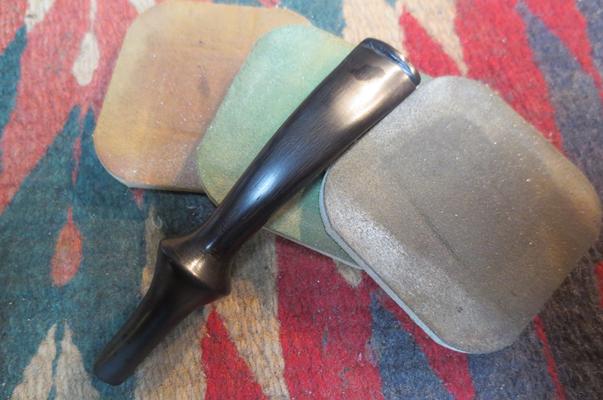
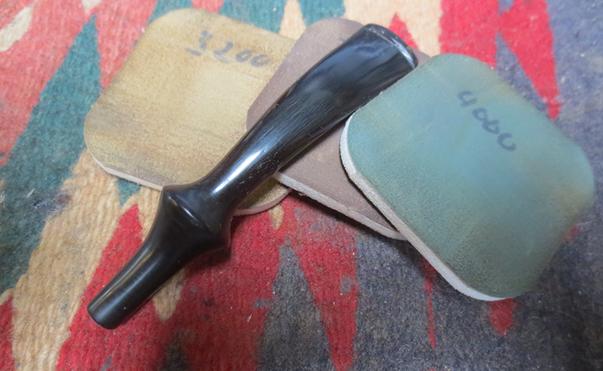
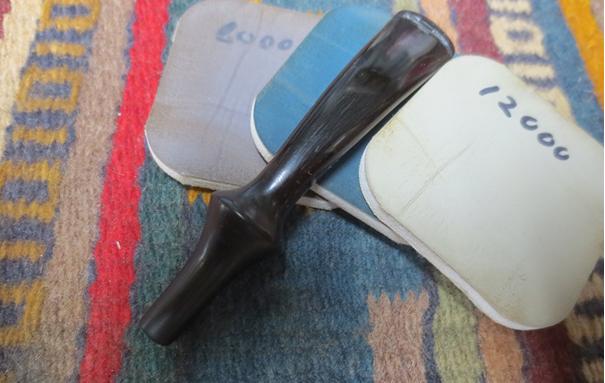
 Now for the micromesh phase, using pads 1500 to 2400 I wet sand the stem and follow with an application of Obsidian Oil to rejuvenate the vulcanite. Following this, I dry sand using pad 3200 to 4000, followed by pads 6000 to 12000. After each set of 3, I apply an additional coat of Obsidian Oil. The stem looks good. I put it aside to dry and call it a day. The pictures show the micromesh phase.
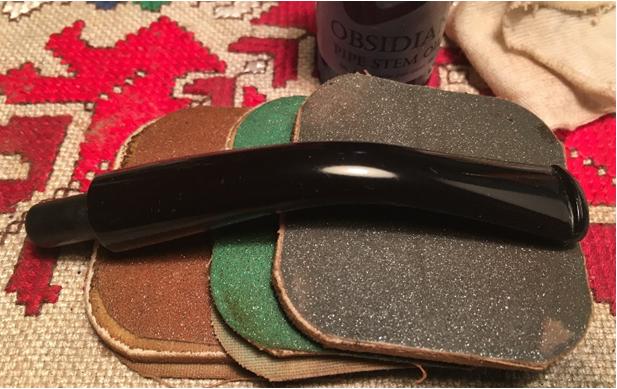
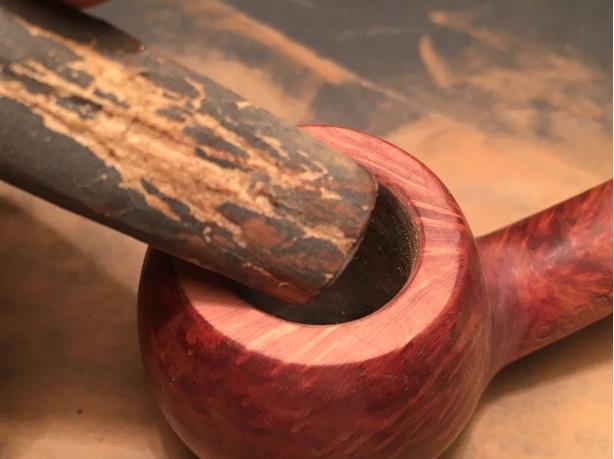
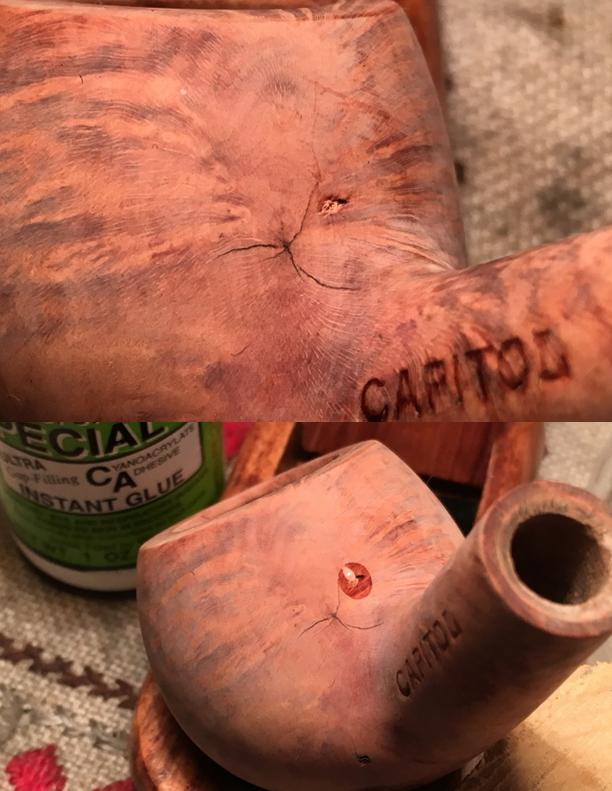
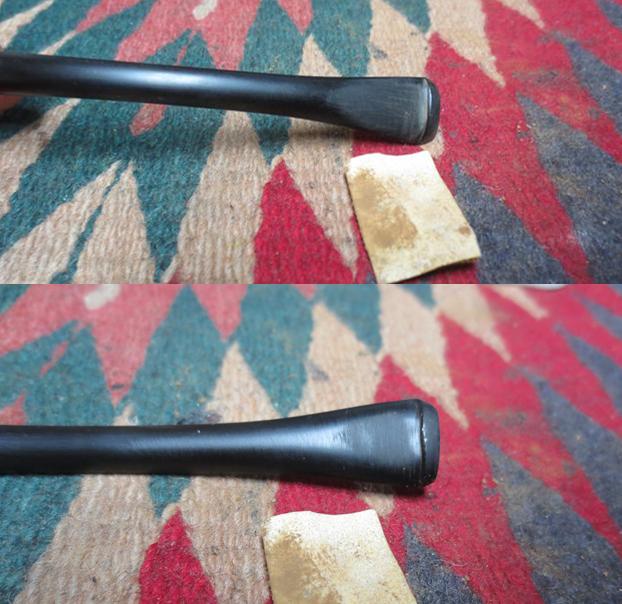
 Early the next morning before heading to work, I want to work on the briar dust patch applied the night before. The superglue dust putty has cured. I take a flat needle file and start filing on the excess mound of cured putty. I’m careful to file down on the patch footprint only and not wander. I take a picture illustrating the idea (#2 below). The idea is that I gradually file the putty excess and ‘sneak up’ on the briar below the patch. I take the filing down to the briar surface, within the patch footprint. At this stage, I apply much less pressure to the file, moving the flat file more in a circular motion lightly over the patch footprint. I want to blend the patched area now with the uncovered briar surface. The aim is to remove the putty excess not take away briar. Picture #3 shows the completion of the flat needle file’s service. I then continue the blending with 240 grit paper expanding the area a bit outside the footprint area (picture #4). I’m not too concerned about this because I know I have sanding to do to eradicate the numerous dents next to the patch.
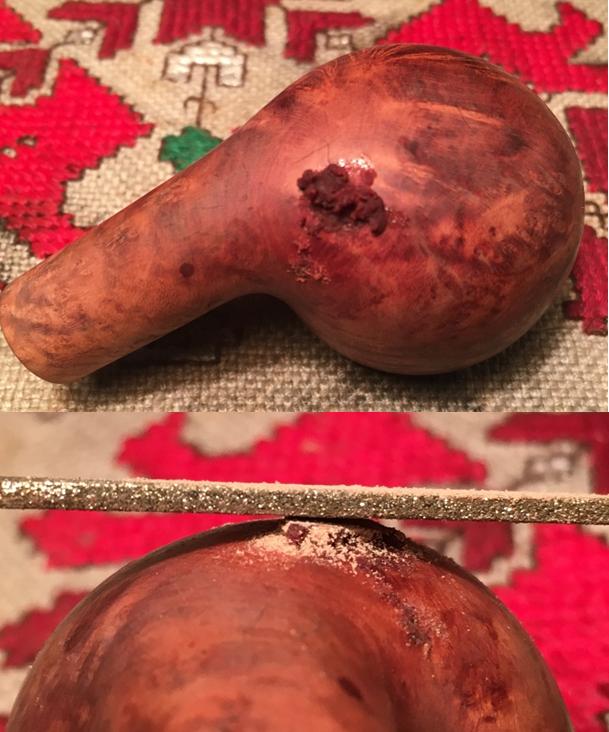
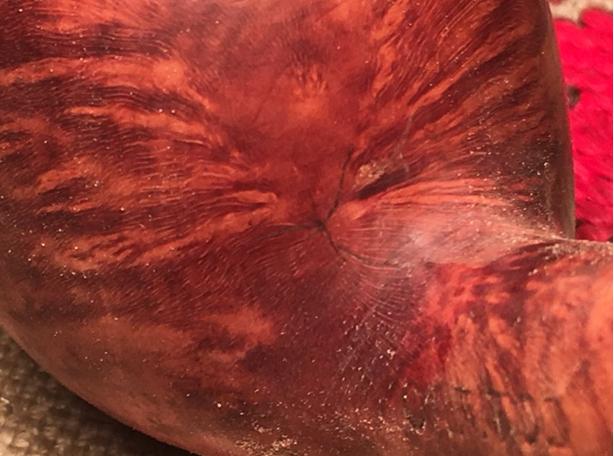
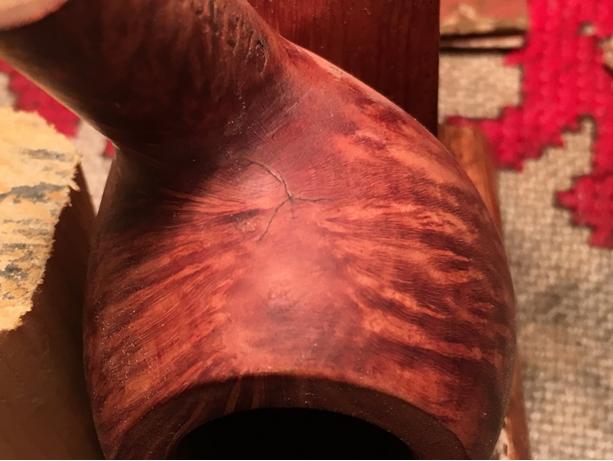
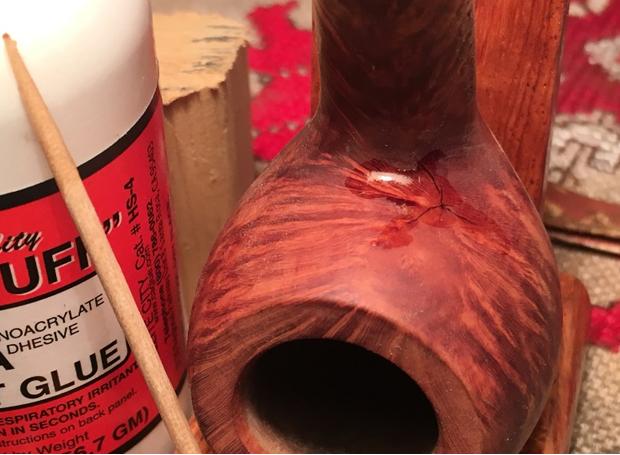
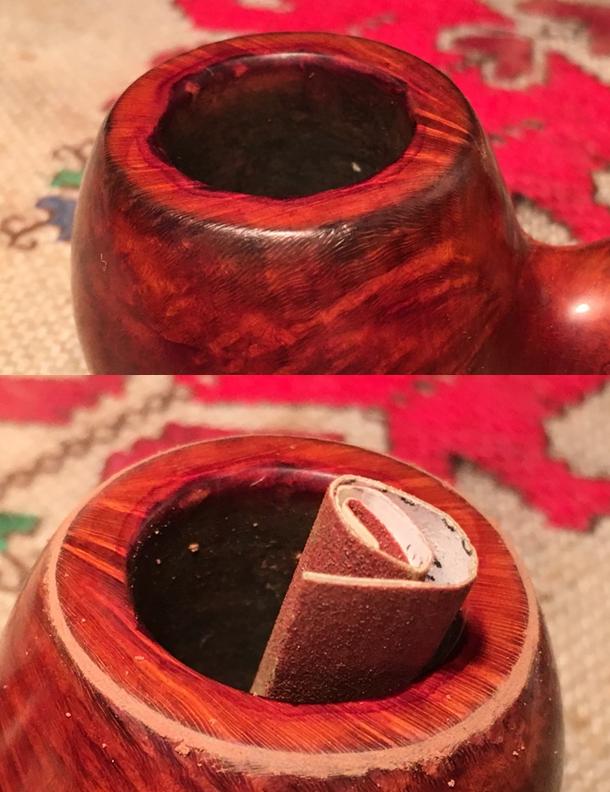
 As my wife was admiring the stummel and the briar patterns over my shoulder as I worked, she exclaimed about the face of the kitty revealed in the briar! Raising my eyebrows to refocus my attention to the area captivating her, I see the pattern which is recorded in the picture immediately below. She describes the two eyes, the whiskers and the forehead, probably in need of a little scratch, I thought! So, the Savinelli Capitol Prince has a kitty, too. Then my wife said, with not as much excitement, isn’t that a crack in the middle of the kitty’s face? I had seen it before but it was small and it followed the contours of the grain pattern. Yet, her question raised questions in my mind. I believe the crack is not growing but I elect to apply Hot Stuff CA Glue to the crack just to be on the safe side. This CA glue’s viscosity is extremely thin and perfect for shoring up cracks as it seeps into to a crack’s crevice in a way that thicker glue is unable. However, the problem with this thin glue is that it can absolutely take off like a rabbit scampering over the briar surface not in need of CA glue. To minimize this, I only dabble a bit on a toothpick trying to hold only a small drop at the point of the toothpick. Then, strategically apply it to the center of the crack which spokes outwardly in four separate veins. I find that the glue is running off the end of the toothpick because of its liquidity. I’m finally able to capture a droplet on the toothpick and apply it to the center. The glue spreads a bit, but I change the pitch of the stummel and use gravity to my favor. I also use the tip of the toothpick and paint the glue over the spoking cracks by drawing the glue from the center. The pictures show the progress of shoring up kitty’s nose and whiskers.
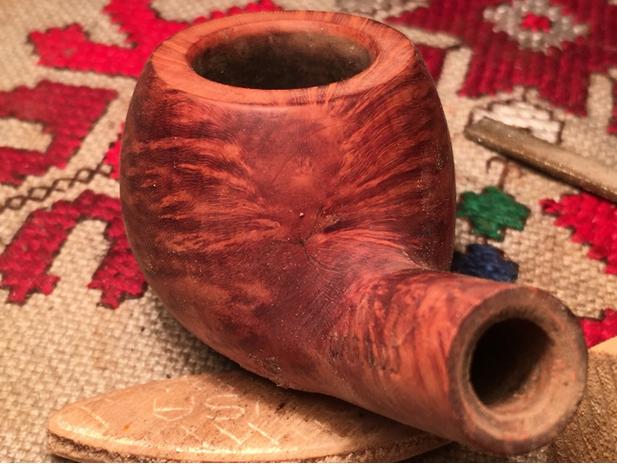
 After the CA Glue cures, I take a small piece of 240 grit paper rolled so that it presents a more solid surface. I then take the 240 roll and strategically sand the crack fix. I keep the roll within the shiny patch footprint with a view of removing glue off the surface and to avoid losing briar as collateral activity. I then take a medium grade sanding sponge and work the patch areas (crack and fill) as well as the multitude of dents on the stummel, but especially on the heel of the stummel. As I work on bringing out the imperfections set in the briar, the thought surfaces in my mind that I had adopted an approach to this pipe, it’s shape and demeanor, going for of a more pristine look – the look of a pipe that is the favorite of royals. A pipe having a quietly, self-confident posture, but elegant and humble. It has a kitty, too! Some pipes seem more of a rugged disposition and seem to beg for some imperfections as badges of past challenges in life – this Savinelli Capitol Prince says, “Please, put a crease in my trousers” – or, as it seems to me! The pictures show the progress.
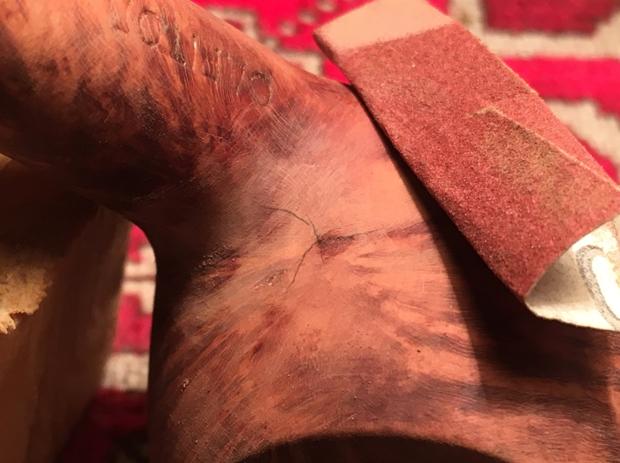
 With the primary patches completed and dents smoothed and blended, I take micromesh pads 1500 to 2400 and wet sand the stummel. I wet sand with the first set of three because it seems the effect of the water on the briar would soften it a bit, and it seems to give the micromesh pads more bite. This helps removing any imperfections/dents left over from all the previous sanding. The latter pads serve to polish what is there more than address imperfections. Well, I was just thinking about smartly pressed trousers when I finish sanding with the first set of micromesh pads, set to take a picture, when I see that the kitty’s eye had changed. He appears to be winking at me! I discover whatever was in the eye before (a small fill?) was no longer there and I am looking at a new royal pit. The latter micromesh cycles must wait as I apply a new ‘T’ Glue patch on the new pit and wait for it to cure and sand and blend it. So, now the kitty has a black eye. The pictures show the pause in progress.
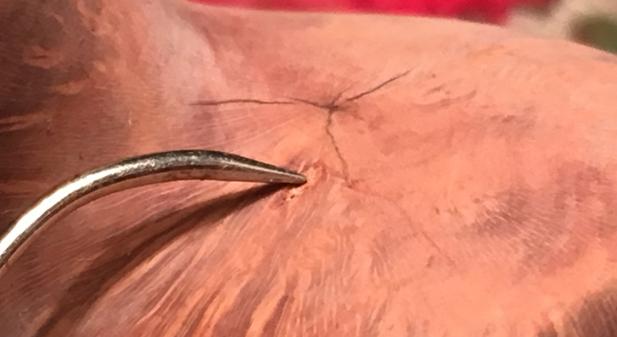
 When the CA Thick glue cured, I filed it down with a half-circle needle file to the surface and fine-tuned it with 240 grit paper. I follow this by addressing the patch area with 600 grit paper then 0000 steel wool.
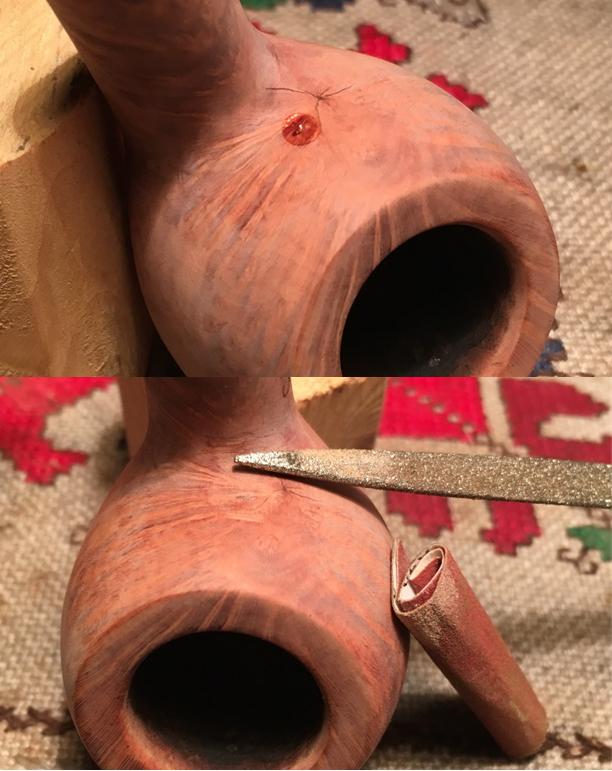
 To catch up this patch area with the rest of the stummel, I use micromesh pads 1500-2400. At this point I return to the micromesh process with pads 3200 to 4000. I notice the initial fill patch on the heel of the stummel with the micromesh polishing had lightened a bit. I take a dark walnut stain stick and dab it in the fill patches then I use a cotton pad with some alcohol and press it a few times to blend and lighten the stain stick application. It looks better now. I finish with micromesh pads 6000-12000 to further blend the stain stick patch as well as the micromesh phase. The pictures show the progress. The grain is looking very good.

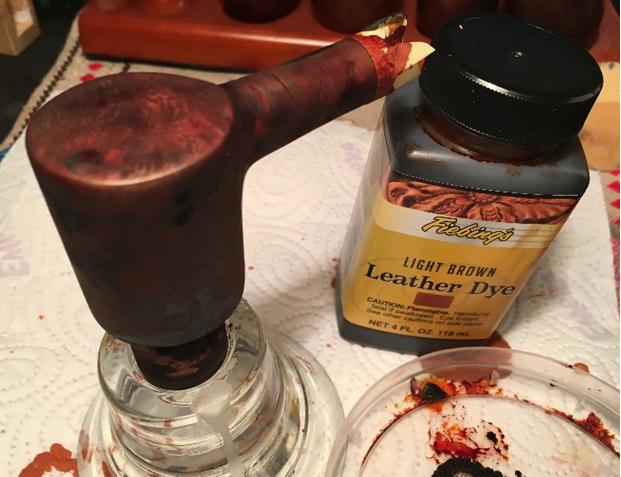
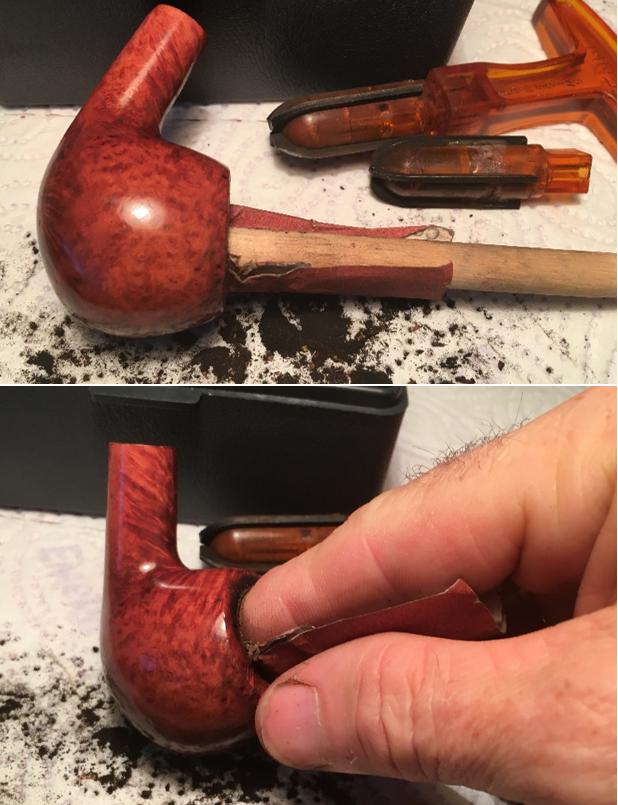
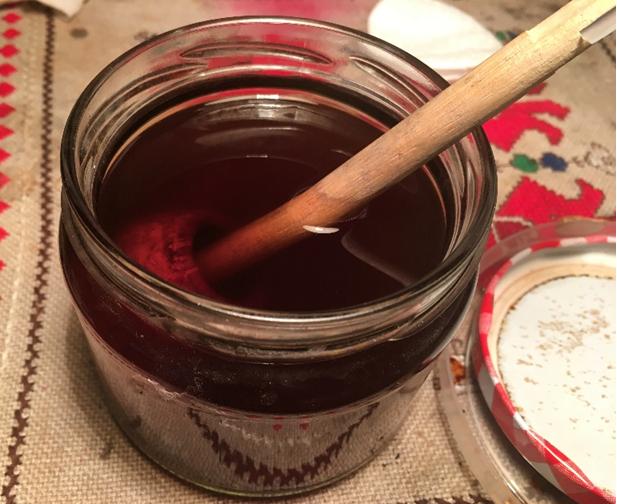
 Time to decide. I have yet to decide upon the next steps – whether to move forward with the natural briar or to apply a stain. This question I put off to the conclusion of the micromesh phase so I can evaluate the briar’s presentation and the pipe’s personality. I rejoin the stummel and stem to get a look at the big picture. Decision made. Using Fiebing’s Light Brown Leather Dye I mix 1 part dye to about 4 parts isopropyl 95% in a shot glass – aiming for a lighter cast. I detach the stem and mount the stummel on a cork to handle the stummel. After wiping the stummel with a cotton pad and alcohol, I heat the stummel with my wife’s hair dryer to expand and open the briar to the dye application. Using a folded over soft pipe cleaner I coat the stummel with the 1 to 4 dye mixture liberally and immediately flame it with a lit candle waiting for that use. The alcohol burns off very quickly setting the dye in the grain. In about 4 or 5 minutes, I repeat the process and set the stummel aside for the night to rest – I as well as the newly stained stummel. The pictures show the progress.
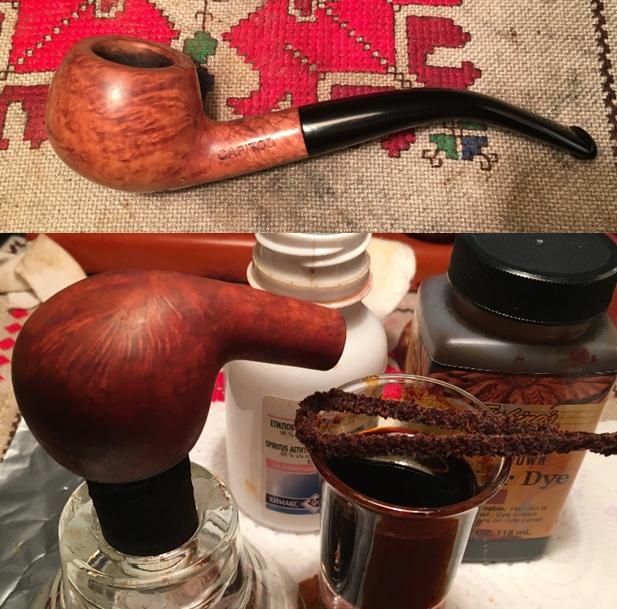 The next morning, anxious to see the results of the newly stained stummel. Taking the Dremel with the attached hand-held extender, I mount a new felt wheel on the extender, set the Dremel on the lowest RPM setting, and apply Tripoli compound to remove the flamed dye crust to expose the surface. I’m liking the color a lot and the grain has responded very well. As I move through the Tripoli process I identify an eye-sore – at least to me. Circling the outer rim edge is a black ring which the felt wheel charged with Tripoli is not removing. The second picture I take after focusing the Tripoli wheel for some time on the ring itself, hoping to lighten and blend the black ring. To me, the ring is unattractive and detracts from the overall appearance of the pipe. The thoughts floating in my mind at this point are, that it is simply darkened stain at that point that a wipe of alcohol might lighten. Another, less appealing thought is that this ring was produced by the flaming and perhaps scorched this most vulnerable part of the rim. I’m thinking that it wasn’t the dye on the rim itself which burned off, but the overflow of dye on the cork that also had burned off did the deed. I’ll need to check into this with Steve! My methodology needs a revamp if this is the case. The pictures show the issue. The final picture shows the beginning of my corrective approach. With an approach moving from conservative to less so, I spend more time focusing on the rim with the Tripoli felt wheel buff. When this did not achieve the desired results, I take a cotton pad with some alcohol in it and wipe strategically around the outer edge of the rim, hanging over the outside slightly. I do a few cycles around the circumference of the rim with the alcohol then follow again with the Tripoli buff to do a follow-up blending. When this did not achieve the desired results, I tightly roll a piece of 240 grit paper and lightly make a quasi-bevel cut on the outer edge of the rim to remove the scorched briar. The results of this are pictured below. Not pictured is the rest of the process. I followed the 240 grit with a rolled piece of 600 grit paper – as with 240 bevel, staying directly on the edge. Then, I jump to mid-range micromesh pads 4000 to 12000, and smooth, polish and blend the outer rim area. While the tendency for perfectionism would have me try something else, the rim looks much, much better and if I didn’t record this excursion here, 99% of onlookers would not see an issue!
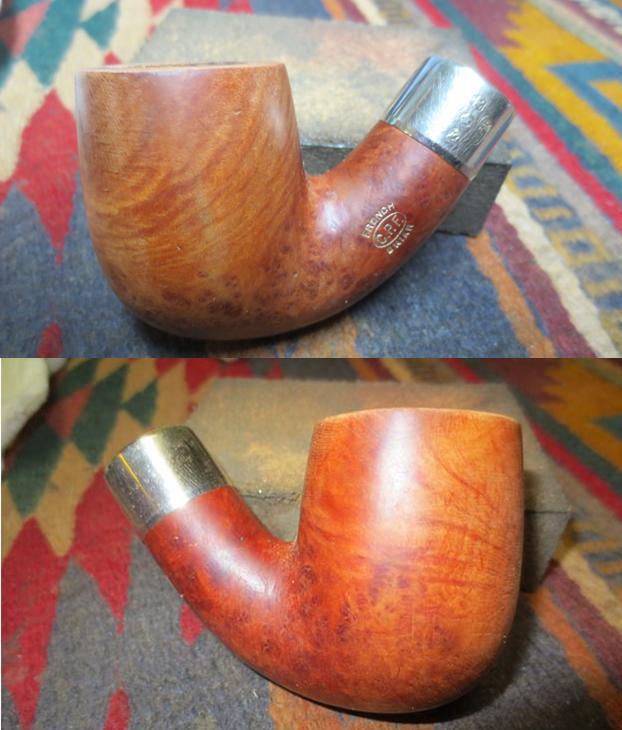
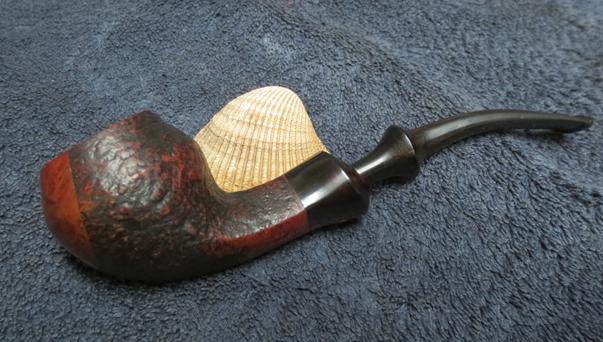
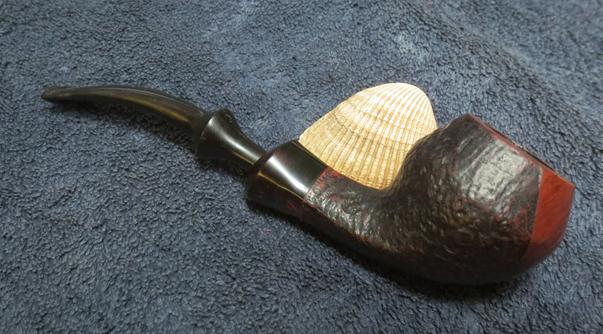
 I move on to complete the polishing process by attaching the Blue Diamond felt wheel to the Dremel hand-extender and working this lesser abrasive compound over the briar surface. Completing the compounds, I wipe/buff the stummel with a cotton cloth to remove left-over compound dust before moving to apply the wax. I reunite the stem and stummel of the Savinelli Capitol Prince. After mounting a cotton wheel to the Dremel, I increase the RPMs to the next number and apply several coats of carnauba wax to the stummel and stem. After the carnauba wax application, I mount a clean cotton wheel with the same RPM setting on the Dremel as with the carnauba and provide a clean wheel buff to the entire pipe. Finally, I give the pipe a rigorous hand-buffing with a micro-fiber cloth to deepen the 3-dimensional-appearing gloss already shining through this happy piece of briar.
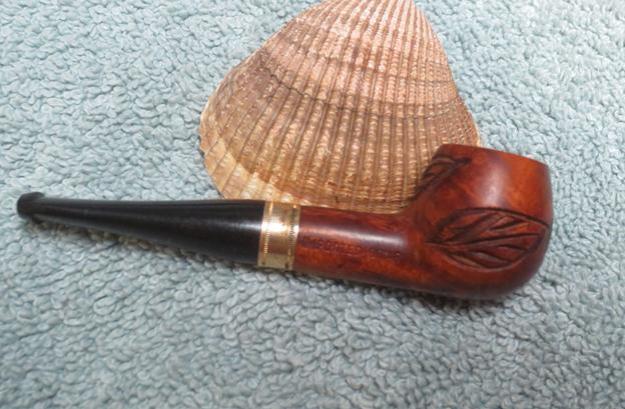
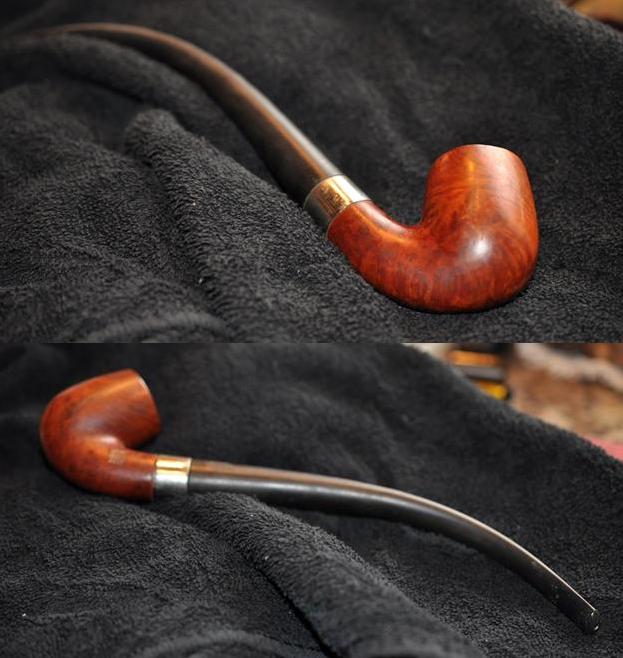
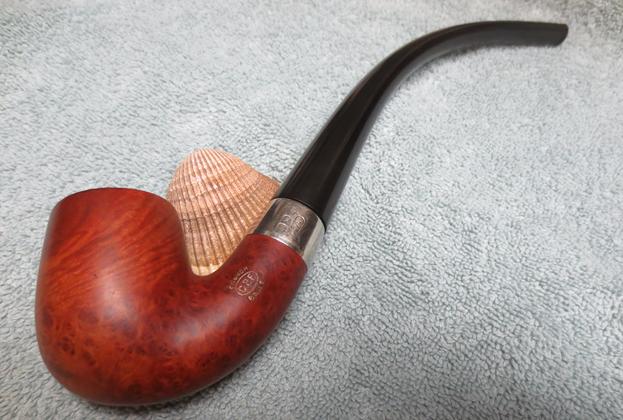
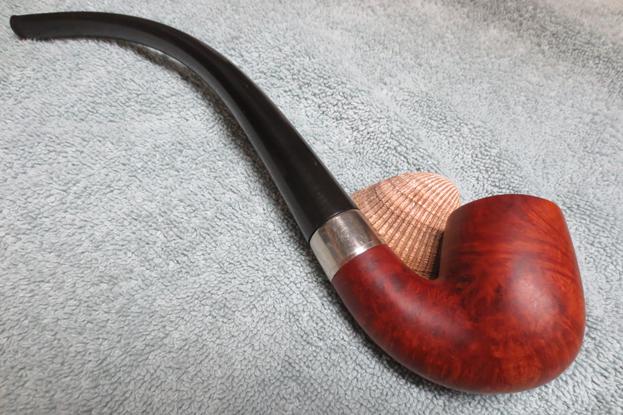
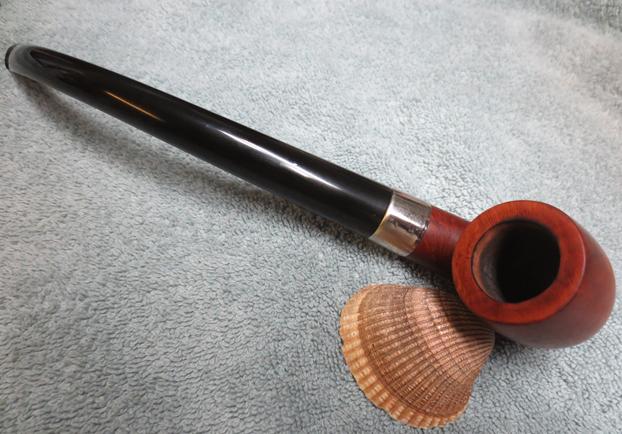
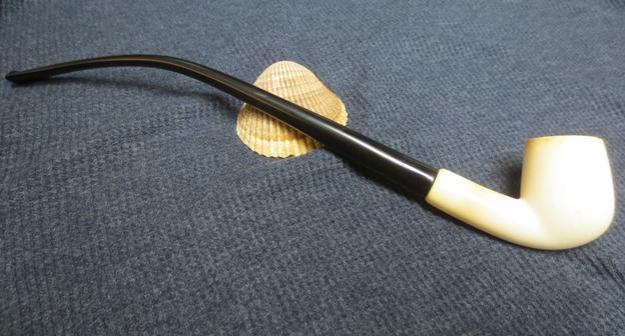
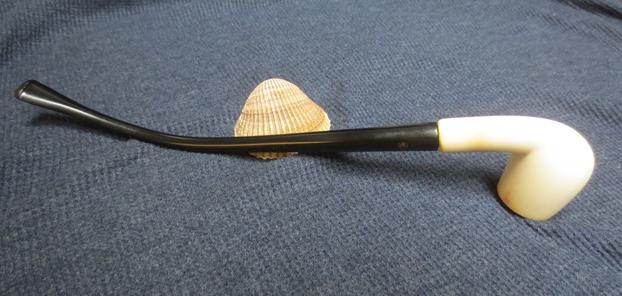
The grain on this small Prince bowl is captivating with larger bird’s eye on the front, splaying fans on the heel, and of course, a kitty with whiskers fanning out as he gazes up the shank and stem at his steward – or should I add, stewardess! The diminutive size of the bowl along with the longer-than-expected sleek shank and stem, would make this Savinelli Capitol Prince – a preferred shape to at least one royal, a wonderful addition to any pipeman’s or pipelady’s collection. Thank you for joining me!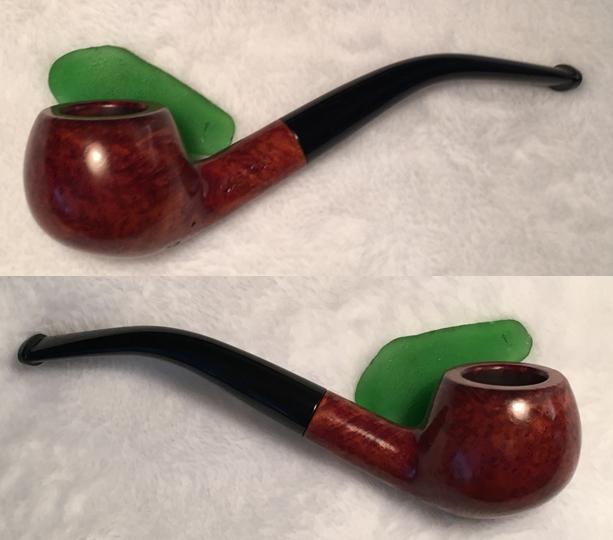


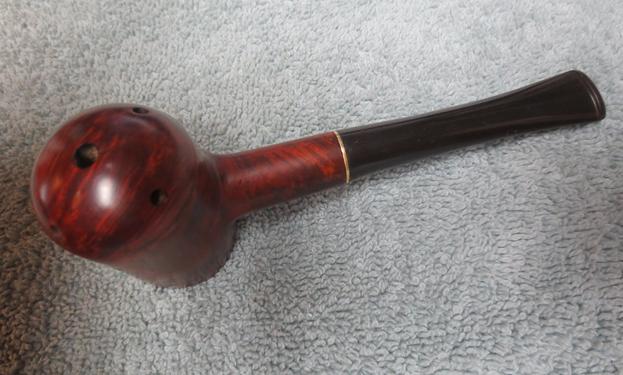
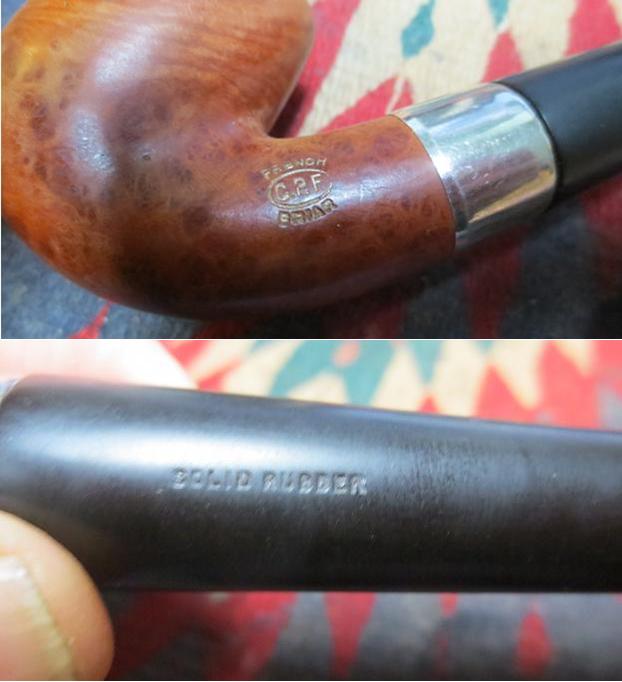
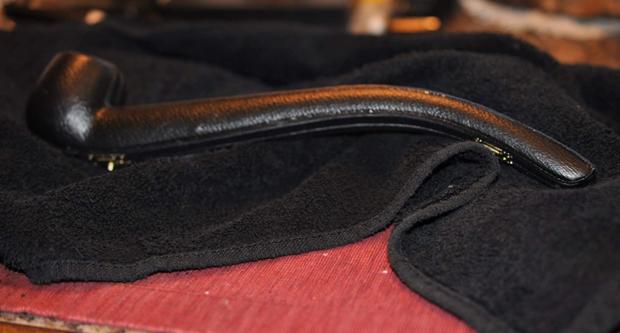
 I have only included the first photos as the pipe I have is virtually identical to this one. Mine also has the gold circle R on the logo on the side of the stem. The only difference is that mine is has a brass spacer on the stem that forms a thin band between the shank and stem. Mine is also in better condition than the one in the photos with no cracks or breaks in the bowl, caps or threads. I believe along with Tony from smokingmetal that the pipe was crafted in the late 1940s. Many things about the briar quality, the rubber that is used in the stem etc. point to manufacture of the pipe occurring during or after the conclusion of World War II.
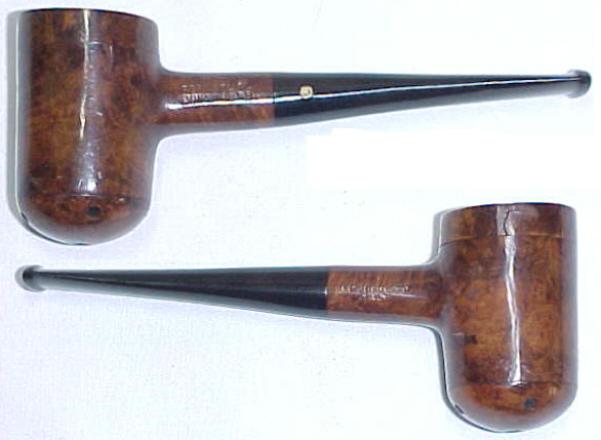
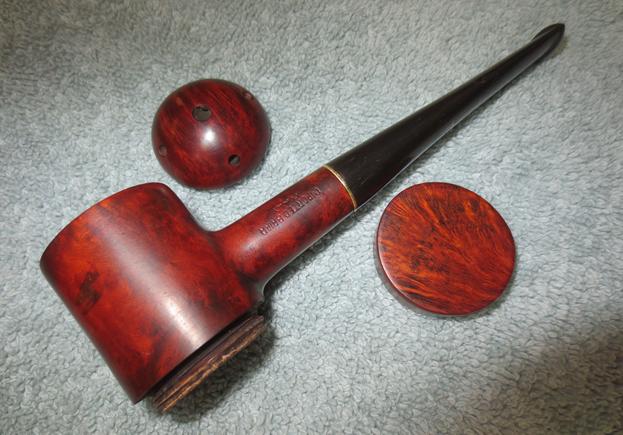
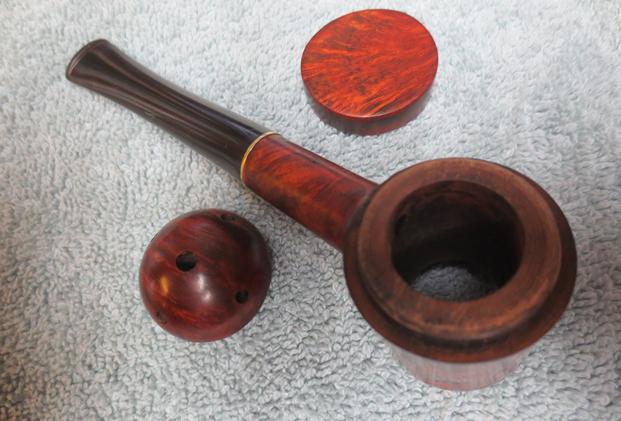
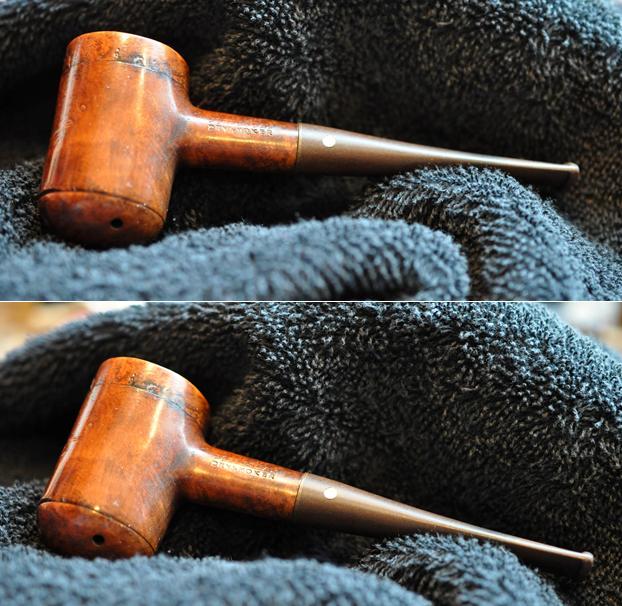 Jeff took some great photos of the bowl taken apart. Contrary to what Tony and Stan mention in the quote article from the website all the parts are present with the pipe. There are no additional pieces needed to make the pipe functional. The first two photos show the rounded bottom cap and the flat top cap removed from the bowl. You can see the wooden threads on the inside of the bowl in the first photo where the bottom cap screwed into it. The second photo shows the threads on the outside of the bowl where the flat top cap screwed onto it. The completed pipe resembled a salt or pepper shaker to my mind – a unique and interesting smoking device. Both caps were darkened by smoking but appeared to be clean. There was a small crack in the rounded bottom cap but it did no effect the fit in the bowl.
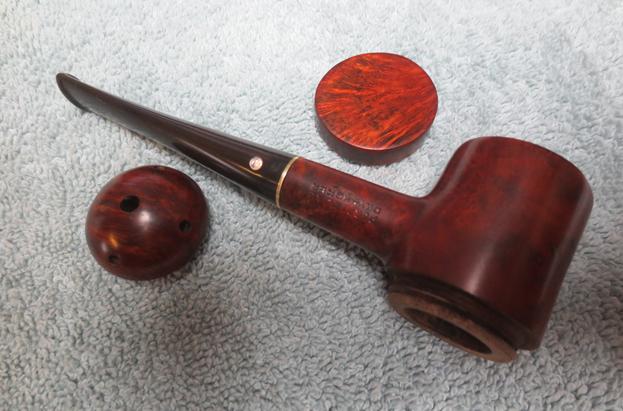
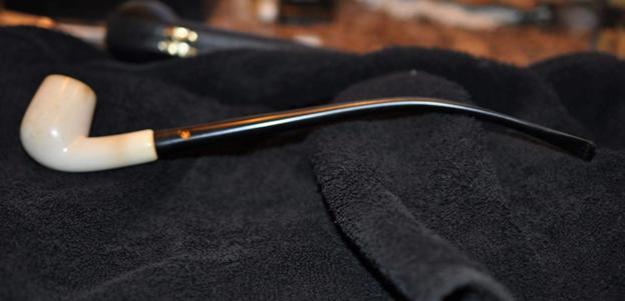
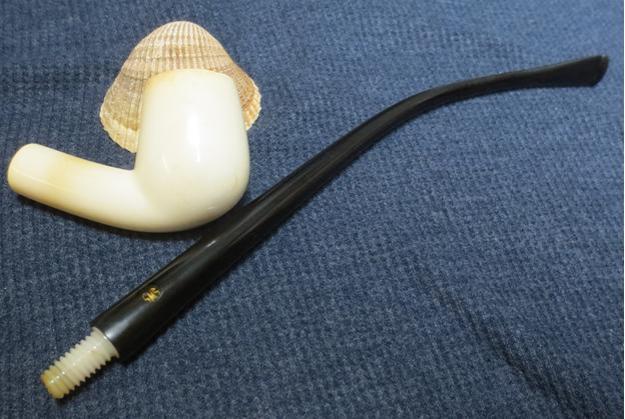
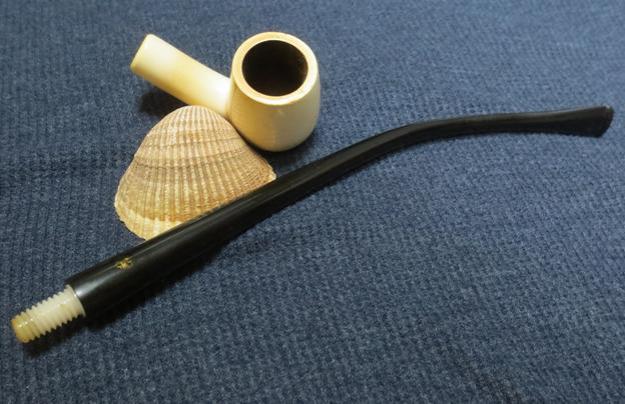
 He also took some photos with the parts laid out together to give an overall idea of what the pipe looked like.
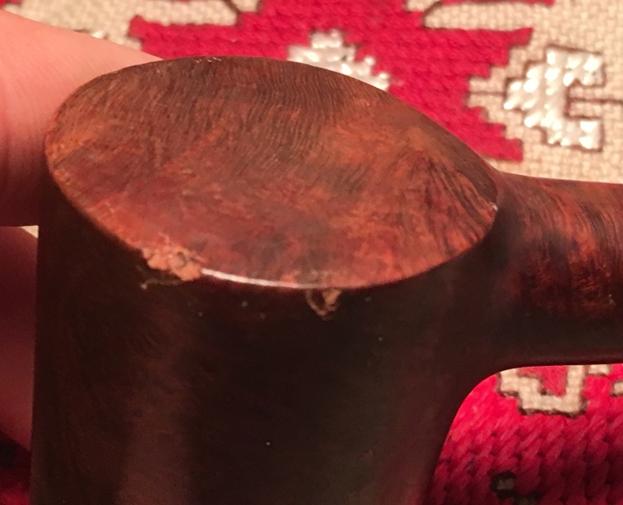
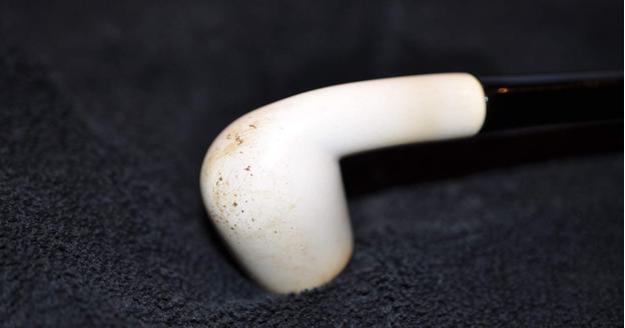
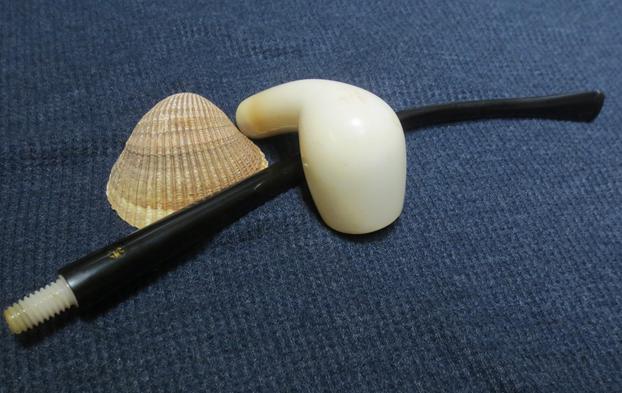
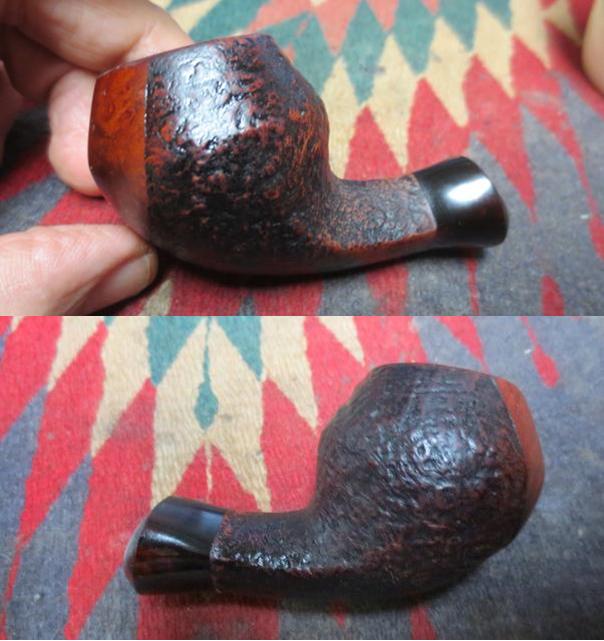
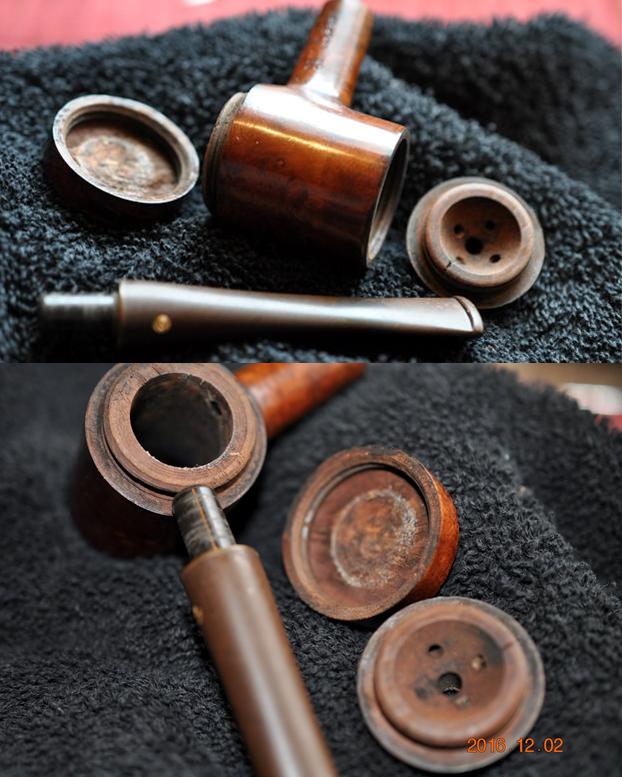 My brother also included some close up photos of the sides of the bowl to show the condition of the finish and what would need to be done to clean it up. He included a photo of the flat top cap to show the remarkable grain underneath the staining and grime.
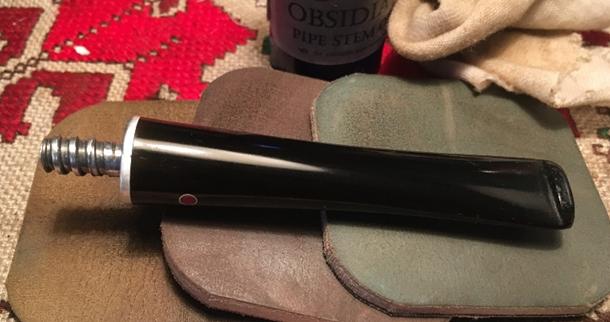
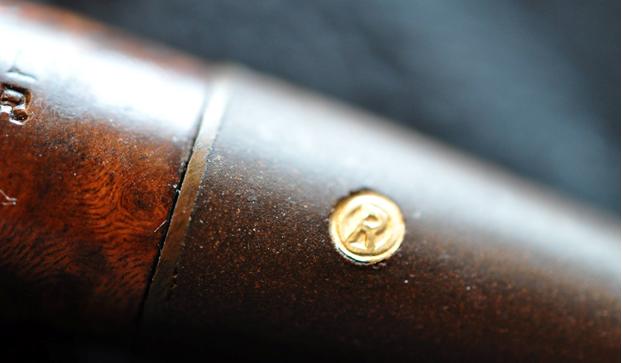
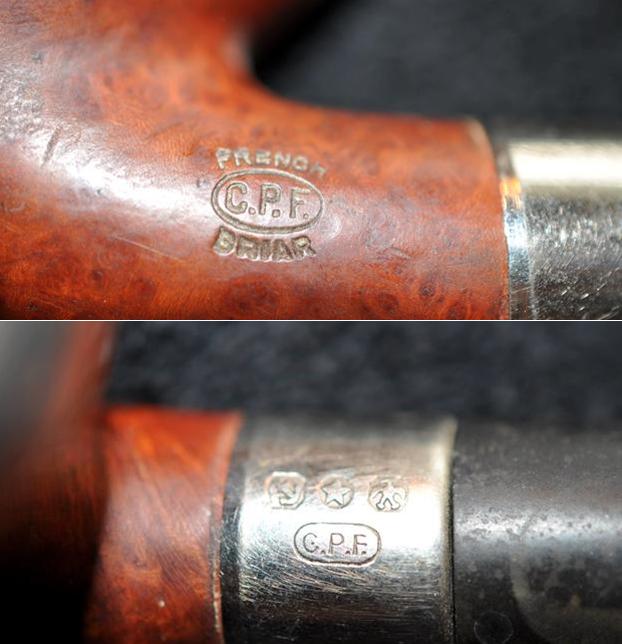
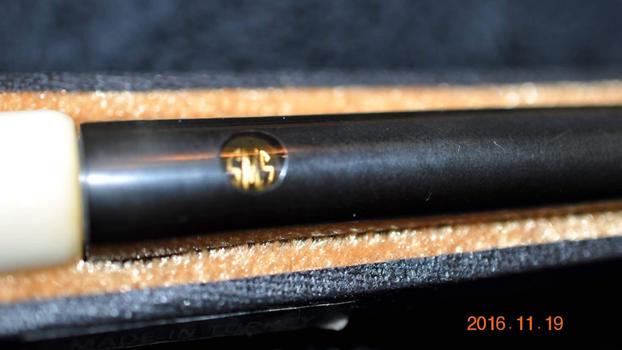
 The next two photos show the stamping on both sides of the shank. The third photo shows the brass circle R logo on the stem and also the brass spacer in between the stem and the shank.
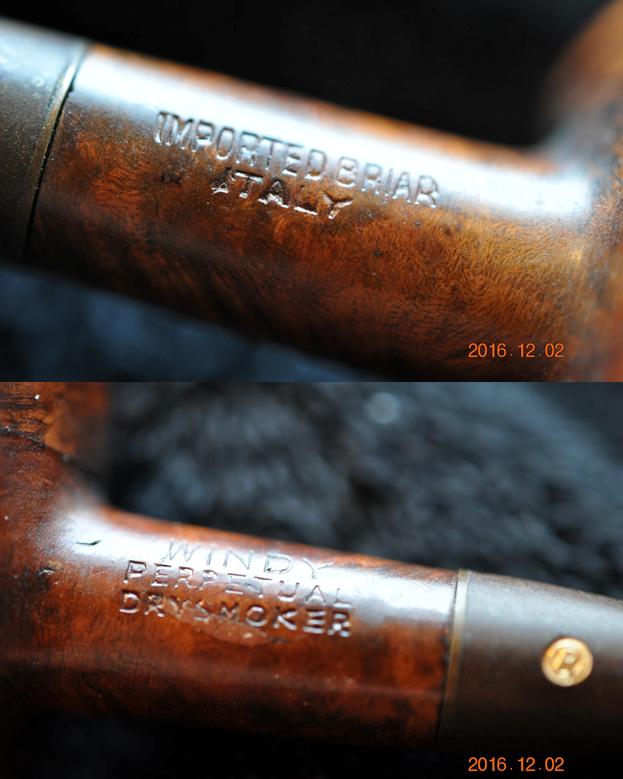
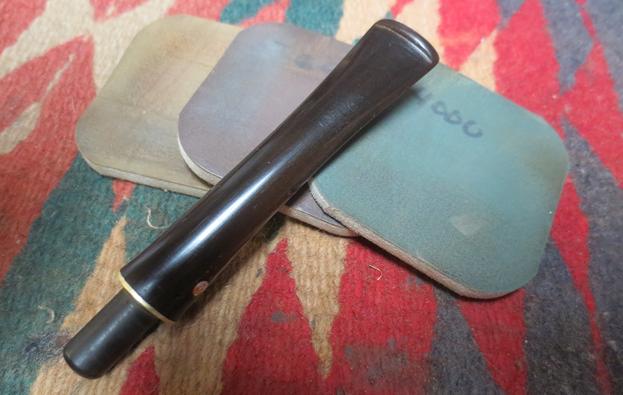
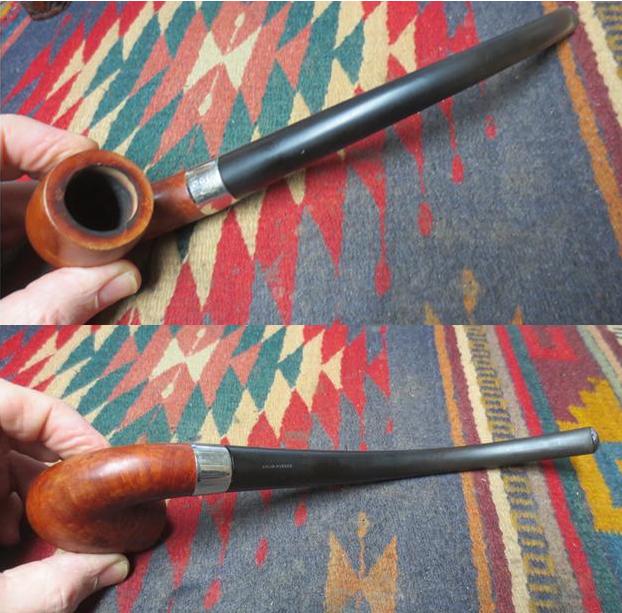
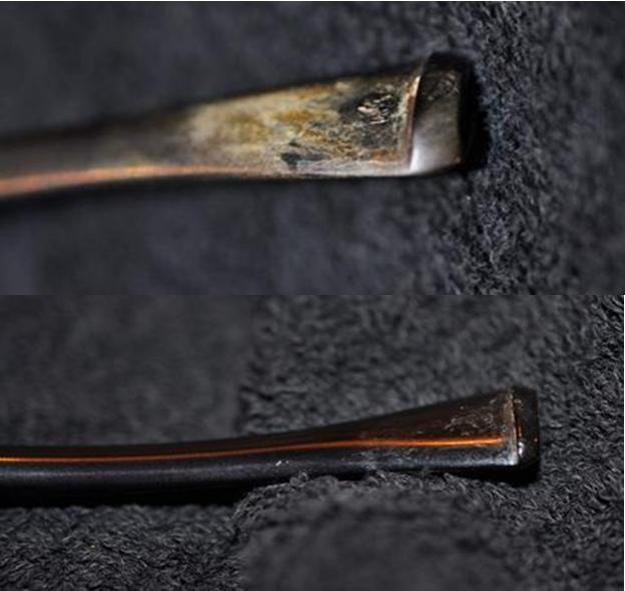
 The final two photos Jeff included showed me the condition of the stem. It looked really good other than the oxidation. There was no tooth chatter or tooth marks in the surface. The only issue I would need to address was the mismatched diameter of the shank and the stem.
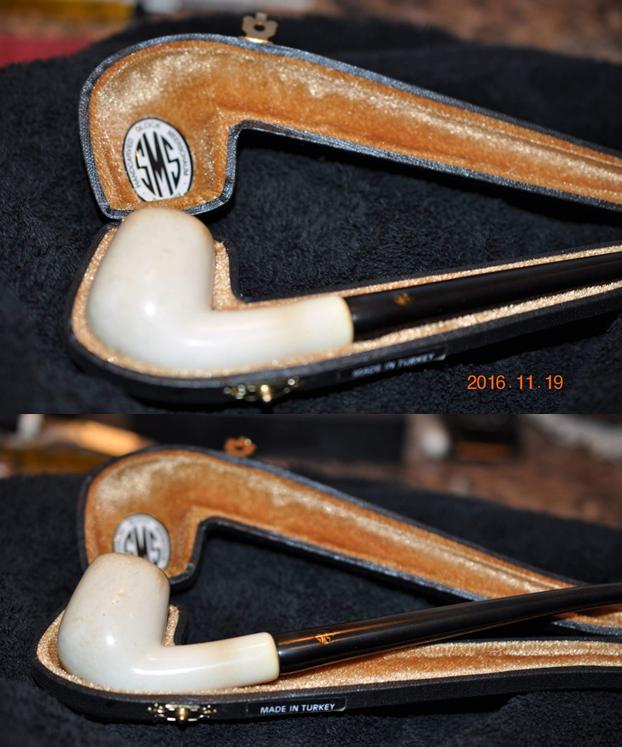
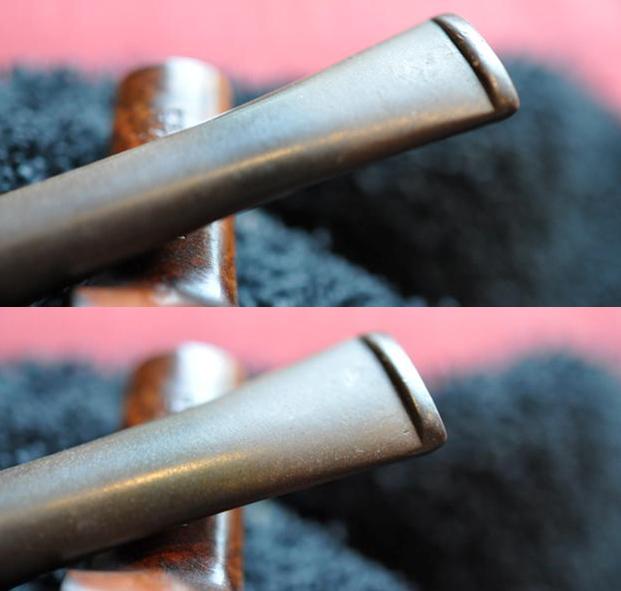 My brother did a really thorough job cleaning up this old pipe. When it arrived in Canada the inside of the bowl and both caps was really clean. He had scraped out the light cake in the bowl and cleaned out the mortise and airway in the stem and shank with alcohol, cotton swabs and pipe cleaners. He cleaned off the exterior of the bowl and was able to remove much of the grime on the surface. The brass space was oxidized but would clean up easily when I worked on the diameter of the stem. I took the next four photos to show the condition I found the pipe in when I unpacked it here in Vancouver.
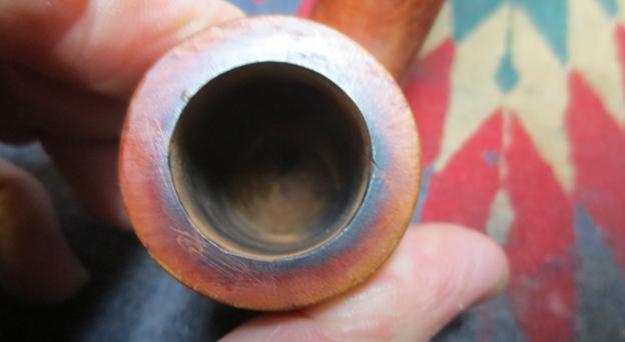
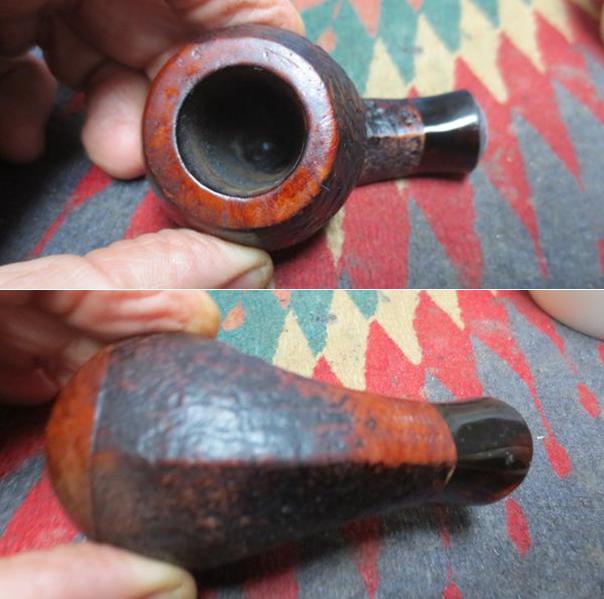
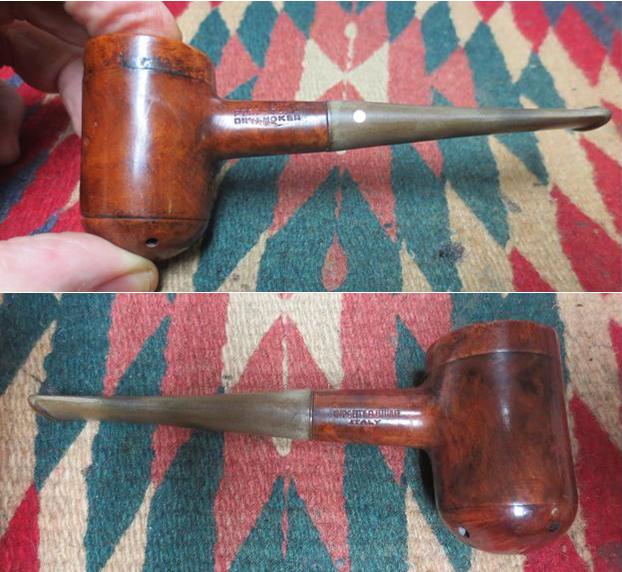
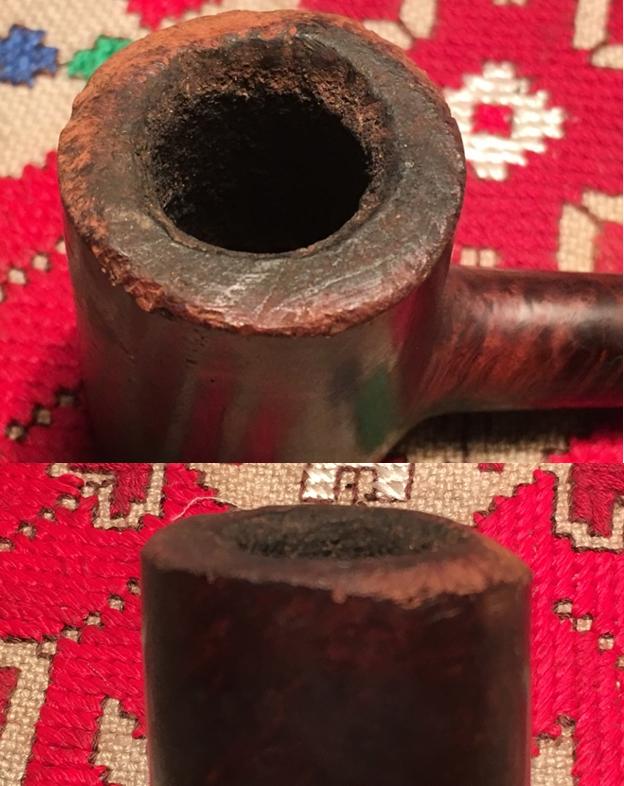
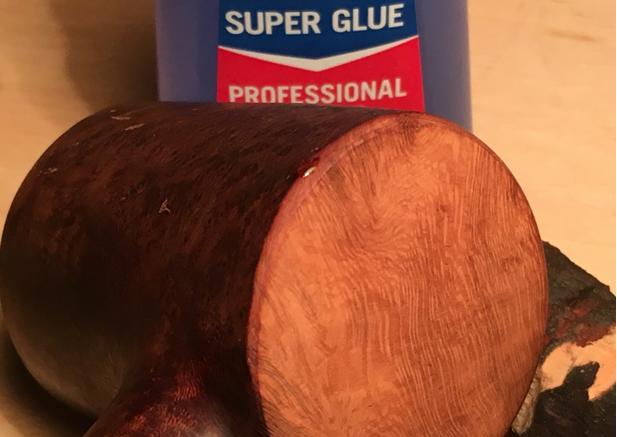
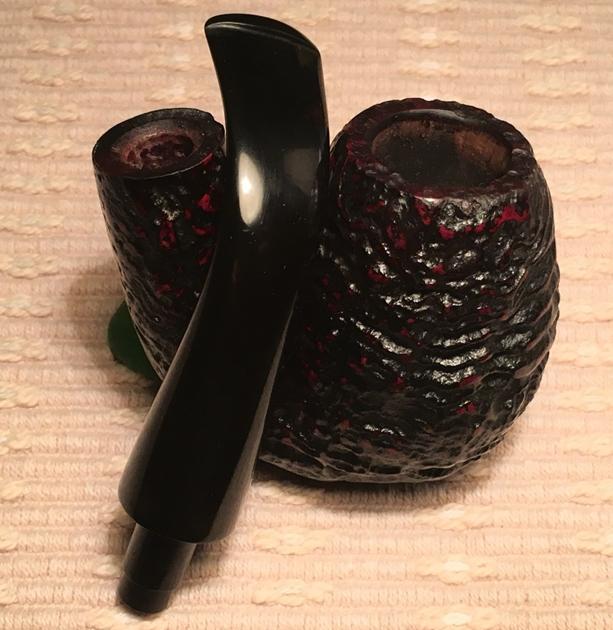
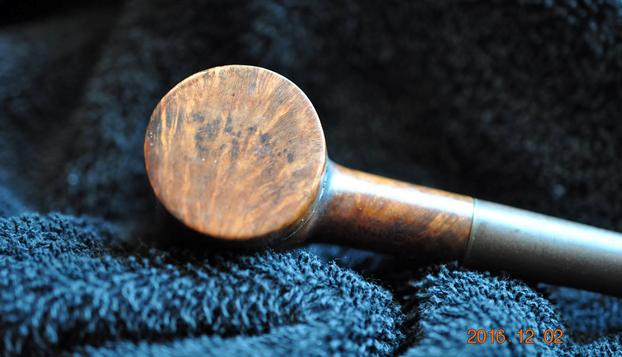
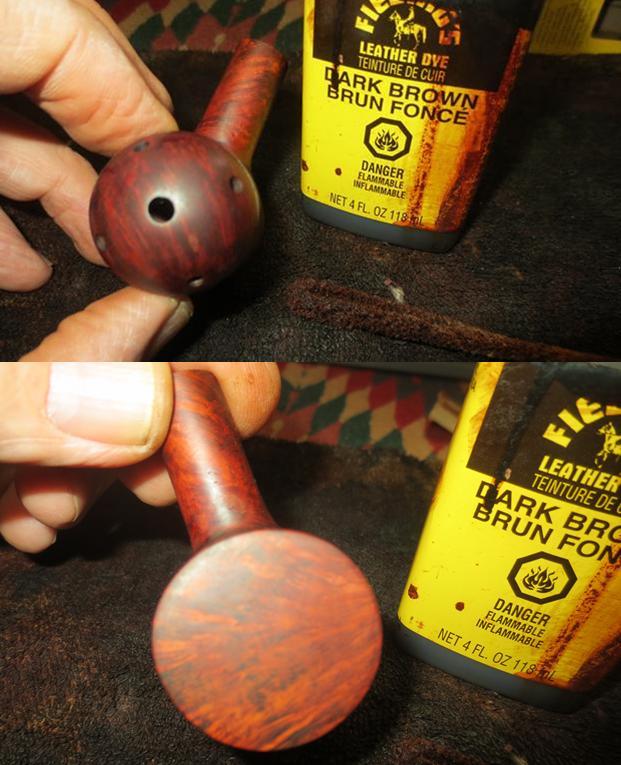
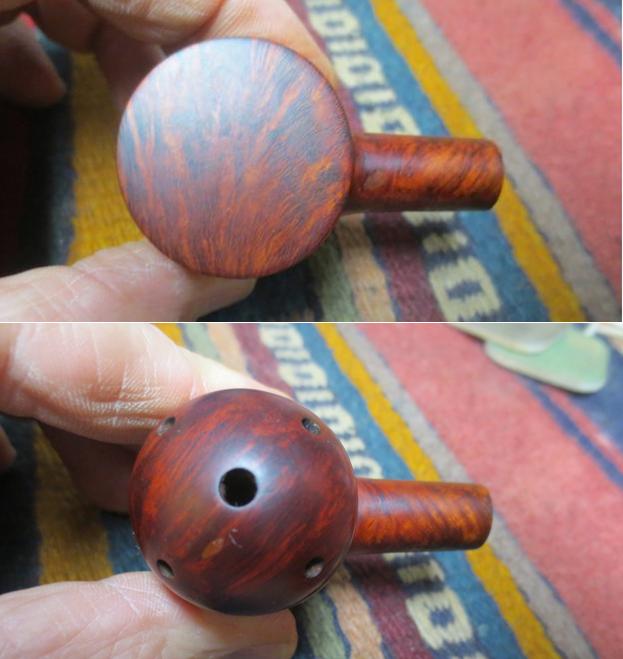
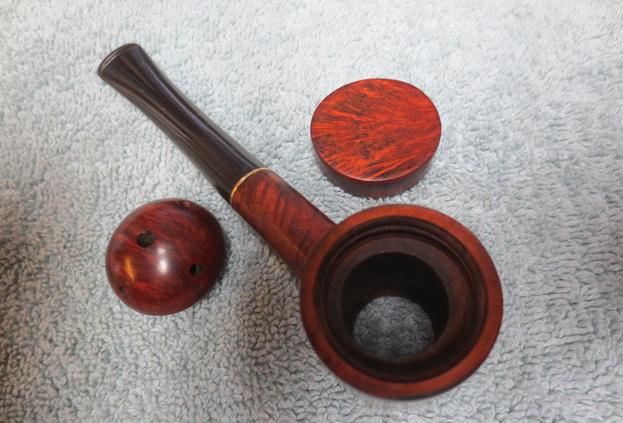
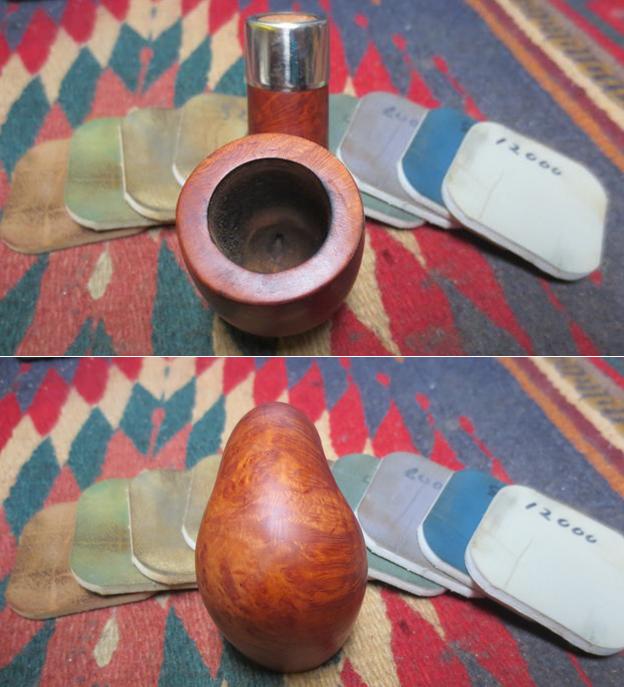
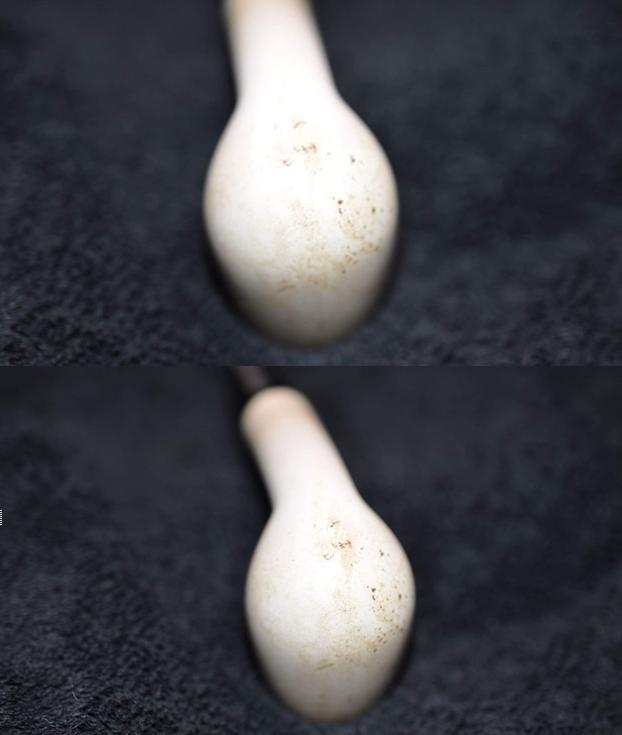
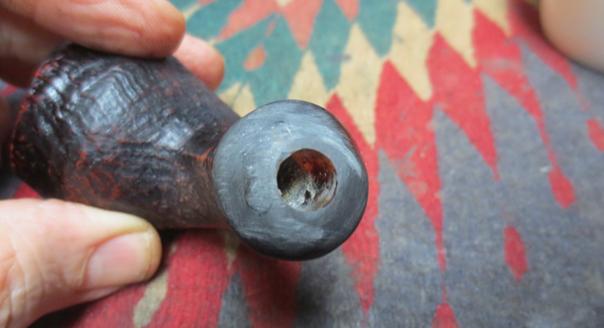
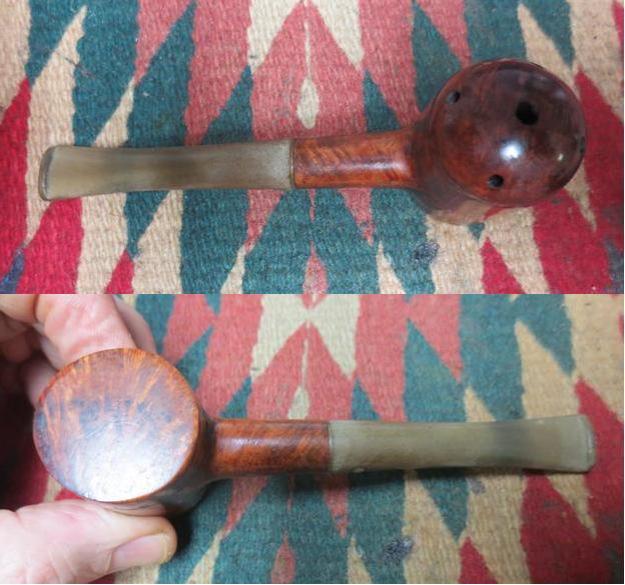 I took the pipe apart and took photos of the parts of the bowl – the centre core, the rounded bottom cap and the flat top cap. In the photos the core is flat side up in the first one and rounded side up in the second one. The bowl and caps were very clean and you could see raw briar inside all of the parts which led me to think that the pipe had not been smoked often.
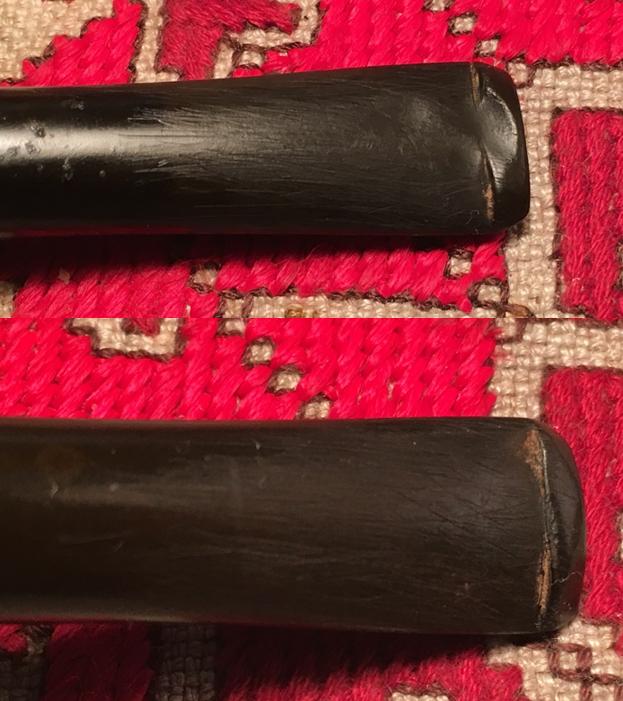
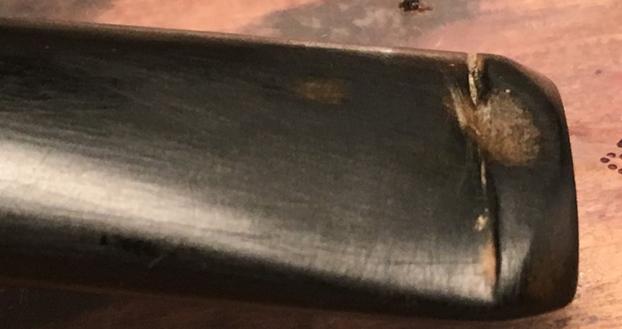
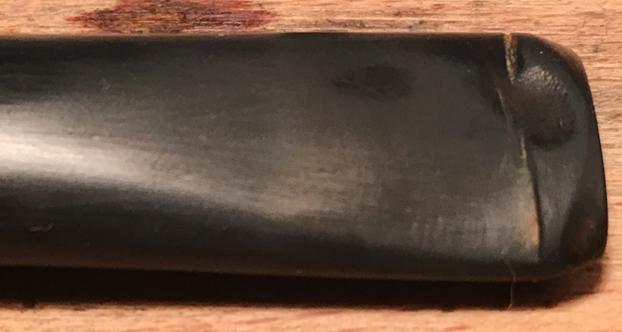
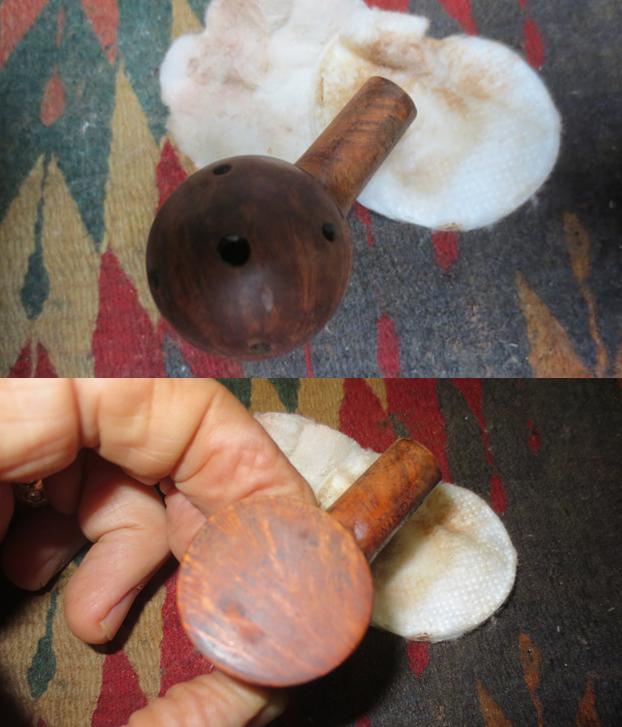
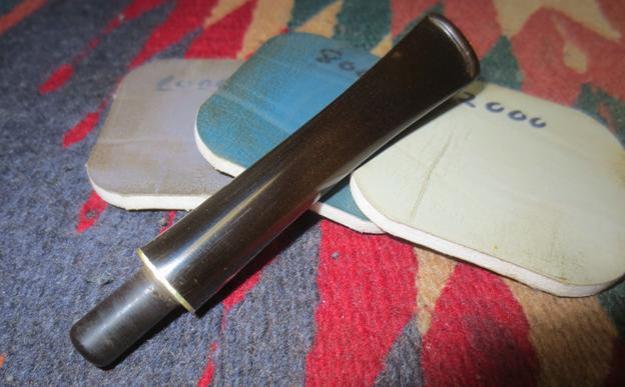
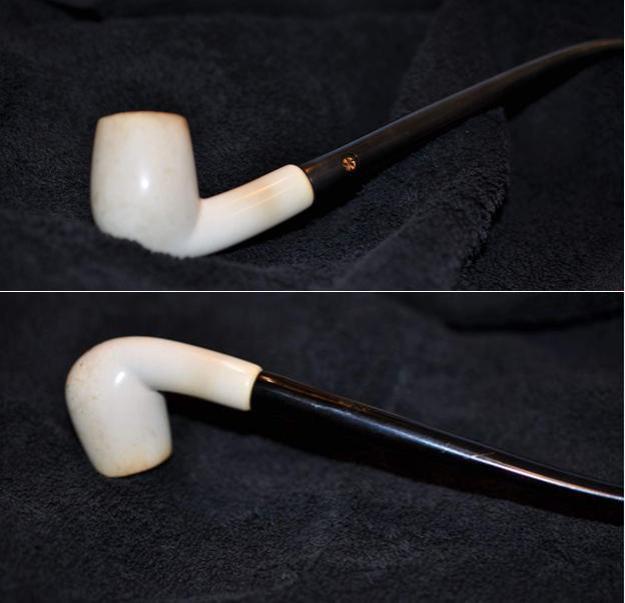
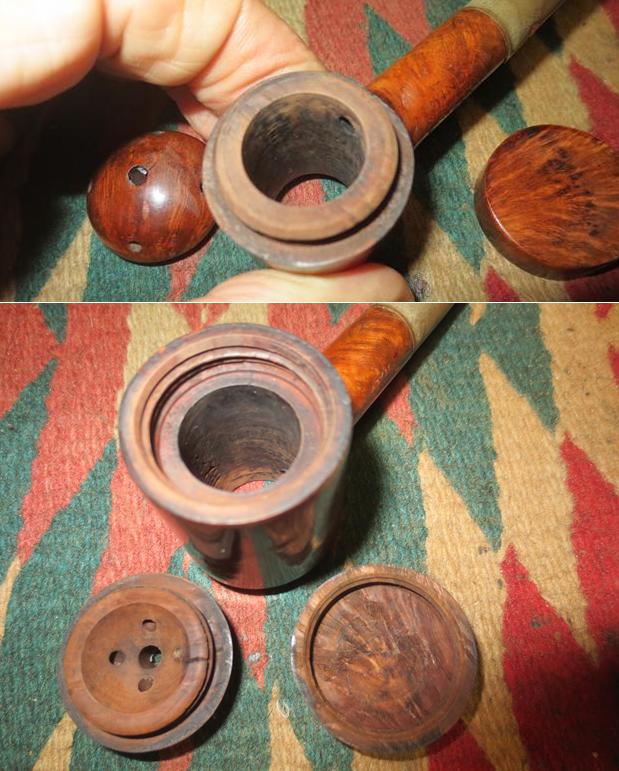 I took some close up photos of the stem to record its condition as well.
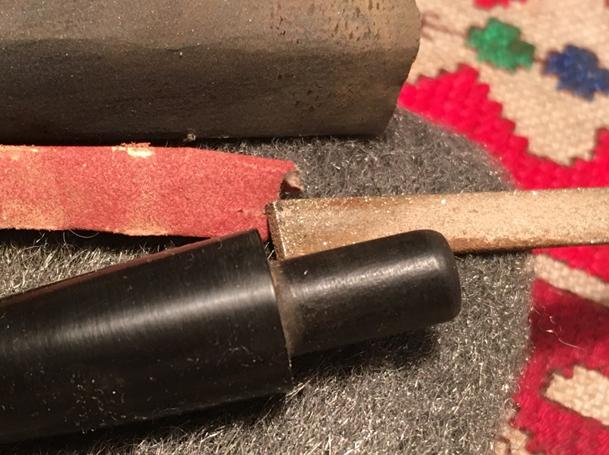
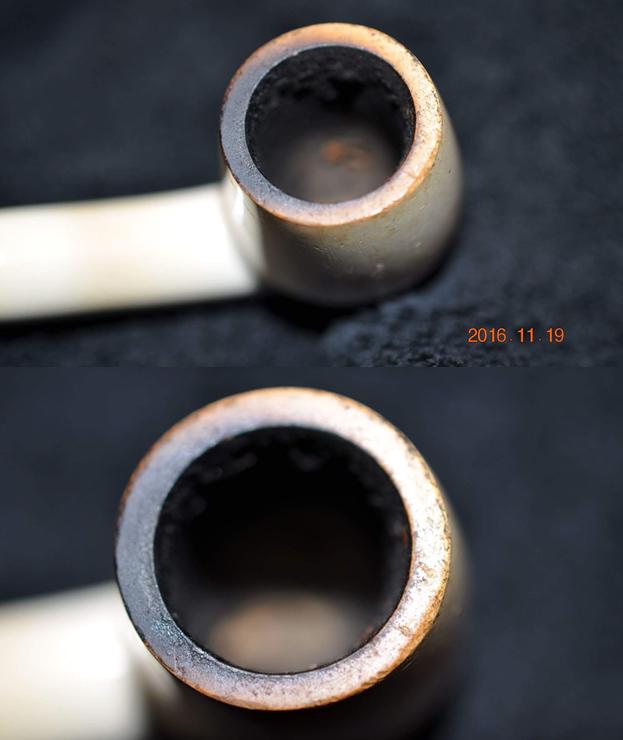
 The fit of the crowned bottom cap to the edge of the core part of the pipe had some damage to it that did not allow the cap to seat tightly against the edge of the core. I topped it with 220 grit sandpaper on the topping board until the cap fit snugly.
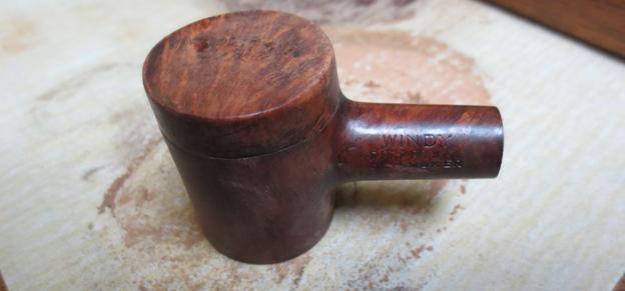 I put the cap back in place and wiped the bowl down with acetone on cotton pads to remove the finish. The fills on the bowl were dimpled so they would need to be repaired with briar dust and super glue.
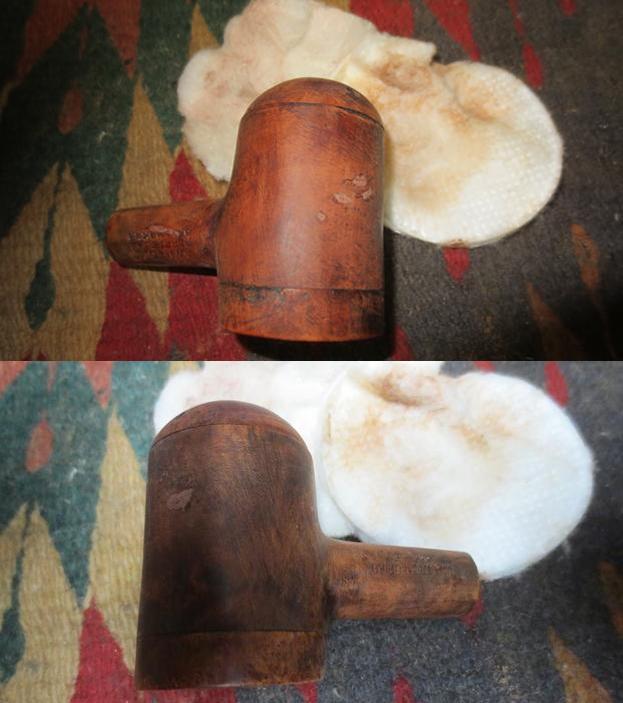
 With the finish removed I could better assess the darkened areas around the sides and bottom of the flat cap. I could also see areas that needed to be sanded around the edges of the rounded bottom cap also. I sanded the entire pipe with 220 grit sandpaper to remove the damaged areas and smooth out the transitions between the core and the caps. I also smoothed out the edges of the fills to prepare them for repair later in the process.
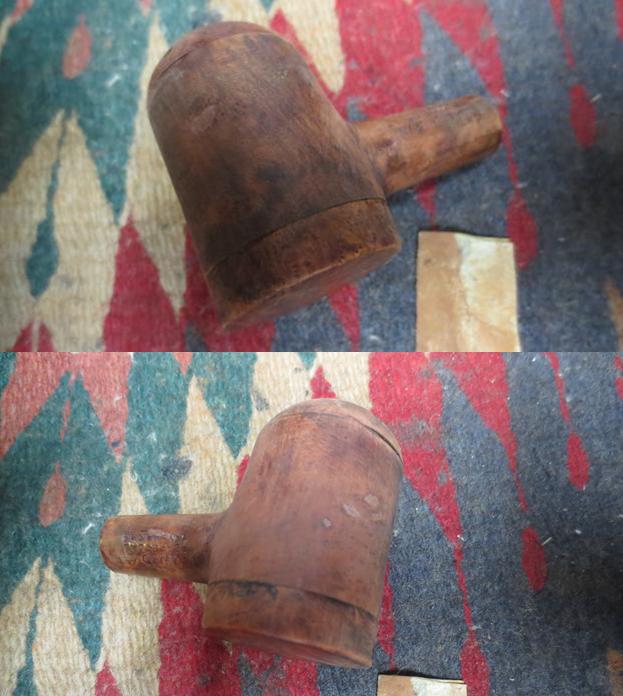
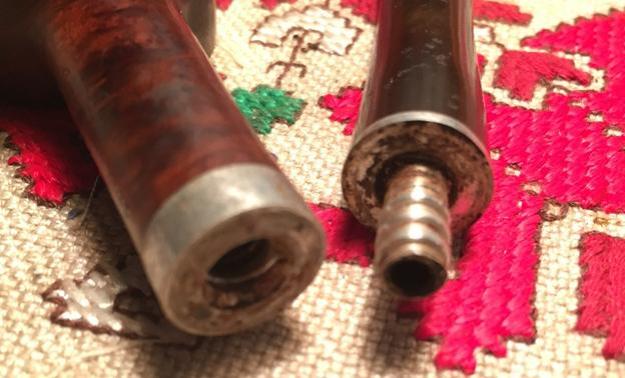
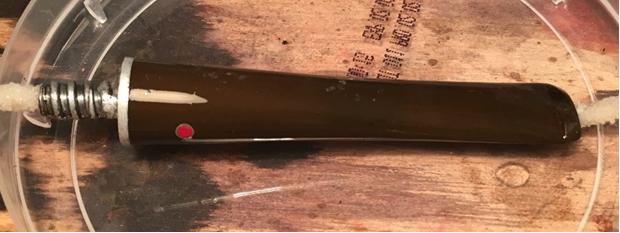
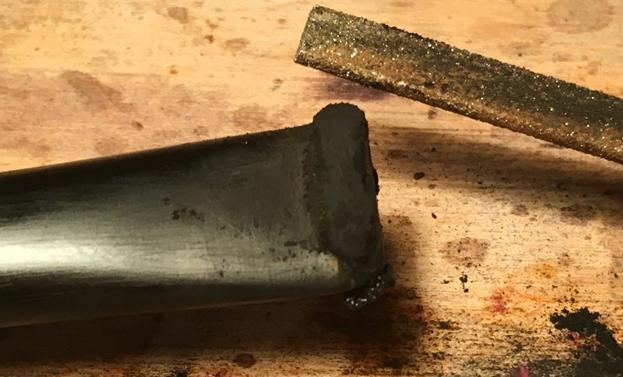
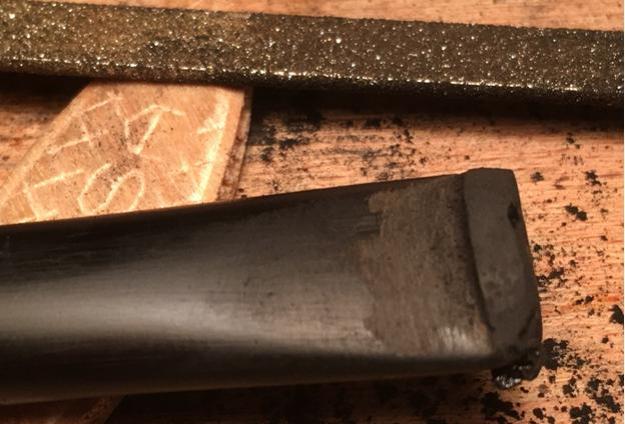
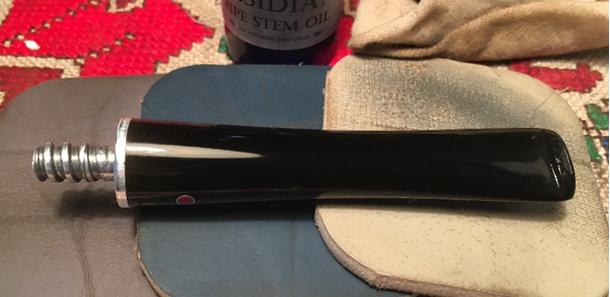
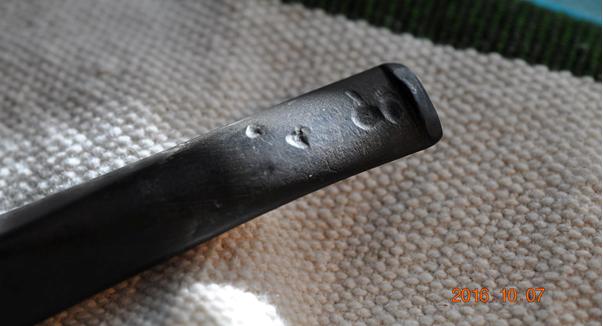
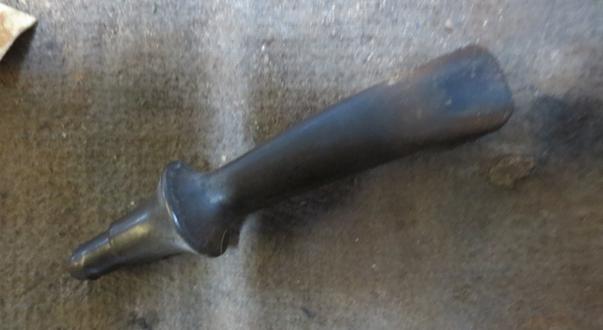
 With that part finished I needed to rework the shank/stem diameter. The right side of the shank was narrower than the right side of the stem. With the stem removed it was easy to see why. That side of the briar shank was thinner in terms of the thickness of the walls of the shank than the left side. The red circle shows the side that needed to be taken down.
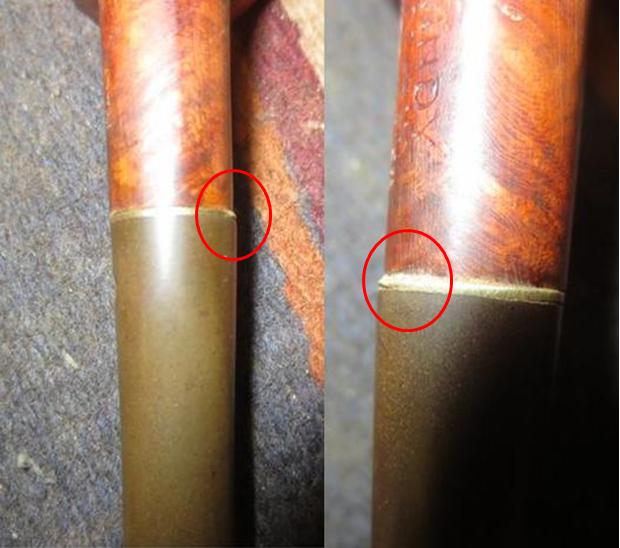 I used the Dremel with a sanding drum to take down the excess vulcanite and brass of the spacer.
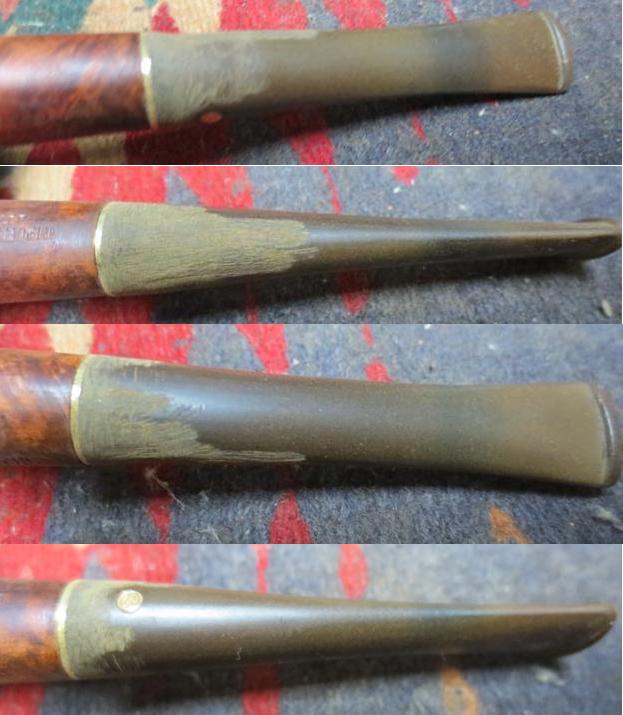 I cleaned out the areas around the fills and removed any of the loose debris around them. I rebuilt the areas around the fills with a mixture of clear super glue and briar dust. I overfilled the repairs to allow for shrinkage. I sanded the repairs smooth to match the surface of the bowl.
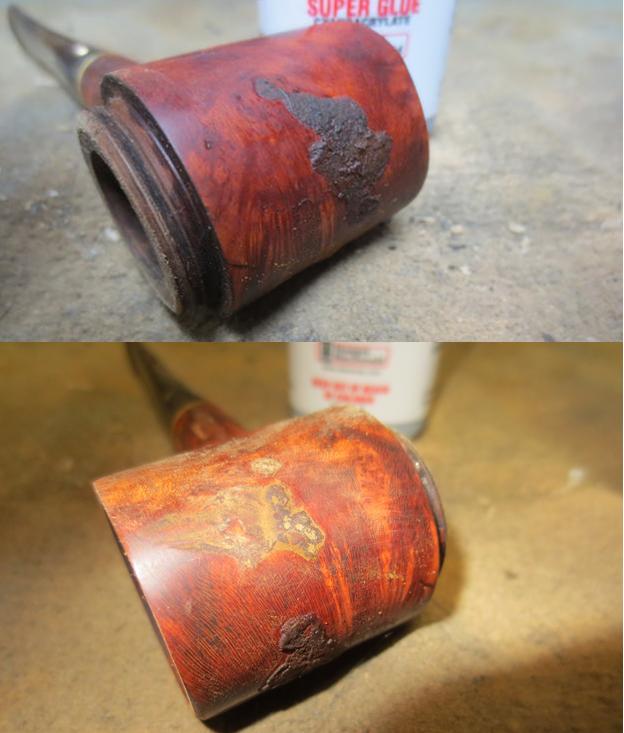 I sanded the repairs smooth and then polished the areas with micromesh sanding pads. I wet sanded the repaired areas with 1500-2400 grit sanding pads and dry sanded them with 3200-12000 grit pads. I wiped the bowl down with a damp cloth. I stained the bowl and the caps with dark brown aniline stain and flamed it to set it. I repeated the process until the coverage was even.
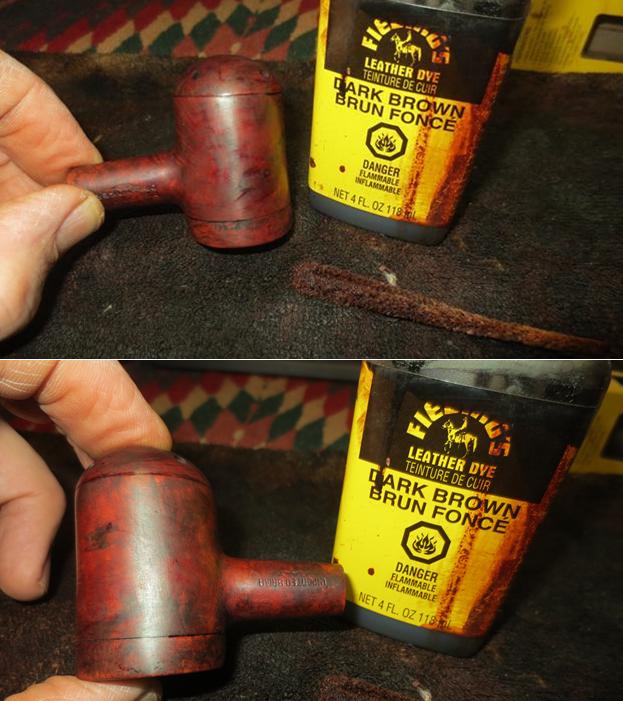
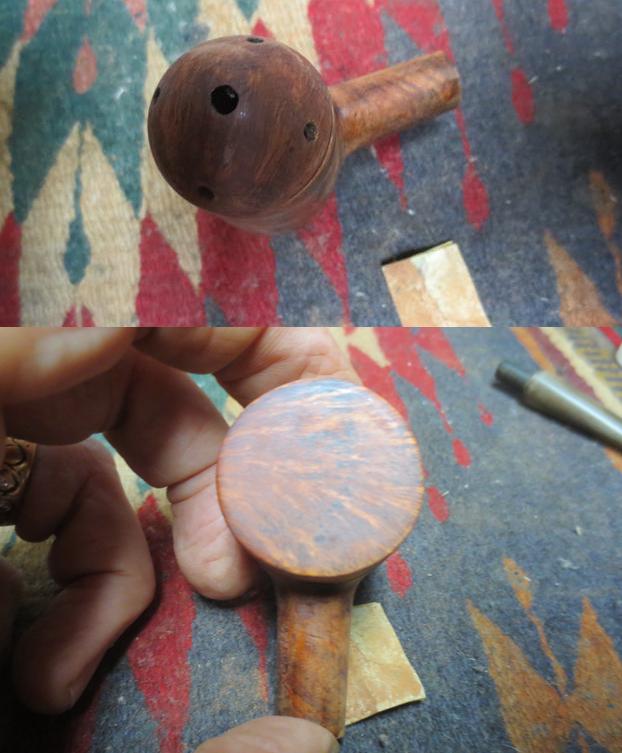
 I buffed the bowl with Blue Diamond polish on the buffing pen. I gave it several coats of carnauba wax and buffed it to a shine.
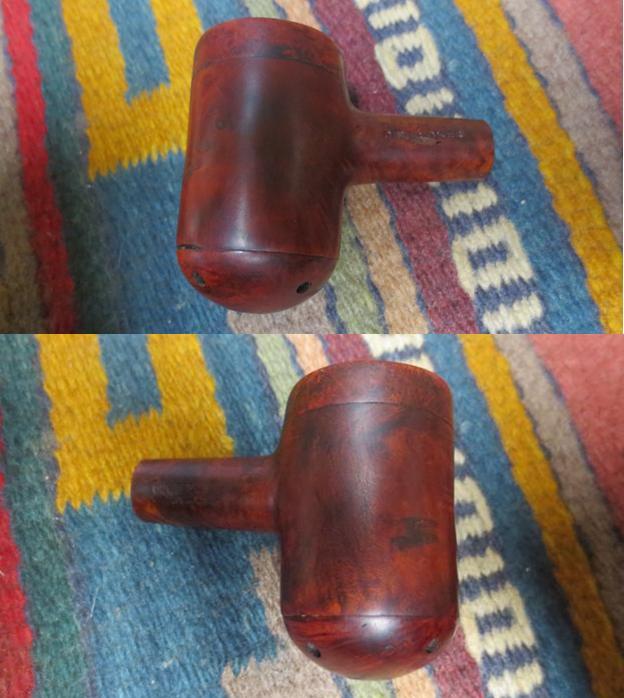
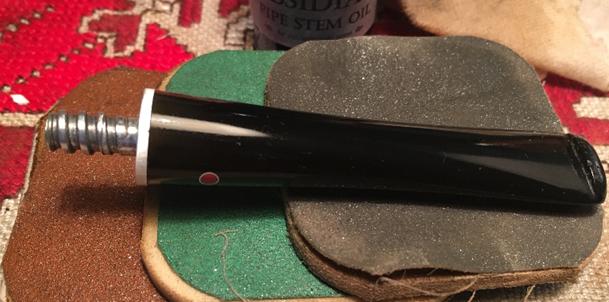
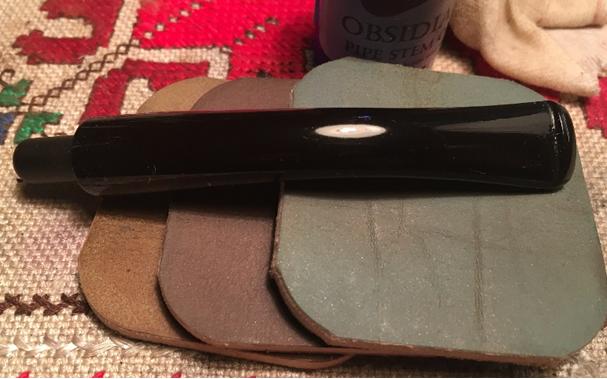
 I sanded the stem with 220 grit sandpaper to smooth out the scratch marks on the vulcanite. I polished it with micromesh sanding pads – wet sanding with 1500-2400 grit pads and dry sanding with 3200-12000 grit pads. I rubbed the stem down with Obsidian Oil after each set of three pads. After the final coat of oil I set it aside to dry.
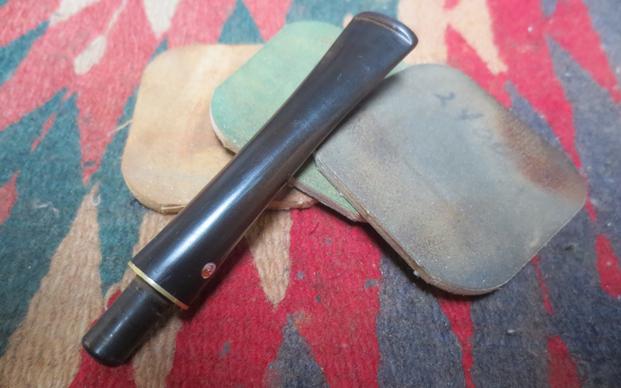
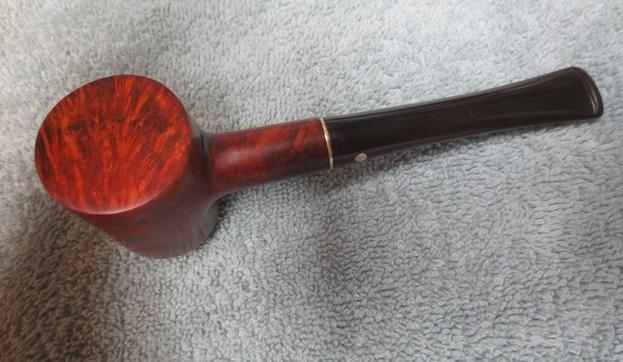
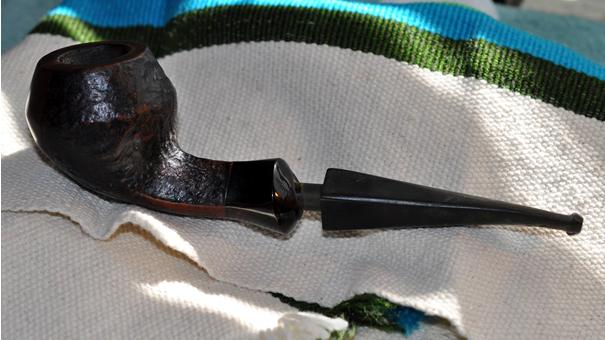
 I buffed the pipe with Blue Diamond once more and then gave the bowl and stem multiple coats of carnauba wax. I buffed it with a clean buffing pad to polish it and then by hand with a microfibre cloth to deepen the shine. The finished pipe is shown in the photos below. Some of the character marks of the pipe that came to me still show and I am sure could tell a story if they were able to speak. I like the finished look – the marks and all give the pipe a sense of history and time. It is not a bad looking old pipe considering that it has traveled from the 1940s into 2016 and who knows how much longer. Thanks for looking.
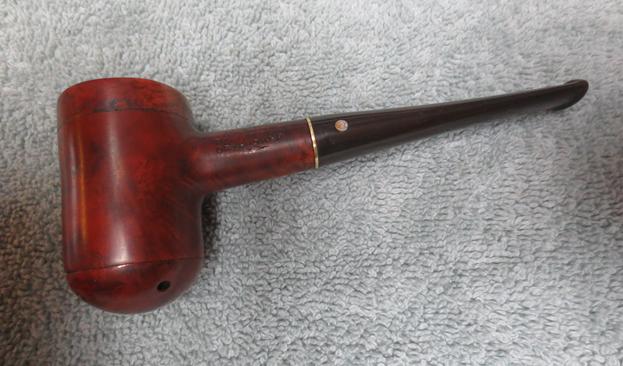


 It was now time to start cleaning the internals of both the stem and stummel.
 Needless to say, the pile of cotton swabs and pipe cleaners were only a representative sample of what it took to get the stem clean. And the well/mortise and airway of the pipe was equally nasty’ I really hadn’t expected this given the maintained cake in the bowl. I stuffed a cotton ball in the bowl and a cotton swab in the air hole, filled the bowl with alcohol and left it to sit over night. I completed cleaning inside the stem before going to bed.