Tag Archives: topping a bowl

Topping and Restaining a Lorenzo Ascona


Blog by Steve Laug

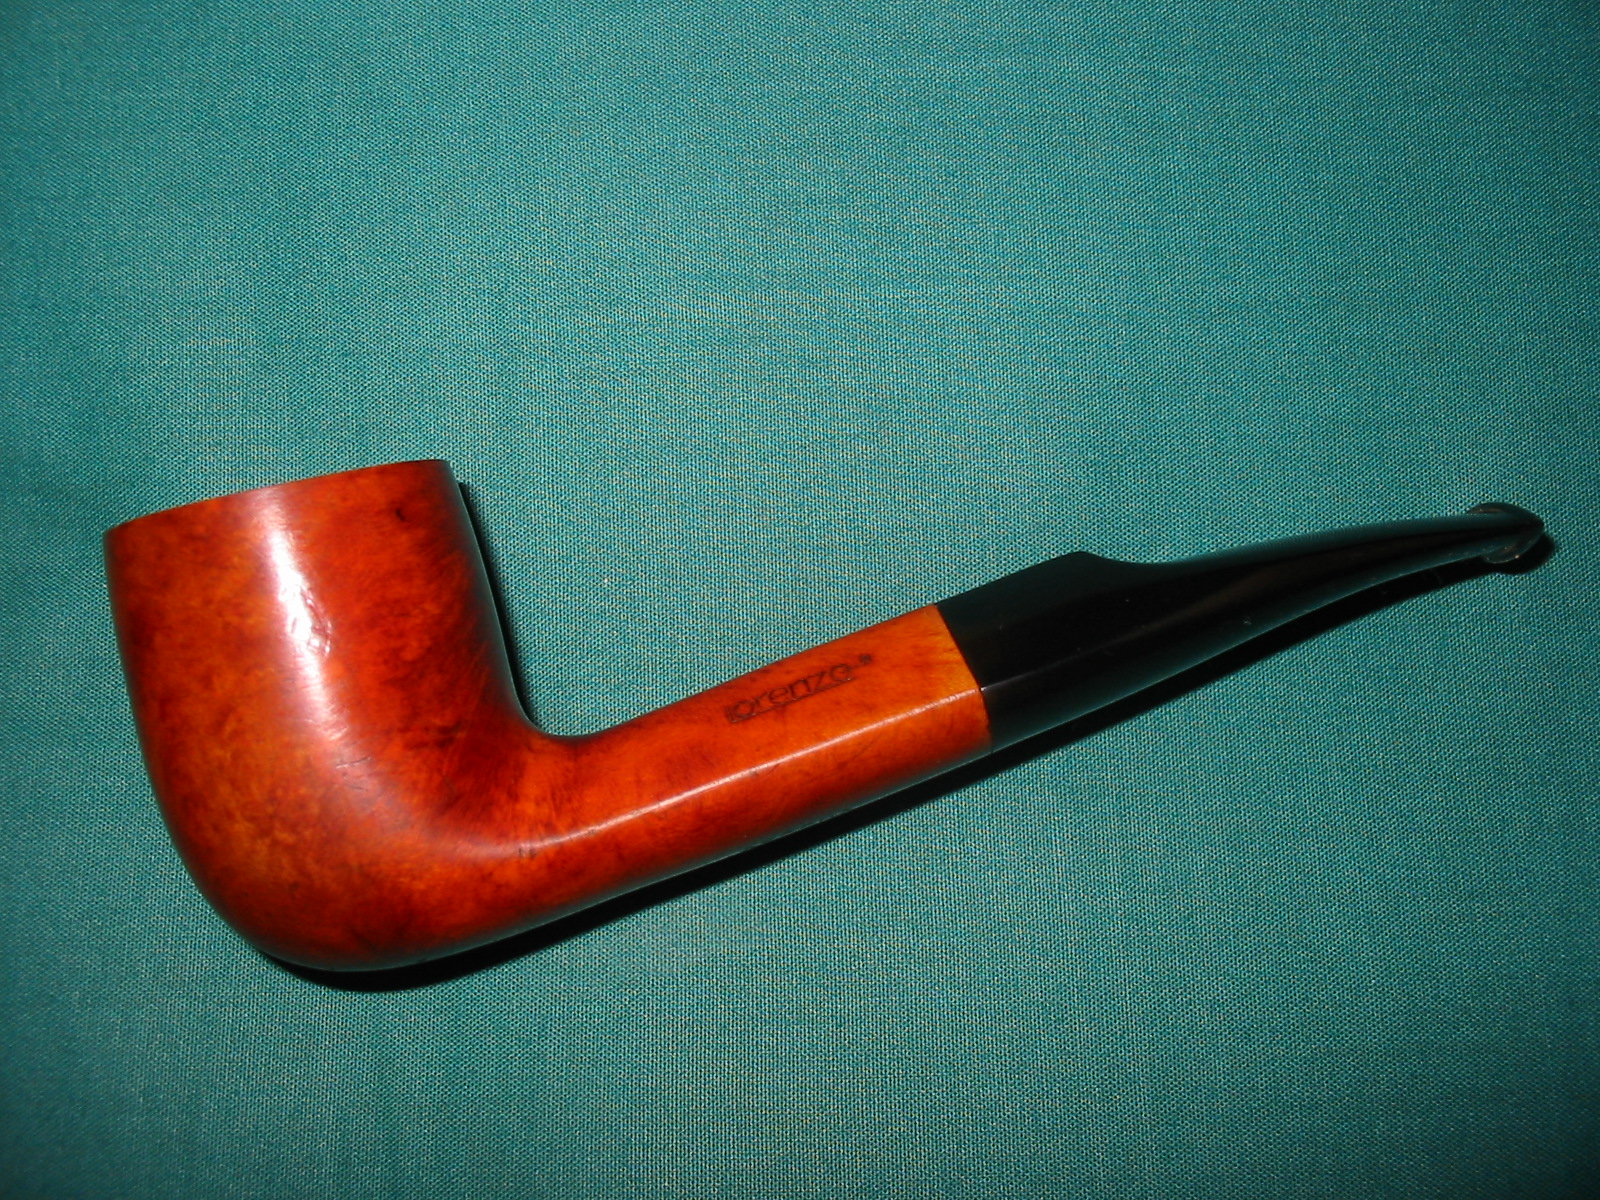
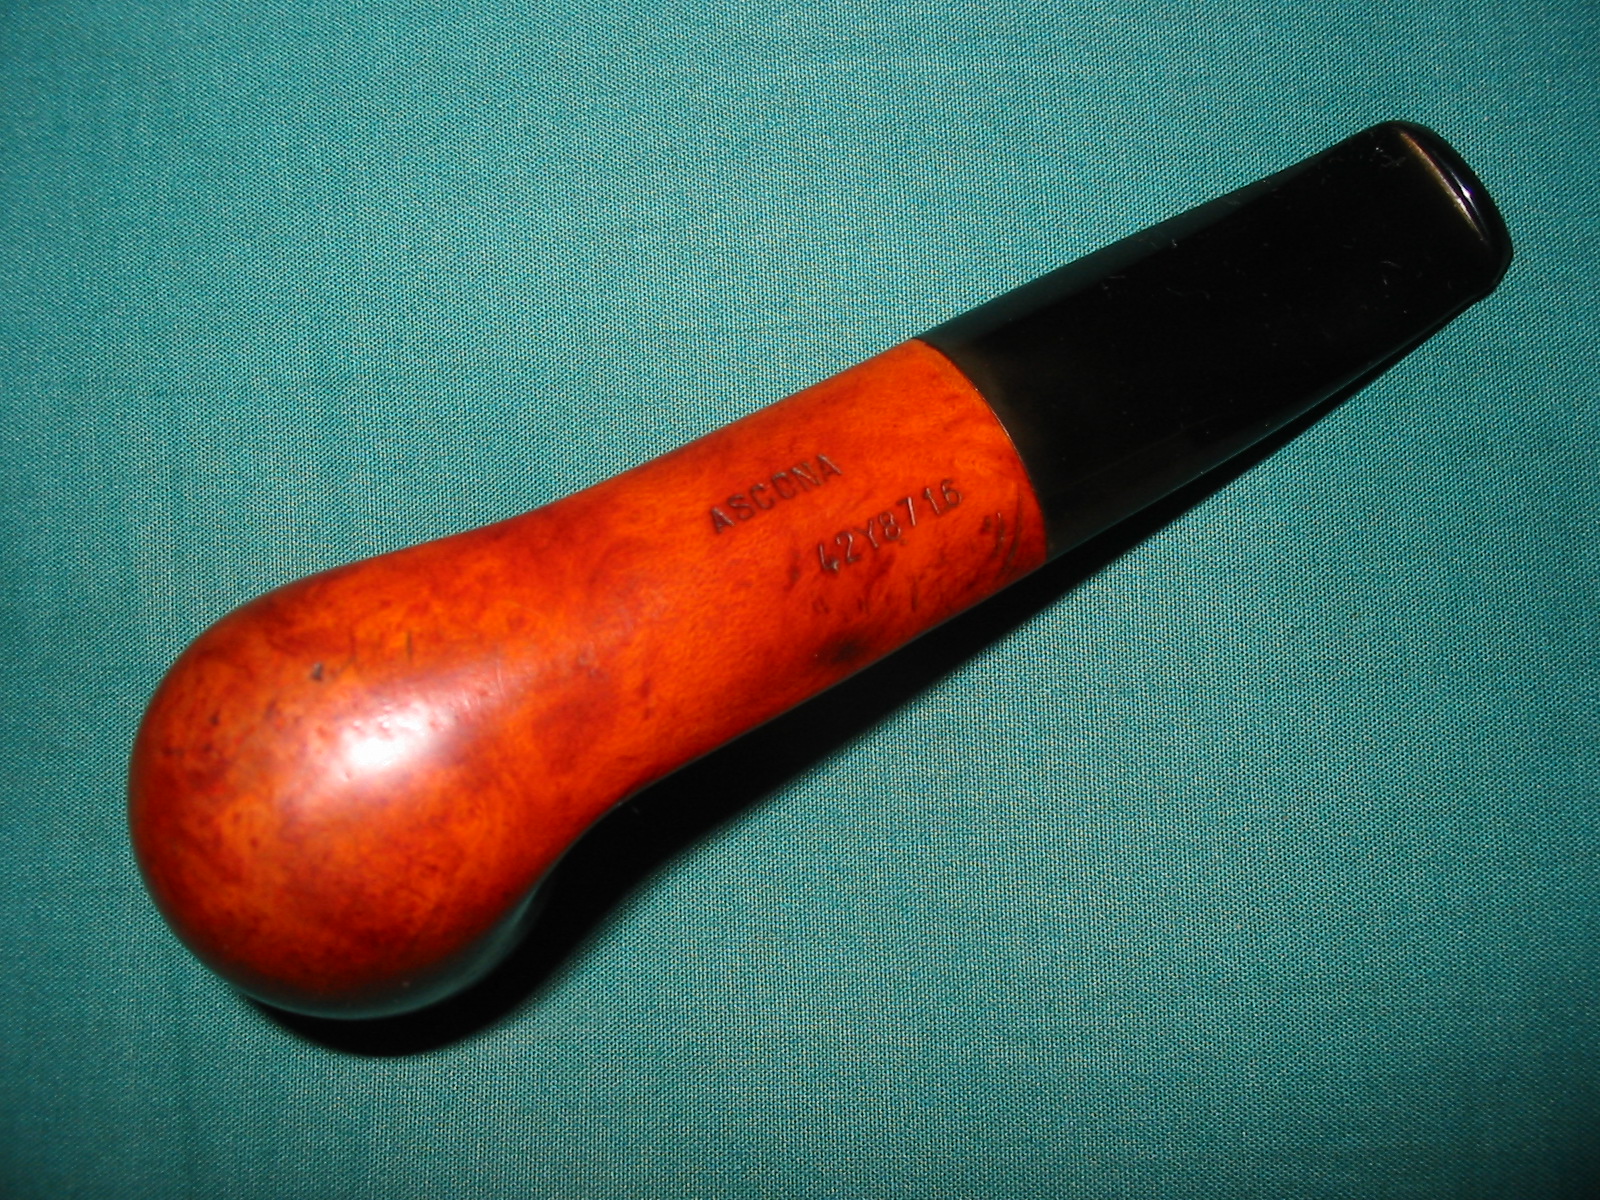
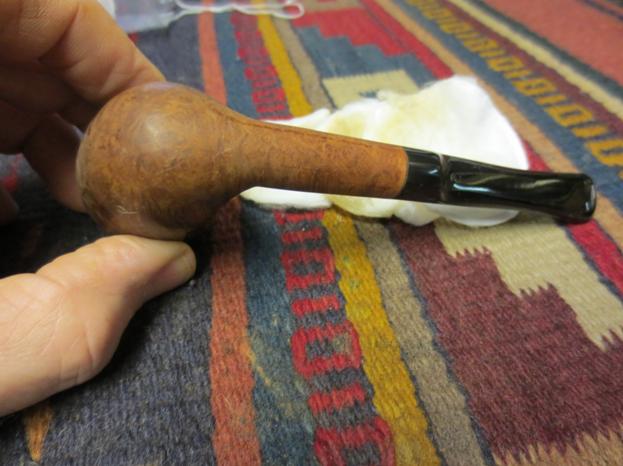
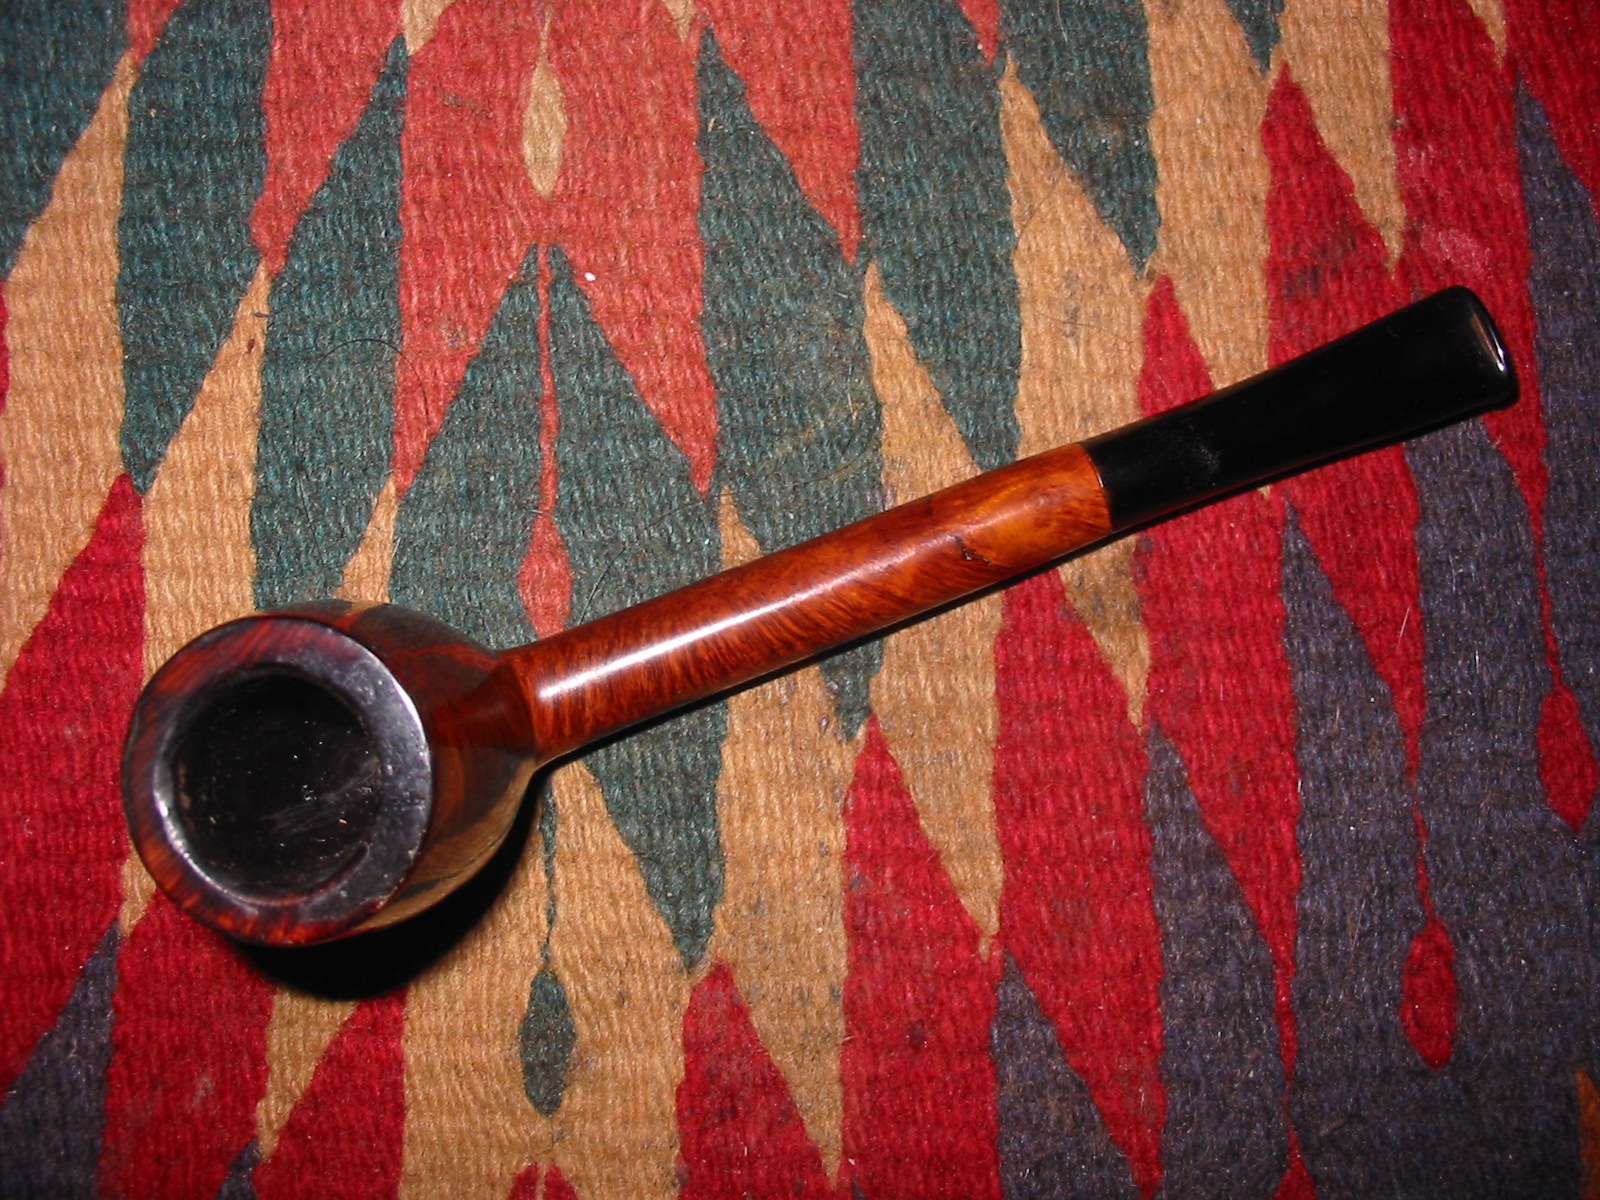
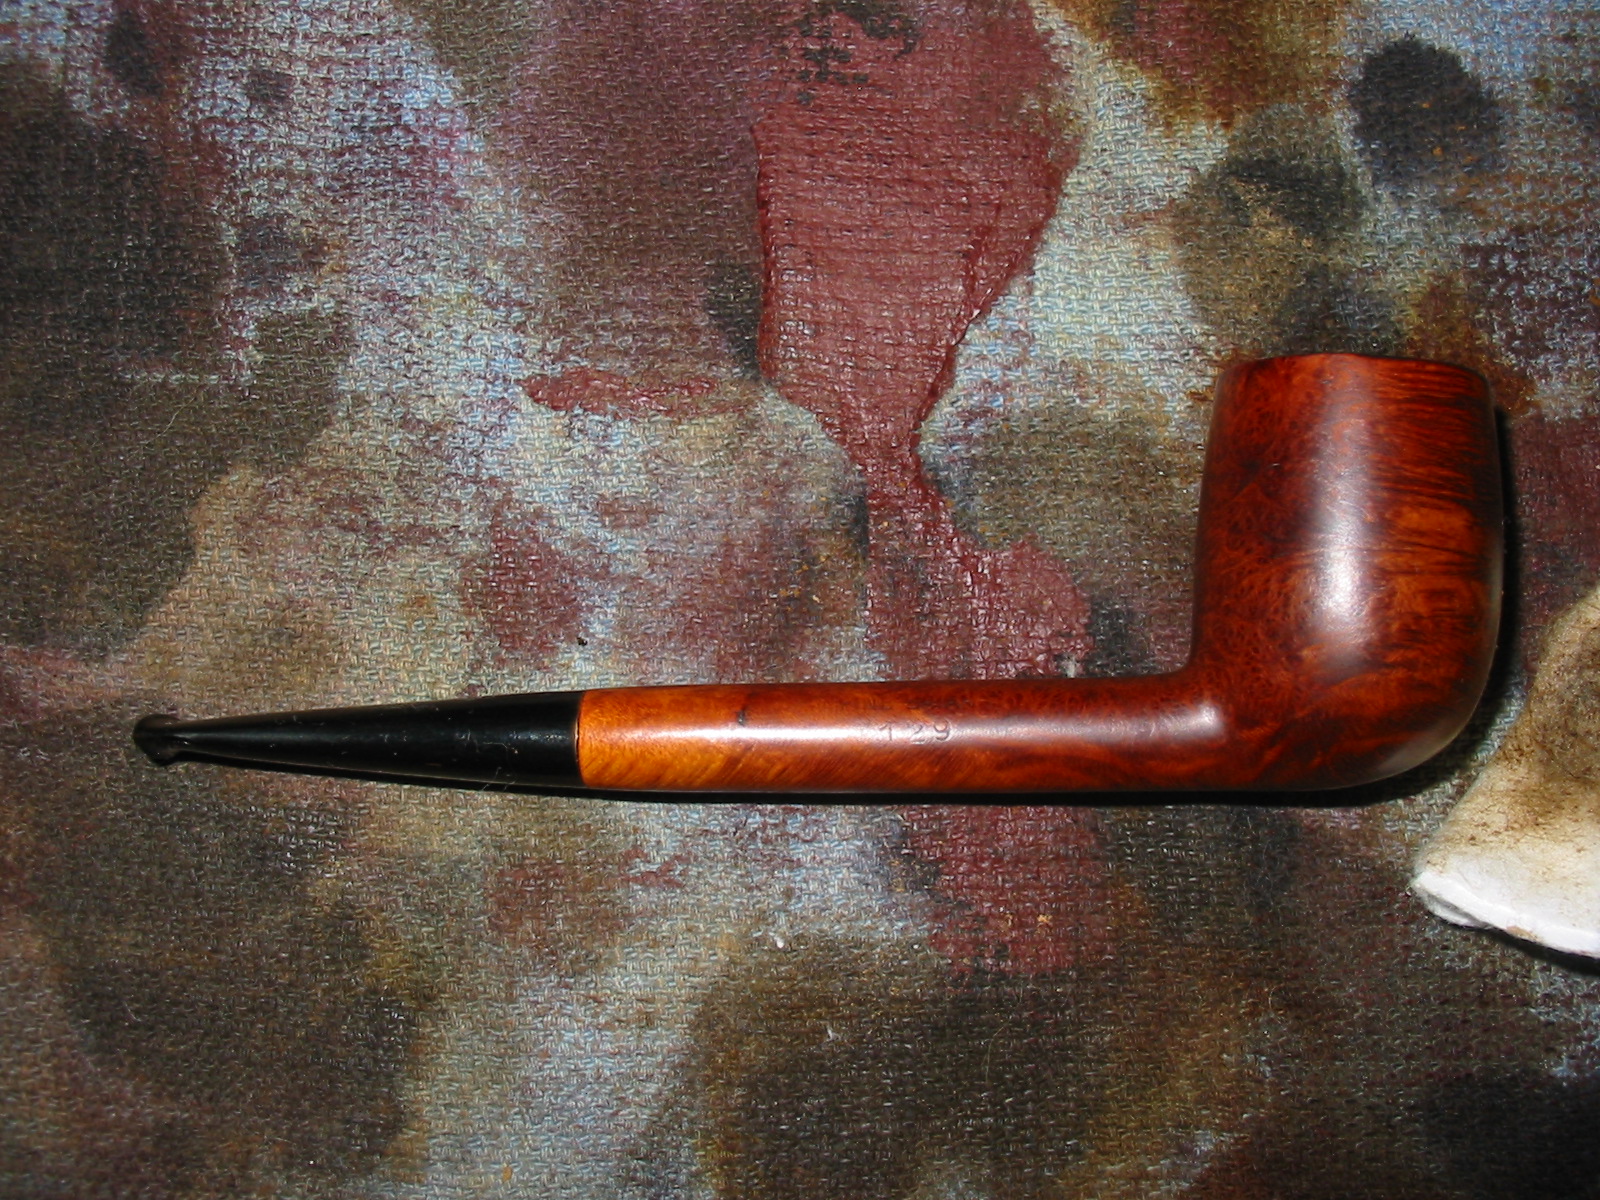
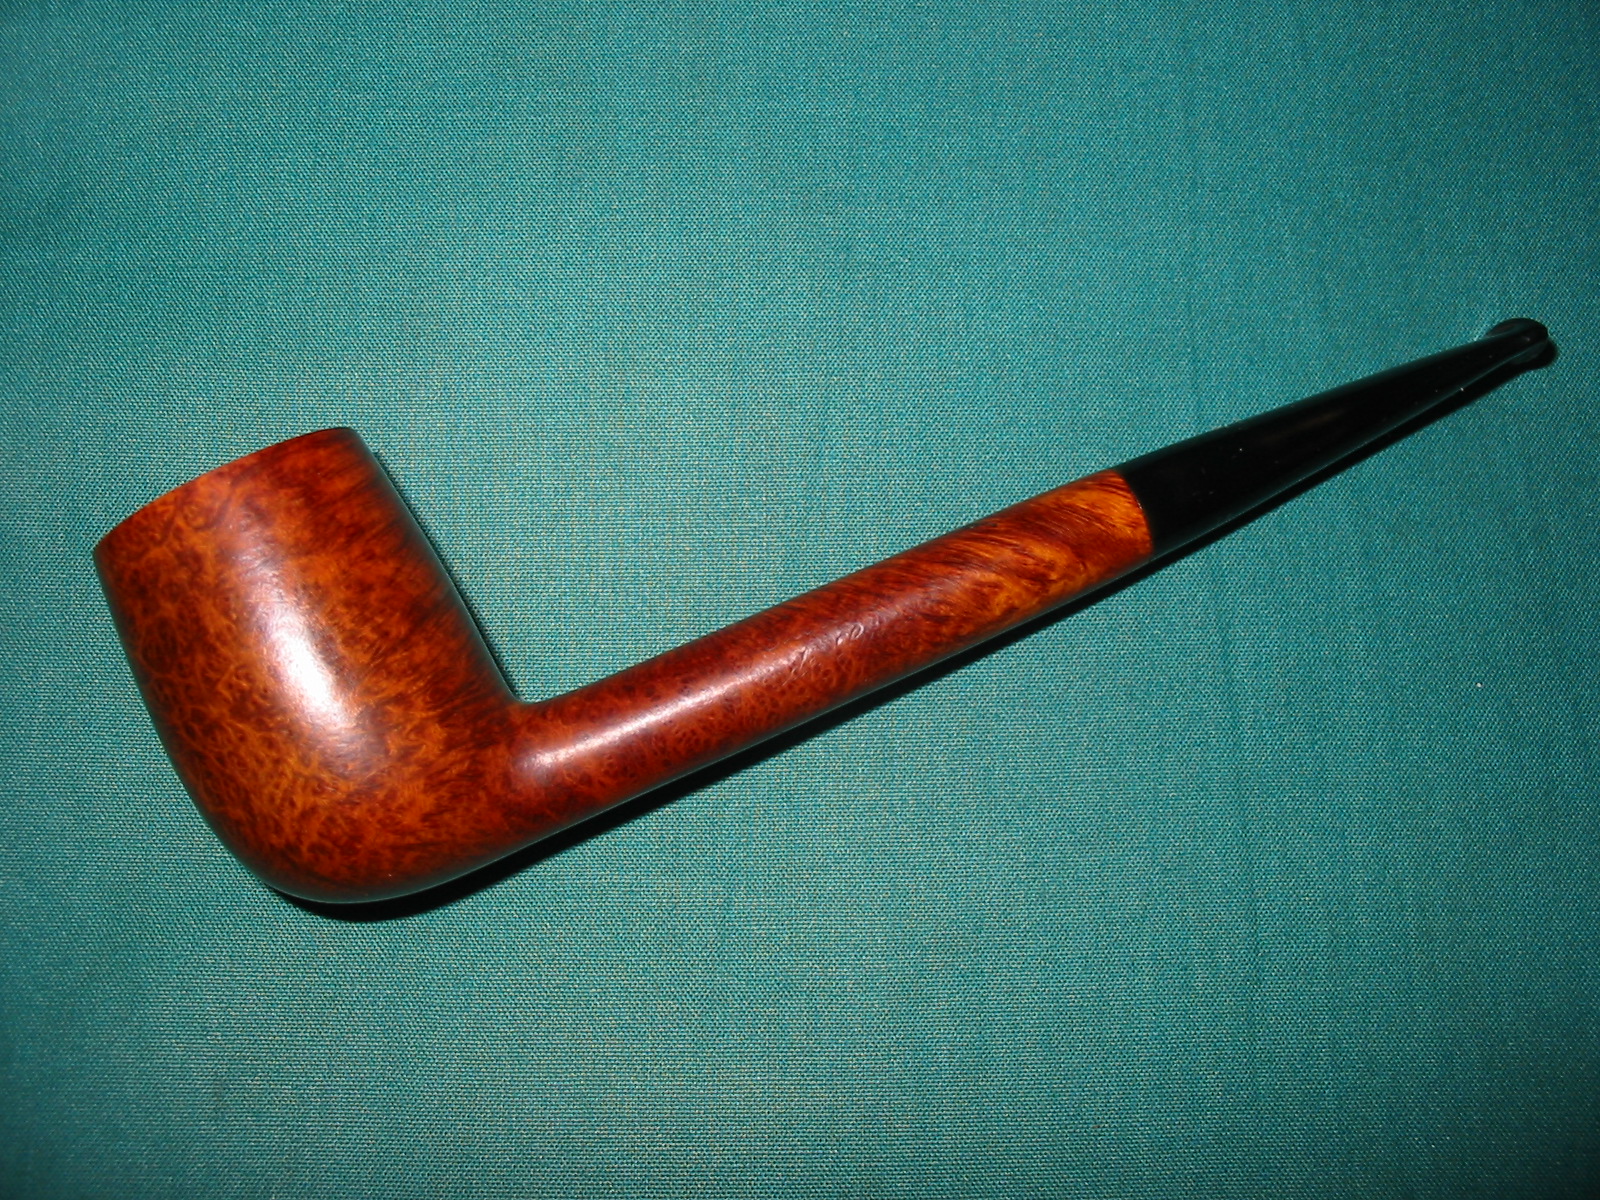
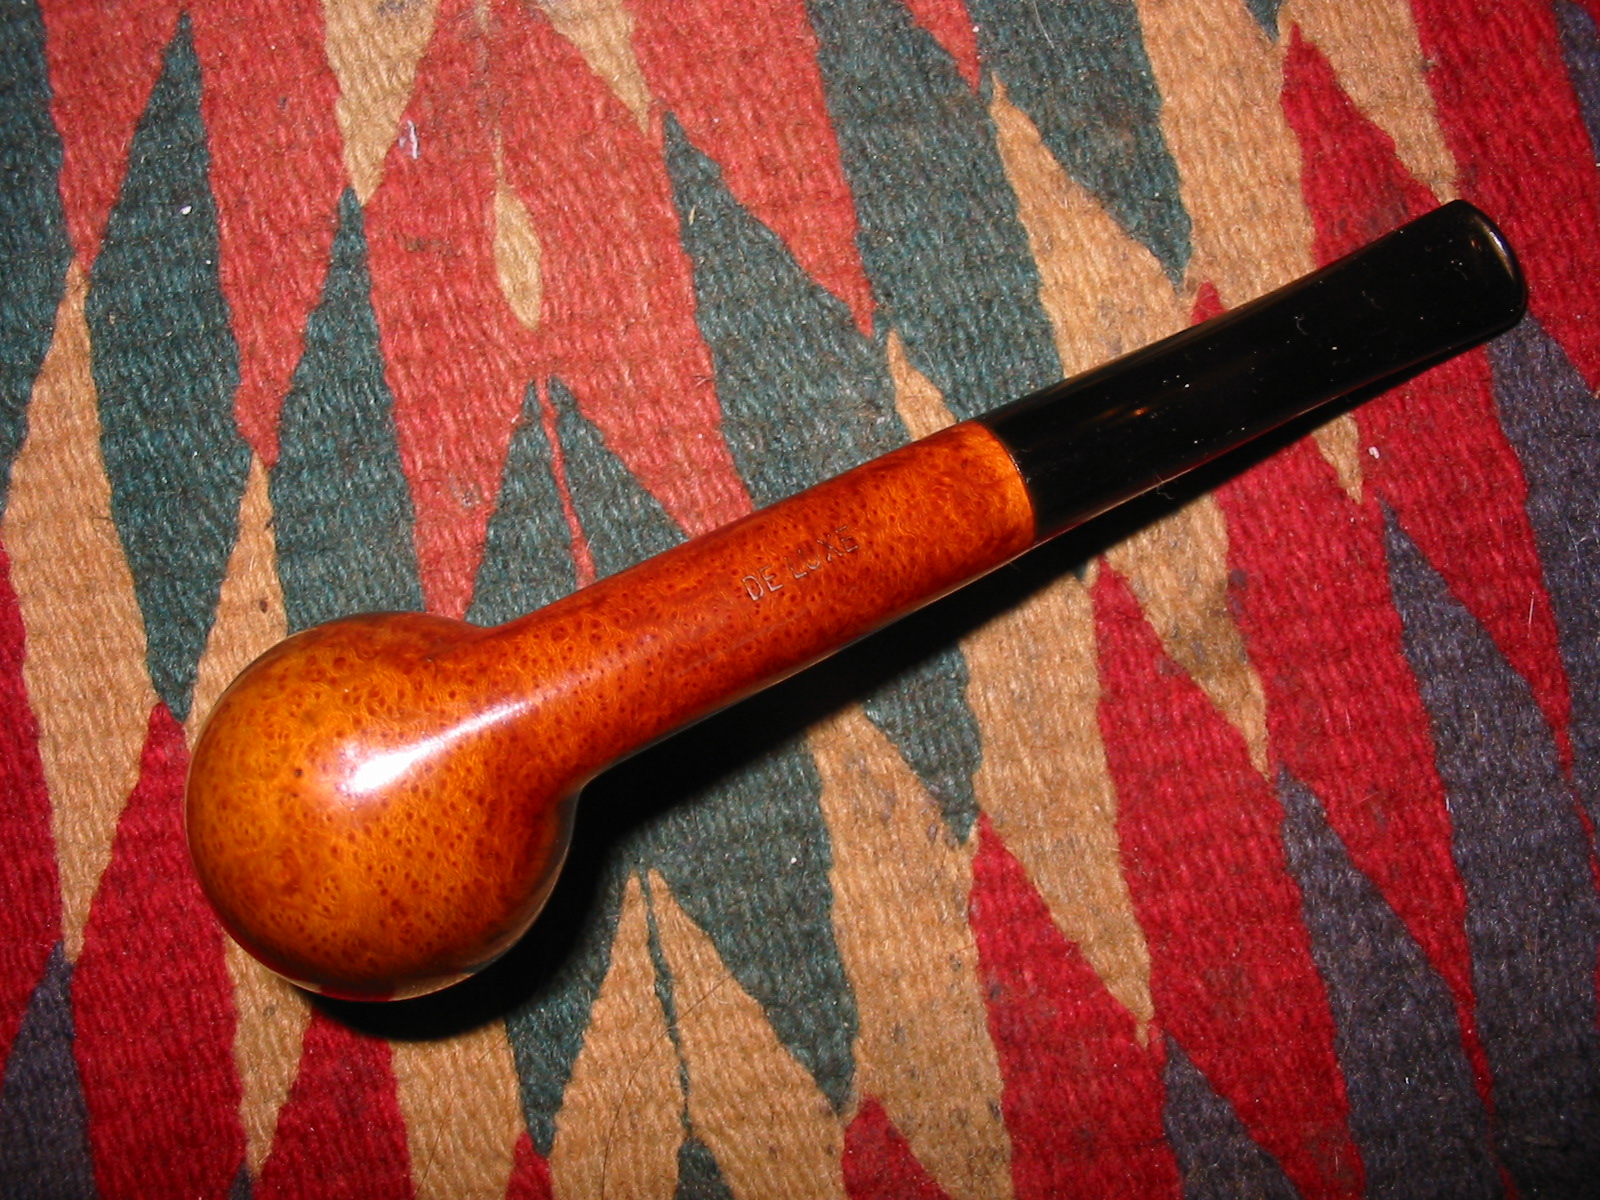
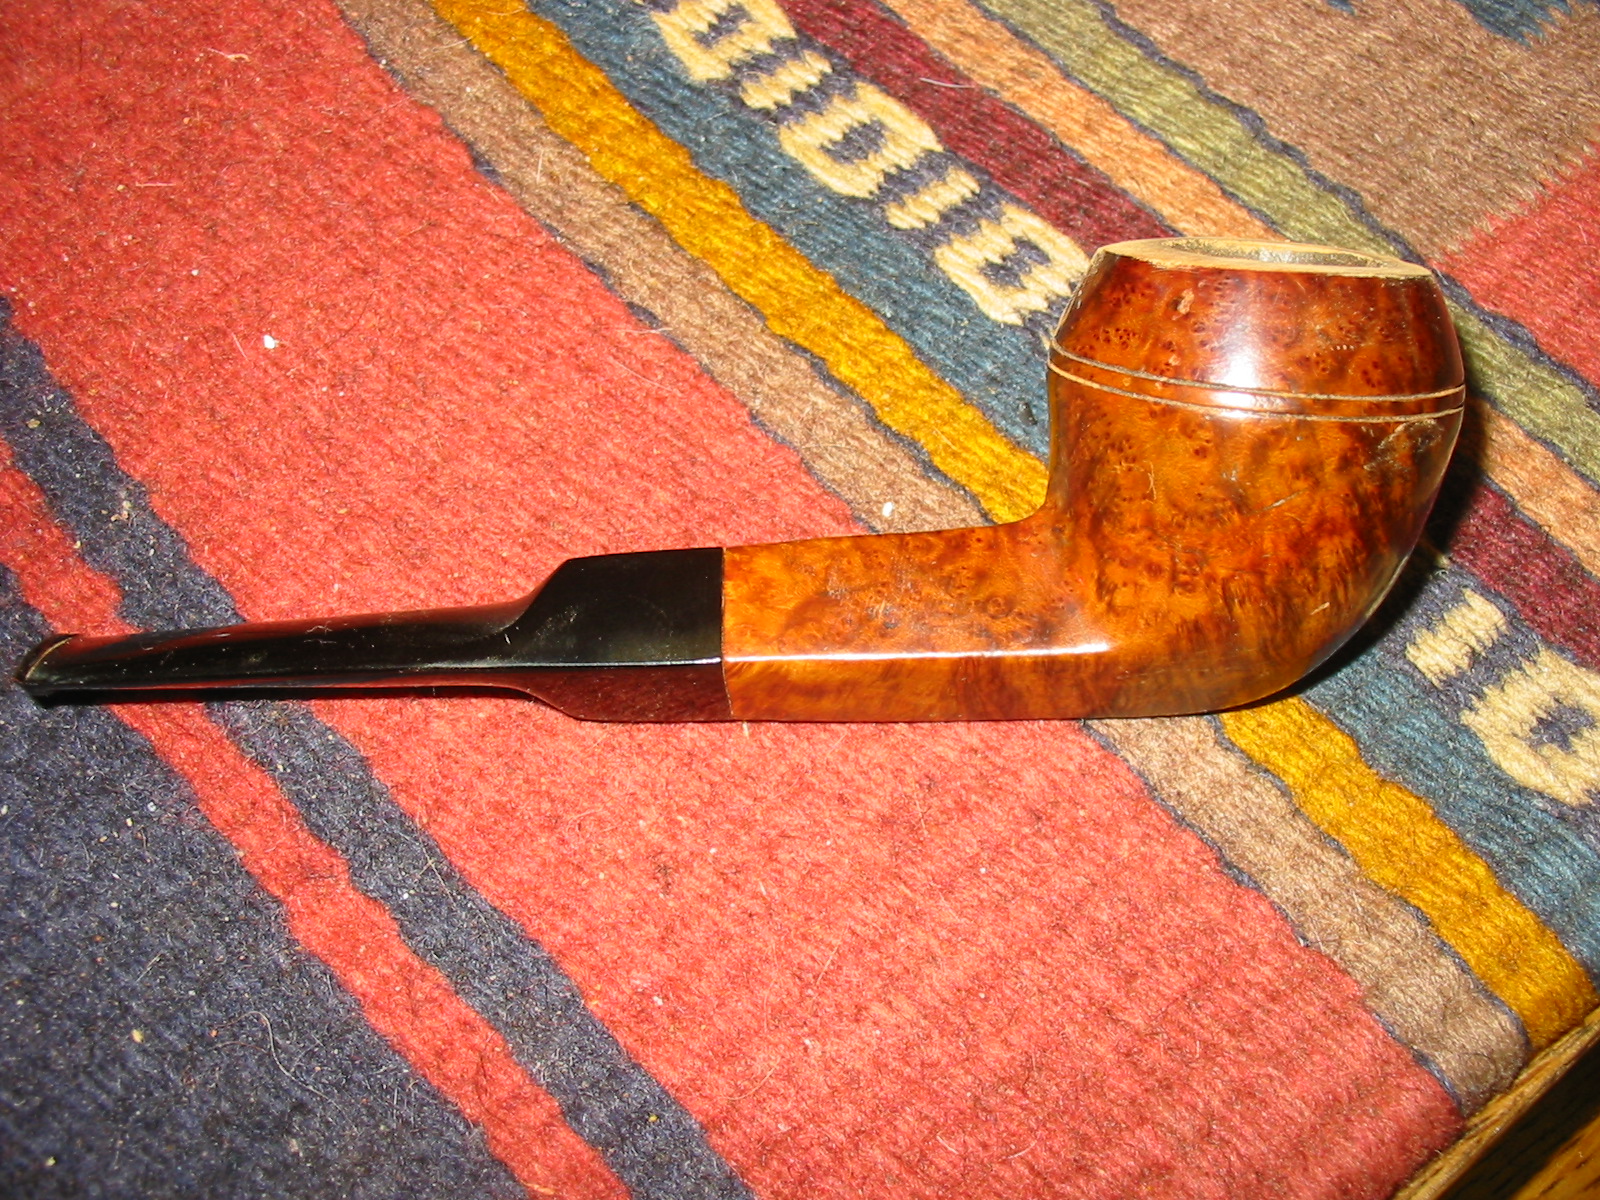
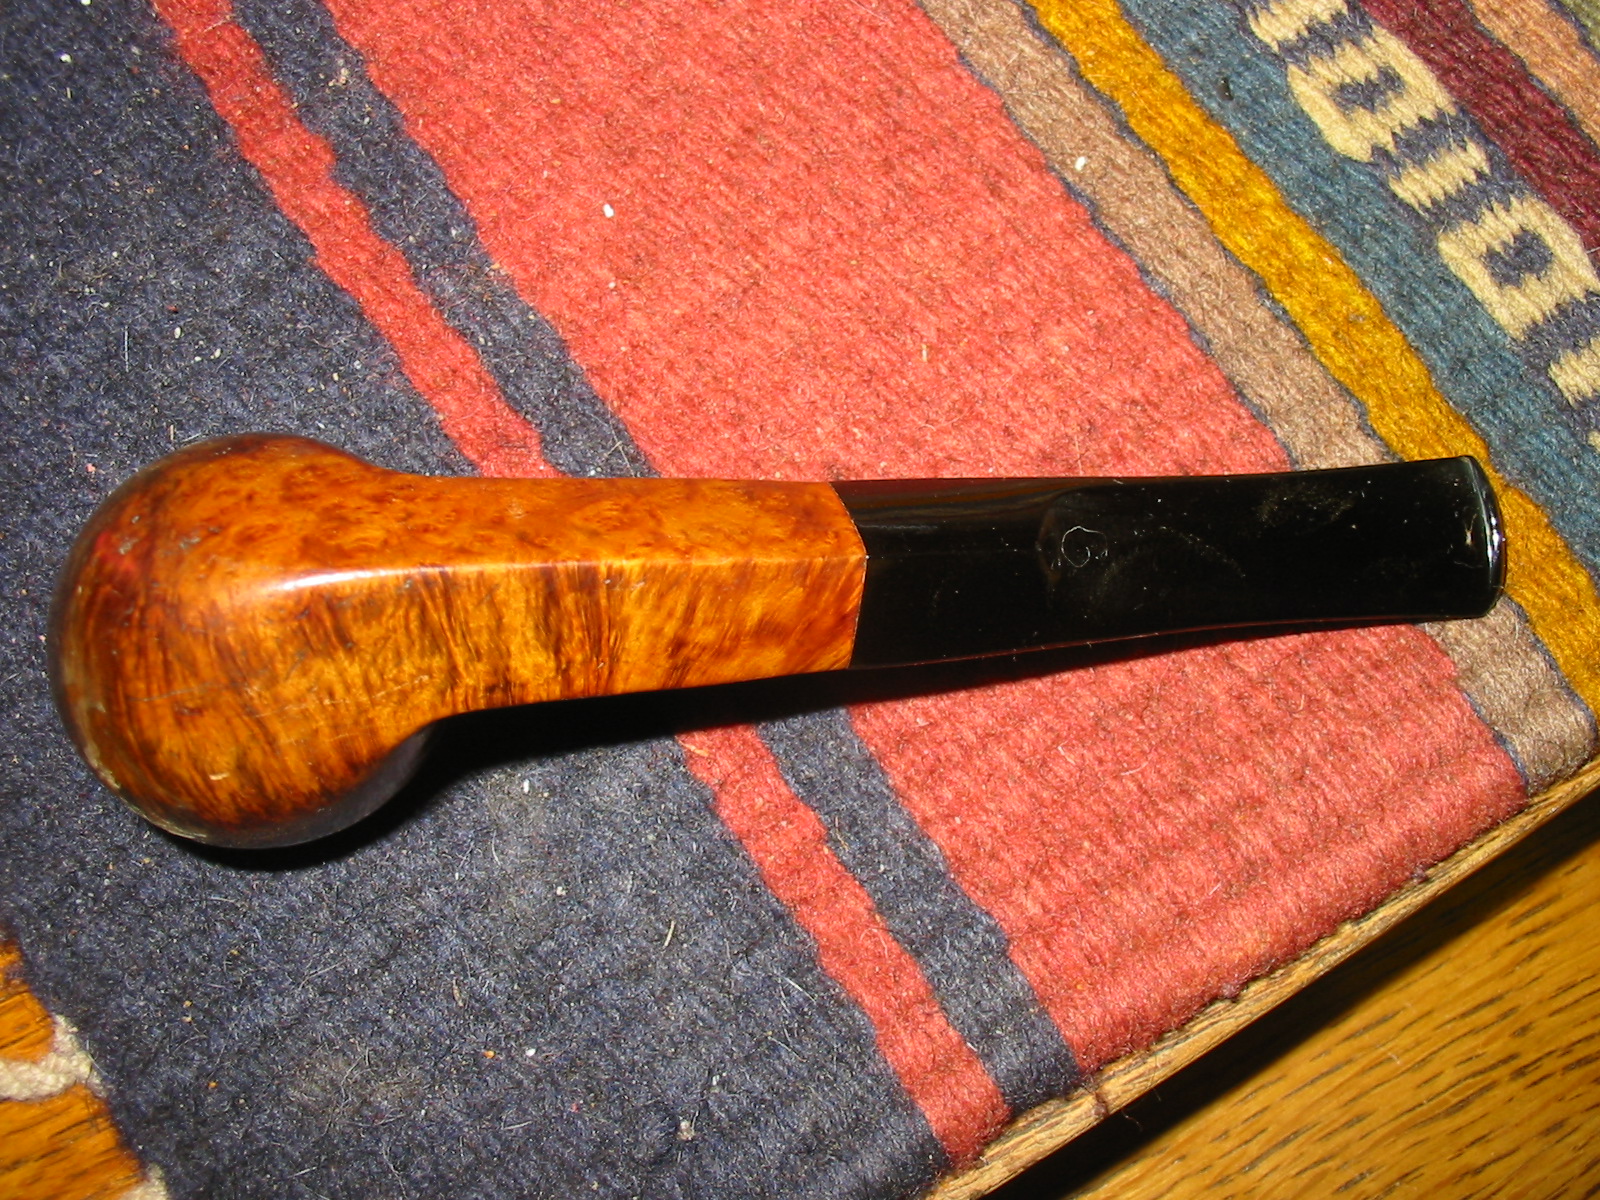
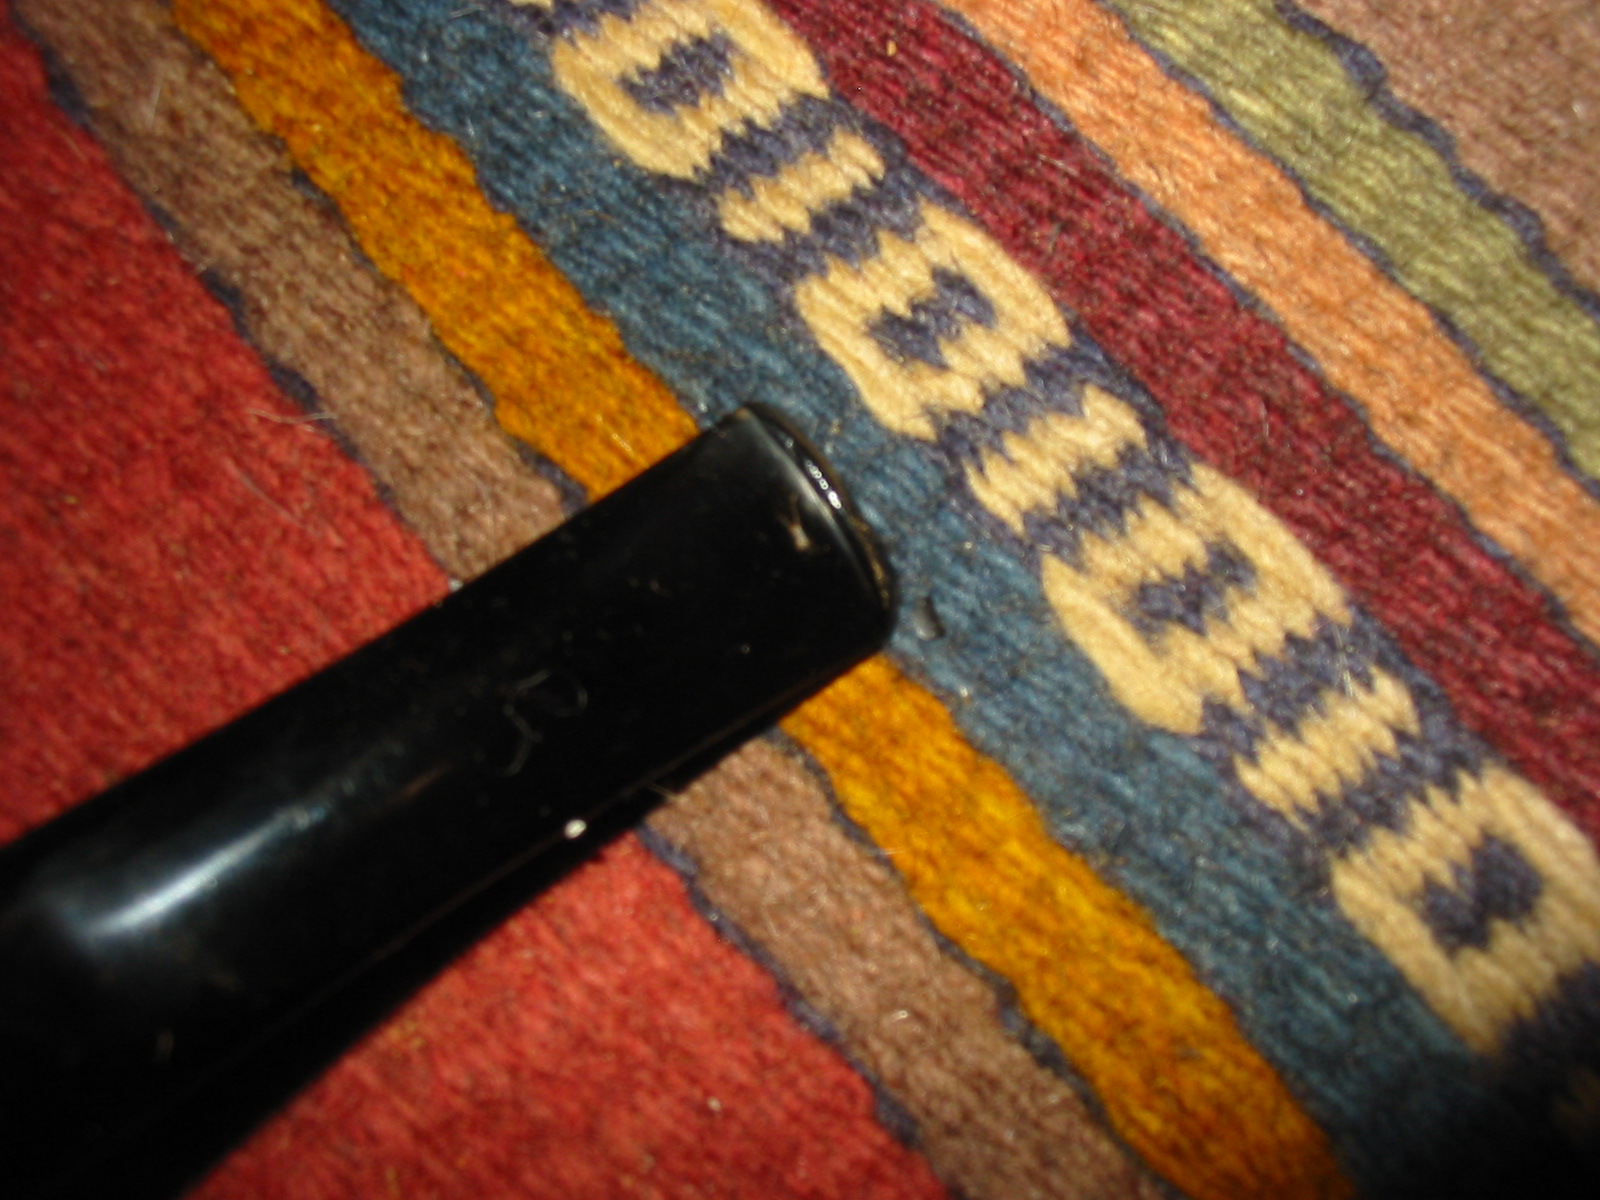
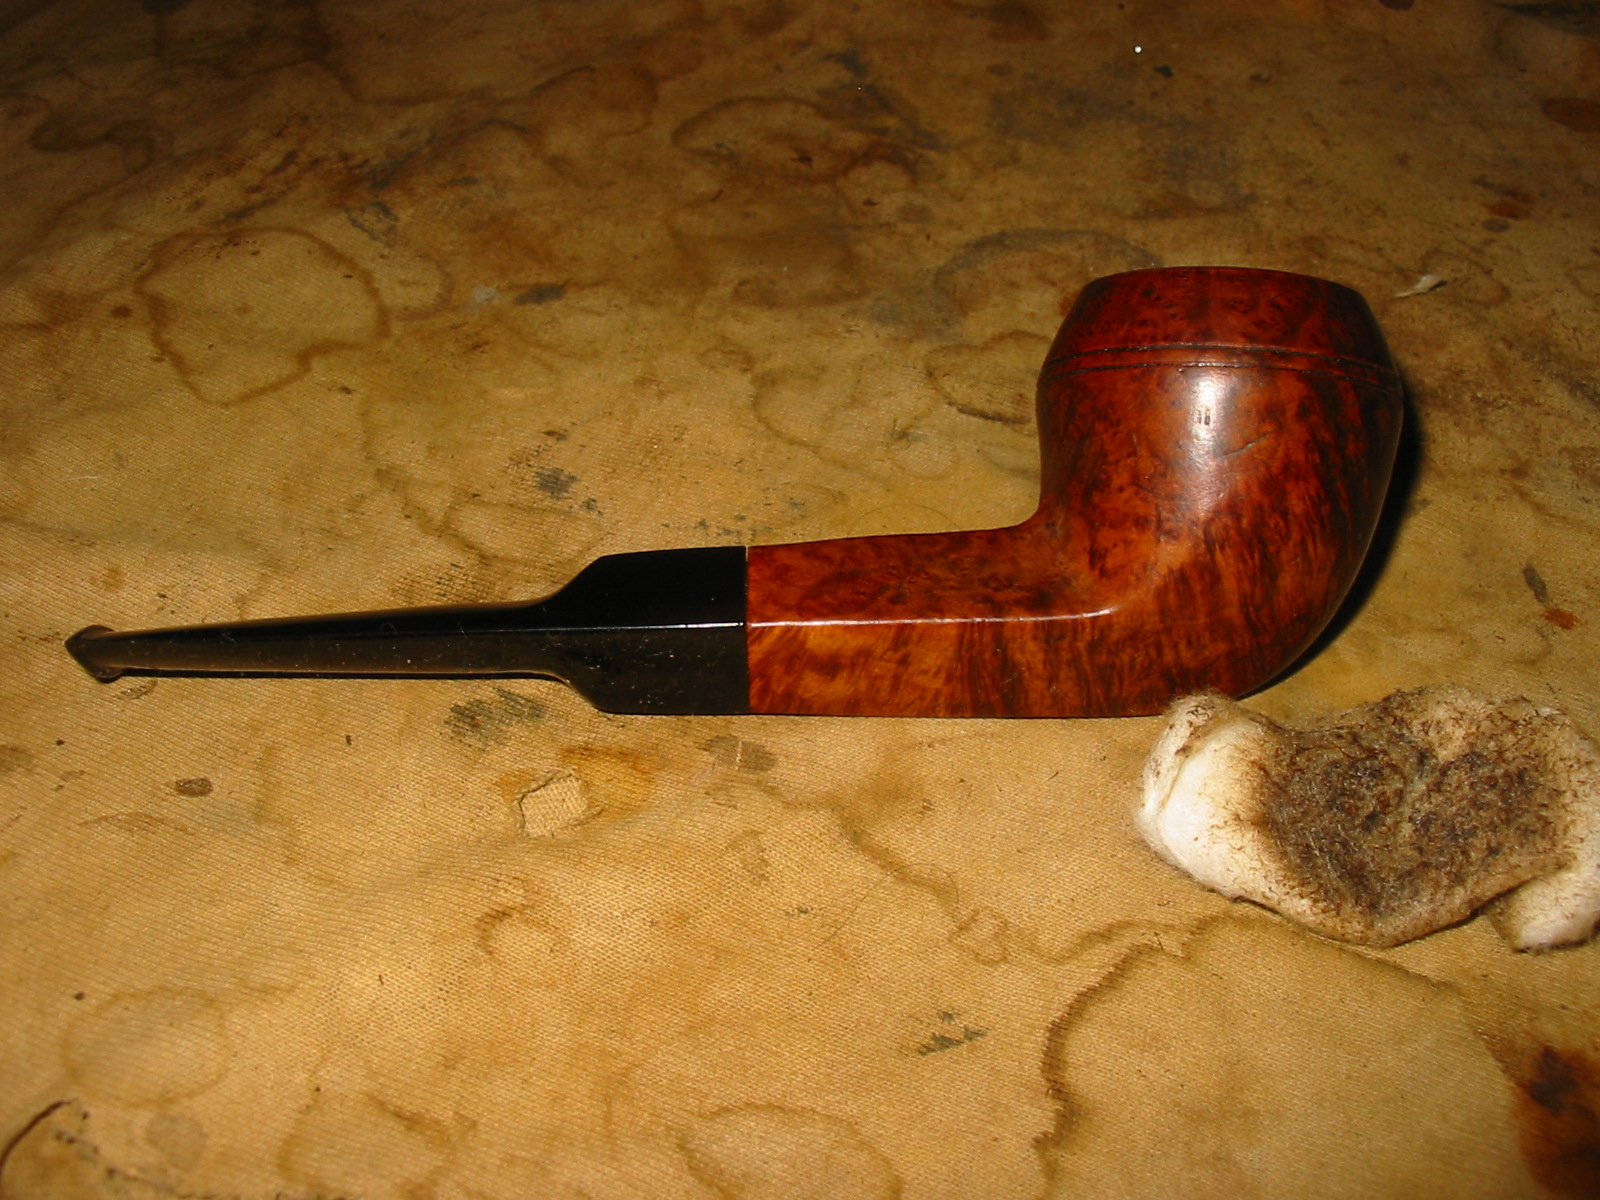
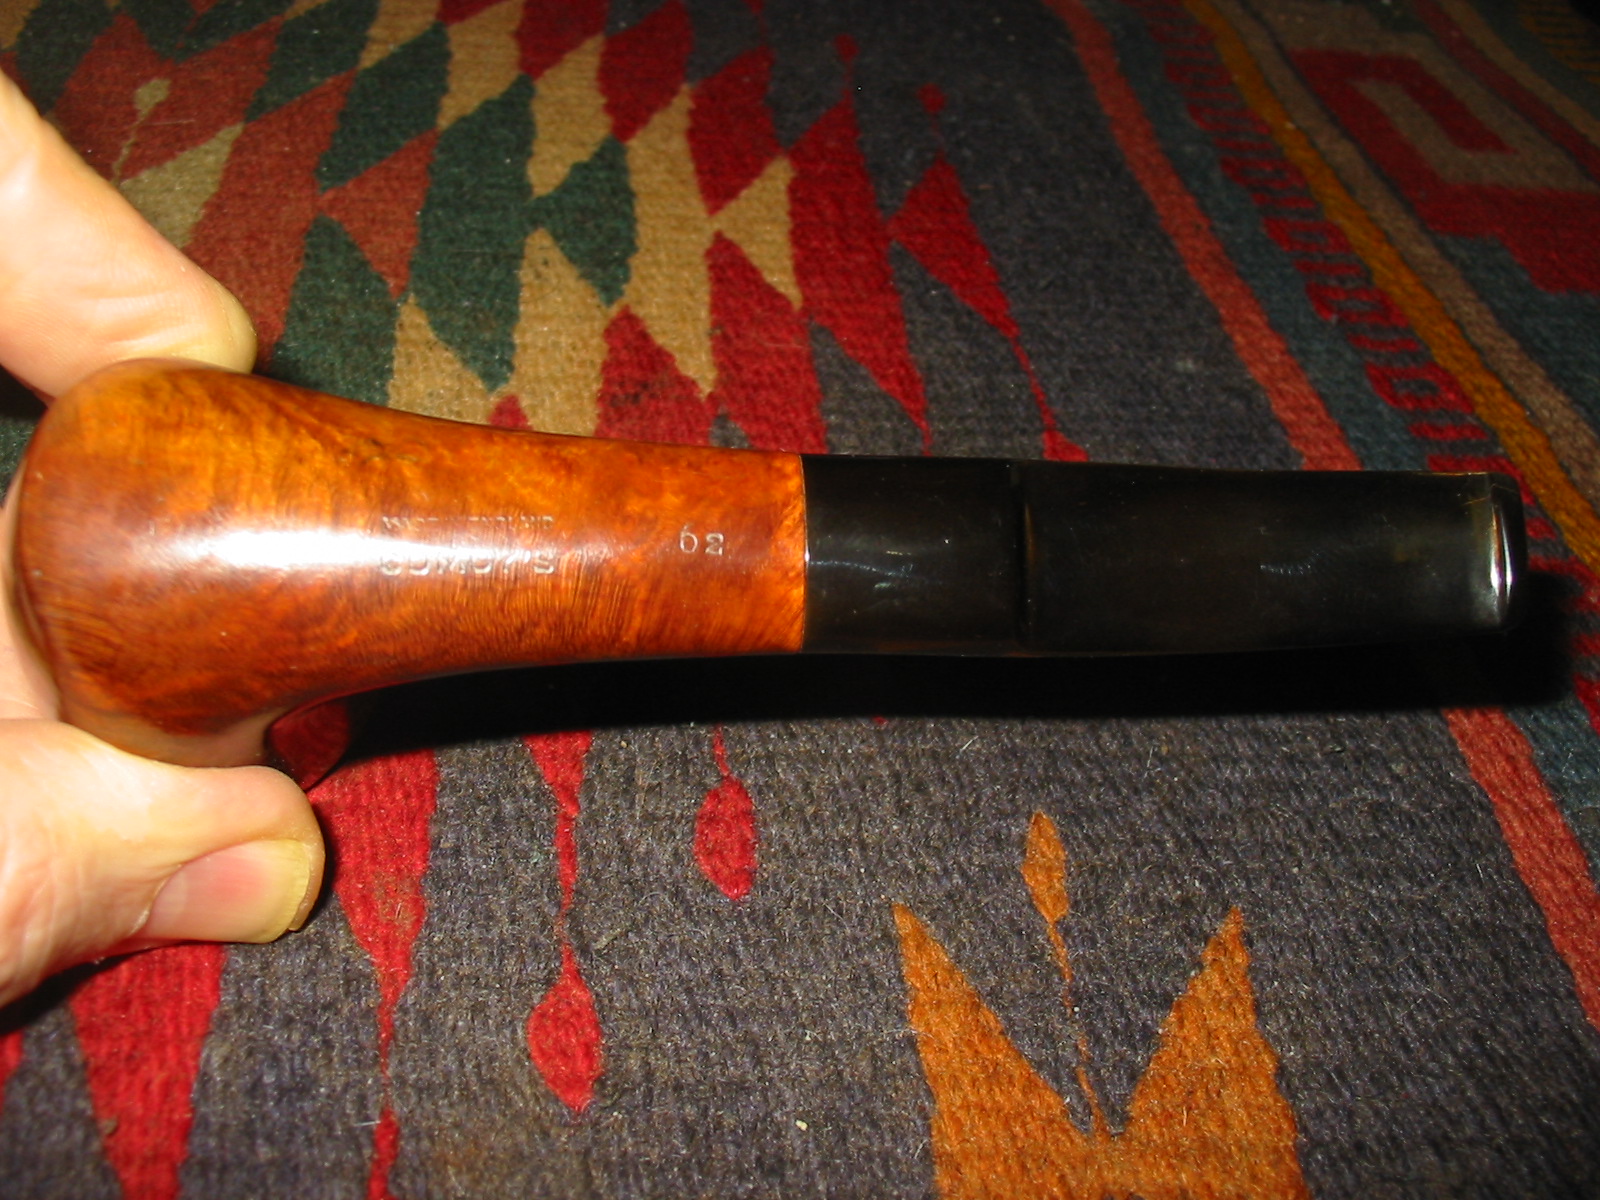
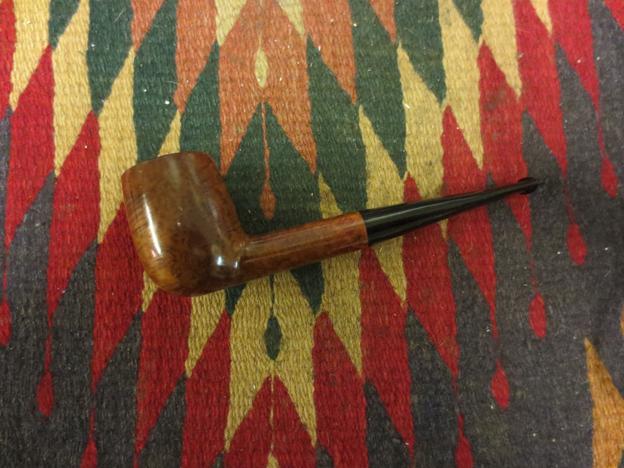
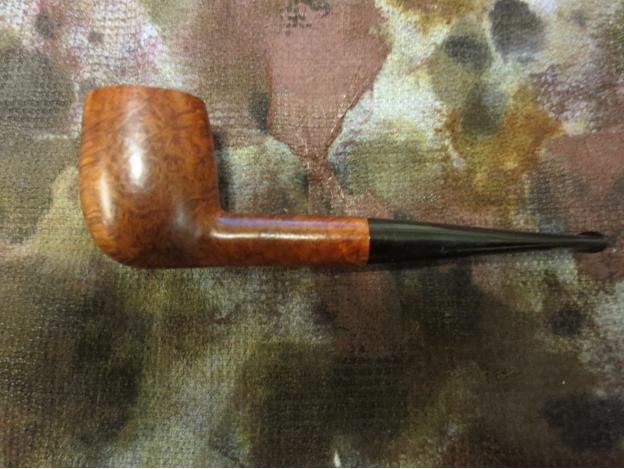
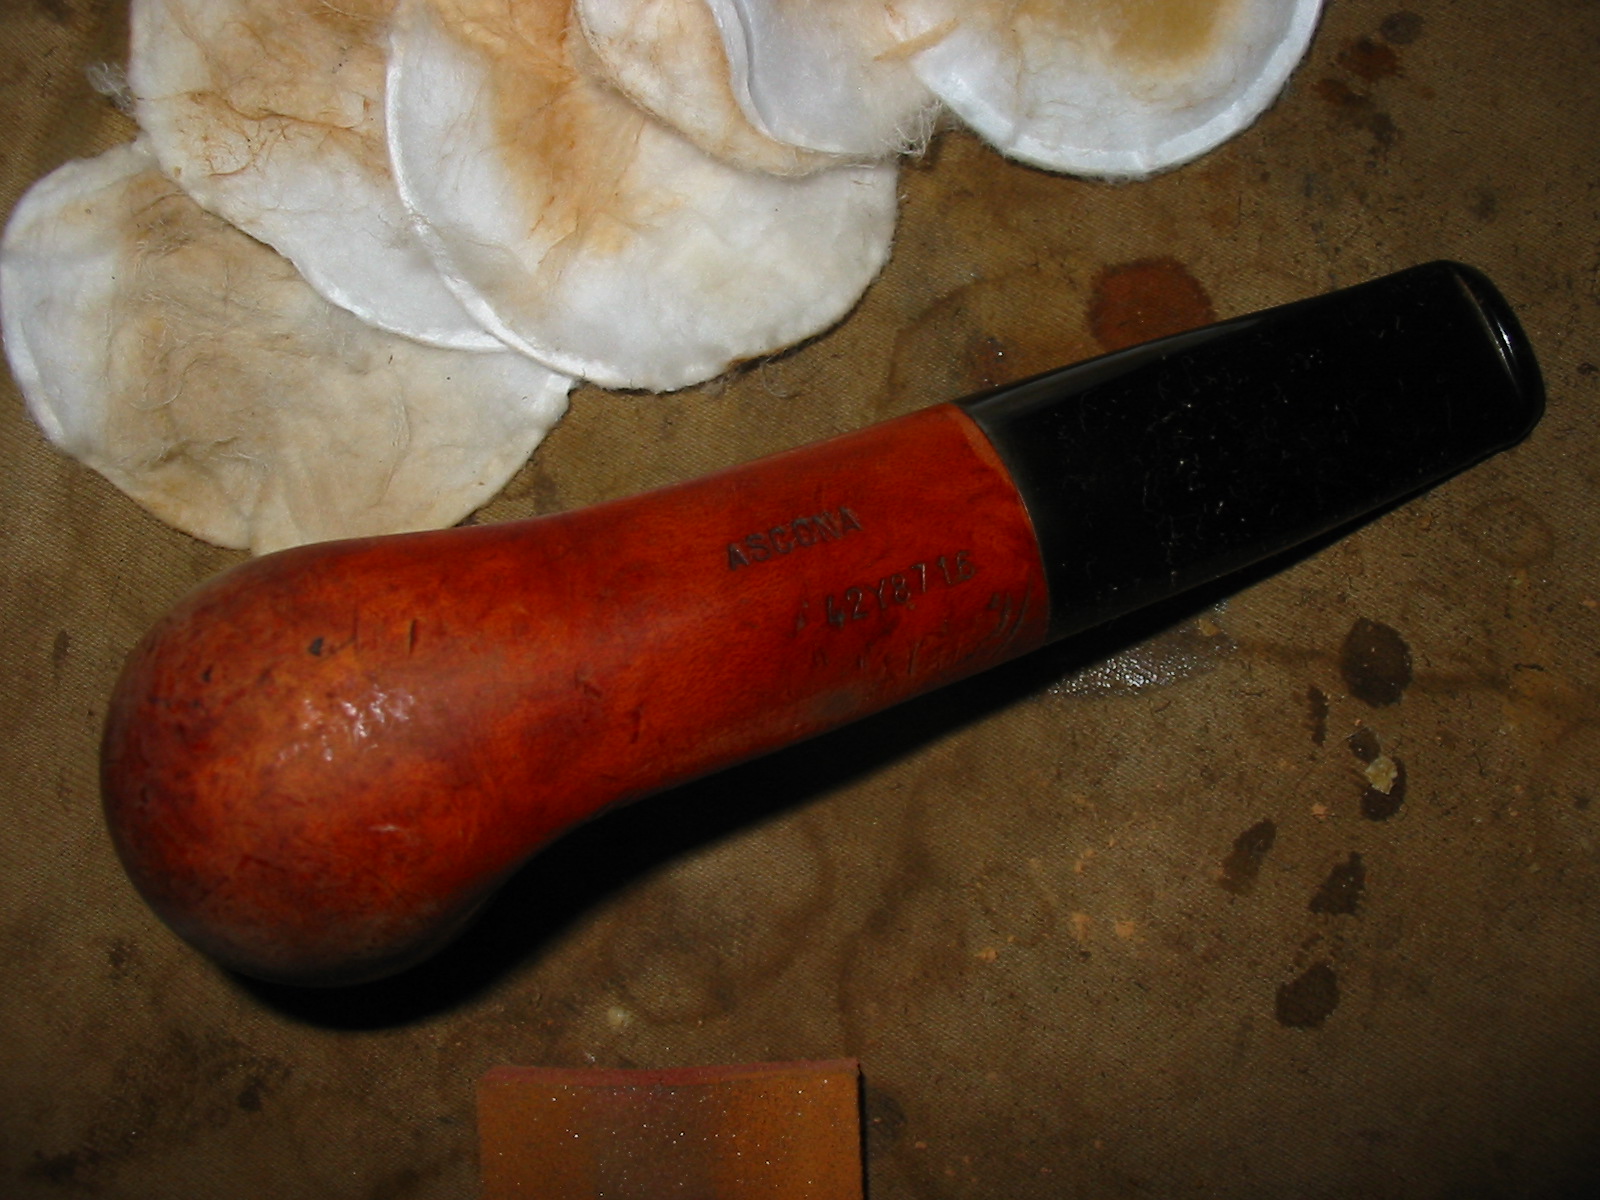
Yet another pipe from the Vancouver Pipe Club donation was this triangular shanked Lorenzo. It is stamped on the left side of the top of the shank Lorenzo and on the bottom of the shank it is stamped Ascona over a series of numbers and letters – 42Y8716. I have no idea what the numbers mean and have been unable to find any information on them. Over the years I have had quite a few old Lorenzo’s but they always seem to find new homes as they tend to be too large to my liking. This one is a bit different – it is probably a group 4 sized bowl with a large triangular shank and saddle stem. The stem was in very good shape and still bears the cursive L logo stamped on the blade of the stem. The bowl was in very rough shape. There was a coat of varnish on the pipe and the bowl had the usual black rubbery bowl coating. The finish was an orange stain that was breaking up under the varnish and leaving light spots in the finish. The rim was beat up and all the outer edges of the bowl either were scarred or burned. The briar under the varnish is quite scratched and there are dents in the briar. I did not take the time to remove any of those other than the ones that came out through my cursory sanding of the bowl. The marks that remain are like character reminders and I decided to leave them. IMG_4125 IMG_4126 IMG_4127 IMG_4128 
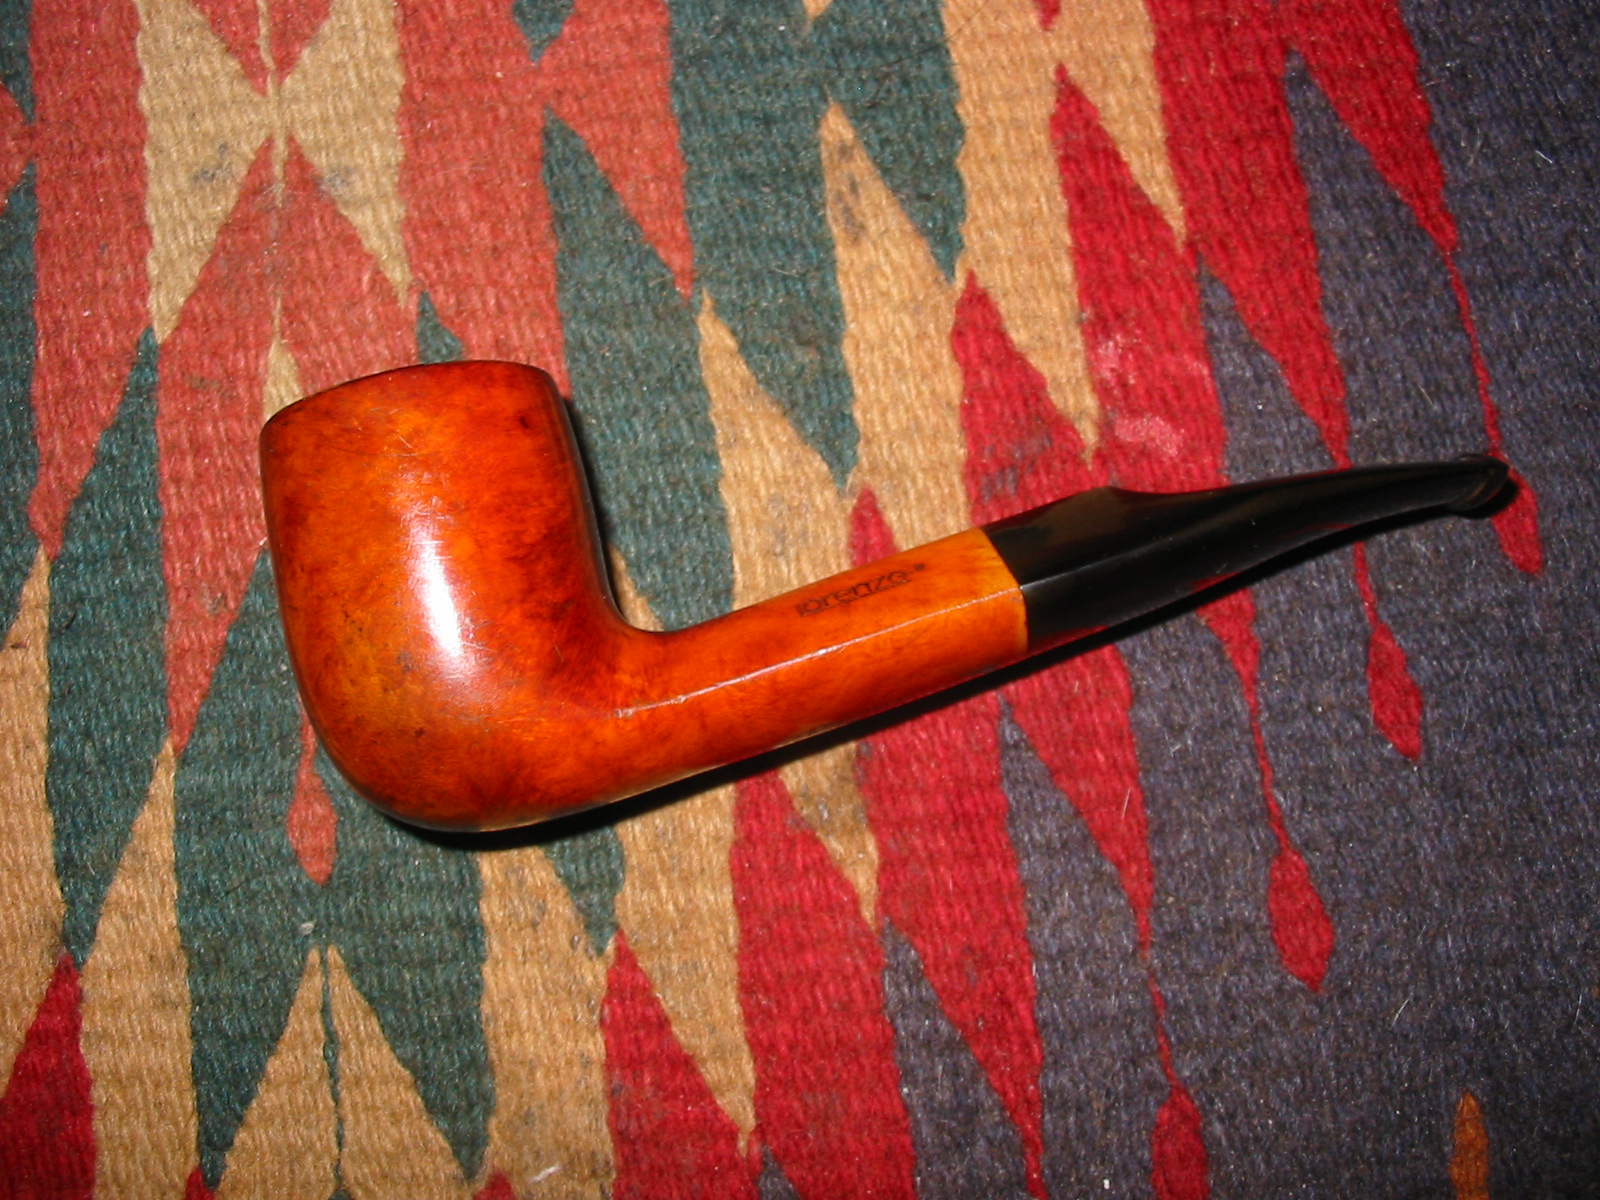
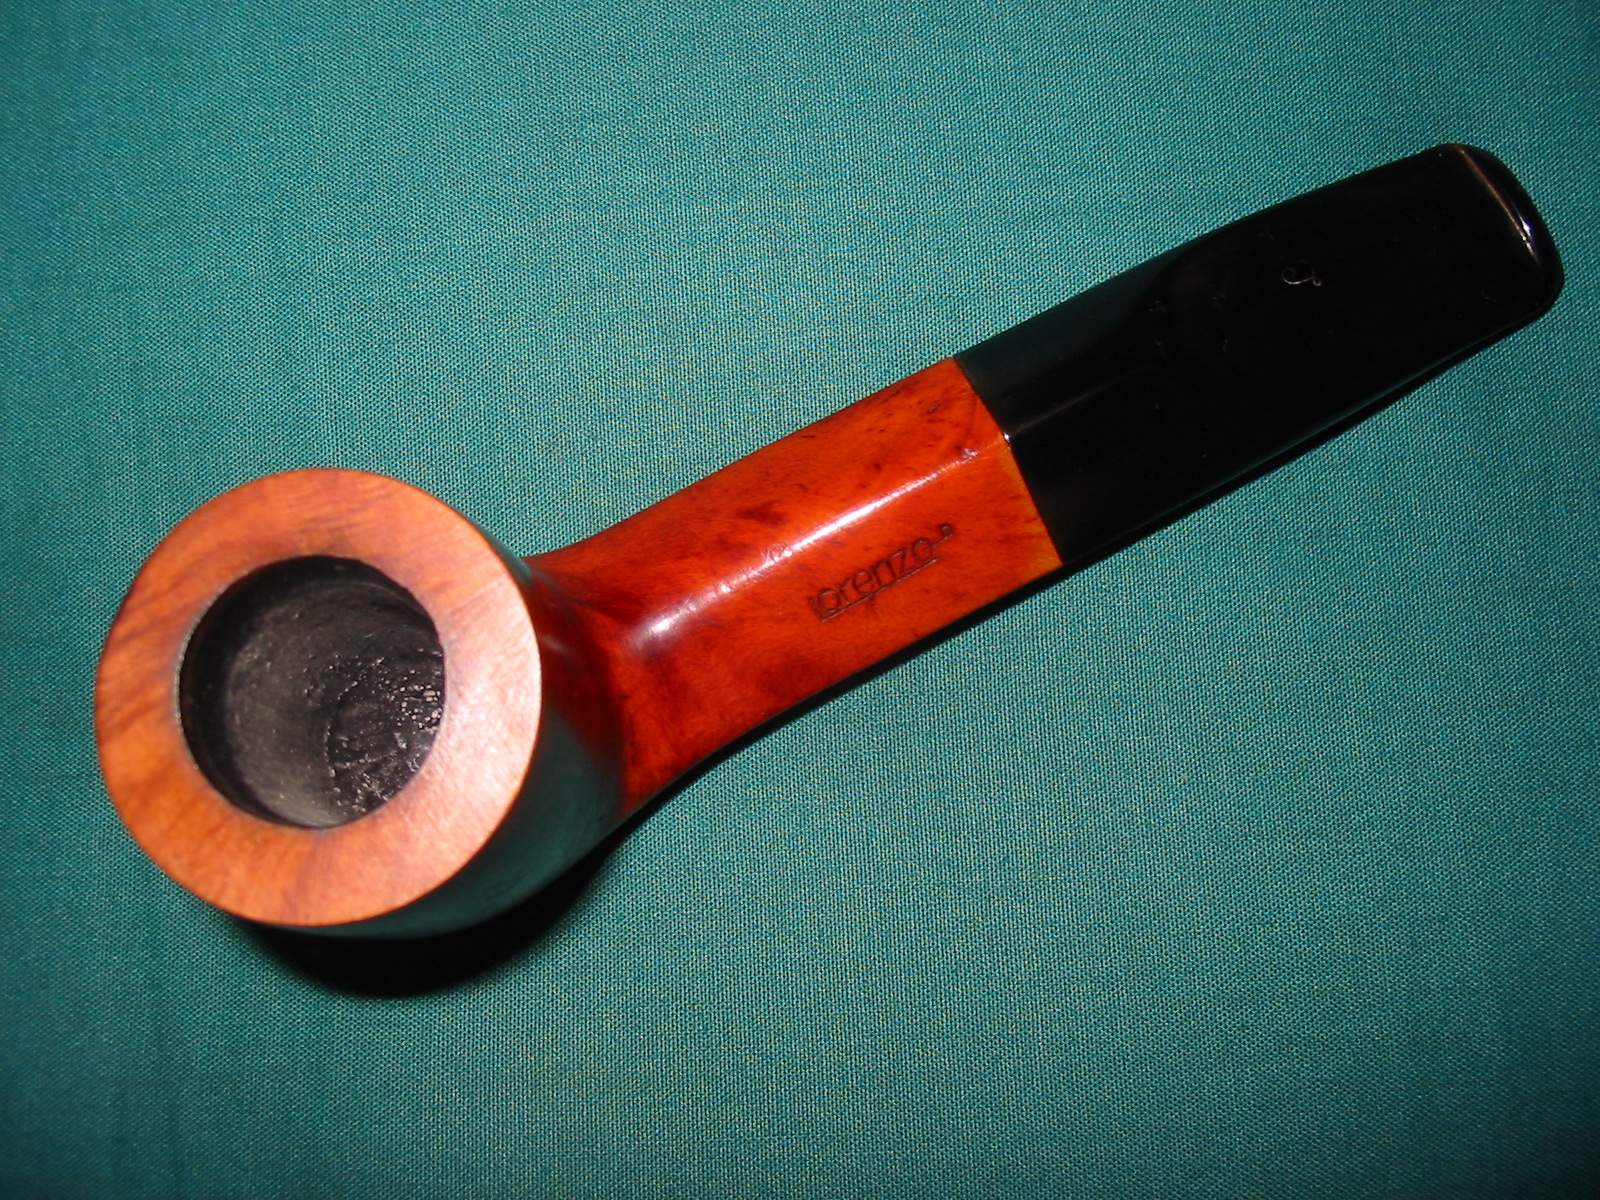
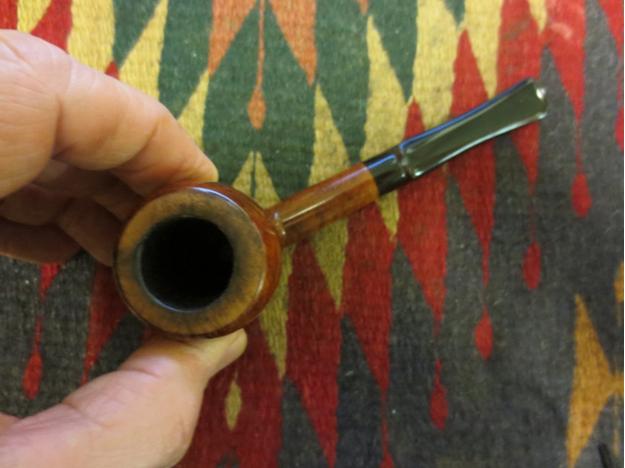
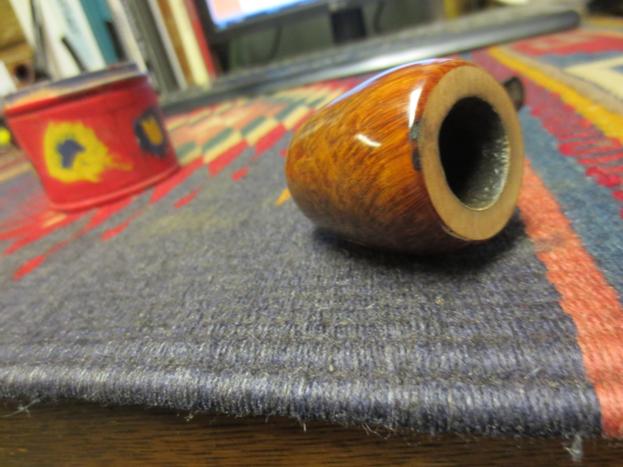
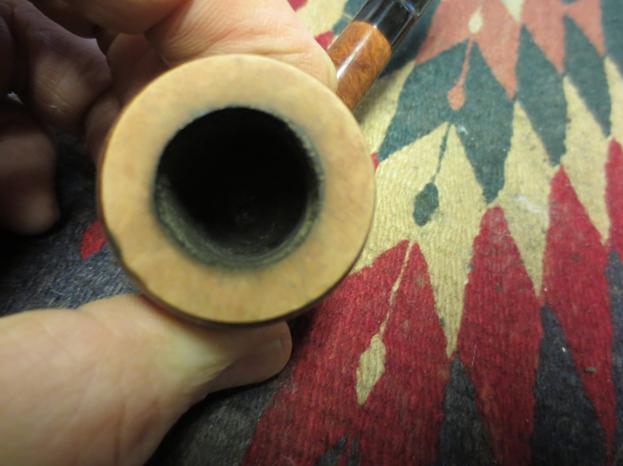
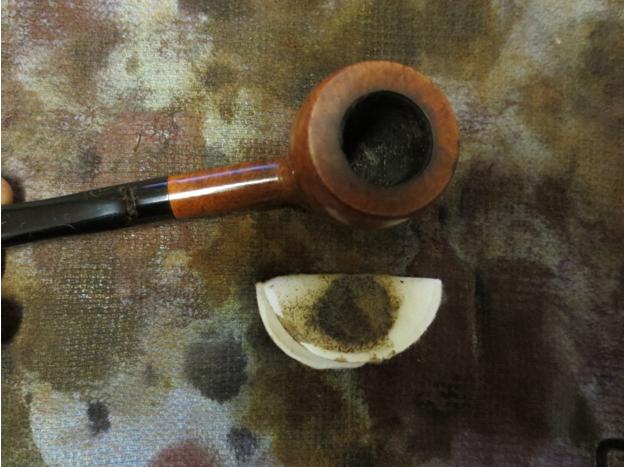
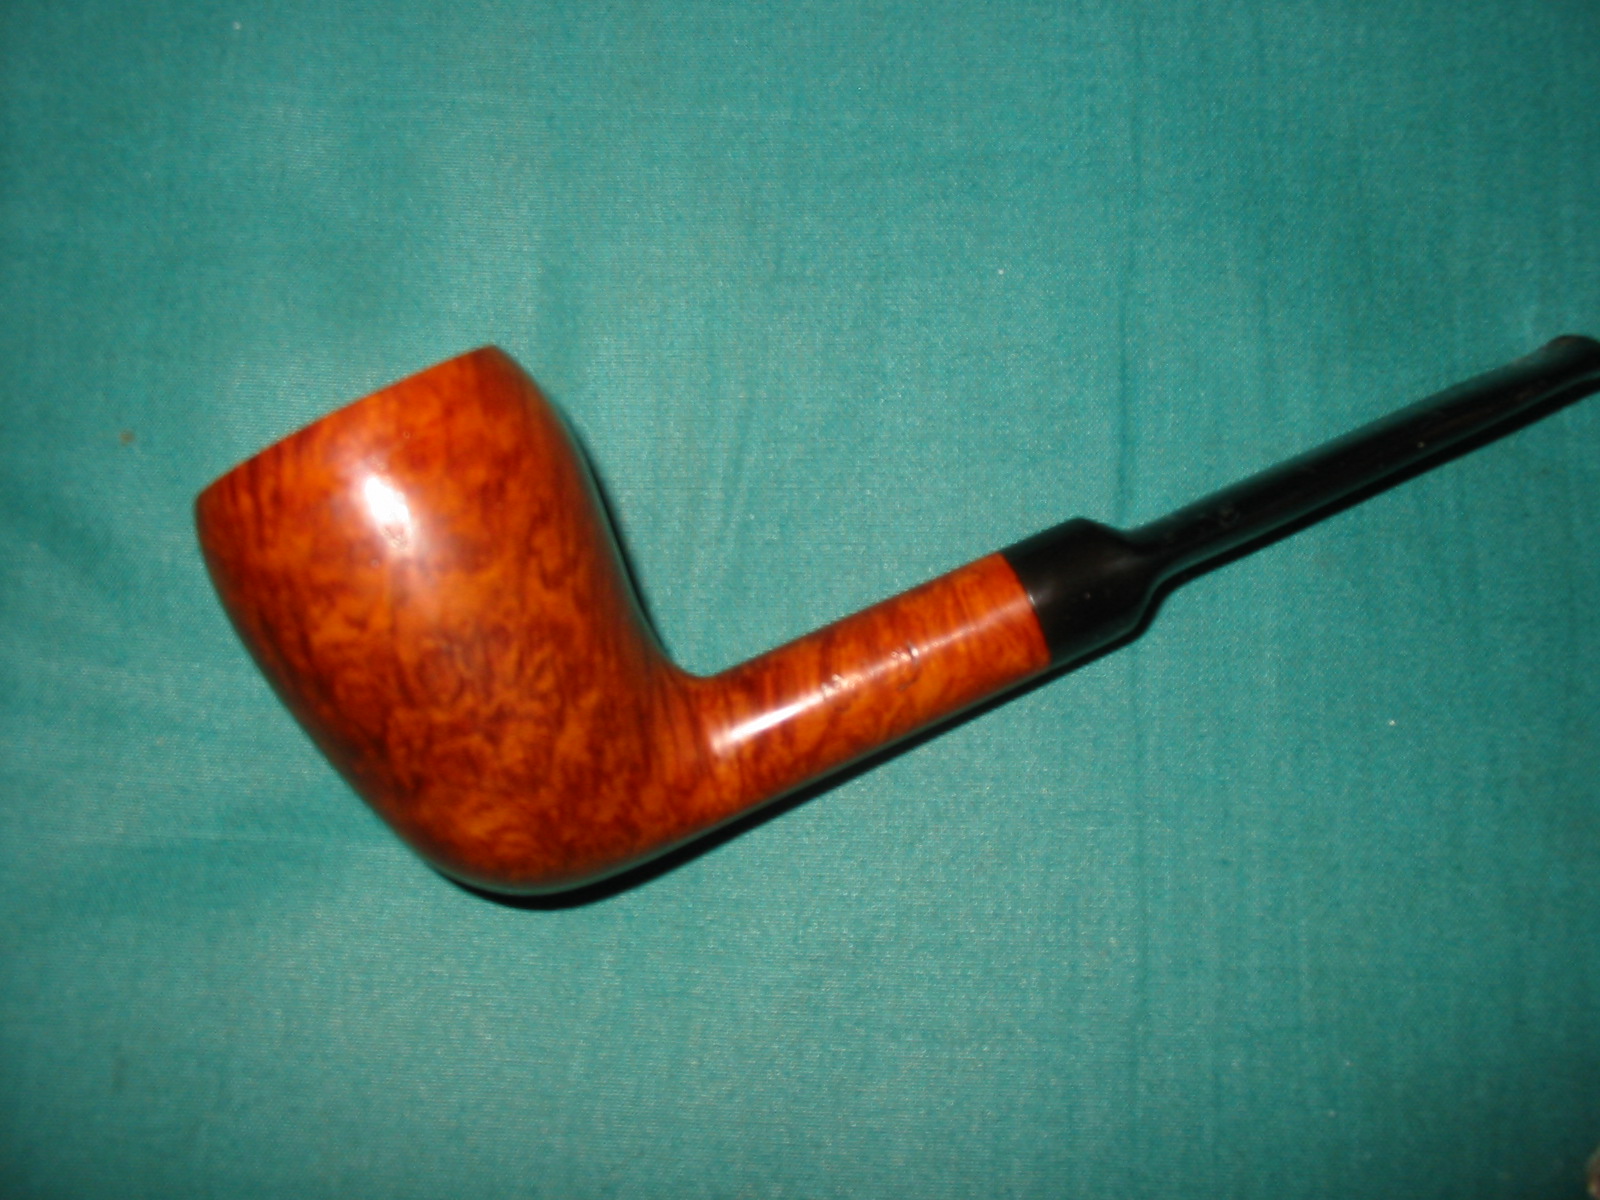
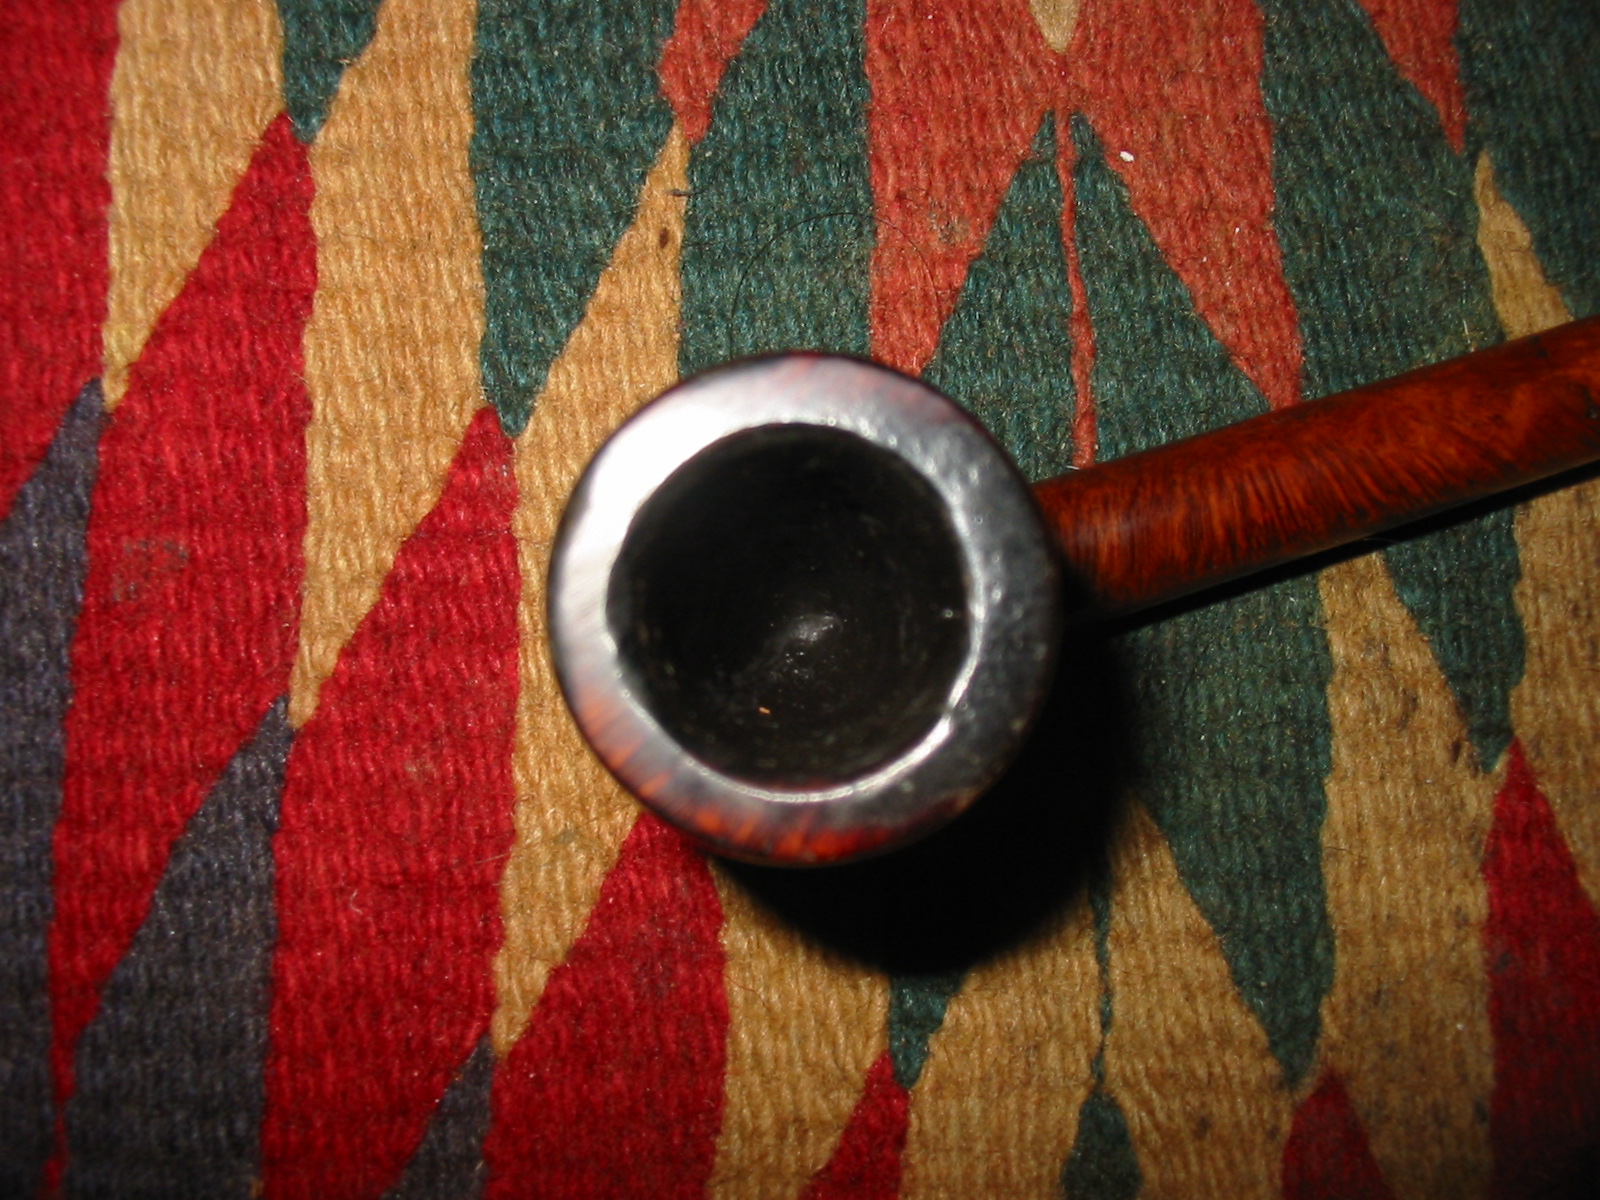
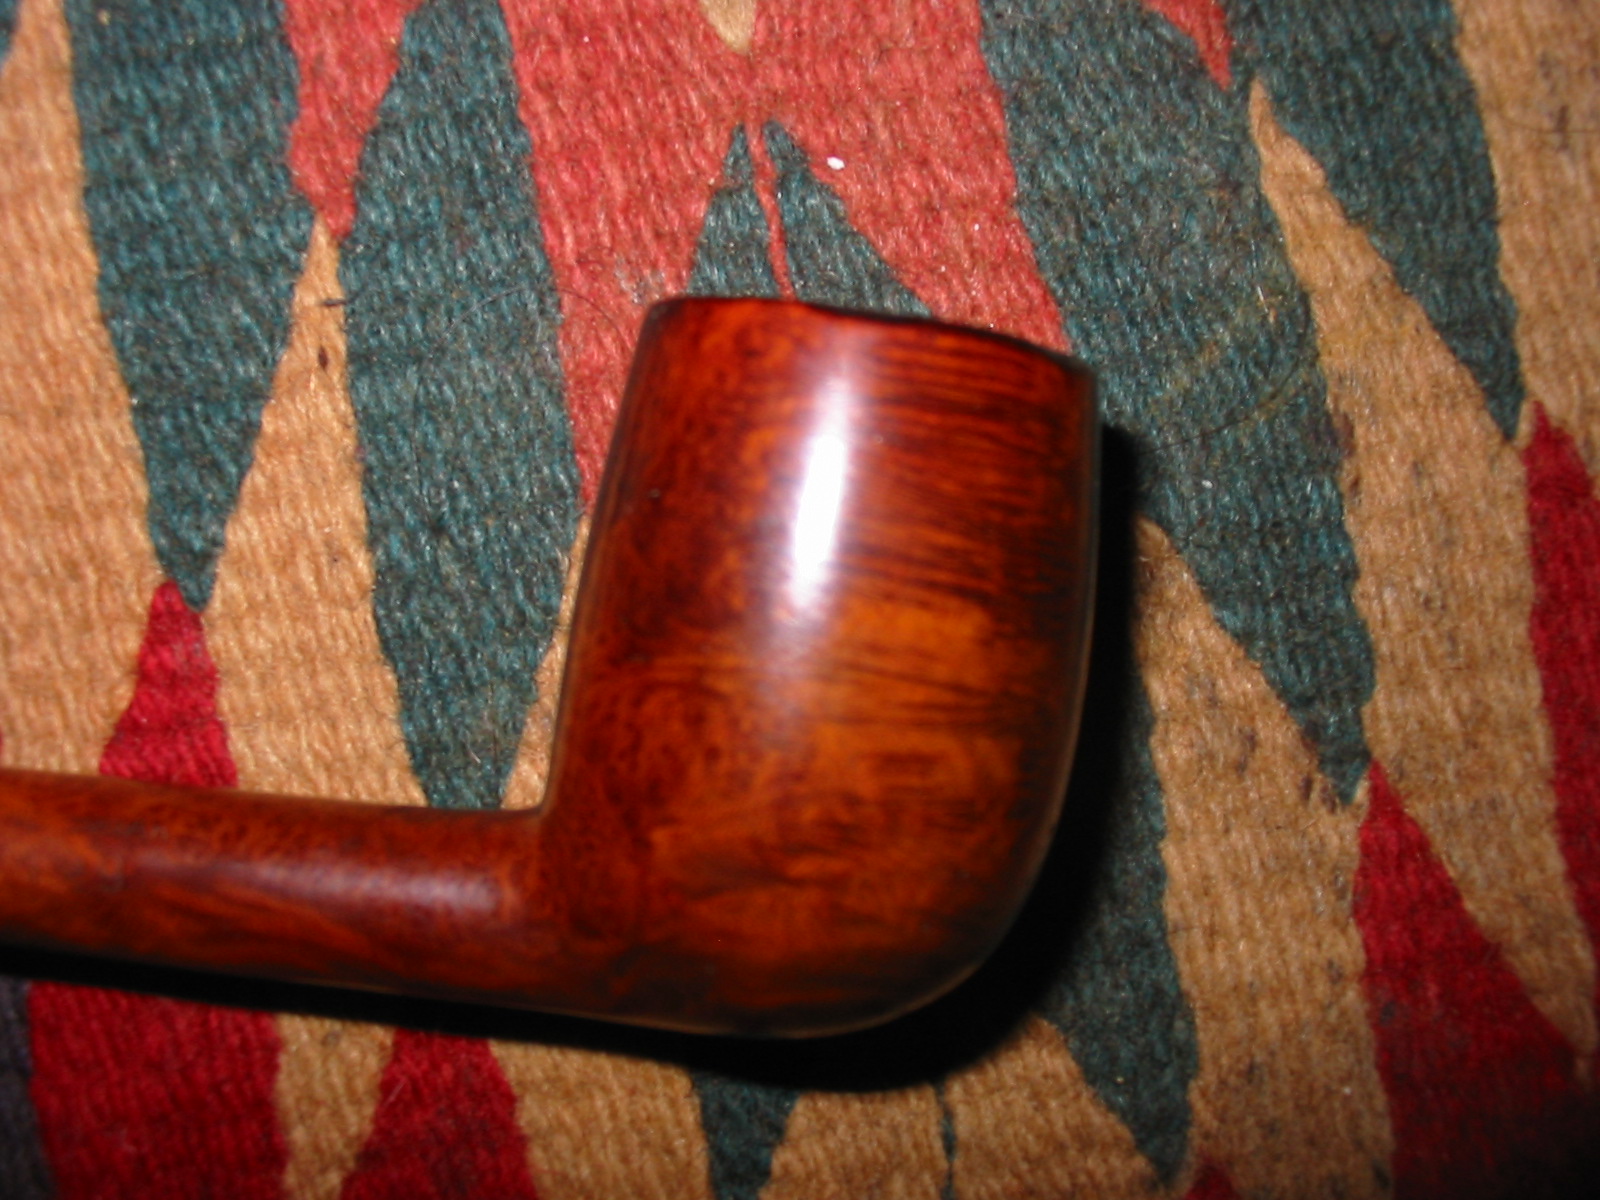
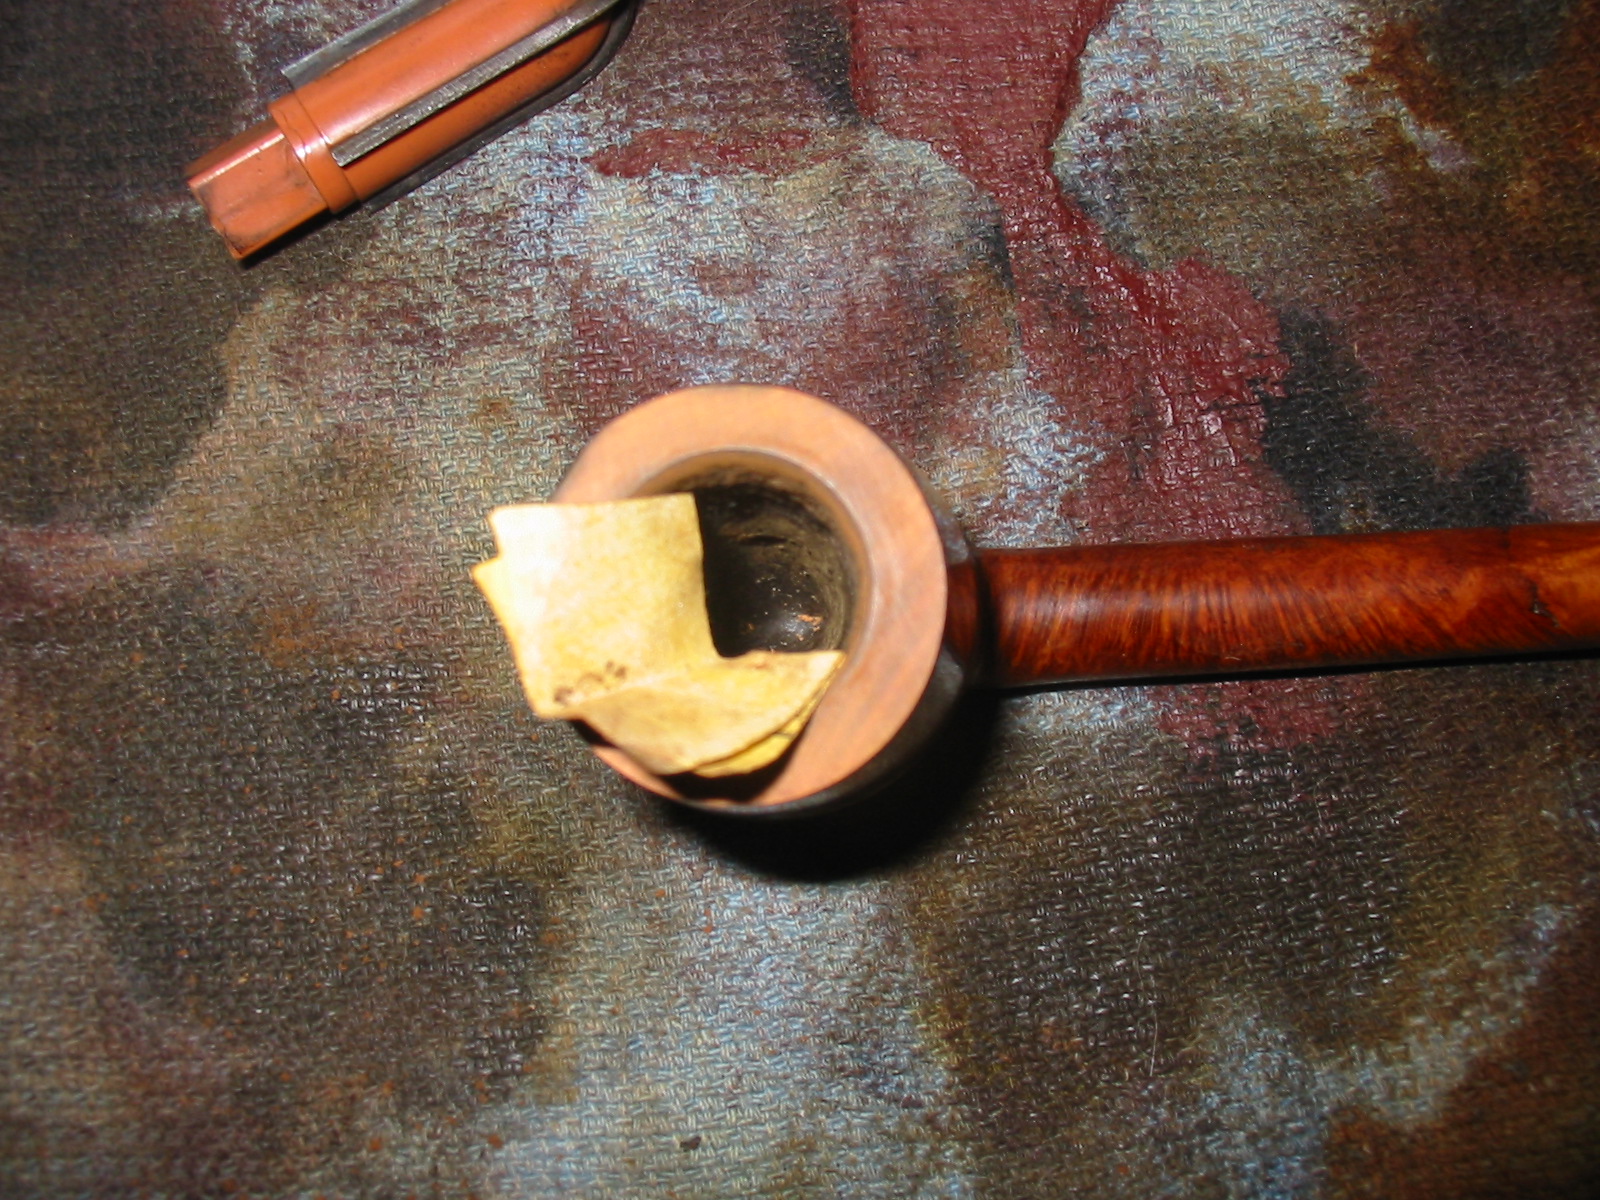
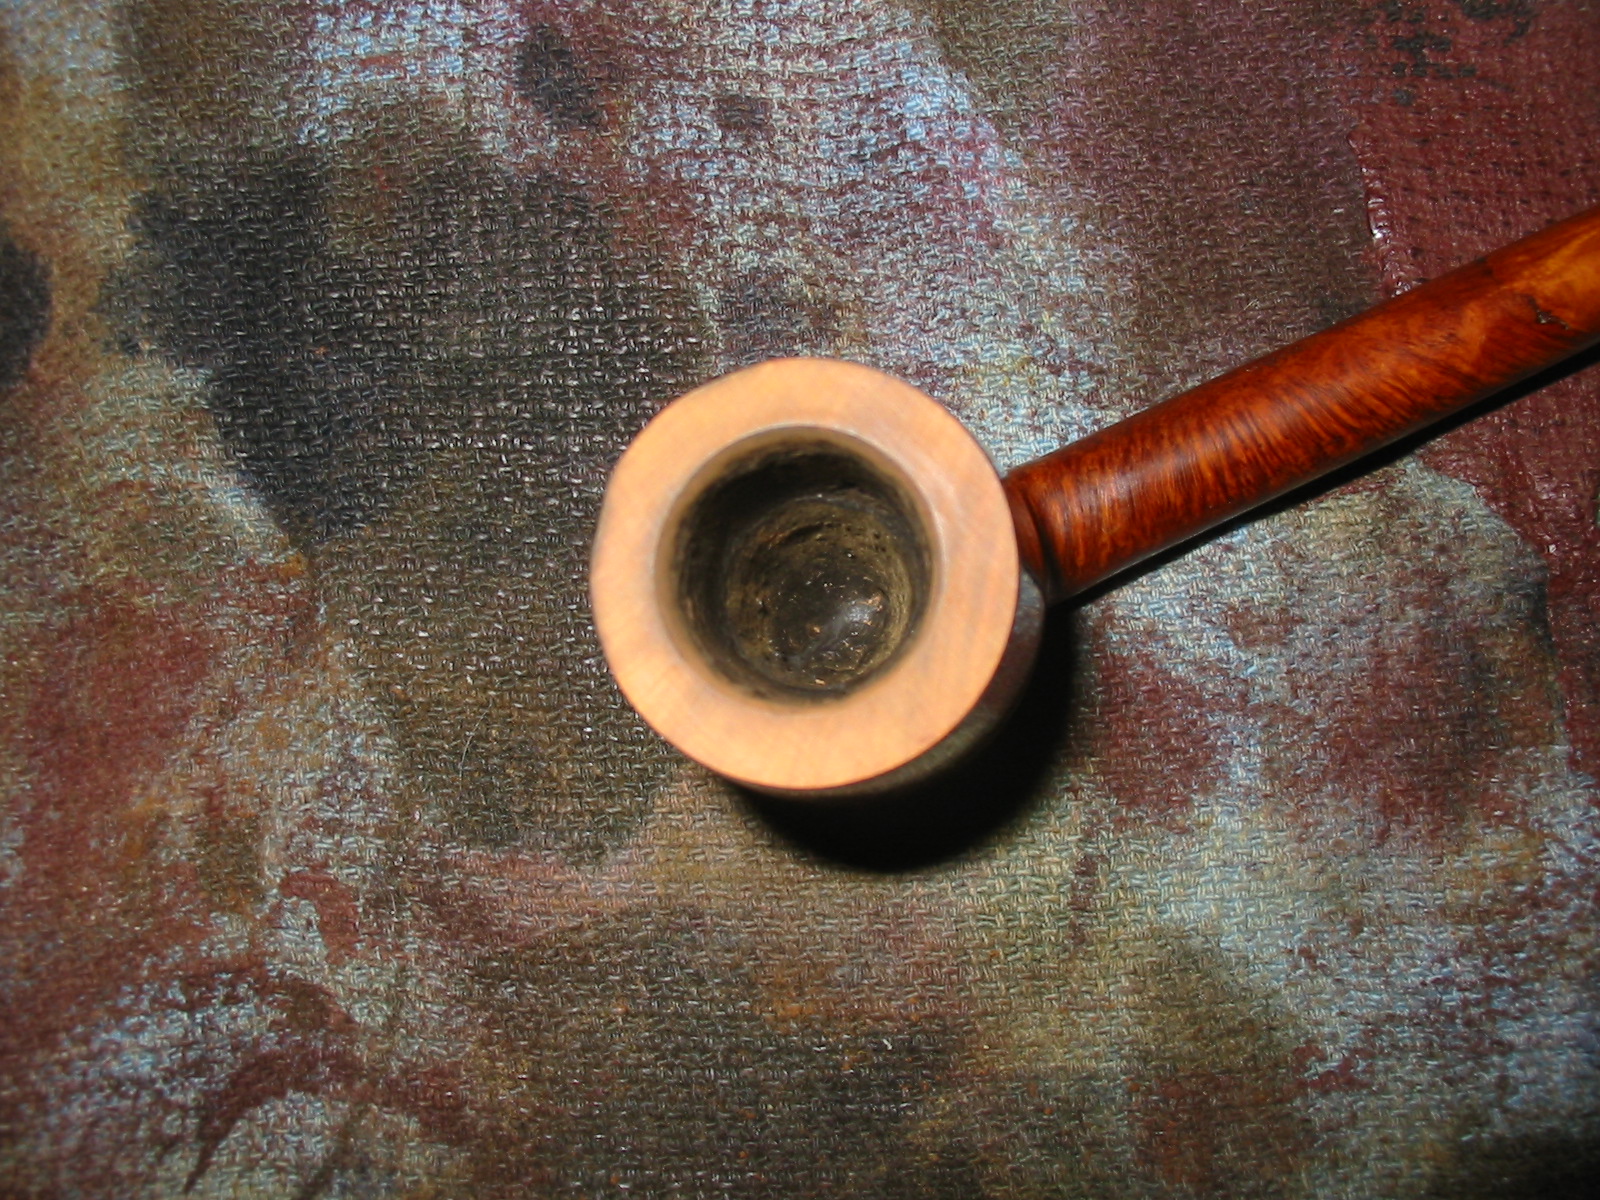
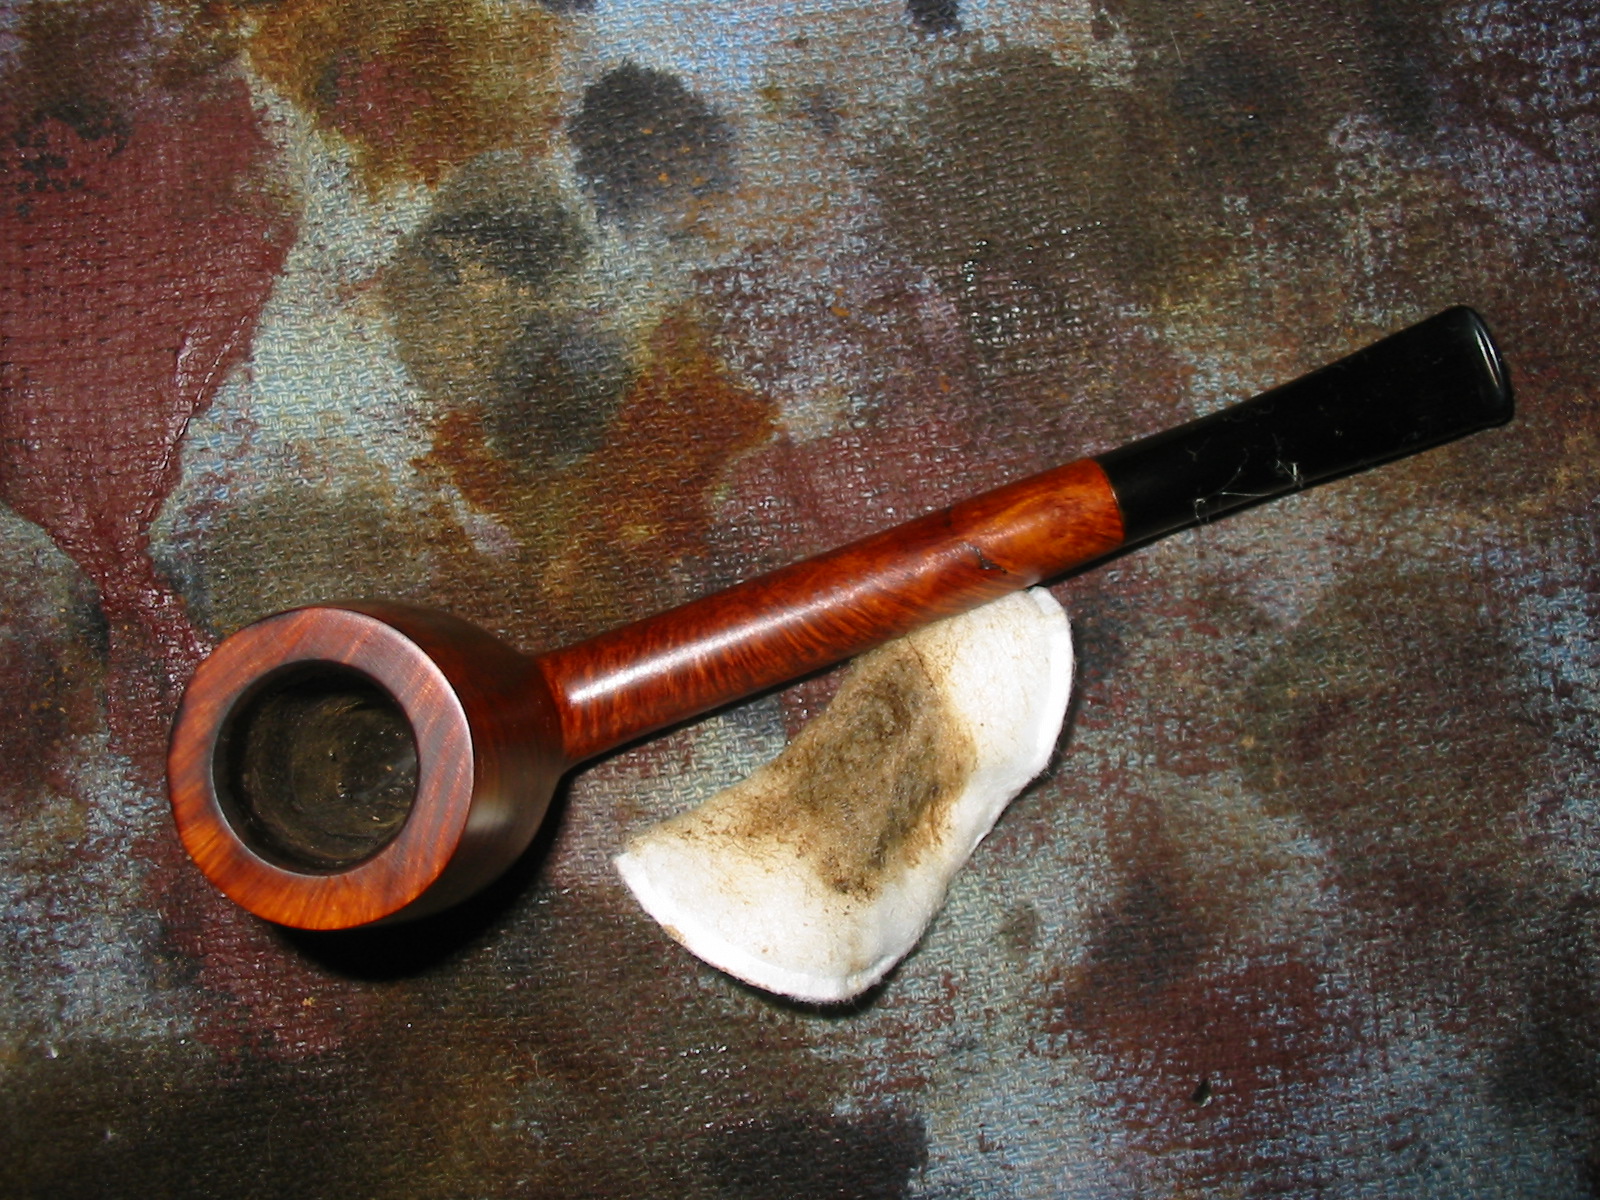
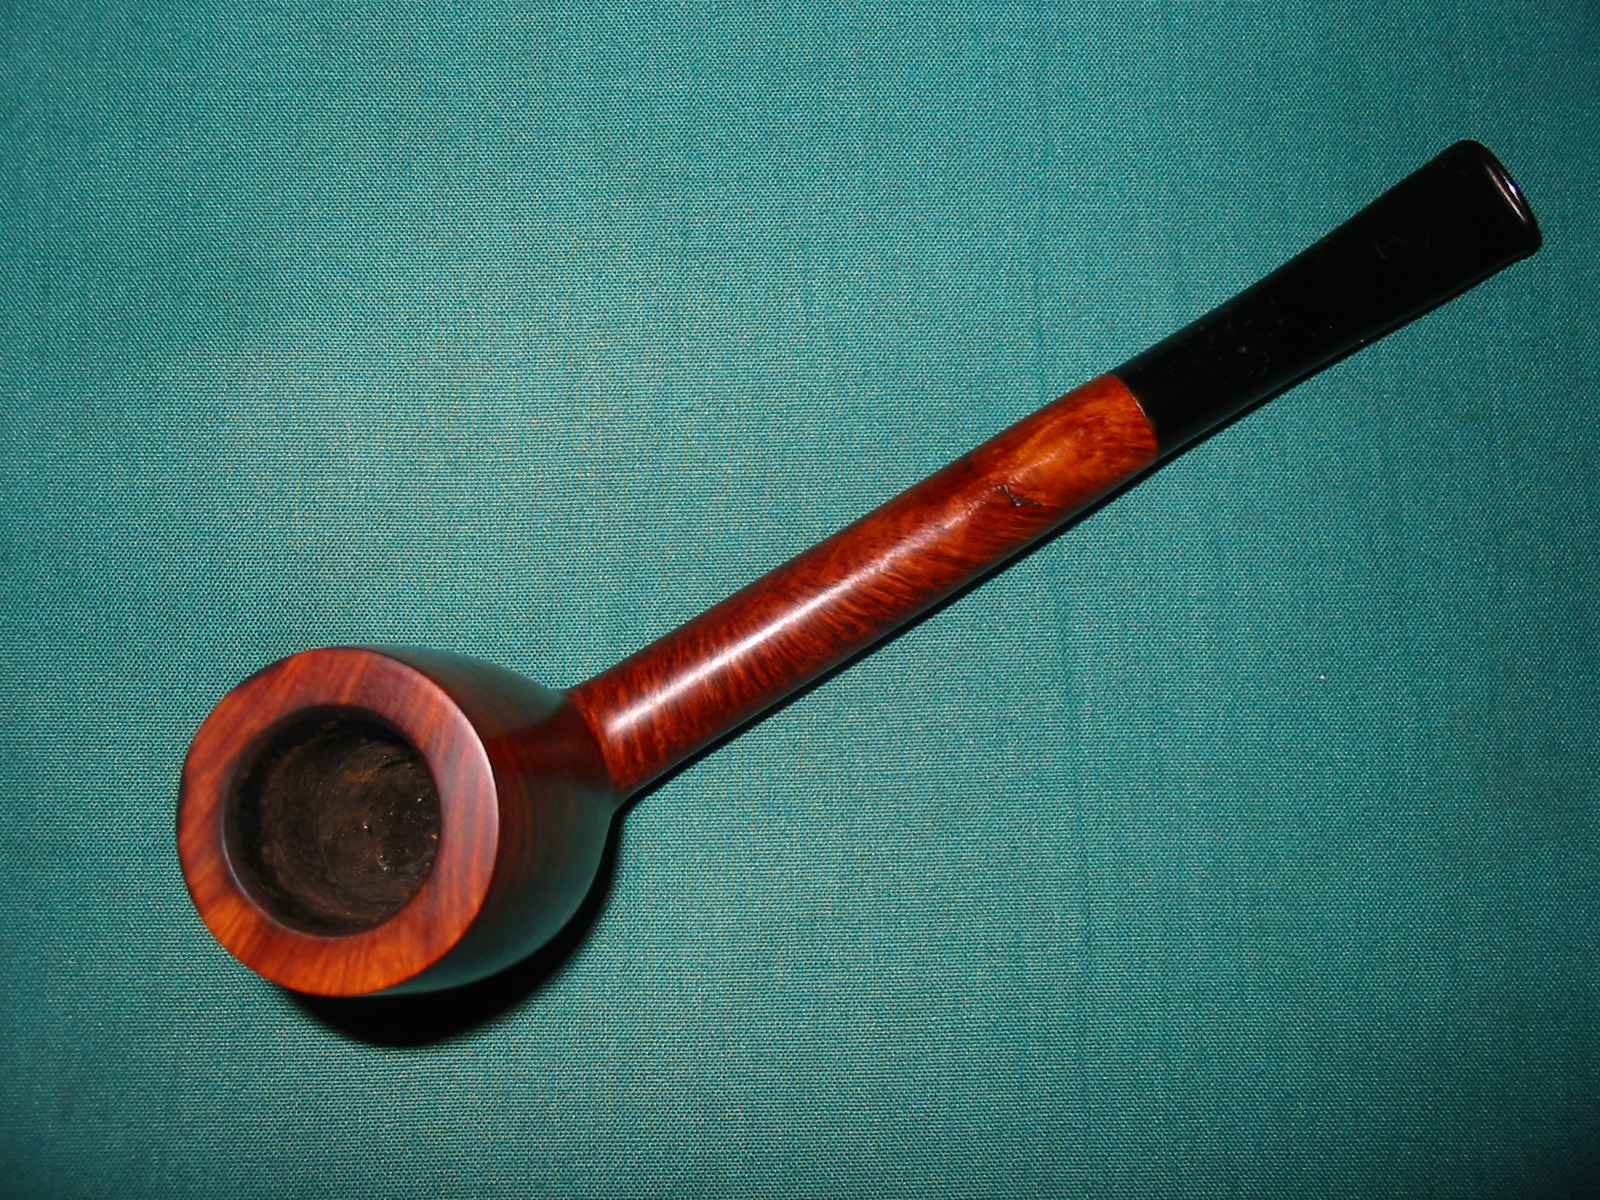
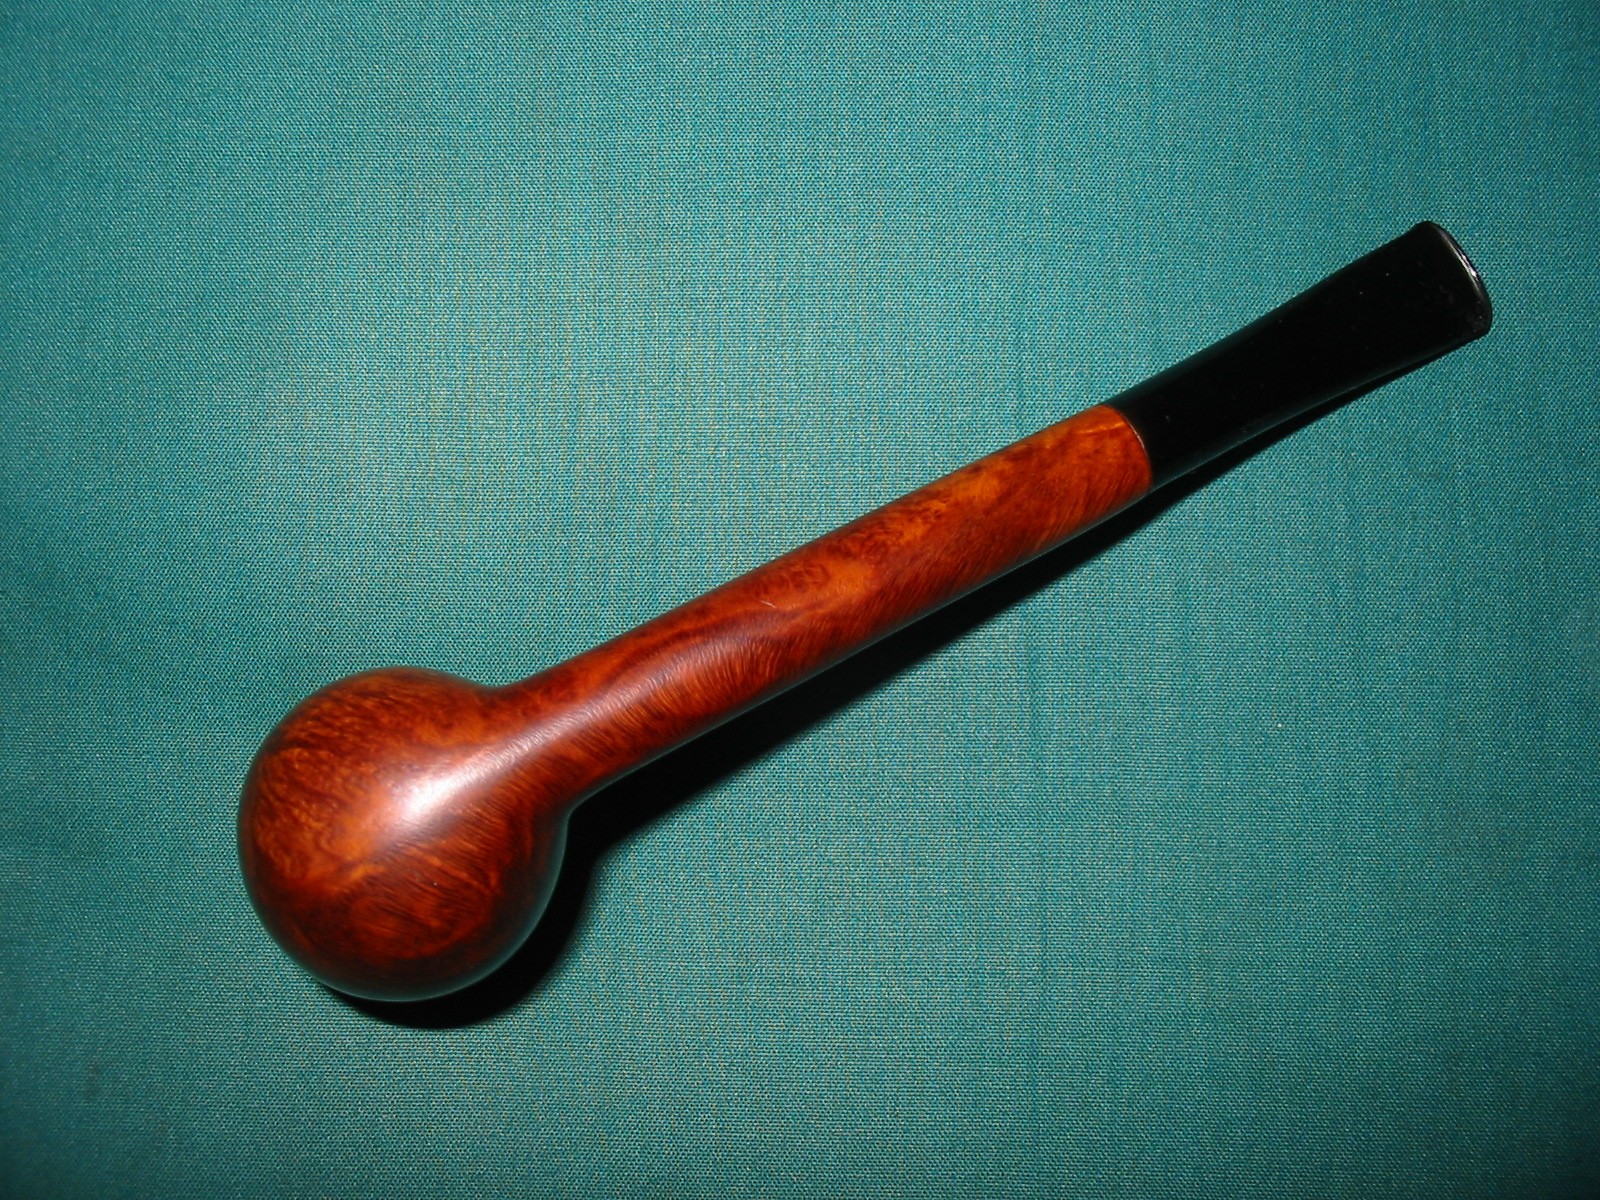
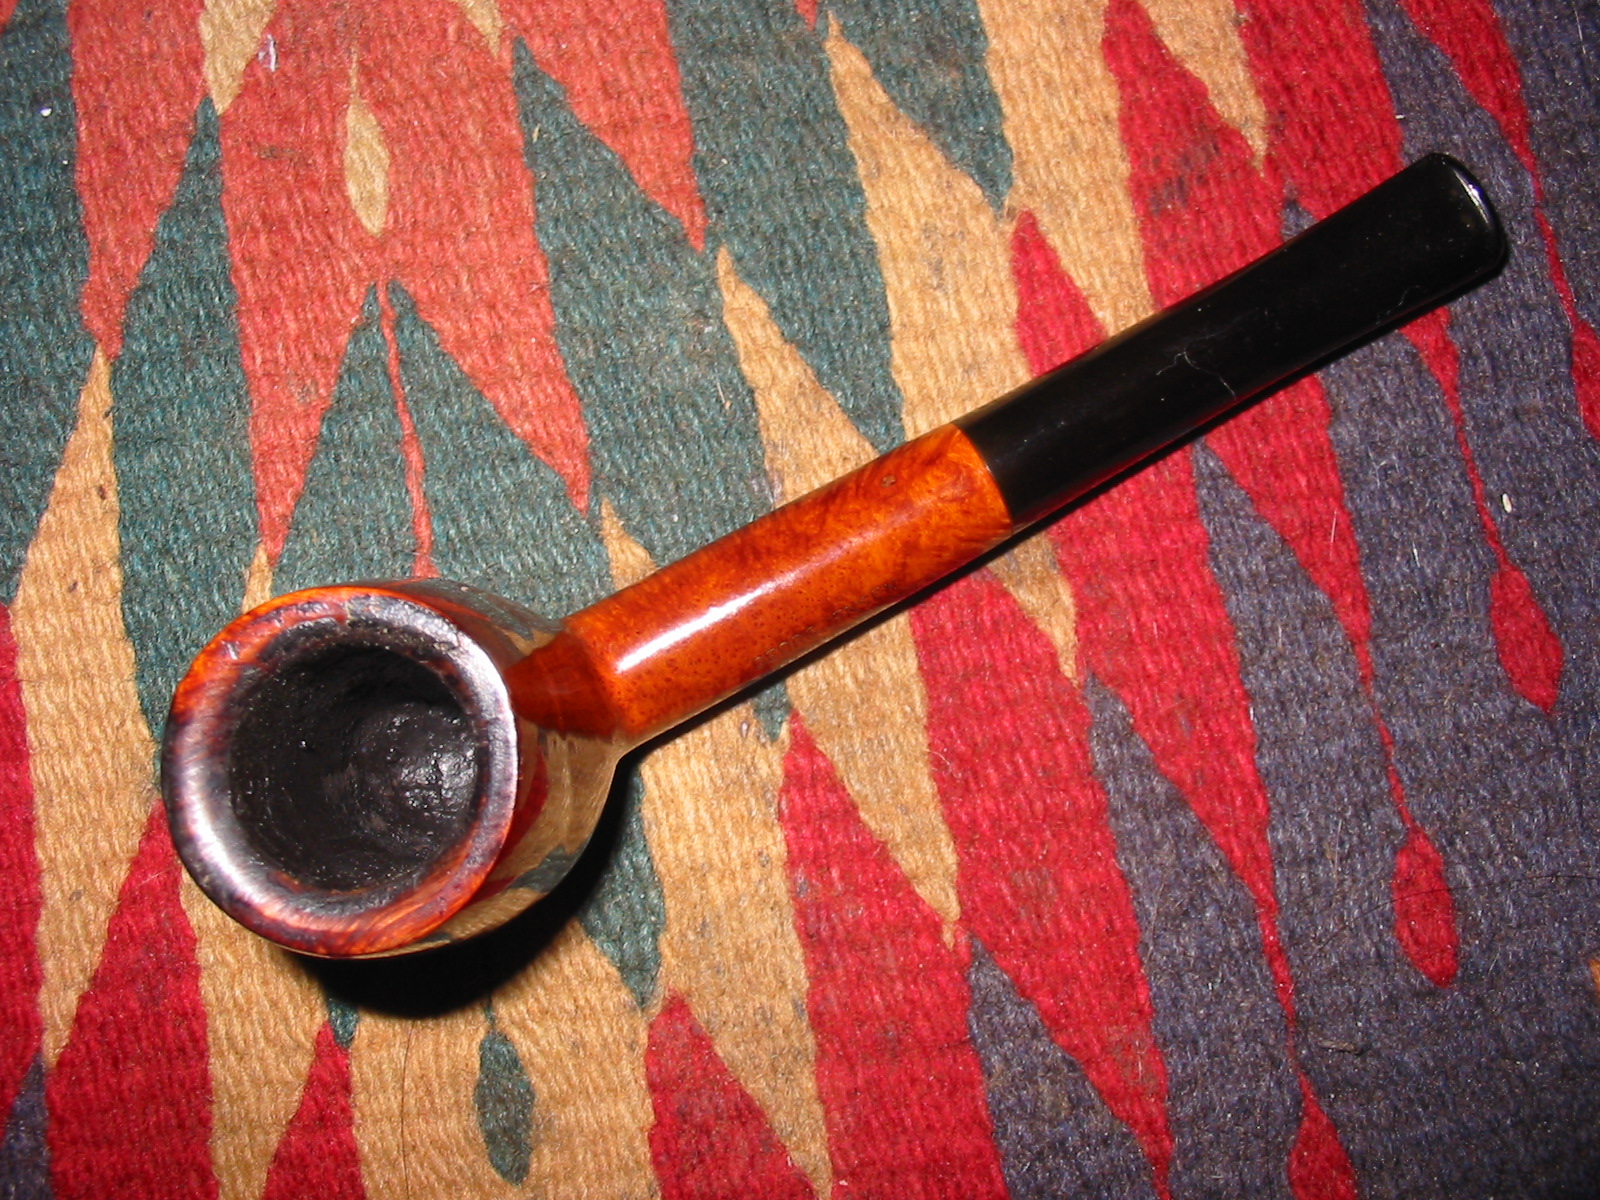
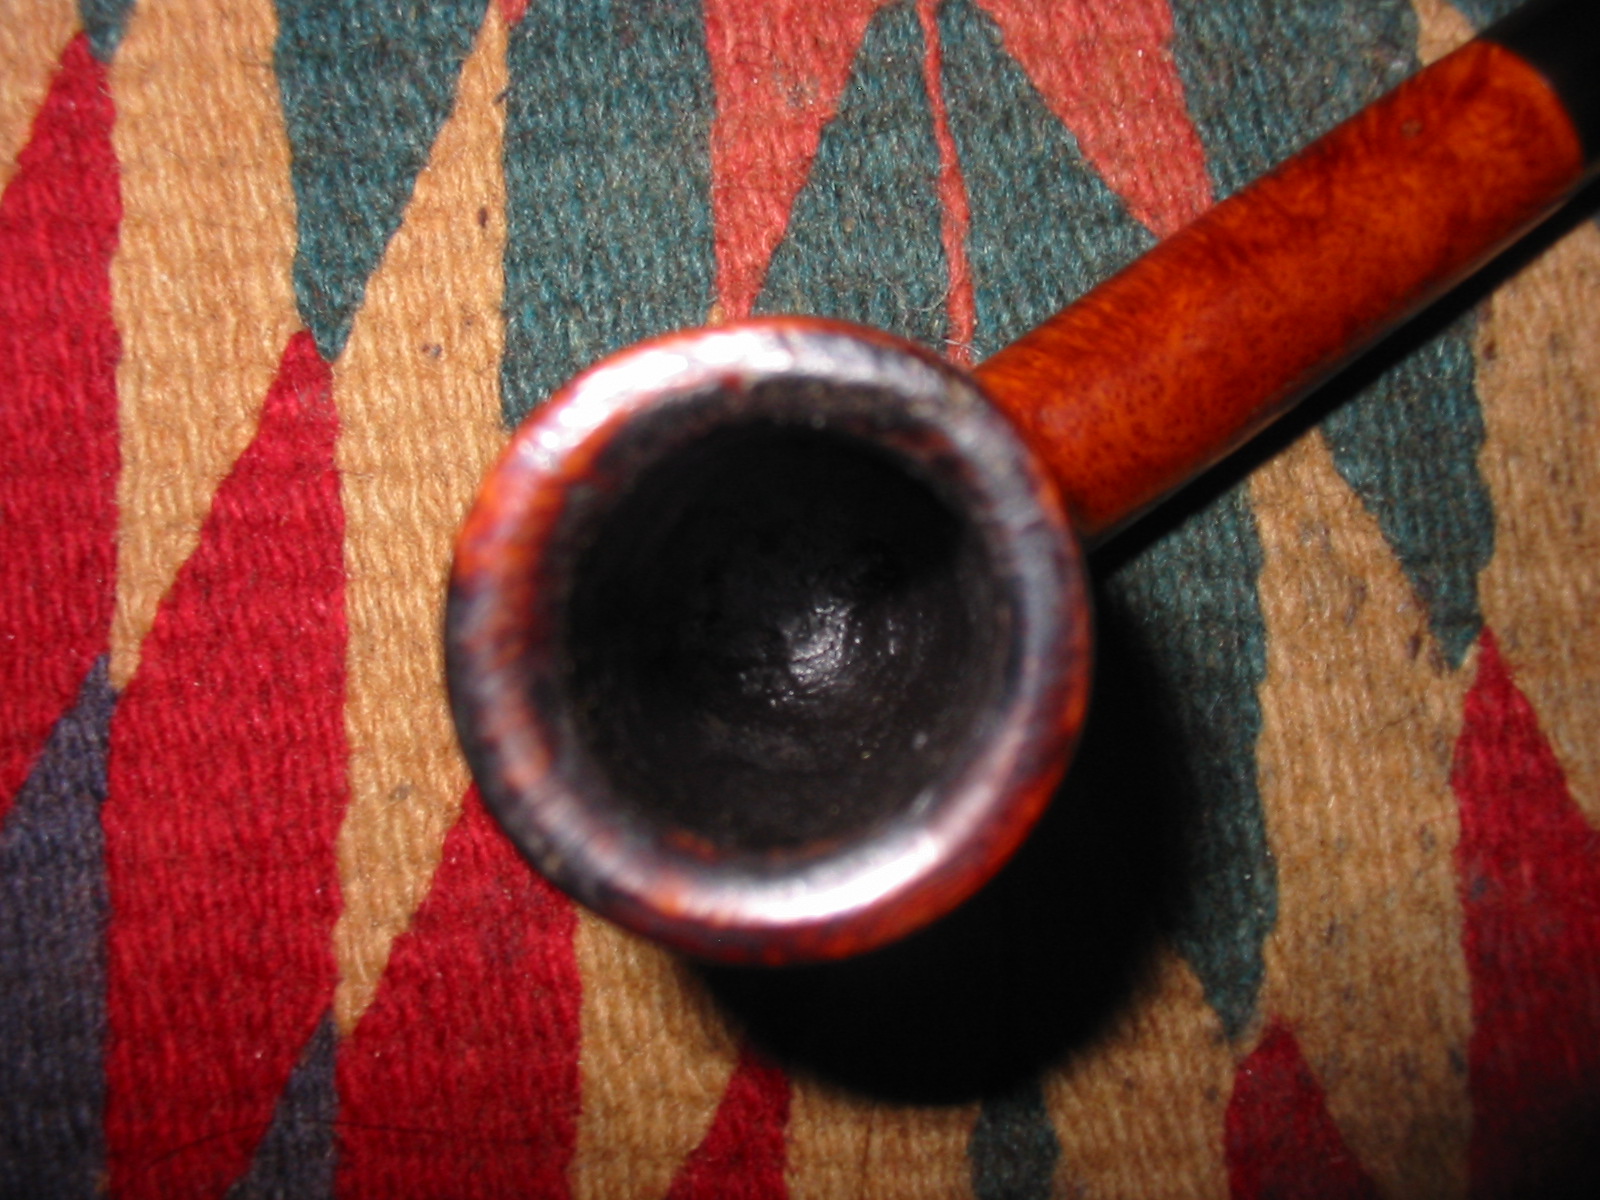
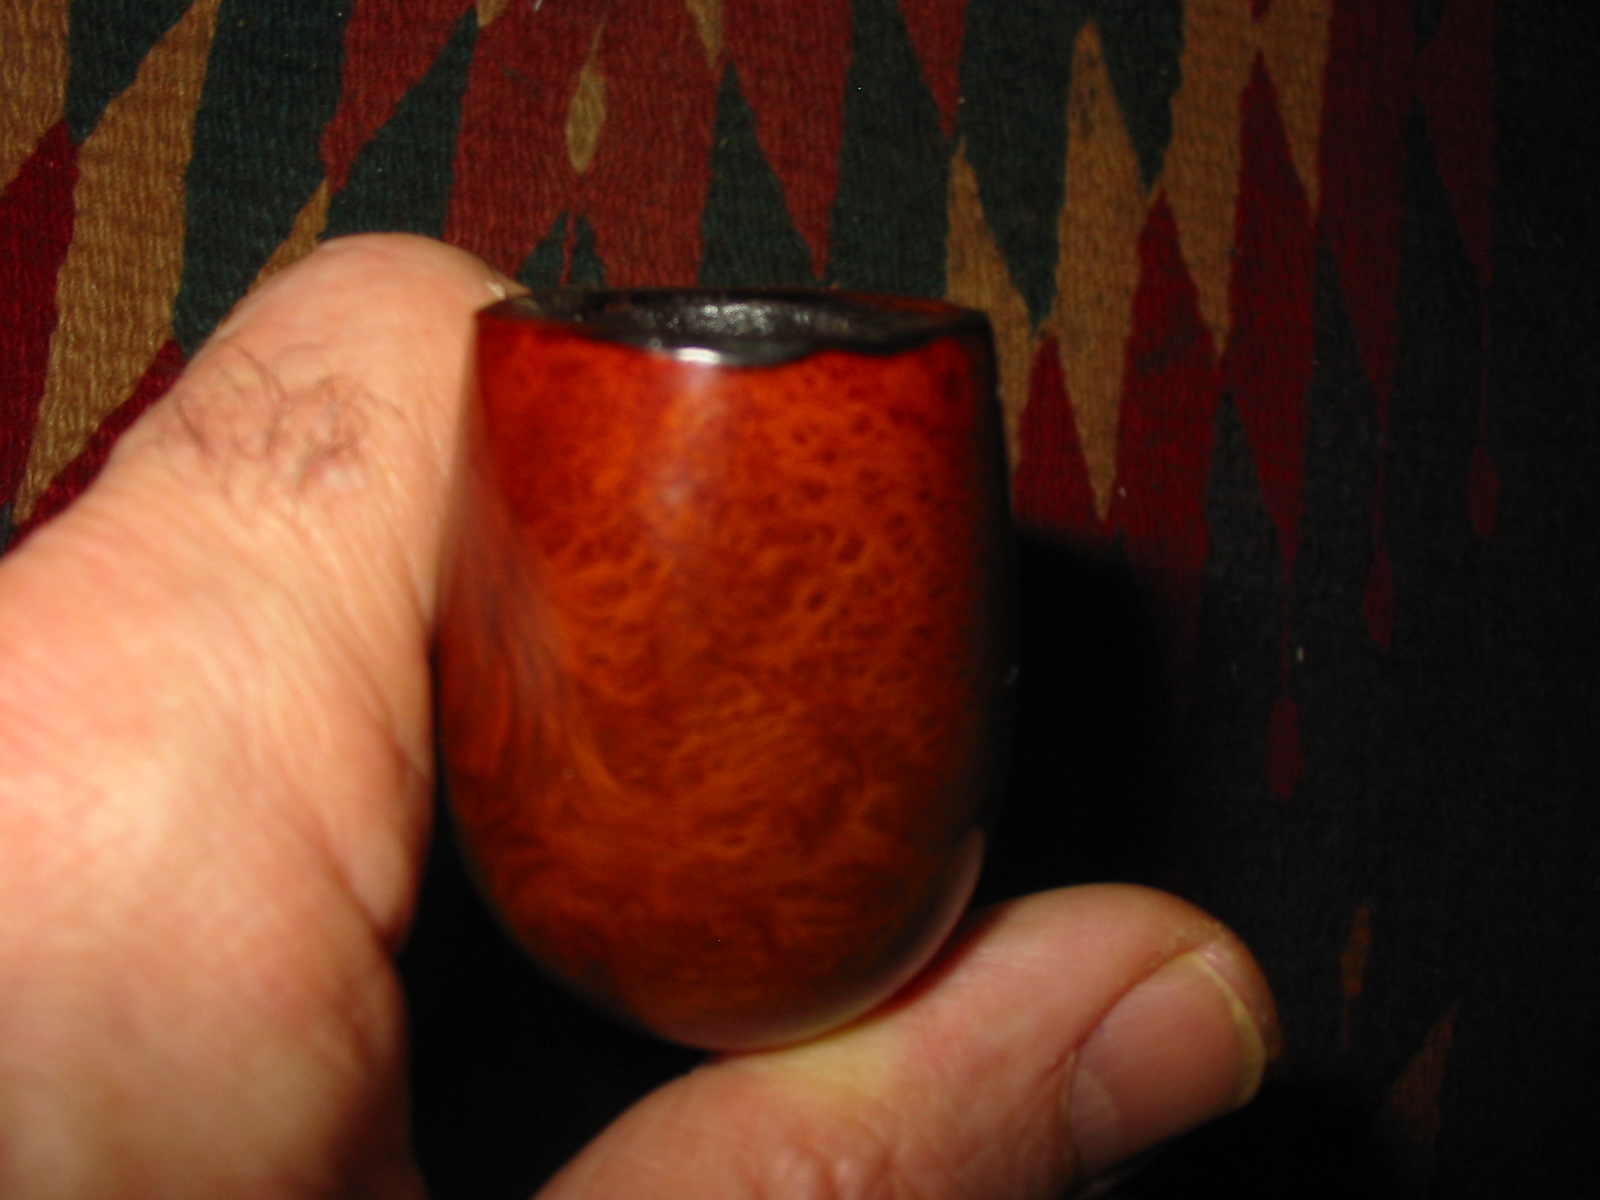
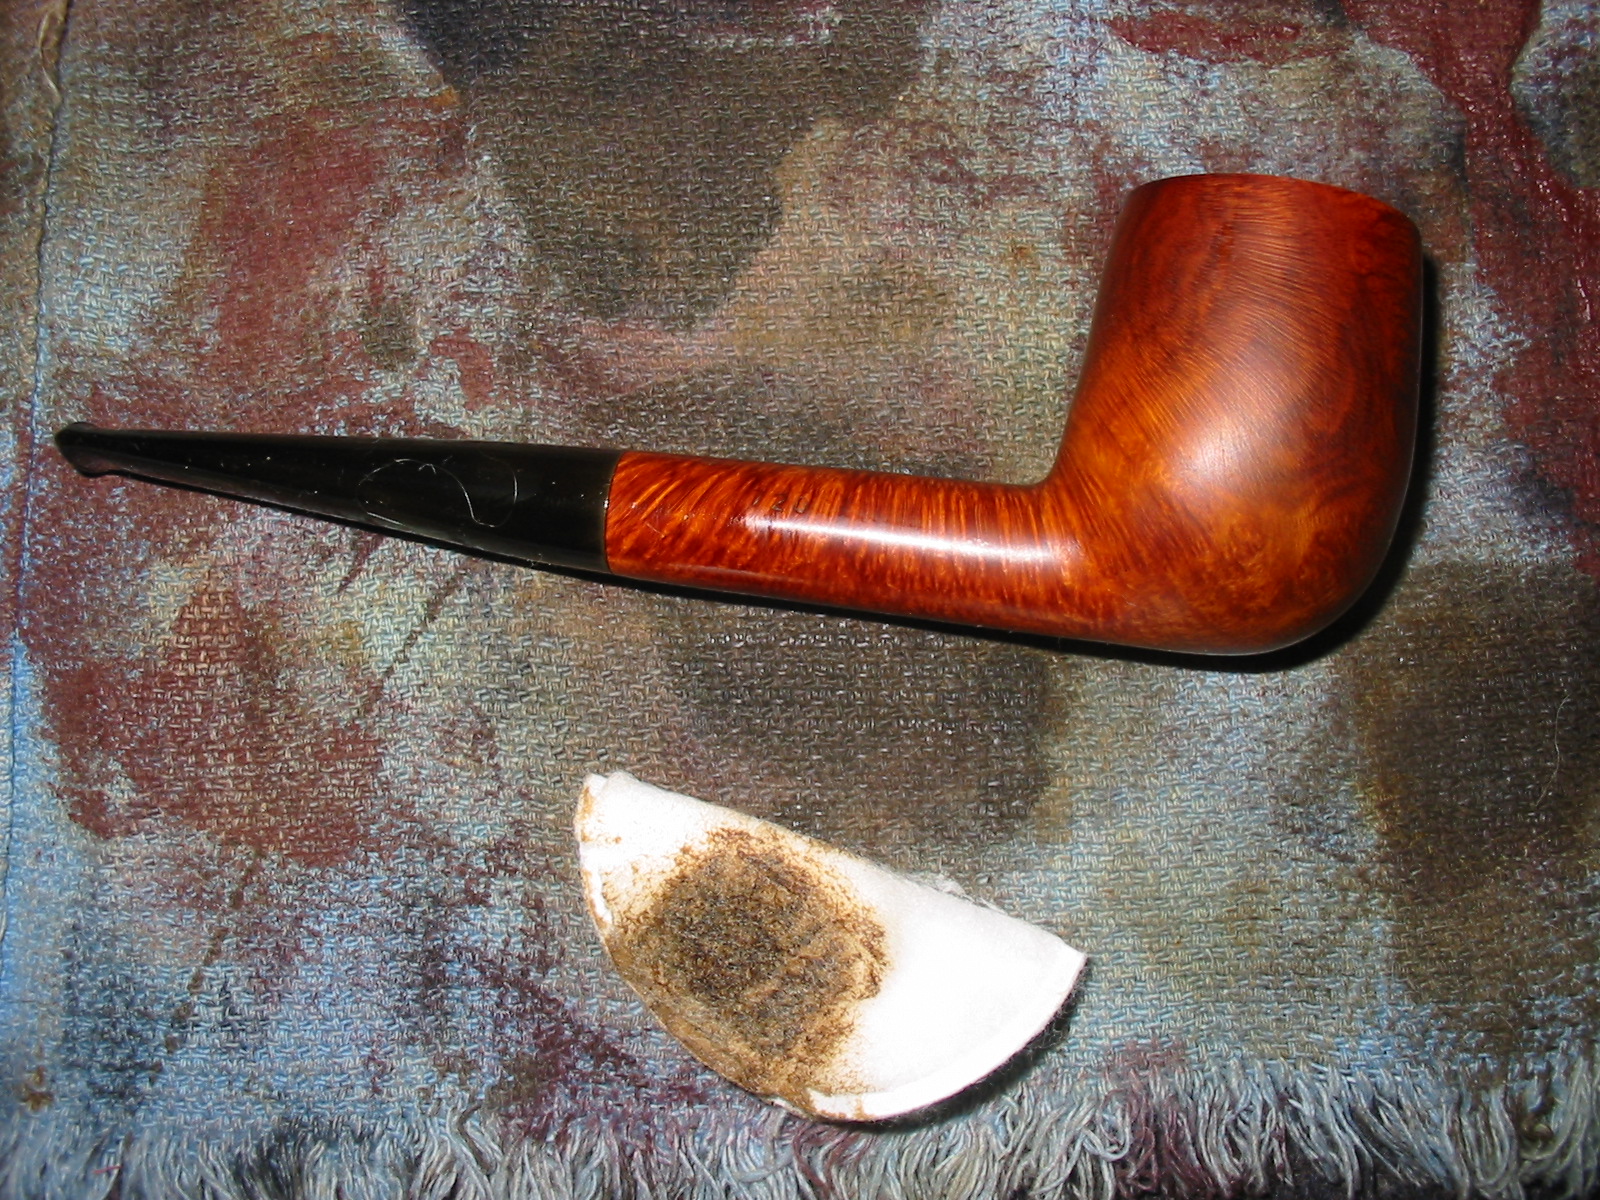
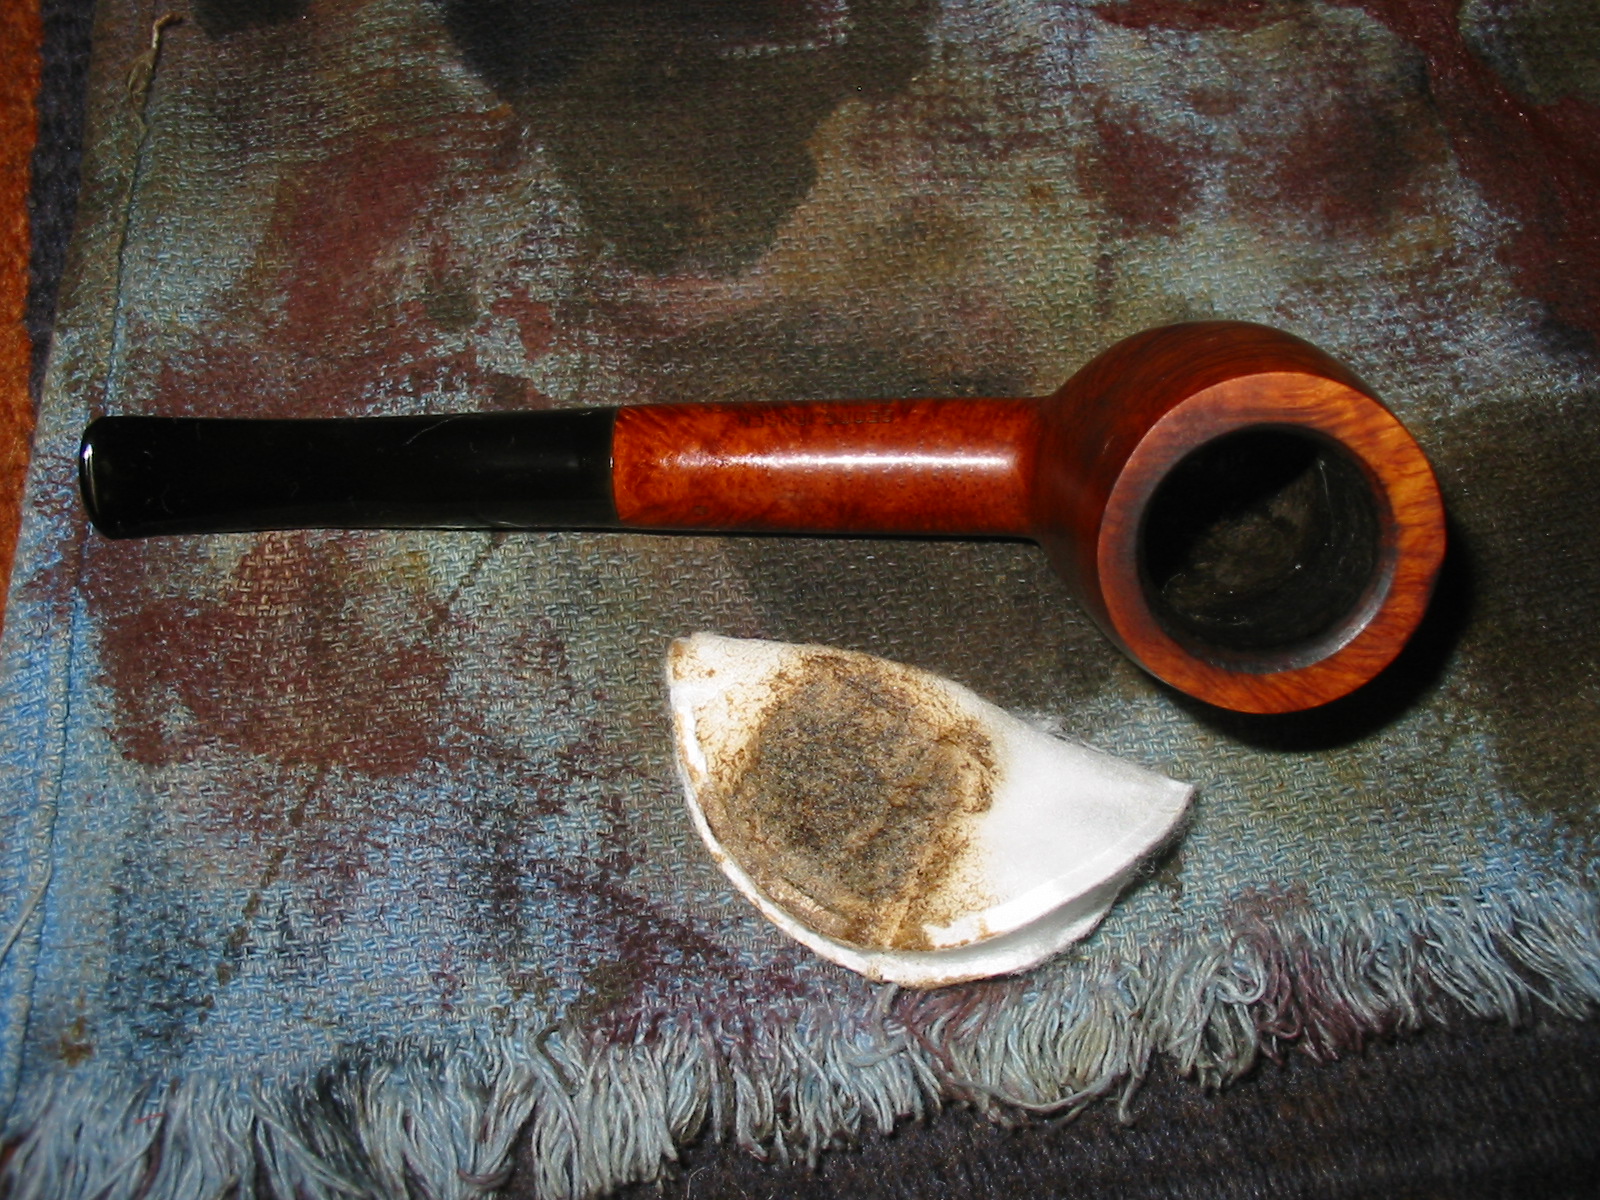
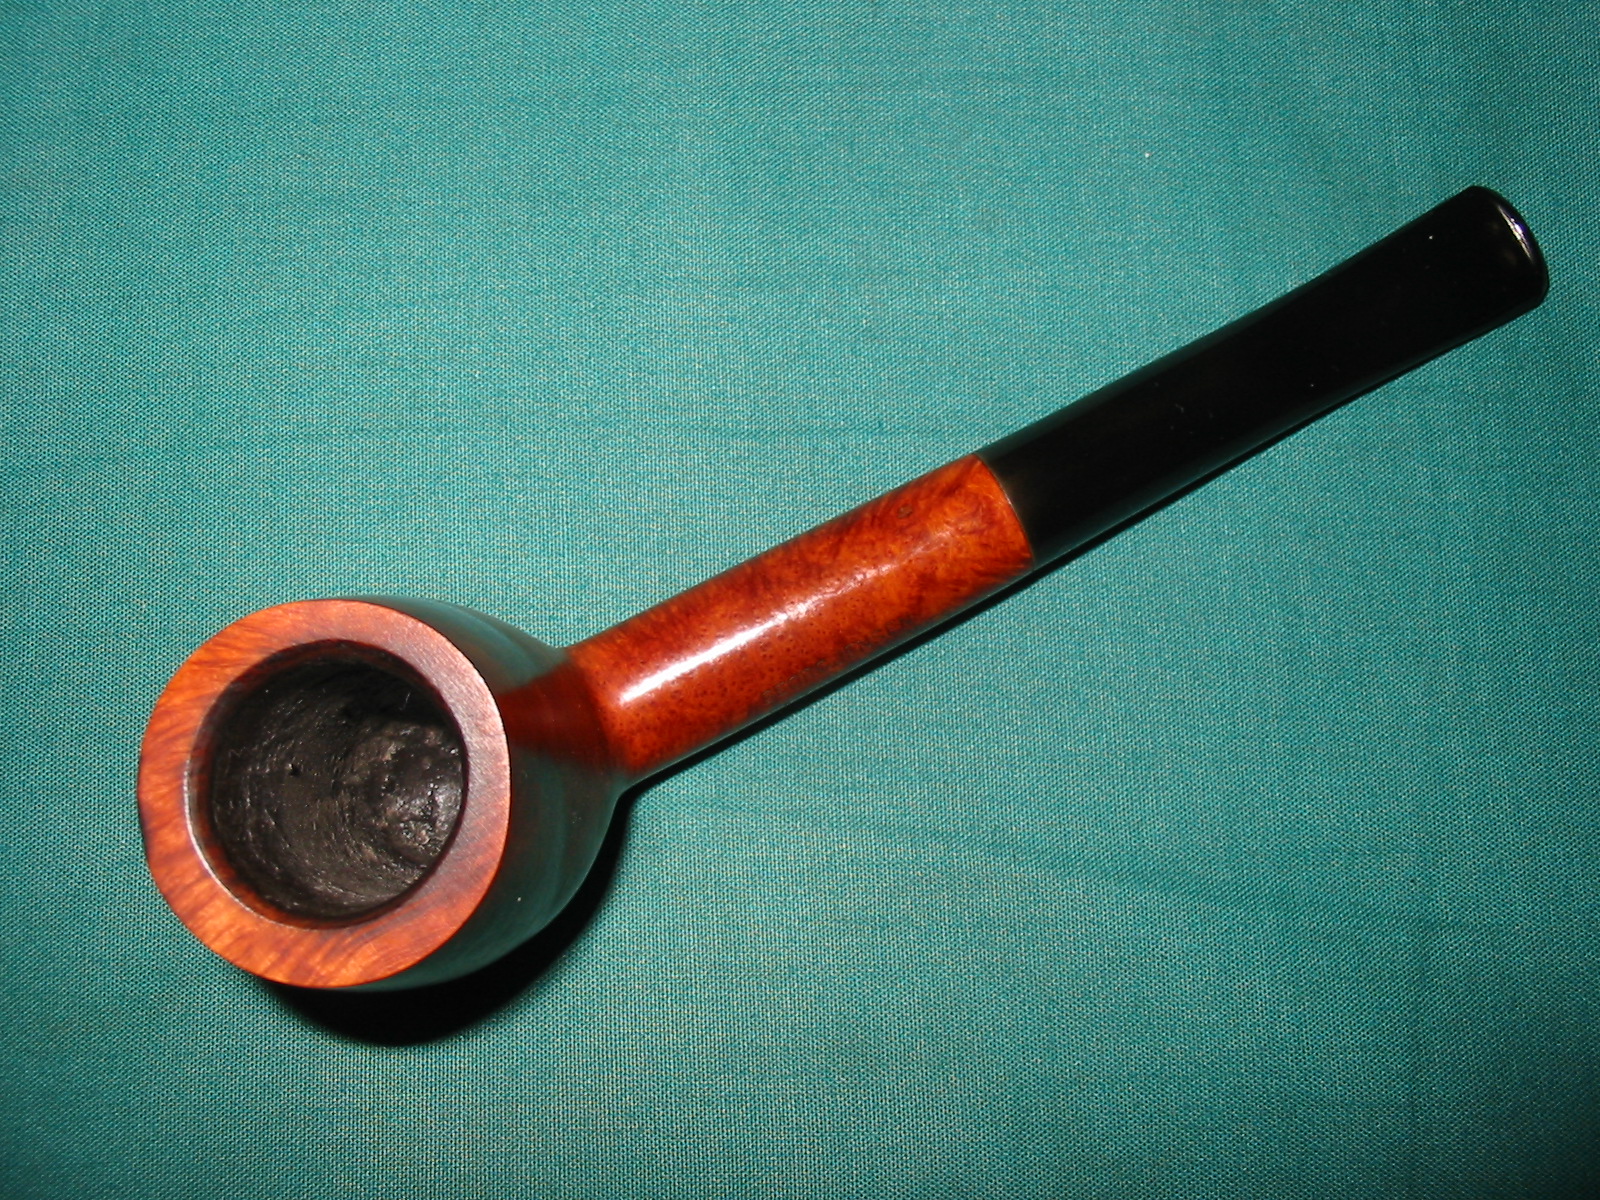
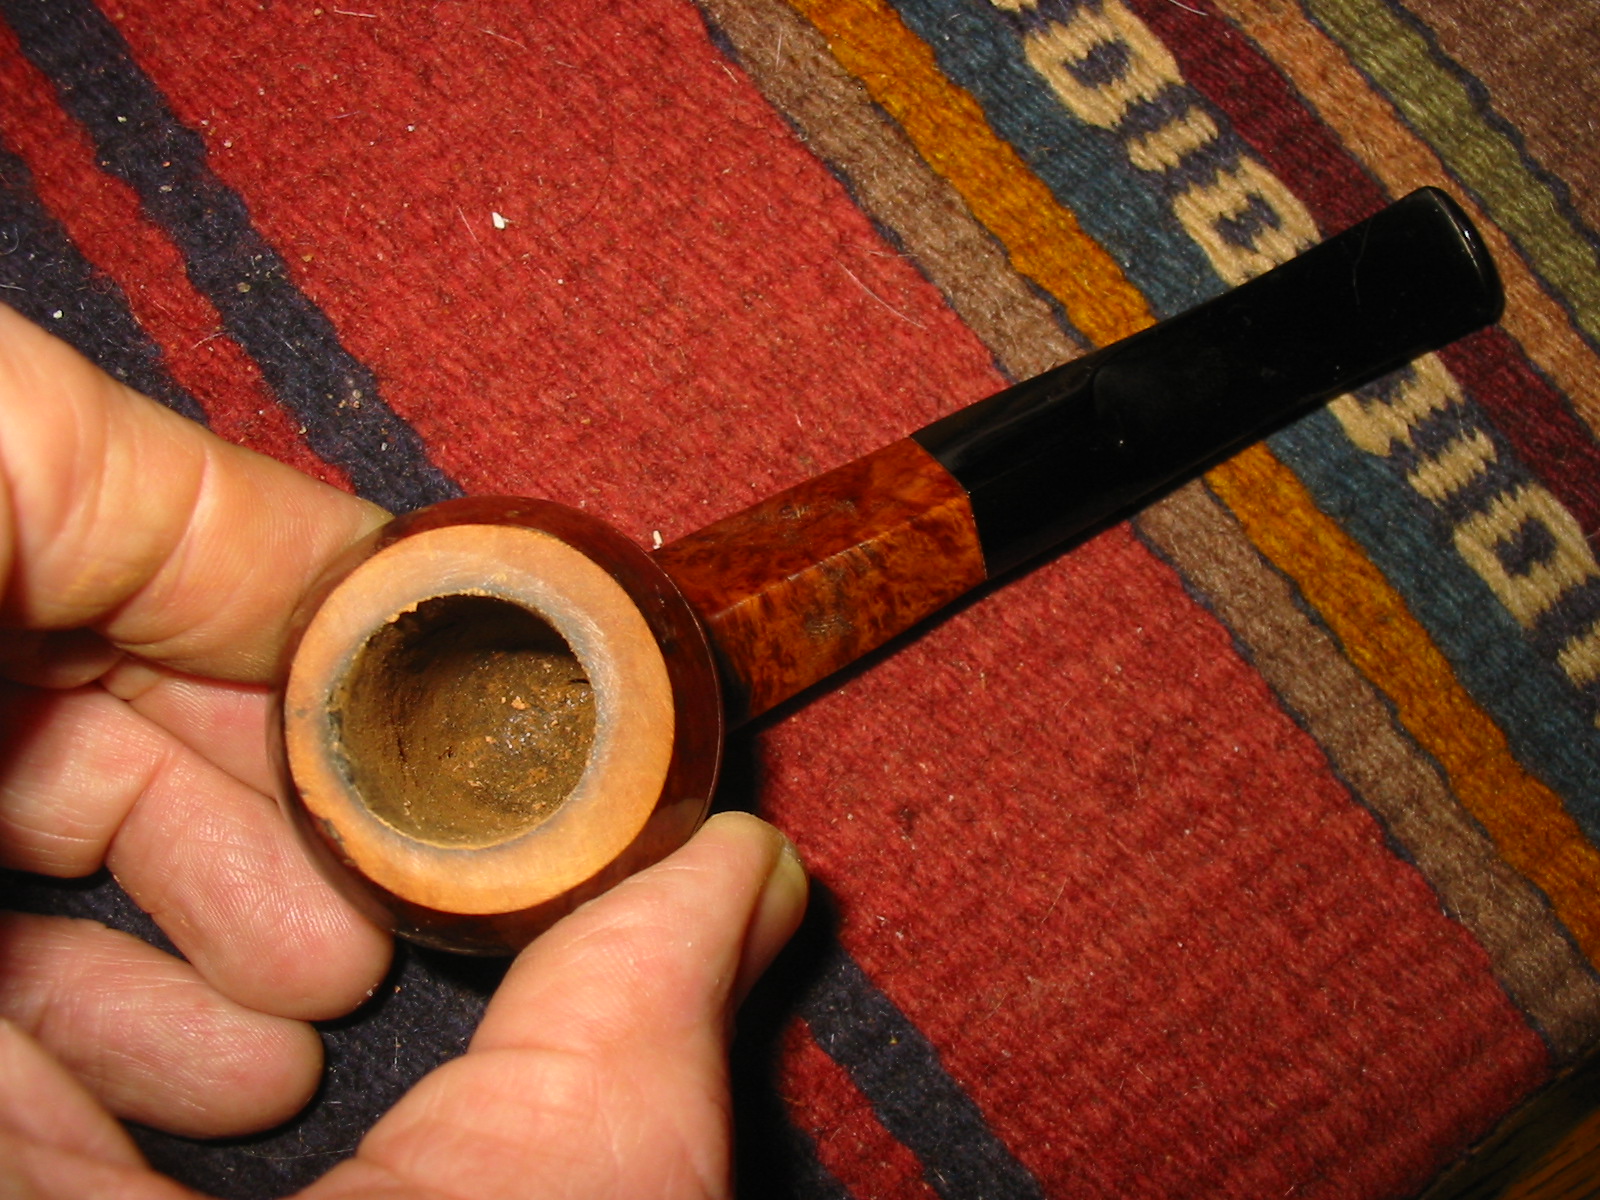
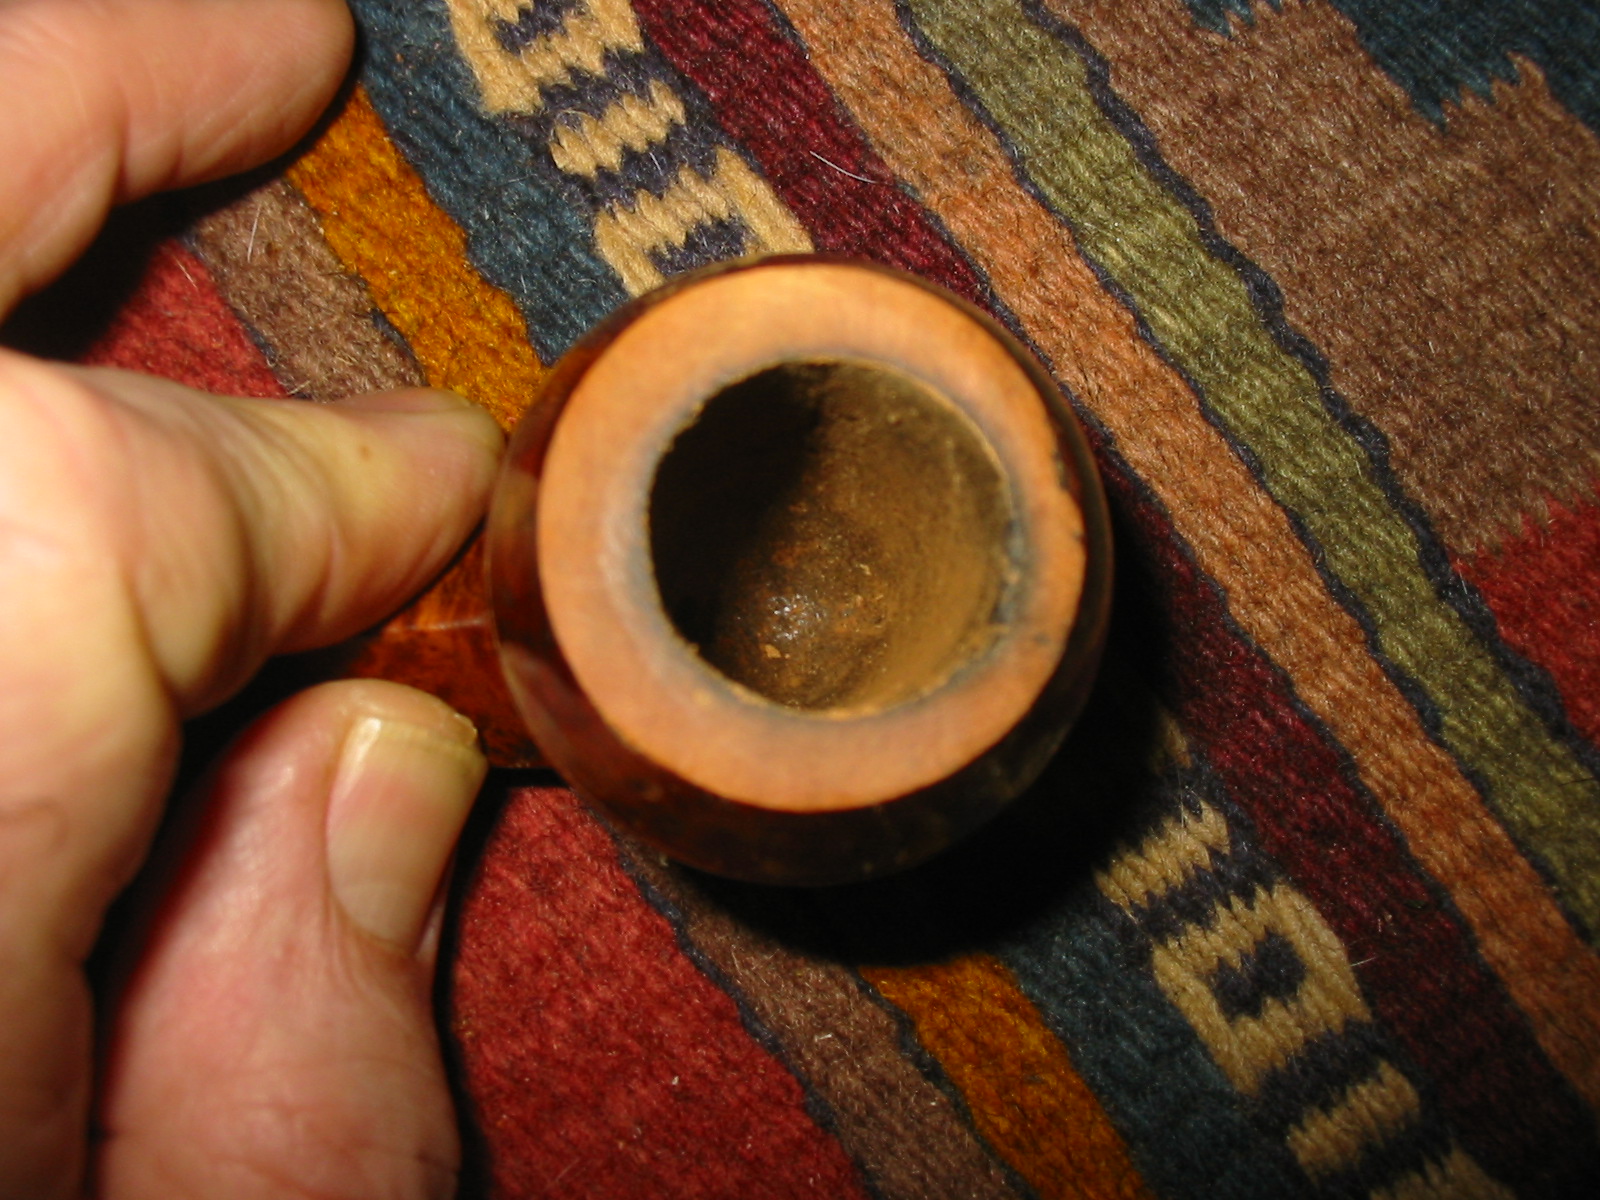
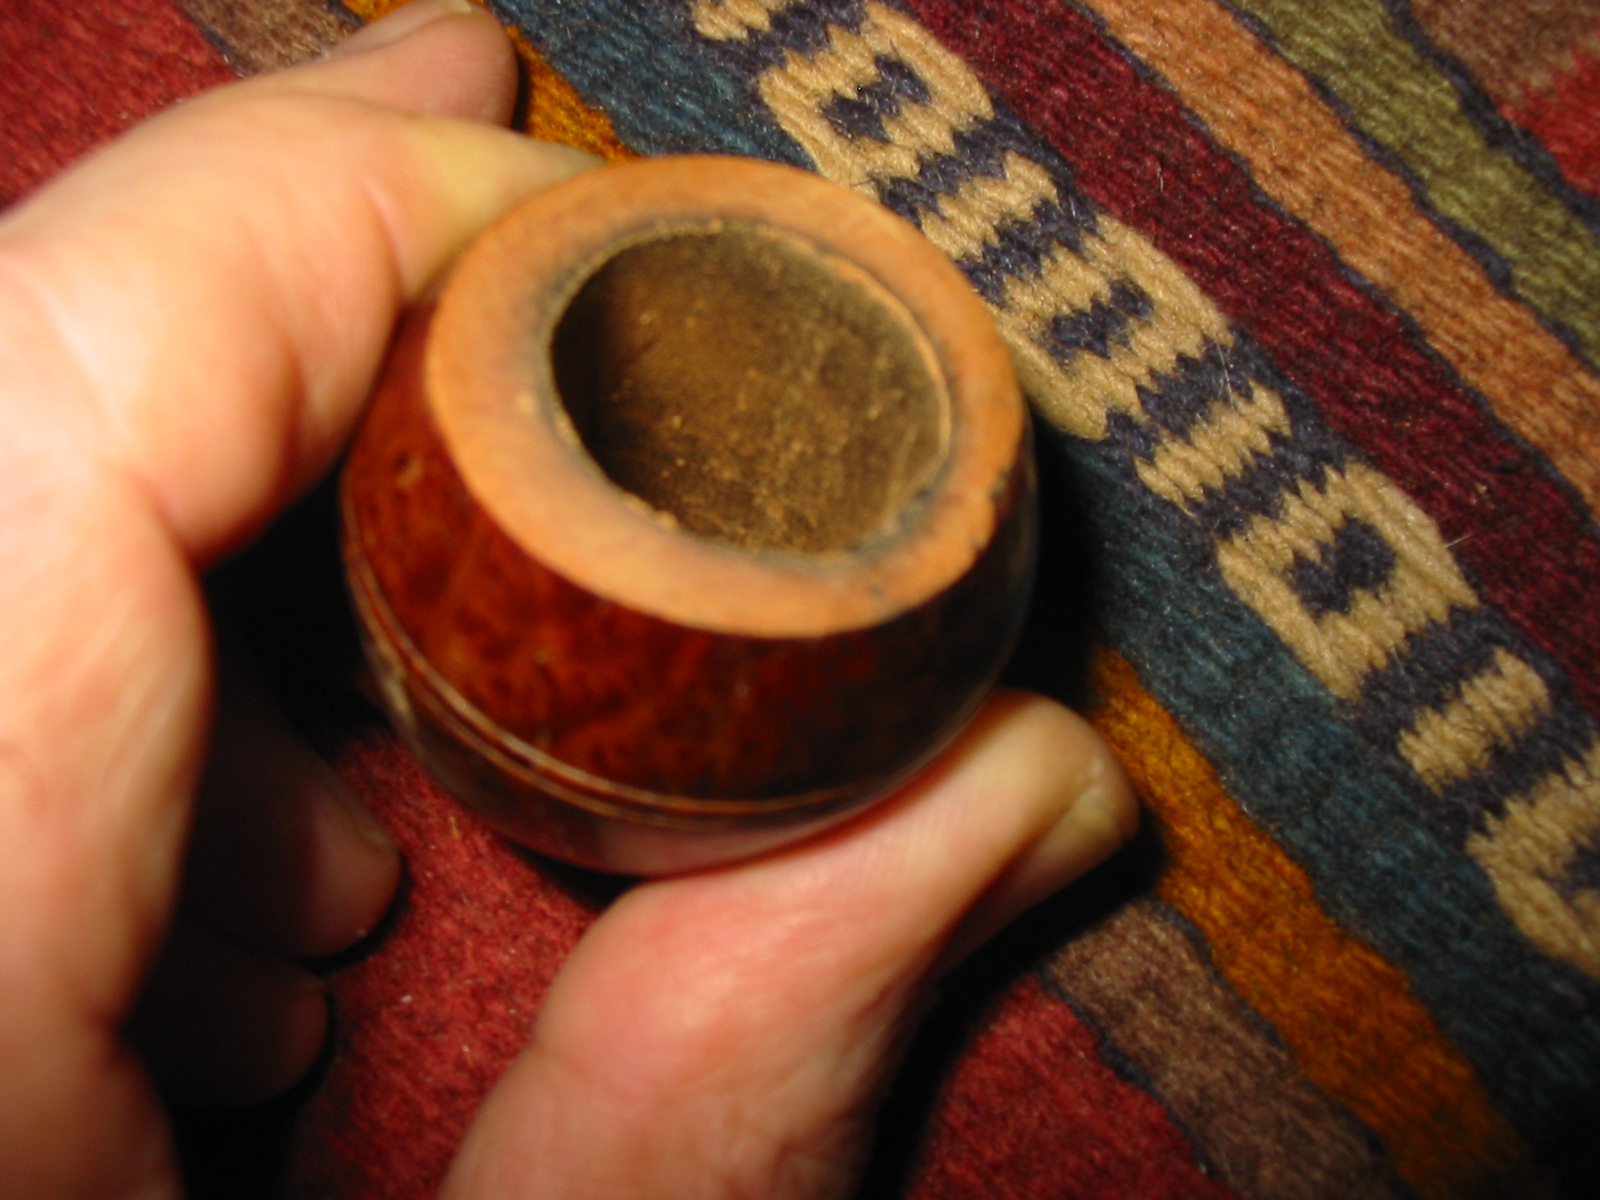
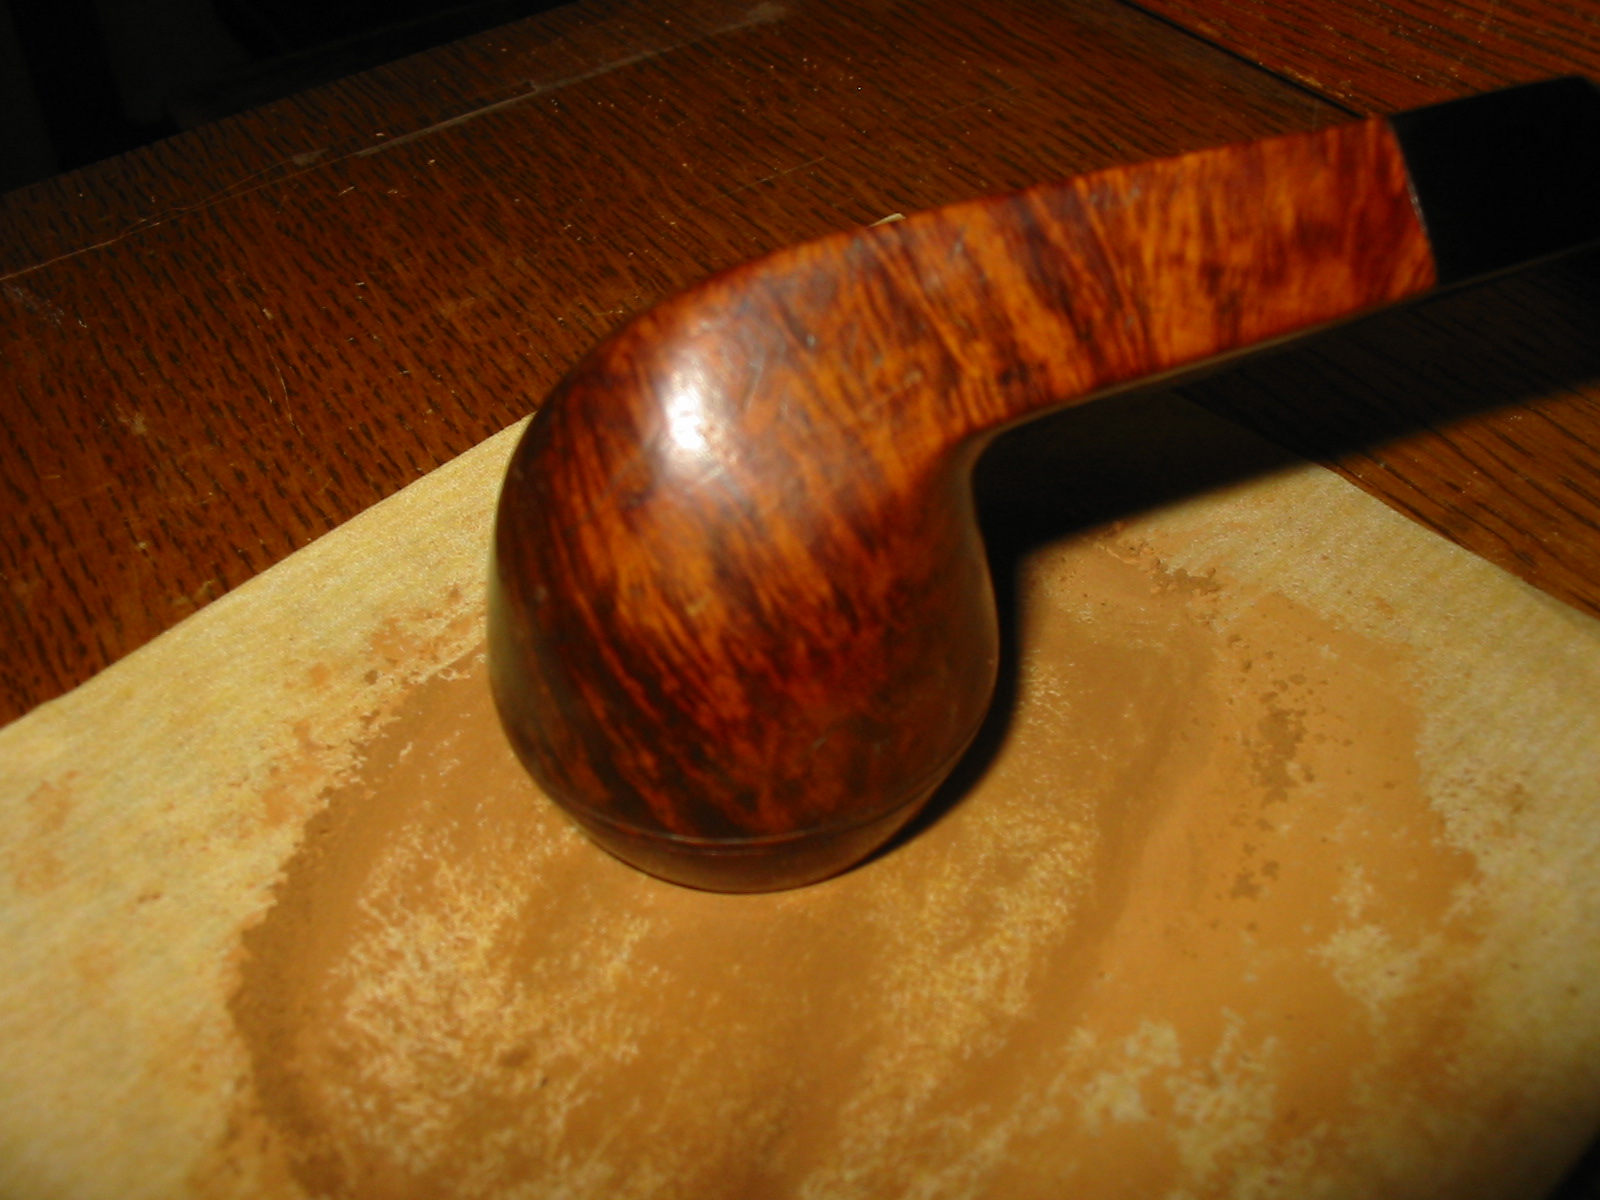
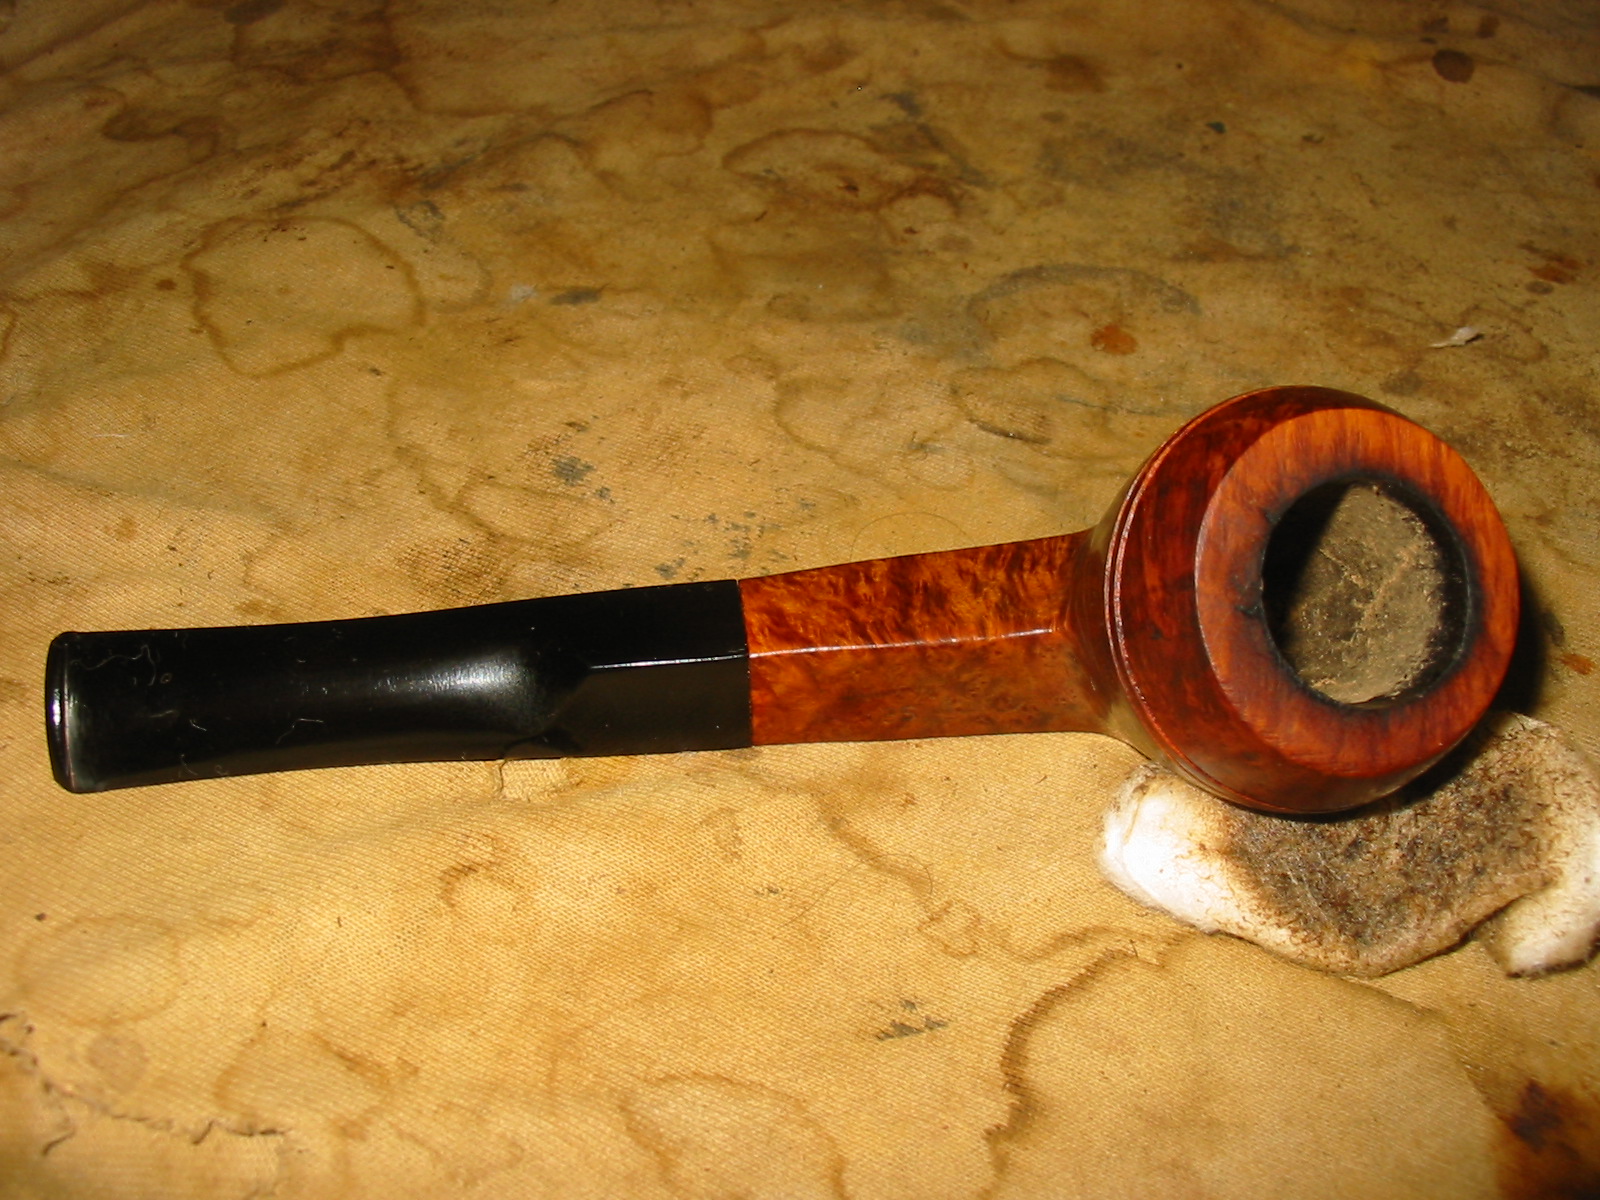
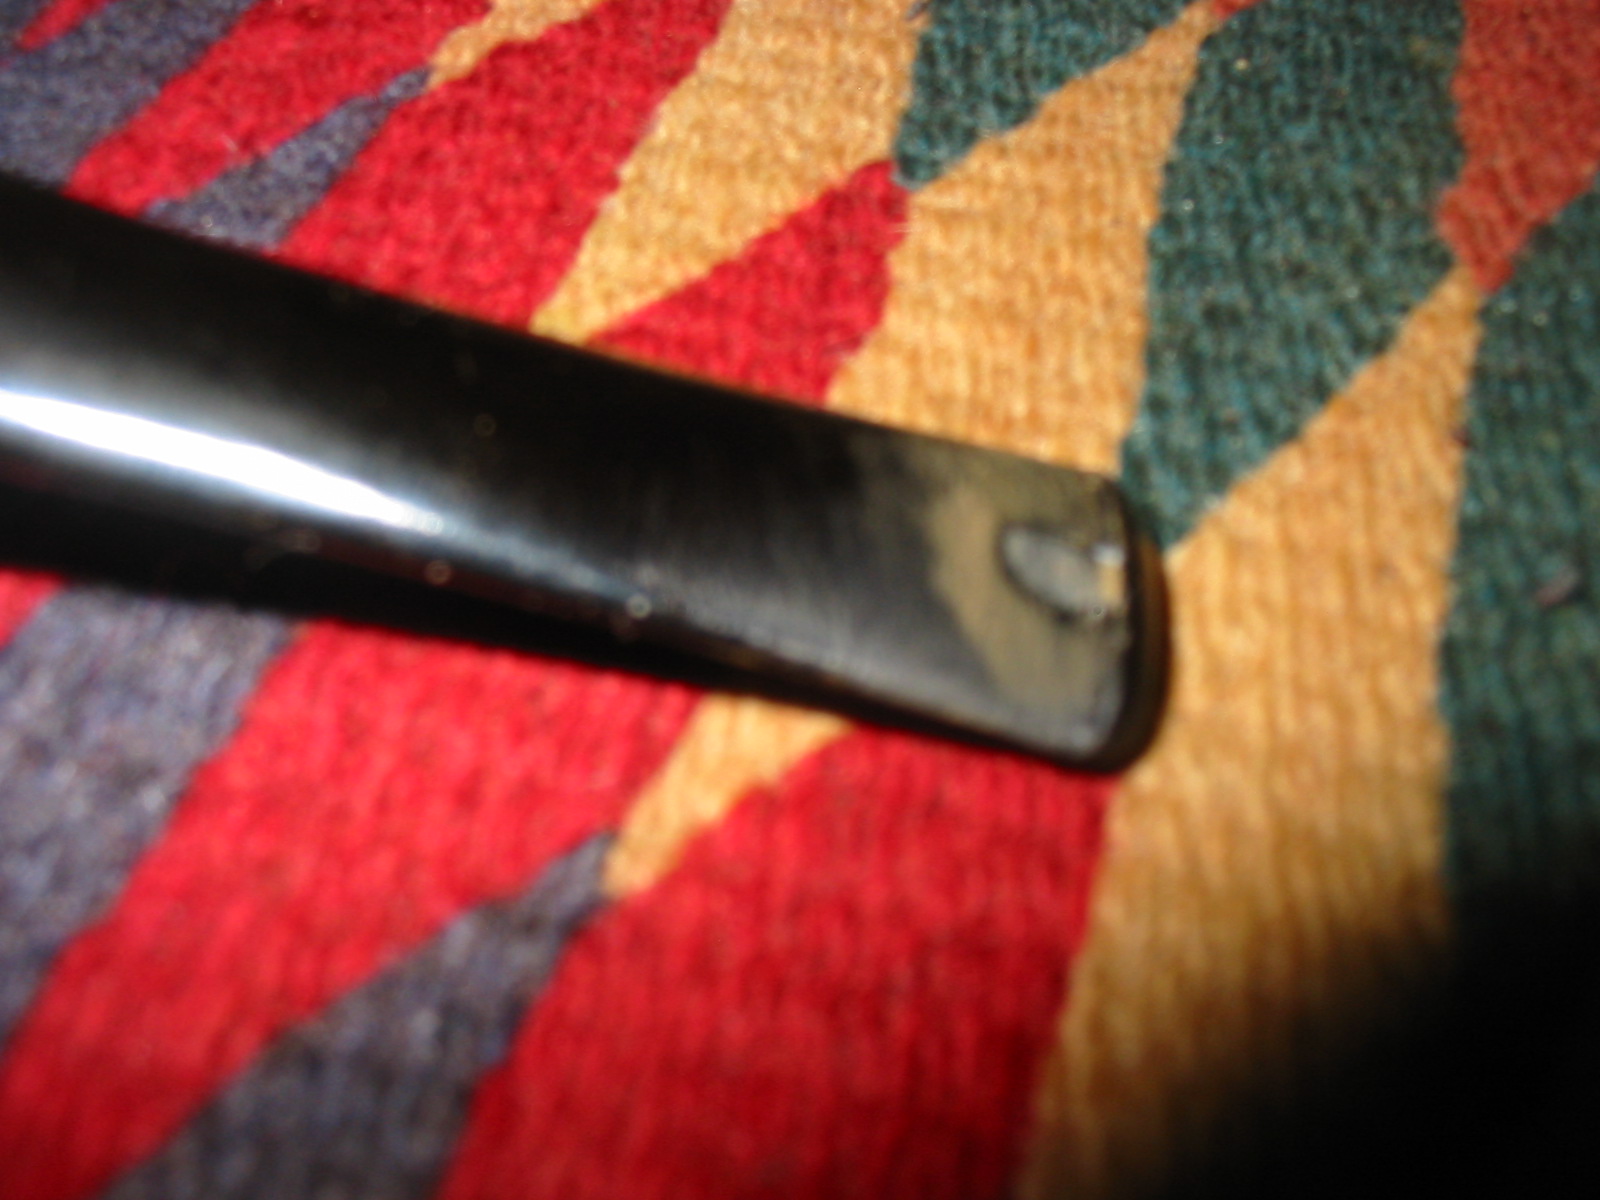
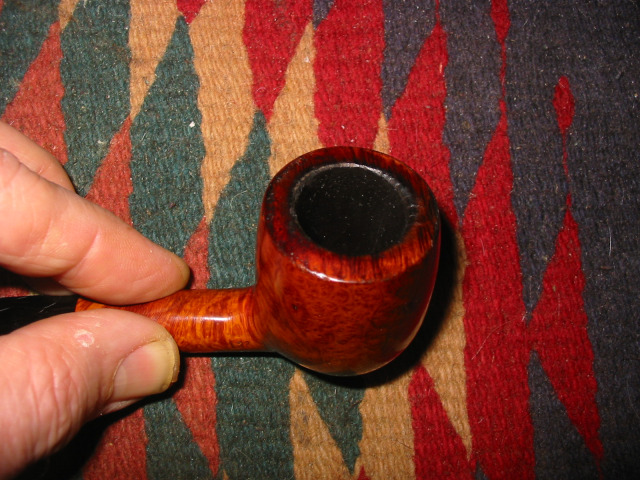
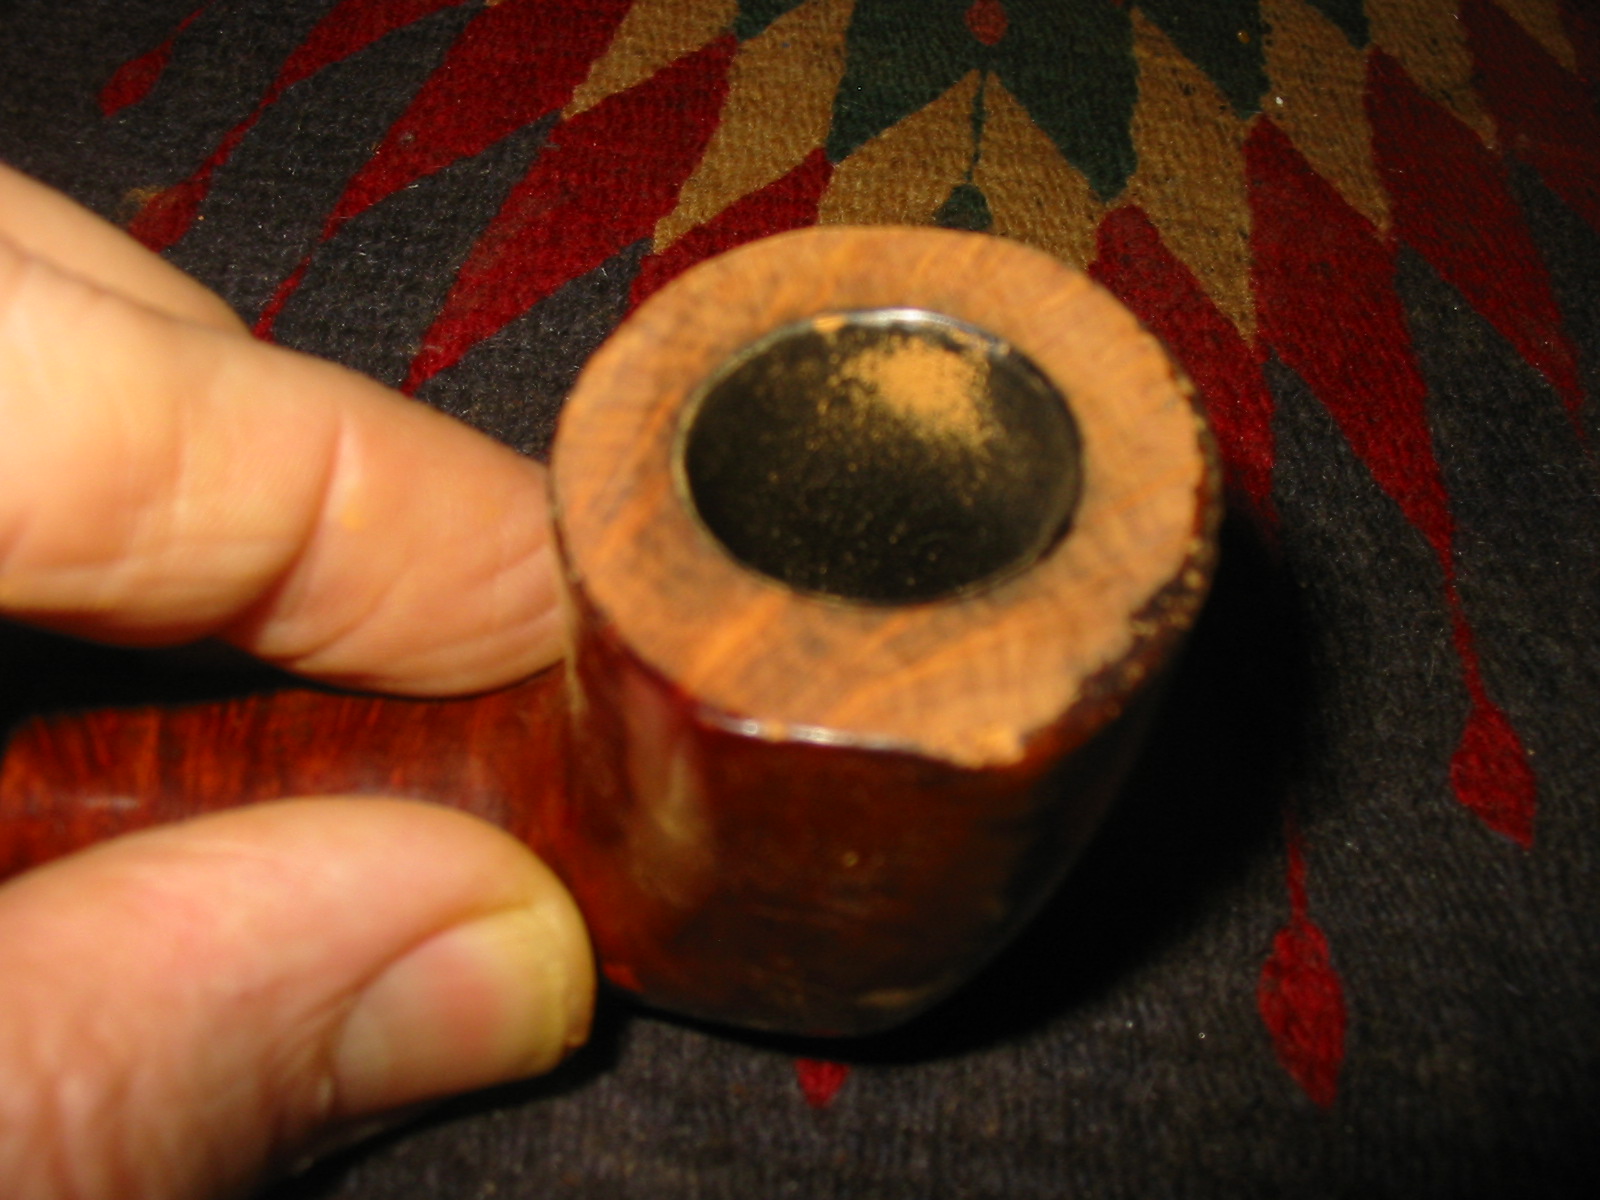
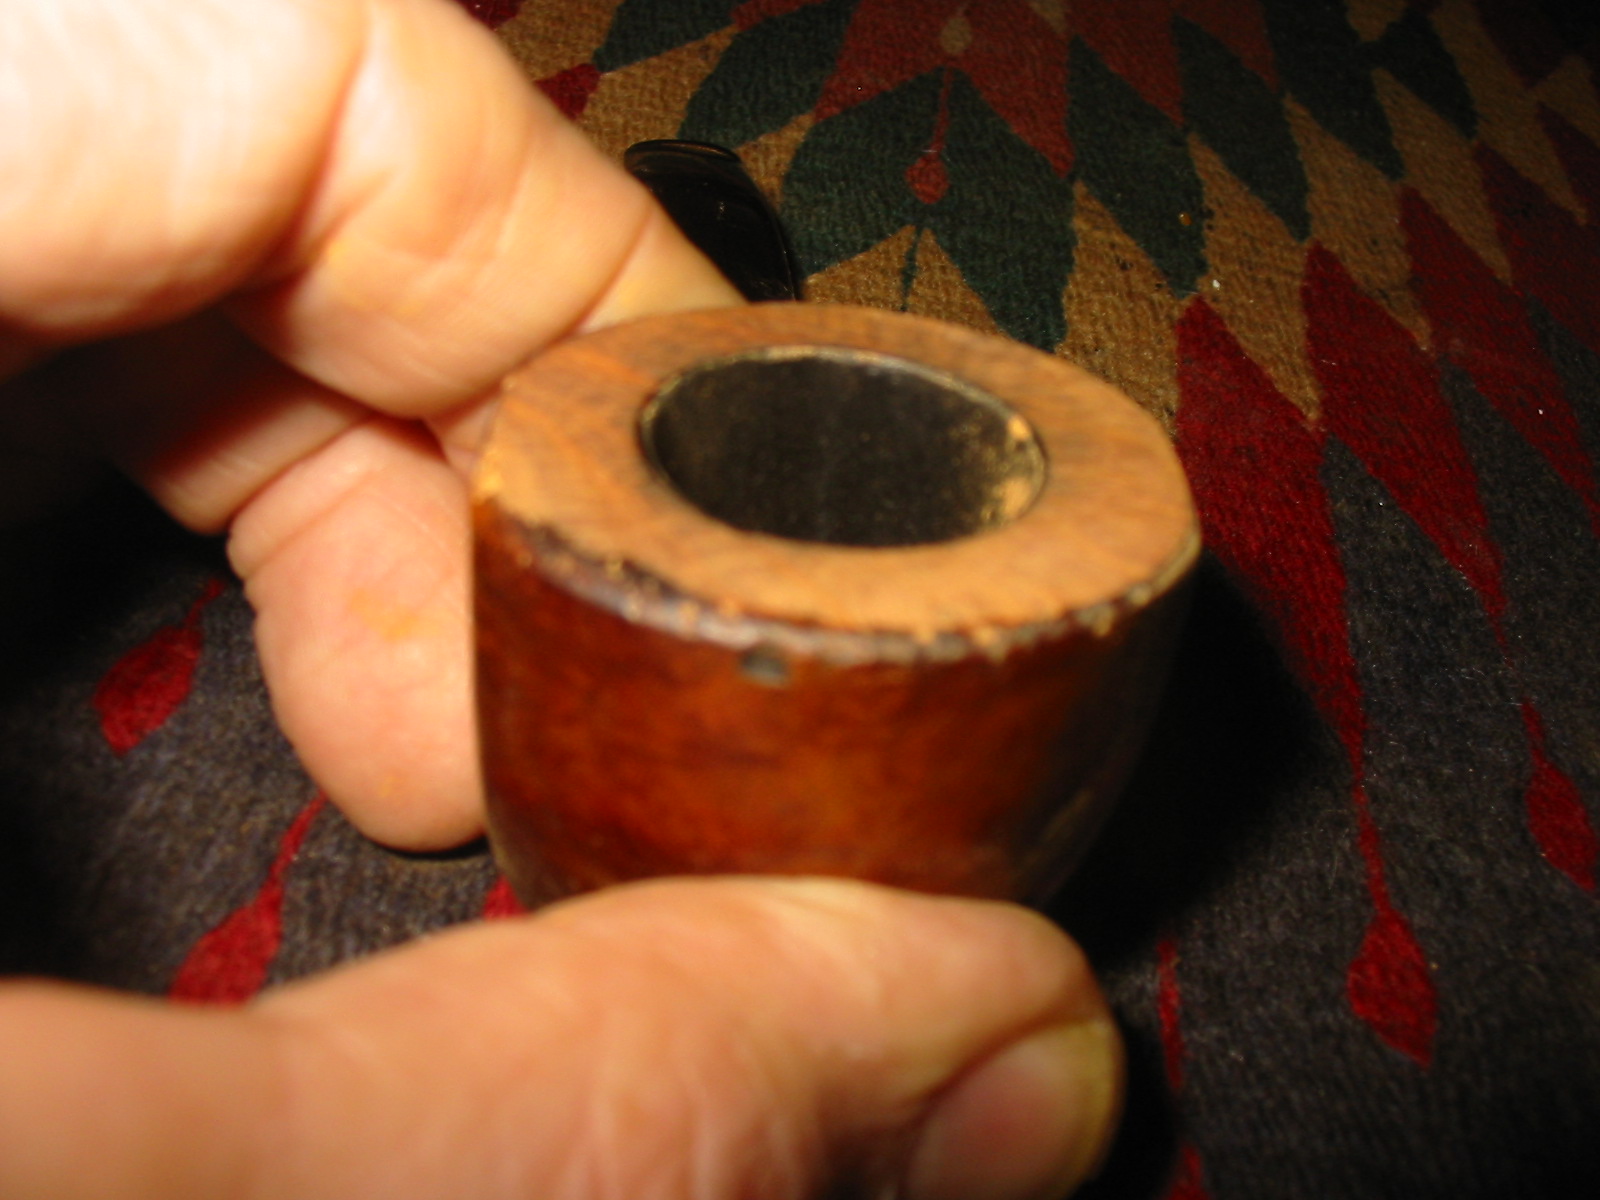
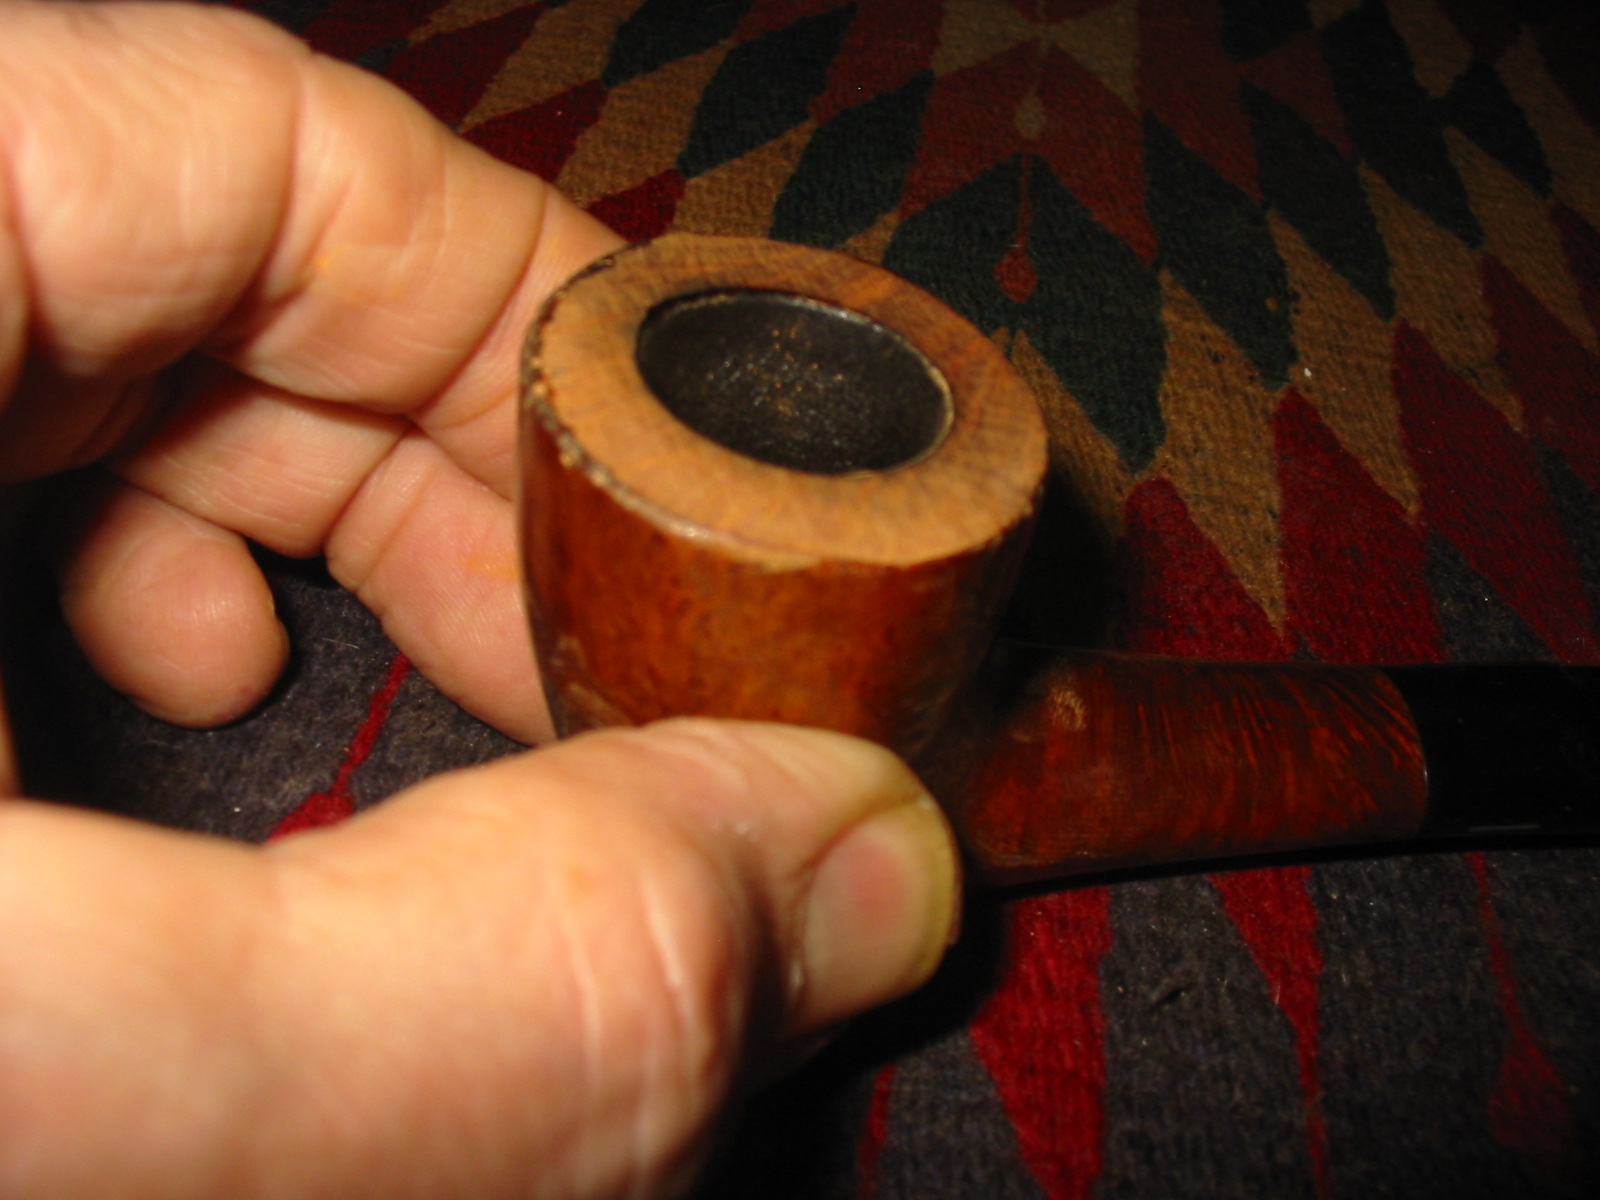
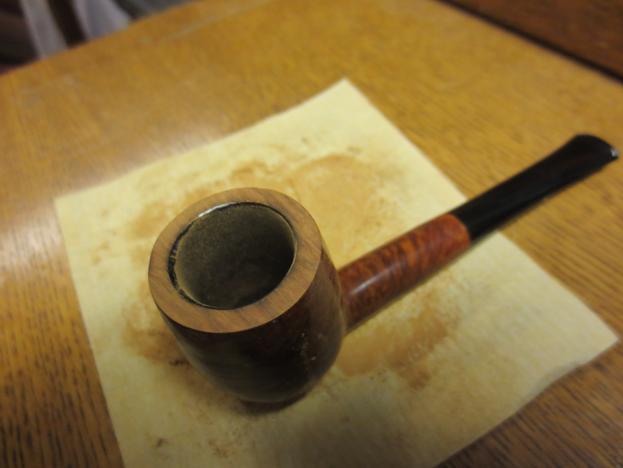
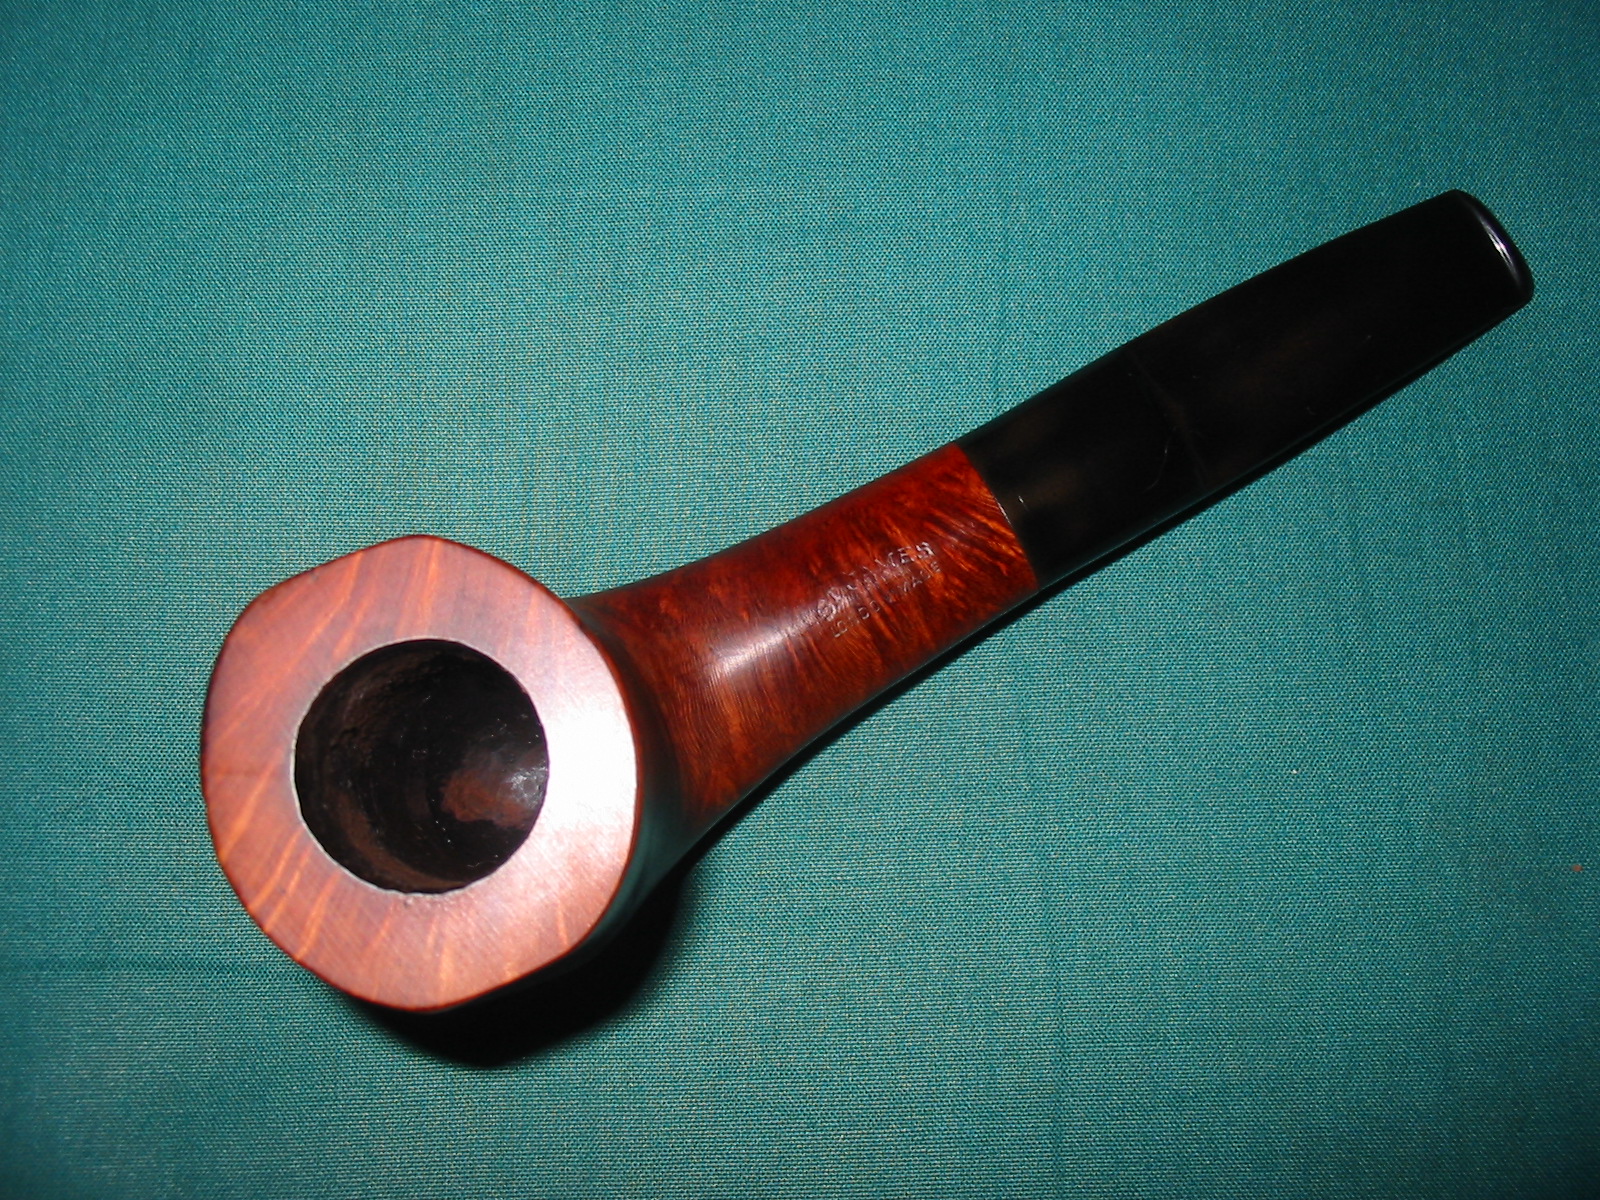
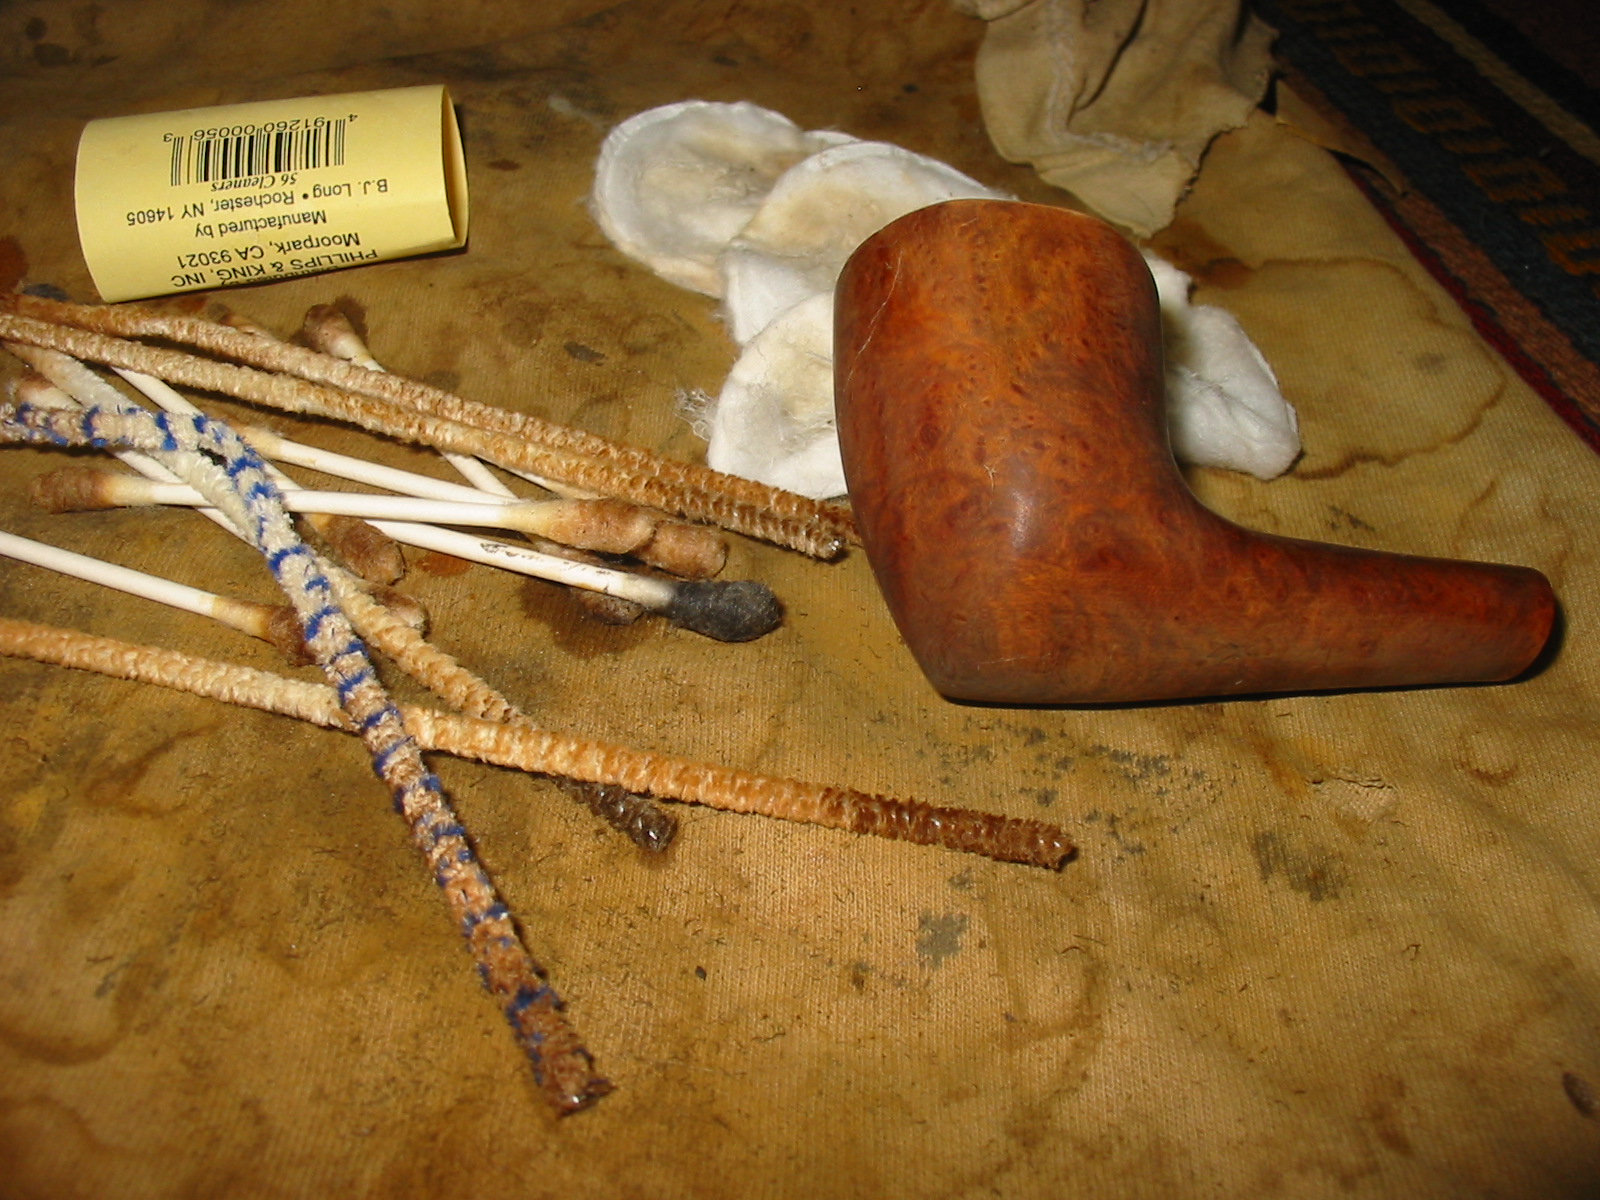
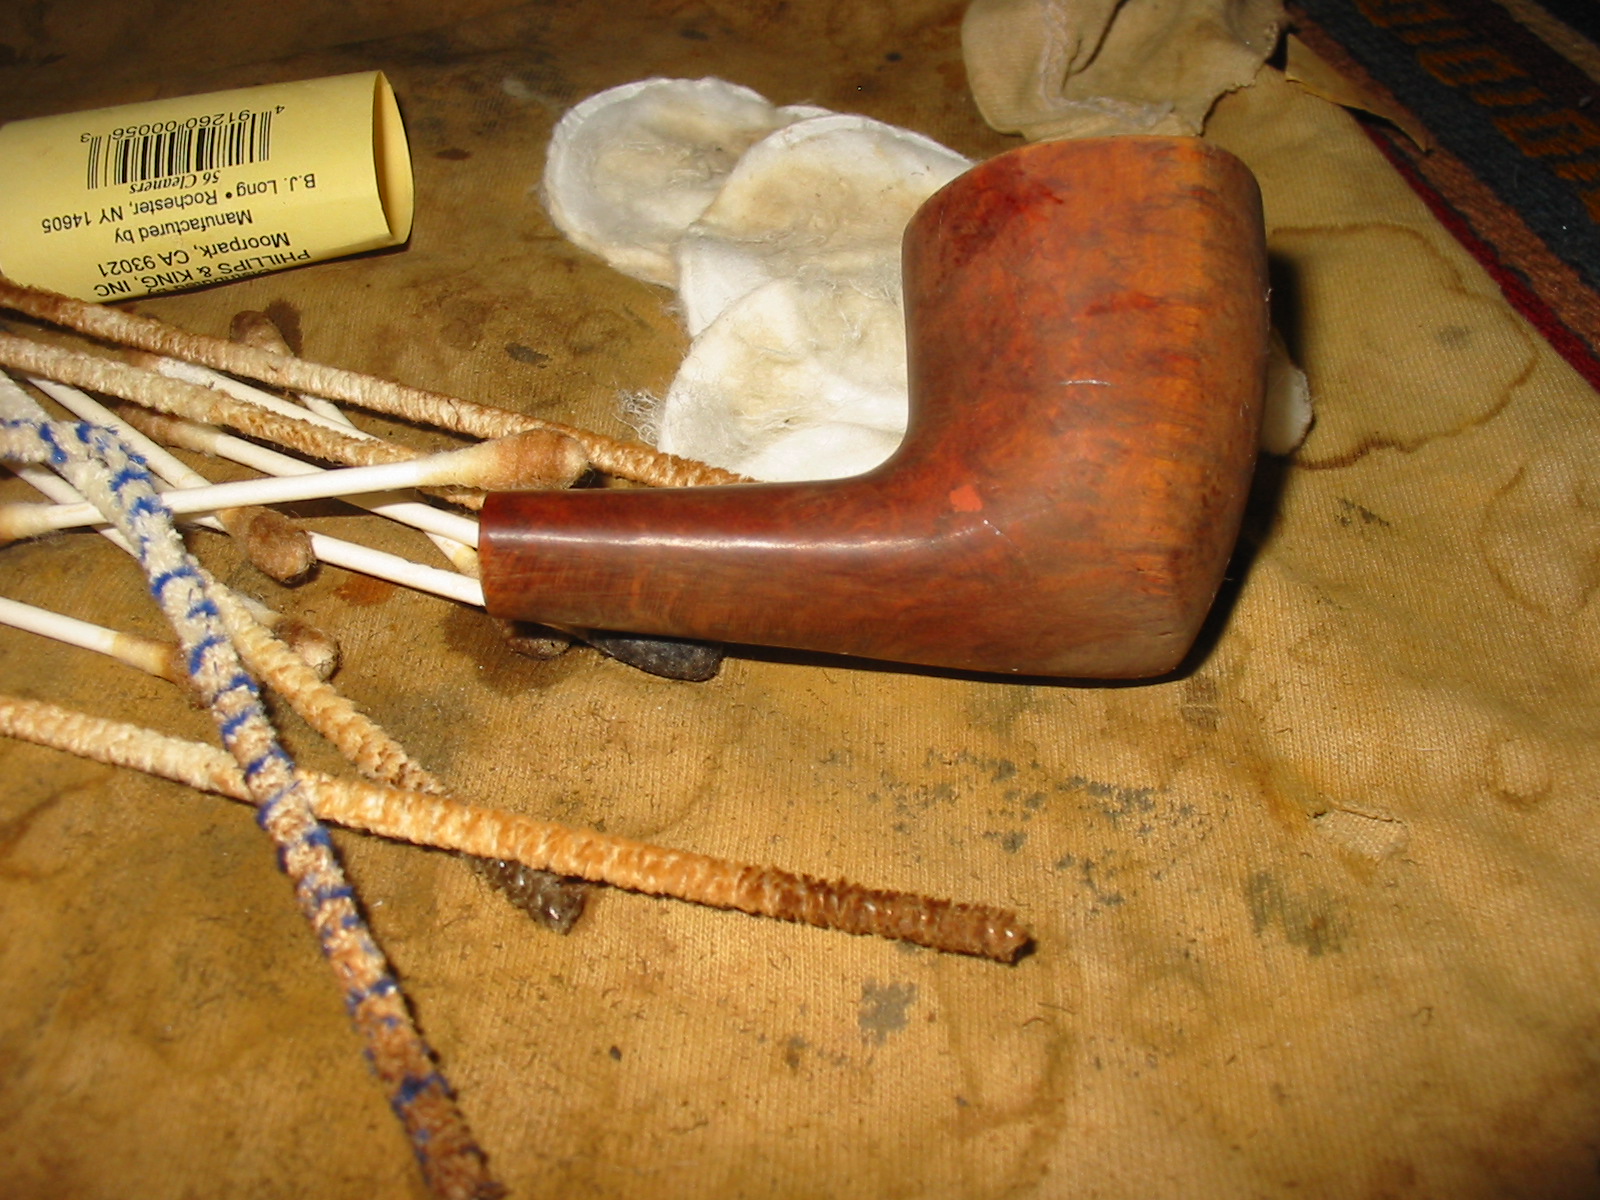
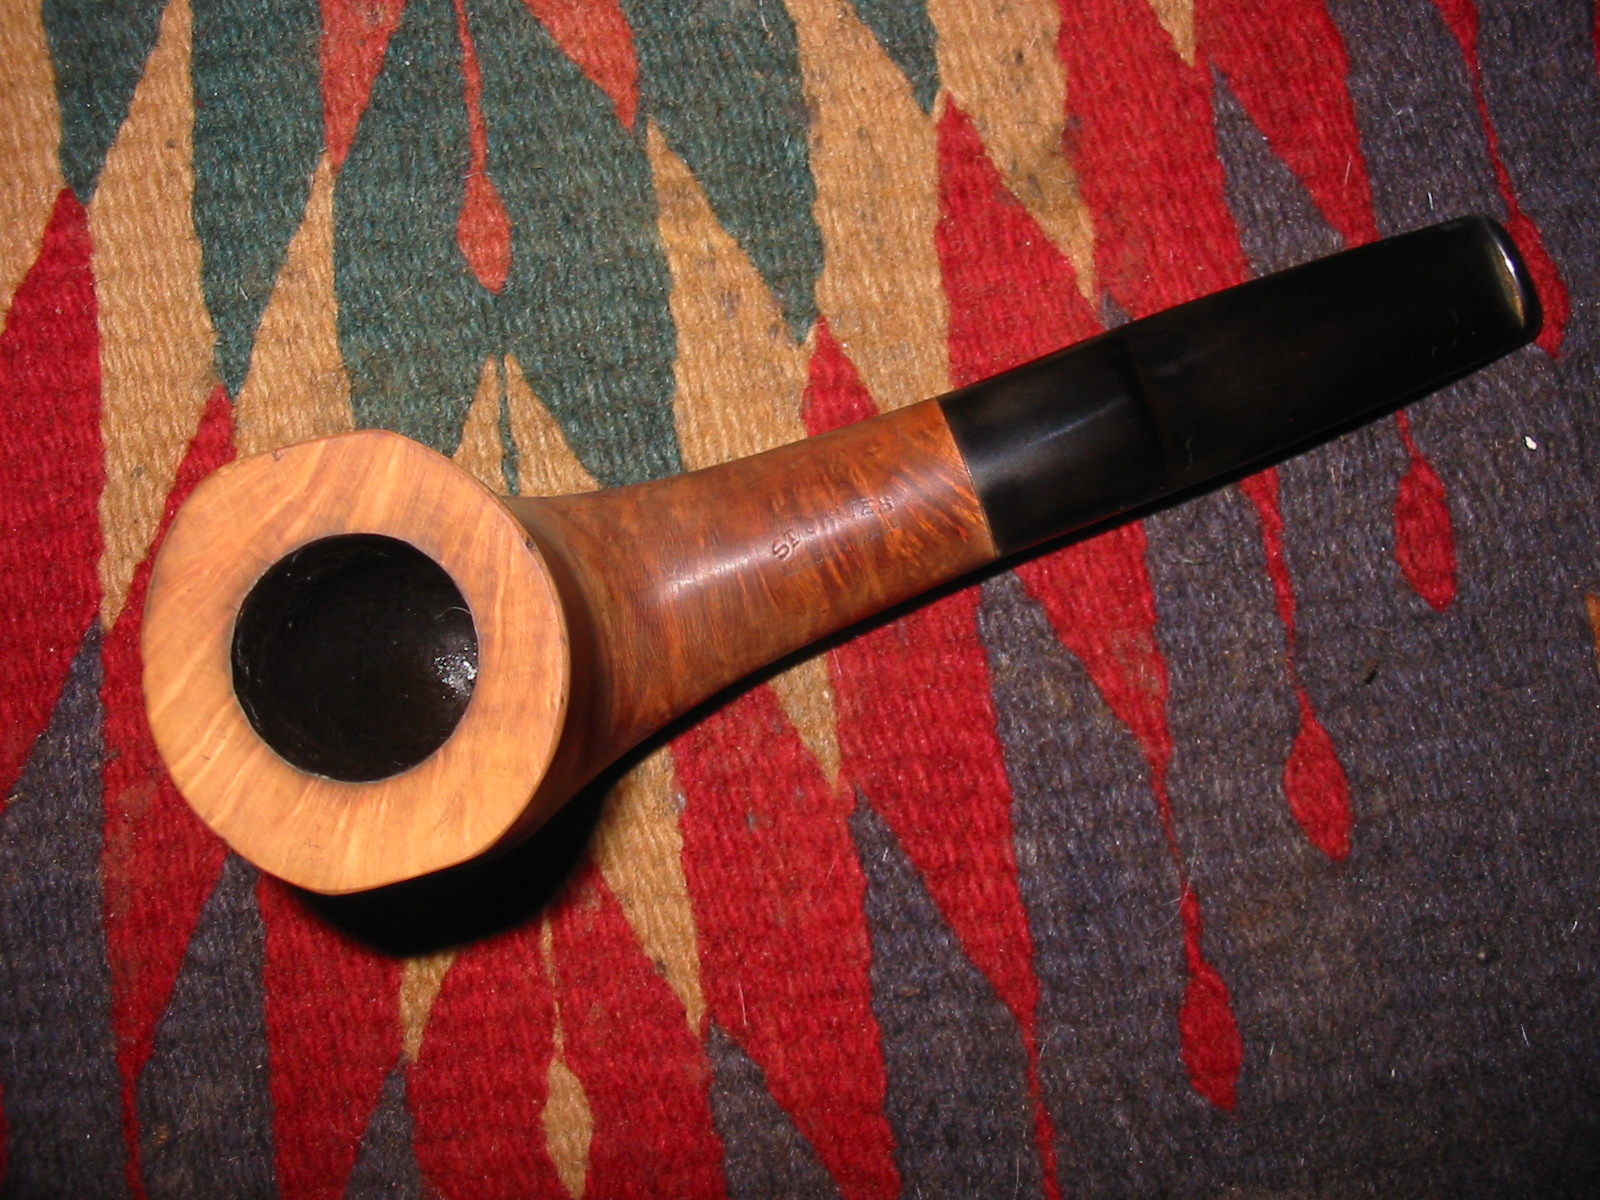
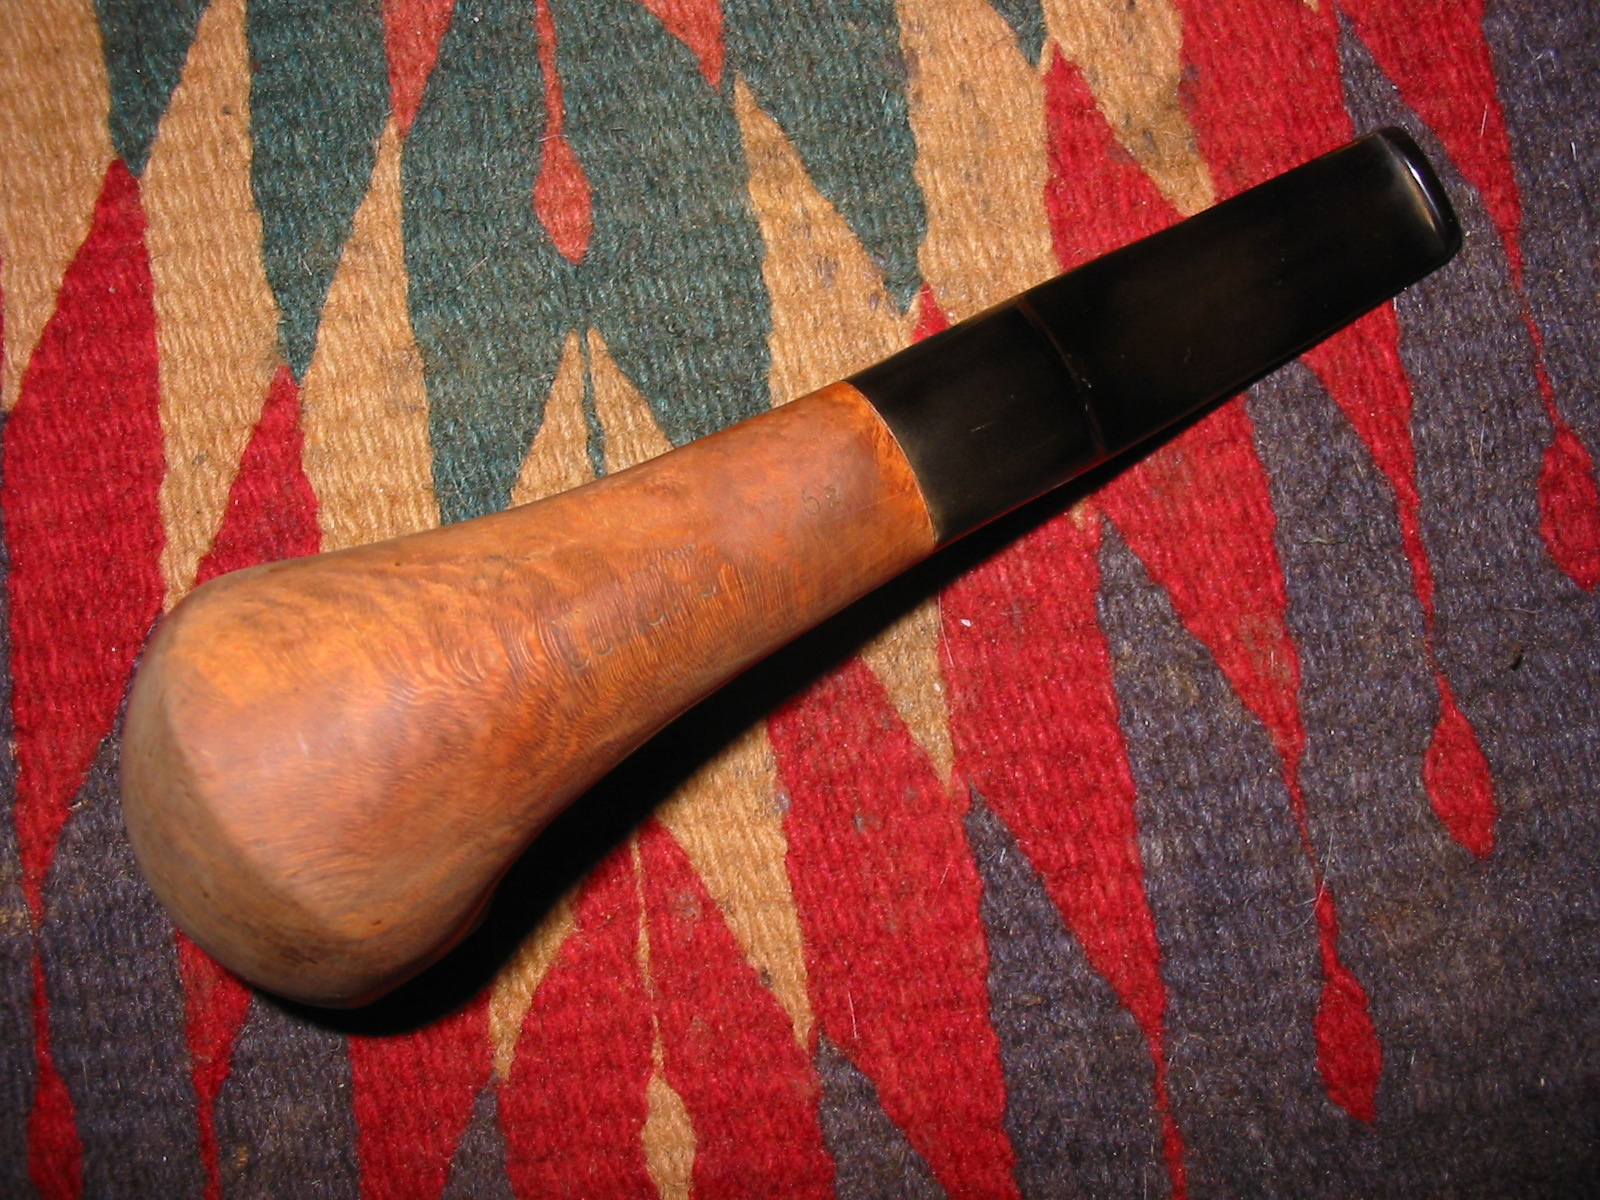
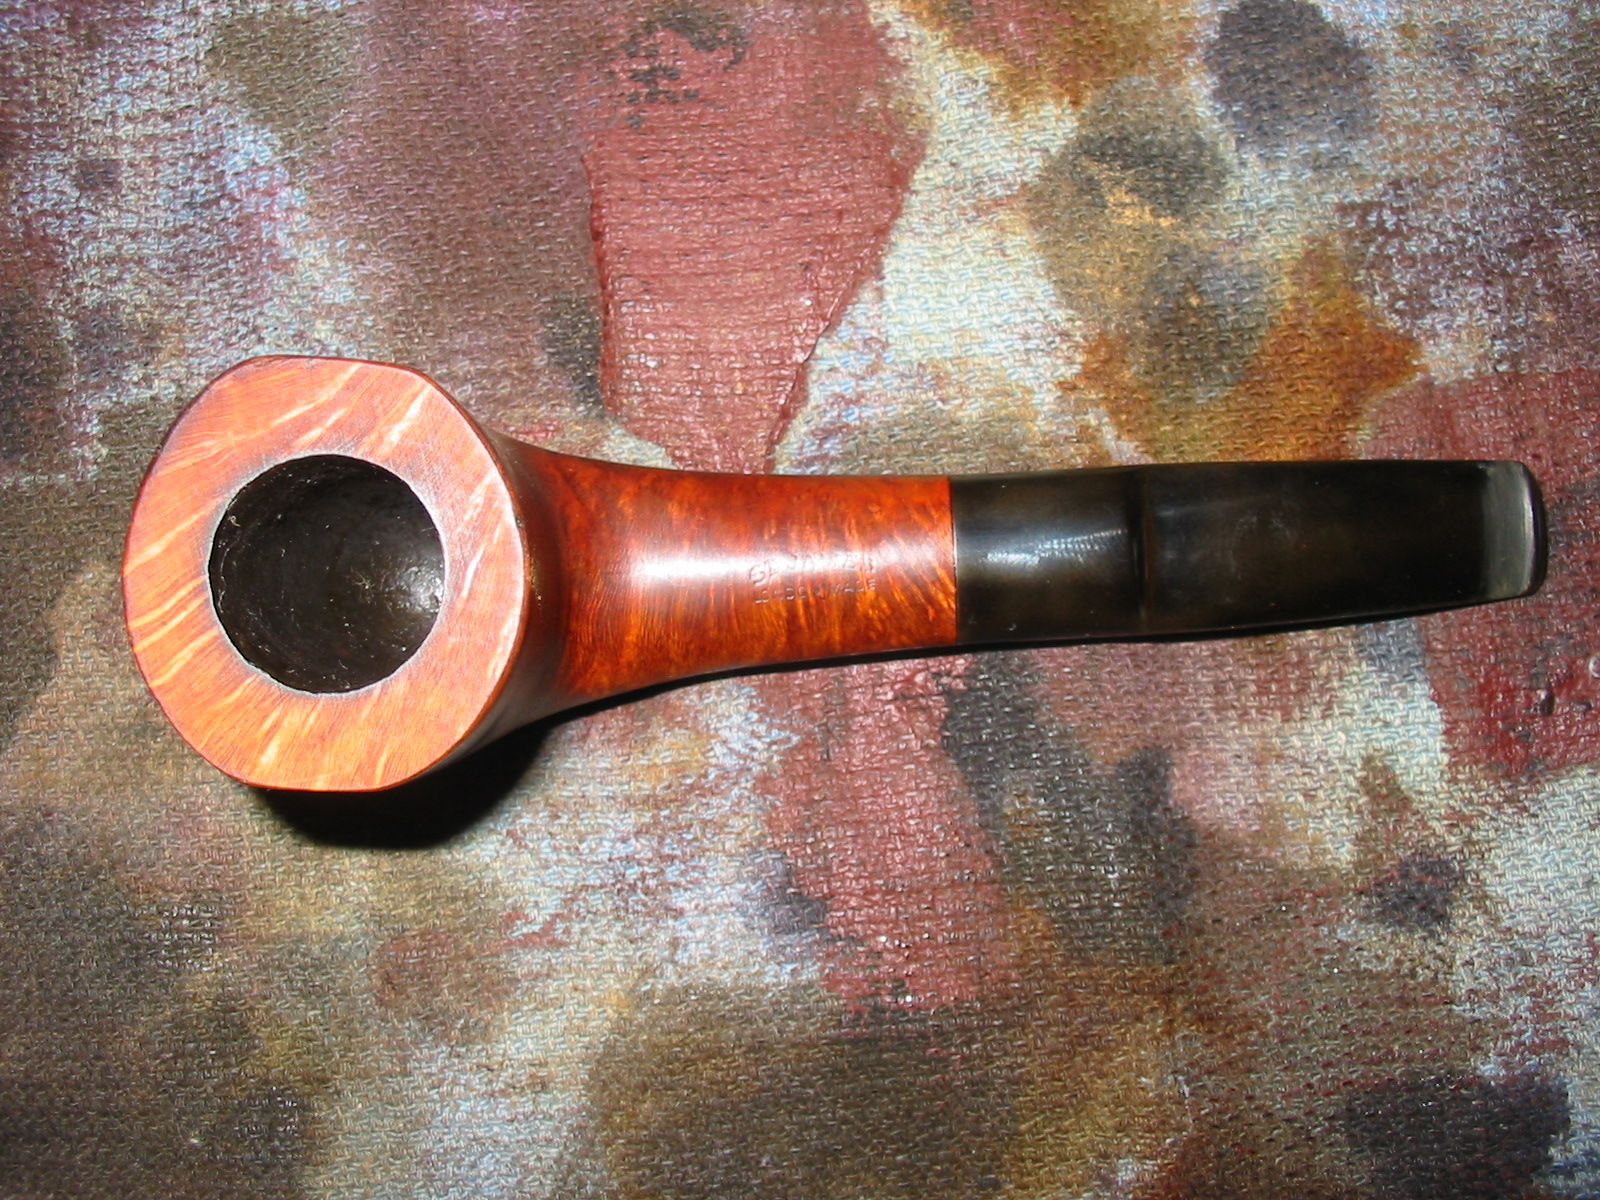
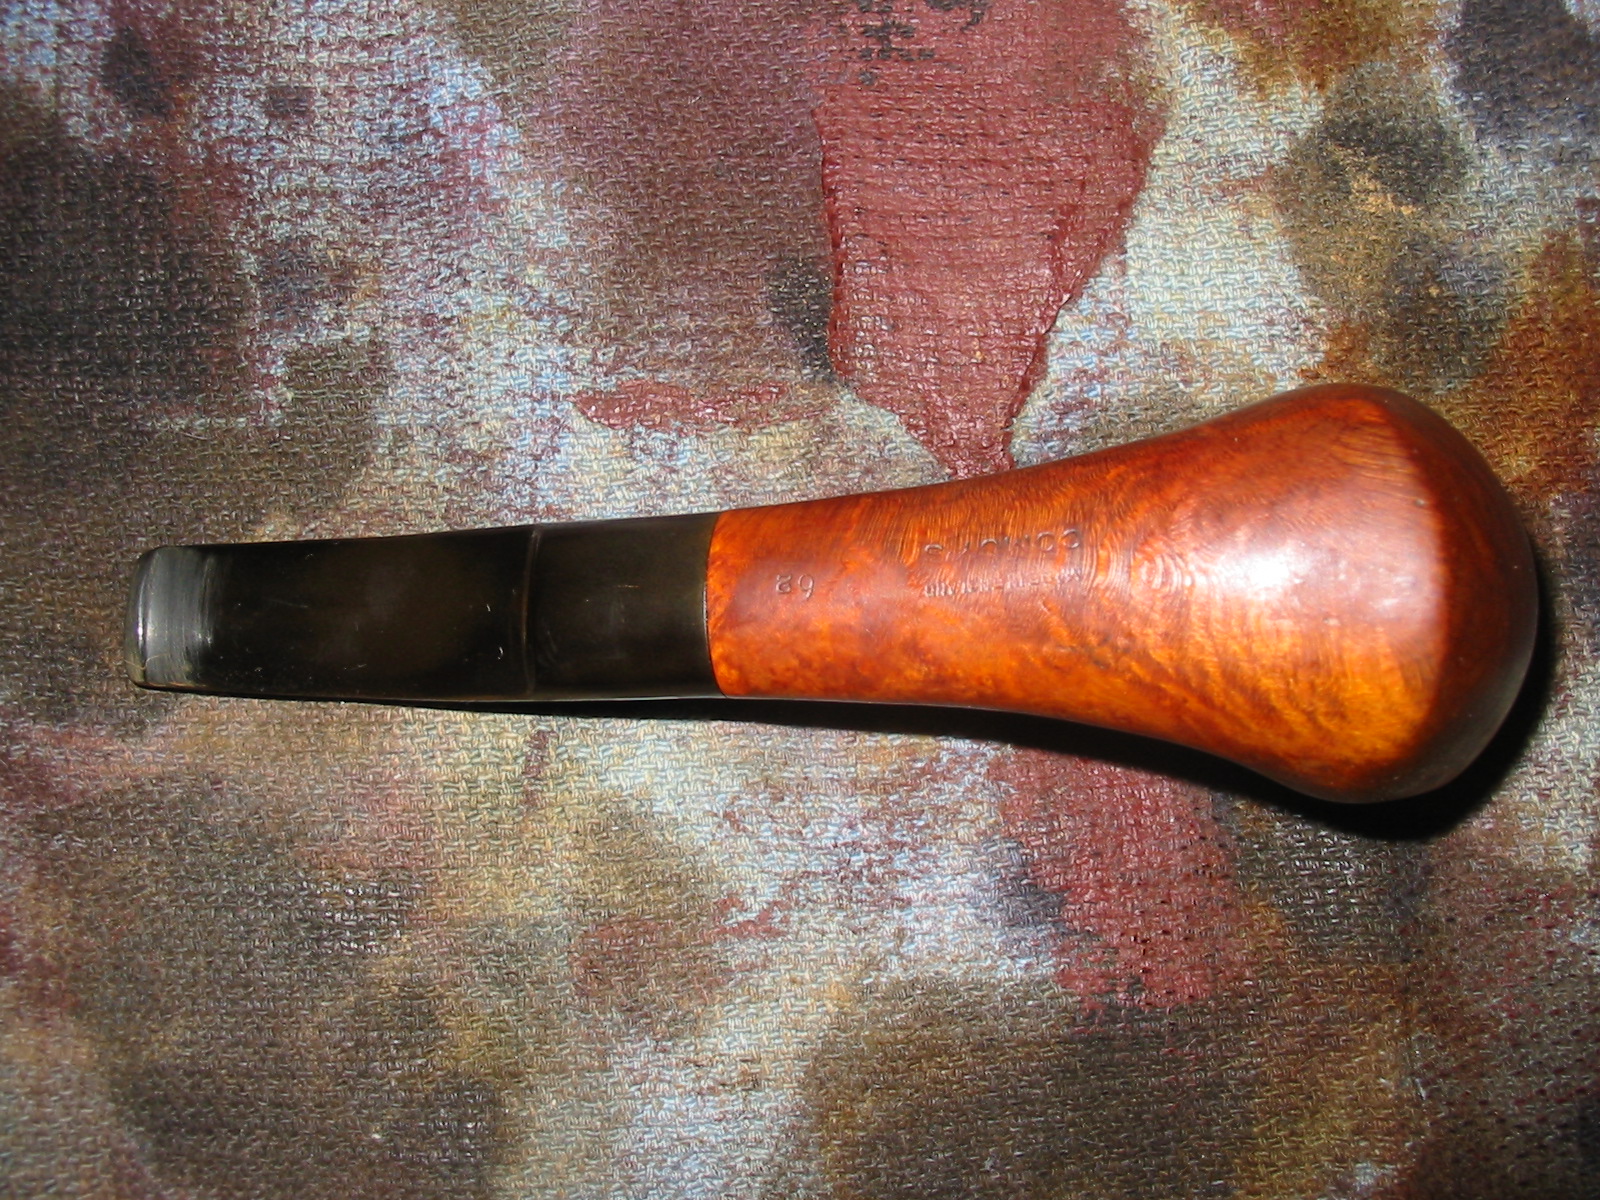
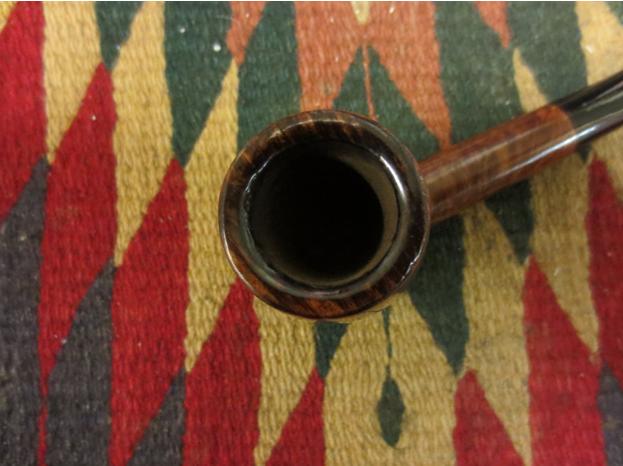
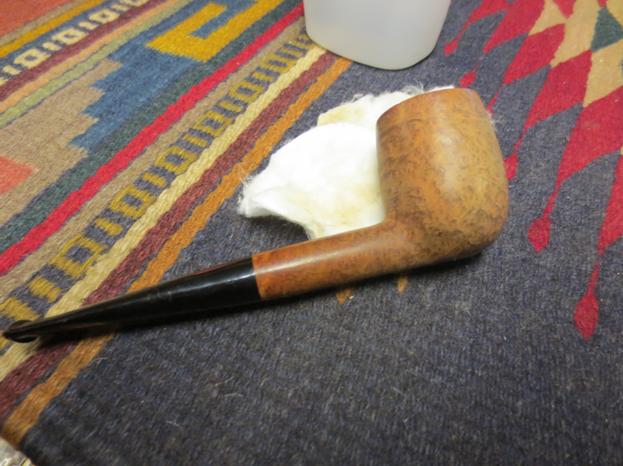
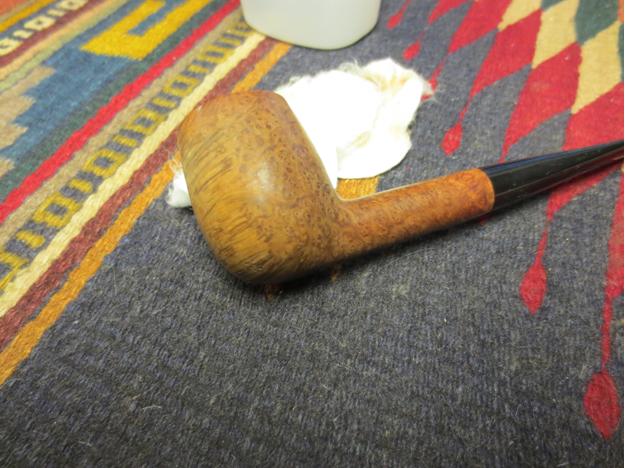
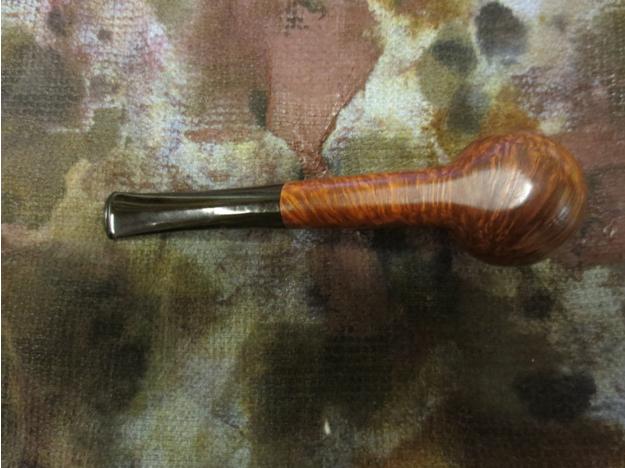
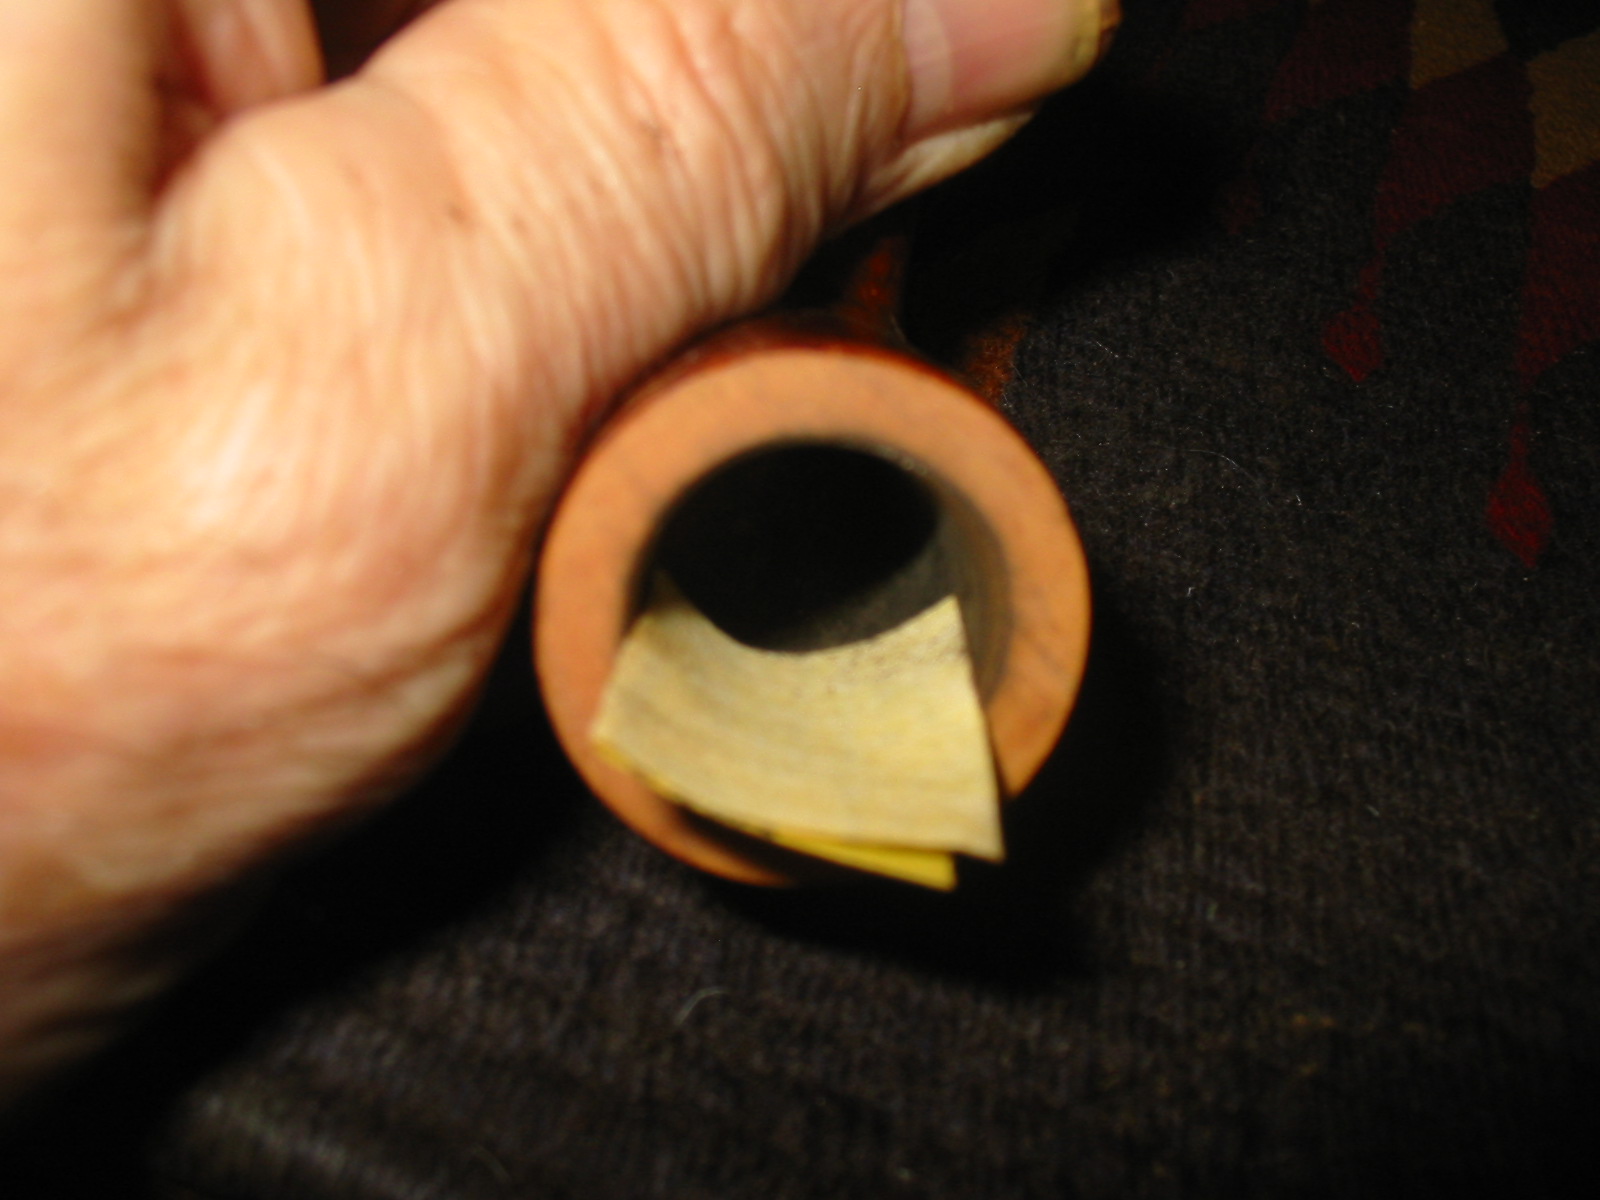
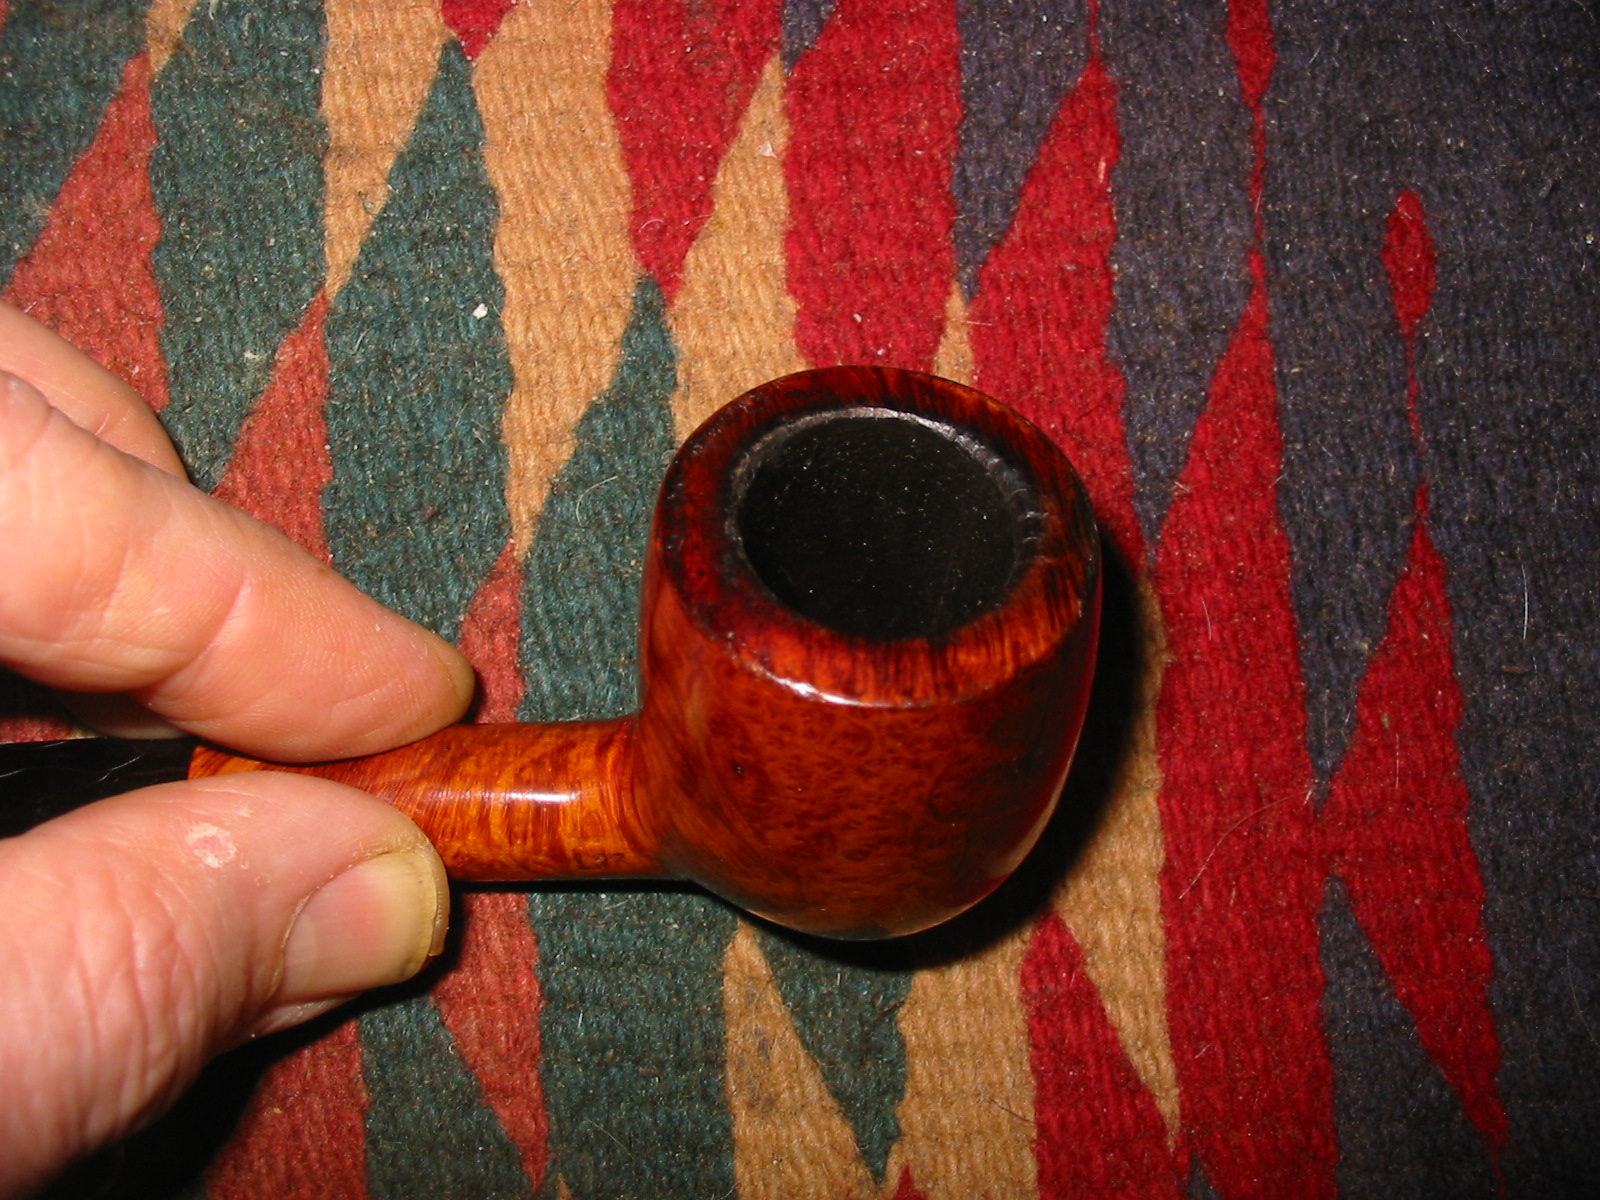
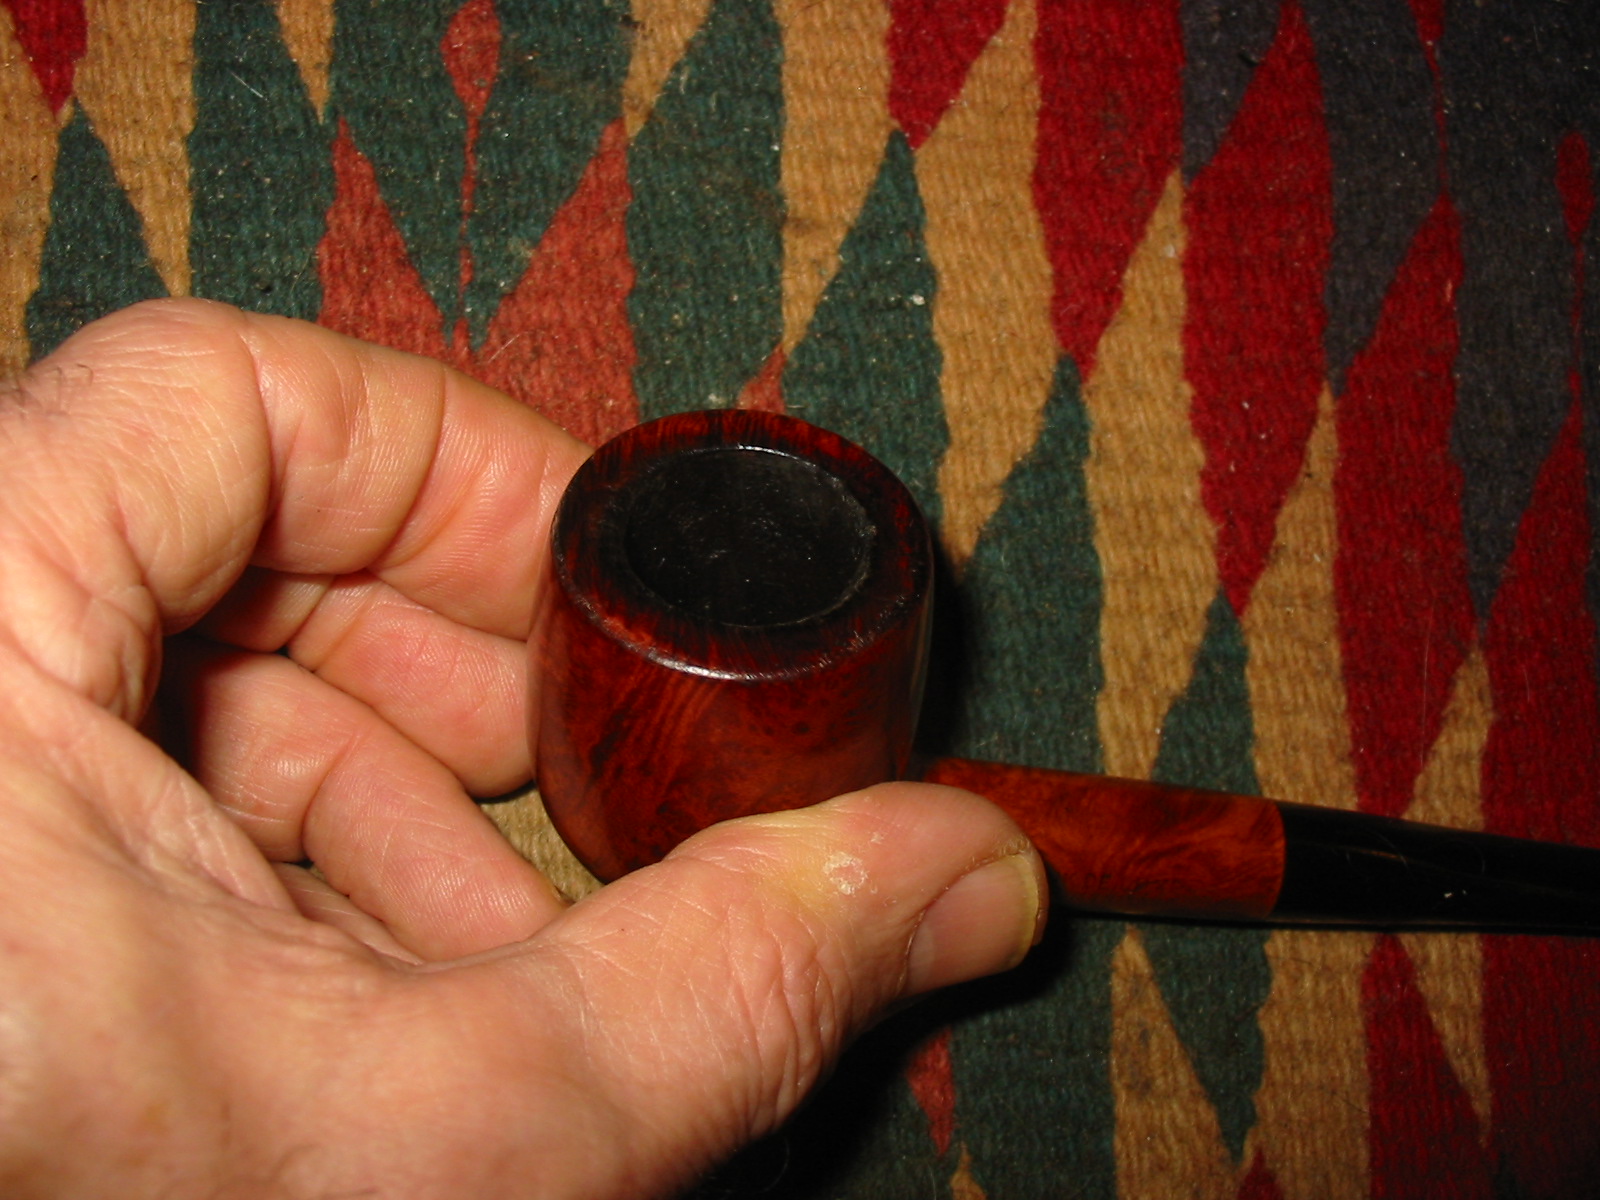
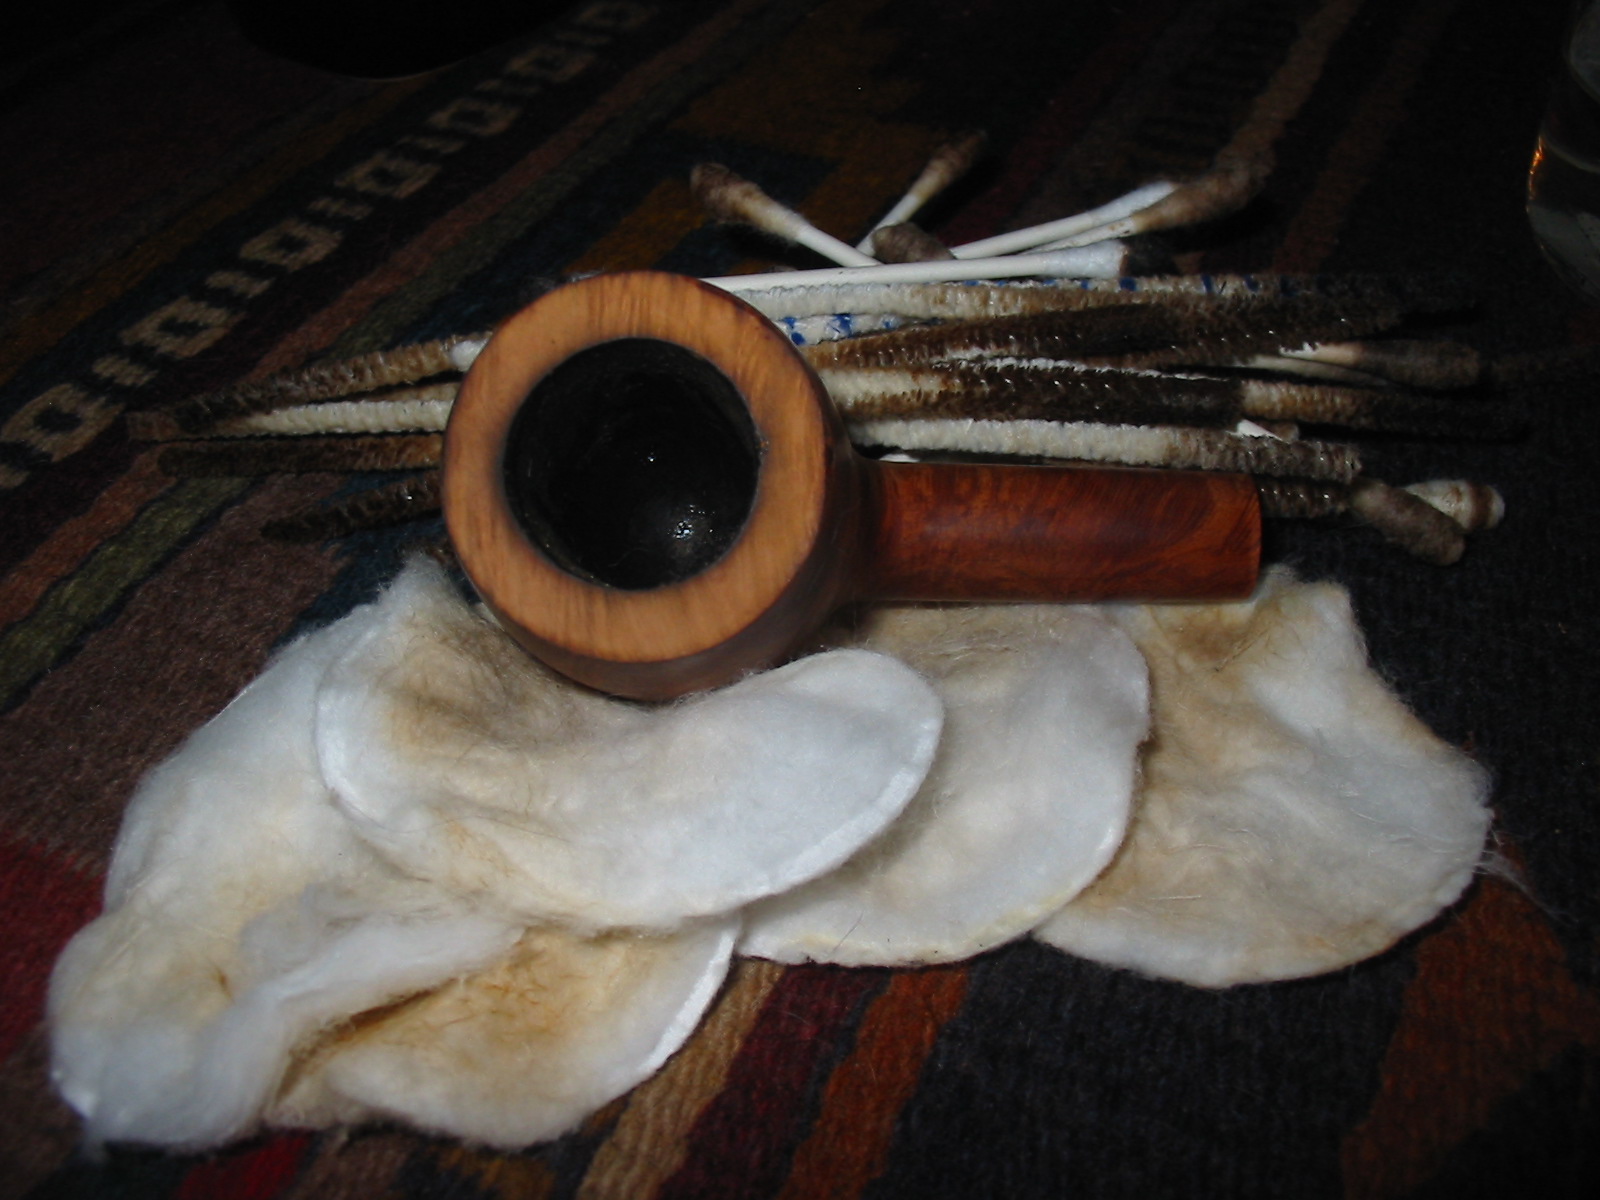
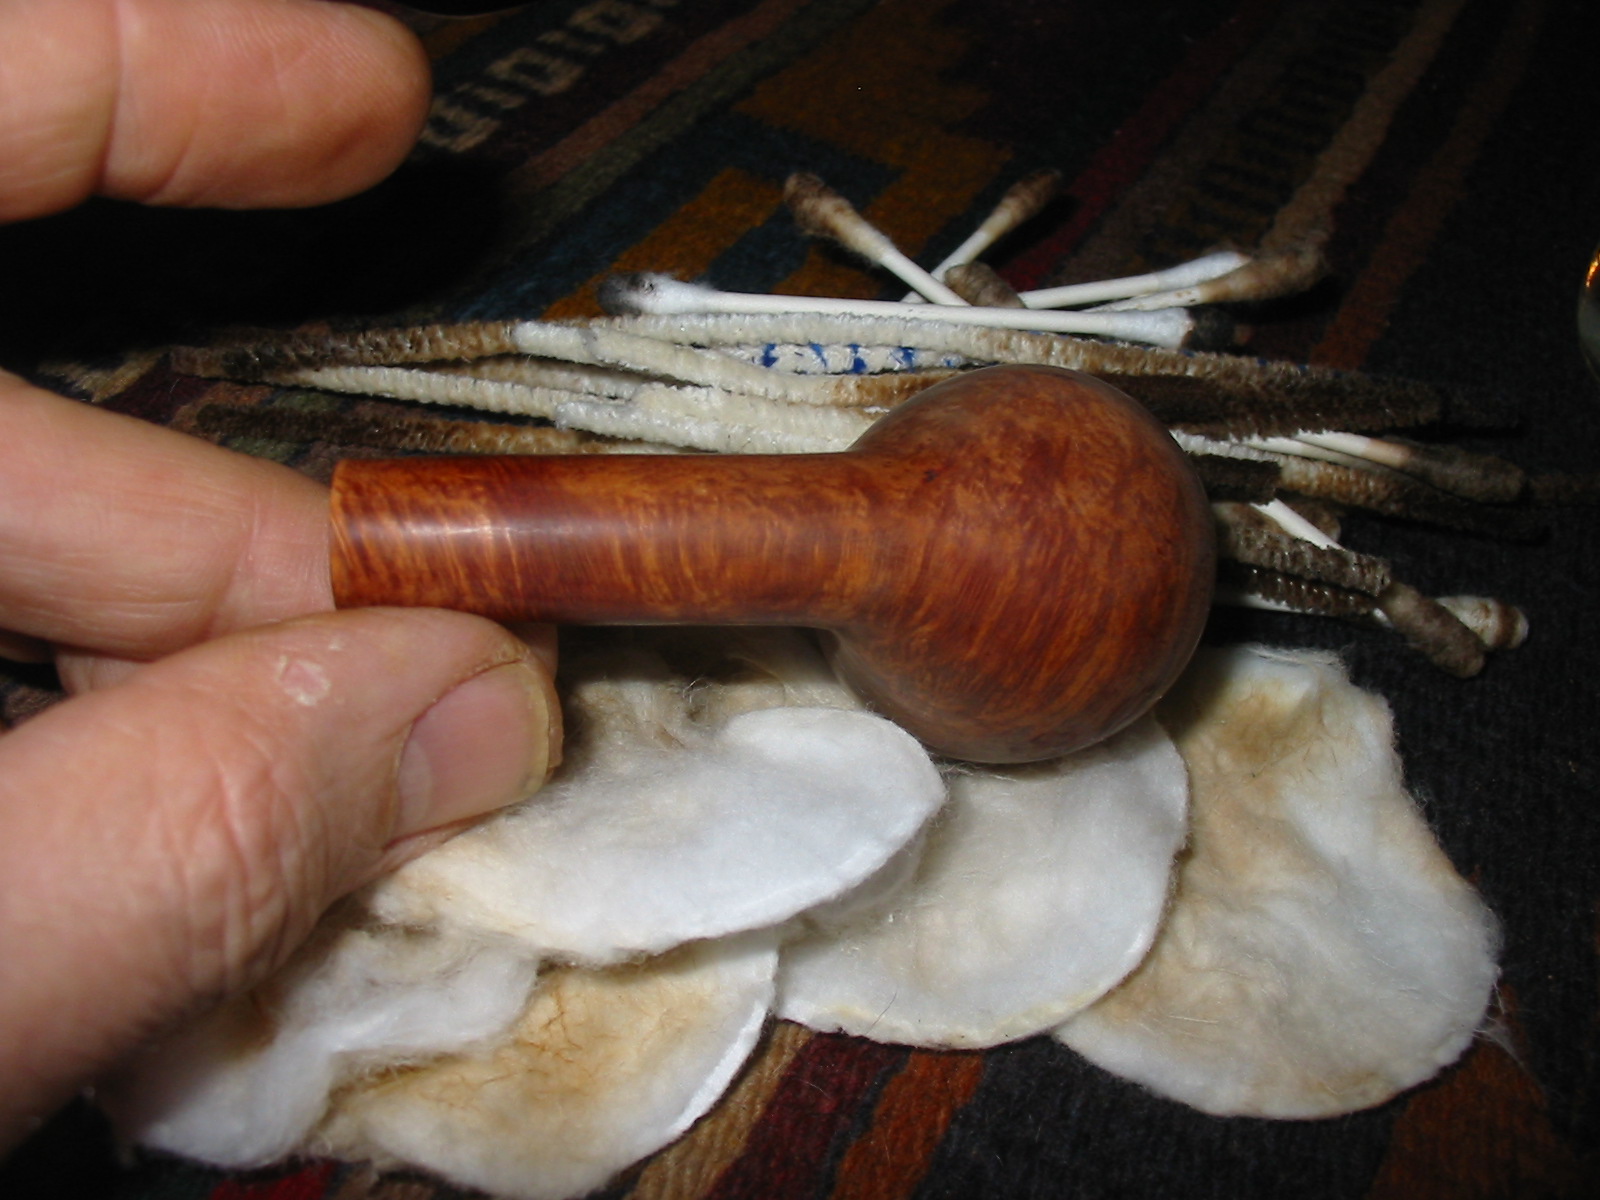
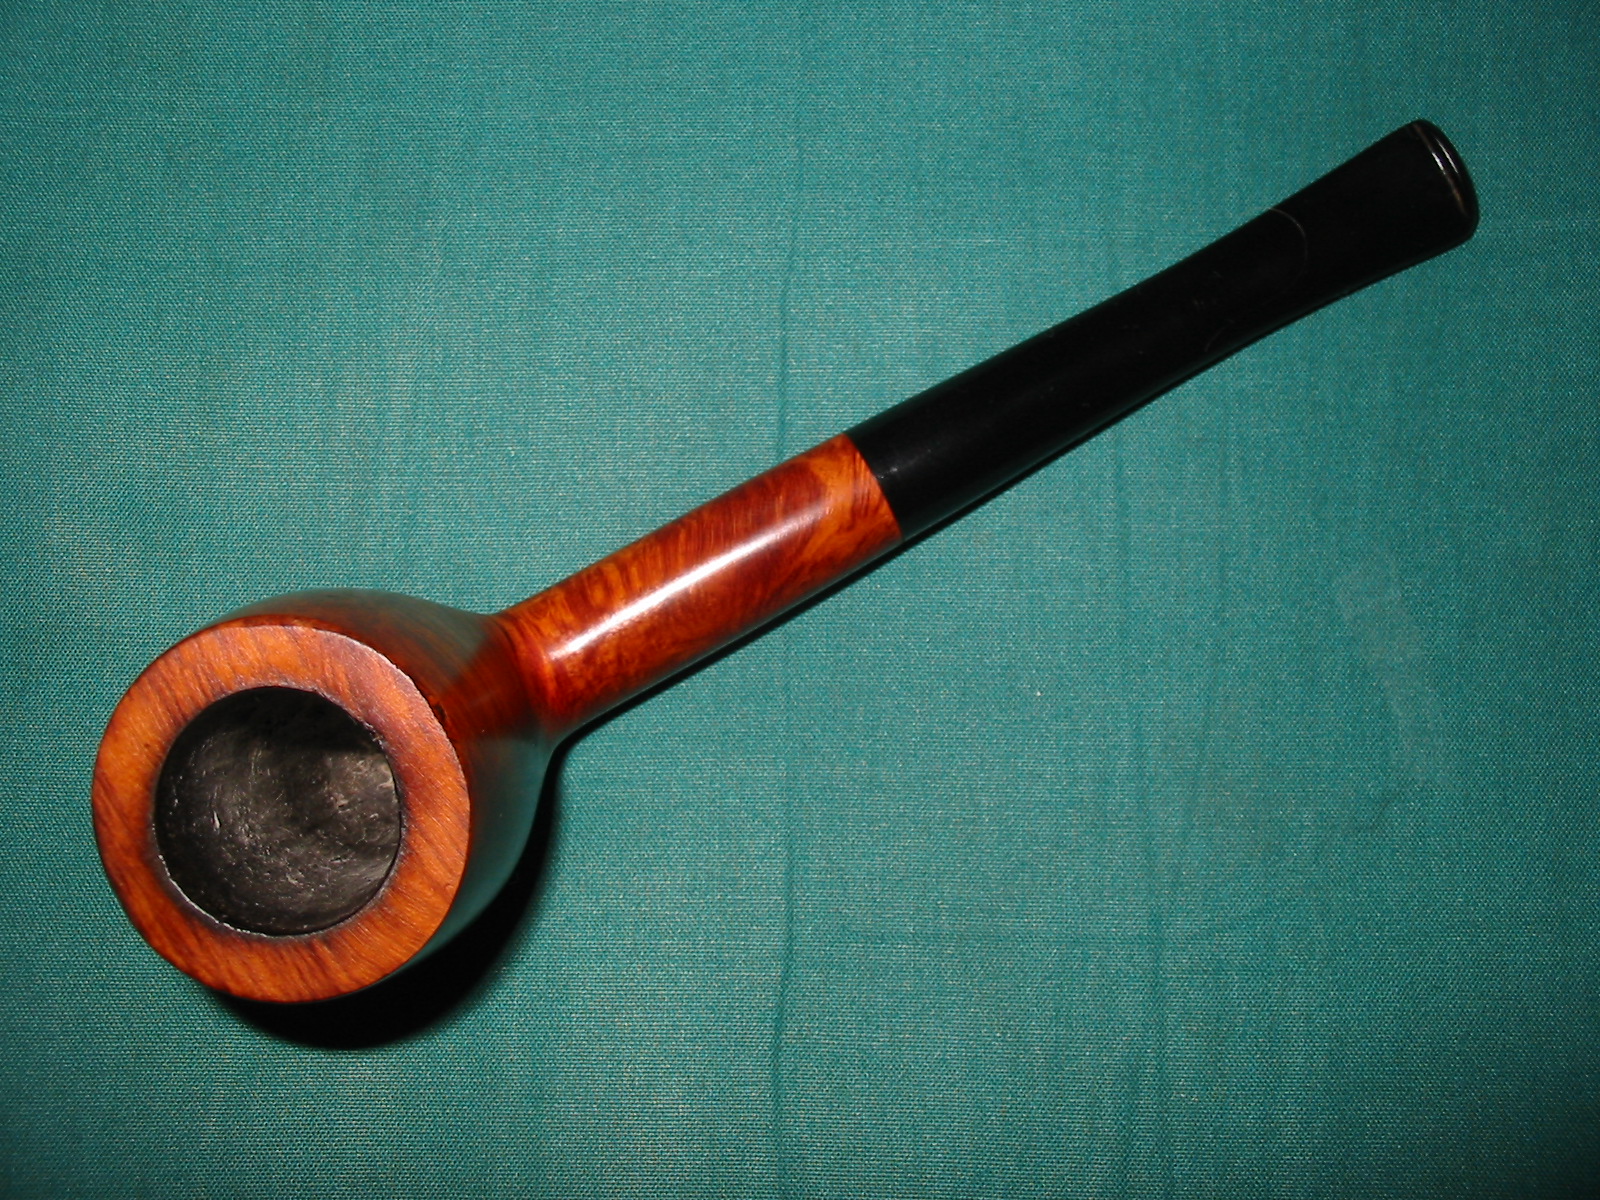
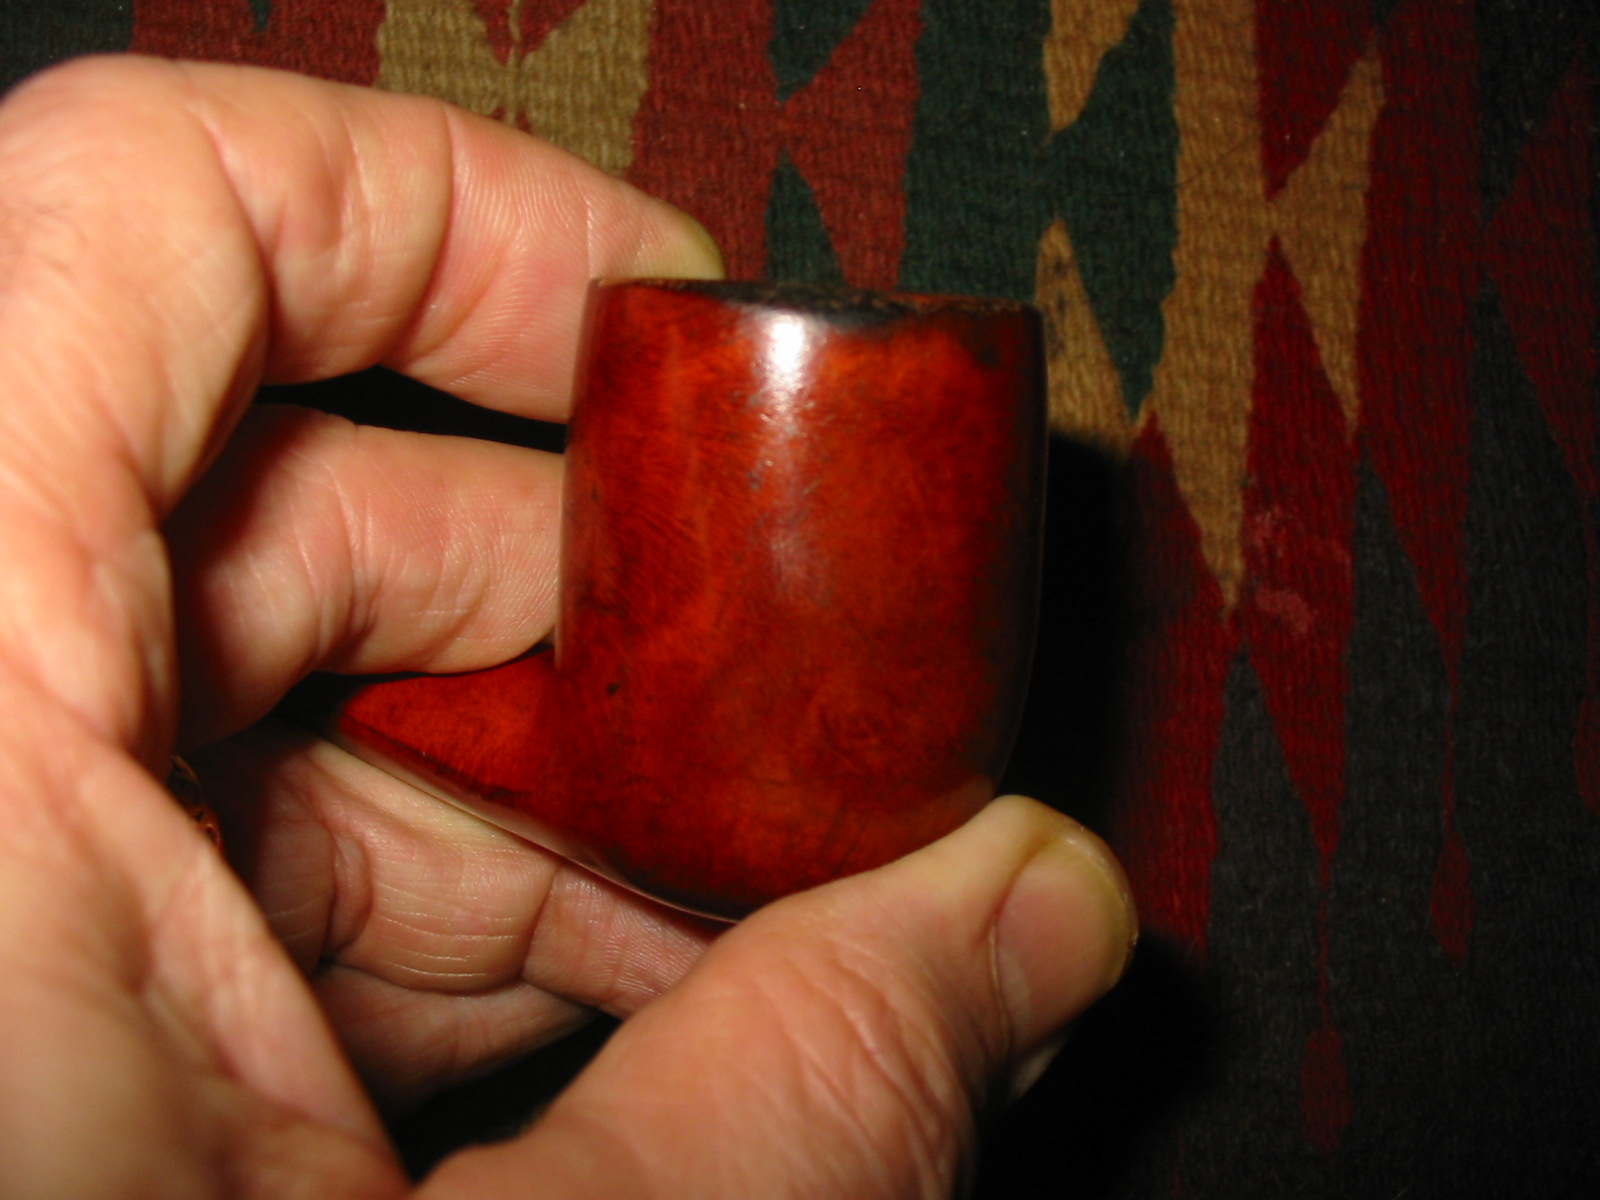
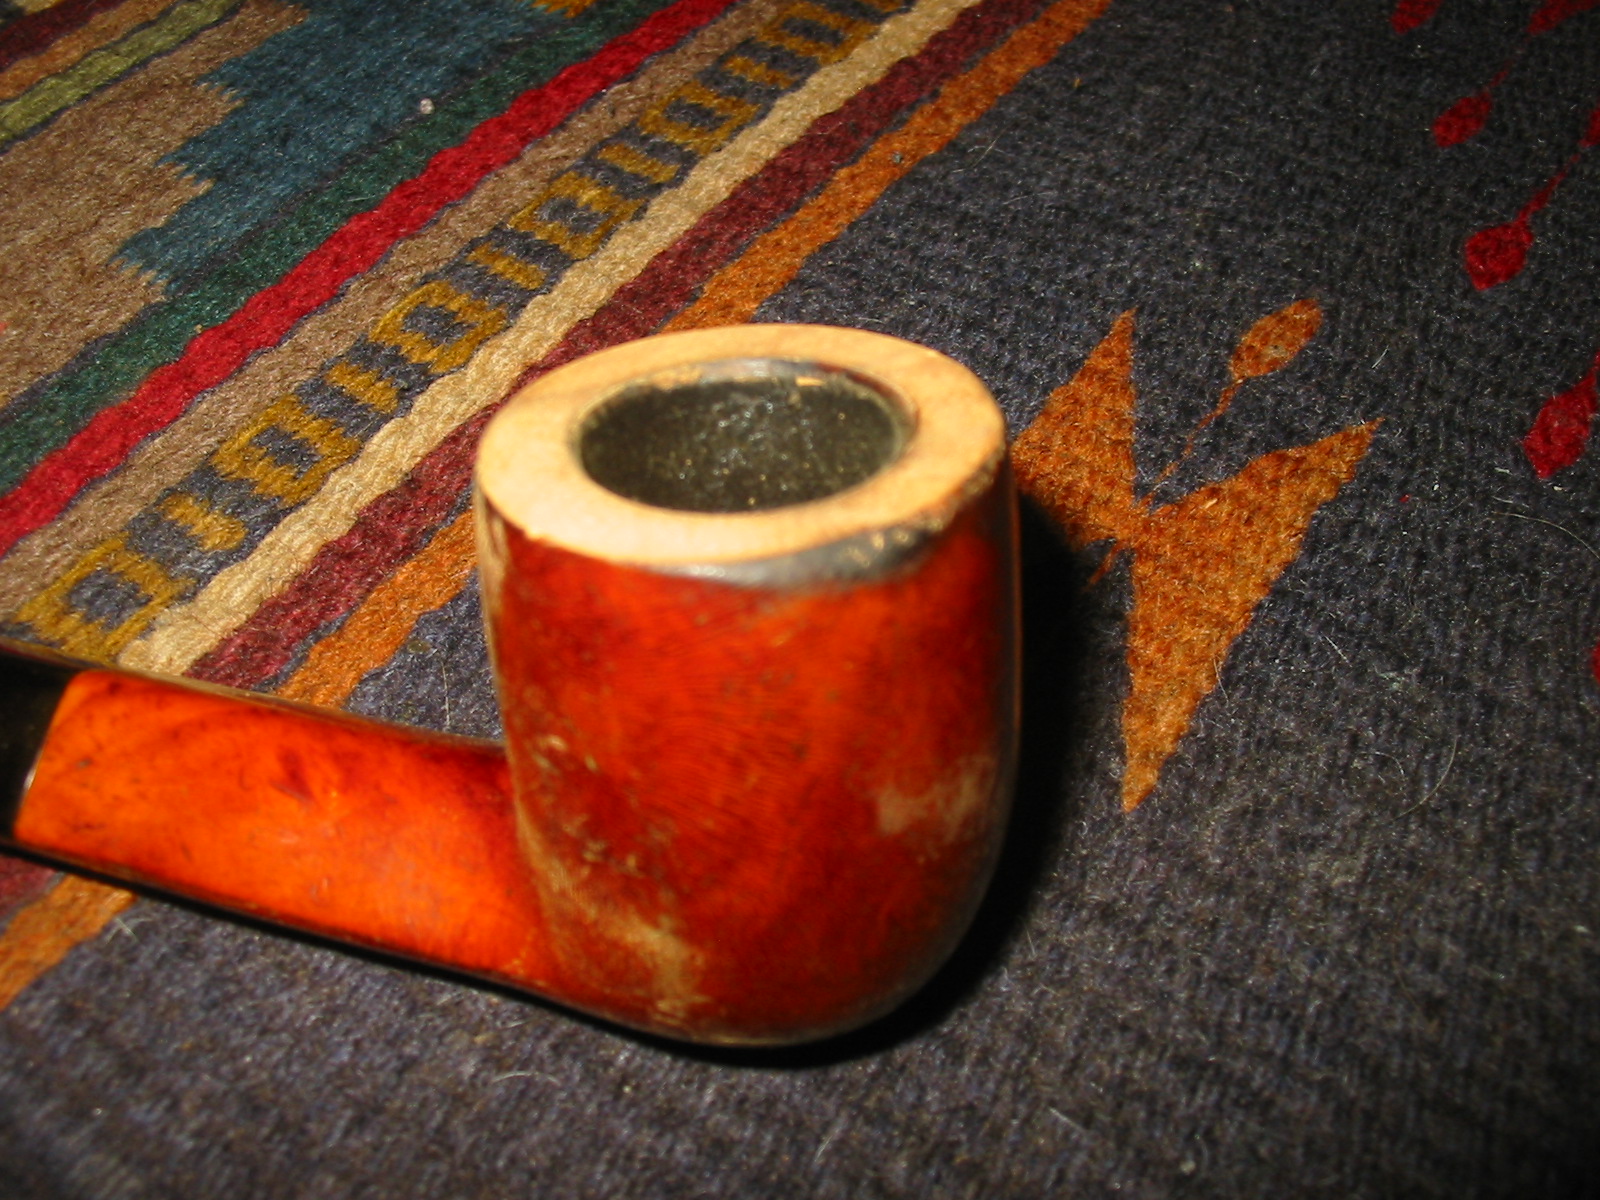
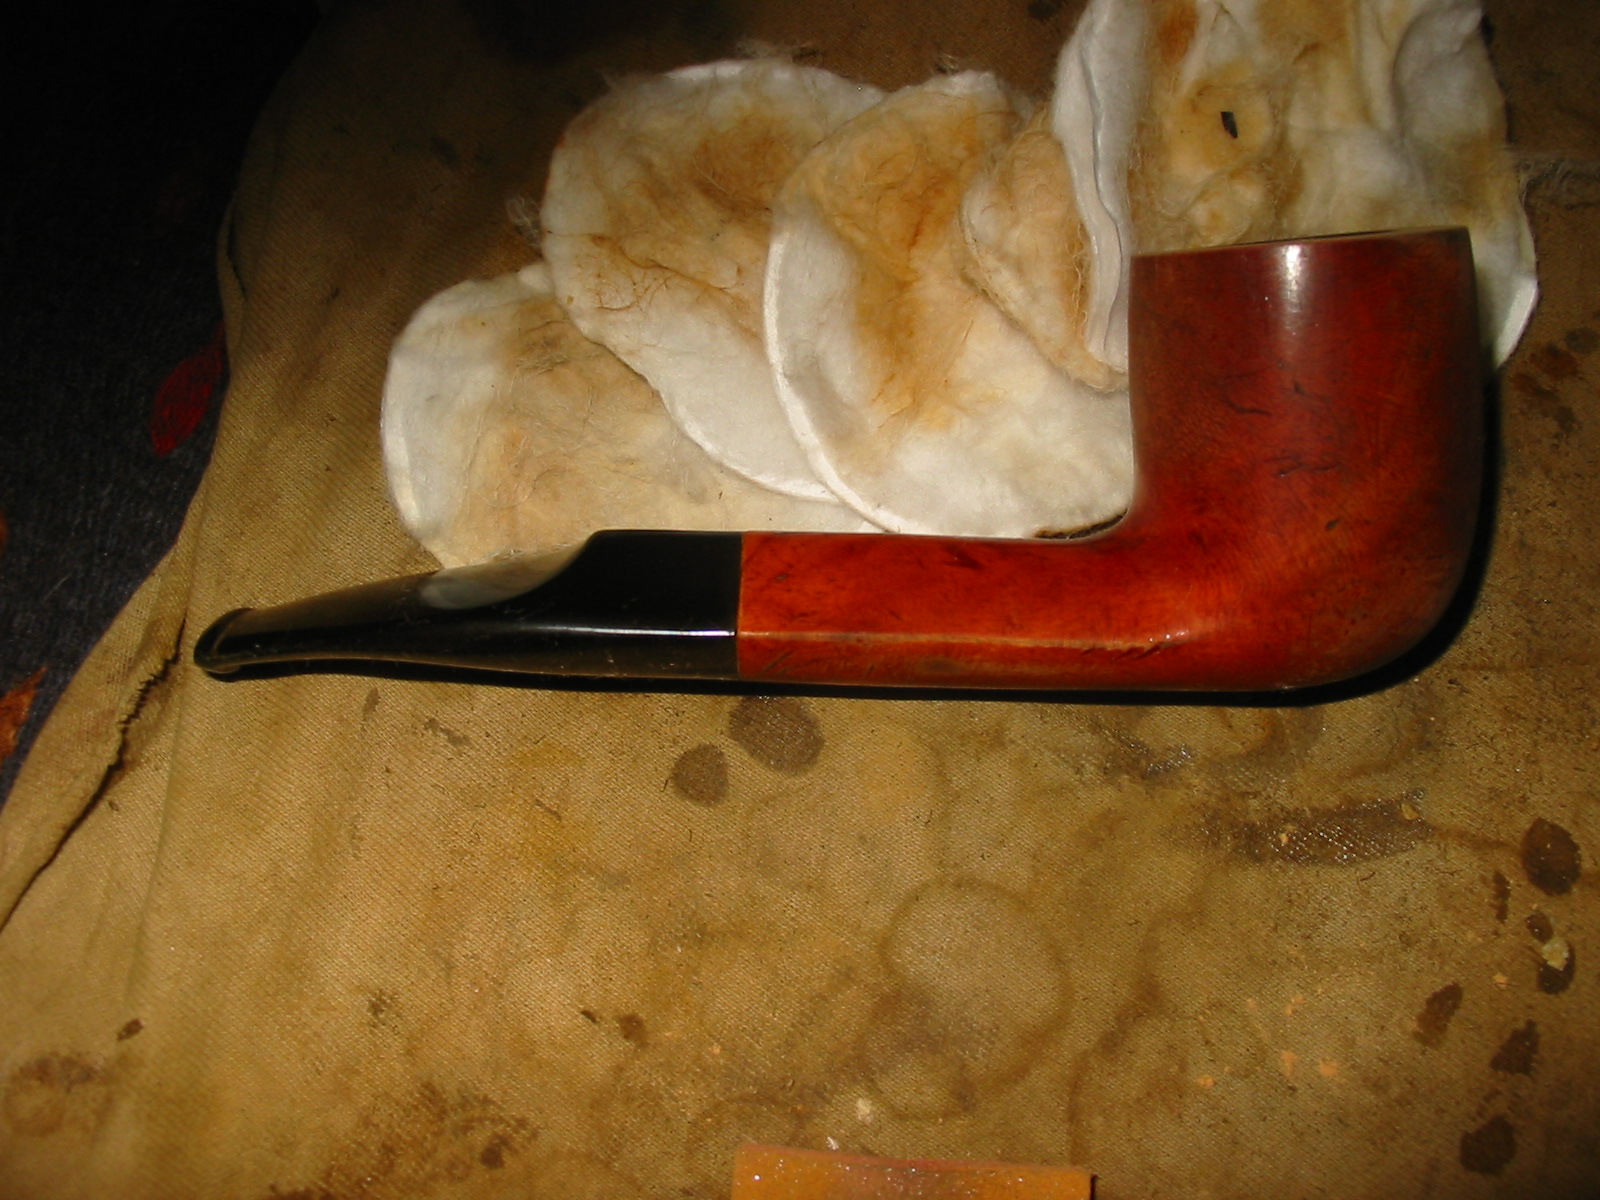
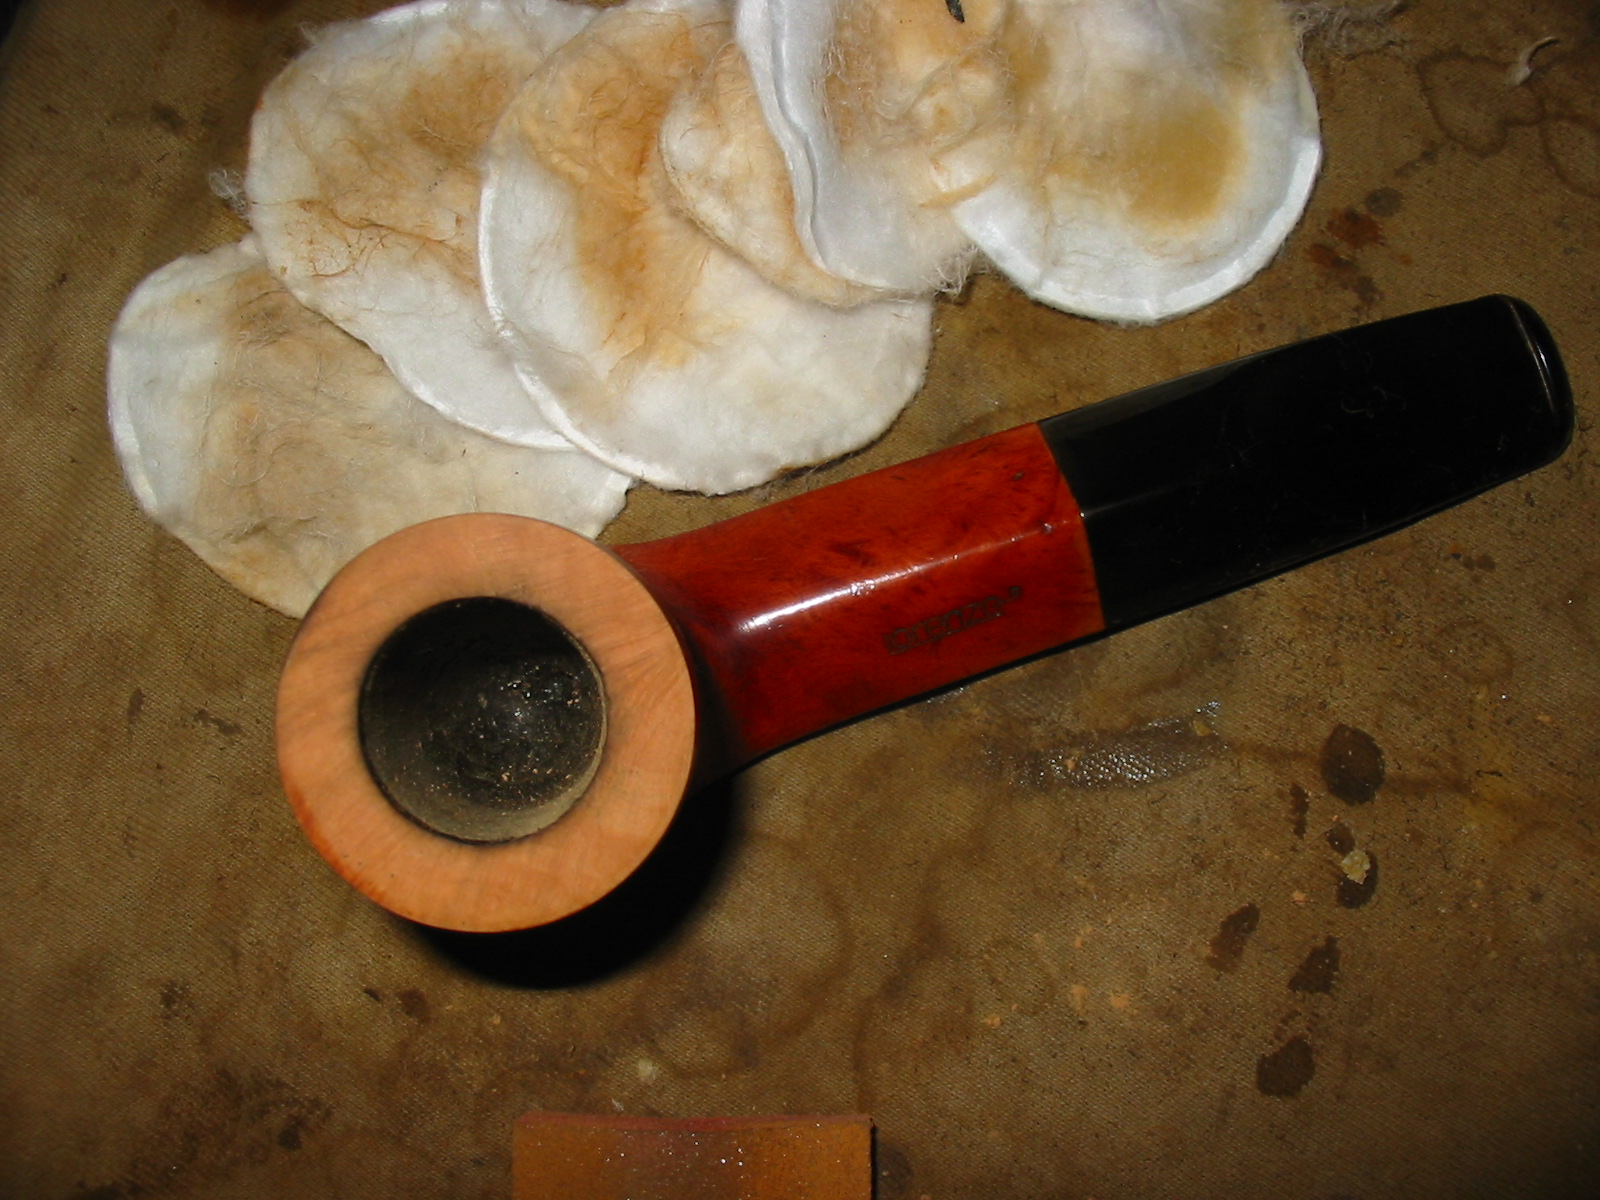
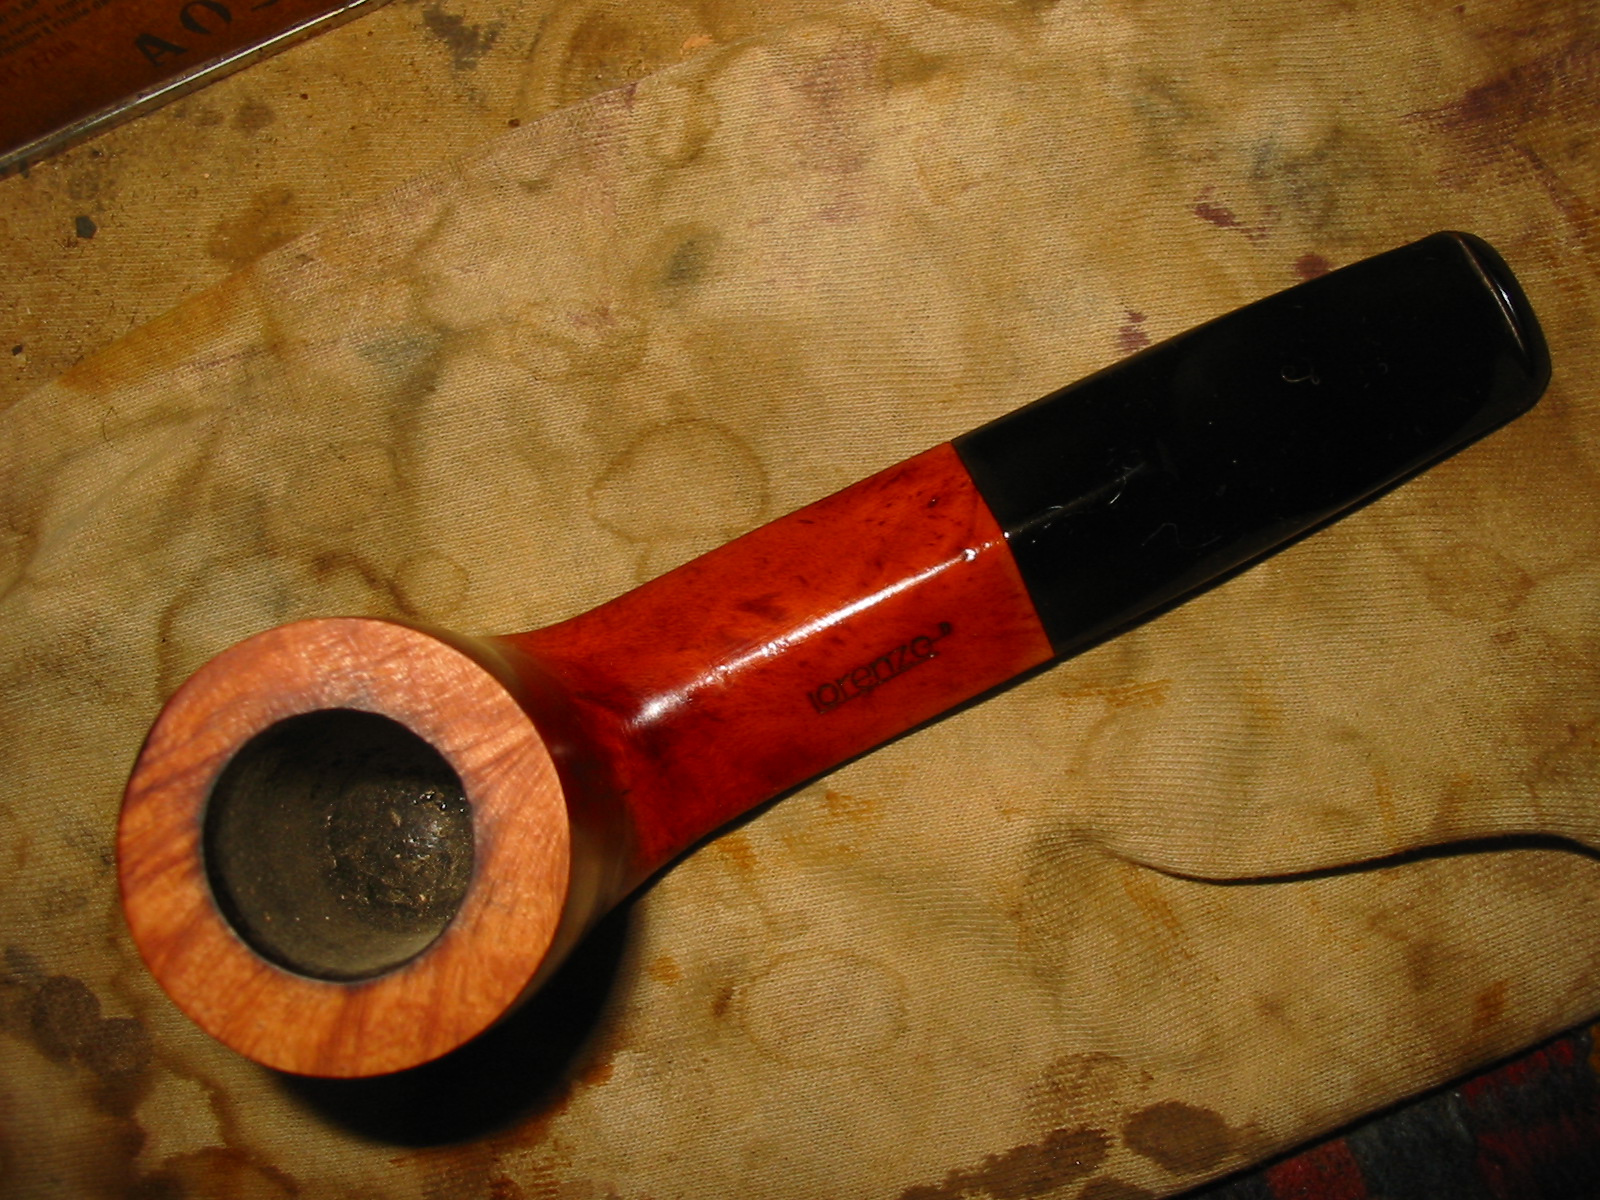
The close up photo below, of the top of the pipe shows the damaged rim -the rough outer edges of the bowl and the burn marks. The second photo below shows the burn damage on the side of the bowl below the edge of the rim. IMG_4124 IMG_4129 
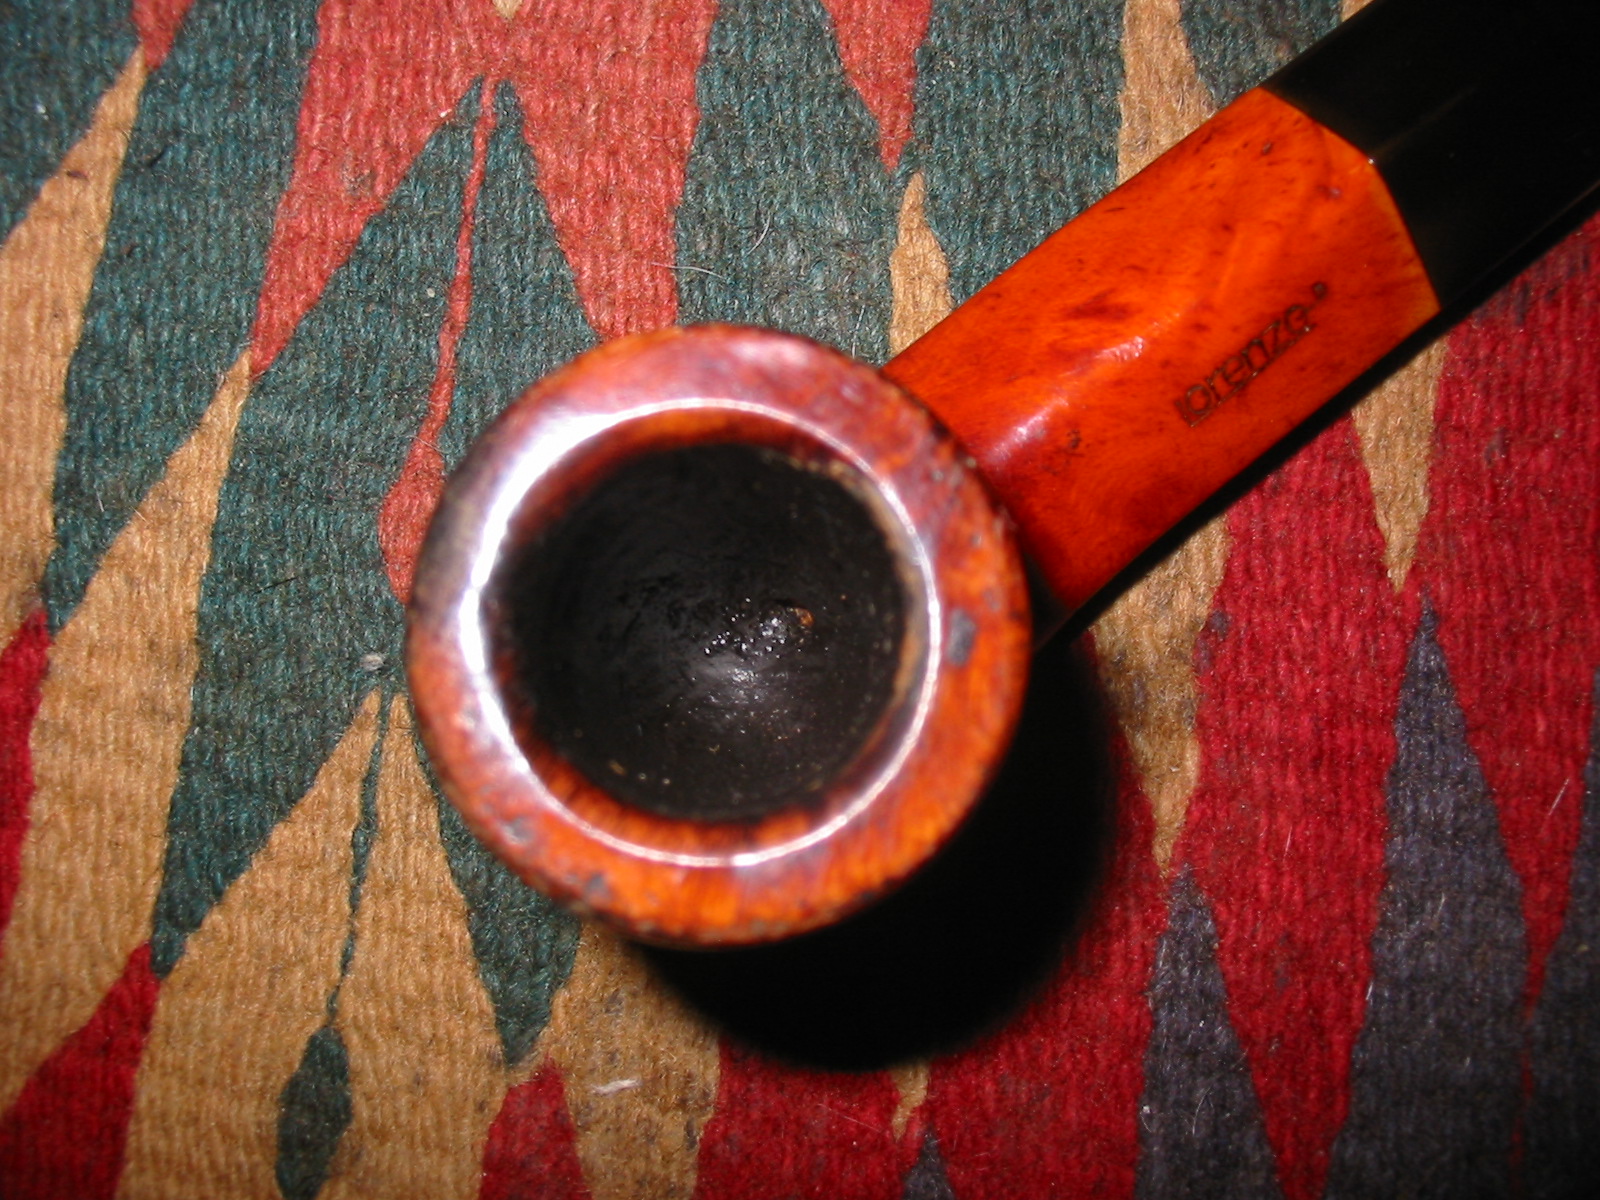
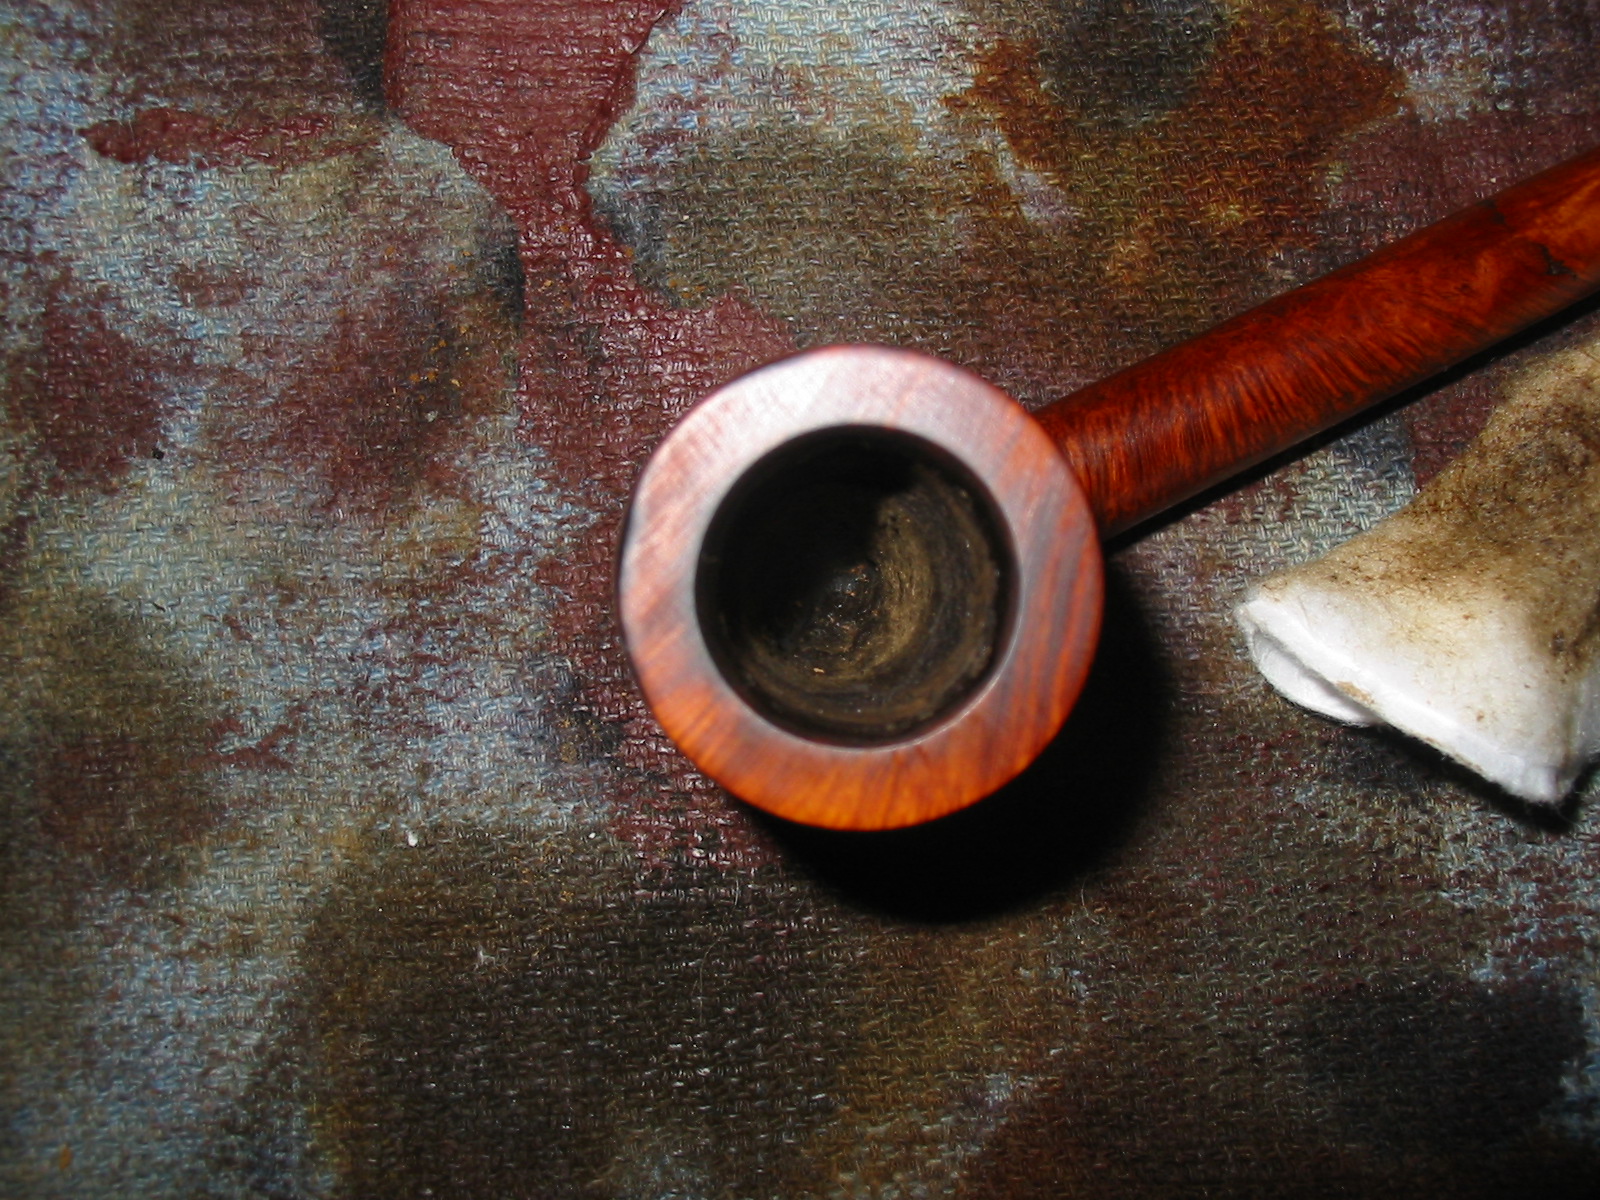
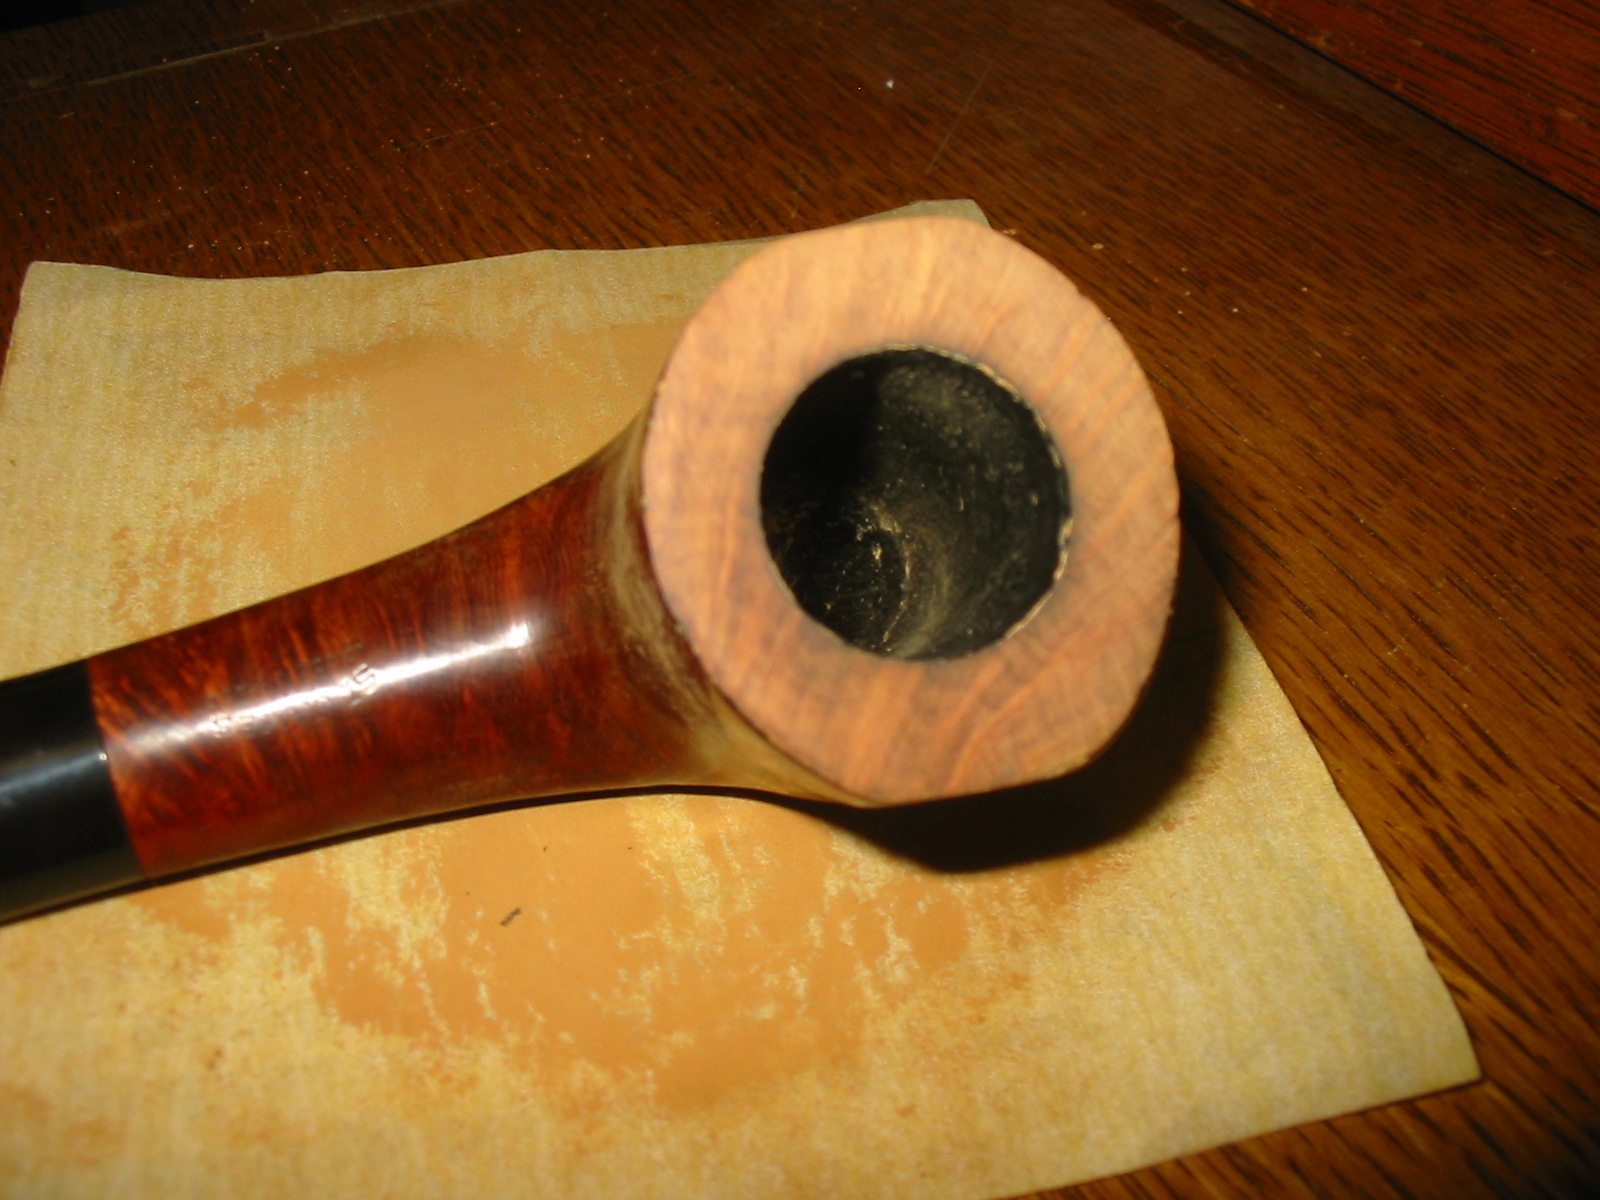
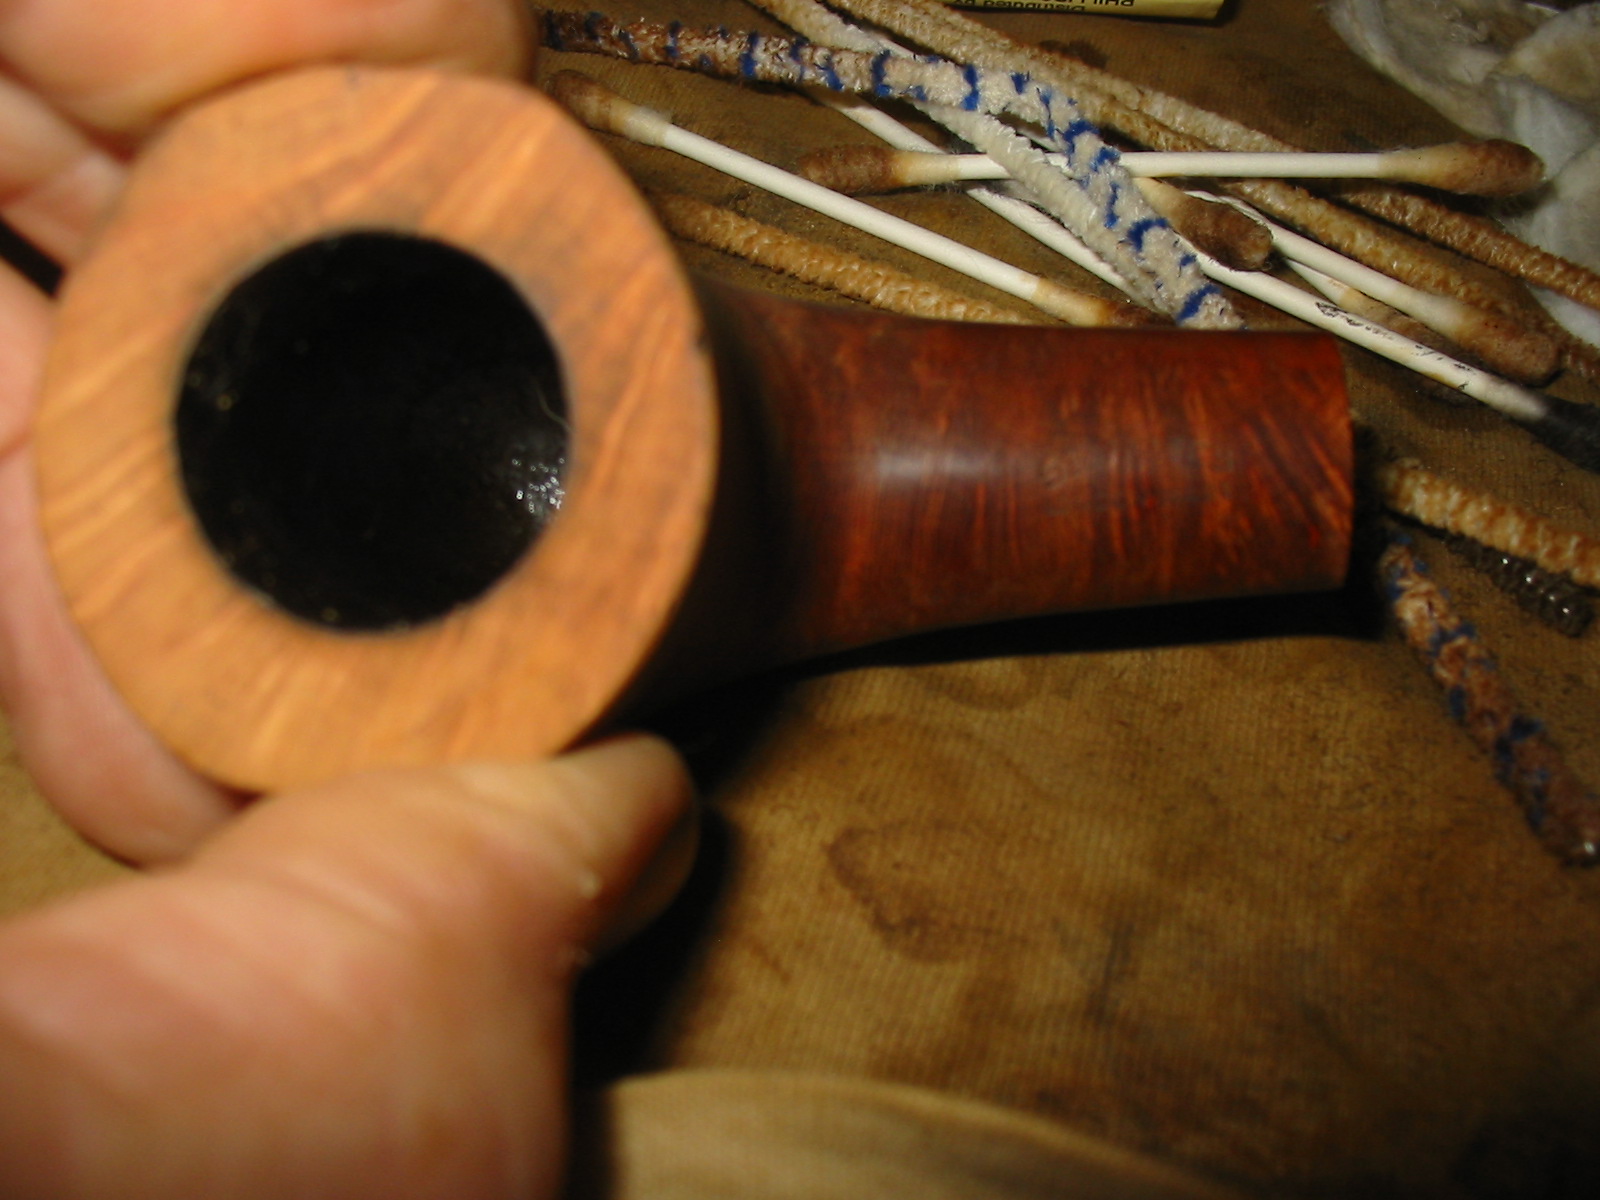
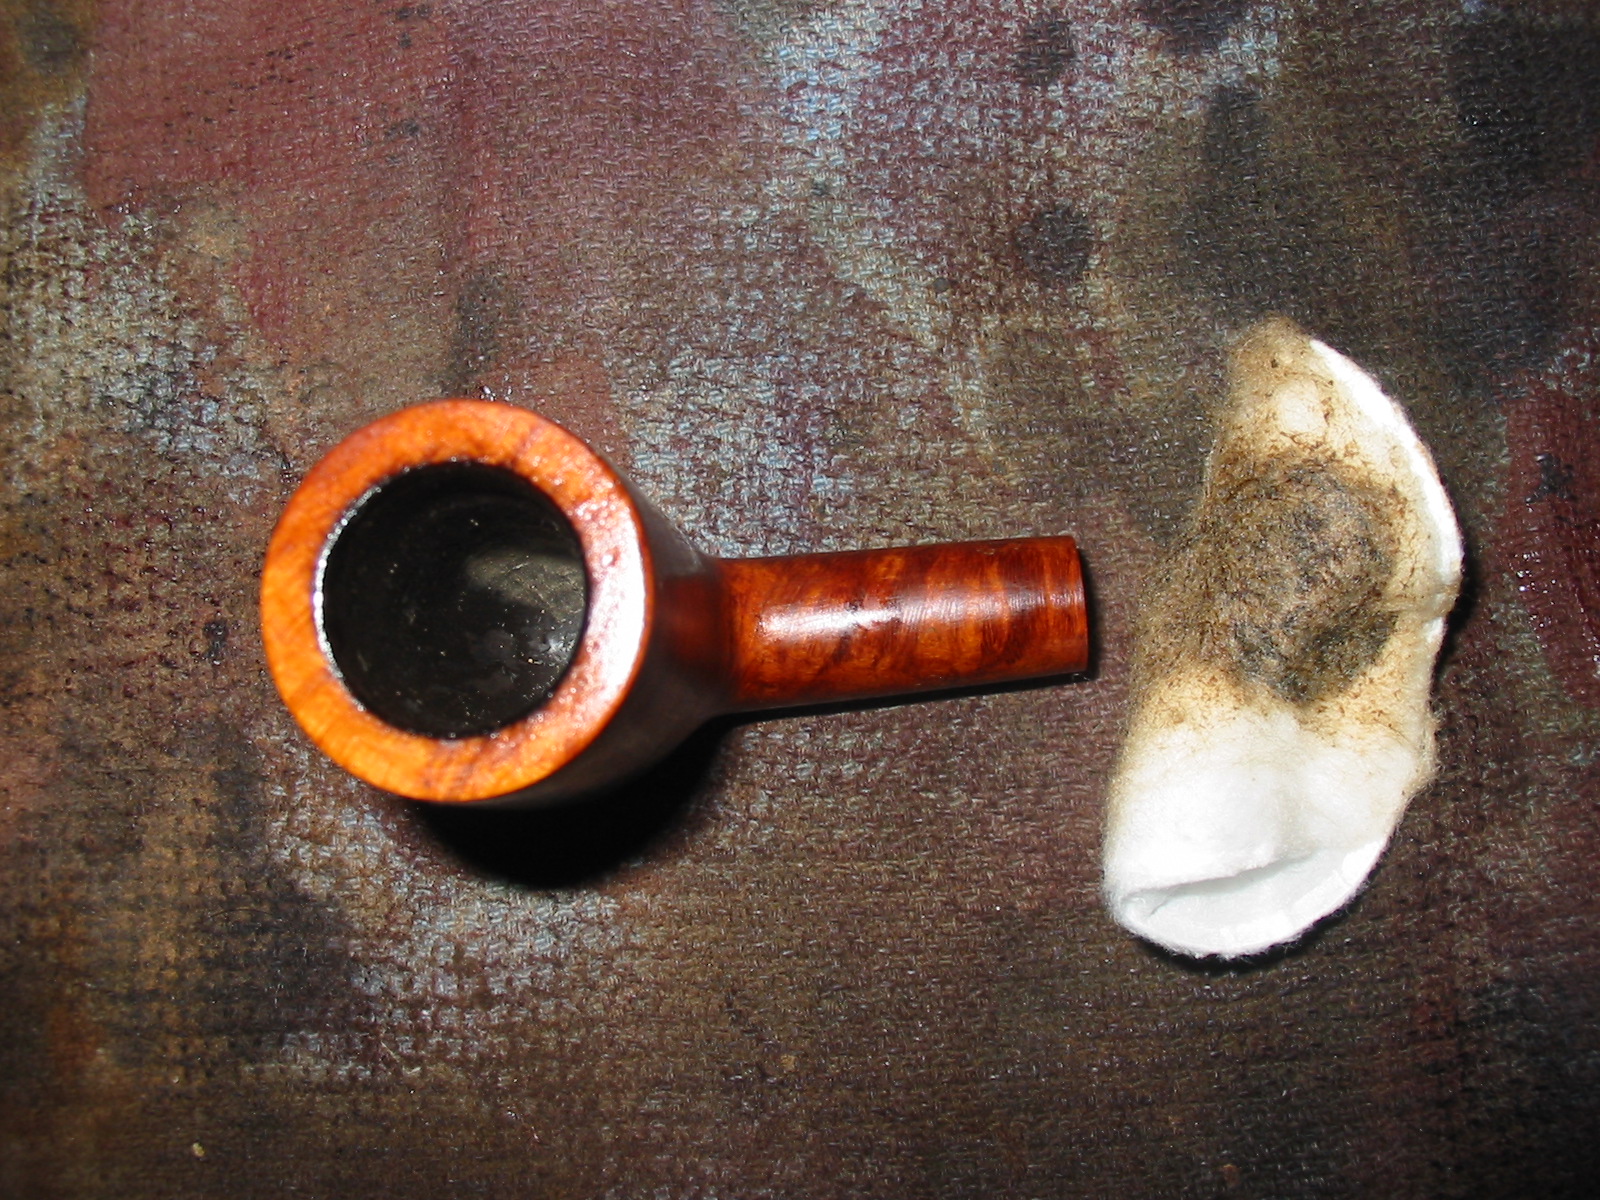
I set up my normal topping tools – a flat board and a piece of 220 grit sandpaper and began to work on the top of the bowl. I wanted to remove as much of the damage as possible and sharpen the edges of the bowl. I wanted to reduce the burn damage on the front right side of the outer rim in the process as well. IMG_4131 IMG_4130 IMG_4132 IMG_4133 
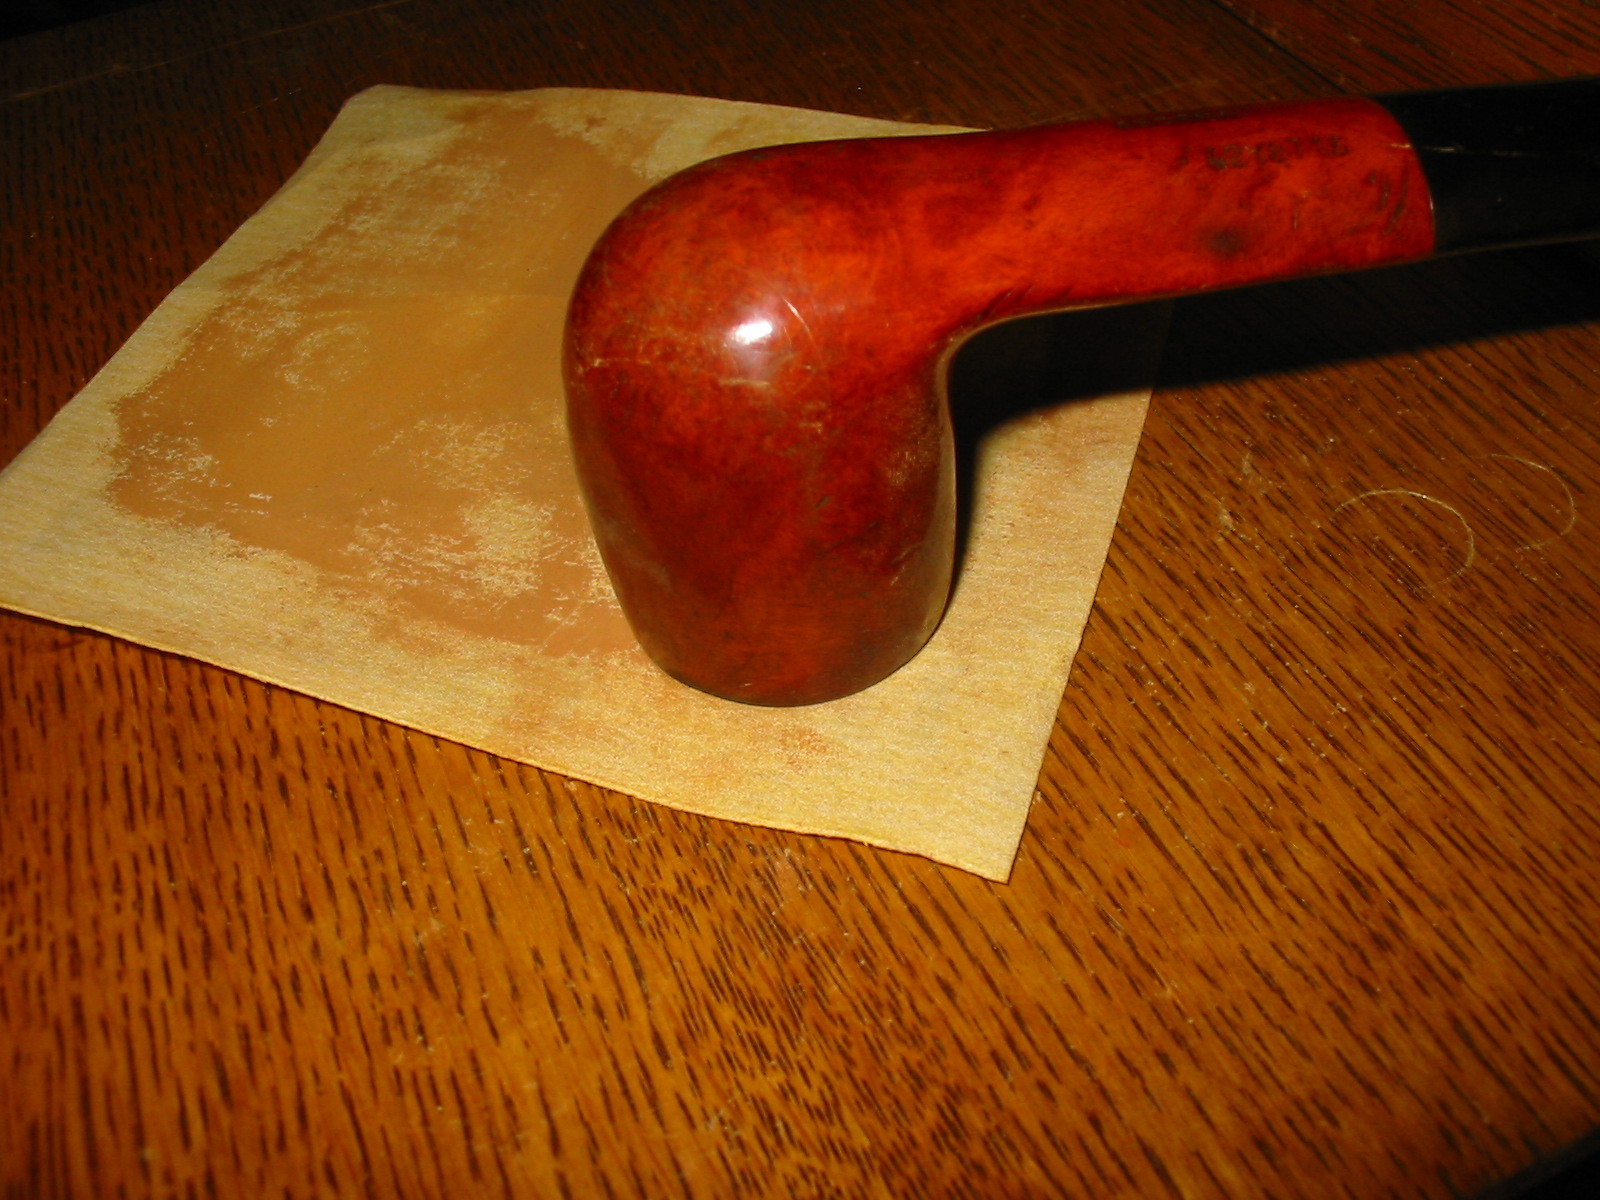
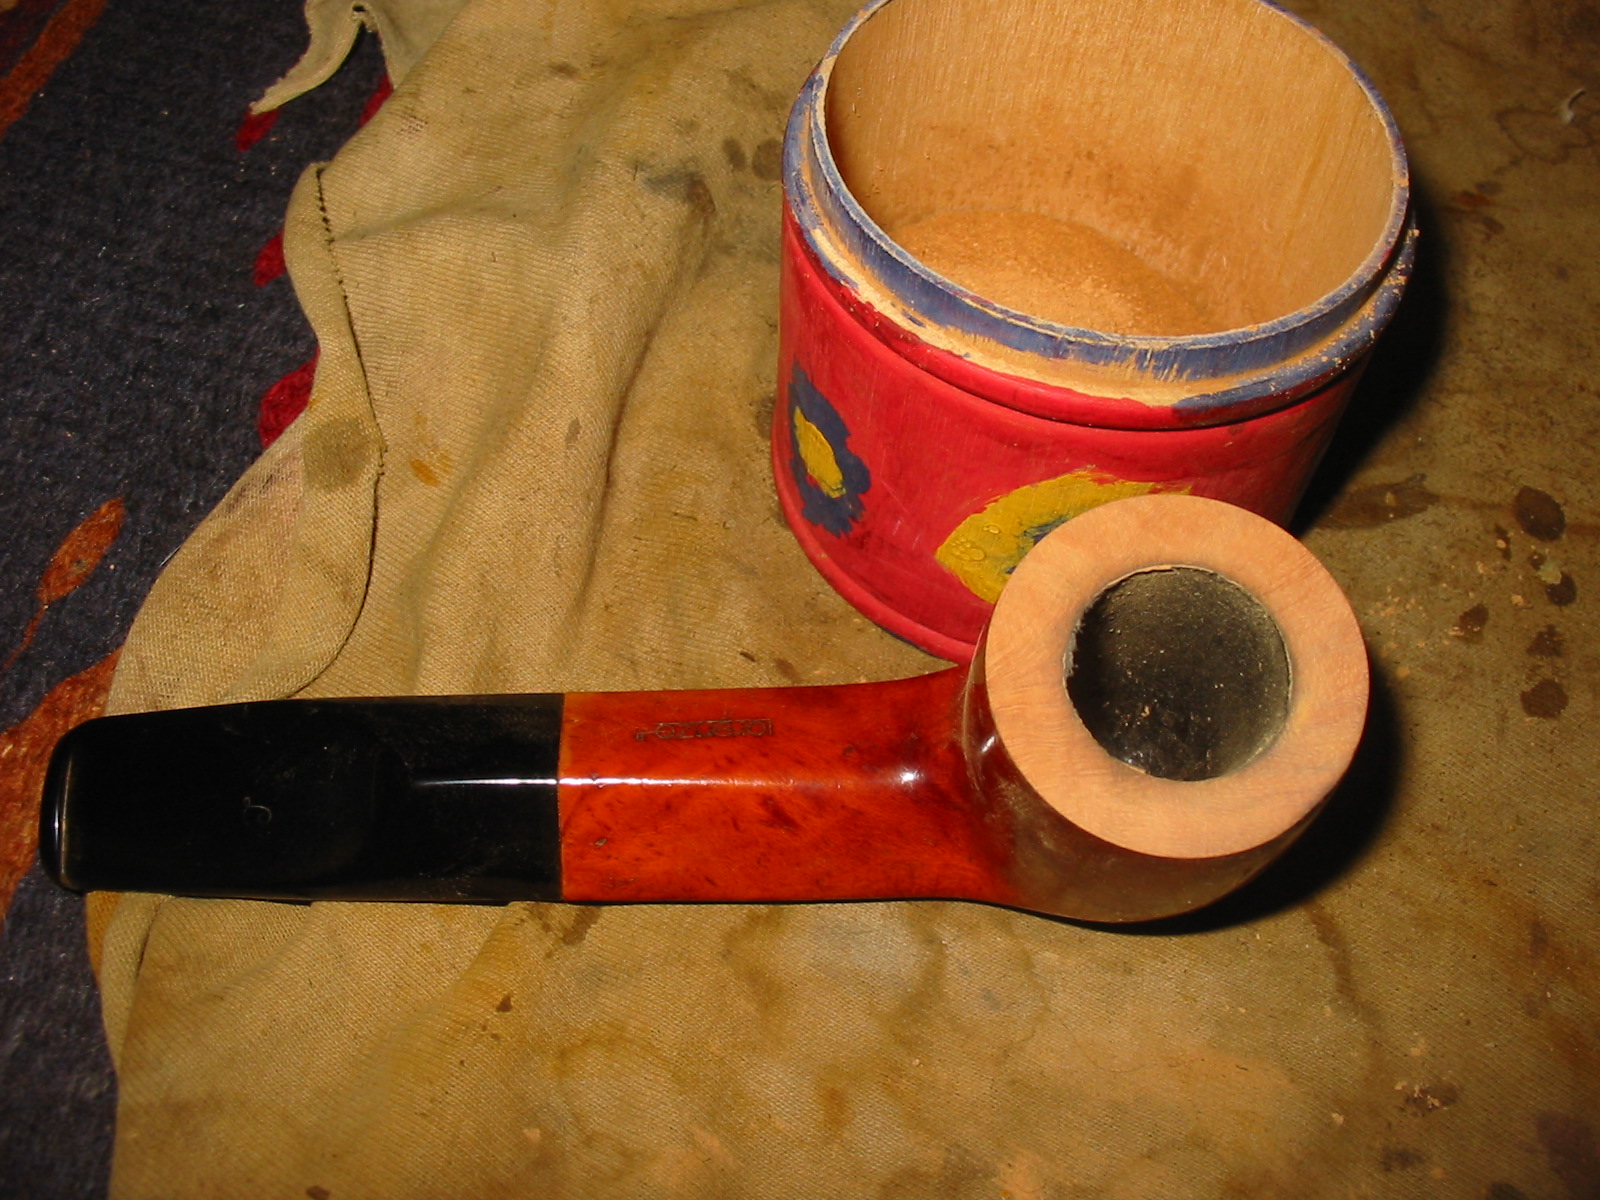
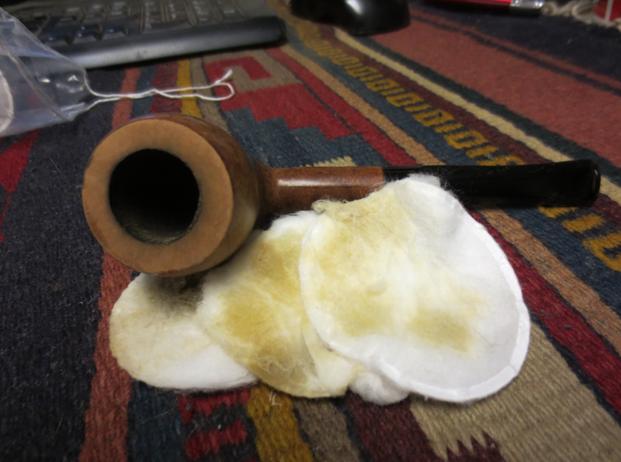
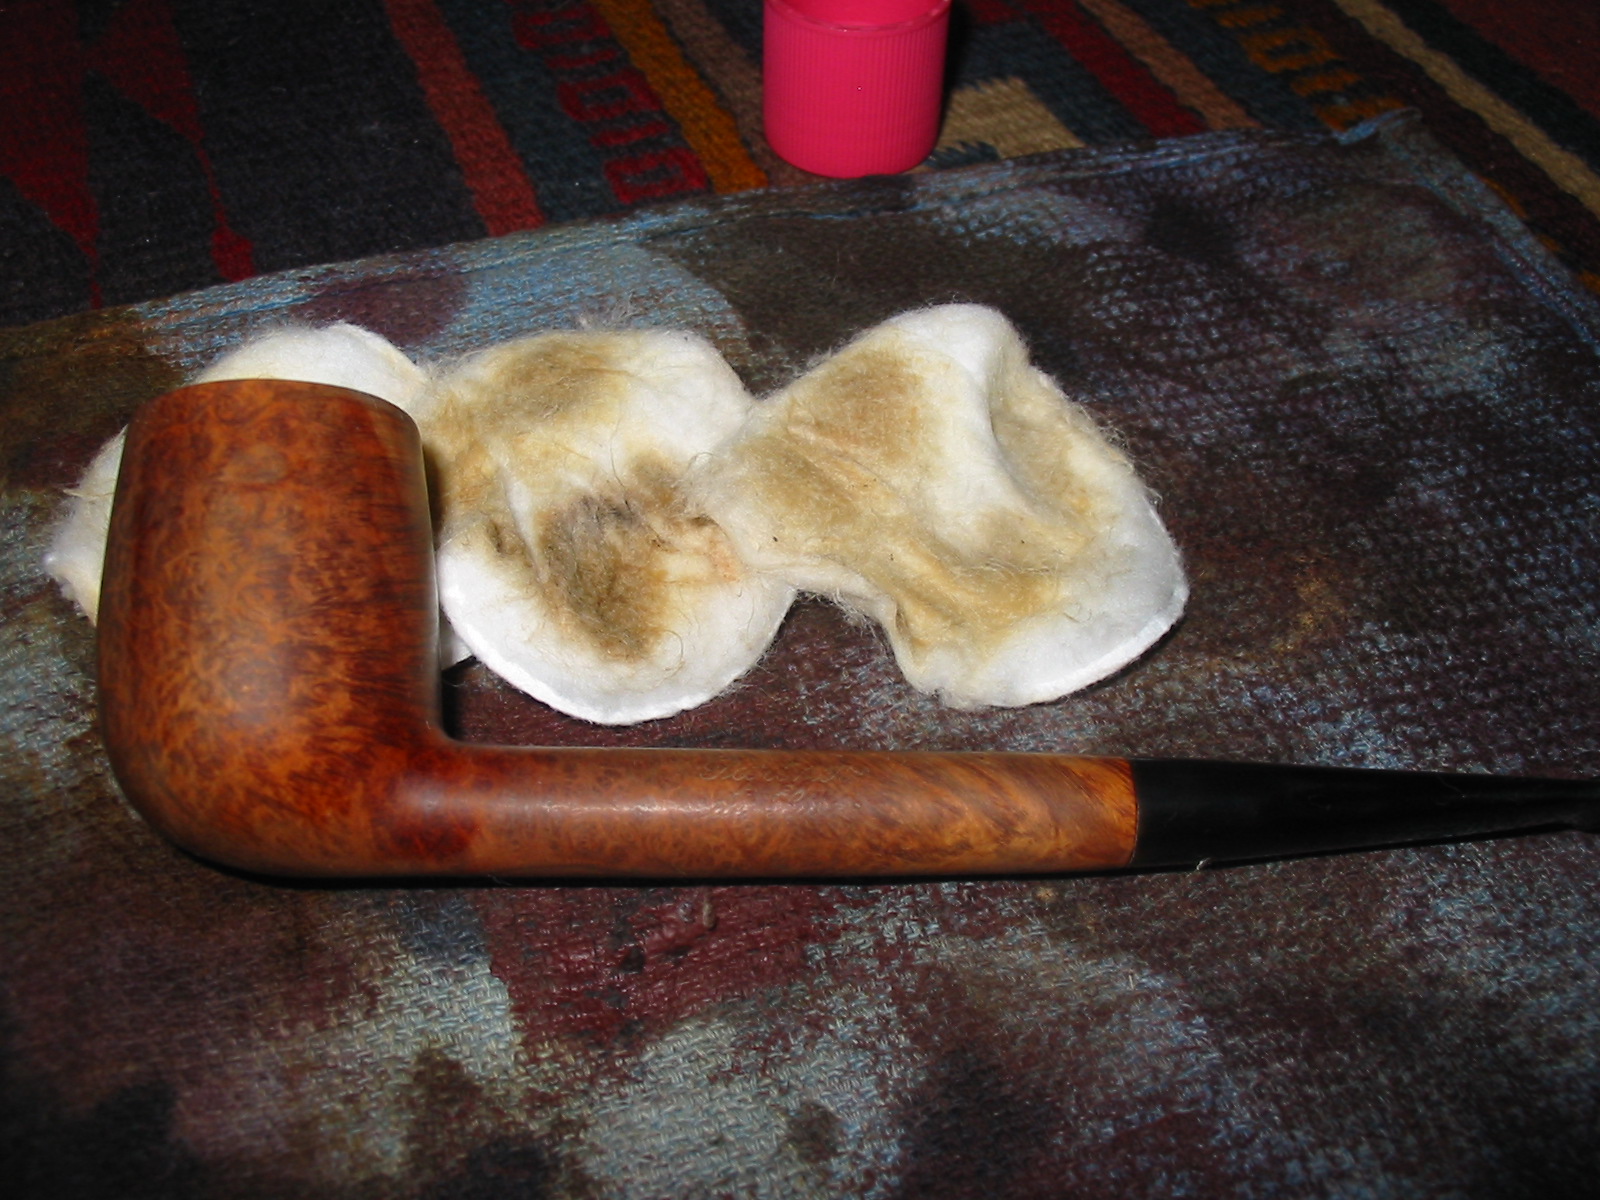
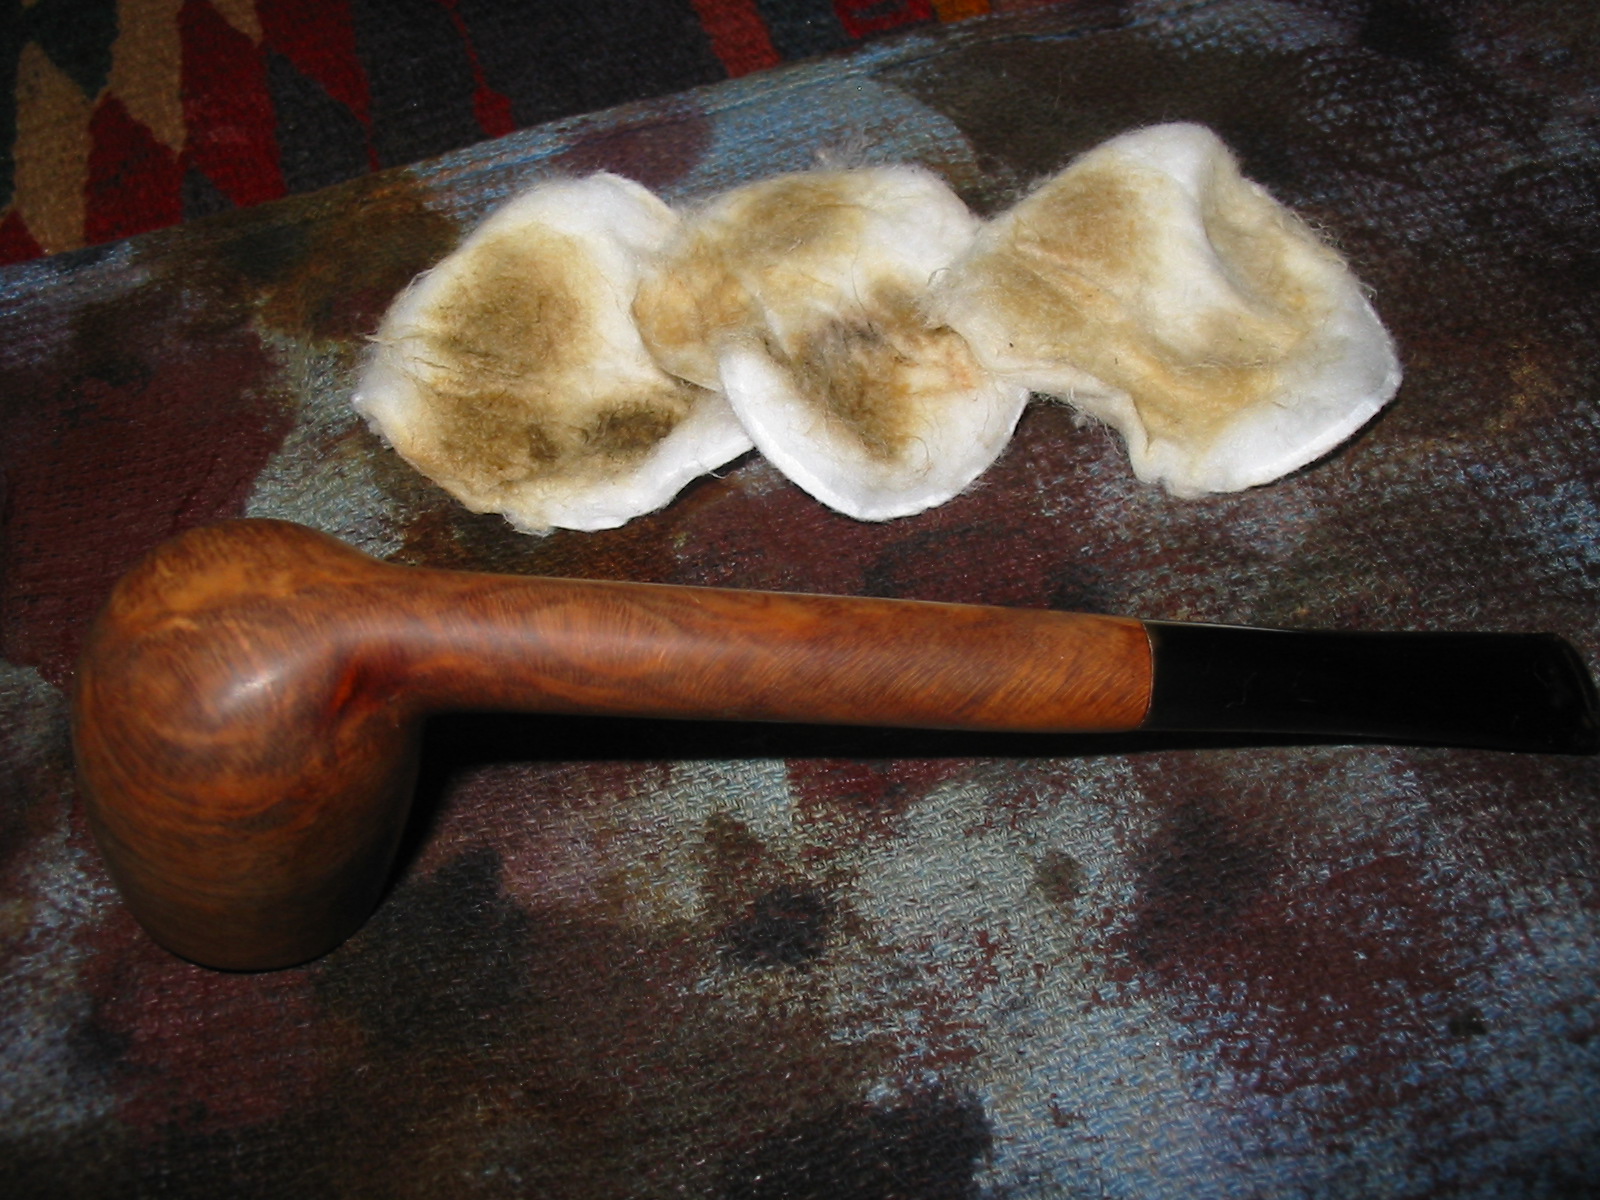
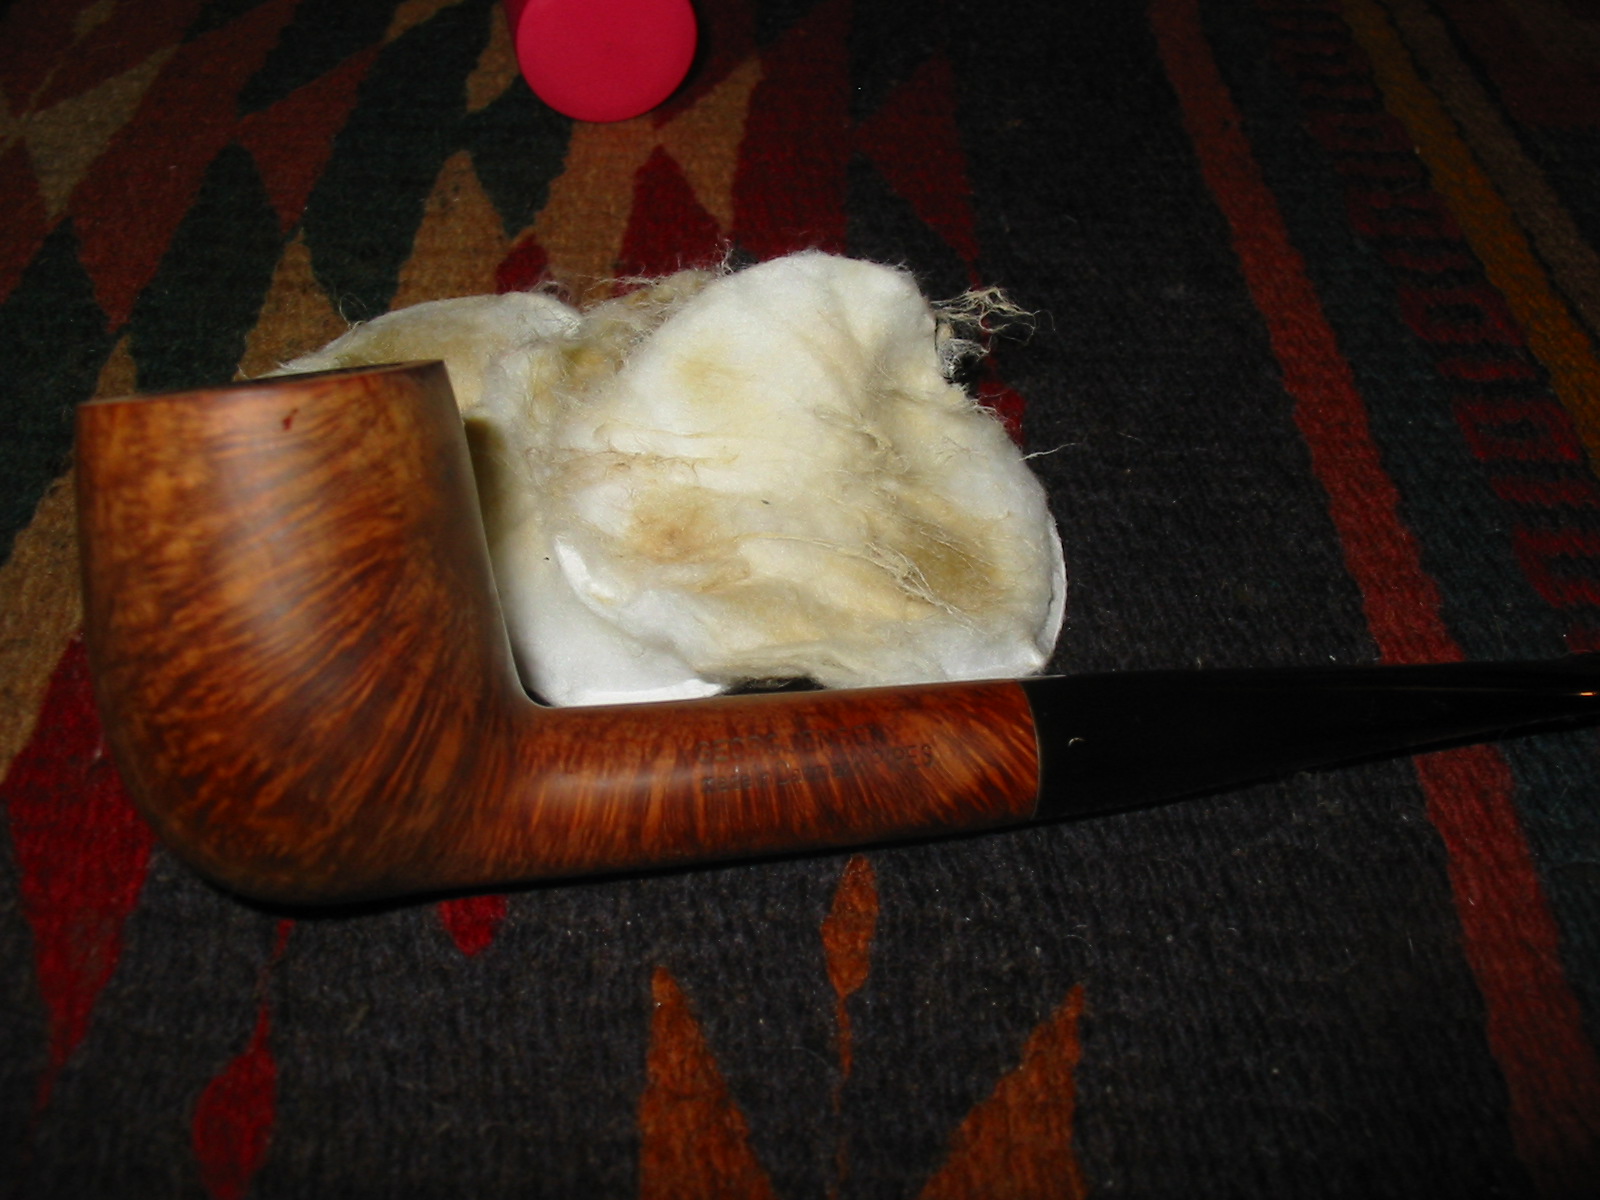
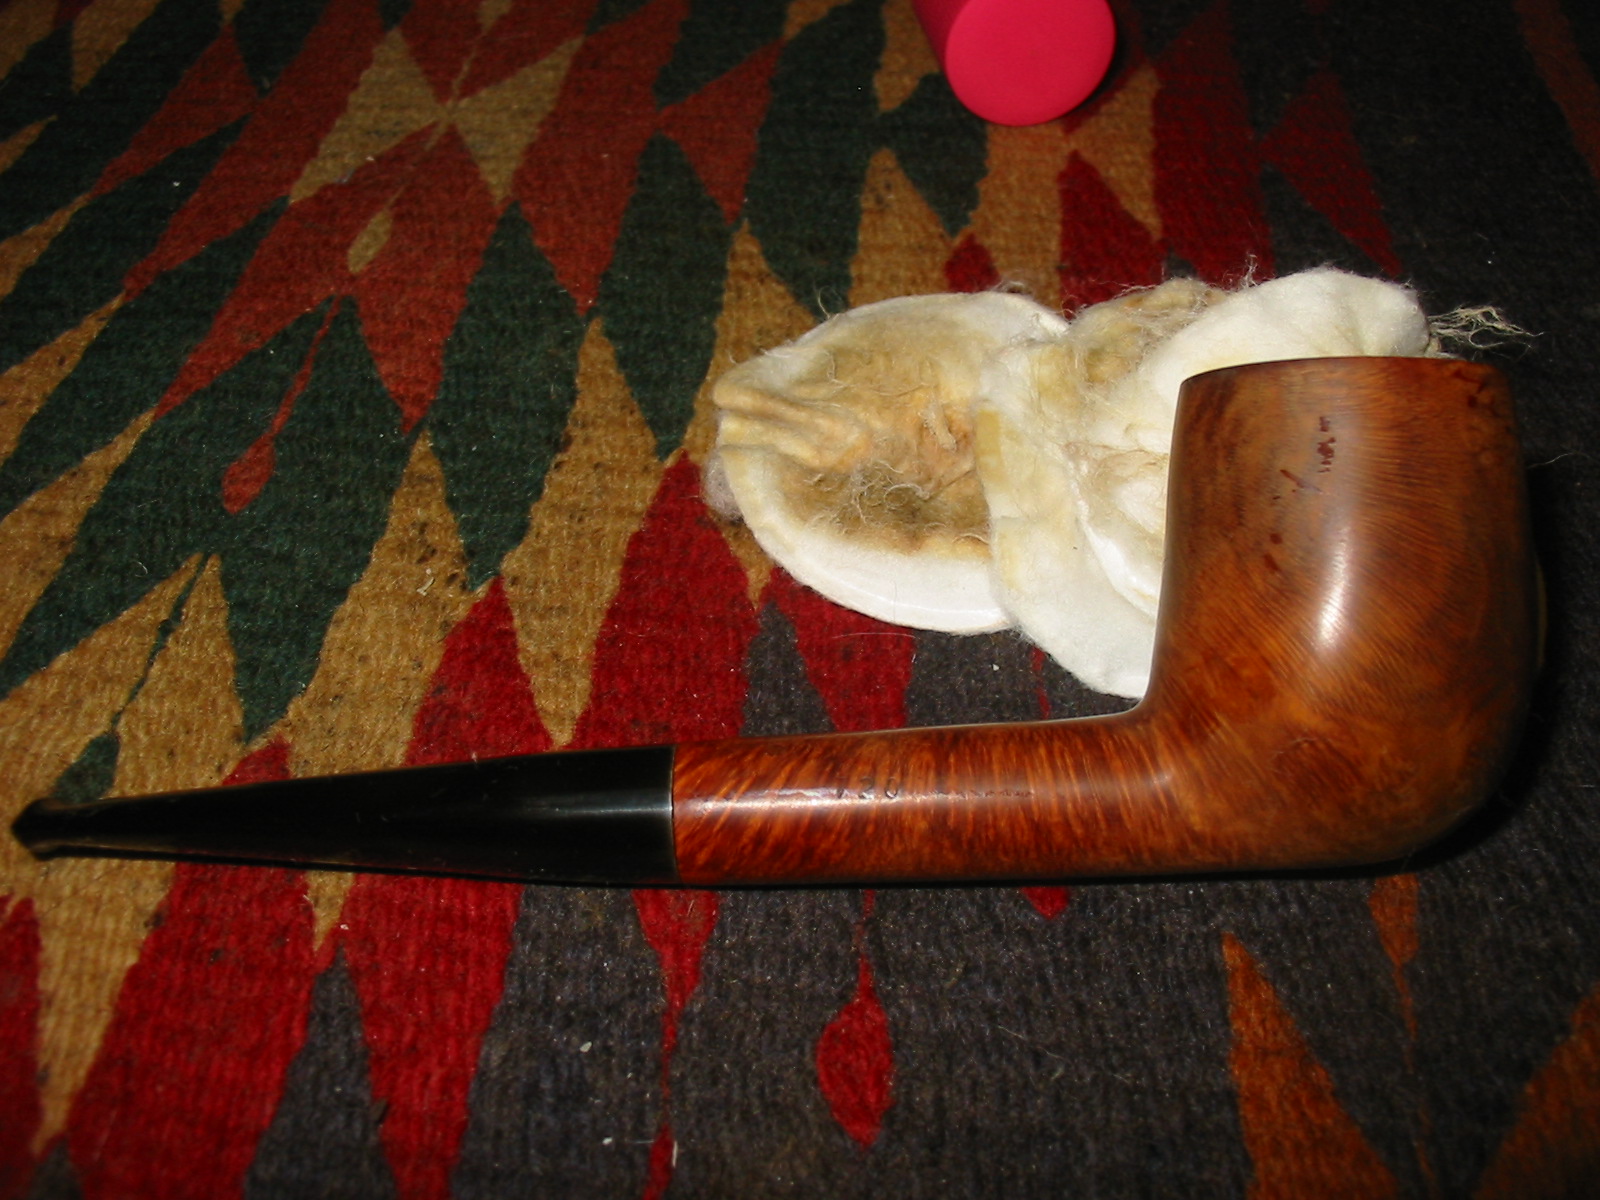
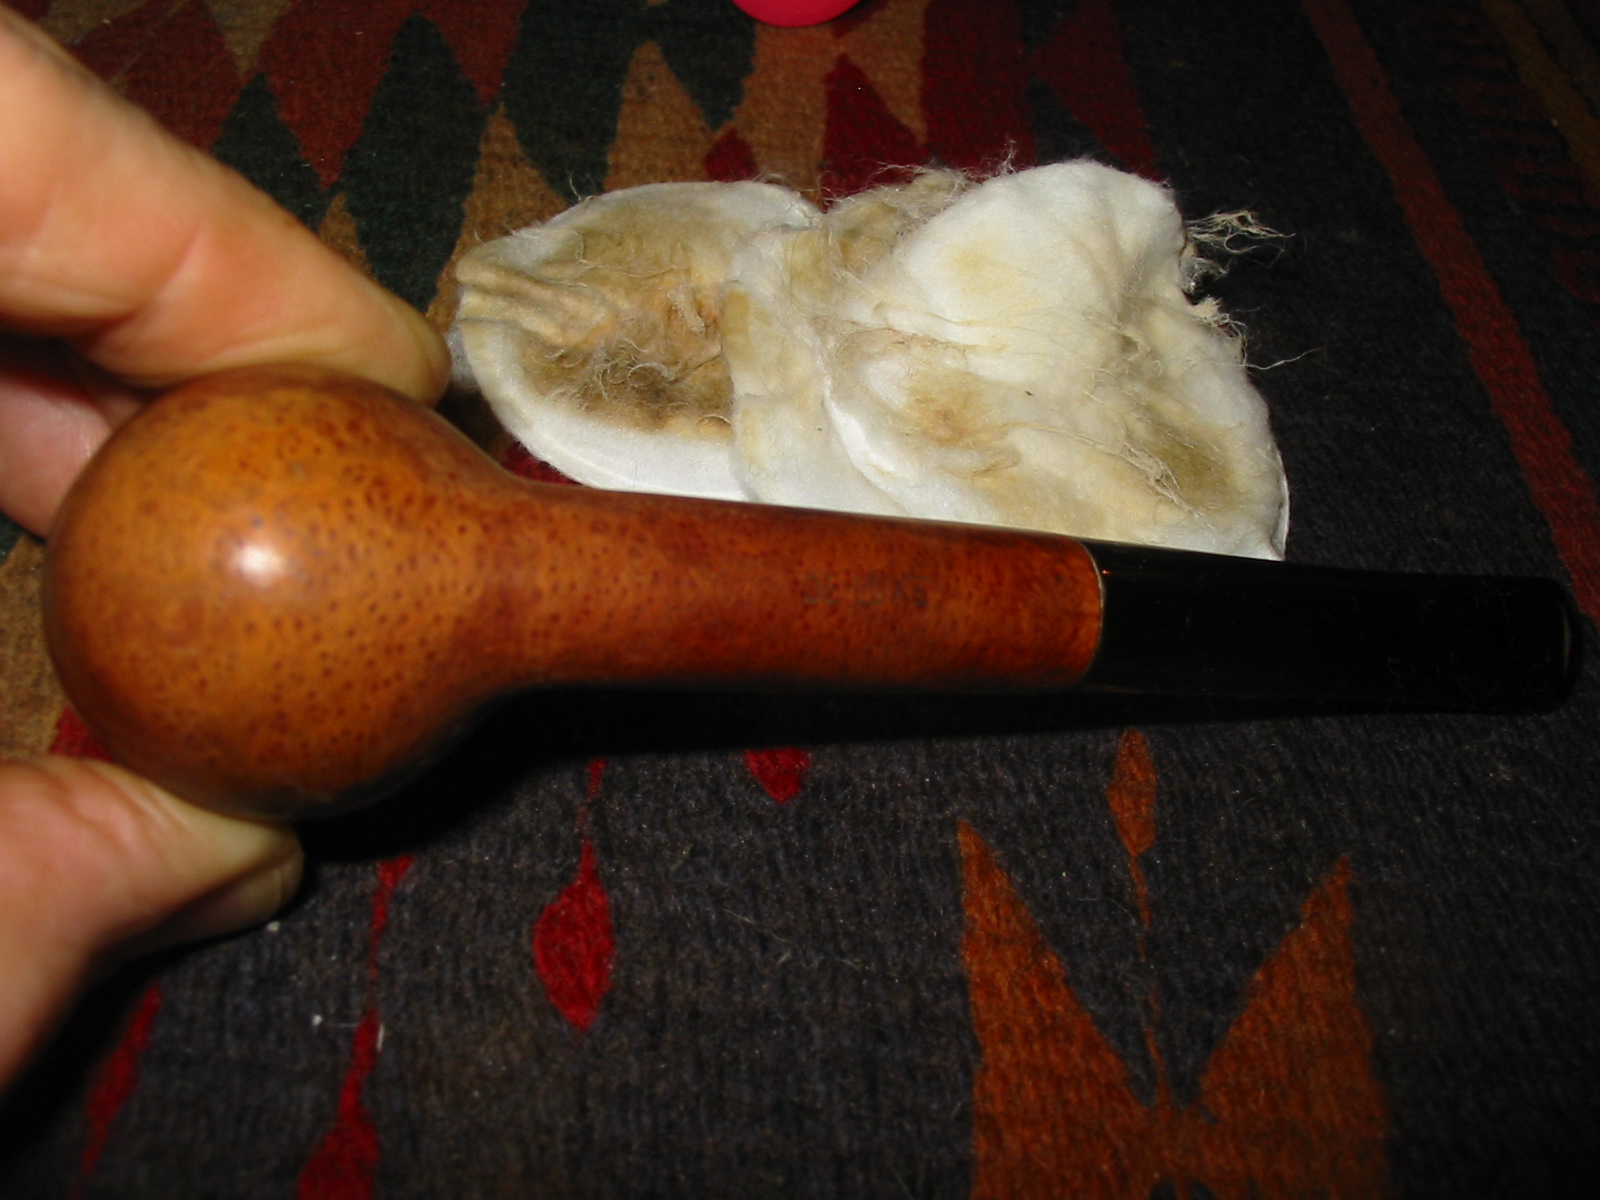
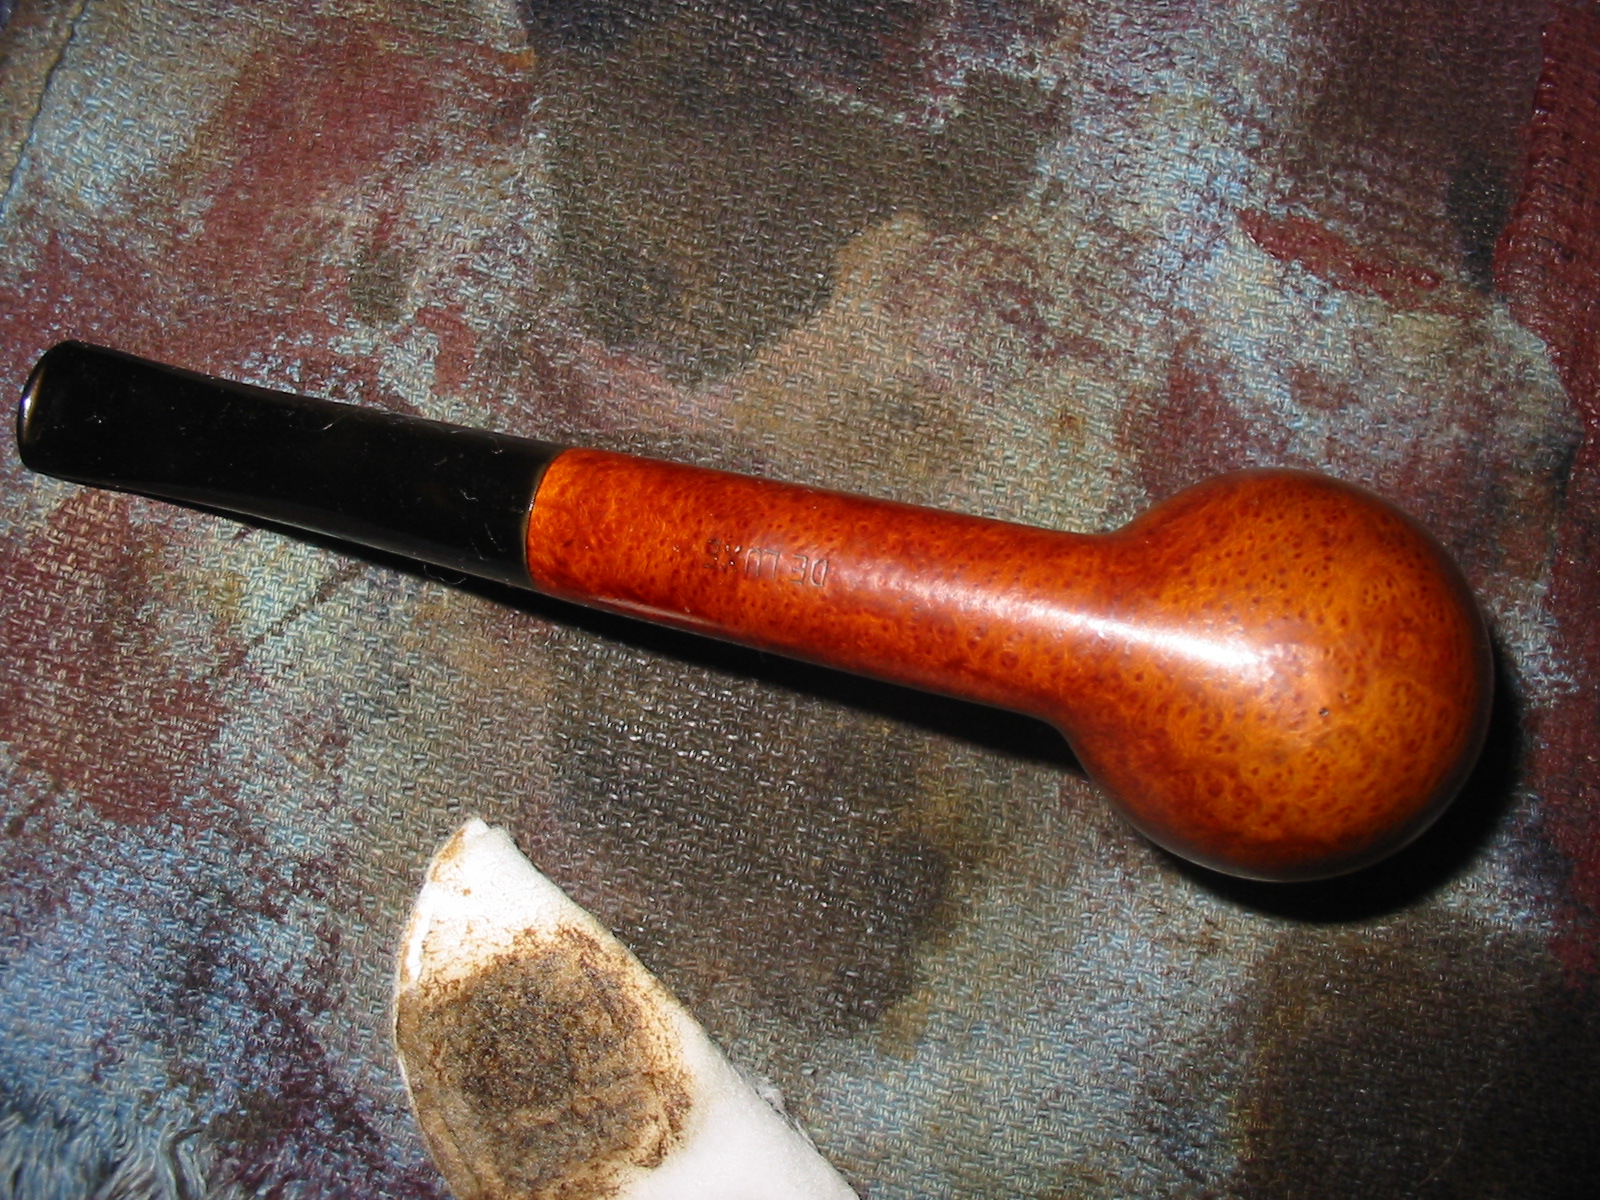
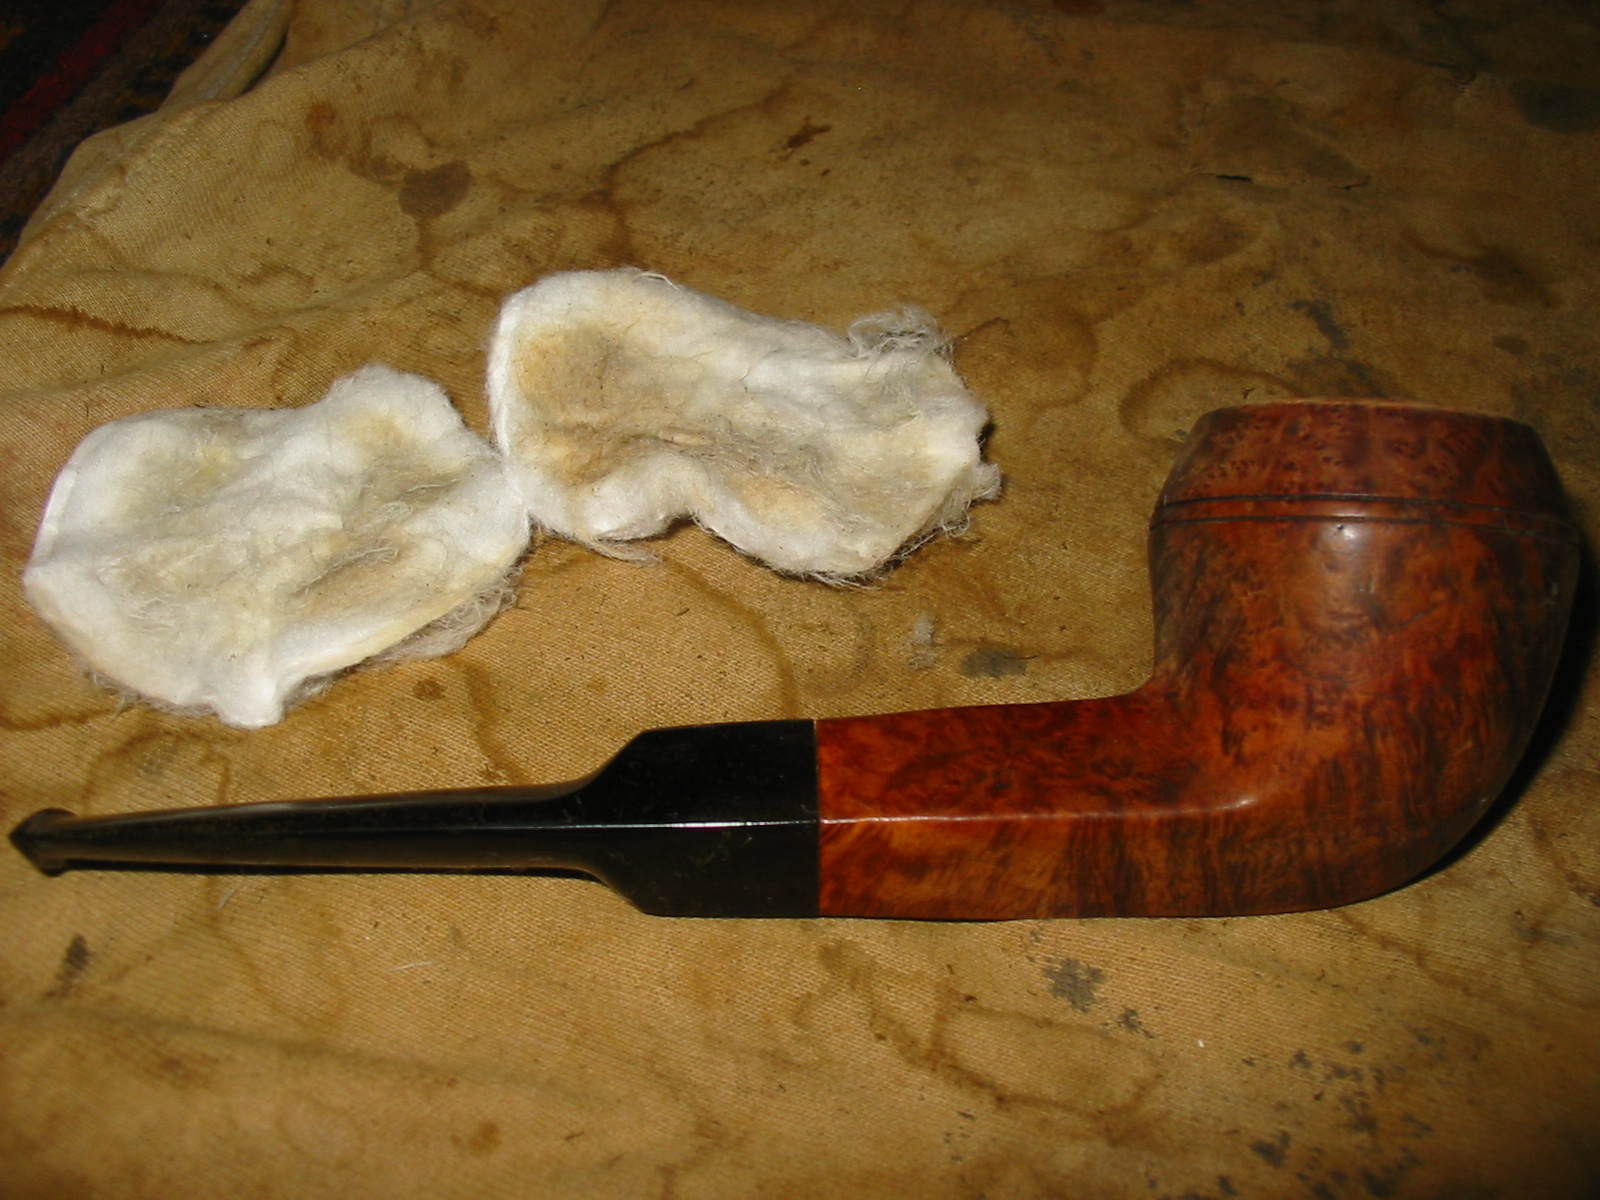
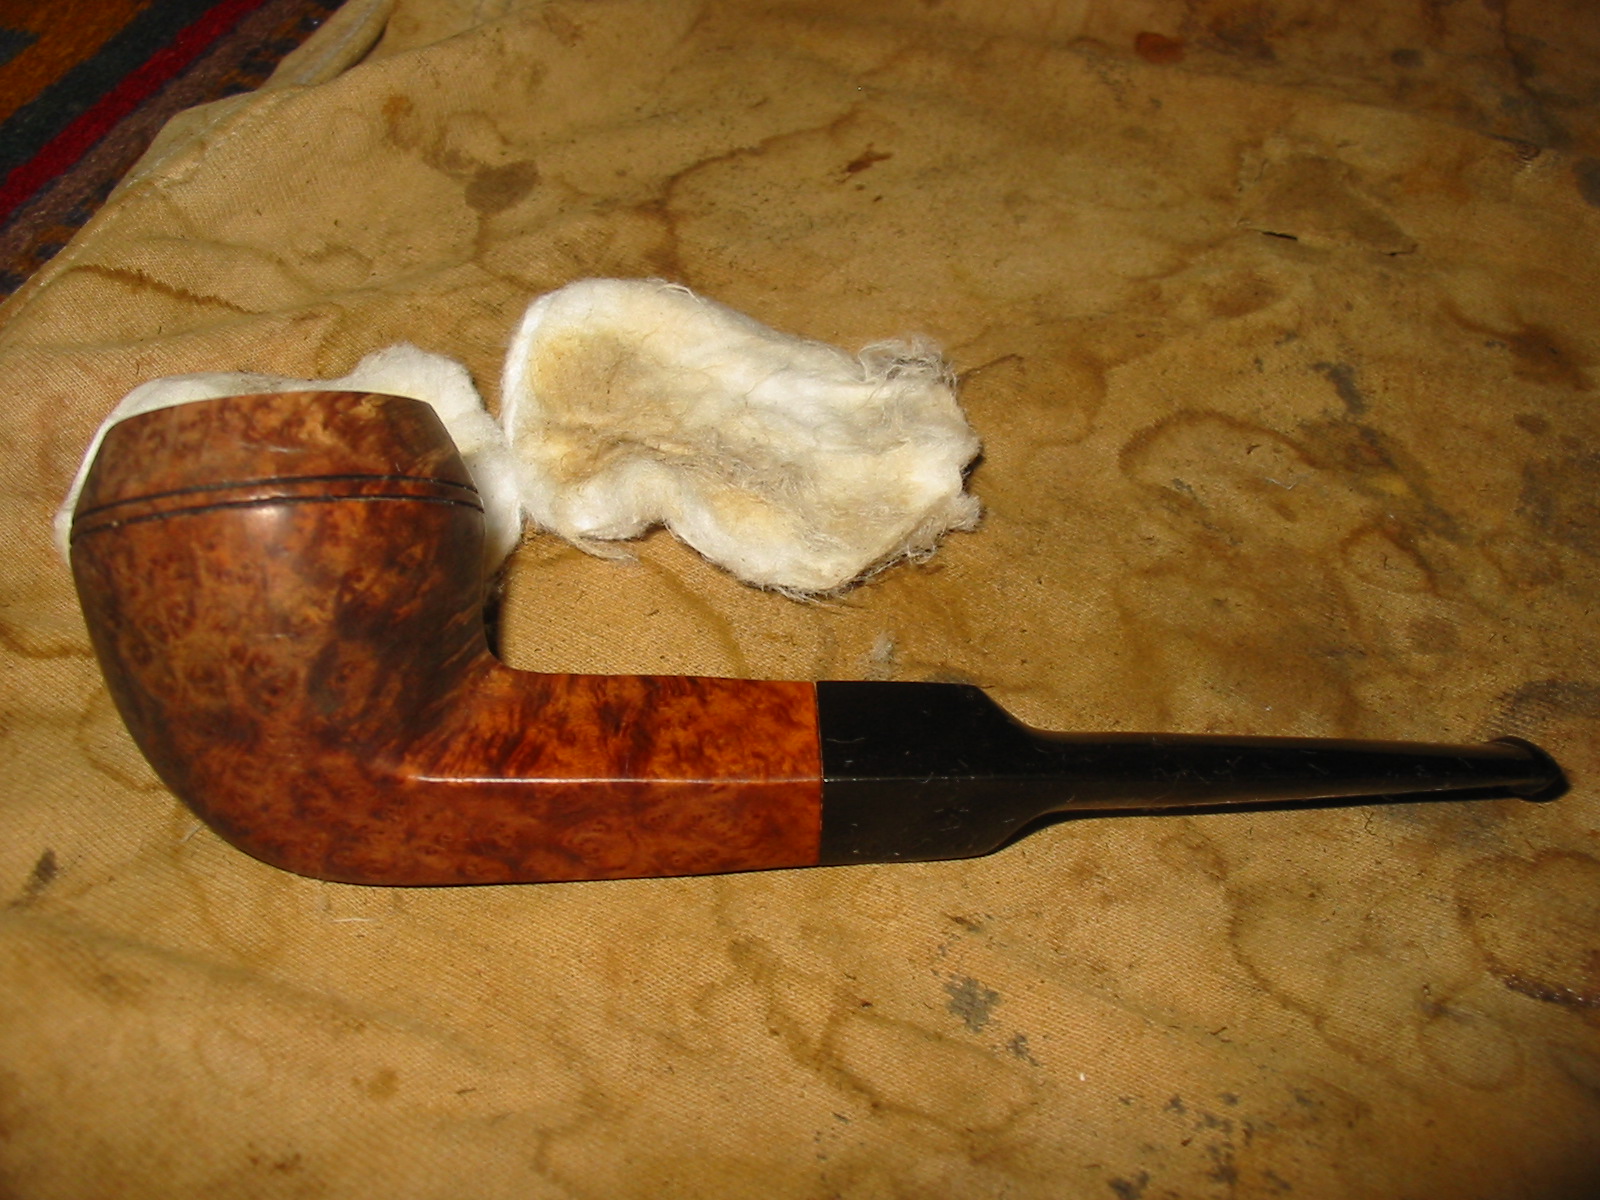
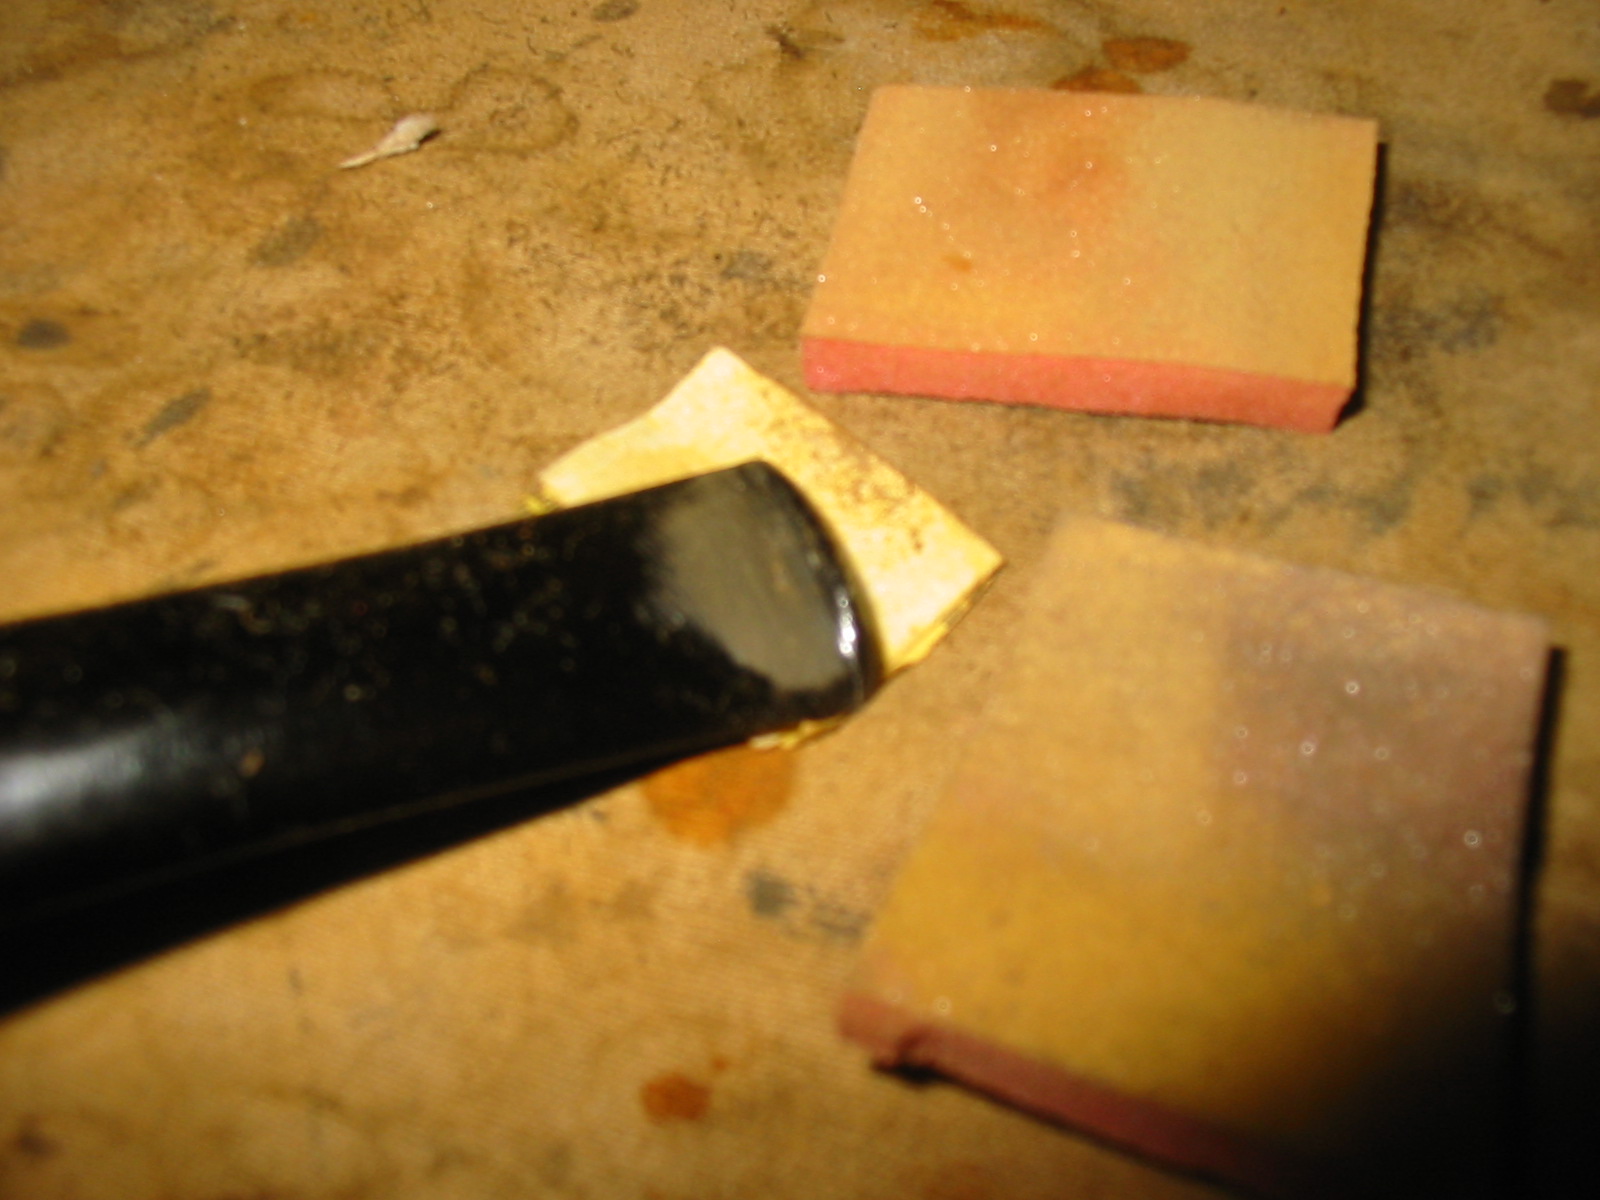
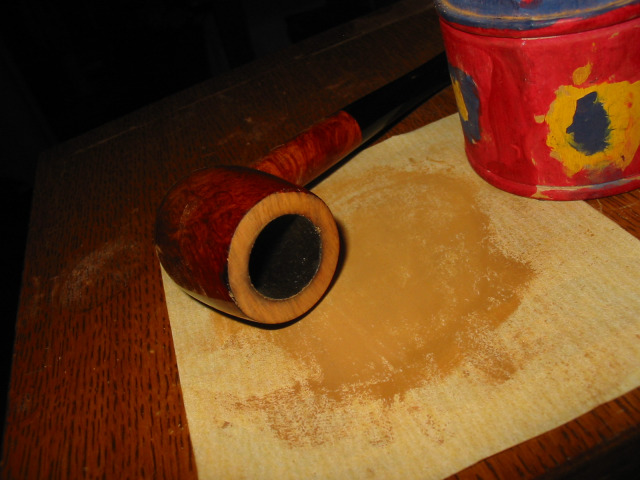
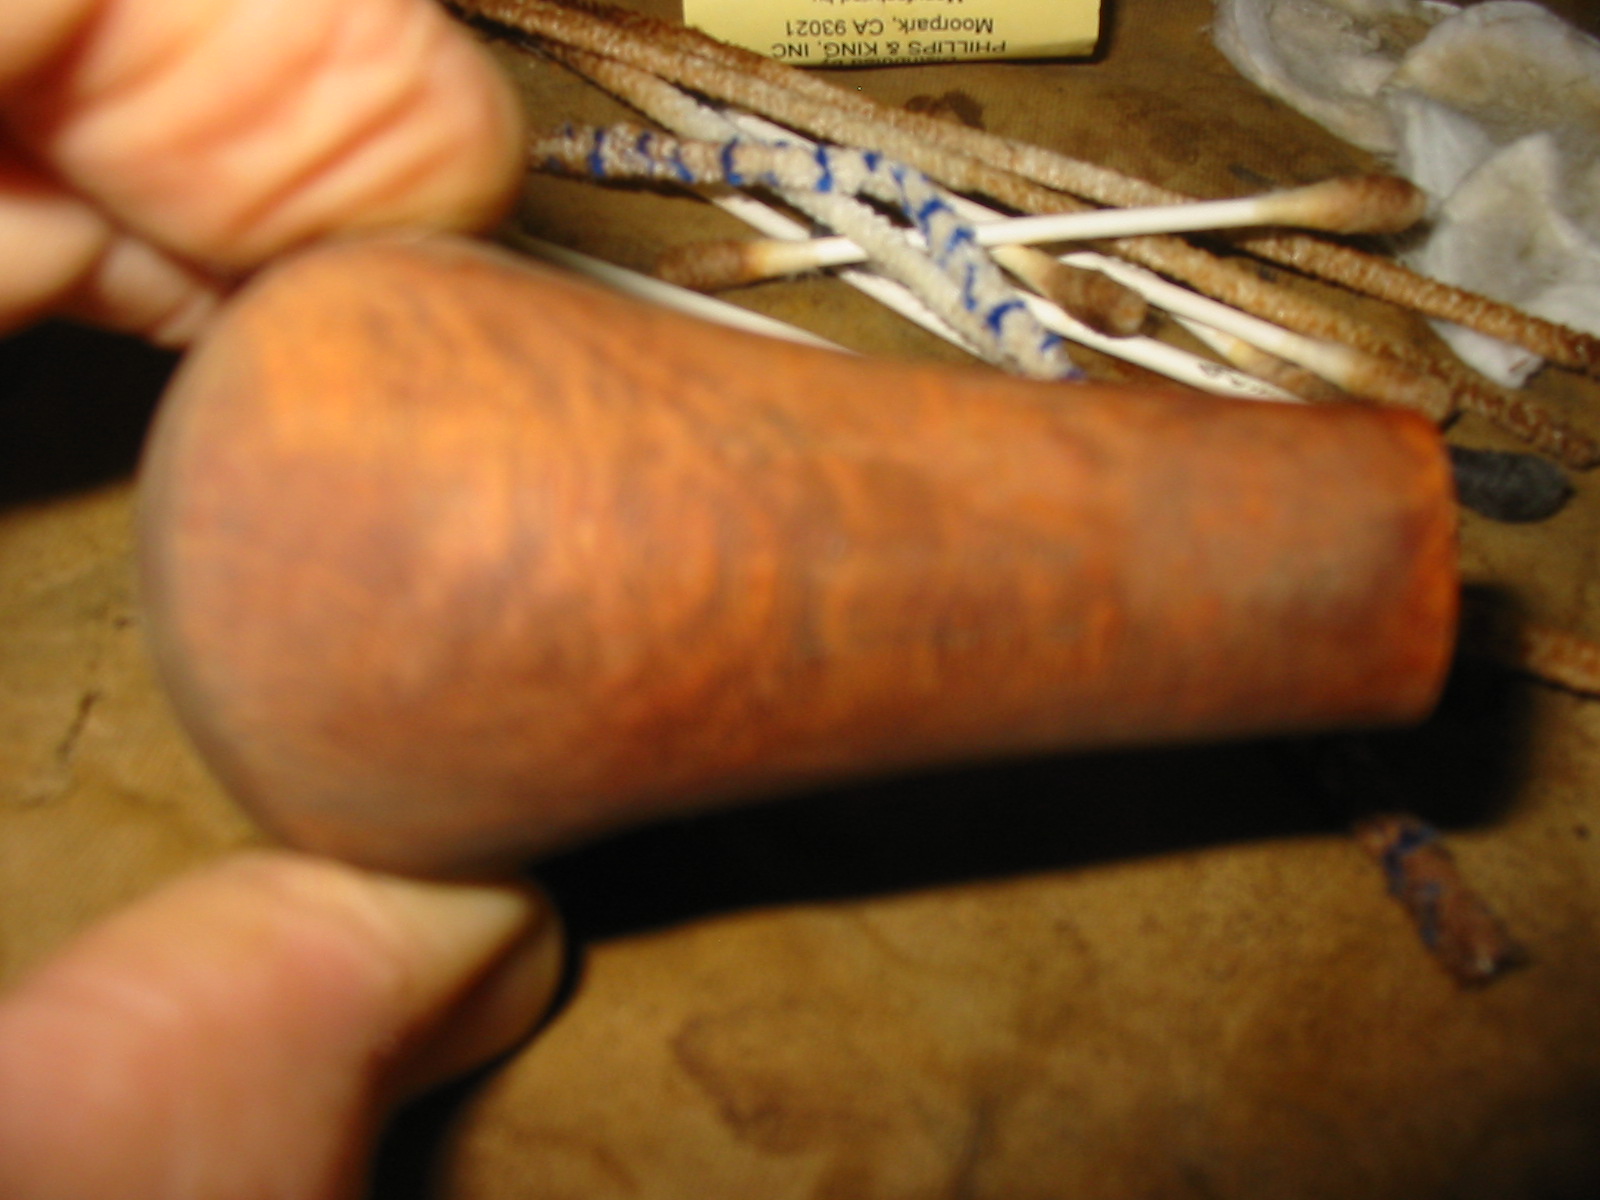
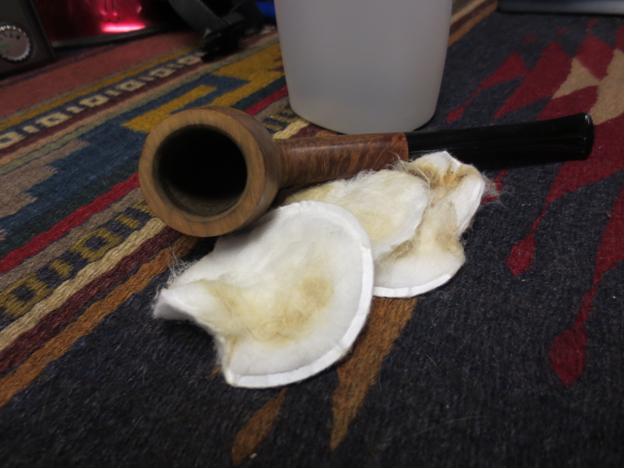
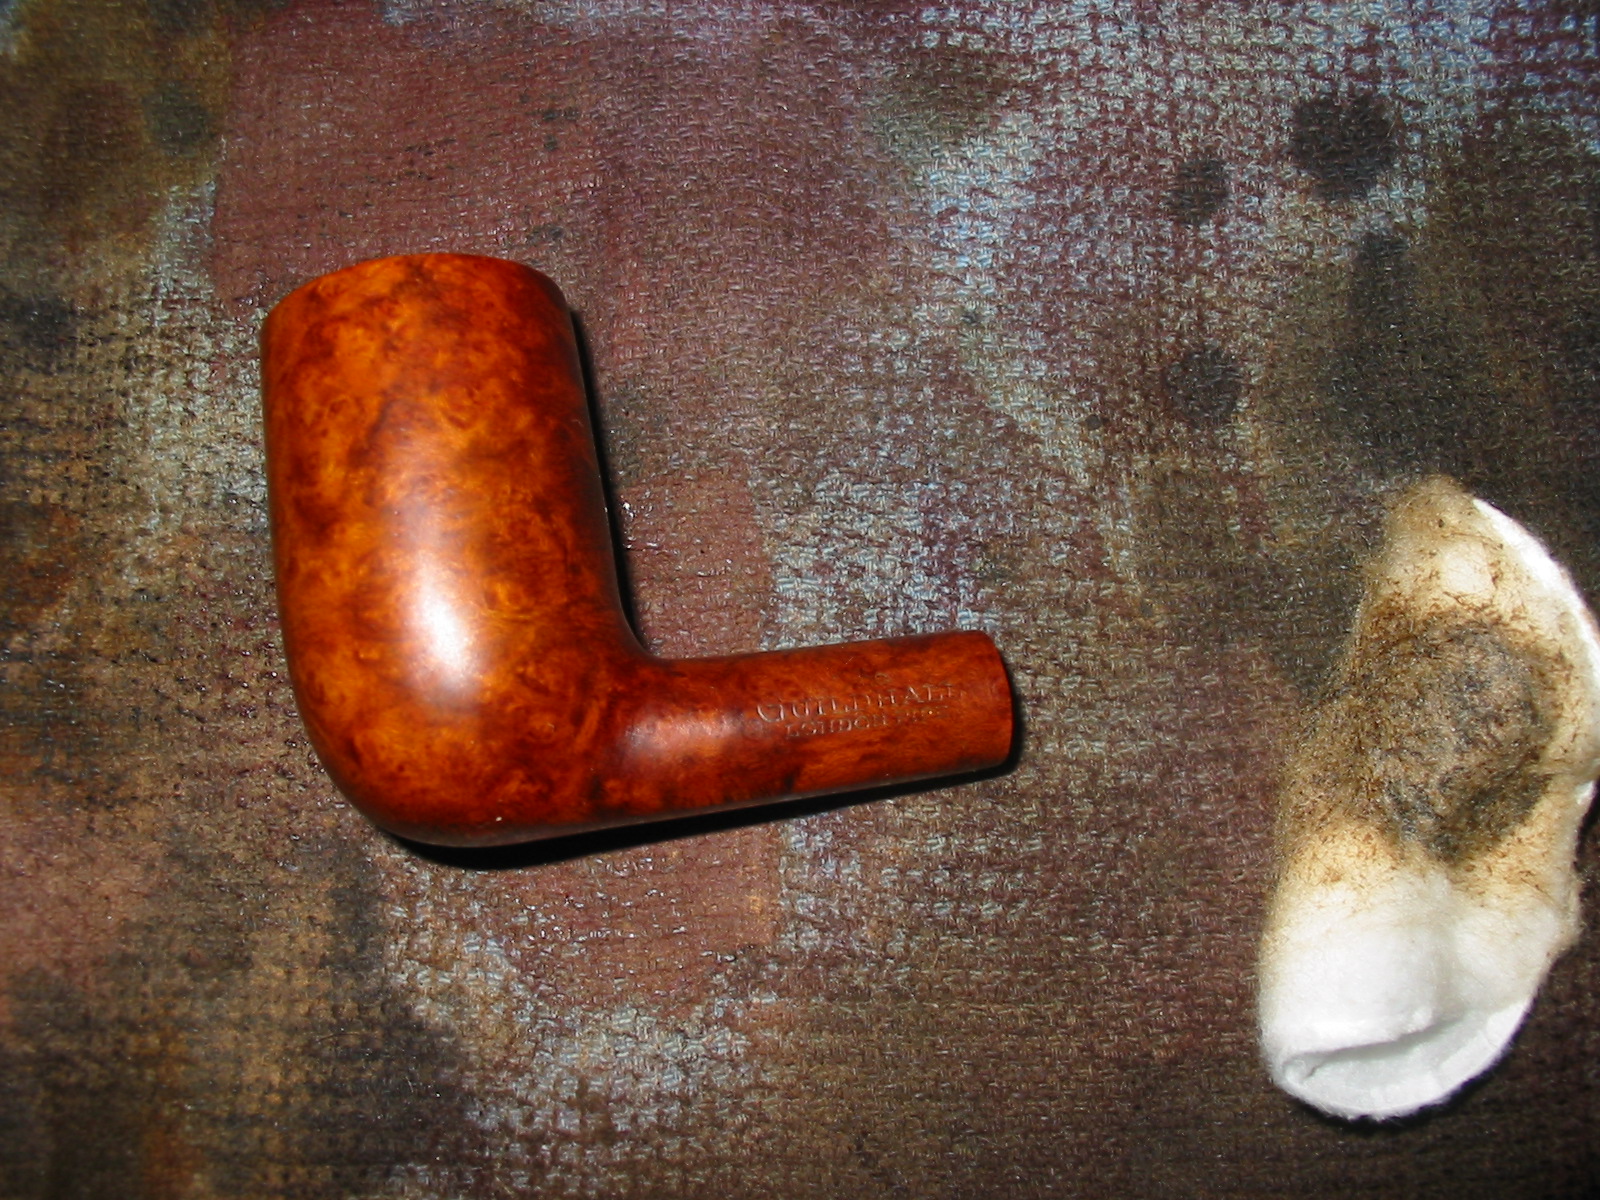
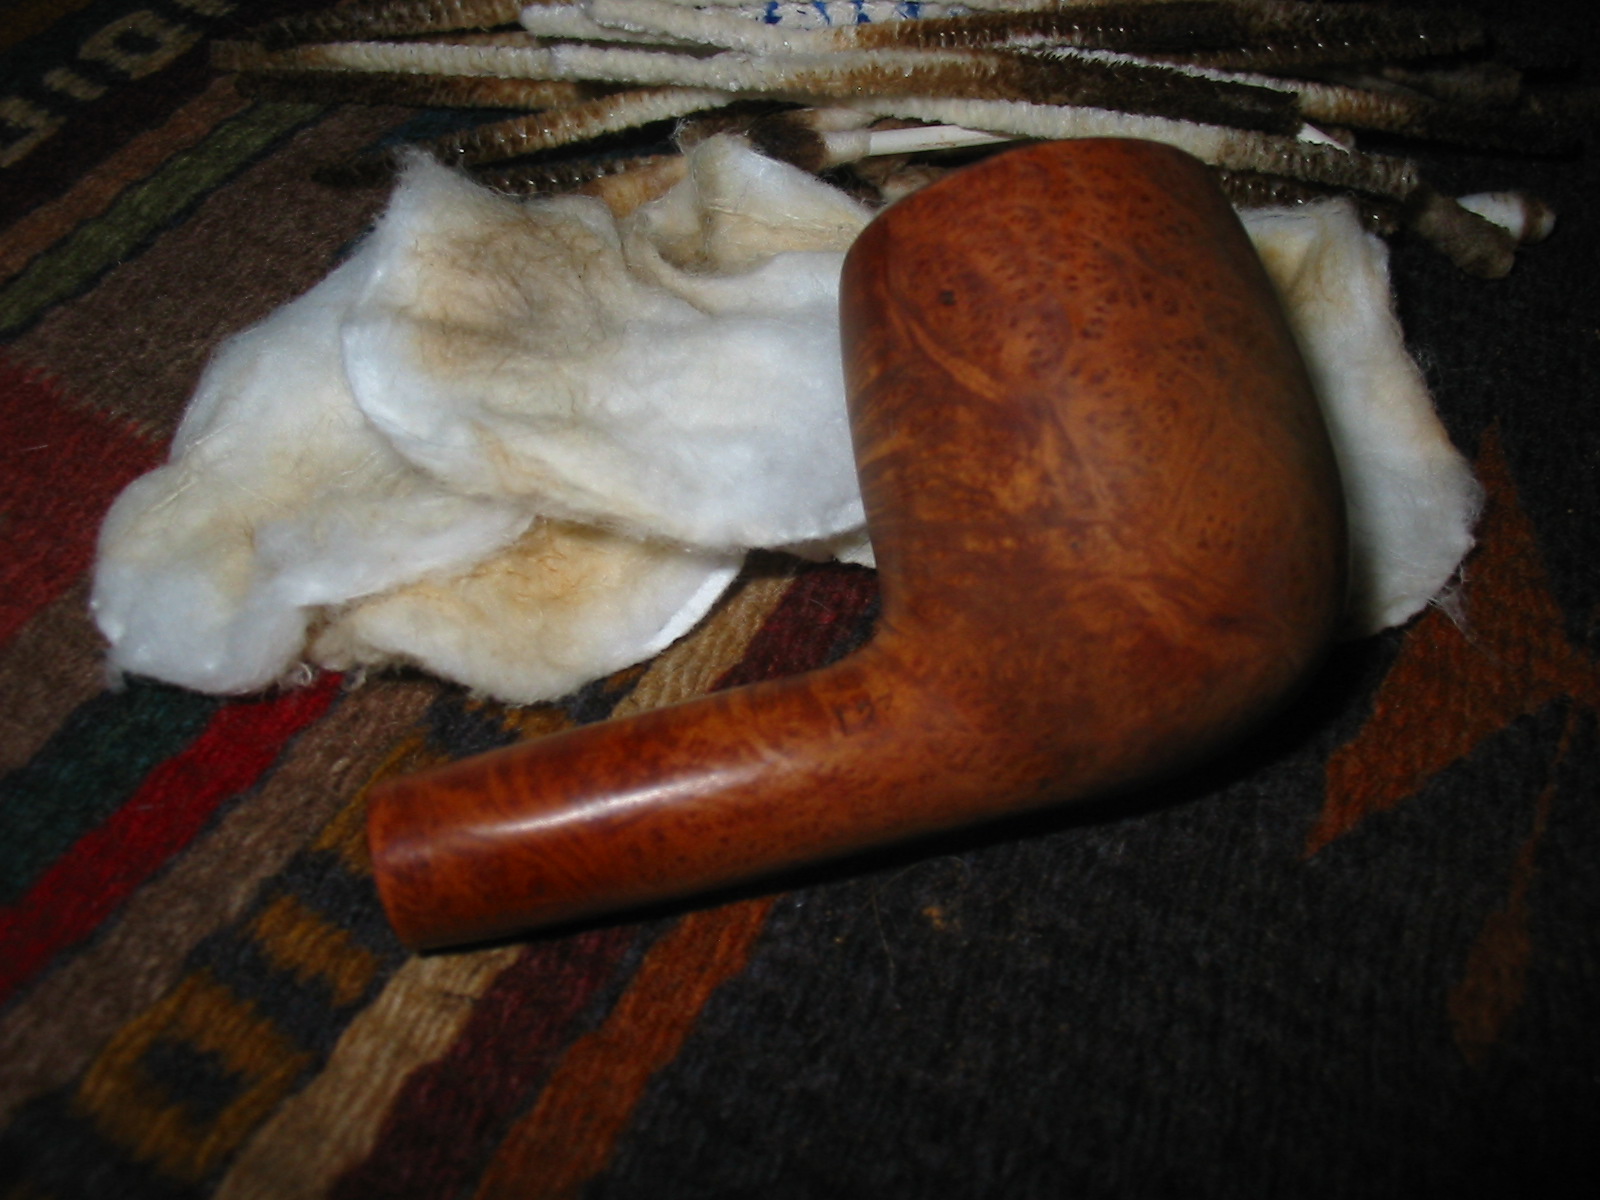
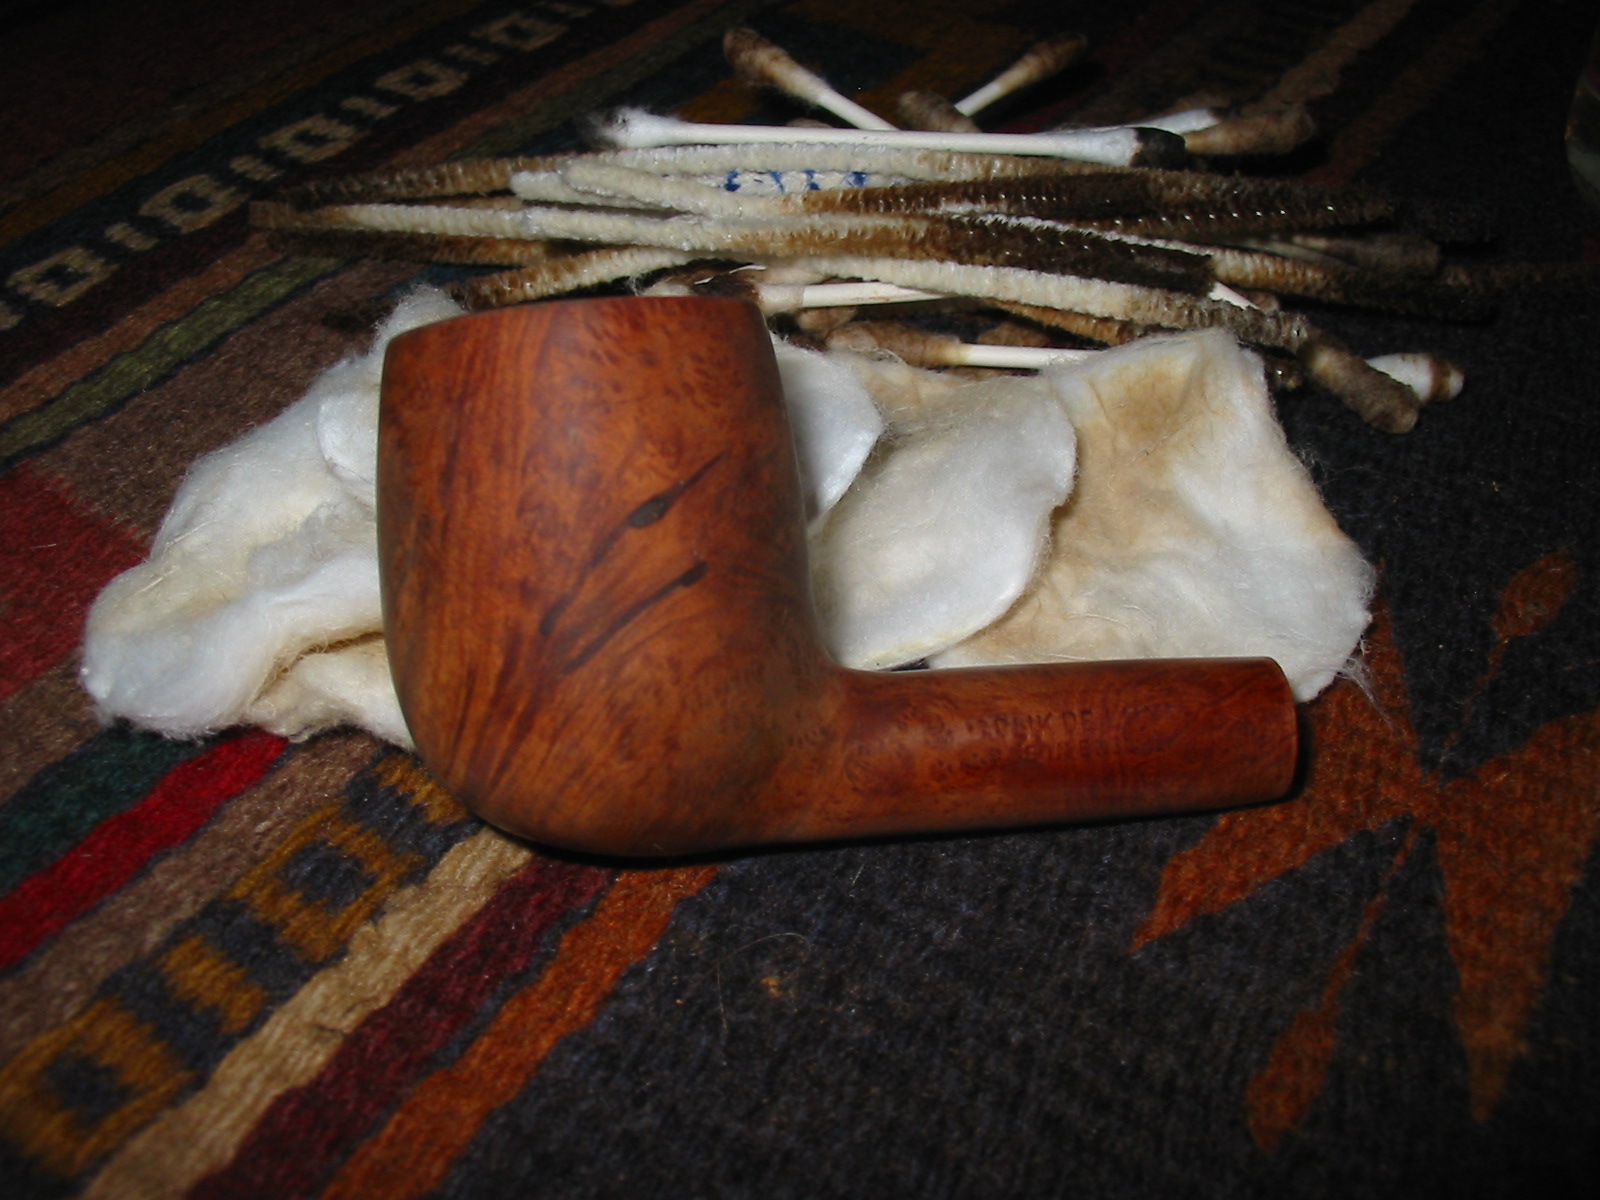
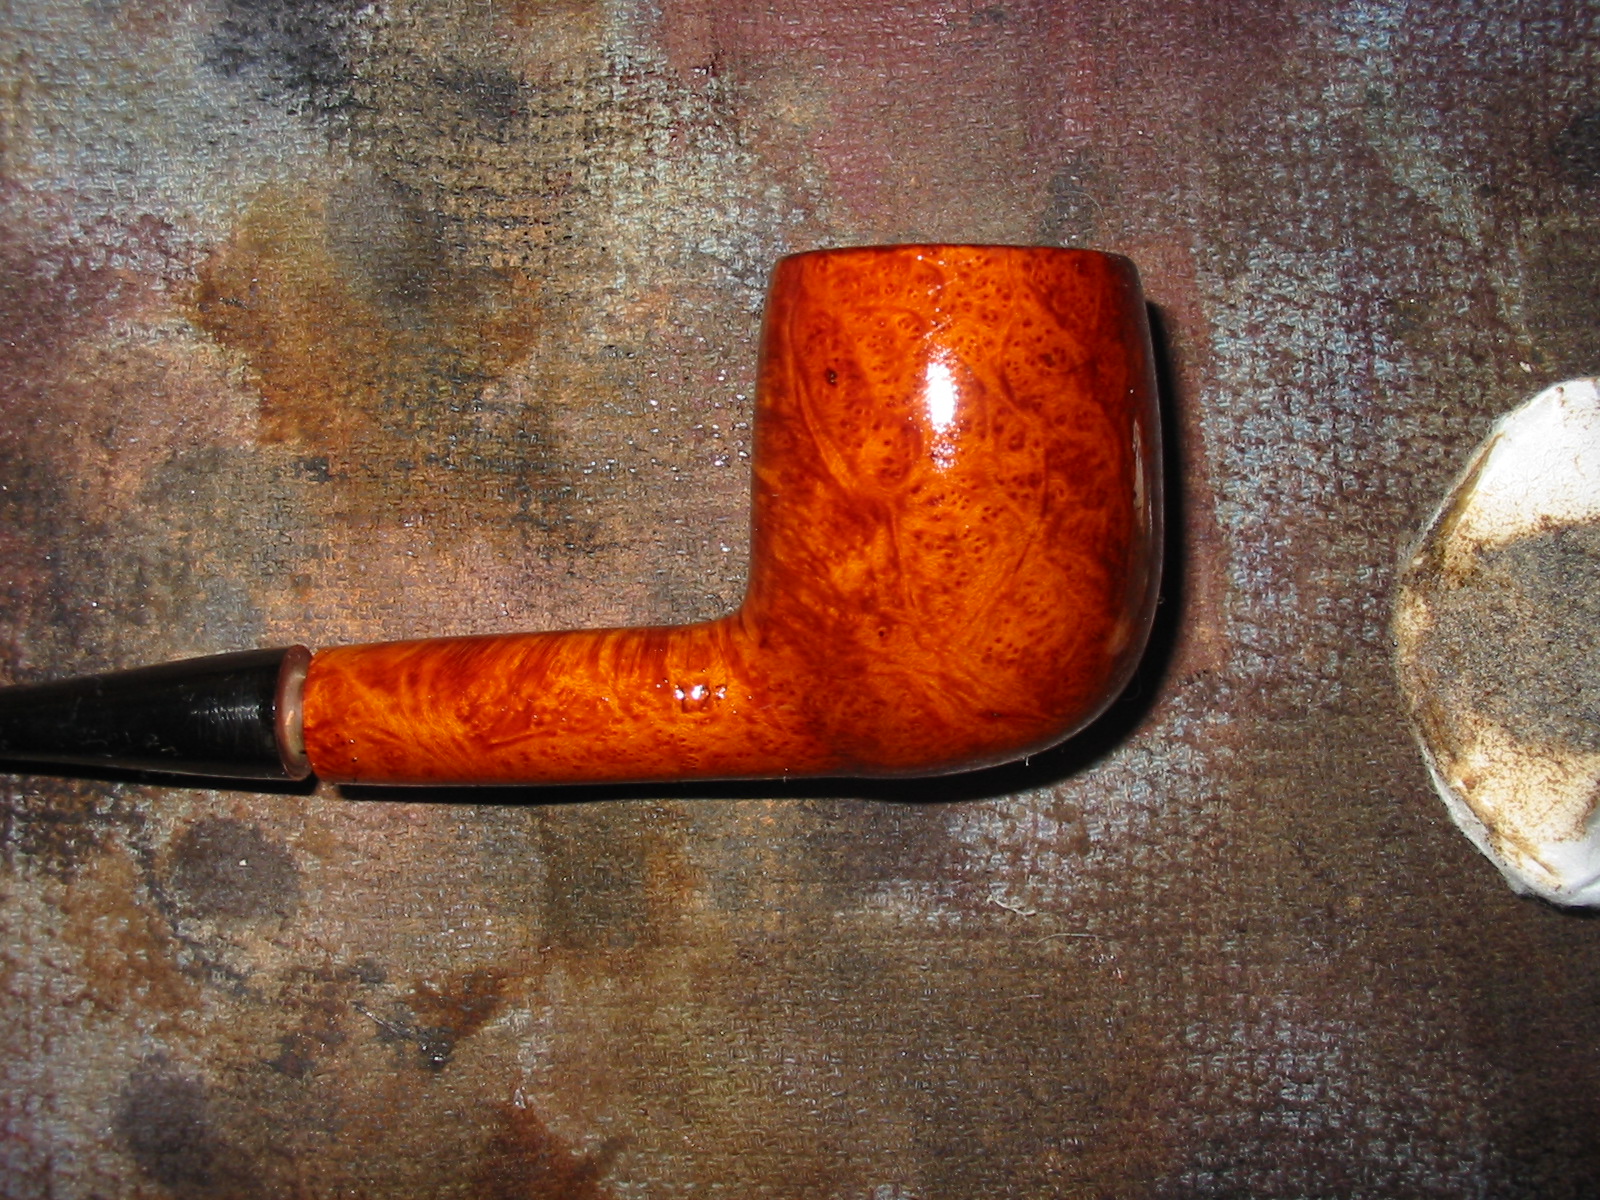
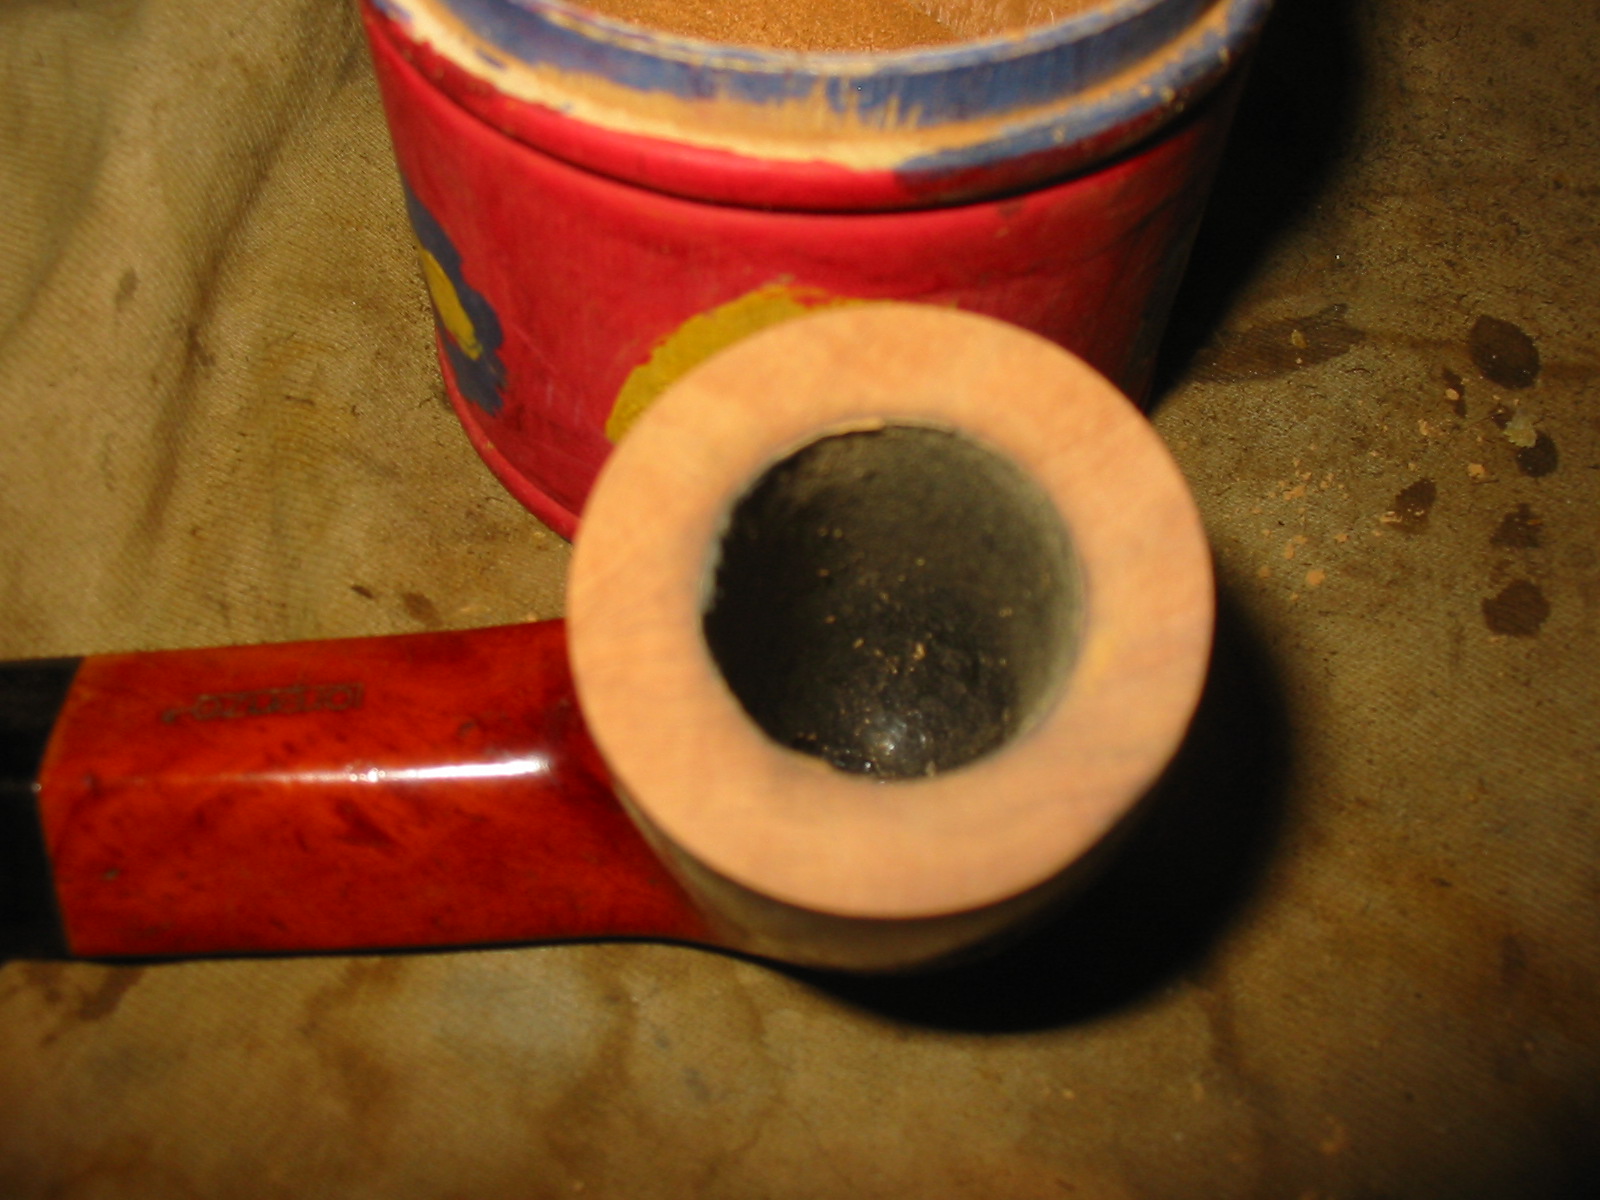
I wiped the bowl down with acetone on cotton pads to remove the varnish and the spotty orange stain coat. IMG_4134 IMG_4135 IMG_4136 IMG_4137 
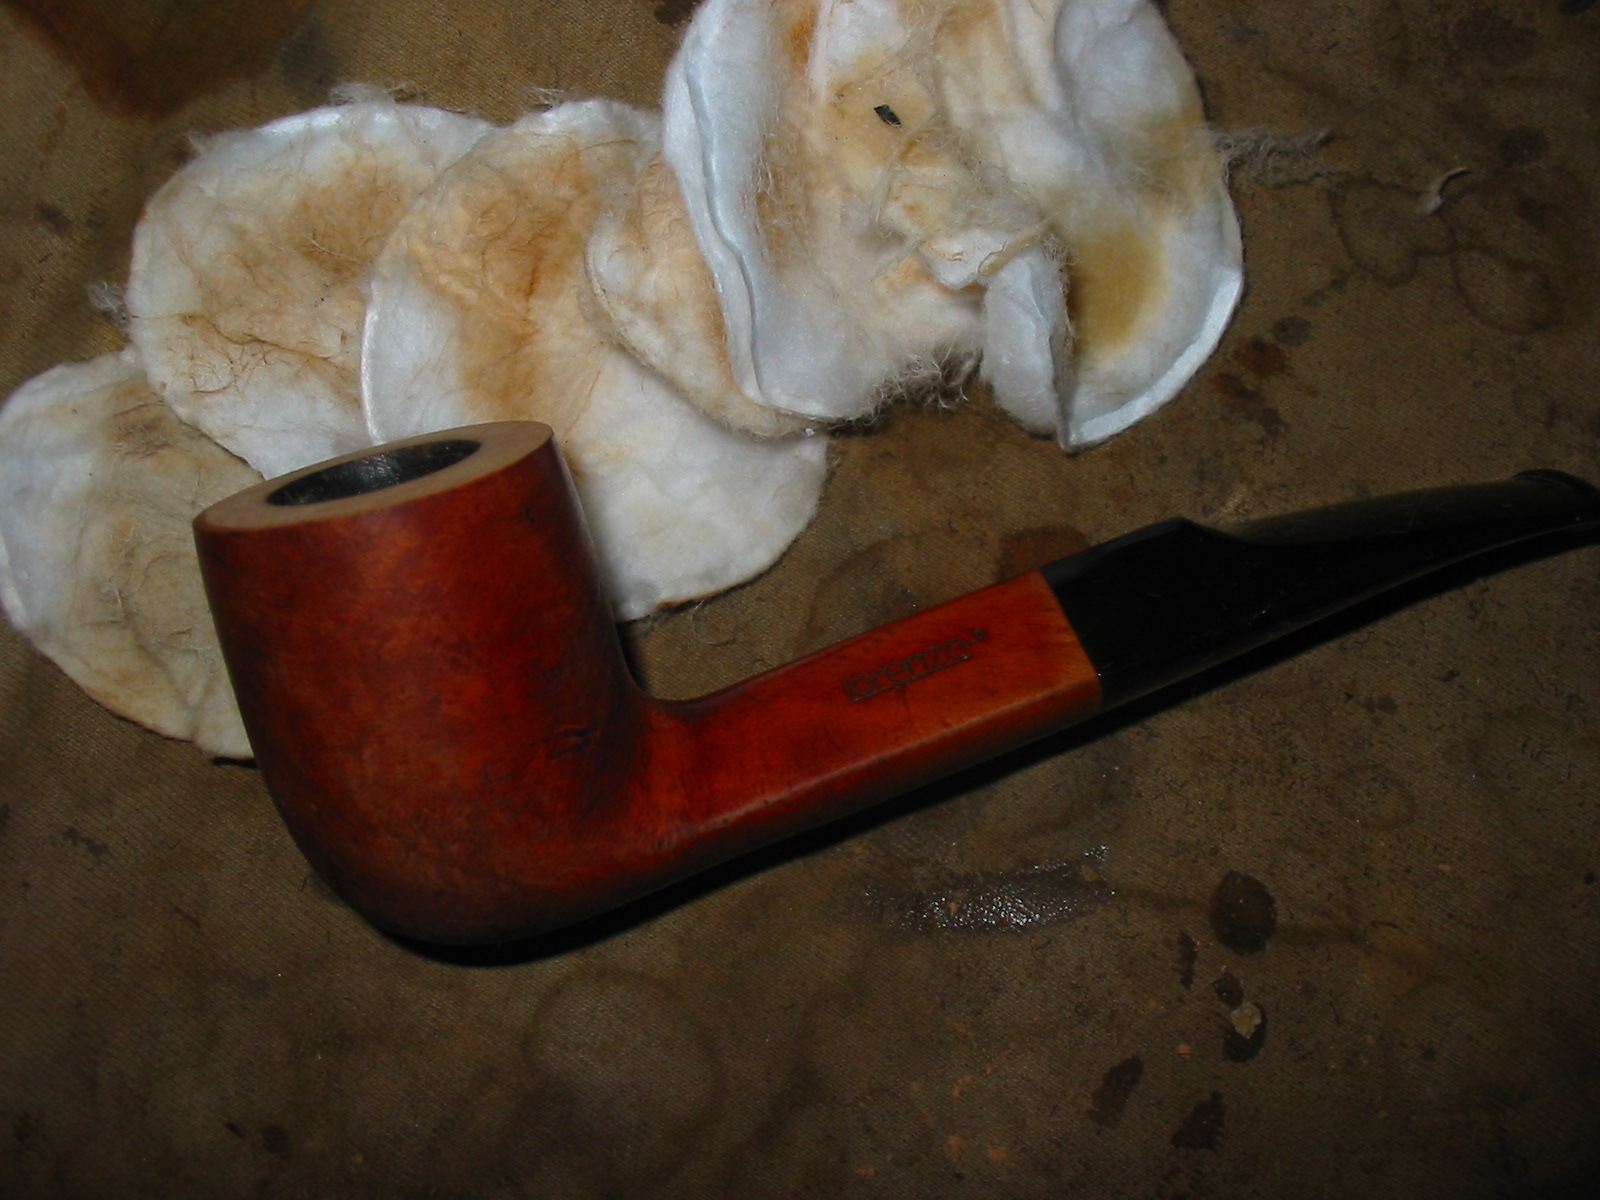
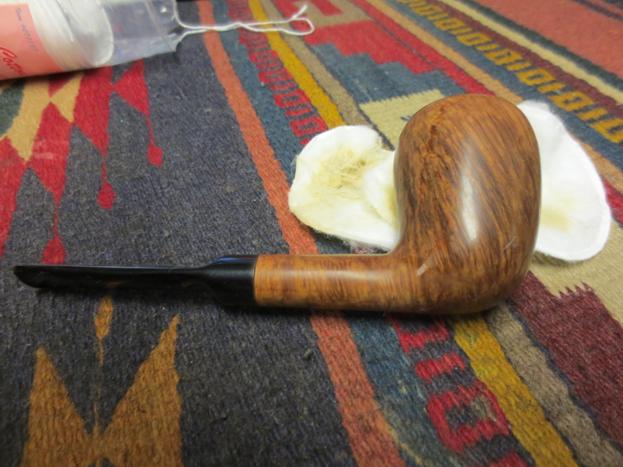
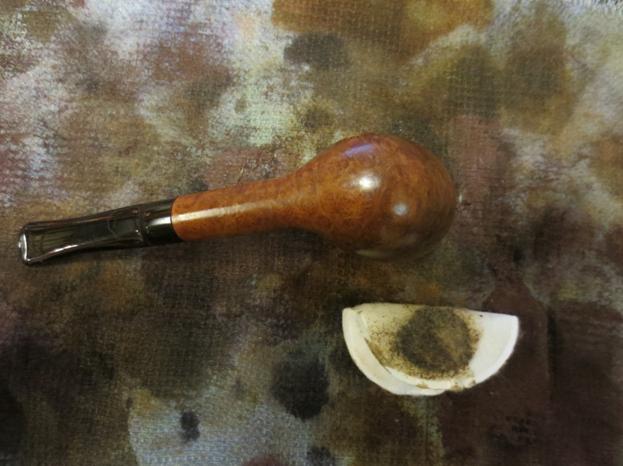
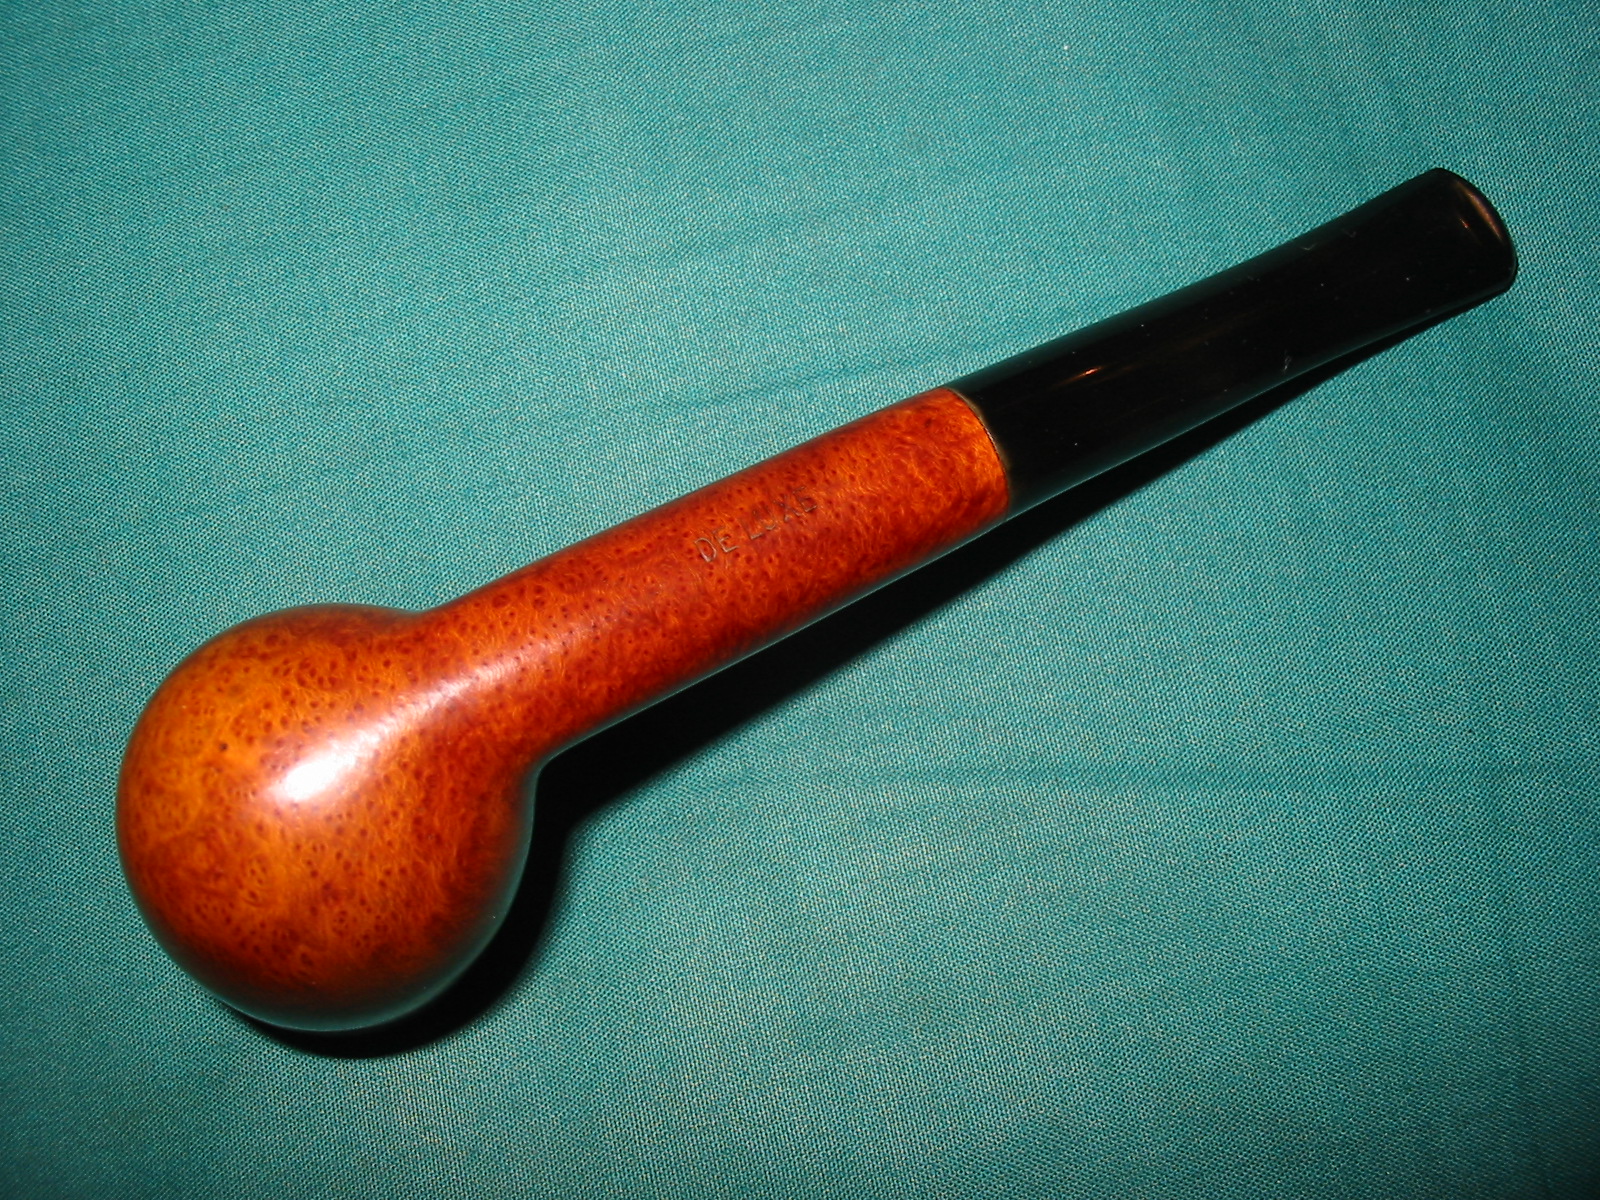
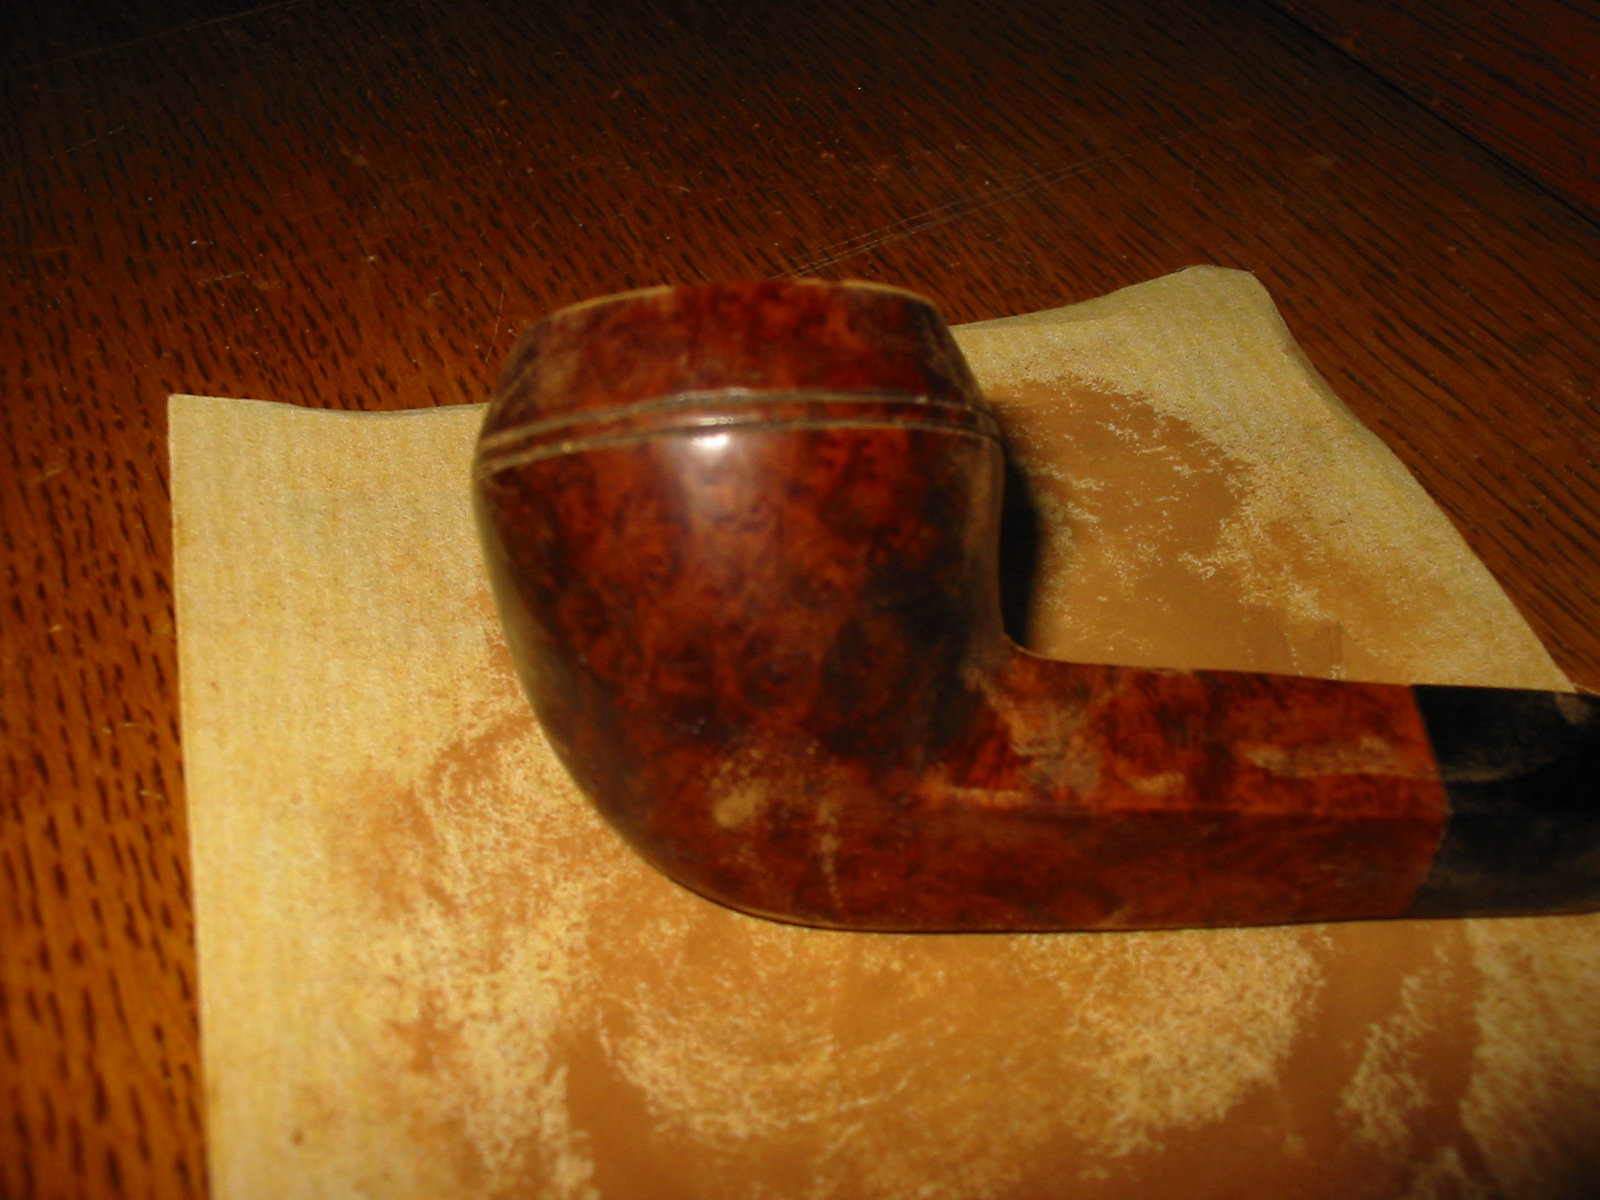
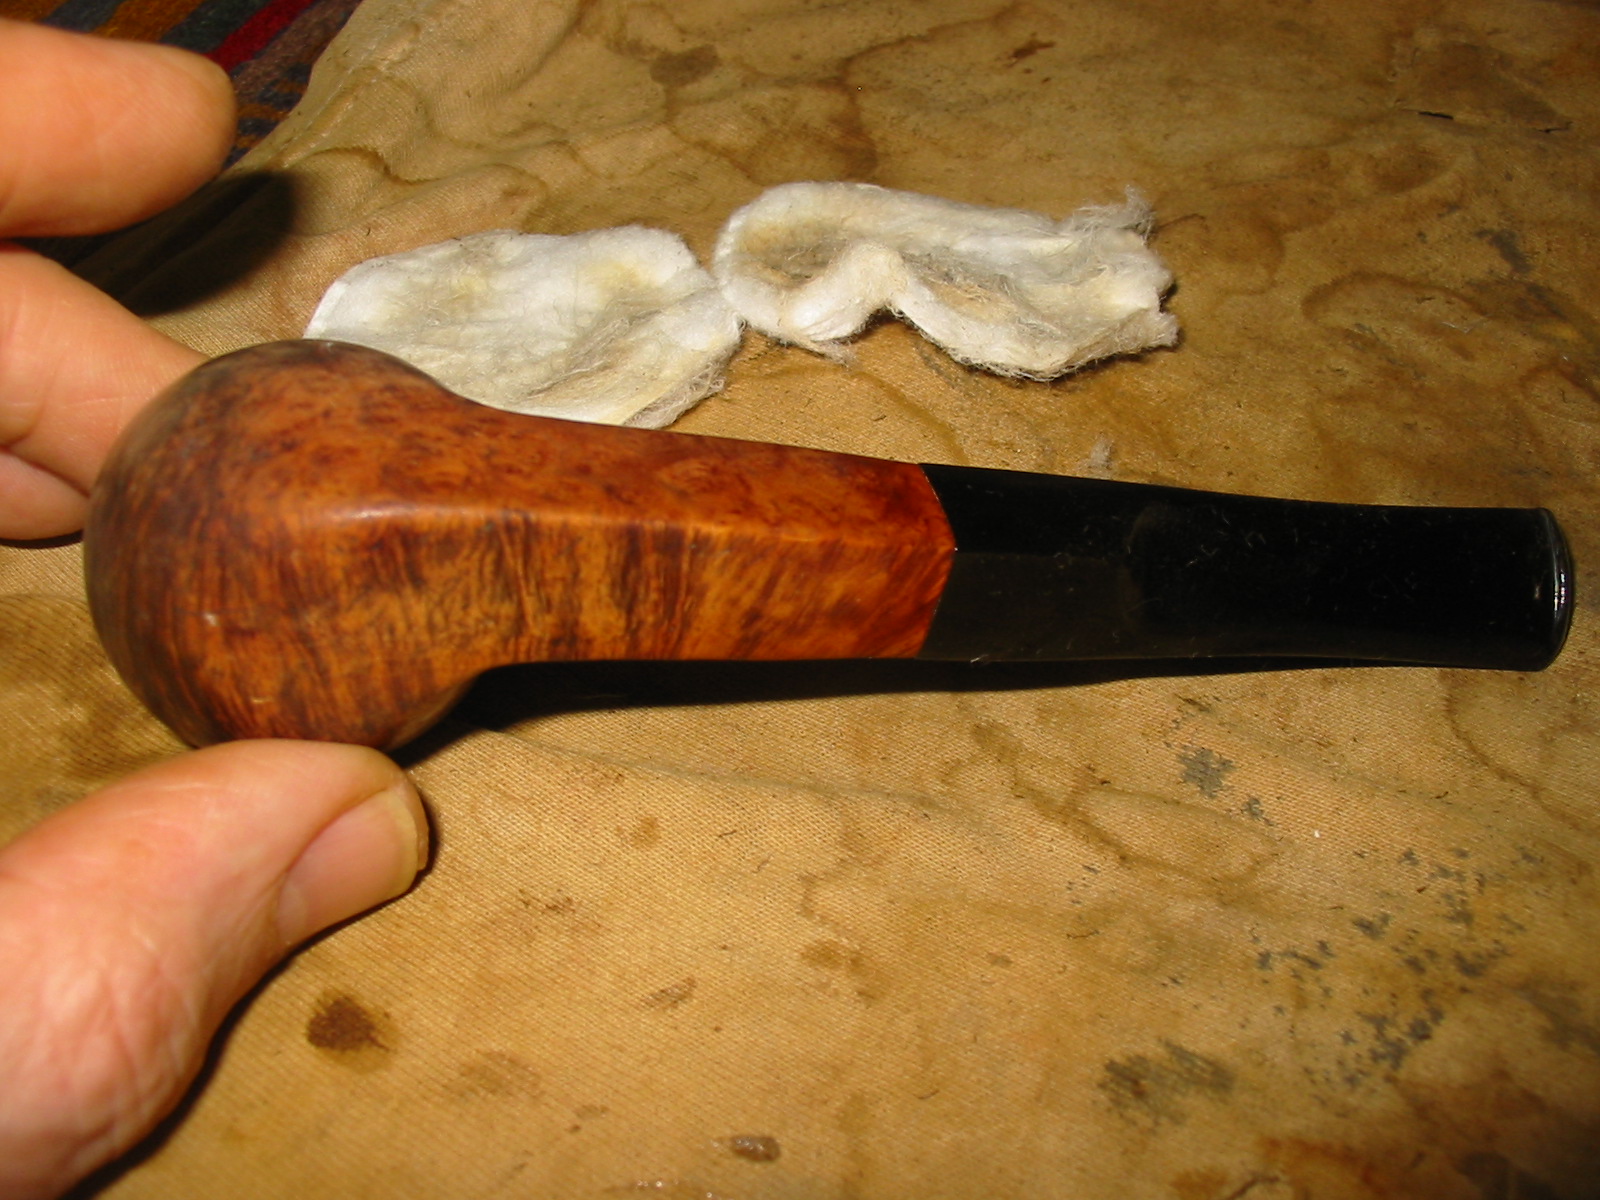
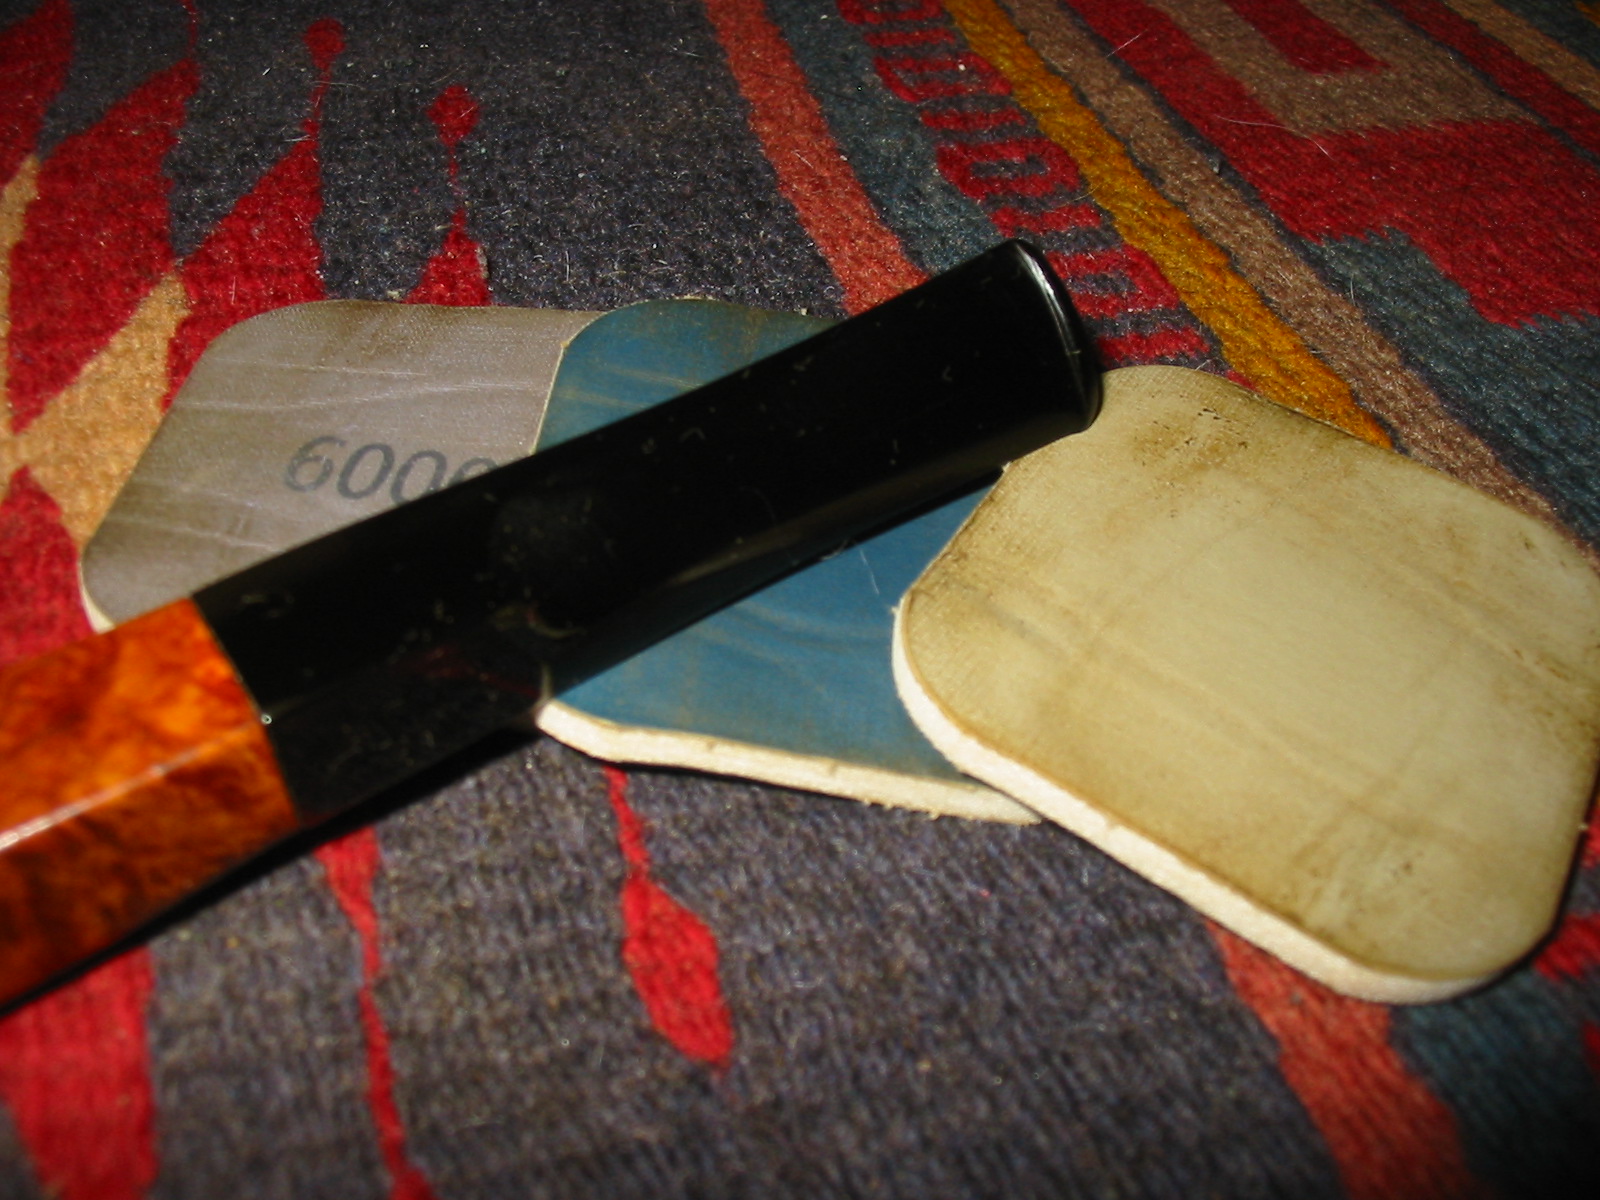
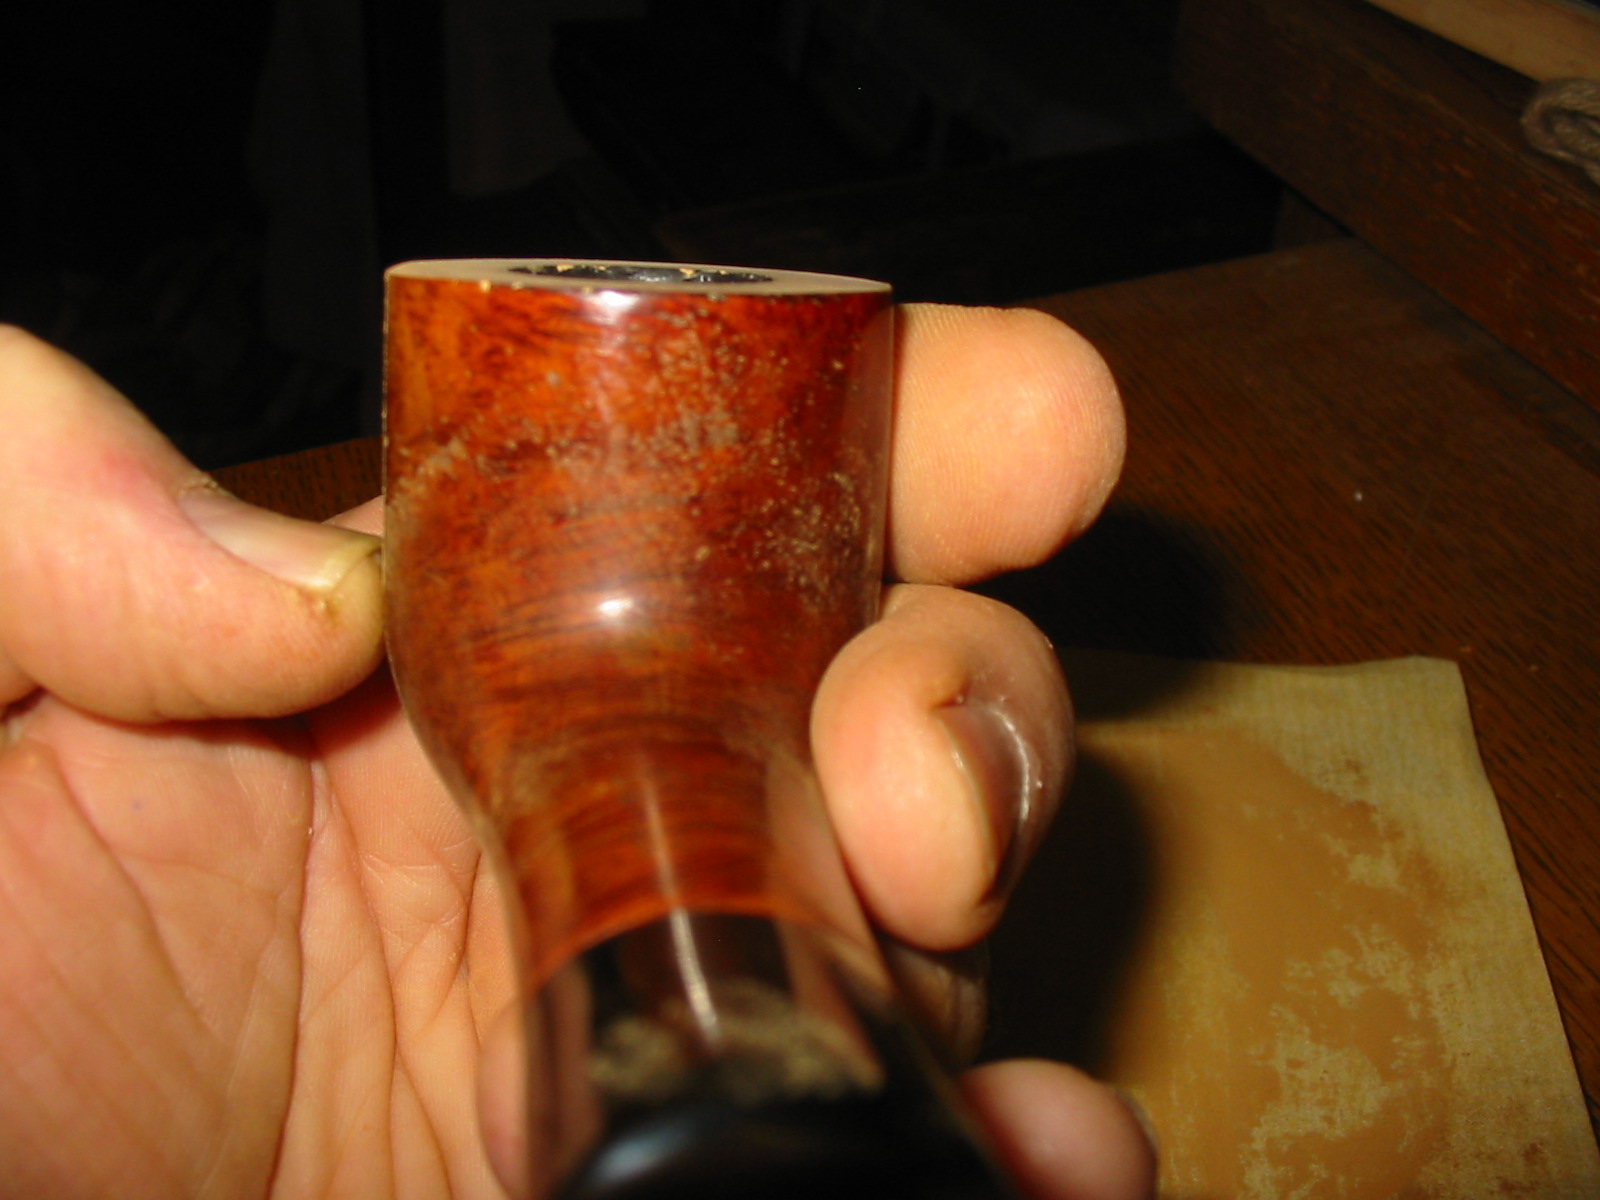
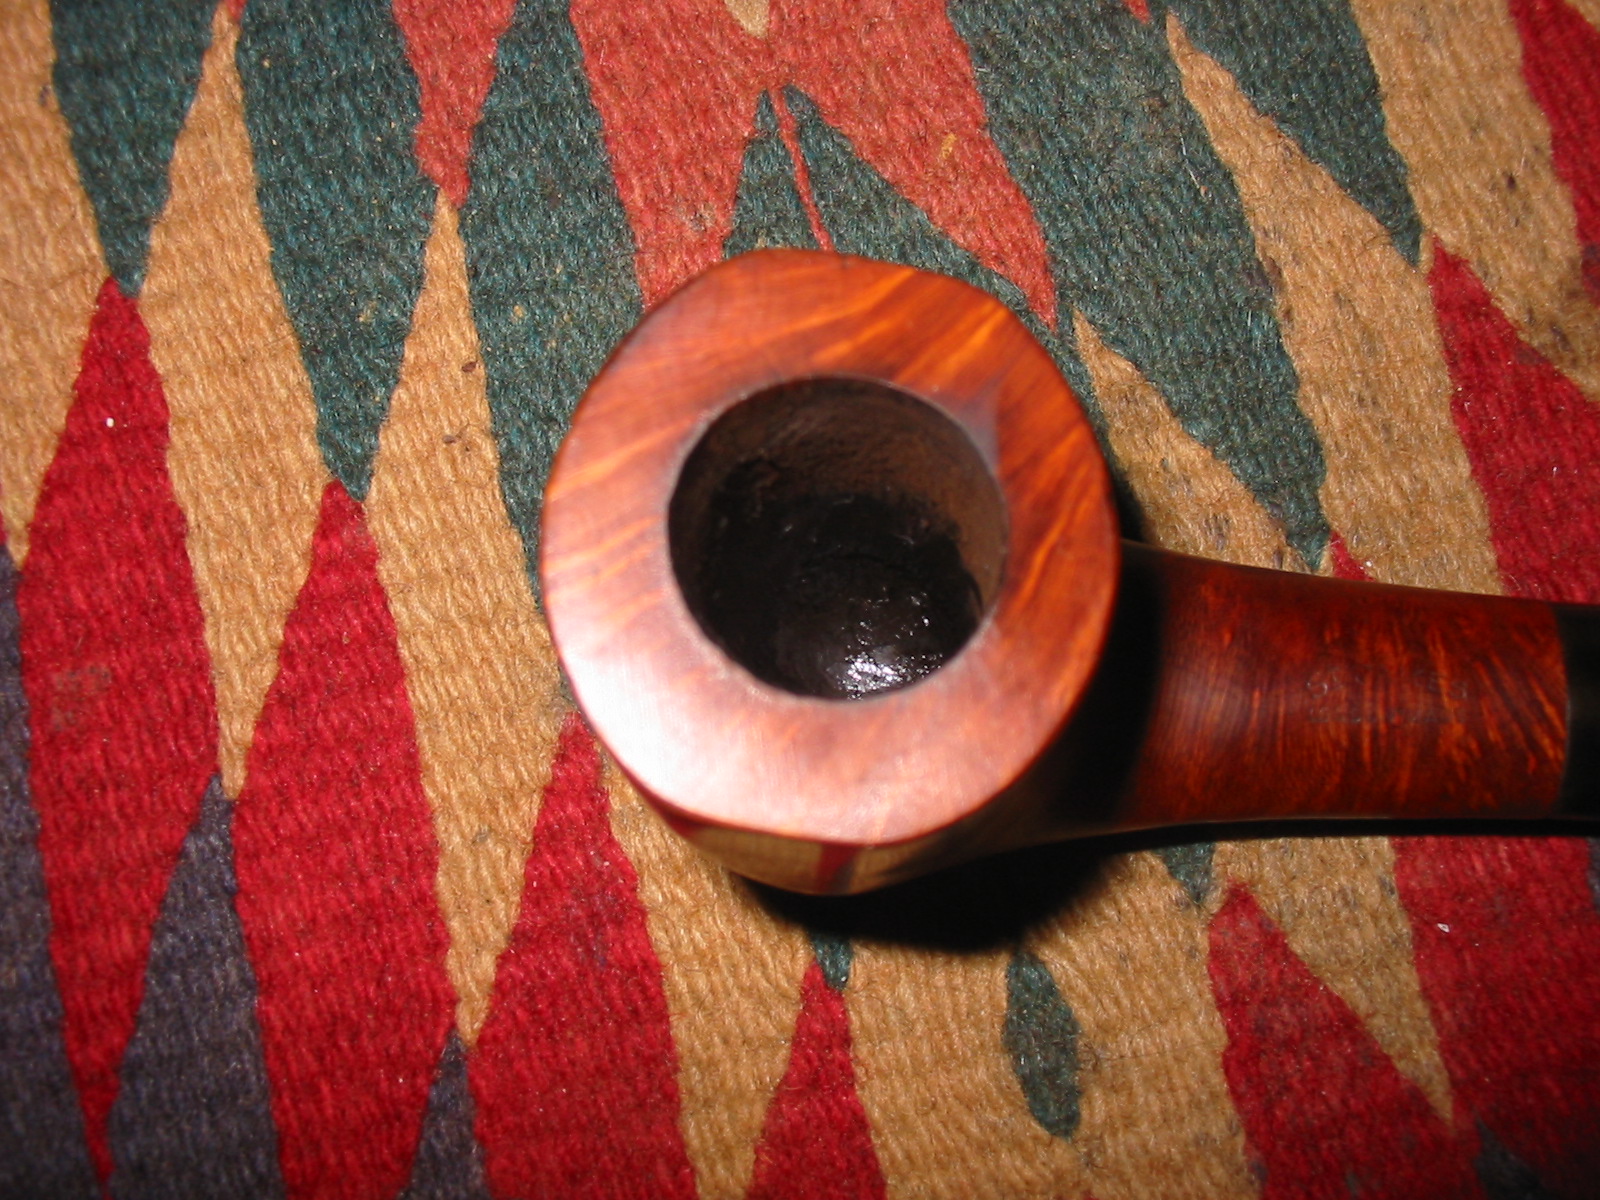
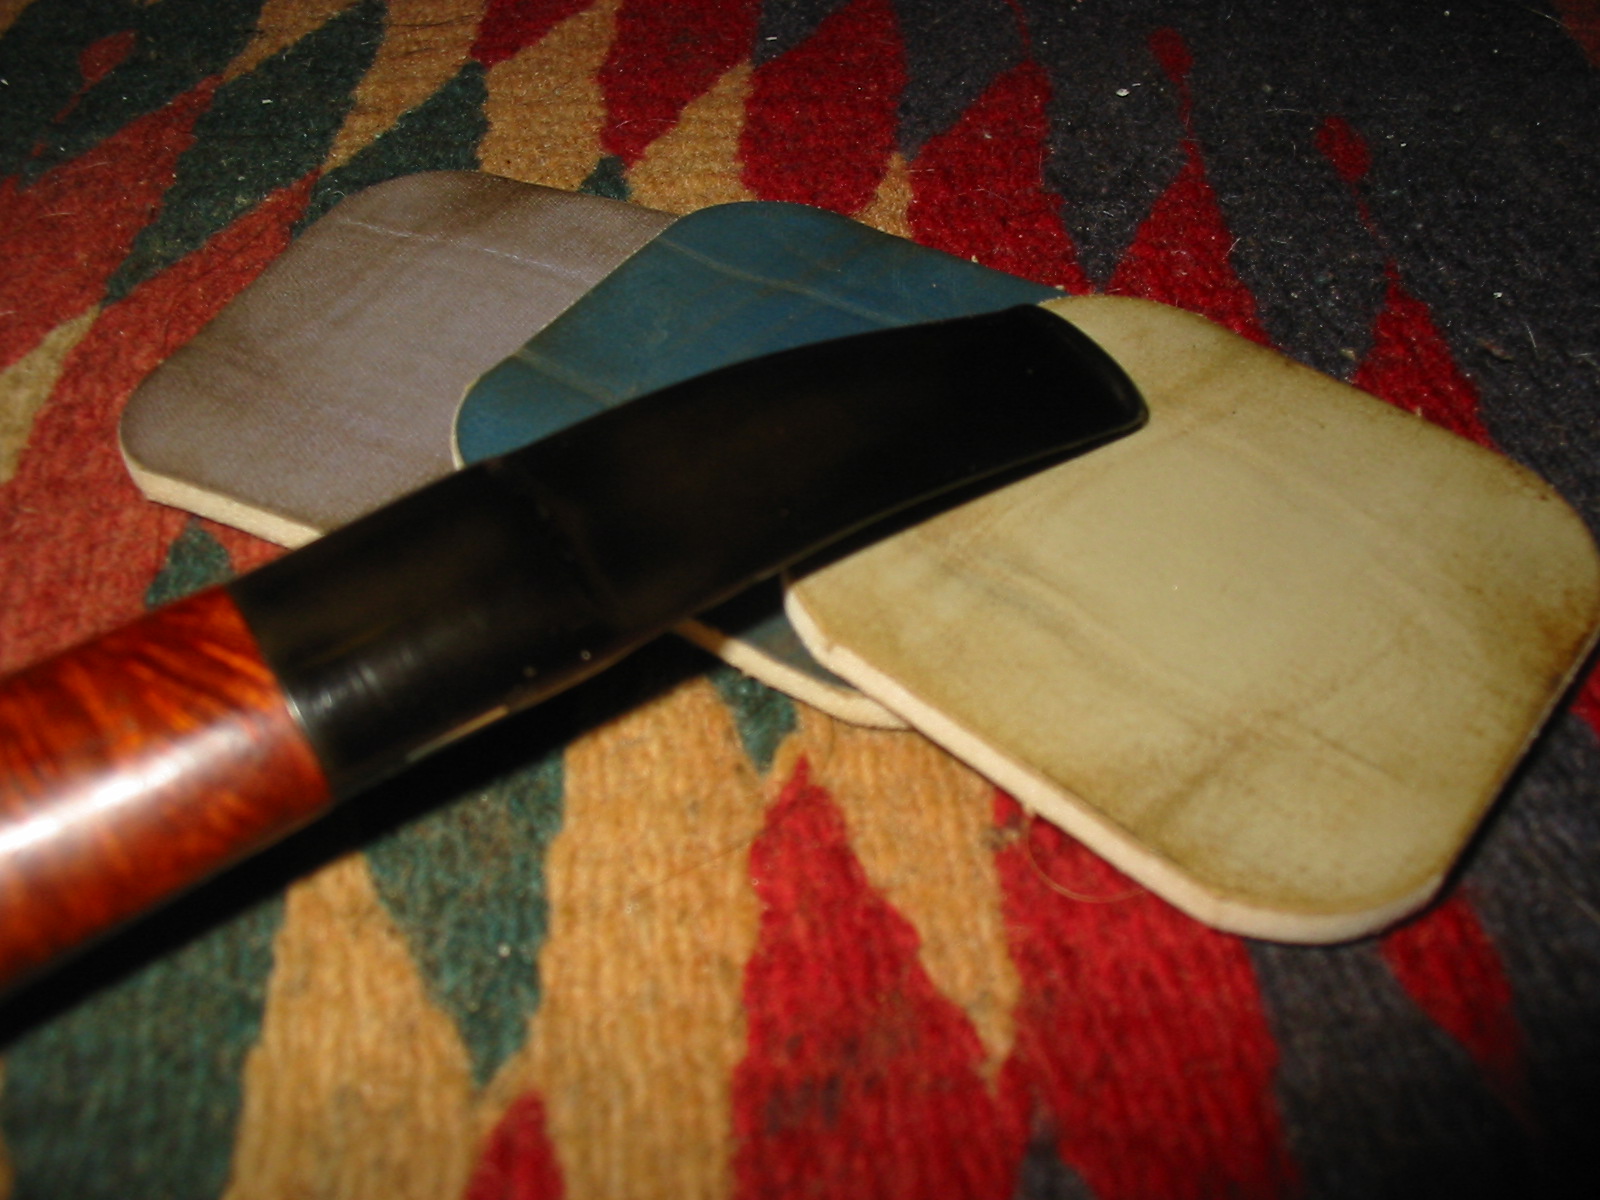
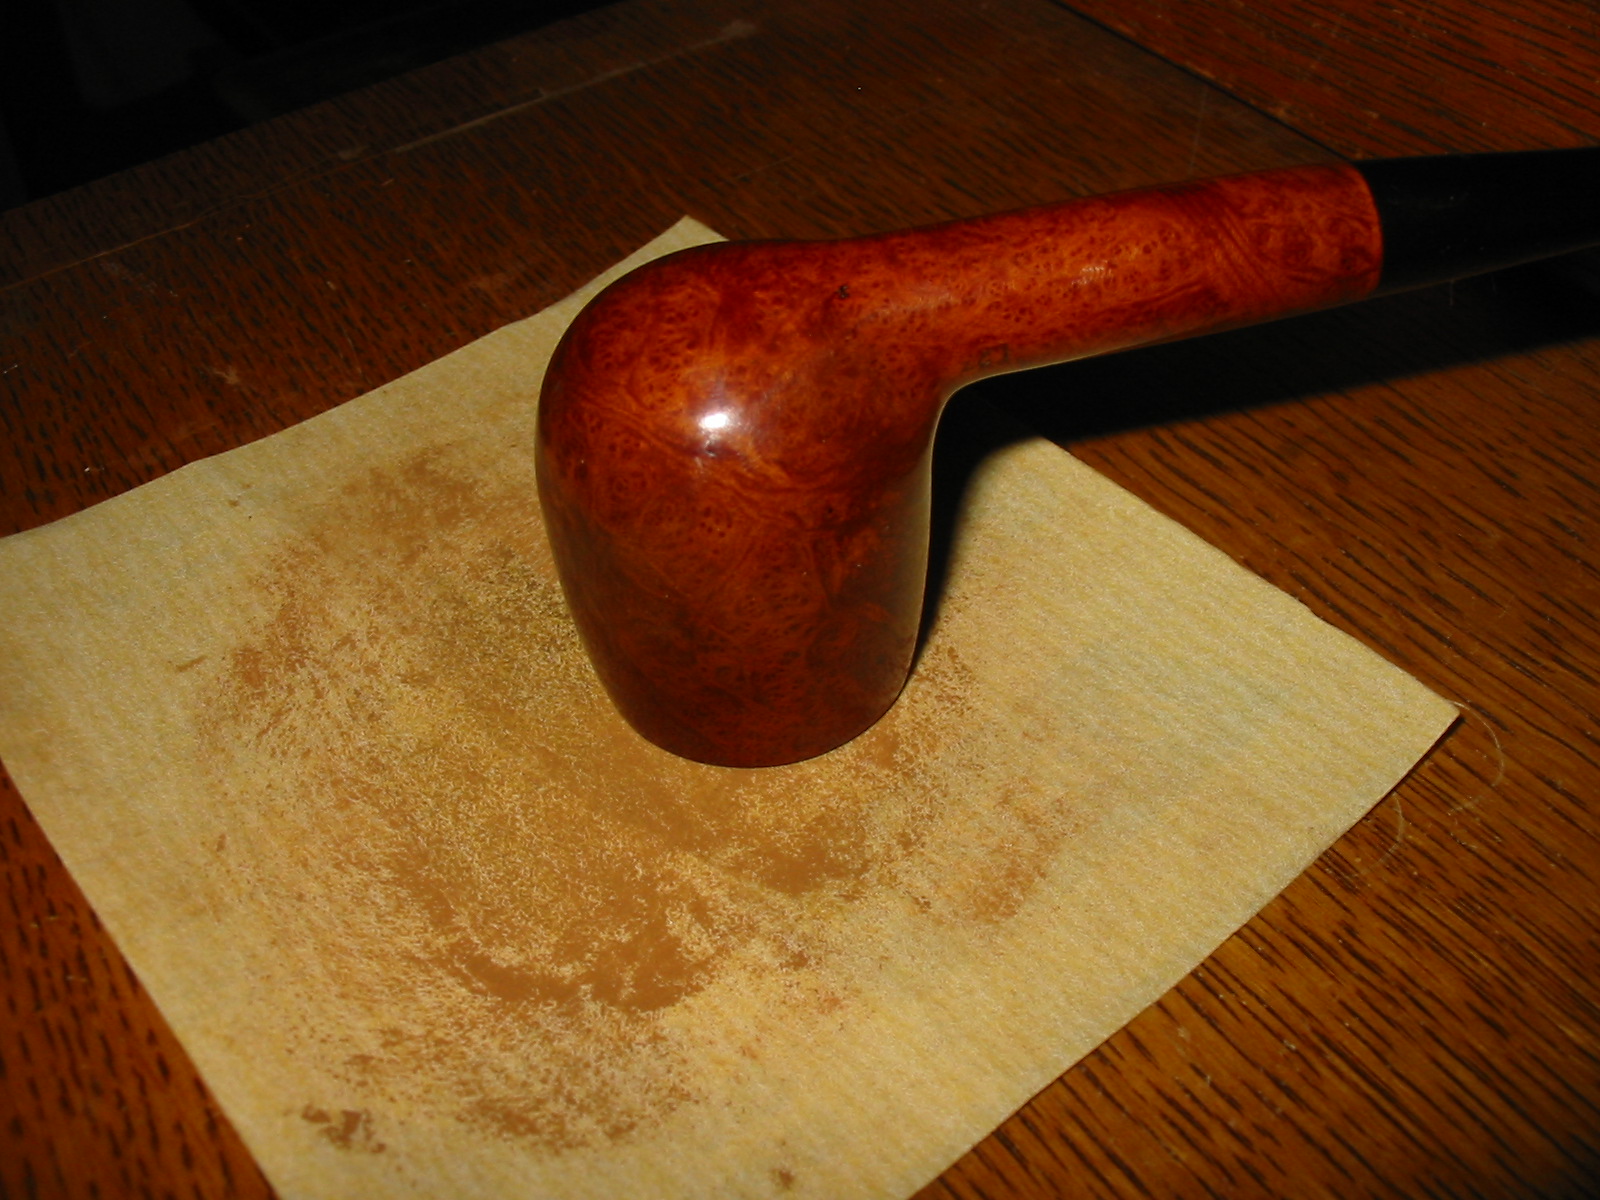
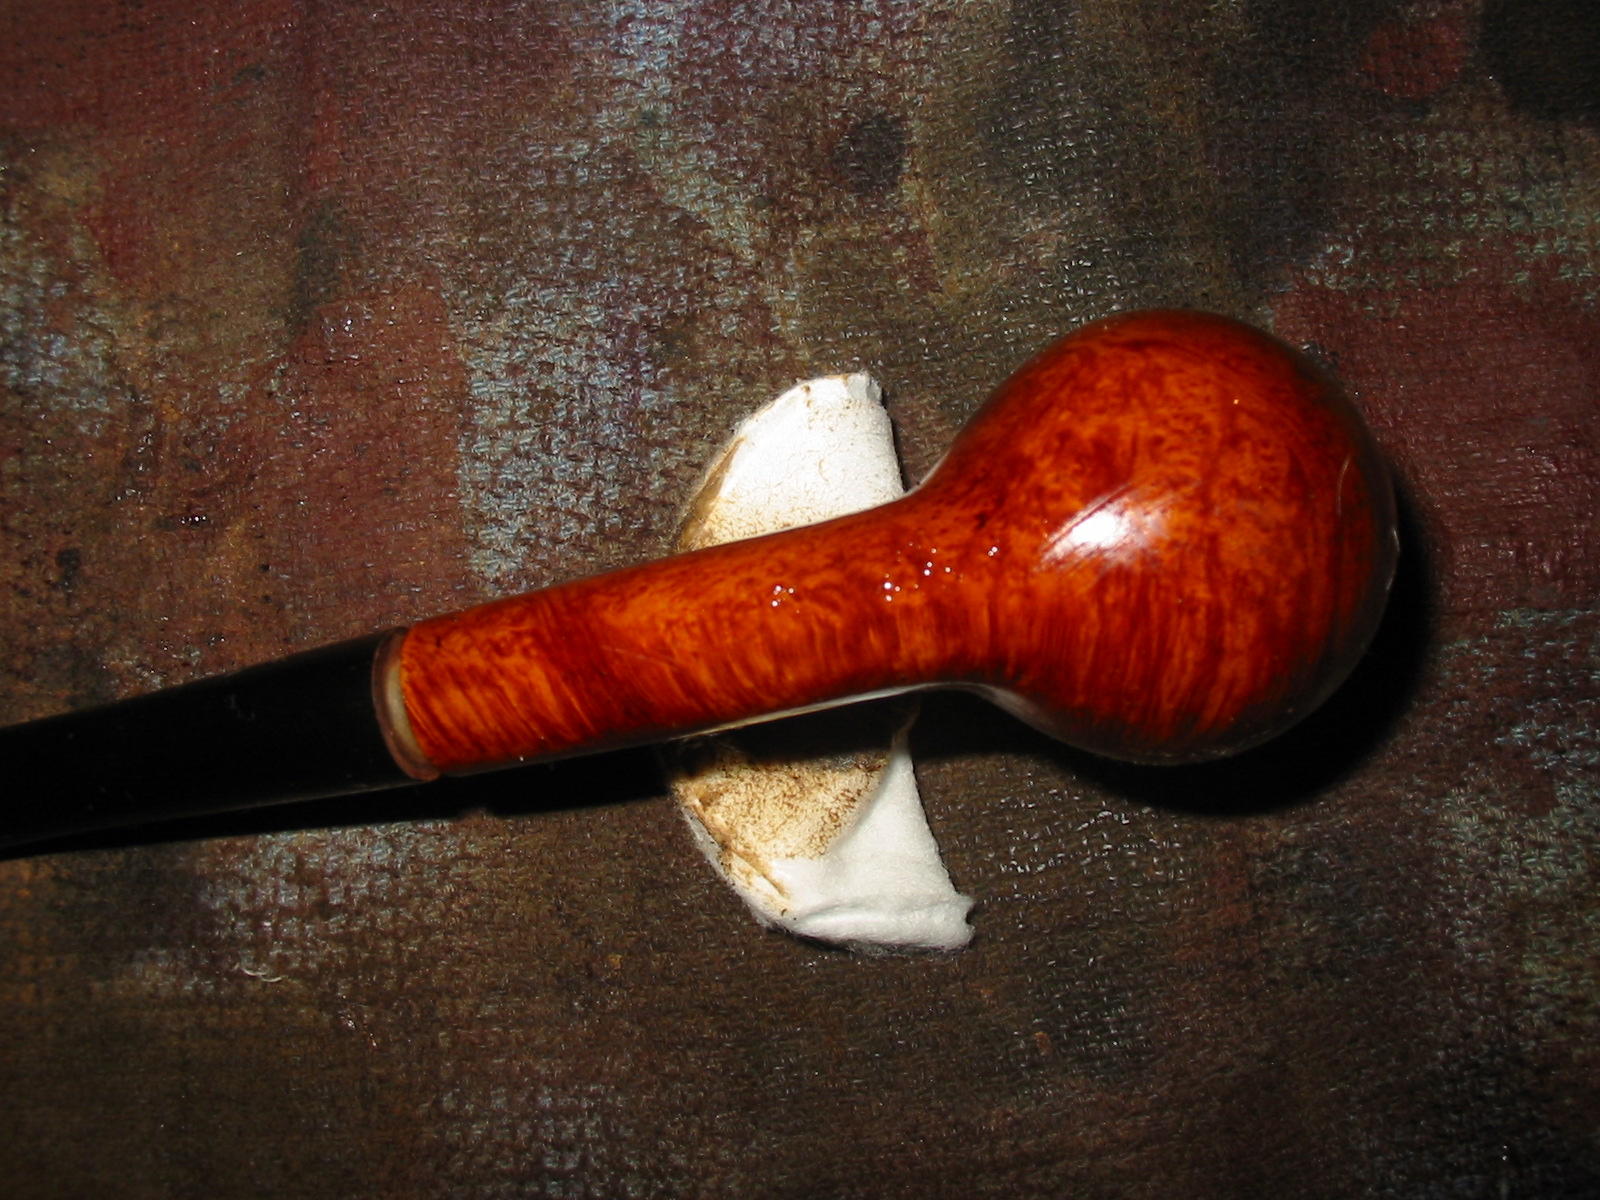
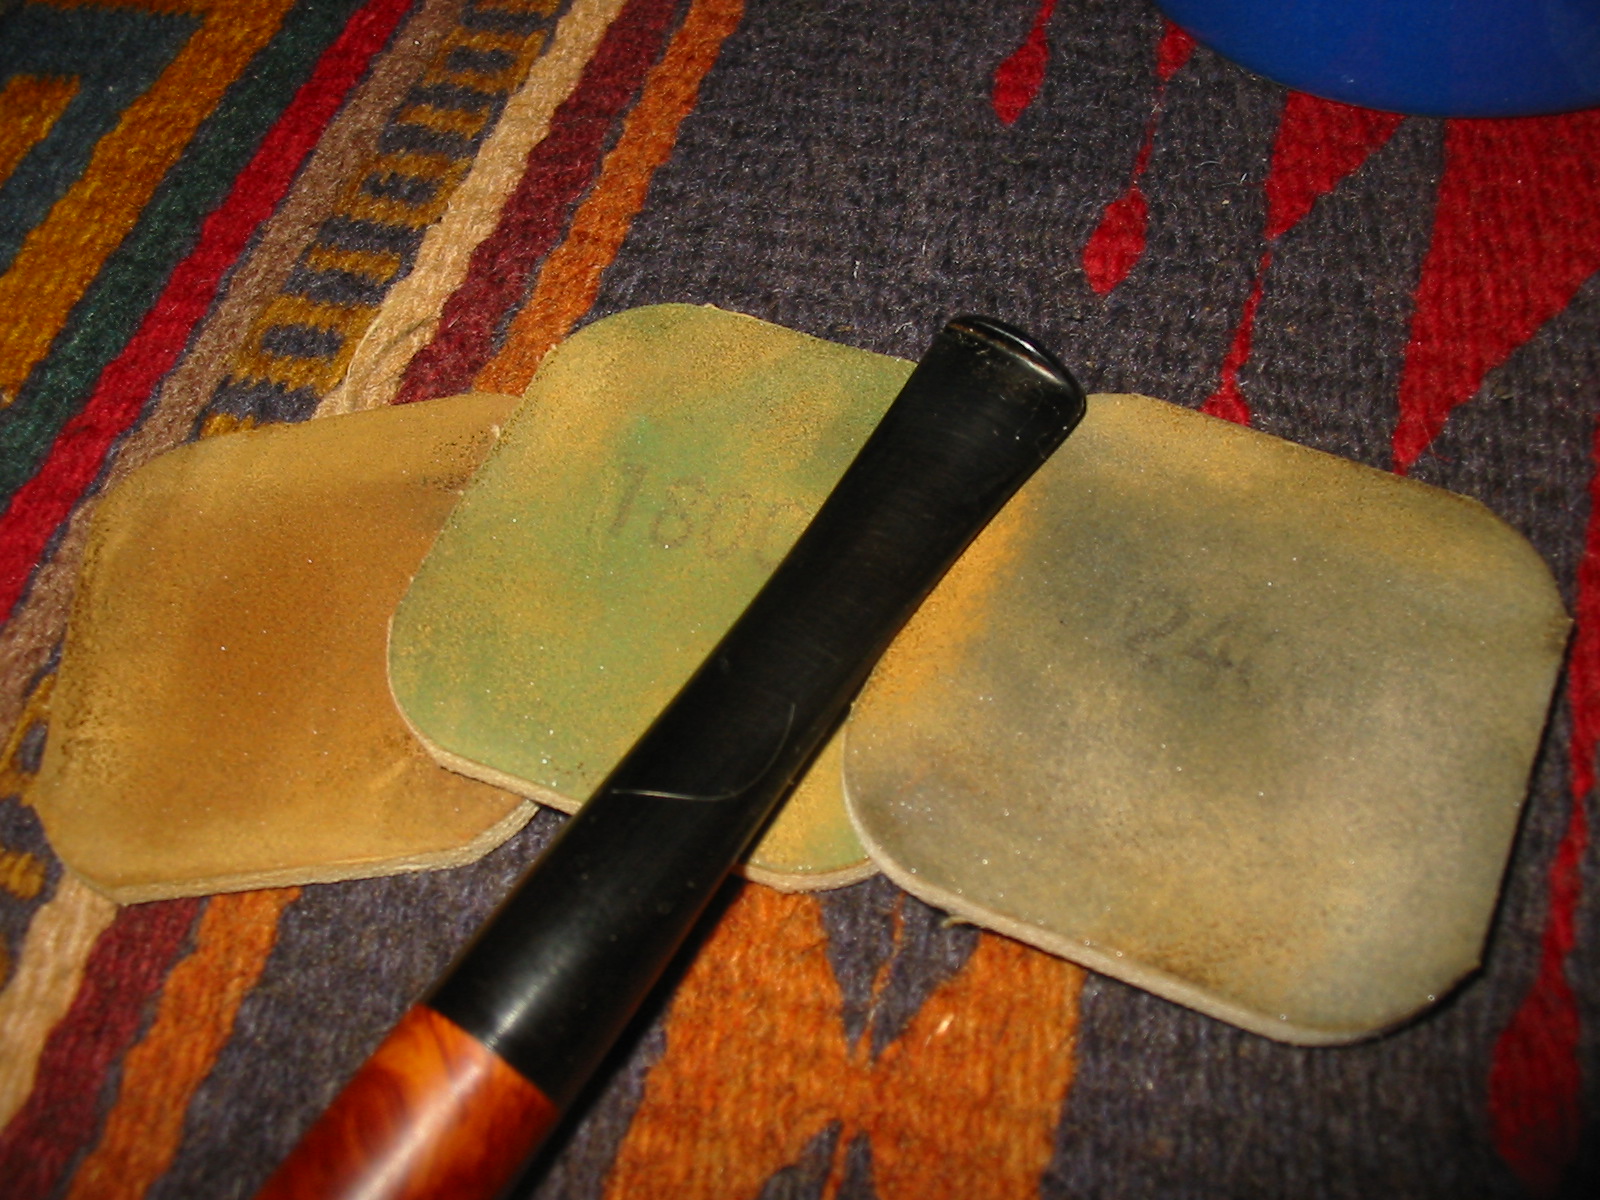
I stained it with two MinWax stains – I used a Medium Walnut first followed by a Red Mahogany stain. I wanted a reddish hue to the pipe that was thinned and lightened by the walnut stain. Once I had finished staining it I buffed the bowl with red Tripoli to smooth out the remaining scratches and even out the stain coat. IMG_4138 IMG_4139 IMG_4141 
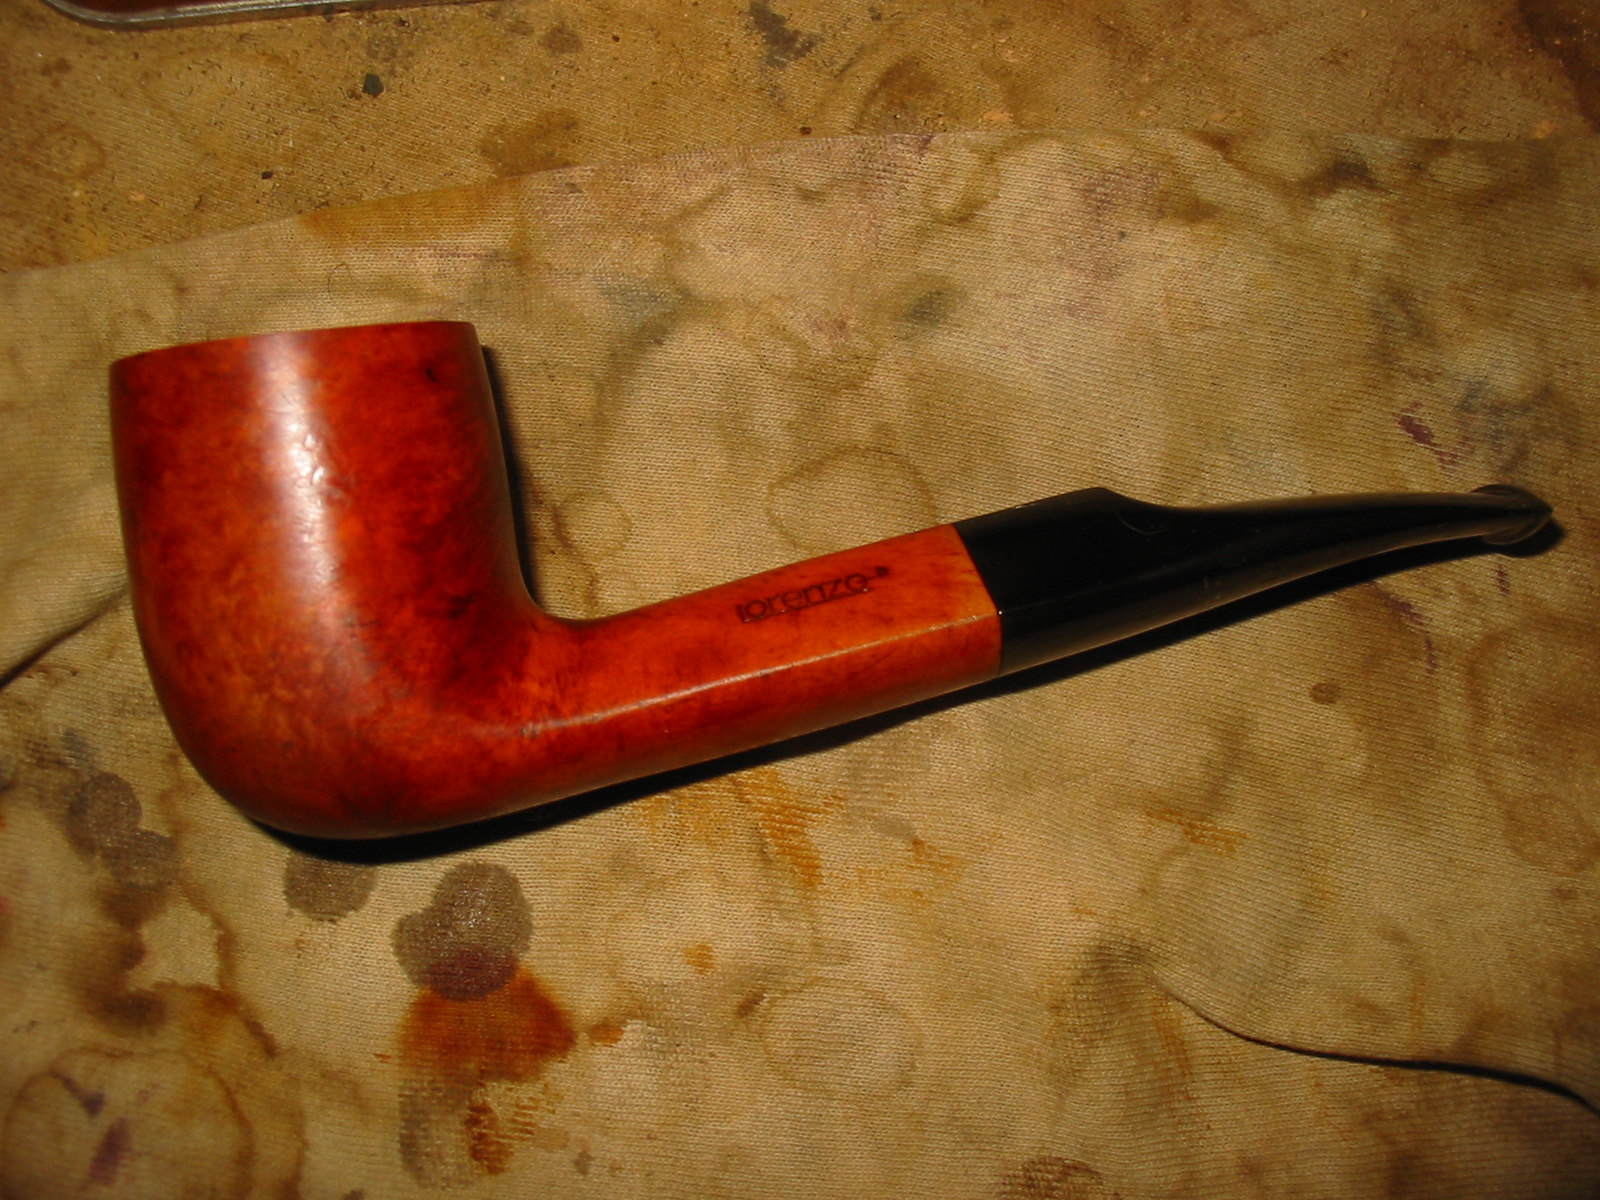
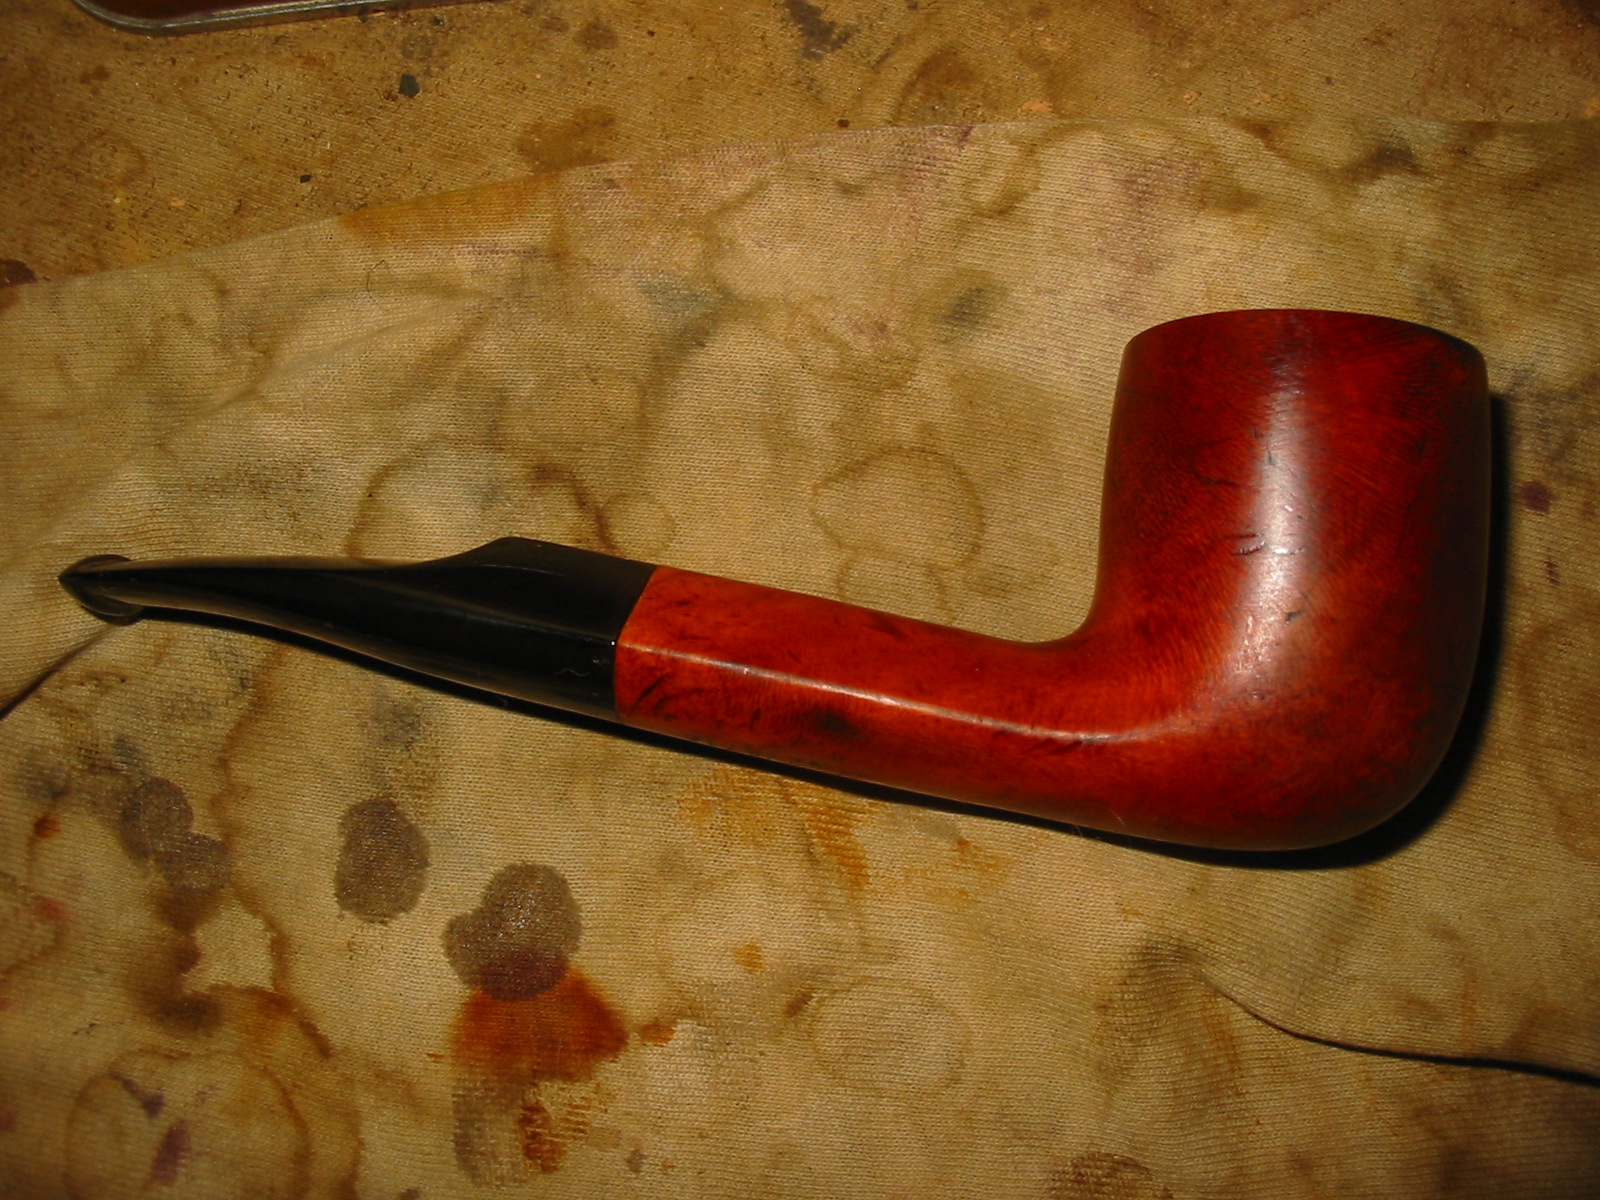
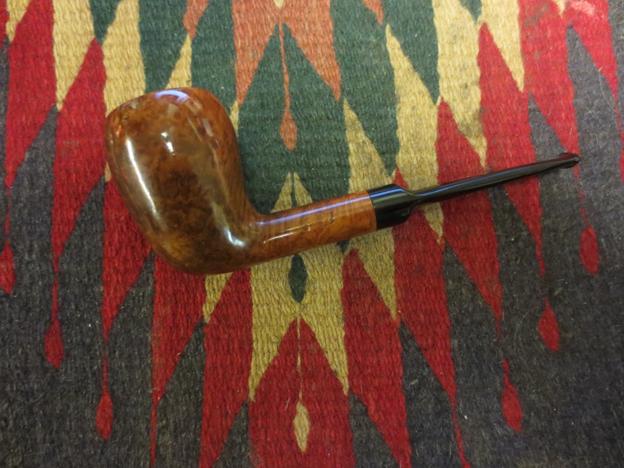
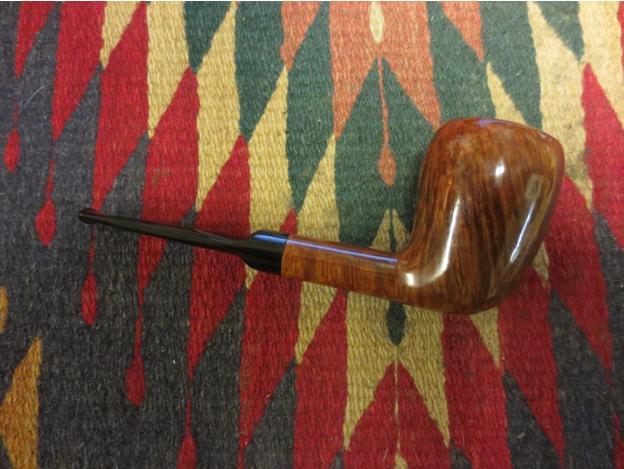
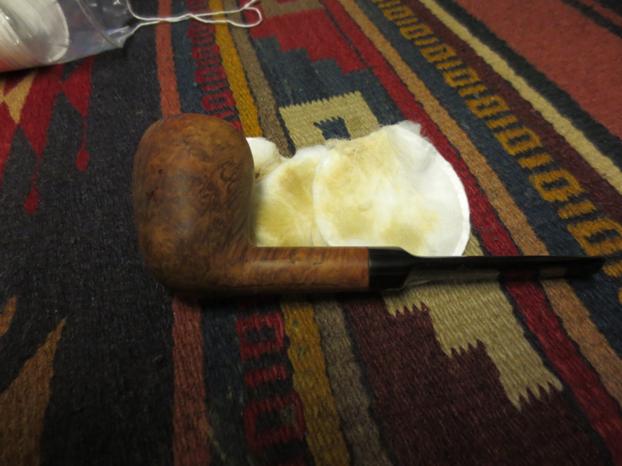
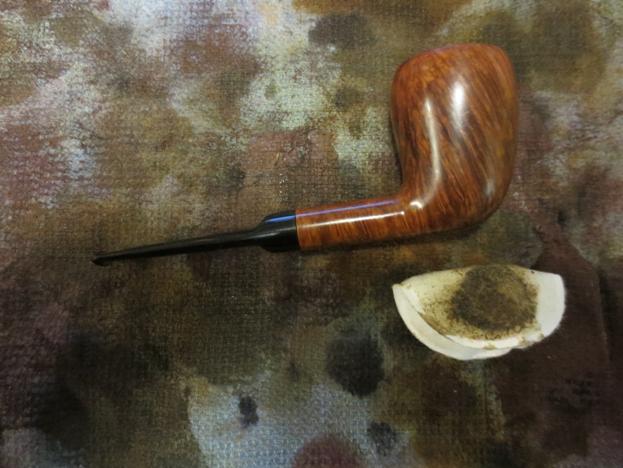
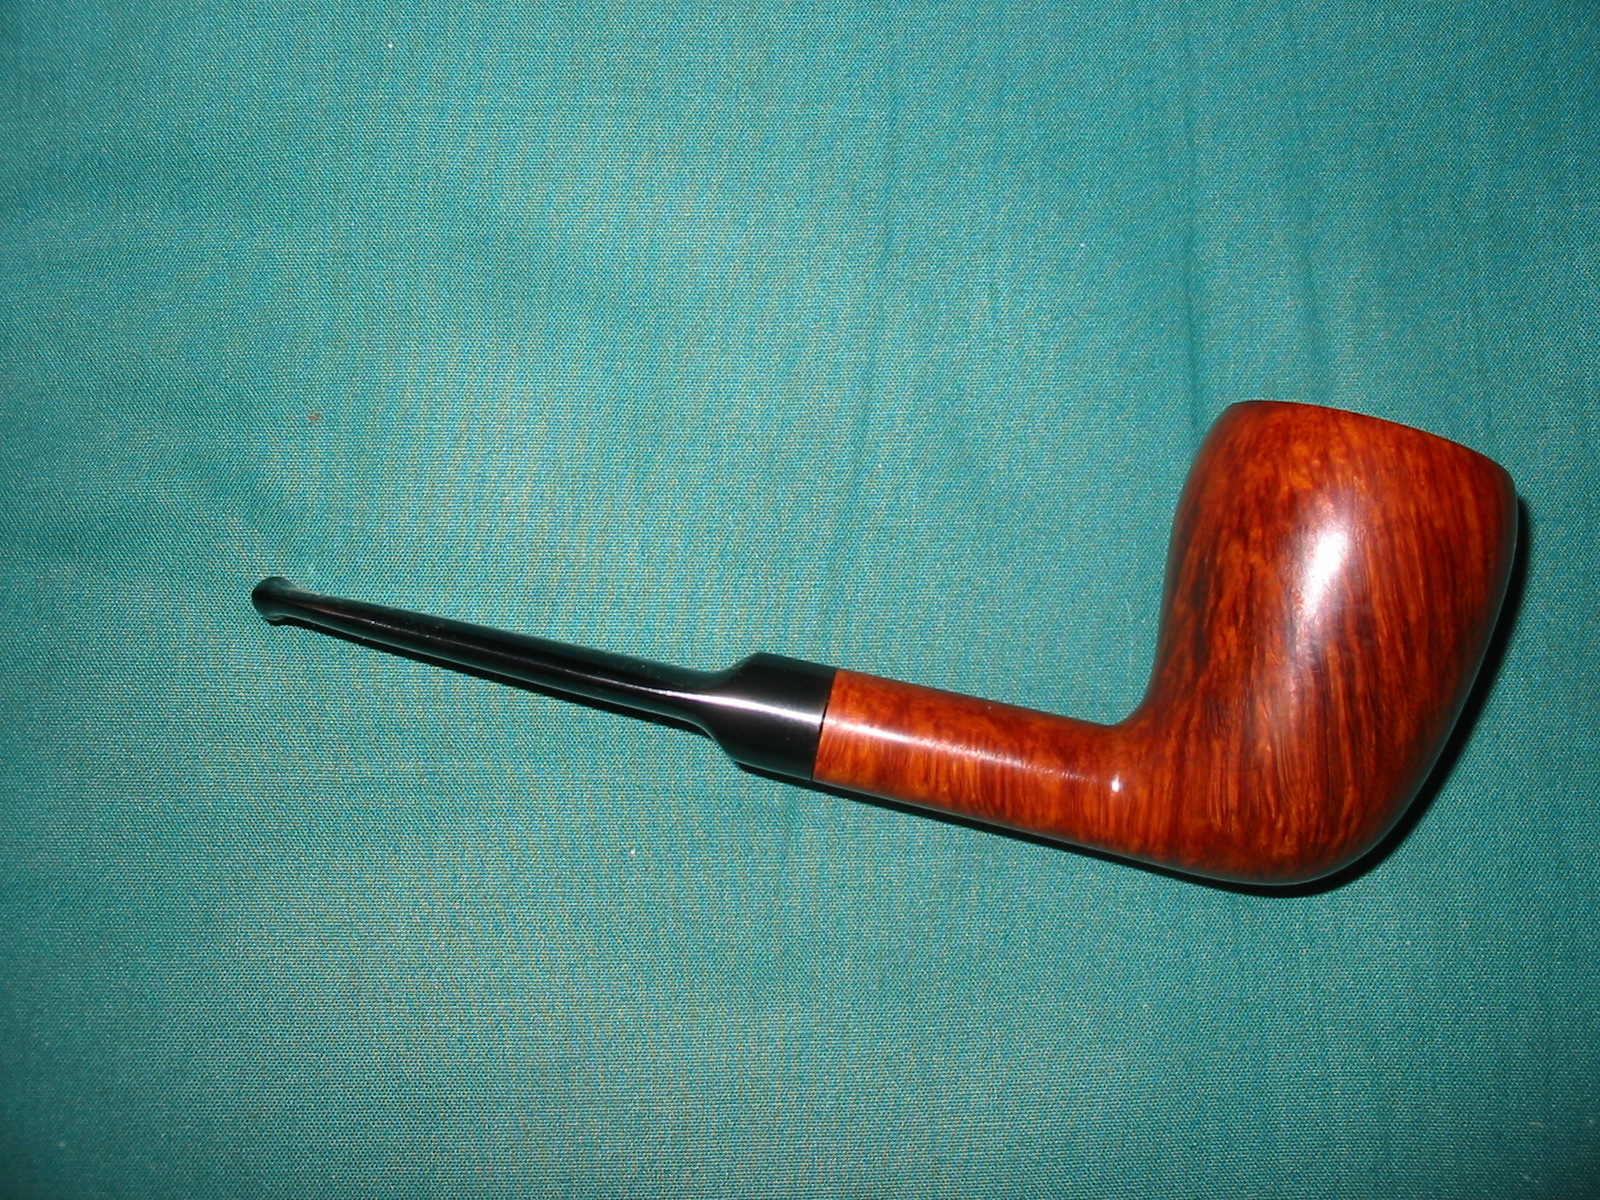
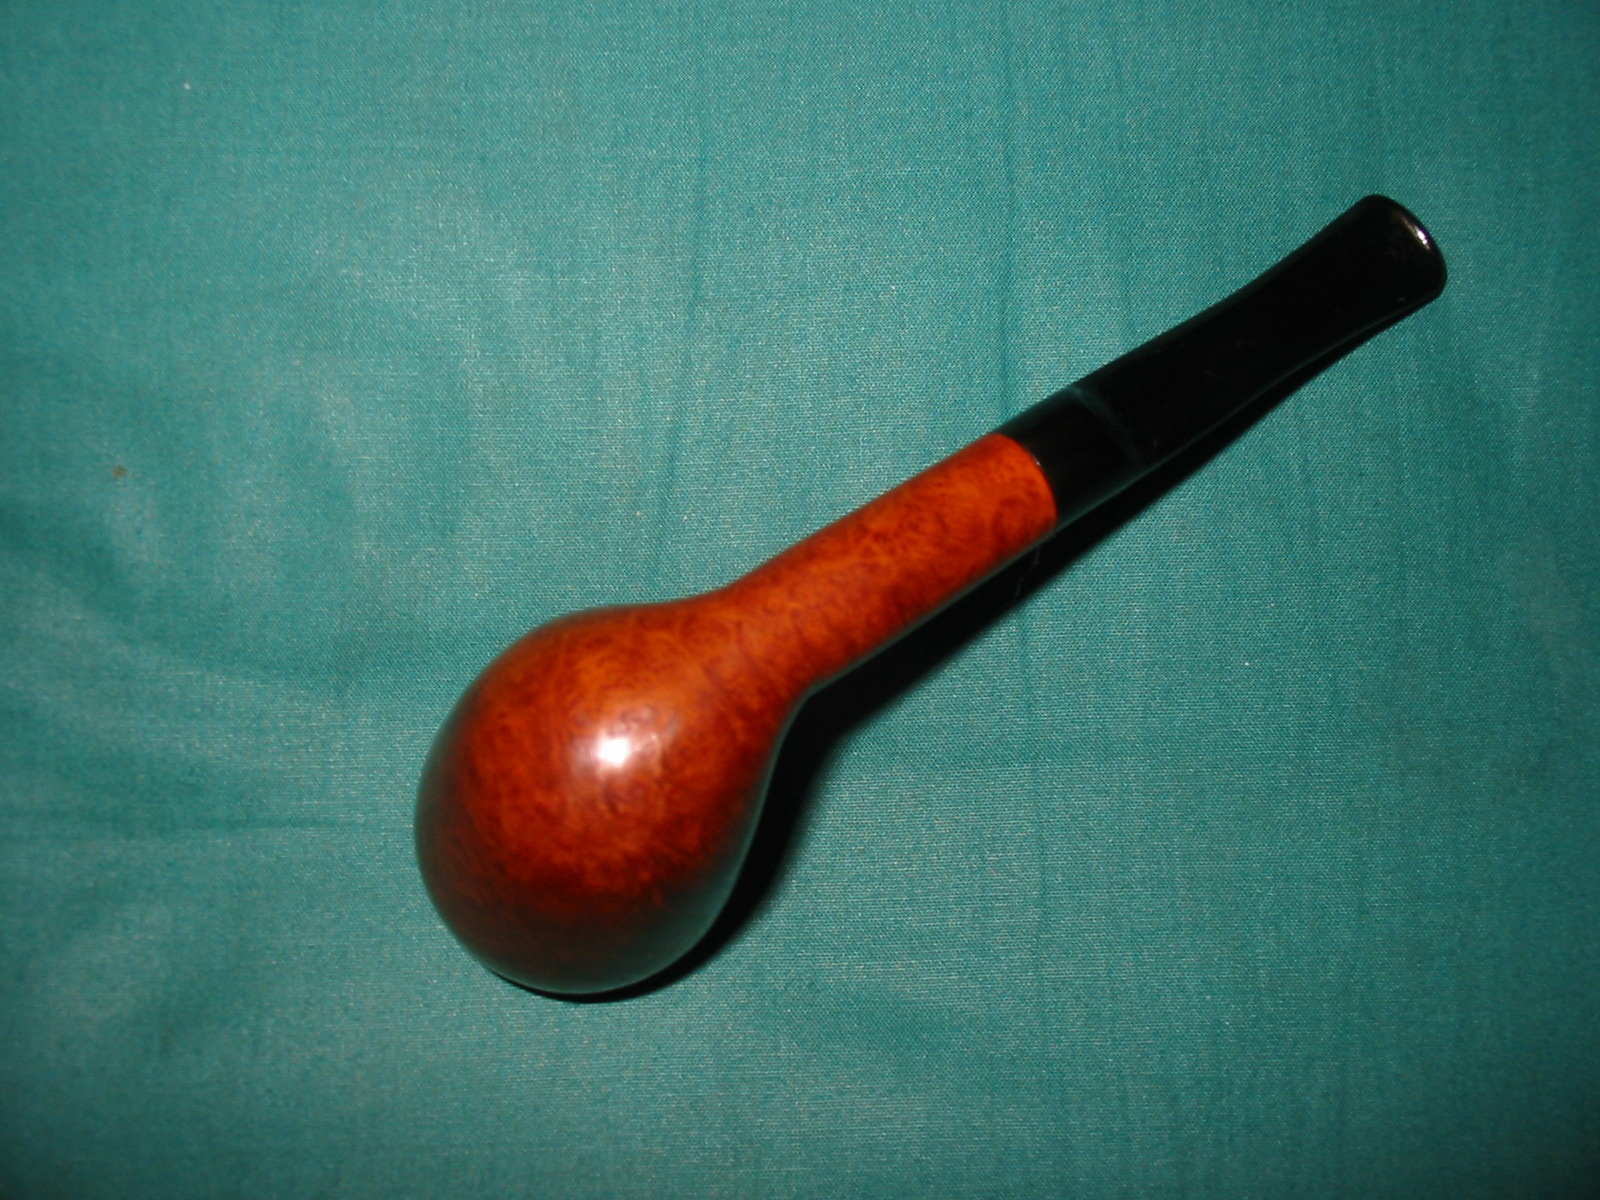
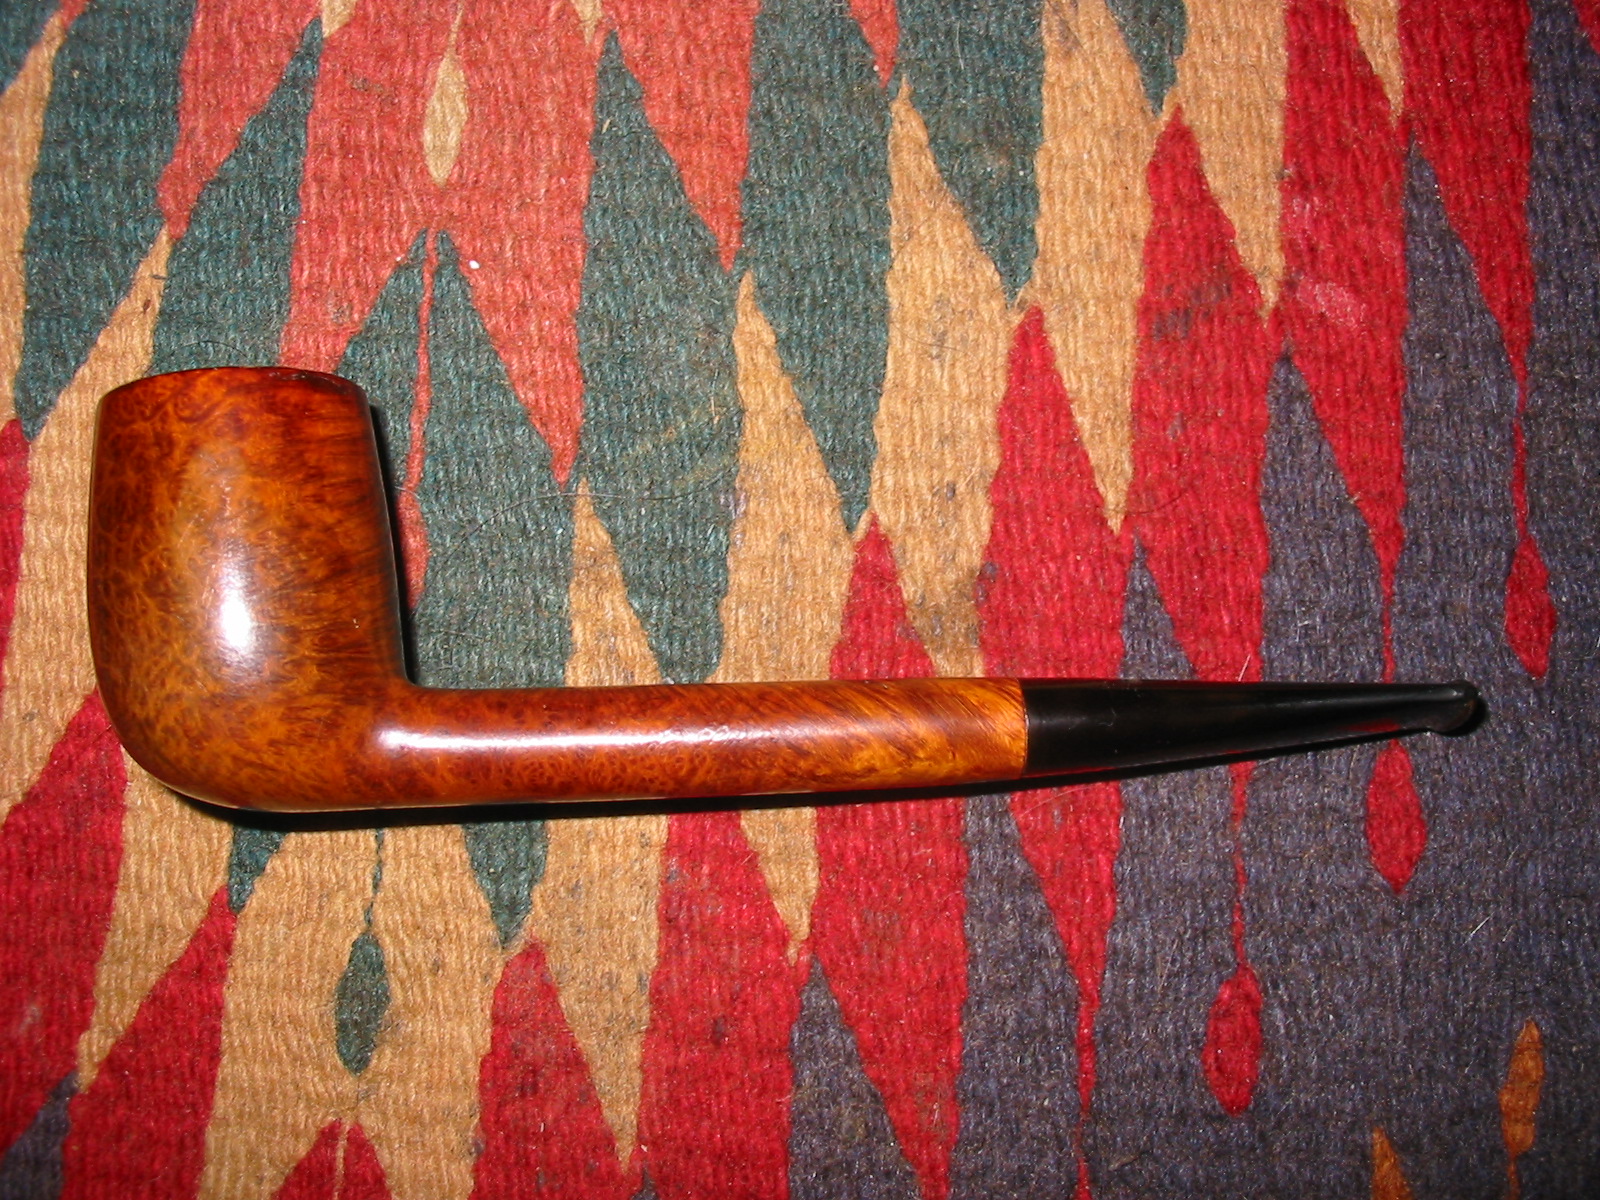
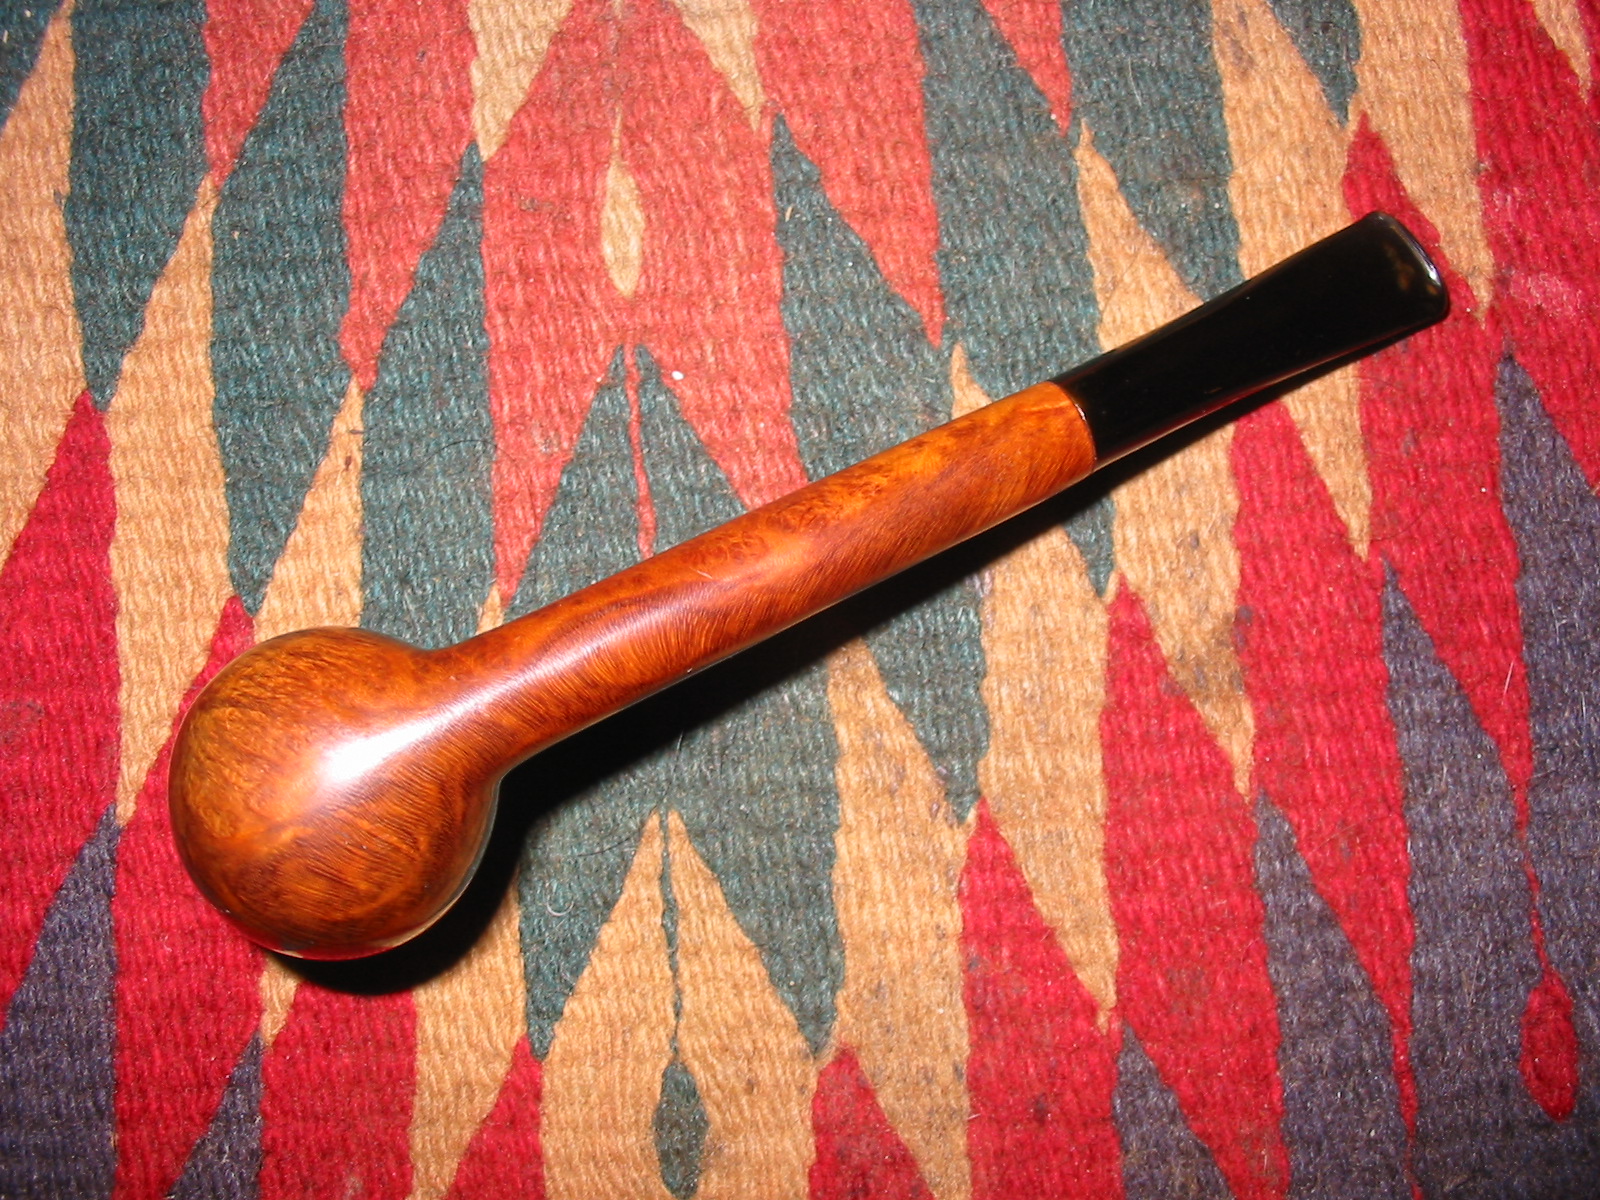
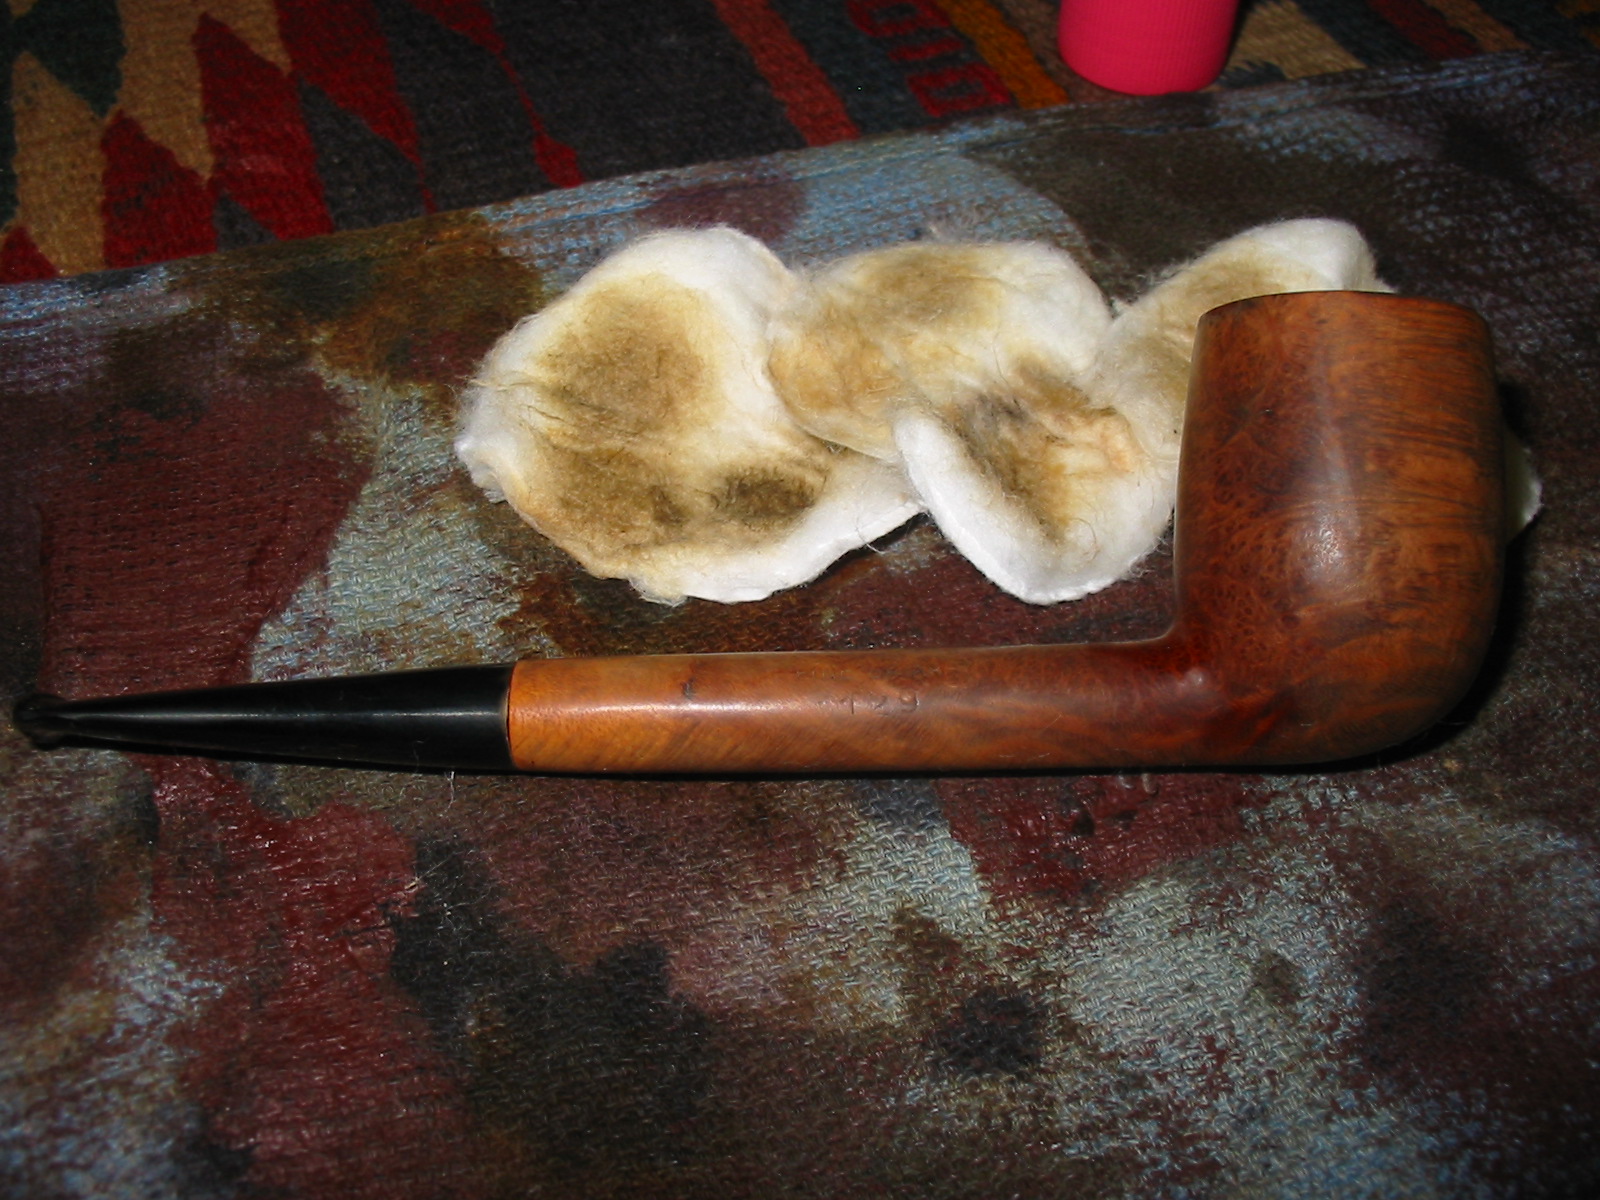
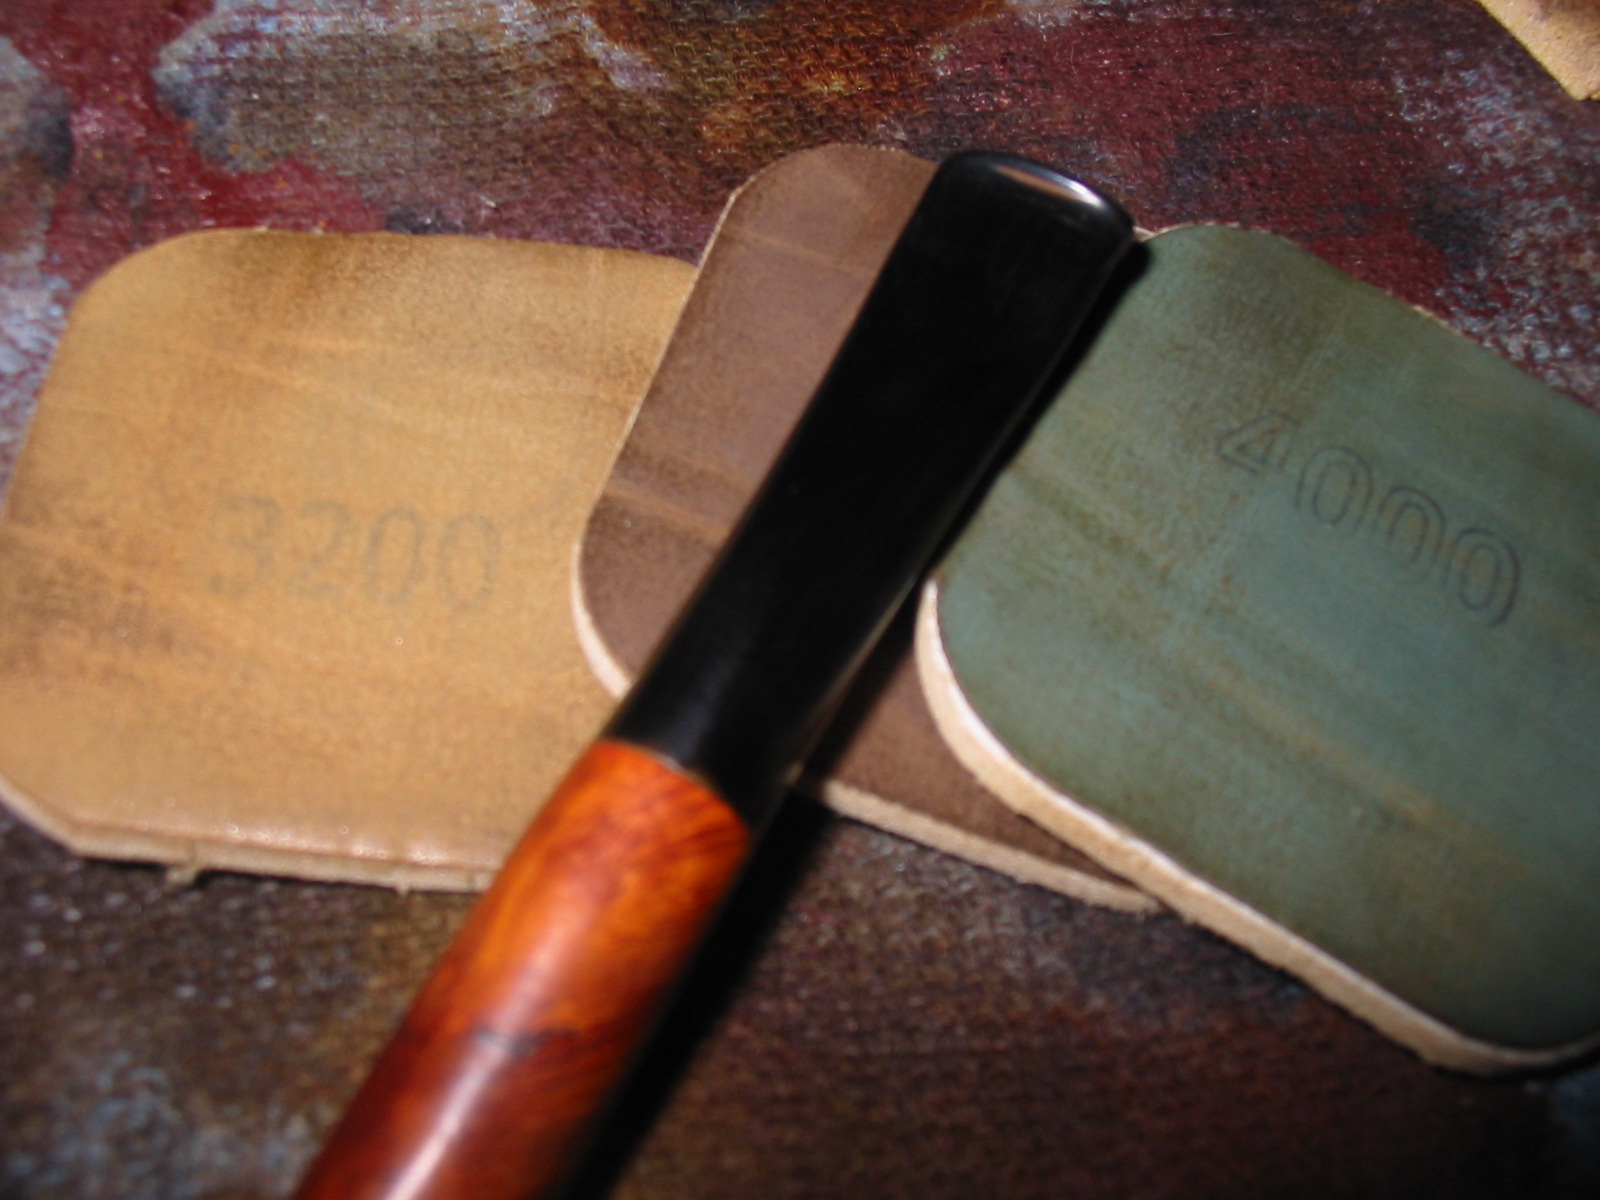
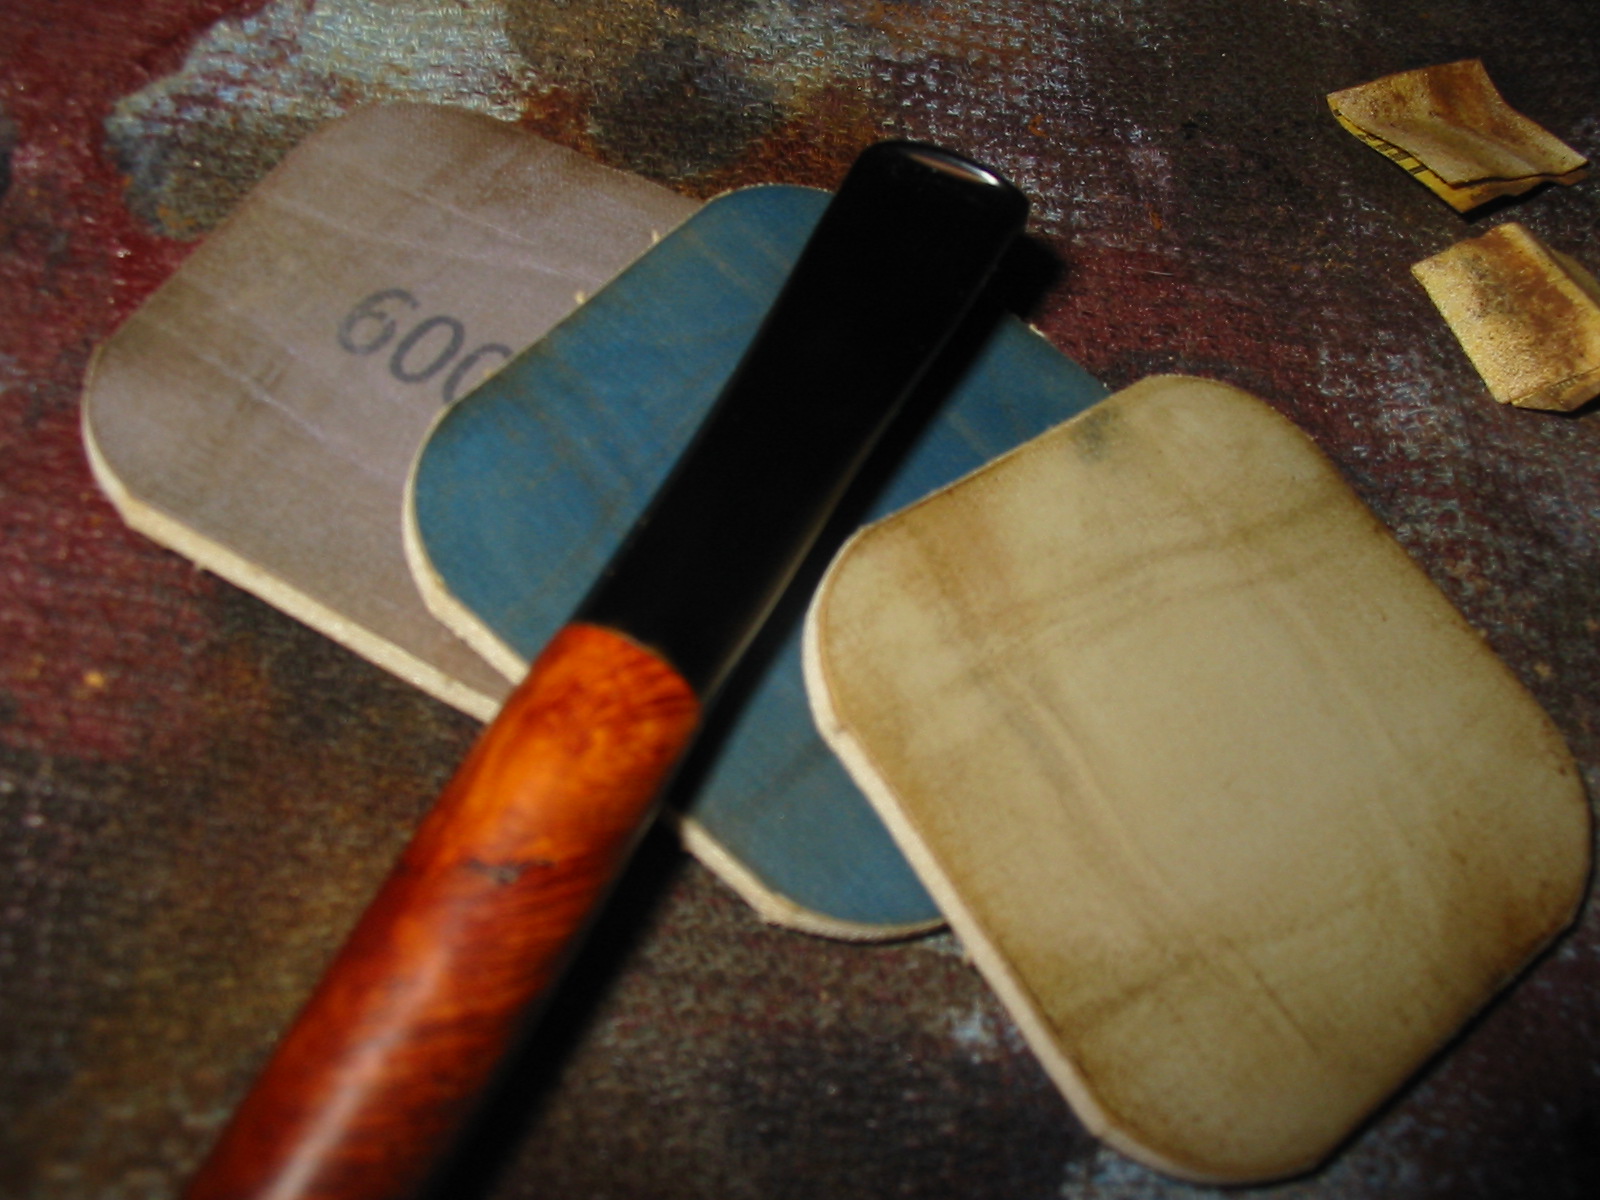
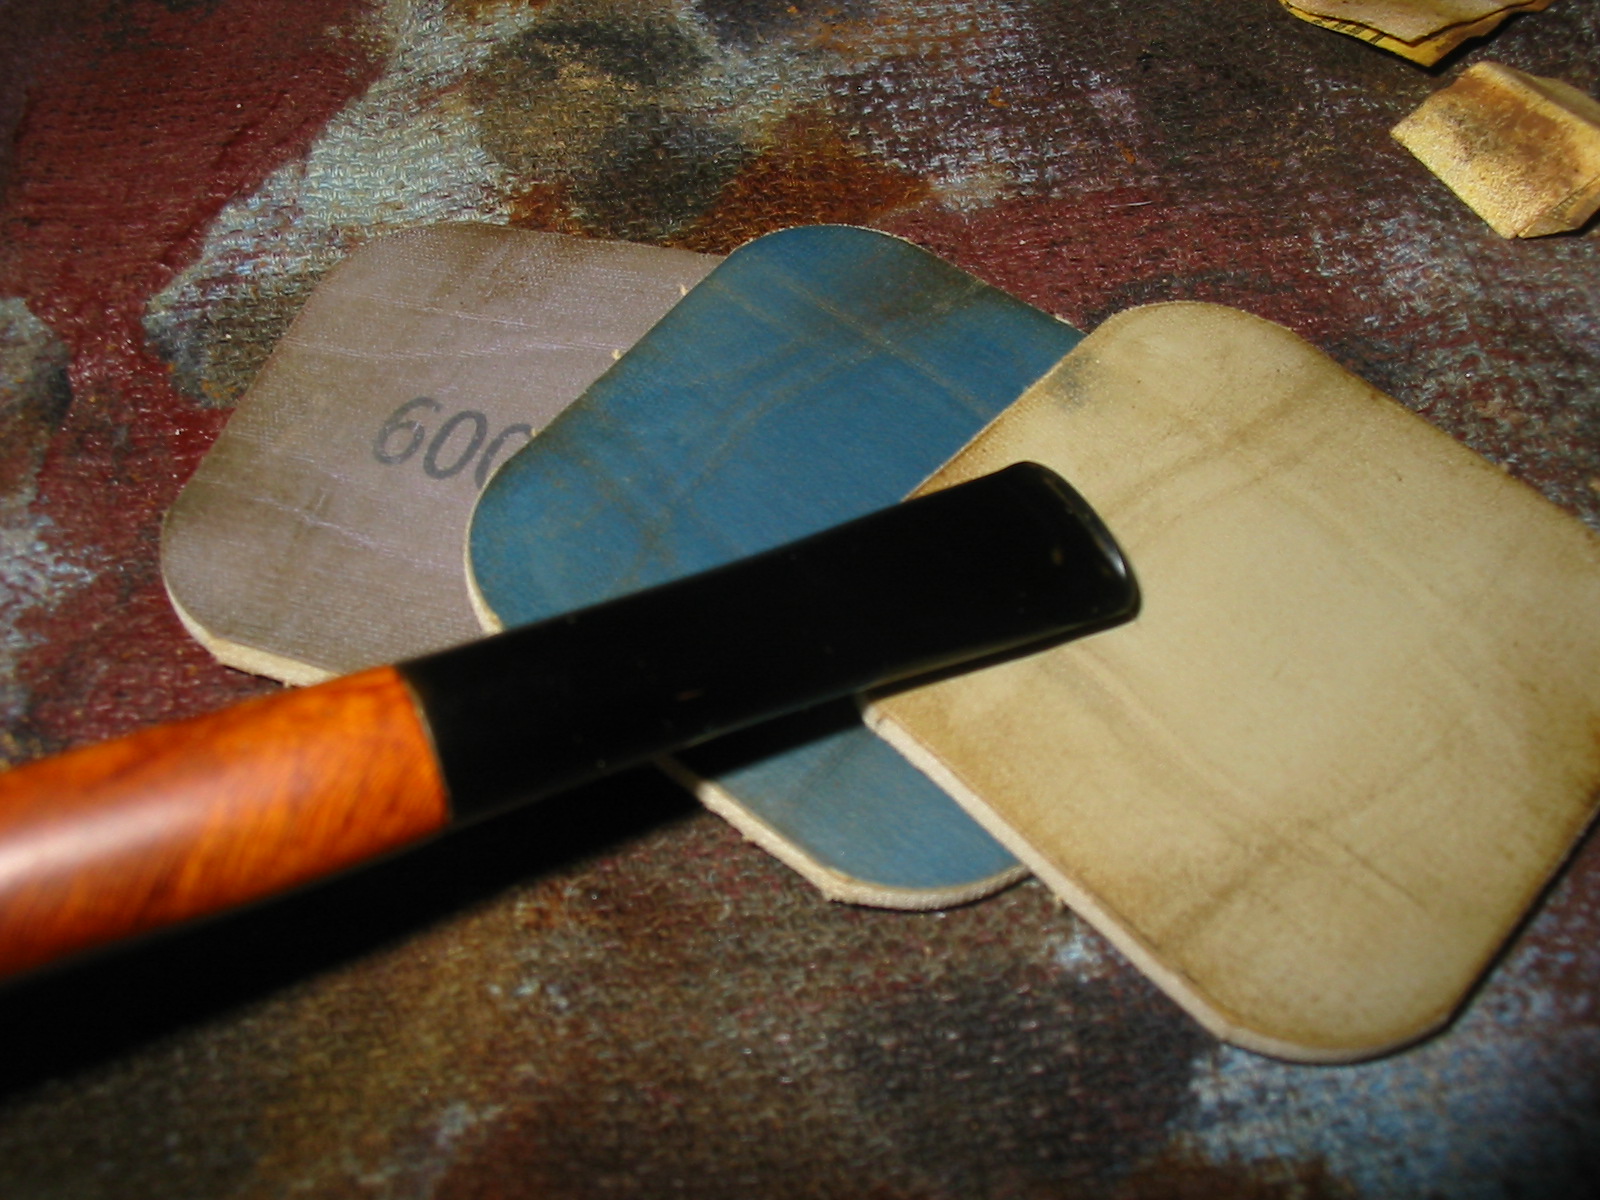
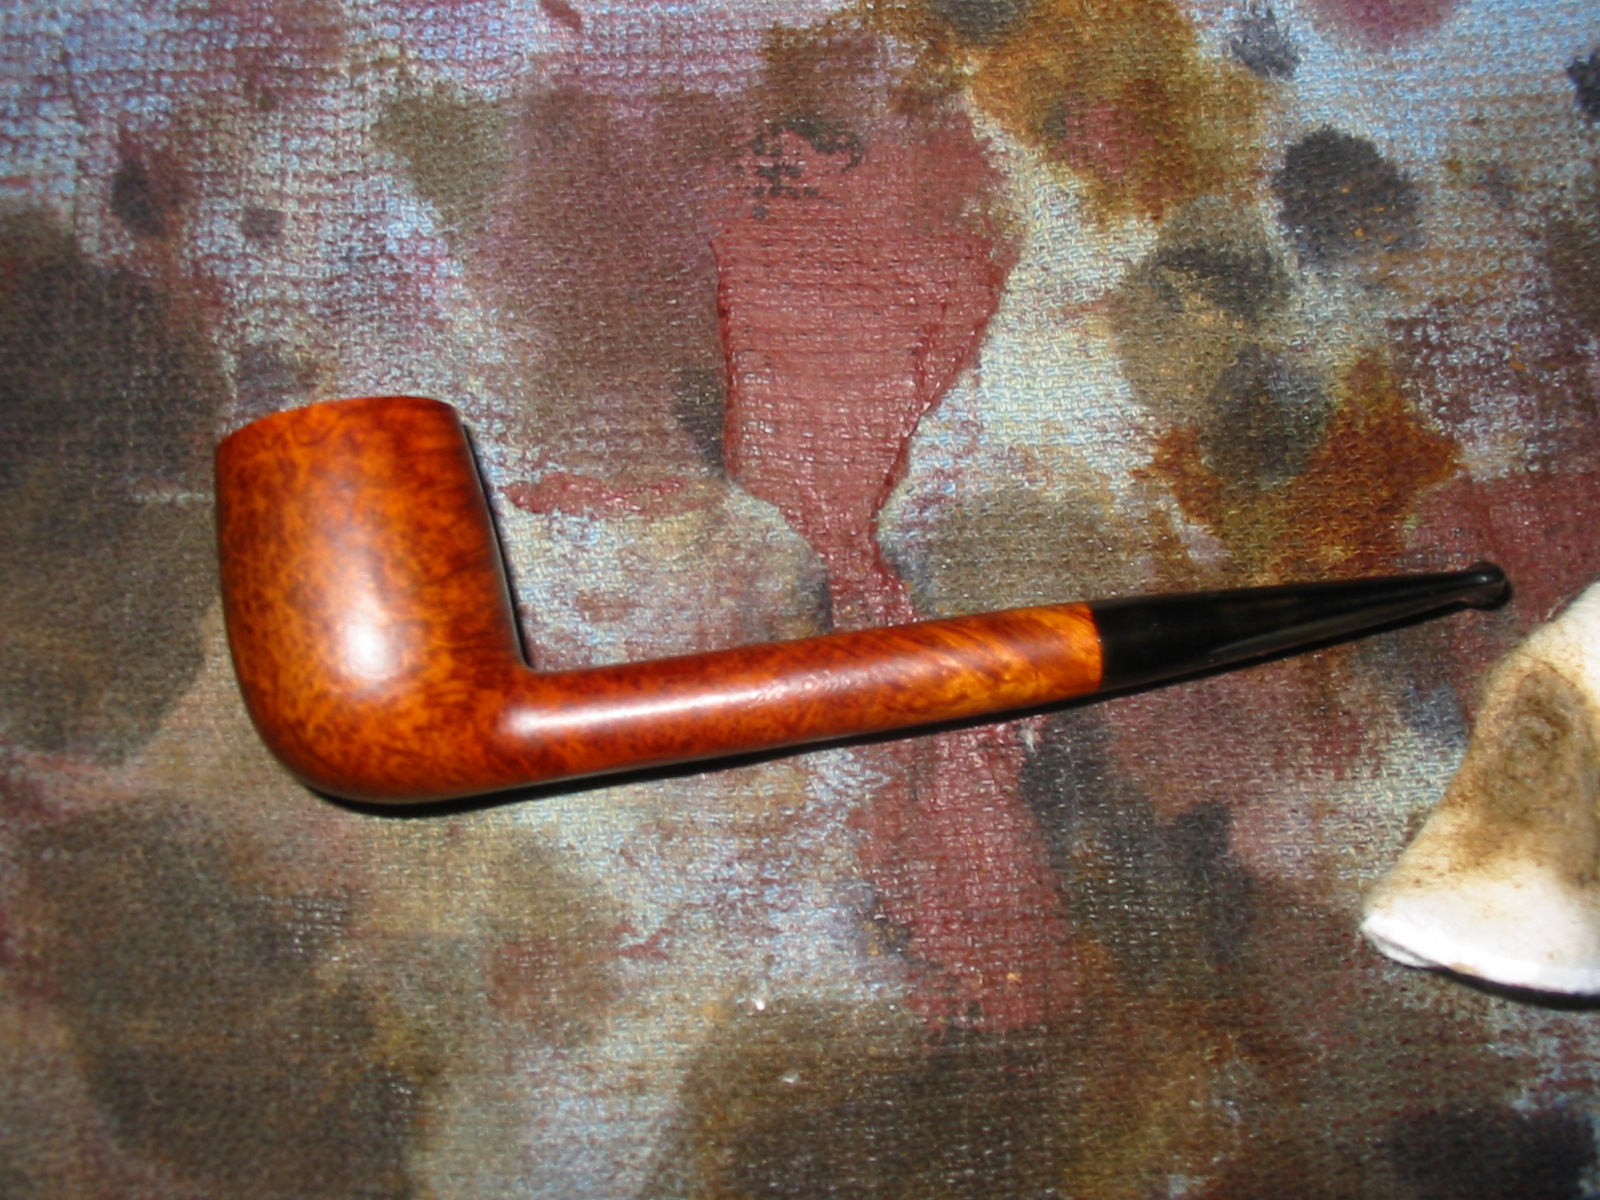
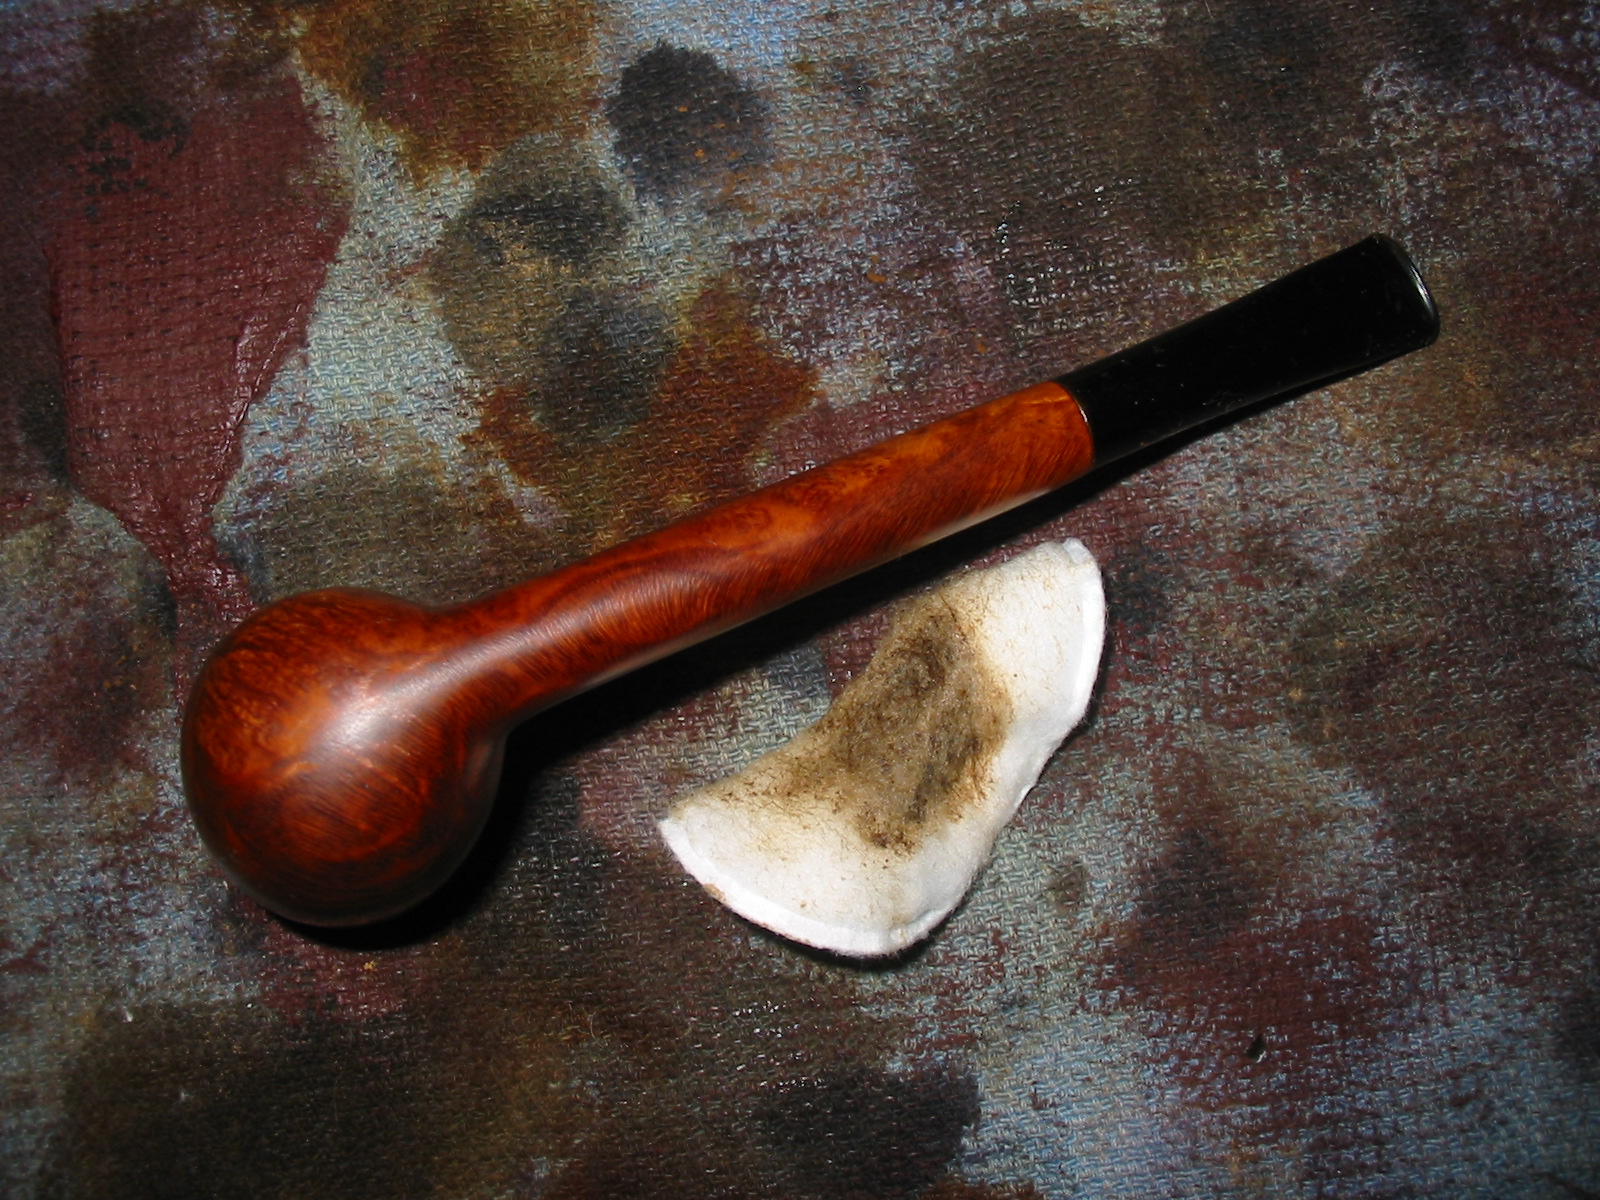
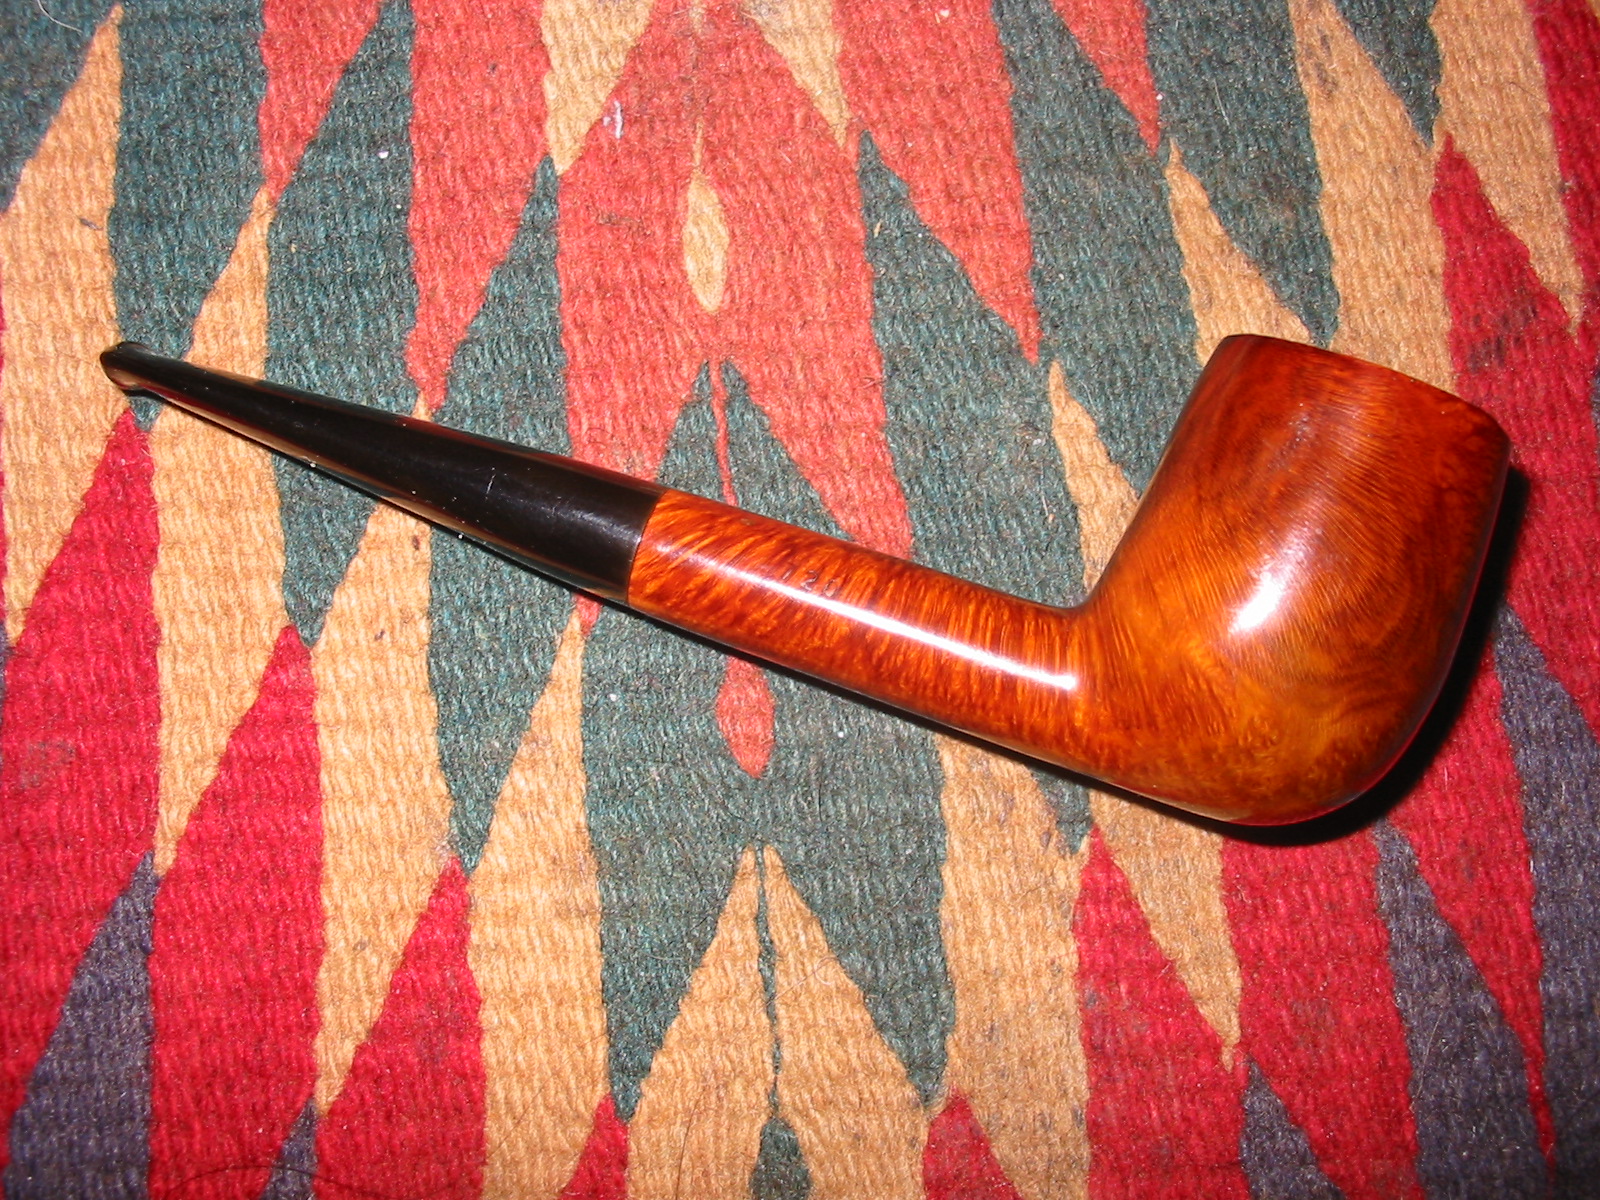
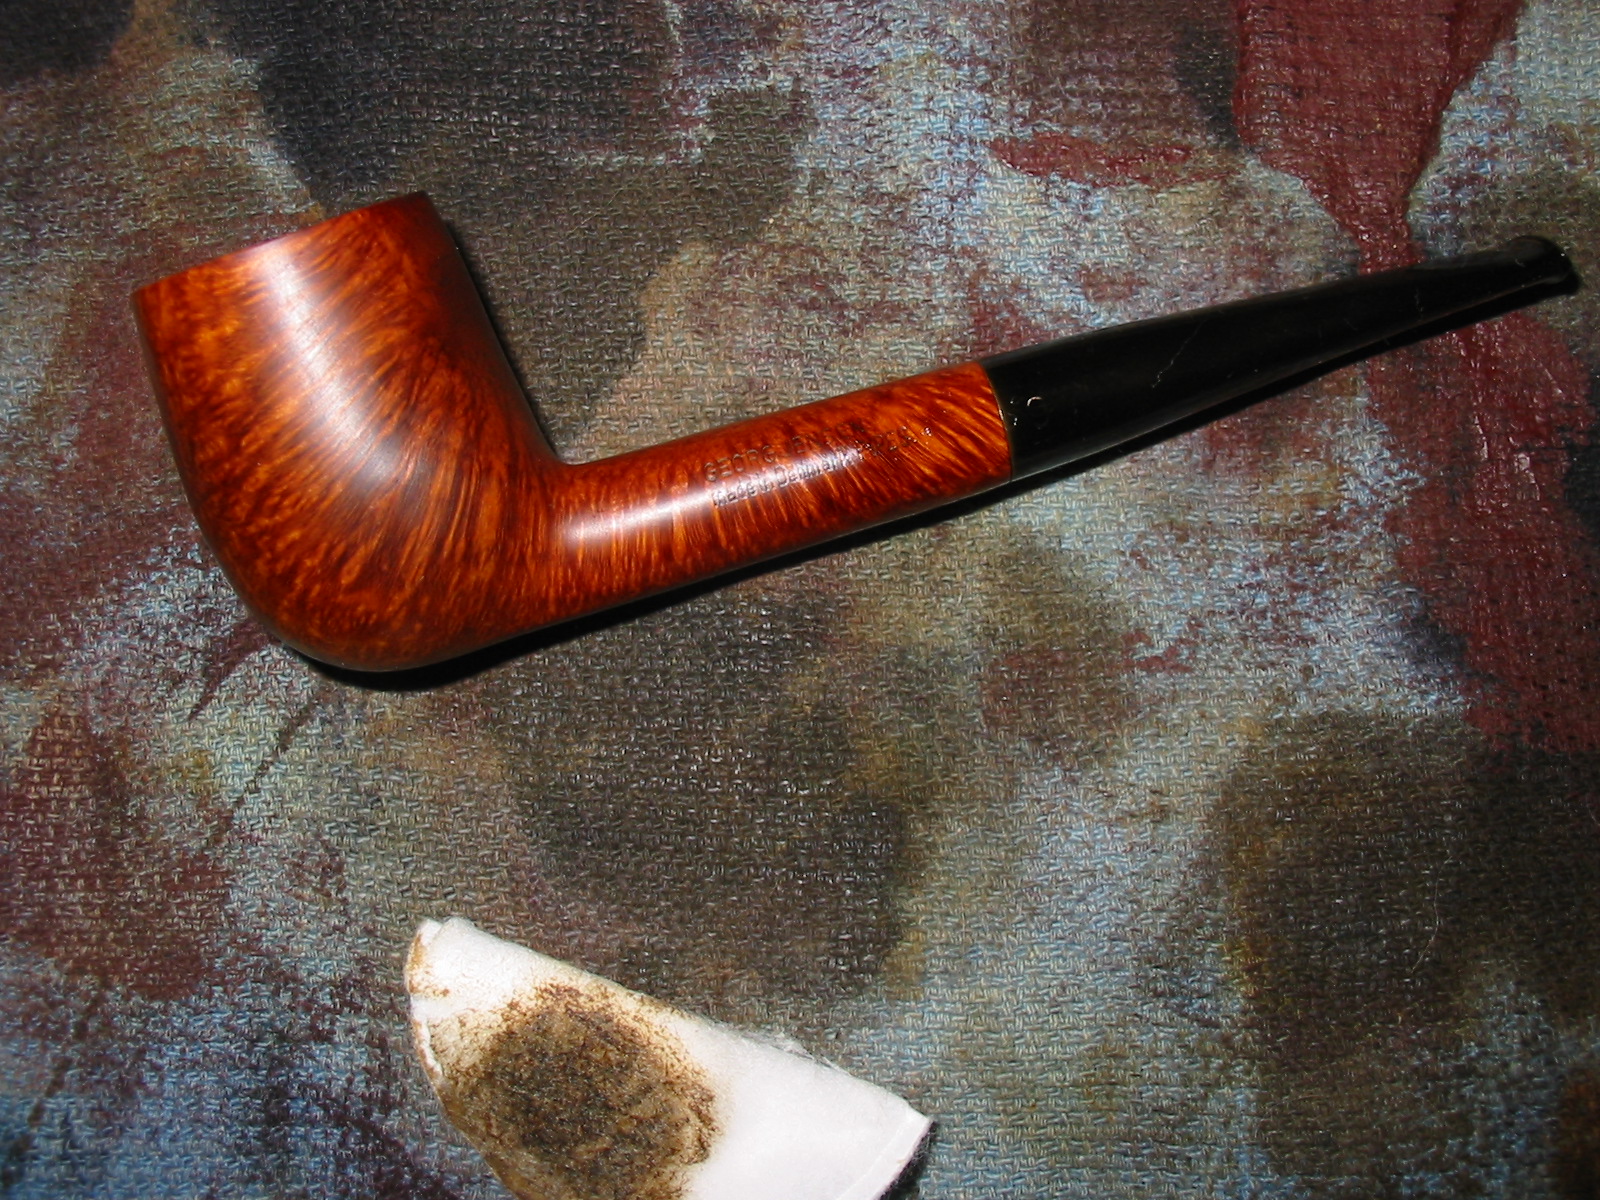
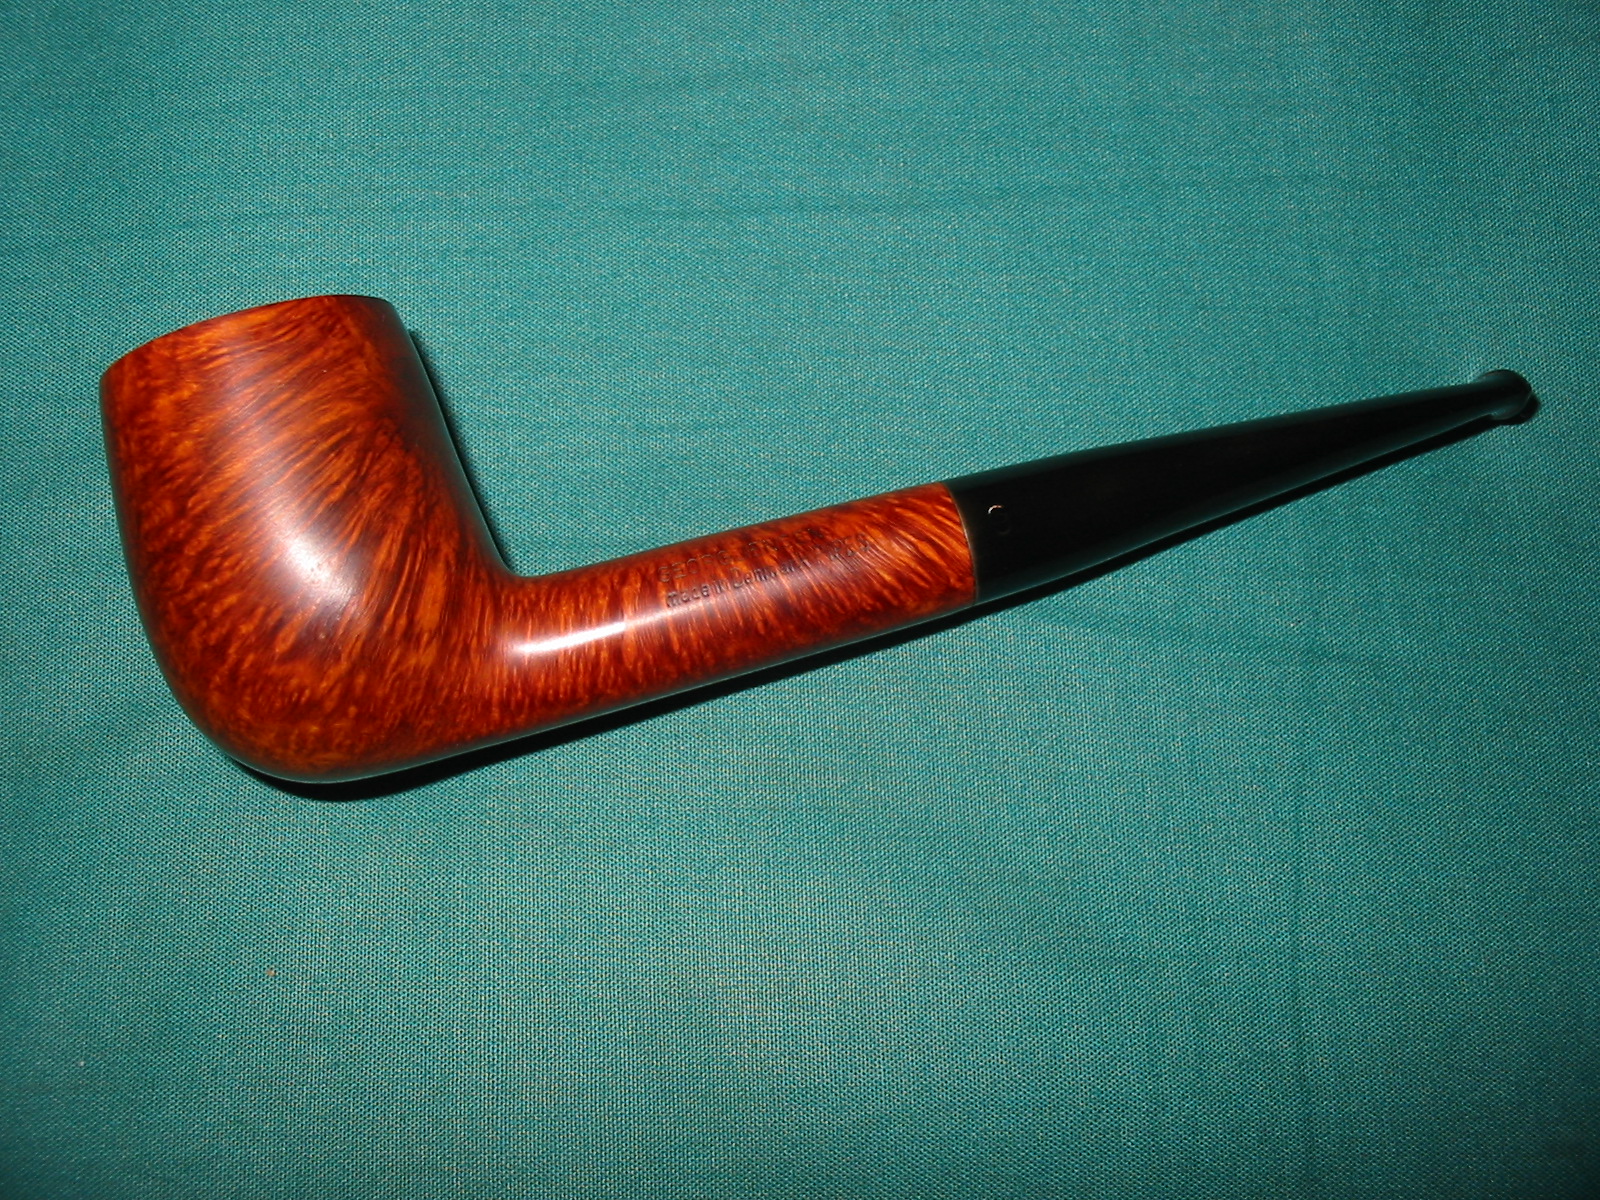
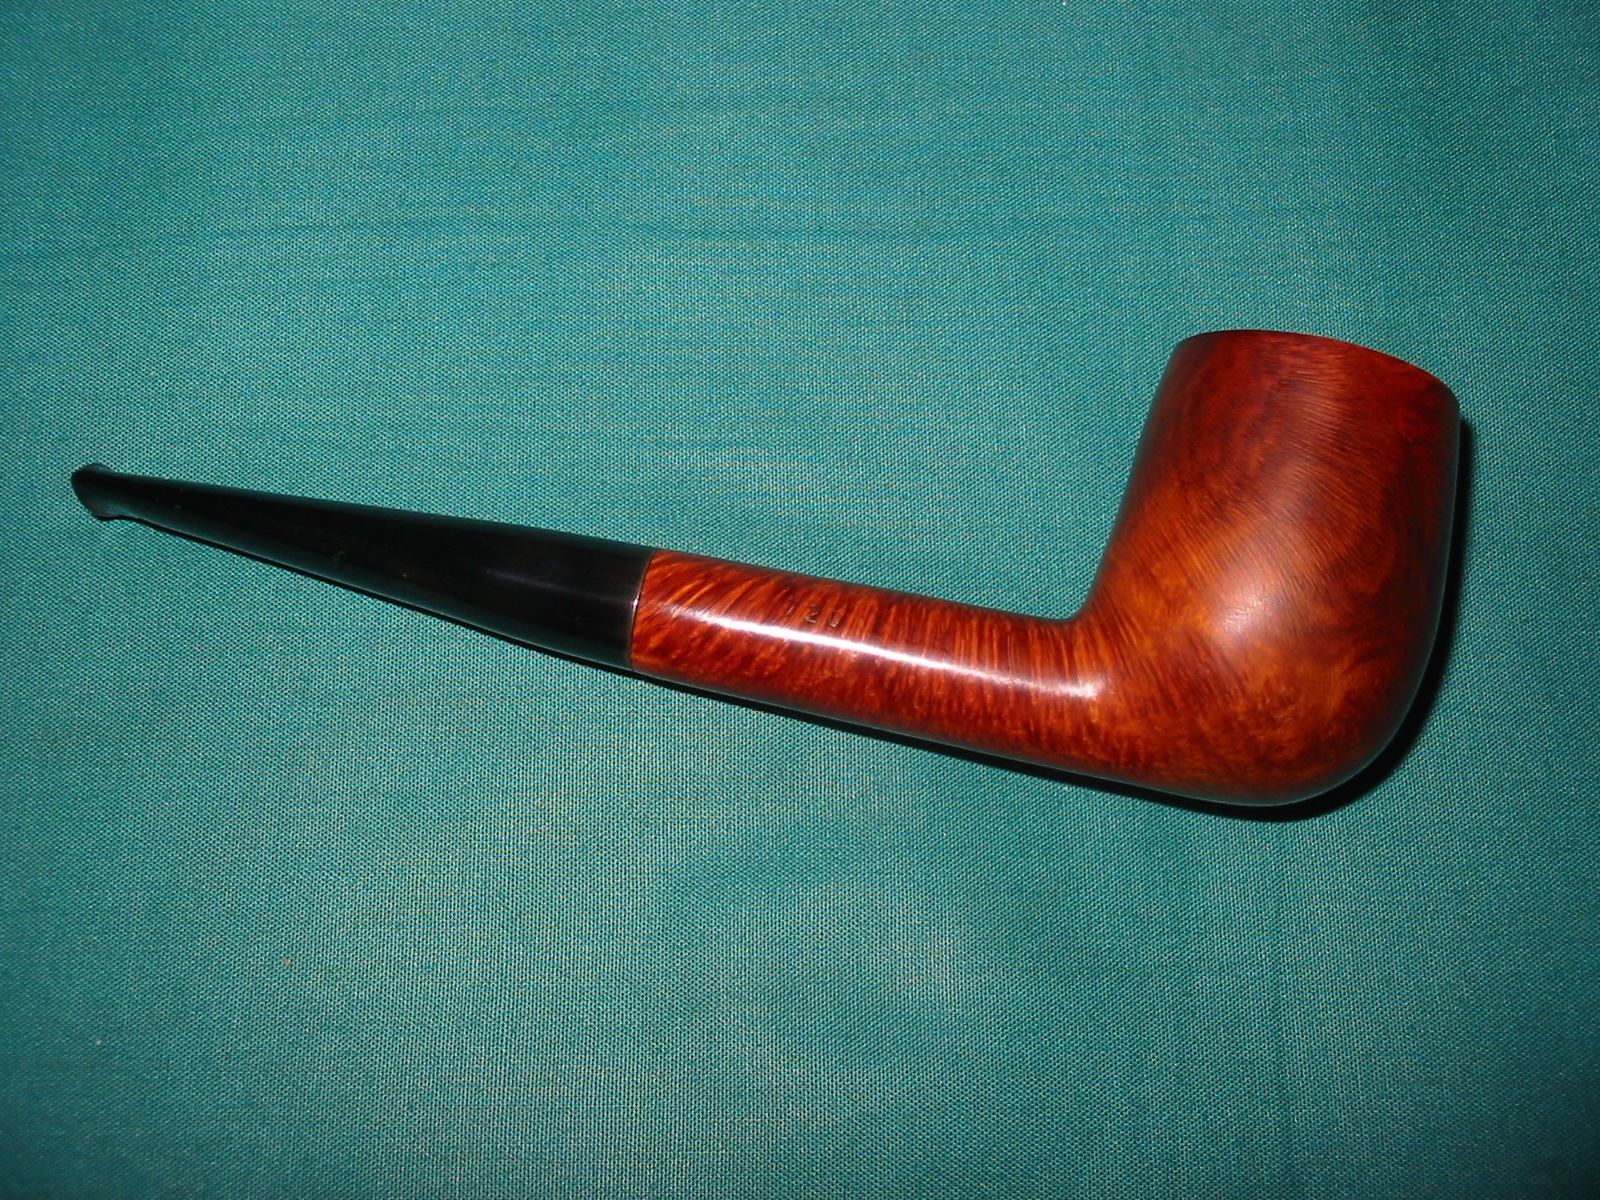
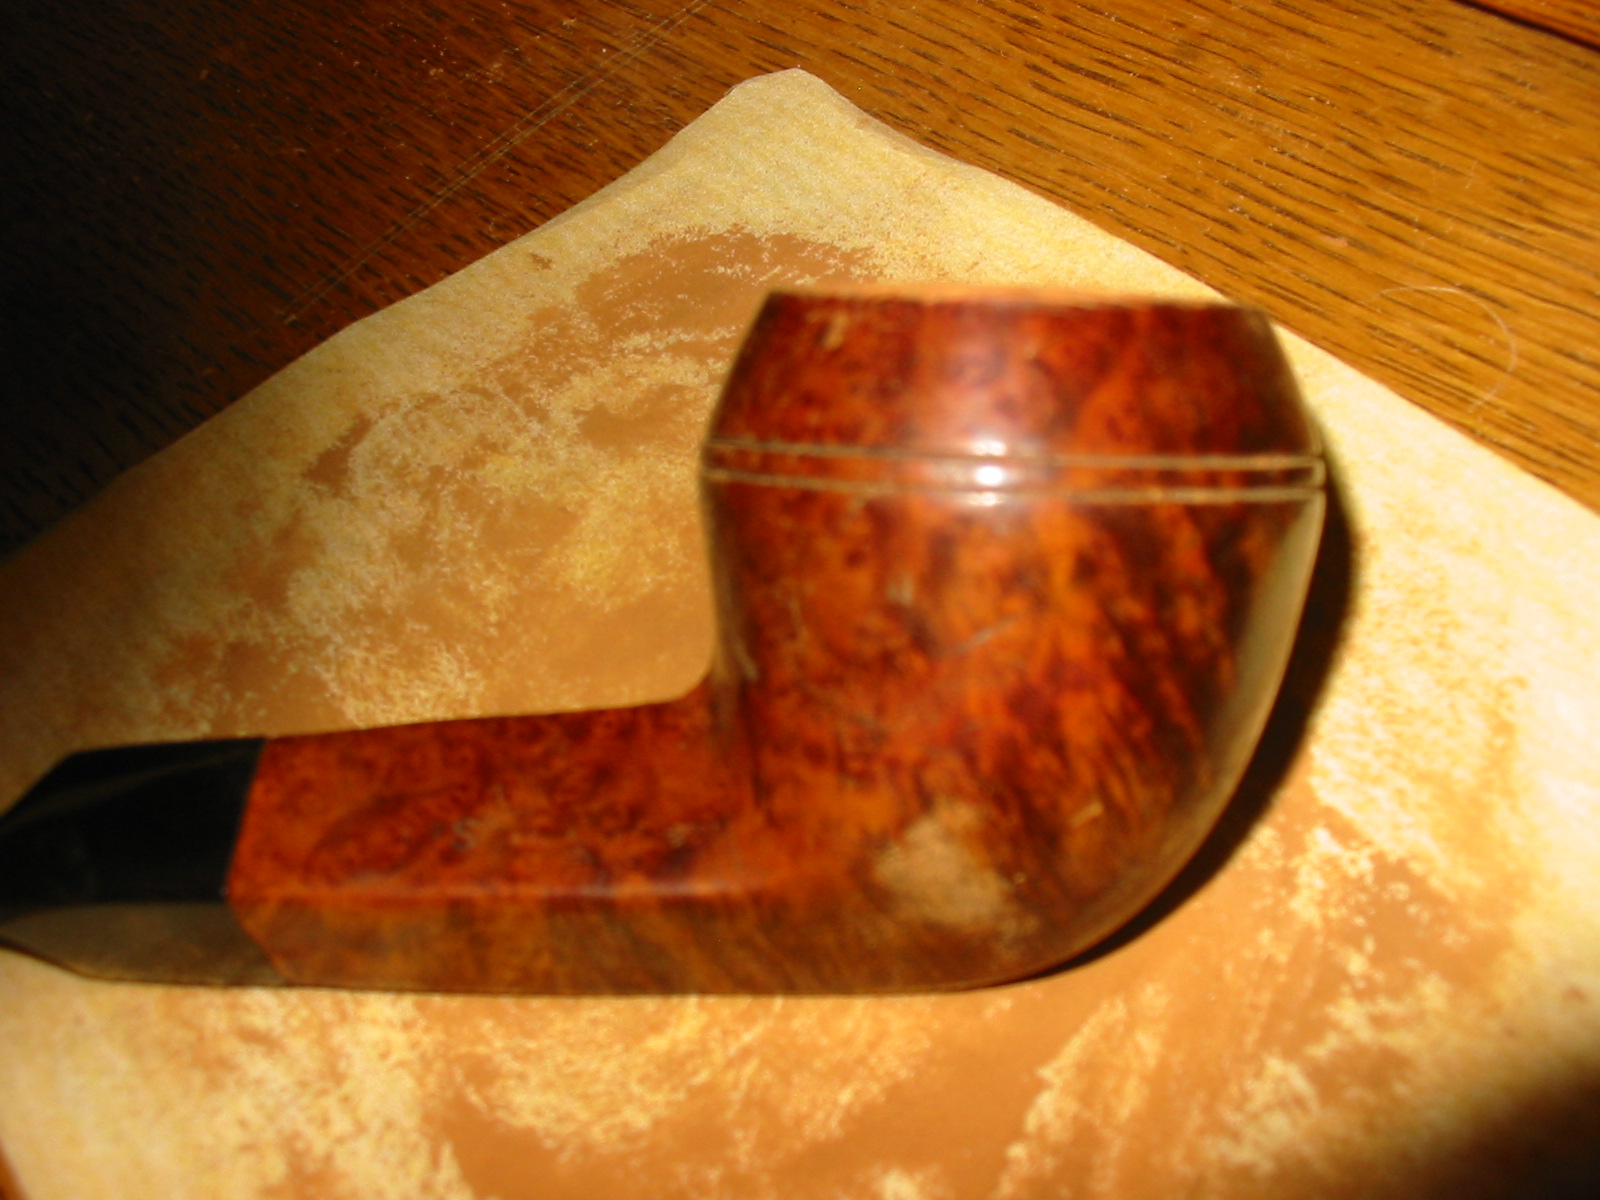
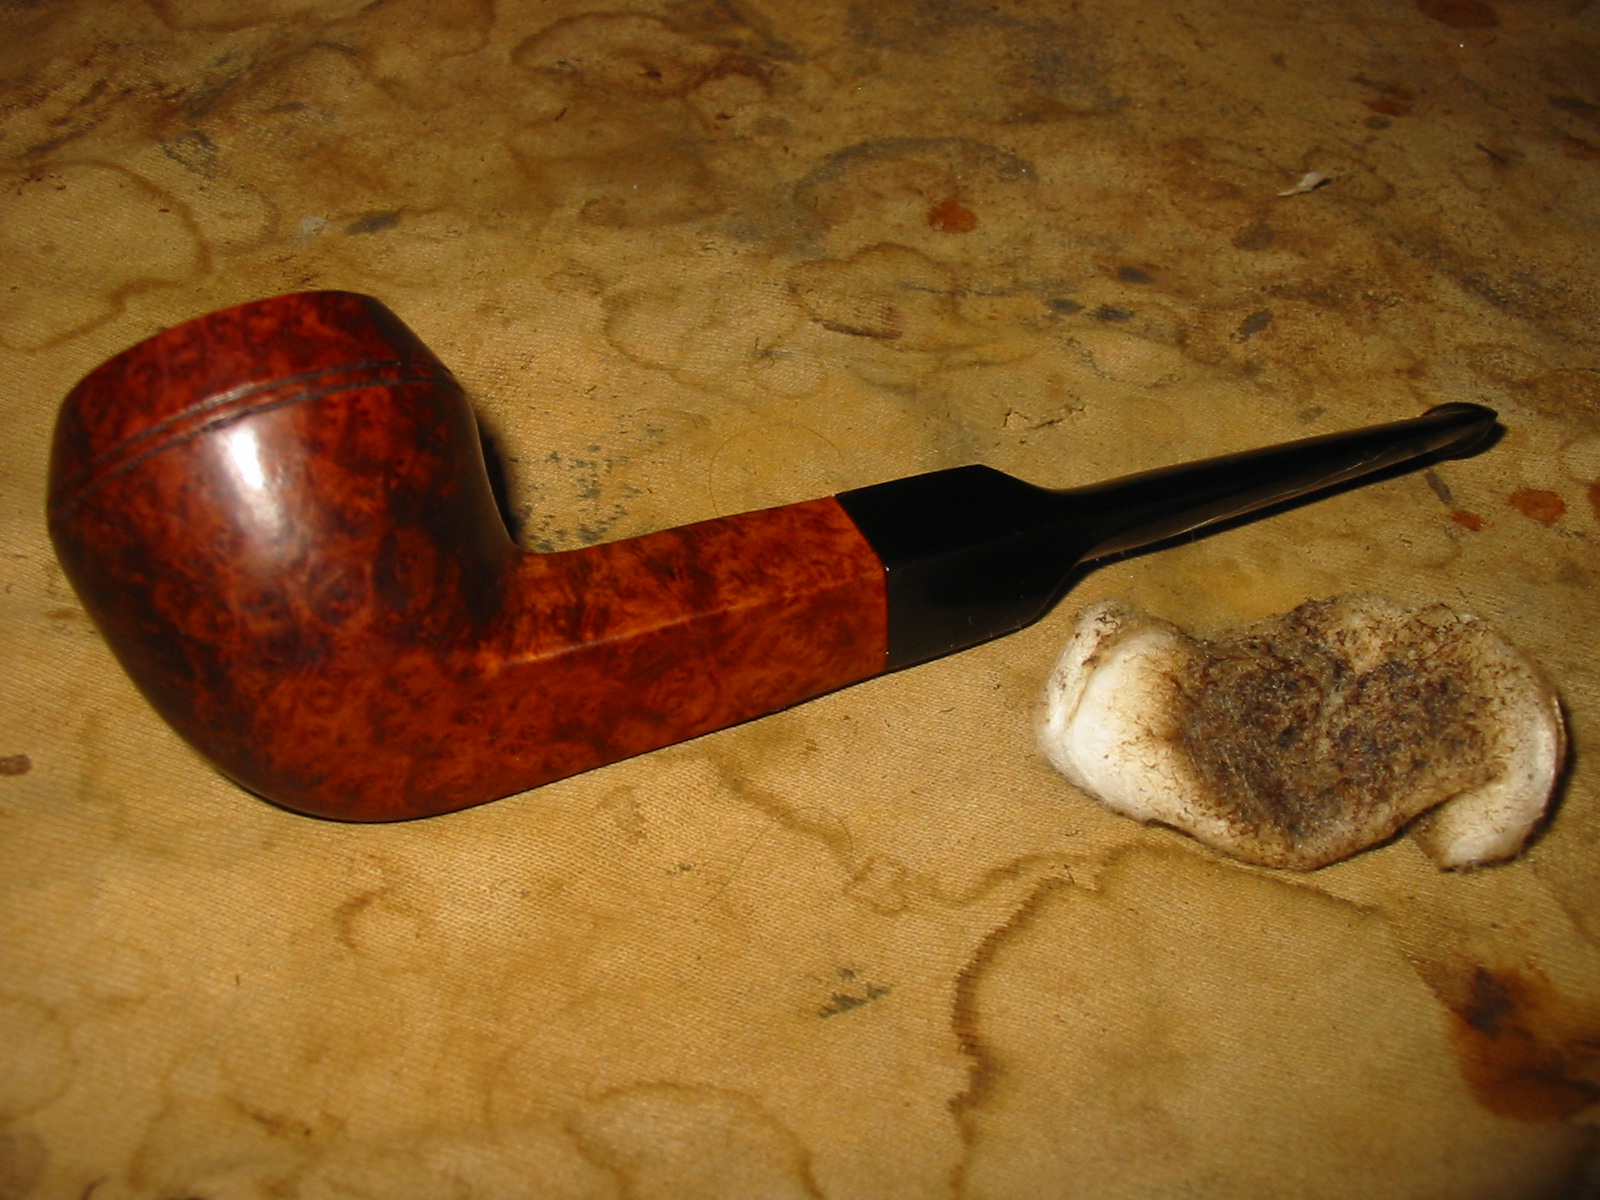
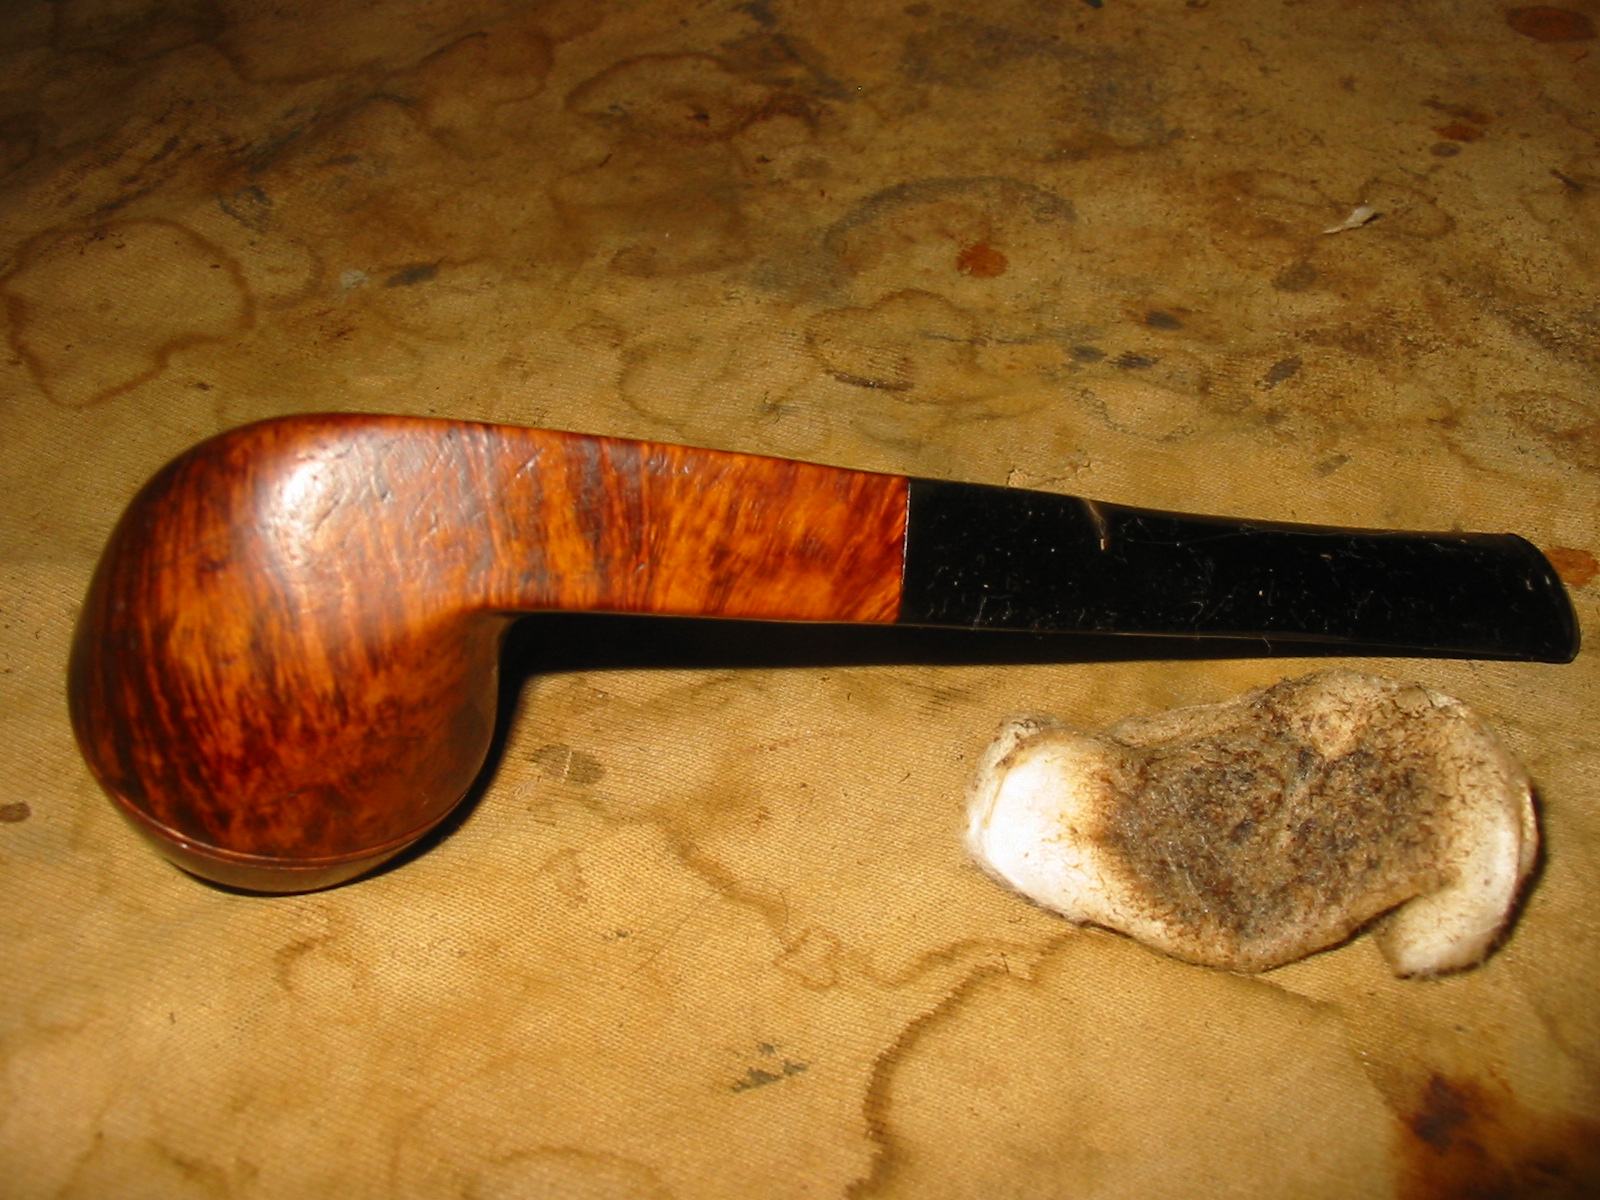
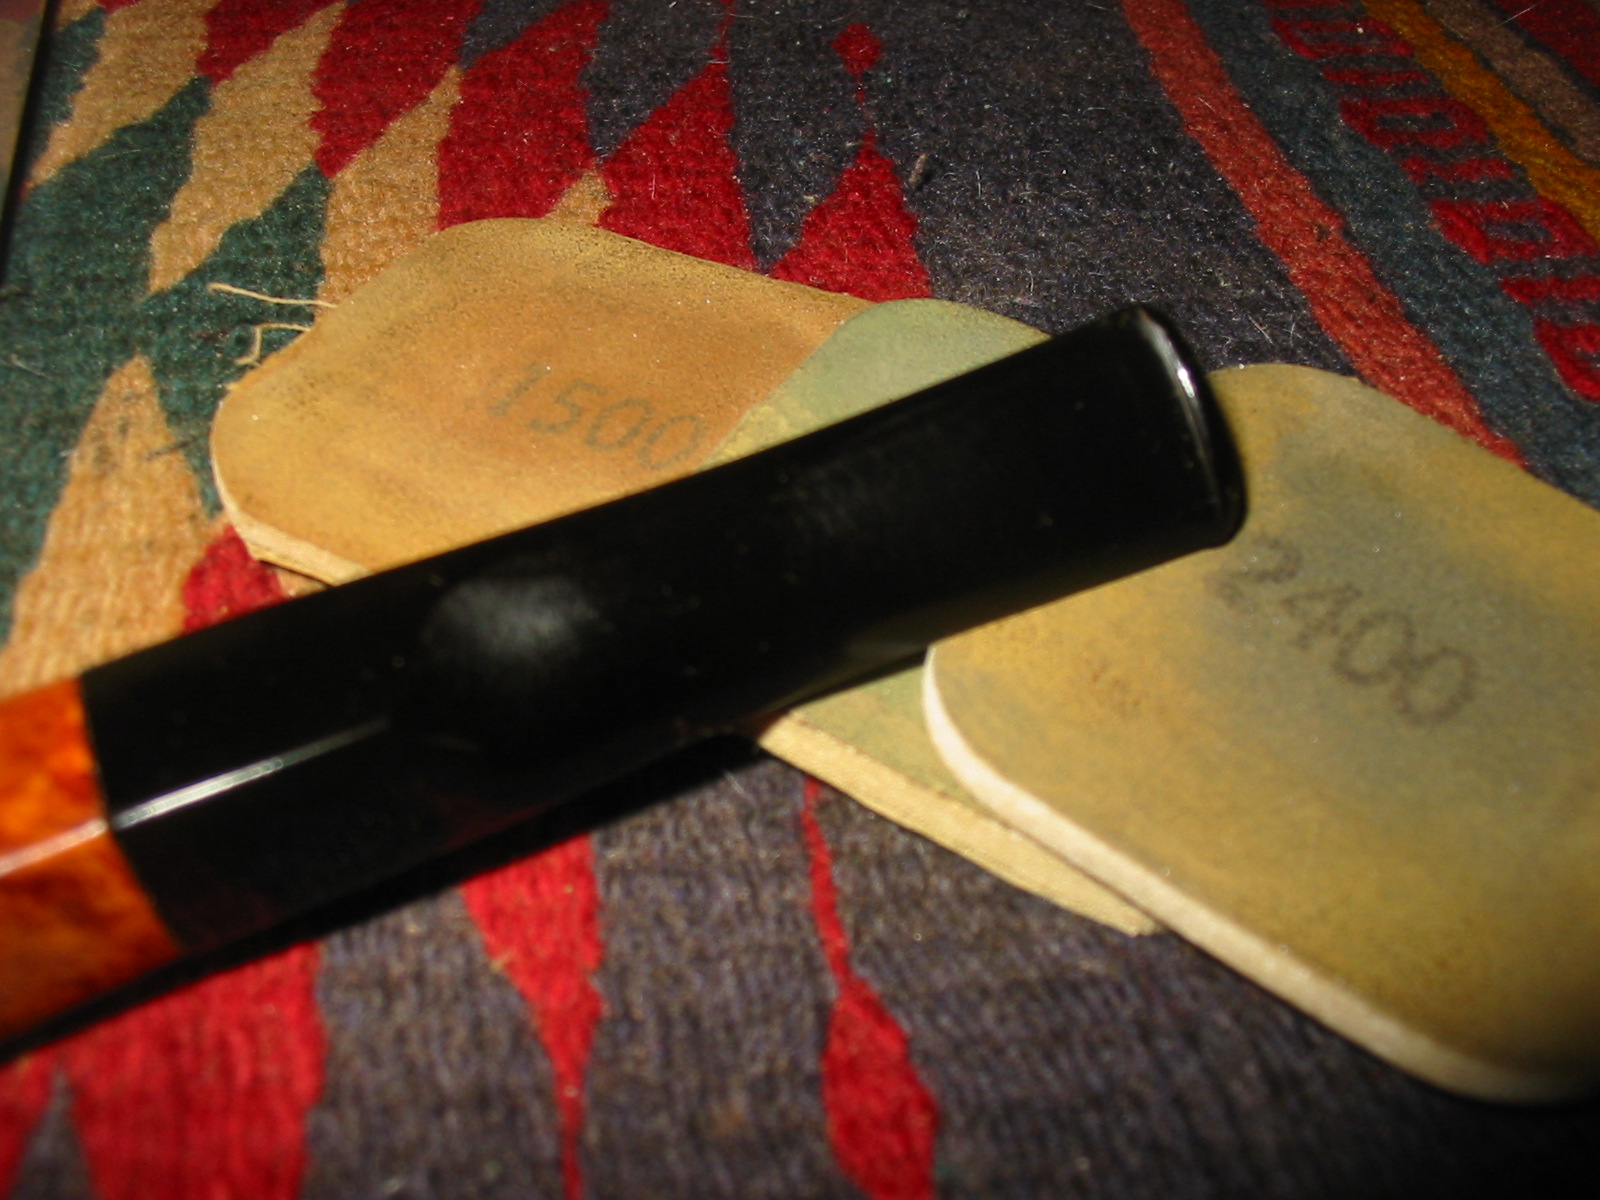
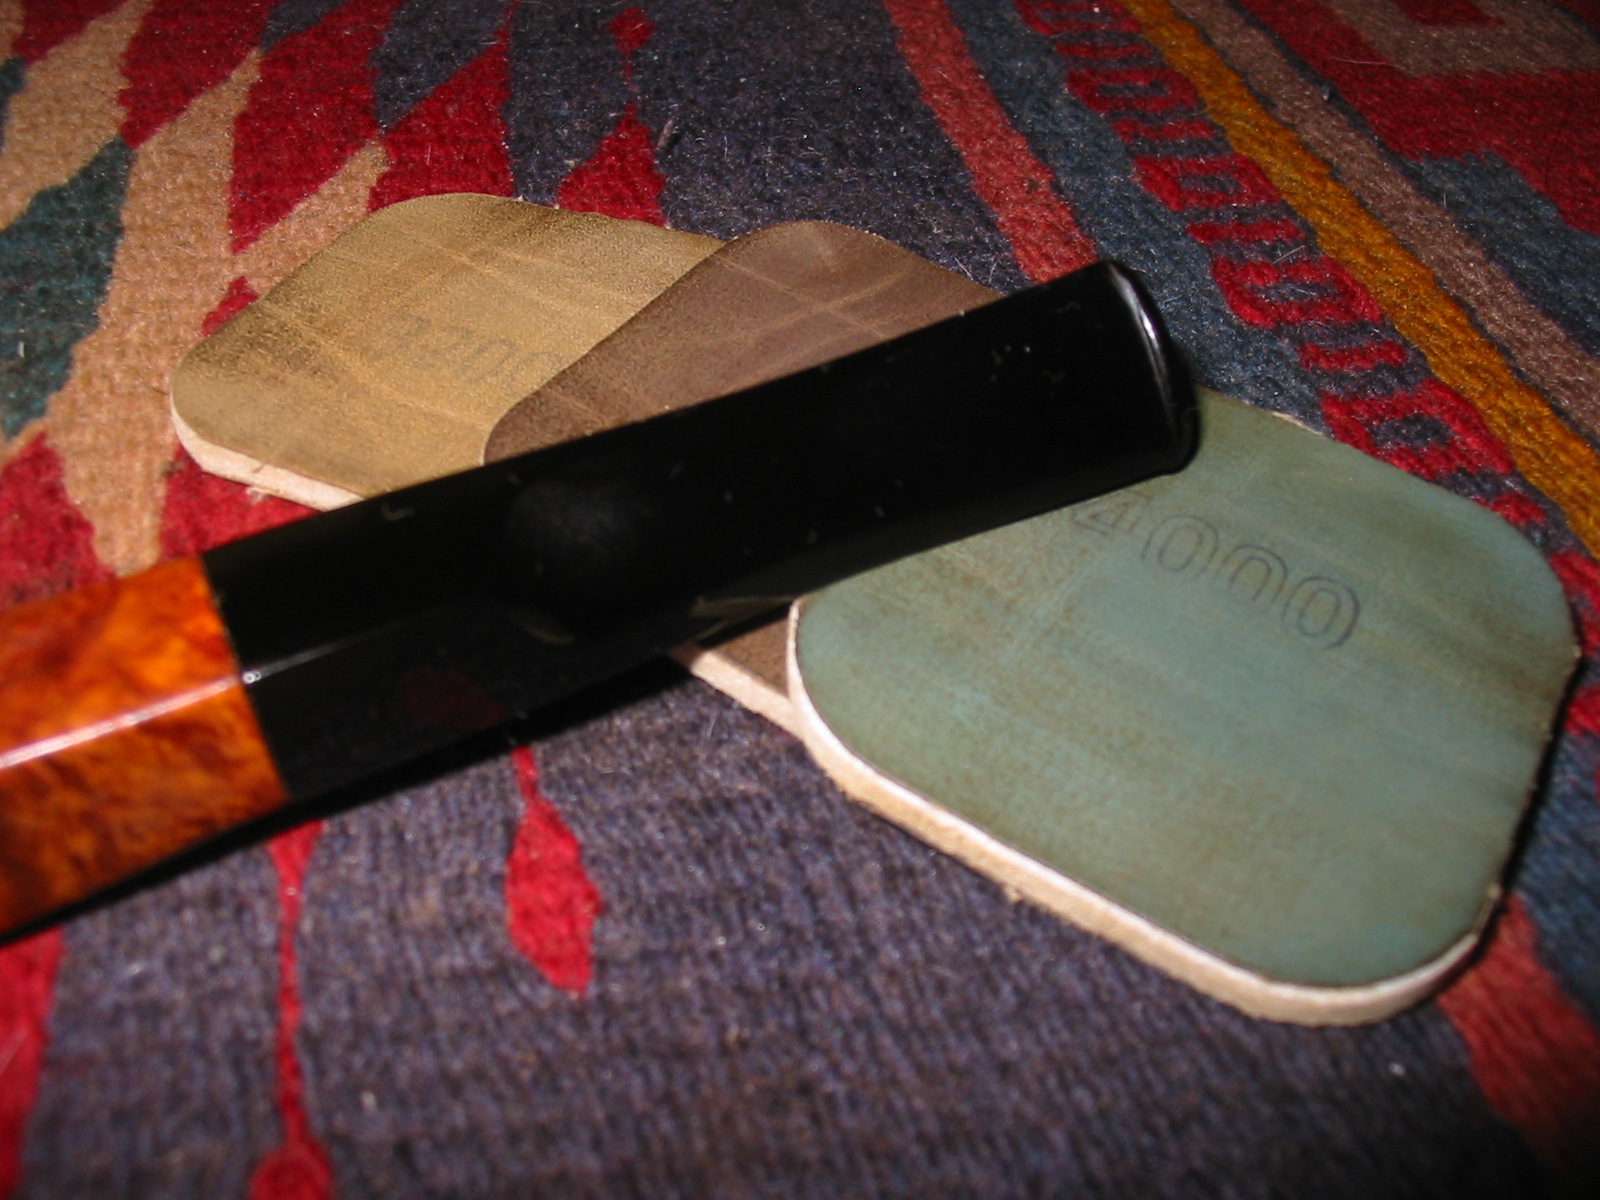
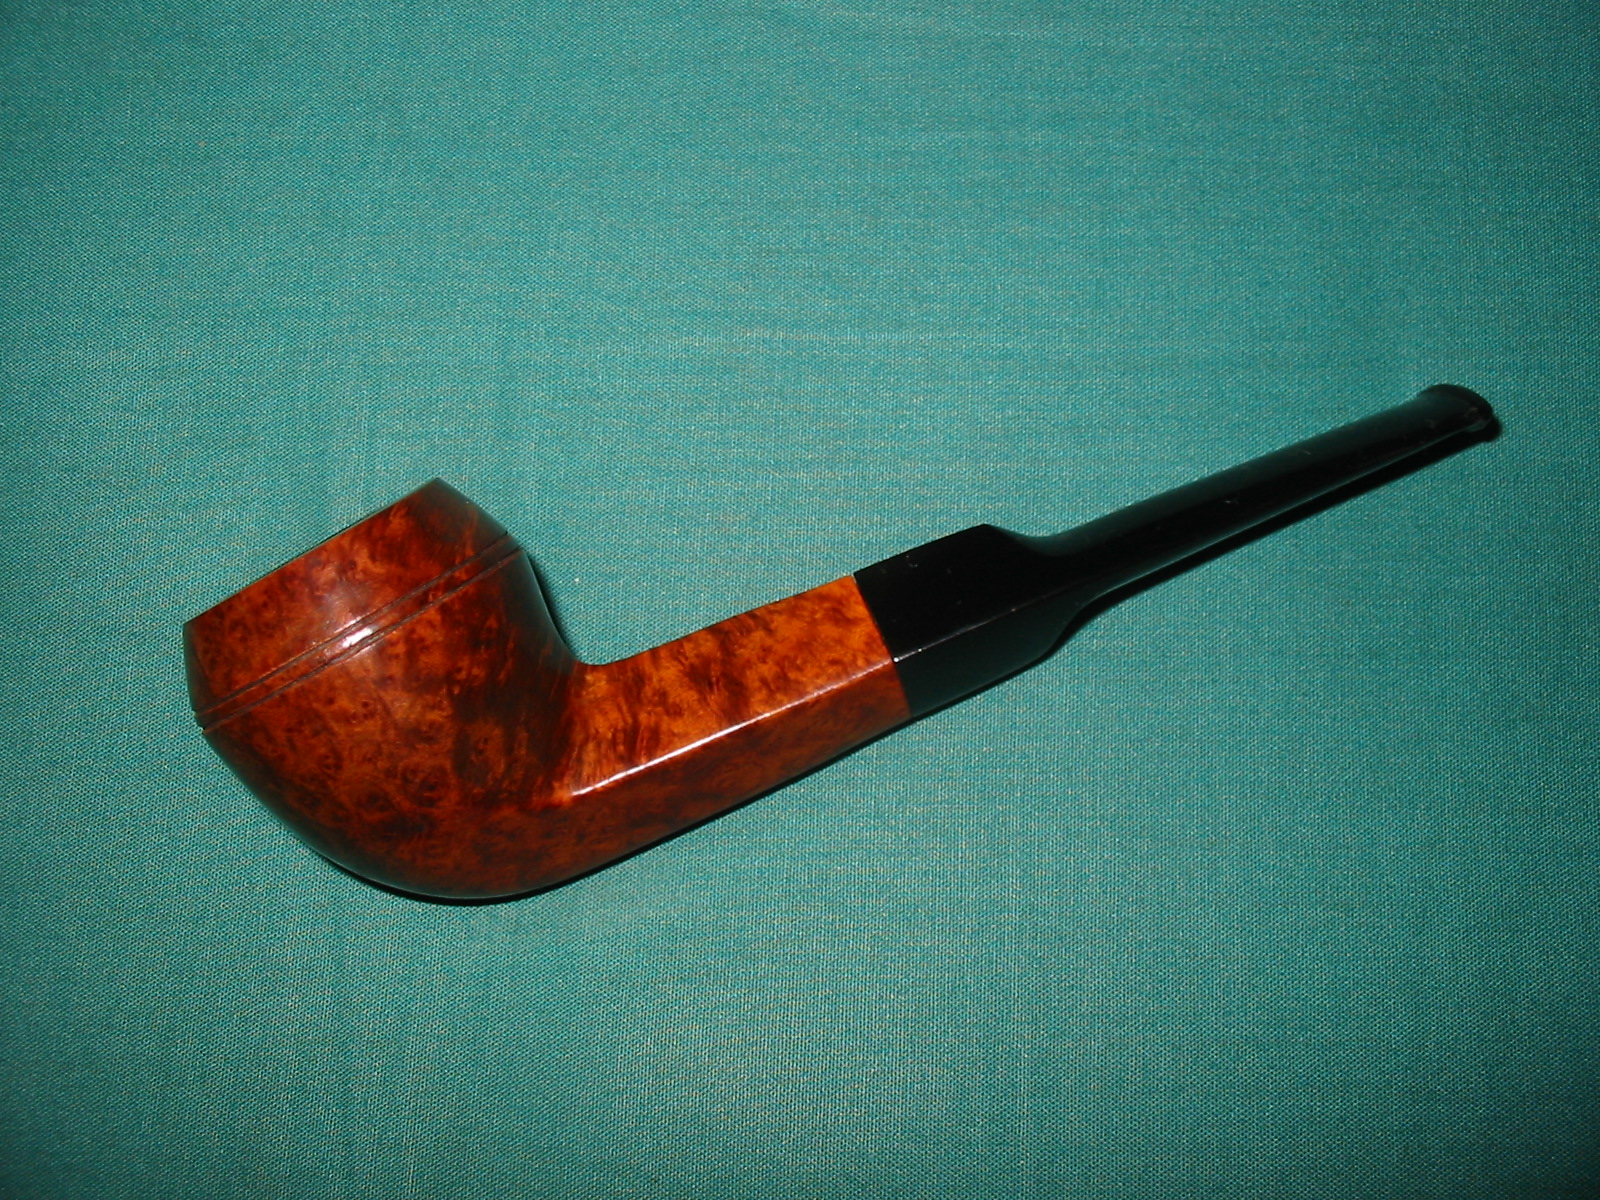
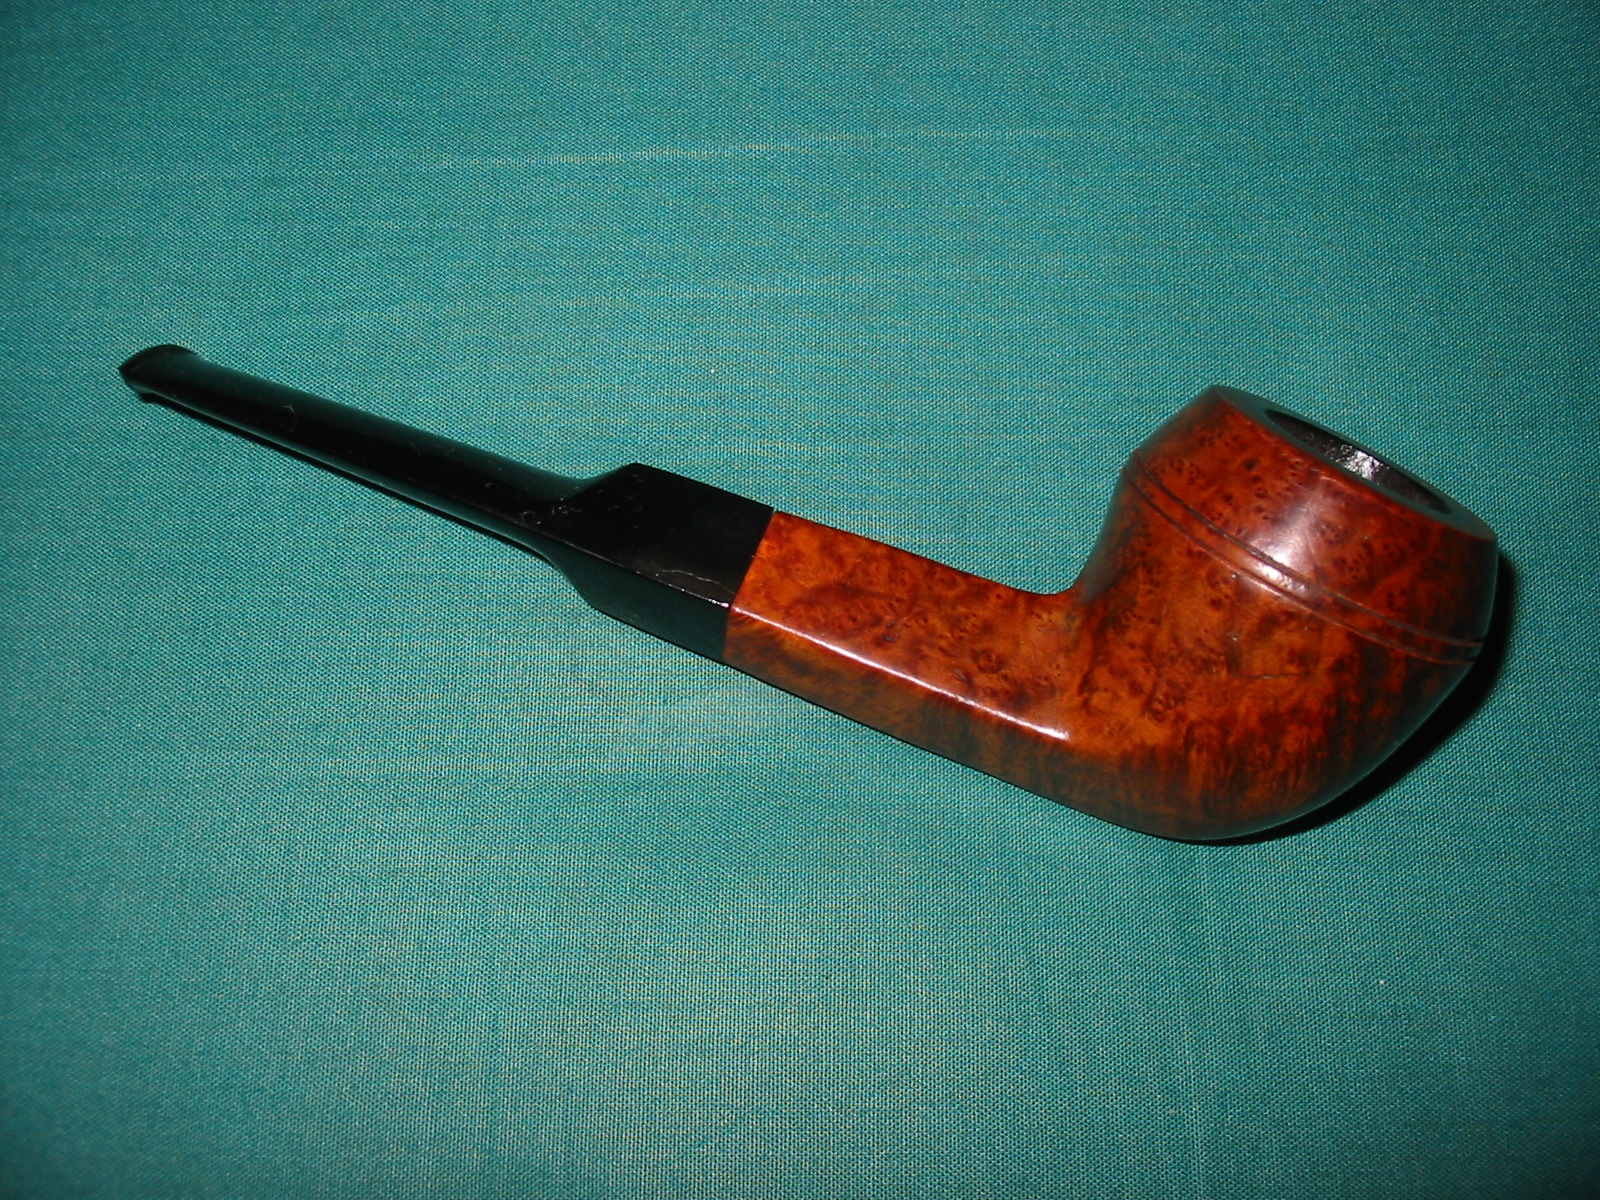
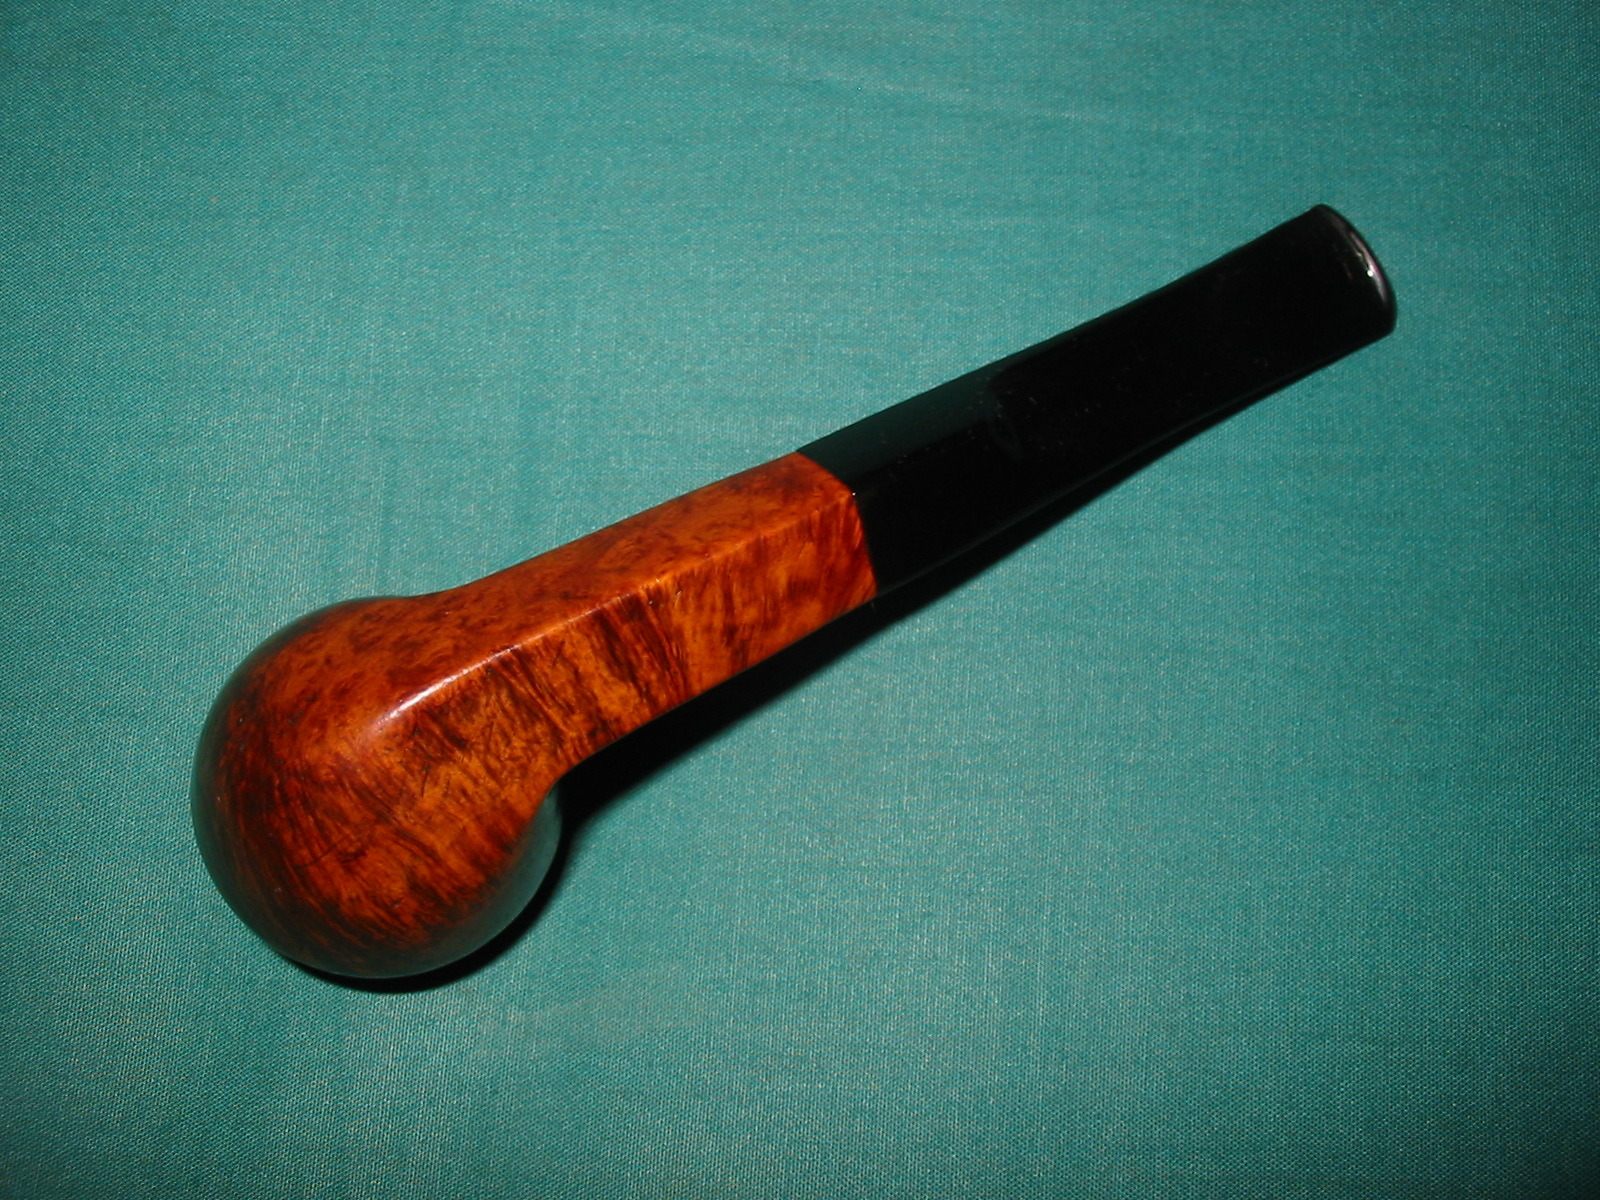
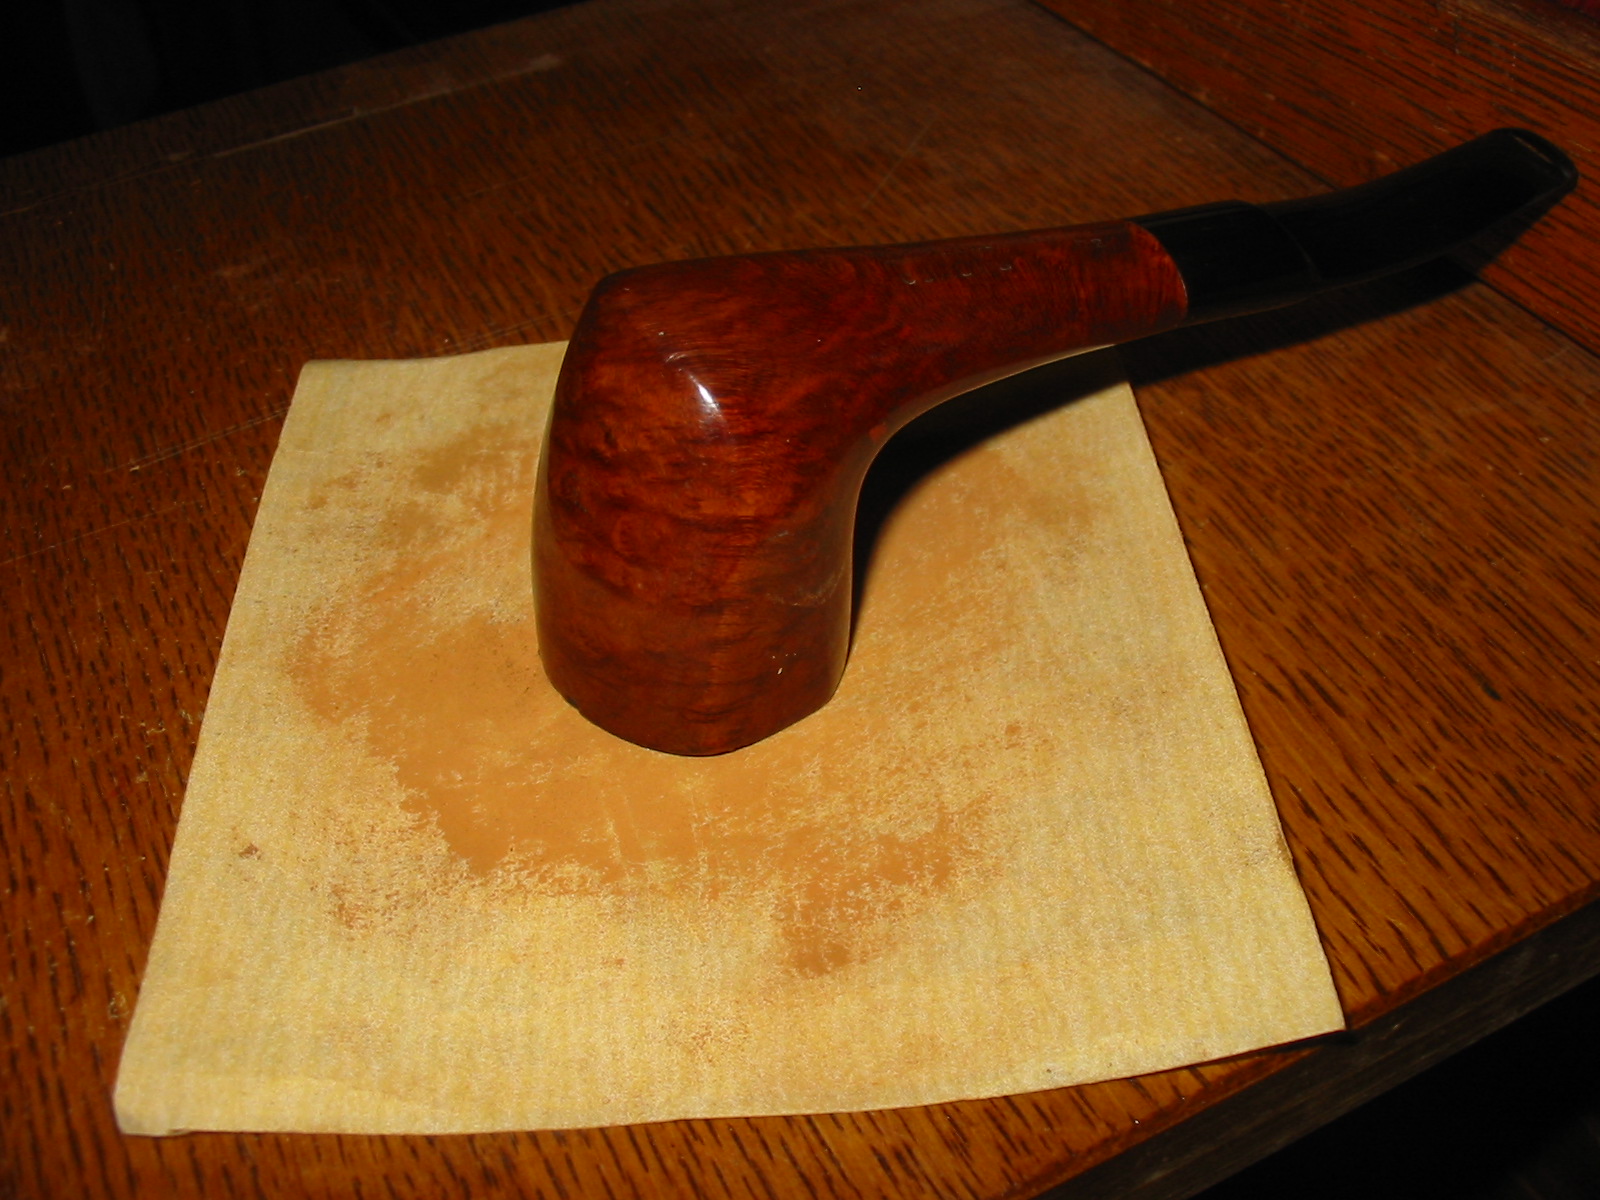
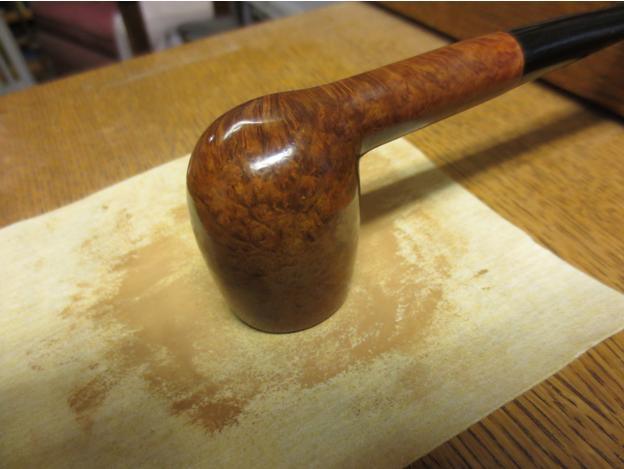
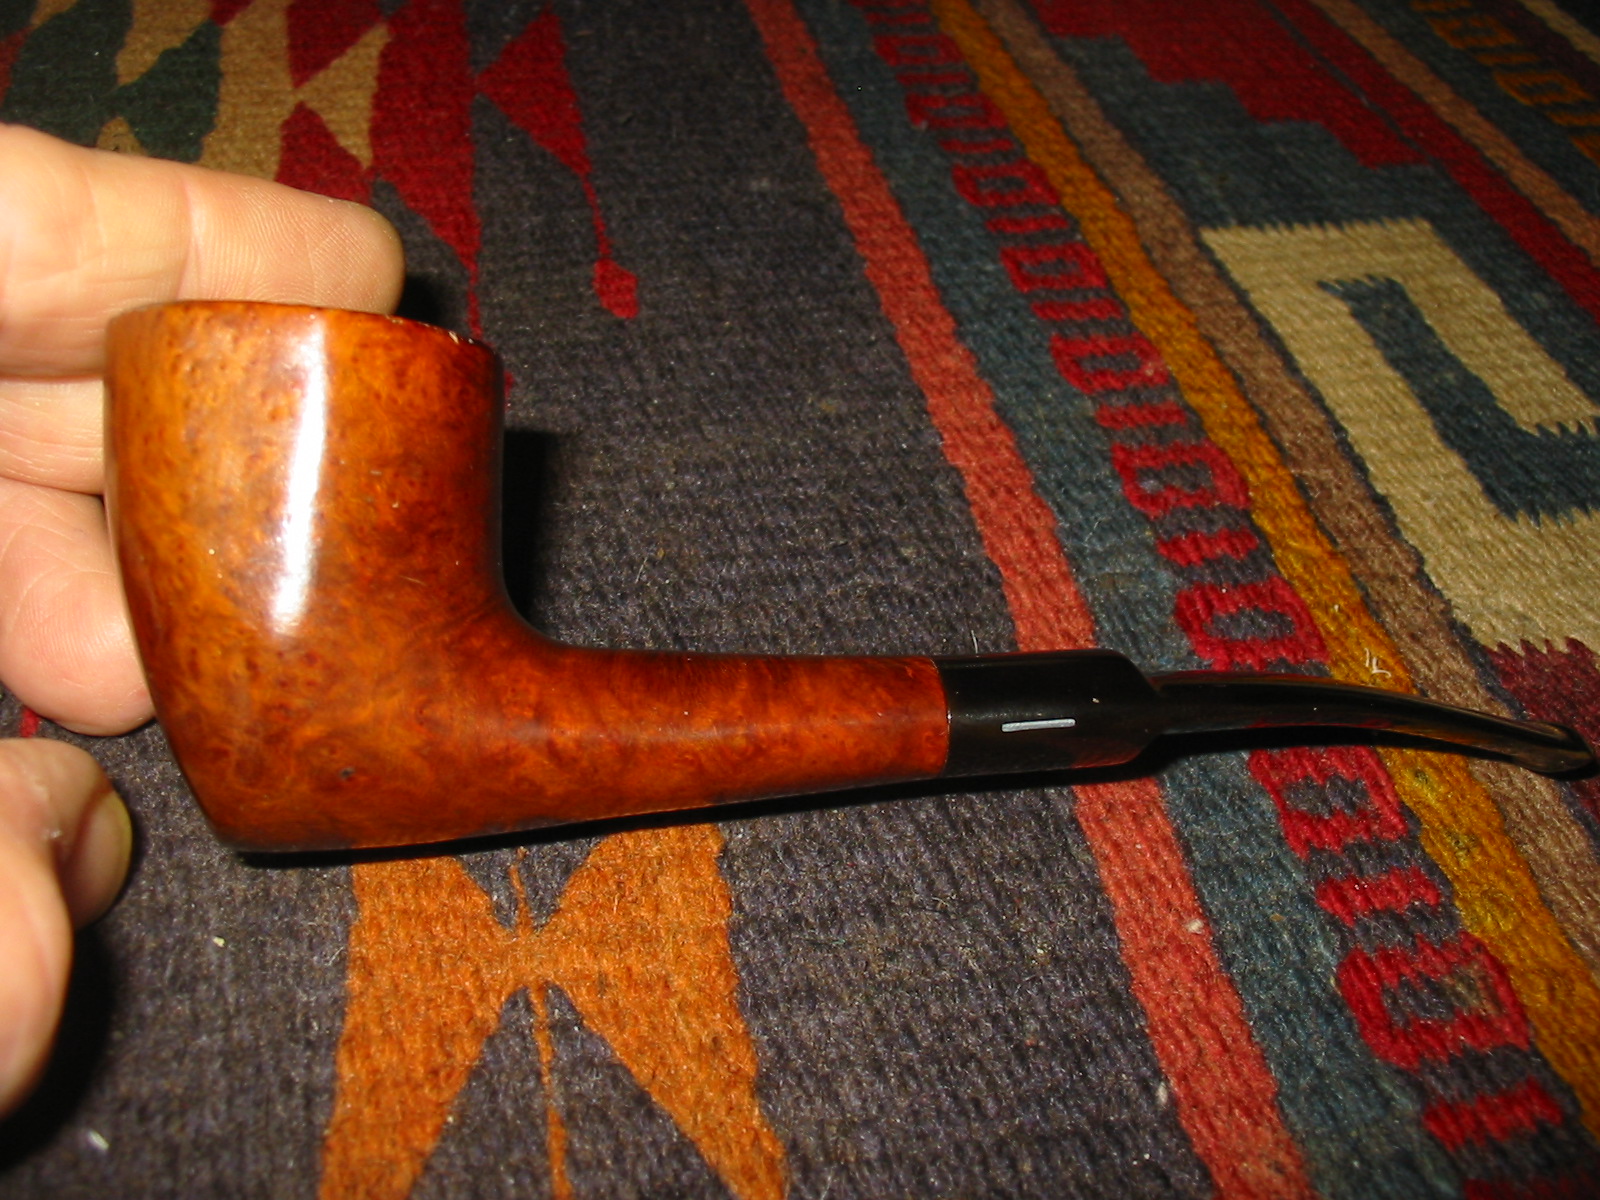
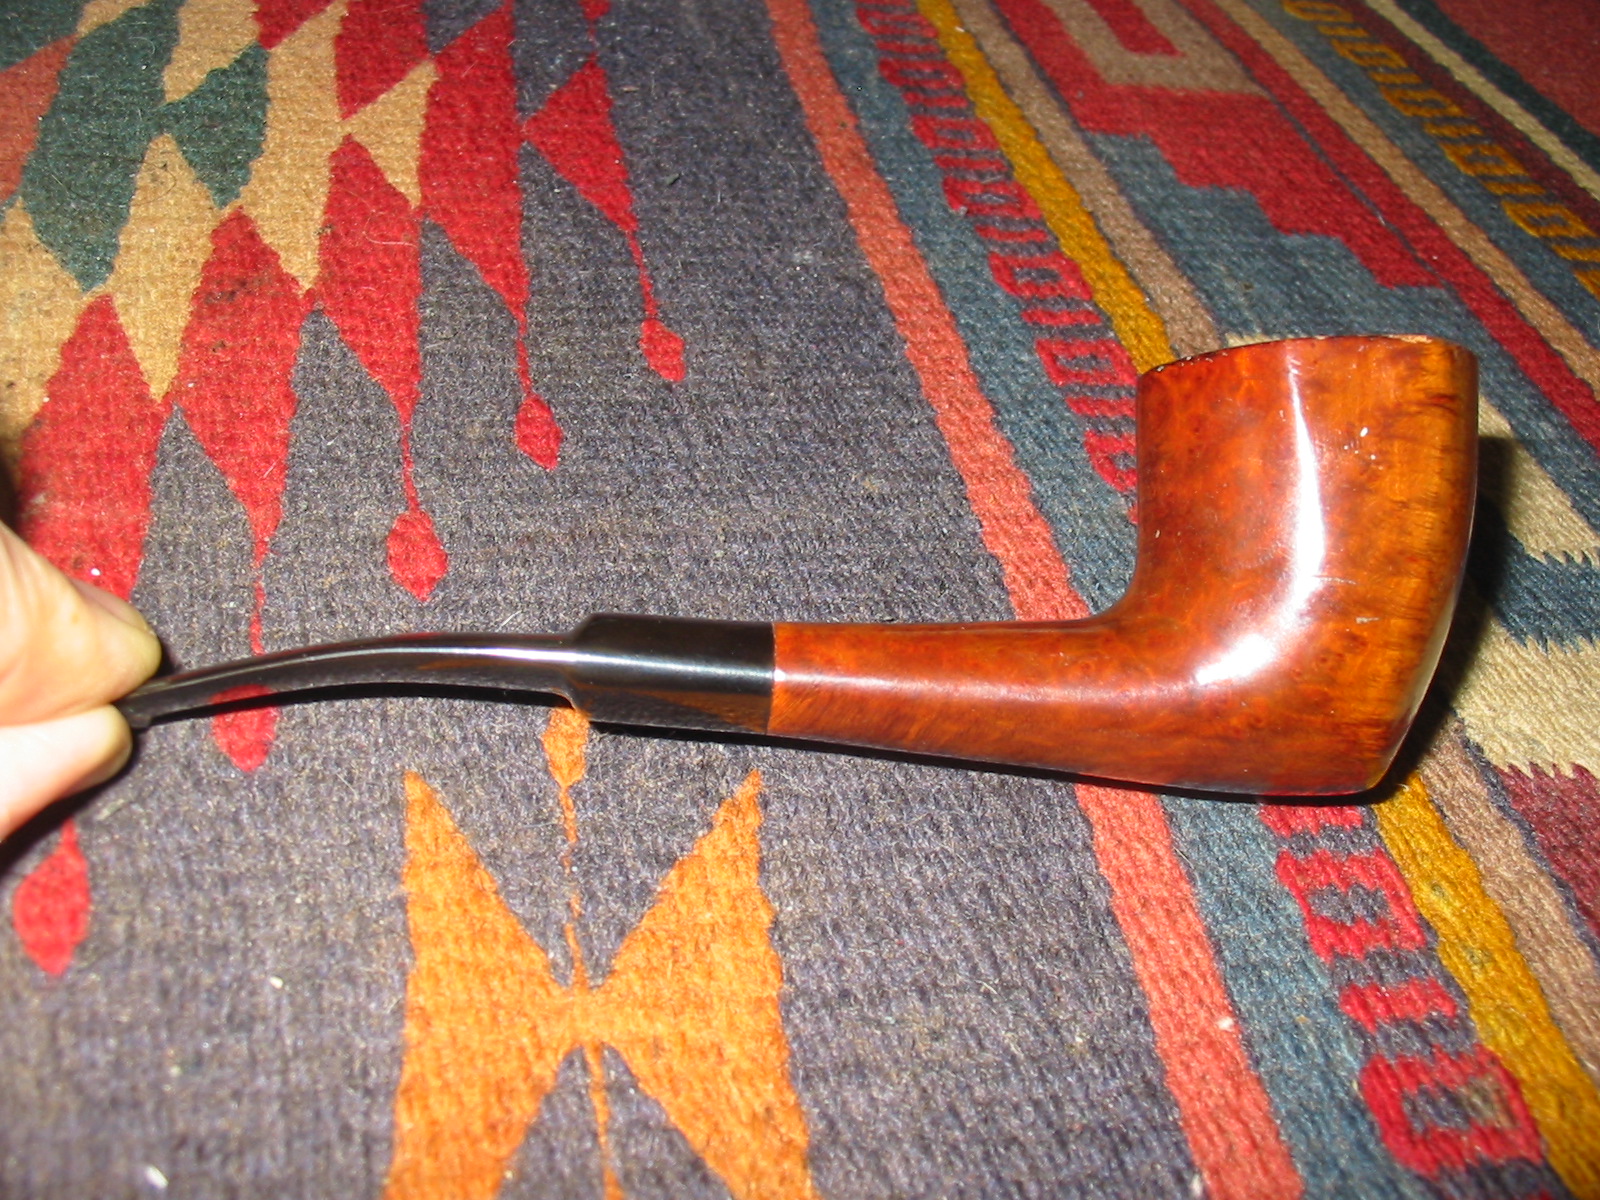
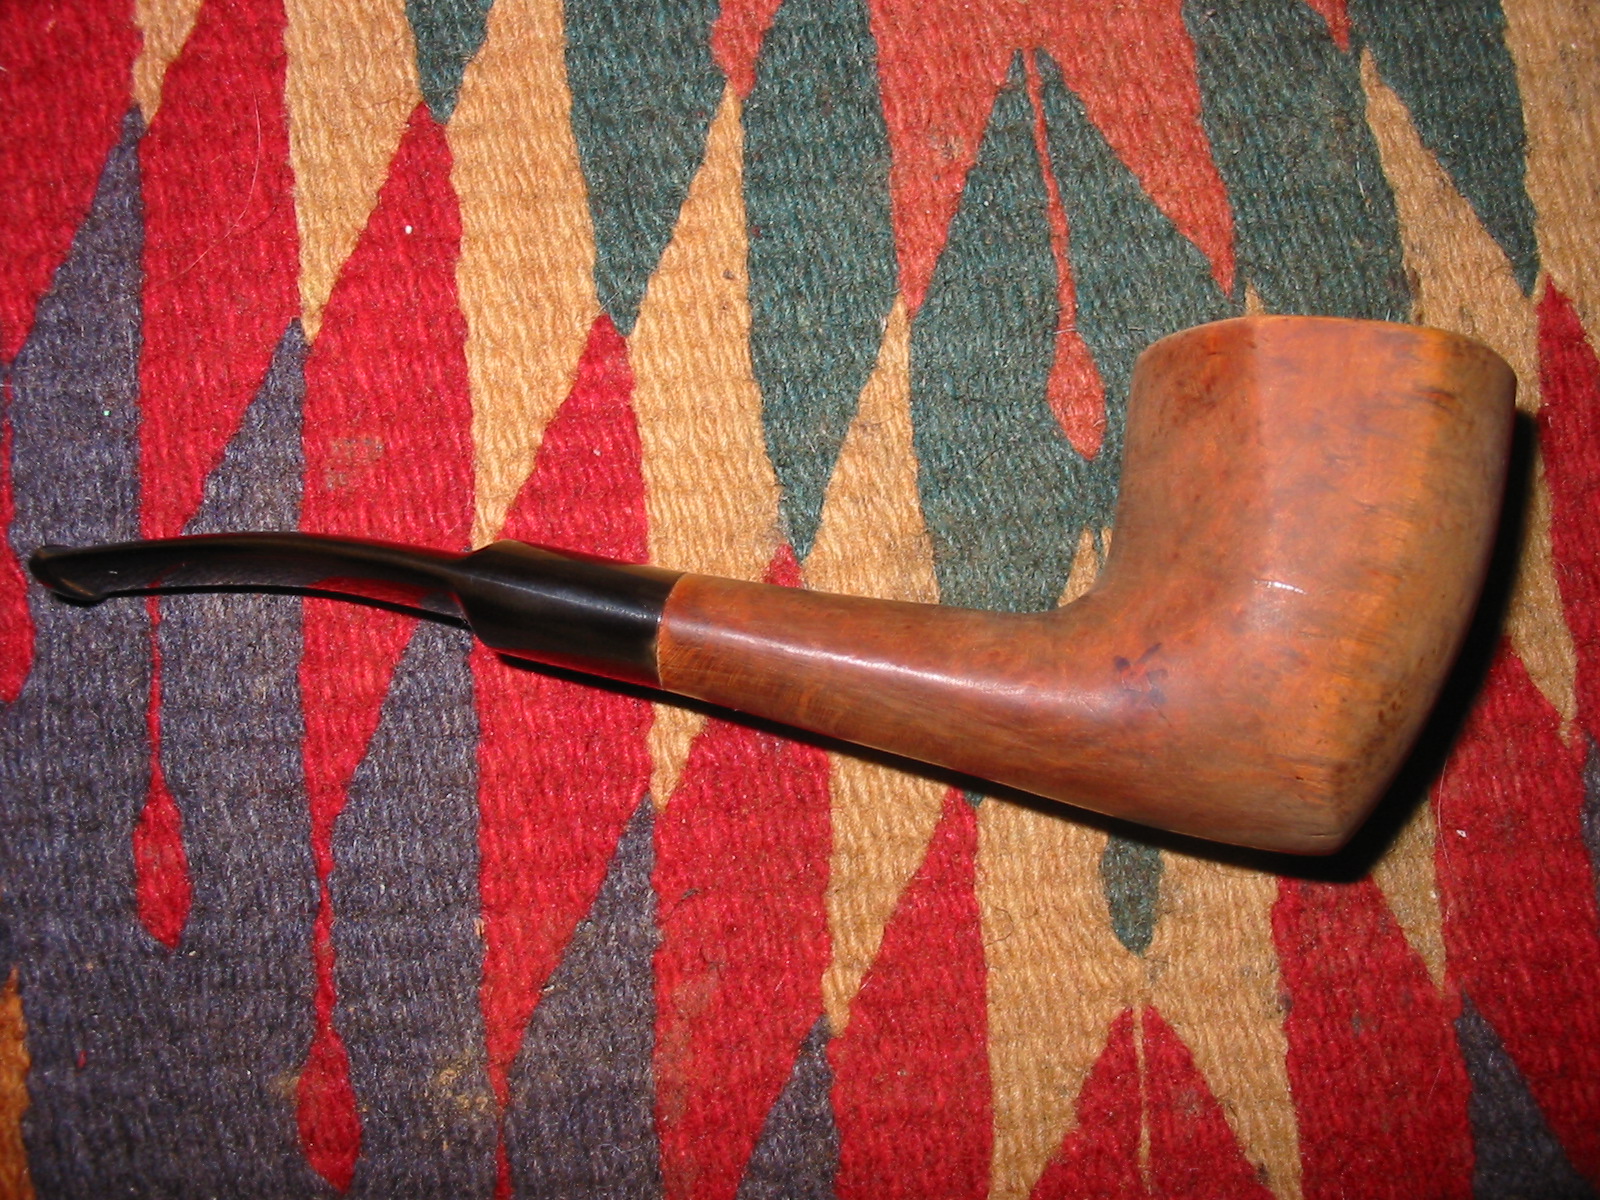
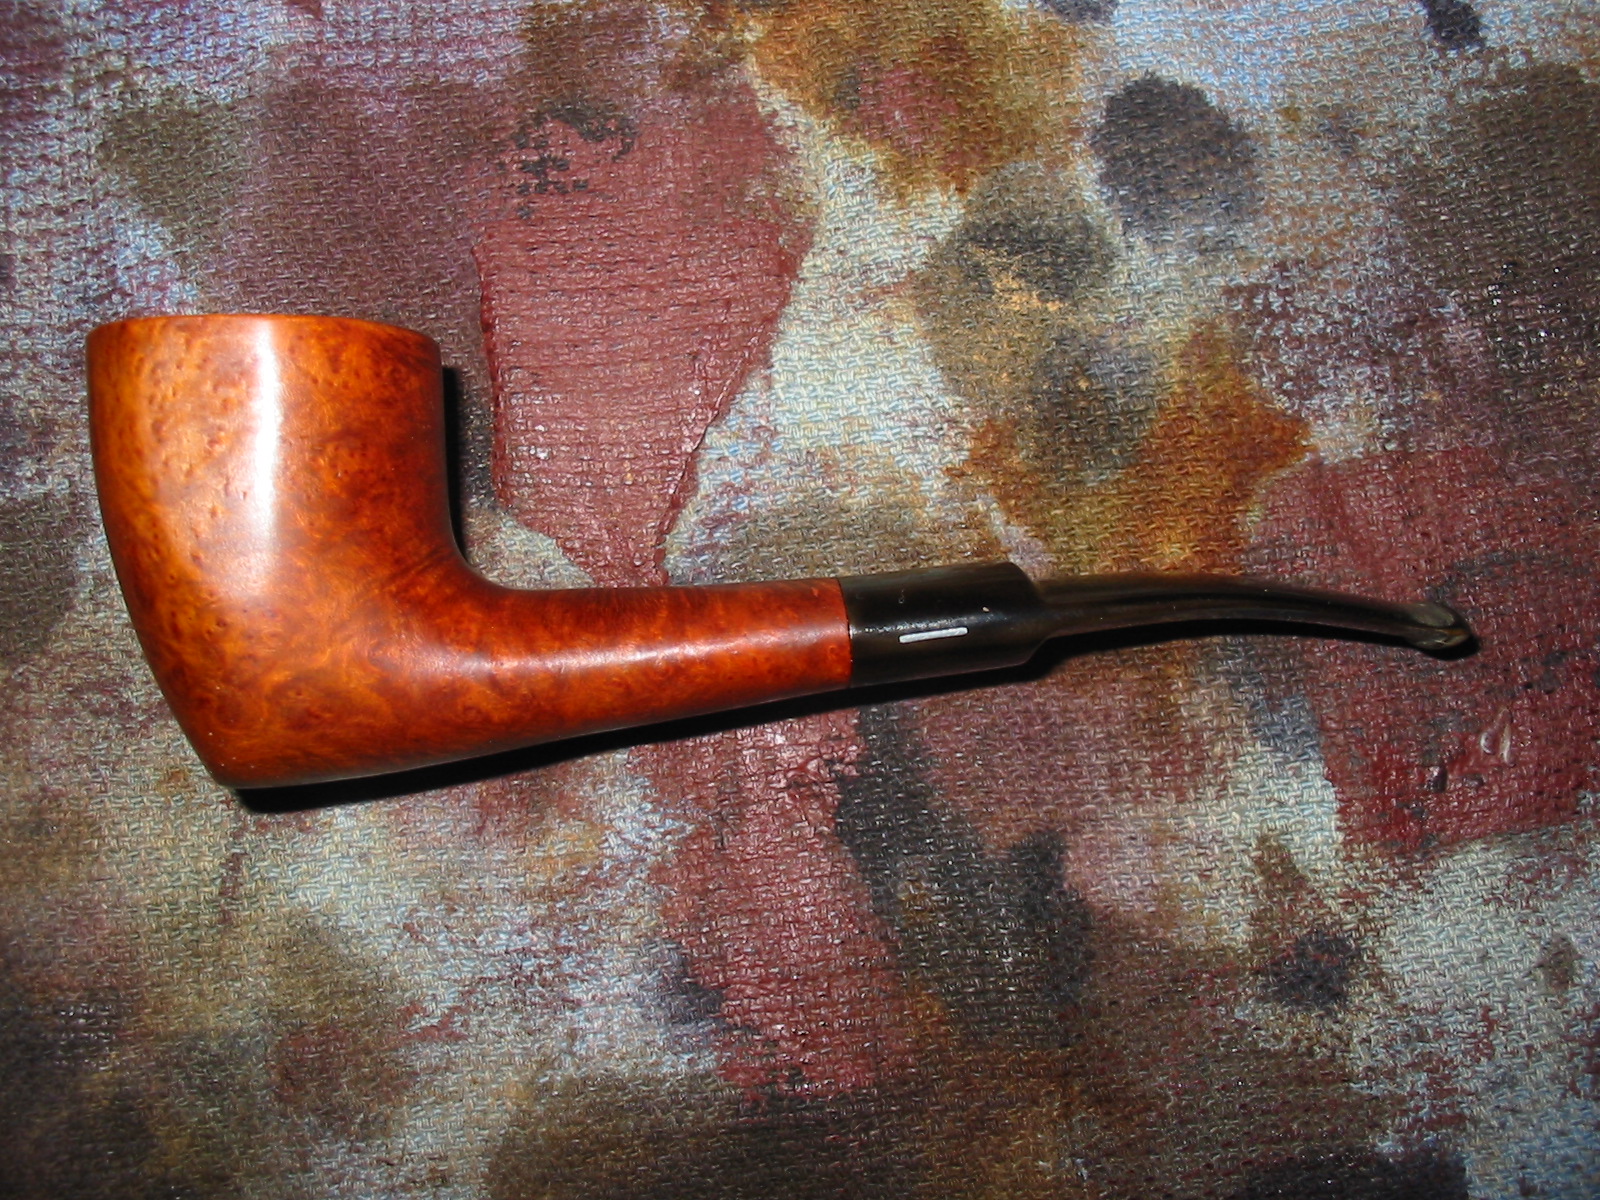
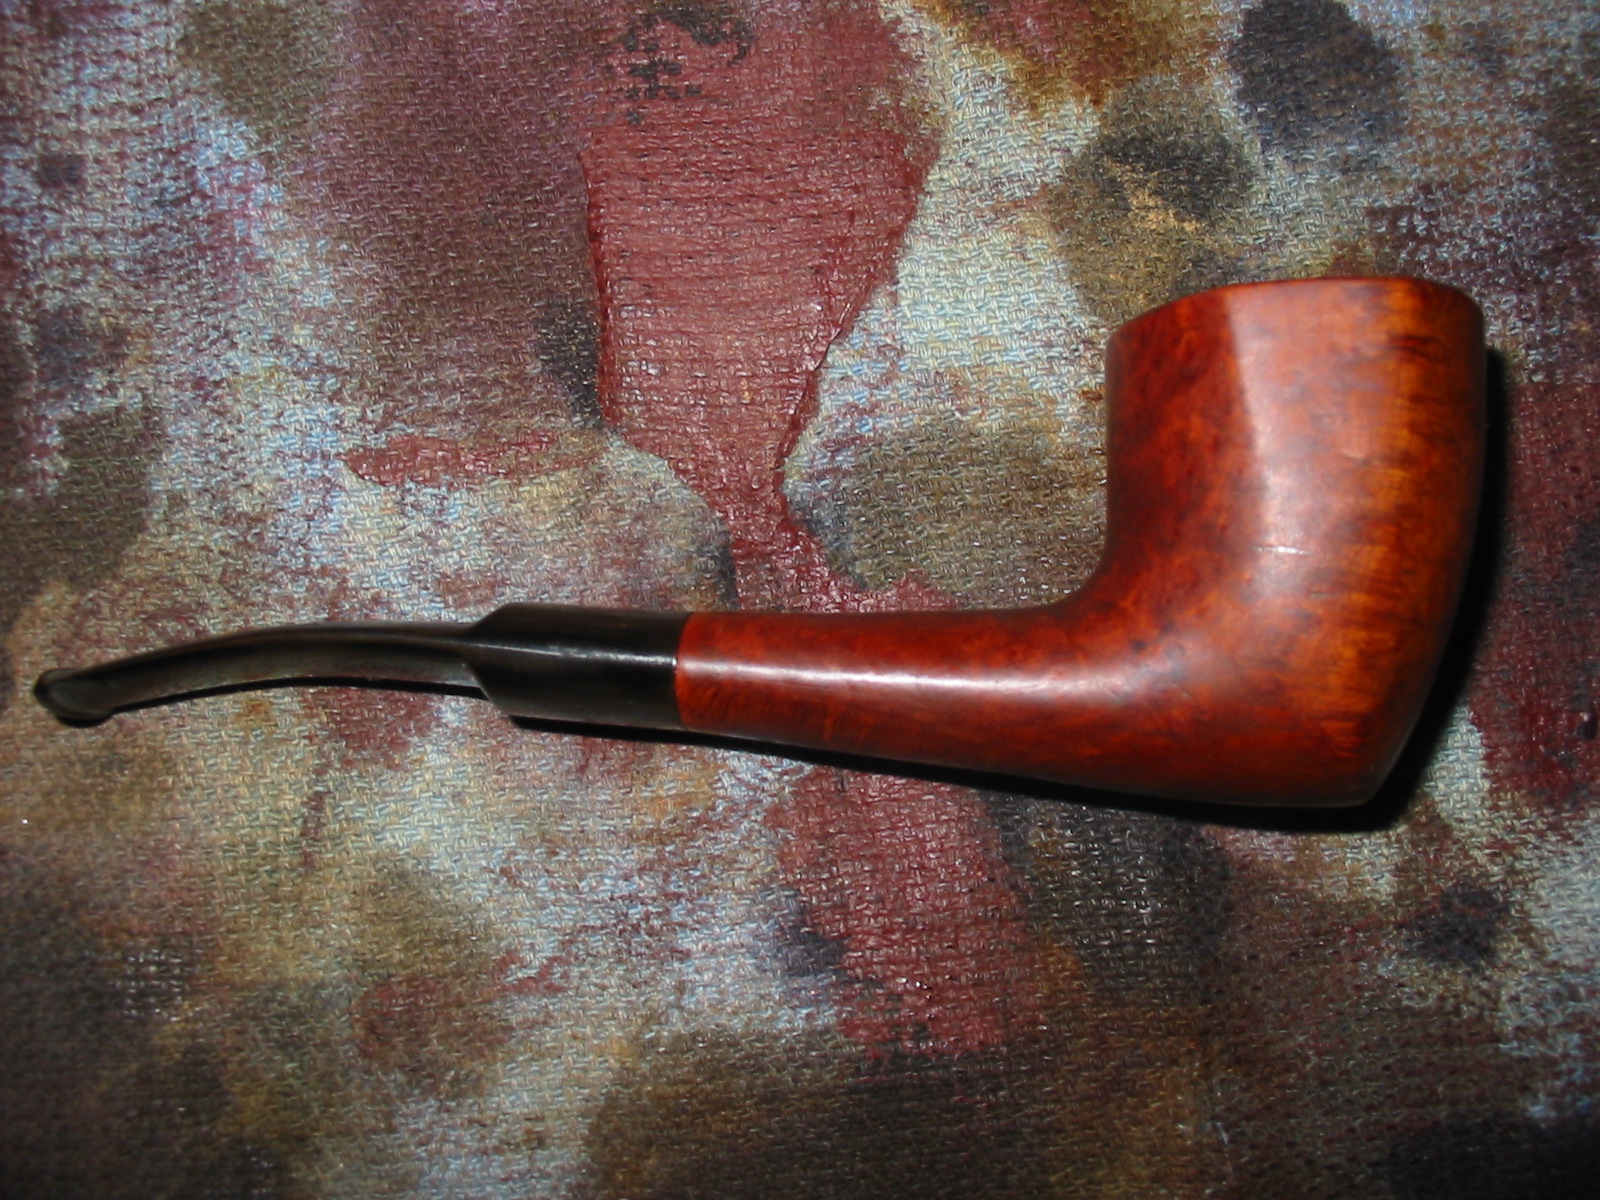
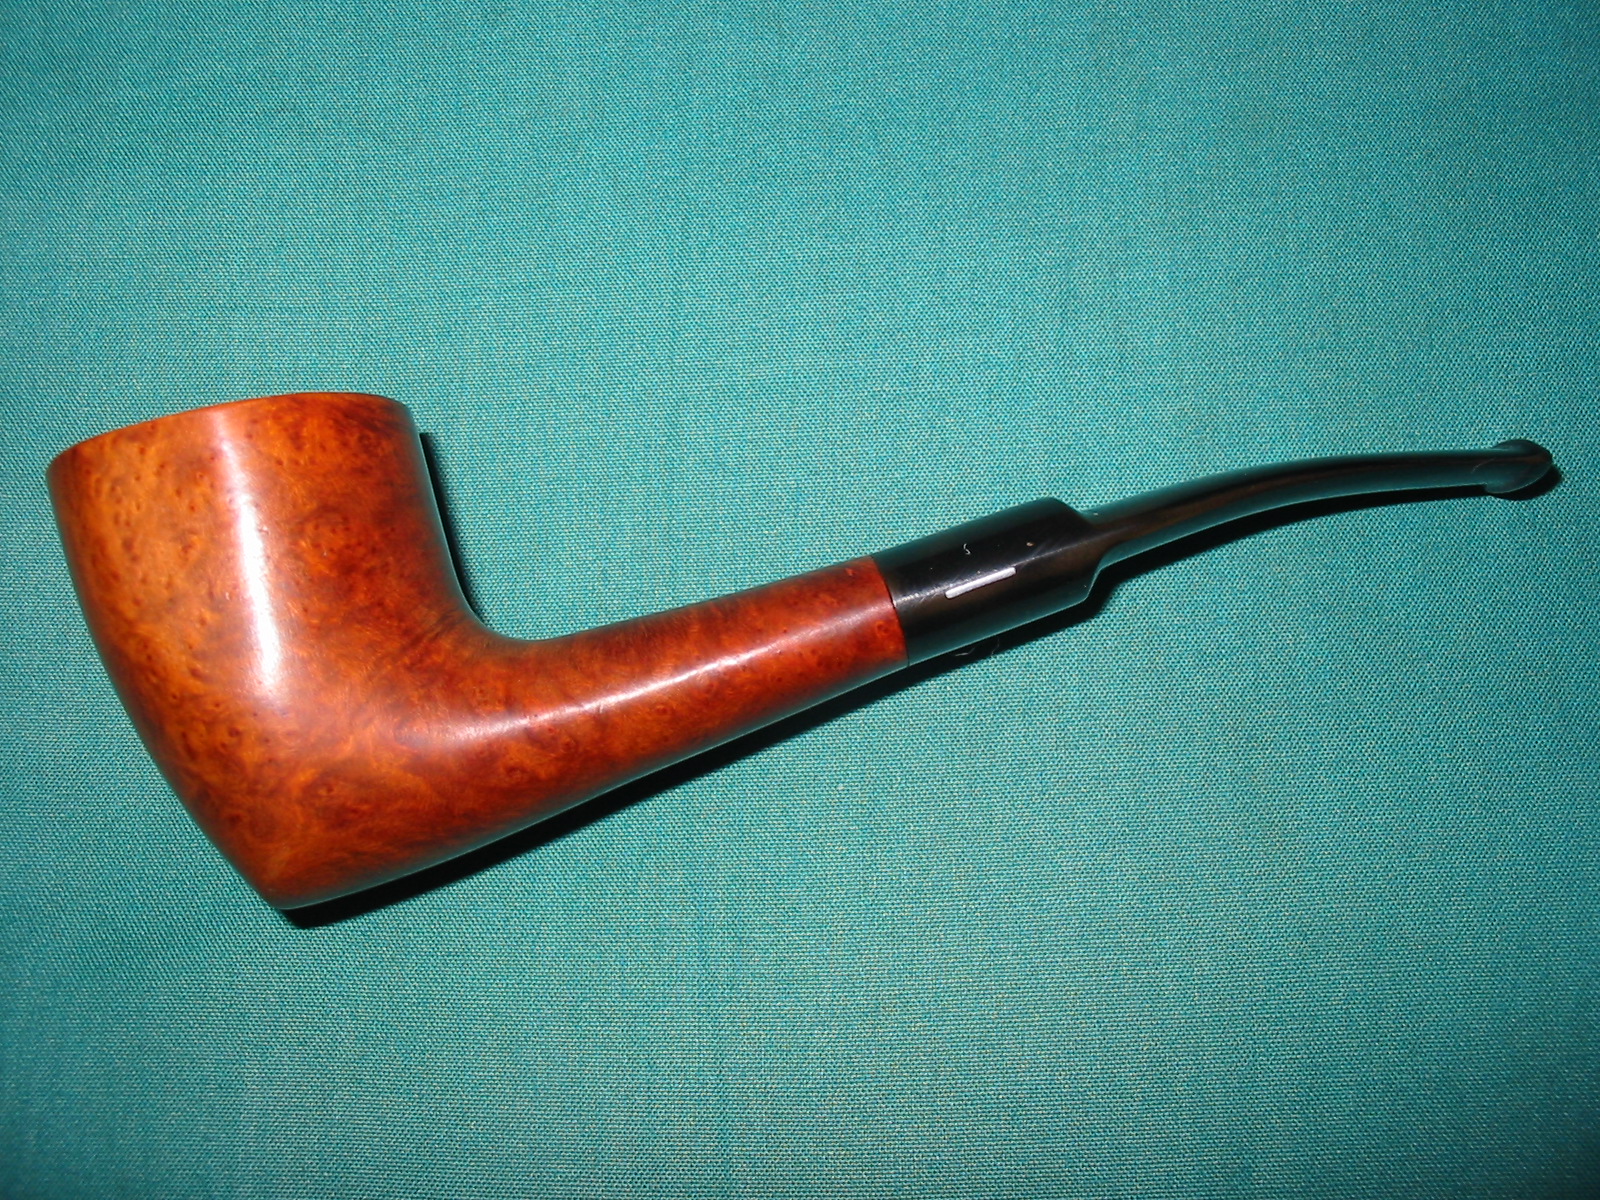
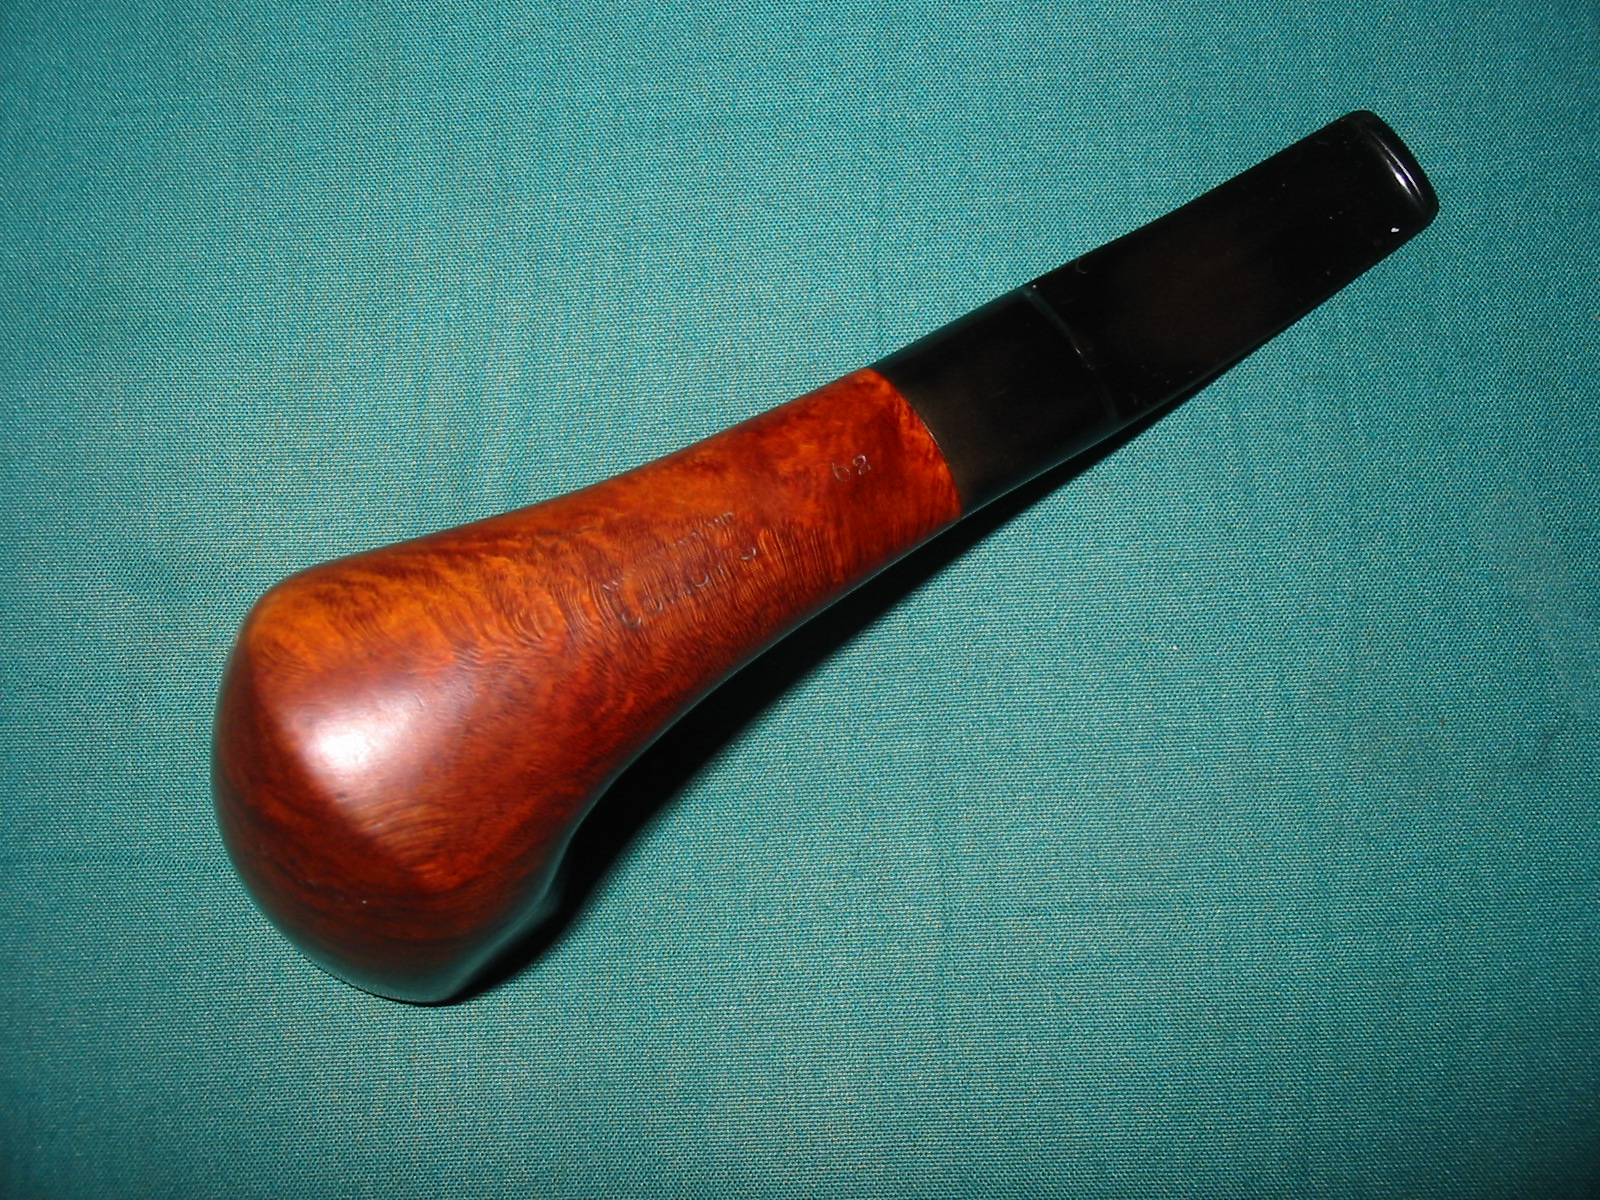
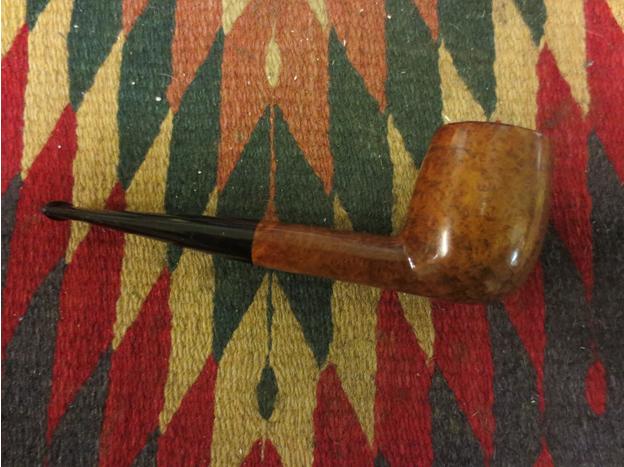
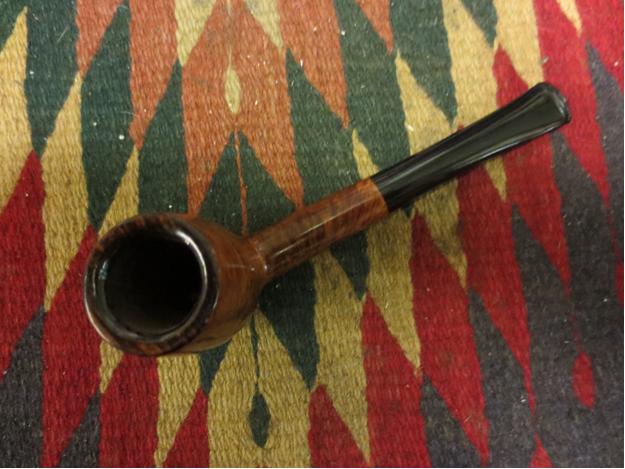
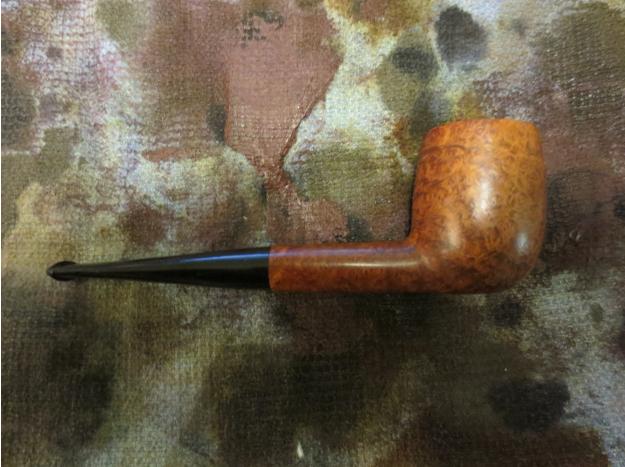
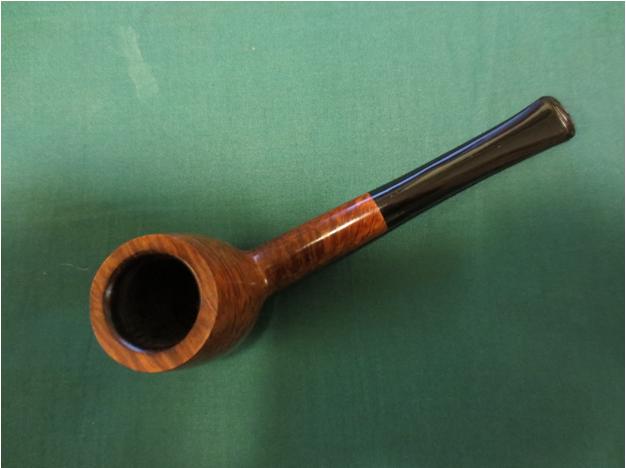
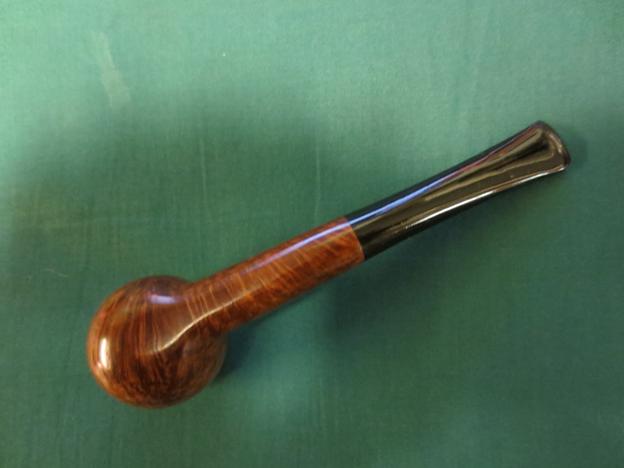
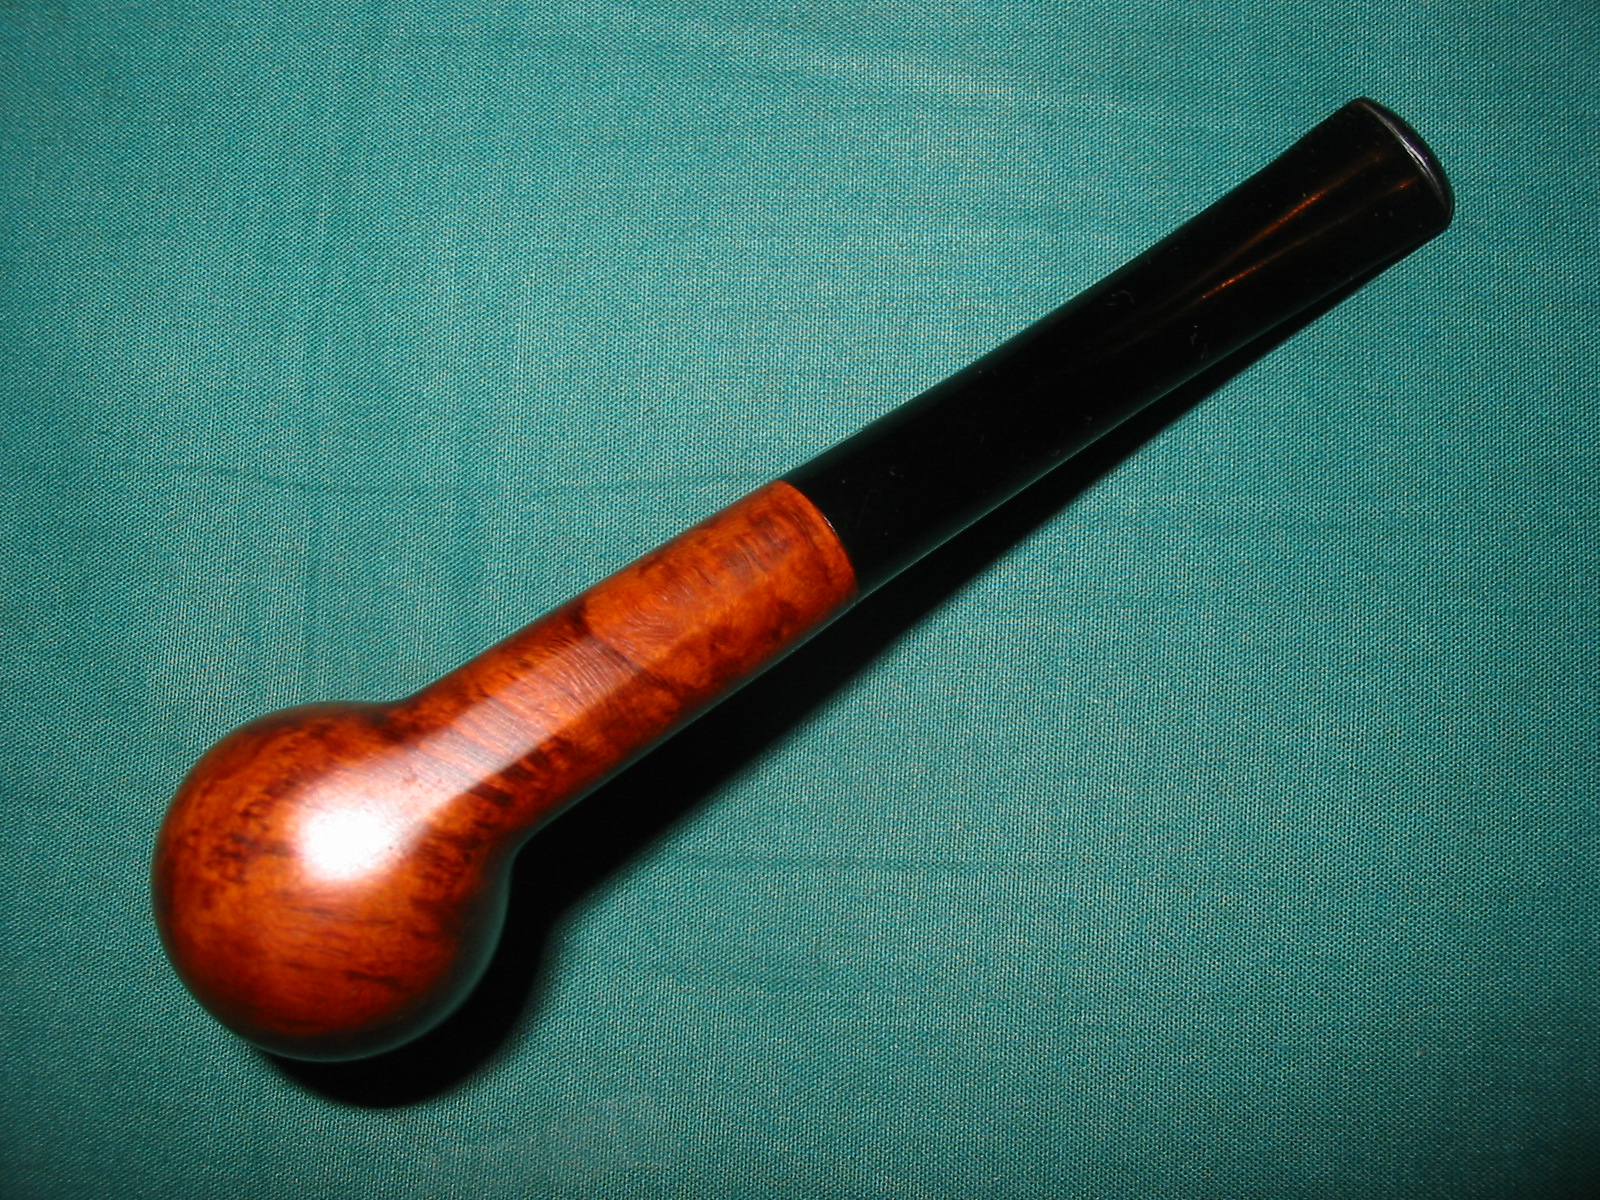
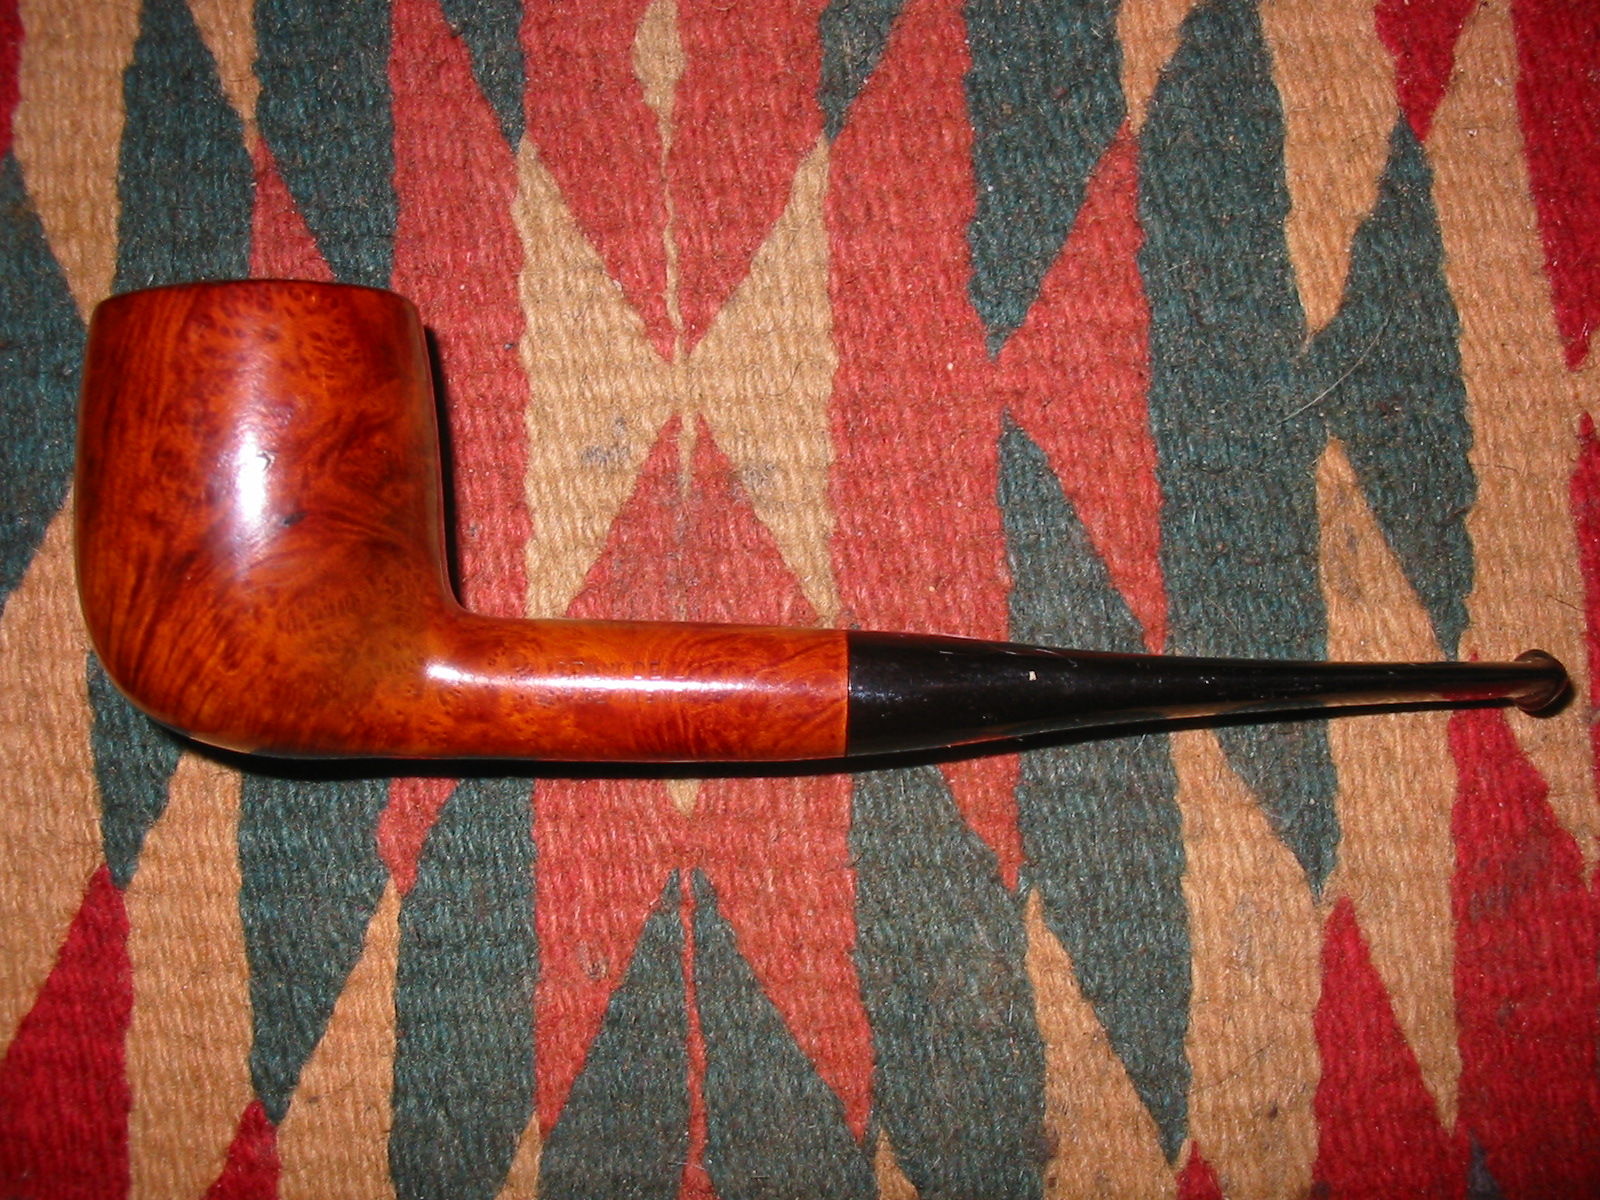
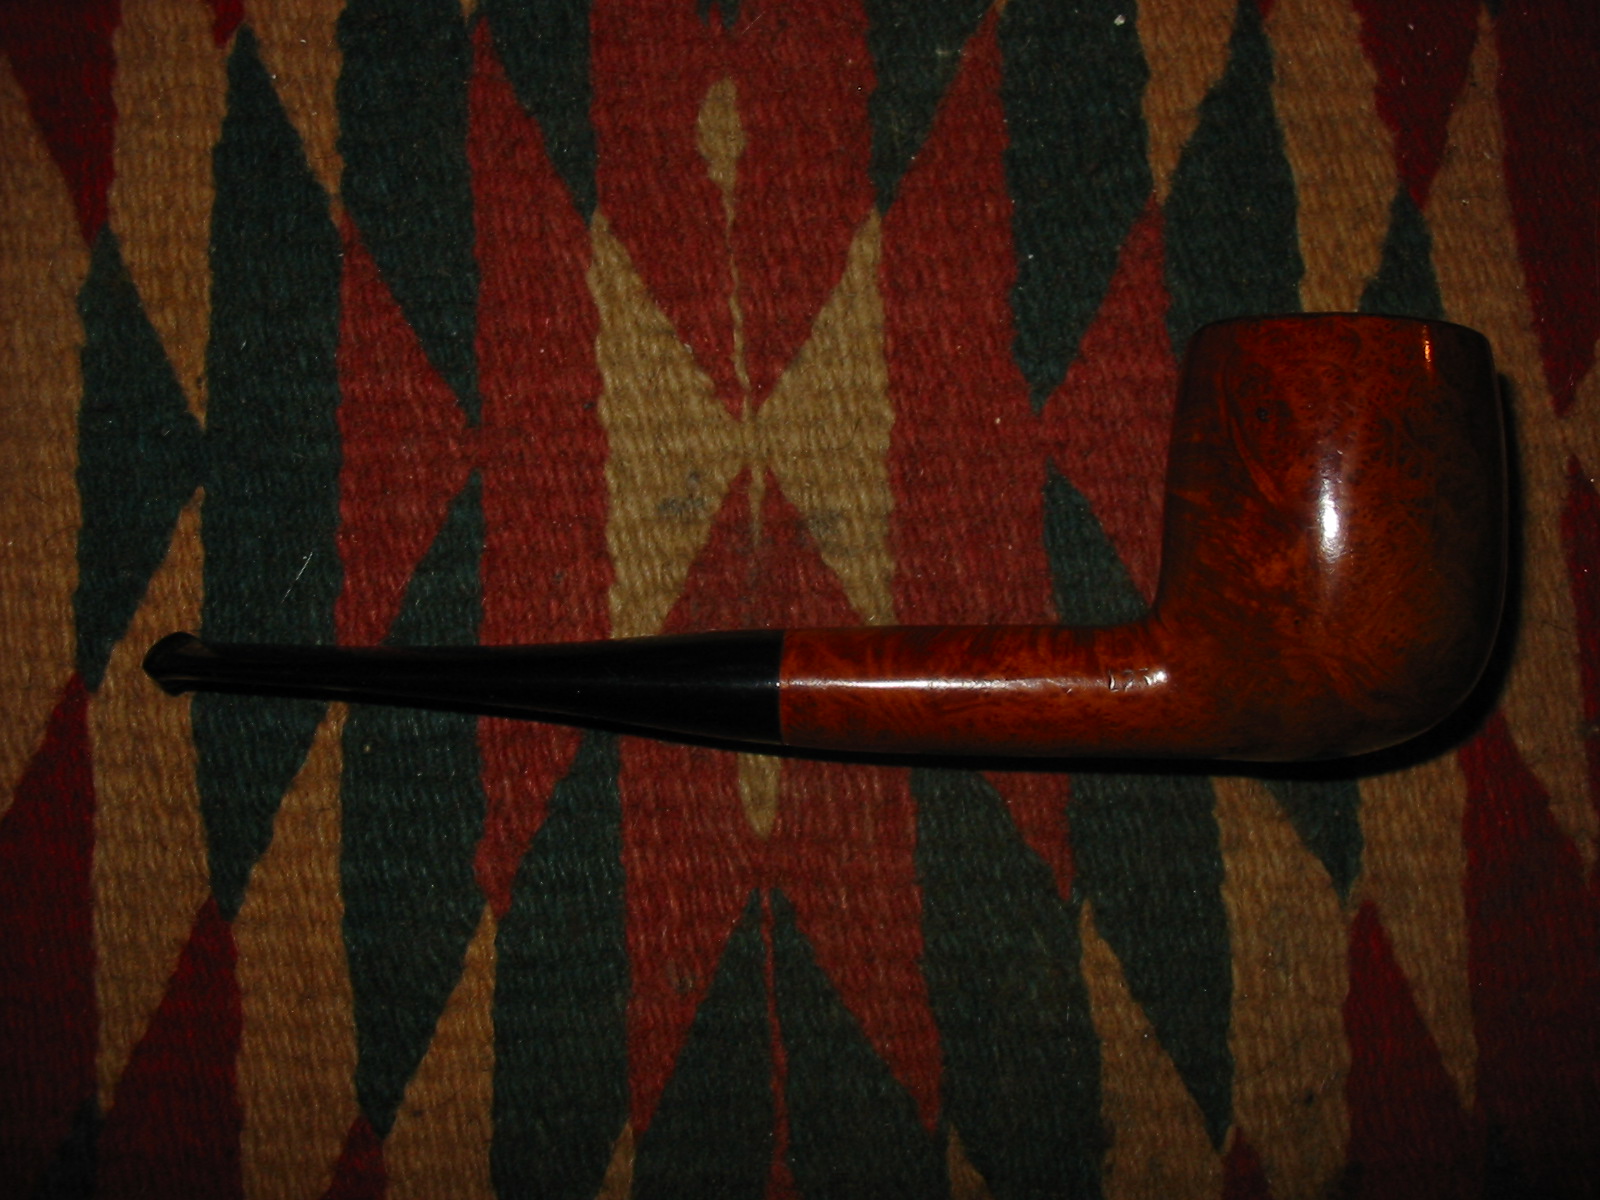
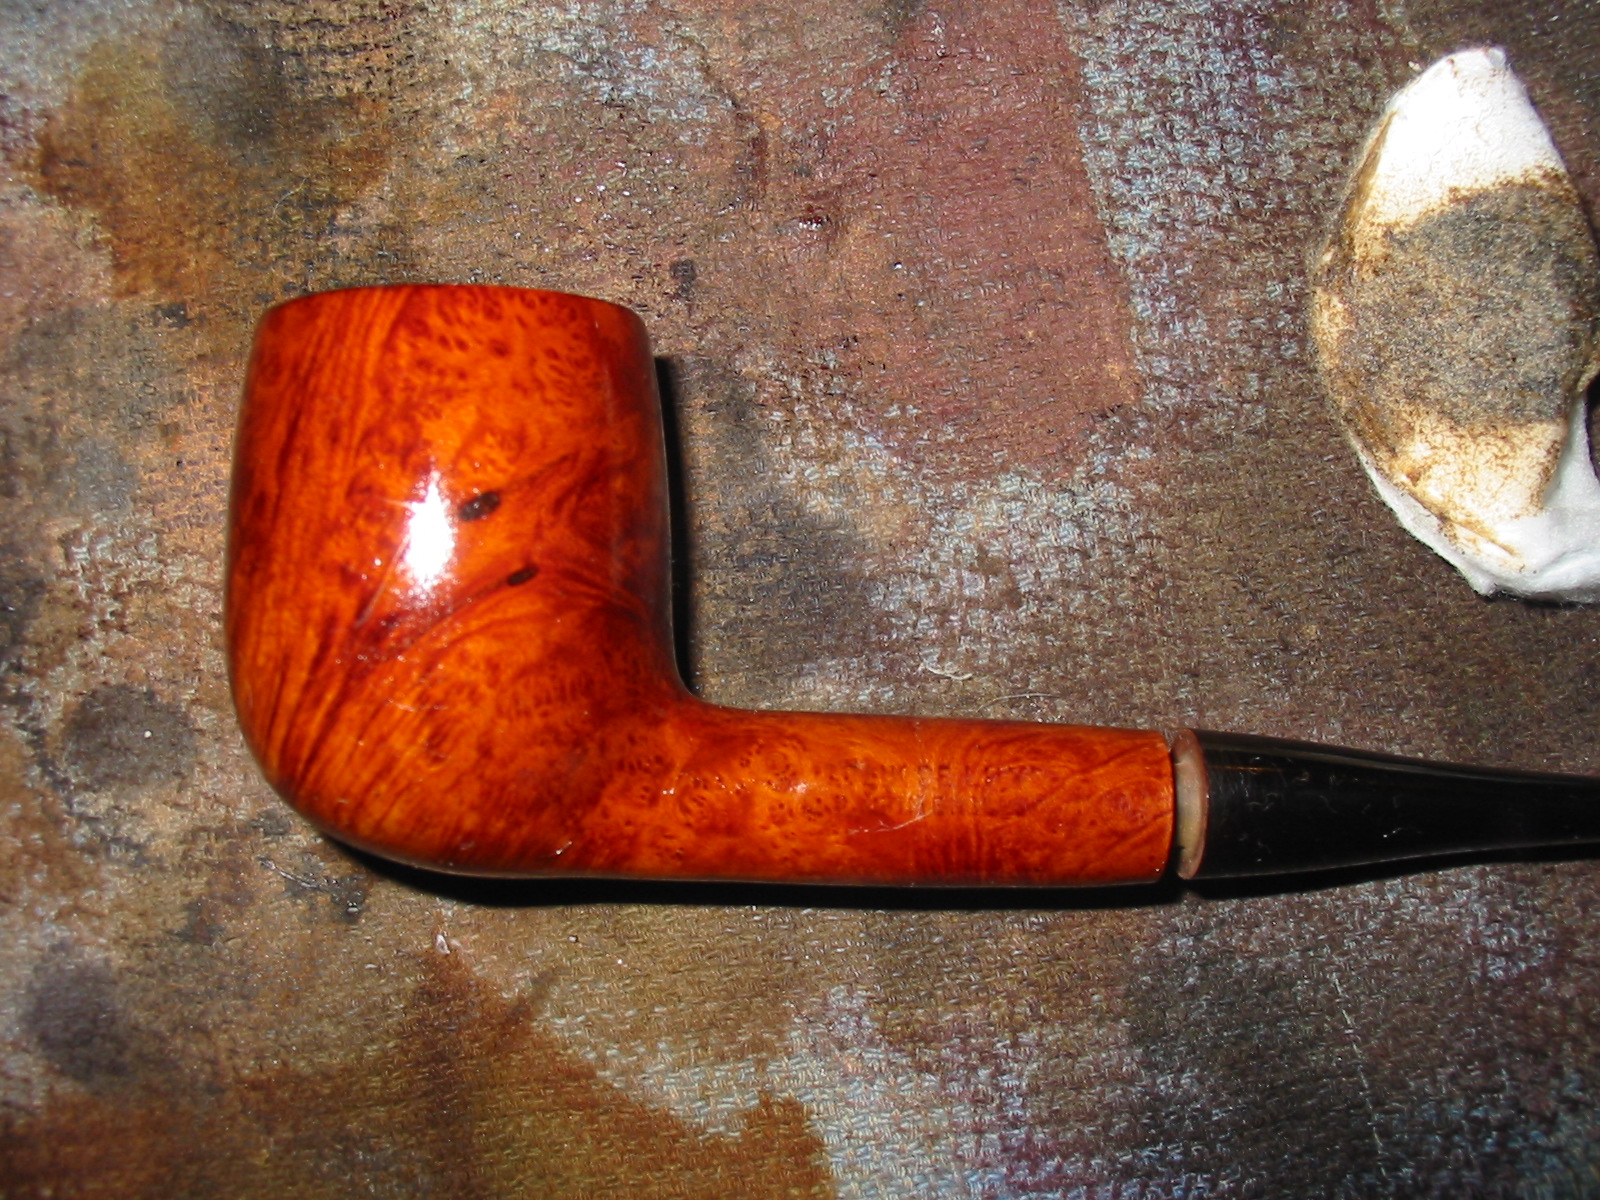
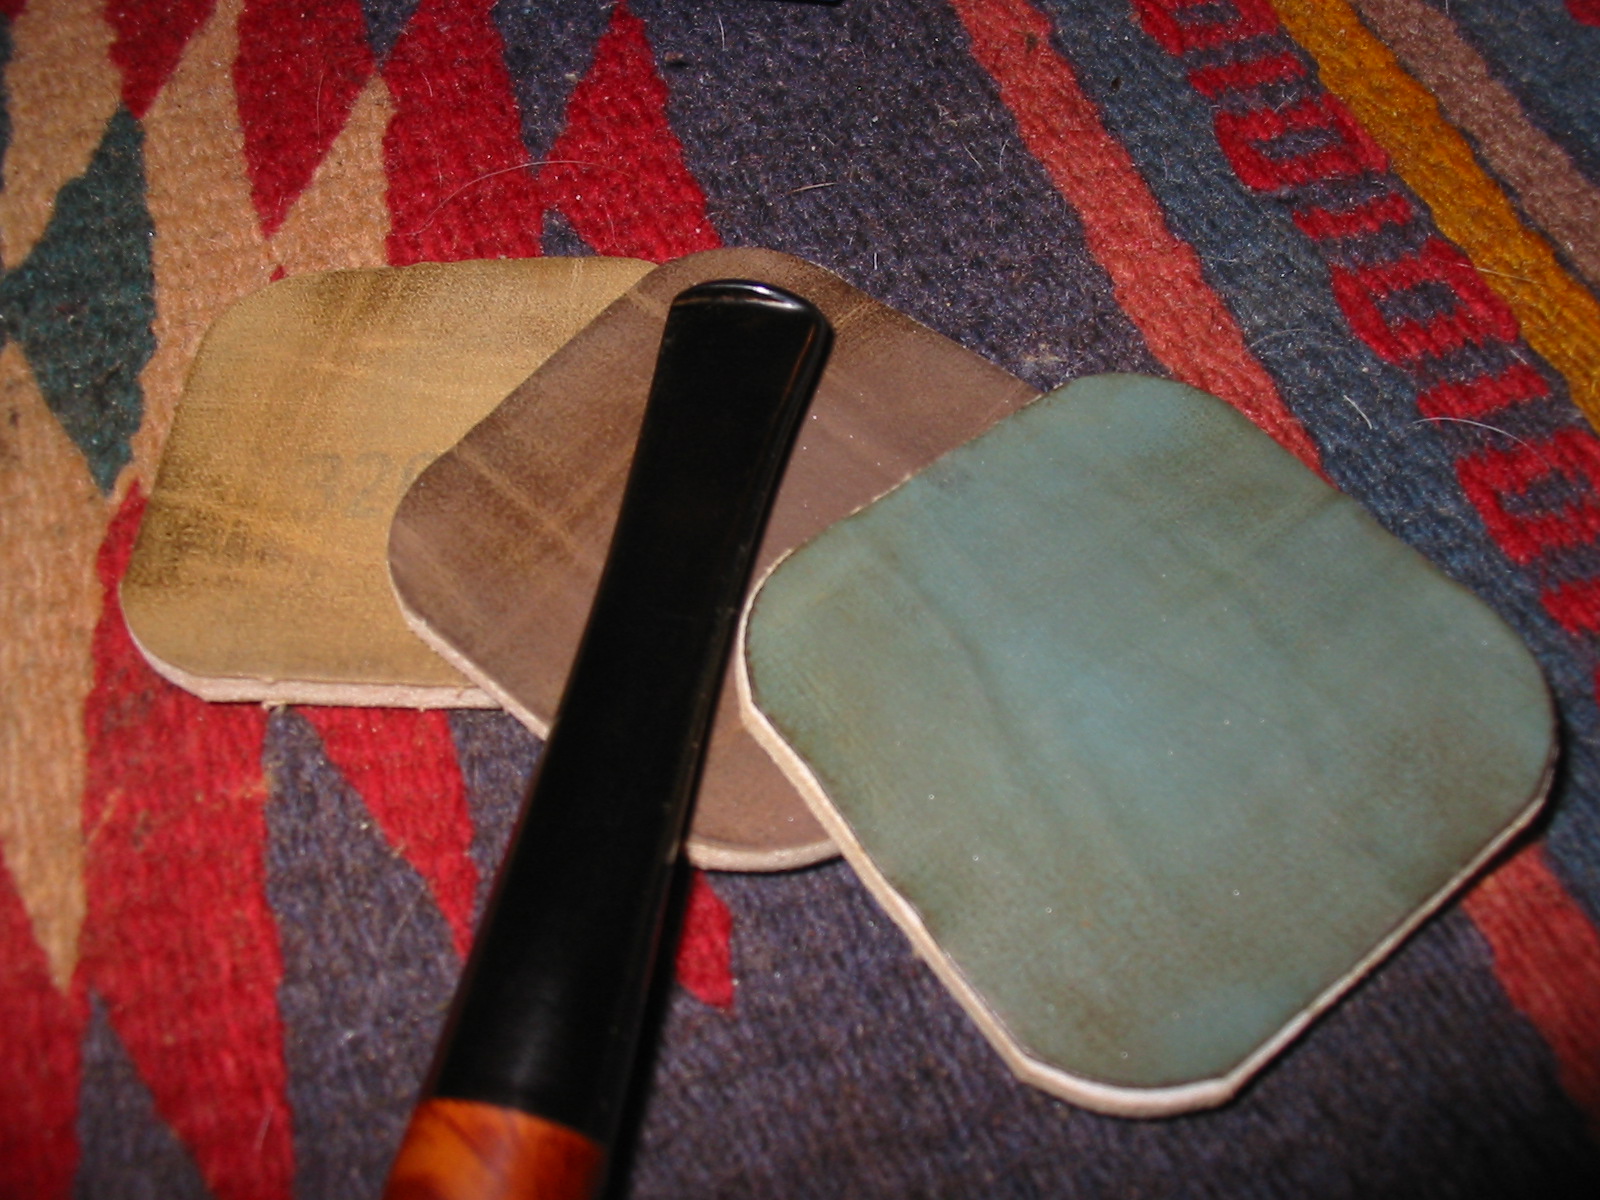
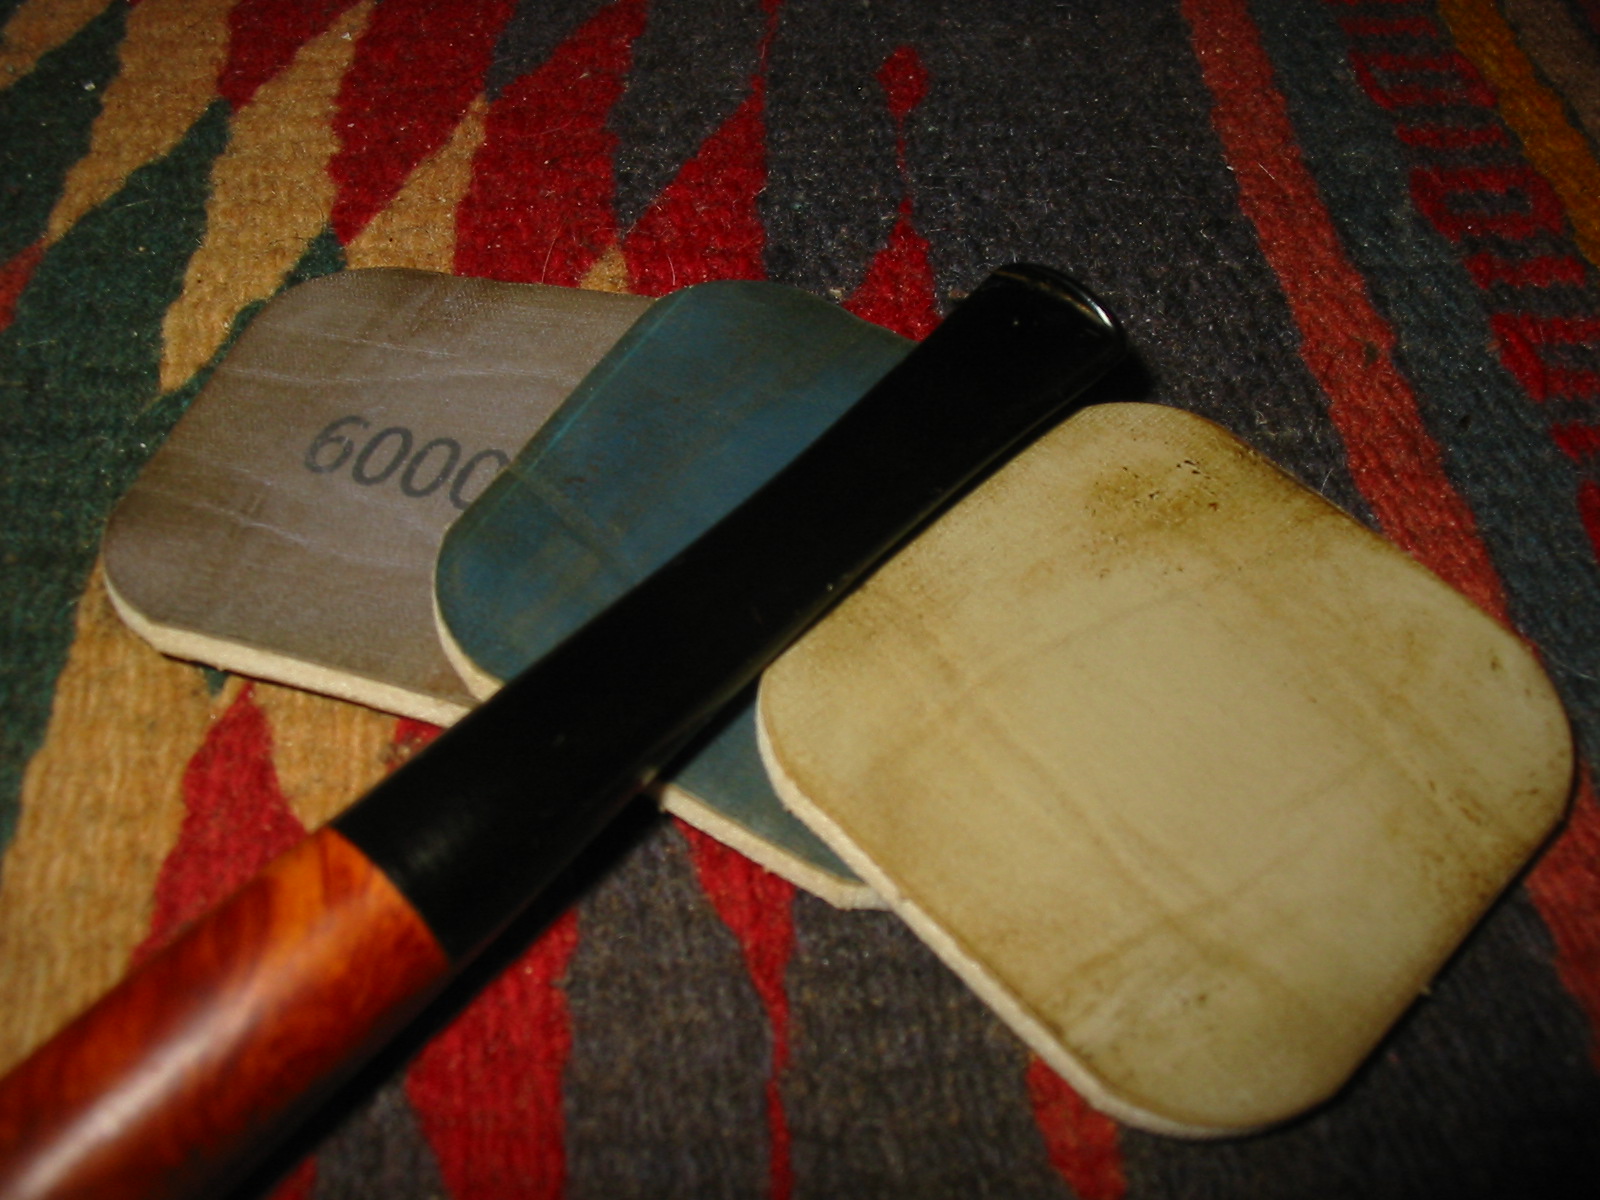
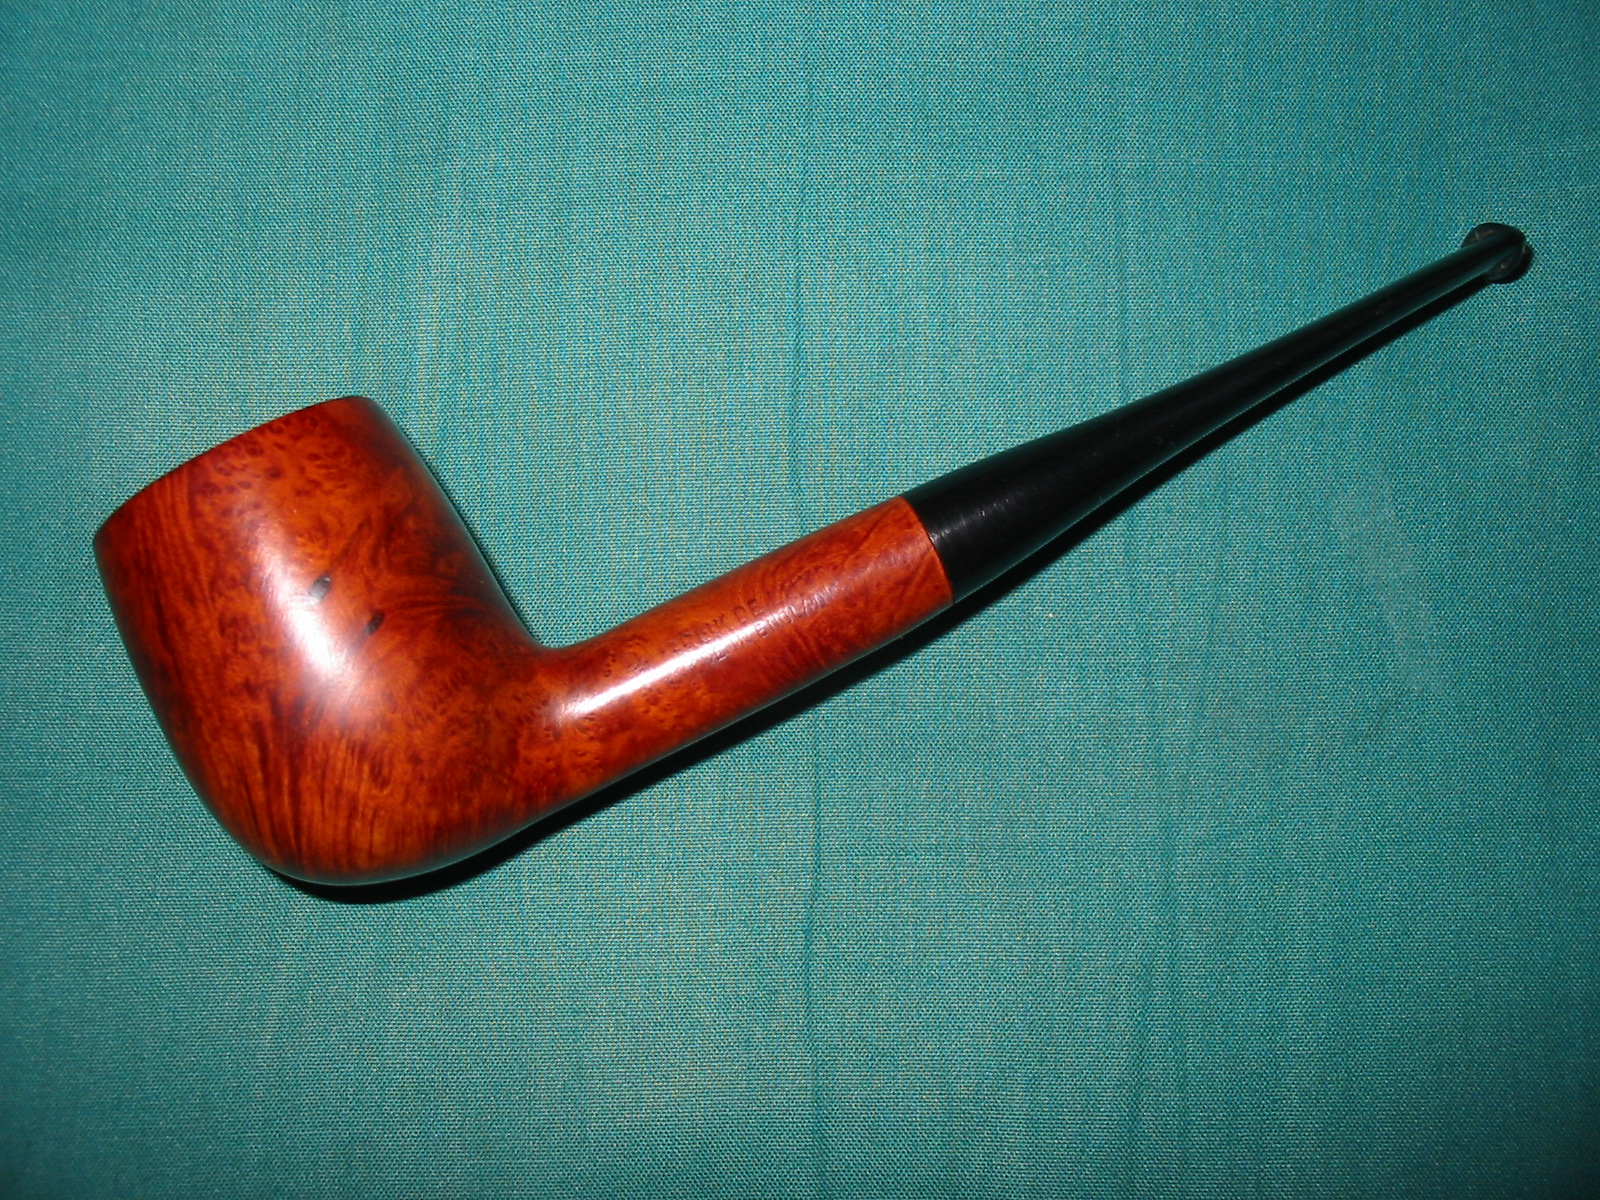
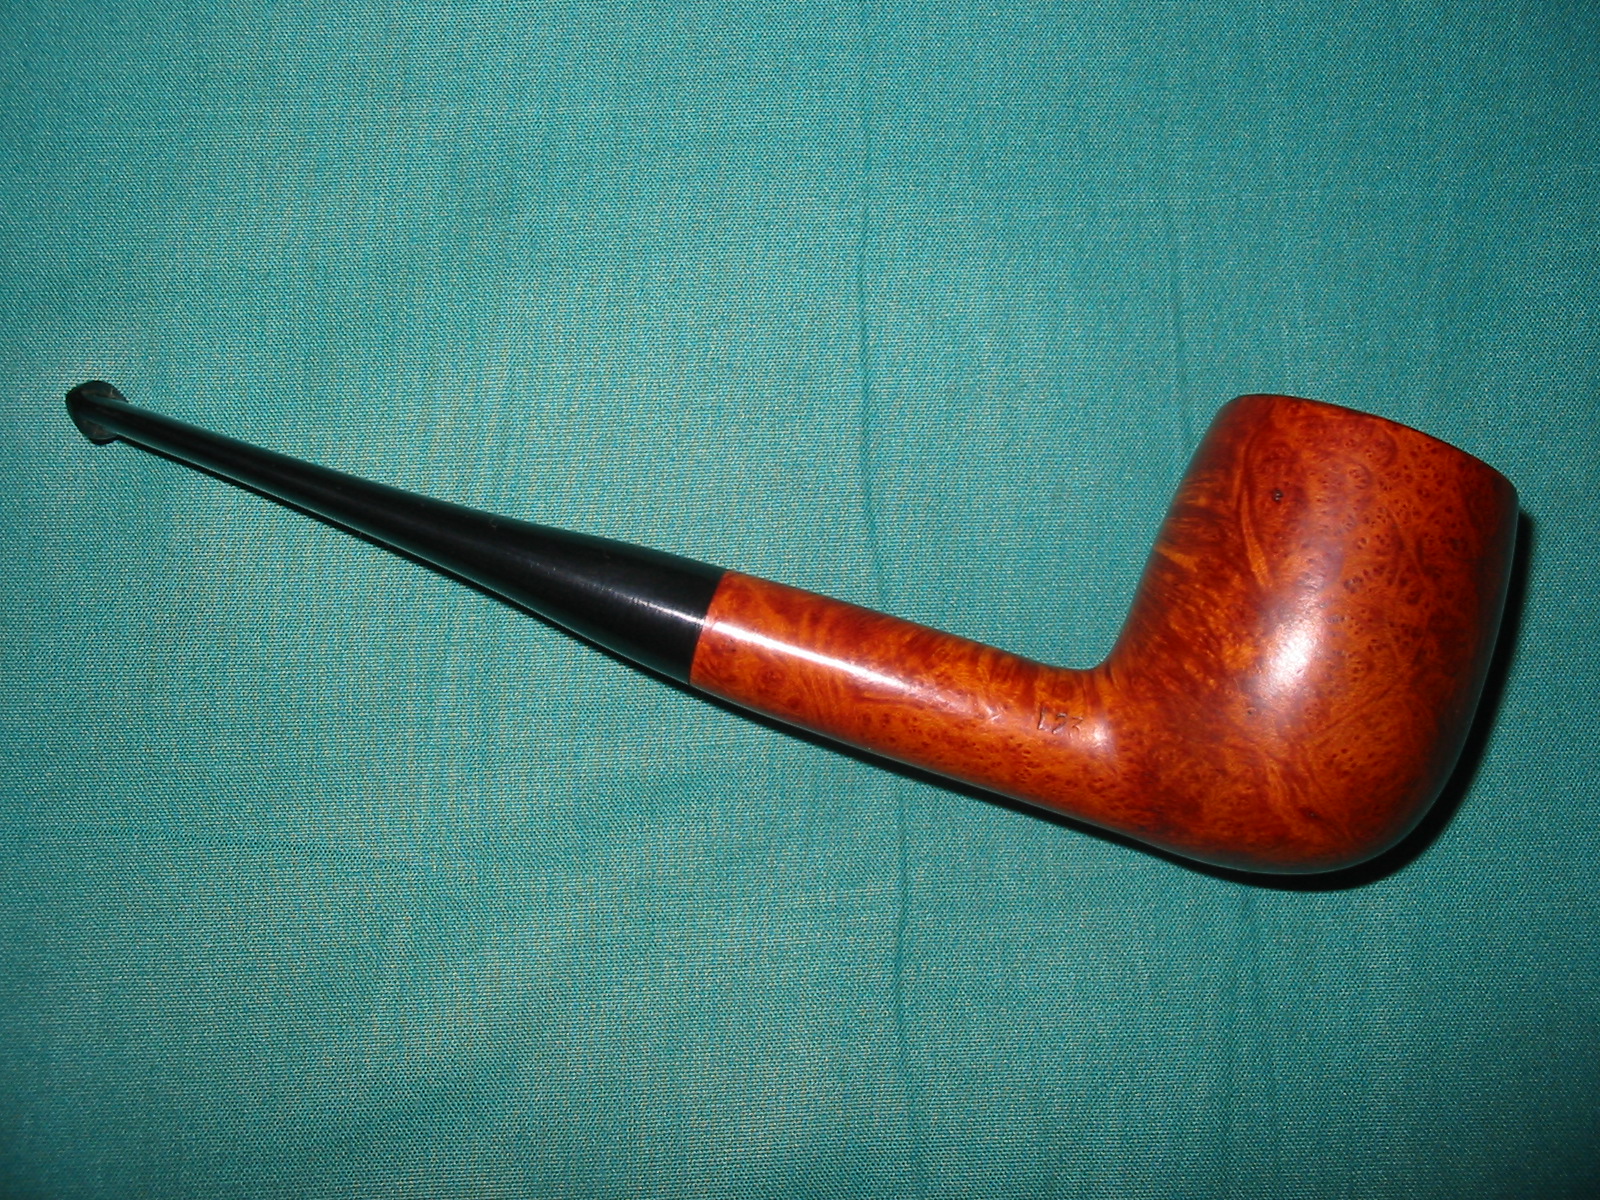
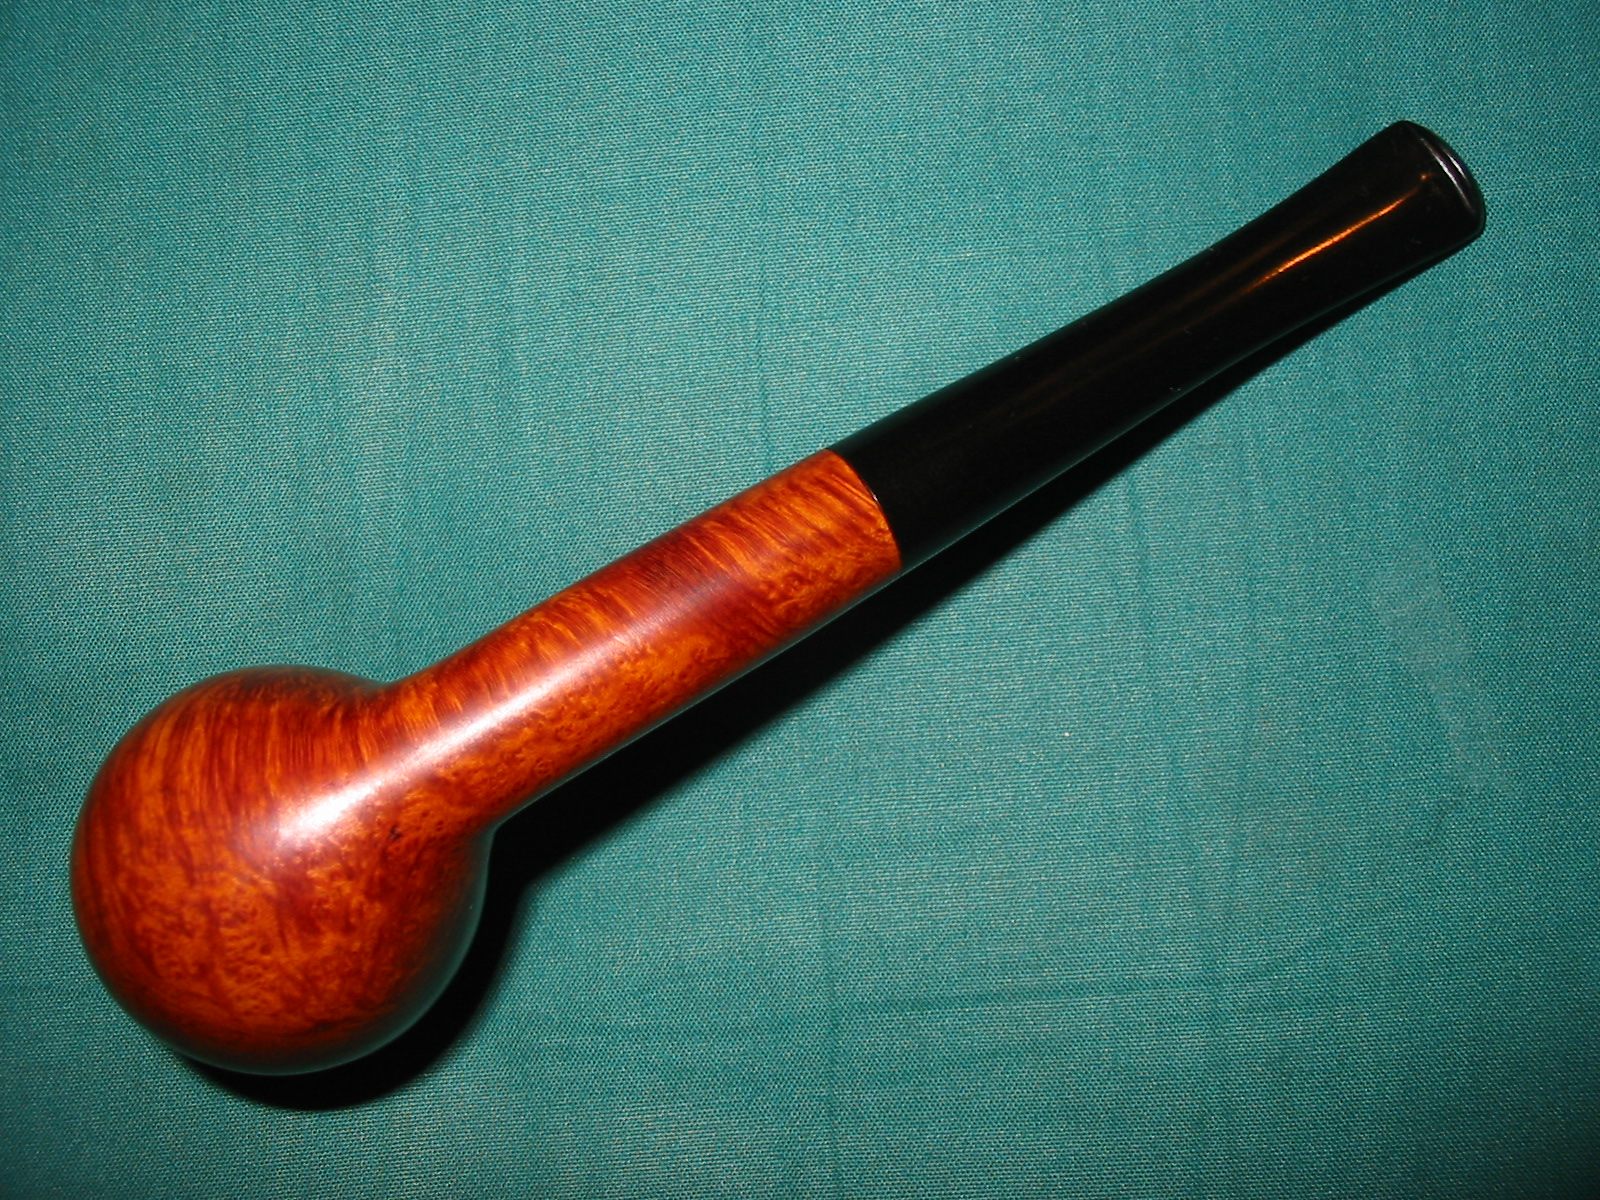
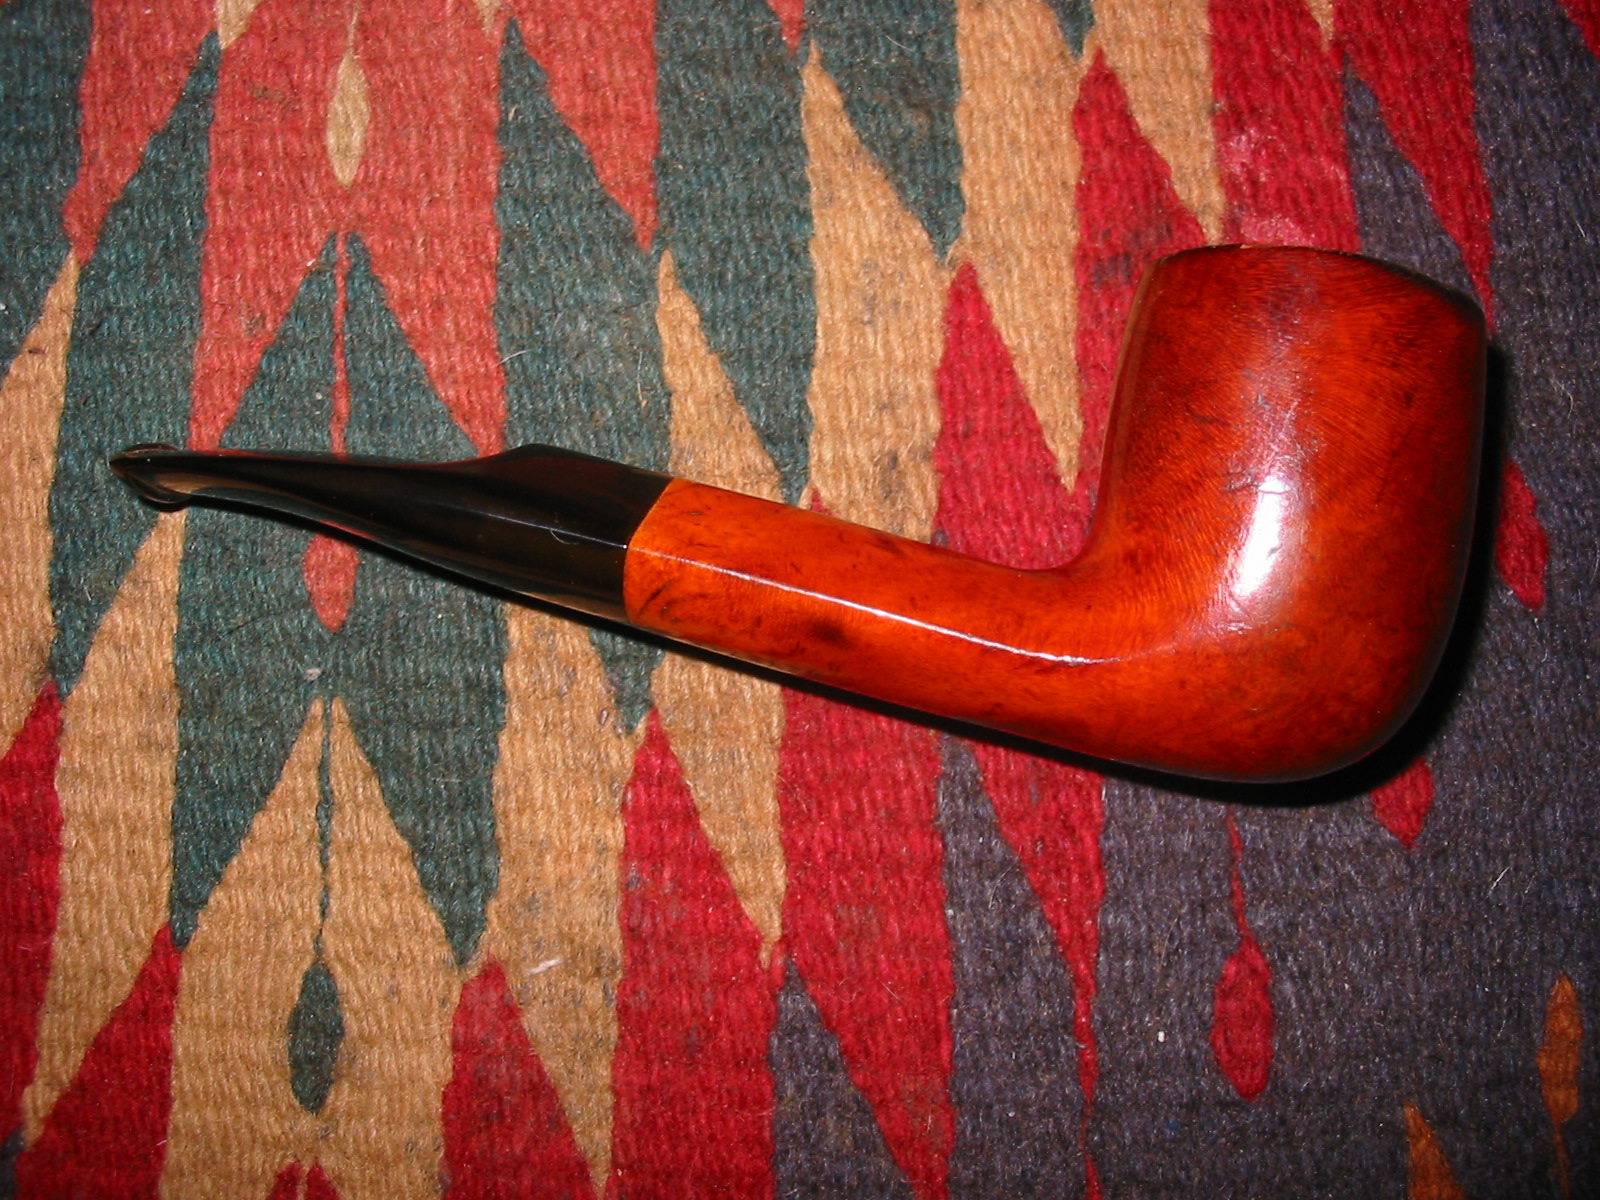
I rubbed the stem down with Obsidian Oil and when it was dry buffed the pipe one more time with White Diamond. I finished the refinishing by giving the pipe multiple coats of carnauba wax and buffing it with a clean flannel buff. The finished pipe is pictured below. It is ready to go back with the others that have been prepared for the Club to use as they choose. IMG_4142 IMG_4143 IMG_4144 IMG_4145

Topped and Refinished a Valby Acorn


This is another one that is from the Vancouver Pipe Club lot of donated pipes. The stamping on this one is quite faint. It looks to me to be Valby. Some of the letters in the stamp over lap making it harder to read. The rim had been topped but not finished. There were still burn marks remaining on the outer edge of the rim. As with the others in this lot the finish was coated with varnish making it perpetually shiny. The rim had some as well but it was still in rough shape. The bowl had been coated with the same black bowl coating. I decided to rework the topping job, remove as many of the burn marks on the front edge of the bowl as possible and refinish the pipe. The stem was in great shape and showed no oxidation or tooth marks.
Valley1

Valley2

Valley3

Valley4

I took the photo below to show the state of the rim. The photo does not do justice to the unfinished nature of the topping. The burn marks are visible in the second photo below on the front edge of the rim both inside and outside. The rest of the rim had scratches from the previous topping and the finish was dull.
Valley5

Valley7

I topped the bowl on the flat board and sandpaper until I had removed the burned portion of the rim and had evened out the top surface. The topping from before had not taken off enough of the damaged portion to be even across the surface.
Valley6

Valley8

I wiped the bowl and rim down with acetone on a cotton pad to remove the varnish coat and the finish so that I could restain and get a good even coat of stain.
Valley9

Valley10

Valley11

Valley12

I restained the pipe with MinWax Medium Walnut stain – rubbed it on and off repeatedly until I had a good even coverage on the pipe.
Valley13

Valley14

Valley15

Valley16

When I had finished with the staining, I took it to the buffer and buffed with White Diamond to smooth out the finish and give it a shine. I chose the stain I did because of the transparency and how well it matched the original stain. I gave the pipe and stem multiple coats of carnauba wax and finish with a soft flannel buff. The finished pipe is shown below and is ready to go back in the box for the Pipe Club to sell.
Valley17

Valley18

Valley19

Valley20

Cleaning up a Partner Deluxe Fine Briar Lumberman 129


Blog by Steve Laug

The next little pipe that I reworked for Vancouver Pipe Club donation of pipes is a nice lumberman. It is stamped on the left side of the shank Partner over De Luxe and on the right side it is stamped Fine Briar over 129. Further research has led me to information that this pipe was made by Savinelli. The shape number matches the number for a pipe shaped like this one. The finish was spotty with light and dark areas around the bowl and shank. The top of the rim had damage on the flat surface and burn marks all the way around the outer and inner edge of the bowl. The outer edge was rough to the touch. The grain was a nice combination of birdseye and cross grain. There were two repaired fills on the top of the shank. The stem had one tooth mark on the underside of the stem and there was tooth chatter on the top side of the stem.
IMG_4070

IMG_4074

IMG_4076

IMG_4077

The first photo below is a close up of the rim to show the damage to the surface of the rim and the inner and outer edges. The second photo below shows the burn marks around the outer edge of the bowl.
IMG_4078

IMG_4079

I topped the bowl using the method I have written about previously to remove the damage to the rim surface and edges. I used a folded piece of sandpaper to bevel the inner edge of the bowl and smooth out the damage and minimize it in the bowl.
IMG_4080

IMG_4082

IMG_4084

I wiped the bowl down with acetone on cotton pads until I had removed the varnish coat and the stain as much as possible. It always makes matching the freshly topped rim with the rest of the pipe if the briar is as neutral as possible.
IMG_4086

IMG_4087

IMG_4088

IMG_4090

IMG_4092

The tooth mark on the bottom of the stem and the tooth chatter on the top of the stem needed to be sanded. The first photo below shows the damage on the bottom of the stem next to the button. I sanded both surfaces with 220 grit sandpaper and then with a medium grit sanding sponge until the tooth chatter was gone and the tooth mark was minimized.
IMG_4081

IMG_4091

I continued to sand the stem with my usual array of micromesh sanding pads – wet sanding with 1500-2400 grit pads and dry sanding with 3200-12,000 grit pads.
IMG_4093

IMG_4094

IMG_4095

IMG_4096

I rubbed the stem down with Obsidian Oil and then buffed the stem with White Diamond. I took the pipe back to the work table and restained the bowl and shank with MinWax Medium Walnut stain to bring life back to the briar. I stained the light areas on the rim and at the shank stem junction multiple times until they matched the rest of the pipe.
IMG_4097

IMG_4099

IMG_4101

IMG_4102

IMG_4103

I buffed the pipe and stem with White Diamond a final time to remove any remaining scratch marks and then gave the pipe multiple coats of carnauba wax to protect and give it a shine. The finished pipe is shown below. It joins the others I have refurbished for the Vancouver Pipe Club box of donated pipes.
IMG_4104

IMG_4105

IMG_4107

IMG_4109

Cleaned and Topped A Georg Jensen Pipes Deluxe Billiard Shape 720


This particular pipe is another one that will go to the Vancouver Pipe Club. It was a pretty easy clean up in that only the bowl rim was a mess. Everything else was in ok shape. It is a billiard with great grain on the left side and bottom of the bowl and top and bottom of the shank. The grain on the right side and the back were lousy. There were also several fills on the poorly grained sides of the bowl. The finish was not in too bad shape though it too had been given a coat of varnish. The inside of the bowl had a black bowl coating that I think was applied to protect the thin back wall of the bowl. The top rim was in rough shape on the inside edge and had burn marks on the sides and front of the outer edge. The stem was in great shape with no damage at all. It is stamped on the left side of the bowl Georg Jensen over Made in Denmark Pipes. On the right side it is stamped 720 in the middle of the shank. On the underside of the shank it is stamped Deluxe.
IMG_4044

IMG_4045

IMG_4048

The next series of three photos show the damage to the rim. The first one is a top view of the bowls showing the overall damage. The second is a close up photo of the rim. The third photo shows the burn damage to the front outer edge of the bowl.
IMG_4046

IMG_4050

IMG_4052

I topped the bowl in my usual manner, sanded it with a medium grit sanding sponge and wet sanded it with a 1500 grit micromesh sanding pad. I wiped down the bowl and rim with acetone on a cotton pad to remove the varnish and the finish. I sanded the inner bevel of the rim with a folded piece of sandpaper to smooth out the damage to the edge and to rework that bevel to give it a clean and renewed look.
IMG_4054

IMG_4055

IMG_4057

IMG_4059

I restained the bowl with MinWax Medium Walnut stain and rubbed it on and off until I had the blend of colours I wanted to highlight the grain patterns. I buffed the pipe and stem with White Diamond to polish the scratches.
IMG_4061

IMG_4062

IMG_4063

IMG_4064

There were some light spots on the shank and the bowl that took more coats of stain than the rest of the pipe so I retouched them and then polished the pipe and stem with multiple coats of carnauba wax. I finished by buffing it with a clean flannel buff to polish it. The photos of the finished pipe are below. It is ready to send back to the Pipe Club and provide someone with a great looking pipe for their collection.
IMG_4065

IMG_4066

IMG_4067

IMG_4069

Reworking a Poorly Done Topping Job on a Bulldog of Unknown Make


This poor old bulldog came in the pipes that were donated to the Vancouver Pipe Club and I decided to work on it and see if I could repair some of the damage that had been done when someone tried to top it in the past. The rim looked as if whoever topped it tried to do it by hand and not on a flat board. Because of that the surface of the rim was wavy with high and low spots and the outer edge was lower than the inner edge in several places. The top was also at a slight angle as the sanding had not been done on a flat surface.

The first two photos below show the damage to the rim from the side profile. Note the wavy surface of the rim. The third photo shows some damage on the underside of the stem next to the button and the fourth photo shows the rim from the top view. In that photo the bowl appears to be seriously out of round and the front edge seems thinner than the rest of the bowl. This is a bit of an illusion due to the poorly executed sanding on the rim. The way the bowl had been sanded left the front of the bowl lower than the back of the bowl thus creating the appearance of a thin wall. The stamping on it had been buffed out on the left side of the shank and on the right side I could still see very faintly London England over 403S. I am uncertain of the maker. I checked the Comoy’s shape number chart, the GBD and the Orlik shape number charts and there is no such number. Perhaps other may have some idea of the maker.
IMG_3999

IMG_4000

IMG_4001

IMG_4002

I took a two close up photos of the top of the rim to show the damage more clearly. There was also significant burn damage to the front inner edge of the rim. Fortunately this damage was only surface and a retopping would take care of most of it.
IMG_4004

IMG_4005

I also took a close up photo of the end of the stem next to the button to show the tooth marks on the underside next to the button.
IMG_4006

I set up my topping board and sandpaper to work on the rim and repair the damage. It took care to keep the high point of the bowl flat against the surface of the paper and sand until the rim flattened out. This took more time than usual as I had to continually check to see if the rounded spots, low dips and angle sanding of the rim surface were being removed. I also wanted to remove the burn damage as much as possible. The next five photos show the process and the results of the sanding. The profile views show the repair of the outer edge to a flat straight surface with a sharp edge. The top view shows the more even distribution of the thickness of the wall and the removed burned area on the front of the bowl.
IMG_4008

IMG_4010

IMG_4011

IMG_4014

I wiped the bowl down with acetone on cotton pads to remove the varnish and the remaining finish on the bowl so that it would be easier to match the colour of the bowl and the newly topped rim.
IMG_4015

IMG_4016

IMG_4017

IMG_4018

I sanded the rim with a fine grit sandpaper and wet sanded with a 1500 grit micromesh sanding pad to remove scratches and prepare the rim for staining. I stained the bowl and rim with MinWax Medium Walnut Stain and rubbed it on to the pipe and rubbed it off until I had achieved the colour and coverage that I wanted.
IMG_4019

IMG_4020

IMG_4021

IMG_4022

I sanded the damaged areas on the topside and the underside of the stem near the button to remove the tooth marks. I started with 220 grit sandpaper and then a medium grit sanding sponge to repair the tooth damage.
IMG_4023

IMG_4024

The mark on the underside was deep and once I had sanded and cleaned it I put a drop of super glue on it to build up the divot. Once it was dry I sanded it again with 220 grit sandpaper and the sanding sponge to blend it into the surface of the stem.
IMG_4027

IMG_4029

IMG_4030

I used my usual array of micromesh sanding pads to polish the stem repair – wet sanding with 1500-2400 grit sanding pads and then dry sanding with 3200-12,000 grit pads. I buffed the stem with red Tripoli and White Diamond and then rubbed it down with Obsidian Oil. When it was dry I rubbed the stem down and reinserted it in the pipe.
IMG_4031

IMG_4033

IMG_4036

I buffed the pipe and stem with White Diamond and then gave it multiple coats of carnauba wax. I finished the buffing with a clean flannel buff to give it a shine. The finished pipe is pictured below. It is ready to go back to the Pipe Club and will make someone a nice pipe.
IMG_4038

IMG_4039

IMG_4040

IMG_4041

My Process of Topping a Damaged Pipe Bowl


I seem to have been doing quite a few bowl topping job here recently. I decided to document the process a bit and focus on the rim work to make the work more clear so others can give it a try. I have chosen two different Comoy’s pipes and an Orlik billiard that I recently reworked. Each one had serious rim damage that needed topping to effectively repair them. The first one shown below was a Comoy’s London Pride that I have written about in full earlier. This one had both inner and outer rim edge damage. The top had become rounded on both edges and it was poorly done. I researched what it was supposed to look like and topped it accordingly. The second one was an Orlik billiard that had a different type of damage – burn marks and gouges that only a topping would repair. The third one was the Comoy’s St. James pipe that repaired.
comoys5

img_3907

All of my bowl topping starts the same way. I have a flat board that I spread a piece of sandpaper on and place the bowl flat against the board on the sandpaper. As I work it against the paper I am careful to keep the bowl top flat against the paper and not lift an edge or angle the bowl. It is very easy to seriously change the profile of the bowl. I also constantly check to ensure that I only remove enough of the damaged briar to repair the problem and not take too much off.
IMG_3963

comoys6

img_3910

The next series of photos show the progress of the topping. On the Comoy’s St. James I took photos each time I checked on the progress of the topping so you can see the point at which I stopped the sanding. The other two bowls I show the end product of the topping.
IMG_3964

IMG_3966

IMG_3967

IMG_3969

IMG_3971

IMG_3972

comoys7

On each of the bowls that I top I also use a folded piece of sandpaper to smooth the inner edge of the rim. This has to be done carefully or the bowl can easily go out of round. On the Comoy’s London Pride I used the folded sandpaper to create a slight bevel on the inner edge of the rim to match what was originally on that pipe. On the St. James and the Orlik I merely sanded the edge to make a clean and smooth surface.
comoys8

img_3911

IMG_3977

Once the rim is successfully topped the process truly has only begun. The surface then needs to be sanded with higher grits of sandpaper and micromesh sanding pads to remove scratches and give a smooth out the briar so that when it is stained the surface does not show scratching or repair damage. Then it has to be stained in such a way that the colour blends in with the colour of the bowl. When I am refinishing a pipe I find that the simplest and most straight forward way to guarantee a match it is to remove the previous finish as much as possible and start from scratch with the whole bowl. This is not always possible and often the matching process takes several stains and several coats to get a good blend with the rest of the bowl. It is often a matter of darkening a stain or thinning it with alcohol to lighten it or even blending several colours of stain together to get the mix that actually blends in seamlessly to the bowl colour. This part is probably the most time consuming part of the process.

The first two photos below show the stain on the Comoy’s London Pride and how the bowl and rim match – both before and after buffing and waxing. The third photo shows the Orlik after staining and buffing. There is still a slight bit of rim darkening on this rim that I left on purpose. The fourth and fifth photos show the St. James after staining and then after buffing and waxing. The change in the shape or height of the bowl is negligible and the overall improvement to the profile and look of the pipe is well worth the effort.
comoys14

comoys19

img_3925

IMG_3989

IMG_3997

I continue to learn and experiment with the process of topping and sanding a bowl to repair the damage inflicted by the previous owner – whether it is thoughtless carelessness or accidental damage. Each time I do the work I become more confident in the process and pleased with the results. If you don’t try and practice you will never learn. If you have comments to add about the process or have suggestions of improvements I encourage you to record them, photograph them and share them with us all. The community benefits from the combined knowledge of its members. Thanks for reading this blog post.

Comoy’s St. James Shape 62 Restored


This oddly shaped Comoy’s came to me in a lot that was donated years ago to the Vancouver Pipe Club. It has been sitting for a long time needing a bit of care to bring it back to life before going to the Club to be sold or given away. It is stamped on the top of the shank, St. James in an arc over London Made in a straight line. On the underside of the shank it is stamped Made in England by Comoy’s followed by 62. The finish was rough on this one; the top of the rim had been beaten against something hard and had damaged the outer edge to the point that it was no longer sharp. The inner edge of the rim was not too bad but the bowl had been coated with a black rubbery bowl coating that was grim. There was one rather large fill on the right side of the bowl near the shank/bowl junction. The stem had some oxidation next to the button and some small tooth chatter there as well. The stem also had one silver bar inset in the vulcanite on the left side. It is not a logo that I have come to associate with Comoy’s but rather with Savinelli. I am not certain the stem is original. Perhaps someone here can shed some light on the stem logo and this particular line of Made in England by Comoy’s Pipes.
IMG_3960

IMG_3961

IMG_3962

I decided to top the bowl and try to repair the outer rim damage. It was truly a mess. In the next photos you will see the set up for topping and also several photos of the bowl rim as I began to sand it out. The sanding dust stuck to the bowl coating.
IMG_3963

IMG_3964

IMG_3966

IMG_3967

IMG_3969

IMG_3971

IMG_3972

When I finally got the topping done to the point where the rim was more smooth and crisp I also sanded the outer edge to minimize some of the deeper chips and rough areas that I left because I did not want to top too much of the bowl. I then cleaned out the bowl and the shank and wiped the bowl down with acetone on cotton pads to remove the varnish coat that had been put on the bowl. I reamed out the bowl coating with a PipNet reamer as I wanted to remove the sticky black substance and wanted to see what the walls of the bowl looked like underneath the ooze.
IMG_3973

IMG_3974

IMG_3976

IMG_3977

I sanded the bowl and rim with a medium grit sanding sponge and then with a 1500 grit micromesh sanding pad to remove the scratching that was present under the finish and that left behind by the sanding sponge. I wiped it down a final time with acetone on a cotton pad to clean and prepare it for restaining.
IMG_3978

IMG_3981

IMG_3982

IMG_3983

I used a black permanent marker to bring grain lines into the fill area and minimize the way it stood out. In the second photo you can see the effect of the marker and stain on the fill near the bowl/shank junction. Previously it had stood out and now it was muted. I restained the bowl with MinWax Medium Walnut stain. I rubbed it on with a cotton pad and wiped it off with a cloth and repeated the process until the stain had given the bowl a good coverage. I sanded the oxidation and tooth marks near the button on the top and the bottom of the stem with the medium grit sanding sponge.
IMG_3985

IMG_3986

IMG_3987

IMG_3988

I took the next photo to show the improvement to the damaged rim and the clean edges that were now present. The stain did a great job in bringing out the grain on the rim. It follows the pattern of the grain on the shank.
IMG_3989

I buffed the stem with red Tripoli and then sanded it with my usual array of micromesh sanding pads – wet sanding with 1200-2400 grit pads and dry sanding with 3200-12,000 grit pads. I buffed the stem with White Diamond and rubbed in a coating of Obsidian Oil to protect against further oxidation.
IMG_3990

IMG_3991

IMG_3992

I buffed the pipe with White Diamond and then gave it multiple coats of carnauba wax. I finished by buffing it with a soft flannel buff. The finished pipe is shown below. Soon it will go the Pipe Club for their benefit.
IMG_3993

IMG_3994

IMG_3997

IMG_3998

Refinishing and Reworking the Rim on a Comoy’s London Pride.


I looked up some information regarding this line of Comoy’s on the internet as I was not familiar with its placement in the ranks of Comoy’s lines. There I found that Comoy’s introduced the London Pride as the second grade to the Blue Riband around the same time to meet the American demand for a lighter finish. It was priced in 1943 at $25 and in 1965 at $25, then in 1979 at $95. It was described as having a natural amber coloring and tending to be Birdseye/Cross-Grained pattern pipes. At the time this pipe was made it was the next-to-top-of-the-line. The original stem had a three-piece “C” logo and this one did not have that. Judging from that fact, the shape of the tenon and the stem shape I am confident that it is a replacement stem. The stampings on the left side of the shank are “Comoy’s in block script over London Pride” and on the right side the stamping is worn. The shape number is near the bowl shank junction on the right and reads 292. The next four photos show the pipe as it was when I brought it to the work table.
Comoys1

Comoys2

Comoys3

Comoys4

The pipe was in fair condition. The stamping was faint, the finish had a thick coat of varnish over it and the rim was heavily damaged. The previous refurbishing had rounded the inner and outer rim removing the characteristic bevel on the inner rim and the sharp out edge. The stem was a replacement and the person who had replaced the stem sanded the shank down to fit the new stem. Fortunately they had not taken off too much of the briar. It was visible from the lines of the pipe and from the lightening of the area around the shank/stem junction. I have included the next photo to show the rim damage that needed to be addressed.
Comoys5

I topped the bowl on a flat board and sandpaper to remove the rounded inner and outer edges. I removed only enough to clean up and sharpen the outer edges and reduce the inner rounding to a slight bevel. I also sanded the inner edge with a folded piece of sandpaper to redo the bevel. I sanded the top and the bevel with a medium grit sanding sponge and also with a 1500 grit micromesh sanding pad to remove the scratches.
Comoys6

Comoys7

Comoys8

I wiped down the bowl with acetone on a cotton pad to remove the varnish coat and the remaining stain on the pipe. I find it easier to match the new rim colour if the bowl is also clean and the stain removed as much as possible.
Comoys9

Comoys10

Comoys11

I stained the bowl and rim with Minwax Medium Walnut stain which brought the colour as close as I could to the photos I found of the original colour of the London Pride line. I applied the stain and hand buffed the pipe.
Comoys12

Comoys13

Comoys14

Comoys15

I probably should have cleaned the inside earlier in the process but I did not bother until this point as it was quite clean. I scrubbed out the bowl with a cotton swab and Everclear as this bowl did not have the same black bowl coating as some of the others from this box of English pipes. The shank and the stem were not too dirty and it only took a few cotton swabs and pipe cleaners to bring it back to clean.
Comoys16

The stem was in great shape so I did not need to remove tooth marks or dents. It was also quite clean so I rubbed it down with some Obsidian Oil and then took the pipe to the buffer and buffed it with White Diamond. I gave the bowl and stem multiple coats of carnauba wax and buffed to a shine with a clean flannel buff. The finished pipe is shown in the photos below. It turned out to be a beautiful pipe – the combination of cross grain and birdseye matches the description I had found on the web regarding this line of Comoy’s pipes. It is ready to serve the next season of its life.
Comoys17

Comoys18

Comoys19

Comoys20

Reworked Comoy’s The Guildhall London Pipe Stack – Shape 345


Blog by Steve Laug

The pipe is stamped The in script over Guildhall over London Pipe on the left side of the shank and number 345 near the bowl on the right side of the shank and Made in London in a circle over England. This is the third of the pipes from the box my daughters found for me. The first two were the Orlik’s that I wrote about earlier. This one was in better condition than the other two. The top was beat up with outer and inner rim damage and also the same varnish coat over the uncleaned rim and the bowl and shank. The stem was original and has the three silver bars on the left side as expected in the Guildhall series. There were tooth dents that had been buffed out and left the stem with waves around the remaining marks. The grain was quite nice on this one – lots of cross grain and birdseye but it was obscured by the finish coat. The interior was filthy as were the others. In the side photos below the finish looks pretty good but the grain could stand out more clearly.
IMG_3927

IMG_3930

IMG_3931

I took the next photo to show the damage on the rim. The inner edge was rough and the outer edge was also rough. There was tar build up under the varnish coat that had not been cleaned off before varnishing. The bowl was also coated with a black bowl coating.
IMG_3932

I sanded the top and bottom side of the stem with 20 grit sandpaper to smooth out the ripples in the vulcanite and remove the remainder of the tooth marks. Once I had them removed I worked on the bowl.
IMG_3935

IMG_3936

I topped the bowl on the sandpaper and flat board as is my usual method. I took off enough briar to make the top smooth and the outer edge sharp as well. I sanded the inner edge with a folded piece of sandpaper to smooth out the damage there as well. The next two photos show the topping process and the sanding of the inner edge.
IMG_3938

IMG_3939

The interior of the shank and stem were filthy and needed a lot of work with Everclear, pipe cleaners and cotton swabs. The photo below shows the first lot that was used but by the time I was finished cleaning the shank I had used about twice that number.
IMG_3940

I wiped down the surface of the bowl with acetone on cotton pads to remove the varnish coat and the finish. I wanted to remove as much of it as possible so that when I restained the rim it would be easier to match.
IMG_3941

IMG_3942

IMG_3943

I sanded the stem with a medium grit sanding sponge and then with my usual array of micromesh sanding pads. I wet sanded with 1500-2400 grit pads and dry sanded with 3200-12,000 grit pads. I buffed the stem in between the wet sanding and the dry sanding with red Tripoli because I wanted to see what I had to work with and if I had removed the rippling on the vulcanite. I had so I went on to the dry sanding. When I had finished I buffed the stem with White Diamond and then rubbed it down with Obsidian Oil and put it aside to dry.
IMG_3944

IMG_3945

IMG_3946

I stained the bowl with MinWax Medium Walnut stain. I applied it with a cotton pad and rubbed it off with a cotton cloth. I repeated the process until I had the coverage that I wanted and the rim and bowl matched.
IMG_3947

IMG_3948

IMG_3950

IMG_3951

I reinserted the stem in the shank and took the pipe to the buffing wheel for a buff with White Diamond. I gave both the bowl and the stem multiple coats of carnauba wax and polished it with a soft flannel buff. The reworked Comoy’s Guildhall Stack is shown in the photos below ready and clean for its inaugural smoke.
IMG_3953

IMG_3954

IMG_3955

IMG_3956

Reworking an Orlik De Luxe L23 Billiard


Blog by Steve Laug

This is the second pipe from box of English pipes that my daughters found when cleaning out our storage room under the front porch (interior room). It is stamped Orlik De Luxe over Made in England on the left side of the shank and L23 on the right side of the shank. It looked as if it had been refurbished by the same gent who did the Orlik Canadian I reworked. This one also had a varnish coat on the bowl that made it shiny. Underneath the varnish the finish was spotty. The outer and inner edge of the rim was damaged and there were deep grooves on the surface of the rim. The tarry buildup had not been totally removed before the finish coat of varnish was put in place. The inside of the bowl had been painted with a bowl coating that was black. The stem appears to be a replacement but it was better craftsmanship than the previous one. The stem itself was clean but had scratches. The interior of the pipe and stem were filthy.

I have little experience with Orlik pipes so the numbering system was a mystery to me. I did a bit of research and found out that the shape numbers remain consistent throughout the various lines of Orlik pipes. The only difference is found in the letter that precedes the number. In the case of the two pipes that I have now worked on each had the letter “L” before the shape number. The letter signifies the line of pipes within the Orlik family that is in hand. The L stands for the Orlik De Luxe line. I have included the chart below that gives the various lines of Orlik pipes. I have also included the shape chart for Large Billiards that shows the L23. The one I have is similar to the one in the picture though I am certain that mine has a replacement stem as it has a different taper to the stem.
orl24

orl4

The first three photos below show what the pipe looked like when I brought it to the work table. The issues that I noted above are clearly visible from these photos. The stamping on the pipe is faint but readable on the left side. The number stamp on the right side is in better condition.
IMG_3901

IMG_3902

IMG_3903

In the photo above the tars that were left on the rim before the varnish are visible by my thumb and also my forefinger. The bowl would need to be topped. I have included the next two close-up photos of the rim to show the condition it was in when I started the rework of this pipe and to explain why I was going to top the bowl. The inner edge of the rim had significant damage and showed signs of being hit against something to empty the bowl. The outer edge had similar damage and was badly pitted on the back and the front of the bowl.
IMG_3907

IMG_3908

I set up the sandpaper on the flat board that I use for topping and topped the bowl until the rim and the edges were once again sharp and clean. I did not have to remove very much of the briar but what I removed took off the damaged outer edges of the rim and reduced the appearance of damage to the inner edge. I sanded around the inner edge with a folded piece of sandpaper to smooth out the inside. The newly topped bowl is visible in the second photo below.
IMG_3910

IMG_3911

I used a lot of pipe cleaners and cotton swabs to remove the black tars and oils that had not been cleaned out for quite a while. This is only the second pipe that I have cleaned up that came from this chap and I have to say I am not impressed at this point. These were sold in a shop as estates that had been refurbished and were ready to smoke. I wiped down the bowl with acetone on cotton pads to remove the varnish coat before I restained the bowl. I used a black permanent marker to carry the grain lines through the two fills on the left side of the bowl. The briar was actually quite nice under the varnish coat.
IMG_3912

IMG_3913

IMG_3914

IMG_3915

I wiped the bowl down a final time with acetone and then gave it a coat of MinWax Medium Walnut stain. I rubbed it into the bowl and then wiped it off with a soft cotton towel. It really brought the grain to life on this old pipe.
IMG_3916

IMG_3917

IMG_3918

IMG_3919

The stem had scratches from the sandpaper that had been used on it previously and a slight bit of tooth chatter near the button that had been buffed over. I sanded it with a medium grit sanding sponge and then with the usual array of micromesh sanding pads – wet sanding with the 1500-2400 grit pads and dry sanding with 3200-12,000 grit pads. I took the pipe and stem to the buffer and buffed the entirety with White Diamond, being careful around the faint stamping on the left side of the shank. I rubbed the stem down with Obsidian Oil and hand buffed it when it was dry.
IMG_3920

IMG_3921

IMG_3922

I buffed the finished pipe with White Diamond and then gave it multiple coats of carnauba wax. I finished buffing with a clean flannel buff to give the pipe a shine. The photos below show the reworked pipe, cleaned and ready for its inaugural bowl.
IMG_3923

IMG_3924

IMG_3925

IMG_3926