Blog by Paresh
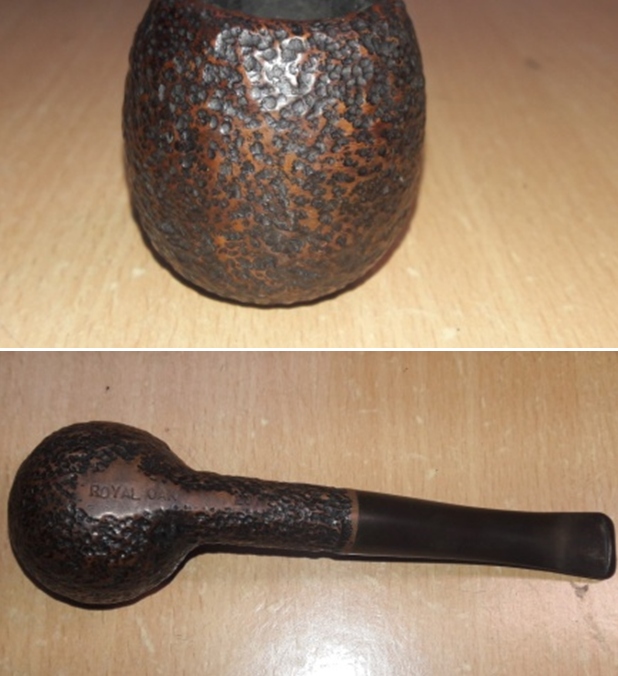
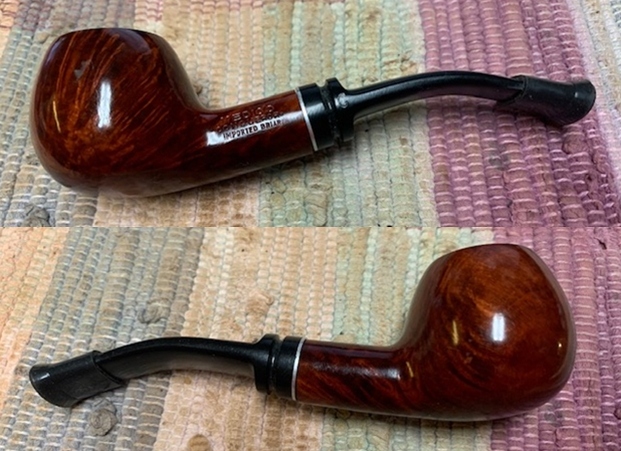
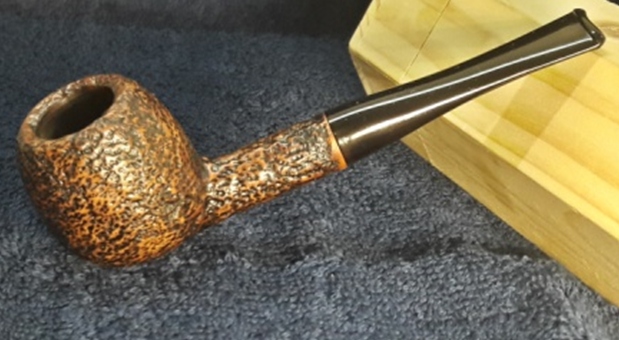
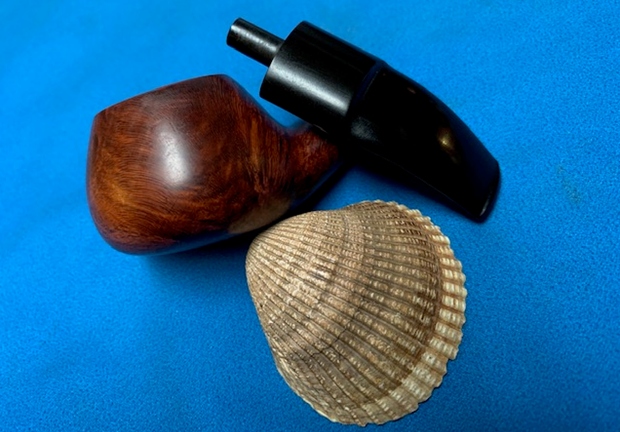
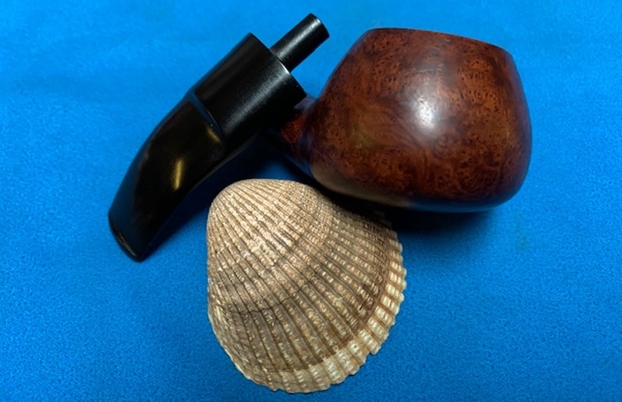
I love classic shaped pipes and one such pipe is now on my work table. It’s a classic tapered stem Apple with an interesting rustication style on the stummel surface. I feel that the stummel was subjected to shallow rustication making for an interesting finish to the stummel surface. The first thought that came to my mind was that this pipe was British, what with the classic shape, nomenclature and the twin bore tapered stem that pointed me in that direction. The unique finish on the stummel, quality of the twin bore stem and the briar all oozed quality.
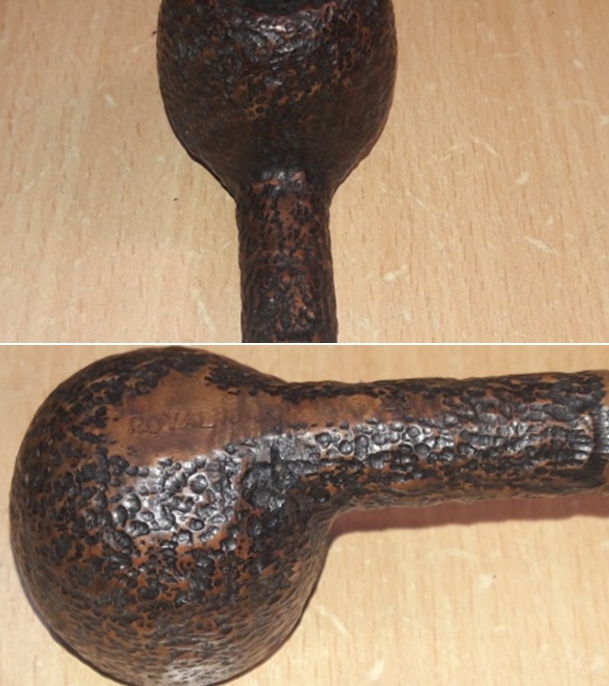
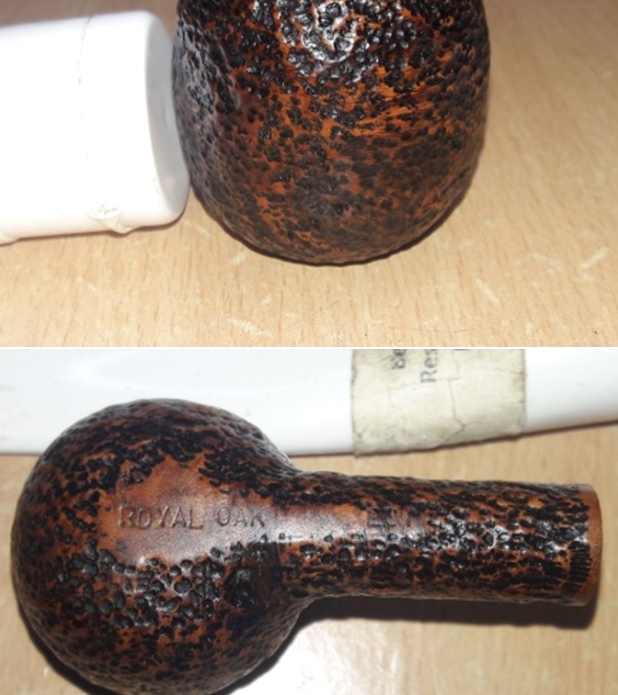
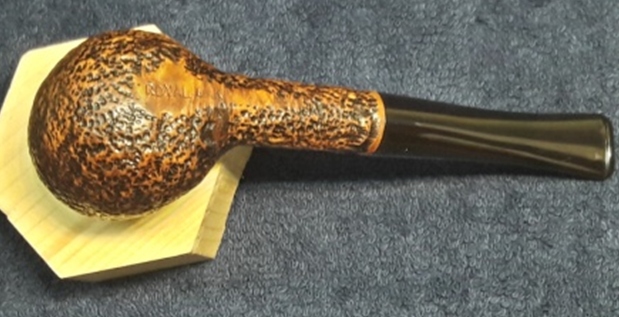
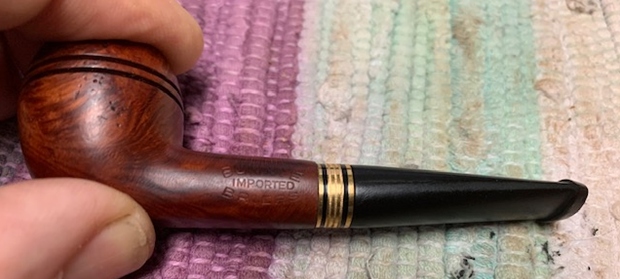
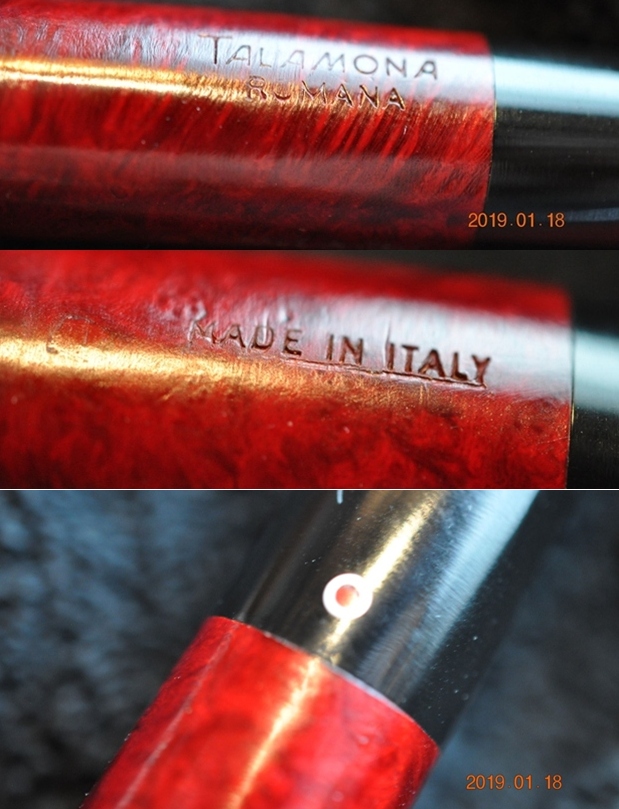
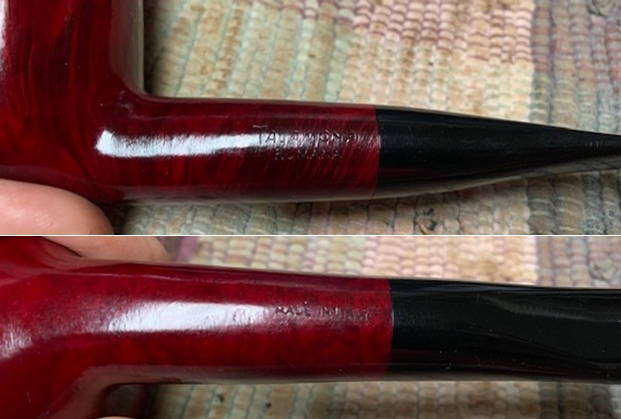
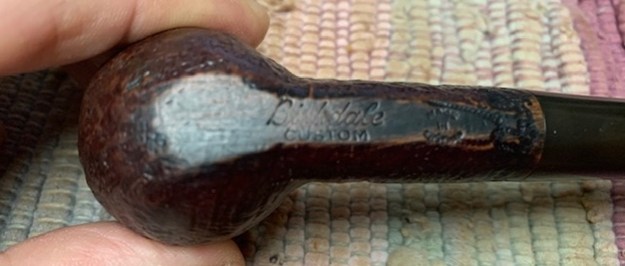
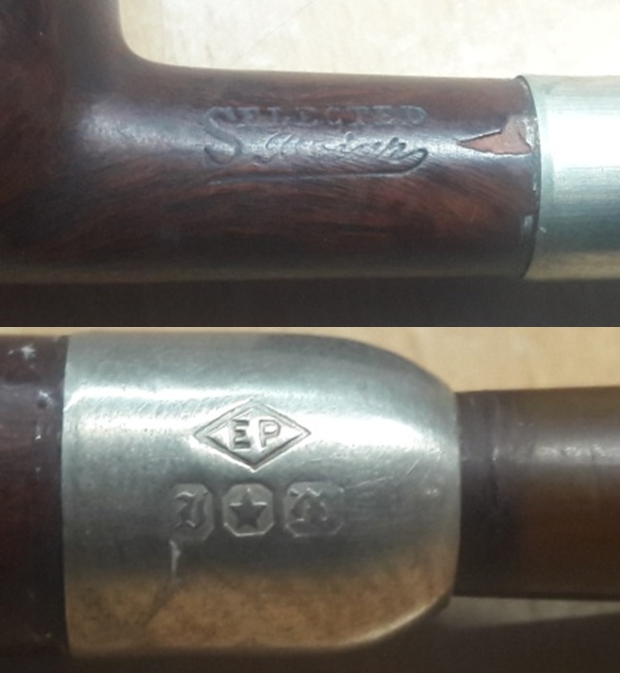
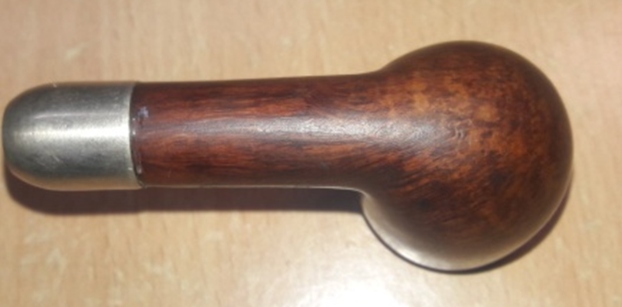
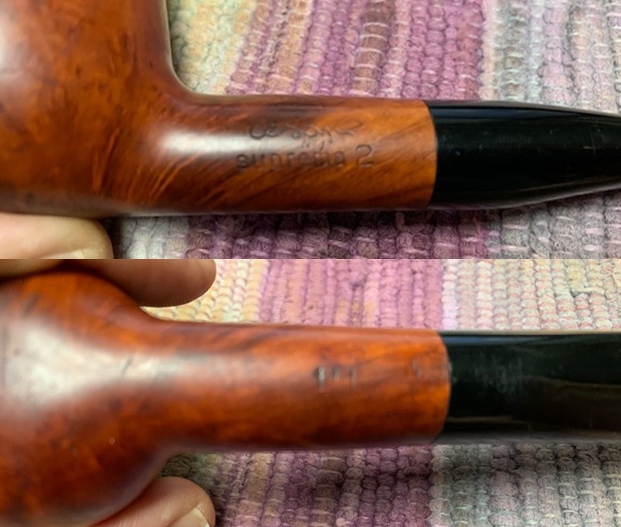
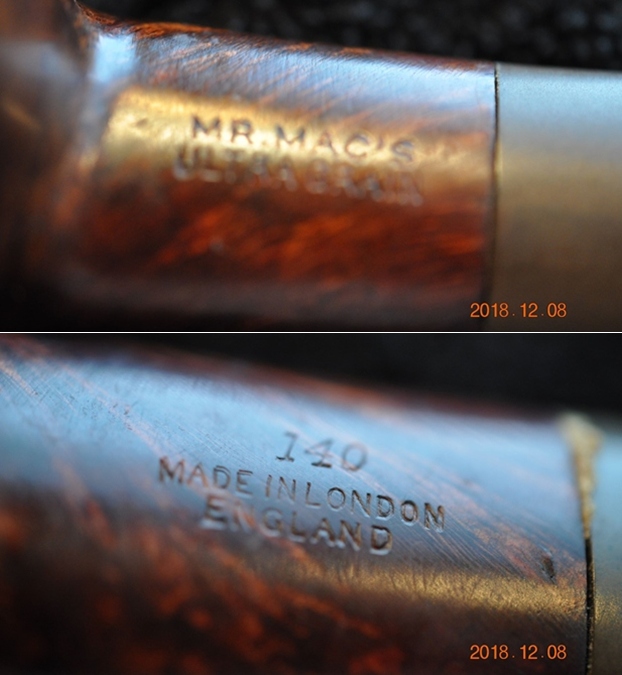
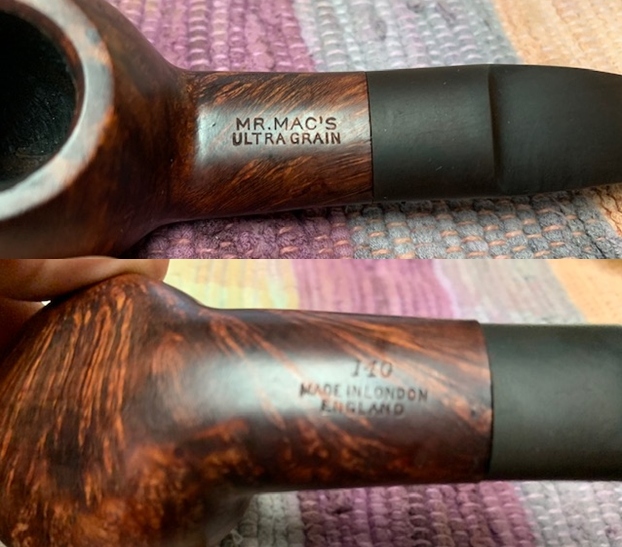
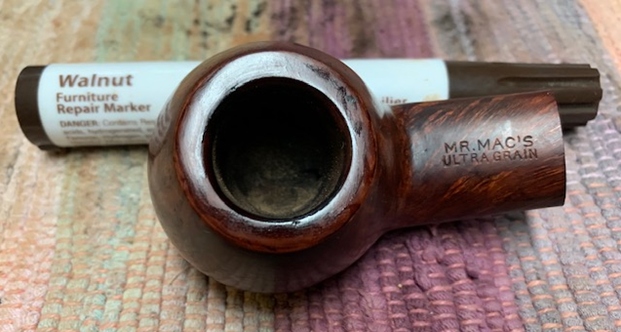
The pipe is a classic Apple shaped sitter with nice rusticated stummel that feels tactile in the hand. This pipe is stamped on the bottom smooth surface of the shank at the foot “ROYAL OAK” in block capital letters followed with shape code # 207. The stampings are crisp and clear. The high quality vulcanite twin bore tapered stem is bears the logo of two white bars on the left side towards the tenon end. The second white bar stamping has faded and is only about discernible. 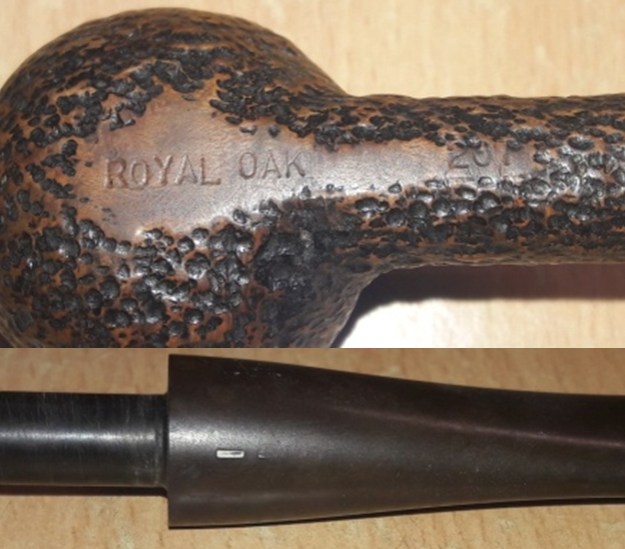 I searched rebornpipes to see if I could find any information on this pipe, as I invariably do, to save time in digging out information about the brand. But this time around, though I came up with many brands/ lines of pipes that started with ROYAL, there was nothing on ROYAL OAK!!
My next go to site is pipedia.org and sure enough, I found what I had been looking for. The Royal Oak finds a mention under Savinelli! That did come as a surprise as all along till this point, I was thinking this pipe had to have a British connection. I visited Savinelli page on pipedia.org and went through the entire information on the brand. Along the way, I picked up snippets of information that pertains to the pipe on my table that I have reproduced below.
https://pipedia.org/wiki/Savinelli
1876 was a year of breakthroughs: Thomas Edison patented the mimeograph, Julius Wolff-Eastport canned sardines for the first time, Alexander Graham Bell made the first telephone call,
Pyotr Ilyich Tchaikovsky completed Swan Lake, Melville Bissel patented the first carpet sweeper, Mark Twain published Tom Sawyer, and in Milan, Italy, Achille Savinelli opened one of the first shops exclusively focused on tobacco and smoking accessories.
It may not have been obvious in 1876, but Achille Savinelli’s commitment to briar pipes would prove to be visionary.
He soon began designing his own pipes (different from the styling we associate with Savinelli today) and arranged their manufacture by local pipemakers in the Varese district of north-west Italy. The pipes became so popular that some were exhibited at the 1881 Esposizione Industriale Italiana (Italian Industrial Exposition)—the precursor to today’s Milan Fair, one of the largest trade fairs in the world.
Achille Sr. spent 14 years cultivating the company and building a strong customer base before passing the reigns to his son, Carlo, who ran the store for the next 50 years.
The store’s success kept Carlo and his wife occupied during business hours, leaving their son, Achille, to his own devices. Much like his father, and his grandfather before him, his “own devices,” as it turned out, were pipes.
As the Second World War began to sweep across Europe, however, Achille Jr.’s experimentation was cut short: he left his beloved workshop for five years of military service, and the experience provided him a new perspective on the role of Italy in the world marketplace. At the time the best-selling pipes in Italy were made abroad, despite the country’s steadfast reputation for producing the finest quality briar. There were Italian pipe makers, make no mistake, but these workshops and factories seemed to focus on maintaining high production numbers rather than on the quality of the product.
He knew it would take more than sheer customer loyalty and rapport to shift the pipe making reputation of his country. It would take a superior product, with a unique aesthetic and the capability to withstand high levels of production without sacrificing quality, to shatter the mold. With this in mind, he decided not to return to his father’s shop. He needed to make his own pipes.
With his two best friends, Amleto Pomé and Mario Vettoruzzo, he assembled a team of fifteen employees to start a new business in the Varese region—the same area of northwest Italy in which his grandfather, Achille Sr., commissioned his own designs more than 60 years before.
Savinelli Pipes began production in 1948 and, although the pipes were of a superior quality and unique in their aesthetic, the brand wasn’t an immediate success.
Aesthetics
Savinelli’s aesthetic is unique. When Achille Jr. first started the company, the best-selling pipes in Italy were made abroad, mostly in England and France. Rather than trying to generate an entirely new style, he capitalized on this trend by following a classical approach to shaping similar to the English style, only tweaking the proportions slightly to produce designs that at once could both satisfy customers looking for classical shapes and be readily recognizable as a Savinelli. As such, a number of designs within Savinelli’s lineup hold closer to this tradition than others. The 207 straight Apple and the 106 straight Billiard both feature classical lines and shank and stem proportions, with just a touch of extra visual weight lent to the bowl.
Savinelli made sub-brands, seconds & order productions
- Riviera– Made for the international market only in the 9mm version
- Roley– Vest pocket pipe; almost identic to “Rolex” by Brebbia
- Roma
- Royal Oak– Distributed in US
I visited pipephil.eu to find if there was any other additional information on this sub-brand from Savinelli. There is no additional information on this site other than that the same two bar logo is also found on Bent Bob’s and King’s Cross pipe, both Savinelli sub-brands. Here is the link to the web page.
http://www.pipephil.eu/logos/en/motifs/mo-nbarres.html#2b
From the above, it is safe to assume that this pipe was made during the era of Achille Jr. for the American markets. This, then, is definitely an older pipe to come out of Savinelli Pipe Factory!!
With the provenance of this pipe established, I move ahead with my visual inspection of the pipe.
Initial Visual Inspection
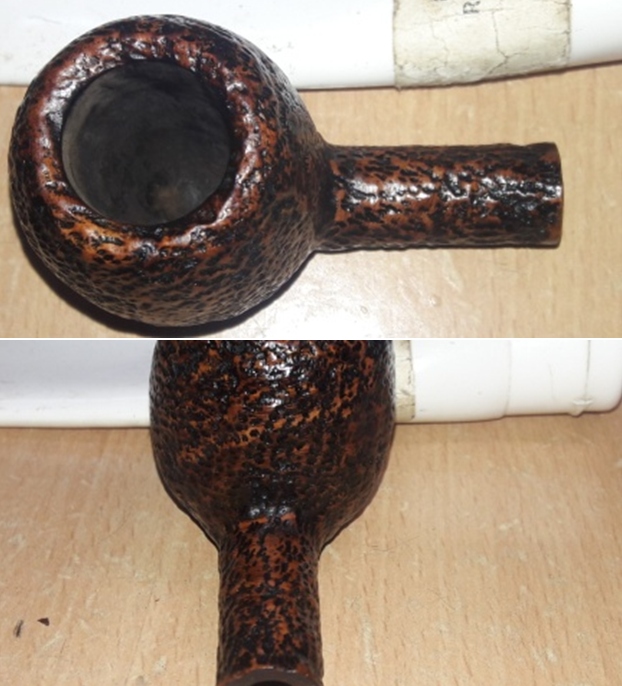
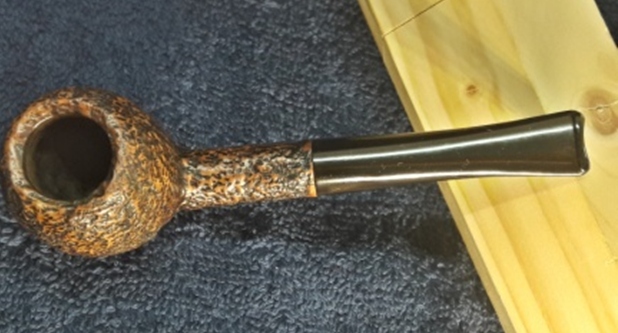
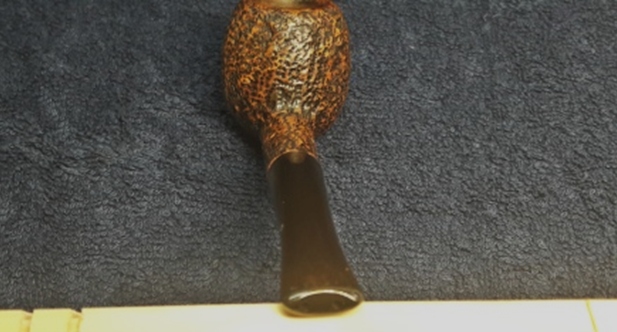
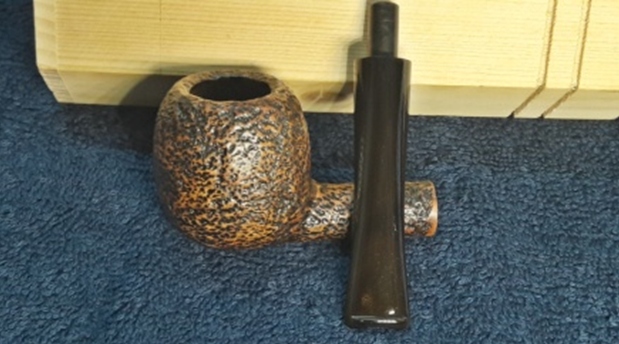
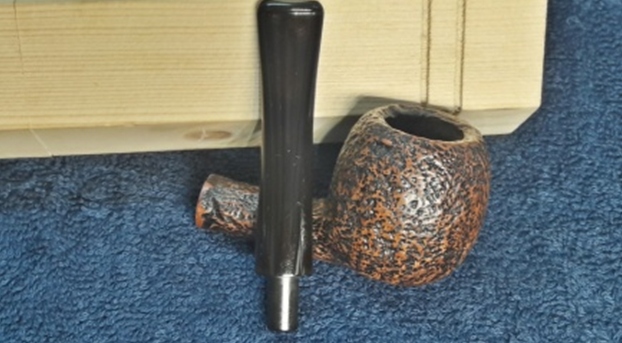
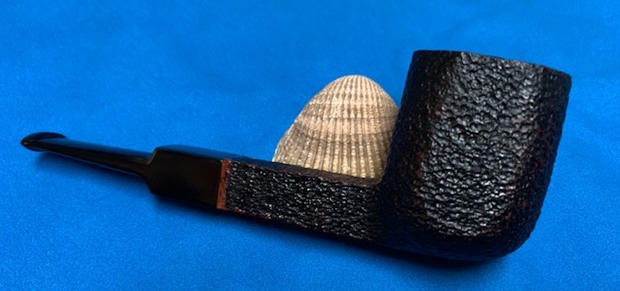
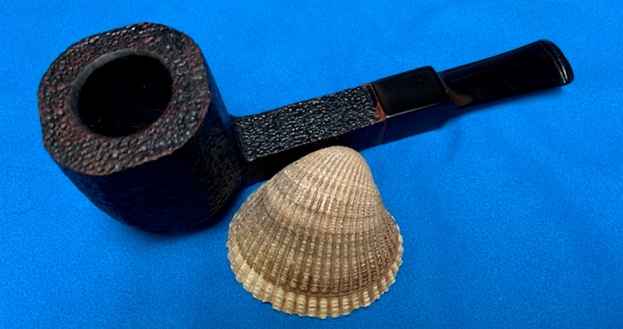
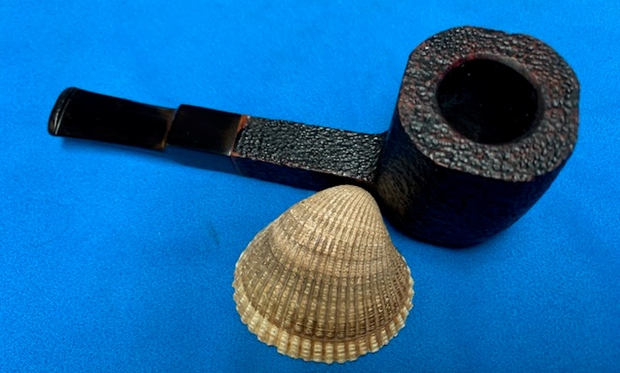
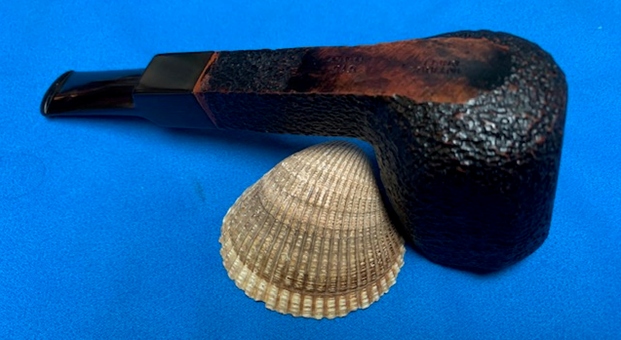
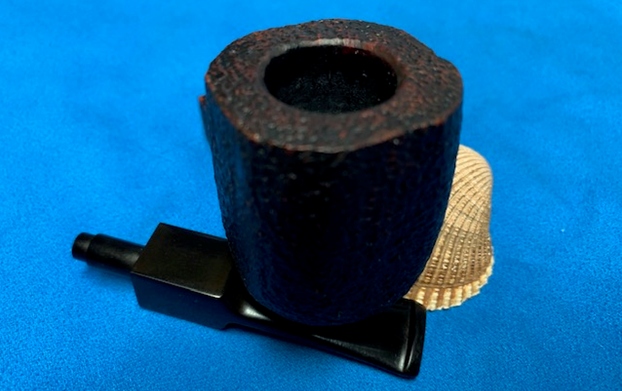
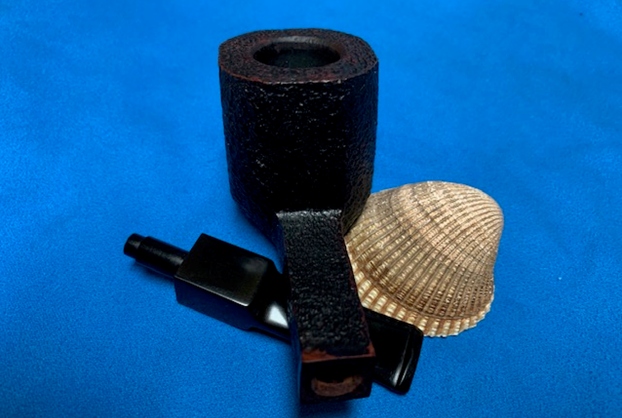
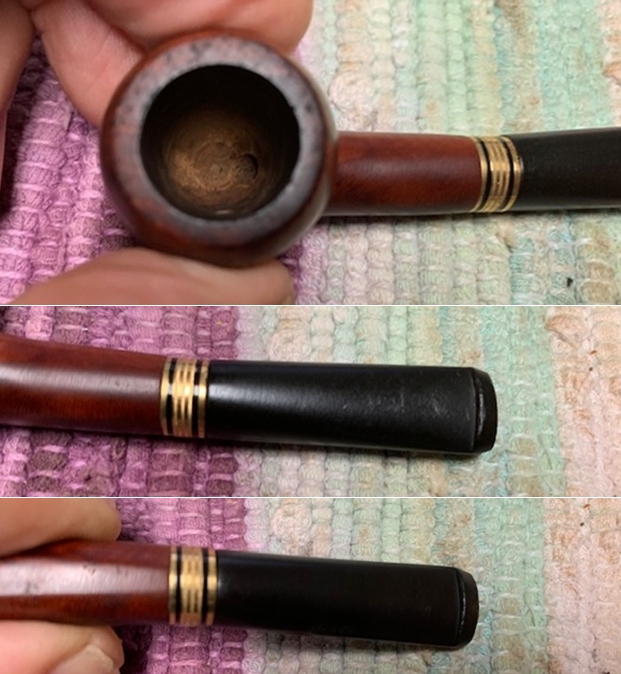
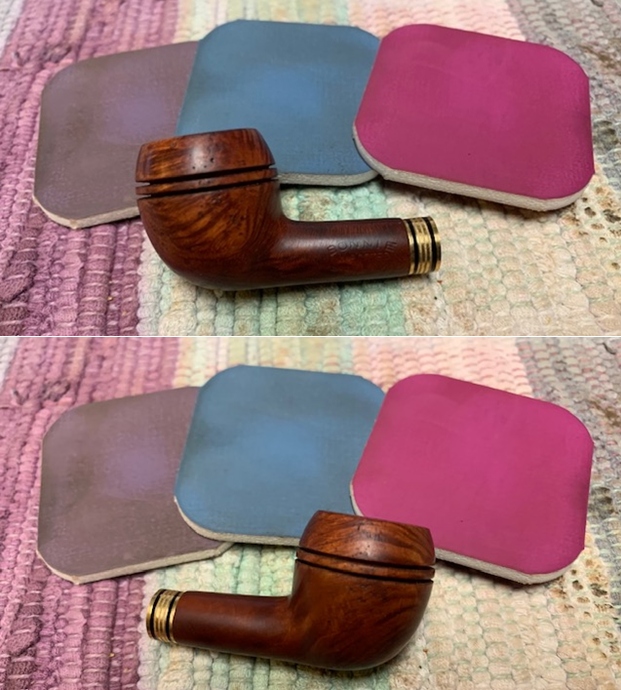
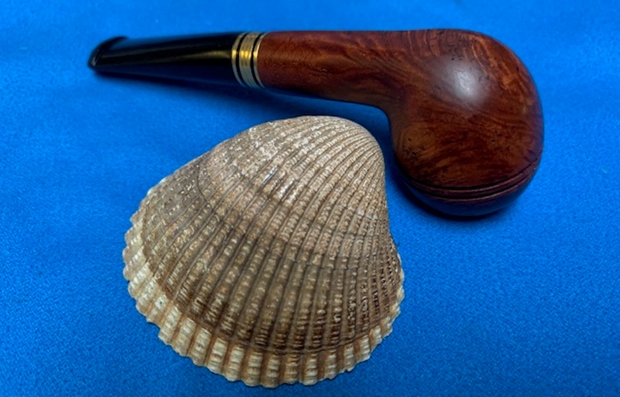
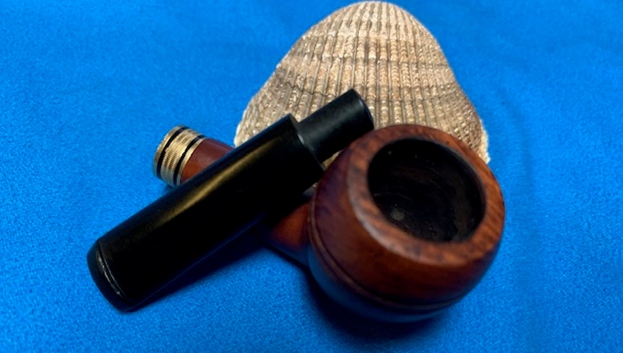
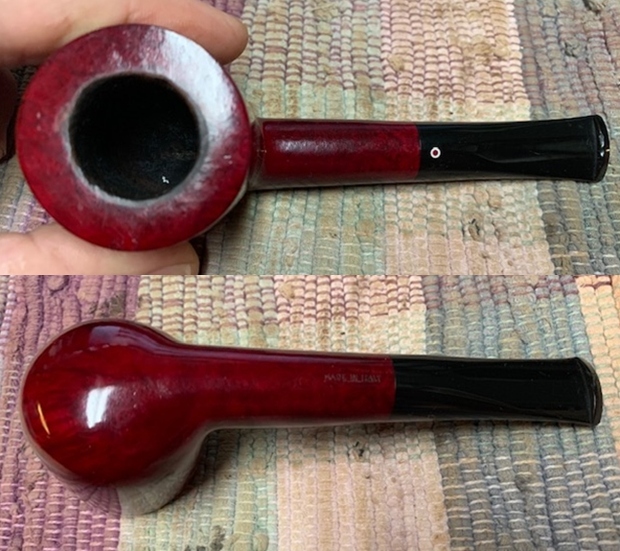
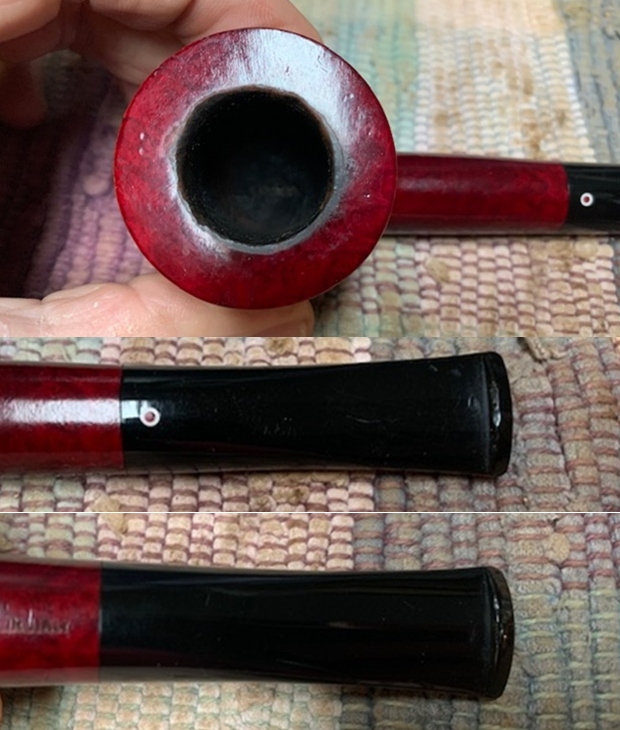
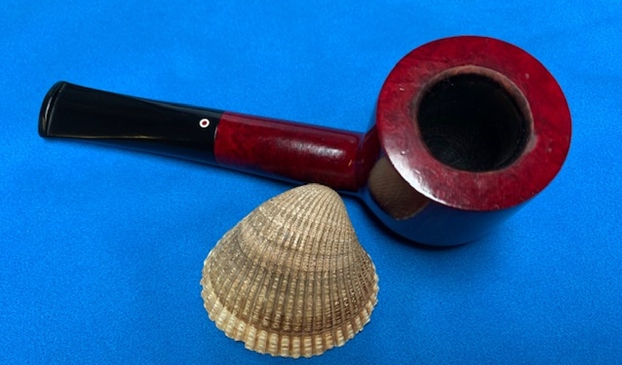
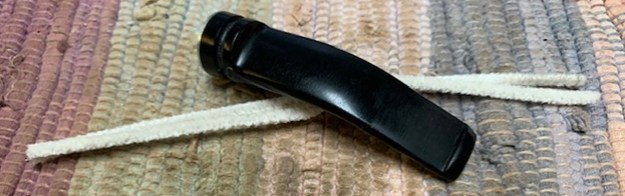
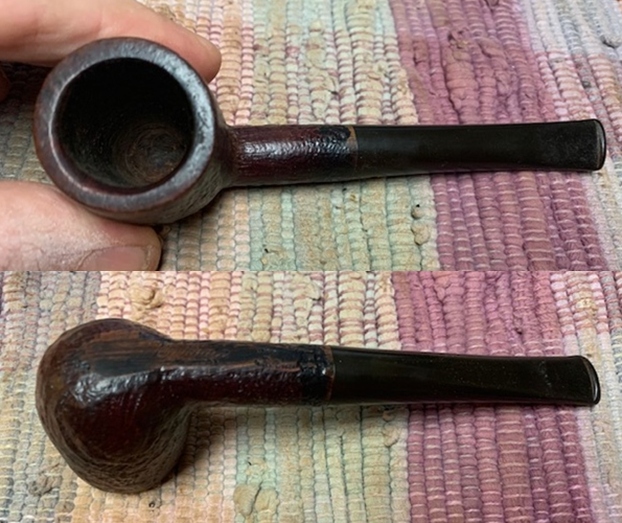
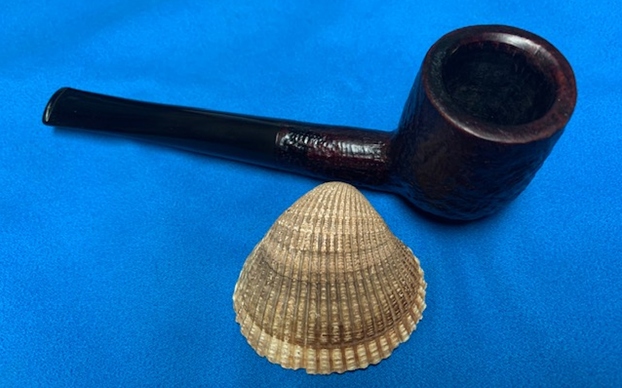
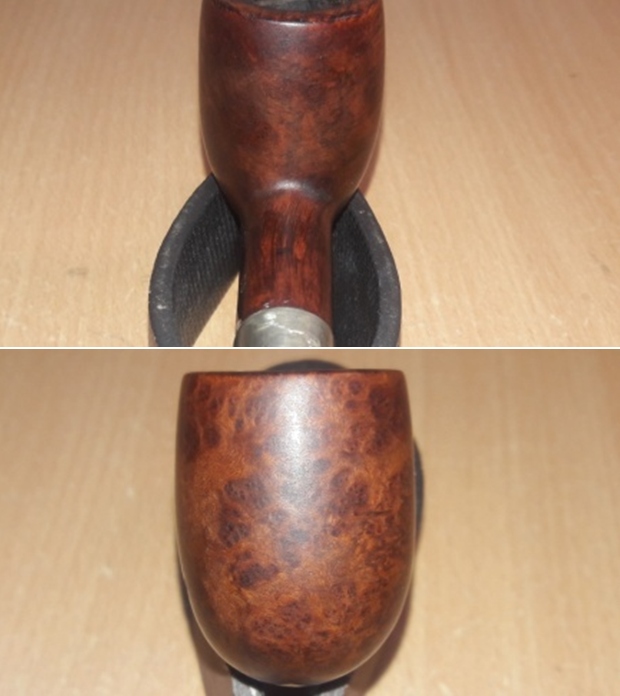
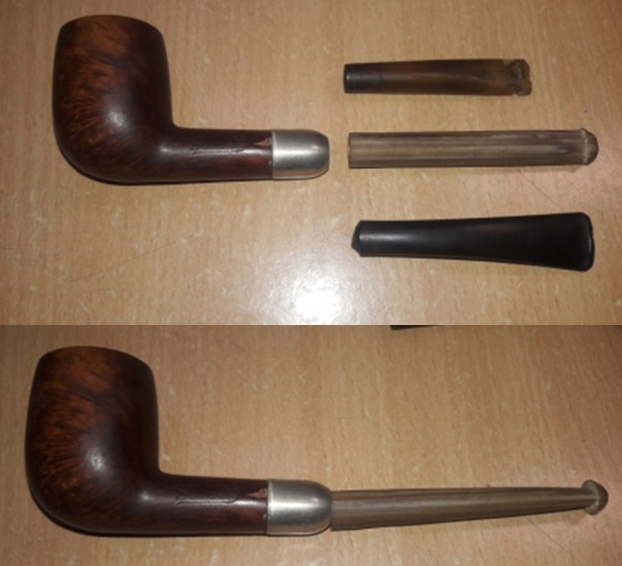
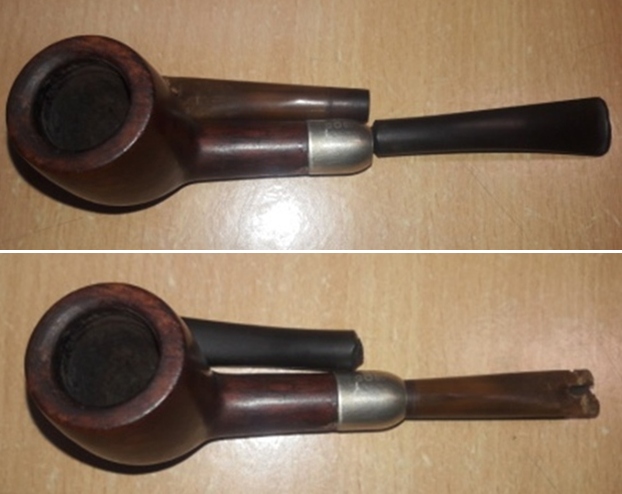
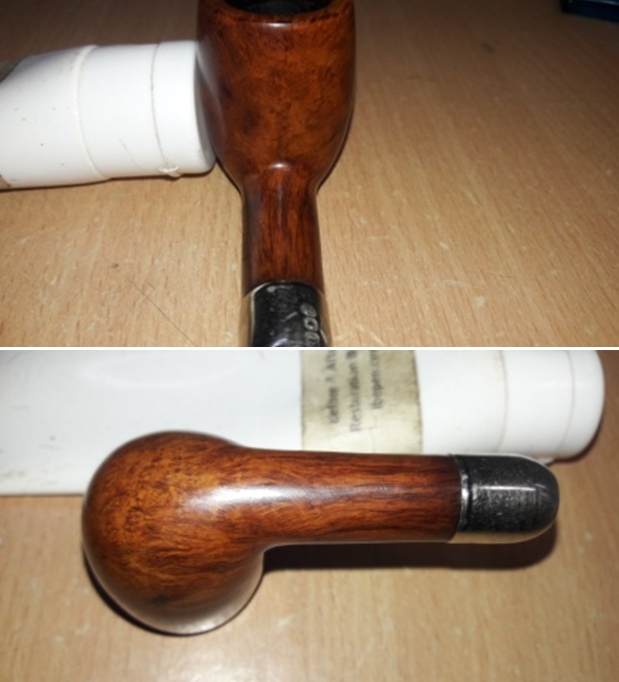
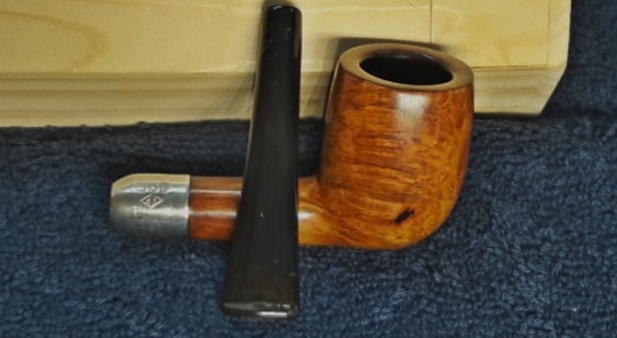
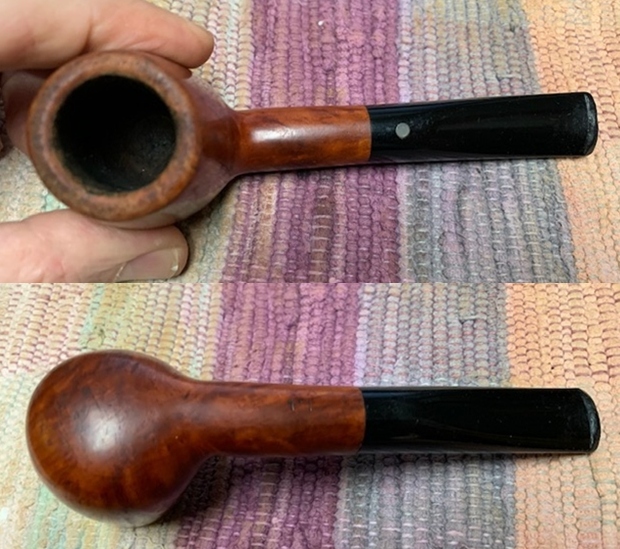
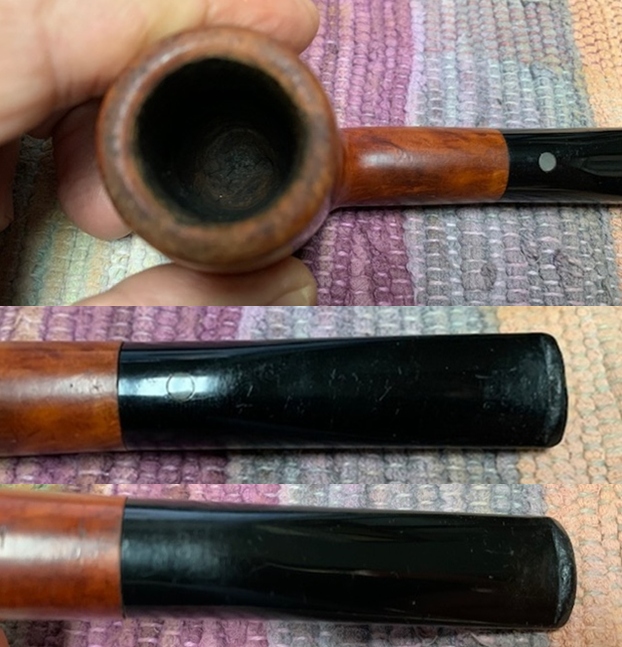
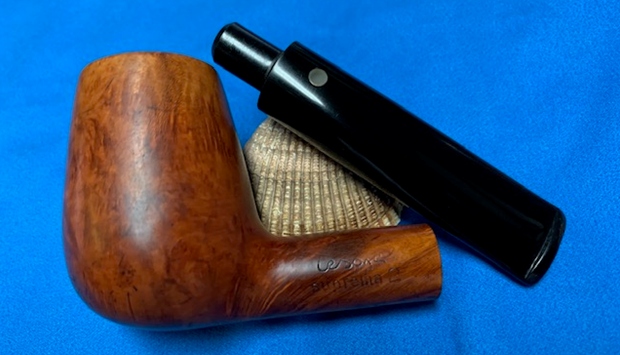
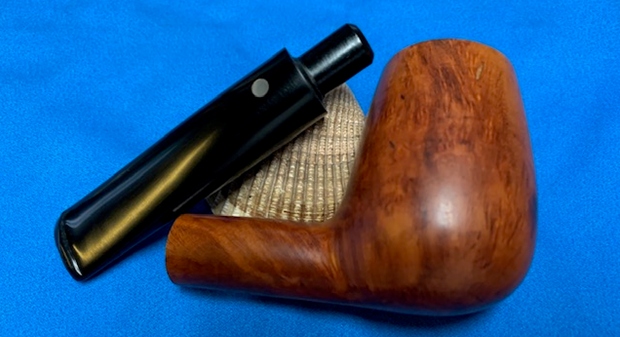
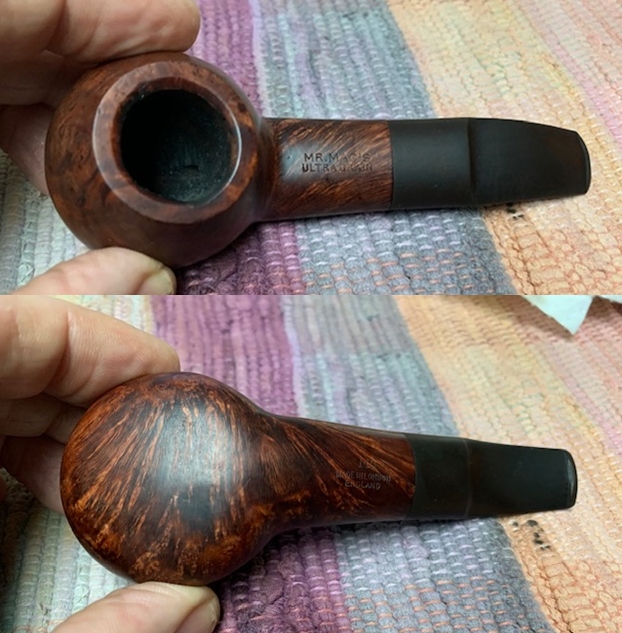
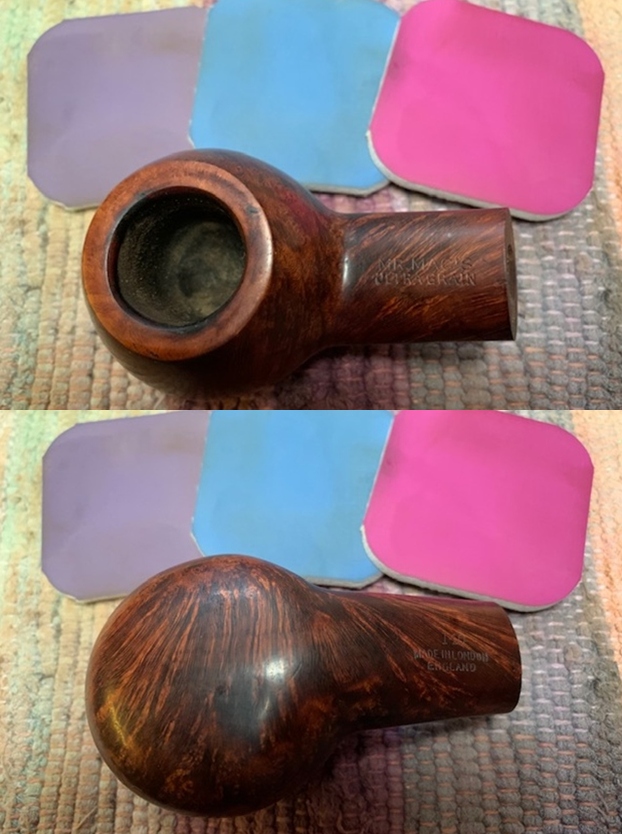
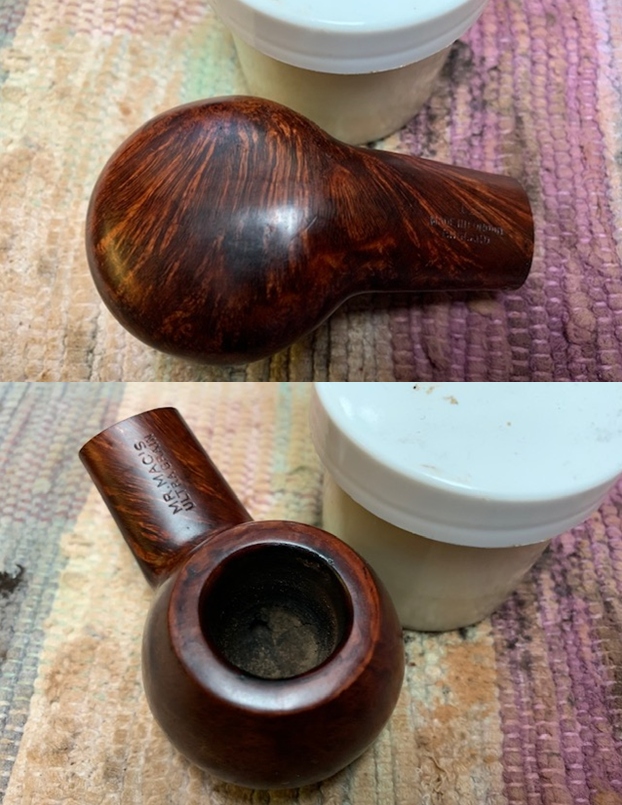
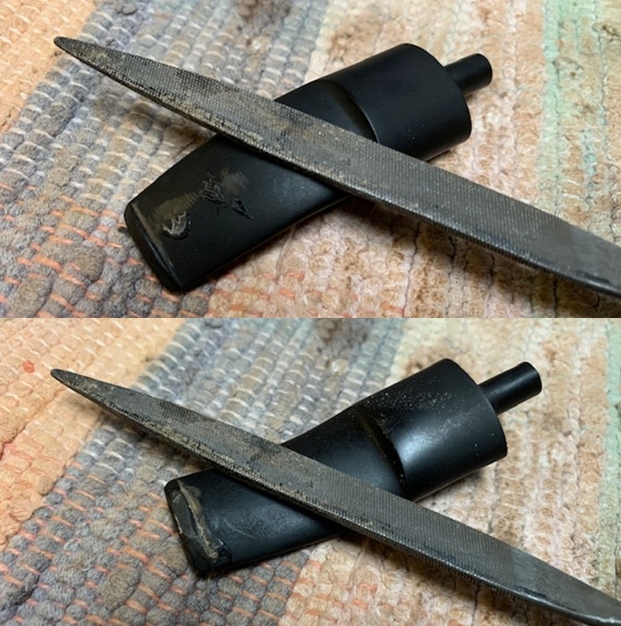
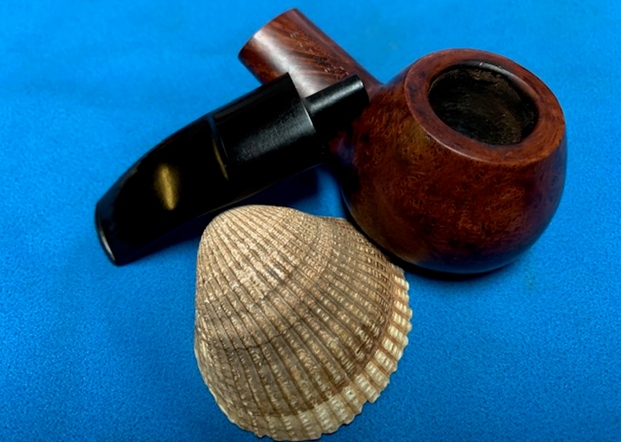
The interestingly rusticated tapered stem sitter is covered in dirt, dust and grime. There is a decent layer of cake in the chamber and the flow of air through the mortise is not very smooth and full. The twin bore stem is heavily oxidized and the bite zone is peppered with deep bite marks and tooth chatter on both the surfaces. Here is how the pipe appears as it sits on my work table.

 Detailed Inspection Of The Pipe And Observations
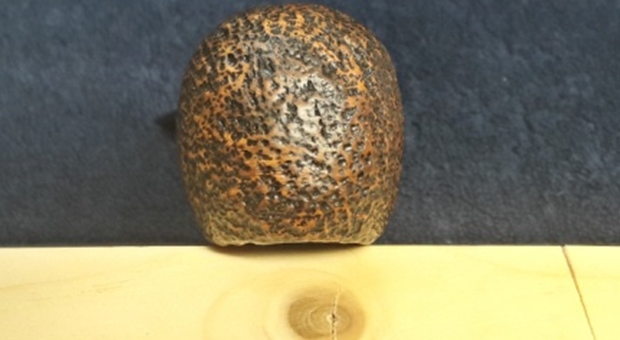
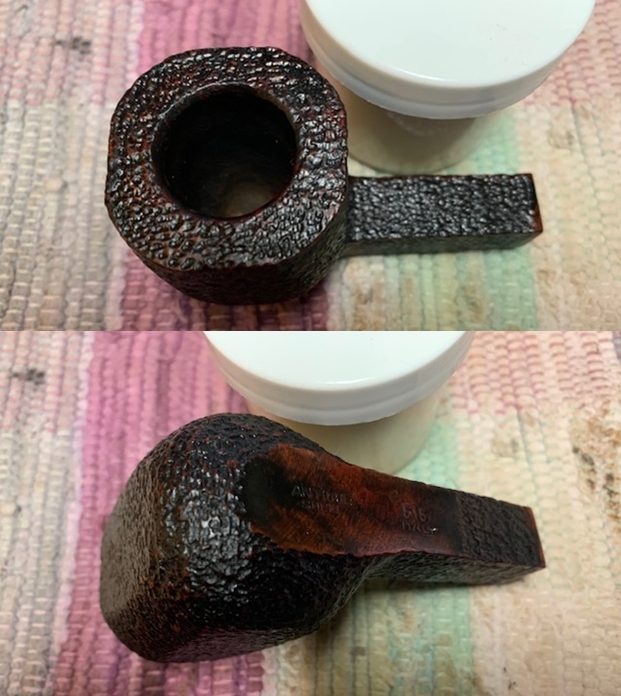
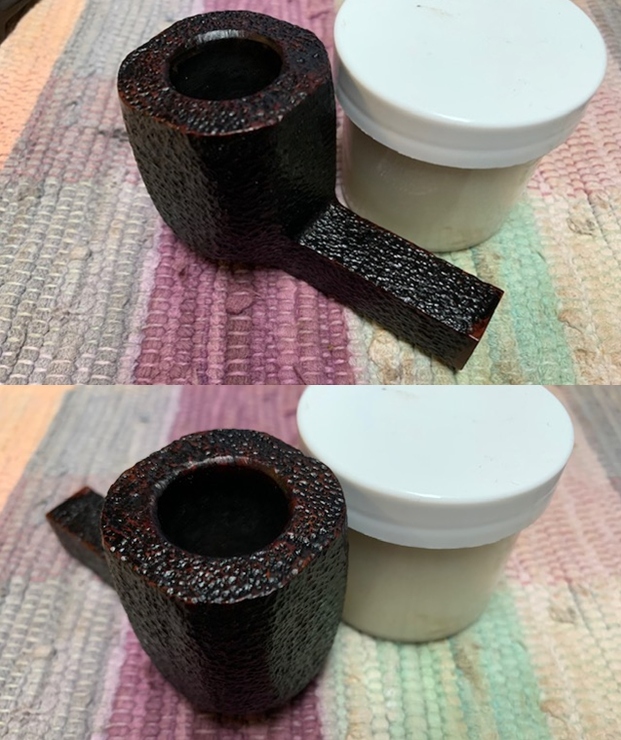
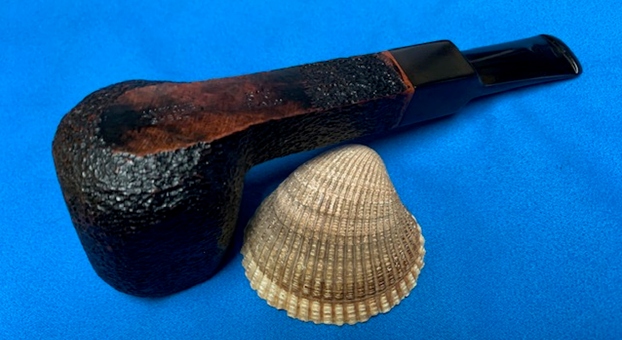
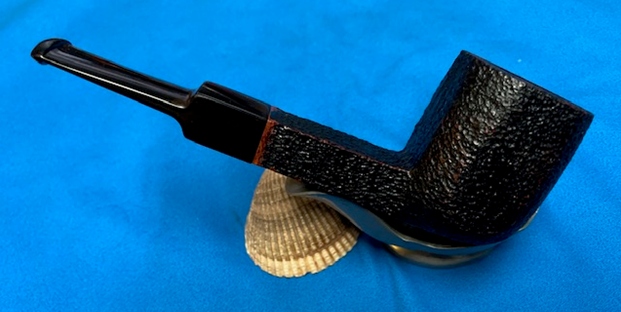
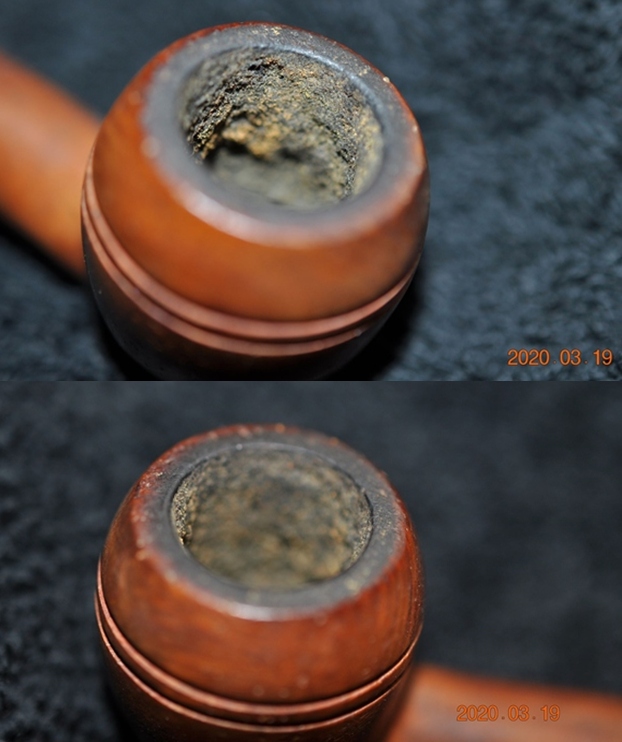
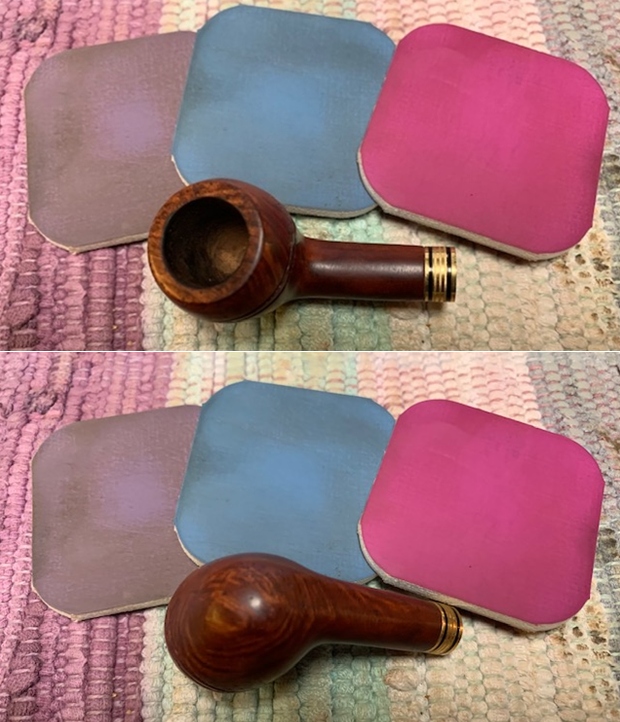
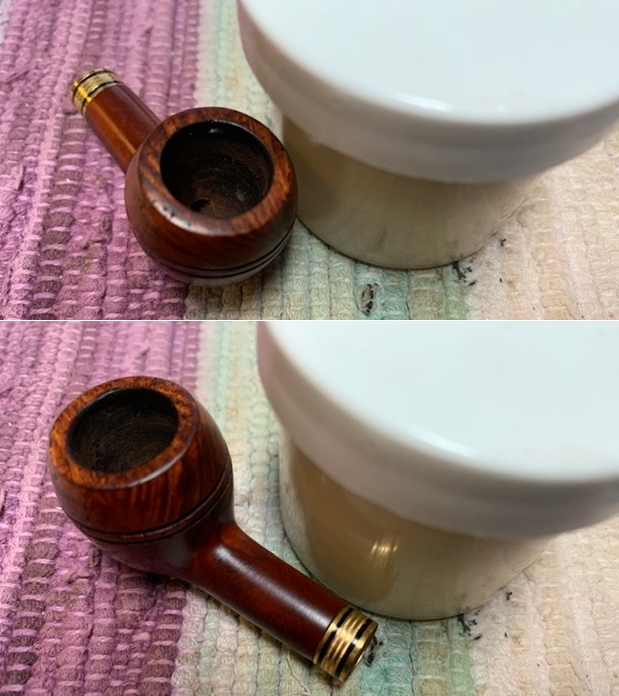
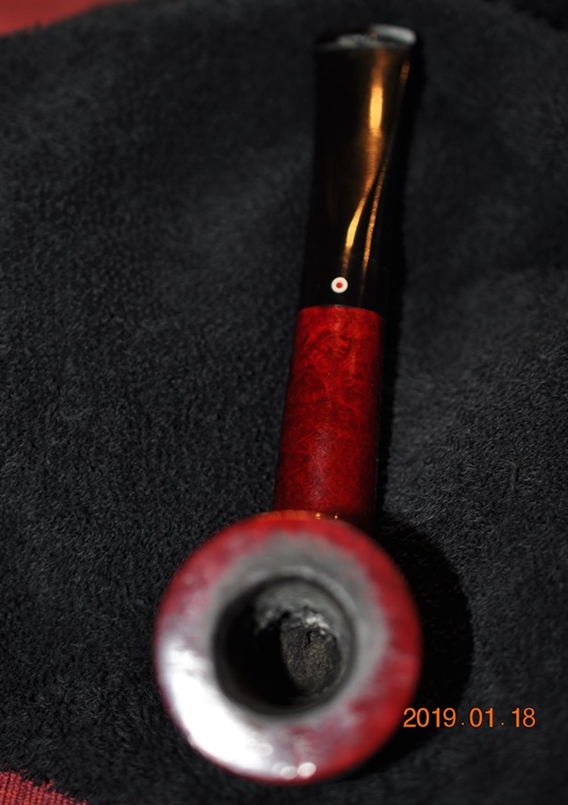
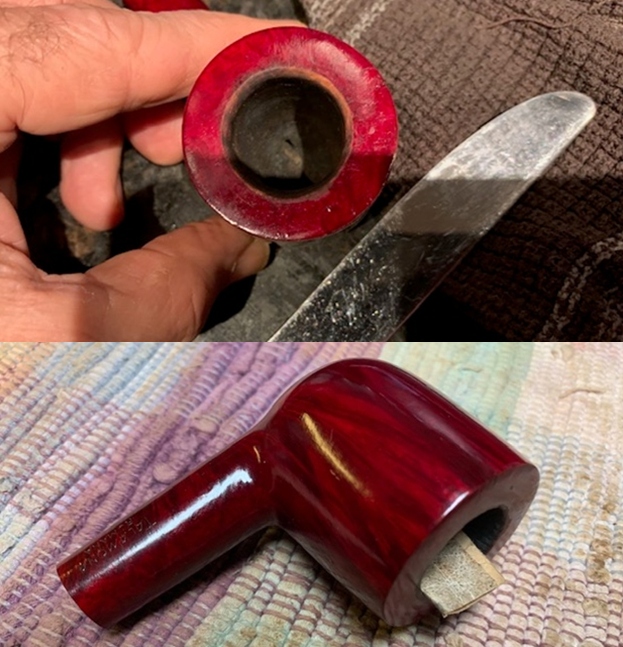
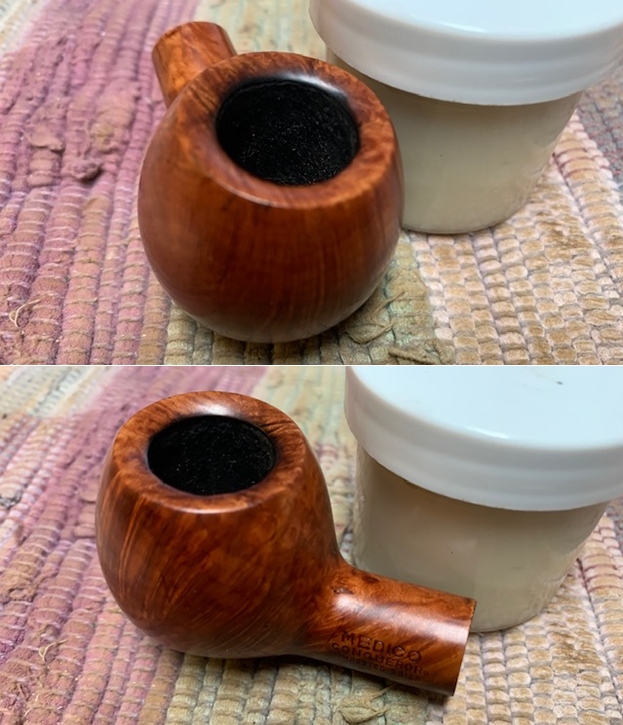
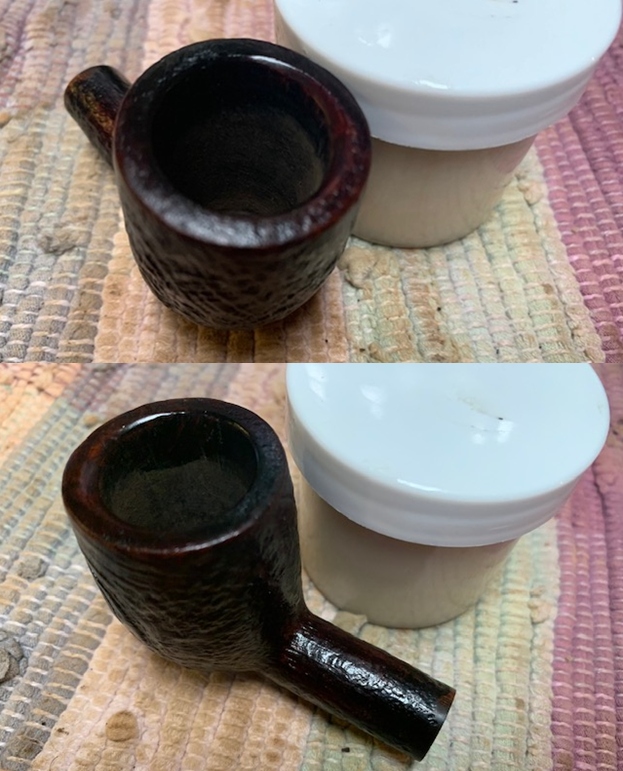
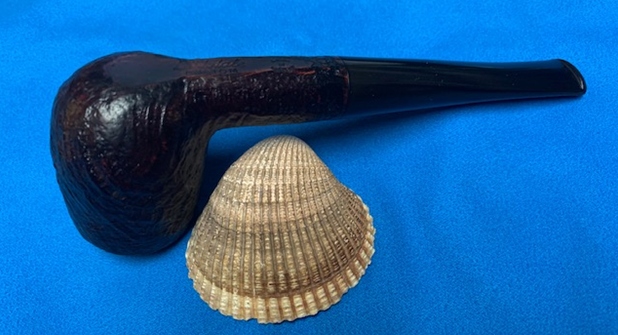
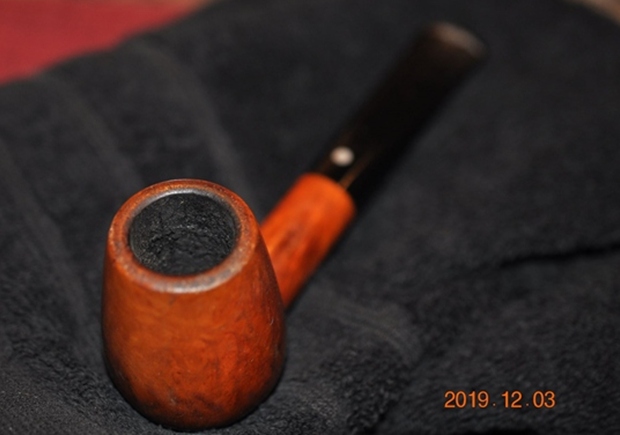
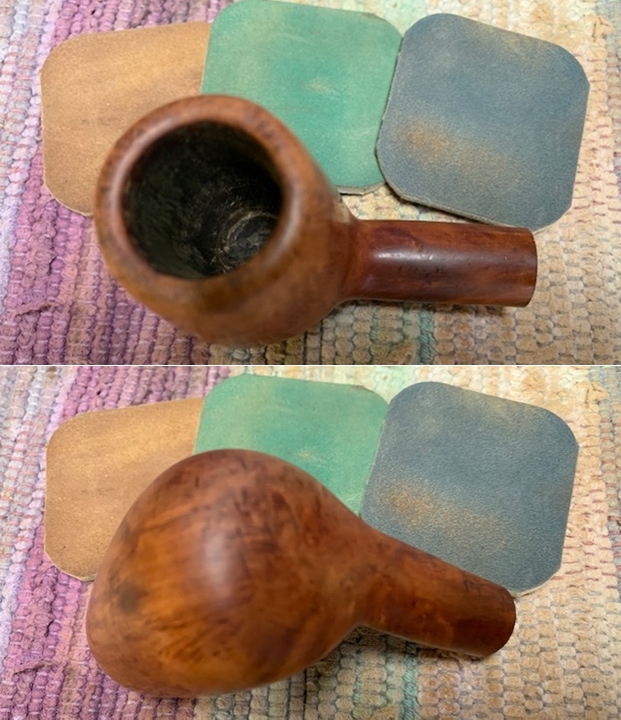
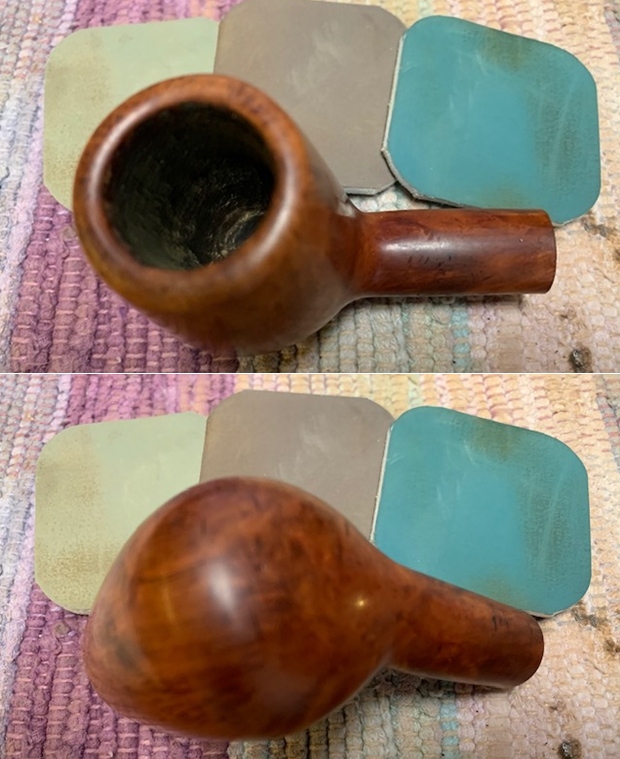
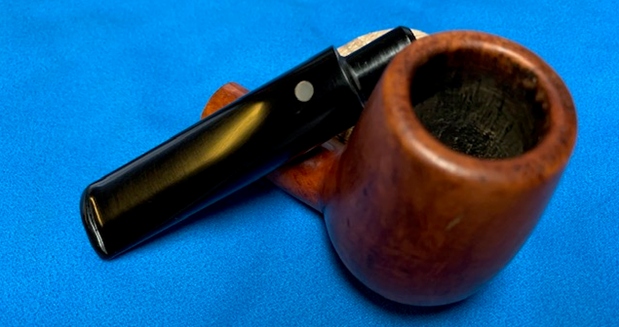
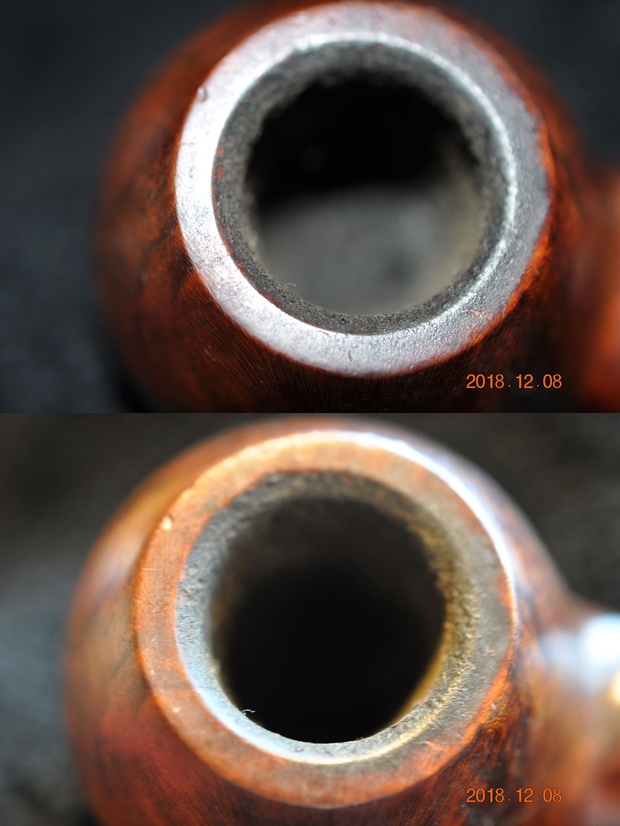
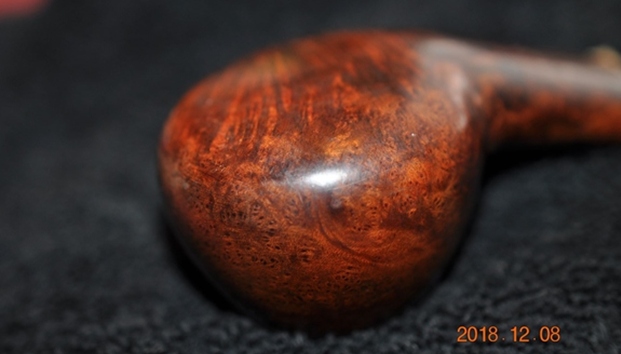
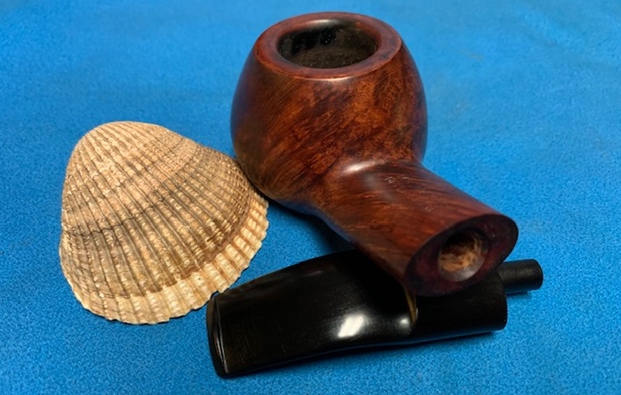
The bowl is a nicely round typical Apple shape with a slight narrow at the rim with a depth of about 1 2/3 inches. The chamber has an even layer of medium cake. The rusticated rim top surface is covered in lava overflow and dirt and grime from previous usage and subsequent storage. The inner and outer rim is in pristine condition. The condition of the inner walls of the chamber can be commented upon after the cake has been taken down to the bare briar. The chamber has strong smells from the old tobaccos. The draught hole is dead center and at the bottom of the chamber and that makes me believe that it should smoke smooth. The stummel all around appears solid to the touch and hence I do not foresee any serious damage to the walls in the form of burnout/ deep heat fissures/ lines or pits. I may have to resort to the salt and alcohol treatment of the chamber if the ghost smells are not reduced after the cake has been removed and the shank internals are thoroughly cleaned. 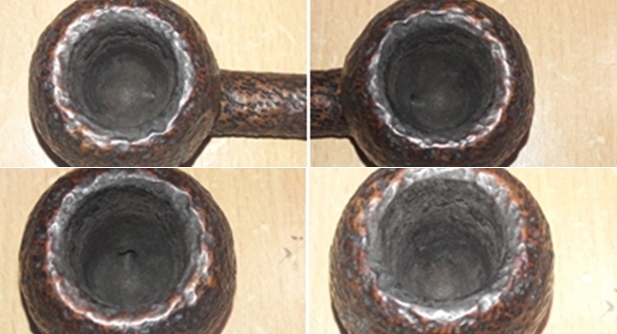 As is commonly seen on rusticated or sandblasted pipes with some serious age on them, the crevices in such surfaces are always filled with dust, dirt, oils, tars and grime from all the years of smoking and storage. This one is no exception to this observation. The grooves of the rusticated stummel surface are filled with dust while the smooth bottom shank which bears the stamping is covered in dust and grime. The fact that the grooved patterns are dusty and filled with dirt is accentuated more due to the light brown and black hues on the stummel and the shank. The briar is looking lifeless and bone dry and has taken on dirty grey hues. I need to be careful while cleaning the shank bottom surface to preserve the stampings on this pipe. Thorough cleaning and rising under warm water of the stummel surface should highlight the beauty of the shallow blasticated patterns.
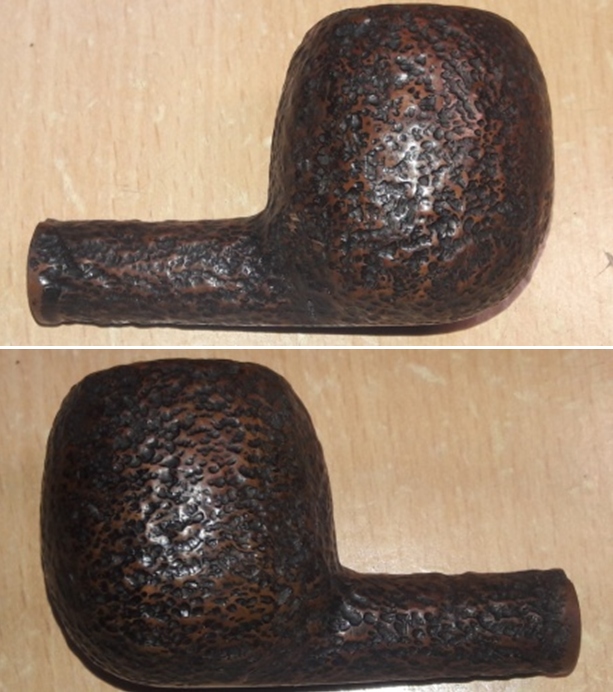
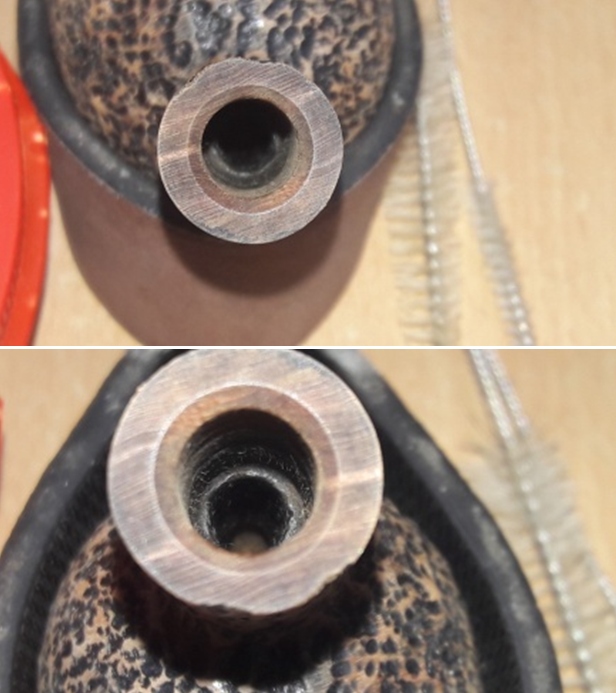
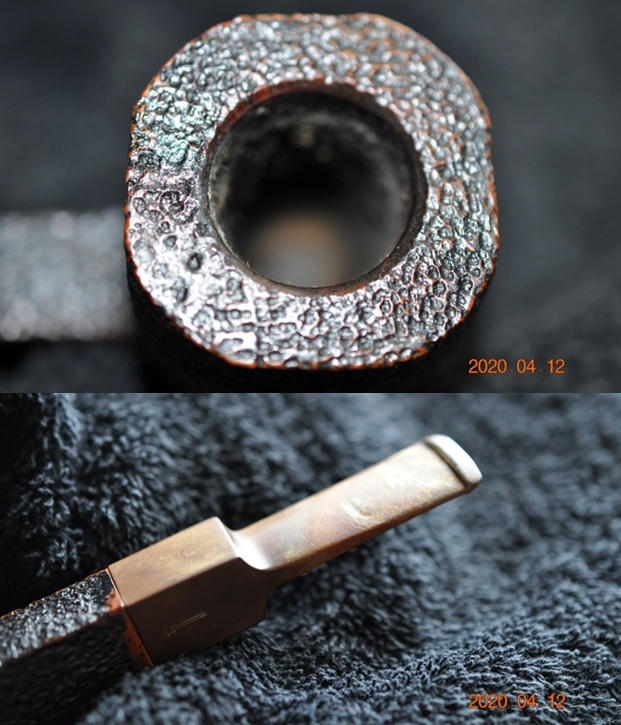
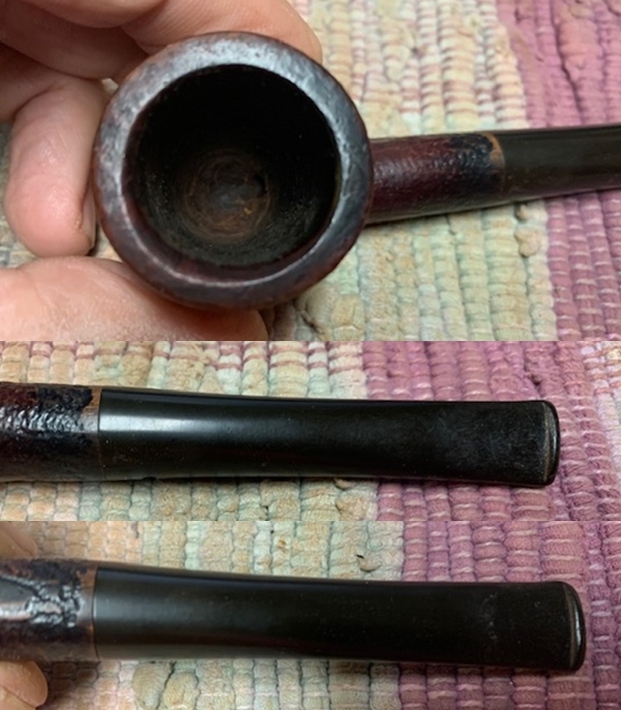
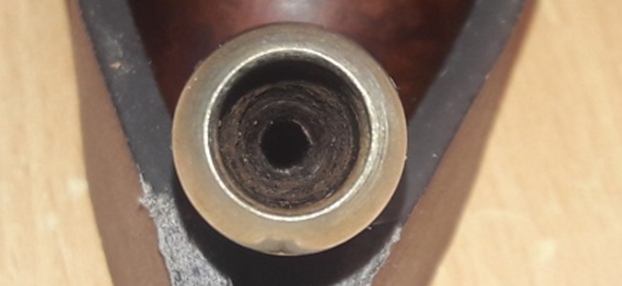
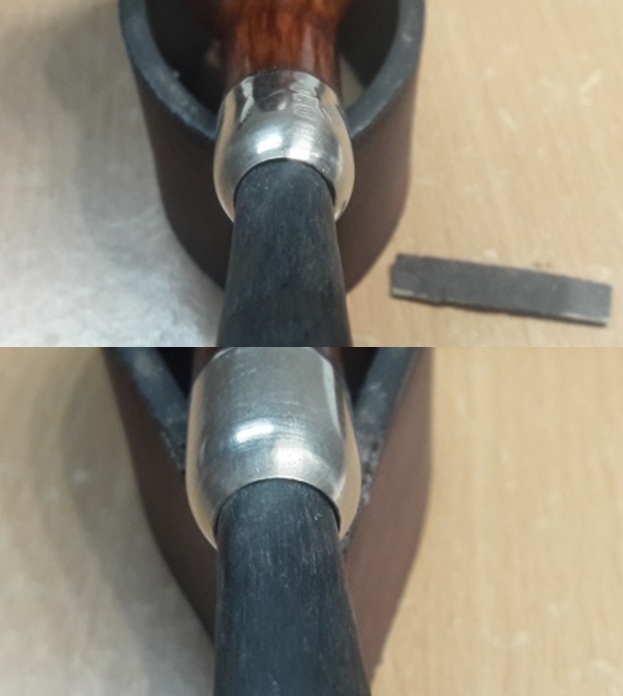
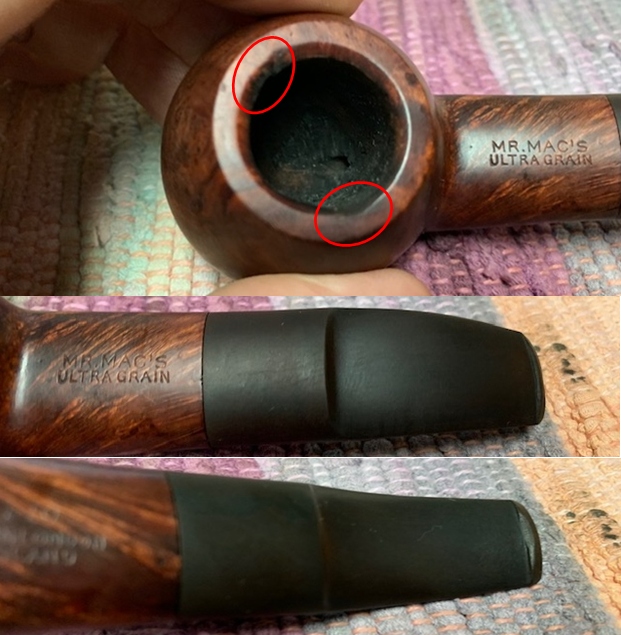
 The mortise shows accumulation of oils, tars and gunk and the air flow is not full and smooth.
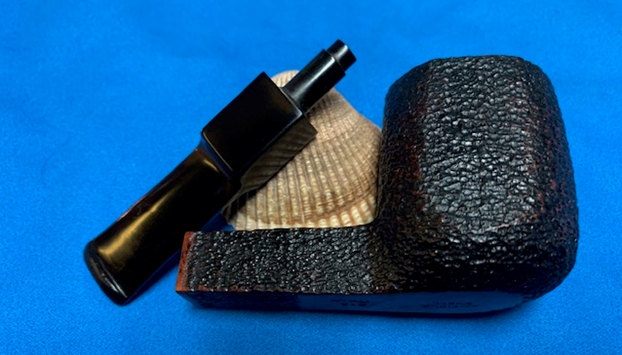
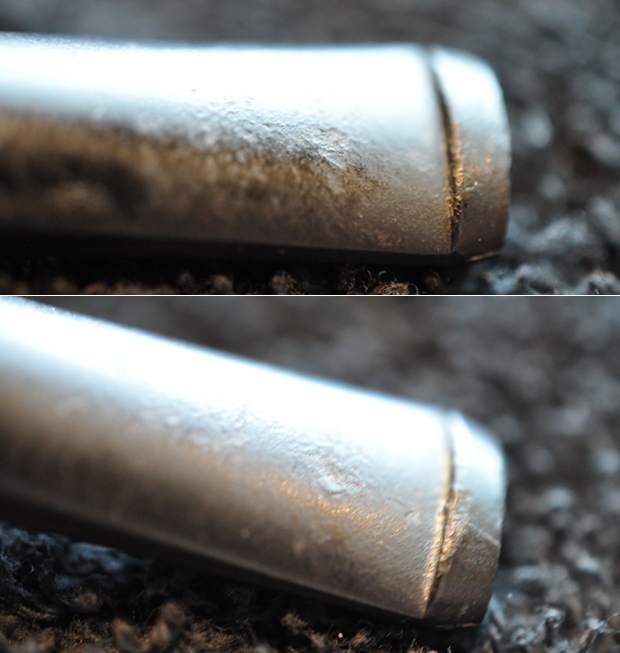
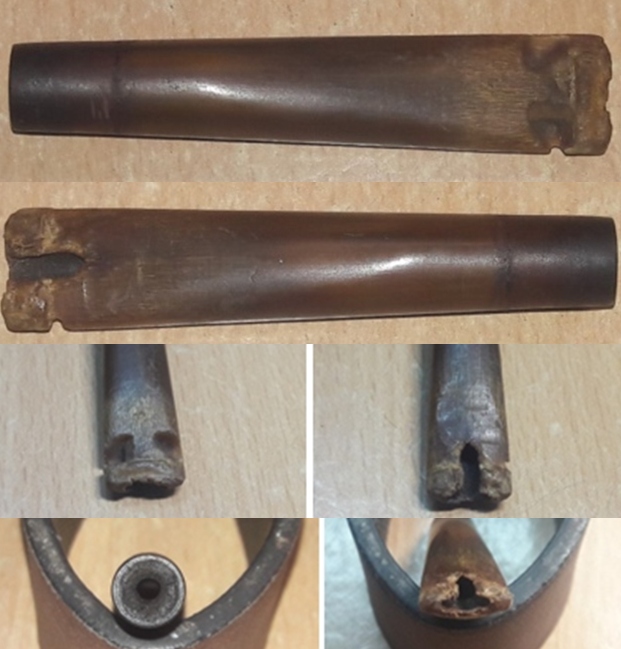
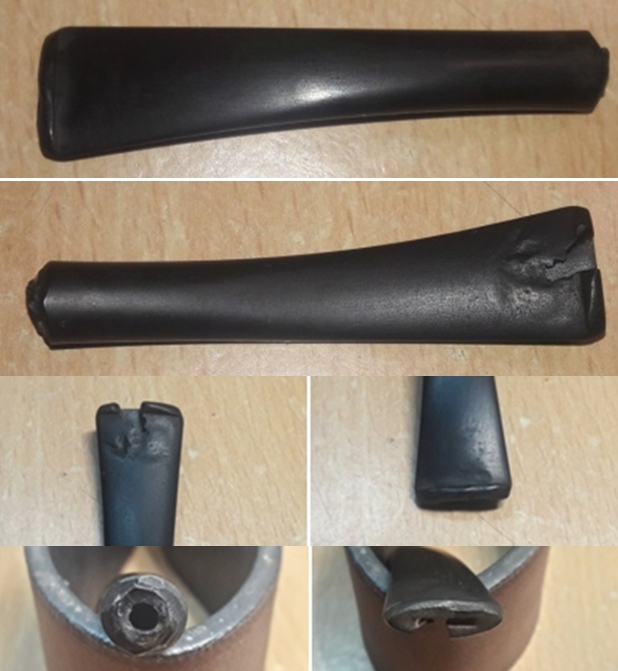
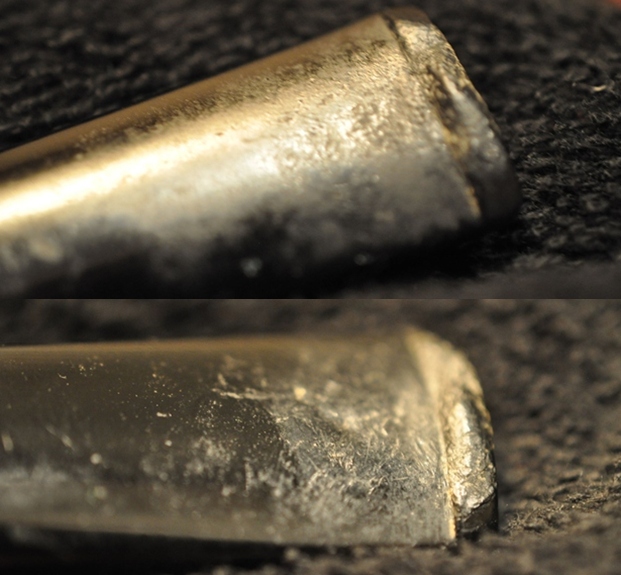
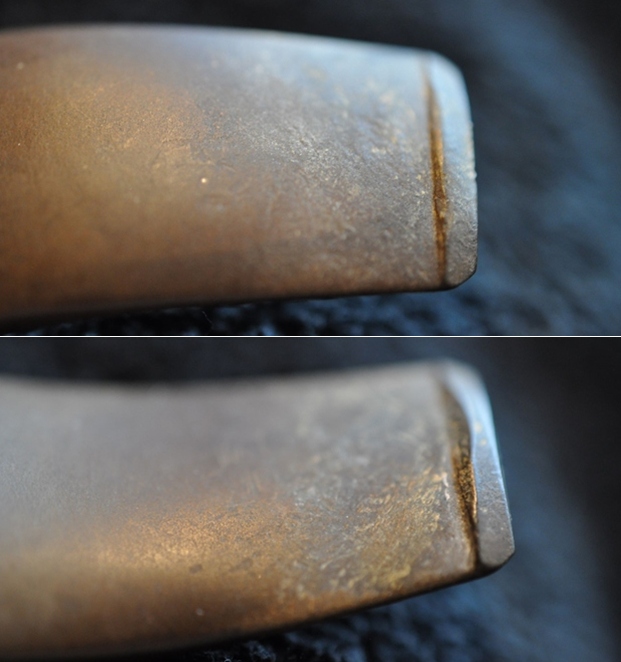
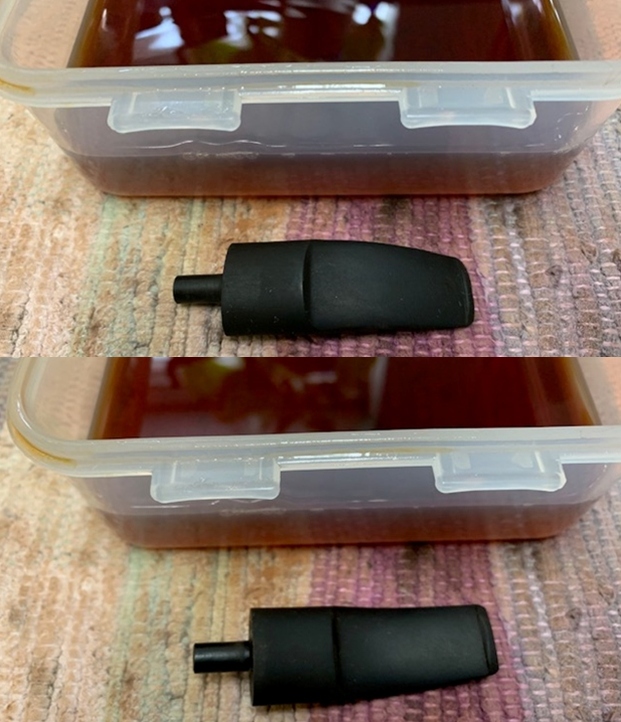
 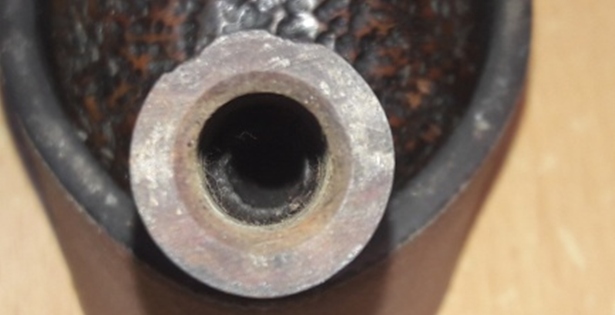 The high quality twin bore tapered vulcanite stem is so heavily oxidized that it appears brownish green in color! Some minor tooth chatter and deep bite marks are seen on both surfaces of the stem. This issue should not be a major headache to address. The lip edge on both sides has bite marks and would need to be reconstructed and reshaped. The tenon has accumulated ash and oils/ tars that have dried out on the inside as well as on the outside. The twin orifice has calcium deposits which will have to be cleaned. The tooth chatter and the bite marks will be raised to the surface by heating and the deeper tooth indentations will be filled using charcoal and CA superglue mix.
  The Process
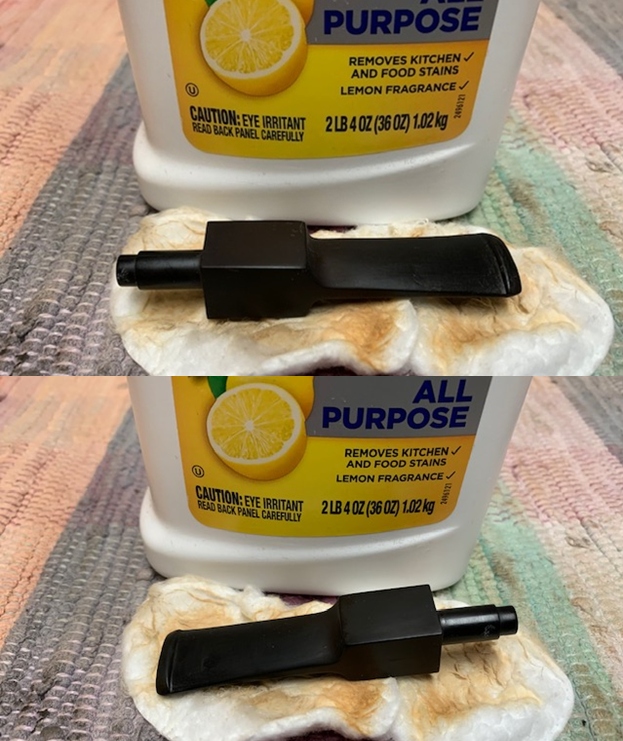
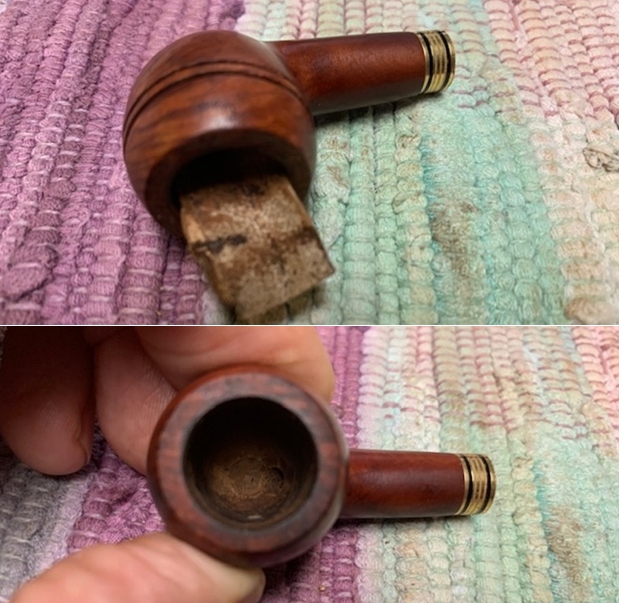
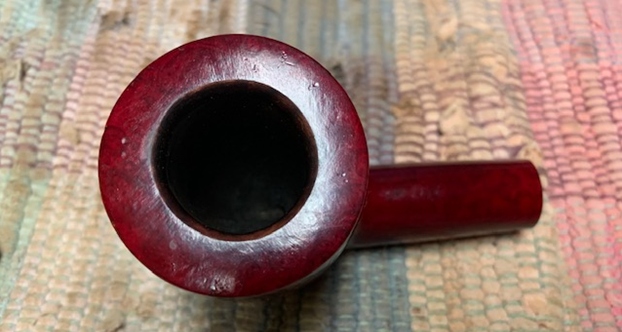
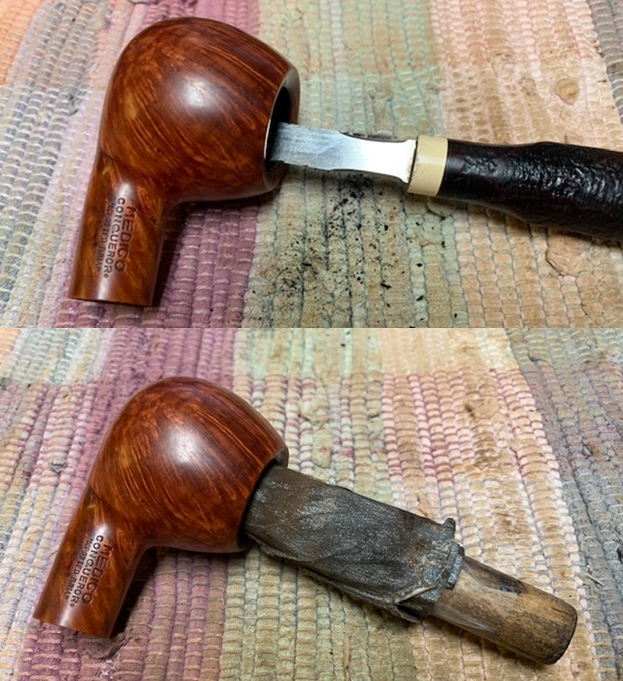
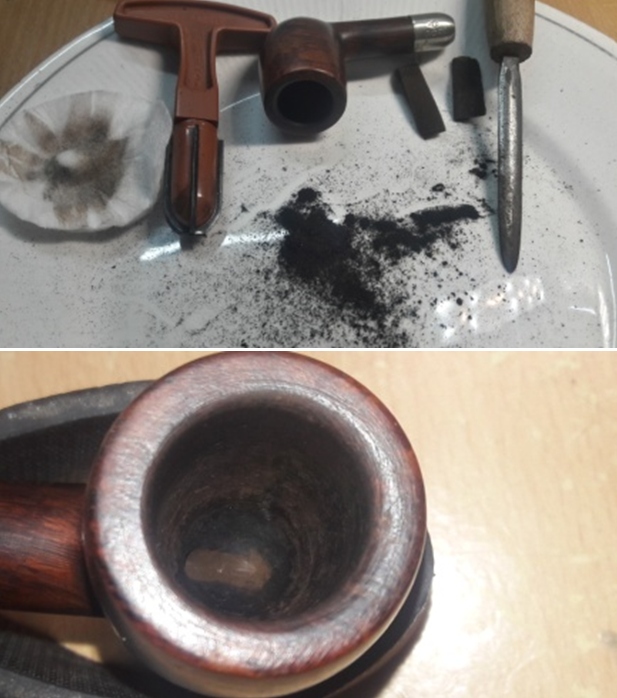
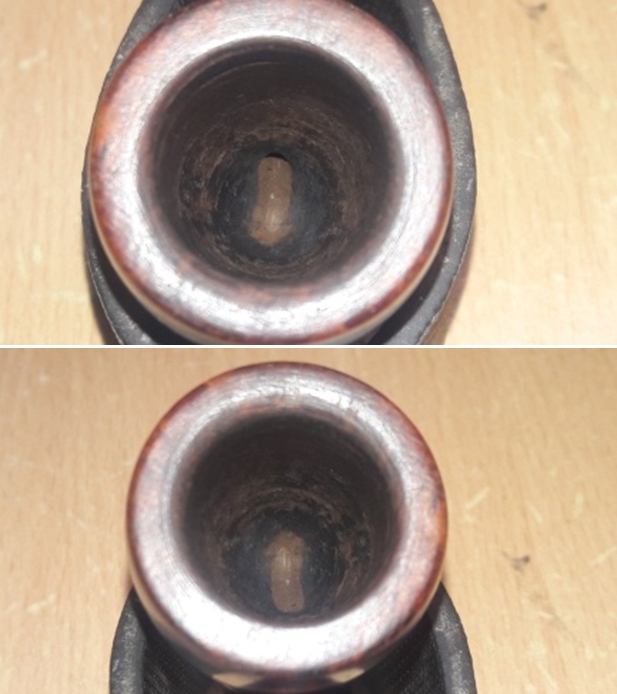
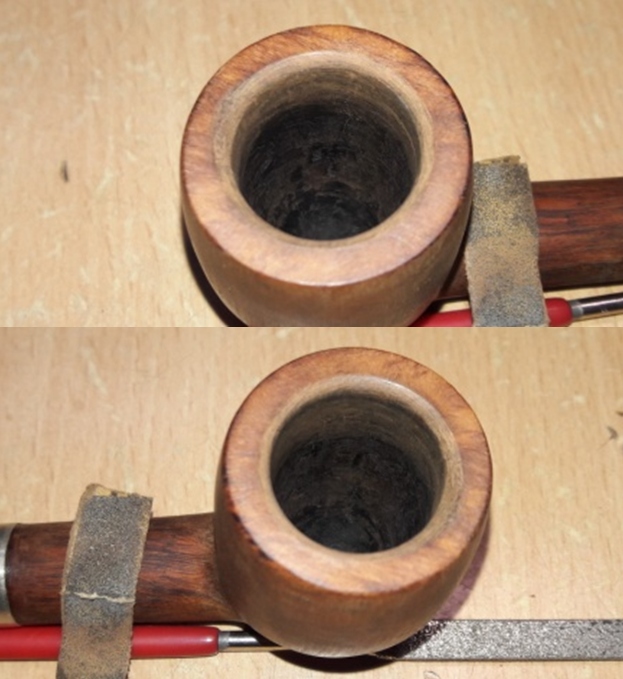
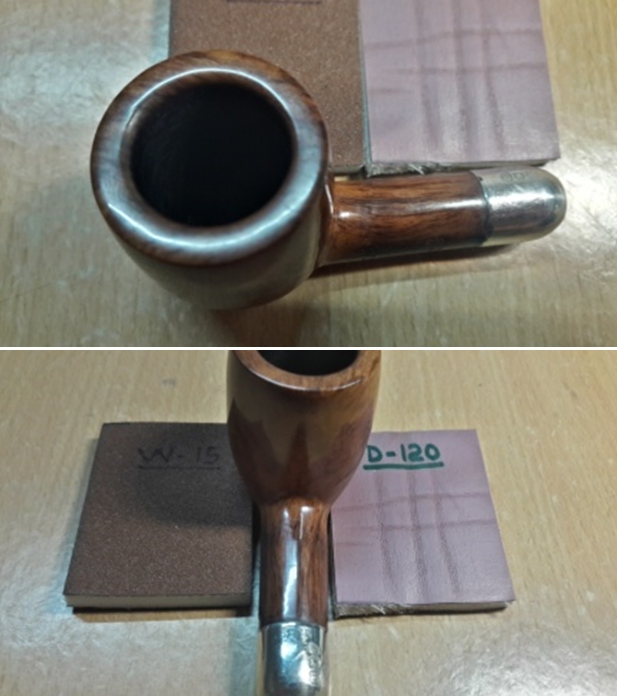
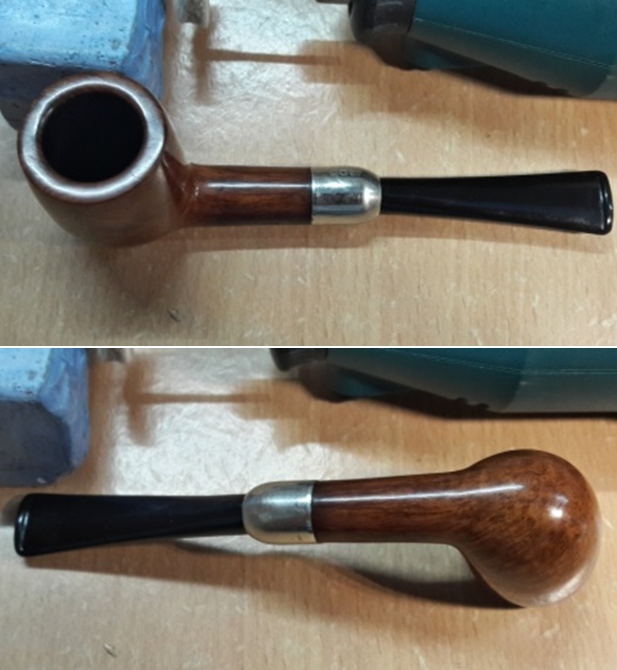
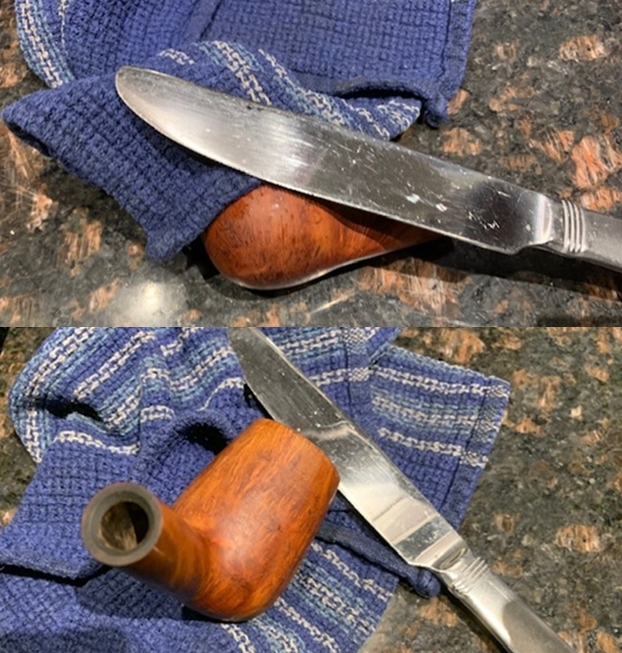
I started the restoration of this pipe by first reaming the chamber with with my fabricated knife to remove the carbon deposits. Once the cake was scraped back to the bare briar, I used a 150 grit sand paper followed by 220 grit sand paper to remove all the traces of remaining cake and also to smooth out the inner walls of the chamber surface. Finally, to remove the residual carbon dust, I wiped the chamber with a cotton pad wetted with 99.9% pure isopropyl alcohol. The chamber walls are sans any damage. The smells from the chamber have greatly reduced. The walls are nice and stout and should provide a cool smoke. 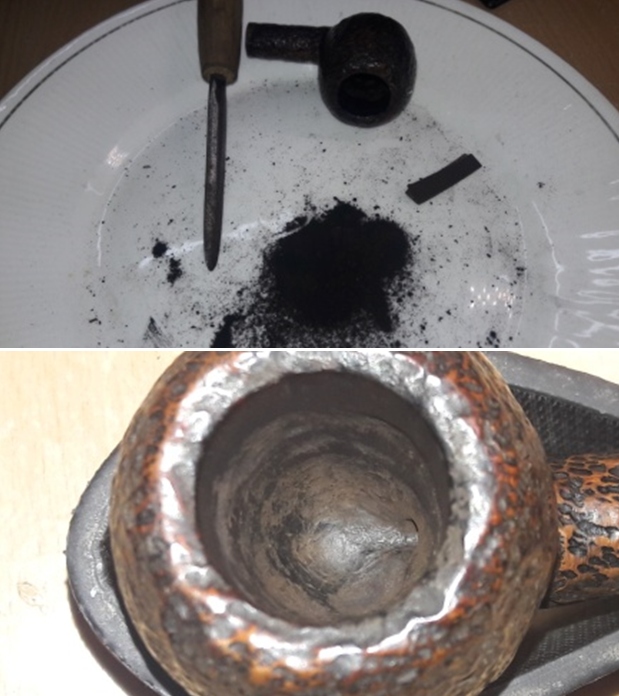
 This was followed by cleaning the mortise with pipe cleaners and shank brush dipped in isopropyl alcohol. I scraped the walls of the mortise with my dental tool to remove the dried oils and tars. The mortise was not very dirty and I further clean it with anti-oil dish washing detergent and shank brush. This helps me in saving a heap of pipe cleaners, which is a very precious commodity here in India. This further eliminated trace of old smells from previous usage, however, I must admit that I was still not very happy with the internal cleaning of the stummel and shank.
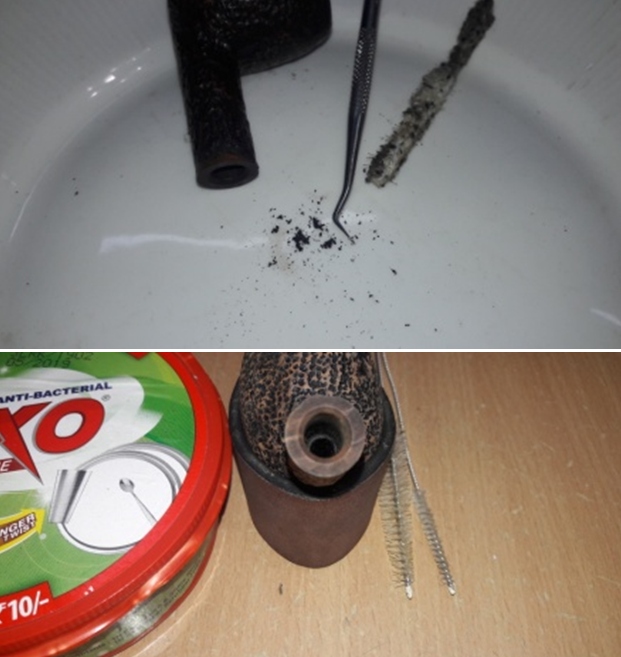
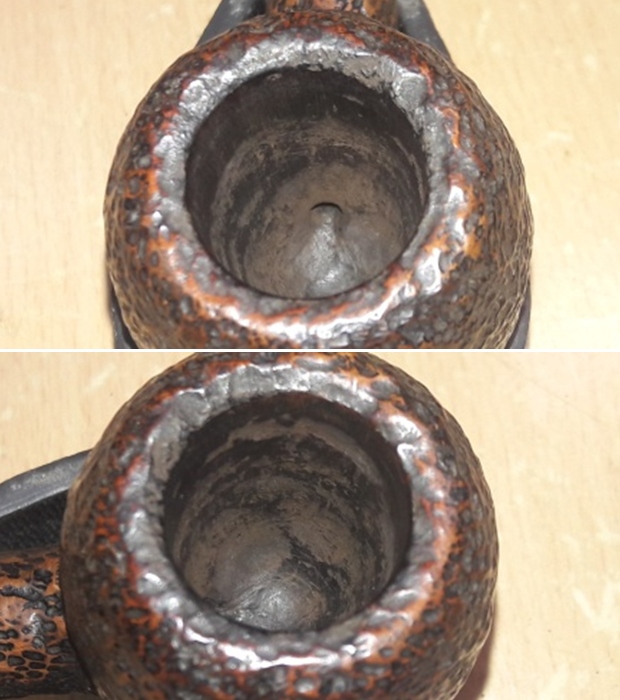
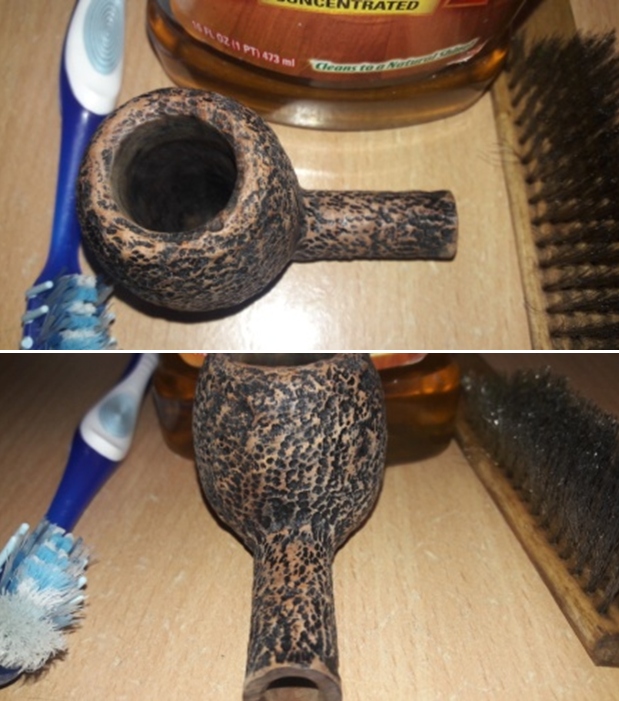
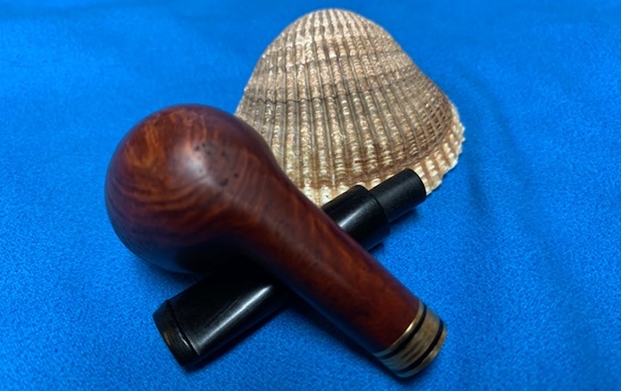
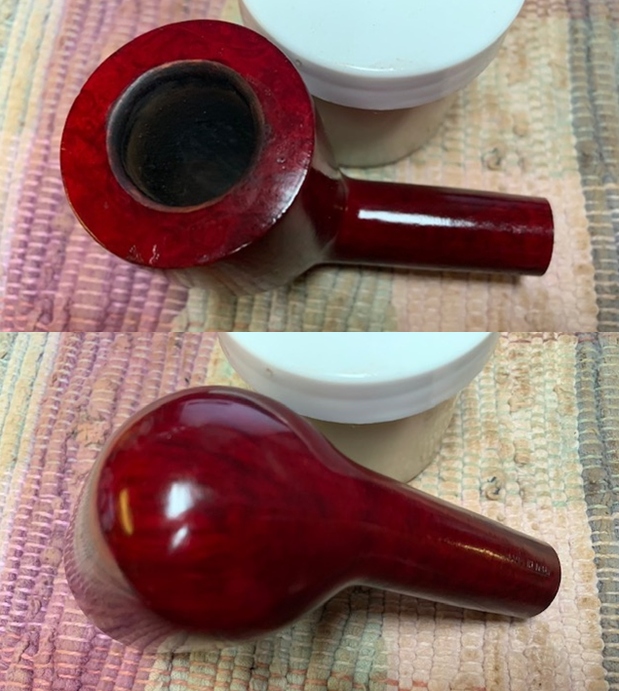
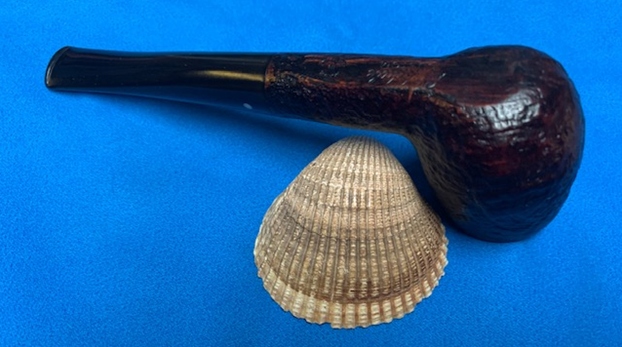
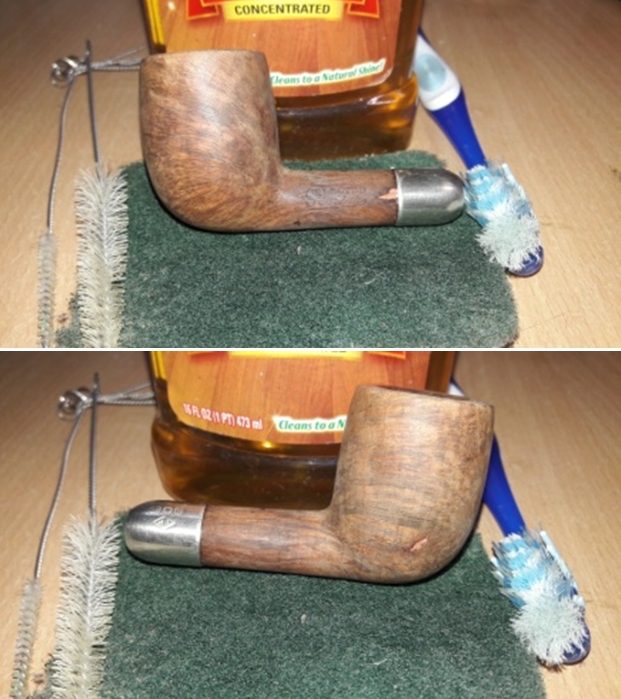
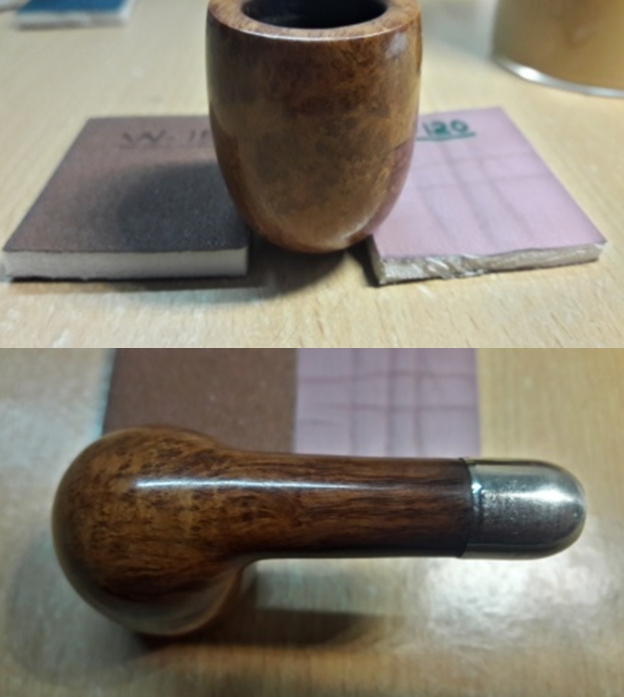
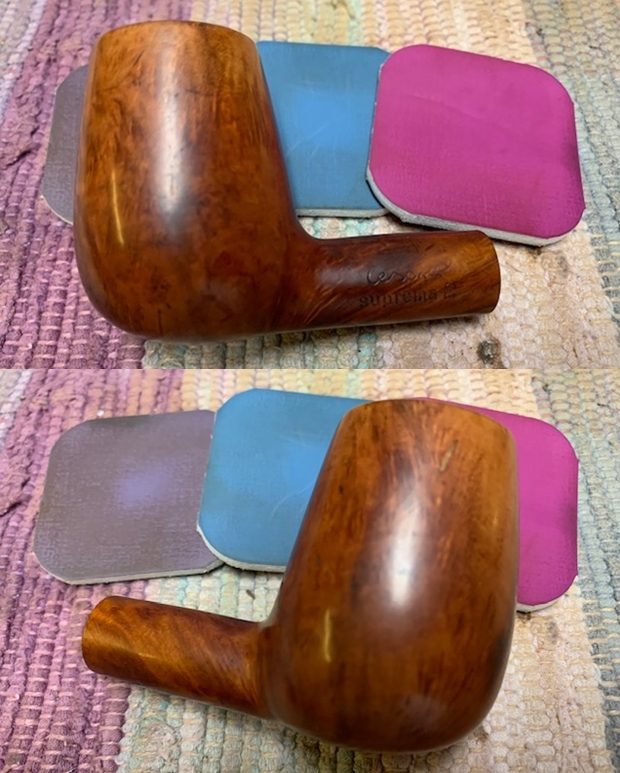
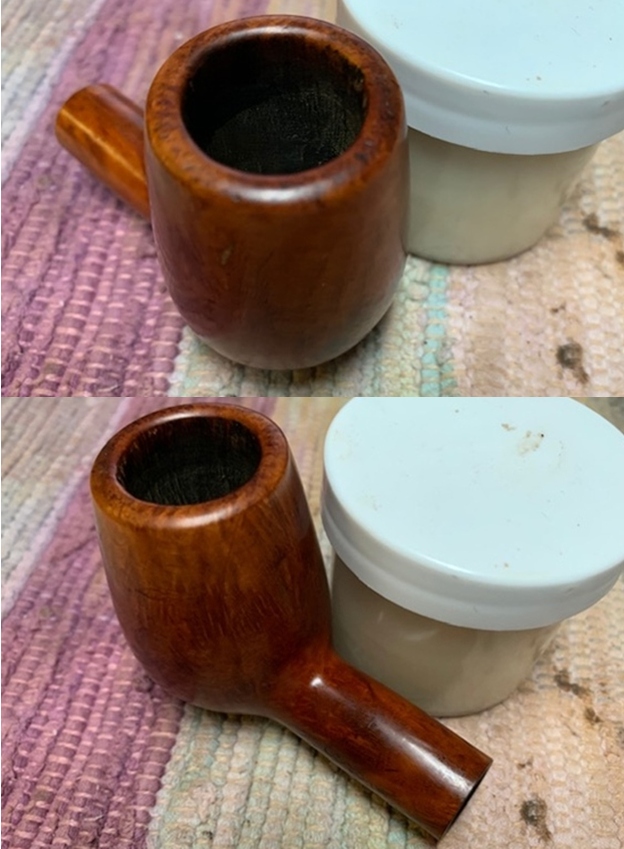
 With the bowl internals clean, I move to clean the exterior of the stummel. I generously applied Murphy’s oil soap with a hard bristled tooth brush and scrubbed the stummel and rim top with the soap. I washed the stummel under running warm water with anti oil dish washing detergent till the stummel surface was clean and dried it using paper towels and soft cotton cloth. I deliberately cleaned the rusticated rim top with a bristled brass wired brush and set the stummel aside to dry out naturally. I simultaneously cleaned the shank internals with the detergent and hard bristled shank brush. The stummel surface has cleaned up nicely with the intricate rusticated patterns on full display. The brown hues of the raised portions of the rustications contrast beautifully with the black of the rest of the stummel. These brown hues will darken considerably once the stummel briar is rehydrated and rejuvenated using the balm and subsequent wax polishing. The ghosting is completely eliminated and the pipe now smells fresh and clean.
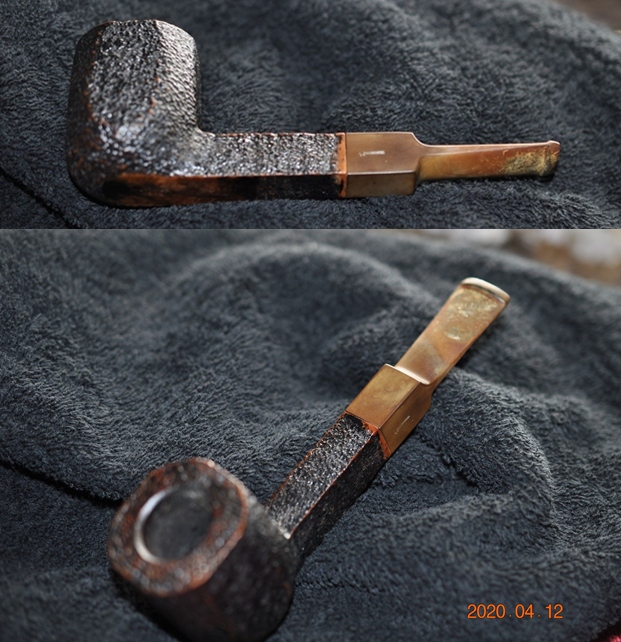
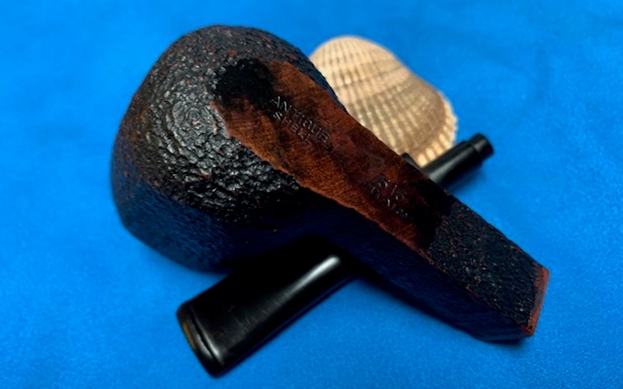
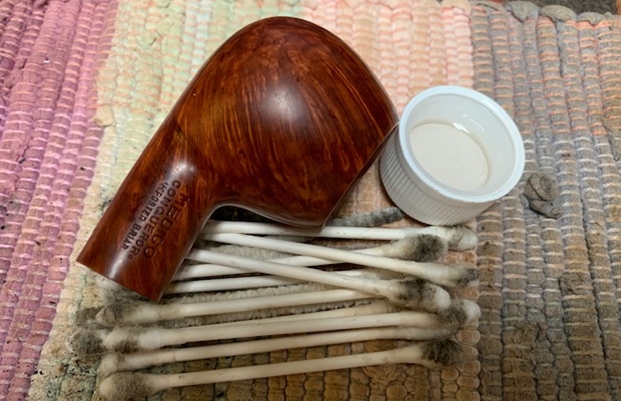
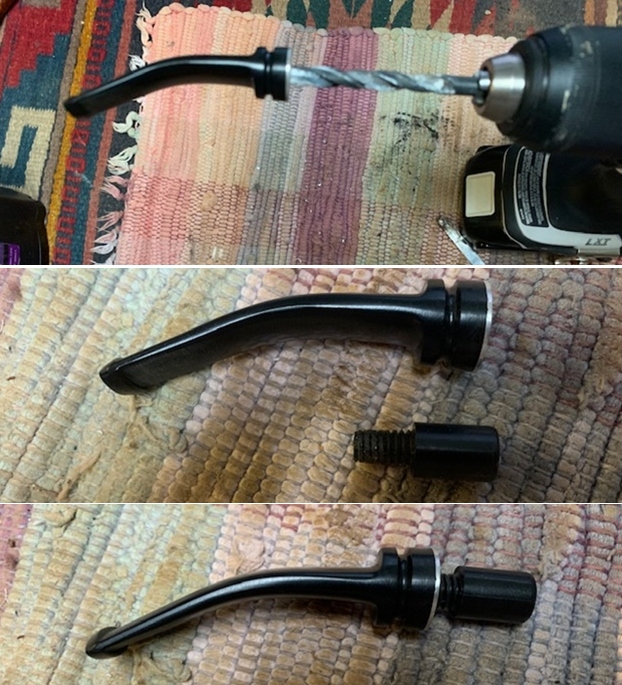
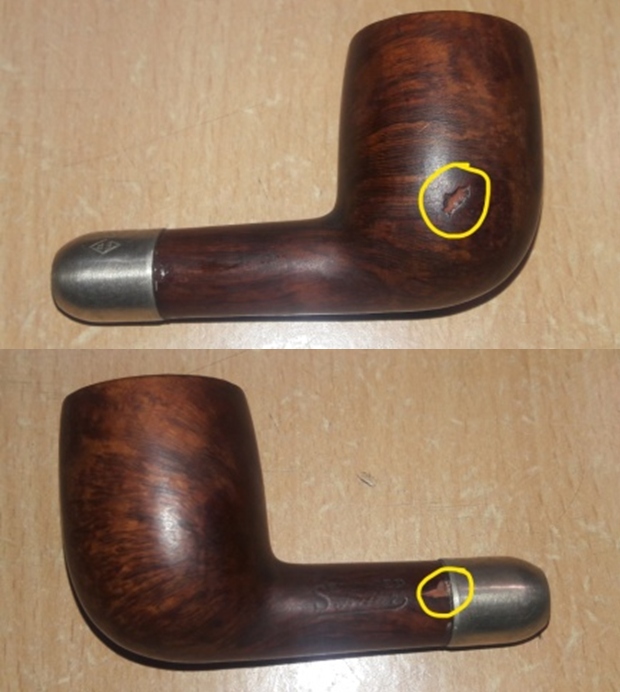
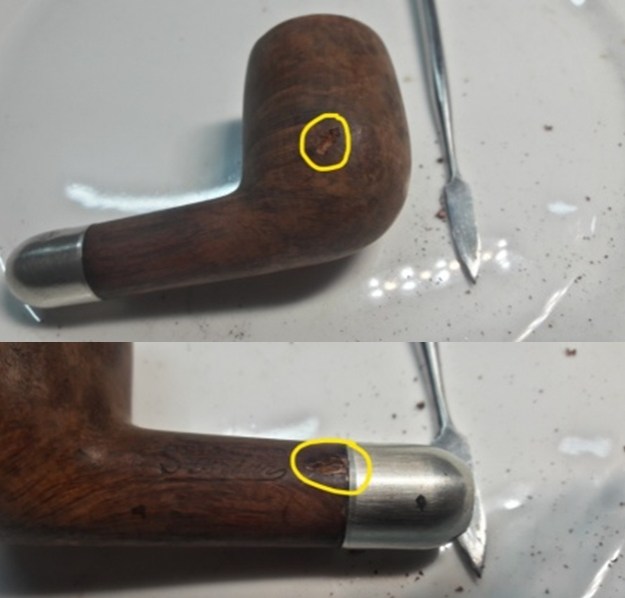
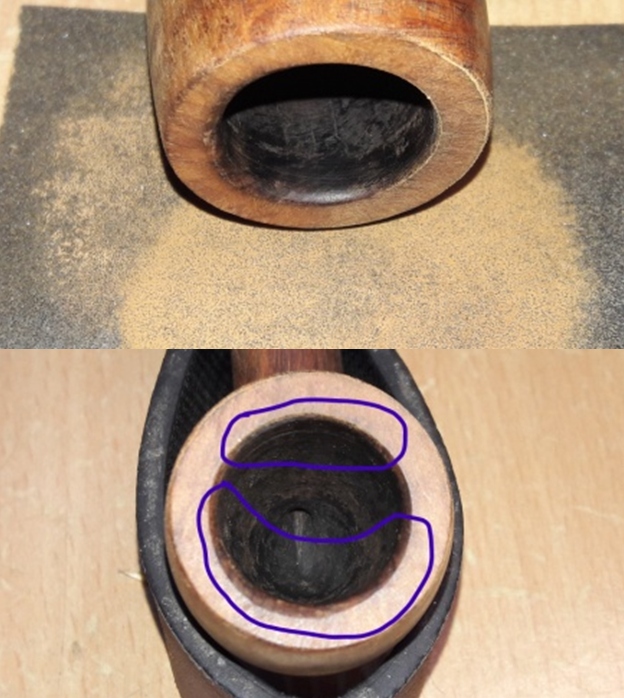
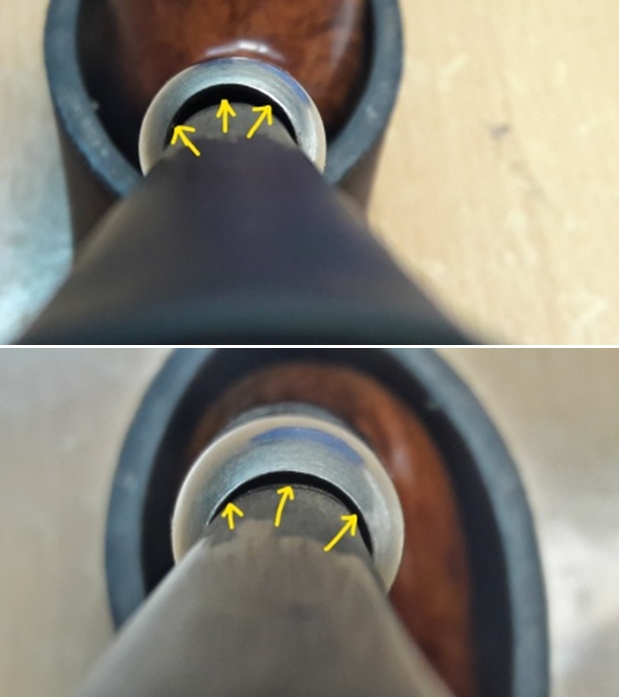
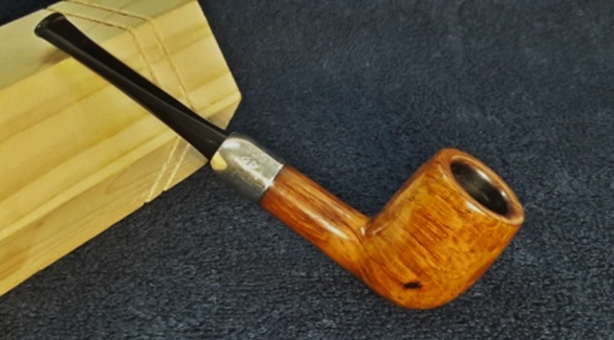
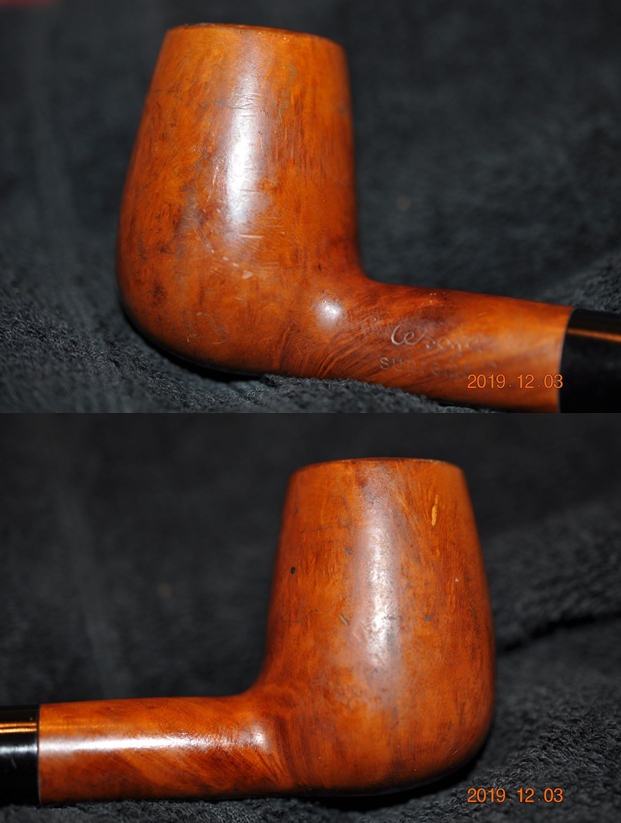
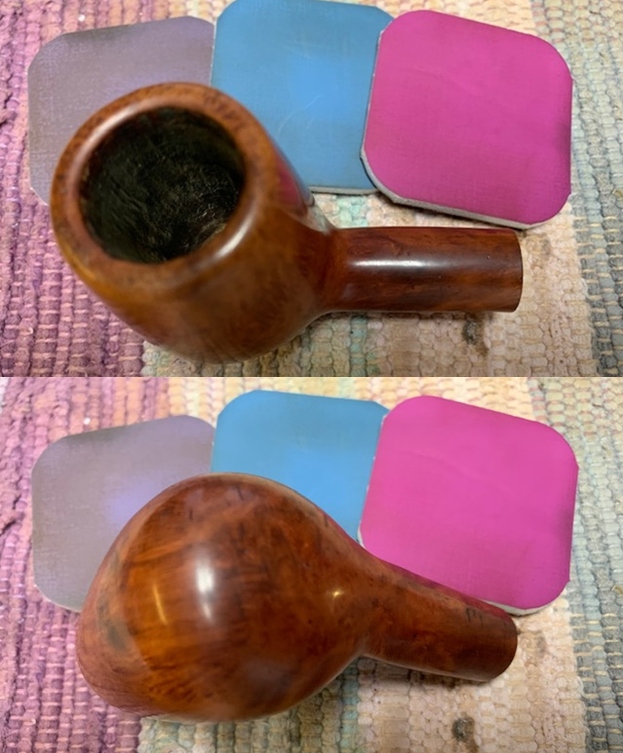
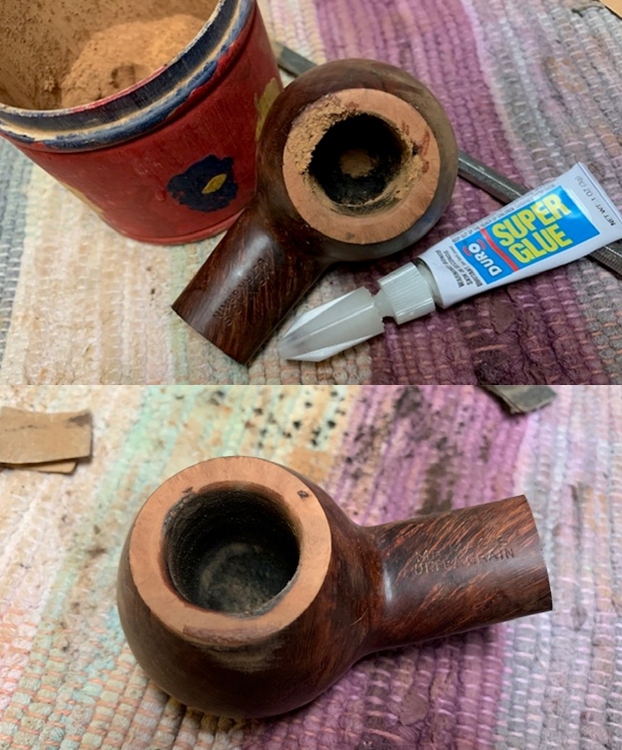
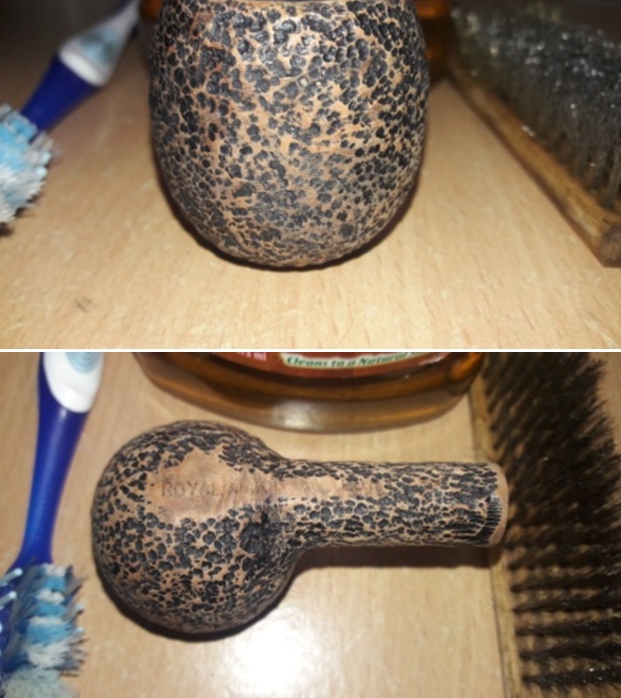 A closer examination of the stummel revealed the reason for this pipe to be designated as a sub brand/ seconds of Savinelli. There is a fill on the right side of the stummel (encircled in yellow), right at the bowl and shank junction which was revealed once the stummel surface was thoroughly cleaned.
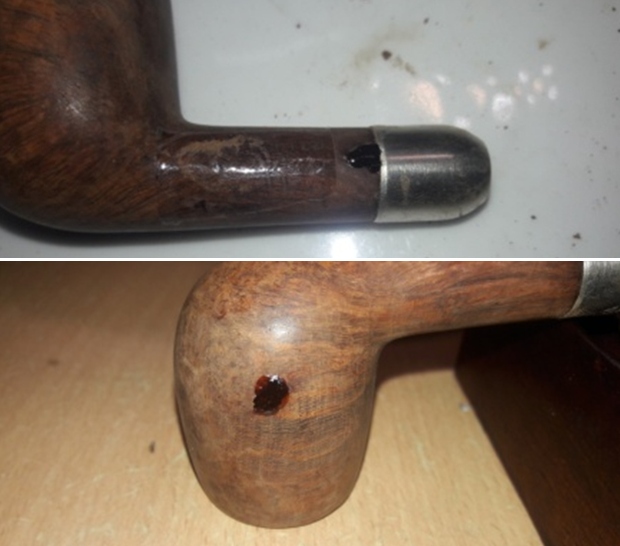
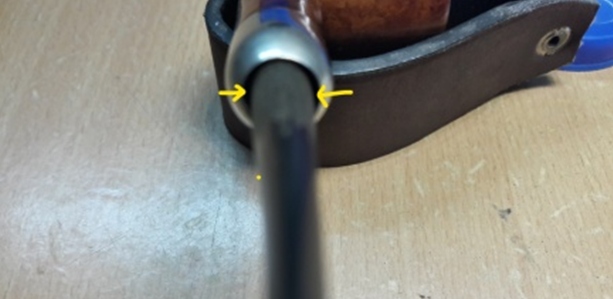
  The fill had loosened up and there was a necessity to refresh the fill. With my sharp dental tool, I gouged out the old fill and cleaned the area with isopropyl alcohol on a cotton swab. I filled the gouged out spot with a mix of briar dust and superglue. I was ultra careful not to allow the mix from spilling over the stampings on the bottom smooth surface of the shank. I set the stummel aside for the fill to cure.
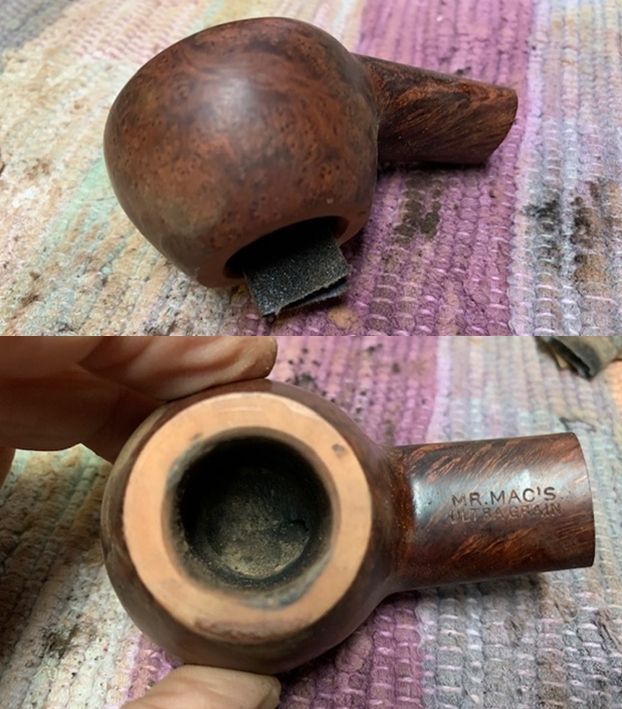
  With the stummel fill set aside for curing, I turned to address the stem issues. Using a lighter, I flamed the surface of the stem. This helped in raising some of the tooth chatter and bite marks to the surface as vulcanite has a property to regain its original shape on heating. I used a 220 grit sand paper to sand the stem and removed all the oxidation from the surface. This step further reduced the tooth chatter and bite marks present on the stem. I wiped the stem with Murphy’s Oil soap on a cotton swab. This helps in cleaning the stem surface while removing the loosened oxidation. The remaining deeper tooth chatter and bite marks would be addressed subsequently.
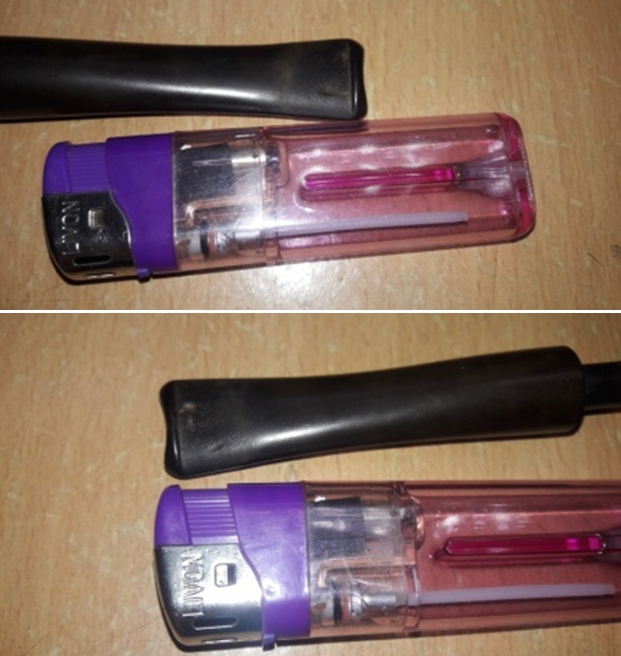
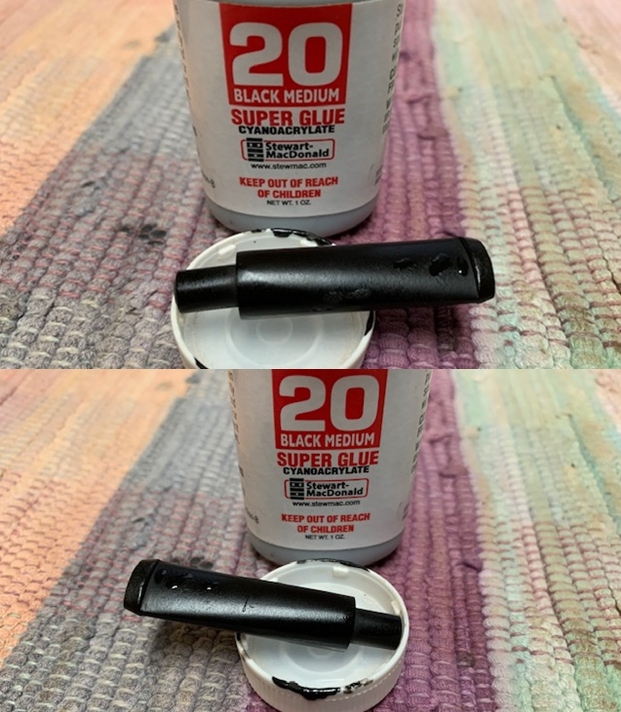
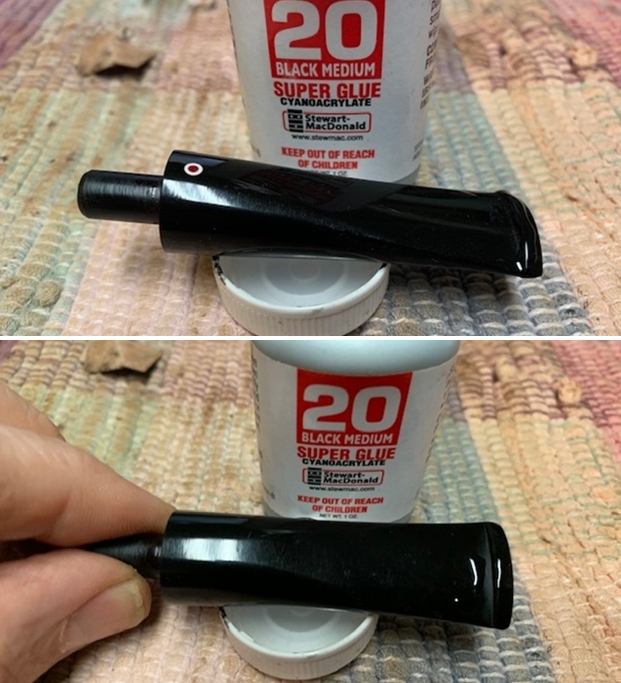
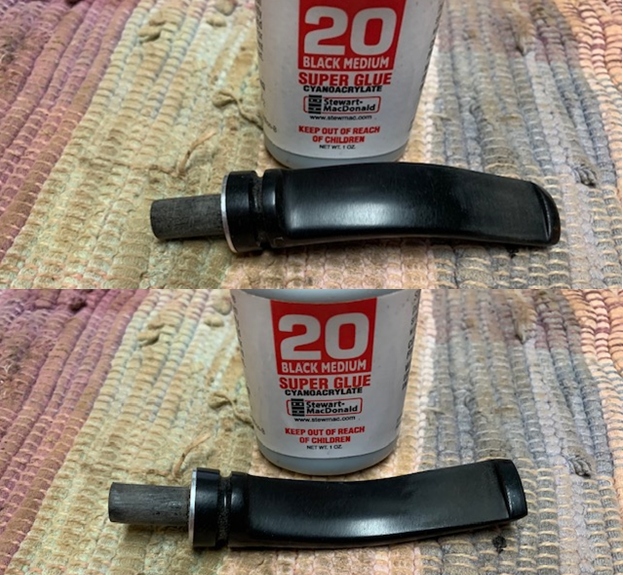
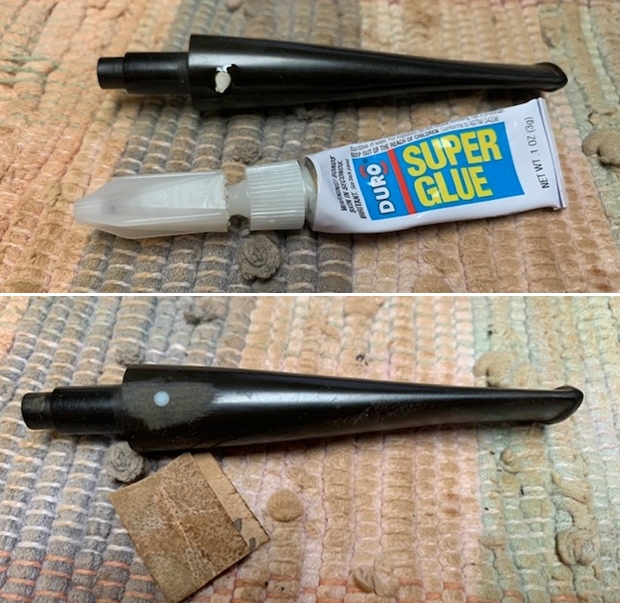
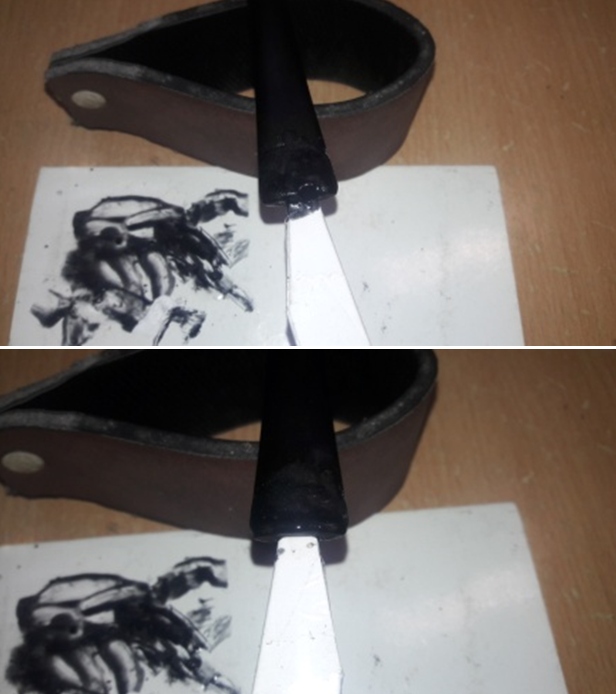
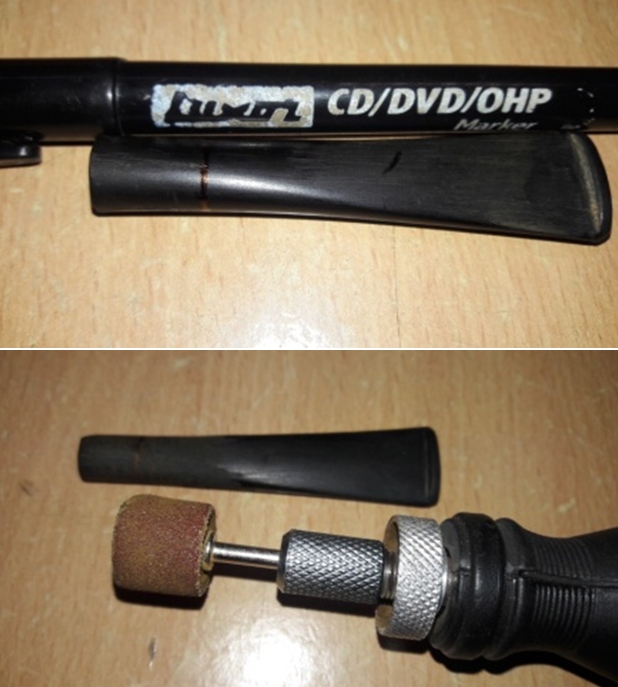
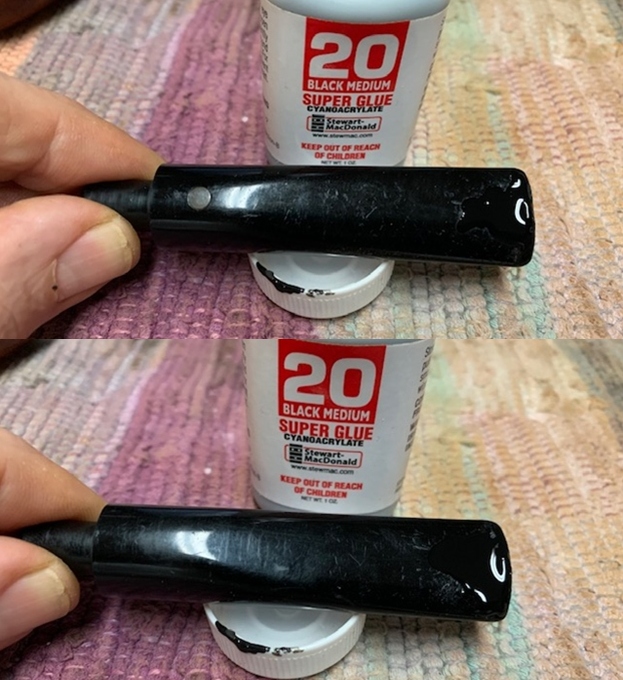
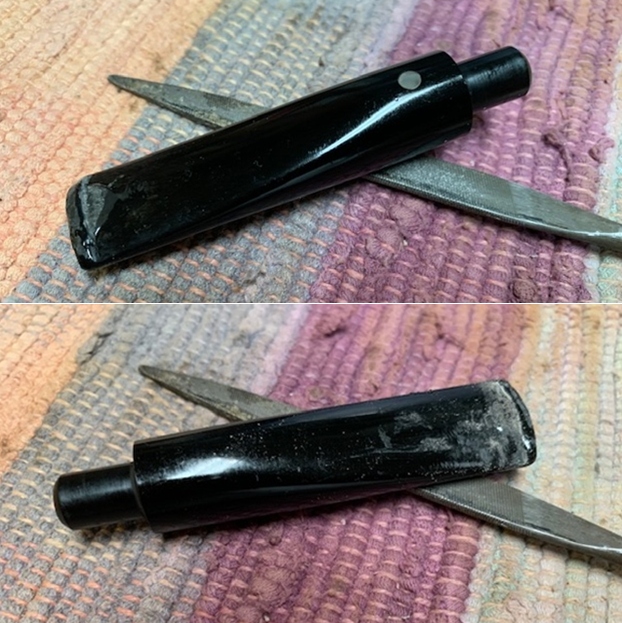
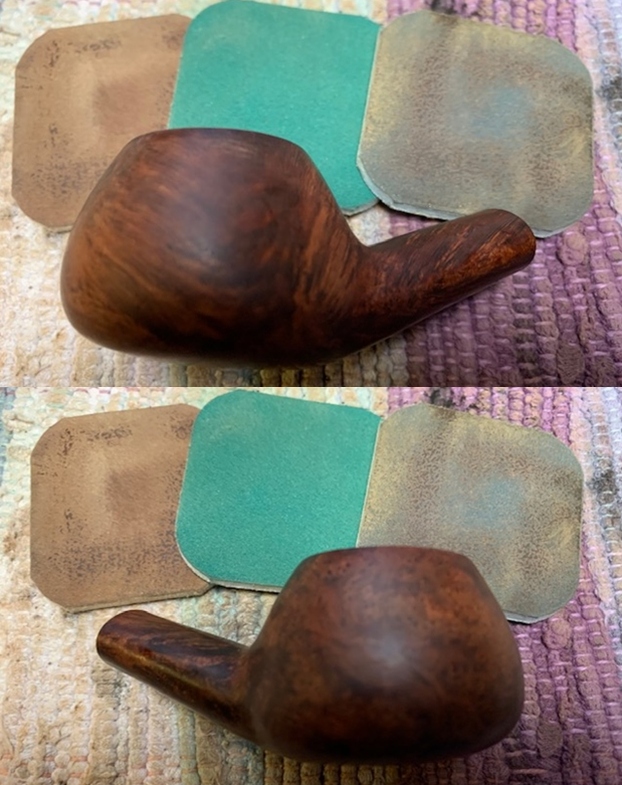
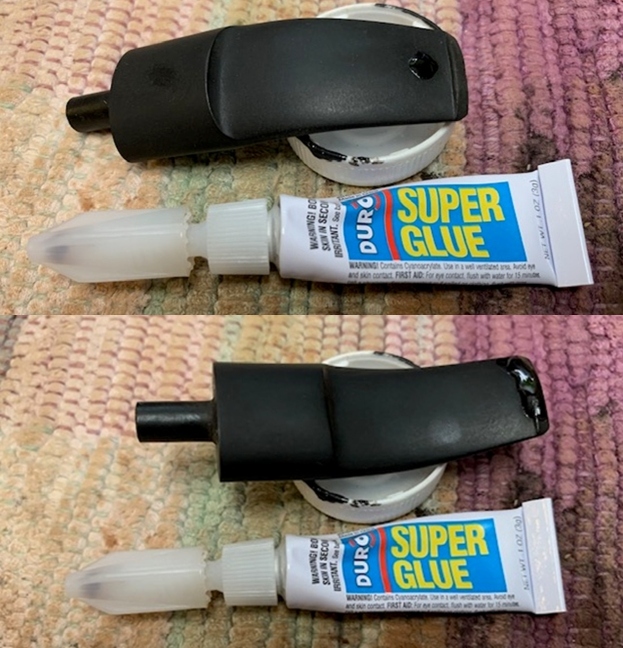
 I addressed the deeper tooth chatter and bite marks by filling them up with a mix of activated charcoal and CA superglue. I applied a slightly thick layer over the lip which I will later sand down to create a defined edge. Once I had applied the mix, I set it aside to cure overnight. Once the fill has hardened, I shall file and sand the fills to match the surface of the stem and sharpen the button edges on either surface.
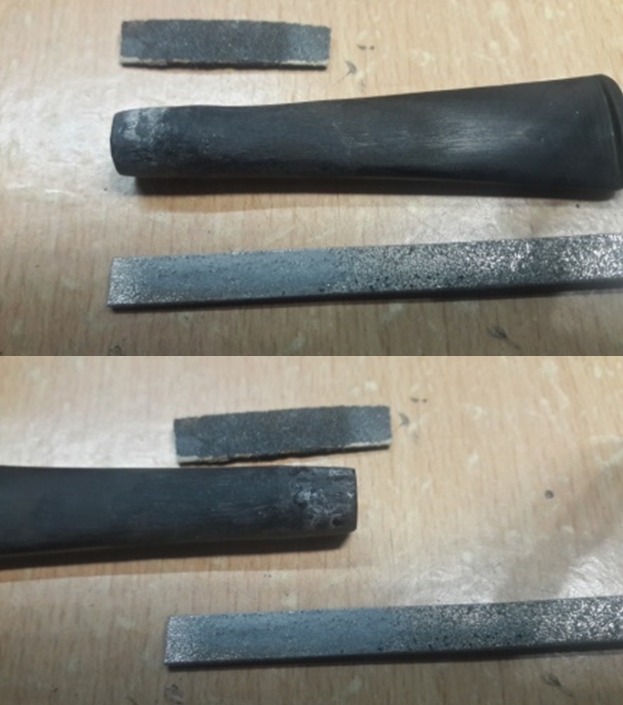
 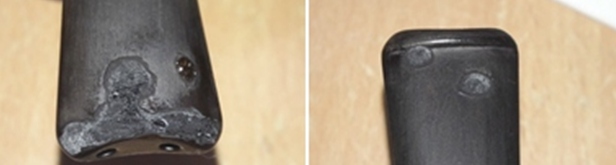 By next afternoon, the stummel fill had hardened nicely. I used the edge of a flat head needle file to sand the fill and match it to the rest of the stummel surface. With a folded piece of 180 grit sandpaper, I further sand the fill to achieve a perfect blending of the fill with the rest of the stummel surface.
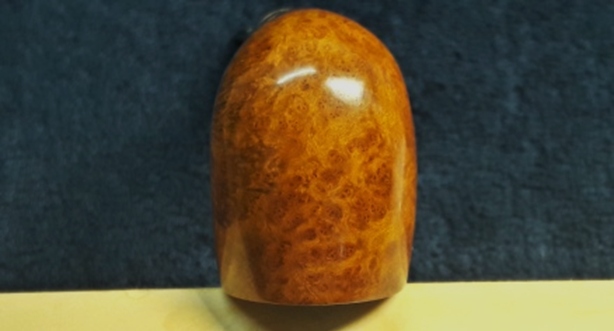
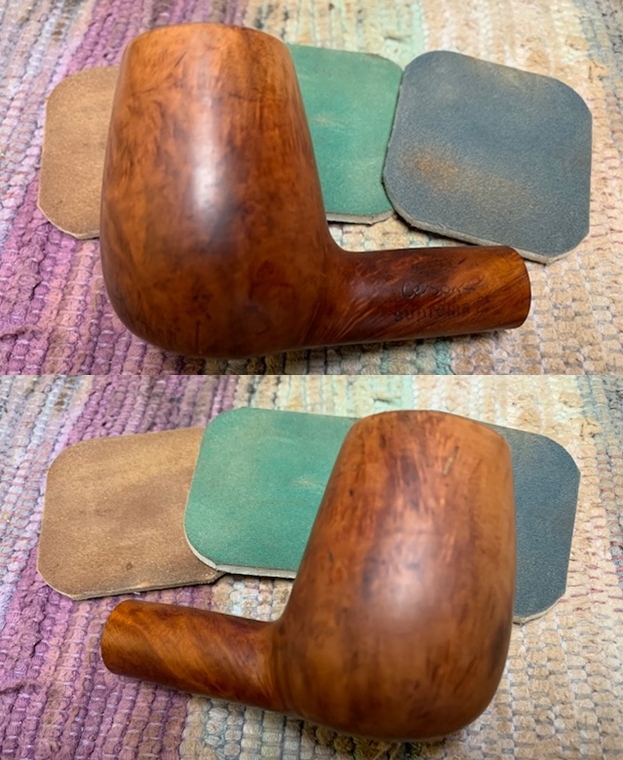
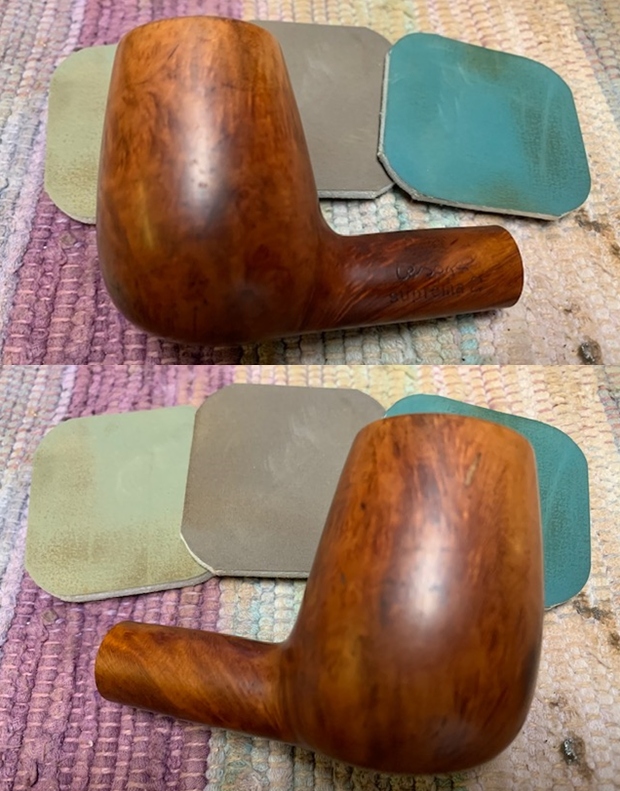
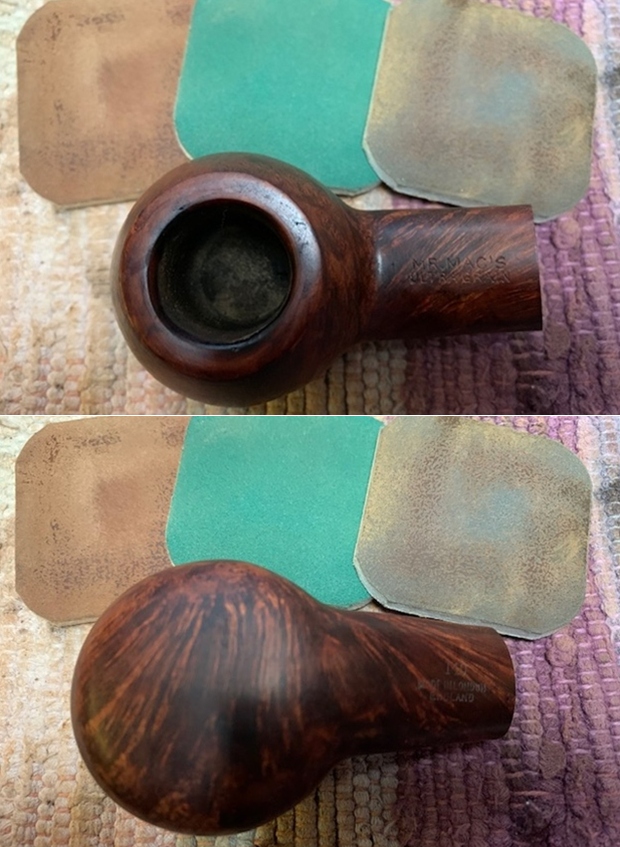
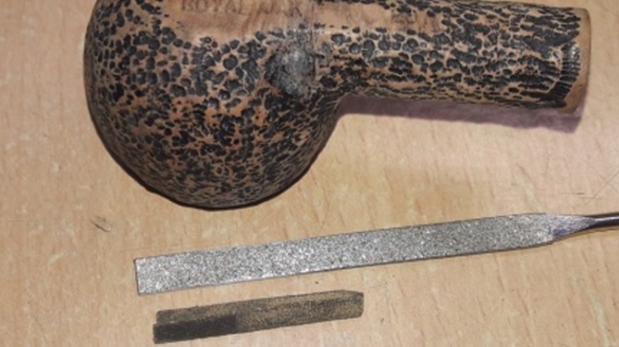 Next, I rubbed a small quantity of “Before and After Restoration Balm” in to the briar with my finger tips, working it deep in to the rustications and let it rest for a few minutes. I generously rubbed the balm in to the rim top surface. The balm almost immediately works its magic and the briar now has a nice vibrant appearance with the beautiful rusticated patterns displayed in their complete splendor. The contrast of the dark browns of the raised rustications with the dark black of the rest of the stummel adds an interesting dimension to the appearance of the stummel which may be insufficiently described in words and be rather seen in person. I further buffed it with a horse hair brush.
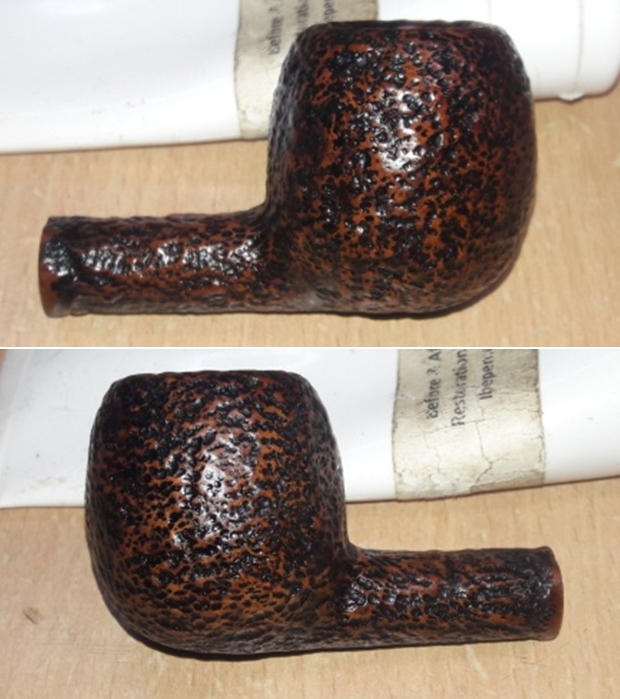
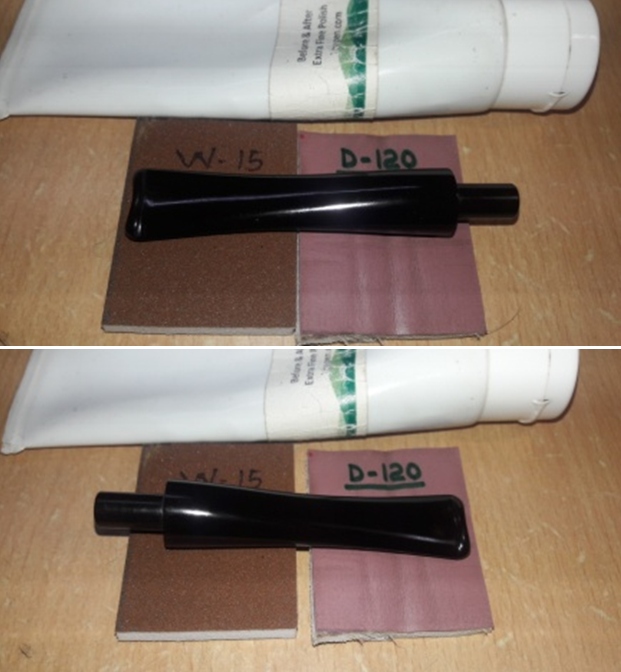
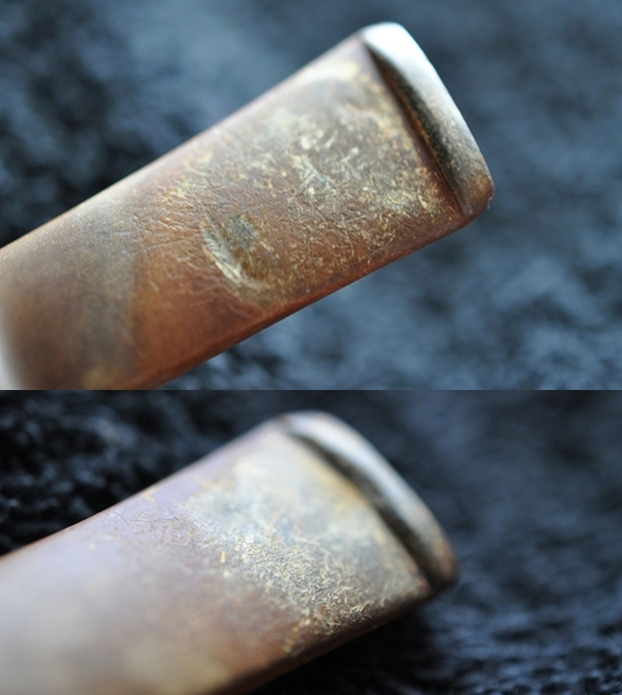
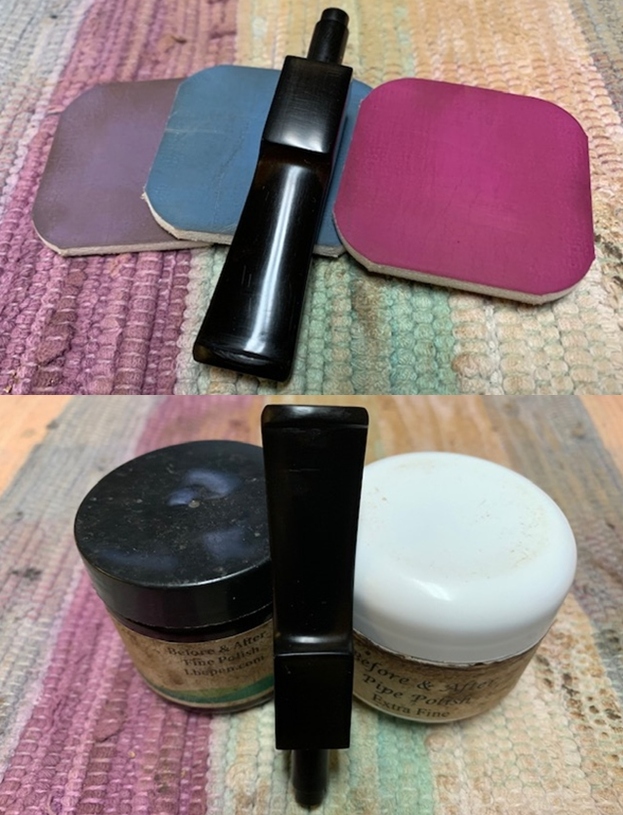
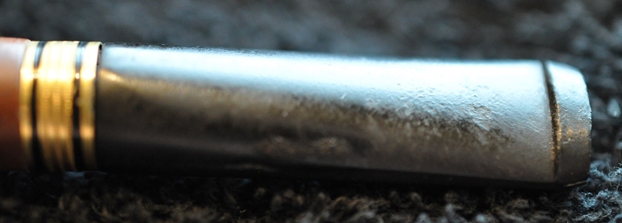
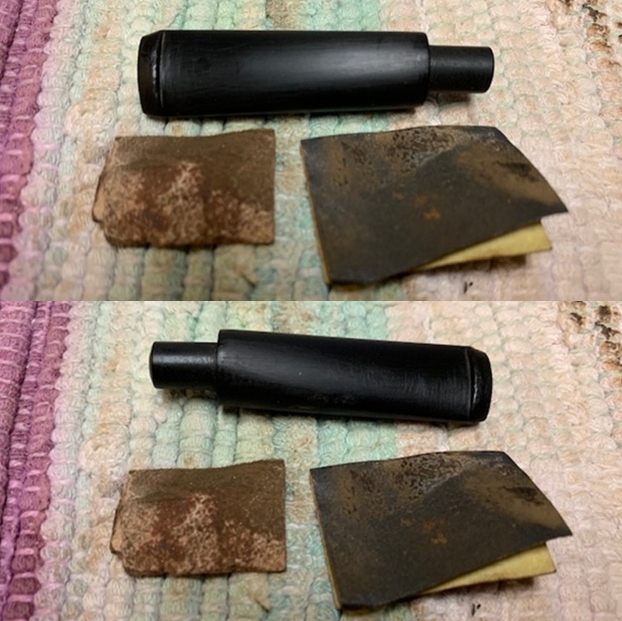
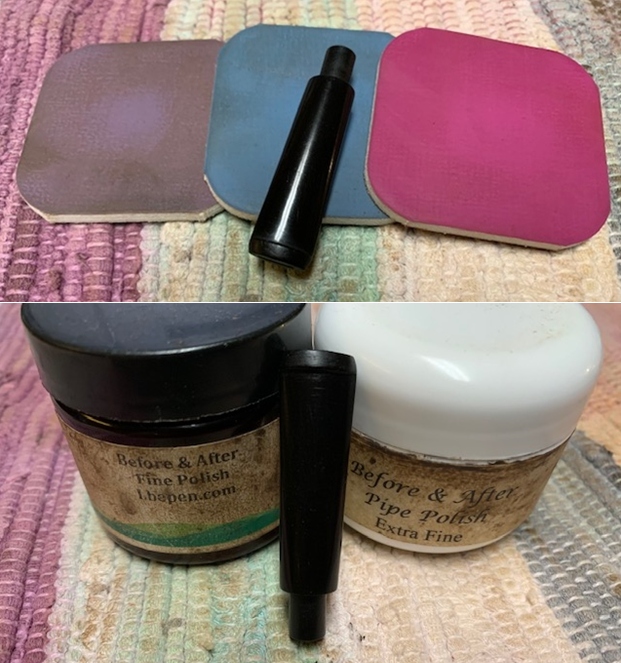
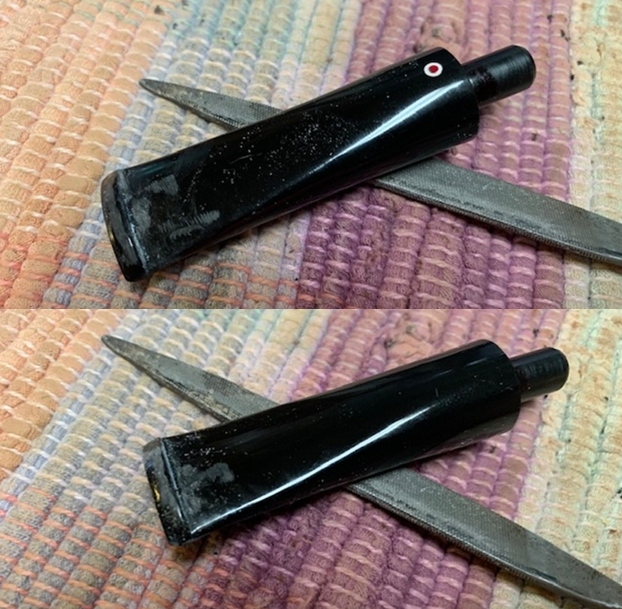
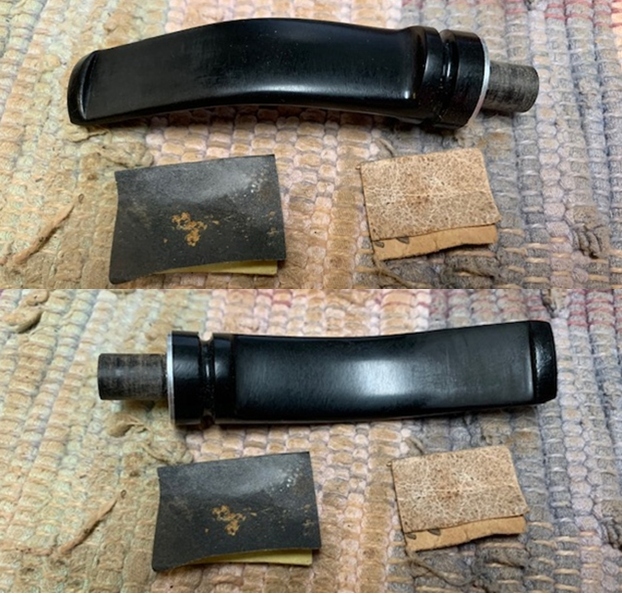
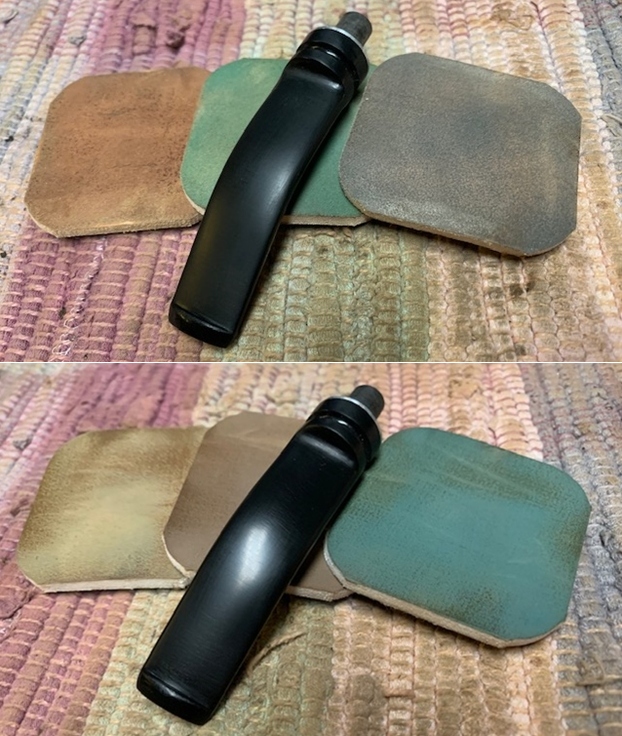
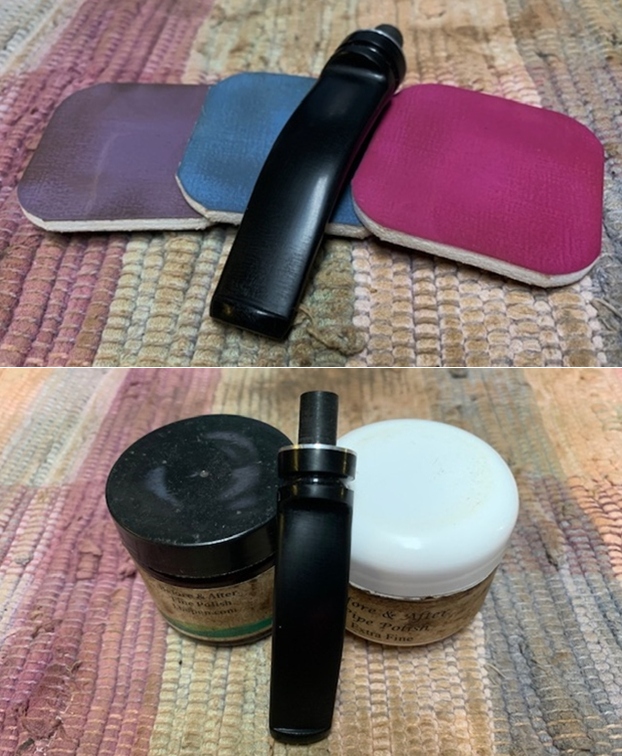
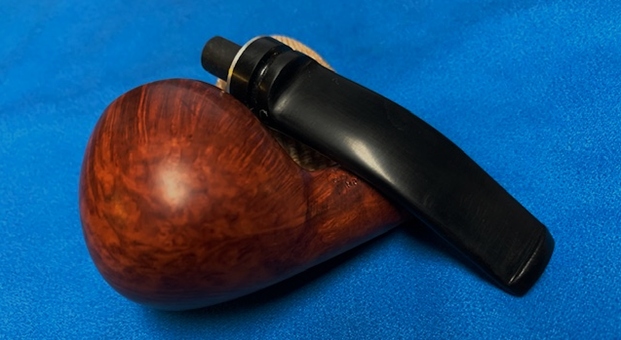
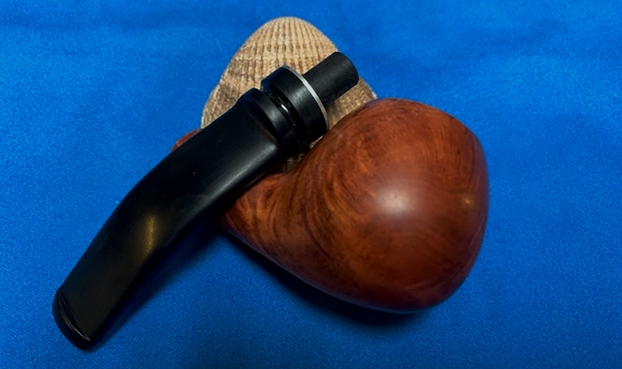
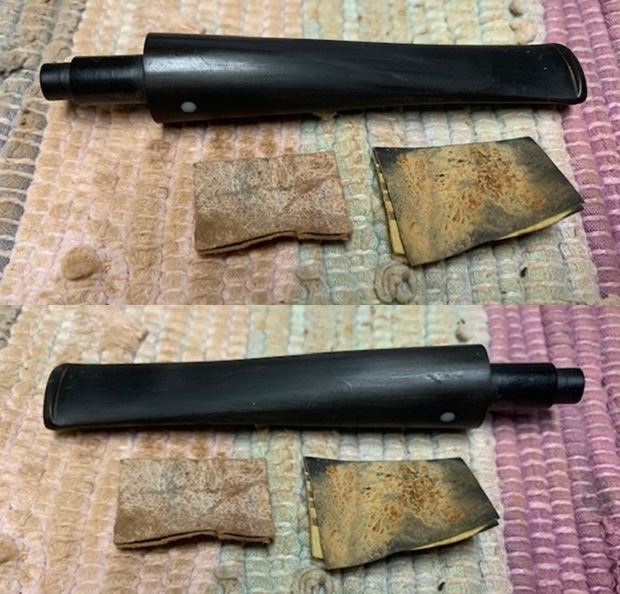
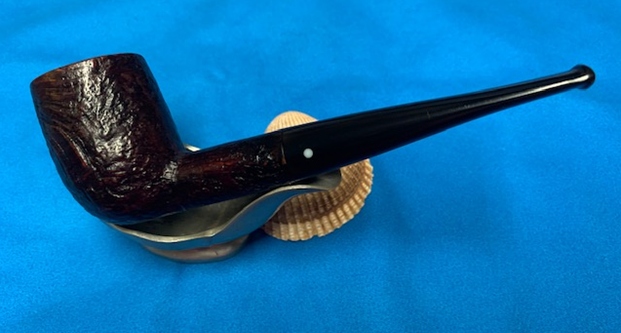
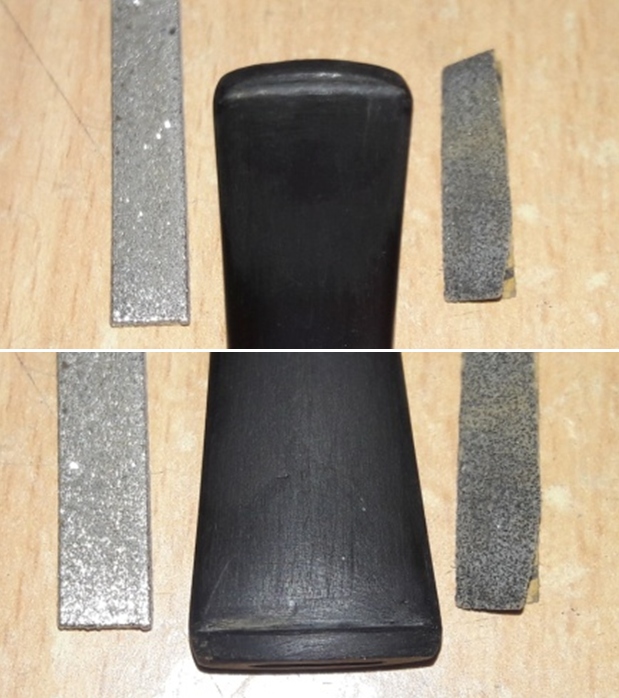
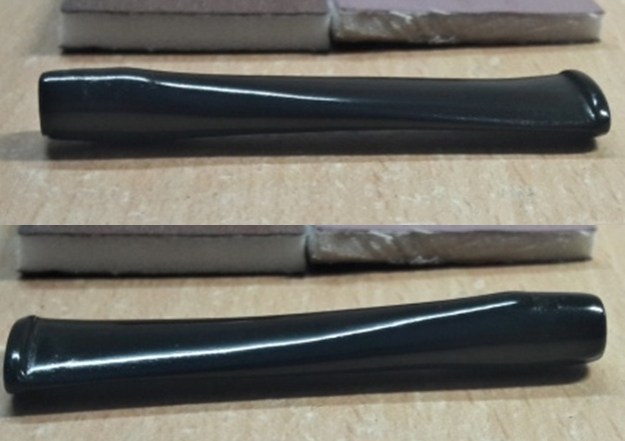
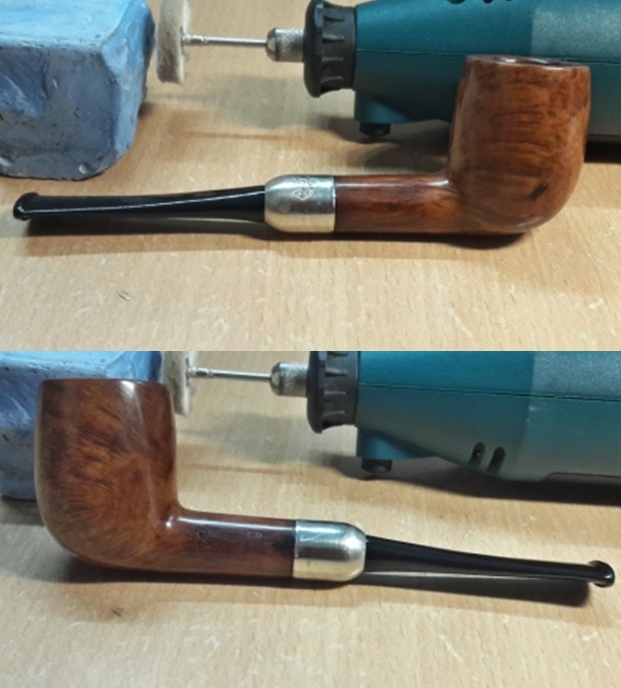
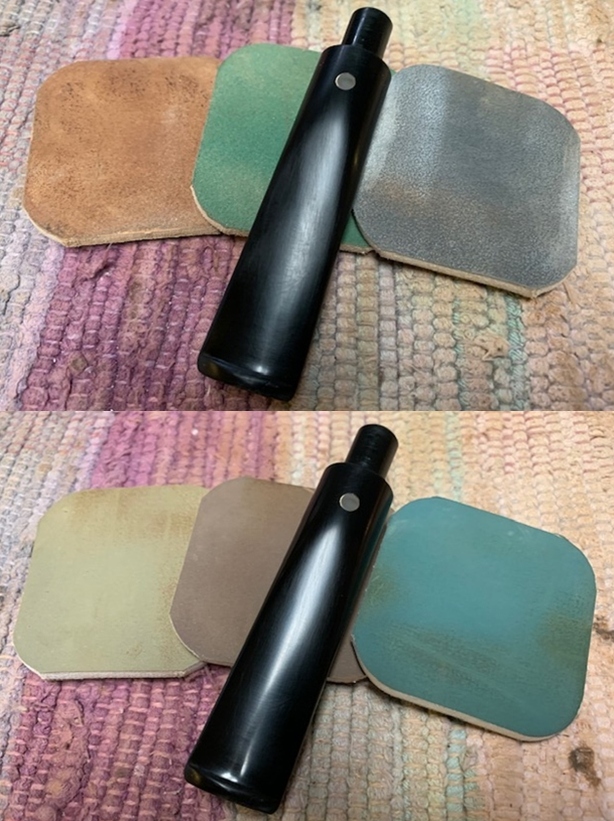
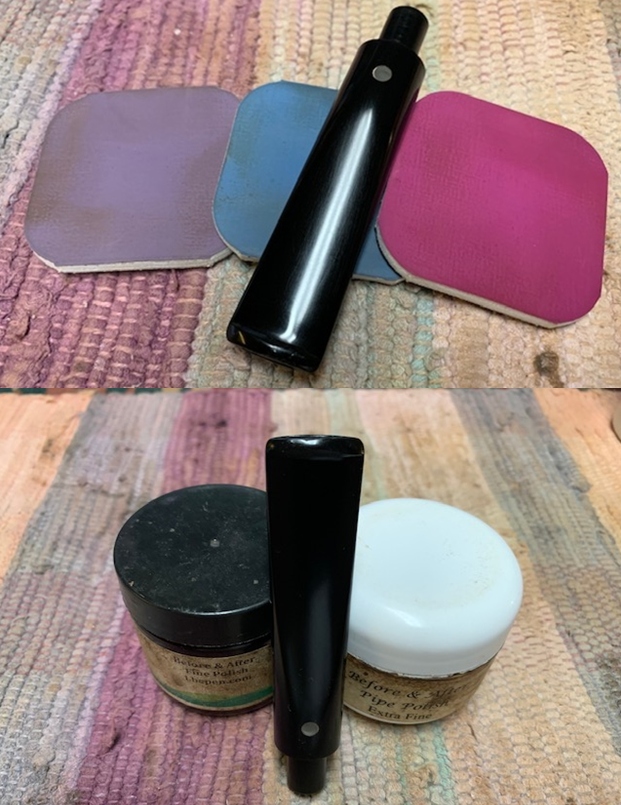
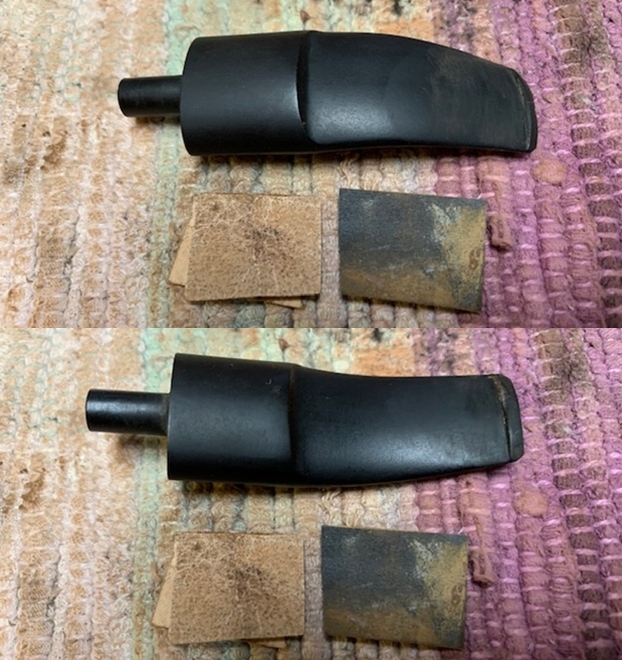
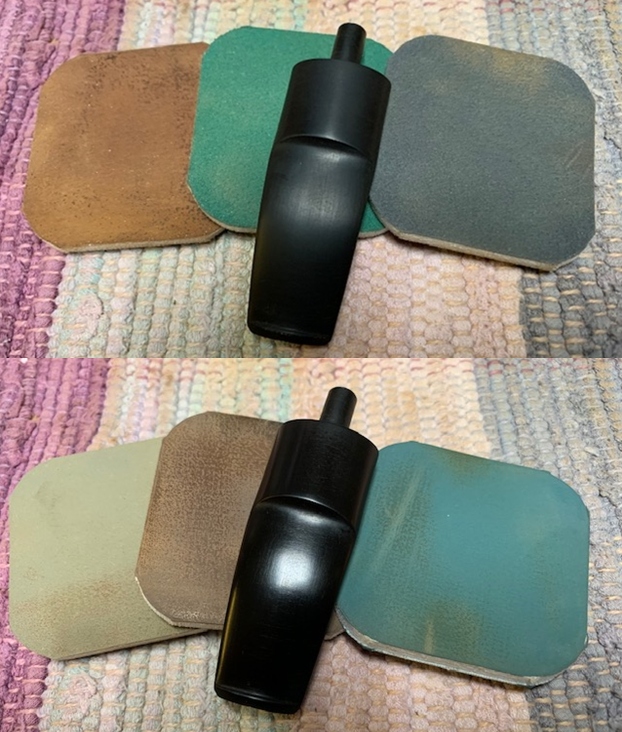
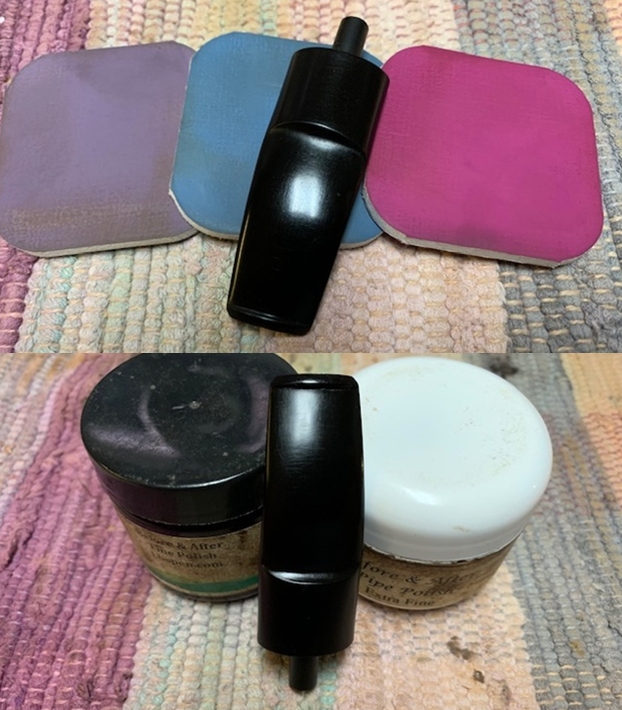
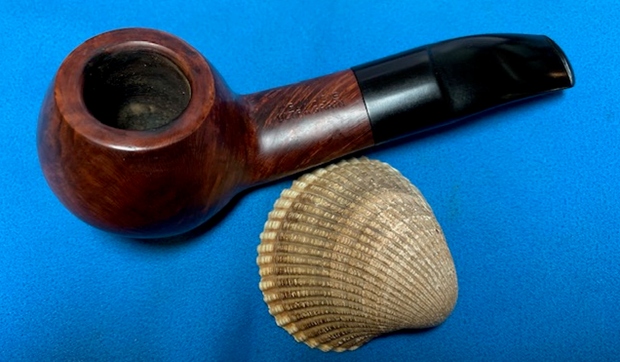
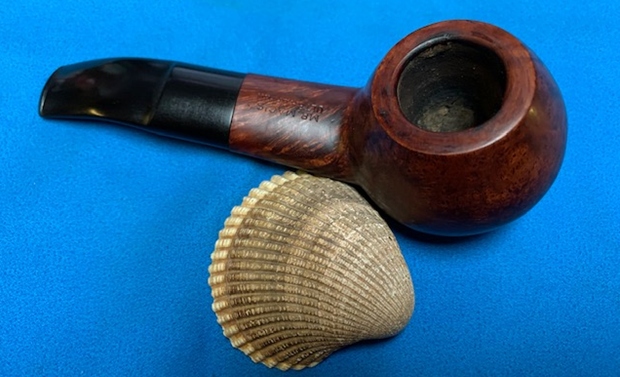
 With the stummel rejuvenation almost complete, save for the final wax polish, I worked the stem. The fill had cured and with a flat head needle file, I worked on the filling till I had achieved a rough match with the surrounding surface and had sufficiently sharpened the button edges. For a better blending, I further sand the entire stem with 220 followed by 400, 600, 800 and 1000 grit sand paper. This helps to reduce the scratch marks left behind by the more abrasive 220 grit paper. To bring a deep shine to the vulcanite stem, I went through the complete set of micromesh pads, wet sanding with 1500 to 2000 grit sandpapers and dry sanding with 3200 to 12000 grit pads. At the end of micromesh cycle, I polished the stem with “Before and After Fine & Extra Fine” paste. The finished stem is shown below.
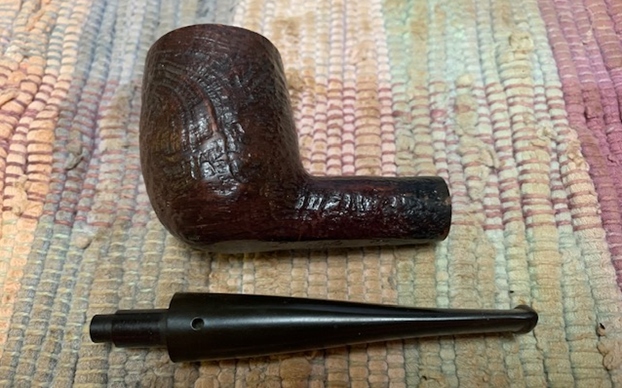
 In my exuberance to complete the restoration and see the finished look of this pipe, I completely forgot to clean the stem internals. I ran a couple of hard bristled / regular pipe cleaners dipped in alcohol. Lucky me, the stem internals were clean and just a couple of cleaners were required freshen up the stem airway.
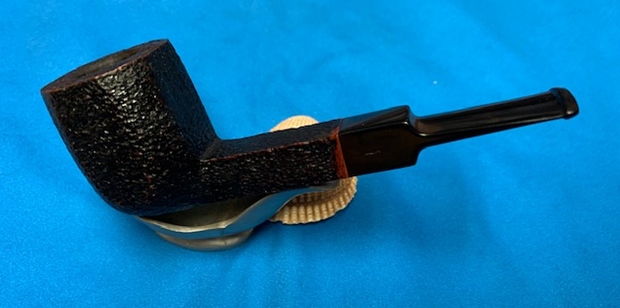
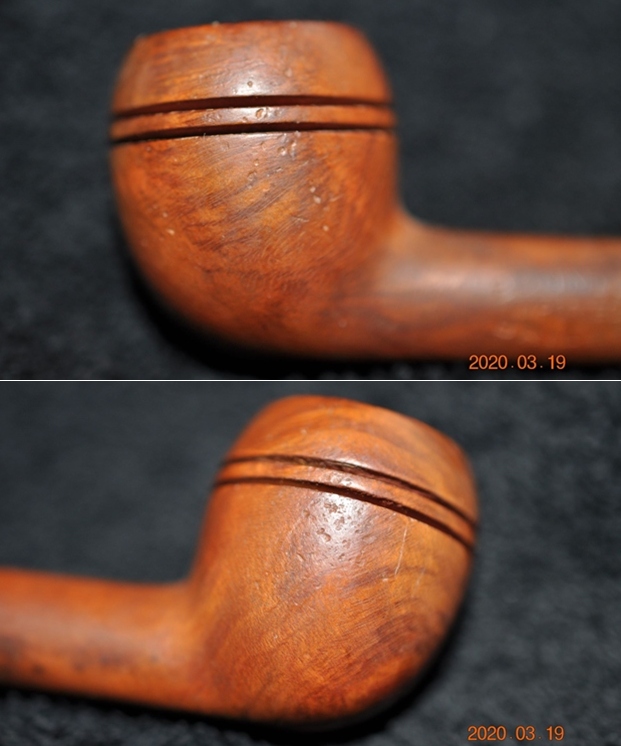
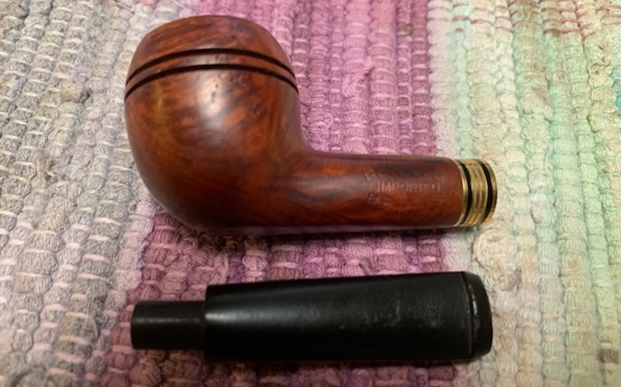
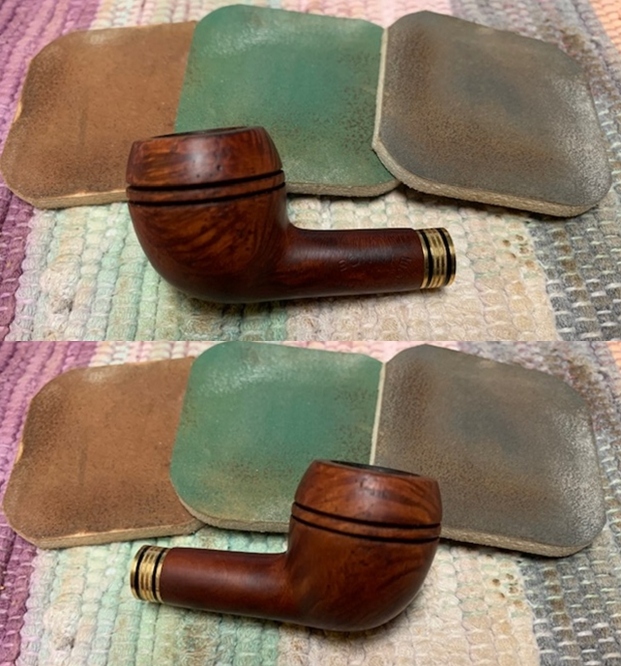
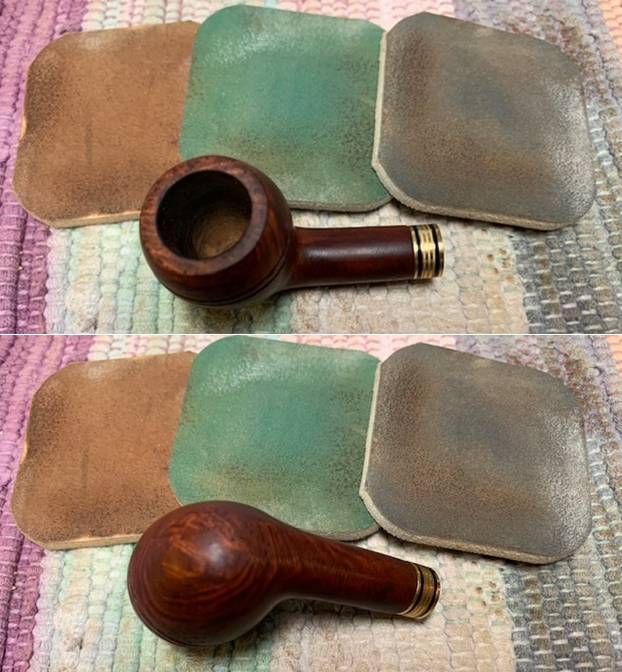
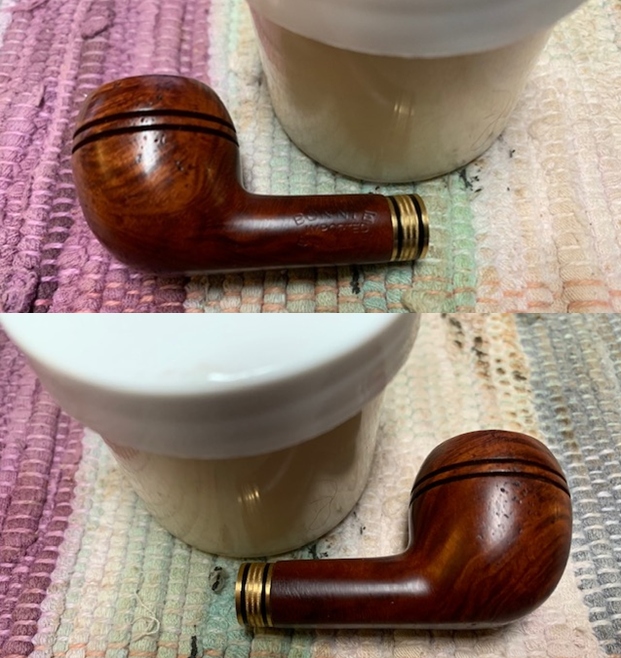
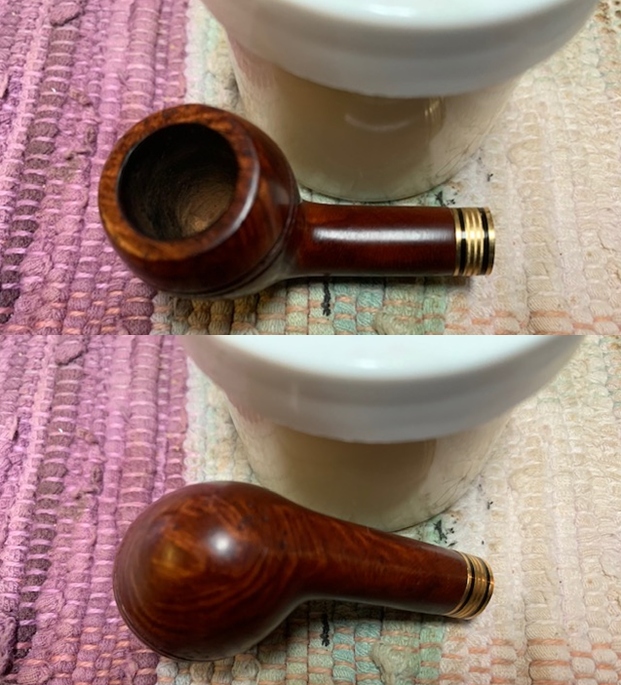
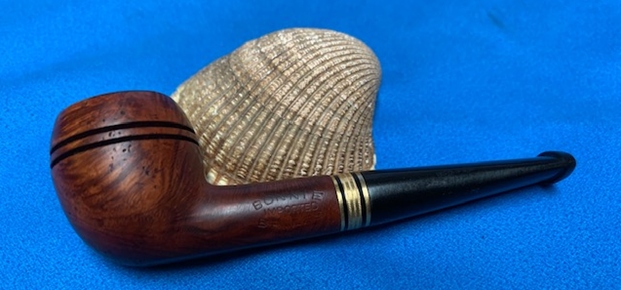
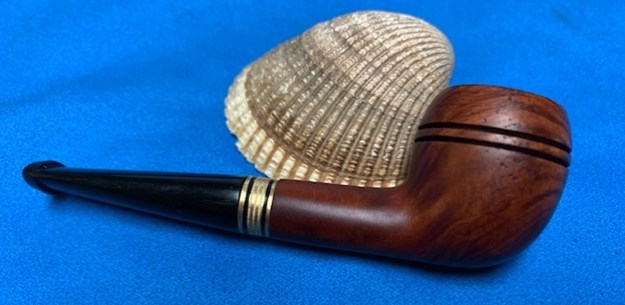
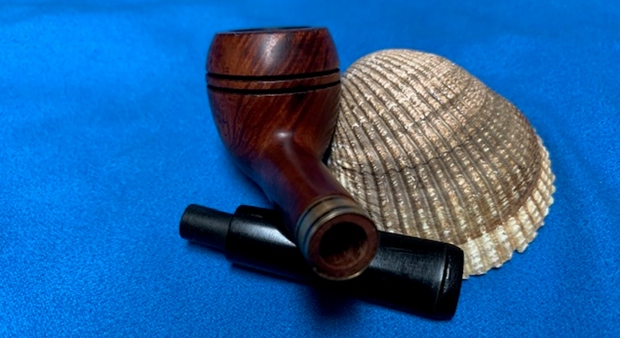
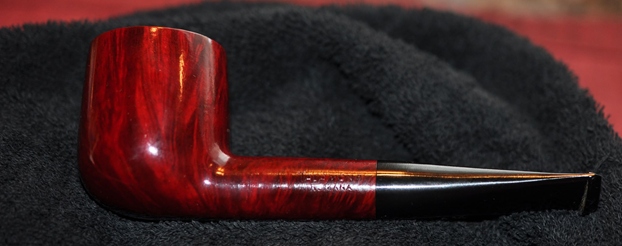
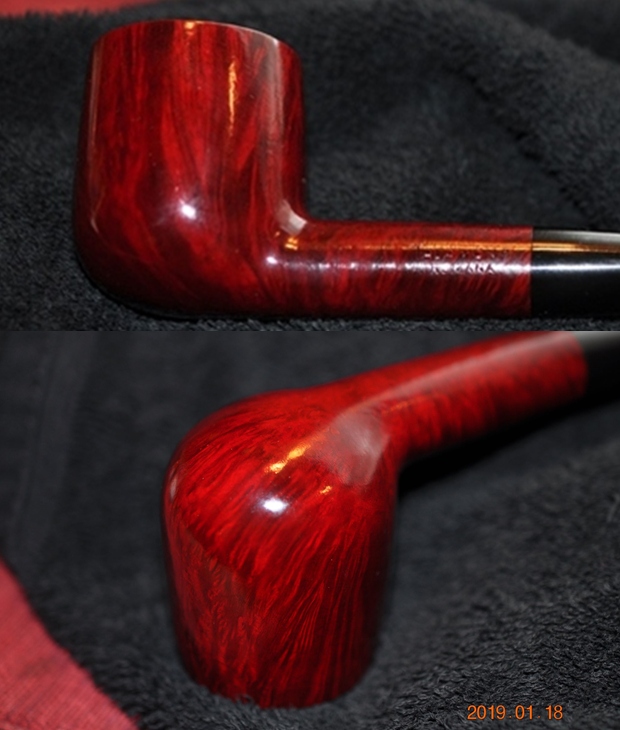
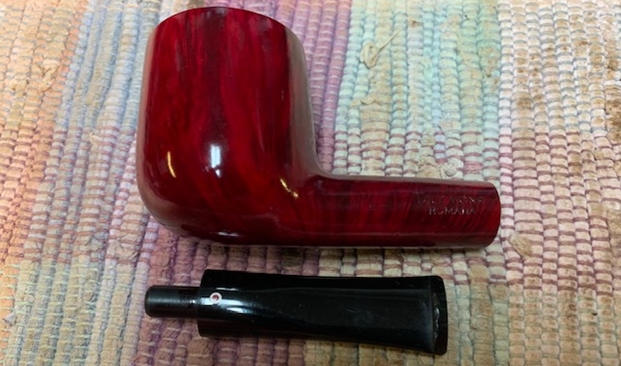
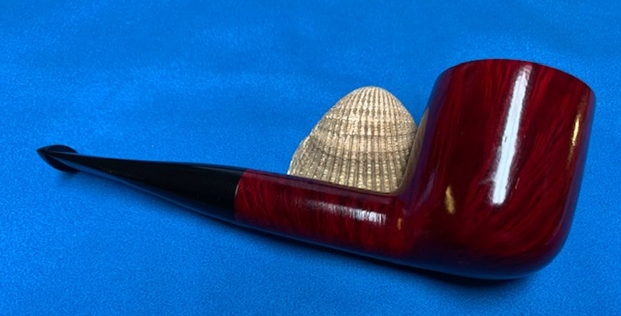
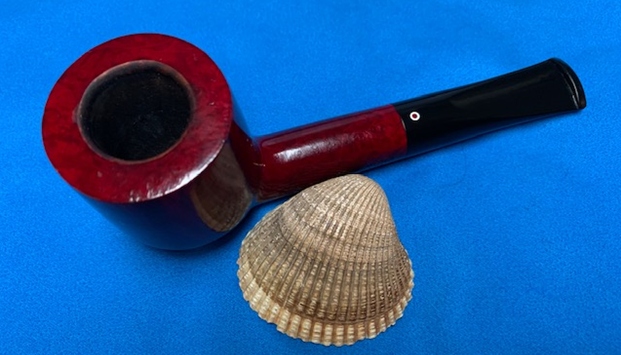
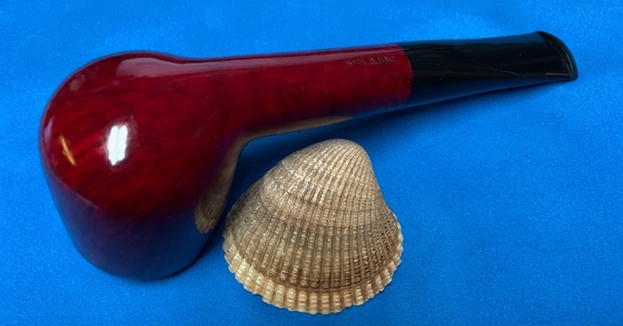
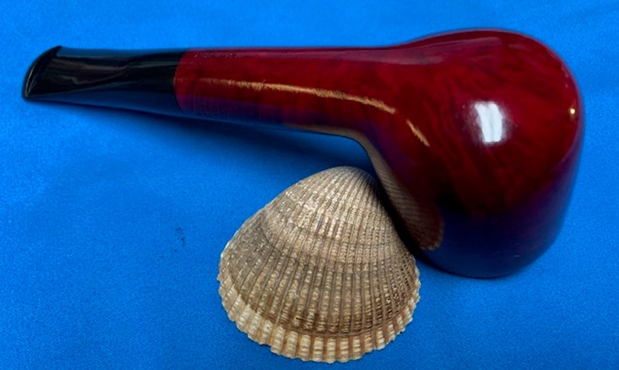
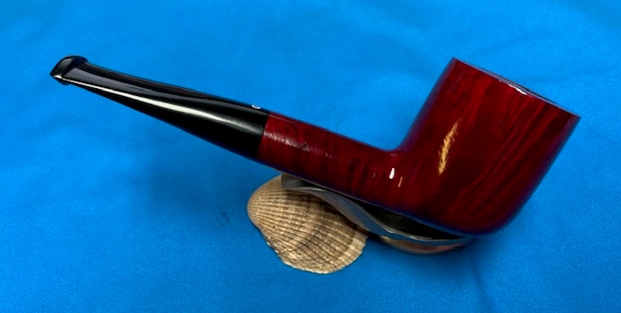
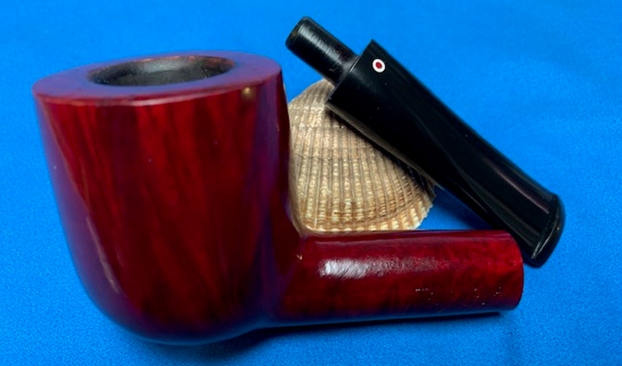
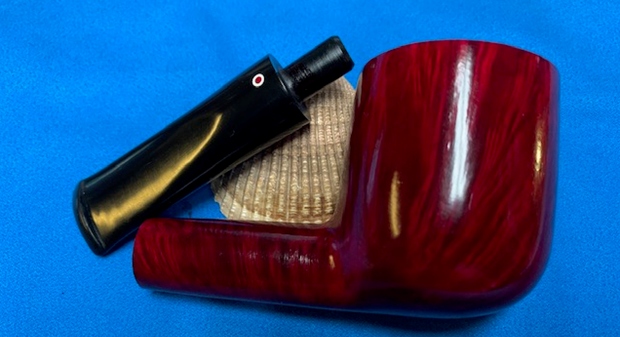
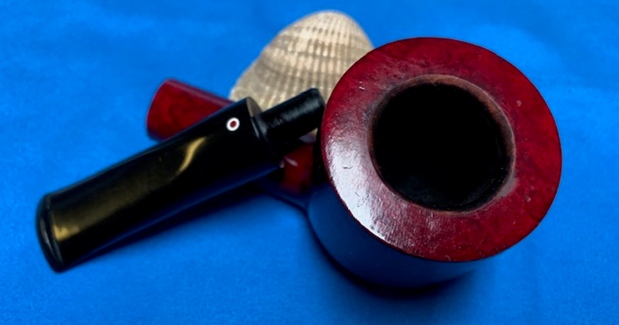
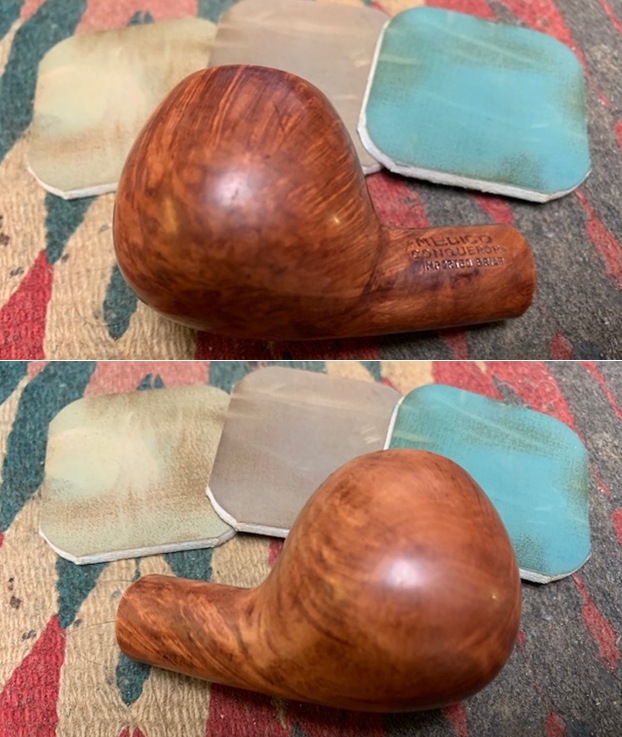
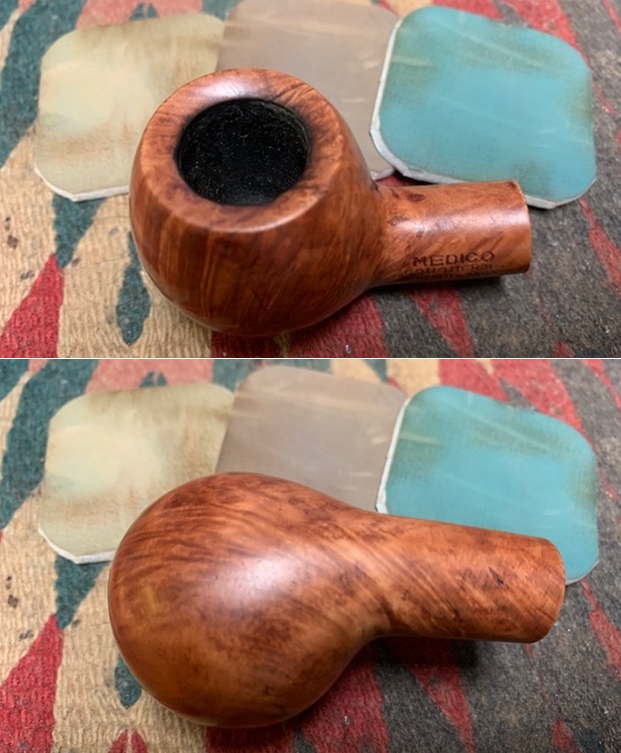
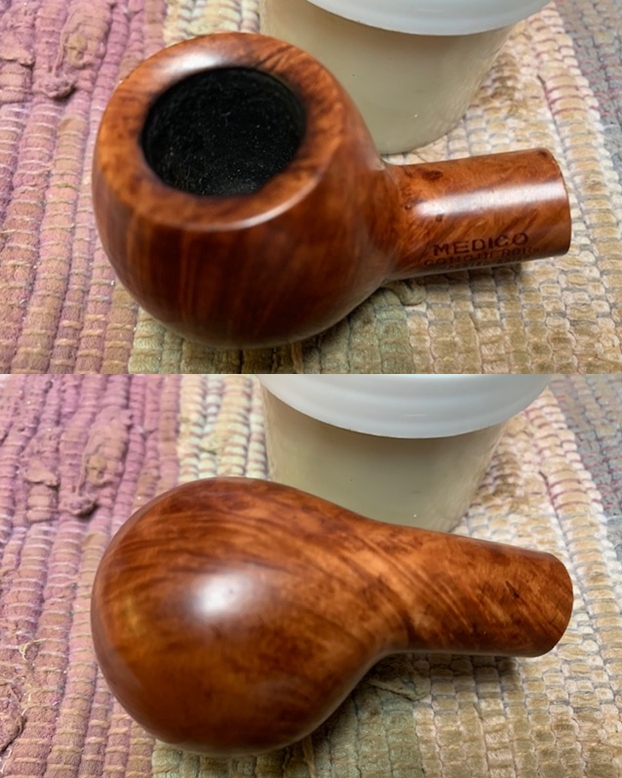
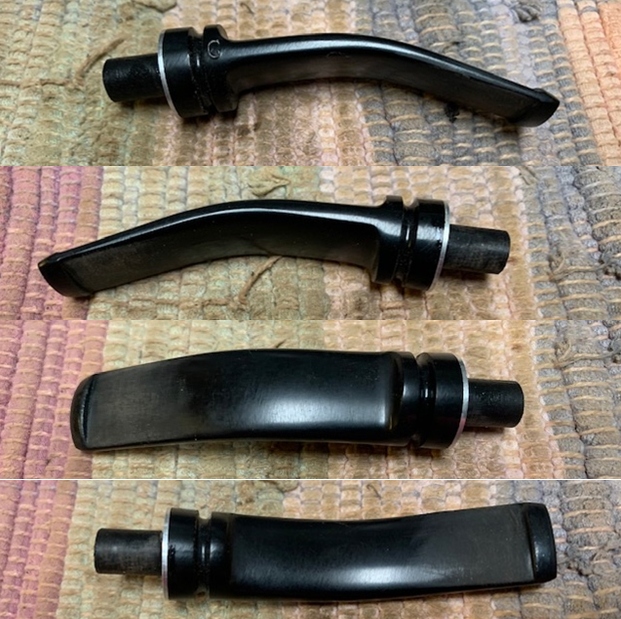
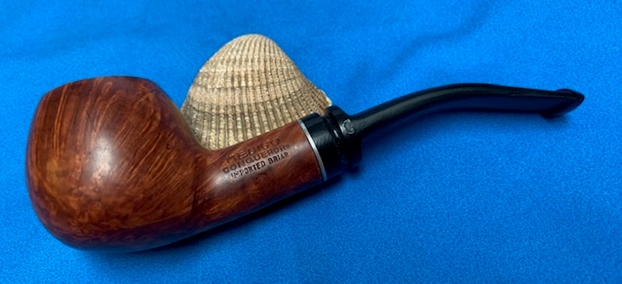
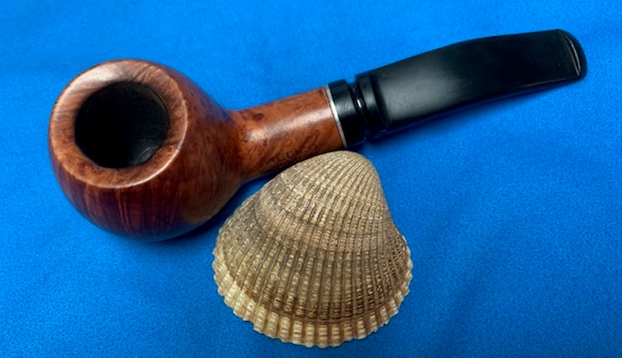
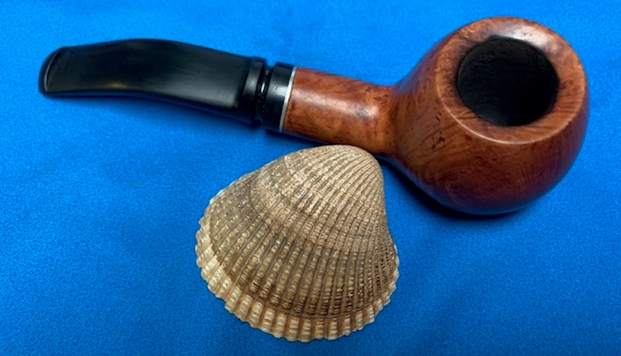
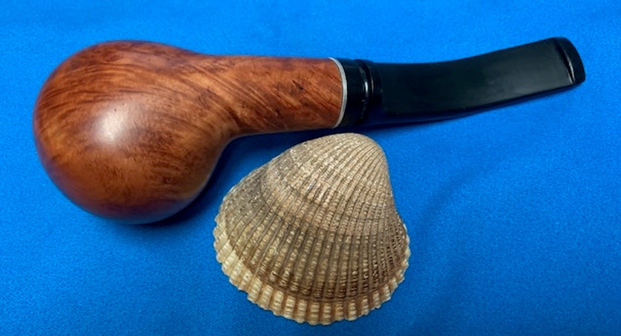
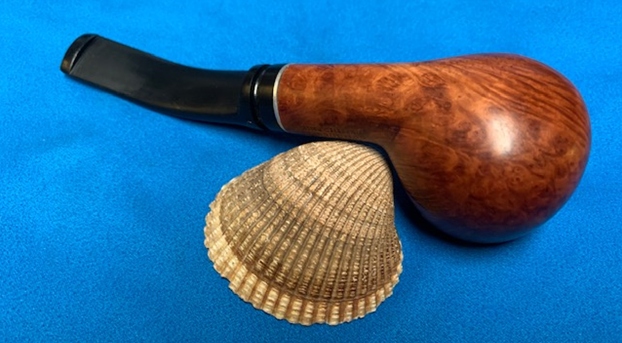
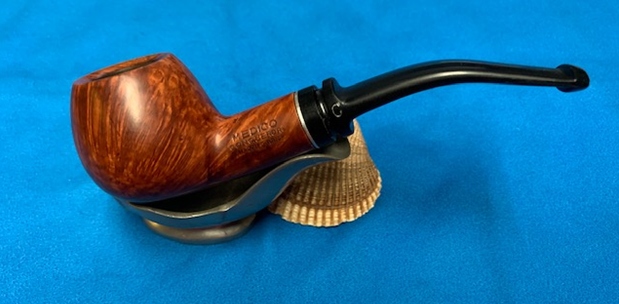
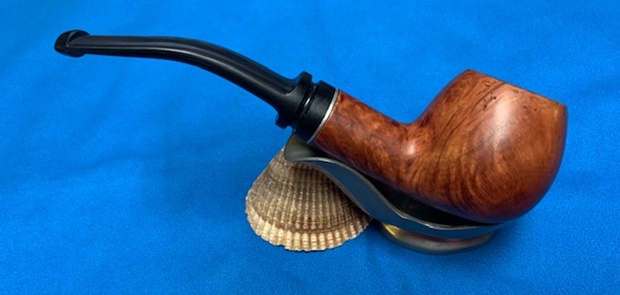
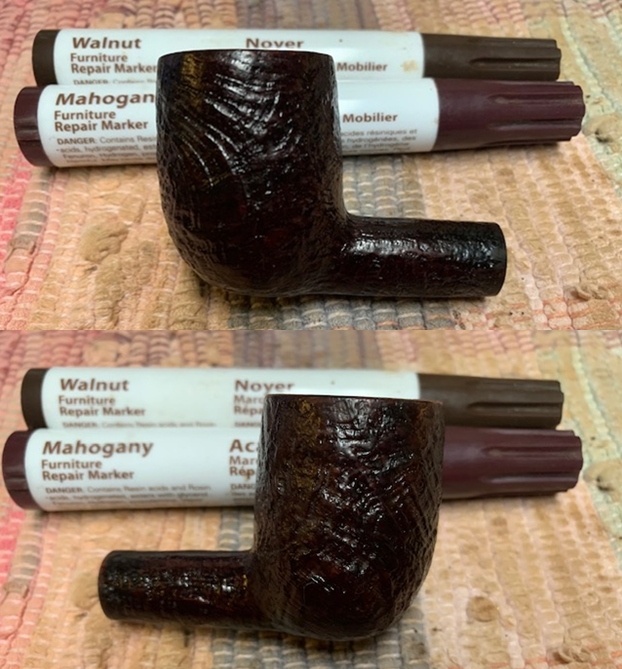
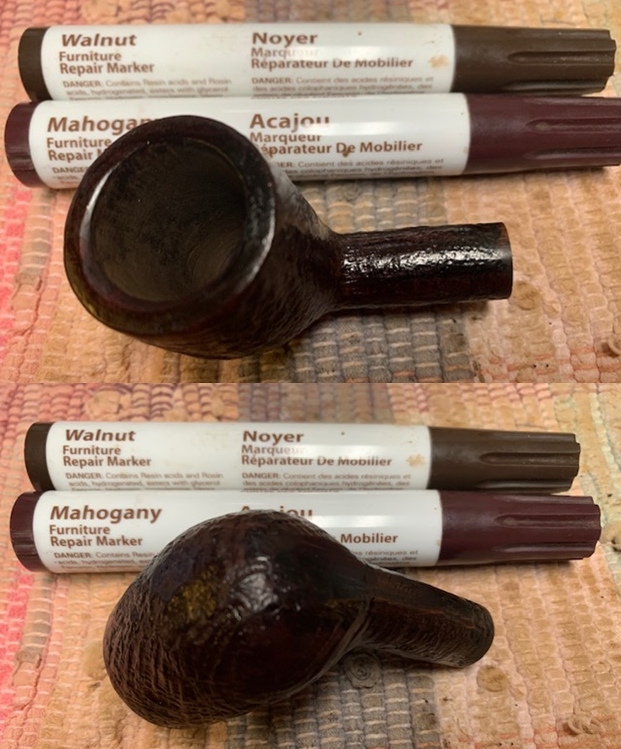
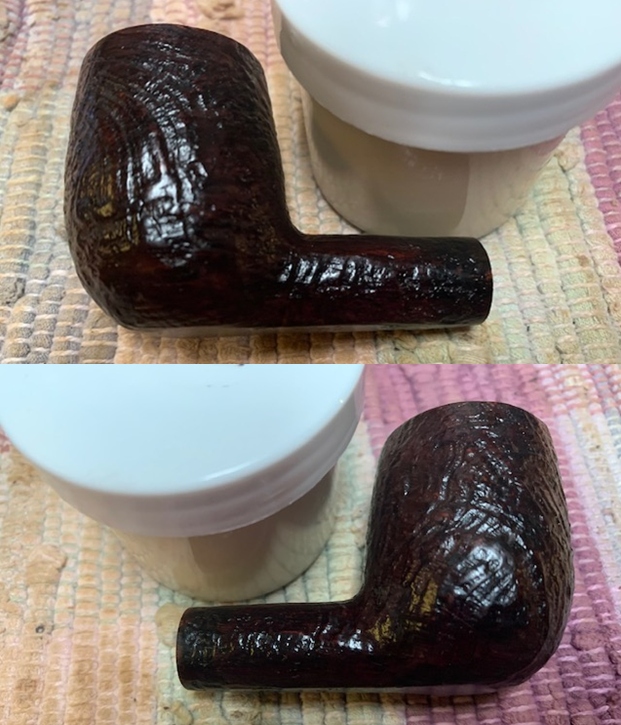
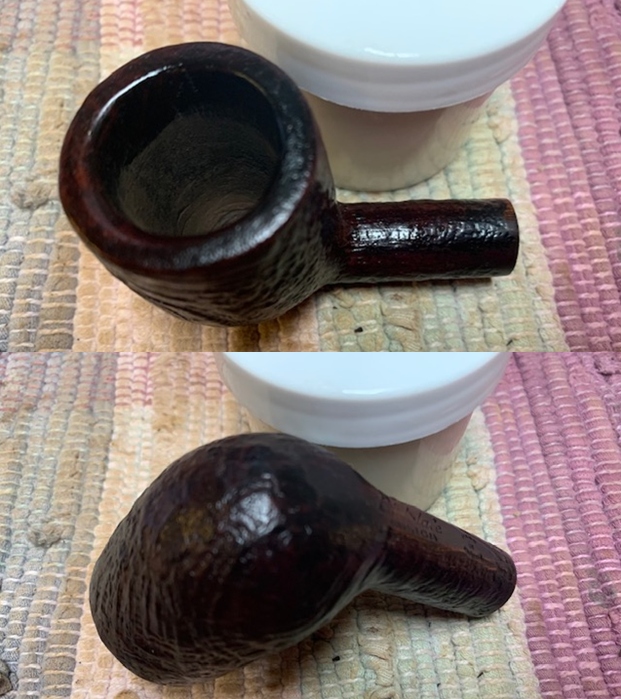
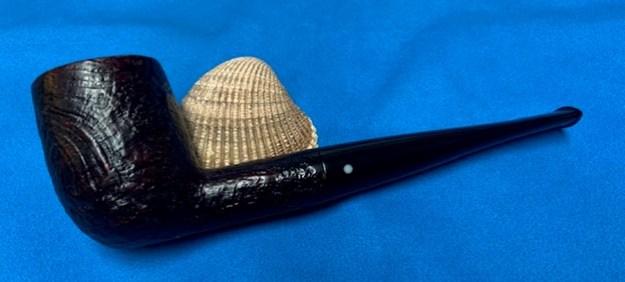
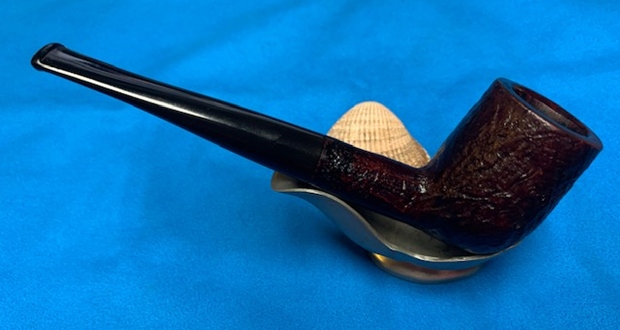
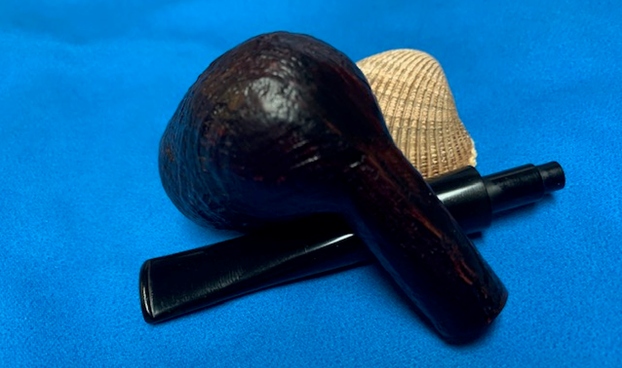
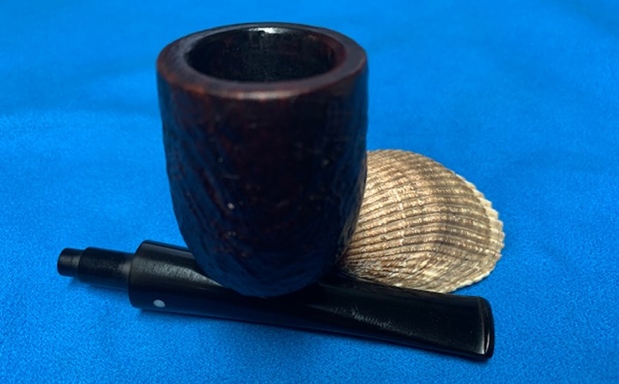
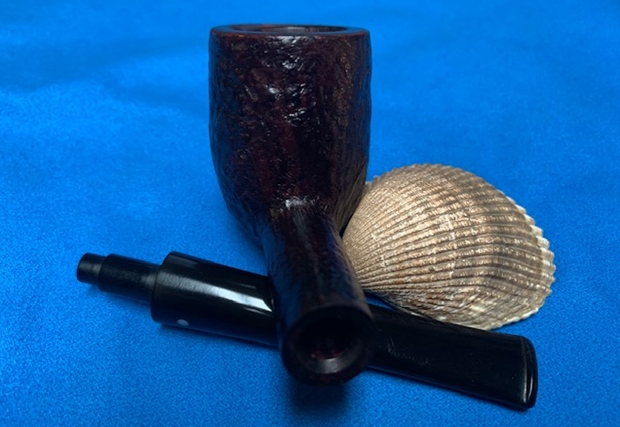
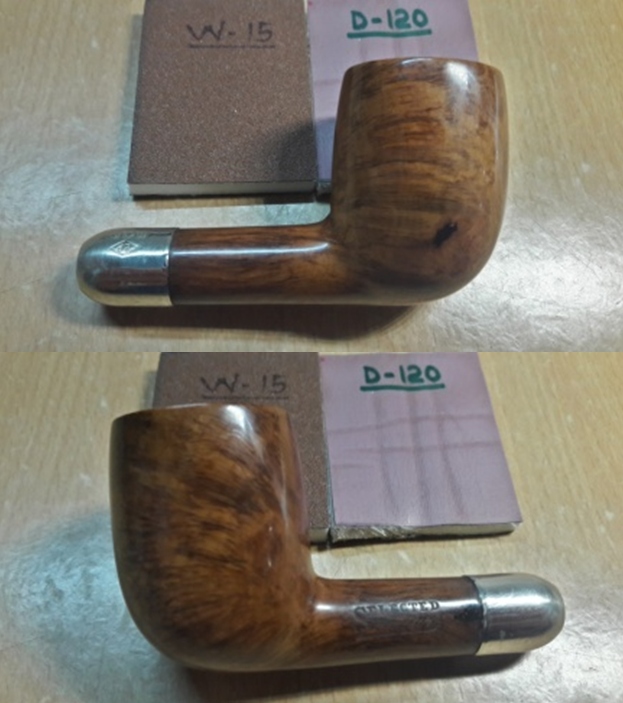
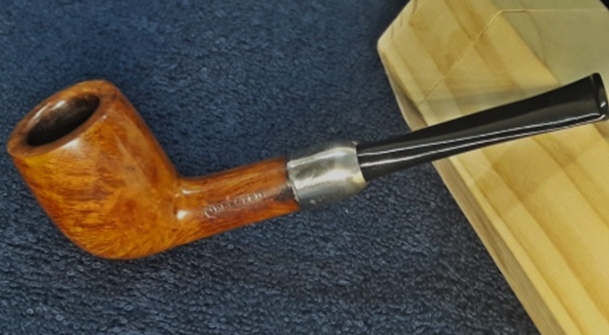
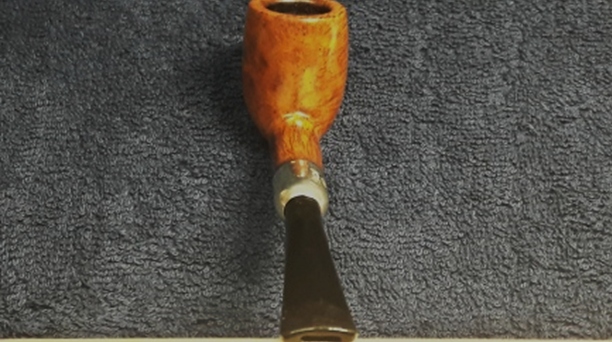
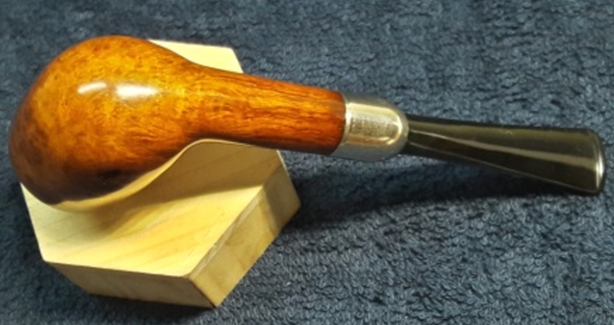
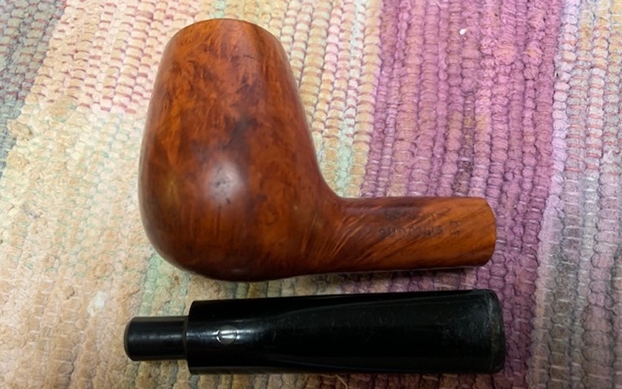
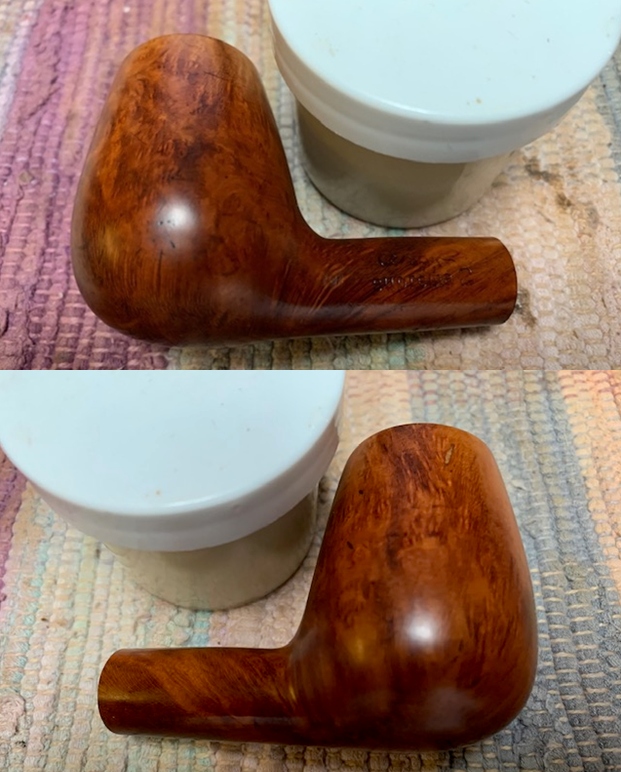
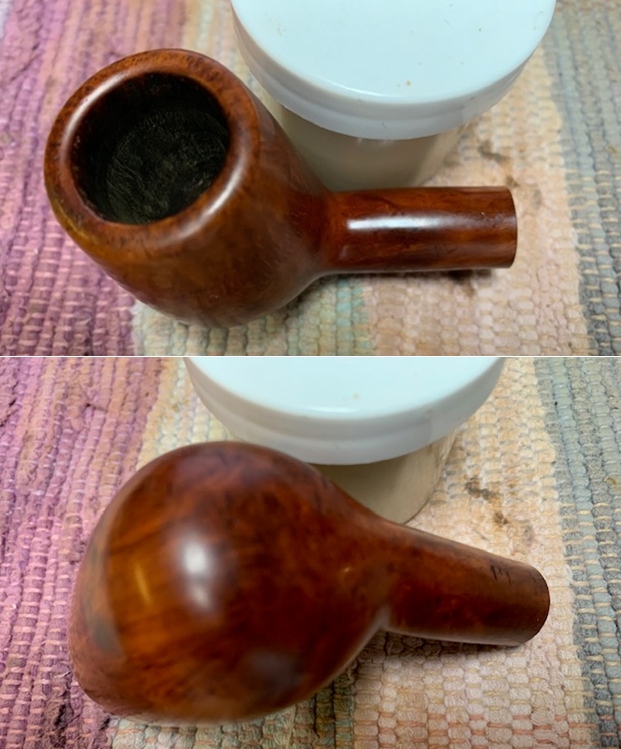
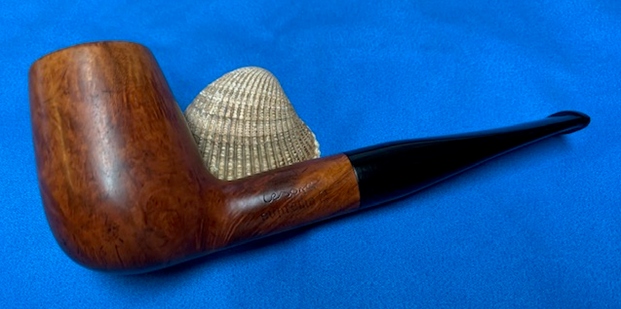
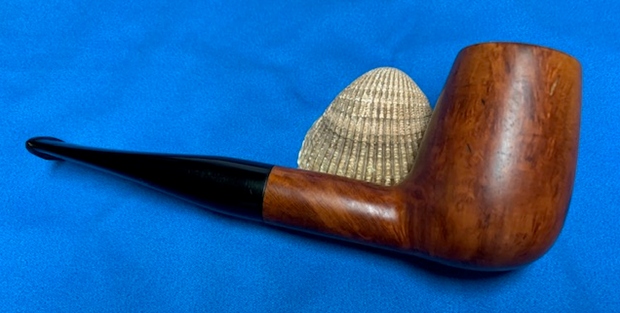
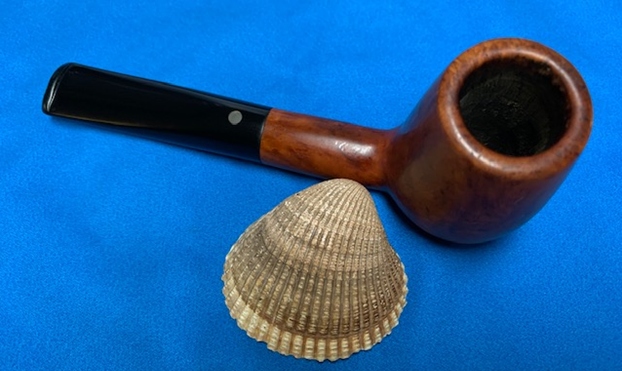
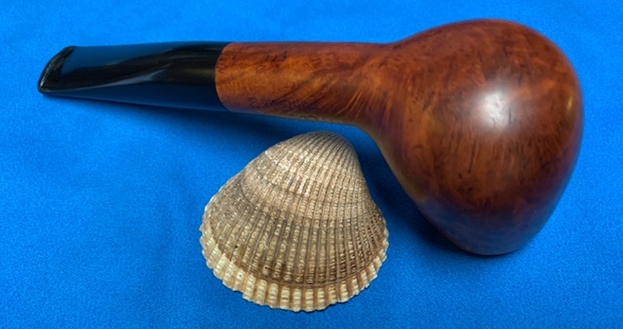
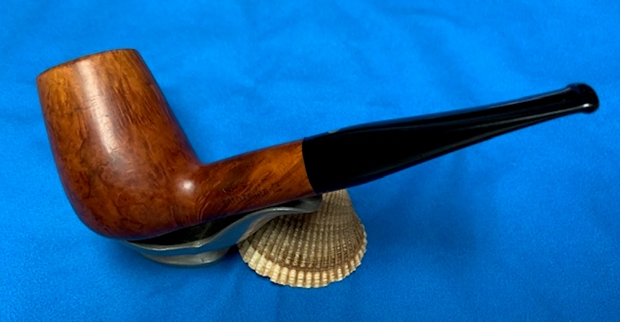
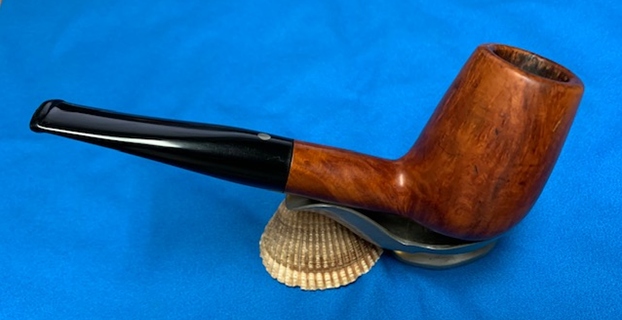
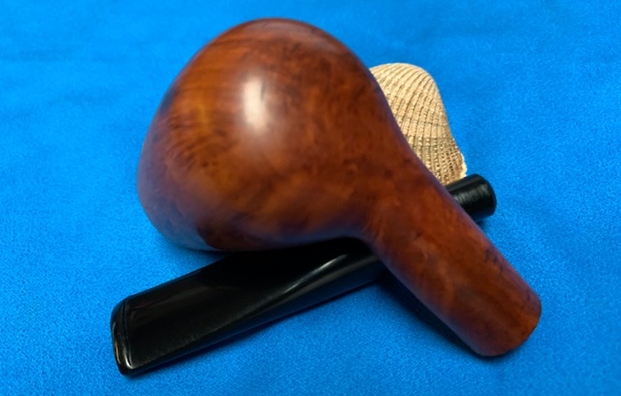
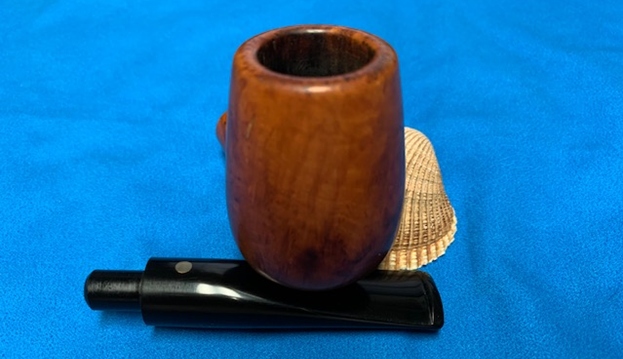
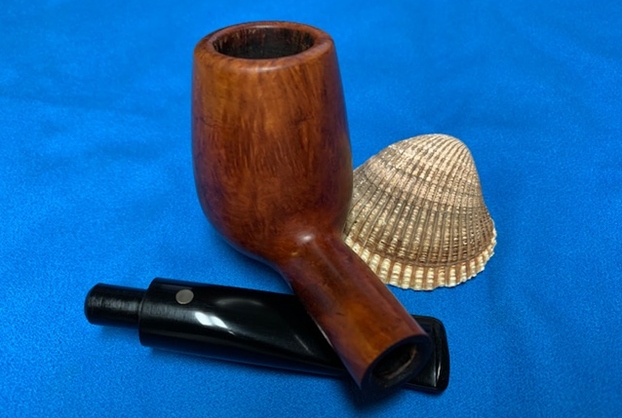
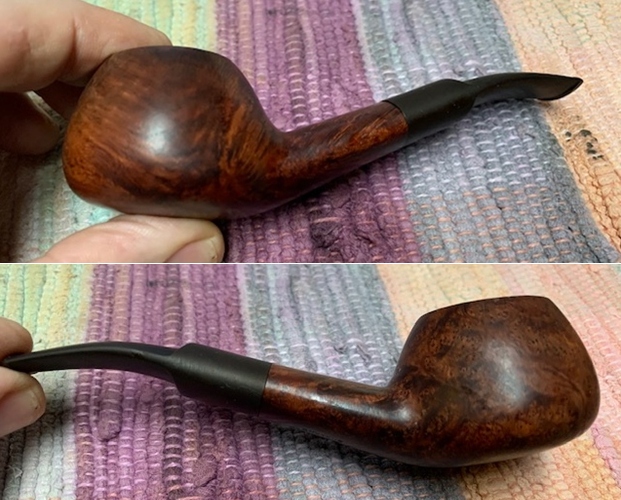
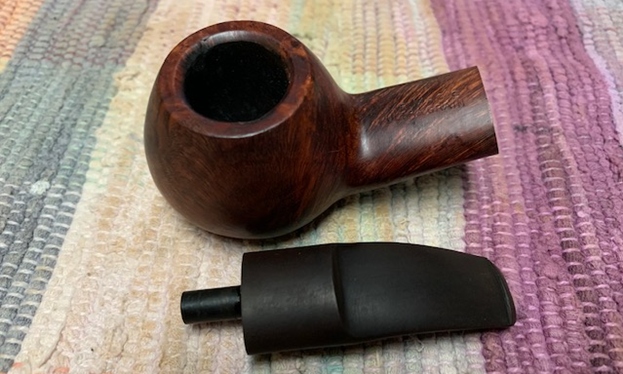
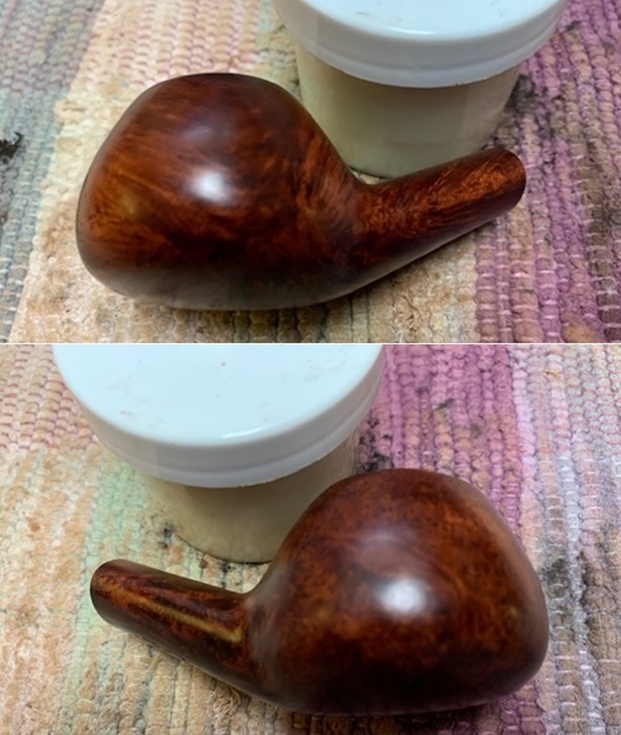
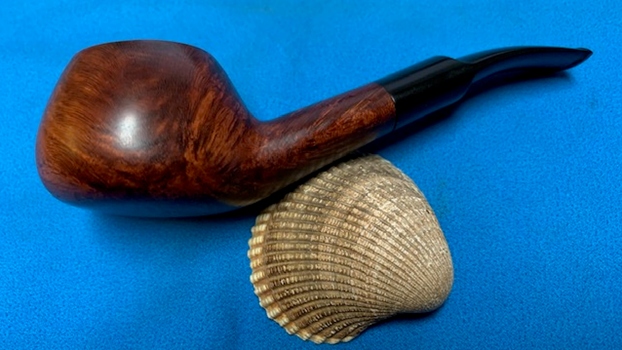
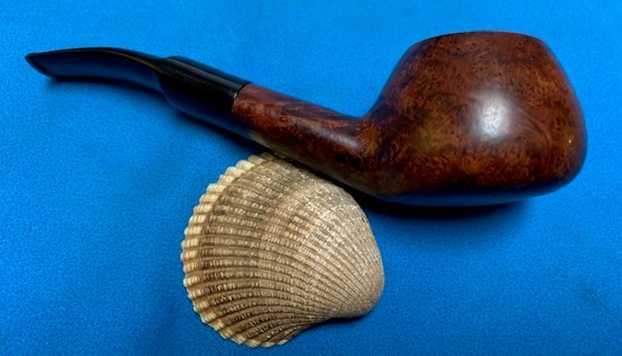
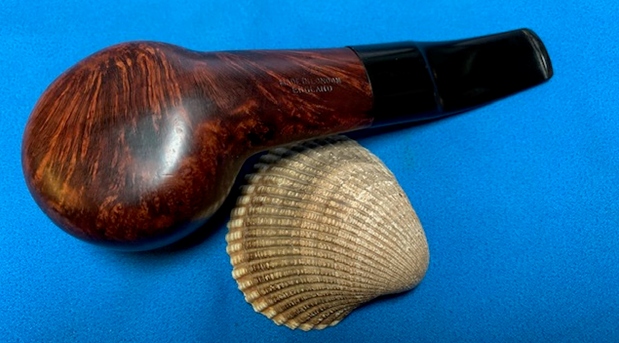
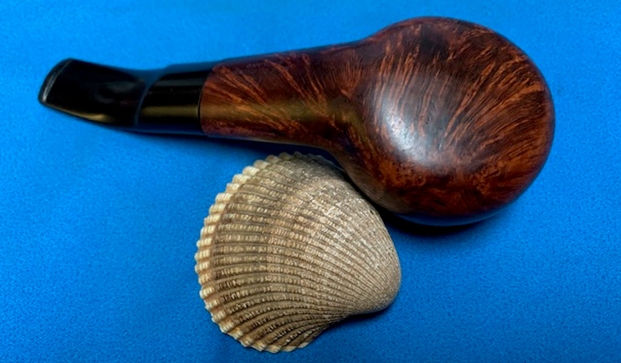
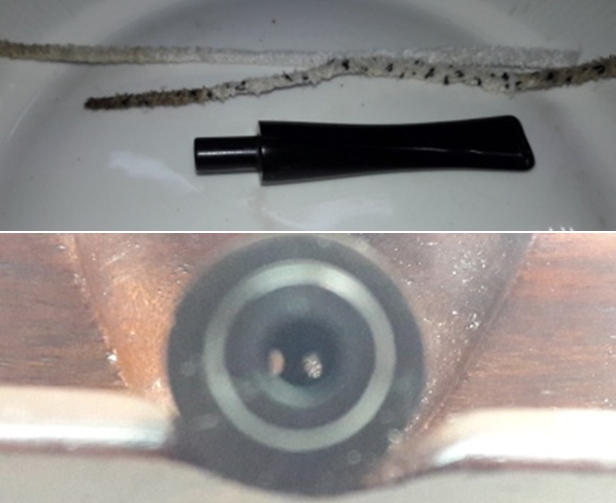 To complete the restoration, I mounted a cotton cloth buffing wheel on to my hand held rotary tool and applied several coats of carnauba wax. I finished the restoration by giving the entire pipe a rigorous hand buffing using a microfiber cloth to raise the shine further and remove any residual wax from in between the rustications. The finished pipe looks amazingly beautiful and is now ready for its long second innings with me. I only wish it could share with me its life story of the past years while I enjoy smoking my favorite Virginia blend in it or maybe an English blend!! The finished pipe is as shown below.
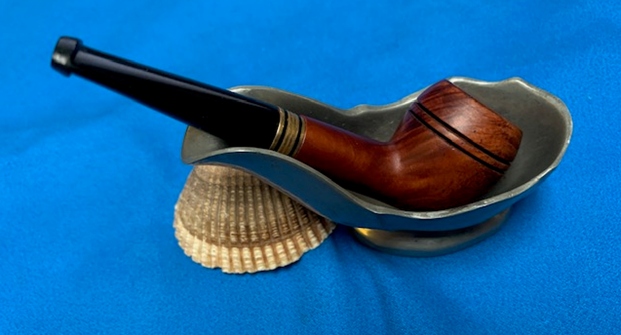

 P.S. I wish to thank each one for sparing their valuable time to read through this write up while also praying for the health and safety of entire mankind. Stay home…stay safe!!
 He took photos of the rim top to show the cake and the dust in the rustication on the top. It is another dirty pipe. He also captured the tooth marks on the top and underside of the stem near the button.
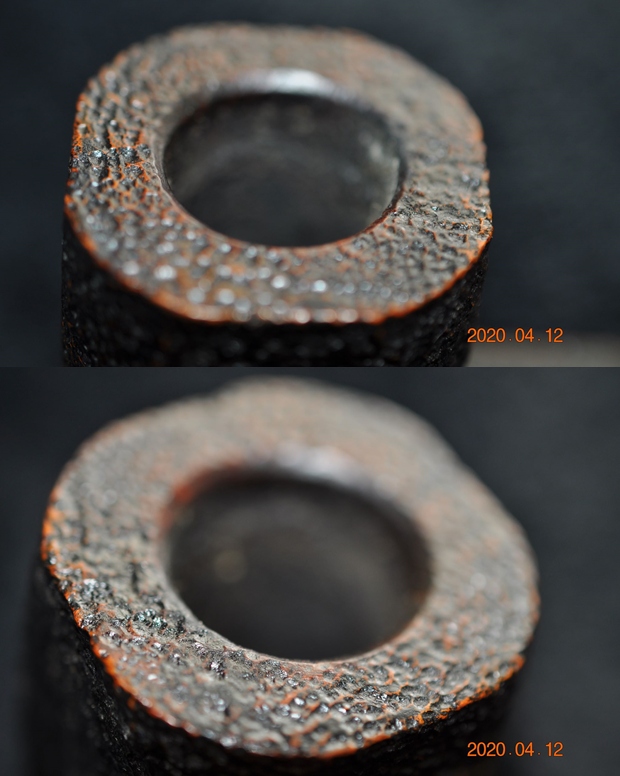
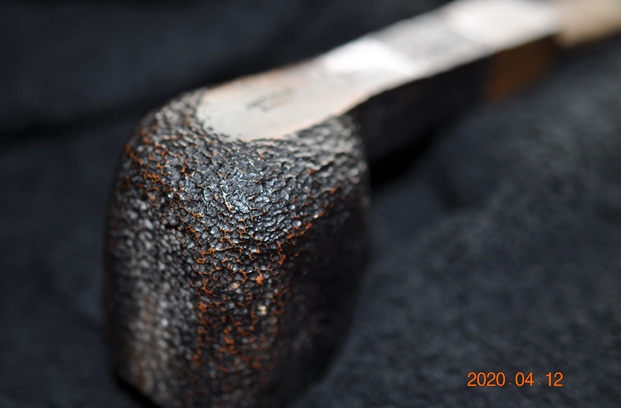
 He took photos of the sides and heel of the bowl to show the rustication around the bowl and the amount of grime ground into the surface of the briar.
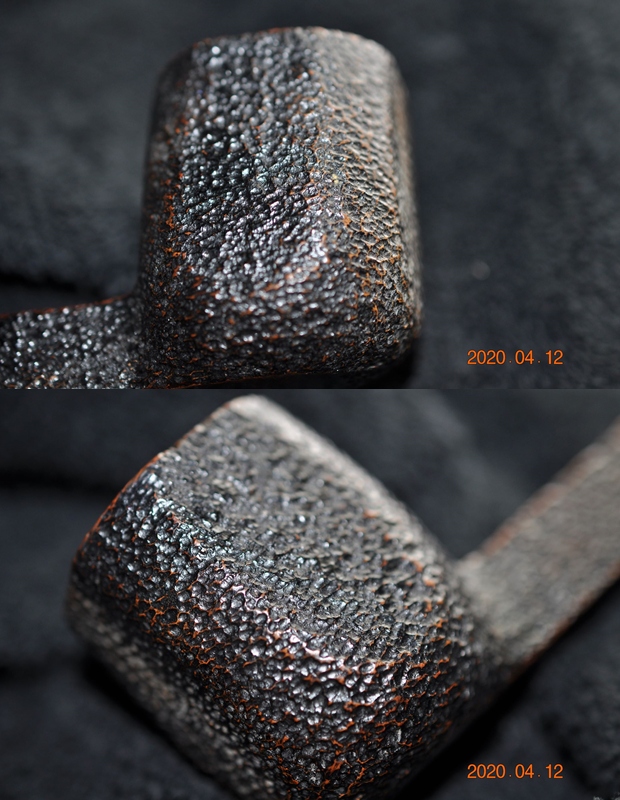
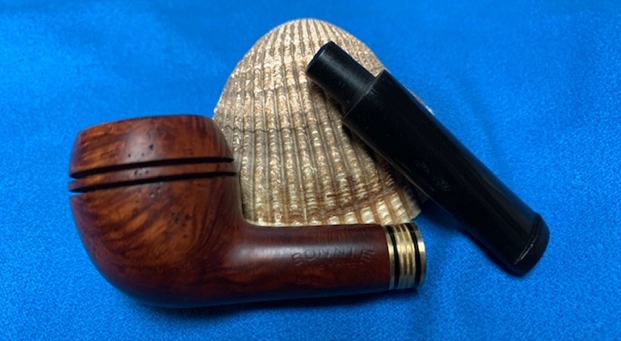
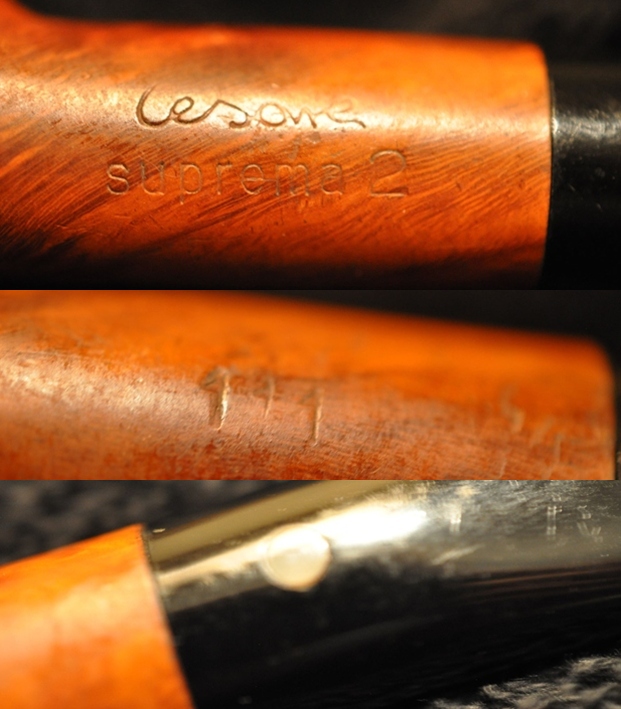
 He took photos of the stamping on the underside of the shank and the shooting star logo on the left side of the stem. It is faint but still present.
 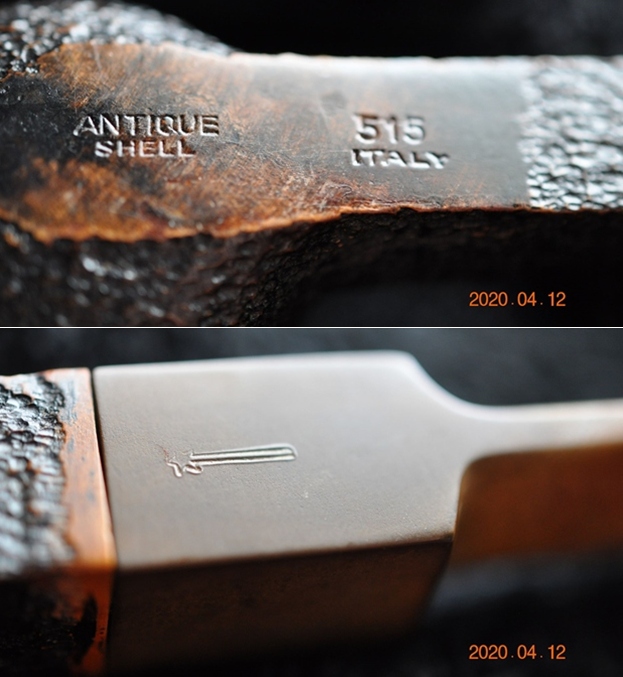 I turned Pipephil’s section on Savinelli pipes and found the Antique Shell listed there with and an example of the stamping on both the shank and the stem. The stamping matches the one that I am working on (http://www.pipephil.eu/logos/en/logo-savinelli1.html).
  I turned to Pipedia and looked up the specifics of the Antique Shell line from Savinelli and read through the article. There were several pictures of the stamping but nothing on the details (https://pipedia.org/wiki/Savinelli).
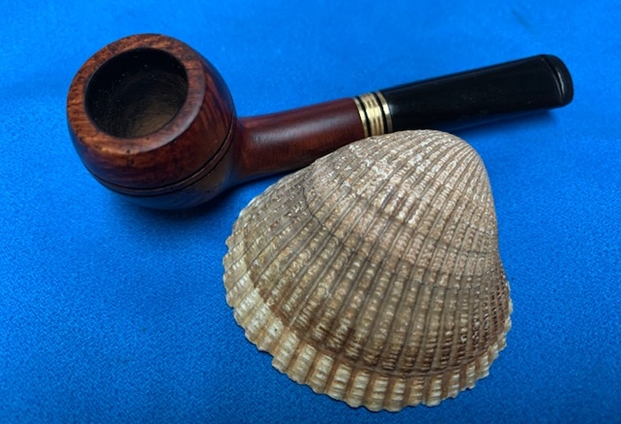
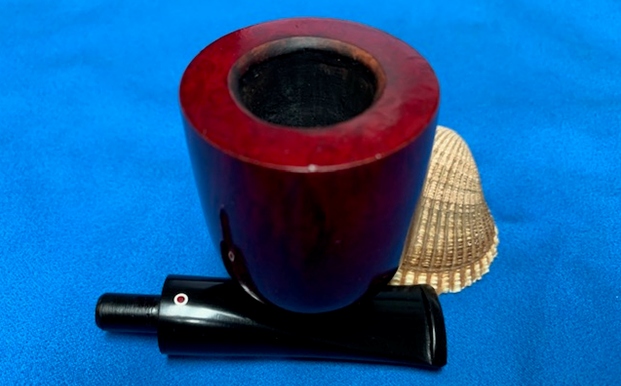
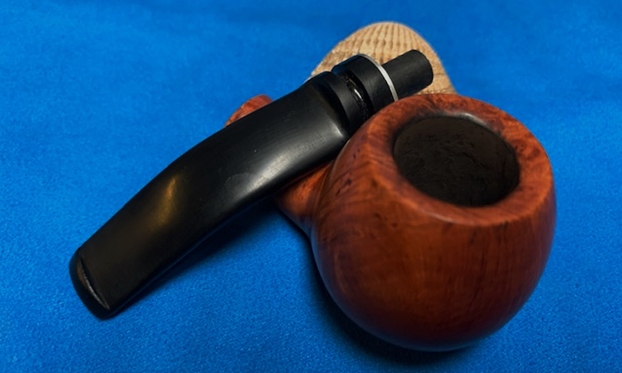
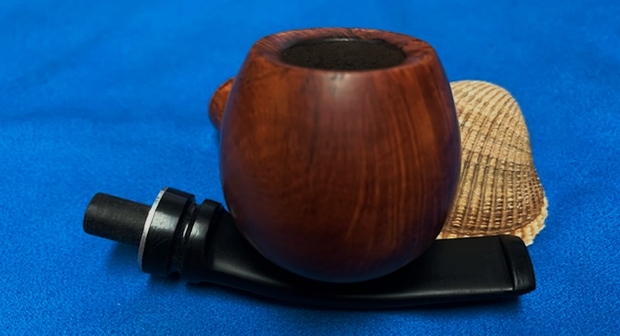
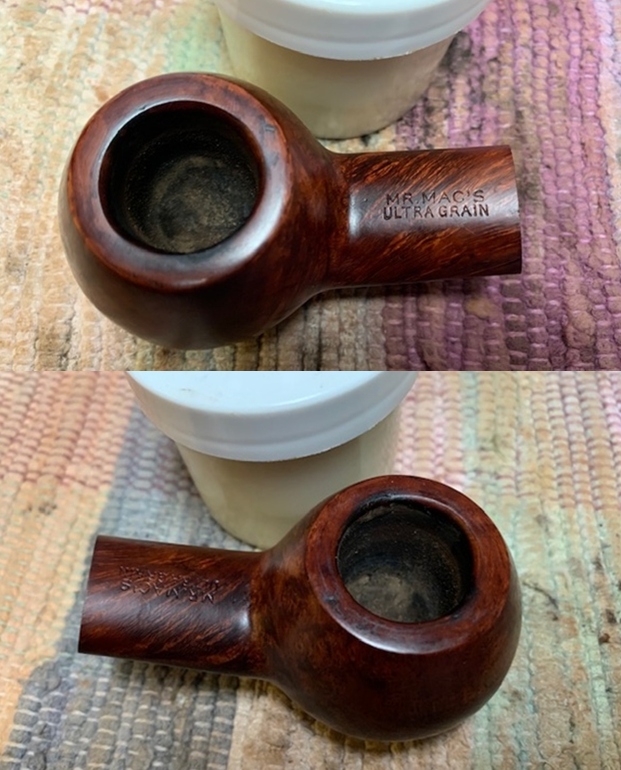
 I took a photo of the rim top and stem to show the condition. They cleaned up really well and the top of the rim looked very good. The inner edge of the bowl was in great condition. The vulcanite saddle stem had tooth chatter and marks on both sides ahead of the button and on the button edges.
 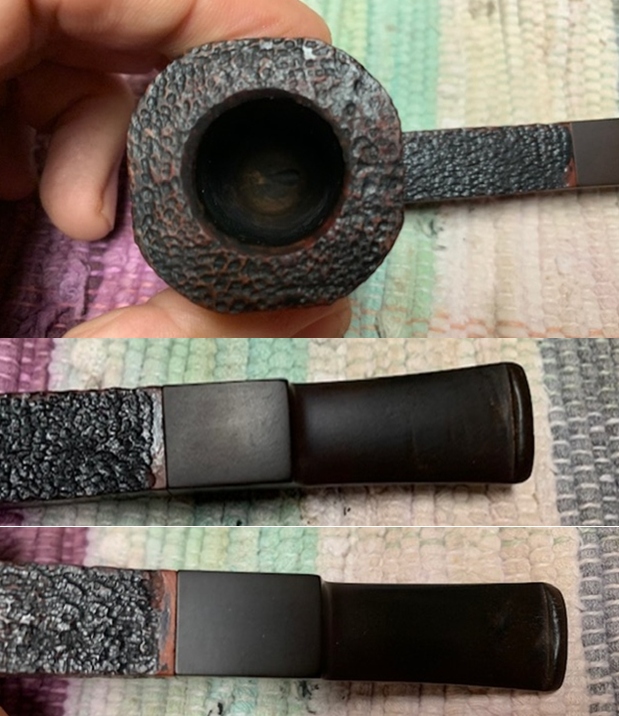 I took a photo of the stamping on the underside of the shank. It read as noted above.
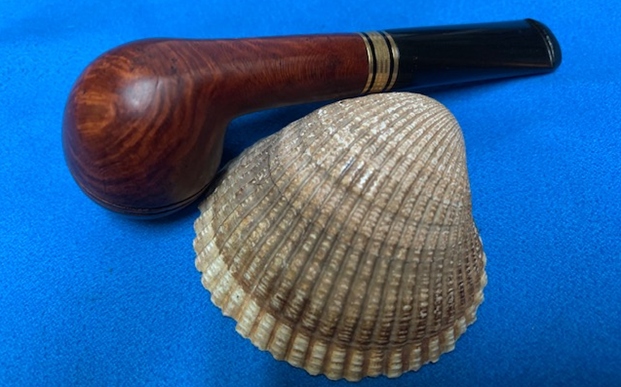
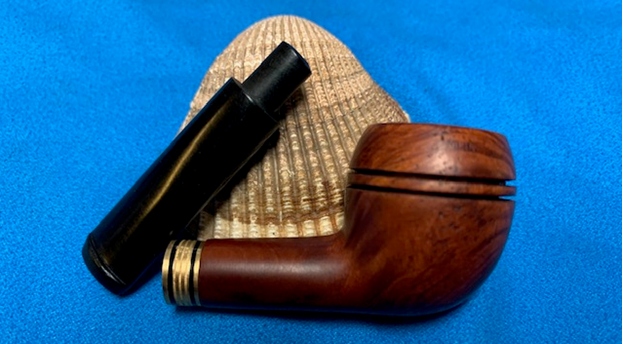
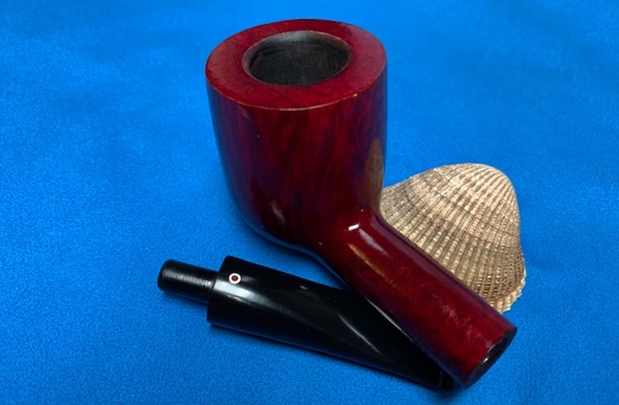
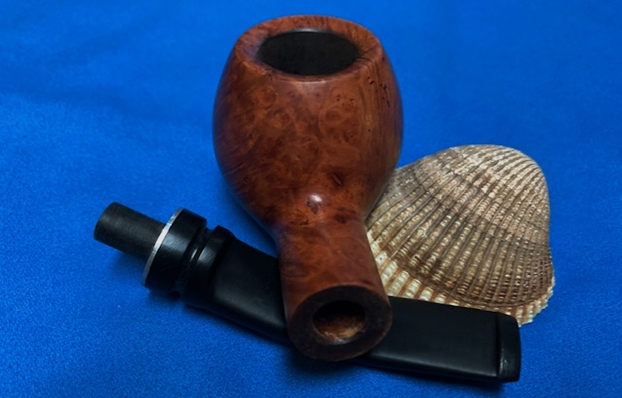
 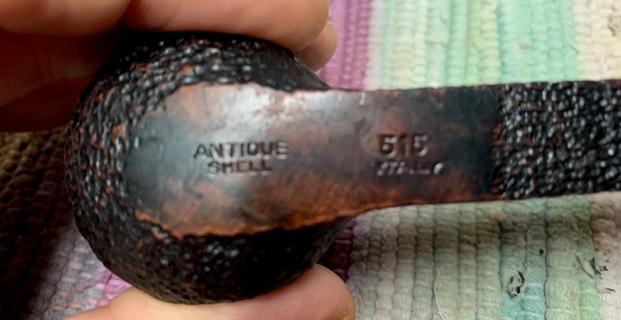 I removed the stem and took a photo of the pipe to give a sense of the whole. It is a well shaped Panel Billiard that looks great.
 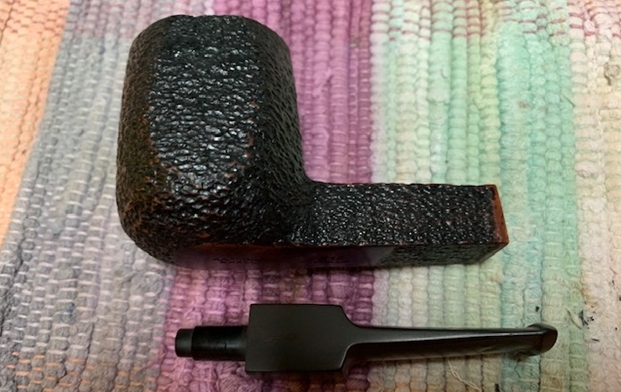 Now it was time to do my work on the pipe. Since it was clean and looked good I rubbed the bowl and shank down with Before & After Restoration Balm. I worked it into the surface of the sandblast bowl sides and shank with my fingertips and a horsehair shoe brush to clean, enliven and protect the briar. I let the balm sit for a little while and then buffed with a cotton cloth to raise the shine. It helped to give depth to the tight rustication around the bowl. The final buffing would bring the pipe alive.
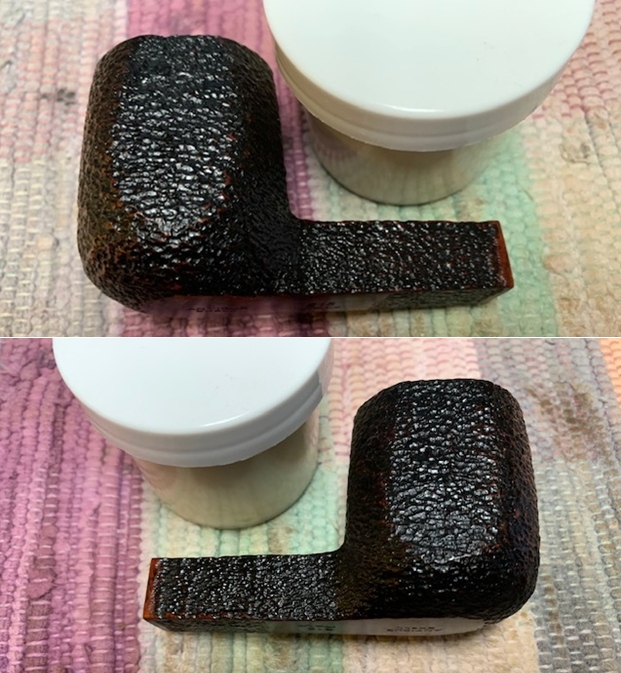
 I set the bowl aside and turned my attention to the stem. I painted the stem with the flame of a Bic lighter to raise the tooth dents in the vulcanite.
 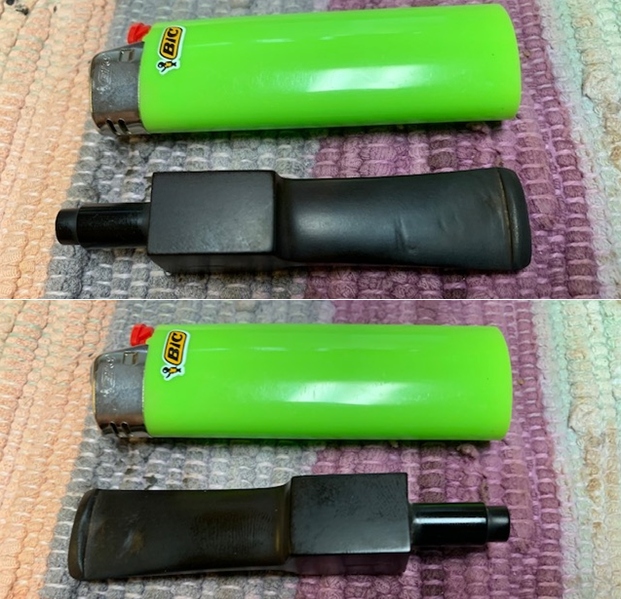 I filled in the dents with black super glue to repair them. Once the repairs had cured I recut the button and smoothed out the repairs with a needle file.
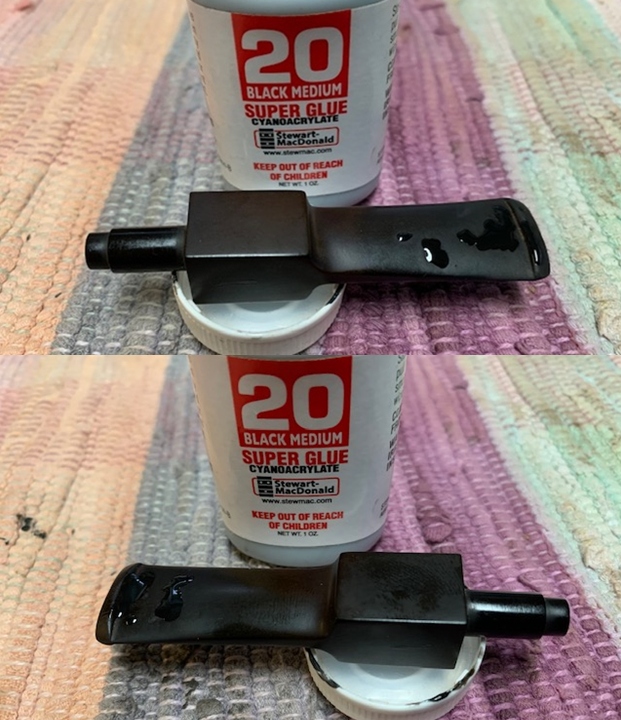
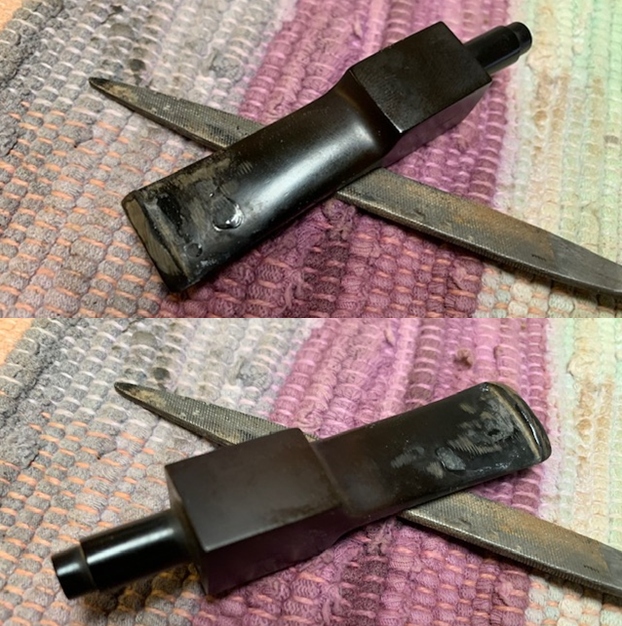 I used 220 grit sandpaper to smooth out the tooth chatter and marks and blend them into the stem surface. I started the polishing with 400 grit wet dry sandpaper. I scrubbed off the remaining oxidation with Soft Scrub All Purpose Cleaner.
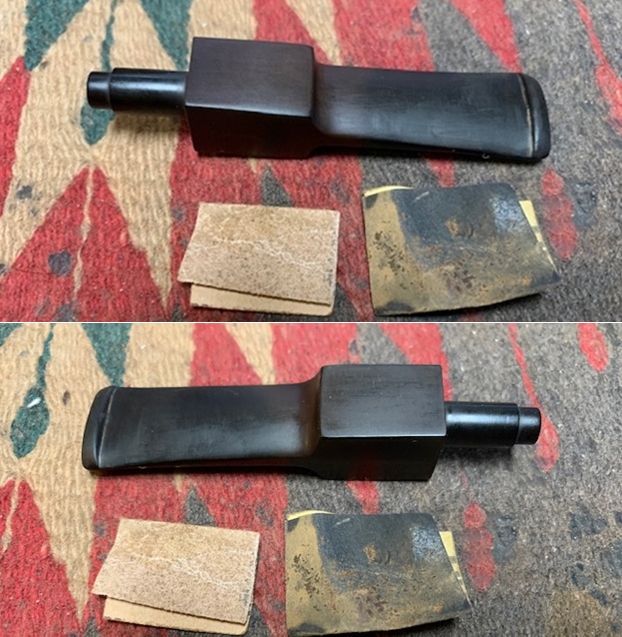
 I polished the vulcanite stem with micromesh sanding pads – 1500-12000 grit pads. I wiped it down with a damp cloth after each sanding pad. I used Before & After Pipe Polish – both Fine and Extra Fine to further polish the stem.
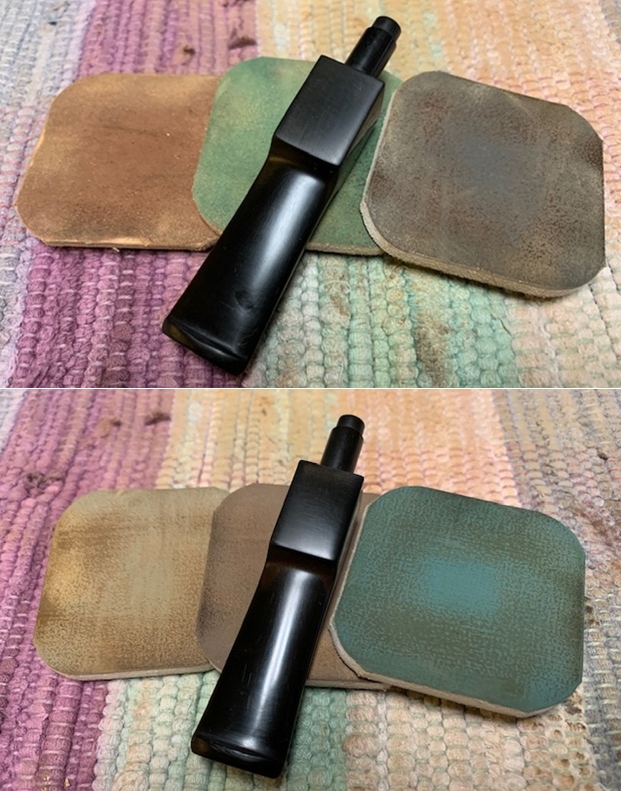
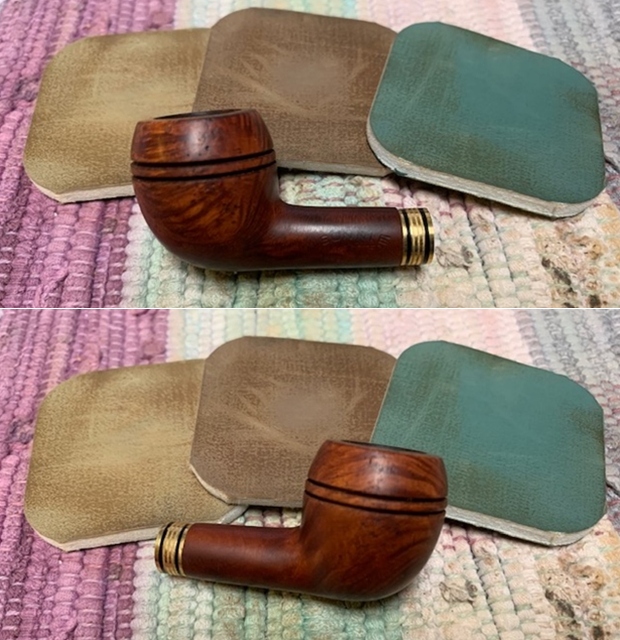
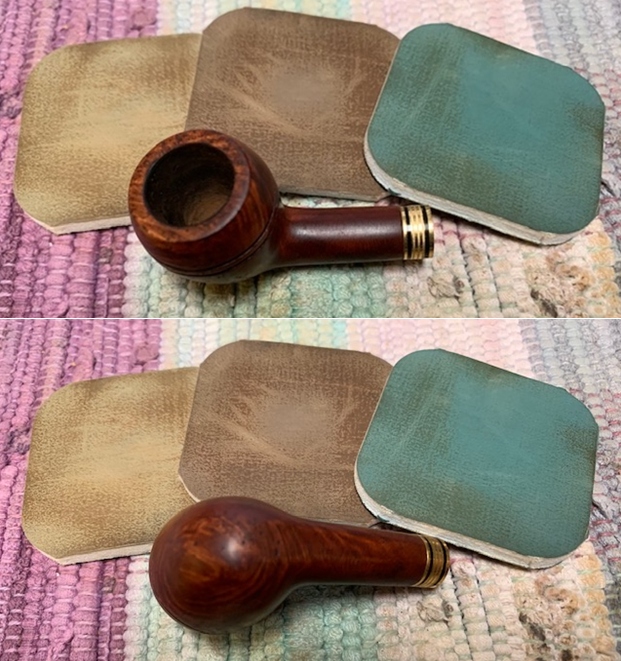
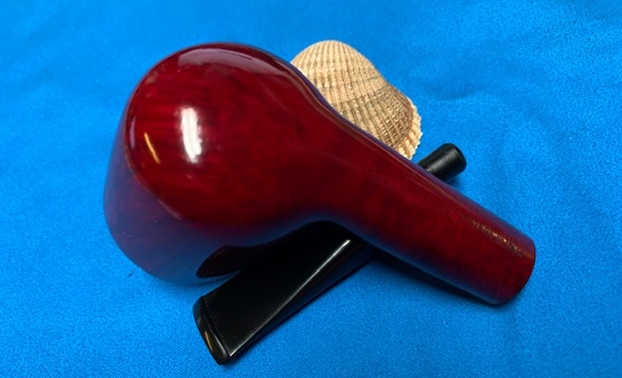
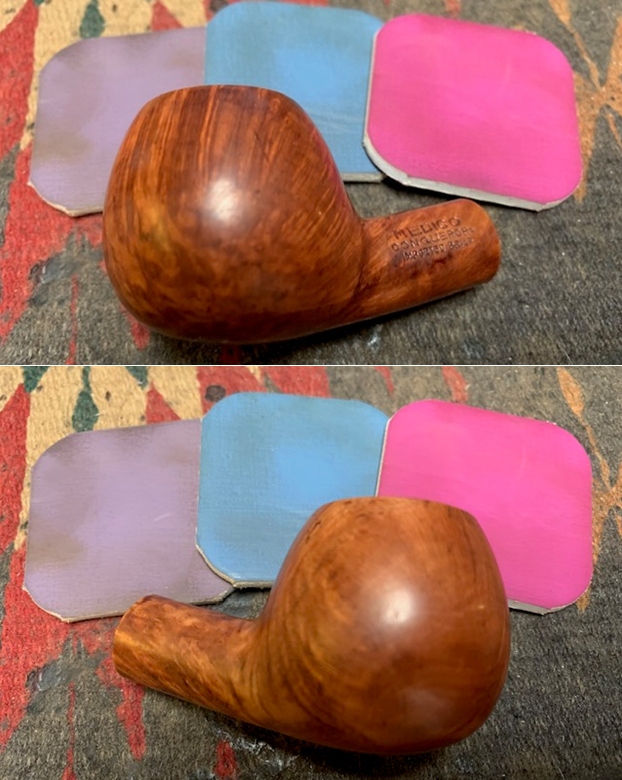
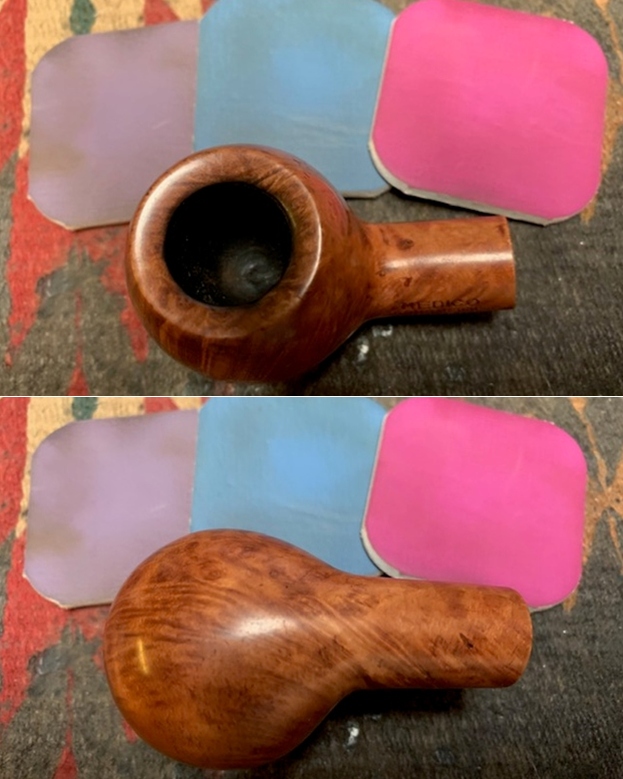
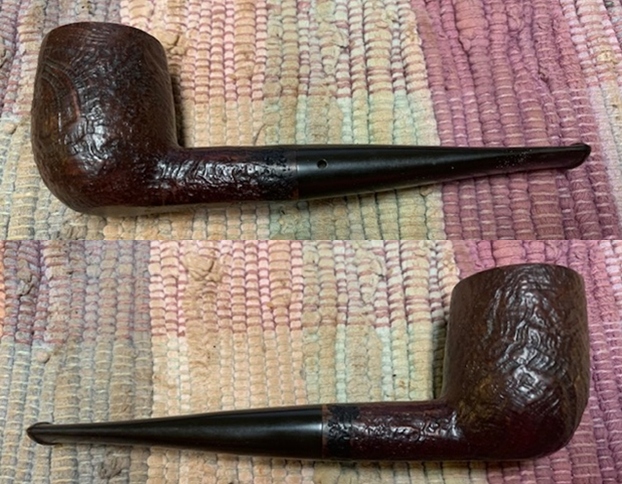
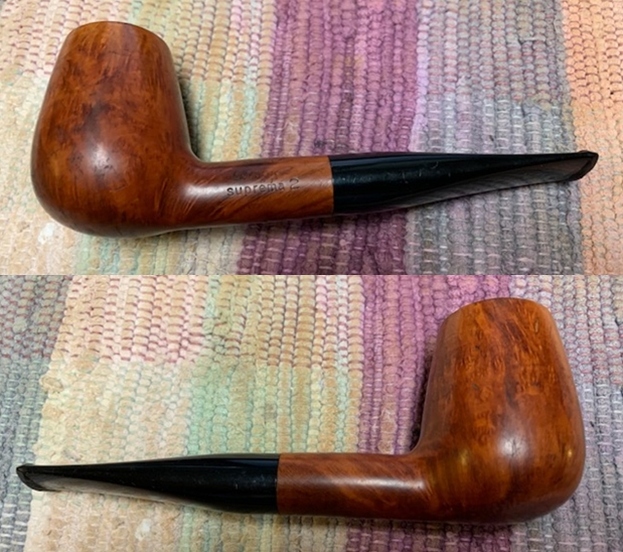
 This beautiful tightly rusticated Savinelli Made Antique Shell 515 Panel Billiard with a vulcanite saddle stem is a great looking pipe now that it has been restored. The rich Antique Shell coloured finish came alive with the polishing and waxing. The dimensions of the rustication really popped. I put the stem back on the bowl and carefully buffed the pipe with Blue Diamond on the buffing wheel using a light touch on the briar. I gave the bowl multiple coats of Conservator’s Wax and the stem multiple coats of carnauba wax on the buffing wheel. I buffed the pipe with a clean buffing pad to raise the shine. I hand buffed the pipe with a microfiber cloth to deepen the shine. The finished Antique Shell Panel Billiard is a beauty and fits nicely in the hand and looks very good. Give the finished pipe a look in the photos below. The dimensions of the pipe are Length: 5 ½ inches, Height: 2 inches, Outside diameter of the bowl: 1 ½ inches, Chamber diameter: 7/8 of an inch. If you are interested in adding this pipe to your collection send me a message or an email. Thanks for reading this blog and my reflections on the pipe while I worked on it. There are many more to come!
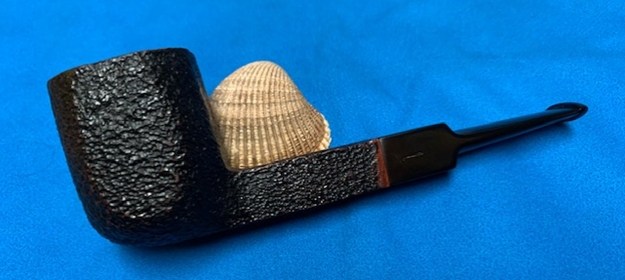


 H
H


