Blog by Steve Laug
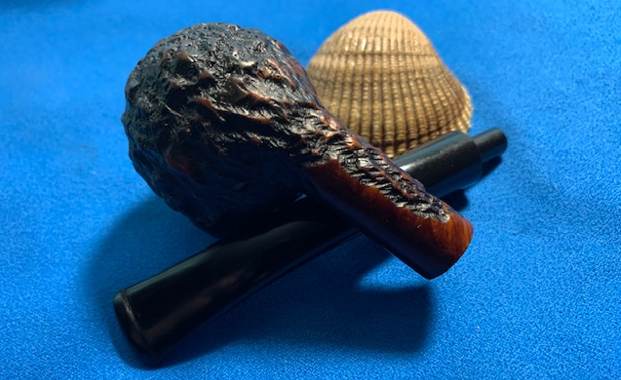
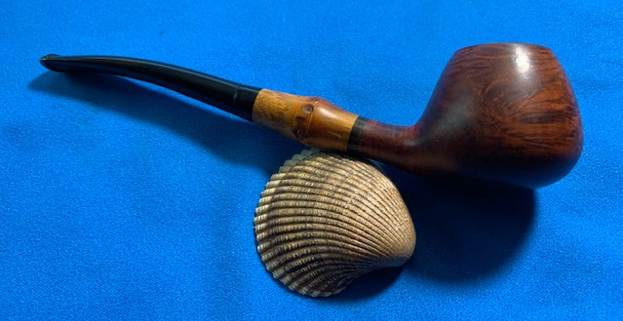
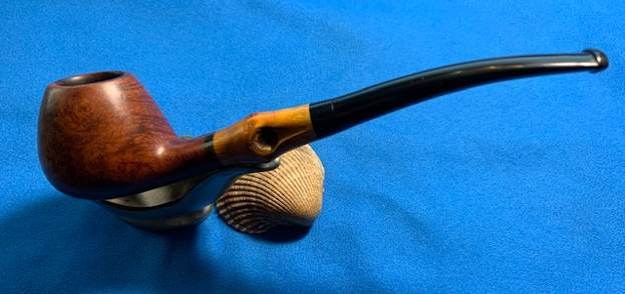
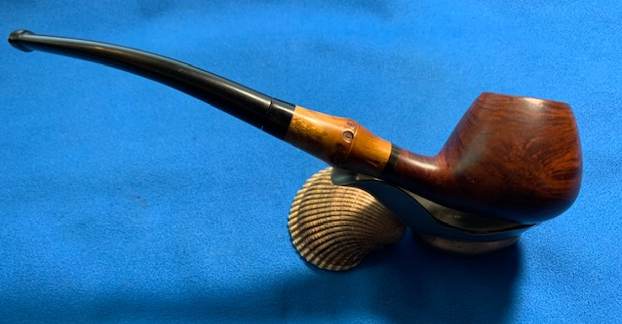
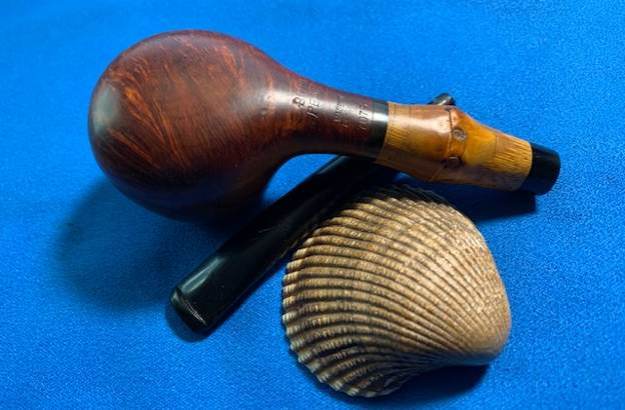
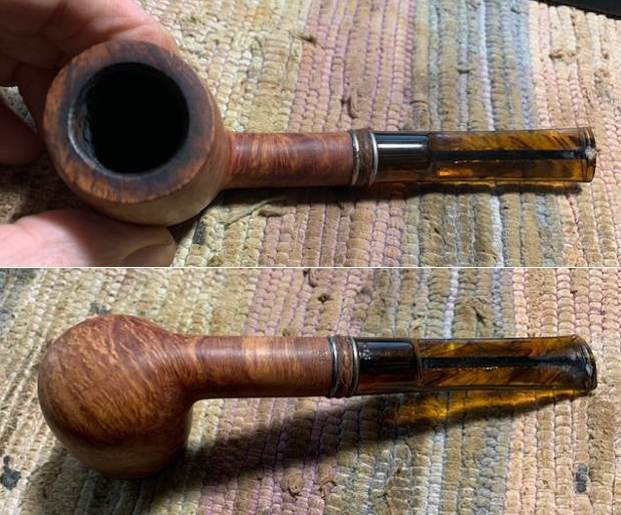
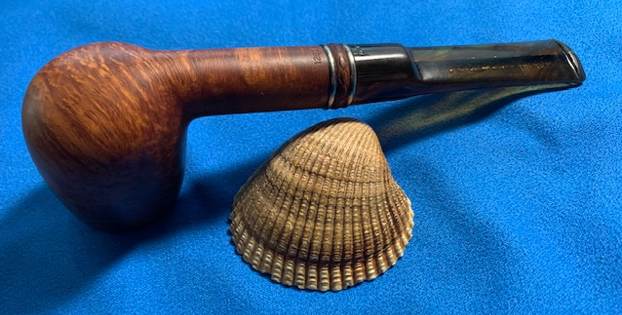
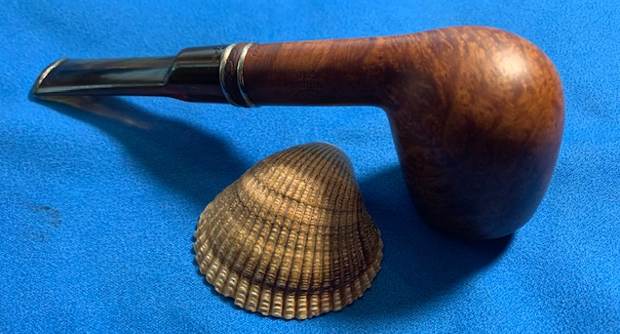
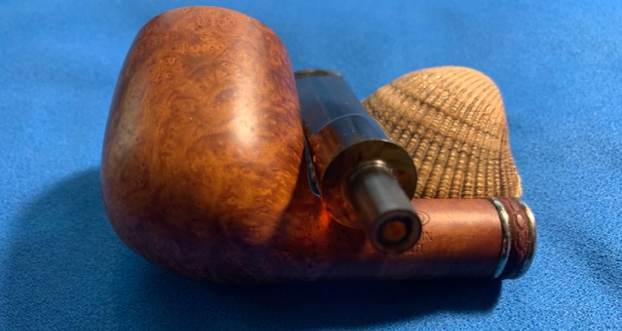
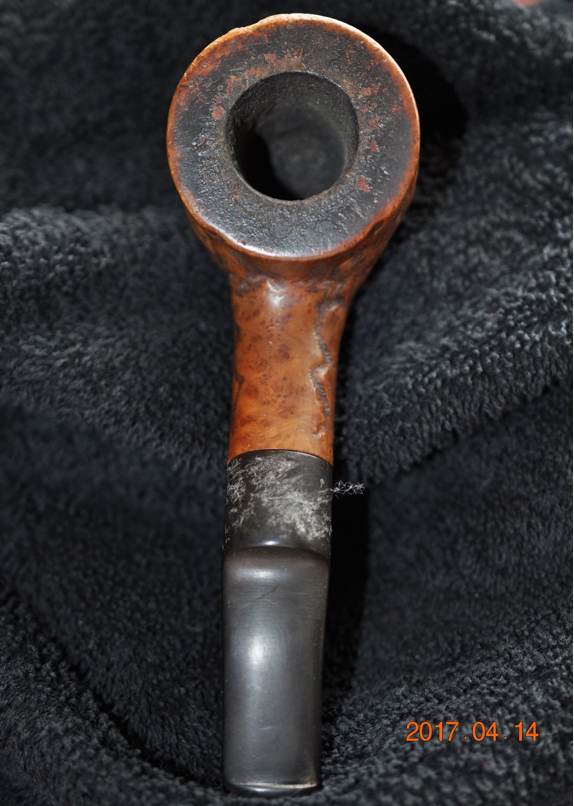
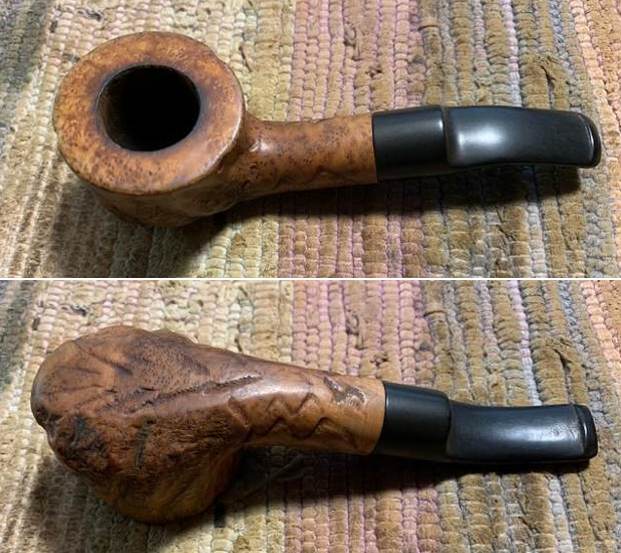
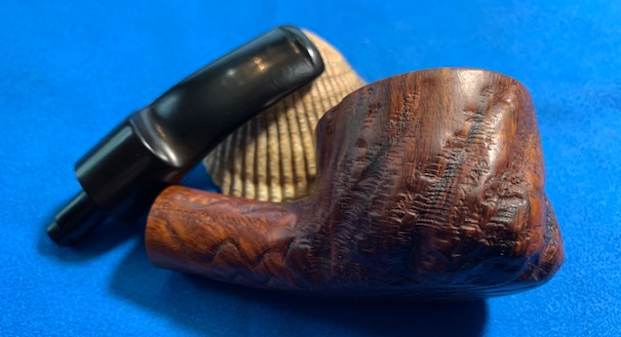
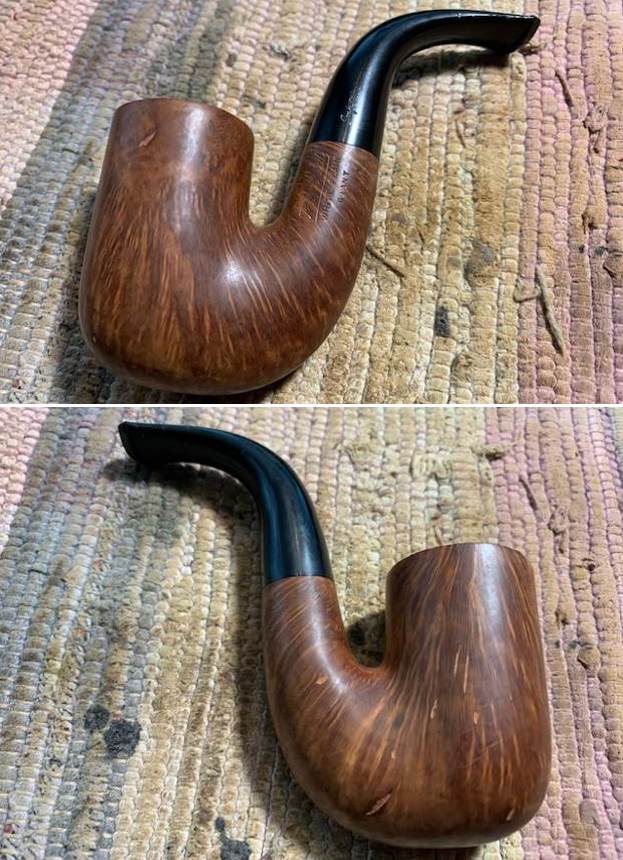
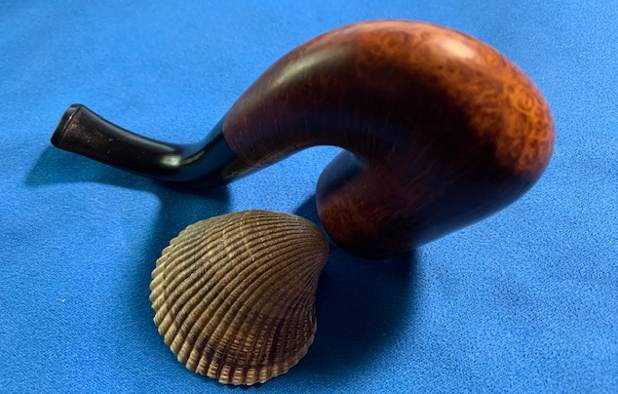
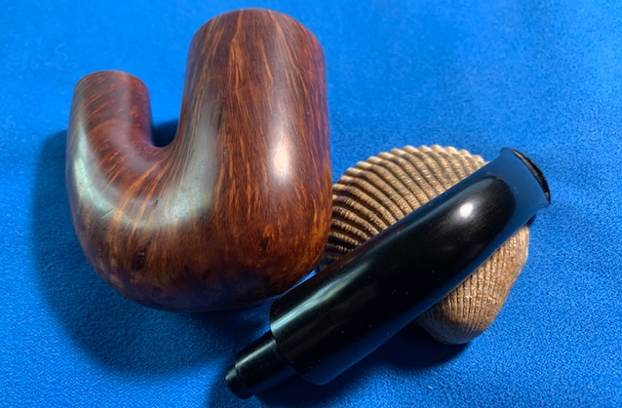
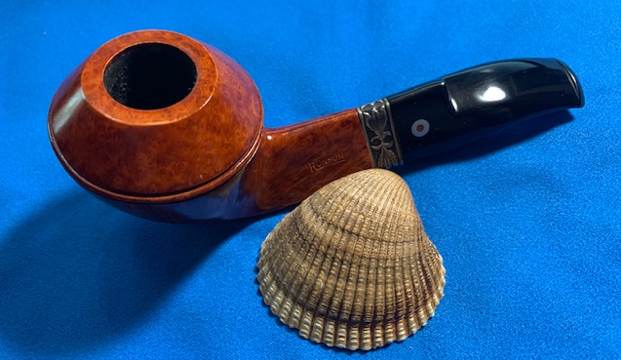
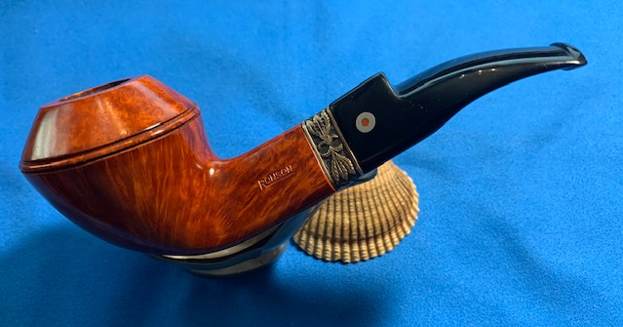
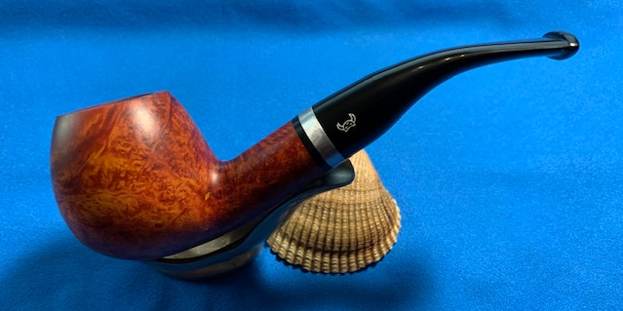
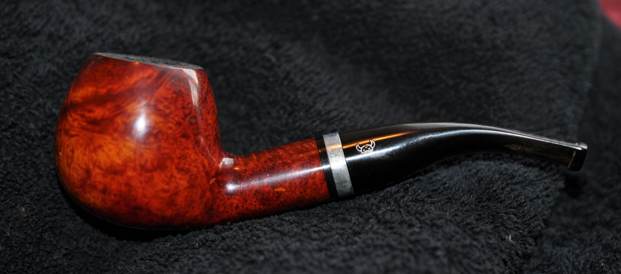
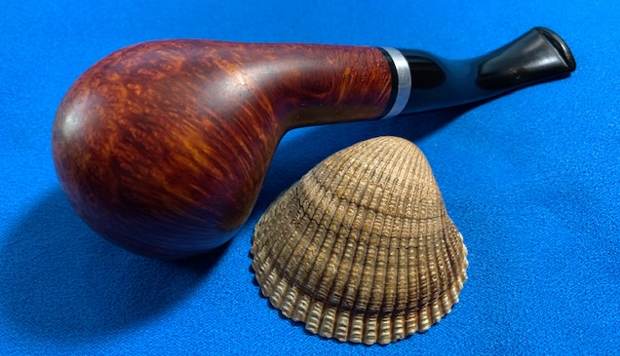
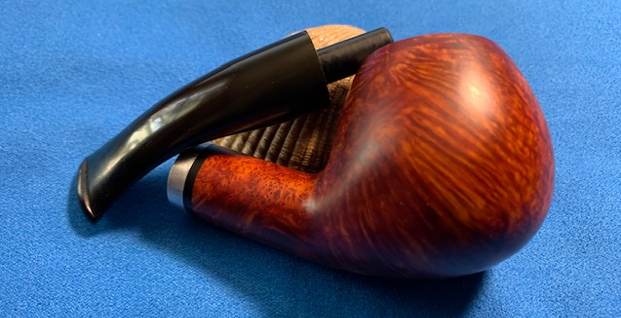
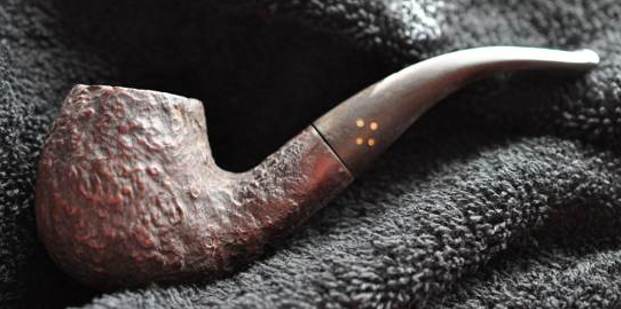
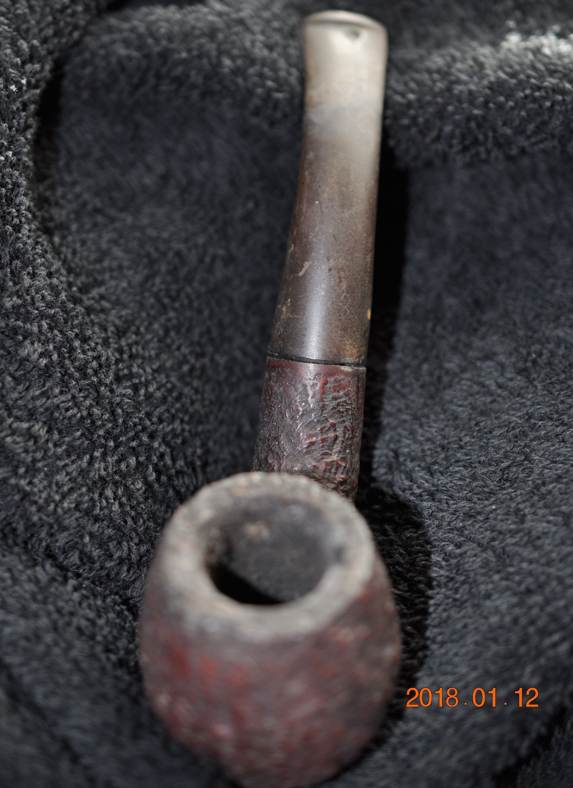
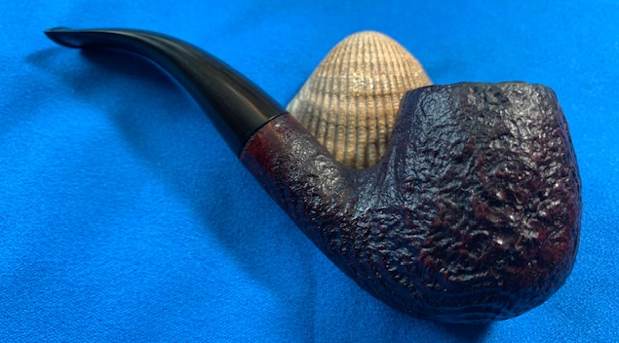
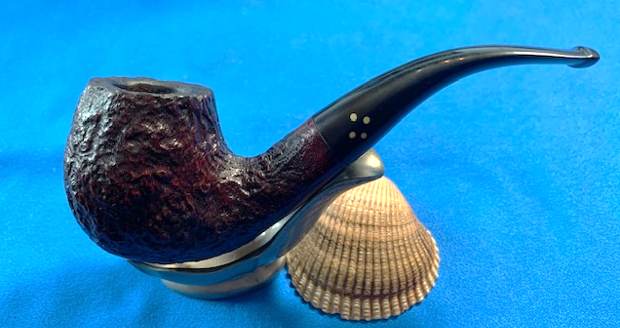
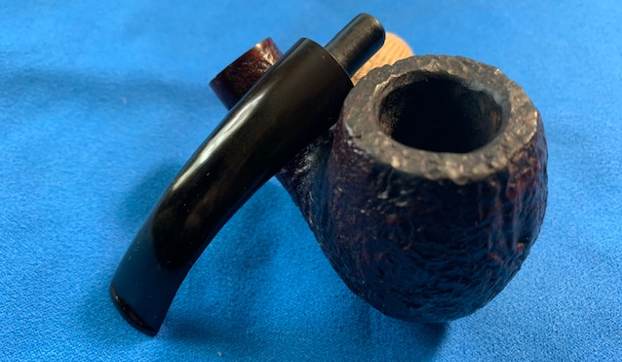
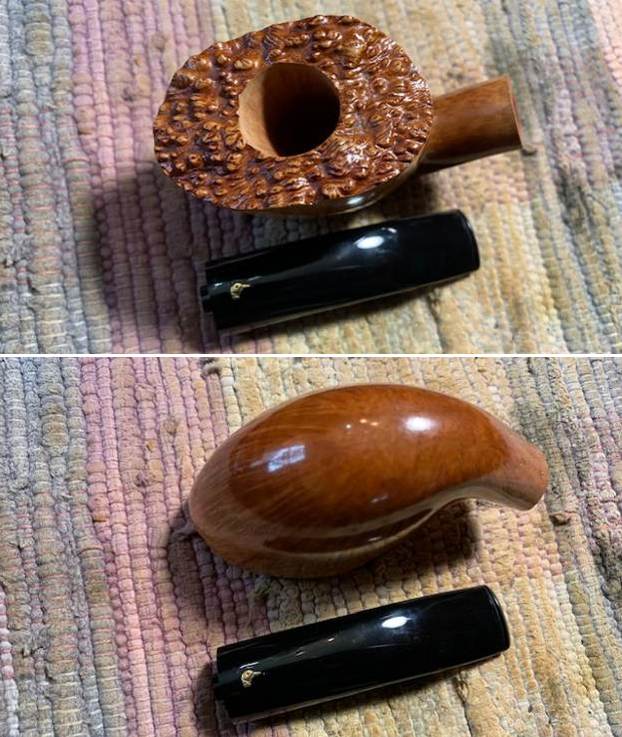
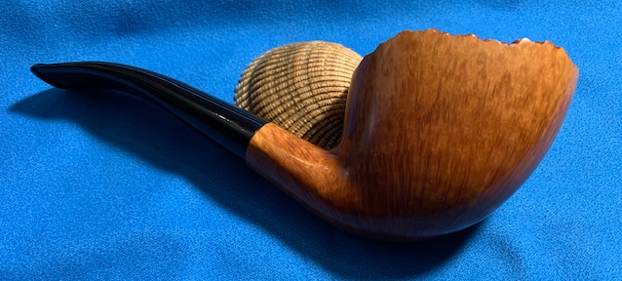
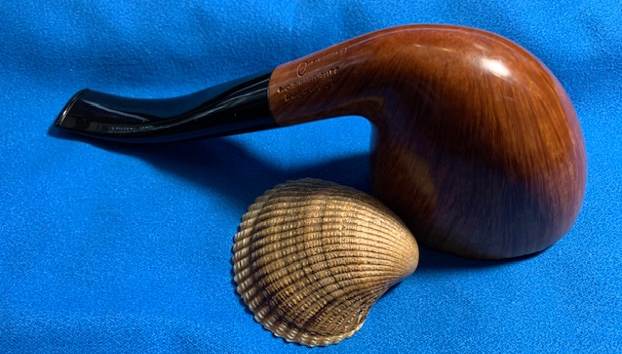
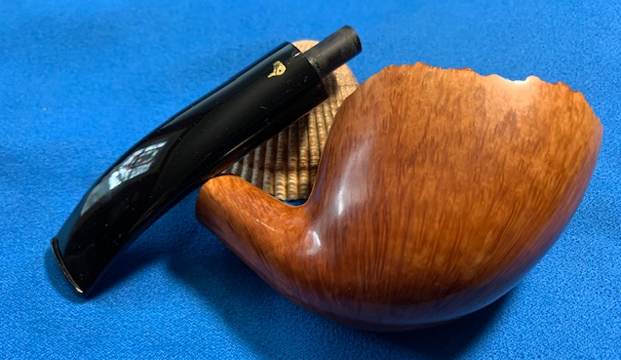
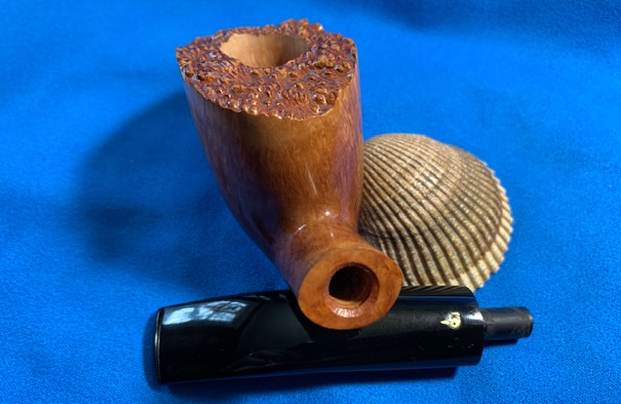
 The next pipe on the table is another interesting Malaga pipe that Jeff. This pipe was purchased off EBay on 10/29/2017 from Manteca, California, USA. It is an interesting looking rusticated bent Apple. The finish looks a lot like a Brigham. It has the classic Malaga oil cured finish and some great looking grain on the smooth rim, shank top and right side. There was a smooth band around the shank end and the rim. The pipe is stamped on right side of the shank and reads MALAGA. The shape is well done and the fit of the stem against the shank is very well done. The carver did a great job of carving the pipe to capture the grain around the smooth portions bowl and shank. The bowl had a heavy cake with an overflow of thick lava on the rim top. The sides of the bowl and shank are very dirty with grime and oils ground into the rusticated finish from prolonged use. The vulcanite stem was heavily oxidized and calcified. It had tooth dents and chatter on the top and the underside of the stem near the button and on the button surface itself. Jeff took photos of the pipe before he started the cleanup work. With some work it will be a real beauty.
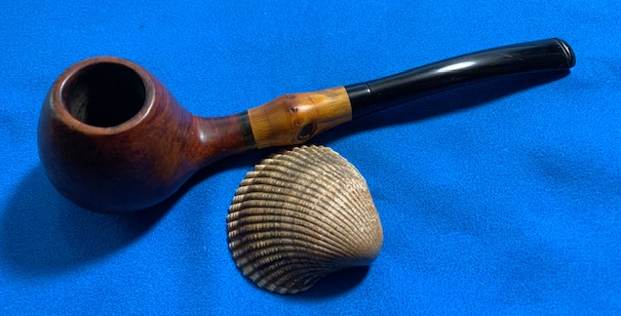
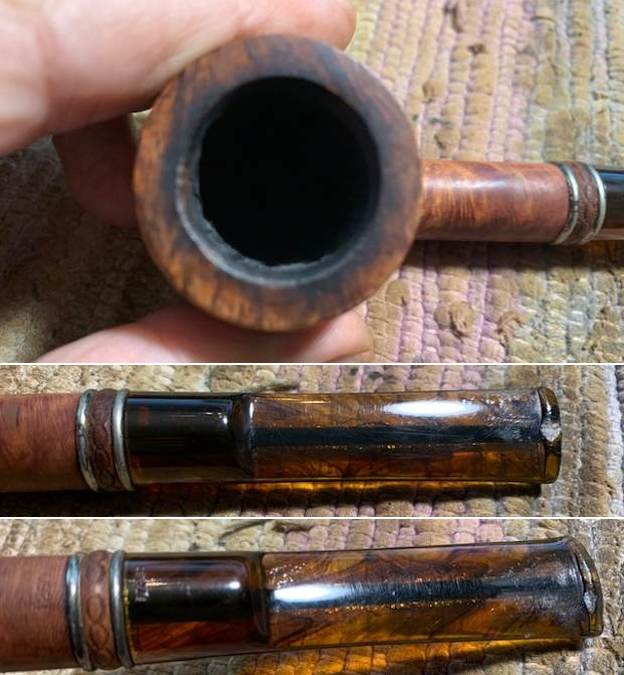
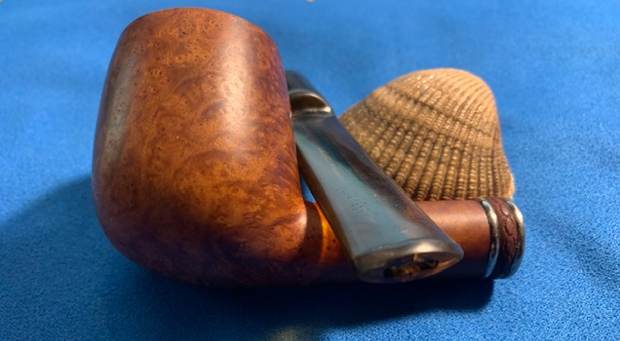
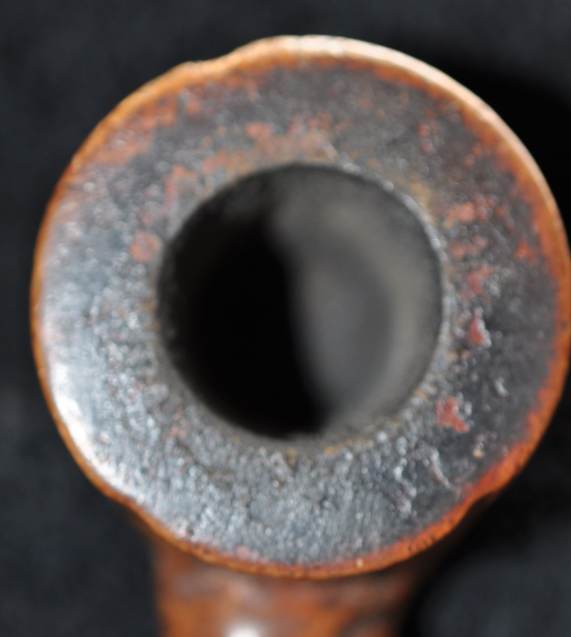
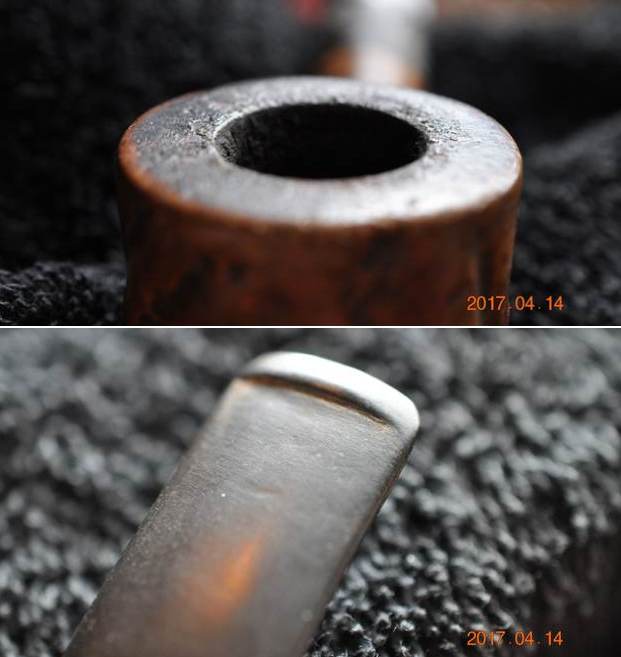
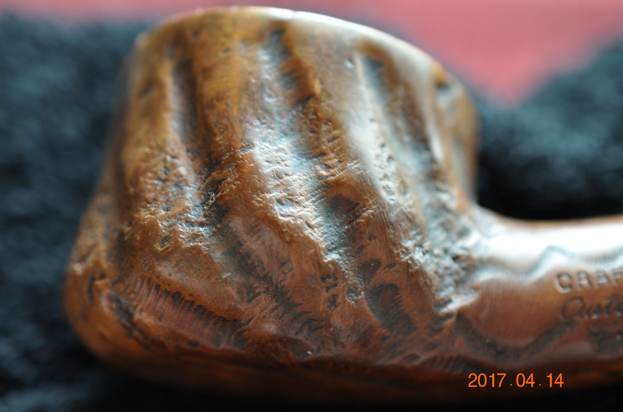
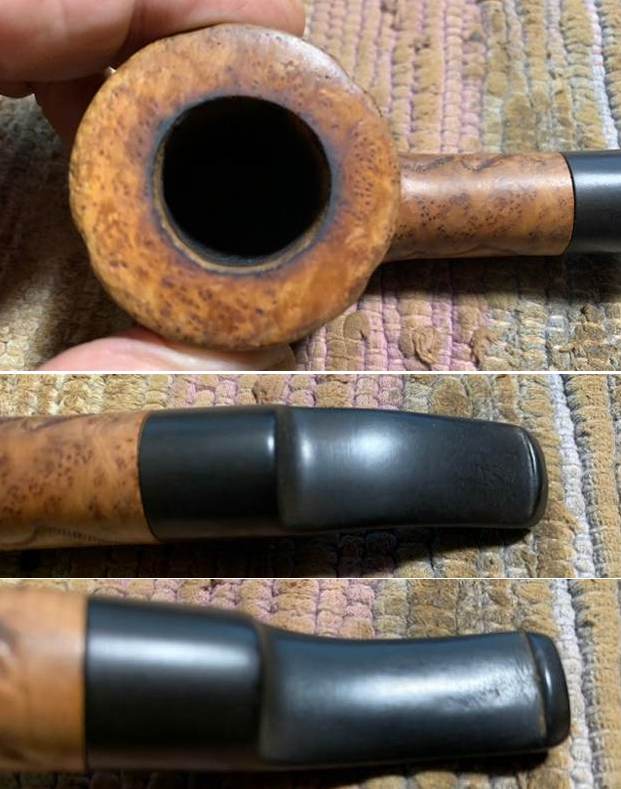
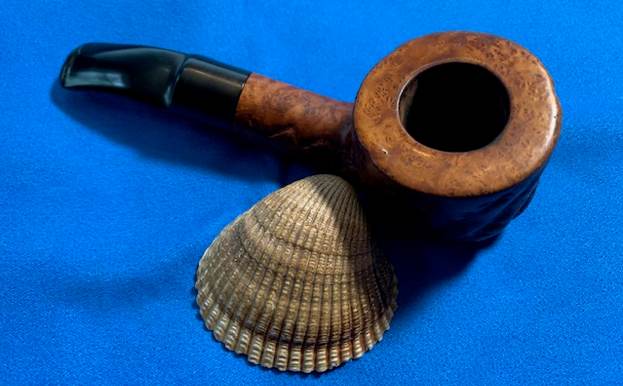
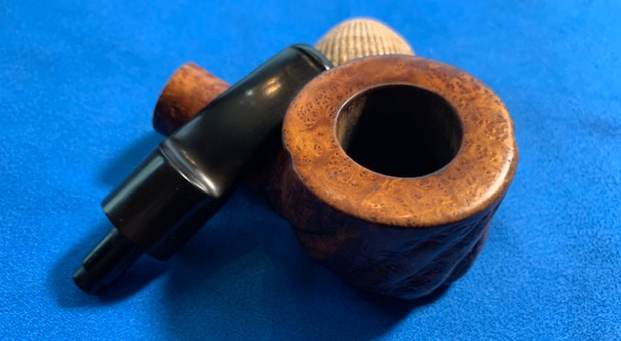
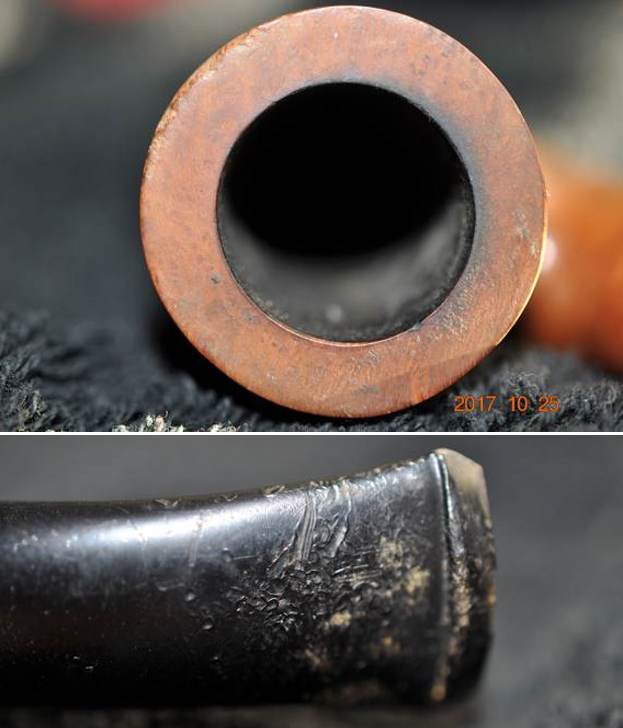
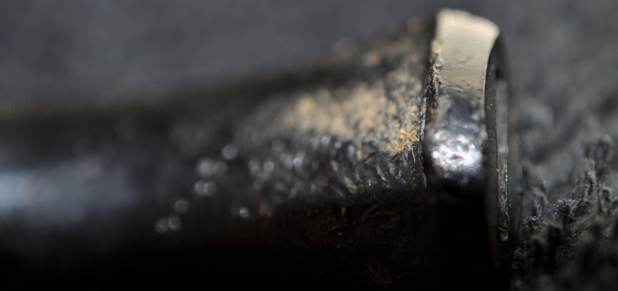
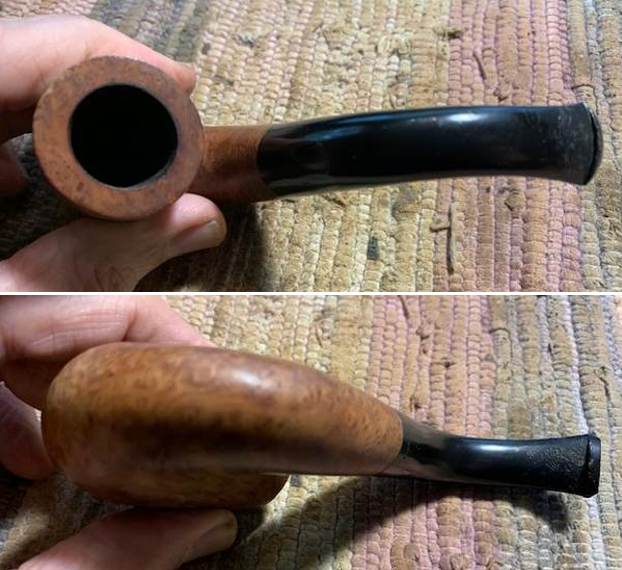
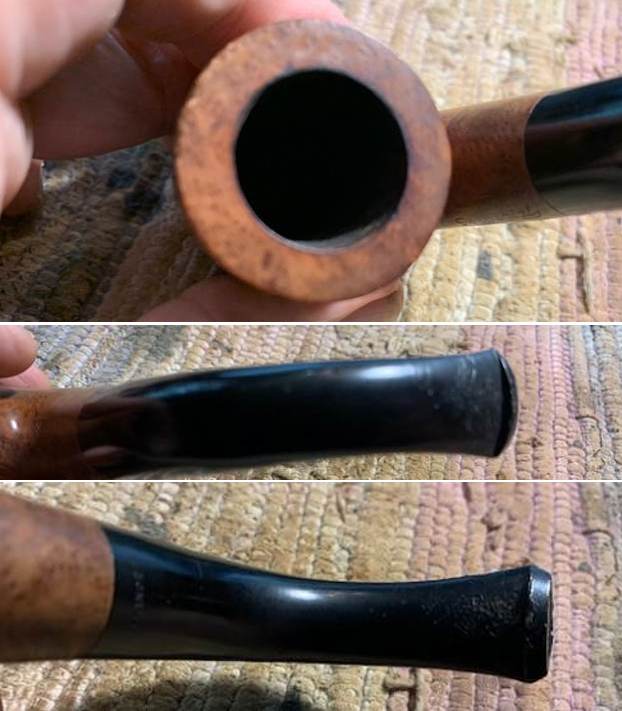
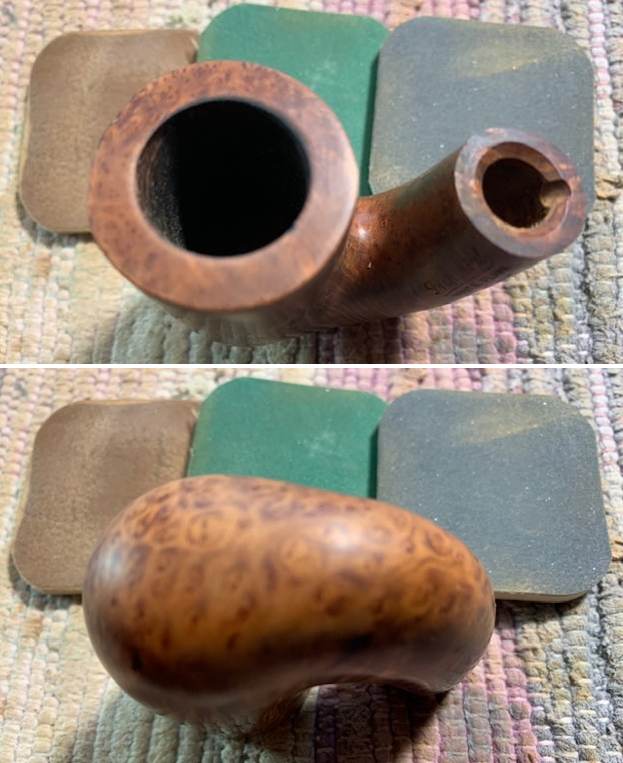
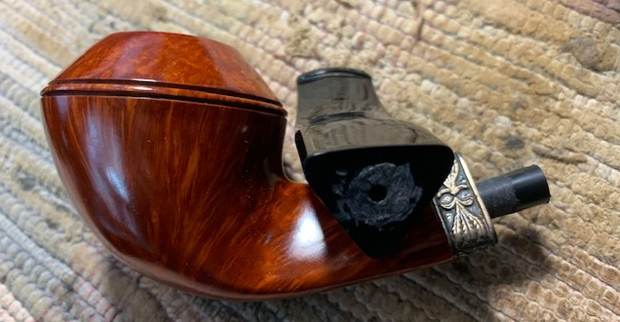
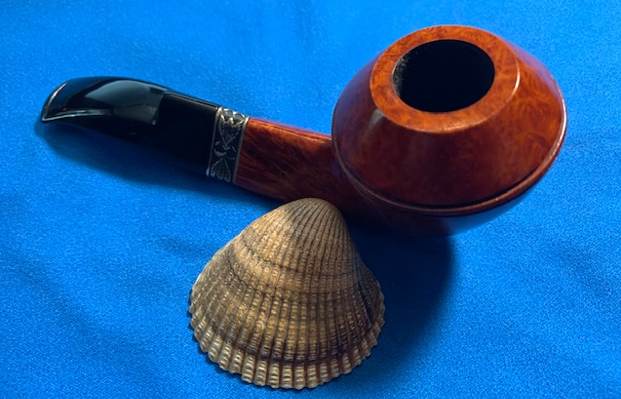
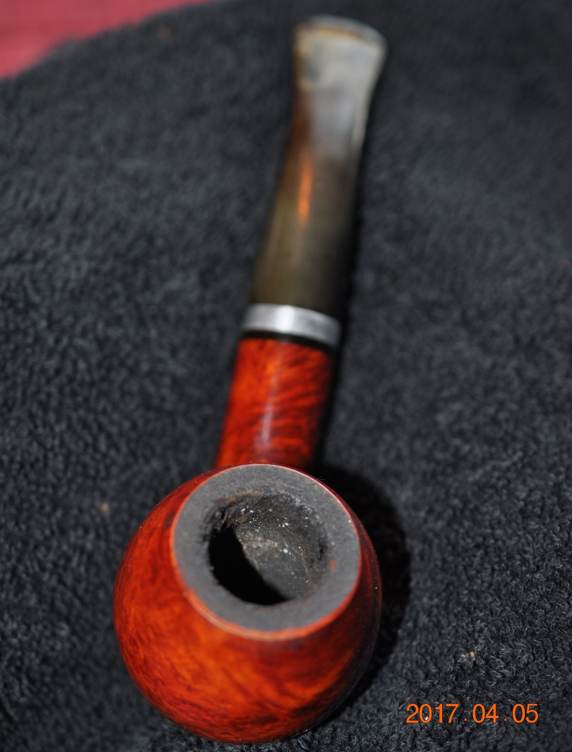
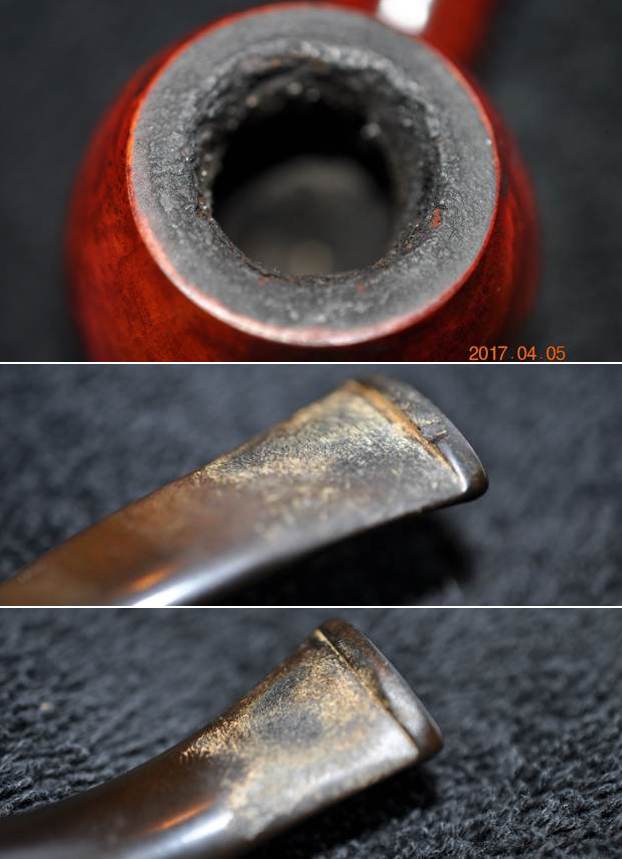
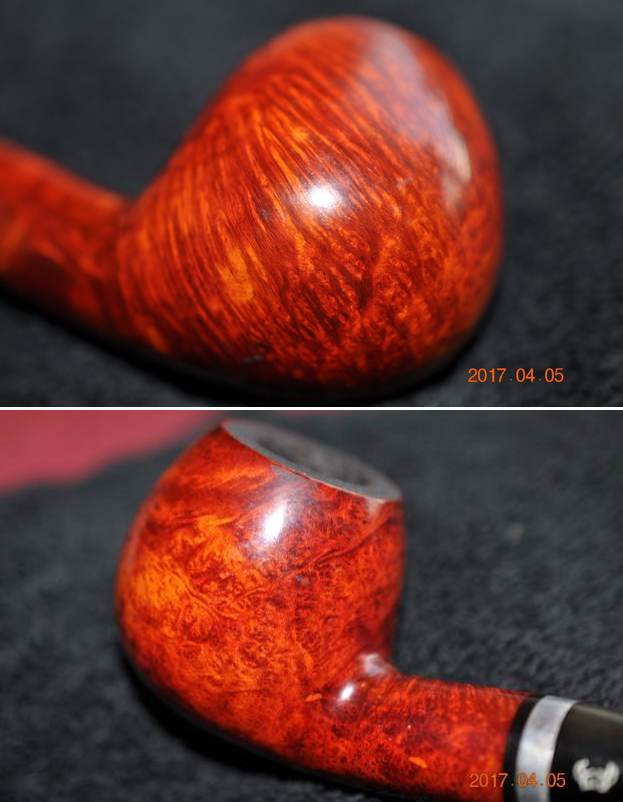
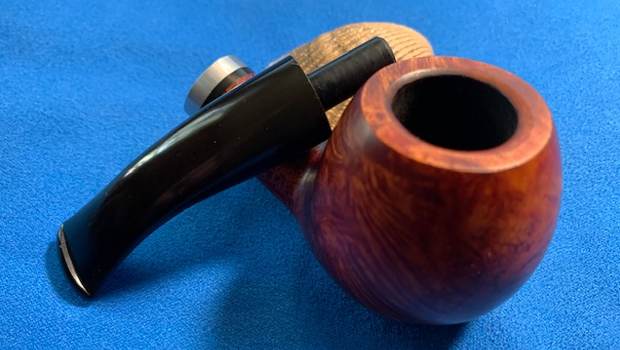
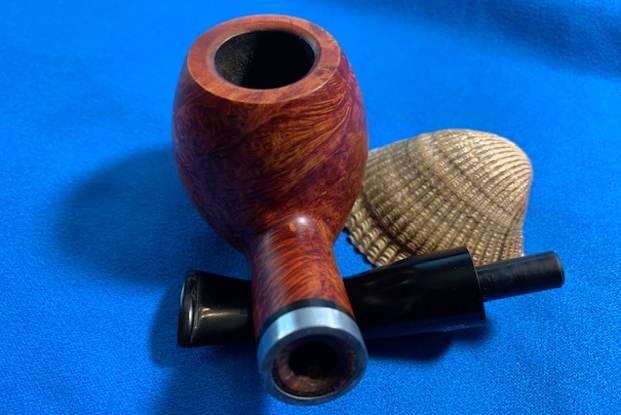
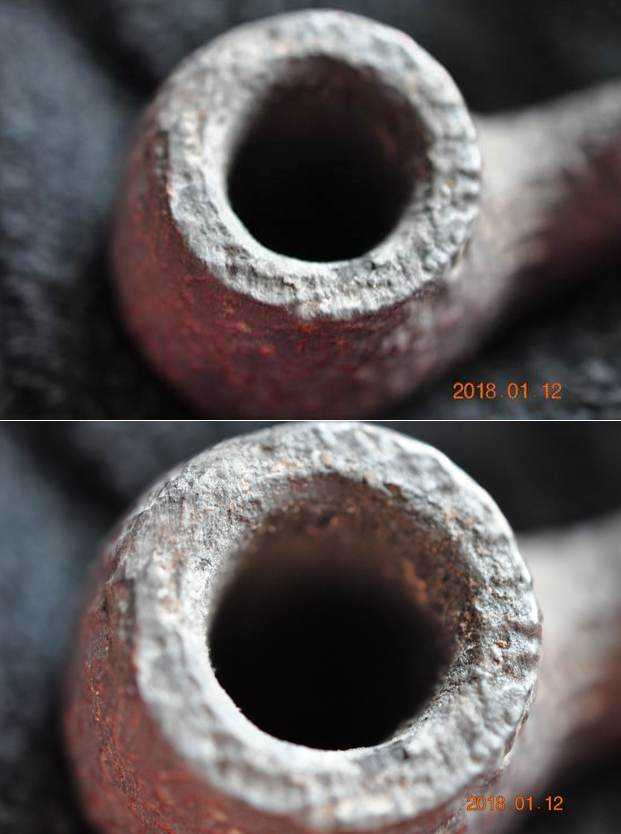
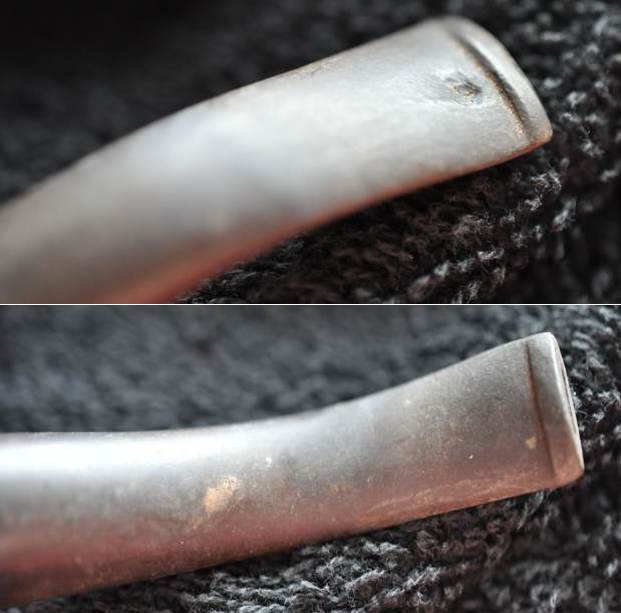
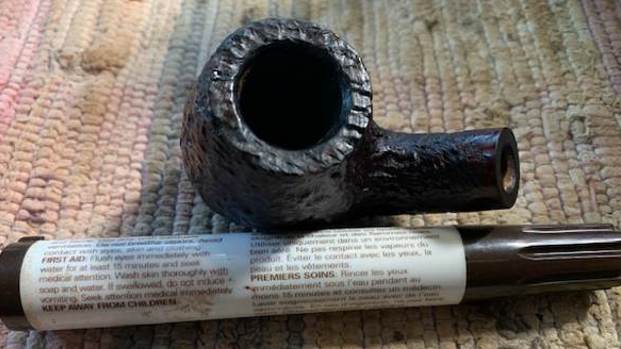
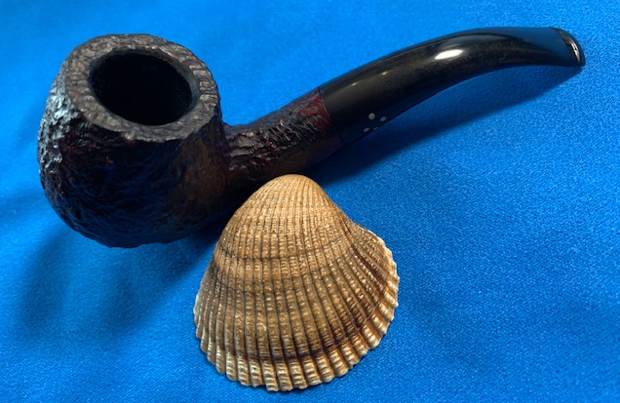
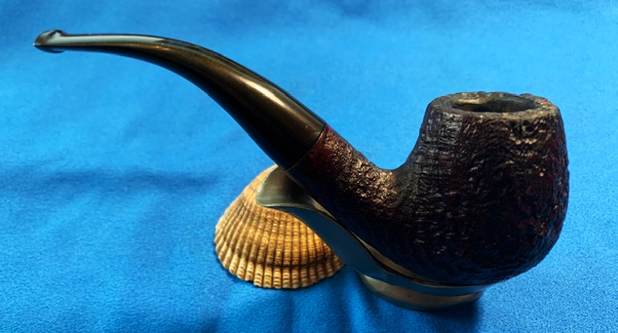
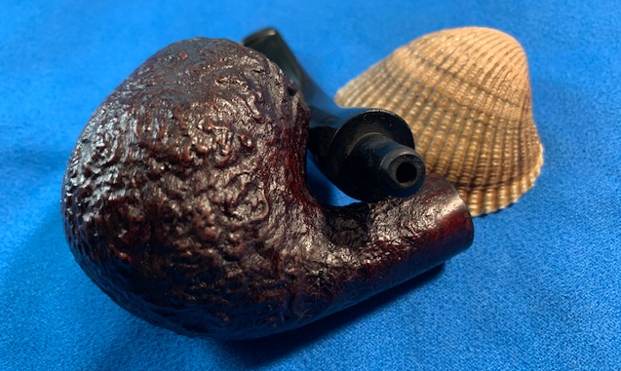
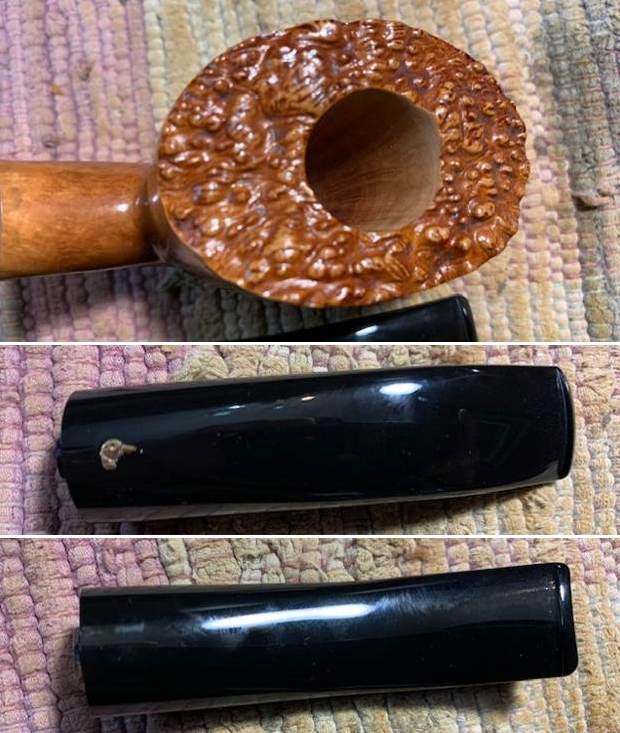
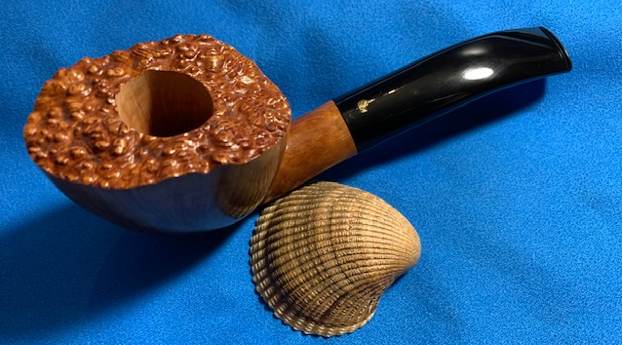
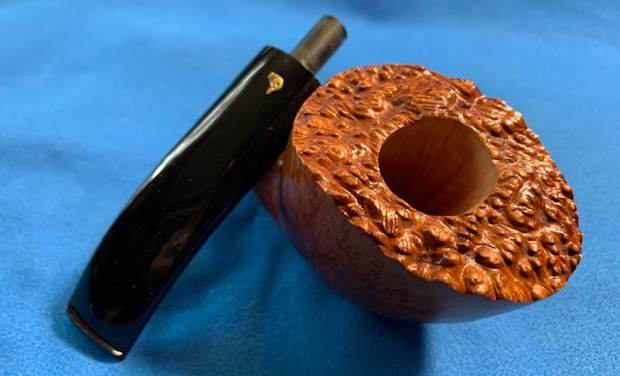
 Jeff took a close up photo of the bowl and rim to capture the condition of the pipe before he started the cleanup work. The bowl has a thick cake and the uneven overflow of lava on the rim top is quite thick all the way around but slightly heavier toward the back. The inside edge of the rim could be damaged but it quite hidden under the lava coat. The stem is deeply oxidized, calcified and dirty and there is tooth chatter and marks on both sides of the stem ahead of the button.
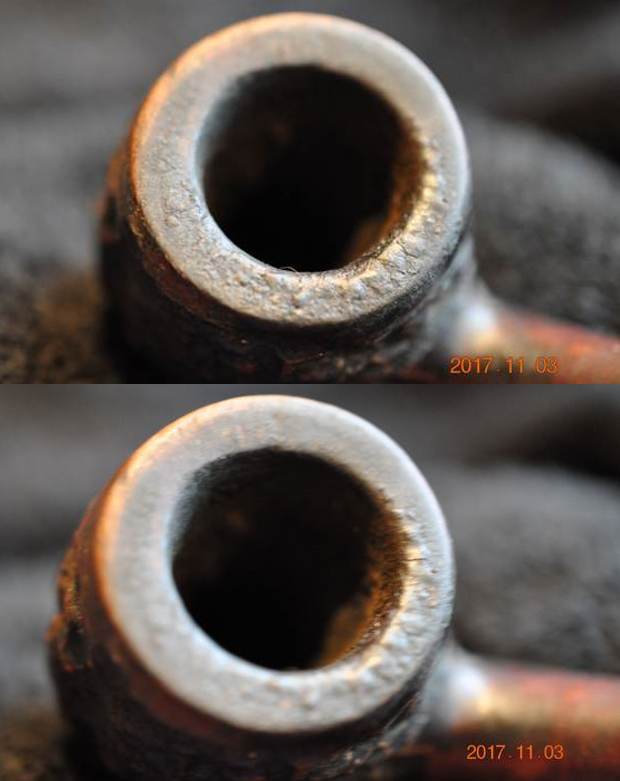
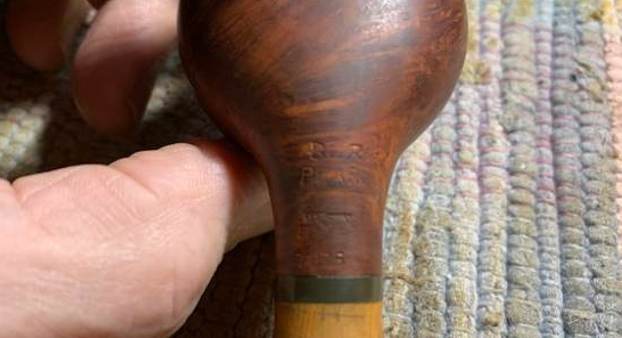
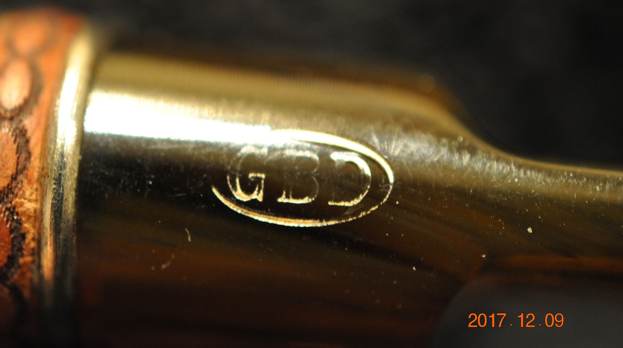
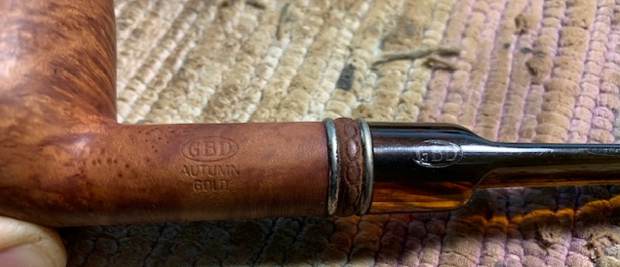
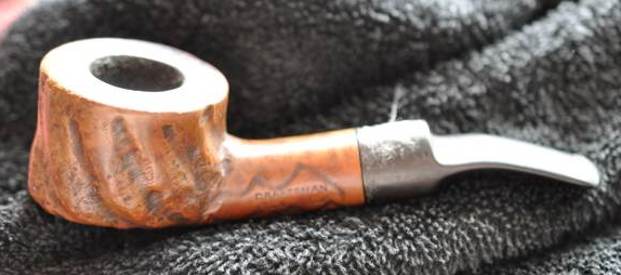
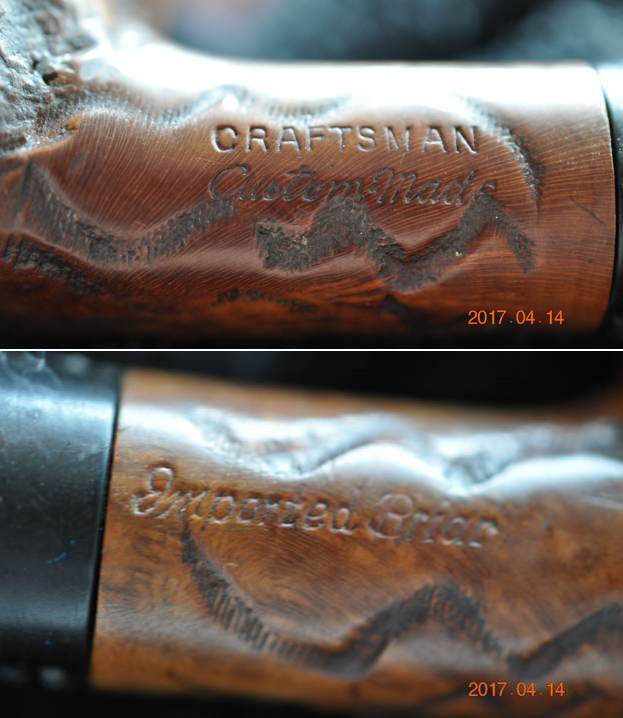
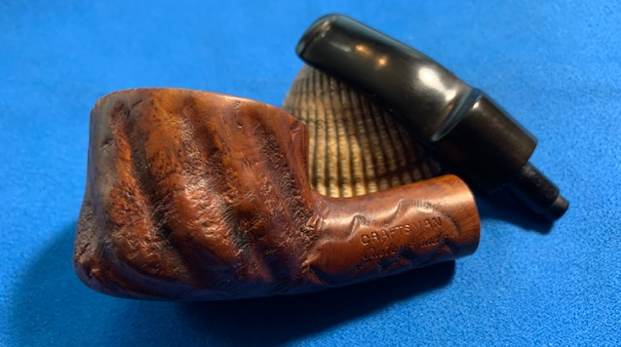
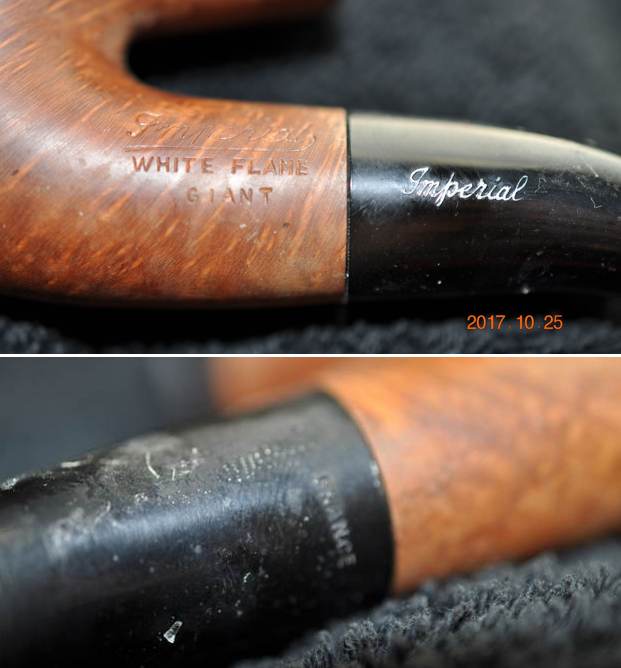
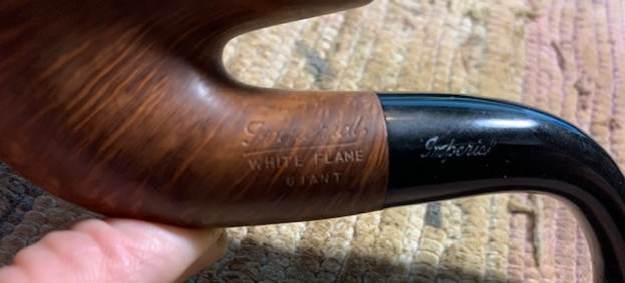
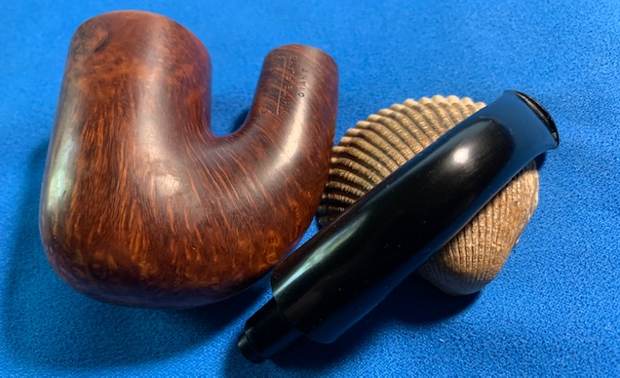
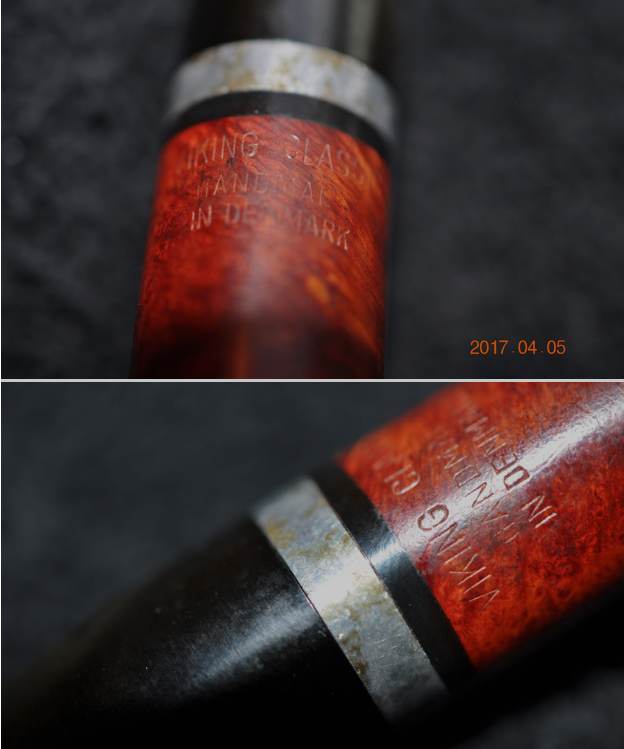
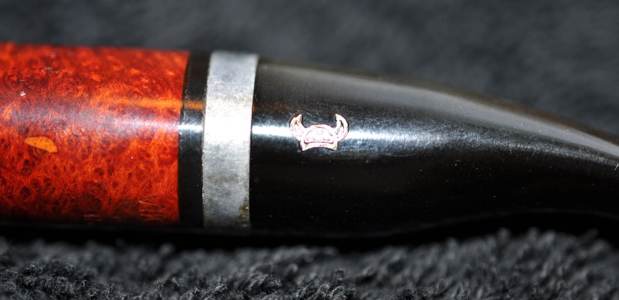
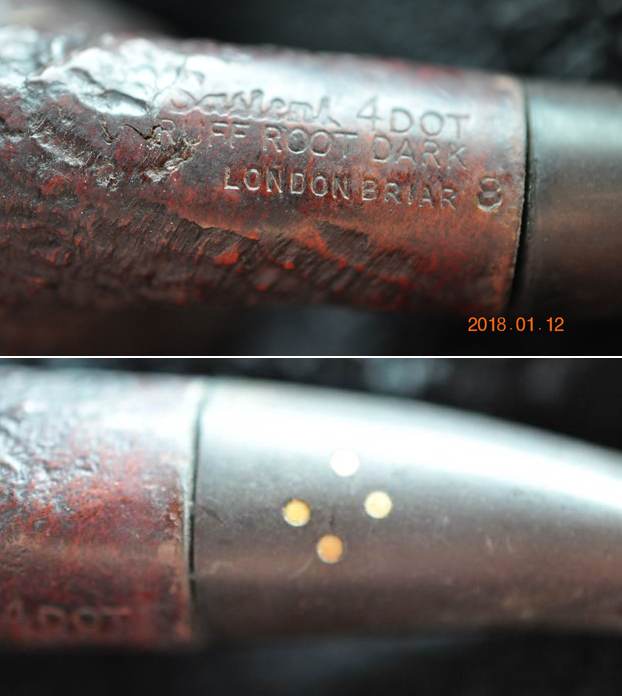
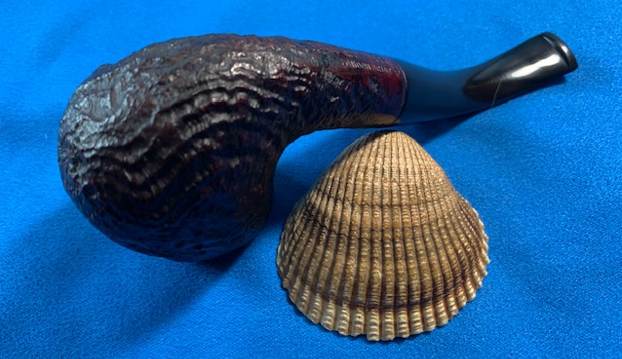
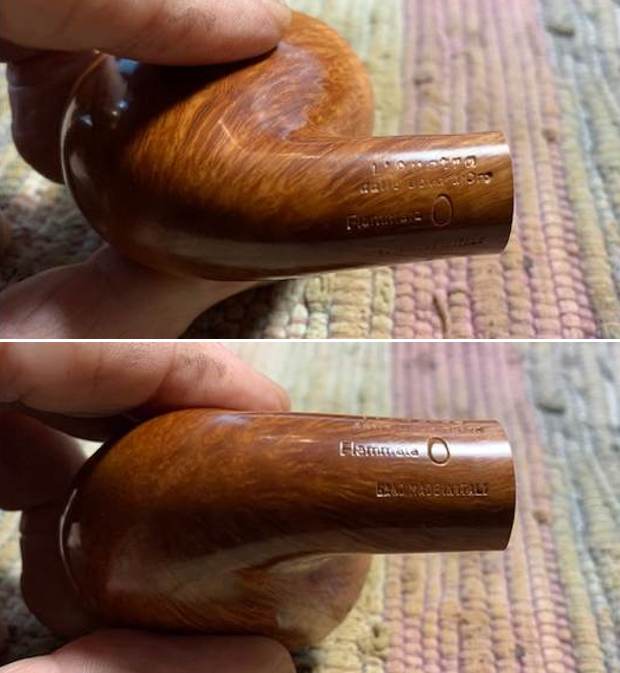
 He took a photo of the stamping on the right side of the shank. It read as noted above.
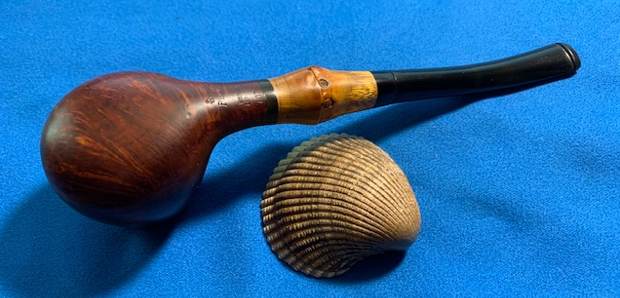
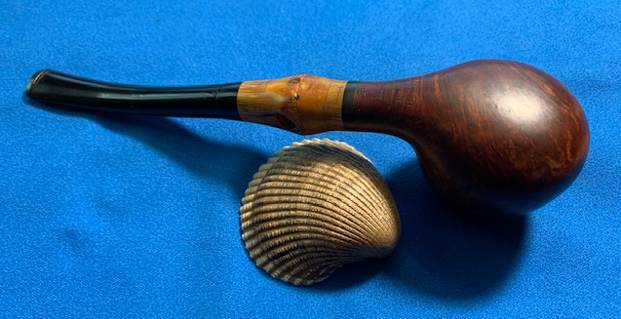
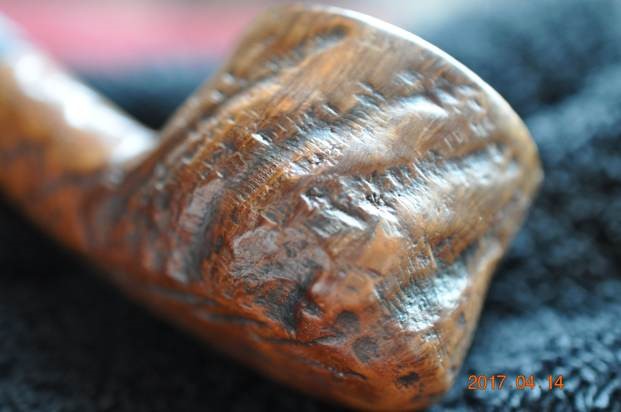
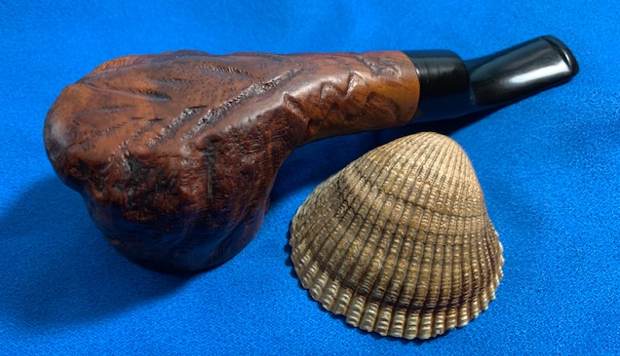
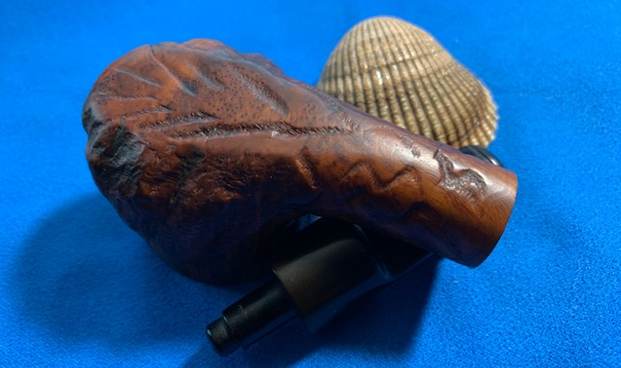
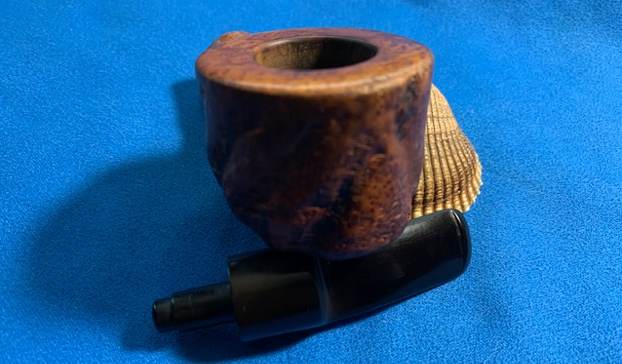
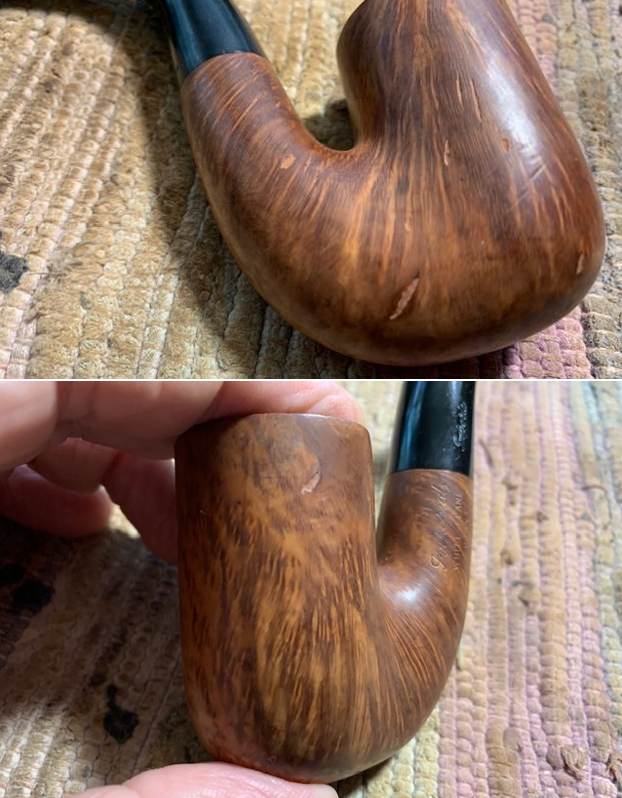
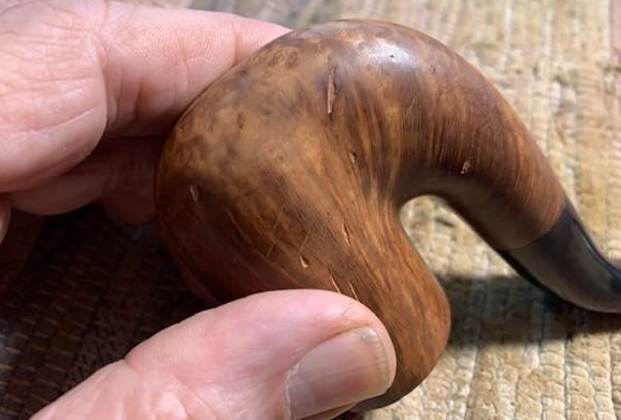
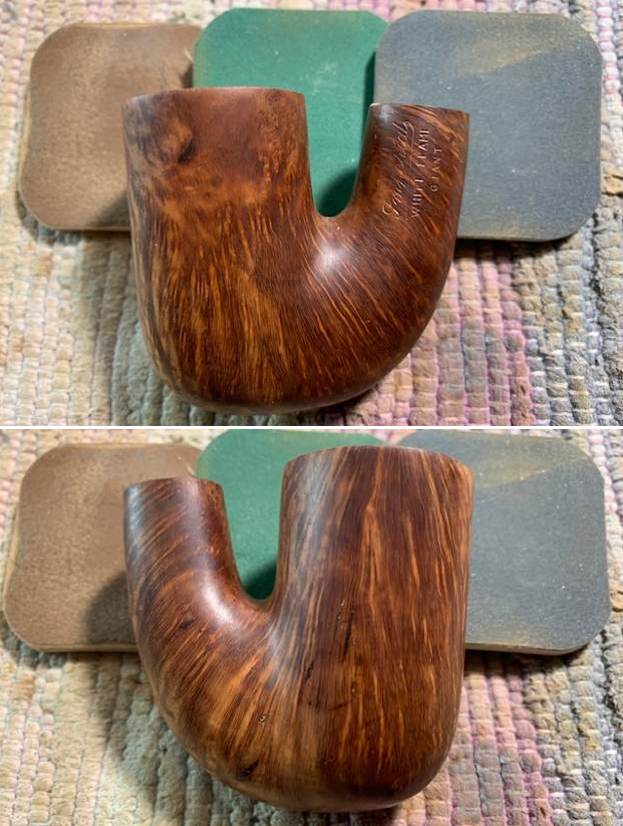
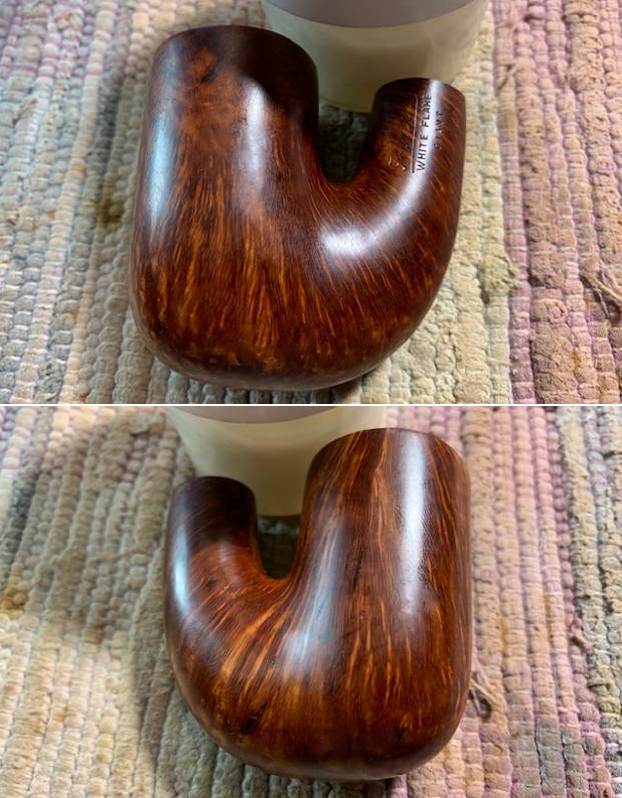
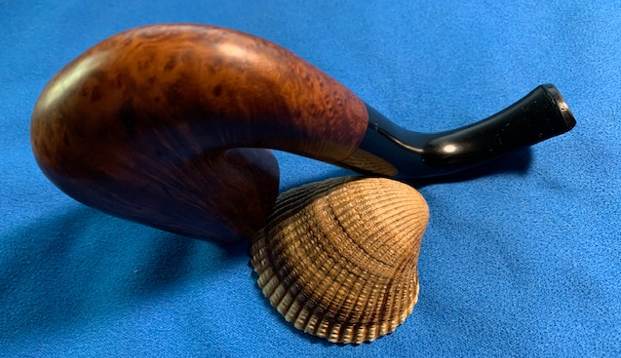
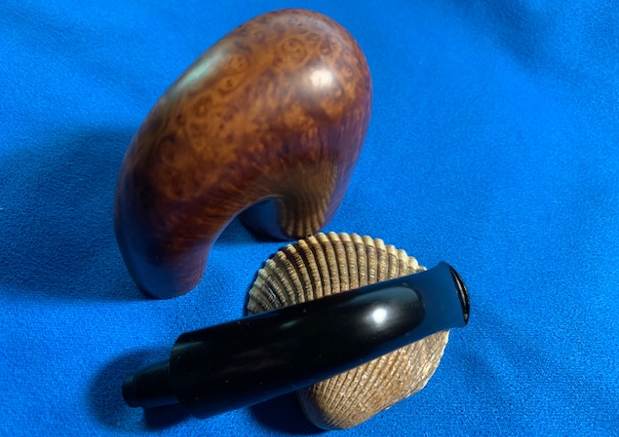
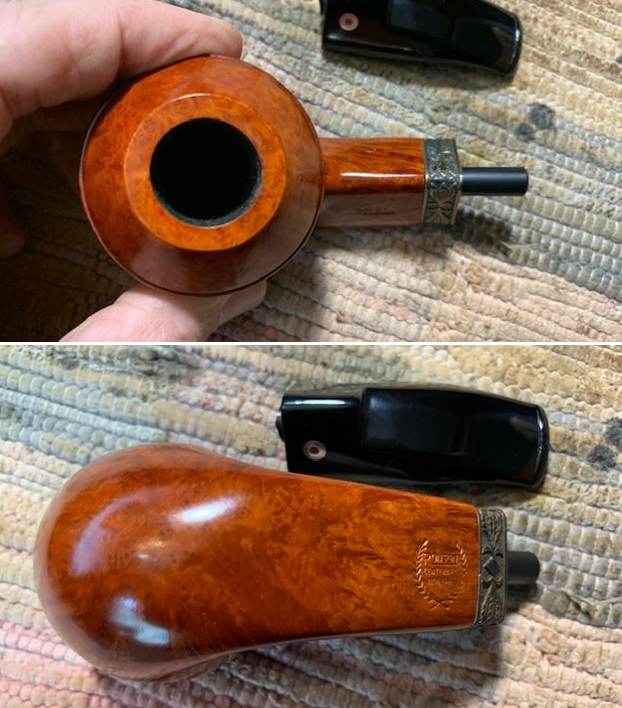
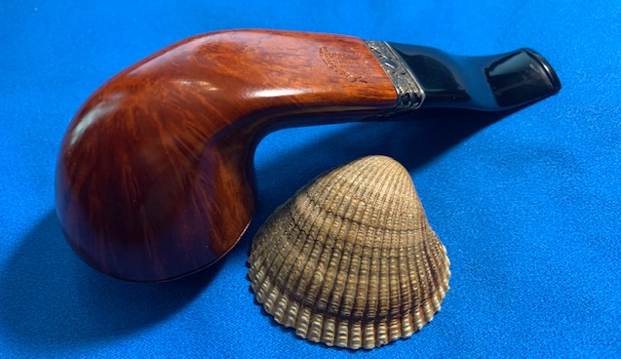
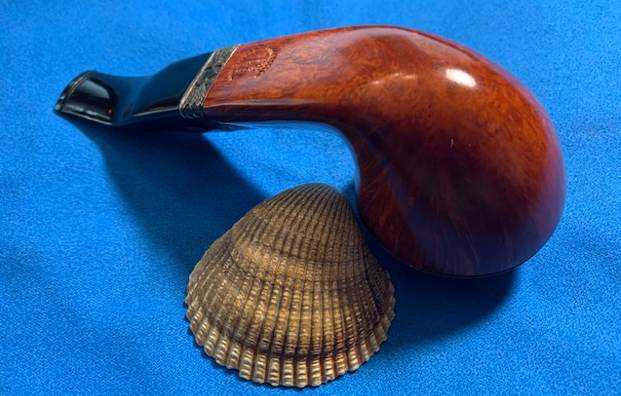
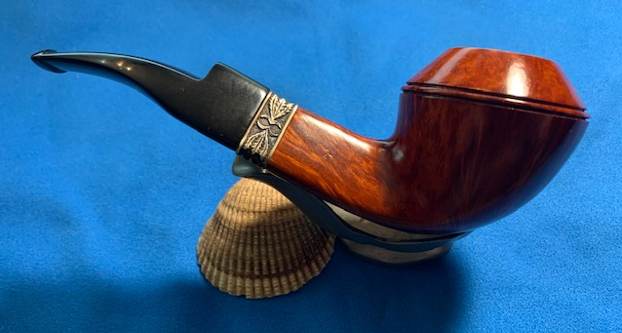
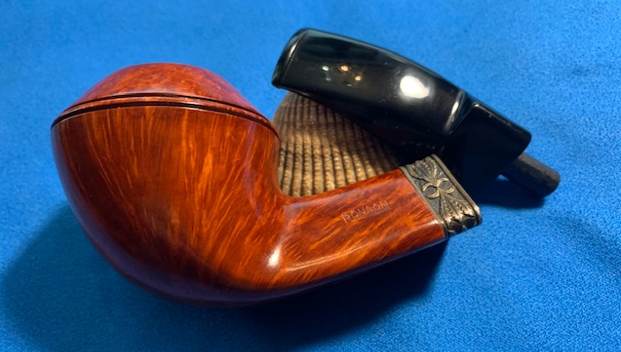
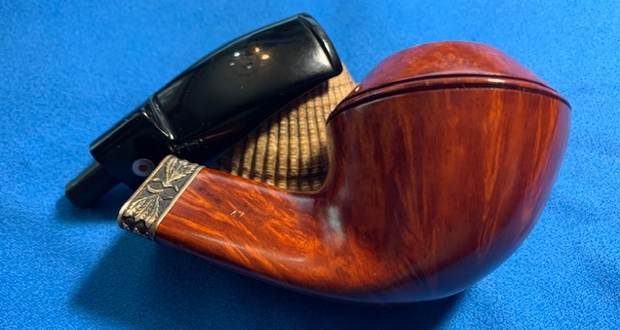
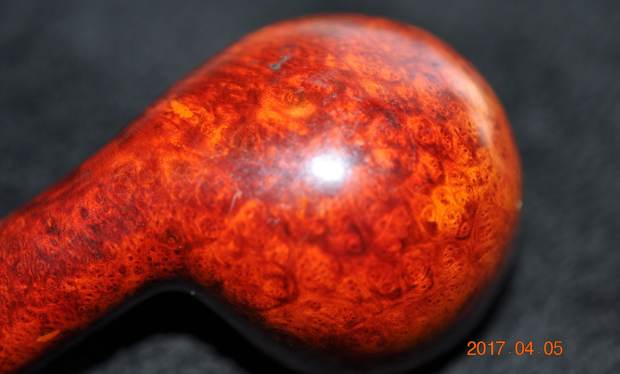
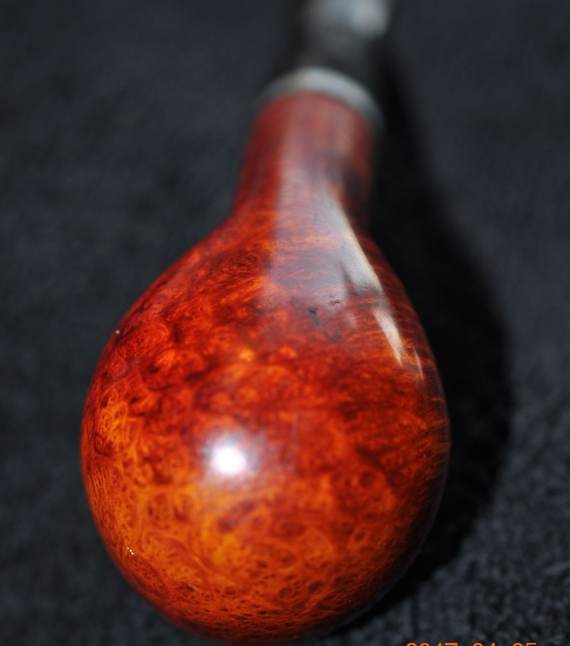
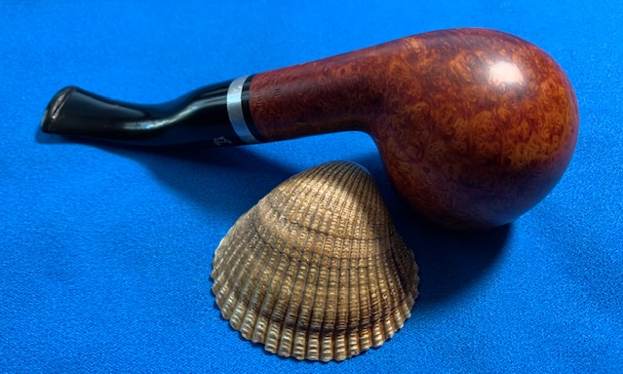
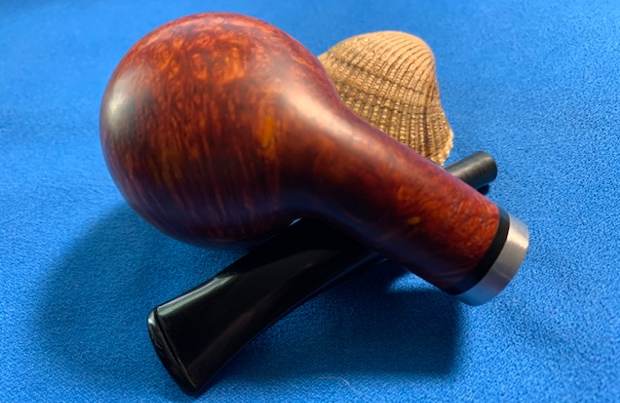
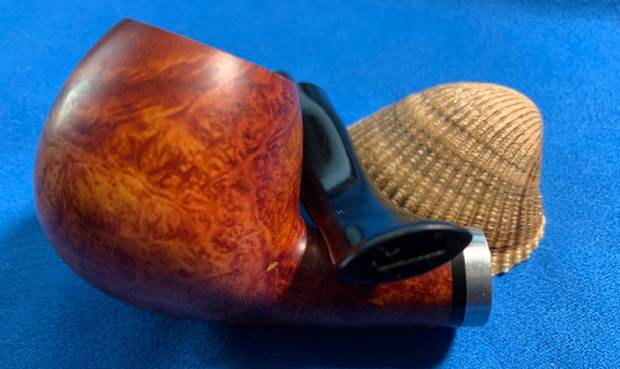
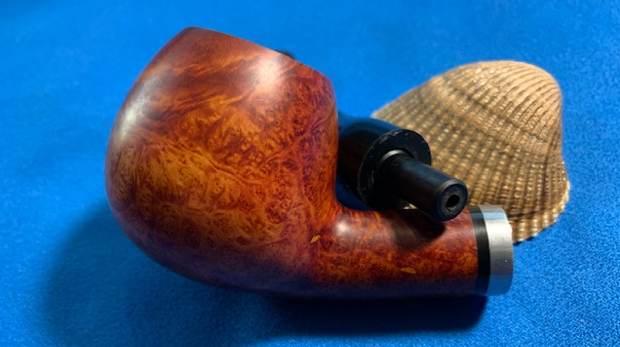
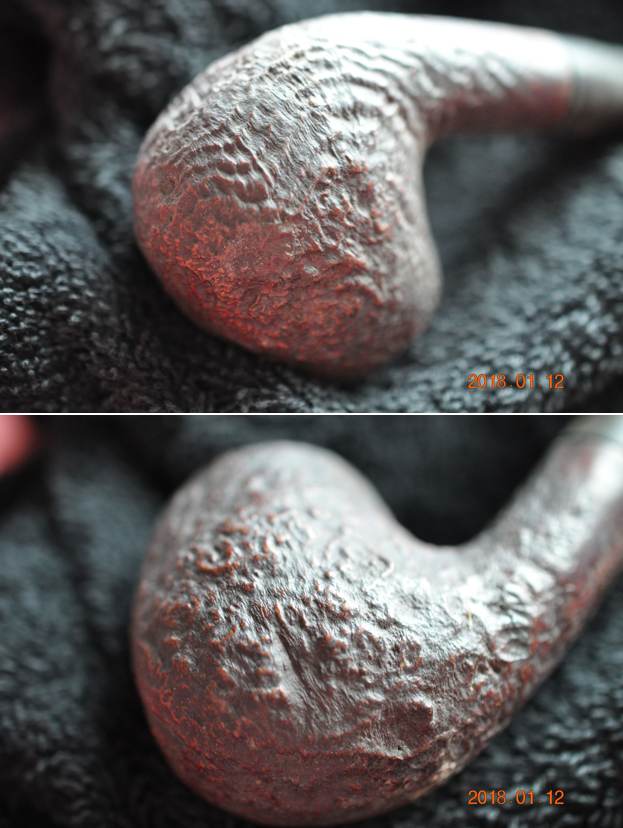
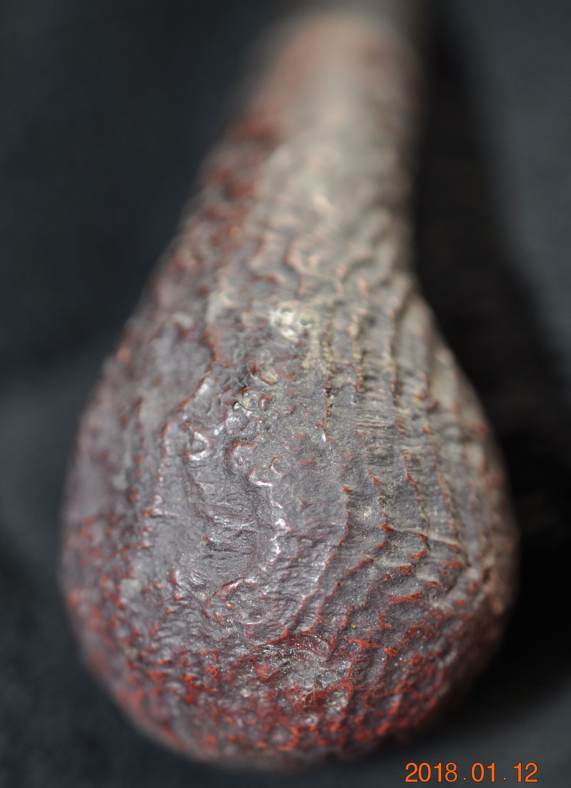
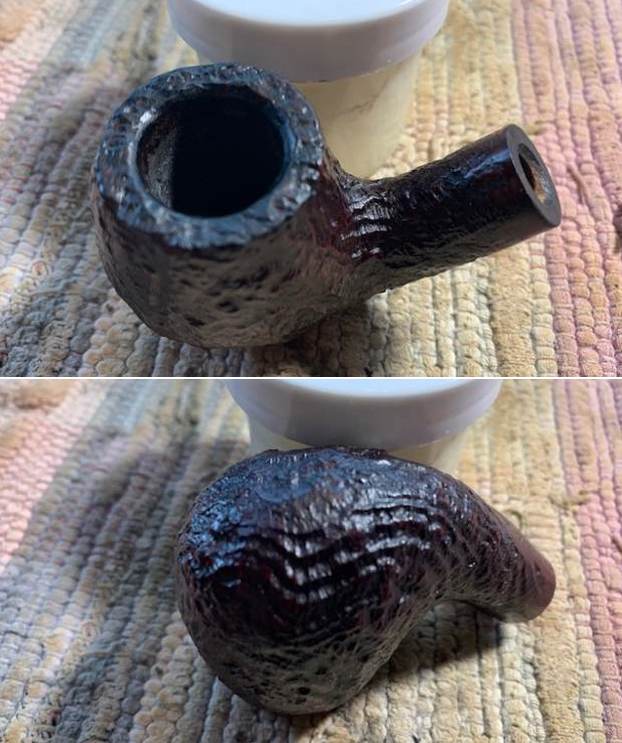
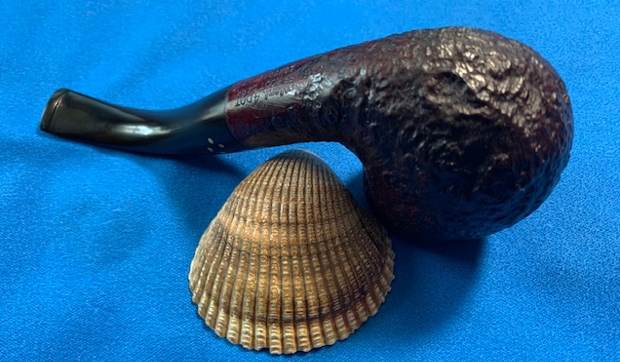
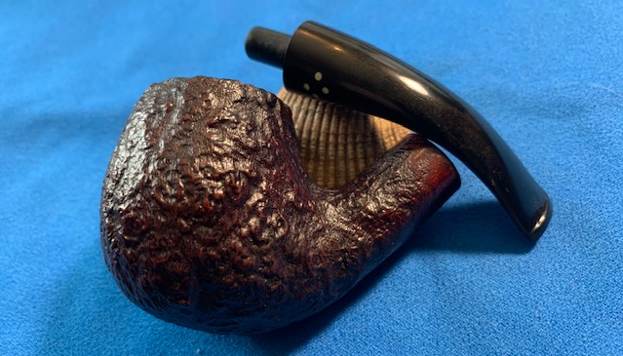
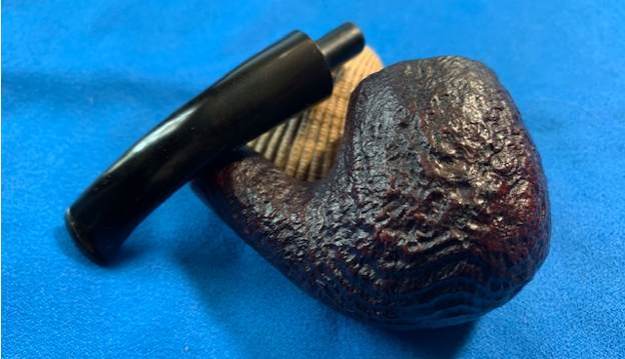
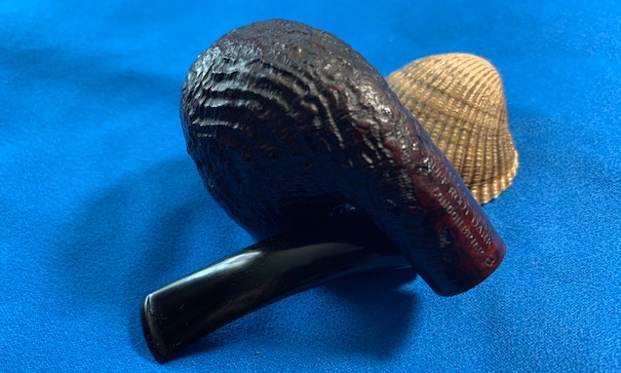
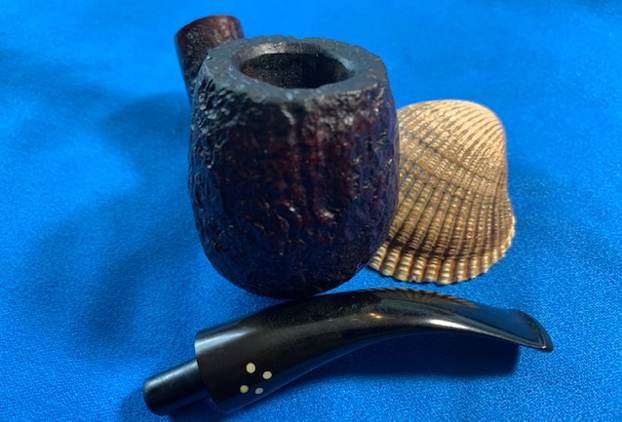
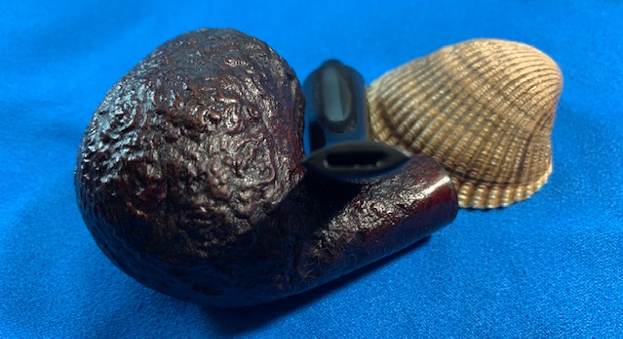
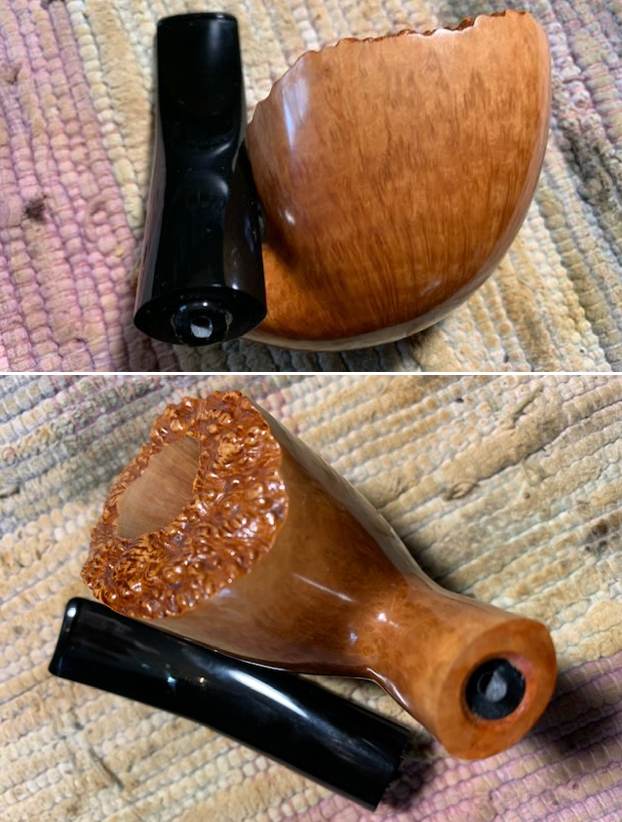
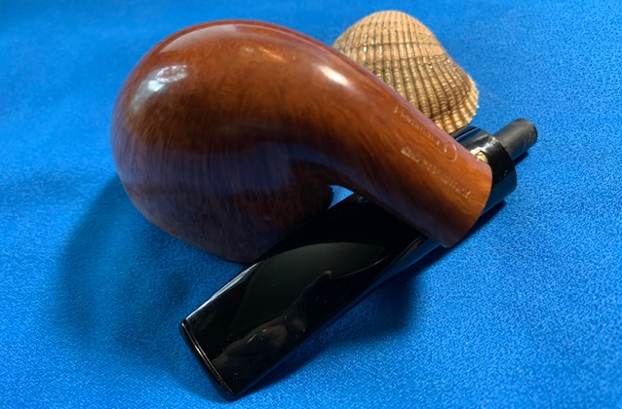
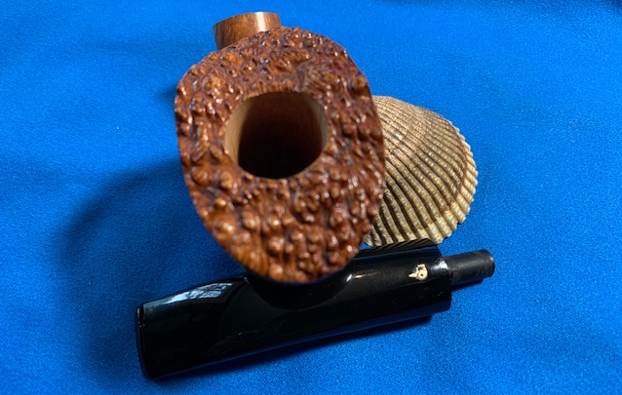
  Jeff took photos of the sides and heel of the bowl to give a picture of what the briar looked like. There is some nice grain around the sides. You can also see the damage to the rim edges and the heel of the bowl in the photos below.
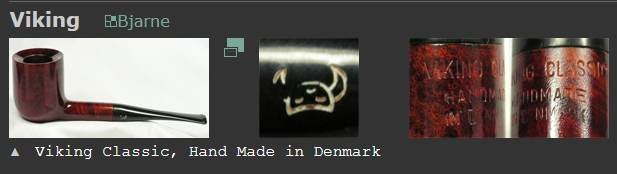
 I am including the link to a blog that I wrote that gives some of the history of the Malaga brand and the Malaga Pipe Shop in Royal Oak, Michigan in the USA. I have written an earlier blog to give a little history of the Malaga Brand and the pipemaker, George Khoubesser. Here is the link – https://rebornpipes.com/tag/malaga-pipes/.That blog also includes links to a catalogue and the history of the pipemaker George Khoubesser. Follow the link to get a feel for the brand and the pipemaker.
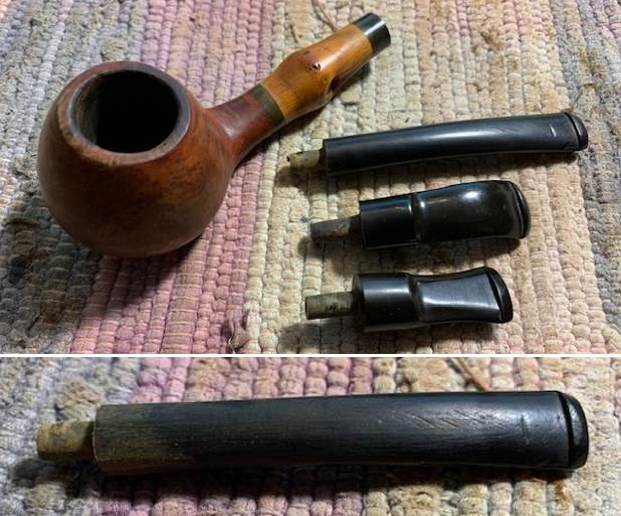
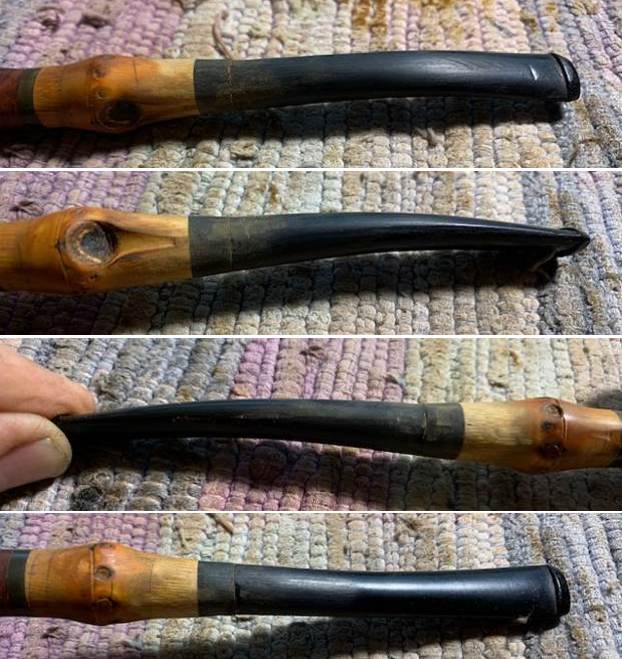
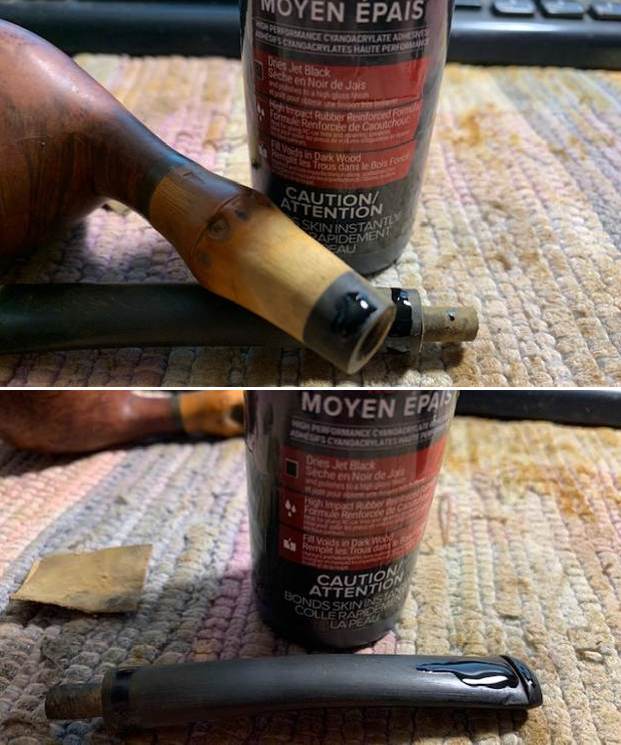
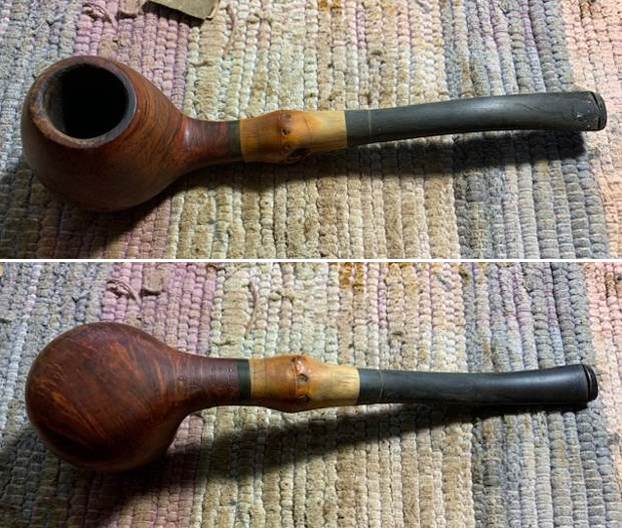
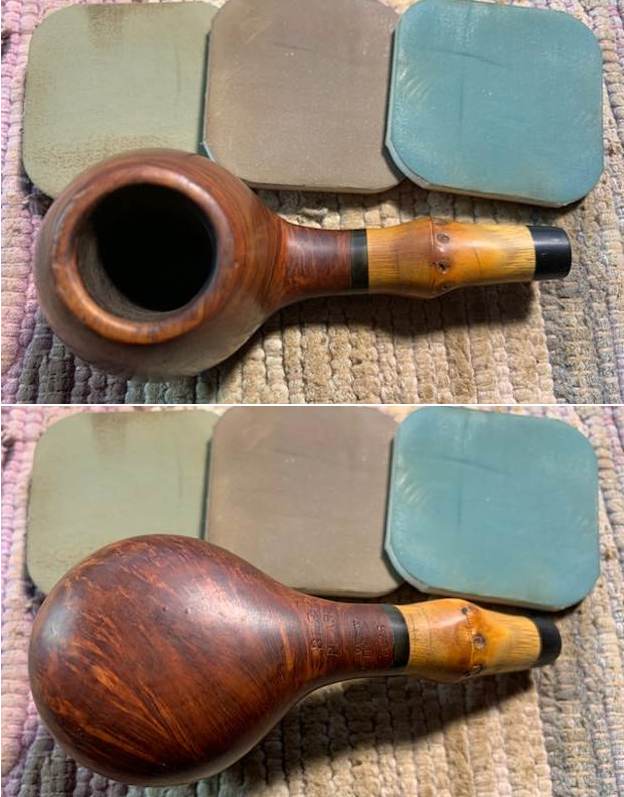
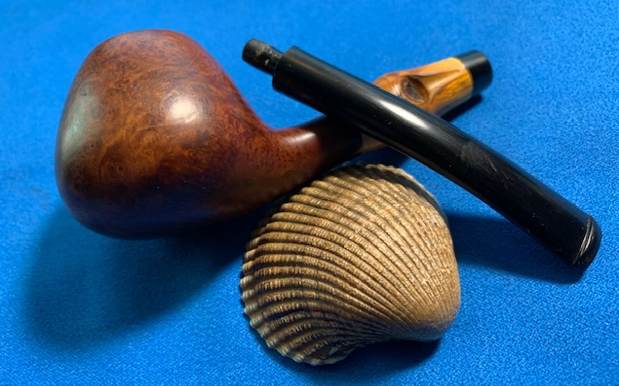
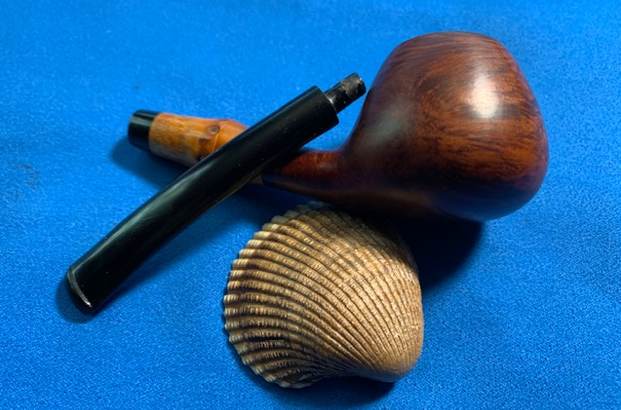
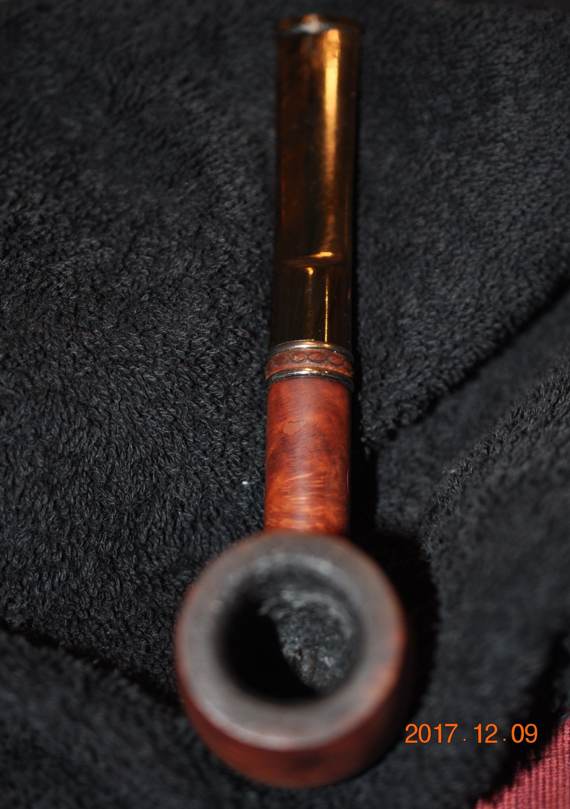
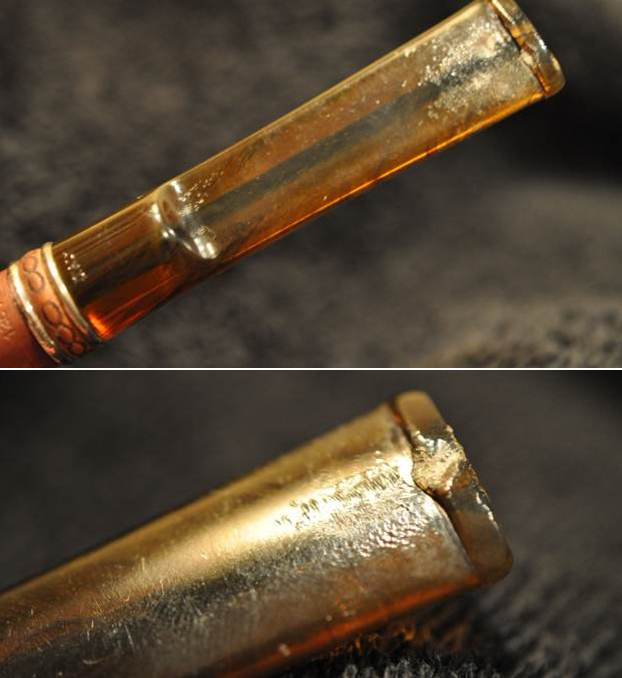
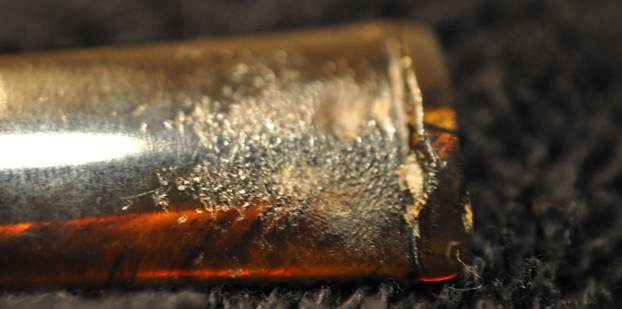
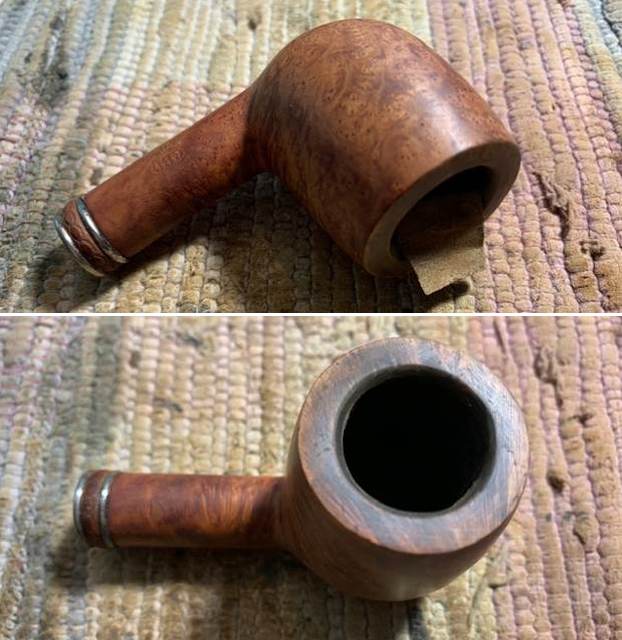
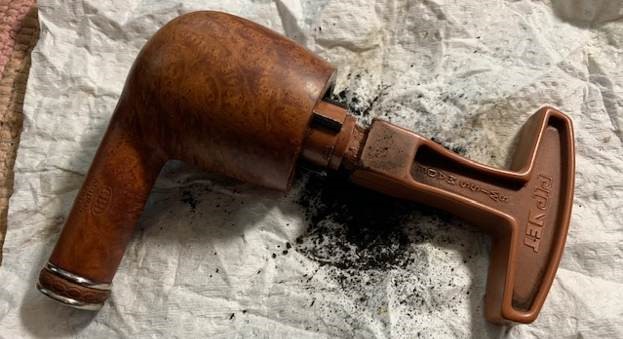
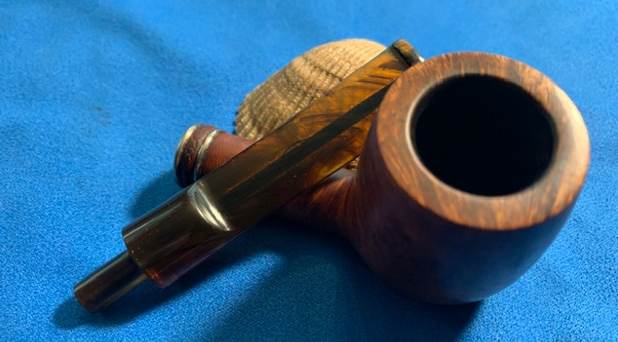
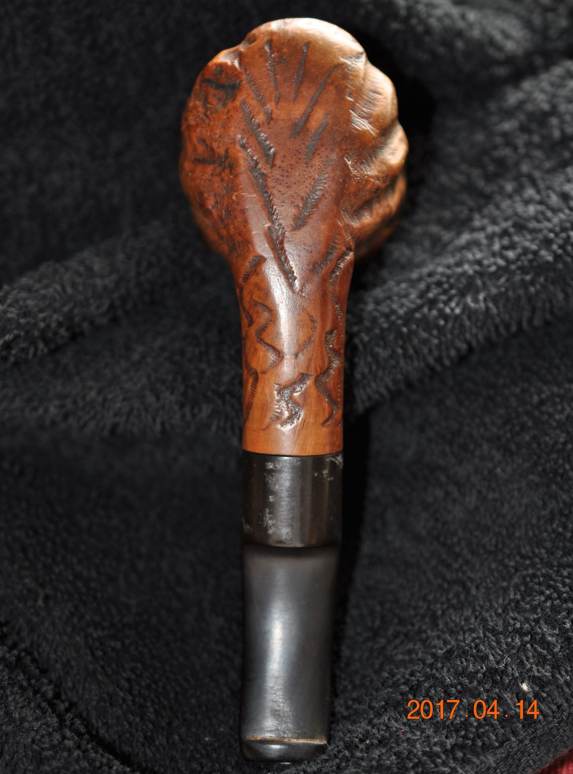
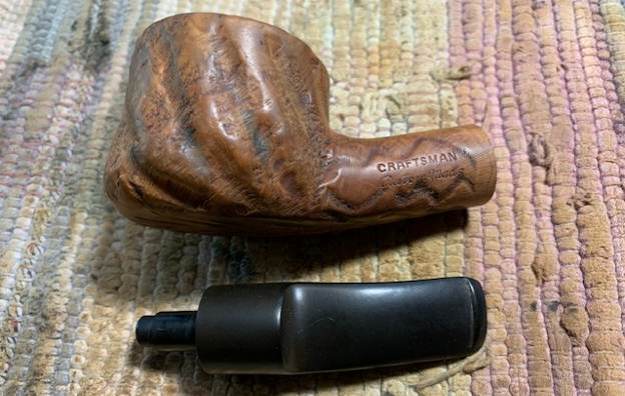
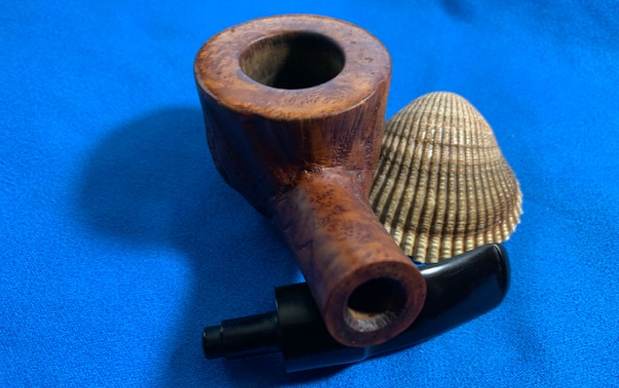
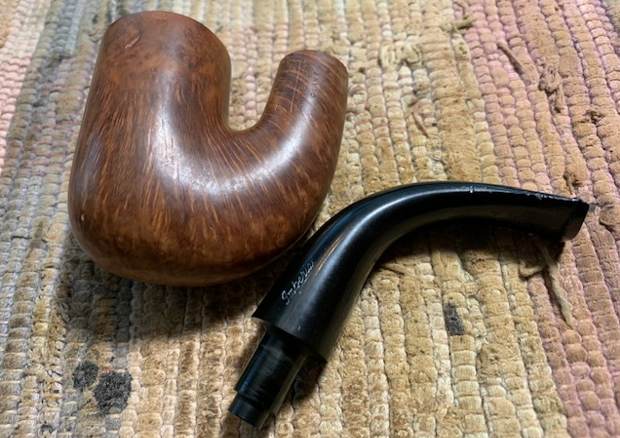
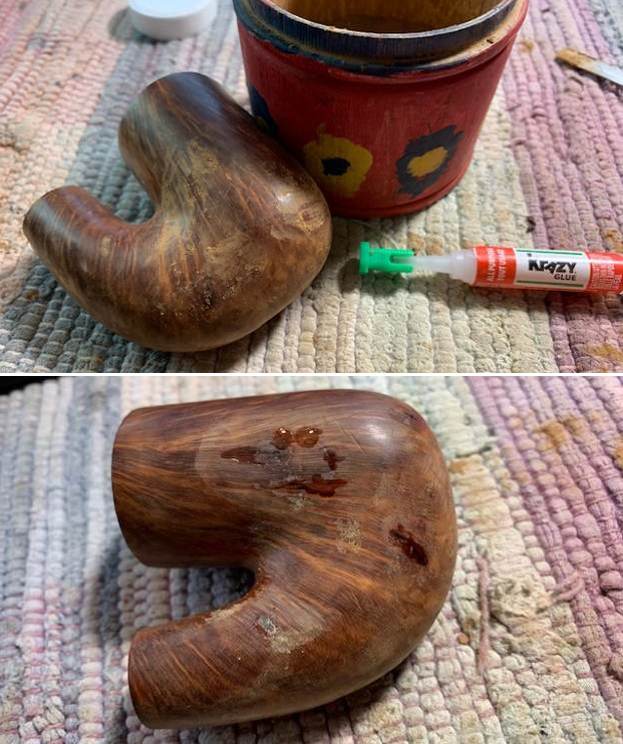
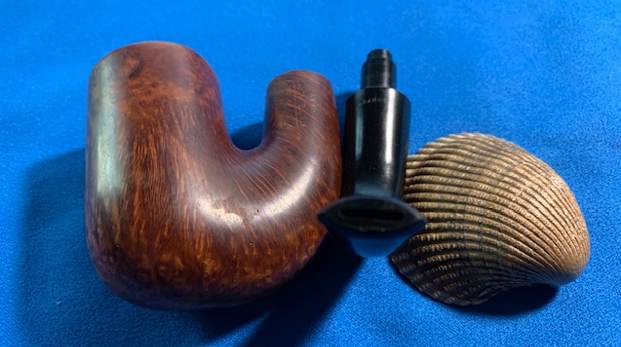
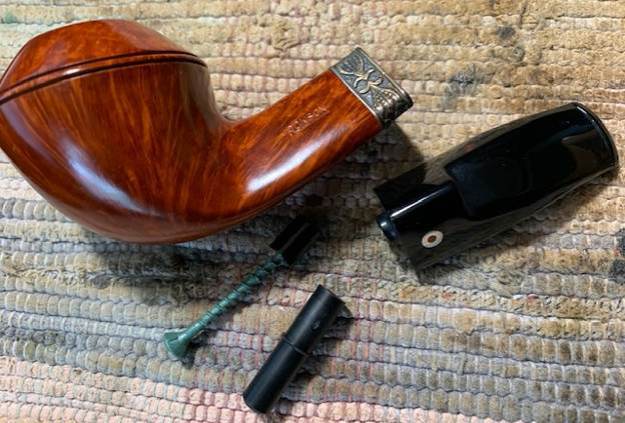
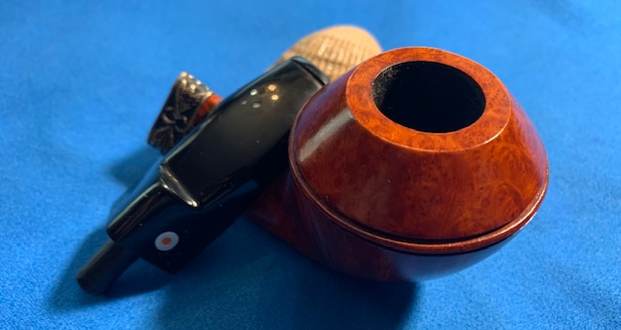
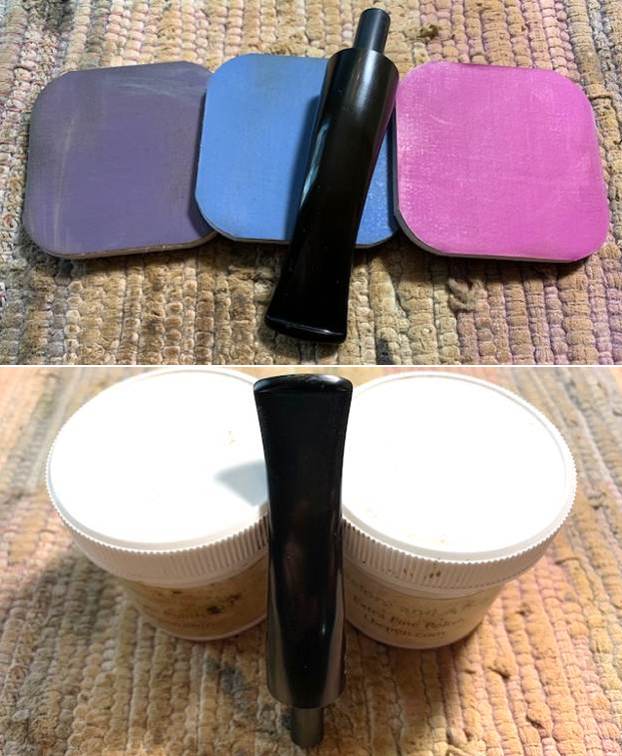
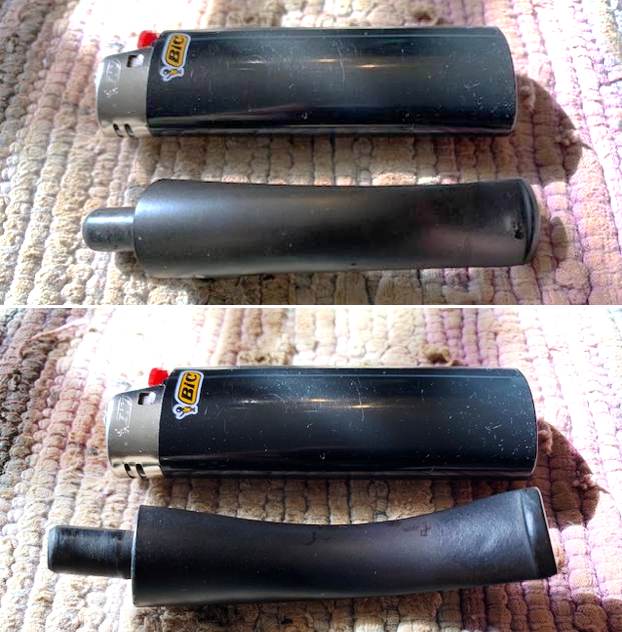
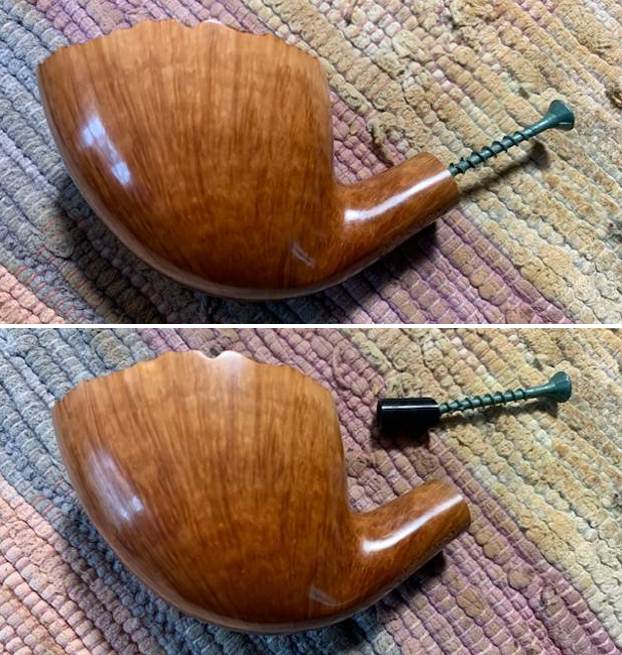
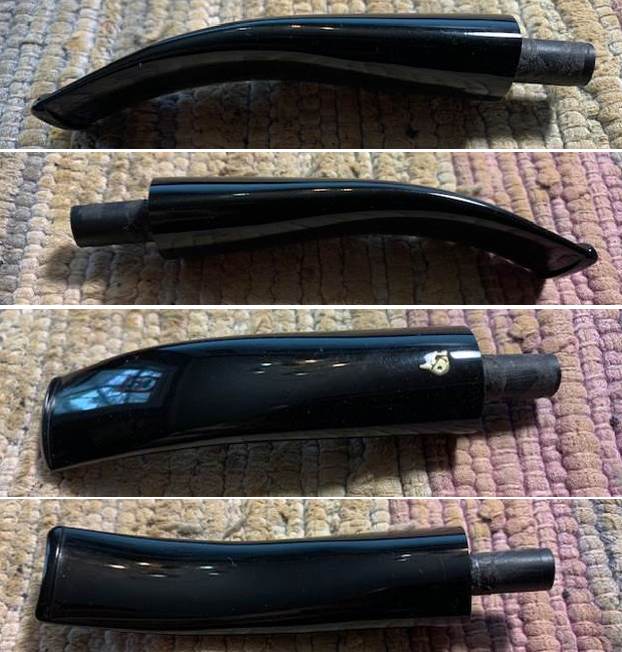
Jeff had cleaned up the pipe using his usual procedure. He reamed the pipe with a PipNet pipe reamer and removed the rest of it with a Savinelli Fitsall Pipe Knife. He scrubbed the bowl with undiluted Murphy’s Oil Soap with a tooth brush. He rinsed it under running warm water to remove the soap and grime. He cleaned out the inside of the shank and the airway in the stem with alcohol, cotton swabs and pipe cleaners. He soaked the stem in Before & After Deoxidizer and rinsed it off with warm water. When the pipe arrived and I unpacked it the stem was broken off at the end. There was about a ¼ inch of the stem and the entire button was in the bottom of the bag that the pipe was packed in. I took photos of the pipe once I received it. 
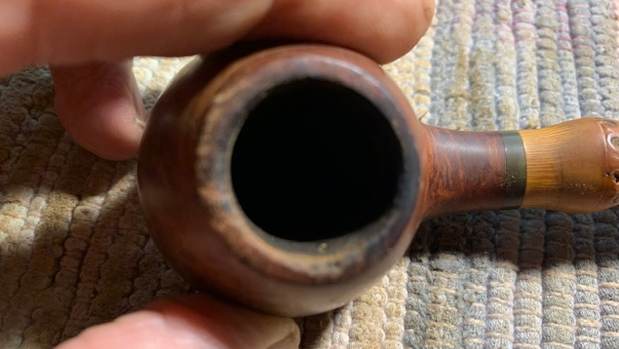
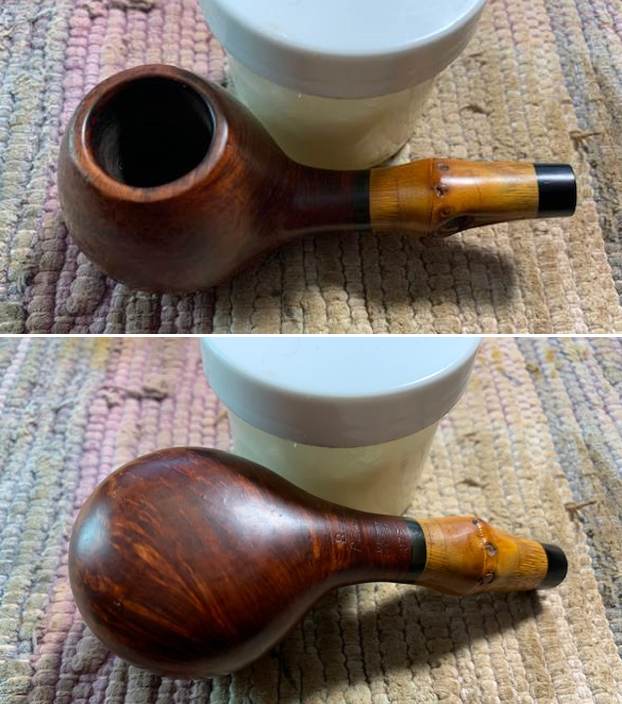
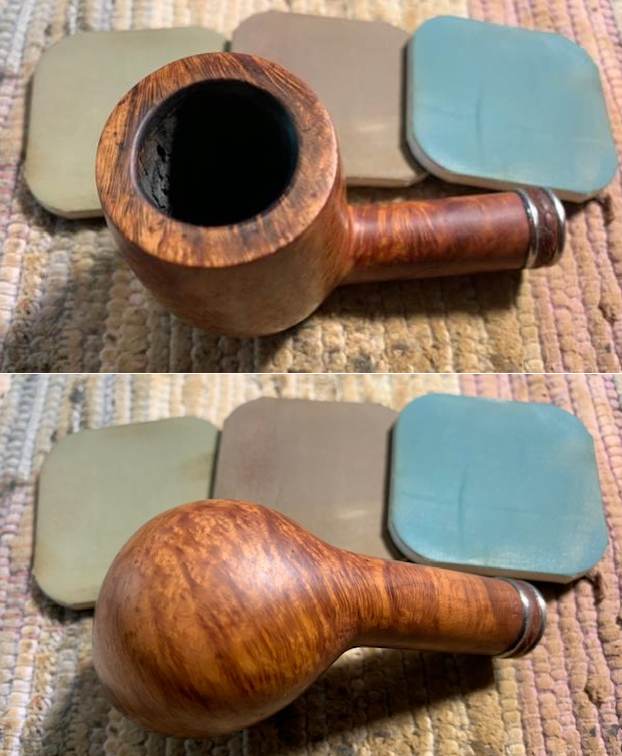
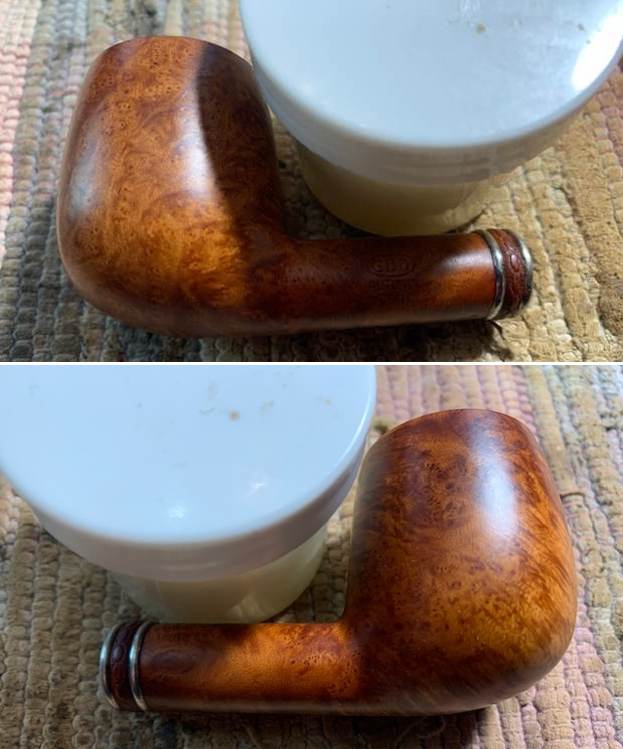
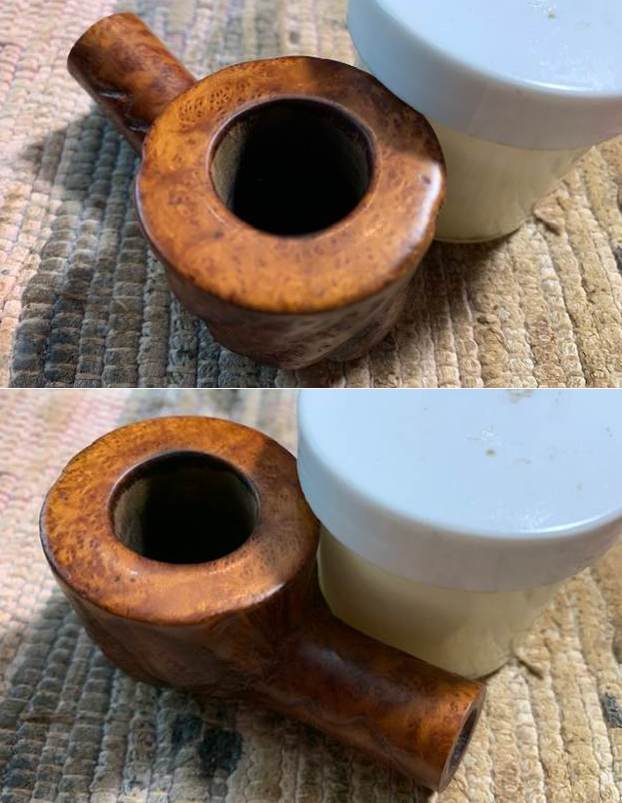
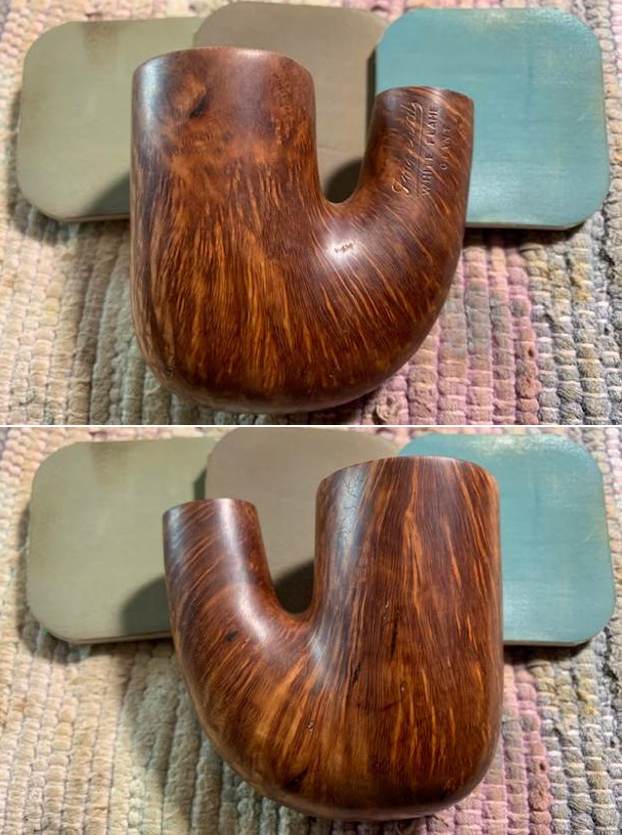
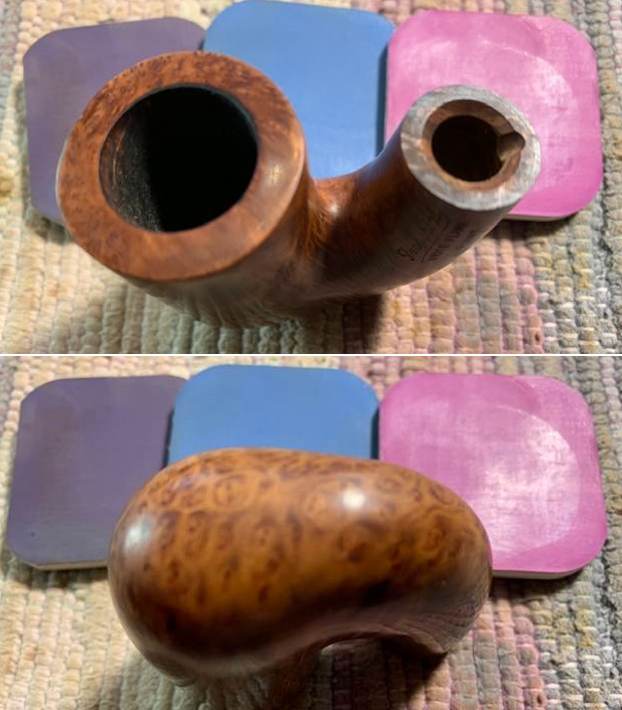
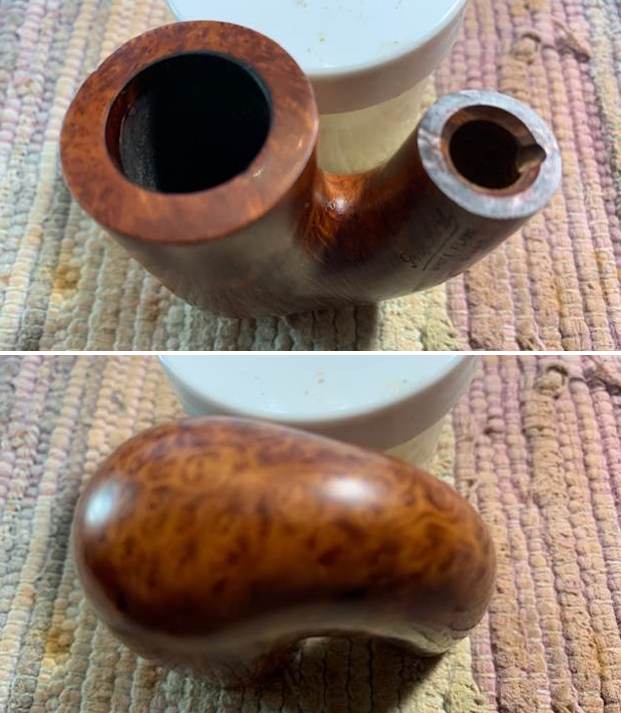
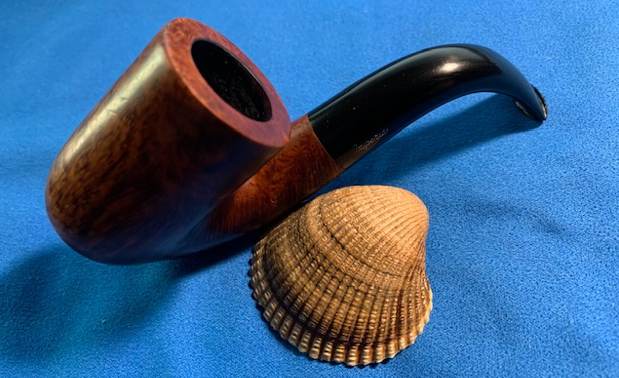
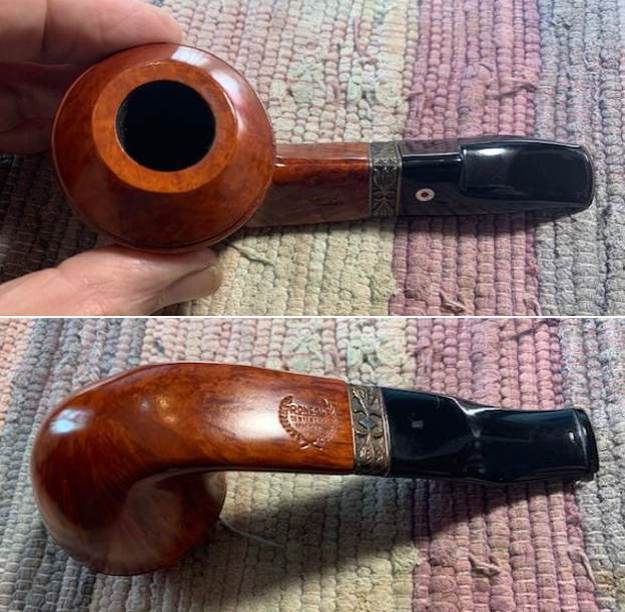
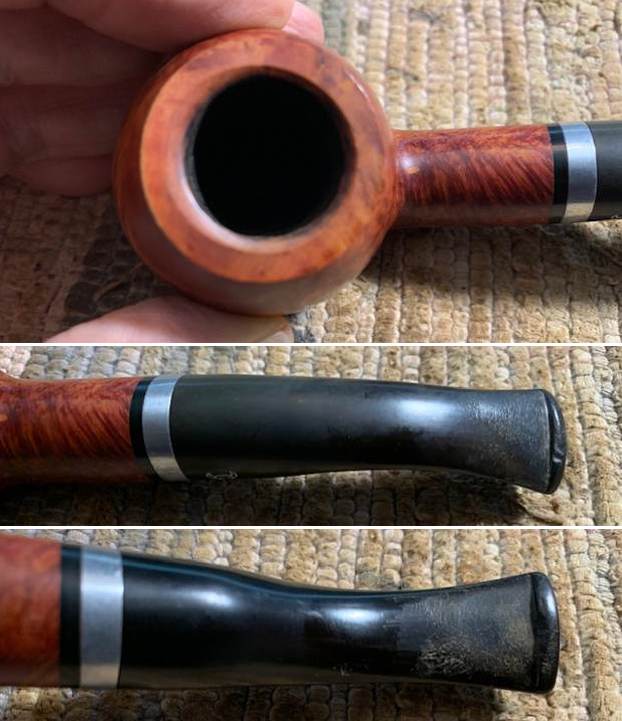
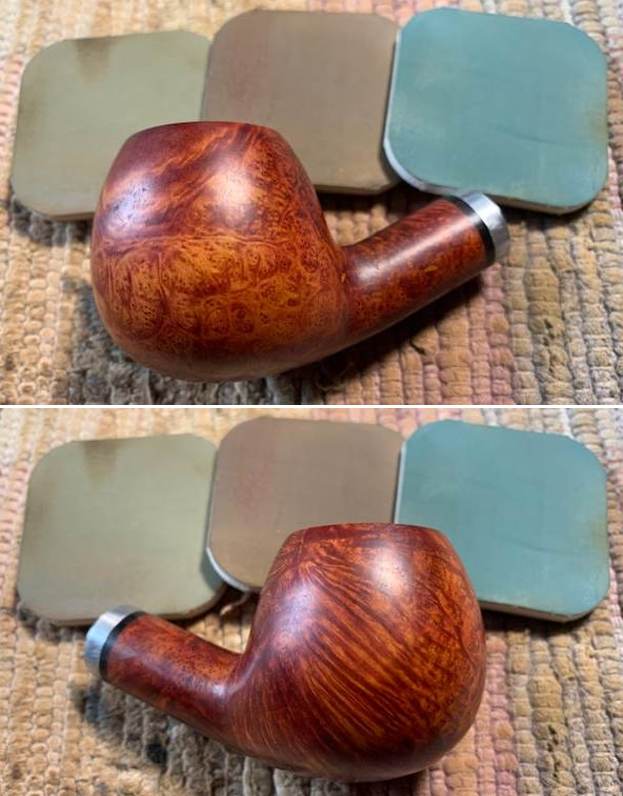
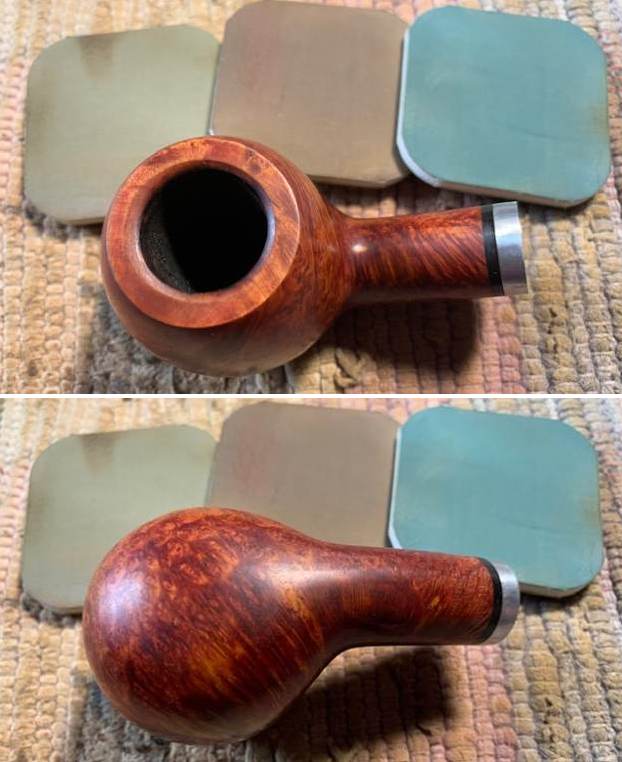
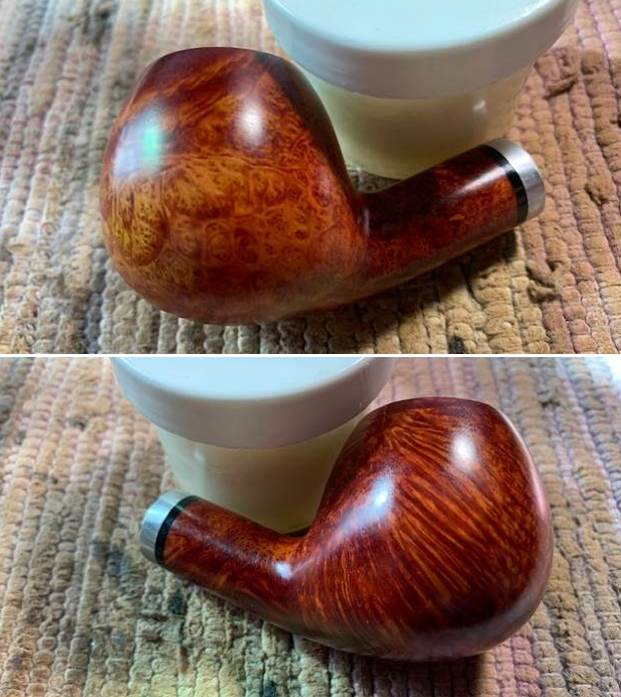
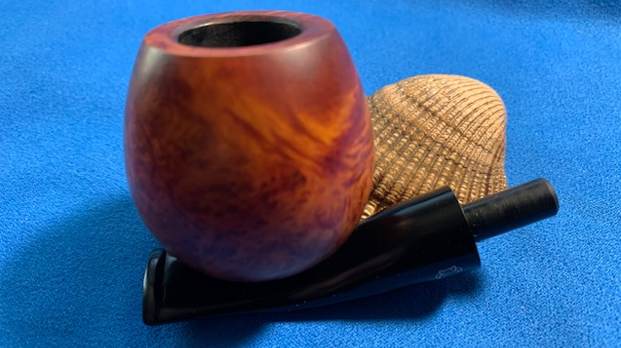
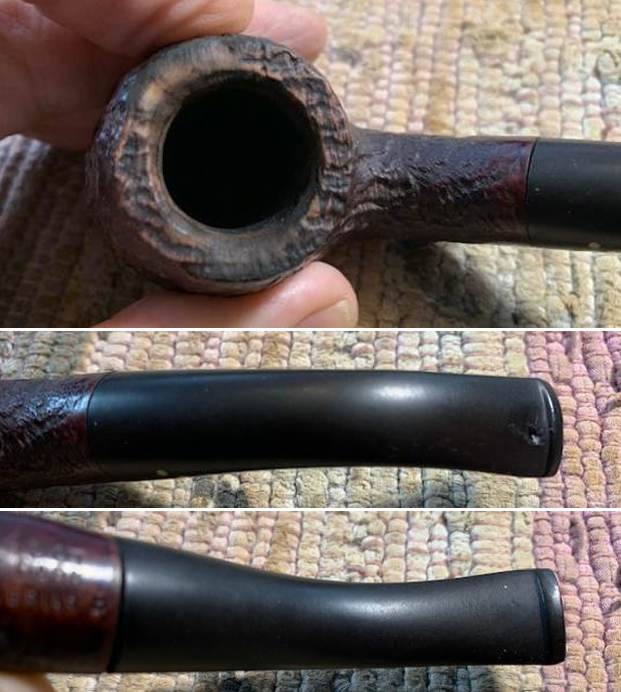
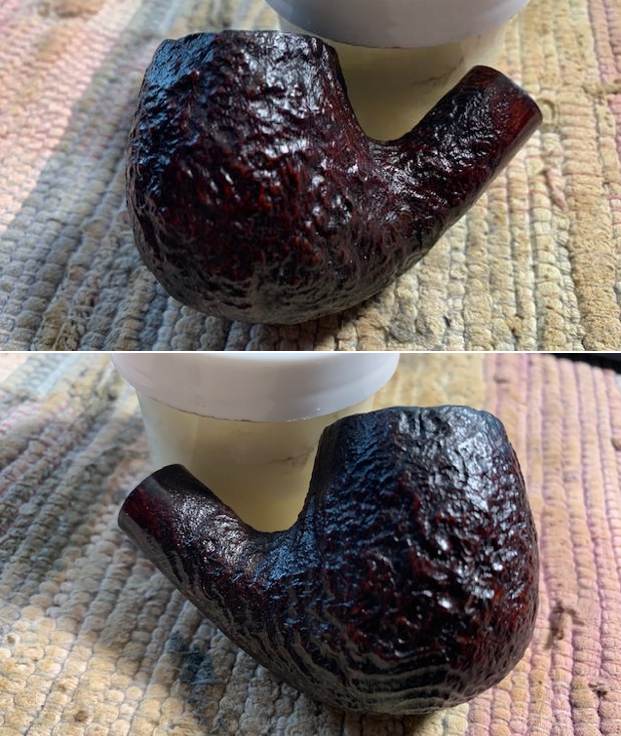
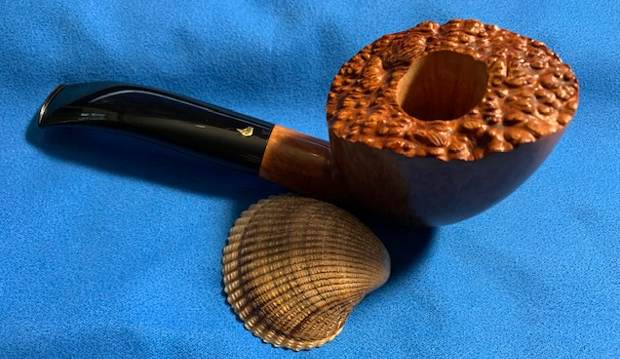
 The rim top cleaned up really well. The rim top and outer edge of the bowl show some darkening over most of the surface. There is damage to the inner edge of the bowl and bowl is out of round. The stem surface looked very good with tooth marks and chatter on the top side and the underside near the button.
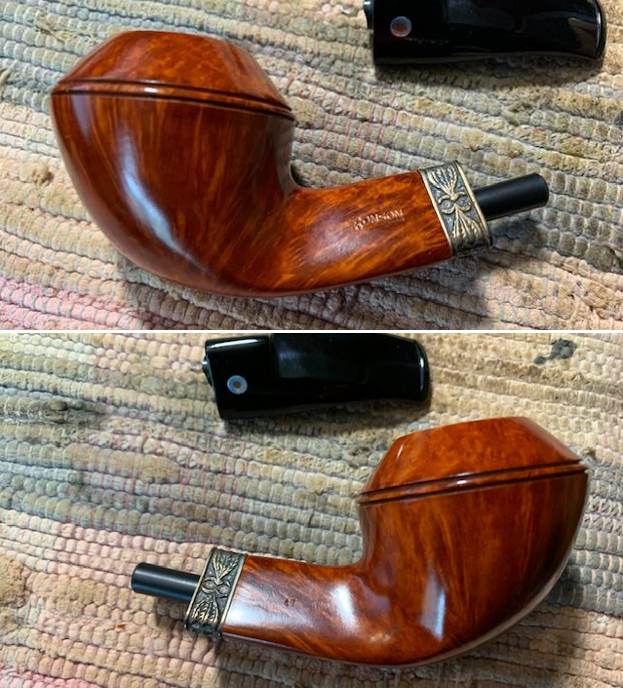
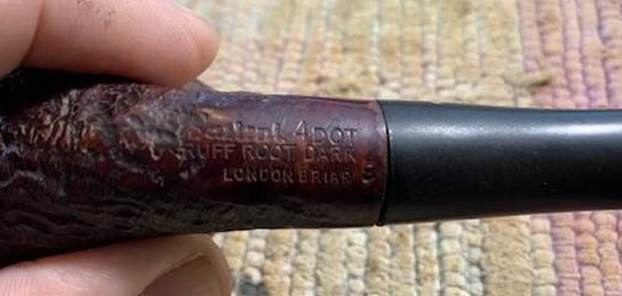
  The stamping on the right side of the shank is clear and readable. It reads as noted above.
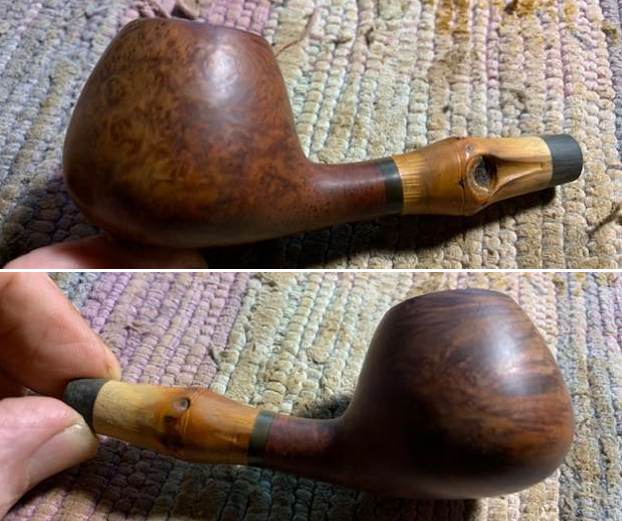
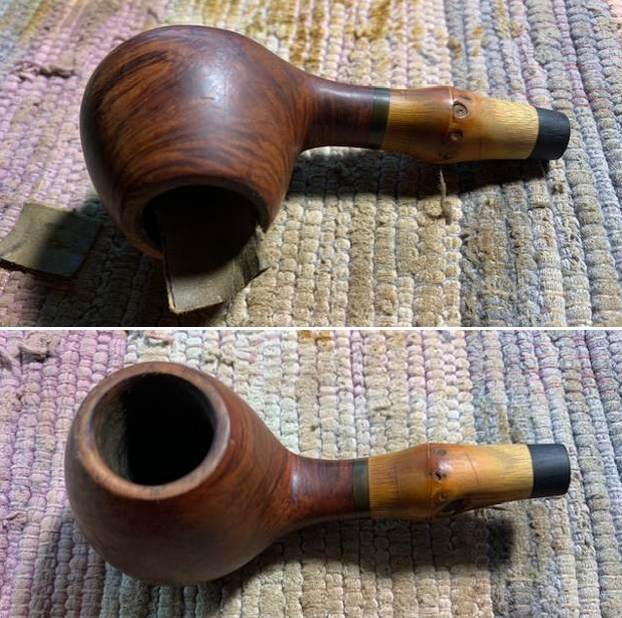
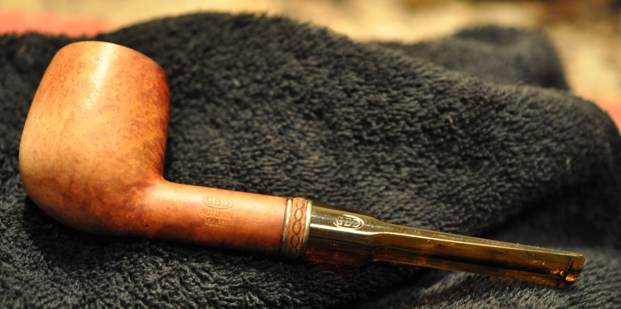
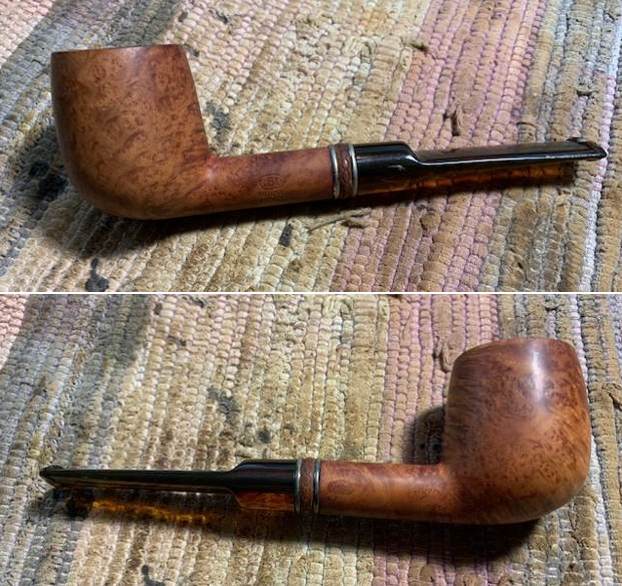
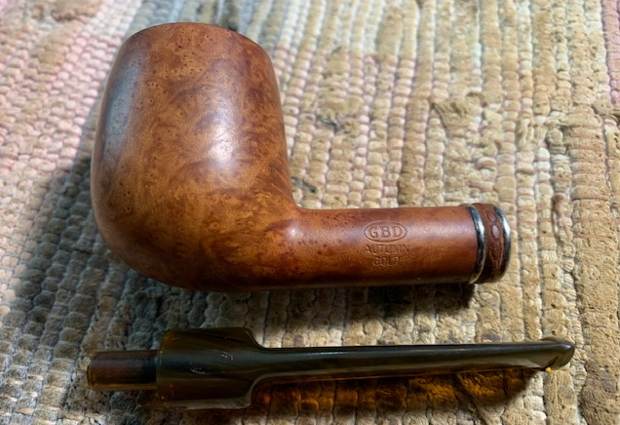
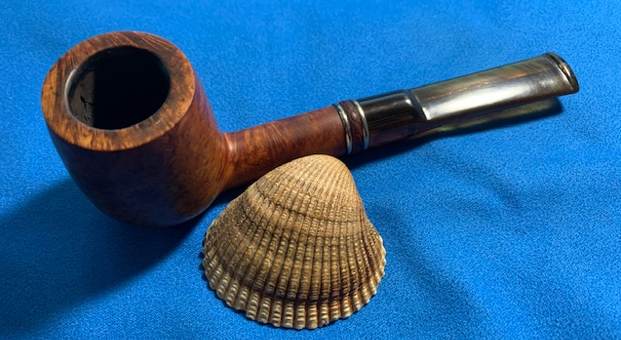
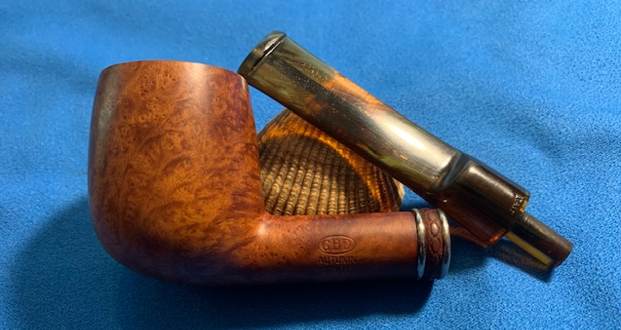
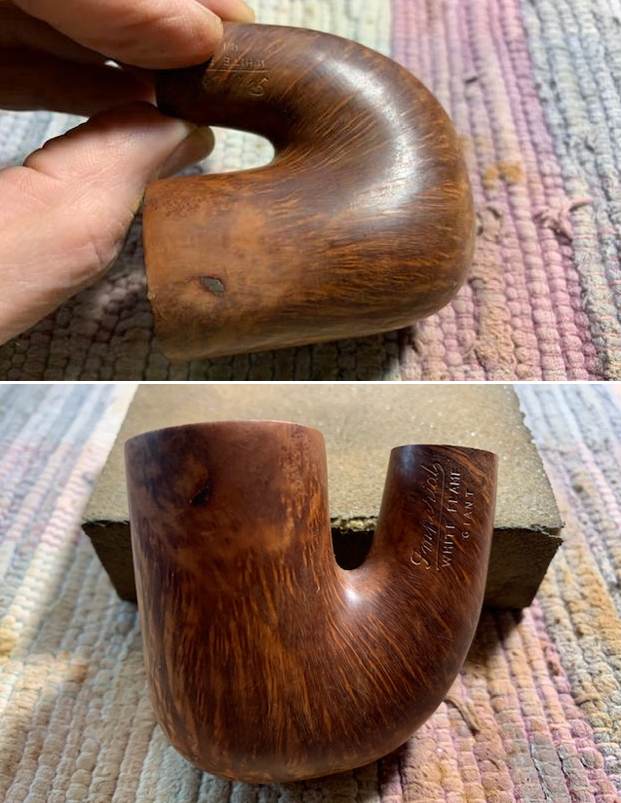
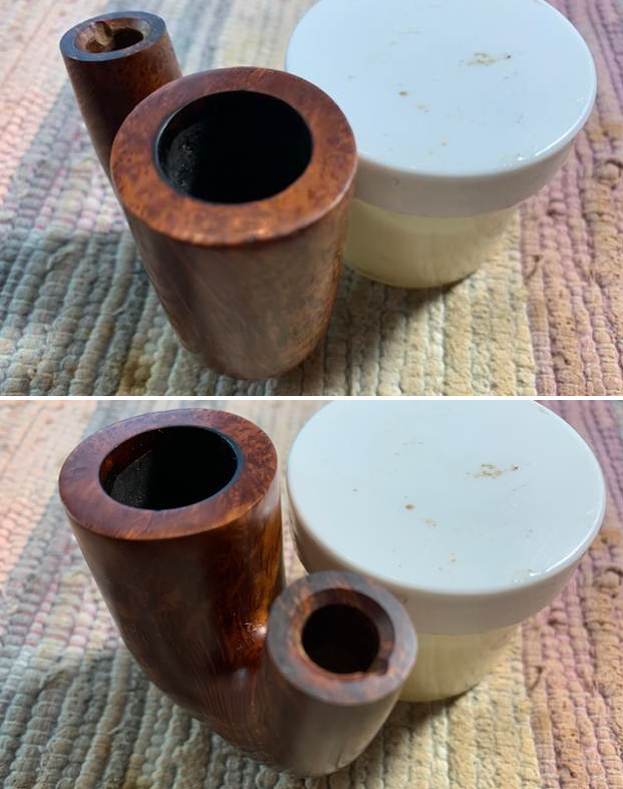
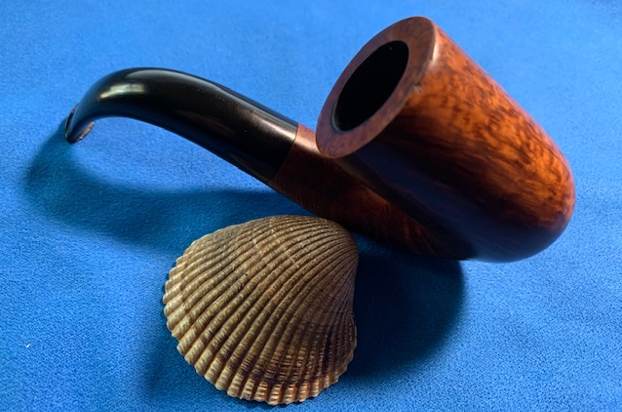
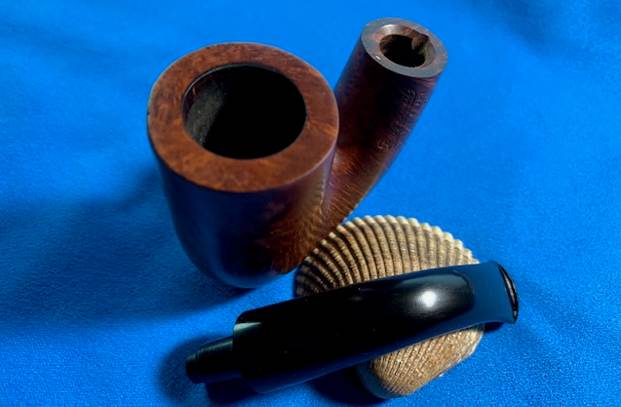
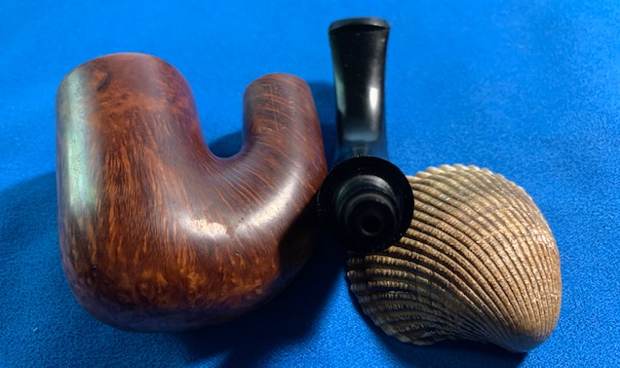
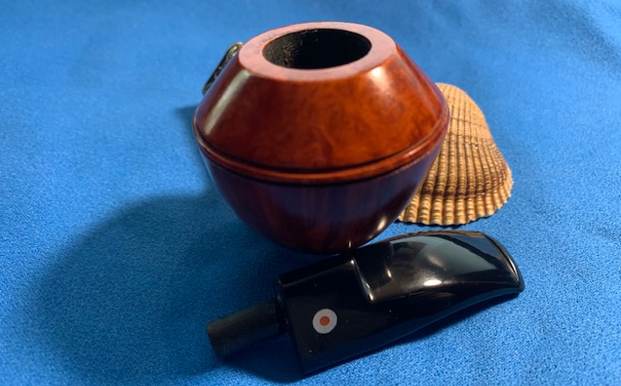
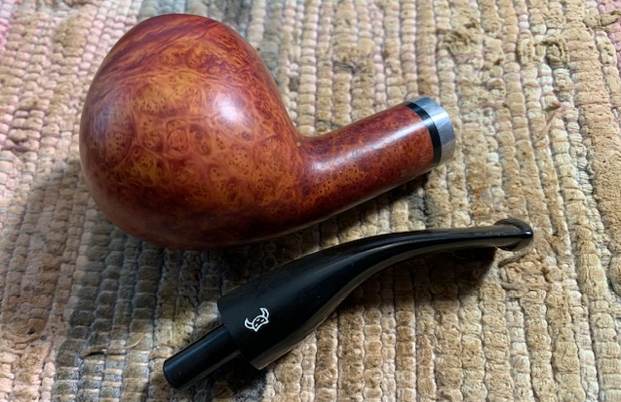
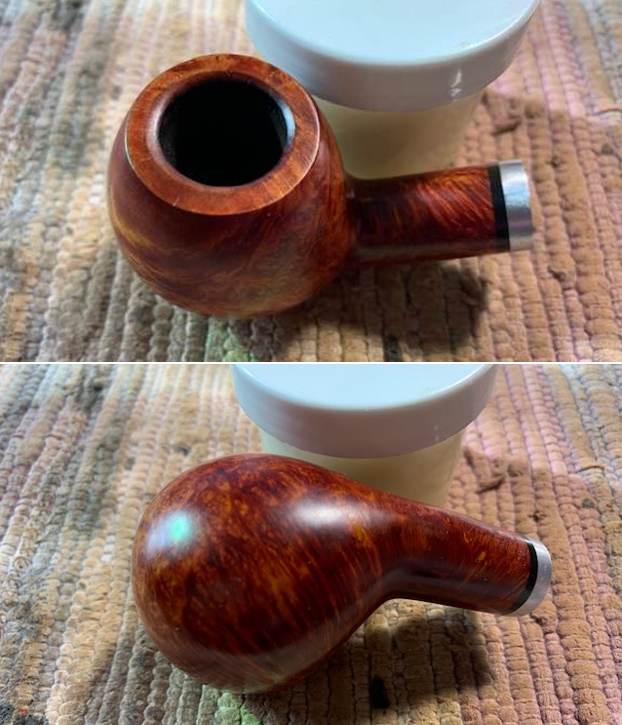
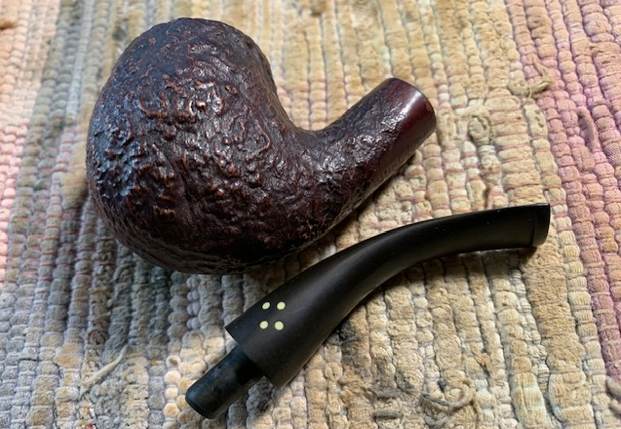
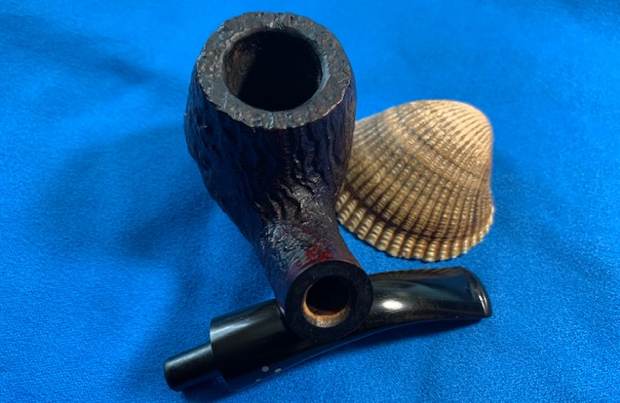
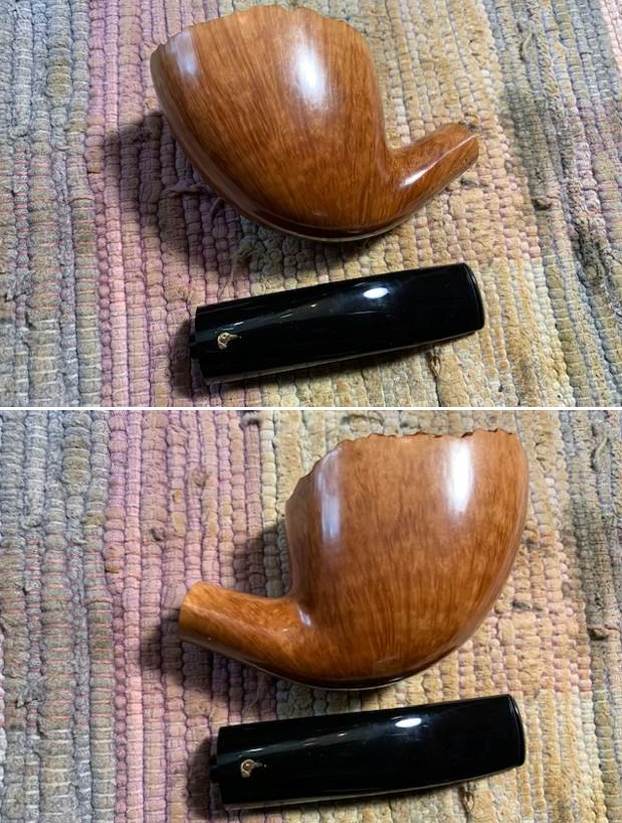
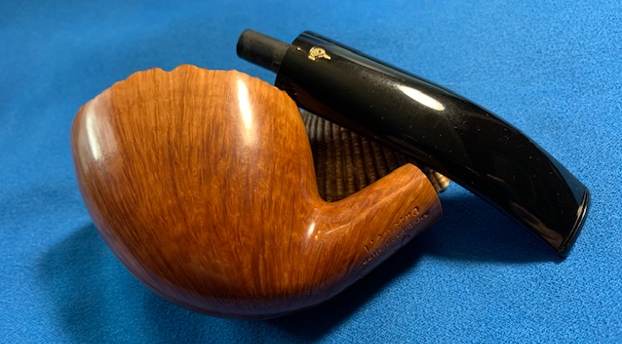
  I removed the stem and took a photo of the pipe to give a sense of the whole.
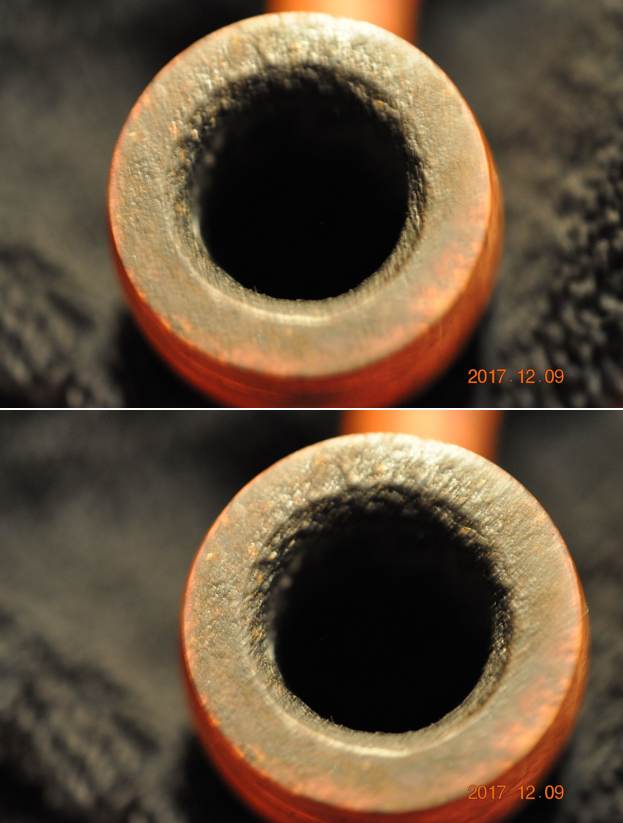
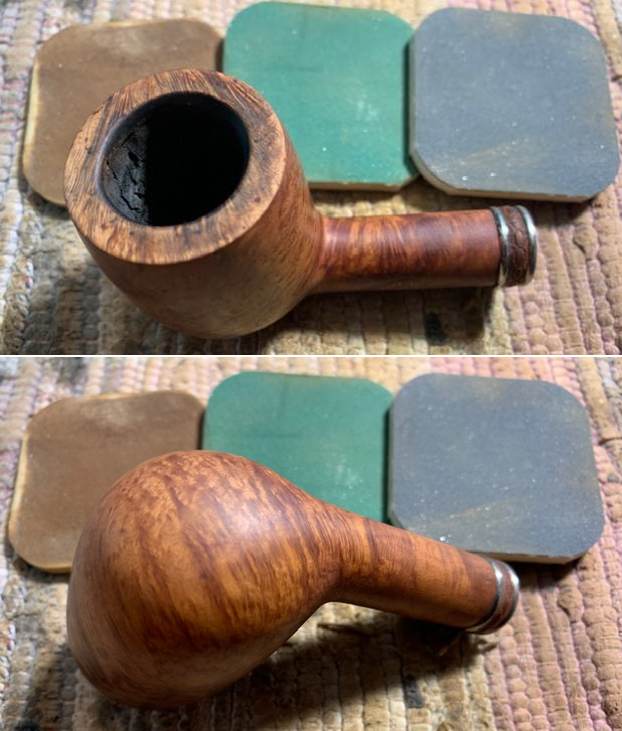
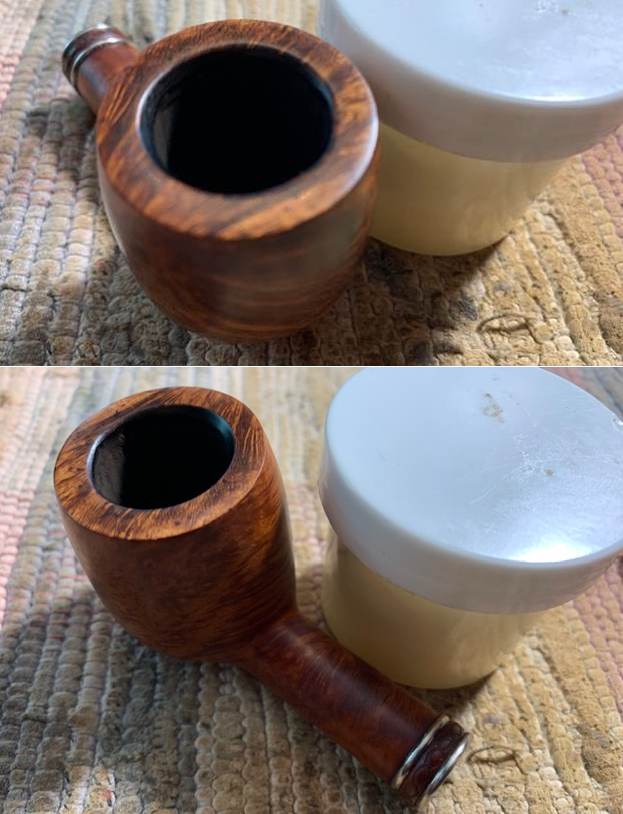
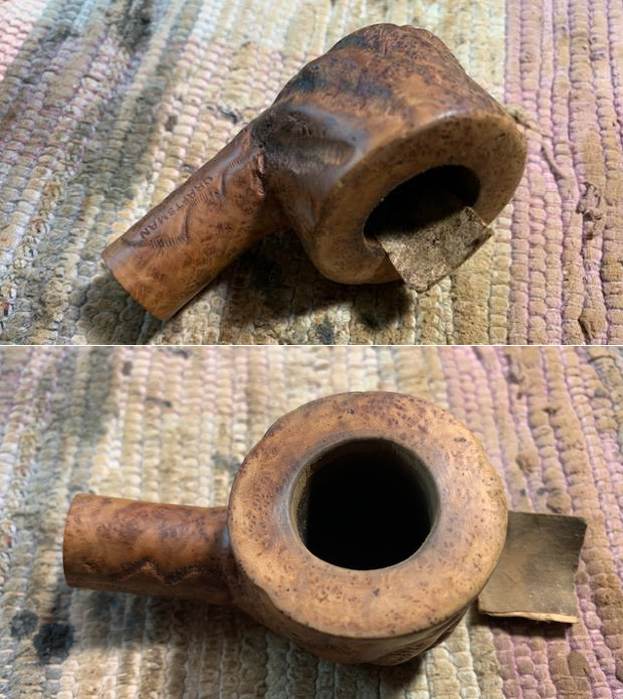
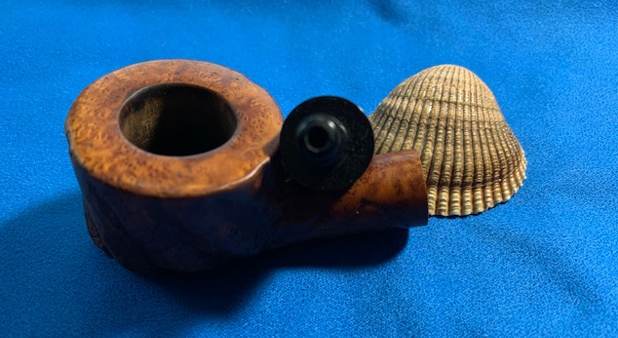
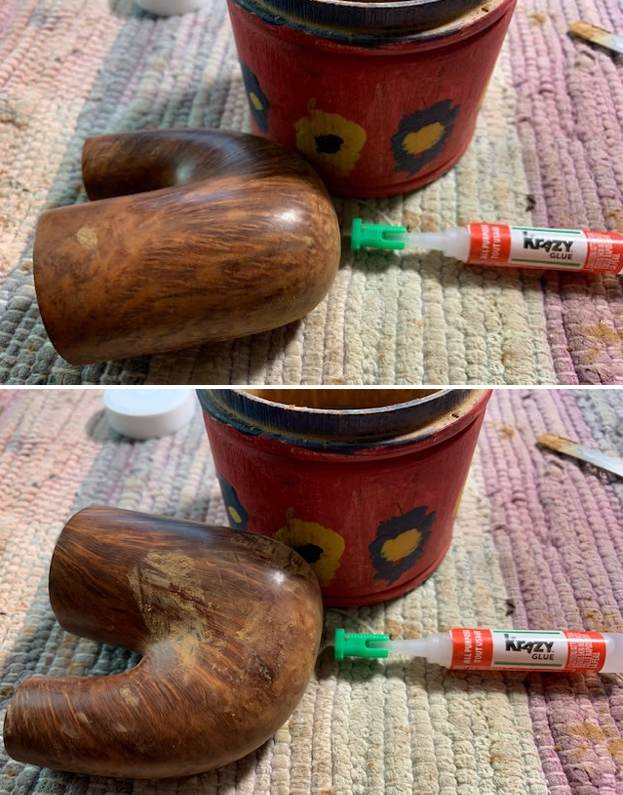
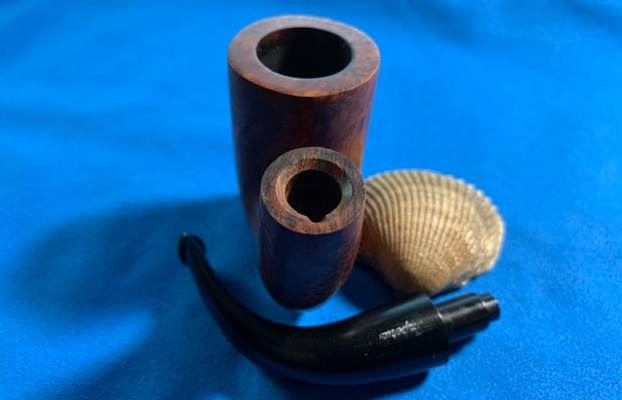
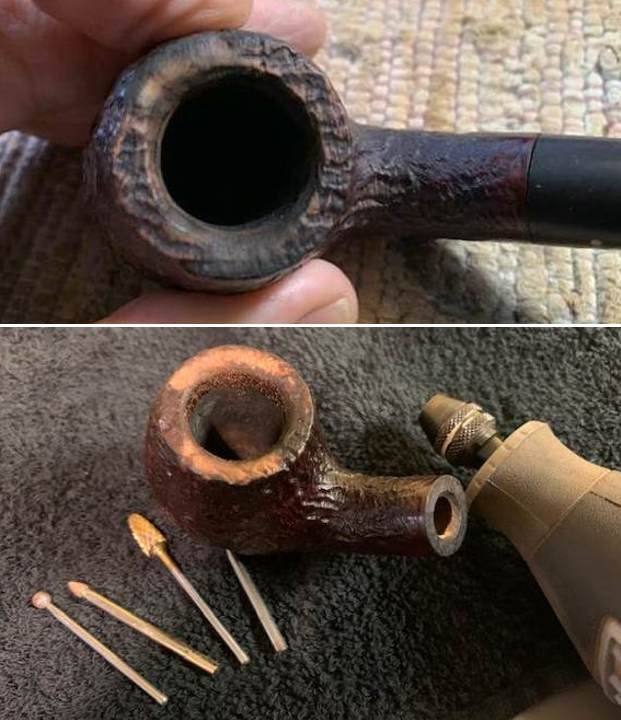
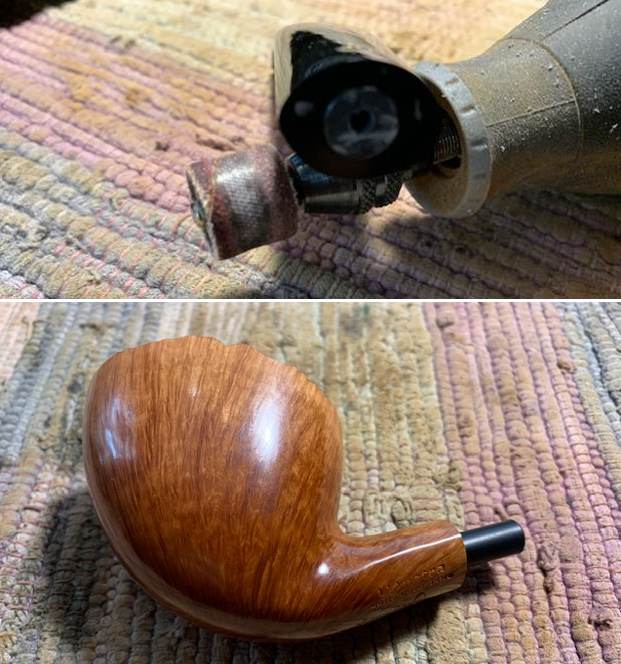
  I started my work on the pipe by dealing with a hard thick area of cake on the lower front of the bowl. The rest of the bowl was very clean but that area had a hard wedge of carbon that was impervious to reaming and scraping. It was thick and was a battle to remove. It is hard to capture a picture of it but you can see part of it in the photo below. I stuffed the bowl with cotton bolls and plugged the shank. I filled the bowl with isopropyl alcohol and let it soak the carbon pack in the bowl. It sat for several hours and once I removed the cotton bolls the cake had softened some.
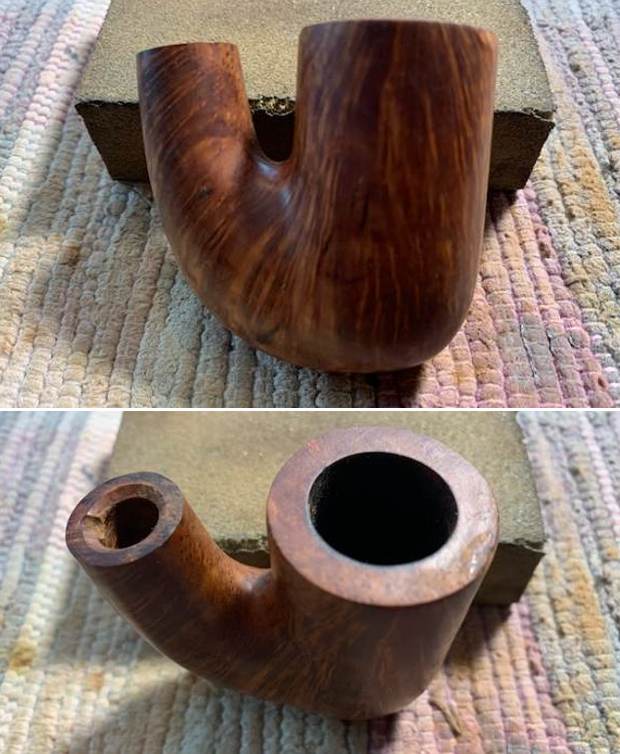
 I scraped and chipped the carbon wedge with the Savinelli Fitsall Pipe Knife and was able to remove all of it. It was rough then but much cleaner. I sanded the bowl walls with 220 grit sandpaper wrapped around a piece of dowel and smoothed out the roughness.
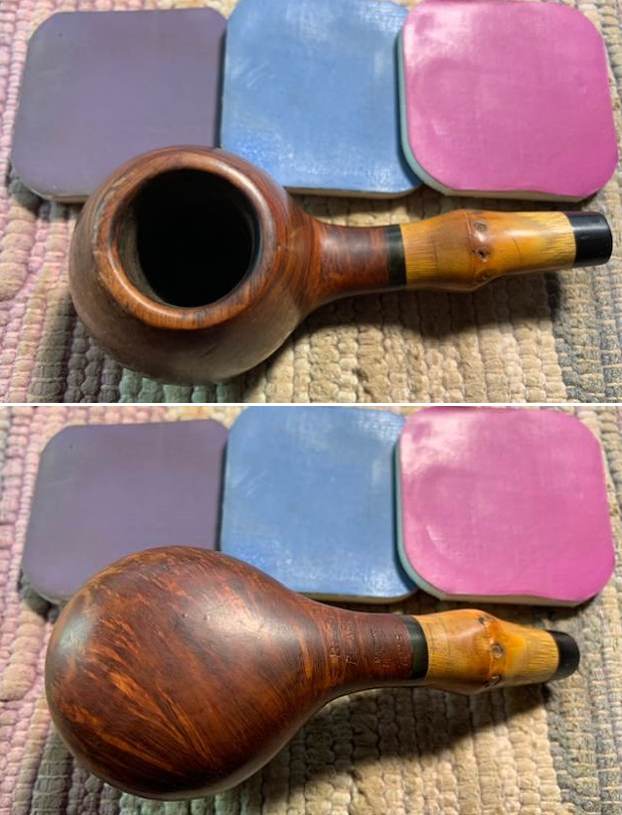
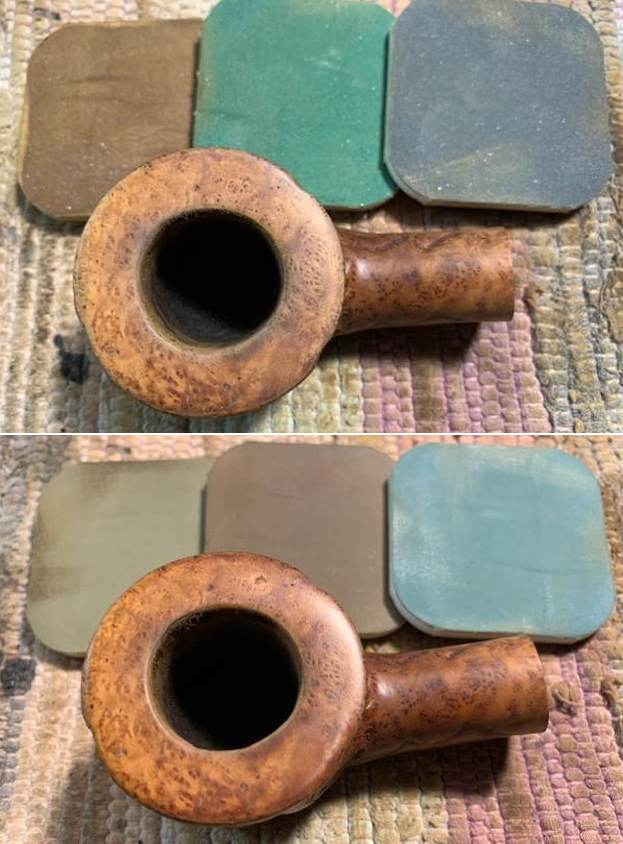
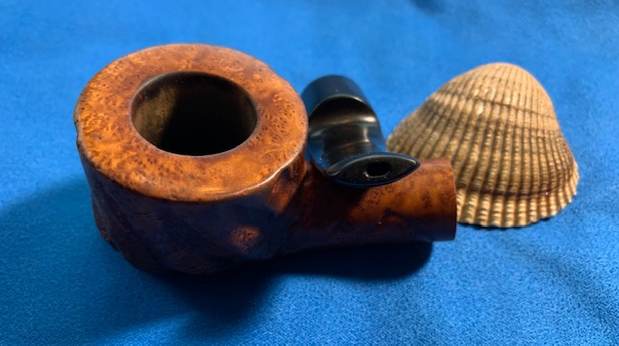
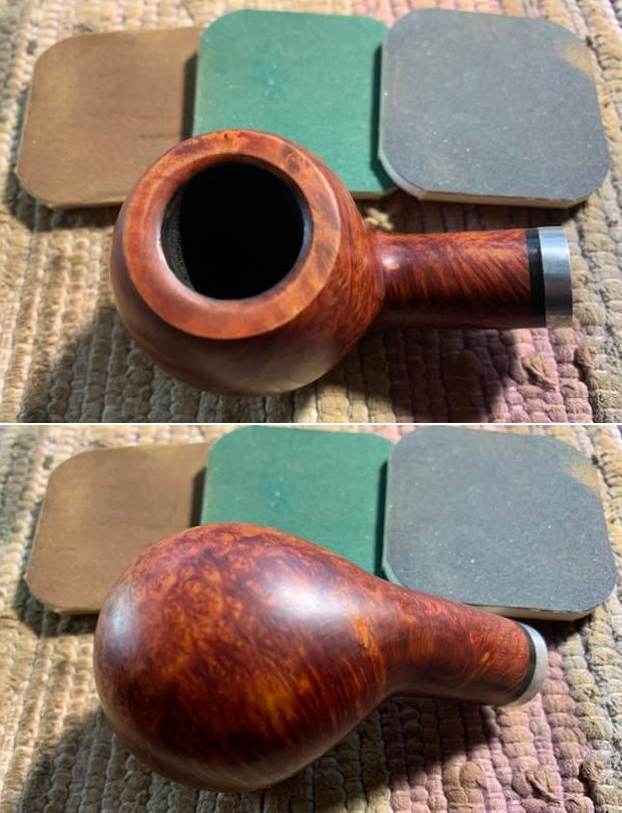
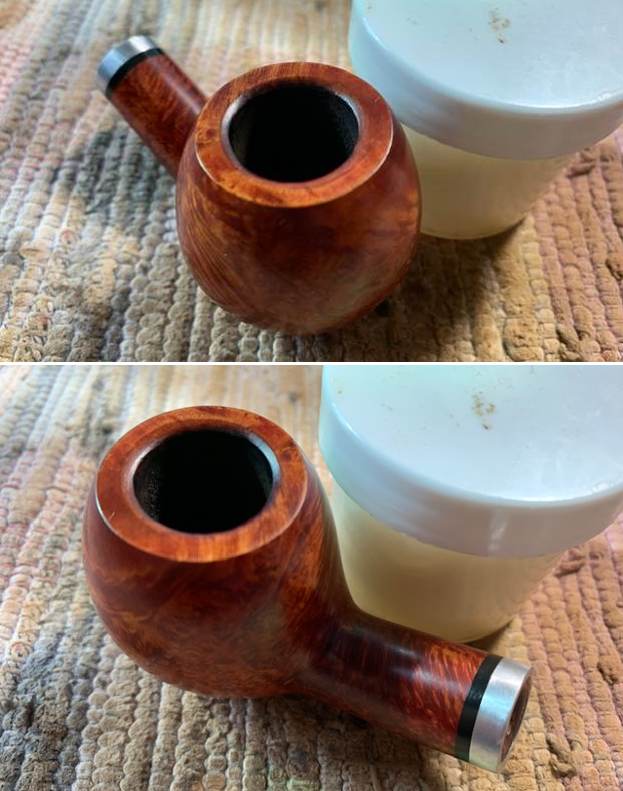
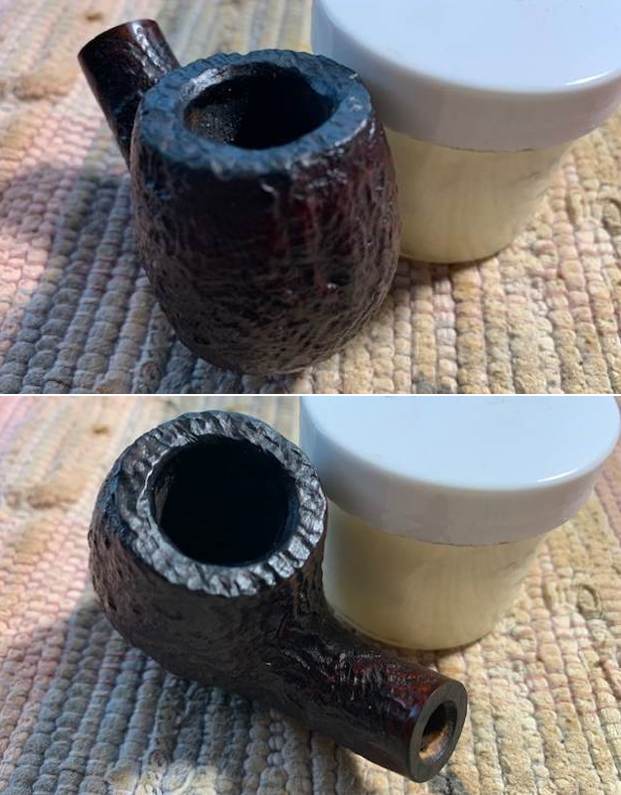
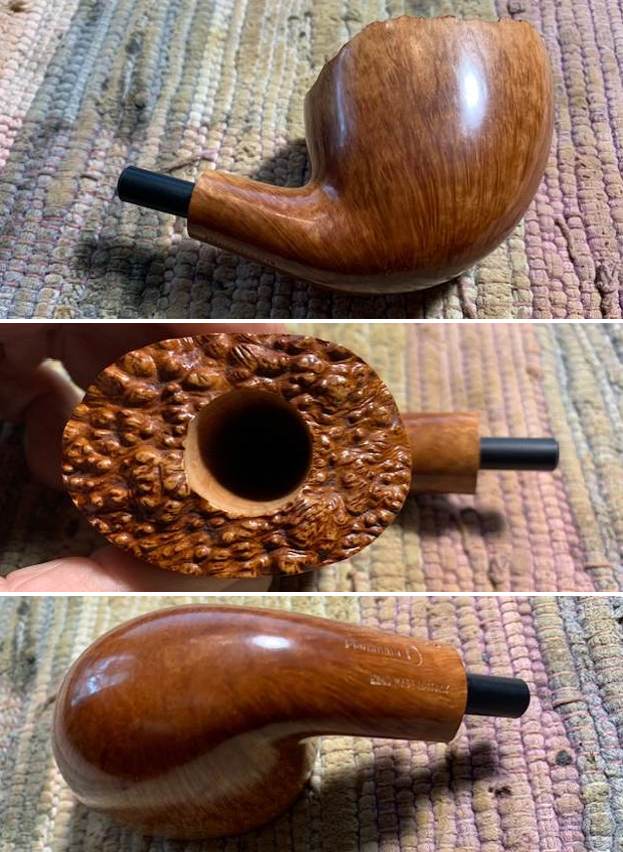
 I worked over the rim top and the inner edge of the rim with a folded piece of 220 grit sandpaper. I gave the inner edge a slight bevel and smoothed out the damage on the rim top.
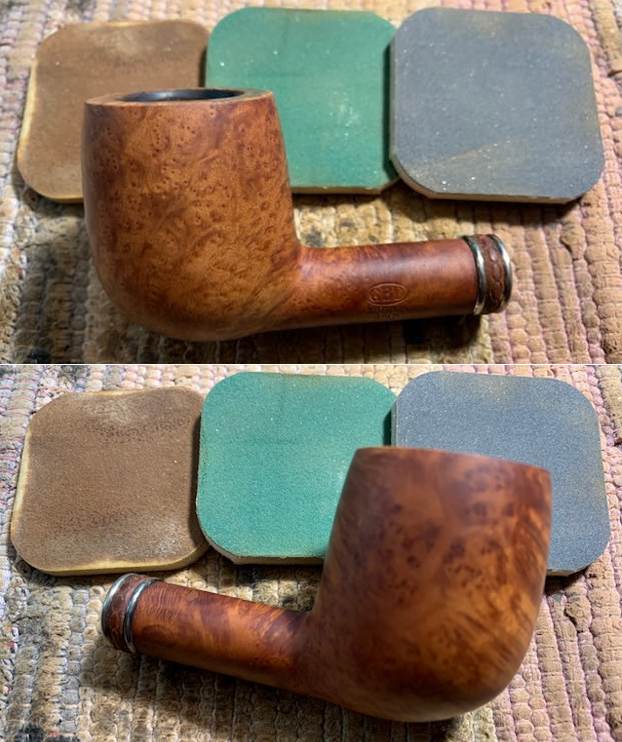
  I polished the rim top and smooth briar with micromesh sanding pads – wet sanding with 1500-12000 grit pads and wiping it down after each pad with a damp cloth. I also ran the pads over the high spots on the rustication as well to give some contrast.


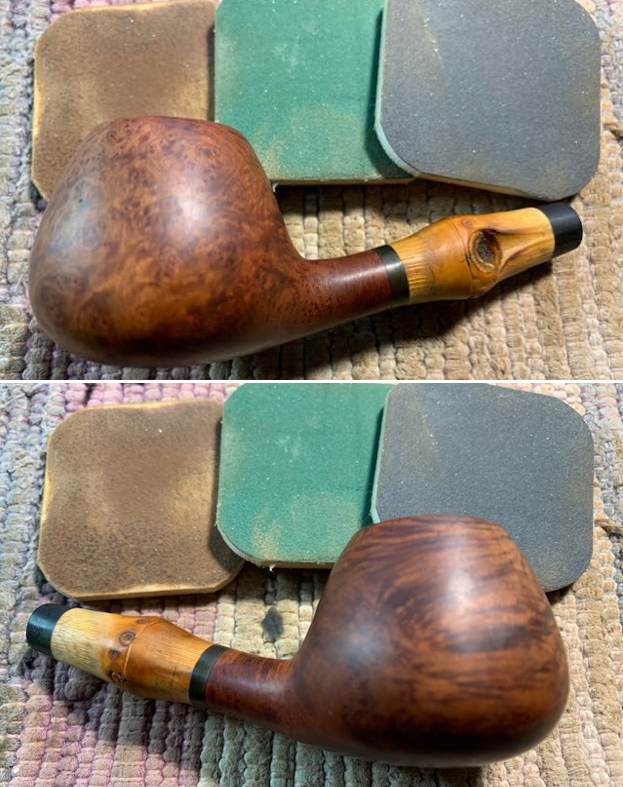
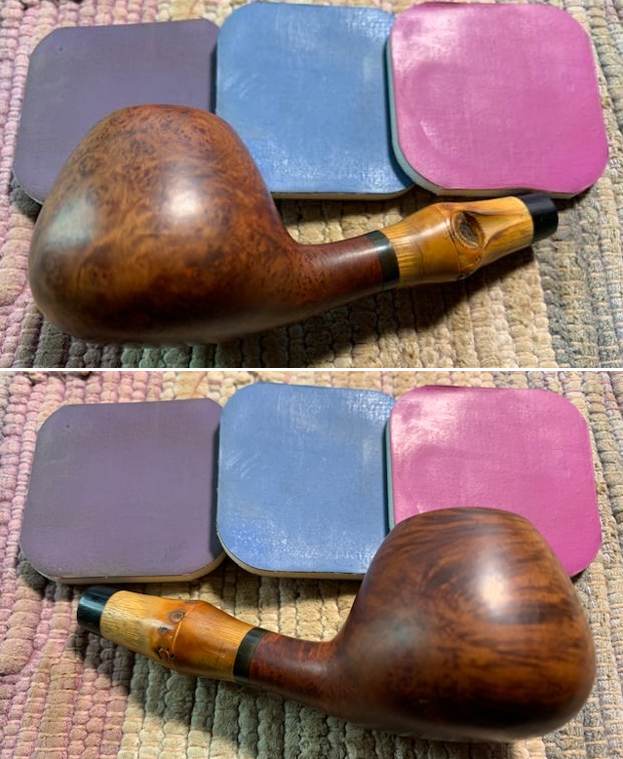
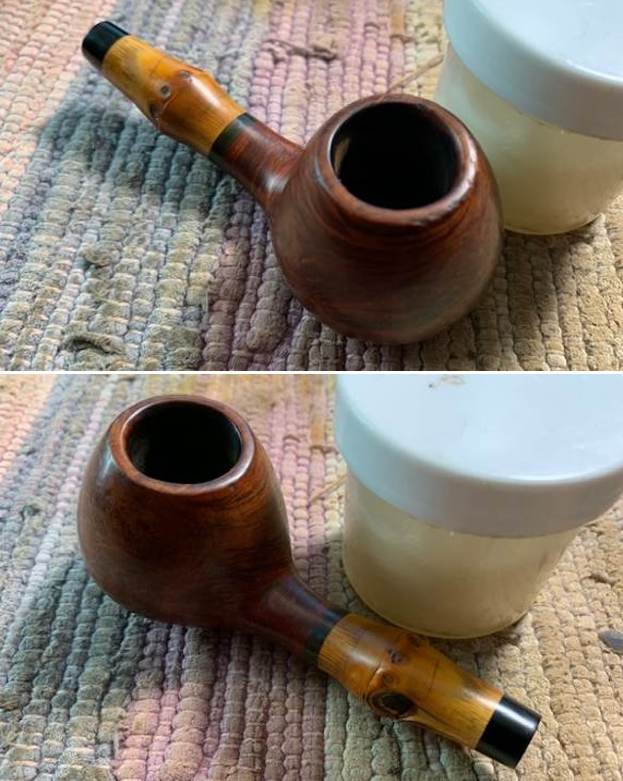
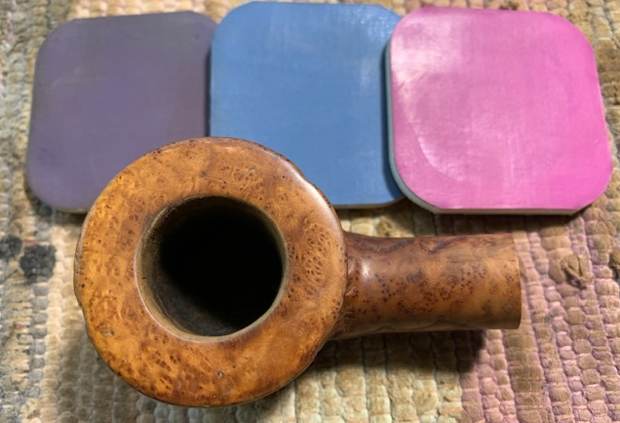
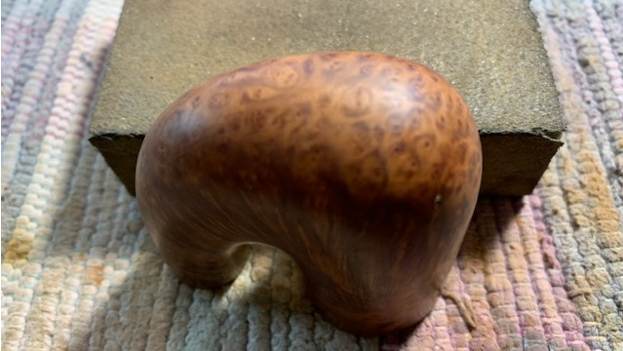
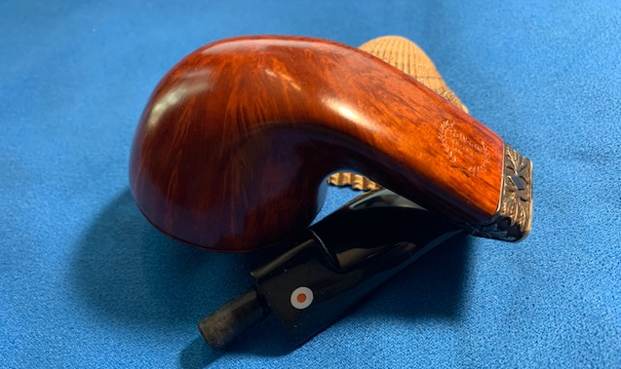
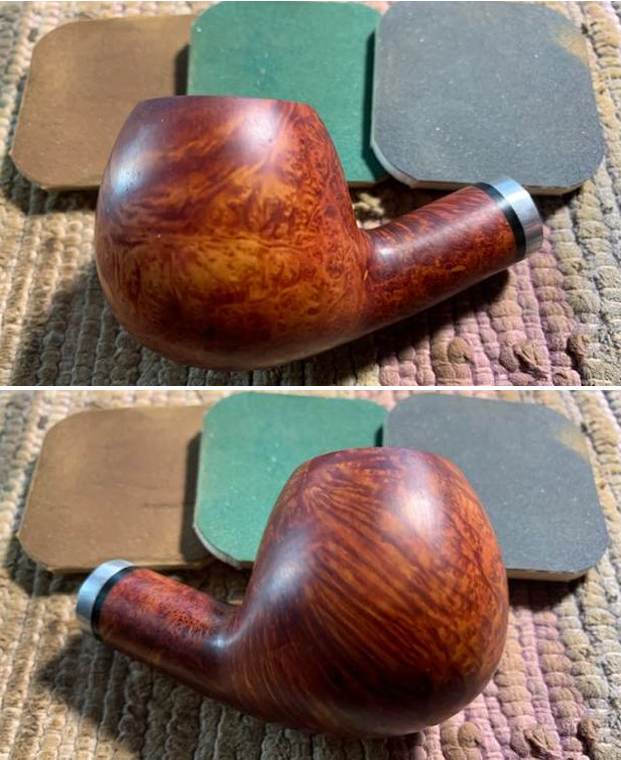
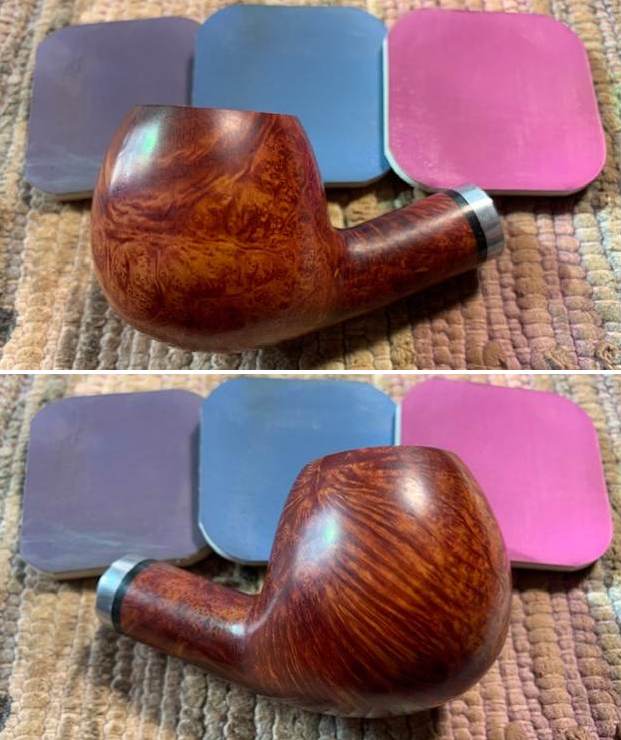
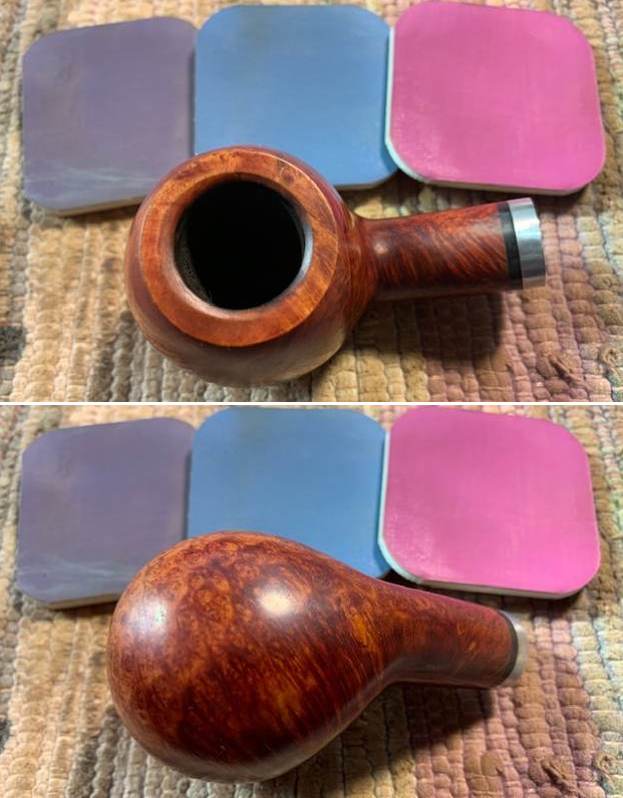
 I rubbed the bowl and shank down with Before & After Restoration Balm. I worked it into the surface of the bowl sides and shank with my fingertips and a horsehair shoe brush to clean, enliven and protect the briar. I let the balm sit for 10-15 minutes and then buffed with a cotton cloth to raise the shine. The grain came alive and the finish looked rich.

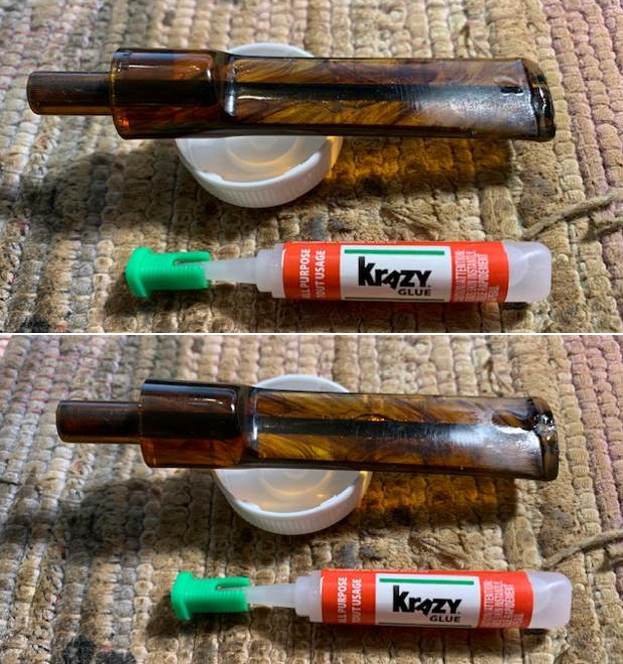
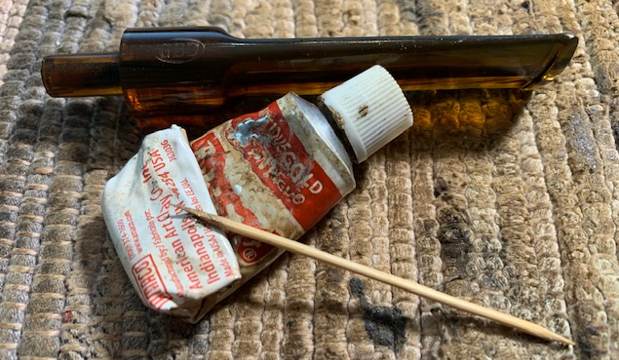
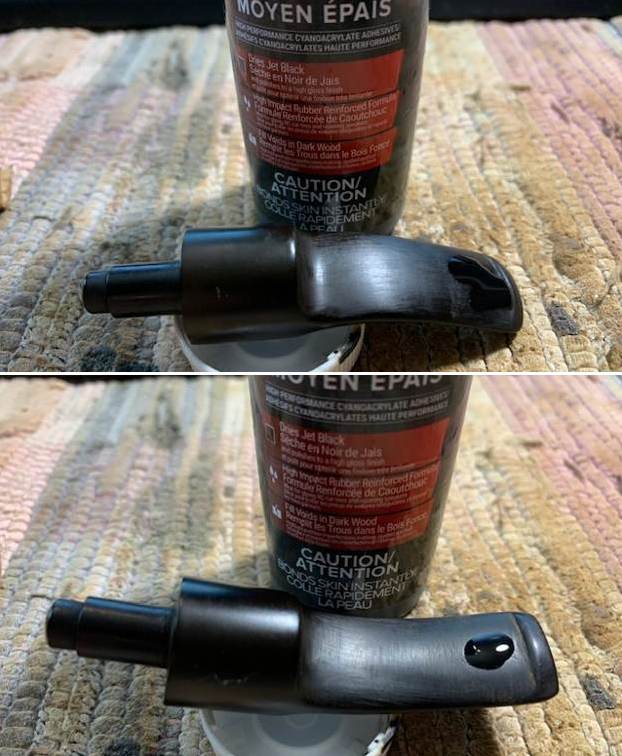
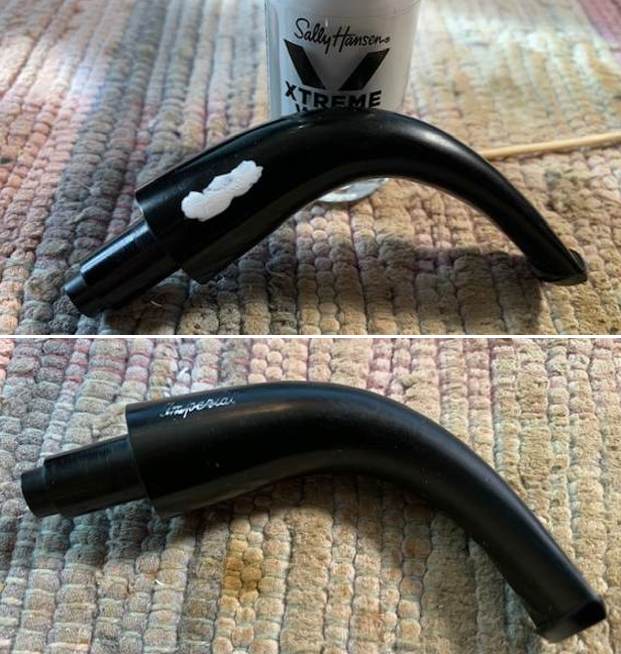
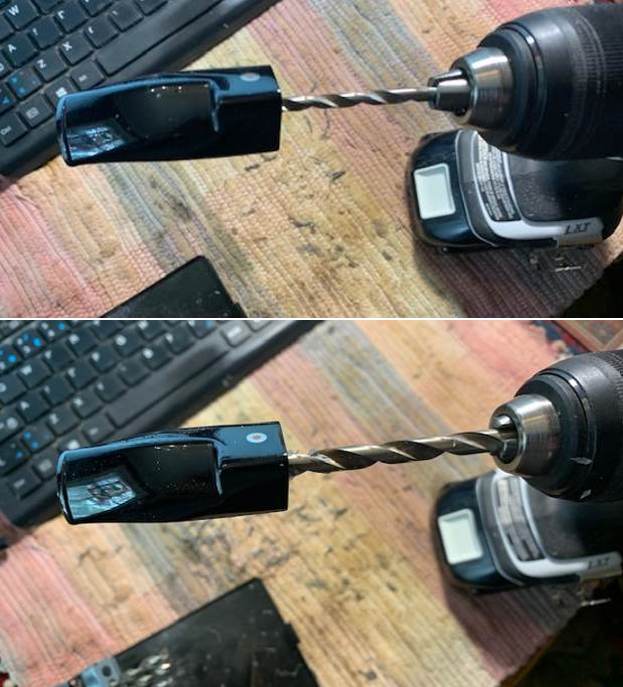
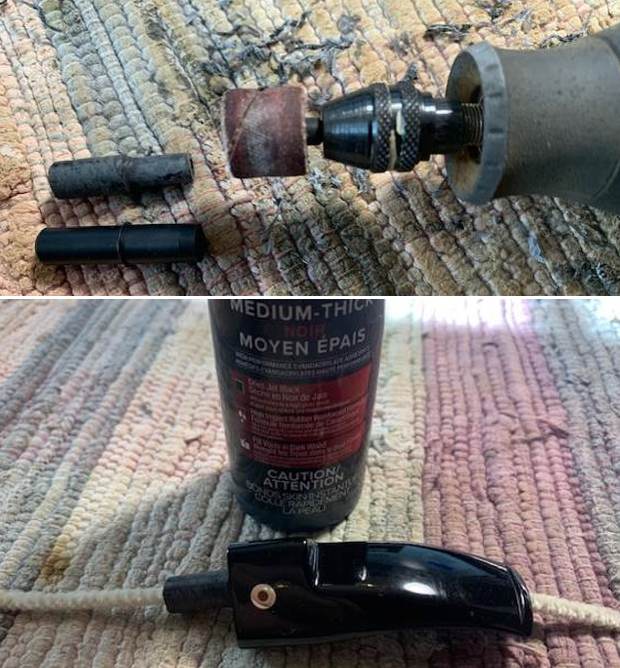
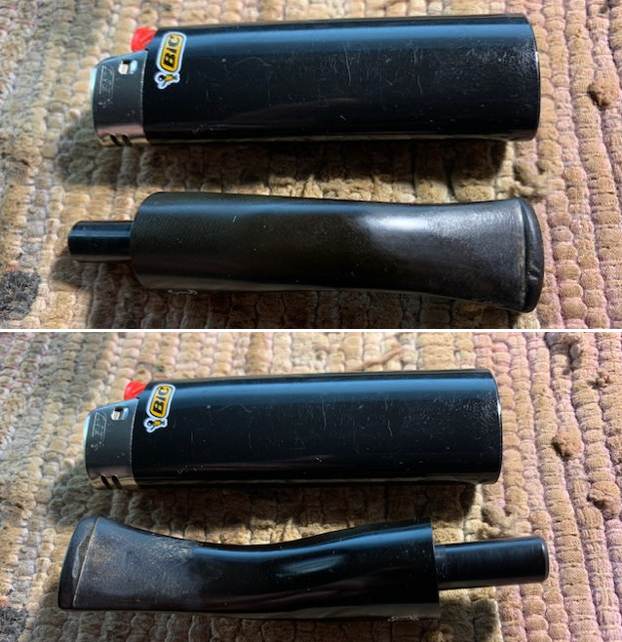
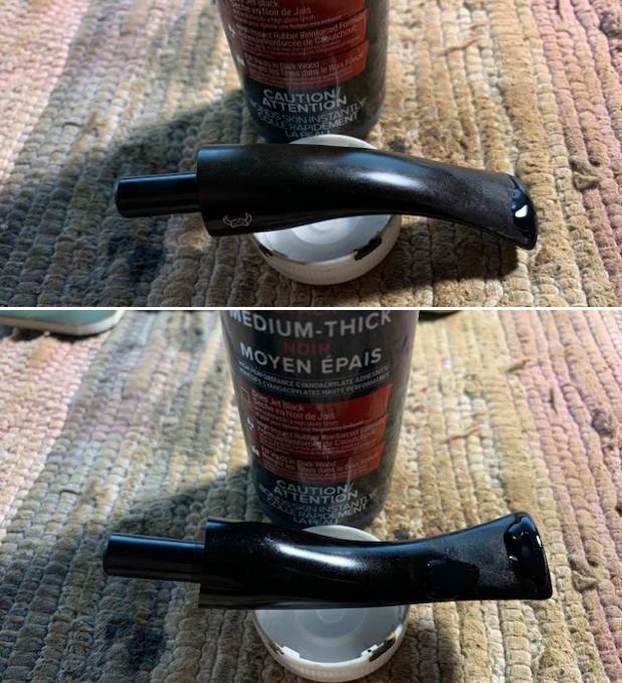
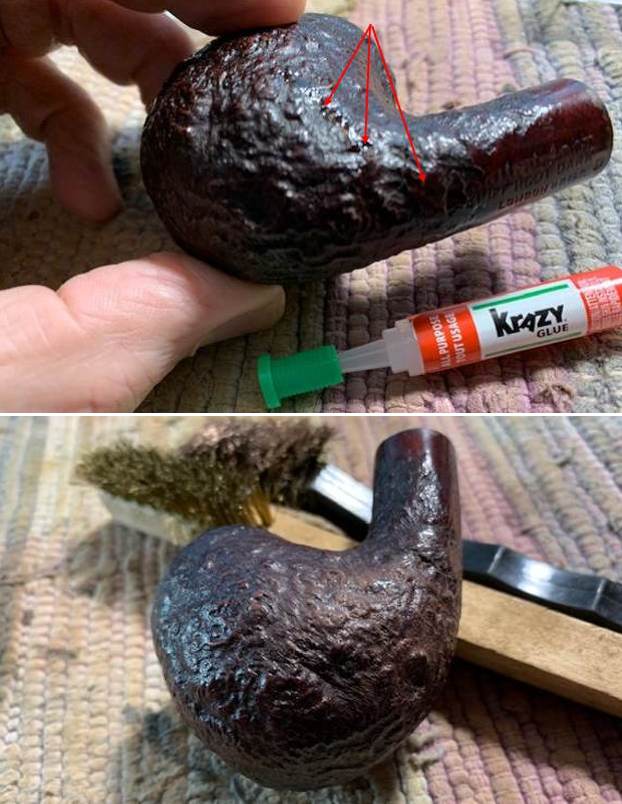
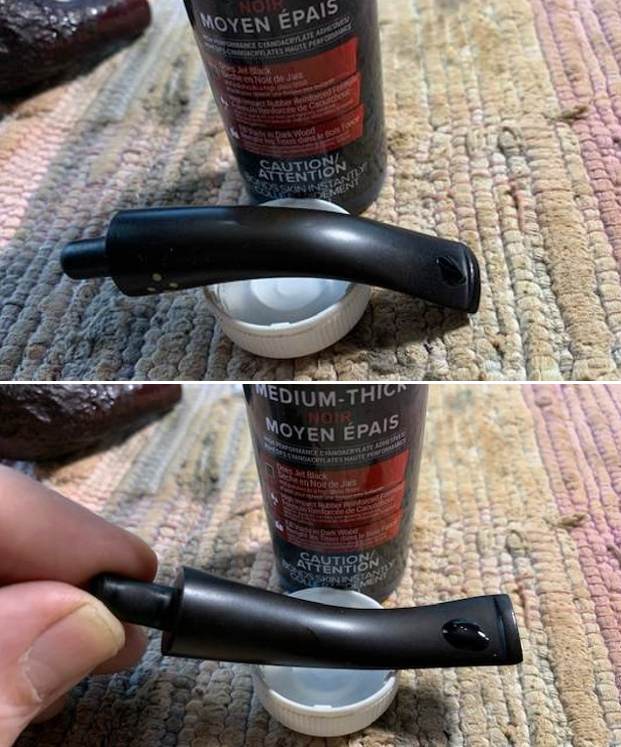
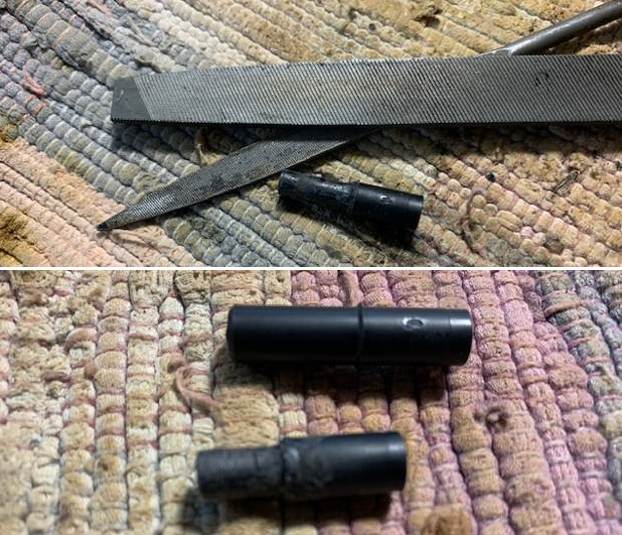
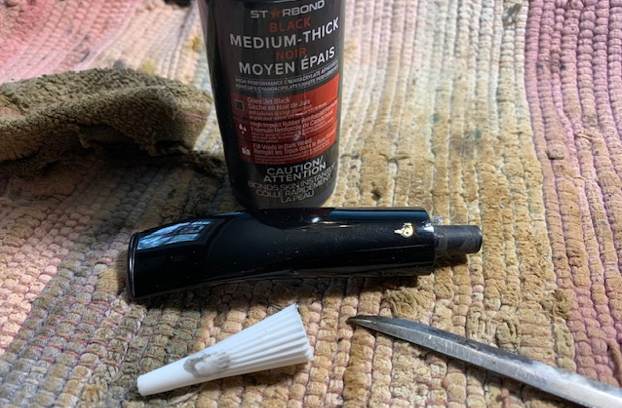
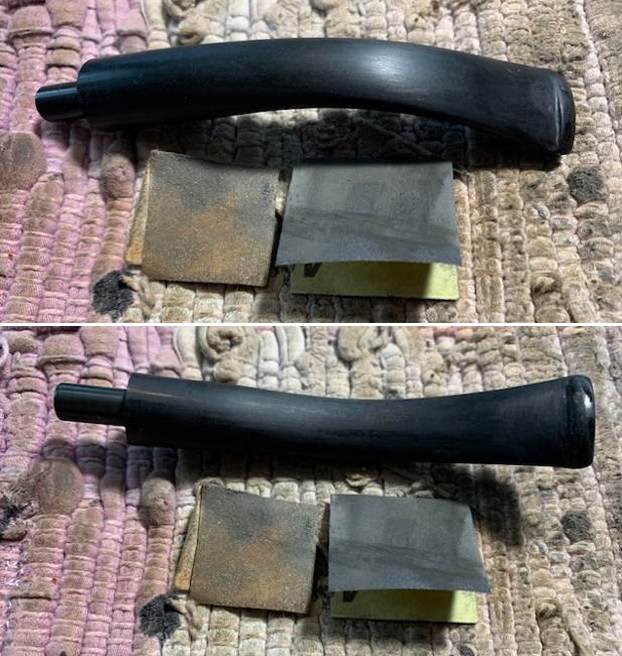
 I set aside the bowl and turned my attention to the stem. I “painted” the surface of the stem with the flame of a Bic lighter to lift them as much as possible. I filled in the remaining tooth dents and marks with Black Super Glue and set it aside for the repairs to cure.
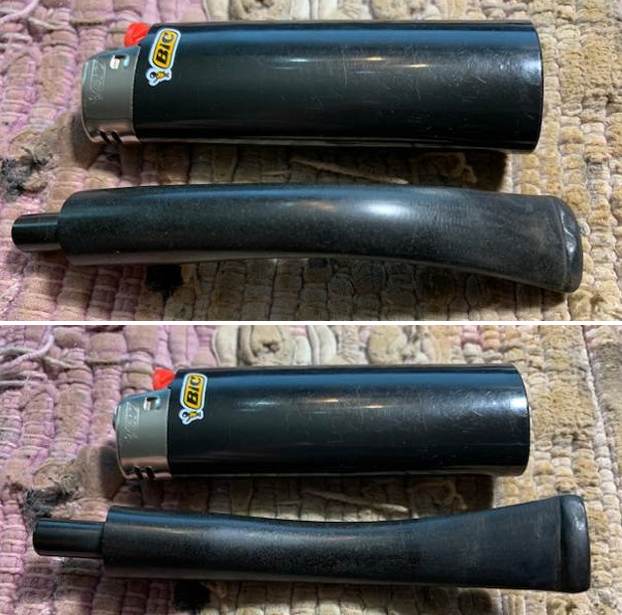
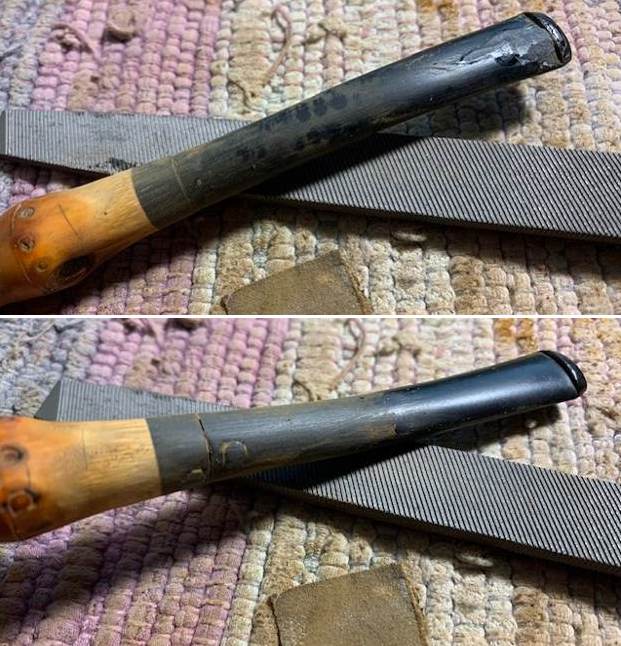
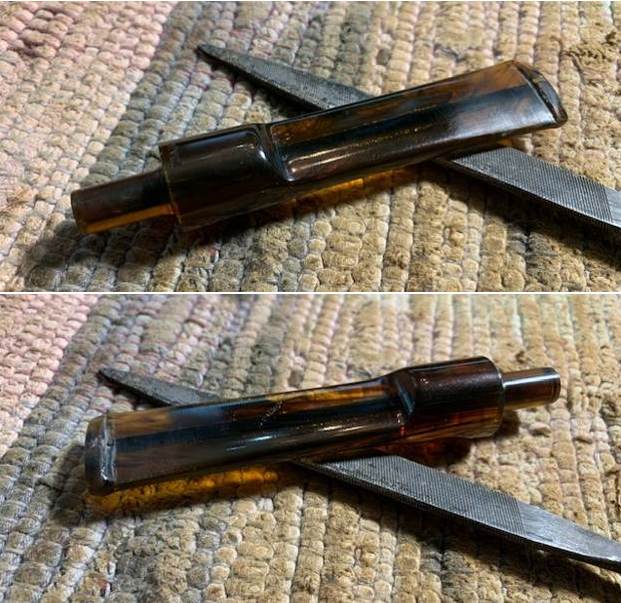
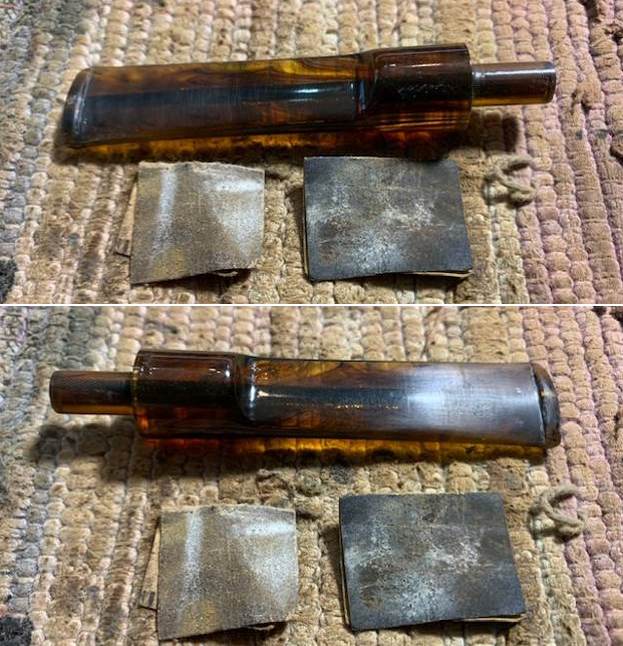
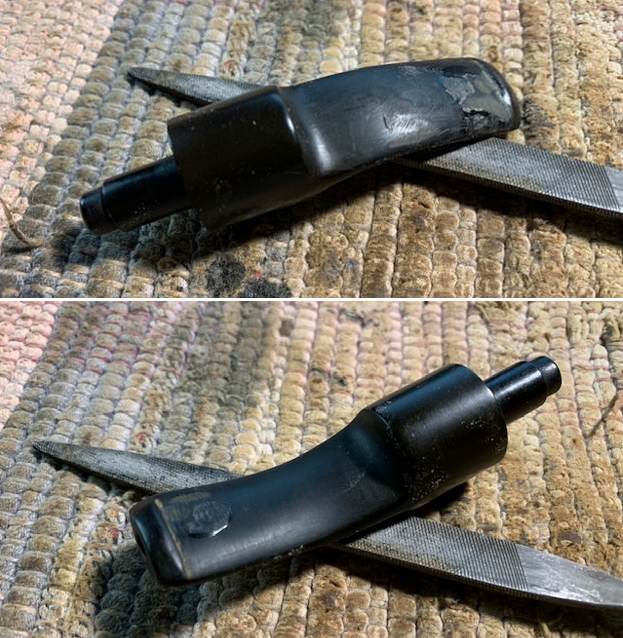
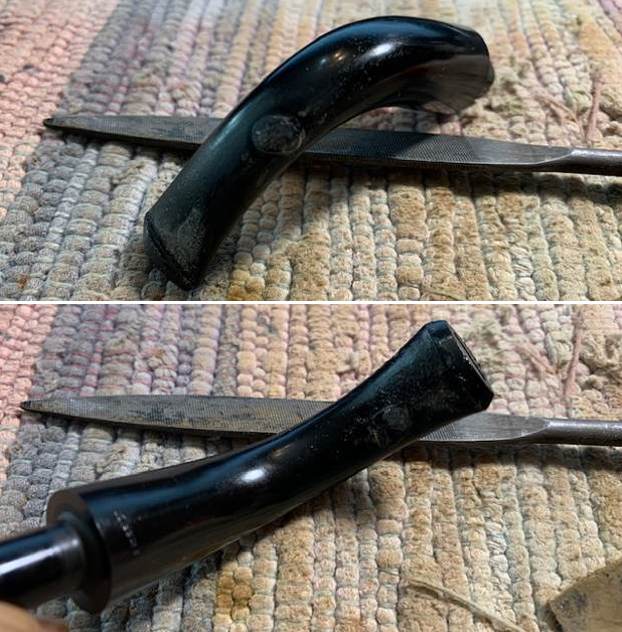
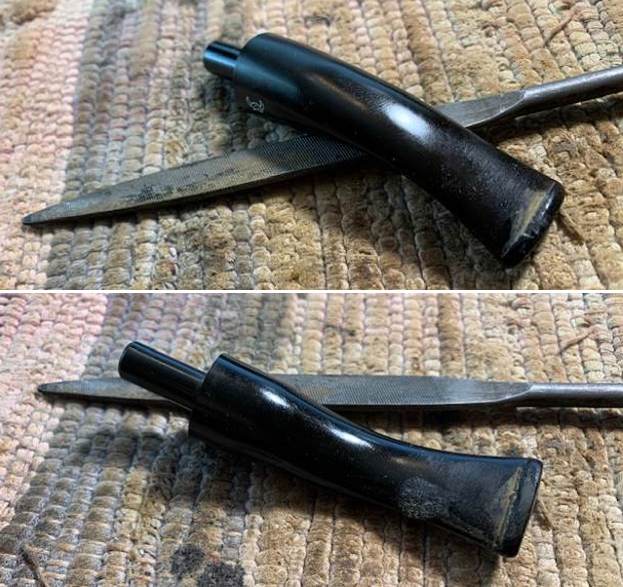
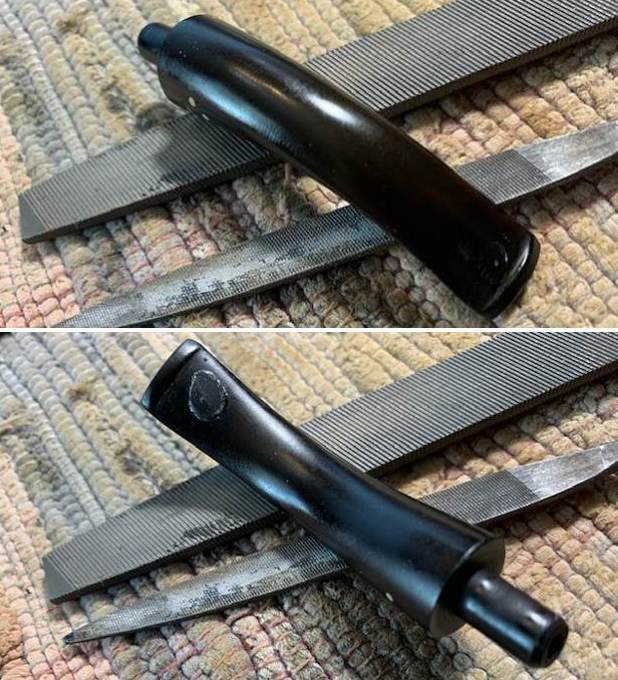
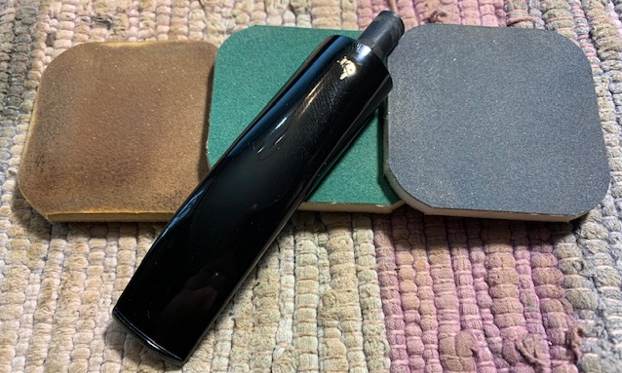
 Once they cured I flattened them with a file. I cleaned up the repaired areas with 220 sandpaper to blend the repairs into the surface of the stem. I started polishing it with 400 grit wet dry sandpaper.
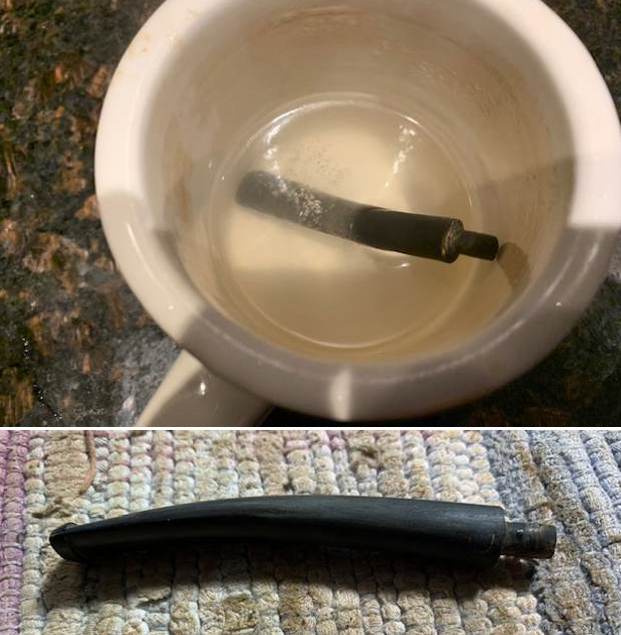
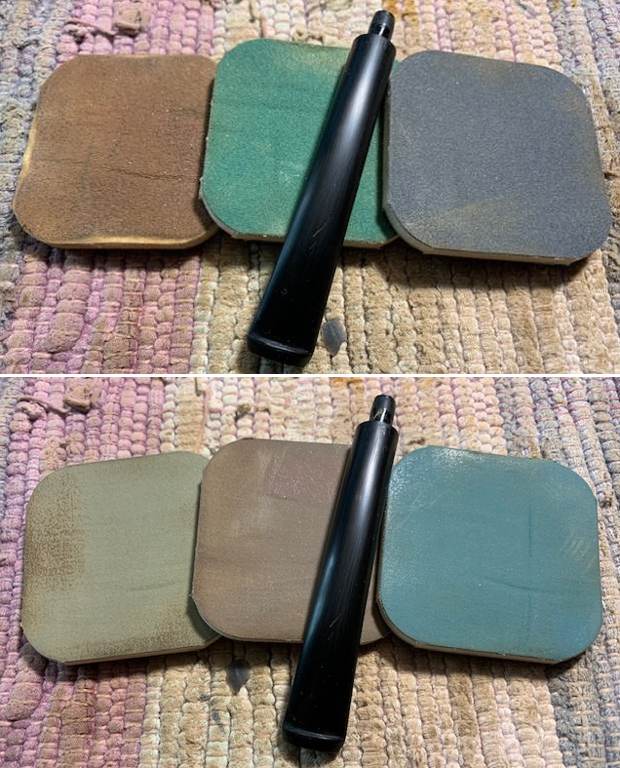
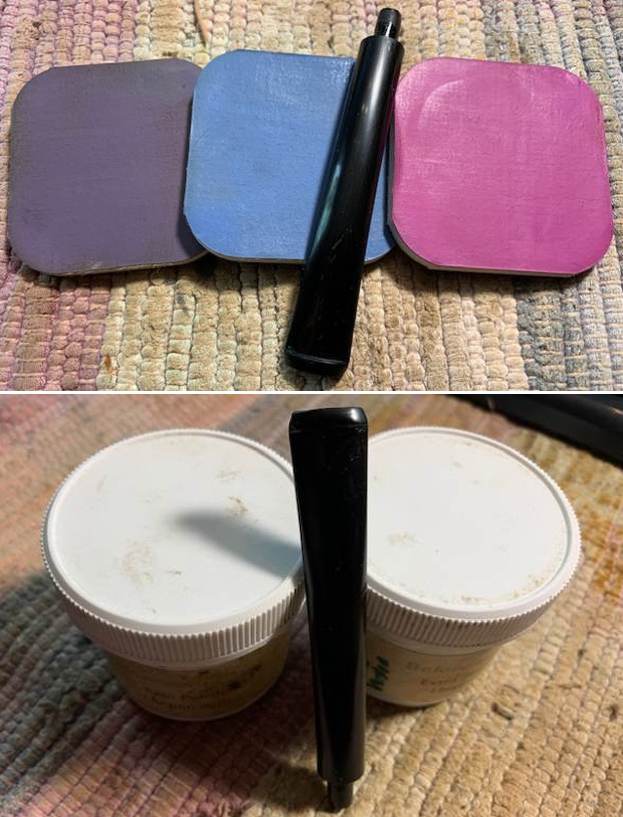
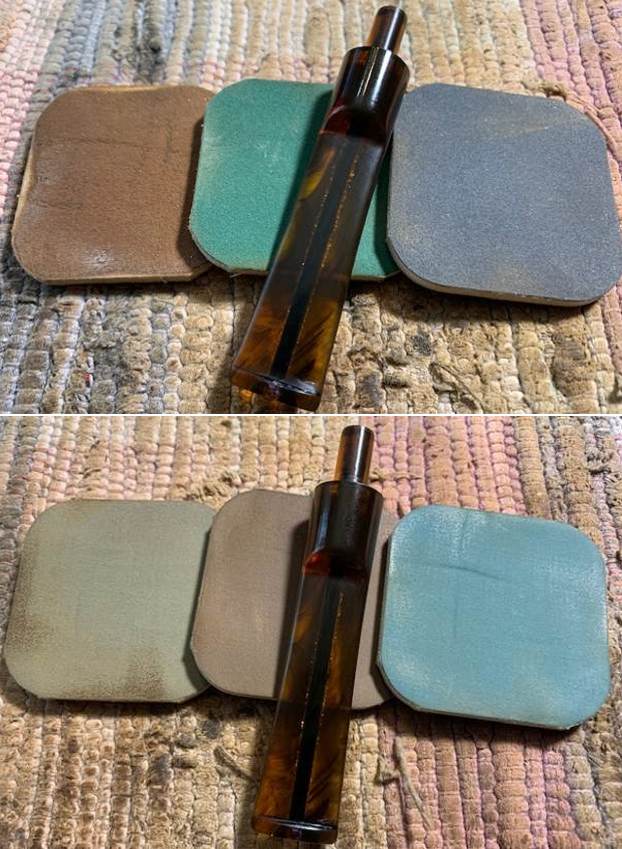
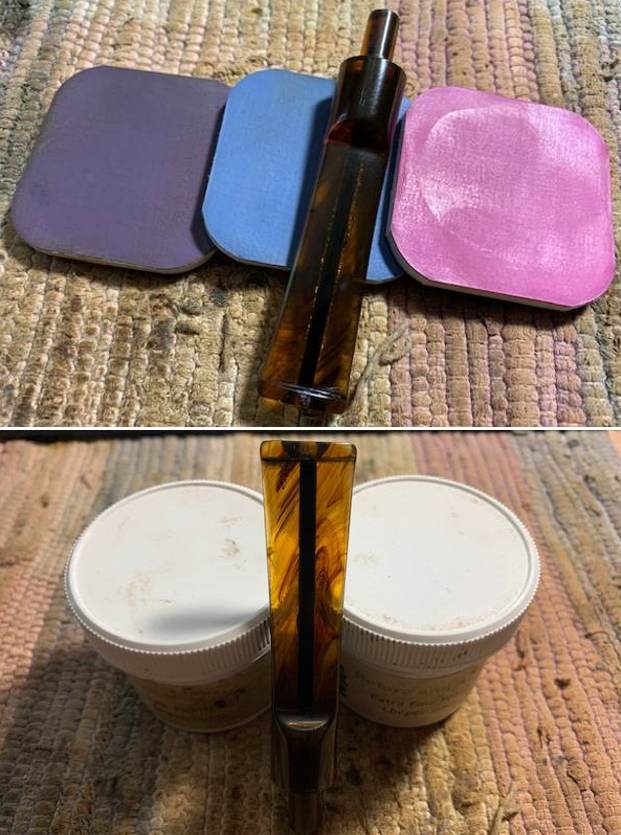
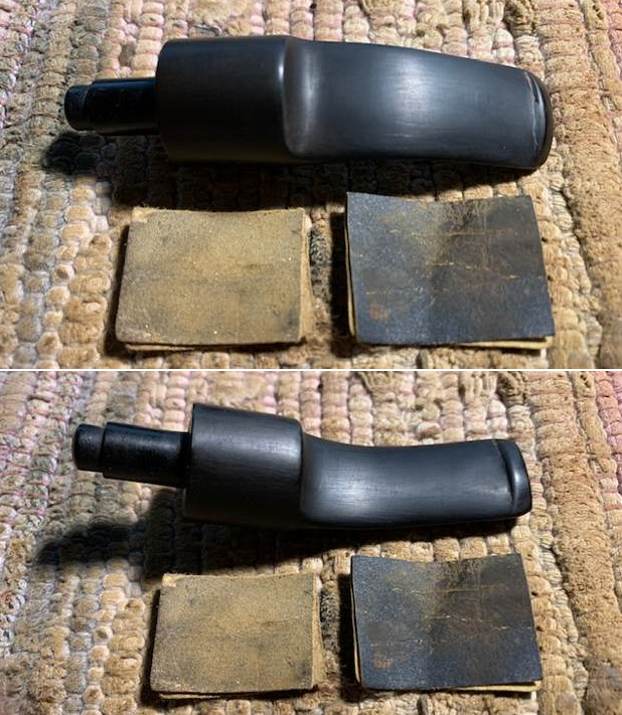
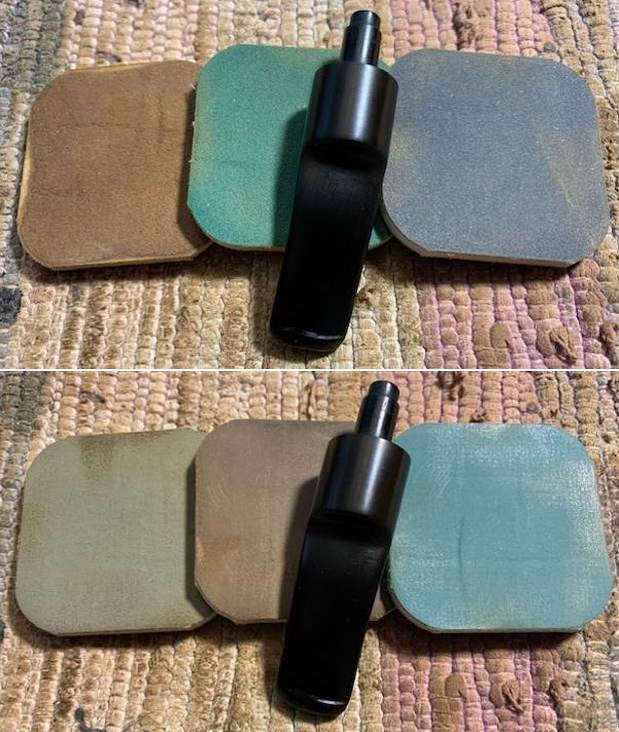
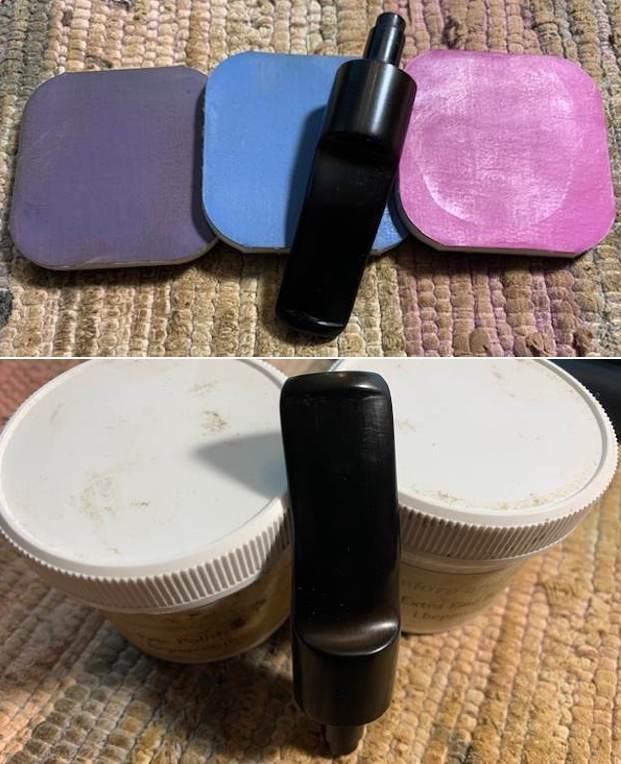
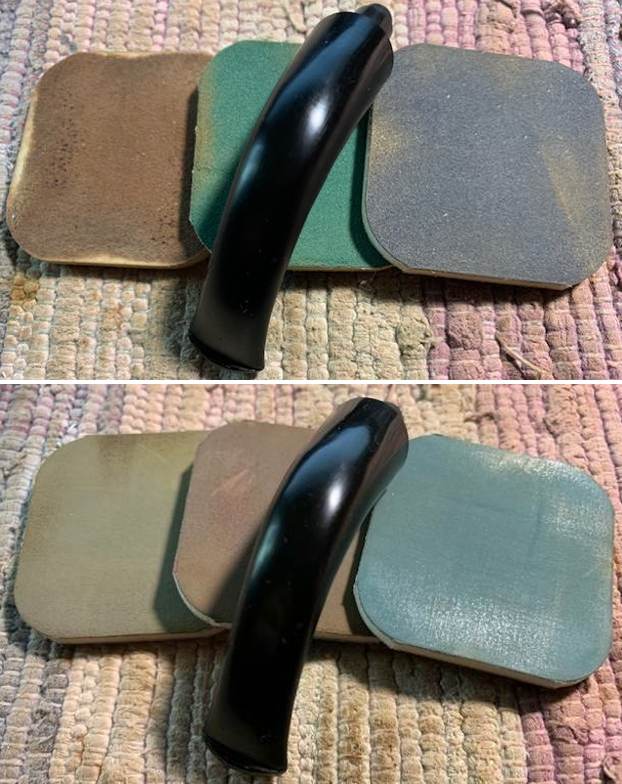
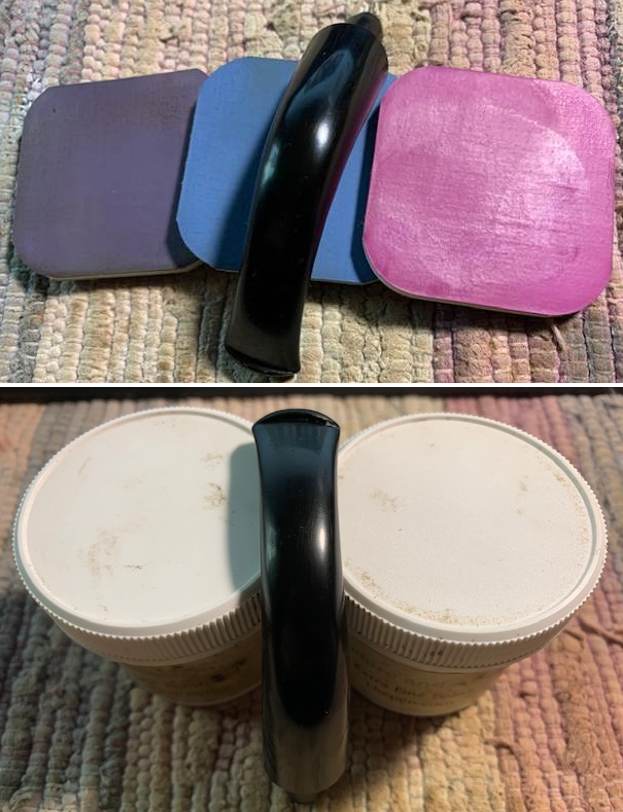
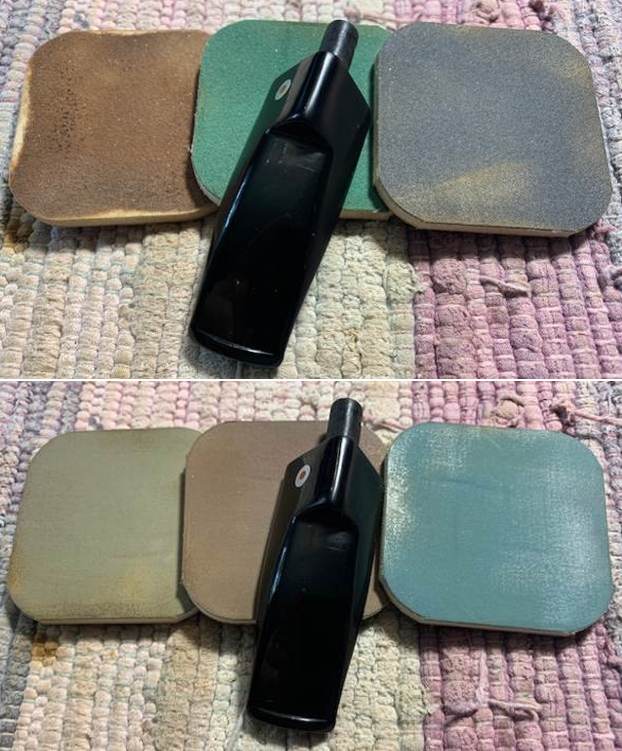
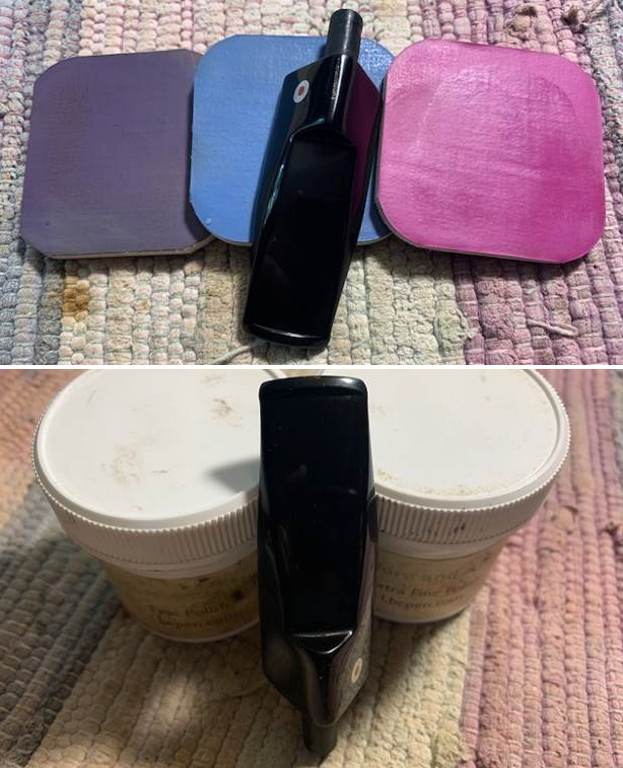
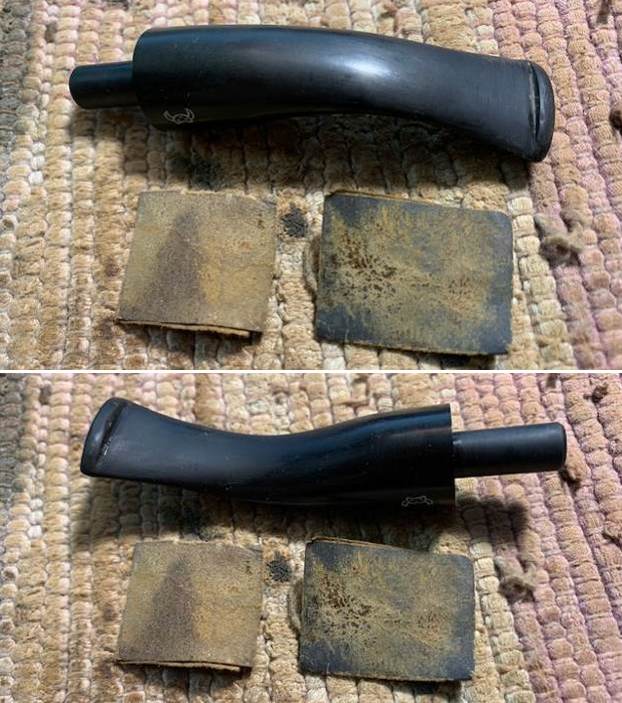
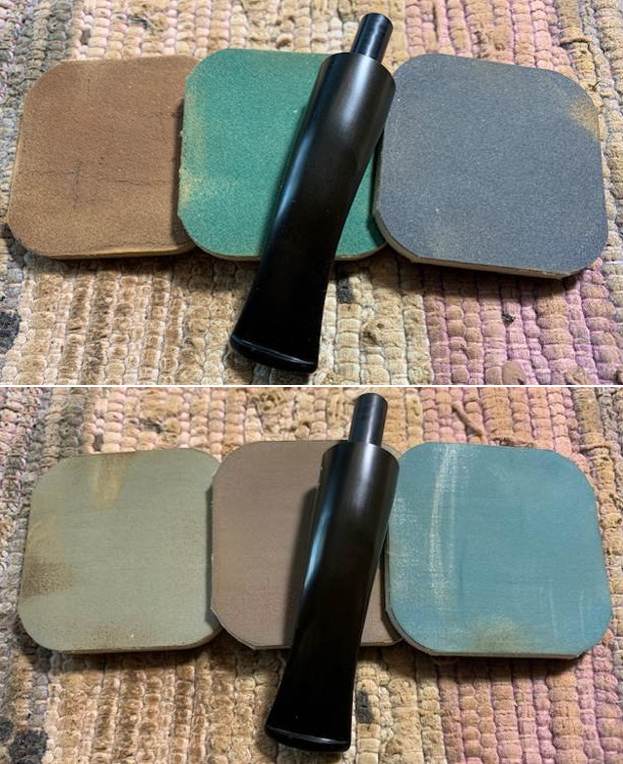
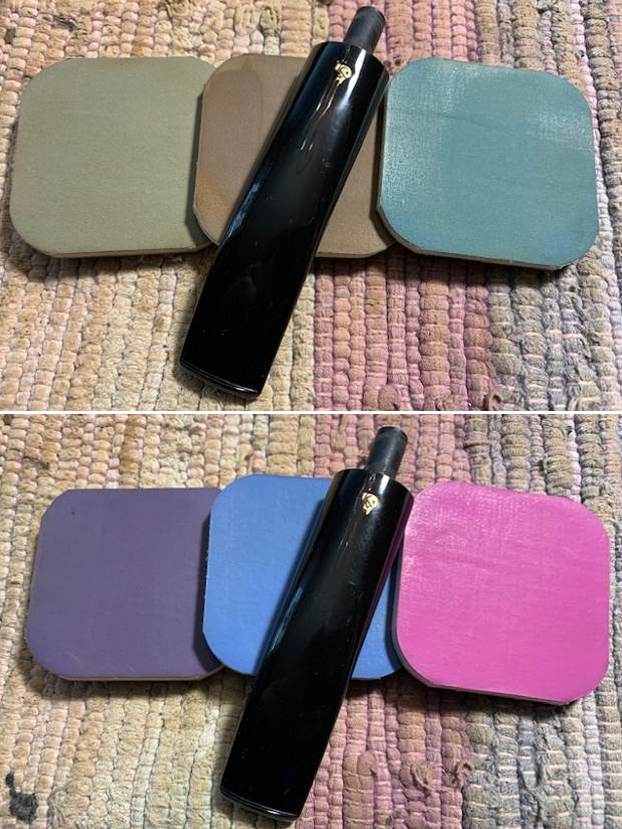
 I polished the vulcanite stem with micromesh sanding pads – 1500-12000 grit pads. I wiped it down with Obsidian Oil after each sanding pad. I used Before & After Pipe Polish – both Fine and Extra Fine to further polish the stem.
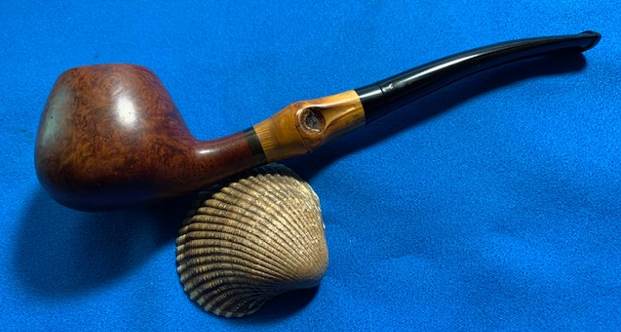
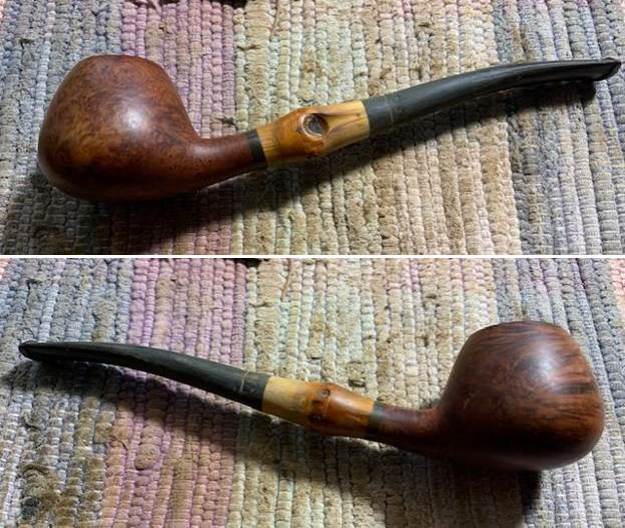
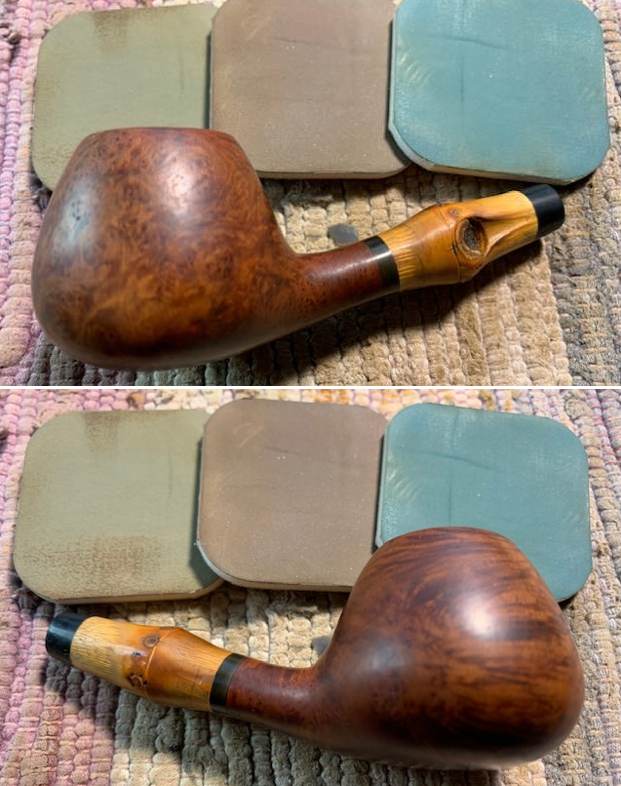
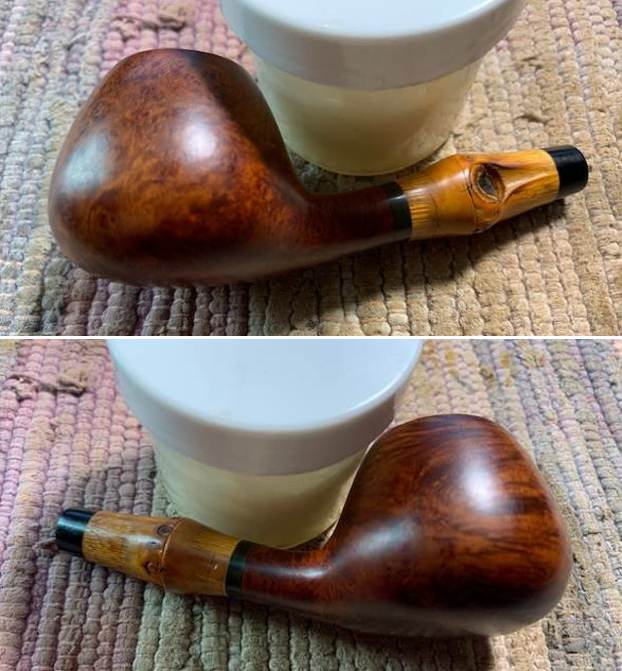
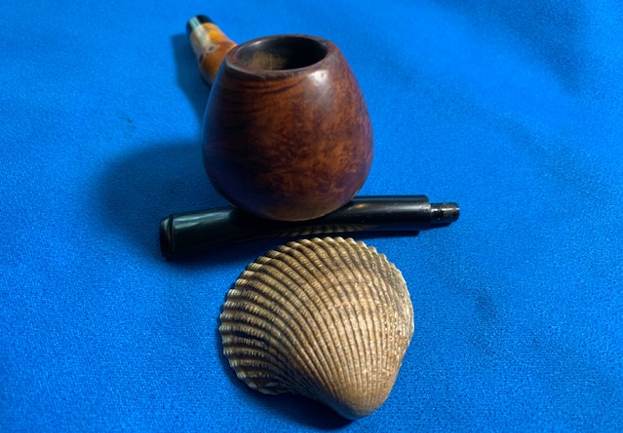
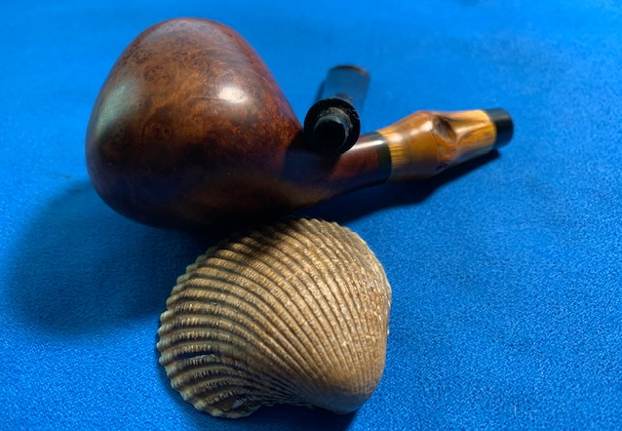
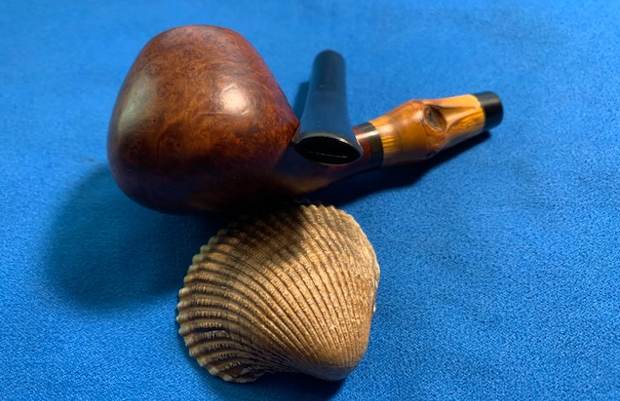
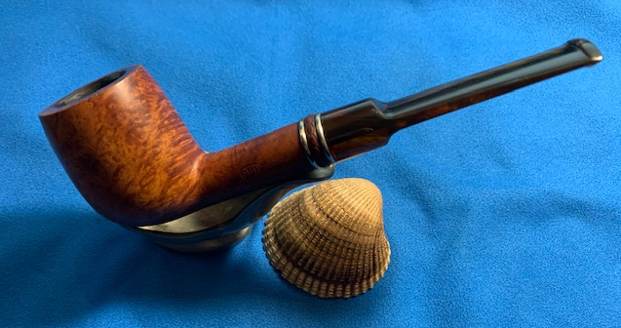
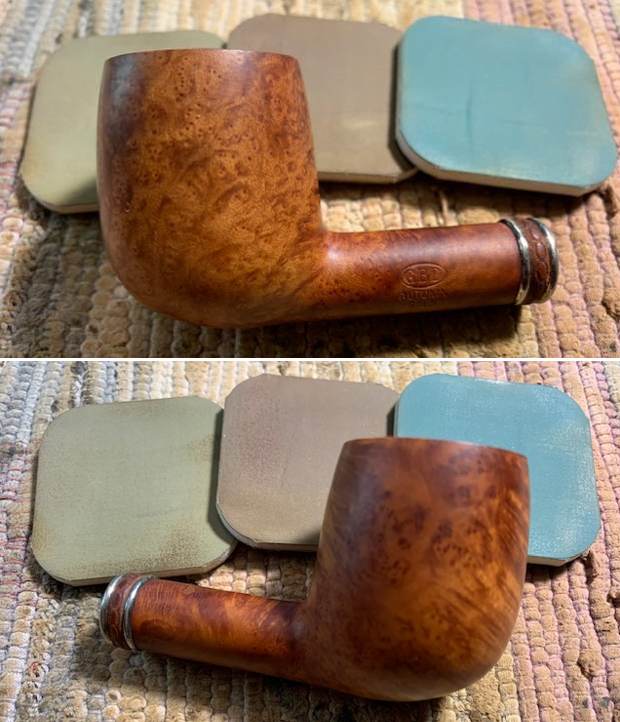
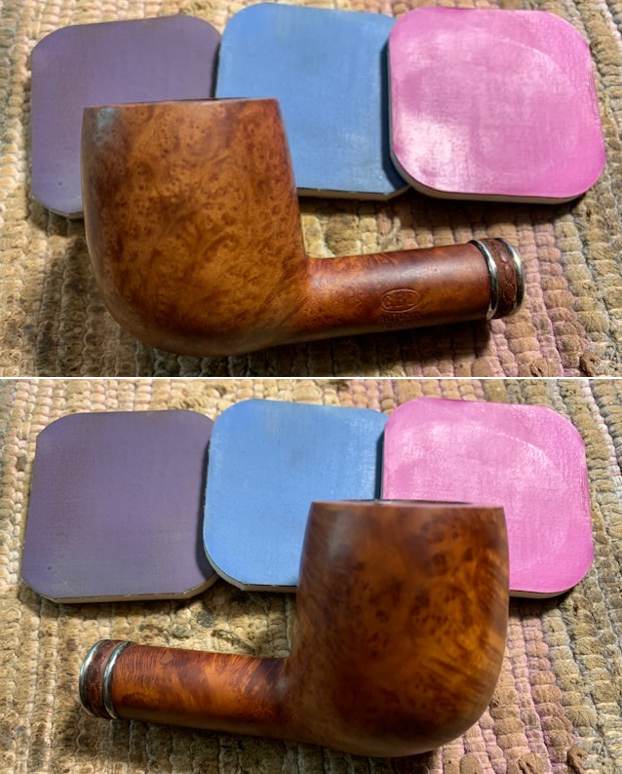
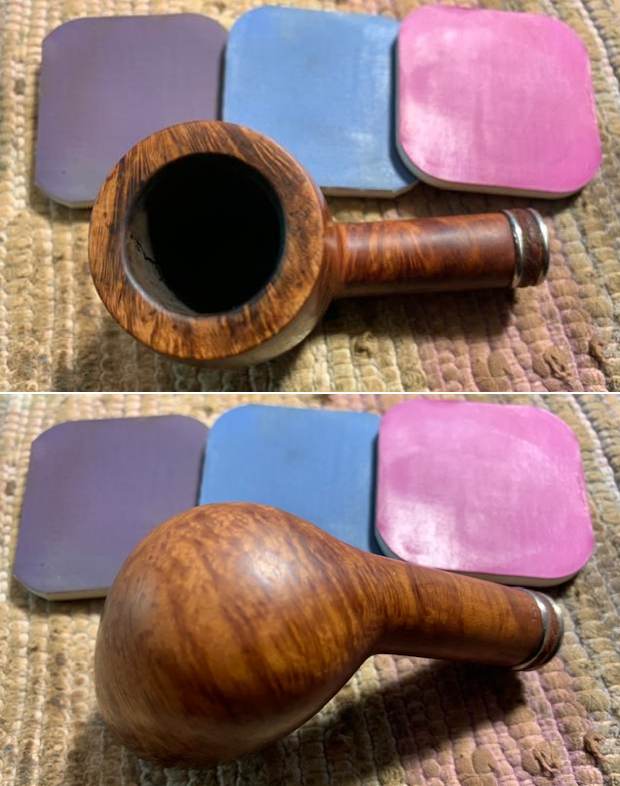
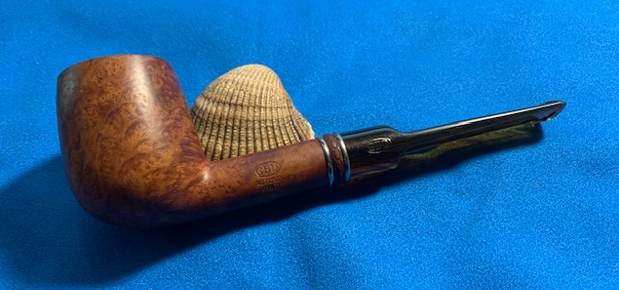
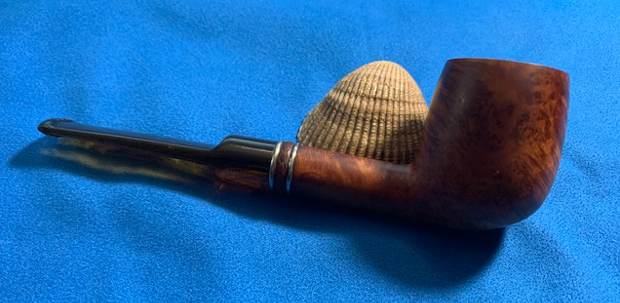
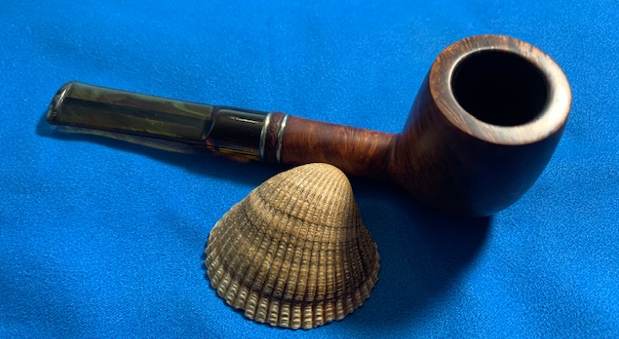
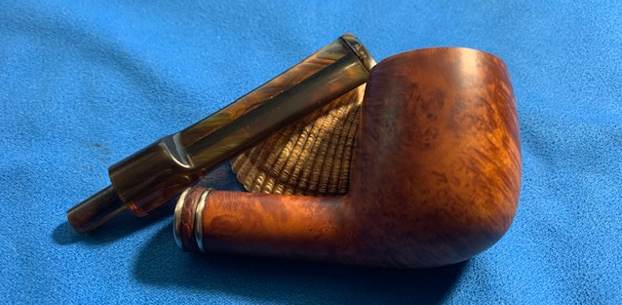
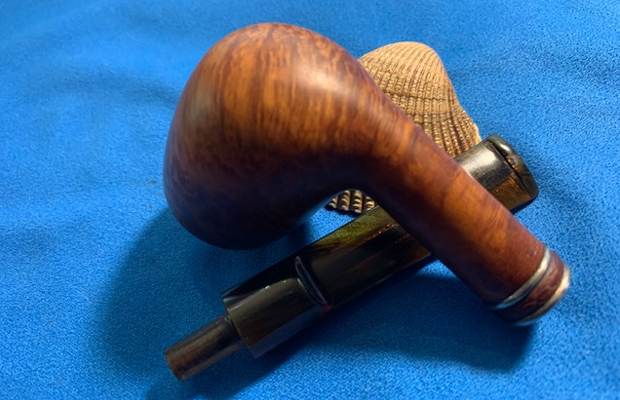
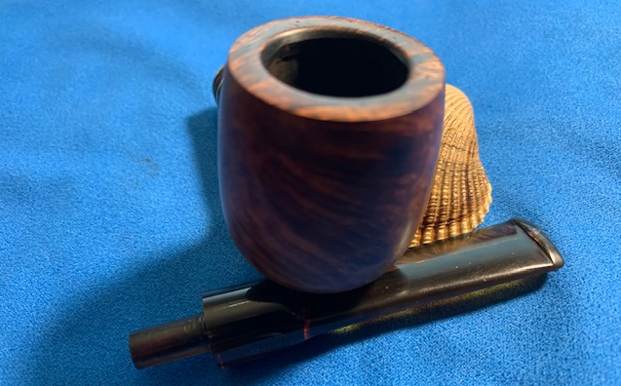
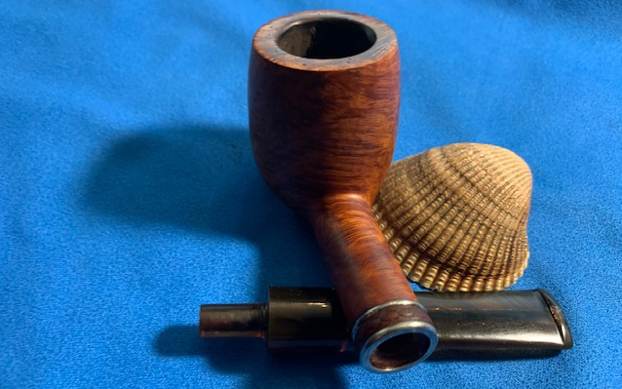
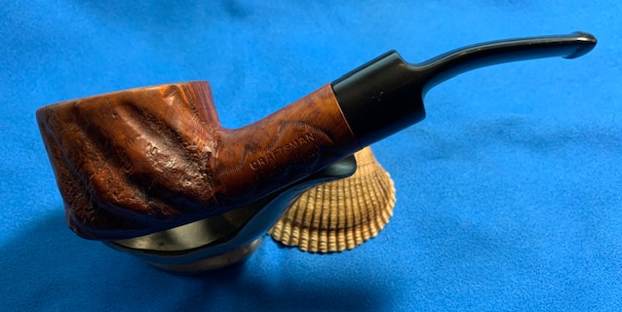
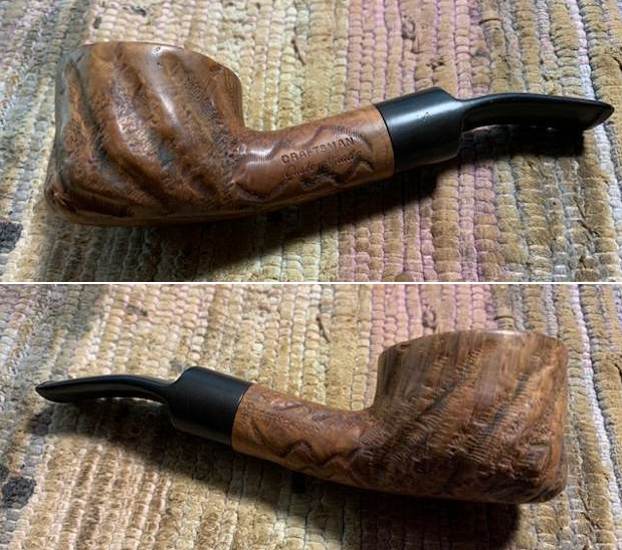
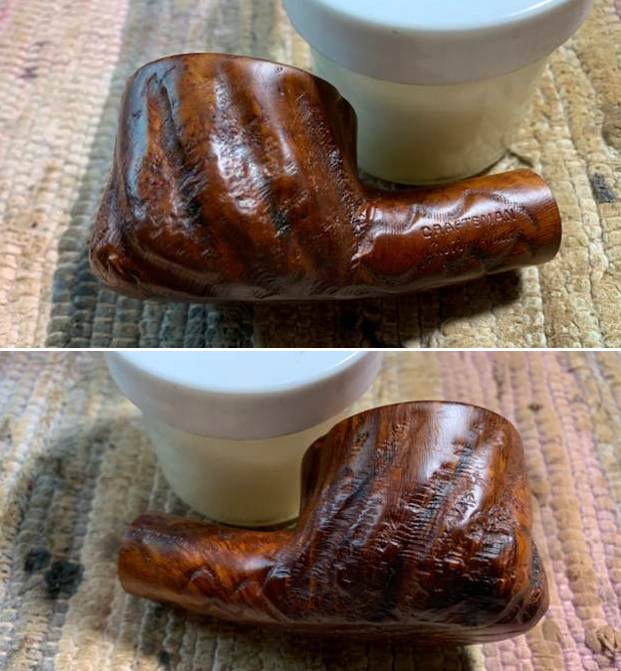
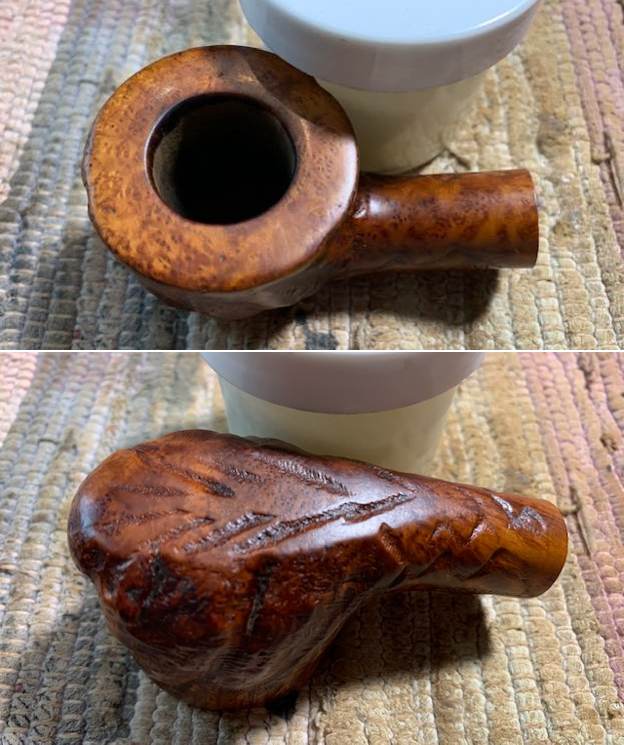
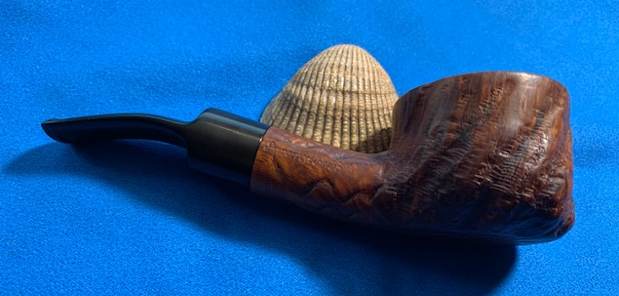
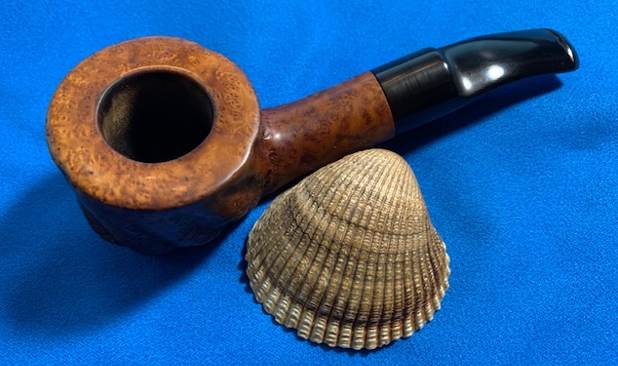
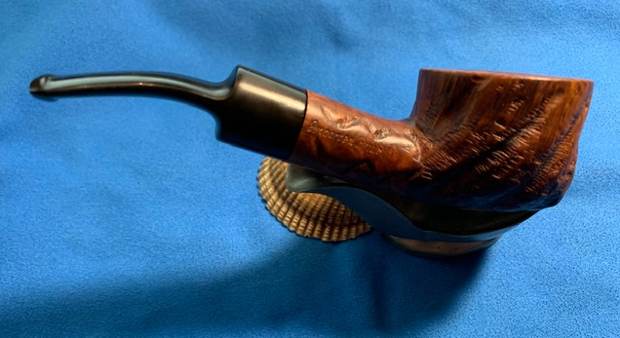
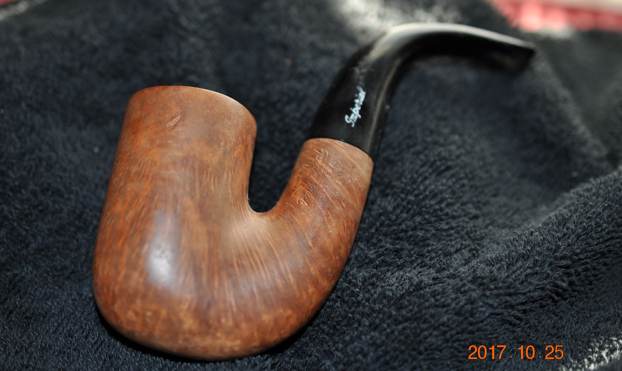
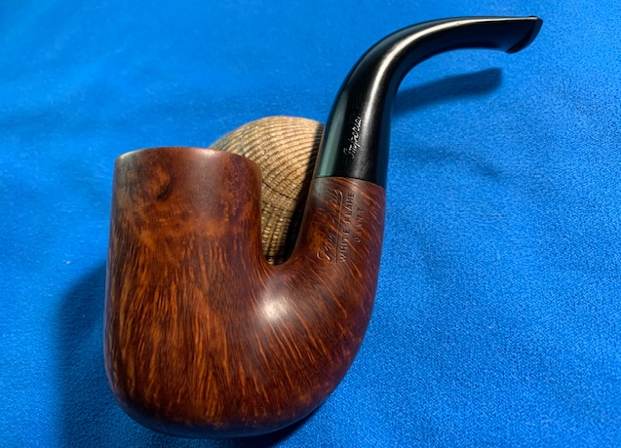
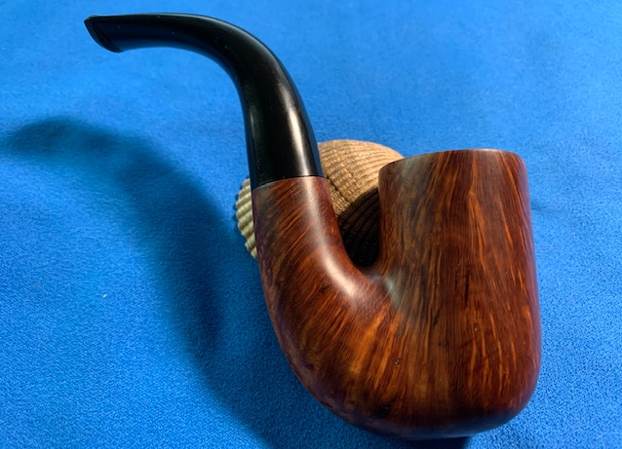
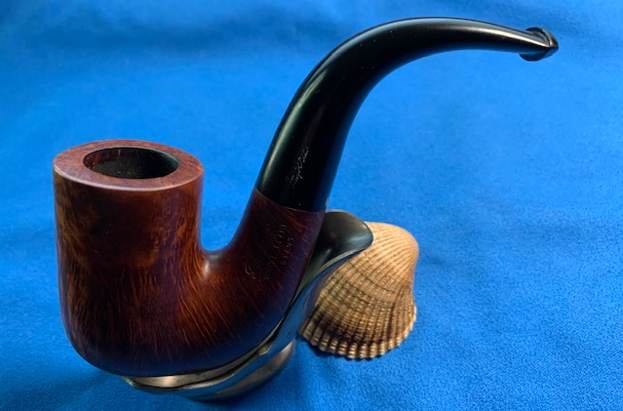
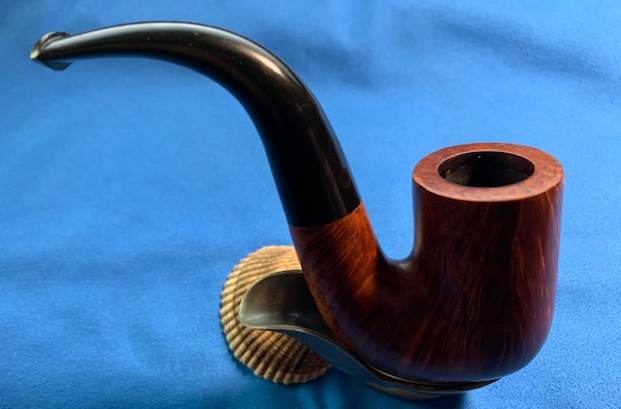
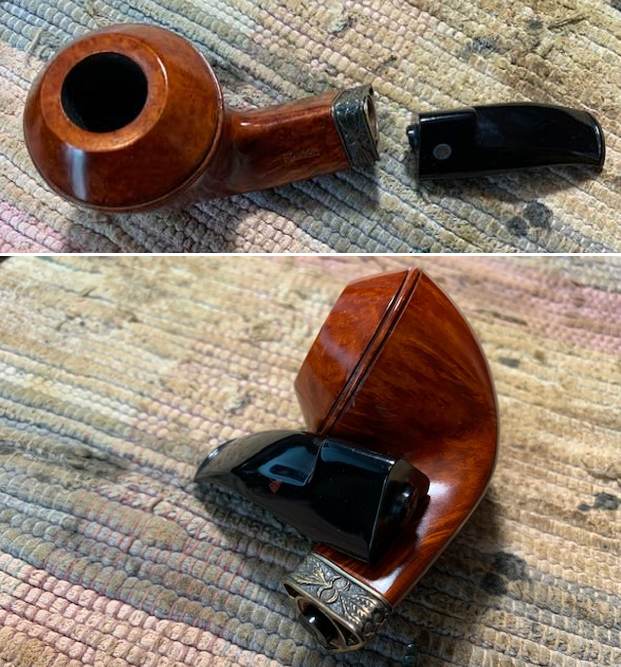
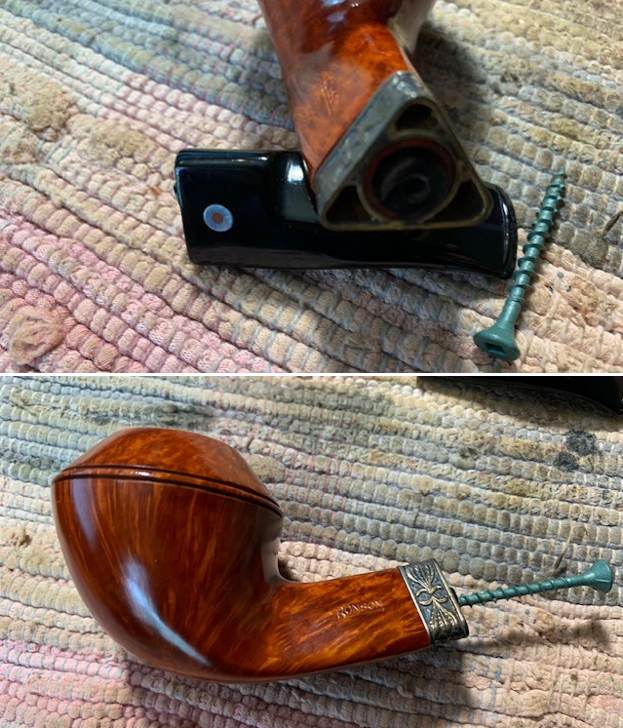
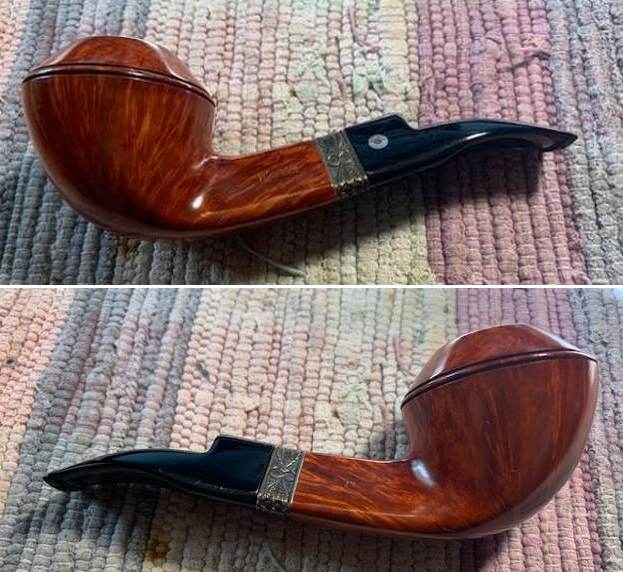
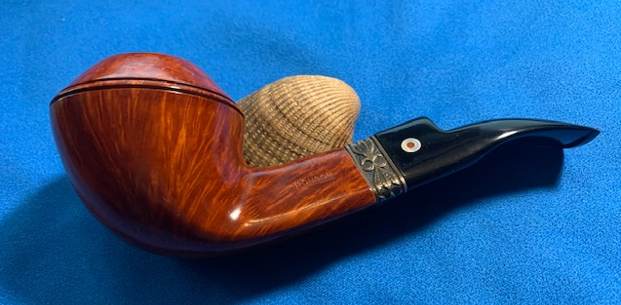
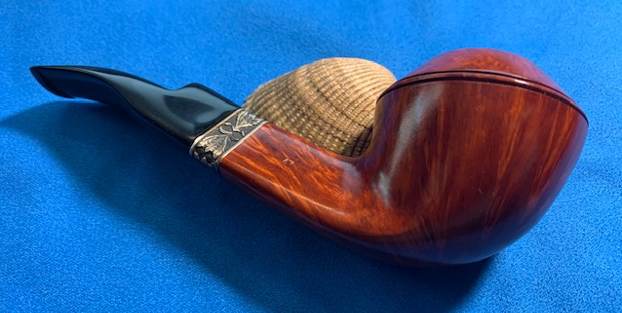
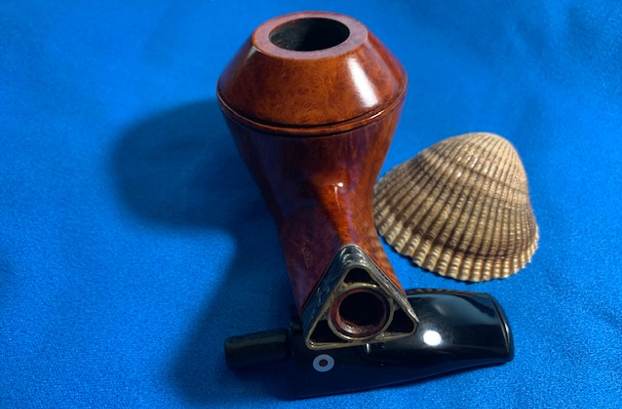
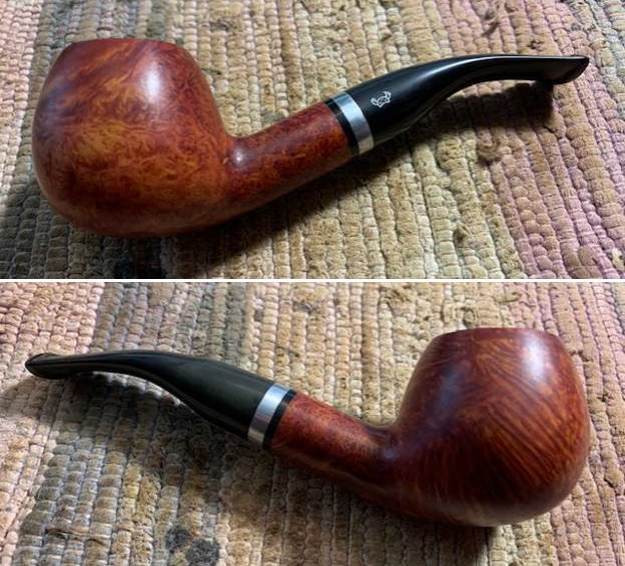
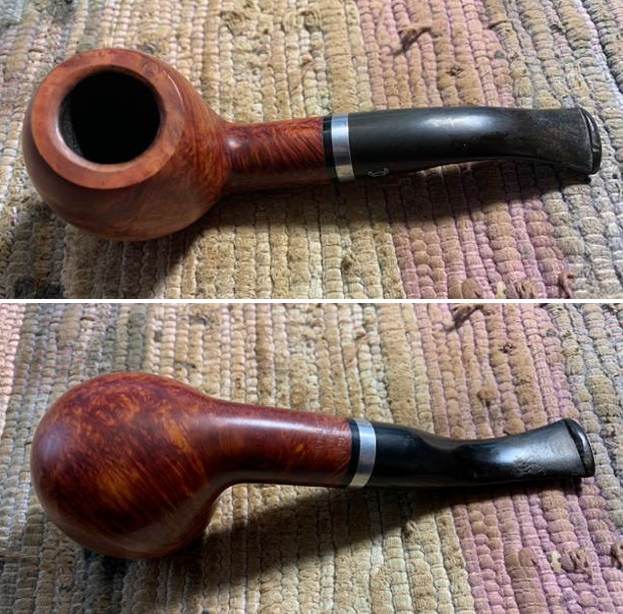
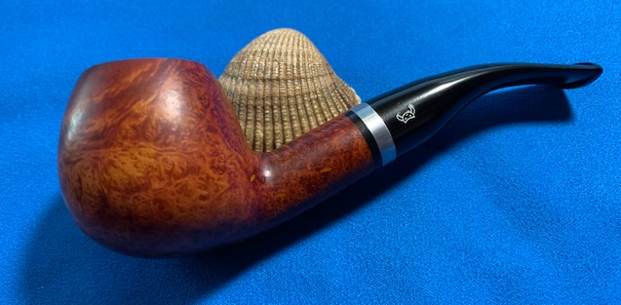
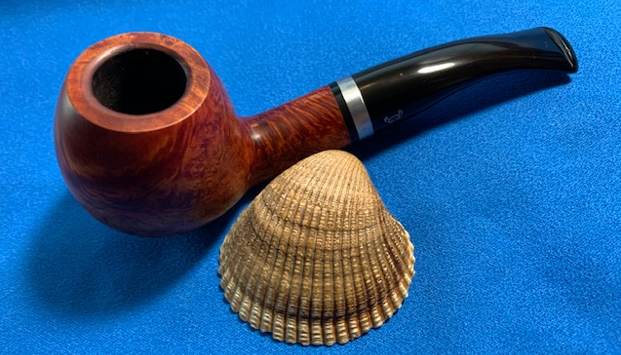
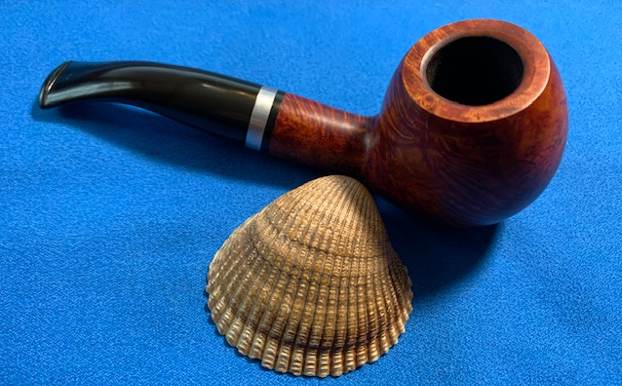
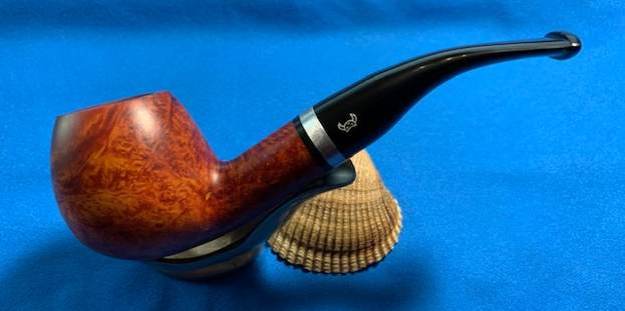
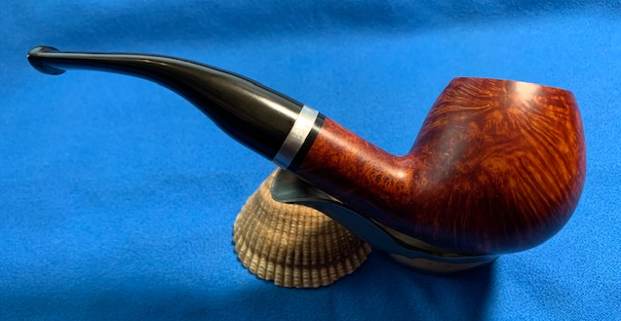
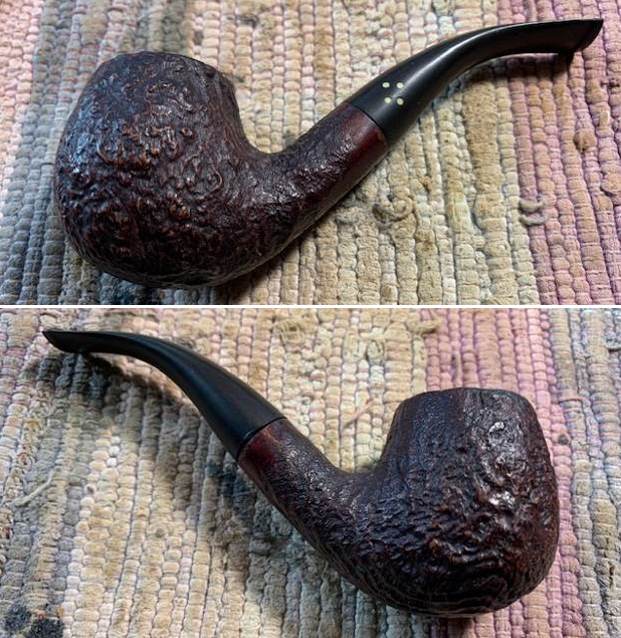
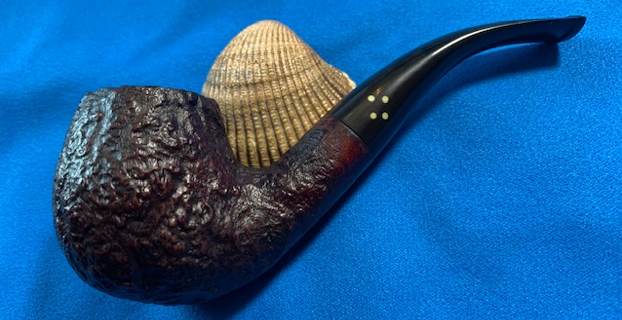
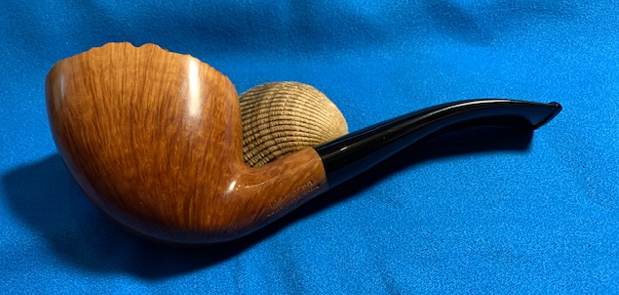
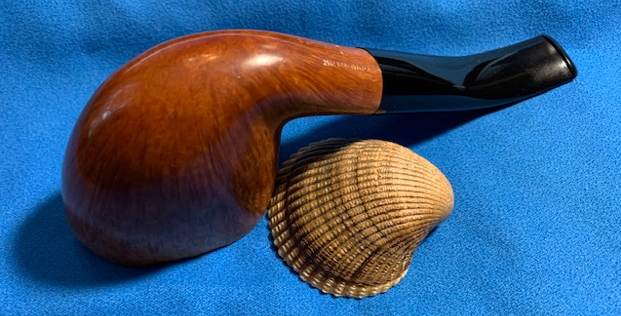
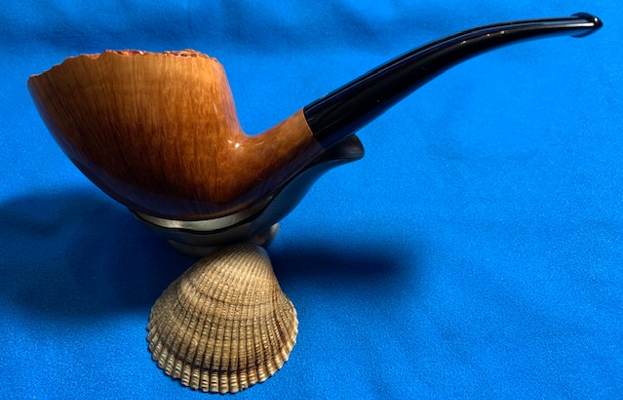
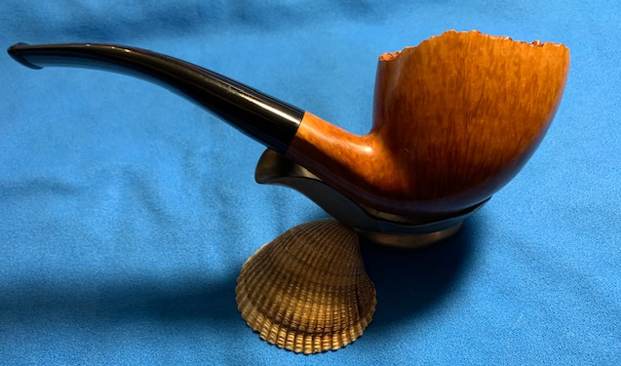
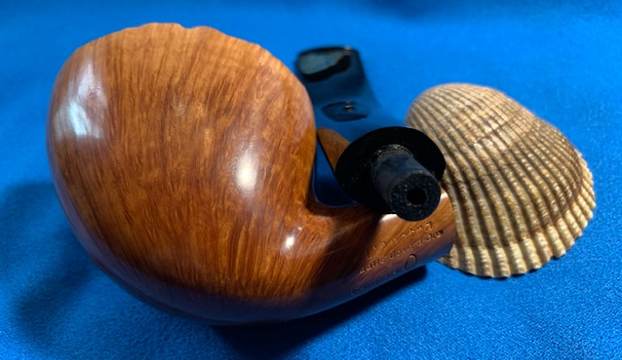
 This Malaga Rusticated Bent Apple with a vulcanite taper stem turned out to be a real beauty. The carver did a great job on the rugged rustication and the shape of the pipe. I polished stem and the bowl with Blue Diamond polish on the buffing wheel and the finish just popped and came alive. I gave the bowl and the stem multiple coats of carnauba wax. I buffed the pipe with a clean buffing pad to raise the shine. I hand buffed it with a microfiber cloth to deepen the shine. The pipe polished up pretty nicely. The pipe took on life with the buffing. The rich oil cured colour works well with the polished black vulcanite stem. The finished Malaga Bent Apple has a rich look that is quite catching. Have a look at it with the photos below. The shape, finish and flow of the pipe and stem are very well done. The dimensions are Length: 6 inches, Height: 1 ½ inches, Outside diameter of the bowl: 1 ¼ inches, Chamber diameter: 7/8 of an inch. The weight of the pipe was 38 grams/1.34 ounces. I will be putting it on the rebornpipes store shortly. It will be in the American Pipe Makers Section. Thanks for reading this blog and my reflections on the pipe while I worked on it. There are many more to come!