Blog by Paresh Deshpande
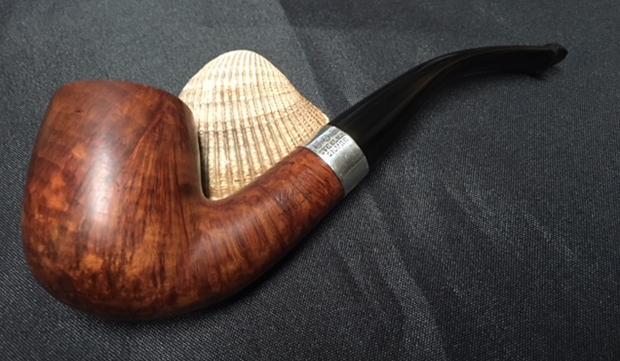
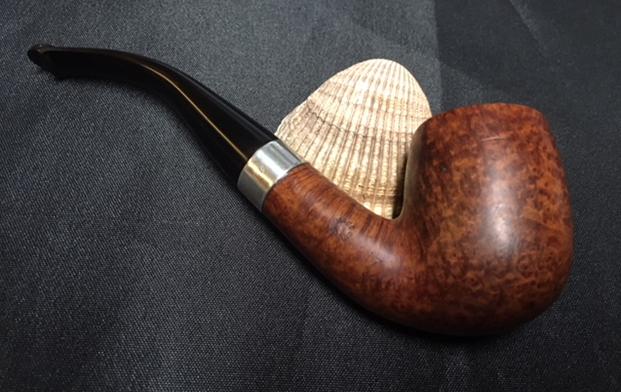
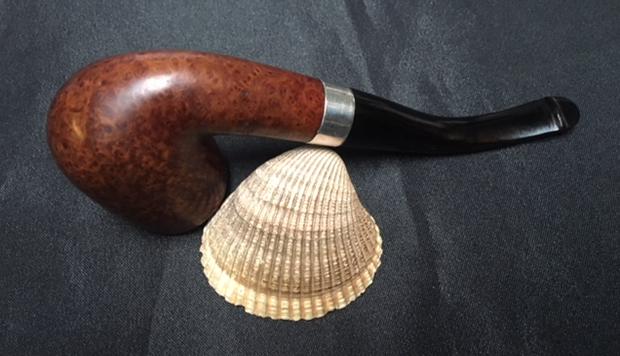
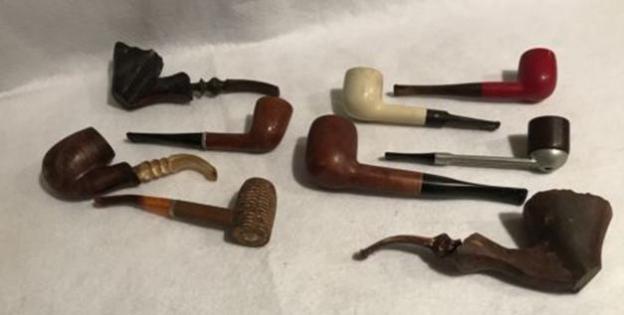
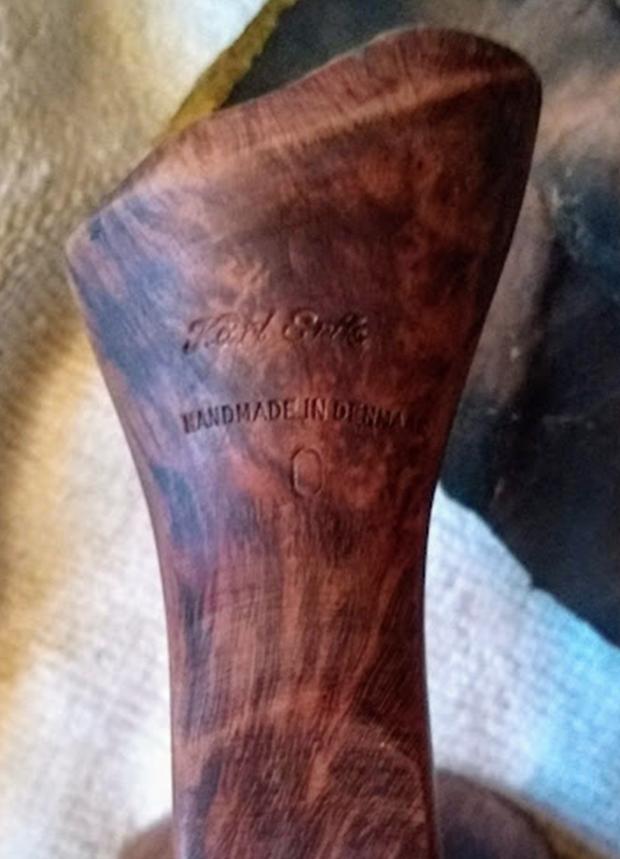
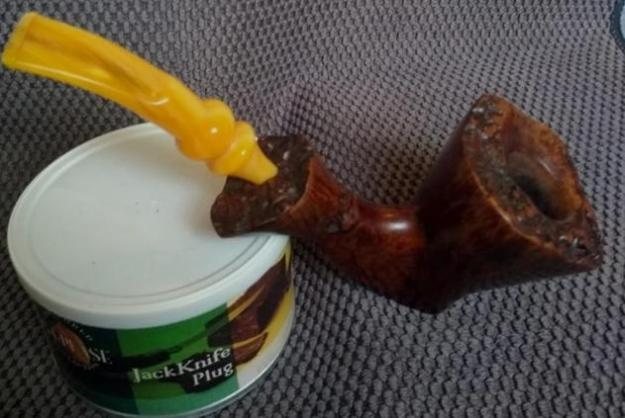
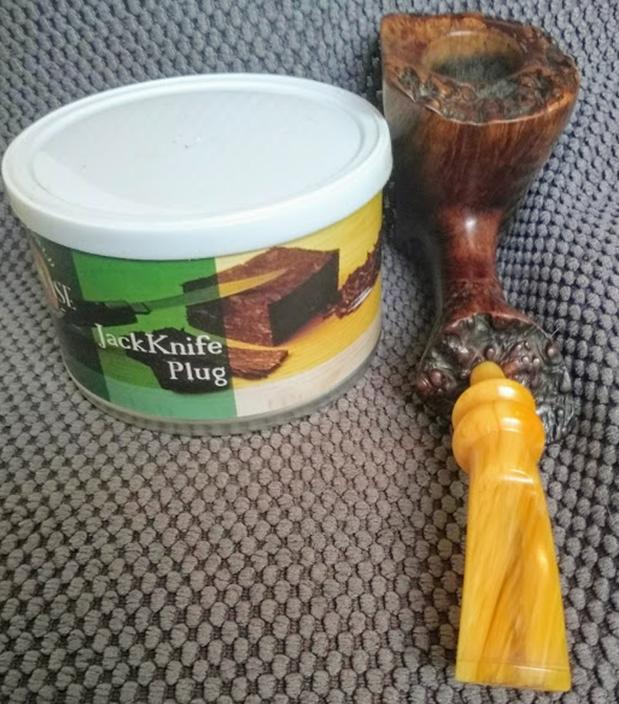
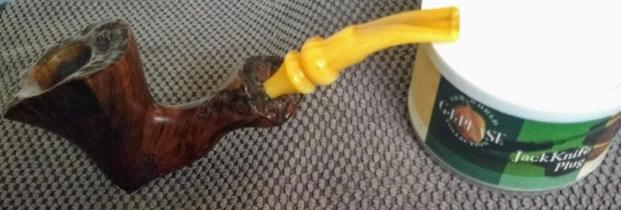
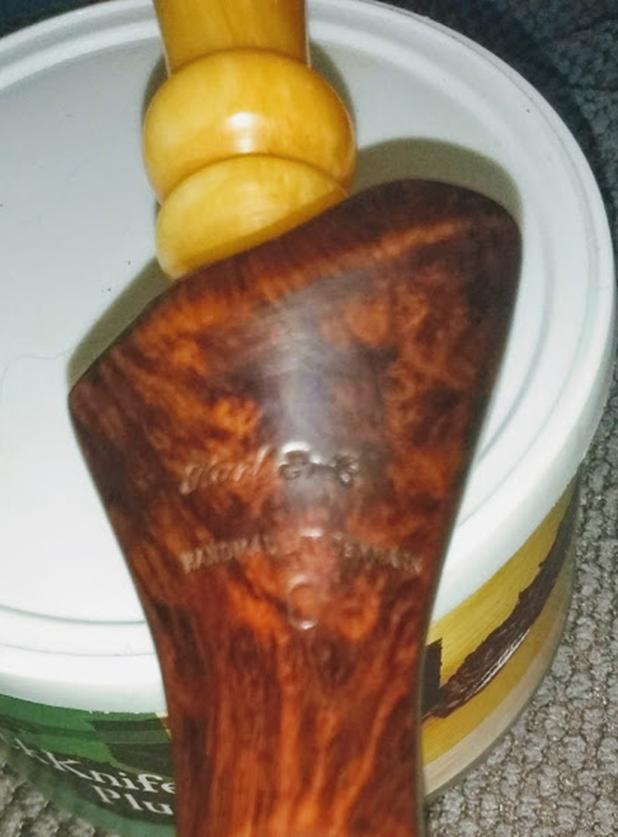
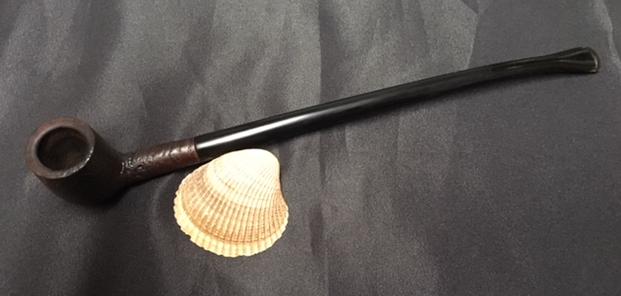
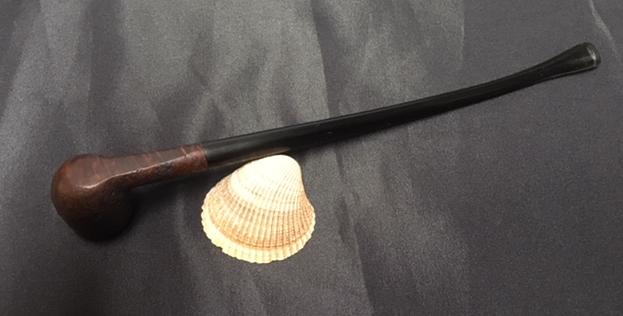
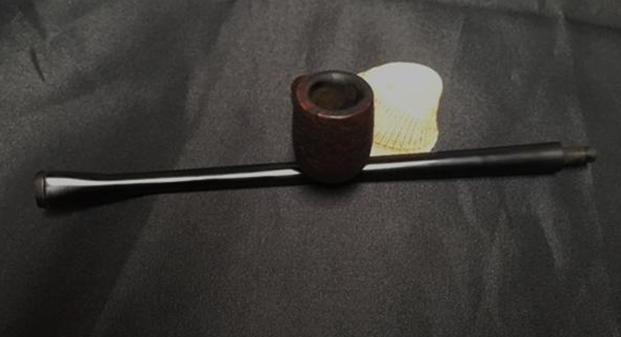
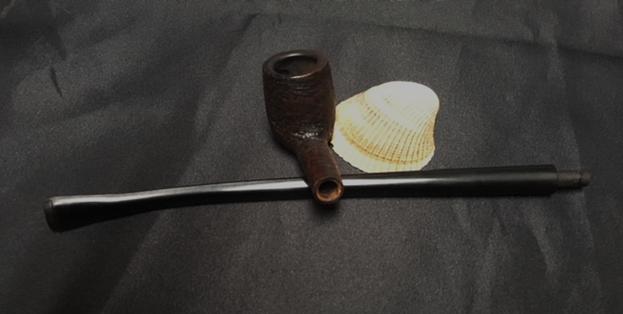
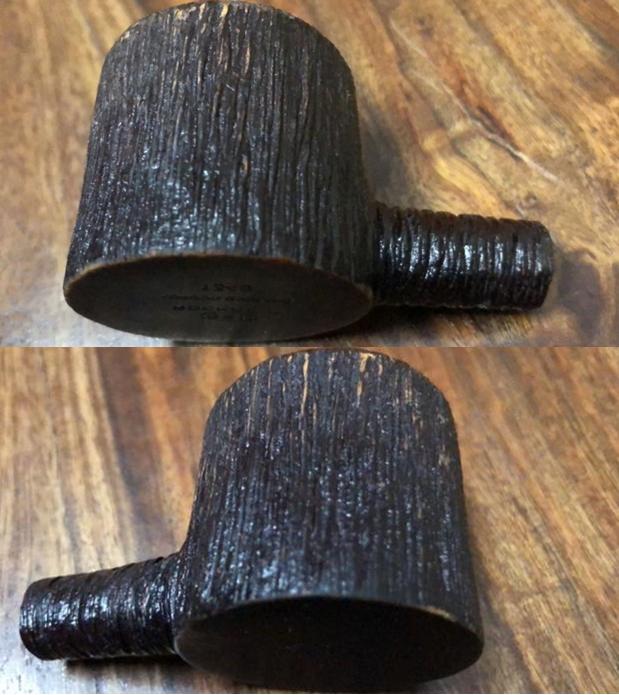
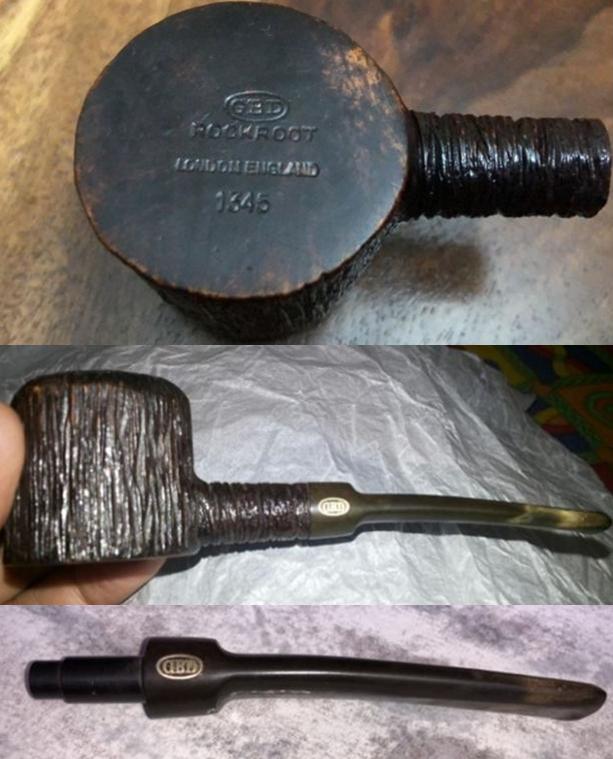
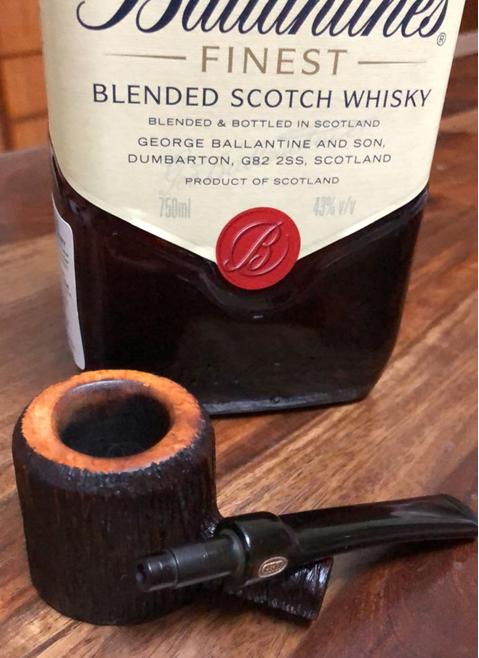
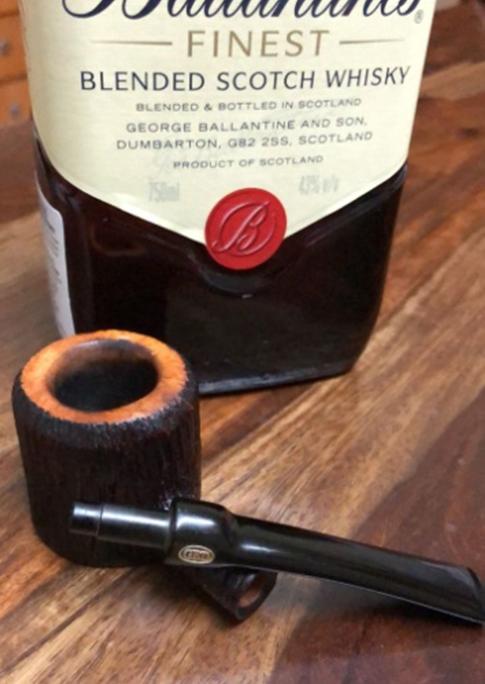
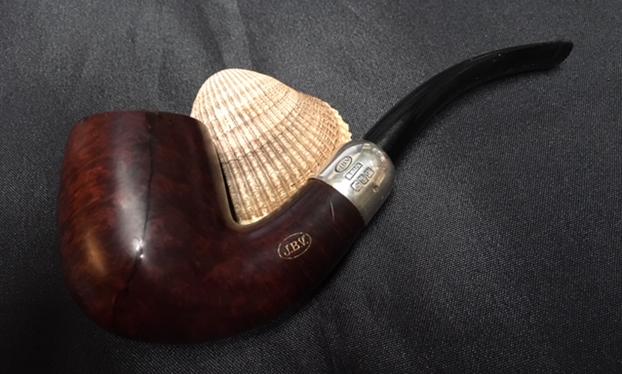
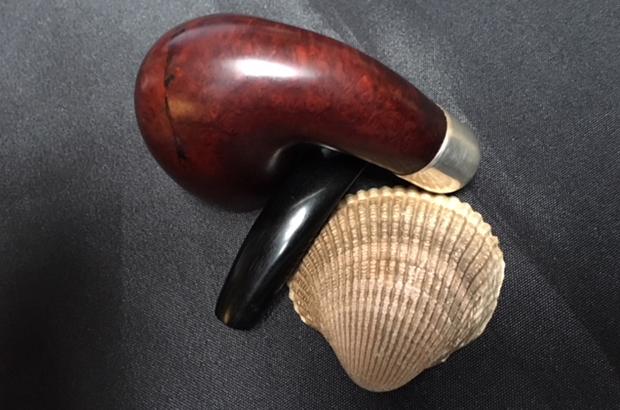
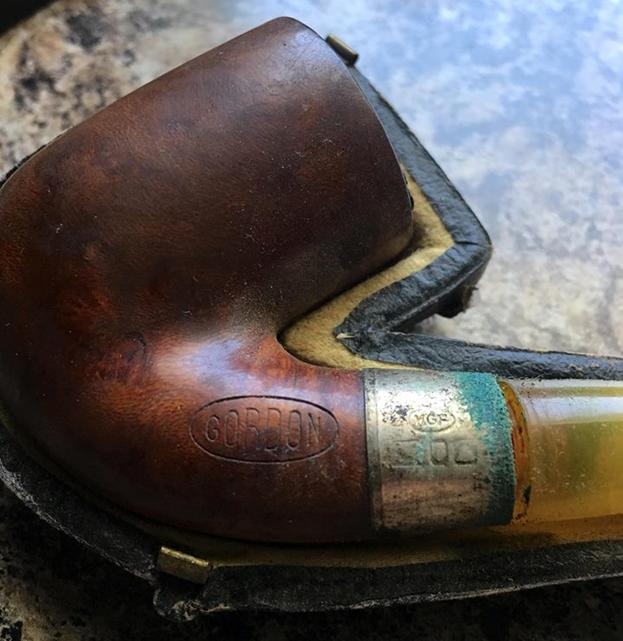
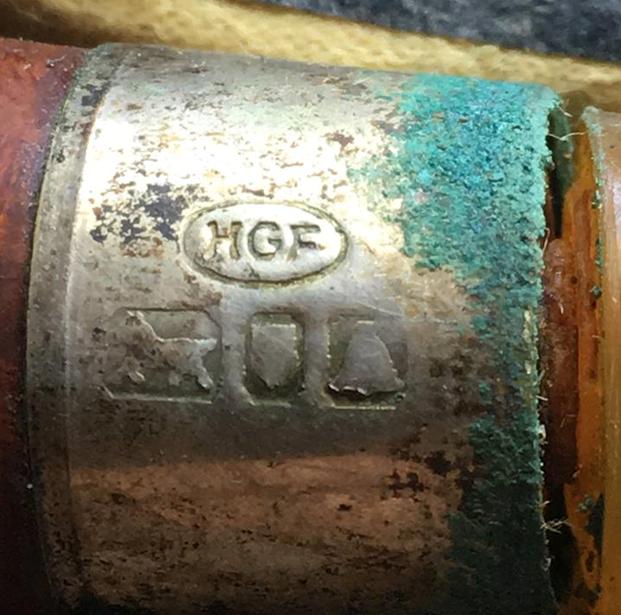
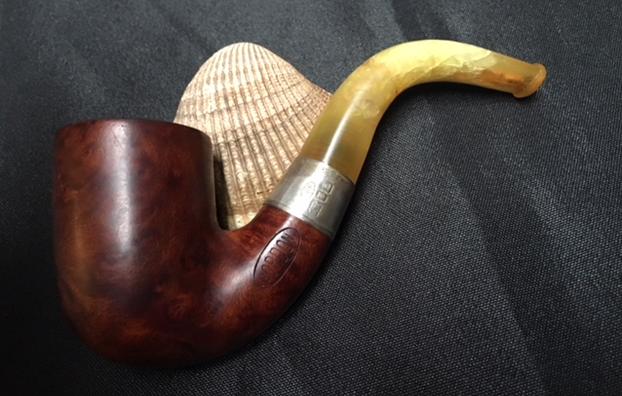
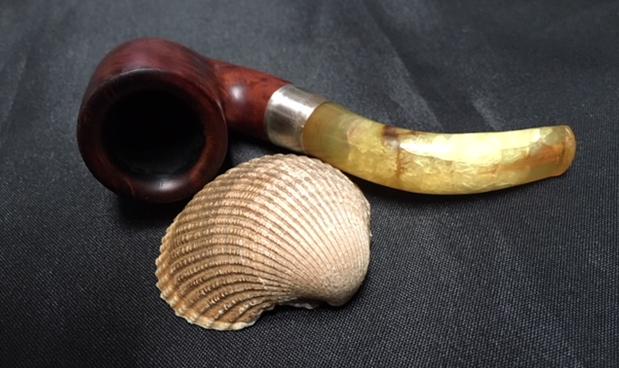
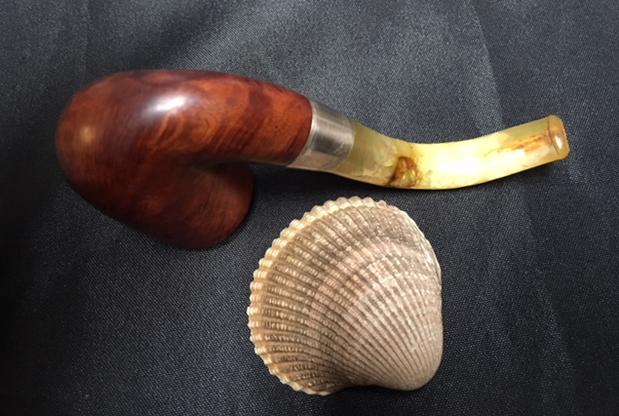
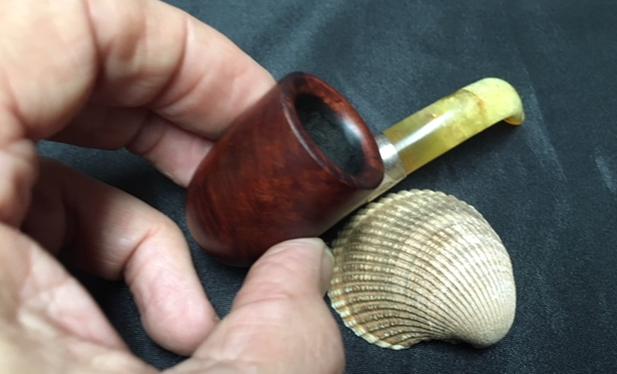
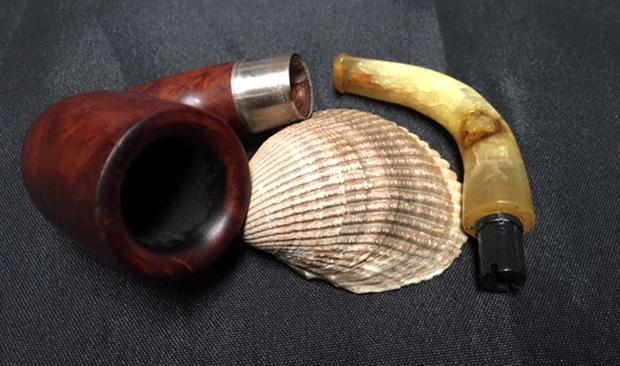
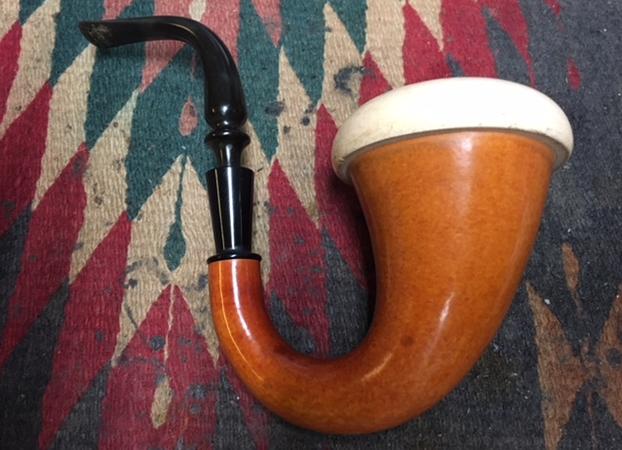
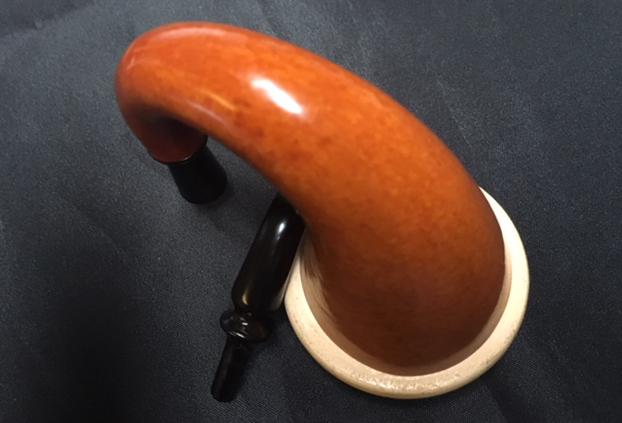
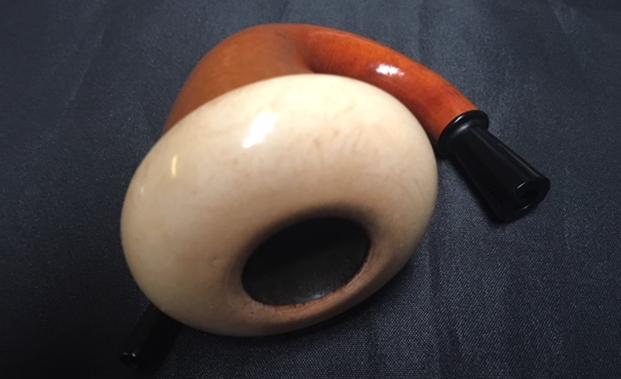
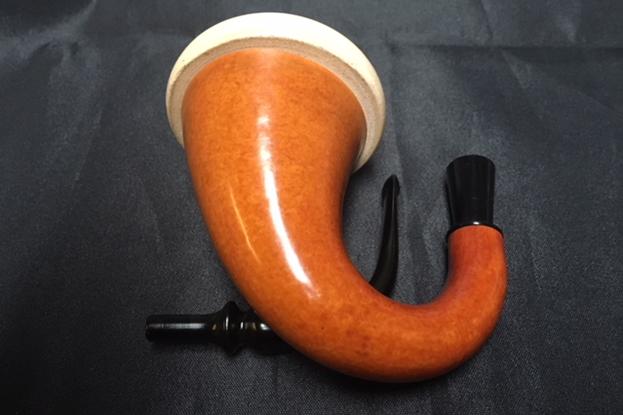
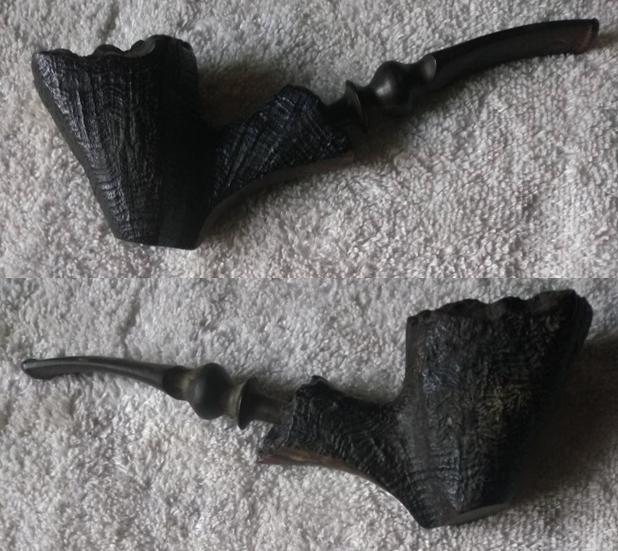
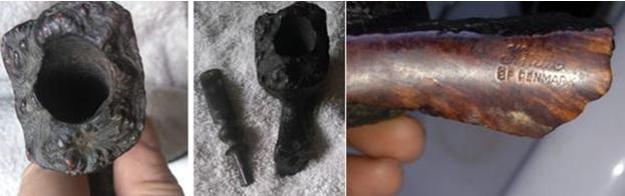
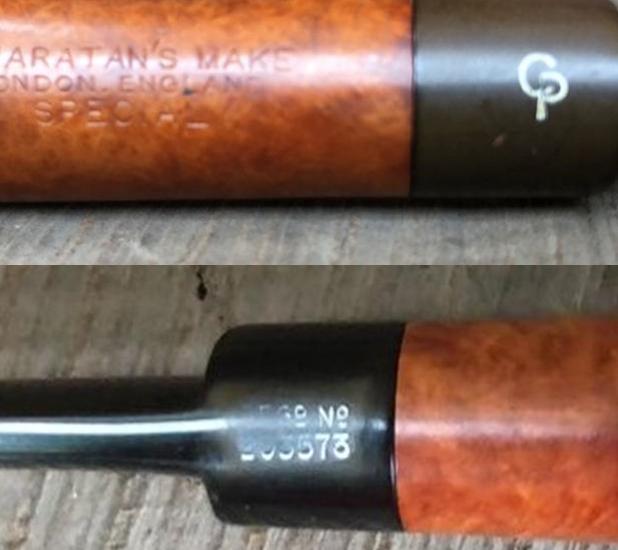
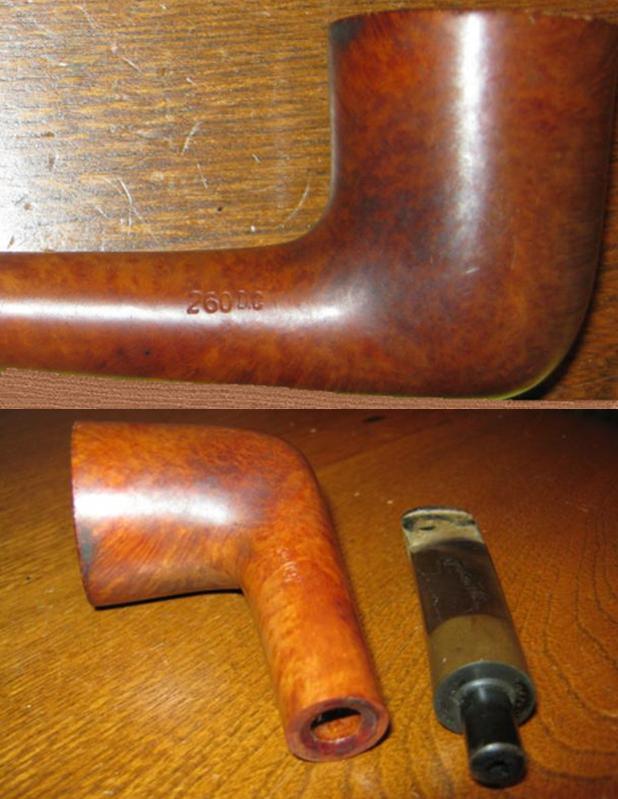
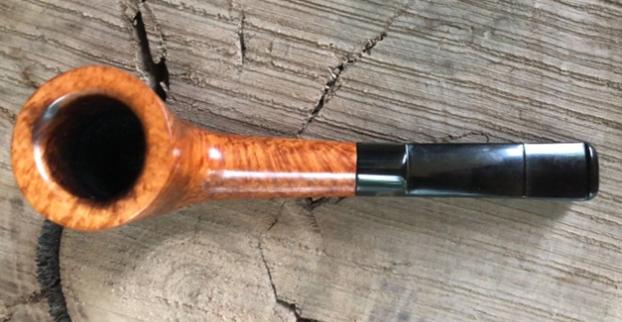
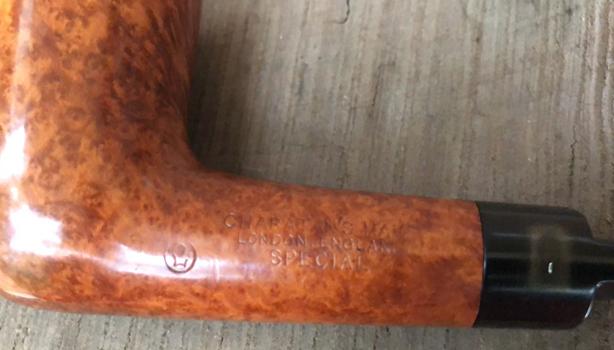
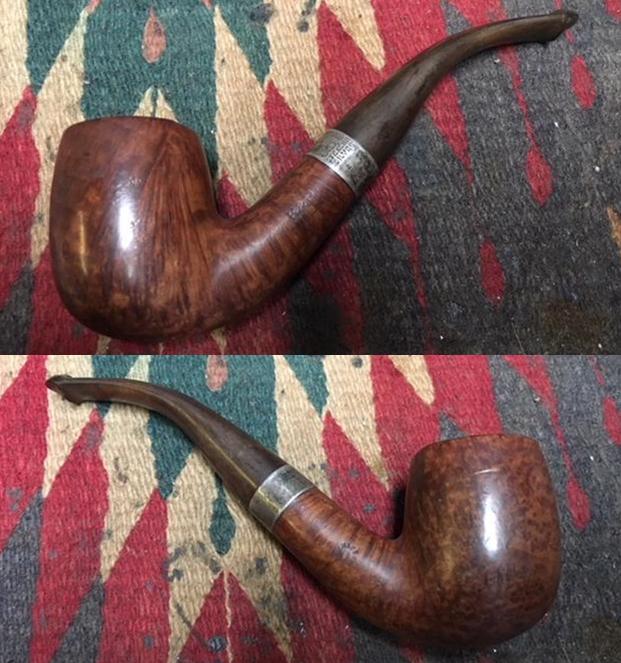
The next pipe that caught my attention was a CHARATAN’S which was in the box of pipes which I had received from my Uncle. This Dublin has beautiful birdseye on the sides and beautiful densely packed cross grains on the front and back of the bowl and also along the shank. The bowl delicately flares up towards the rim top and together with a subtle bend to the double step saddle stem, lends this pipe a lovely Dublin shape with a charm and grace that can be seen on a well crafted pipe from this quality brand!!!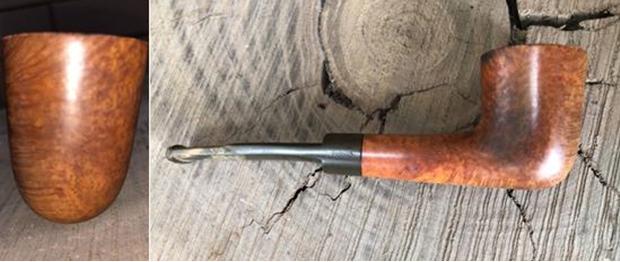 The pipe is stamped “CHARATAN’S MAKE” over “LONDON ENGLAND” over “SPECIAL” in block capital letters on the left side of the shank. Further towards the bowl on the same side, it is stamped with the letter “L” inside a circle in cursive letter. The right side of the shank is stamped as “260DC”. The left side of the stem is stamped on the saddle with “CP” logo, with the lower half of the “C” embedded within the letter “P”. The right side on the saddle is stamped with “REGD NO” over “203573”.
 I searched Pipedia for more information about the brand and also to try to accurately date this pipe. I have reproduced the details which I could glean from this website:
“In 1863 Frederick Charatan, a Russian / Jewish immigrant, opened a shop in Mansell Street, located in the borough of Tower Hamlets, London E1, where he began to carve Meerschaum pipes.
Charatan was the first brand to make entirely hand-made briars from the rough block to the finished pipe including the stems. The nomenclature “Charatan’s make” refers to this method of production and was meant to differ Charatan from other brands who “assembled” pipes from pre-drilled bowls and delivered mouthpieces.
On the retirement of his father in 1910 Reuben Charatan took over the family business.
In 1950 Herman G. Lane, striving to expand his business in Great Britain, made contacts with the Charatan family. Apparently Lane got a certain influence soon, but it was not until 1955 that Lane Ltd. became the sole distributor for Charatan’s in the United States superseding Wally Frank. This can be documented in a “biography” written for Herman G. Lane titled “Leaves from a Tobaccoman’s Log”.
Thanks to Herman G. Lane’s dedicated labor Charatan became hugely popular in the States. As reported by Ken Barnes in an interview with Rick Newcombe, Reuben Charatan passed away in 1962, and his widow sold the firm to Herman Lane 1 or 2 years after his death [1]. In the early 1960’s Charatan pipes were the first to overstep the $100 Dollar line in US pipe sales. In 1978 Lane’s heirs sold the Charatan company to Dunhill. The Prescot Street factory was closed in March 1982. Thereafter the fame and quality of the make declined.
The pre-Lane period (prior to 1955) and the Lane era pipes (1955 to until sometime between 1979 – 1984) are of primary interest the collector. The Lane era is often quoted as beginning about 1950. Charatan records indicate the DC (Double Comfort) bit was introduced in the 50’s, but some report seeing them in earlier production. Still others indicate they were introduced by Lane in 1960. Regardless, the DC bit is not an accurate way to date a pipe because many Charatan’s were made with regular and saddle type bits throughout the “Lane Era”.
An excellent article, Dating of Charatans has been translated for Pipedia by Mathias Acciai. This study by Fabio Ferrara of Monterubbiano – Italy is based on more than 2000 old Charatan pipes he studied from the “Basciano stock” purchased by Mario Lubinski – Fermo. This fantastic addition to the Charatan knowledge base is now in English here on Pipedia.
The first step on dating a Charatan is to carefully look to some details:
- a) Shape of the mouthpiece
- b) marking on the mouthpiece
- c) engraving on the shank
- d)shape and position of shank engraving/writing
This is because you can make the following conclusions:
a) From 1863 to 1960 the mouthpieces have a normal shape, saddle or tapered. From 1961 they use the ‘Double Comfort’ style still used today. By the way there are some saddle bits (without the double comfort) used in pipes that date after 1960 but these models are always characterized by a X (in the place of the DC) engraved after the shape number on the shank. This means that if a pipe has a tapered mouthpiece instead of a double comfort one, it is definitely a pre-Lane pipe before 1960. While if a pipe has a normal saddle bit stem, it could belong to every era. Nevertheless the pipe is pre 1961 if the shape code does not include an X, and is a pipe from after 1960 if the X is engraved.
Finally any pipe with the double comfort stem is definitely after 1960.
b) The CP logo on the stem is stamped in a different shape according the era it was used. Some differences are less obvious than others, however the glaring differences are detectable in 4 phases. The CP till the 1960 is very fine, the C penetrates the P.
From 1961 to 1977 the CP logo is more pronounced and the C penetrates the P.
From 1980 (approx.) the C does not penetrate the P any more, even though the two letters are joined.
The CP of Dunhill era has a different shape than the one of the French Russell era.
c) Pipes that belong to eras till the 1960 have the engraving ‘CHARATAN’S MAKE LONDON ENGLAND’ in two lines, the shape code is composed by numbers only. The X and the DC appear only on pipes after 1960.
The engraving ‘MADE BY HAND (in caps) -IN-City of London’ in three lines identifies pipes made between 1965 and 1966. The engraving in script font ‘Made by Hand -In-City of London’ on three lines identifies pipes made between 1966 and 1979. The circled £ (Lane) characterizes pipes produced from 1955 to 1980 (approx.)
d) engravings are different in both size and shape, depending on eras.
Identification of a third era pipe (First Lane era, 1961-1965)
Pipes of this period are quite common.
1) The mouthpiece is frequently double comfort, rarely saddle without the double comfort, never tapered. If the stem is not a double comfort but a saddle one, it is characterized by the letter X on the right of the shape code (e.g. 2502X), naturally in this case the letters DC are not displayed.
2) In the CP logo, the C enters the P
3) Presence of £ on the shank (note that from 1955 all the pipe imported in the USA by Lane has it, however that stamping is not synonymous of the Lane era)
4) Presence of the letter DC just after the shape number (e.g. 2502 DC) or of the letter X only if the stem is not a double comfort one
5) Presence in some models of the stamp “MADE BY HAND” on the shank (introduced for the first time in 1958)
6) Presence of the writing “CHARATAN’S MAKE LONDON ENGLAND” in 2 lines
7) The CP logo is thicker than in previous eras.
From the above information, it can be safely assumed that this particular piece dates from somewhere from 1960 to 1965, that is the first Lane Era, which coincides with the period of the other pipes that belonged to my grandfather. With this information in mind, I moved ahead to the next process in the restoration.
INITIAL VISUAL INSPECTION
I always follow the advice of Mr. Steve given out in his blog on restoration process for novices like me and carry out initial visual inspection of the pipe. This helps a lot in formulating your POA for the restoration.
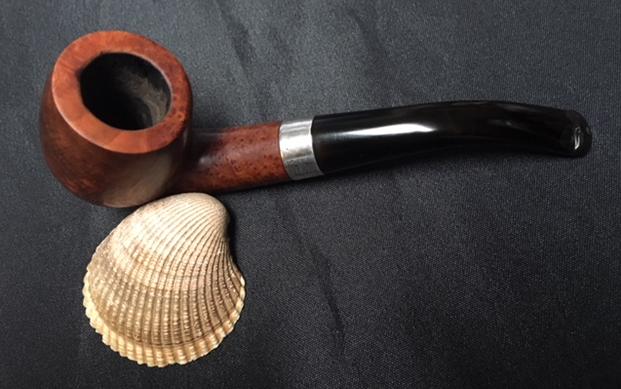
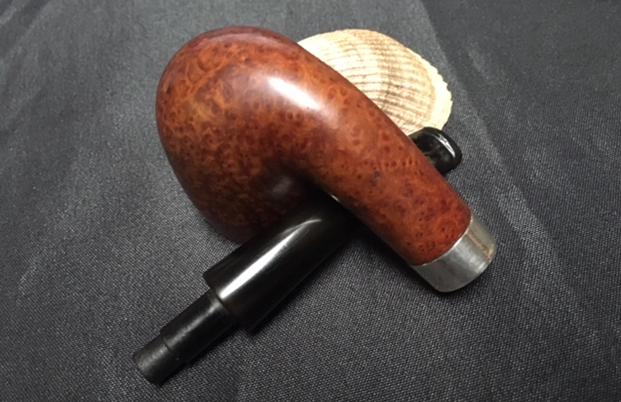
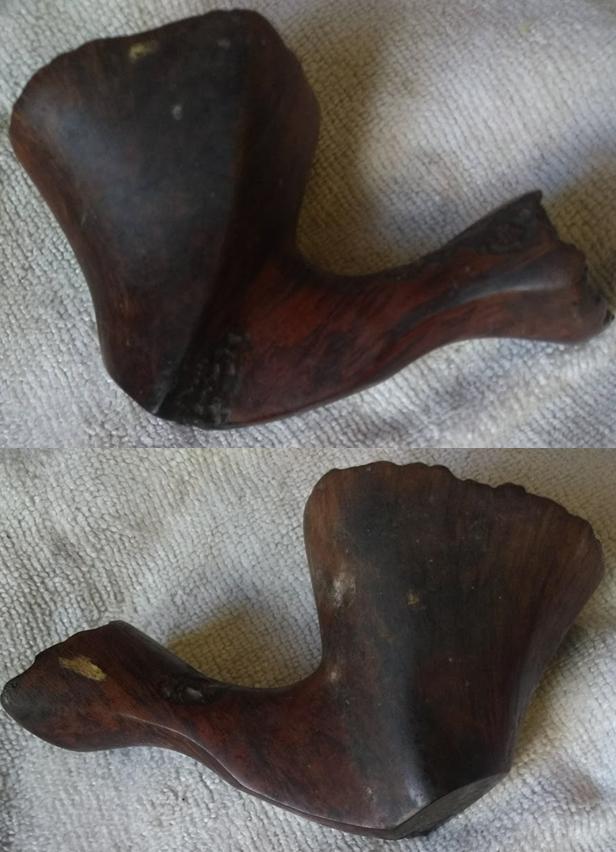
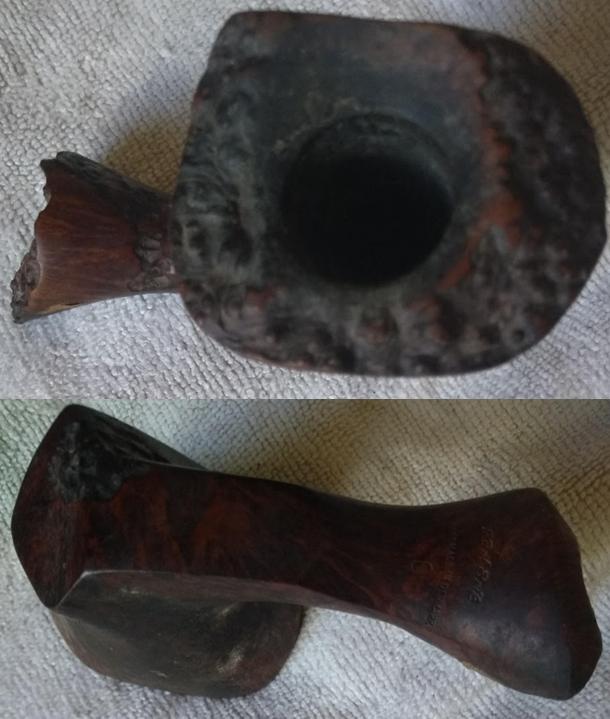
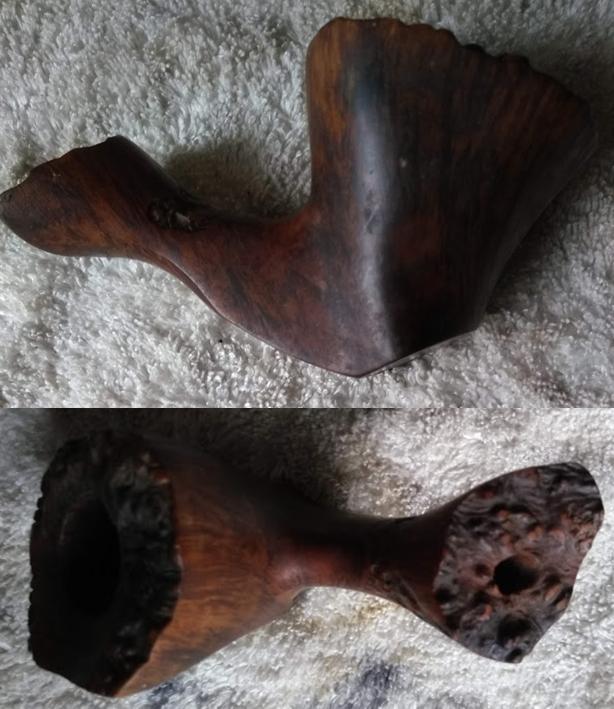
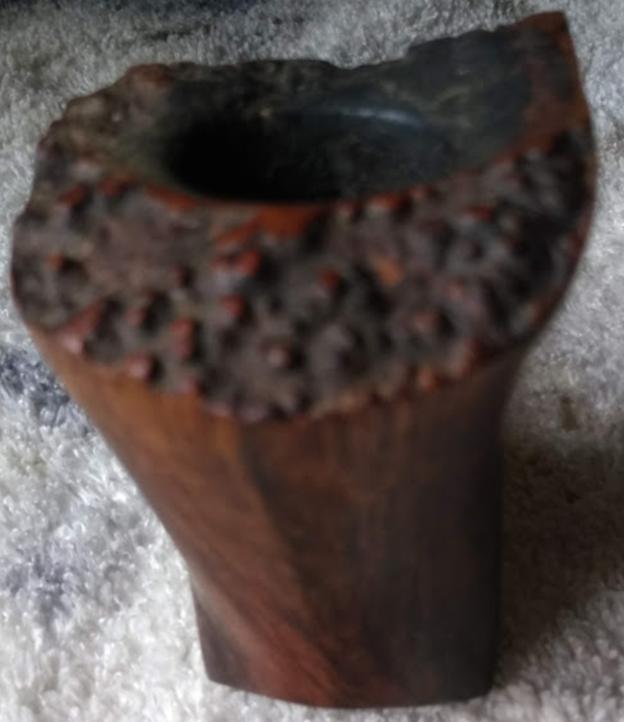
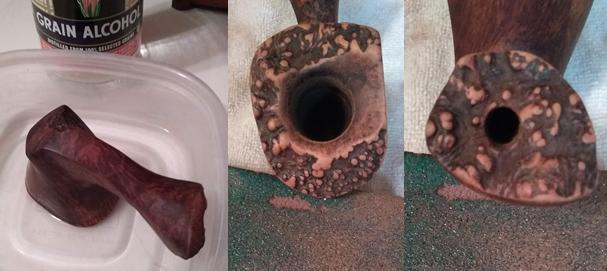
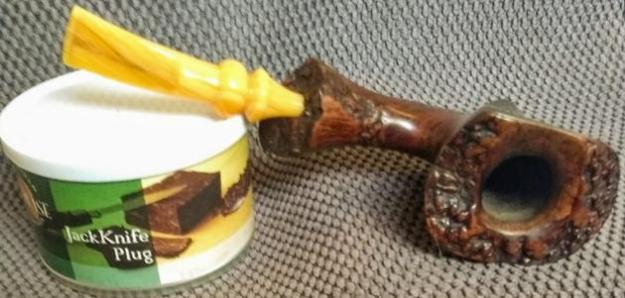
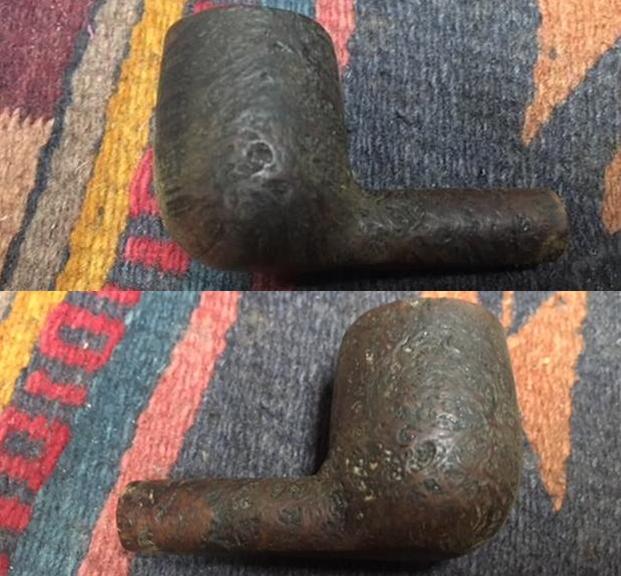
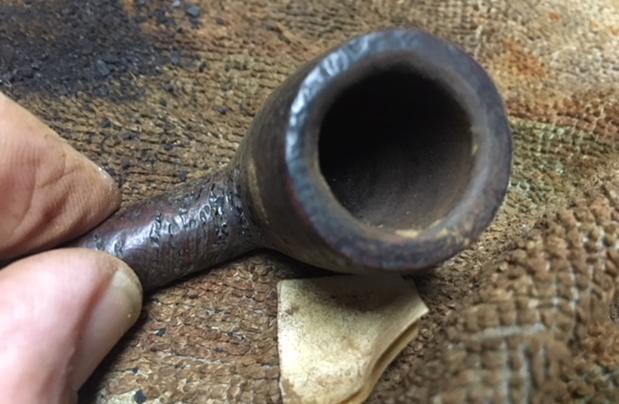
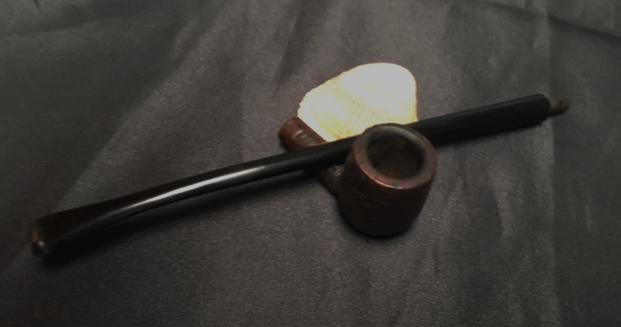
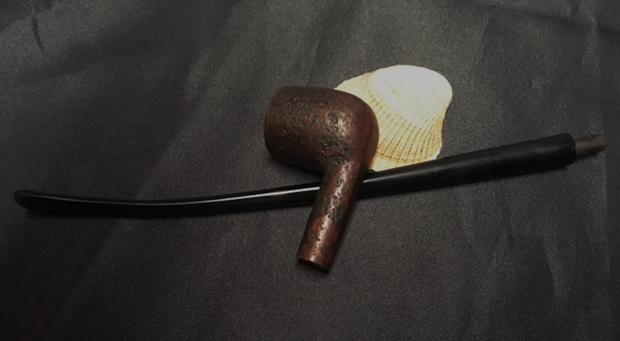
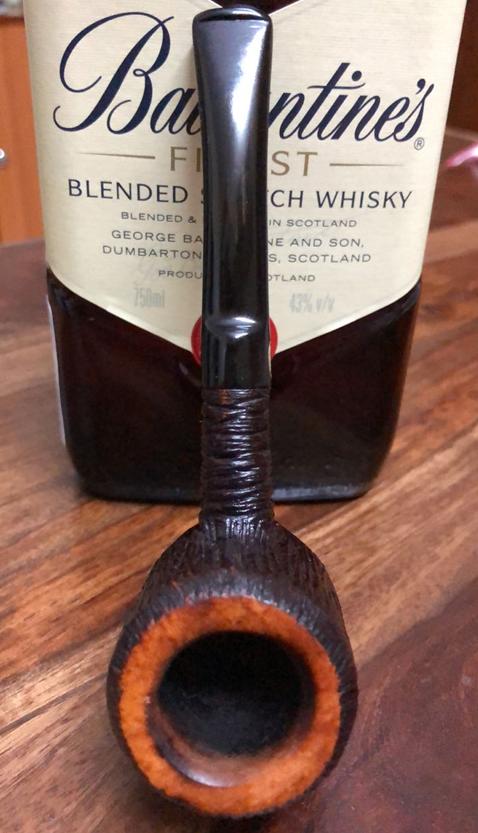
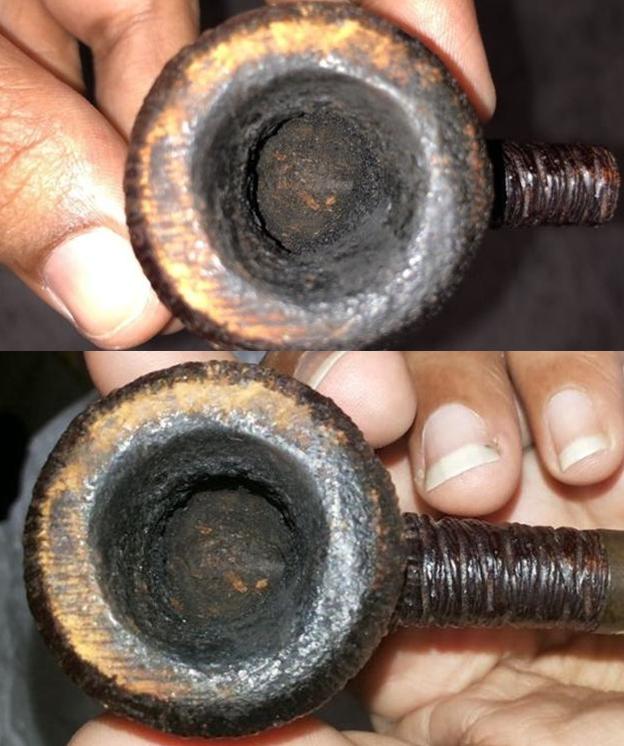
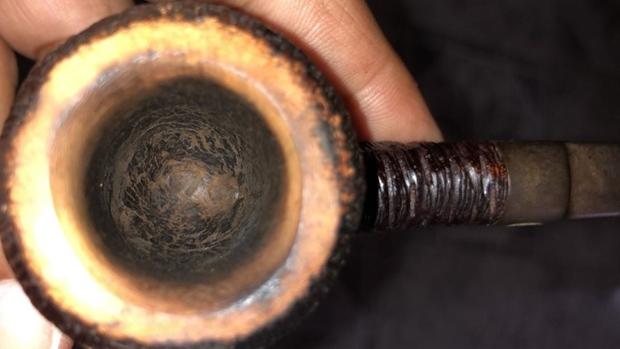
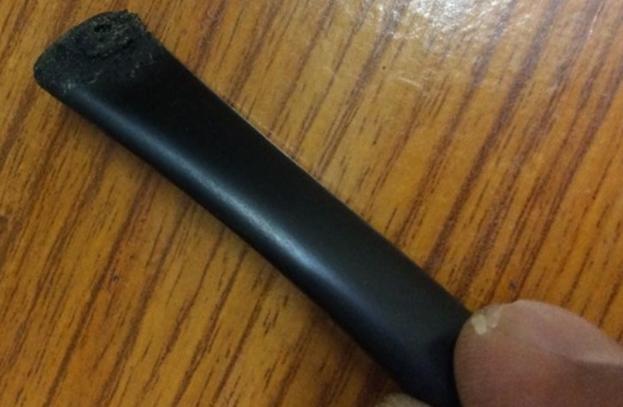
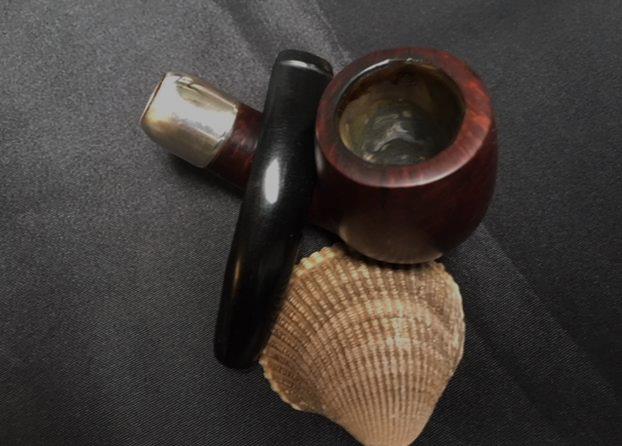
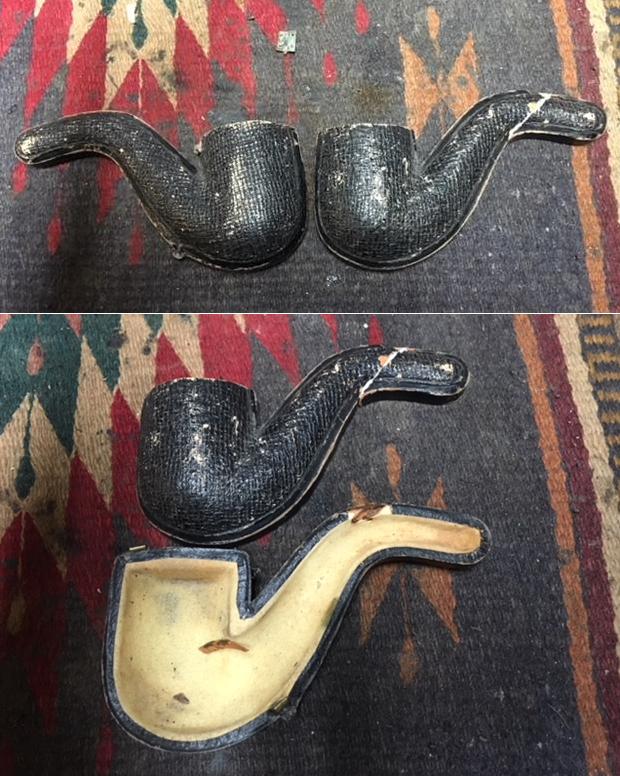
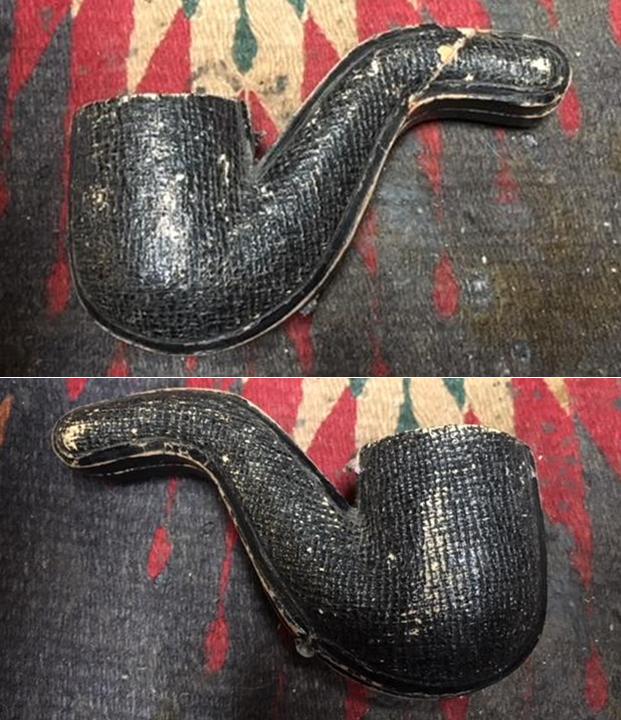
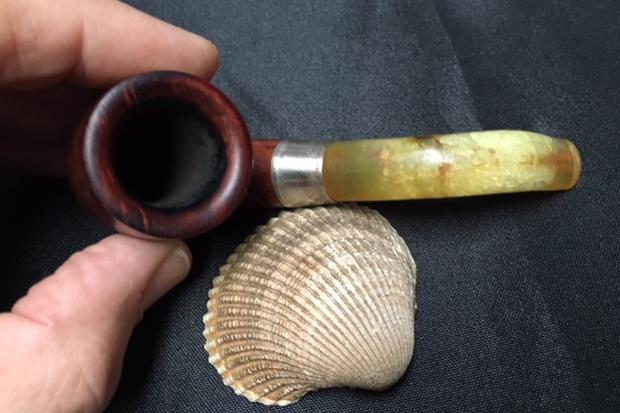
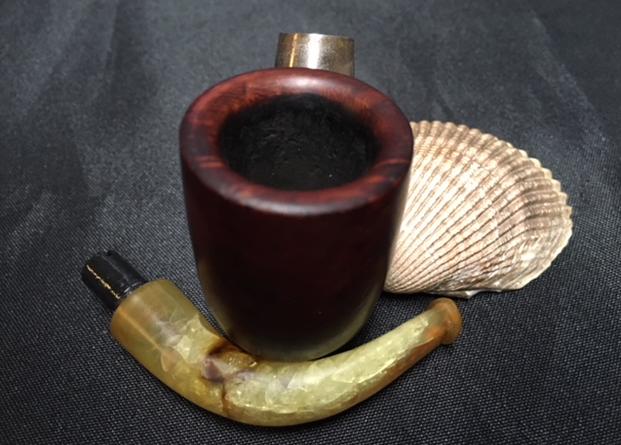
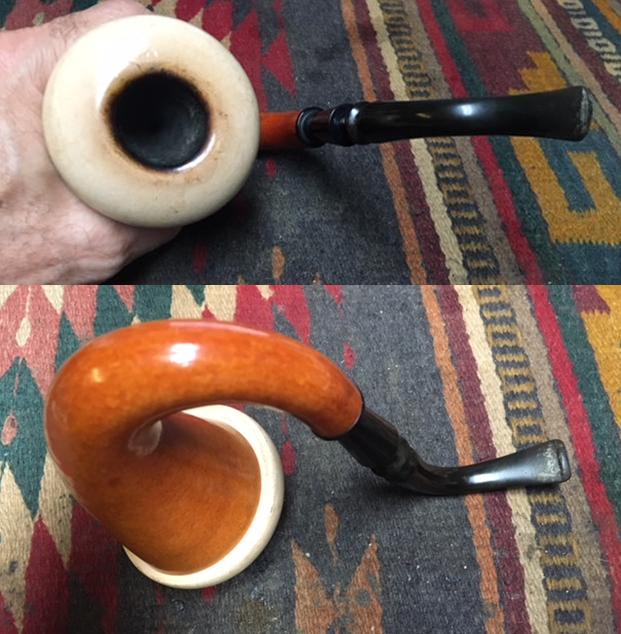
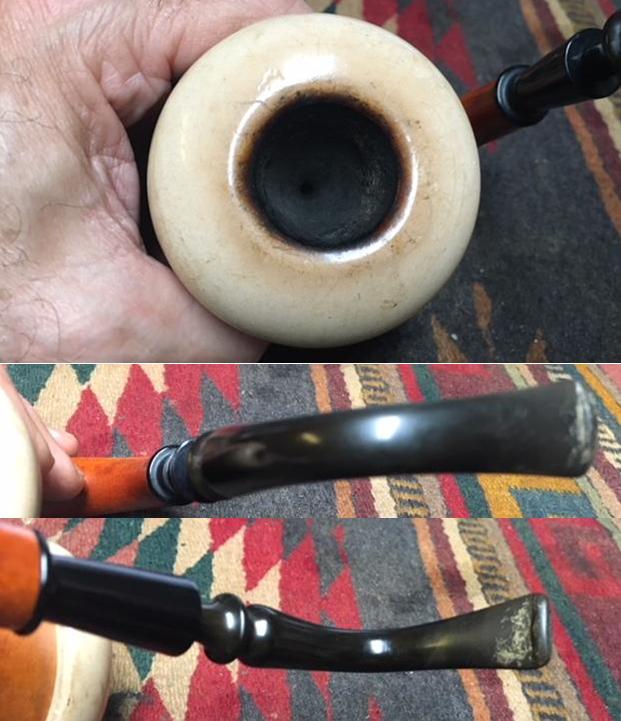
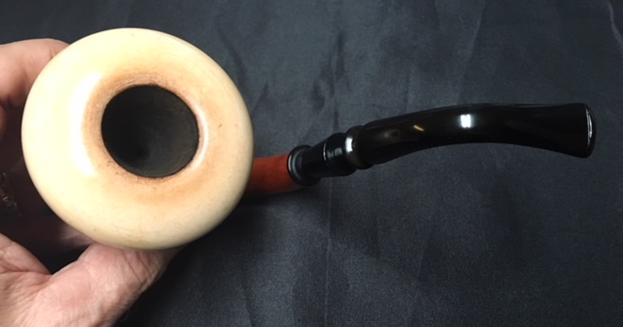
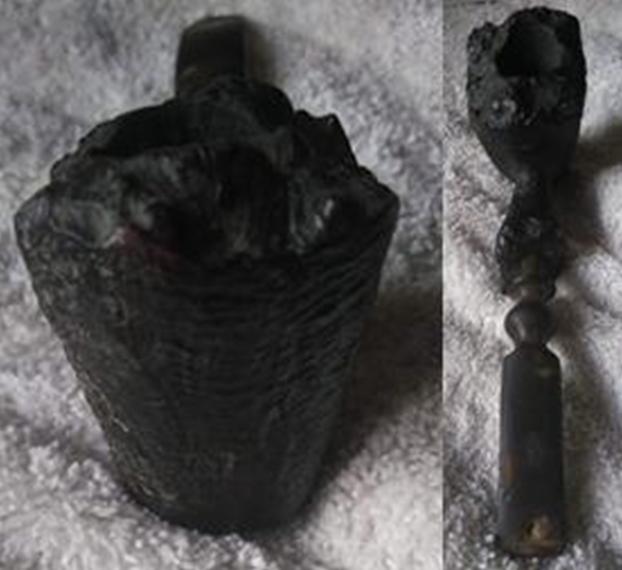
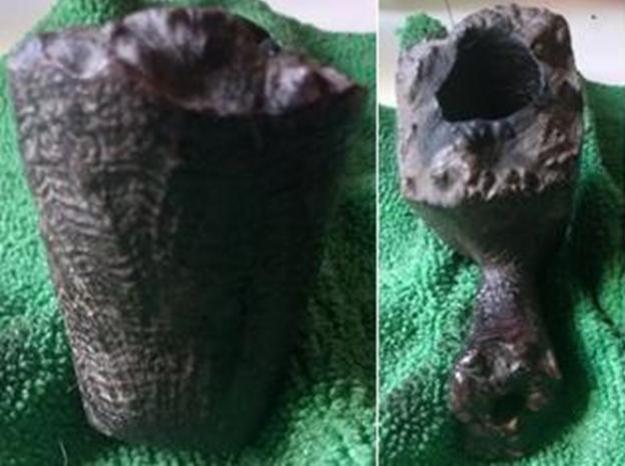
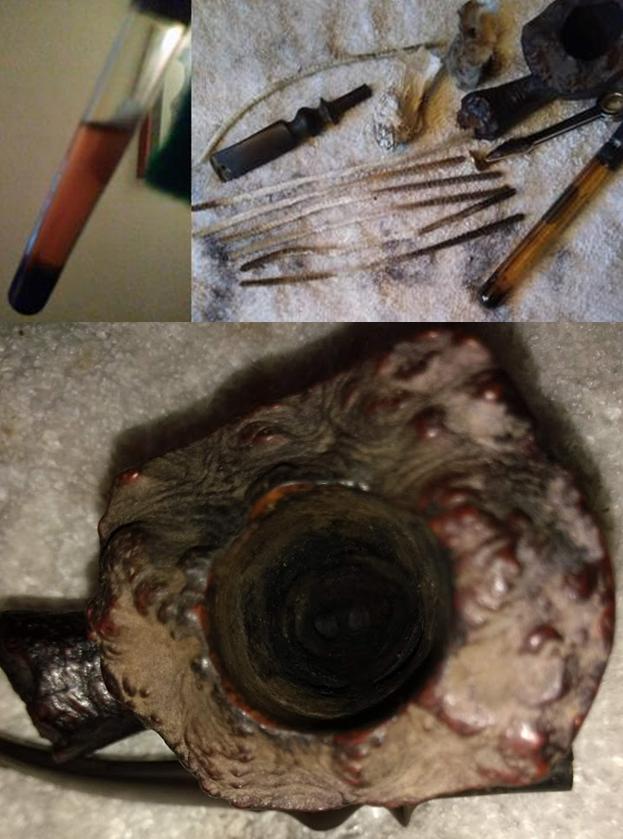
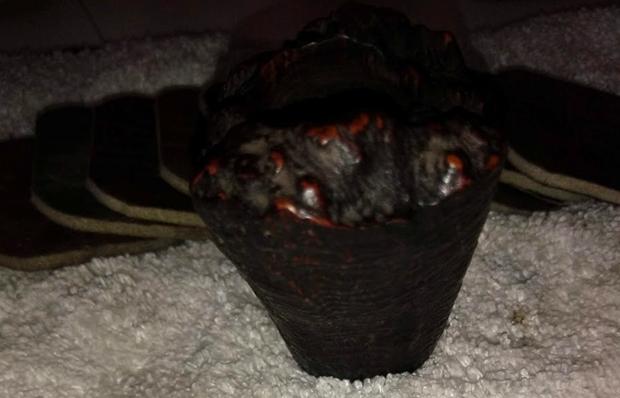
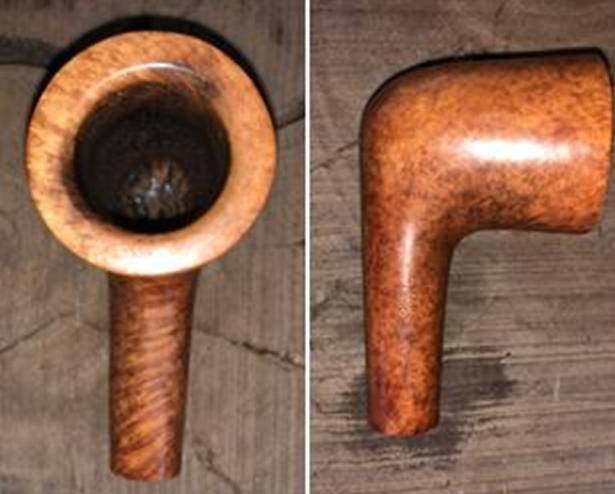
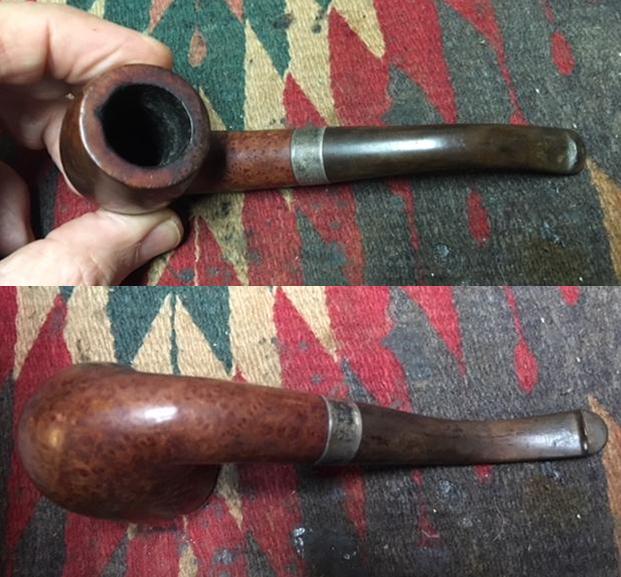
The bowl is heavily caked with an equally heavy overflow of lava on to the rim top. The outer edge of the rim appears to be intact save for the light charring on the left side in 9 ‘O’ clock direction. However, the inner edge of the rim is a totally different story!!!! Deep extensive charring can be seen on the inner edge in 1 ‘O’ clock direction on the right side and in 8 ‘O’ clock direction on the left side. The internal condition of the bowl and the exact extent of the char can only be ascertained after the process of reaming is completed. 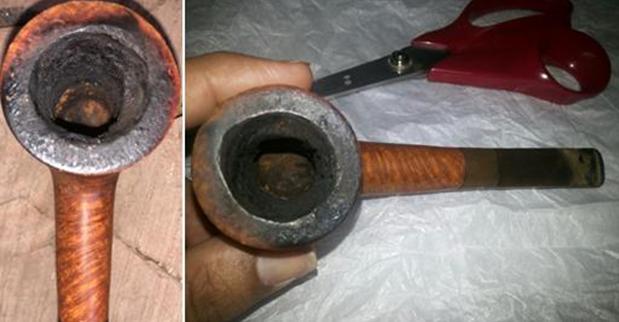 The stummel and the shank are covered in grime and dust of these years of use and subsequent storage, giving it a dull and lackluster appearance. This will need to be addressed.
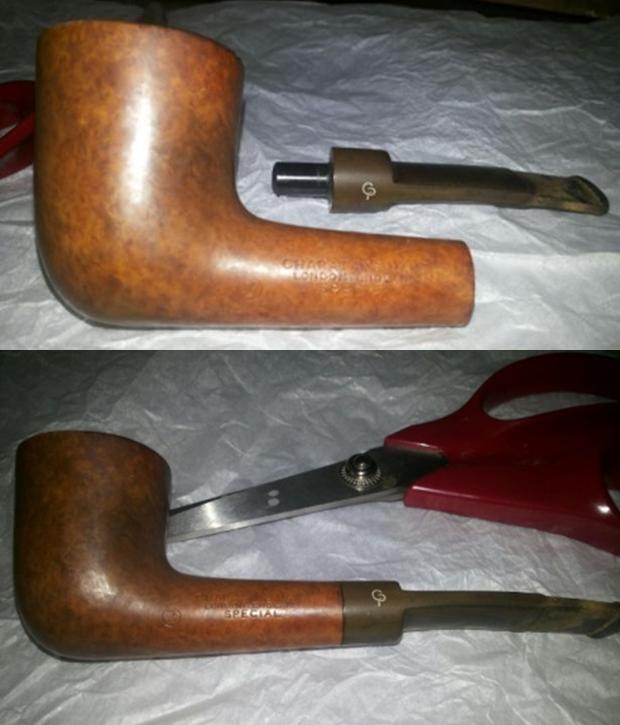
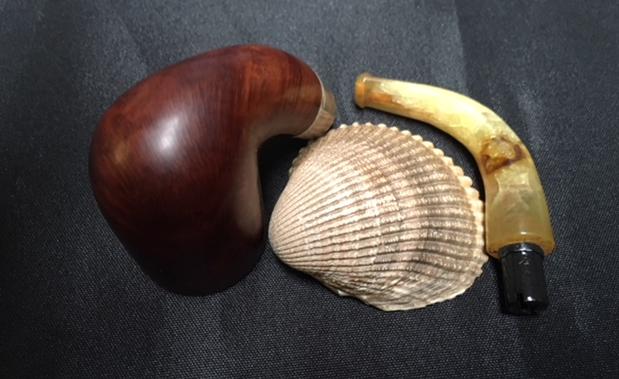
 Air does not flow easily through the pipe and requires some lung power to do so. The airway in the stem and/ or in the shank is restricted and needs to be cleaned out.
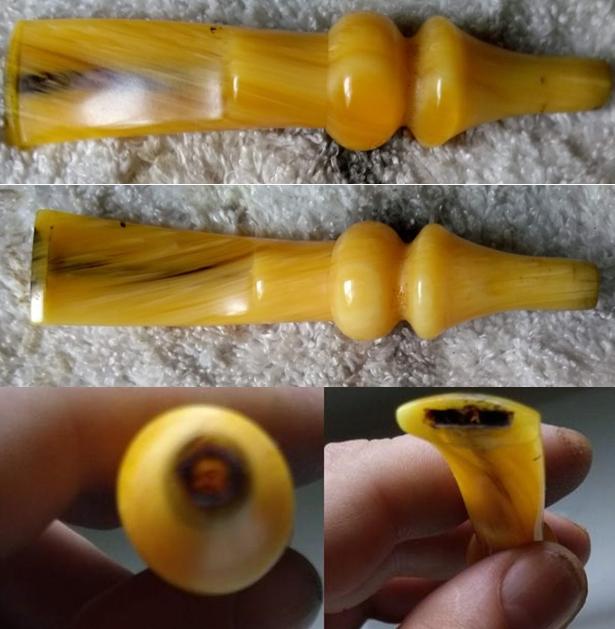
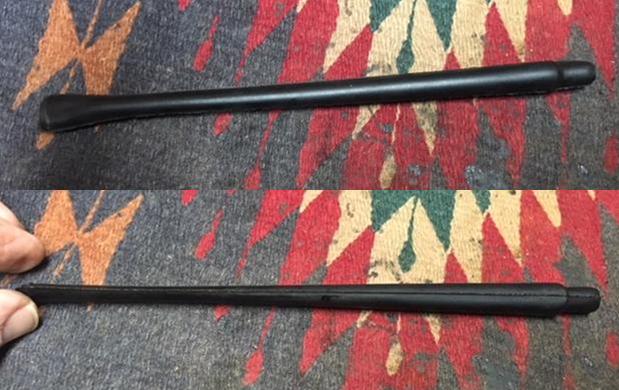
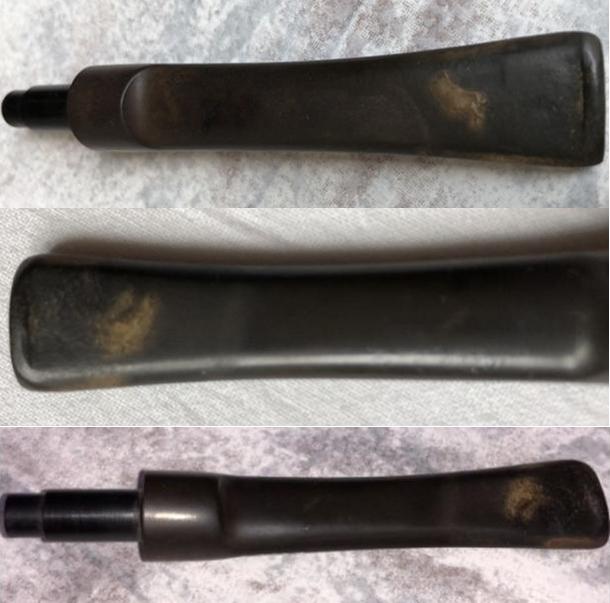
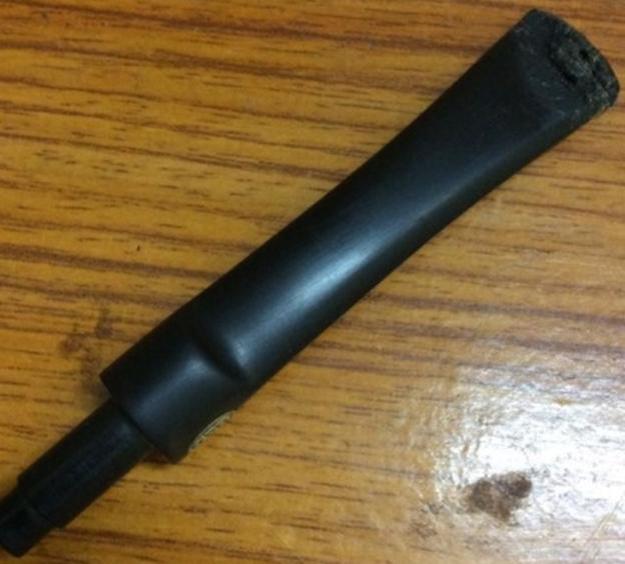
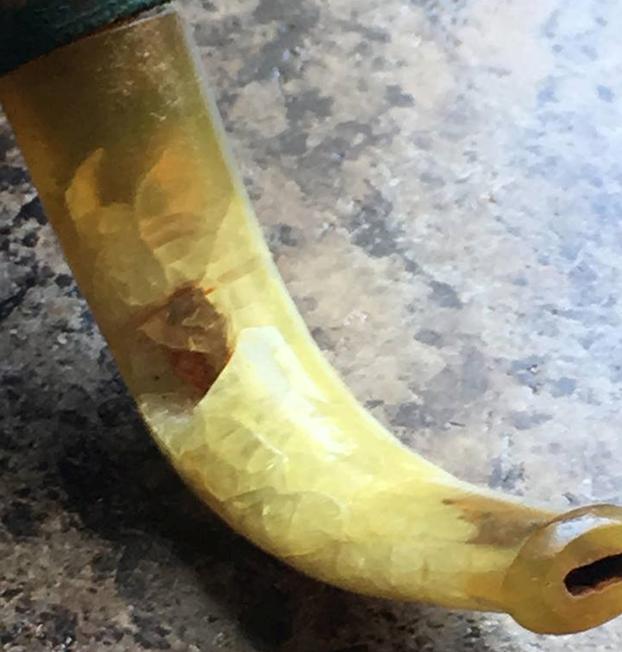
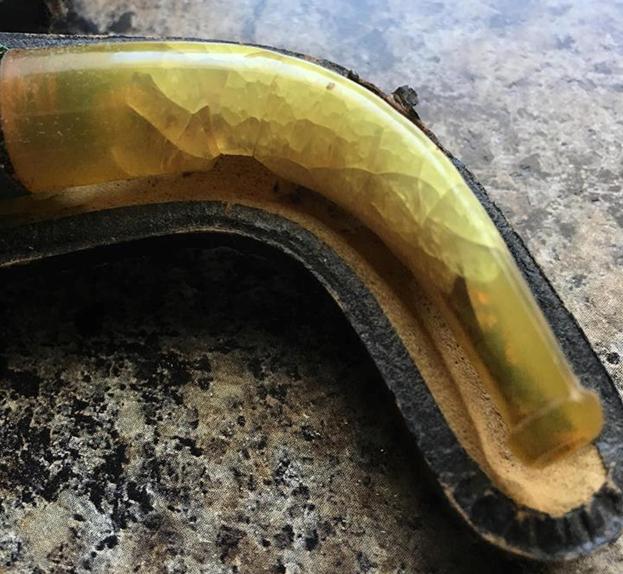
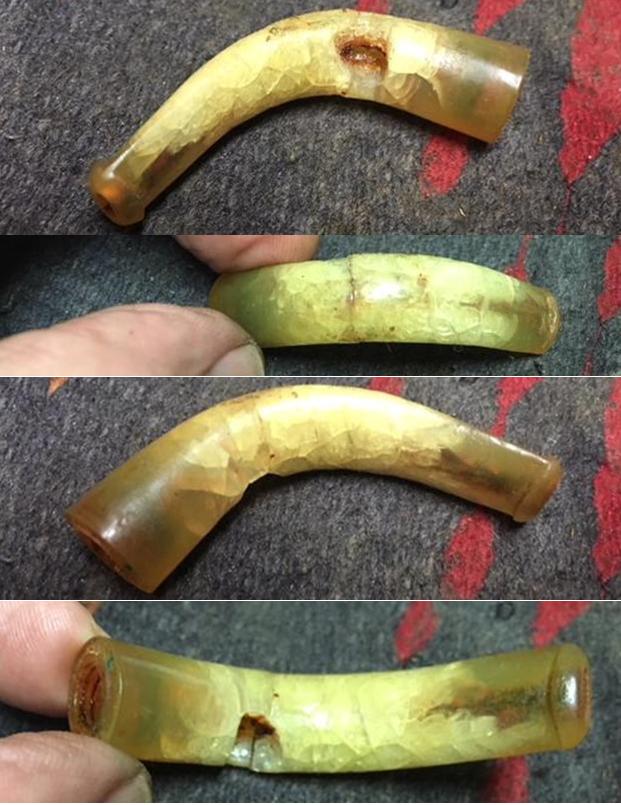
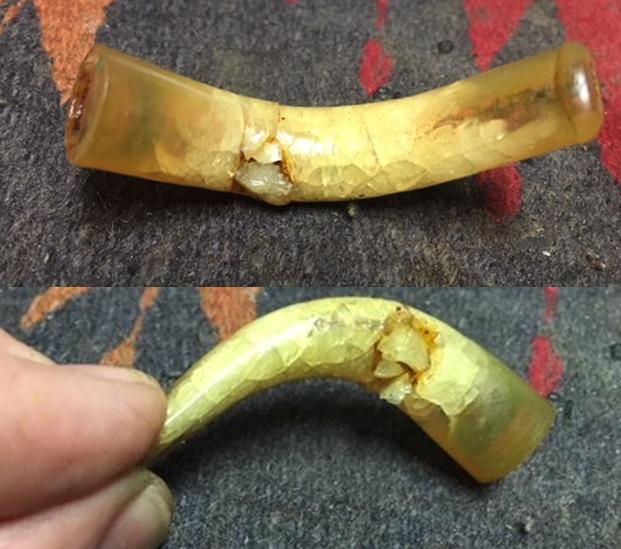
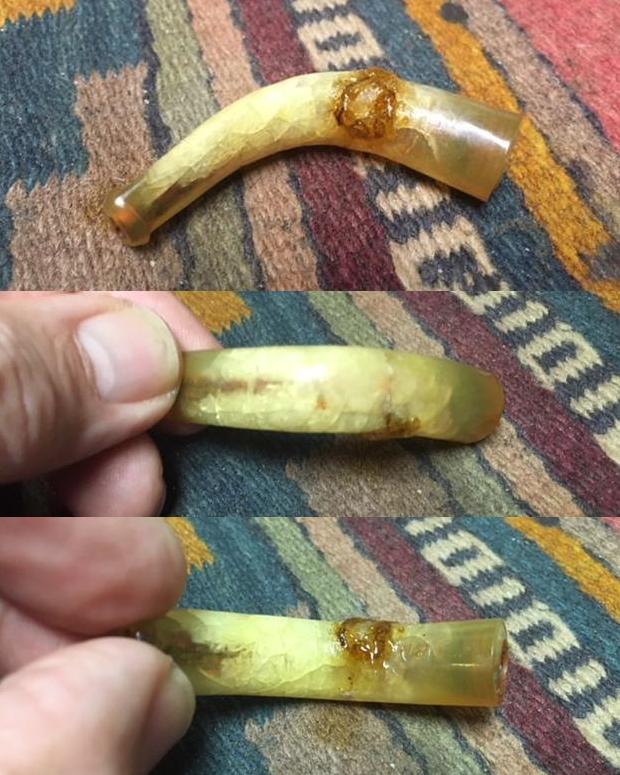
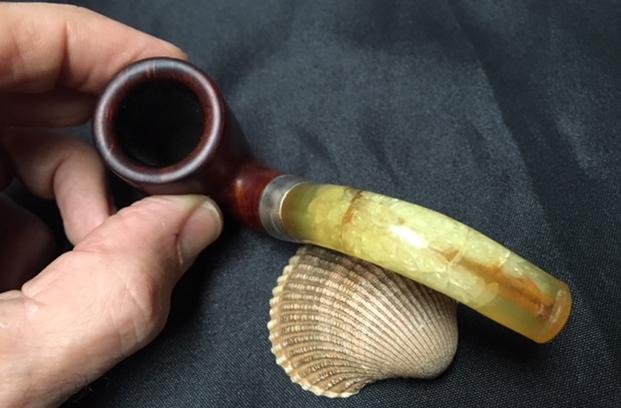
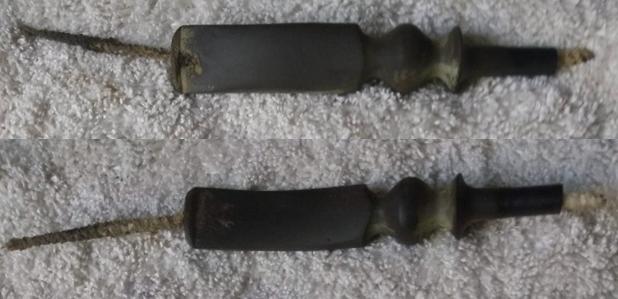
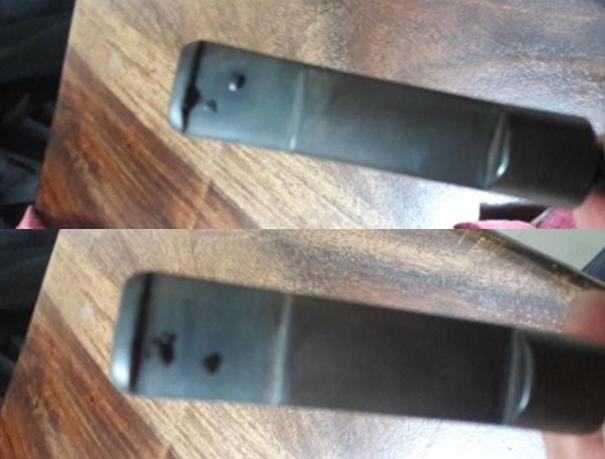
  The stem is a Double Comfort stem which is correct for the period. Heavy calcification can be seen on the lower half of the DC stem with a few deep bite marks and lot of tooth chatter on both the lower and upper surface. The lip/ button is deformed and will need to be worked upon.
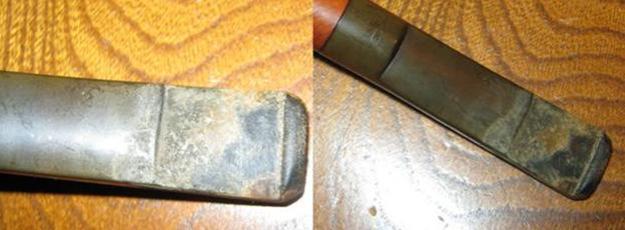
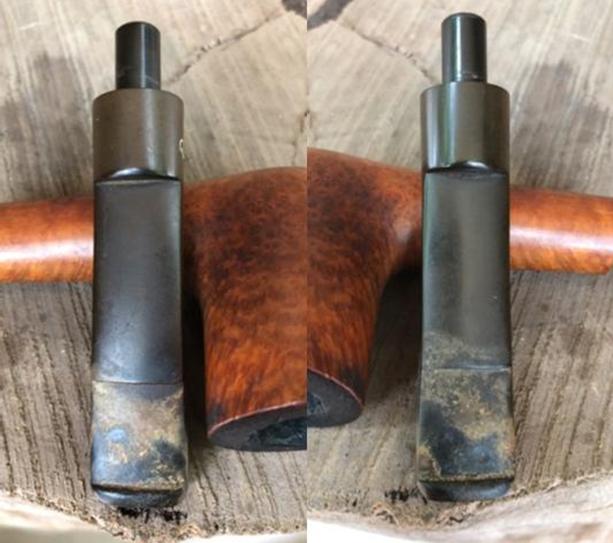 All said and done, the major cause of concern which will require maximum attention and work is the rim top, rim inner edge and the extensive charring seen on the right and left inner edge!!!!
THE PROCESS
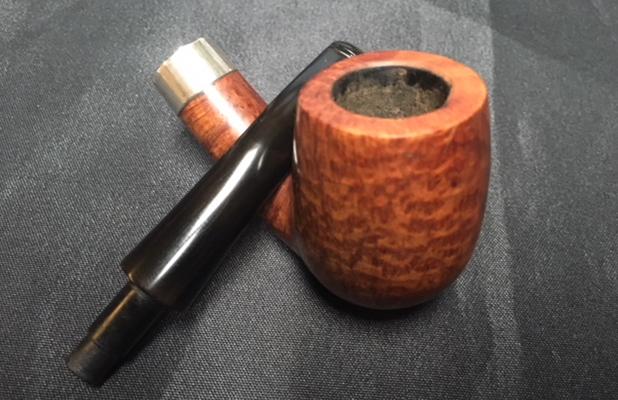
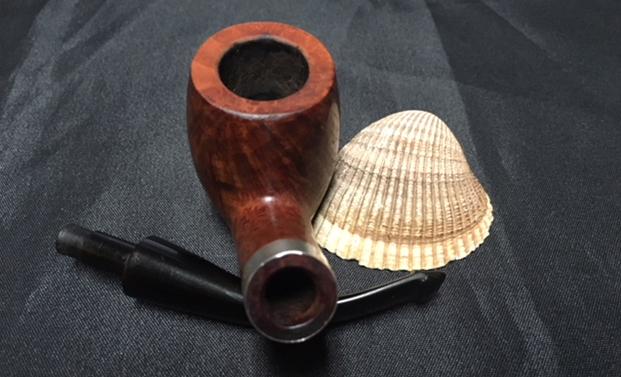
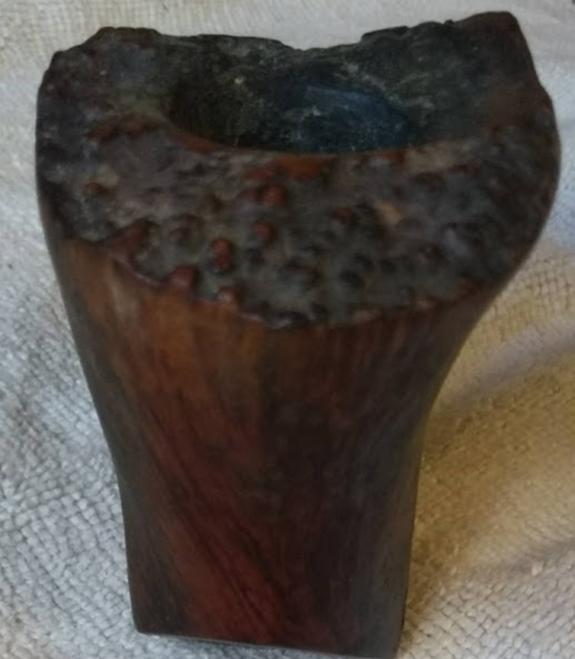
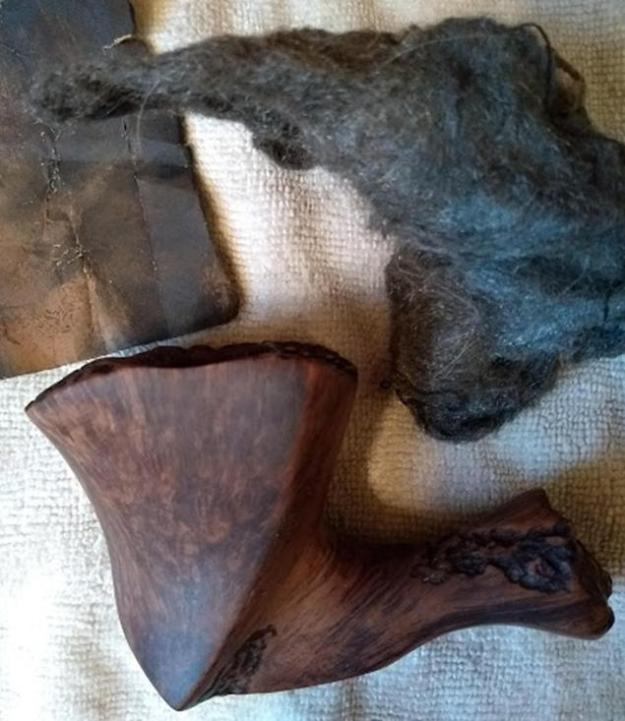
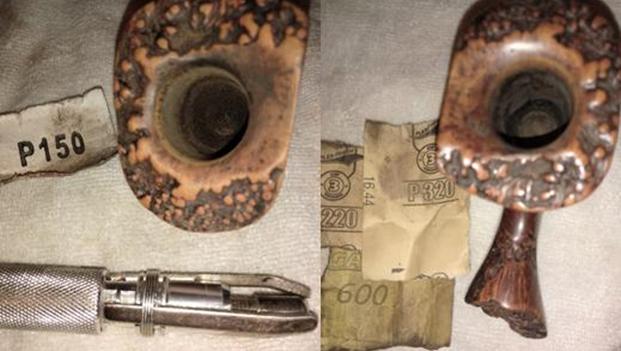
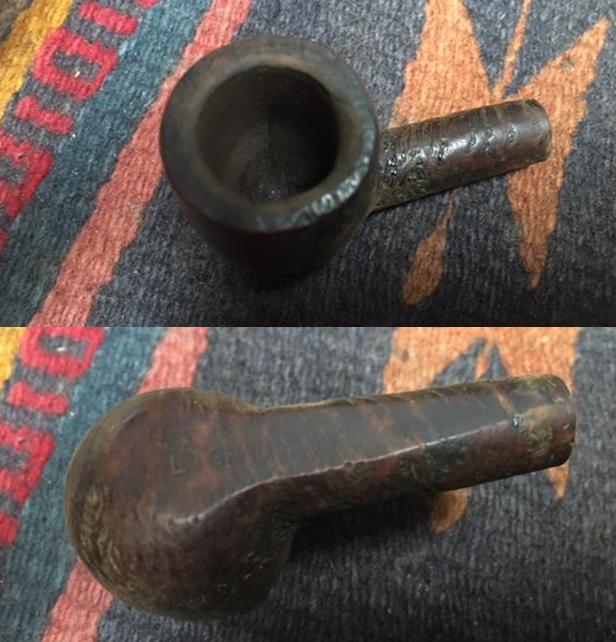
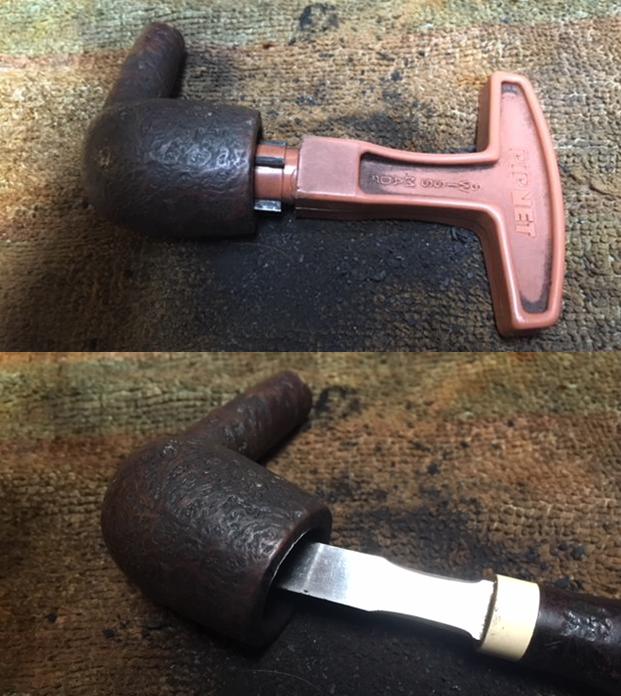
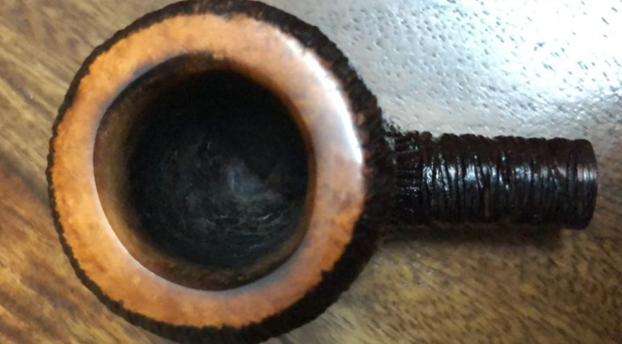
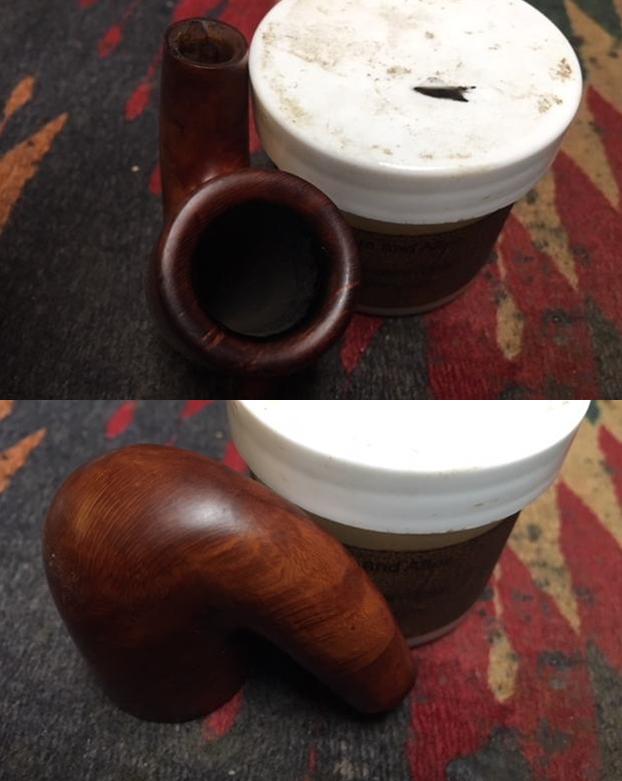
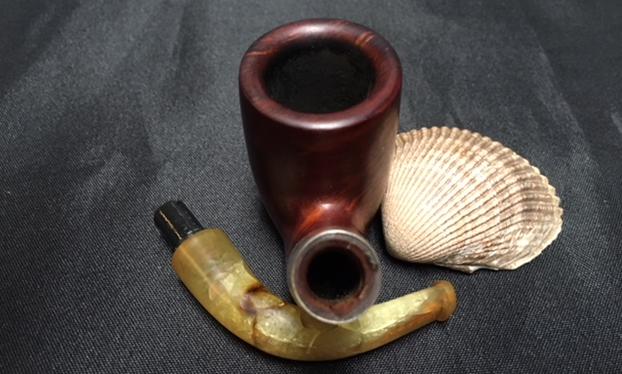
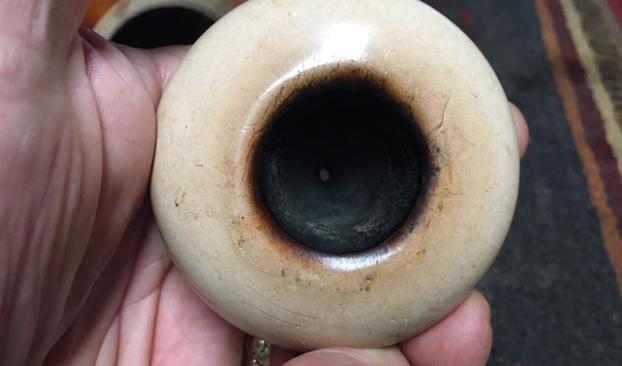
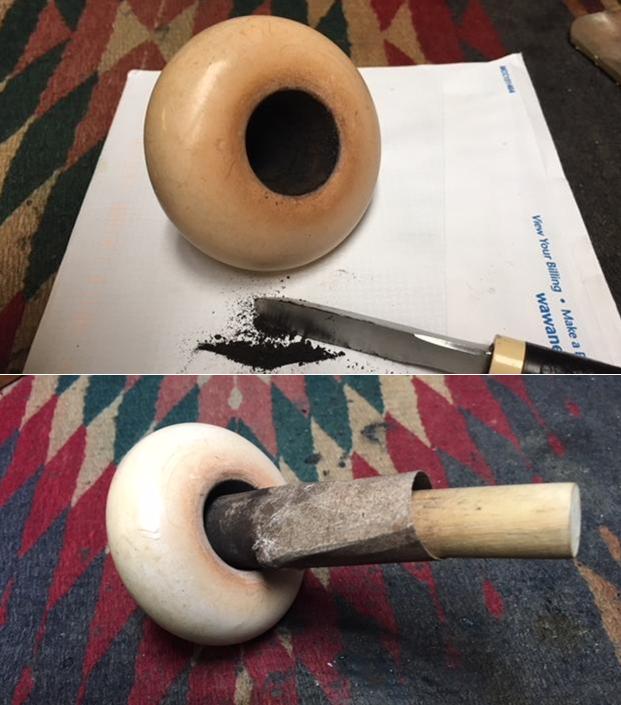
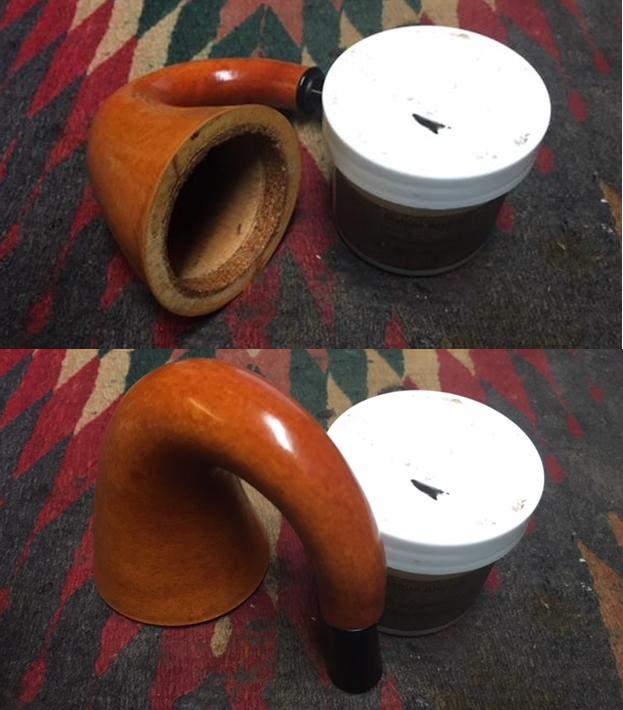
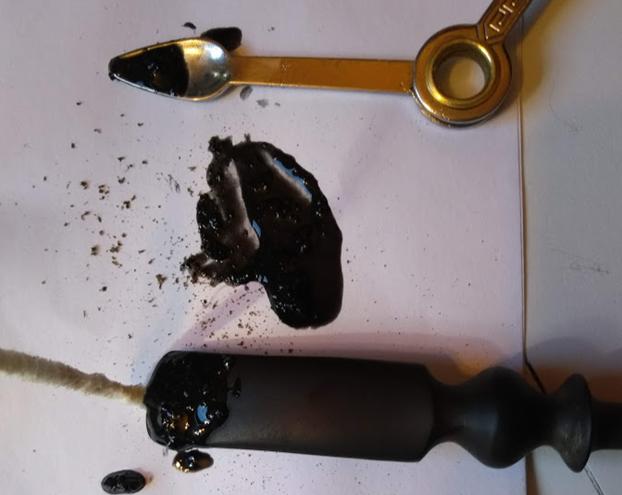
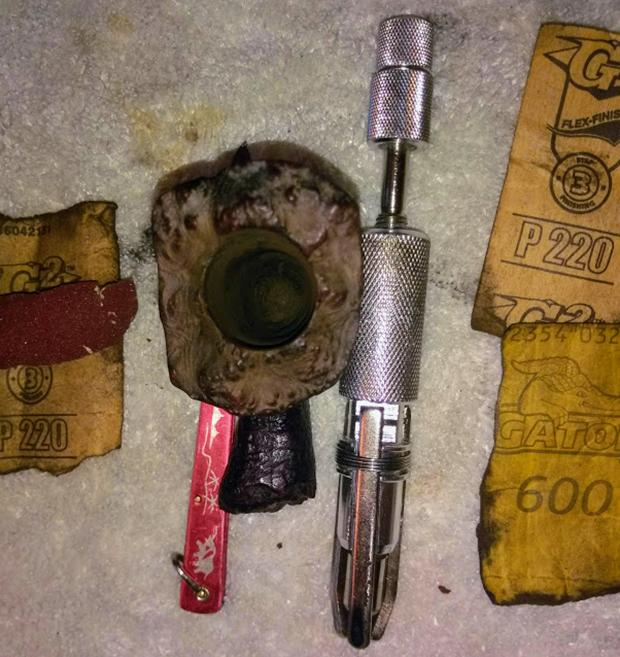
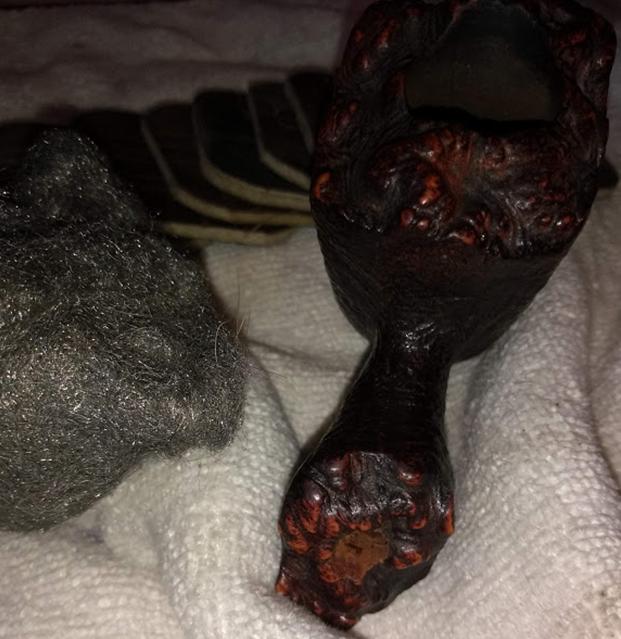
As usual, Abha, my wife took upon herself the task of reaming the bowl to get rid of all the grime, tars and oils accumulated in the chamber. Using a Kleen Reem pipe tool made short work of reaming and she was able to get rid of the thick cake. She gently removed all the remaining cake crust till she reached the briar using my fabricated knife set and thereafter sanding the chamber with a 220 grit sand paper. Thereafter, using the fabricated knife, I gently scraped and removed all the overflow of lava, tars and oil from the rim top. With hope in my heart and prayer on my lips, I gently scraped the charred wood from the inner edge on both sides till I reached solid briar. The picture below will tell the story of its condition!!! The char marks to the inner edge of the rim on the right side in 1 o’clock direction is the widest followed by the one on left side in 8 o’clock direction. The char on the outer left edge at 8 o’clock direction is not very severe. I decided to top the bowl and create a bevel on the inner edge to address these issues. I Facetimed with Mr. Steve and he too concurred with my POA.
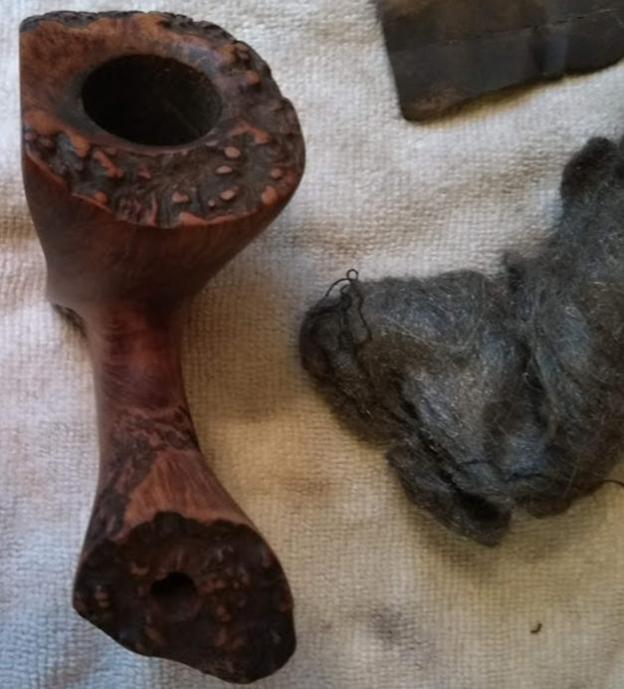
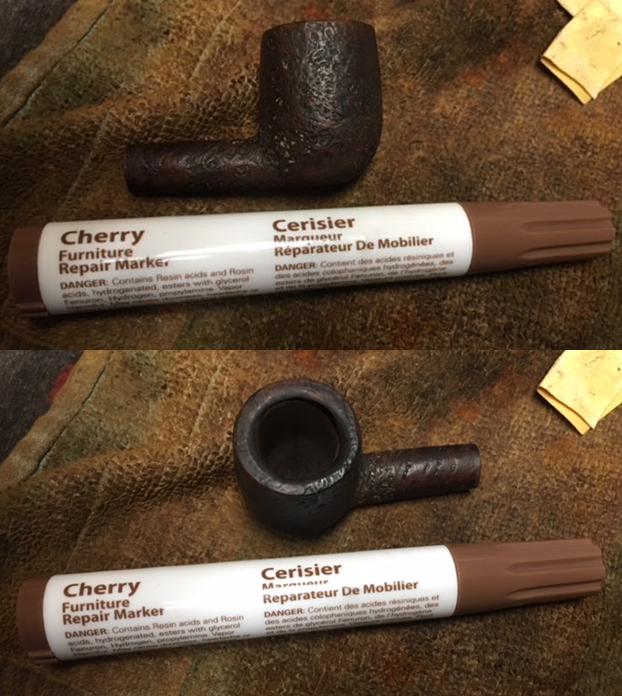
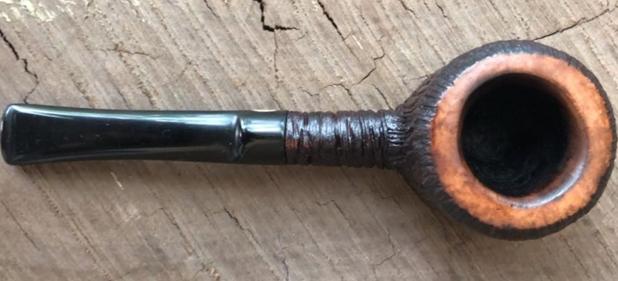
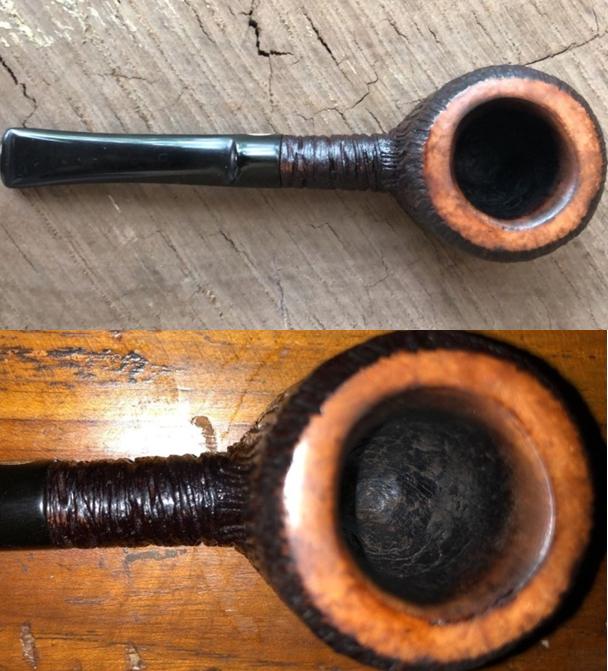
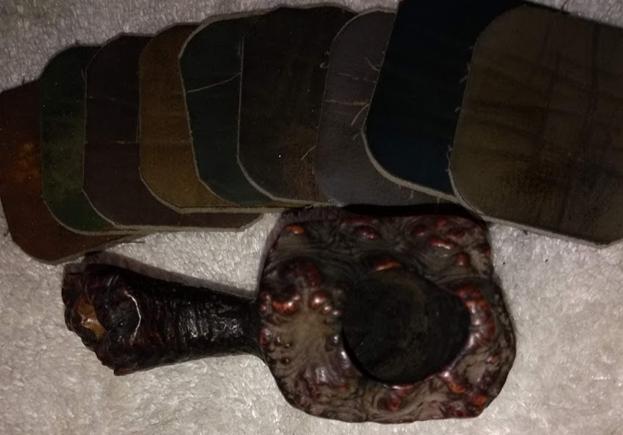
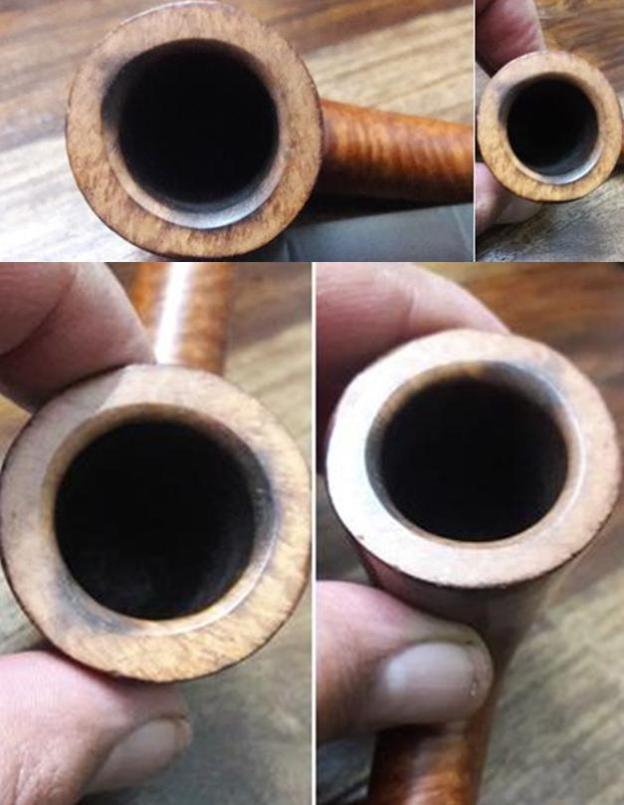
I started by topping the bowl with a 220 grit sand paper till the charred surface on the inner as well as outer edge of the rim was reduced. Using a folded piece of 180 grit sand paper, I gave a slight bevel to the inner edge. However, I was not very pleased to see the results. The charred surfaces stood out like sore thumbs on either sides of the rim.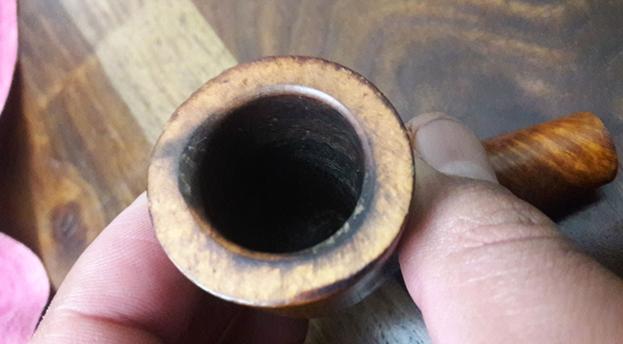 To further mask the charred inner edges, Abha suggested creating a deeper bevel and attempt to conceal the damaged inner edge within this bevel. After viewing the pictures, Mr. Steve also approved of this plan. Thus, I created a deep bevel making sure that the charred surfaces are within this bevel. The inner edge is looking much better and presentable as can be seen in the pictures below. It took me considerable time to complete this stage since I had to frequently check the progress so that I did not end up losing too much surface off the rim top.
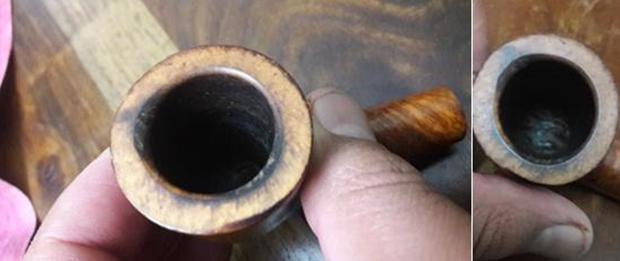
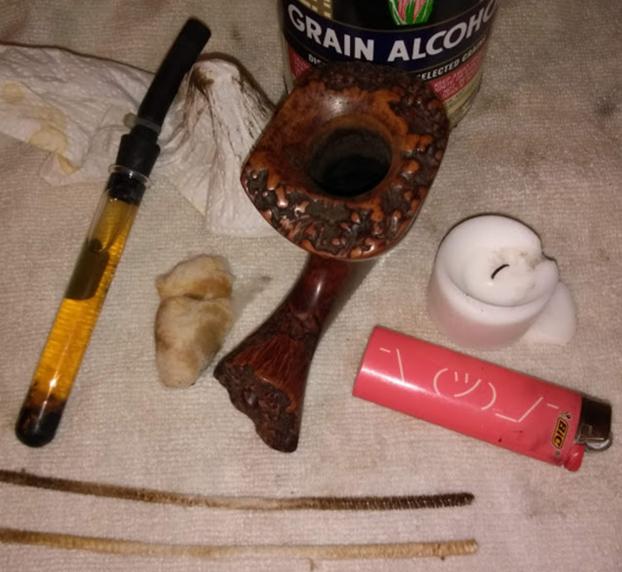
 I, thereafter, cleaned the exteriors of the stummel, rim top and shank with undiluted Murphy’s Oil soap and a toothbrush, taking care that water does not enter into the chamber and the shank. I wiped it down with a soft cotton cloth and kept it aside to dry out.
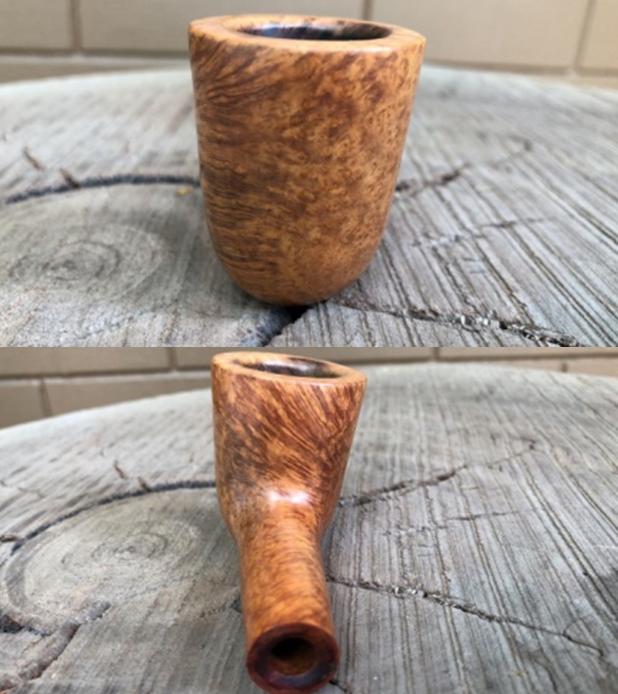
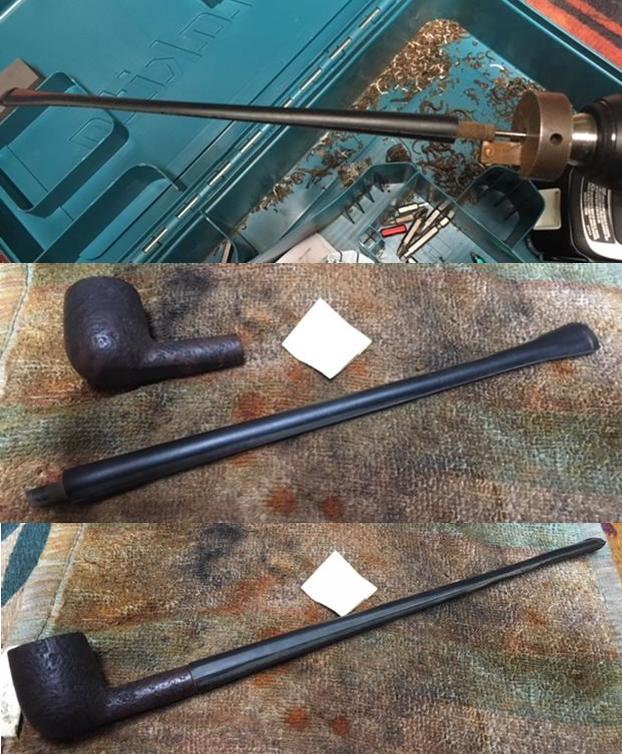
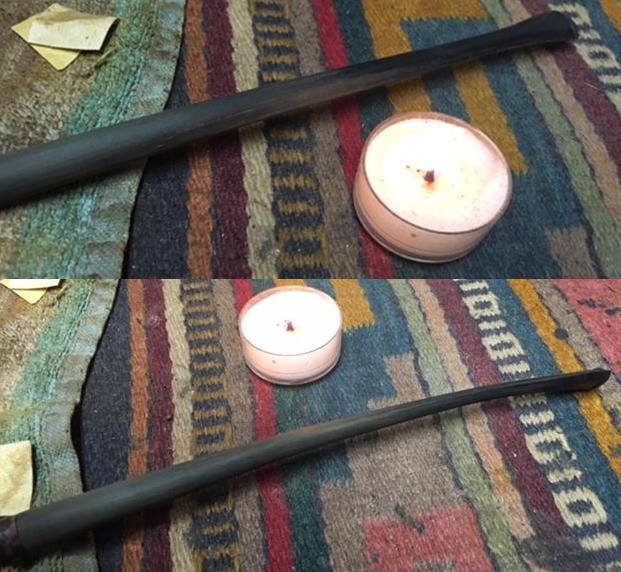
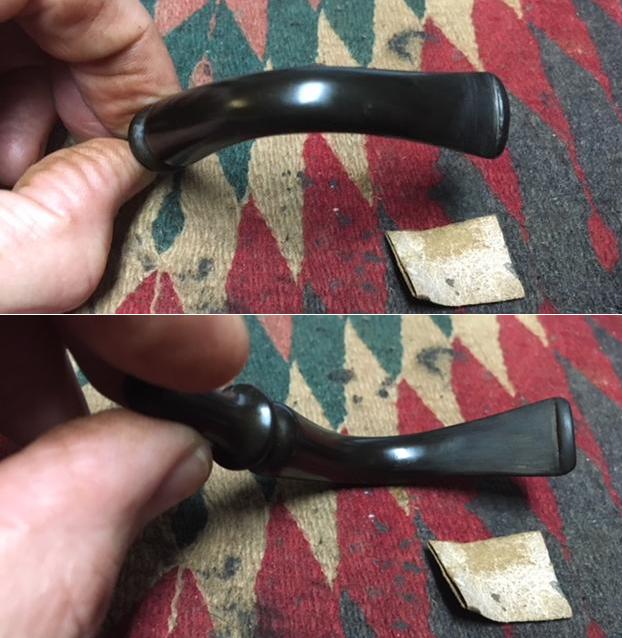
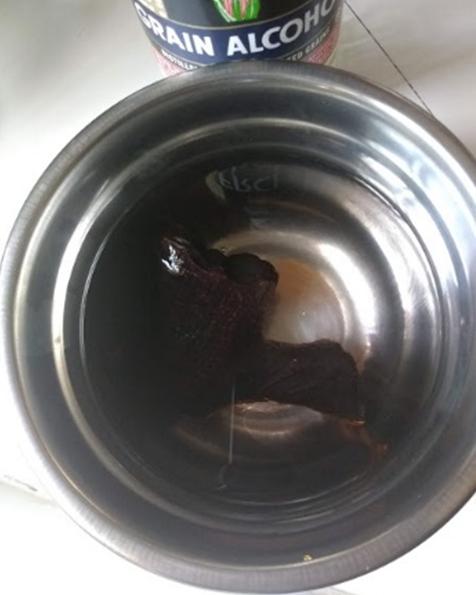
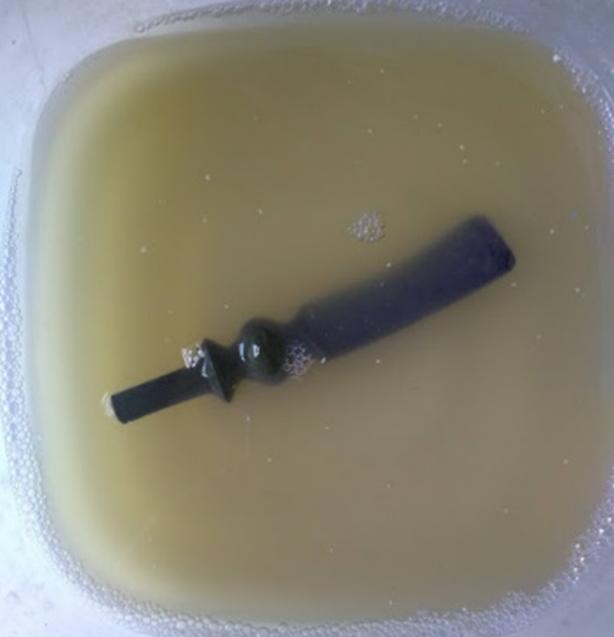
 Turning my attention to the stem, I started by masking the “CP” logo and the Regd No. with whitener (pics…..). I painted both the surfaces of the stem with a Bic lighter to raise the tooth chatter and bite marks to the surface. Sanding the stem with 220 grit sand paper, I evened out the surface of the stem. The deeper tooth marks were spot filled with clear CA super glue and set aside to cure overnight.
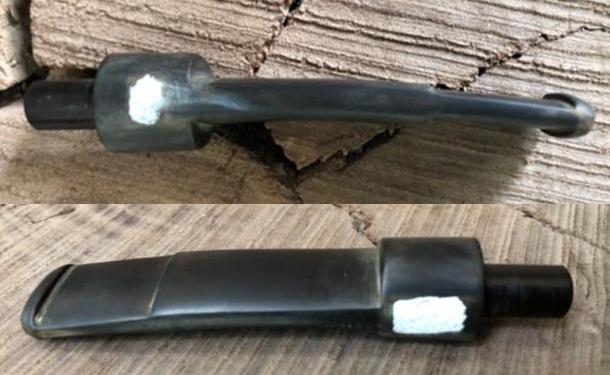
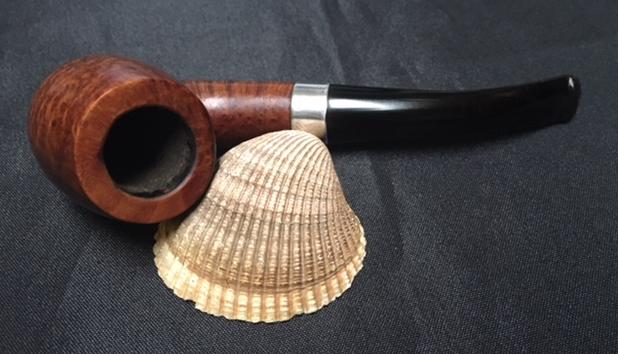
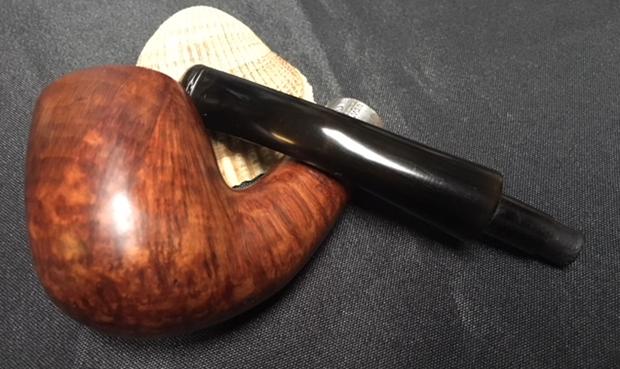
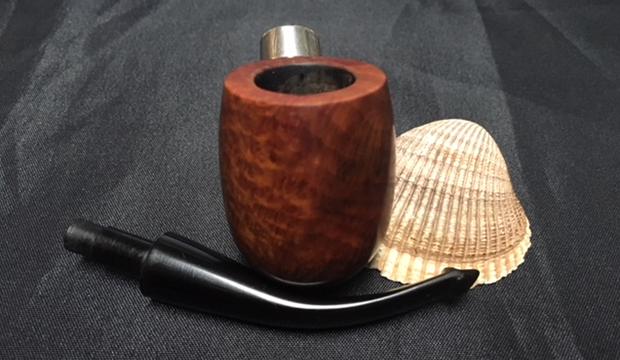
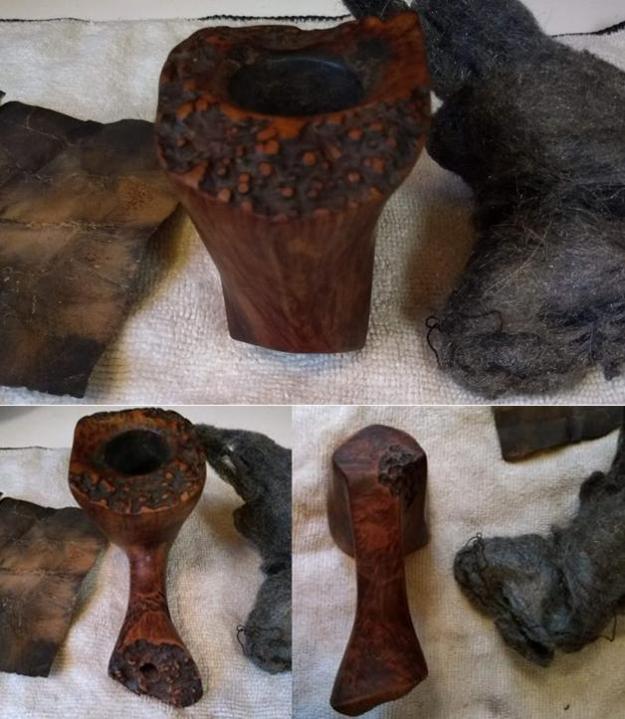
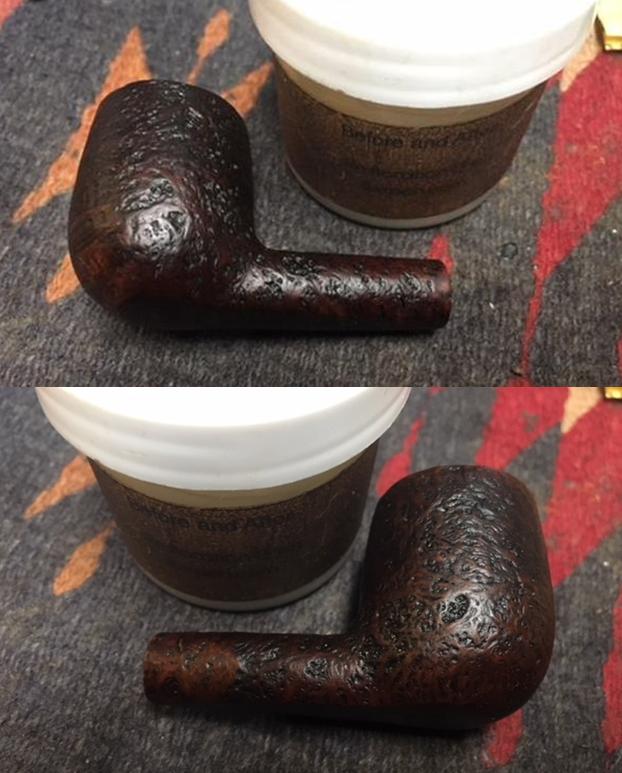
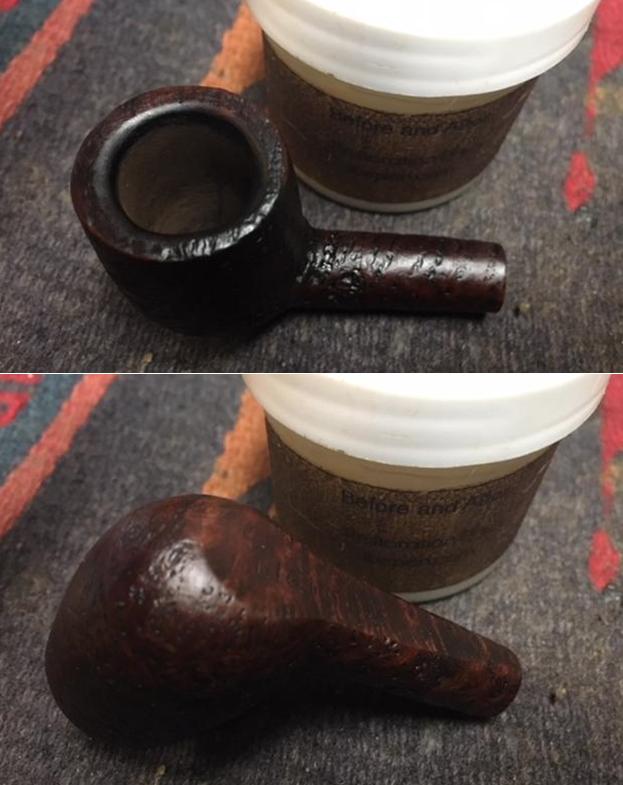
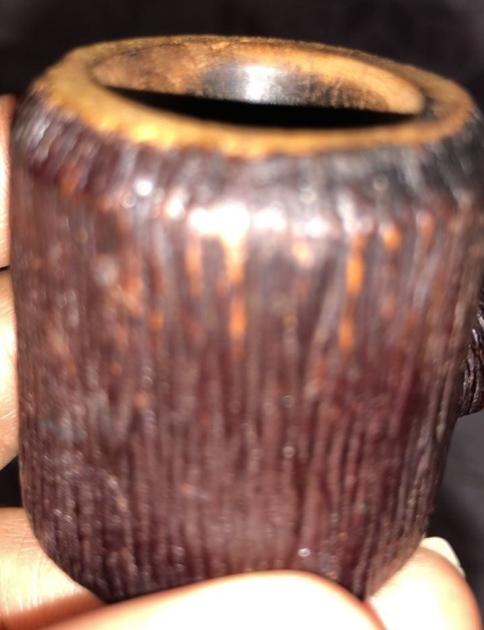
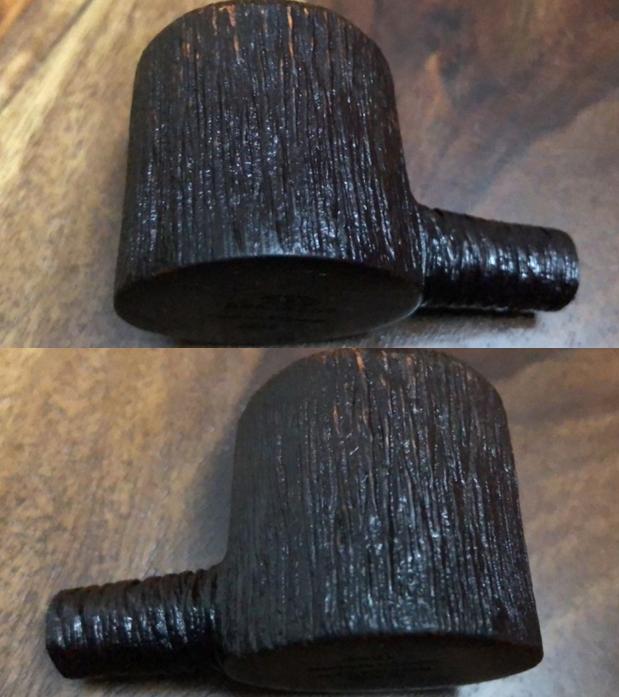
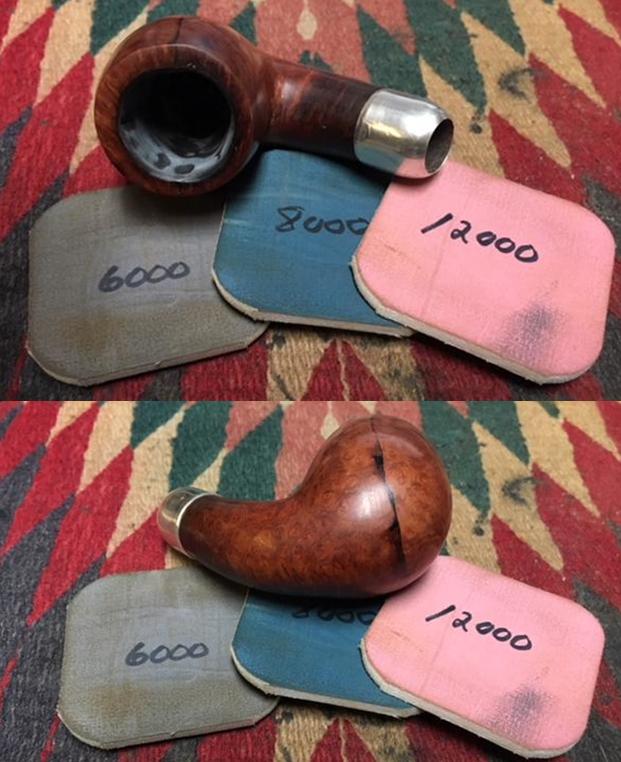
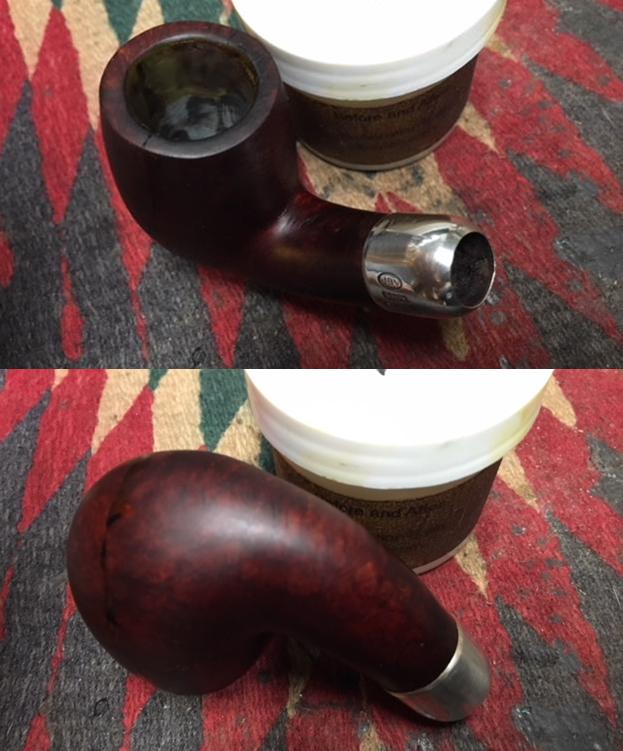
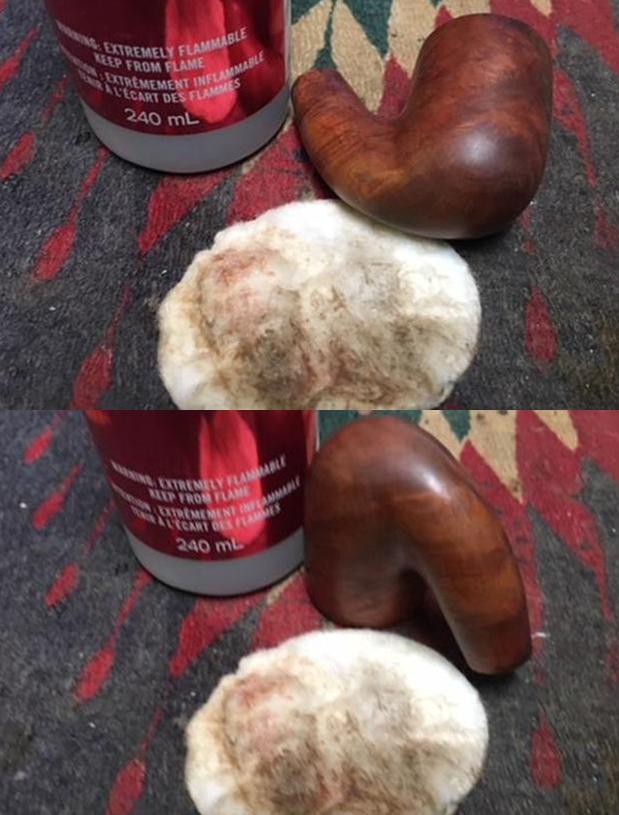
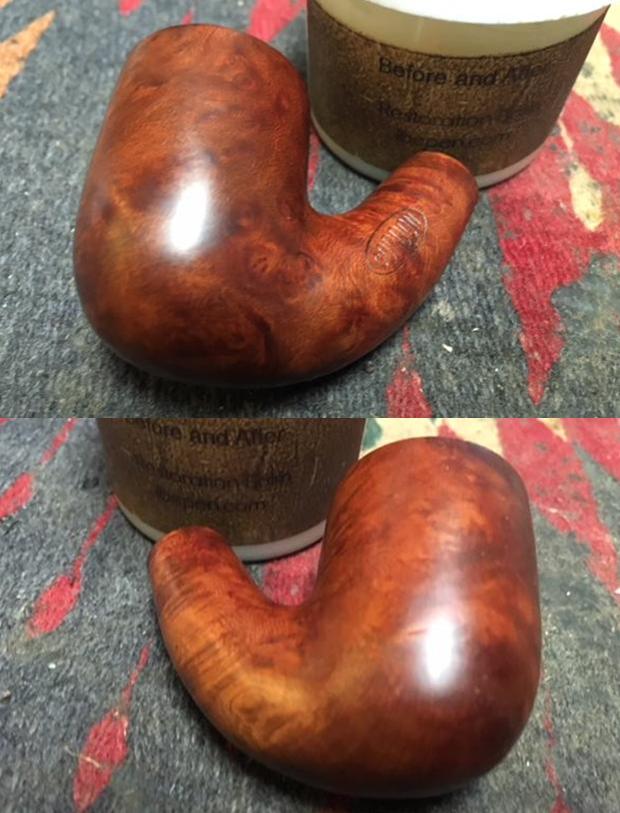
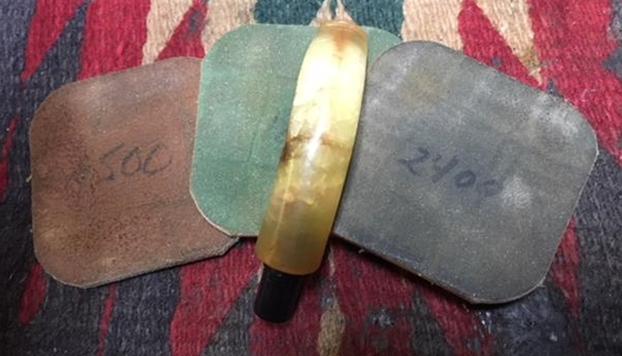
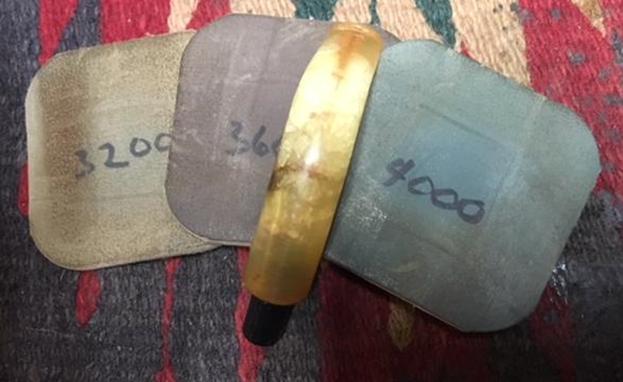
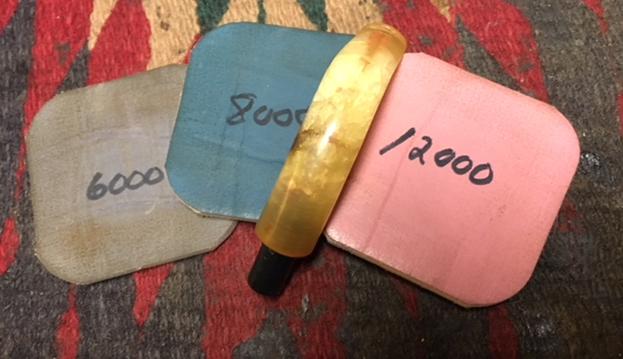
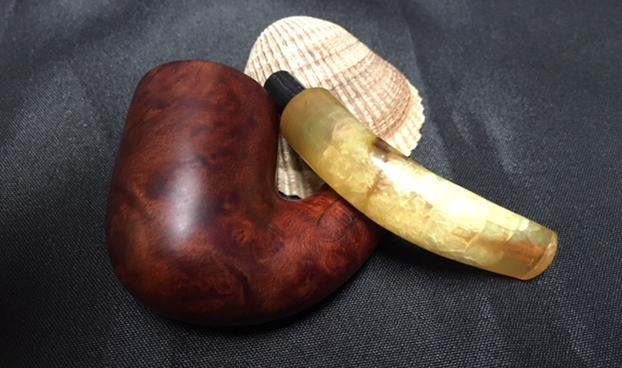
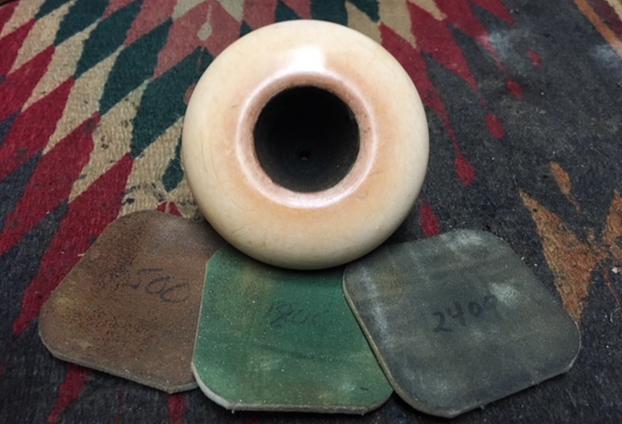
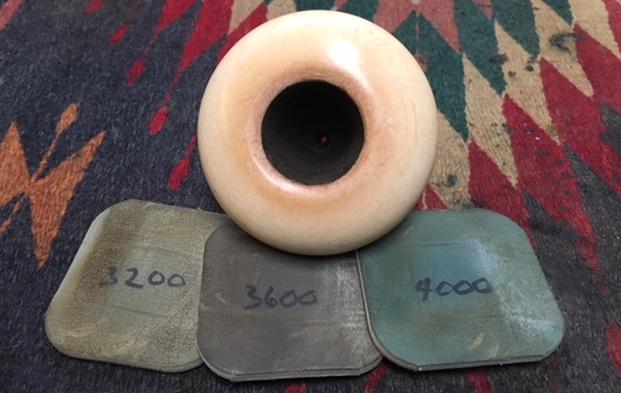
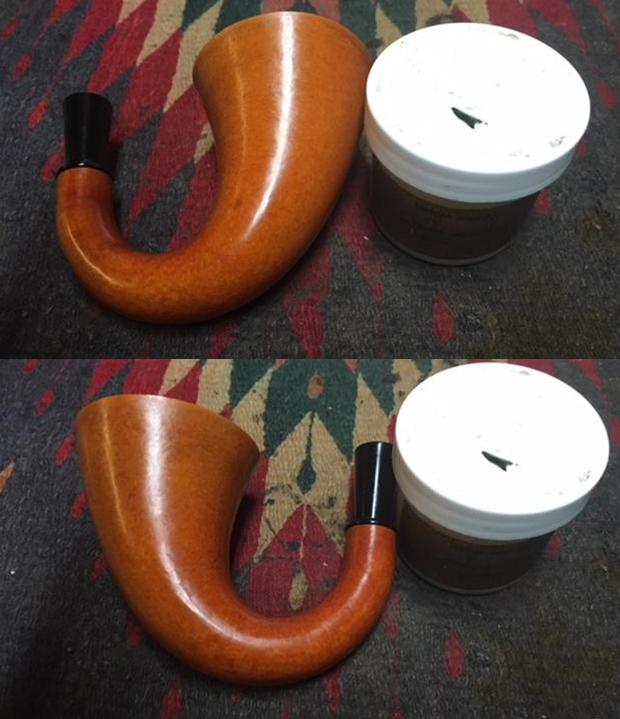
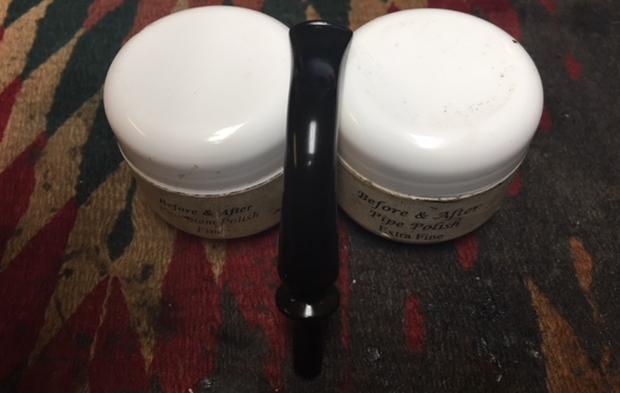
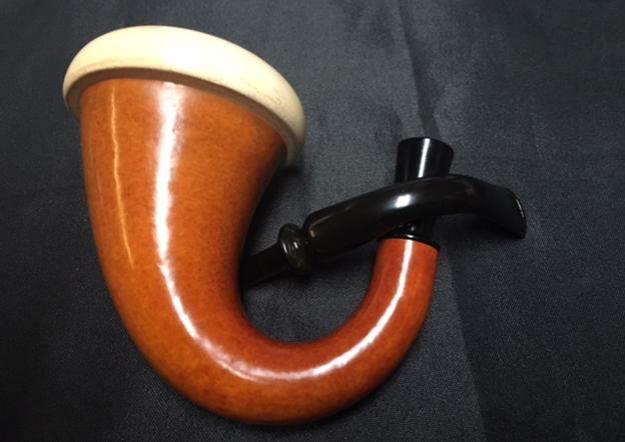
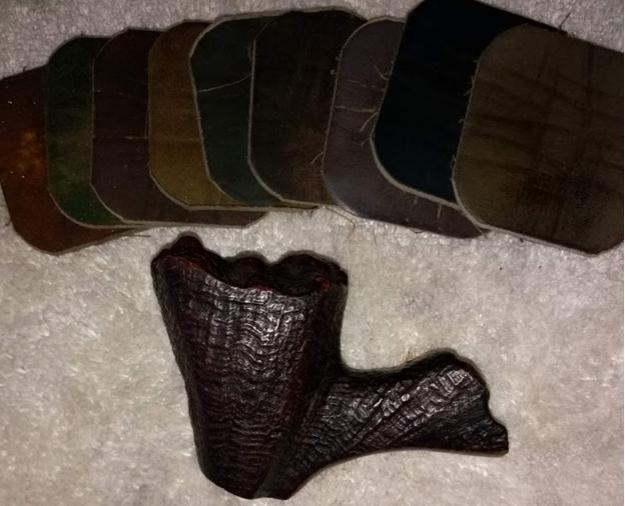
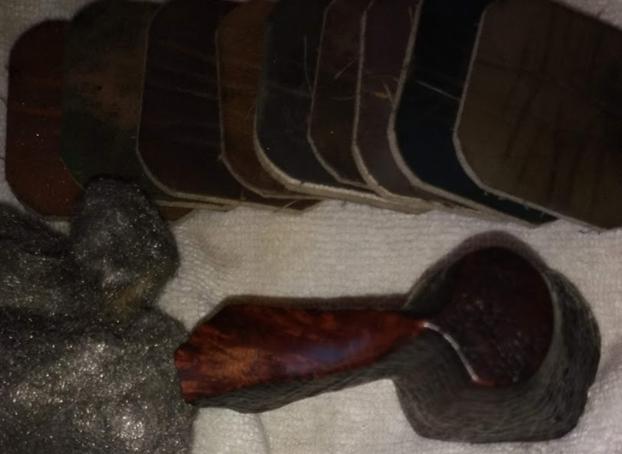
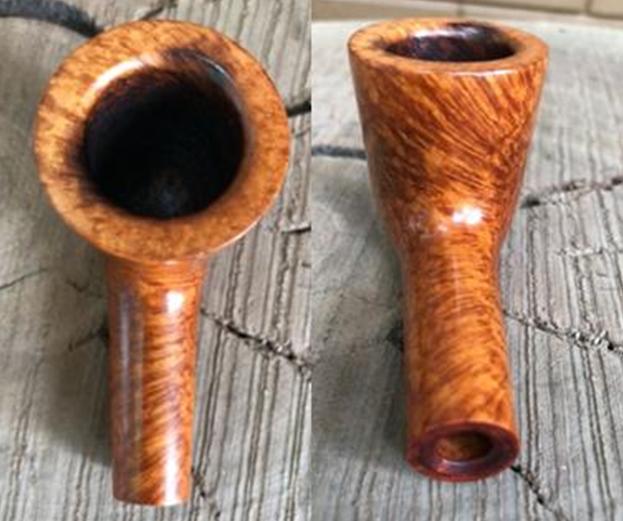
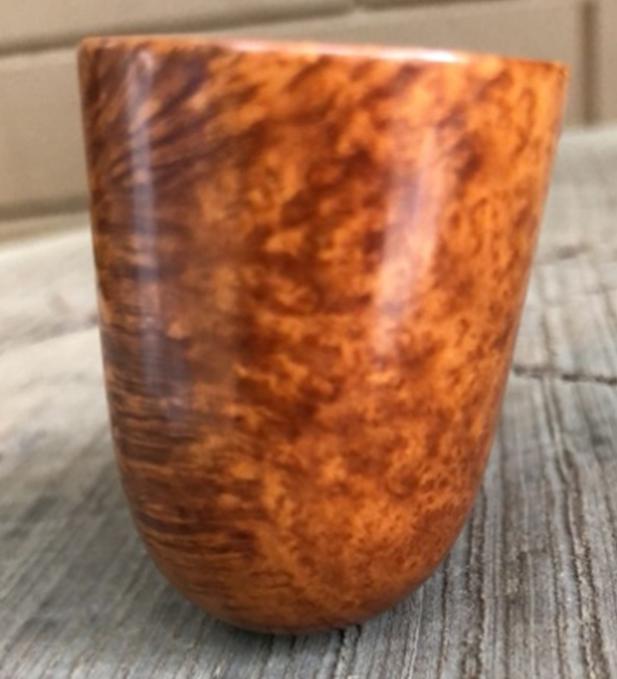
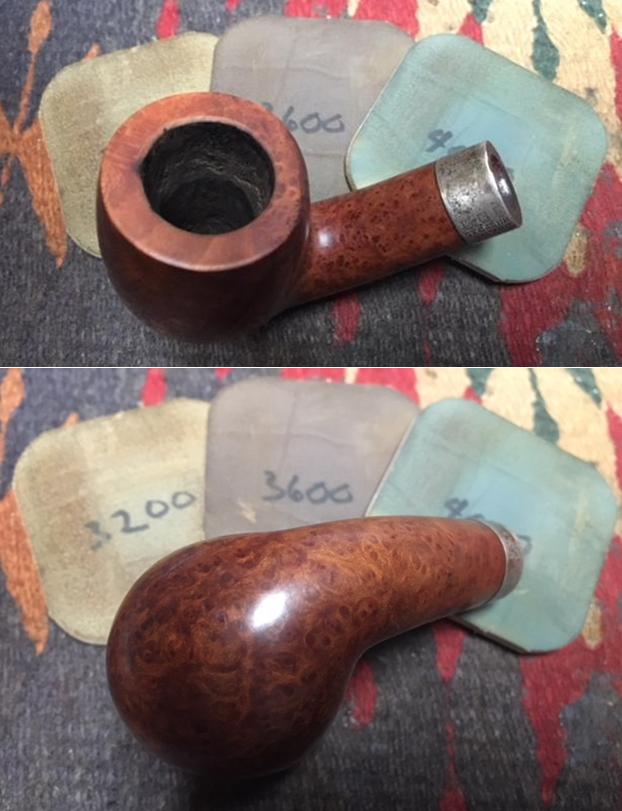
 Back to the stummel, I dry sanded the exteriors of the bowl, rim top and the shank with 1500 to 2400 grit micromesh pads and wet sanding with 3200 to 12000 grit micromesh pads. The beautiful birdseye and the cross grains really popped out at this stage!!!!!(PICTUREs…..). Though the darkened areas of the inner edge caused due to charring were very much visible in pictures, in reality it does not look as bad. There is an option to further cover up the darkened areas by staining the complete bowl with a dark stain, I decided not to do so for two reasons, firstly, the pipe looked beautiful in this lighter hues with lovely grains in plain sight and secondly, I DO NOT HAVE THE MATERIAL AND EQUIPMENT FOR THE SAME and also have never tried this technique (this aspect WILL be my agenda during next leave!!!). With that decision made, I rubbed a small quantity of “BEFORE AND AFTER RESTORATION” balm into the briar surface and let it rest for 2-3 minutes for the balm to work its magic. I really feel that this is one product which every pipe smoker should have for routine maintenance of his/ her pipe. This balm infuses fresh breath of life into the briar while forming a protective layer over the briar surface. Using a soft cotton cloth and undiluted (LOL!!!) muscle power, I buffed it to a nice shine. Have a look at the bowl for yourself.

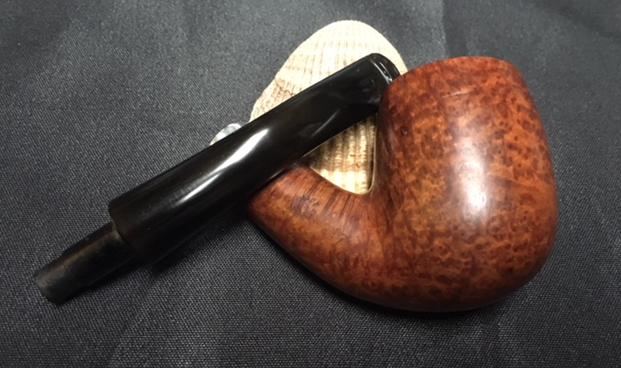
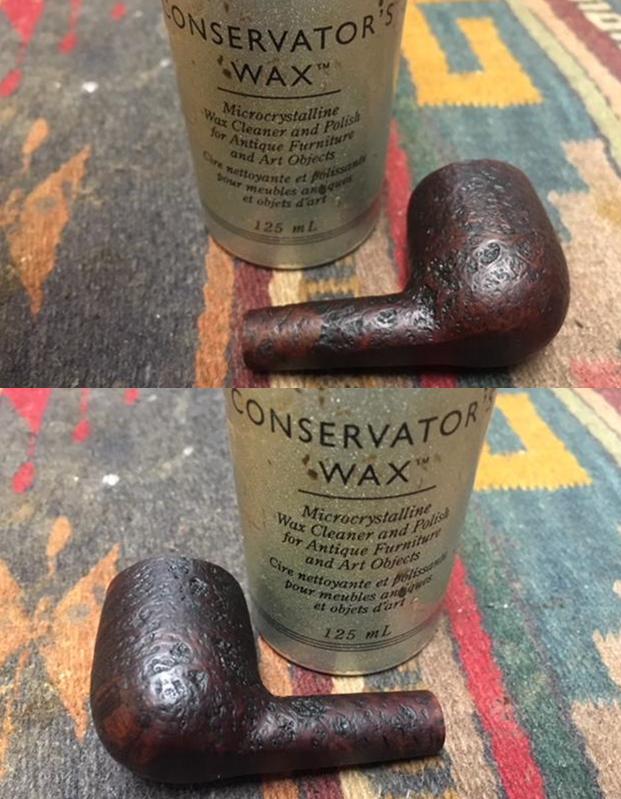
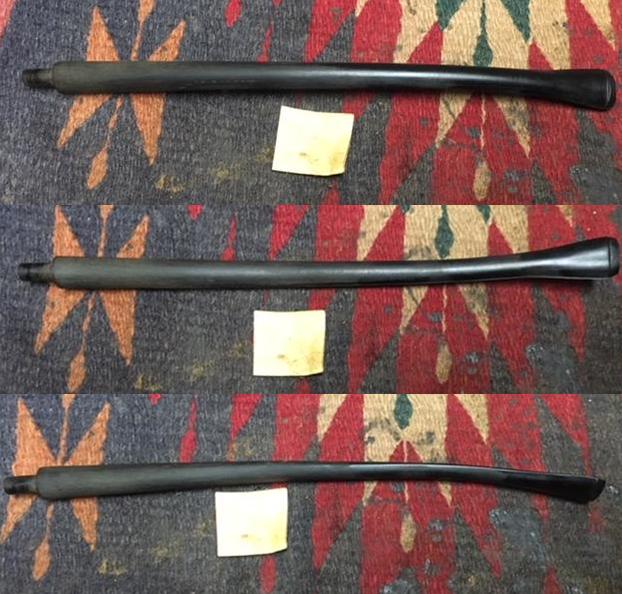
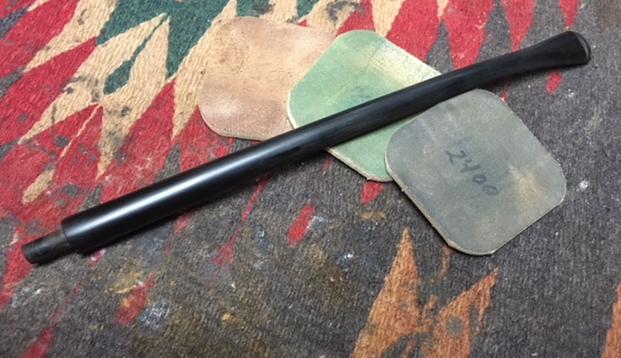
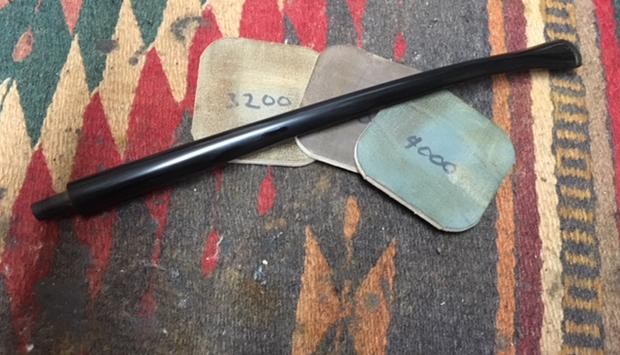
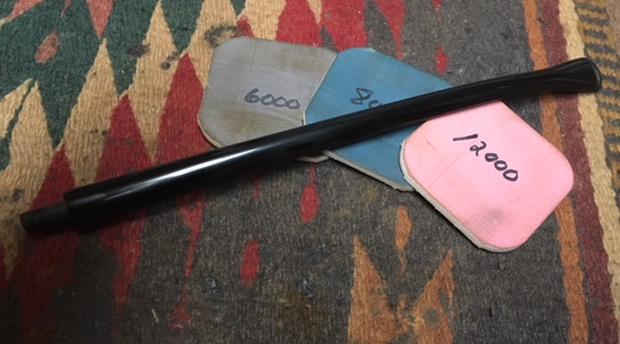
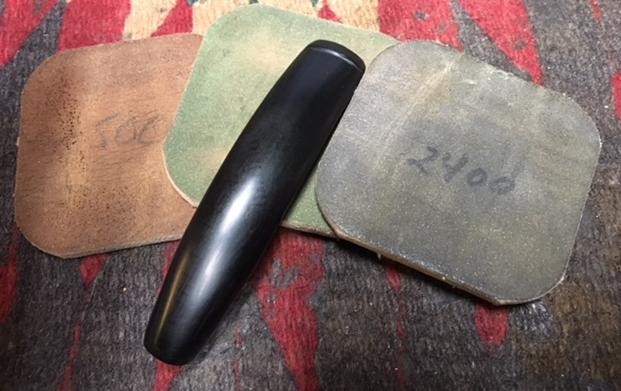
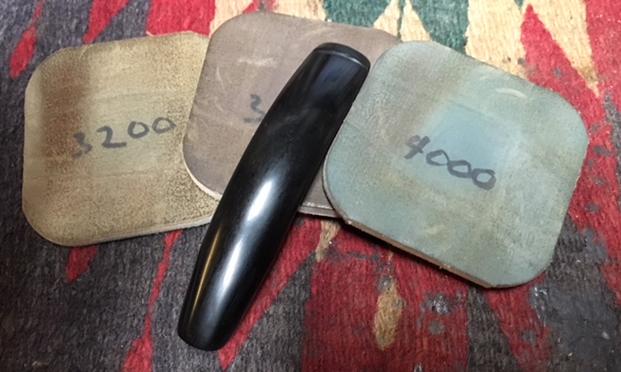
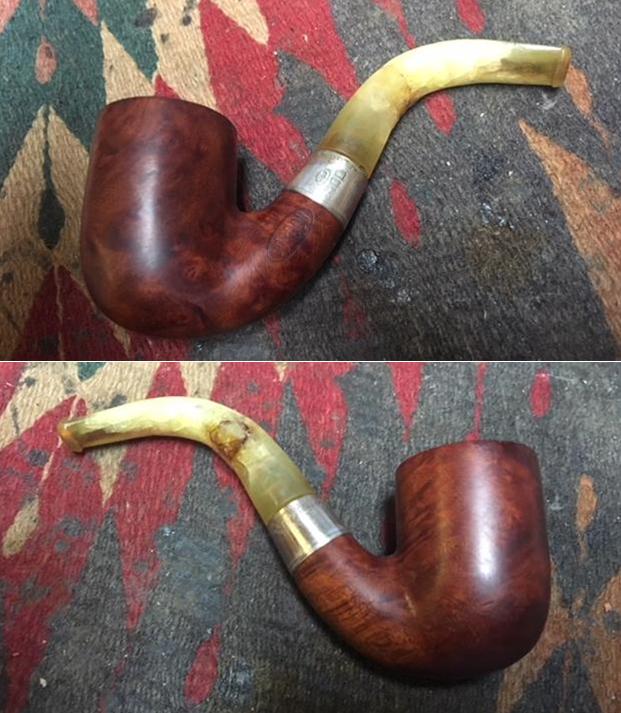
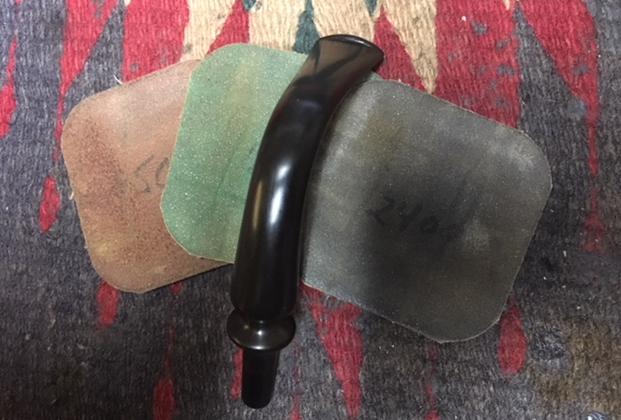
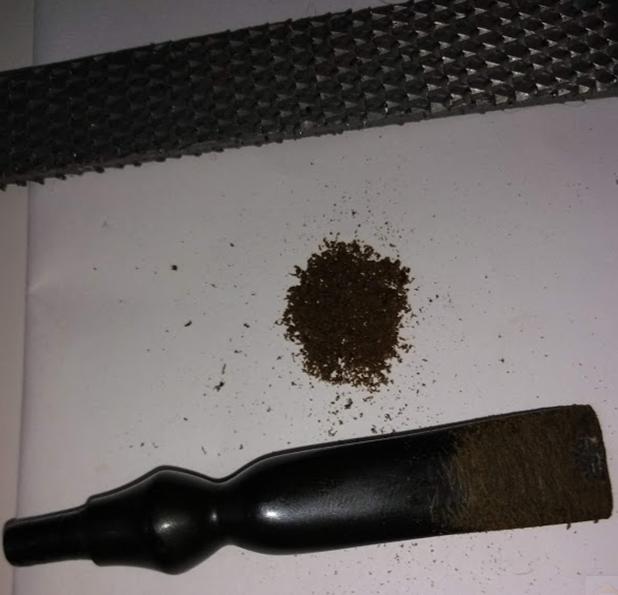
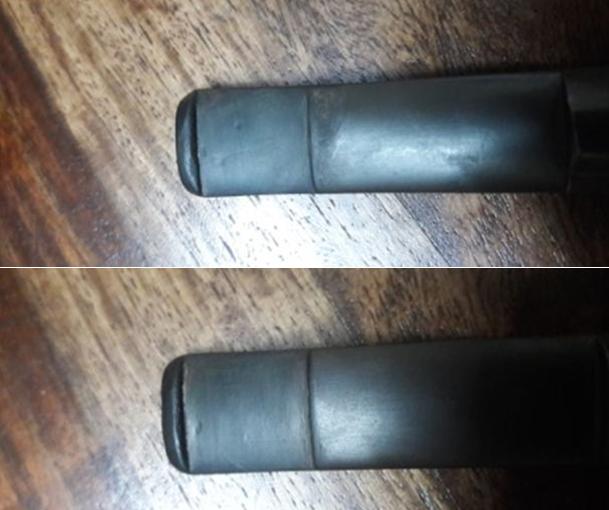
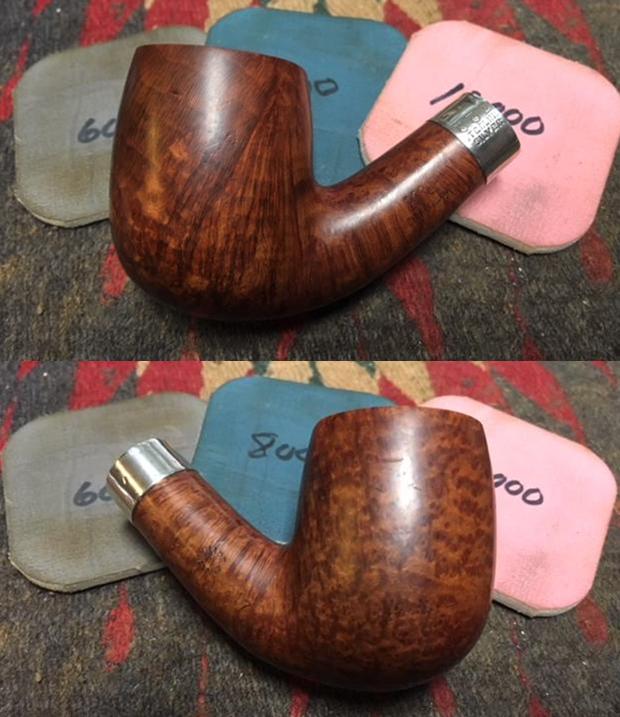
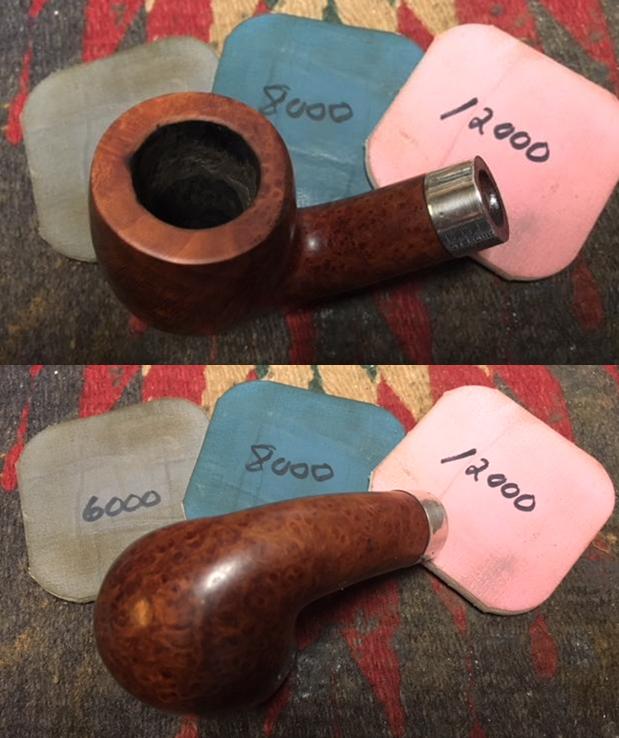
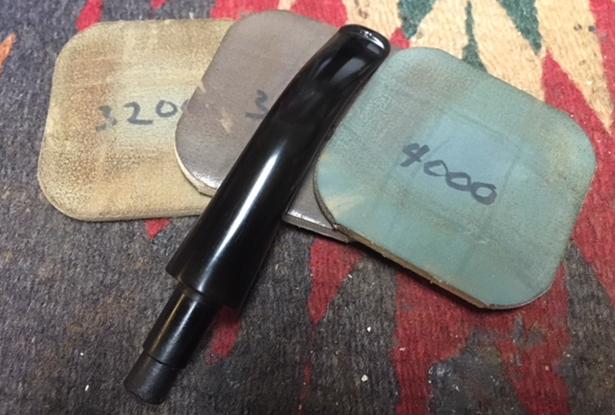
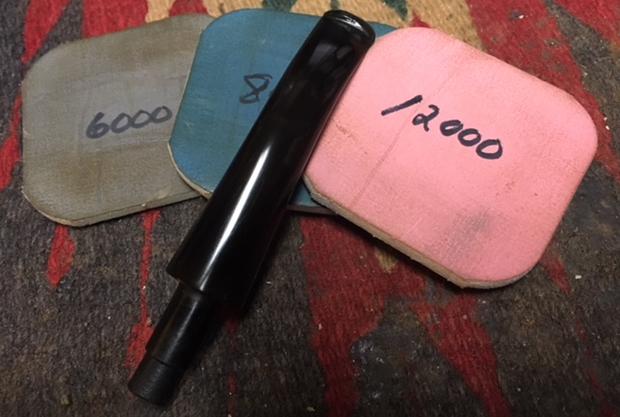
 With the stummel completed, save for a final polish with PARAGON WAX, I turned back towards working on the stem again. Using a flat head needle file, I sanded the fills to match the stem’s surface. I also worked on the button edge and created a crisp edge. Once I was satisfied, using micromesh sanding pads, I dry sanded the stem with 1500 to 2400 grit pads and wet sanding with 3200 to 12000 grit pads. I wiped the stem with moist cotton swab after every pad and rubbed in Extra Virgin Olive oil after ever three pads (Pictures….). Although I tried to take all care and precautions to preserve the stampings on the stem, I HAVE MANAGED TO OBLITERATE IT!!!! Can anyone suggest an easy method to restore it???? Indentations are visible though, which is a saving grace!!!!
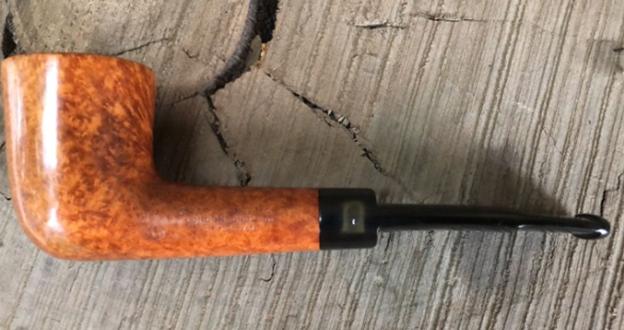
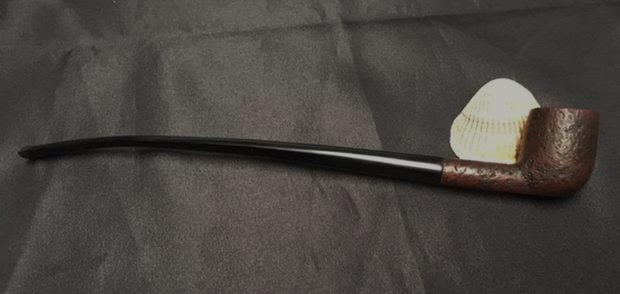
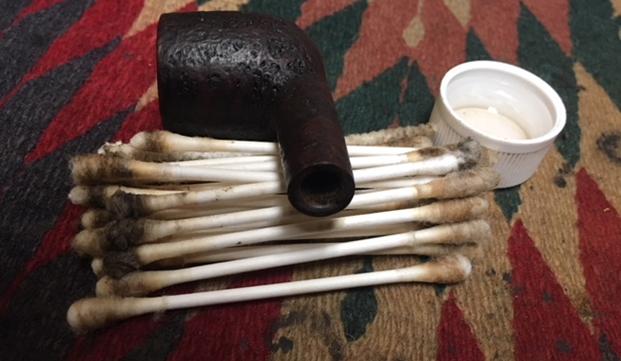
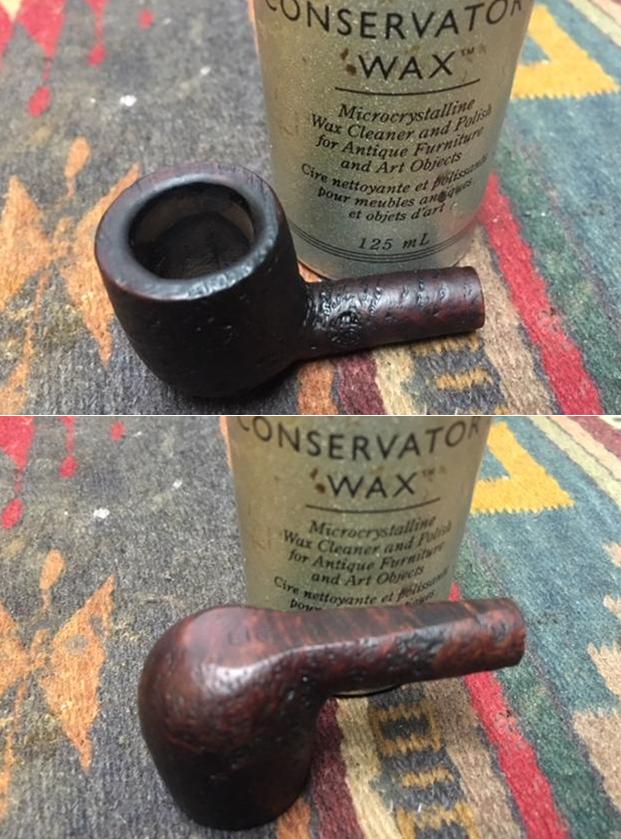
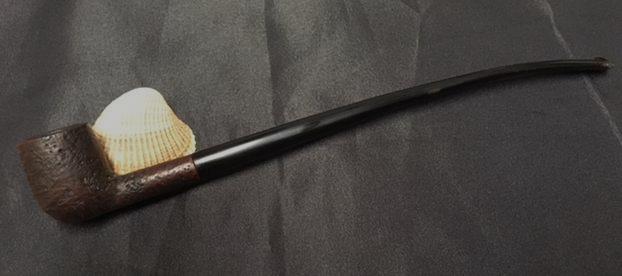
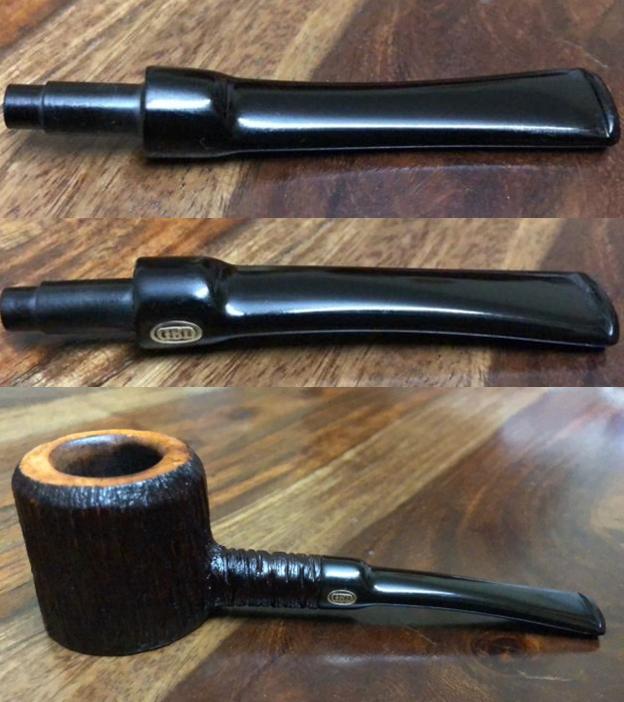
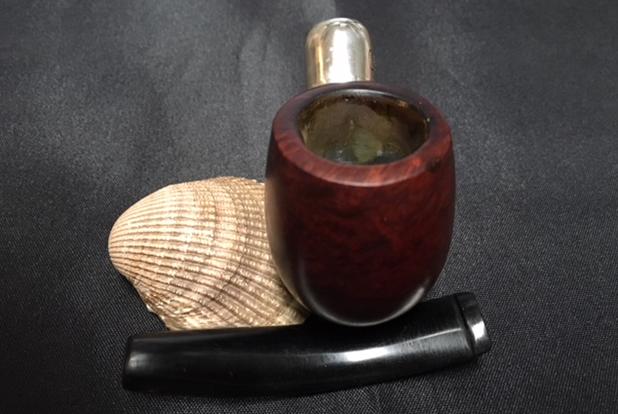
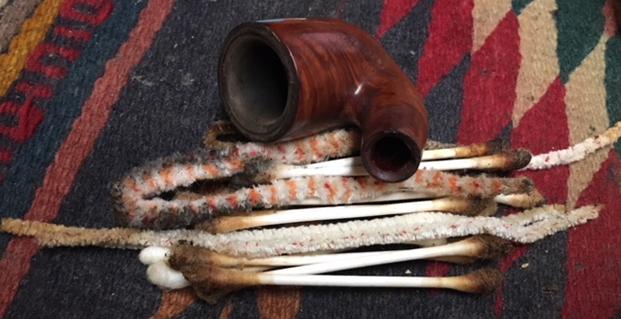
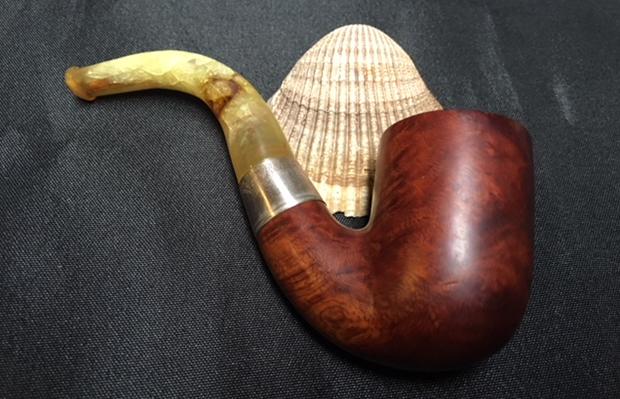
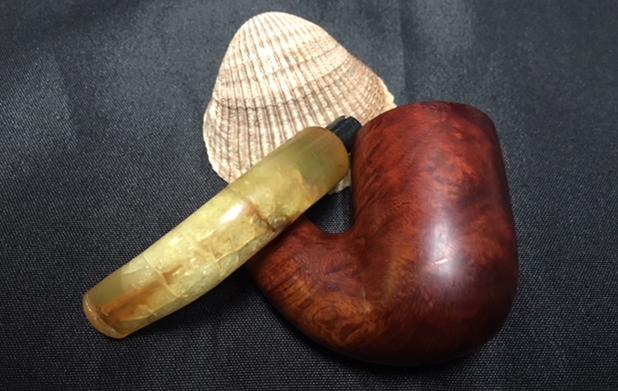
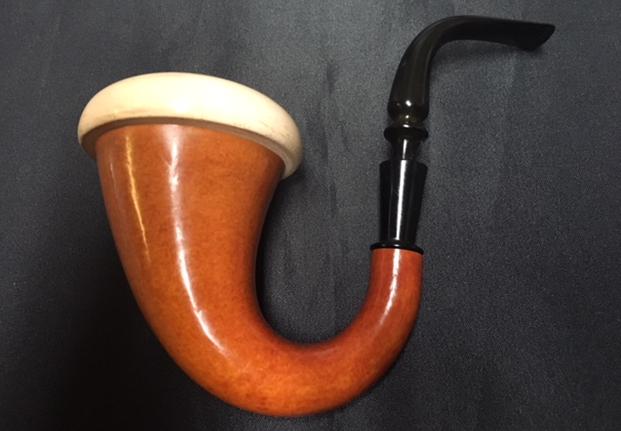
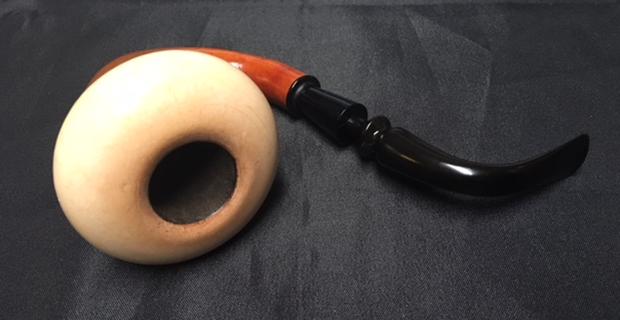
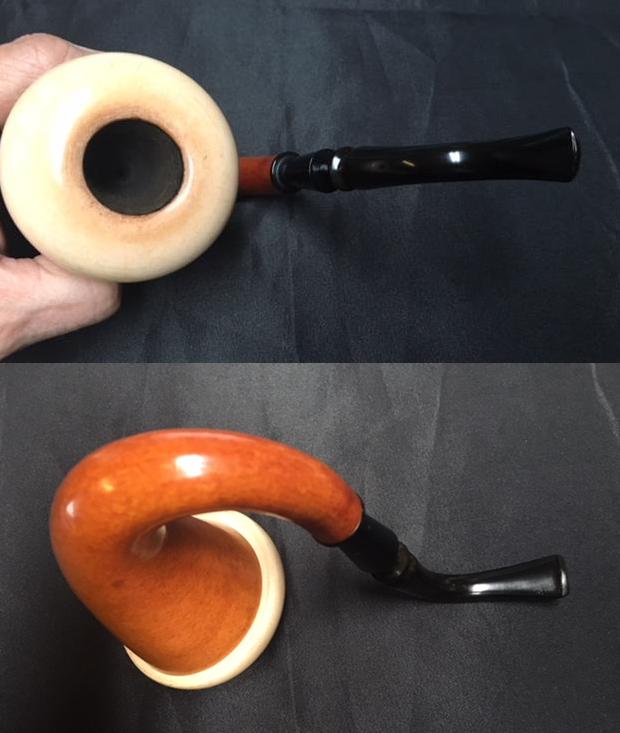
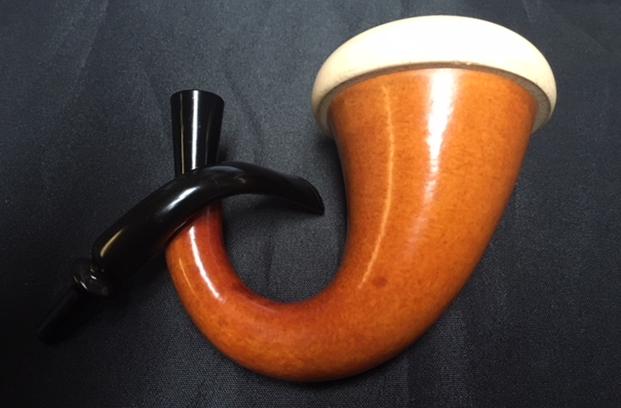
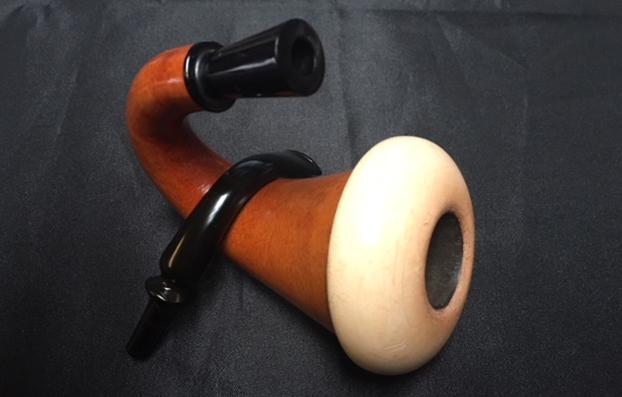
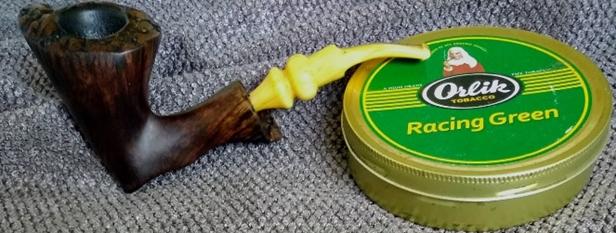
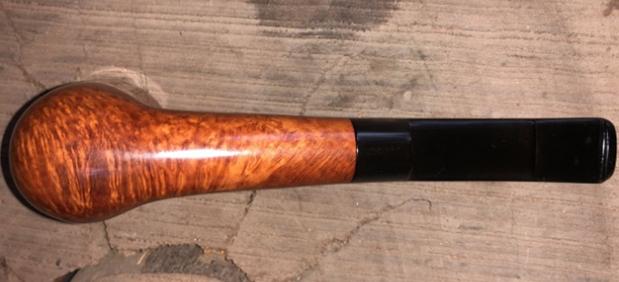
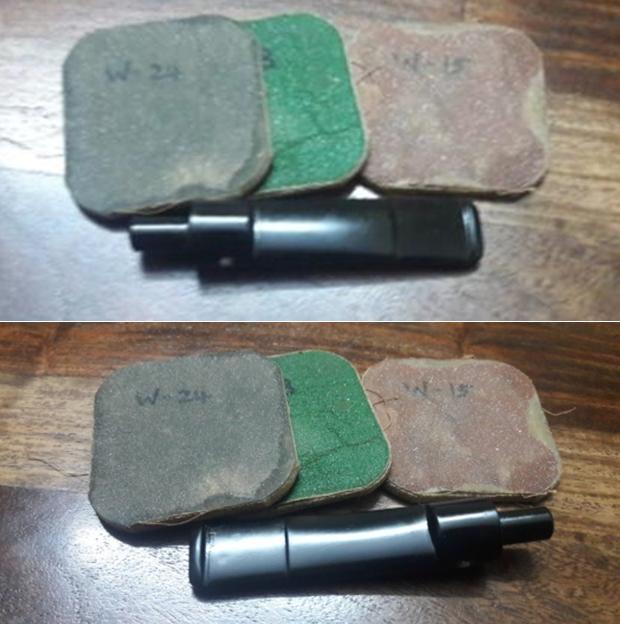 Once I was finished with the stem, I cleaned out the internals of the stem and shank using Isopropyl alcohol, cue-tips, shank brush, regular and bristle pipe cleaners till air flow was open and free. Thereafter, I gave a final polish to the bowl with Paragon wax, rubbing and buffing it with a soft cloth and muscle power till cows came home!!!!!!!! The finished pipe can be seen in the pictures below. Thank you for walking with me on this journey of learning and resurrection of fond memories of my Old Man!!!!!
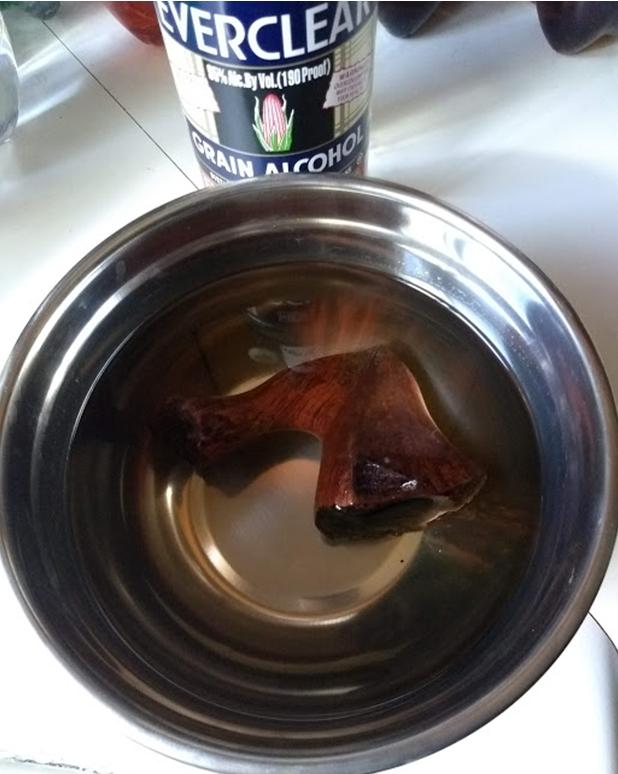
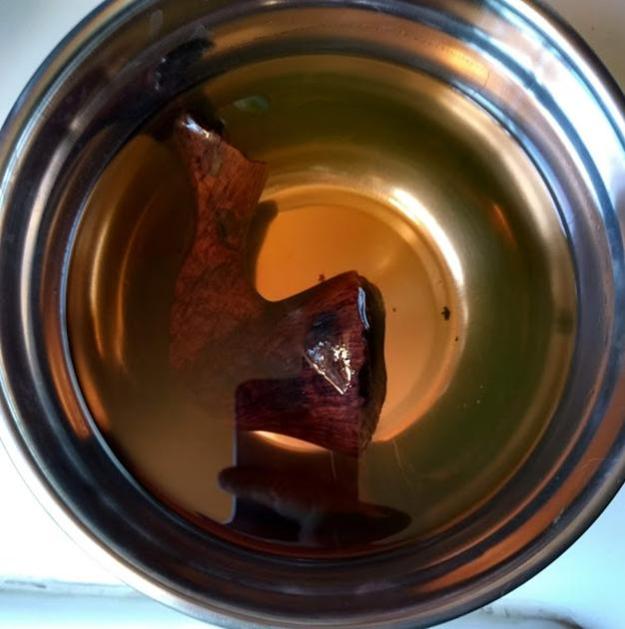
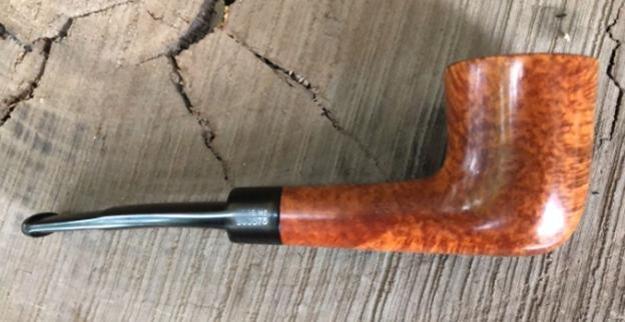


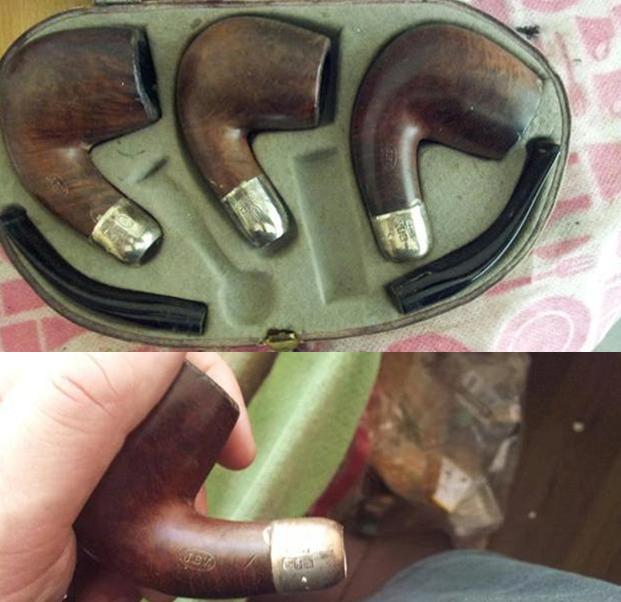
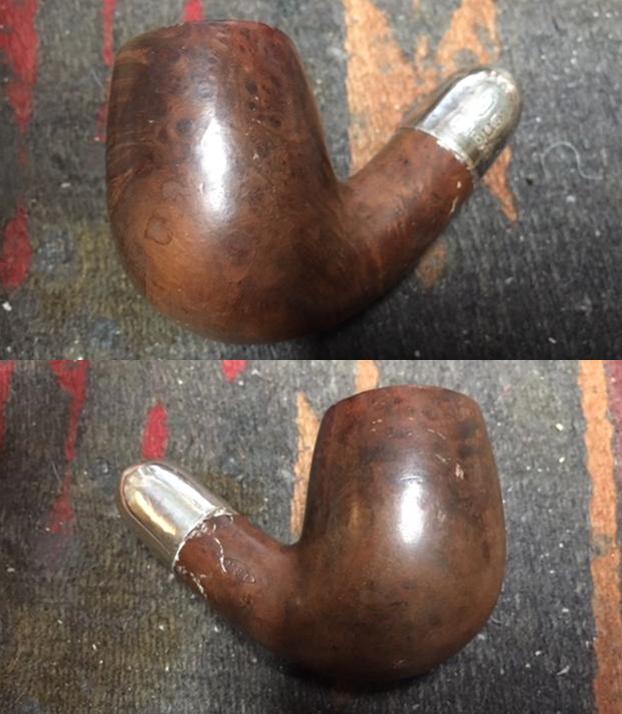
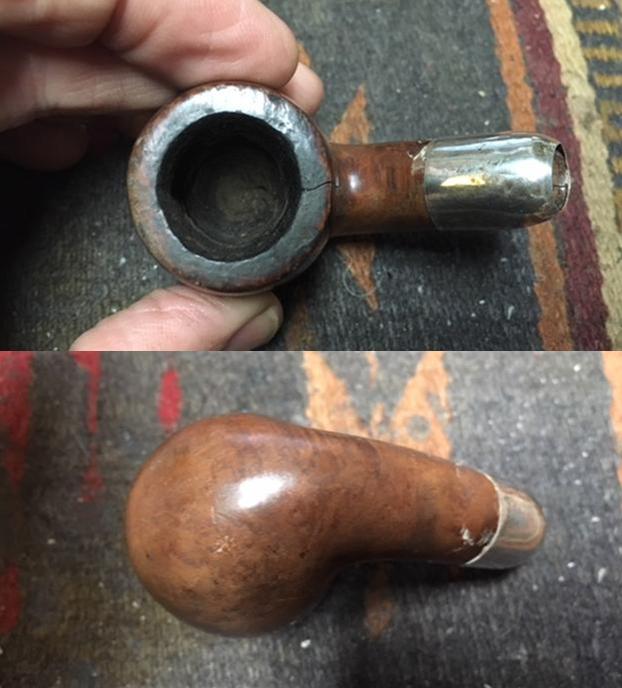
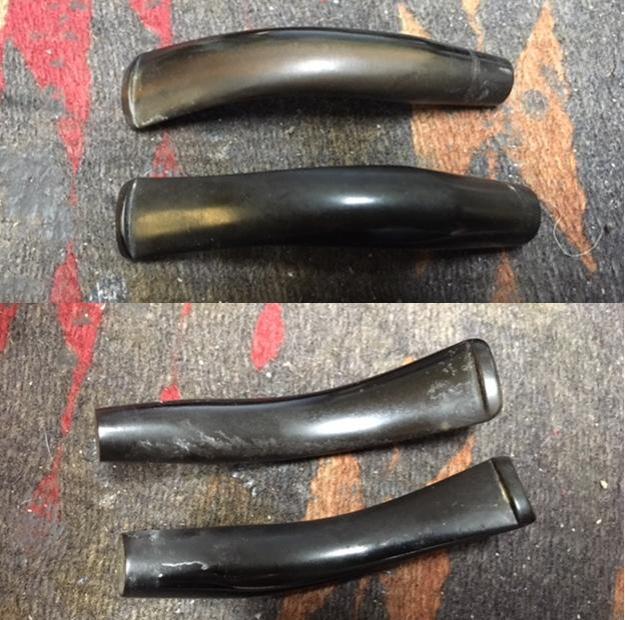
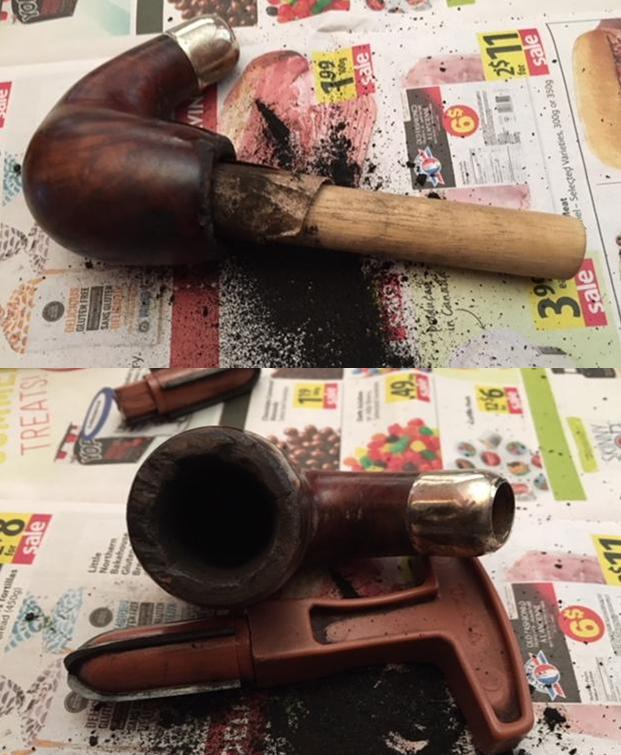
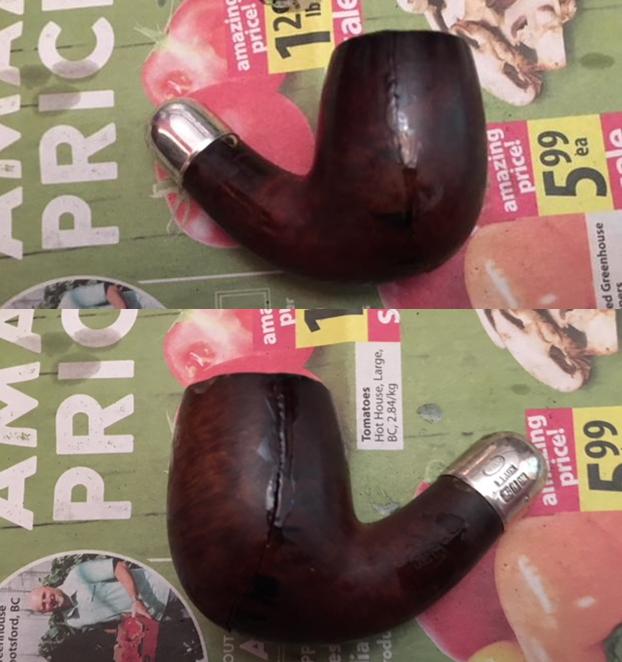
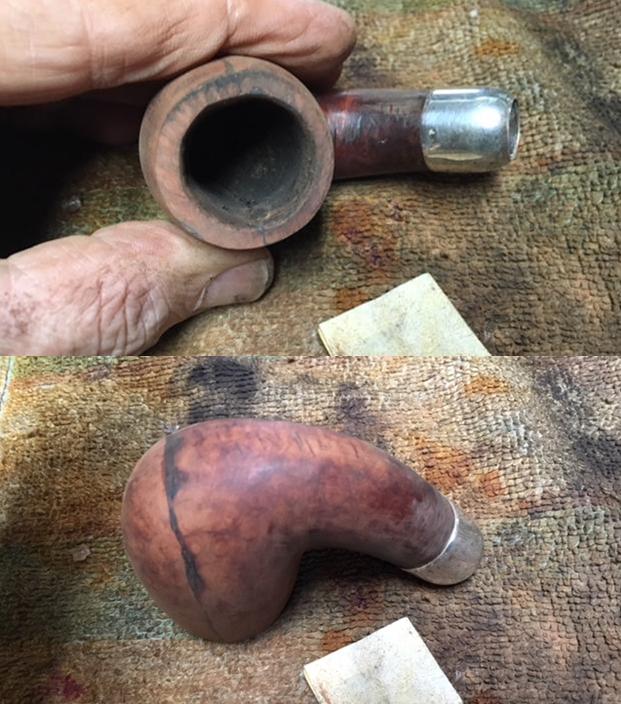
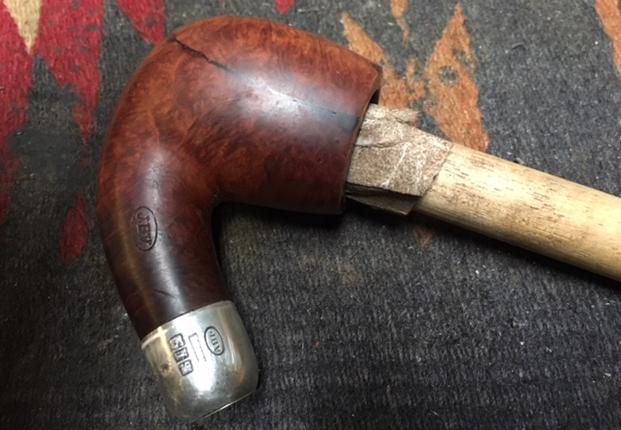
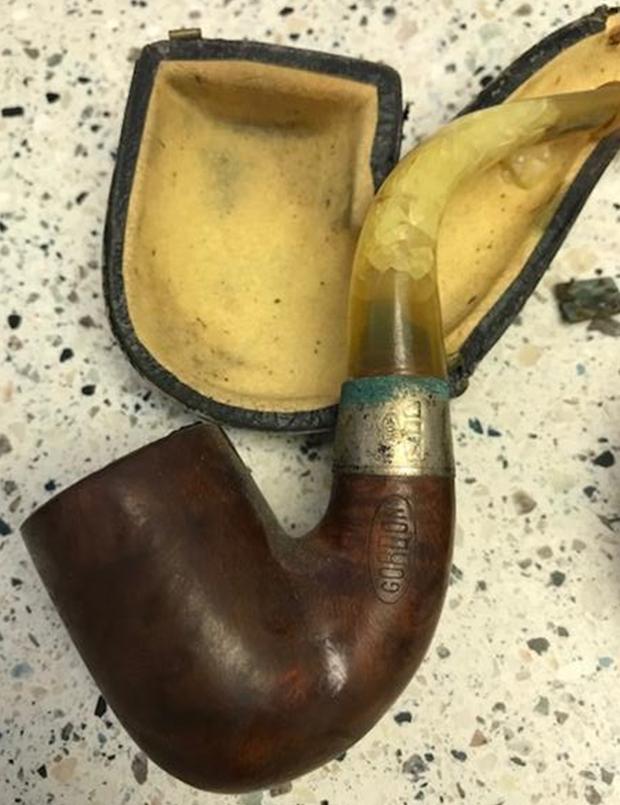
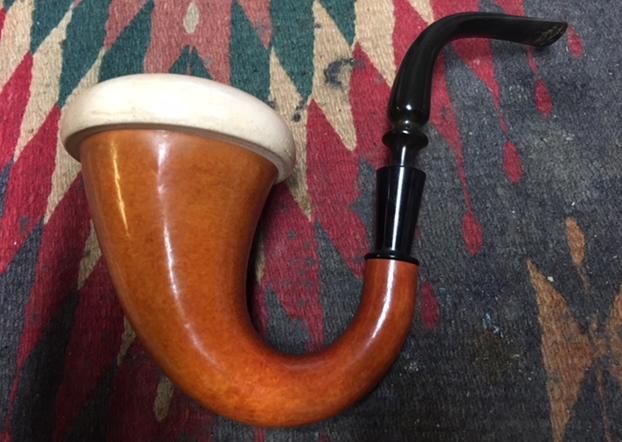
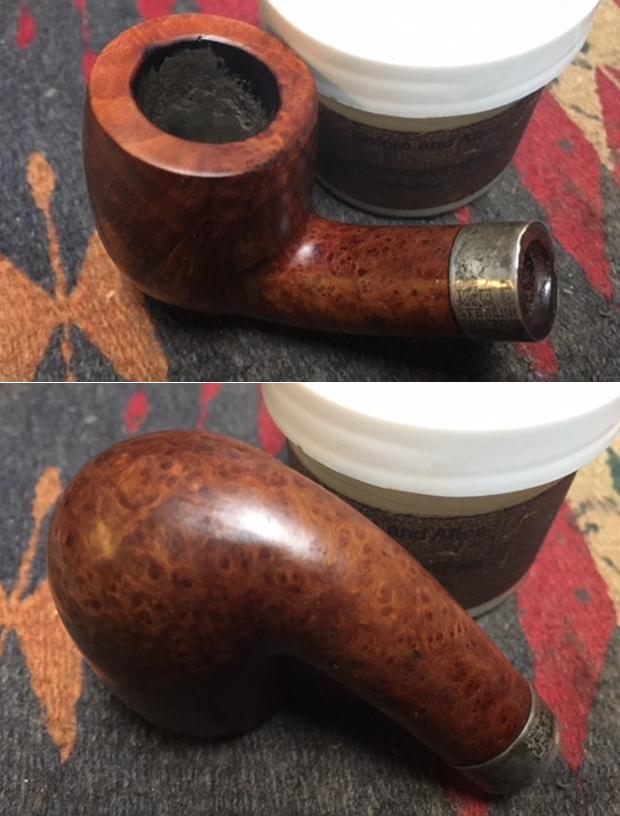
 I took close up photos of the rim top and the stem to show the condition they were in when I received the pipe. The first photo shows the damage to the rim top – there is a nick out of the front inner edge of the bowl and a few other nicks and chips that make it appear to be out of round. The back outer edge on the shank end is worn down at an angle but it is not rough. The inside of the bowl has some uneven cake around the bowl and some tar and oil on the top of the rim. The sterling silver band – with K&P and Sterling Silver stamped on it is oxidized and tarnished but otherwise in good condition. The photos of the stem show the tooth damage on the top and underside of near the P-lip button. There is a deep tooth mark on the top side ahead of the button and some wearing down of the button edge on the left and right. The underside of the stem also has tooth chatter and some wear on the sharp ledge. The airway on the top of the stem is still in good condition.
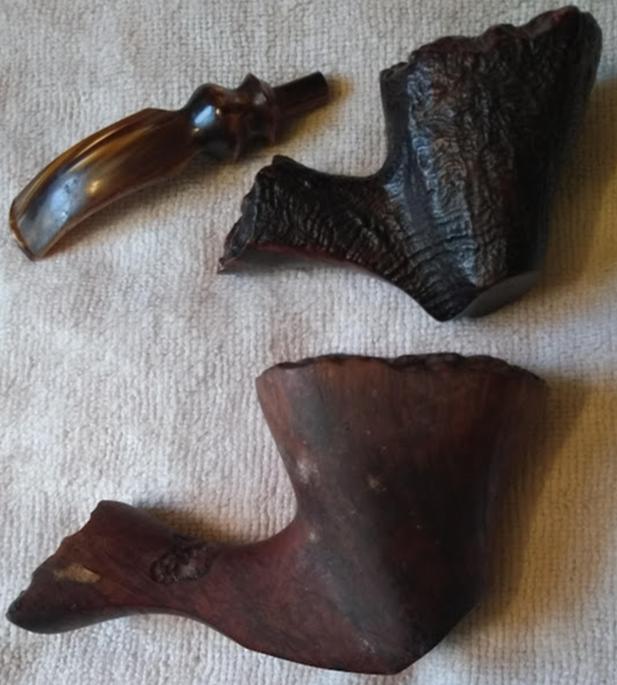
 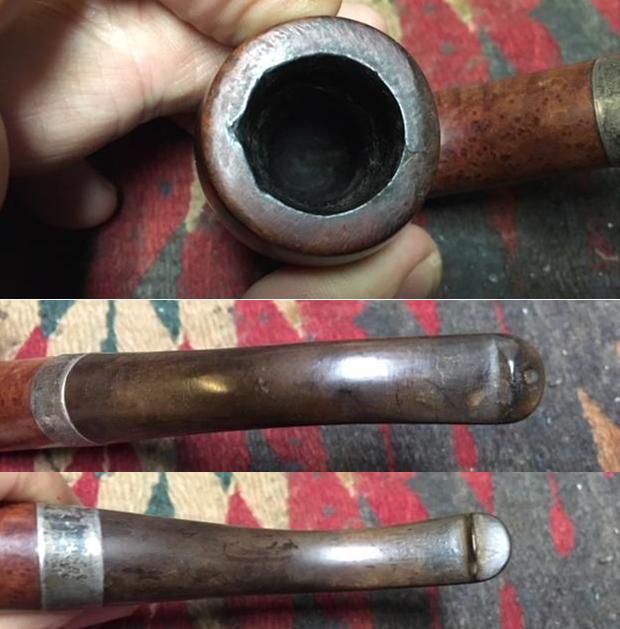 I took a photo of the pipe with the stem removed to give an idea of the style of the tenon on the stem and the look of the pipe sans stem.
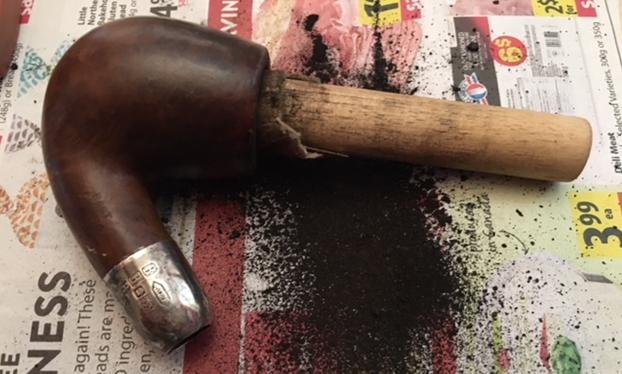
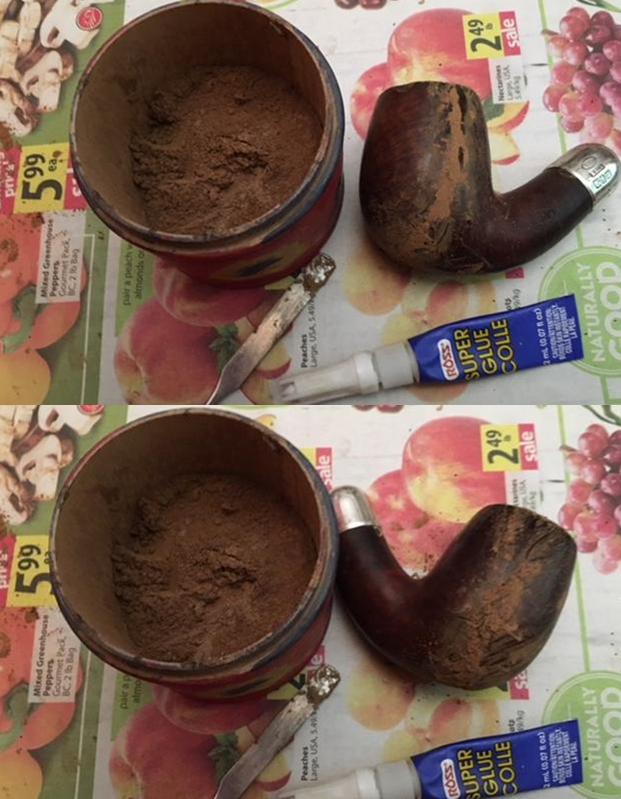
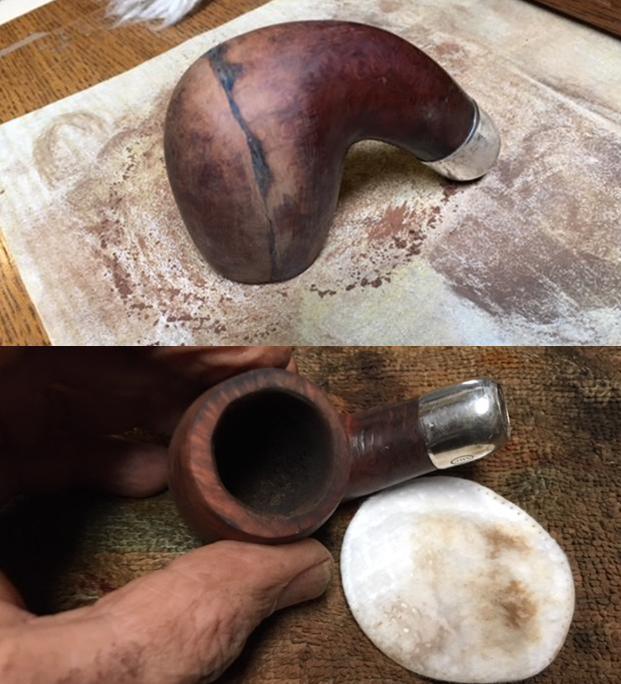
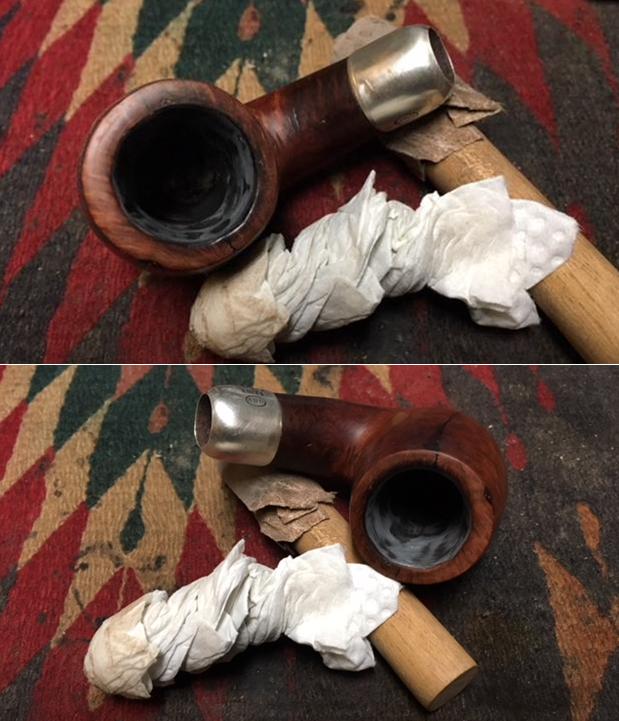
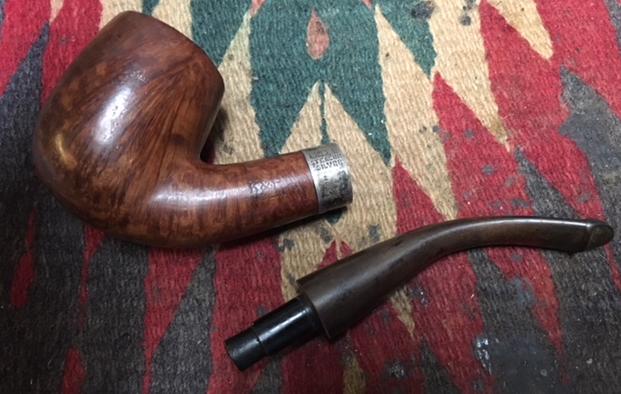 I took a photo of the stamping on the both the right and left side of the shank. It is very clear and readable. The stamping left reads K&P over Dublin and the stamping on the right reads shape number 217 and the COM stamp as mentioned above – Made in Ireland in a circle.
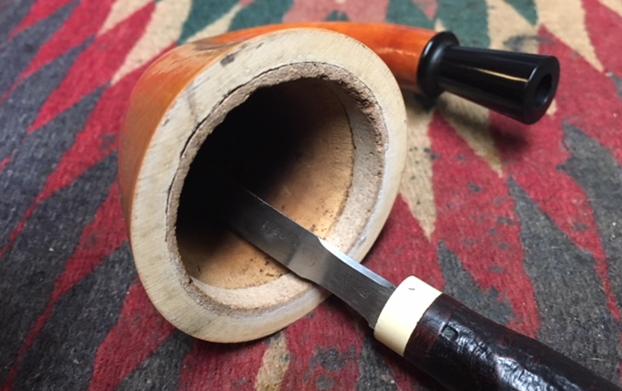
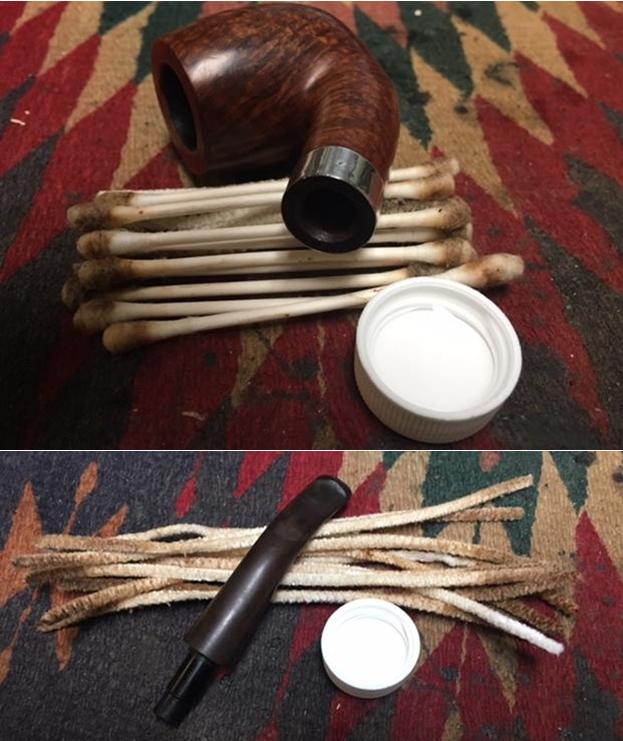
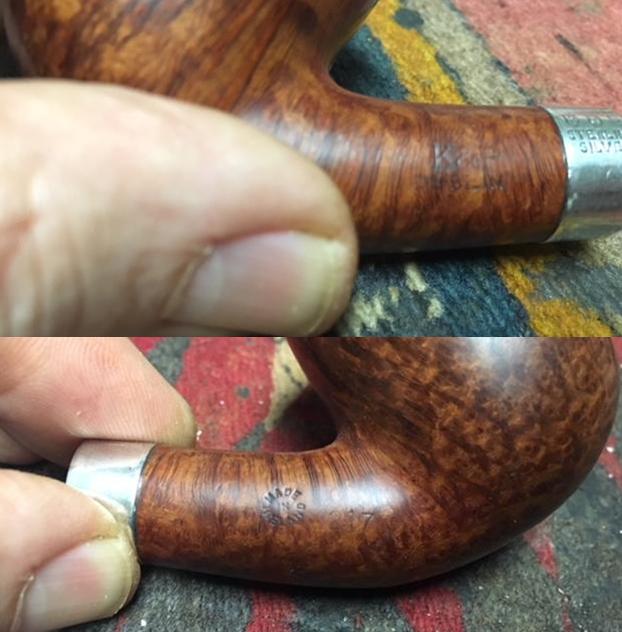 I started my clean up on the bowl with reaming and then cleaning out the airway to the bowl and the inside of the mortise as well as the airway in the stem. I reamed the bowl with a Savinelli Fitsall Pipe Knife to remove the cake on the walls. I used a dowel wrapped with sandpaper to sand down the walls on the bowl. I cleaned out the airway in both the bowl and stem with alcohol (99% isopropyl), pipe cleaners and cotton swabs until they were clean on the inside.
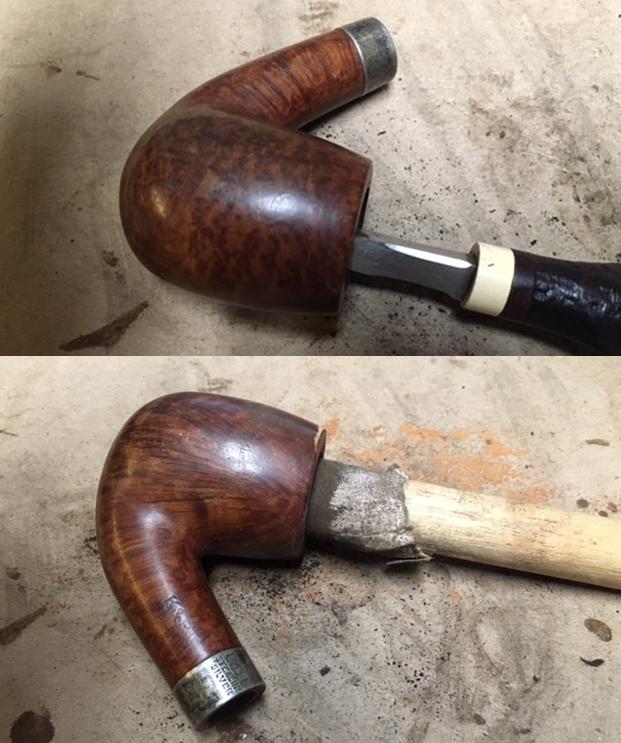
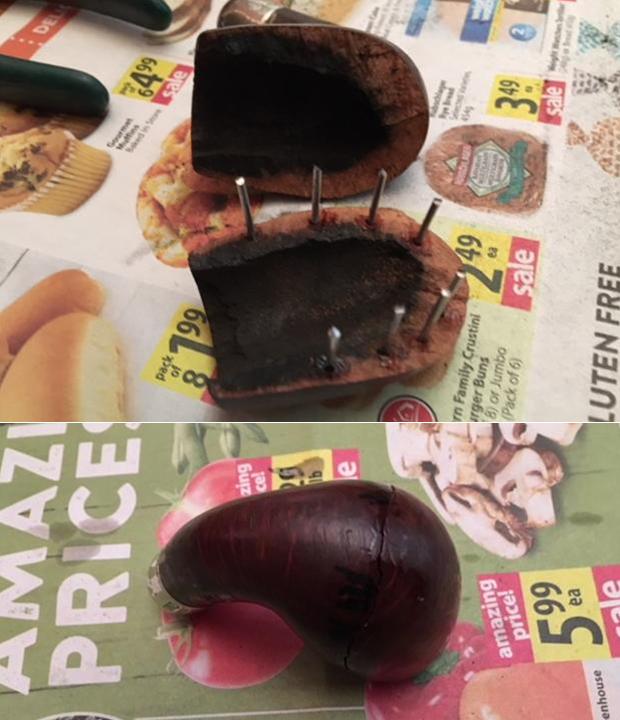
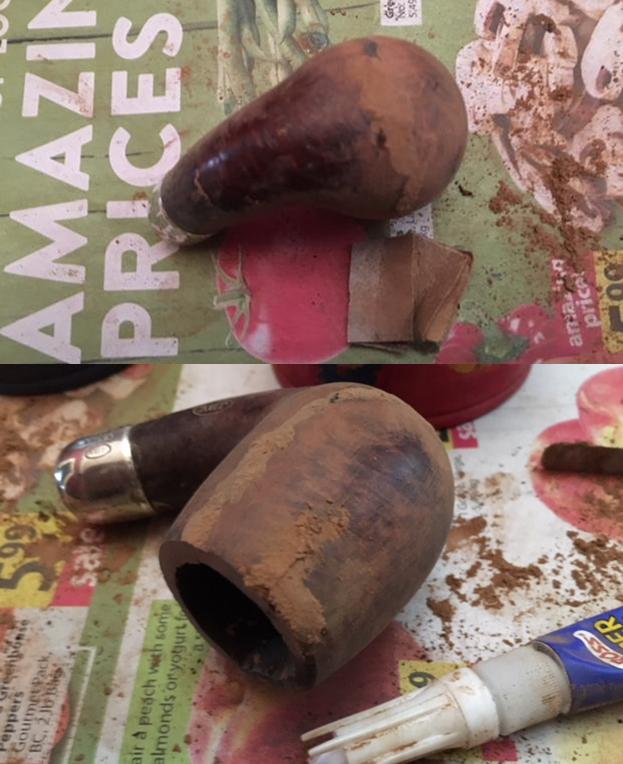
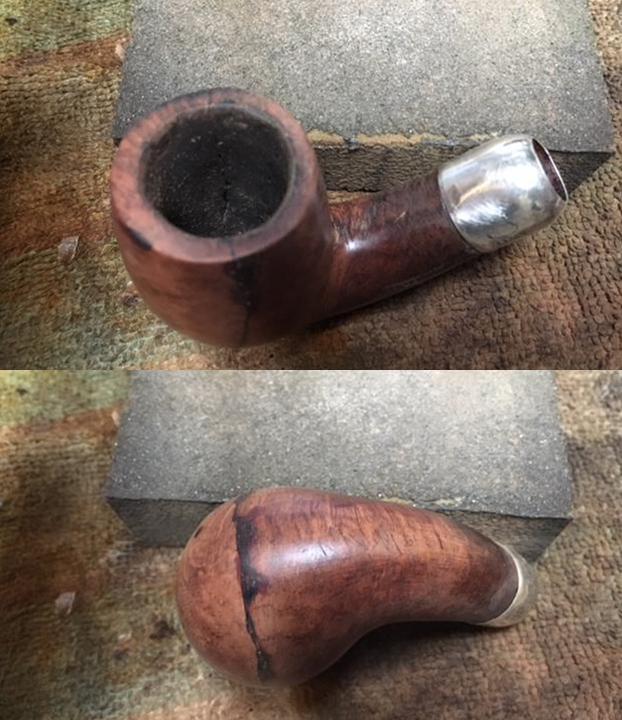
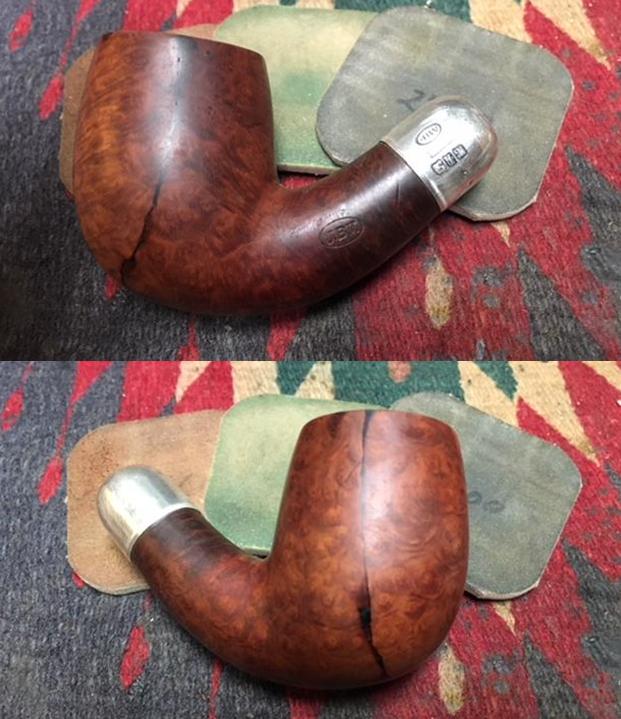
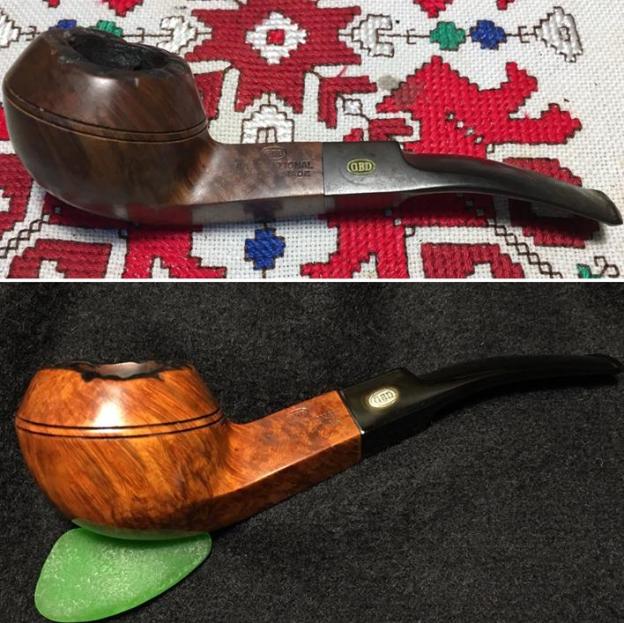
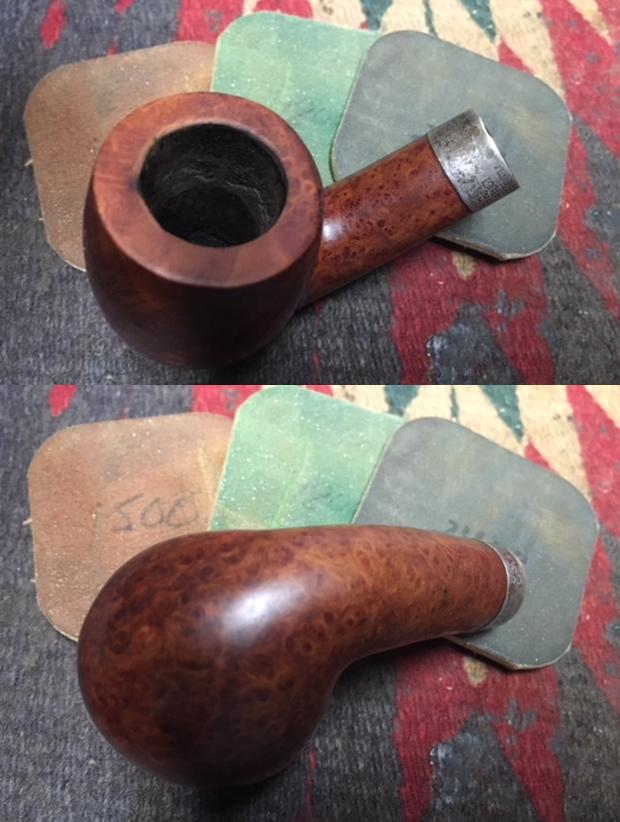
 To remove the damage from the rim top I lightly topped the bowl with 220 grit sandpaper on the topping board. I checked it repeatedly as I did the topping to make sure I had removed just enough to suffice to remove the damage. The second photo shows the topped bowl. You will note that I left a little of the damage on the rear outer edge so as not to top too much of the briar.
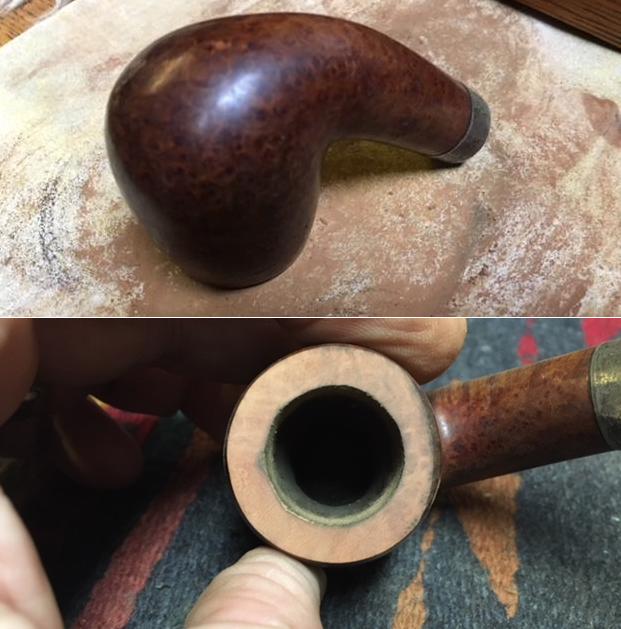 I wiped the rim top down with alcohol on a cotton pad to remove the dust then stained it with an Oak coloured stain pen. I buffed it lightly with a soft cloth to even out the stain.
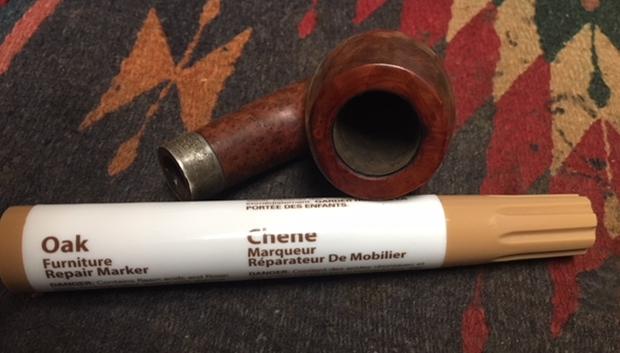 I wiped down the bowl alcohol on a cotton pad to remove the dust and grime on the surface of the bowl. I polished the briar finish with micromesh sanding pads – wet sanding with 1500-2400 grit micromesh pads and dry sanding with 3200-12000 grit pads. I wiped it down after each pad with a damp cloth. The grain began to shine through with both flame and birdseye showing up on the sides of the bowl.
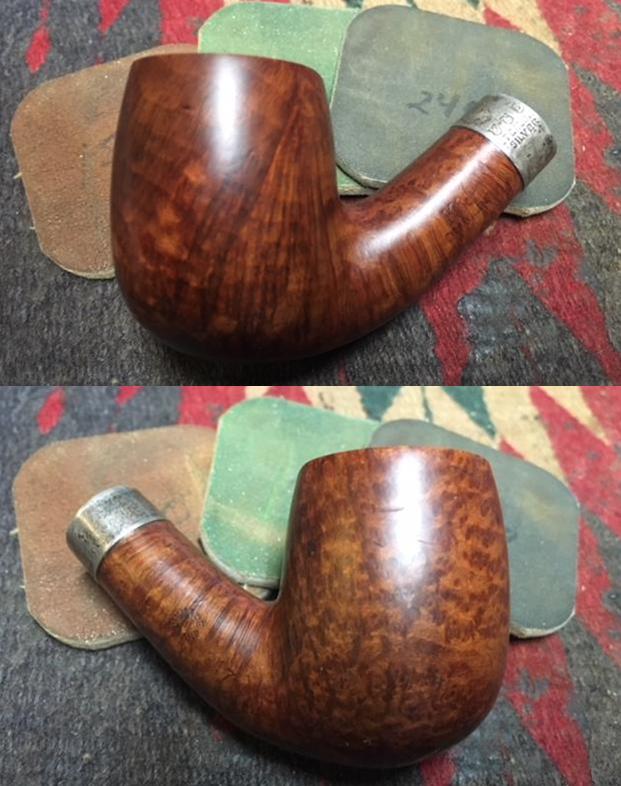
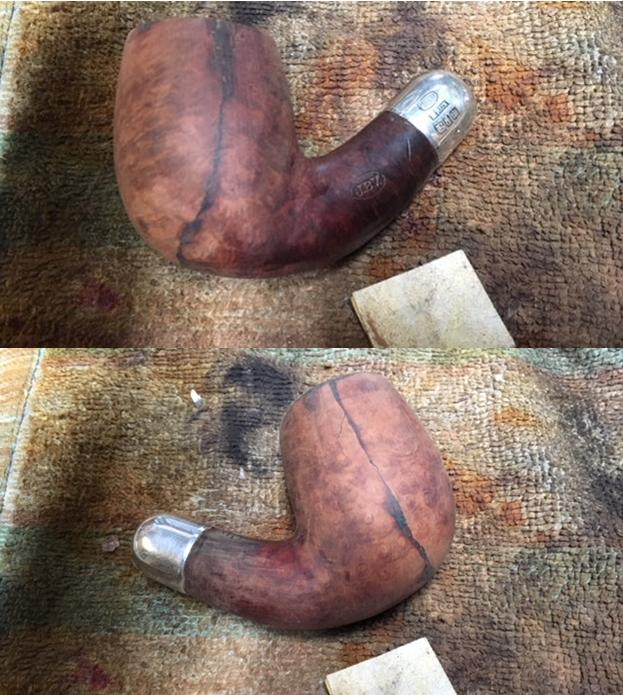
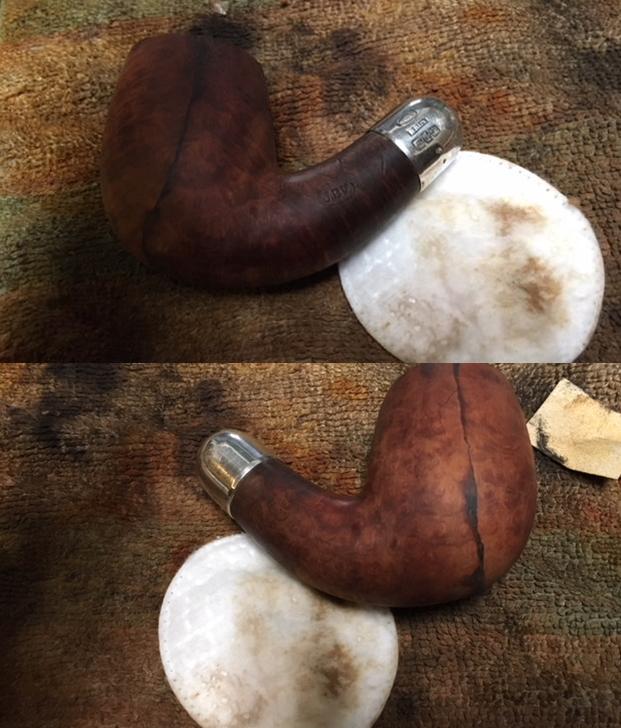
 I rubbed down the briar with Before & After Restoration Balm. I worked it into the finish with my fingertips and finished working it in with a shoe brush. The balm worked to clean, preserve and enliven the surface of the finish on the small bowl. The briar was coming alive so I took some photos of the pipe at this point.
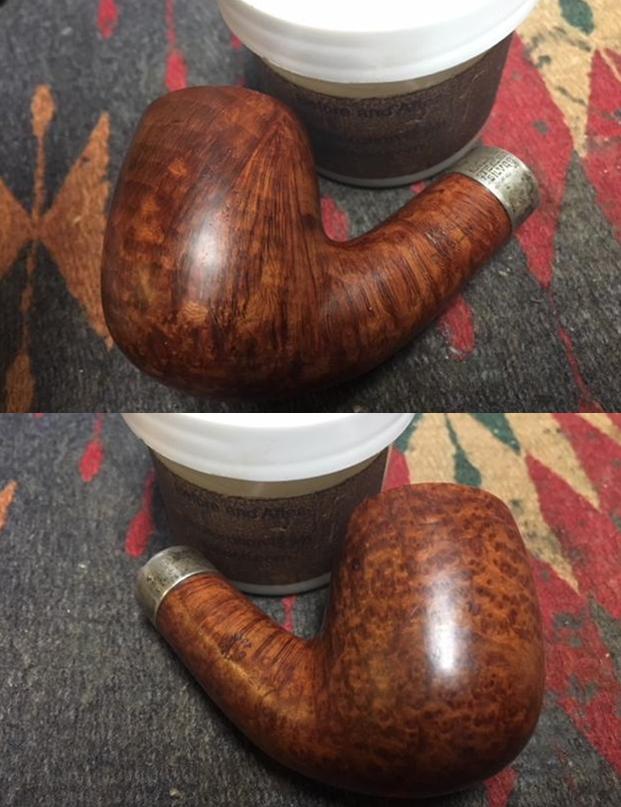
 I polished the silver band with Hagerty’s Silver Polish to remove the tarnish. It is a soft scrub that is put on the band and buffed off with a cloth afterwards. I used a cotton pad to remove the tarnish. I polished it further with a jeweler’s cloth to protect and give it a shine.
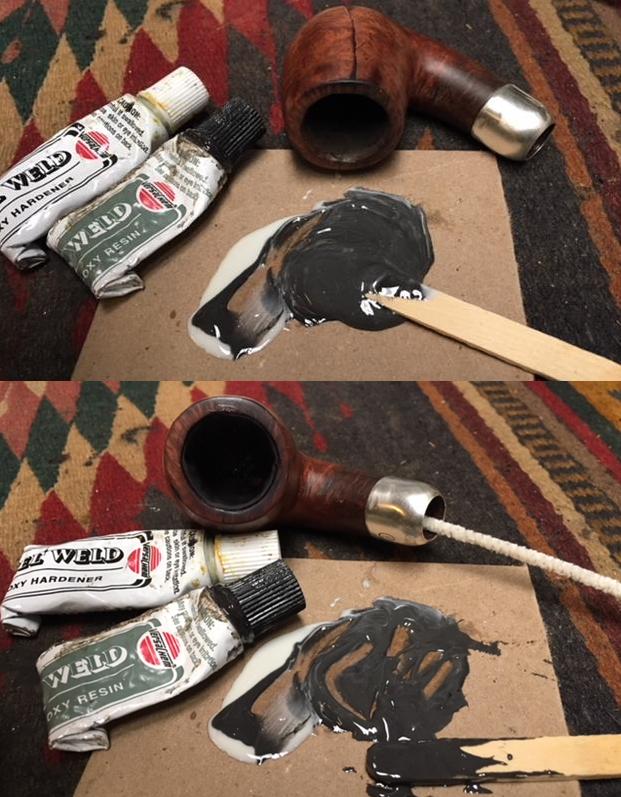
 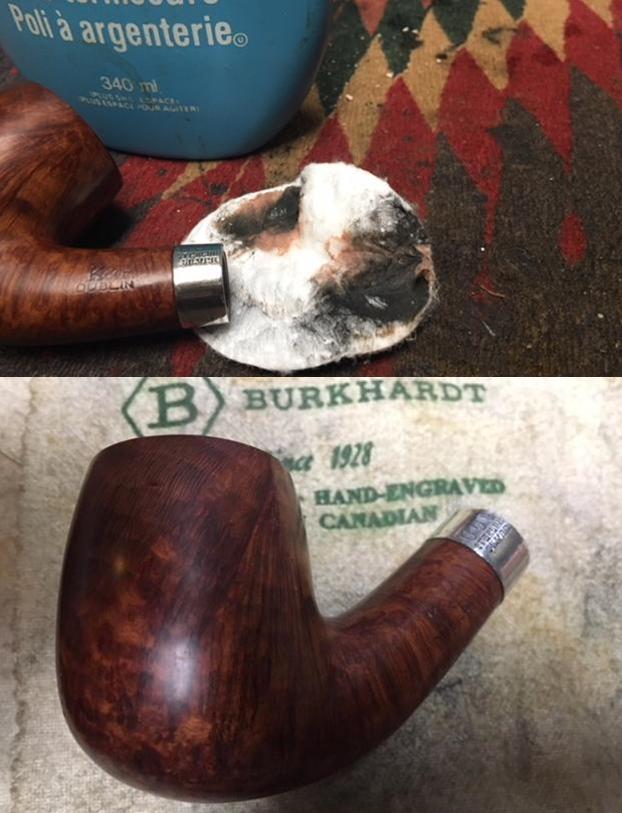 I set the bowl aside and began to work on the dents in the stem surface. I “painted” the vulcanite with a Bic lighter flame to try to raise the dents. I was able to get those on the underside completely removed. The deep one on the top surface of the stem and sides of the button needed to be addressed differently. I cleaned the areas around the button and filled in the dents with black super glue. When the repair cured I sanded the repairs and the oxidation with 220 grit sandpaper. I folded the paper and worked in the edges of the button.
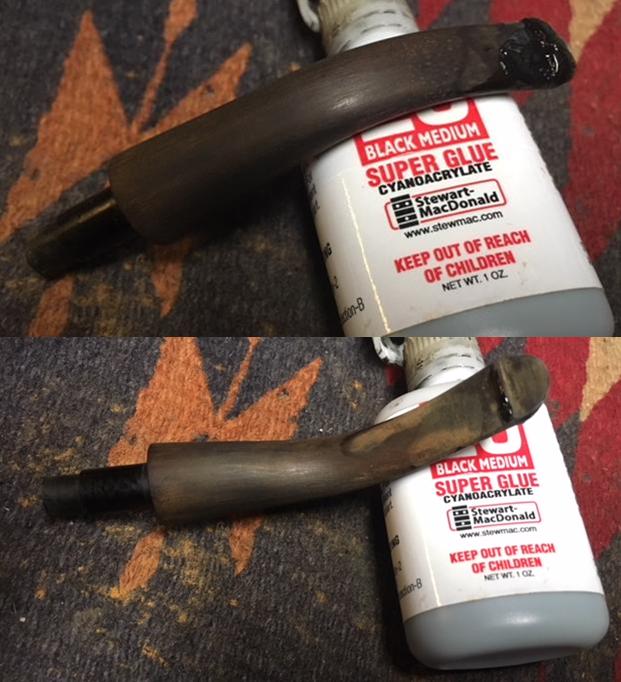
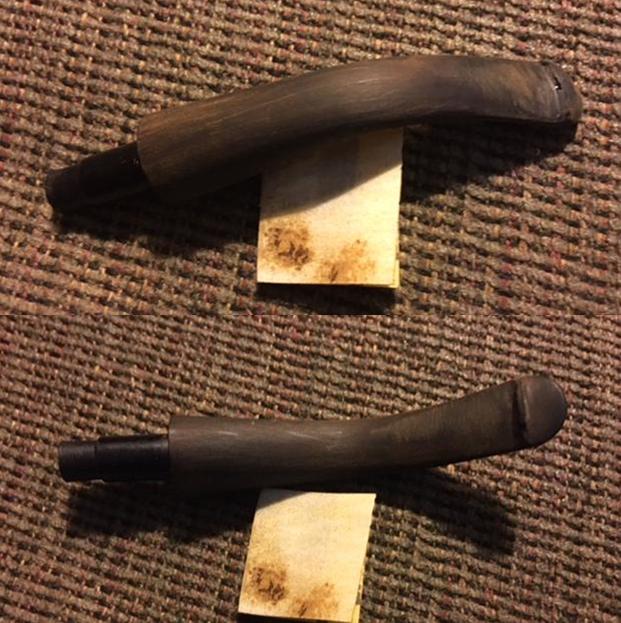 I polished the stem with micromesh sanding pads – wet sanding with 1500-2400 grit pads and dry sanding with 3200-12000 grit pads. I wiped the stem down with Obsidian Oil between each sanding pad.
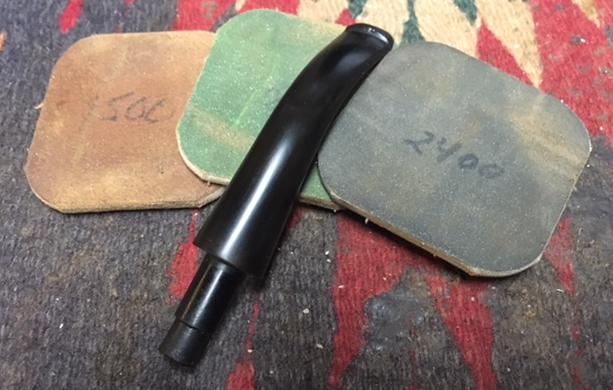
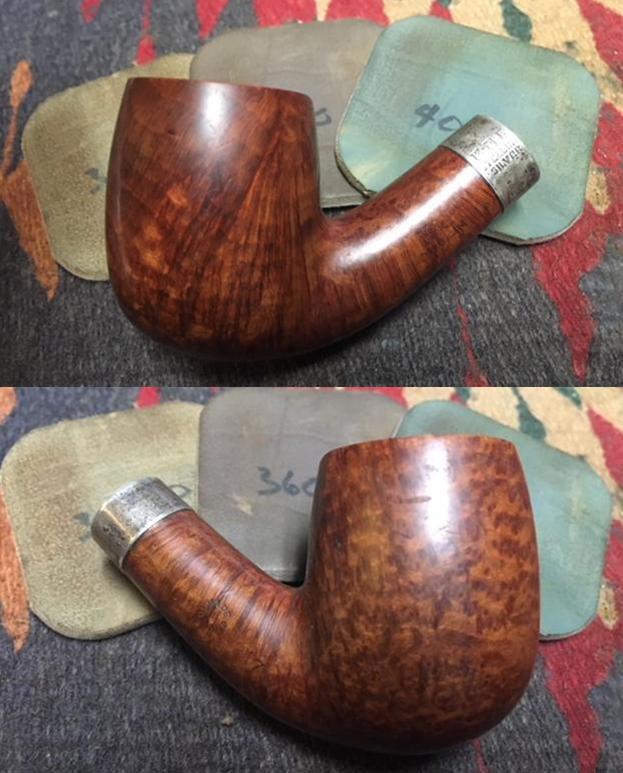
 I put the stem back on the bowl and buffed the pipe with Blue Diamond polish on the buffing wheel. I carefully avoided the stamping on the both sides of the shank. I gave both the bowl and the stem multiple coats of carnauba wax and buffed the pipe with a clean buffing pad to raise the shine. I hand buffed it with a microfiber cloth to deepen the shine. The finished pipe is shown in the photos below. I have one more pipe to finish for him – it is the last of the pipes he found while pipe hunting. This has been a fun bunch of pipes to work on. I look forward to moving through the rest of them. Thanks for looking.