Blog by Dal Stanton
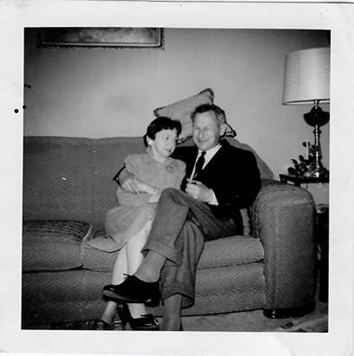
Pipes come to me in many ways – pipe picking in bazaars, second-hand shops and antique shops. The eBay auction block is another way I procure pipes to restore to benefit the Daughters of Bulgaria, our work here in Bulgaria helping women and girls who have been trafficked and sexually exploited. Another gratifying way pipes have come to me are from people who hear about the Daughters and want to help. They donate pipes from their own collections or pipes that were passed on from loved ones. In 2017, my wife and I were in Butler, PA, speaking at a church that has financially and prayerfully supported the work we do in Bulgaria for many years. We were invited to visit the home of Dan and Jane Hartzler, who we’ve known for many years. We had a great time visiting and Dan said he wanted to give me something. He brought out 4 very well-used pipes in a rack and offered them to me to use to benefit our work with the Daughters. The pipes came from his now deceased father, Rex, who was an Ohioan all his life from his birth in 1922 till his final day in July of 2011. When I receive pipes in this way I always try to find out about their former steward – it adds depth of story and meaning when I restore pipes that are passed on. Dan shared with me about his father during that visit and in subsequent emails after we
  departed Butler. It’s not possible to capture an entire lifetime in the brevity of this write-up, but I found very interesting was that Rex had a yearning for adventure in his early years. When he started college in 1940, he also took flying lessons and subsequently joined the Navy pilot program during WWII. This choice in his life as a young man brought him into an interesting role during WWII. He piloted blimps flying protective duty over the Panama Canal – a critical naval east/west artery to connect the Atlantic and Pacific naval operations. This description from BlueJacket.com is interesting and adds insight to Rex’s duties as a ‘lighter than air’ pilot. The primary role of the blimp was directed toward anti-submarine warfare. The toll on merchant marine fleets were heavy during the beginning years of the Atlantic theater supporting the Allied war effort in Europe. The ‘Lighter Than Air’ units played a key role in turning the tide of these major naval losses. To guard shipping using the Panama Canal, blimps were stationed on both the Pacific and Atlantic sides to ward off submarine attacks on shipping. Dan told me that is father never piloted again after the end of the war and settled into married life in 1946 and raised a family in Ohio.
Dan looked for a picture of his father smoking his pipe that I could add but couldn’t find one. One reason for this was probably the fact that Dan’s mother didn’t like pipe smoke in the house, so Rex would normally load up the bowl with his favorite blend and go outside where he walked among the trees – and by looking at some of the pipes that Dan gave me, we concluded that he probably knocked on the trees or on other hard surfaces to clear the ashes! I’m thankful for Dan’s contribution of his dad’s pipes to benefit the Daughters. I brought them back to Bulgaria and placed them in the ‘For “Pipe Dreamers” Only!’ collection online and this is where Jim found the Canadian he wanted to commission. Jim came to my Dreamers inventory with Canadians on his mind. After looking at different offerings he came down to Rex’s La Strada, which I was very pleased to commission and now, begin restoring this well-used La Strada Scenario from Rex to a new steward.
Jim added one more request for the La Strada Canadian when I began work on it. He sent this short note with a link:
dal,
noticed this as an improvement for many pipes. would it do well for the pipe you’re working on for me? https://pipedia.org/wiki/Airflow:_The_Key_to_Smoking_Pleasure
jim
The title of the Pipedia article piqued my interest and it introduced me to debate regarding “opening” the airway in a pipe to improve the physics of airflow. The author of the article, Ken Campbell, originally posted it to The Pipe Collector, the official newsletter of The National Association of Pipe Collectors (NASPC), I believe in 2011 where he makes a compelling argument. Ken Campbell sited those who did not agree with his assessments, but what I found interesting was the science behind the proposition that increasing the diameter of the airway, if done correctly, according to the author. can enhance the enjoyment, reduce gurgles, difficulties in keeping the bowl lit, etc. A step closer to pipe smoker’s nirvana! The science is interesting, and whether it’s correct or not, I’m not sure, but it’s compelling. I’m repeating this paragraph from Campbell’s, ‘The Key to Smoking Pleasure’ in toto including the pipe artisans he sites to make his case:
My first clue came from an article I read in Pipes & Tobacco in the Winter/1996/97 edition, early in 1997. The article was entitled “Nature’s Designs” by Dayton H. Matlick and was about Lars Ivarsson, his pipe making and some of his philosophy and knowledge about smoking. I quote Messrs. Matlick and Ivarsson from this article: “Unrestricted airflow through the entire channel is essential for an easy-smoking pipe….’Once you pick the shape and size of pipe you like, test the airflow,’ says Lars Ivarsson. ‘Draw in through the empty pipe at normal smoking force. There should be no sound or, at most, a deep, hollow sound. This means the airflow is not restricted, an essential element of a good-smoking pipe. If you have any whistling sounds,… meaning restricted airflow, you will probably have trouble keeping it lit and it will probably smoke wet. According to Lars, ‘You’re getting turbulence in the airstream when you exceed a certain speed. The sound of that turbulence indicates that the smoke will get separated. Smoke is actually microdrops of moisture containing hot air and aroma. When air passes quickly through a restricted passageway, turbulence moves the heavy particles, including the moisture, to the perimeter, like separating cream from milk. This can be caused by too small a diameter or sharp corners in the smoke passage [which is] an extremely important issue….[T]he physics of the boring of your pipe will definitely have an impact on the taste of the pipe and your smoking pleasure. For all of his pipes, Lars uses a four millimeter [Ed. about 5/32nd of an inch] channel from one end of the pipe to the other. This may vary with the pipe maker, but the sound test will still hold true.”
The article is interesting, and I’m always interested in trying new things to expand my restoration repertoire, so I responded to Jim saying that I would give it a try, but because I had not done this before, I would need to research it more to make sure I get it right. So, opening the airway of this La Strada Scenario Canadian is what I need to investigate and look for longer drill bits to add to my collection.
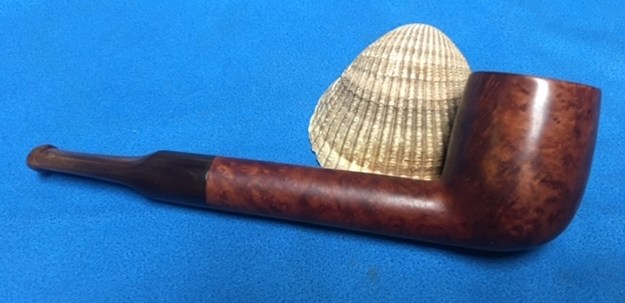
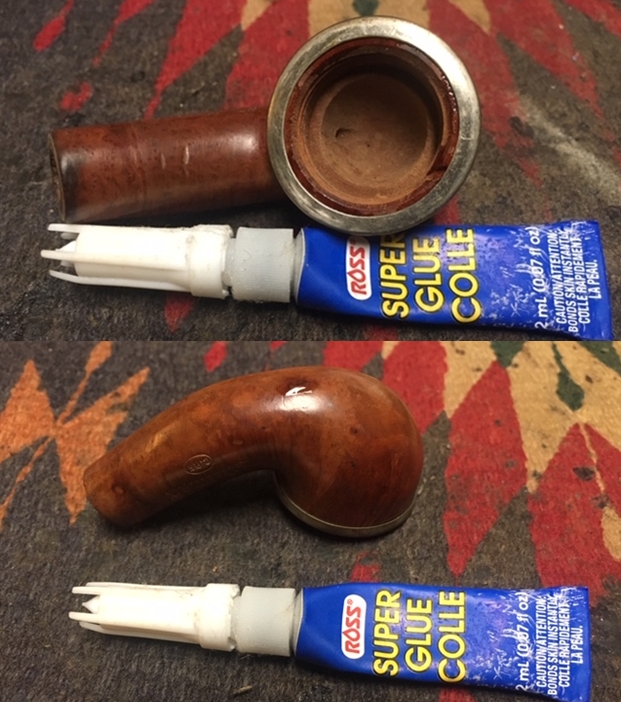
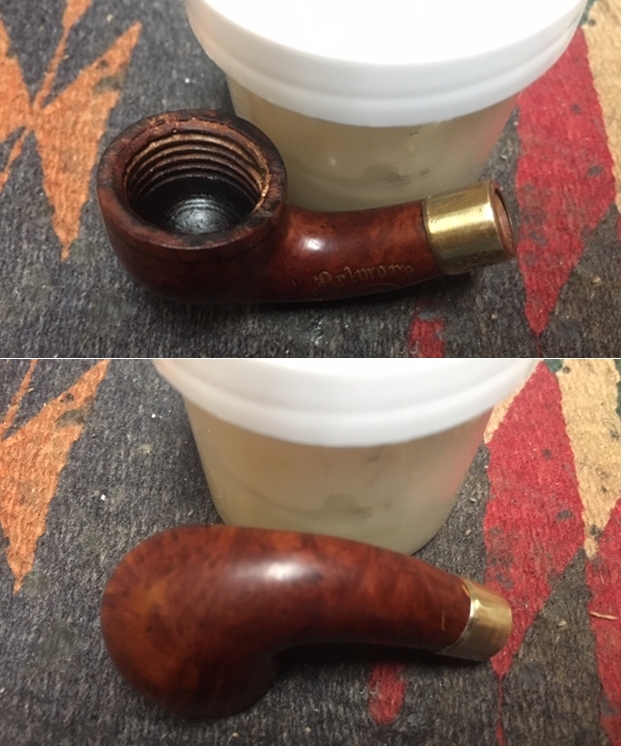
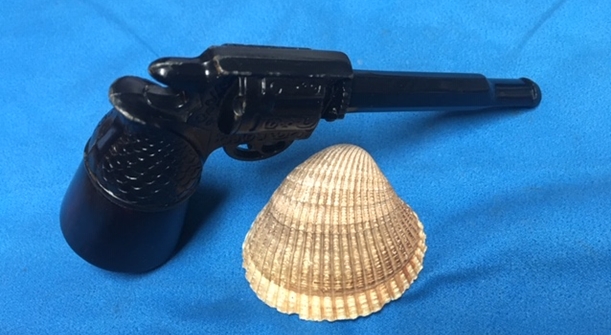
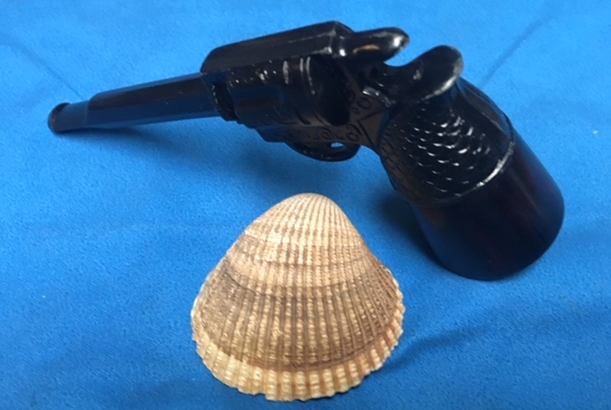
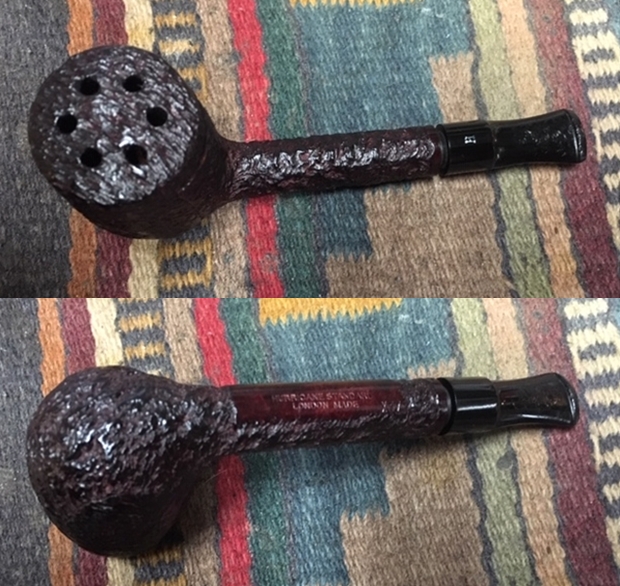
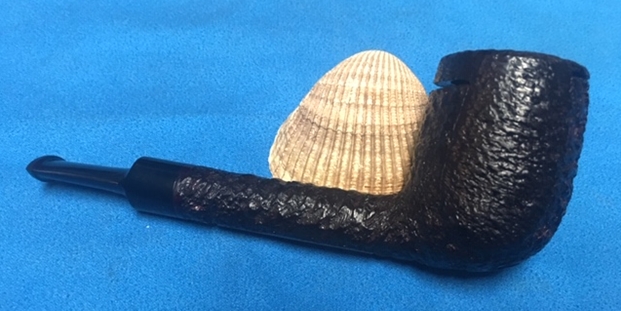
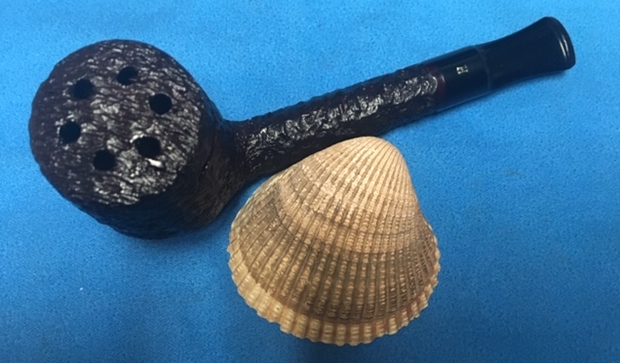
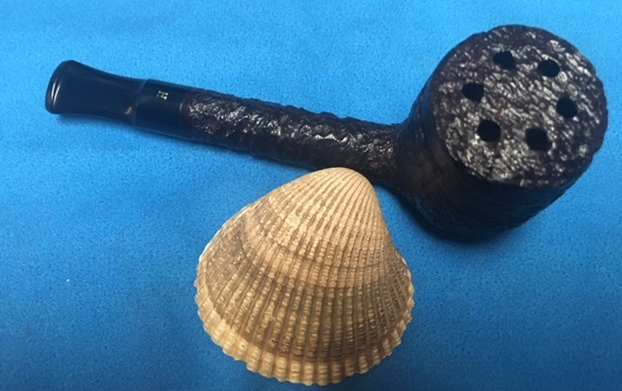
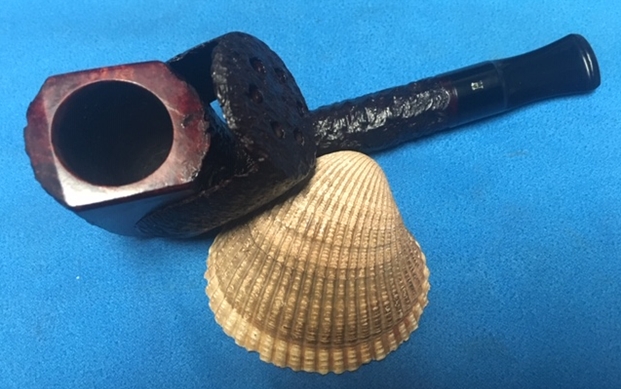
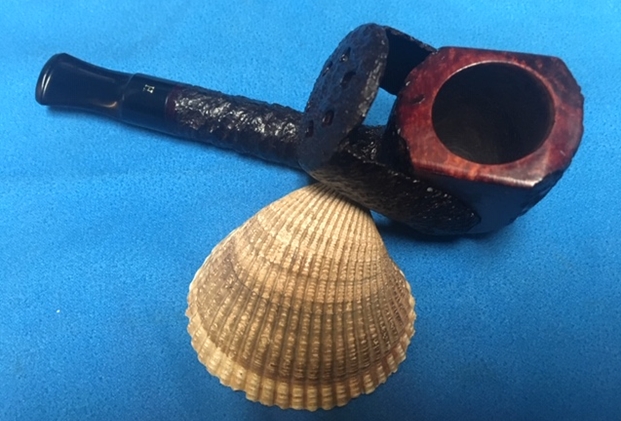
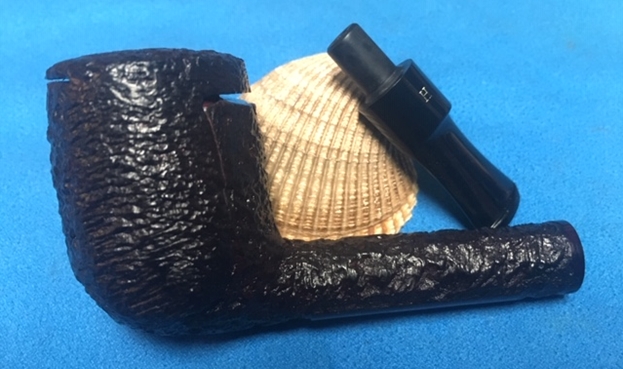
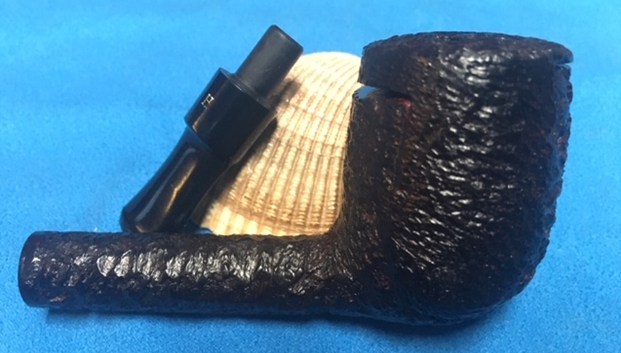
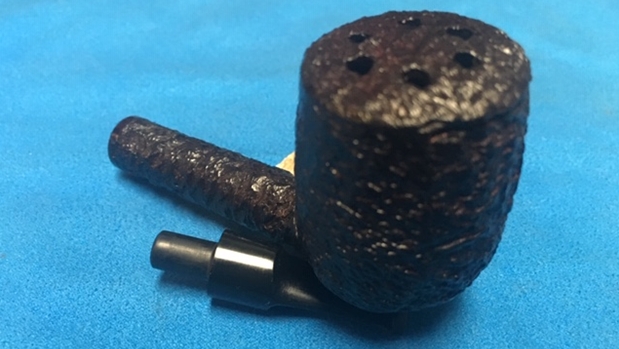
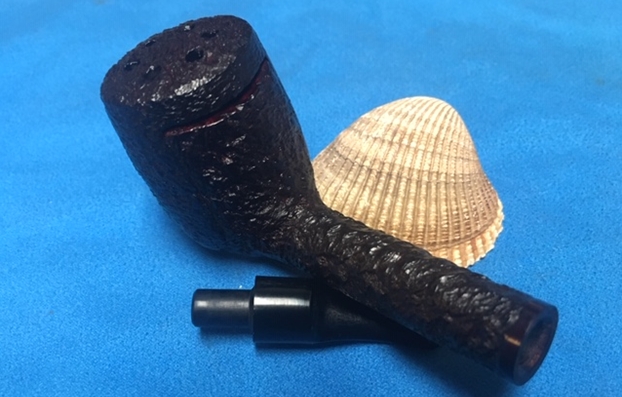
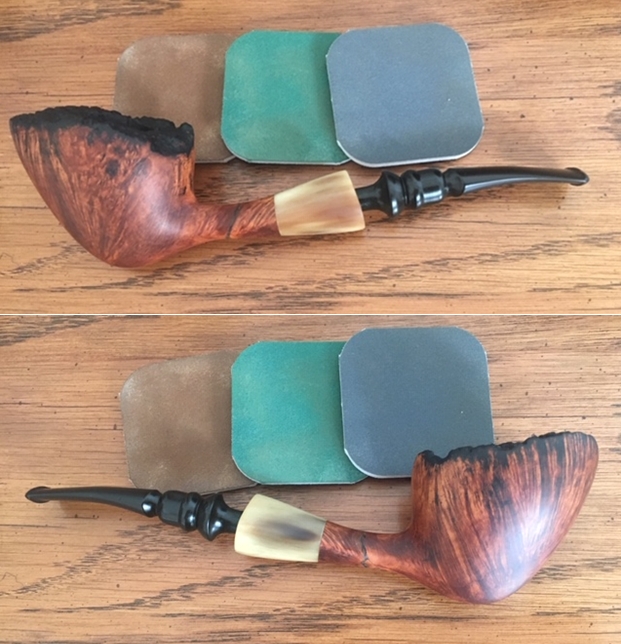
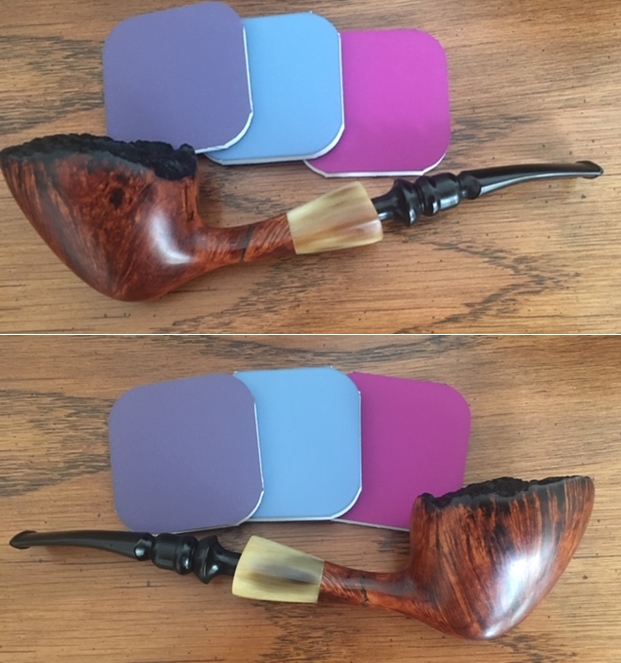
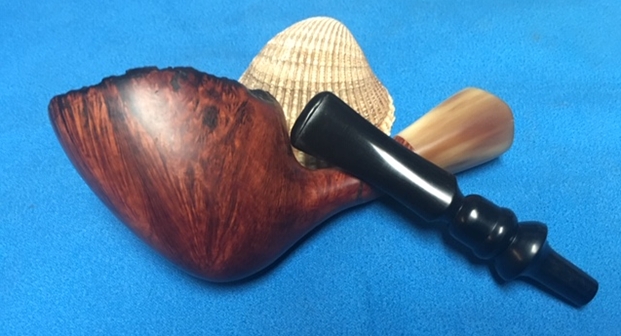
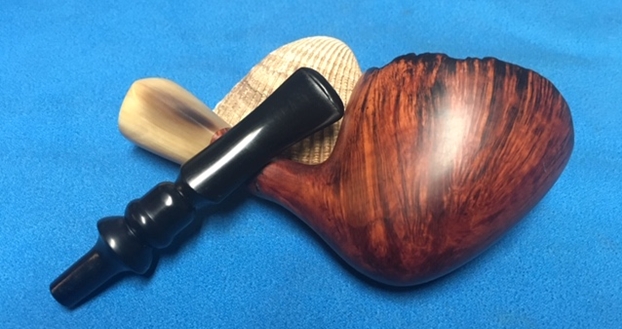
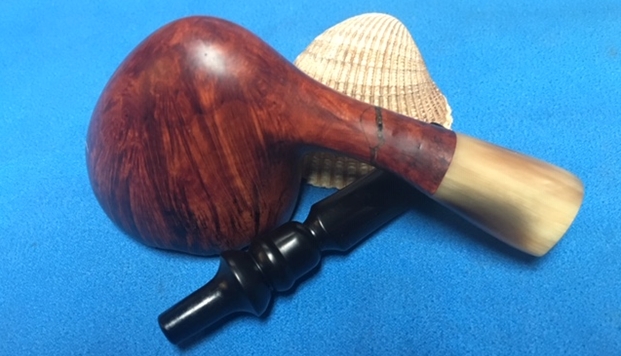
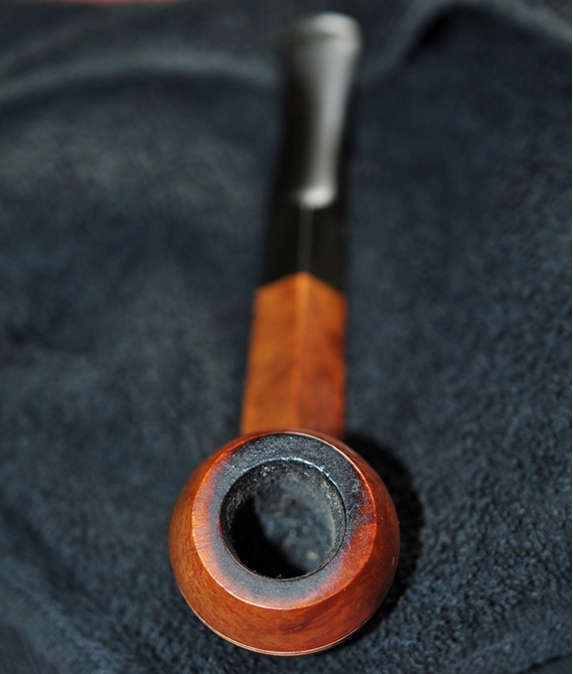
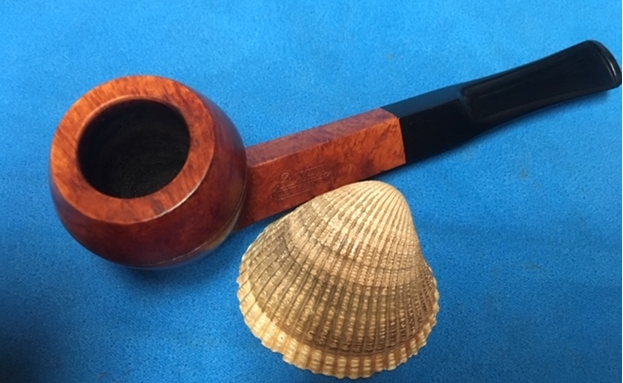
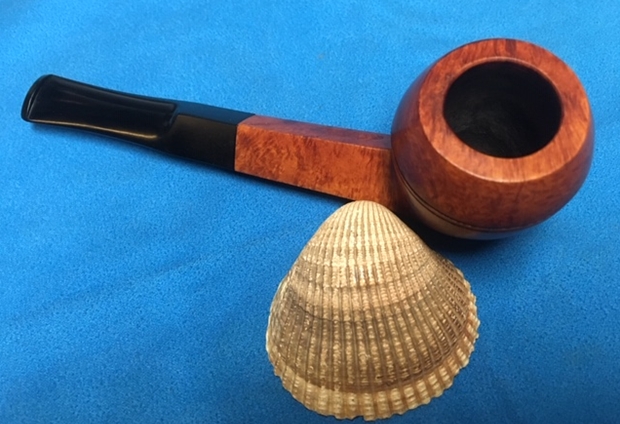
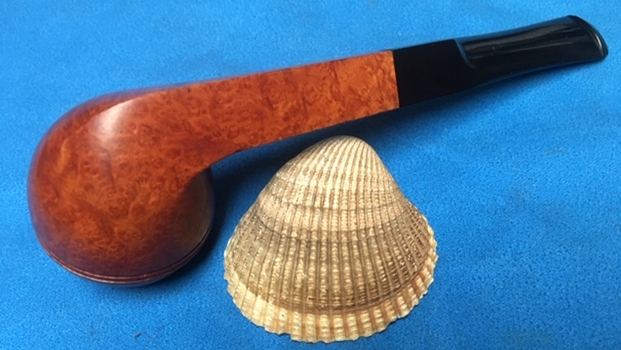
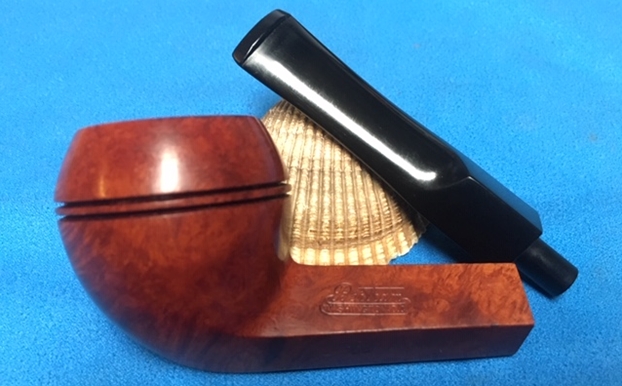
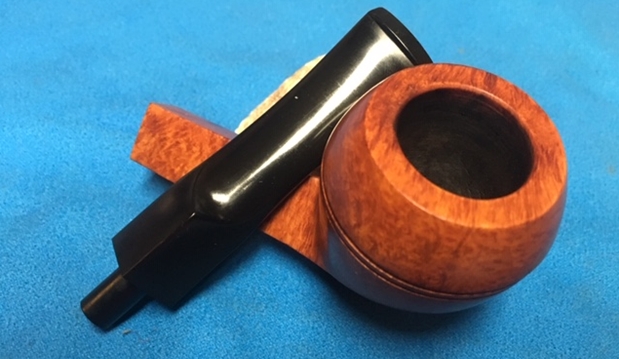
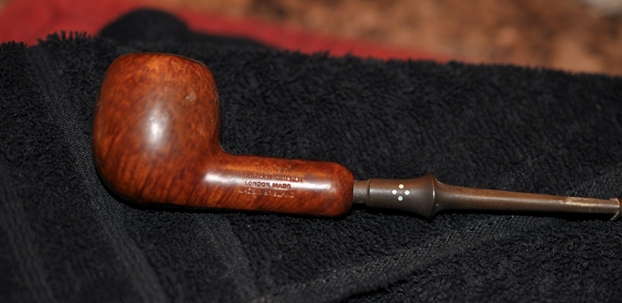
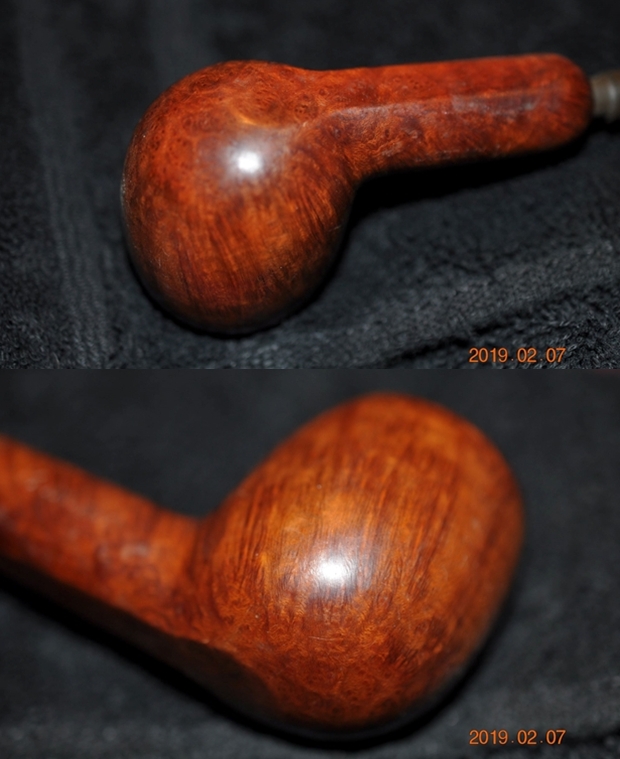
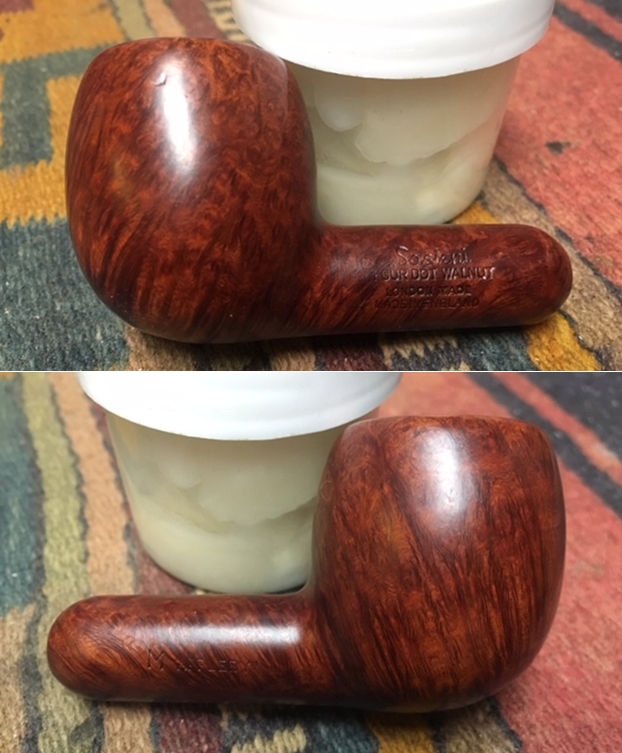
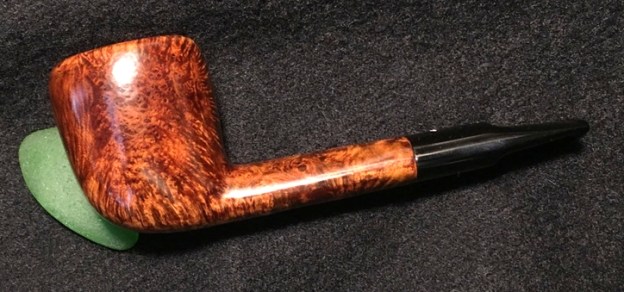
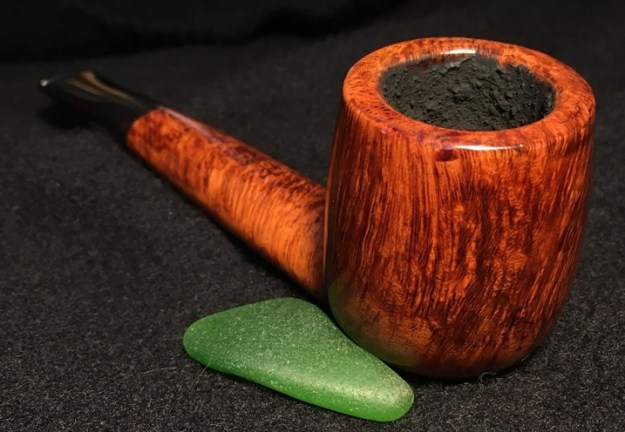
These were the pictures of Rex’s Canadian posted in ‘For “Pipe Dreamers” Only!’ that got Jim’s attention.


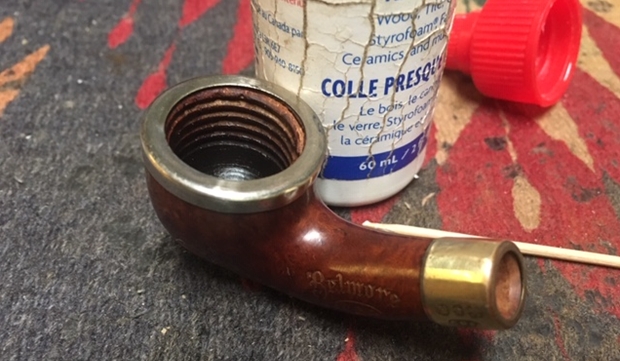
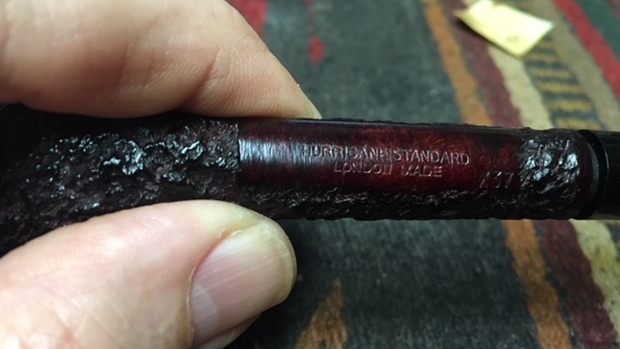
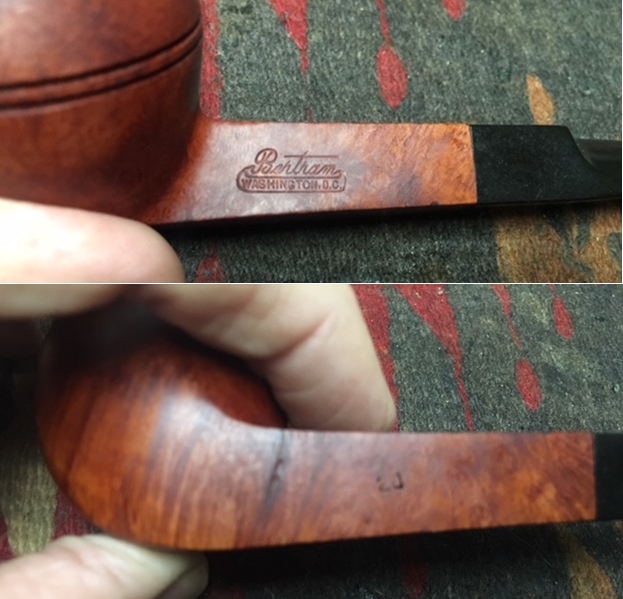
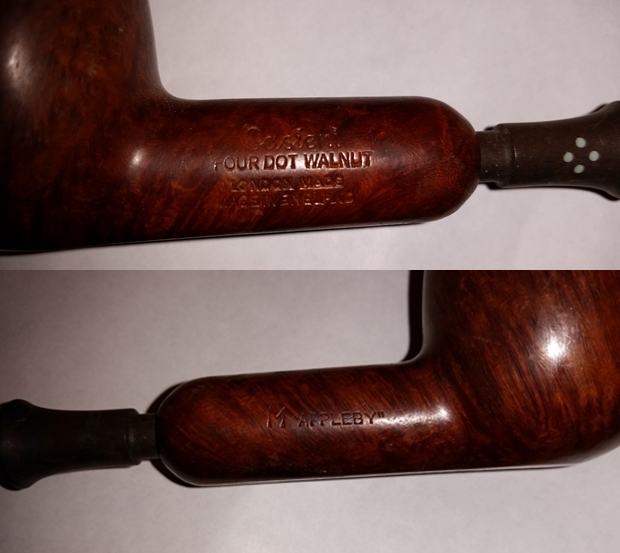
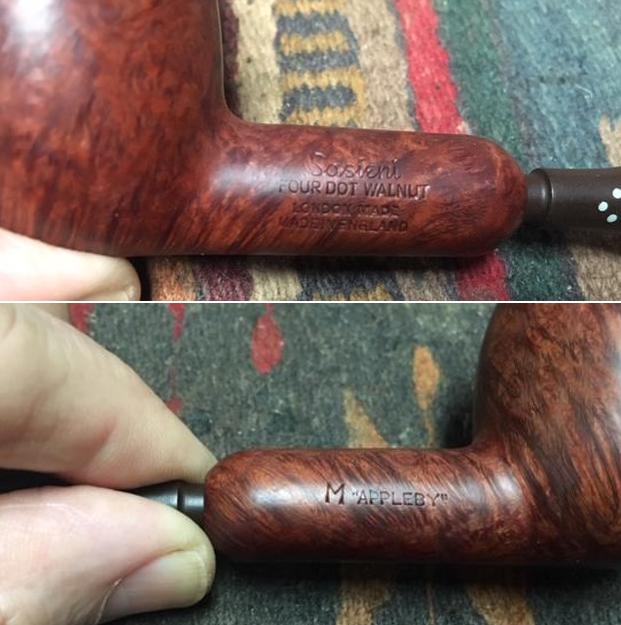
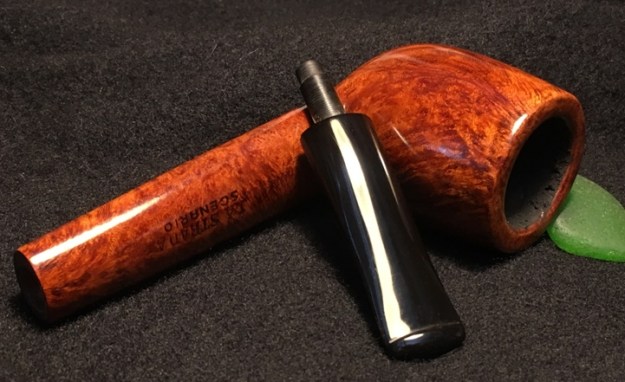
‘La Strada’ simply means, ‘The Street’ in Italian. The information gleaned from Pipedia and Pipephil.eu (See LINK) point to the La Strada name being primarily an Italian pipe production made for export, especially to the US. Pipedia also added this bit of information: La Strada was an Italian export brand. Its large formats had some success in the USA, and were included in the 1970 Tinder Box catalog. Steve restored a very nice looking La Strada Staccato found on rebornpipes (See LINK) where he posted this page from Tinderbox showing La Strada Offerings. The Scenario shown on this page is a Bent Stem Sitter. Interestingly, the Staccato example is the Canadian shape that I have on the worktable.  As I was looking at the Staccato line, I recalled that I have a nice quarter bent Billiard La Strada Staccato in the ‘For “Pipe Dreamers” Only!’ collection available for commissioning! The ‘strapped’ sculpting and matte finish is the Staccato hallmark which I like.
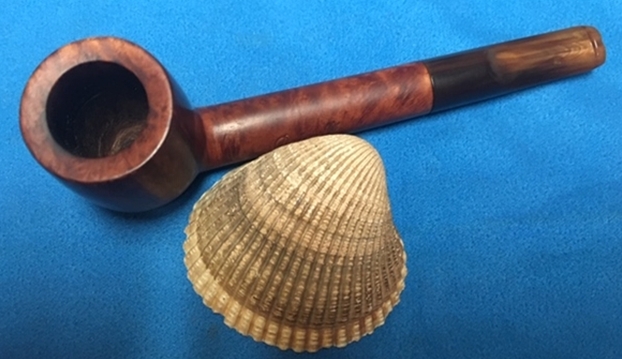
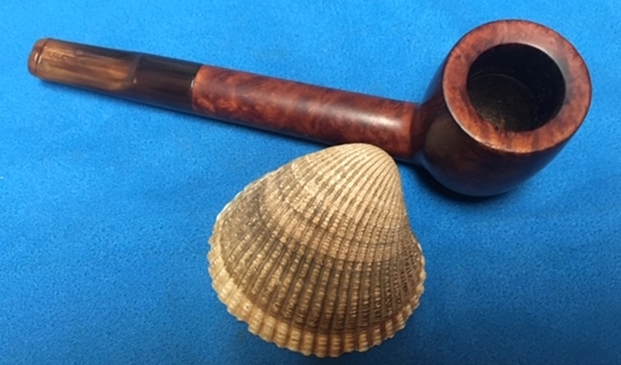
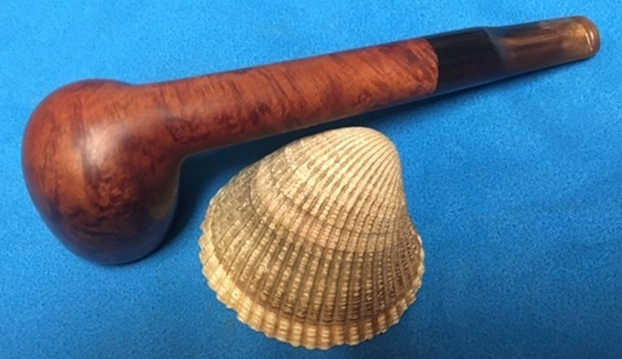
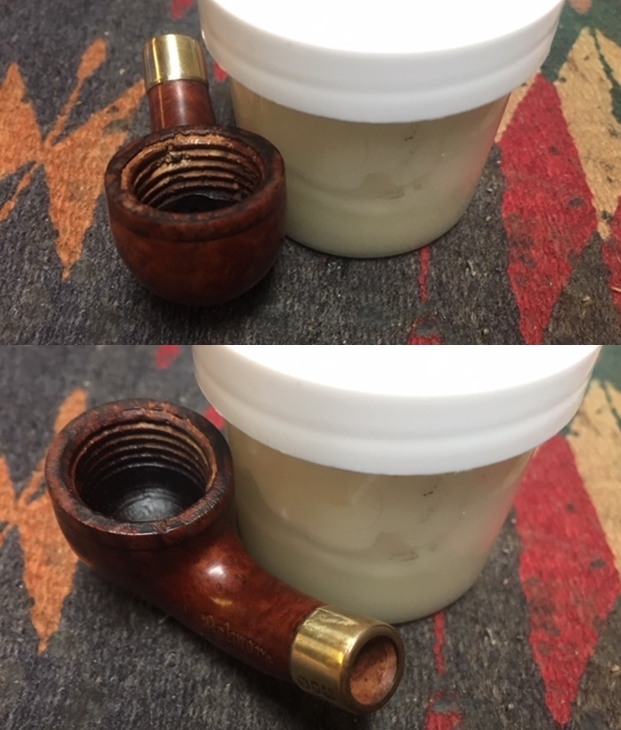
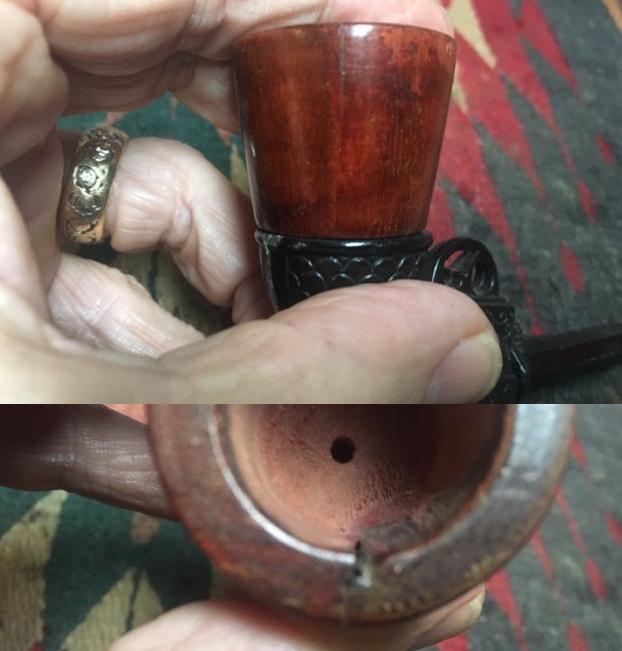
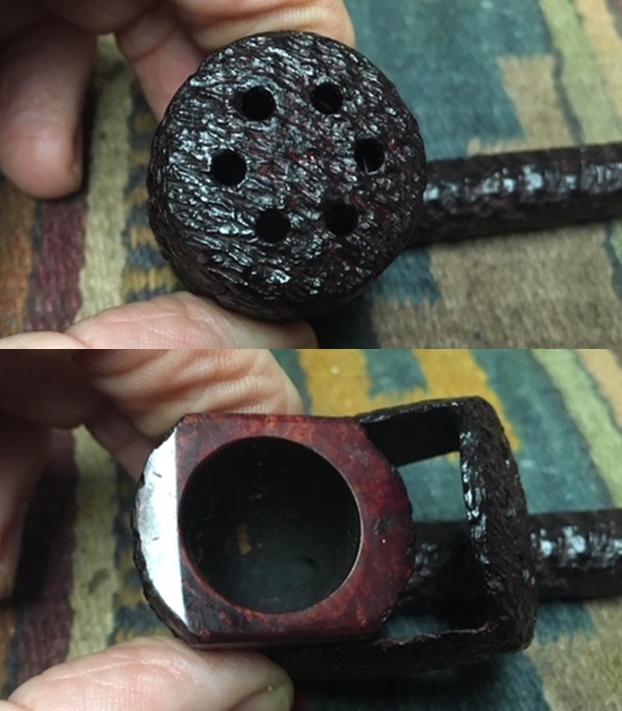
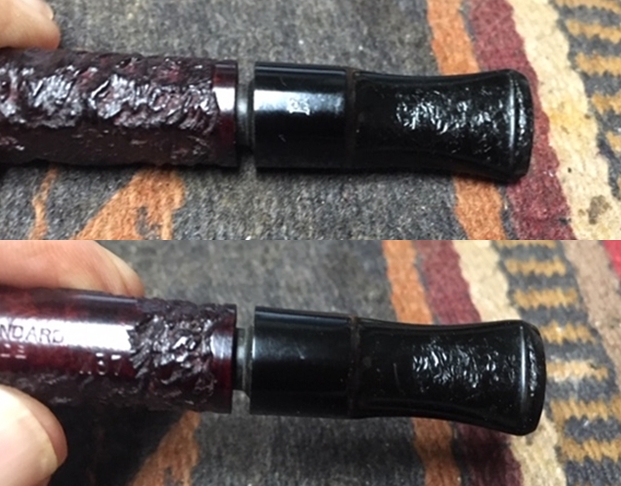
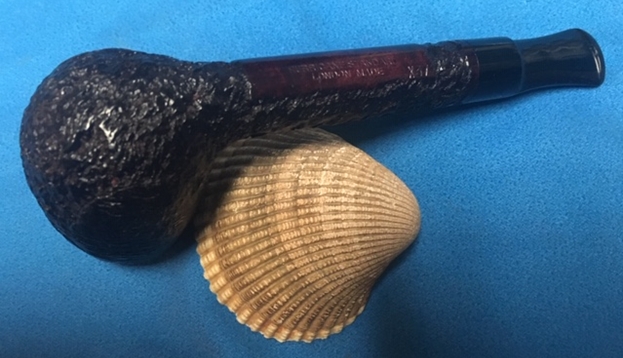
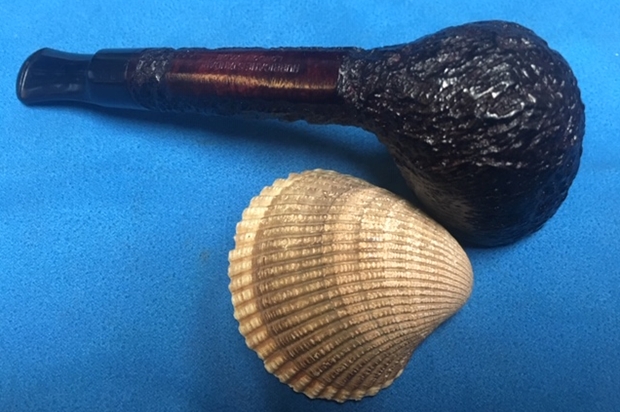
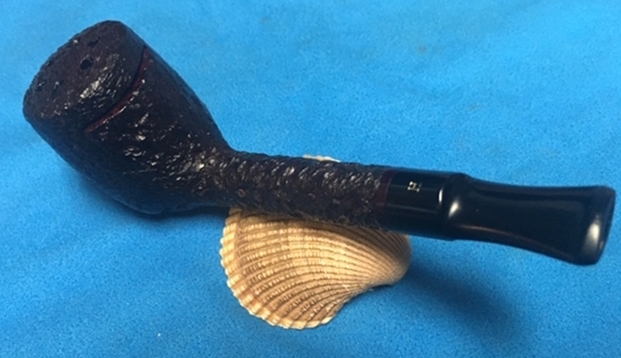
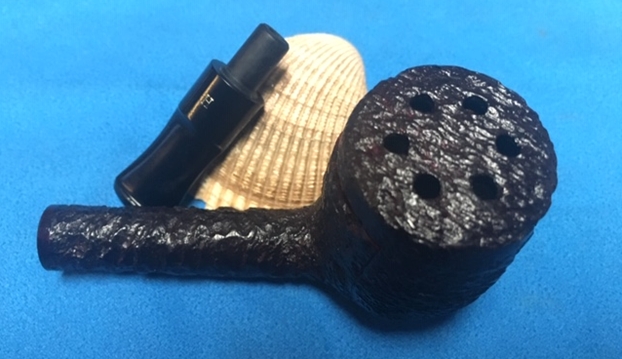
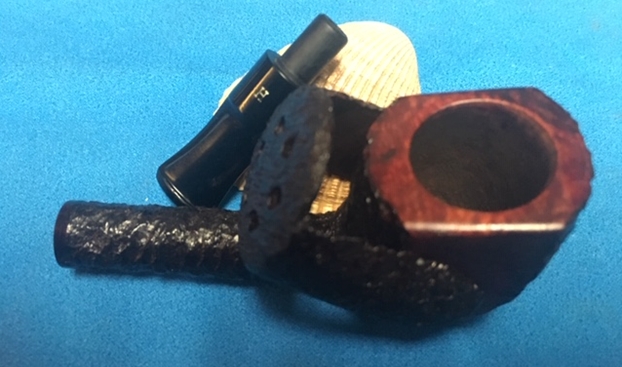
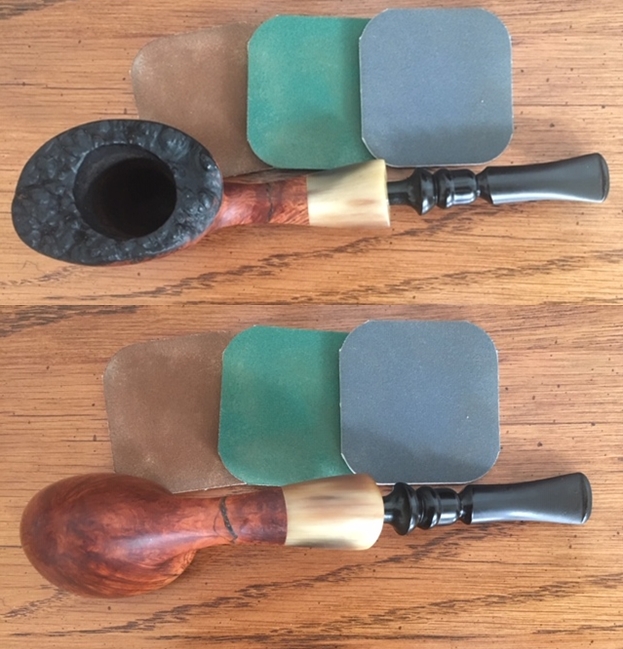
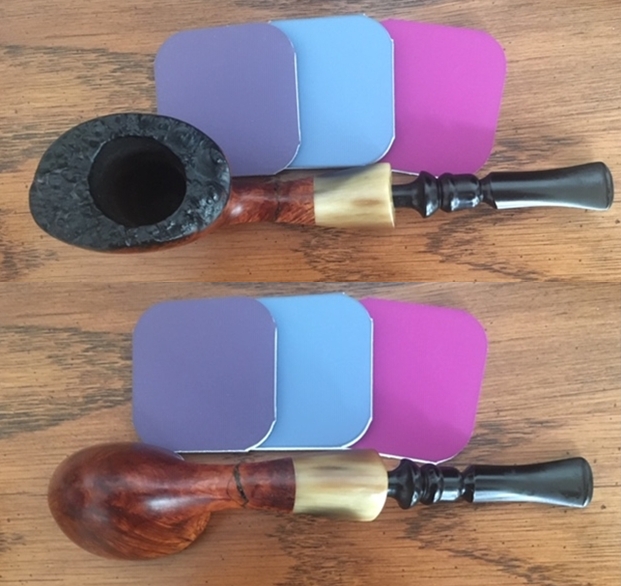
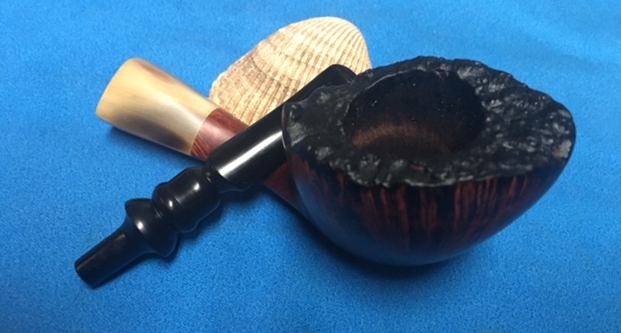
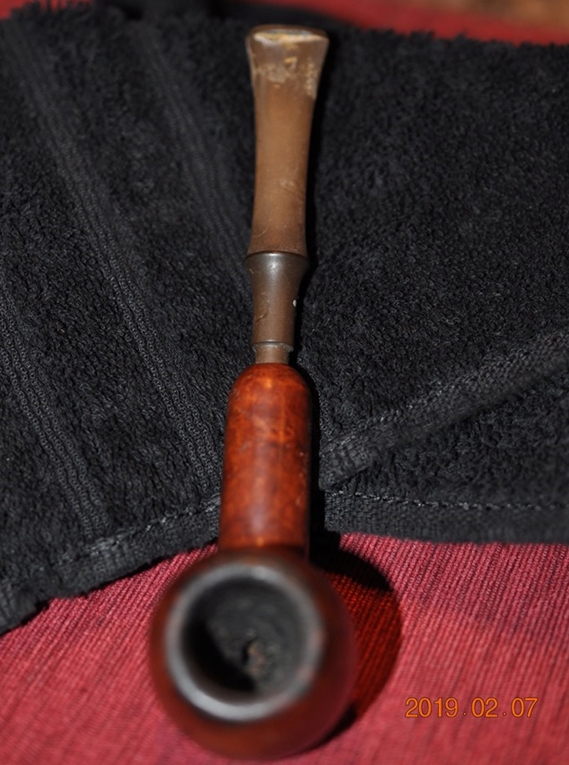
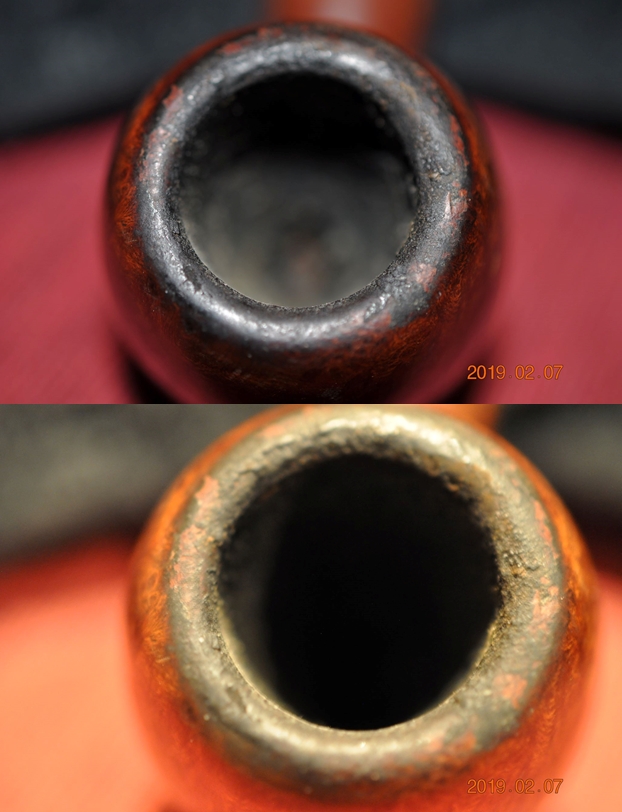
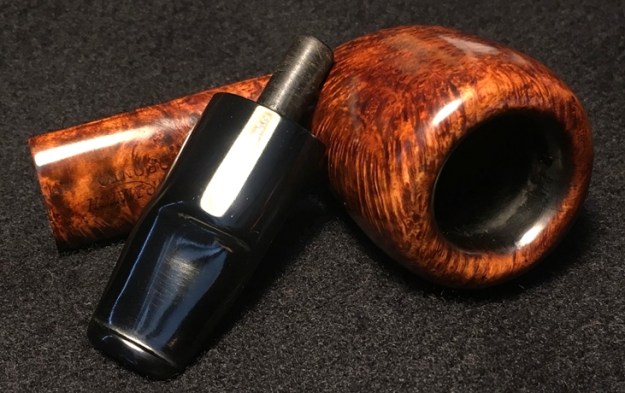
 Looking at the La Strada Scenario Canadian now on the worktable, it is evident that it was put in service a good bit and the thick, uneven cake in the chamber shows this. The lava over the rim is also thick revealing the signs of Rex’s stummel thumping practice as he would flip the Canadian over in his hand and thump it on a nearby tree to dislodge the ashes. I take a few pictures below focusing in this area. The rim’s fore section is nicked and chipped from this. The second picture is looking at the back side of the bowl and the darkened area over the rim which was most likely how Rex lit his pipe. Both pictures reveal the grime covering the stummel in need of cleaning. The short stem of the Canadian reveals deep oxidation in the vulcanite and bite compressions on the upper- and lower-bit areas.
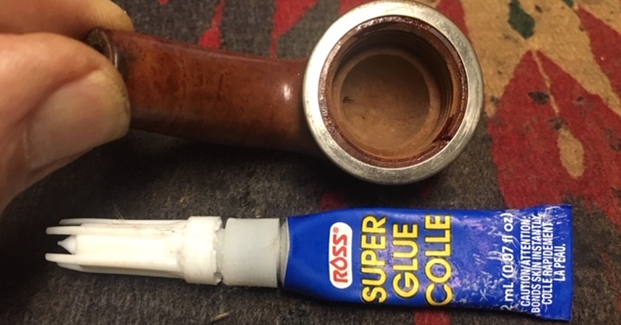
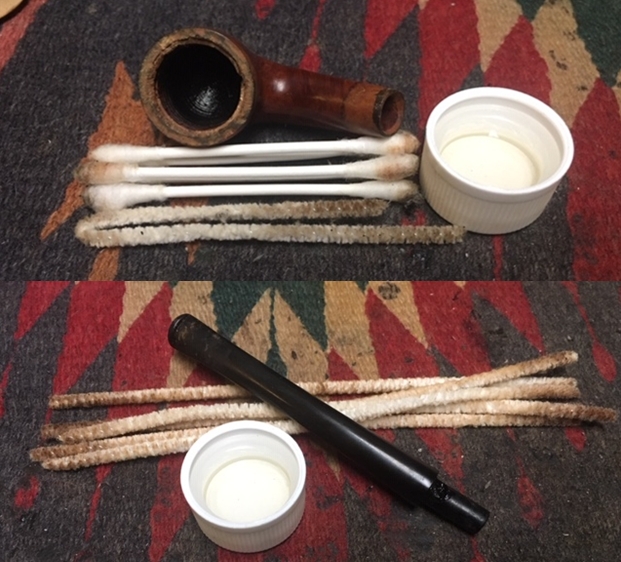
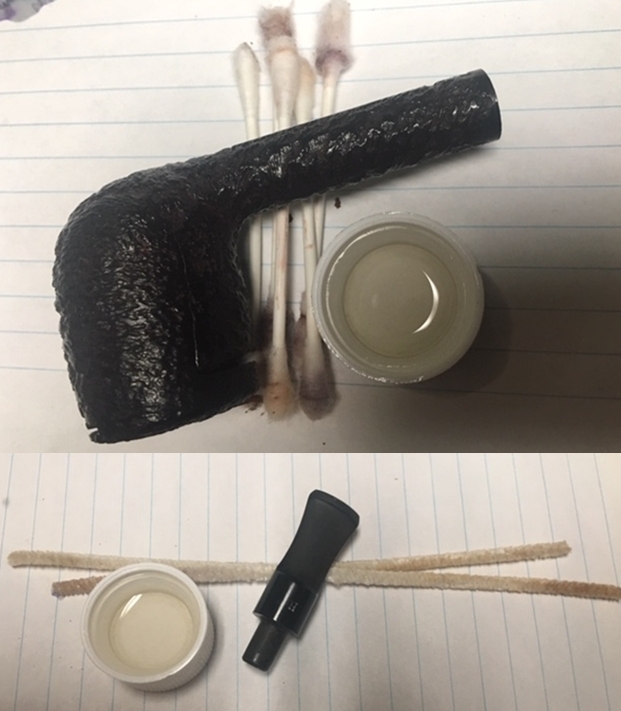
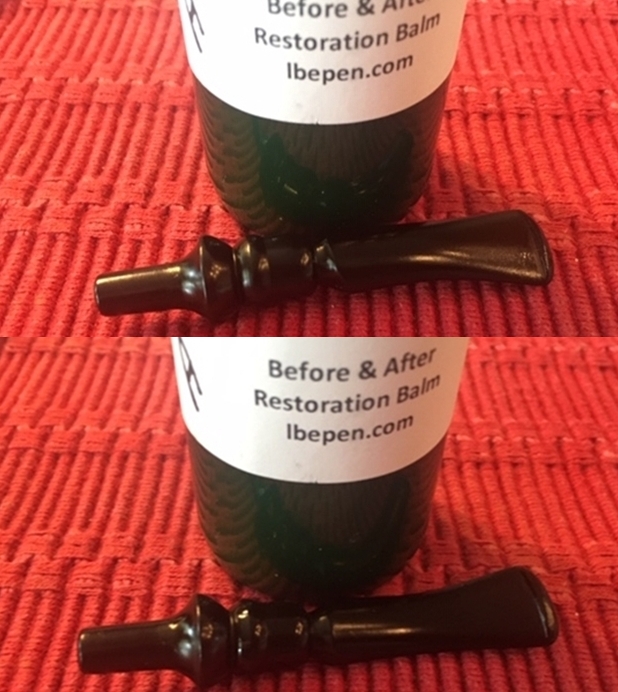
 With the initial assessment of the pipe’s condition completed, I begin the restoration by adding the stem to a soak of Before & After Deoxidizer to begin addressing the deep oxidation in the stem. I don’t believe that the soak will fully remove the oxidation, but this is a start in the right direction. The first picture below shows the La Strada on the far right after the communal activity of cleaning the airways before putting the stems into the soak. Using pipe cleaners wetted with isopropyl 95%, I ream out the oils collected in the airways. I not only am cleaning the airway but sparing the B & A Deoxidizer bath from undo contamination! The stuff is expensive, and I want it to stretch as long as possible! After cleaning the airway, I place the La Strada’s stem in the bath for several hours.
 After some hours, I fish the stem out of the bath and drain the excess Deoxidizer back into the bath. I then use a cotton pad wetted with isopropyl 95% to wipe the stem down removing the raised oxidation resulting from the soak. I also clear out the airway of fluid and clean it again with pipe cleaners wetted with isopropyl 95%. As expected, my naked eye still detects the dark green evidence of residual oxidation in the stem – the pictures do not pick it up. For now, to start the stem revitalization, I coat the surface with paraffin oil (a mineral oil) and put the stem aside to absorb the oil and dry.
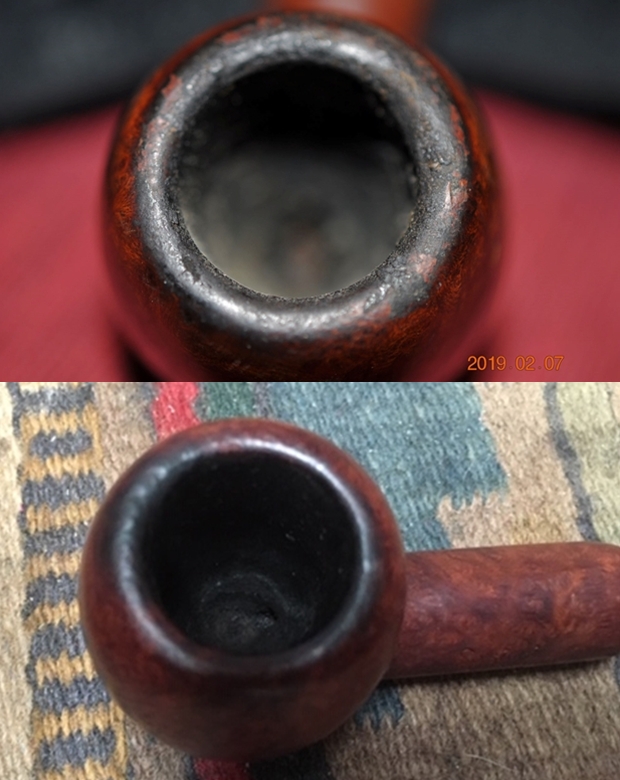
 Now, looking to the Canadian stummel, I take a close-up of the chamber area showing the thick carbon cake. To address this, I start by reaming the chamber with the Pipnet Reaming Kit starting with the smallest of the 4 blade heads available. After putting down paper towel to help in cleaning, I go to work. Reaming the chamber not only cleans and gives the chamber a fresh start, but it allows me to see the briar underneath the cake to identify any potential burning issues with the chamber.
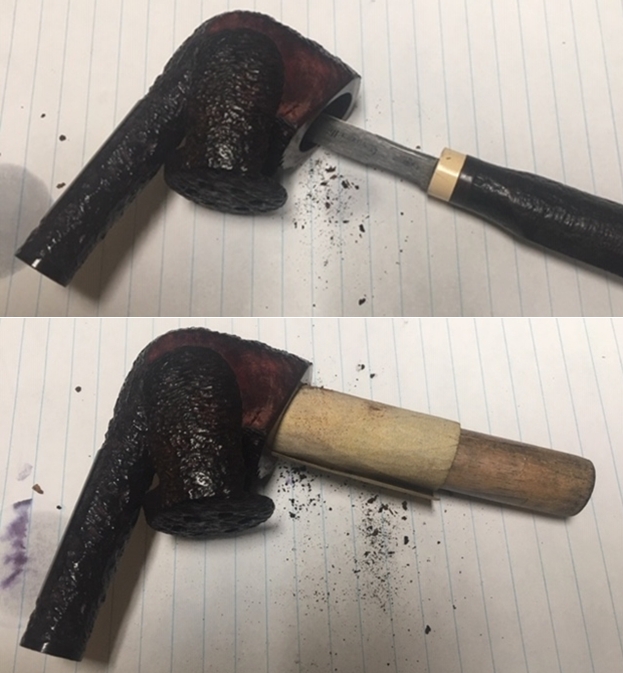
 I use 3 blade heads to ream the chamber then I shift to using the Savinelli Fitsall Tool to further scrape the chamber wall and to reach down to the floor of the chamber.
  After this, I sand the chamber using 240 grade paper wrapped around a Sharpie Pen to give me reach and leverage as I sand. Sanding removes the final carbon cake hold outs and helps smooth the chamber surface. The second picture shows the full arsenal of tools used to address the chamber reaming.
 After I wipe the carbon dust with a cotton pad wetted with isopropyl 95% to clean, I give the chamber an inspection. About 2/3s down into the chamber there are evidences of some heat cracking which I don’t believe are serious enough to address with more than providing a new protective layer on the chamber wall. I’ll do this later with a coating of either pipe mud or using a mixture made from activated charcoal and yogurt (or sour cream). I take two pictures, the first with an open aperture to see more clearly the cracking. Below the cracking, a small reaming ‘shelf’ has developed from too much forced pressure from the reaming tool. I’ll work on smoothing that out with sanding aiming for a uniformed chamber contour.
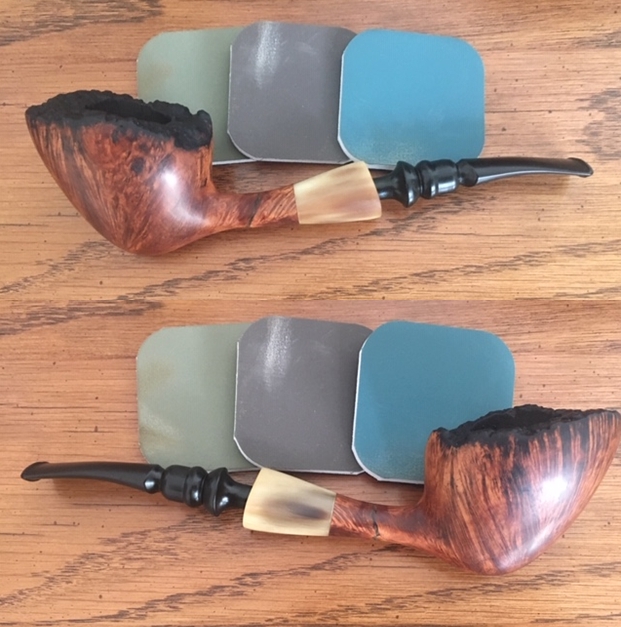
 Next, to address the grime and oils on the Canadian bowl and long shank and to work on the lava flow on the rim, I first take a few pictures going ‘around the horn’ showing the starting condition.


 Next, I start by using undiluted Murphy’s Soap with a cotton pad and scrub the surface. I also use a Winchester pocketknife to carefully scrape caking on the rim. A brass wire brush also helps in this effort on the rim which helps clean but does not add to the rim erosion. I start with the scrubbing using the Murphy’s Soap and work through scrubbing the smooth surface and scraping and brushing with the brass wire brush the rim area.
 I do an initial rinsing of the soap in the sink, and then immediately dive into cleaning the internals using pipe cleaners and cotton buds dipped in alcohol as well as the full range of long shank brushes reaching through the long Canadian airway. I also excavate much oil grime and tars from the mortise and reaching into the airway using a dental spatula. I then take the stummel to the sink, and using warm water, I rinse the stummel again and use dish soap and warm water with the shank brushes to continue cleaning the airway. This picture shows the conclusion of the carnage!
 After completing the cleaning, I inspect the external surface and am glad to find no large fills or holes revealed after the cleaning. I like the potential of this briar to come out well. But I do detect one more problem to add to the list.
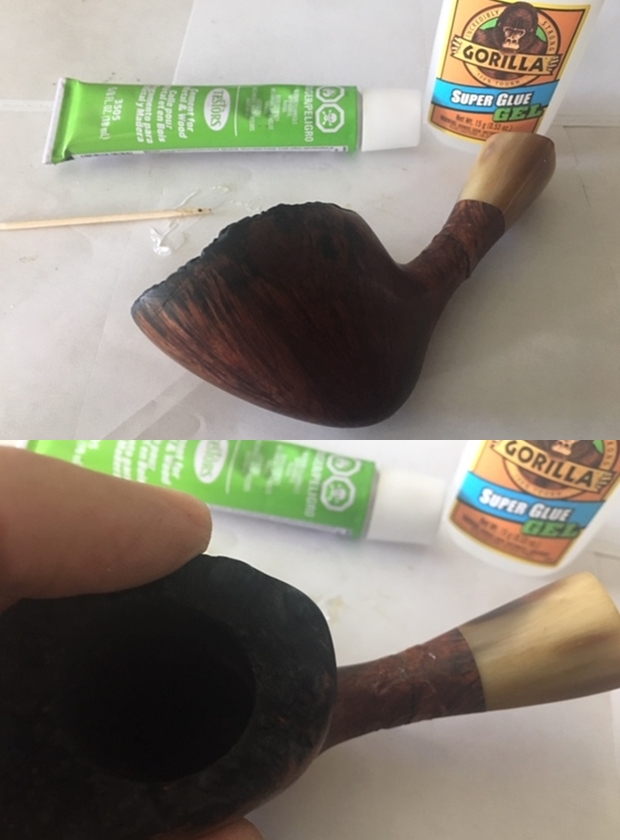
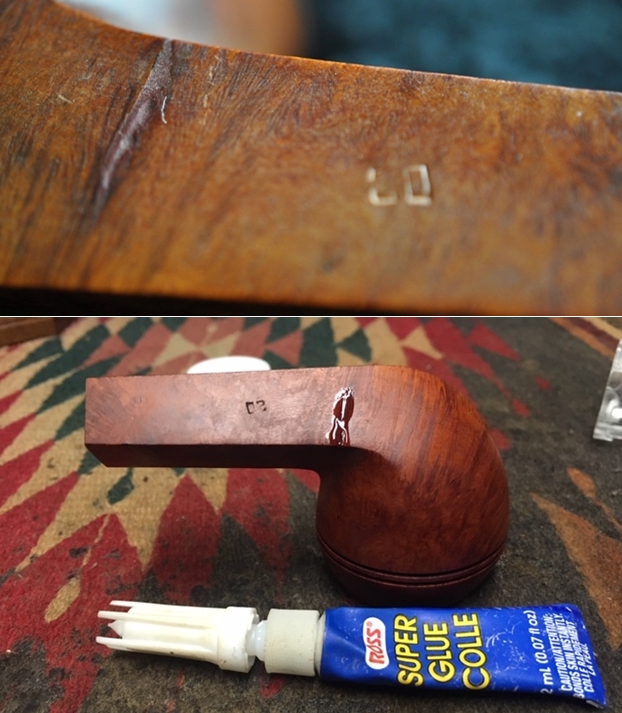
 Looking closely at the distinctive vertical grain pattern running upward from the heel just to the right of the shank, I detect a crack. At first, I think that it may simply be a ‘gap’ between the grain lines, but the more I look at it, I believe it’s a crack that needs to be addressed or it will possibly grow along the grain line.
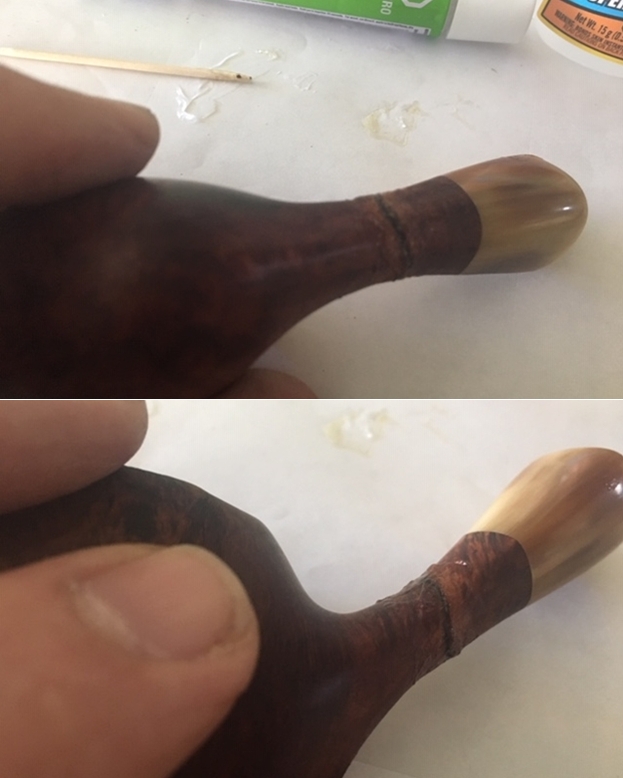
 I decide to address this problem straight away. I first mark the terminus points on each side of the crack. Using a sharp dental probe tool, I press an indentation at each of these points. I need a magnifying glass to correctly identify the ends of the cracks. I press these indentations at the end points for two reasons. First, I can better see where I need to drill counter-creep holes with the Dremel, but also the probe holes create a guide hole or a starter to guide the Dremel’s drill bit which I’m applying freehand! The first two pictures are of the lower guide hole and then the next two, the upper guide hole.


 Next, I mount a 1mm drill bit in the Dremel and with a steadier hand than usual, I drill both counter-creep holes freehand. The guide holes help a good bit. The picture shows the holes drilled at each end. Not bad!
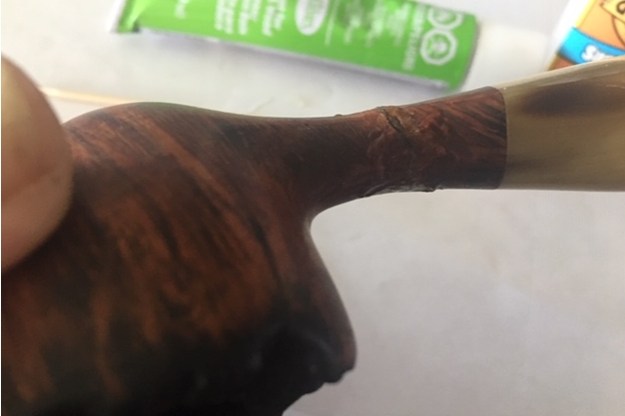
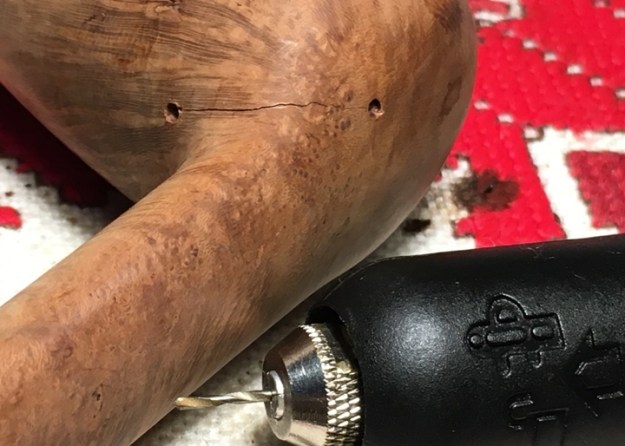 I use a thin CA glue to run along the crack to shore it up as well as in the counter-creep holes. I use thin CA glue to encourage seepage into the crack to provide a better seizing of the crack. I then sprinkle briar dust over the holes and the crack to encourage blending.
 Not long after, the crack patch has set up enough for me to continue my work on the stummel. I turn my attention to the battered rim. There is no question that it will be visiting the topping board. I take another closeup of the fore section of the rim to show its raw, battered condition. The second picture shows the deterioration of the front side progressed to the point it appears to be sloped forward. The normal disposition of the plane of the rim on the Canadian will be close to parallel to the shank. I’ll need to remove some of the rim to bring proper orientation back to the rim.
  I cover the chopping board with 240 grade paper, and I start rotating the inverted stummel over the paper. I intentionally lean to the rear to help move the rim line toward level. The next pictures show the progression of topping.
 At this point I’m satisfied with the progression. The rim has evened out and even though there are residual chips on the front side of the rim, I believe the small ones can be dispatched with a slight beveling. The larger ones remaining will need more attention.
 I switch to 600 grade paper on the chopping board and give the stummel a few more rotations to smooth the surface more.
 The smaller skinned-up area on the right should disappear with some gentle bevel sanding. I’ll first apply some briar dust putty to the larger remaining chips on the left, and then sand these areas out. One larger chip remains on the aft of the rim which will also receive a fill of briar dust putty. It should work well.
 I use a plastic disc to serve as my mixing pallet and I also put down some strips of scotch tape to help with the cleanup. I mix some briar dust with regular CA glue. I first put a small mound of briar dust on the pallet and then add a small puddle of CA glue next to it. I gradually draw the briar dust into the CA glue until it thickens enough to trowel to the chipped areas using a toothpick. The pictures show the progress.
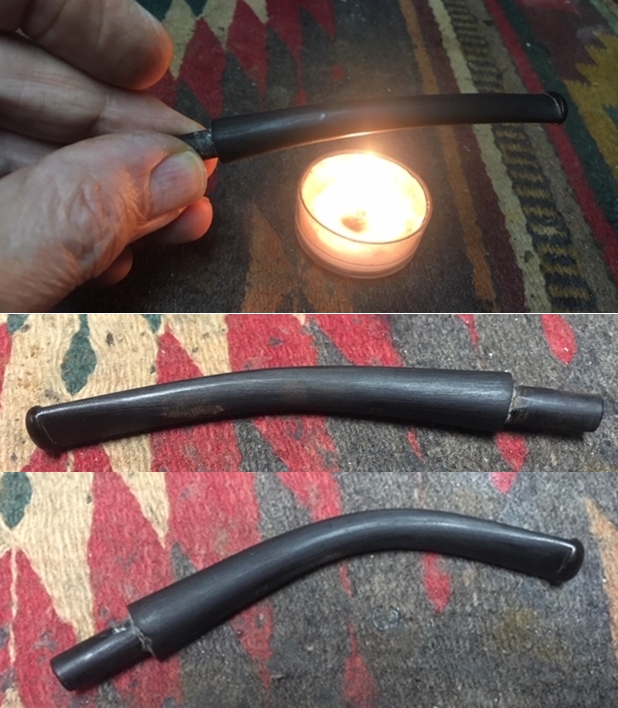
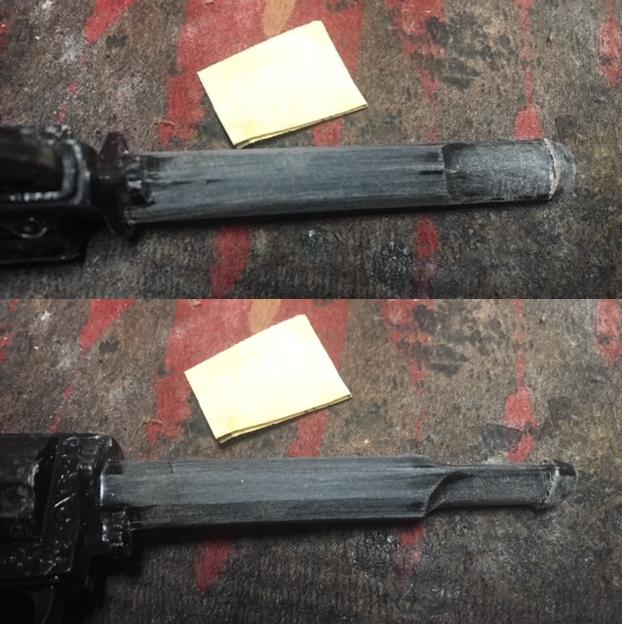
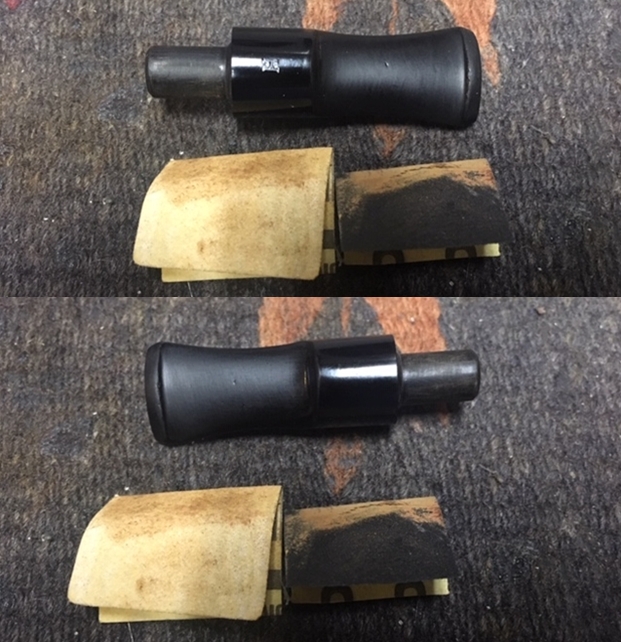
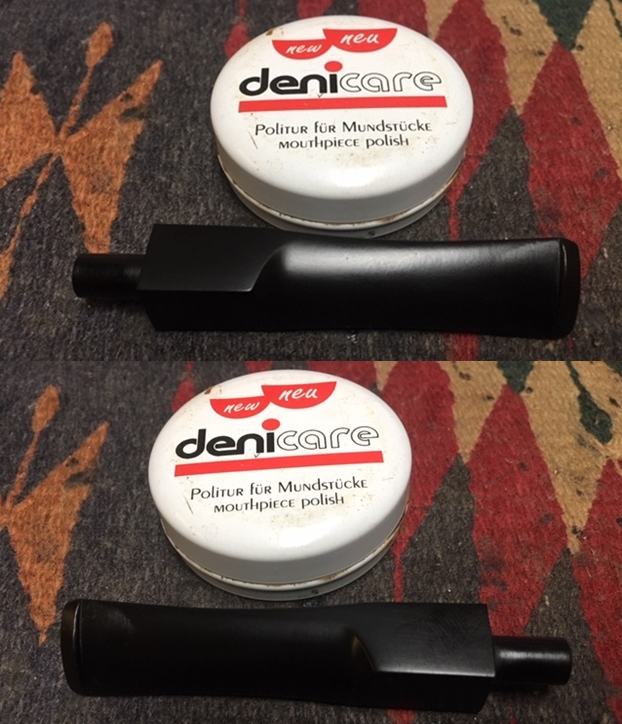
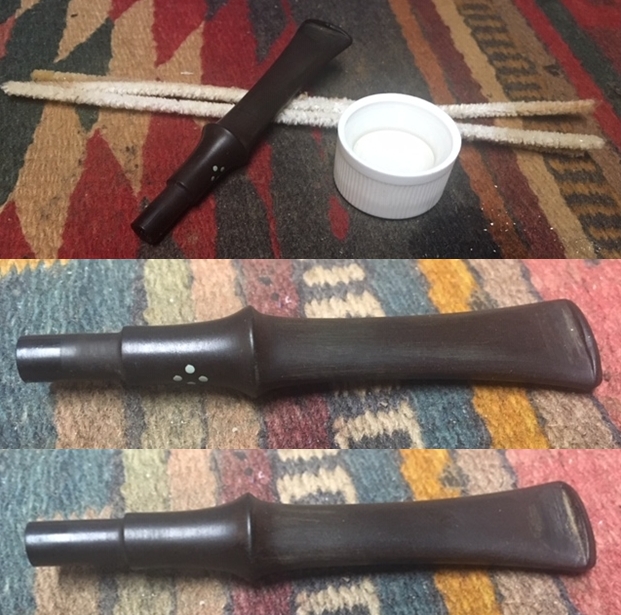
 With the patches on the rim curing, I turn to the La Strada Scenario’s short Canadian stem. When the stem came out of the Before & After Deoxidizer soak, I noted that I could still detect deep oxidation. I need to address this, but first I will work on the tooth compression on the bit. They aren’t severe. First, I use a Bic lighter and paint the bit with the flame to heat the vulcanite. When heated, the physics of the rubber expands with the heating and hopefully will lessen the severity of the compressions.
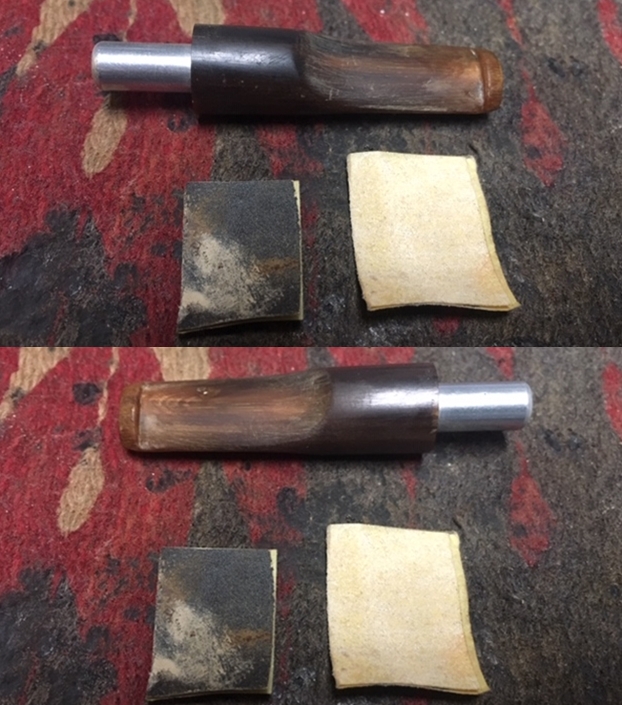
  This works well, but I still need to sand. I sand using 240 grade paper to work on the remaining tooth compressions and the residual oxidation. I use a plastic disk I fabricated to sand against to avoid shouldering the stem facing. I also use a flat needle file to sharpen the button definition.
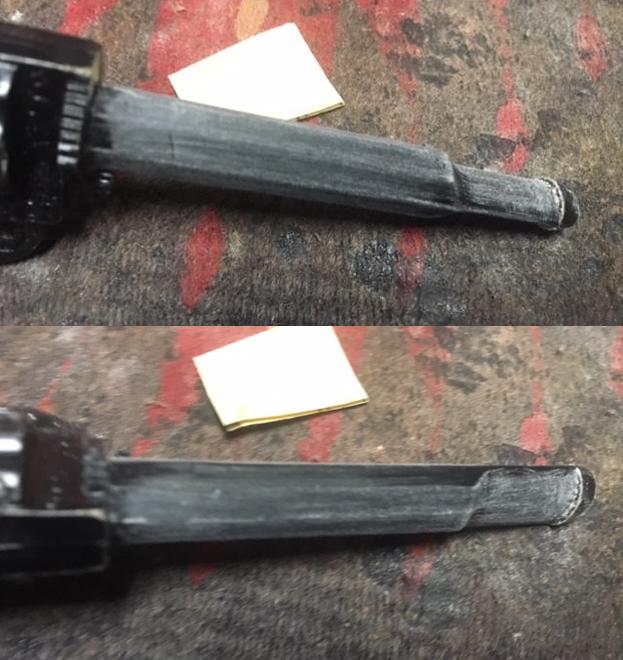
 I widen the aperture on this picture to show the continued residual oxidation near the disk – more sanding needed.
 After using the file and 240 grade paper, I wet sand the stem using 600 grade paper then follow using 0000 steel wool. I like the progress.
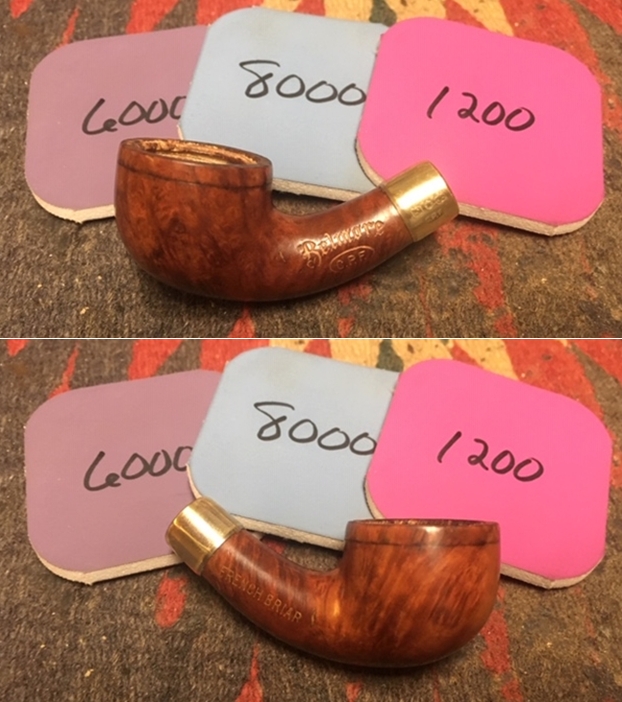
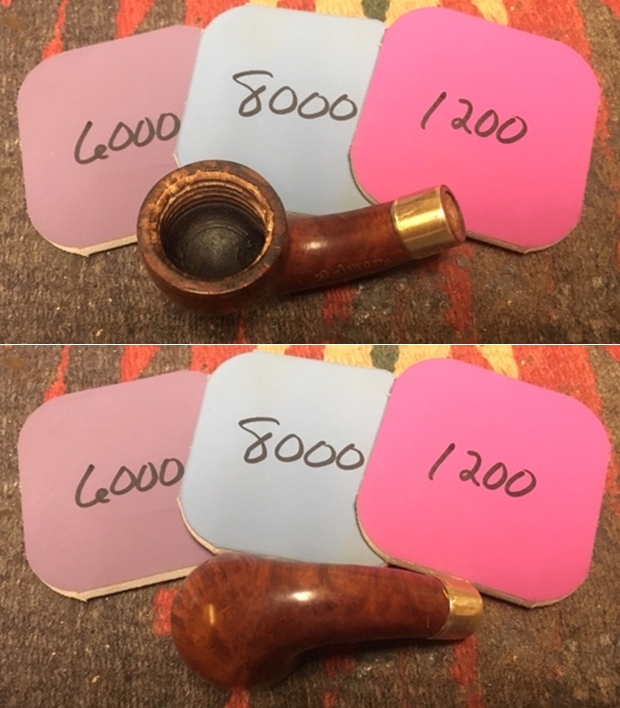
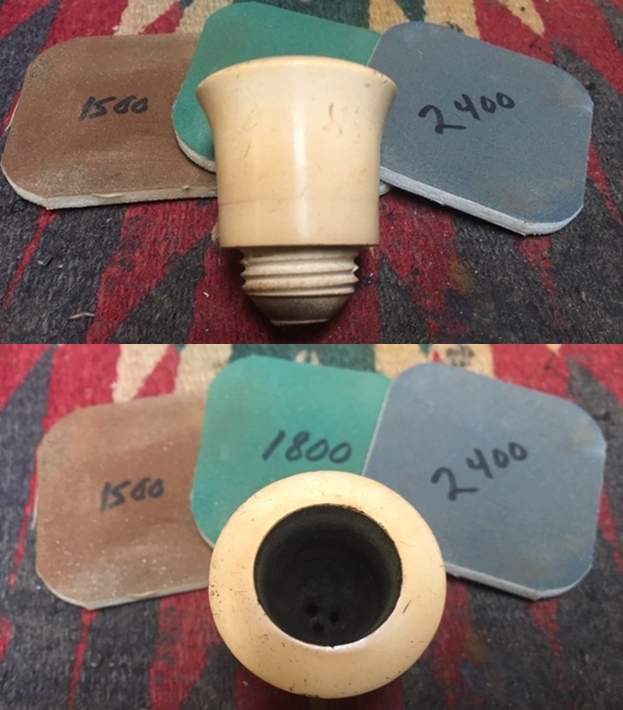
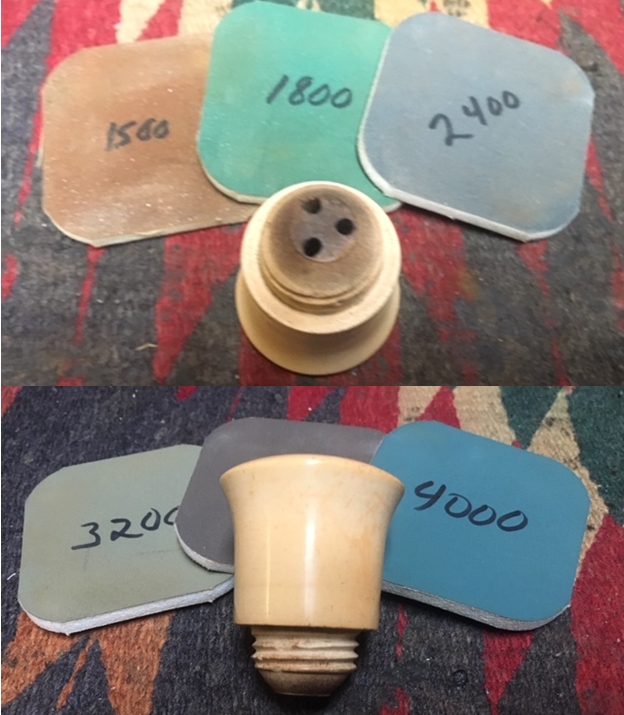
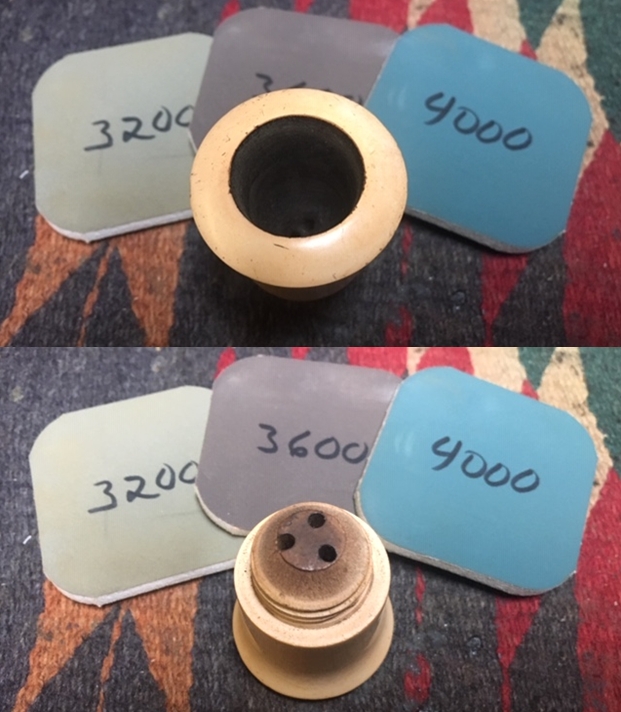
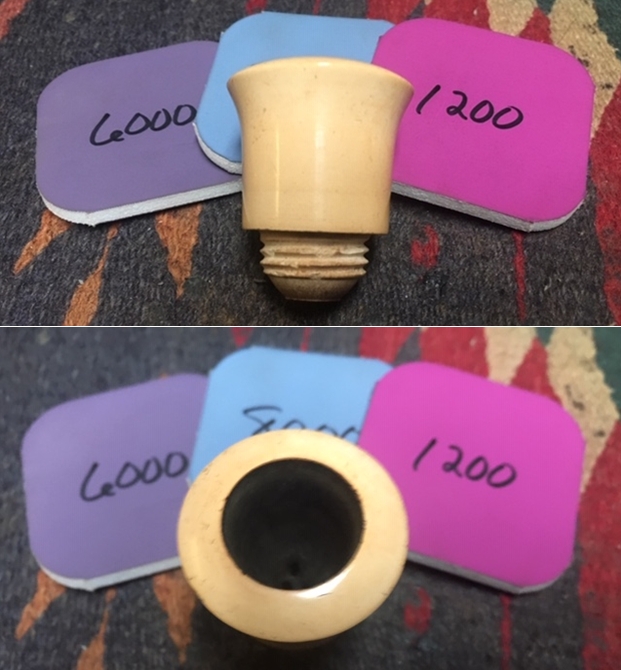
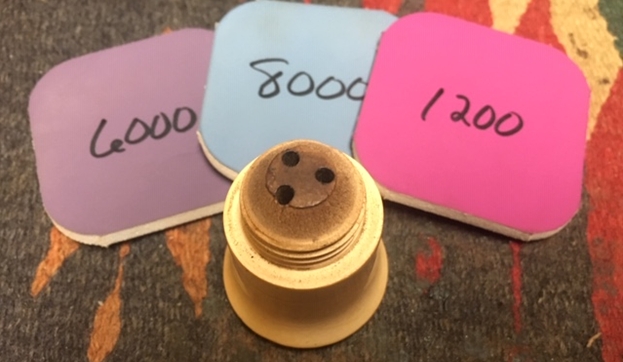
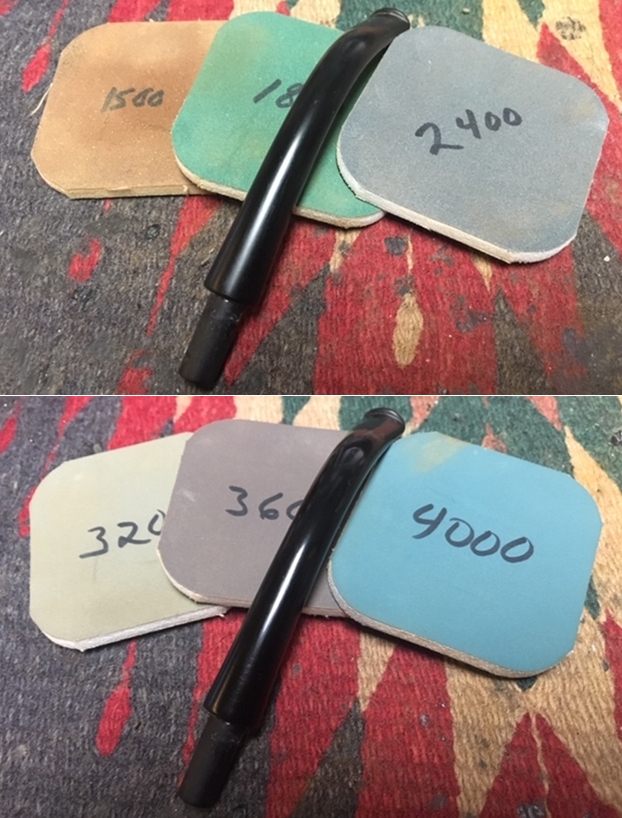
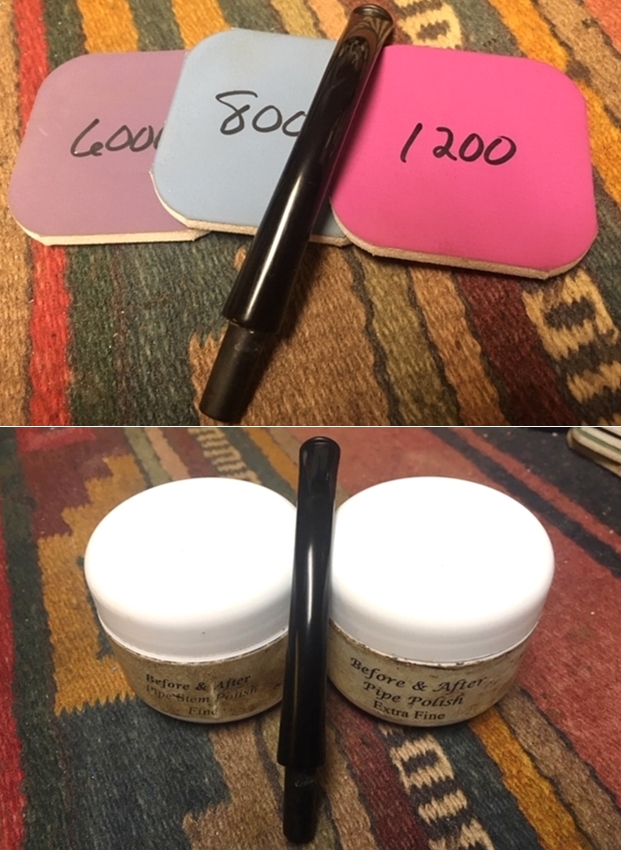
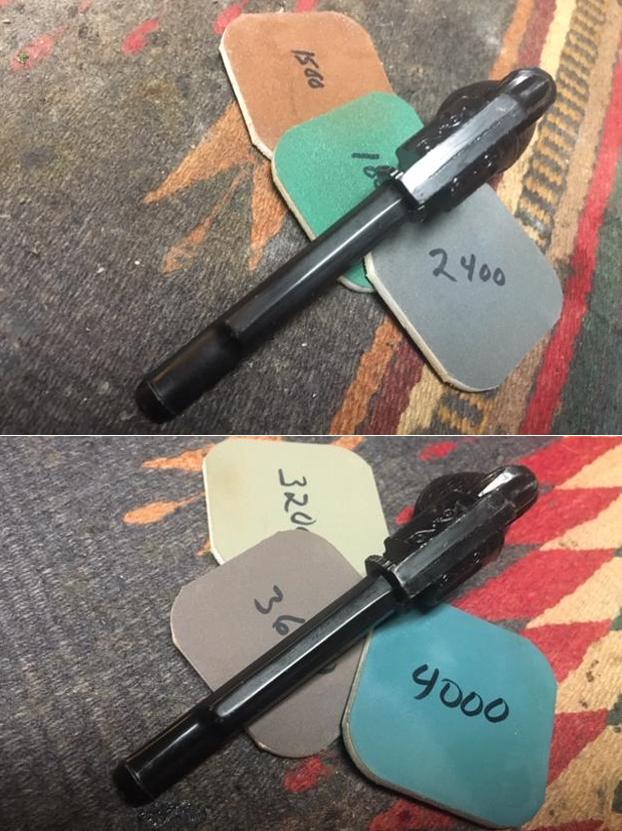
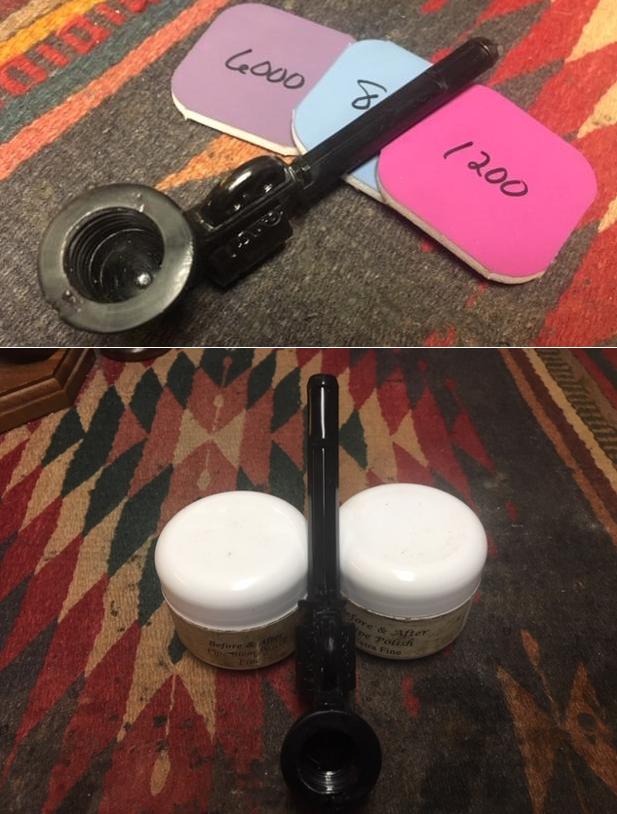
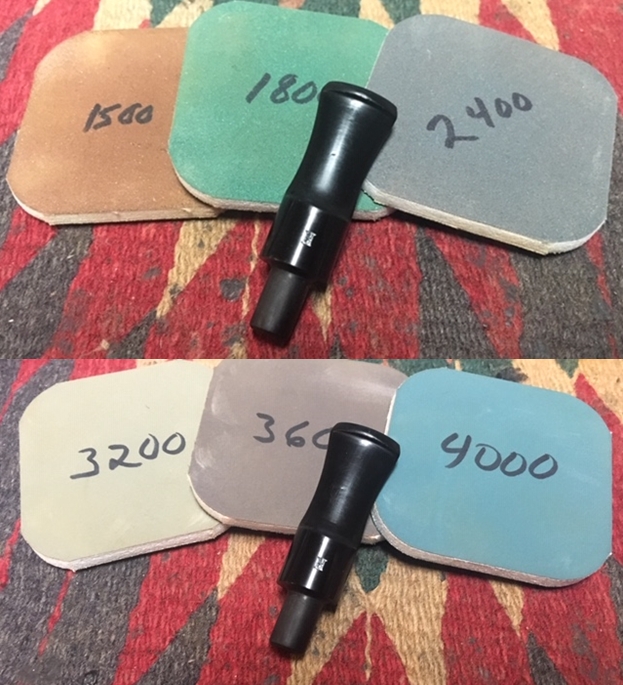
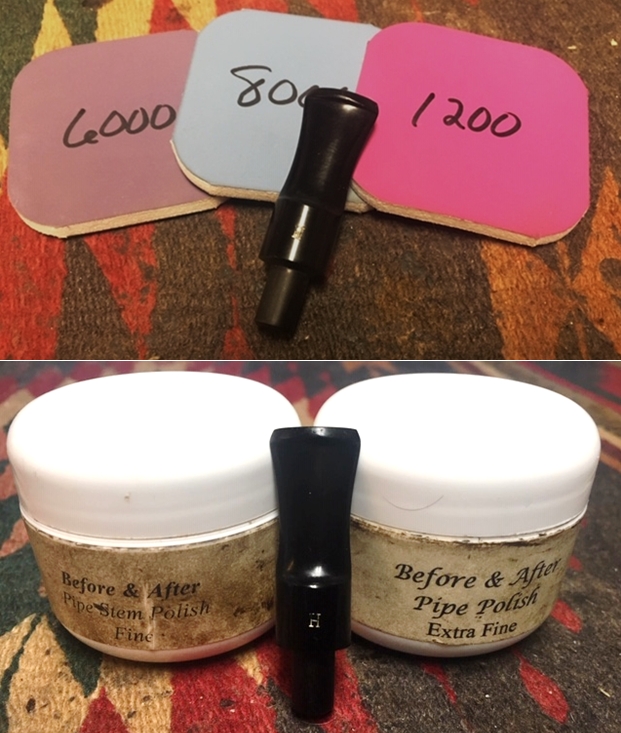
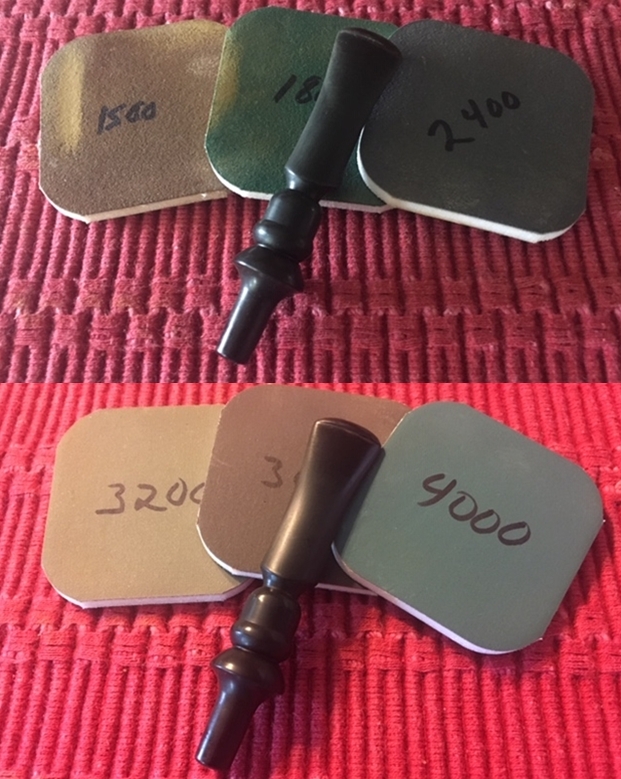
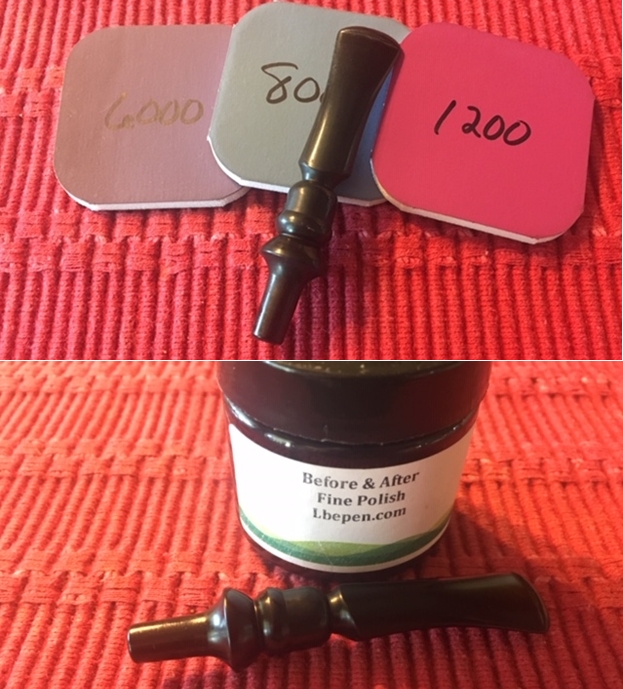
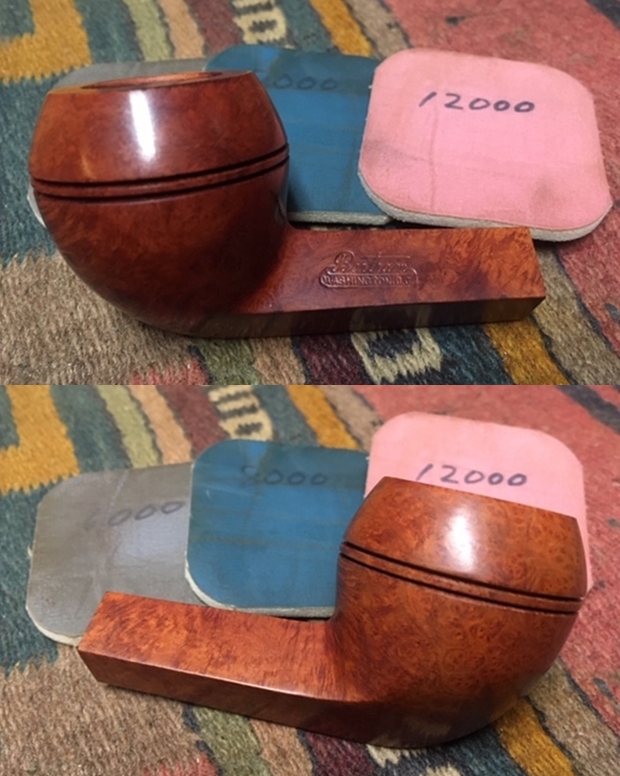
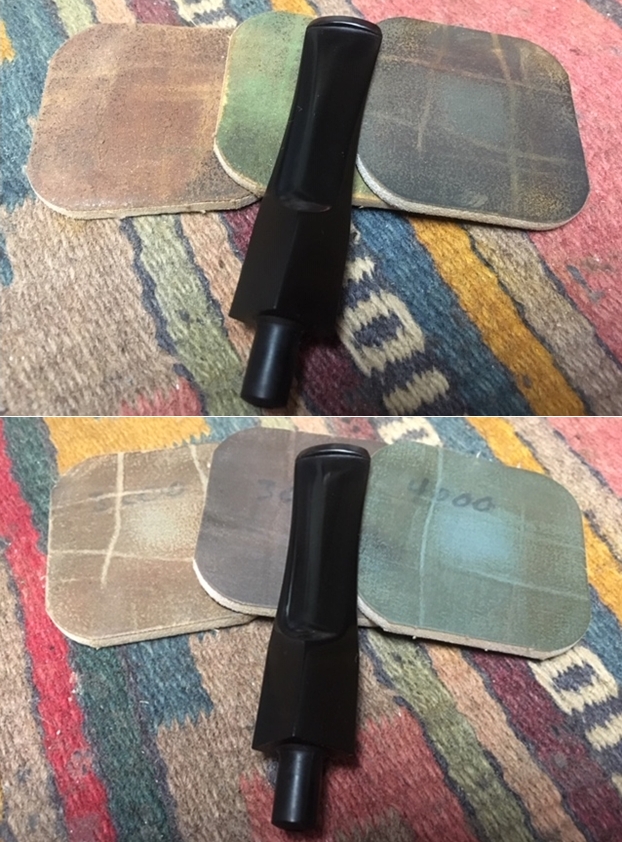
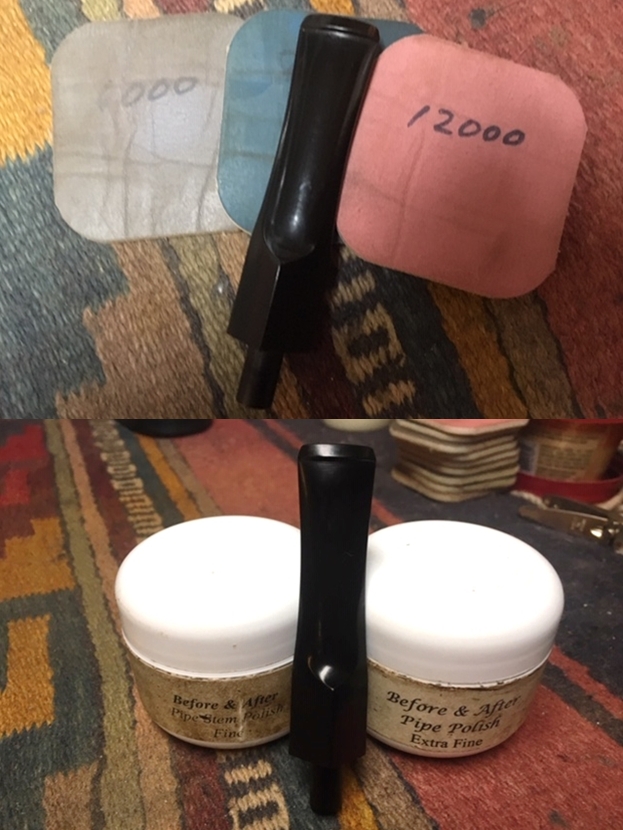
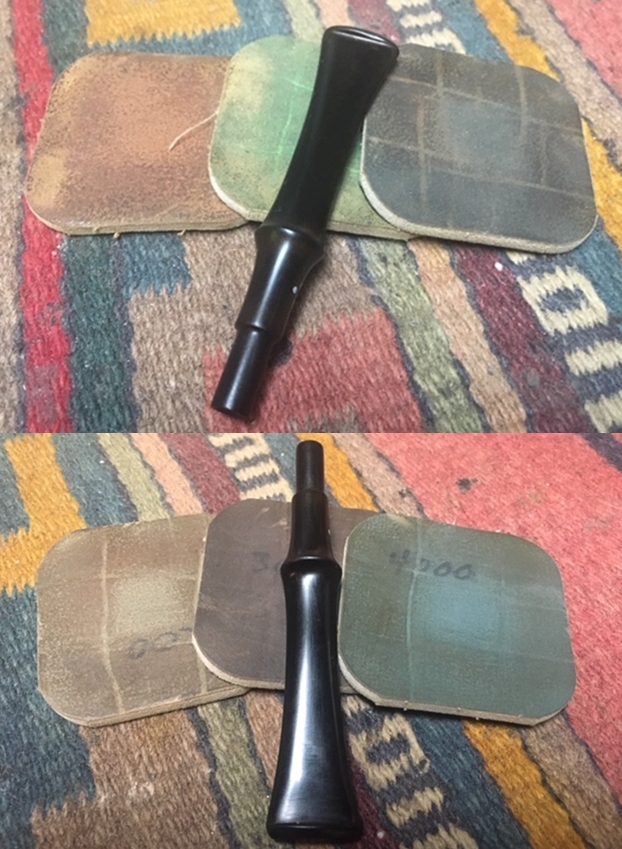
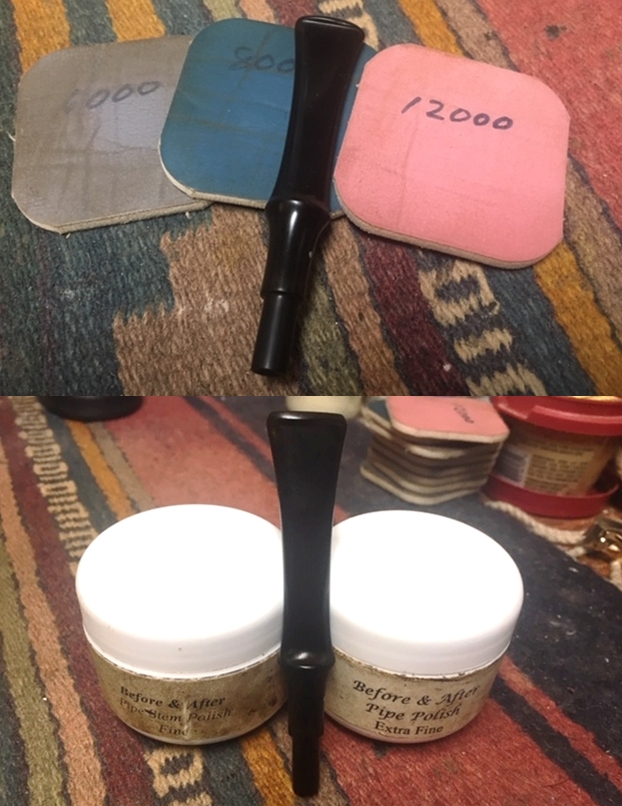
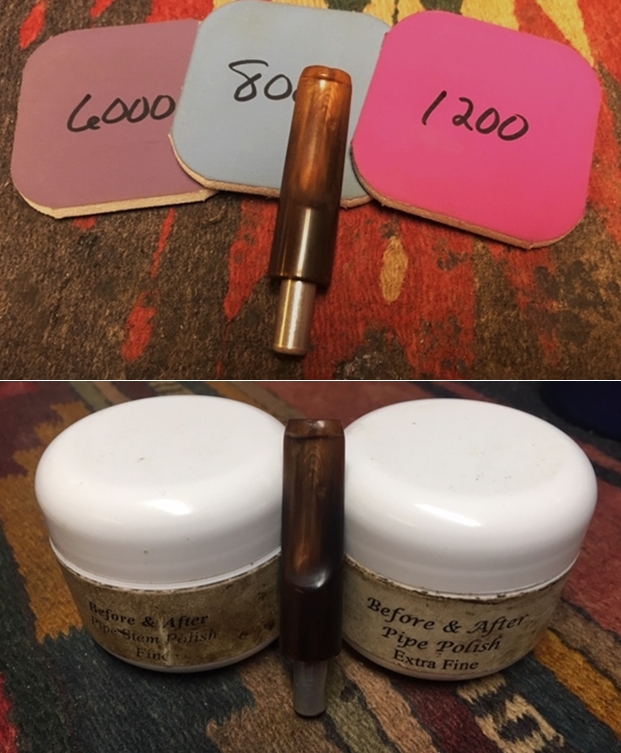
 I’m on a roll with the stem. Next, I wet sand using micromesh pads 1500 to 2400. I follow by dry sanding with pads 3200 to 4000 and 6000 to 12000. After each set of 3 pads, I apply a coat of Obsidian Oil to further rejuvenate the vulcanite stem. I love the newly polished vulcanite pop!

 The briar dust patches filling out the chips on the rim are fully cured. Using a flat needle file, I first work to file the excess patch material on the topside of the rim. I file the excess briar dust patch down until close to the rim surface.
 When each of the three main patches are filed down vertically, I switch to filing the sides of each patch down close to the briar surface.
 I then take the stummel back to the topping board and light turn a few revolutions on 240 grade paper and then 600 grade. This brings the patches down flush with the rim.
 Using 240 grade paper again, I create a soft bevel on the external rim lip. This both shapes the patches and cleans up the smaller nicks on the circumference of the rim’s edge. I also do the same on the internal edge of the rim.
 Finally, I go over both the external and internal bevels with 600 grade paper to smooth and blend. I like what I see! This phase of the rim repair is complete.
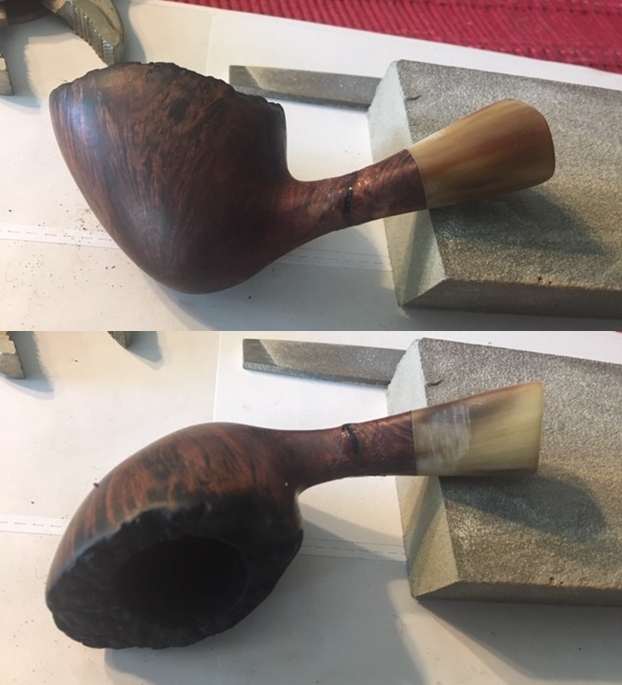
 Next, I address the crack repair patch. Again, I use a flat needle file to file the excess material down to the briar surface then follow with 240 and 600 grade papers.

 While I have the sandpaper handy, the front of the bowl has some skins and pits. I quickly dispatch these using 240 and 600 grade papers.
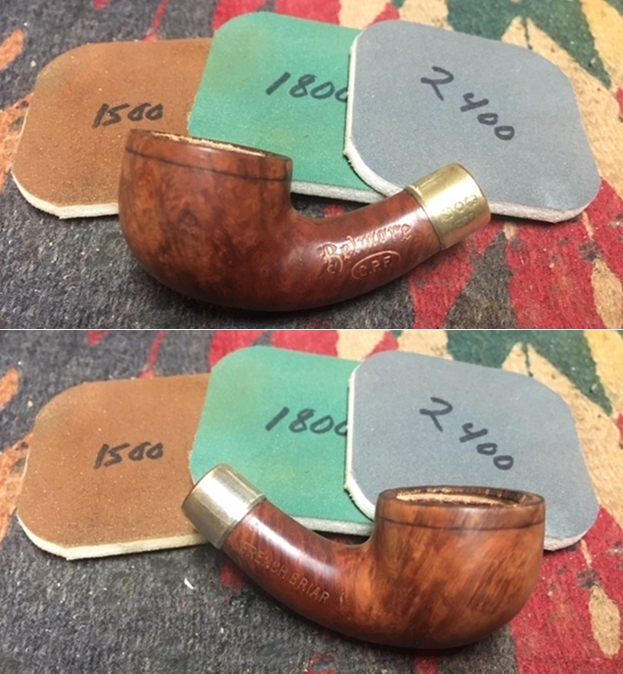
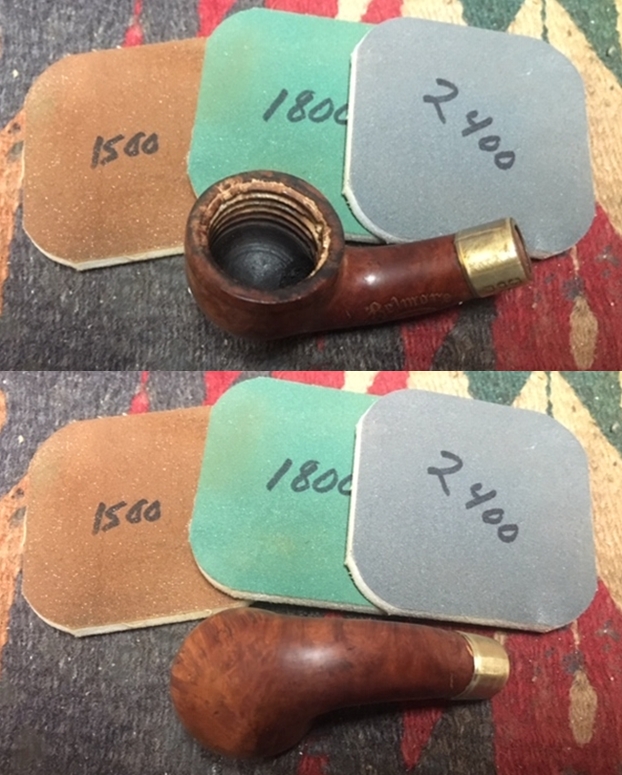
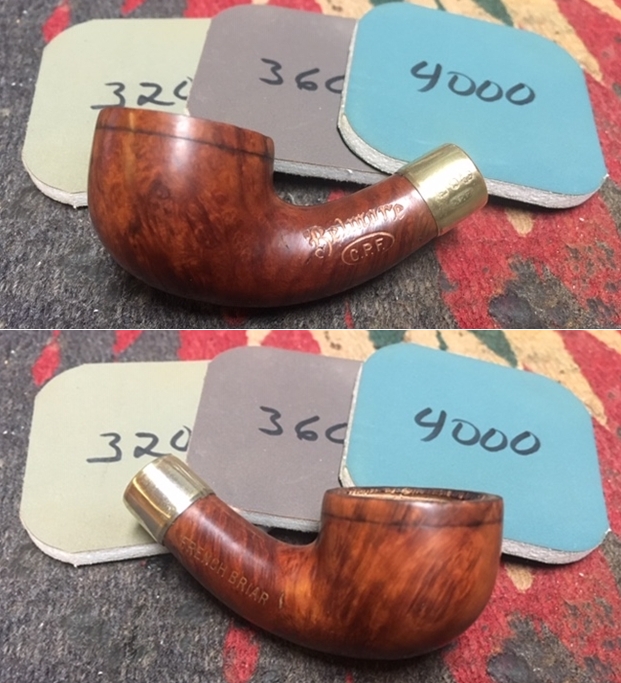
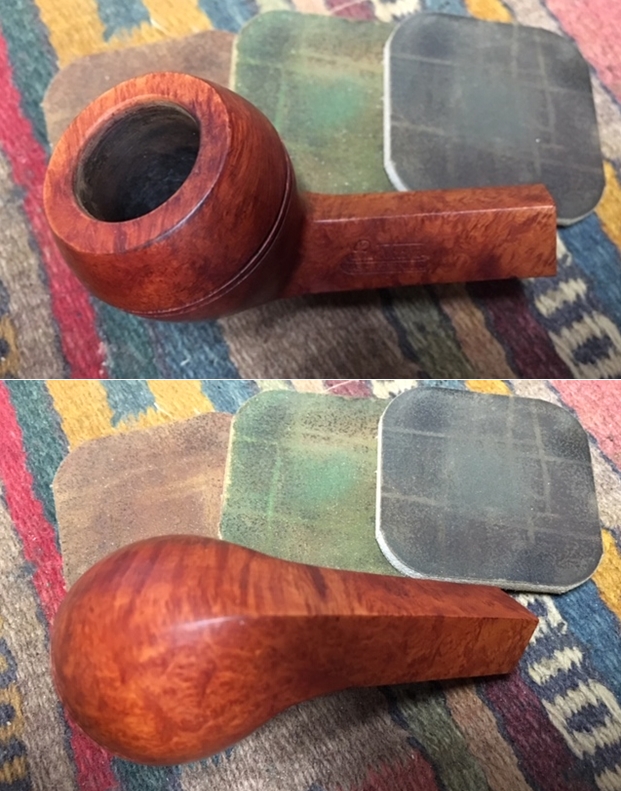
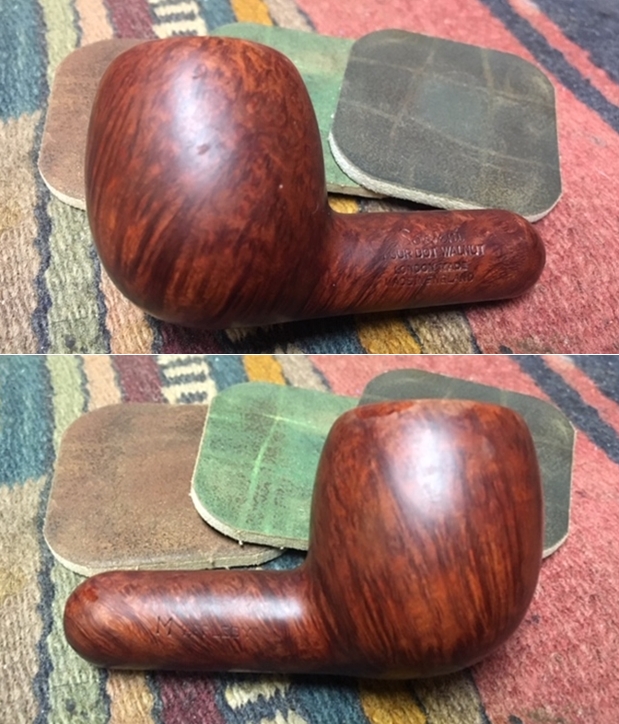
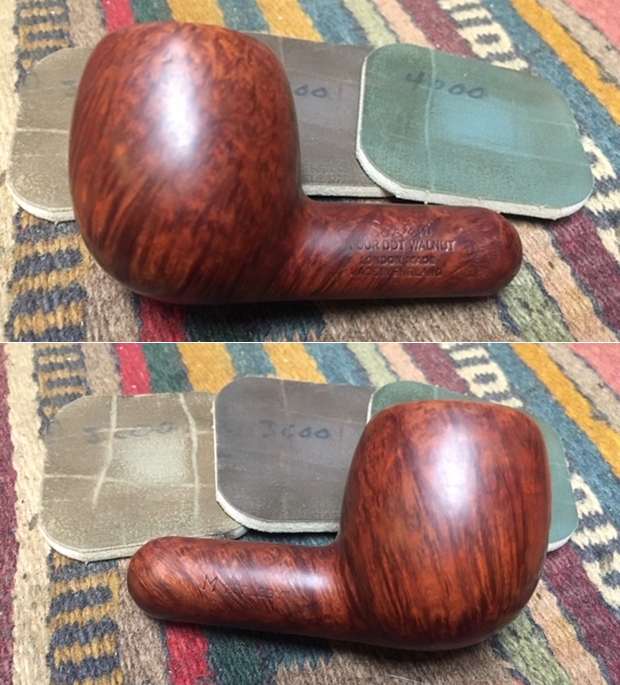
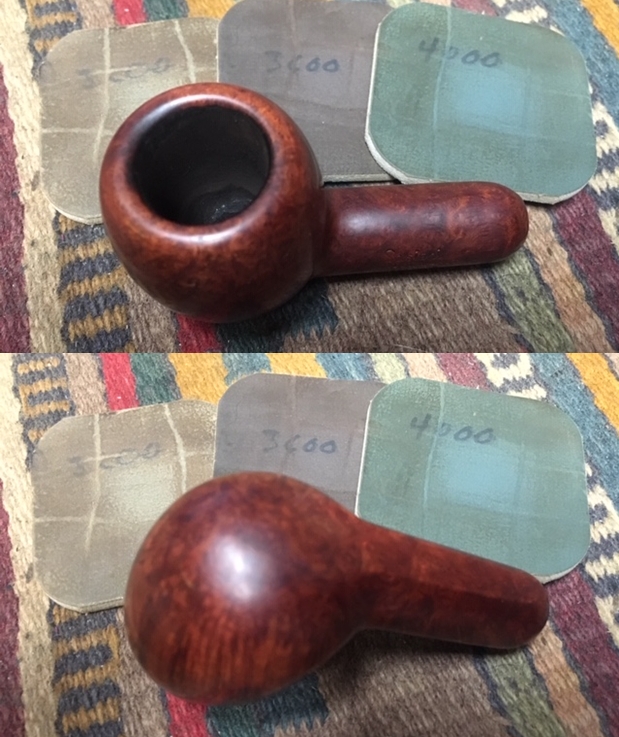
 I follow the rough sanding by utilizing sanding sponges before the micromesh regimen. I use a coarse, medium, and then light grade sanding sponge and sand the entire surface. I’m careful around the nomenclature on the shank. I like using the sanding sponges to clean the surface of minor imperfections, but they are not invasive.
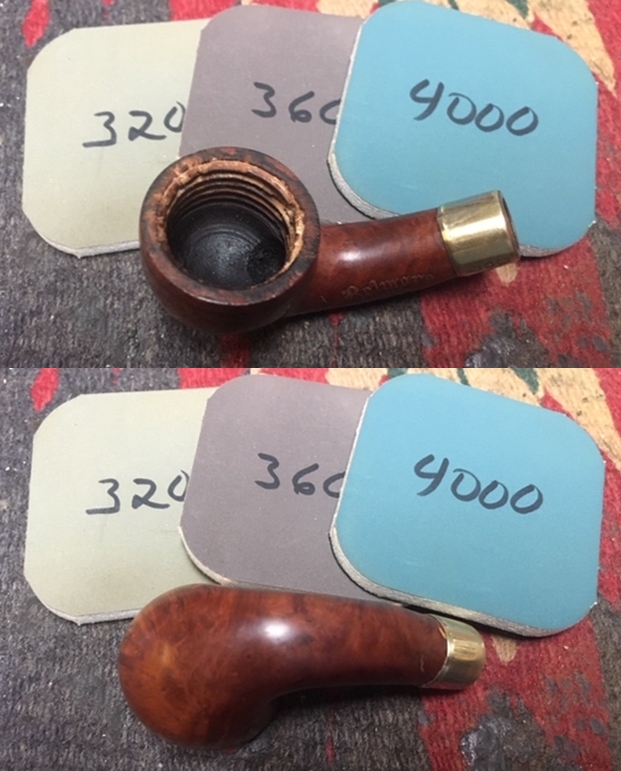
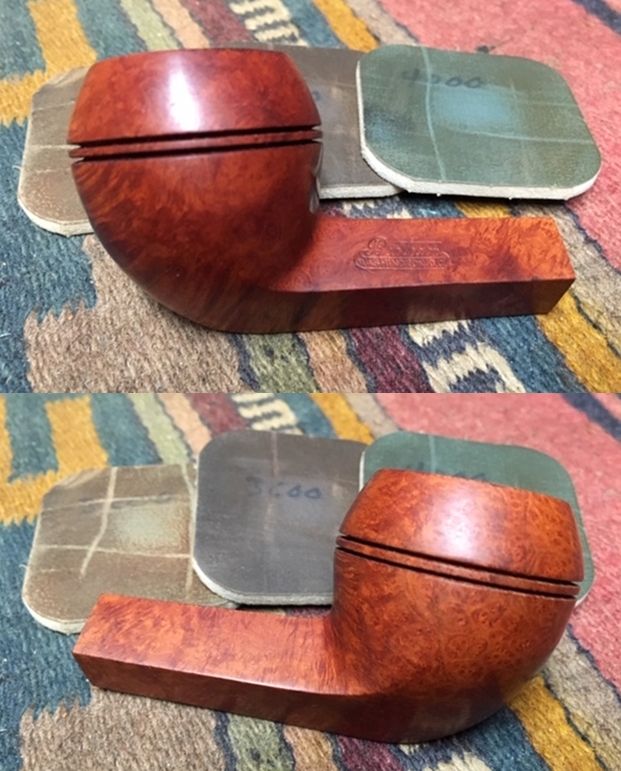
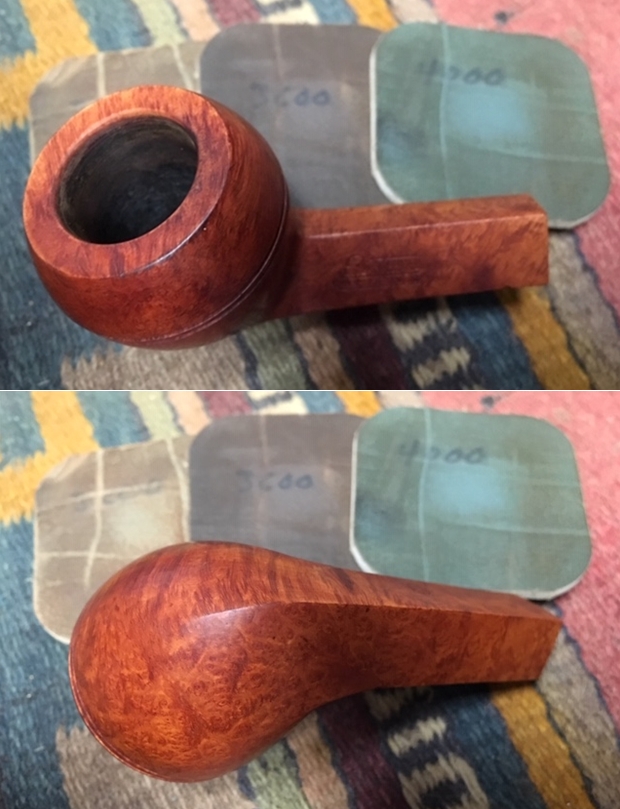
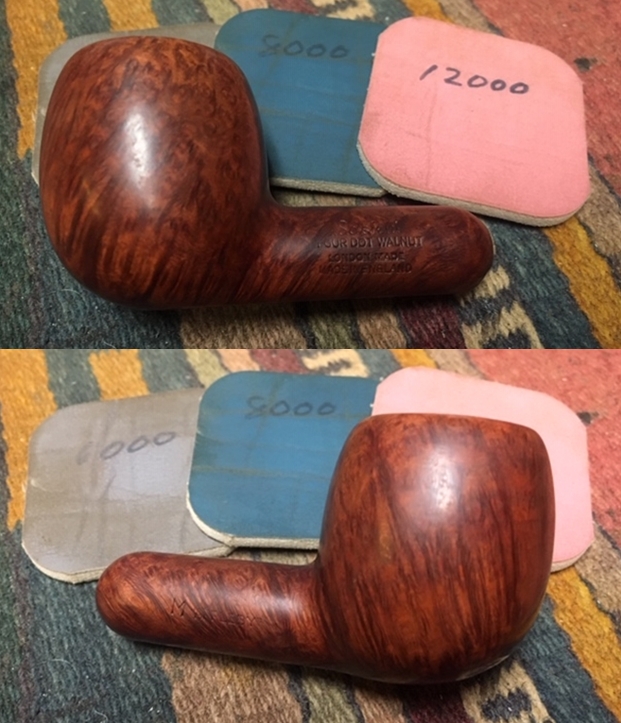
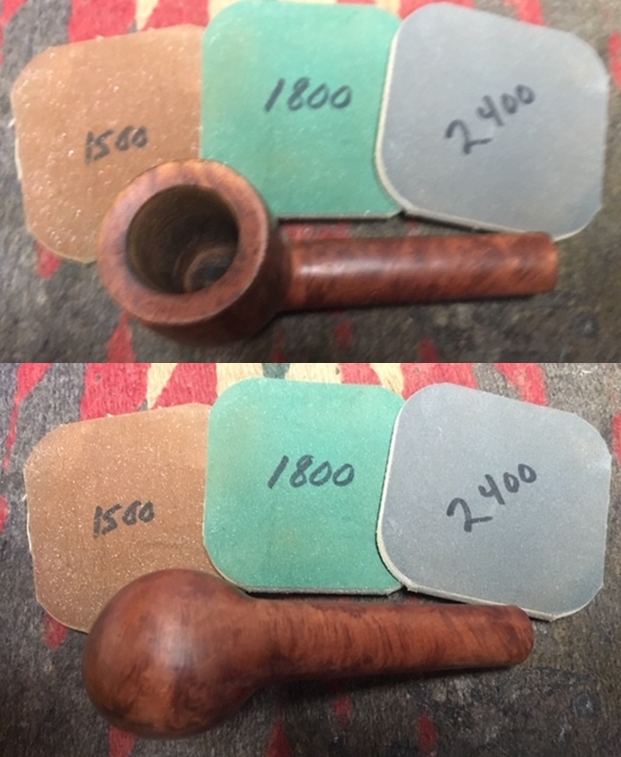
 Turning now to the micromesh pad regimen, I wet sand using pads 1500 to 2400. I follow by dry sanding with pads 3200 to 4000 and 6000 to 12000. Wow! I’m liking the way this grain is coming out.
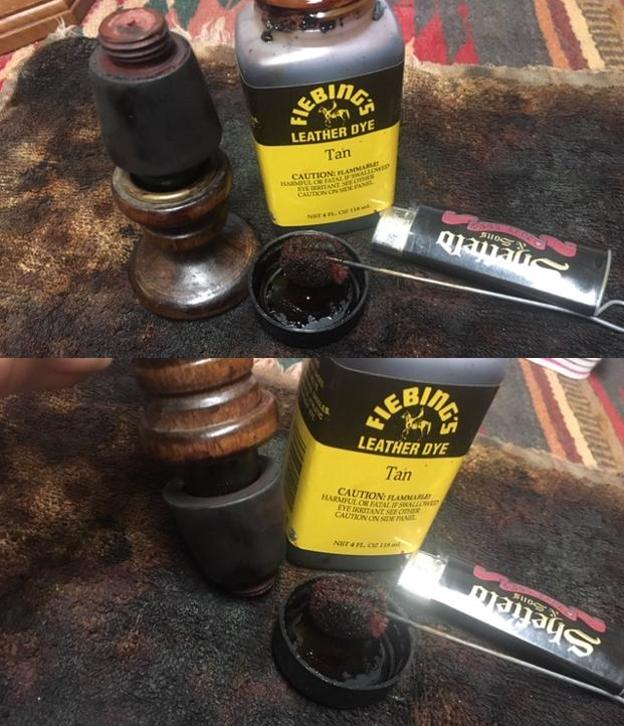
 I’ve come to a juncture and decision point. The grain has come out beautifully and I like the rich honey brown tone of the briar. Yet, the patches on the rim and for the crack repair stand out and to me, distracting. The pictures below show this and for this reason, I decide to apply a darker hue to mask the repair work. The patches will not disappear totally, but the contrast will be minimized. I like using Fiebing’s Dark Brown for this purpose. As an aniline – alcohol-based dye, I can lighten it by wiping the stained surface with a cotton pad wetted with alcohol.
 After I assemble all the components for staining on my worktable, I warm the stummel using a hot air gun to expand the briar which enhances the reception of the dye pigment. After the stummel is warm, I use a folded over pipe cleaner to apply the dye. I apply the dye in swatches and then flame the aniline dye with a lit candle. The alcohol combusts and sets the pigment in the grain. After I methodically apply dye and flame the entire stummel, I repeat the process again assuring thorough coverage. I set the stummel aside to rest through the night to allow the new dye to settle in. And for me, I turn out the lights and call it a day.

 The next morning, the flamed stummel has had enough time to rest the new dye. To ‘unwrap’ the stummel removing the crust, I mount a felt buffing wheel on to the Dremel, set it at the slowest possible speed and begin the methodical process of both removing the crust as well as polishing the briar with Tripoli compound.
 I stop to take a picture during the process to show the emerging briar grain after the staining process. It’s amazing as I uncover the briar. I’m pleased with the hue that I’m seeing.
 Not pictured above is that I changed the felt wheel to a cotton cloth buffing wheel, increased the speed of the Dremel to about 40% full power and when over the entire surface again with Tripoli compound. Unlike with the felt wheel, with the cotton wheel I can reach into the crook of the shank and bowl to apply compound removing the crust. I also fine tune the polishing using the cloth wheel – it brings out and sharpens the grain a step more.
Below, after completing the use of Tripoli compound, I wet a cotton pad with alcohol and I very lightly wipe the stummel. This helps to blend the newly applied stain as well as lighten the finish a bit. Next, I rejoin the stem and stummel (after I took this picture!) and mount another cotton cloth wheel to the Dremel, maintaining the same 40% power setting and I apply Blue Diamond compound to both stem and stummel. After completing this, I wipe the pipe down with a felt cloth to remove the compound dust before applying wax.
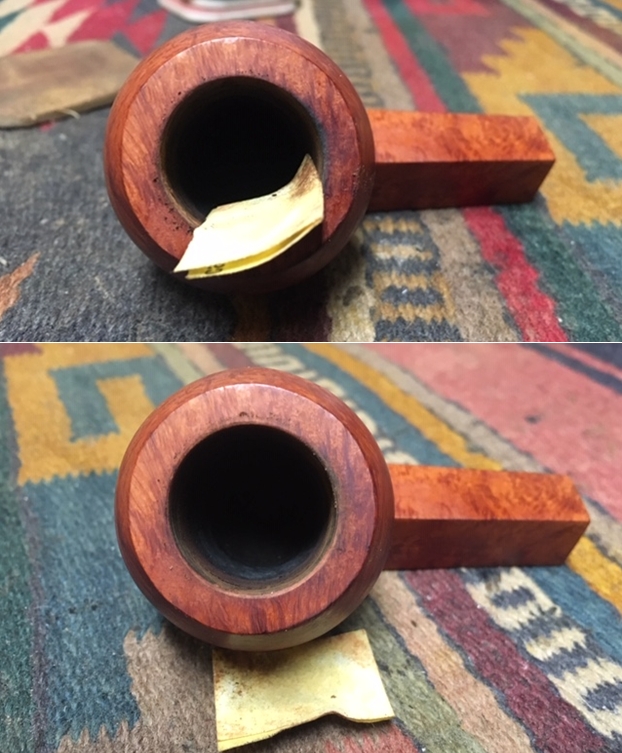
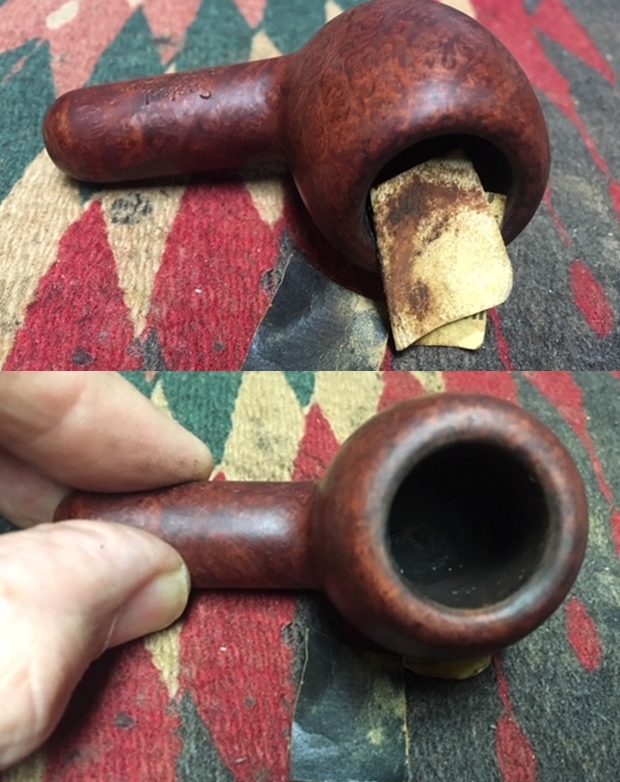
 Before applying wax, to provide the chamber with a starter layer to encourage the develop of a protective cake, I mix Bulgarian natural yogurt and activated charcoal to form a mixture which I apply to the chamber walls. After I stick a pipe cleaner through the stem and the draft hole, to guard the airway from being blocked, I mix the yogurt and charcoal dust to a point where the mixture does not drip off the pipe nail tool as I hold a dollop of the mixture in the air. I then apply and spread the mixture over the chamber evenly and fully. Satisfied with the progress, I then put the mixture aside for it to set-up after a few hours.

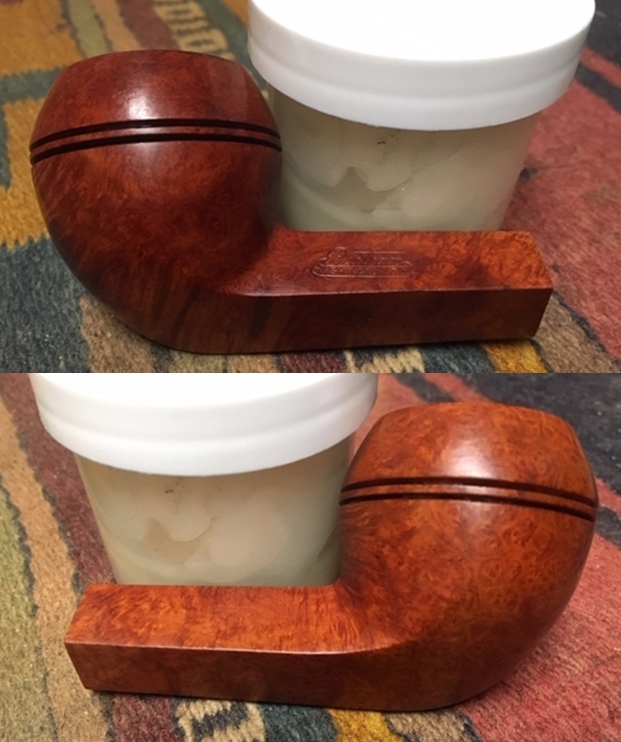
 I then mount another cotton cloth wheel to the Dremel and apply a few coats of carnauba wax to the Canadian. To finish the restoration, after applying the wax I give the pipe a hearty hand buffing with a microfiber cloth to raise the shine even more.
Before completing the restoration, I received an email back from Jim regarding his request that I ‘open’ the airway from the factory drilling to a .4mm width. I did some reading and found a long enough .4mm drill bit to do the job. Yet, while it would not be a difficult thing to open the straight Canadian airway, my concern was that I really could not change the airway construction of the small, Canadian stem. I didn’t know whether this continued compression point of the air passage would defeat the physics advantage of opening the airway. I left it to Jim to decide and what he decided to do was to first test the airway’s factory diameter and then open the airway himself to compare smoking experiences. This sounded good to me and I hope to hear from Jim the results of this comparison.
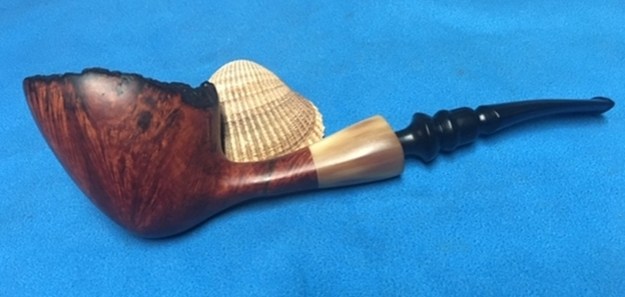
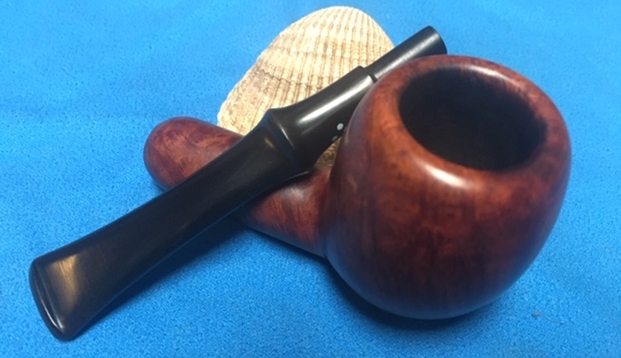
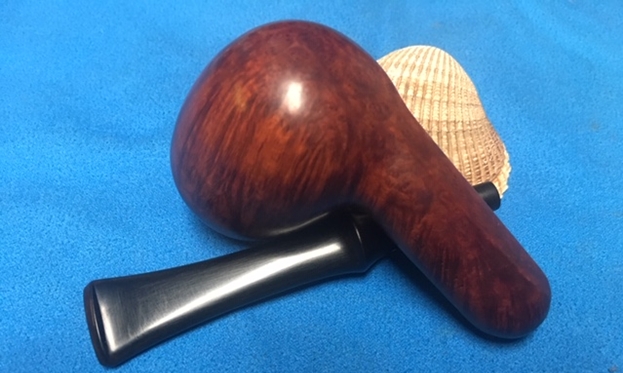
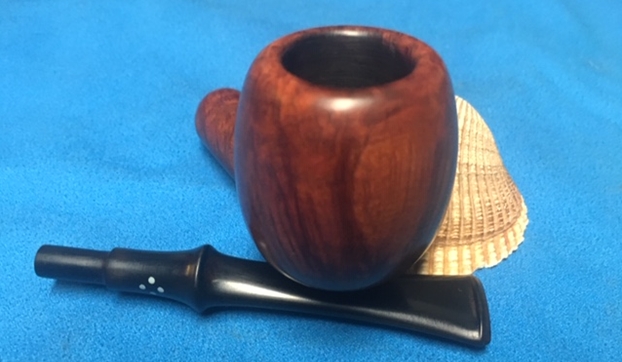
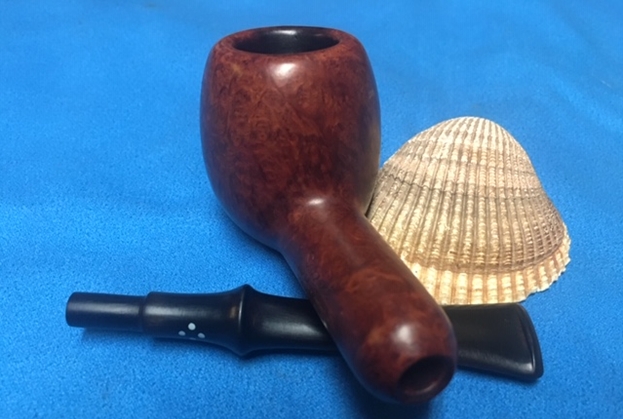
What can I say? Rex’s La Strada Scenario Canadian has been reborn and ready to begin a new lifetime! The pipe required some attention, but I’m pleased with the masking of the patches on the rim and for the crack repair. The grain is exceptional on this Italian La Strada. The bowl showcases both flame and vertical grains with some bird’s eye on the heel. The longer Canadian shank is also a great plus – a cooler smoking experience. Jim saw the potential of this Canadian in the For “Pipe Dreamers” Only! collection and since he commissioned it and waited patiently for me to restore it, he has the first opportunity to purchase the La Strada Canadian from The Pipe Steward Store which benefits the Daughters of Bulgaria – helping women and girls who have been trafficked and sexually exploited. I thank Dan Hartzler for donating this pipe for this purpose, and I thank you for joining me!


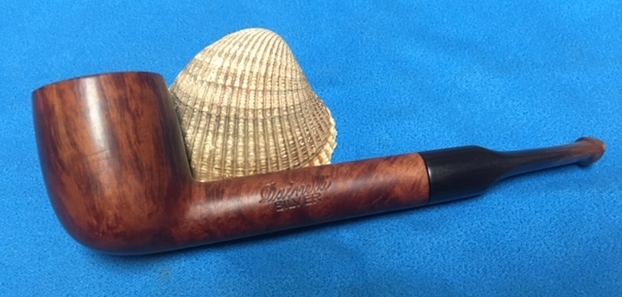
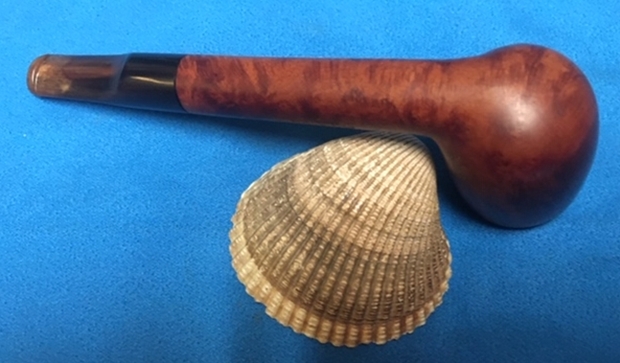
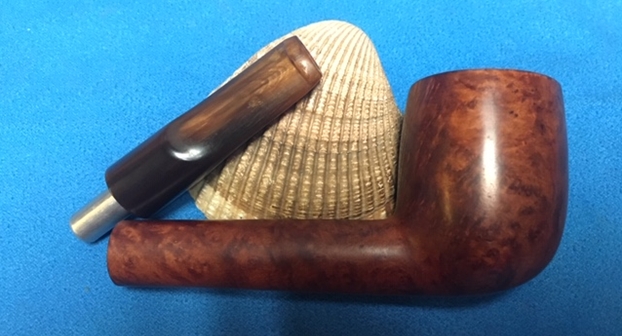
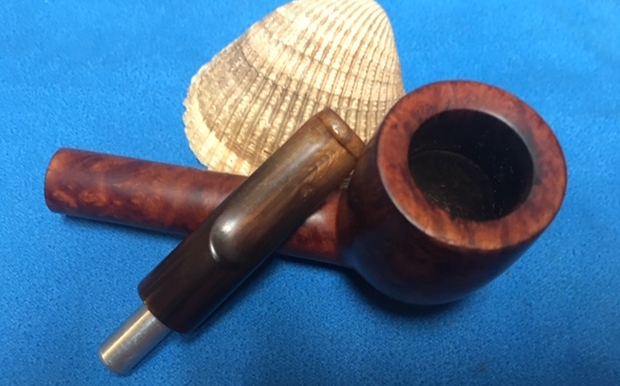
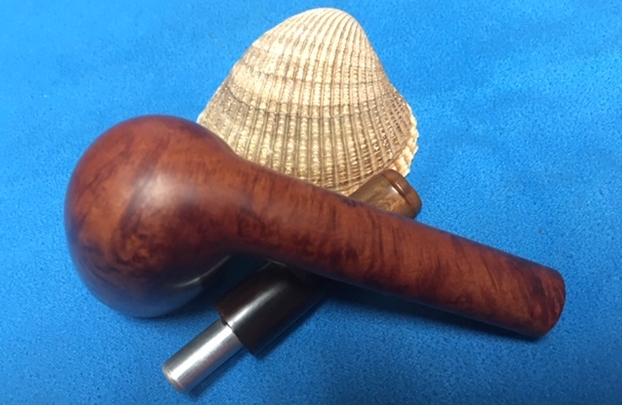
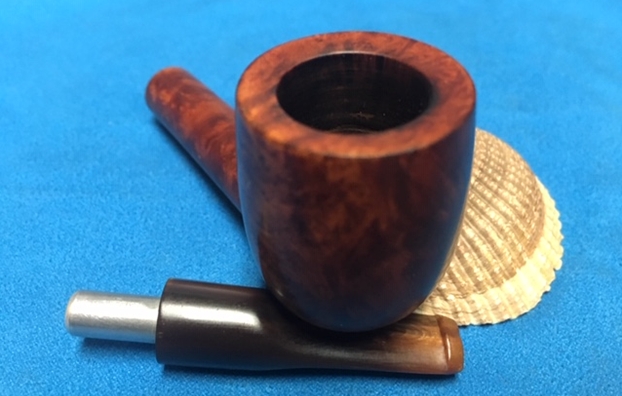
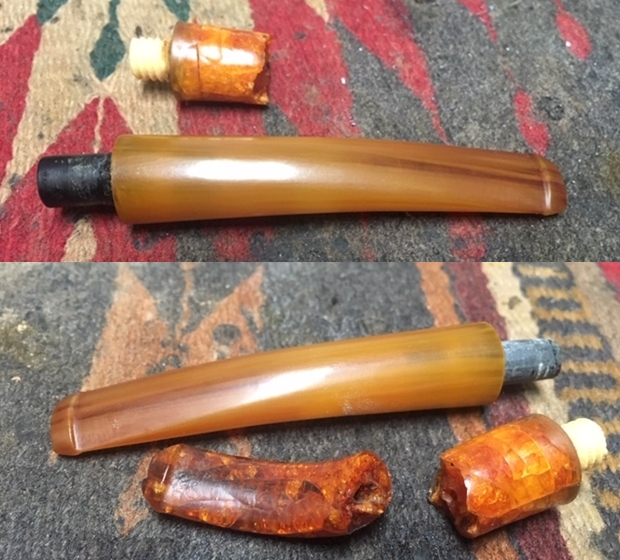
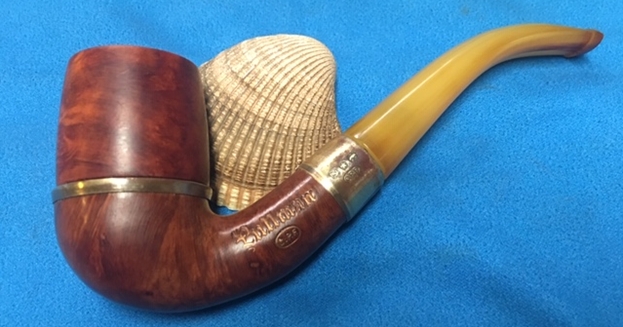
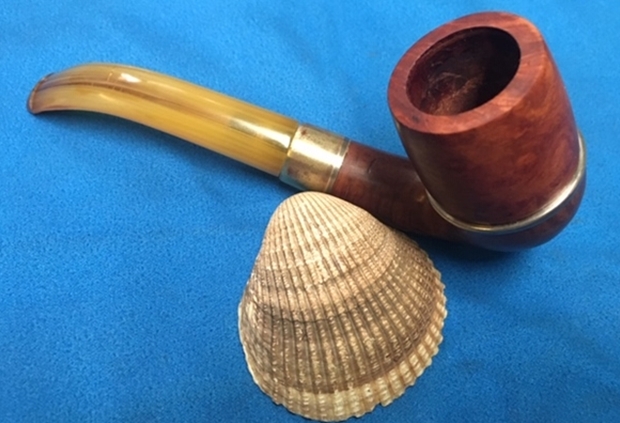
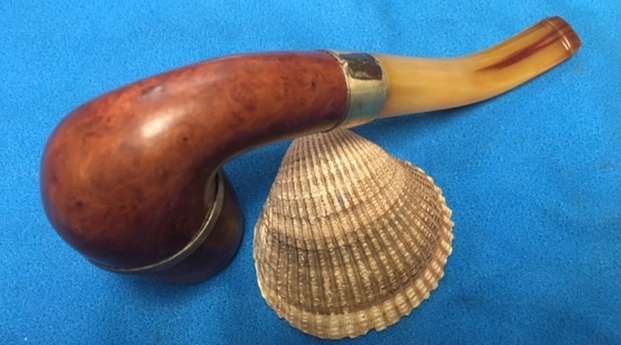
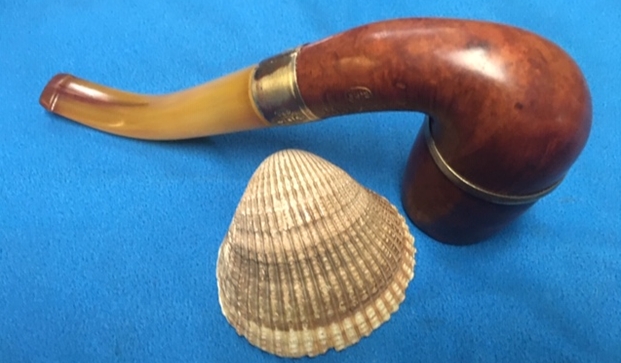
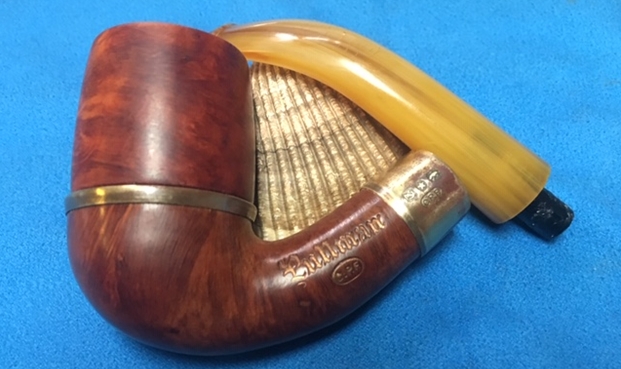
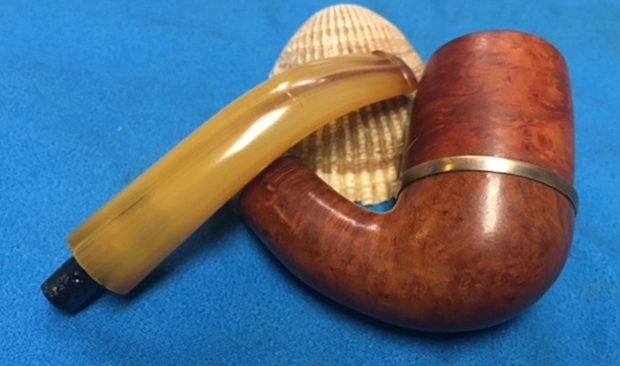
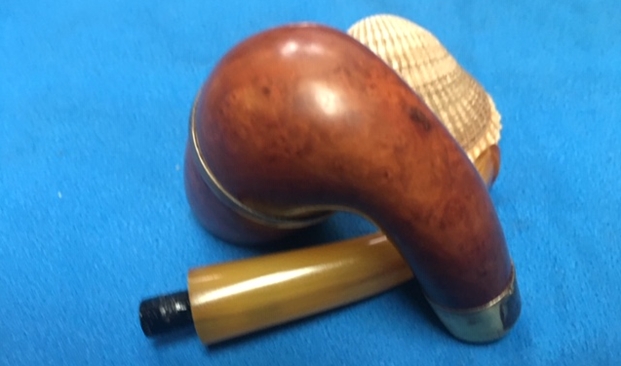
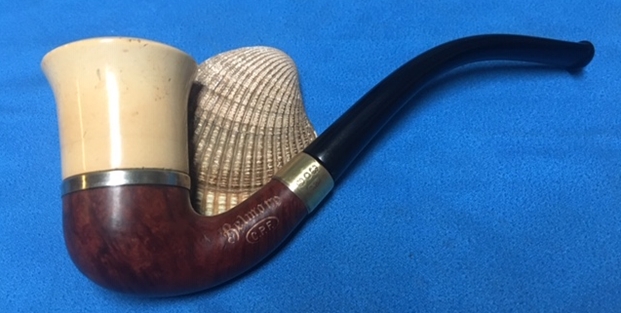
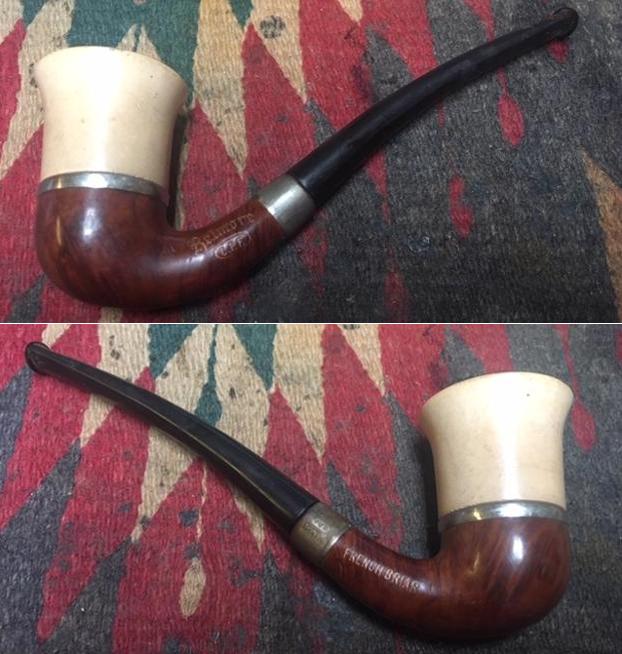
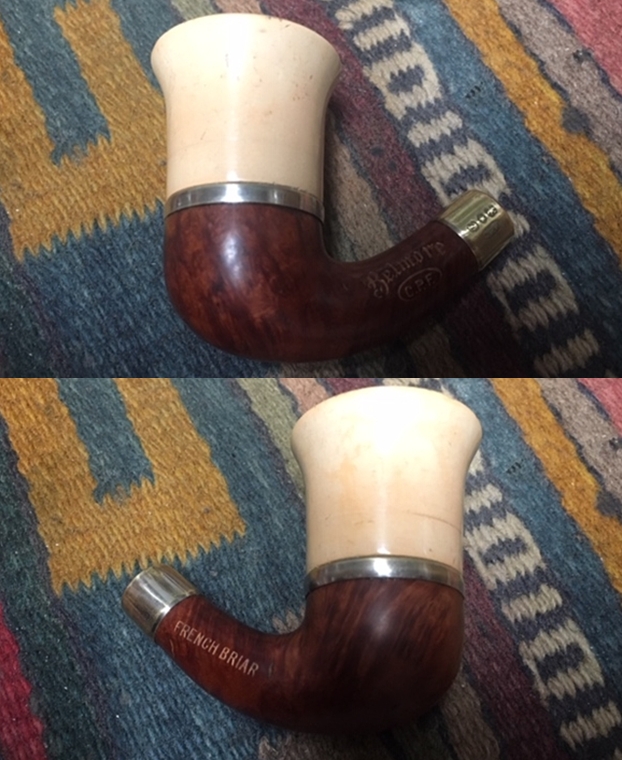
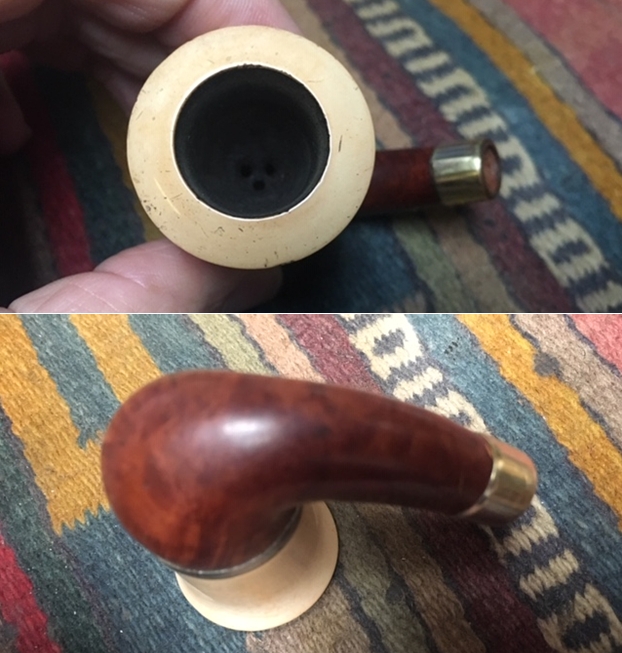
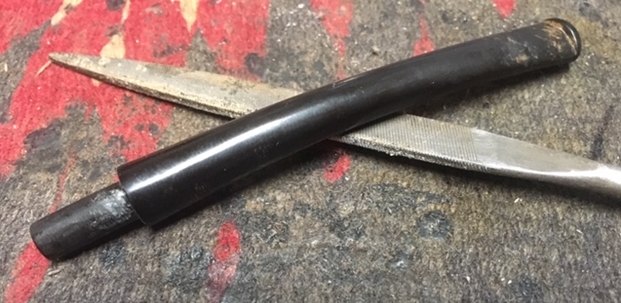
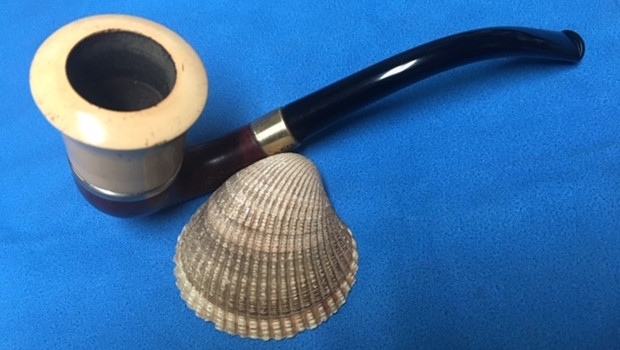
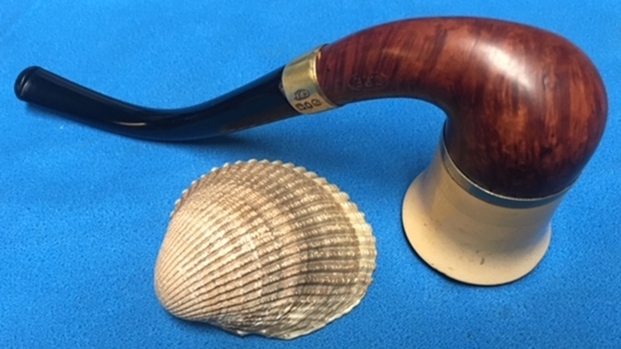
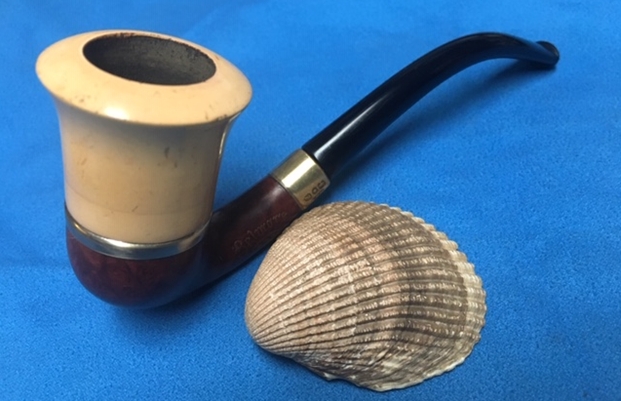
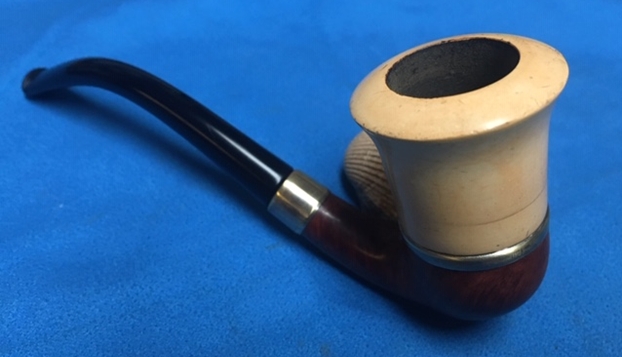
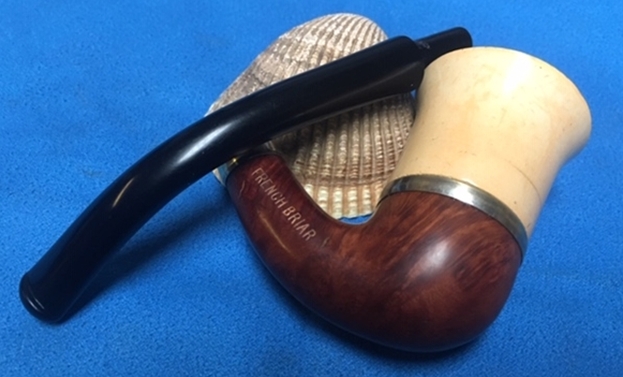
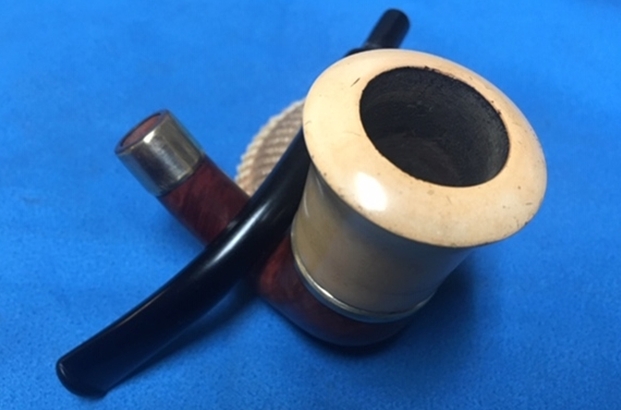
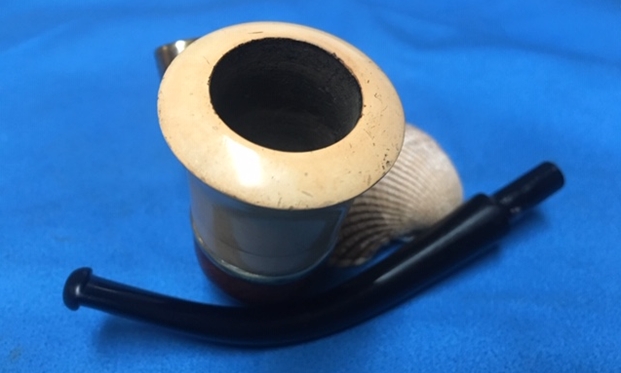
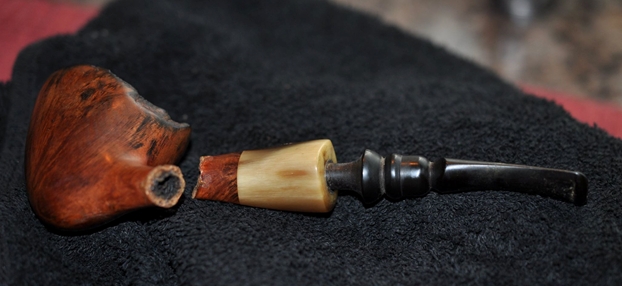
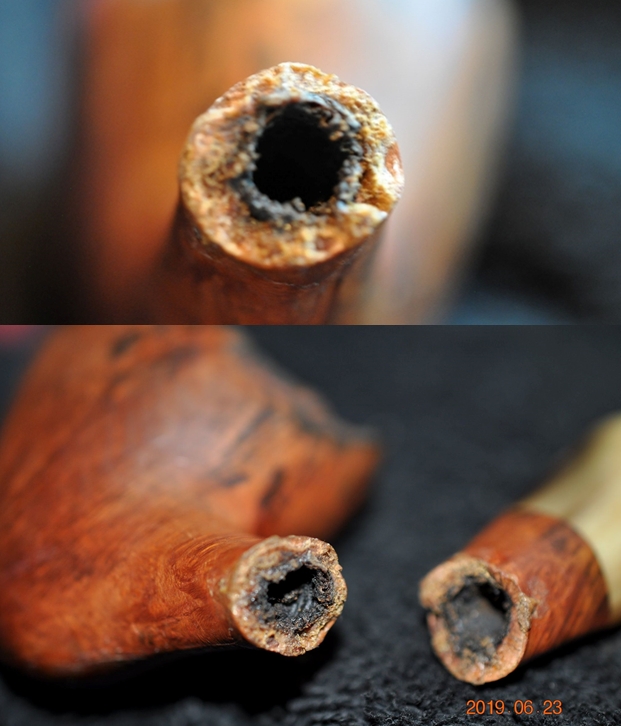
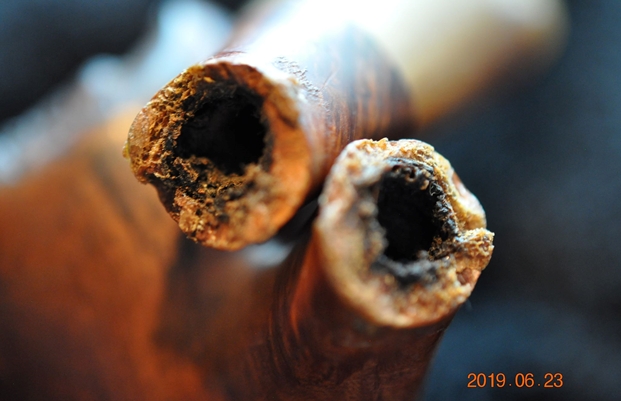
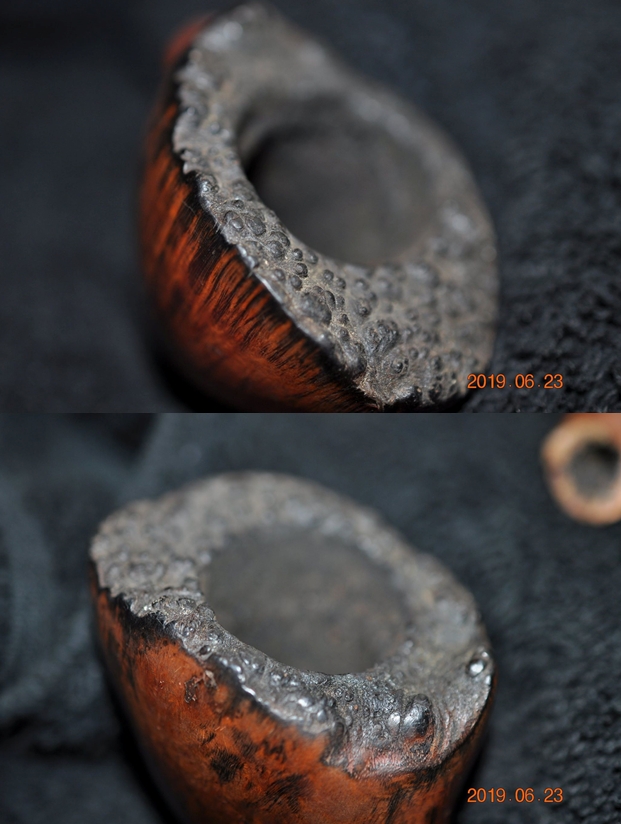
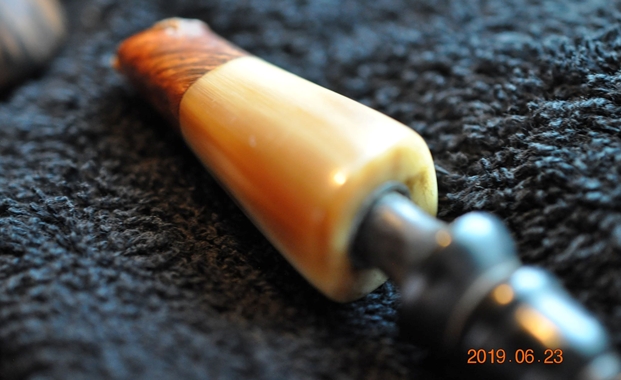
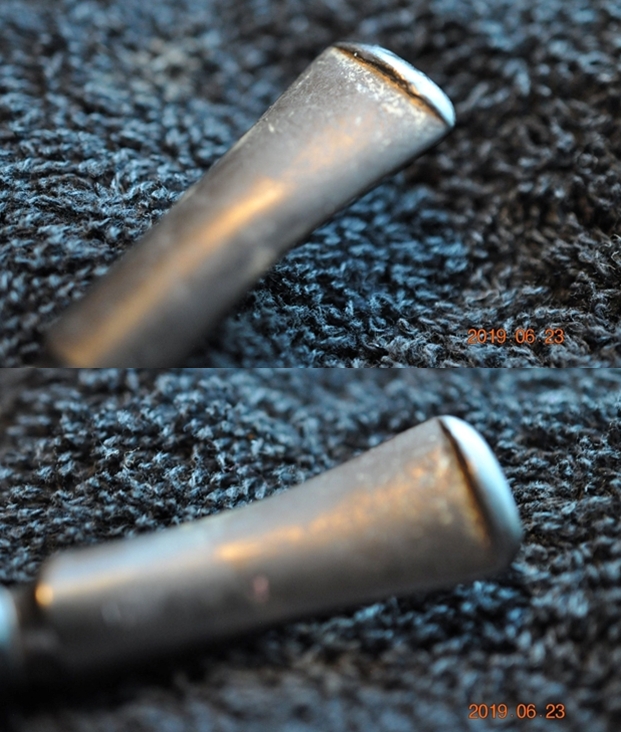
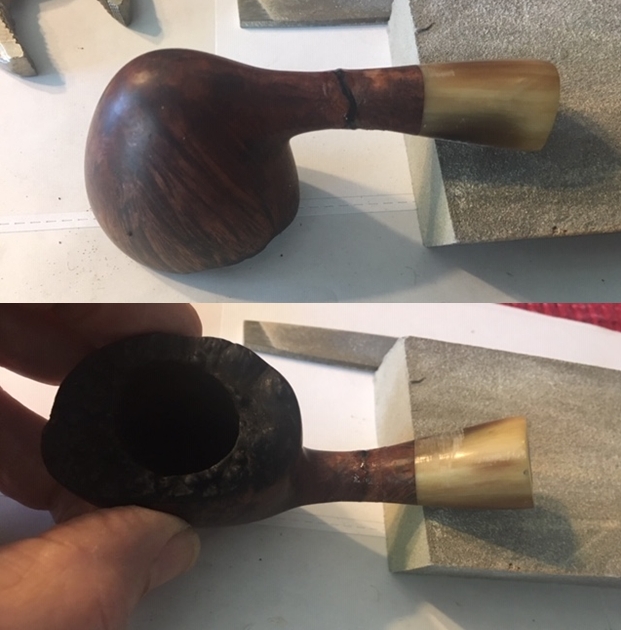
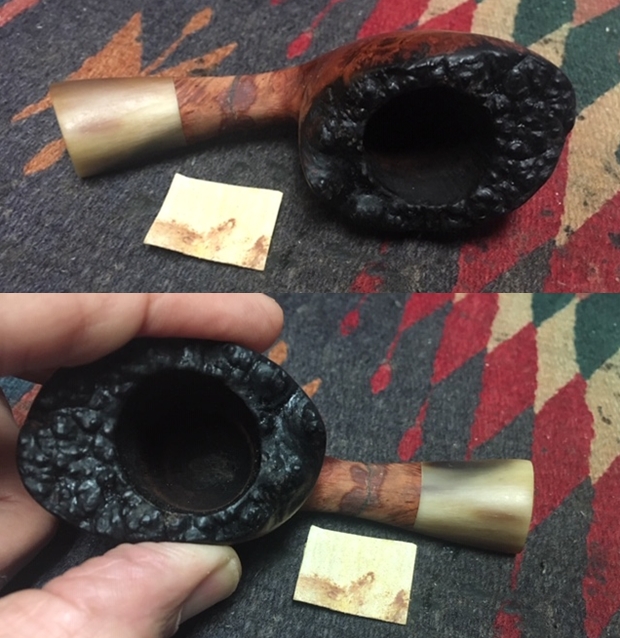
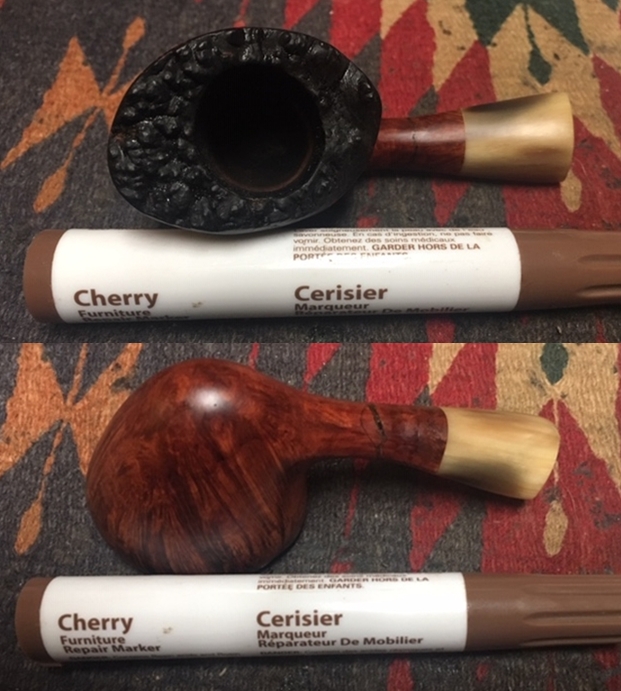
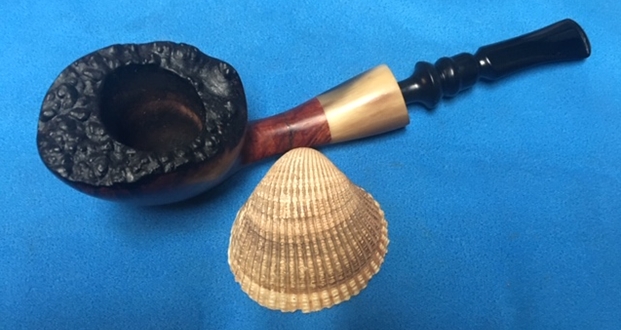
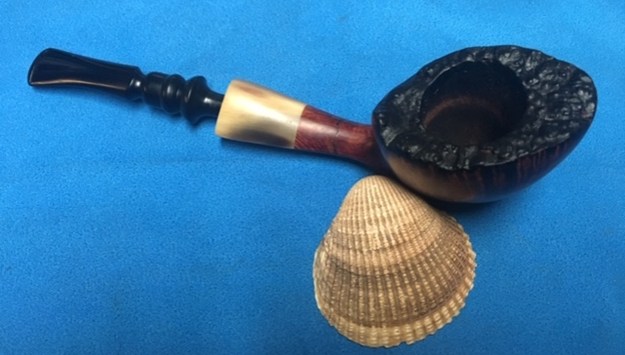
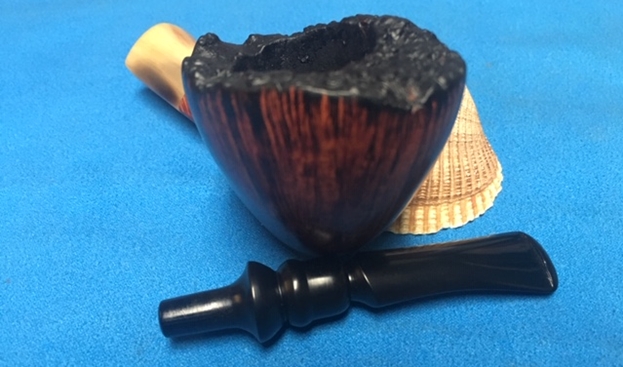
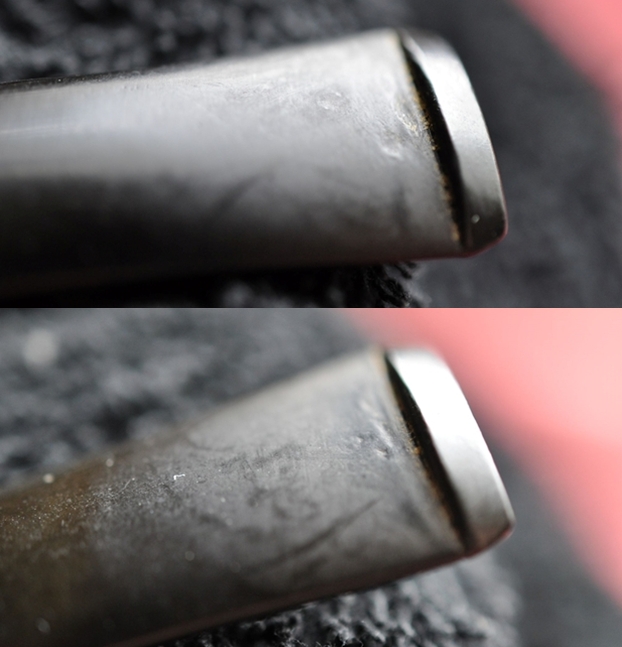
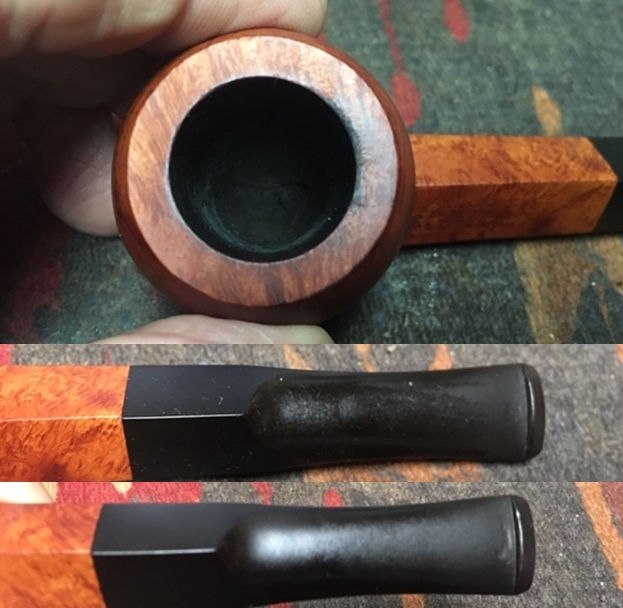
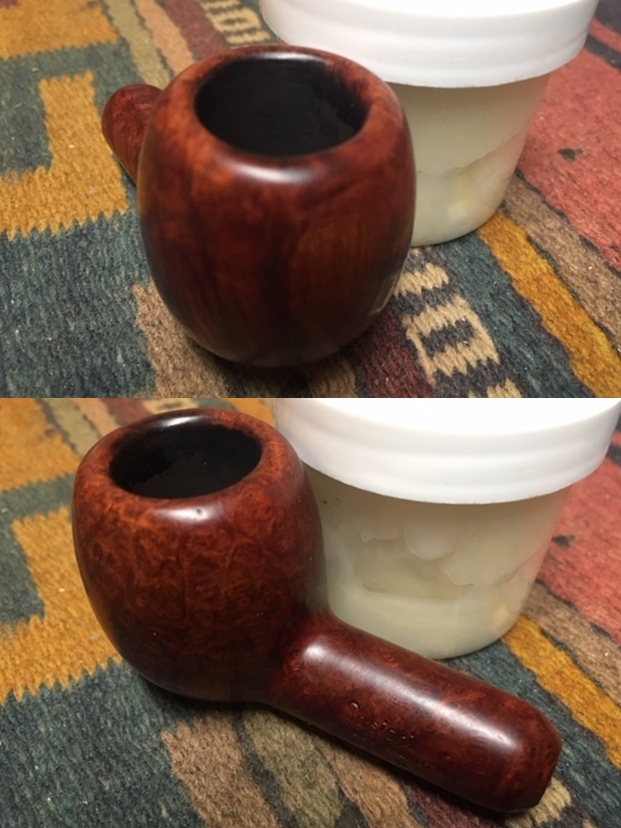
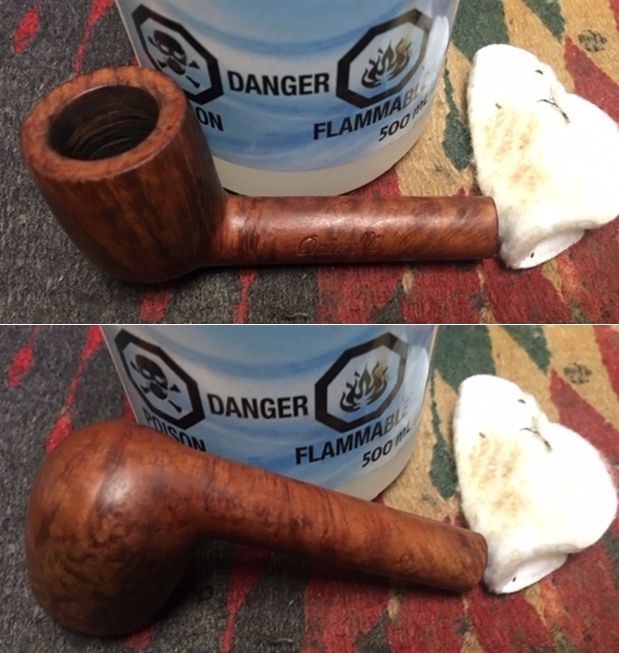
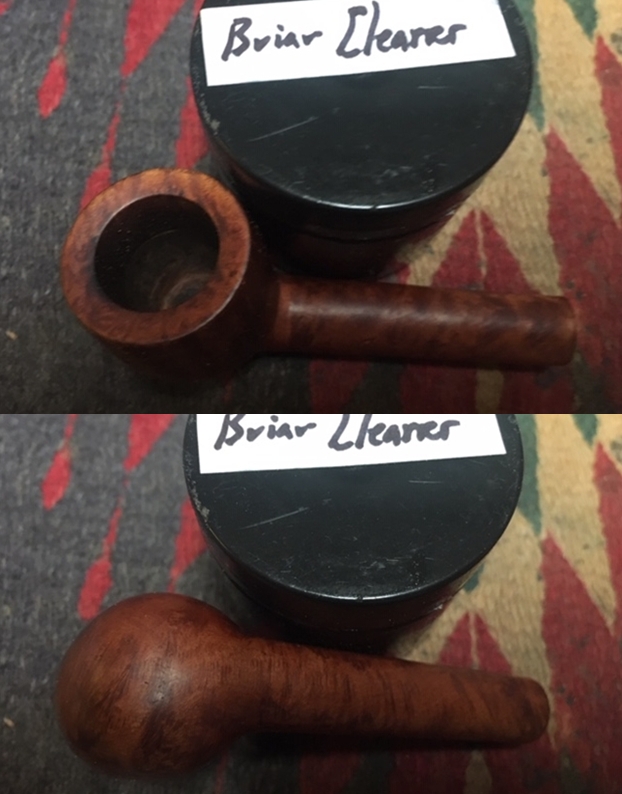
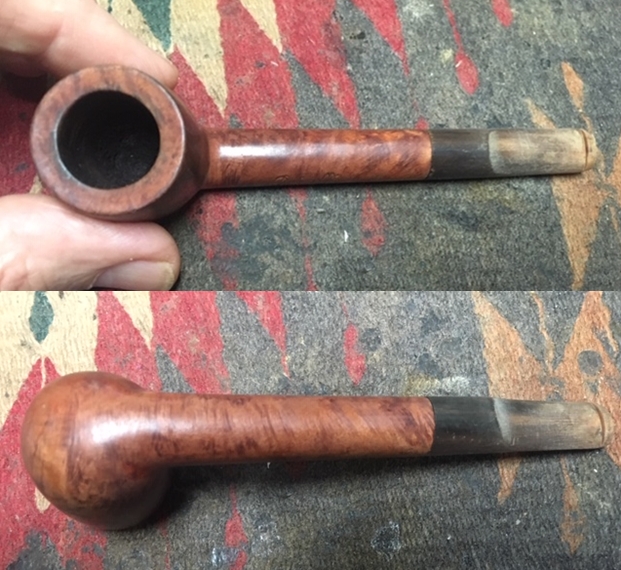 I took close-up photos of the bowl and rim top to capture the condition of the pipe when it arrived. The rim top look dried out but clean. The outer and inner edges of the rim look good but there are a few nicks in the outer edge. I took photos of the horn stem surface to show the oxidation and the chatter on both sides near the button. The tooth marks are visible next to the button on both sides.
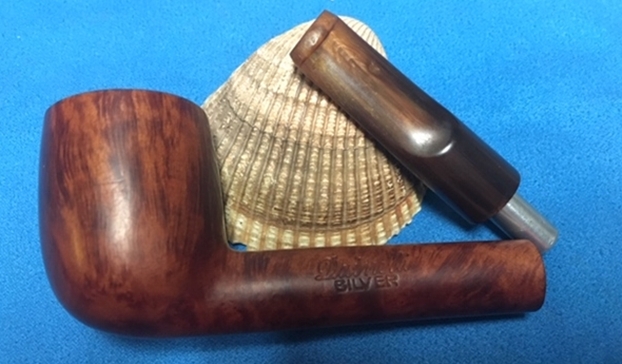
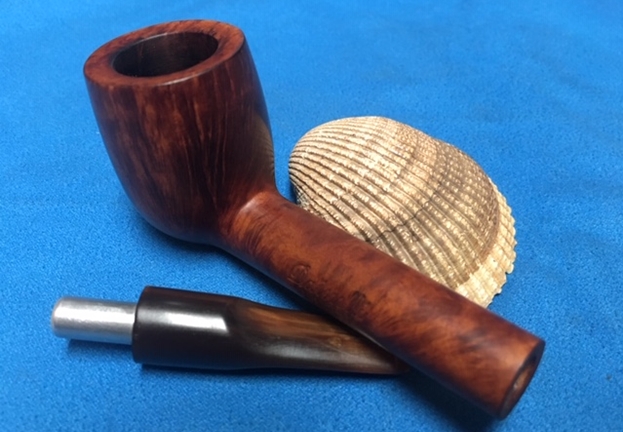
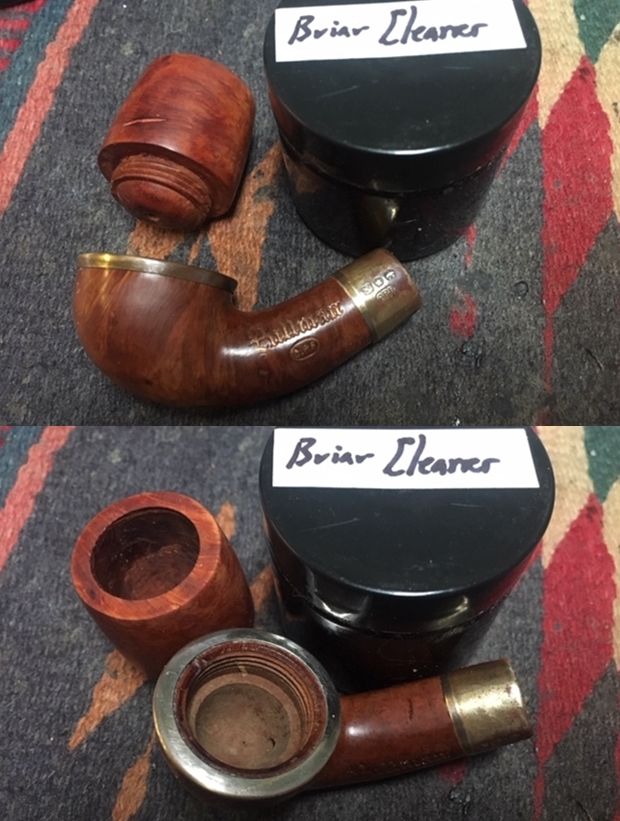
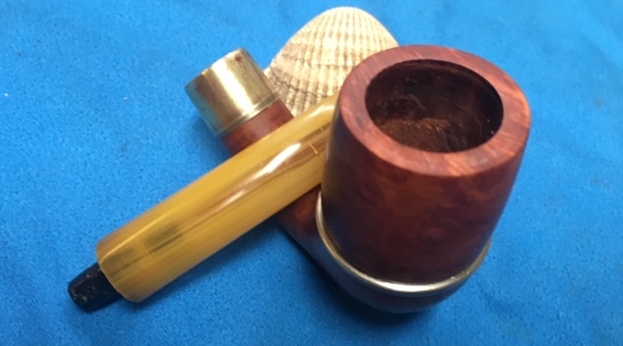
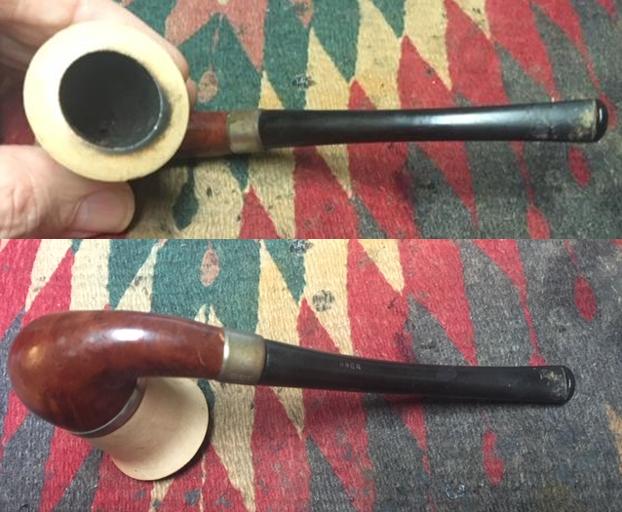
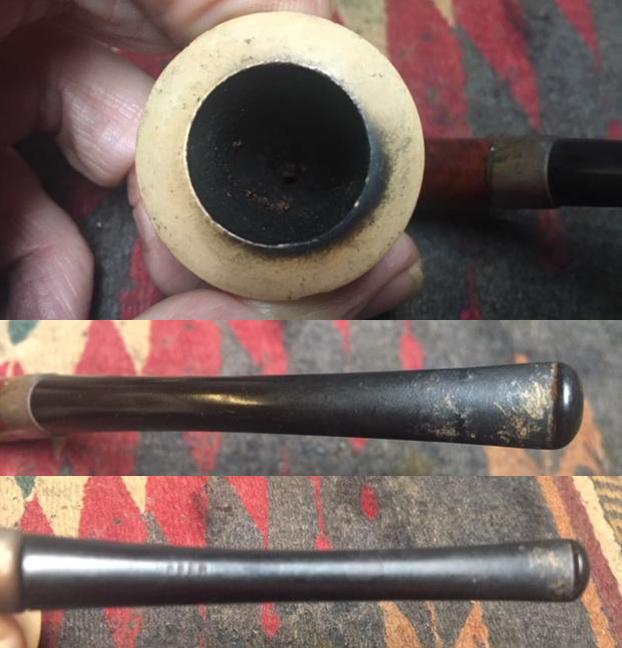
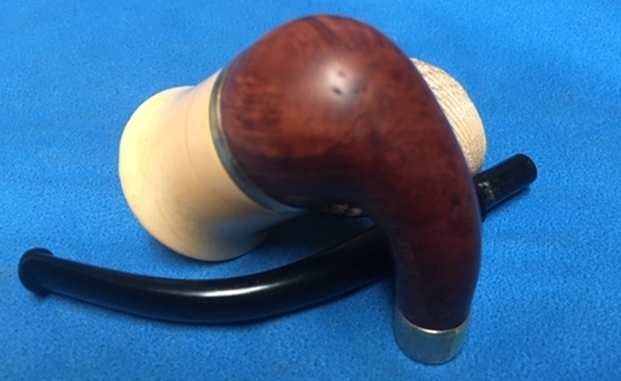
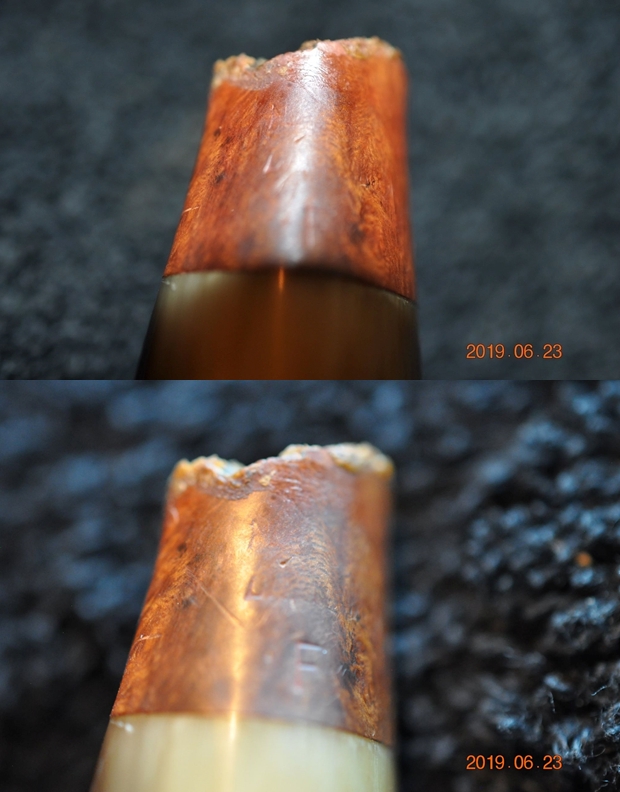
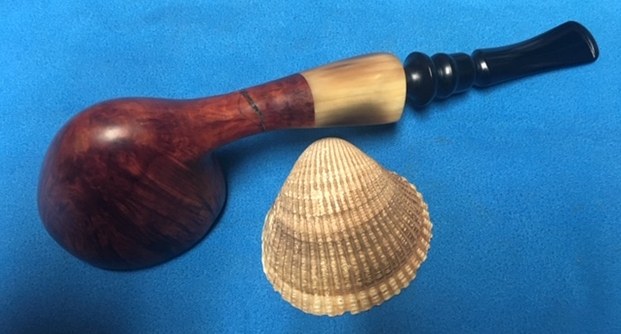
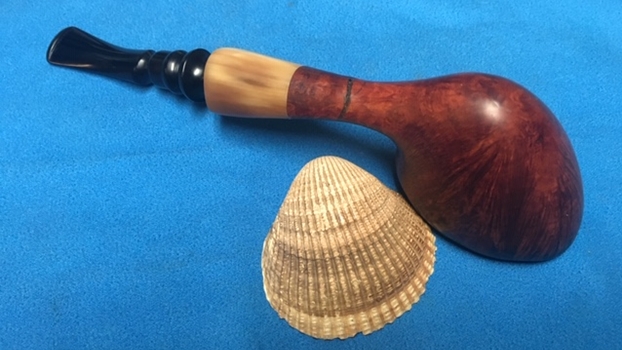
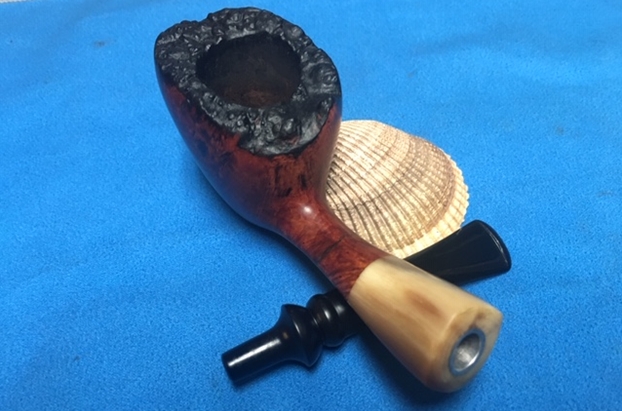
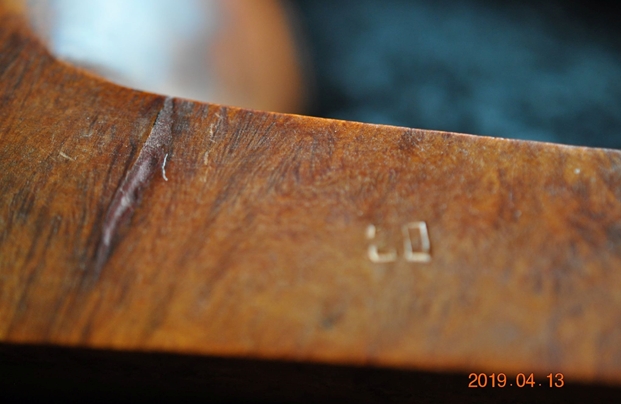
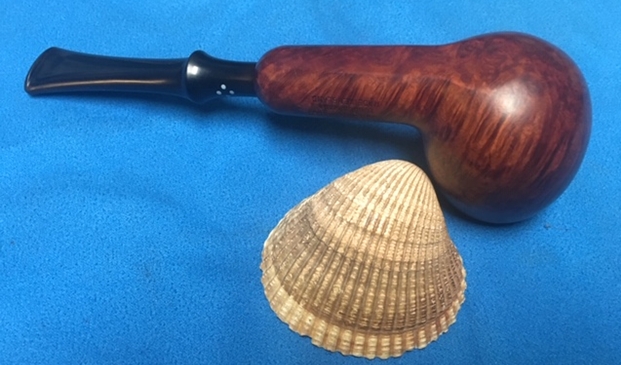
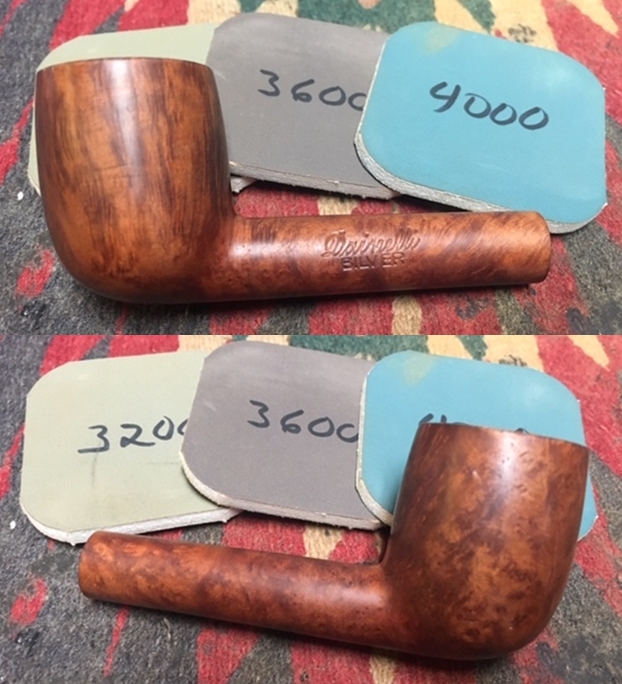
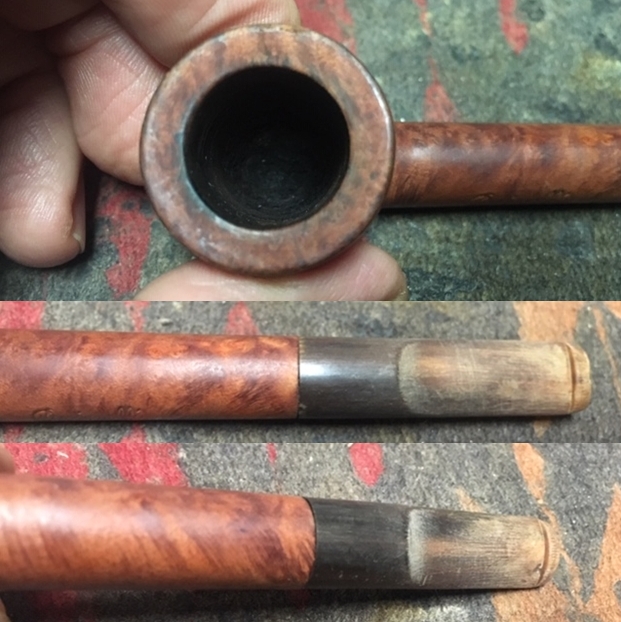 The next photo captures the stamping on the left side of the shank. It reads Dainelli over Silver. I took the stem off the shank and took a photo to show the metal tenon.
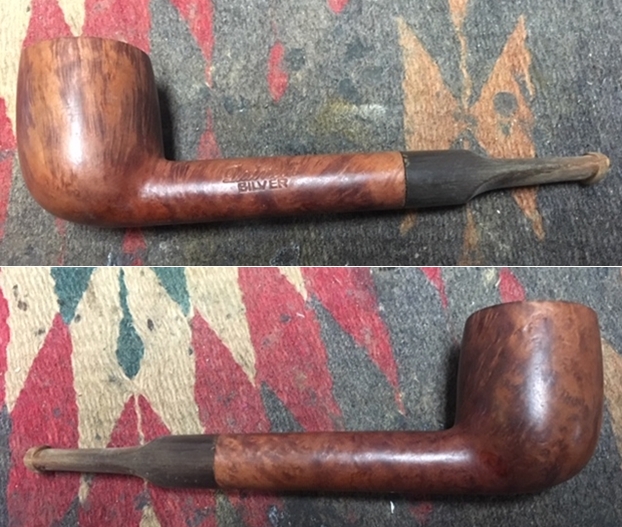
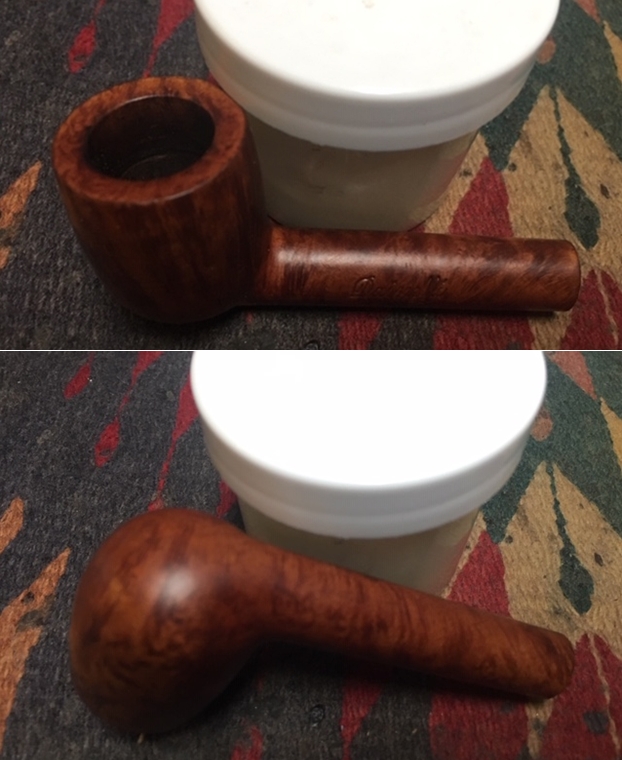
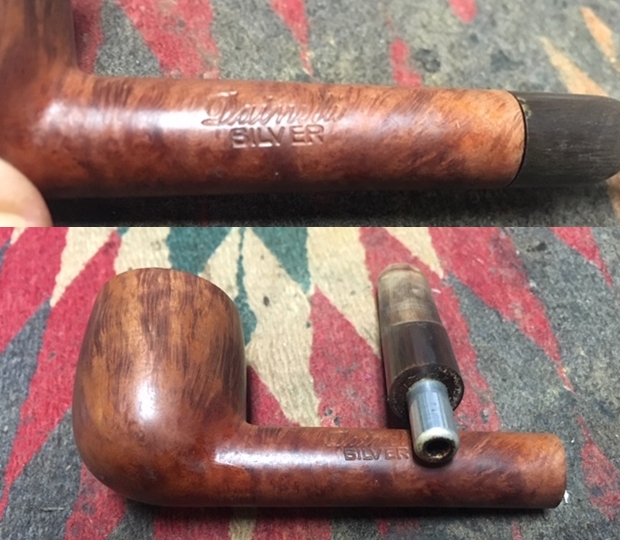 This is the first pipe with this stamping that I have ever worked on. I am unfamiliar with the brand so some research was in order. I checked on Pipedia and Pipephil to see if there was any information on the brand. There was nothing listed on either site. I checked in “Who Made That Pipe” and once again came up empty. I turned to Lopes, “Pipes, Artisans and Trademarks and again the trail was dead. I broadened the search on Google to look for the brand and even associated it with pipe shops or tobacco companies and still there was not a link at all. It looked like I was not the only one who had never heard of the brand.
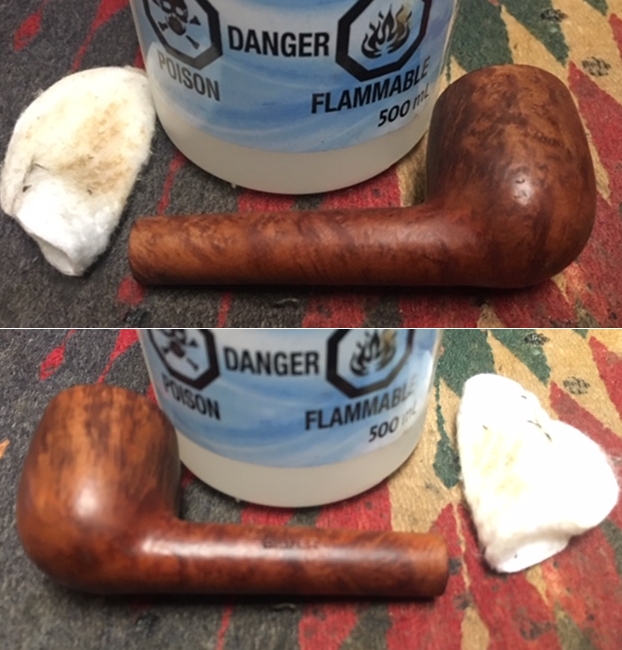
 I reamed the bowl with a Savinelli Fitsall Pipe Knife and scraped the cake out of the bottom of the bowl. The buildup on the bottom was thick and heavy. The pointed end of the knife allowed me to remove the remaining cake. I sanded the bowl walls with a piece of dowel wrapped with 220 grit sandpaper.
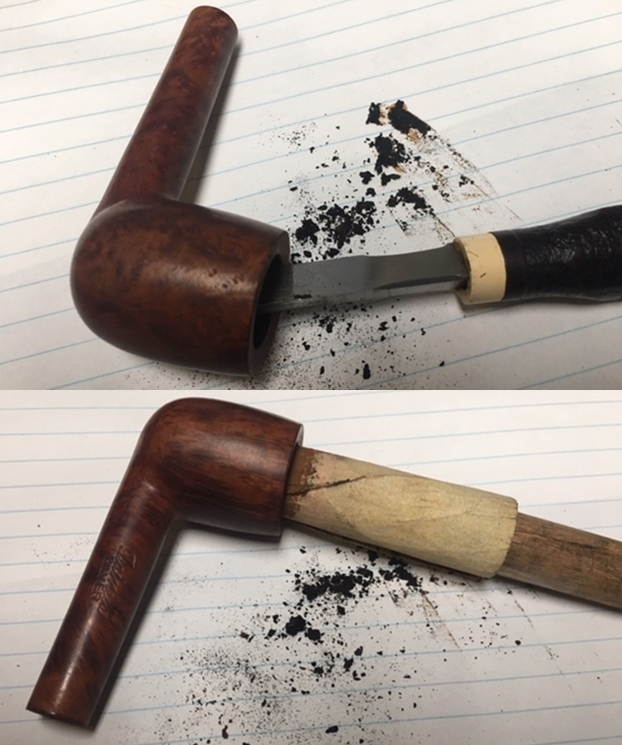 I scrubbed out the internals of the pipe with pipe cleaners, cotton swabs and alcohol. It was a very dirty shank and mortise. I have found that stems with metal tenons seem to draw moisture and tars around the shank walls. I cleaned out the stem with pipe cleaners and alcohol. I used a cotton swab and alcohol to clean out the end of the tenon.
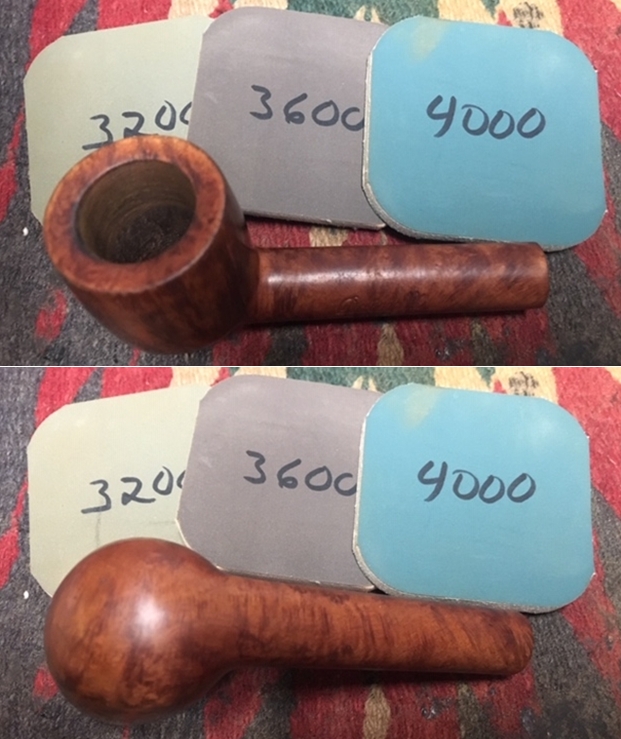
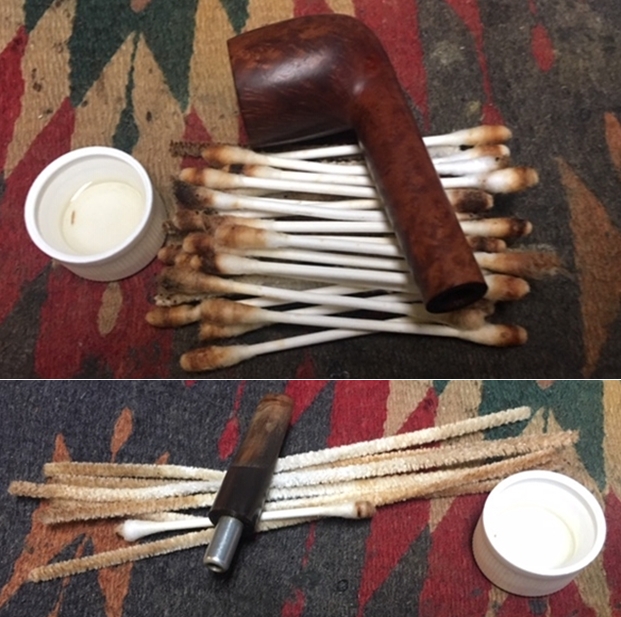 I polished the bowl and rim top with micromesh sanding pads – wet sanding it with 1500-12000 grit pads. I wiped the bowl down with a damp cloth after each pad to remove the sanding debris. After the final sanding pad I hand buffed it with a cotton cloth to raise a shine.
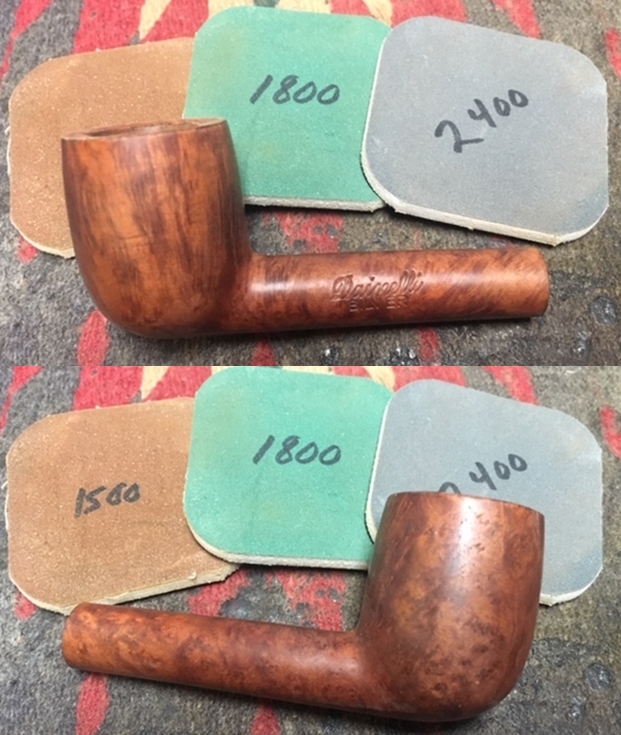

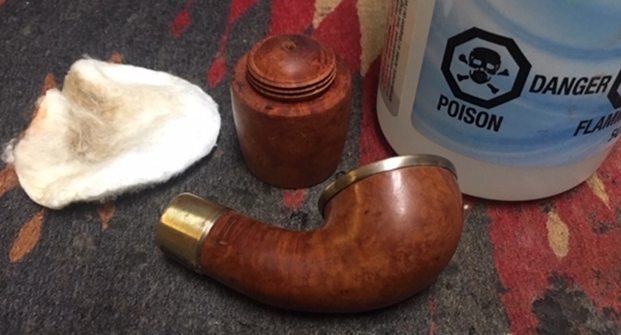
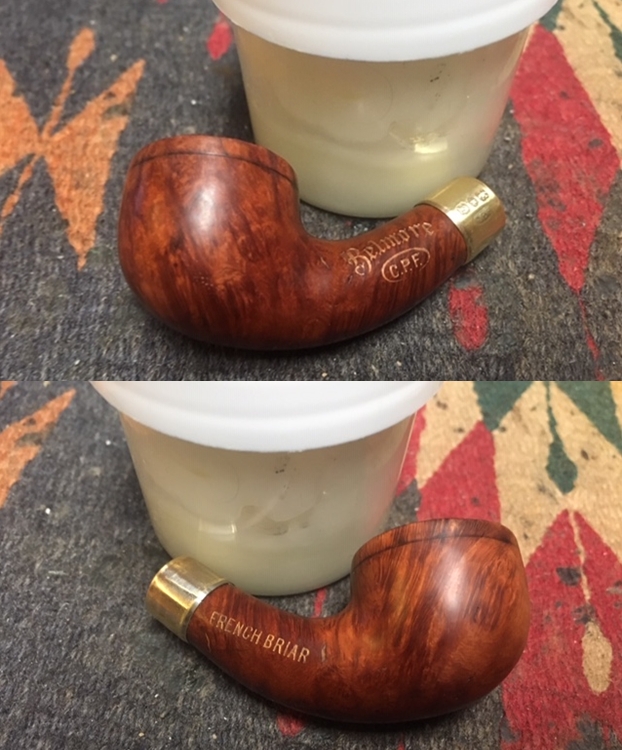
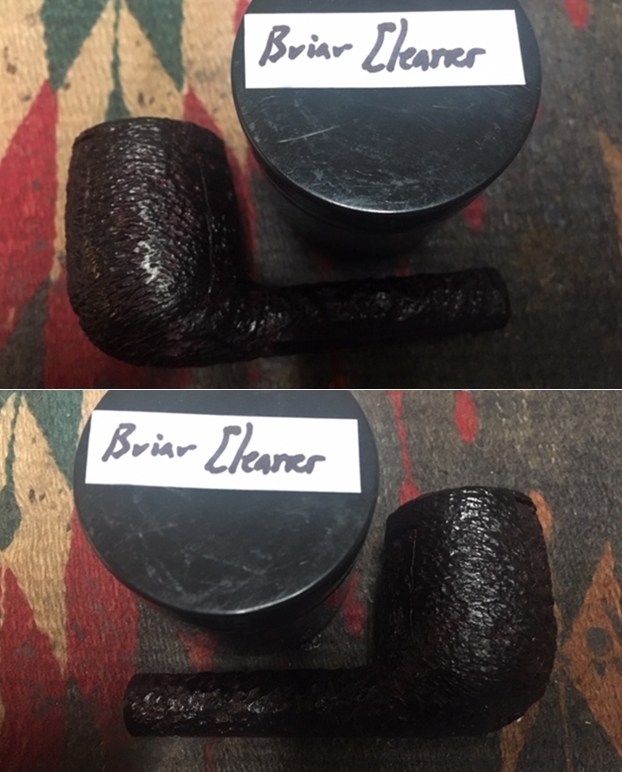
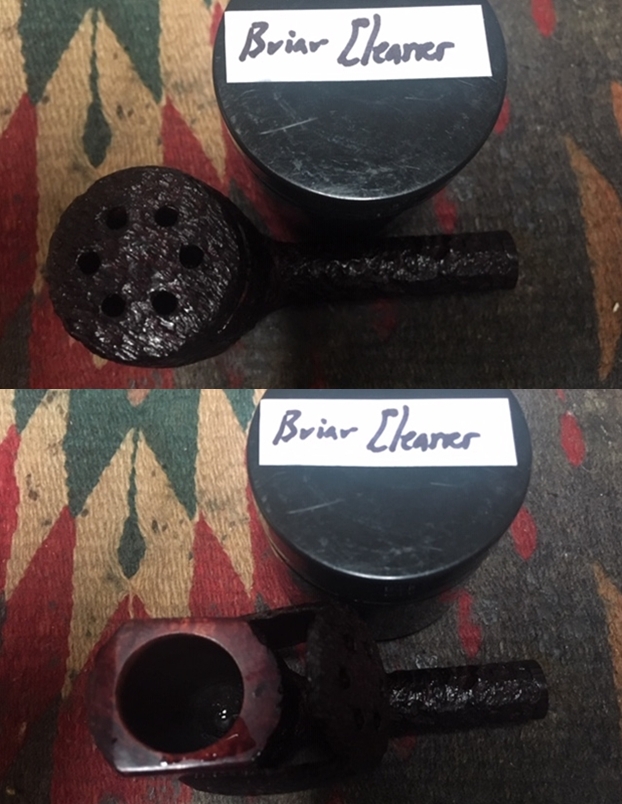
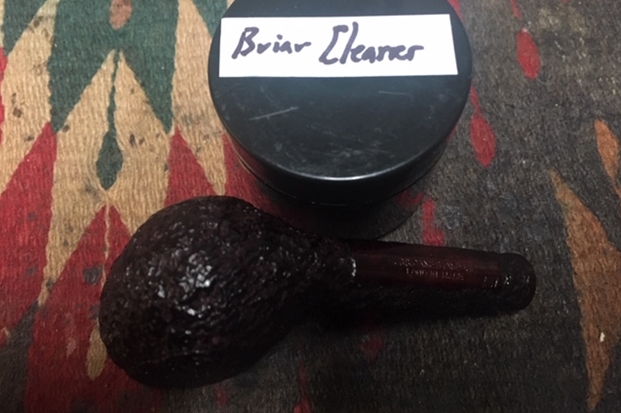
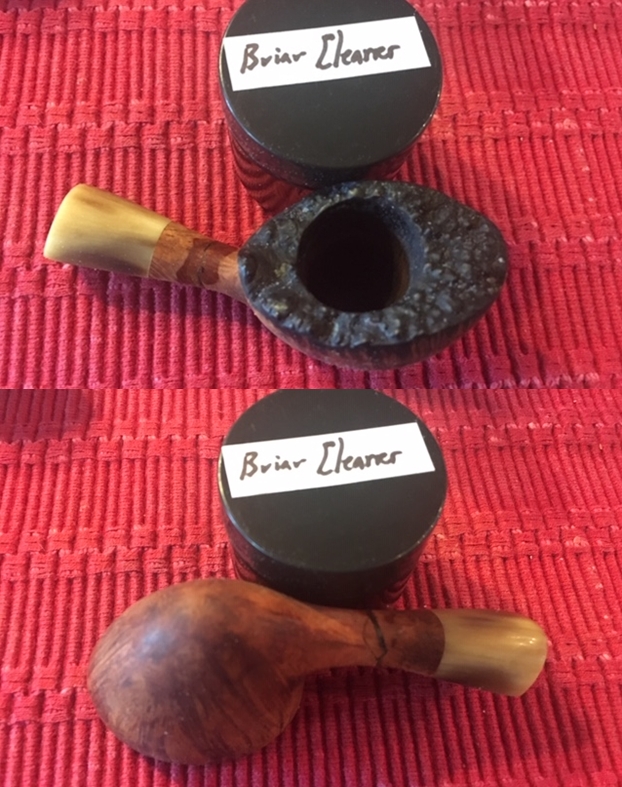
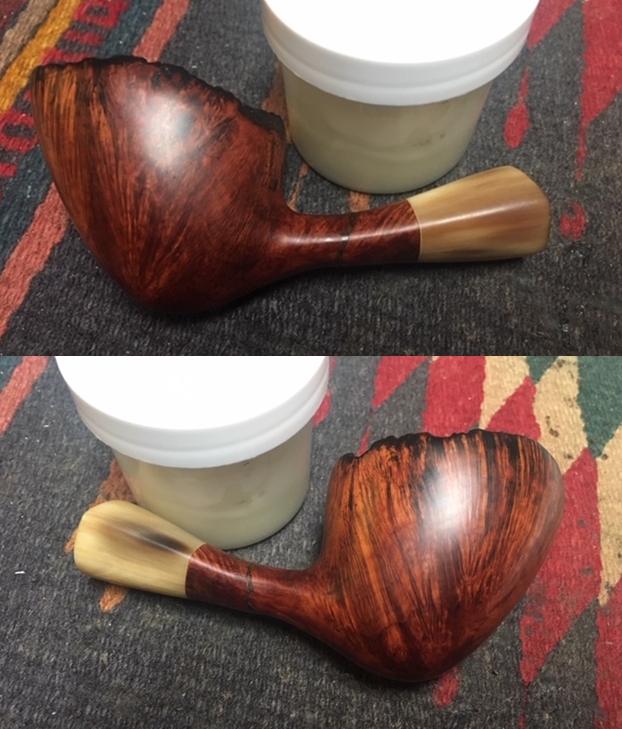
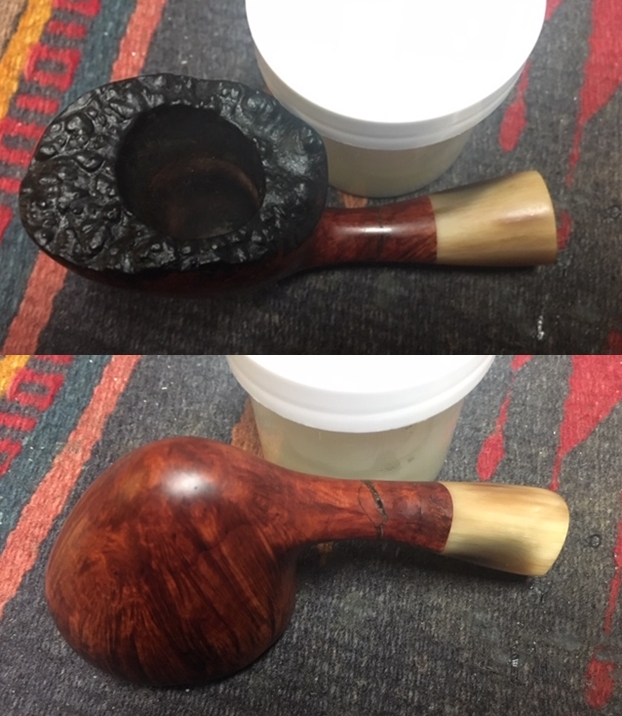
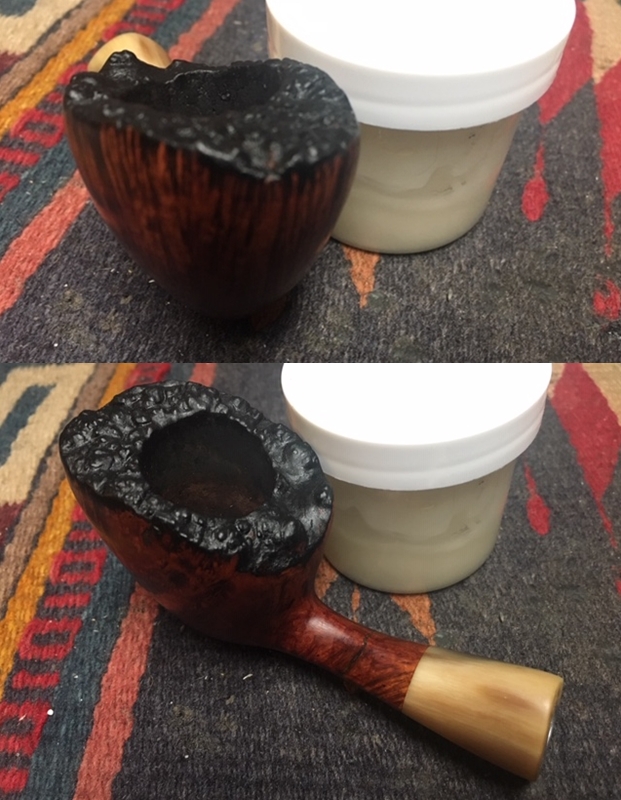
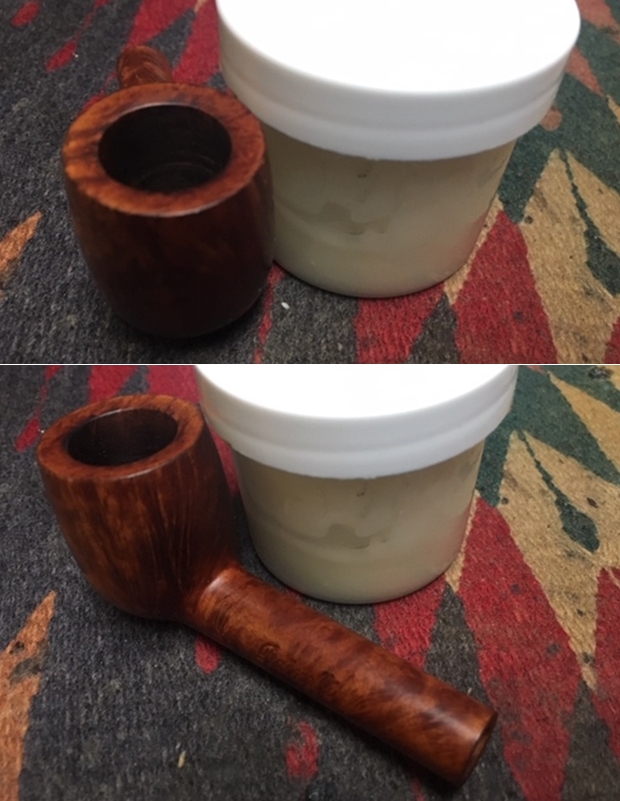
 I am still experimenting with Mark Hoover’s Briar Cleaner to see what I think of it as a possible replacement for my usual Murphy’s Oil Soap scrub. I rubbed it onto the briar, working it into the grain. I wiped it off with a clean cloth. There was still a residue from the cleaner left behind and no matter how I rubbed it off it was hard to remove. I ended up rinsing it with warm water to remove it and dried it with a microfiber cloth. I am still not sure if this is will replace Murphy’s for me. I am committed to working with it. I took photos of the pipe at this point in the process.
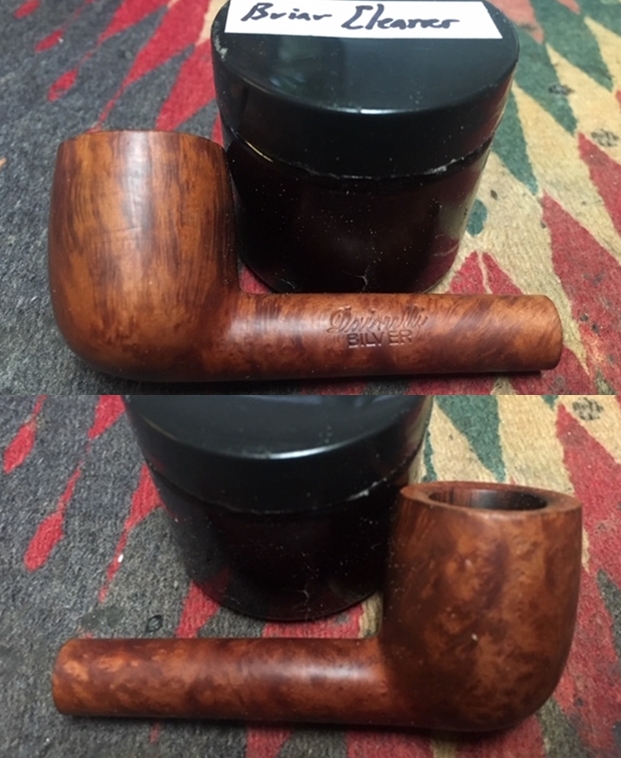
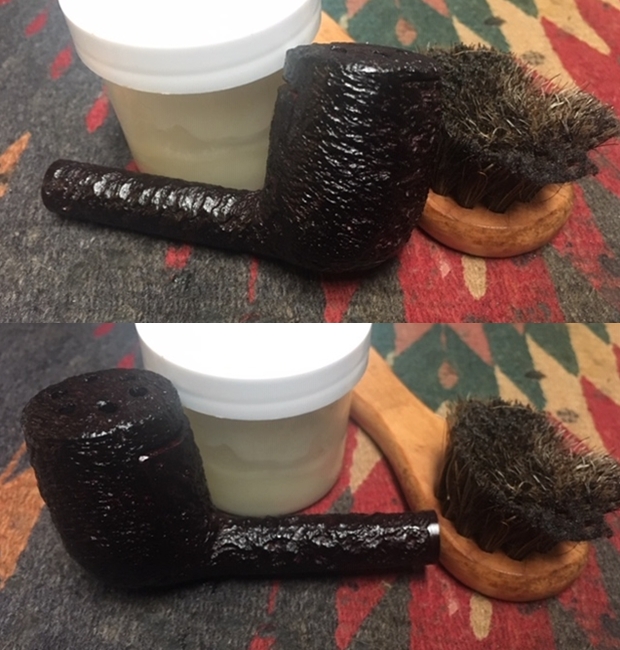
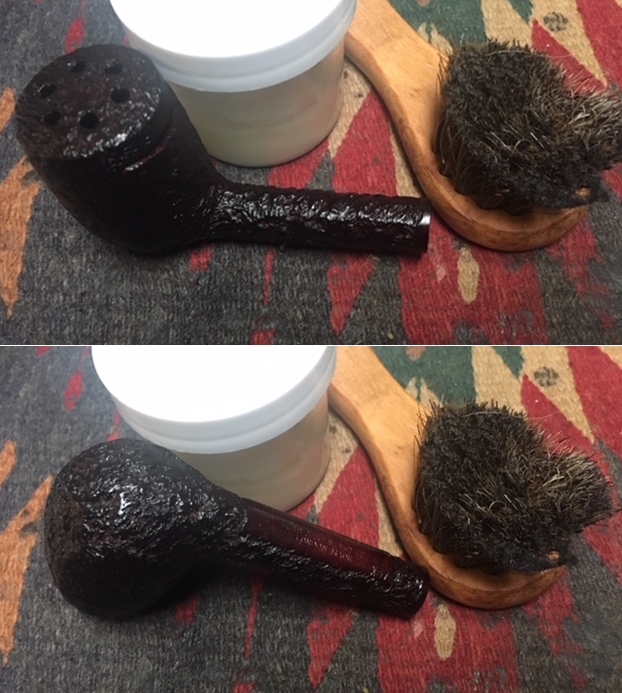
 I really like Mark Hoover’s Before & After Restoration Balm for its restorative properties with dry briar. I worked it into finish of this Lovat with my fingertips to clean, enliven and protect it as I usually do at this point in the process. I let the balm sit for a little while and then buffed with a cotton cloth to raise the shine. The Restoration Balm really makes the grain stands out beautifully.
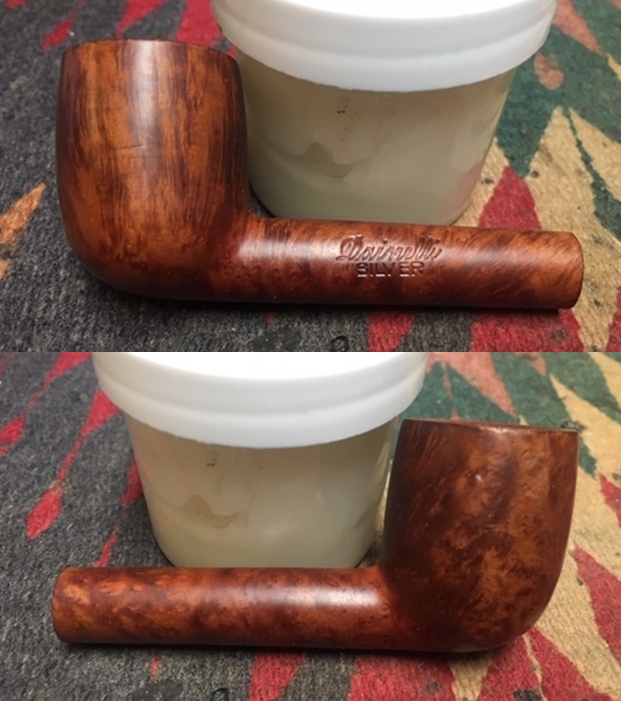
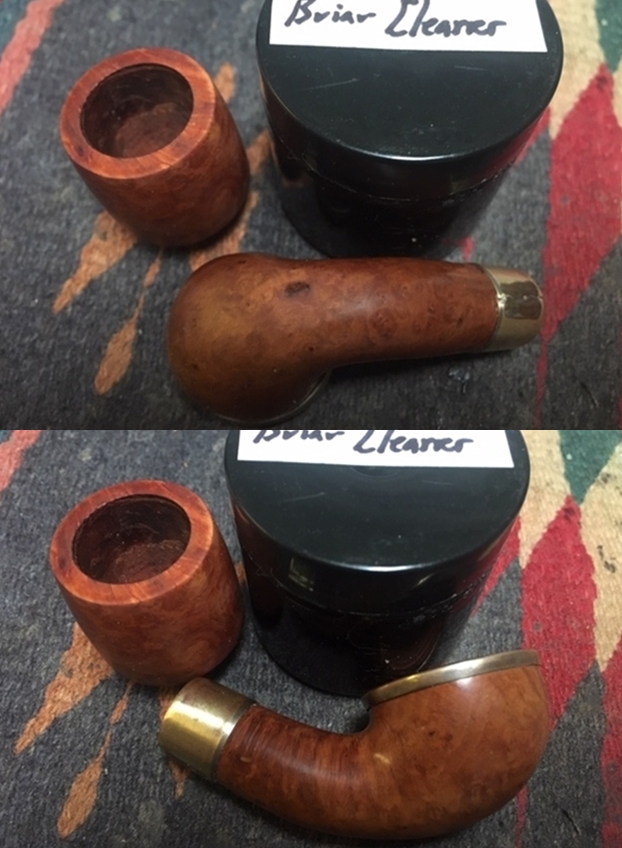
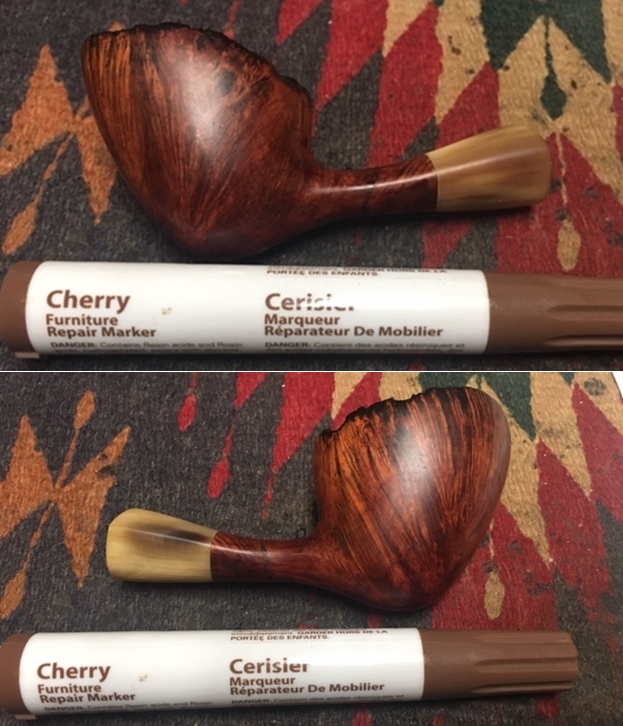
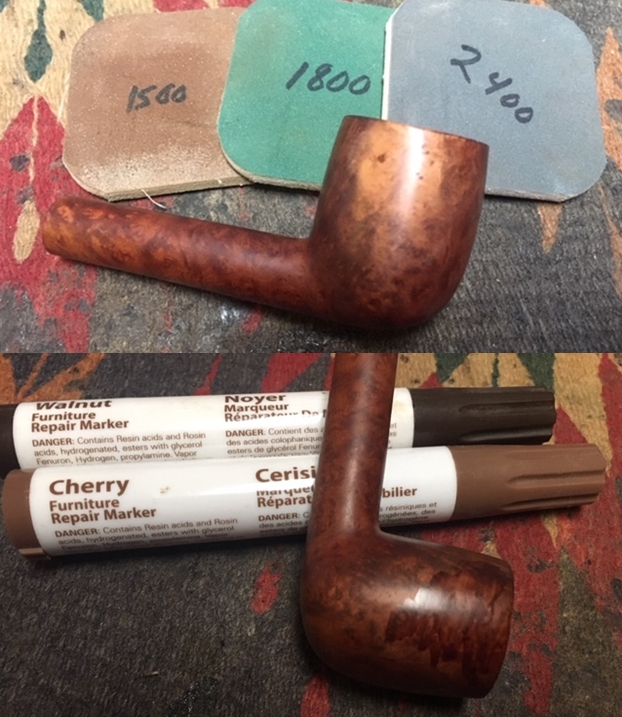
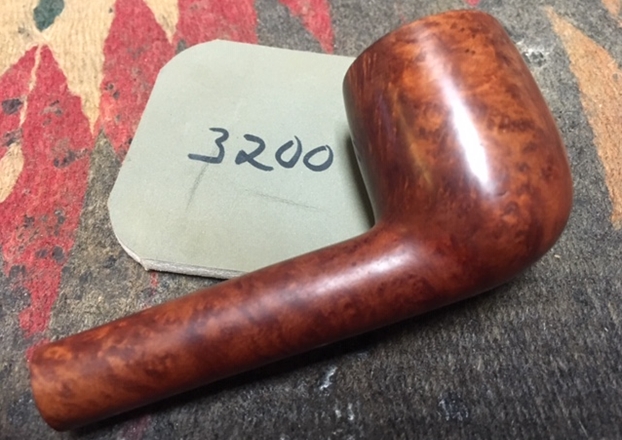
 After rubbing it down I noticed some deep dings and nicks in the briar on the right side of the bowl near the rim. I filled them in with clear super glue. When the repairs had cured I sanded them out with 220 grit sandpaper, polished them with 400 grit sandpaper and 1500-2400 grit micromesh sanding pads. I stained the area on the bowl with a Walnut and Cherry stain pen. Once it had cured I polished it with a 3200 grit micromesh sanding pad. I was able to blend the repair into the rest of the bowl.
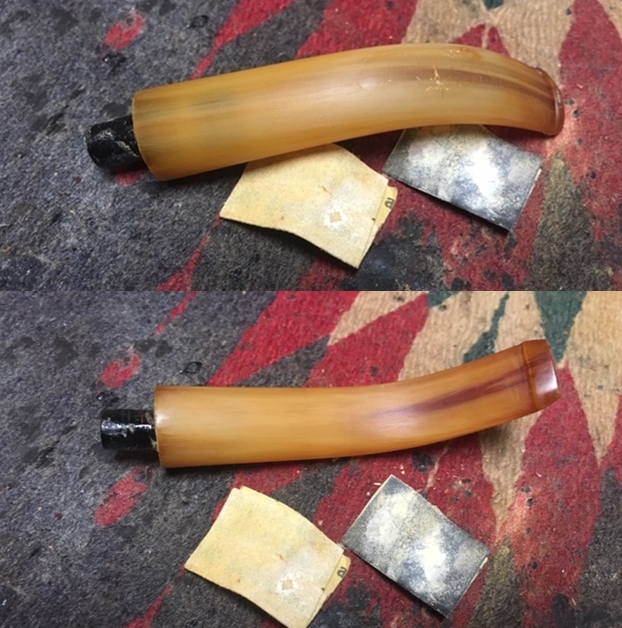
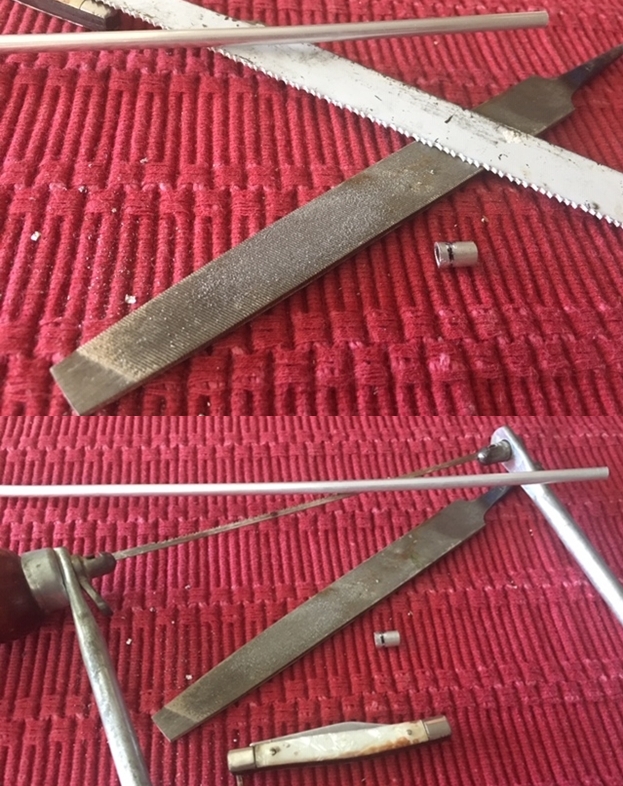
 I set the finished bowl aside and turned my attention to the stem. I filled in the tooth marks and the areas where the horn was dry and delaminating. I set the stem aside to let the glue dry.
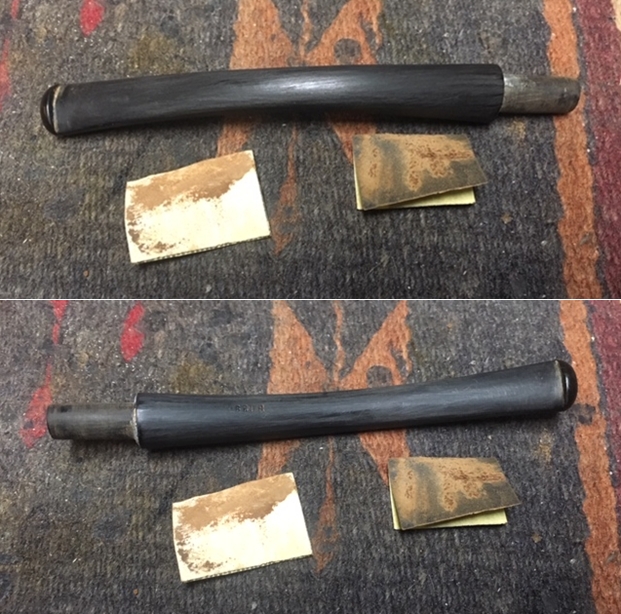
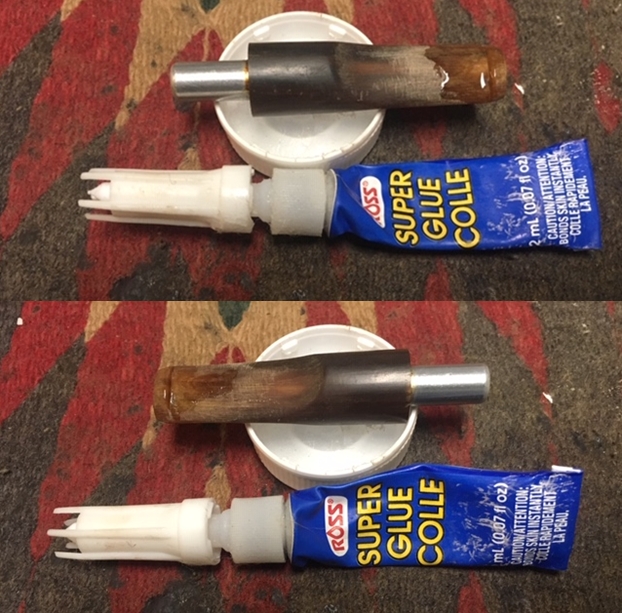 Once the repairs had cured I used a needle file to reshape the button edge and flatten out the repairs. I sanded the stem surface with a folded piece of 220 grit sandpaper to smooth them out. I started the polishing with a folded piece of 400 grit sandpaper to smooth out the scratches.
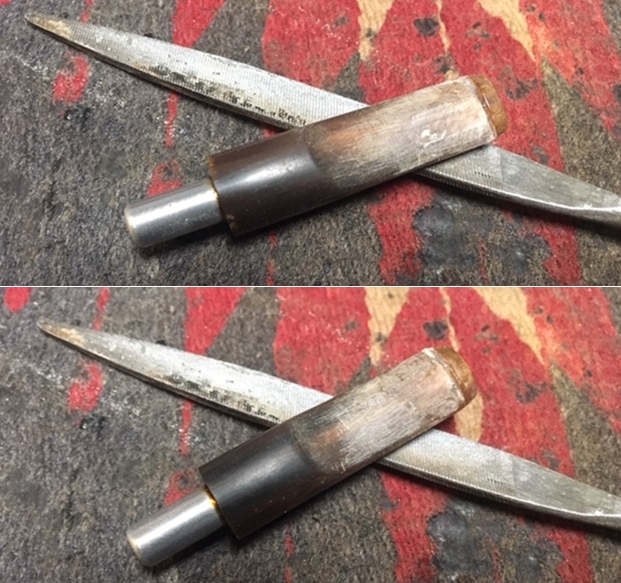
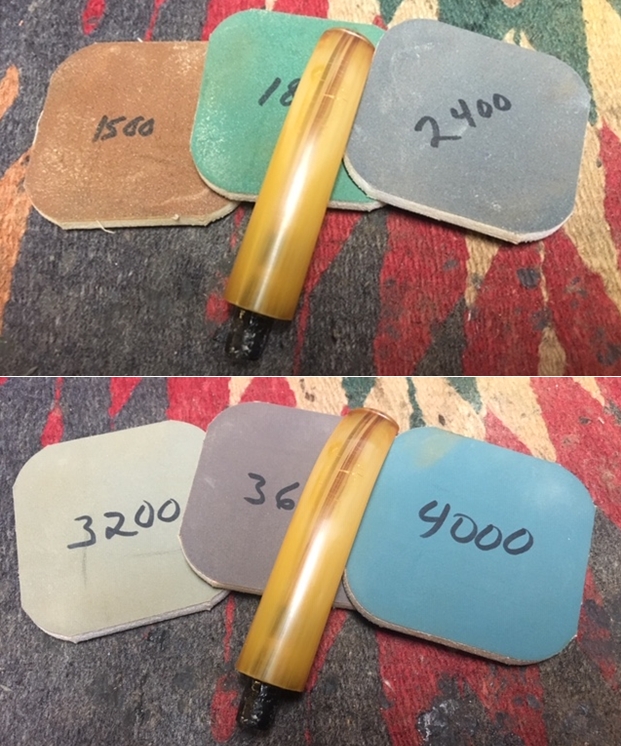
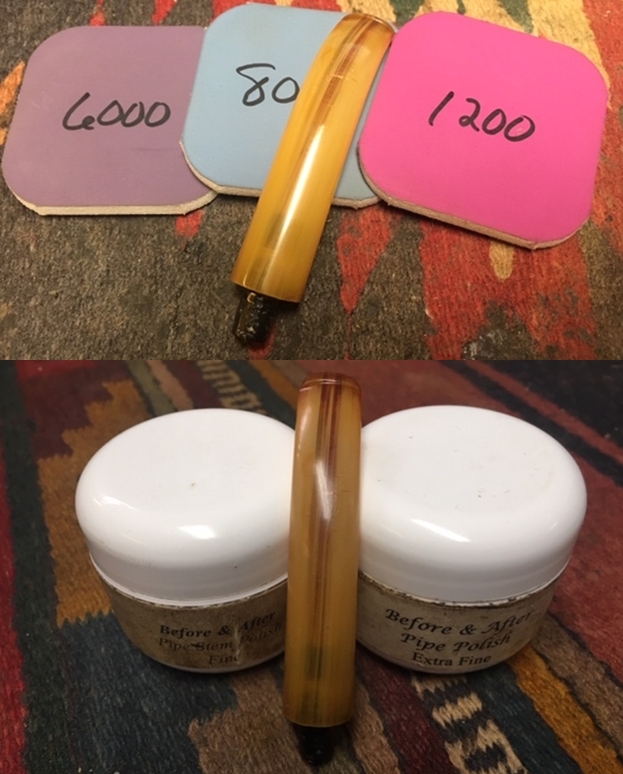
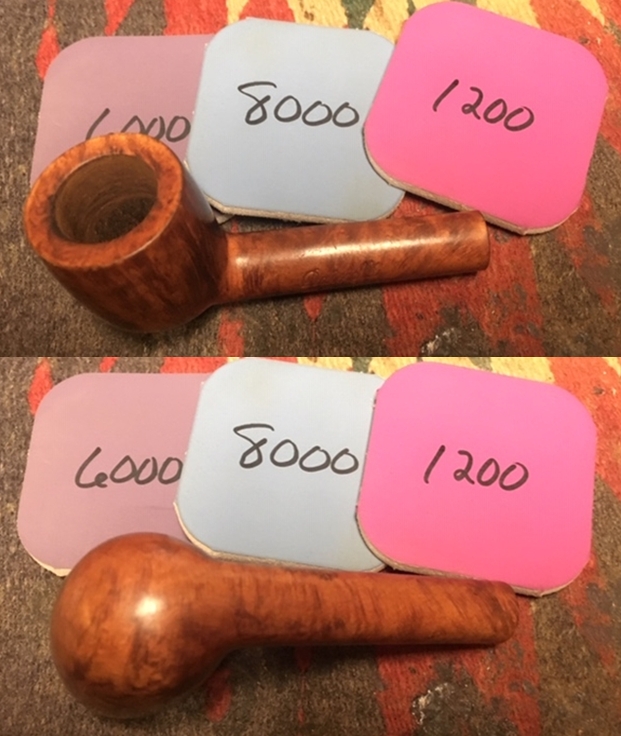
 I polished the stem with micromesh sanding pads – wetsanding it with 1500-12000 grit pads. I wiped the stem down with Obsidian Oil after each pad. I polished it with Before & After Pipe Polish – both Fine and Extra Fine and gave it a final coat and set it aside to dry.
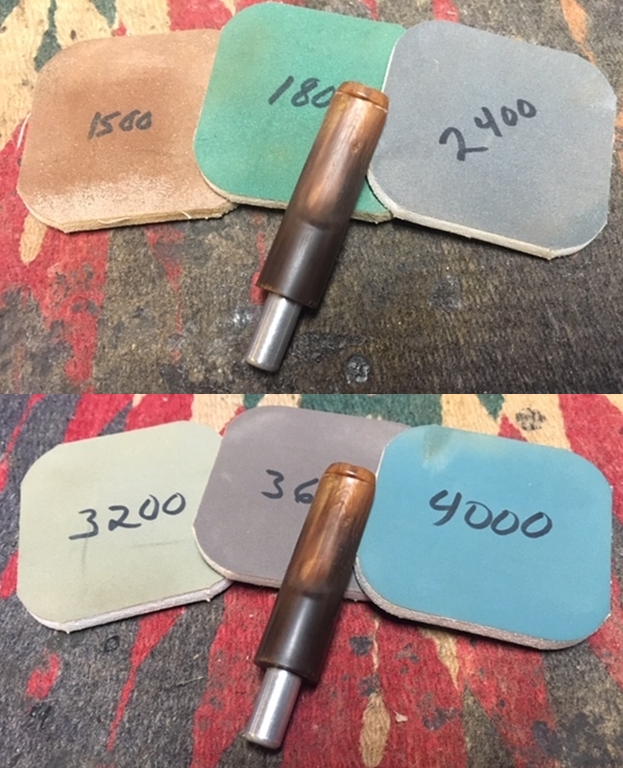
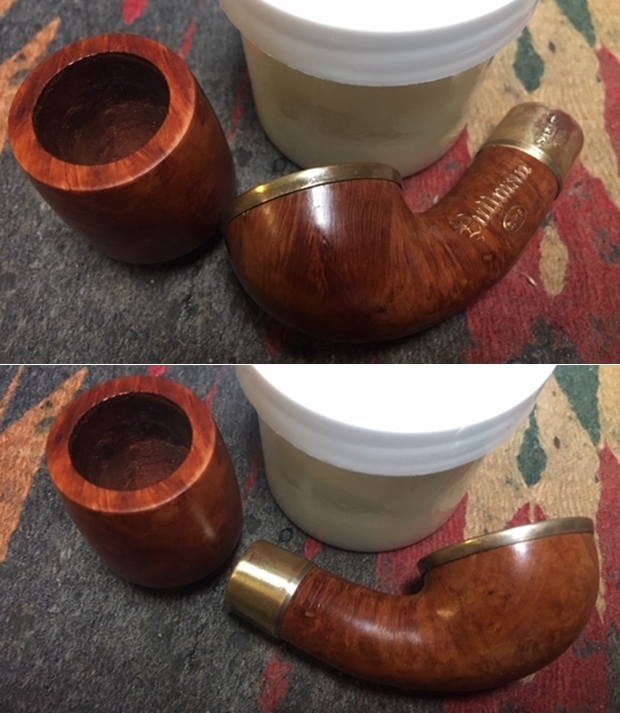
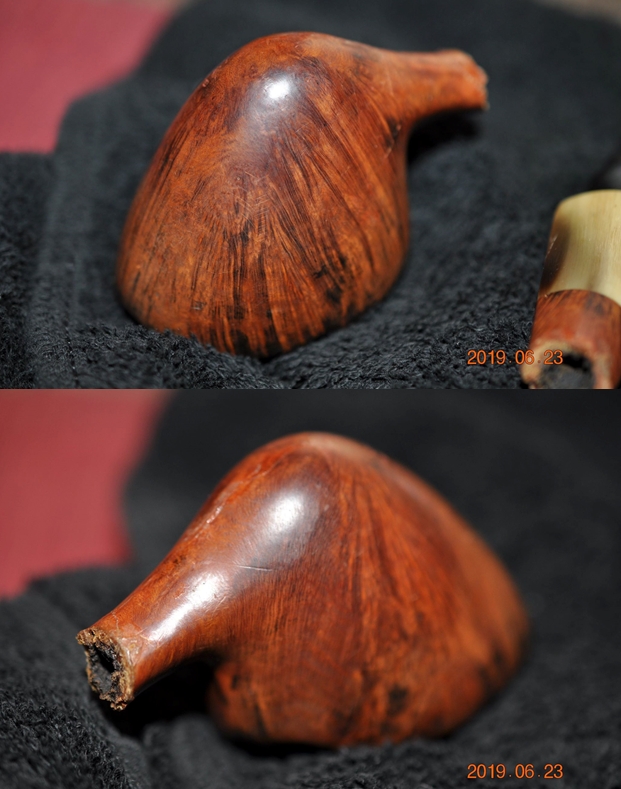
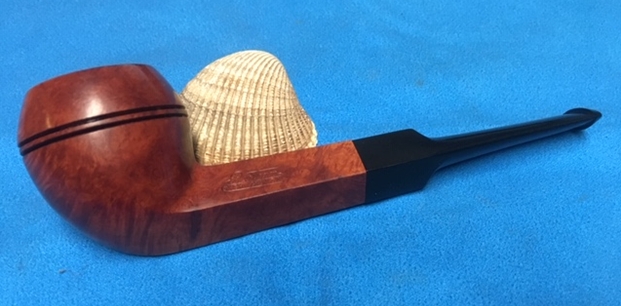
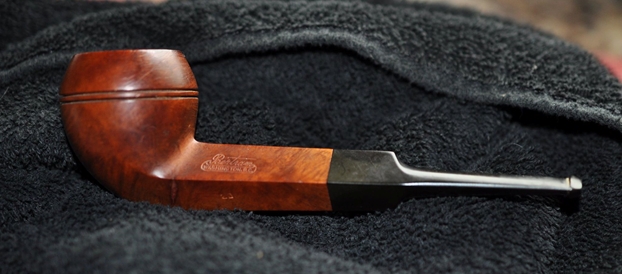
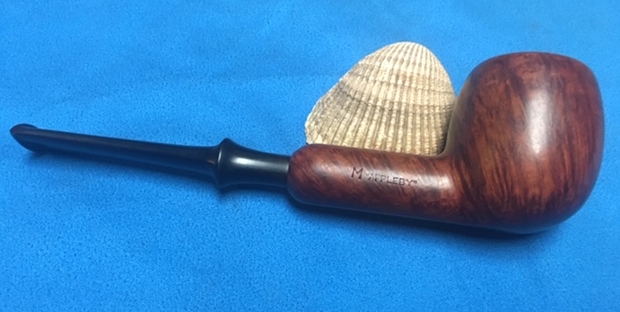
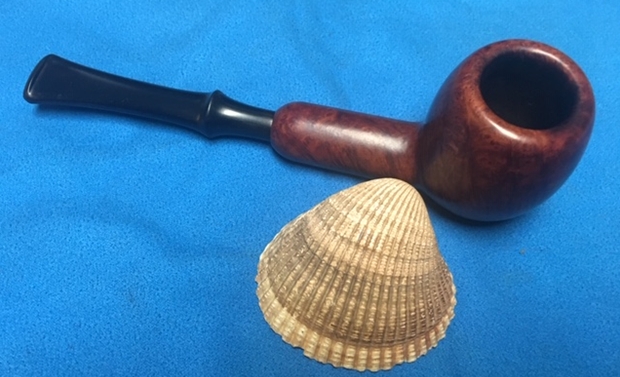
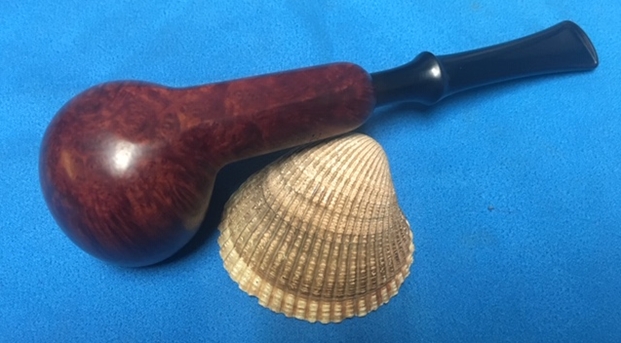
 I put the stem and bowl back together and buffed the pipe with Blue Diamond on the buffing wheel. I polished the briar and the stem until there was a rich shine. This Dainelli Briar Lovat has a classic shape and a rich finish that highlights the grain around the bowl. Once I buffed the pipe the grain popped. The striated horn stem had a rich glow after polishing. The finished pipe is actually quite a beauty in my opinion. The shape does not quite match a British shaped Lovat and has almost a French look to it. It is a beautifully grained Lovat that fits well in the hand and sits right in the mouth. Have a look at it with the photos below. The dimensions are Length: 5 inches, Height: 1 1/2 inches, Outside diameter of the bowl: 1 inch, Chamber diameter: 5/8 of an inch. If any of you have heard of the brand before let me know in the comments section below. I thank you ahead of time for any info you may give. Thanks for walking through the restoration with me as it was a pleasure to work on.