Blog by Steve Laug
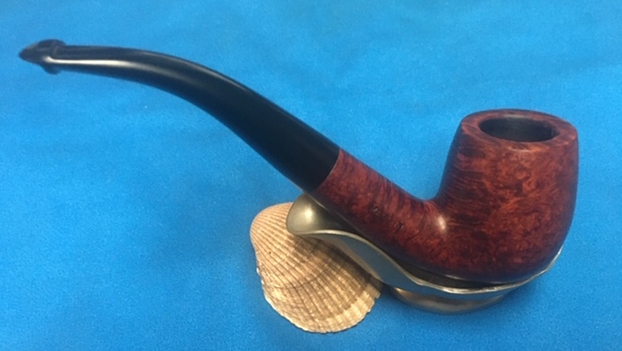
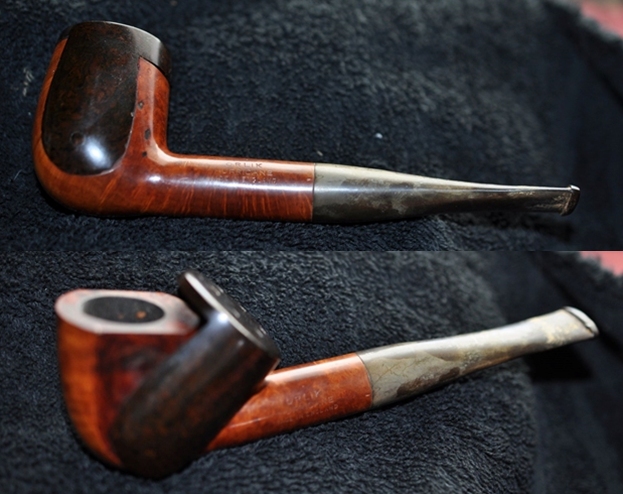
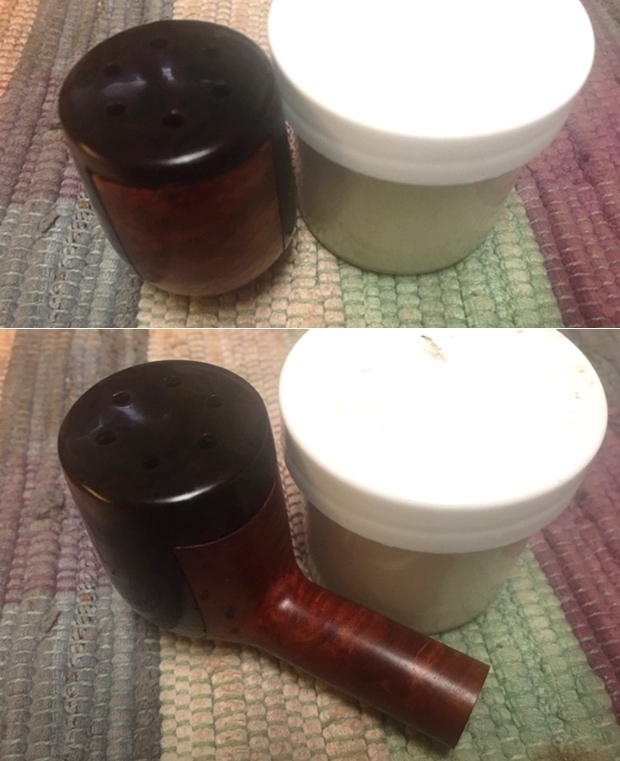
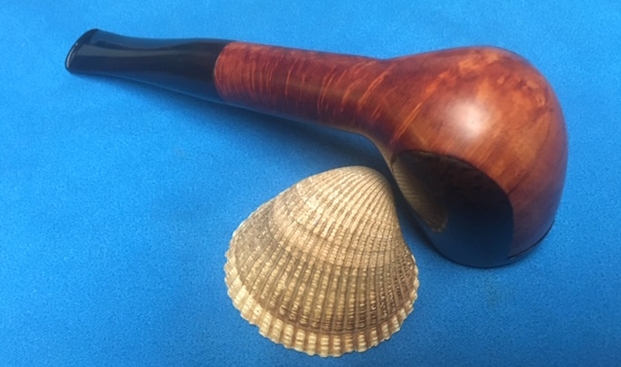
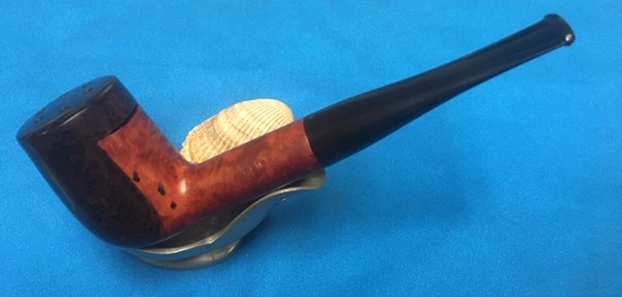
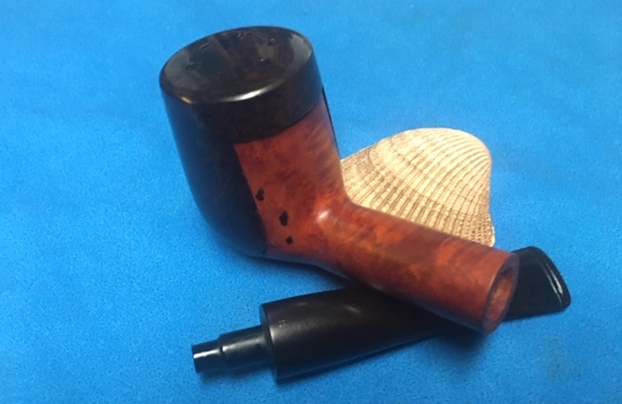
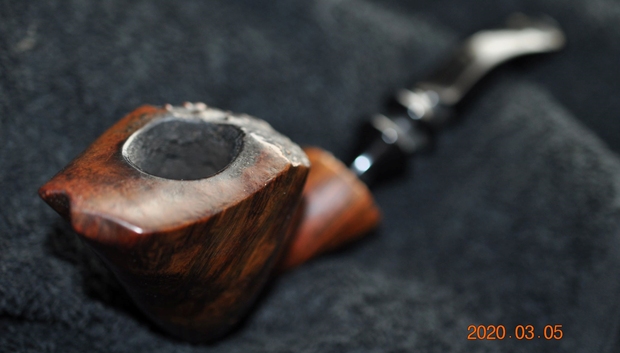
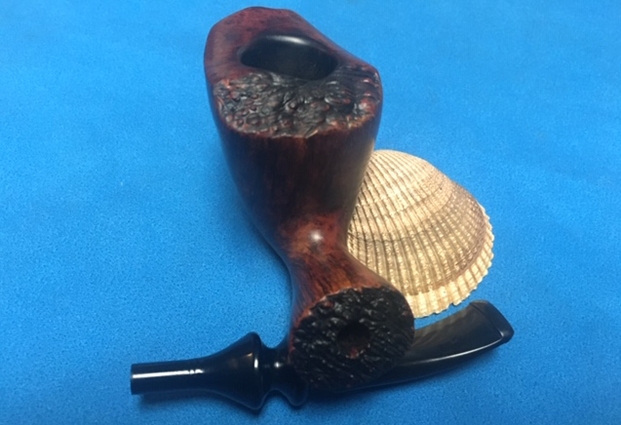
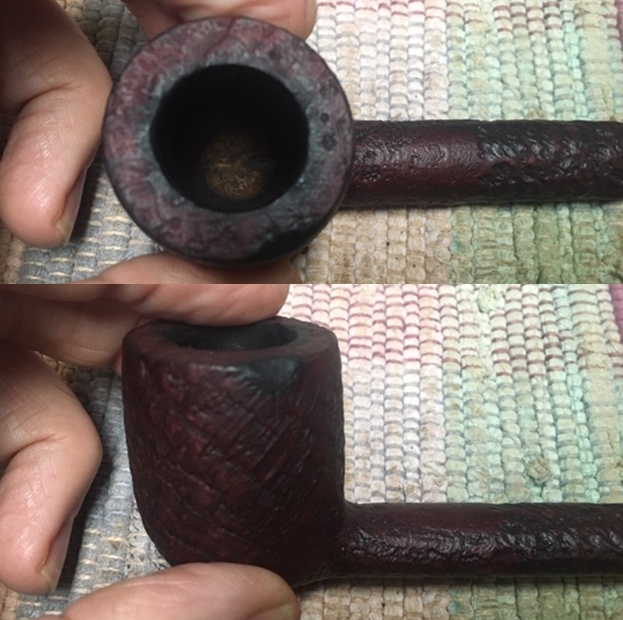
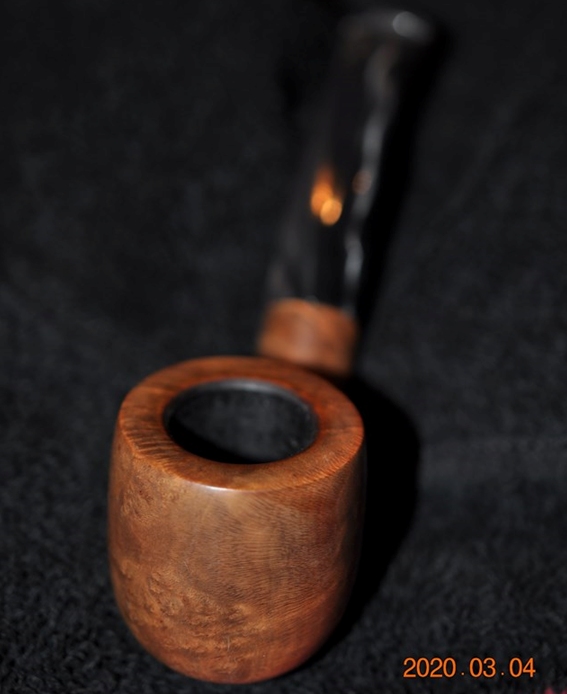
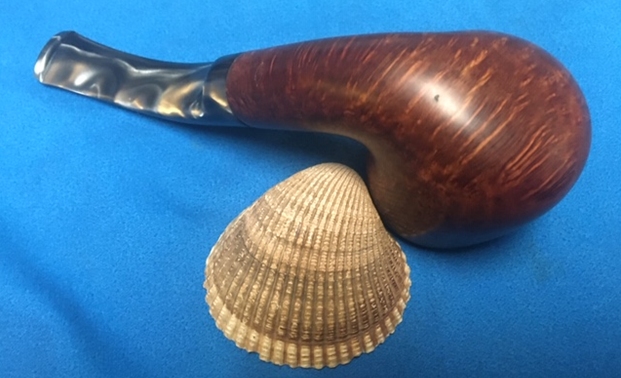
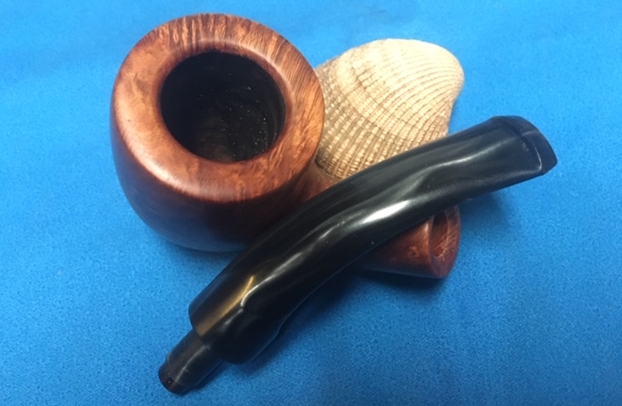
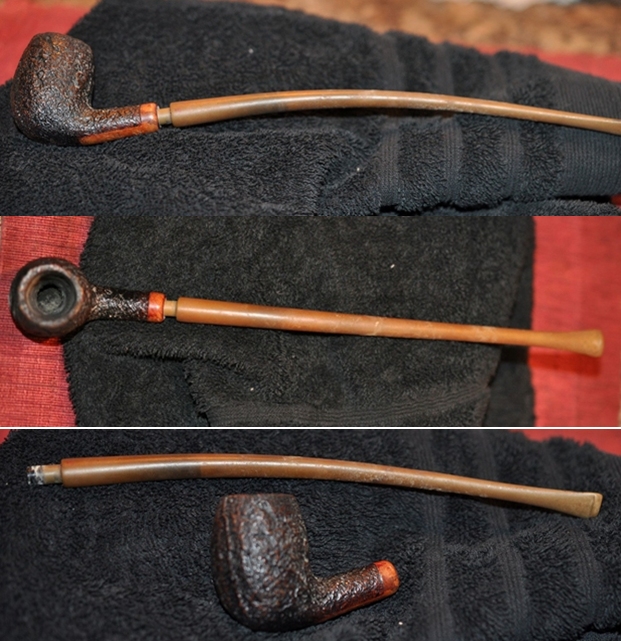
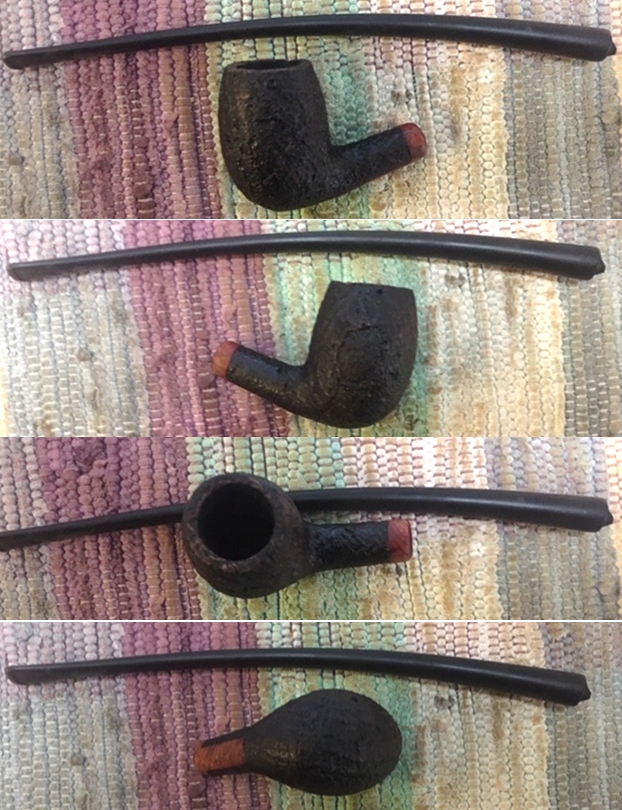
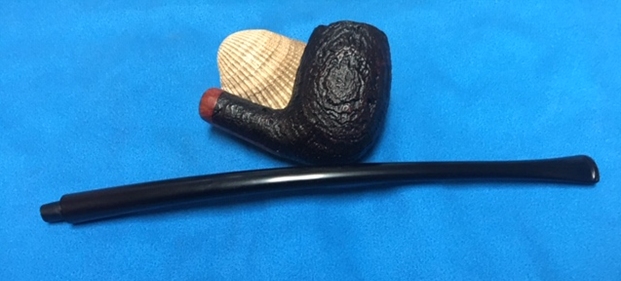
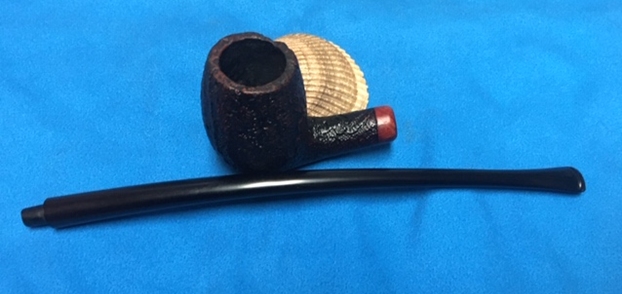
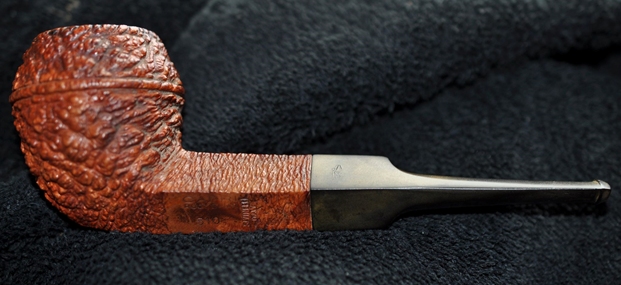
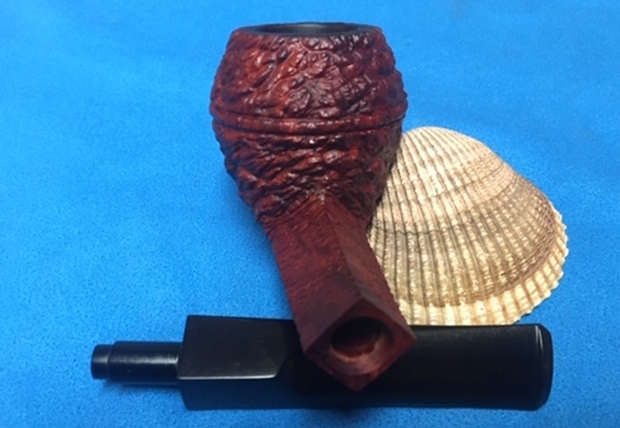
In the last box of pipes Jeff sent me there was one final pipe that was left to restore. This one is a Peterson’s 69 Bent Billiard. It is stamped on the left side of the shank Peterson’s Deluxe and on the right side it bears the 69 shape number near the bowl shank junction and Made in Ireland. It was a dirty pipe when we received it. There was a thick coat of lava on the rim top and some damage on the inner edge of the rim. The rim top had some nicks and dents in it that were quite deep. There was a thick cake in the bowl that had remnants of tobacco stuck in it. The finish was dirty and there were spots of grime and oils. The stem was oxidized and there were tooth marks on the top and underside ahead of the button. There was tooth chatter on both sides of the stem. Jeff took some photos of the pipe before he started his cleanup work.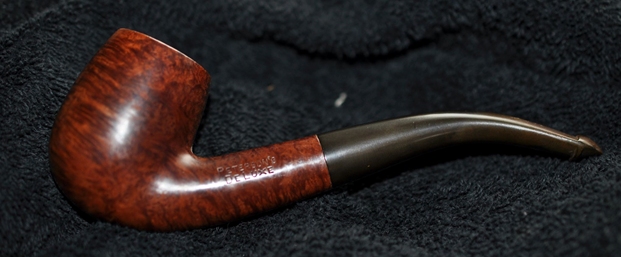
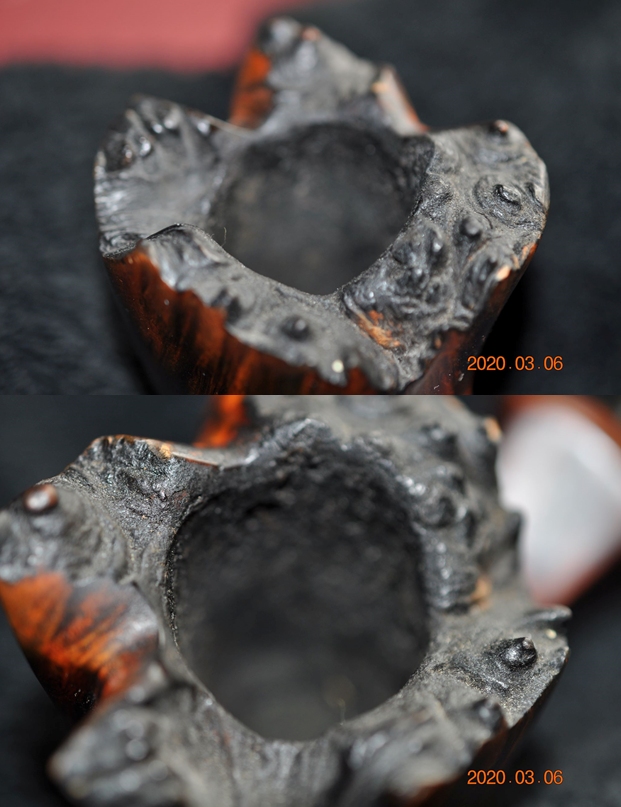
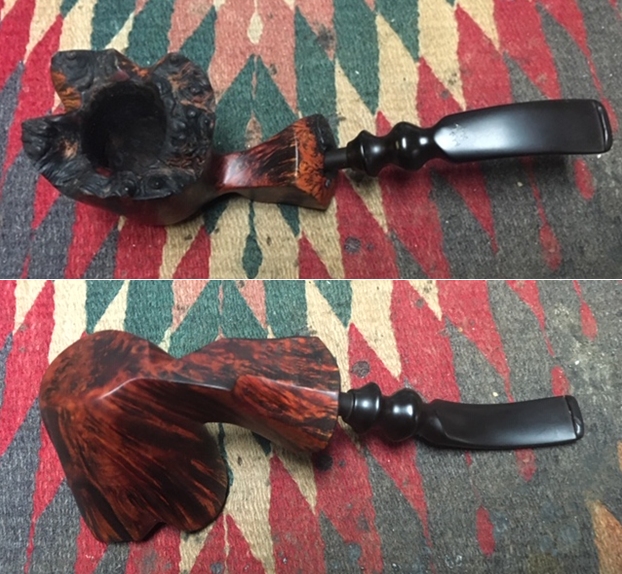
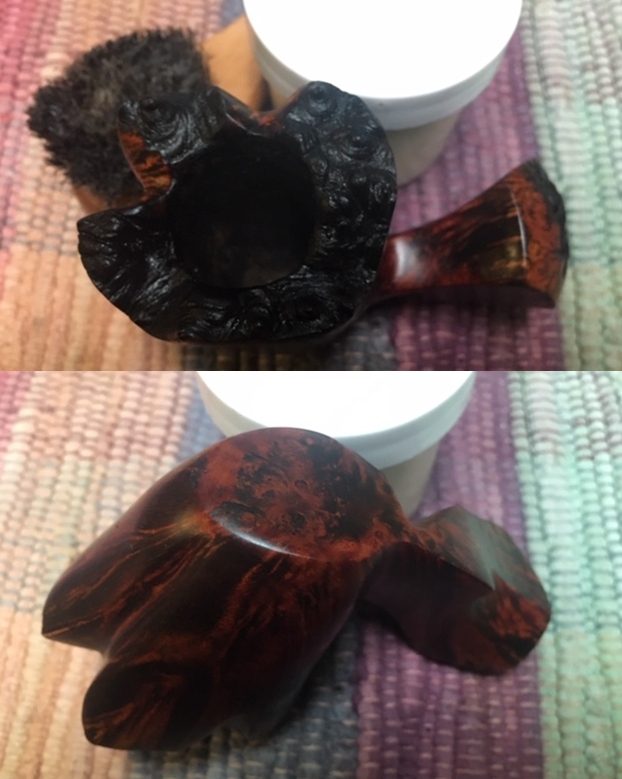
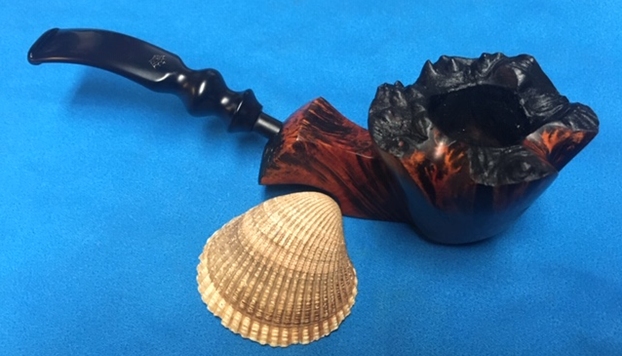
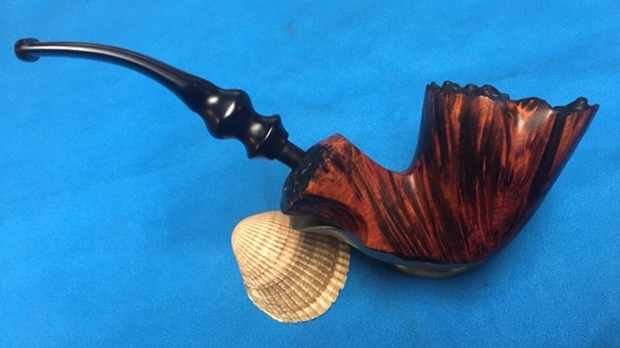
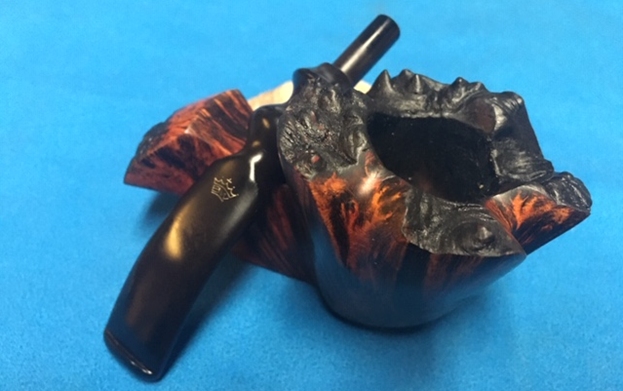
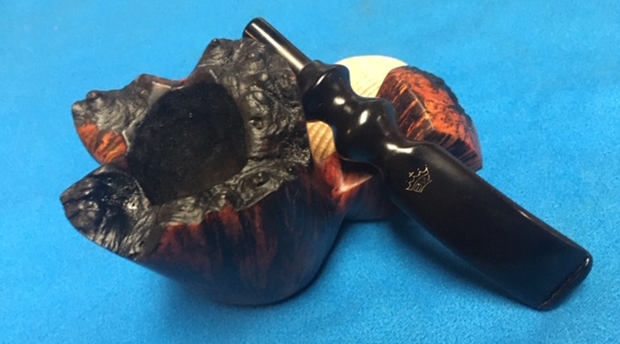
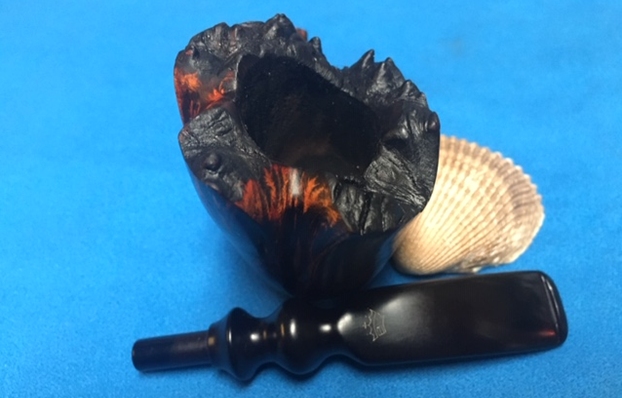
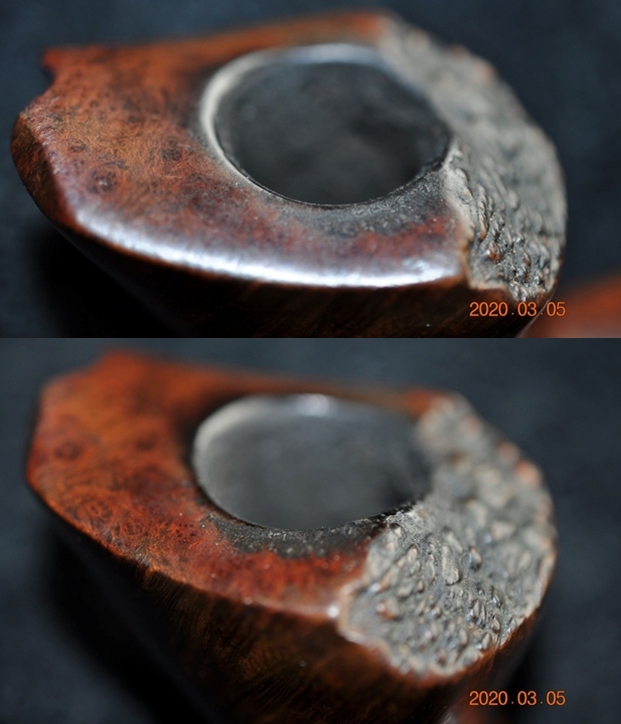
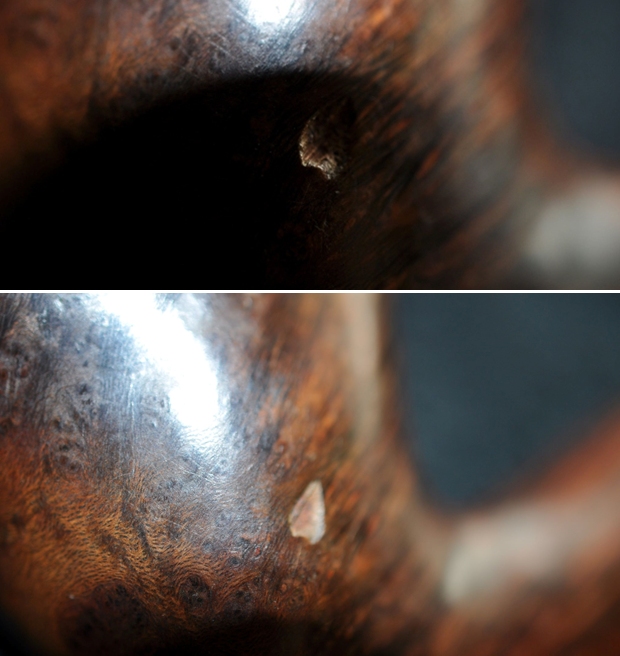
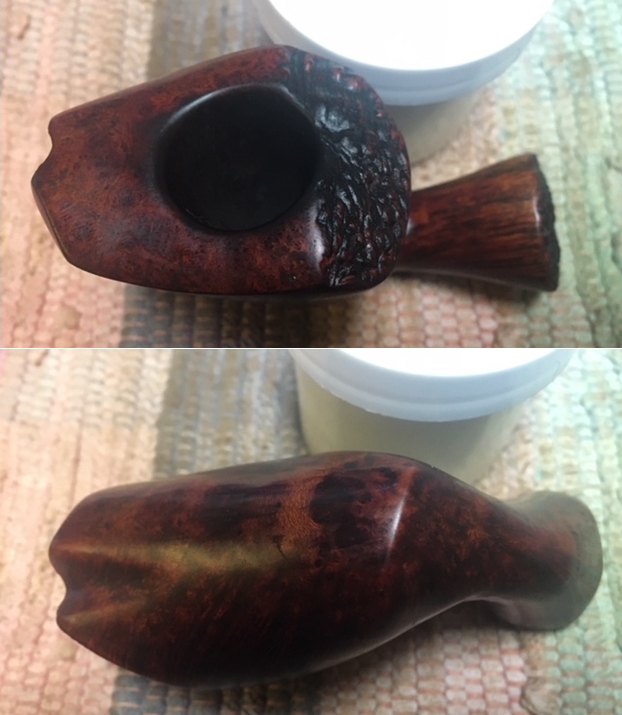
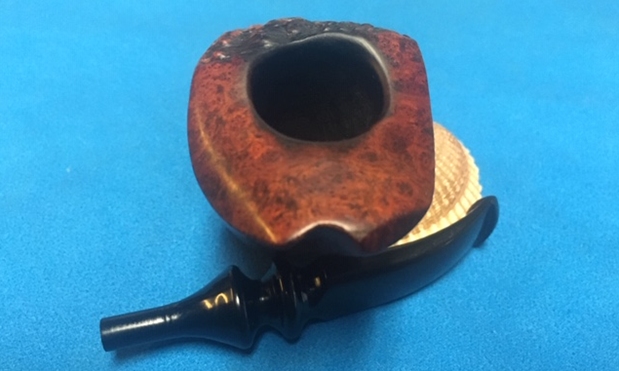
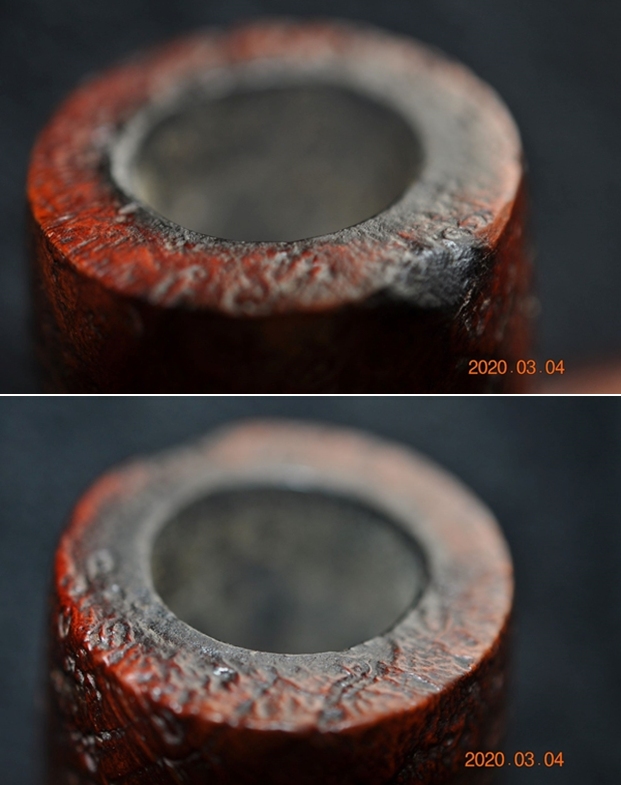
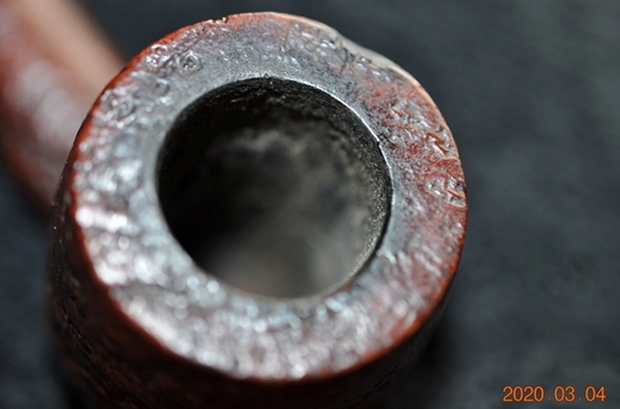
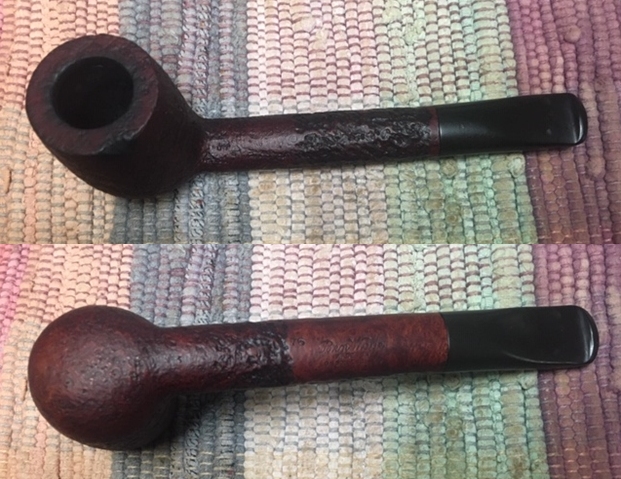
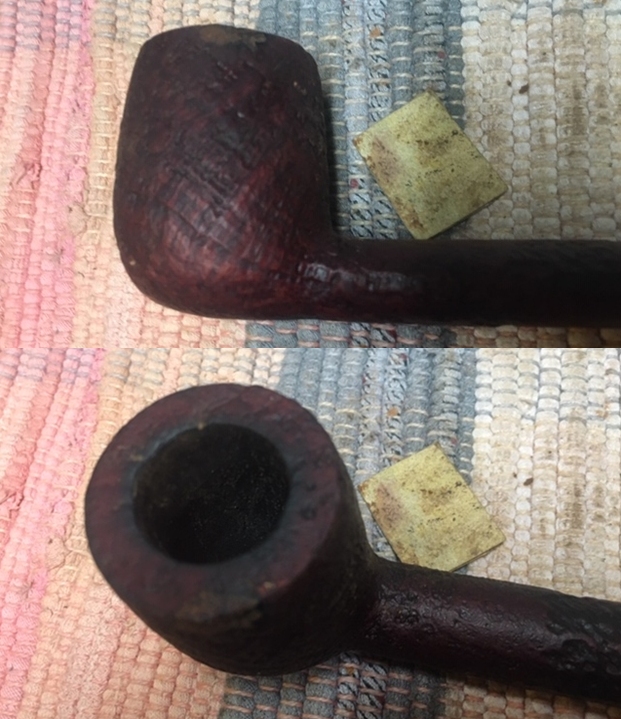
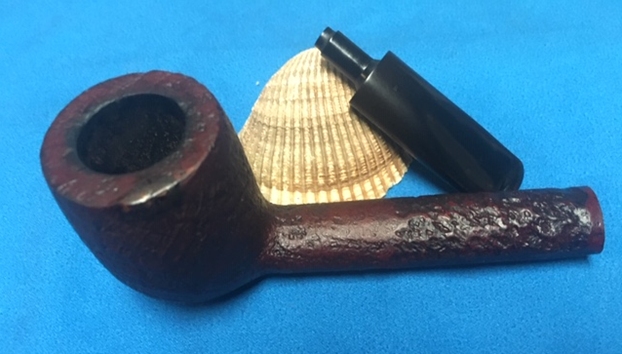
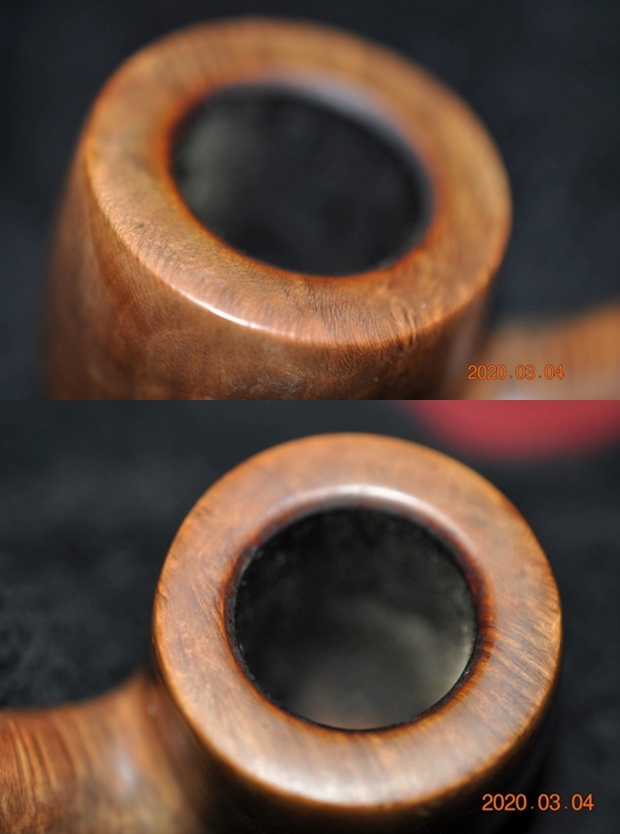
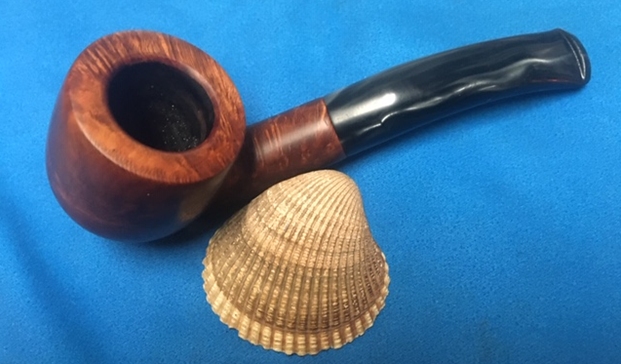
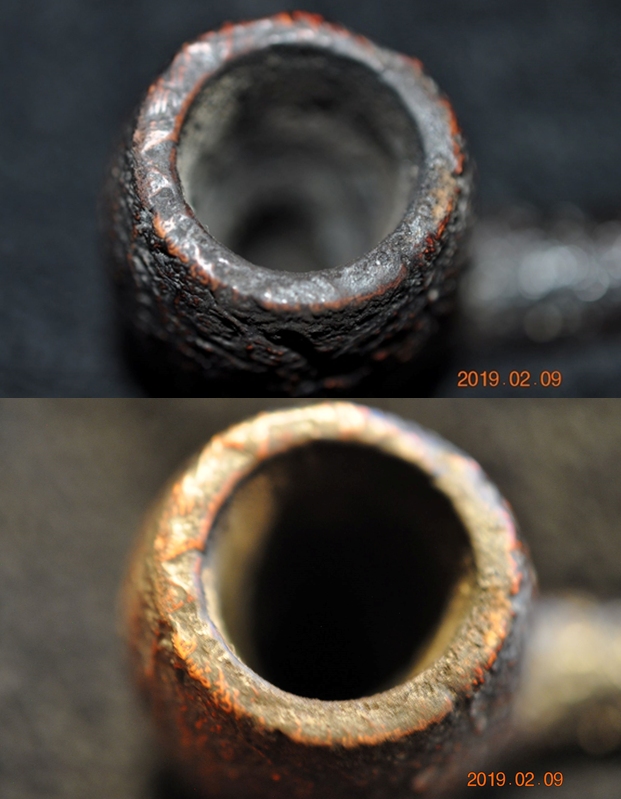
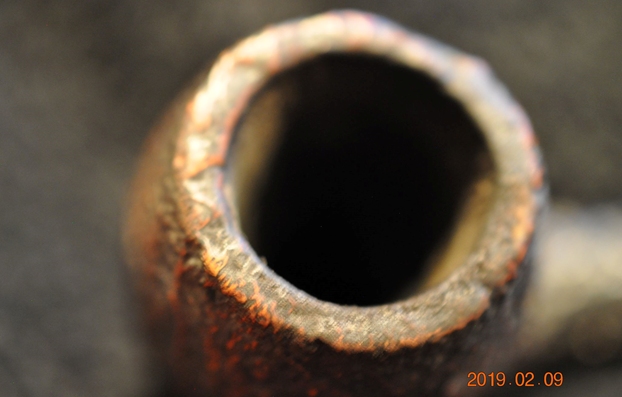
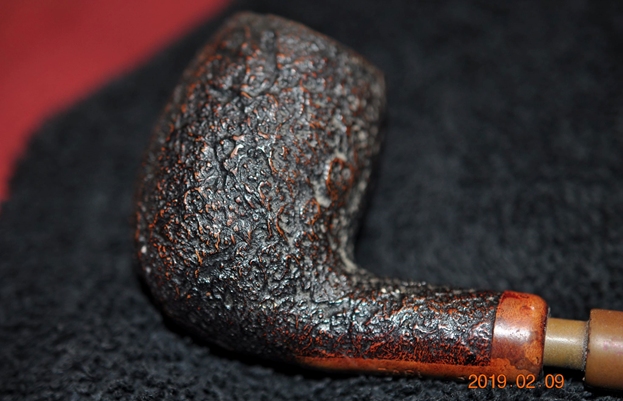
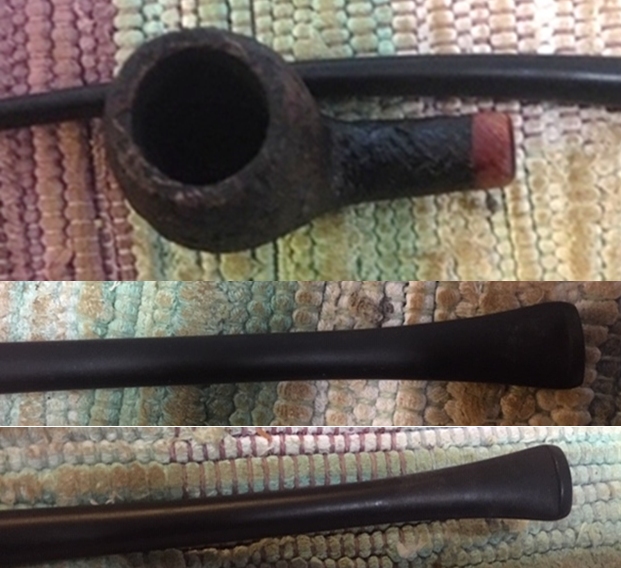
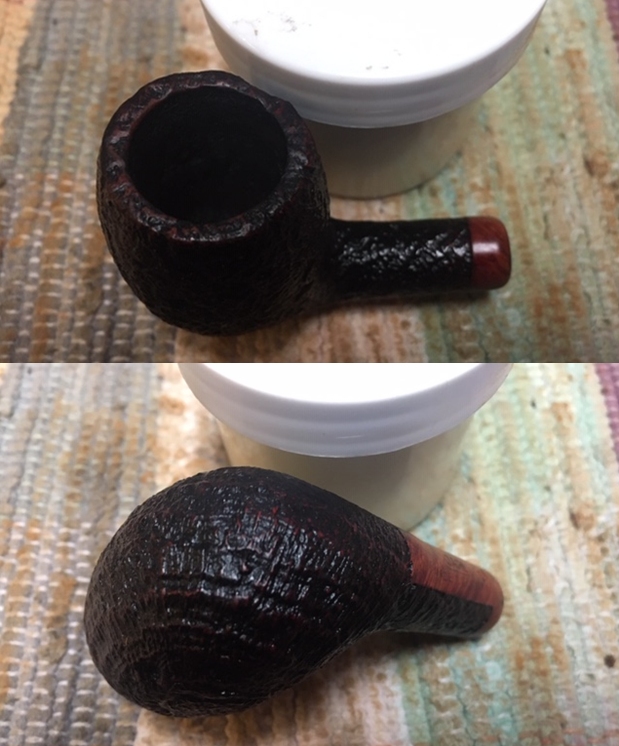
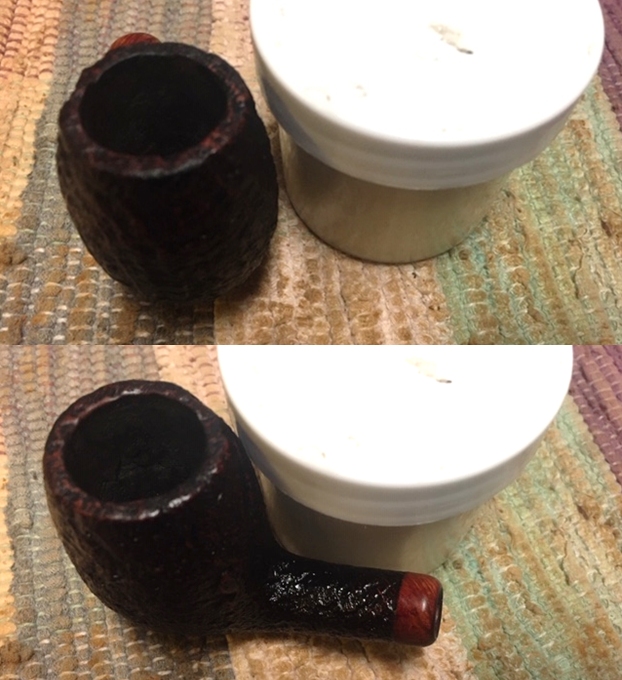
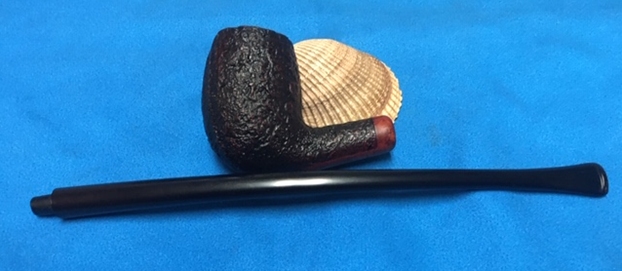
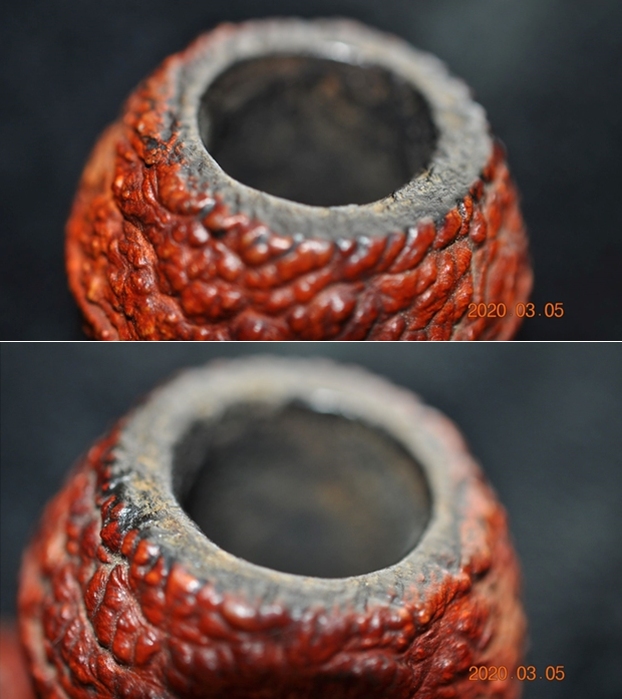
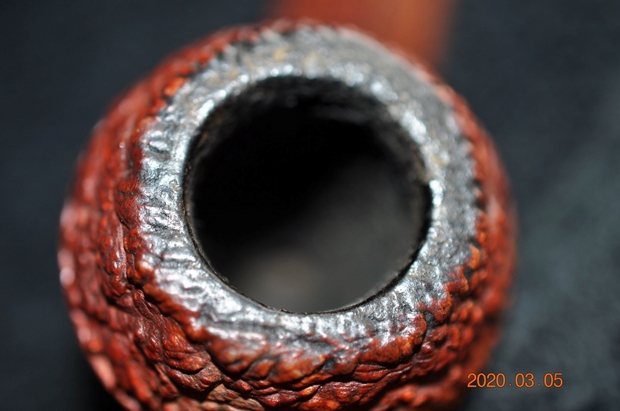
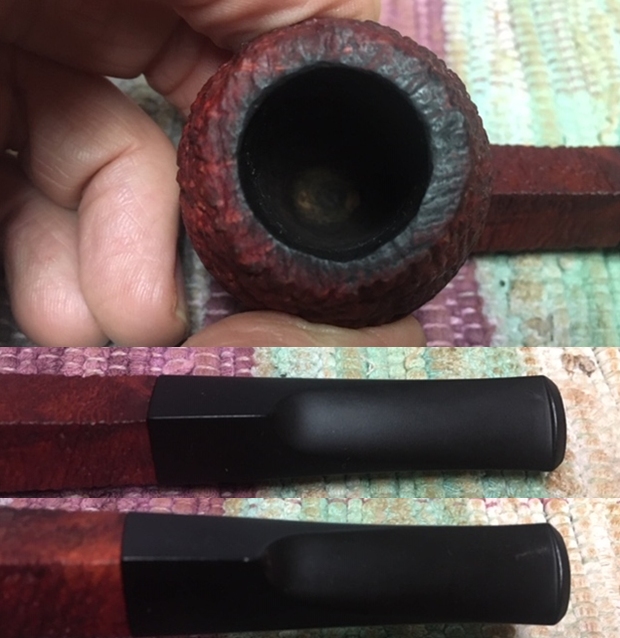
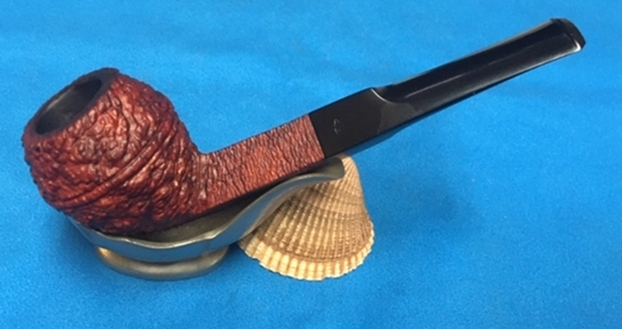
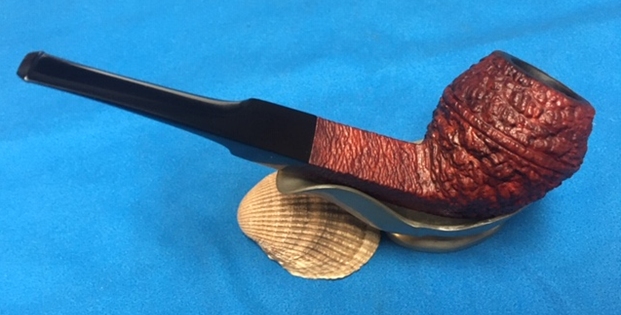
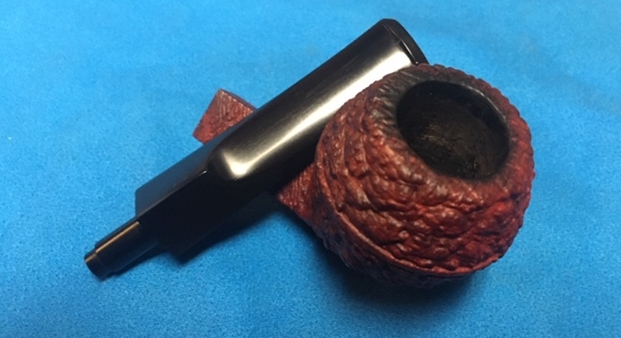
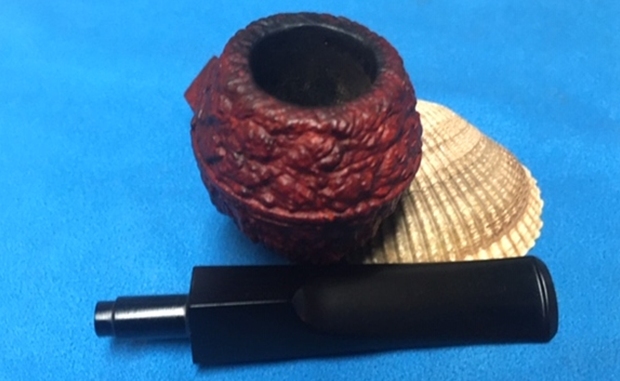
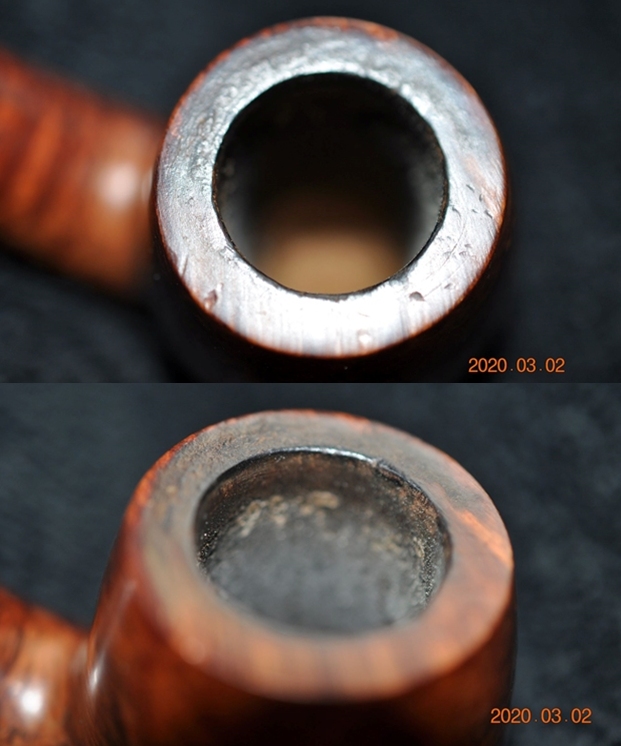
 He took photos of the bowl and rim top to show their general condition. You can see the tars on the inner edge of damaged rim top. The cake in the bowl is quite thick and there is tobacco debris on the walls of the bowl. The finish on the bowl is dull but still very stunning.
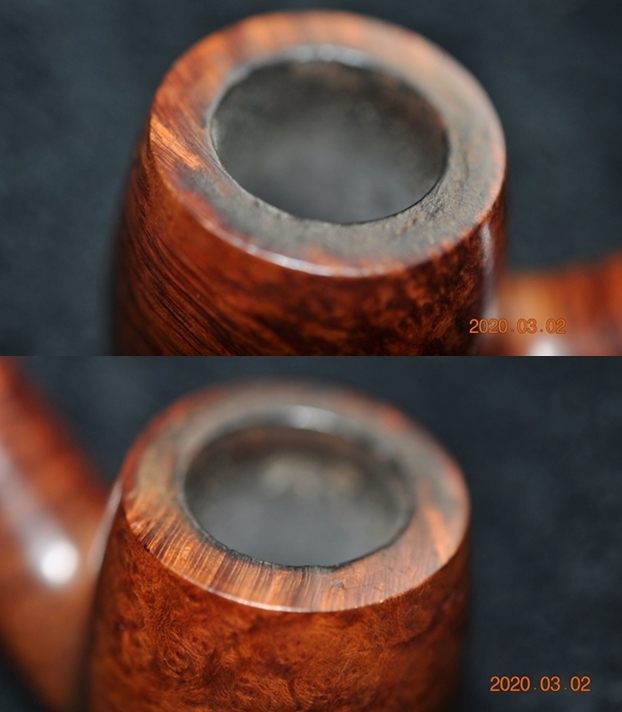
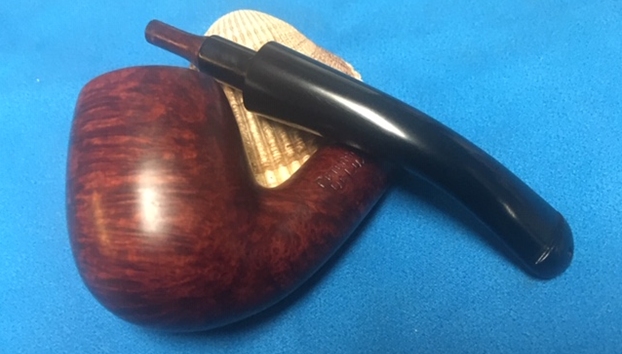
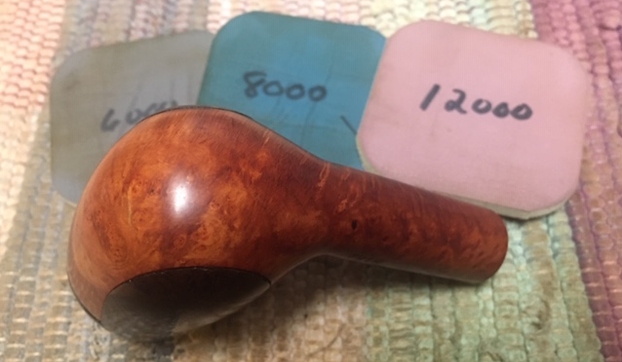
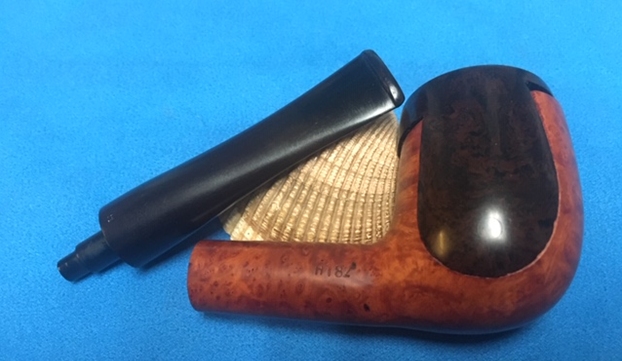
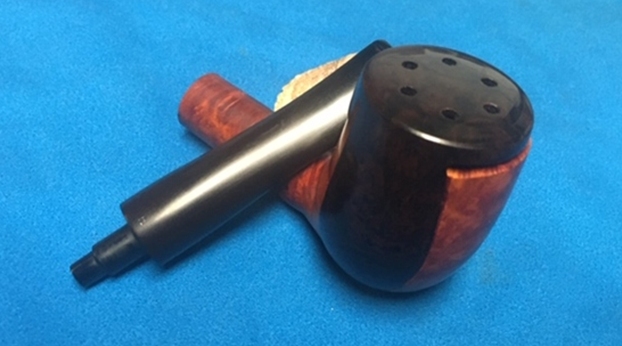
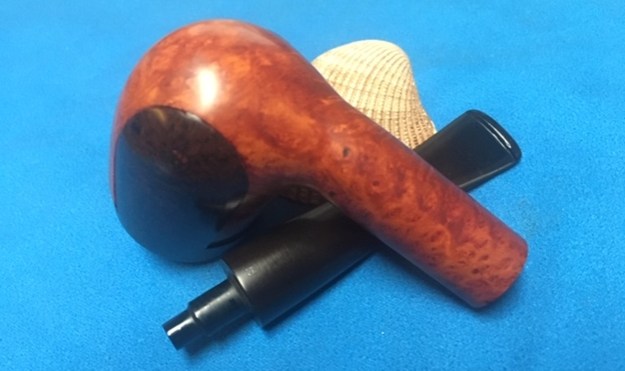
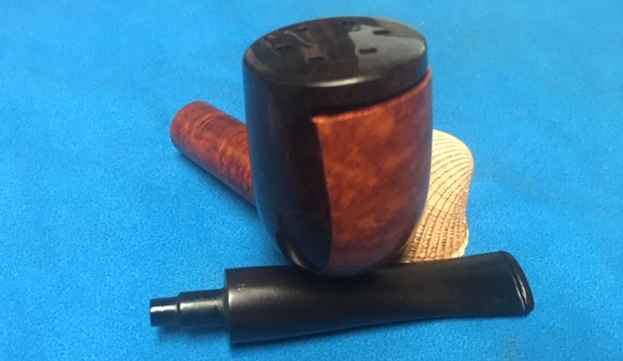
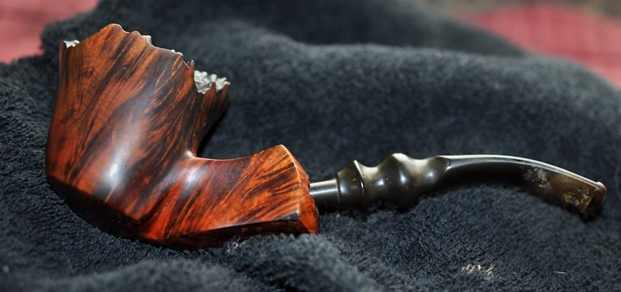
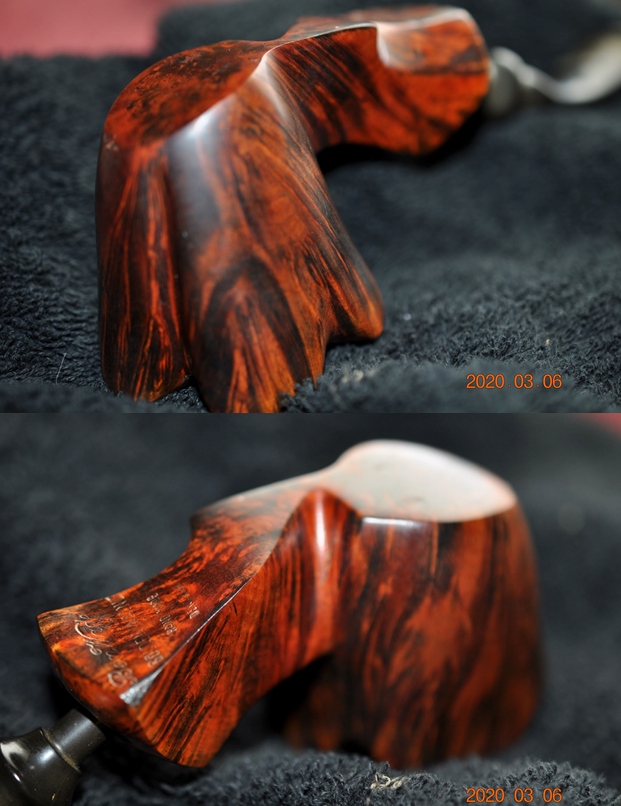
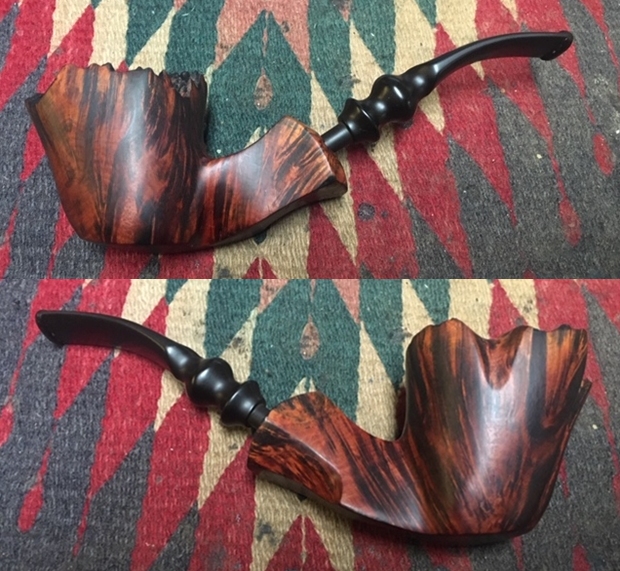
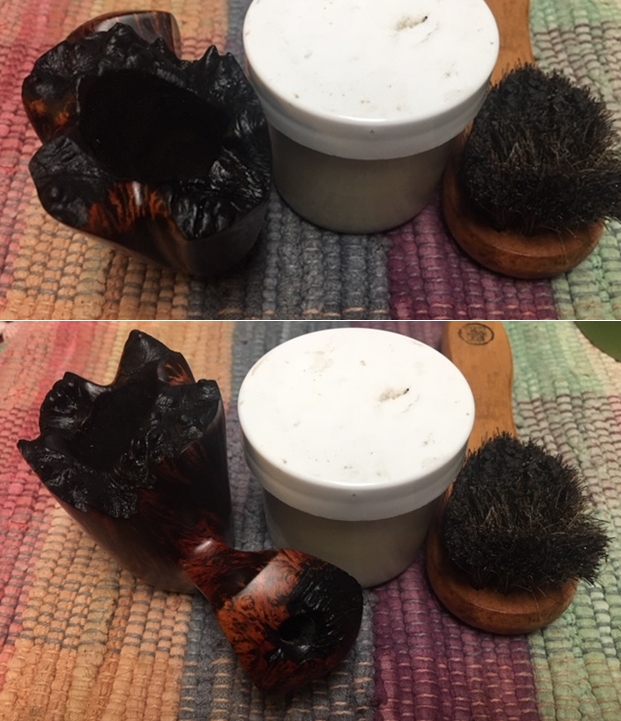
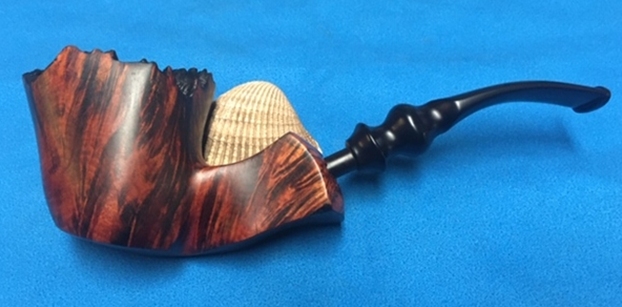
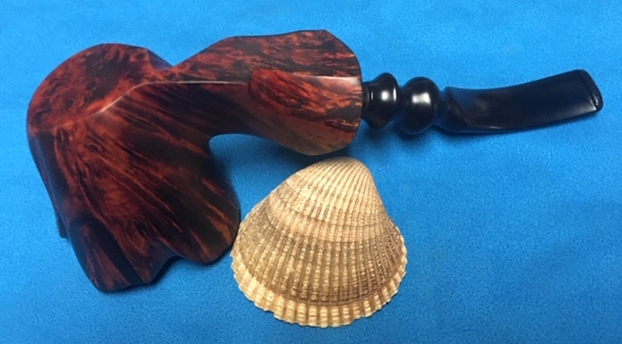
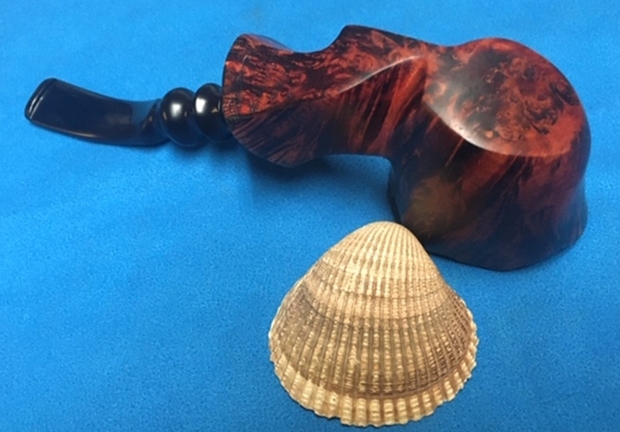
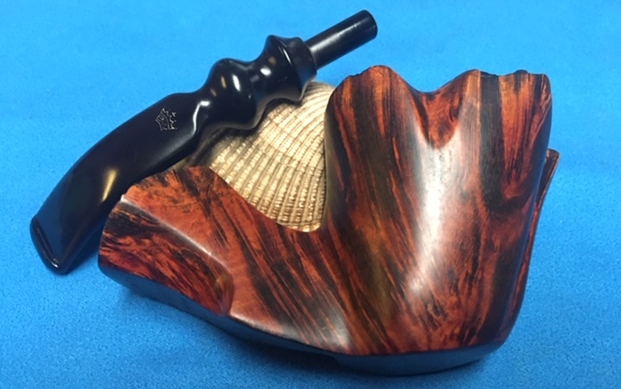
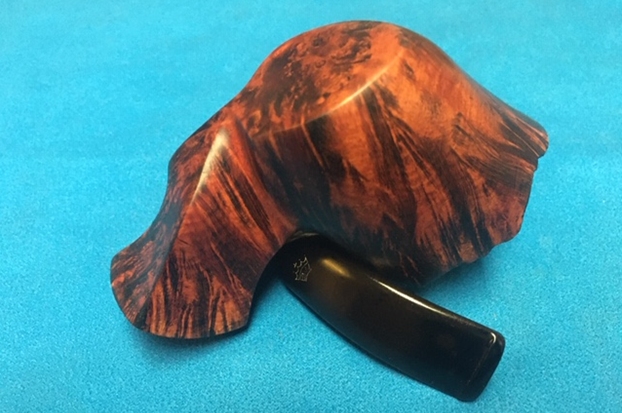
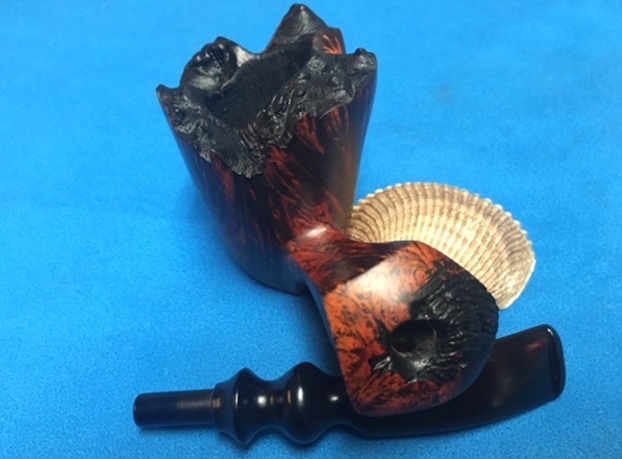
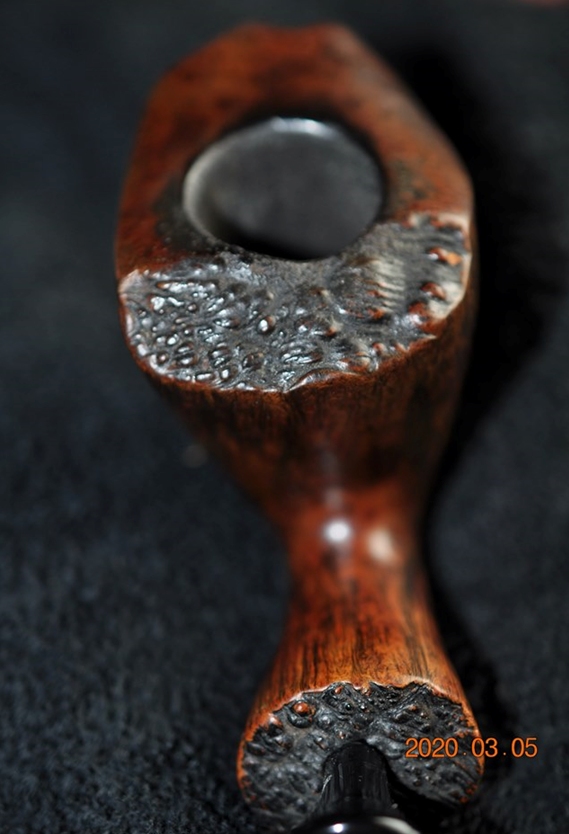
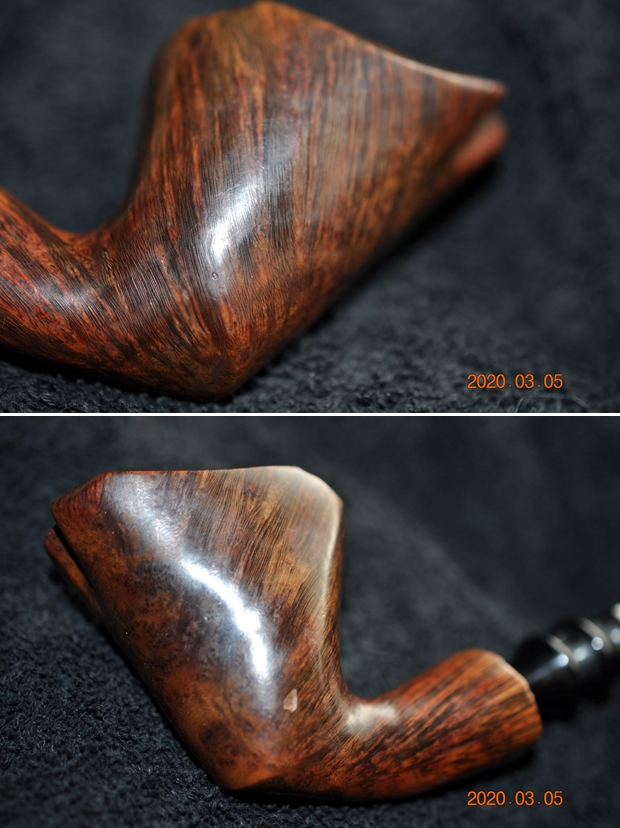
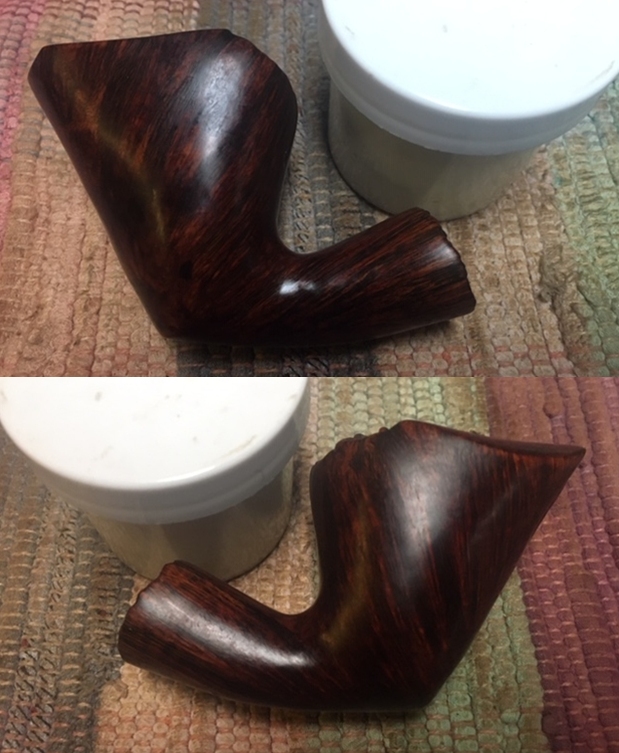
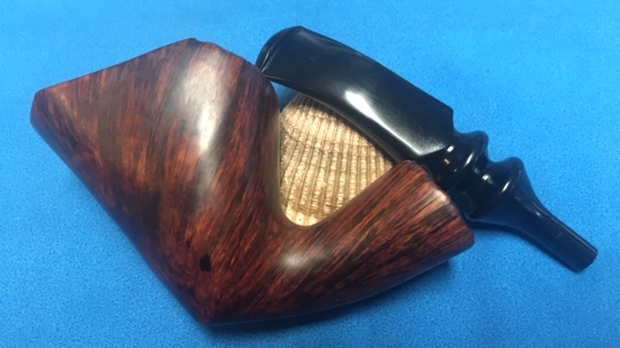
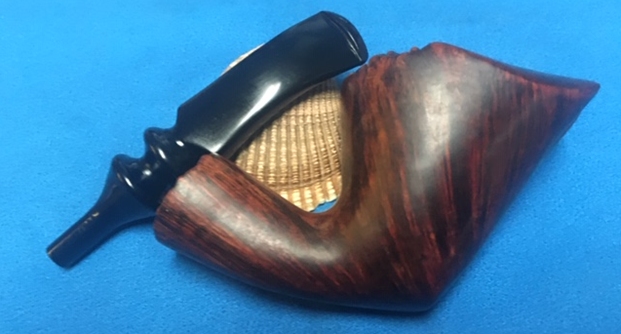
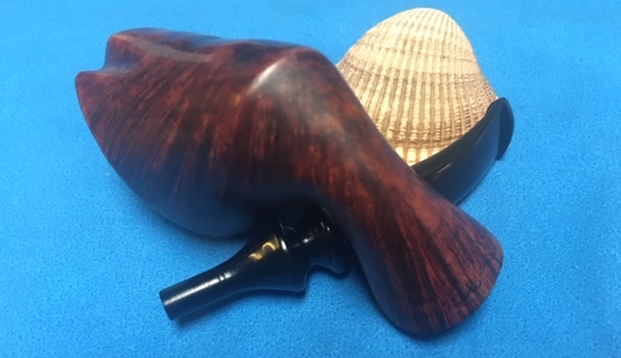
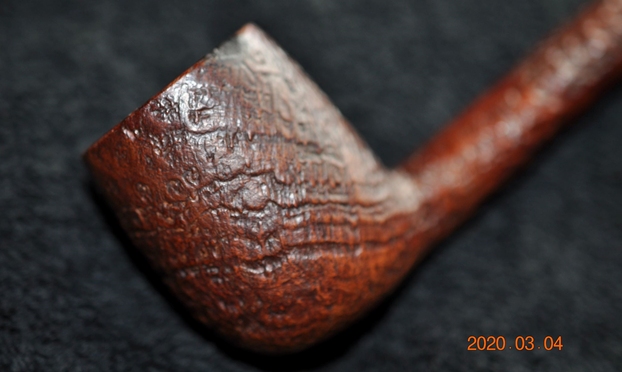
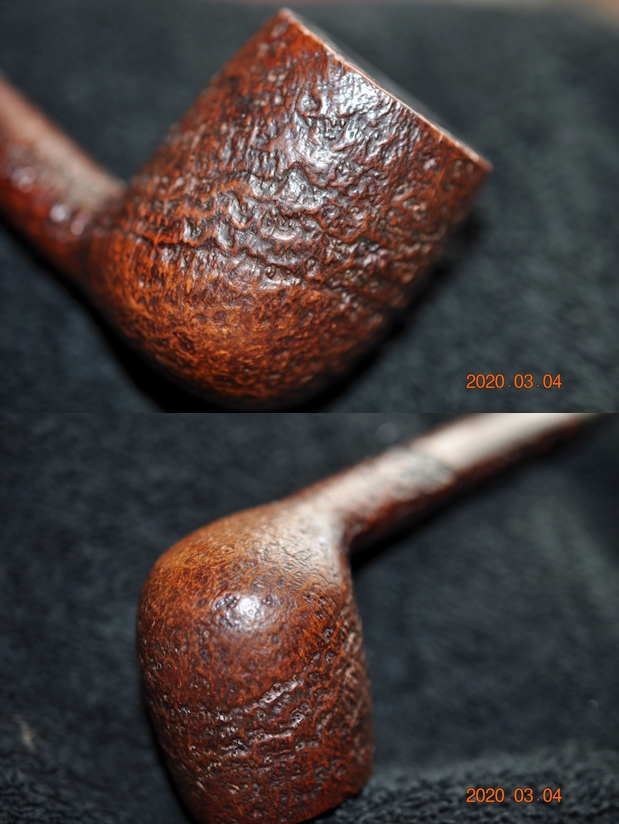
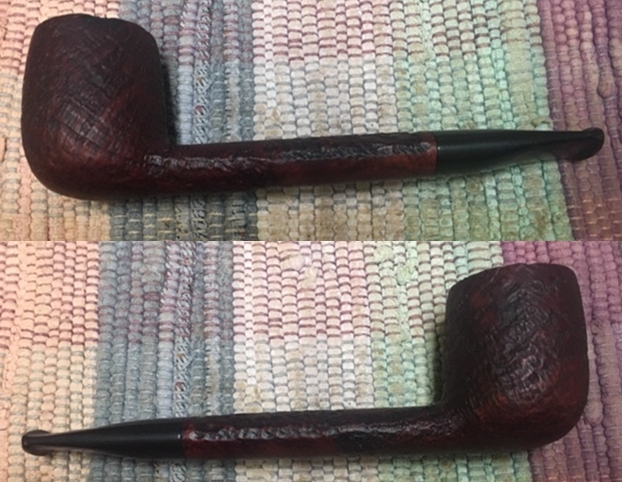
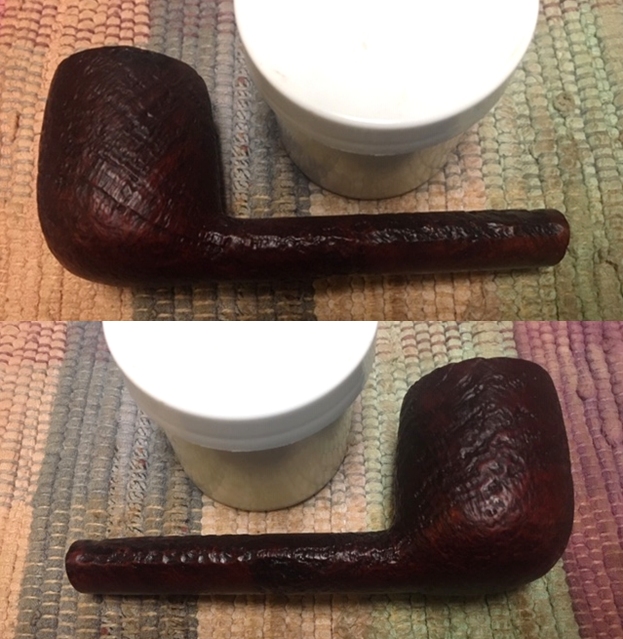
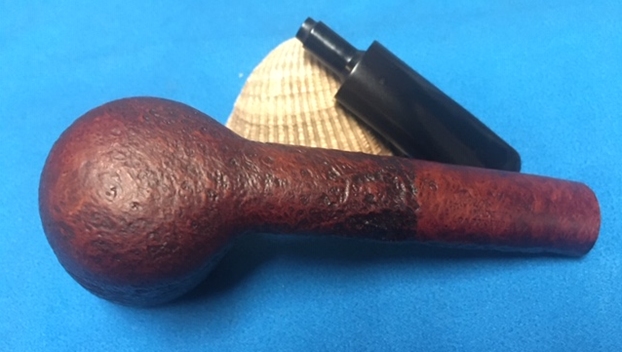
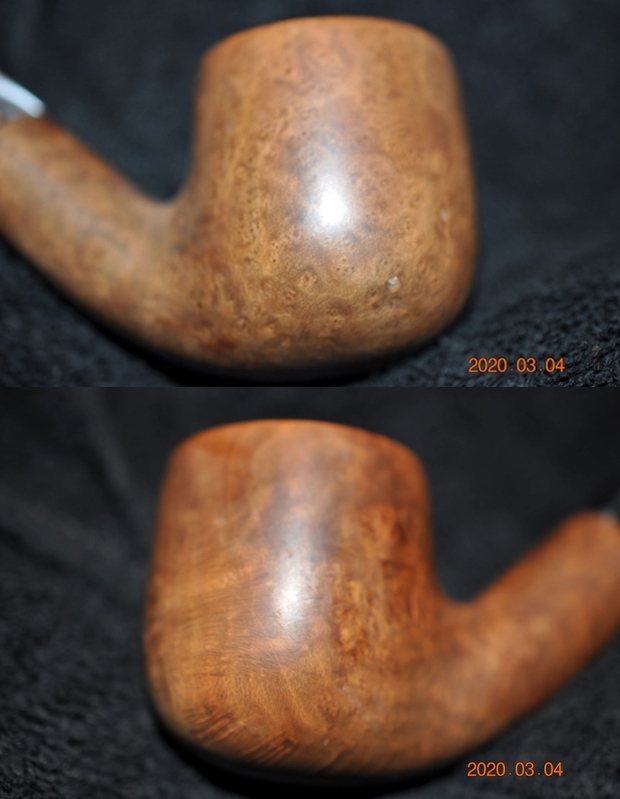
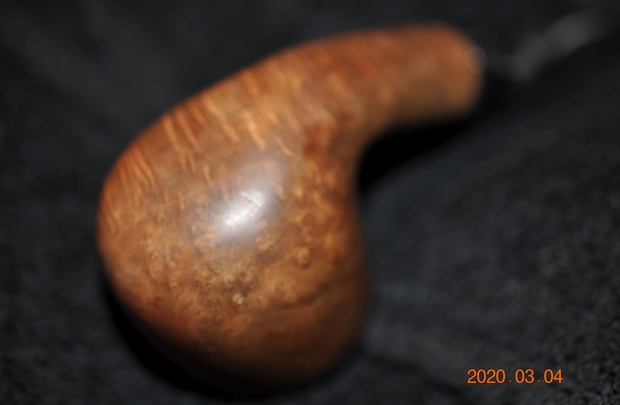
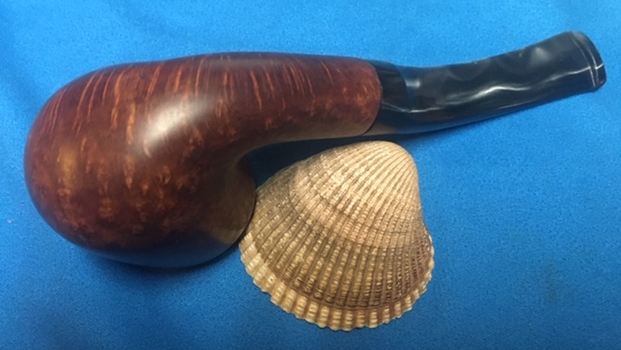
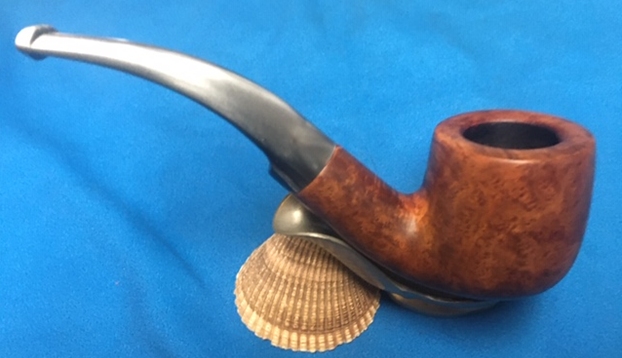
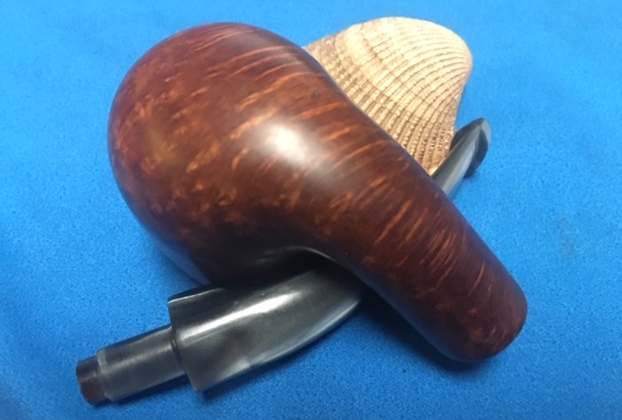
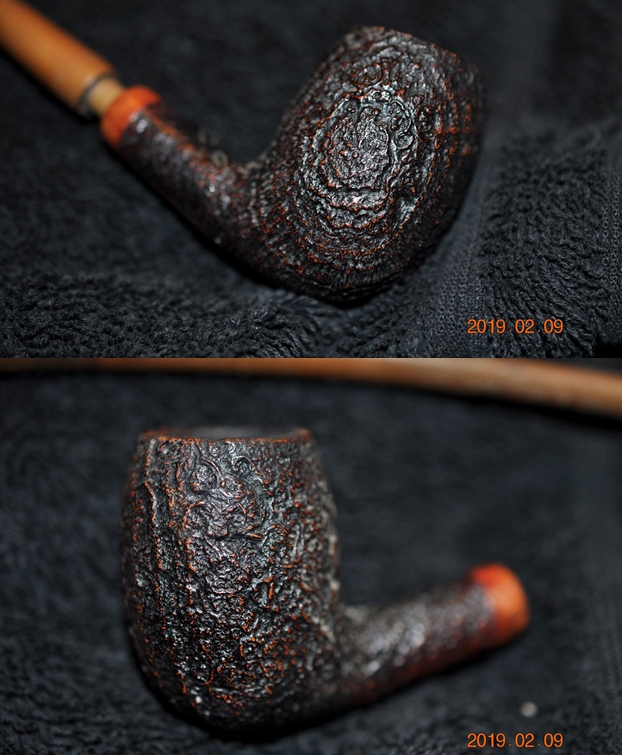
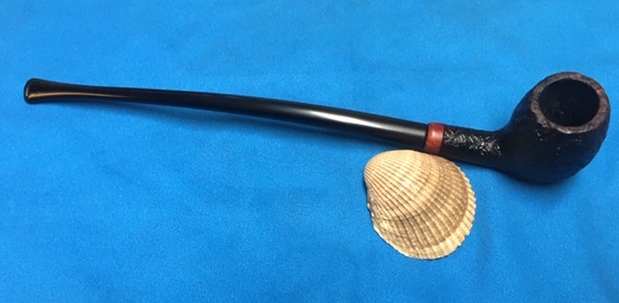
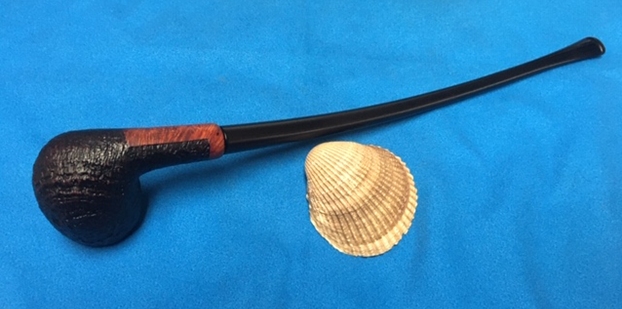
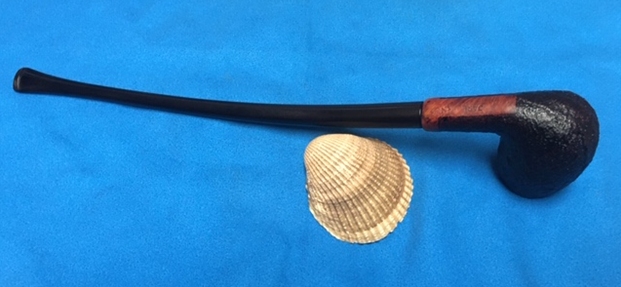
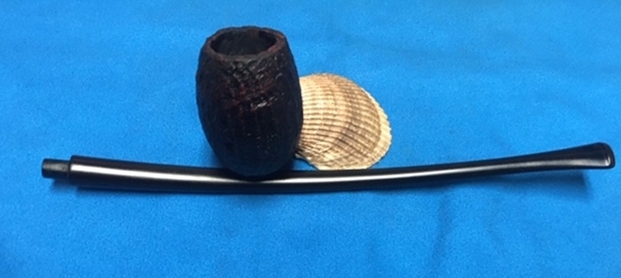
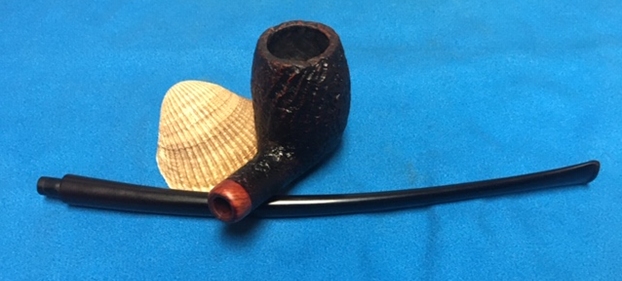
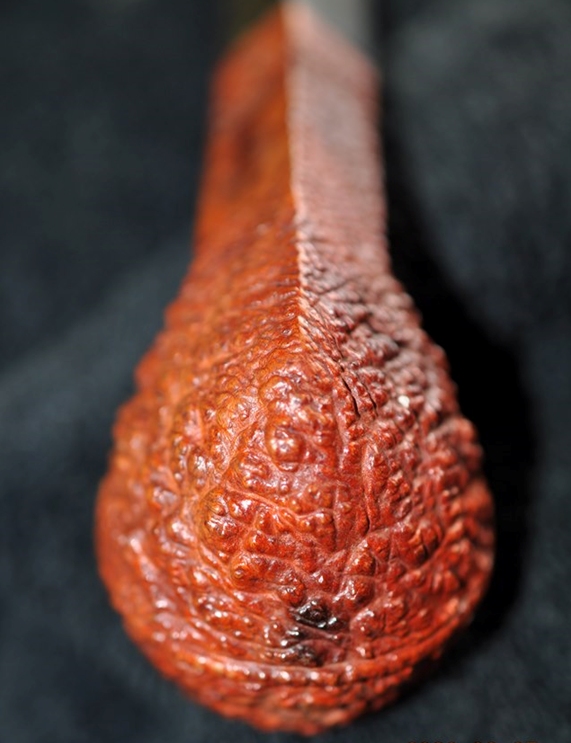
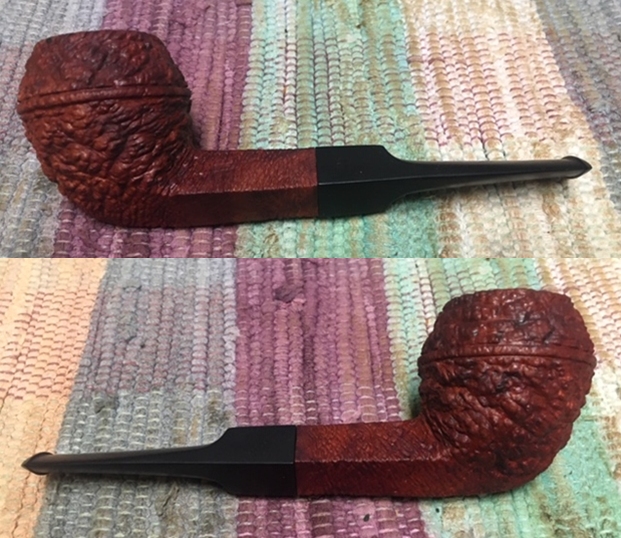
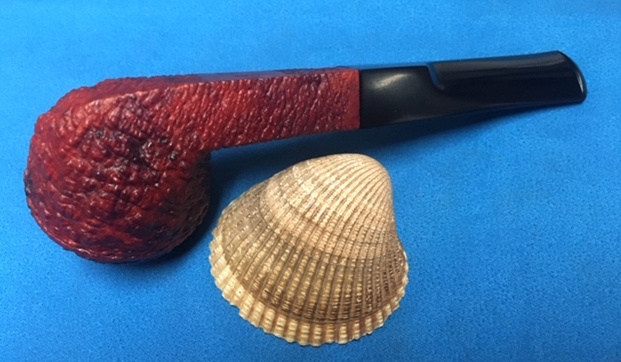
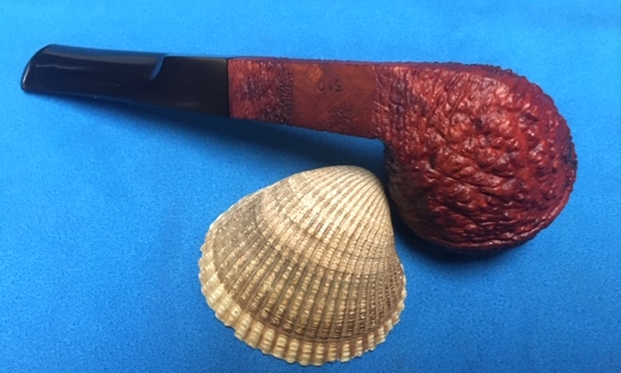
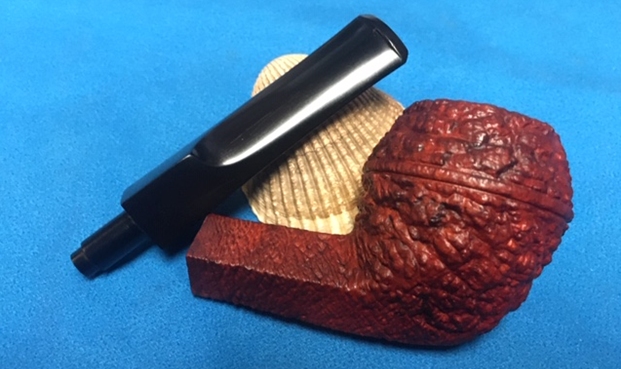
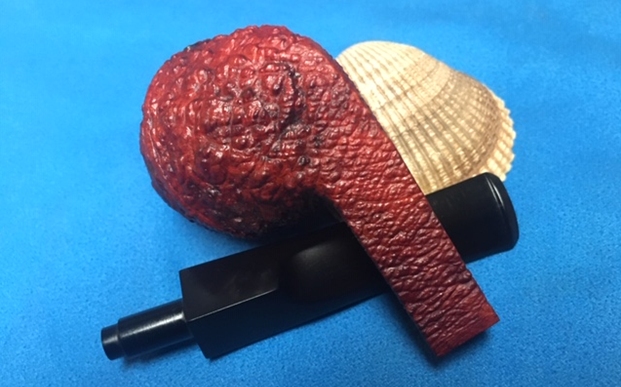
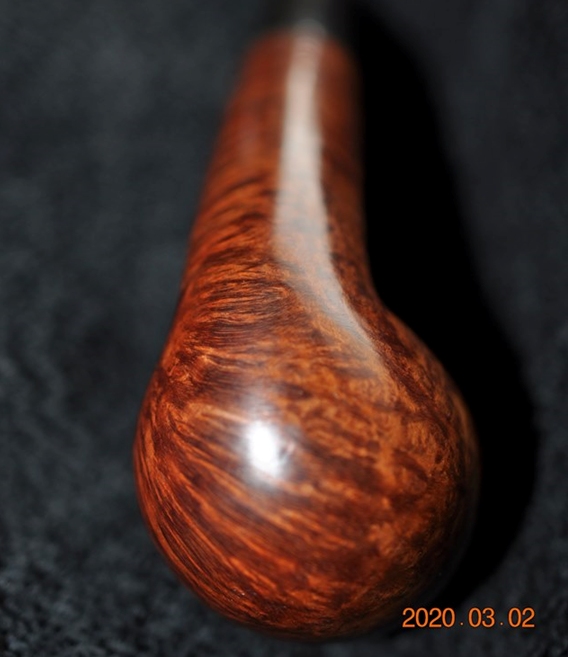
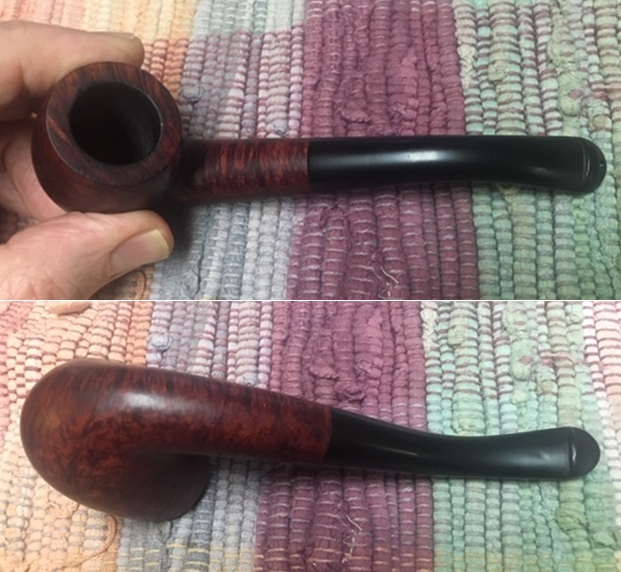
 Jeff took some photos of the sides and heel of the bowl to give an idea of the grain on this particular piece of briar. It is amazing and I cannot wait to see what it looks like once it is polished and waxed.
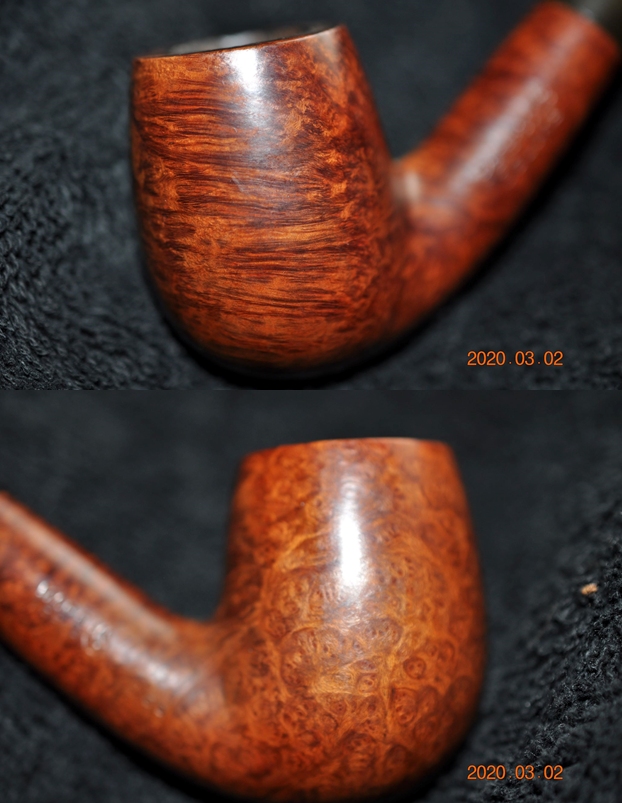
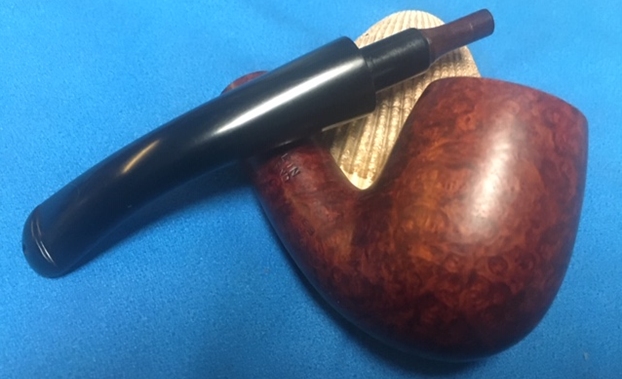
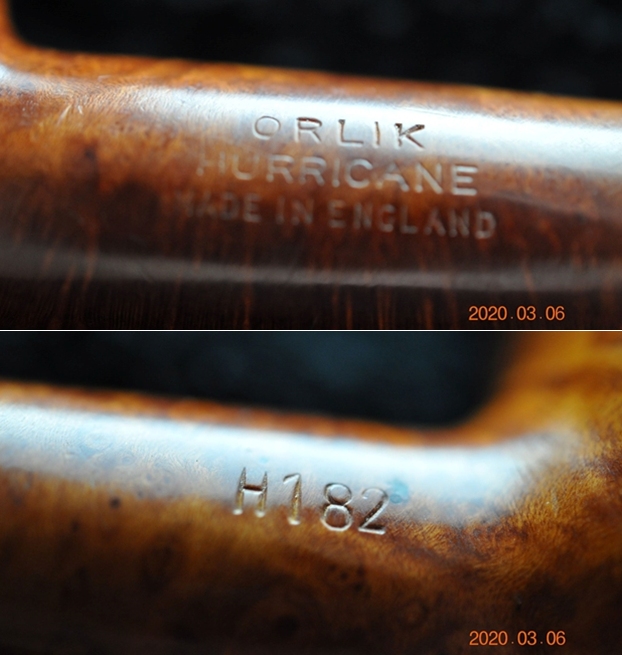
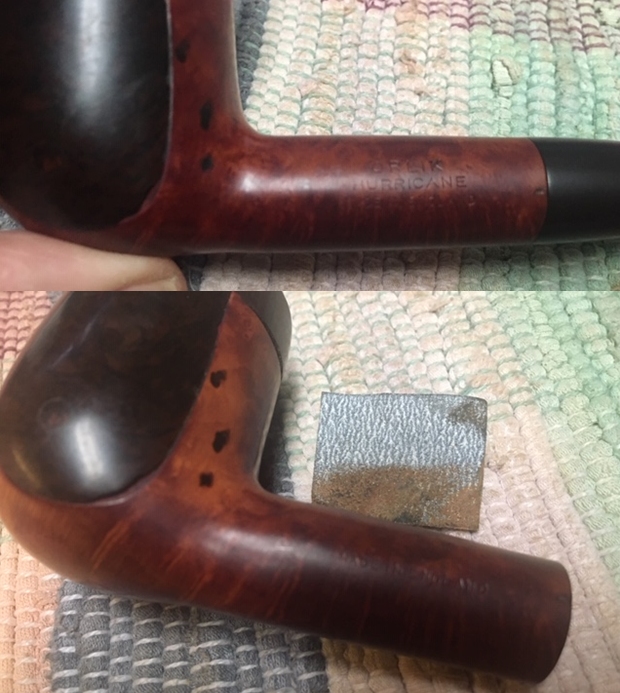
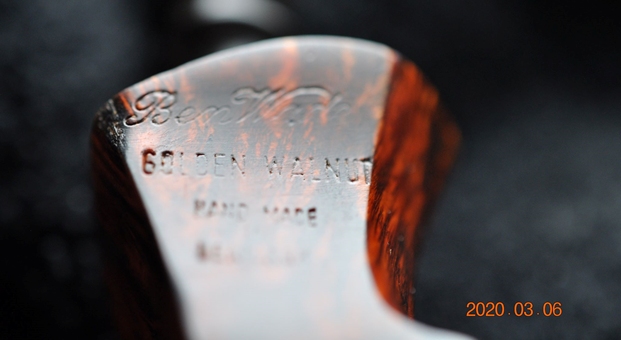
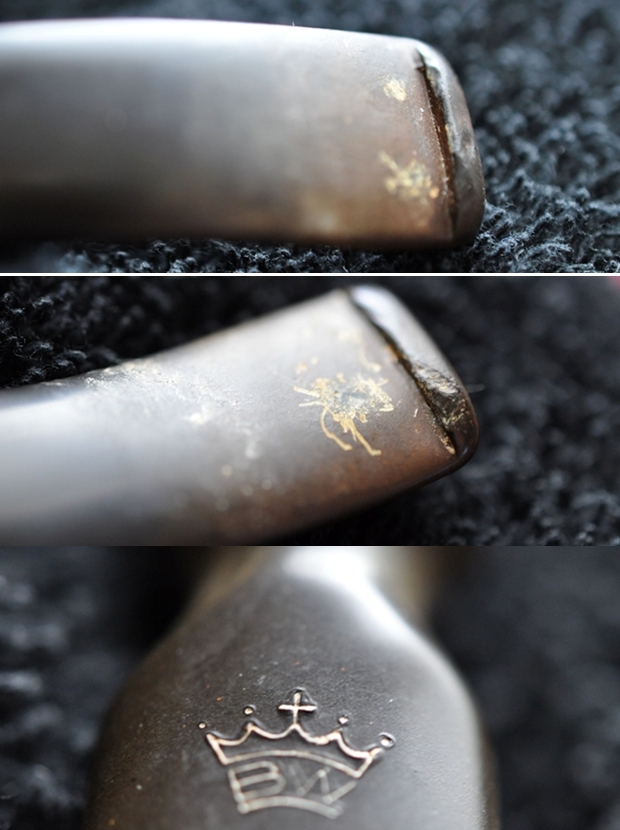
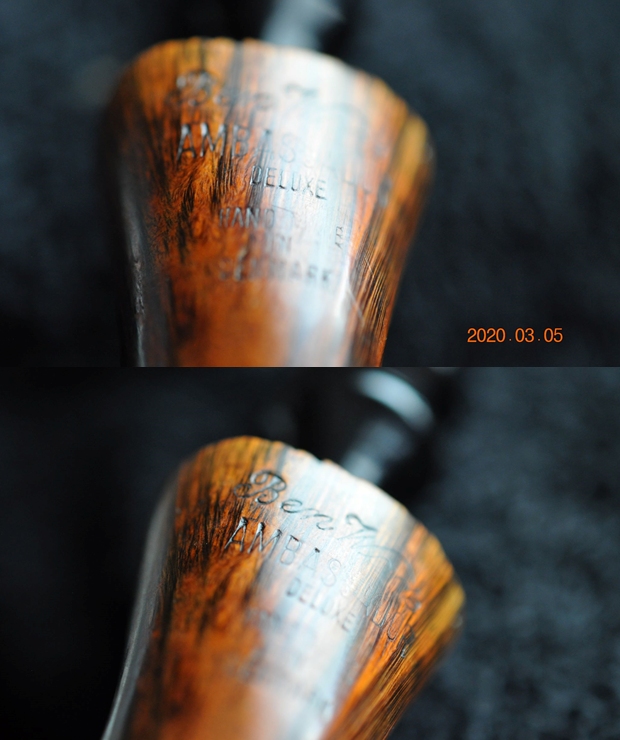
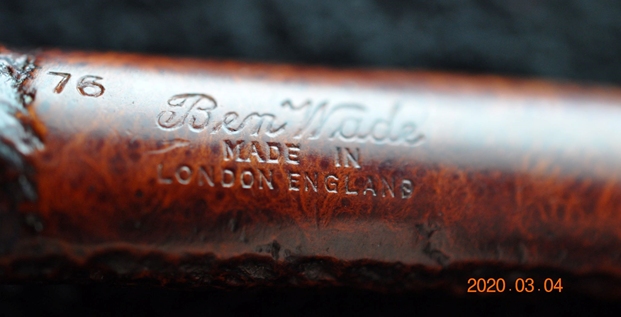
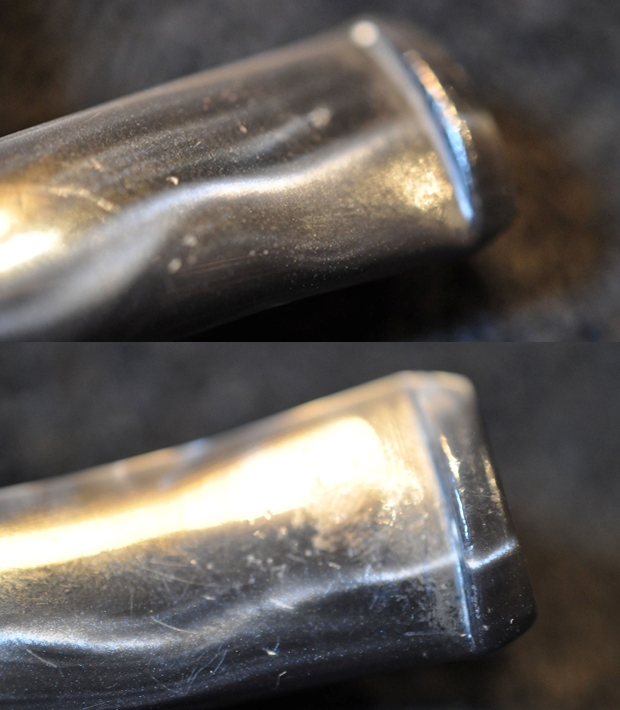
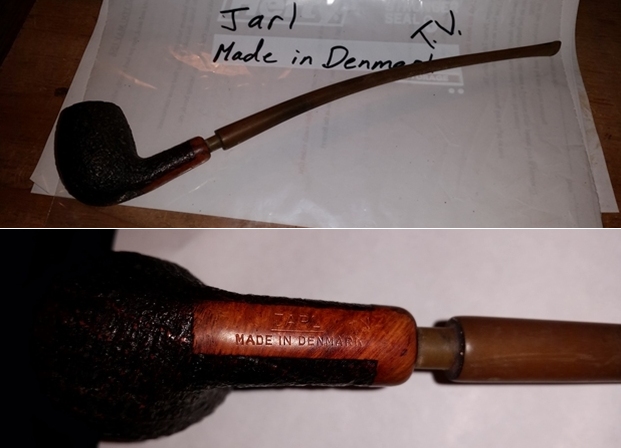
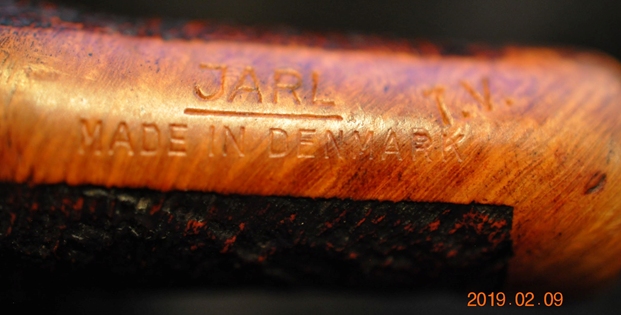
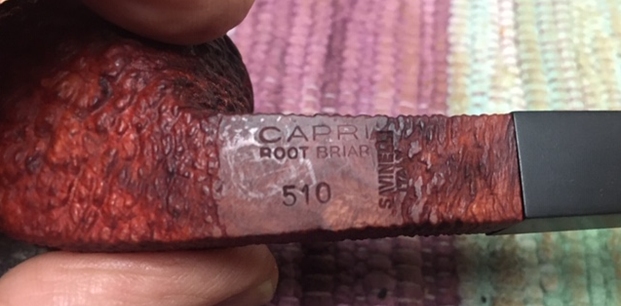
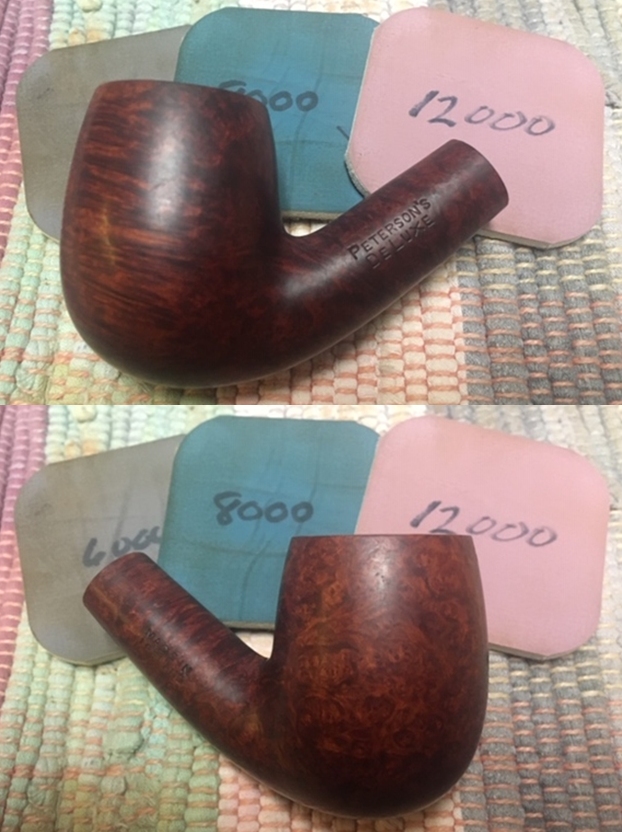
 He took photos of the stamping on both sides of the shank to capture it for me. The first photo shows the left side of the shank and the stamping as noted above. The second shows the right side of the shank with the Made in Ireland stamp and shape number 69.
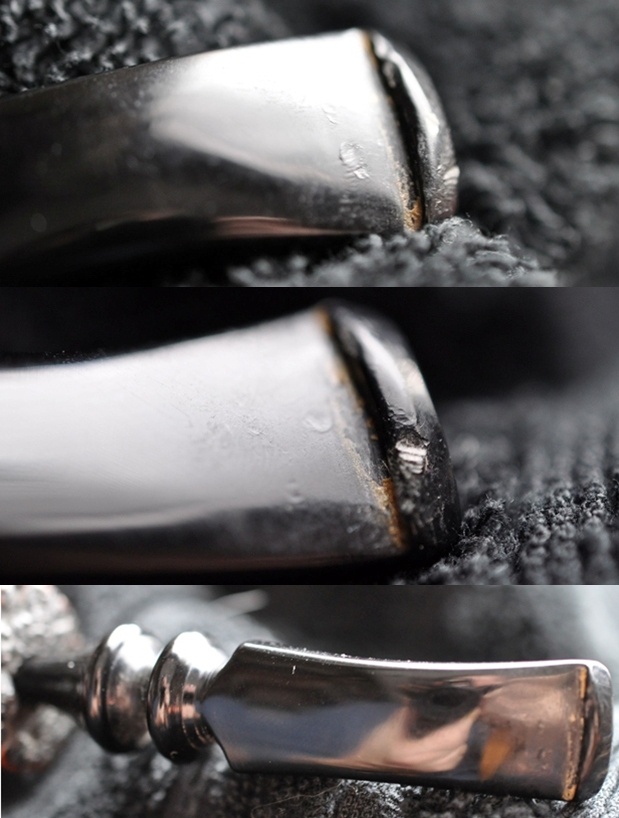
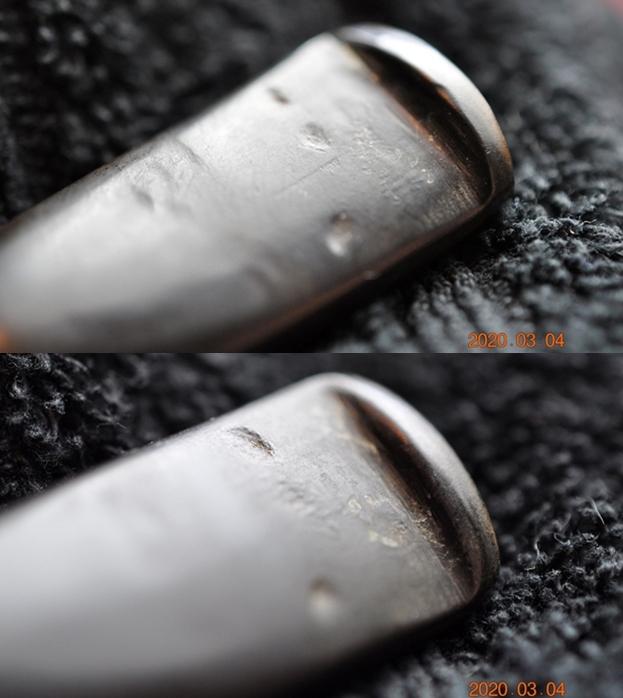
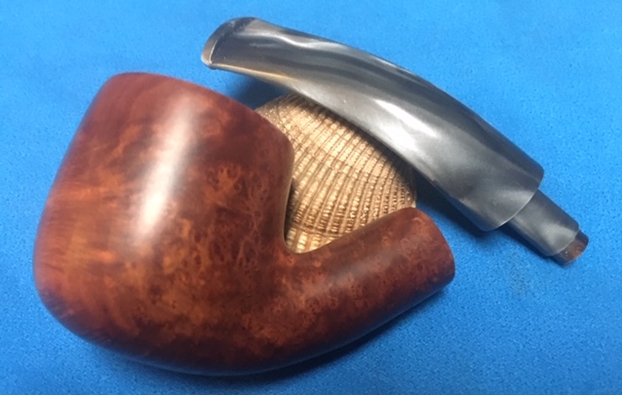
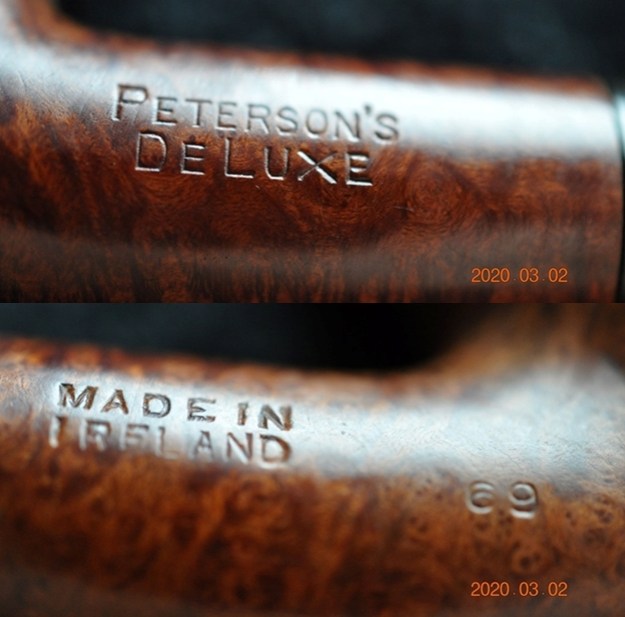 This pipe has a classic Peterson’s P-lip stem that has some oxidation on the surface of the vulcanite that is quite deep. There seems to be some tooth marks and chatter on the top and underside.
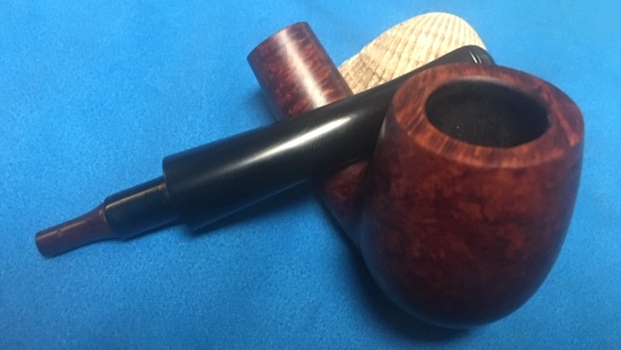
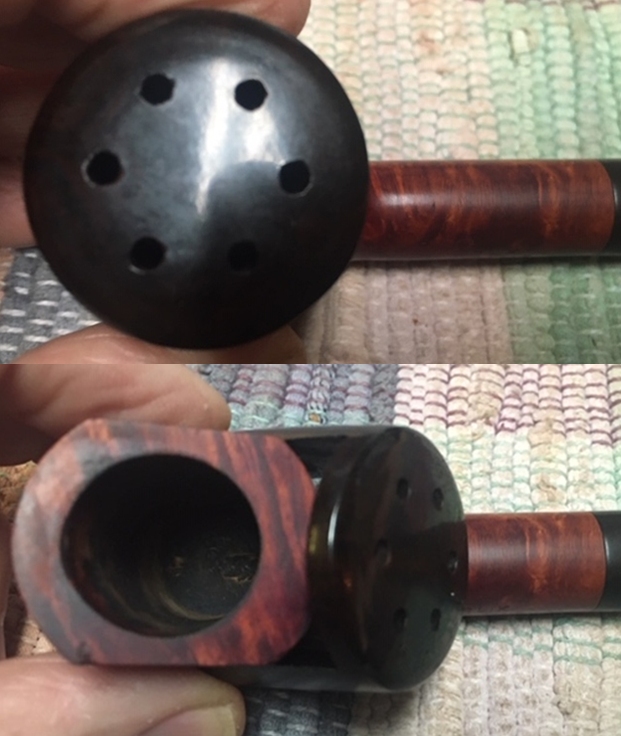
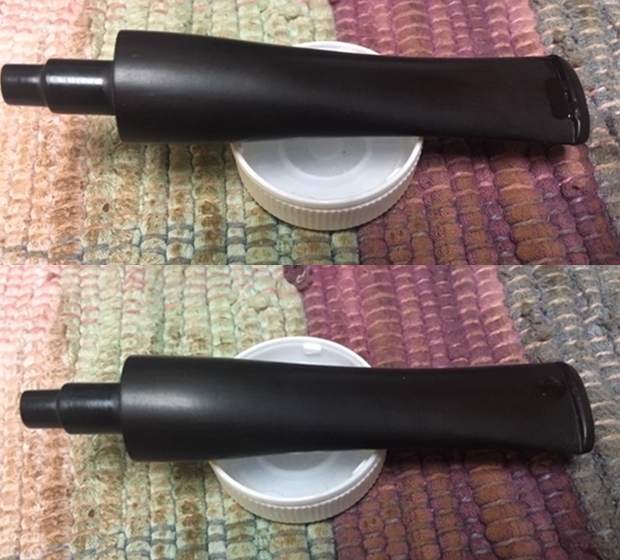
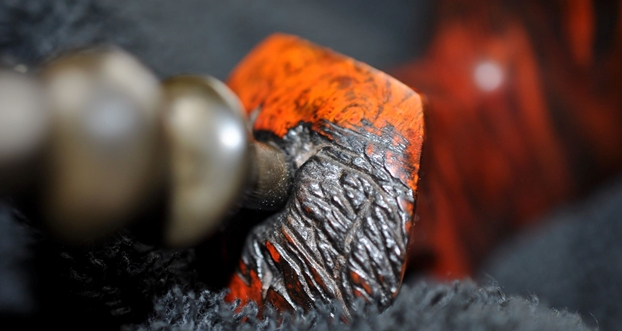
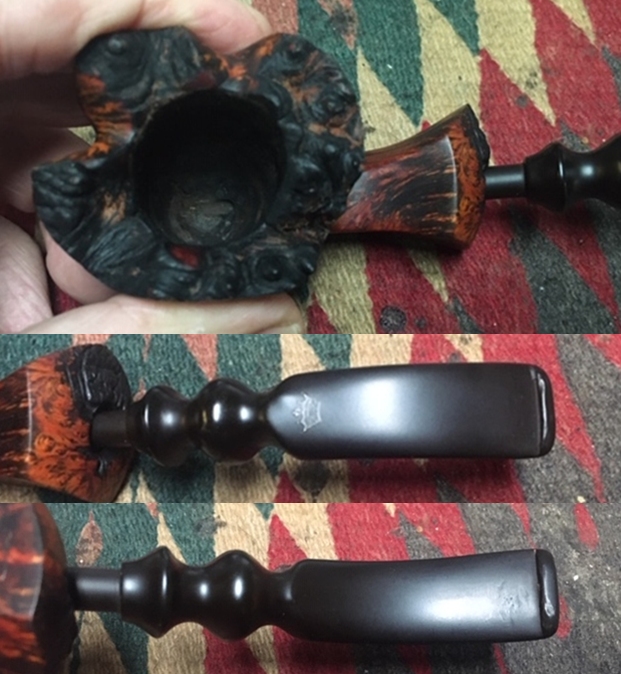
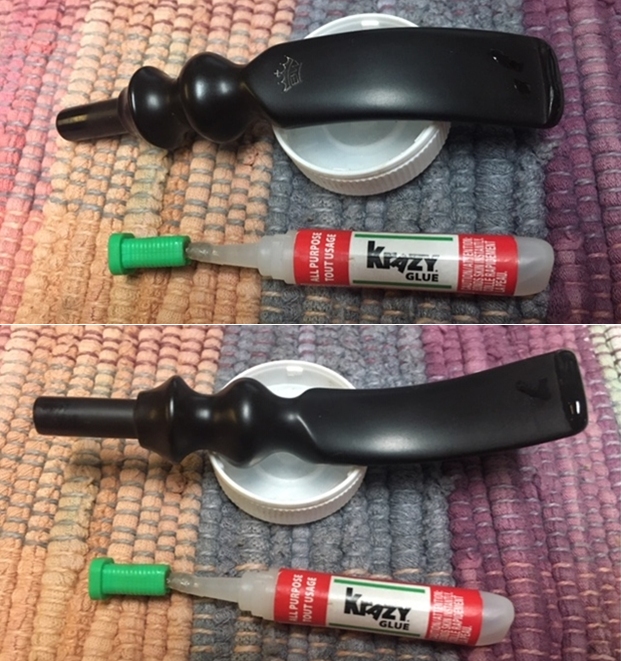
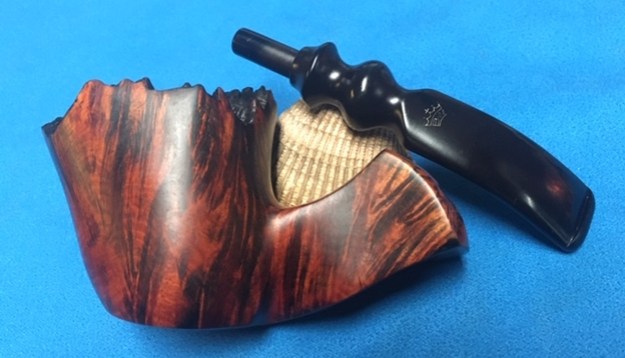
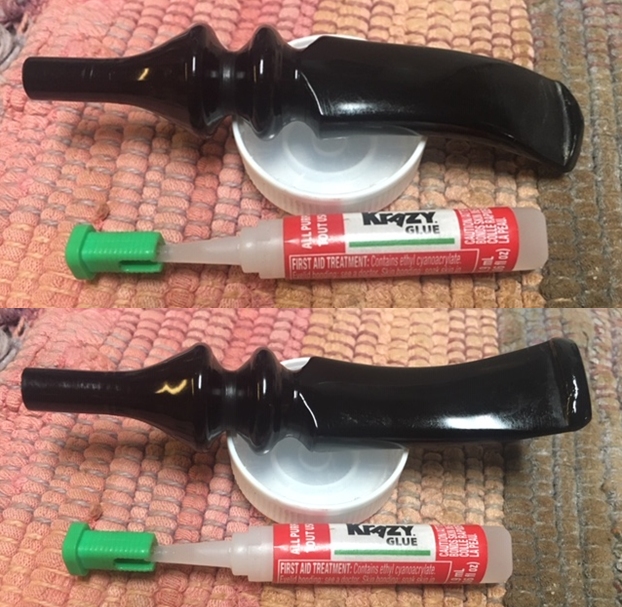
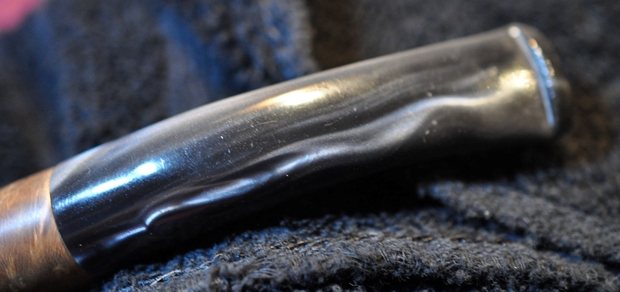
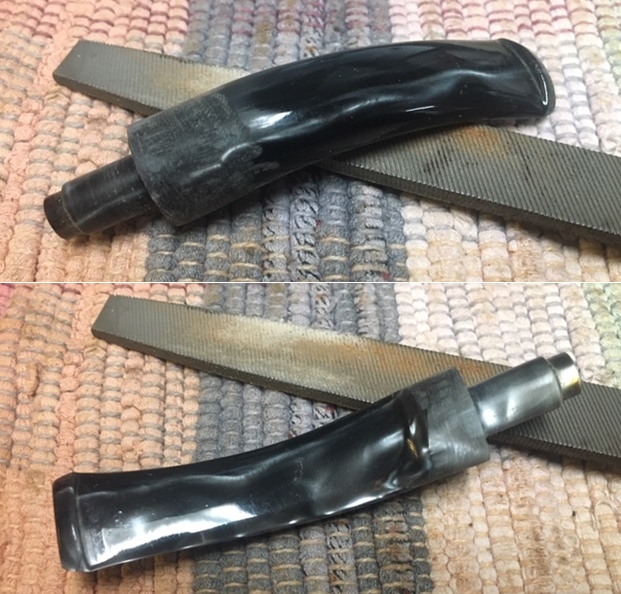
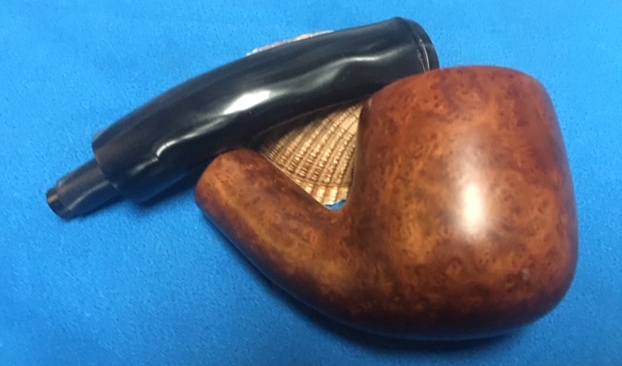
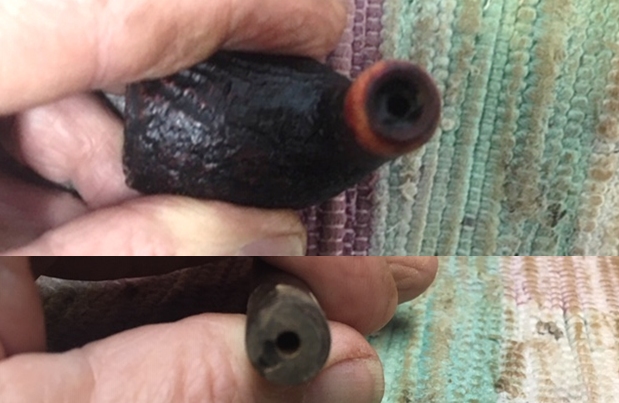
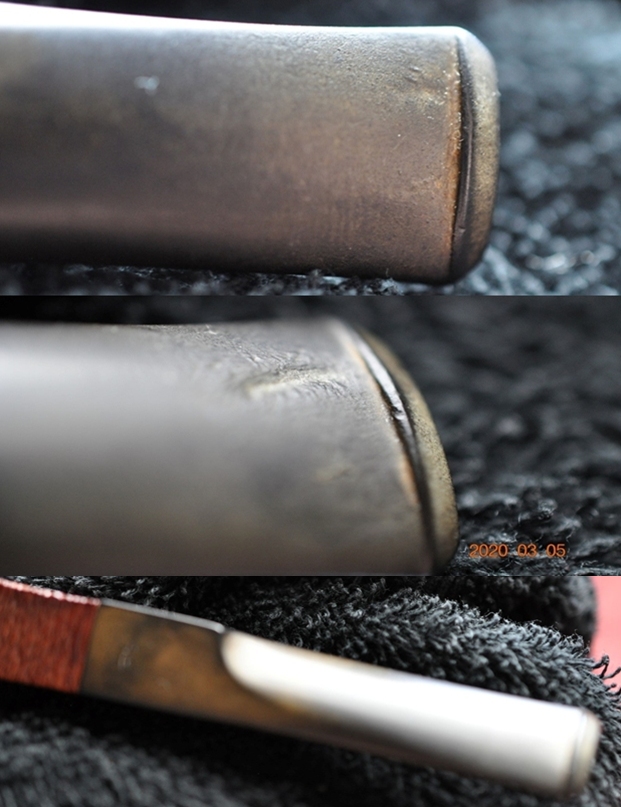
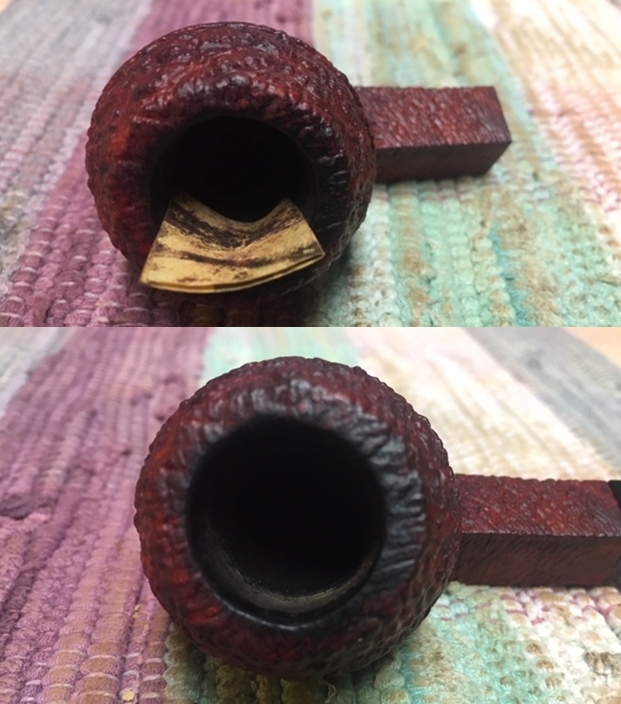
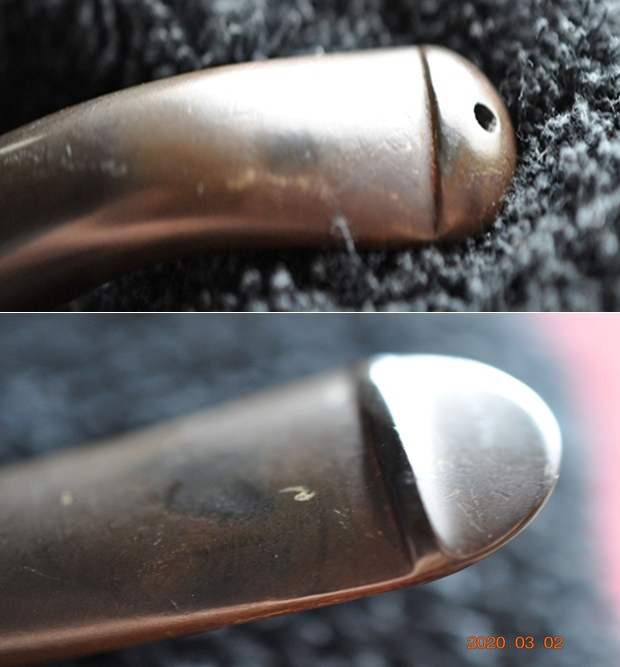 He removed the stem from the shank and took photos of the bone chimney screwed into the end of the tenon.
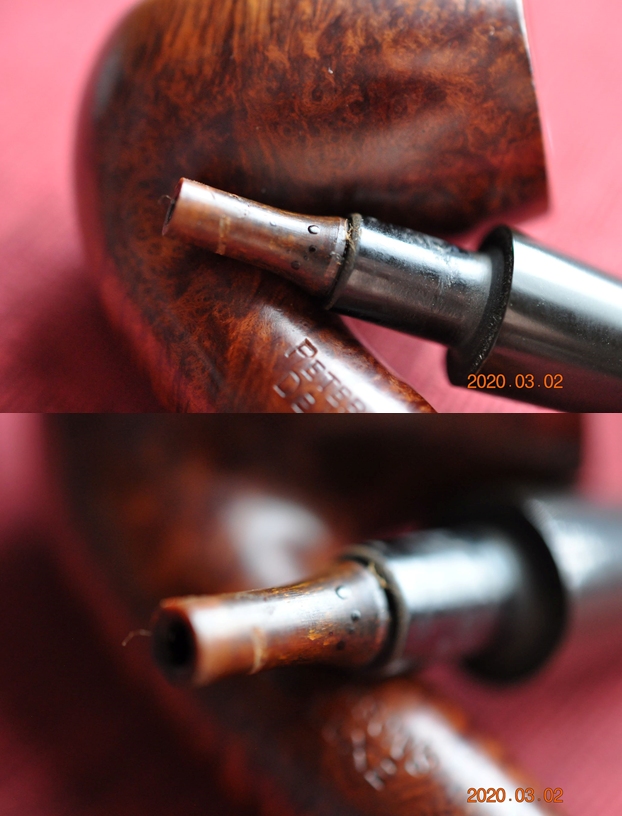 I turned to Pipephil’s site to get a quick overview of the Peterson’s Made in Ireland pipes. (http://www.pipephil.eu/logos/en/logo-peterson.html). I have included a screen capture of the pertinent section from the site. The summary to the right of the photos is always succinct and quite pointed. In this case it says that the Made in Ireland stamp refers to a Pipe of the Pre-Republic era (Before 1949). Notice the Country of Manufacture stamp in two lines and block letters.
 I turned to Pipedia and reread the history of the Peterson’s brand and focused on the Pre Republic Era (1915-1949). I quote from that article below:
…Around 1916, Peterson began stamping their pipes “Made in Ireland” in what is referred to as a block format…
… Prior to 1920 it was rare for a country of origin to be stamped on the pipe, just Peterson’s Dublin on the band. After 1921/22, if it is stamped “MADE IN IRELAND” and the “Made in” is stacked over “Ireland” or “MADE IN EIRE” or several other forms, it was made between 1922 and 1938…
…Peterson initially graded their mass -produced System pipes, i.e., regular catalogue pipes (in descending order) “Deluxe,” “First Quality,” “0” grade, “2nd grade,” and “3rd grade.”
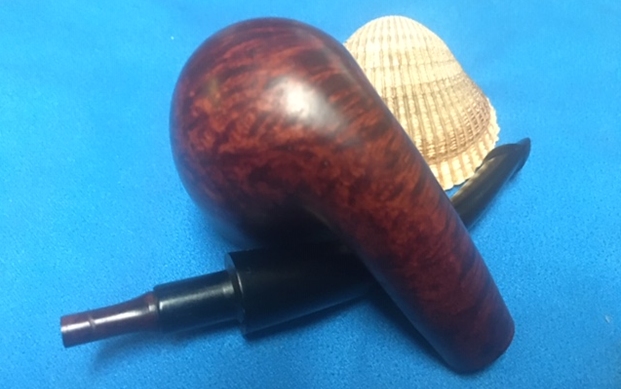
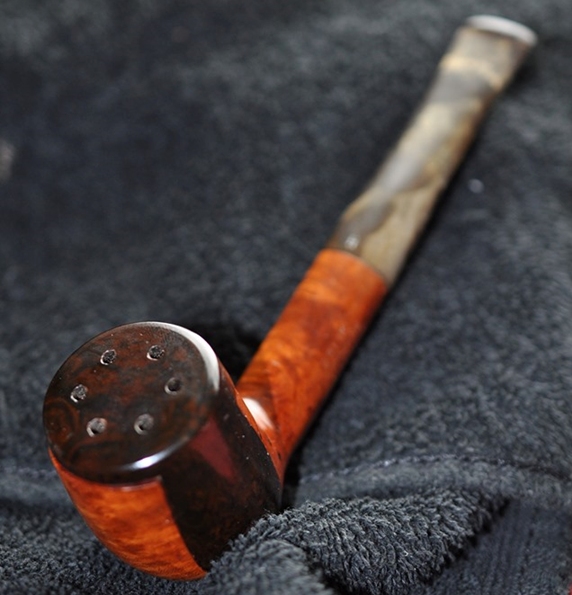
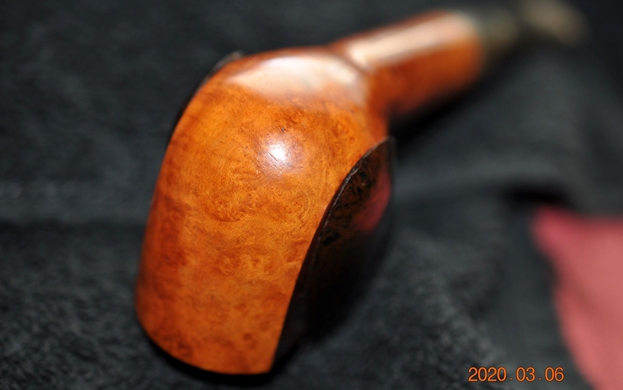
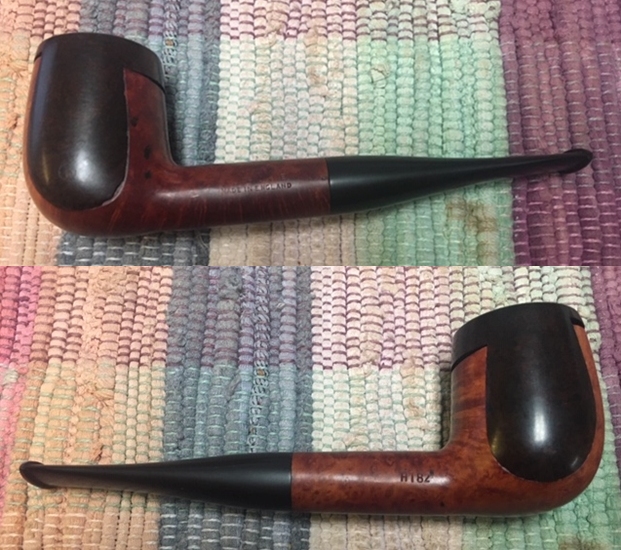
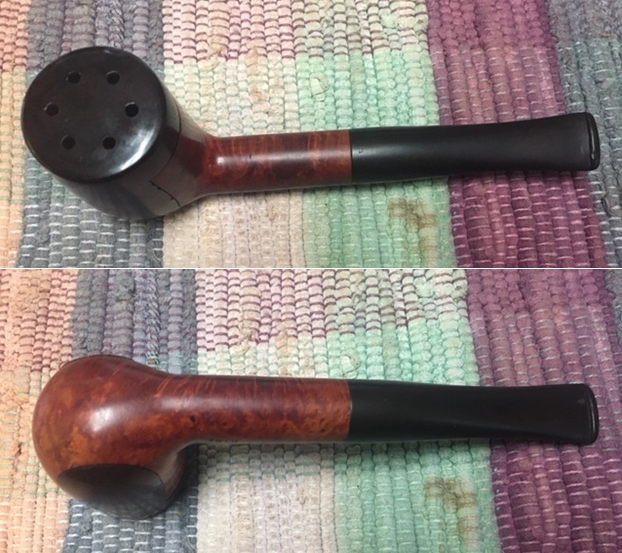
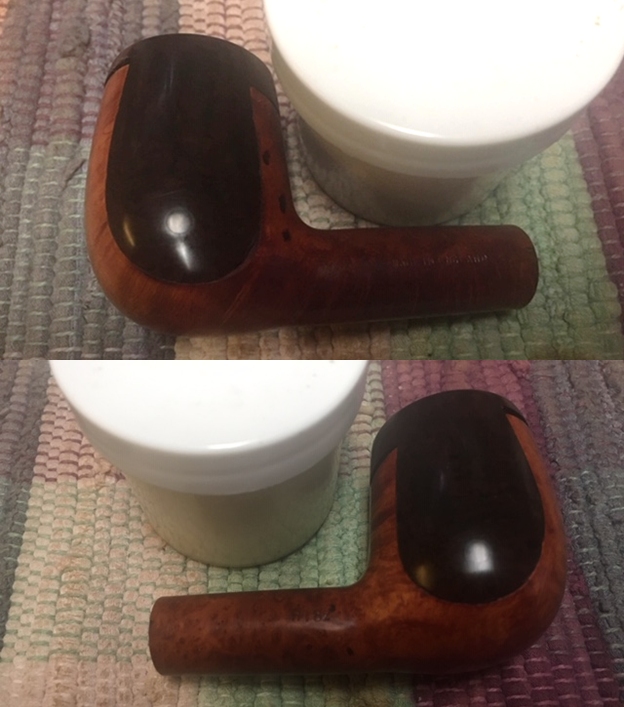
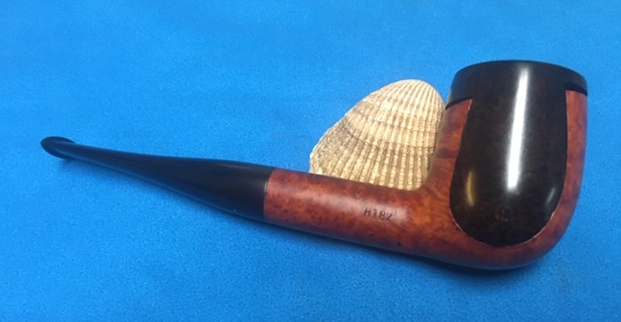
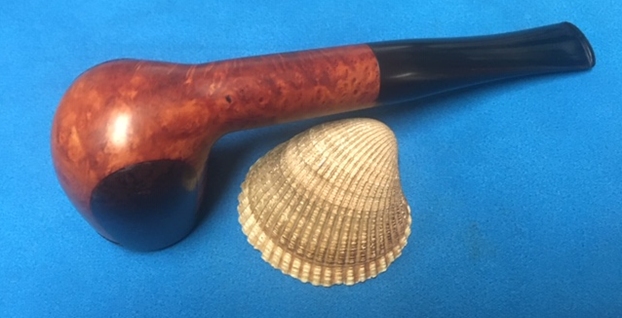
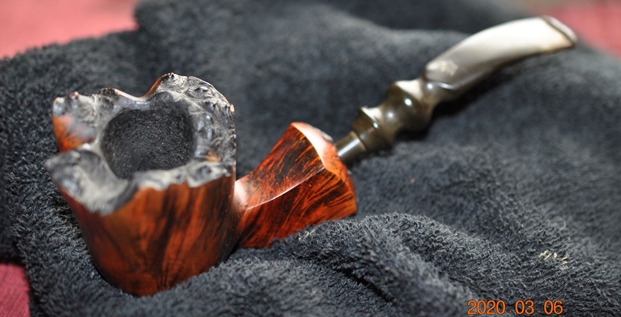
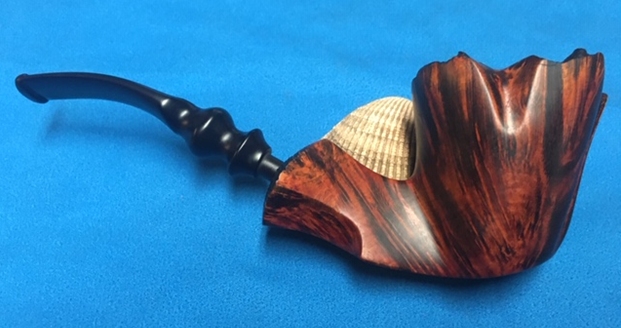
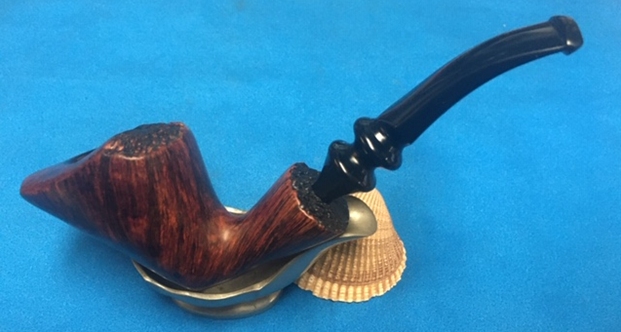
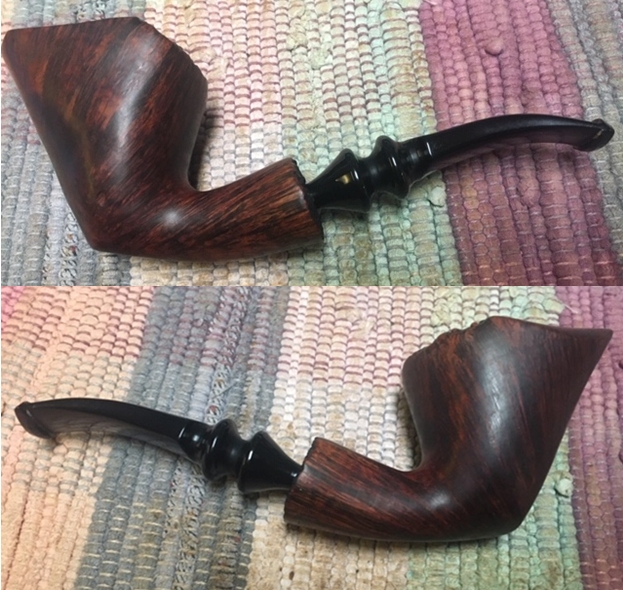
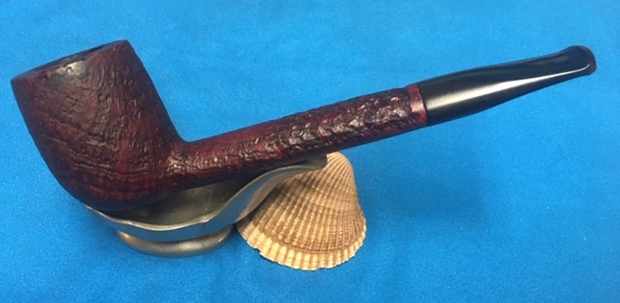
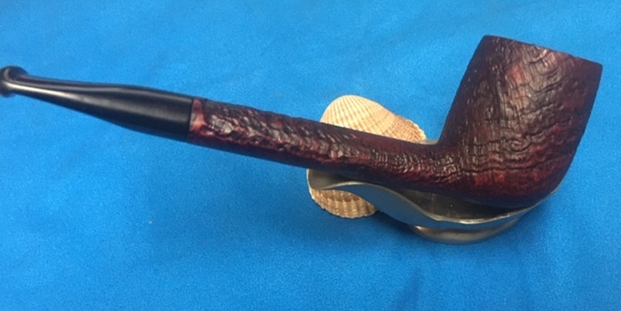
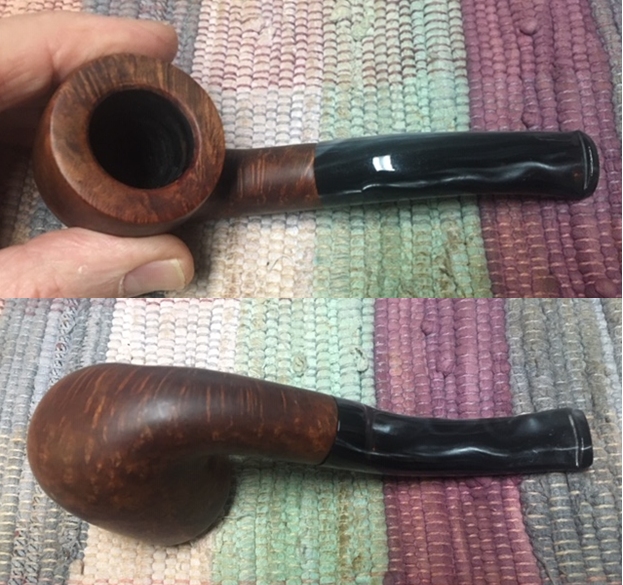
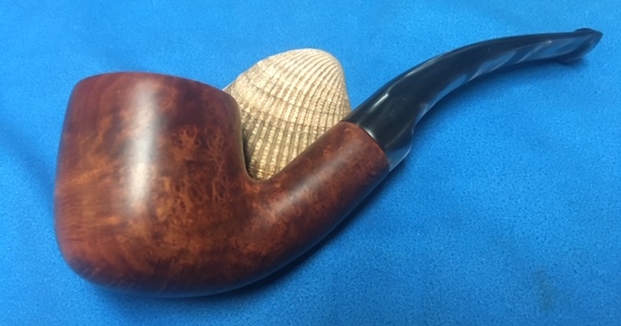
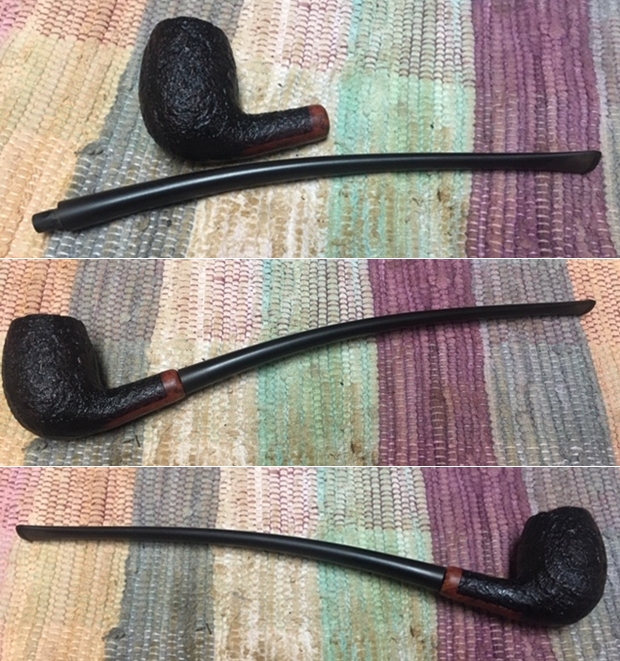
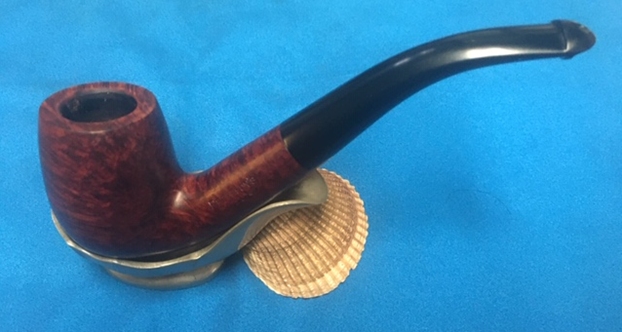
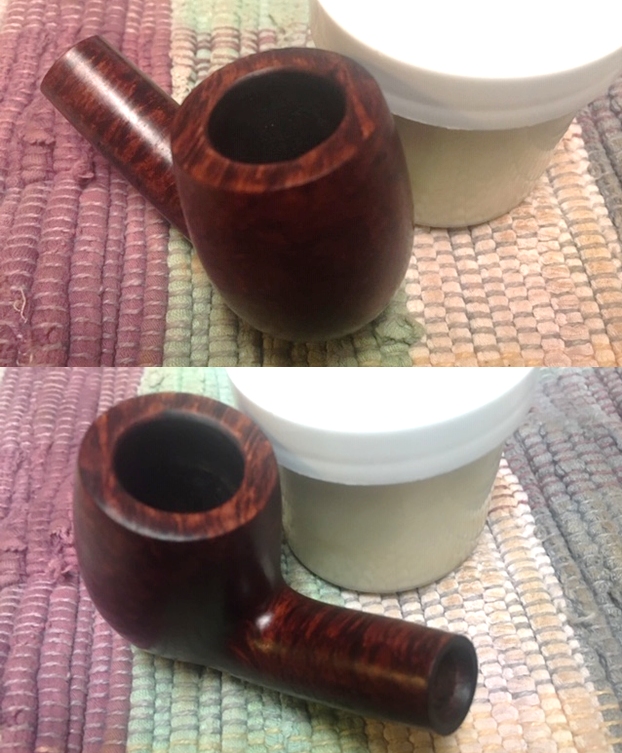
I moved forward to work on the pipe itself and see what I had to do with it. It had come back looking amazingly clean. Even the stem looked like new, with most of the tooth chatter gone. I was impressed. Jeff had done his normal thorough clean up – reaming, scrubbing, soaking and the result was evident in the pipe when I unpacked it. I took photos of the pipe before I started my work on it. Just look at the grain on this delicate pipe. Stunning!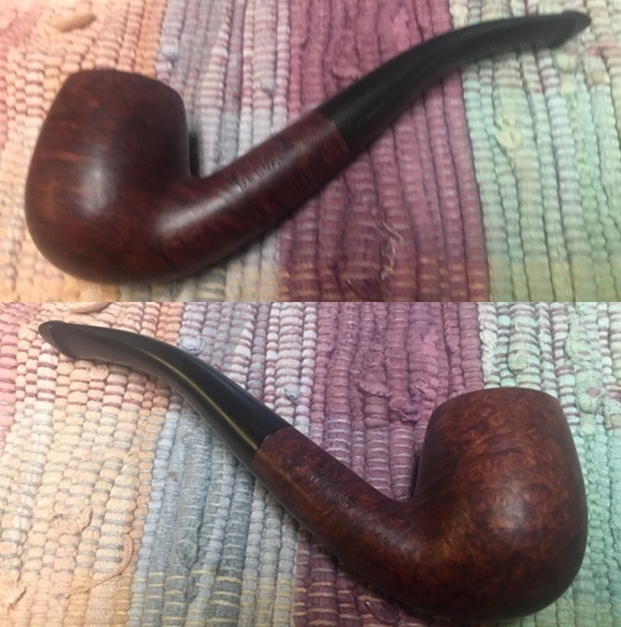
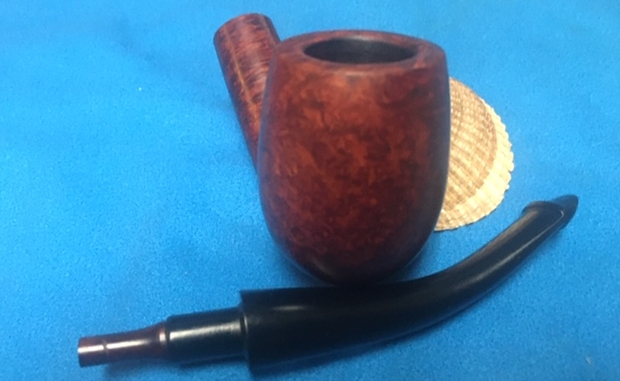
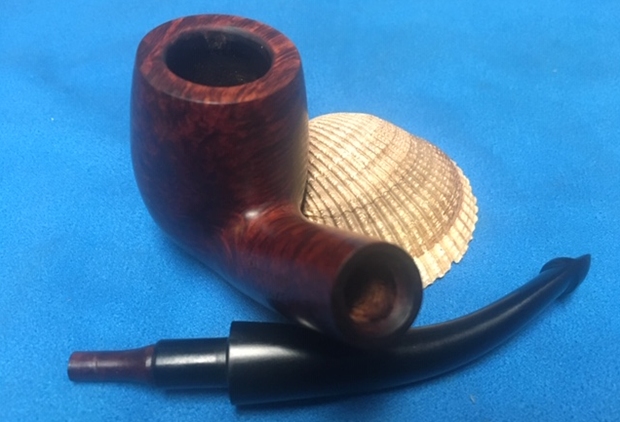
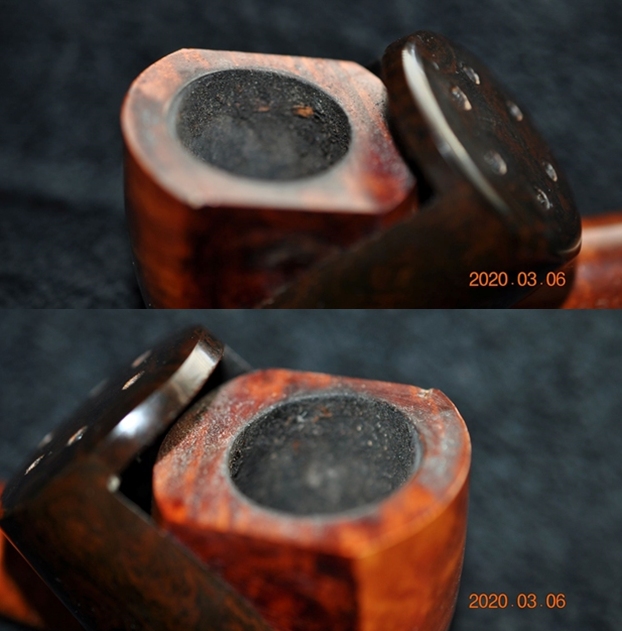
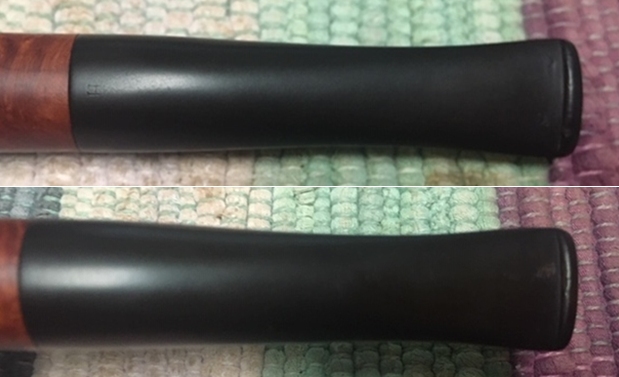
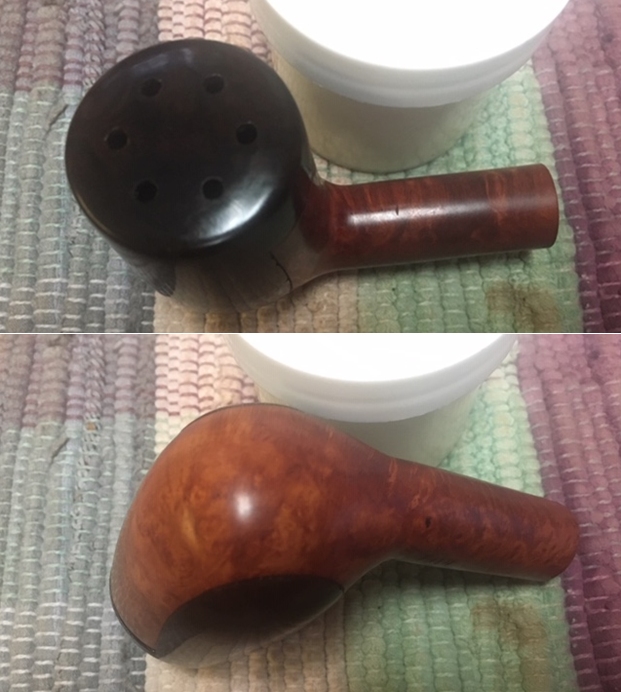
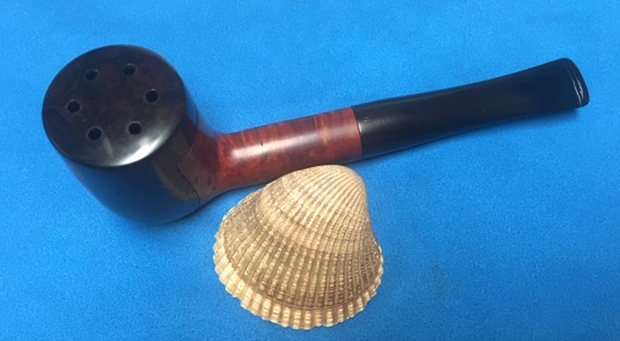
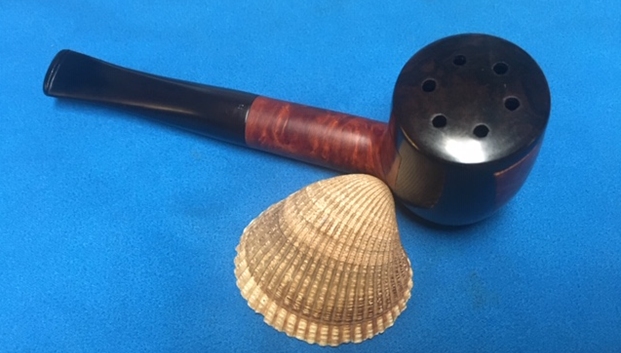
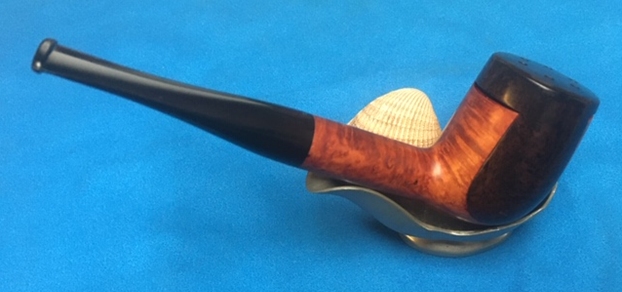
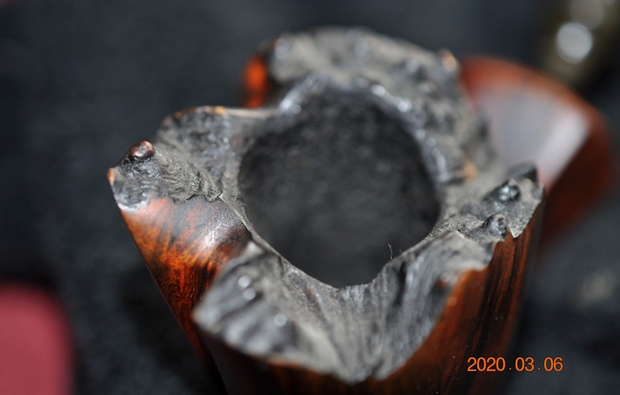
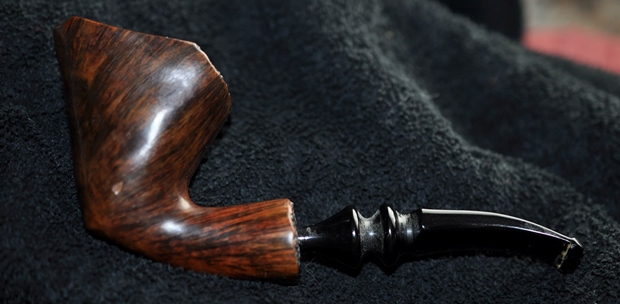
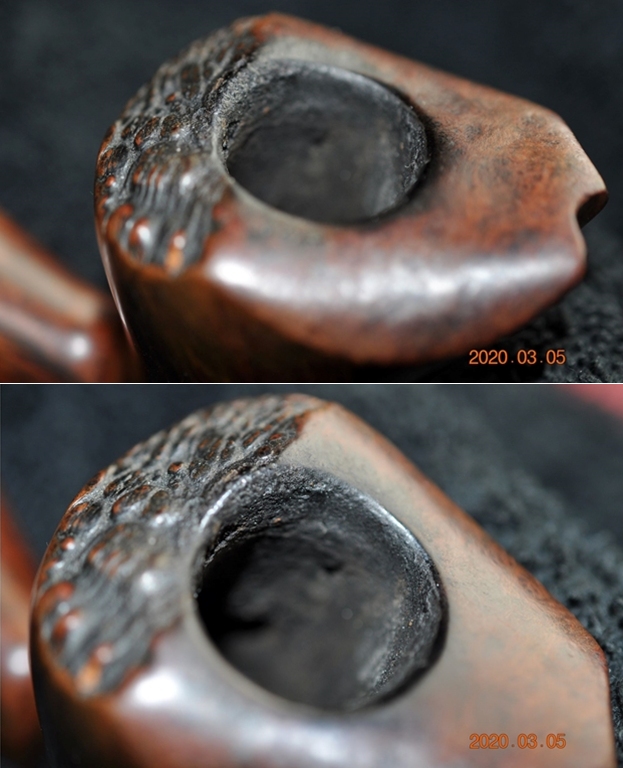
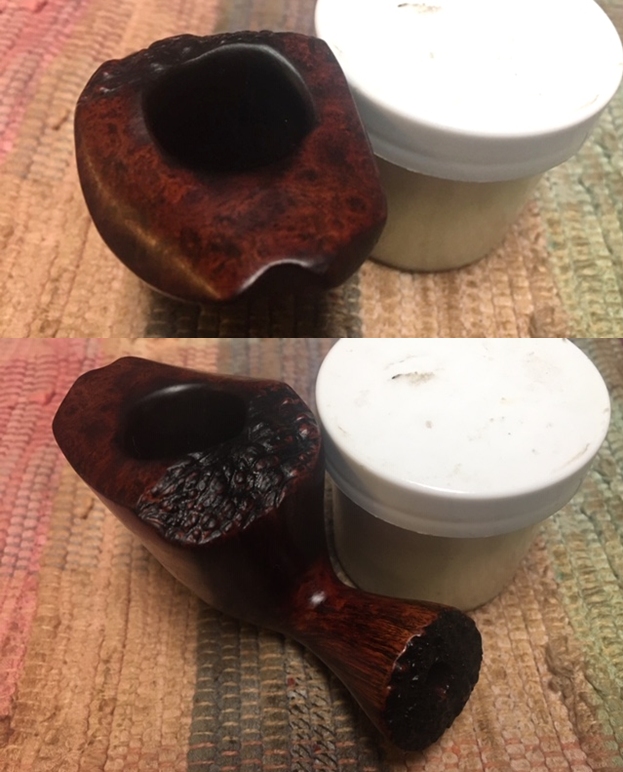
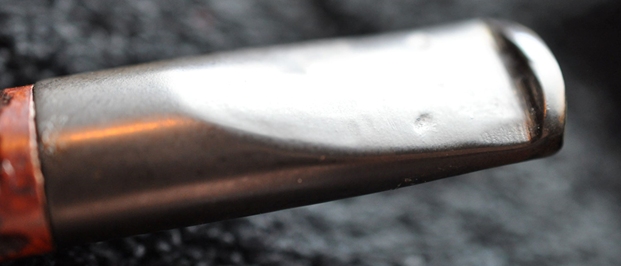
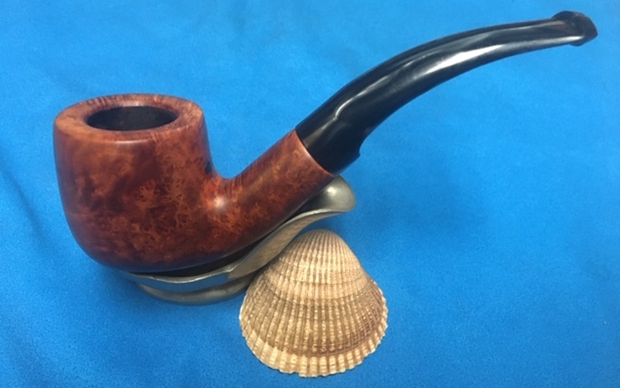
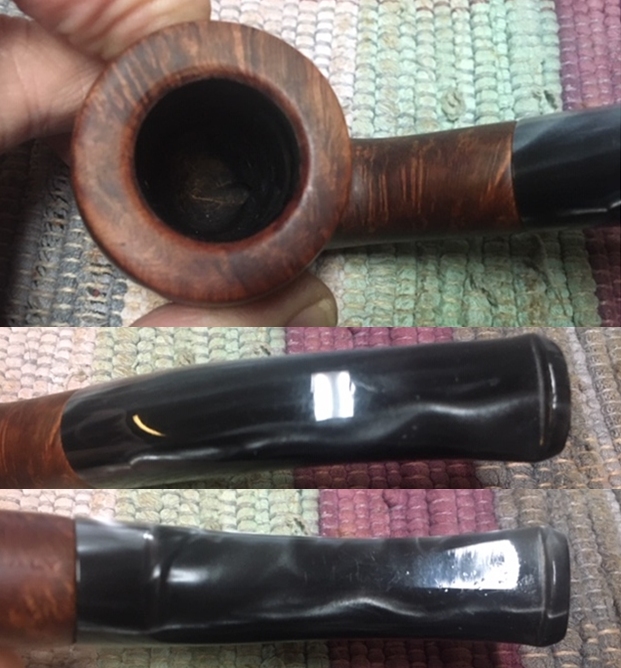
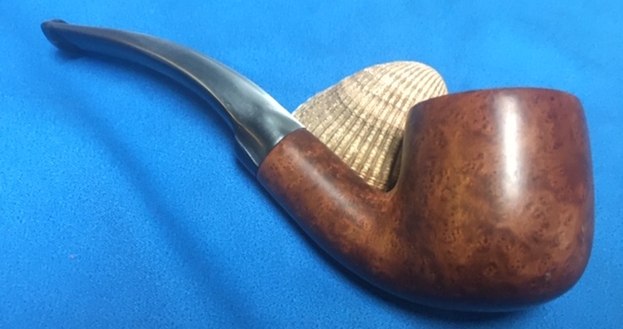
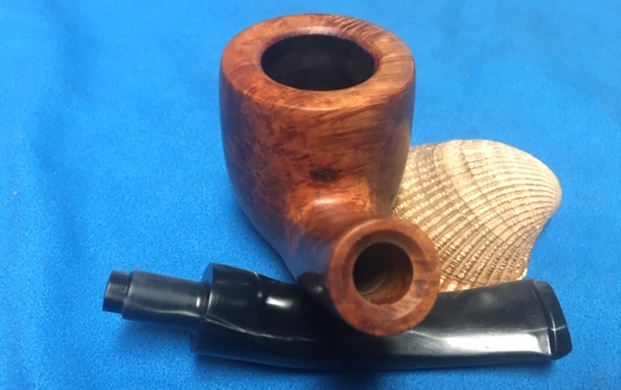
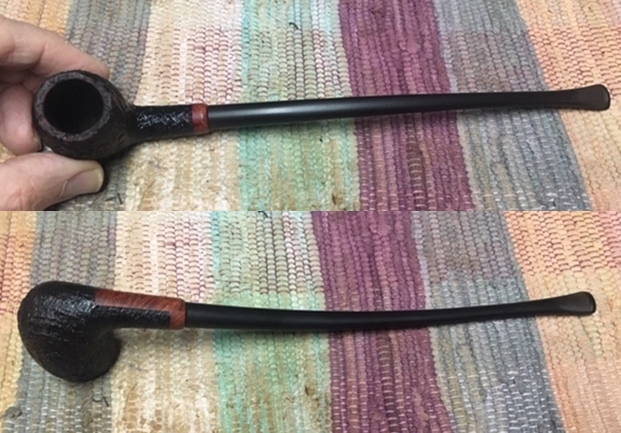
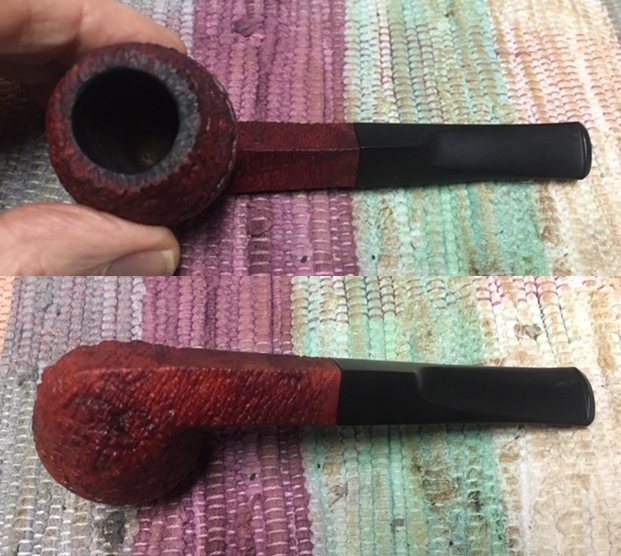
 I took some photos of the rim top and stem. The rim top and bowl looked very good. The cake and lava overflow were gone and the inward beveled rim was very clean. Jeff had been able to get rid of the darkening and lava and tars. The rim top had nicks and marks and the inner edge of the bowl was damaged and out of round. The close up photos of the stem shows that it is a much cleaner and better looking stem. The light tooth chatter was gone and the stem looked really good.
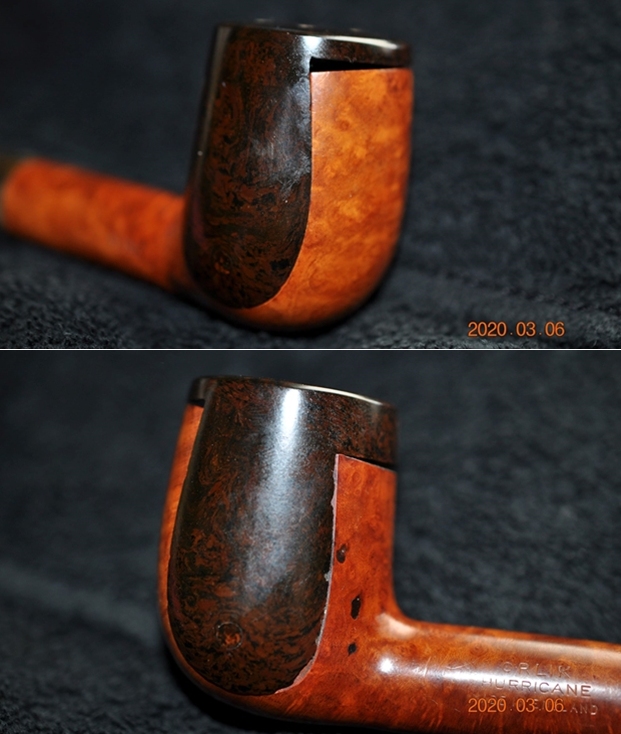
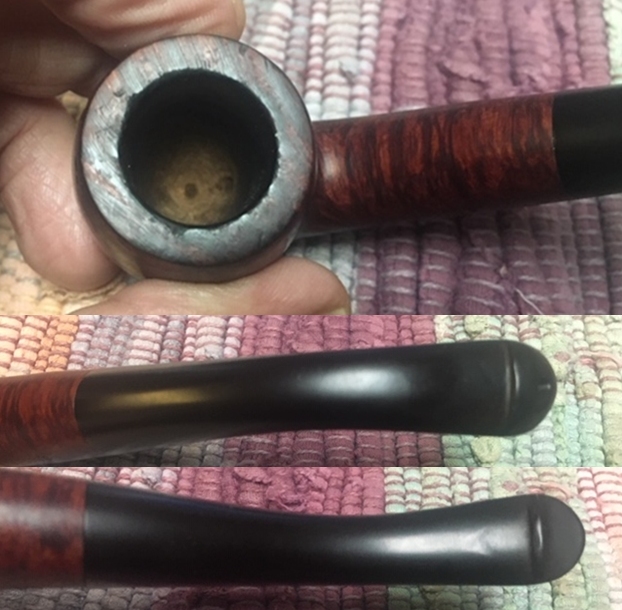 I took some photos of the stamping on the shank sides to show the condition after the cleanup. Often the stamping takes a hit with the cleaning and is lessened in it clarity. Jeff does a great job in leaving the stamping looking very good.
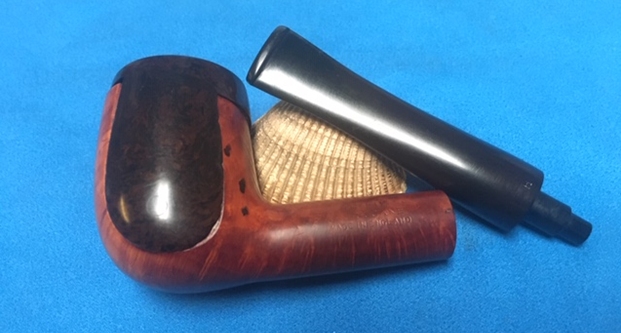
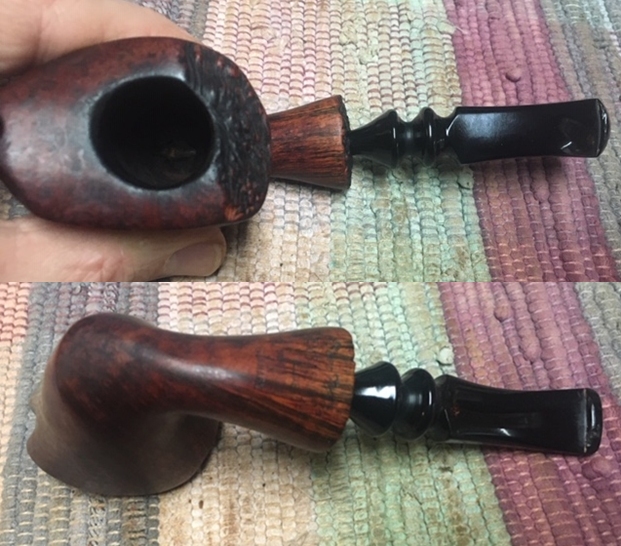
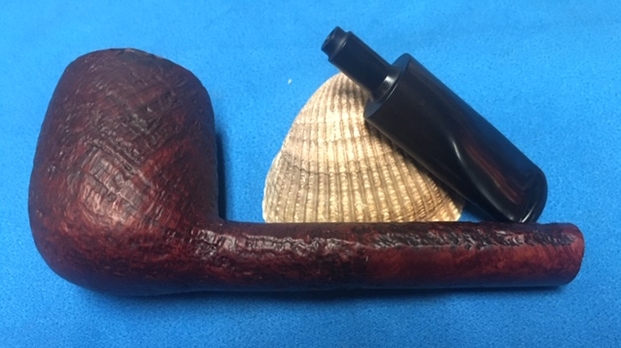
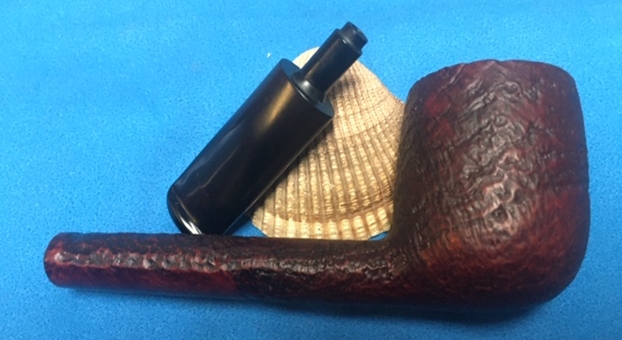
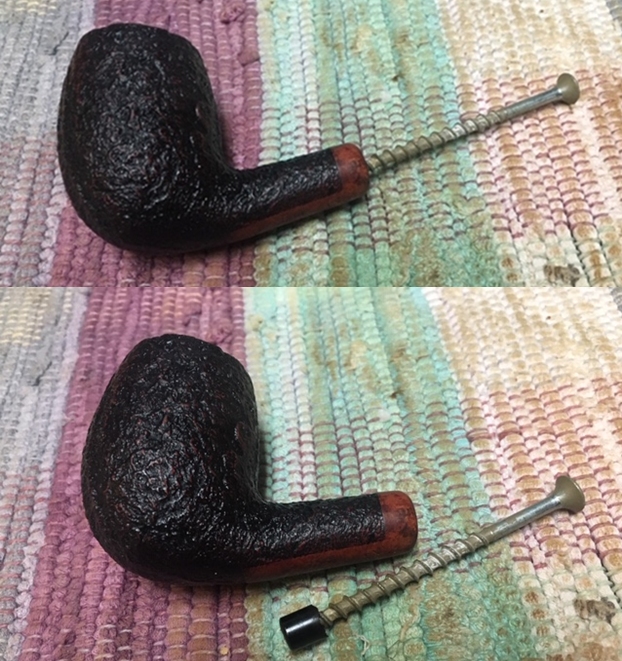
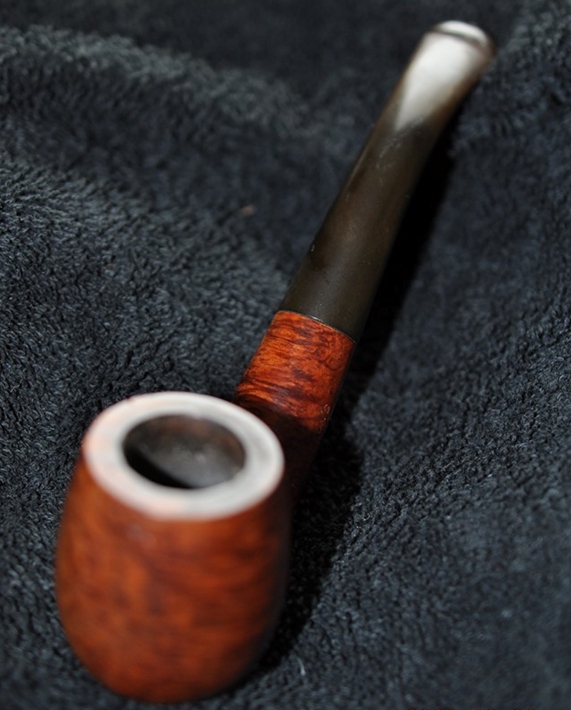
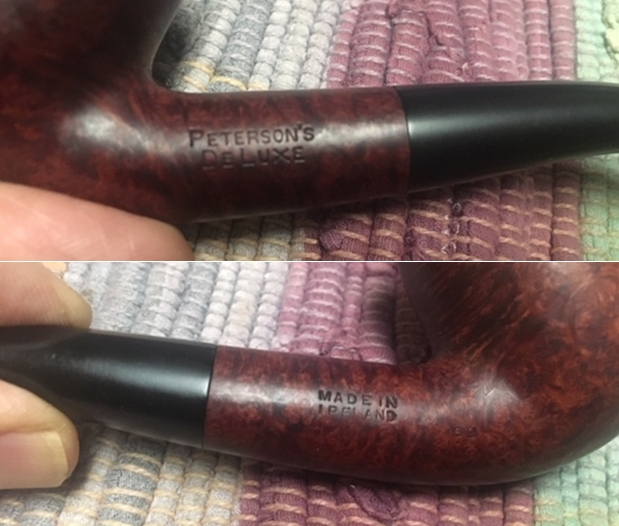 I removed the stem from the shank and took a photo of the pipe at this point. Like other Peterson’s Deluxe pipes that I have worked on this stem had a bone chimney threaded into the tenon to extend into the lower part of the mortise and provides a funnel for drawing the smoke into the mouth of the smoker.
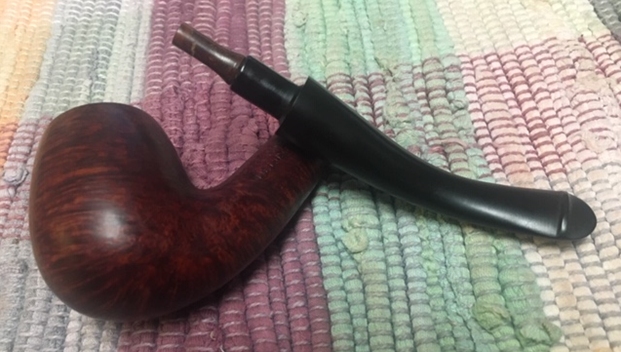 I took photos of the bone extension and did some research into the design and purpose. I googled and found the following information:
I turned to the blog Peterson Pipe Notes (http://petersonpipenotes.org/tag/peterson-chimney/). There I came on an article on the chimney. I quote a part of that below and you can read more by going to the site.
I’ve seen a lot of old De Luxe Systems from Peterson, spanning most of the 20th century. I’ve seen a lot fewer Standard Systems. I understand from the book that the Standard Systems never had the bone (later aluminum) chimney. Were those System Standard stems just tapered all the way down? The current version has that little stepped tenon, and for the life of me, I can’t understand what that really achieves. If it’s just about increasing the length of the stem, wouldn’t a natural taper all the way down look better? I’m just wondering if you know when Standard Systems developed that tenon thing.
I then continued to read through the links that were shown. The next one was a discussion on the Pipesmagaizine about the bone tenon extension or chimney. It was a fascinating discussion and I am including pertinent portions here (https://pipesmagazine.com/forums/threads/need-help-bone-extension-on-a-pre-republic-peterson-straight-dublin-120f-delux.68650/).
…The extension was detailed in the patent application in 1894 (US519135A), although it doesn’t detail the material used or the fixture type. I read somewhere (unverified I’m afraid) that the chimney changed from bone to aluminum late 60s but, as with most things ‘Pete’, I don’t think this change happened overnight since I had a 1971 Deluxe with a bone chimney (it may have been scavenged from a different pipe, I guess). As others have said, trying to remove it if it is stuck will almost certainly break it. If you’re desperate, you can put a micro-screwdriver through two of the holes in the side and gently turn, but personally, I wouldn’t risk it…
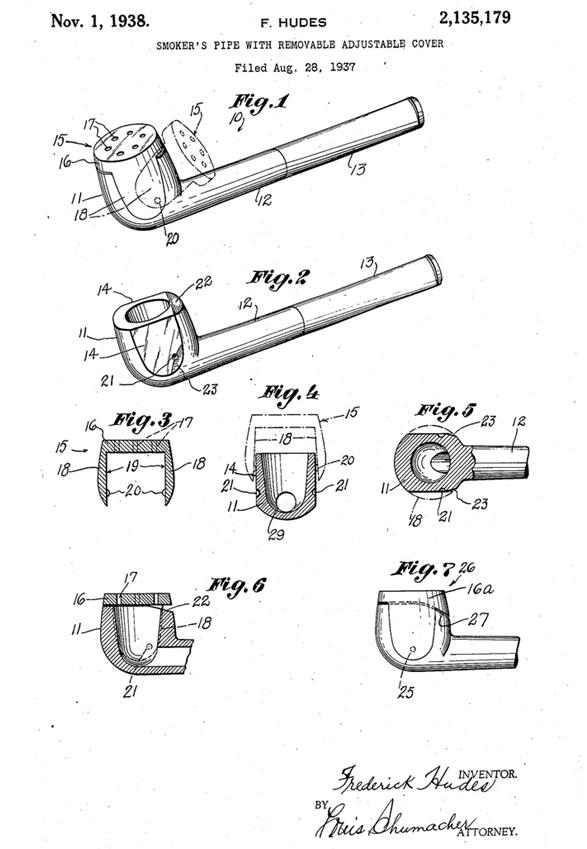
…The third thing I want to call your attention to is the tenon extension. Traditionally (if not during the Dublin Era), tenons and mouthpieces have been of great importance to Peterson. This one, while molded and not a bone screw-in, features the extended “chimney” so crucial to correct tenon-mortise airflow for the P-Lip mouthpiece. The graduated bore of the P-Lip as well as this extension makes the pipe a “sub-System” (as we call it in the book), which means that it will perform considerably better than a traditional fishtail. This type of molded extension goes all the way back to the original molded-stem Patent mouthpieces, incidentally, and doesn’t seem to have disappeared (alas!) from the Peterson workshop until the 1950s. This may have been due in part to the fashion of implanting stingers, and not merely to brand amnesia, but whatever the reason, it is unfortunate…
…Here’s what the patent app says: (extension 10 is chimney, pocket 5 is sump) the stem and mouth-piece may be made round, oval or of any other desired shape. It will be seen that the tubular extension 10 extending into the pocket 5, not only serves to deflect the nicotine and other obstructions into the said pocket as well as to conduct the saliva into the latter, but that it will also serve effectually to prevent any obnoxious matter from the said pocket to return into the stem, even if the pipe be inverted; the annular space around said flange serving to receive the contents of the pocket in case the pipe should be tilted.
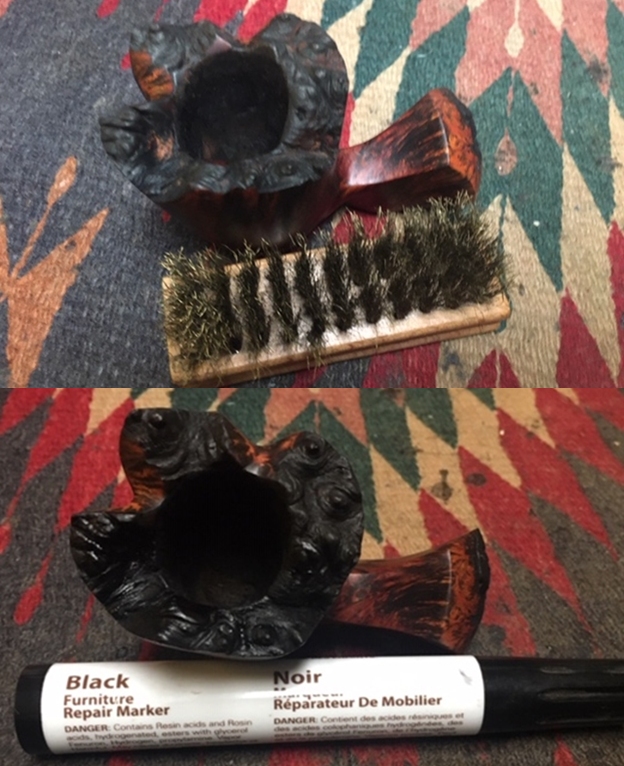
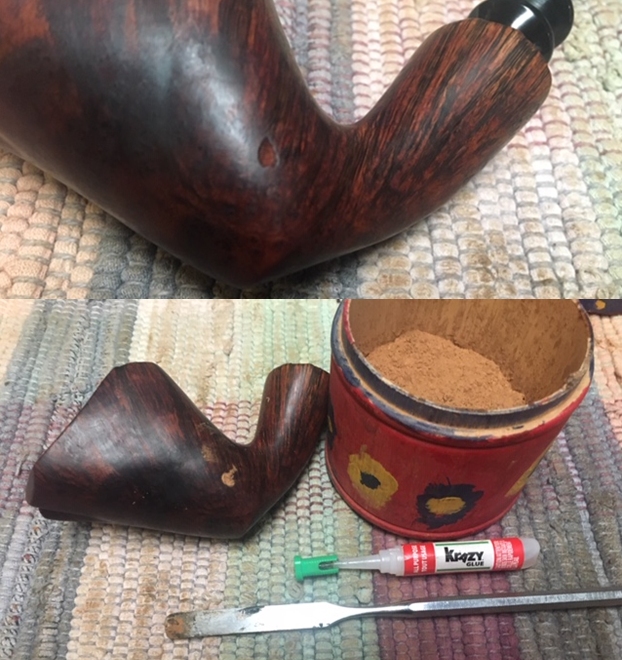
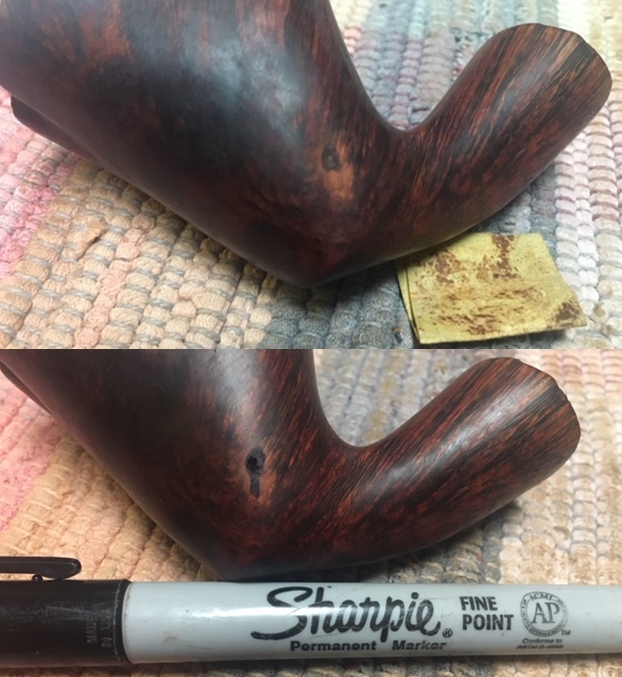
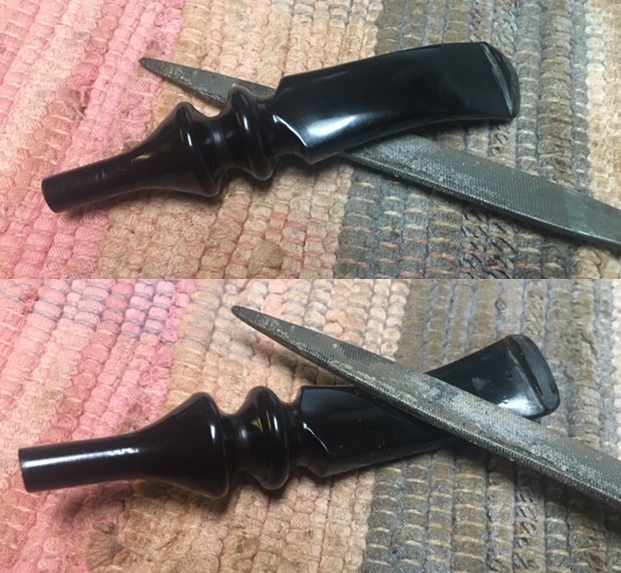
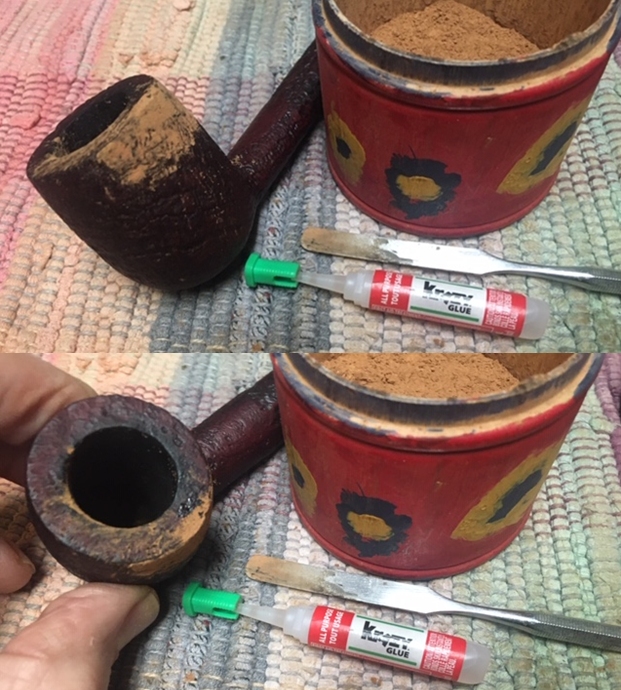
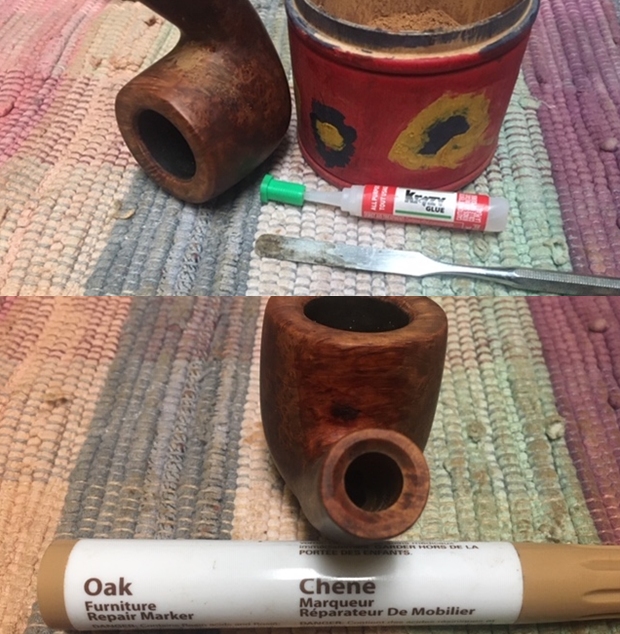
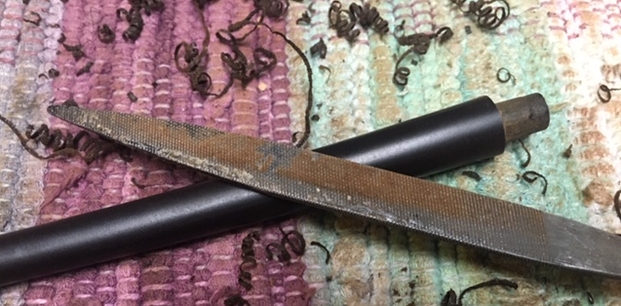
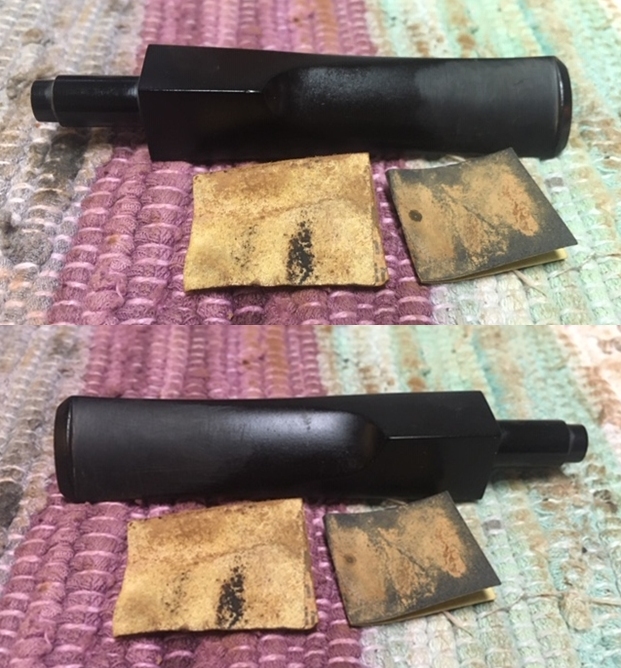
I found this a fascinating read. The chimney was an integral part of the airflow of a P-lip system.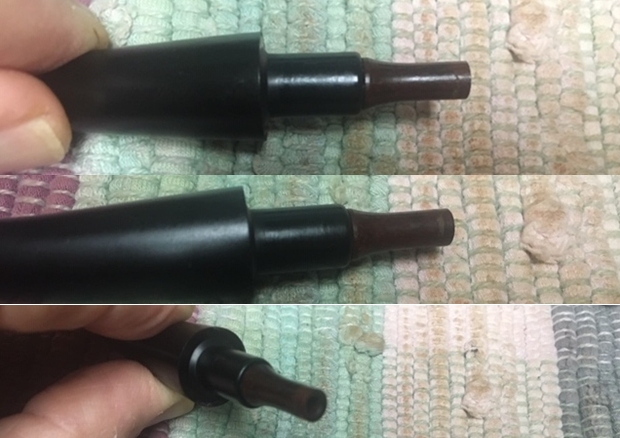 I started my restoration work on this pipe by addressing the out of round inner edge of the bowl and the damage to the rim top. I used a folded piece of 220 grit sandpaper to clean up the edge and give it a slight bevel and worked over the rough areas on the rim top with the same sandpaper. The finish rim top looked very good. All that remained was to polish it with micromesh.
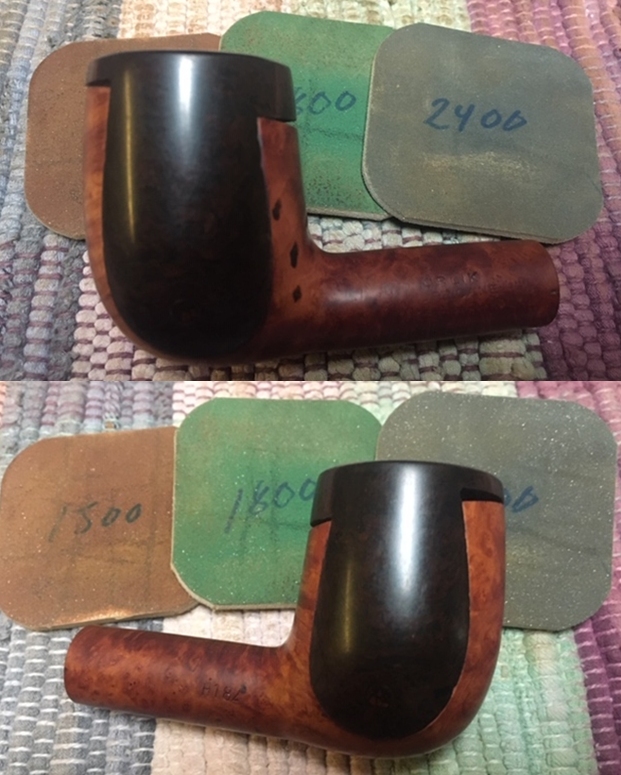
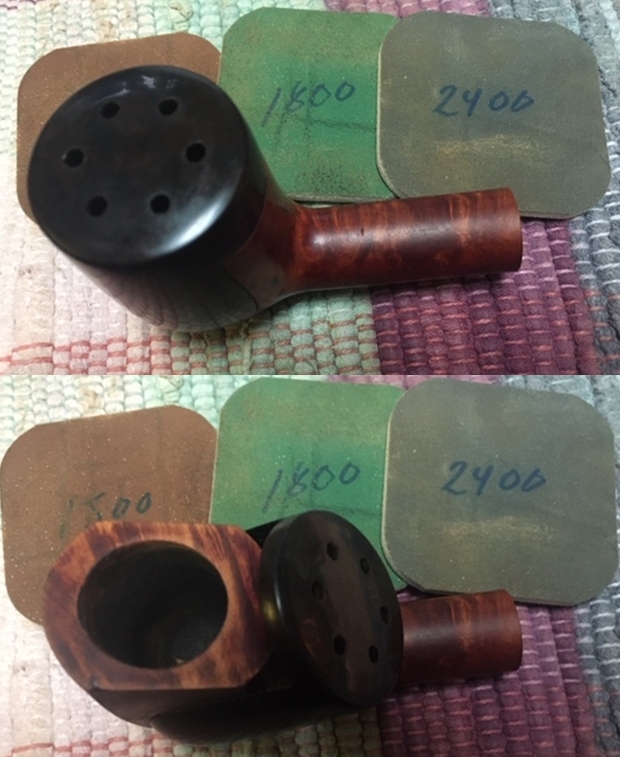
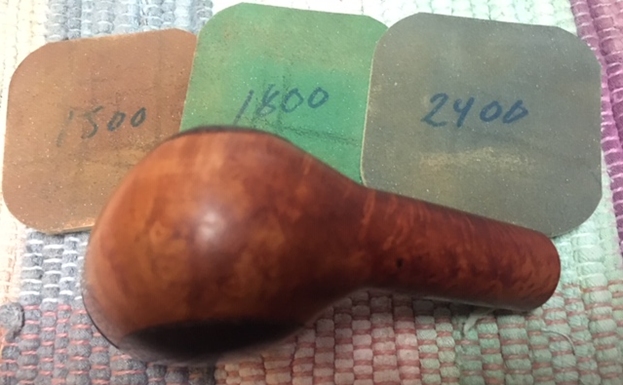
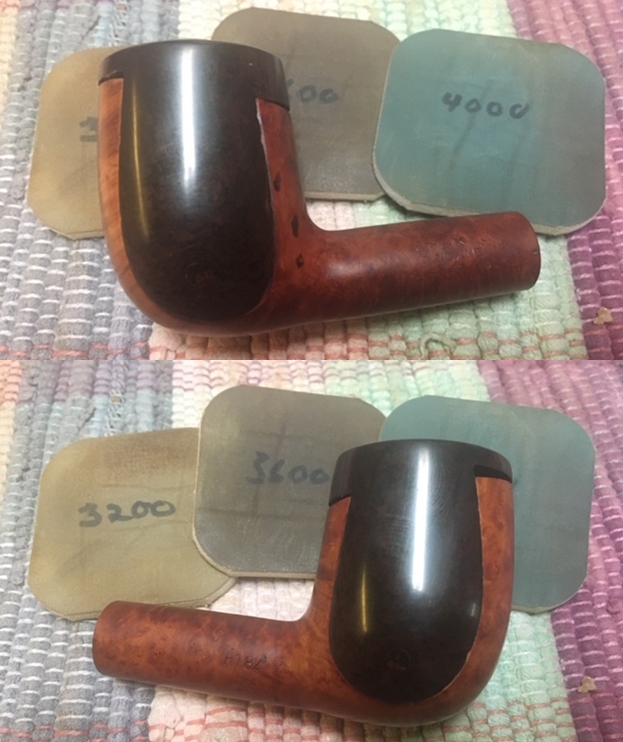
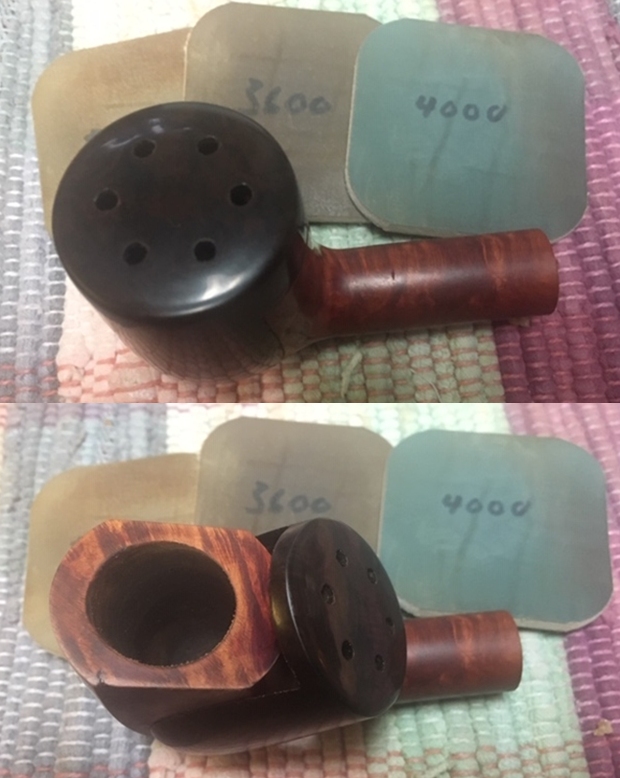
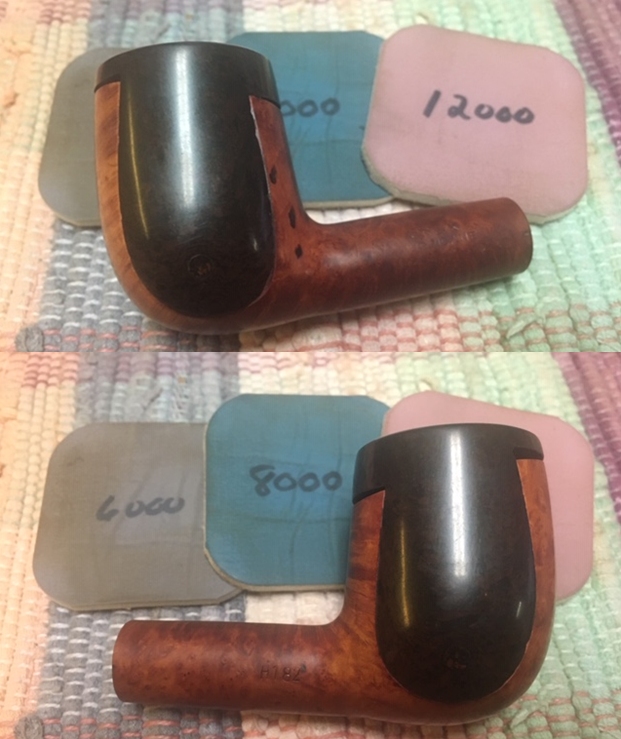
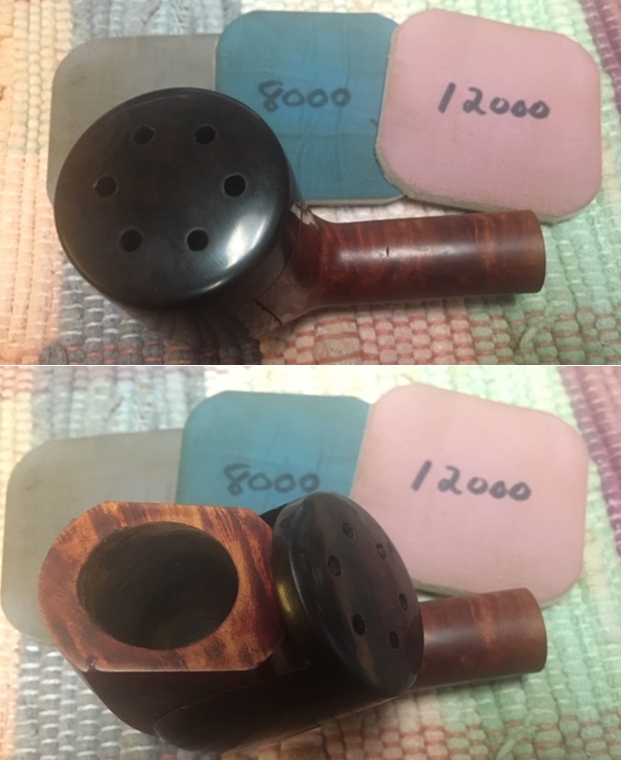
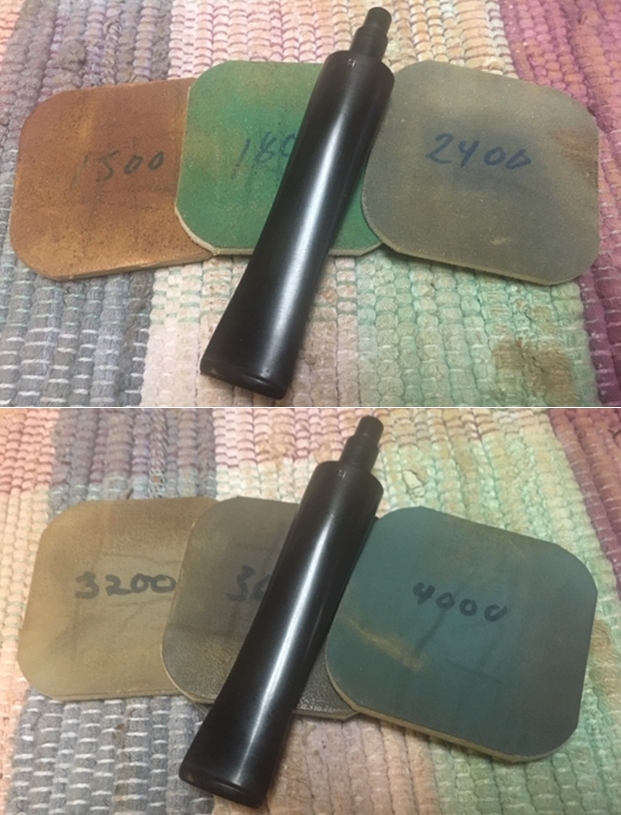
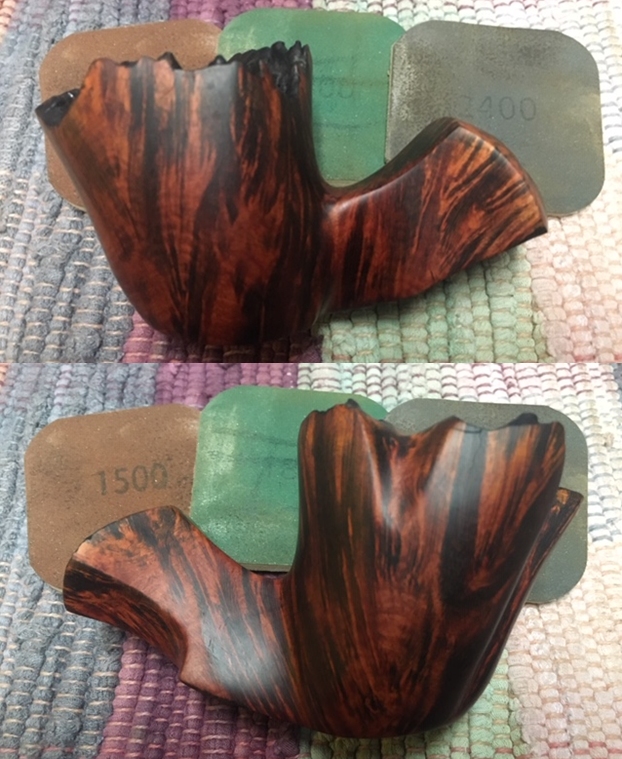
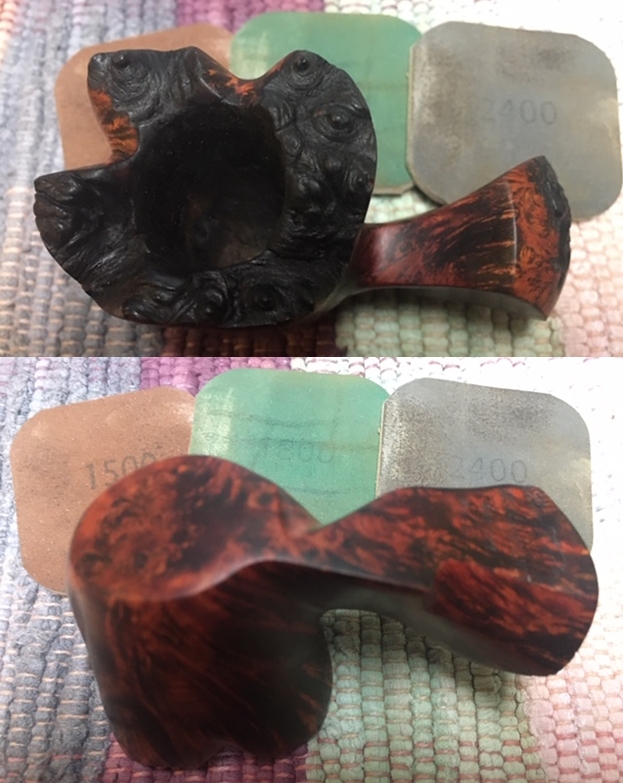
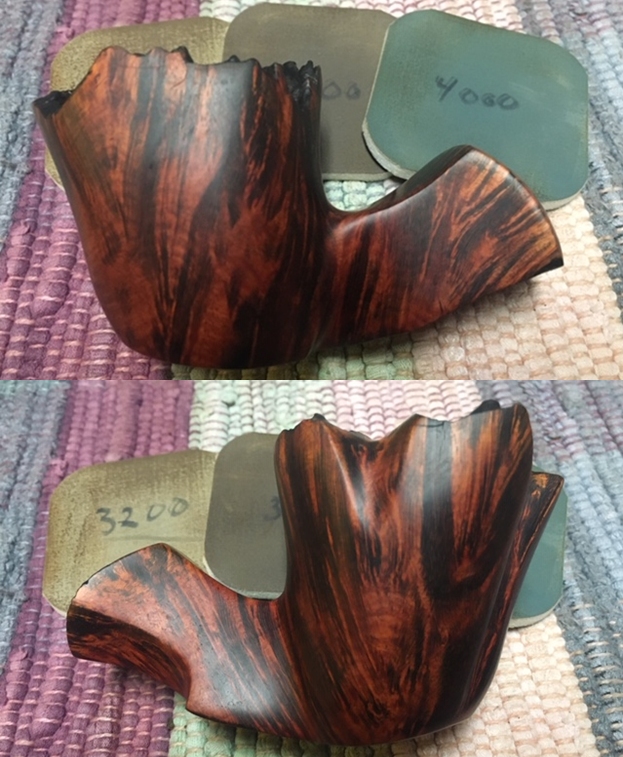
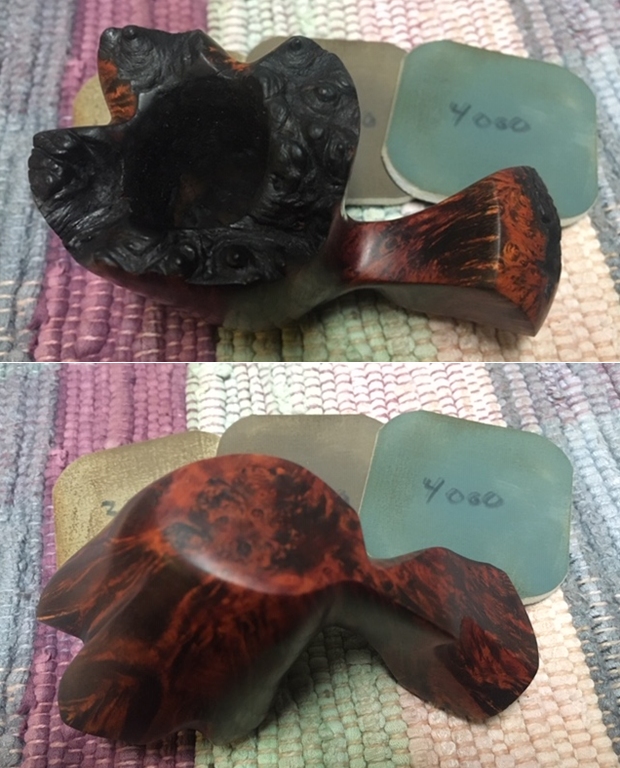
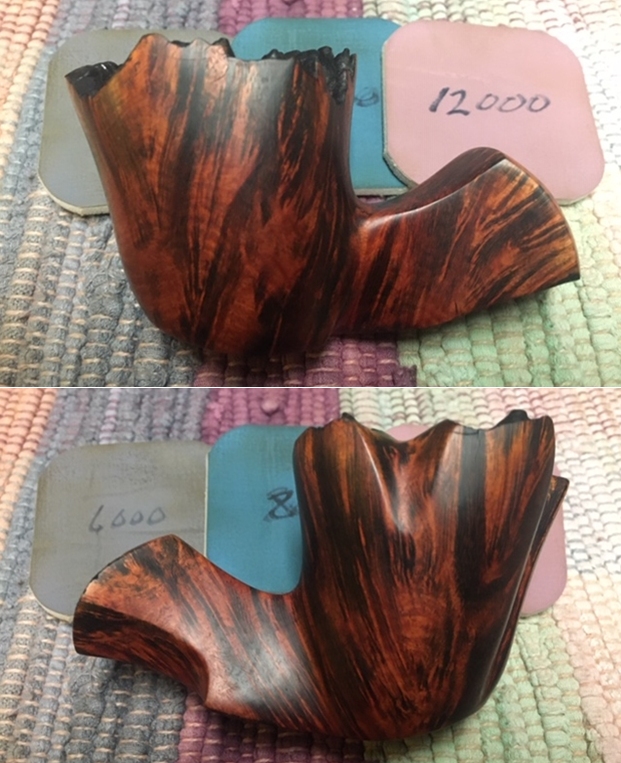
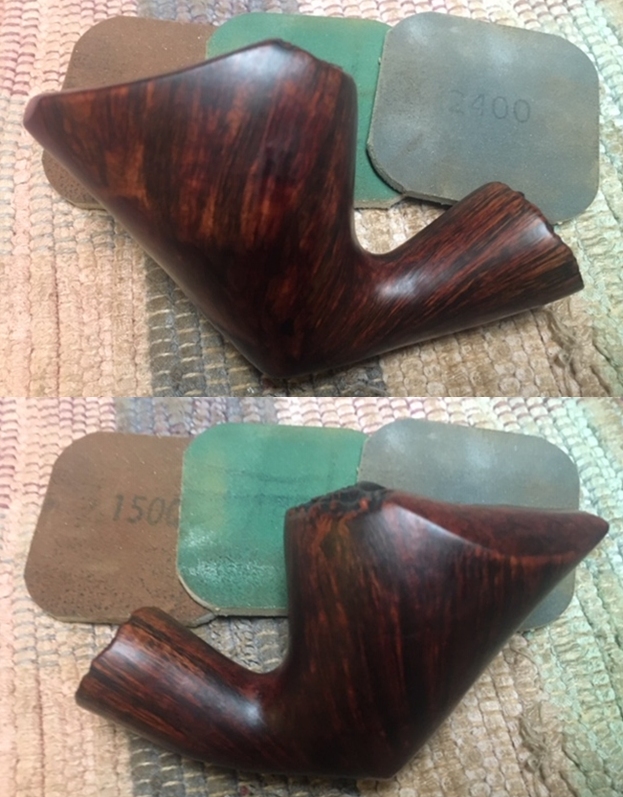
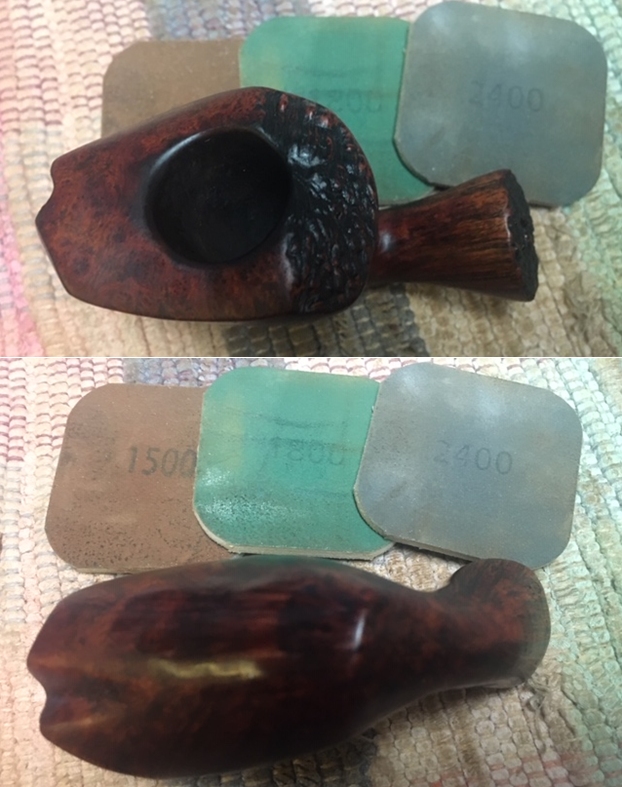
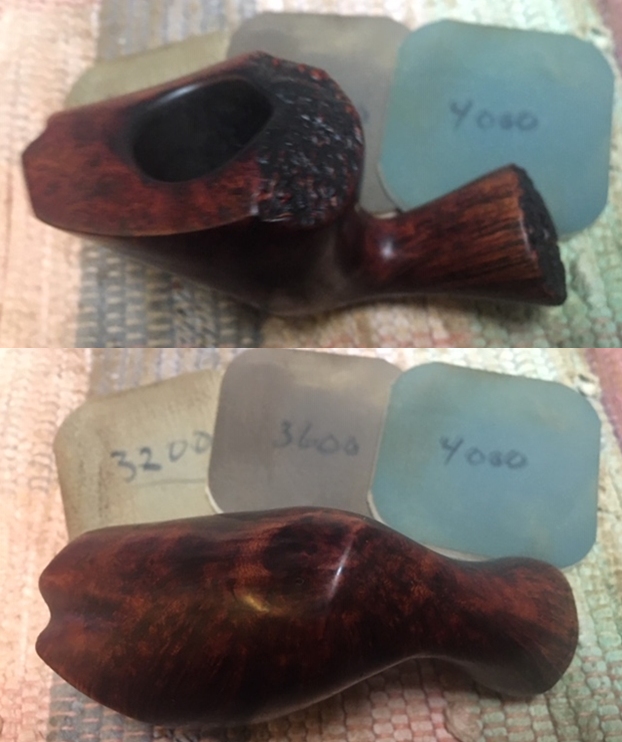
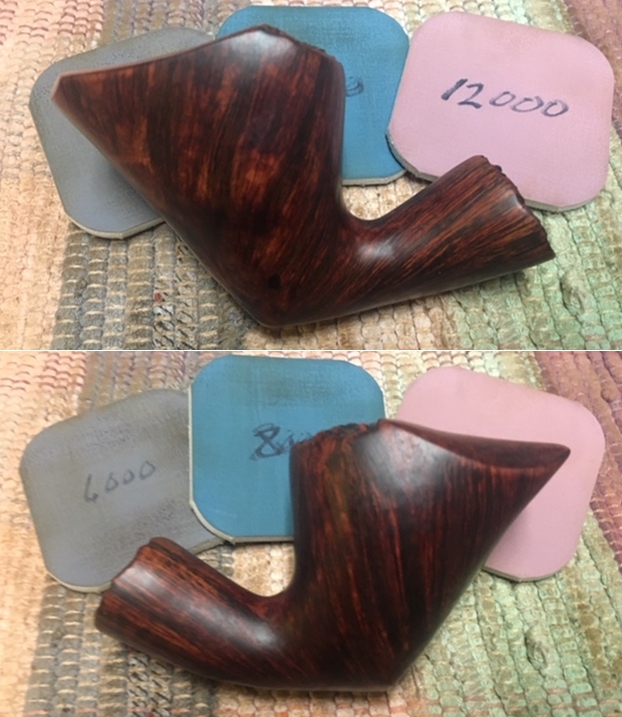
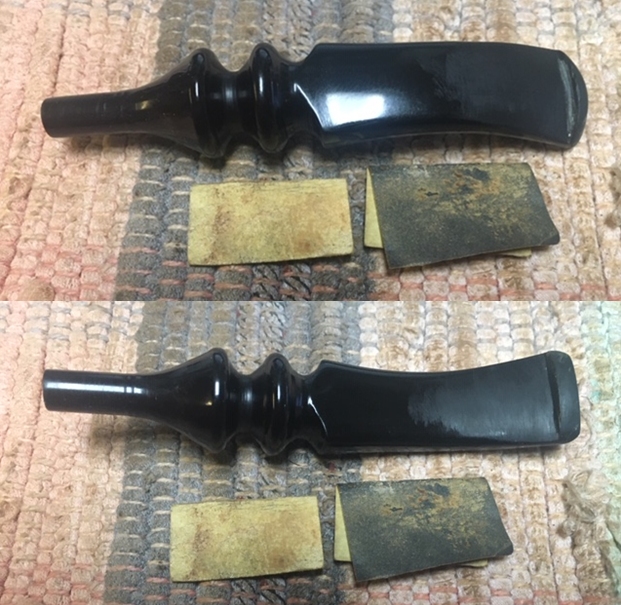
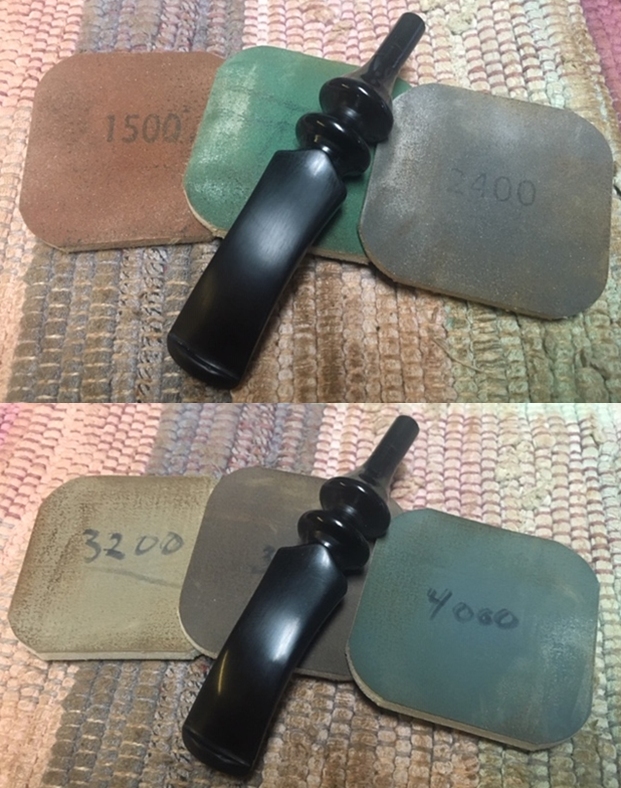
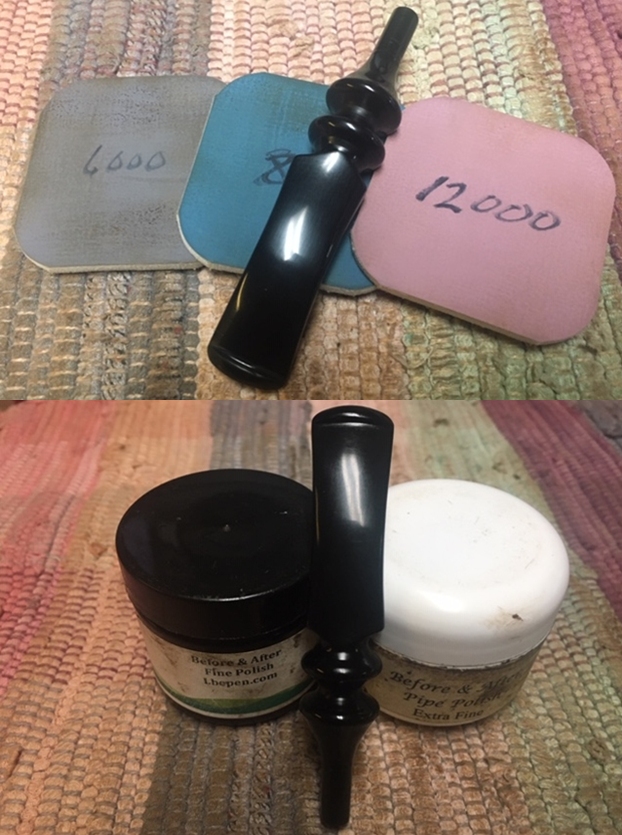
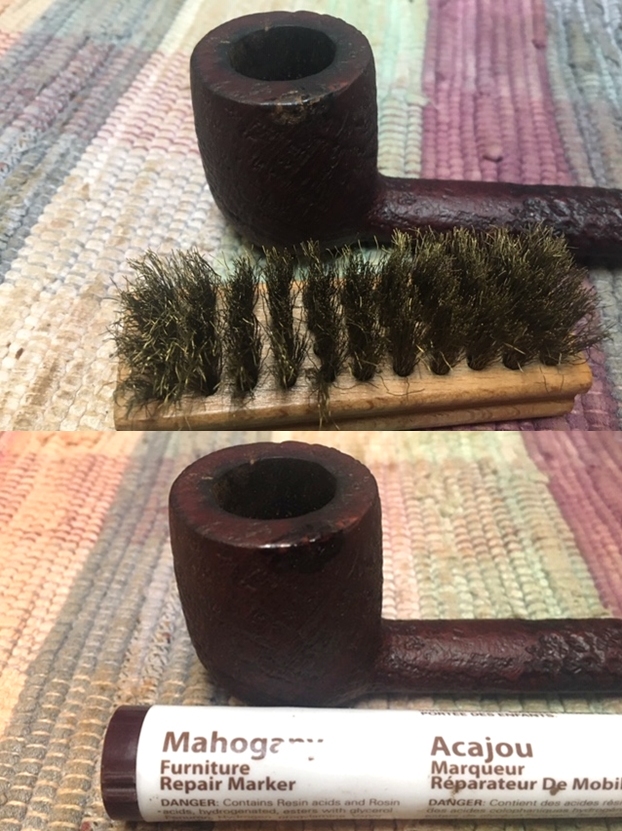
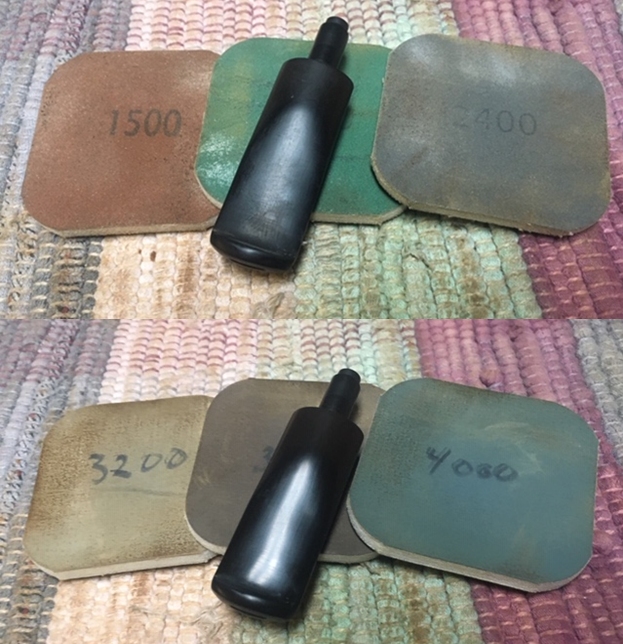
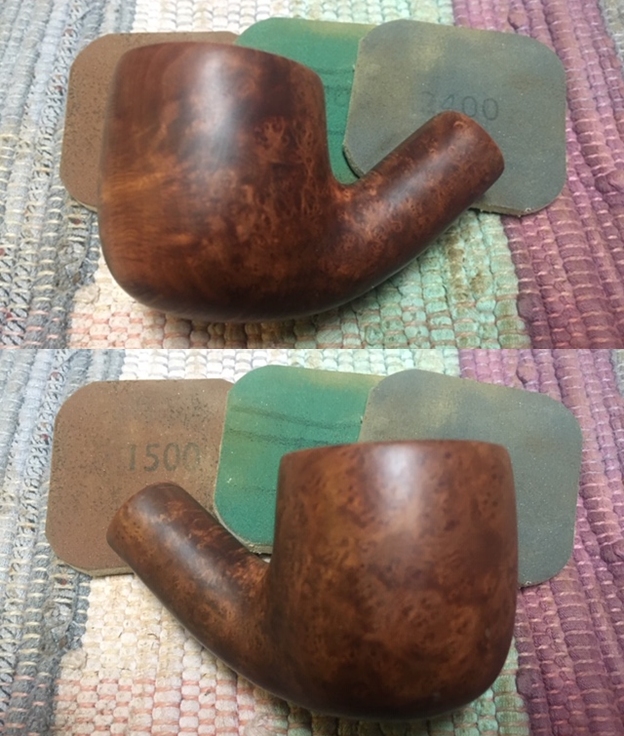
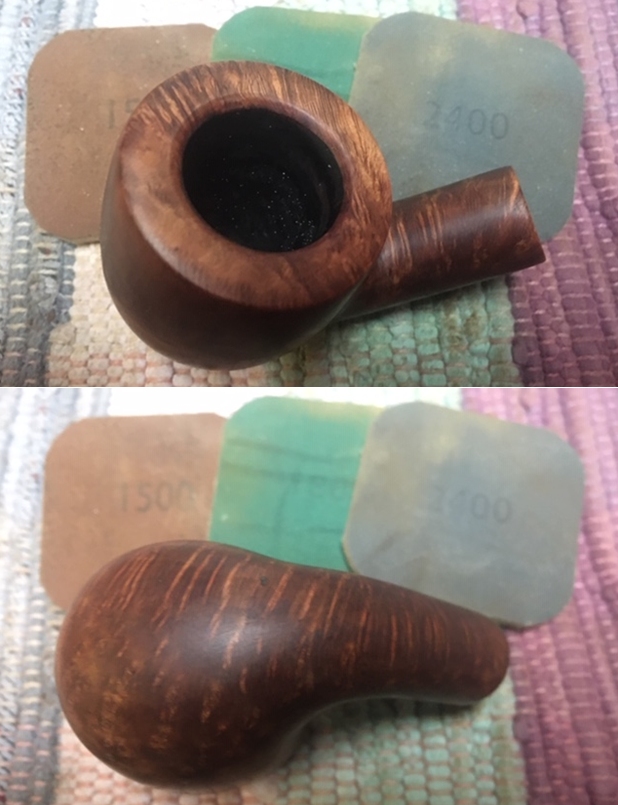
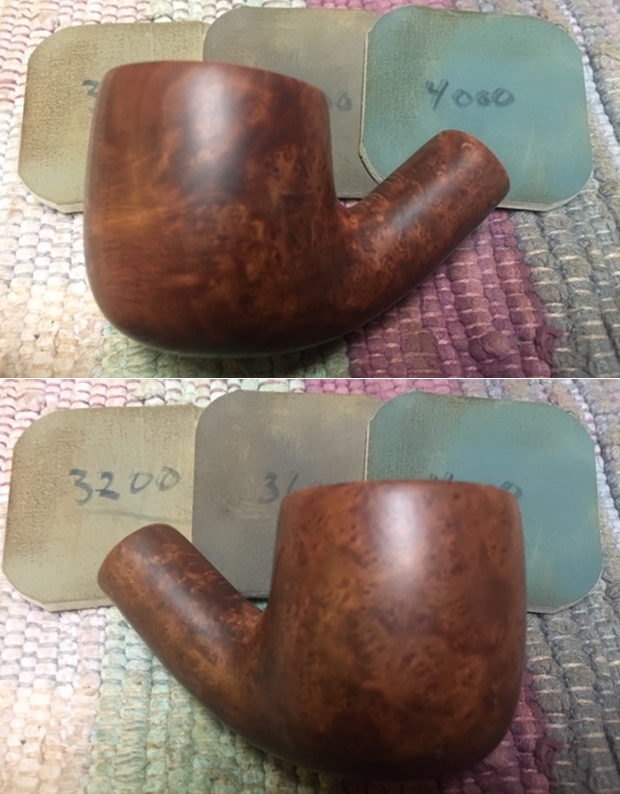
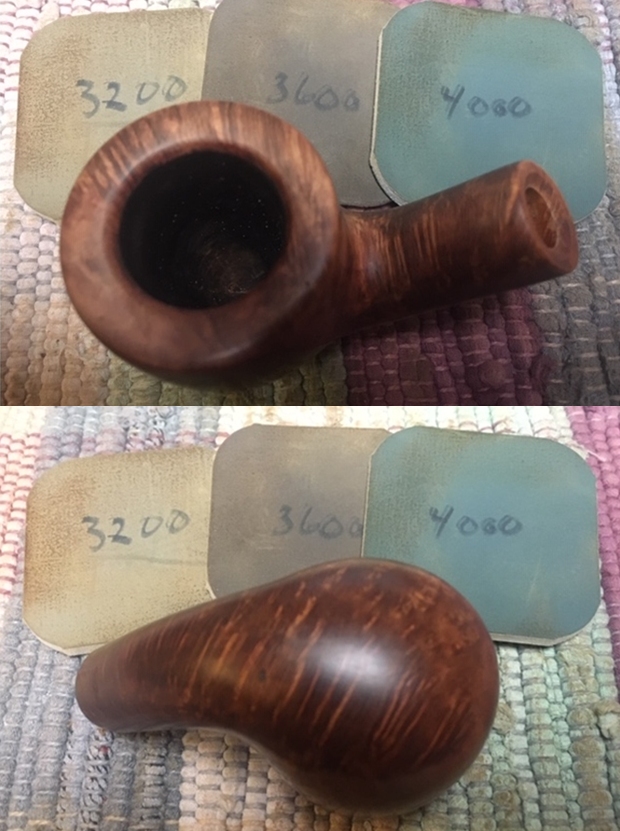
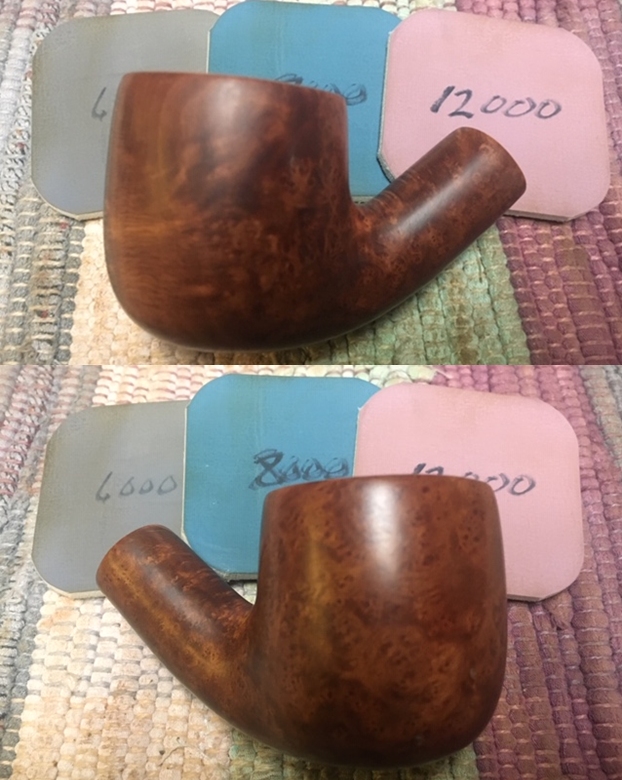
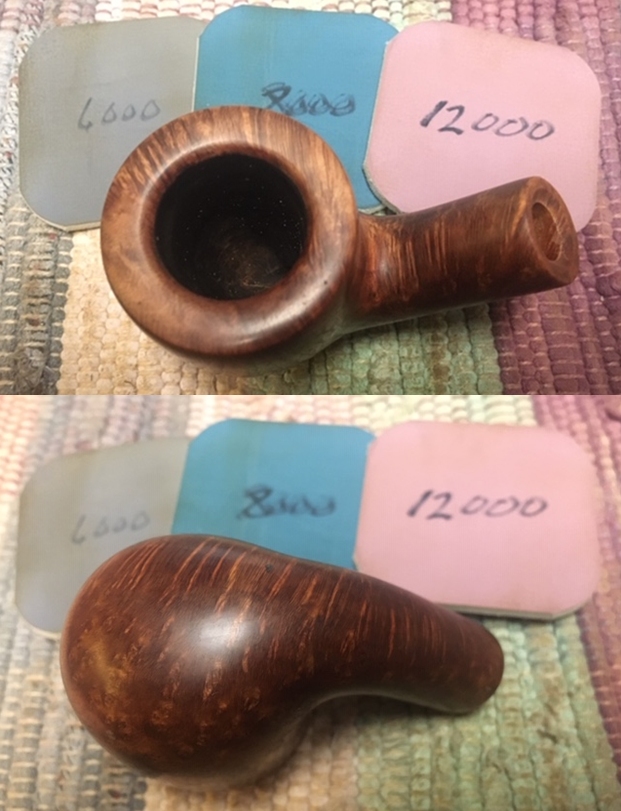
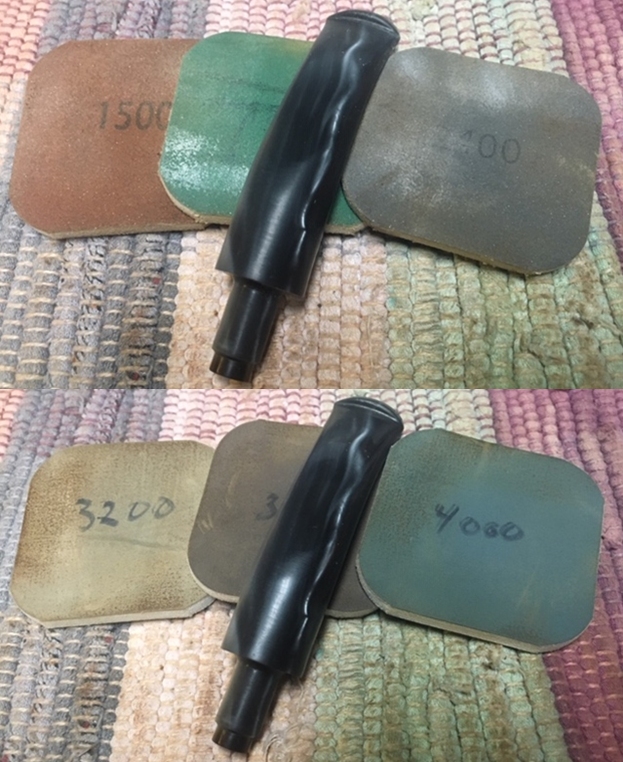
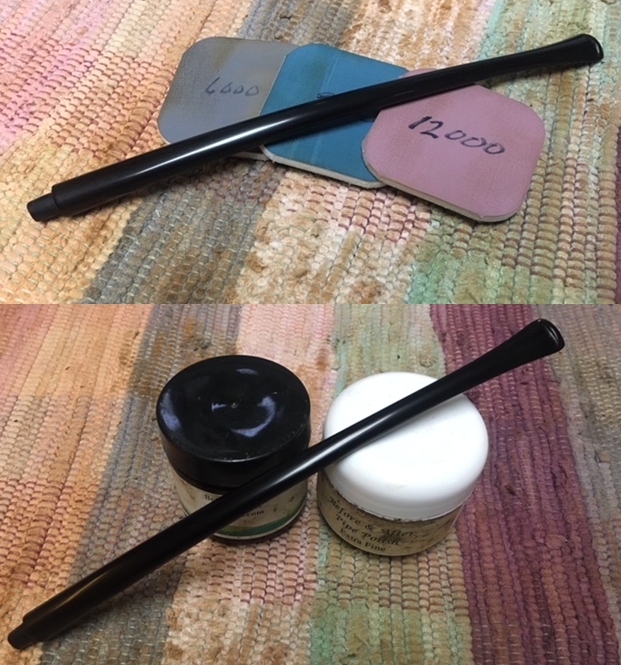
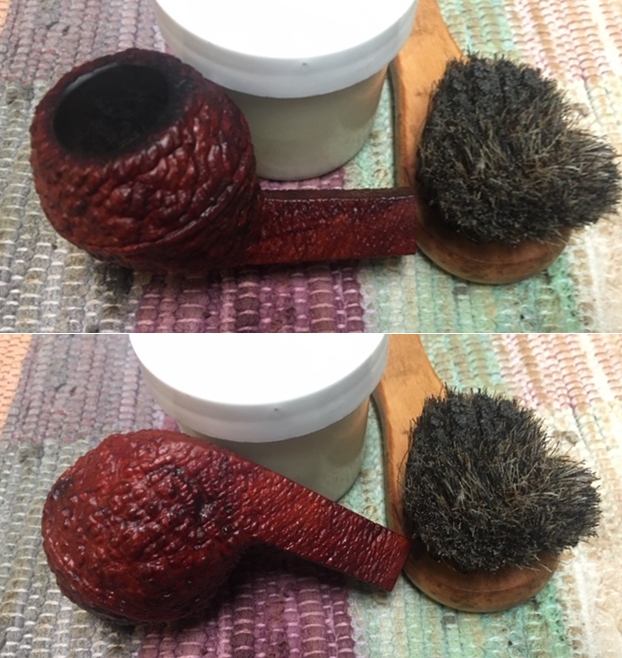
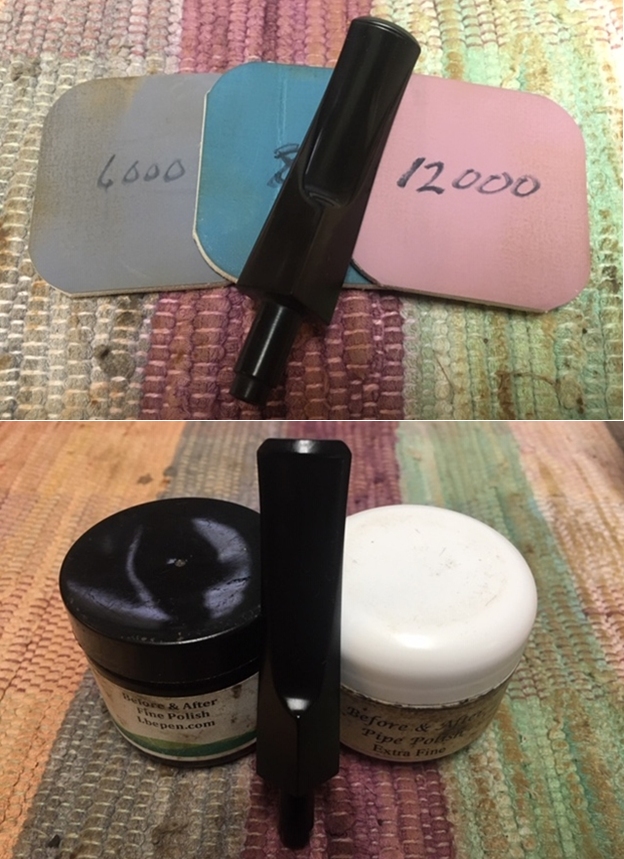
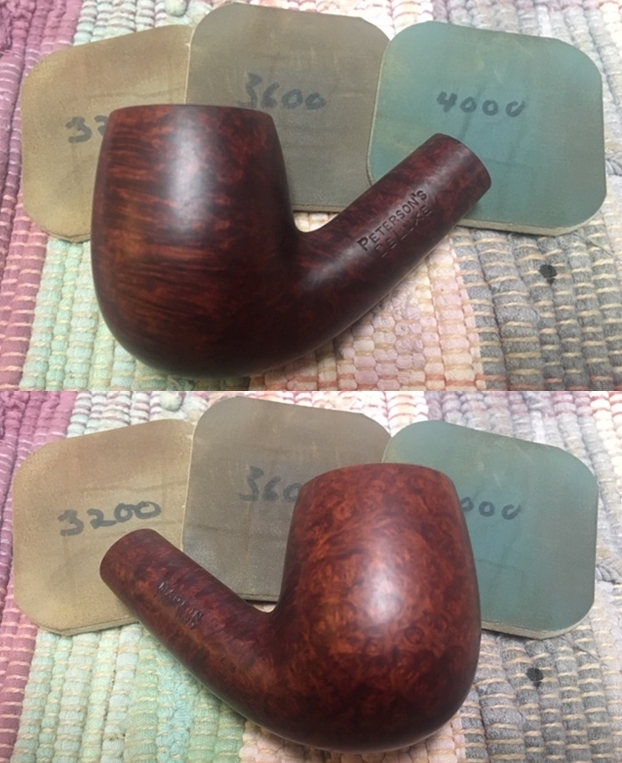
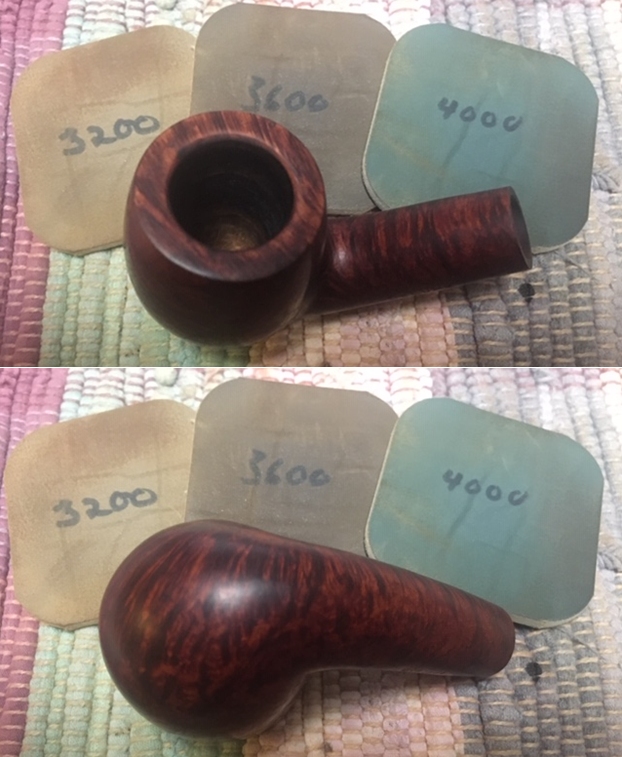
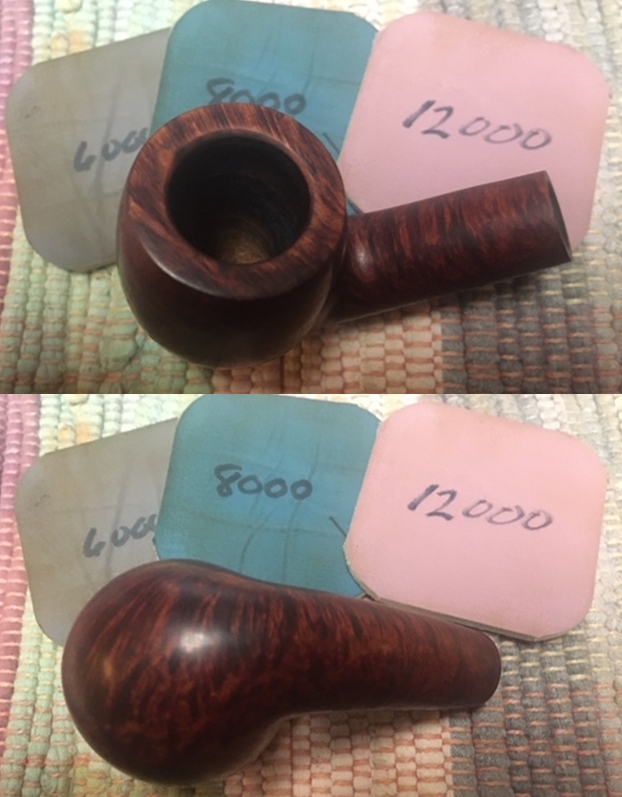
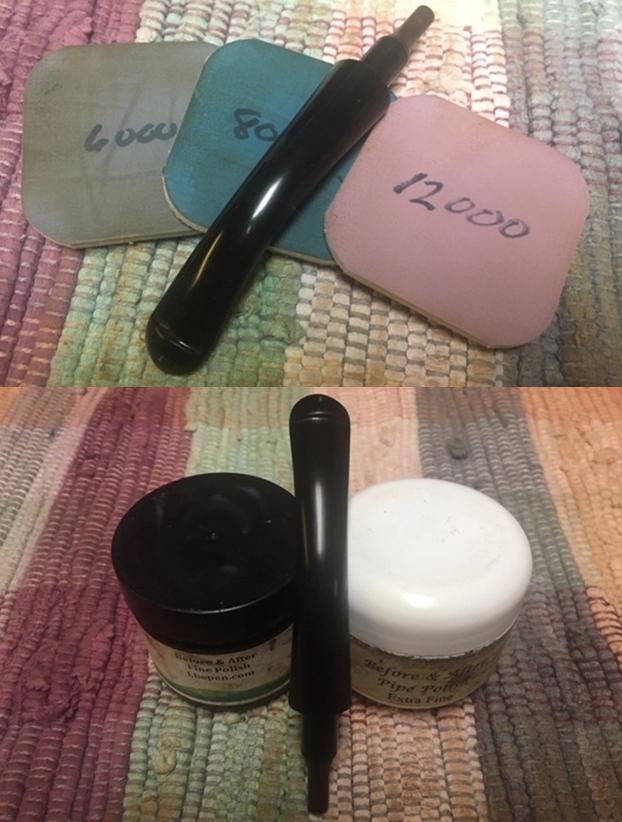
 I started my polishing regimen on the bowl. I used nine worn micromesh sanding pads and dry sanded the bowl with 1500-12000 grit pads. I wiped the bowl down with a damp cloth after each pad. The bowl really shines by the final three pads.
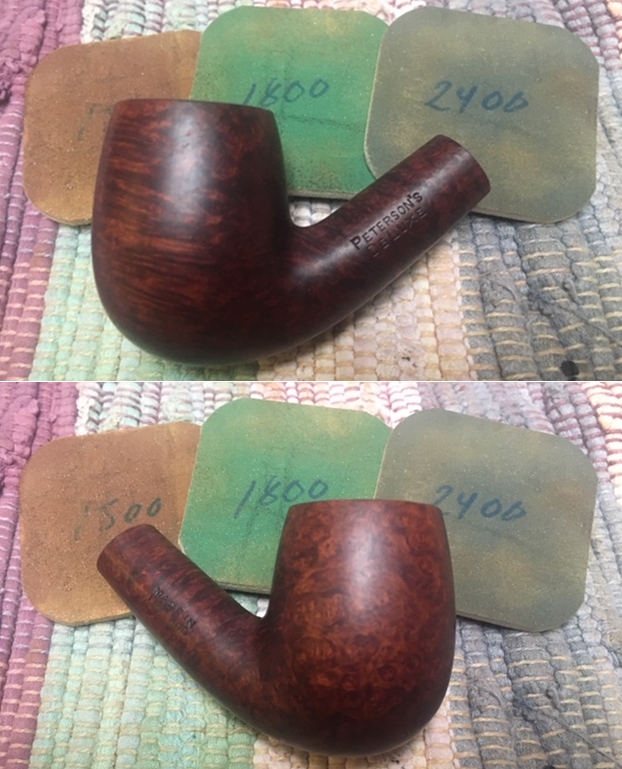
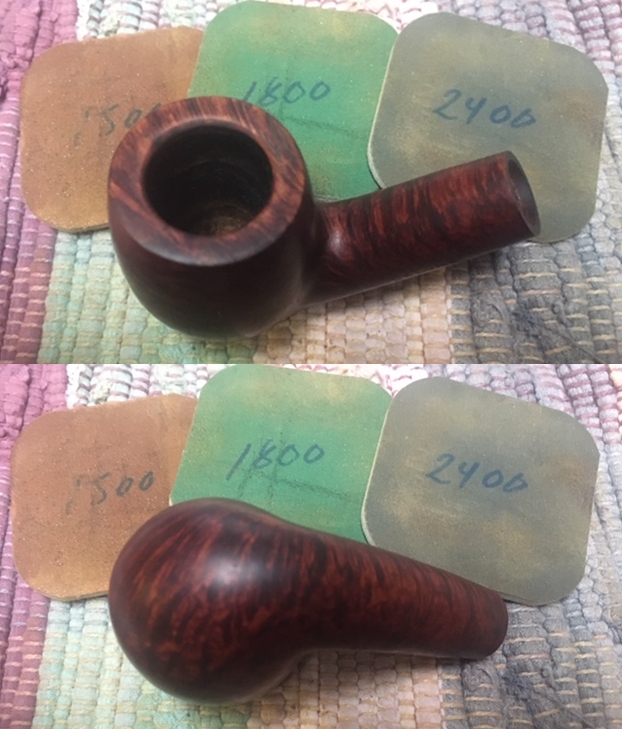
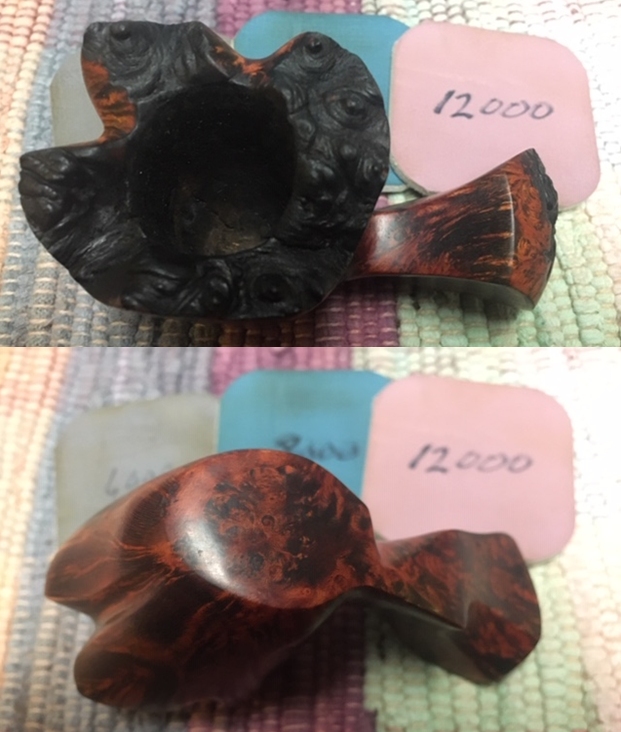
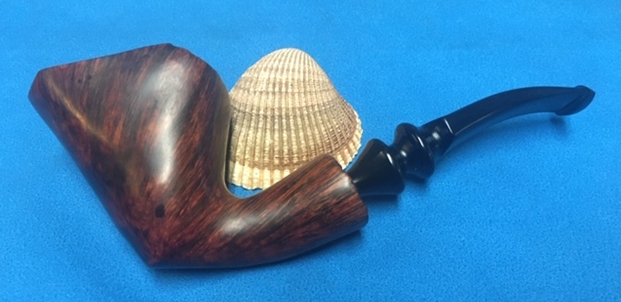
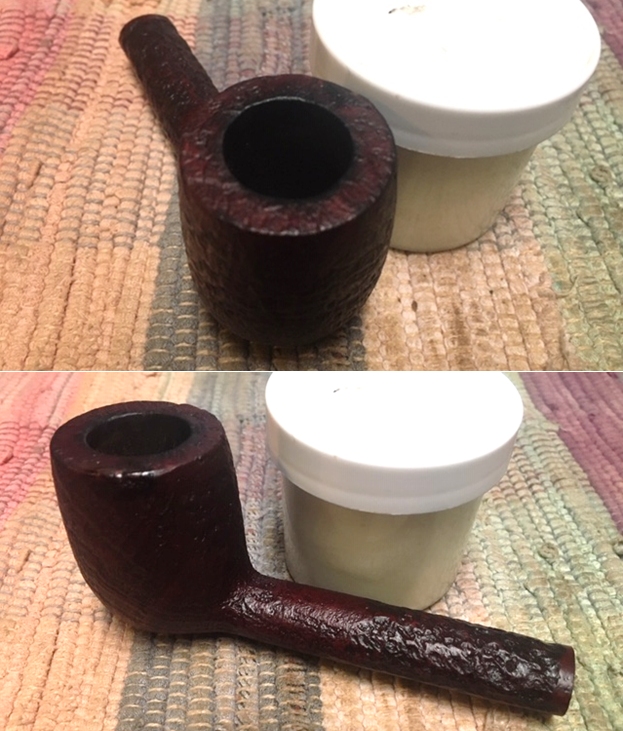
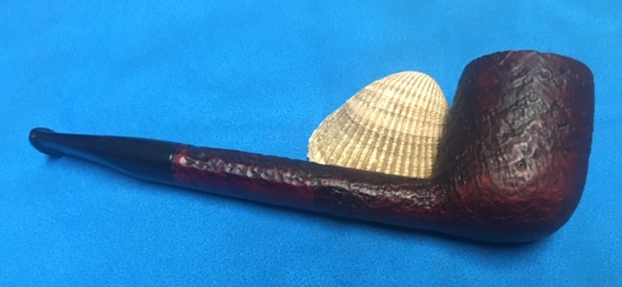
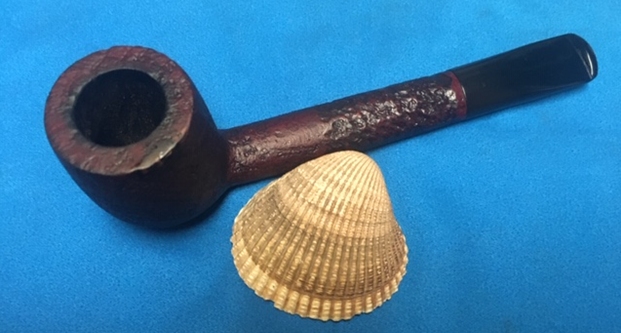
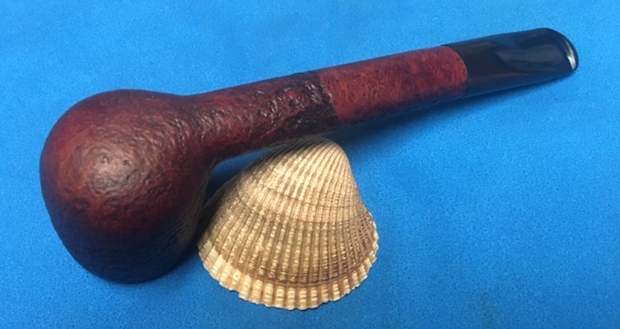
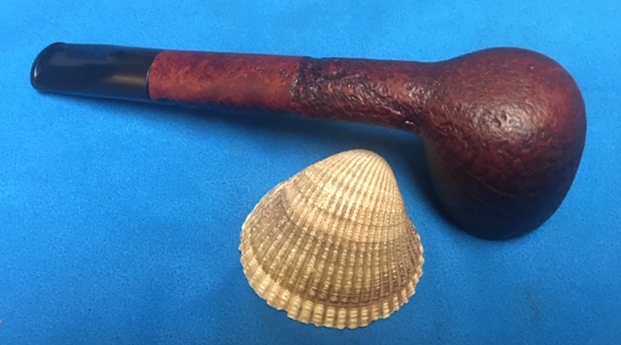
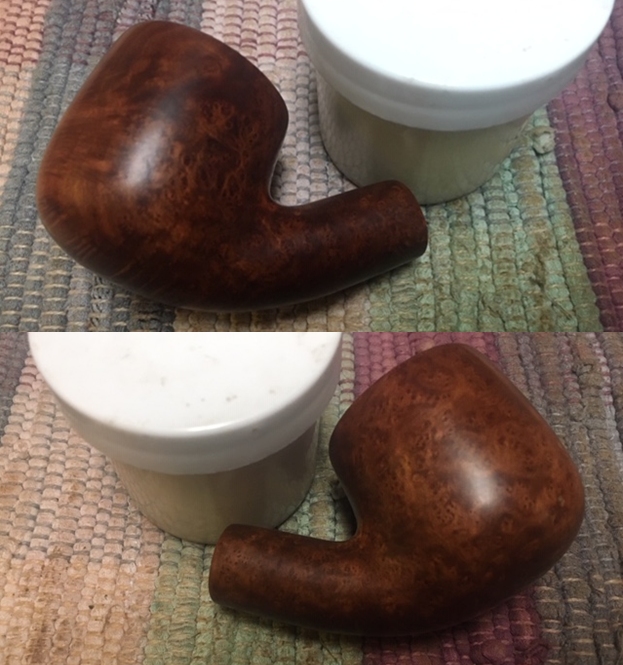
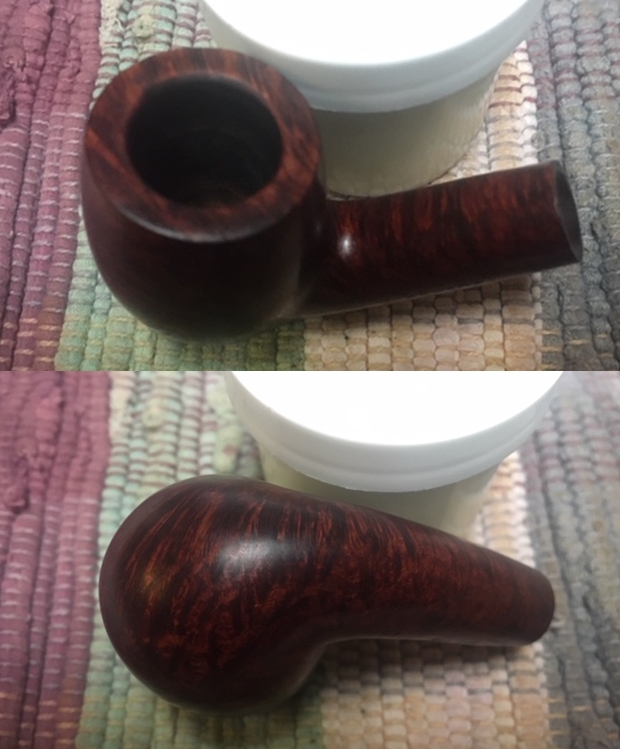
 I worked some Before & After Restoration Balm into the surface of the briar with my fingertips to clean, enliven and protect it. I let the balm sit for a little while and then buffed with a cotton cloth to raise the shine. The photos show the bowl at this point in the restoration process.
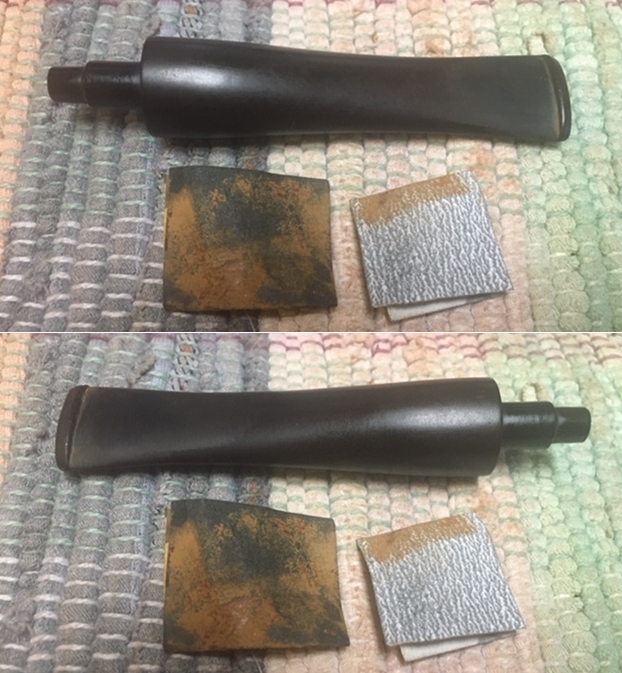
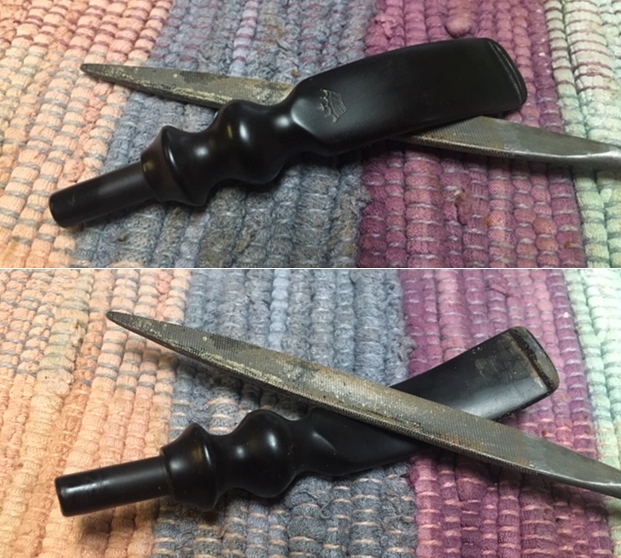
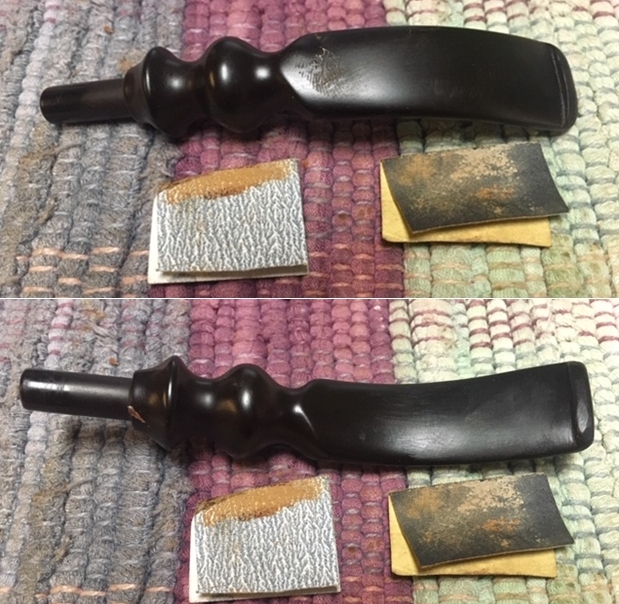
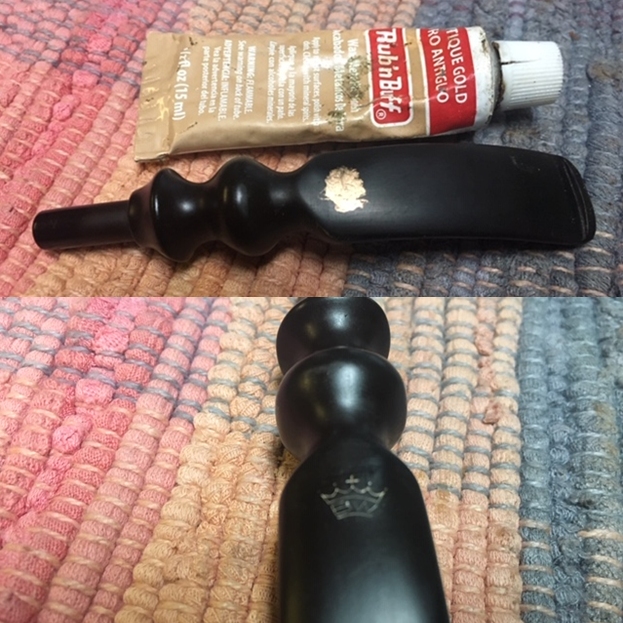
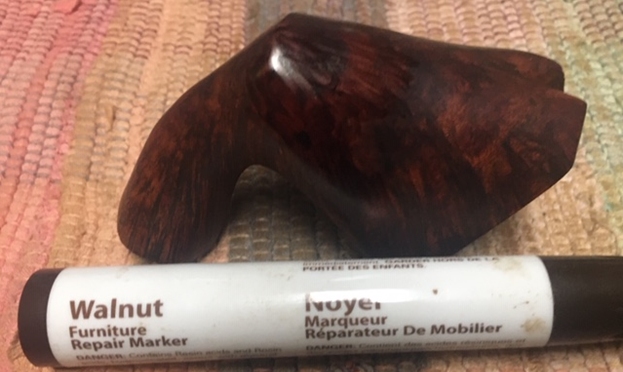
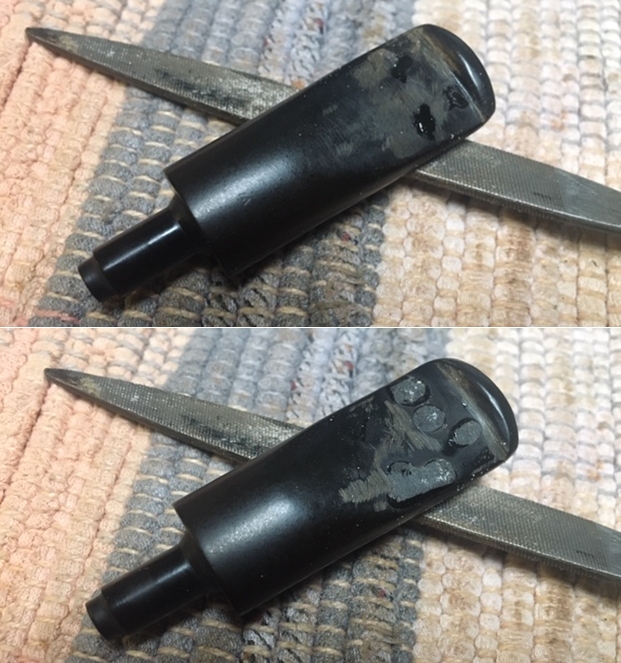
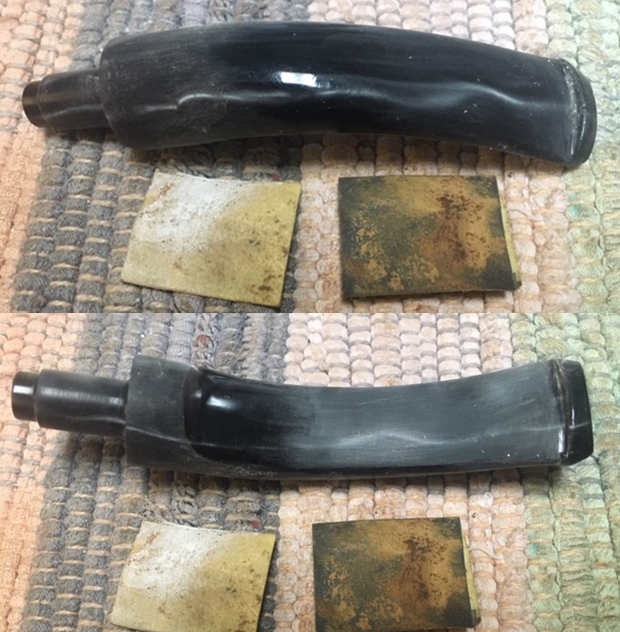
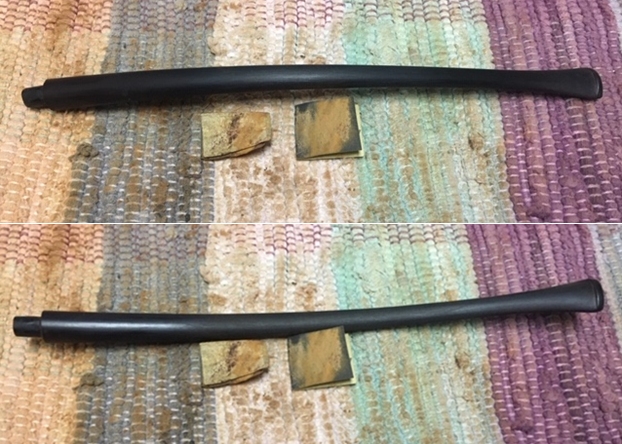
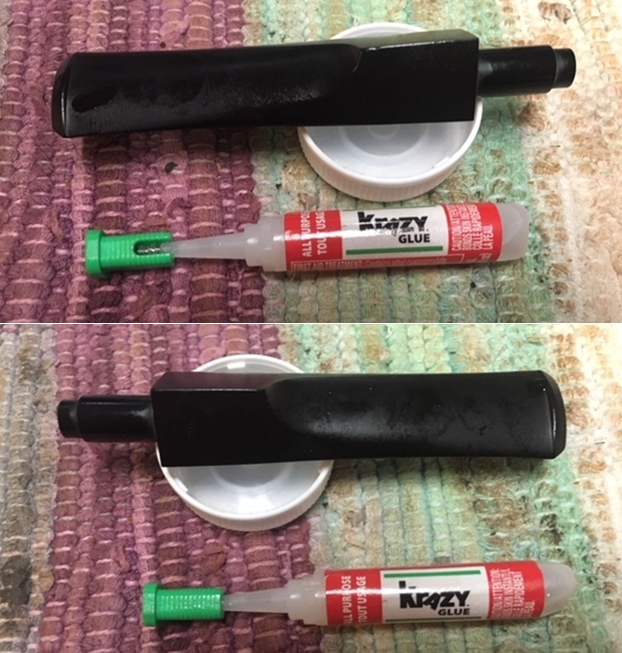
 I set the bowl aside and turned my attention to the stem. I sanded out the tooth chatter and blended in the repairs with 220 grit sandpaper and started to polish it with a folded piece of 400 wet dry sandpaper. Once it was finished it was smooth.
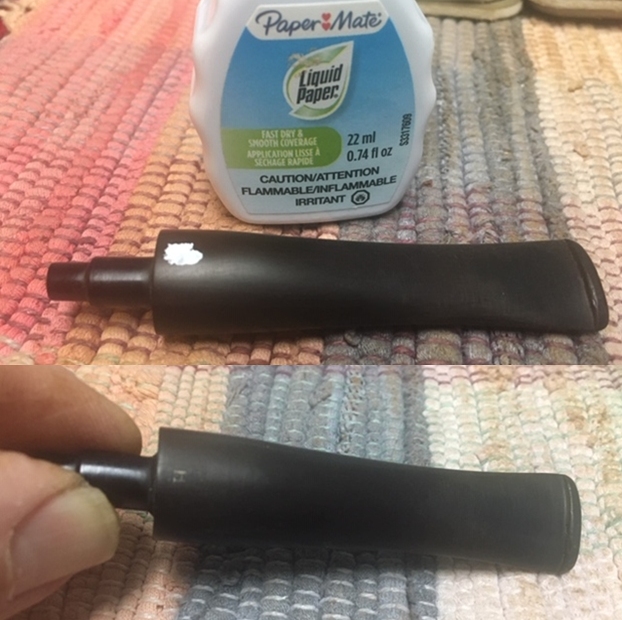
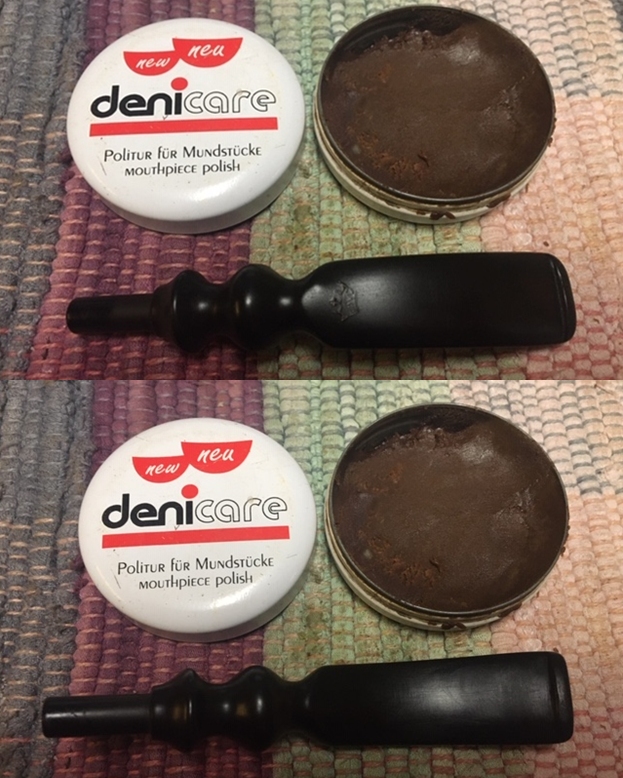
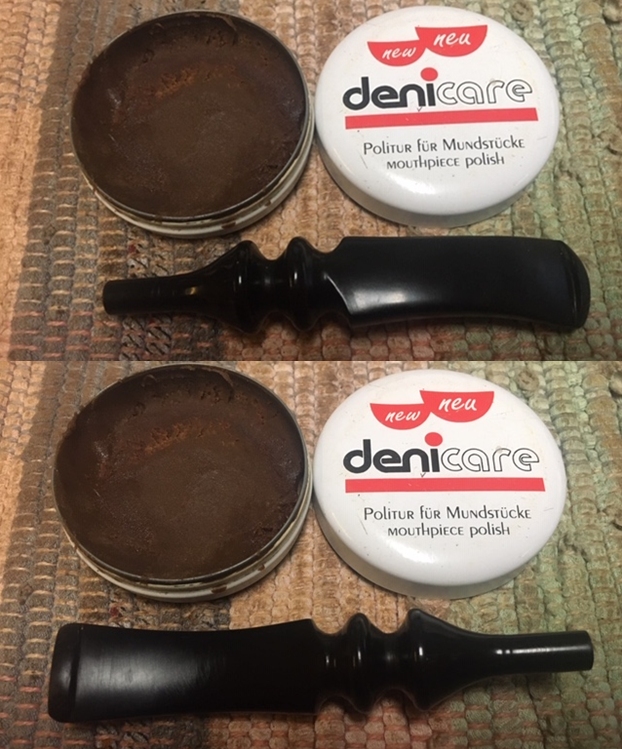
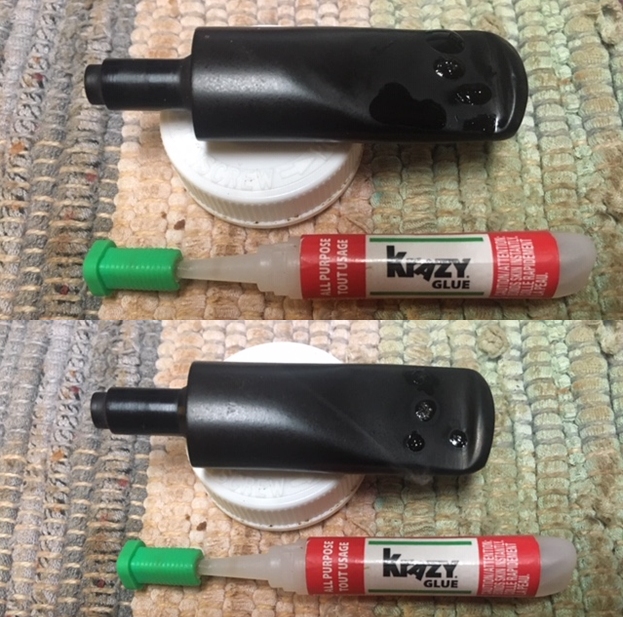
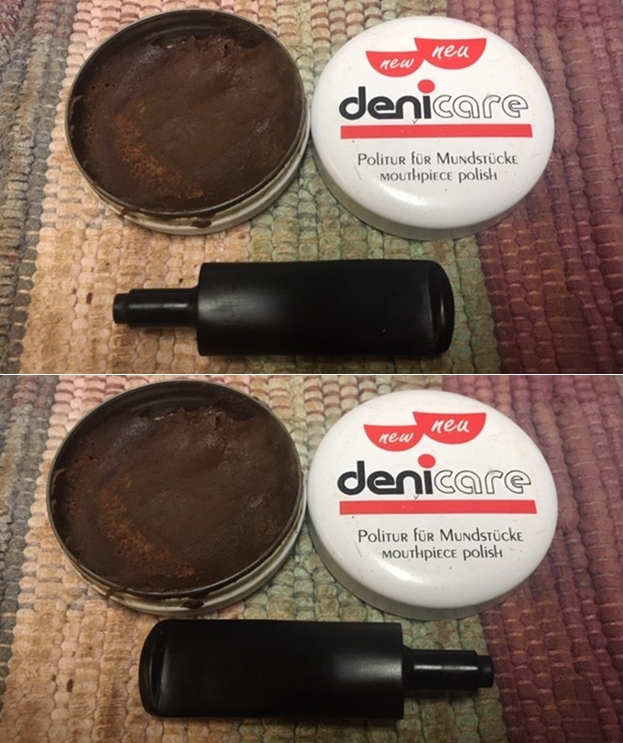
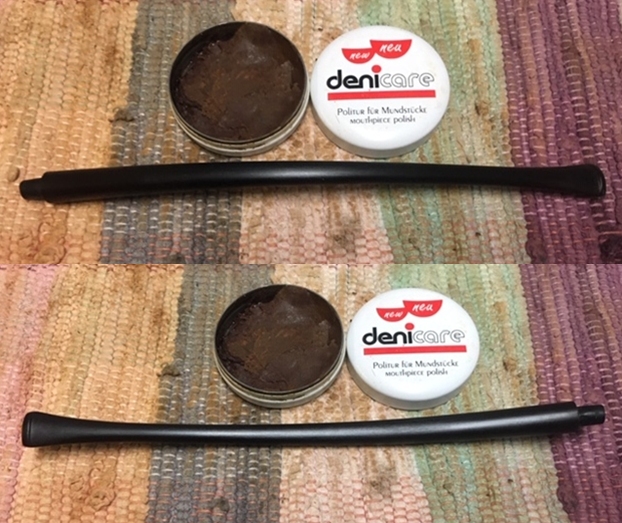
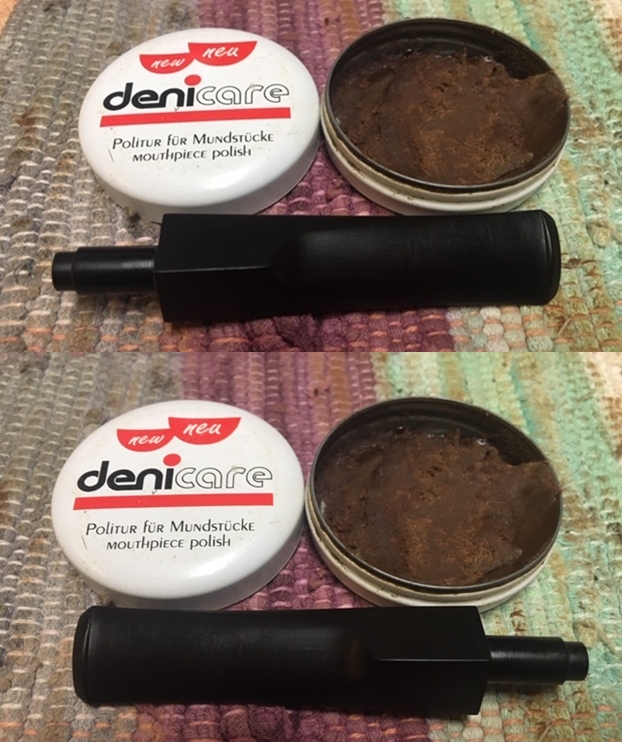
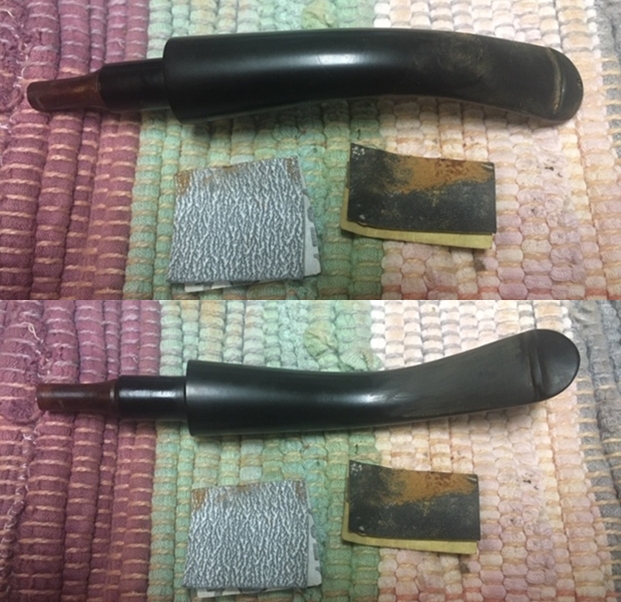 I used some Denicare Mouthpiece Polish that I have in my kit to start polishing out some of the scratches and remaining oxidation on the stem. I rubbed it in with a cotton pad and my finger tip and buffed it off with a cotton pad.
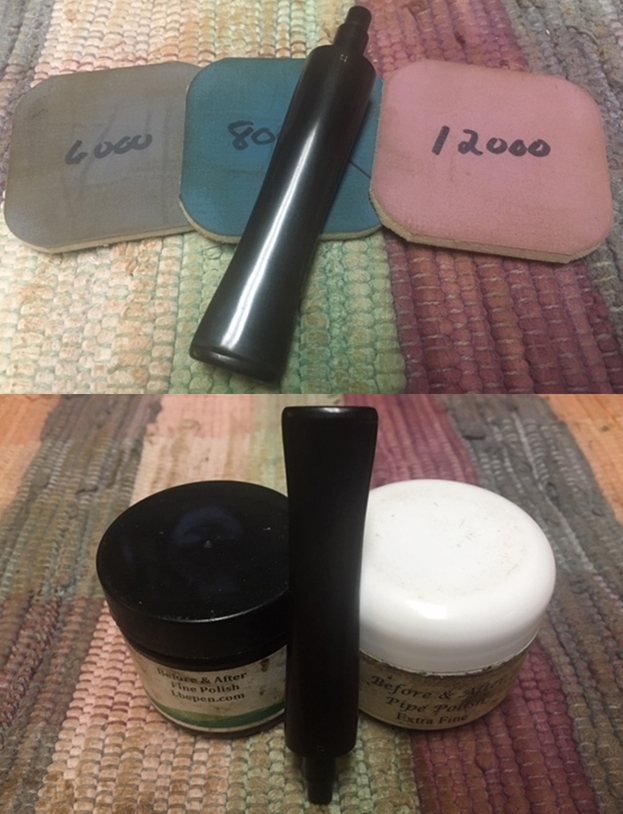
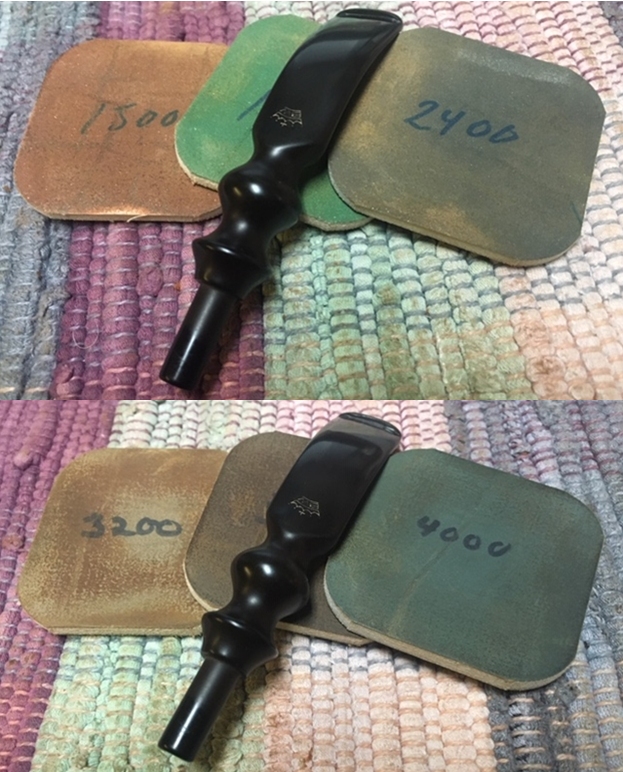
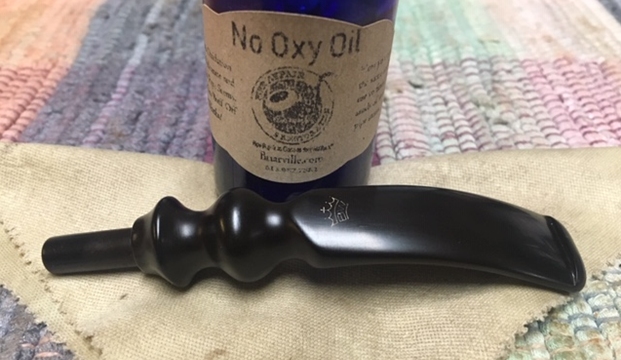
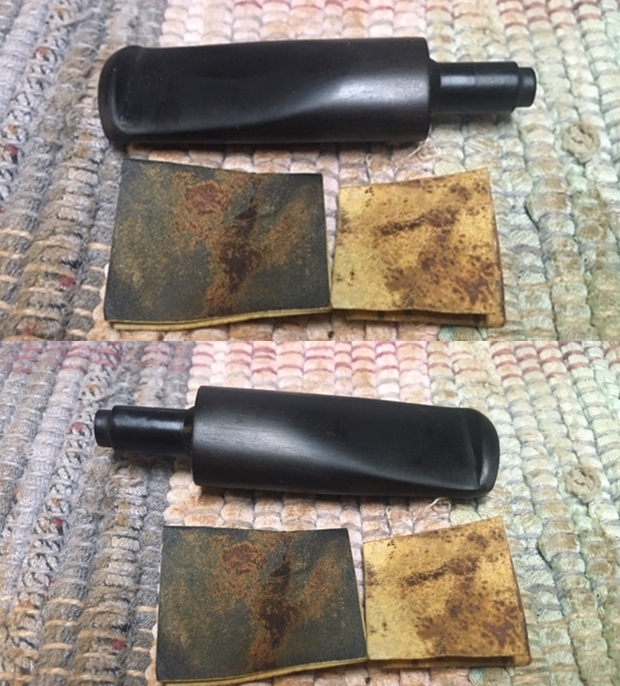
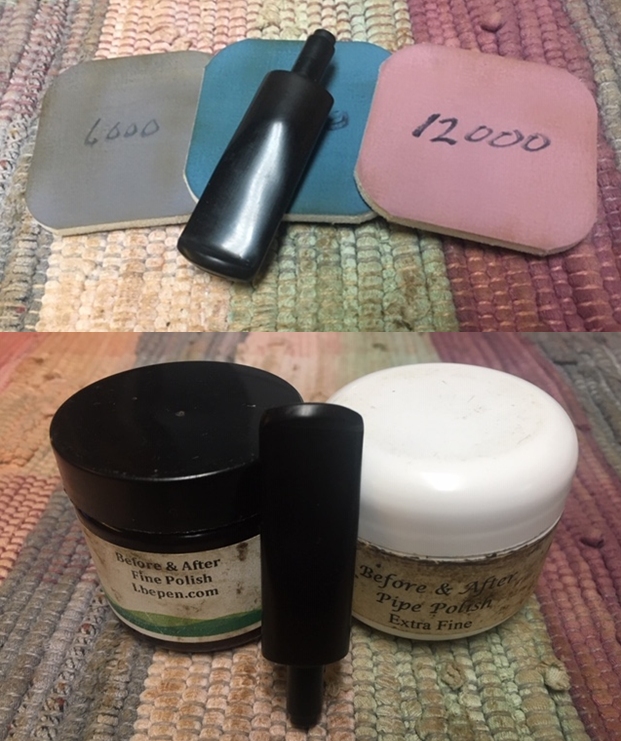
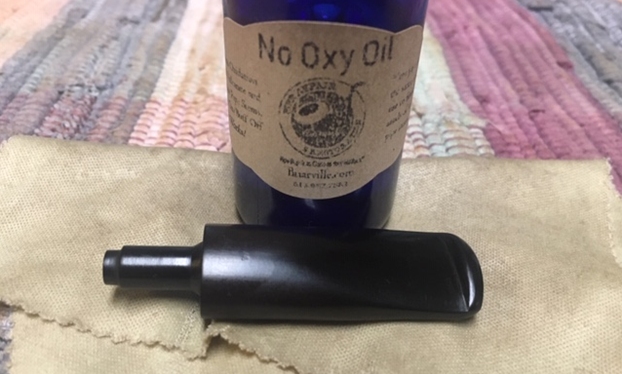
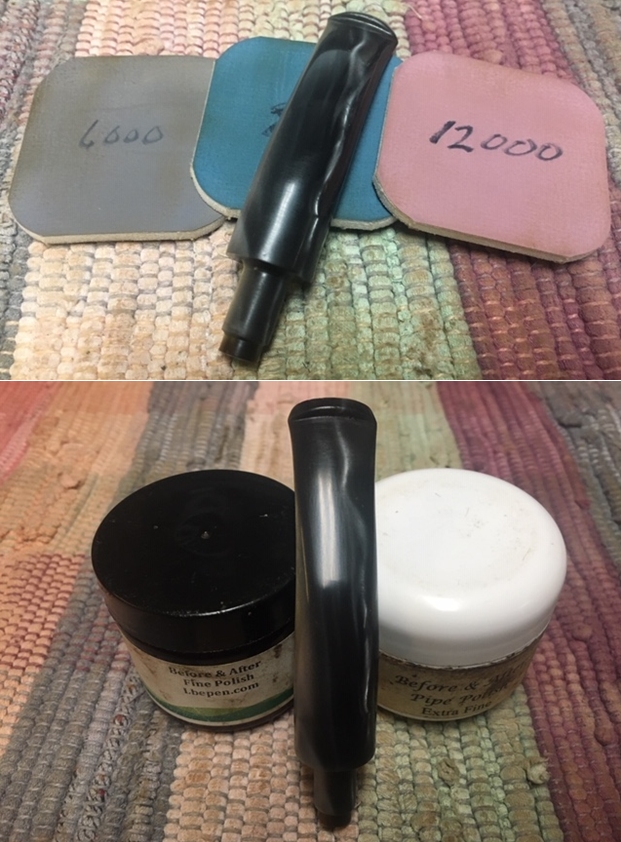
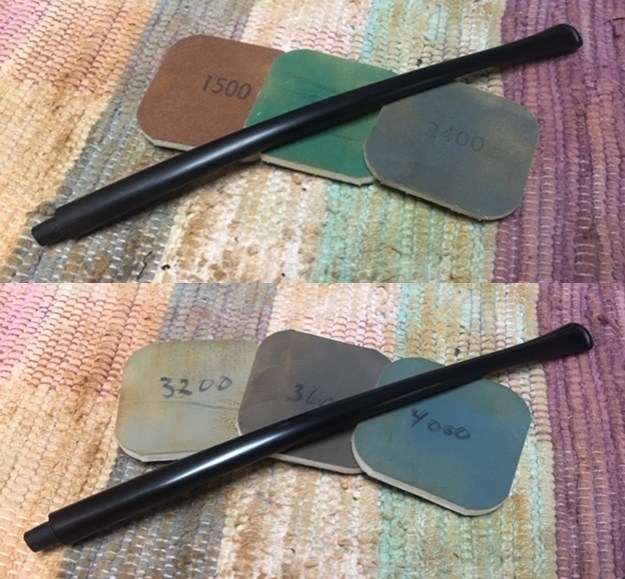
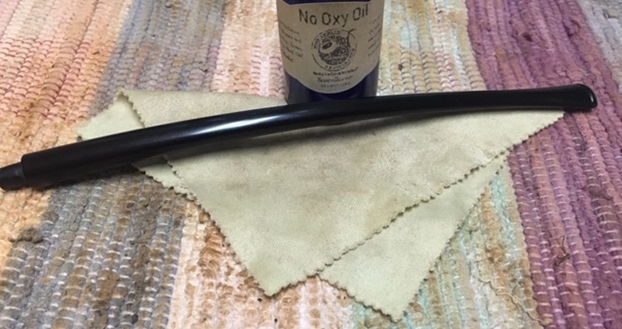
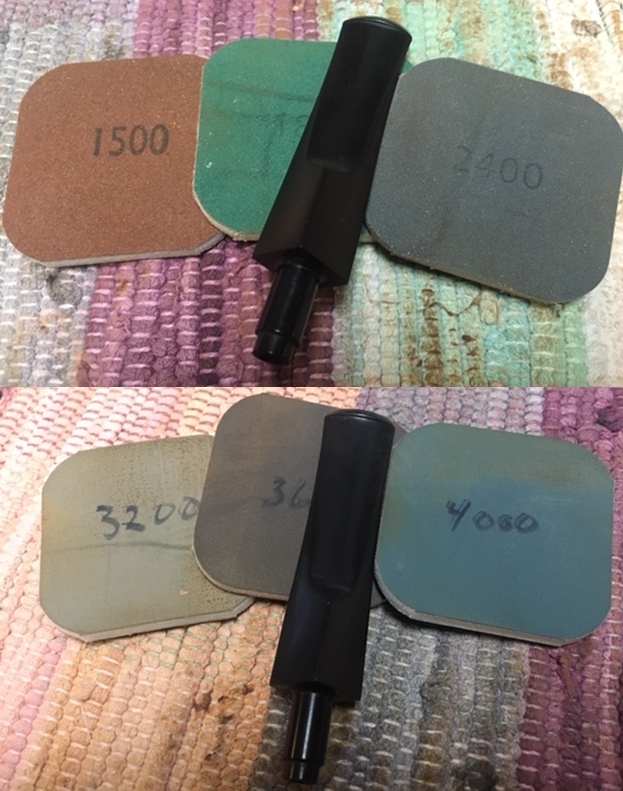
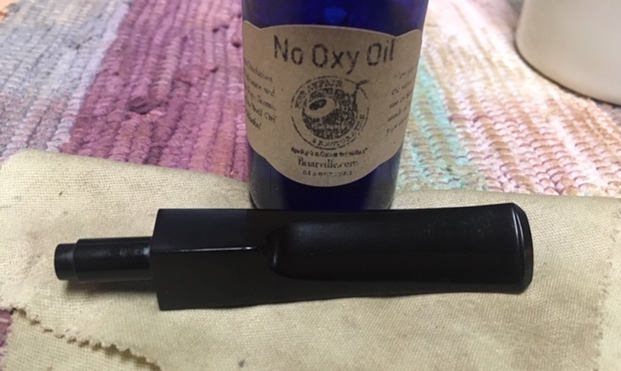
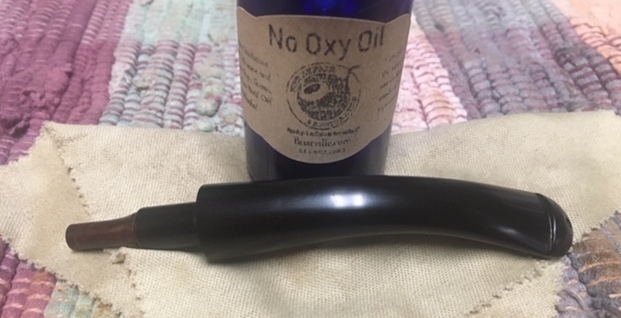
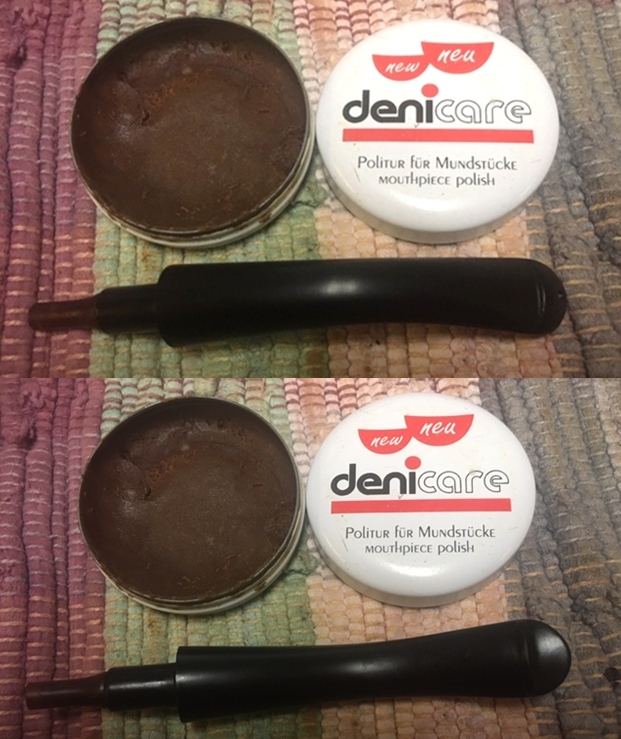 I polished the stem with micromesh sanding pads – dry sanding with 1500-12000 grit sanding pads. I wiped it down after each sanding pad with a cloth containing some Obsidian Oil. I finished polishing it with Before & After Pipe Stem Polish – both Fine and Extra Fine and buffed it off with a cotton cloth. I gave it a coat of Briarville’s No Oxy Oil to preserve and protect the stem.
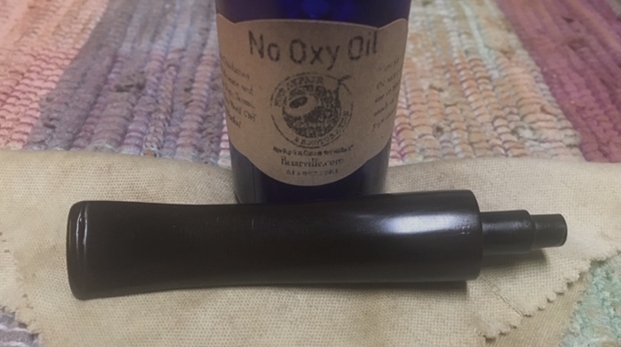
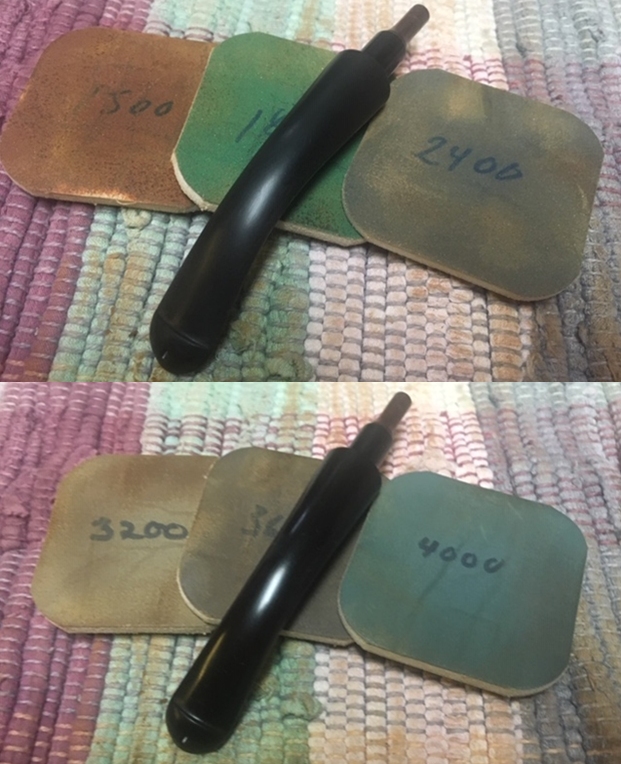
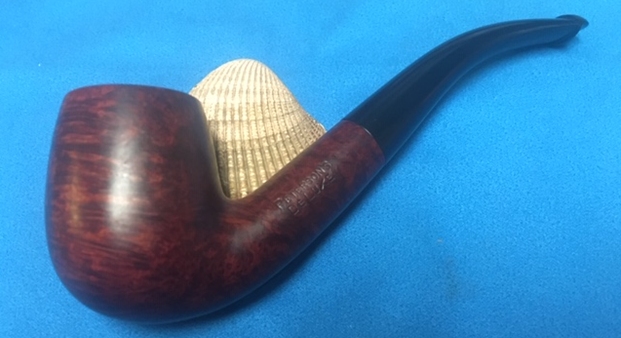
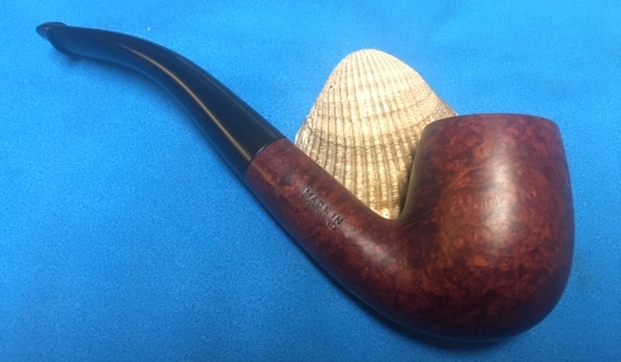
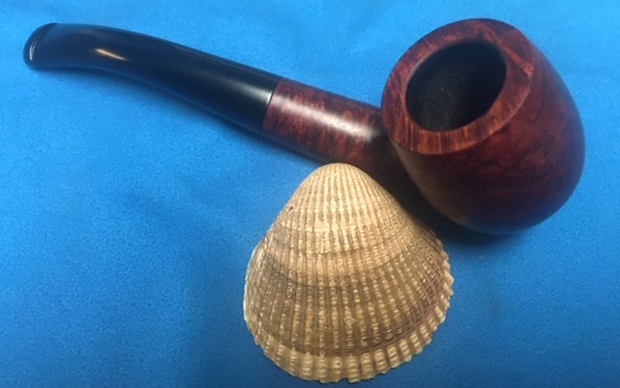
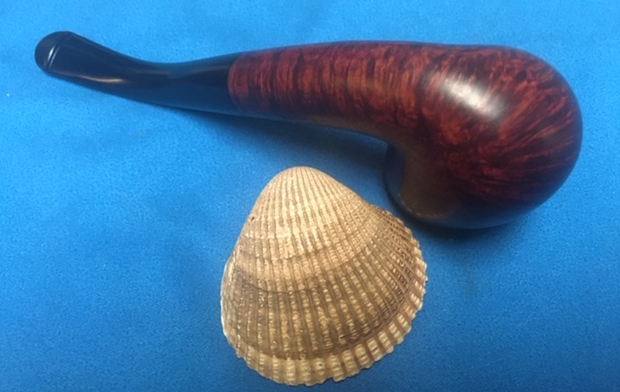
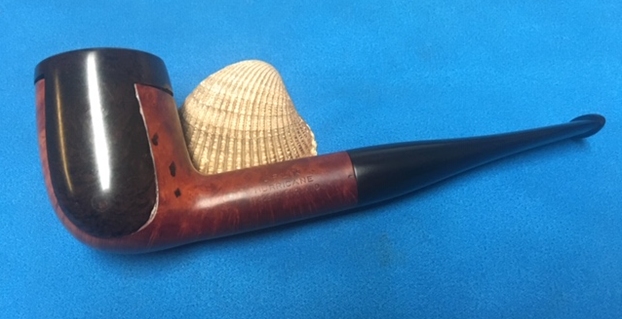
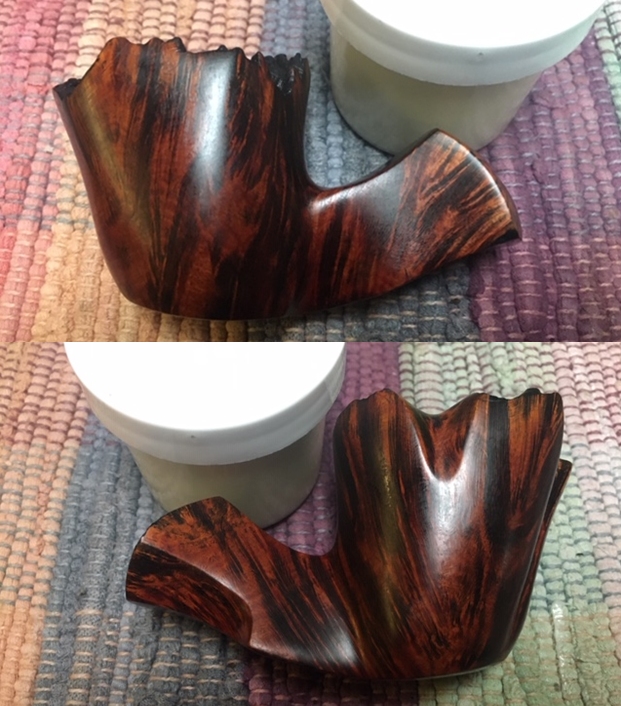
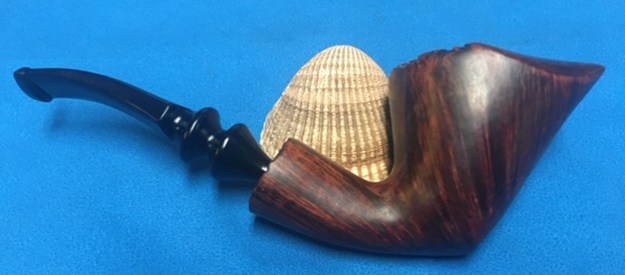
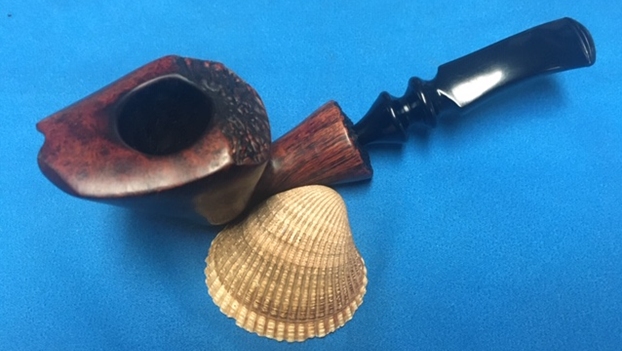
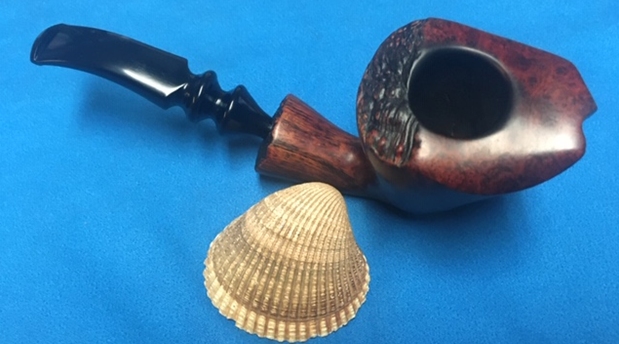
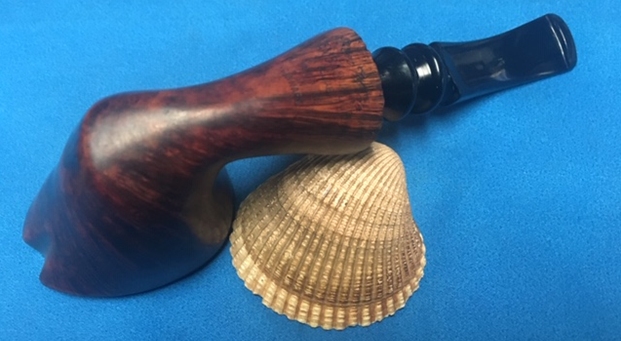
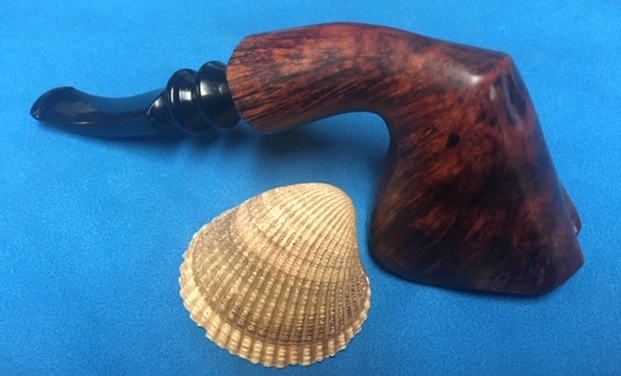
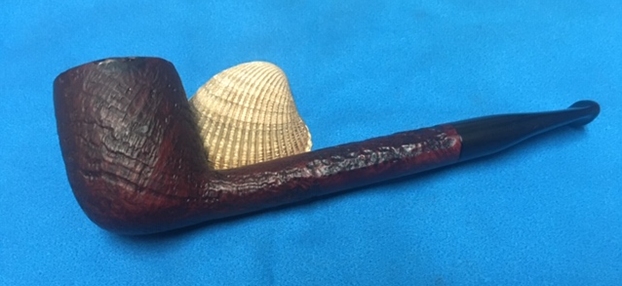
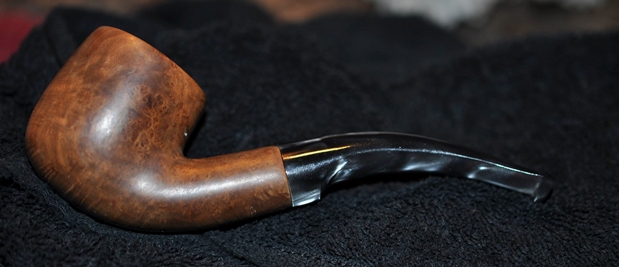
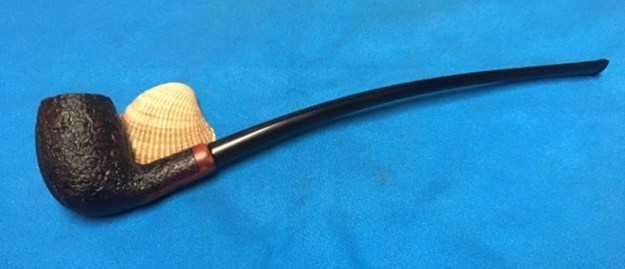
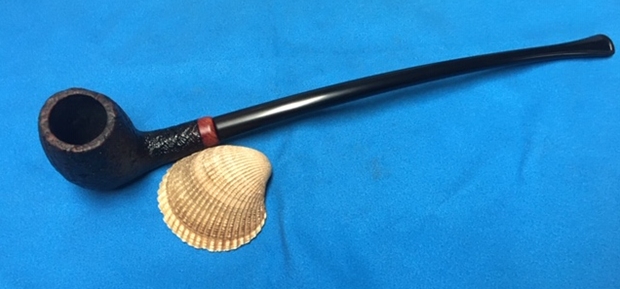
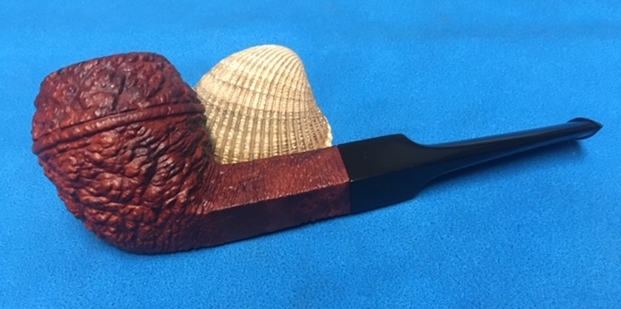
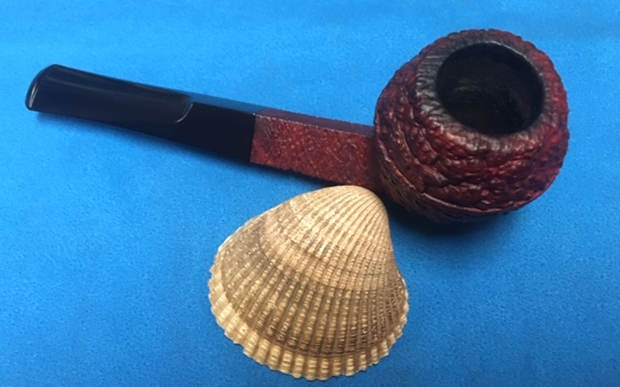
 I don’t know how many times I have said this but I love it when I come to the end of a restoration and all of the parts come together and the pipe looks better than when we started the cleanup process. I put the stem back on the bowl and buffed the pipe with Blue Diamond on the buffing wheel. I carefully avoided the stamping on the shank sides during the process. I gave the bowl and stem multiple coats of carnauba wax on the buffing wheel and followed that by buffing it with a clean buffing pad on the buffer. I hand buffed the pipe with a microfiber cloth to deepen the shine. The finished pipe is a real stunning example of an Irish Made Pre-Republic Deluxe 69. Once again the grain and the way the shape follows the grain is amazing. Give the finish pipe a look in the photos below. I can only tell you that it is much prettier in person than the photos capture. The dimensions of the pipe are Length: 6 inches, Height: 2 inches, Outside diameter of the bowl: 1 ¼ inches, Chamber diameter: ¾ of an inch. This Made In Ireland Pre-Republic shape 69 Peterson’s Deluxe is a great piece of pipe history that is in exceptional condition. Thanks for walking through the restoration with me as I worked over another beautiful pipe. This one will be staying in my collection for now while I think about what to do with it. Thanks for your time.