Tag Archives: staining

Restoring a Pair of Old Yello Bole Bamboo Pipes


This refurbishment involved two old Yello Bole Bamboos and it was a pleasure. There was a time I did not like bamboo shanks on pipes. They seemed to always be clunky and cumbersome to me. However I have picked up several old ones lately – these two older Yello Boles and Kaywoodie Mandarin. They have changed my opinion of the older bamboo pipes. These old timers have a patina and a spider webbing in the bamboo that lends them age and an aura of being ancient.

The first one came to me in dire need of a thorough cleaning. The bowl was heavily caked and dirty. The finish was bubbled and spotty. The bowl literally had cob webs in it. I wiped out the cobwebs and reamed the bowl. I cleaned out the airway in the bowl and shank with many pipe cleaners and a shank brush dipped in isopropyl alcohol. I scrubbed the outside of the bowl and the bamboo with Murphy’s Oil soap. I wiped off the grime. I then carefully wiped down the bowl with acetone and a cotton cloth to remove the ruined finish and clean the surface of all varnishes and stains. Once done I restained the bowl with a medium brown aniline stain and buffed the bowl and shank. I coated the bowl and the shank with several coats of carnauba wax and buffed with a flannel buff to bring out the shine.

The stem was pretty oxidized and brown. I soaked it in Oxyclean while I worked on the bowl. When I had finished the bowl I took it out of the soak and used micromesh pads to remove the oxidation. I used my normal regimen of pads from 1500-6000 grit and then put it back on the pipe and took it to the buffer to be buffed with Tripoli and White Diamond. The black of the stem came back very well. I coated the stem with Obsidian Pipe Oil and then wiped it off and buffed it with several coats of carnauba wax.

ImageImageImage

The second one is a darker bowl and a bit different shaped pipe. The one above was more of a pot shape while this one is a billiard in shape. The first had a three knuckle piece of bamboo and this one had a two knuckle piece. The bowl on this one was also in rough shape. It needed a thorough cleaning as well. I removed the grime from the outside of the bowl and scrubbed it and the shank down with Murphy’s Oil Soap as I did the previous one. The bowl was reamed and cleaned along with the shank and airway with pipe cleaners, shank brushes and isopropyl alcohol.

The finish on this one was not in as bad shape so I merely washed it down with isopropyl and then polished it with the buffer using White Diamond and then I gave it several coats of carnauba wax. The bamboo also had a darkening patina on it that I did not want to damage or change so I carefully wiped it down with the undiluted oil soap (not leaving it on the bamboo but merely wiping it down with a soft cloth). I then waxed the bamboo with several coats of wax.

The stem was also pretty oxidized and brown. I soaked it in Oxyclean while I worked on the bowl. After I had finished the bowl I took it out of the soak and used micromesh pads to remove the oxidation. I used my normal regimen of pads from 1500-6000 grit and then put it back on the pipe and took it to the buffer to be buffed with Tripoli and White Diamond. The black of the stem came back very well. I coated the stem with Obsidian Pipe Oil and then wiped it off and buffed it with several coats of carnauba wax.

ImageImageImageImageImage

A Quick Refurb – Yello Bole Dublin


I picked up this older KBB Yello Bole Dublin on eBay. It was stamped KBB in a cloverleaf, then Yello Bole over cured with real honey and then Imported Briar. I am working on the assumption that it was made shortly after WW2 with the imported briar stamp to differentiate it from the old Yello Boles made during the War from Manzanita or Mountain Laurel. http://pipedia.org/index.php?title=Yello-Bole

It was in far better shape than the pictures on the auction showed. It was dirty from dust on the outside. The bowl was dusty and cob webbed on the inside but it had been only smoked part way down the bowl. The old Yello Bole Honey Cured coating was still visible in the bottom half of the bowl. I removed the stinger apparatus, cleaned the stem inside and out (small tooth dent on the underside of the stem). Reamed the upper half of the bowl just gently to remove the bits of tobacco and beginning cake on the top half of the bowl and swabbed it out with a pipe cleaner dipped in alcohol. I scrubbed the outside of the bowl with Murphy’s Oil Soap, dried it off and gave it a light coating of stain add a bit of depth to the pipe. Here is the finished product.ImageImageImage

Two men and Pipe Restoration via Skype – Part 1


Blog by Steve Laug

Part 1 of this post appeared as an article in the August 2012 issue of Pipe Smoker Unleashed Magazine. It is available at the website address below. Part 2 will appear in the September issue.

I would like you to walk through the process of refurbishing two pipes that I sent to Carl Hackman. Once he received them we met on Skype and walked through the process of refurbishing them. Carl would also post pictures and comments and I would reply on Pipe Smoker Unleashed Forums http://www.pipesmokerunleashed.com/forum/forum.php to involve the PSU Community in the process as we worked together via Skype. This essay combines the two media to give a report on the process.

Carl described the condition of the two pipes before we started the work. It is an important part of the refurbishing process to discern what needs to be addressed before you work on a pipe. I have learned that half the battle in refurbishing a pipe is the preparation – both understanding the pipe and gathering the tools. To make this more interesting the reader should be aware that Carl is in the Dominican Republic and I am on the west coast of Canada – Vancouver, British Columbia. The Skype connection worked brilliantly for these lessons in the art of refurbishing. We completed the work in two 3 hour sessions and the end product in the pictures below will tell the story. Join us at the virtual work bench with your computer! CH is Carl and SL is me.

CH – Generosity from Steve has allowed me to try a full restoration of 2 pipes. He sent me 2 pipes to play with and try and hone some restoration techniques. I’ll document all the steps I take and show the end result. If I don’t screw it up too much and make a reasonable job of it then it may grace the pages of our magazine. With Steve’s help along the way I’m sure we can bring together an amateur refurbishment project.

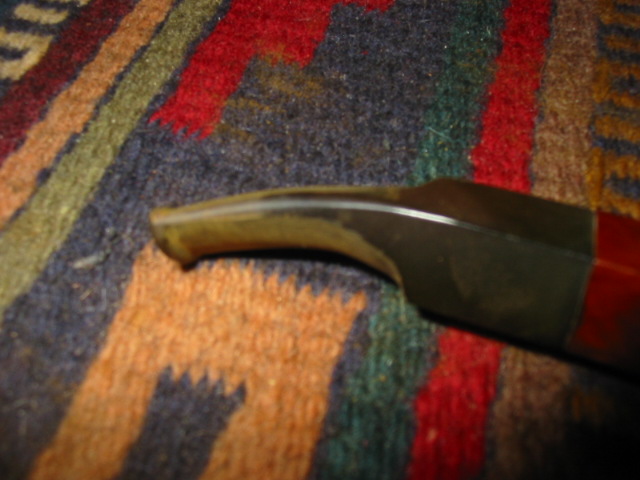
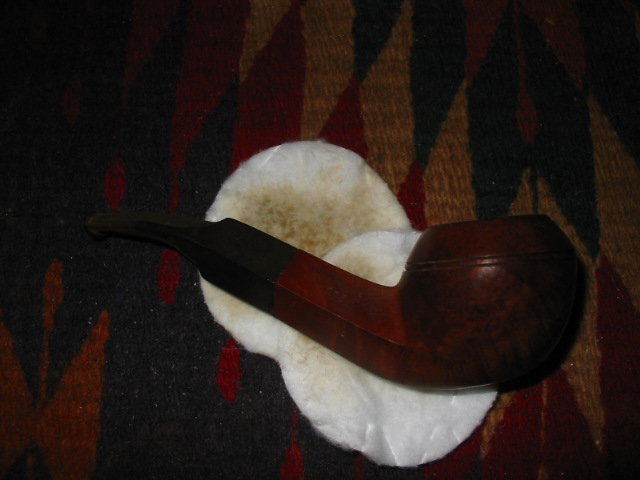
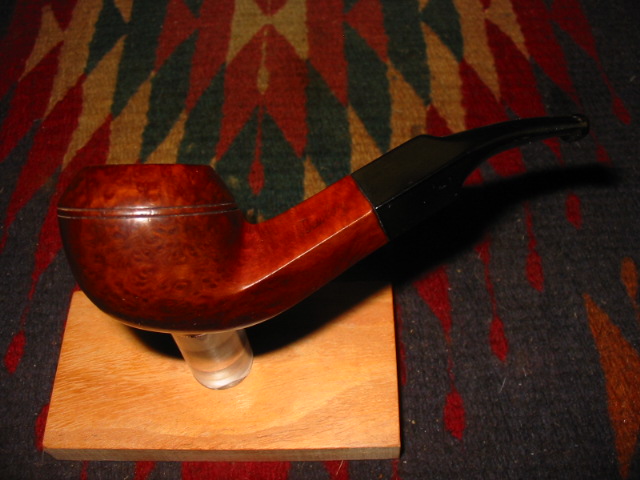
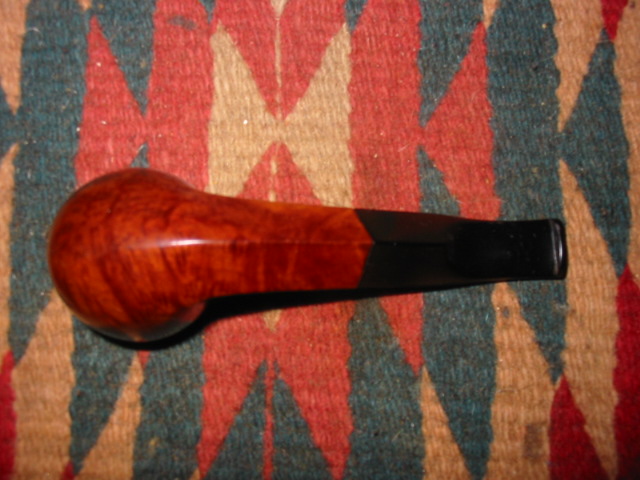
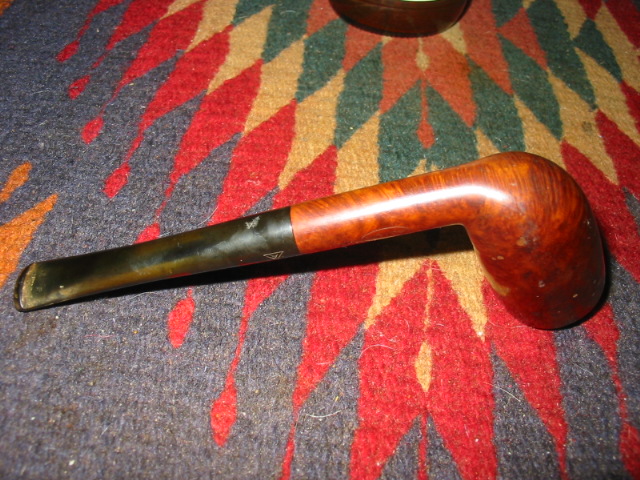
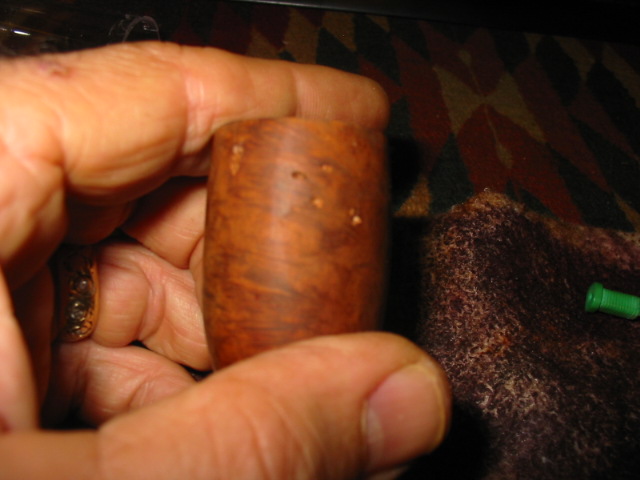
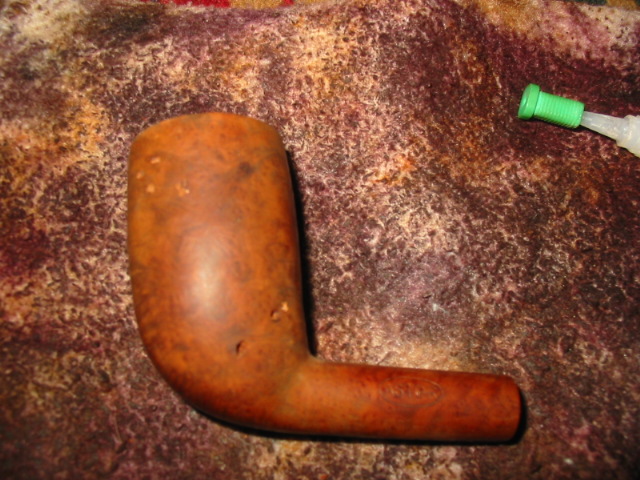
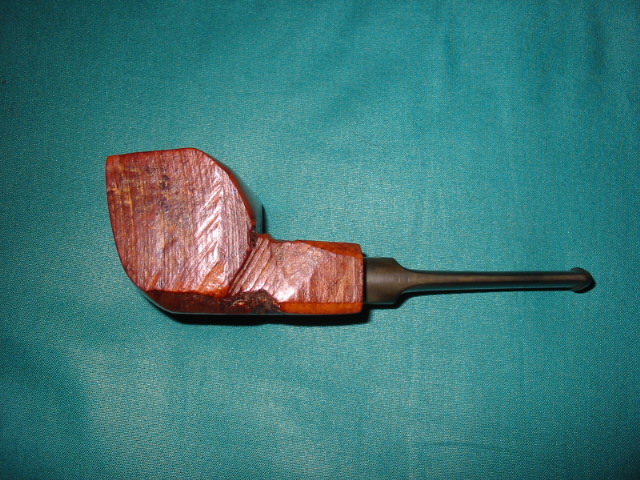
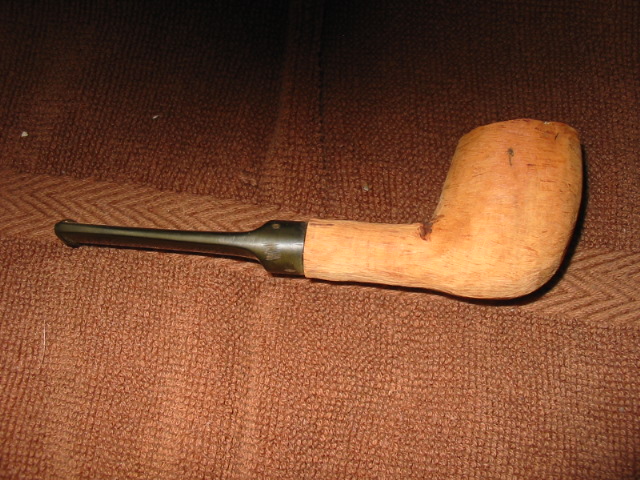
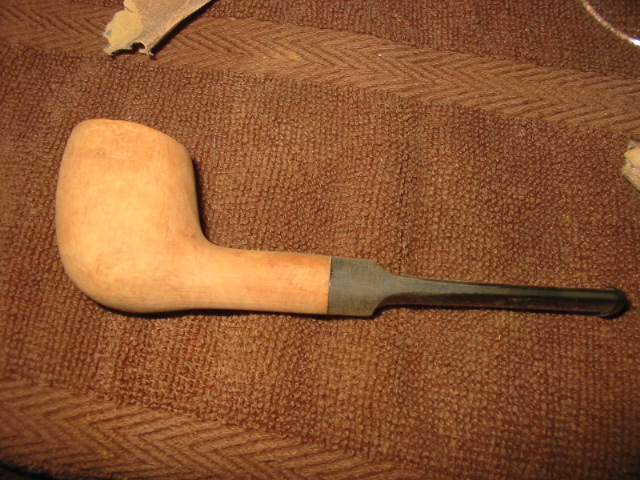
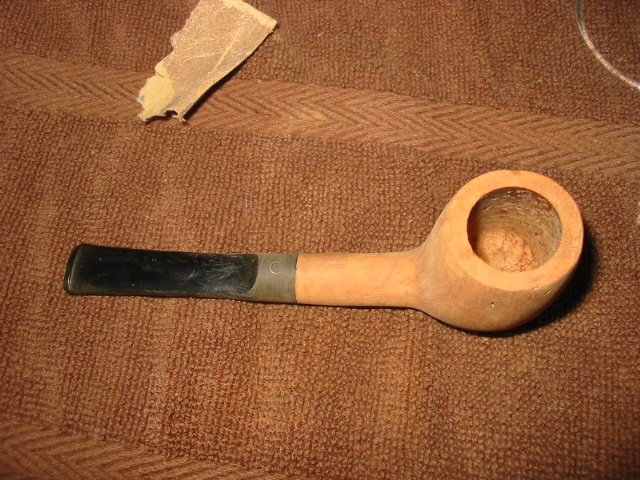
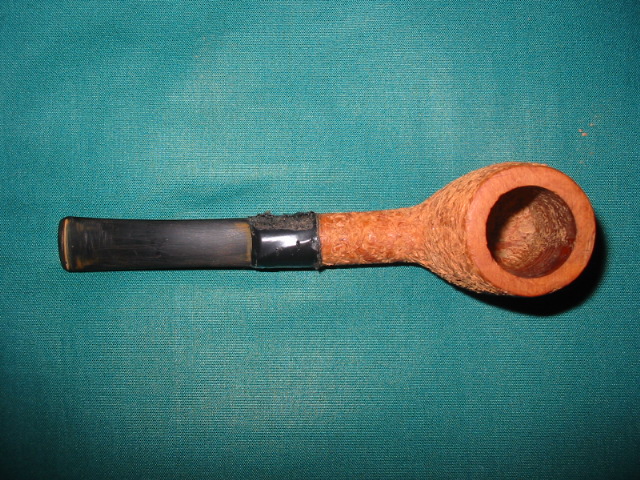
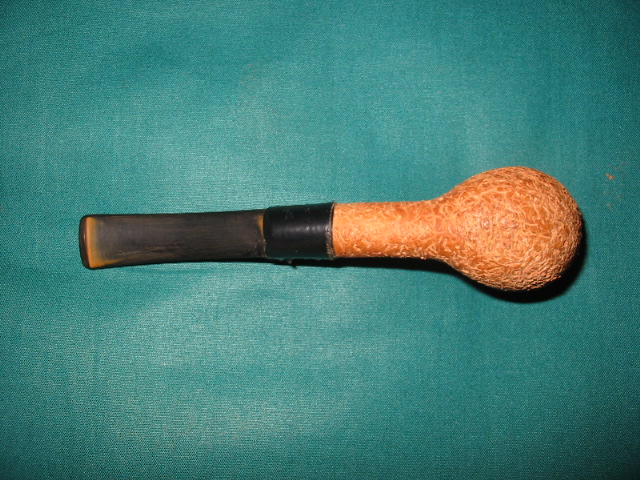
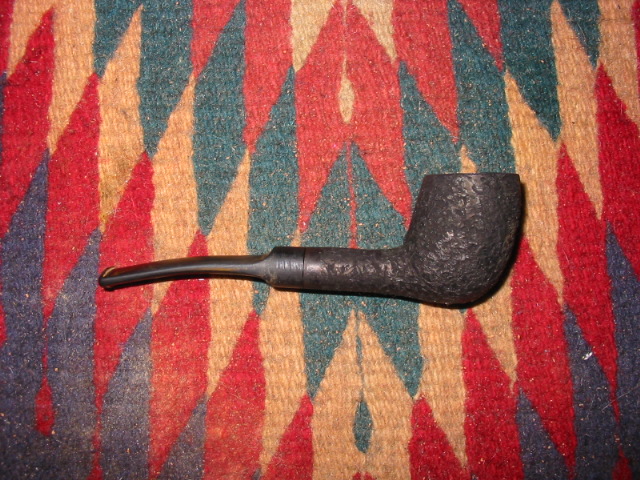
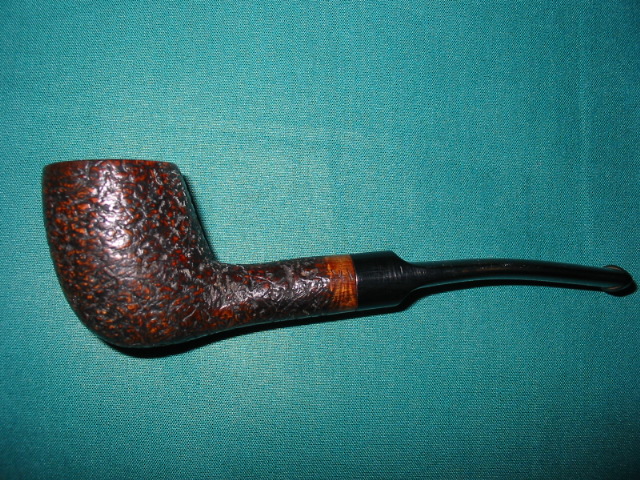
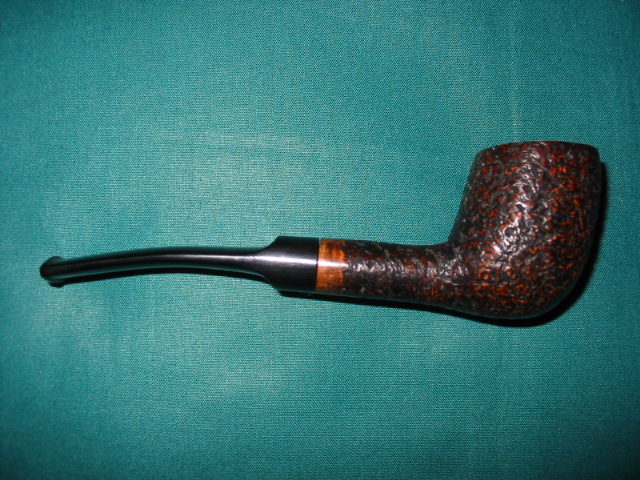
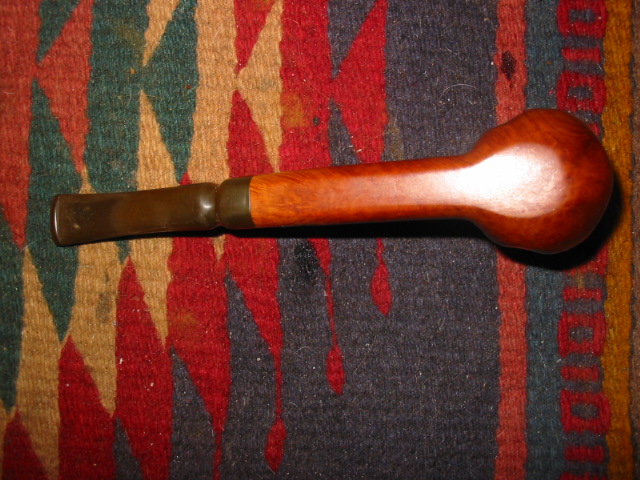
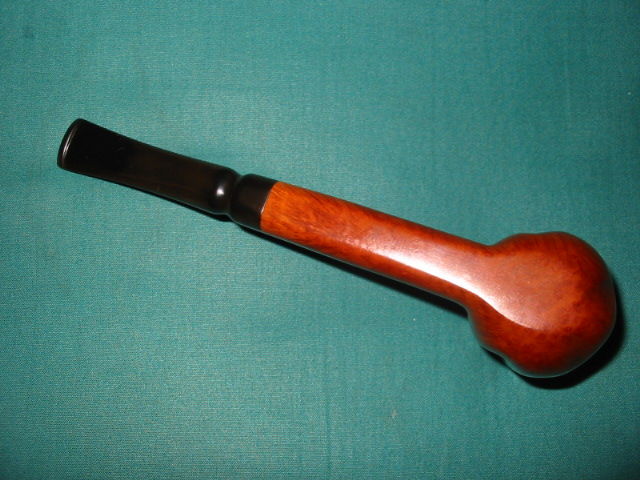
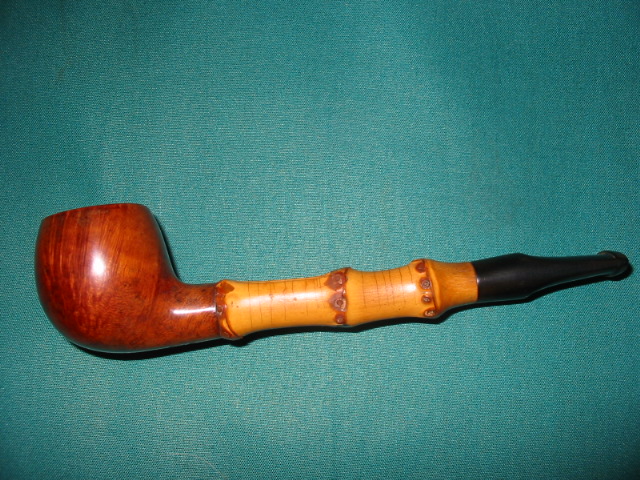
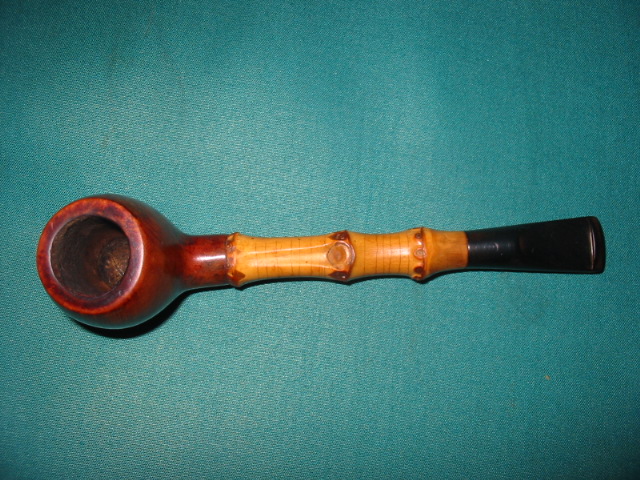
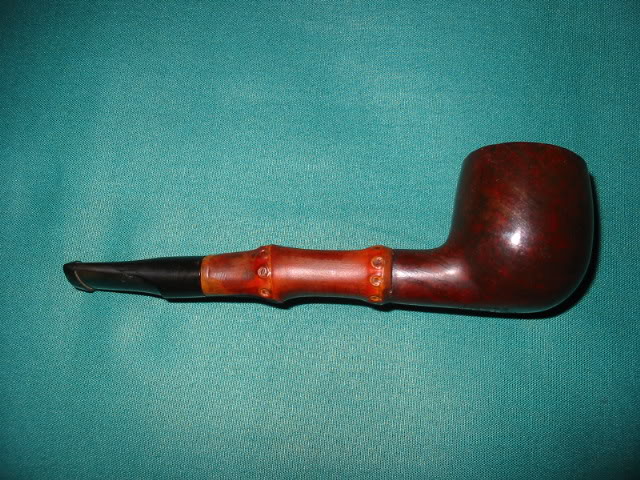
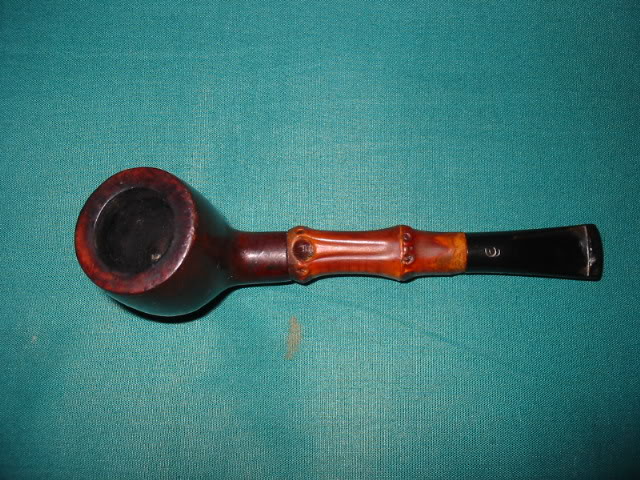
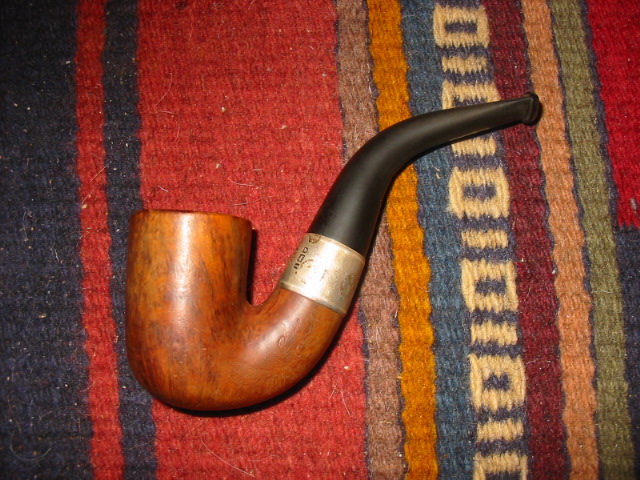
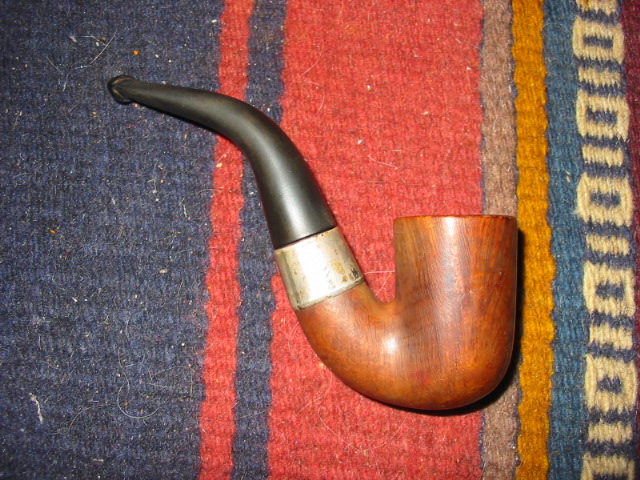
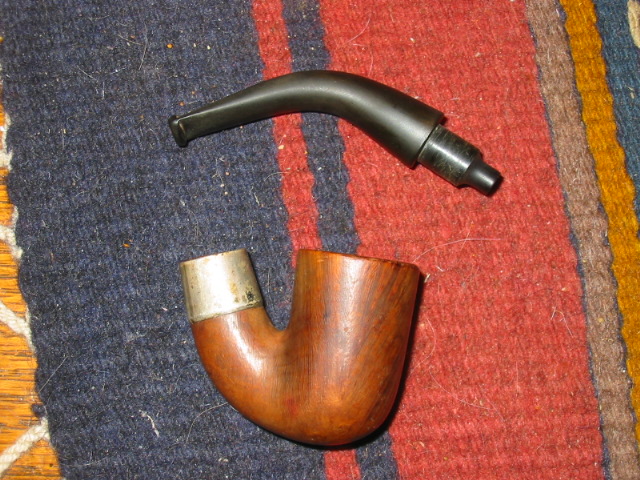
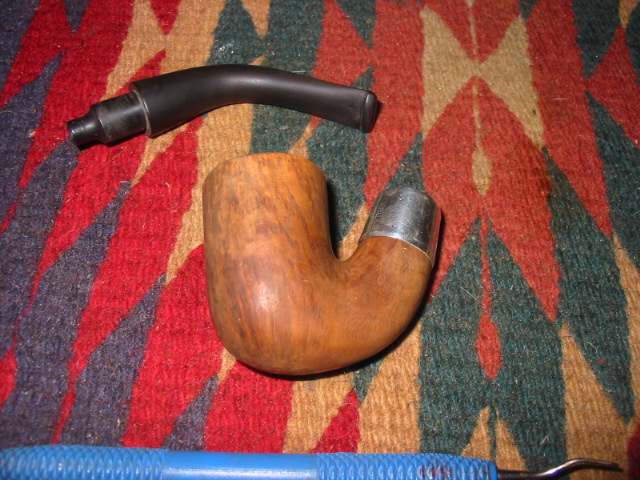
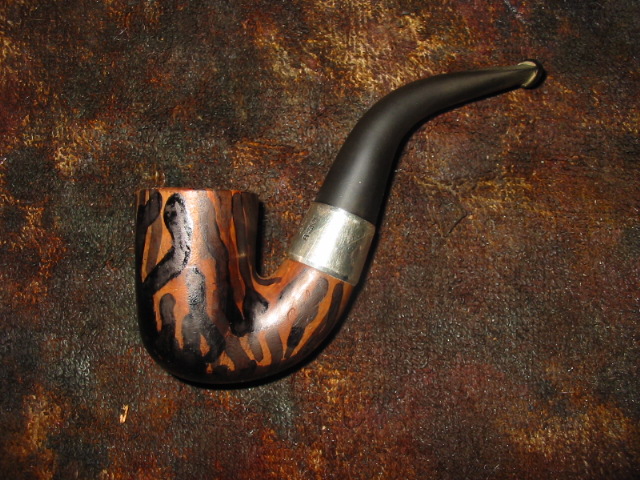
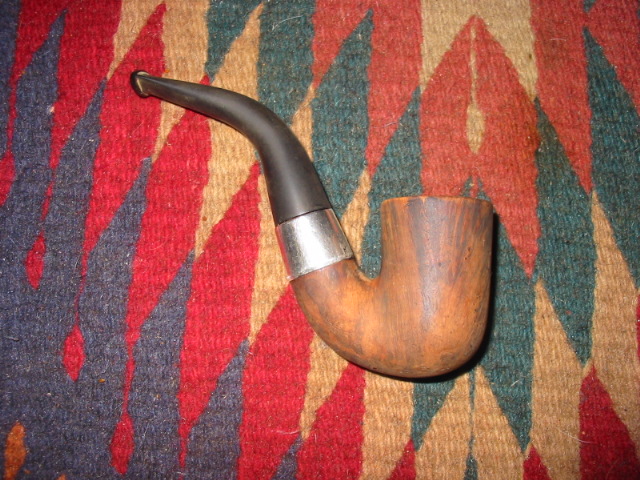
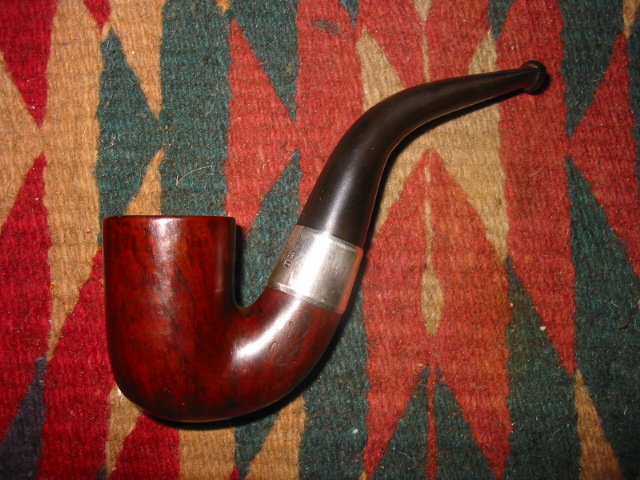
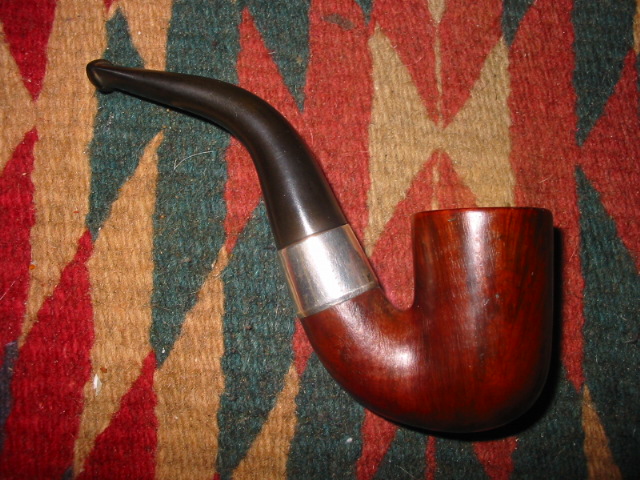
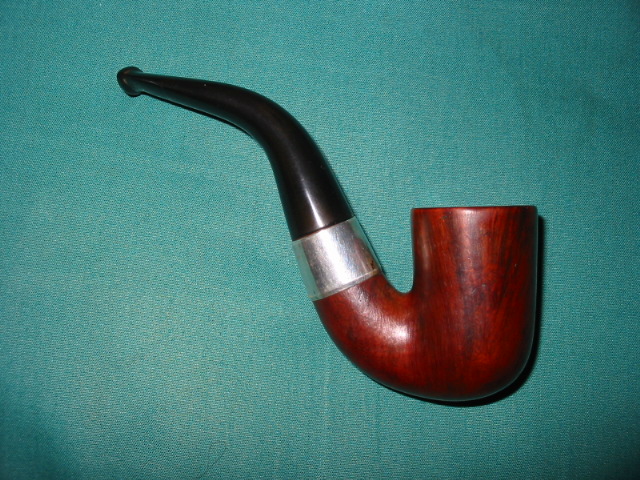
The top pipe is a French Dublin and below that is a Captain Black Billiard

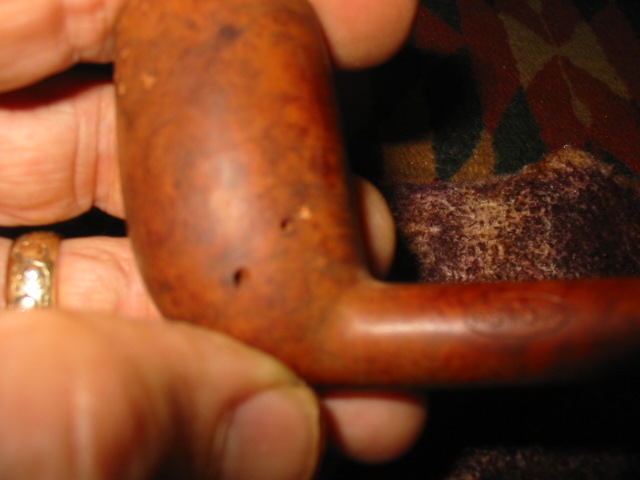
The Dublin has a small chip on the rim and some dings on the outside of the bowl. There is caking around the rim but it looks in pretty good shape. The saddle shaped stem is really tight and may not be the original. When restored this will be a lovely pipe. I intend to sand the finish and stain off completely and re-stain the bowl, maybe a tan color.

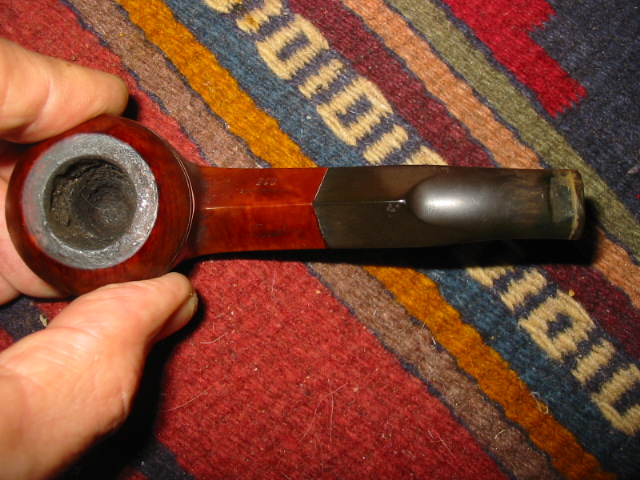
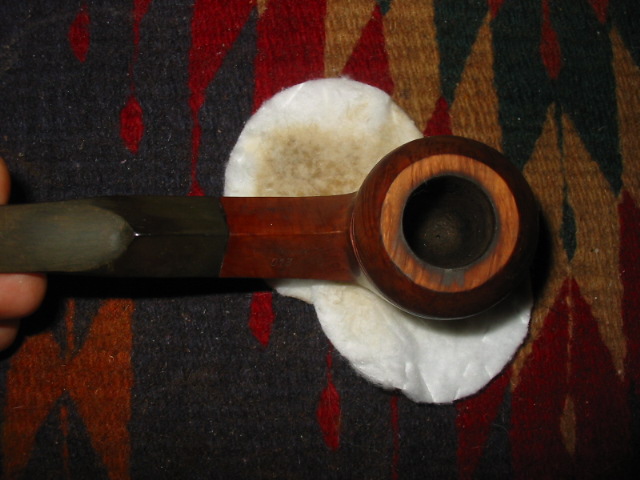
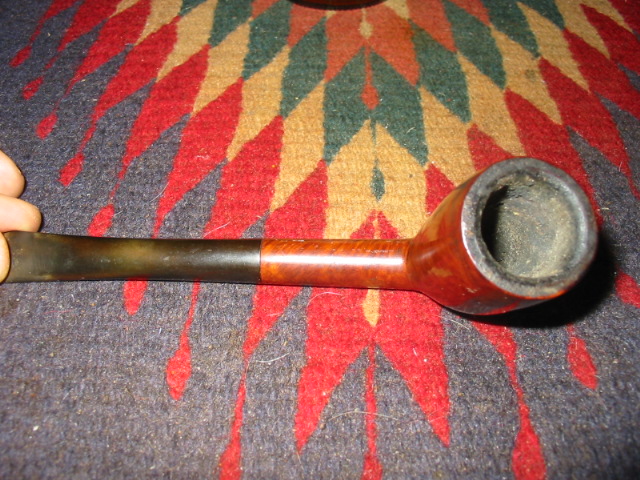
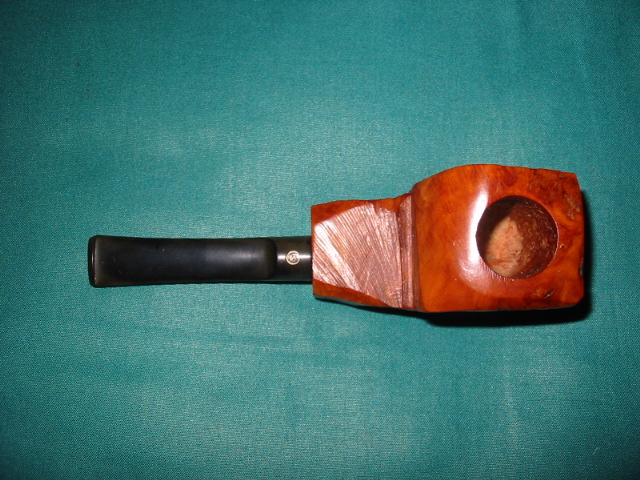
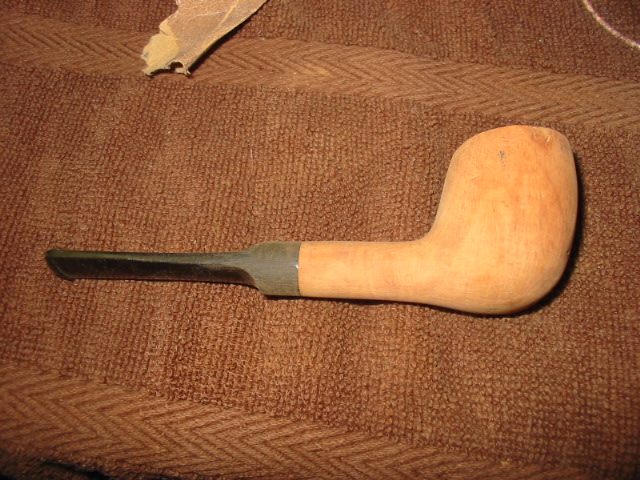
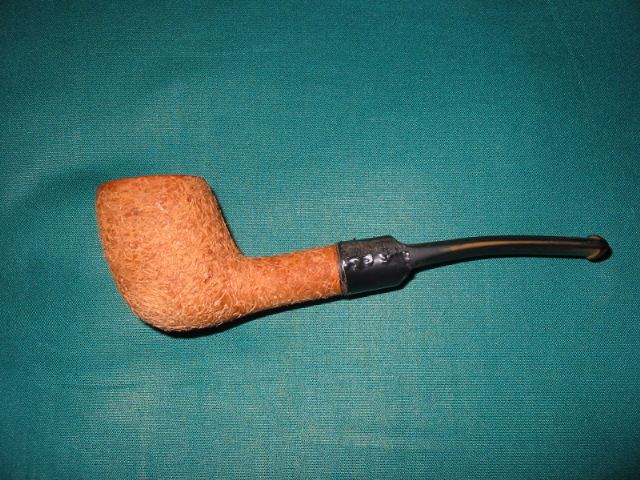
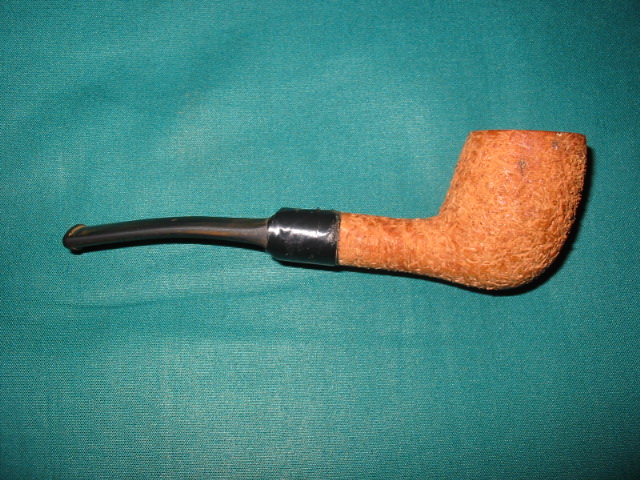
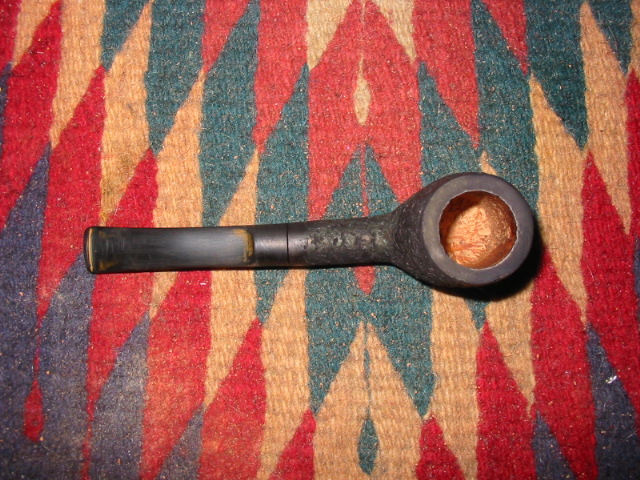
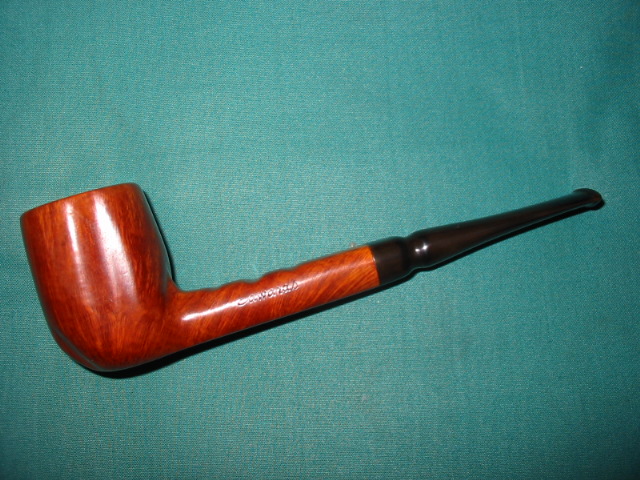
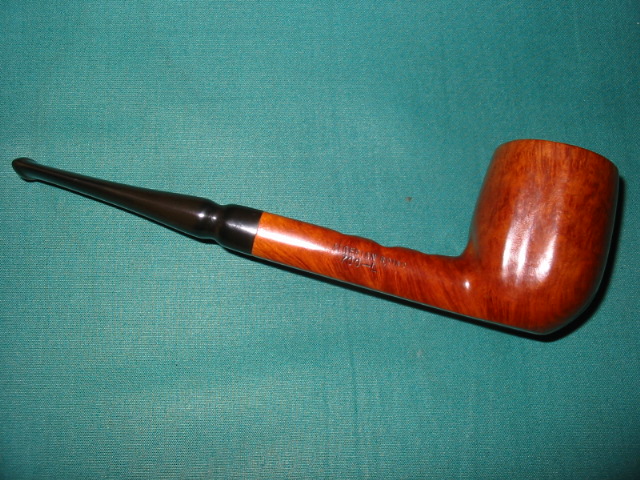
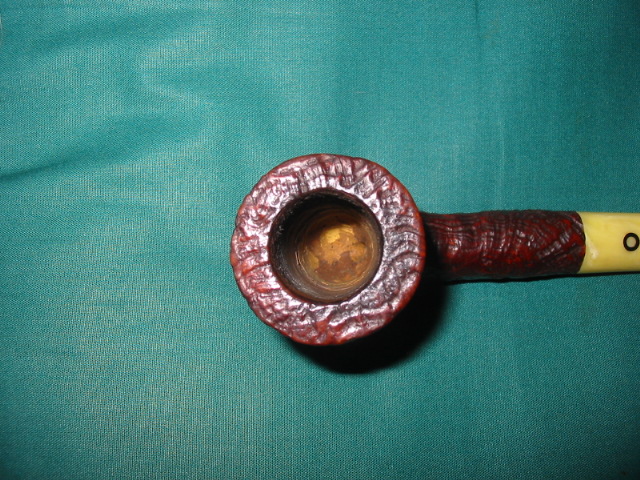
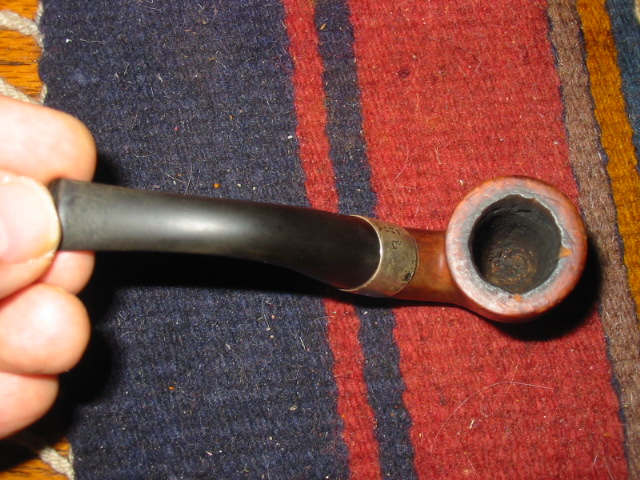
The Captain Black is made in England and is a dainty B14 model. The rim has some minor dings and the chamber rim is slightly misshaped (I’m not sure how to try and correct that but it isn’t so bad that it detracts from the beauty of this pipe). There is a burn mark on the base of the bowl near the start of the shank and I’ll have to see the extent when I start sanding it down. Again I intend to refinish the bowl, this time with a medium brown stain. The stem looks to be in good shape and probably just needs a bleach bath, light sanding and then some buffing with white diamond and carnauba wax. She will be a little beauty when restored.

I’m sure now that I have them here and have made some initial observations that Steve will chime in and let me know the best way to proceed and maybe point out some areas I may have missed.

SL – Good call on the observations. Well done. Not sure how the stains will come out or if you can do what you have planned. I usually have a plan before I start but then have to let what I find in the process determine where I go with the stains. Don’t use bleach on the stems Carl. It really deteriorates the vulcanite in my opinion. Let’s do it a bit differently. Both stems were original. The one on the Dublin is probably tight from the gunk on the tenon and in the mortise. We will clean that out in the process of the refurb.

Also before you sand either bowl down drop them in an alcohol bath over night and let them sit. It will soften the tars on the rims and also remove most of the finish for you. If you can snag a bottle of fingernail polish remover we will use that after the alcohol bath and the bowls dry a bit. It is acetone and works great to remove any remaining finish on the bowls.

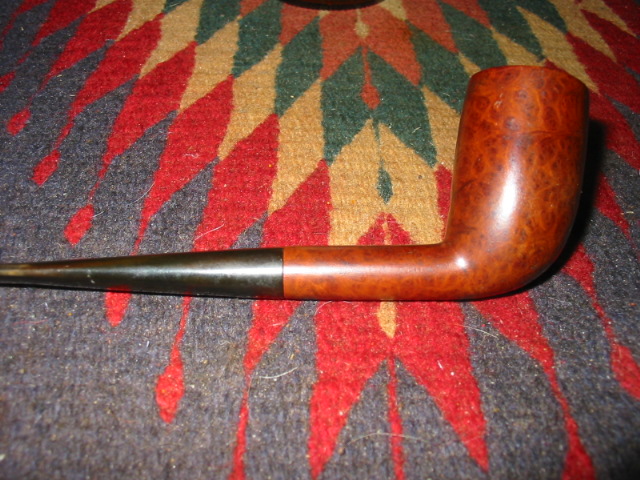
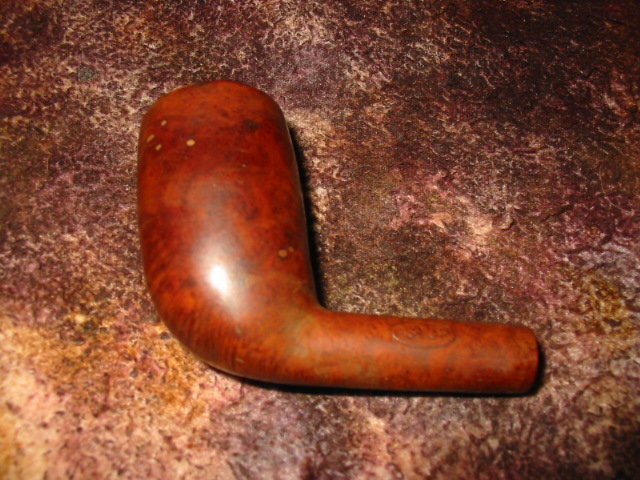
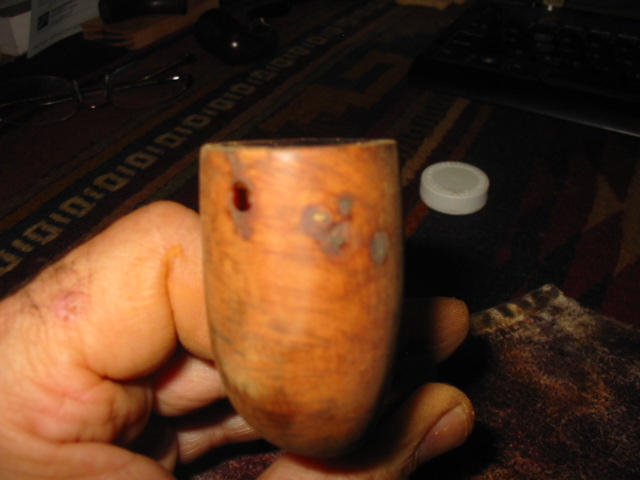
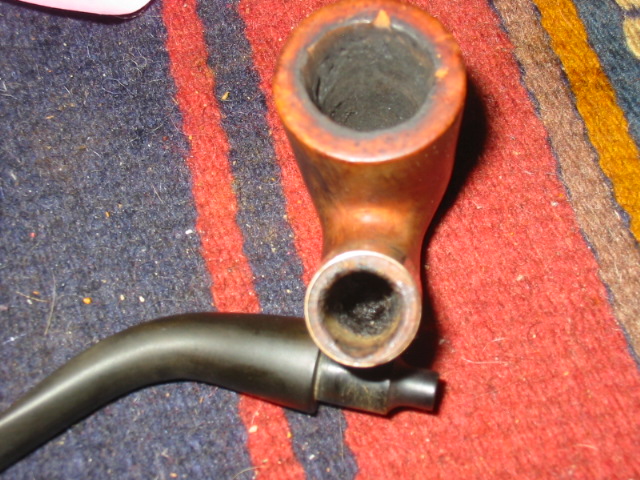
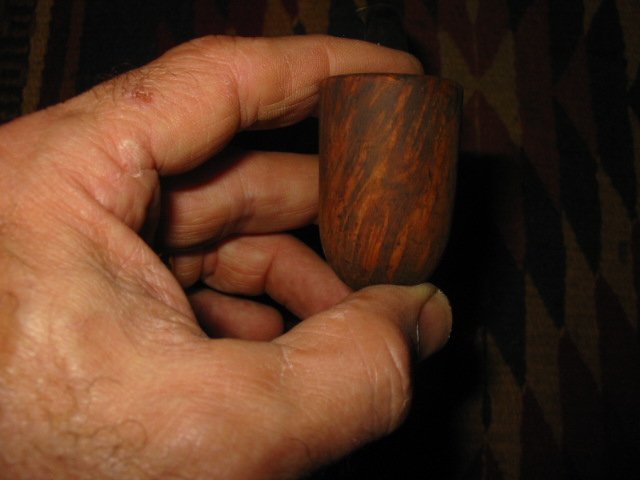
CH – I dropped the Dublin in as well. For the Dublin I initially started sanding it with 220 grit sandpaper to remove the initial layer of finish and the cake on the rim. I then wiped the bowl with an alcohol dampened cloth to highlight the dings (and there are quite a few now that I didn’t notice before). They really stood out after the wipe. I dropped it into the alcohol bath as you advised.

SL – Check the bowls in a half hour – particularly the Dublin as you sanded most of the finish off of it.

CH – Ok mate, I love the Dublin shape and it feels great in the hand. After the initial clean on it the stem fitted perfectly.

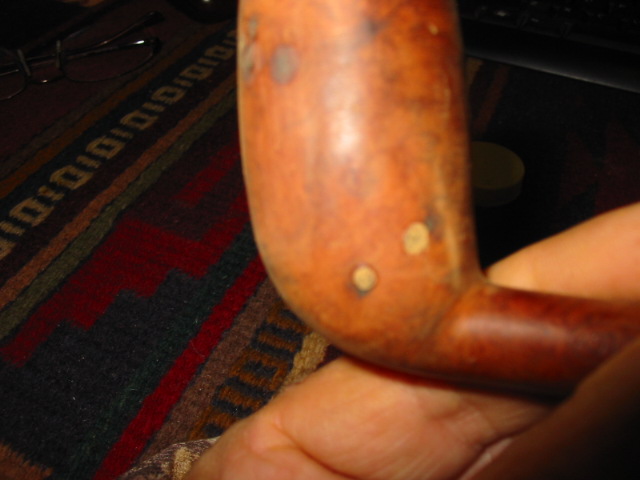
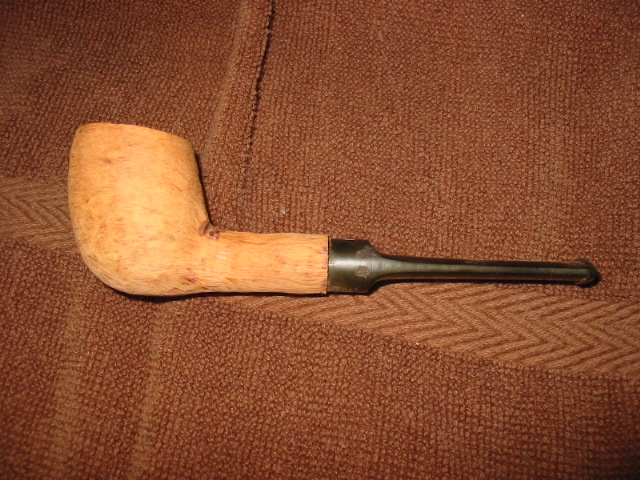
SL – I figured the stem would – it was the one that came with it. Once you take it out of the wash, wipe it down and let it dry. The pink spots on the pipe are the putty fills. You did a good job removing the finish.

CH– It will be a stunning pipe mate.

SL – The grain on both pipes looks good.

CH – Yeh, I love the little Billiard as well.

SL – We can use the black stain to hide the fills and highlight the grain.

CH – Nice to have an English pipe.

SL – I figured you would like that.

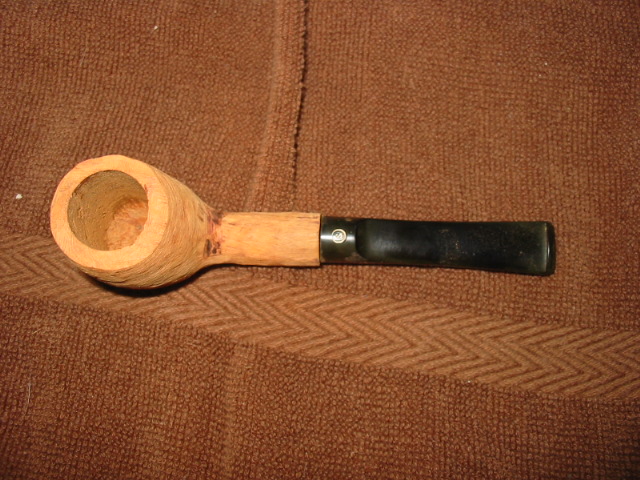
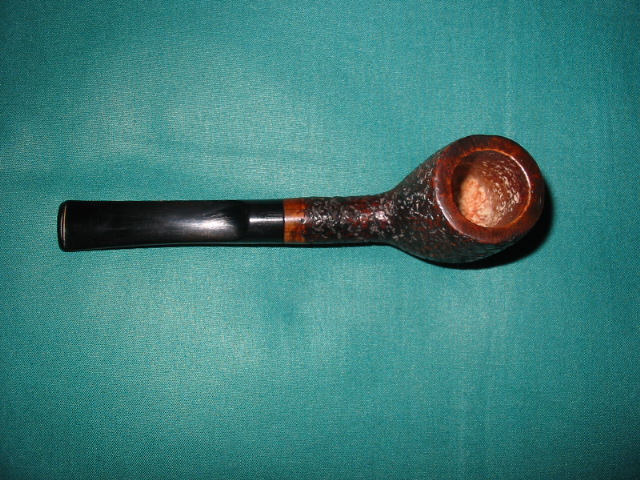
CH – Here is a picture of the Dublin after initial sanding with 220 and alcohol wiped to highlight dings. The next picture is shows both the billiard and Dublin in the alcohol bath.

SL – You can steam the dents out pretty easily. Heat a flat blade (I use a knife from our old cutlery) on a flame – I do it on the gas stove. You can also heat it on a candle or such. Once it is hot put a wet cloth on the ding and put the hot knife on top of the wet cloth – it should hiss and steam. Do this until you have removed the dents. Do this prior to sanding. Once the dents are raised as much as possible sand with the 220 – try to follow the grain on the pipe so you make less work or yourself in the later sanding. You can also use a steam iron in place of the knife and the fire.

As I look at the pictures though, it appears to me that many of those dents are fills. Fills can be hidden with a darker stain or picked them out and refilled with briar dust and super glue. We can decide that later. You will want a lid on the alcohol bath as it evaporates pretty quickly. I reuse mine for 3 or 4 months as I find the old stains give a patina to the briar as it soaks. While the bowls are soaking you can work on the stems.

CH – Ok mate, I’ll leave the bowls in the alcohol bath for another 1.5 hrs and then look at the marks on the Dublin. When I looked at the bowl initially before sanding those areas looked like indentations. I’ll have a closer look once the bowl has dried out.

SL – We can work with those Carl. We can also make a nice dark tea stain to do some grain work on it. Once they come out of the bath and dry we can sand a bit more. Sand with the grain as scratches can be a bear to get out. Once we are done sanding it all the way through your micromesh pads we can talk about the staining.

CH – The only colors I have are medium brown and tan. And I had to wait a month to get those from Miami to here due to the Dominicans saying that they were dangerous.

SL – No problem. We can use something else. You have some tea correct?

CH – Lipton’s – a pretty light tea though

SL – That will work. We want to make a very dark cup of tea. Let it steep over night you want it almost black.

CH – Right ok. The medium brown stain looks pretty dark

SL – Medium brown is dark but once it buffed it is pretty light. The tan is really light almost neutral. We will paint on the tea solution on the grain, following the grain with the brush that you apply it with.

CH – Ok. So just stick a couple or 3 teabags in a cup and leave to stew overnight?

SL – Yes leave it in overnight. We will repeat it a few times to give a good deep colour.

CH – Shame about the fills as I was thinking that shape would lead to a nice contemporary tan pipe.

SL – We may be able to hide them a bit with the tea stain. We shall see. If not we can also use the medium brown the same way to darken the fills.

CH – I spent a small fortune getting those 2 dyes over here and I won’t be able to use them. LOL!

SL – We will use them; the tan could work with the dark stain as an undercoat. We will have to stain them differently because of the fills.

CH – I want the billiard to look darker so I will definitely use several coats of the medium brown. I want to have a classic look for the billiard and contemporary one for the Dublin – sort of 2 different styles of refurbishment; one sympathetic to the original and one a complete facelift to bring it into current times.

SL – That should work. Let’s aim for that with the Dublin. Do you have a small paint brush?

CH – Yeh I have several paint brushes and also the applicator that comes with the dye.

SL – You want a pretty fine brush to follow the darker grain lines.

CH – You are an enabler mate. You create enthusiasm. LOL!

SL – Let’s get back to the stems.

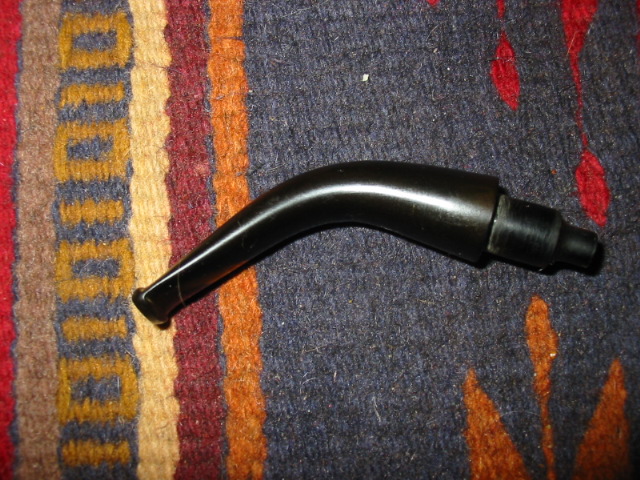
CH – The stems are in excellent condition with no tooth marks or dents. I have used bristle pipe cleaners dipped in whiskey in them and they are surprisingly clean. I will sand them with 220 grit sandpaper and then micromesh. Do you use Tripoli on them or do go directly to White Diamond when buffing.

SL – Start with a higher grit on the stem as you will scratch it with the 220. If you have some wet dry sand paper 400 or 600 use that on the stems. If they are clean as you say then let’s use micromesh 1500 to work them over. I find with the lower grits if I sand length wise it scratches less than cross wise.

CH – Ok, I’ll work on the stems while the bowls are soaking.

SL – You can use only the micromesh on the stems if you like.

CH – I have a buffer mate and some Tripoli, White Diamond and carnauba.

SL – The first micromesh 1500 will make the stem appear grey. Keep working it until it is smooth. I keep a small bowl of water next to me when working and dip the pad in it while sanding. The grit cuts better when wet. You get a grey slurry of the pads when you dip them while sanding. Change the water between grits.

CH – Working on the Dublin stem now with wet mesh.

SL – Excellent. You won’t need to buff much if you work the pads up to about 6K.

CH – Can only get 220 or higher or 2000 here mate, remember we are 3rd world in this place LOL.

SL –I should have thrown in a few papers and sanding pads when I sent those to you. Pretty cheap here.

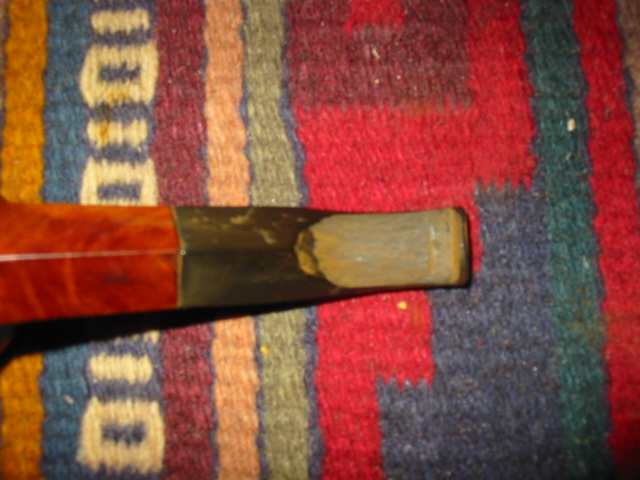
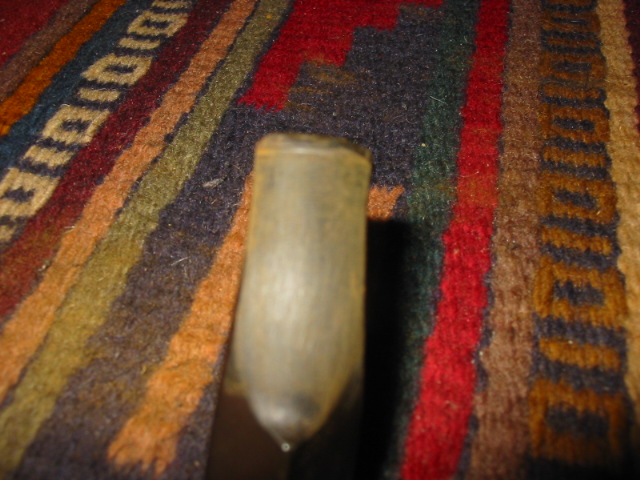
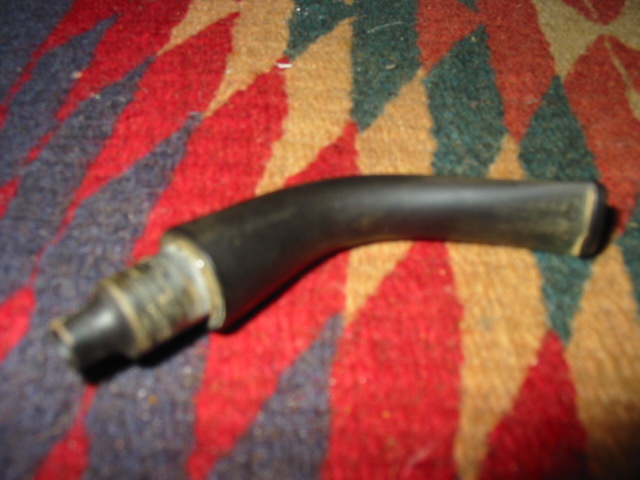
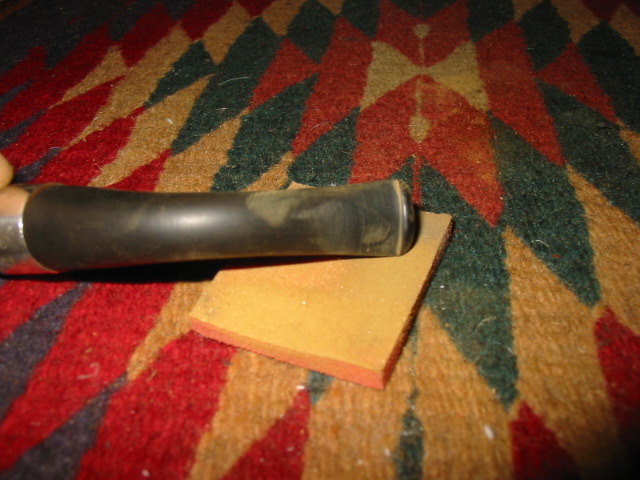
CH – No worries mate, I managed to get a mini buffer shipped over with Tripoli, White Diamond and carnauba. Here is the Dublin stem after wet and dry sanding. The tenon will need careful cleaning to ensure that the fit is not degraded.

CH– Would you use Tripoli on a stem or go straight to White Diamond? Some people say that Tripoli is too harsh for stems.

SL – I use Tripoli. Now would be a good time to pull the bowls out of the wash. Put the stem on the pipe before you buff them – VERY IMPORTANT AS YOU WILL ROUND THE EDGES. Give it a buff with Tripoli. Lightly load the buffing pad. It can go on heavy and it makes the work miserable. A heavily coated pad turns the Tripoli to a reddish brown sludge on the stem… a real pain. When done look for scratches. If there are some go back to the micromesh until they are gone. Once it is good and smooth move to the White Diamond. Again check for scratches. Remedy with Tripoli and/or pads. Use a light touch. I use it all the time and it is good. It is finer than the 2000 you are using

CH – Ok will do mate. Fit stem then photo then initial Tripoli buff.

SL – Perfect.

CH – Going to take a picture of the alcohol bath before removing the bowls as it is pretty brown LOL.

SL – Remember, the tenon may be a little tight when you take it out of the soak – that is ok.  The main thing is not to round the edges on the stem at the joint. Even if it does not go all the way in it is ok. It gives you a guide.

CH – Ok. Should I rinse the bowls after removing them from the bath?

SL – No don’t bother. It will evaporate quickly.

CH – Ok. Is the alcohol reusable even though it is brown?

SL– Yes I reuse it for 3 months or more. I find the brown in the alcohol seems to give a nice patina and evens things out on old bowls. I usually let the sediment settle out in the bottom of the alcohol bath and then pour it off, rinse the container, dry it and put the alcohol back.

In terms of buffing the pipe Carl, hold the pipe with a thumb or finger in the bowl when buffing as it will easily be jerked out of your hand.

CH – Yeh, I know LOL.

 SL – I have broken a few stems doing it wrong… even dented a beautiful pipe that was getting a final buff

CH – I think you are right about the fills mate. Took the pipes out of the bath and the Dublin has soft areas where the fills are.

SL – Yup they will harden again. We can level them off a bit. Should work out.

CH – I have some mahogany wood filler here that is similar color to the briar if we need to fill instead of sanding down too far.

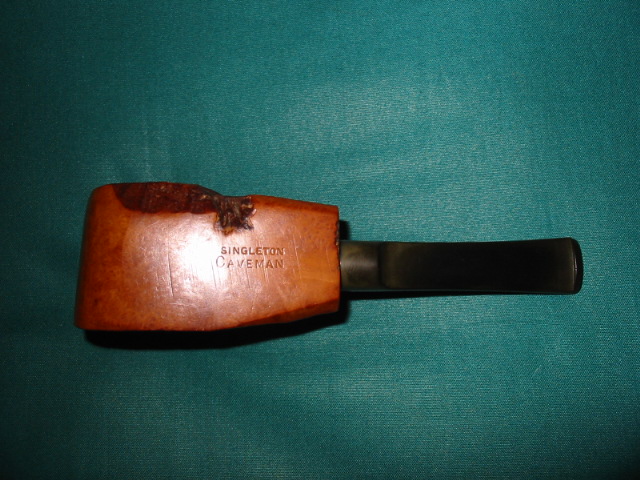
SL – That may work. How does that burn look on the little billiard?

CH – Haven’t sanded the bowl yet on the billiard so not sure until I get into it. Can’t see anything on the inside of the chamber to indicate it has burned through.

SL – Most of that one you may not need to sand. I think it is a cigarette burn from an ashtray. How do the stems look? To give them a last bit of sheen I will often add some olive oil to the highest micromesh pad and rub the stem down then a final buff to give a glow.

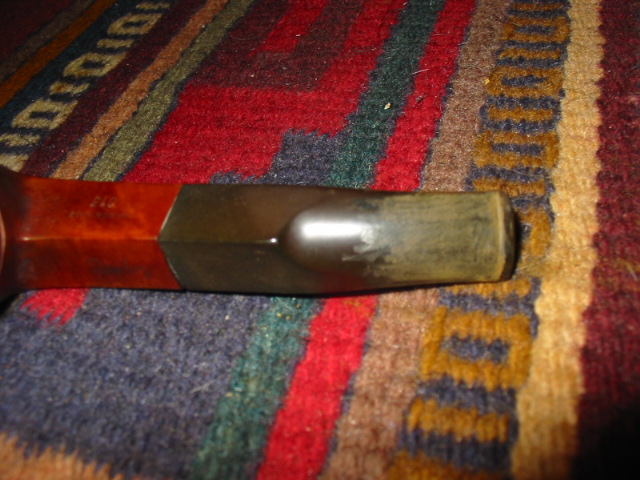
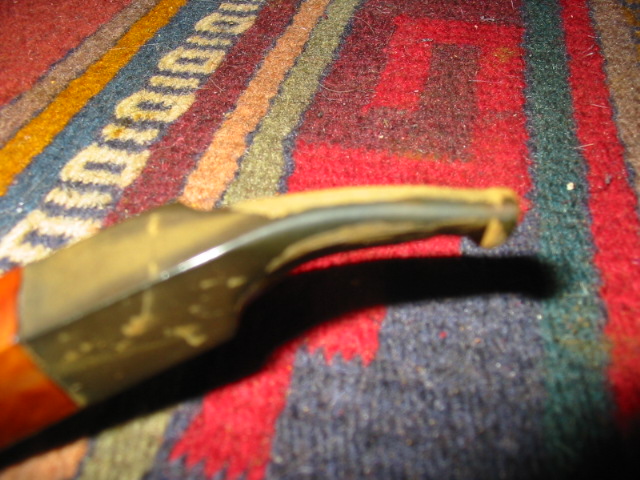
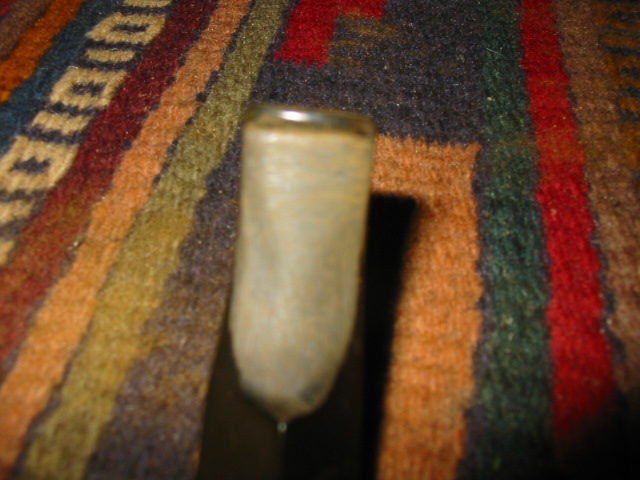
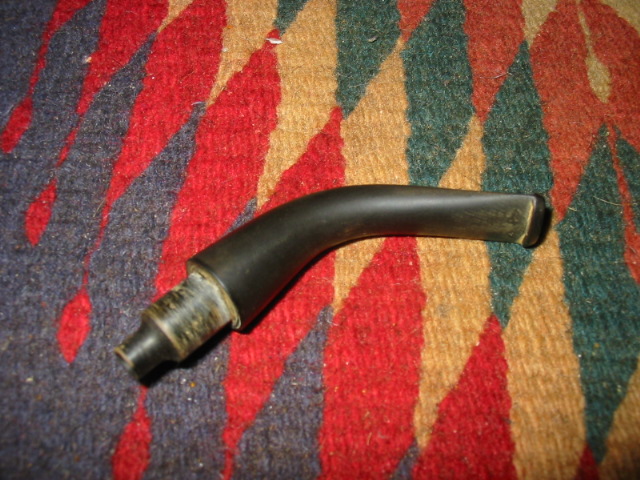
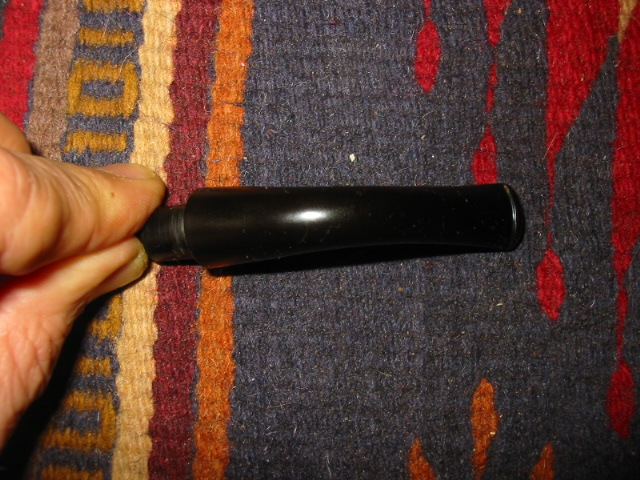
CH – Ok here is a picture of the stems mate

SL – They look really nice. Well done

CH – Thanks mate, they look way better in natural light though. The flash can be a bit harsh.

SL – The next stage is buffing the stems with Tripoli, White Diamond and carnauba wax.

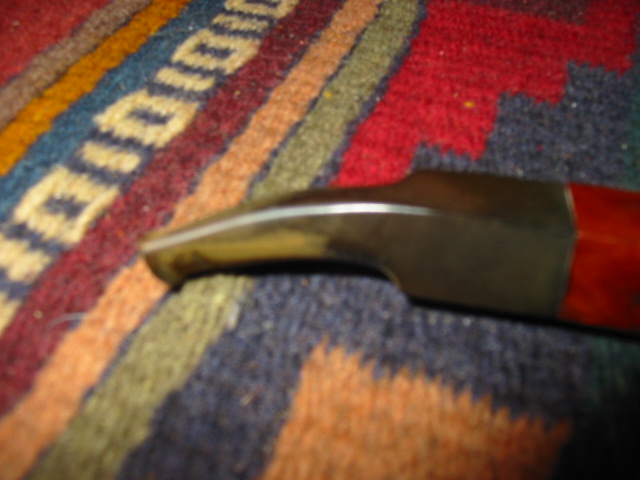
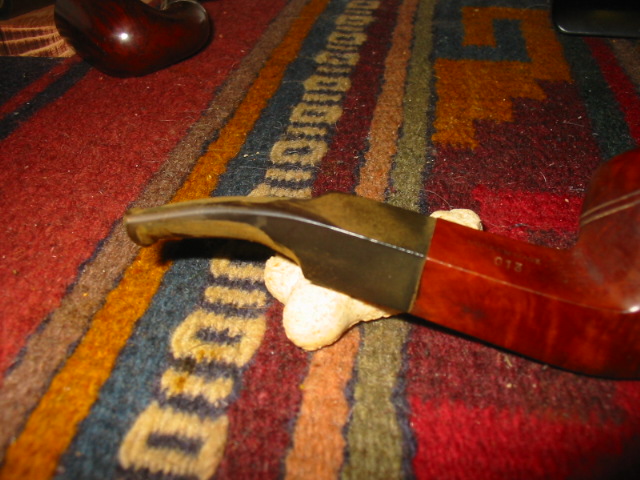
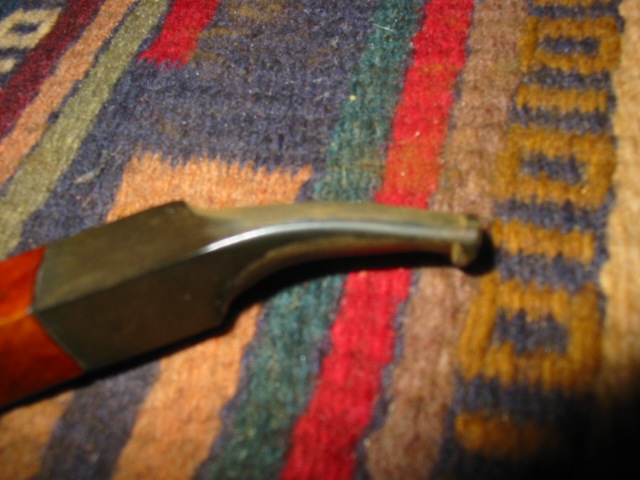
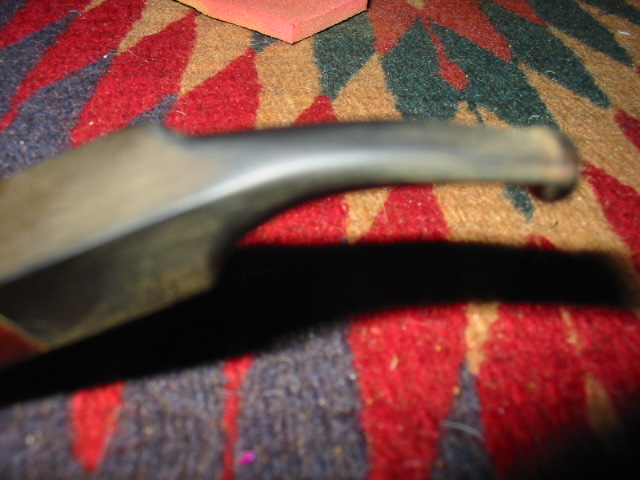
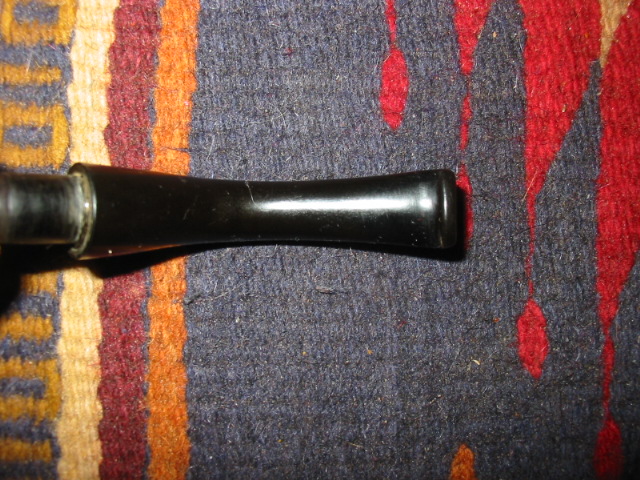
CH – Ok here is what the stems look like after buffing.

SL – Good job. The buttons still have the sharp edge! Also the shank stem junction still is crisp without a rounded edge – very nice. Rounding the edge and the loss of the crispness of the button are usual mistakes folks make. Buff the billiard with the Tripoli and see what it does.

CH – Ok

SL – Sometimes the alcohol bath removes the grime and gives you a great old patina look. All it needs is a buff.

CH – How old is it?  Do you know?

SL – Probably 60’s era on both of them. That was what the rest of the lot were.

CH – I would leave it original if it was a 61 LOL!

SL – Could be you know… no way of really knowing for sure.

CH – Hard decision whether to leave it and live with the rim mate.

SL – Nah lets work on it and smooth it out a bit.

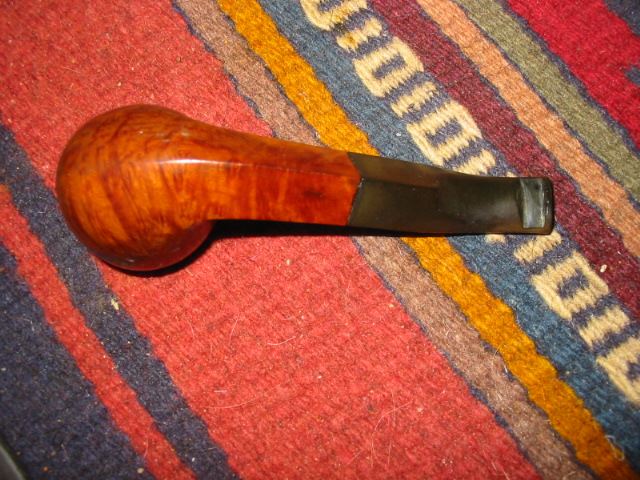
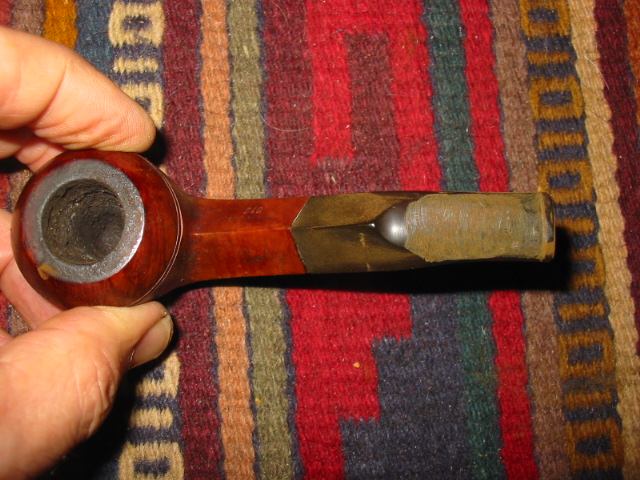
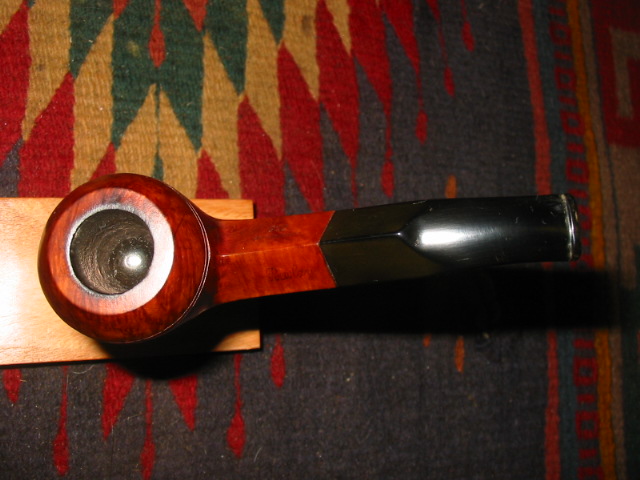
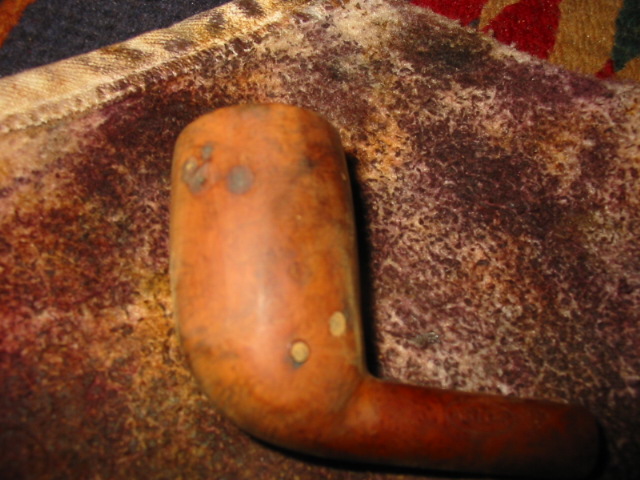
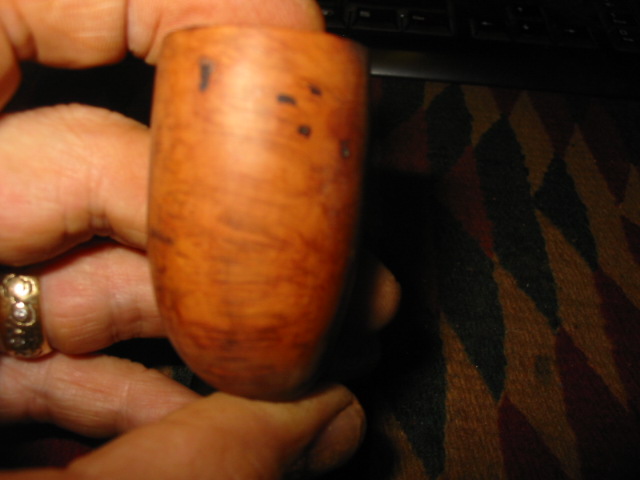
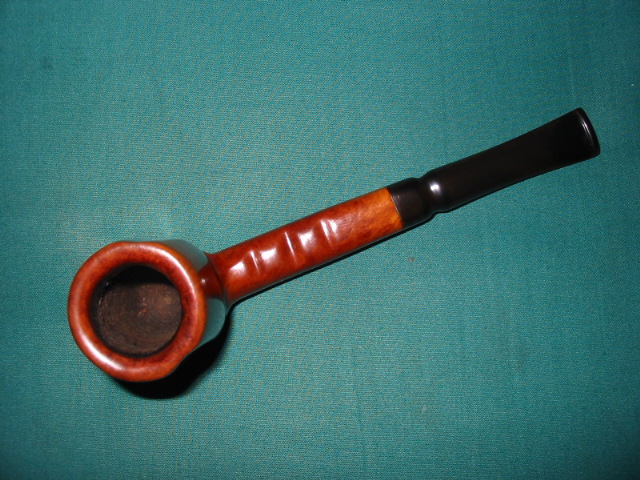
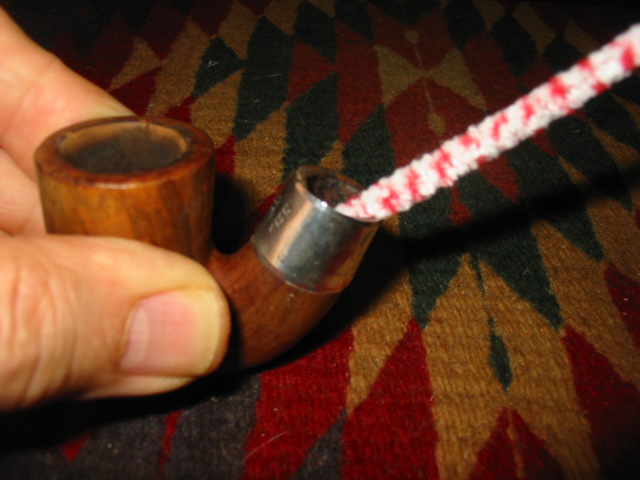
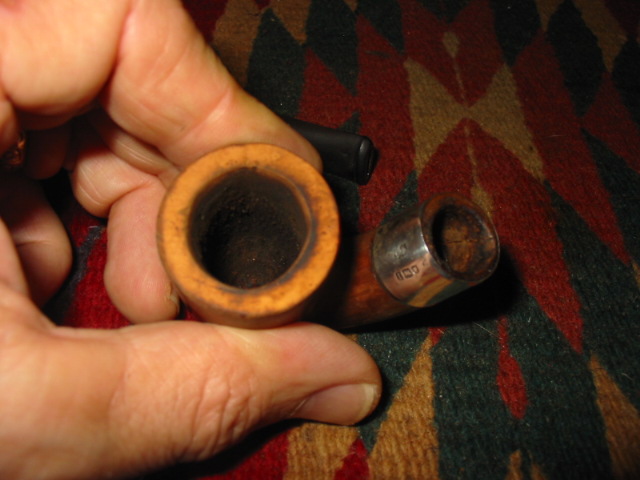
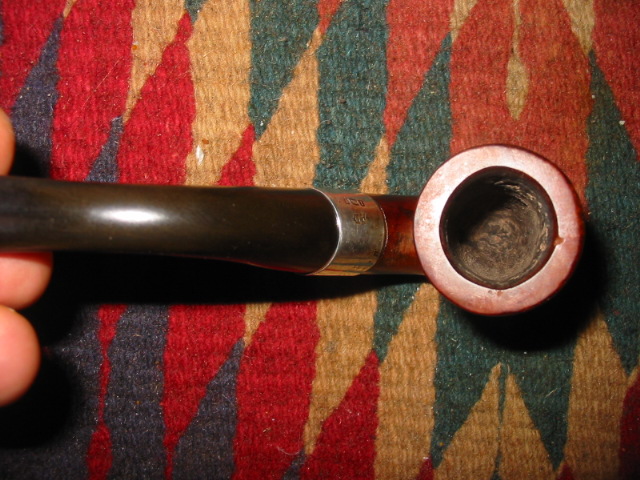
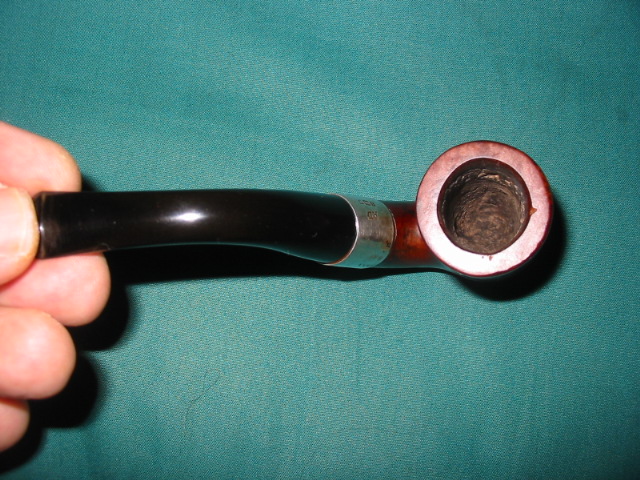
CH – It has a nice patina, I wonder what diamond white and carnauba would do for it. I love the patina and after the alcohol dip and a quick blast with Tripoli the grain is quite lovely. The problem is the rim. It has some chipping on the outside and the inside looks as if it was reamed with a knife. I don’t want there to be a large variation in color and I don’t want to ruin the rim by sanding it out of true.

SL – We can leave the bowl as is in terms of the finish and even up the out of round bowl a bit. How is the rim?

CH – Obviously been reamed with a knife at some point. The outside of the rim is slightly rounded and has some chipping around the edges. Nice grain on the bowl though mate.

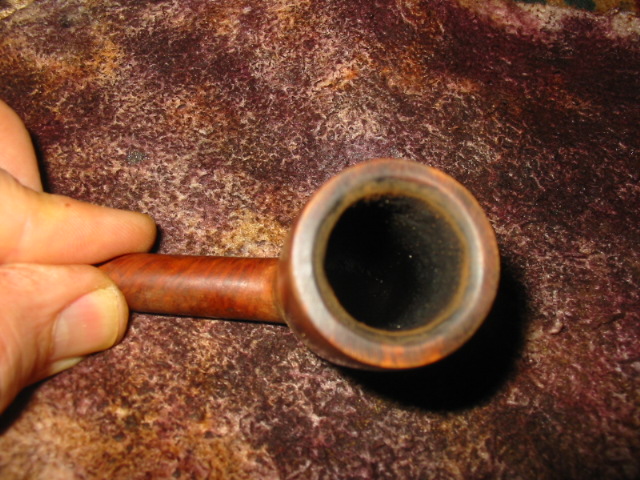
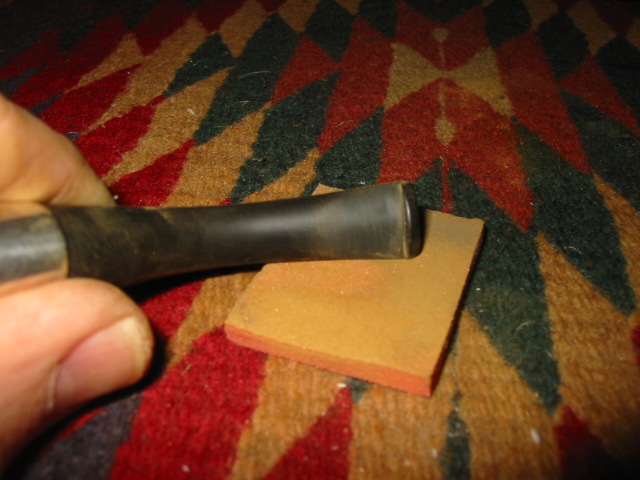
SL – It is indeed. I thought it would have when I had it here. Amazing how removing the grime and a bit of finish with the alcohol makes the grain show. As far as dealing with the roundness of the bowl – take a small 1 inch square of 220 grit sandpaper and fold it in half lay it at an angle to the inside of the rim. You will work in slowly evening out the rough spots and cuts on the inside. Try to work to get the distance from the inner circumference to the outer one to be equal all the way around the bowl. Doing this you may not need to do anything to the rim… we shall see. We can also work to match the whole thing…

CH – Mmm, trying to think how to match the stain when we are done with that.  The patina is really nice

SL – That will be fairly easy – medium brown will work perfectly for the patina of old pipes. Work on the roundness of the bowl first before tackling the rim. You may be able to leave the rim. Work the edge slowly with the 220 sandpaper to smooth it out on the inside edge. Doing it at an angle will allow you to even things out aiming for equal distance between inner and outer edge all the way around.

CH – Ok mate, working on it now.

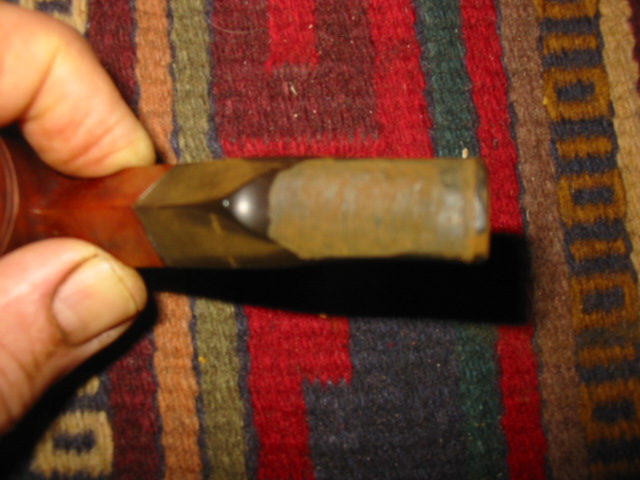
SL – In your picture of the top I see that you need to take out some on the top side of the picture (right side) and also on the butt side of the bowl near the shank. Very little needs to be done with the left side.

CH – I think we are very close.  Not sure how much more I should play with it for a pipe of this age.

SL – You did it brilliantly!! Perfect

CH – Thanks mate. I was really worried about ruining it.

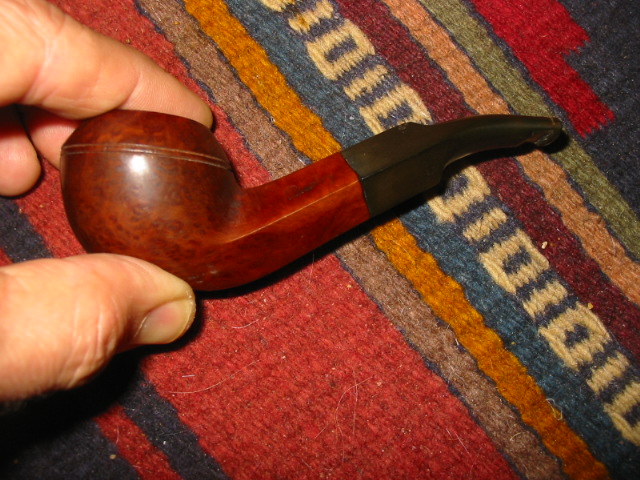
SL – No need. You did well. It looks way better and like it should after some 40 years of care. It is these little steps that make the difference.

CH – Yeh that is what I was thinking. You can be too anal and ruin the pipe’s character

SL – Now steam out a few of the dents to the top and you should be good to buff and polish. Heat a butter knife over a flame and fold a wet dish cloth on the rim. Lay the hot knife on top of the wet cloth and it should hiss and steam. You may need to do a few times but it will lift most of the dents in the rim. It will dull the finish but a buff with white diamond and some wax will remedy that.

CH – Right, I’ll get onto it mate. She is a little gem mate, I really appreciate it.

SL – You are doing great. Once that is done you can buff with White Diamond and wax. Should be a keeper. How is it working?

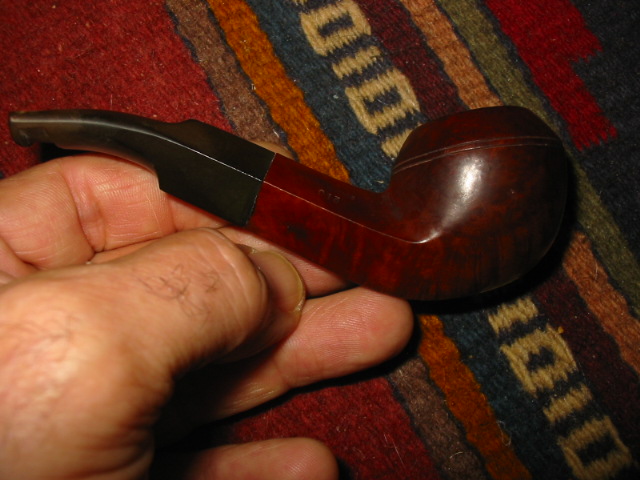
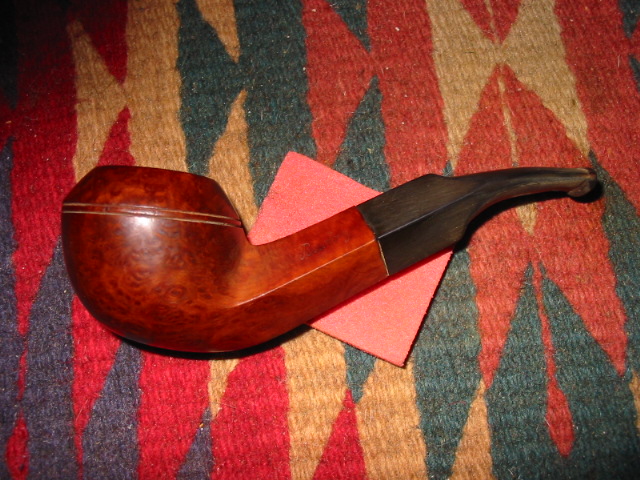
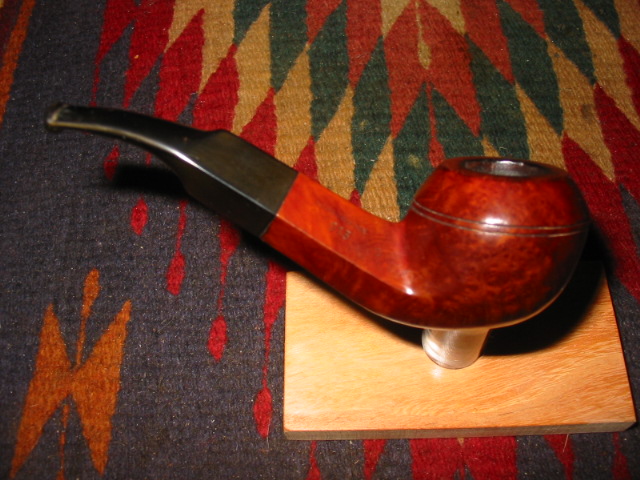
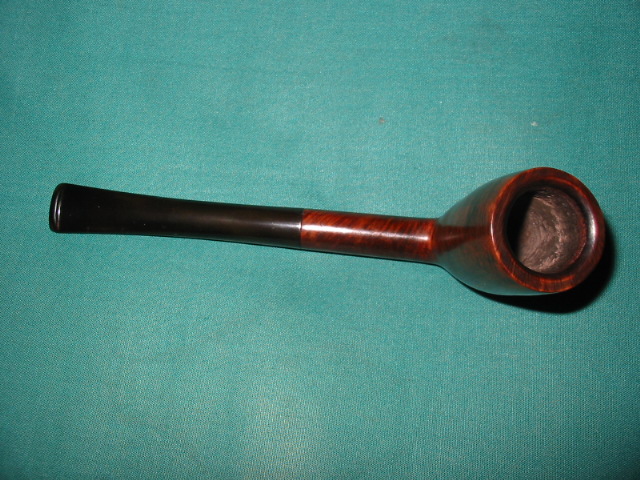
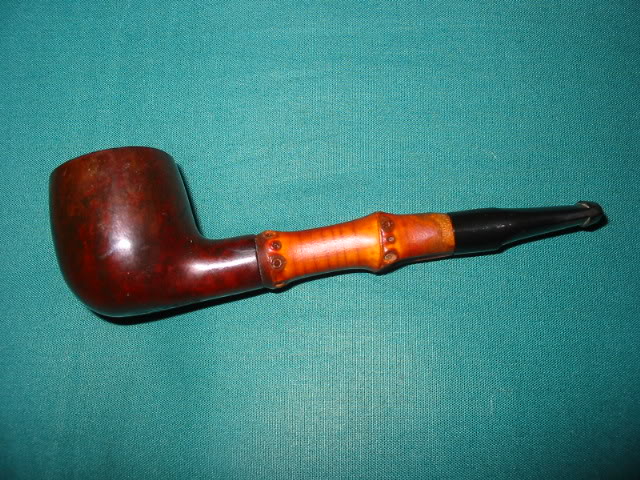
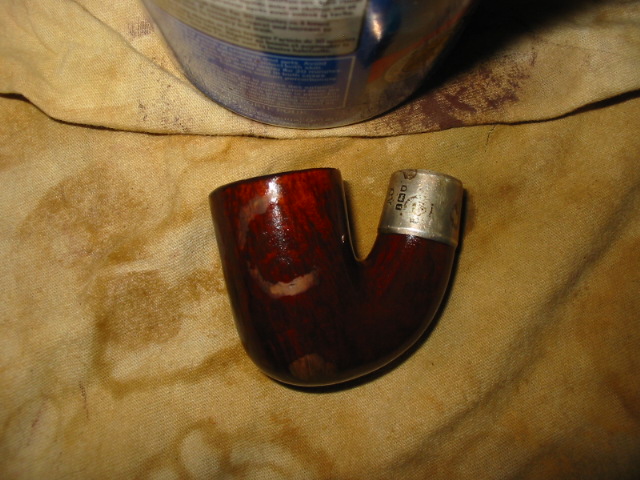
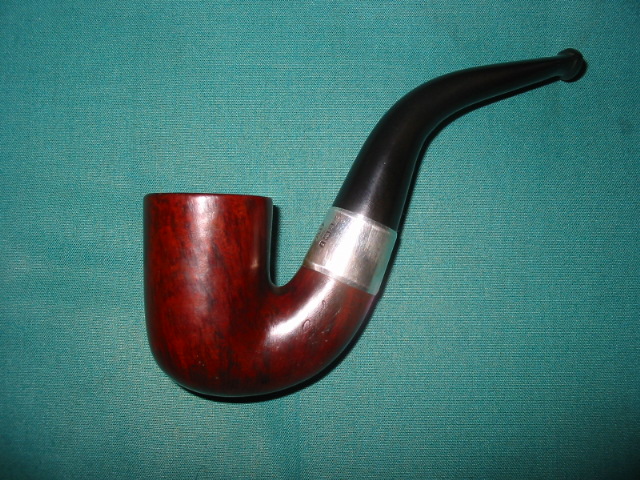
Carl went on to steam the dents until they were less visible and then he buffed the pipe on his buffer with Tripoli and White Diamond.

CH – Just going to upload a photo of the billiard.

Restoring a unique Peterson 10


I picked up this old Peterson shape number 10 at a flea market for about $12. This one needed cleaning inside and out as well as reaming. The finish was quite good. I just used a soft bristle tooth brush to get into the crevices. The shank had a crack in it so I banded it with a silver band. The bowl was caked and very narrow. I used a battery terminal brush and an old adjustable reamer to get inside of it. The stem on it was obviously not the original but a smaller diameter replacement stem that did not fit well. The shank had been sanded smooth but was not tapered to meet the misfit stem but it was perfect for setting the band. Before doing that I used some super glue to squeeze the crack in the shank together. I held it until it was dry. I then heated the band with my heat gun and pressure fit it on the shank. I flattened the bottom edge of the band to match the flat bottom where the stamping is. I fit and shaped a new stem. Once it was fit I bent it to a comfortable fit for the mouth. Then I sanded and polished it with my usual regimen of micromesh pads from 1500-6000 grit.

New Life for an Old Barling


I have often written on the blog that good refurbishing begins with observation of the work at hand. I never fail to spend time looking at a pipe and noting areas of concern before I work on it. That is probably why it is pretty simple to record the work I have done on the pipe after the fact. In the old Barling bent, who’s refurbishment is recorded in the following post, I chose to post the notes from my observations. Enjoy!

At Smokers Forums a friend and I have exchanged ideas and thoughts through pm’s, emails and phone calls for several years now. Our talks have covered much ground but seem to also involve at least a fair amount of chatting about refurbishing estate pipes. A couple of weeks ago he contacted me with an idea of somehow collaborating on a refurb. He had an old timer he wanted me to look at and talk over with him. It came in the mail and I gave him a call with what I saw as I handled the pipe and took it apart. The list below gives some of my observations about the pipe as I checked it out carefully.

  1. The band is crooked and turned on the shank. It may take heating the band to it to loosen it.
  2. The silver hallmarks are an anchor, lion and a shield. The shield should have a letter in it to identify the year but it is worn away. The band is made in Birmingham, England, and it is Sterling Silver. As for the year, the best I can do is estimate; it lies within a 20 year period – 1876-1895. We would need to check the dates on Barlings made in the 1800s, to see when it fits into their history. That could narrow it down. It also may be an aftermarket band that was added to repair the shank.
  3. The only stamping is Barling in script. I cannot see an “s” on it and certainly no apostrophe. That should also help date it. The tail on the “g” hooks or curls under several other letters.
  4. The divot in the bottom edge of the shank, for lack of a better word, is not a worn spot in the shank – interestingly once I cleaned the shank I lined up a pipe cleaner in the centre of the divot and it is perfectly aligned with the drilling of the airway. With the pipe cleaner in place (think drill bit) the divot is gone and the walls are all equal. I am thinking this is the divot that is often found in Oom Paul or bent shapes to drill the airway straight to the bowl. I am going to give that a bit more thought before I step in with a repair to the shank. I may get away with building up the tenon instead.
  5. The bowl is in very good shape. I cleaned it out and the walls are all sound and the bottom of the bowl is also sound – no sign of damage to the briar; though the airway comes out a little high on the side of the bowl. I may need to smoke a cigar to make some pipe mud to raise the bowl bottom a bit!
  6. There is a little damage to the front outer edge of the rim but it has been rounded with time.  The inner rim was damaged by a reaming with a knife and is slightly out of round. I have already remedied that with sandpaper.
  7. The design of the tenon is very interesting. It is almost a reverse funnel (think inside of a funnel). The curvature at the tenon and step down is such that it provides a bit of a cooling chamber in the sump of the pipe almost like those new fangled calabash things that are hitting the market now.
  8. The vulcanite is very hard and does not seem to show any oxidation. I have seen that before on these old timers – they use a very good quality of rubber and maybe less sulfur in the mix to vulcanize it. Not sure but for some reason they hold the black colour without any browning.
  9. The stem has a few tooth marks – 2 on top and two on the bottom. Some minor tooth chatter as well.
  10. The silver band is also angled like it was put on crooked after it was misaligned. The hallmarks should be on the side but seem to be on the top.
  11. It appears that there is a crack in the shank that was repaired and then banded.

Chuck and I talked through this list a bit on the phone and then through pms on Smokers Forums and he left it to me to see what I could do with the old pipe. Here are some pictures of the pipe when it arrived. The finish was pretty much gone but there was some great looking grain underneath. The issues I pointed out above will be clearly visible by looking at the photos in the first series of three. All of the external issues are visible in these photos.

ImageImageImage

Once the stem was removed from the pipe several other issues became apparent. The biggest one that we discussed was the way the mortise was worn and out of round. You can see the dip or divot in the bottom of the shank that makes the mortise almost oval. Inside the mortise you can also see the tar buildup where the step down end of the tenon sat. It has the reverse of the shape of the step down. Where it had a curved shoulder between the tenon and the step down, the mortise had the reverse. The tars were built up to the point that the tenon step down sat firmly in place. The rest of the tenon was loose in the mortise as years of use had worn away a part of the mortise. The question we were left with once the pipe was cleaned was how to address the wear in the mortise and tighten up the fit of the tenon. The options were two:

  1. Build up the inside diameter of the mortise – this could be done by inserting briar and redrilling it or by using a build-up of glue and briar dust.
  2. Build up the outer diameter of the tenon – there are several ways of doing this including the use of clear nail polish or superglue applied to the tenon and then sanded to fit correctly.

Each method had a few issues involved in using them.

–          To build up the mortise with an inserted piece of briar would be difficult in that the mortise was no longer round and once the mortise was redrilled the walls of the briar plug would be very thin. Also the stem itself was cut to fit the out of round shape of the shank and mortise so it would have to be reshaped.

–          To build it up with glue and briar dust would work but be a bit hard to control the amounts and if it was built up too much removing it and sanding it would be difficult to control.

–          To build up the tenon with nail polish is a temporary fix and would need to be repeated over time and use. To use the superglue is more permanent but are there any long term effects from the use of the glue on the inside of the pipe. Even if, as in this case the tenon is not in contact with the mouth. The glue would only be used on the upper portion of the tenon and not on the step down portion.

ImageImageImage

Chuck and I discussed these options and issues and he left it to my judgment to choose one. I thought about it and laid aside the pipe for the night and came back to it in the morning. I examined the tenon and mortise once again to get another view of the problem before I worked on it. I inserted a pipe cleaner at the angle of a drill bit from the shank through the airway to the bottom of the bowl to see where the edge would land. The drilling of the shank matched the notch in the bottom of the mortise. It had been enlarged due to the age of the pipe and its use but it matched exactly. This influenced my decision where to go with the repair. Once that was decided it was time to work on the finish of the pipe and the internals. I dropped the bowl in the alcohol bath to let it soak and remove the grit, grime and old finish. I was hoping that the soak would also loosen the glue on the band so that I could turn it into the correct position on the shank. It soaked for about an hour and a half while I did other things. I removed it from the bath and laid it on my work table. The pictures below show it before I dried it off.

ImageImage

I steamed the dents on the top and also sanded out the remnants of them on the surface. I wiped down the bowl with acetone to remove any remaining finish on the bowl. I picked the thick tars in the sump of the shank and tapped out the crud that came loose. It took a lot of detailed picking to get the surface free of the build up. I then cleaned out the sump of the shank with many cotton swabs until they were clean. The picture below shows the pipe after the cleaning and wiping down with acetone. The second picture shows the rim with the dents removed and the roundness of the bowl restored.

ImageImage

After thinking through the options on the shank and the mortise situation I decided that the best way of dealing with this old war horse was not to build up the mortise and cause problems with the fit of the stem and shank but to work on the tenon on the stem. I had read elsewhere of the use of super glue to build up the tenon so I gave it a coating. The best way I have found it to work for me is to drip it on the tenon and turn it as it drips. The fluid thus gives the entire tenon an even coating. The first two pictures below show the tenon after the application of the layer. Once it was dry the tenon was obviously too big so I sanded it, while repeatedly checking for the fit. The third picture shows the tenon as it is now – a perfect snug fitting stem on the Barling this morning!

ImageImageImage

To highlight the beautiful grain in the pipe I used a brush dipped in black stain to follow the grain patterns on the bowl. I applied it with an art brush to give it a good coverage. Before applying the stain to the bowl I warmed the briar to open the pores in the wood to receive the stain deeply. The pictures below show the bowl after staining with the brush. It looks odd and actually less than charming but the process works as will be seen in the next series of photos.

ImageImageImage

After stain dried I sanded it with a fine grit sanding foam that allows me to follow the curves. I was careful around the faint stamping on the shank. Here is the pipe after it has been wiped cleaned with Isopropyl alcohol after sanding. The grain is highlighted well. The final picture below shows the grain on the front of the bowl.

ImageImageImage

I set aside the bowl for awhile and dealt with the tooth marks on the stem. After steaming them to raise them I sanded with 240 grit sandpaper to remove the remaining signs of the tooth marks and the tooth chatter. I then sanded with fine grit foam sanding pads to work out some of the scratches in the surface.

ImageImage

I did some more sanding with the micromesh sanding pads on the pipe bowl to get the black stain tamed a bit so that when I put the overstain on it would show through but not dominate. I wanted to get a stain on the pipe that fits the older Barling pipes that I have here so I thinned down some oxblood stain for the overstain. I applied it and flamed it. Then I took it to the buffer and with a light touch removed the excess and left a nice top coat of rich reddish brown stain with the black shining through to highlight the amazing grain on this old pipe. The three pictures below show the pipe with the stem on but the stem was not finished as it still showed some of the browning of oxidation.

ImageImageImage

From there I removed the stem again and sanded it with 400 and 600 grit wet dry sand paper and water. I finished the stem with 1500-6000 grit micromesh pads dipped in water to give bite to the sanding disks as I polished it. The way I use the micromesh is to dip it in water and then sand, dip again and sand again through the various grits until I am finished and the stem has some depth to its blackness. I coated the stem with several coats of Obsidian Oil and then a coating of wax by hand.

ImageImageImage

I put the stem back on the pipe and took it to the buffer. I buffed the whole thing with White Diamond and then cleaned the silver band with silver polish and polished the entire pipe with multiple coats of carnauba wax.

ImageImageImageImage

GBD Tapestry 9438 Re-boot


Earlier this year I refurbished a GBD 9438 in Tapestry finish and vowed never to touch a chair-leg stem again. That pipe proved to be a wonderful smoker and is a frequently used pipe in my rotation. A few weeks ago I found the identical pipe on Ebay and won the auction. This second 9438 was in a little better shape and the stem was not nearly as oxidized. The Rondell appeared to be damaged.

The bowl was in terrific shape, with very crisp nomenclature. There is an “E” stamp just at the end of the stem. If anyone has an insight as to what that means, please comment. The bowl was lightly reamed, then soaked with Everclear and sea salt. After the bowl was soaked, I buffed the briar with some Tripoli, White Diamond and finally a few coats of Carnuba wax. The briar is in really nice shape and the polished top is unmarred.

My attention then went to the stem. From the Ebay picture, I thought a piece of the brass rondell was missing. But that proved to be only grime. These rondells now appear to be unattainable, so I was pleased to discover this. The stem was soaked in an oxyclean solution. It was then cleaned with 2000 grit wet paper, than the last few grades of micromesh. After sanding, I buffed the stem with white diamond and then plastic polish.

I’m very pleased with the finished pipe. The briar a bit nicer than my first 9438 Tapestry. I bought it with the intention of giving to a family member as a Christmas gift, but now.….

Perspective of the pictures makes it appear the pipes are different sizes. However, they are identical in size. The tenon on the recent addition is curiously a bit longer than my first 9438.

Before:

The fisnished pipe and some shots with the sister 9438 Tapestry:

Al Jones aka “Upshallfan”

Reshaping a button and stem on a Bewlay Bulldog


I picked up this nice older Bewlay Bulldog in a group of pipes I got off of Ebay. It was part of a lot that included two other Bewlay’s and two Barlings as well as quite a few other older pipes. This one is a nice little Bulldog – 4 ¾ inches long. When it arrived the stem was really a bit of a mess. The previous owner seemed to have cut off a portion of the stem and cut a groove on the top of the stem and the bottom as well to form some sort of new button. You can see from the first two photos below what the stem looked like. There were channels on the top and bottom of the stem that were about a ¼ inch wide and went the width of the stem. The stem was a bit oxidized and the bowl was dirty and tars and carbon were built up on the rim.

ImageImage

The next two photos show the stem in profile and you can see the channels if you look closely at the button area of the stem. The button had no real profile or shape to it. The briar was very nice on this one so I really wanted to rework the stem and keep the original stem intact.

ImageImage

I used needle files to begin to reshape the stem and the button. There was a lot of material to remove to even out the slope of the stem to the button. I also needed to reshape the button to make it truly a button. The slot needed to be cut in the button as well as there was only the end of the airway and it was very close to the top of the button. The next series of four photos show the work of the needle file in reshaping the stem. The groove on the top of the stem is shown in the first photo and you can see that it was not too deep. The angle of the blade to the saddle however was very steep and the stem was thick. While the groove is gone there still was a lot of work to do in reshaping the angles of the stem. In the second photo you can see the work done on the underside of the stem. This groove was very deep and there was a lot of work to do to smooth the surface to remove the groove and reshape the angles on the blade of the stem. All the work done at this point was done with flat blade needle files to smooth the grooves, flatten the stem and shape the button. The third and fourth photos in the series show the stem in profile so that you can see the button begin to take shape and the grooves begin to be blended into the surface of the stem blade.

ImageImageImageImage

I decided at this point to use my Dremel with the sanding drum to thin the stem down and to work out the groove on the underside of the stem. The next series of five photos show the stem after the sanding with the Dremel. I was careful to not cut too deeply in the top of the stem as the airway seemed very close to the surface of the stem. I thinned the upper portion of the stem just before the saddle. I wanted the slope from the saddle to the button to be gentler and to make the bit thinner. The first two photos show the stem after sanding the top of the stem with the Dremel. The third photo shows the underside of the stem where I sanded to thin the stem and to remove the groove. At this point the groove is just a simple line that is cut in the stem. The groove is gone. The rest I decided to remove with sandpaper and hand sanding. The last two photos in the series show the stem in profile to give an idea of the slope from the saddle to the button and how the shape is beginning to develop. There was still much sanding to do.

ImageImageImageImageImage

From this point on I used sandpaper to shape the stem. The next series of four photos were taken after I sanded the stem with 240 grit sandpaper to remove the marks and scratches from the Dremel sanding drum. The shape is beginning to get close to what I am aiming for in terms of thickness and slope of the stem from saddle to the newly formed button. You will note that the top edge of the button is still pretty shallow – that is because the airway is pretty close to the surface at this point and I do not want to sand through it. The groove on the top and the line that was left in the above photos of the bottom of the stem are gone.

ImageImageImageImage

I then switched to a finer grit sanding pad. The pad is pictured in the photos below. It is pink foam with fine grit sandpaper attached. It allows me to follow the bends of the stem and to get in close to the button and smooth the scratches out even more. I also used it to sand the saddle to remove the oxidation on the flat parts. The next series of two photos show the new look to the stem and button. They are close ups of the stem in profile. I wanted you to see the slope of the stem and the shape of the button. The sanding foam worked great to be able to smooth out the lines and the edges of the stem so that the edge of the diamond saddle follow to the end of the button in a nice smooth slope. The last four photos show the stem once it has been wiped down with some Isopropyl alcohol after finishing with the sanding foam. There is still a bit of oxidation on the stem but the angles and flow of the stem look natural and the button is clearly visible.

ImageImage

I restained the bowl at this point just for a change of pace. The next series of photos show the bowl of the pipe after I had wiped it down with acetone. From that point I went on to restain it with some oxblood aniline stain.
ImageImageImageImage

This series of photos show the restained bowl and the remaining oxidation that needed to be dealt with on the stem.

ImageImageImageImage

In the next photos the pipe is finished. Before it got to this point I sanded the bowl and the stem with micromesh sanding pads from 1500-6000 grit to polish the bowl and rim and to finish polishing the stem. The 1500 grit micromesh worked well to remove the remaining oxidation on the saddle and the remaining scratches on the stem. From there each course of sanding with the different grits of micromesh added more and more shine to the stem. The biggest change in the polishing comes with the shift to 4000 and 6000 grit. I then took the pipe to the buffer and used White Diamond to finish the polishing of the entire pipe and then gave it several coats of carnauba wax to make it shine.

ImageImageImageImage

Restoring an Astor Belge


This was one of the pipes I picked up recently on a trip to the US. It is a small Astor Belge shape which is one of my favourite shapes of pipes. Astor pipes were made by Comoy as a second line of pipes. From the number of fills on this one it can easily be seen why it is a second. It is a shame as it also has some amazing cross grain on the front and back and some beautiful birdseye among the fills on both sides. The extent of the birdseye grain can be seen in the second photo below.

ImageImageImageImage

The pipe was dirty but really in pretty good shape for its age. I reamed the bowl and cleaned the bowl and shank with Isopropyl alcohol (99%) to remove the tars and oils from the inside. Then I dropped the stem in some oxyclean to soak and wiped the bowl down with acetone (fingernail polish remover) to remove the finish. I dropped the bowl in the alcohol bath for awhile to give it a good soak and worked on several others for awhile.

After an hour in the bath, I removed the bowl and dried it off. The next series of three photos show the pipe after removal from the bath. I used micromesh 1500 grit sanding pads to remove the grime and tar from the rim and the inside bevelled edge. It took a bit of work to smooth this out and keep the angles the same all the way around. The third photo below shows the finished bevel and the top after quite a bit of sanding. The top took a bit more sanding with the micromesh to remove the darkening as it was on the surface and not too deep into the briar.

ImageImageImage

At that point I decided to remove the fills from the bowl as I personally dislike the pink putty fills that are often used on these old timers. I used the dental pick to remove the as can be seen in the next series of three photos. They were all pretty deep and would need to be repaired. After picking out the fill I wipe the bowl down with a soft cloth and Isopropyl alcohol to clean the surface of any remaining bits of putty. When they are clean and dry I fill them with briar dust that I have saved for this purpose.

ImageImageImage

After filling them with briar dust I drip the super glue/krazy glue into the dust and it dries almost instantly. The next three photos show the newly filled holes at various stages of the repair. The first photo shows the dust and super glue in the bottom holes before I sanded them. The top holes in the photo have been sanded a bit to smooth them out but are not finished. The second photo of the front of the bowl shows both the sanded ones and a newly filled hole with the super glue patch before it dried. The final photo in this series of three shows all the holes filled and the initial sanding completed.

ImageImageImage

The next two photos sow the holes patched and sanded smooth. The super glue and briar dust turned black in this case. This does not always happen but it did this time. I have no explanation for that in this case but they do look better than the previous pink fills. I have also learned that they can be hidden a bit with a dark understain. In this case I decided to stain the entire bowl with black aniline stain for a first coat. I flamed the stain and when it dried I took the pipe to the buffer and buffed the entire bowl with Tripoli to remove the excess stain and leave the black in the grain and around the fills. You can also use black permanent marker to build the grain pattern around the fills to help hide them though I did not use that method on this pipe. I then sanded the bowl with the 1500 and 1800 grit micromesh pads to remove more of the overstain. I washed the bowl down several times with acetone to also lighten the black. Once it was at the saturation I wanted it was ready for the overcoat of stain.

ImageImage

I decided to use oxblood coloured aniline stain for the finish coat on this one. I wiped it on and then wiped it off before it dried to get good coverage I repeated that several times and finally gave it a full coat and flamed the stain to set it. When it was dry I took it to the buffer and buffed it with Tripoli and White Diamond to give the final coat a real shine.

I finished the stem with my usual regimen of micromesh pads from 1500-6000 before putting it back on the bowl and buffing the pipe with White Diamond. I coated the stem with several coatings of Obsidian Oil and then gave the whole pipe multiple coats of carnauba wax to finish. The pictures below show the finished pipe. Though the fills are still visible they are diminished in their overall presence in the pipe. They no longer stand out in the finish. I personally love the depth of colour that this old Belge has with the new stains.

ImageImageImage

Carving one of my own


Every so often I get the urge to carve a pipe of my own. I have done it from scratch, drilling the airway and bowl but often it is just as much fun for me to buy a pre-drilled block with its own stem and rework it into something I like. The pictures and essay below will take you through my process with a pipe I picked up off EBay for almost nothing. When you look at it some of you will recognize that for awhile in the 80’s and maybe earlier Singleton sold these pipes as Caveman Pipes. They were rough and were stained and waxed, stamped Singleton Caveman pipes and sold as is. I have always thought that they were ugly and looked unfinished. This one just begged to be reshaped – at least that is the excuse I gave when the package arrived and my wife commented on “yet another pipe”.

The first four photos give a good sense of what it looked like when it arrived at my house. It was a fairly small piece of briar and there was no way of knowing what lay beneath the surface of the block. It was stained and waxed. The stem was oxidized a bit but it did not matter as I was going to reshape it and make it my own. The last photo of the four shows the Caveman stamping I was referring to earlier.

ImageImageImageImage

I took out my Dremel with the larger sanding drum, replaced the sandpaper cylinder with a new one and began the process of removing the briar and making a shape that I liked and that I felt the briar held inside. The next three photos show the block with much of the briar removed and a shape is beginning to come out. I bring it to this point in the shaping process with the Dremel and the sanding drum. It works great for me. Some of you may notice the nicks from the Dremel on the saddle of the stem. Those are a pain but I was not worrying too much about it as I planned to shape the stem a bit more as well and those would disappear in the process. Also note, the shank is still not the diameter of the saddle on the stem at this point. From this stage one I do the shaping by hand with 100 grit sandpaper. It makes short work of the remaining excess briar. You will also see some burn marks at the bowl shank junction from the sanding drum – nothing that will not sand off. There are also sand pits and flaws beginning to show up in the surface of the briar.

ImageImage

Image

Much sanding went on before I took the next series of three photos. I used the 100 grit sandpaper to remove much of the excess and then progressed to 220 and 240 grit sandpaper to bring the shape to the stage in these photos. I also sanded the saddle of the stem and the edges of the blade to match the line of the shank. I wanted the flow to be uninterrupted by the juncture of the two materials and I wanted the transition to be smooth. There were many sand pits visible at this time on the sides, top and bottom of the bowl and the shank. It is always a bit of pain to get to this point in the shaping and sanding and not be able to get rid of them. This left me with a bit of a quandary. What should I do to get the best finish on this pipe? I dislike fills and did not want to use putty in any form on this pipe. I figured the next bet would be to rusticate the pipe and give it an interesting texture for the prestained finish.

ImageImageImage

I used a tool that I fashioned out of a fistful of galvanized nails, a piece of steel pipe, a cap and nipple coupling. It looks like the photos below. It is the tool on the left. I also used a florist’s frog (pictured on the right) to give the finished surface a different touch.

ImageImage

Before I used the tool on the surface of the briar, I wrapped the saddle of the stem and a 1/8th inch band with black electrical tape. I wanted to protect the saddle and the small band of briar from being rusticated with the tool. It is a work horse but is not subtle in its deep cuts. I wrap the cap end with a thick towel to protect my hand when I pushed the points of the nails into the briar. I pushed the head into the briar and twisted the tool back and forth to cut the surface of the briar and roughen it. The next series of four photos show the rusticated surface of the pipe after I finished with the nails and also after I rubbed the florist’s frog across the surface to knock off high points. I was aiming for a finish that has the look of aged leather so I wanted no roughness left but I wanted a crinkled, wrinkled look to the briar.

ImageImageImageImage

The next two photos show the pipe after I gave it a black understain. I used black aniline stain and applied it with a dauber. Once the pipe was covered I used a lighter to flame the stain to set it deeply in the briar. My goal was to have the black stain set deeply into the crevices of the rustication once I had buffed it. (I have learned that when I am staining to always start with the darkest stain and work toward the final lighter coat.) Once the stain was dry I took it to my buffer and buffed it with Tripoli. The buffer removed all of the black stain from the smoother, higher surfaces and the band next to the stem and the rim. The only black stain remaining was in the crevices and pits in the briar. At that point I restained the pipe with a medium brown aniline stain and flamed it as well. I took it to the buffer and this time buffed with Tripoli and White Diamond. I wanted the brown to give a top coat and allow the black to show through. I also wanted to smooth the surface a little to make it smooth in the hand.

ImageImage

The final series of photos show the finished pipe. I think I achieved the look of old worn leather I was aiming for with this rustication and staining. I worked on the stem and smoothed it out with 400 and 600 grit wet dry sandpaper and water. Once the scratches were gone I worked through the usual regimen of micromesh pads from 1500 to 6000 grit. These gave the stem a good polished look. I finished it on the buffer with White Diamond and multiple coats of carnauba. The bowl was waxed with Halcyon 2 wax so that I could avoid the wax build up from carnauba in the crevices of the rustication. I gave the entirety a final buff with a clean flannel buffing pad. This one has become a favourite smoker of mine. It is perfect size to fit in my jacket pocket and it is a veritable furnace for good Virginia Flake tobacco.

ImageImageImage

Edwards Contour or Criterion Restoration


I found this old Edwards pipe while I was visiting a small community in Washington in the US. My wife and I were away for our 36th wedding anniversary and always love visiting second hand shops and antique malls. We must have visited a dozen or more shops on that trip. This older Edwards pipe was in the last shop we visited. It was an interesting shape and intrigued my eye. I made an offer for it and it soon became mine.

Once I got home I decided to refurbish it as one of the first I dealt with. I am not sure of the name of the particular Edwards line this one came from but on one of the online forums someone thought that it belonged to either the Contour or Criterion line. He had pointed out that the lines were carved in France but the only sign of that was that the word France was usually stamped on the underside of the stem. However, on this one there was no stamping on the stem – no France or other name, just smooth brown oxidation. The stem also had tooth marks on the top near the button and a very prominent dent on the underside of the stem near the button. The finish on the pipe was dirty but in great shape. There were no dents or scratches and the pipe seemed to have been well cared for. Edwards did not stain their pipes as is evidenced by the natural finish on this one. The rim was probably the most potentially problematic area on the pipe. It was tarred, caked and possibly charred on the bevel inward.

ImageImageImageImage

I reamed the bowl and cleaned the inside of the bowl and the shank. I wiped down the entire pipe with undiluted Murphy’s Oil soap on a cotton pad and removed the grime and old waxes. I scrubbed the bevelled rim with the oil soap as well to remove the tars and the surface carbons. I used some 1500 and 1800 grit micromesh to remove the rest of the tars and bring it back to a smooth surface. I was pleased to see that there was not any charring or burn to the surface of the rim and once cleaned it looked pristine. The pipe has not been stained but had a natural finish so I buffed and polished the rim and the rest of the surface of the pipe to get the shine back. While I was at the buffer I also buffed the stem with Tripoli to break up the oxidation and then took it back to my work table. At the table I used nail polishing sticks (these are fingernail polishing stick and come with micromesh sandpaper on a foam stick) to sand out the bite marks on the top and underside of the stem. I worked with the 1500-6000 grit micromesh pads to polish the stem and remove the remaining oxidation. A folded pad worked well to sand in the grooves of the stem to give even that area a clean glow. I coated it with Obsidian Oil and once it was dry I buffed the entirety with several coats of carnauba wax.

ImageImageImageImage