Blog by Paresh
I had been procrastinating restoration work on this pipe for long, primarily for want of spares. This was one of my inherited pipes that had its horn stem completely shot!! I had been waiting for a suitable replacement stem, preferably a horn stem and so when I received my stash of around 40 vulcanite and 20 horn stems (a mix of used and new stems), this pipe moved up the queue for refurbishing.
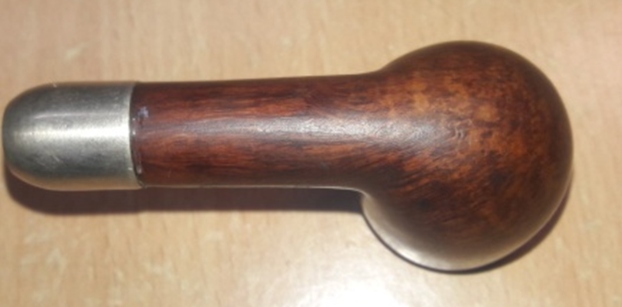
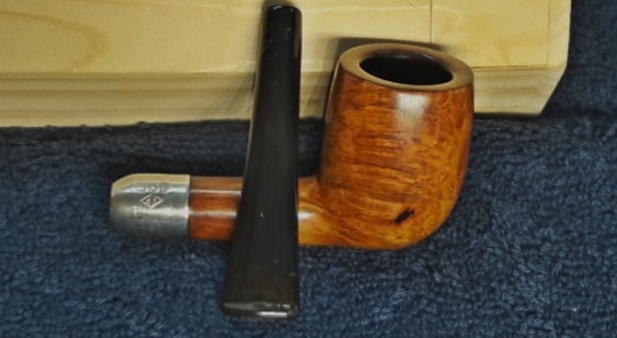
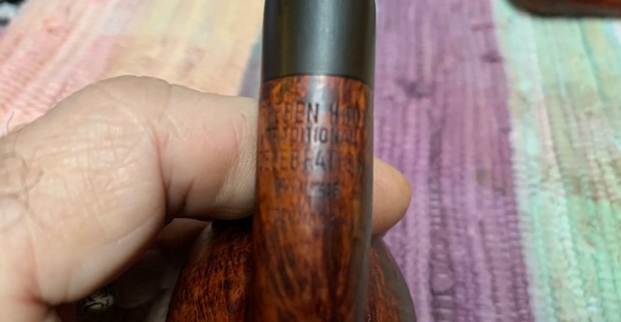
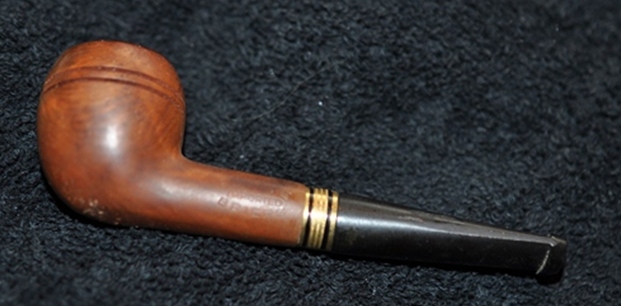
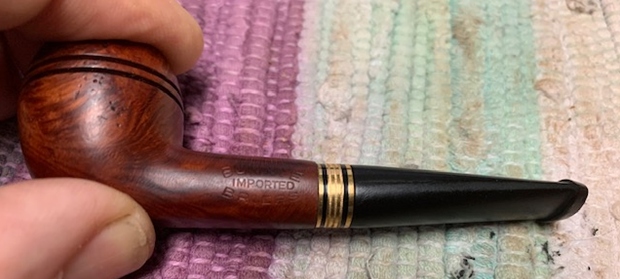
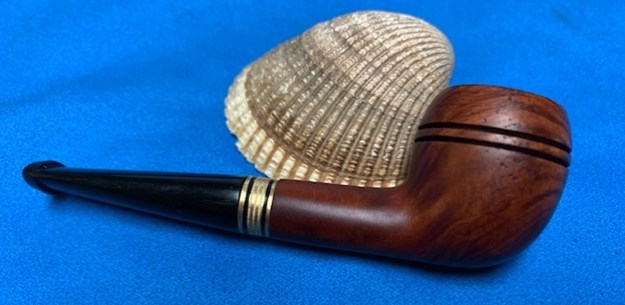
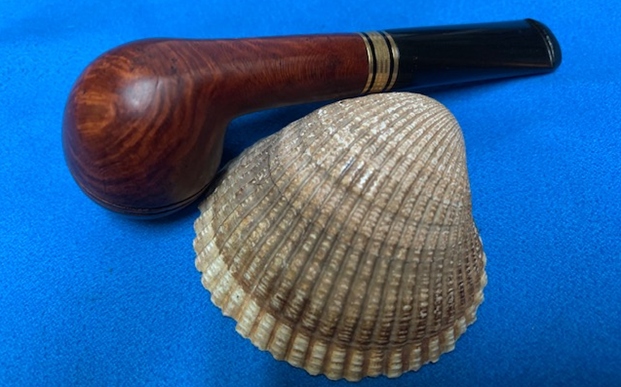
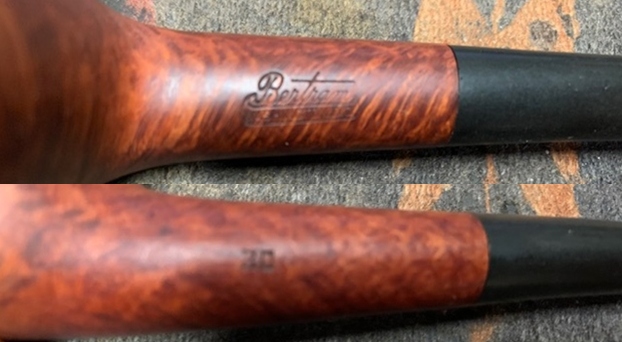
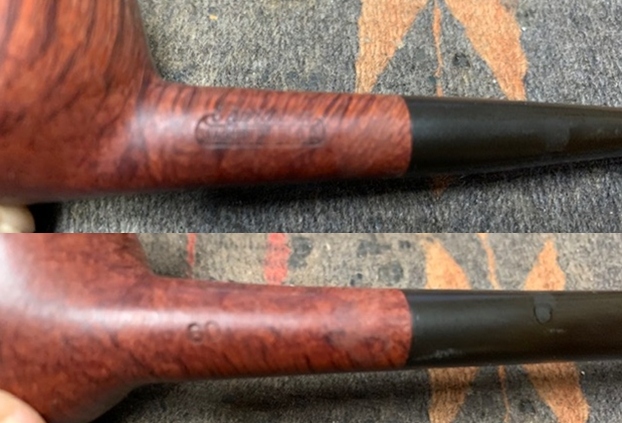
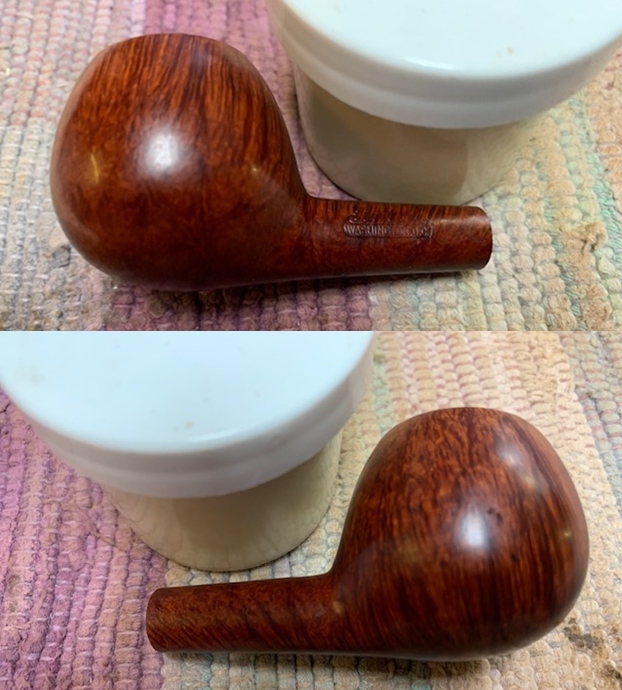
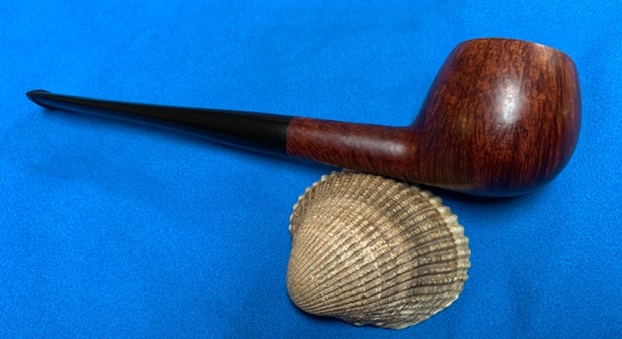
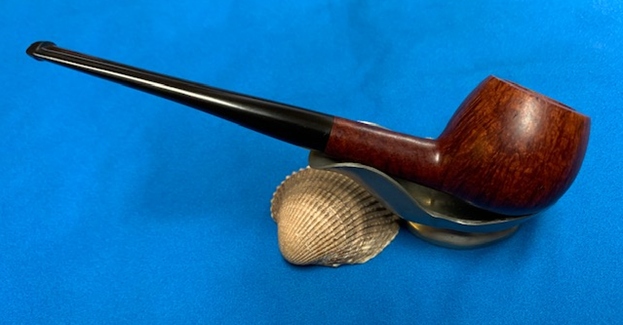
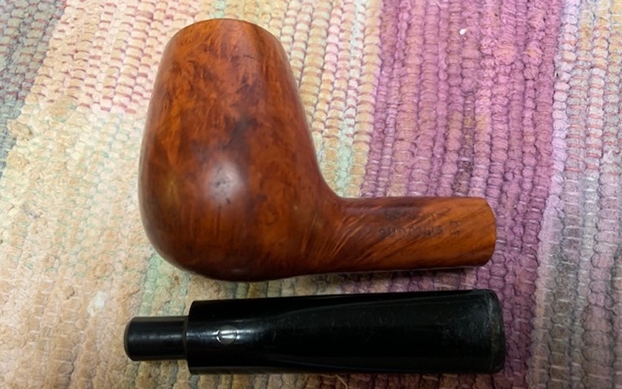
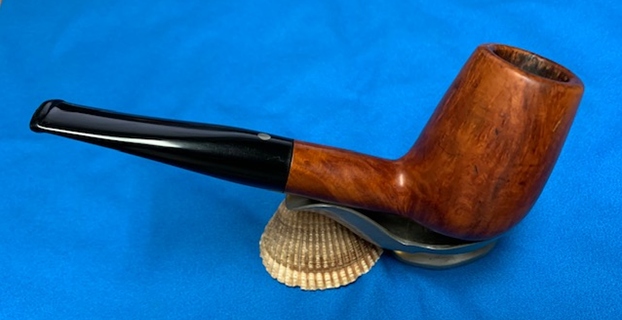
This pipe has an old world charm about it what with its classic billiard shape and military mount horn stem. The stummel has a mix of Bird’s eye grain on the front, back and at the foot of the stummel with cross grains to the sides of the bowl. The shank has beautiful cross grains that run the entire length of the shank. It appears as if these straight grains emanates from the shank end and move up towards the bowl shank junction. It is stamped on the left side of the shank as “SELECTED” in block with letter S being larger than rest of the letters, over “Briar” in artistic hand. The shank end nickel ferrule is stamped as “EP” in a rhombus over three American faux hallmarks. The stampings are crisp and clear. 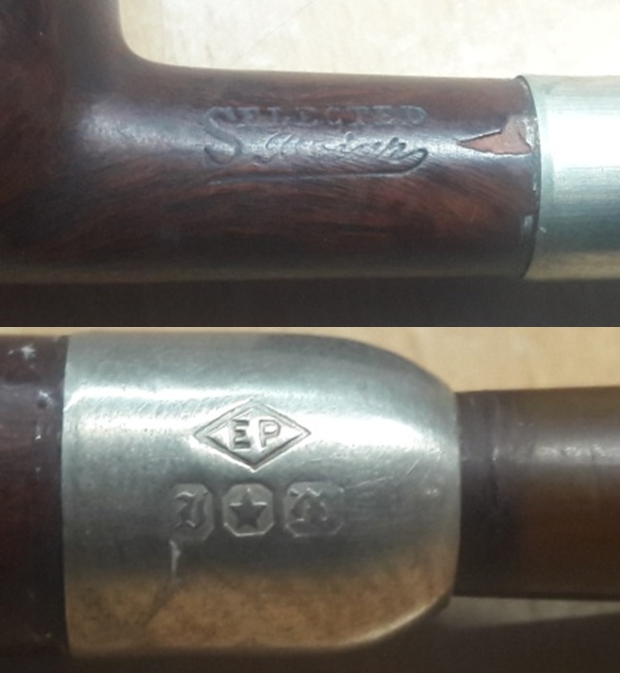 The lack of COM stamp or brand name makes me believe this pipe to be a BASKET PIPE and the faux American hallmarks points to the probability of this pipe being made for the American market. The stamp “EP” stands for ELECTRO PLATED nickel ferrule as I know.
The horn stem points to the vintage of this pipe as being from prior to 1920s when vulcanite rubber gained prominence as a stem material.
The dating of this pipe as prior to 1920s is my guesstimate based primarily due to fitment of a horn stem. Any concrete and substantiated information on this pipe and its dating will be a huge learning for me and fellow readers of rebornpipes!!
Initial Visual Inspection
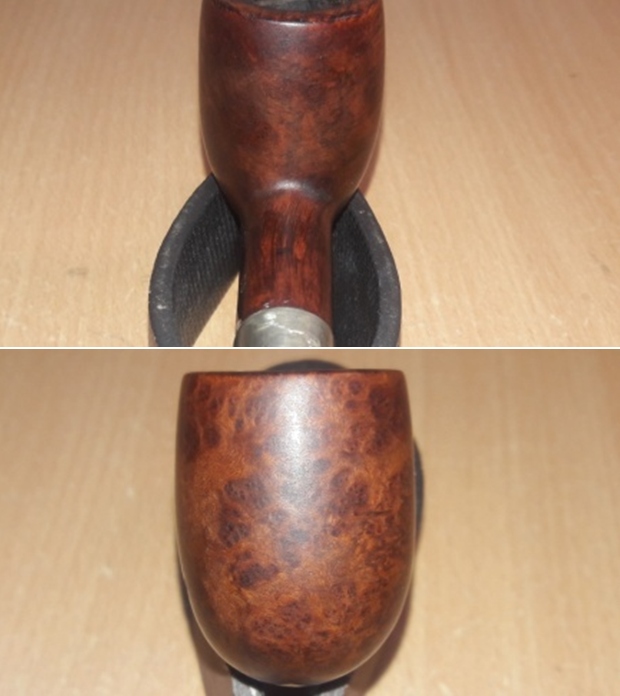
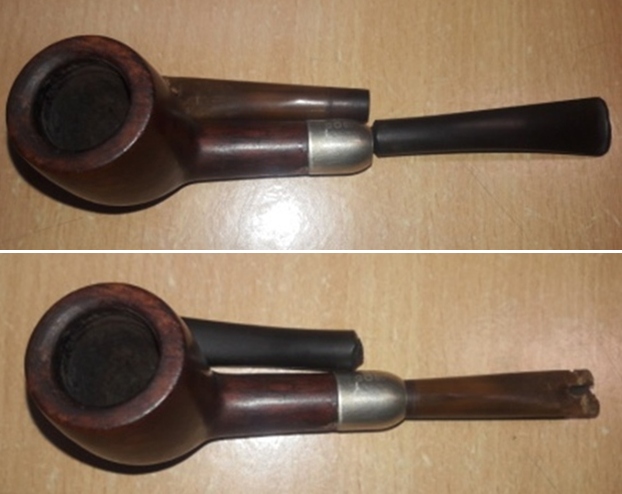
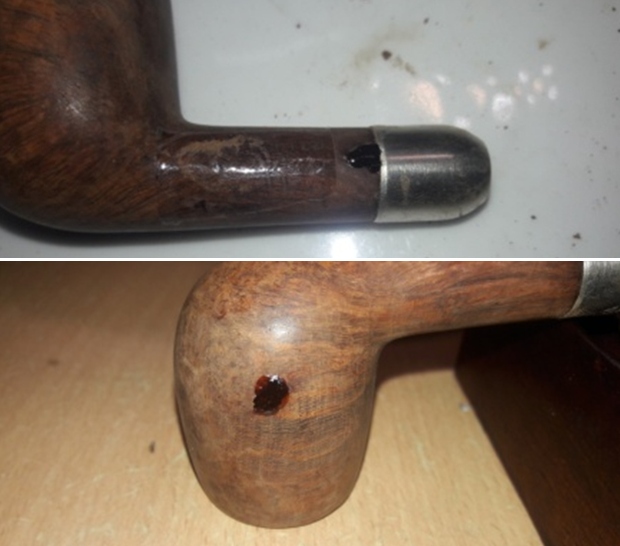
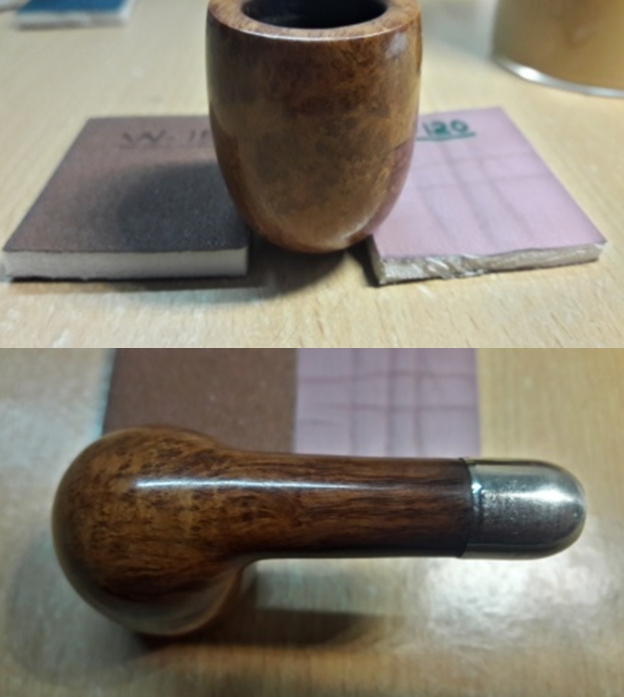
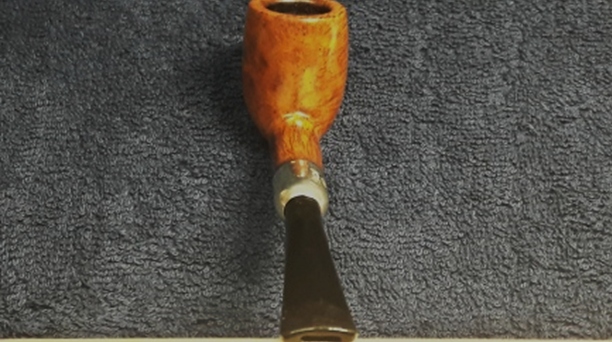
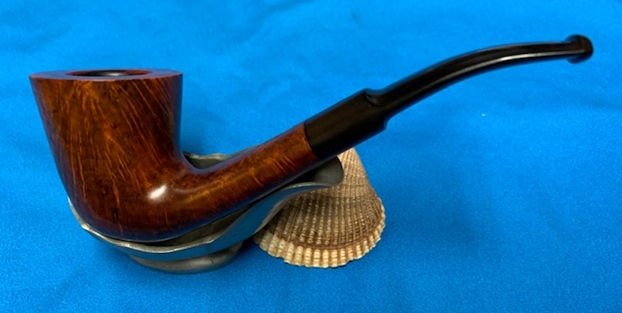
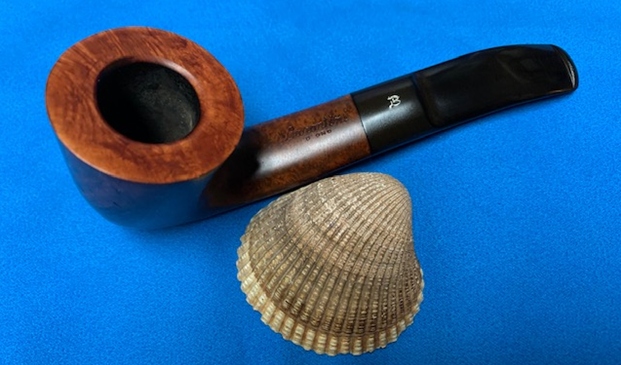
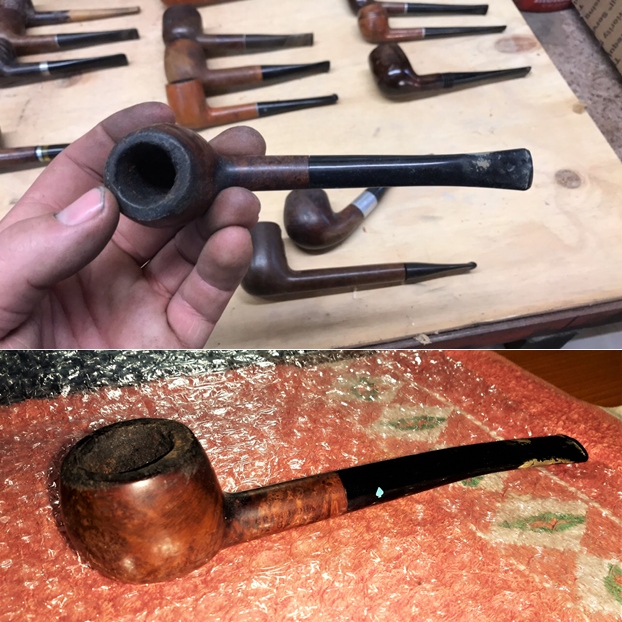
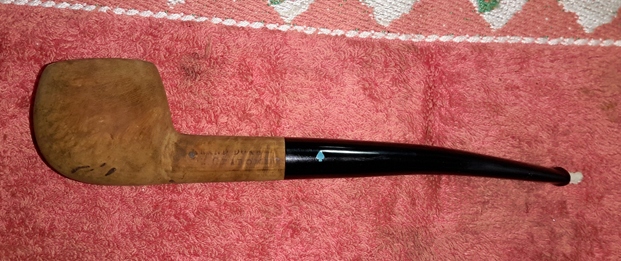
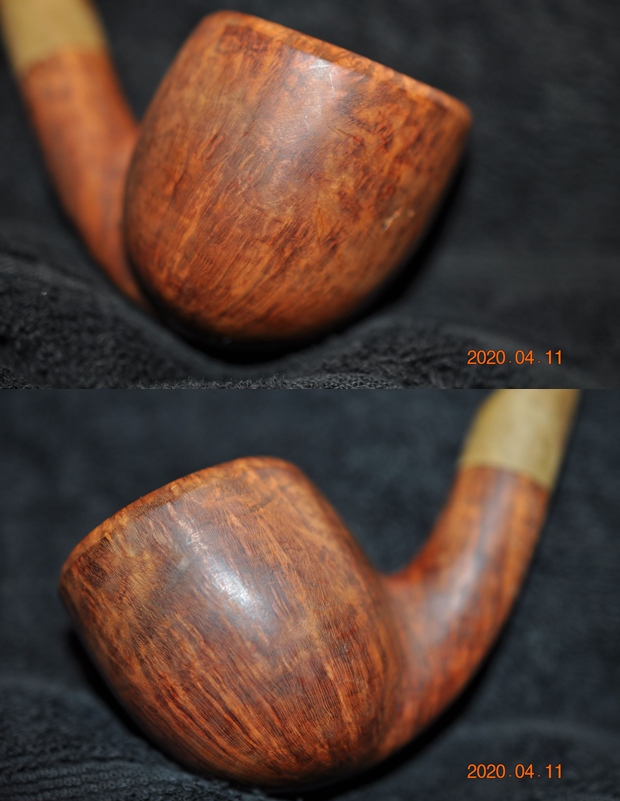
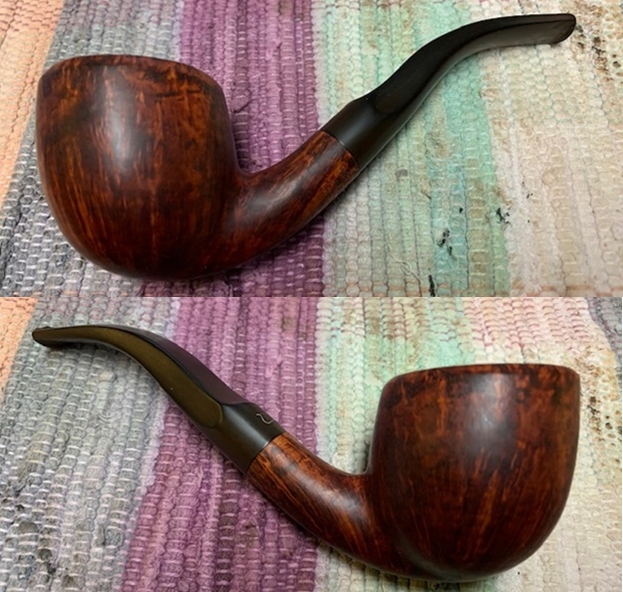
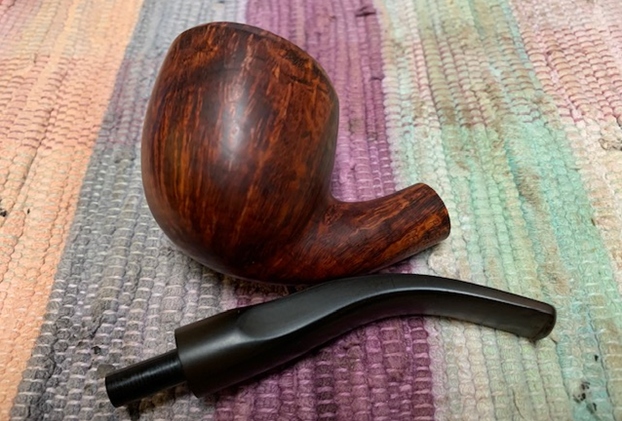
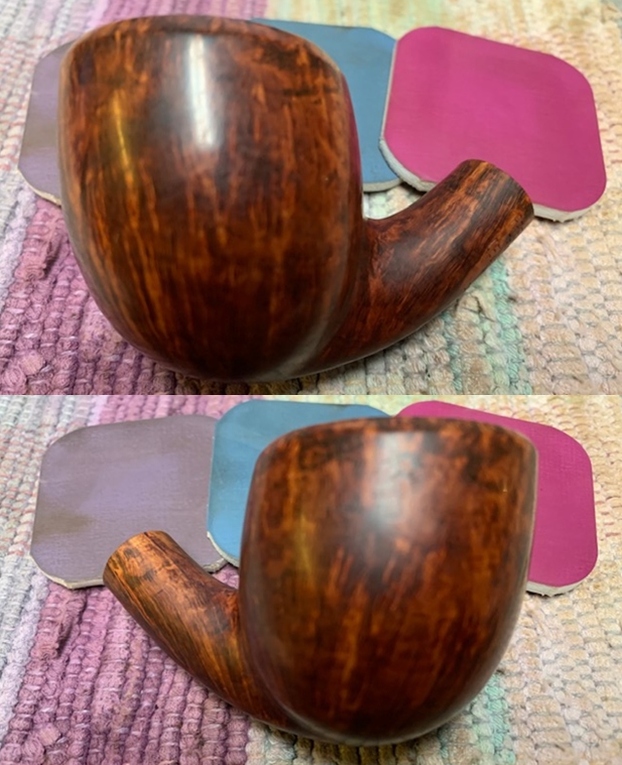
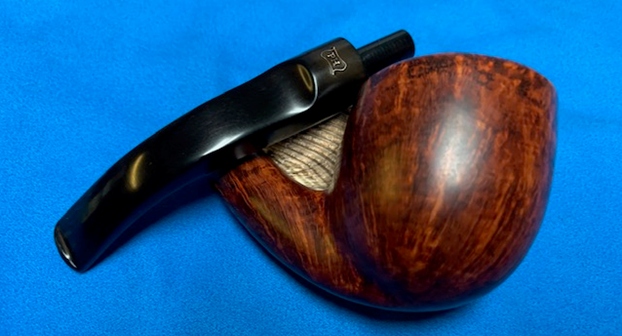
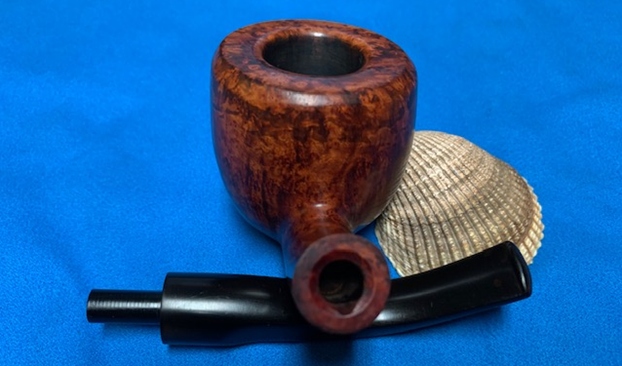
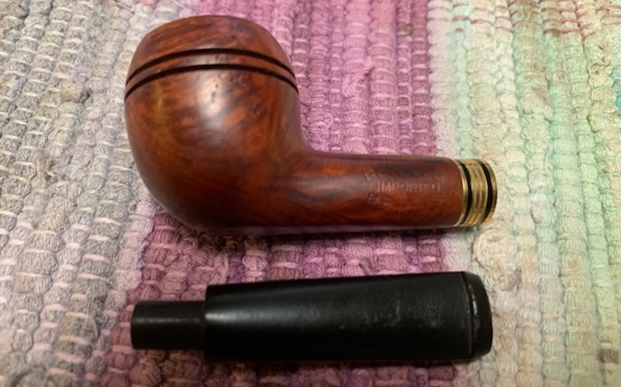
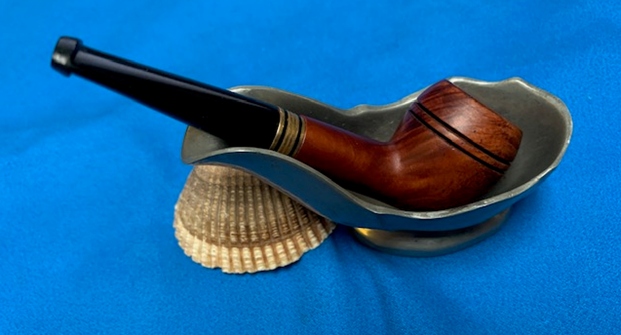
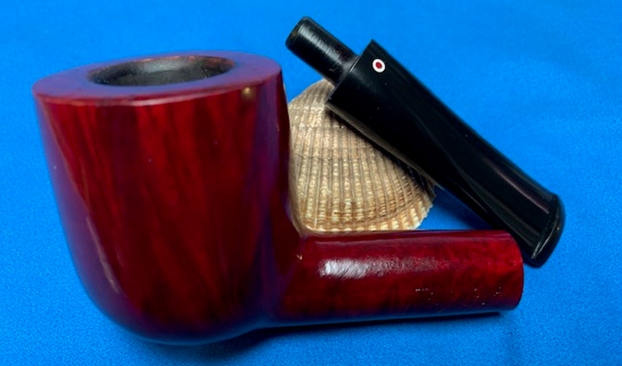
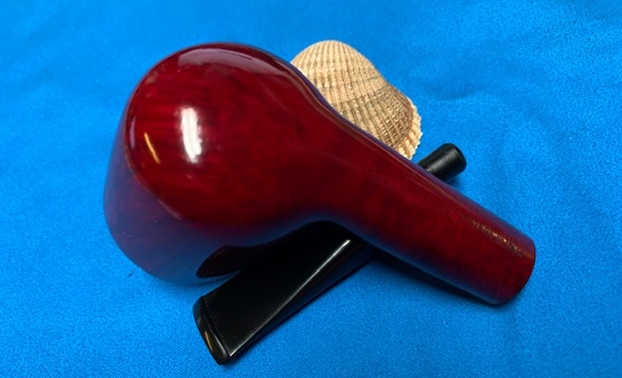
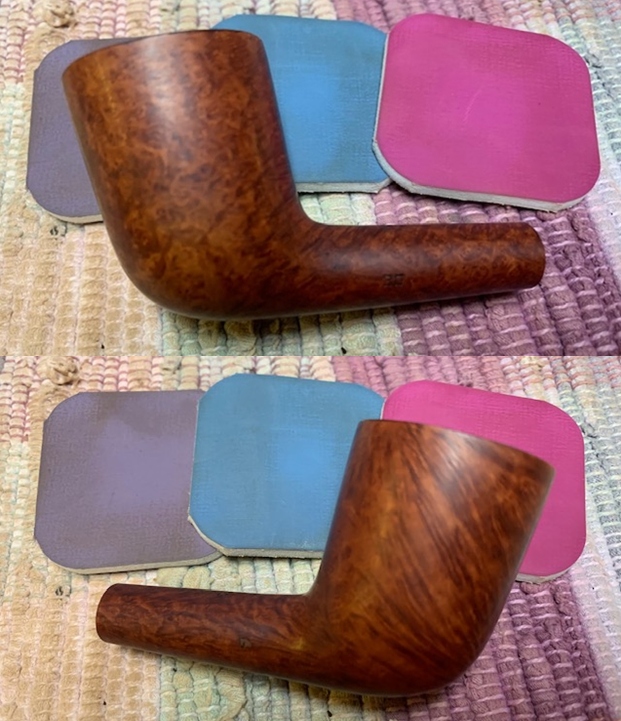
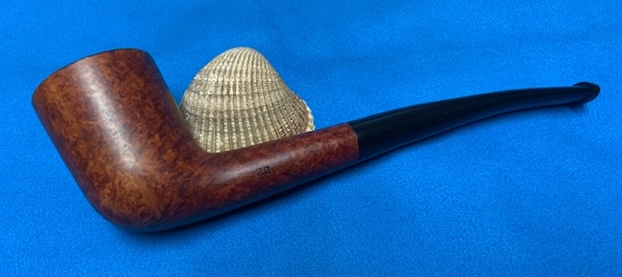
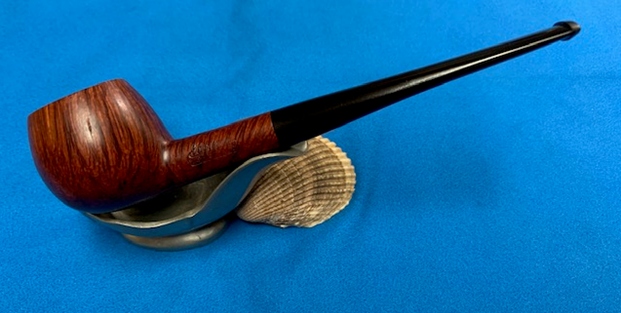
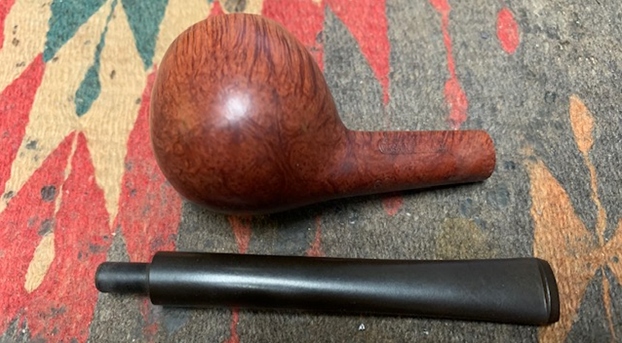
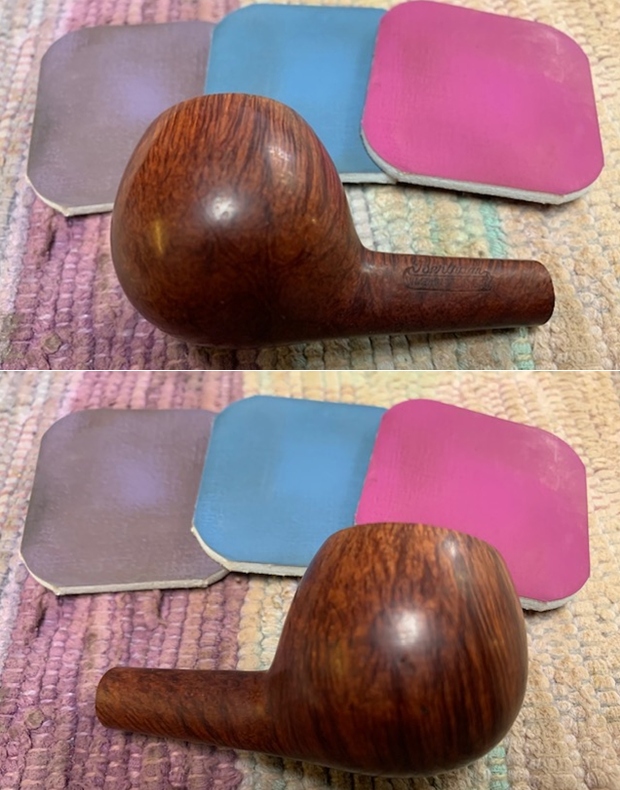
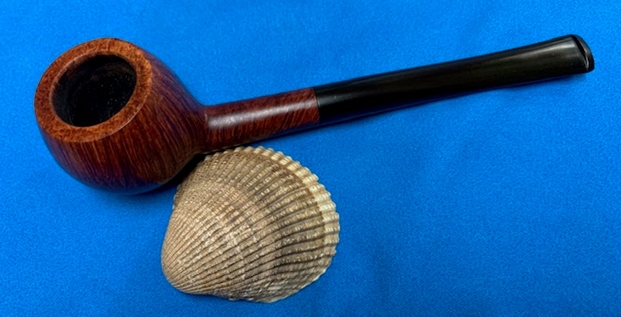
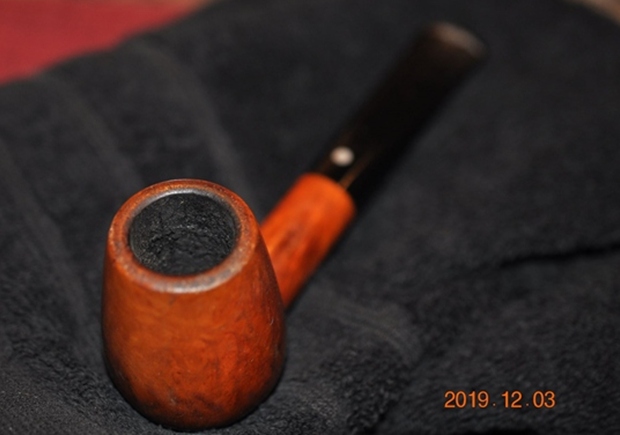
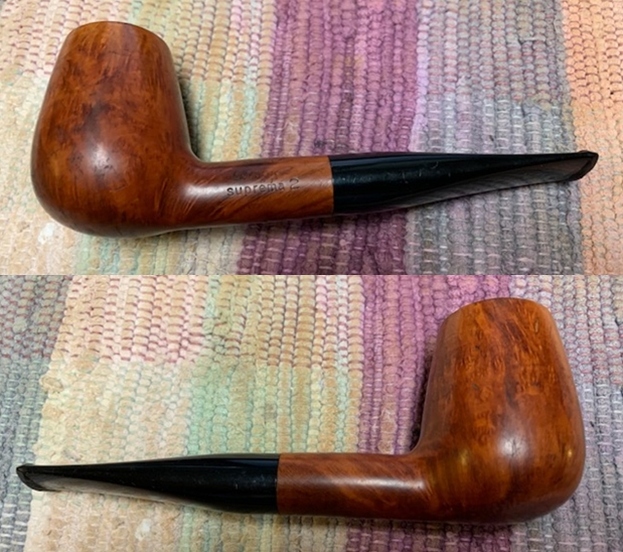
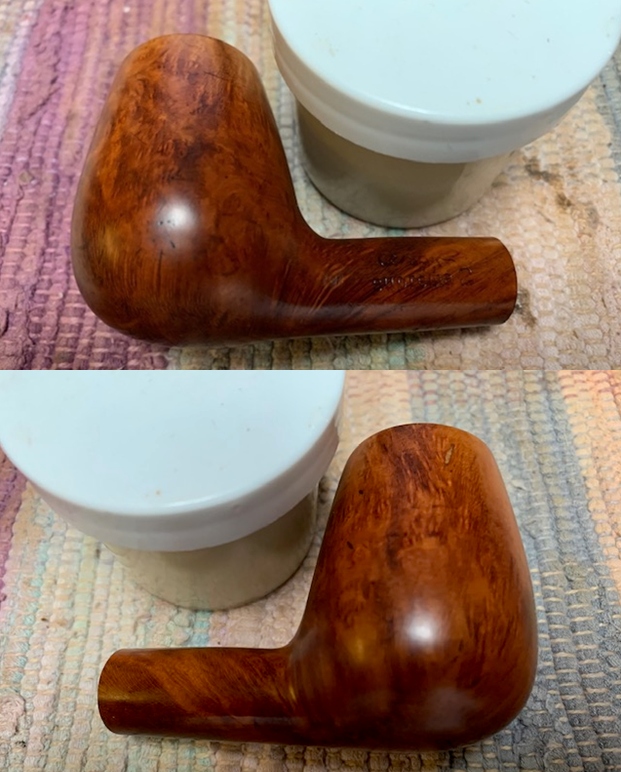
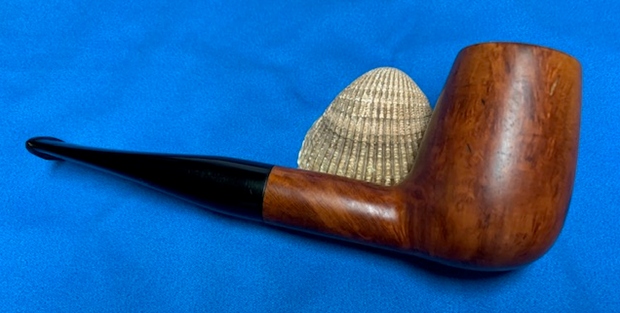
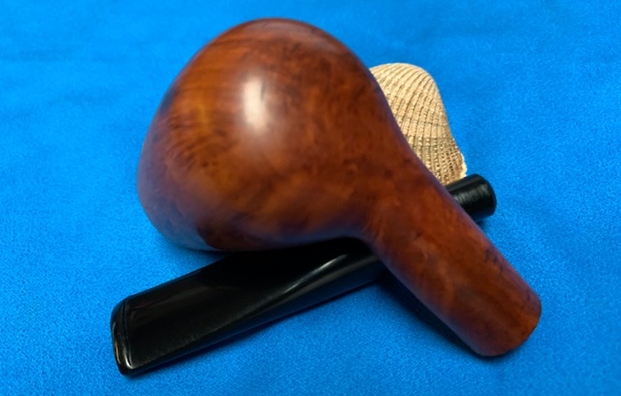
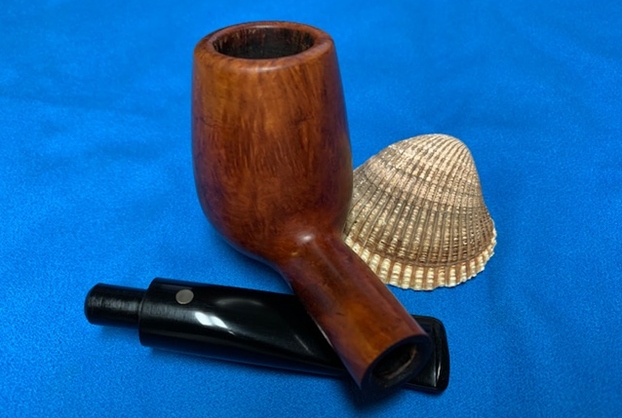
This pipe has the classic straight Billiard shape with a medium sized bowl. The stummel boasts of a mix of Bird’s eye grain on the front, back and at the foot of the stummel with cross grains to the side of the bowl. The shank has beautiful straight grains all round. The stummel surface is covered in a lot of dust and dirt. There are a couple of fills in the briar but that does not mean that the quality of the briar is sub standard. The carving, hands feel and appearance of the pipe, even in this condition, screams high quality and excellent craftsmanship. There is a decent layer of cake in the chamber. The stem has been cut short before and is heavily damaged with a through hole on one of the stem surface and few deep bite marks in the bite zone. Here is how the pipe appears as it sits on my work table.

 Detailed Visual Inspection
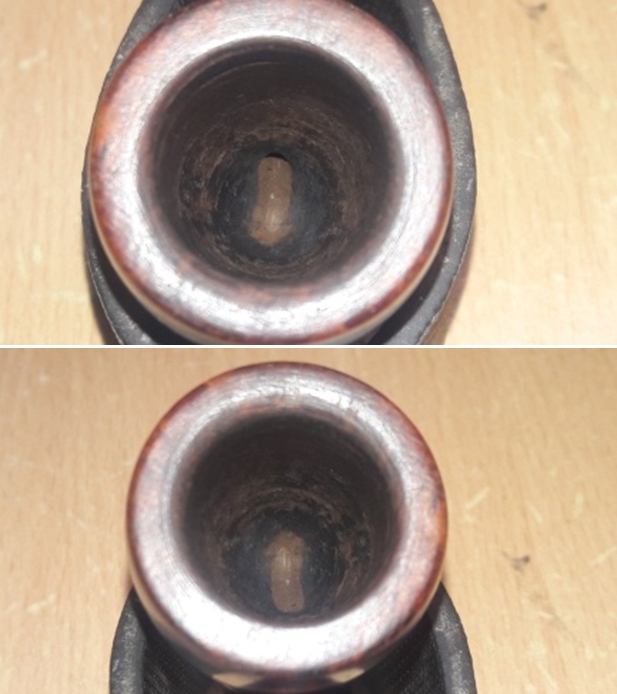
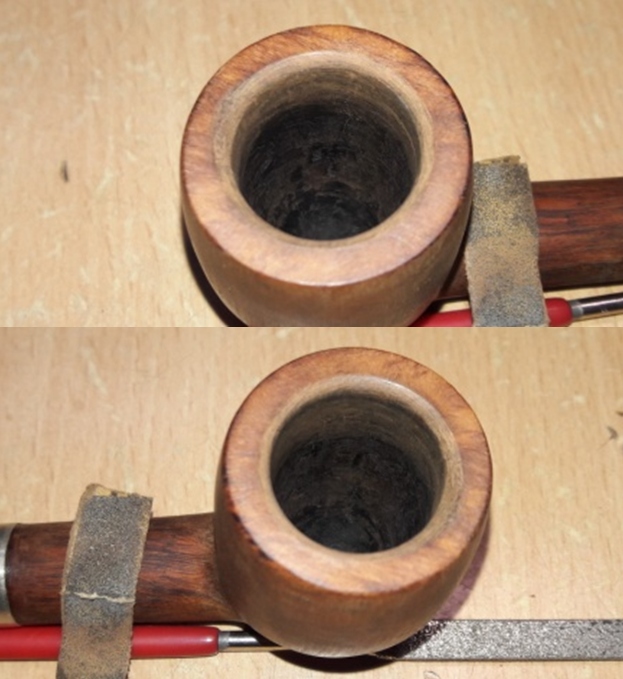
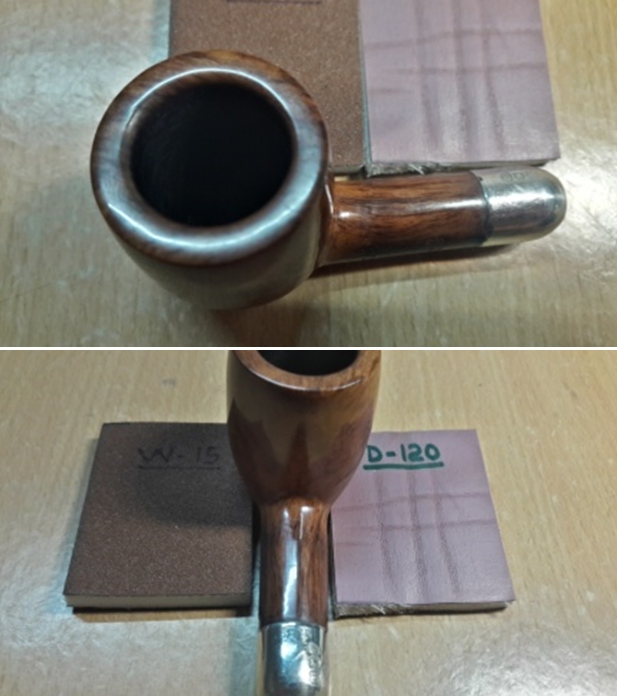
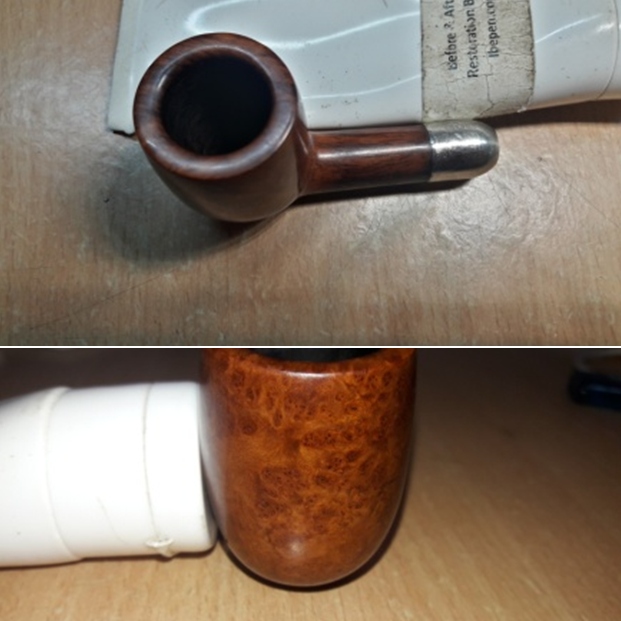
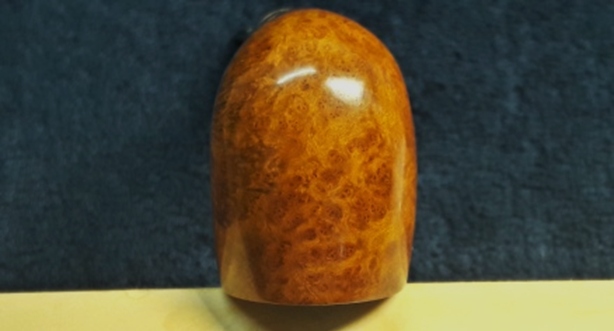
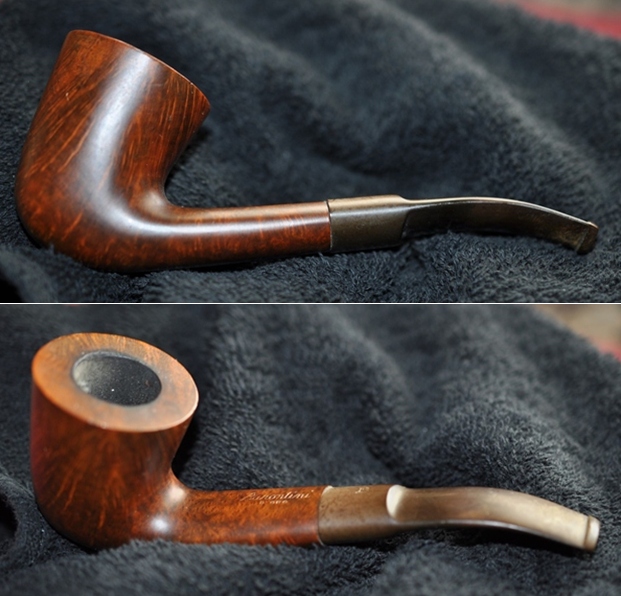
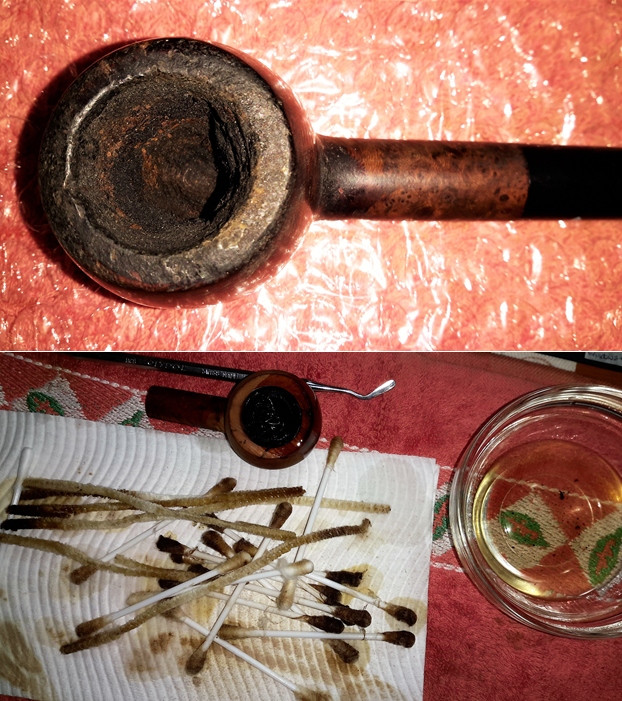
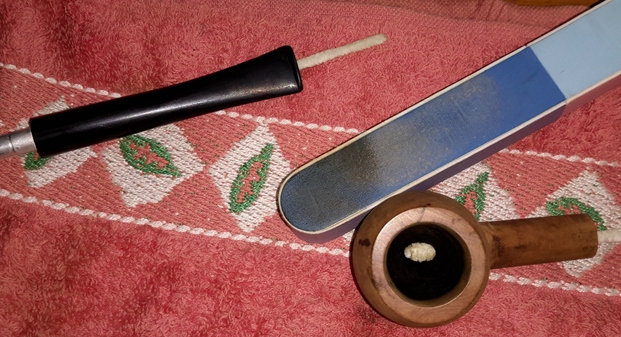
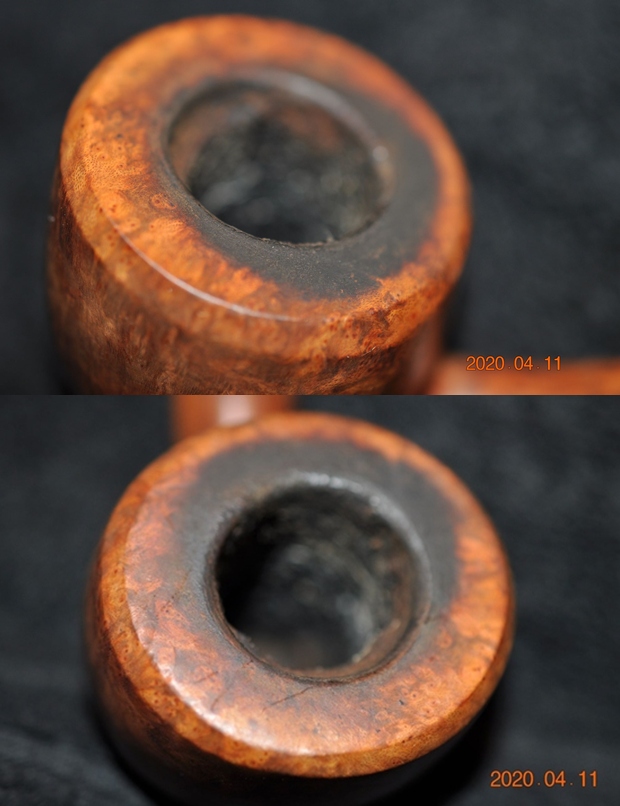
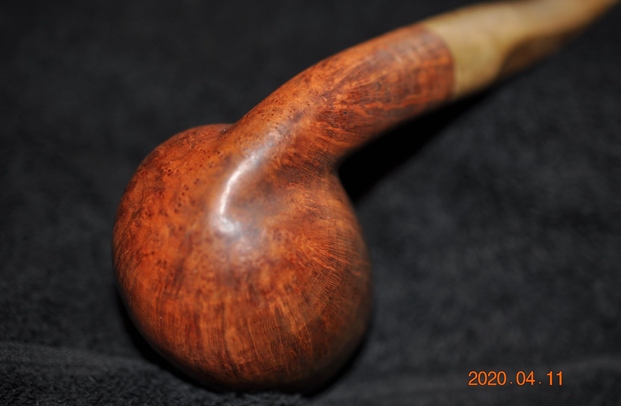
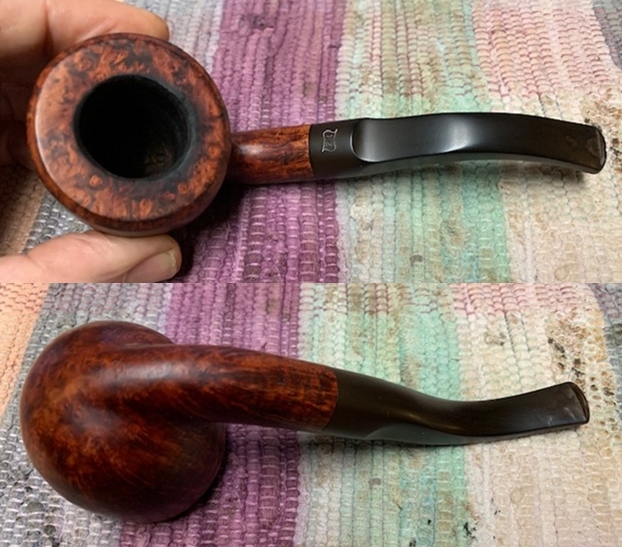
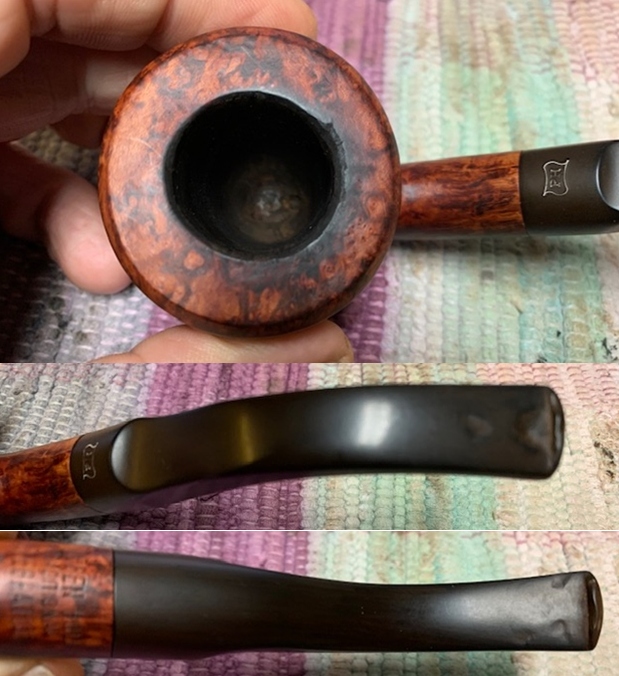
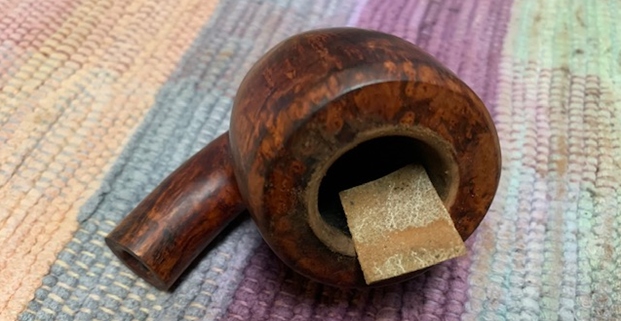
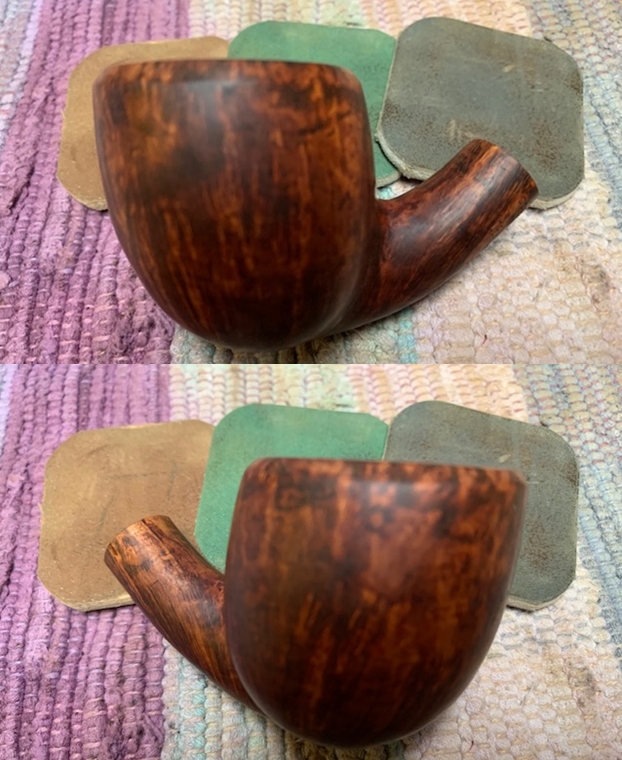
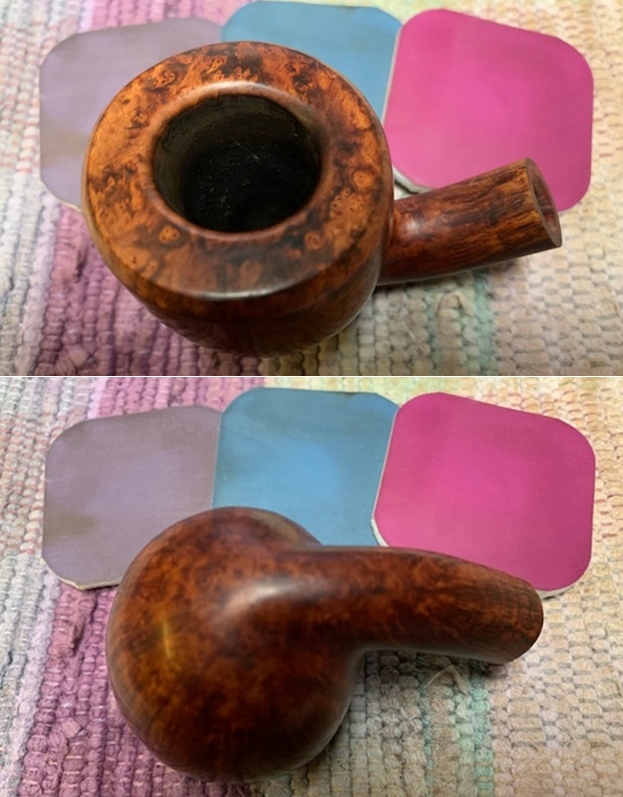
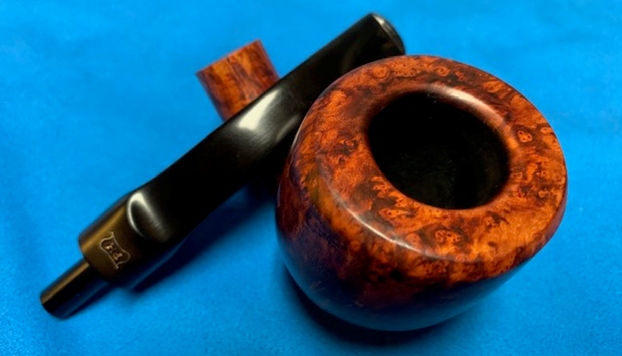
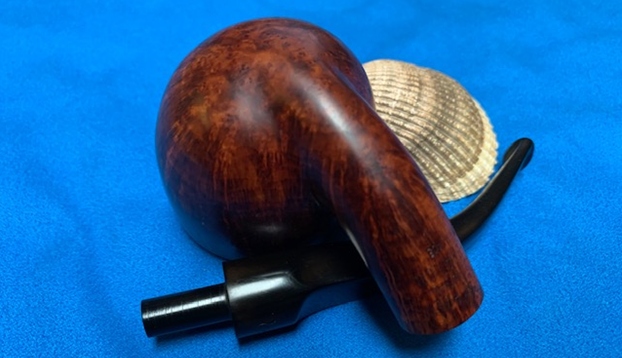
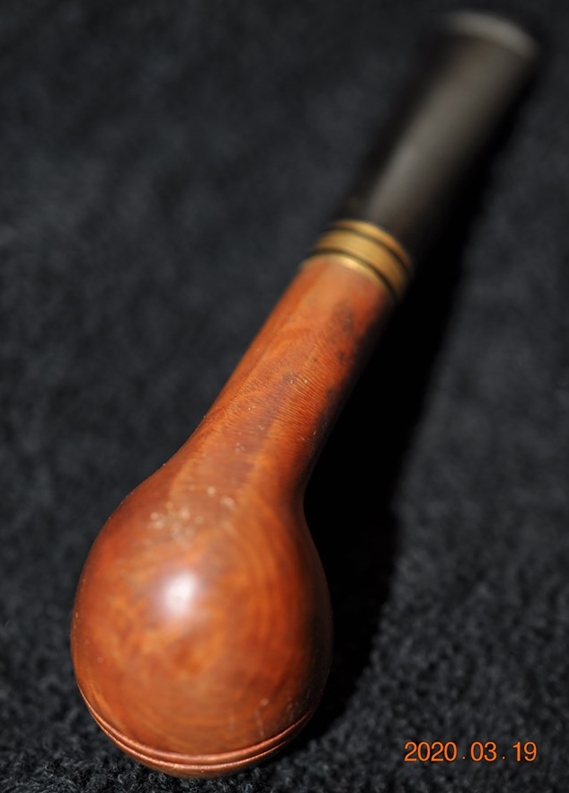
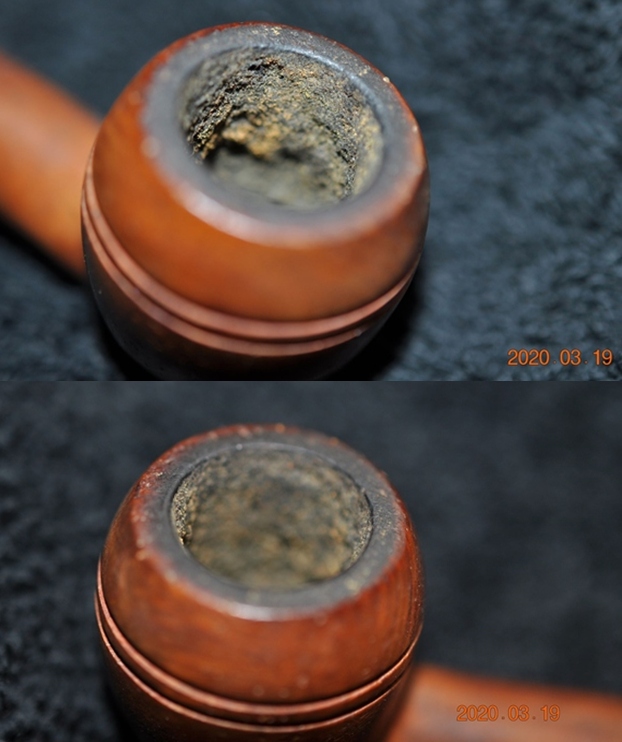
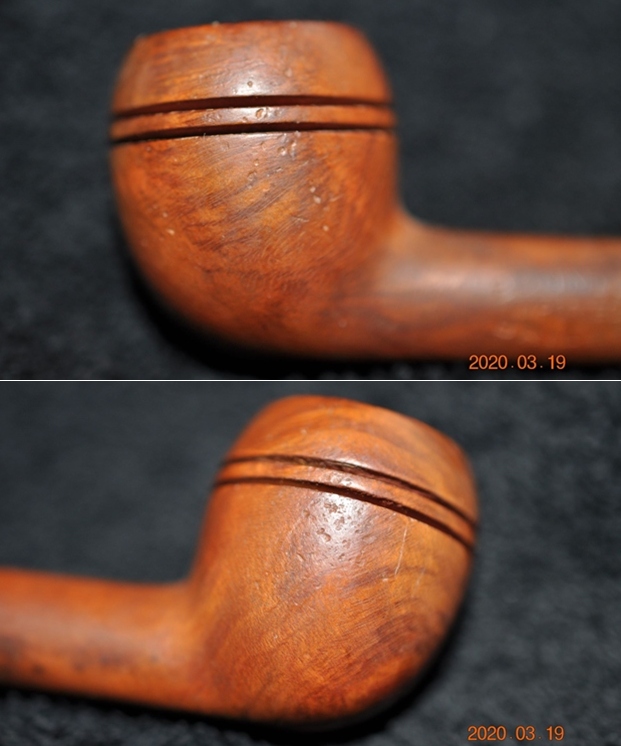
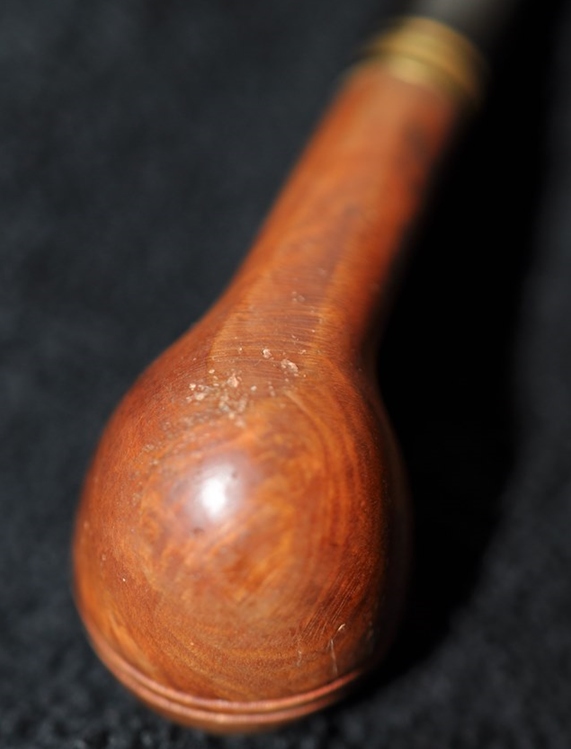
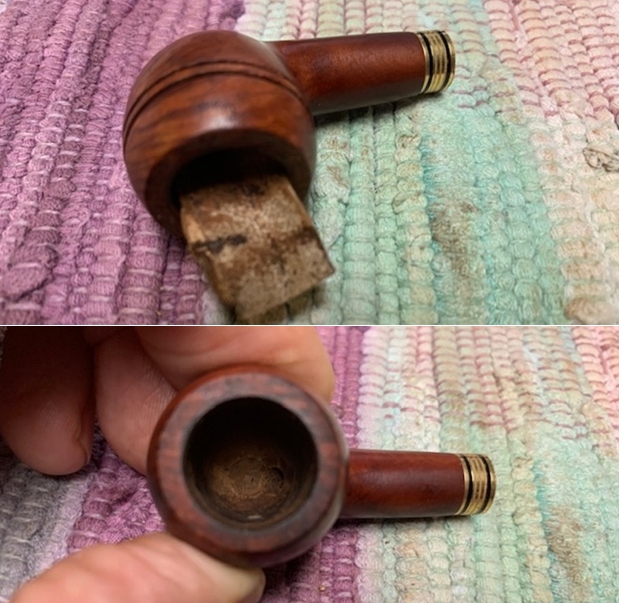
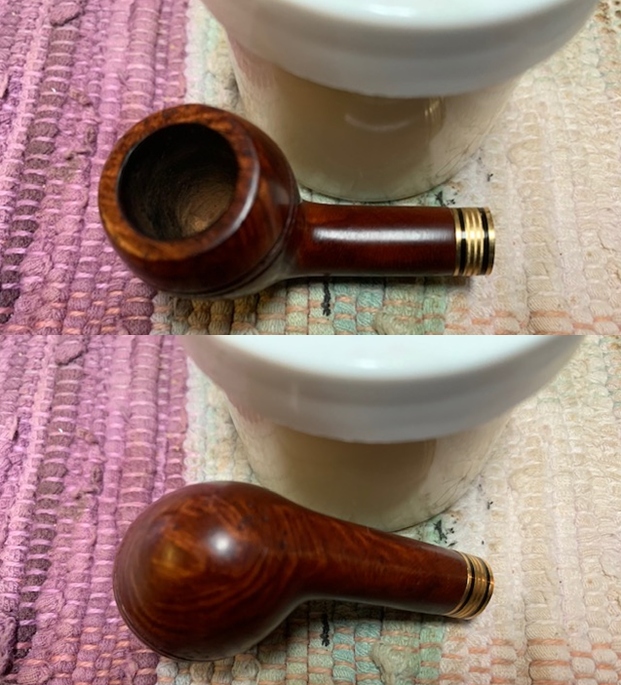
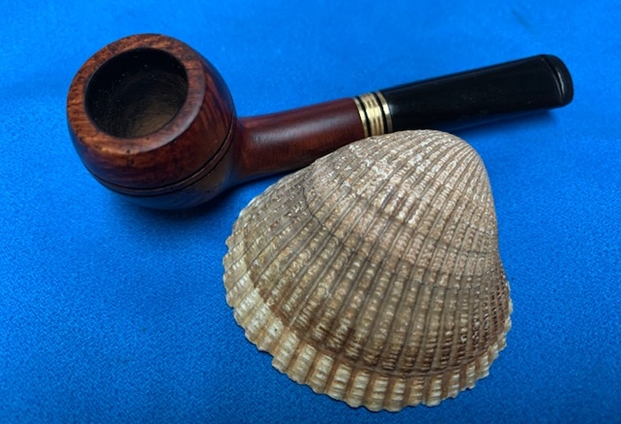
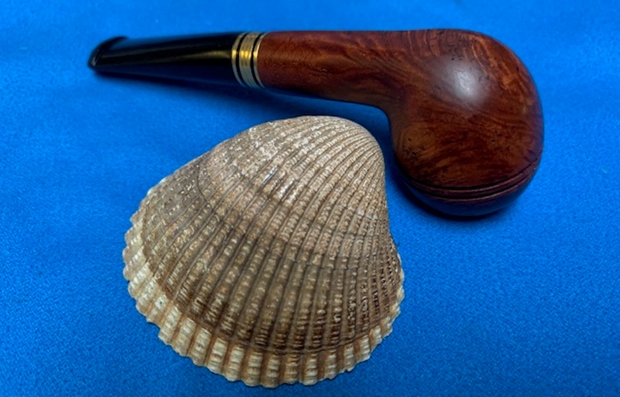
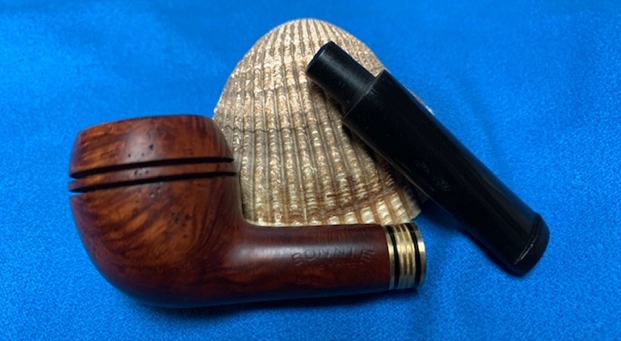
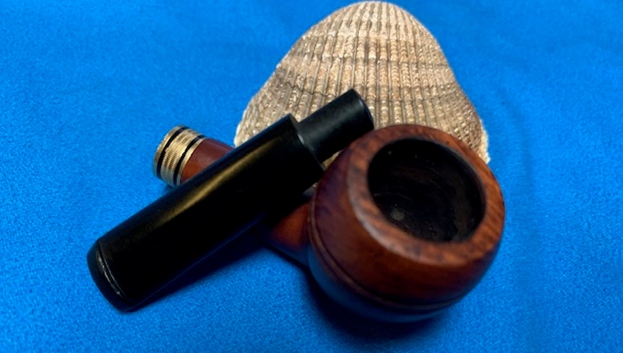
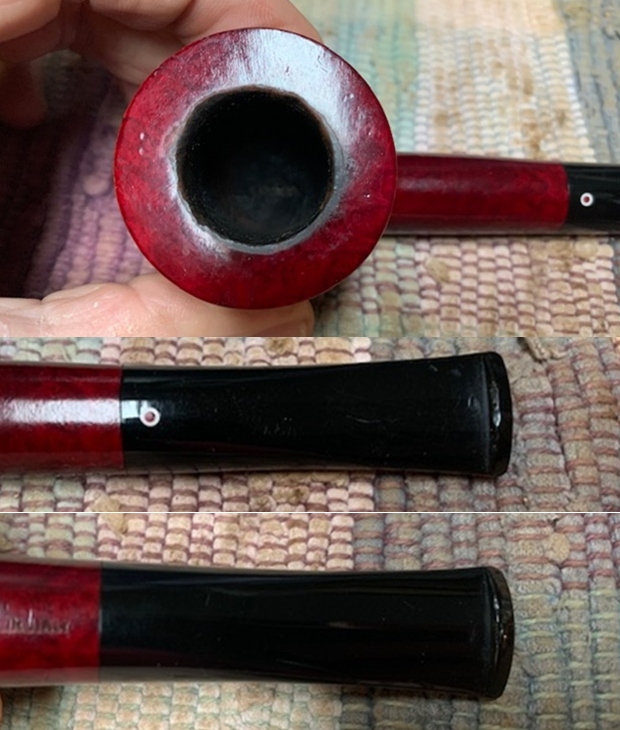
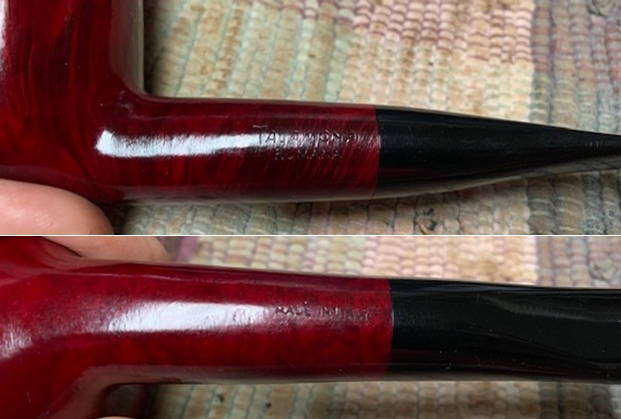
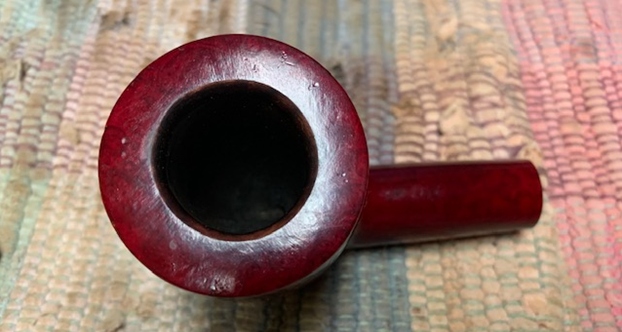
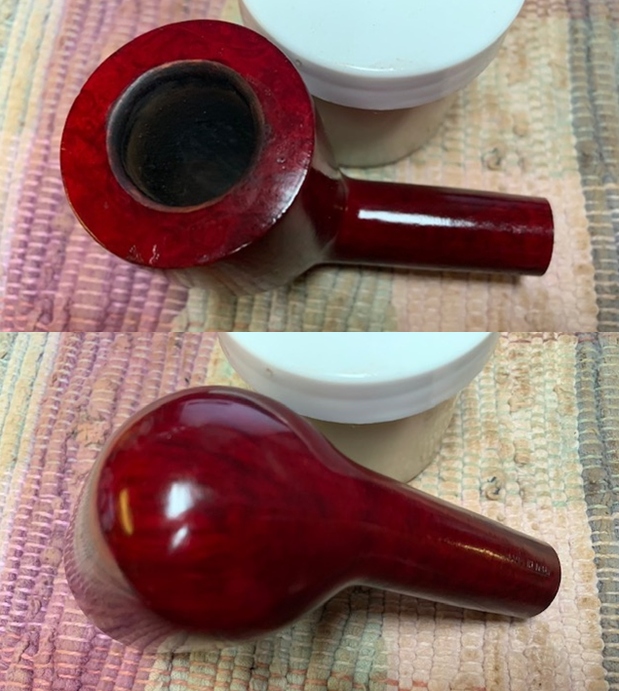
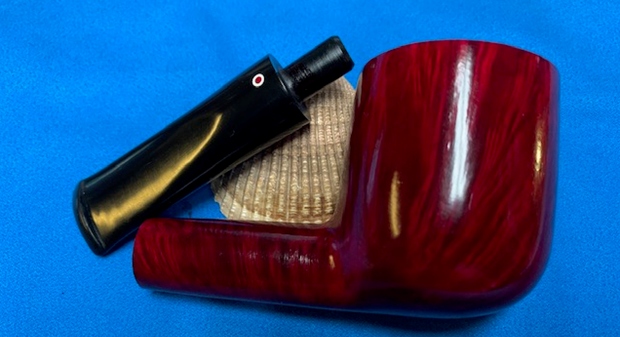
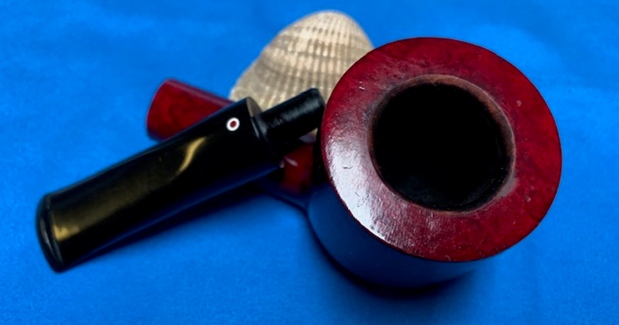
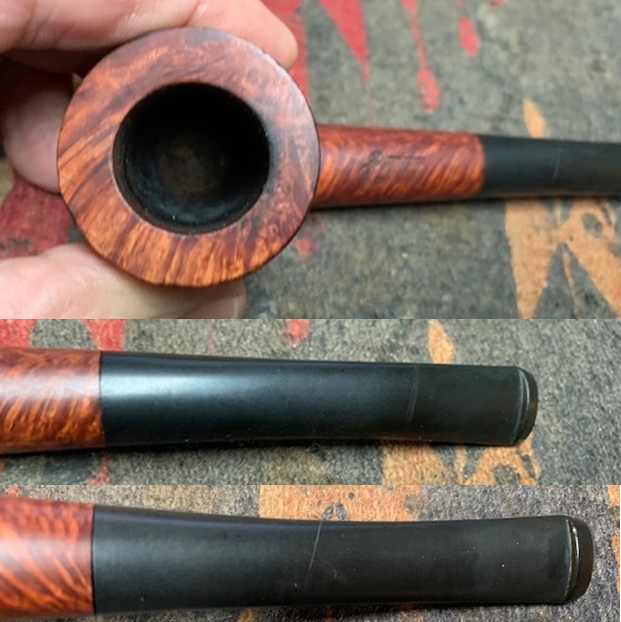
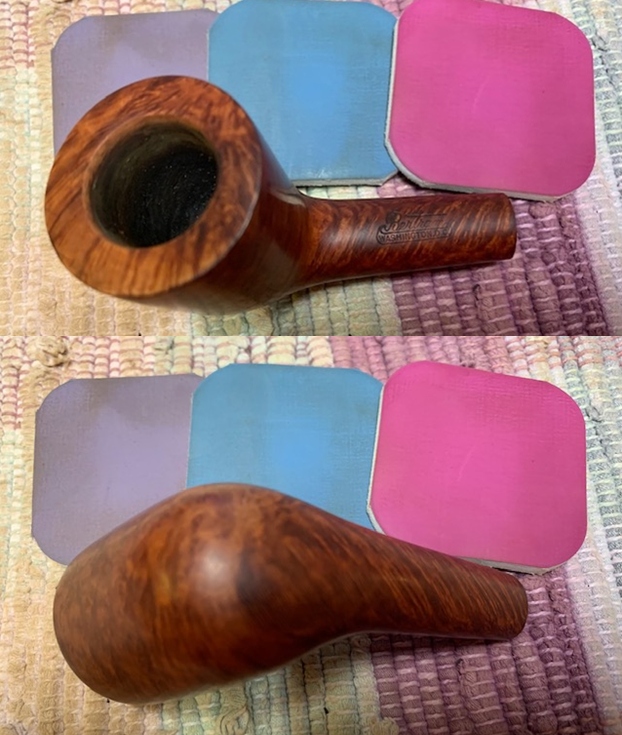
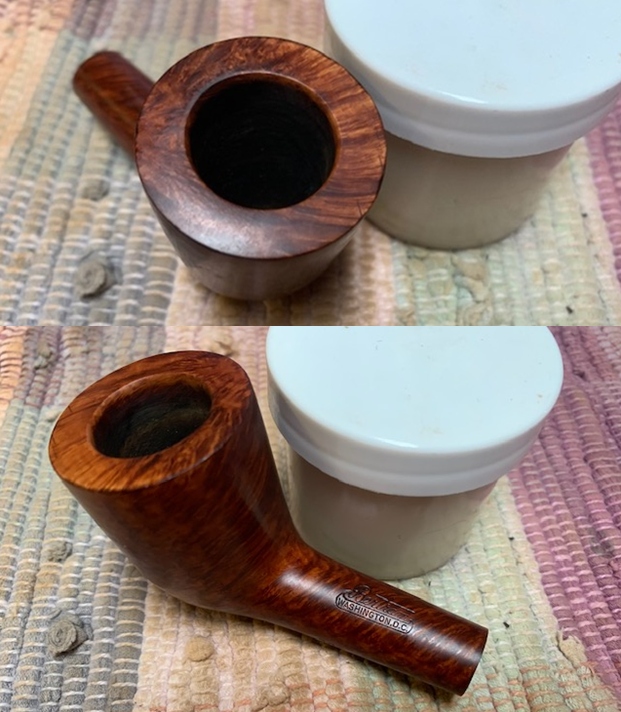
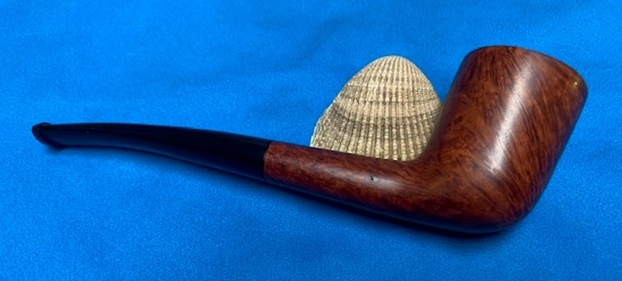
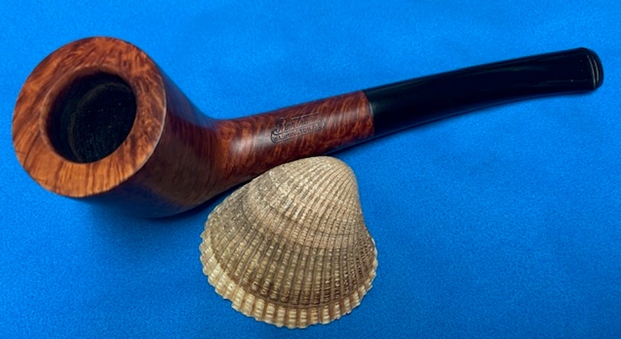
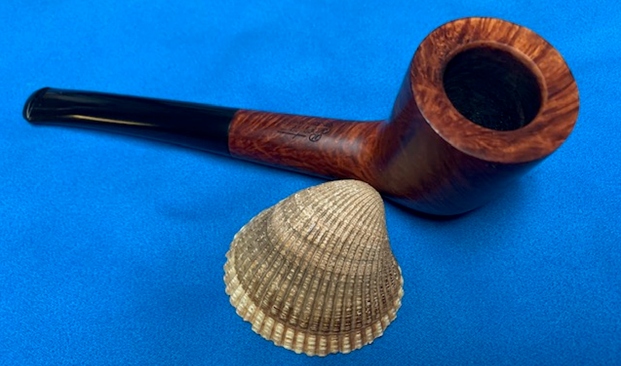
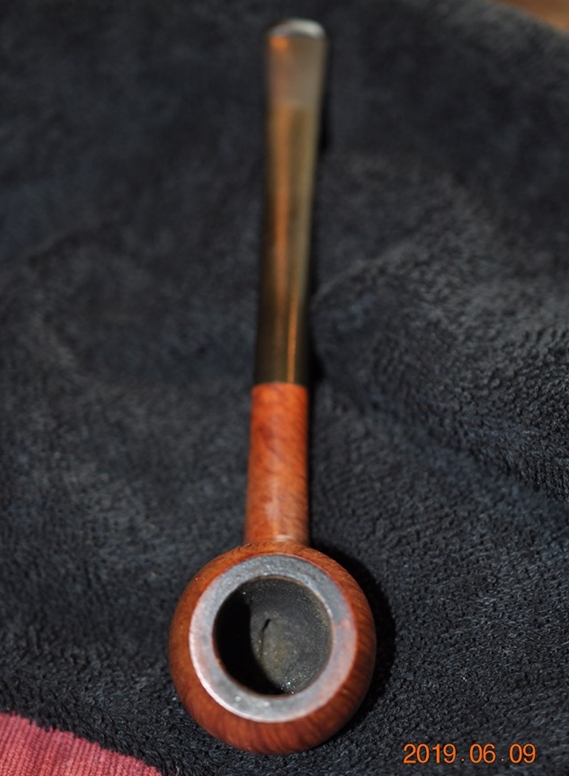
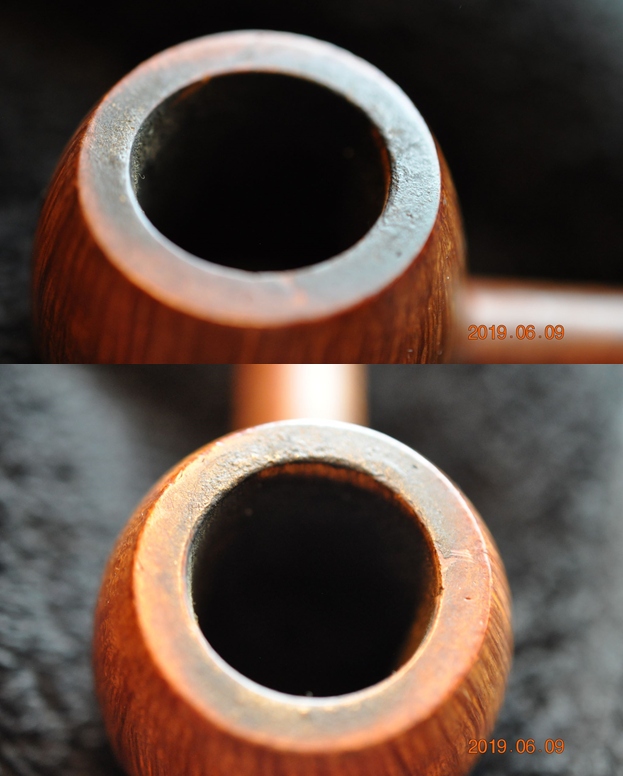
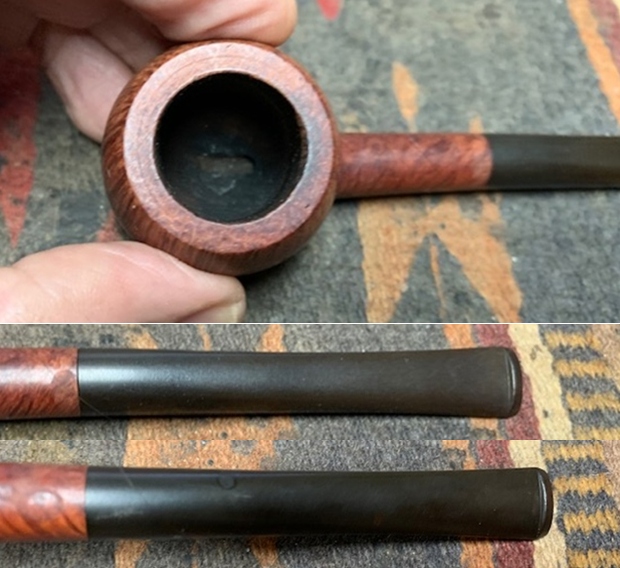
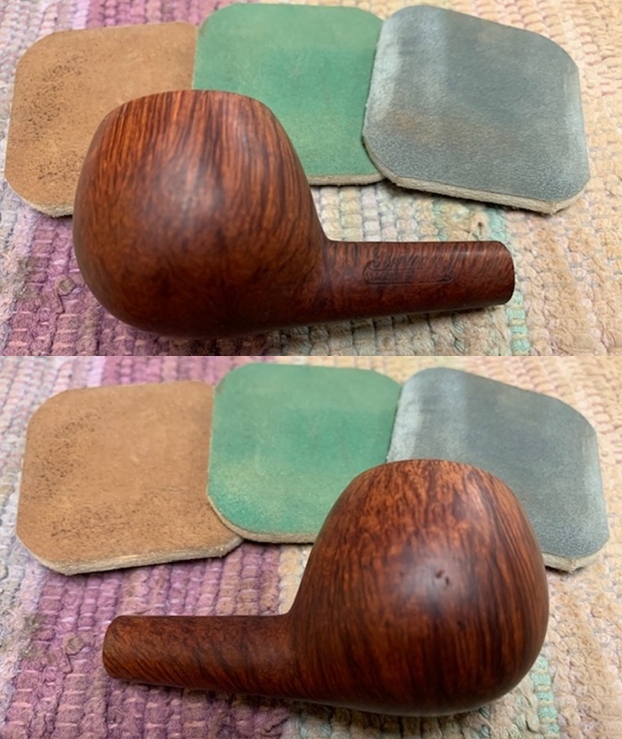
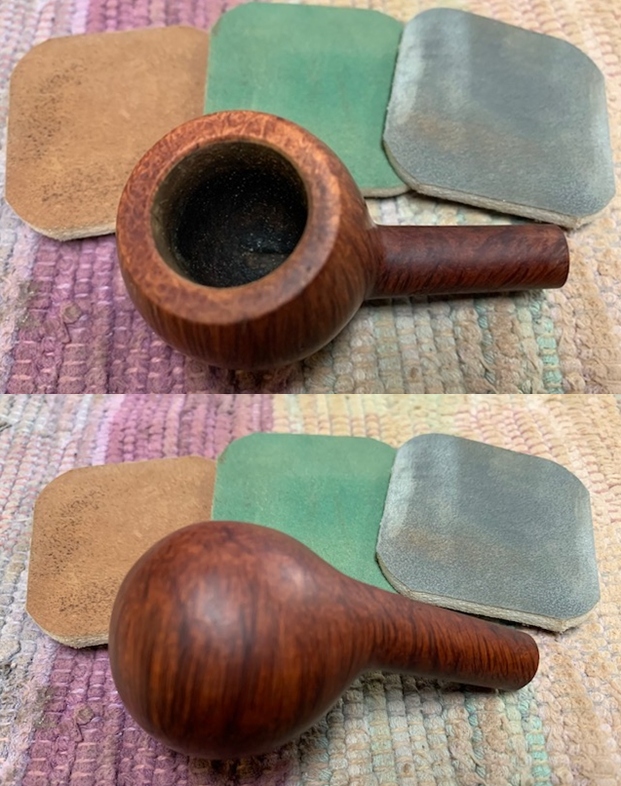
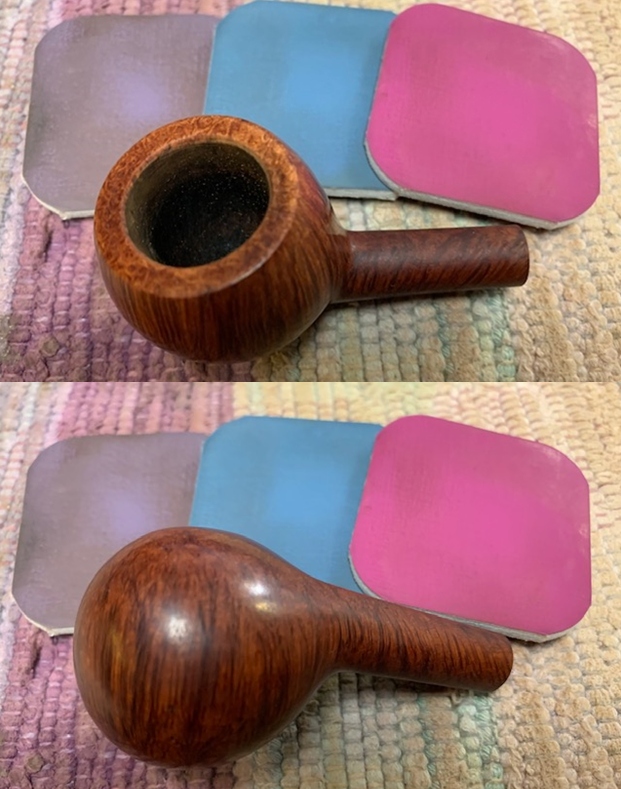
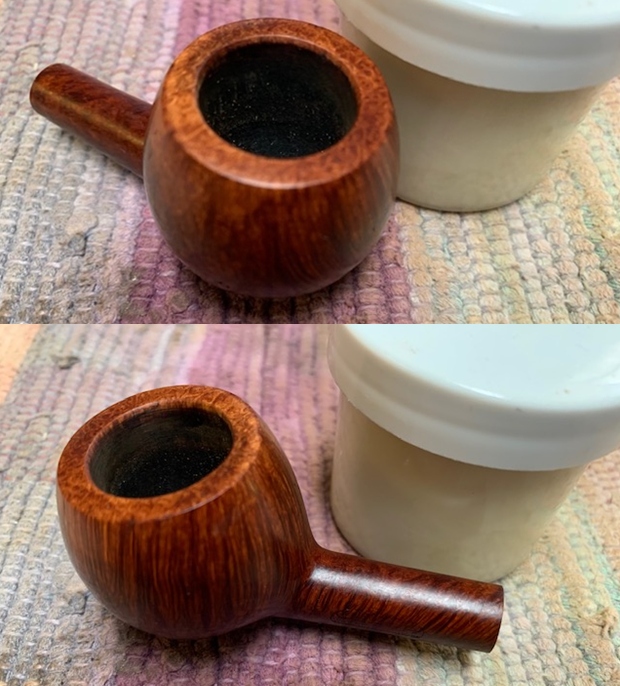
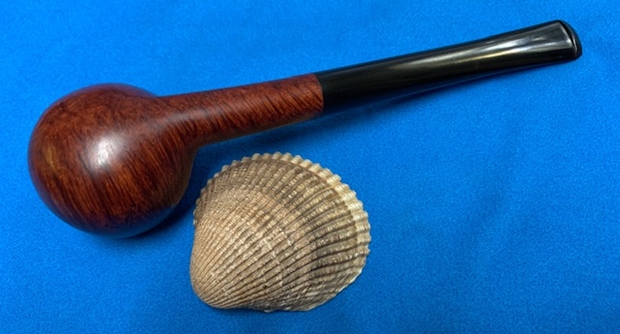
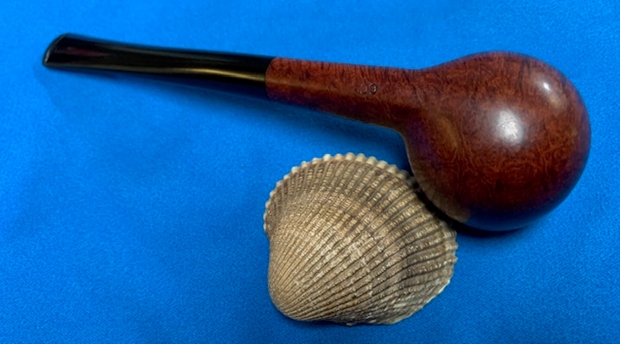
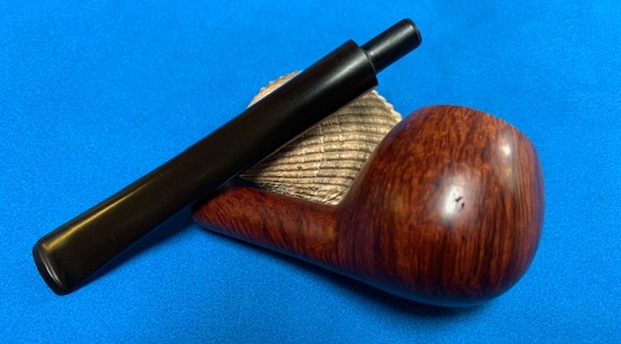
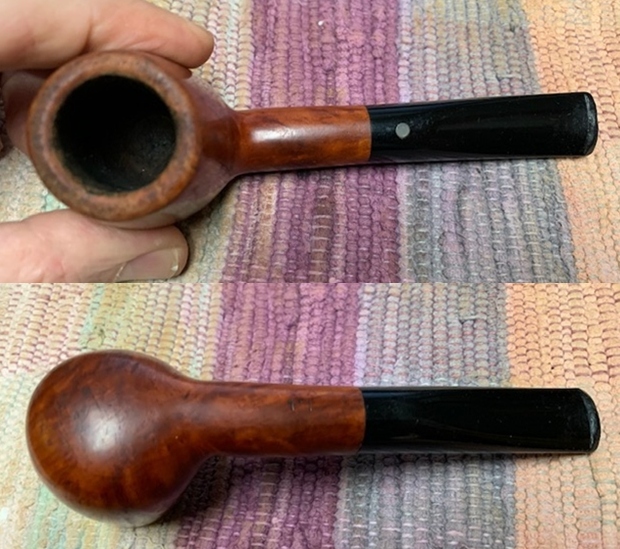
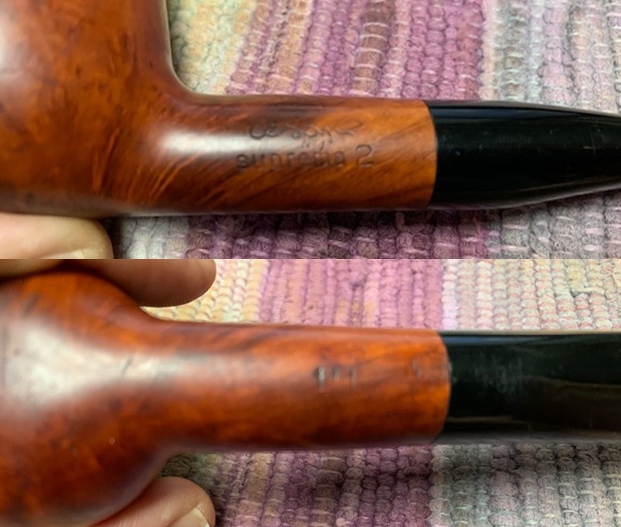
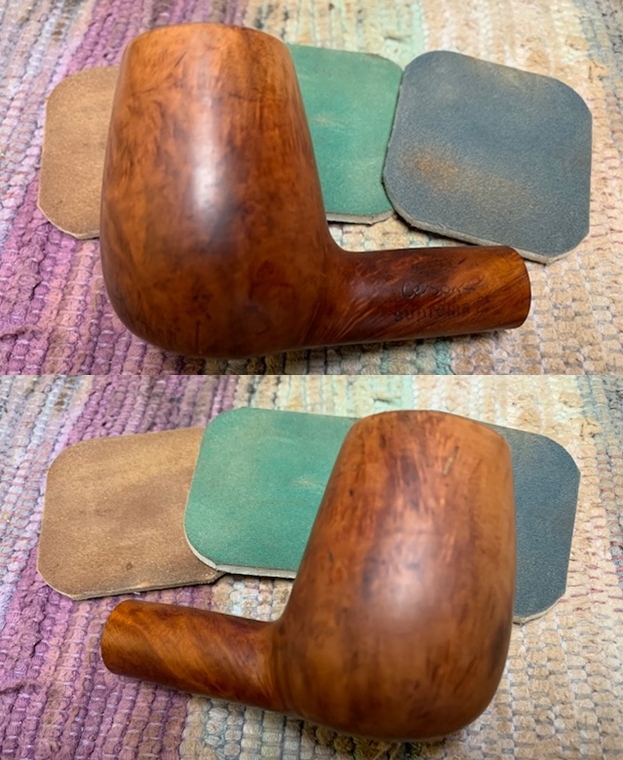
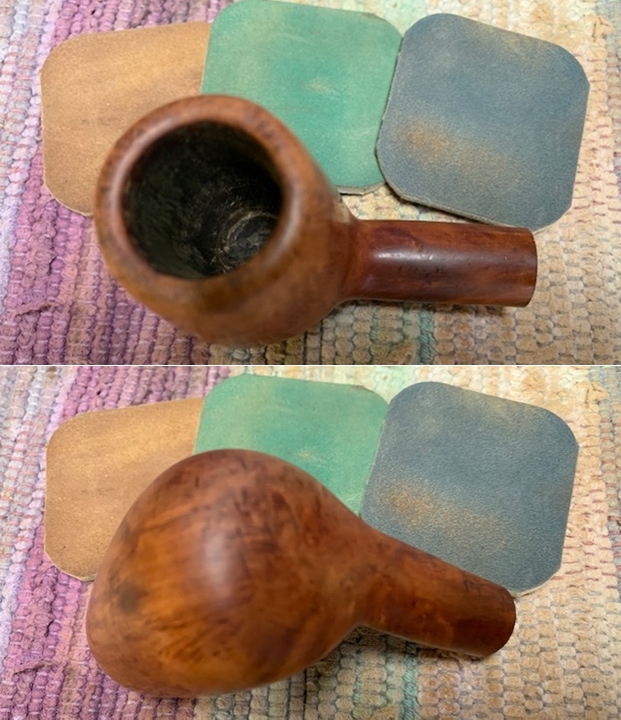
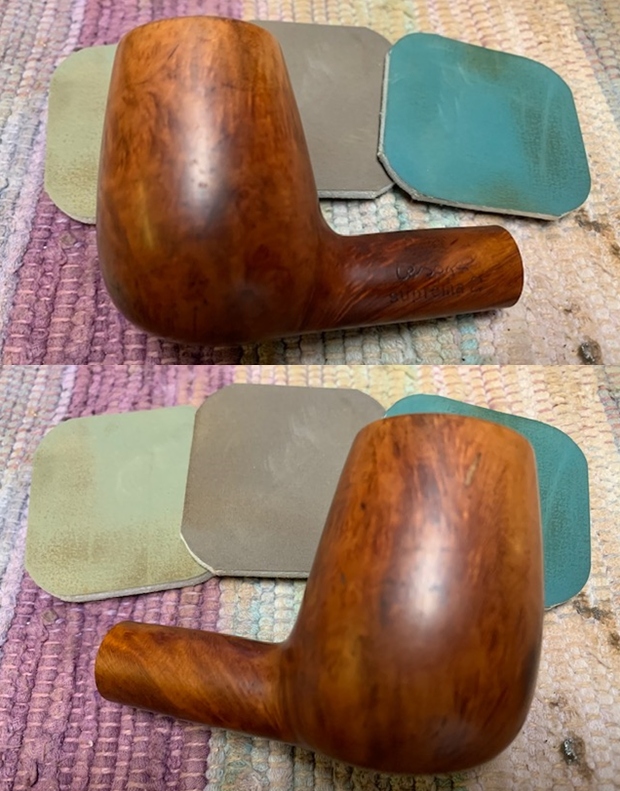
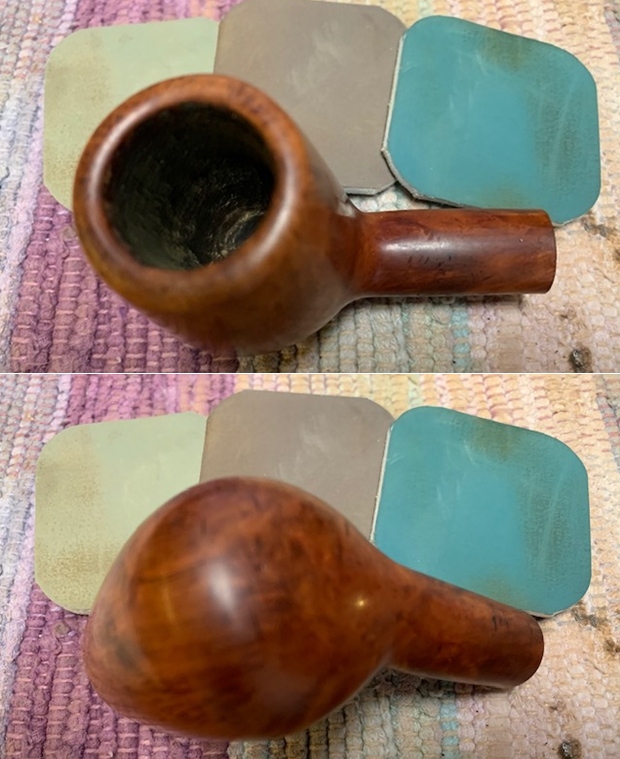
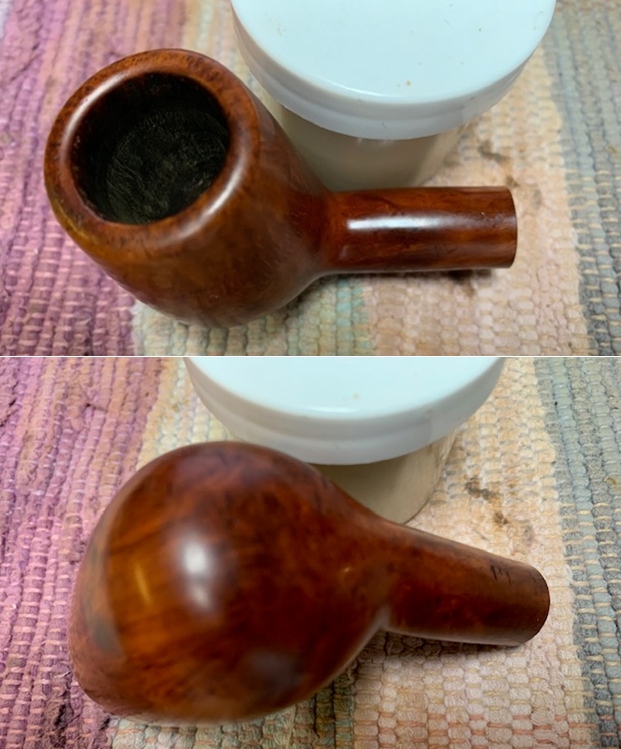
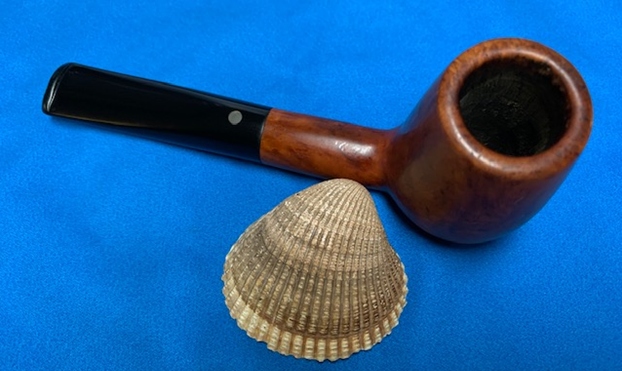
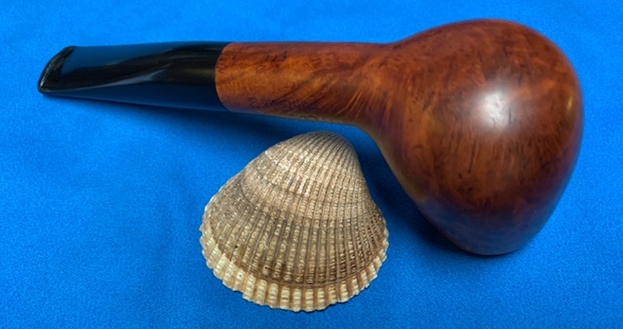
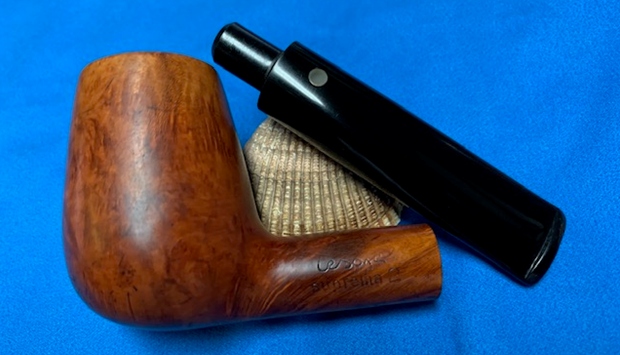
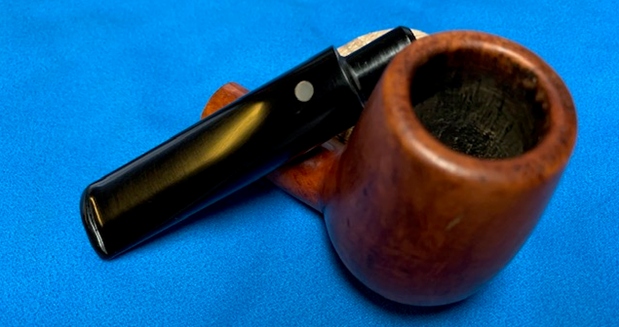
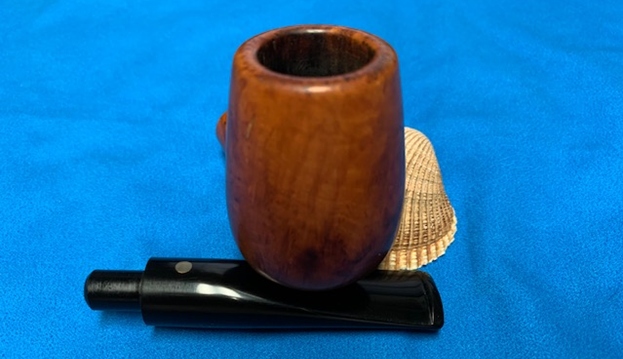
The chamber has an even layer of thin cake and appears to have been reamed and never smoked thereafter. The smooth rim top surface is scratched and it seems that the rim top has been scrapped to remove overflowed lava. Both the inner and the outer rim edges are beveled and appear sans damage. The condition of the inner walls of the chamber can be commented upon after the cake has been taken down to the bare briar. The chamber odors are mild. The draught hole is dead center and at the bottom of the chamber and that makes me believe that it should great smoke. The stummel appears solid to the touch all around and hence I do not foresee any serious damage to the walls in the form of burnout/ deep heat fissures/ lines or pits. To address the damage to the rim top, I shall top the surface on 220 grit sand paper. The reaming and subsequent cleaning of the chamber and mortise should completely eliminate the ghost smells from the chamber. The smooth stummel surface has taken on a layer of aged patina, through which one can make out the beautiful mix of Bird’s eye grain on the sides and at the foot of the stummel with cross grains to the front and back of the bowl. The shank displays tightly packed lovely cross grains that run the entire length. There are two fills in the entire stummel (encircled in yellow), one on the right side and another in the shank, adjacent to the stamping and close to the edge of the ferrule. The vintage of the pipe and years of uncared for storage has added layers of grime and dust over the stummel surface giving the briar a lifeless and bone dry look. Thorough cleaning of the stummel surface and rinsing it under warm water should highlight the grain patterns while preserving the patina. I shall refresh the fills with a mix of briar dust and superglue. The fill near the stampings on the shank will need to be worked on very carefully, if I have to preserve the stamping and which I always ensure!! It will be easy job if the ferrule can be separated from the shank end.
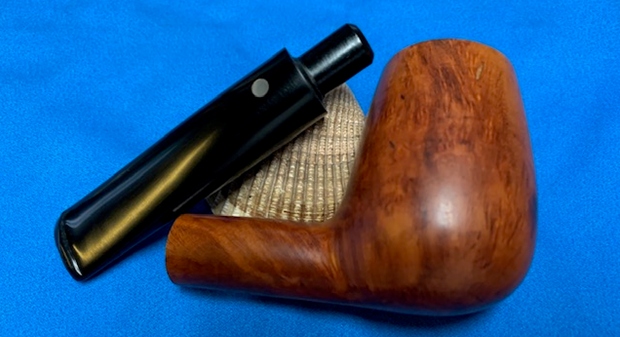
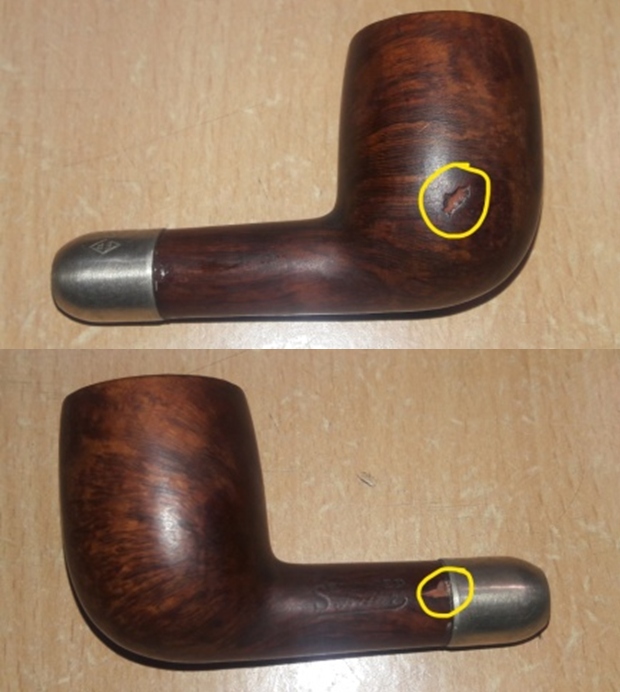
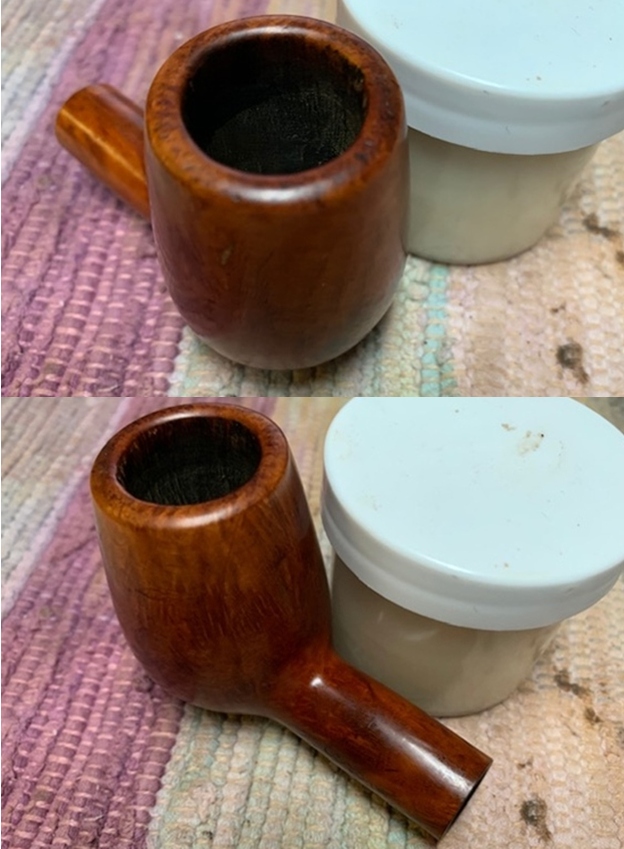
 The mortise shows accumulation of oils, tars and gunk and will need to be cleaned up. However, I have to admit that it is not as clogged as I am used to on my grandfather’s pipes.
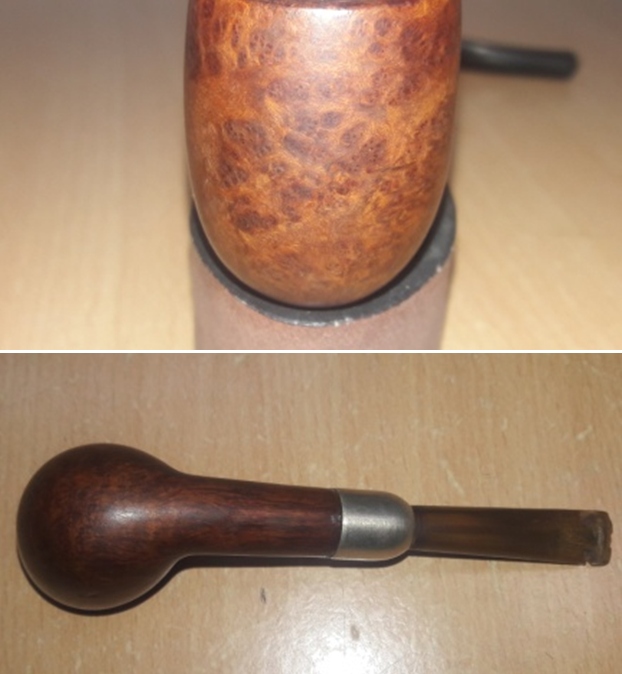
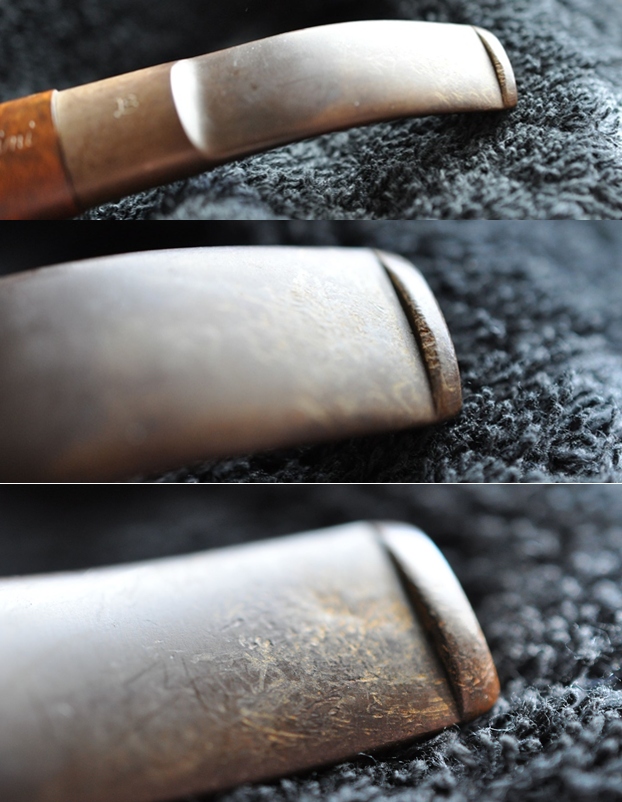
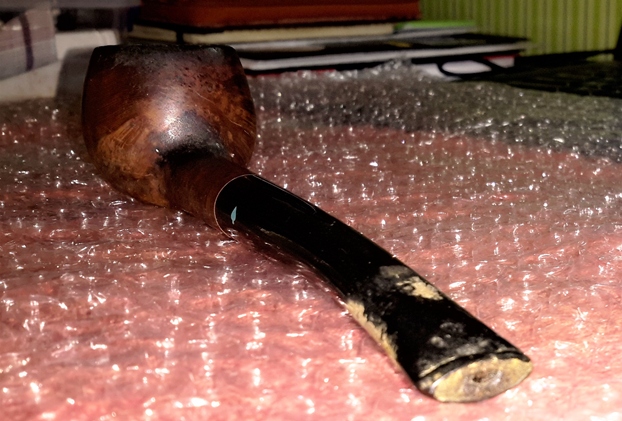
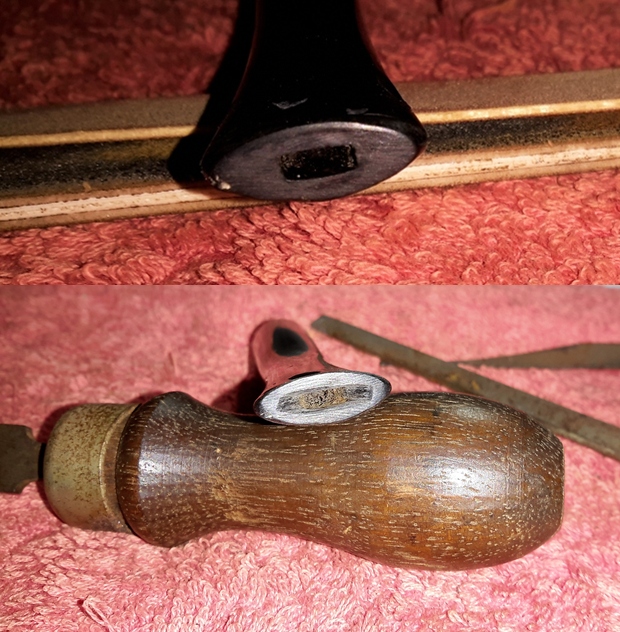
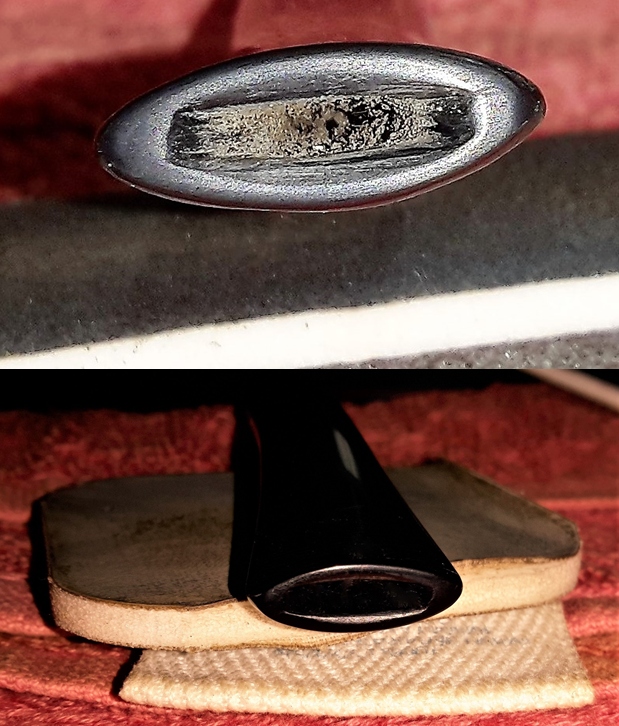
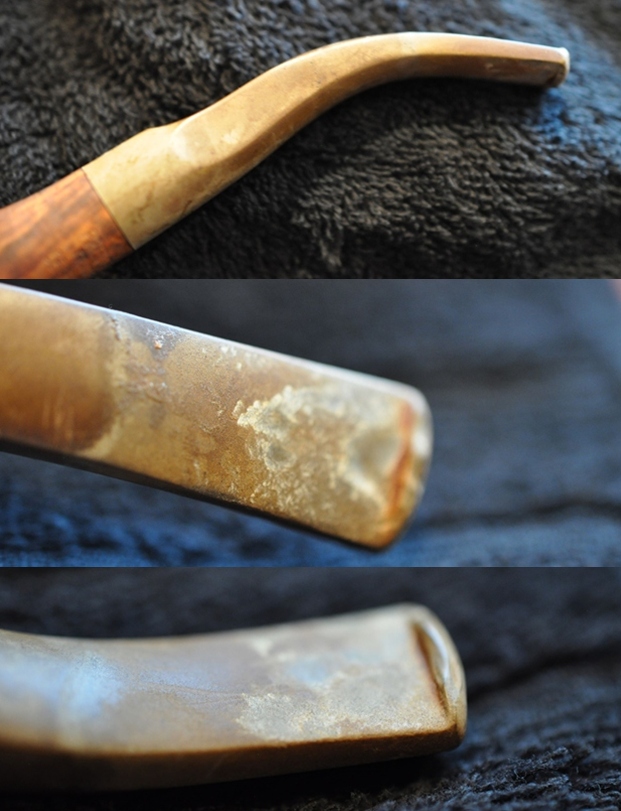
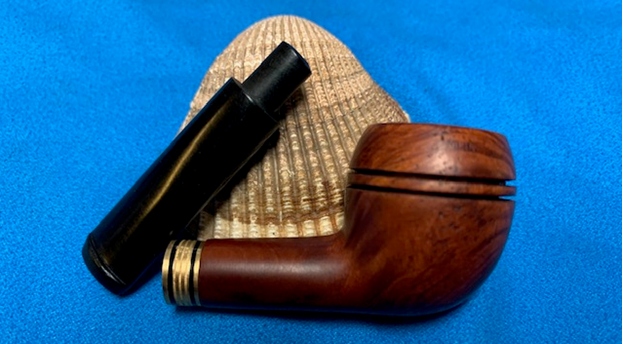
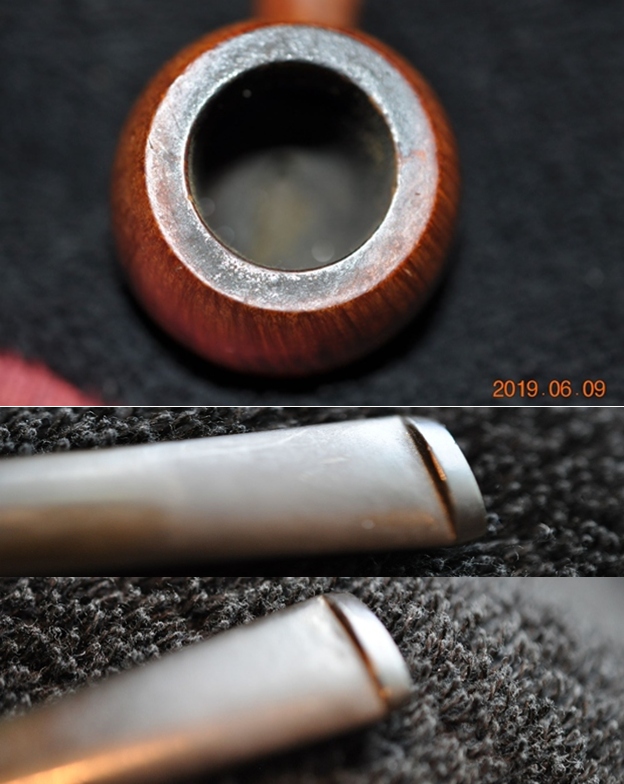
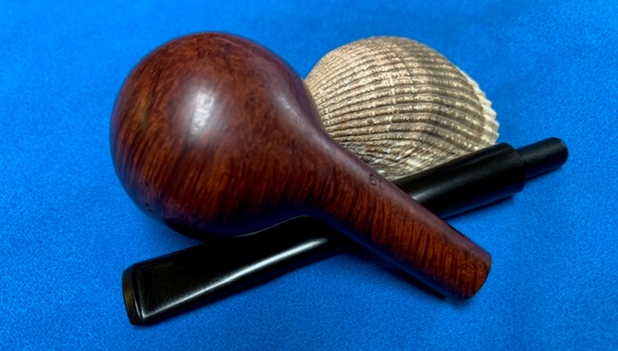
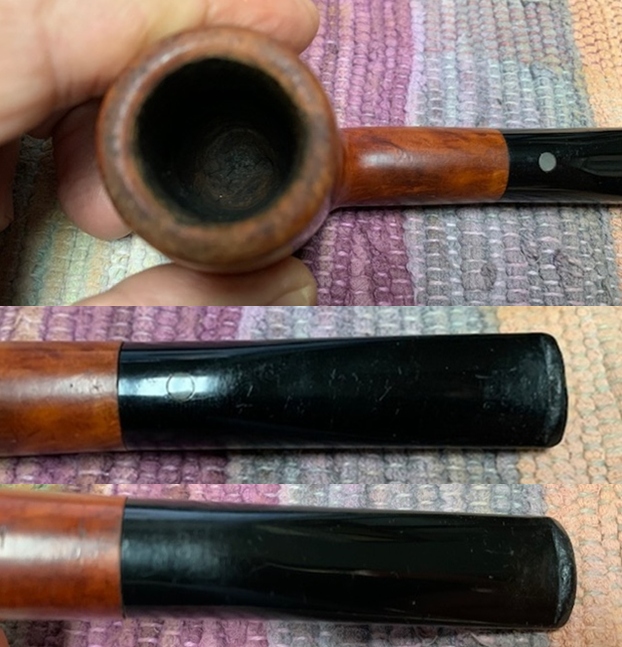
 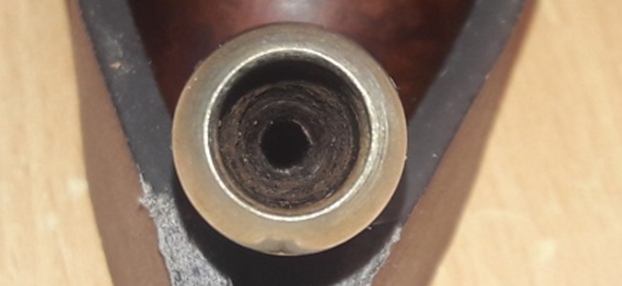 The horn stem in military mount style is completely shot!! You name an issue that a restorer is likely to come across in a stem, it is present and how!! Though personally I feel that every stem is repairable to an acceptable standard, however, in this case I feel that a stem replacement is in order to improve both the aesthetics as well as functionality of this pipe. Have a look at the pictures below to get an idea of the issues that this stem brought to the table…
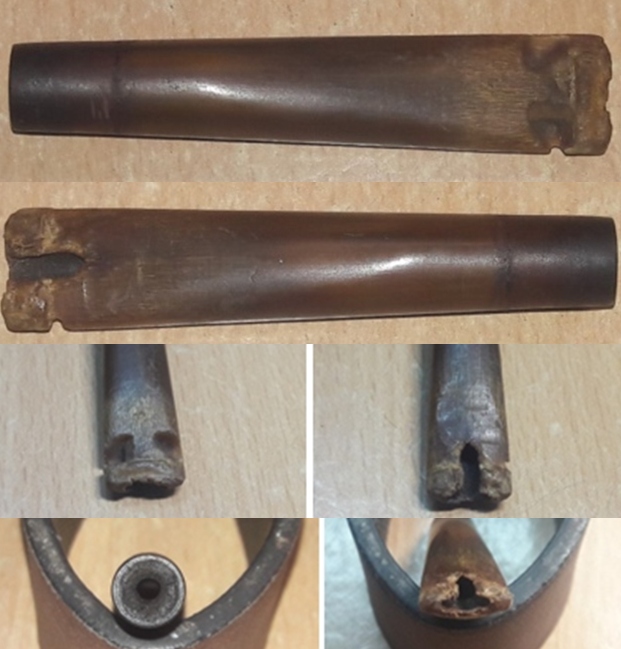 The Process
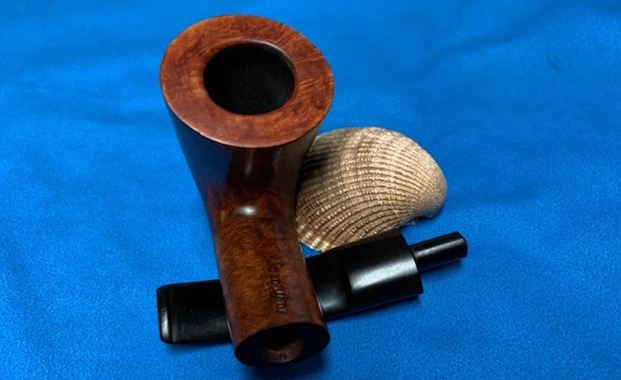
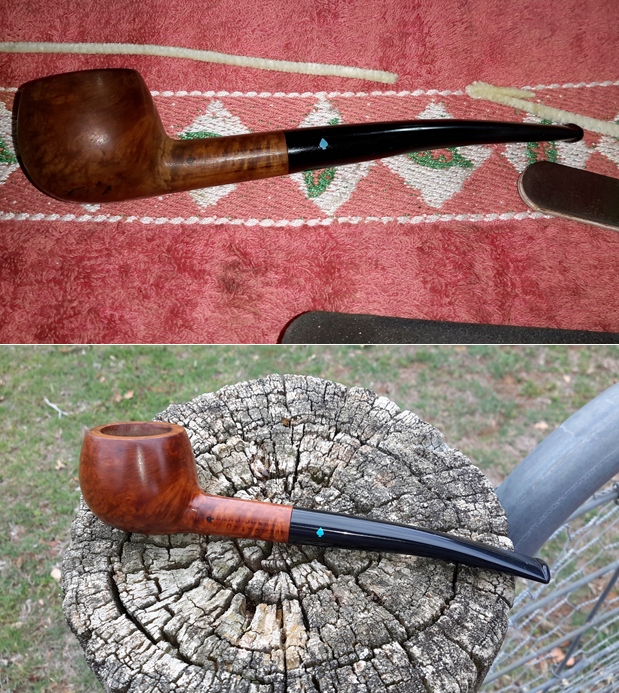
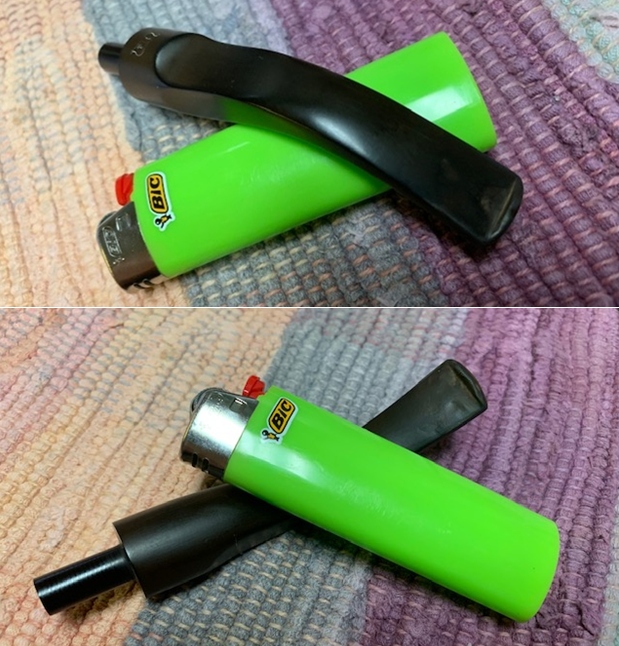
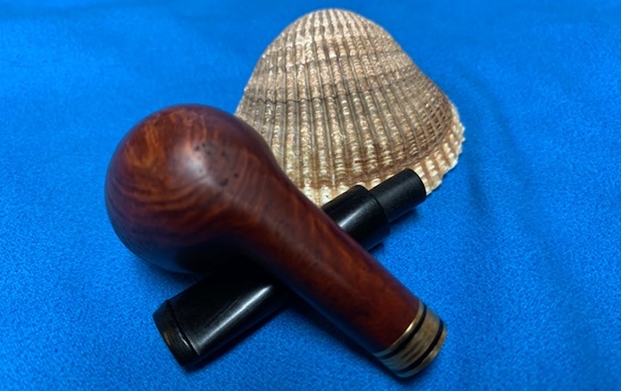
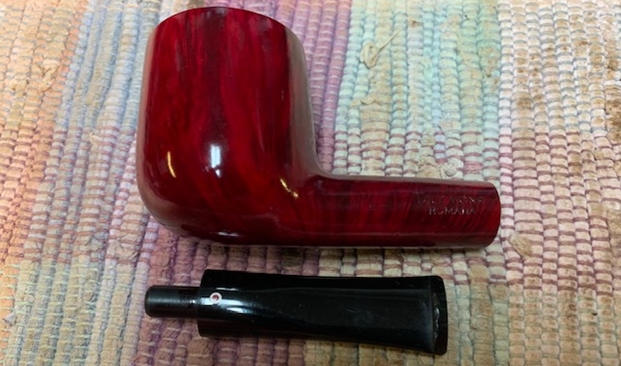
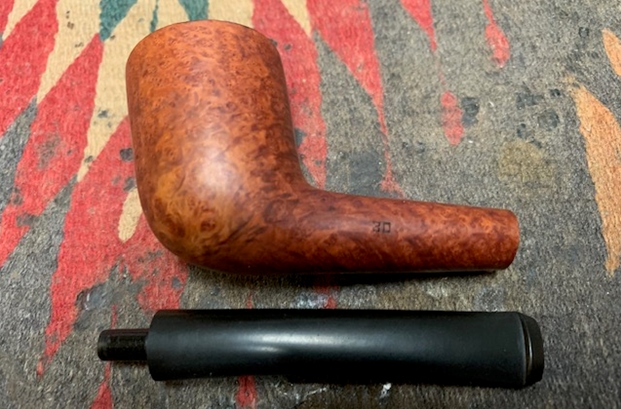
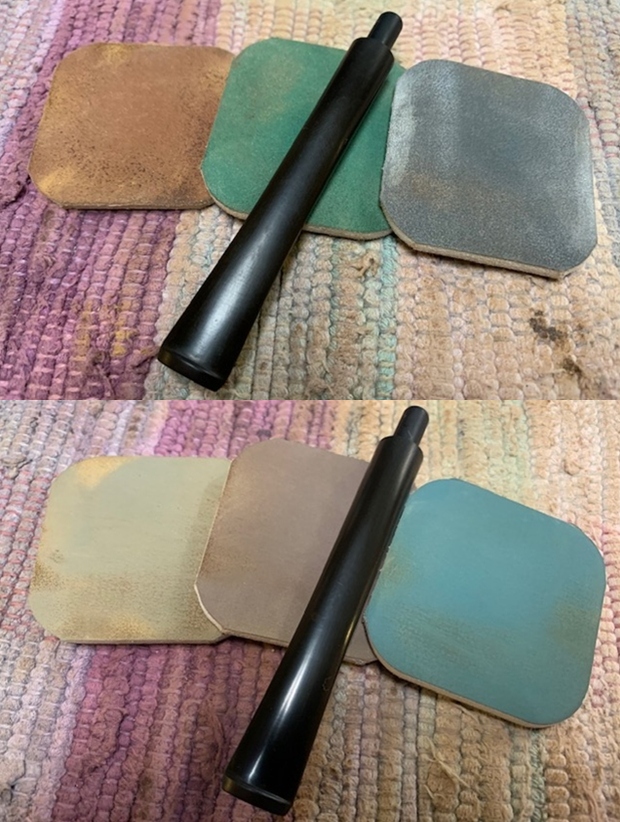
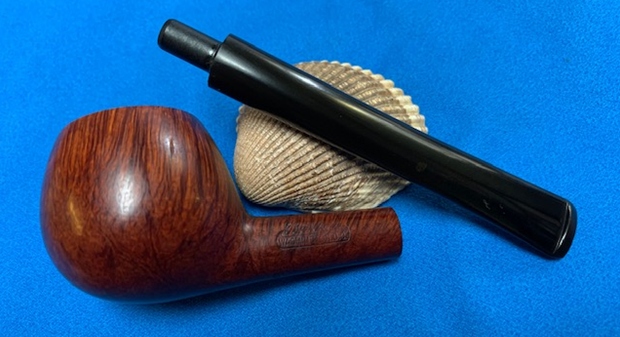
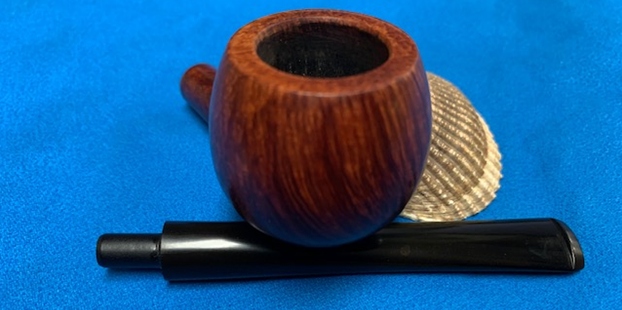
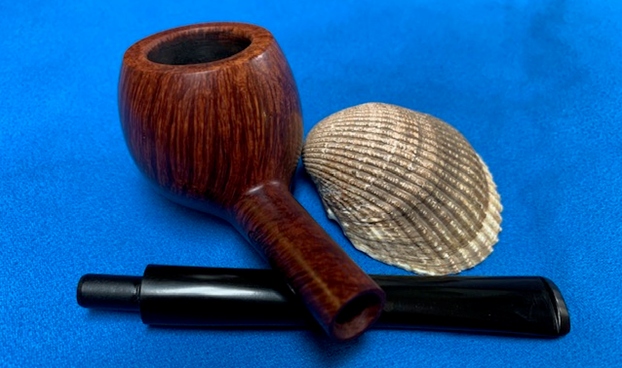
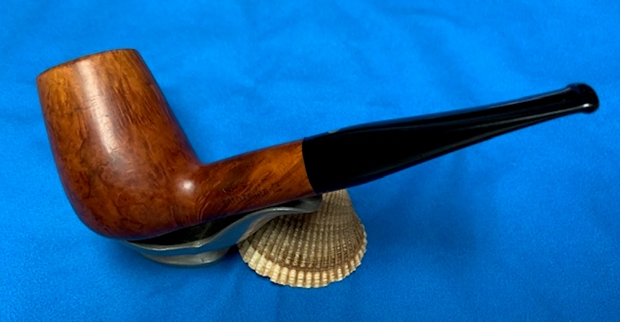
The first step in this restoration was to identify a suitable stem that would replace the old and chewed up horn stem. I FaceTimed with Steve and we went through the lot of horn stems that I had received. We shortlisted a straight military mount style specimen of brand new horn stem with a round orifice. It would suit the pipe both functionally and aesthetically. However, it did not have a taper and the slight belly swell that the original horn stem had. We ended the conversation with a few tips that Steve gave to help me work through this project. On a hunch, I got the slightly bent vulcanite stem that I had earmarked for another project, an early 1900s BEN WADE, and checked it out against the stummel. The extreme flare at the slot end, the taper and the size made me reconsider the horn stem that Steve and I had shortlisted. This vulcanite stem had the Castello like military mount stem and it really looked fantastic. I shared the pictures (shown below) of all the three stems, including the original and the vulcanite stem with Steve and promptly received the characteristic response from Steve, “Ohhh! The vulcanite stem looks like it was made for this pipe…I would definitely go with the vulcanite”. Decision made, the slightly bent vulcanite stem would be the one replacing the horn stem. I am definitely being ambitious to achieve Castello like shape to the stem, but there is no harm in trying!!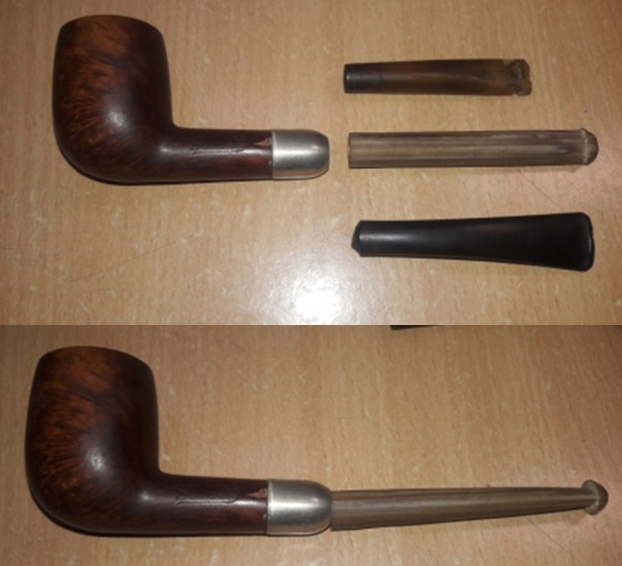
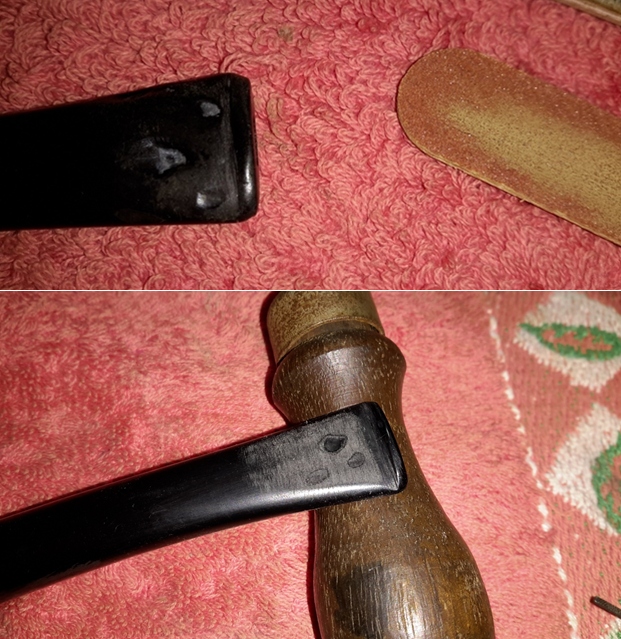
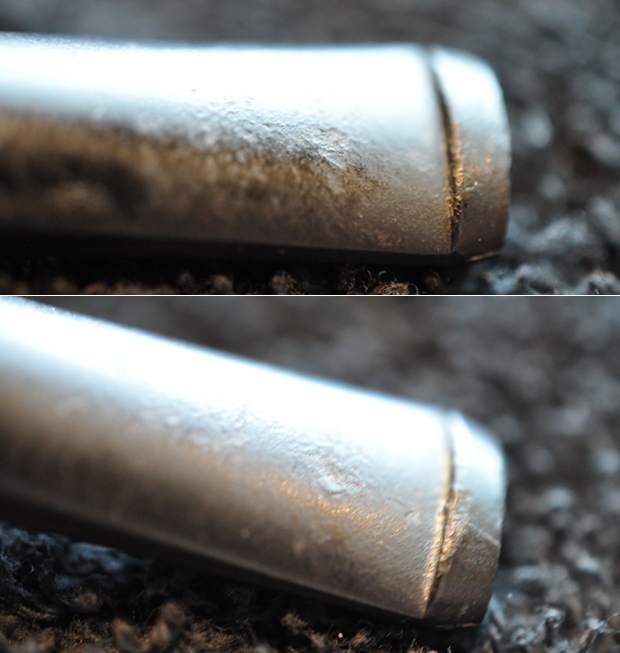
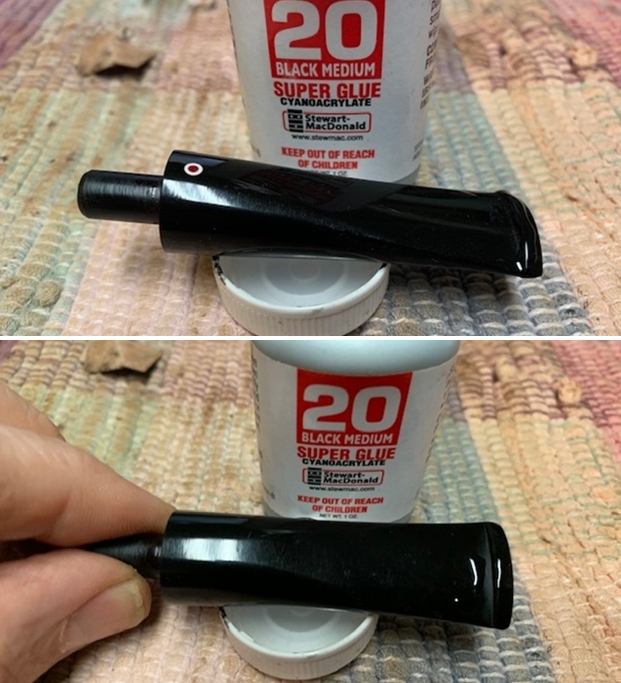
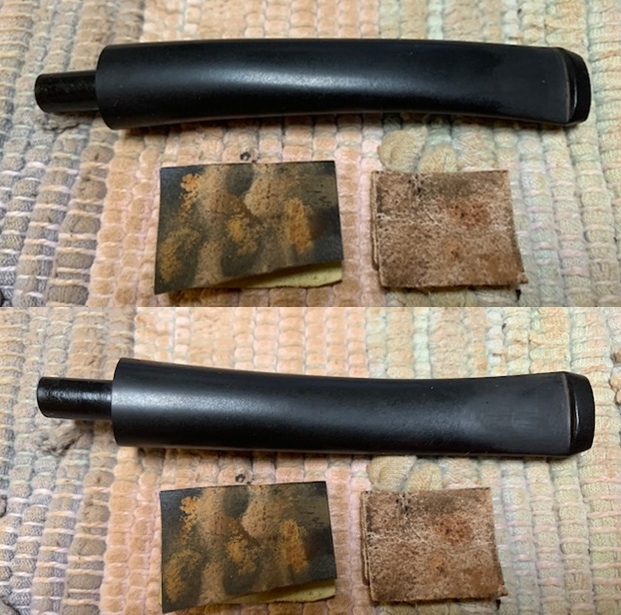
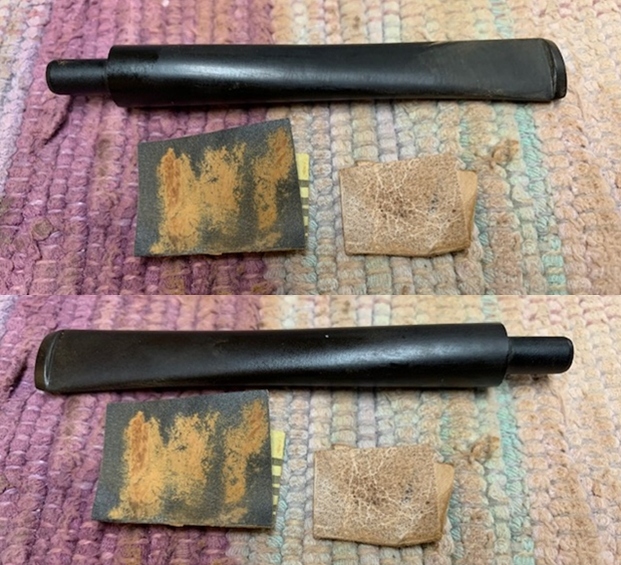
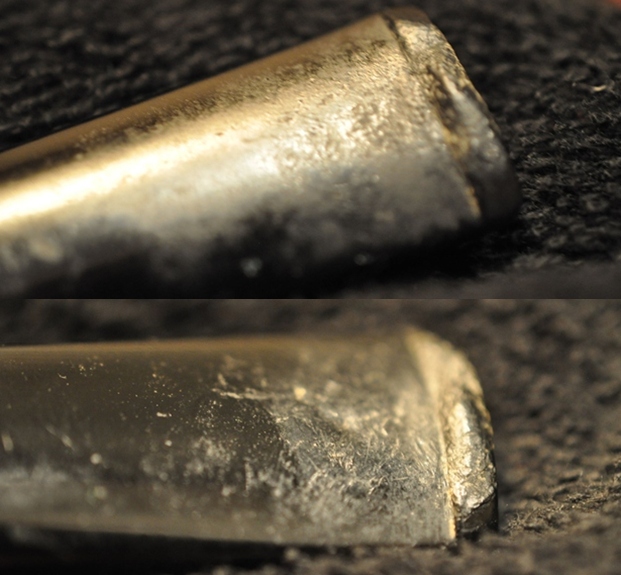
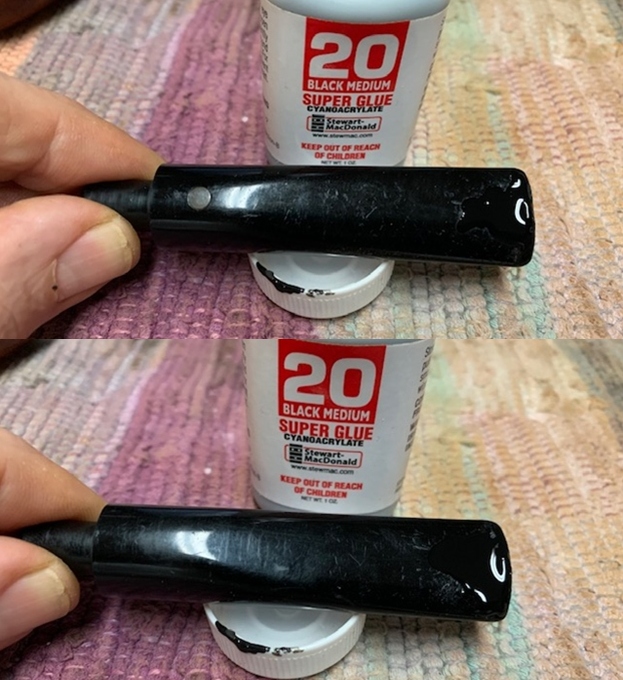
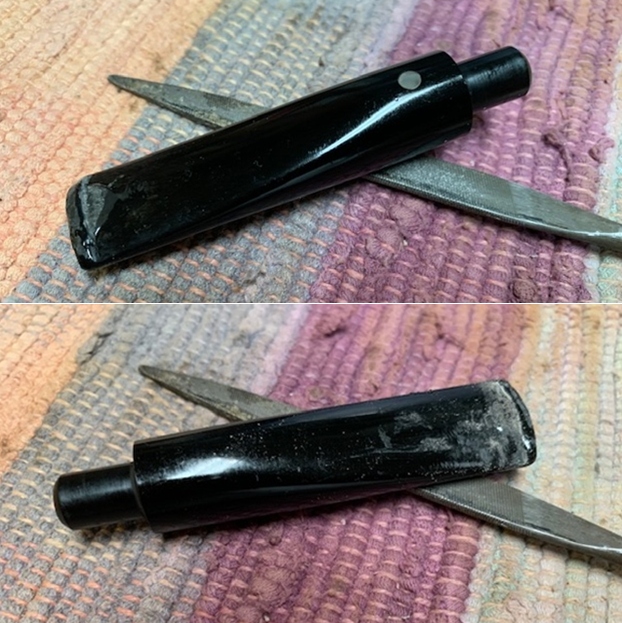
 The replacement vulcanite stem too came with its own set of damages. The stem was deeply oxidized with heavy and deep tooth indentations in the bite zone over the upper stem surface. The lower stem surface had a large chunk of vulcanite chewed off from the bite zone, including the button. The button edge on the upper stem surface is also deformed with heavy tooth indentations. The tenon has been unevenly sawed off, definitely an amateurish job, but it would save me some work nevertheless!! The stem would need to be straightened out first. The bite zone and buttons on either surfaces will have to be reconstructed and reshaped. Thereafter, the issue of seating of the stem in to the mortise will have to be dealt with.
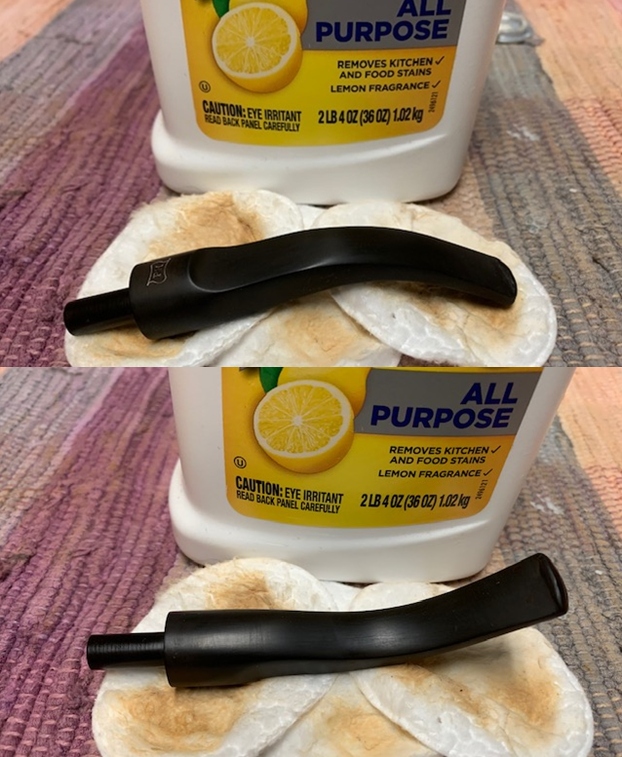
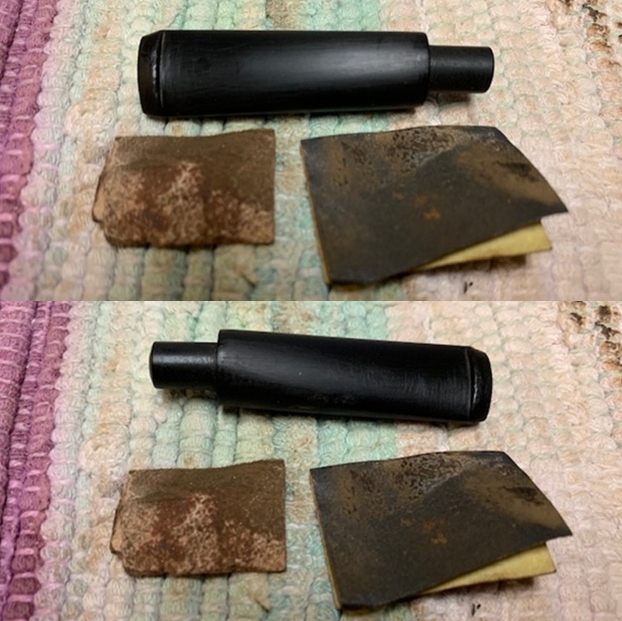
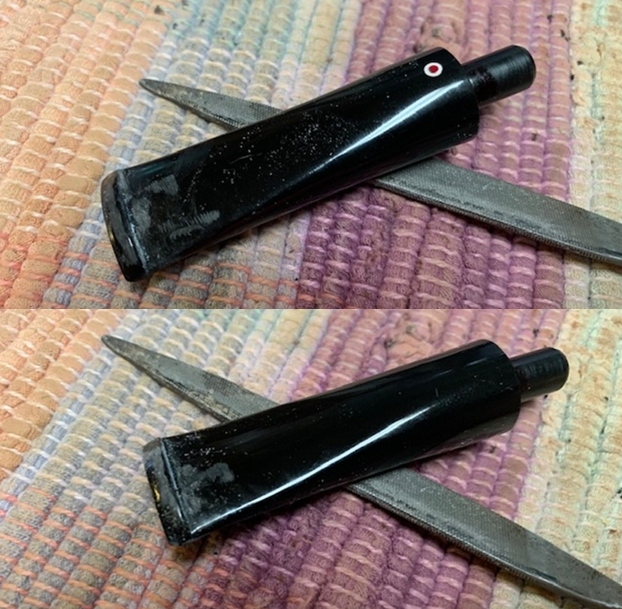
 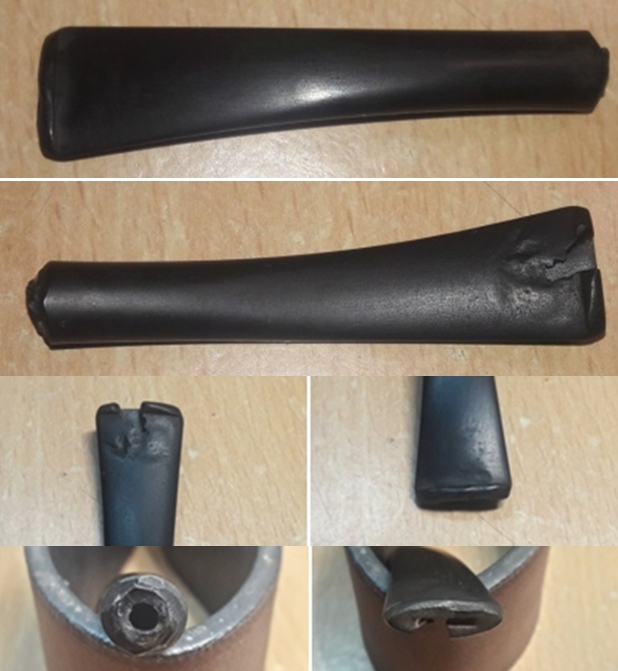 Before progressing to stem repairs proper, I decided to straighten out the stem first. I inserted a pipe cleaner through the stem prior to heating as the pipe cleaner prevents the collapse of the air way. With my heat gun, I gently heat the stem till it was pliable. I gently pressed the stem against the flat table surface and held it in place till the stem had sufficiently cooled and retained the straightened shape. I further cool it down under running cold water and set the straight shape. This heating also raised the tooth chatter and bite marks to the surface in the bite zone. The stem has been perfectly straightened out and some of the tooth chatter has been raised to the surface. The quality of vulcanite on this stem is top class.
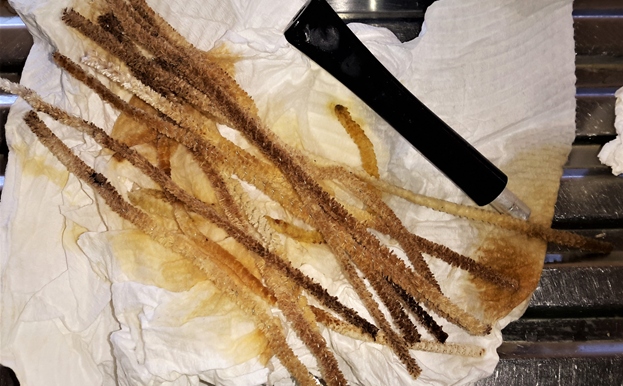
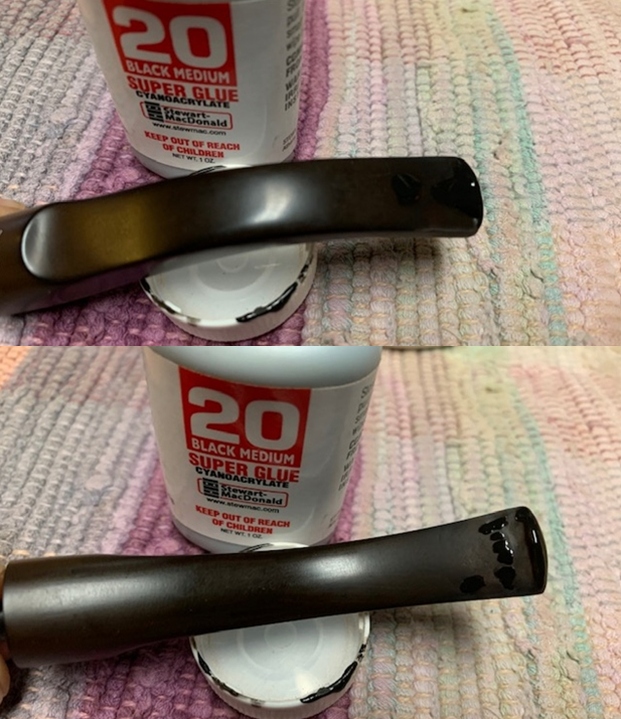
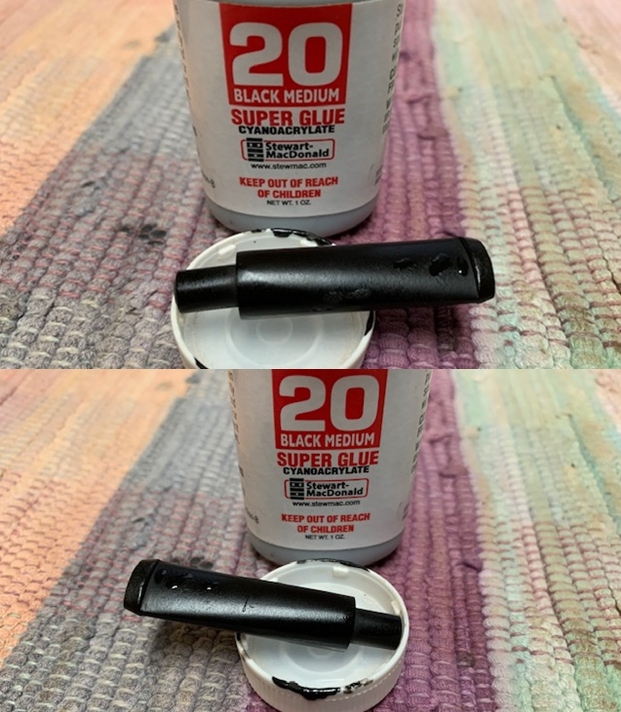
 Next I inserted a triangulated index card covered in scotch tape in to the slot. The tape prevents the mix of superglue and charcoal from sticking to the index card/ seeping in to the air way and blocking it. I mixed superglue and activated charcoal powder and generously applied it over the bite zone, including over the buttons, on either surfaces of the stem and set it aside to cure. Once the fill has hardened, I shall file and sand the fills to match the surface of the stem and sharpen the button edges on either surface. I have been using CA wood superglue and this glue hardens immediately and allowed me only a few seconds of application whereas the all purpose CA superglue allowed me enough time to get an even spread over the damaged surface.
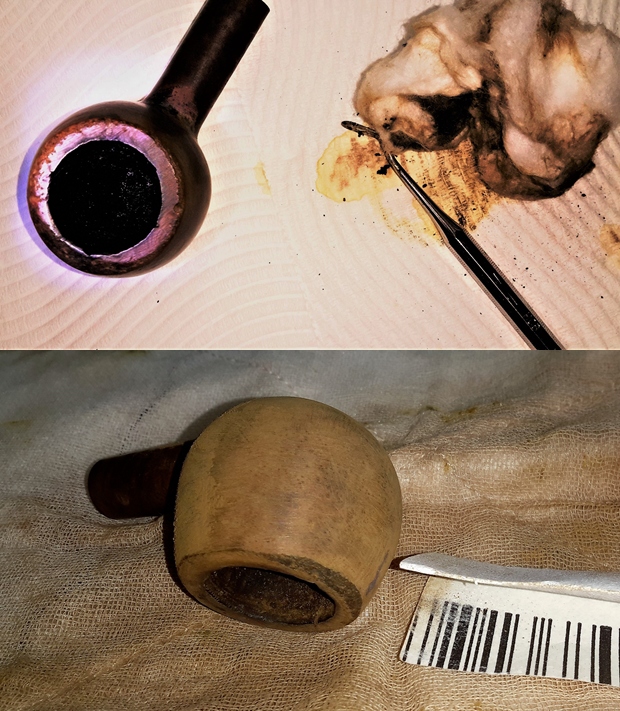
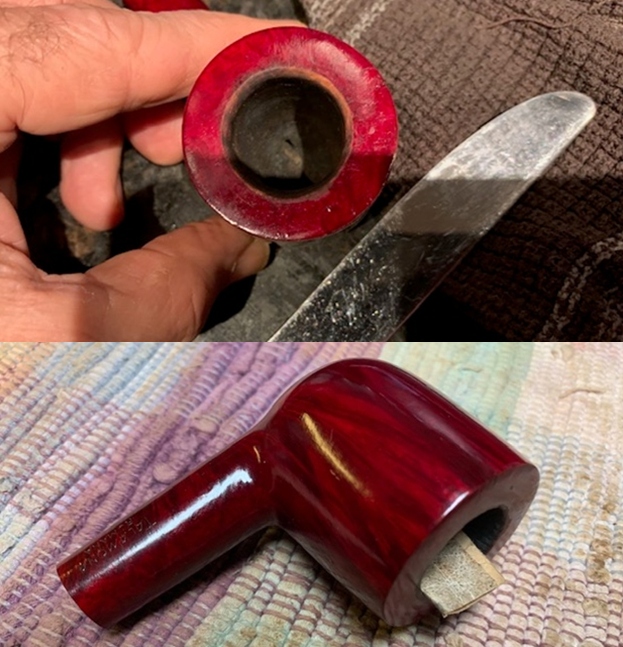
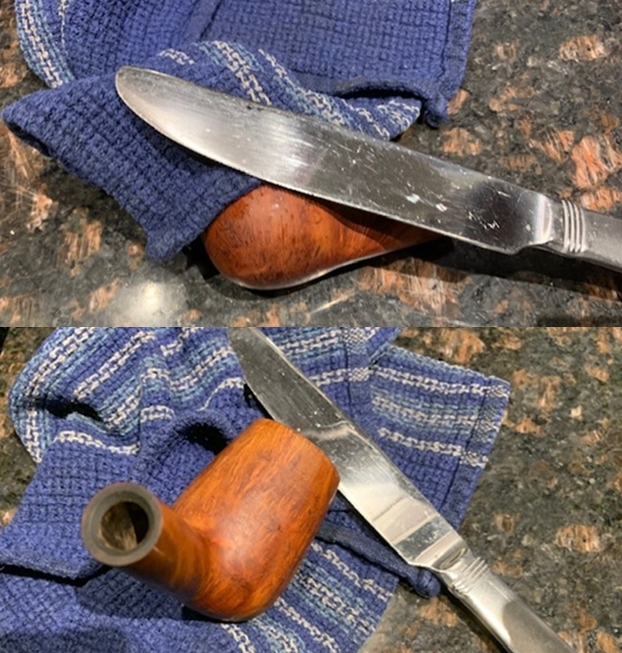
 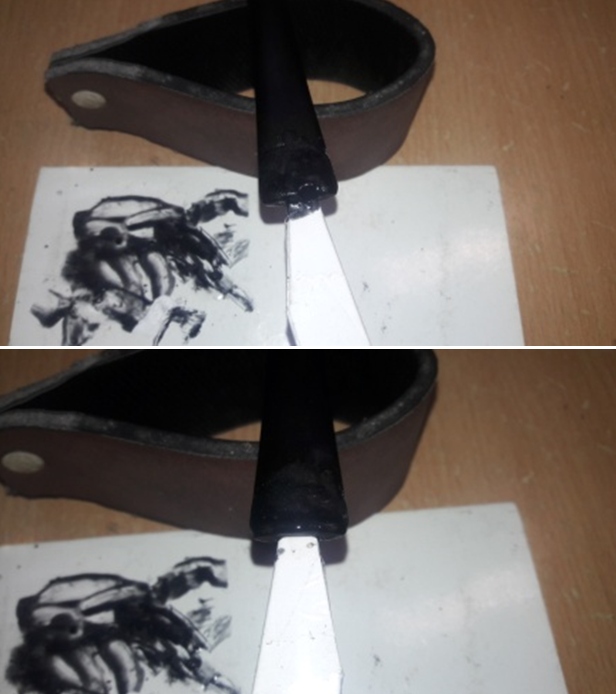 While the stem fills and repairs were curing, I worked on the stummel by reaming the chamber with size 2 PipNet reamer head. With my fabricated knife, I further scraped the chamber walls to remove the remaining carbon deposits. Once the cake was reamed back to the bare briar, I used a 150 grit sand paper followed by 220 grit sand paper to remove all the traces of remaining cake and also to smooth out the inner walls of the chamber surface. Finally, to remove the residual carbon dust, I wiped the chamber with a cotton pad wetted with 99.9% pure isopropyl alcohol. The chamber walls are sans any damage. The outer and inner rim edge is in great shape. The rim top surface itself is peppered with dents/ dings and scratches which will be addressed by topping. The ghost smells are greatly reduced and may be eliminated after the shank/ mortise are thoroughly cleaned.
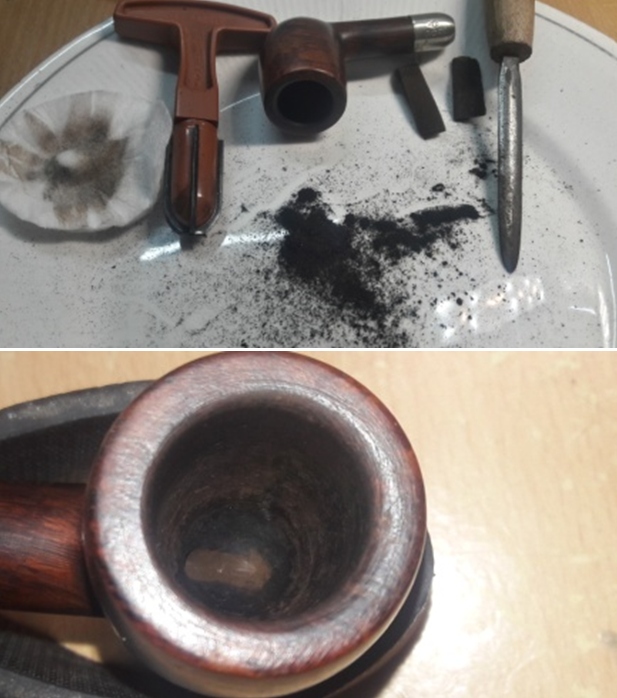
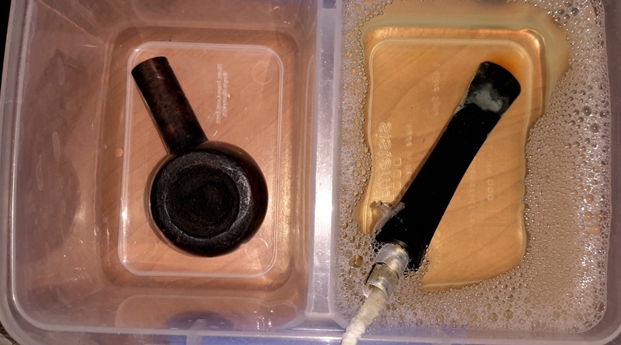
 This was followed by cleaning the mortise with cue tips, pipe cleaners and shank brush dipped in isopropyl alcohol. I scraped the walls of the mortise with my dental tool to remove the dried oils and tars. The mortise was pretty clean and it did not take too much effort and pipe cleaners to get it nice and clean.
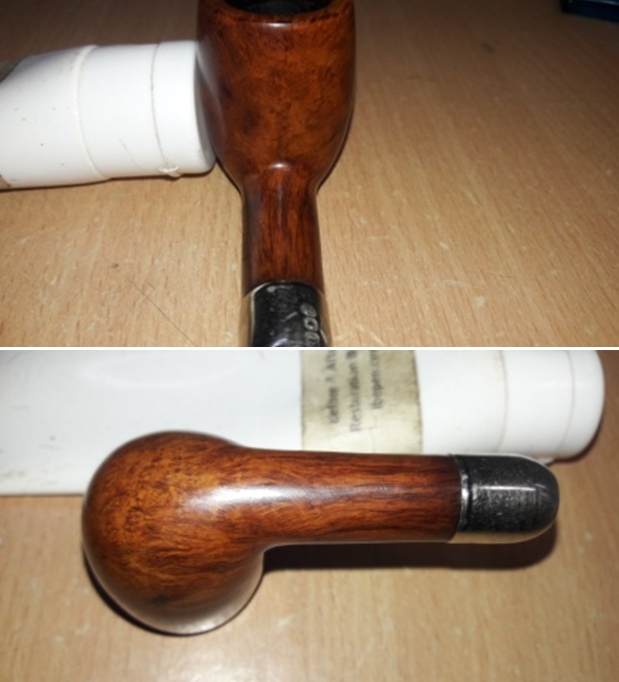
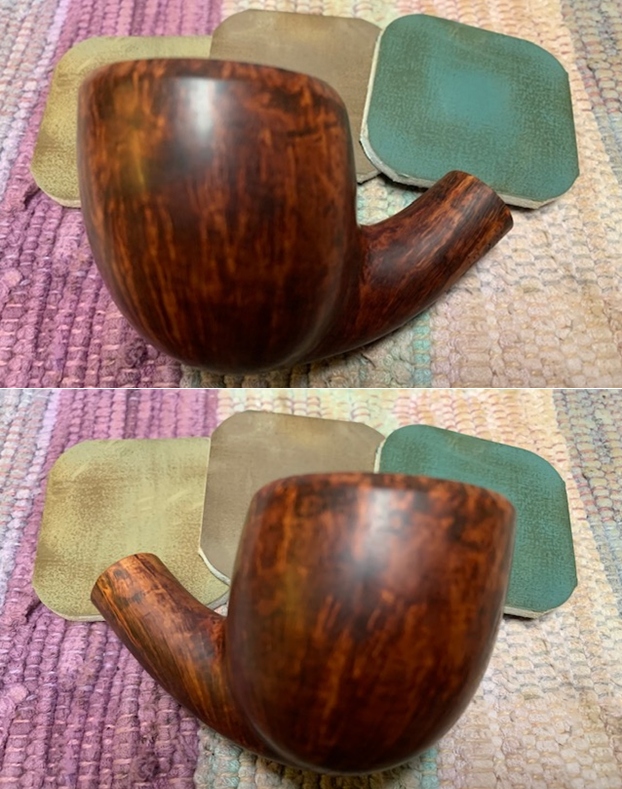
 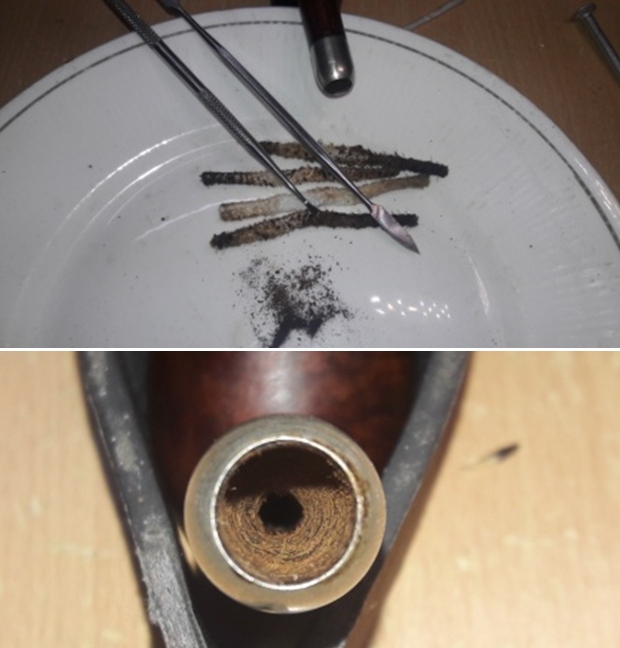 With the bowl internals clean, I move to clean the exterior of the stummel. I used a hard bristled tooth brush and Murphy’s Oil soap to scrub the stummel and rim top. For this stummel cleaning, l I used Murphy’s Oil soap as I wanted to preserve the old patina that had developed on the stummel and was not sure how the Briar cleaner product would affect it. After the scrub with oil soap, I washed the stummel under running warm water with anti oil dish washing detergent till the stummel surface was clean and dried it using paper towels and soft cotton cloth. I simultaneously cleaned the shank internals with the detergent and hard bristled shank brush and set the stummel aside to dry out naturally. The stummel surface has cleaned up nicely with the beautiful grain patterns on full display. The ghost smells are completely eliminated and the pipe now smells fresh, odorless and clean. The shank air way is nice and open. I am sure that the pipe will turn out to be a fantastic smoker with a full wide and open drew. I also noticed that the shank has a distinct taper towards the walls of the mortise. I prefer to have my tenon as close to the walls of the mortise as possible to ensure minimum gap between the air openings and the taper on this pipe means that the military mount stem tenon end will have to be shaped so.
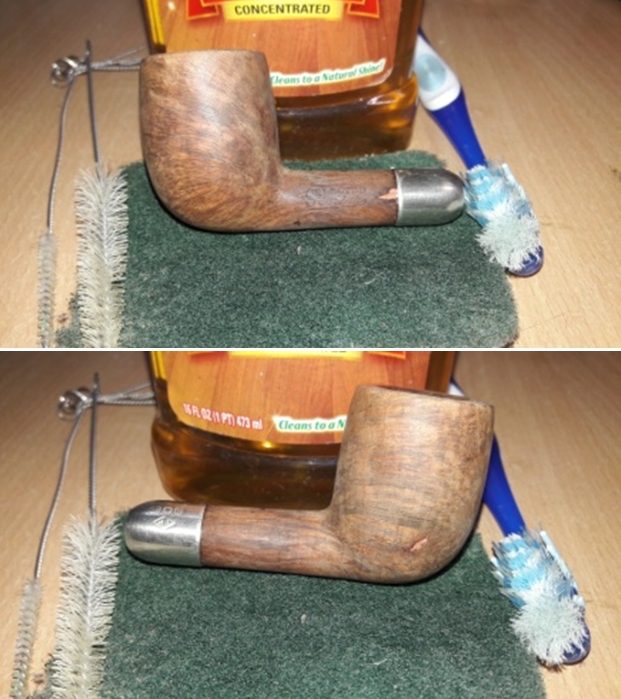


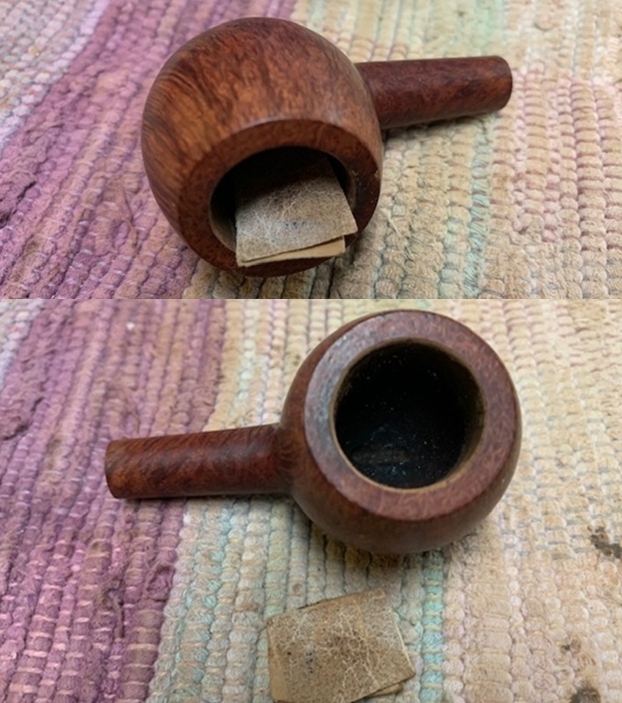
 Next I addressed the issues of the two fills in the stummel surface. With a sharp dental tool, I gouged out the fill to the right side and one at edge of the ferrule on the left side of the shank. I covered the stampings on the left side of the shank with a scotch tape to prevent the briar dust and superglue glue mix from spreading over and ruining the stampings. Using the layering method, I filled these gouges with a mix of briar dust and CA superglue till the mound of the mix was slightly above the rest of the stummel surface. This helps in a better blending of the fill with the rest of the stummel surface while sanding and reduces the scratches caused by the use of a needle file as you have a correct perspective of the sanding that is required. I set the stummel aside for the fills to cure.
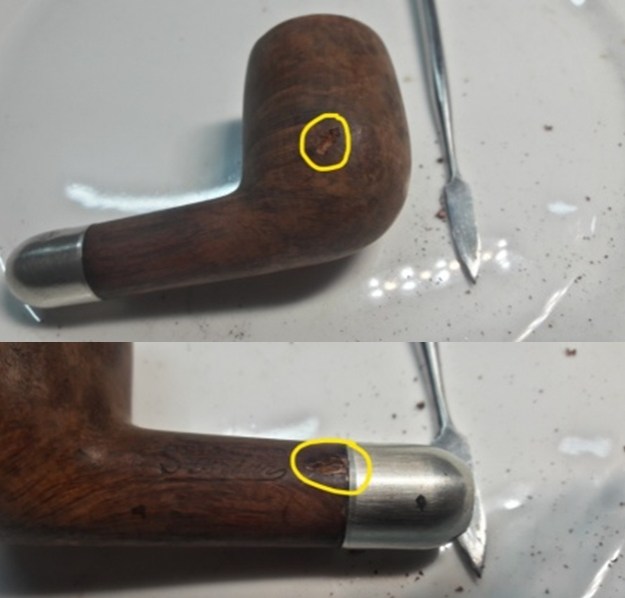
 While the stummel fills were set aside to cure, the next afternoon, I worked on the stem fills which had cured completely. With a flat head needle file, I worked on the filling till I had achieved a rough match with the surrounding surface and had sufficiently sharpened the button edges. I further sand the fills with a piece of 180 grit sand paper to achieve a better match. I used a slot file to even out the horizontal slot edges and widen it a bit. The reconstructed button over the lower surface needed to be refilled to make the button and the slot end face even. I spread the mix of charcoal and superglue over the button edge and slot end face on either sides again and set the stem aside for the refill to cure.
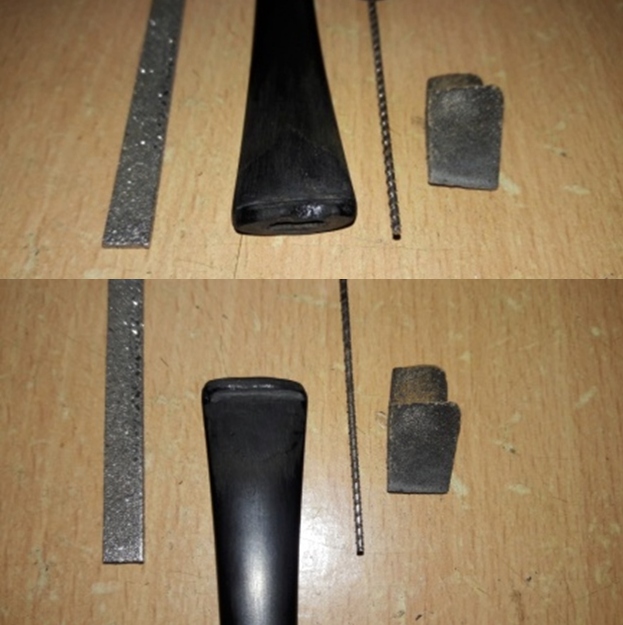
 With further stem repairs being on hold, I turned back to the stummel repairs. Using a flat head needle file, I sand the fill till I had achieved a rough match with the surrounding stummel surface. I sand the entire stummel with a piece of 220 grit sand paper to further blend in the fills with the stummel surface.
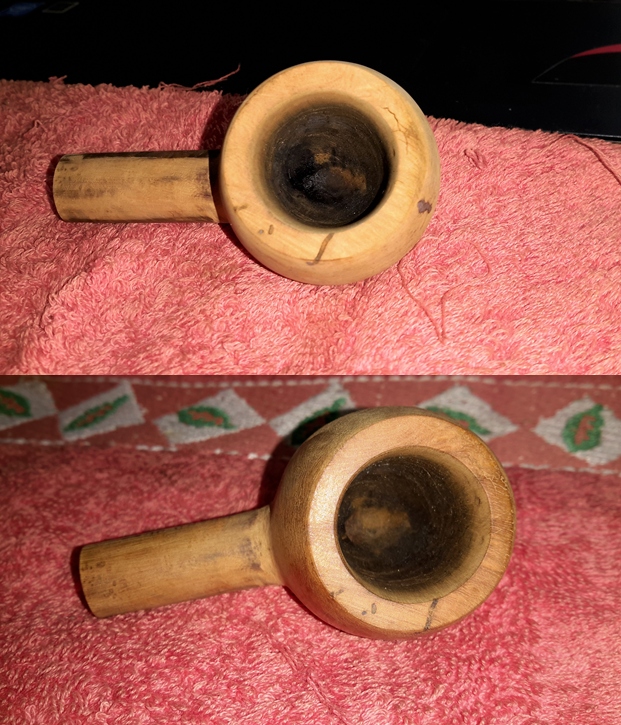
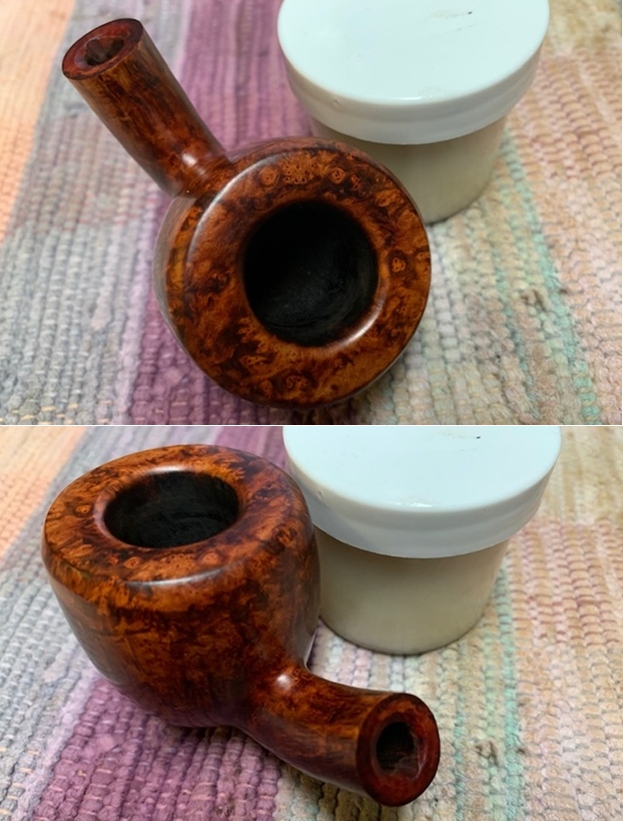
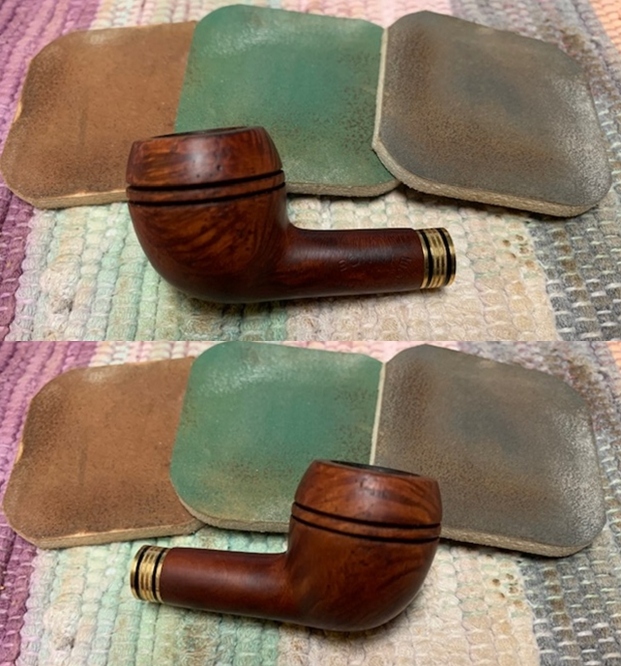
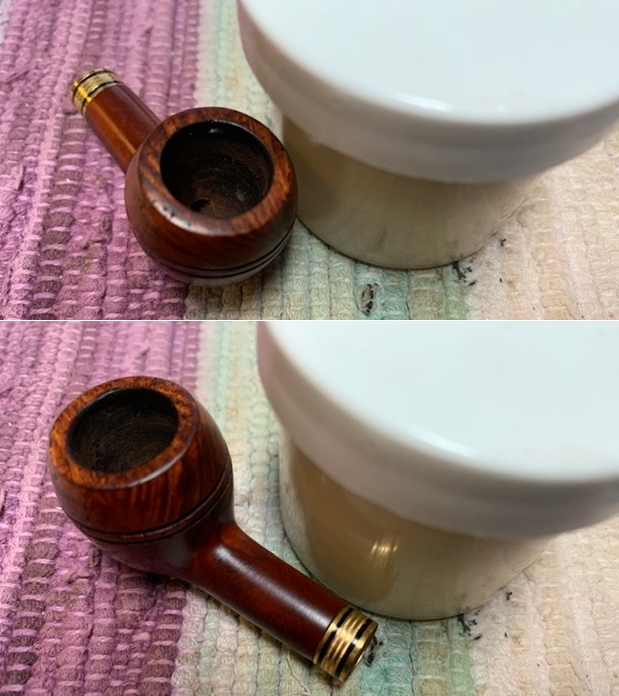
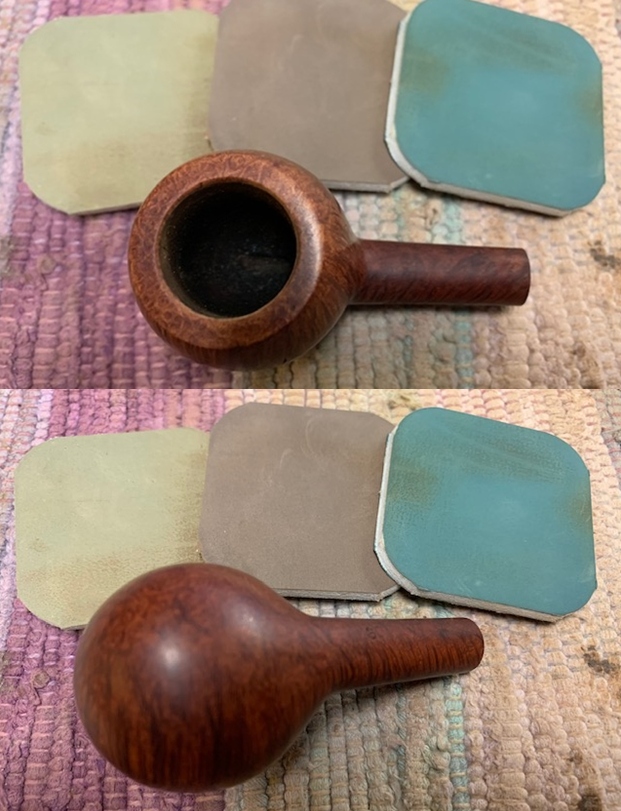
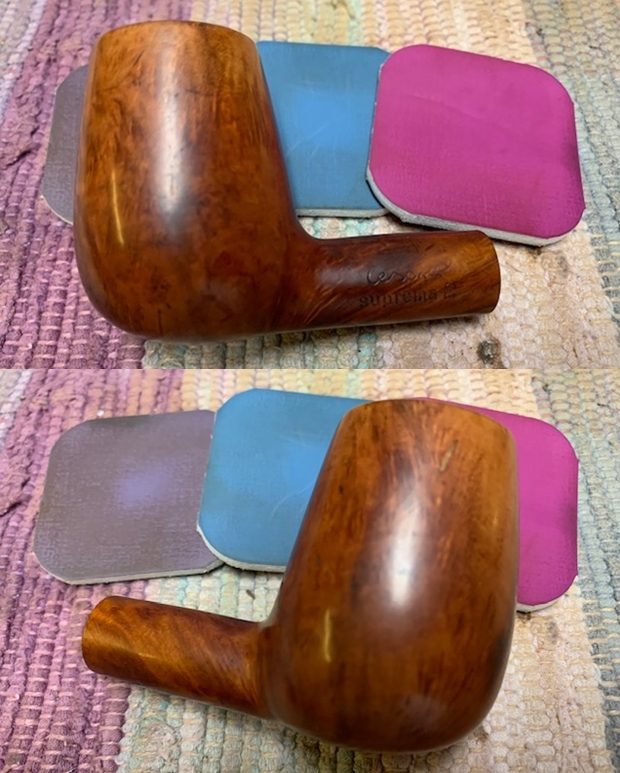
 I topped the rim top surface on a piece of 220 grit sand paper, checking frequently for the progress being made as I hate to loose briar estate any more than absolutely necessary. The scratches over the rim top have now been completely addressed. The inner rim edge bevel appeared to be slightly uneven at the front and at the back end of the rim top (encircled in blue) and I decided to freshen and even out the bevel. With a folded piece of a 220 grit sand paper pinched between my thumb and forefinger, I create a slight bevel on the inner edge of the rim top surface. I am careful so as not to alter the profile of the stummel by excessive topping or creation of the bevel. I am pretty pleased with the appearance of the rim top and edges at this stage. The following pictures show the progress being made and improvements to the inner and outer rim edges.
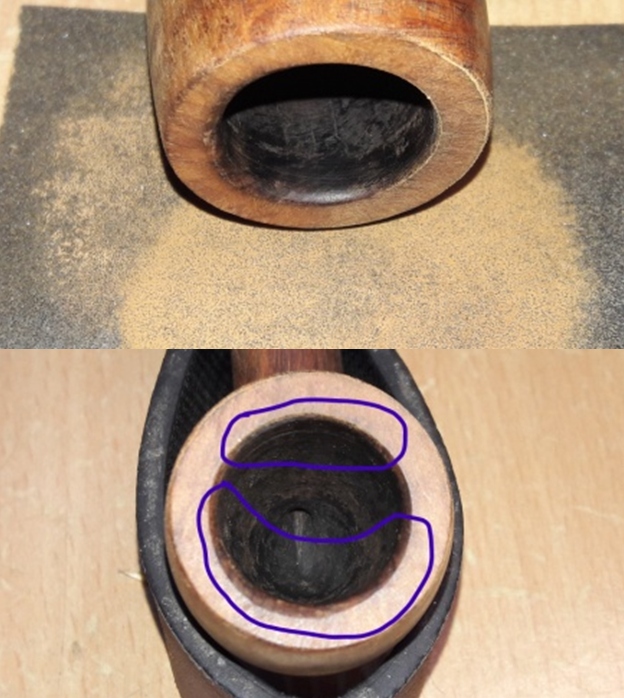
 With the stummel repairs almost complete, save for the micromesh and wax polish, I worked the stem. The fill had cured and with a flat head needle file I sand the fills and reshape the buttons. I further sand the fill and buttons with a folded piece of 220 grit sand paper. I am pretty happy with the way the stem repairs have shaped up and also the buttons now have a nice crisp edge to them.
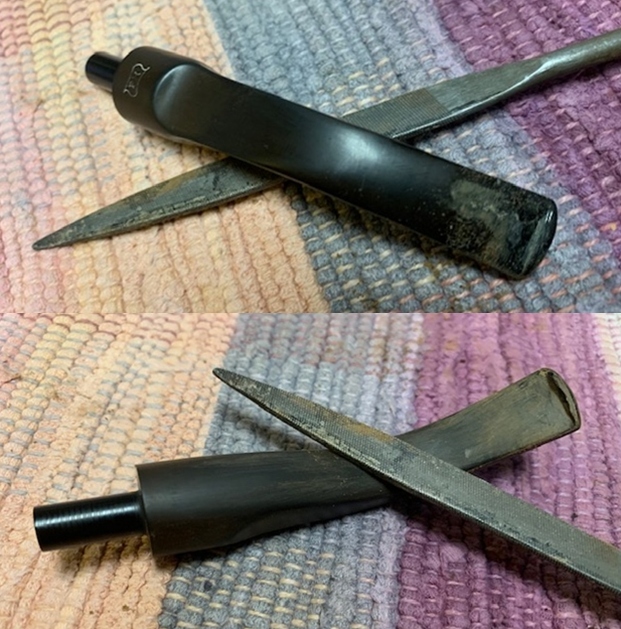
 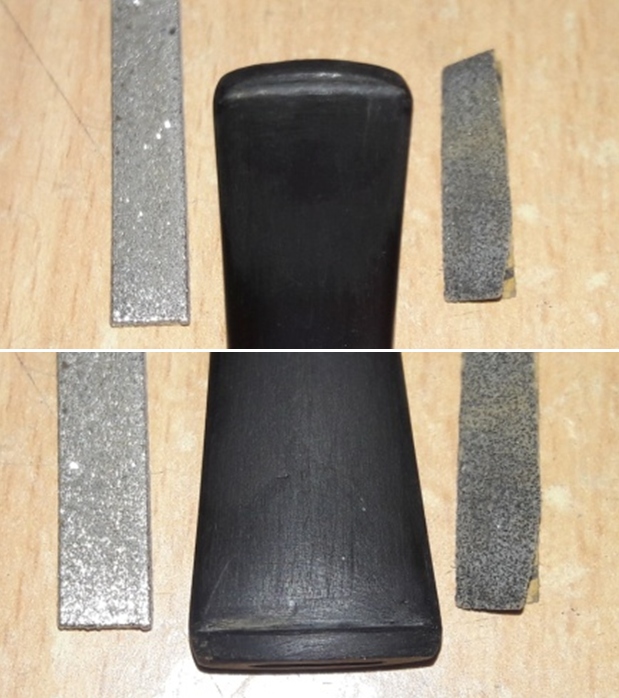 I followed up the repairs to the bite zone by addressing the issues at the tenon end of the stem. I sand the tenon end over a piece of 180 grit sandpaper to a smooth and even face.
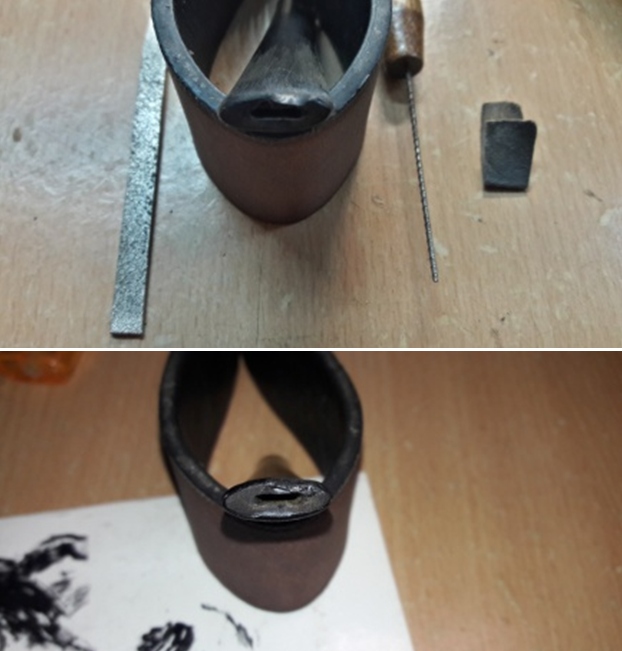
 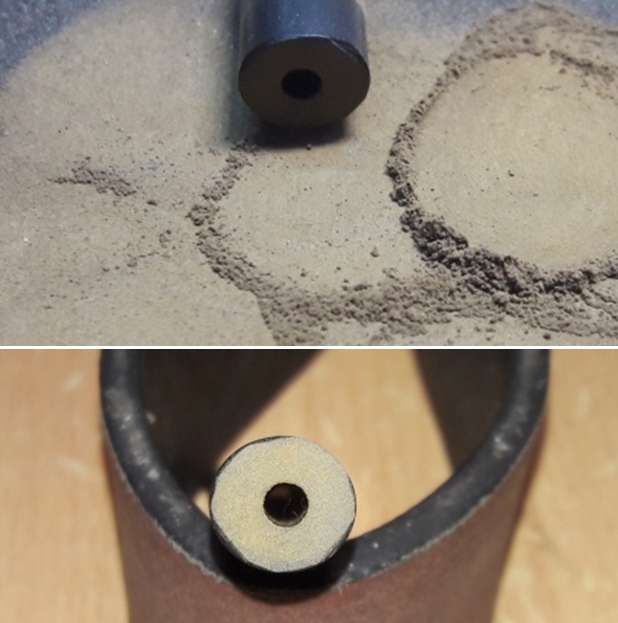 I marked the approximate length of the mortise over the stem from the tenon end with permanent marker. This would give me a reference point from where I would need to turn the tenon. I mounted a 150 grit sanding drum on to my hand held rotary tool and sand the tenon end. While sanding the tenon end, I always had the profile of the Castello stem at the back of my mind. I checked for the seating of the stem in to the mortise frequently and stopped once I had an approximate seating. I fine tuned the seating by further sanding of the tenon end with a piece of 220 grit sandpaper. When I checked the seating, I realized with a cringe that there is a substantial vertical gap (indicated with yellow arrows) between the stem and the shank end on either surface while the sides are a perfect fit.
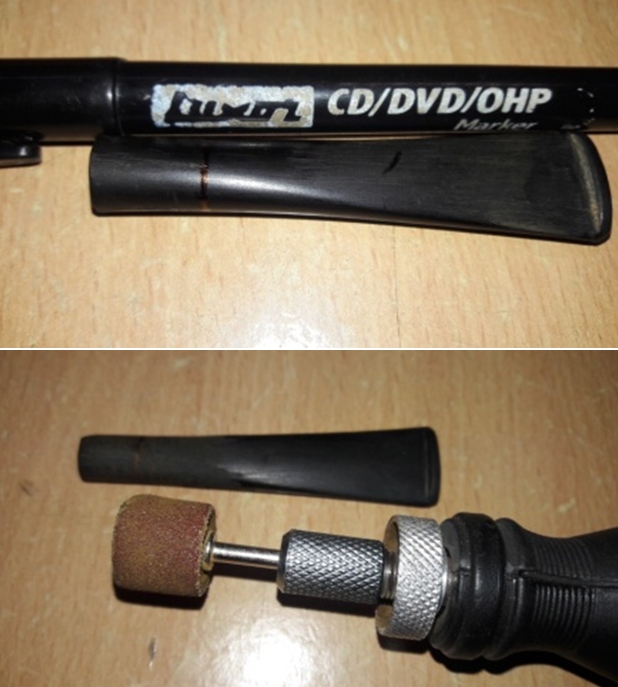
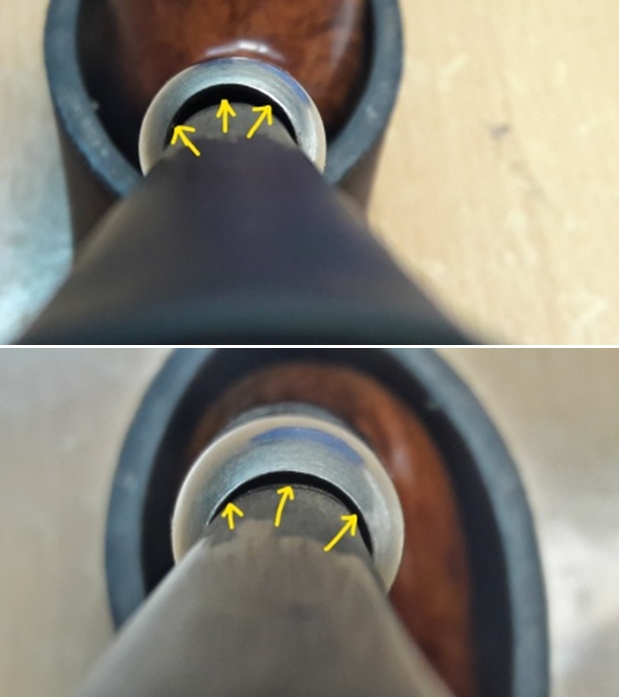
 Another FaceTime consultation with Steve and we both reached a conclusion that there was no option but to rebuild the upper and lower stem surface afresh to cover the gap between the stem and shank end since other shortlisted stems would not do justice to the pipe’s complete appearance. So what followed was a tedious, laborious and time consuming process of filling with a mix of activated charcoal & superglue, curing, sanding, checking the seating and repeating the process till I achieved a snug fit of the stem in to the mortise. I have explained the entire process in just two lines, but in reality it took me 4 complete days to achieve the desired results. The pictures below will give the readers an idea of the process that was involved. At this stage of restoration, I had achieved a rough seating of the stem in to the mortise and discerning Readers would have noticed minor gaps between the stem and shank end. I too had observed this gap but am not perturbed by this as this issue will be addressed when I fine tune the seating by sanding with higher grit sandpapers. Also, if the issue persists, I can always resort to rebuilding and readjusting as necessary.
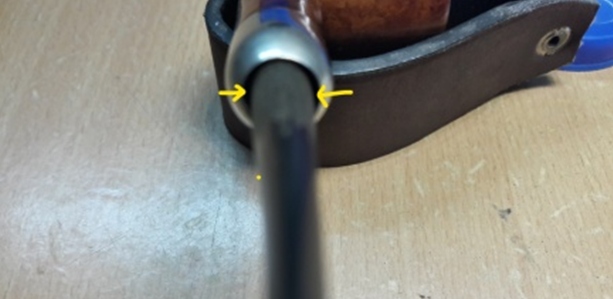
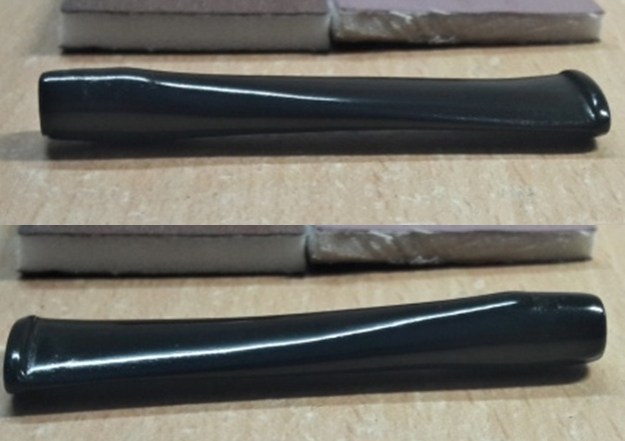
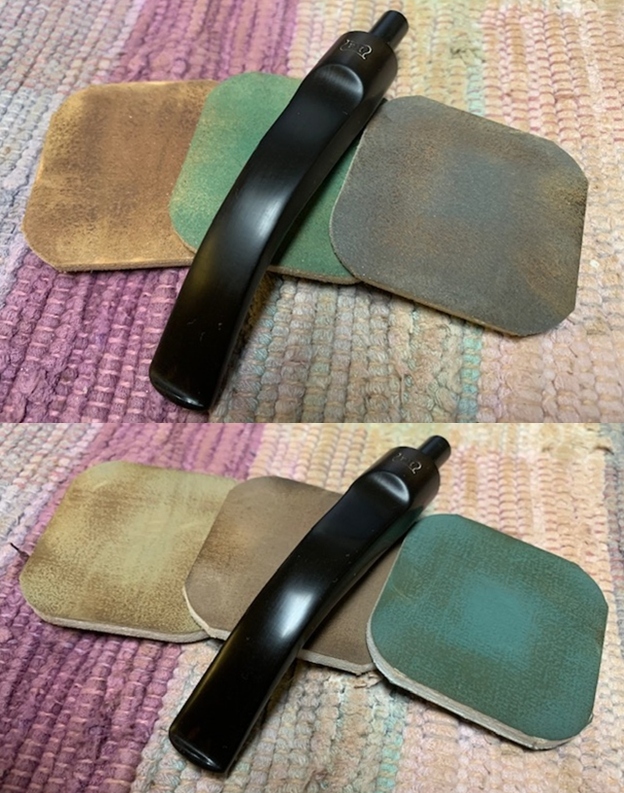
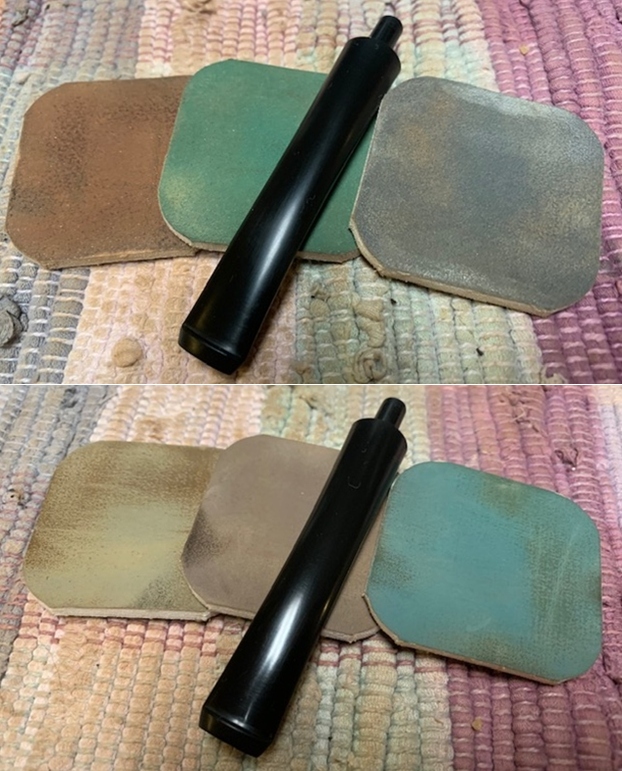
 Thereafter, again began the process of fine tuning the seating of the stem in to the mortise by sanding with 320, 600, 800 and 1000 grit sandpapers. The technique that I used is very simple; sand one side, check the seating and if the seating is not snug, sand the relevant side and continue to do so till I achieved a snug airtight fit. The closer I came to the perfect fit, the higher grit sand paper I used. A lot of patient and diligent work of 7 hours, I reached the point where I felt “no more sanding… this is the perfect seating!!”. My mantra “LESS IS MORE” was also playing at the back of my mind. I had simultaneously sanded the entire stem surface through all the above mentioned grit sand papers. I was very pleased with my efforts as I had achieved a perfect snug seating of the stem in to the mortise while being able to maintain the semblance of a Castello like stem!!
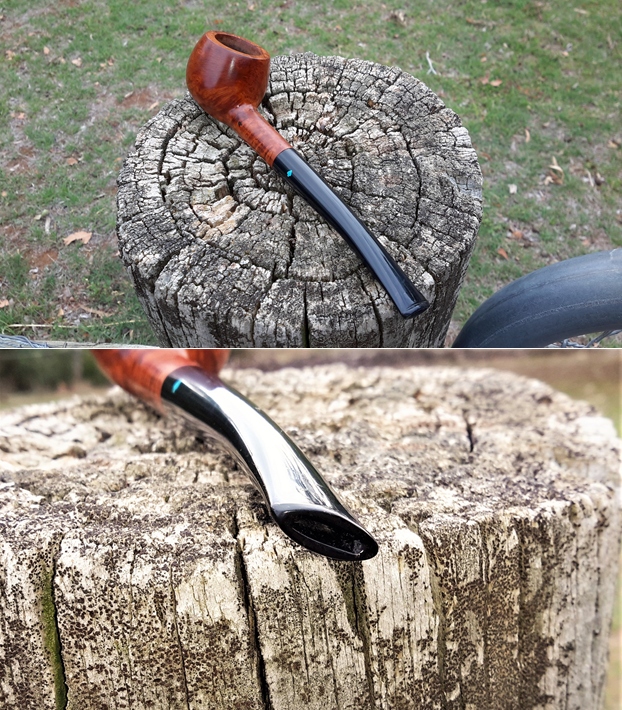
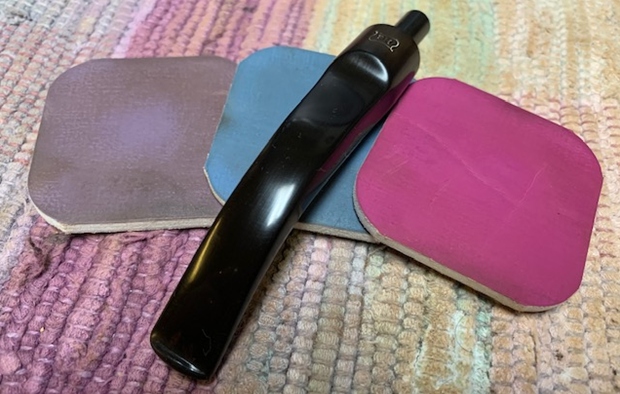
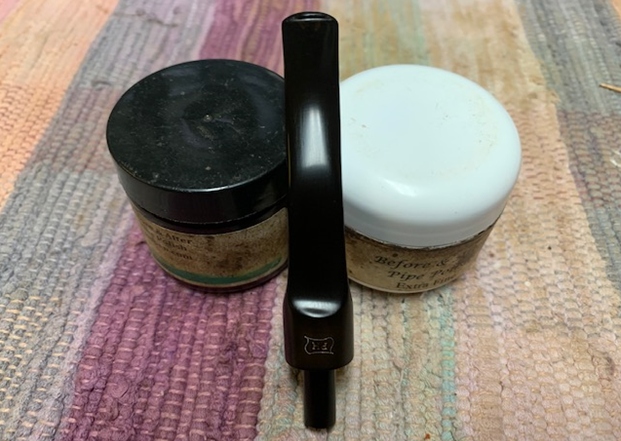
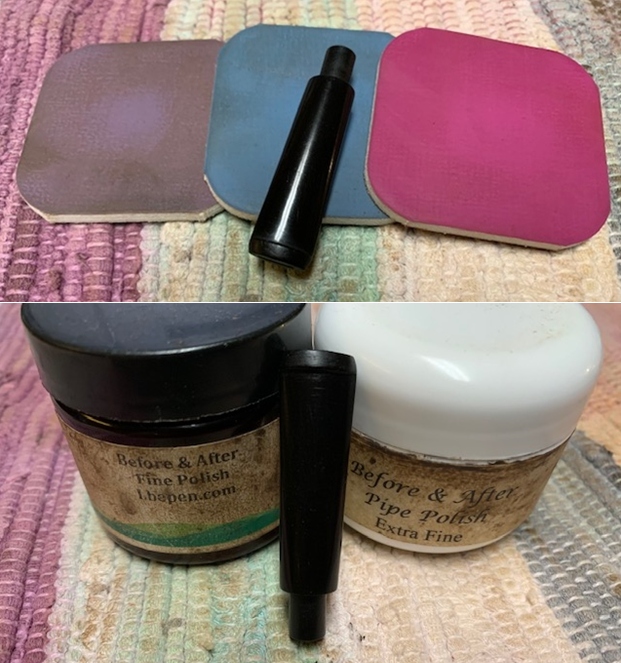
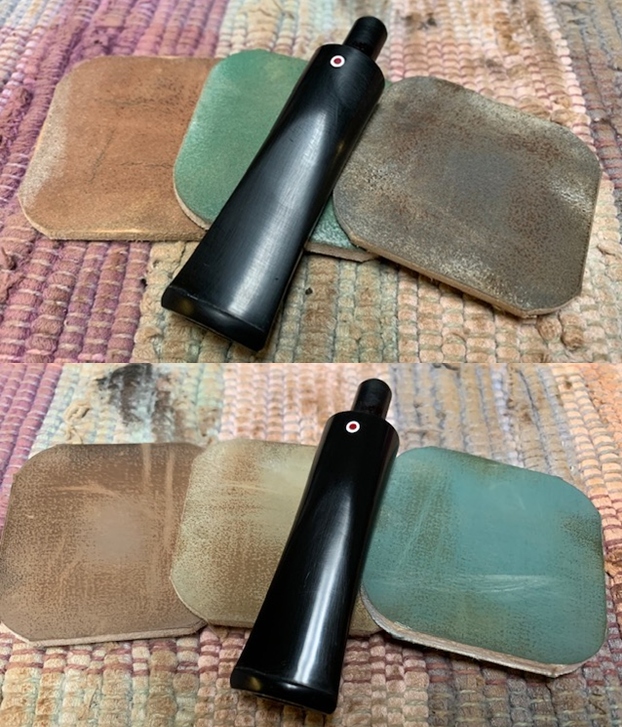
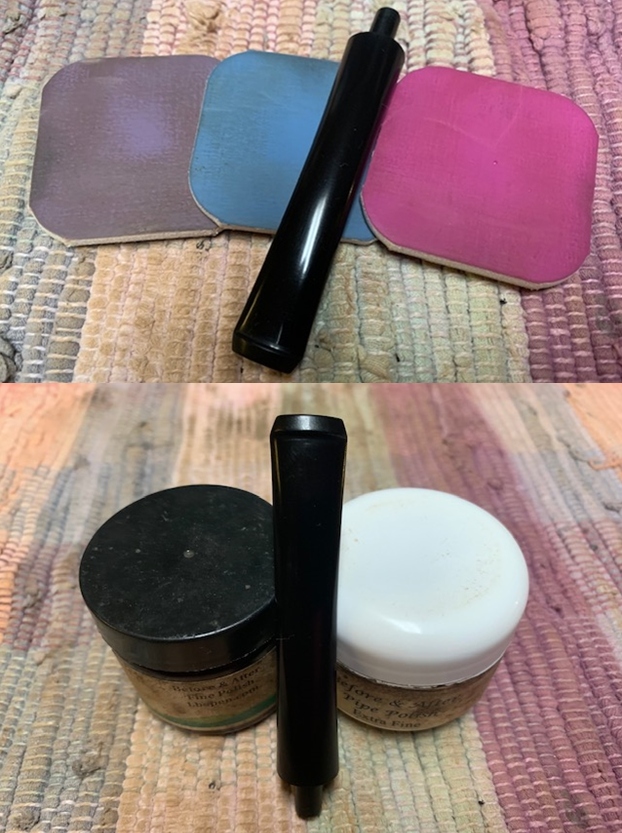
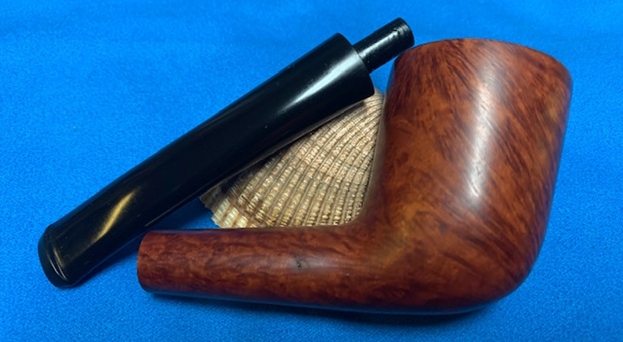
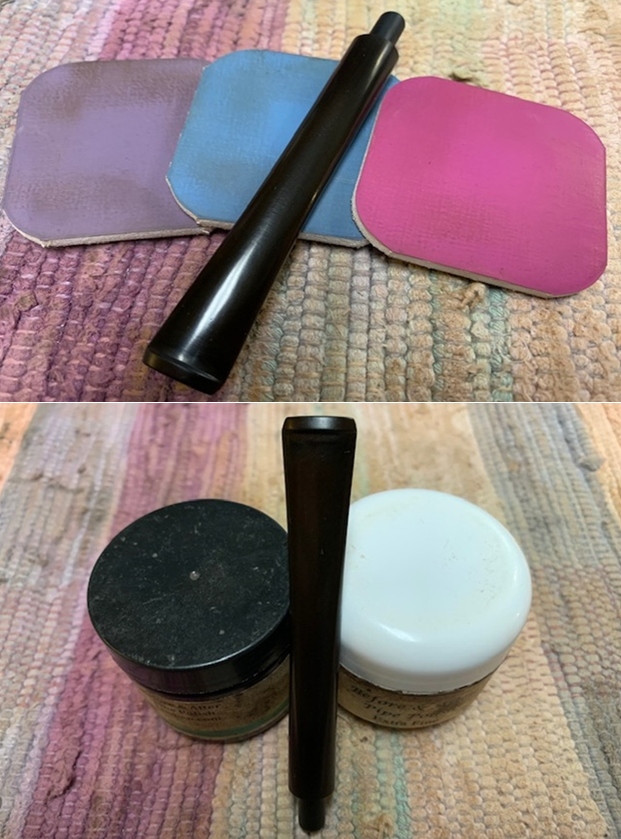
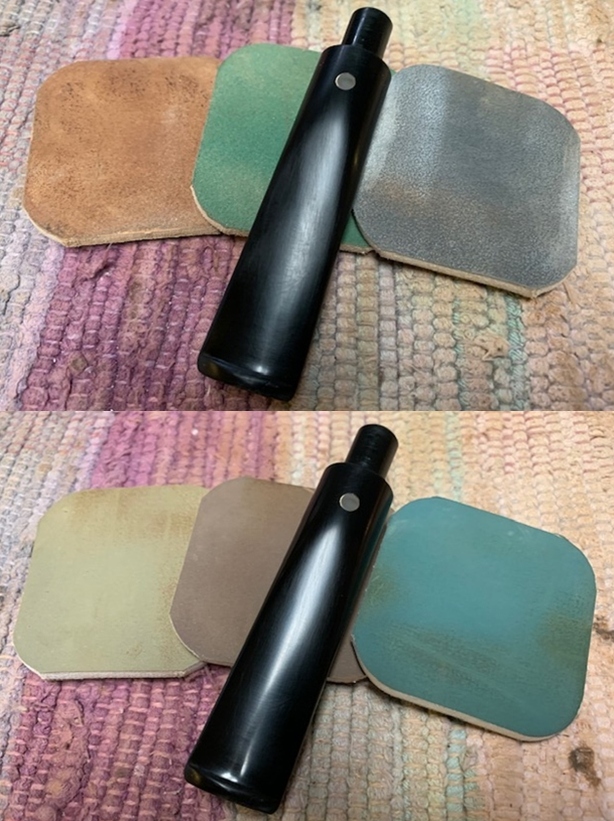
 To bring a deep shine to the vulcanite stem, I went through the complete set of micromesh pads, wet sanding with 1500 to 12000 grit sandpapers. I wiped the stem with moist cloth after each pad and rubbed it down with Extra Virgin Olive oil to rejuvenate the vulcanite. At the end of micromesh cycle, I polished the stem with “Before and After Fine & Extra Fine” paste. The finished stem is shown below.
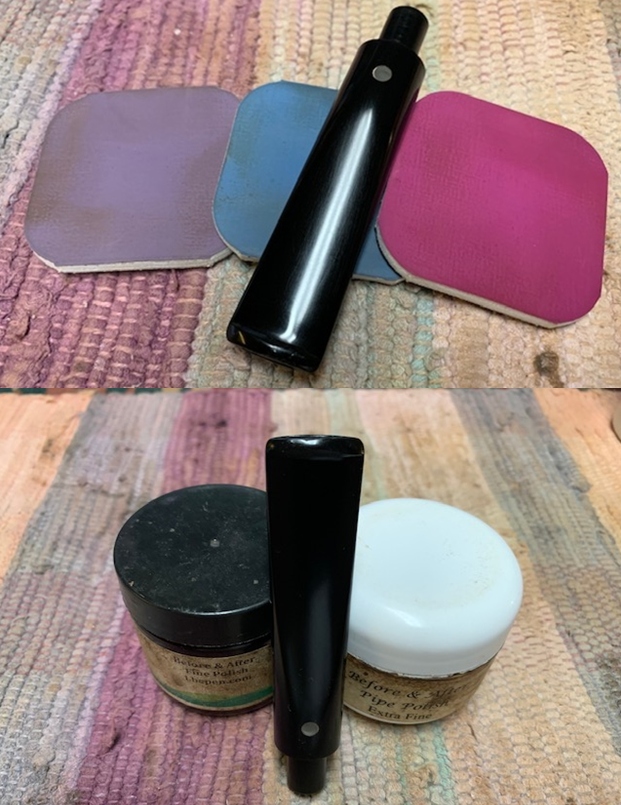
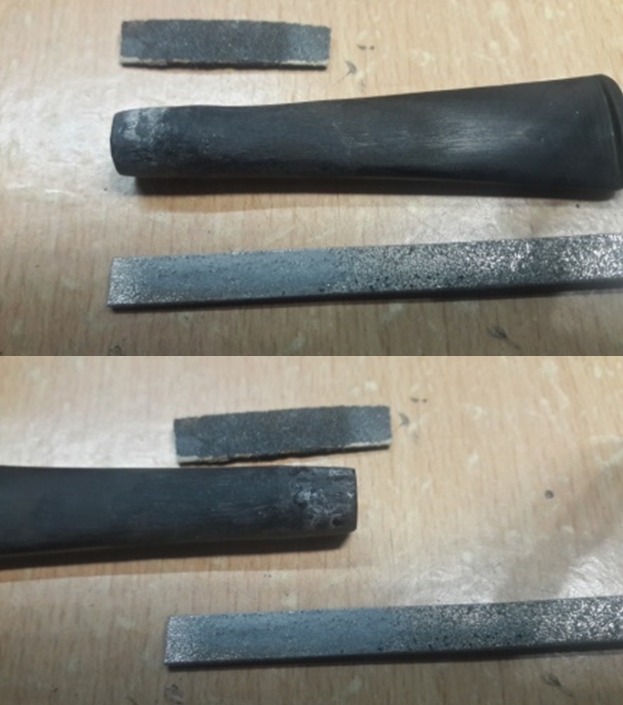
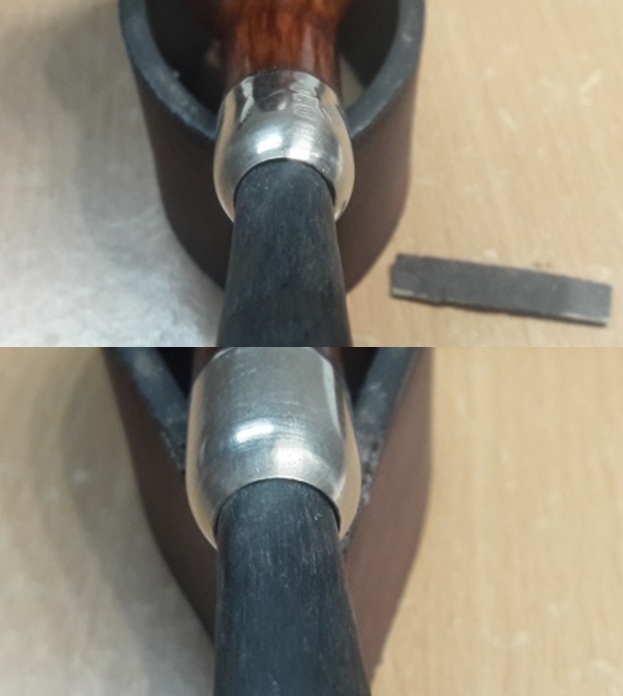
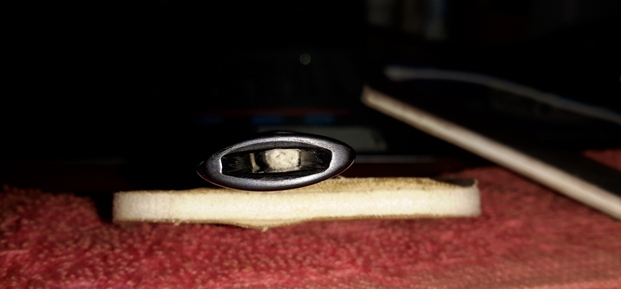
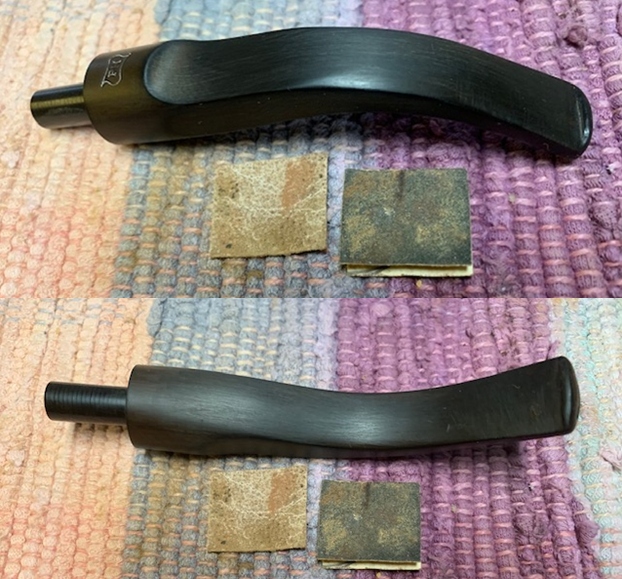
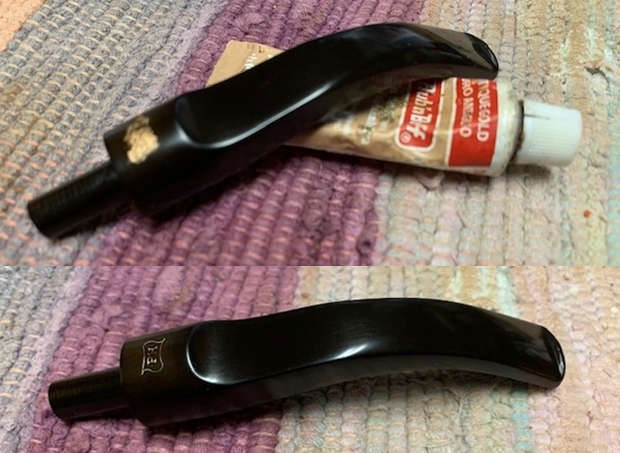
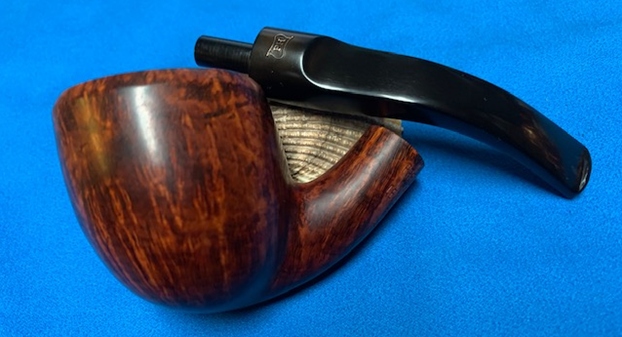
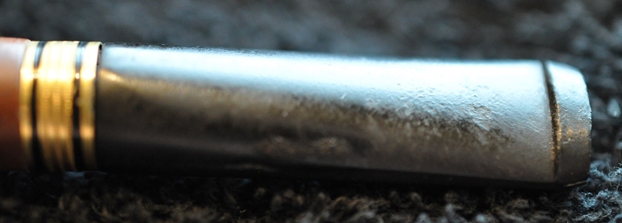
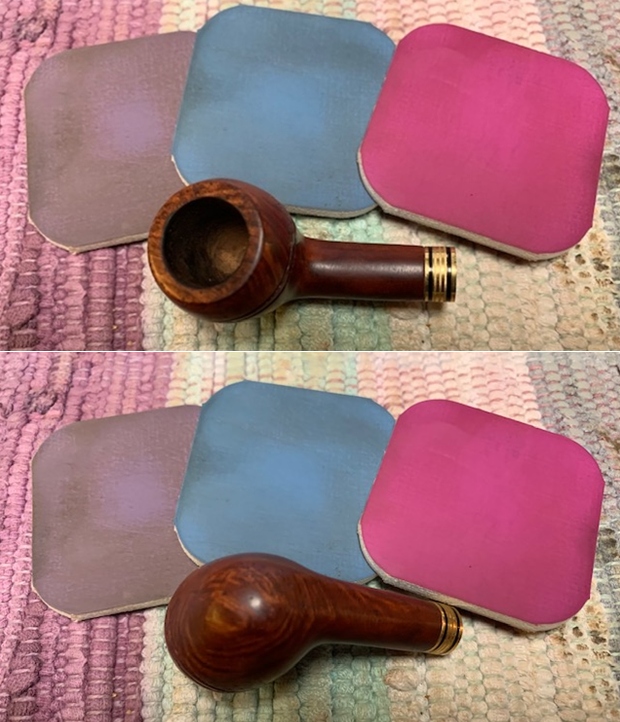
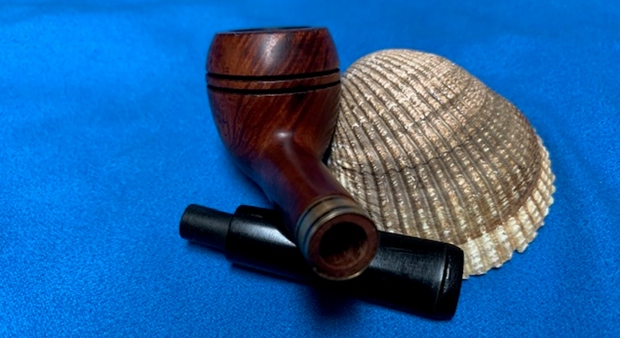
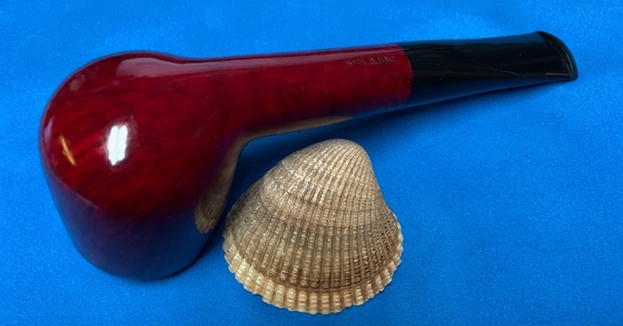
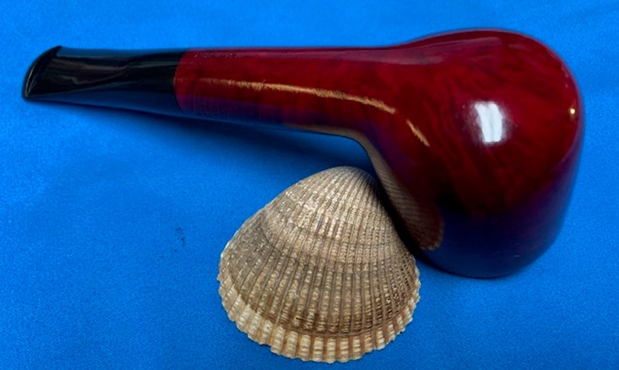
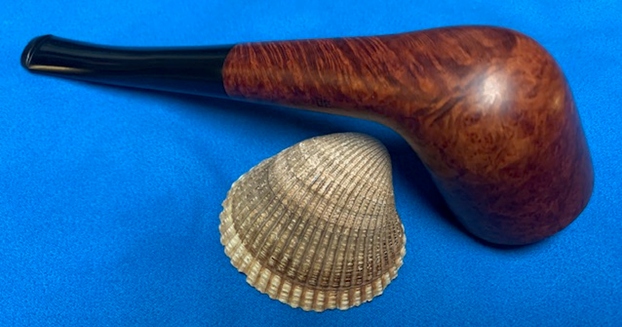
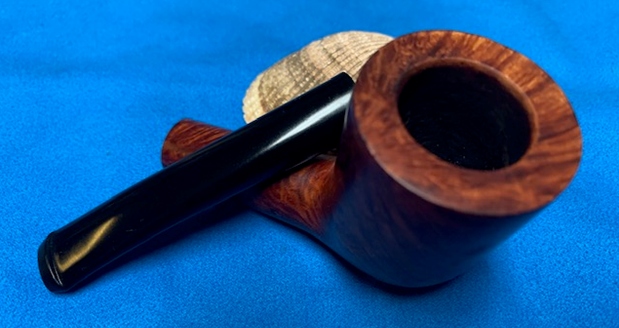
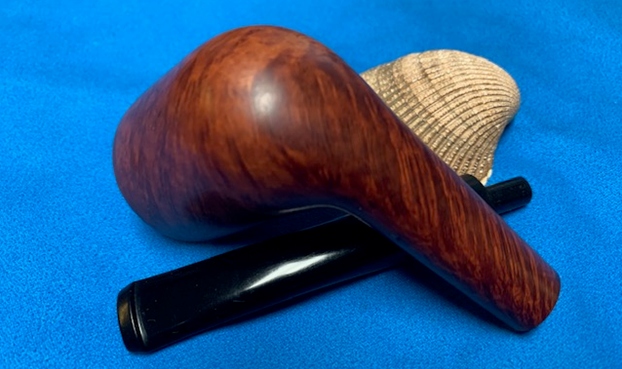
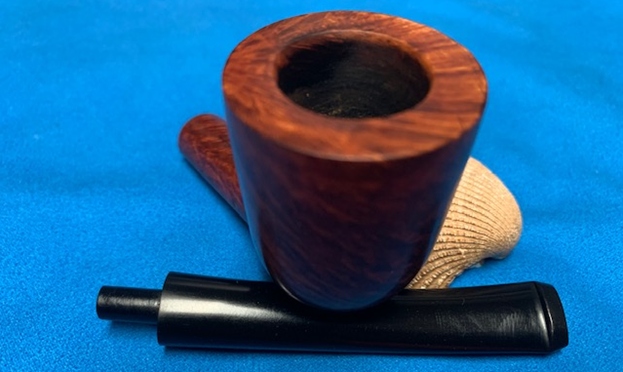
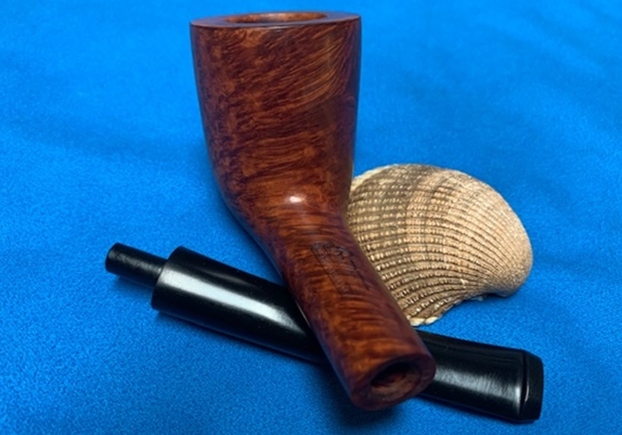
 For the readers to get a perspective of the stem transformation I am including the pictures below of the stem before the modifications to fit the shank were started. The gentle and seamless flare to the stem at the tenon end on both surfaces looks cool, akin to a Whale back!
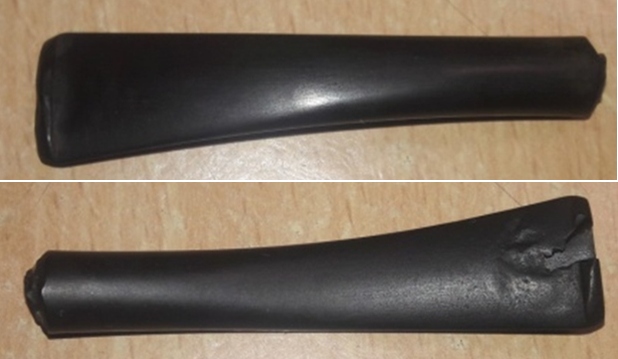 To check and verify the correctness of the alignment of the stem airway, the tenon opening, shank/ mortise airway and finally through the draught hole, I did the PIPE CLEANER test. The pipe cleaner passed through cleanly and without any obstruction from the slot end right through the draught hole.
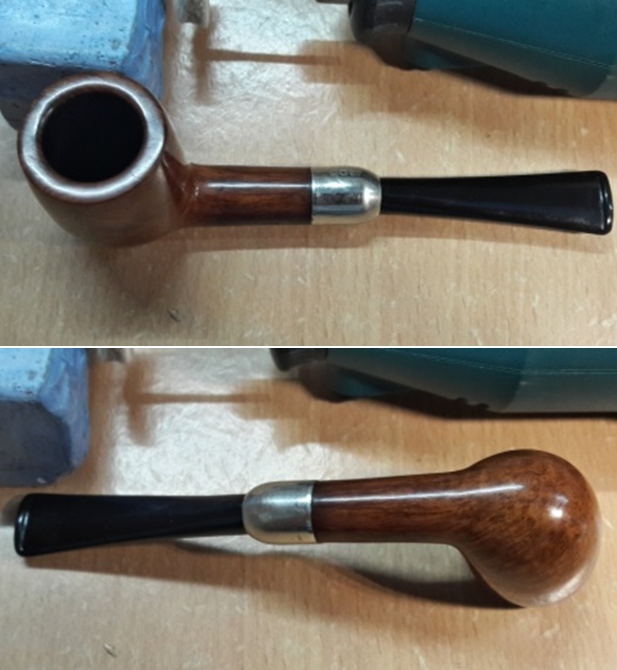
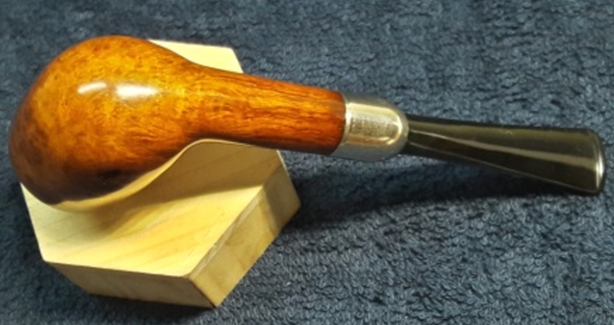
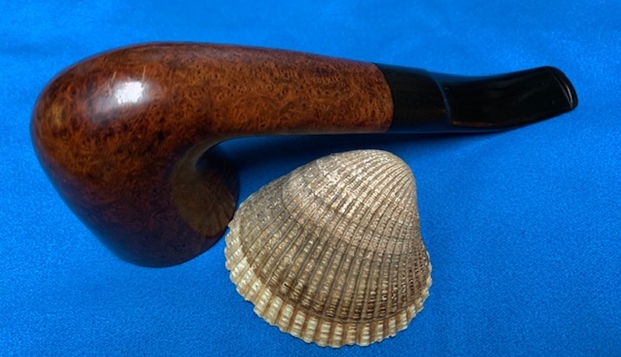
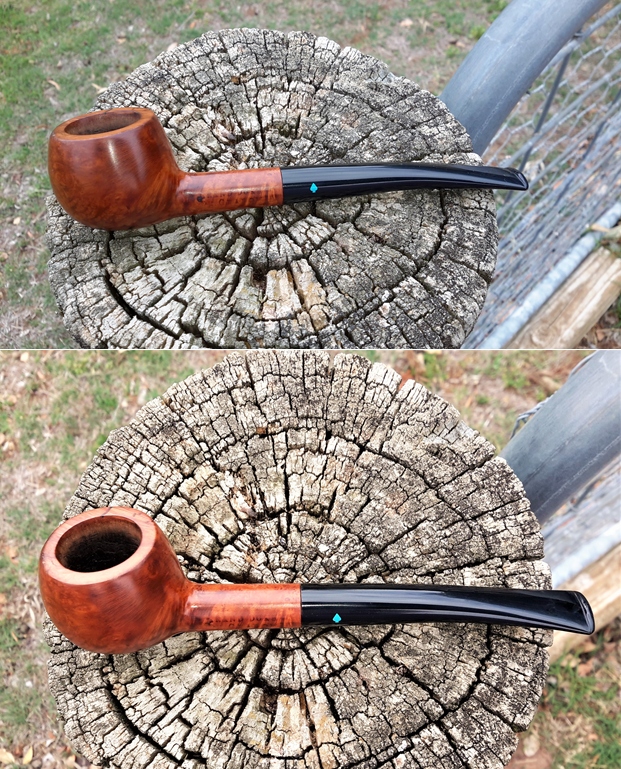
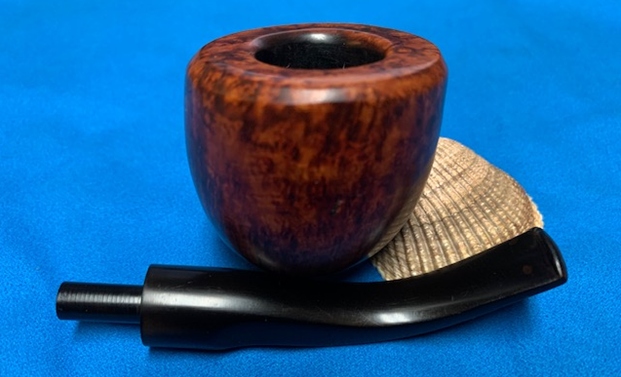
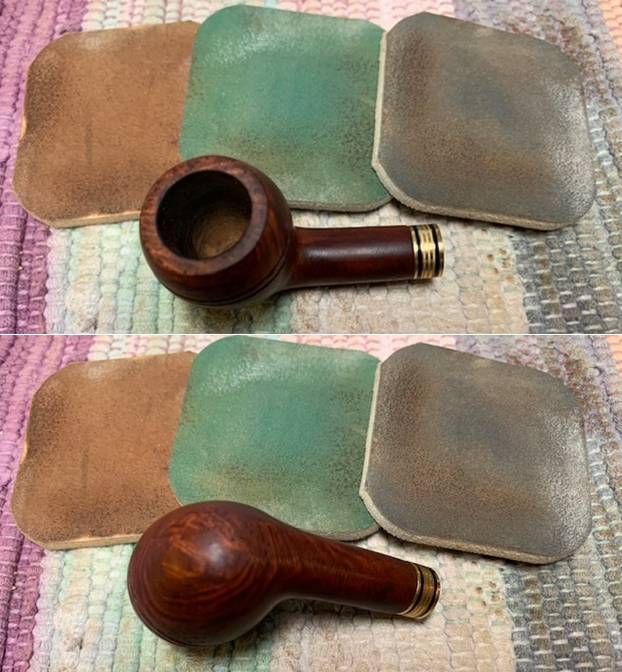
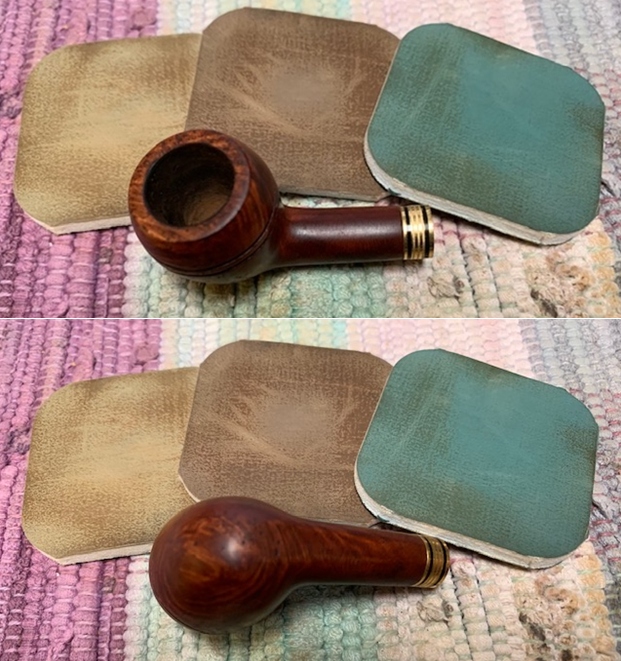
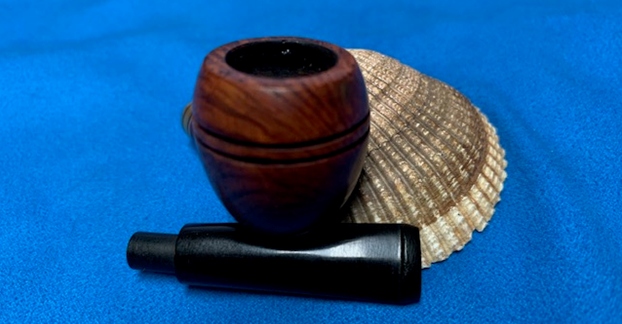
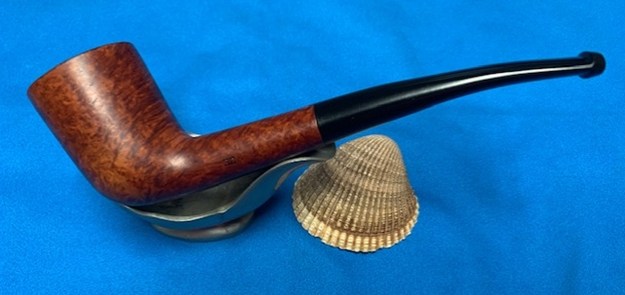
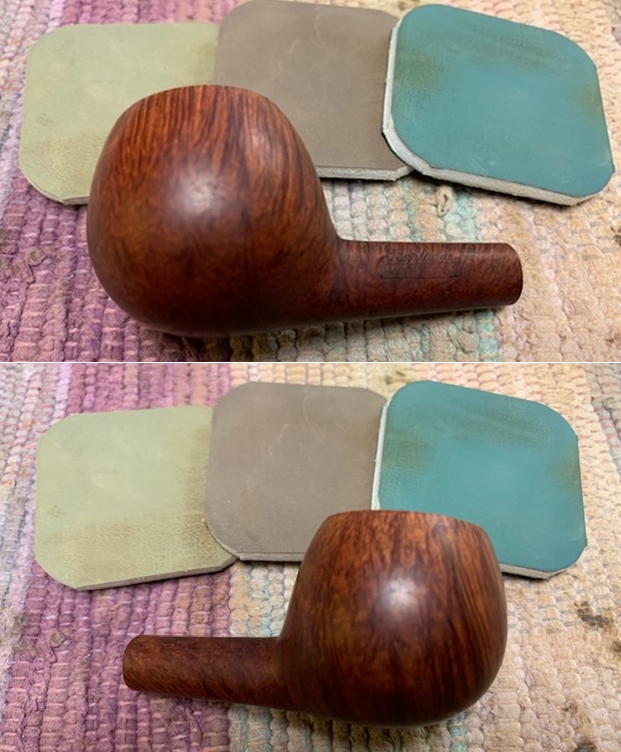
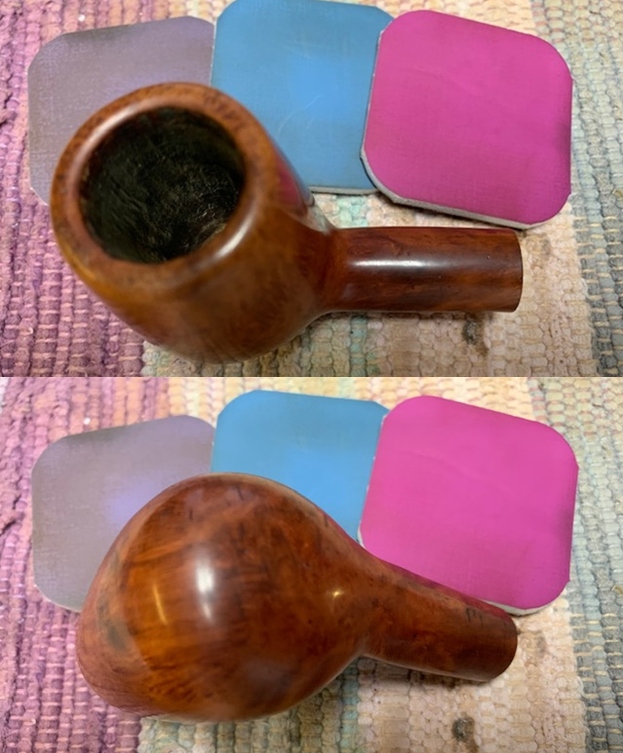
 With the stem repairs, transformations and micromesh polishing complete, I turned my attention back to the stummel which was yet to be polished with the micromesh grit pads. I wet sand the entire stummel with 1500 to 12000 grit micromesh pads, wiping frequently with a moist cloth to check the progress. I really like the looks of the stummel at this point in restoration. The grain and the clean lines of this piece of briar is really appreciable. The few scratches that were noticed over the stummel surface too have been addressed at this stage.
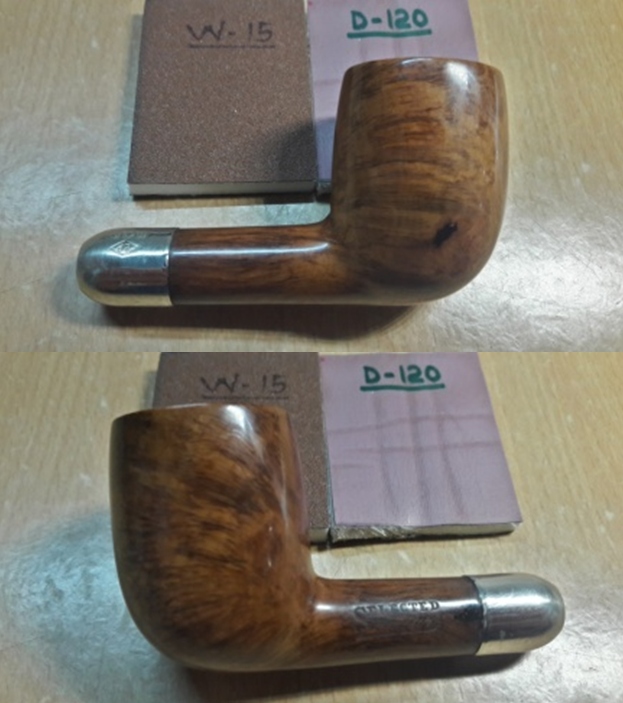
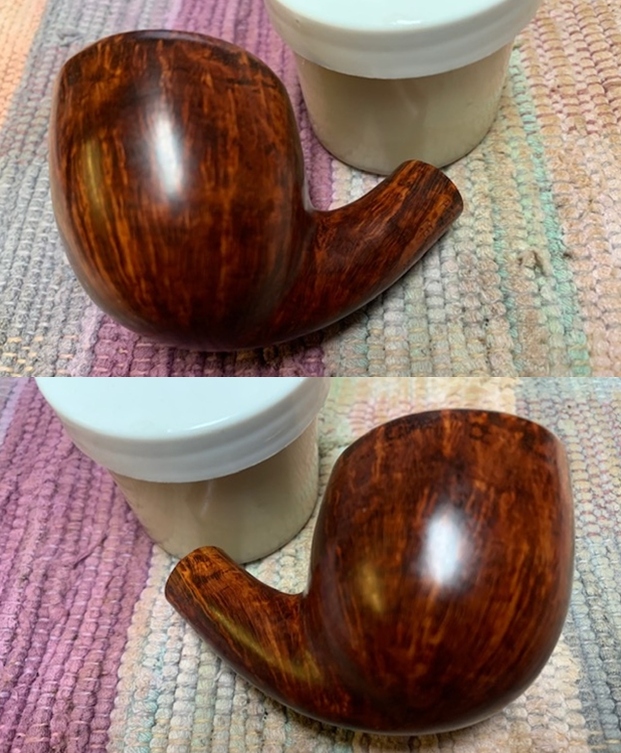
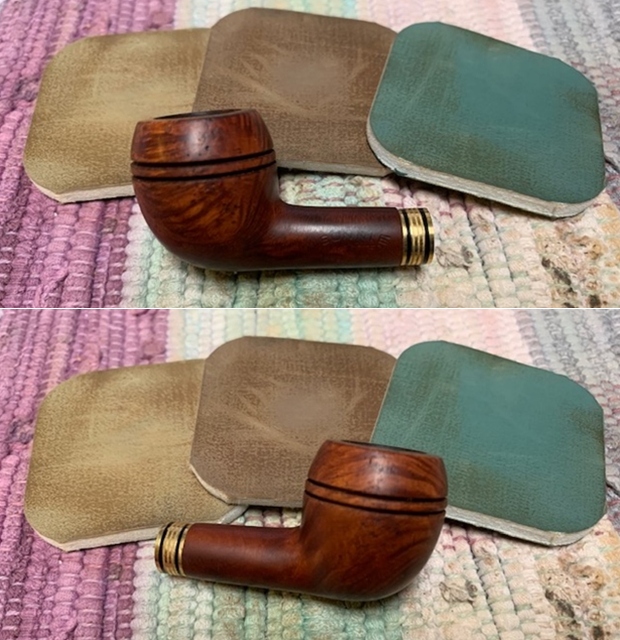
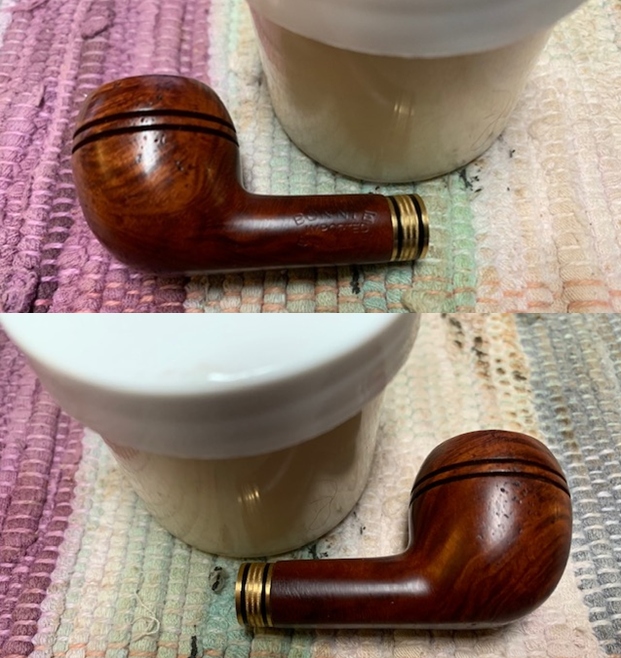
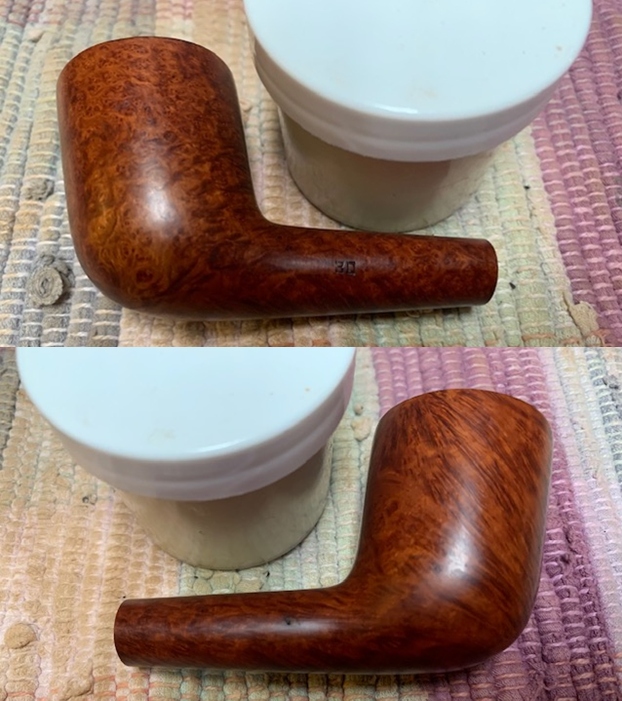
 Next, I rubbed a small quantity of “Before and After Restoration Balm” deep in to the briar with my finger tips and let it rest for a few minutes. The balm almost immediately works its magic and the briar now has a nice vibrant appearance with the beautiful grain patterns displayed in their complete splendor. I further buffed it with a horse hair brush. The contrast of the dark browns of the Bird’s eye and cross grains with the natural patina of the rest of the stummel adds an interesting dimension to the appearance of the stummel.
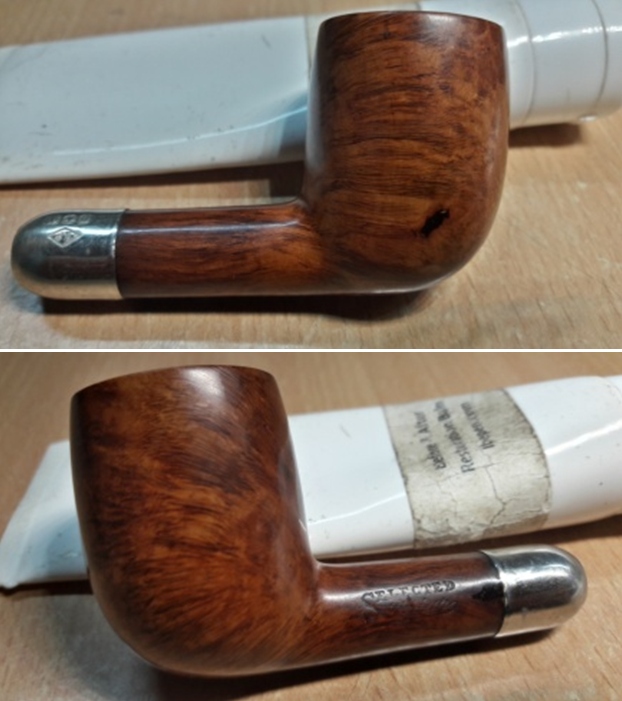
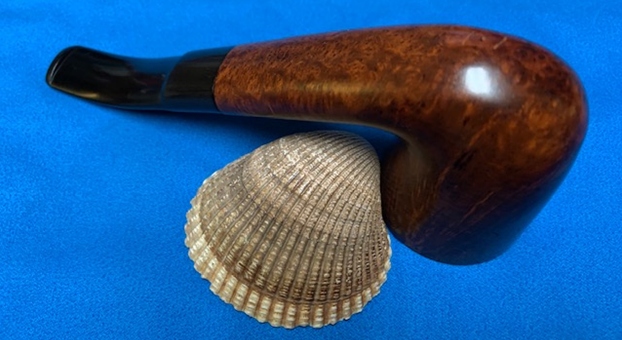
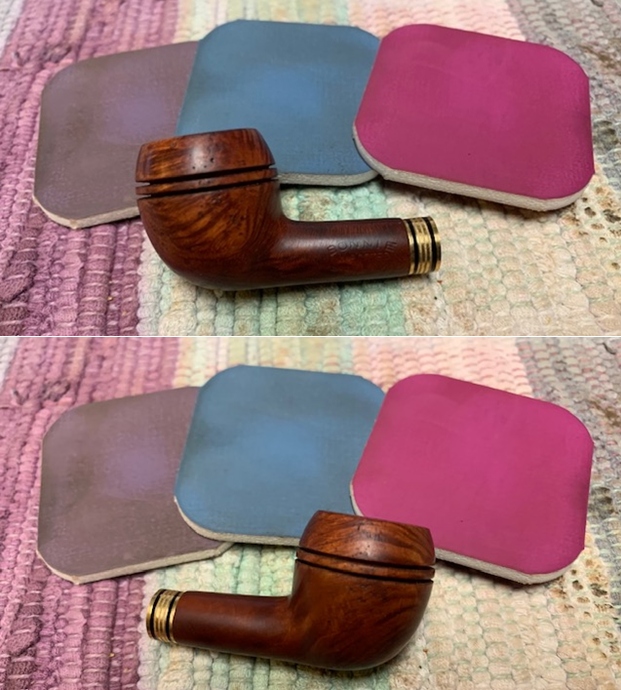
 I have now reached the homestretch in this restoration project. To complete the restoration, I mount a cotton cloth buffing wheel on to my hand held rotary tool and polished the stummel and stem with Blue Diamond compound. This compound helps to remove the minor scratch marks that remain from the sanding.
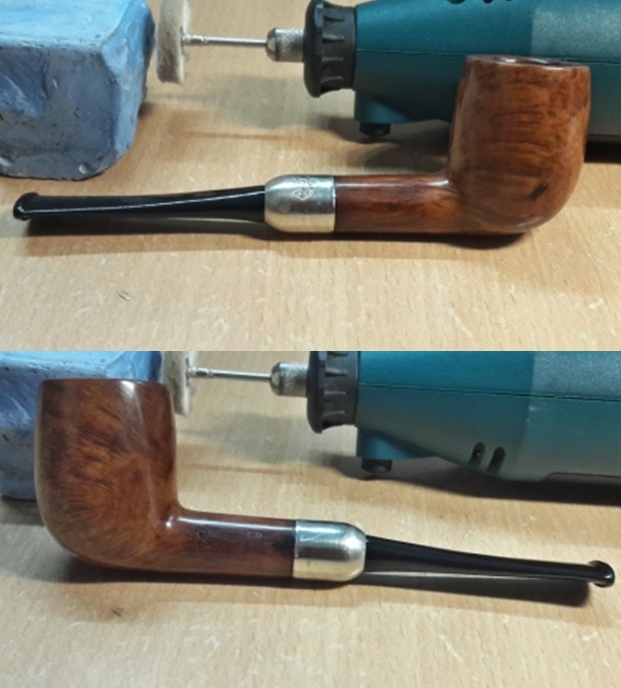
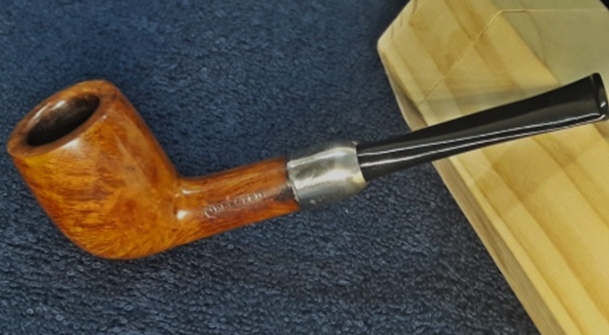
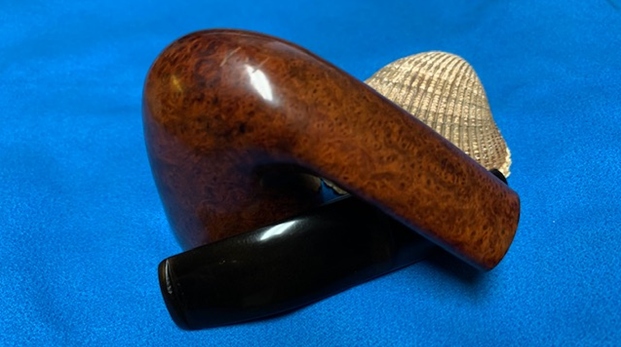
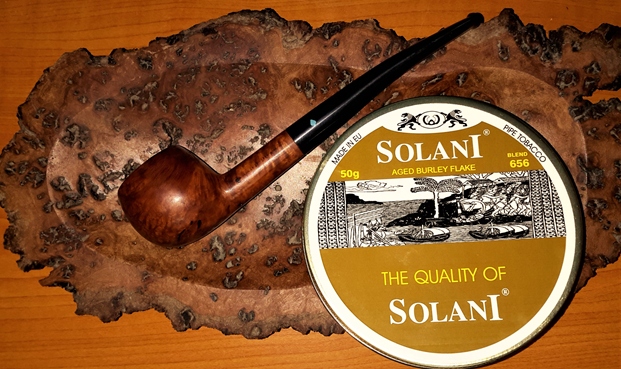
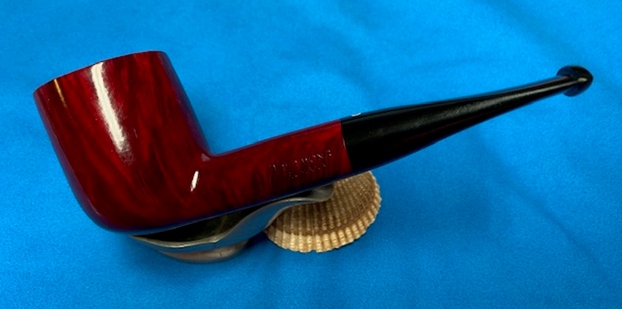
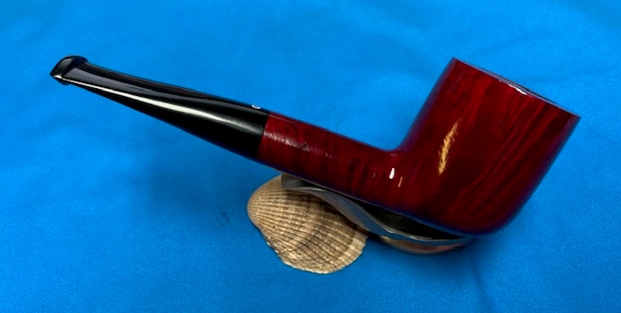
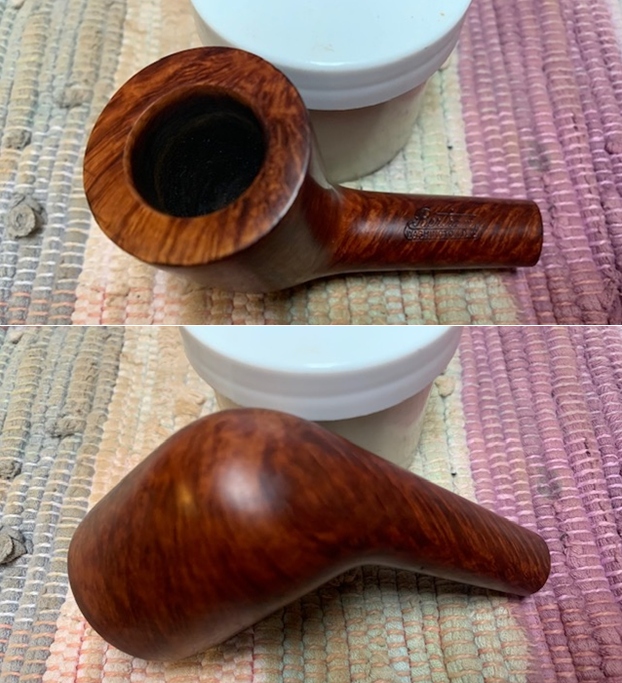
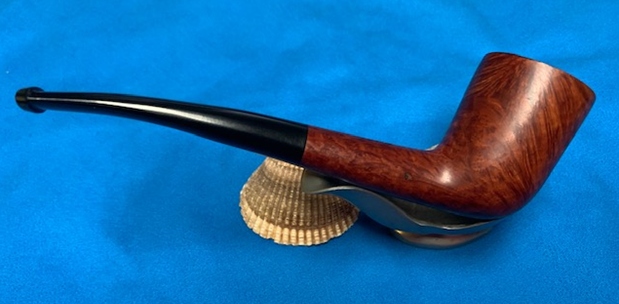
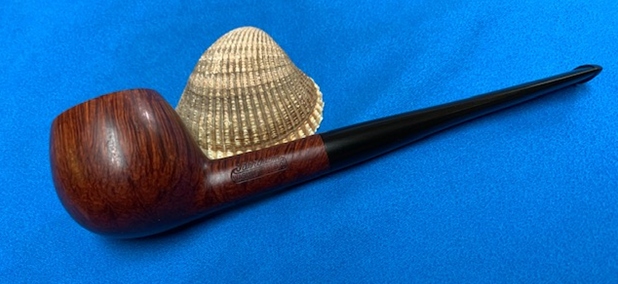
 I mounted another cotton buffing wheel that I have earmarked for carnauba wax and applied several coats of the wax. I finished the restoration by giving the entire pipe a rigorous hand buffing using a microfiber cloth to raise the shine further. With a jeweler’s cloth, I cleaned the nickel ferrule to a nice deep shine. The finished pipe looks amazingly beautiful and is ready to join my collection. I only wish it could share with me its life story of the past years while I enjoy smoking my favorite Virginia blend in it or maybe an English blend or maybe just keep admiring it!! Big thank you to all the readers who have joined me on this path by reading this write up as I restored and completed this project.
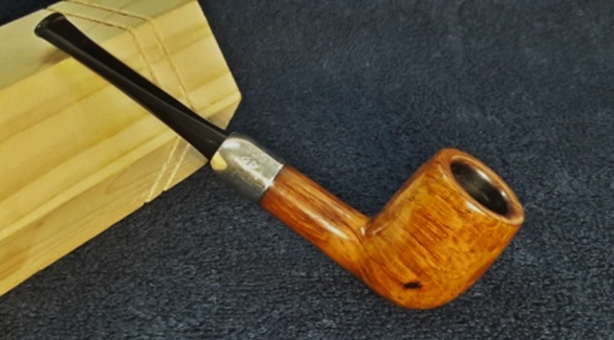


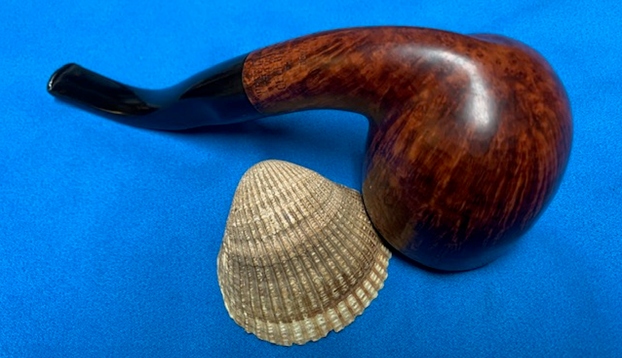
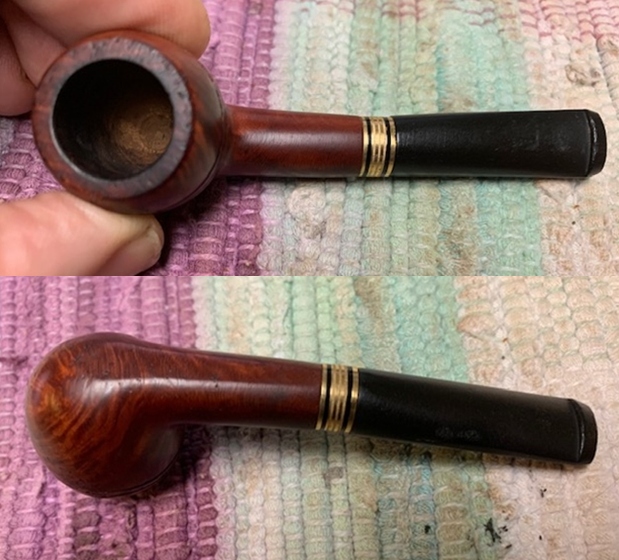
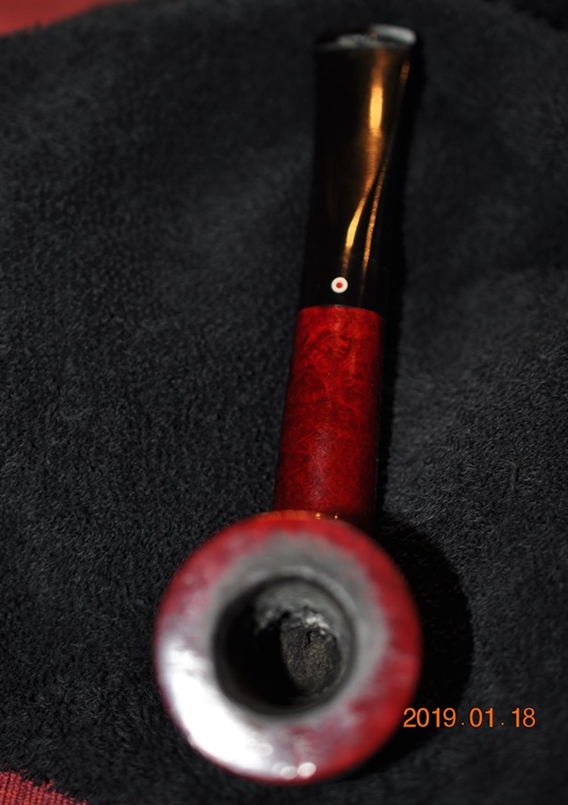
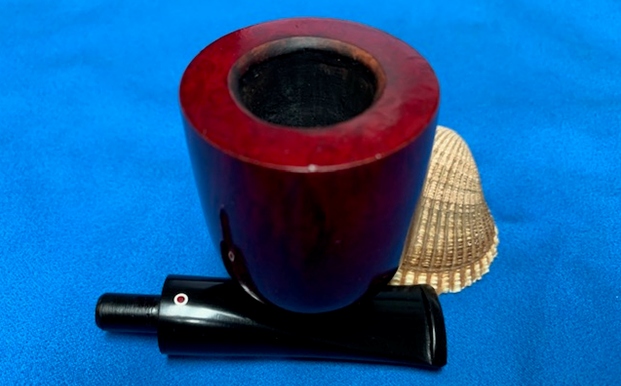
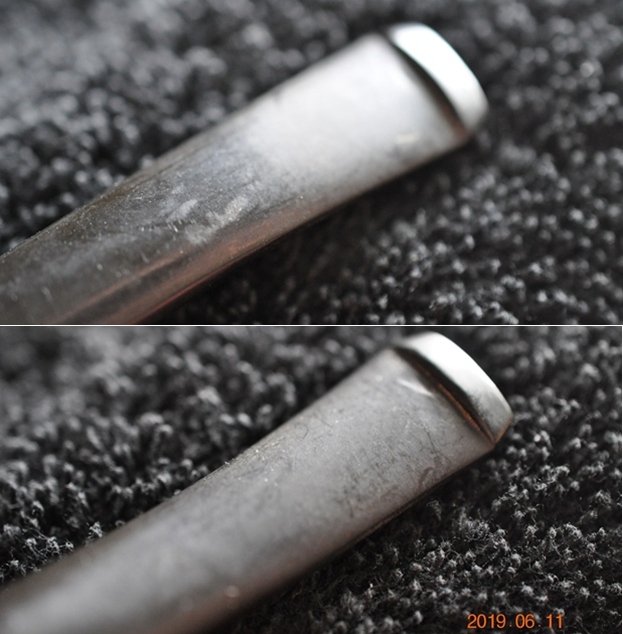
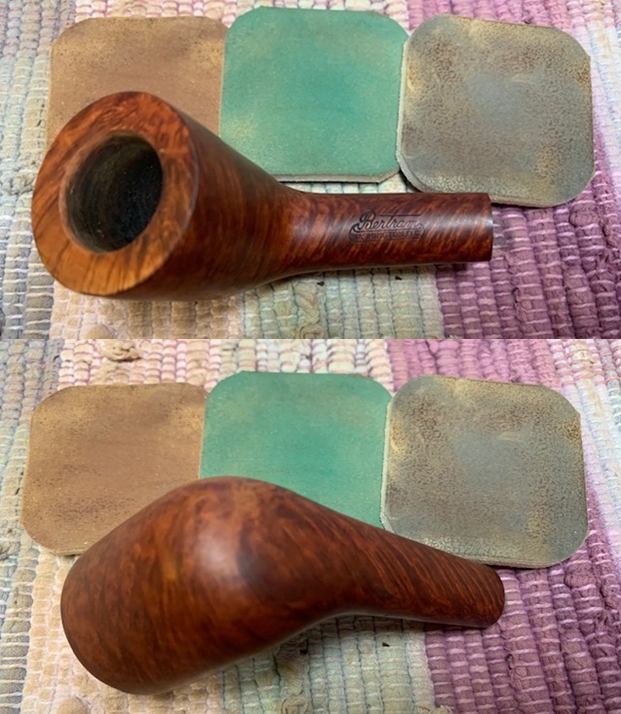
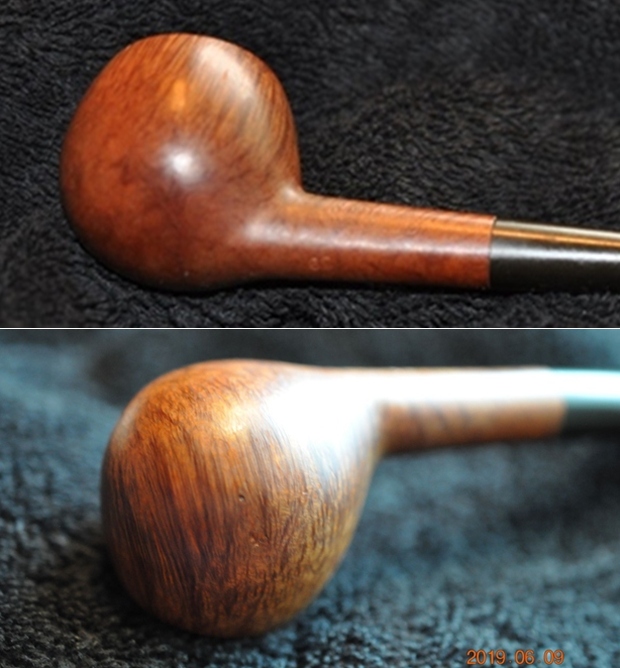
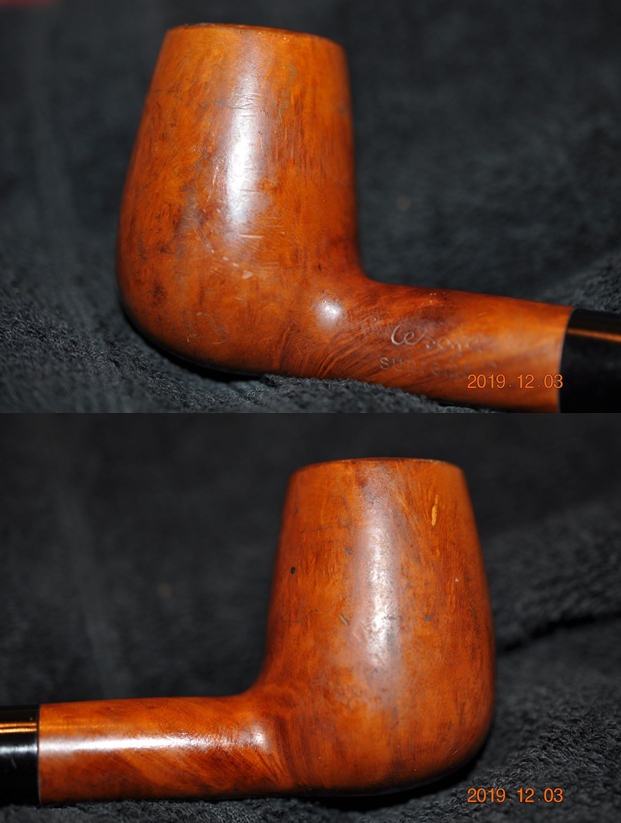
 He took photos of the rim top to show the cake and the light lava coat. It is another dirty pipe. He also captured the shape of the stem and the deep tooth marks and chatter on the top and underside of the stem near the button.

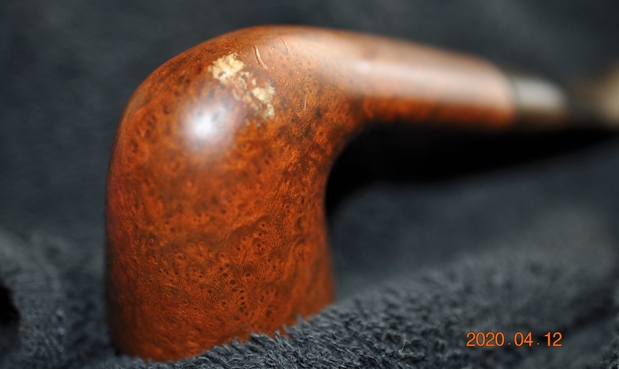
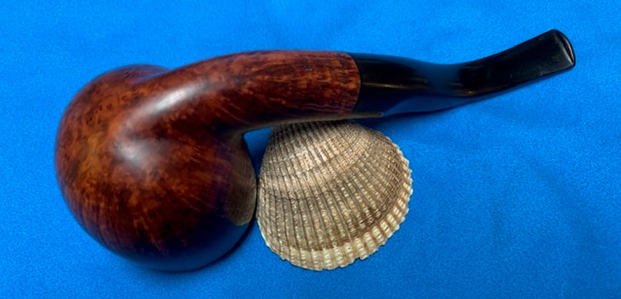
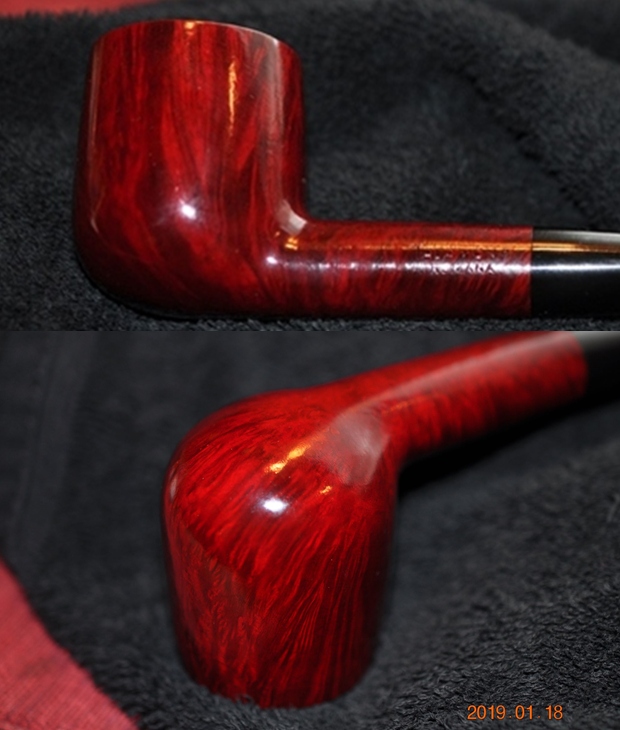
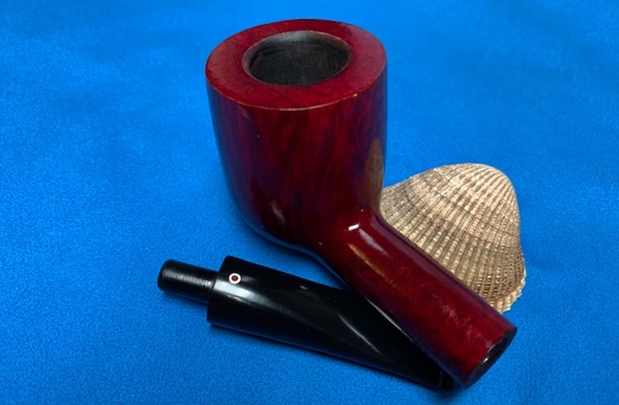
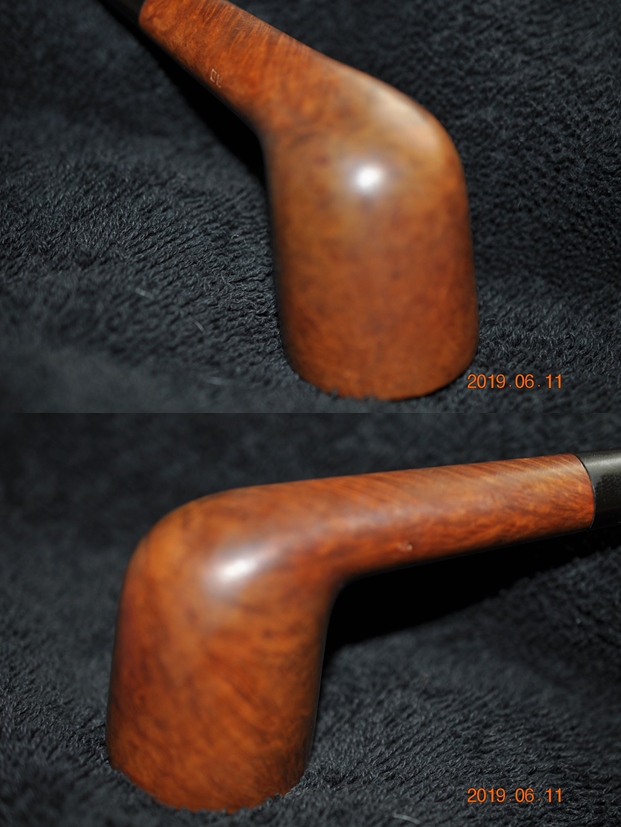
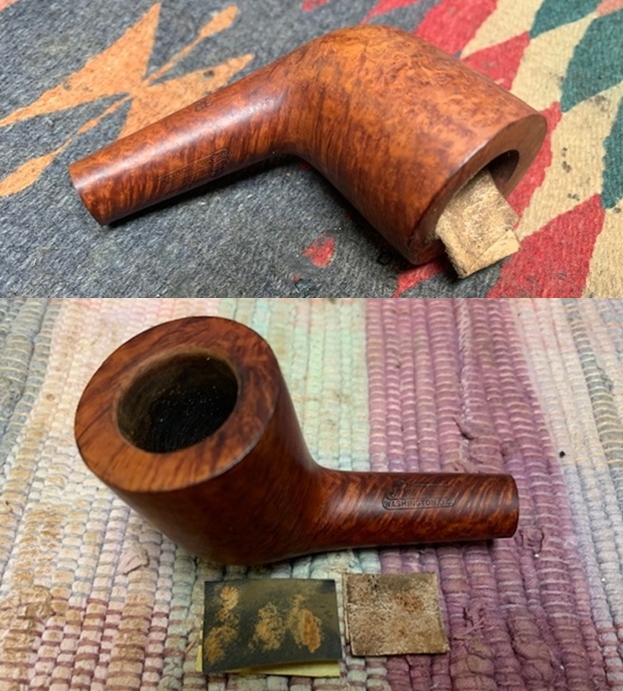
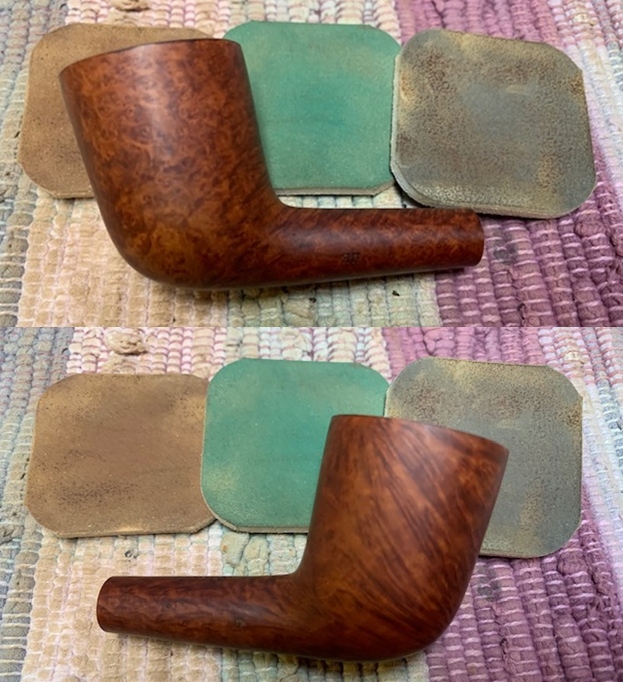
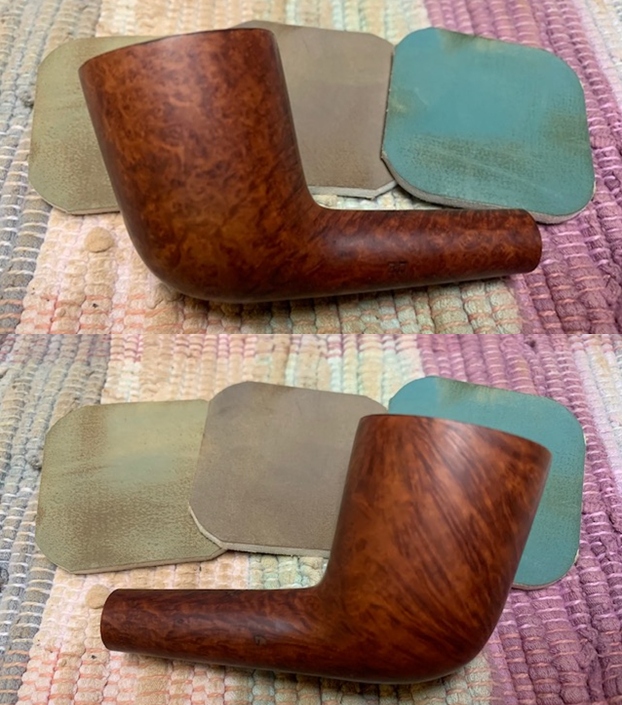
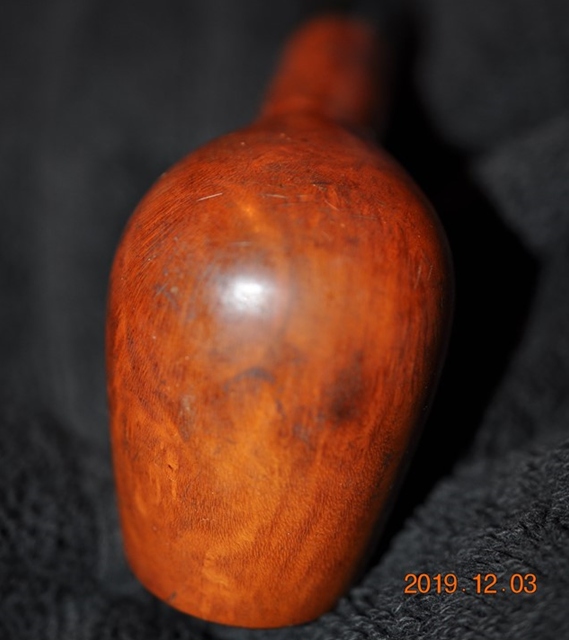
 He took photos of the sides and heel of the bowl to show the beautiful grain around the bowl and the amount of grime ground into the surface of the briar.
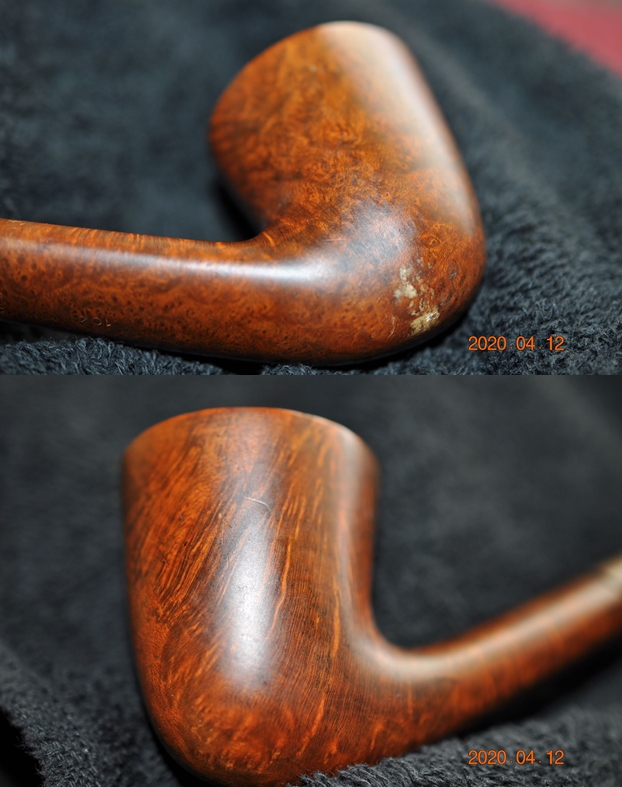
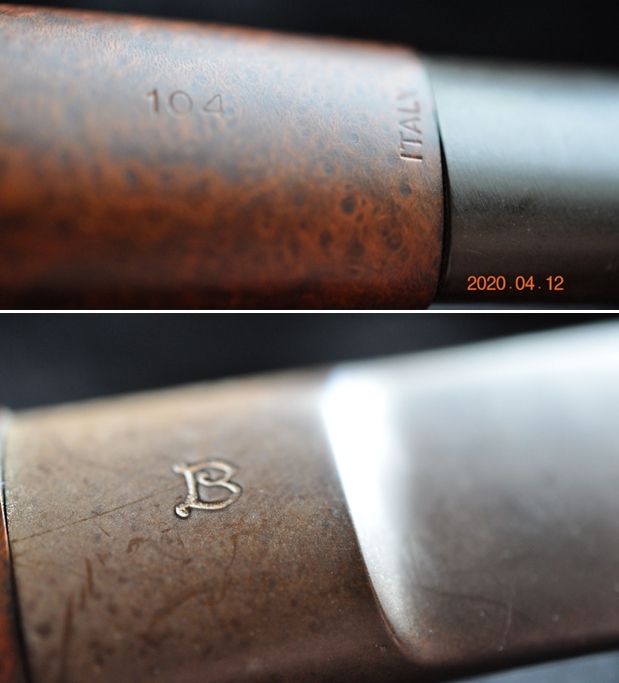
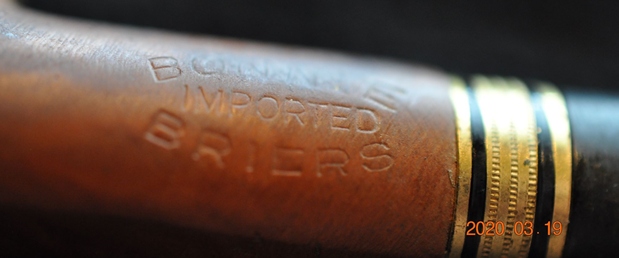
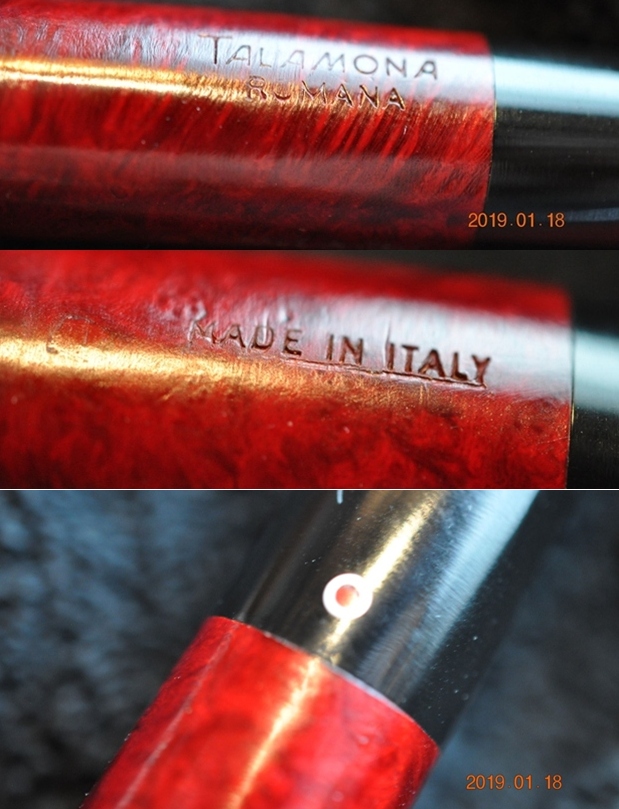
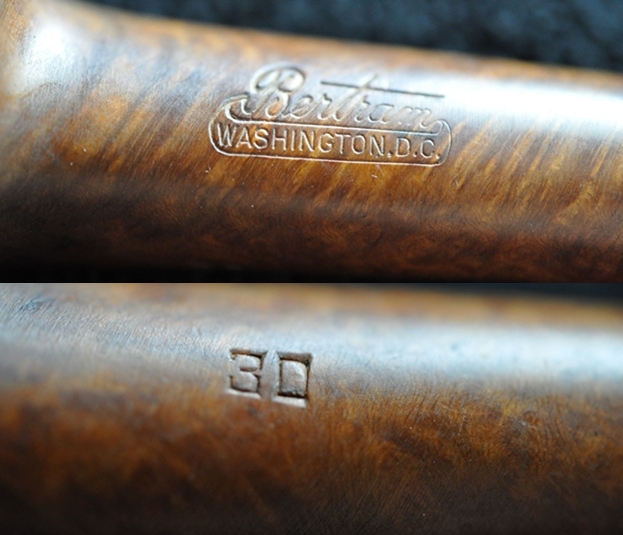
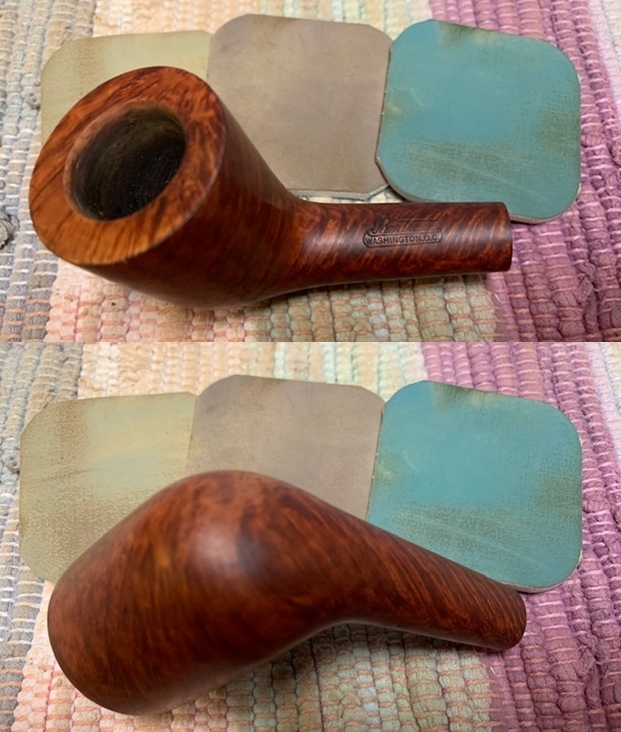
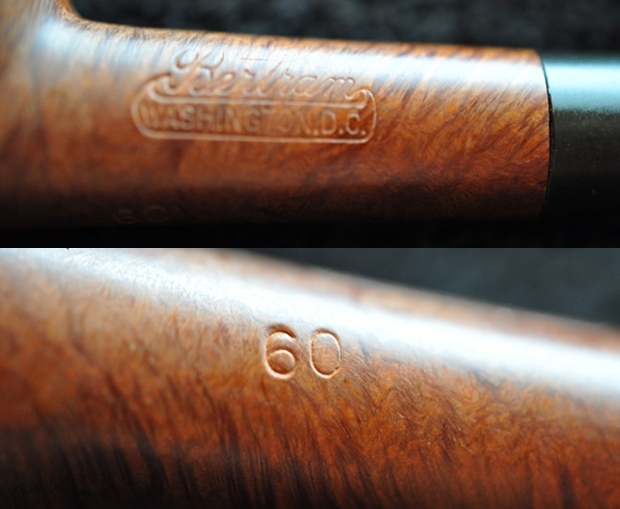
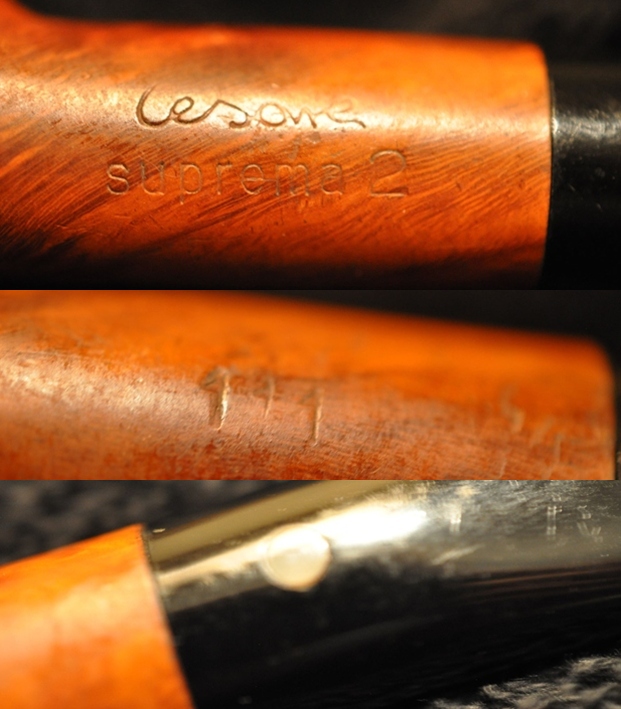
 He took a photo of the stamping on the top and underside of the shank and it is clear and readable as noted above. The B on the stem top is also readable.
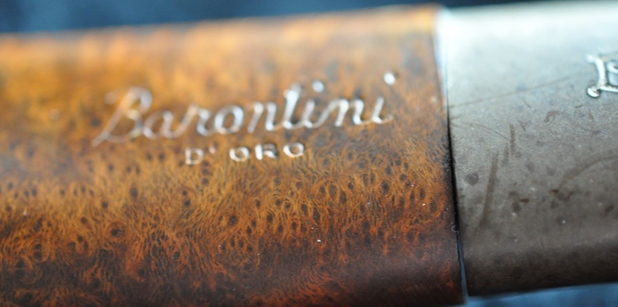
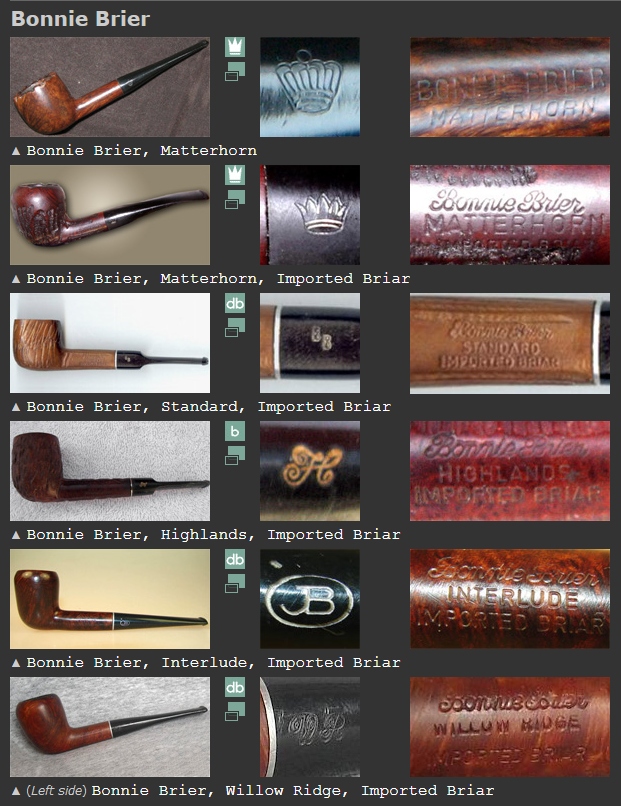
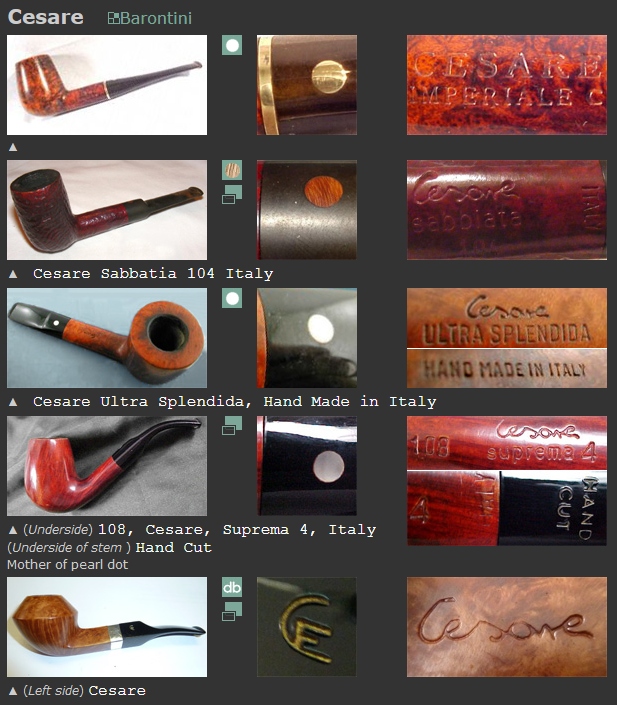
 I turned to Pipephil to get a quick overview of the brand (http://www.pipephil.eu/logos/en/logo-b2.html). I remembered the connection to the Cesare brand pipe that I had worked on recently. The Barontini’s are carved by Cesare.
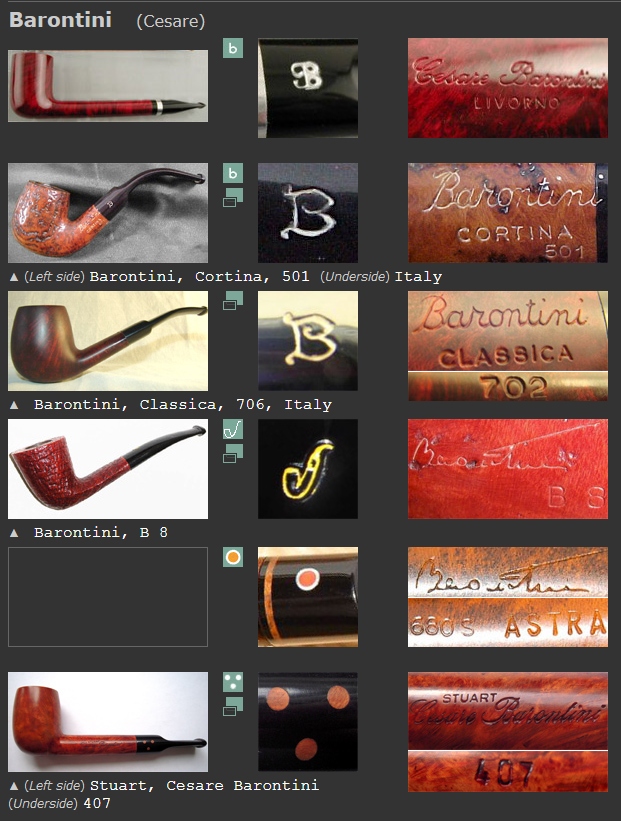 I then turned to Pipedia for a bit more history (https://pipedia.org/wiki/Barontini,_Cesare. I quote below:
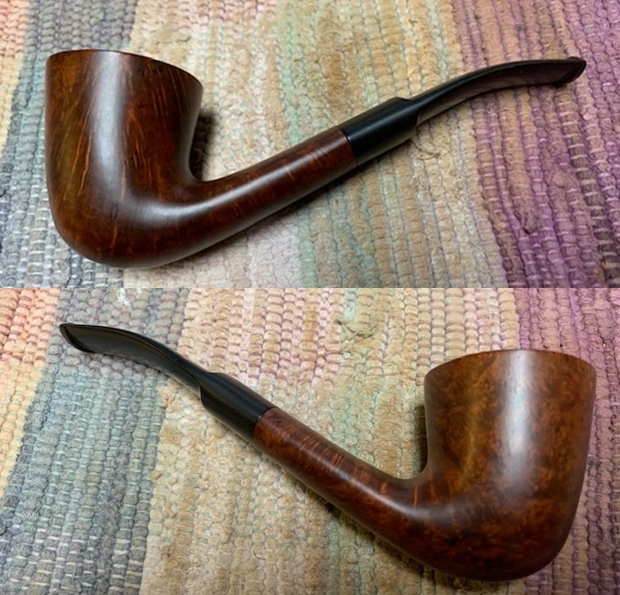
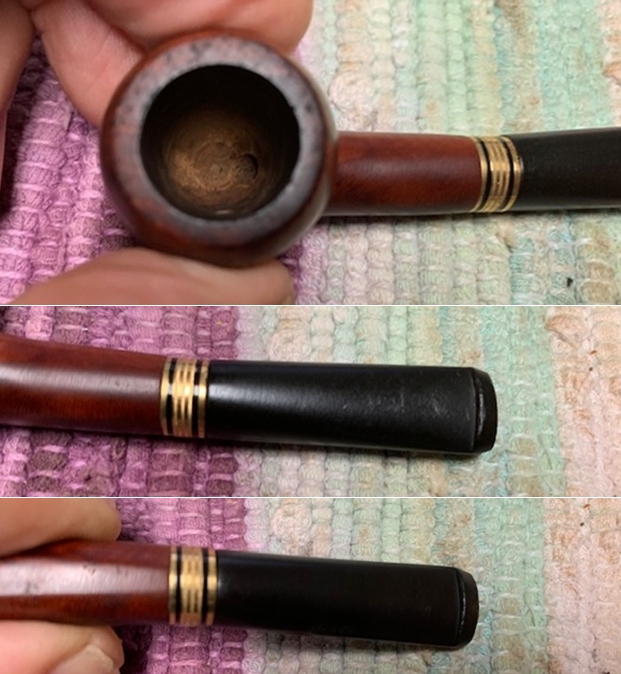
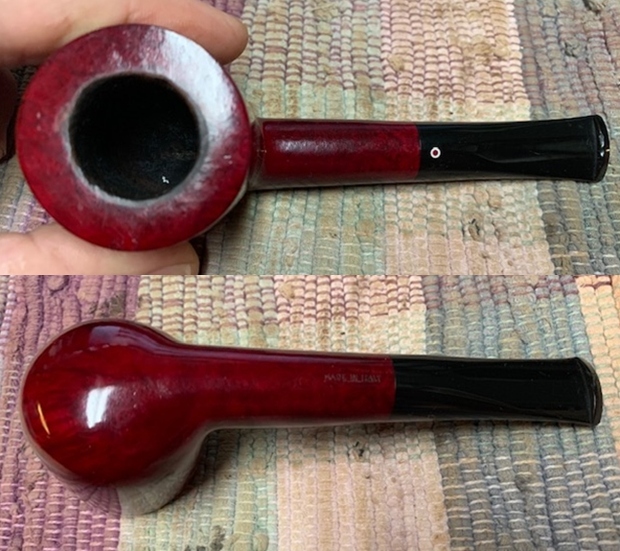
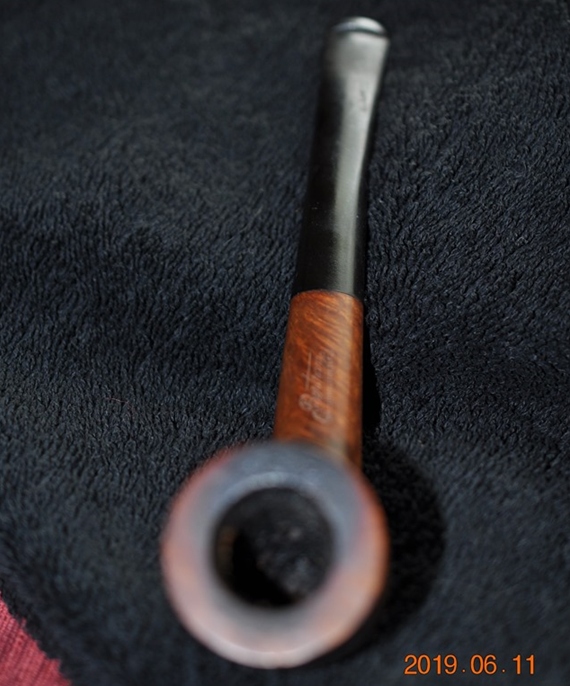
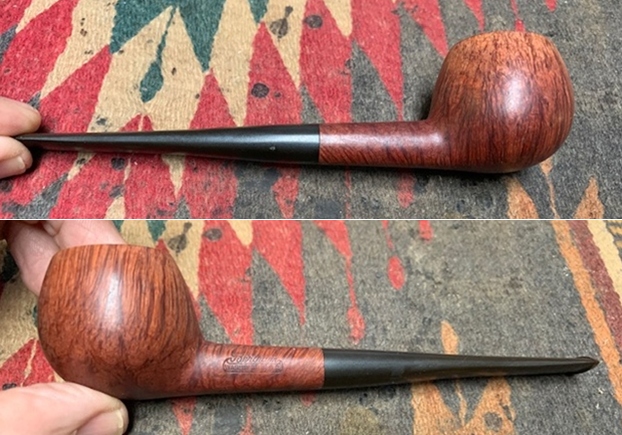
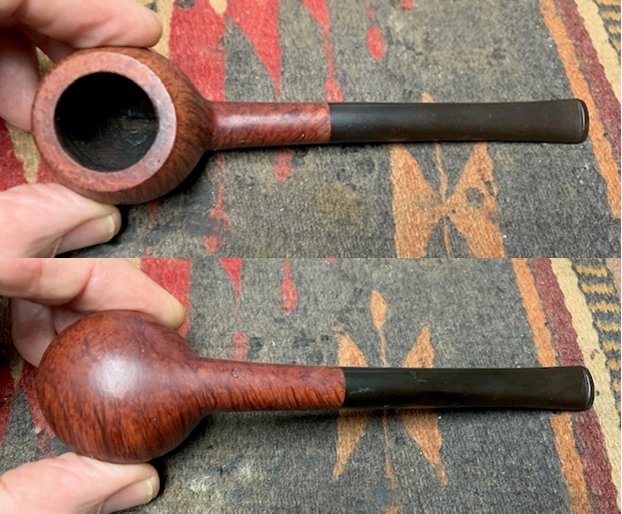
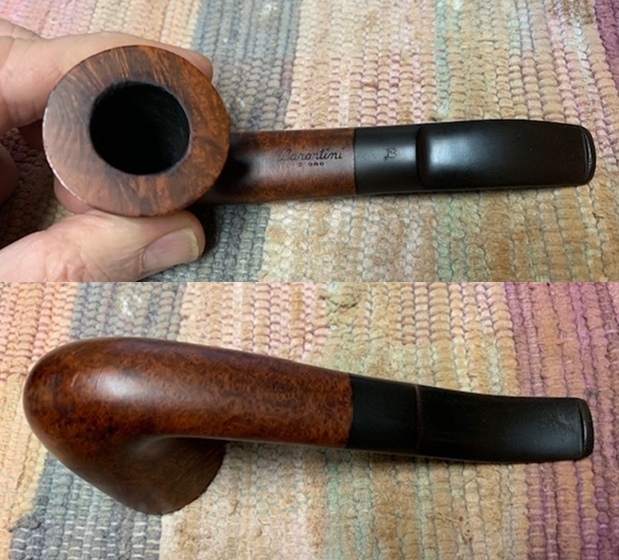 I took a photo of the rim top and stem to show the condition. They cleaned up really well and the top of the rim looked very good. The inner edge of the bowl showed chipping and burn damage all around. The vulcanite saddle stem had light tooth chatter and marks on both sides ahead of the button and on the button edges.
 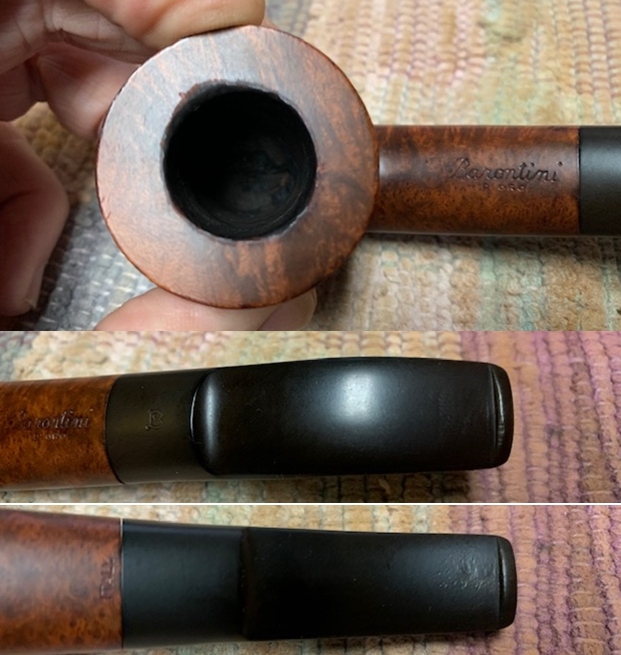 I took a photo of the stamping on the top and underside of the shank. It read as noted above.
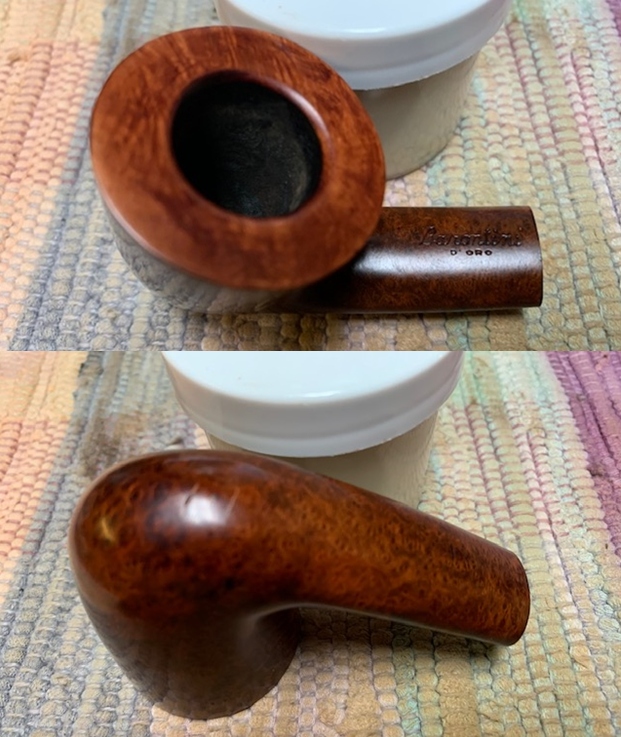
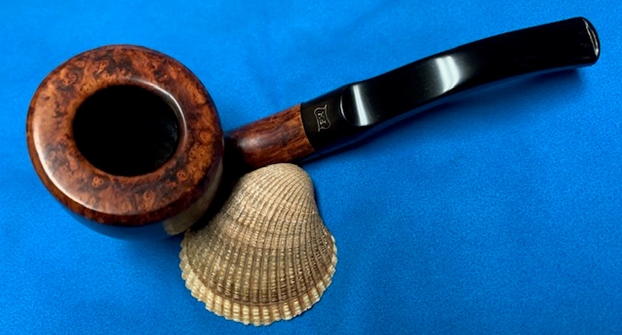
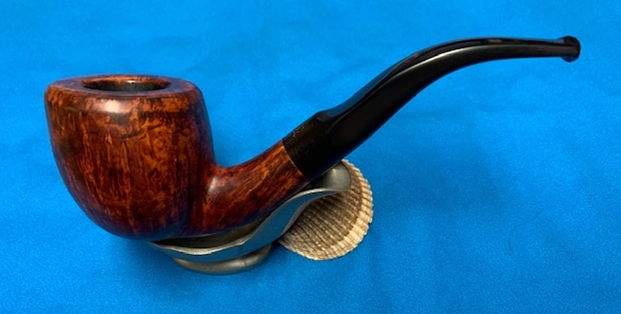
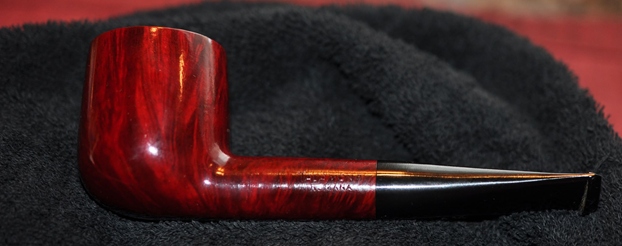
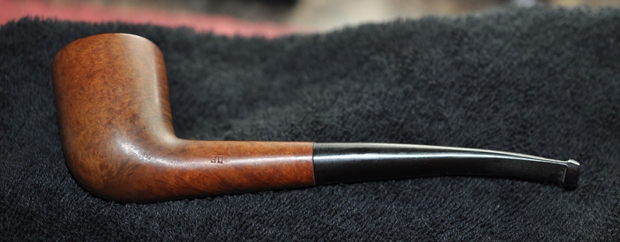
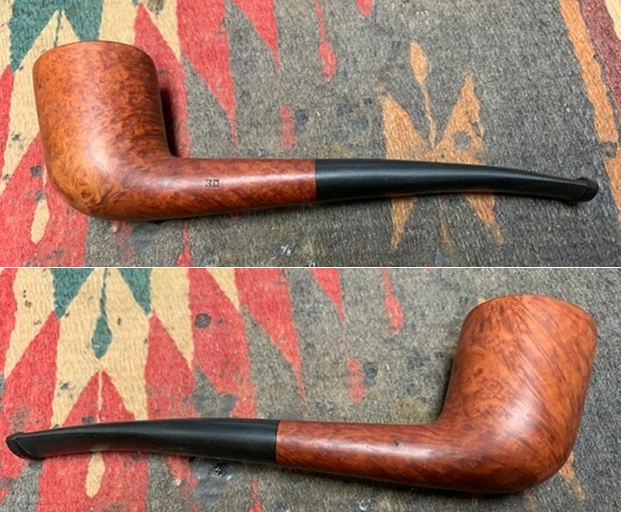
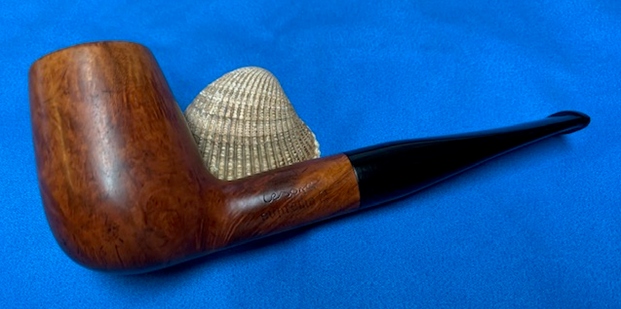
  I removed the stem and took a photo of the pipe to give a sense of the whole. It is a well shaped Author that looks great.
 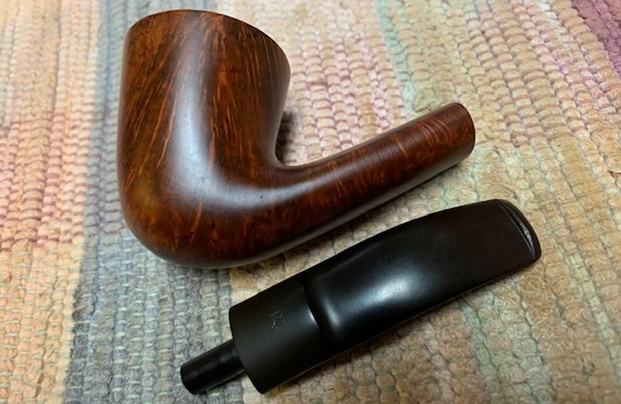 Now it was time to do my work on the pipe. I started by working over the damage on the inside rim. I topped the bowl on a topping board with 220 grit sandpaper to smooth out the damage to the rim surface. I used a folded piece of 220 grit sandpaper to give the inner edge a bevel to take care of the burn and clean up the edges of bowl.
 I polished the briar with micromesh sanding pads – wet sanding with 1500-12000 grit pads and wiped down the bowl after each sanding pad.
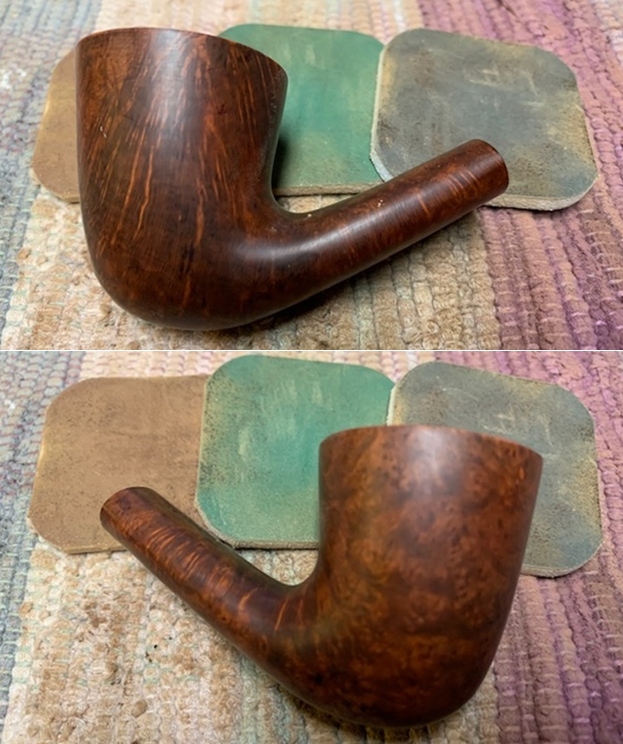


 I stained the rim with a combination of Cherry and Walnut stain pens to get a match with the colour of the stain on the bowl. Once it was buffed it would blend in very well.
 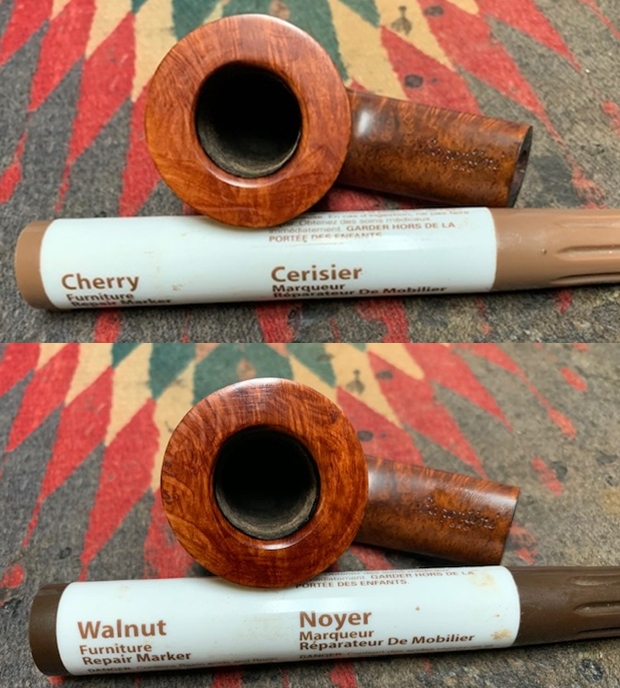 I rubbed the bowl and shank down with Before & After Restoration Balm. I worked it into the surface of the bowl sides and shank with my fingertips to clean, enliven and protect the briar. I let the balm sit for a little while and then buffed with a cotton cloth to raise the shine. The Balm did its magic and the grain stood out.
 I set the bowl aside and turned my attention to the stem. I sanded out the tooth marks on the stem with 220 grit sandpaper and started the polishing process with 400 grit wet dry sandpaper.
 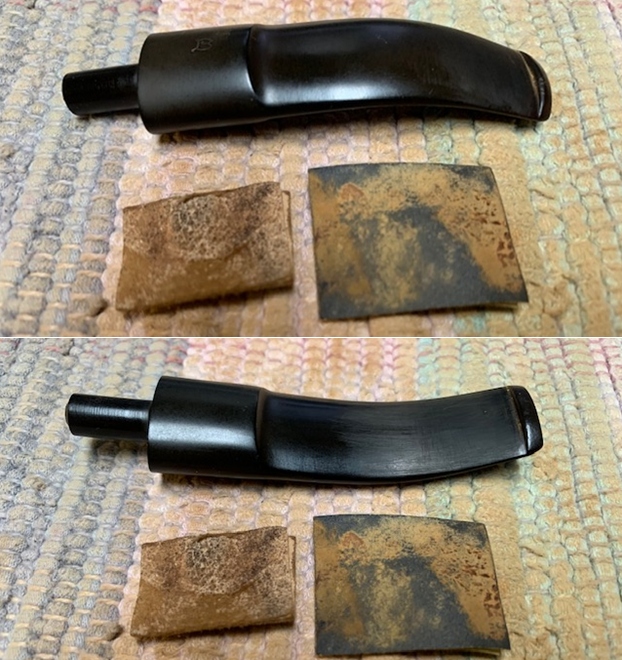 I polished the vulcanite stem with micromesh sanding pads – 1500-12000 grit pads. I wiped it down with Obsidian Oil after each sanding pad. I used Before & After Pipe Polish – both Fine and Extra Fine to further polish the stem. The photo below shows the polished stem.
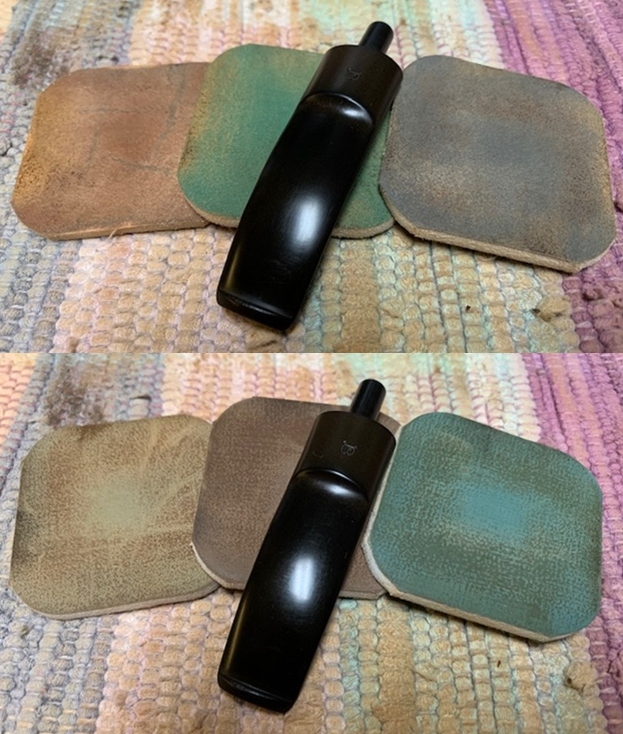
 I touched up the “B” stamp with Paper Mate Liquid Paper. I pressed it into the stamped letter with a tooth pick. Once it cured I scraped off the excess with the tooth pick.
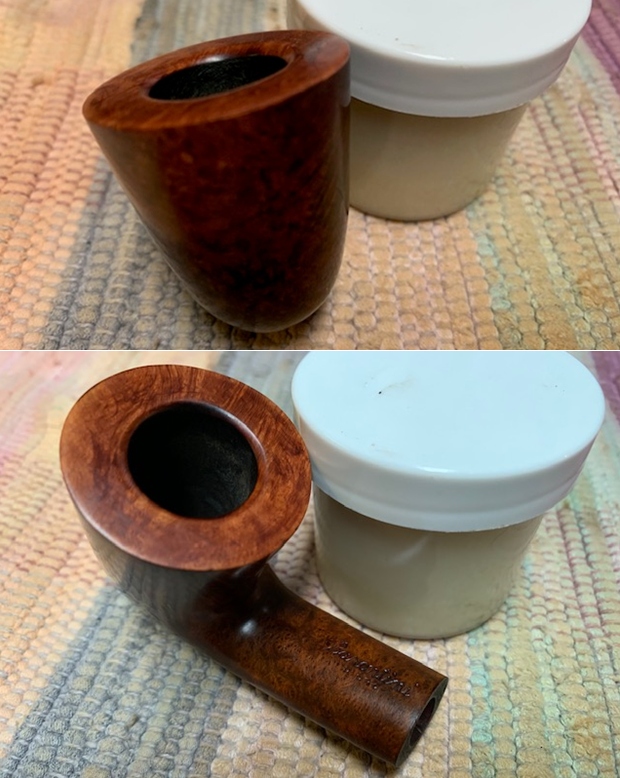
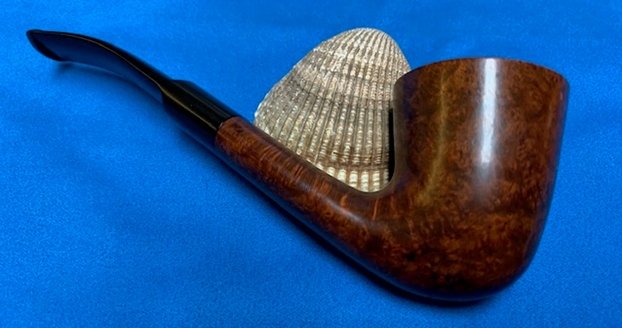
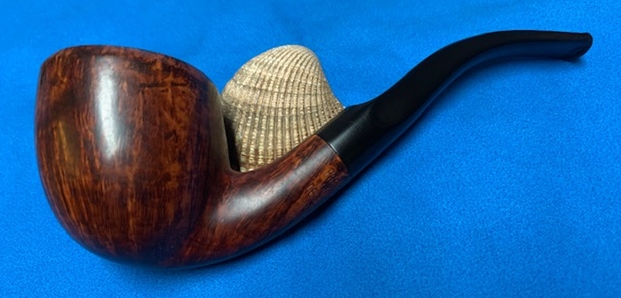
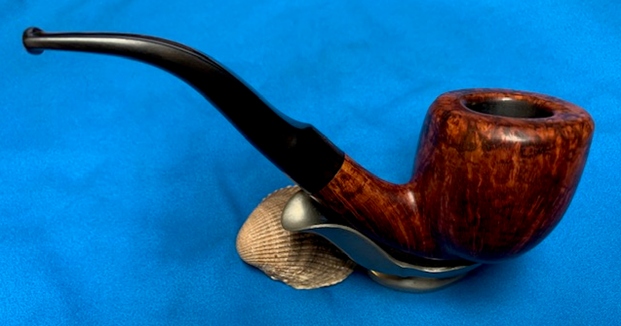
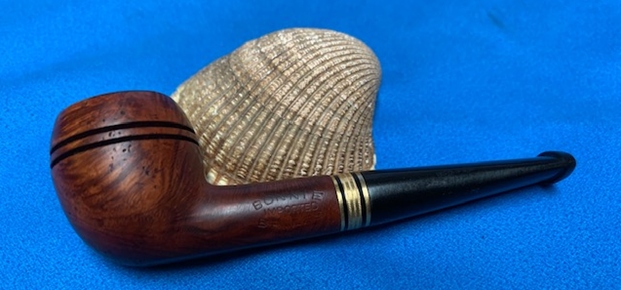
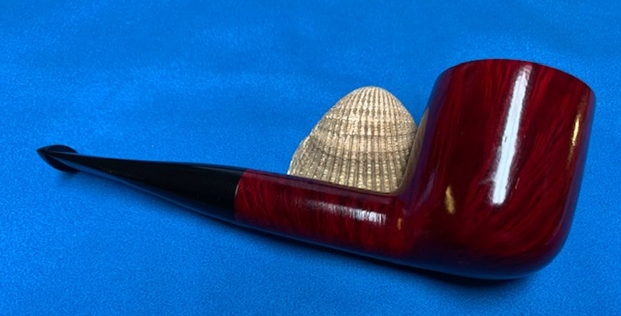
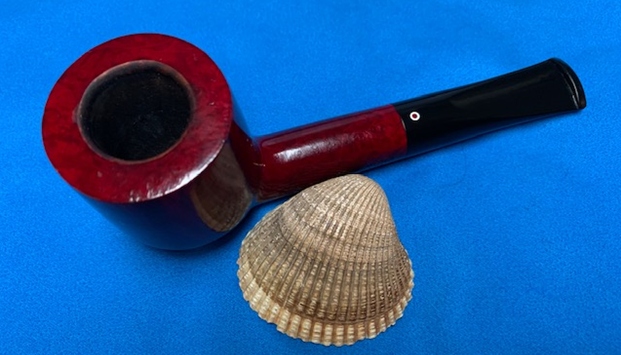
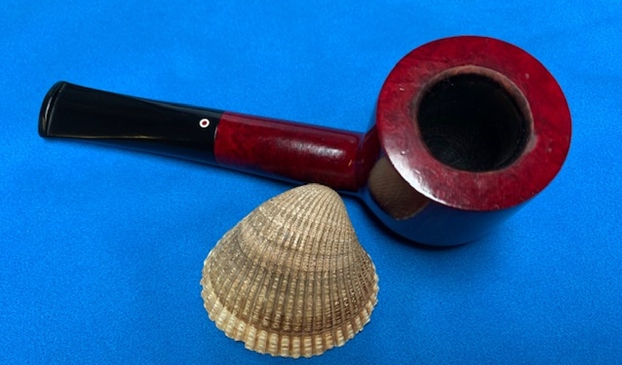
 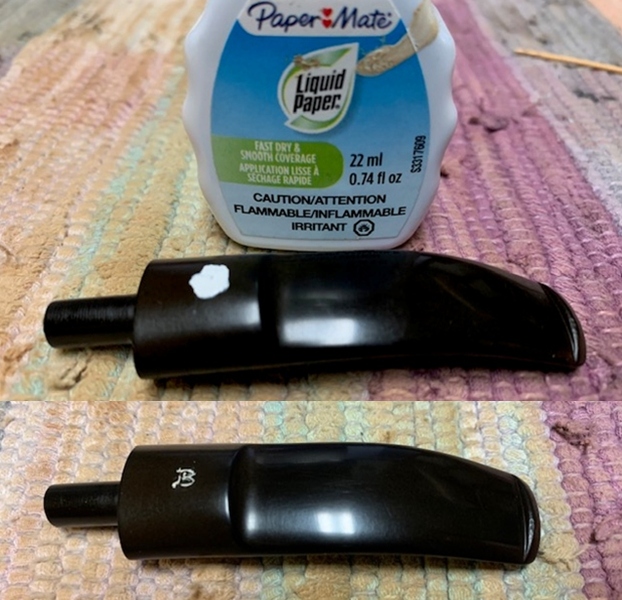 This nicely grained Barontini D’ Oro 104 Dubin with a vulcanite saddle stem is a great looking pipe now that it has been restored. There are fills around the bowl that blend in nicely with the finish on the bowl. The rich brown stains of the finish came alive with the polishing and waxing. The grain really popped. I put the stem back on the bowl and carefully buffed the pipe with Blue Diamond on the buffing wheel using a light touch on the briar. I gave the bowl and the stem multiple coats of carnauba wax on the buffing wheel. I buffed the pipe with a clean buffing pad to raise the shine. I hand buffed the pipe with a microfiber cloth to deepen the shine. The finished Barontini Bent Dublin is a beauty and fits nicely in the hand and looks very good. Give the finished pipe a look in the photos below. The dimensions of the pipe are Length: 5 ½ inches, Height: 2 inches, Outside diameter of the bowl: 1 ½ inches, Chamber diameter: ¾ of an inch. Thanks for reading this blog and my reflections on the pipe while I worked on it. There are many more to come!


 H
H


