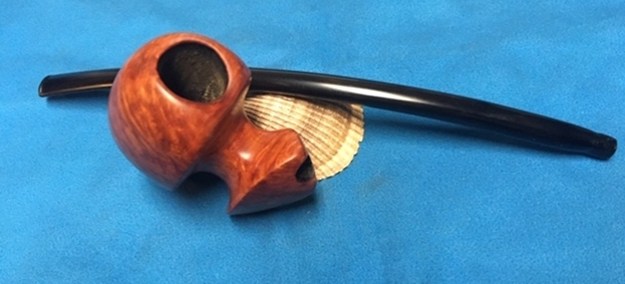
Blog by Dal Stanton
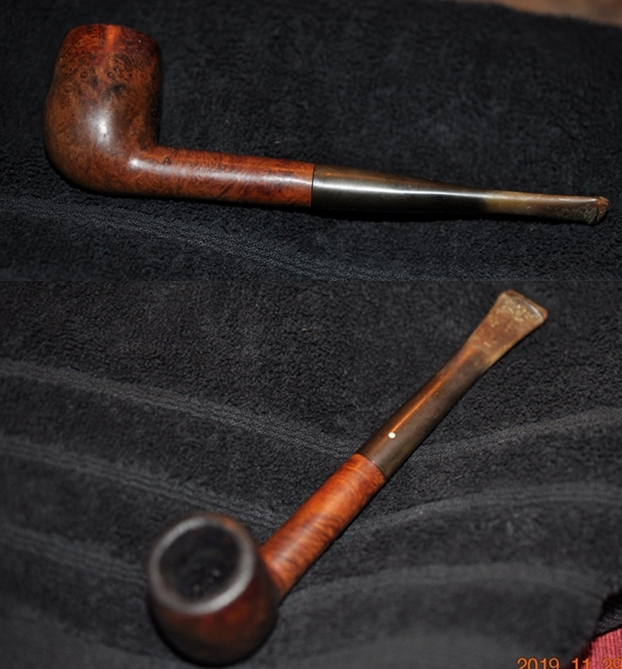
I completed the first Christmas CW project by repurposing an Italian Permofilter rusticated bowl and mounting it on a Warden stem. It is to be a gift for my son, Josiah, who came to Bulgaria from St. Louis to celebrate Christmas in Sofia, Bulgaria, with Mom and Dad! Josiah’s Churchwarden came out well! Our daughter, Johanna, also has come to Bulgaria for Christmas. She and her husband, Niko, arrived first and so my work fashioning a CW as a Christmas gift for Niko is a bit clandestine trying to keep it a secret until Christmas Day! Niko hasn’t been easy to figure out for a pipe gift! I was first going to give him a sculpted Meerschaum because I knew he had one before – a cheaper one that disintegrated in his hand while smoking it. Yet, after he arrived, he saw that I was working on a Churchwarden for ‘someone’ who had commissioned one (actually, it was Josiah’s Churchwarden that I had commissioned myself!) and he wanted a Churchwarden, which was also on his priority list to add to his collection. When I fished around regarding which he would rather have – trying not to spill the beans that I was gifting him a pipe, he said that a Churchwarden was higher on the list. So, the Sculpted Meerschaum goes back into the inventory benefiting the Daughters of Bulgaria – our work helping women and girls who have been trafficked and sexually exploited!
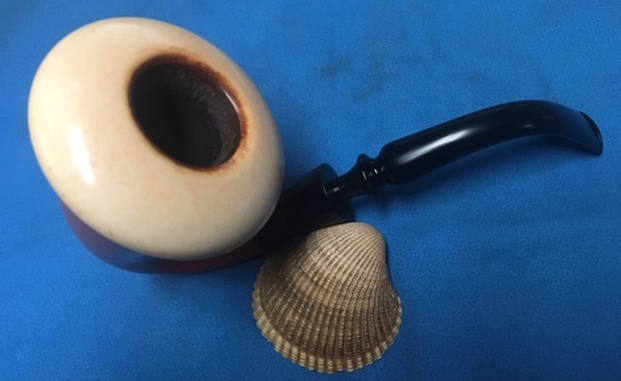
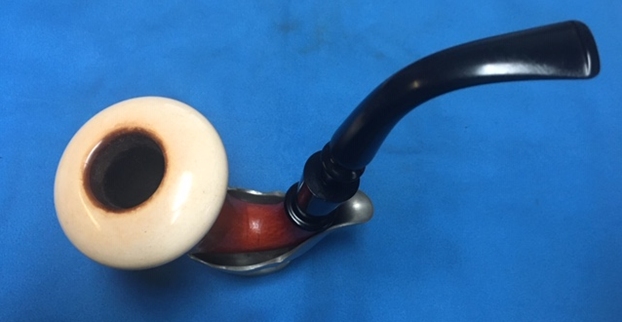
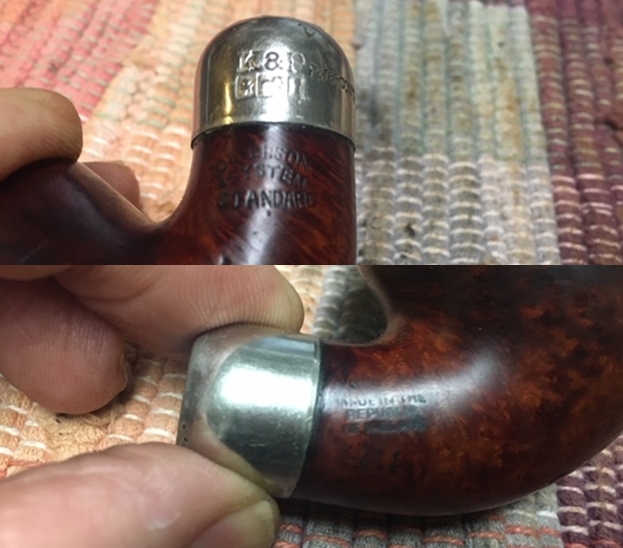
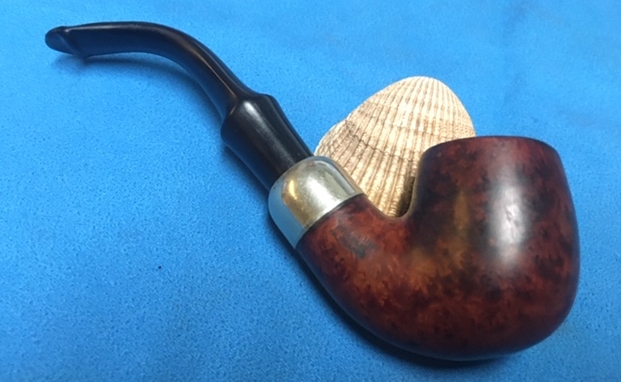
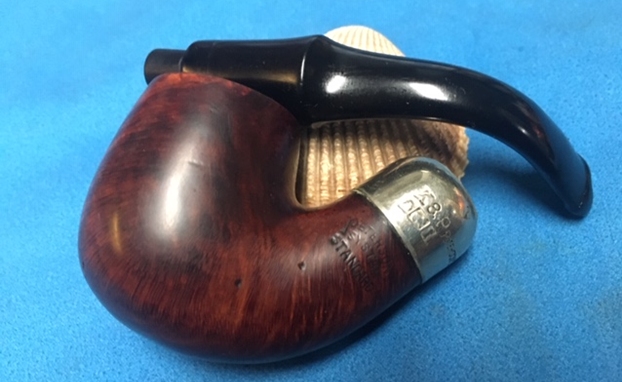
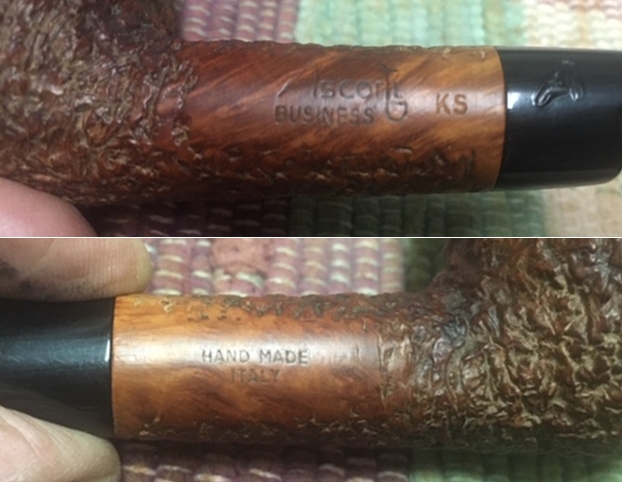
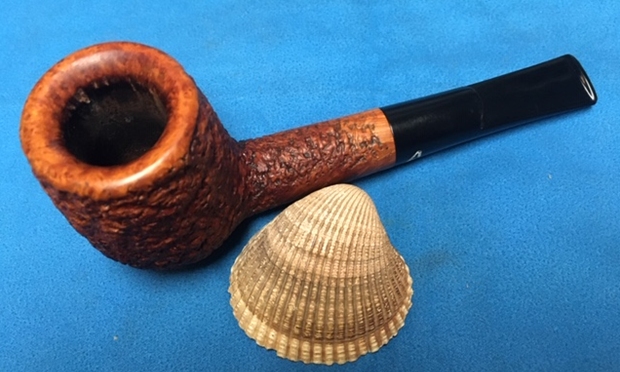
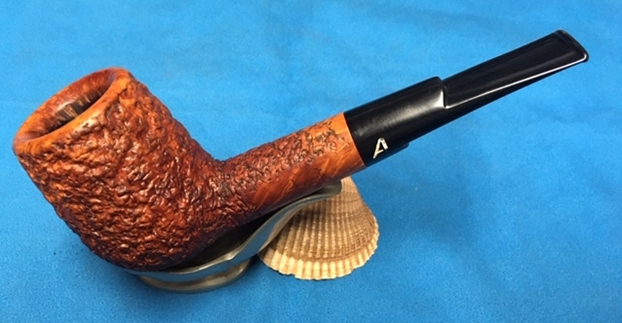
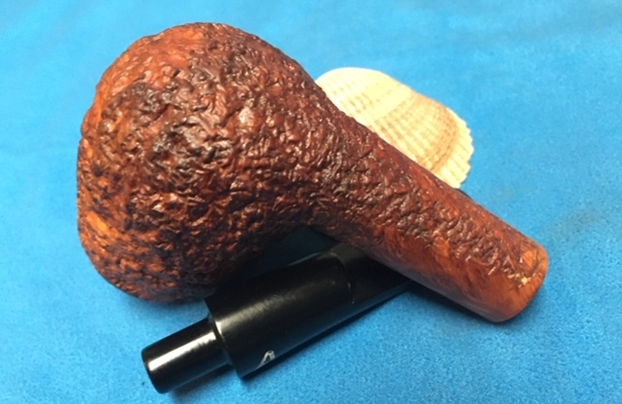
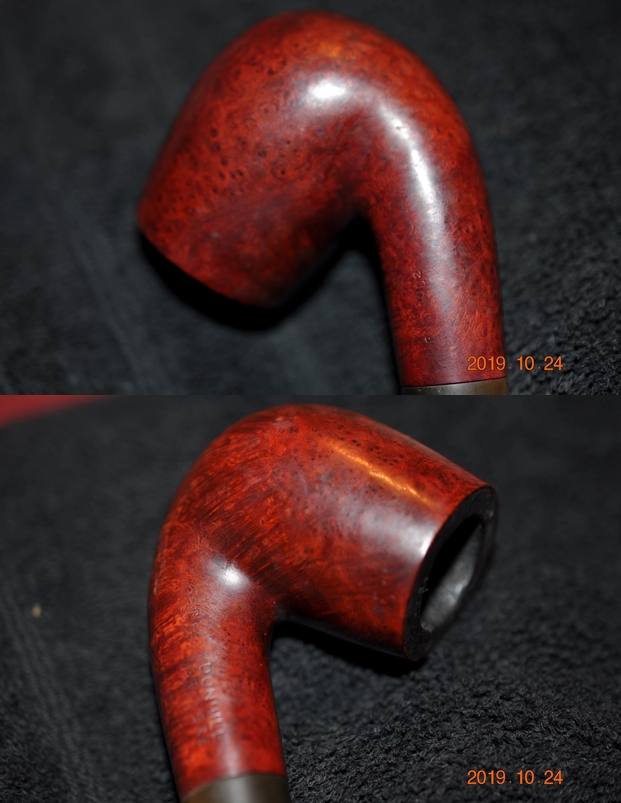
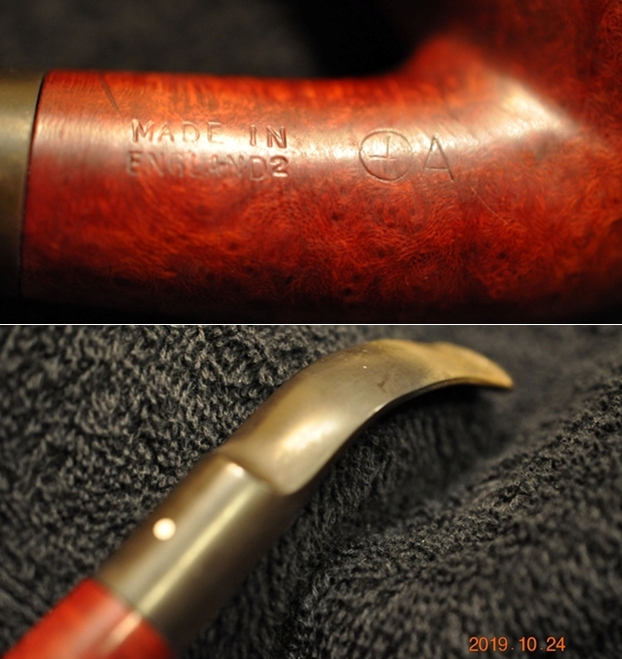
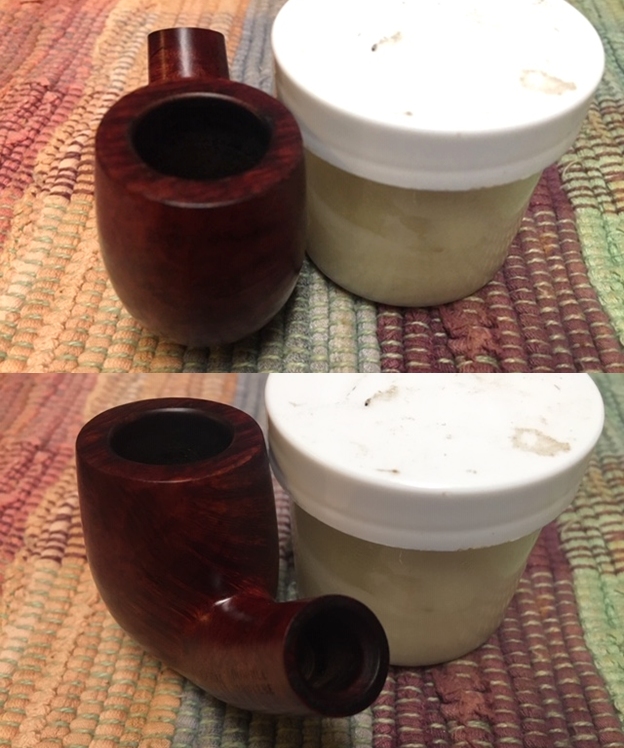
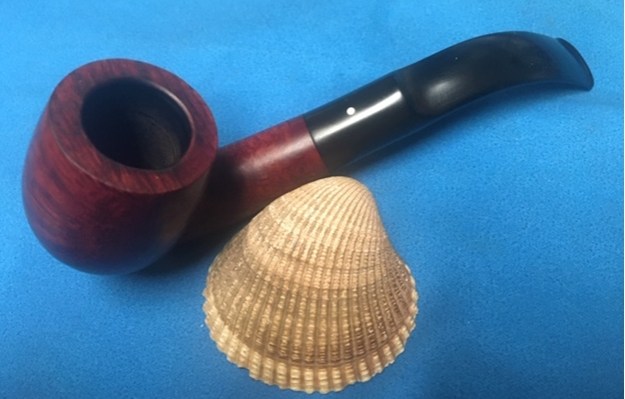
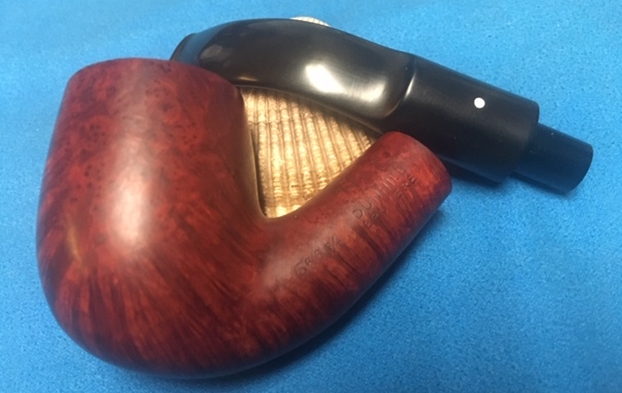
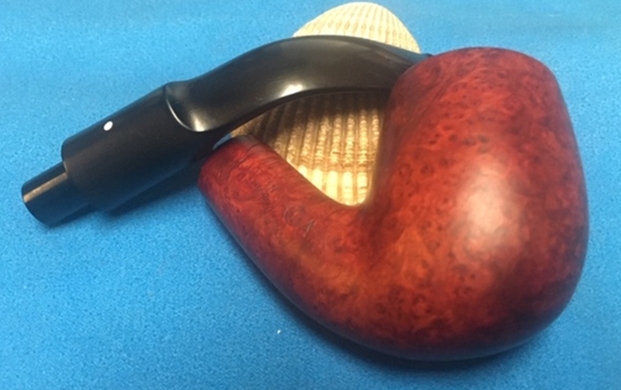
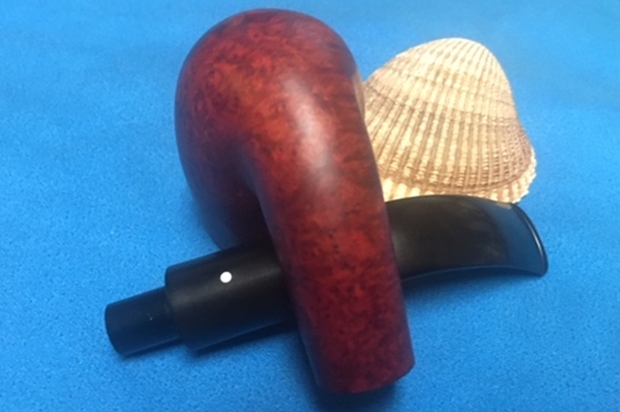
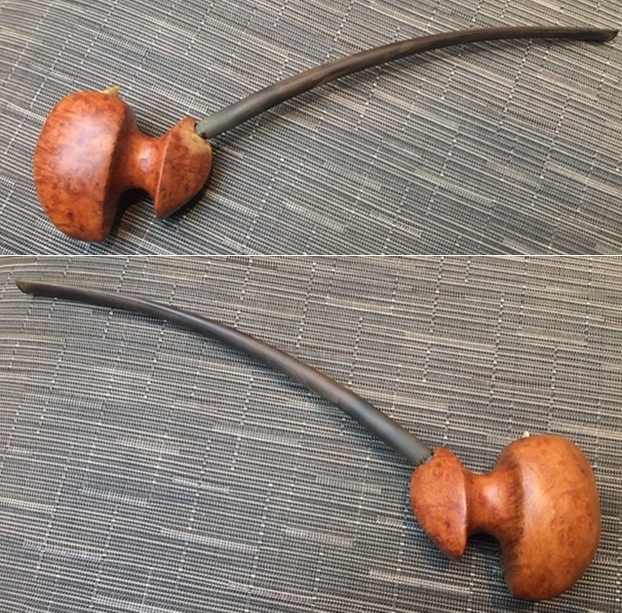
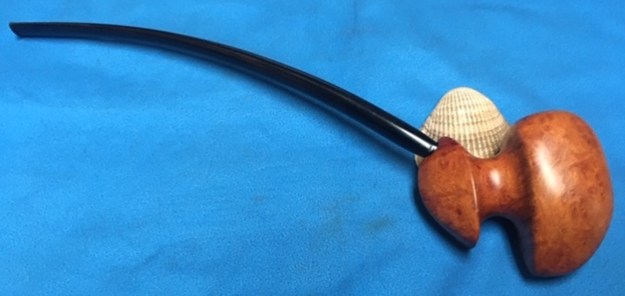
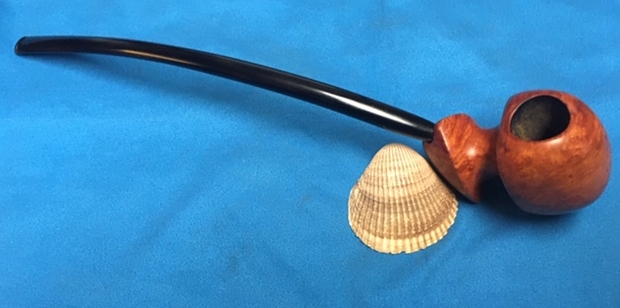
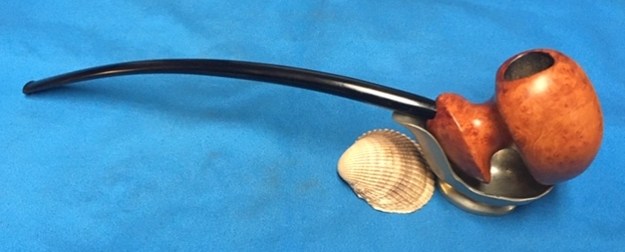
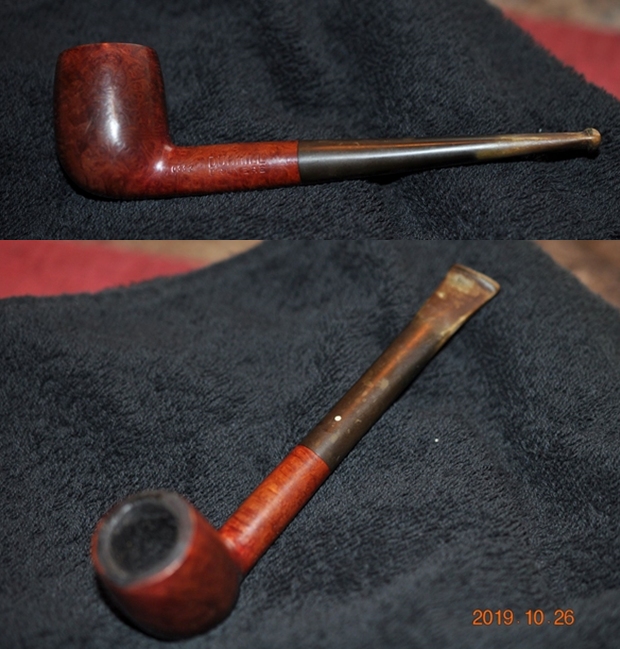
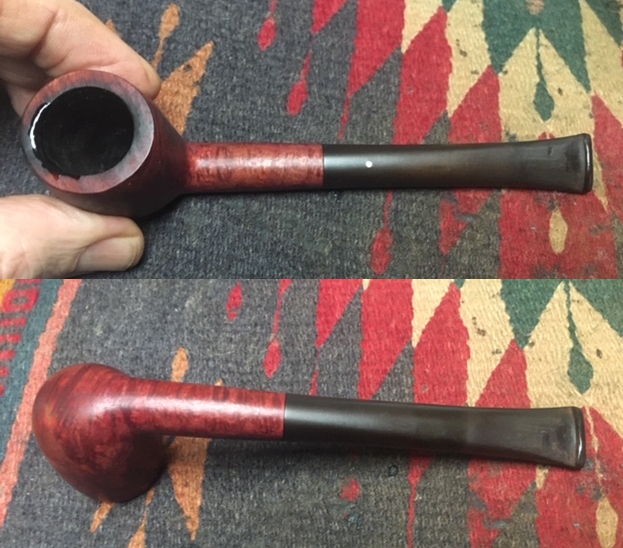
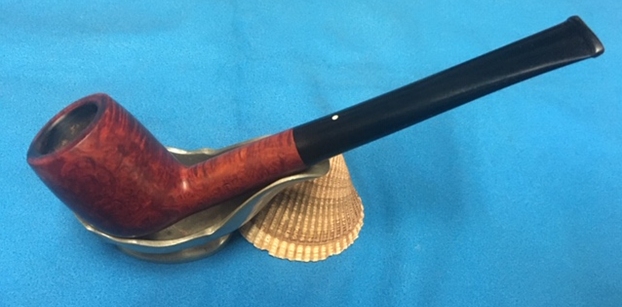
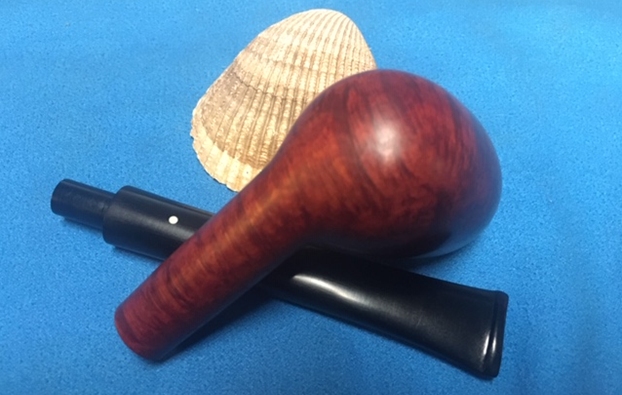
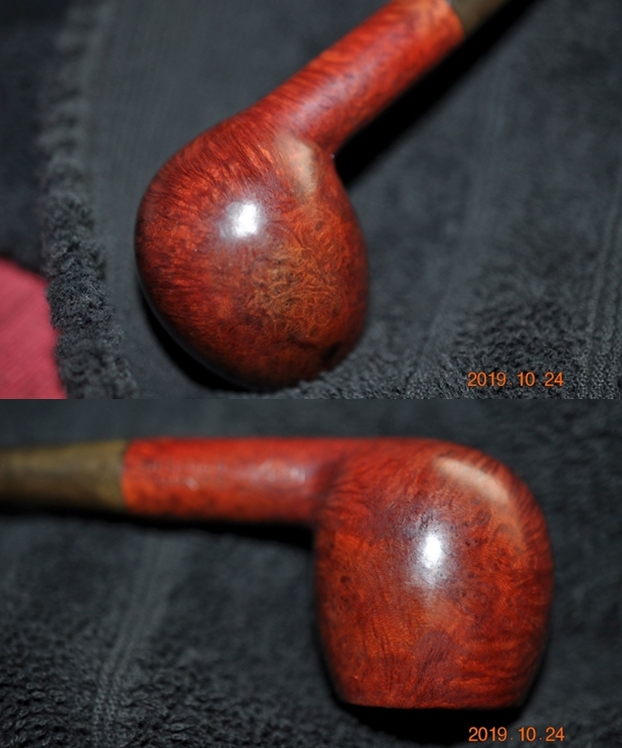
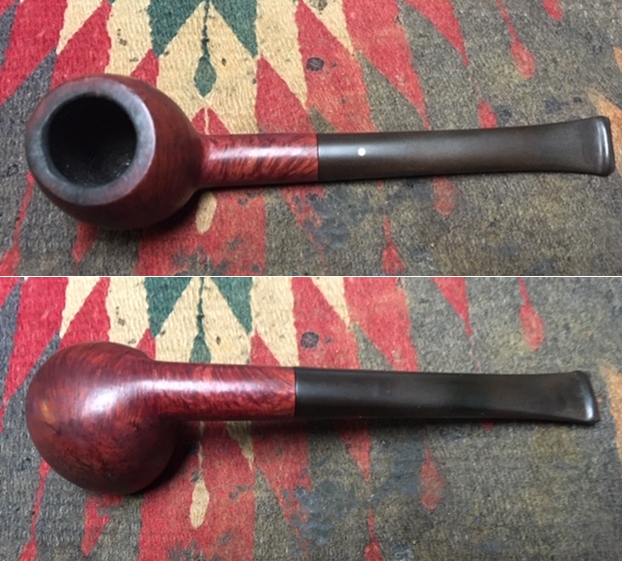
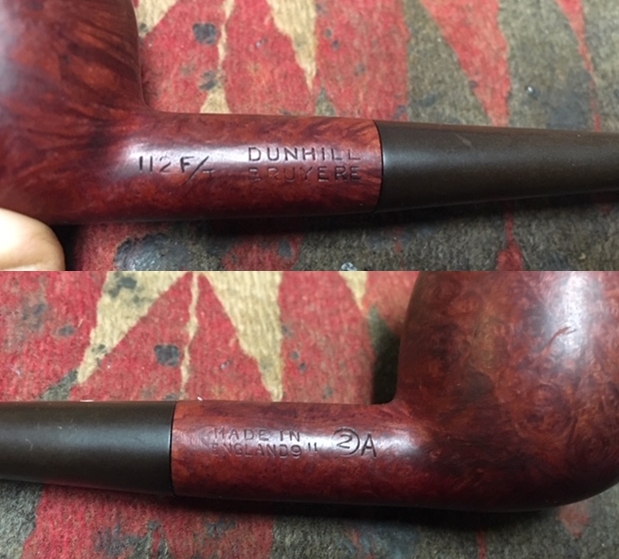
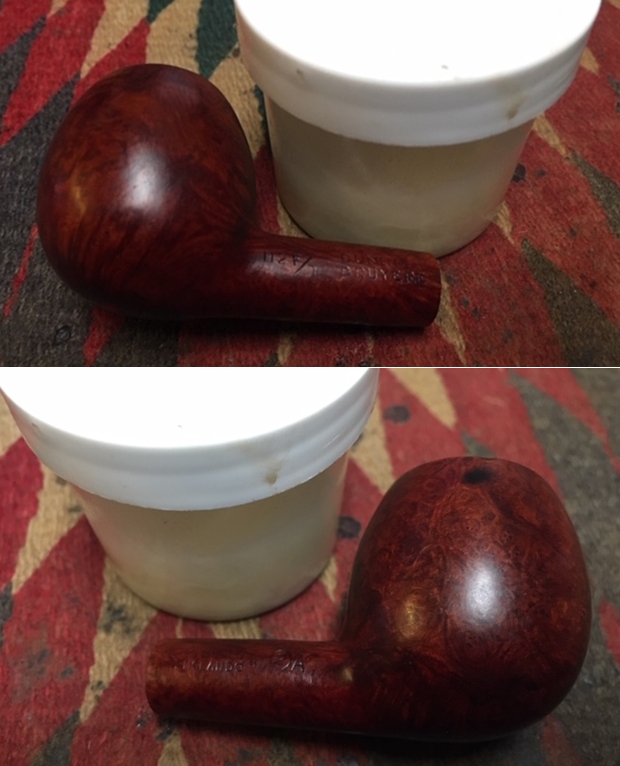
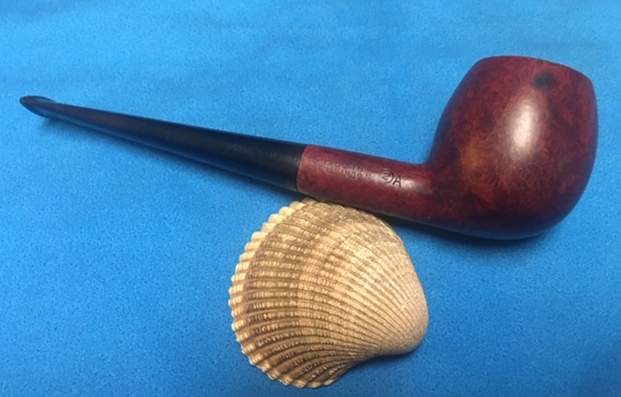
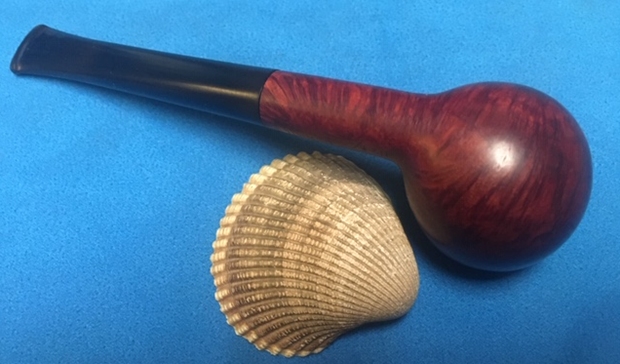
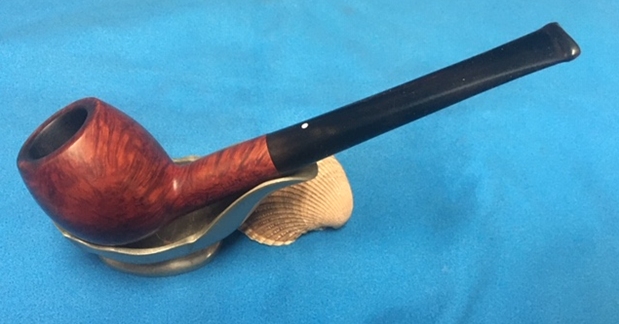
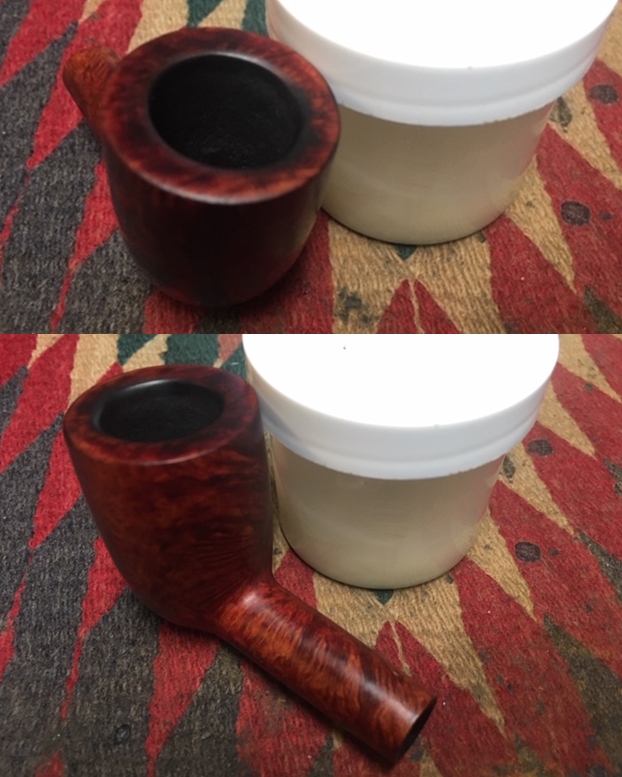
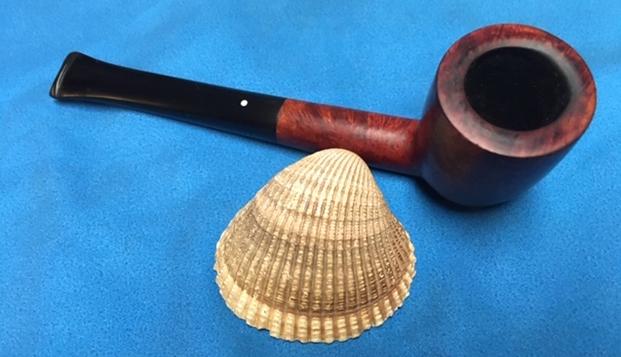
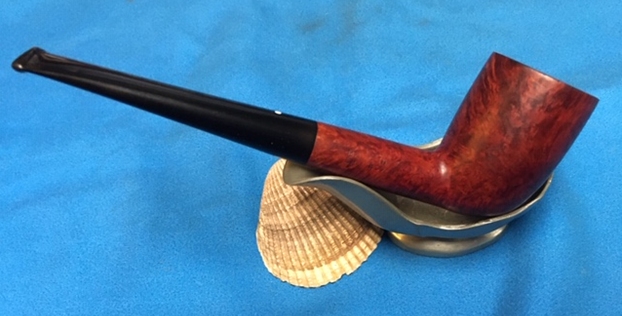
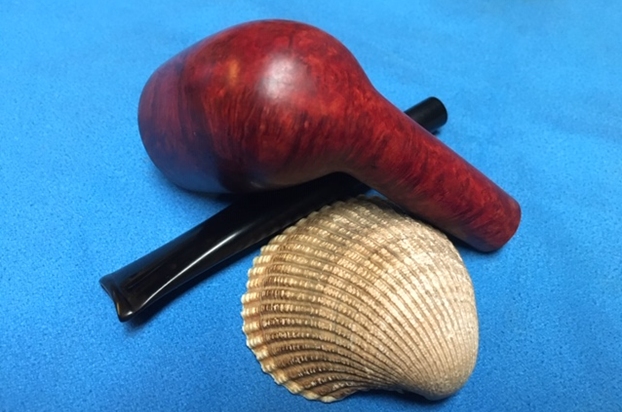
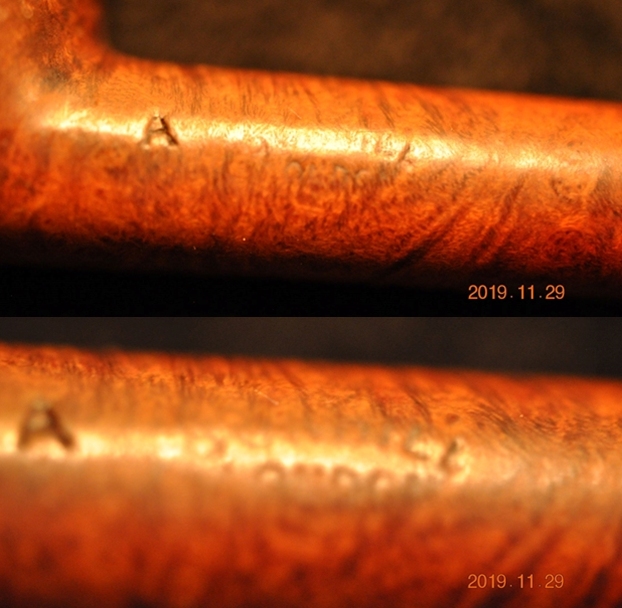
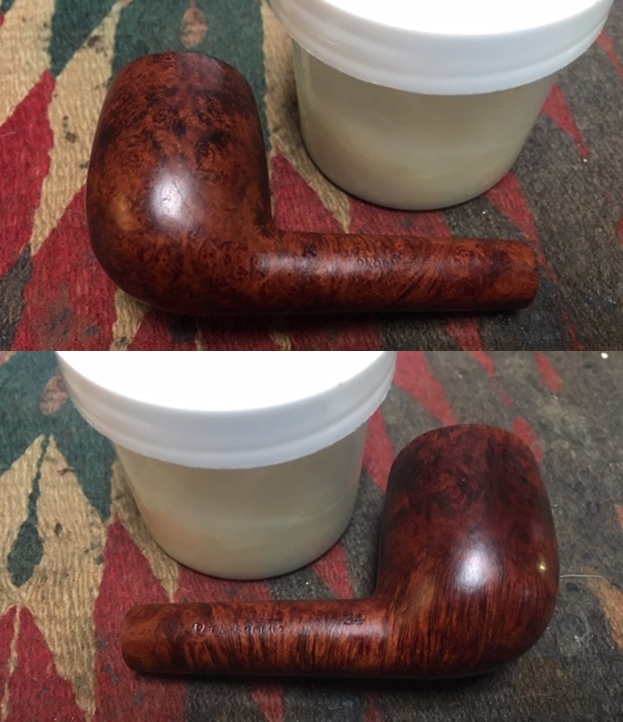
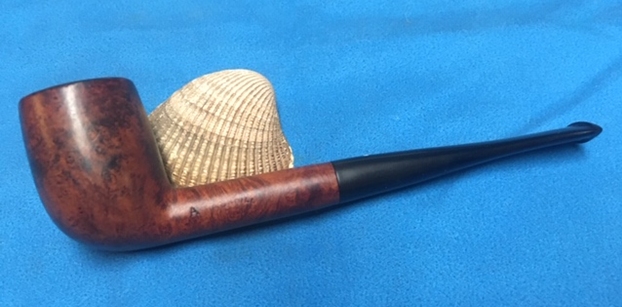
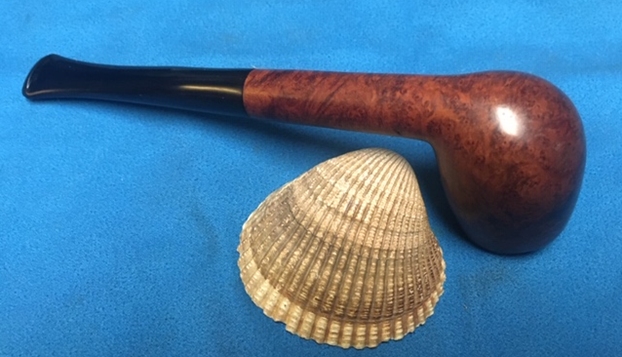
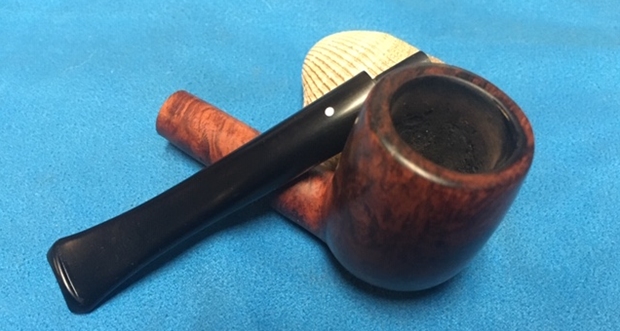
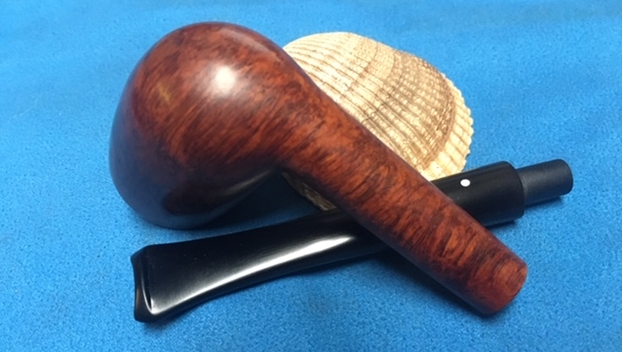
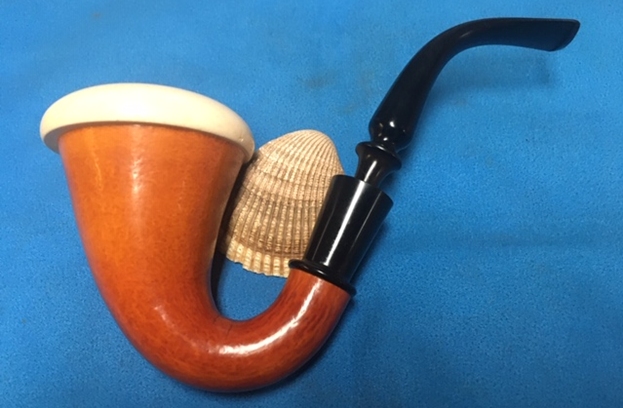
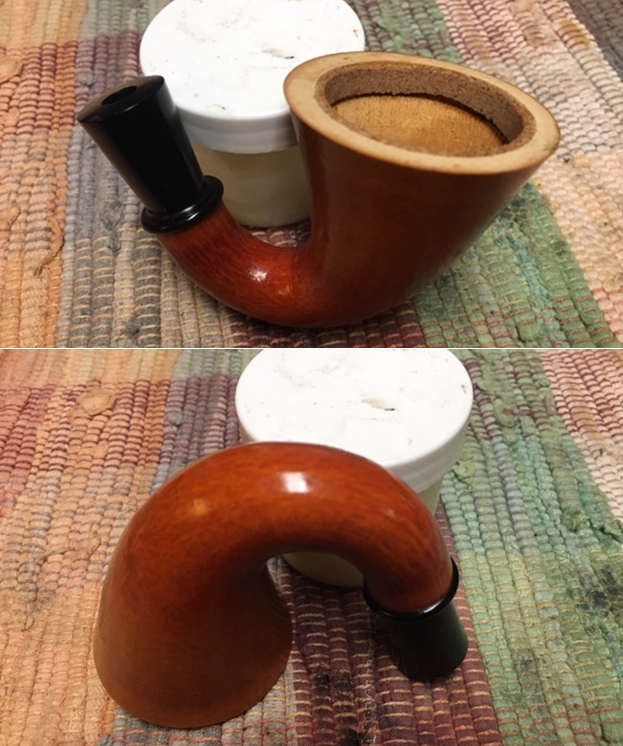
 The bowl I’m repurposing is from an unbranded petite bent Billiard that is marked only with the nomenclature, ‘Made in England’ on the left shank side and a shape number on the right, ‘950’. I acquired this pipe in the ‘Lot of 66’ and it has been waiting for someone to commission him in the For “Pipe Dreamers” Only! collection. It is an attractive pipe and the grain shows much potential. I did a quick search of the main shape number charts of English pipe names such as BBB and GBD but found no reference to a shape 950 that helped me with identifying the origins of this pipe.
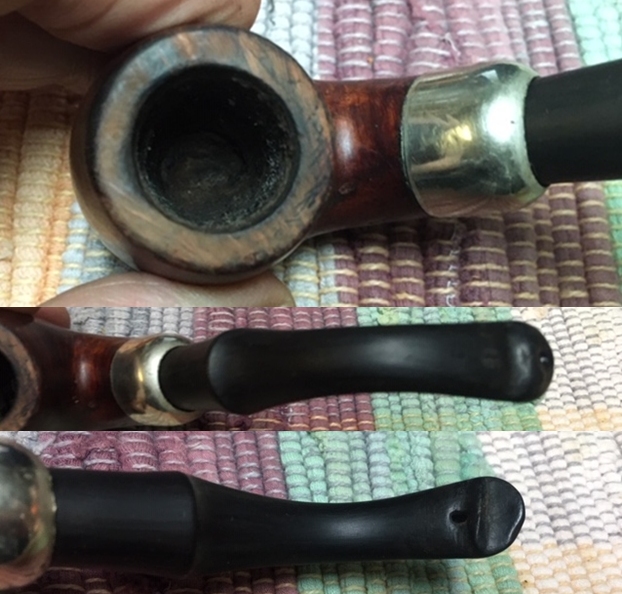
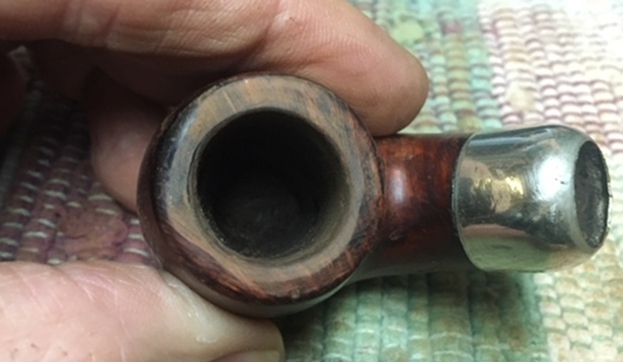
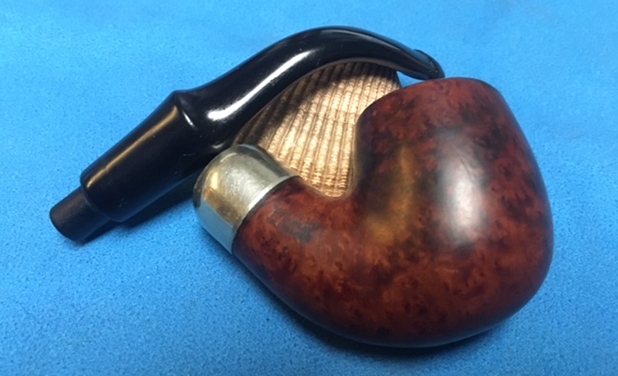
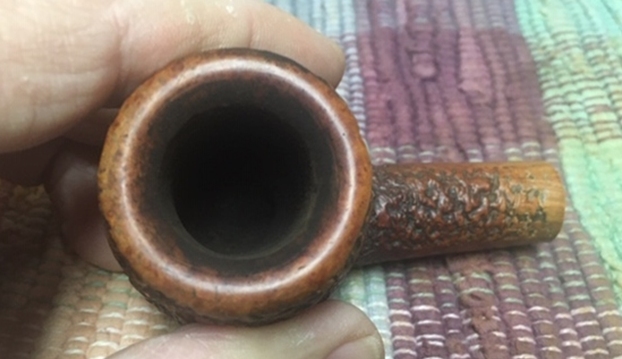
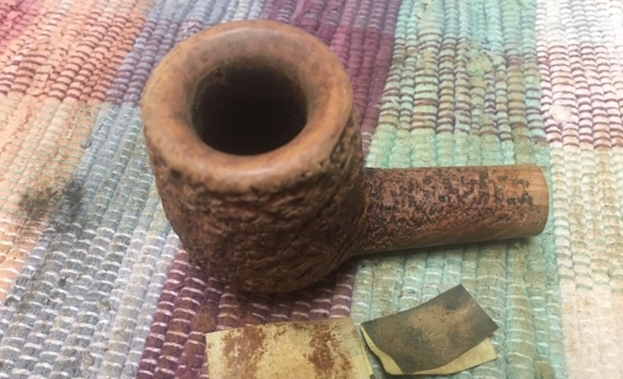
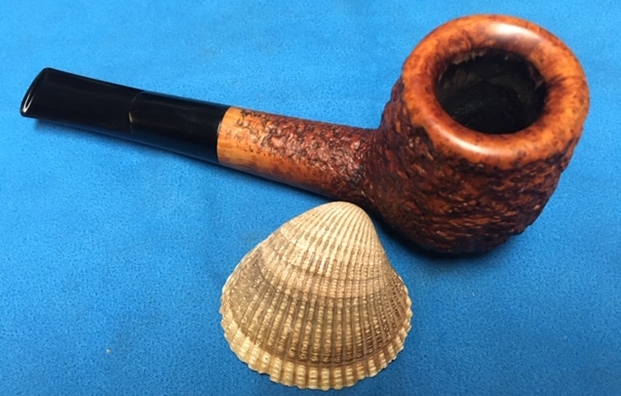
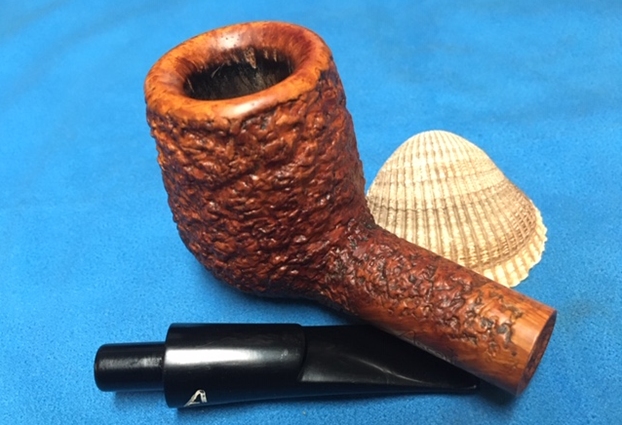
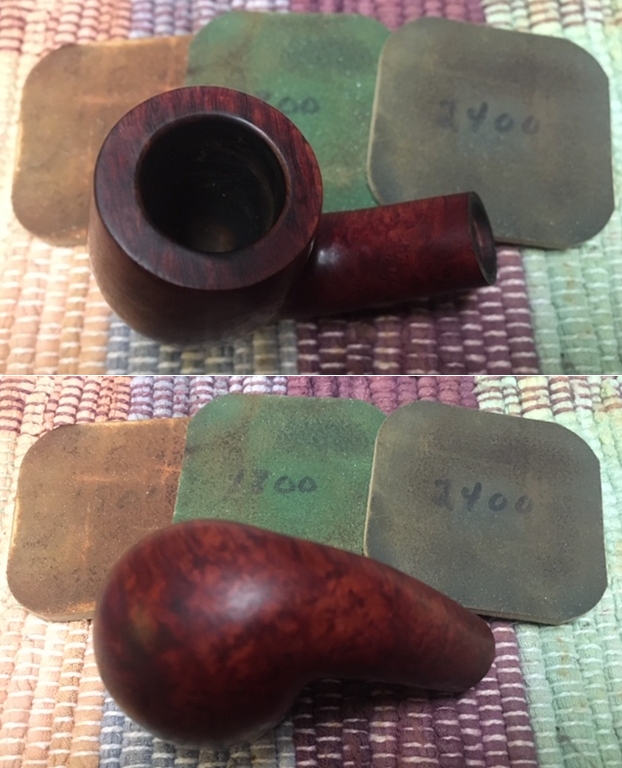
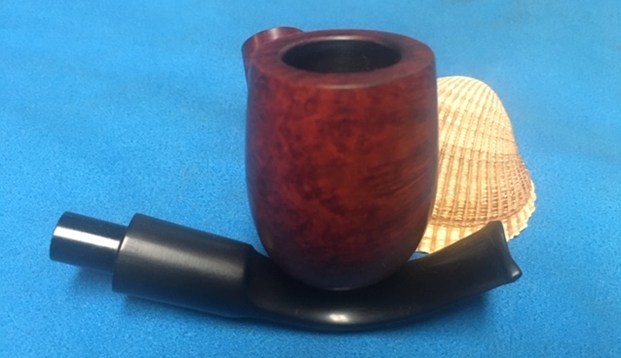
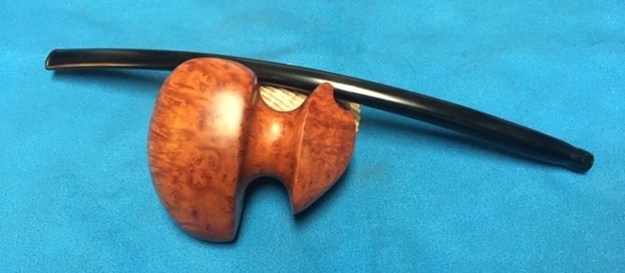
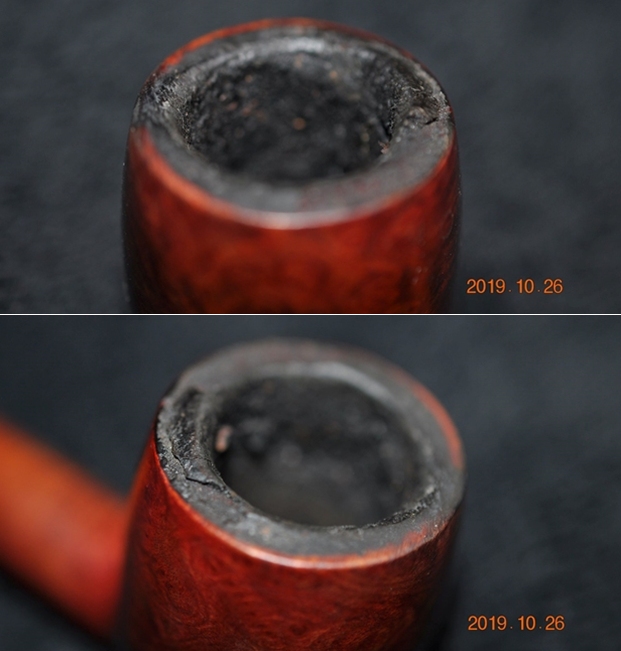
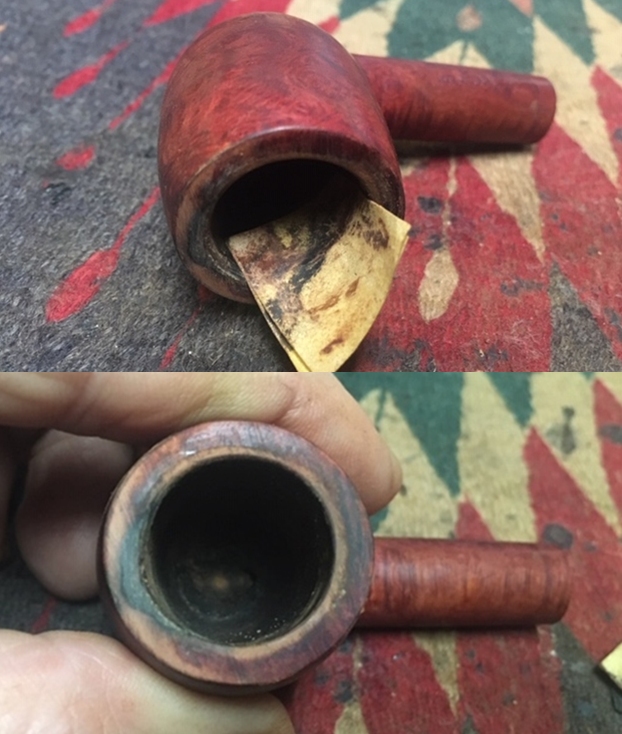
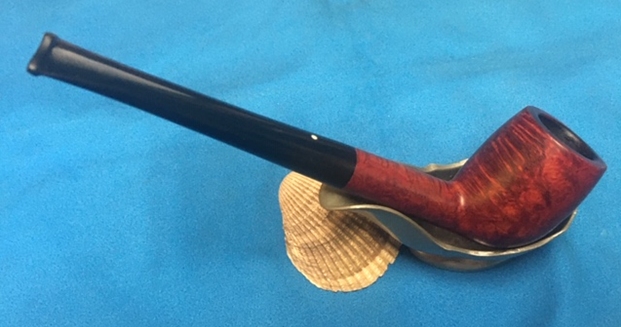
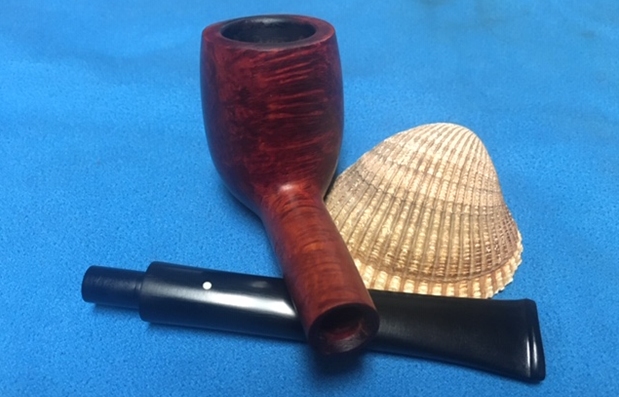
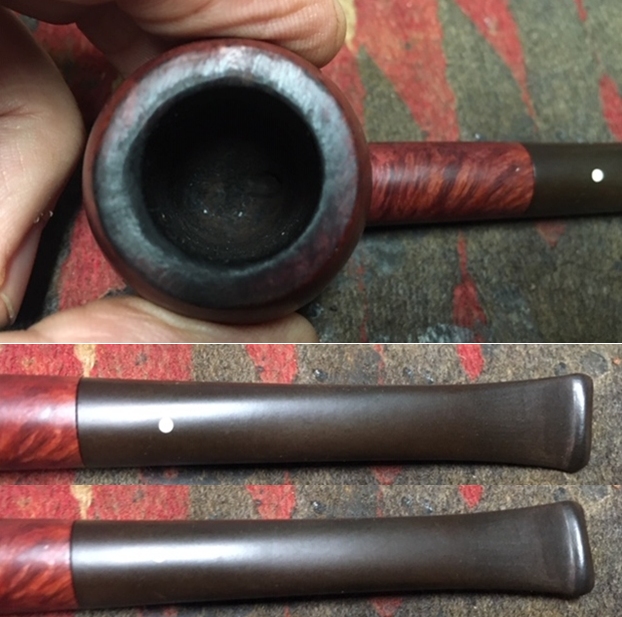
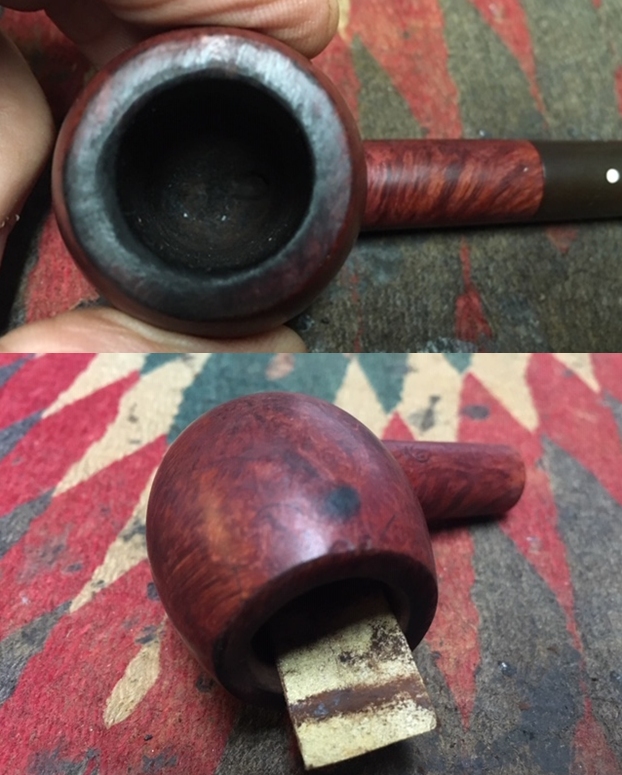
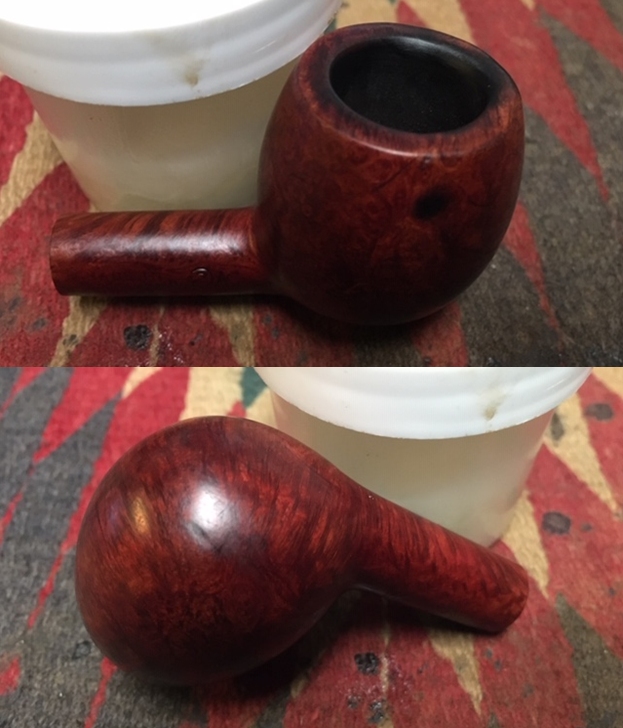
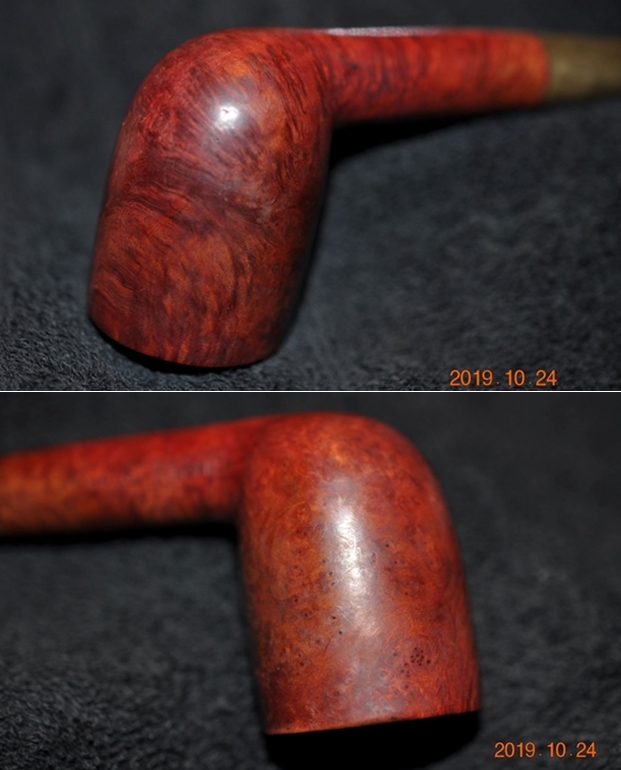
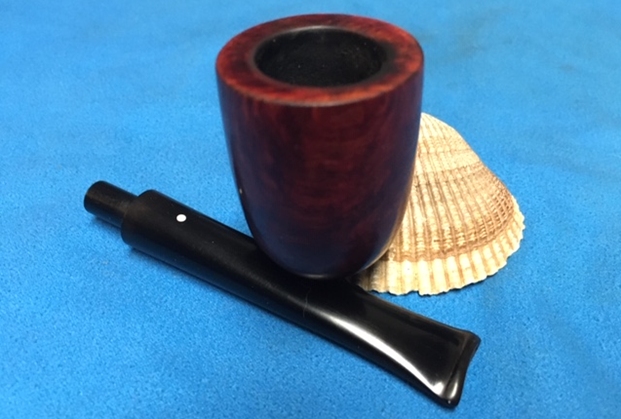
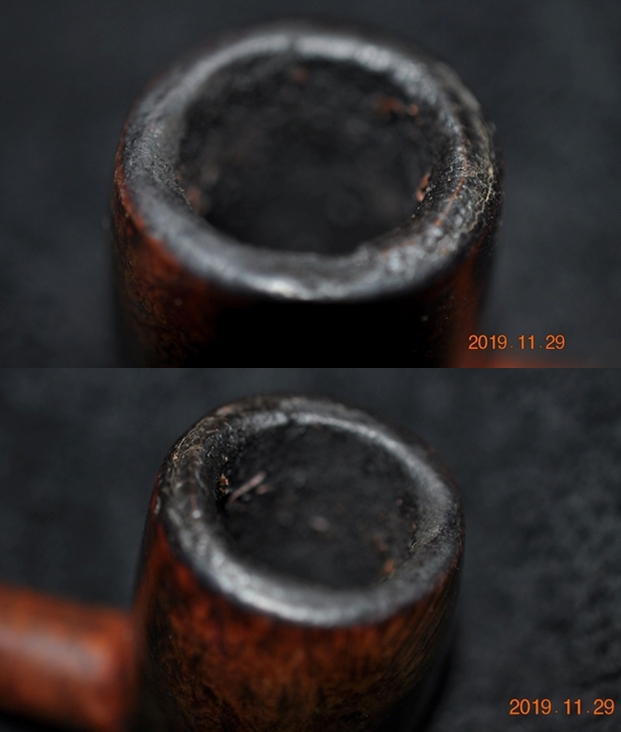
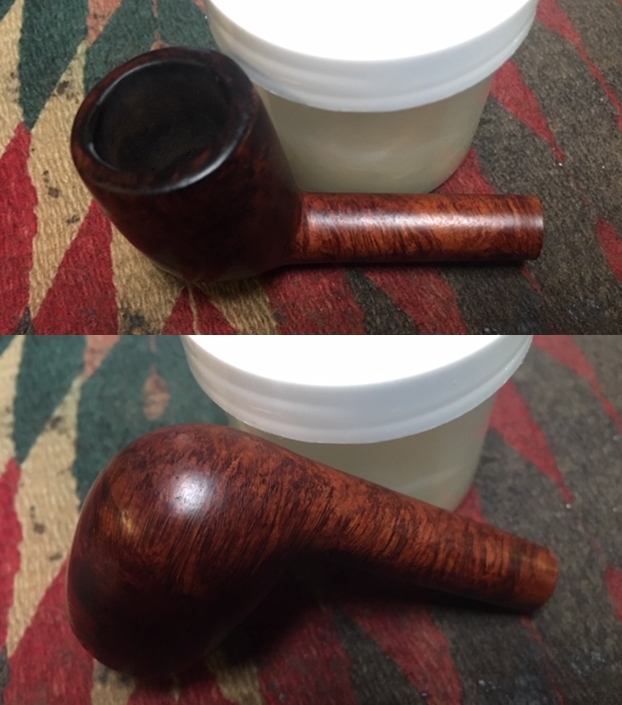
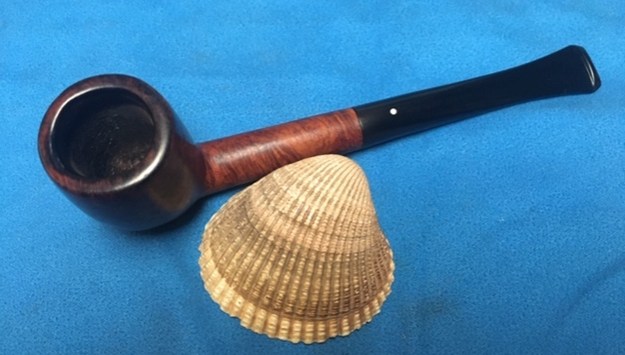
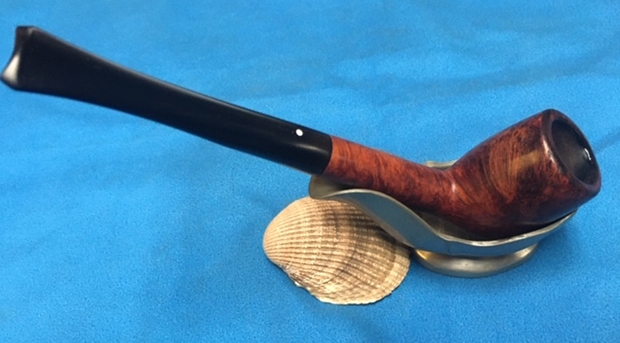
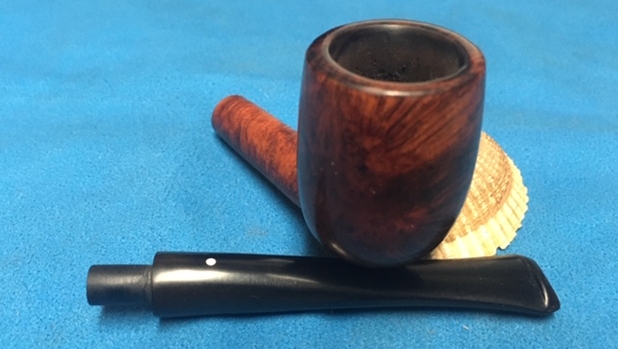
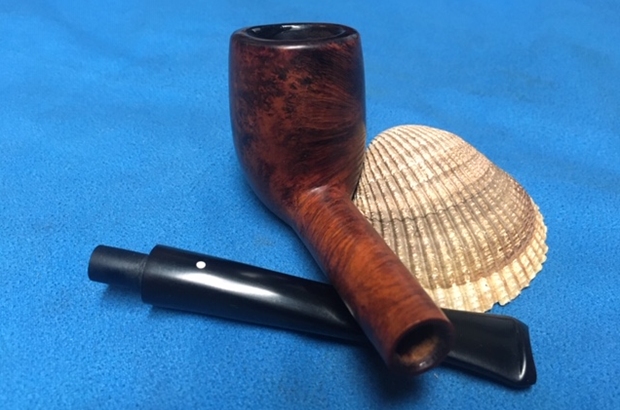
 Now with the stummel on the worktable to transform it into a Churchwarden, I take more pictures to take a closer look. The chamber has light to moderate cake build up and the lava flow over the rim is thick. The rim width is also imbalanced with a thinning of the rim on the front left. Undoubtedly, the point where the former steward drew down the flame to light the blend.
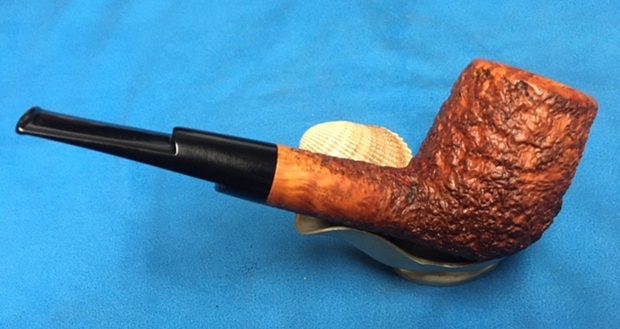
 The rim also has its share of nicks, cuts and chips.
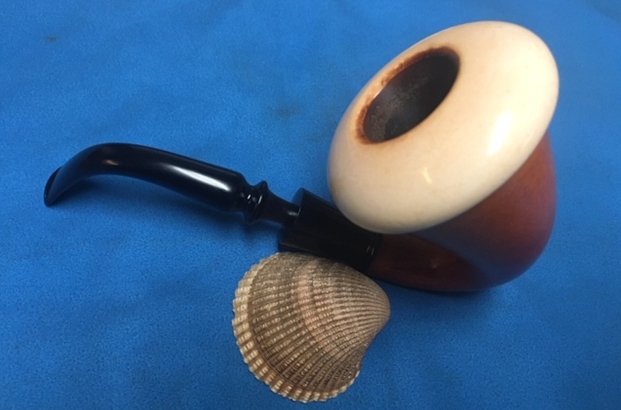
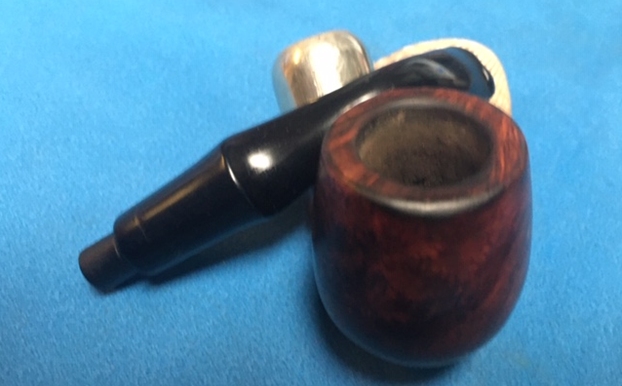
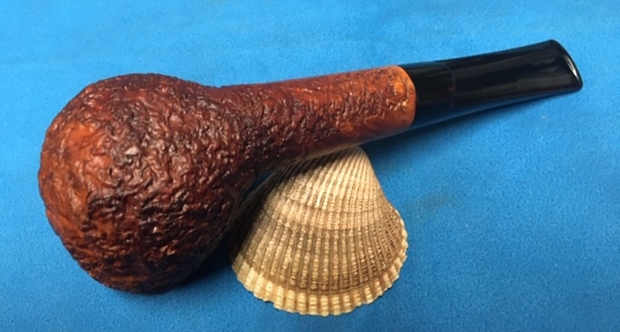
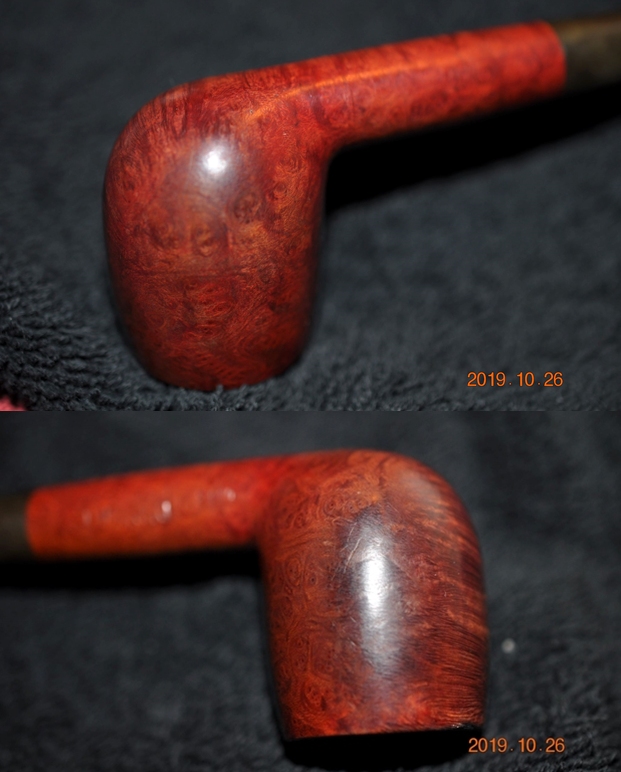
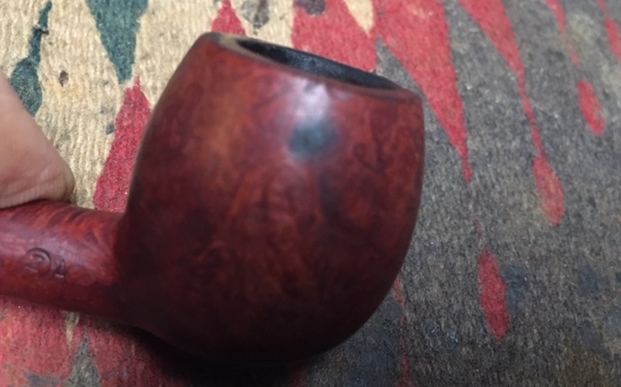
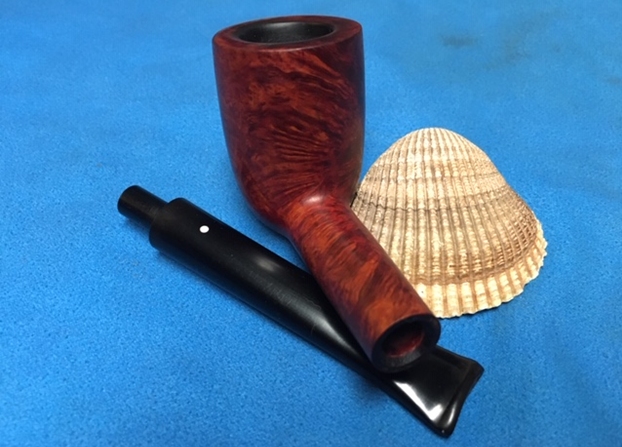
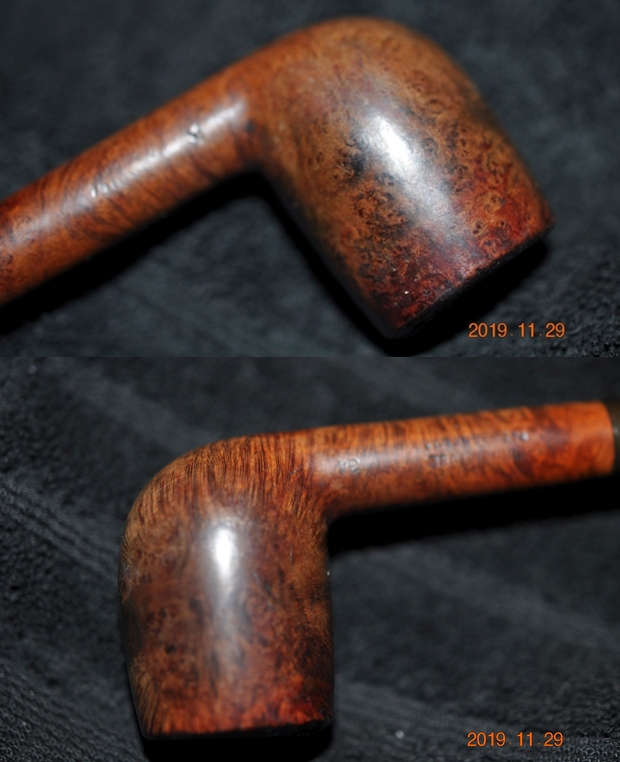
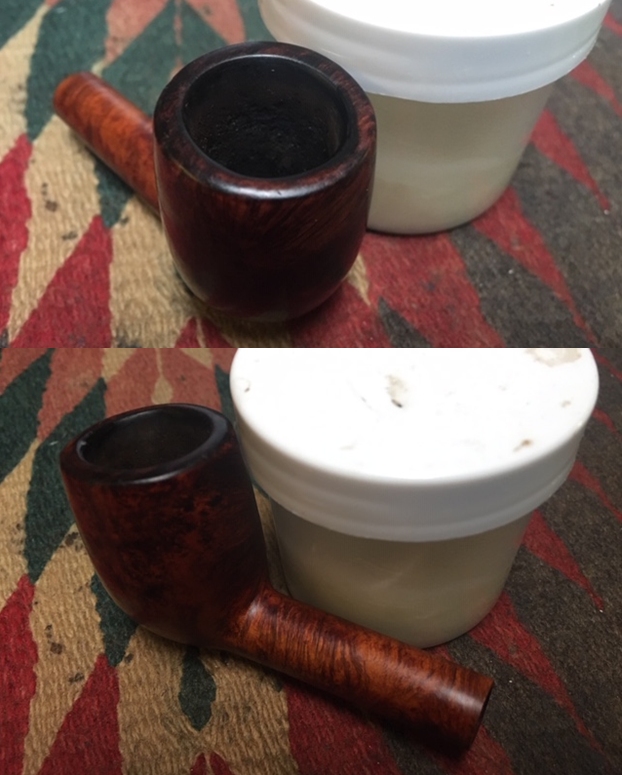
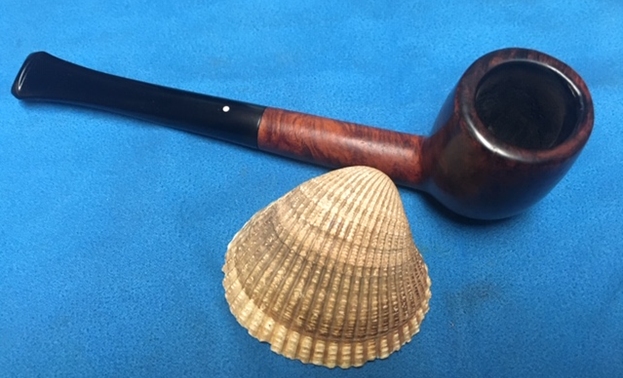
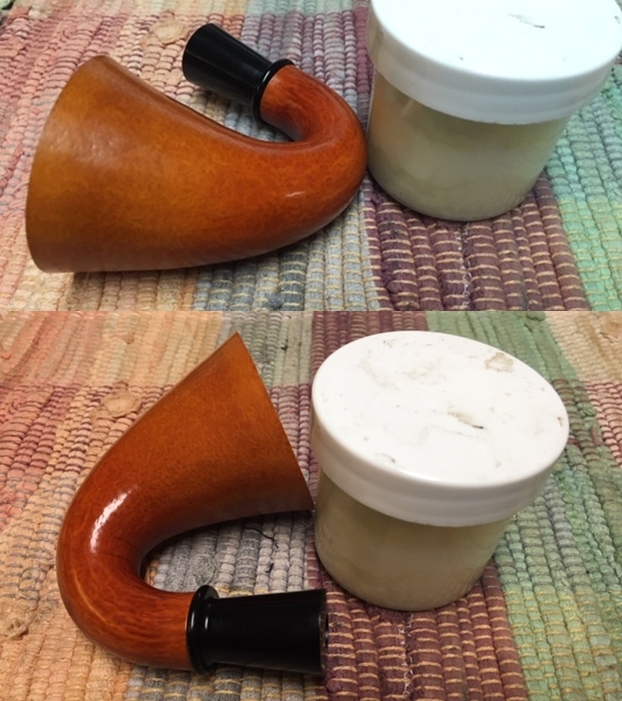
  The stummel also has several dents and pits here and there which need addressing. As expected, the grime is thick on the darkened stummel. Yet, the grain underneath shows great potential. The grain is primarily vertically oriented around the stummel.
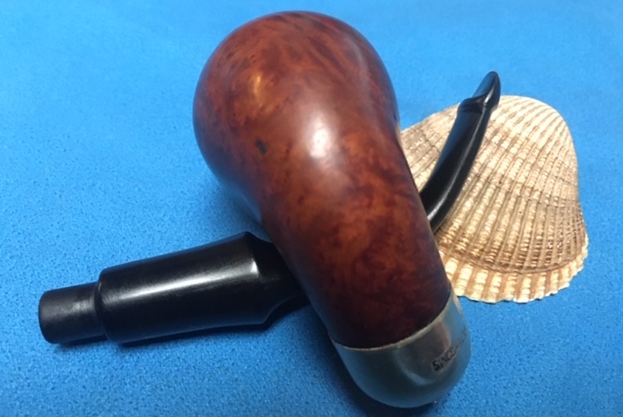
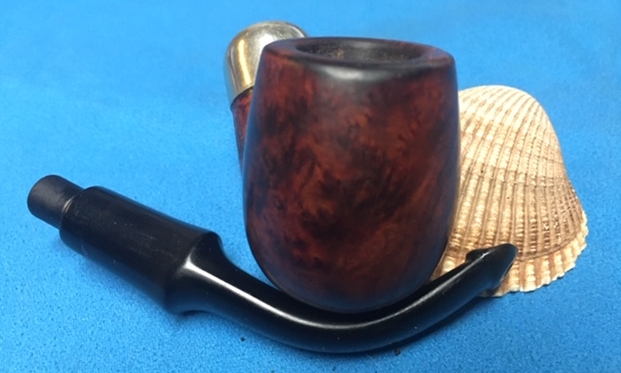
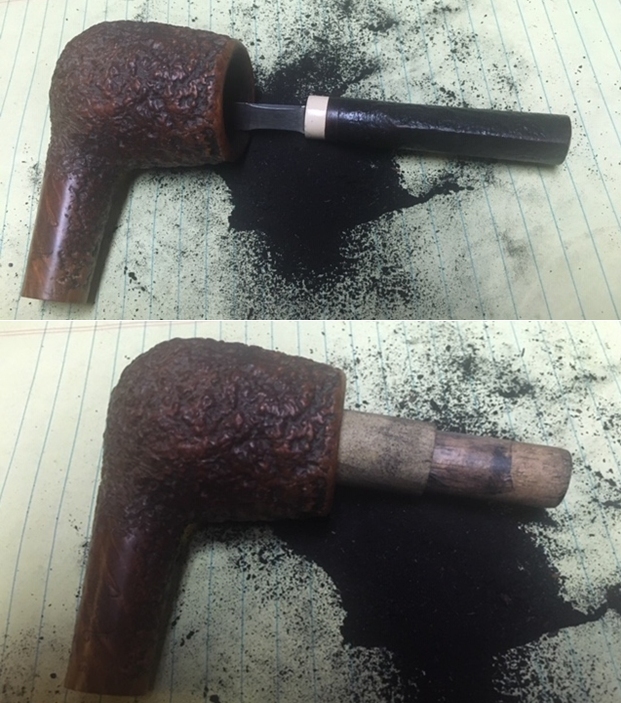
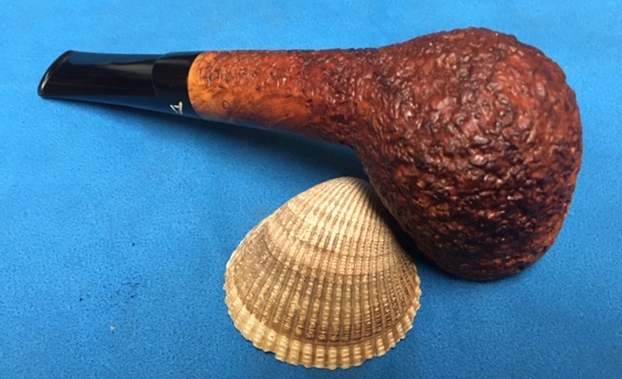
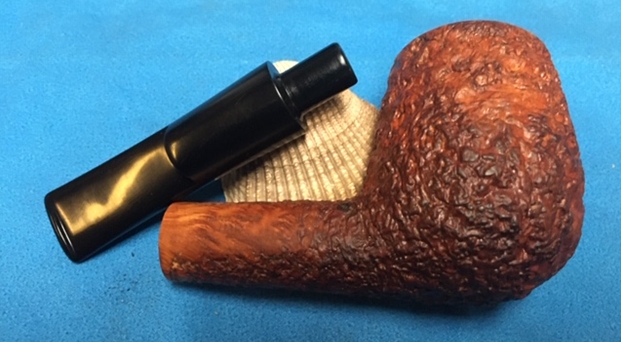
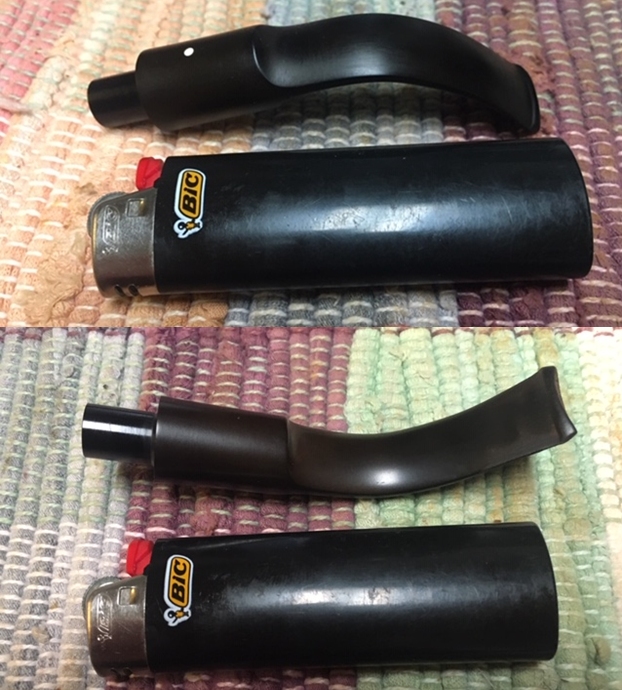
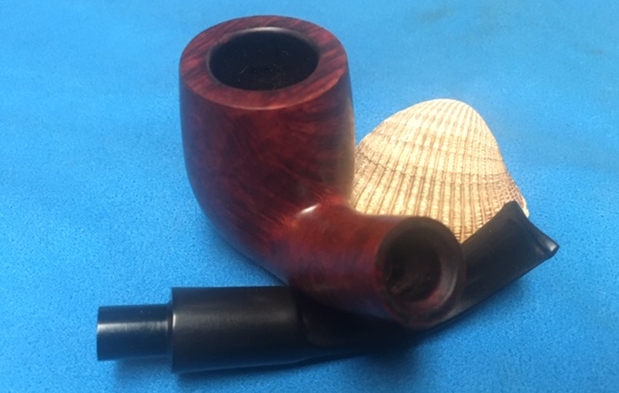
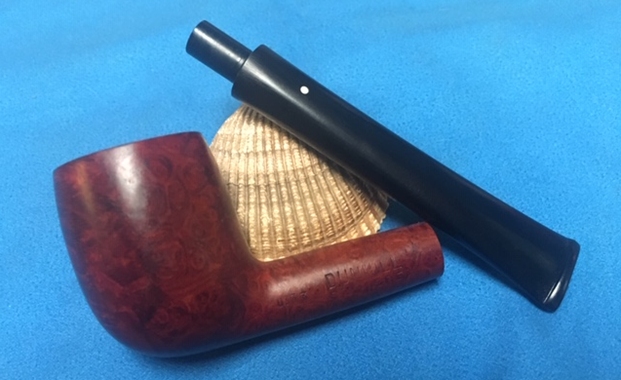
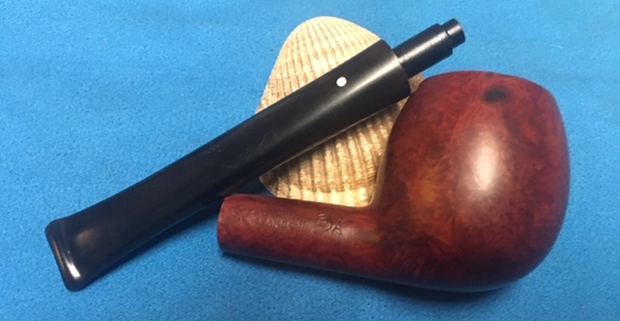
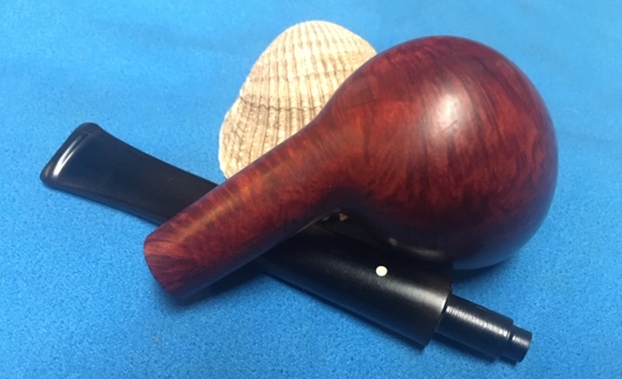
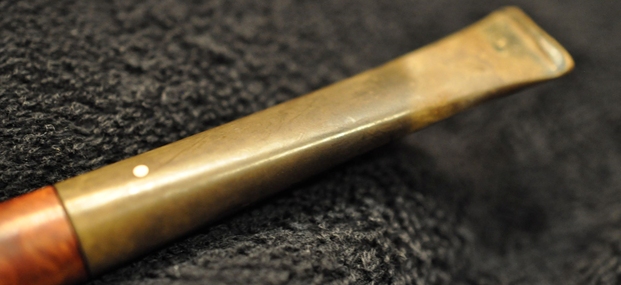
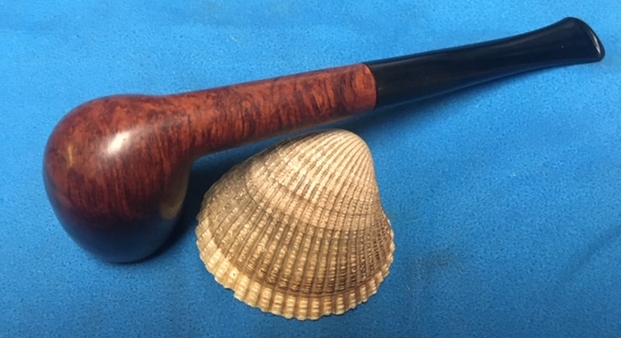
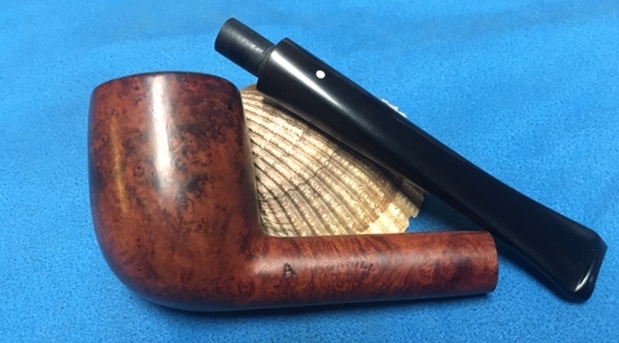
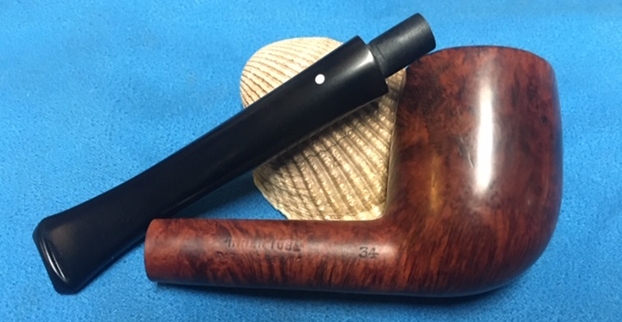
 The stummel has the feel of having some age. By the shape and looks of it, I would guess that it is from the 1960s or earlier. The plan is to transform the petite bent Billiard into a Churchwarden by mounting it to a precast Warden stem that measures 8 5/8 inches in length. I acquire Warden stems from Tim West at www.jhlowe.com.
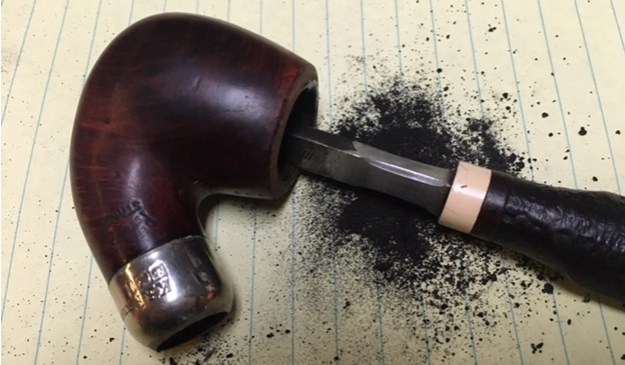
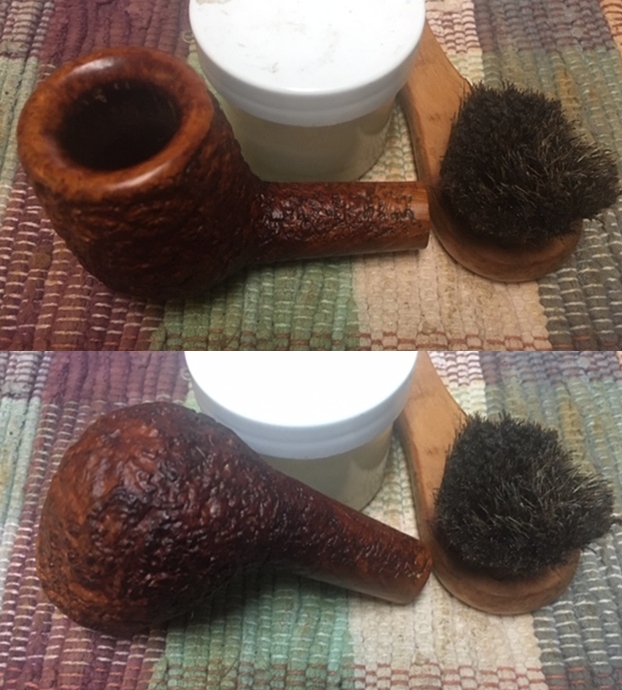
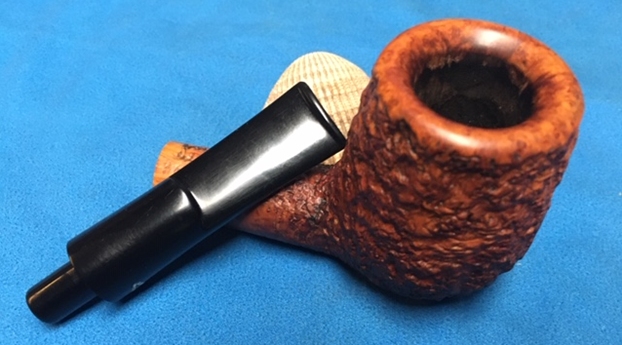
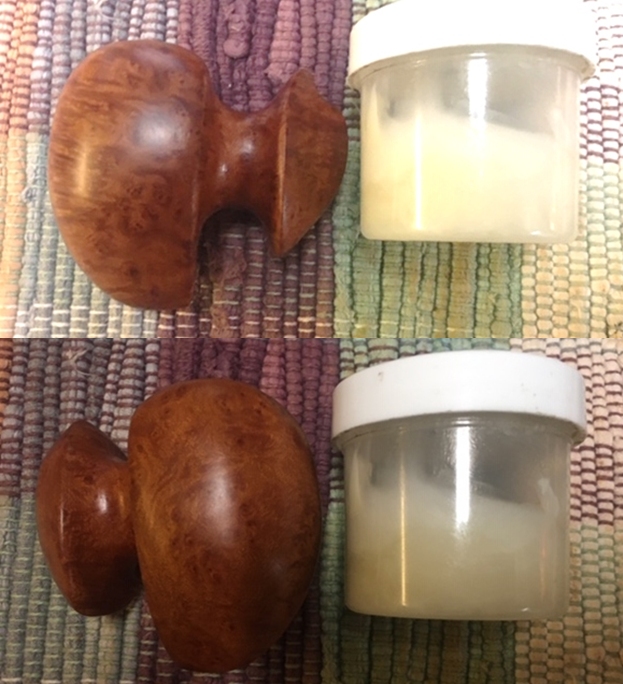
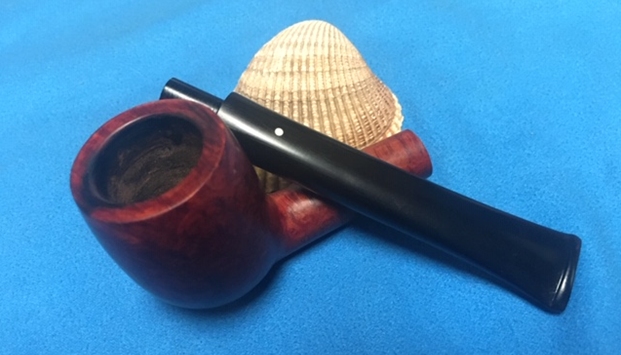
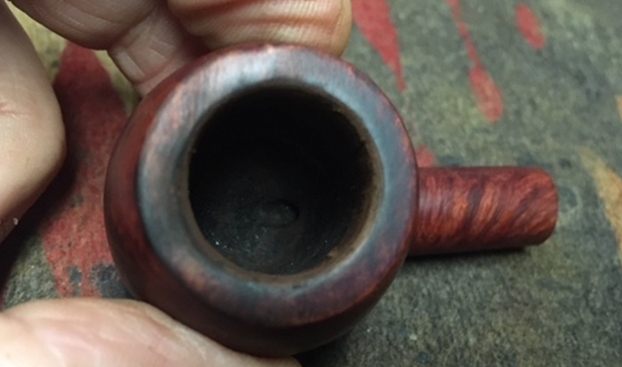
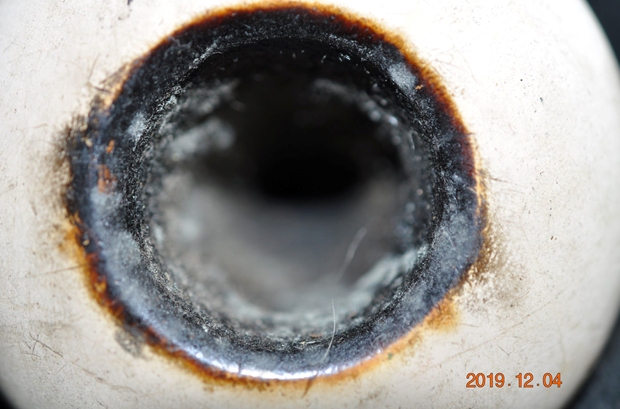
  I begin this CW Christmas project for Niko with the cleaning of the stummel. First, after spreading paper towel to aid in cleaning, I use the Pipnet Reaming Kit to address the cake build up in the chamber. I again take a close-up picture of the chamber showing the light cake build up to mark the start. I use only the smallest of the 4 blade heads available in the Pipnet Kit. Transitioning to the Savinelli Fitsall Tool, I scrape the chamber walls further and follow by sanding the chamber wall with 240 grade paper wrapped around a Sharpie Pen. The left-over carbon dust is then removed with a cotton pad wetted with isopropyl 95% and after an inspection of the walls, I find no problems with heating.

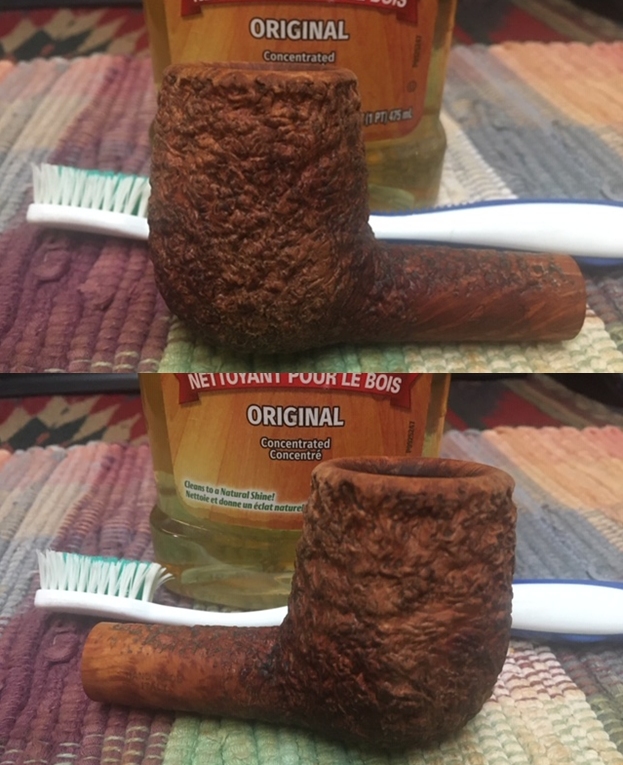
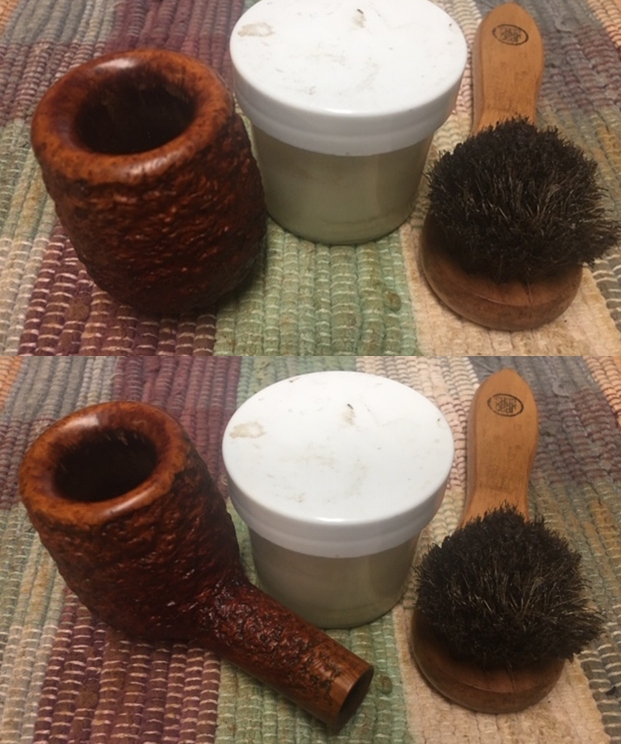
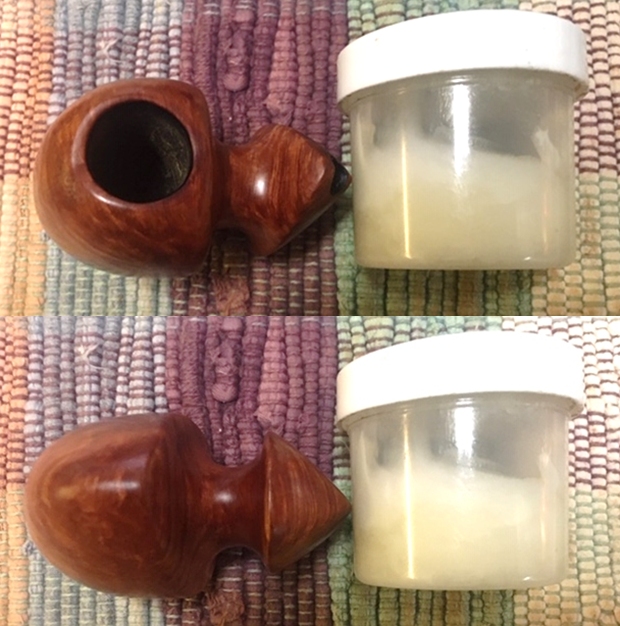
 Moving now to the cleaning of the external surface, the surface is scrubbed using a cotton pad wetted with undiluted Murphy’s Oil Soap.
 A brass wire brush is also helpful in scrubbing the rim top addressing the lava caked on it. I also utilize my Winchester pocketknife to scrape the rim. To rinse the soap, the stummel is transferred to the kitchen sink where the stummel is rinsed with warm water. Using different sized shank brushes with anti-oil dish soap, the mortise and airway are cleaned.
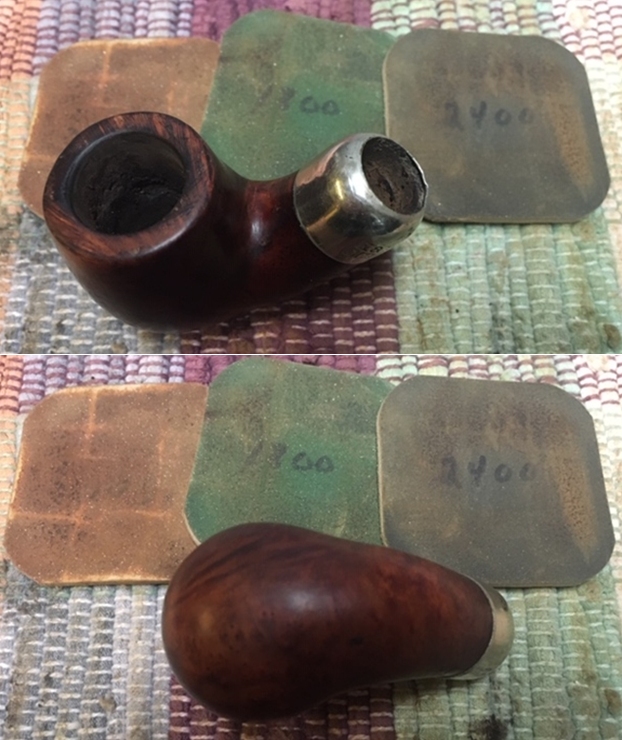
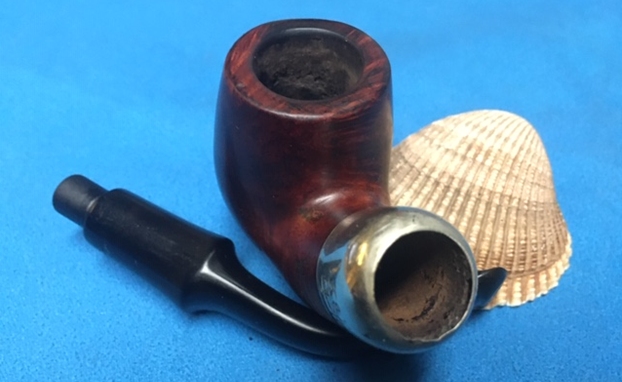
  Finally, after rinsing and back at the worktable, a picture records the results of the cleaning. The old worn finish is all but gone revealing the briar beneath. The scratches and imperfections are very evident mingling with the distinctive grain patterns.
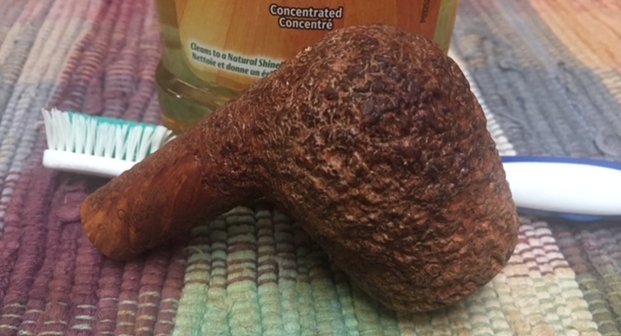
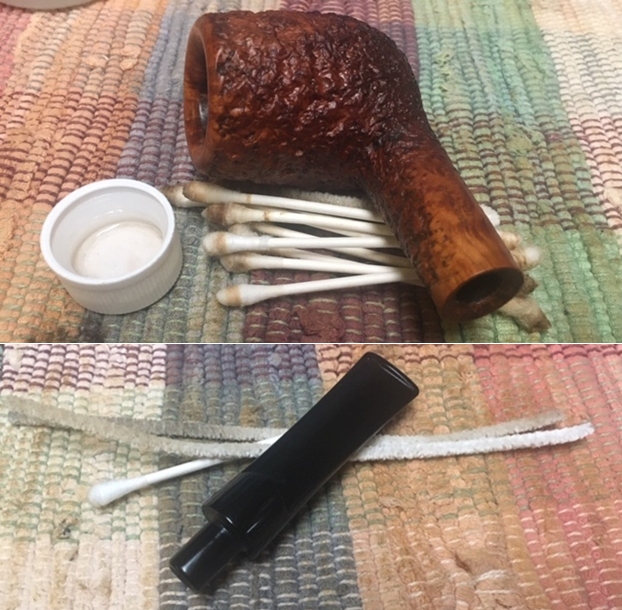
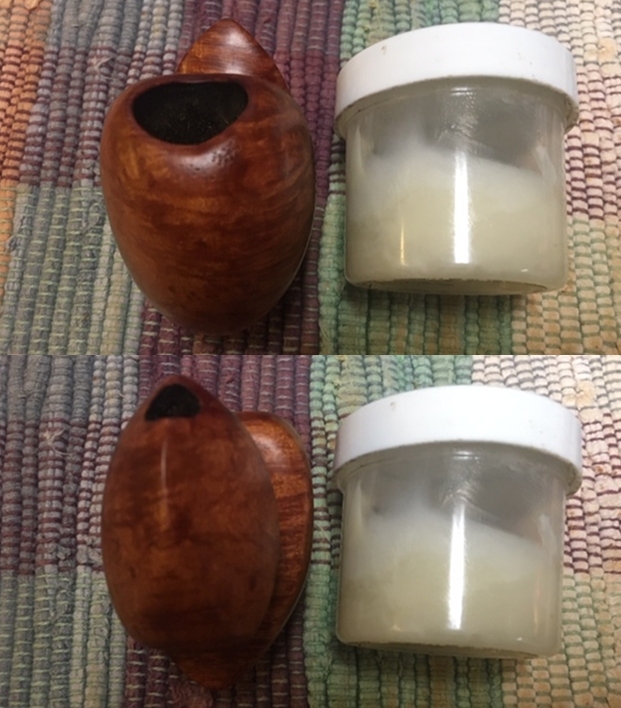
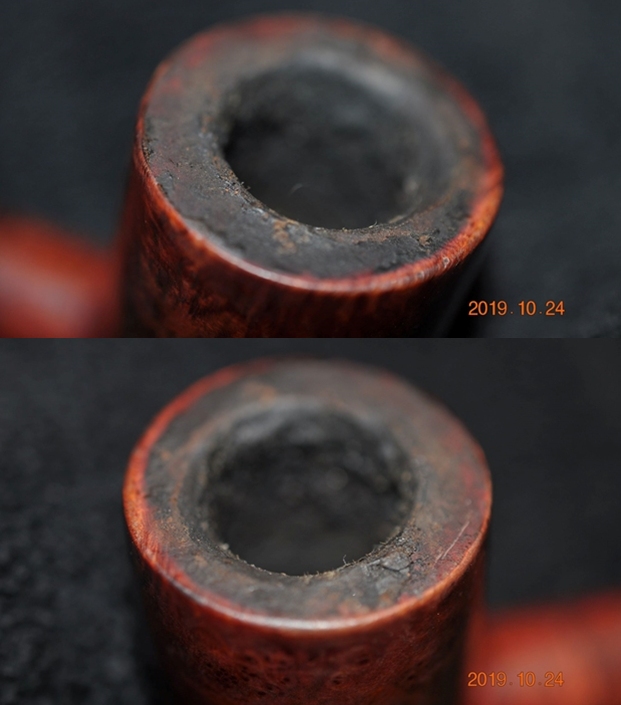
 Next, using cotton buds and pipe cleaners wetted with isopropyl 95%, cleaning the internals is addressed. As the picture below shows in stark visual imagery, the internals were a bear to clean! Using a small dental spoon, I also excavate a lot of tars and oils scraped off the mortise walls. From what I am able to see and feel down the mortise with the probe, the internal design has a trap and the angled airway is drilled over the top of the trap angling toward the draft hole entering the chamber. The trap has done the job of collecting the gunk, but the steward did not seem to know that frequent cleaning of the trap would keep this guy in better shape! Finally, after many expended pipe cleaners and buds, they began to emerge lighter. Later, the internal cleaning will continue with an alcohol and kosher salt soak further to clean and refresh the internals.
 Now looking at the stummel, I know that the shank will be undergoing a good amount of sanding to shape the shank during the stem fitting process. Therefore, the restoration work that I now do on the stummel external surface will not progress beyond the shank sanding at this point. I start at the top looking at the rim’s condition. It’s in bad shape with nicks and chips around the rim’s edge and the scorching damage resulting in the thinning on the left front quadrant. I use the topping board to begin addressing these issues.
  With 240 paper on top of the chopping board that serves as the topping board, I rotate the inverted stummel several times on the board.
  After a few rotations, I stop to look. With this first picture, the contours of the rim thinning are clearer. I continue to rotate on the topping board.
 These next pictures show the progression of the topping a step at a time. I stop with the 240 topping even though edge damage remains. I will rectify this with beveling instead of removing more rim real estate.

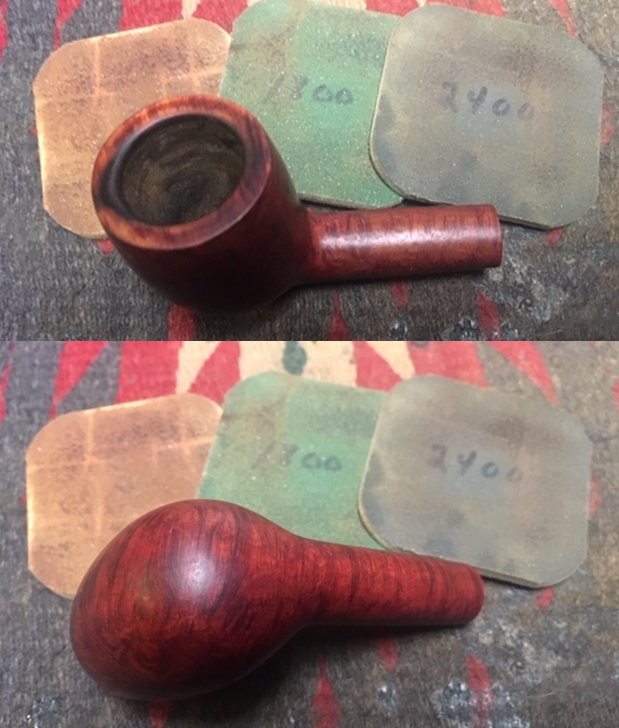
 I switch the paper to 600 grade and smooth the rim top further with this finer grade sanding paper. After several rotations on the board, I’m satisfied with the topping board results. Nice looking bird’s eye grains are peeking through the rim surface.
 Addressing the edge problems, 120 grade paper is used first to cut an outer edge bevel to remove the remaining cuts and chips on the edge. Following the 120 paper 240 grade paper is used to smooth out the bevel.
 Again to freshen the rim lines after the beveling, I do a very quick topping again with 240 and 600 grade paper.
 I finish the rim repair by sanding the bevel on the outside and inside rim edges with 600 grade paper. It looks good. I move on.
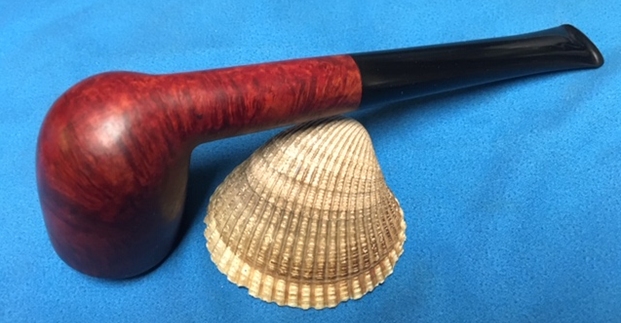
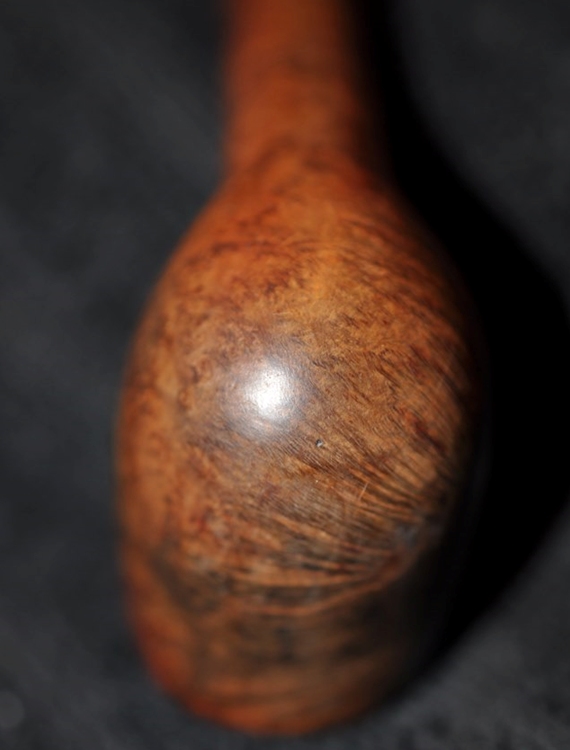
 Continuing now to address the stummel proper, I will do what I can to spare the remnant nomenclature on the shank sides as I sand out the problems on the stummel. I use sanding sponges to address the cuts and dents on the stummel surface. First, using a coarse sponge to sand, I follow with a medium grade and a light grade sponge. Wow! This block of briar is impressive with vertical flame grain running around the bowl and as you would expect, bird’s eye grain populating both the heel and rim. Very nice.
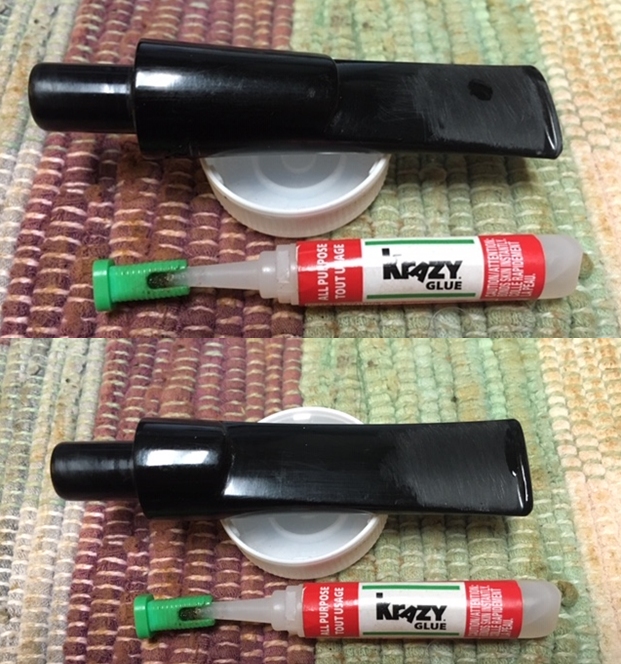
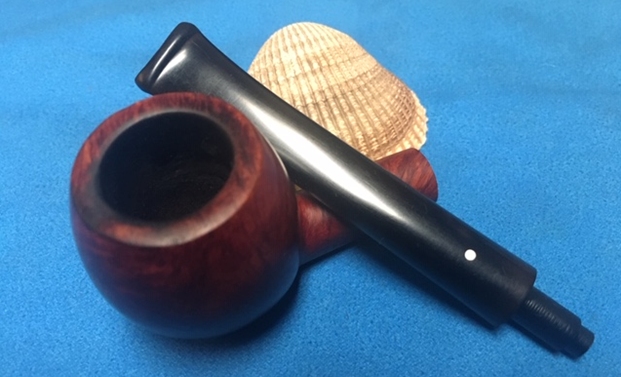
 I’ve progressed all I can now with the stummel until the stem sizing and placement is completed. The first step in this process is to size and fit the Warden precast stem’s tenon into the mortise. As with the first Churchwarden gift project for my son, Josiah, Niko’s Churchwarden Made in England bowl’s mortise is measured to establish the ideal target measurement for the tenon. This measurement is 8.61mm. 40mm is added to this ‘target size’ to establish the ‘fat size’ target. This is a conservative sizing of the rough tenon in order to patiently and more slowly sand the tenon to the target size. This allows for customizing the tenon as well as avoiding the danger of cutting too much with the Pimo Tenon Turning Tool. The ‘fat size’ is right at 9mm.
 Next, to establish a starting measurement sizing of the rough tenon of the precast Warden stem, the PIMO tool is used. To do this, the first step is to drill the airway with a drill bit provided by the PIMO kit to allow the PIMO tool’s guide pin to fit the airway. After mounting the drill bit on the hand drill, the airway is easily enlarged with the bit.
  Next, after mounting the PIMO tool on the hand drill, using the Allen wrenches provided by the PIMO kit, I adjust the carbide cutter arm to be just a bit smaller than the rough tenon size. This is simply to cut a uniform starting measurement size.
  I accomplish the initial cut and take a measurement of 9.46. The difference between this measurement and the fat target of 9mm is .46mm.
  Again, I adjust the carbide cutter arm to close this gap. After adjusting, I do a test cut by only cutting a little of the tenon and then measure.
  The reason for doing the initial test cut is that if you over cut and the tenon is too small… well, you have a very loose fit! My test cut was too much – 7.63mm! The target size, actual mortise measurement is 8.61mm.
  After widening the cutting arm, I make another test cut and measure – 8.93mm. This is good enough for achieving the fat target.
  I complete the tenon cut at 8.93mm. I take the cut all the way to the stem facing – making sure that there is a square cut and no shouldering on the stem facing.
 Transitioning now to sanding, I first use a coarse 120 grade paper to do the heavy lifting. As I sand, I test periodically to see the progress of the tenon’s entry movement into the mortise. I grip the paper around the tenon and then with my other hand rotate the stem to create the sanding movement. This keeps the tenon round as well. The pictures show the progress.

 When the tenon is close to fitting, I switch to 240 grade paper. The stem finally seats into the mortise.
 When I eyeballed the shank size and the stem next to it, I knew that the shank was a bit larger than the stem and I would need to sand the shank some to taper the shank toward the stem size. When the stem was seated, I saw how much of an overhang there was – it’s not a little.
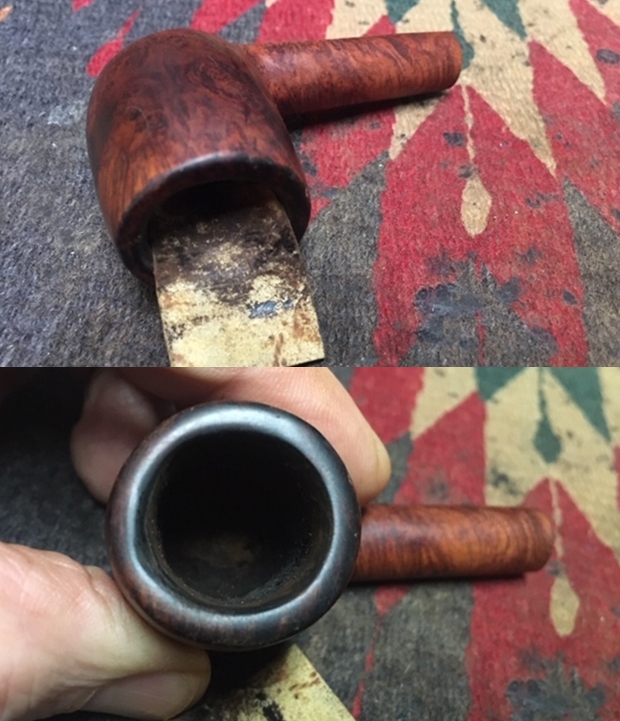
 This angle however, revealed another issue that I did not foresee. On the lower shank, just below the stem is the hollow caused by the angled drilling of the airway. I take a close-up of this cavity and then remove the stem to show the inverted mortise and drilling. Oh my. This creates some challenges. As if to add insult to injury, I discover another issue. The tenon has a slight rock or wiggle when it’s fully engaged. What this means is that the front of the tenon was sanded down too much and is not in contact with the mortise wall. The tenon closer to the stem facing is making contact. When I pivot the stem vertically, it rocks a little. Not good.
 I decide to address the lose tenon first and think about the rest. To expand the tenon, I use a drill bit to insert into the airway. I choose a drill bit which is the next size larger than what will fit into the airway. I then use a Bic lighter to heat the tenon to warm the vulcanite. When the vulcanite is warm enough, it softens and then I push the bit in the airway which expands the tenon. After heating and inserting the bit, I take it to the kitchen sink and run cold water on the tenon to set the expanded vulcanite. With the aid of a pair of pliers, the bit is retracted and again the tenon is inserted into the mortise. The procedure worked well – the tenon tightened and there is now no rocking. Moving on.
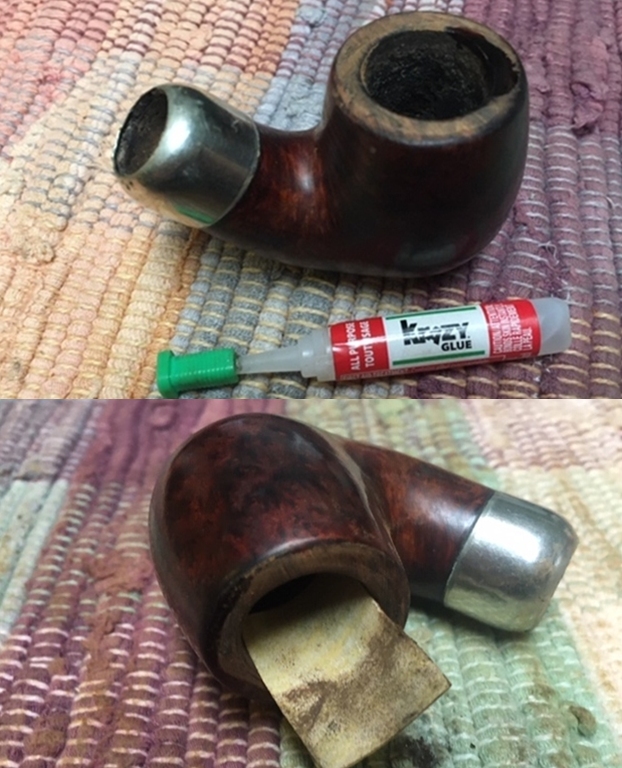
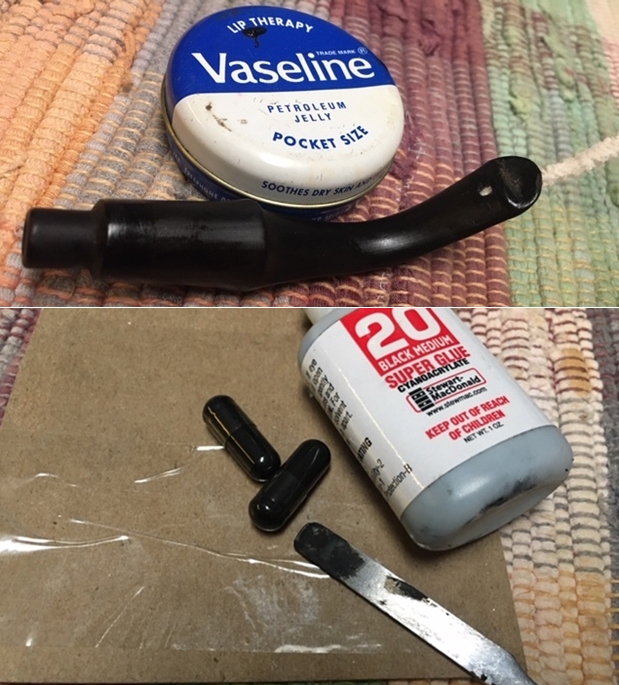
 After giving some thought to the conundrum of the shank and Warden stem placement, I recognize that I will not be able to save the bowl’s scant nomenclature. To taper the shank in a balanced way, will require the sanding to start further up the shank. I also decide that I will fill the drilling channel with briar dust putty to remove the hollow and make this area solid. Finally, I decide to fit the shank with a band to mask the hollow as well as to give the emerging Churchwarden an added bit of class.
  First, to fill the drilling channel, I mix a small amount of briar dust and thick CA glue. I use a plastic disk as a mixing pallet and to help with cleanup I put scotch tape down to mix on. After putting a small amount of briar dust on the pallet, thick CA glue is placed next to it. Using a toothpick, the briar dust is pulled into the CA glue and is mixed with the toothpick.
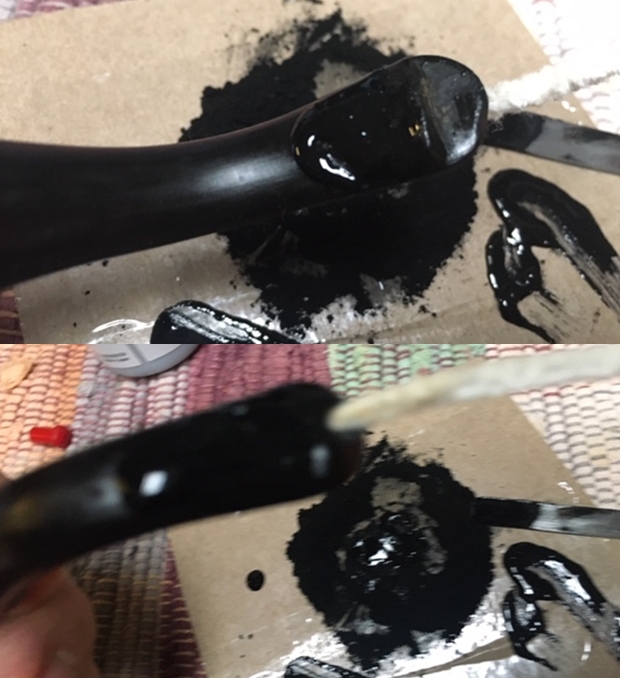
  When the mixture thickens, I use the toothpick to trowel the putty into the drilling channel in the mortise. I then set the stummel aside allowing the putty to cure through the night – lights out!
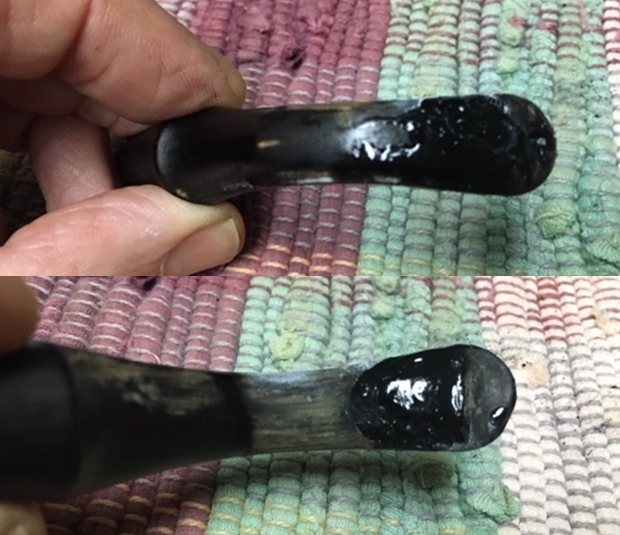
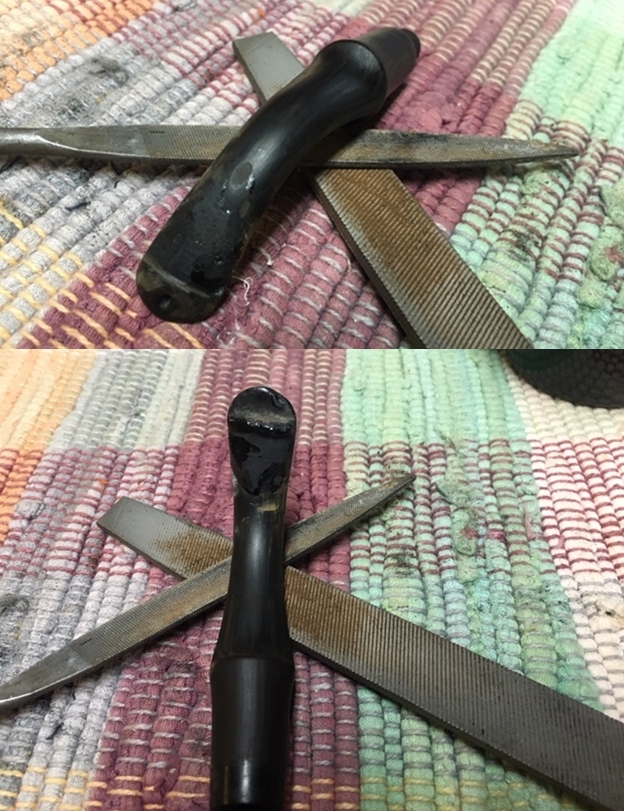
 The next morning, the putty has cured, and I go to work filing the fill to match the curvature of the mortise. A half-circle tapered needle file does the job well.
  The next pictures show the patch material now filling the hollow of the airway drilling and as well the necessary sanding to remove the excess overhang of the shank facing over the stem.
 To begin the sanding to remove the excess over the stem facing and to taper the shank, a coarse 120 grade paper makes the work more efficient. The sanding includes the entire shank to provide a more gradual tapering toward the stem. Without this, a ‘stuffed pants’ appearance is left. The stem remains engaged in the mortise throughout the sanding process.
 After a good bit of sanding, the alignment is looking good. As usual, on the sides where the precast stem seams are, the sanding is more directed. The pictures show the alignment at this point using 120 grade paper alone. The tapering of the shank looks good.
 I mark the upper side of the stem with a piece of scotch tape so that I later refit the stem with the correct orientation. The next thing I want to see it how a band or shank cap will work. Some months ago, the word went out about a pipe man on French eBay selling bags with a variety of copper rings, bands, caps, and spacers at a very decent price. I don’t know who started the rumor – Steve, Paresh, Victor?, but several of us were able to order a supply for our work desks. The package containing the supply had a card, Pipe Estate at www.pipes-estate.com. I have been waiting for an opportunity to utilize this addition to my inventory.
 After dumping the multitude of copper fitments on my worktable, it was fun taking a closer look at all the available sizes and shapes. But the question always is, will there be one in all these that will work??
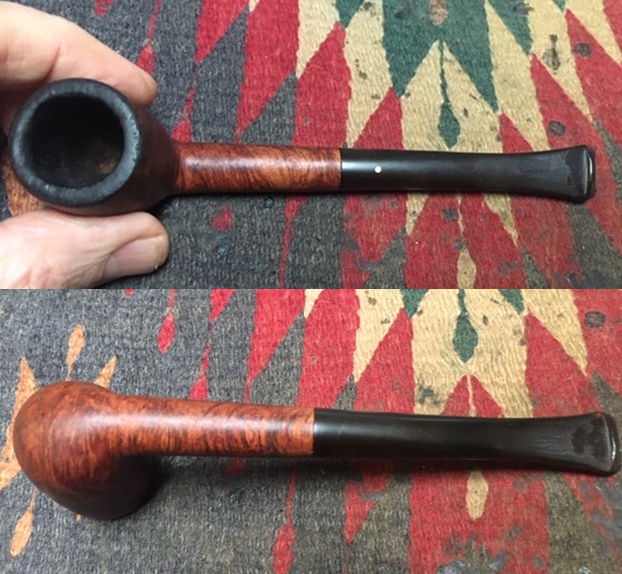
 As if I were holding the Holy Grail, I found a few that looked hopeful, but one was perfect. A copper shank cap that fit the shank perfectly and reaches over the end of the shank to provide a spacer. Perfect!
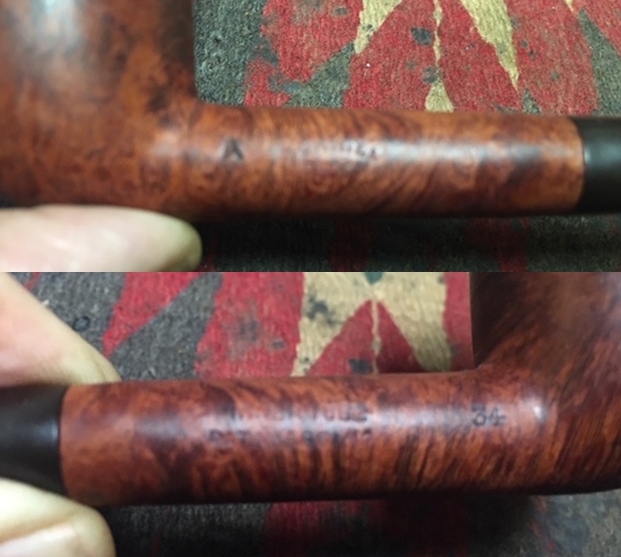
 Remounting the stem, I oohed and awed at the beauty and wonder of this addition to the creation of this Churchwarden going to Niko for Christmas! There was a sacrifice in having to sand away the ‘Made in England’ marking on the shank which bums me out in a huge way, but I’m pleased with the shank tapering and the contribution of the copper shank cap to the ensemble.
 The rest of the Warden stem is awaiting sanding, but for the time, I continue sanding to smooth and finish the stummel. Following the coarse 120 paper that did the main work on the tapering, 240 and 600 grade papers continue the process of smoothing the shank surface.
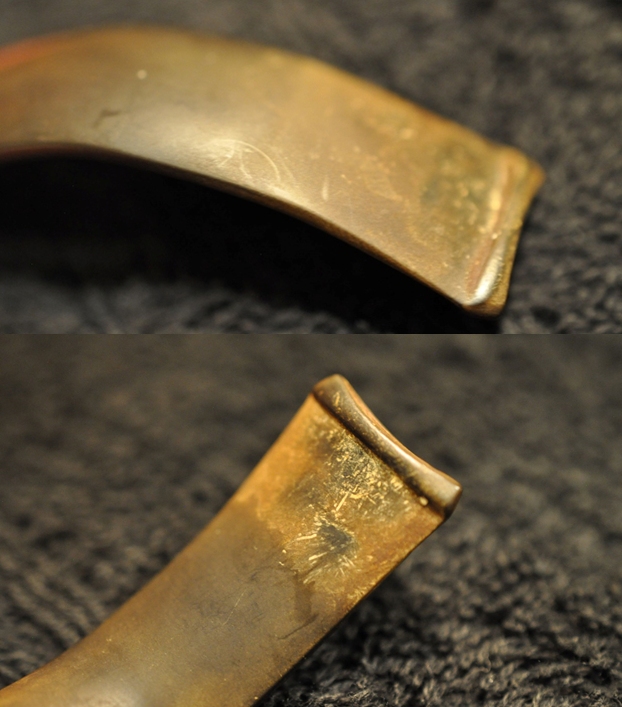
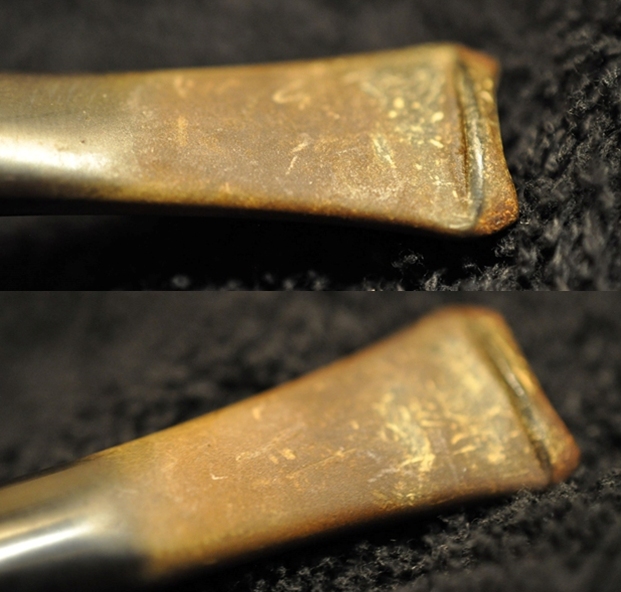
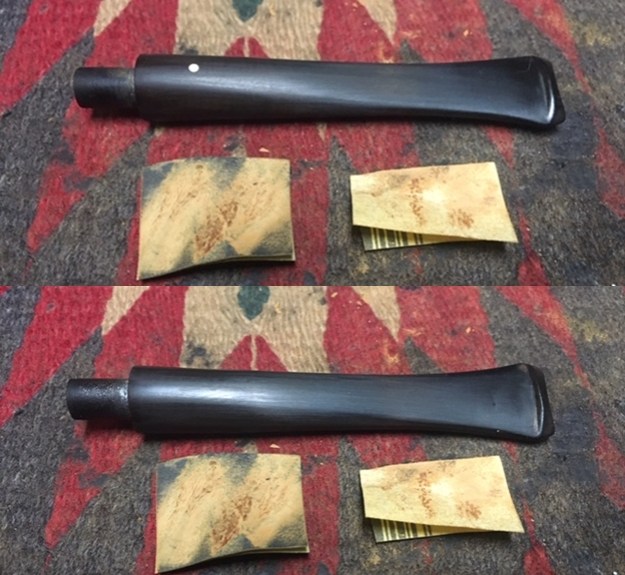
 Next, I put the stummel aside and continue sanding the remainder of the Warden stem with 120 sanding paper. I also use a flat needle file to shape the raw, precast button.

 Following the filing and 120 grade paper, 240 grade continues the smoothing process by erasing the scratches left behind by the coarser filing and sanding.
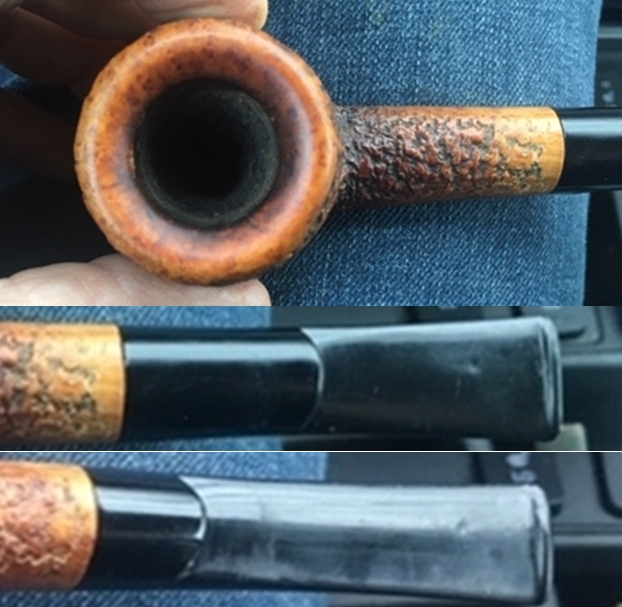
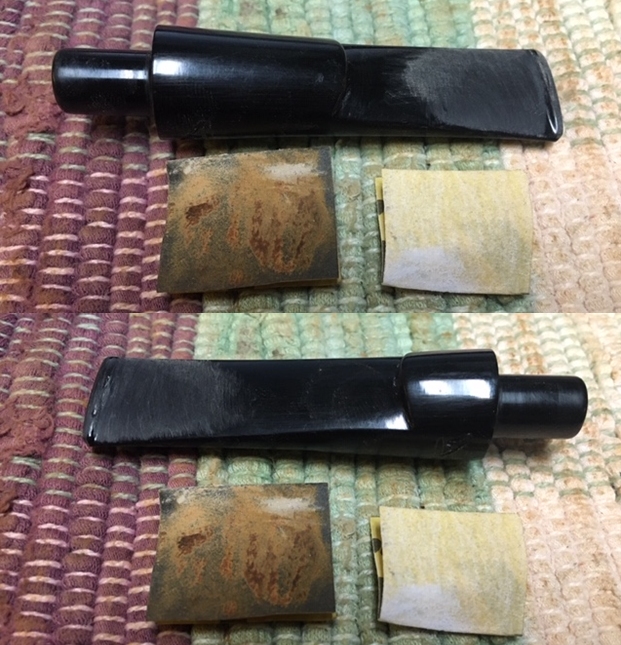
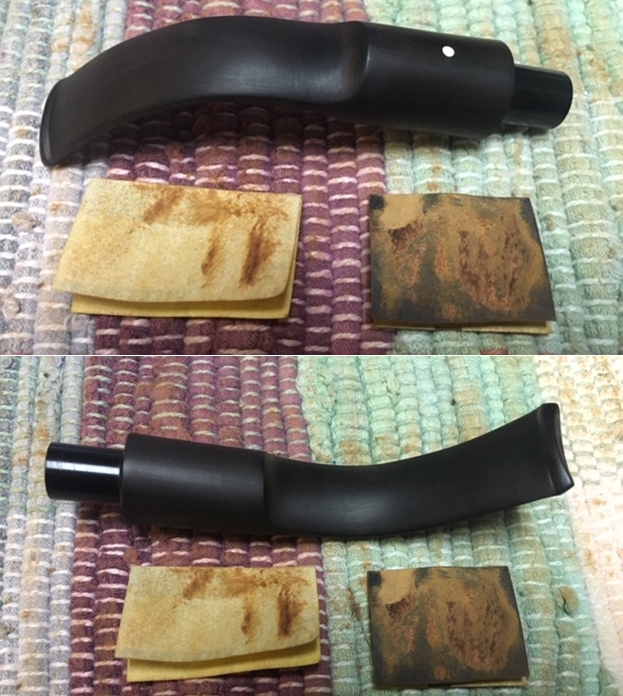
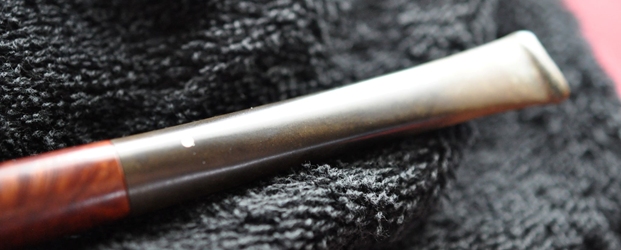
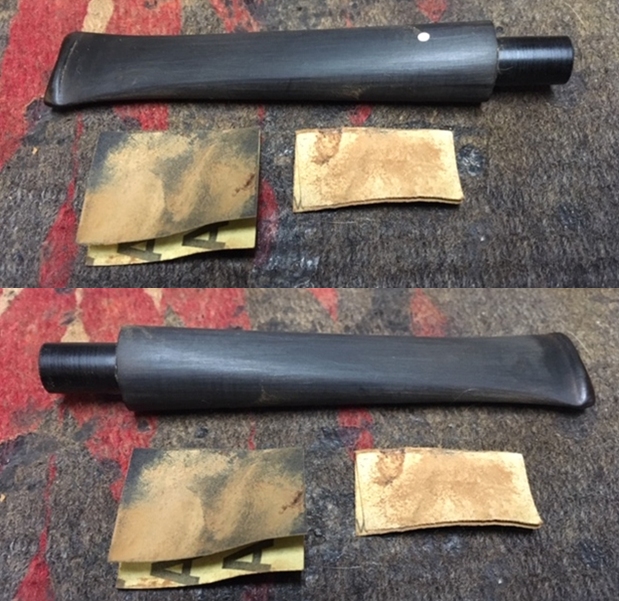
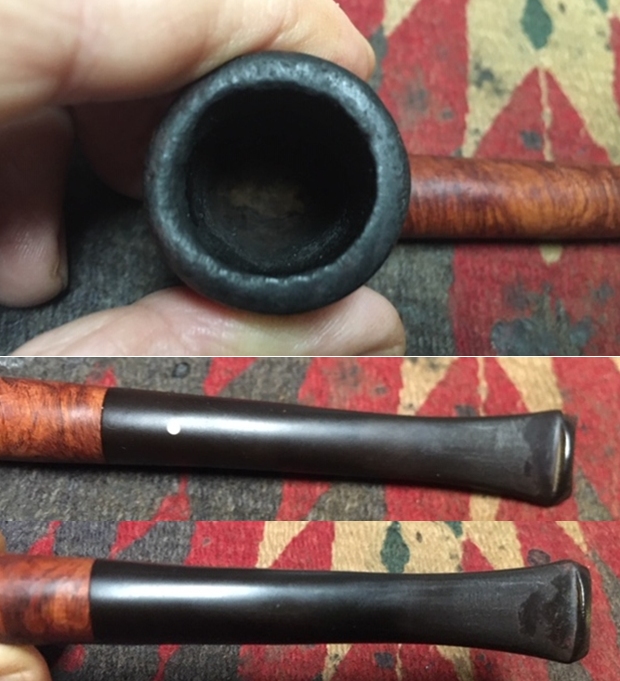
 Following the 240 paper, wet sanding with 600 grade paper erases the scratches of the 240 sanding and then applying 000 grade steel wool completes this phase of the sanding process. One picture of the entire stem is taken followed by closeups of the upper and lower bit.
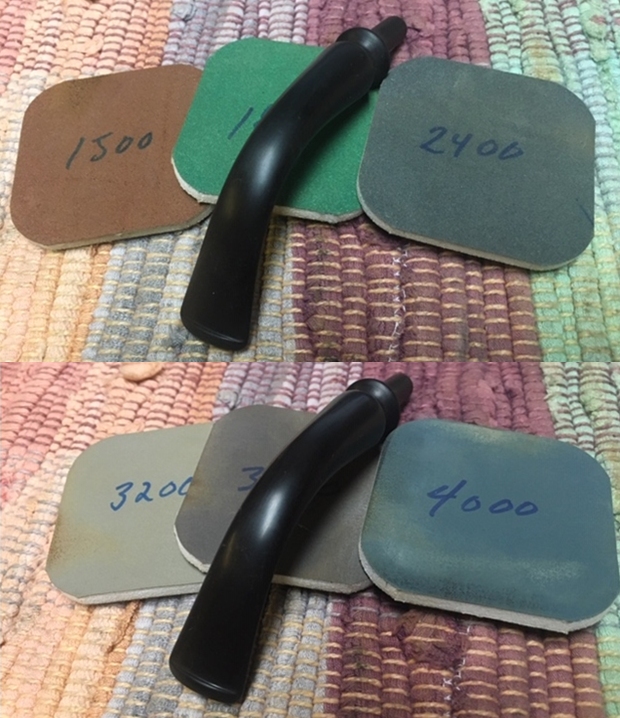
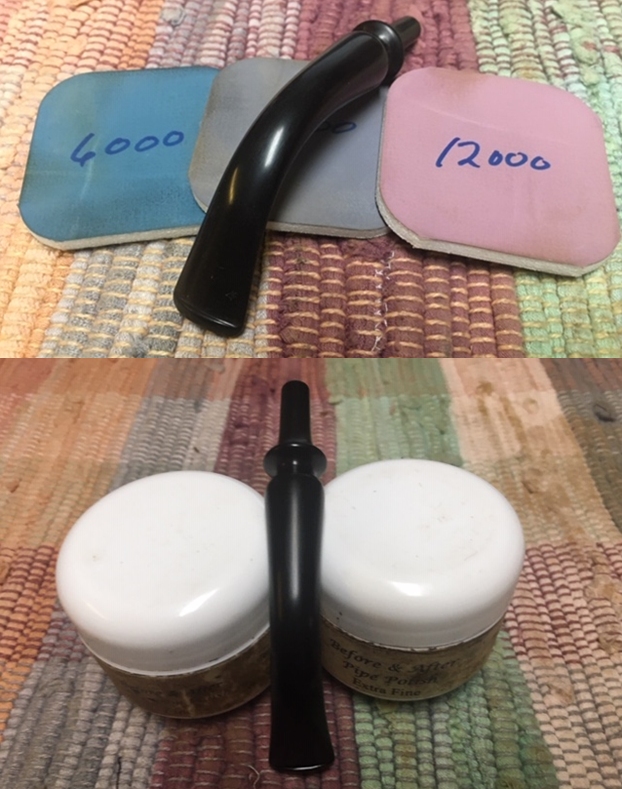
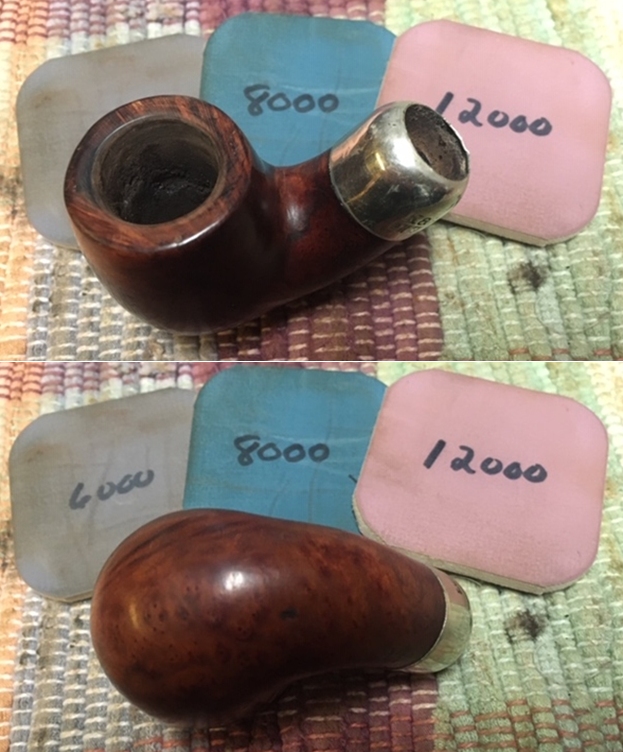
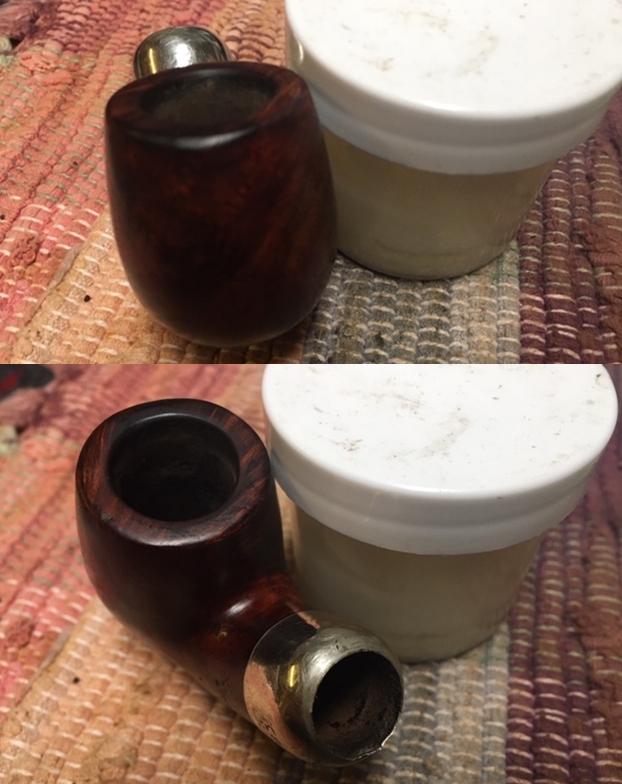
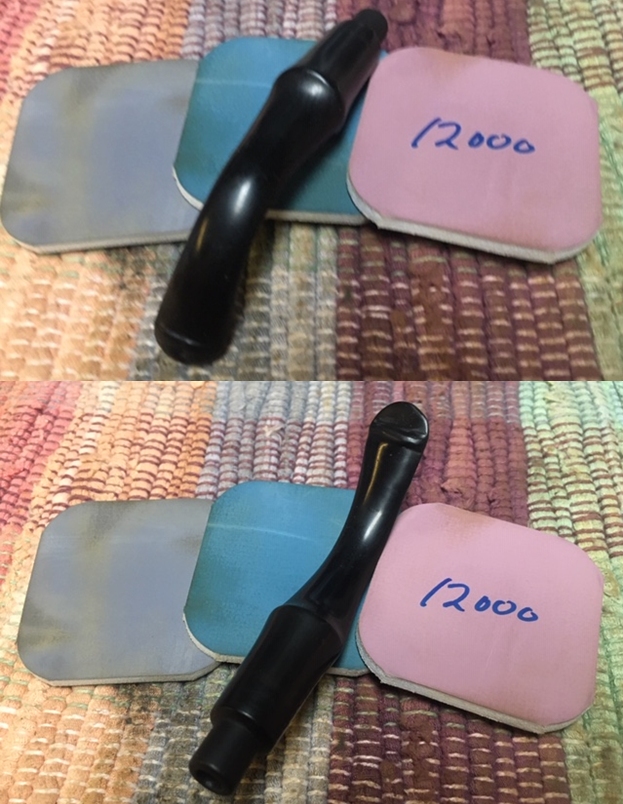
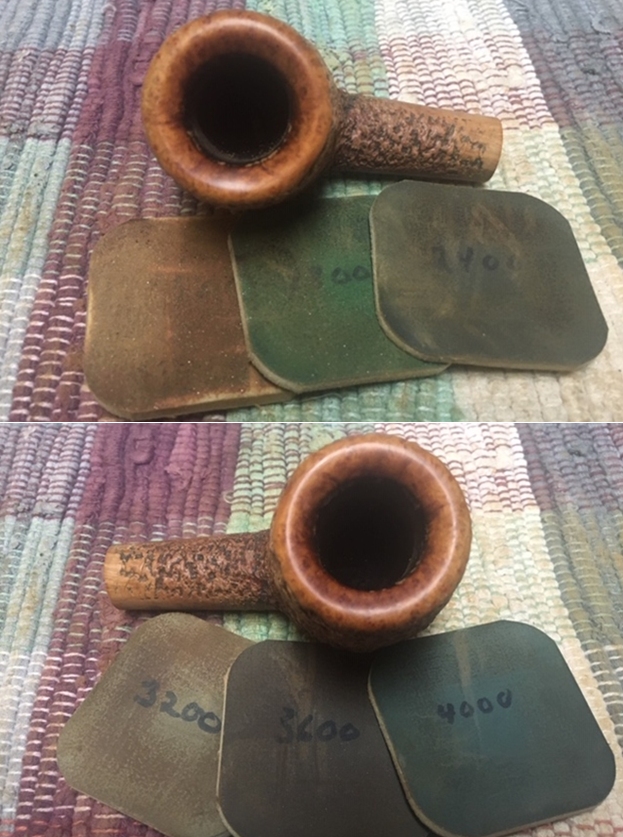
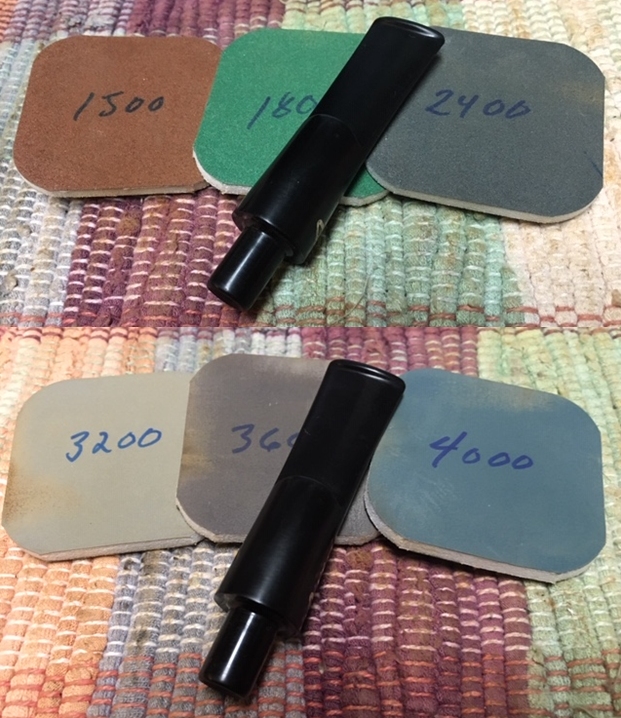
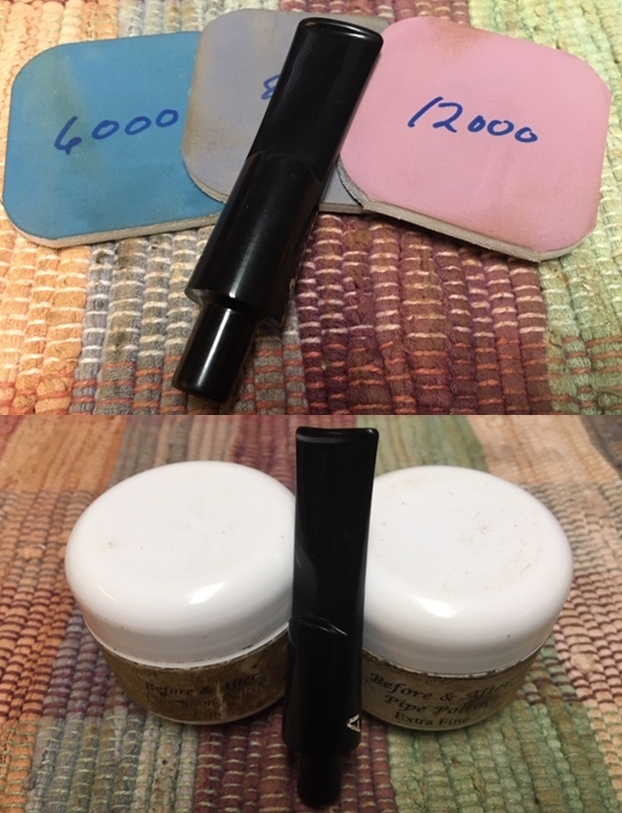
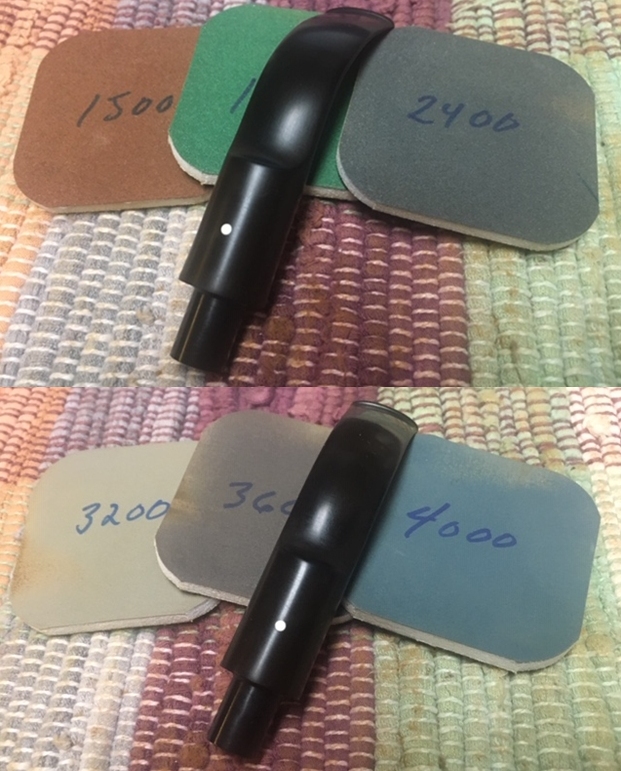
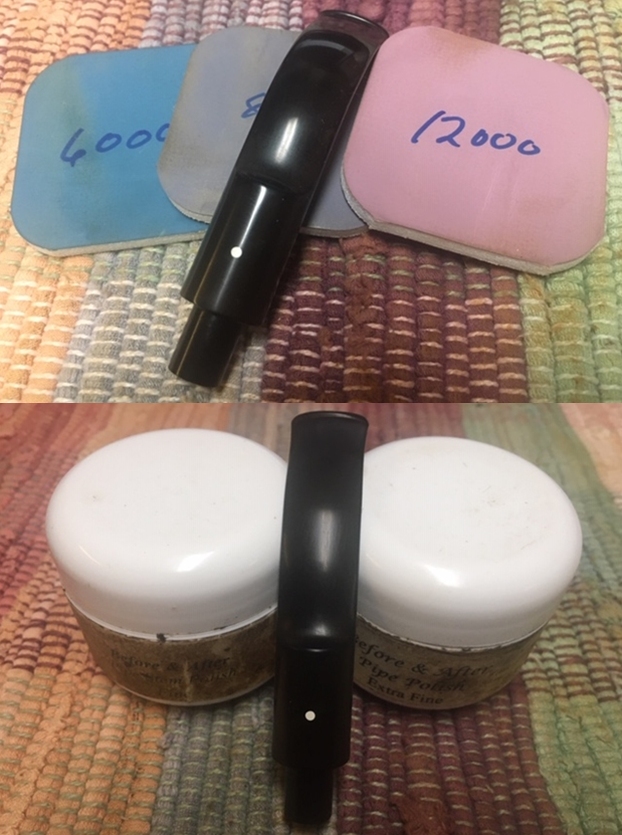
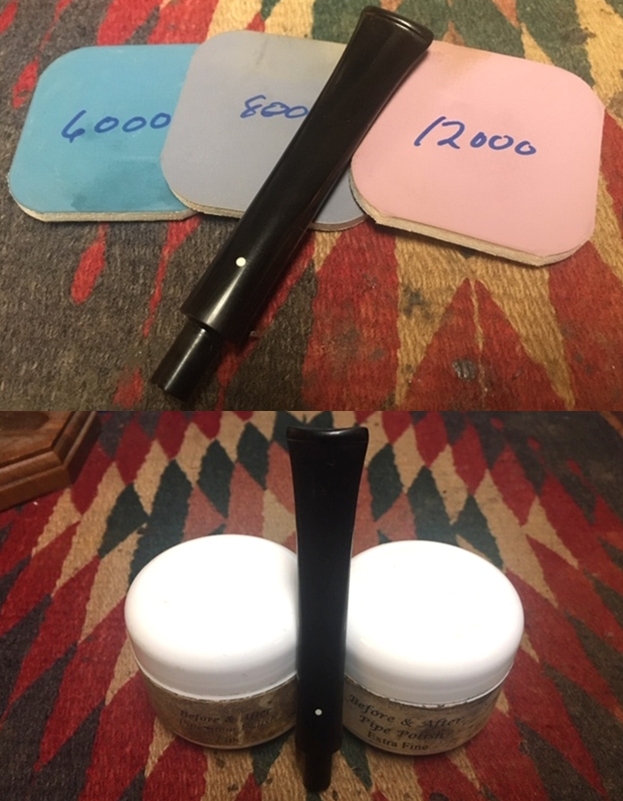
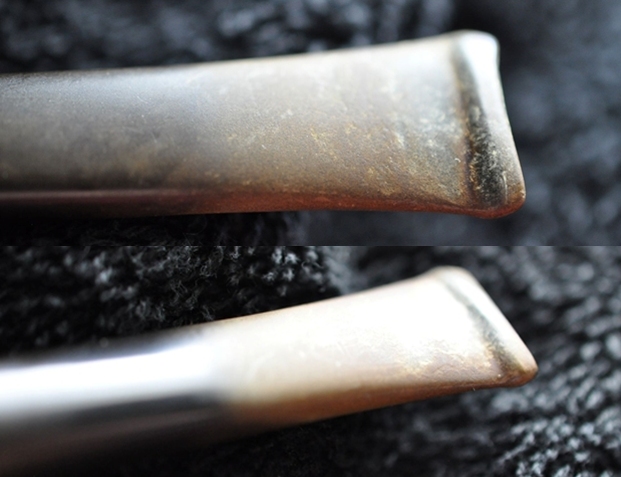
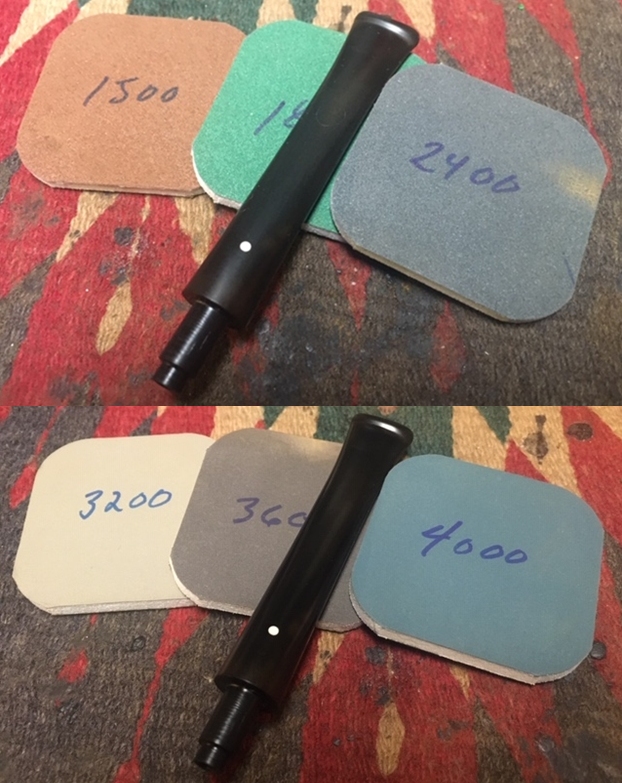
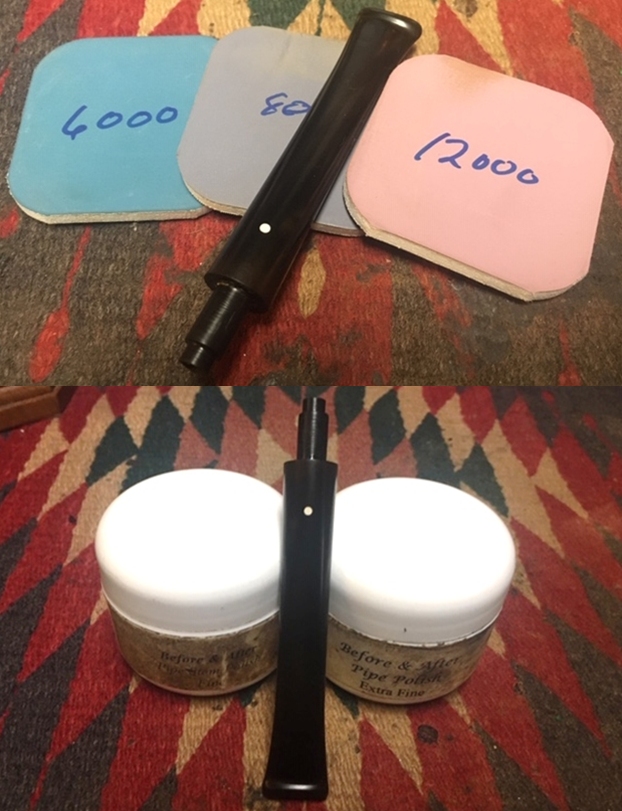
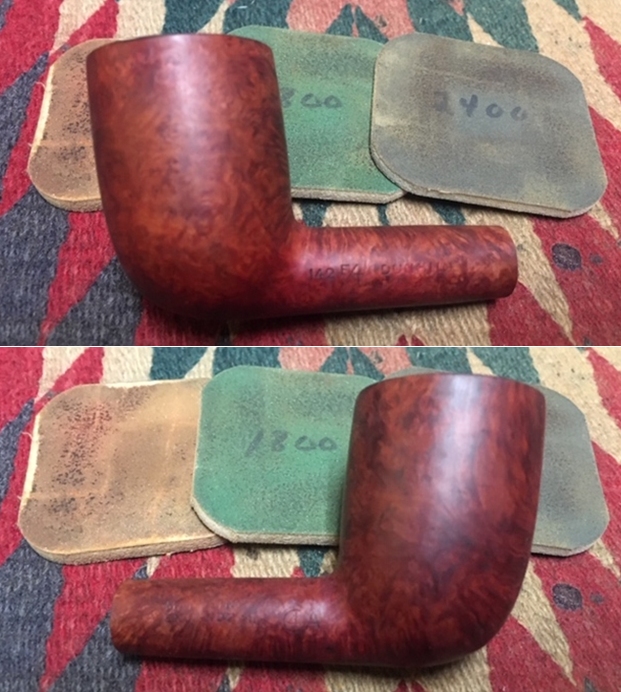
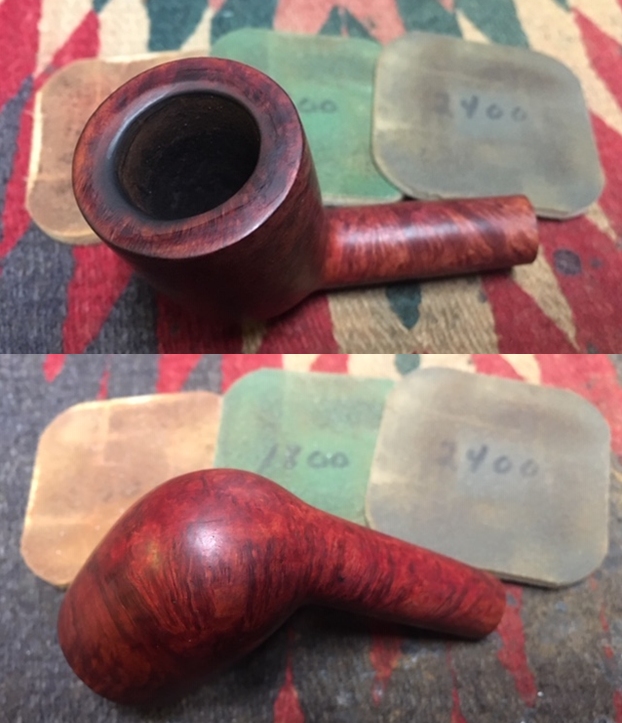
 The full regiment of micromesh pads is applied next by wet sanding with pads 1500 to 2400 then dry sanding with pads 3200 to 4000 and 6000 to 12000. Between each set of 3 pads, Obsidian Oil is applied to vitalize the vulcanite stem. Again, I take one picture of the entire stem from the orbital shot and two closeups of the upper and lower bit after the final 3 micromesh pads.
 With the micromesh process completed, it is time to bend the Warden stem. I like to draw a template of a bend so that I’m not simply eyeballing the process. The general goal is to have the mouthpiece of the Warden stem on a parallel trajectory with the plane of the rim. On the diagram below, I draw a horizontal line representing the plane of the rim. I also rough sketch the current disposition of the unbent stem. Then I rough in a bend starting about 1/3 the distance from the shank and complete the sketch parallel with the rim plane. This is the guide template.
 The hot air gun focuses on the area about 1/3 up the stem for the first bend attempt. I bend the fat part of the stem first to have a more even and sweeping bend as it takes longer for the fat part to become supple than the thin part. As the stem is rotated over the hot air, gentle pressure is applied and when the stem starts to bend, I know it’s reaching the state of shaping. As the bottom third becomes supple, I move the heating up the stem a bit now to warm the middle. All the while rotating back and forth and around.
 After the stem heats enough using the hot air gun, I place the pipe on the template and hold it in place until it holds its position. I’ve found that even though it takes longer this way, I’ve lost the shape I want if I transition the pipe to the kitchen to run the stem under cool water to quicken the cooling. The first attempt is good. There’s a nice flowing bend but the final trajectory is a little wide.
 The second attempt is very close to what I want, but it’s still a hair wide.
 One more time heating does the trick. This time I take the stem to the sink and run it under cool water to cool the vulcanite and hold the bend that has been created.
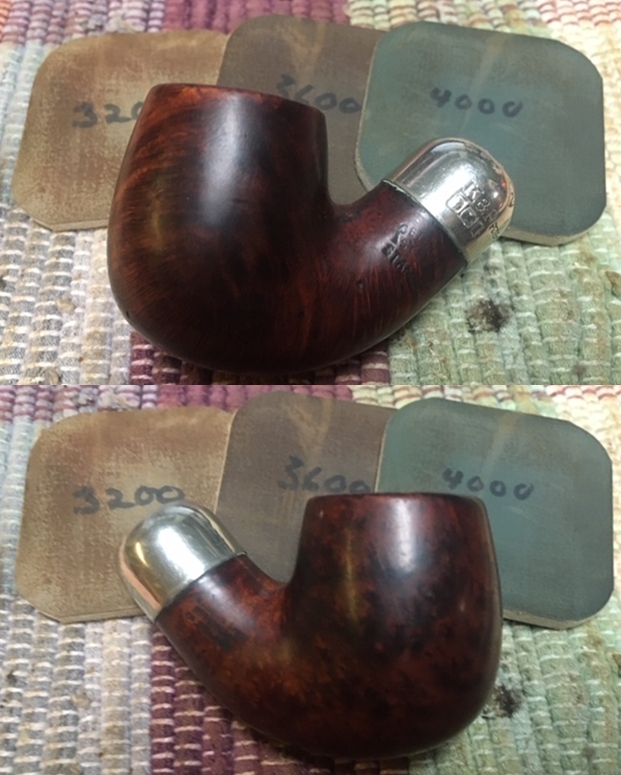
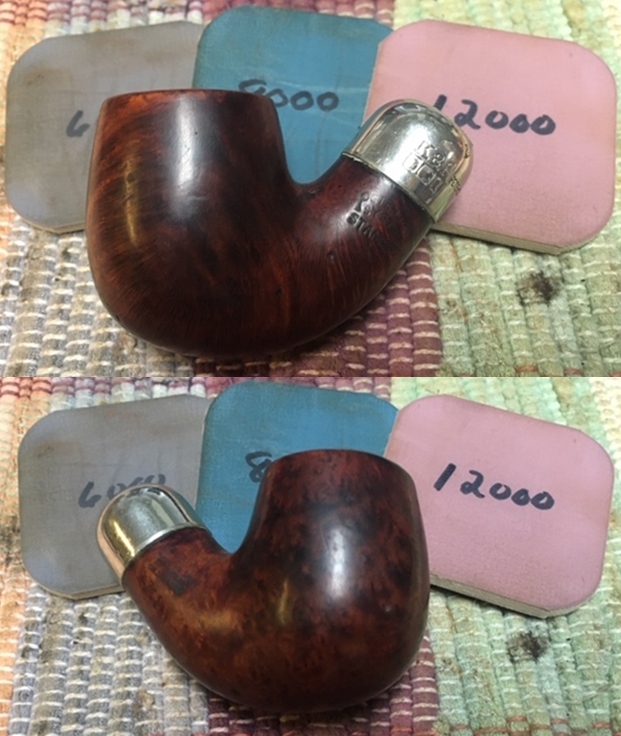
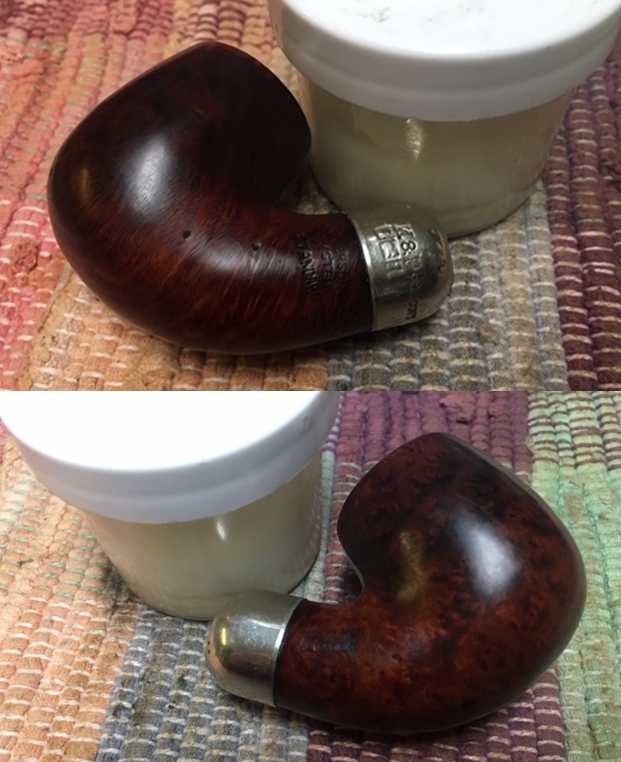
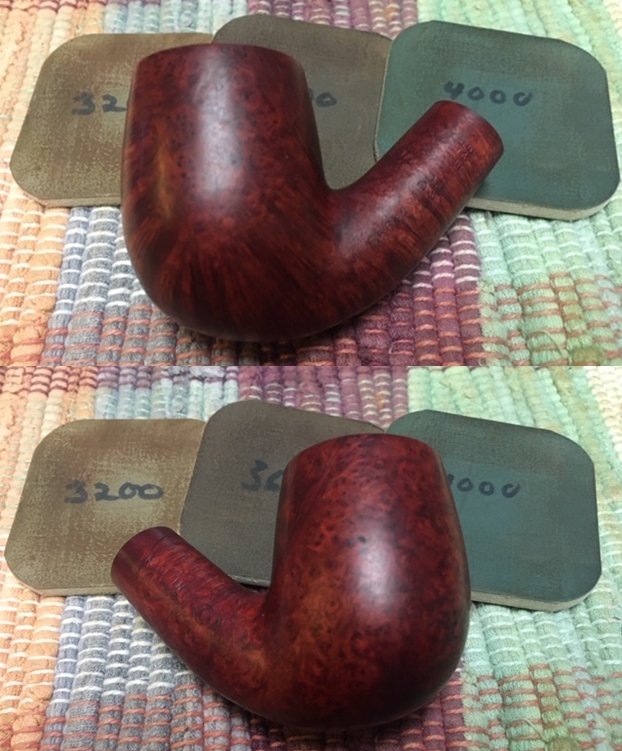
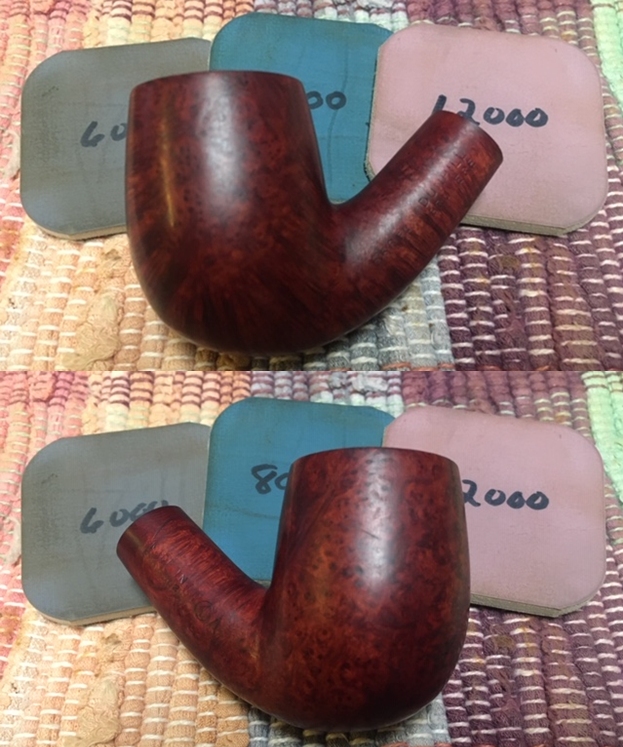
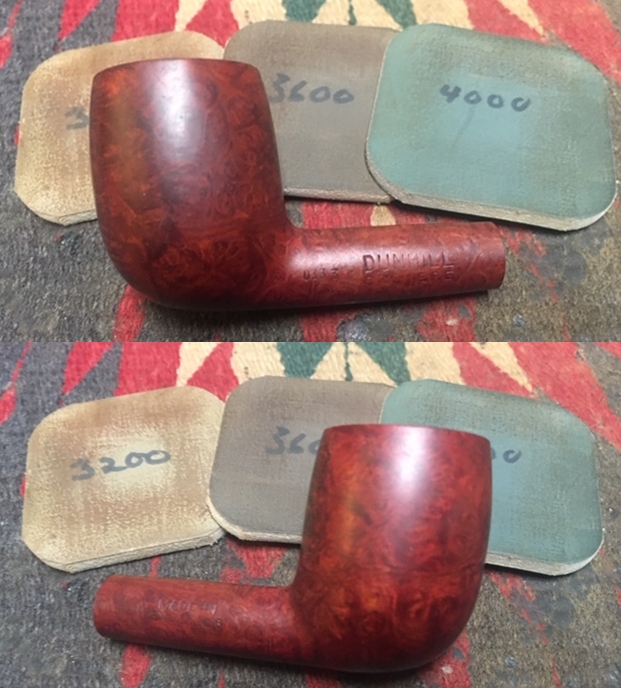
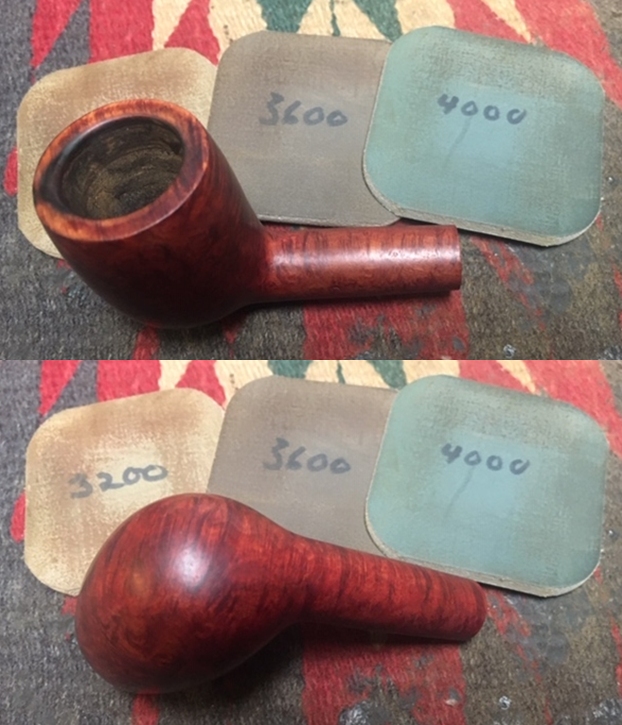
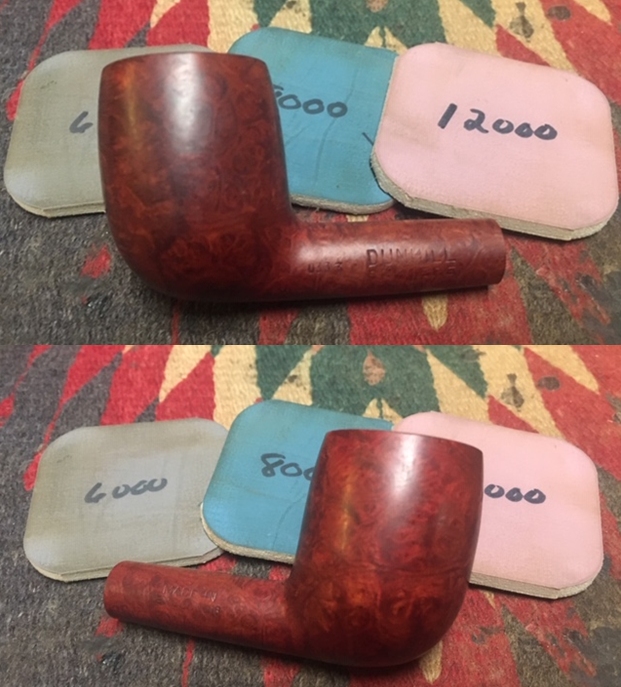
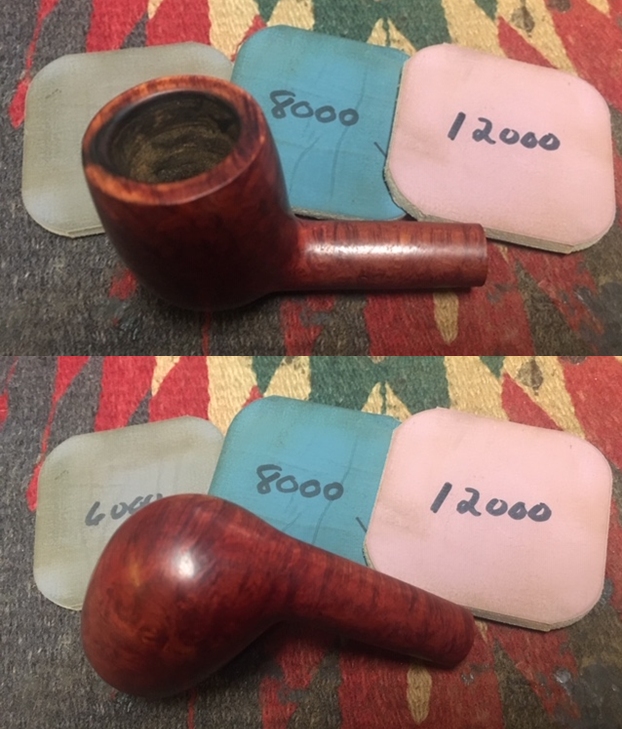
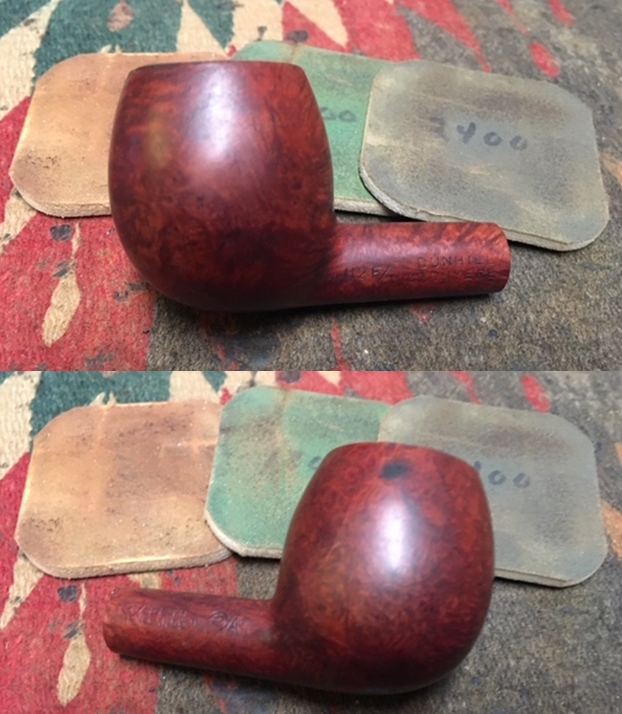
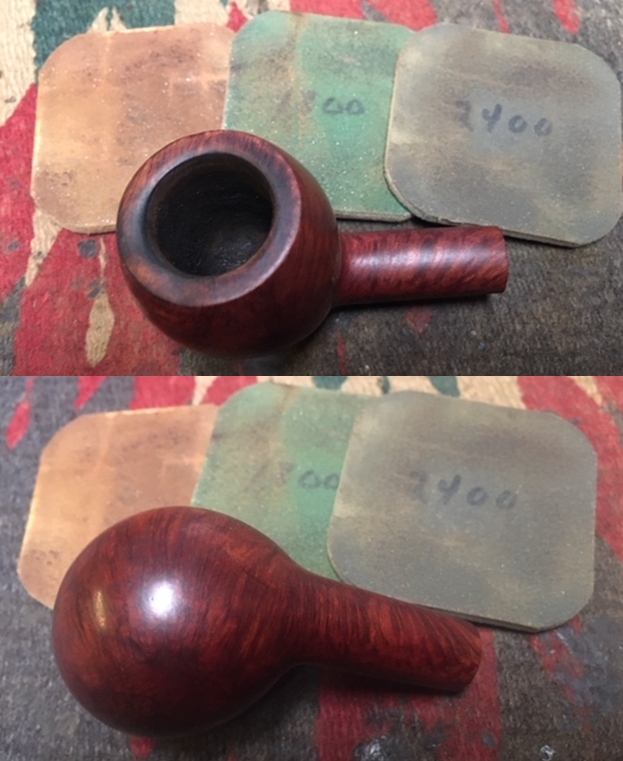
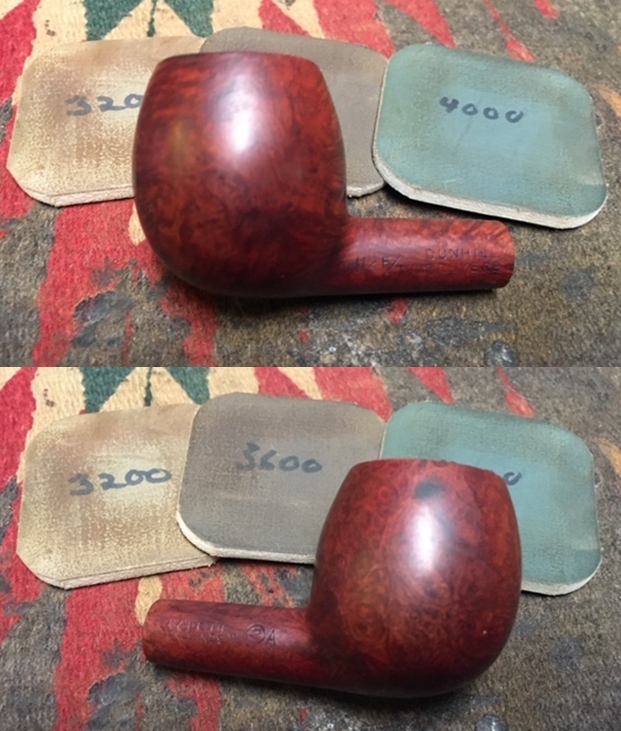
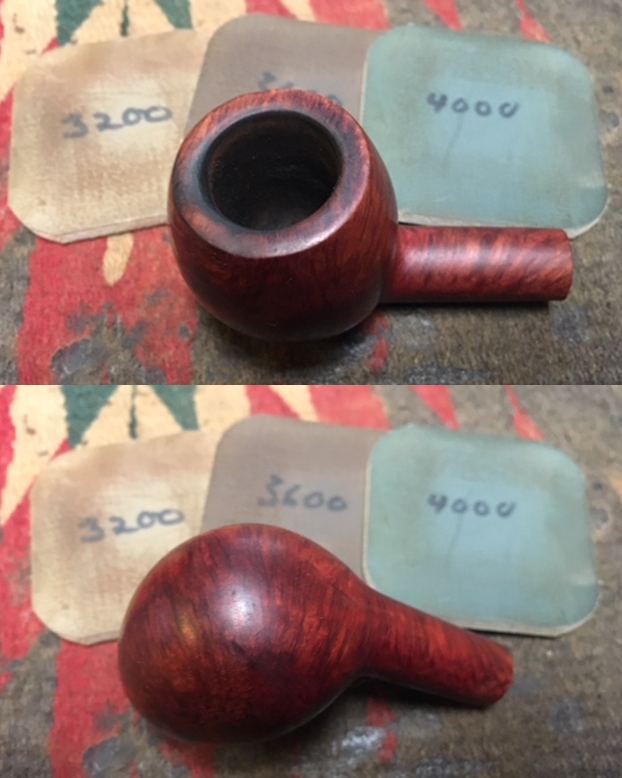
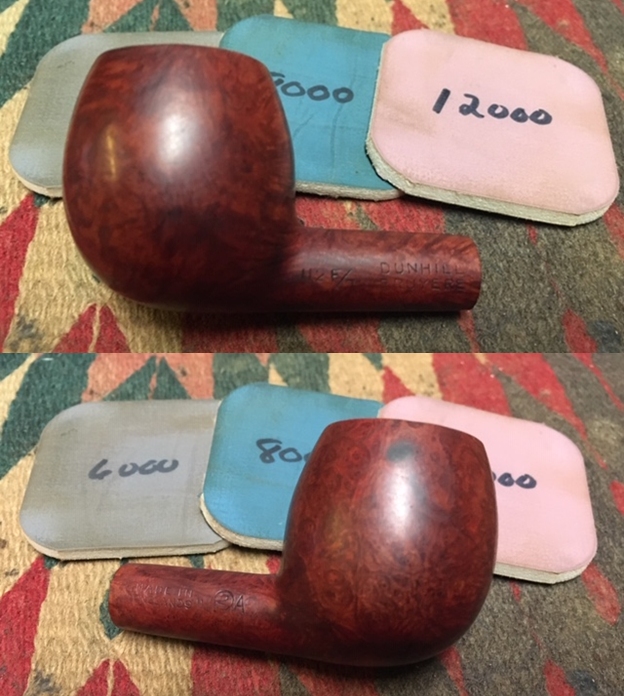
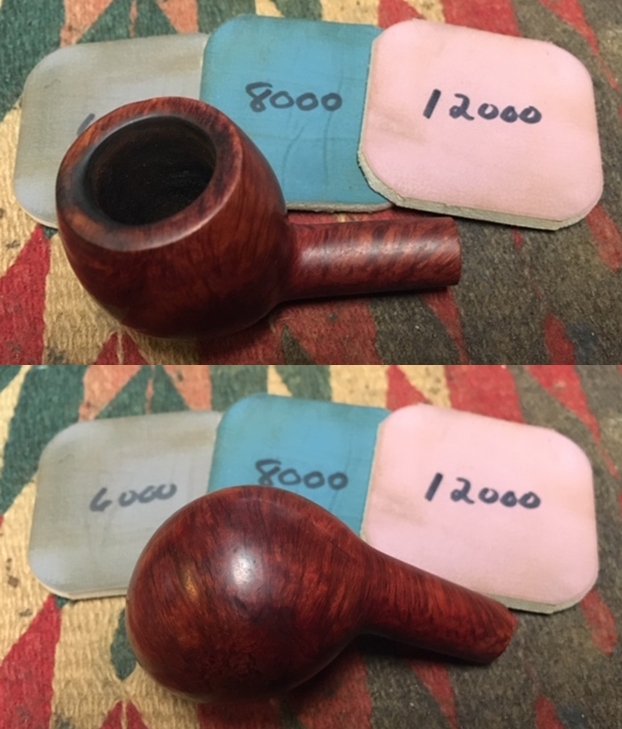
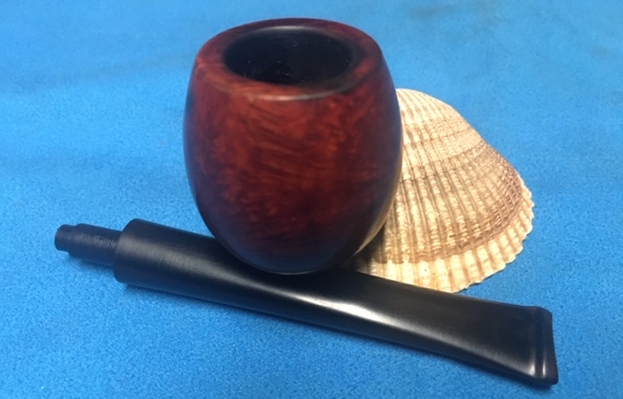
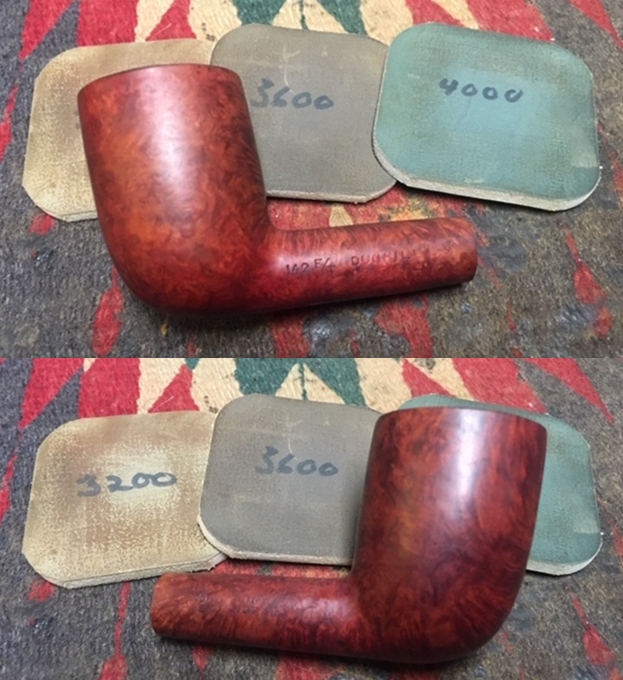
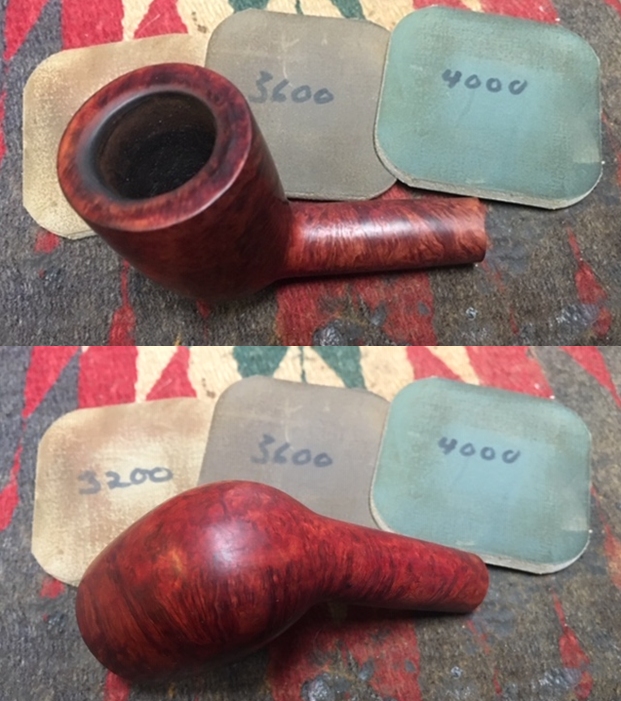
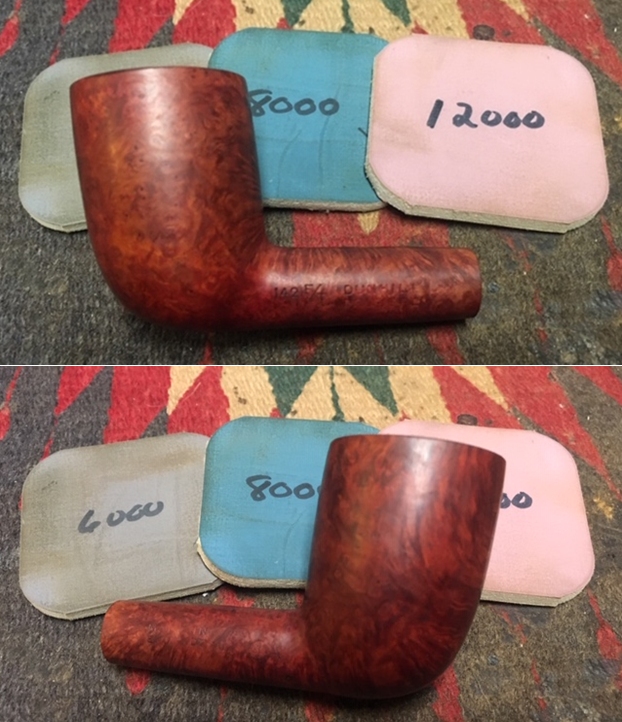
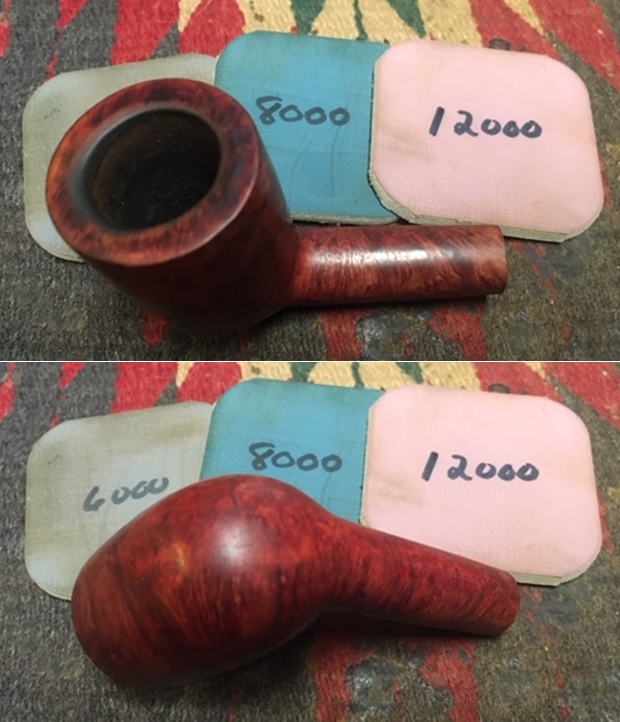
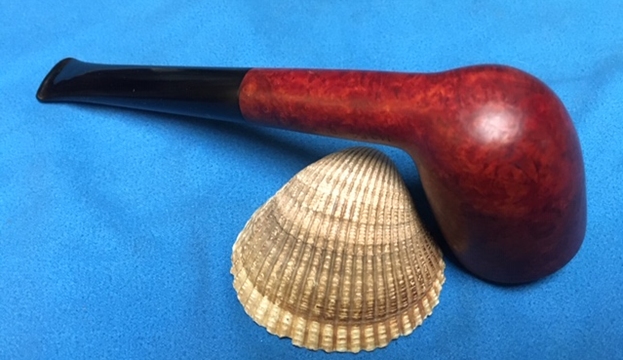
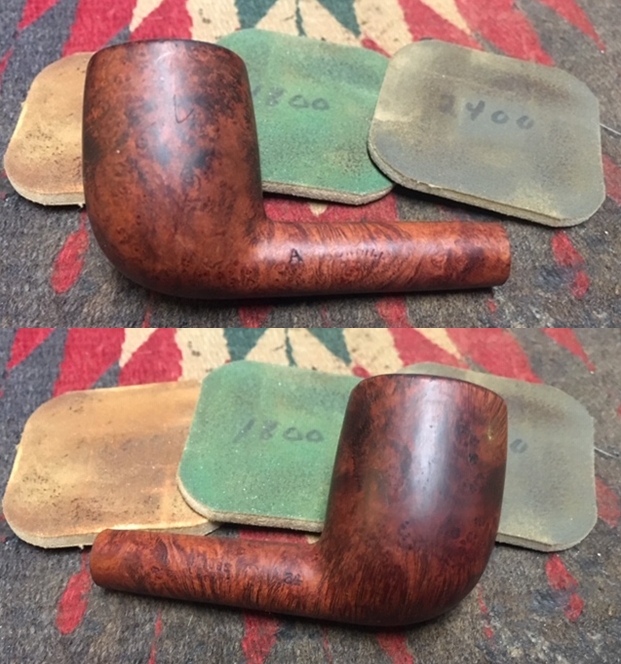
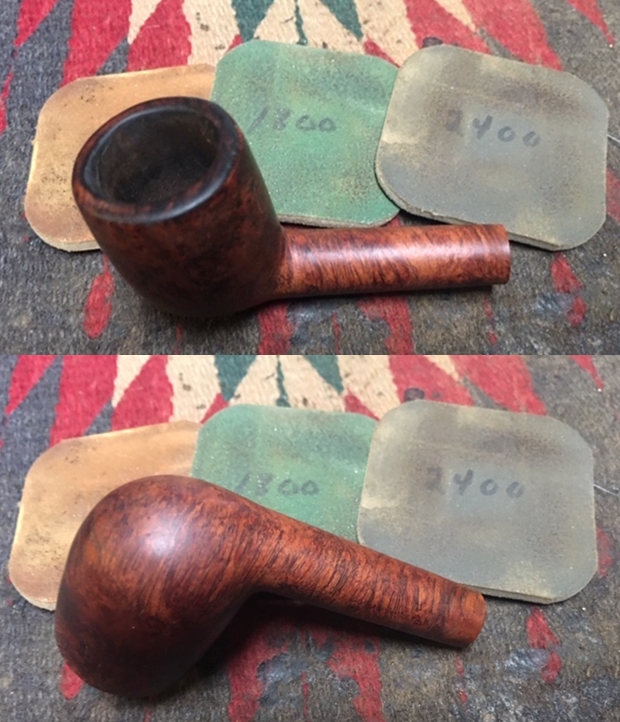
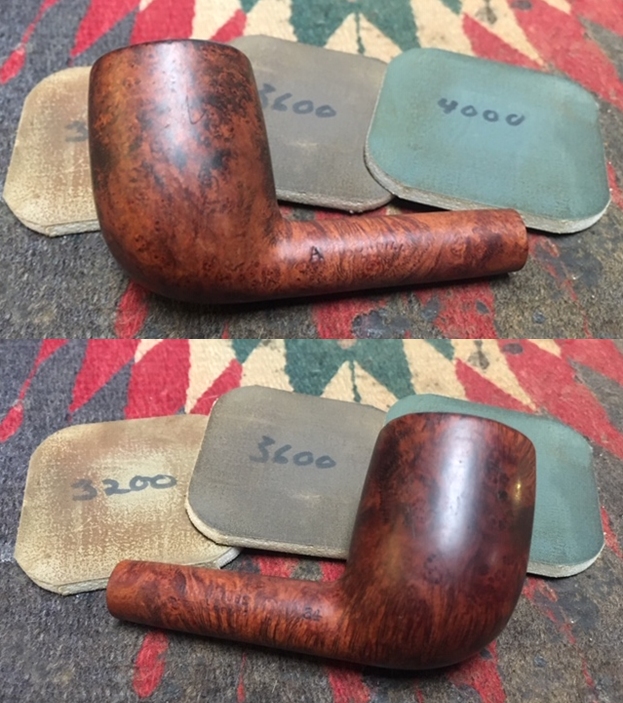
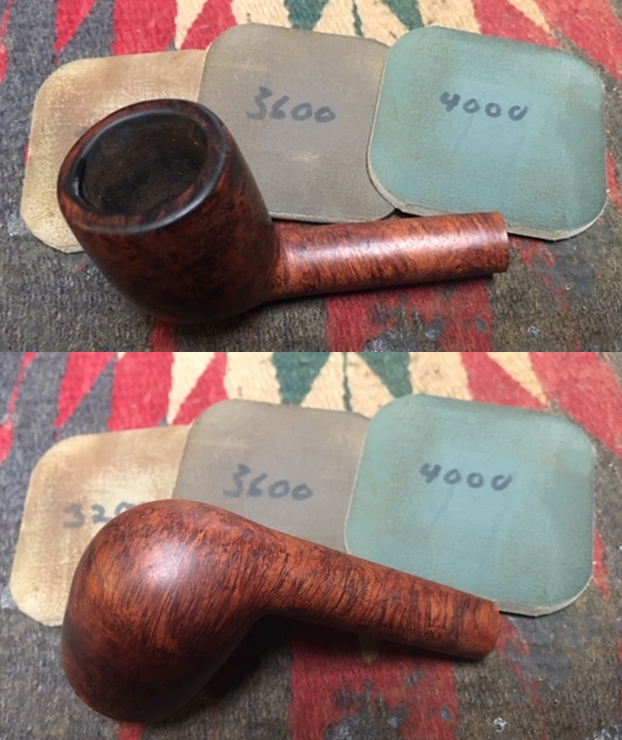
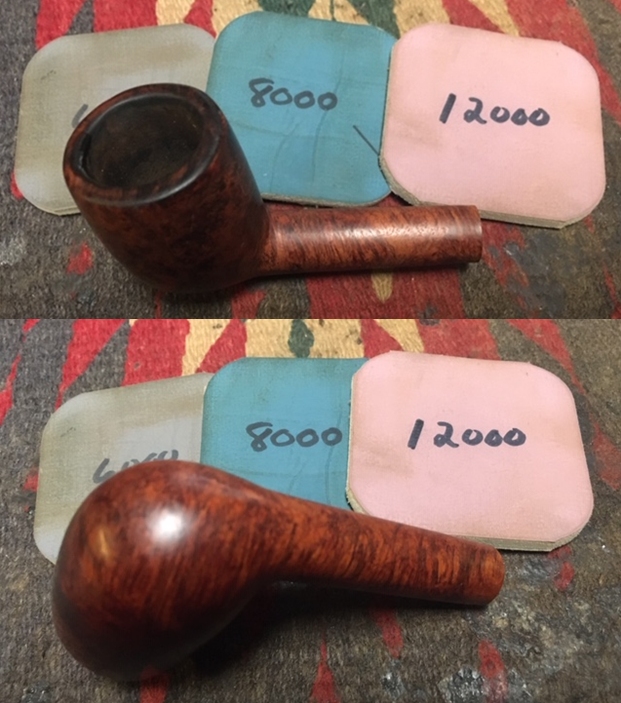
 With the Warden stem completed until the final polishing phases, I turn again to the stummel. Using the full regiment of micromesh pads, with pads 1500 to 2400 I wet sand, followed by dry sanding with pads 3200 to 4000 and 6000 to 12000. The bowl’s grain emerges through the process and I like what I’m seeing. The bowl is fully wrapped with a vertical flame grain with bird’s eye grain populating the heel and rim – as you would expect being the cross-view perspective of the flame grain.
 With the hour growing late, I continue the internal cleaning and refreshing process using a kosher salt and alcohol soak. The first step is to fashion a ‘wick’ from pulling and stretching a cotton ball. The wick serves to draw tars and oils out from the mortise cavity.
  Using a stiff wire, the wick is guided down the mortise. Then the bowl is filled with kosher salt which doesn’t leave an aftertaste as the iodized version. The stummel is then placed in an egg carton for stability.
 Using a large eyedropper, isopropyl 95% fills the bowl until it surfaces over the salt. After a few minutes the alcohol is absorbed, and I top off the alcohol one more time and set the stummel aside to soak through the night.
 The next morning, the soiling of the salt and wick evidences the processes active through the night. The tars and oils were drawn from the internal briar surface. I toss the expended salt and wipe the bowl with a paper towel. I also blow through the mortise to loosen and remove any remaining salt crystals.
 To make sure all is cleaned, one cotton bud and one pipe cleaner dipped in isopropyl 95% were all that was needed to verify the results of the internal cleaning – cleaned! I move on.
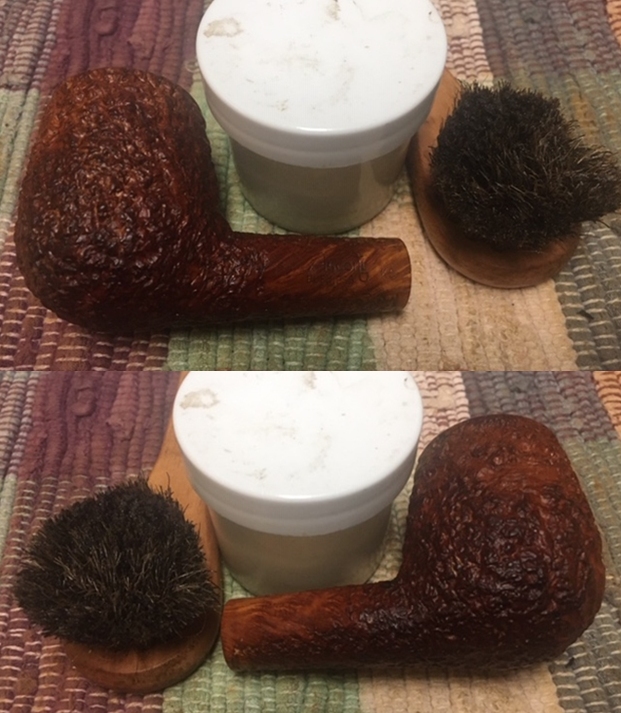
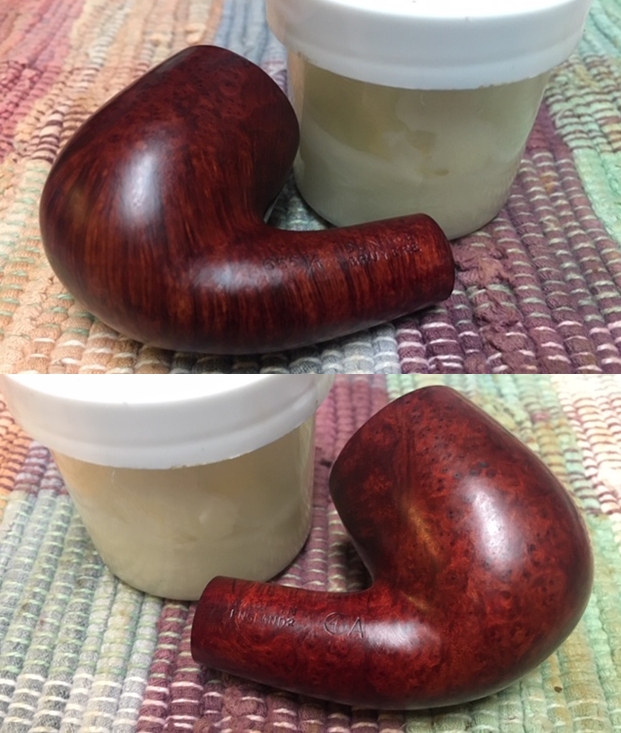
 Next, using Before & After Restoration Balm, the external briar is freshened and enlivened. Mark Hoover’s Restoration Balm (www.ibepen.com) works very well to bring out the natural hues and to deepen them. I place some of the Balm on my fingers and work it into the briar surface. Afterwards, I place it the stummel aside for about 20 minutes to allow the Balm to do its thing. Then the excess Balm is wiped/buffed off with a micromesh cloth. The results are as hoped – a beautiful piece of briar is now more beautiful.
 Before moving on to the fine polishing and waxing phase, the copper shank cap/band needs to be attached to the shank. I test fit the cap over the shank and insert the stem. The fit still looks good. Next, with great caution, I place a drop of thick CA glue on the end of a toothpick and this apply the glue to the inside of the ring/cap. Using the end of the toothpick, I run the glue around the entire underside and then slip it over the shank and press it into place. I do this without excess glue seeping out from around the edges – relief! I do not reengage the stem for a few minutes to allow the CA glue to cure – I don’t risk getting glue on the stem!
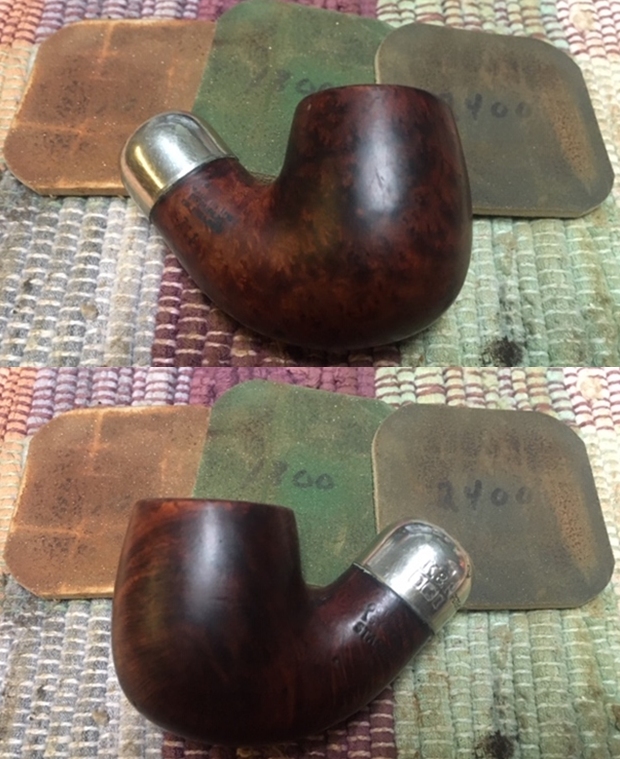
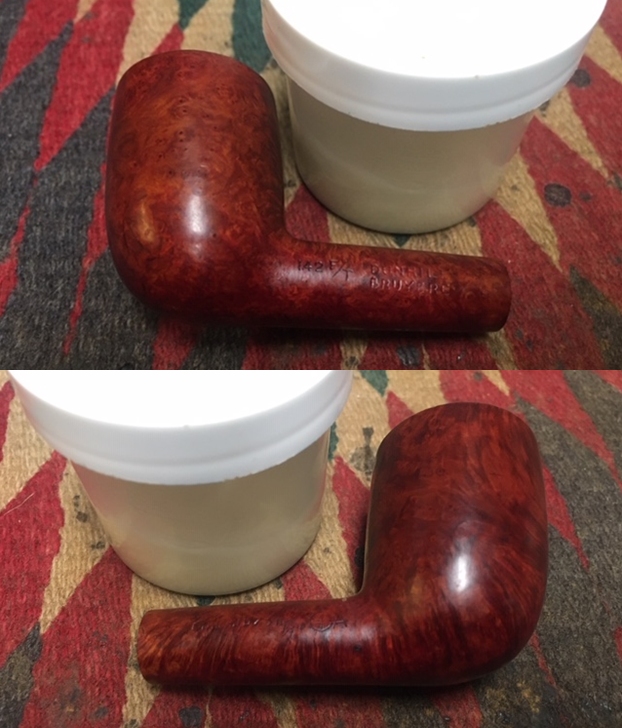
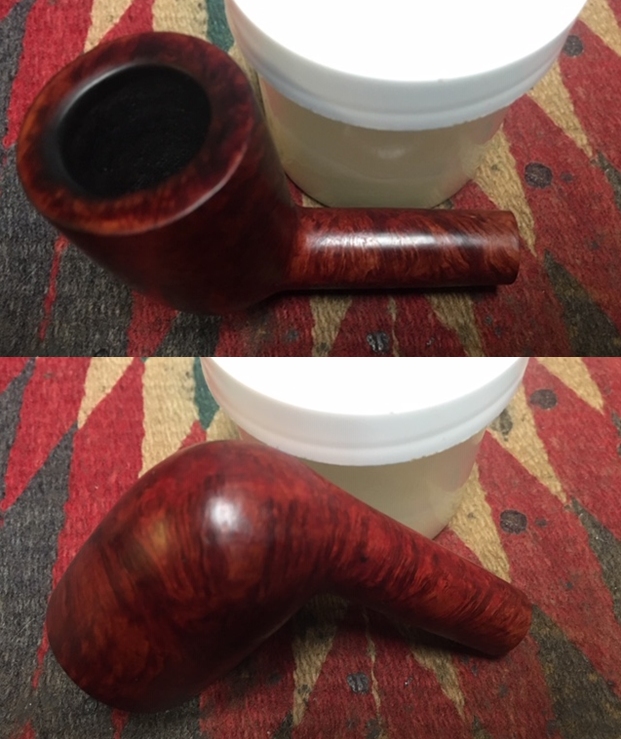
 On the home stretch! With a cotton cloth buffing wheel mounted to the Dremel with the speed set at about 40% full power, I apply Blue Diamond compound to the stem and stummel avoiding the copper band. When completed, I use a felt cloth to buff the pipe to remove compound dust before applying the wax. Next, changing to another cotton cloth buffing wheel maintaining the same speed, carnauba wax is applied as well to the stem and stummel followed by a rigorous hand buffing with a microfiber cloth to raise the shine.
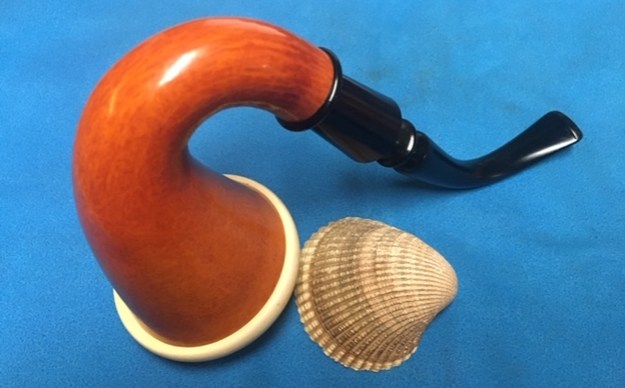
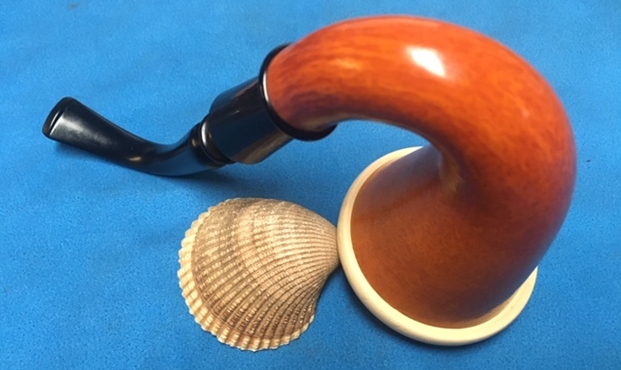
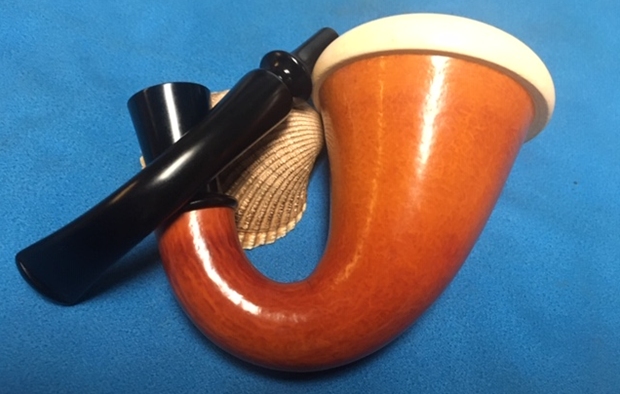
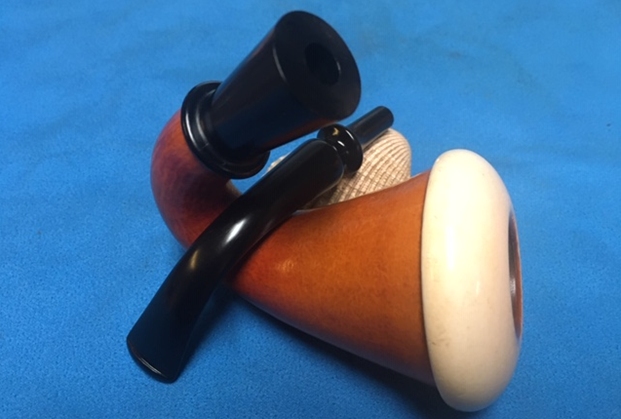
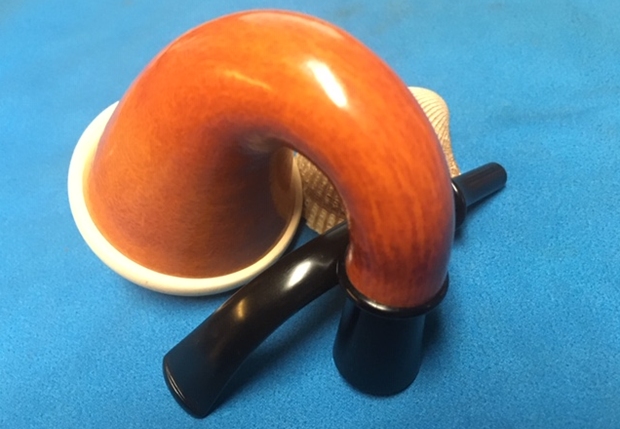
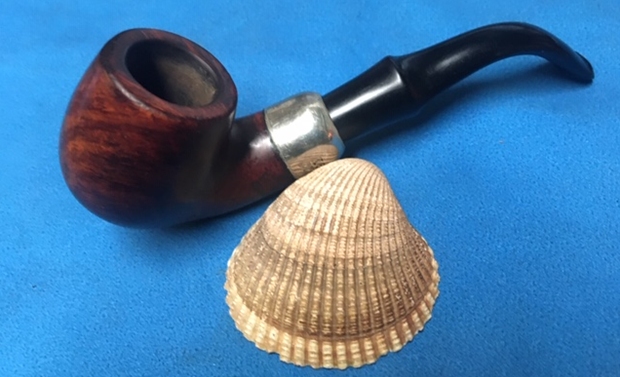
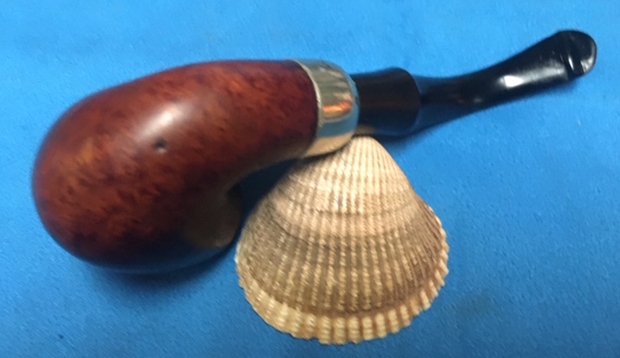
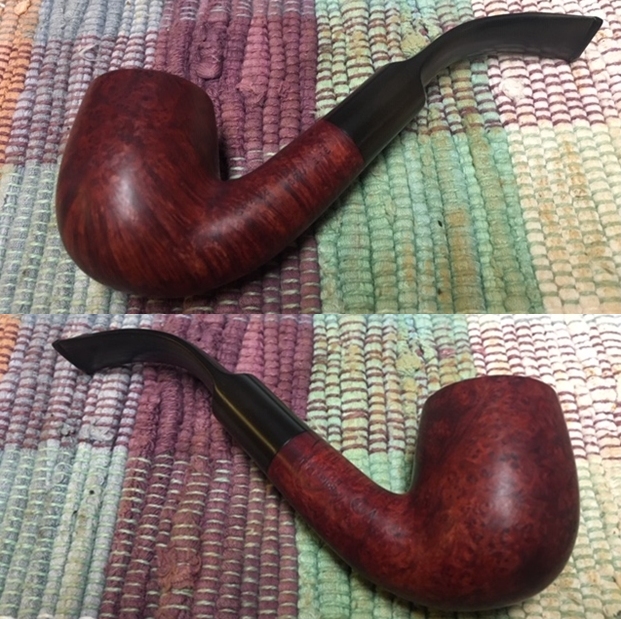
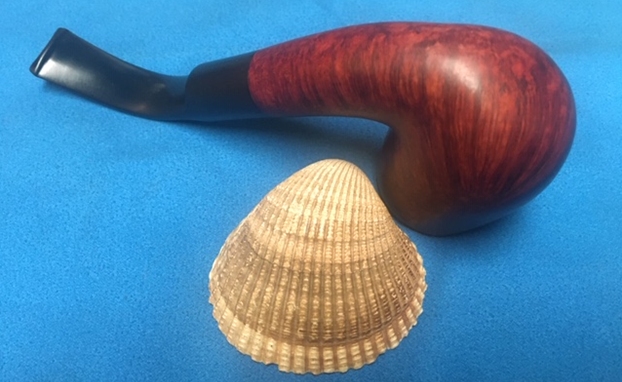
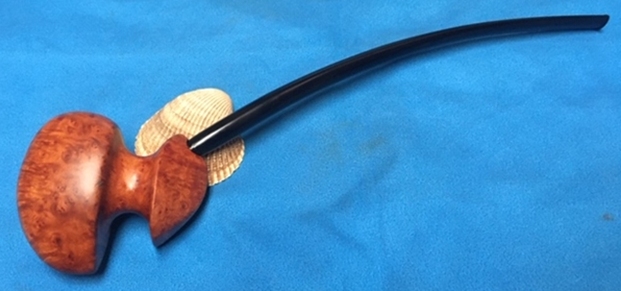
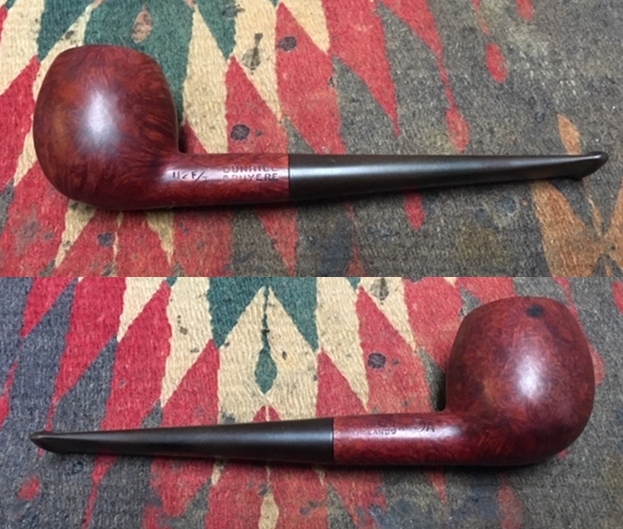
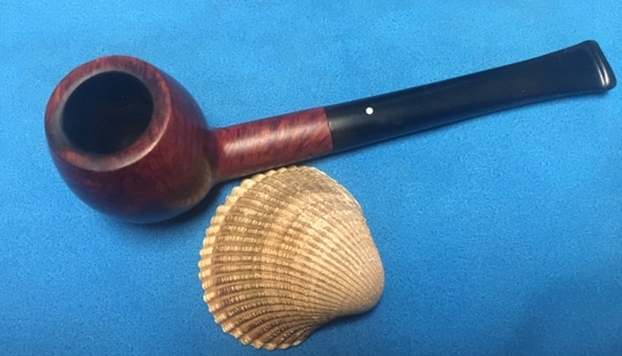
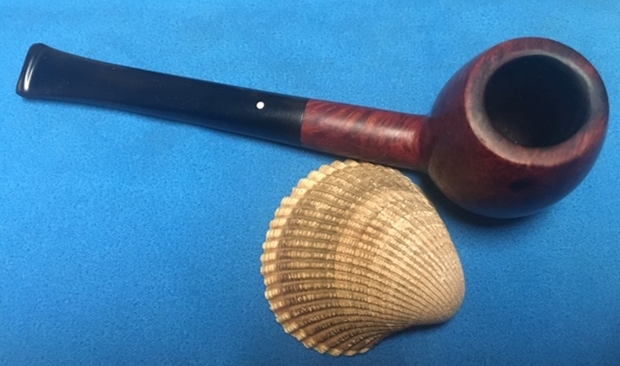
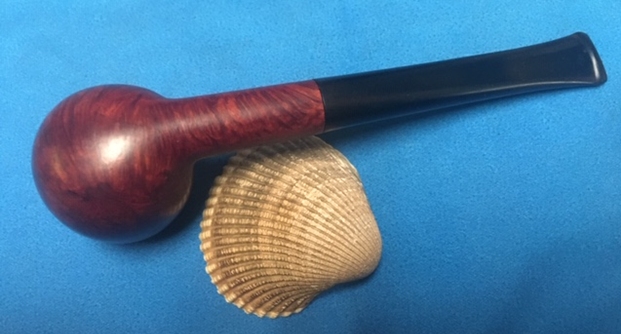
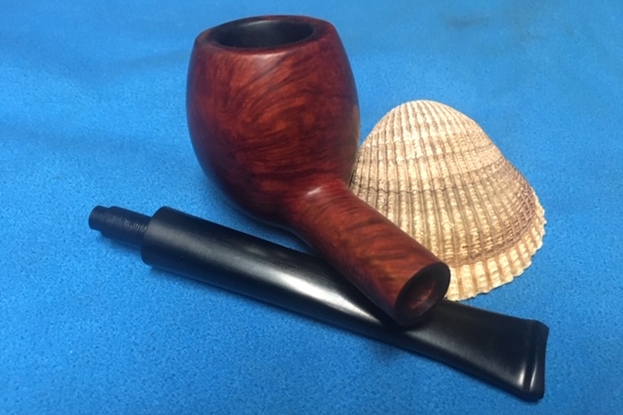
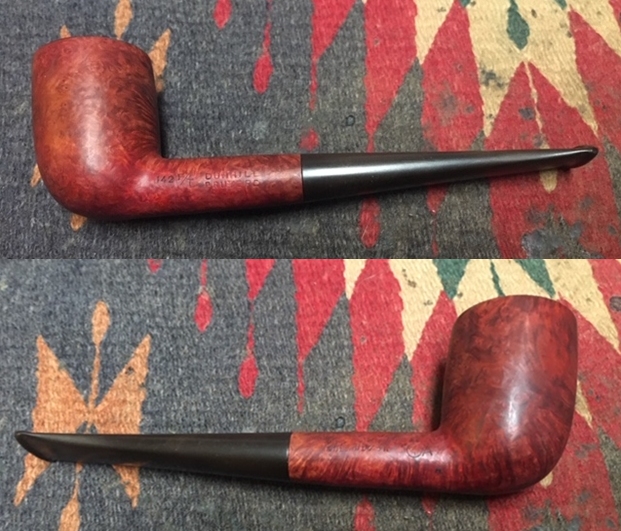
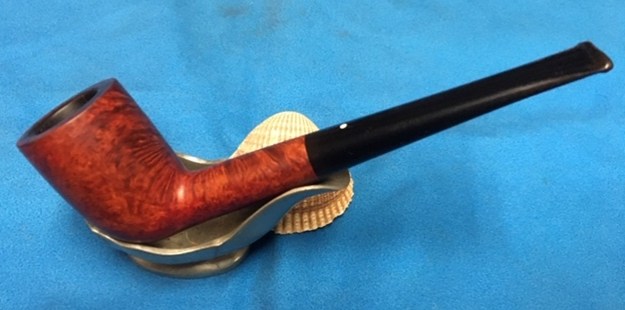
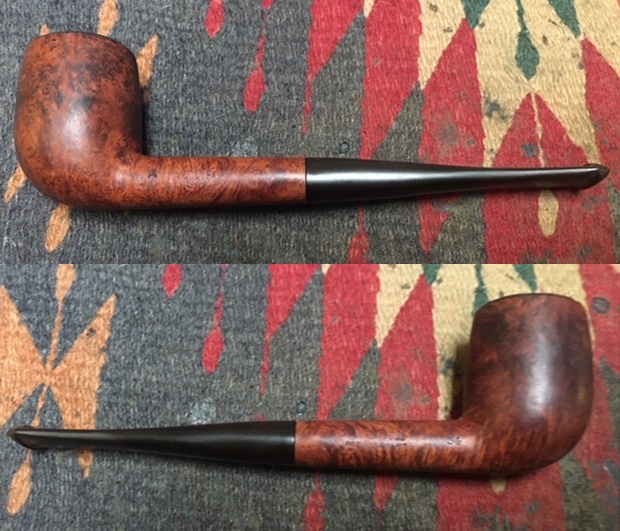
Wow! The grain on this stummel catches the eye with the flame grain circling the bowl. This bowl works well as a Churchwarden. The size is perfect, and the shank pitch puts the long flowing Warden stem at a nice trajectory. The addition of the copper band/shank cap is classy and works very well to transition the bowl and the stem. I believe my son-in-law, Niko, will enjoy this Churchwarden which will be wrapped and waiting for him under the tree! Thanks for joining me!


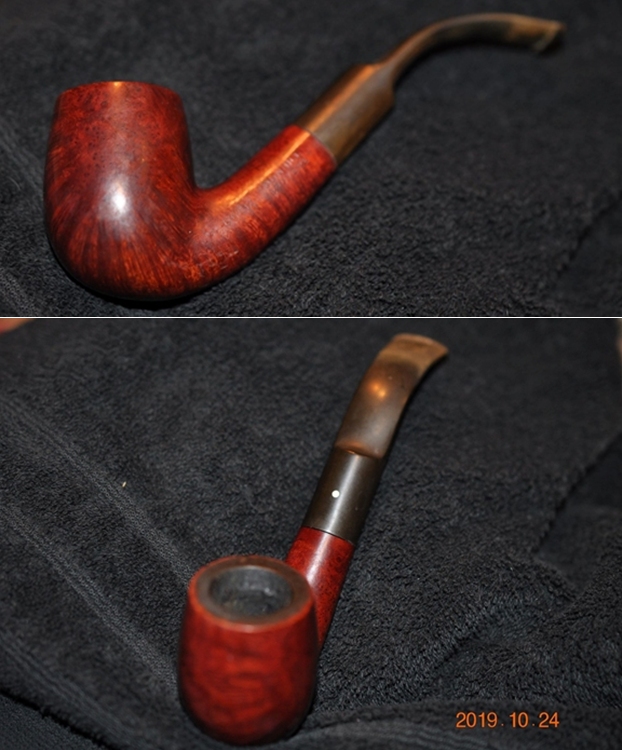
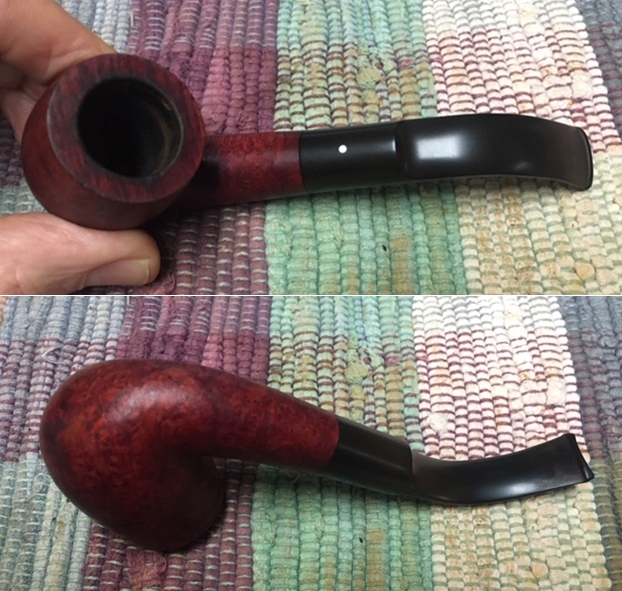
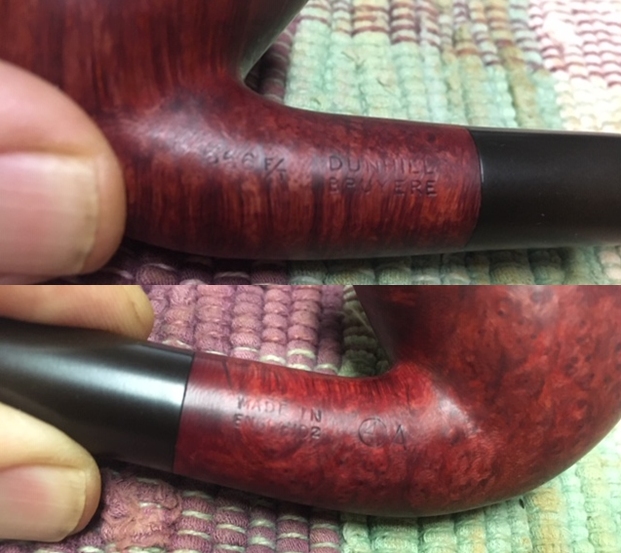
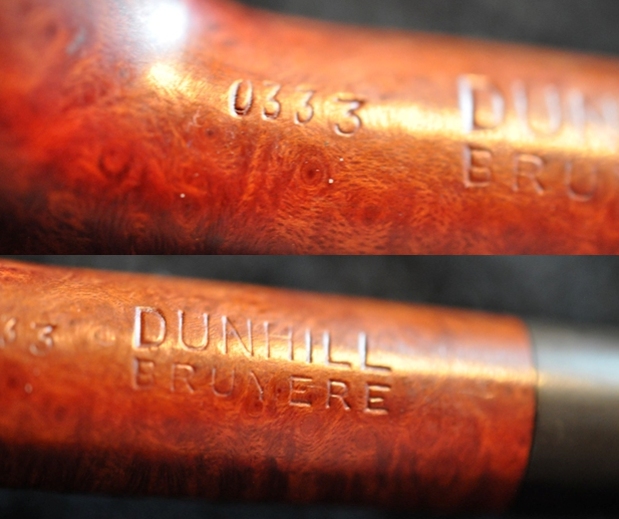
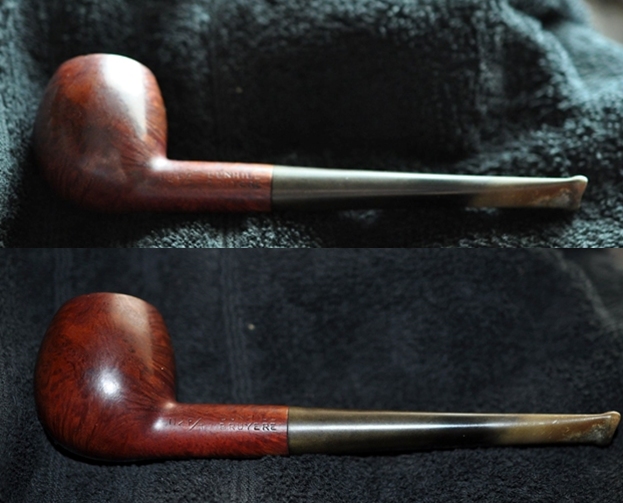
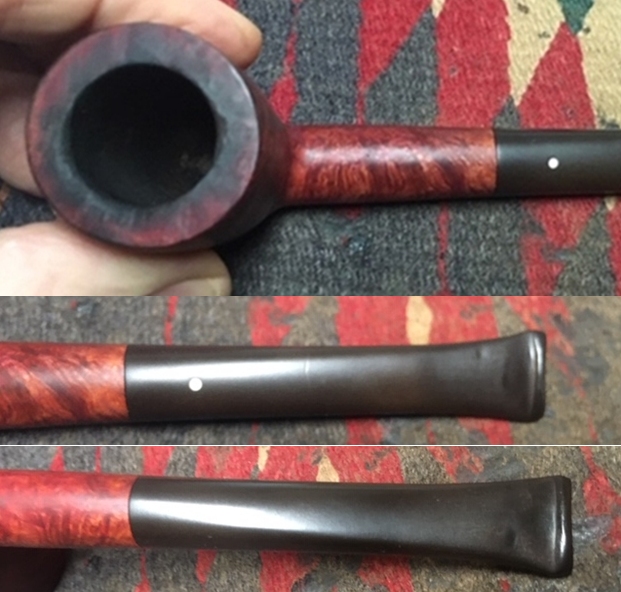
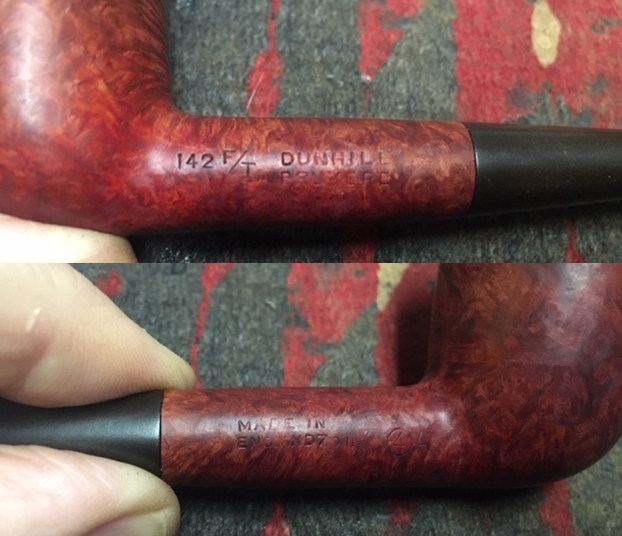
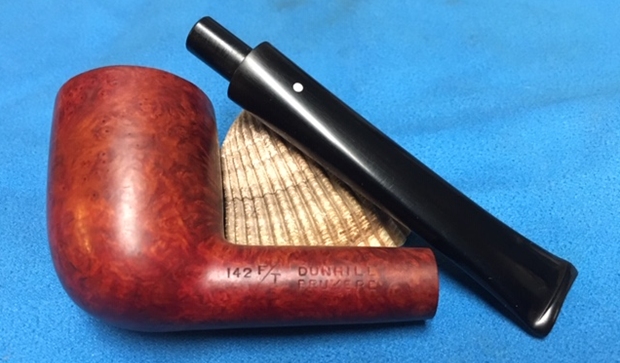
 After brief foray into restoring a couple of other pipes I am back to Bob Kerr’s estate (his photo is to the left). If you have not “met” the man and would like to read a bit of the history of the pipeman, his daughter has written a great tribute that is worth a read. Because I have included it in over 60 restorations to date I thought that I would leave it out this time. Be sure to check out some of the recent Dunhill restoration blog (https://rebornpipes.com/2020/01/01/restoring-the-last-of-bob-kerrs-dunhills-a-1962-dunhill-bruyere-656-f-t-bent-billiard/)
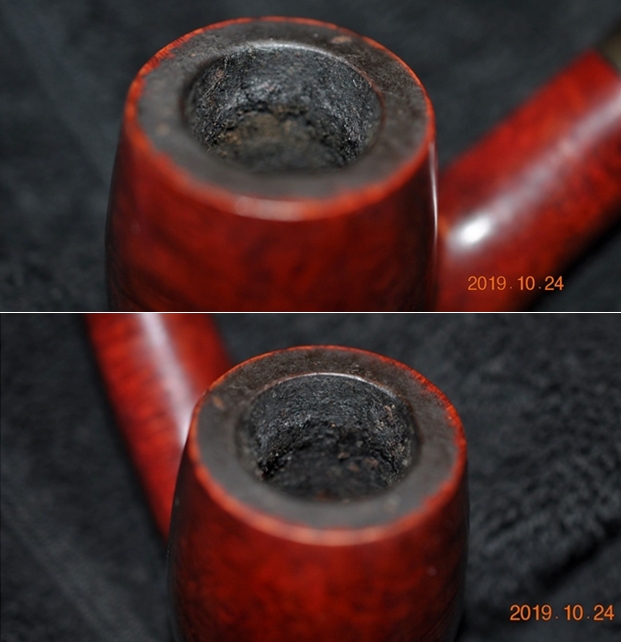
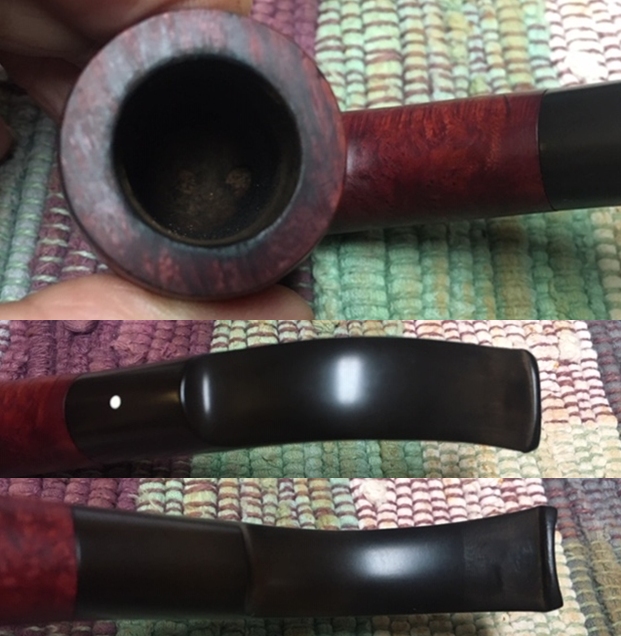
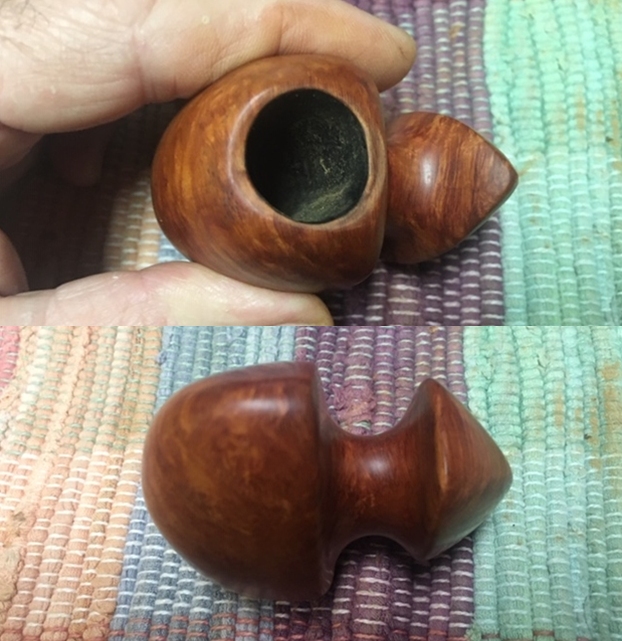
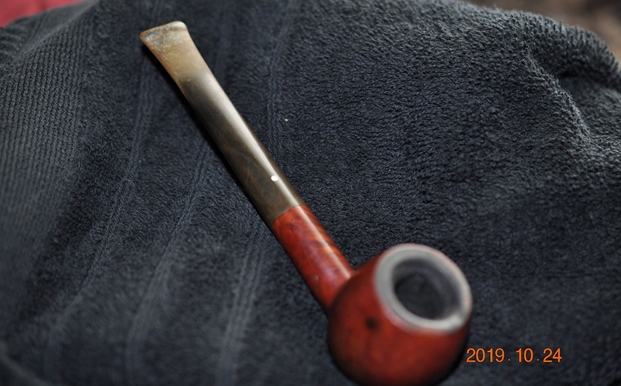
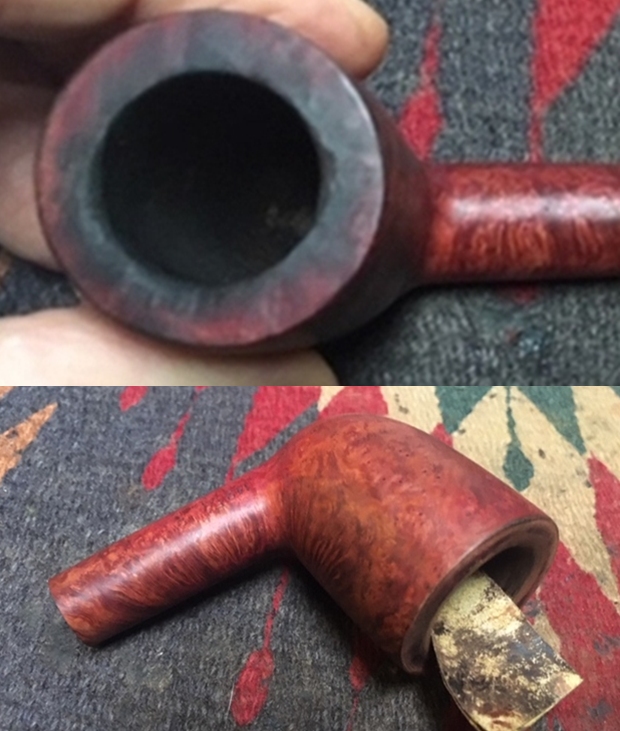
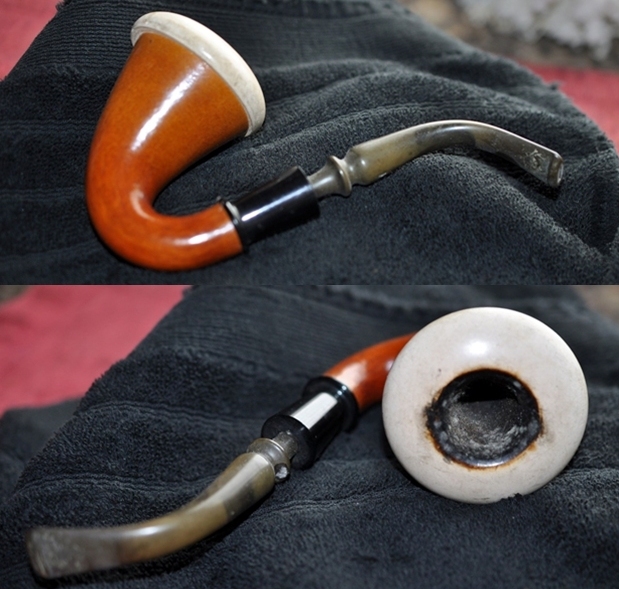 Jeff took some close up photos of the bowl cup to show the condition. The photos capture the visual well but actually the other senses are not even brought into the equation. It was really nasty. The thick cake was growing things!
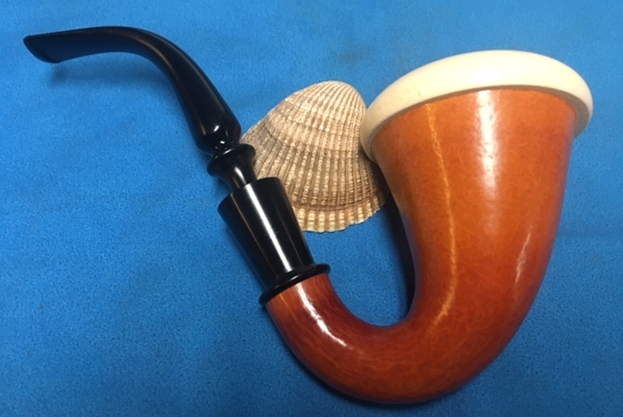
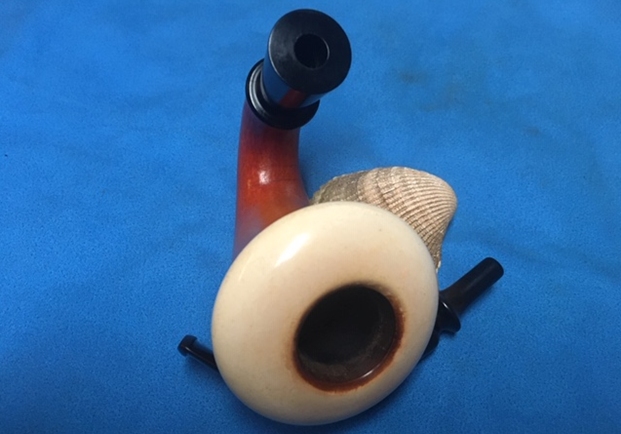
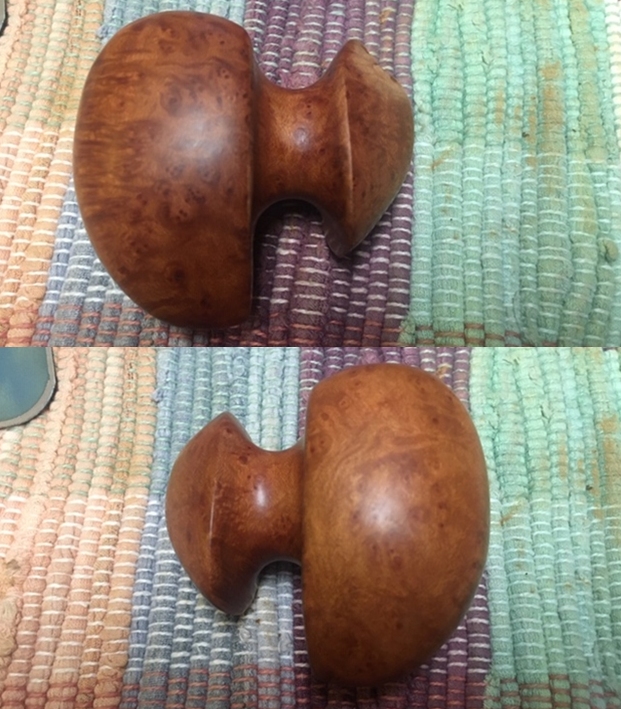
 A redeeming photo had to be included after those to give a bit of encouragement and hope. This is a shot of the gourd calabash from the underside. The striations in the gourd and the shine on the bottom are quite stunning.
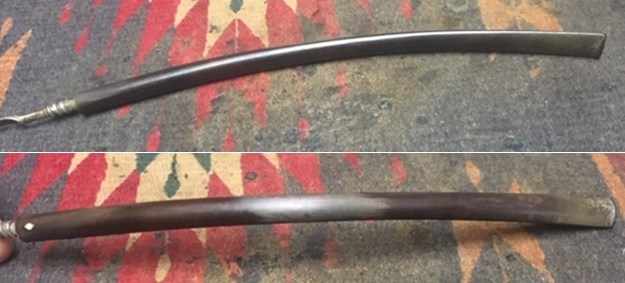
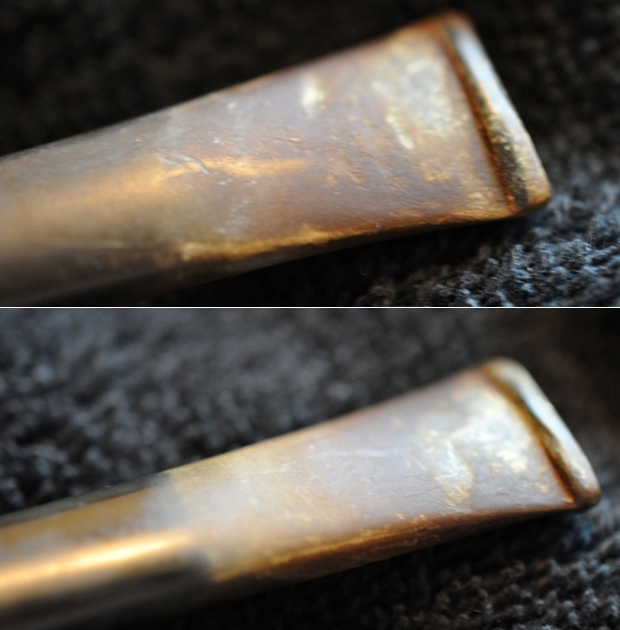
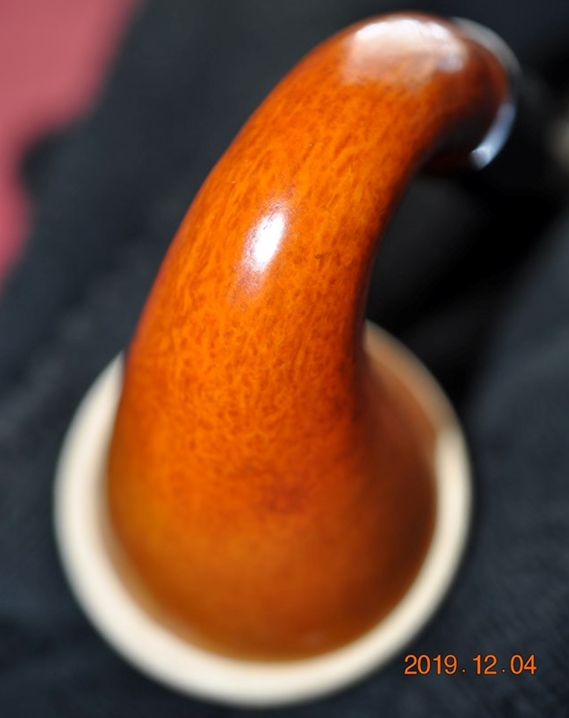 The stem actually was surprisingly good for this estate. There were not any deep tooth marks in the vulcanite. We only had to deal with the oxidation and calcification. There no deep pits in the surface of the rubber. The third photo shows it in comparison to the ferrule so you can see how far from black it gone.
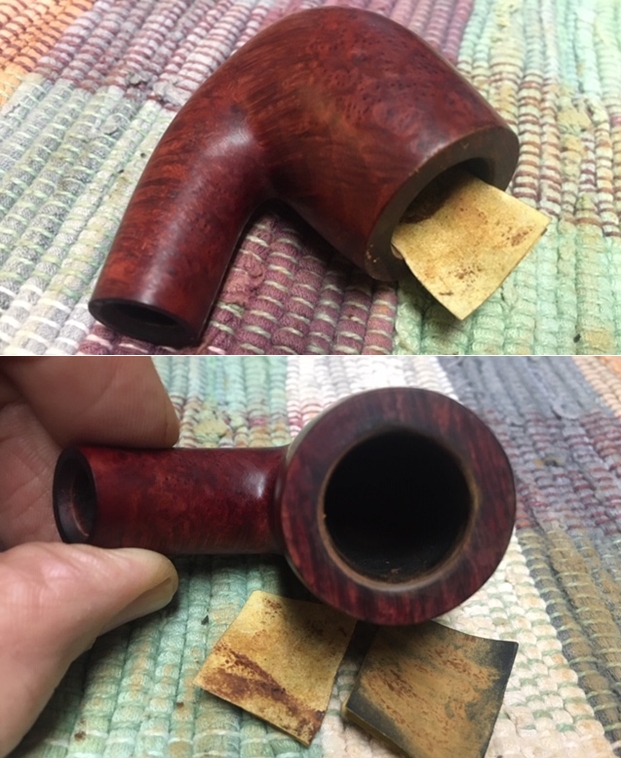
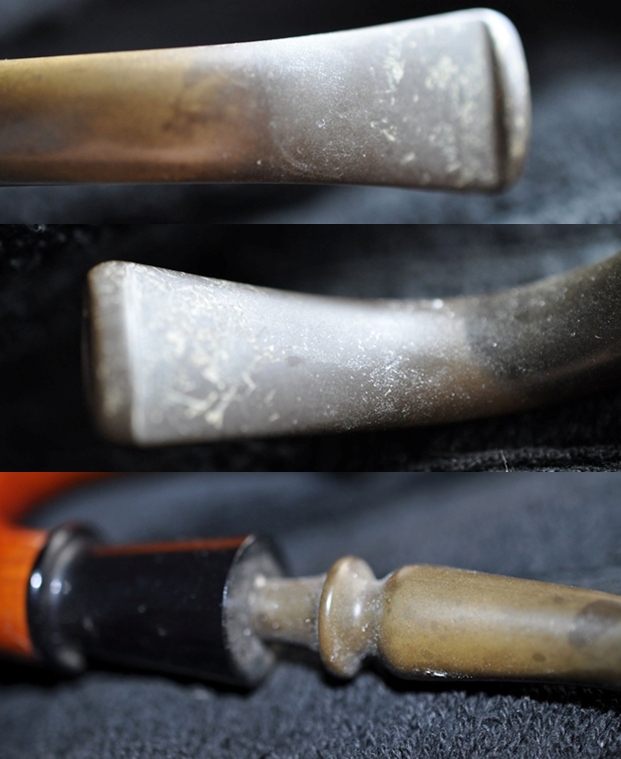 I can’t begin tell you how great it feels to have Jeff’s help on cleaning up the pipes from Bob’s estate as the 125+ pipes were taking me a long time to do alone. In fact I doubt if I would have as many finished as I do now. Together we have cleaned all of the pipes and have restored over 60. He does cleaning job and leaves the rest to me. This one was no different. He cleaned this filthy pipe with his usual penchant for thoroughness that I really appreciate. This one was a real mess and I was looking forward to seeing what he had done with this one when I took it out of his box. It looked amazing and CLEAN. He carefully reamed the meerschaum cup with a Savinelli Fitsall Pipe Knife. He scrubbed out the internals of the gourd and the shank with alcohol, pipe cleaners and cotton swabs until the pipe was clean. He scrubbed the exterior of the gourd with Murphy’s Oil Soap and a tooth brush to remove the grime and grit. The gourd and meer cup look really good. The stem looked a lot better. Jeff soaked the stem in Before & After Deoxidizer to remove the oxidation on the rubber. The pipe was ready for me to carry on the next part of the process.
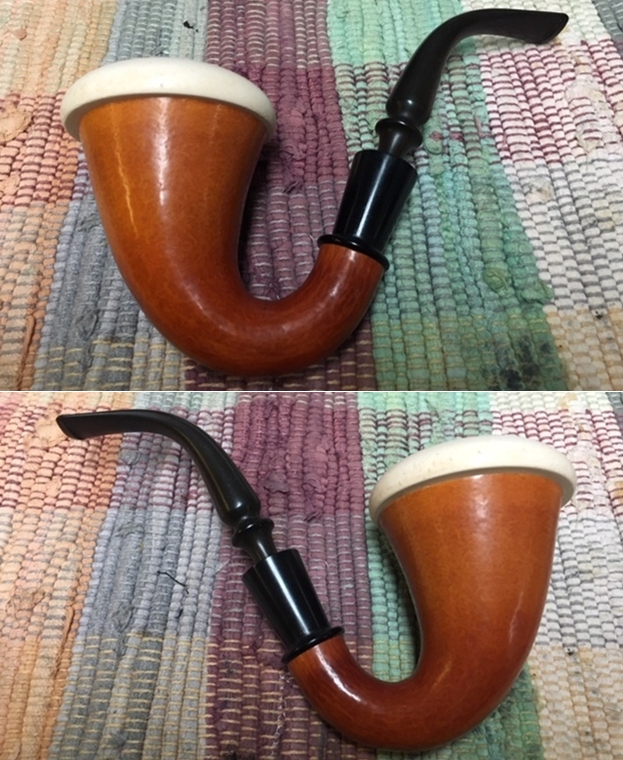
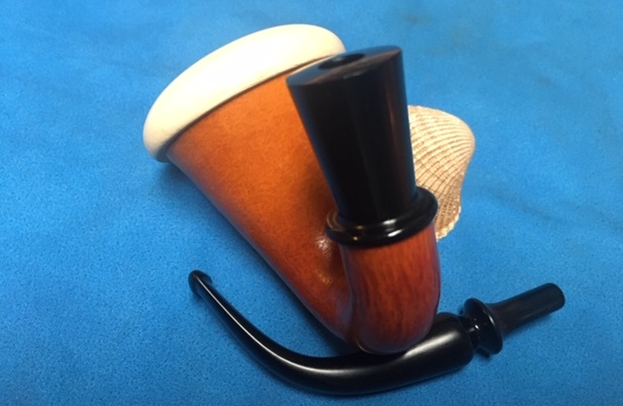
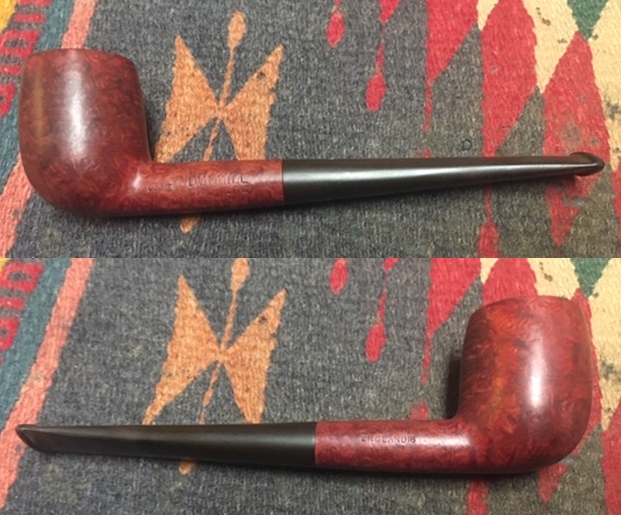
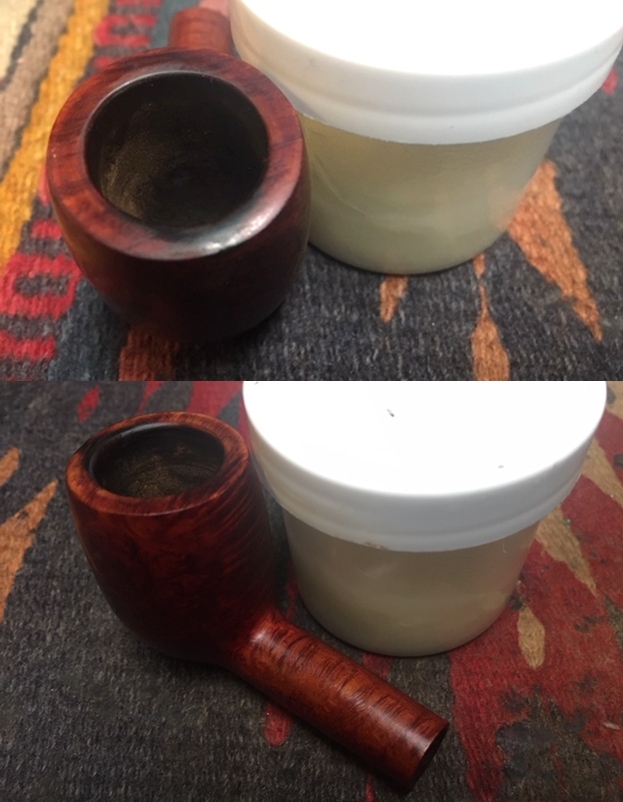
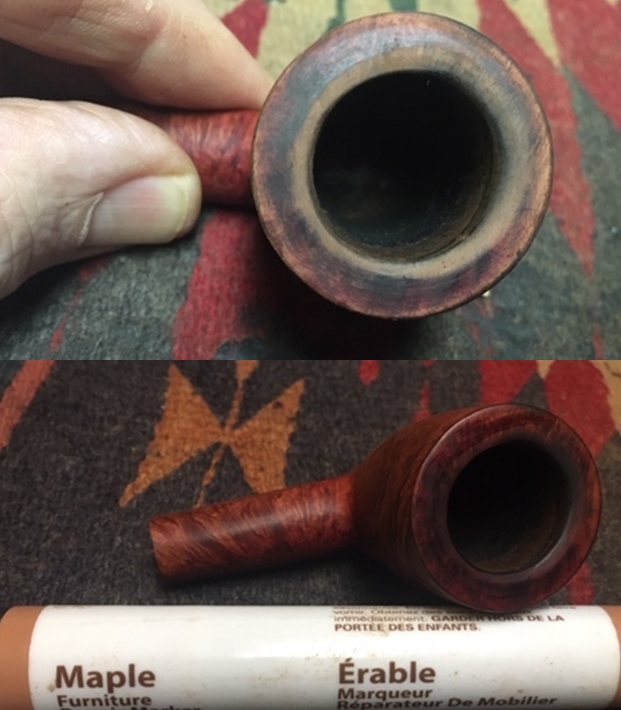
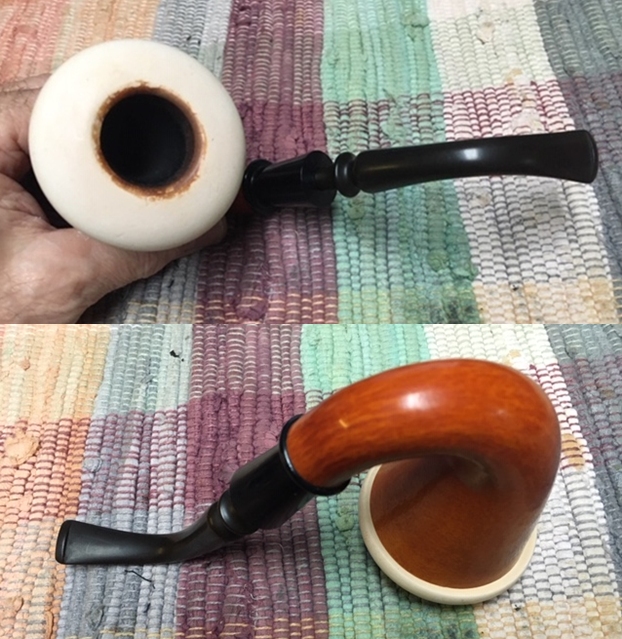 I took some close up photos of the meerschaum cup and also of the stem surface. I will tell you what; I am absolutely amazed at how good this pipe looks. I wanted to show how well it had cleaned up and what needed to be done. The cup was in remarkable condition. The surface was in decent condition. The inner edges of the cup were darkened and there was some debris on the edges of the bevel. Otherwise it was beautiful. The stem actually looks very good in the photos. There was no chatter or toot marks on the stem surface. There was a little bit of oxidation that I needed to work on in the curves of the stem and turned area. But it too was amazing… the whole pipe is a surprise to me. Looks good, smells good and should smoke well!
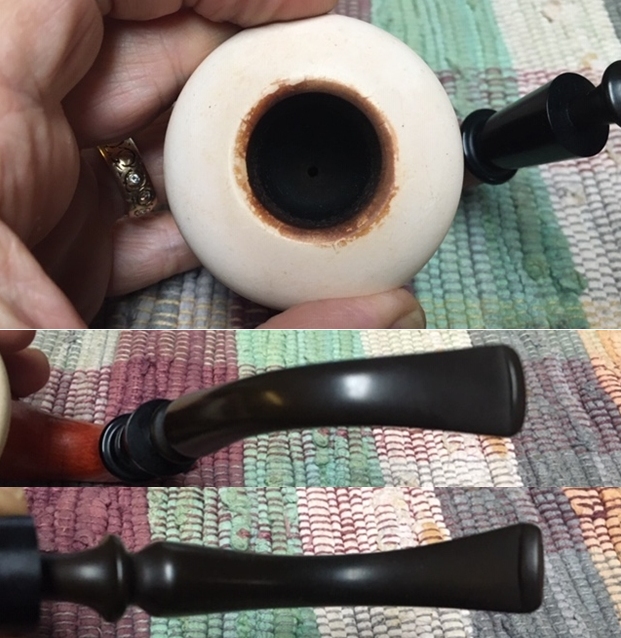 I popped the meerschaum cup out of the gourd to check out the interior. It was stunningly clean. The cork gasket was dry but whole. The underside of the cup was stained but it too was very clean.
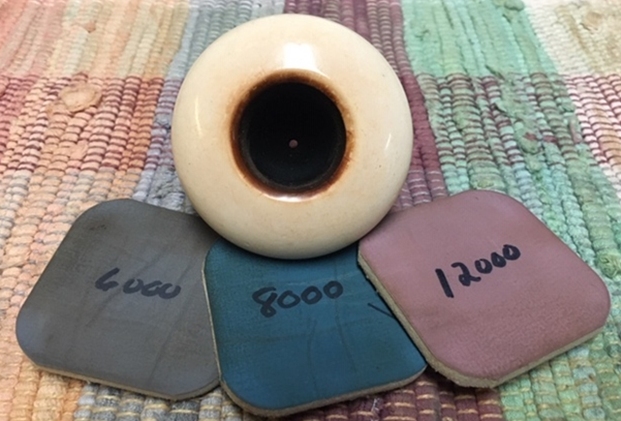
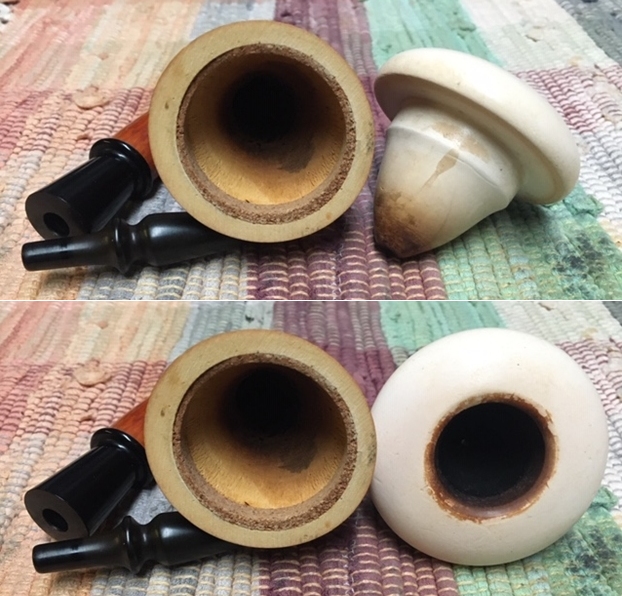 I worked on the rim and top of the meerschaum bowl with micromesh sanding pads. I wet sanded the edges and surface with 1500-12000 grit sanding pads and wiped the surface down after each pad. The meerschaum really became smooth and took on a deep shine. The inner edge of the bowl kept a bit of colour but was also very smooth.
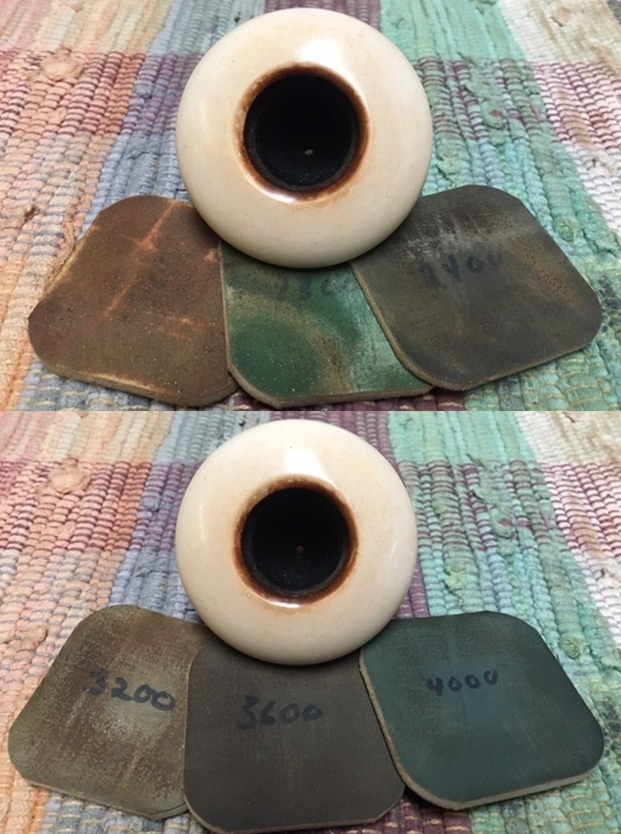
 I set the cup aside and rubbed down the gourd with Before & After Restoration Balm. While it was designed for enlivening and protecting briar it works wonders with a piece of dried gourd calabash. I worked it into the surface of the gourd with my finger tips and let it sit for about 10 minutes. I buffed it off with a soft cotton cloth.
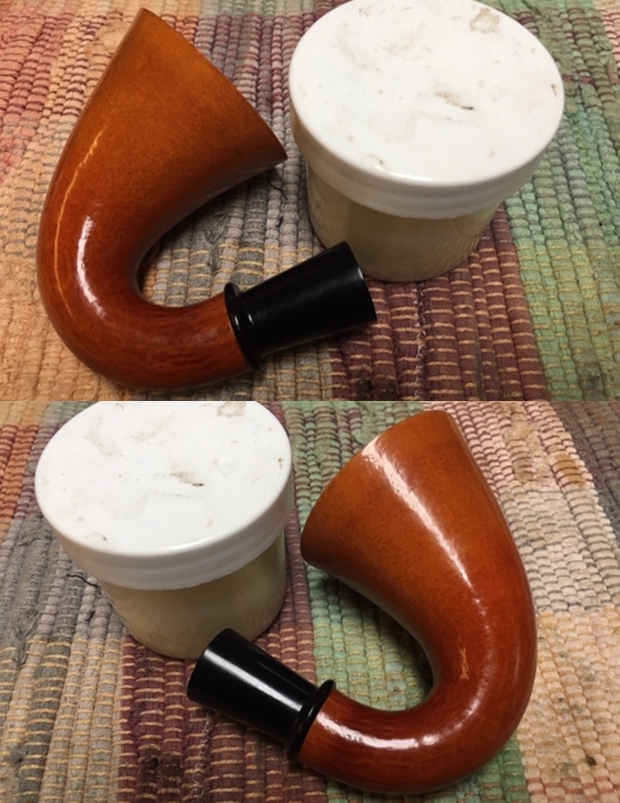
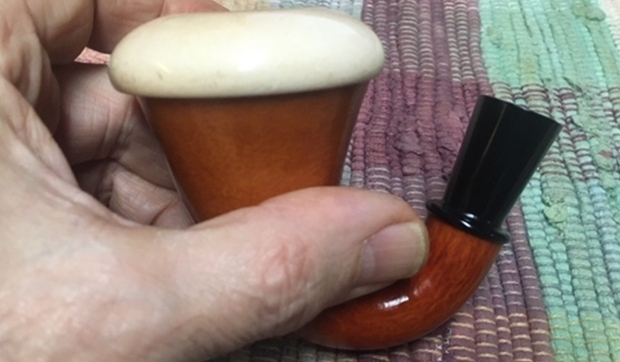
 With the gourd cleaned and polished and the meerschaum cup cleaned and polished it was time to put that part of the pipe back together. I like to rub the cork gasket down with some Vaseline Petroleum Jelly to put some life and elasticity back in the cork. I rub it down with my finger tip and let it sit for about five minute so that the cork absorbs the jelly. Once that is done I can easily insert the cup without fear of damaging the cork.
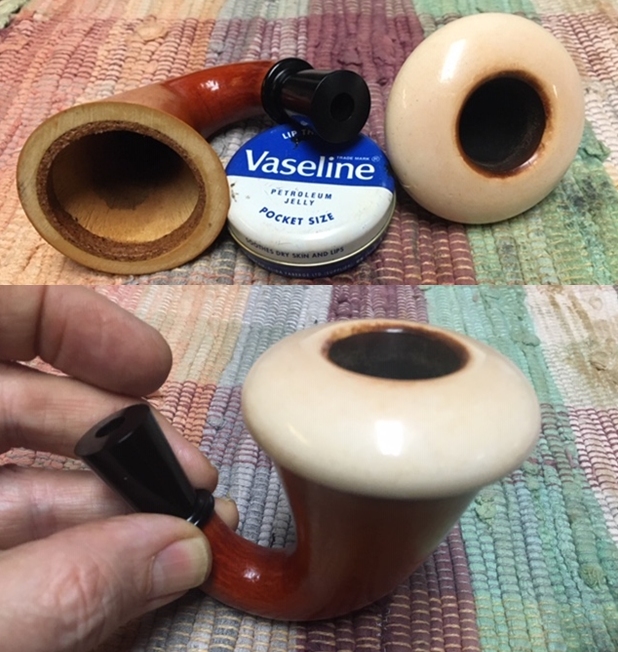
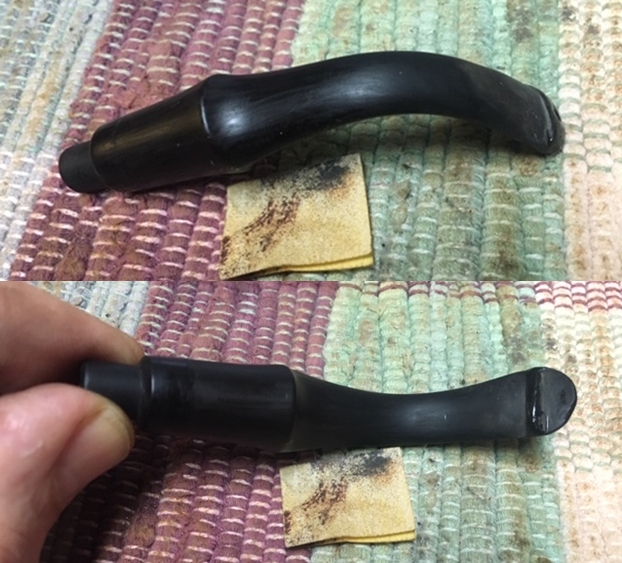
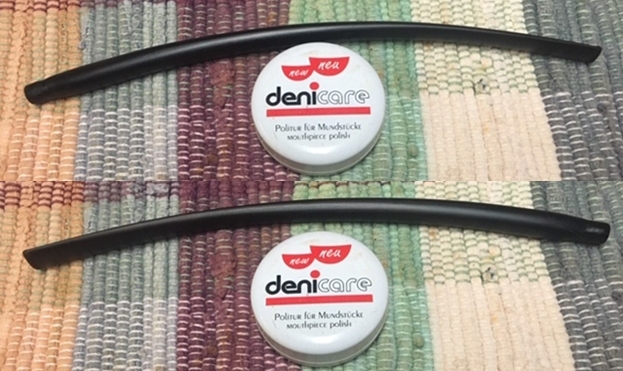
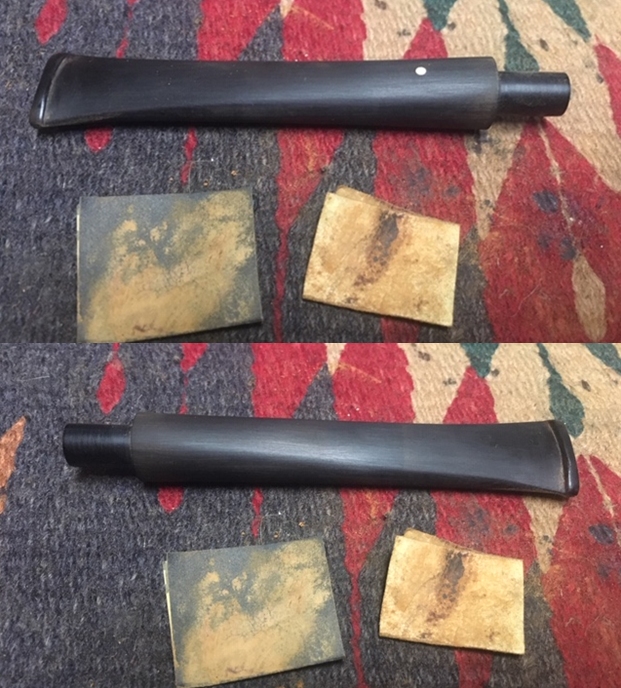
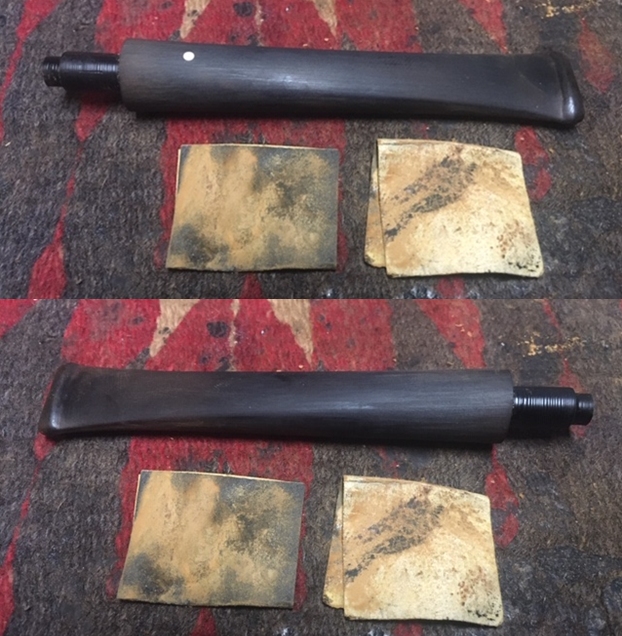
 With the bowl done it was time to address the stem. It was in pretty decent condition other than a little residual oxidation in the curves of the turned area and on the tenon area. I sanded the surface of the stem with 220 grit sandpaper to remove the remaining oxidation in the stem surface and the remaining oxidation in the vulcanite. I polished it with 400 grit wet dry sand paper.
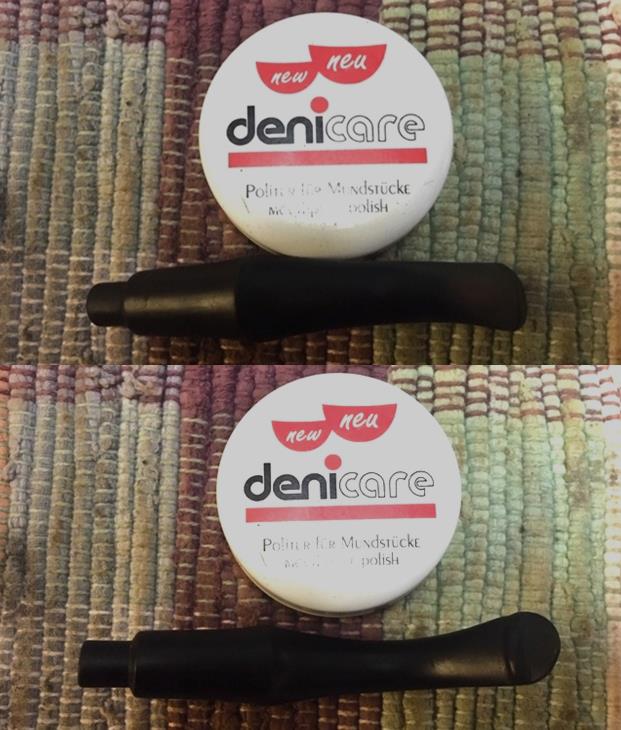
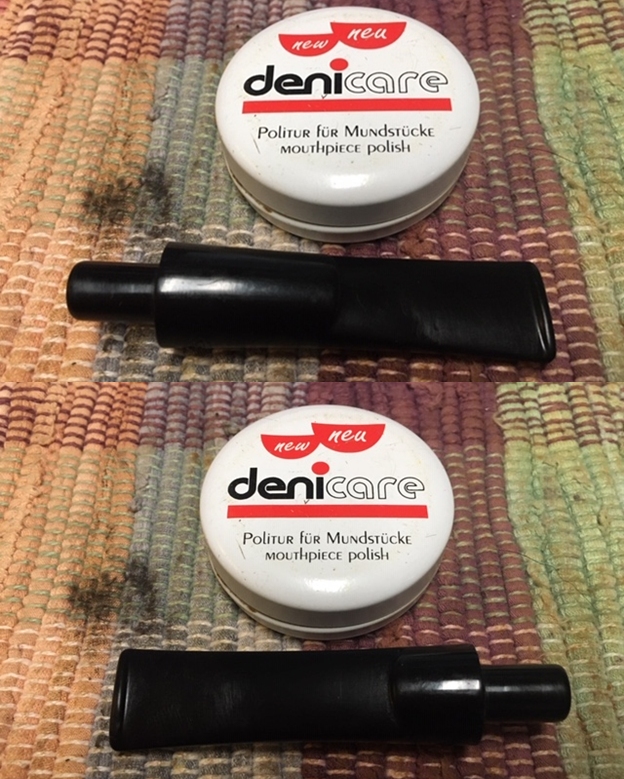
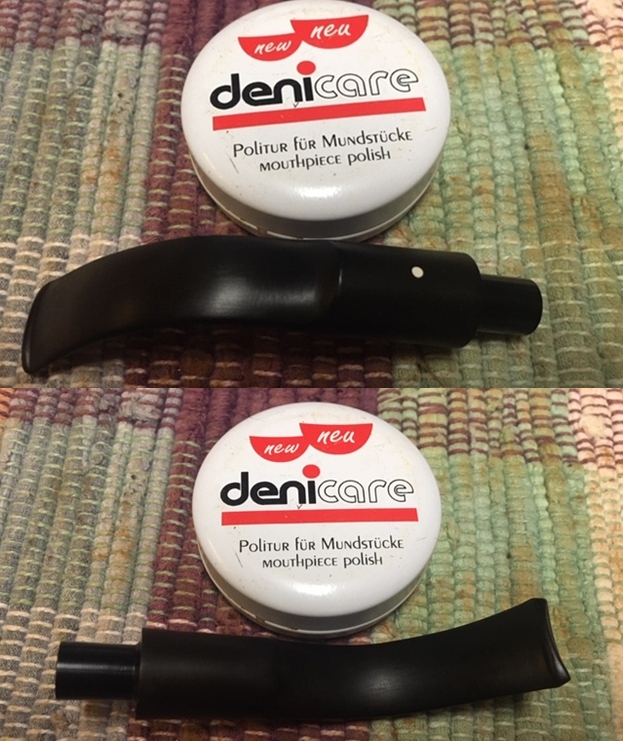
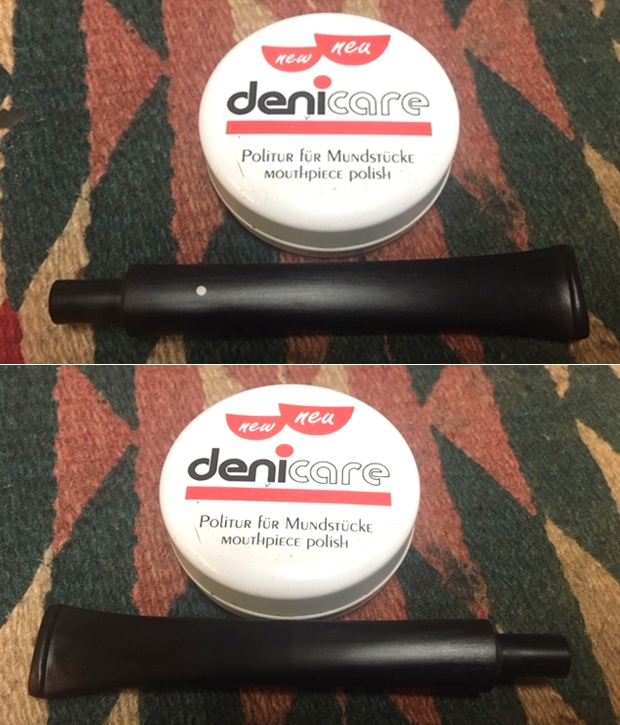
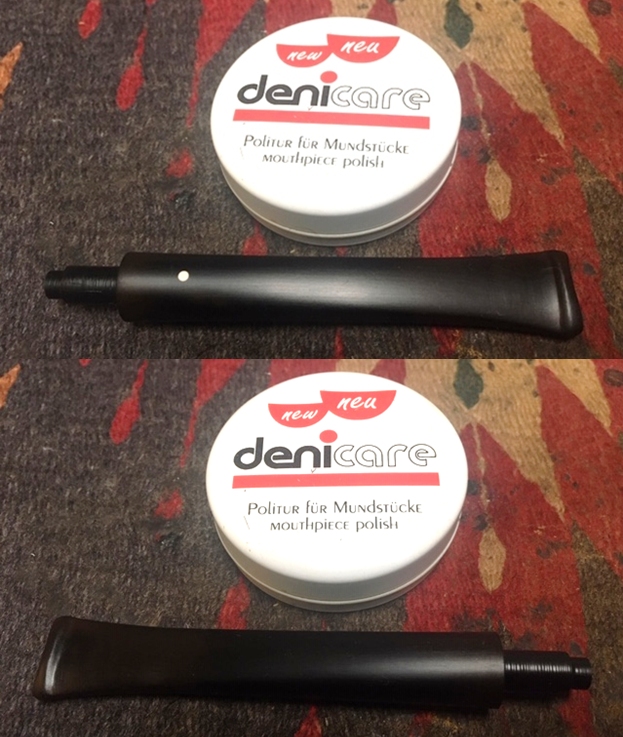
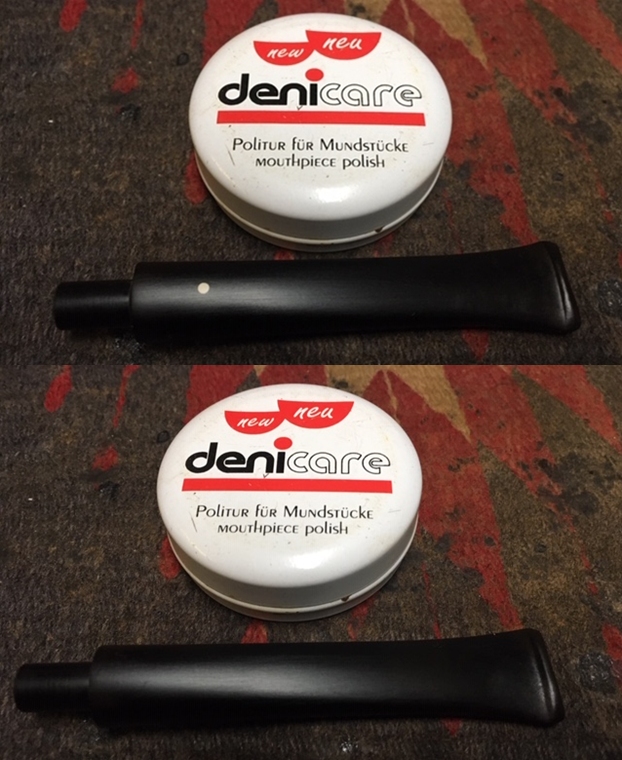
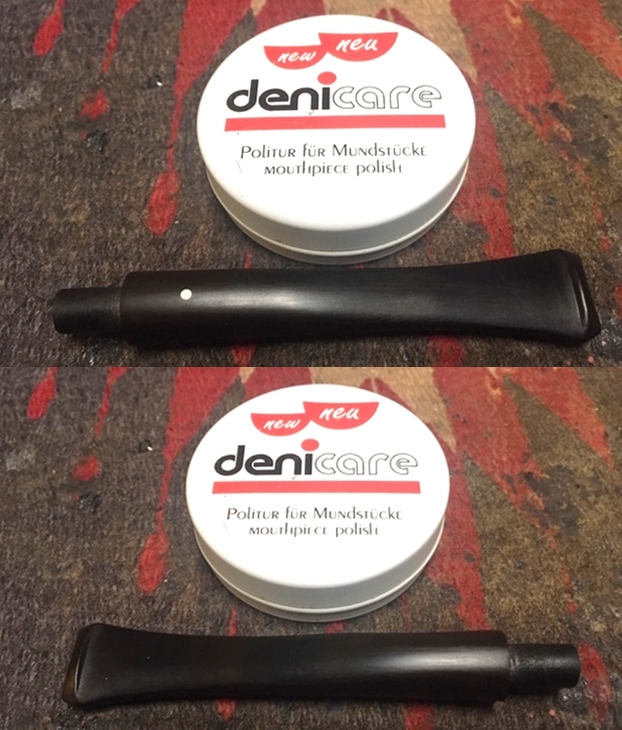
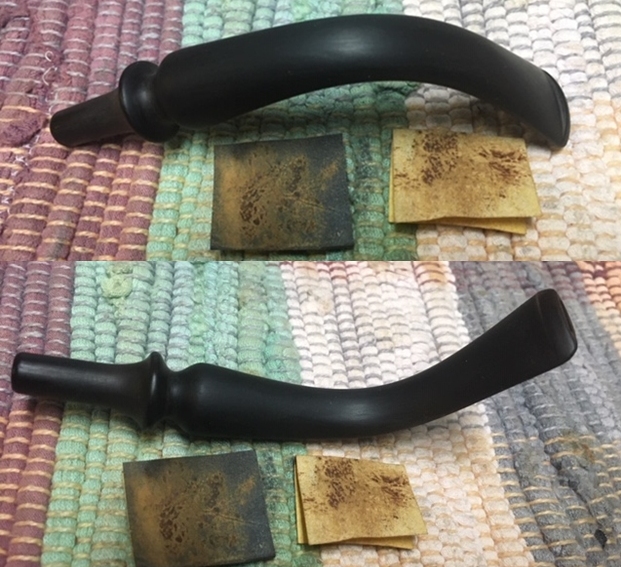 I rubbed the stem down with Denicare Mouthpiece Polish. I have found it is a great pre-polish for my use as it shows me areas that I need to work on with the micromesh sanding pads.
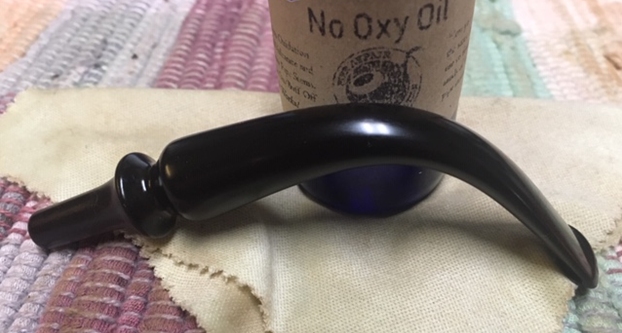
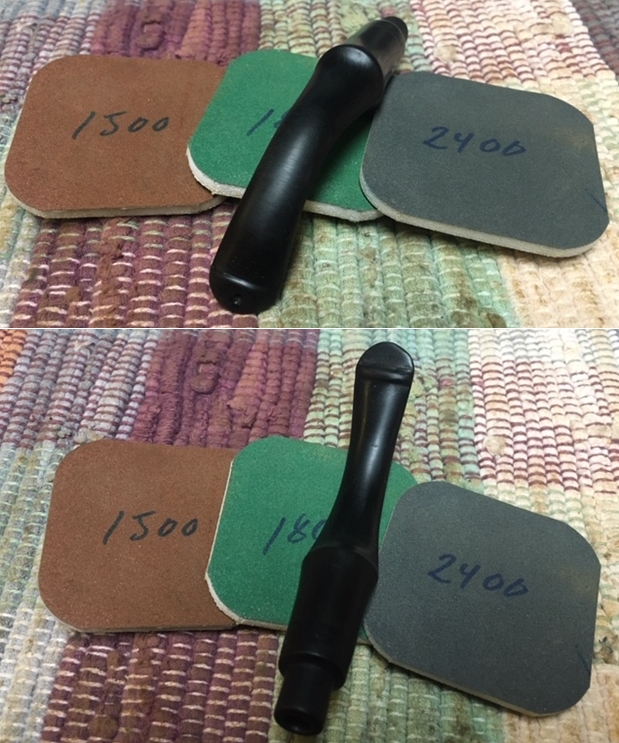
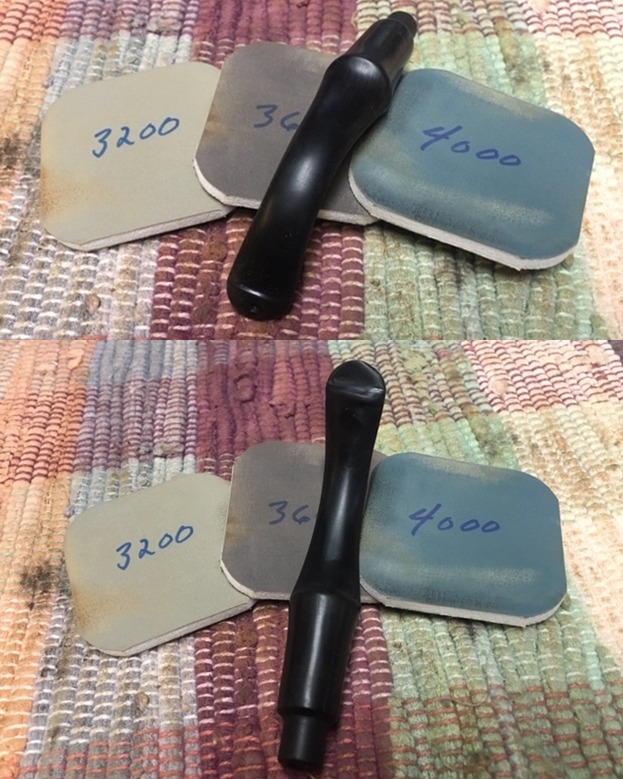
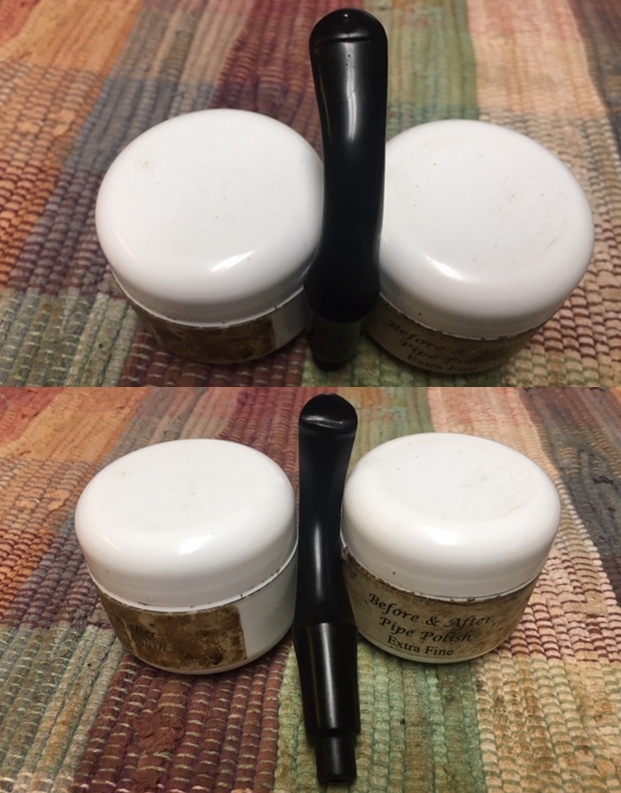
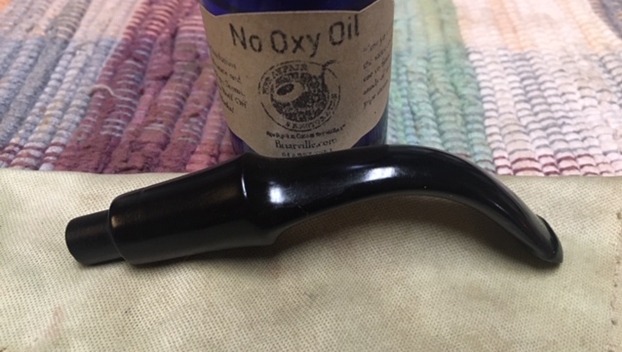
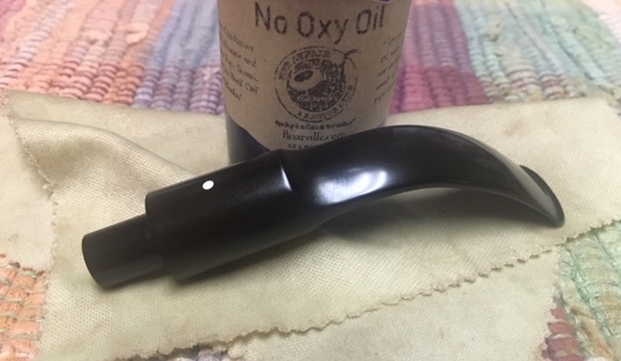
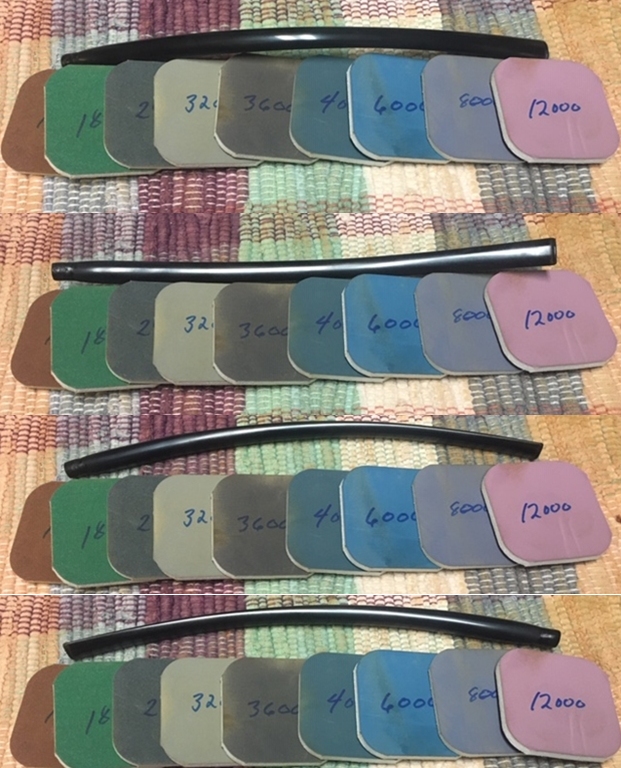
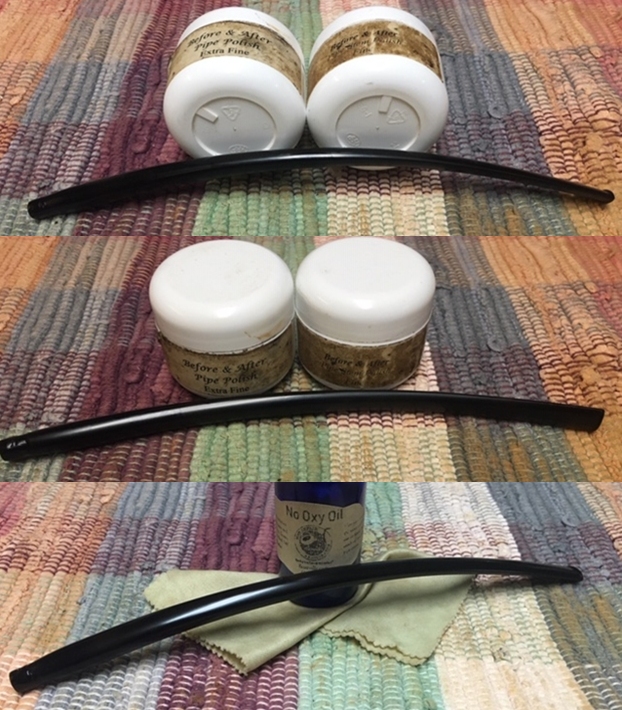
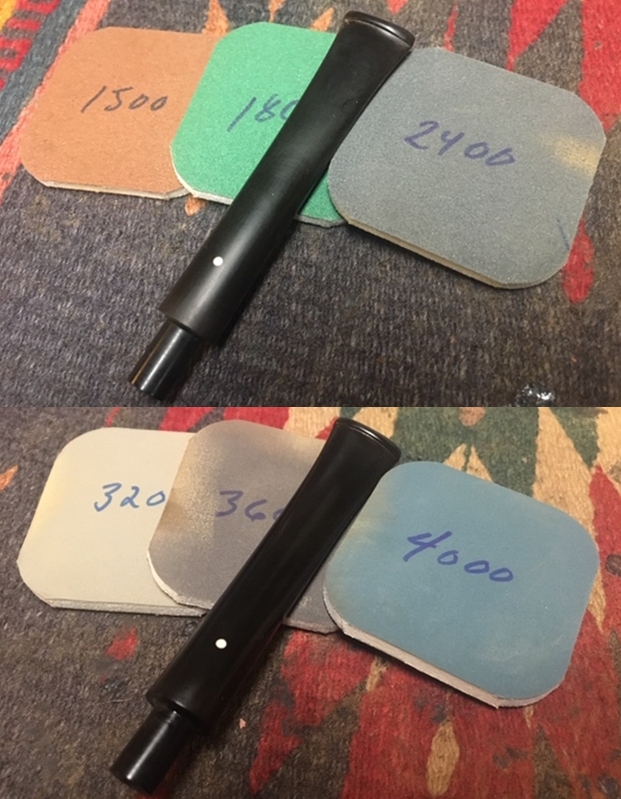
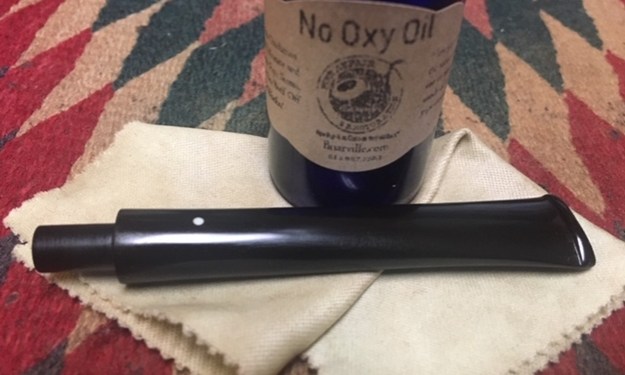
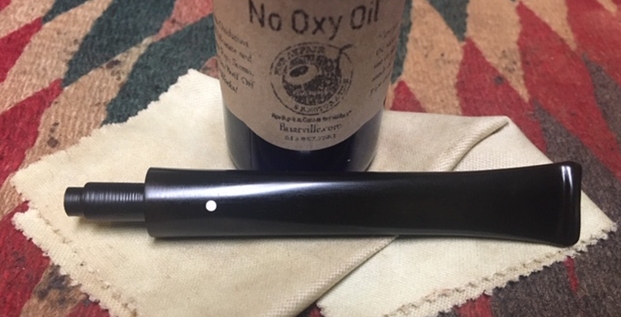
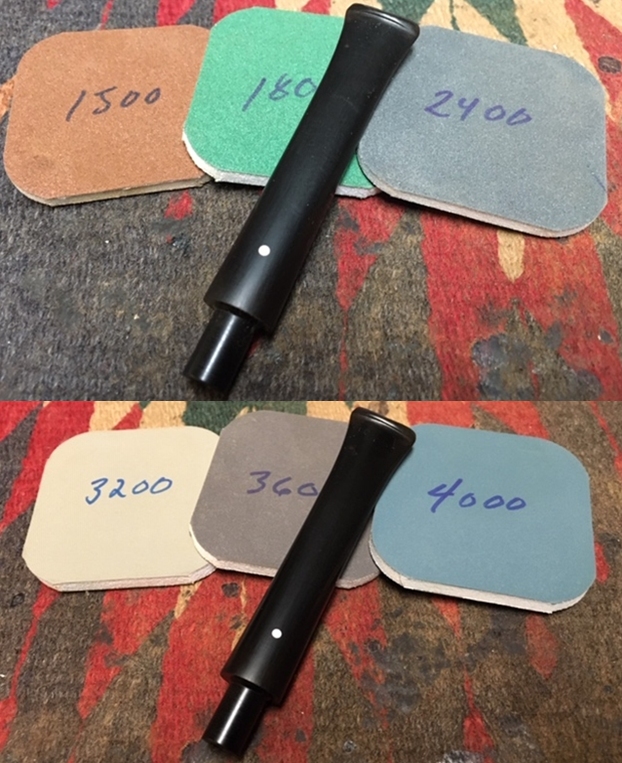
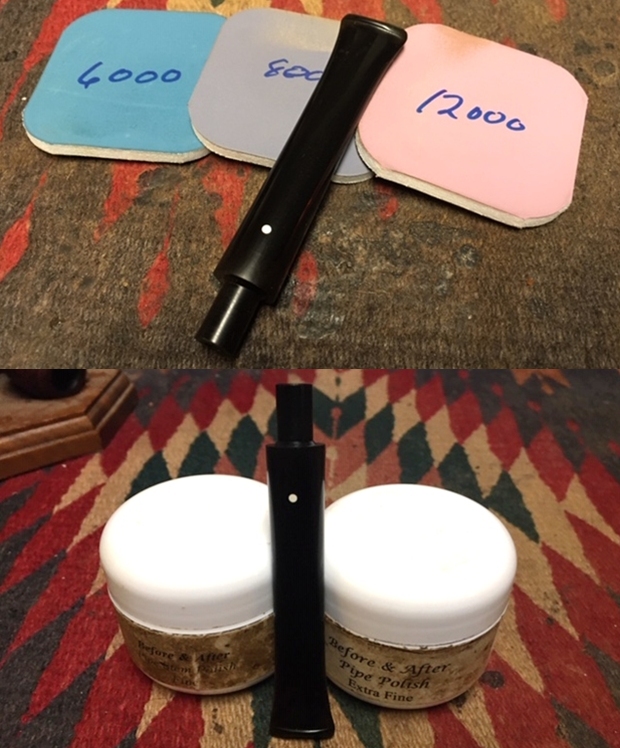
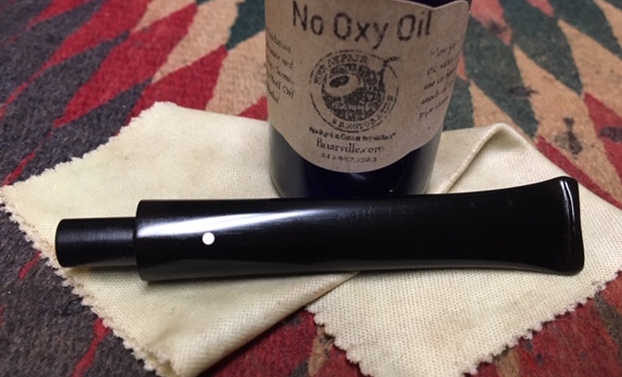
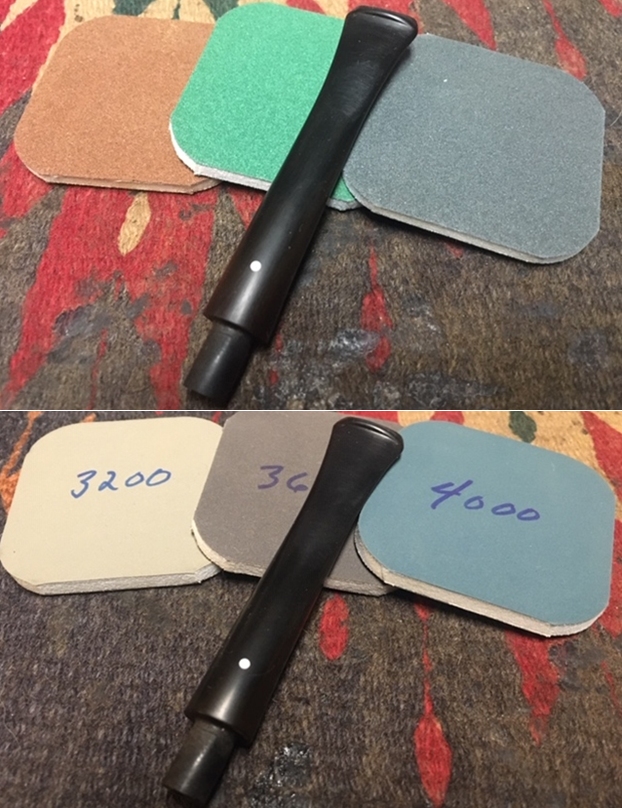
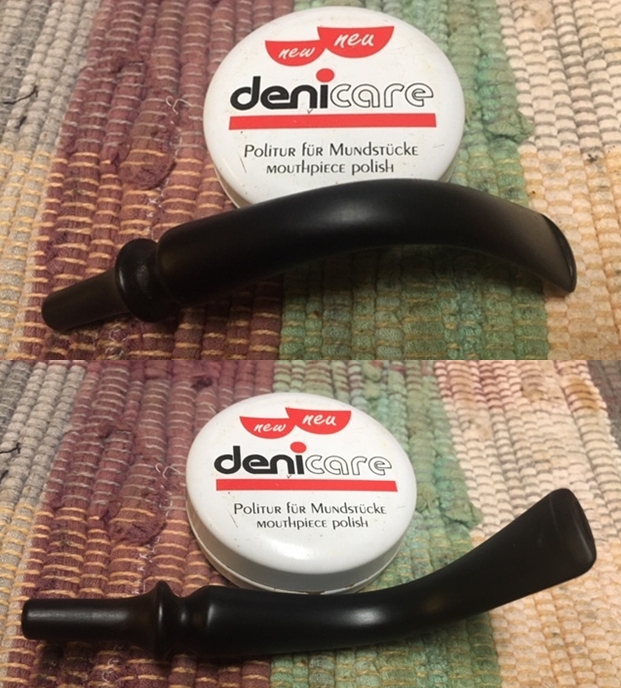 I polished the stem with micromesh sanding pads – wet sanding with 1500-12000 grit sanding pads. I wiped it down after each pad with a damp cloth to remove the sanding dust. I polished it further with Before & After Pipe Polish – both Fine and Extra Fine. I finished by rubbing the stem down with some “No Oxy Oil” to protect the vulcanite. I am continuing to experiment with the product from Briarville and tracking how it works so I can write a review of it.
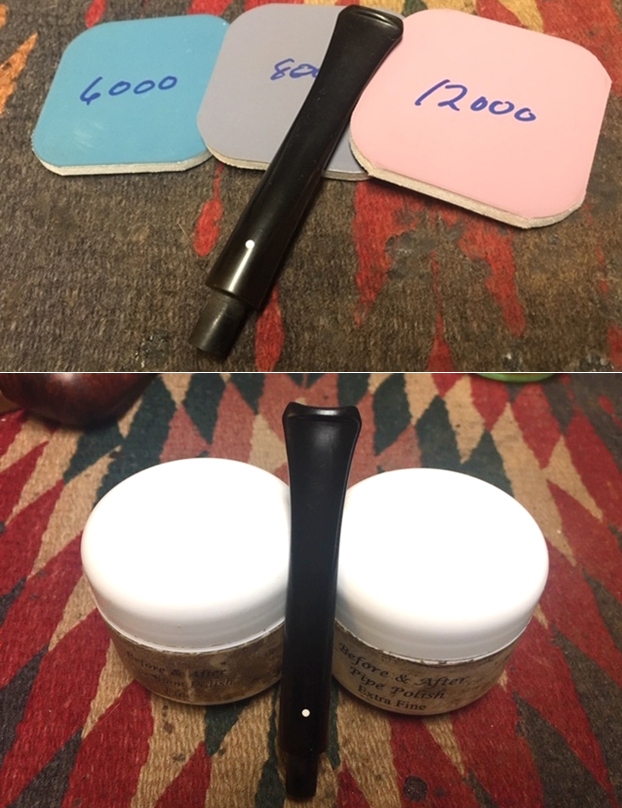
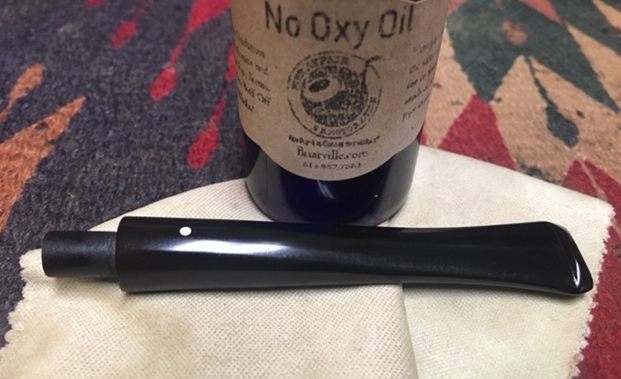