Blog By Paresh Deshpande
The next pipe that I had selected to work on was dictated by my desire to work on something that would be a simple and an easy project. I went through the box of pipes for restoration and selected a beautiful lightweight straight billiards that came to us in a lot which I prefer to call as my Mumbai Bonanza!
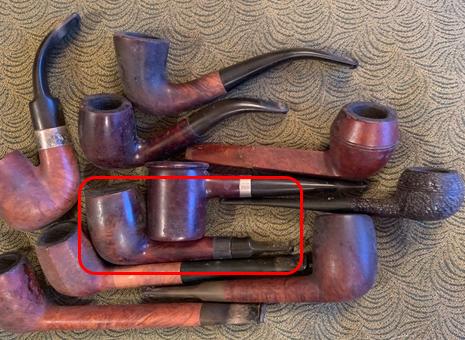
I was fortunate enough to have heeded the advice of my dear friend and mentor, Steve, and struck a deal with a junk collector from Mumbai. He did not know what he was selling and I did not know what I was buying as we reside in different cities!! The argument that Mr. Steve presented was that if not anything, I shall at least have some spare parts and this was logical. I struck a deal and here are pictures of the pipes that I received in this lot. 
 This lot contains some very nice collectible pipes, a few well known brands and some mediocre brands. Overall, with seven Dunhill pipes, a Preben Holm #1 FH, a couple of “Made in England” Pete System pipes, a couple of Charatan’s Belvedere, Custom-Bilt, Stanwell and other assorted pipes, I would say that I had struck a decent haul!! This is indeed my “Mumbai Bonanza”.
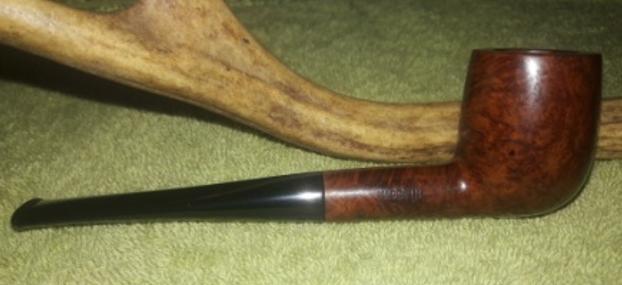
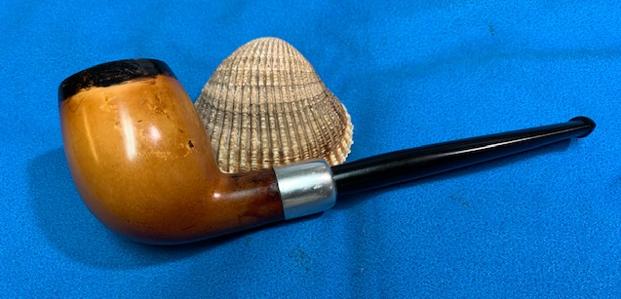
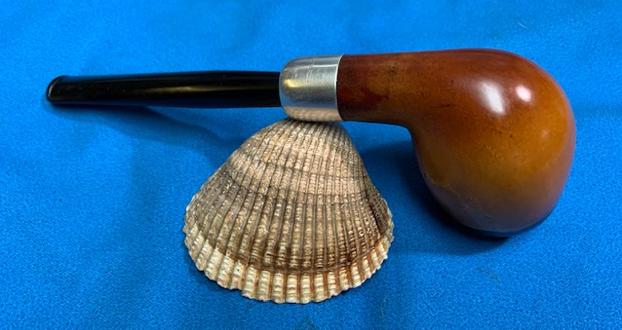
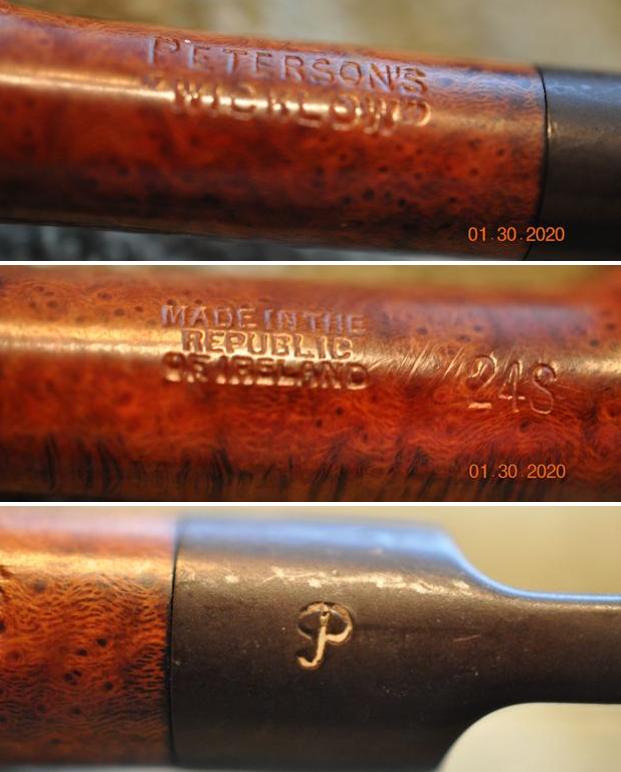
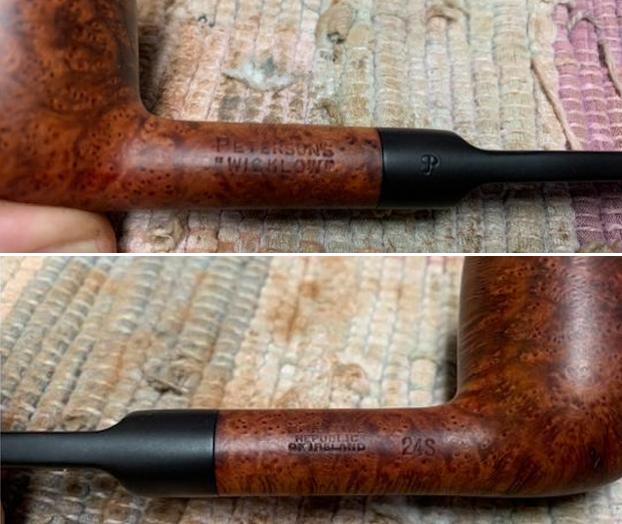
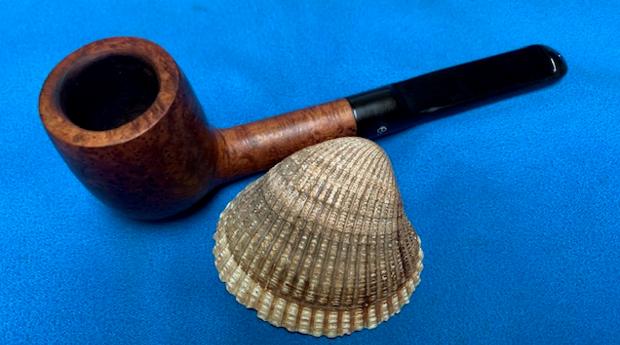
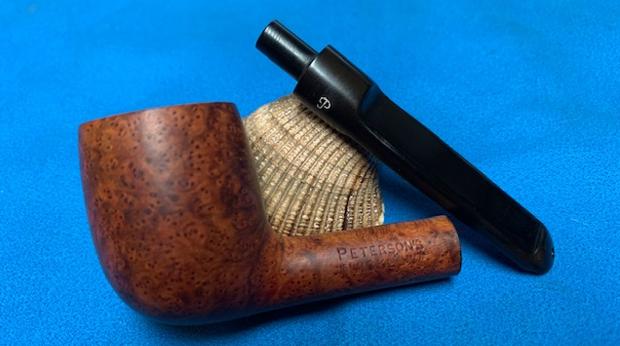
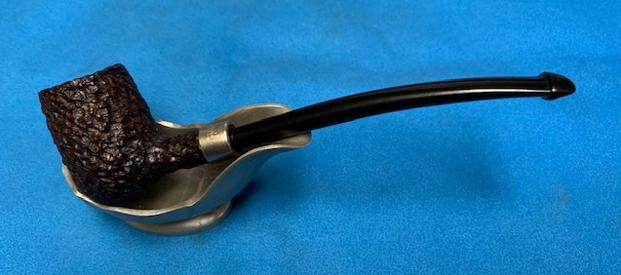
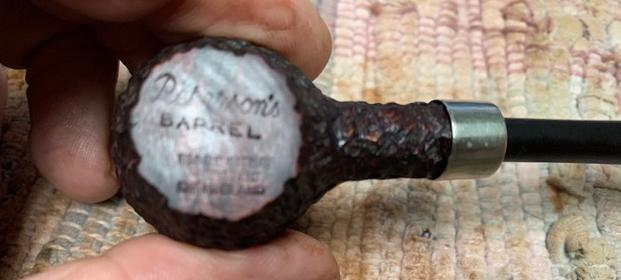
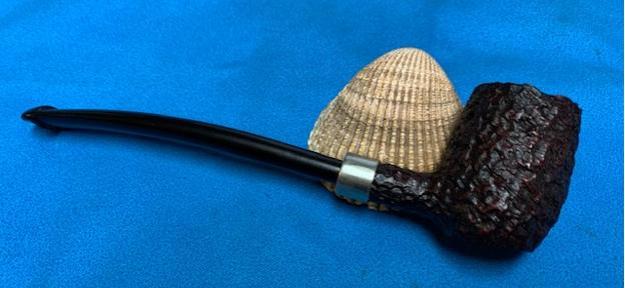
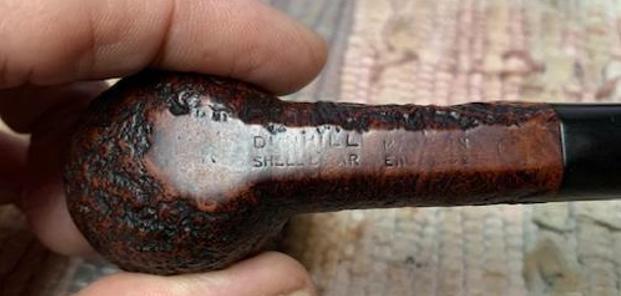
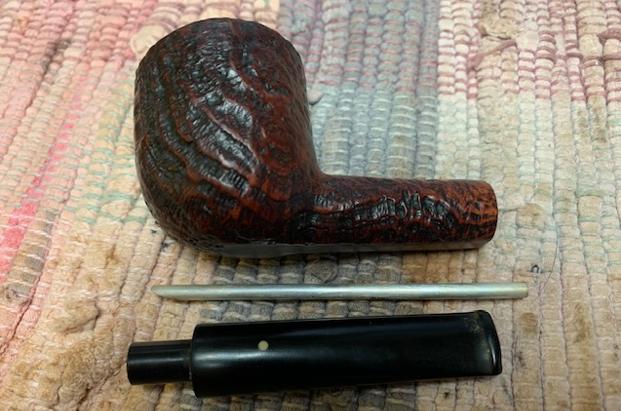
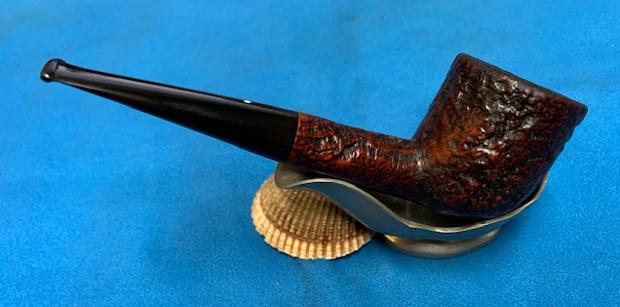
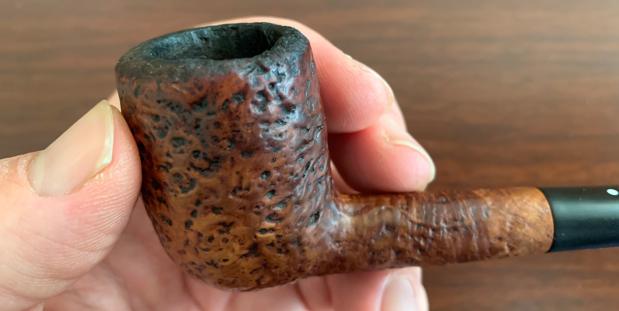
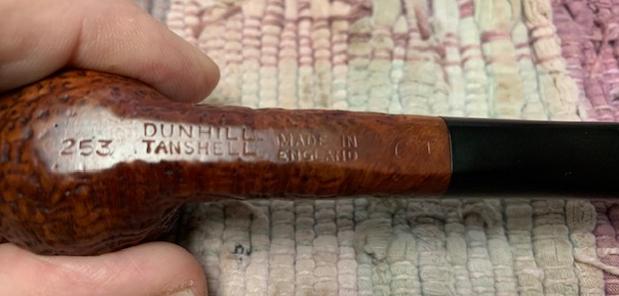
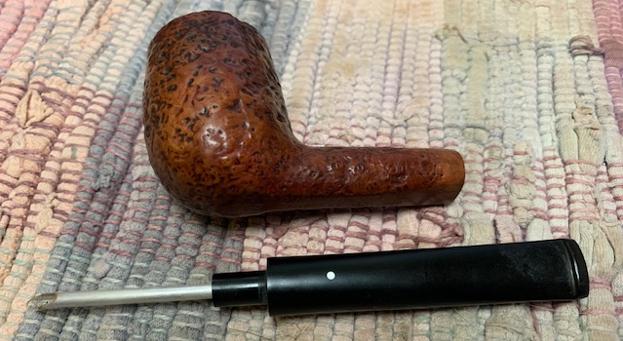
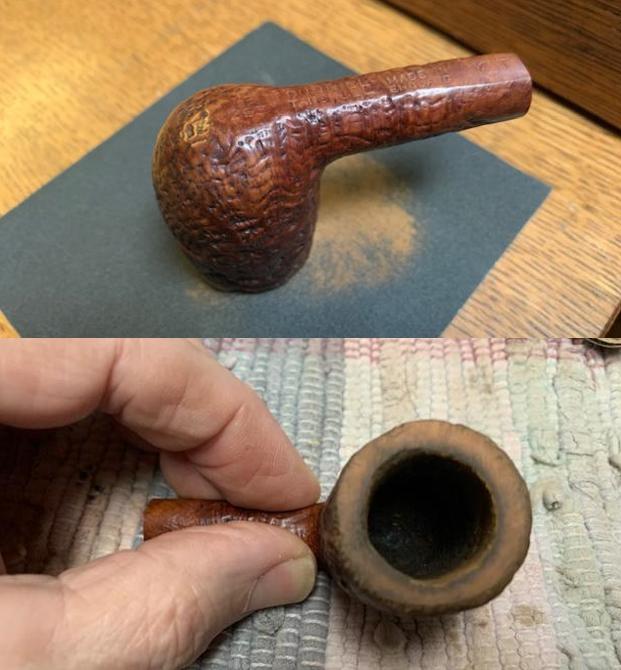
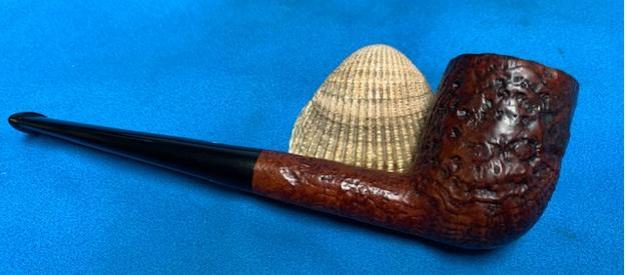
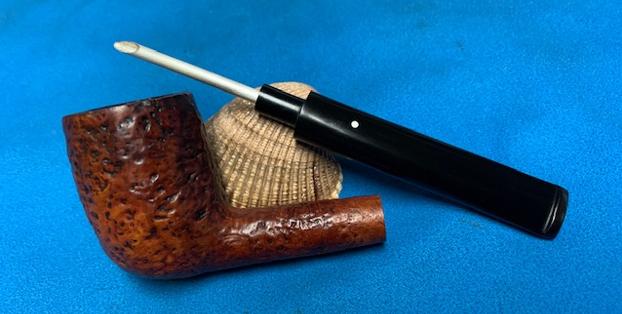
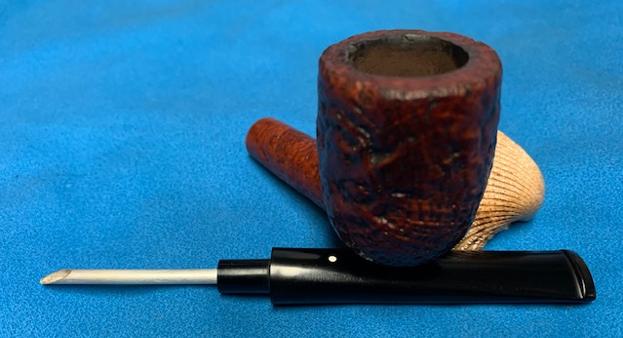
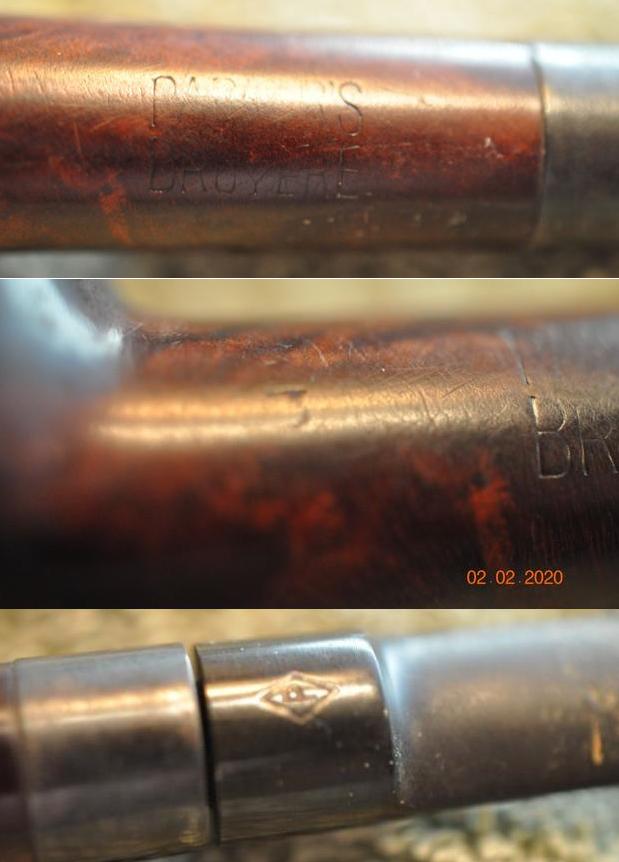
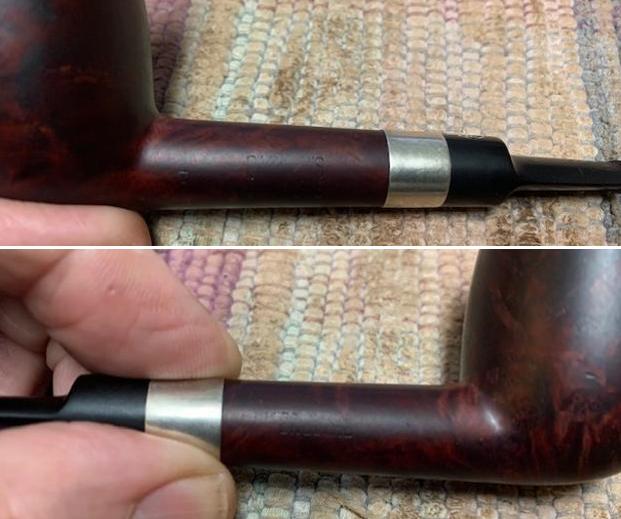
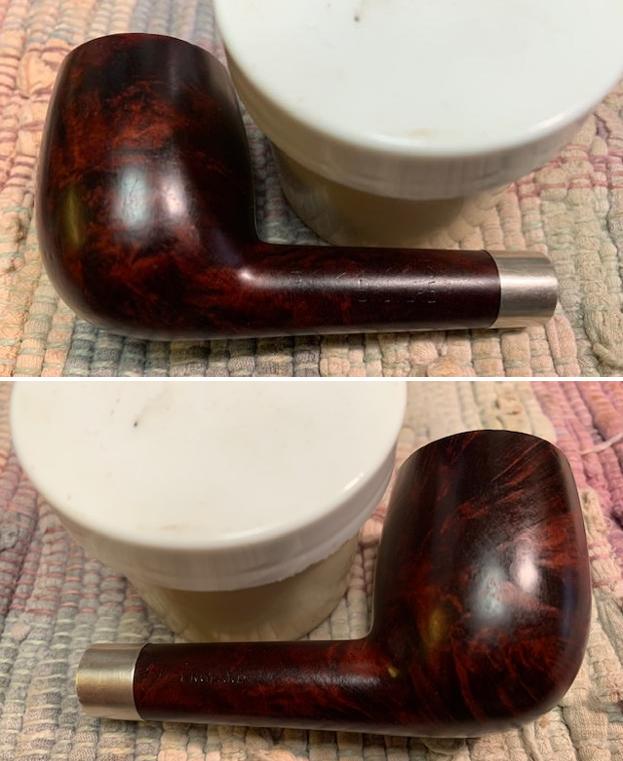
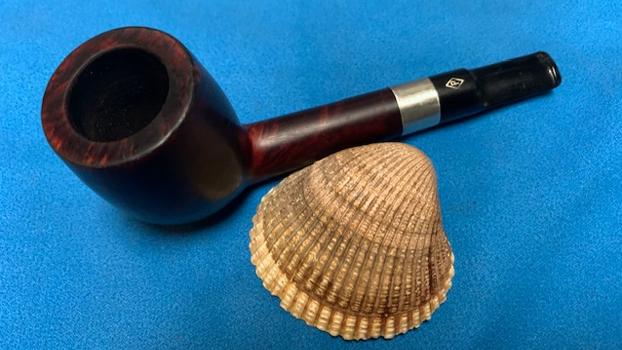
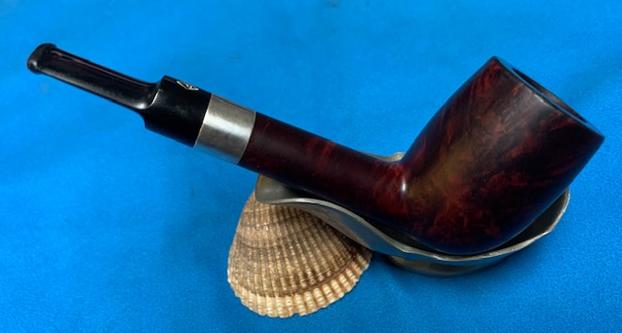
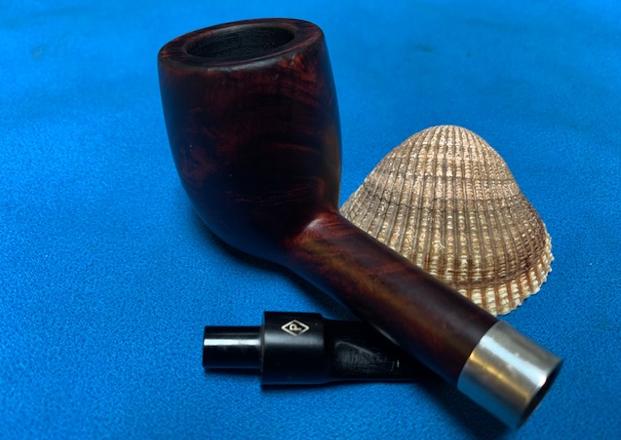
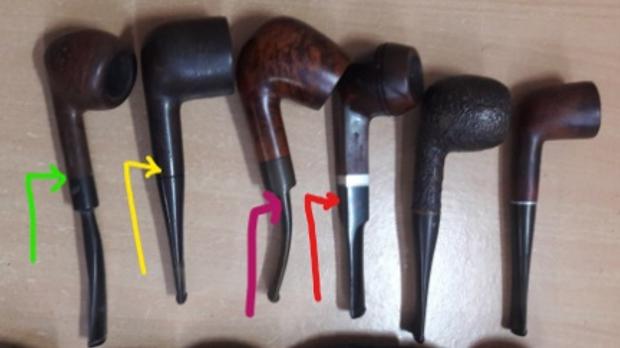
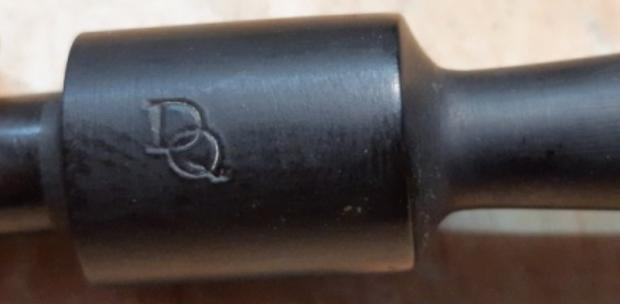
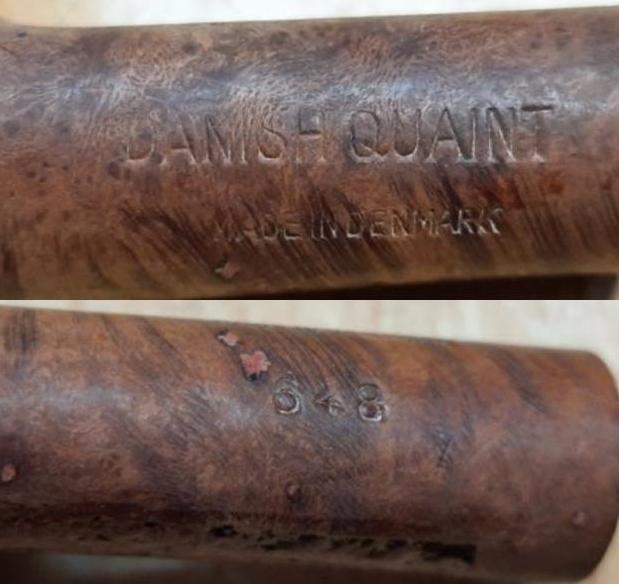
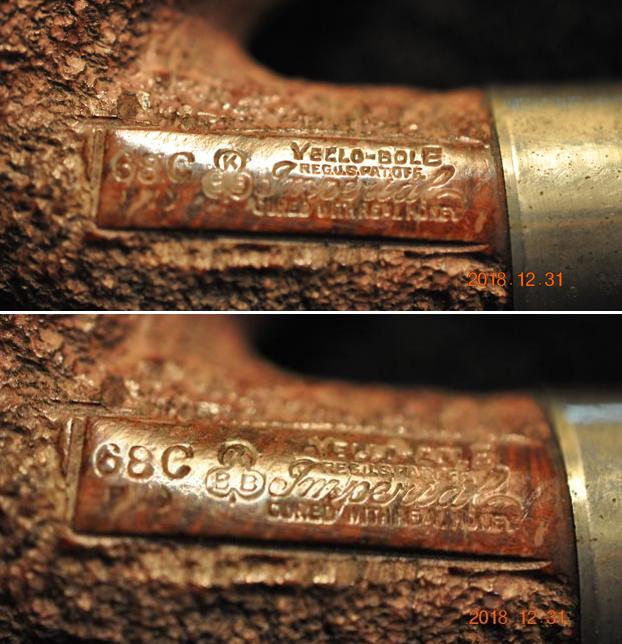
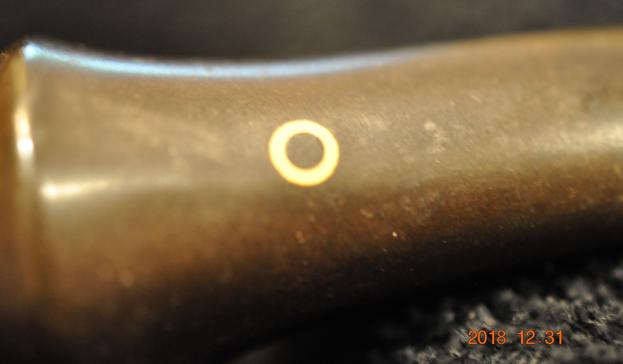
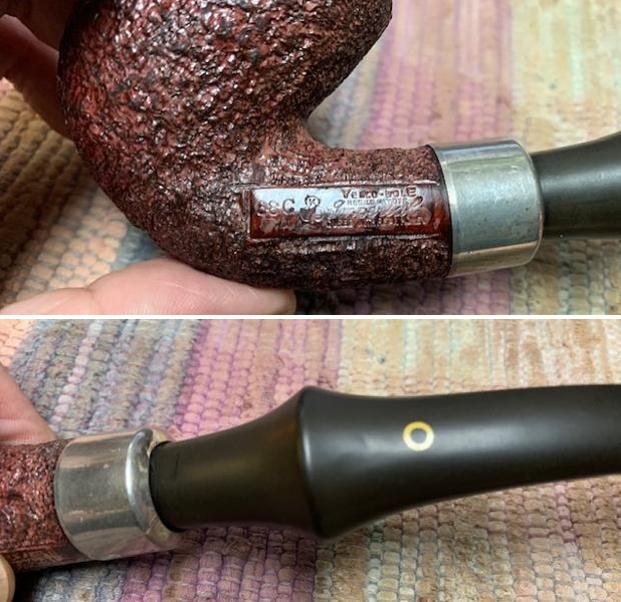
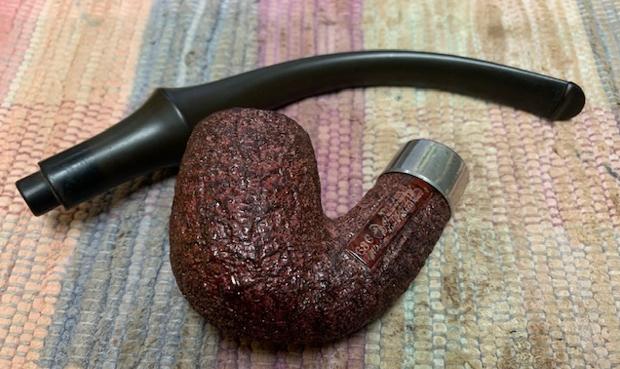
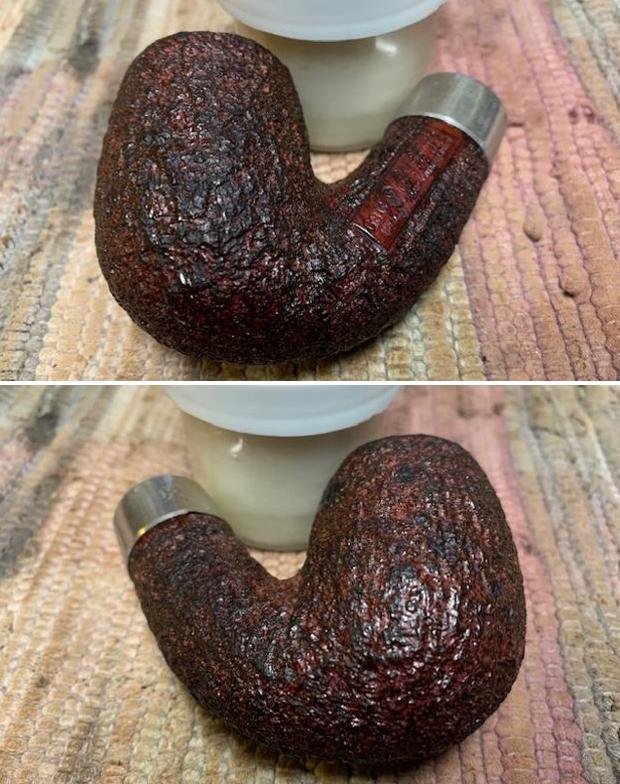
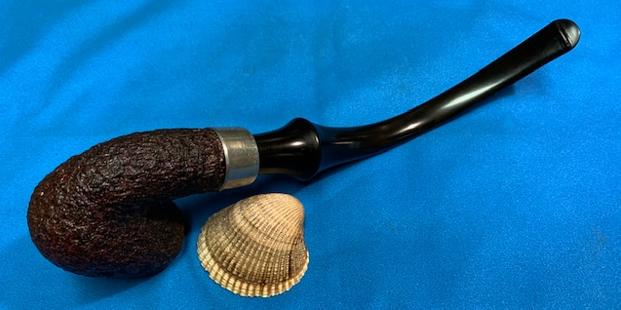
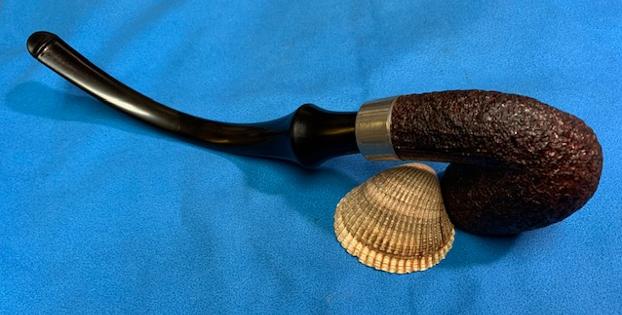
This 23rd pipe that I decided to work on from this find is a medium sized straight billiard and is indicated in green color arrow. It has a very solid feel in the hand with a very light weight to it making it ideal to clench all day long. The pipe exudes top notch quality of briar, very high quality of craftsmanship and construction with perfect proportions and classic design! It is stamped on the left of the shank as “HERTER’S” over “ANGLERS PIPE” in block capital letters. The right side of the shank bears the COM stamp “MADE IN” over “ENGLAND” followed by the shape code # 147 towards the stummel end. The stem is stamped as “HERTER’S” in block letters. All the stampings are crisp and easily readable.
 Since I had never heard of, let alone worked on a Herter’s pipe, I was keen to know more about this brand and if possible, establish approximate date/period for this pipe. I first turned to rebornpipes.com, as Steve has chronicled and researched many of the pipe houses and brands over the years working on pipe repairs and restoration. But unfortunately, this time around, there was no information available on this brand. Next, I turned to pipedia.org for information and there is very scant information available about the brand. The info that I gathered is reproduced below:-
Apparently this outdoor outfitting company had pipes made for them? If you have any additional information please add it here, or send it to sethile.pipes@gmail.com and we will add it for you.
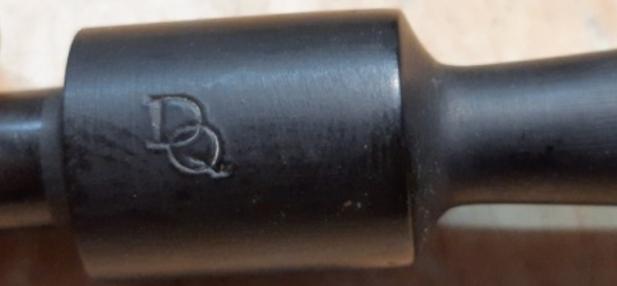
Well, that’s all the info that was available about the brand, other than a few pictures of the pipes and stampings that were available, thanks to Dough Valitchka.
Next I turned to pipephil.eu and the only additional information I learned was I quote “Private label of the same name outdoor equipment stores (fishermen, hunters, forest rangers…). A unique model: Herter’s pipes are all of the same shape.”
I have included a screenshot of the relevant part including pictures of the pipe and stampings seen on the pipe. I disagree with the comment “Herter’s pipes are all of the same shape” as there are different shapes available as I found out later during my research.
He-Hh — Pipes : Logos & Markings (pipephil.eu) Still not satisfied with the information gained so far, I did a random search for Herter’s on the web and Google Baba provided me with enough material to learn about Herter’s. The first thing I learned was that Herter’s was a Outdoor Goods Business that was started by George Leonard Herter. The first site I visited was Wikipedia and have reproduced the particulars of George Herter. Here is the link and relevant information that I have reproduced:-
George Leonard Herter – Wikipedia
George Leonard Herter (24 May 1911 – 5 July 1994) of Waseca, Minnesota was the founder of the Herter’s outdoor goods business and an author. His best known books are the Bull Cook and Authentic Historical Recipes and Practices series (published in three volumes), which have a cult following today.[1]
In 1937 Herter took his father’s dry goods store and turned it into a mail order outdoor goods business, selling hunting and fishing items through a catalog. He later opened retail outlet stores, which pioneered the style of outdoor goods stores now operated by Cabela’s and Bass Pro Shops. The company went bankrupt in 1981.[1]
He is best known for his books, which were self-published and sold through his stores. The New York Times describes the Bull Cook series as his “magnum opus“, “a wild mix of recipes, unsourced claims and unhinged philosophy that went through at least 15 editions between 1960 and 1970.”[1]
How to Get Out of the Rat Race and Live On $10 a Month, despite its title, is an encyclopedic 656-page collection of outdoor and survival skills.
The Bull Cook series and How to Get Out of the Rat Race are credited as co-written by George Leonard Herter and his wife, Berthe E. Herter.
There is a very insightful and informative article in Star Tribune on Herter’s catalog that I came across and here is the link to that article. It is titled, “Herter’s catalog is long gone, but not forgotten”.
Herter’s catalog is long gone, but not forgotten – StarTribune.com
Before there was an Internet or a Cabela’s, Bass Pro Shop or Gander Mountain, there was Herter’s — the first outdoors gear juggernaut. Say the word “Herter’s’’ and a legion of mostly men, now middle-aged or older, in Minnesota and nationwide nod their collective heads in fond recollection. Herter’s mail-order catalogs were legendary, hundreds of pages jammed with hunting, fishing, camping and other outdoor gear that could be delivered to your doorstep. Those catalogs included lengthy descriptions, instructions and bold, often audacious claims — entertaining readers while also enticing them to buy. Herter’s was the Sears, Roebuck of the outdoor industry and was perhaps best known for its waterfowl products. Launched and headquartered in Waseca, Minn., the company was the inspiration for today’s huge mail-order and big-box outdoor retailers. And at the center of it all was George Herter, an eccentric and reclusive entrepreneur, a marketing genius who made brazen, bombastic claims to boost sales of his products. Though he died more than 20 years ago, he remains an enigma — and one of the most interesting characters in Minnesota history.
“He was an icon in Minnesota, and had a lot to do with influencing waterfowling, not only in Minnesota but throughout the United States,’’ said Doug Lodermeier, 60, of Edina, a waterfowl historian and collector who gave a presentation on Herter’s legacy Saturday at the annual Minnesota Waterfowl Association’s waterfowl symposium in Bloomington.
“It’s easy to dismiss him as a crackpot and goofball, but the reality is he was a genius,’’ Lodermeier said. “He was way ahead of his time.’’
Herter labeled most of his products “world famous” or “model perfect,” and he claimed many were endorsed by the North Star Guides Association — which didn’t exist.
Said Lodermeier: “As a kid I couldn’t wait for the Herter’s catalog to come because me and my friends just rolled on the ground reading his claims and outlandish stories. We loved it — and we bought his stuff.’’
Herter reportedly wrote all of the copy in his catalogs, instruction manuals and pamphlets and also was a prolific author — among his books: “How to Get Out of the Rat Race and Live on $10 a Month.” In a cookbook he wrote, “The Virgin Mary, Mother of Christ, was very fond of spinach.’’
Quirkiness aside, Herter built an outdoors empire, starting around 1935 in Waseca. It began as a catalog business that focused on fly-tying, but it grew to include virtually every outdoor product imaginable — and some unimaginable. Eventually Herter opened stores in Waseca, Glenwood, Mitchell, S.D., Beaver Dam, Wis., Iowa City and Iowa Falls, Iowa, and Olympia, Wash.
But after decades of success, a “perfect storm’’ led to Herter’s demise, Lodermeier said: The overexpansion of those retail stores at a time when oil prices were skyrocketing, the Gun Control Act of 1968, which prevented firearms from being bought and sold via the mail, and federal bans on the importation of some feather species Herter’s used for fly tying.
Herter’s went bankrupt in 1977, and the though the man has become mostly forgotten, his name lives on. Cabela’s now owns the brand, and customers can order an assortment of Herter’s gear and ammunition.
 George Herter saw combat in Europe during World War II, earned a Purple Heart and may have suffered from post-traumatic stress disorder. Reclusive even at the height of his success, Herter apparently didn’t give interviews, and few photographs of him exist. The man who left an indelible mark on the outdoors industry is relatively unknown.
He died in 1994 in Minneapolis at age 83, leaving behind no autobiographies or interviews.
“I don’t want to be known and rarely tell people my right name. I never allow anyone to take my picture,’’ he wrote in one book.
With a fair idea of the enigmatic man behind Herter’s, my quest to know about Anglers Pipe and it’s place in the Outdoor Goods business, pushed me to further research. I came across a blog by Dean Smith, an Angler and collector of fishing collectible. Here is the link to the blog and certain excerpts from his researched blog.
Tackle Treasures: vintage fishing tackle collectibles
About Tackle Treasures…
When most folks think about fishing collectibles they likely conjure up images of fine bamboo rods, early reels, wooden lures with glass eyes, hand carved ice-fishing decoys or perhaps leather trimmed split willow creels. Not me …I like all of the other stuff best …gizmos, bottles, boxes, tins, medals, pins, knives, fly tying vises, advertising items and all sorts of paraphernalia with a fishing theme. Poke around the site for bit …I’m sure you’ll see the attraction after a tour.
In the old days smoking and outdoor activities seemed to go hand-in-hand …thereby the vast proliferation of smoking products with angling themes. In fact, smoking was so popular that some tackle manufacturers offered smoking products and accessories. For example, both Hardy and Herter’s made “Anglers Pipes”. Now, I am not the least bit certain what distinguishes a normal pipe from an Anglers pipe …but it did give me something else to collect and that’s all that matters. Hardy also made an “Anglers Pipe Reamer” …which begs the question, would it only work on “Anglers Pipes?”

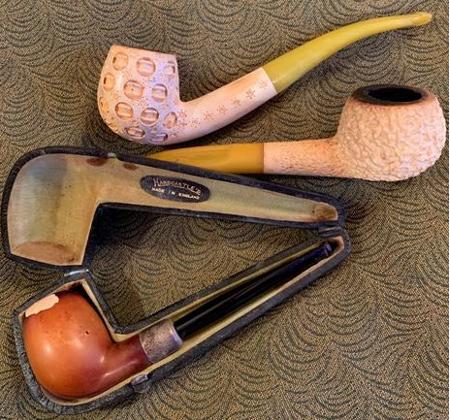
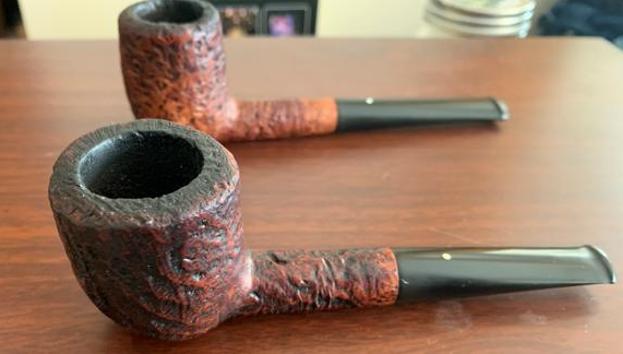
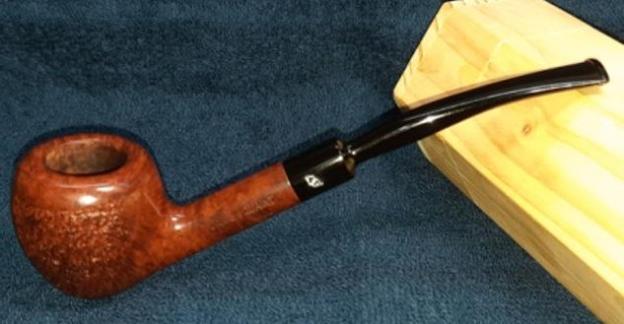
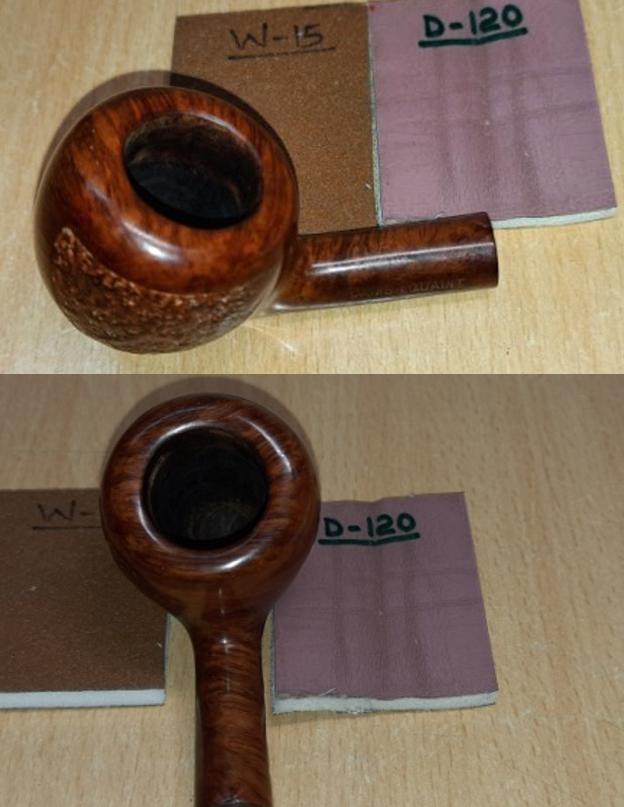
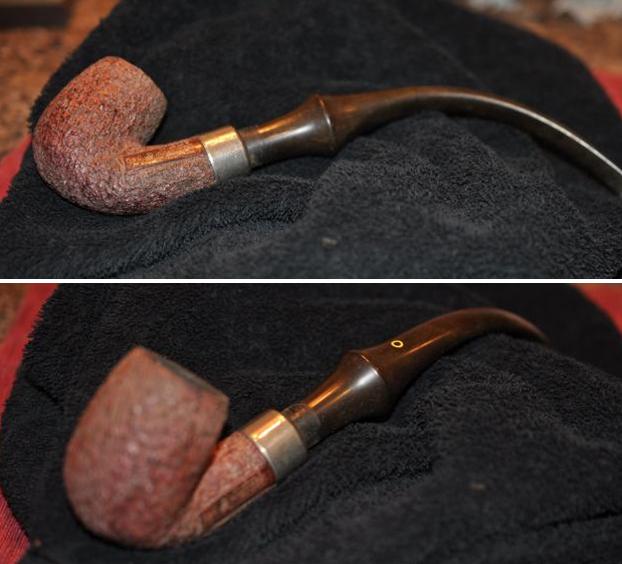
Herter’s Anglers Pipe and Hardy Brothers Pipe Reamer

I Certainly Didn’t Set Out To Collect Herter’s Anglers Pipes …But Now I Have Three …All Different (Annotations are by the owner of the blog, Mr. Dean Smith)
Thus from the above, it is now understood that the pipe on my work table was retailed by Herter’s Outdoor Goods, a mail order venture, that was started by George Leonard Herter in 1935 and which declared bankruptcy in 1977. Herter’s supplied smoking products and accessories, including pipes that were made specifically for the firm by one of the many British pipe makers.
Now that I have a fair idea of the shop from where this pipe was sold and having established the provenance, I moved ahead with the inspection and further restoration of the pipe.
Initial Visual Inspection
This lot had some highly collectible and sought after pipes. That pipes such as this one, an unknown entity amidst all the Preben Holms, Stanwells, Dunhills and Charatan’s in this lot, can make its presence felt is testimony to its quality briar, construction and the legacy of being part of American pipe history and e-commerce.
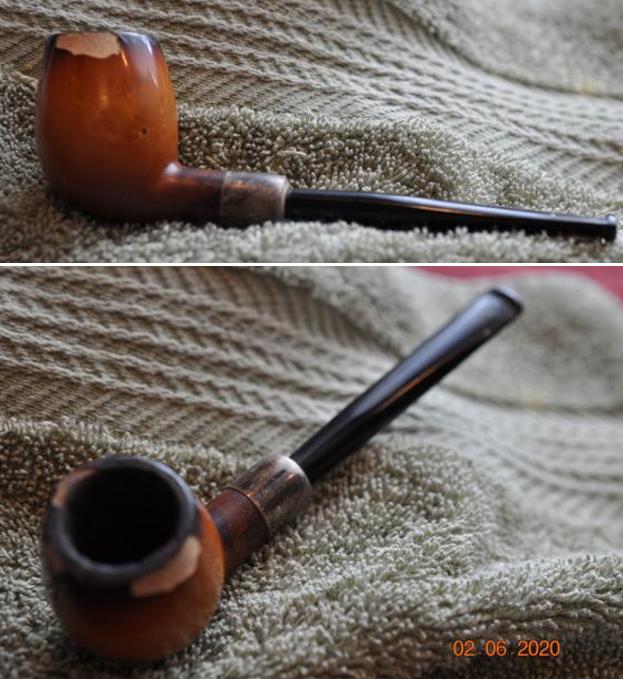
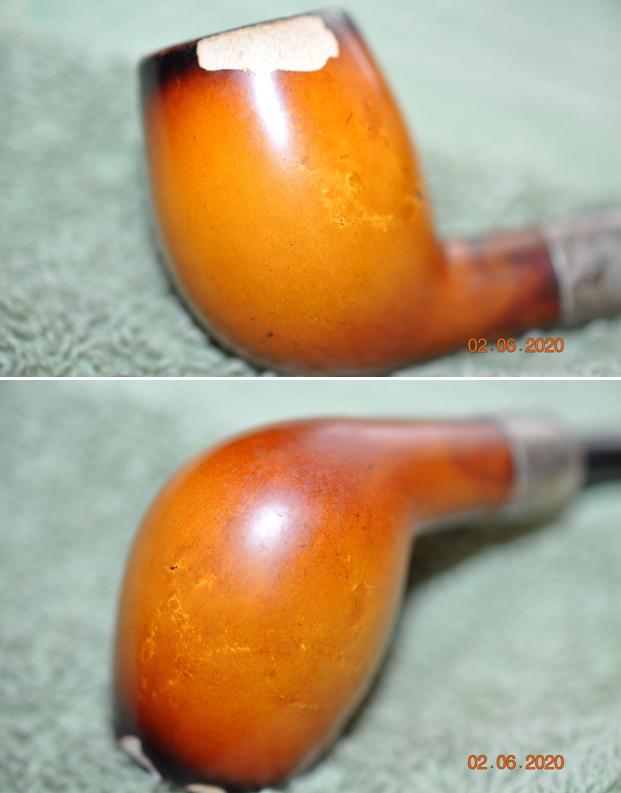
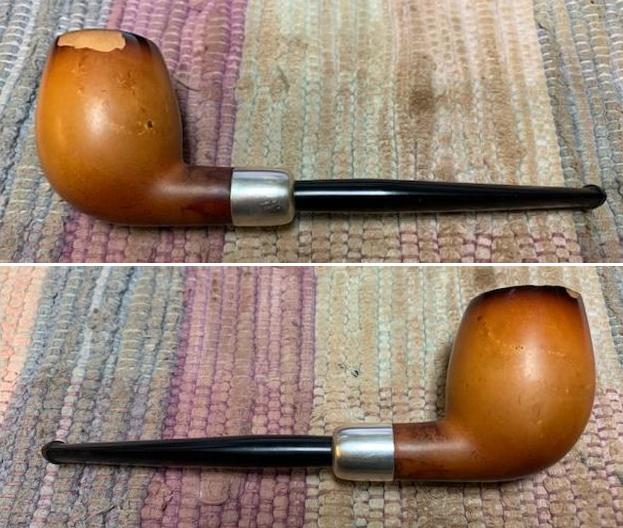
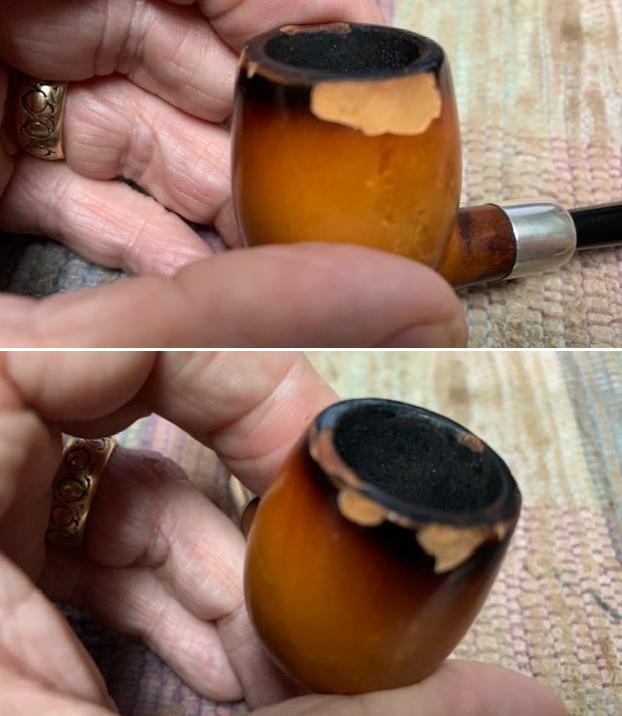
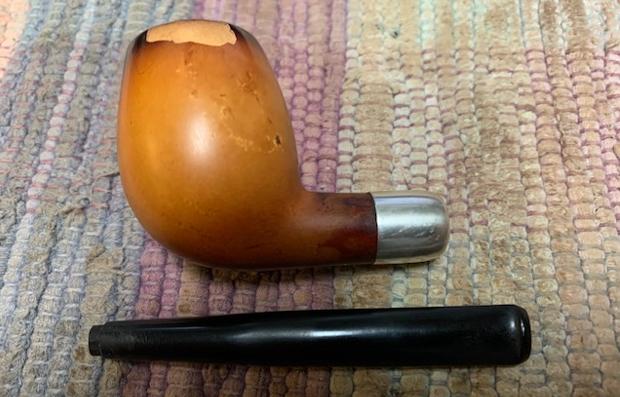
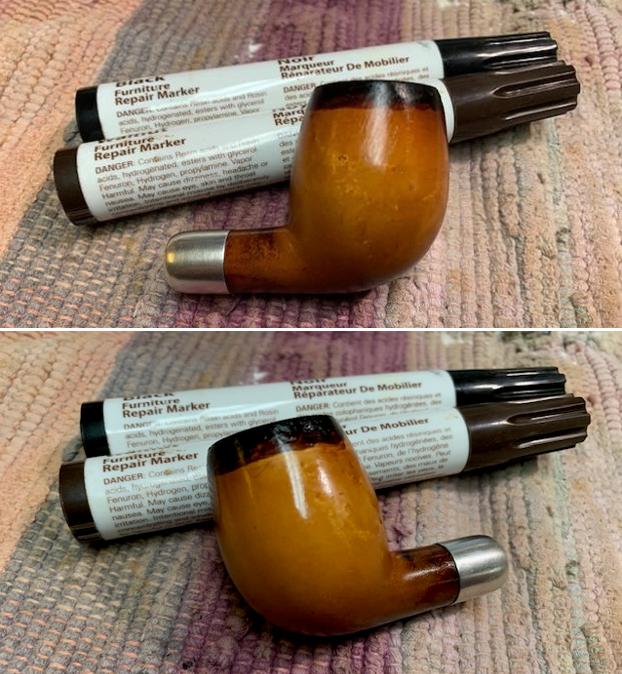
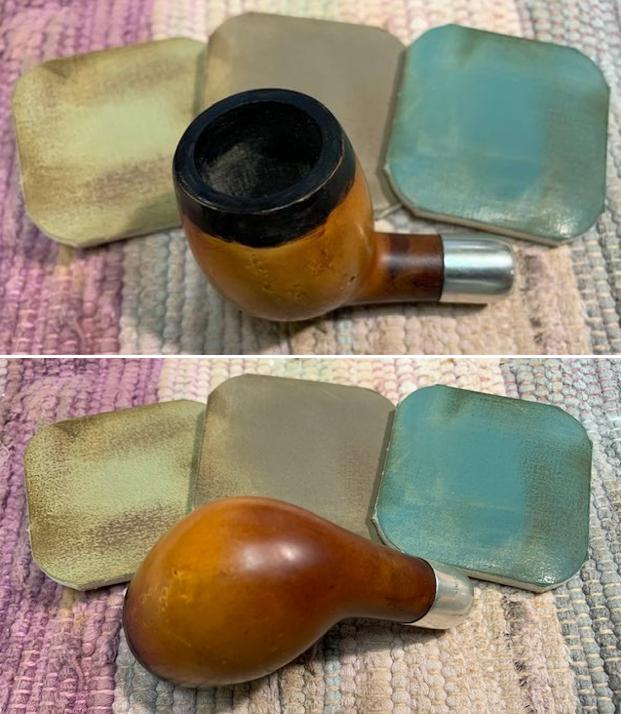
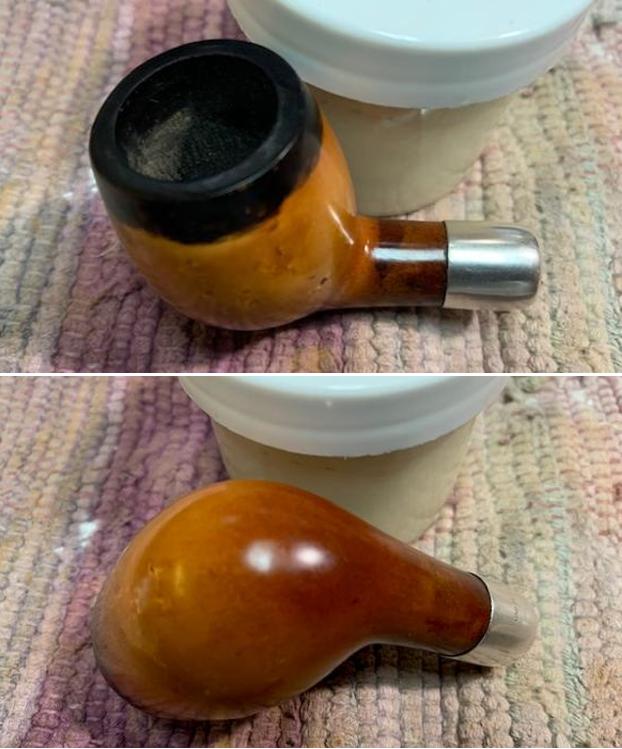
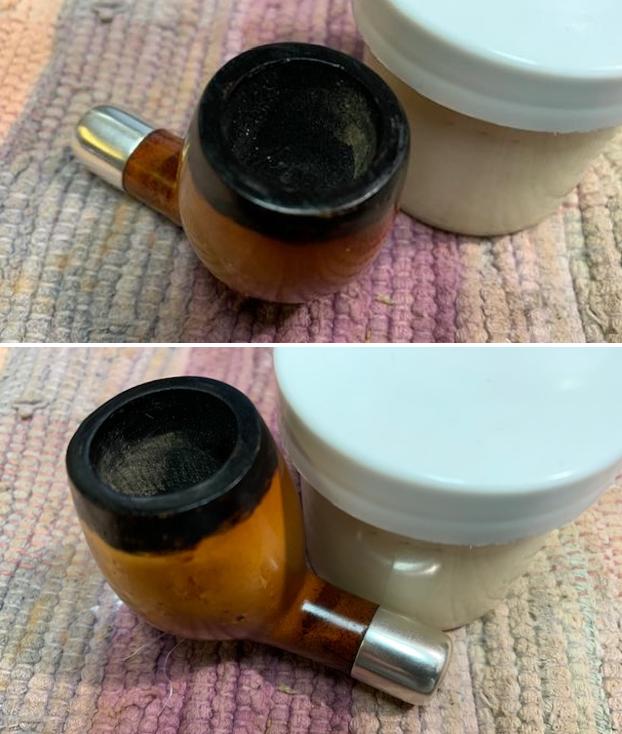
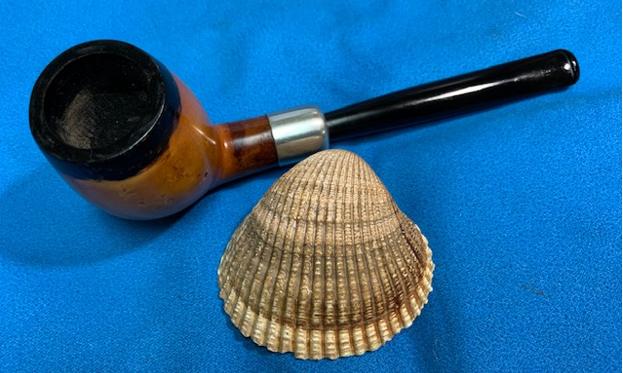
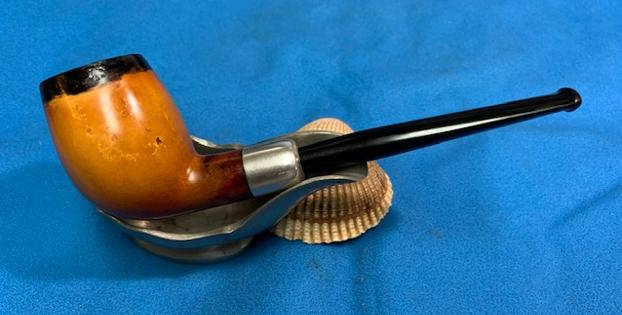
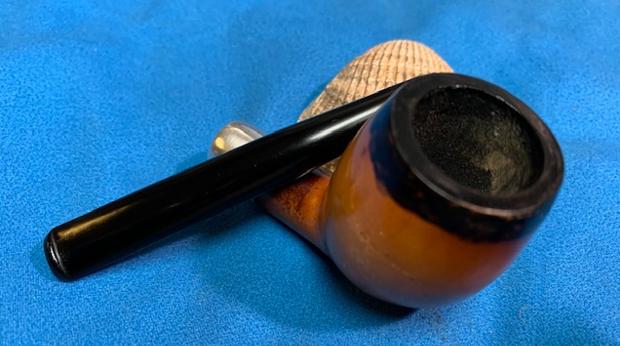
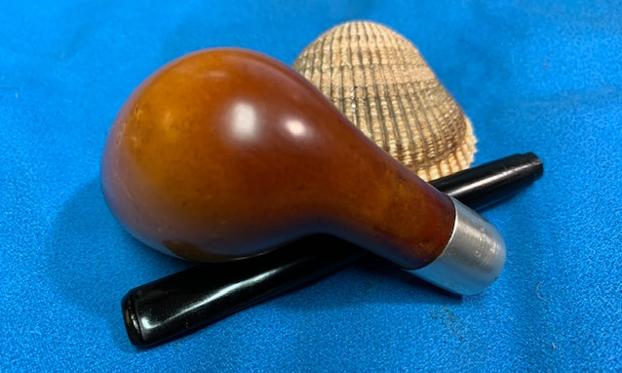
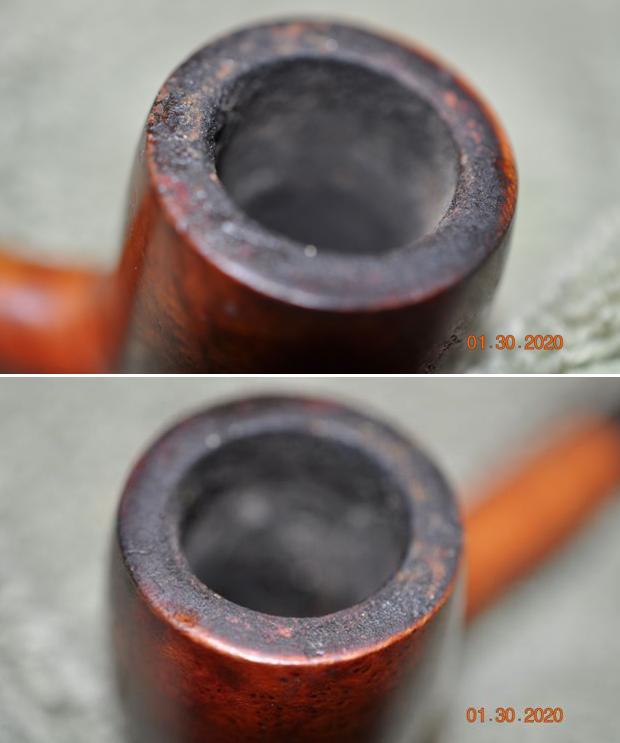
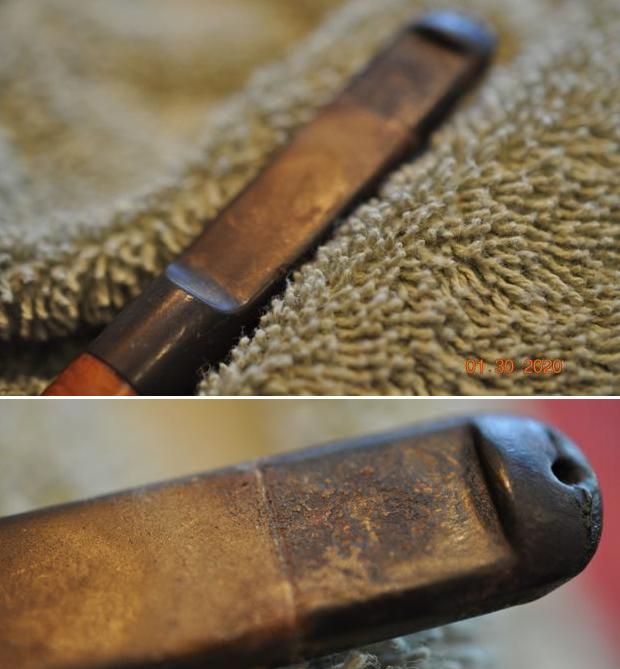
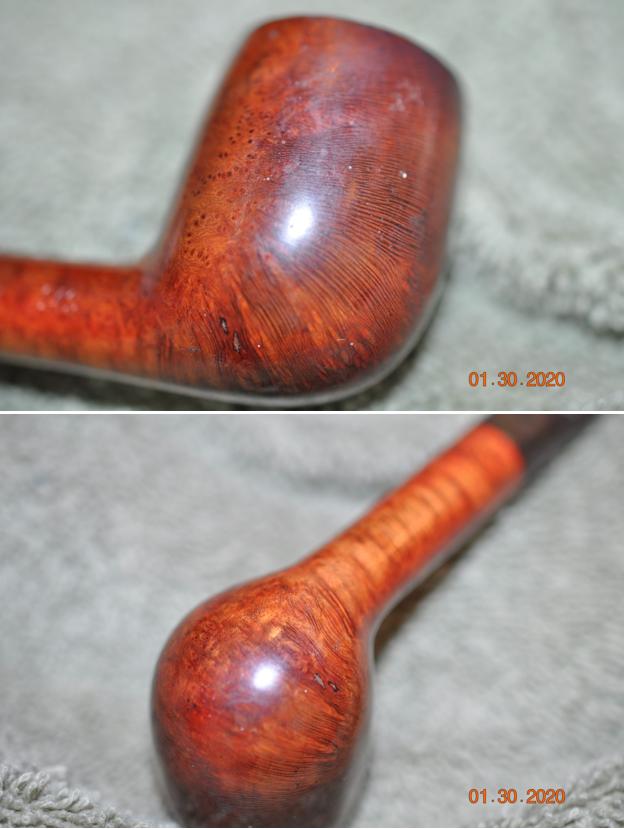
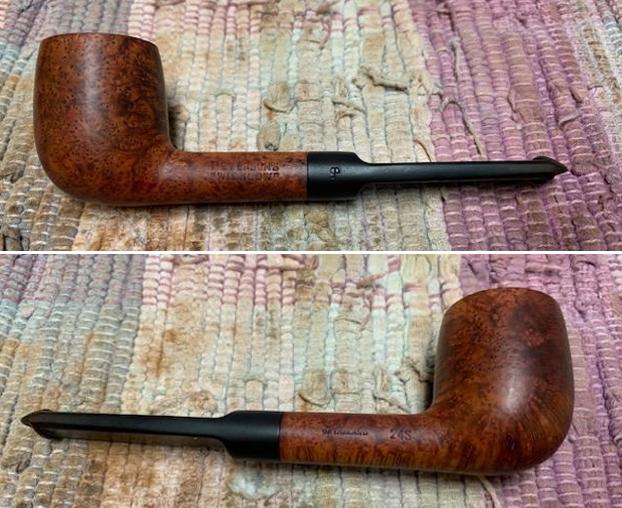
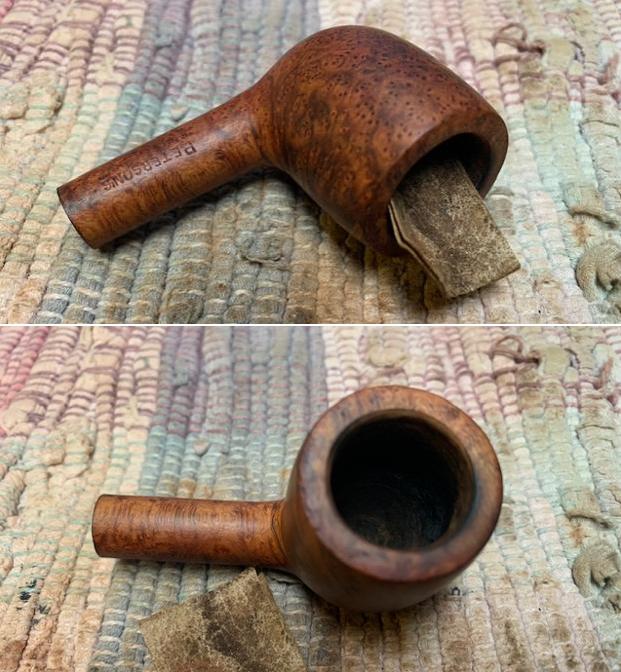
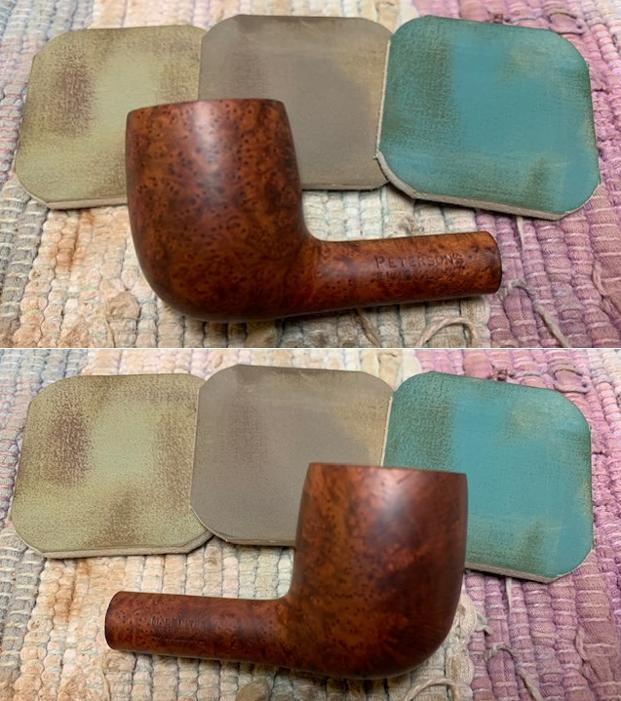
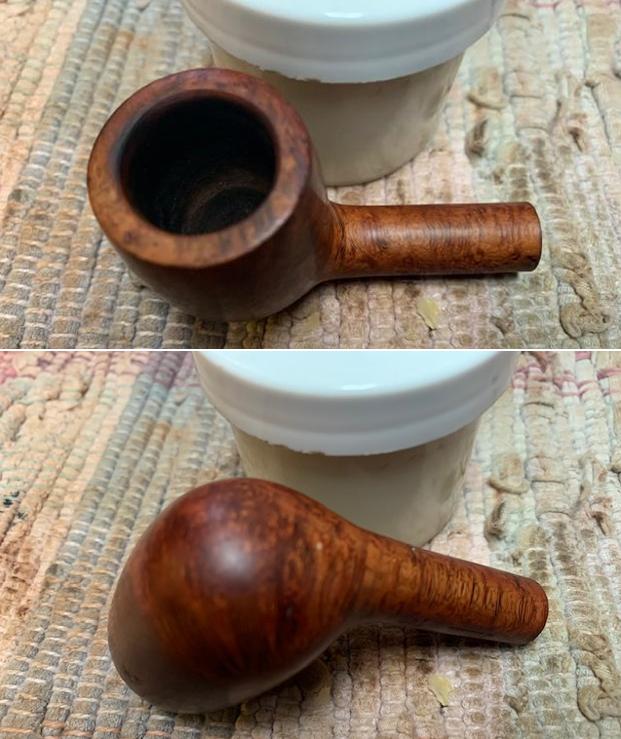
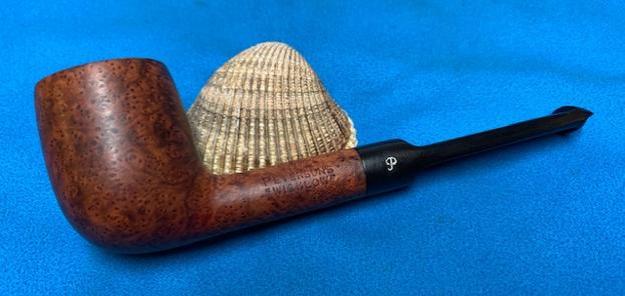
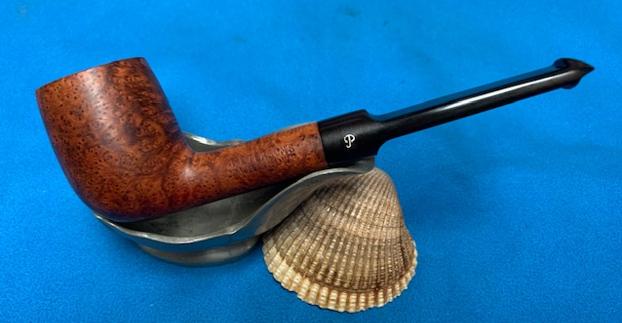
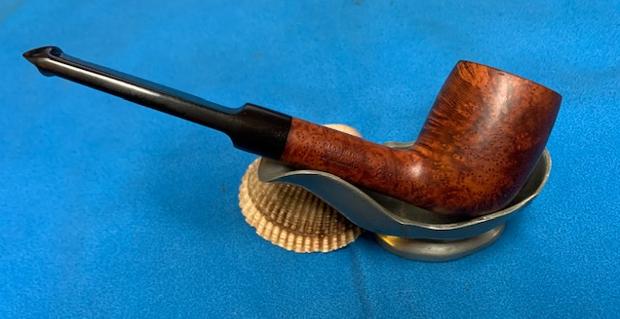
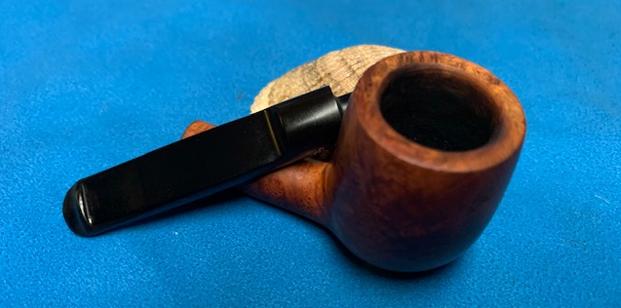
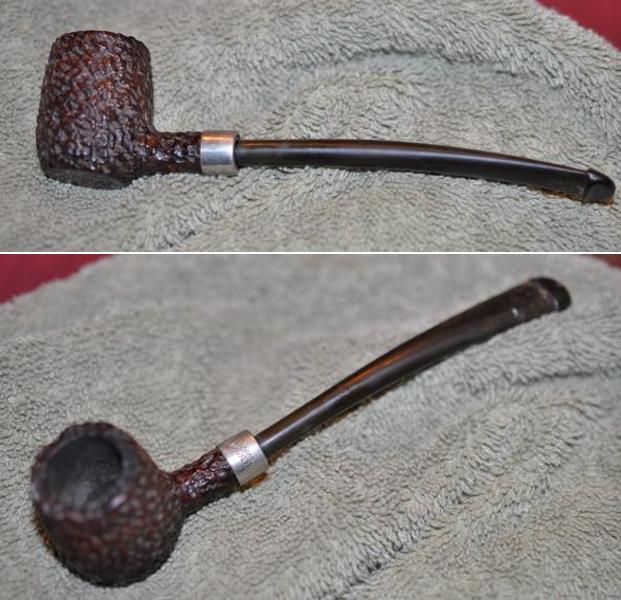
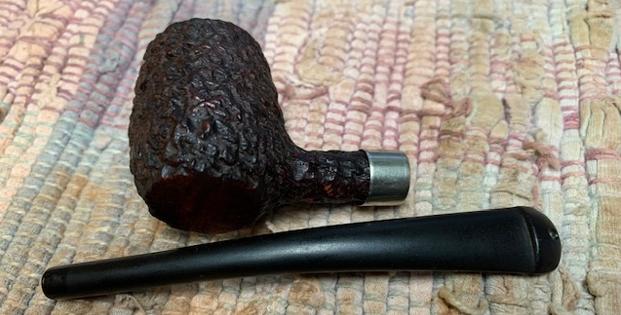
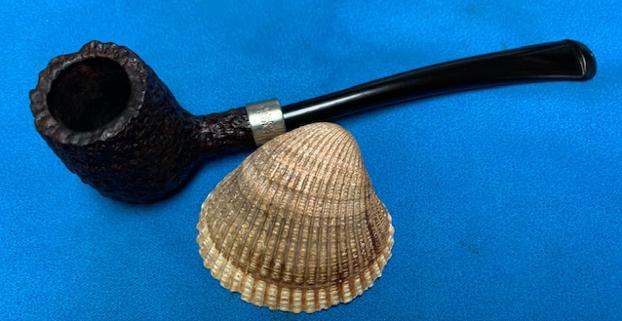
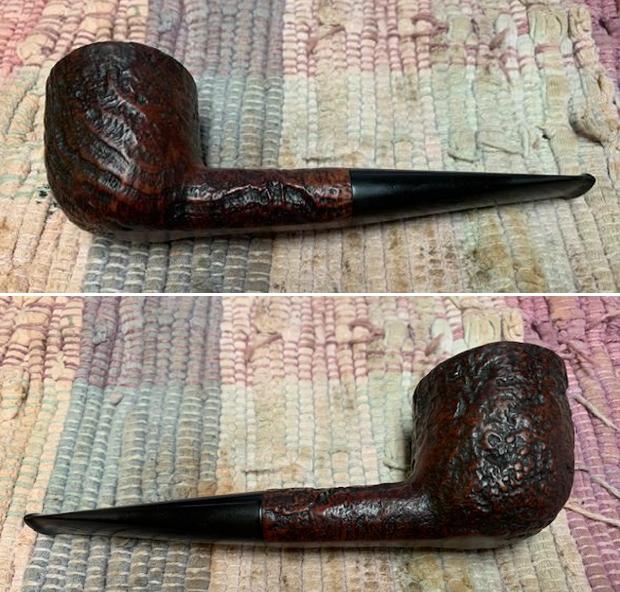
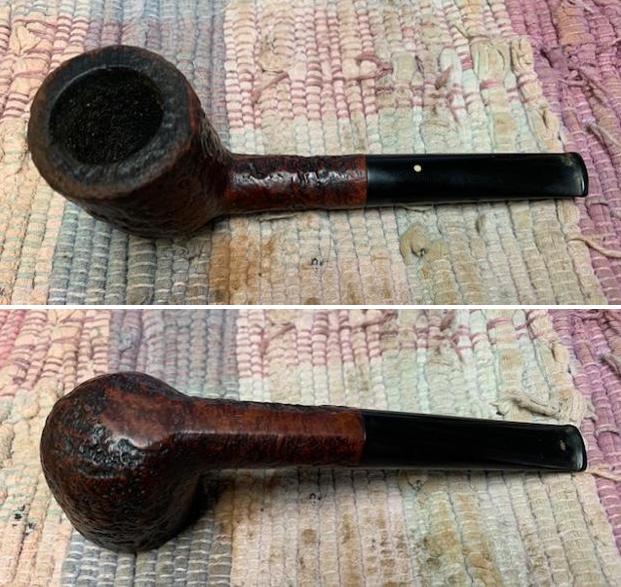
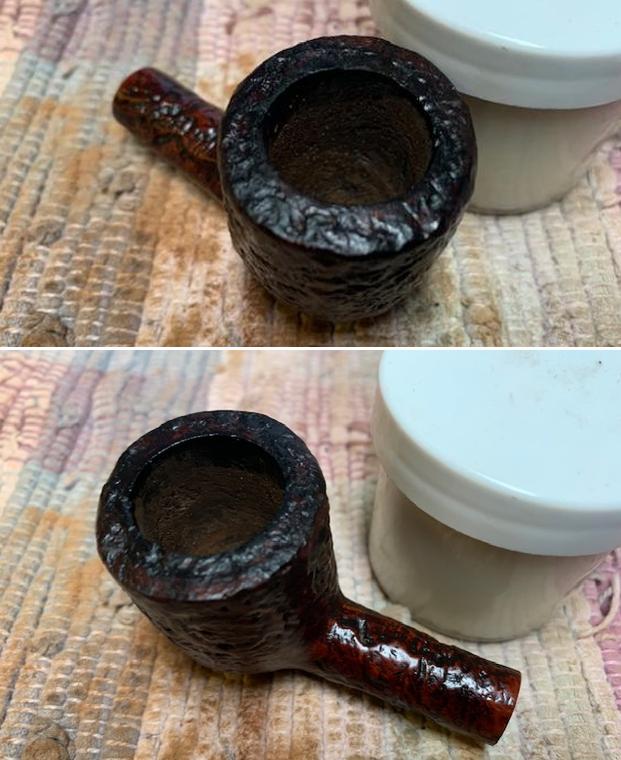
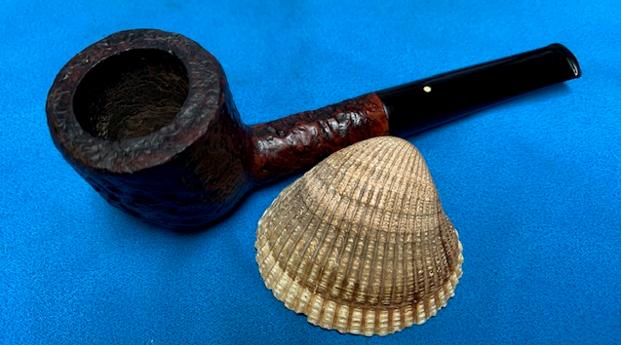
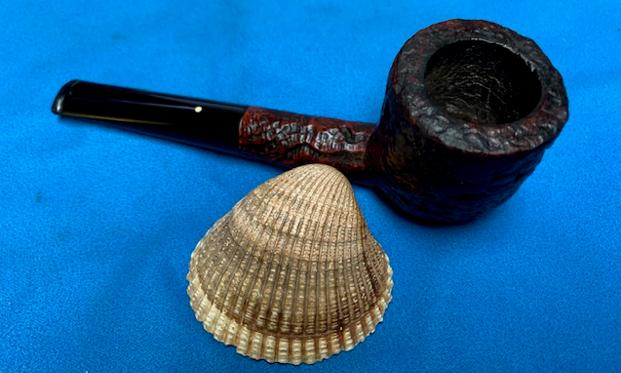
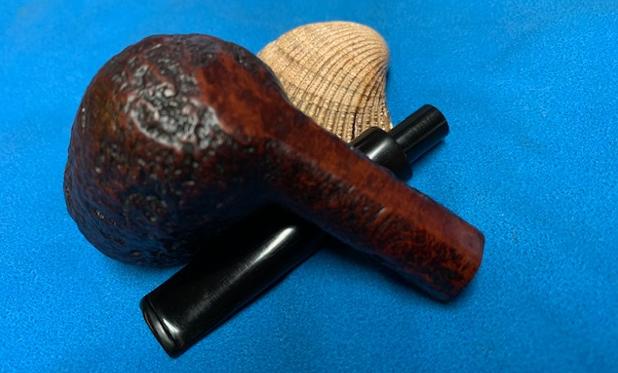
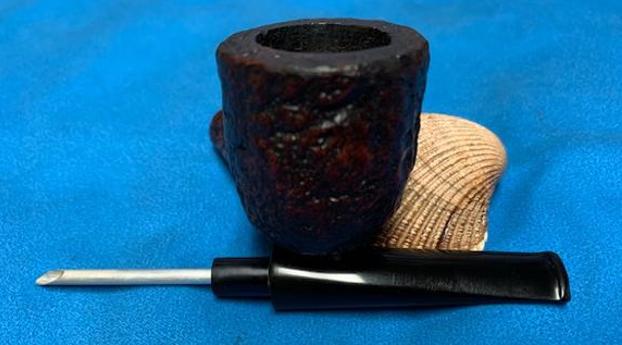
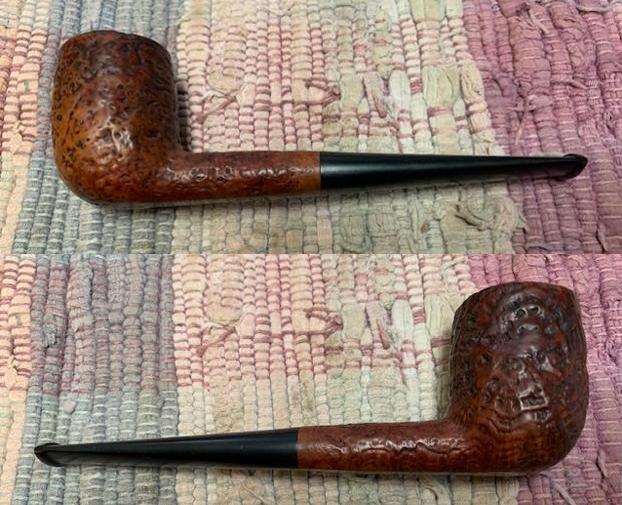
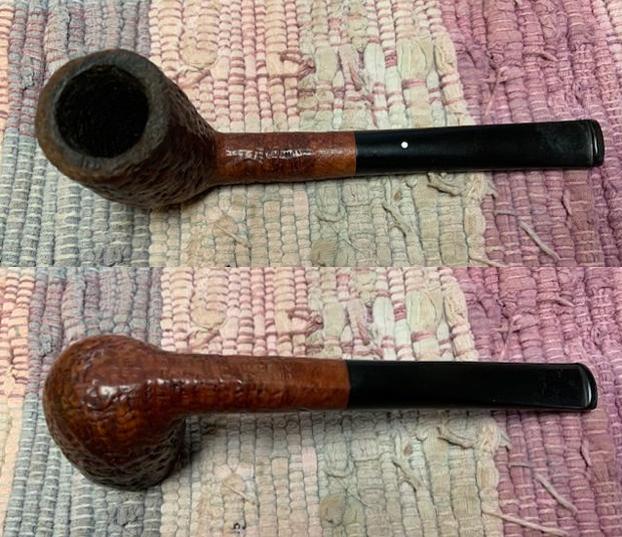
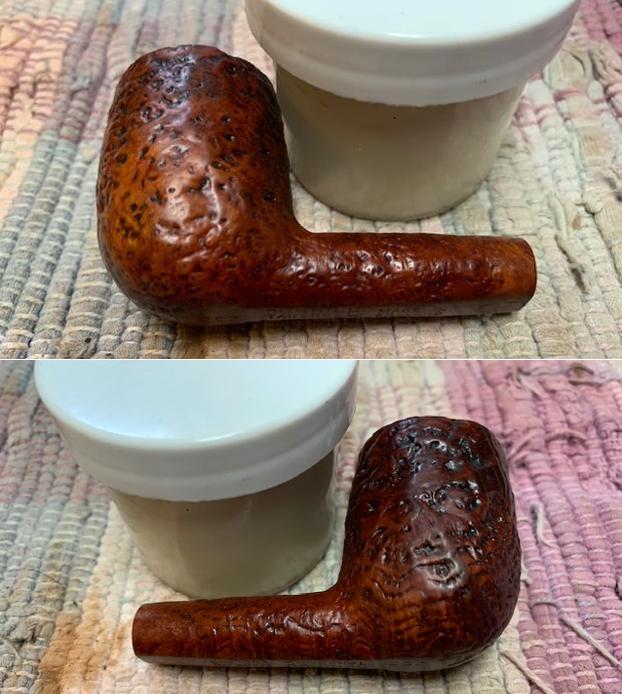
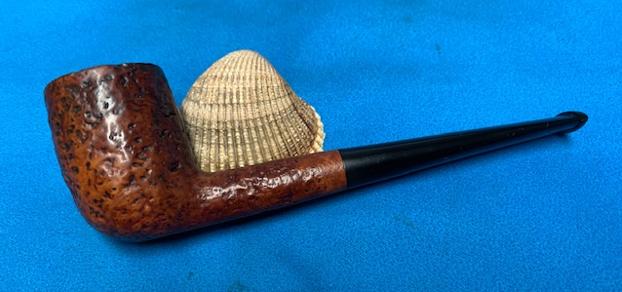
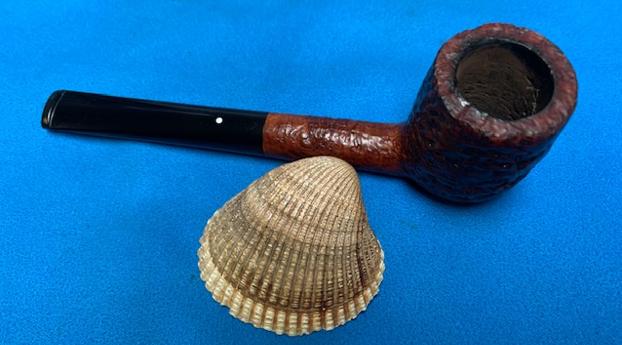
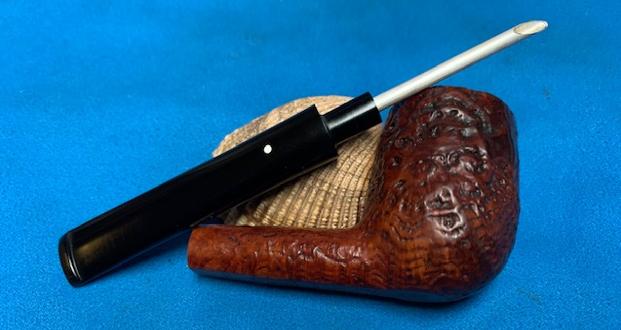
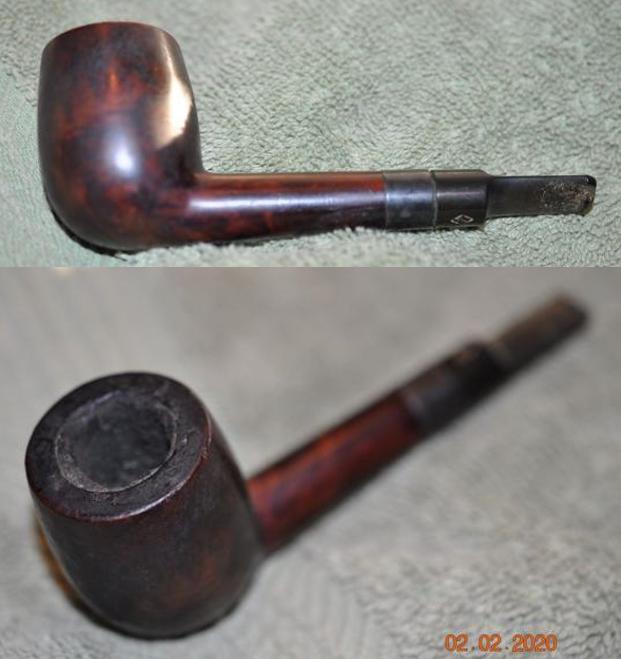
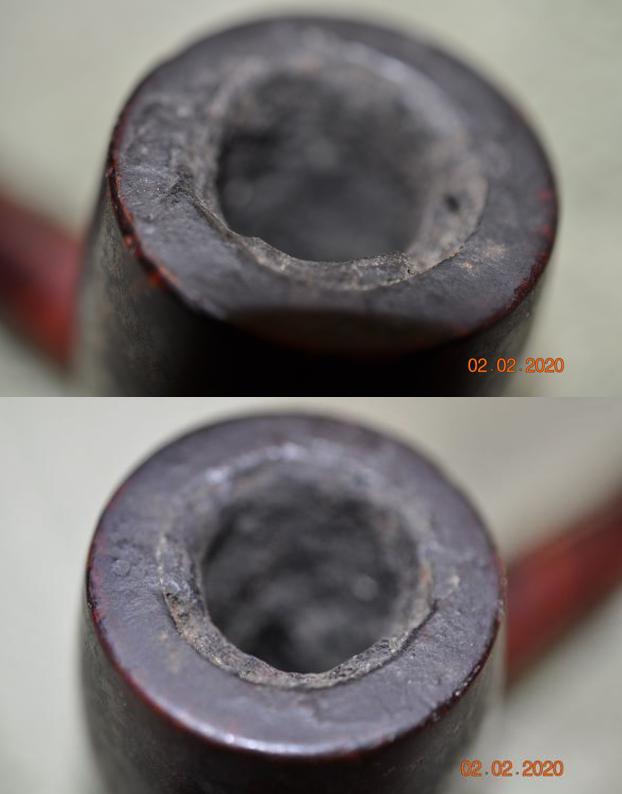
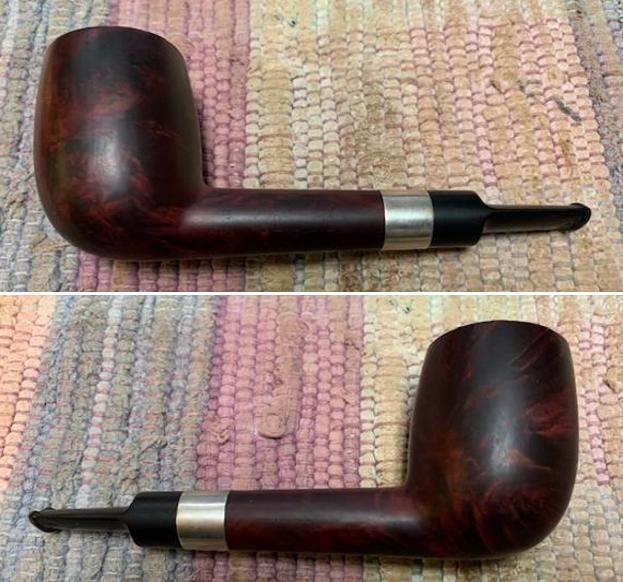
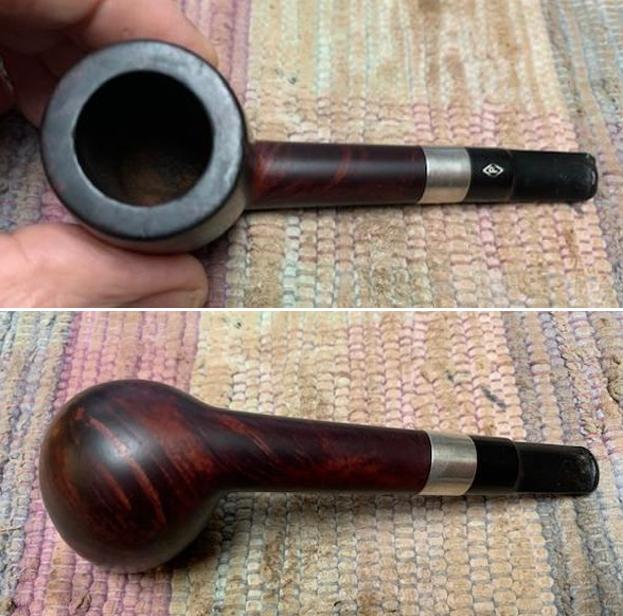
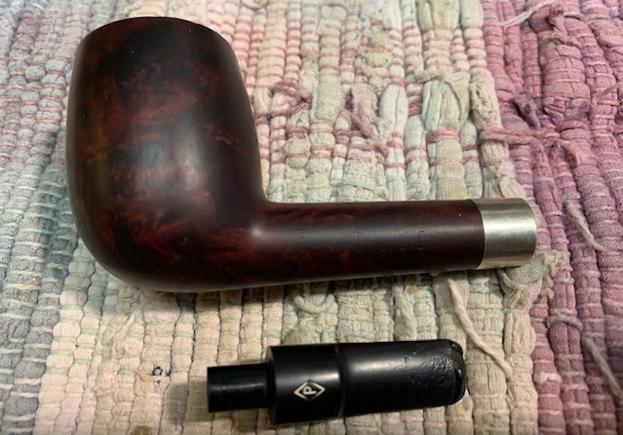
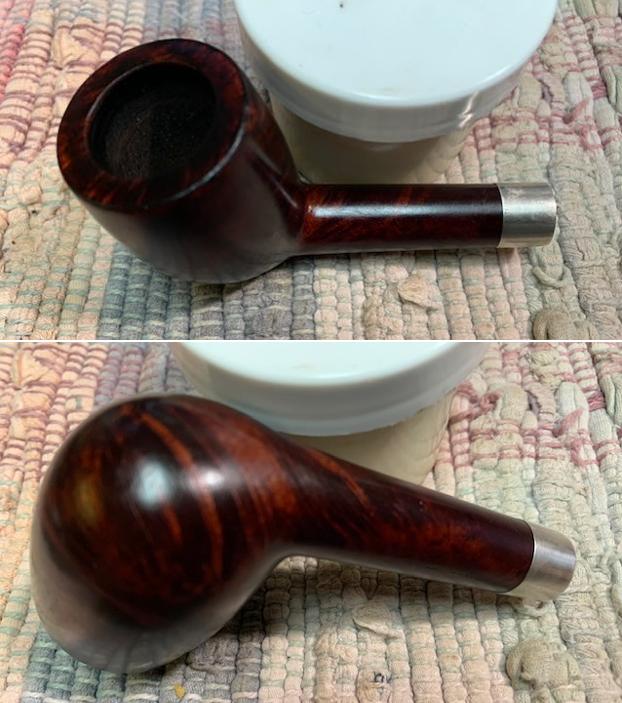
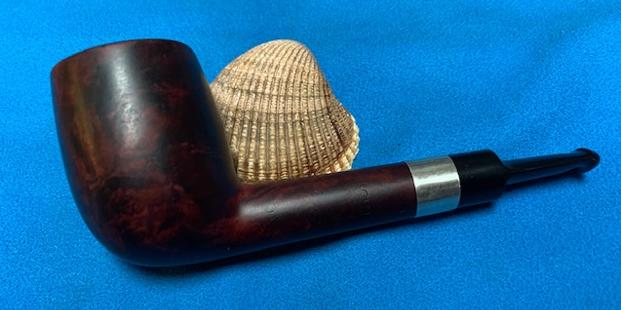
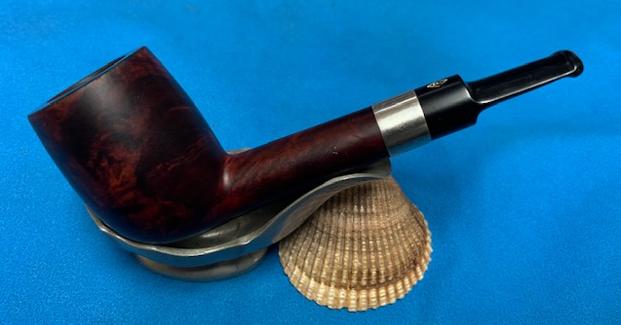
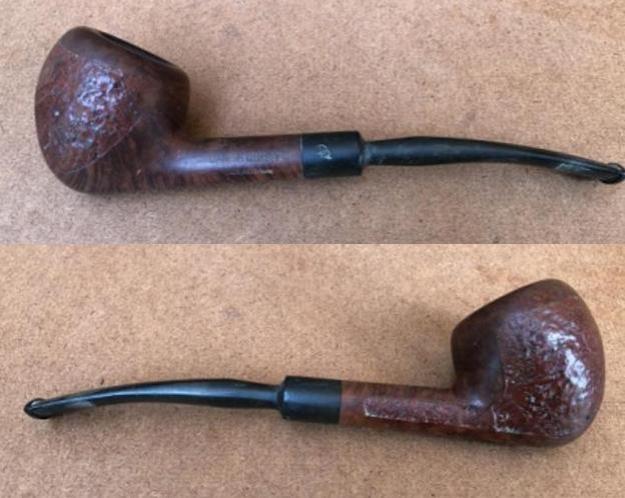
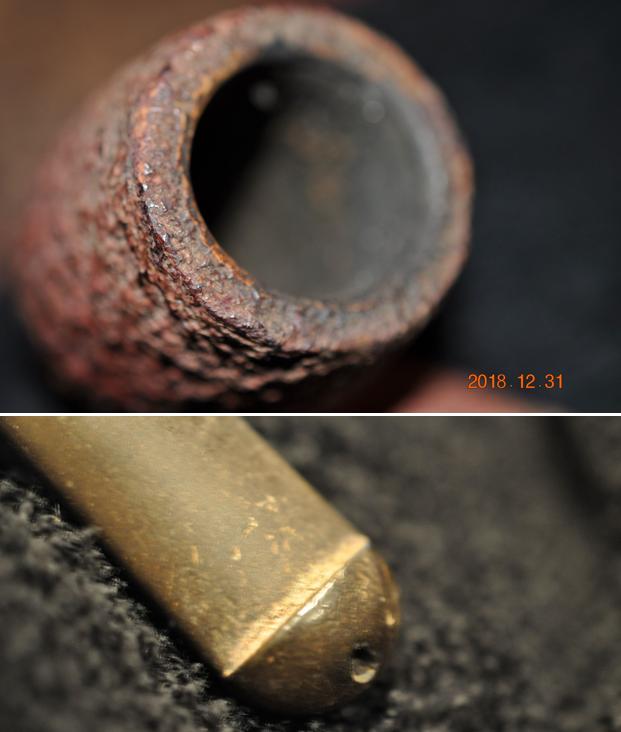
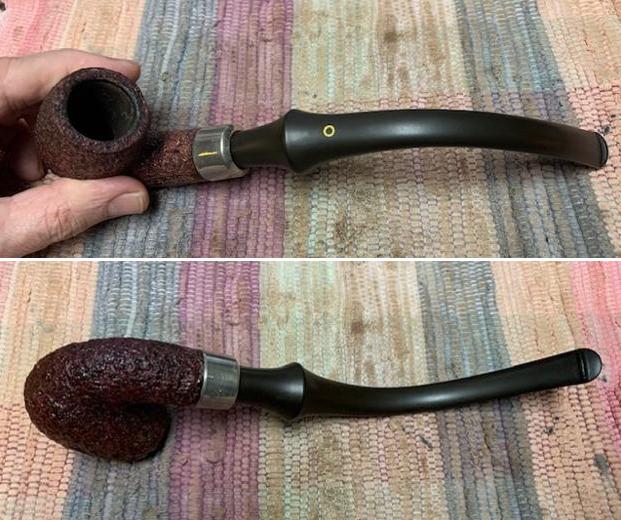
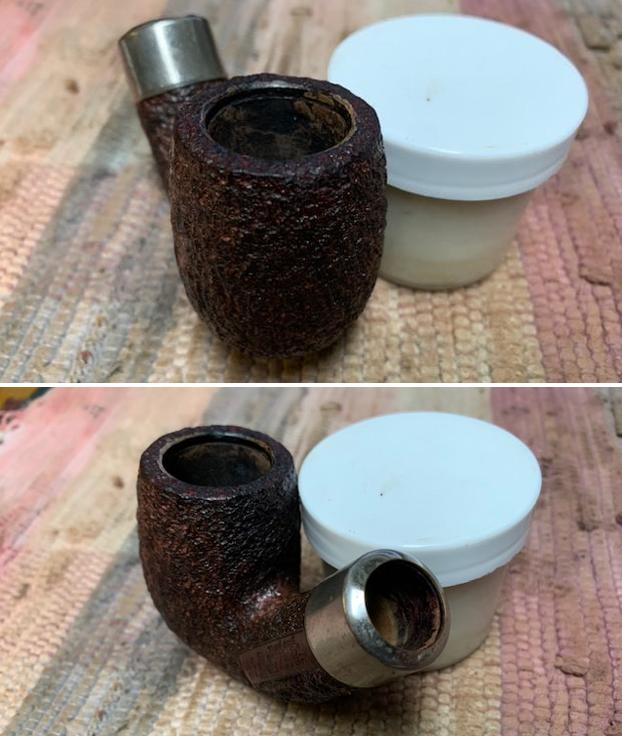
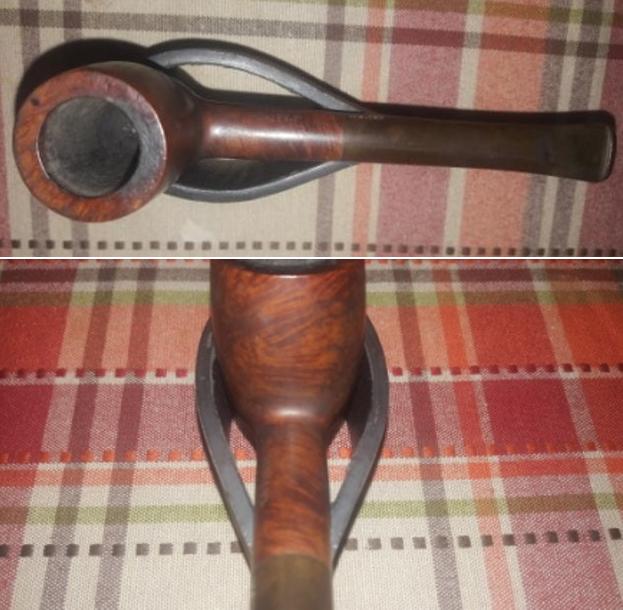
The pipe has a medium sized bowl with a straight vulcanite stem. The chamber has a thick layer of cake with lava overflow over the rim top surface. There are a few dents/dings over the rim top with the inner and outer rim edges in decent condition. The stummel surface is covered in dirt, dust and grime which hides the beautiful mixed grains of bird’s eye and cross grains. The stummel is dull and lifeless. The mortise appears to be clogged as the draw is hard and constricted. The vulcanite stem has light tooth chatter on either surface in the bite zone and is heavily oxidized. The button edges are slightly worn down with minor bite marks and would benefit from sharpening of the edges. The pipe has a very light weight which makes it ideal for outdoor activity or when you need your hands to be free. The pipe as it sits on my work table is shown below.
 Detailed Inspection…
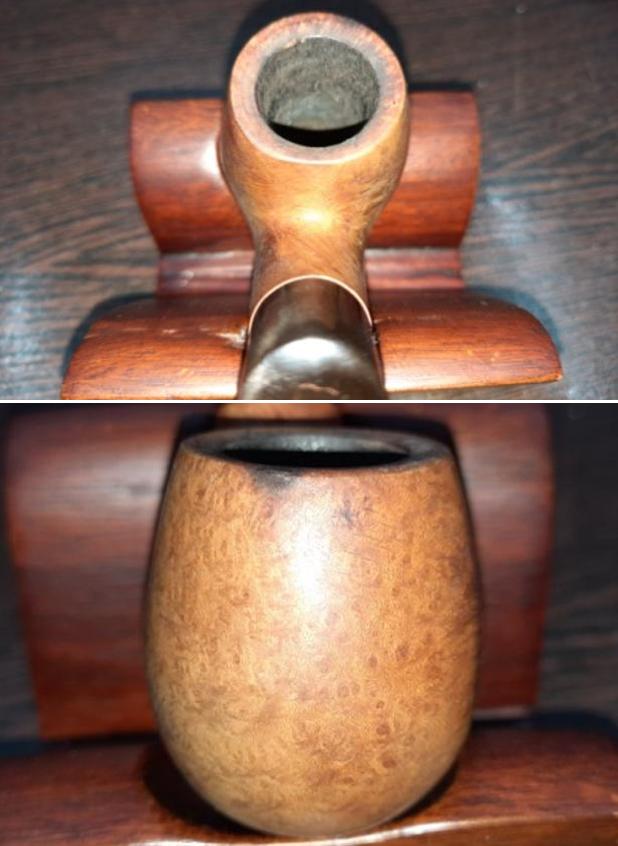
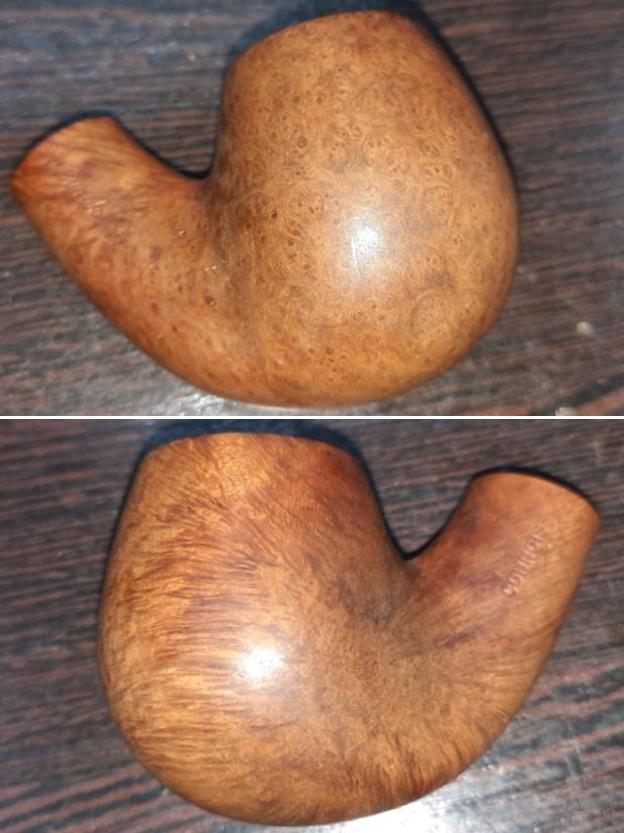
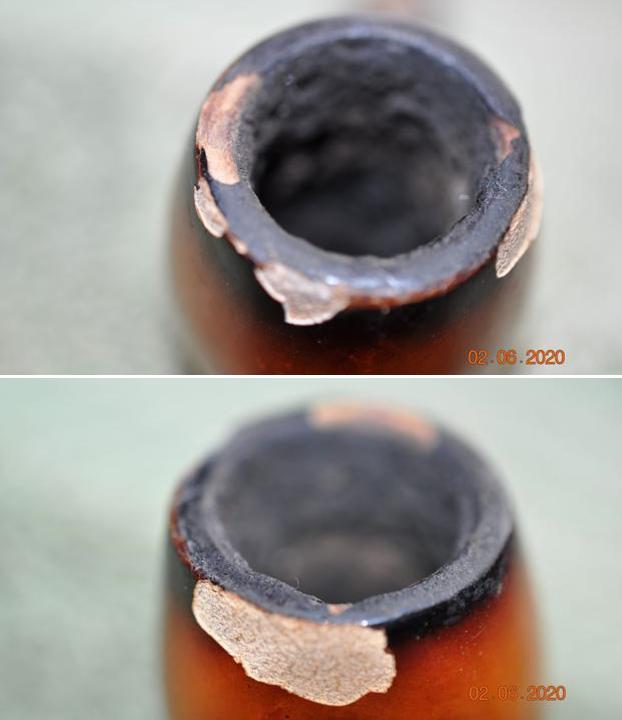
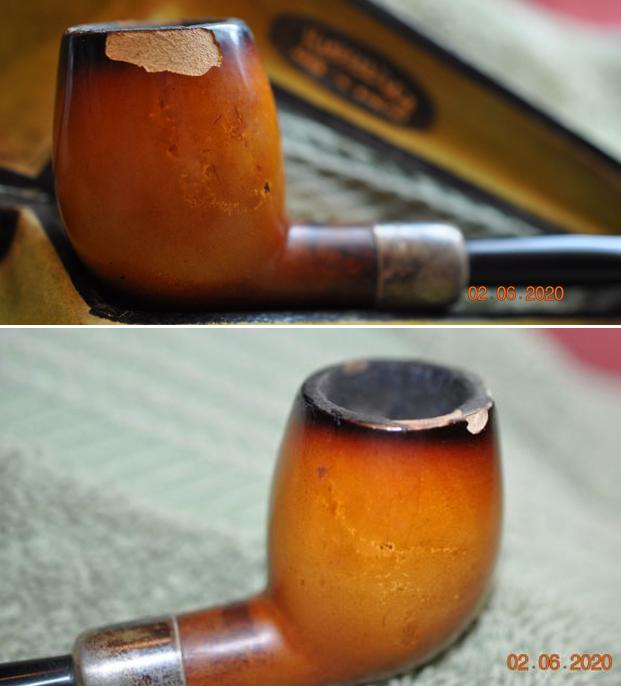
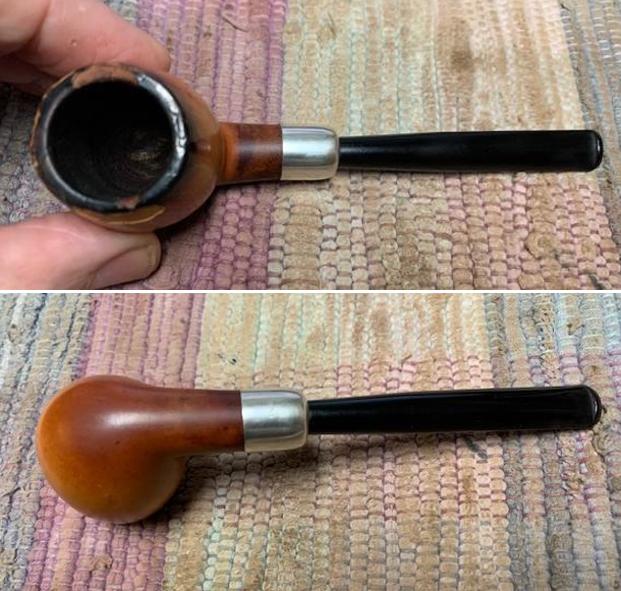
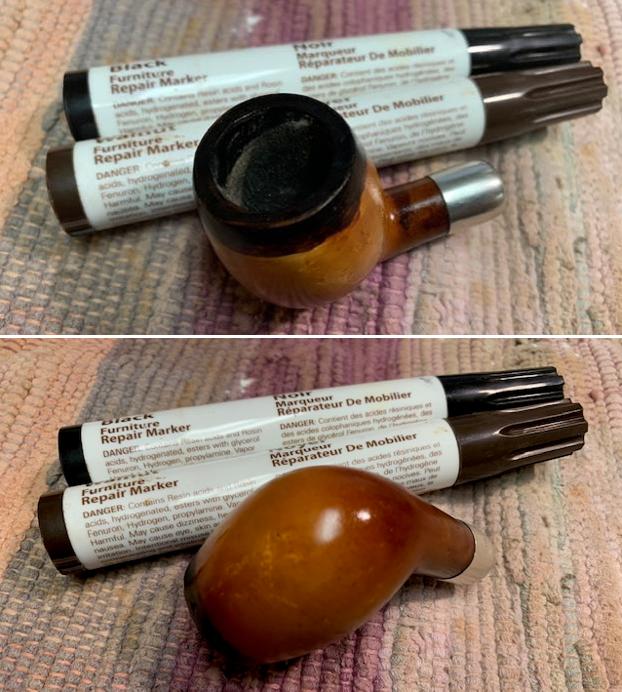
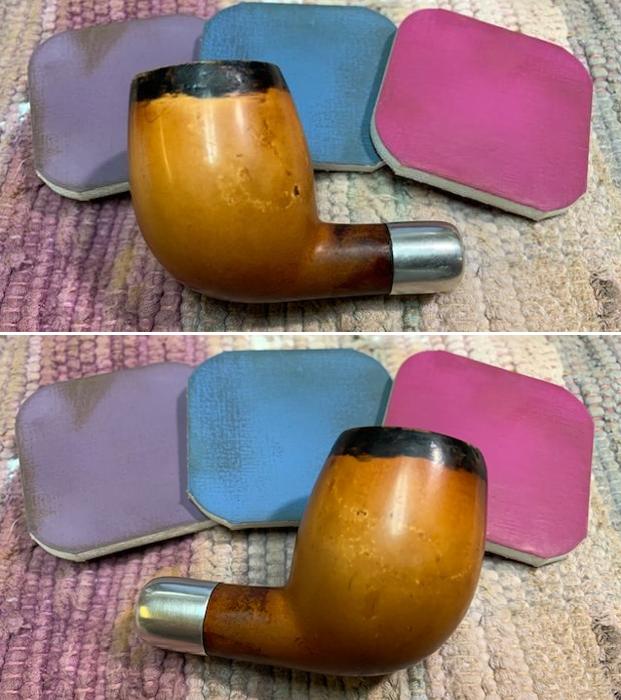
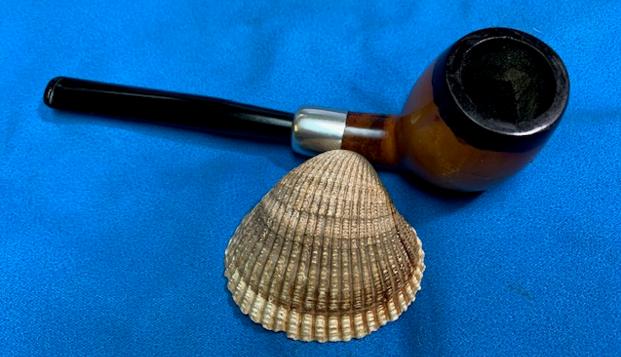
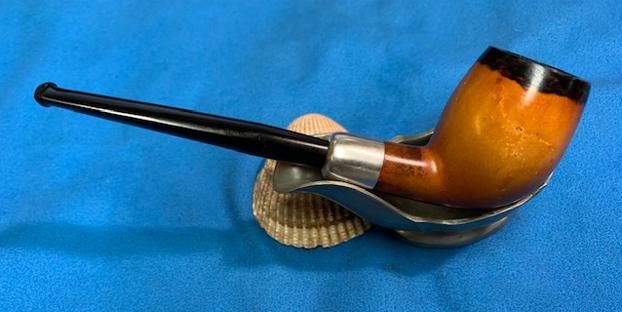
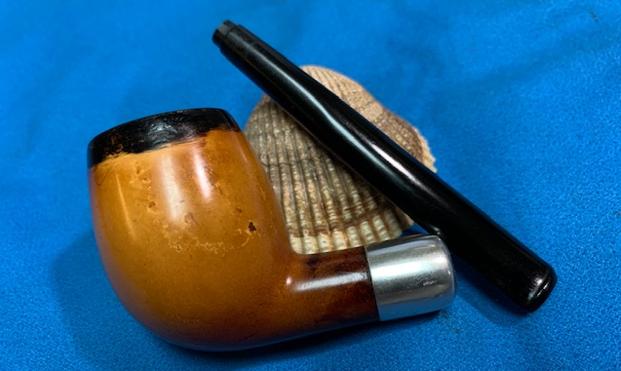
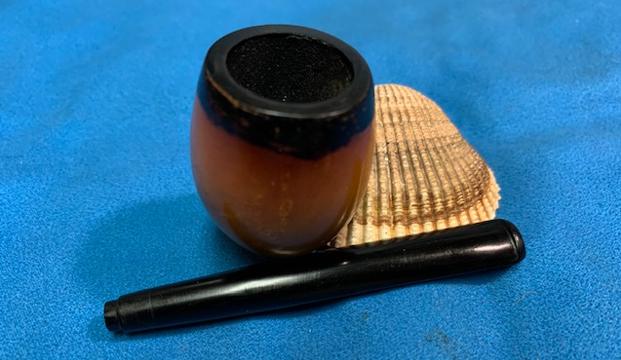
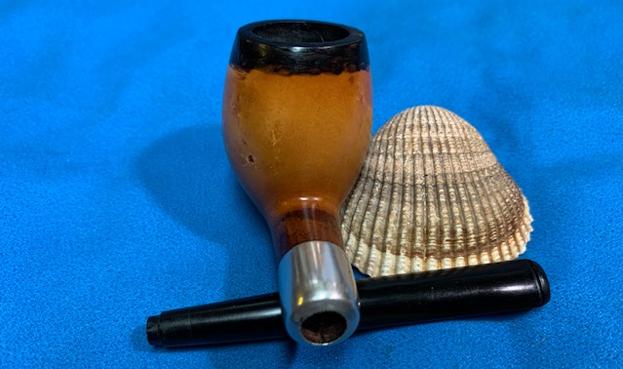
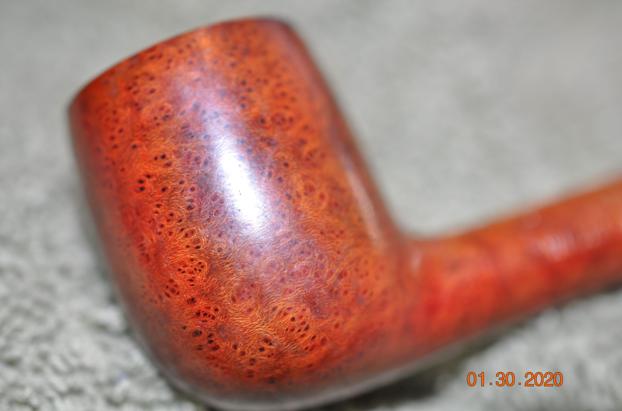
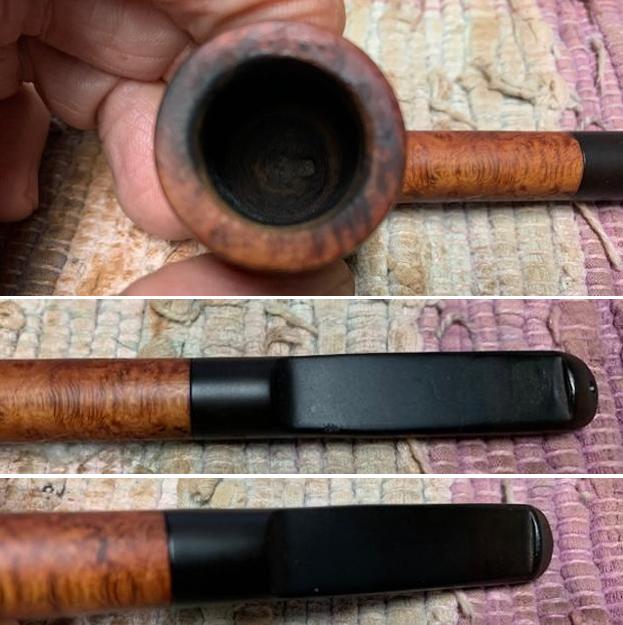
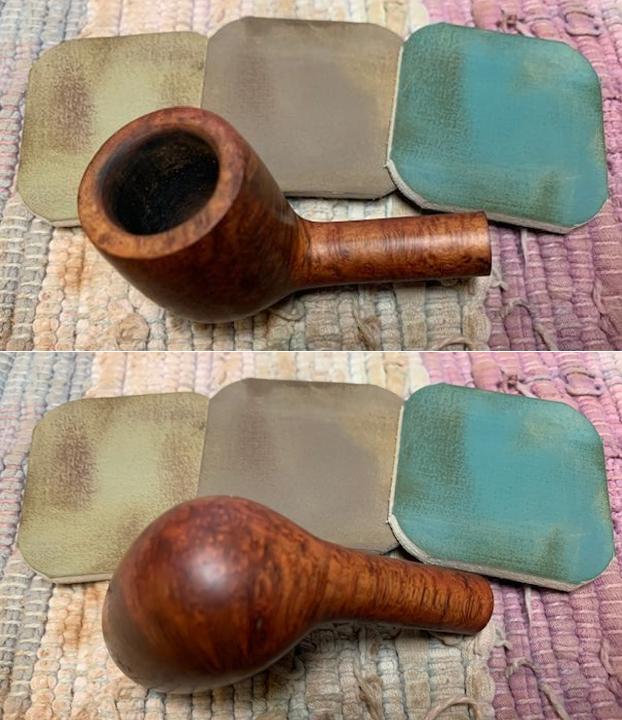
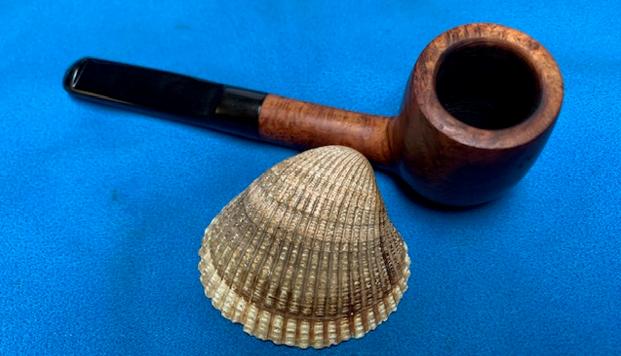
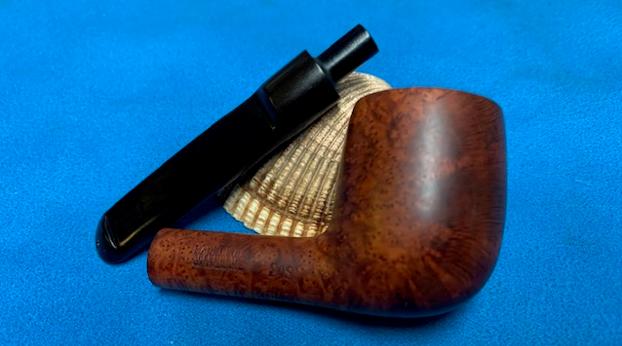
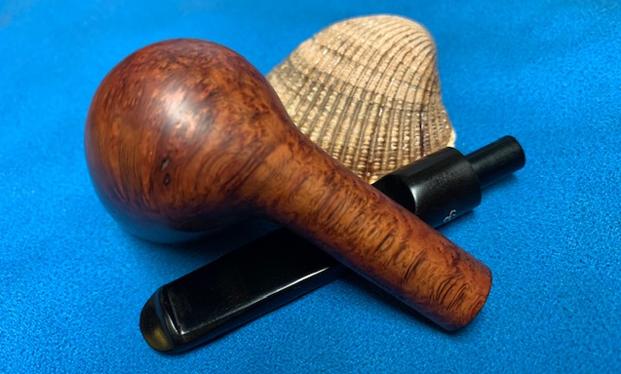
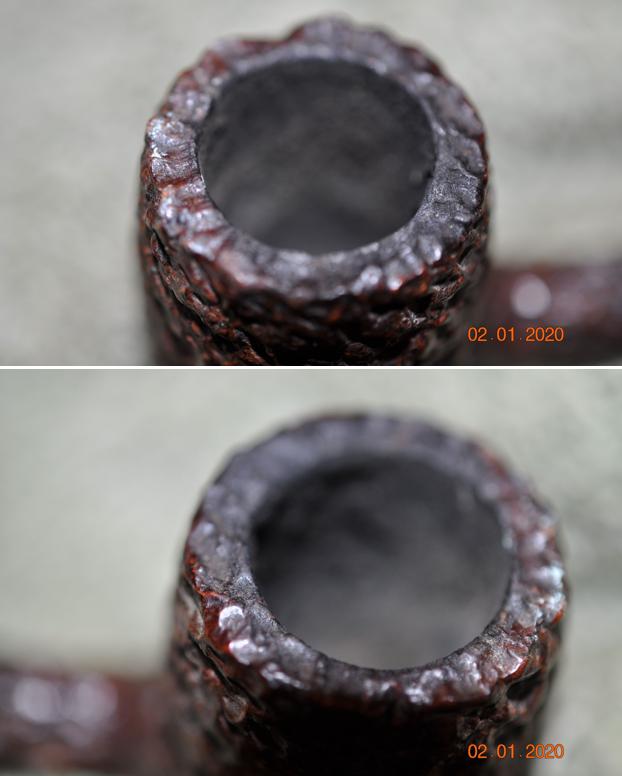
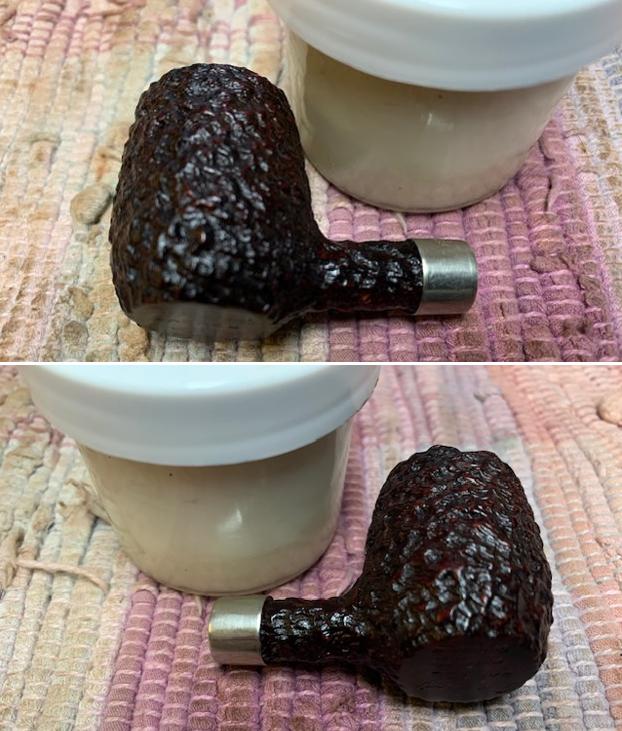
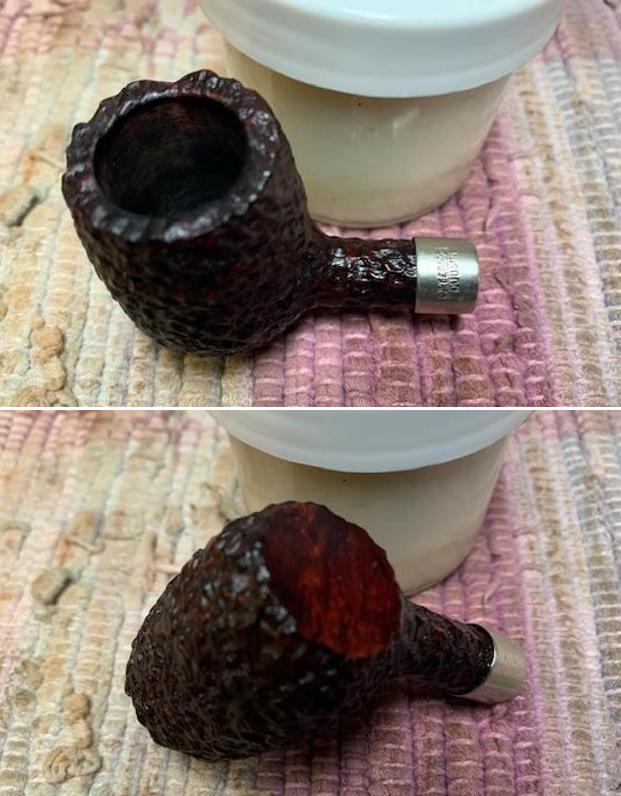
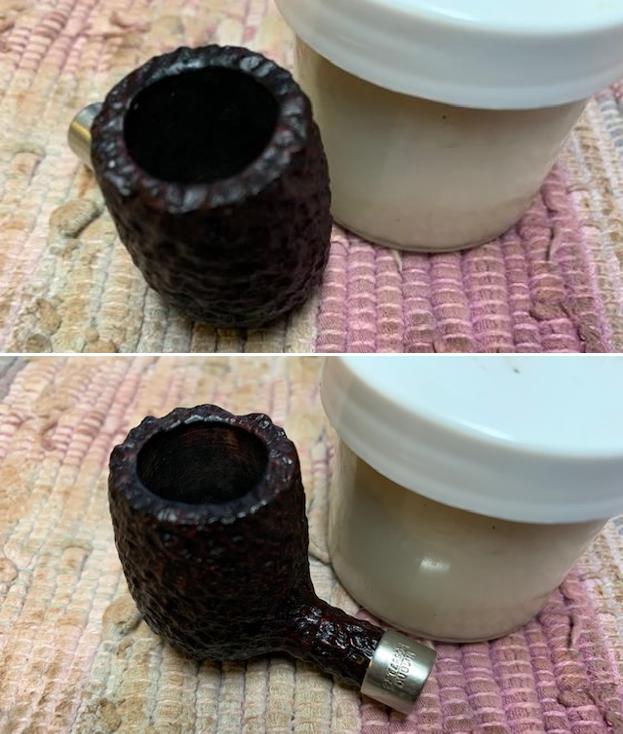
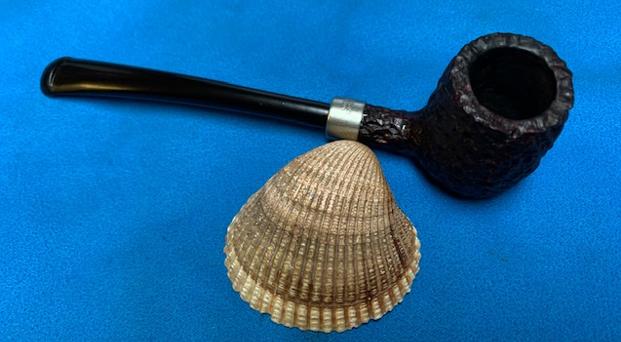
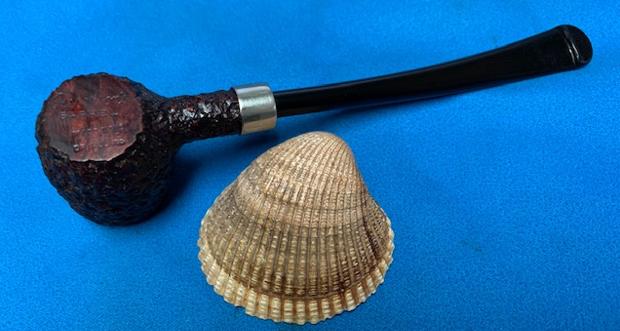
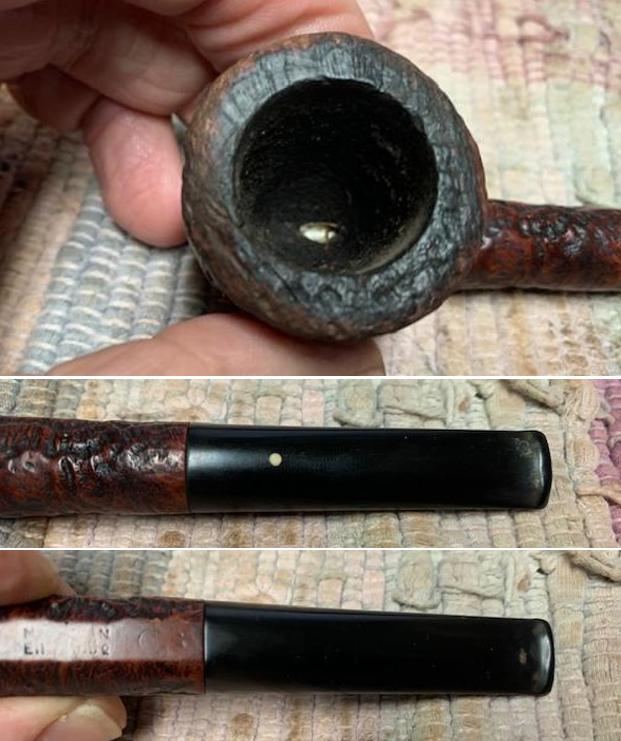
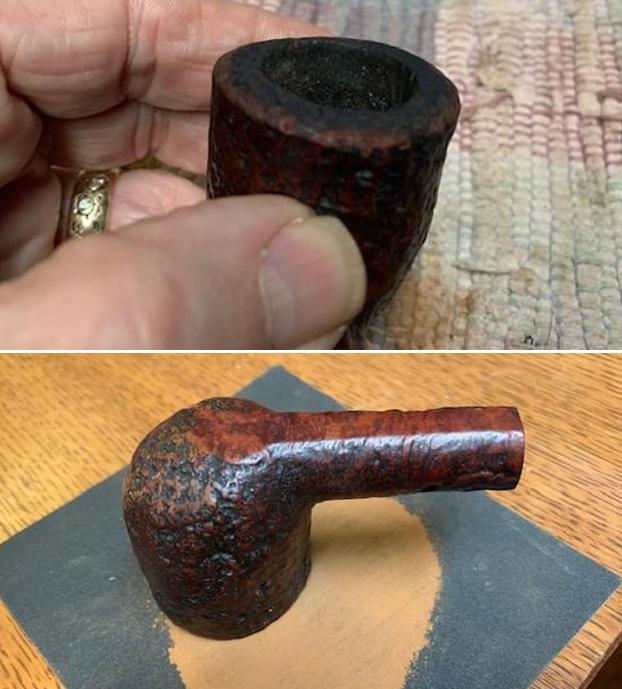
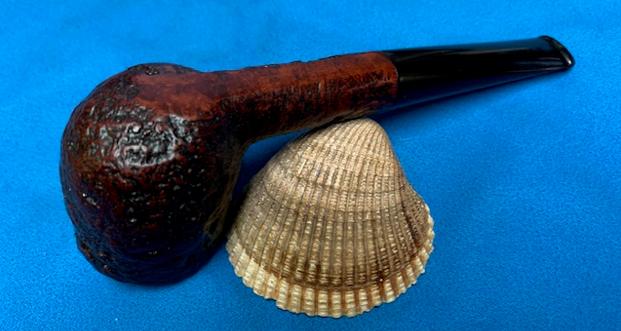
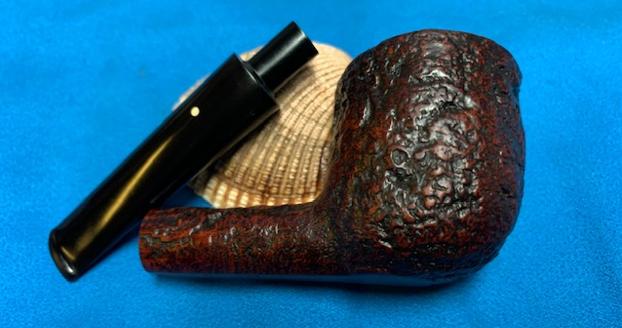
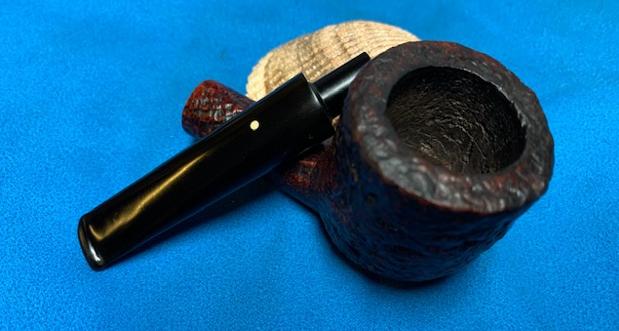
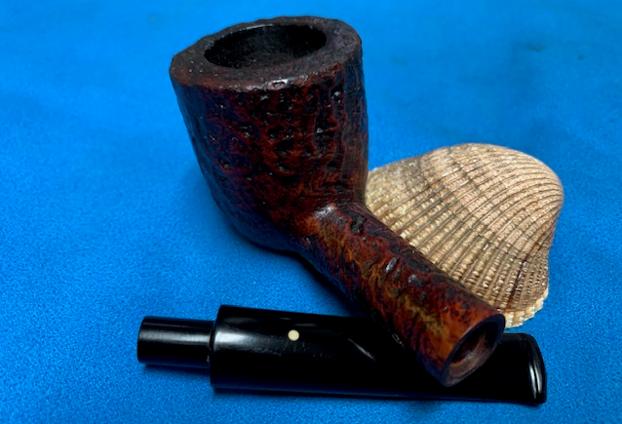
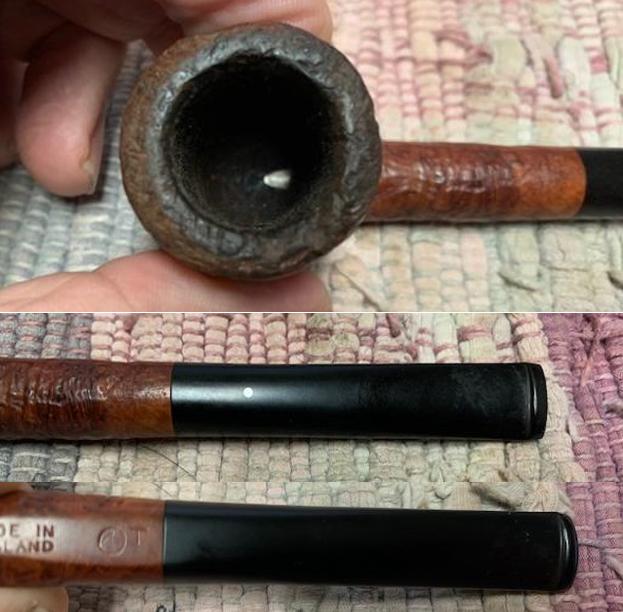
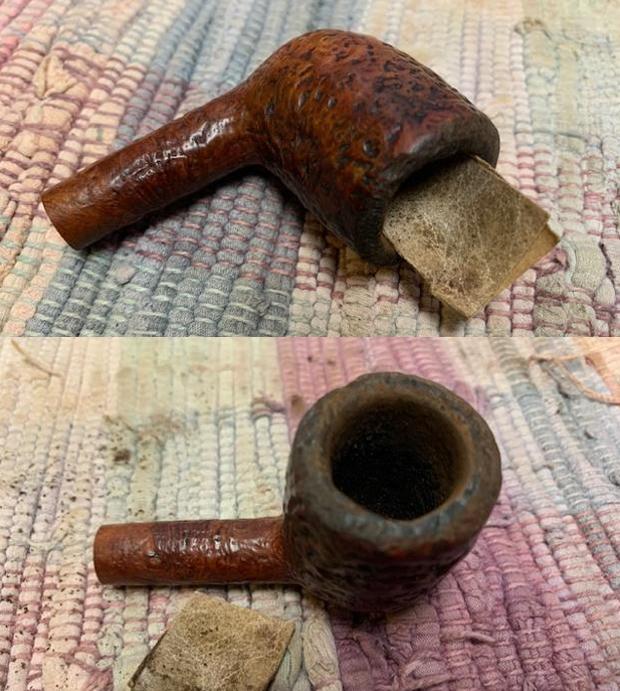
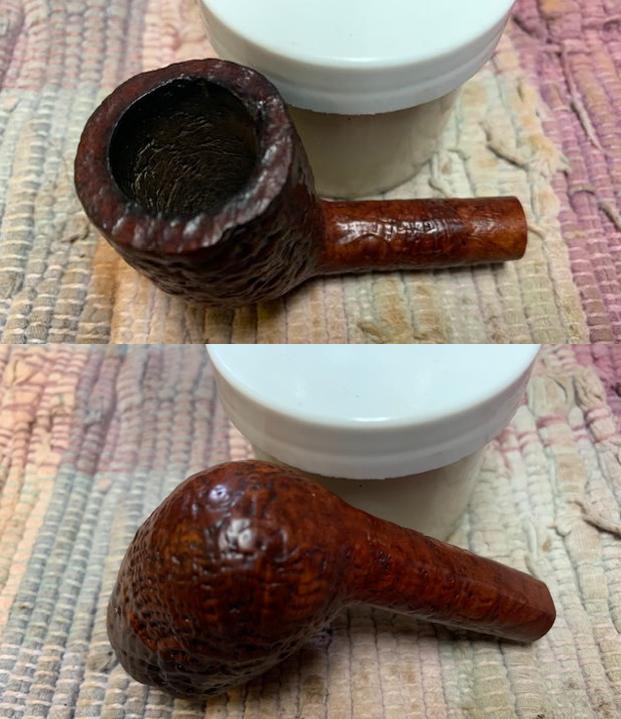
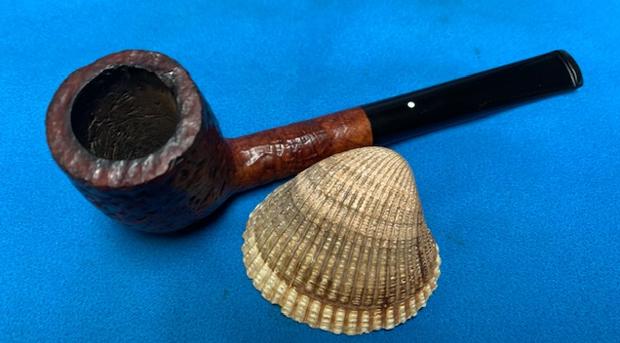
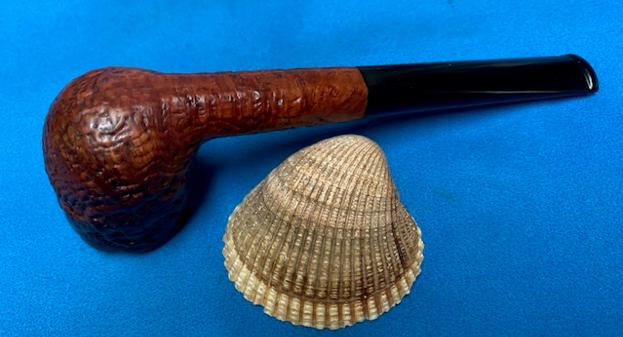
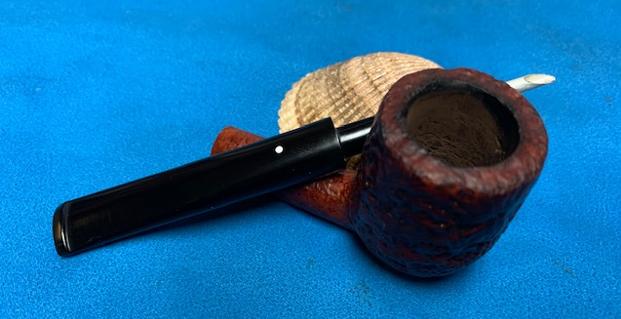
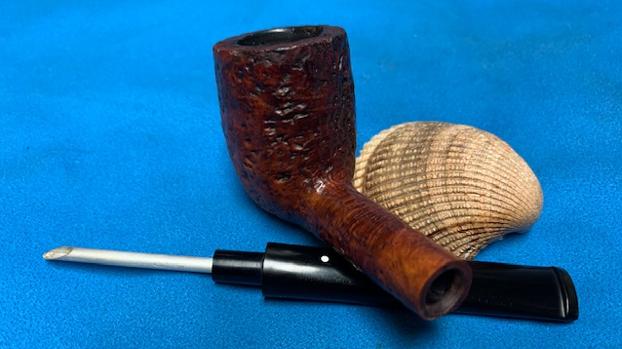
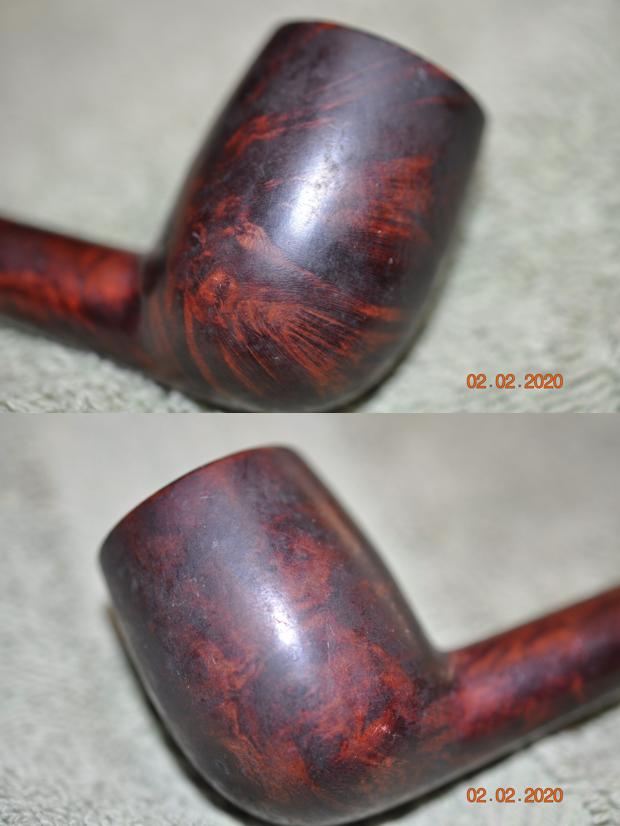
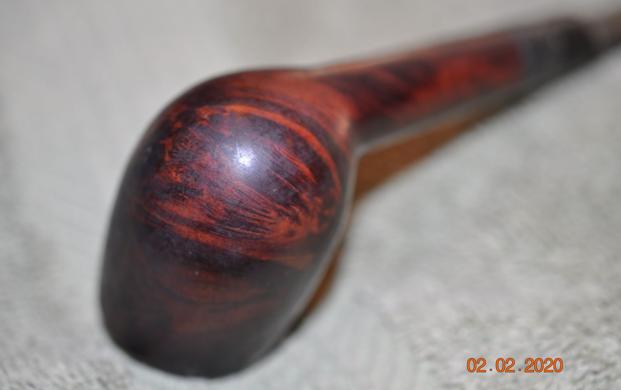
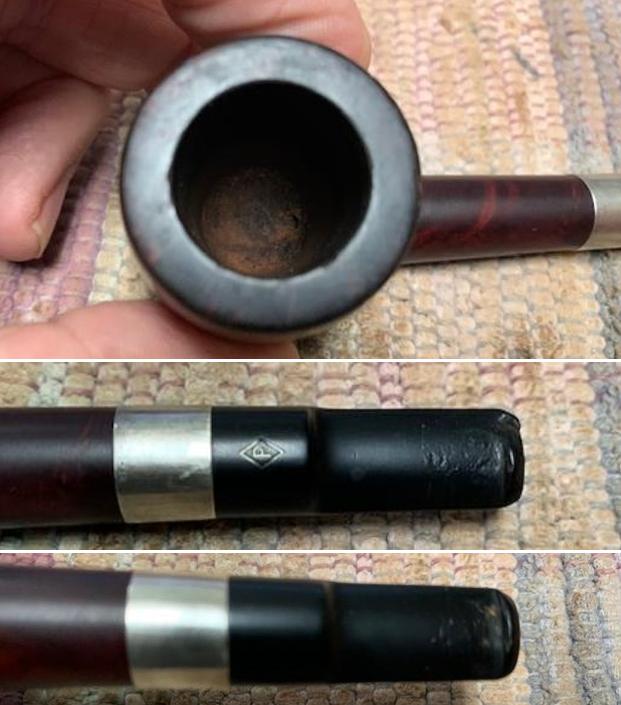
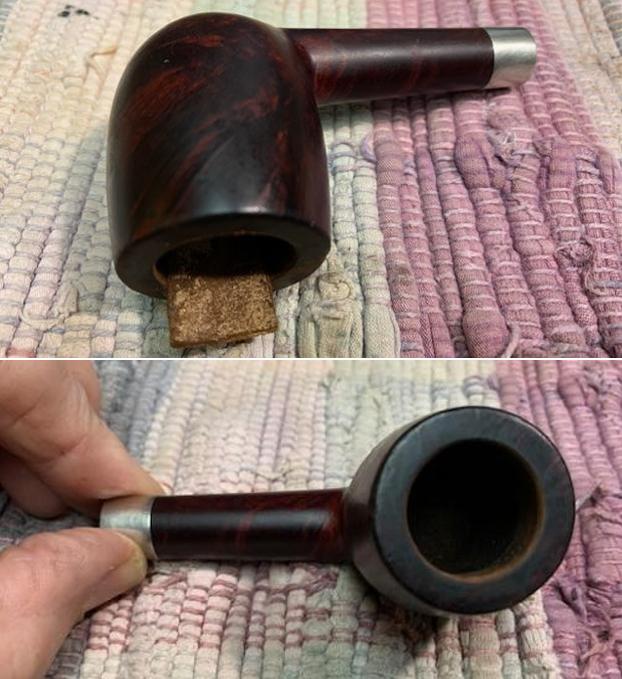
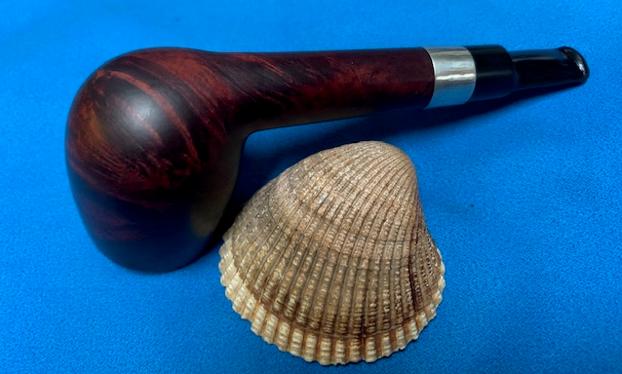
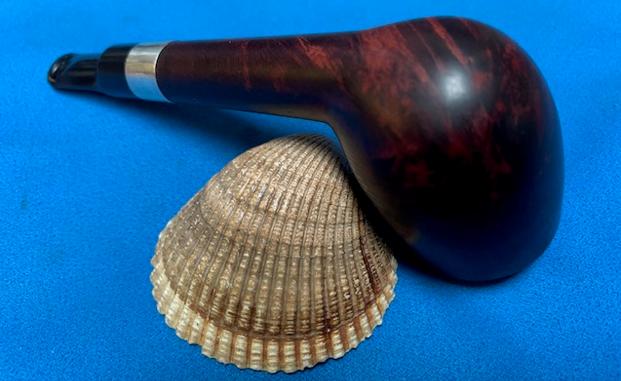
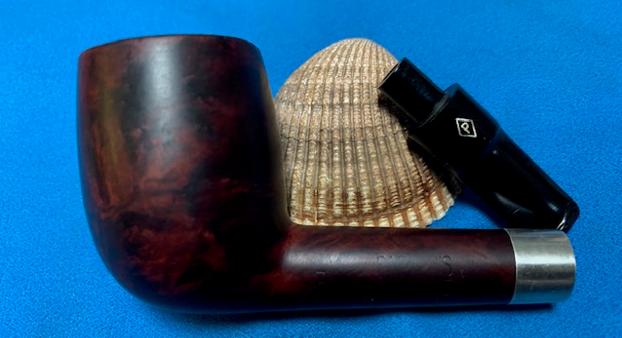
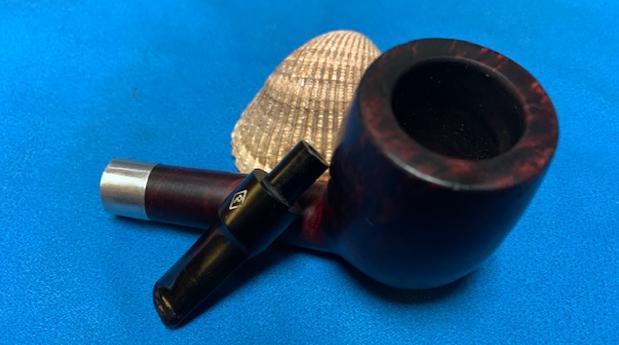
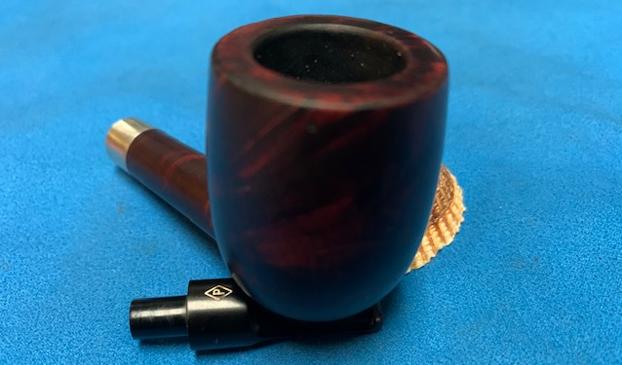
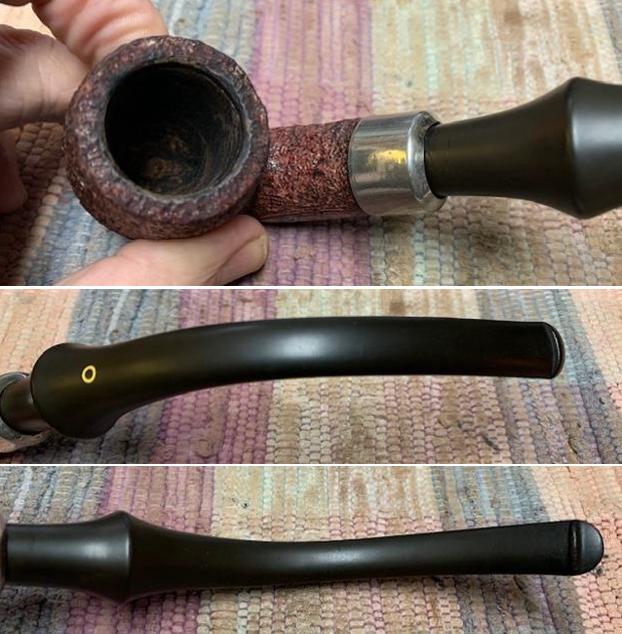
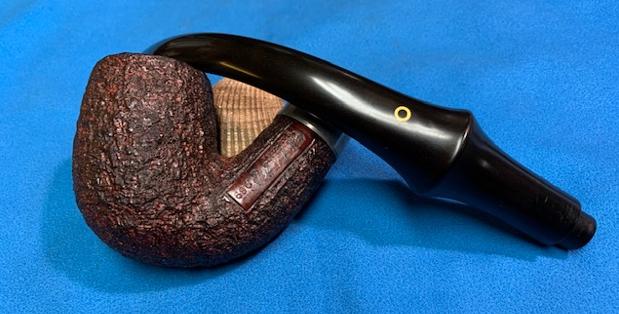
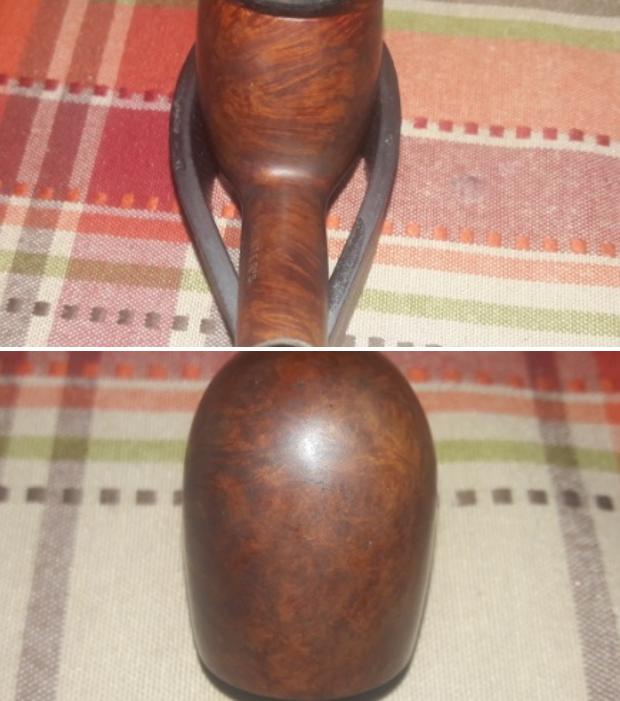
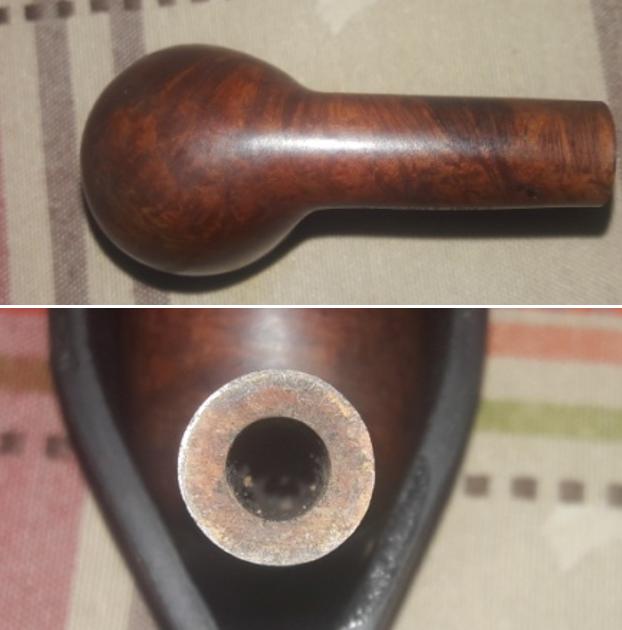
The pipe came to us in a very well smoked state and a thick layer of cake buildup is observed in the chamber. The rim top surface is covered in the thick overflow of lava in 6 ‘O’ clock direction and several dents and dings to the rim top surface can be seen, probably caused due to the tapping it must have received at the hands of the previous owner to remove the dottle. This will need to be addressed. The inner and outer rim edges are in decent condition. The draught hole is perfectly at the bottom center and should be a great smoke. The old smells should reduce once the chamber and shank internals are cleaned up.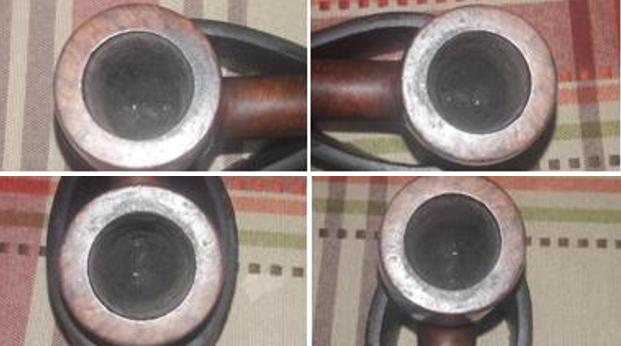 The smooth stummel surface has beautiful grain patterns with a mix of bird’s eye, cross grains and nice swirls. The stummel surface has dulled a bit and appears lifeless due to accumulation of grime, dust and dirt. The mortise and the draught hole are clogged with accumulation of oils and tars making the draw laborious. The fact that there is not a single fill in the stummel surface and it’s light weight points to a very high quality of well cured briar.
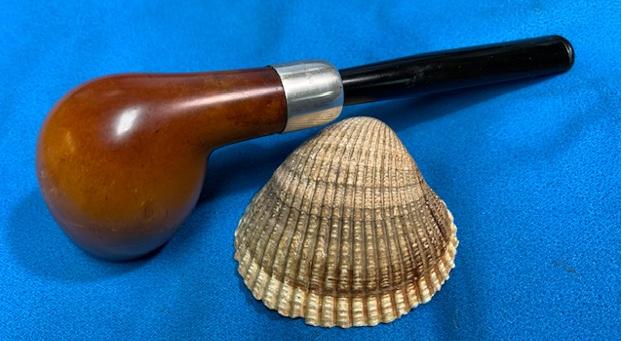
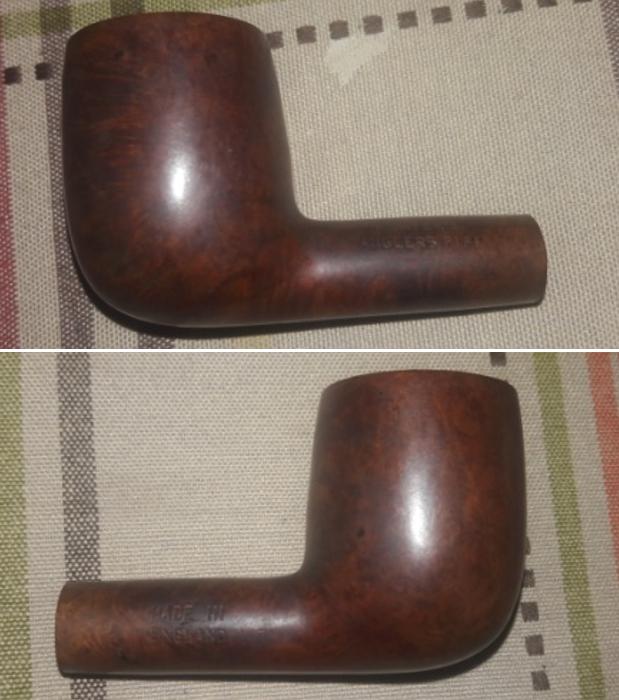
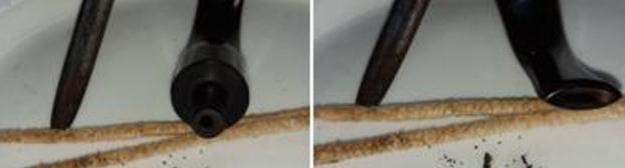
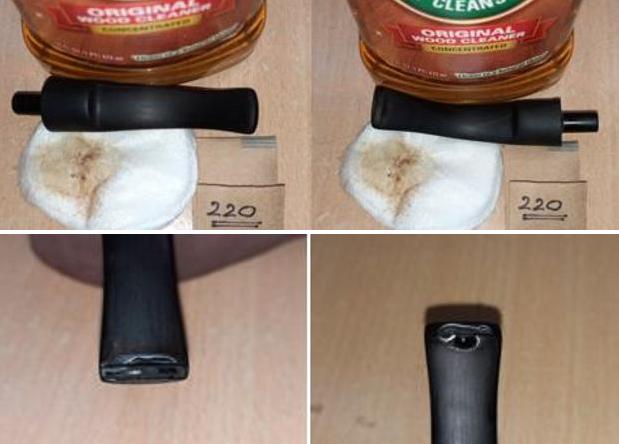
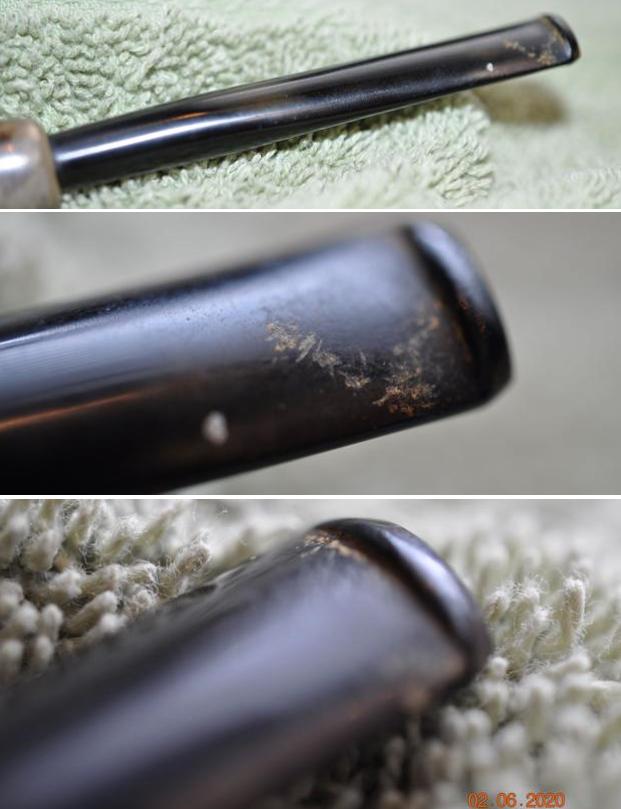
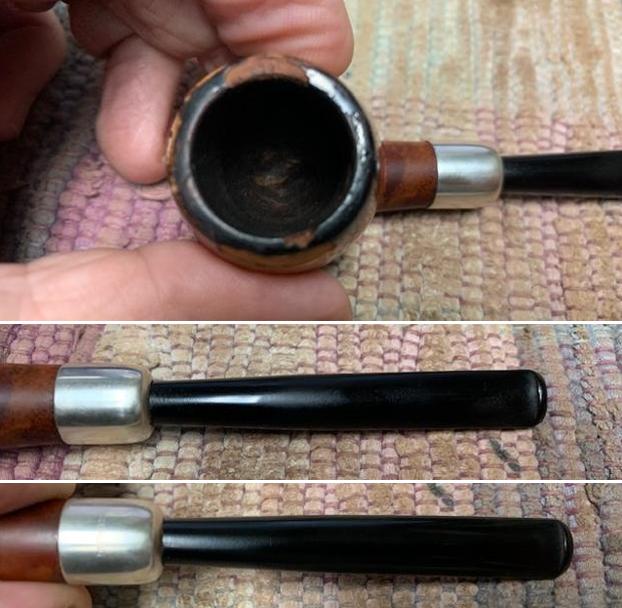
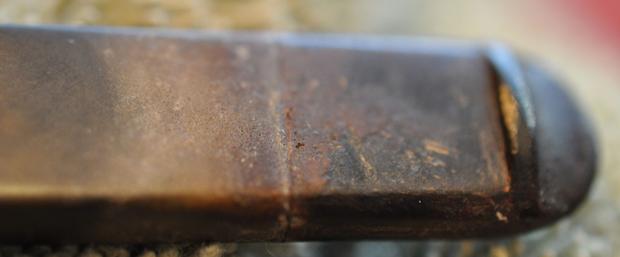
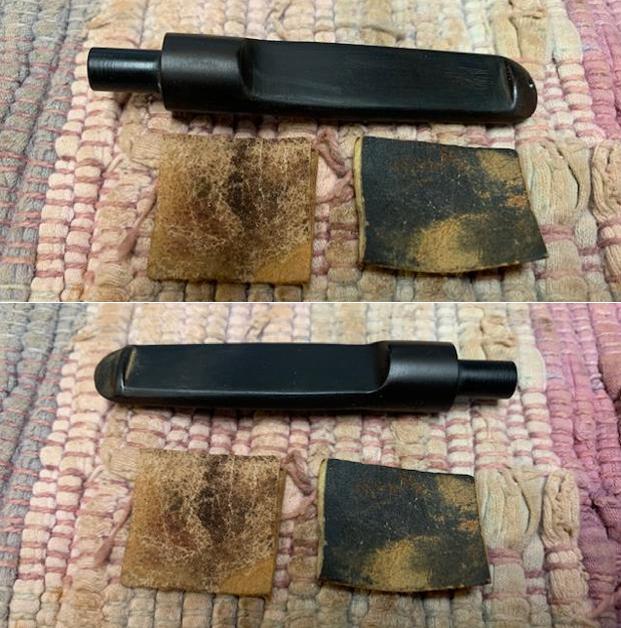
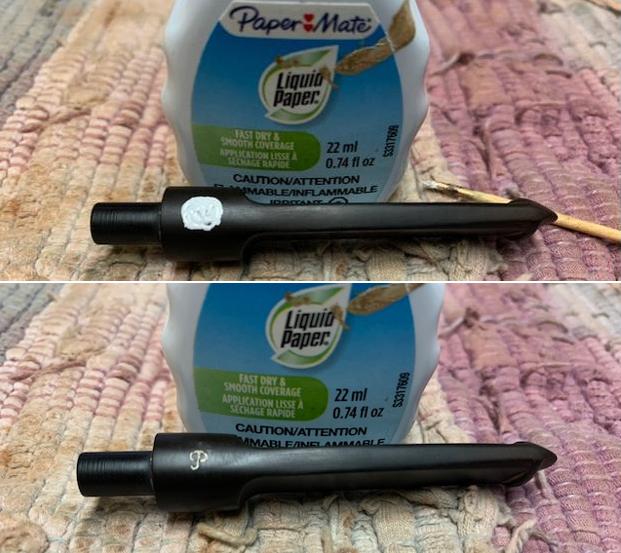
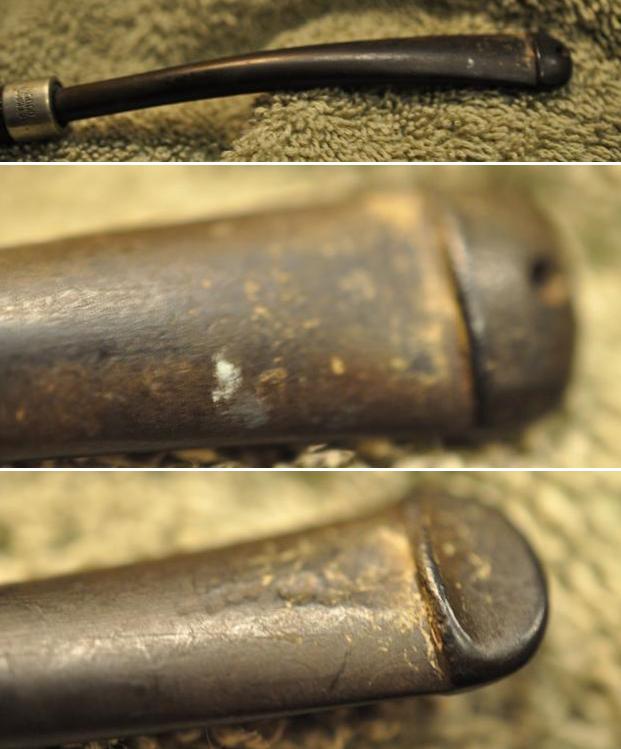
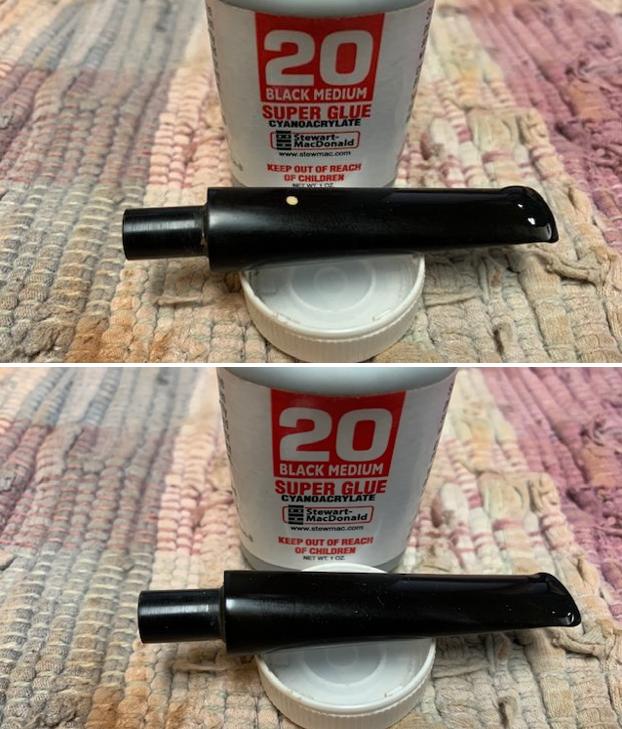
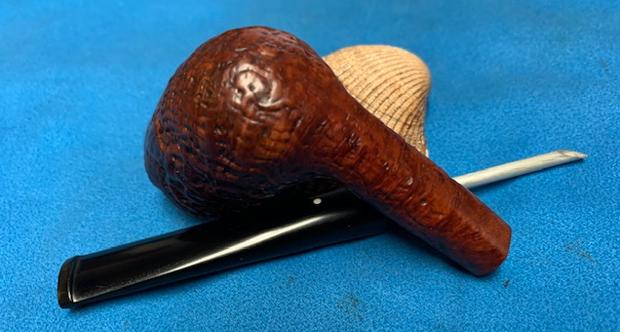
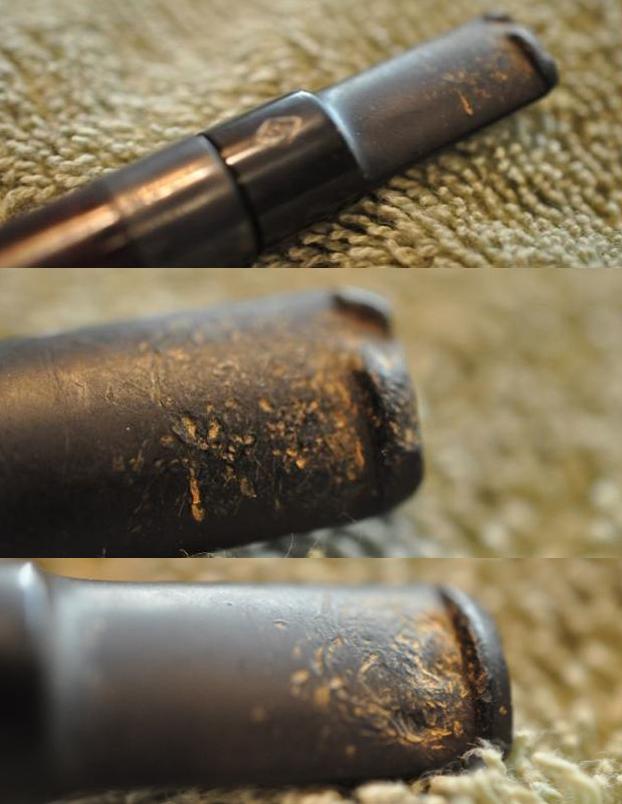
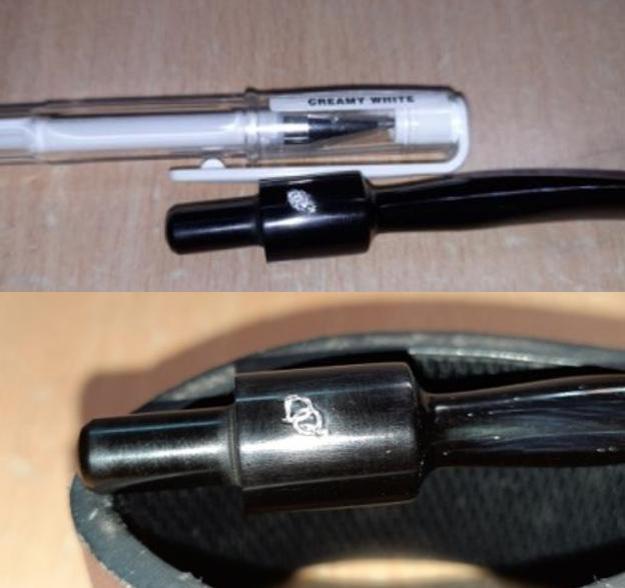
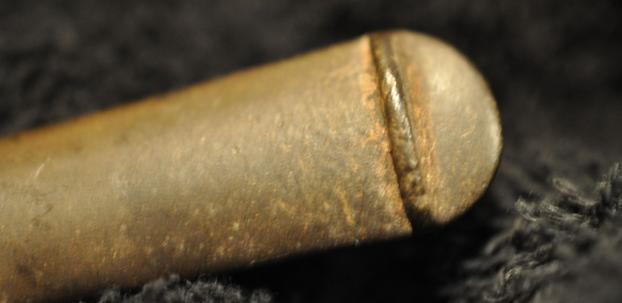
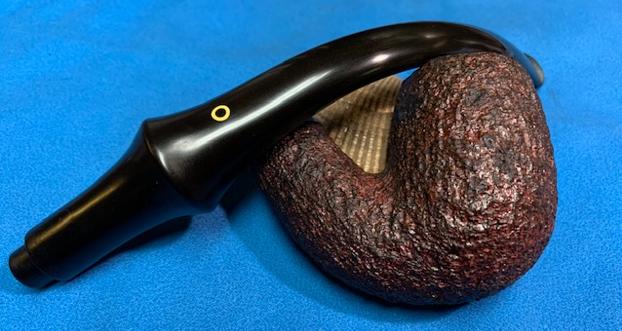
 The straight vulcanite stem has a slight flair out towards the slot end and is deeply oxidized with light tooth chatter on either surface in the bite zone. The insides of the slot and tenon show heavy accumulation of oils and tars. The button edges have worn out a tad bit and also have minute bite marks. The buttons could benefit from sharpening of the edges. The ‘HERTER’S’ logo needs to be refreshed.
 The Process
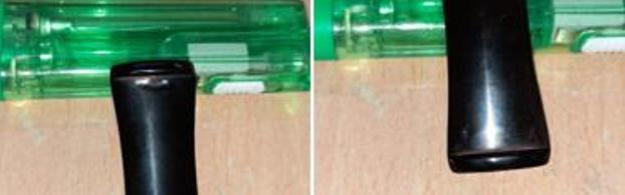
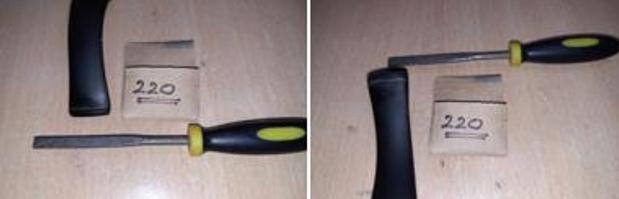
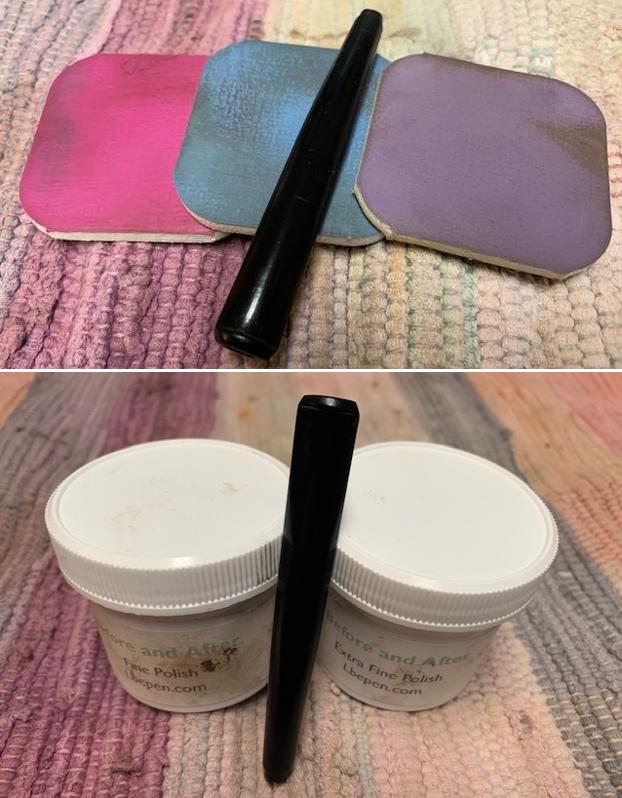
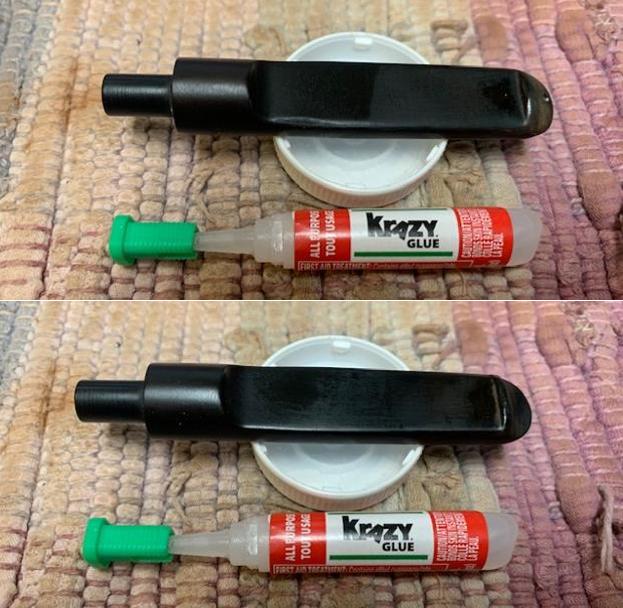
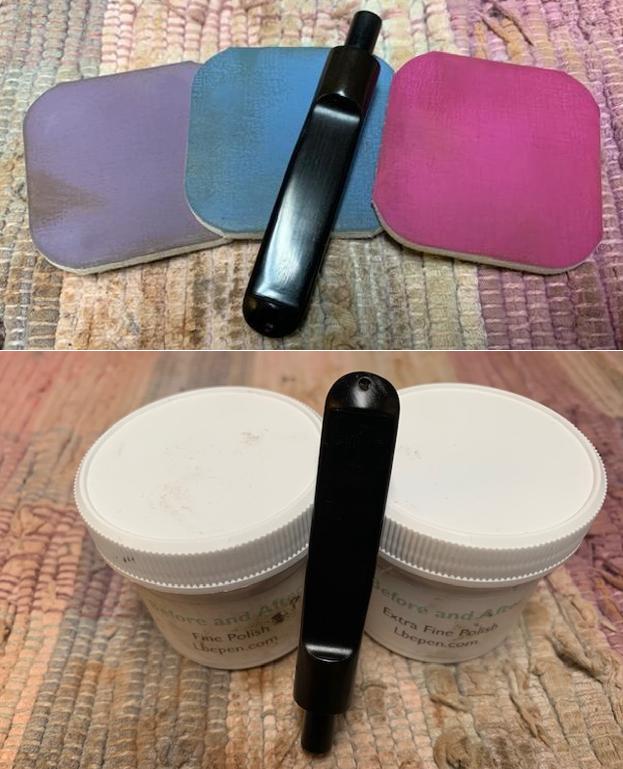
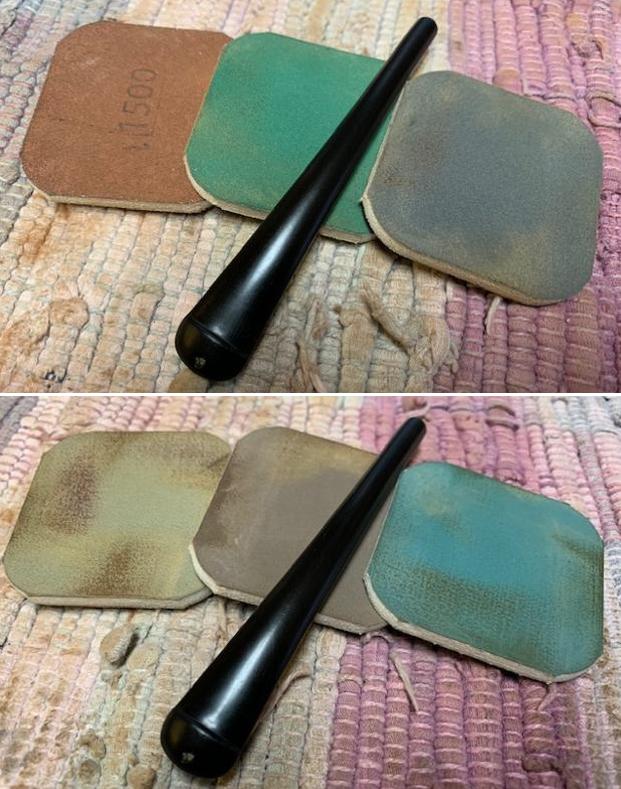
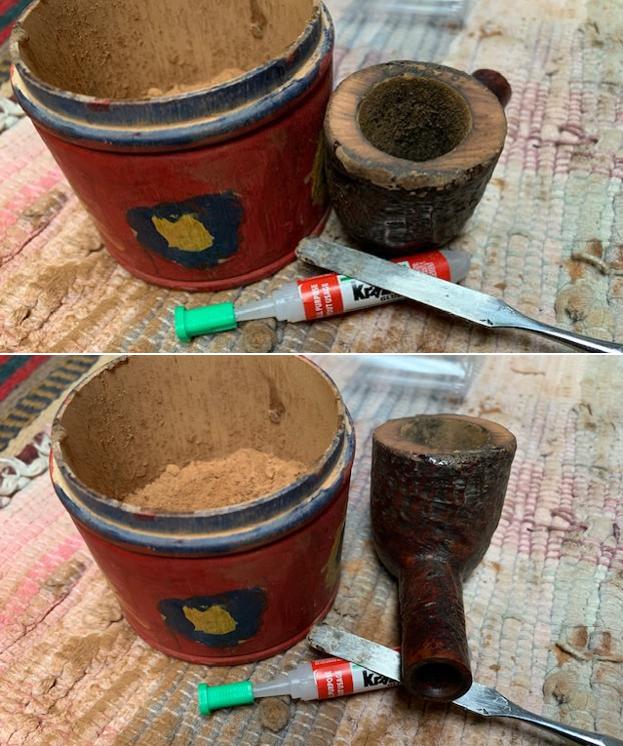
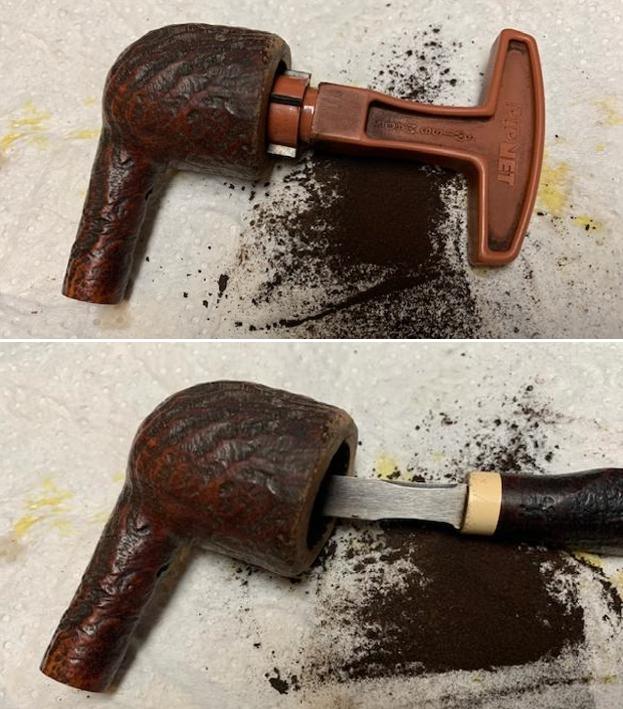
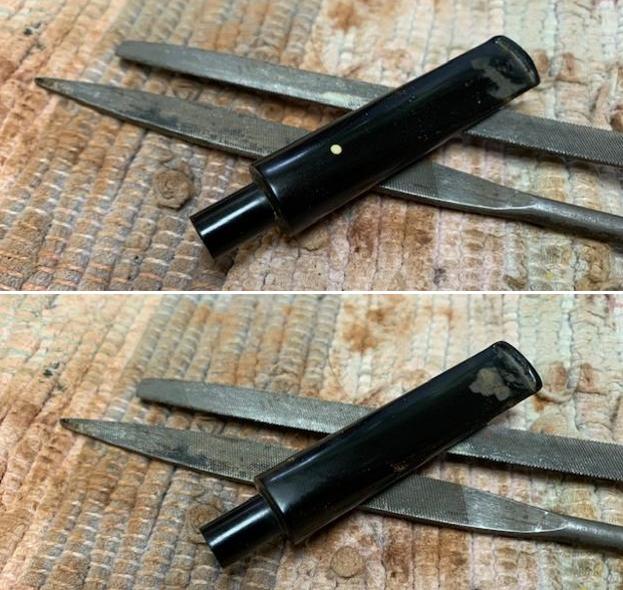
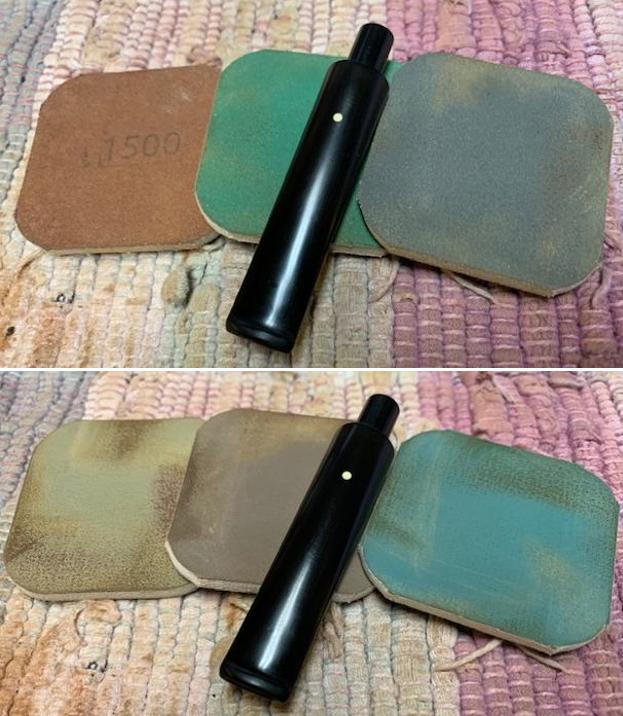
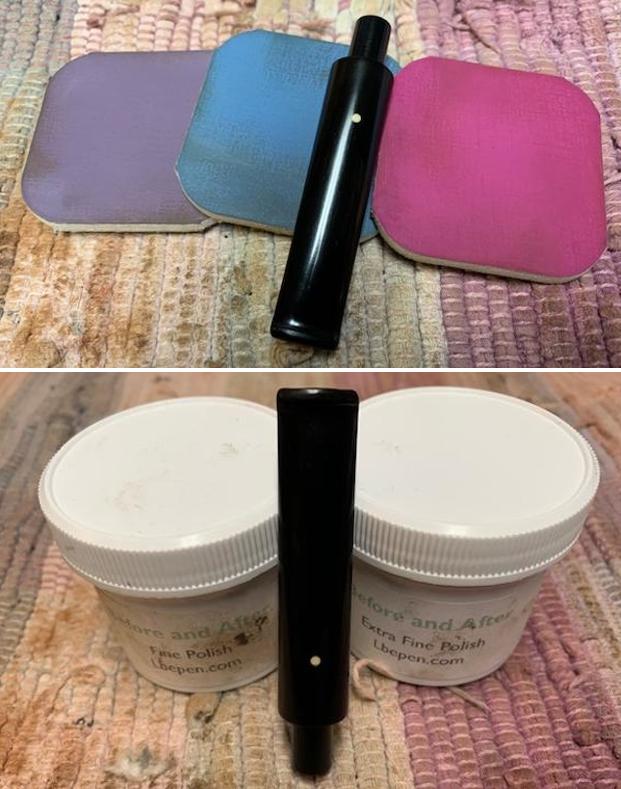
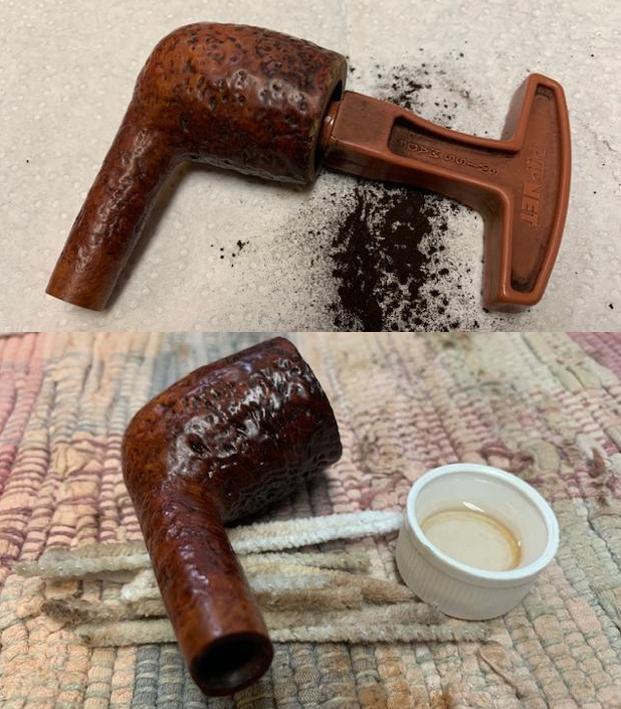
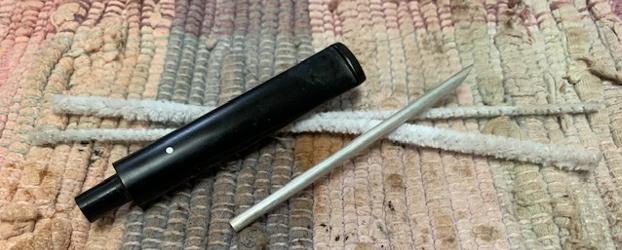
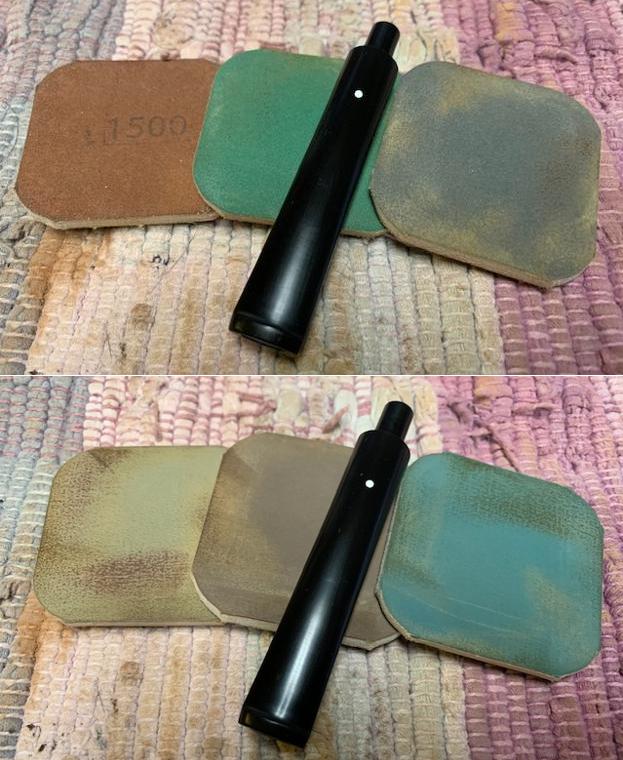
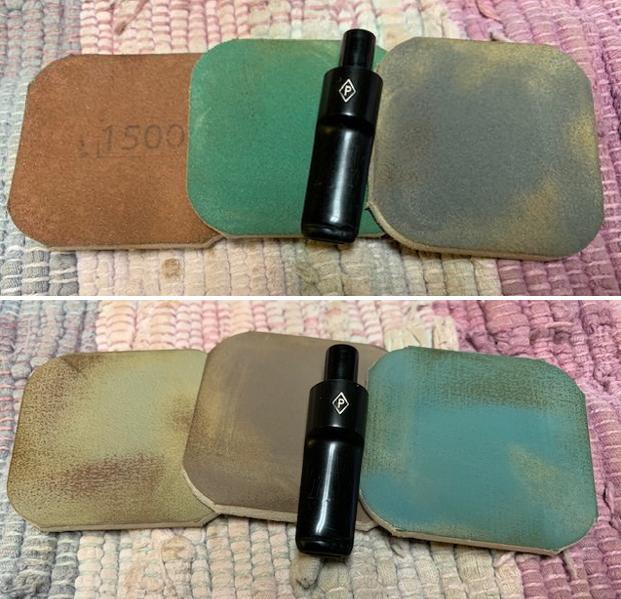
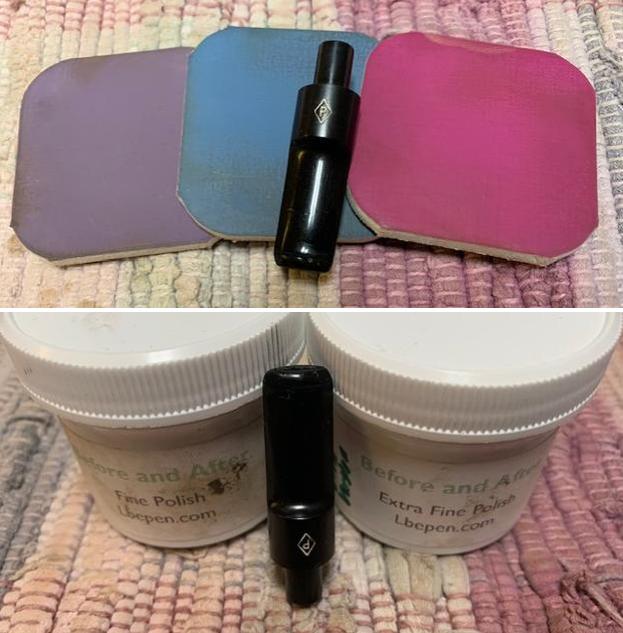
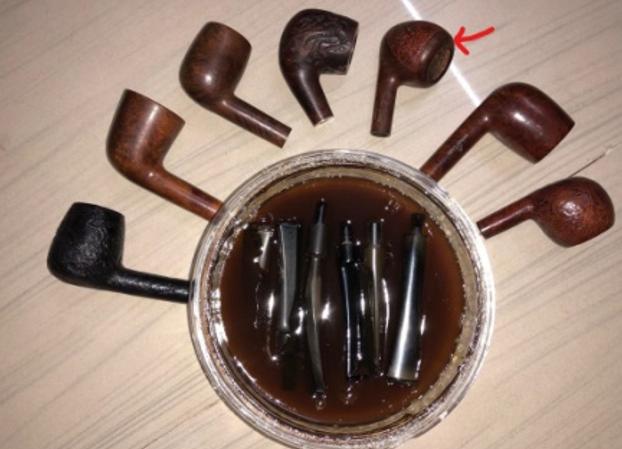
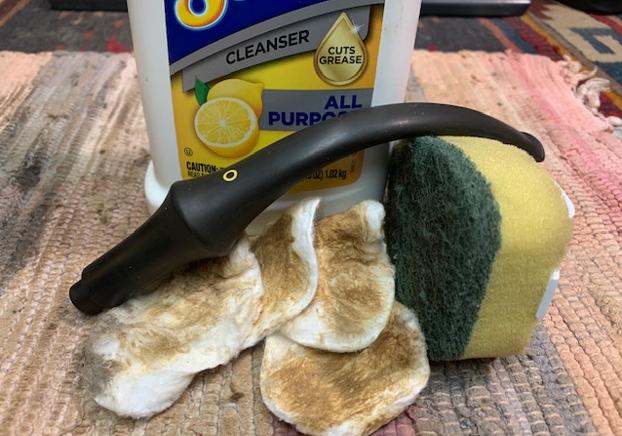
I started the restoration of this pipe by first cleaning the internals of the stem with bristled pipe cleaners and 99.9% pure isopropyl alcohol. I scraped out the dried oils and tars from the tenon end and the slot end with my fabricated knife. I followed it up by sanding the entire stem with a folded piece of 220 grit sand paper to remove the surface oxidation. It has been our (Abha, my wife and me) experience that sanding a stem before dunking it in to the deoxidizer solution helps in bringing the deep seated oxidation to the surface which in turn make further cleaning a breeze with fantastic results.  I dropped the stem in to “Before and After Deoxidizer” solution developed by my friend Mark Hoover. The solution helps to draw out heavy oxidation to the surface, making it’s further removal a breeze, while the minor oxidation is eliminated to a very great extent. The initial sanding helps to draw out the complete oxidation as the sanding opens up the stem surface that has been initially covered with oxidation. I usually dunk stems of 5- 6 pipes that are in-line for restoration and this pipe is marked with a green arrow. I generally allow the stems to soak in this solution overnight to do its work.
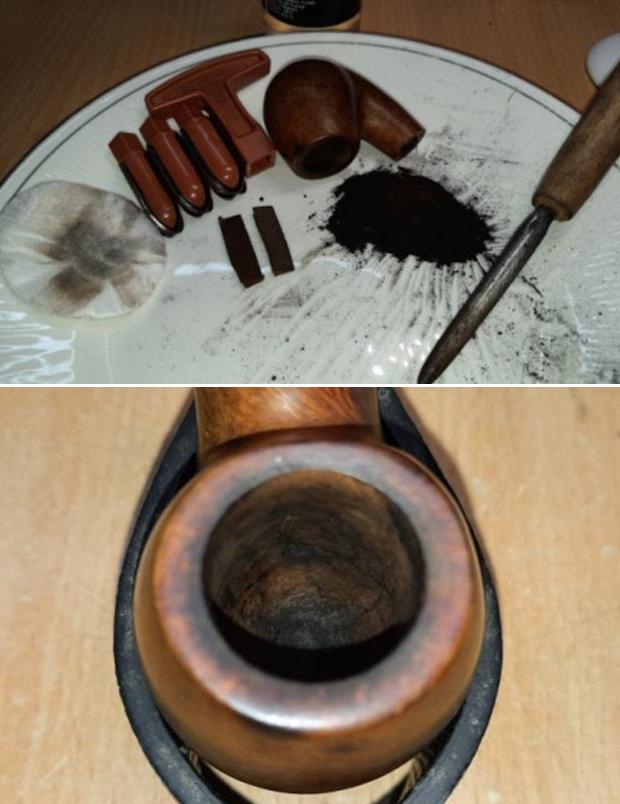
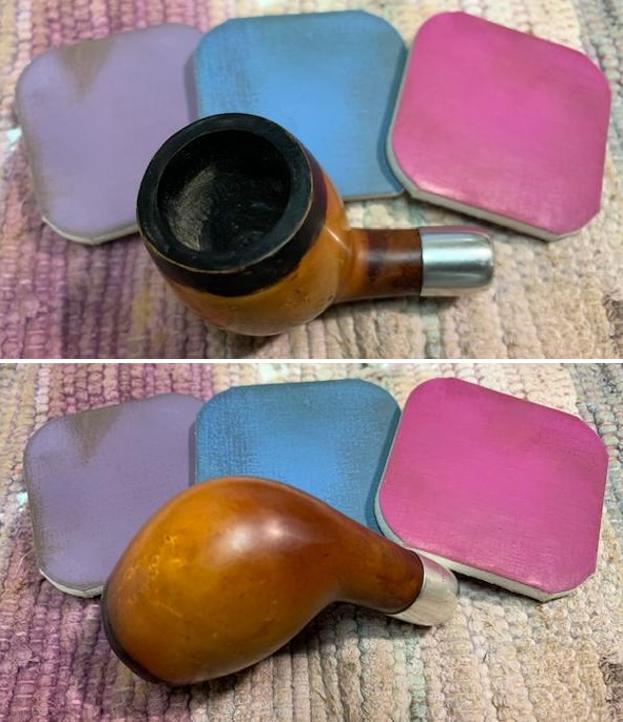
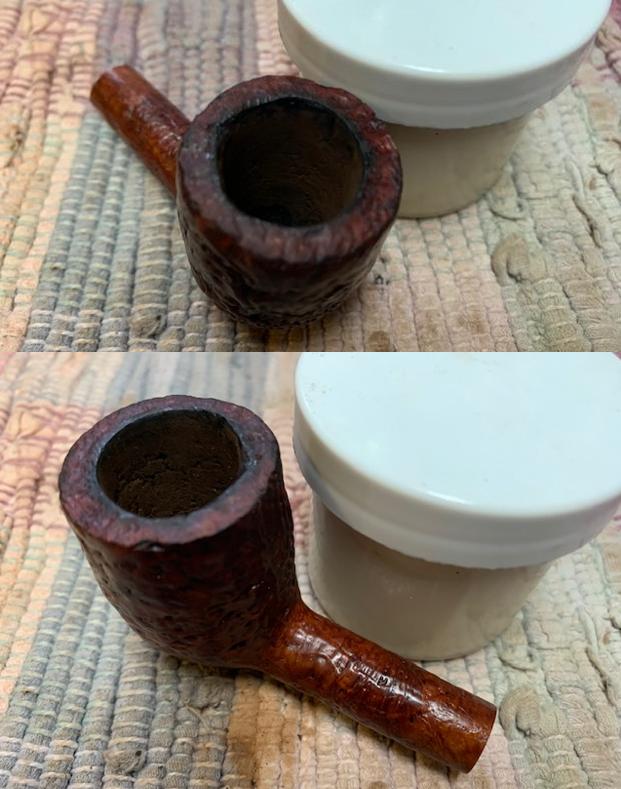
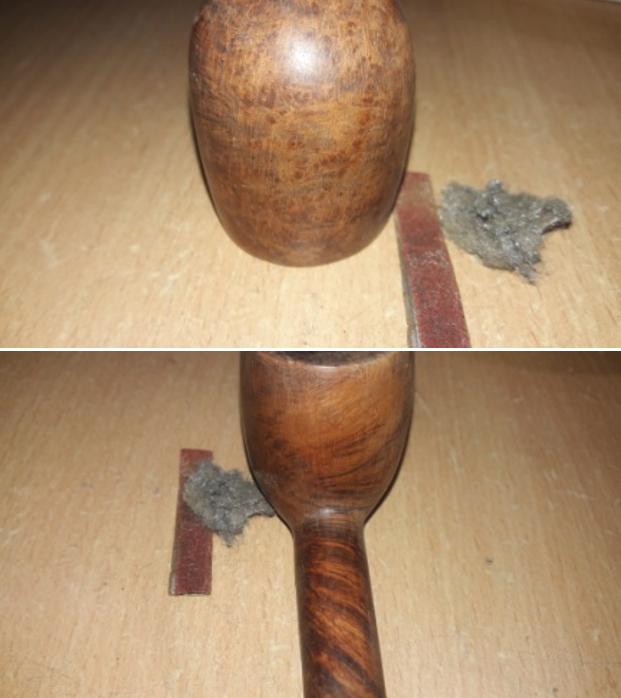
 While the stem was soaking in the deoxidizer solution, I worked on the stummel by first reaming the chamber with size 1, 2 and 3 Castleford reamer heads. I further scraped the chamber walls with my fabricated knife to remove the remaining carbon deposits. Once the cake was reamed back to the bare briar, I used a 150 grit sand paper followed by 220 grit sand paper to remove all the traces of the remaining cake and also to smooth out the inner walls of the chamber surface. Finally, to remove the residual carbon dust, I wiped the chamber with a cotton pad wetted with 99.9% pure isopropyl alcohol. I gently scraped the rim top surface to remove the lava overflow. The chamber walls are sans any damage. The dents and dings over the rim top are now amply evident. This would need to be addressed.
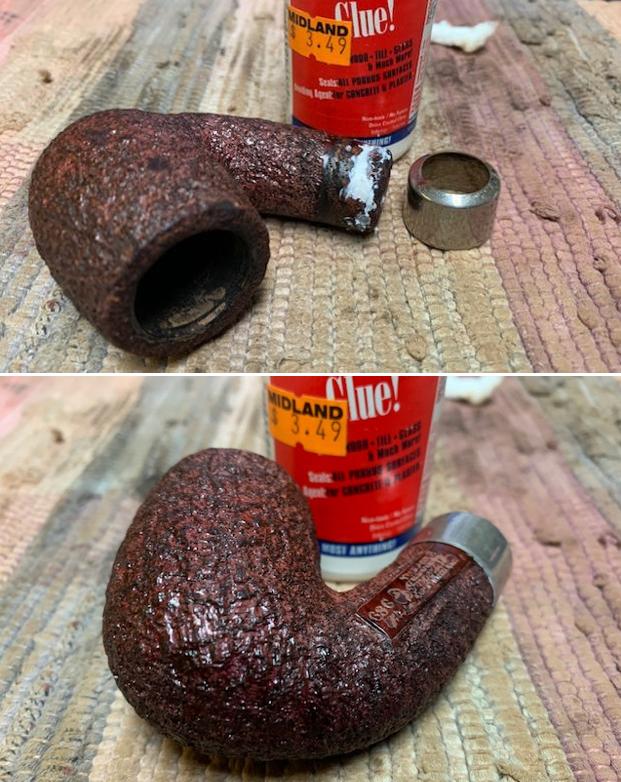
 This was followed by cleaning the mortise with cue tips, pipe cleaners and a shank brush dipped in isopropyl alcohol. I scraped the walls of the mortise with my fabricated knife to remove the dried oils and tars. The heap of gunk scraped out from the mortise walls tells the sordid saga of the condition of the shank internals. Well, the shank internals are clean and will be further cleaned once the stummel exterior is cleaned using oil soap and shank brushes.
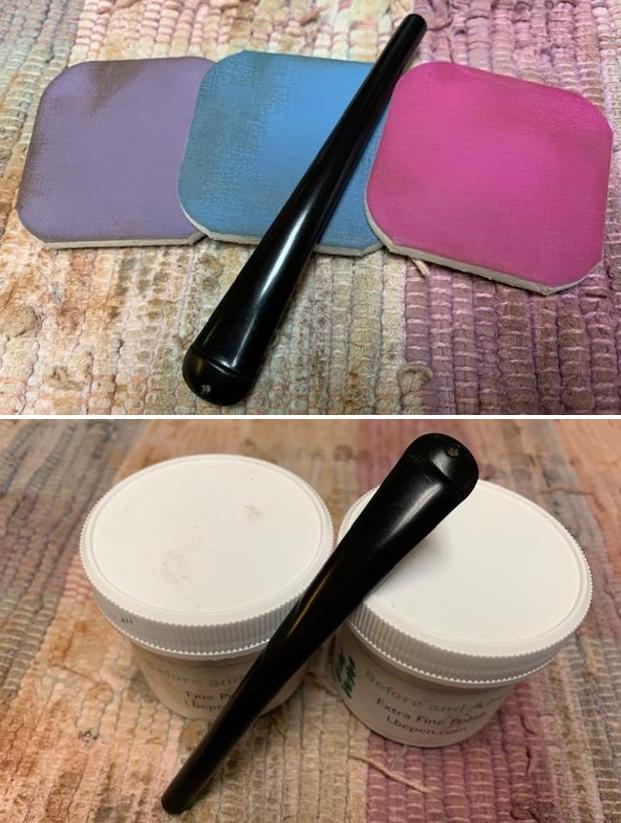
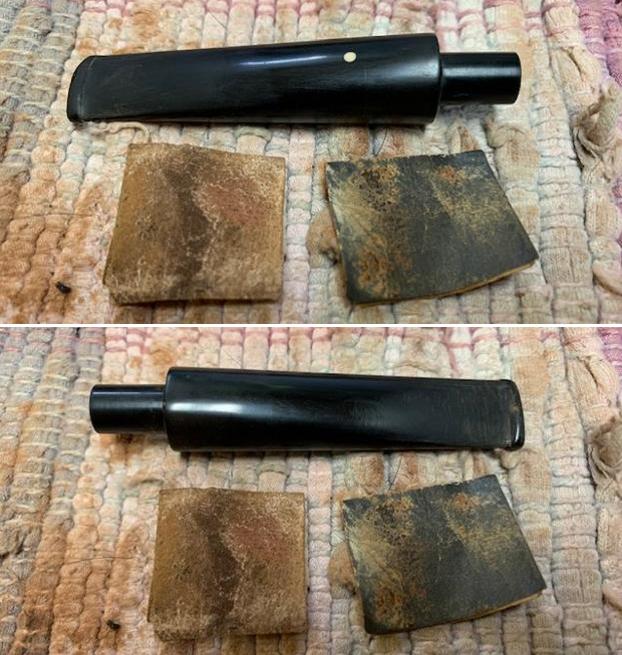
 The next morning, Abha removed the stems that had been soaking in the deoxidizer solution overnight. She cleaned the stem and the stem airway under running warm water and scrubbed the raised oxidation from the stem surface using Magic Eraser followed by a Scotch Brite pad and the airway with a thin shank brush. She further removed the oxidation by scrubbing the stem with 0000 grade steel wool and applied a little EVO to rehydrate the stem.
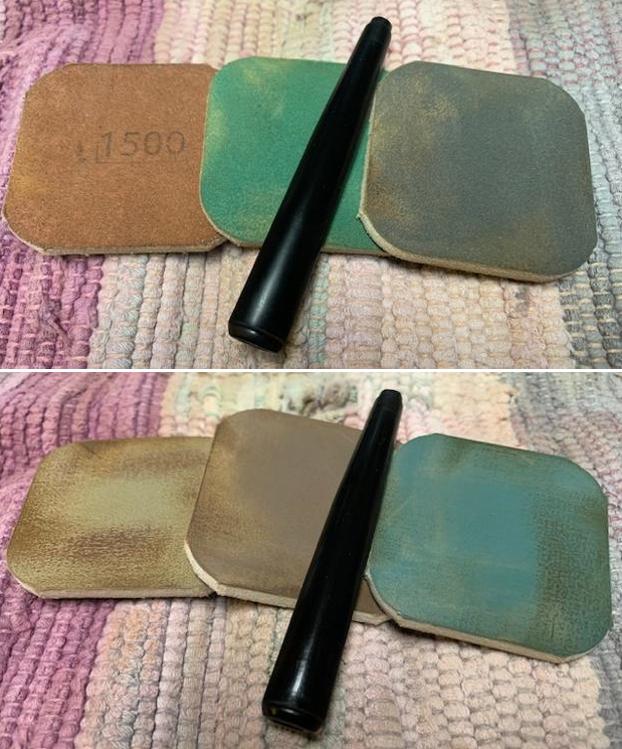
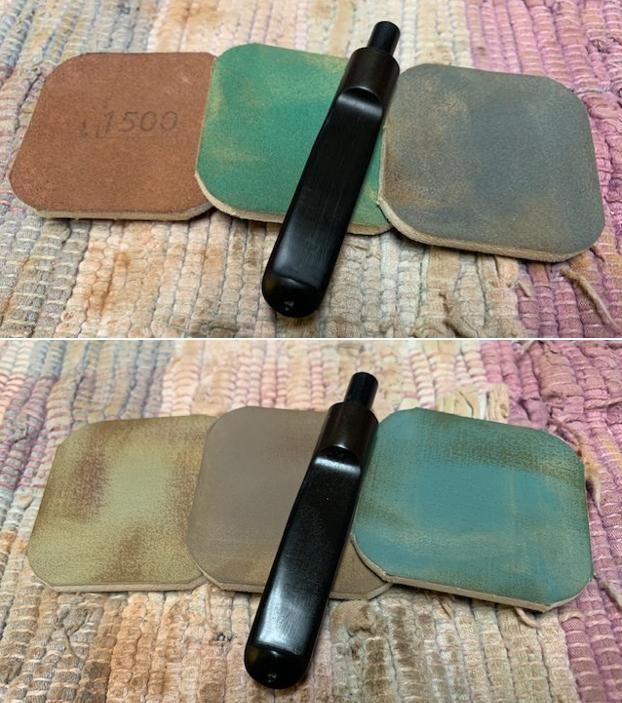
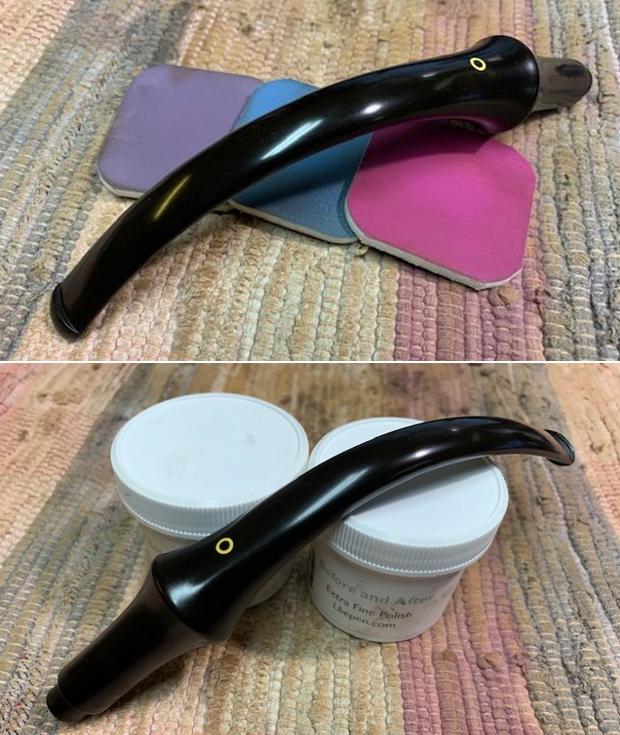
 Staying with the stem refurbishment, with a flat head needle file I sharpened the button edges. I further sanded the entire stem with 220 followed by 400, 600 and 800 grit sand paper. This helps to reduce the scratch marks left behind by the more abrasive 220 grit paper. To bring a deep shine to the vulcanite stem, I went through the complete set of micromesh pads, wet sanding with 1500 to 2000 grit sandpapers and dry sanding with 3200 to 12000 grit pads. I wiped the stem with moist cloth after each pad and rubbed it down with Extra Virgin Olive oil to rejuvenate the vulcanite. I am not able to find the pictures that I had taken of the micromesh polishing and the completed stem and apologize for not including the same.
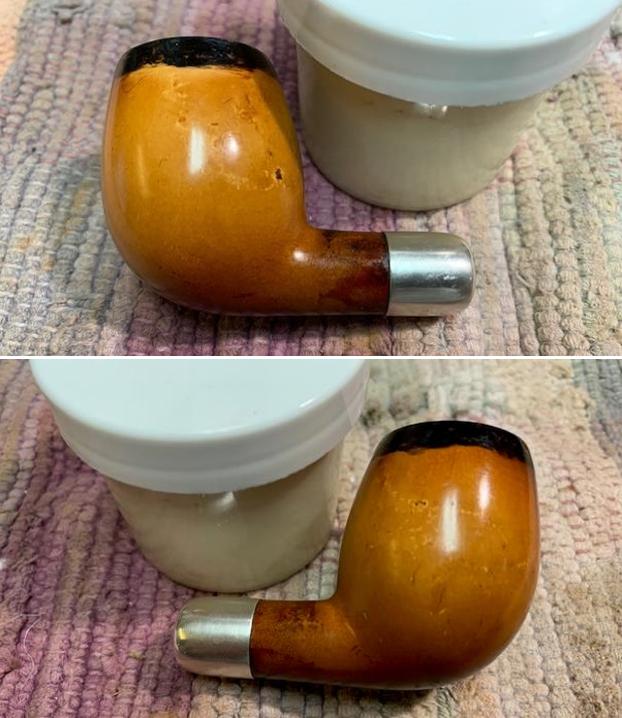
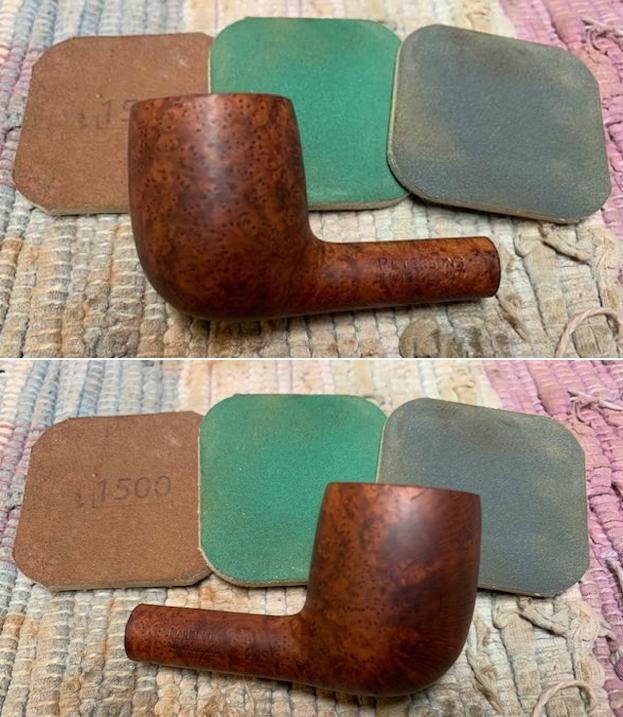
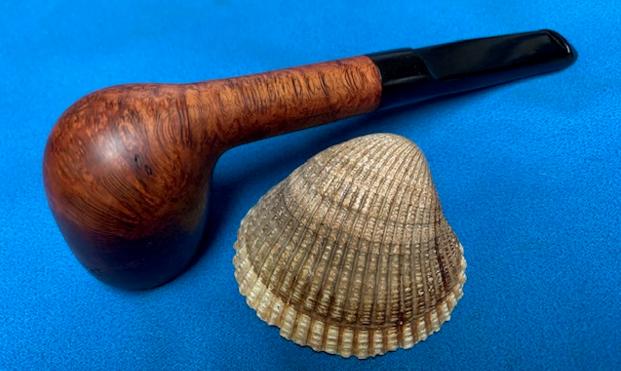
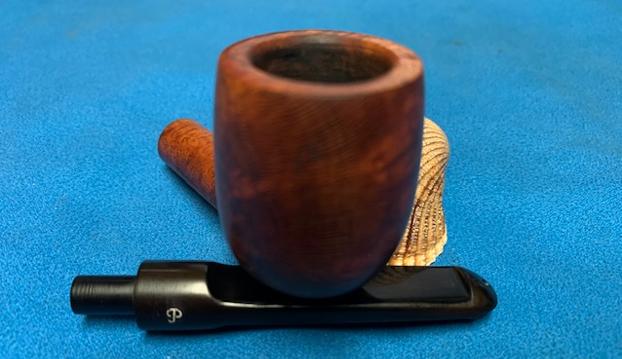
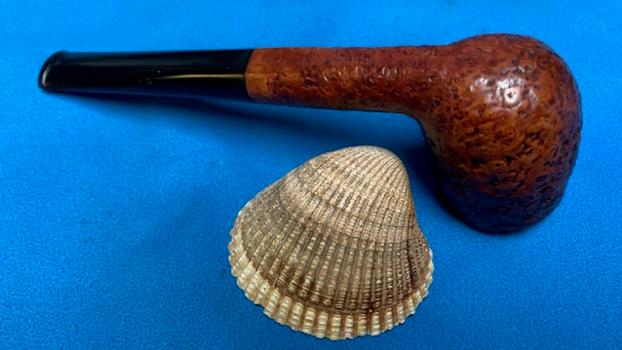
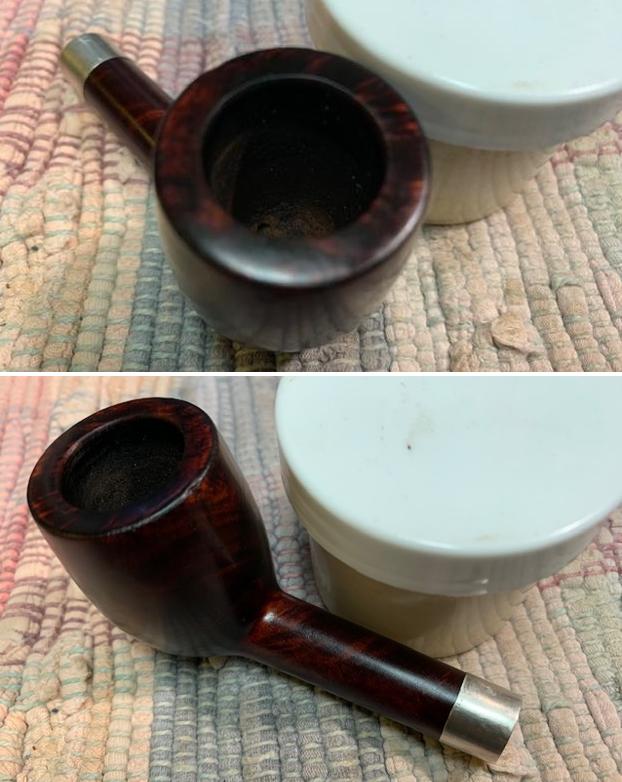
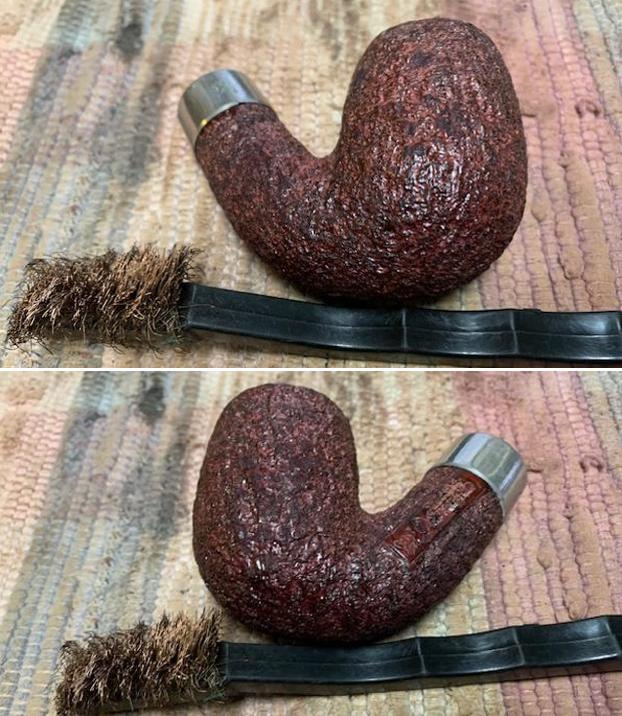
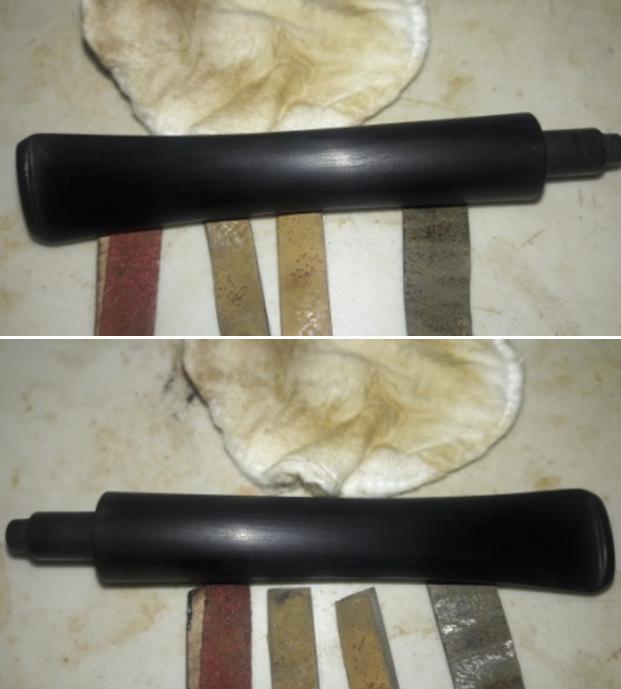 With the stem refurbishment completed and the bowl internals clean, I moved on to clean the exterior of the stummel. I generously applied “Briar Cleaner”, a product that has been developed by my friend Mark Hoover, to the external surface of the bowl and the smooth rim top surface. It works similar to Murphy’s oil soap and needs to be applied to the stummel surface and set aside for 5-10 minutes. The product pulls out all the dirt and grime to the surface making further cleaning easy. I am quite happy with this product. I used a hard bristled tooth brush to scrub the stummel and rim top with the solution. After the scrub with Briar Cleaner solution, I washed the stummel under running warm water with anti oil dish washing detergent till the stummel surface was clean and dried it using paper towels and a soft cotton cloth. I deliberately cleaned the smooth rim top with a hard bristled toothbrush and set the stummel aside to dry out naturally. I simultaneously cleaned the shank internals with detergent and a hard bristled shank brush. The stummel surface has cleaned up nicely with beautiful bird’s eye and cross grain patterns on full display.

 With the stem fill set aside to cure, I started with cleaning of the stummel surface. With a folded piece of 220 grit sand paper, I sanded the entire stummel surface. This not only removes the stubborn dirt and grime that remains on the stummel but also evens out the minor dents and dings from the surface. I followed it up with sanding using a piece of 0000 grade steel wool. This helps reduce the sanding marks left behind by the coarser grit sand paper. These sanding marks will be completely eliminated once I am through with micromesh and Blue Diamond polish.
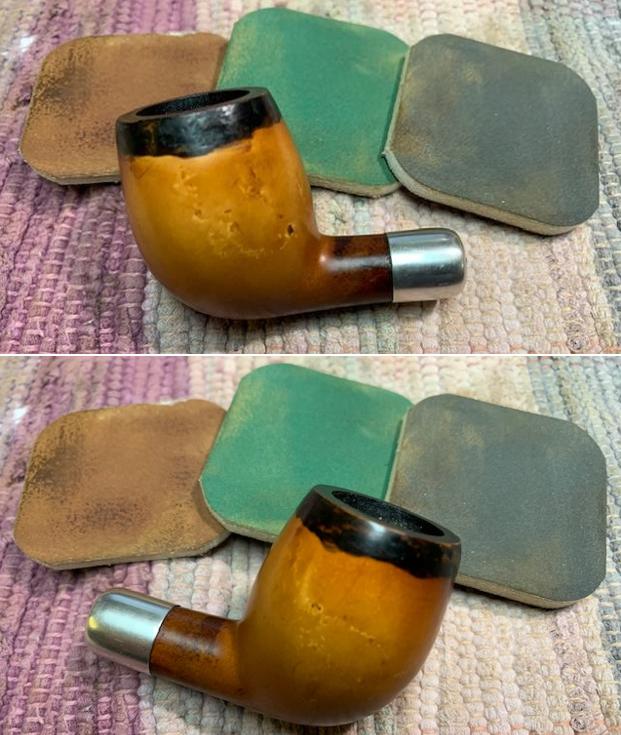
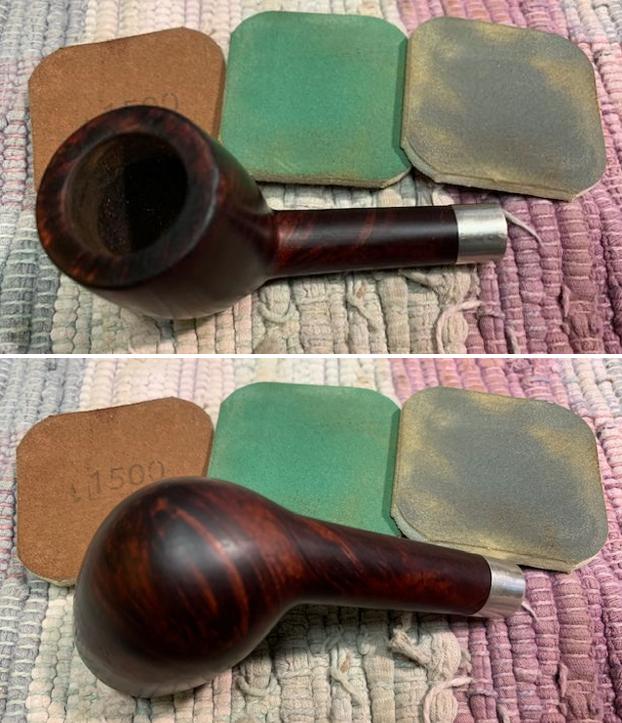
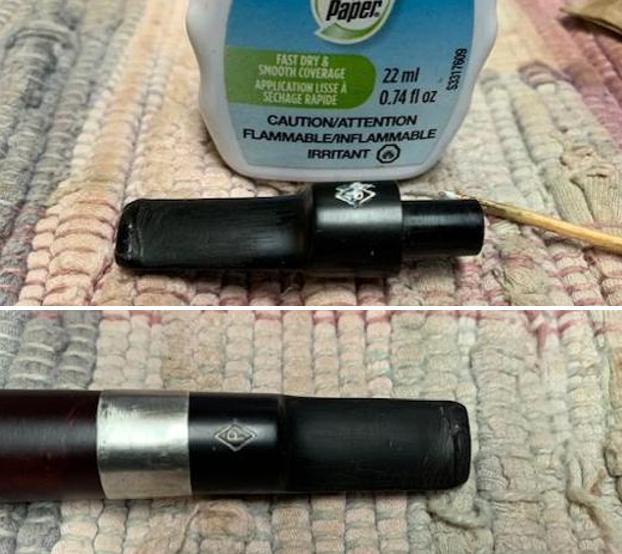
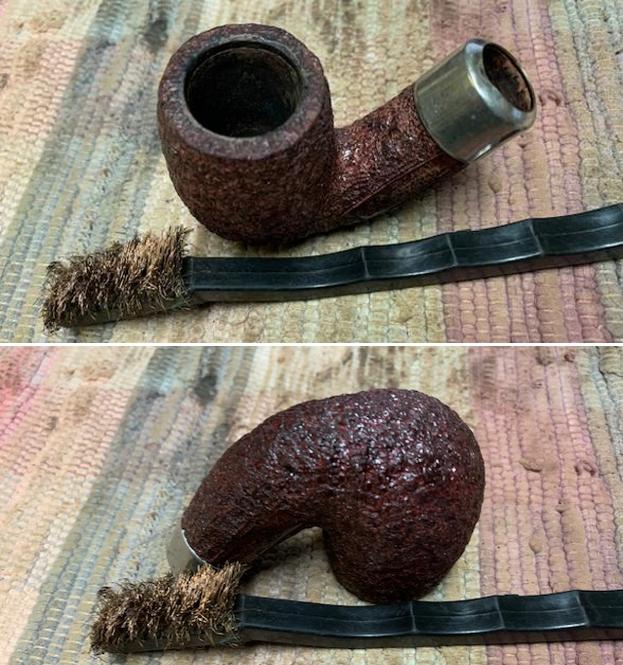
 Now that I had a fair idea of the extent of topping required to the rim surface, I topped the rim on a piece of 220 grit sand paper to even out the rim surface dents and dings. To further smooth out the scratches left behind by the abrasive 220 grit sand paper, I topped the rim surface on a piece of 400 grit sand paper. The rim top was now a shade lighter than the rest of the stummel surface and would require to be stained dark brown. Since I had packed my stuff for the impending transfer, I was without my stain pens. I remembered an old trick that Steve had taught me to darken the rim top using readily available shoe polish and so I used Dark Tan Cherry shoe polish over the rim top surface and set it out in the sun for the surface to absorb the polish. A dark spot is seen over the rim top in 11 o’clock direction and being natural to the briar I decided to let it be.
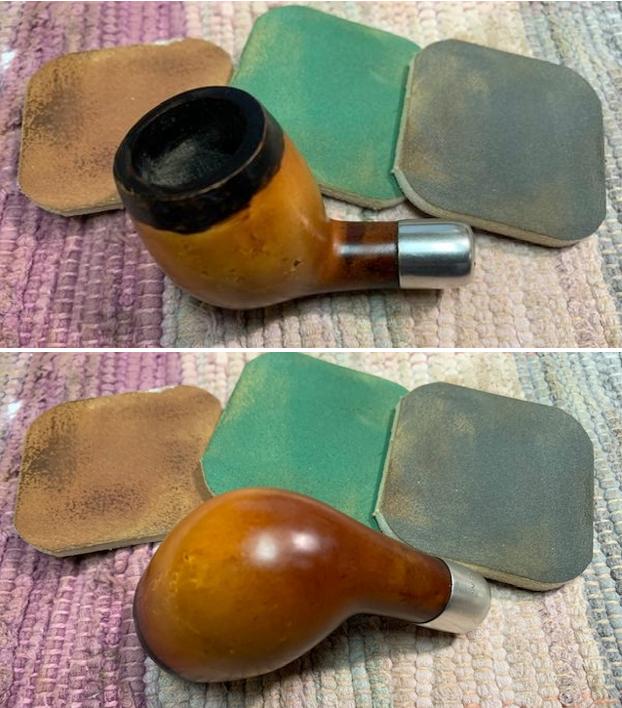
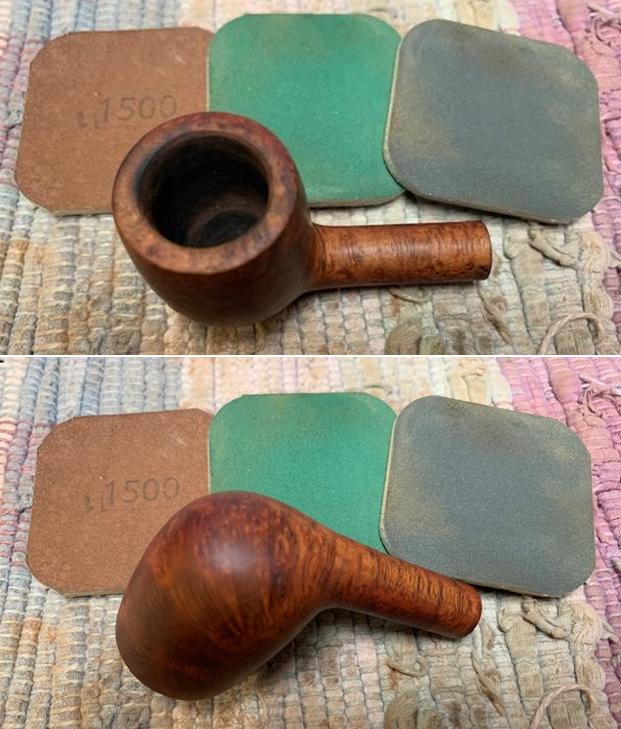
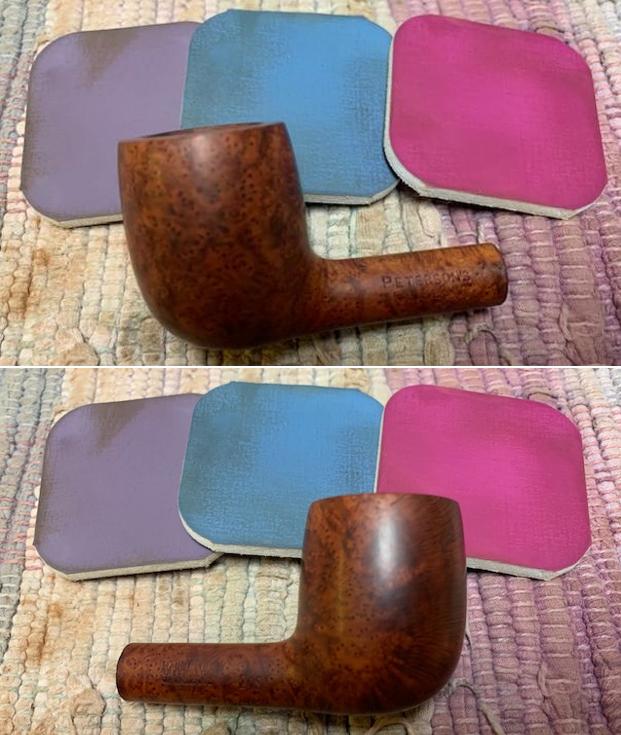
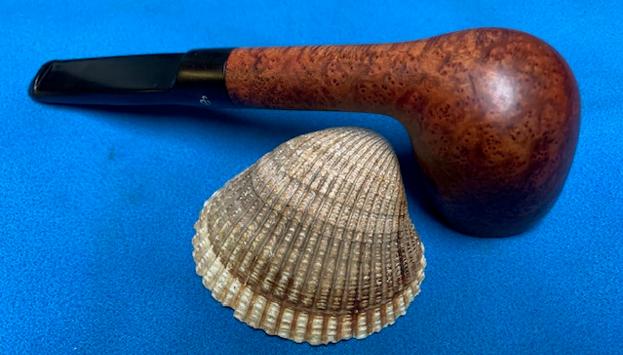
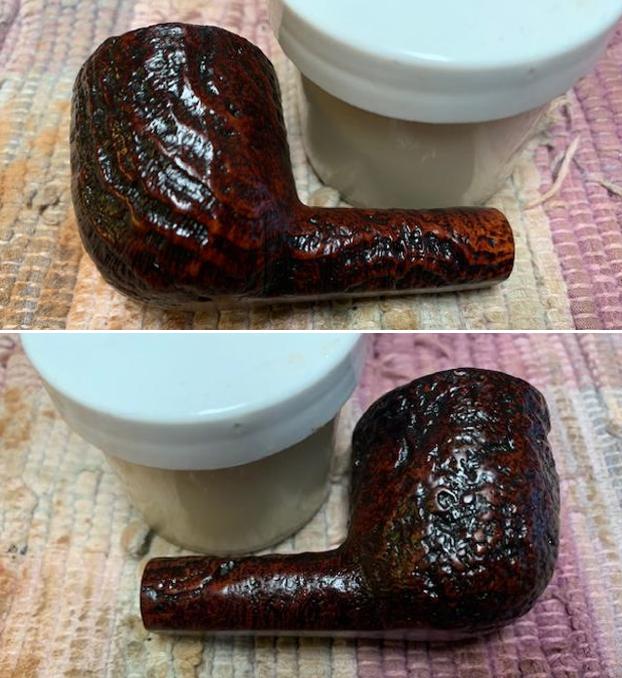
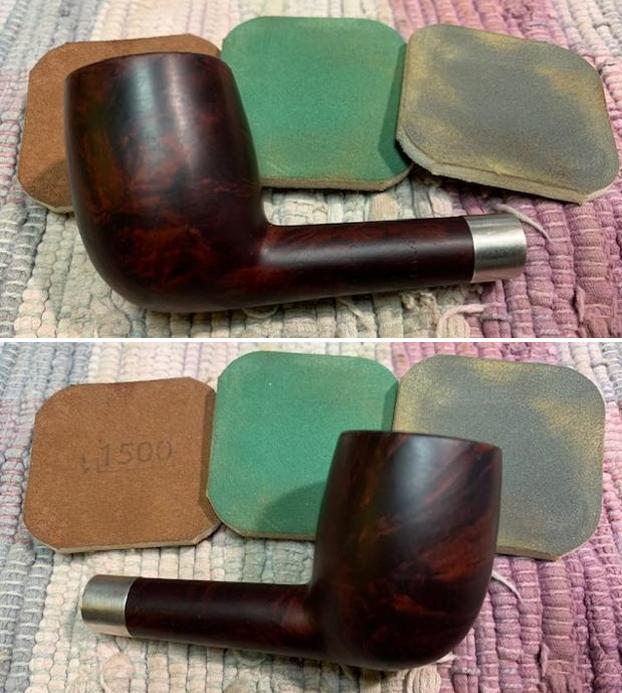
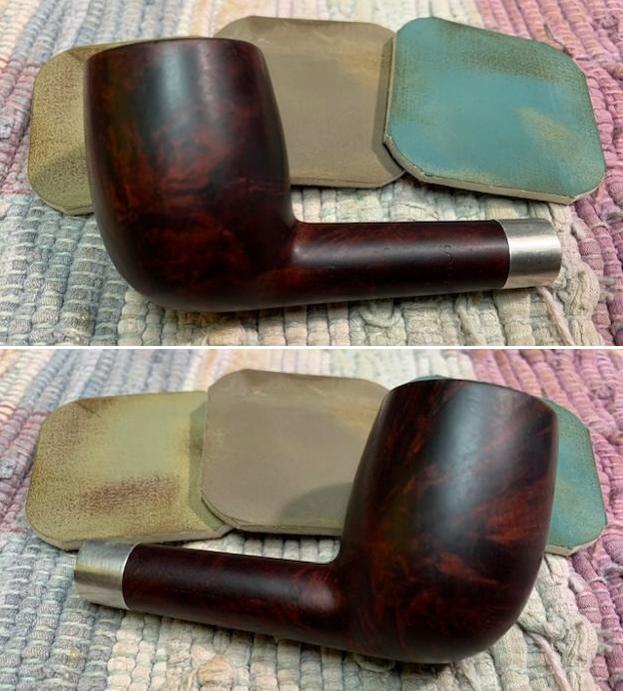
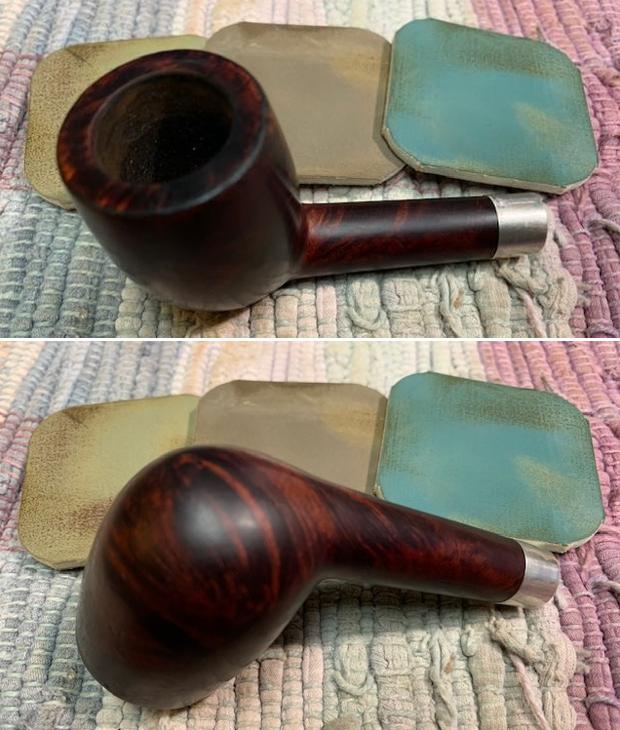
 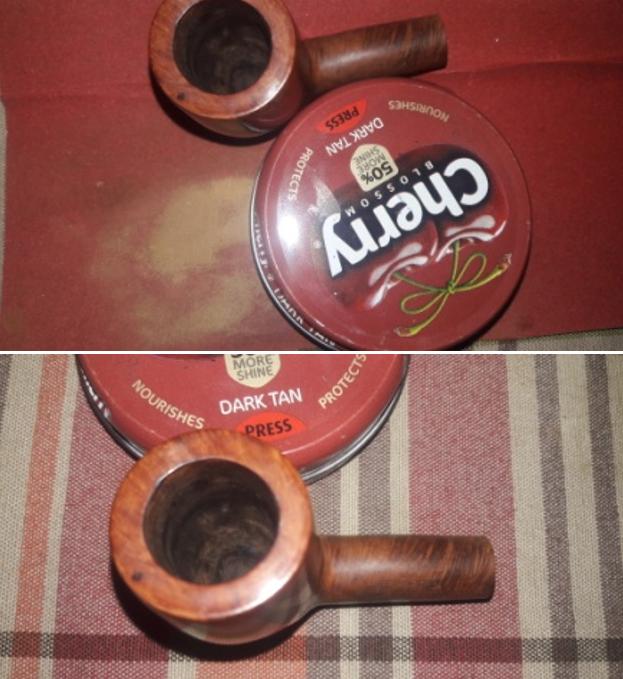 I subjected the stummel to a complete cycle of micromesh polish, wet sanding with 1500 to 12000 grit pads and paid greater attention to polish the rim top surface. I wiped the stummel with a moist cloth after every grit pad to remove the sanding dust left behind by the pads. This also helps in monitoring the progress being made and provides an opportunity to take early corrective action, if required. Next, I rubbed a small quantity of “Before and After Restoration Balm” into the briar with my finger tips and worked it deep into the surface and let it rest for a few minutes. The balm almost immediately works it’s magic and the briar now had a nice vibrant appearance with the beautiful grain patterns on full display. The contrast of the dark browns of the grain with the light hues of the rest of the stummel added an interesting dimension to the appearance of the stummel. I further buffed it with a horse hair brush to further deepen the shine.

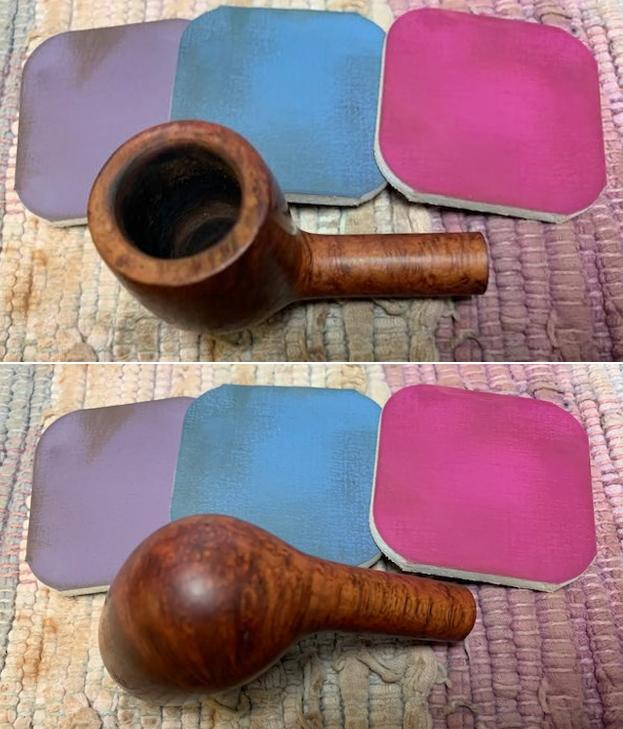
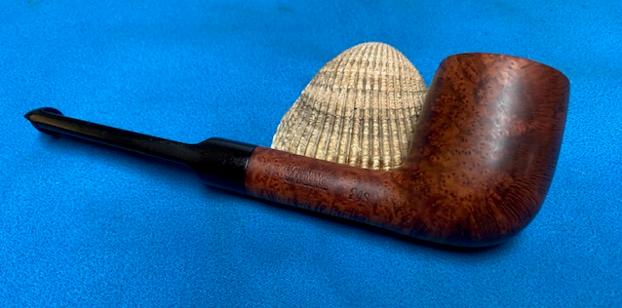
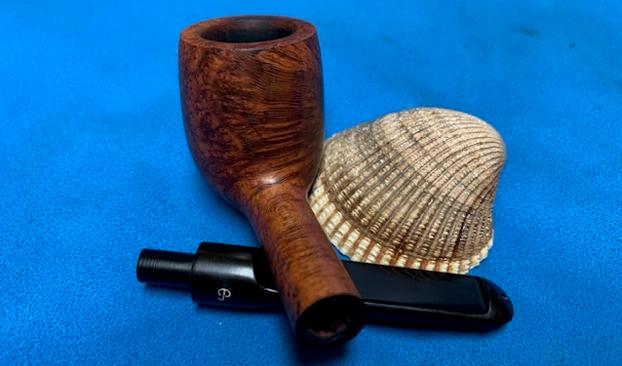
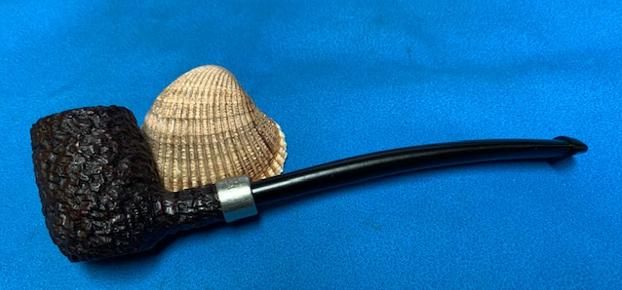
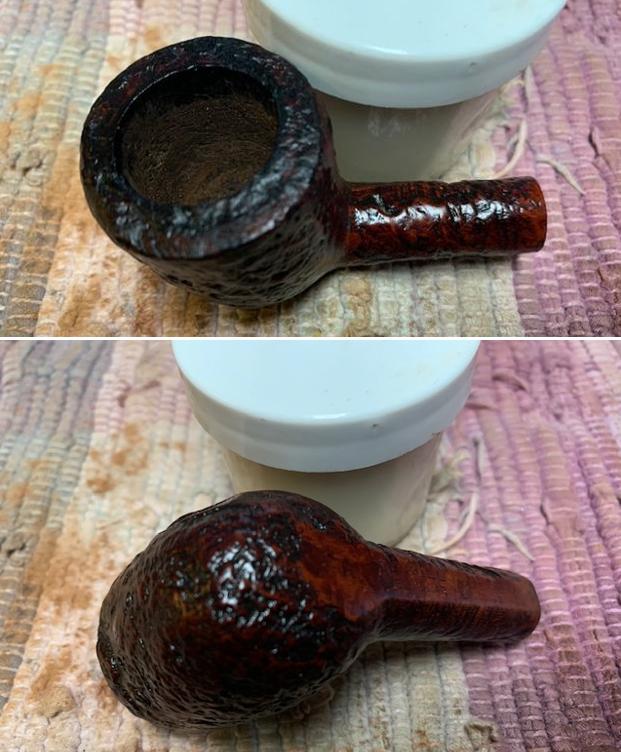
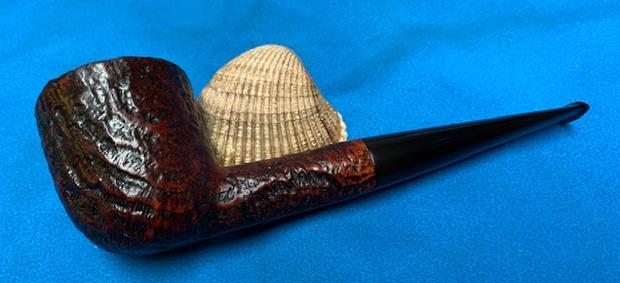
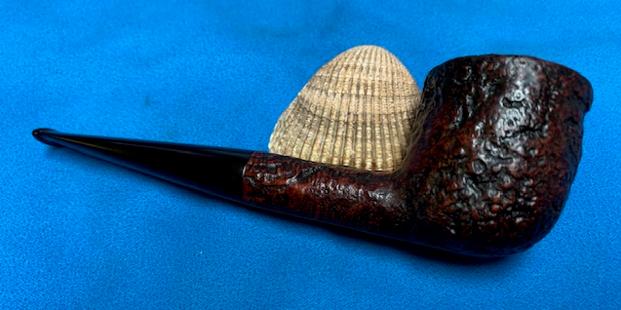
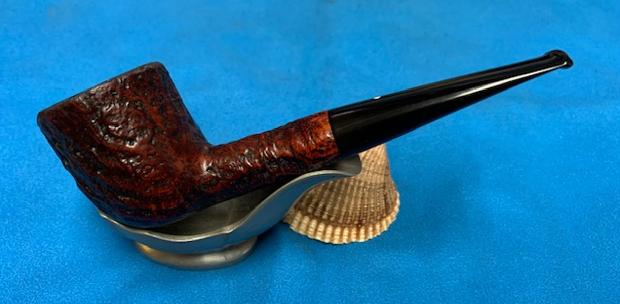
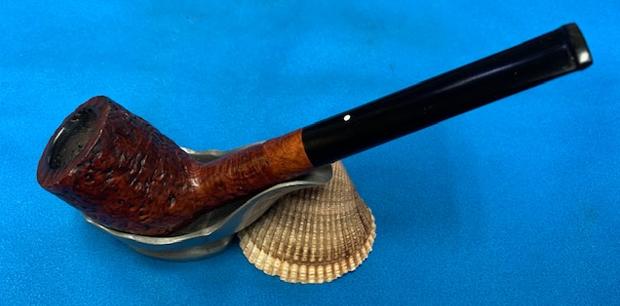
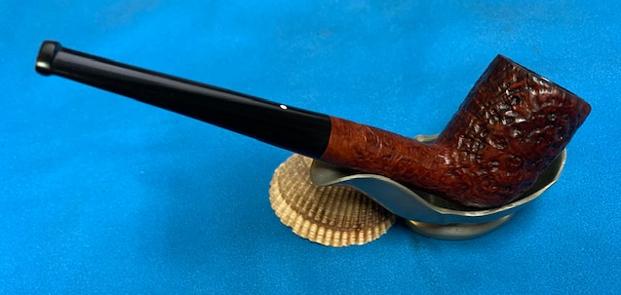
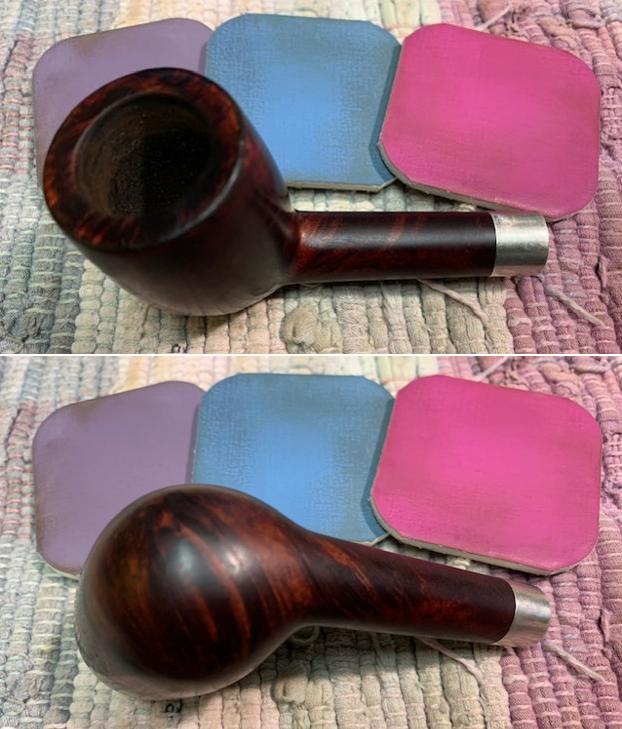
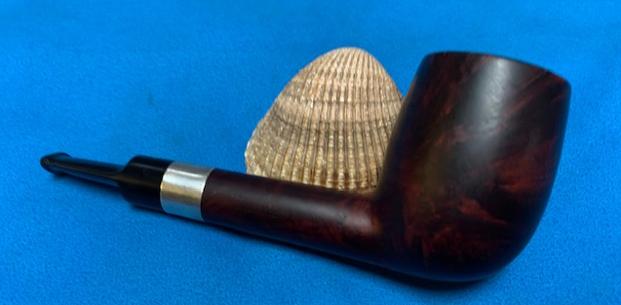
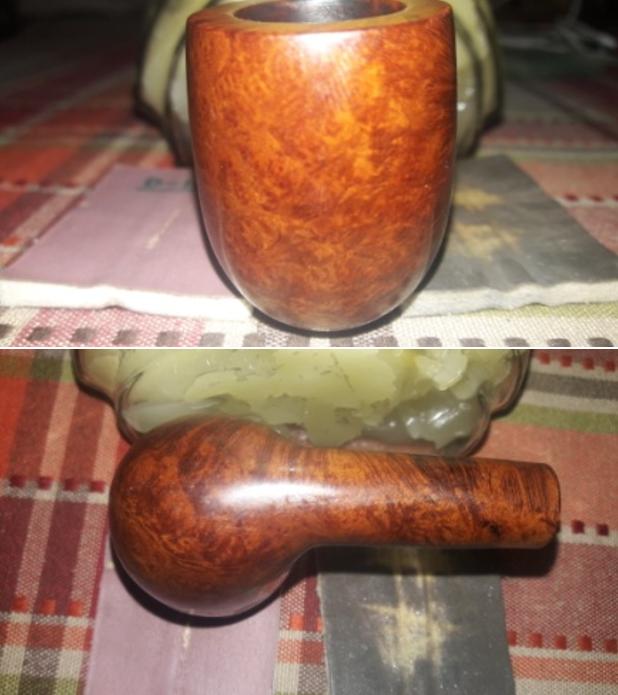 To complete the restoration, I mounted a cotton cloth buffing wheel onto my hand held rotary tool and applied a coat of Blue Diamond to the stummel and the stem in order to polish out the minor scratches. With a cotton buffing wheel that I use for carnauba wax, I applied a coat of carnauba wax and continued to work on it till the complete coat of wax had been polished out. I finished the restoration by giving the entire pipe a rigorous hand buffing using a microfiber cloth to raise the shine further. The finished pipe with a natural finish to the briar looks amazingly beautiful. The pipe feels really light in the hand and has such a perfect balance in the mouth if you like to smoke your pipe clenched. I really appreciate your valuable time spent in walking the distance with me on this restoration.