
Blog by Steve Laug
The next pipe on the work table came to me from friend who picked it up because of the name and the description. He liked the look of the pipe and sent me an email to see what I thought of it. He included a link to the eBay sale so I could check it out myself.
Steve, I’m asking if you would take a look at this listing and tell me what you think, as it certainly needs stem work. https://www.ebay.com/itm/RARE-Early-Vintage-ABDULLA-DRIBACCY-SHARK-SKIN-Briar-Pipe-London-Made-/193674187402?_trksid=p2349624.m46890.l49292
I’m a storyteller by profession (a business writer) and this one just has a great story to tell. I keep going back to it. And I’d be sorry to see it with a replacement stem. Is it salvageable? And is it something you’d be willing to do? Just let me know what you think. Any advice is appreciated.
(I think the asking price is high, but I think he’ll budge.)
Best regards, Baker
I clicked on the link and followed it to the listing. The seller described the pipe and its stamping as follows:
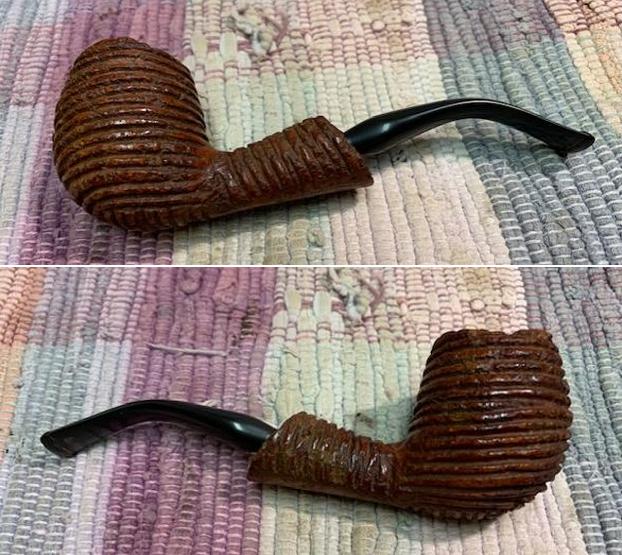
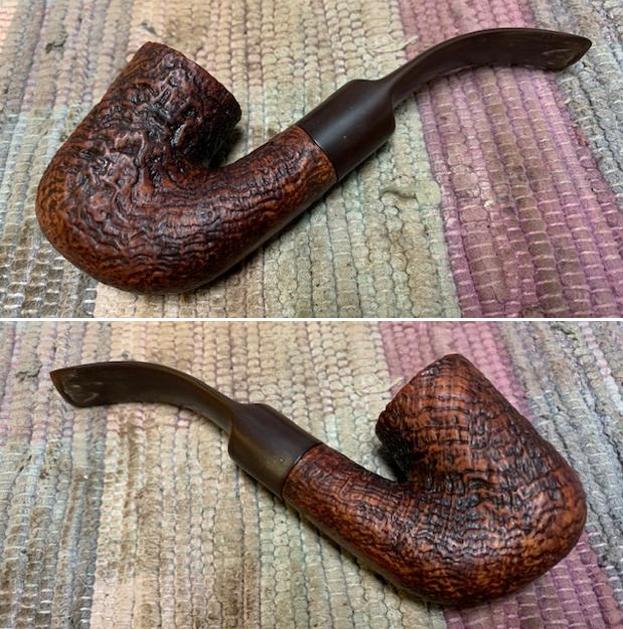
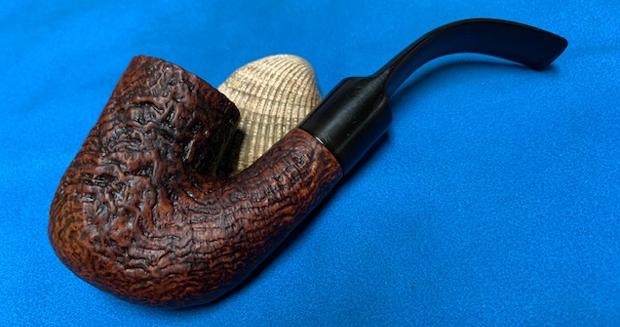
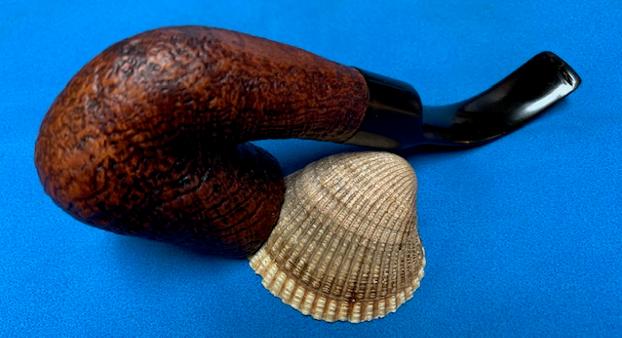
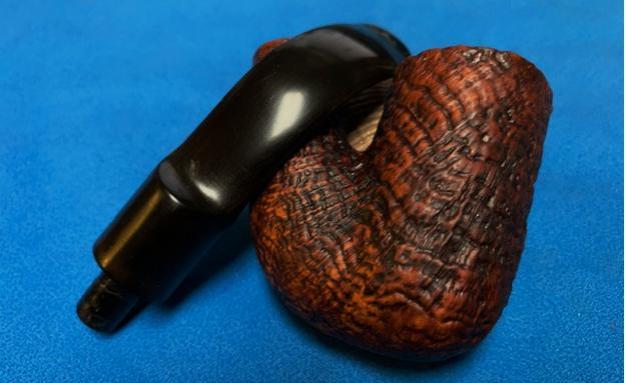
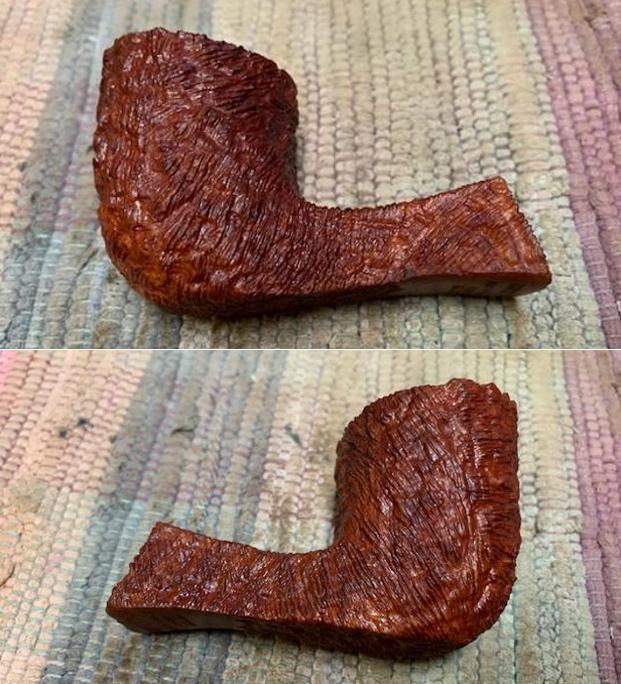
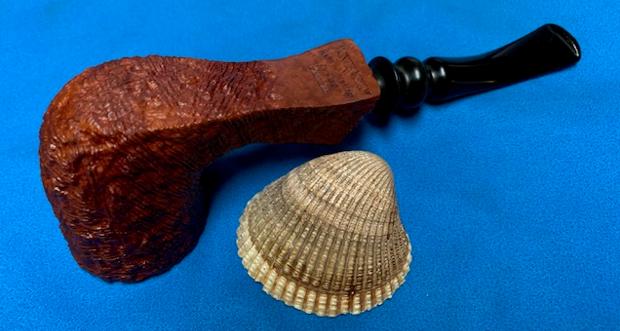
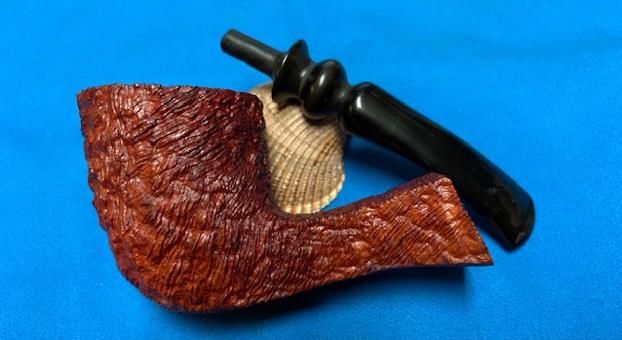
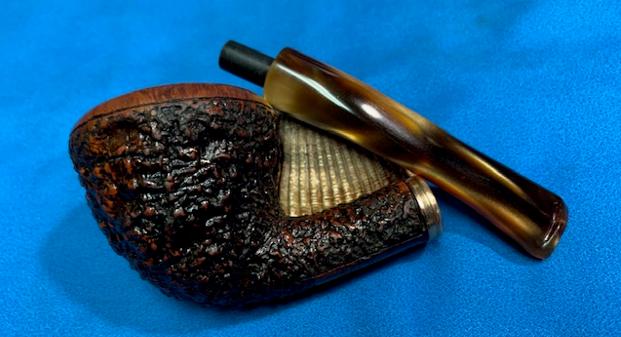
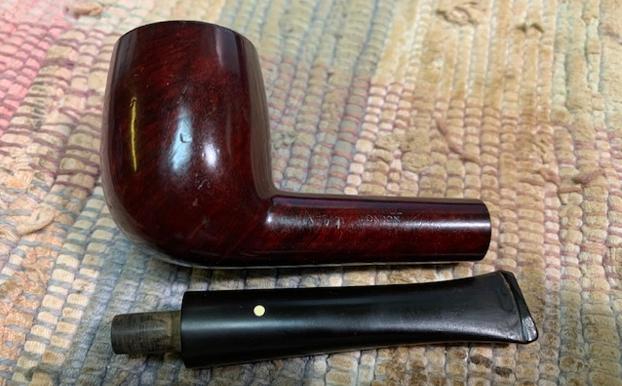
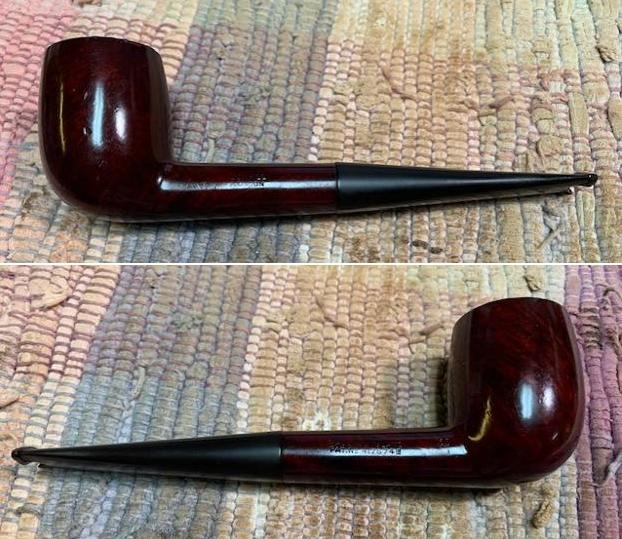
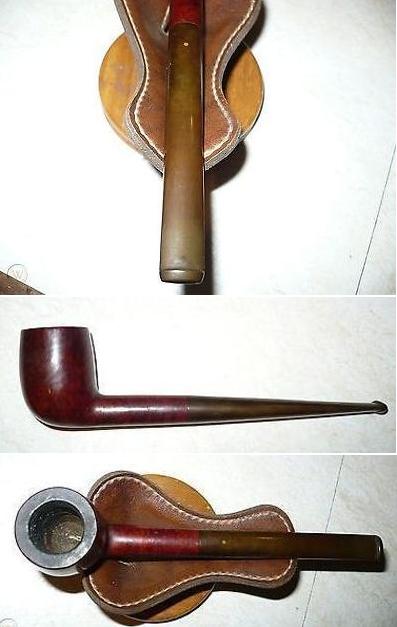
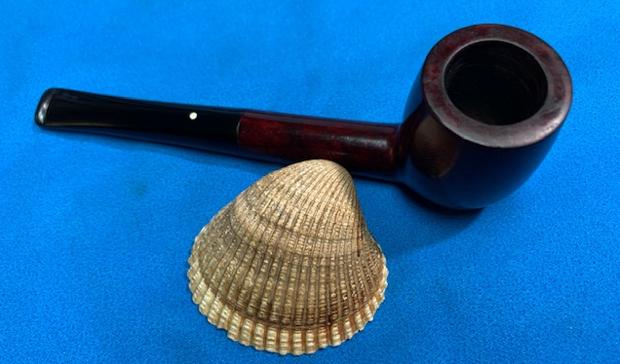
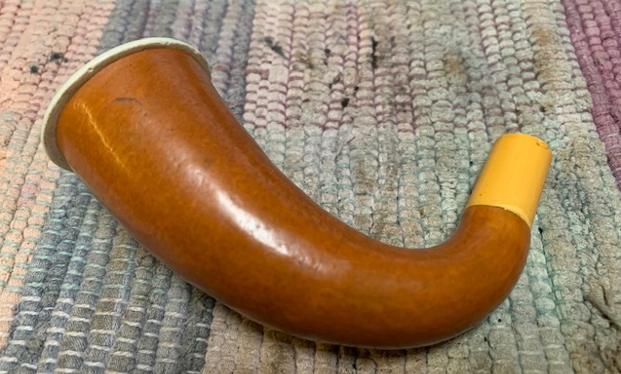
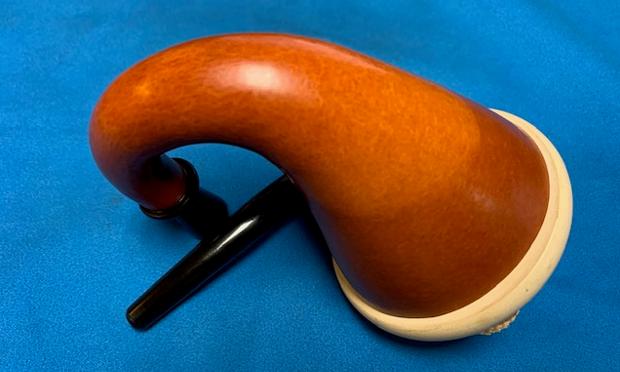
RARE Early Vintage ABDULLA DRIBACCY SHARK SKIN Briar Pipe. This early Shark Skin model is early vintage, my research while not conclusive would put it at 1940s or earlier and made in London. An old French ad in the photos suggests it is Shark Skin #2418. The pipe is in very good condition limited darkening of the rim or tar build up in the bowl. Stem has no visible chatter with rubber tip, see photo of tip with a minor chip of the vulcanite under the rubber tip. (I have included that old French Ad below).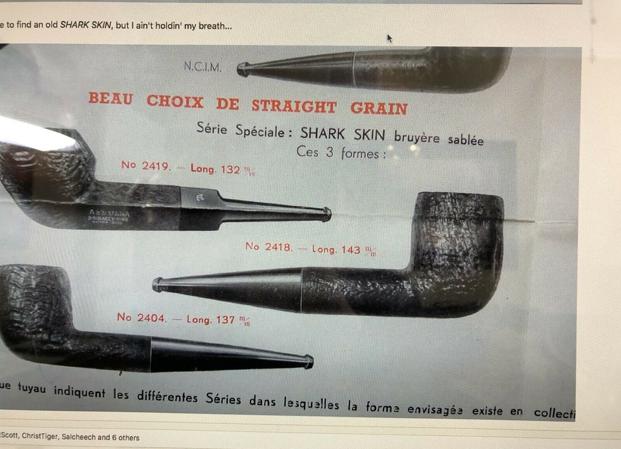 I went through all of the photos that were included in the listing on eBay and saved them. They tell the story of the current state of the pipe. It is a chubby billiard with a nice sandblast finish. As I looked it over it was clear to me that the stem was a replacement and a bit more oval than the shank. Whoever had replaced the stem had reduced the diameter of the shank and shouldered it down in size to match the stem. They had then rusticated the shank end coning to look better than a smooth finish. The stem itself was rustic to say the least with file marks on the top and underside that left it rough. There was a rubber Softee Bit on the end of the stem to cover up something that was not clear to me. As you scroll through the photos you can see the poor shaping to the shank end that was done to fit a smaller stem.
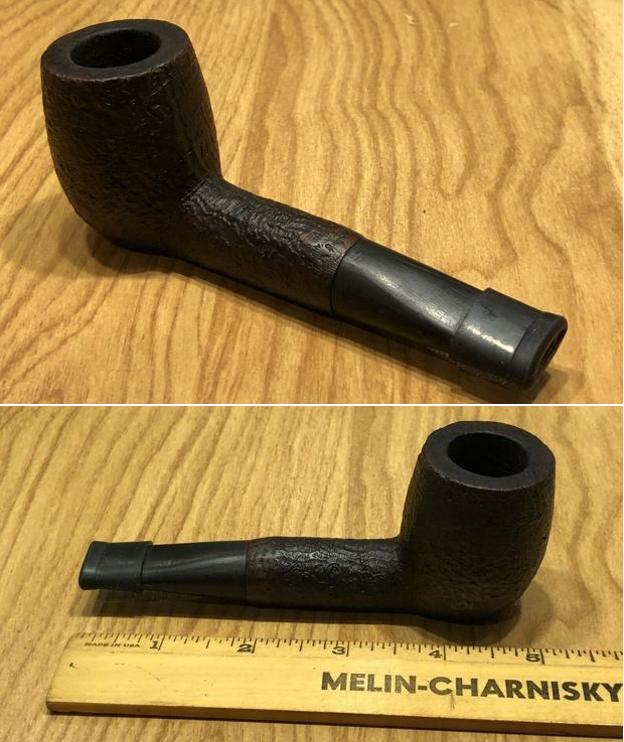
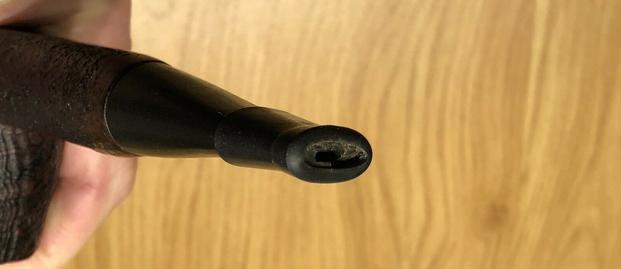
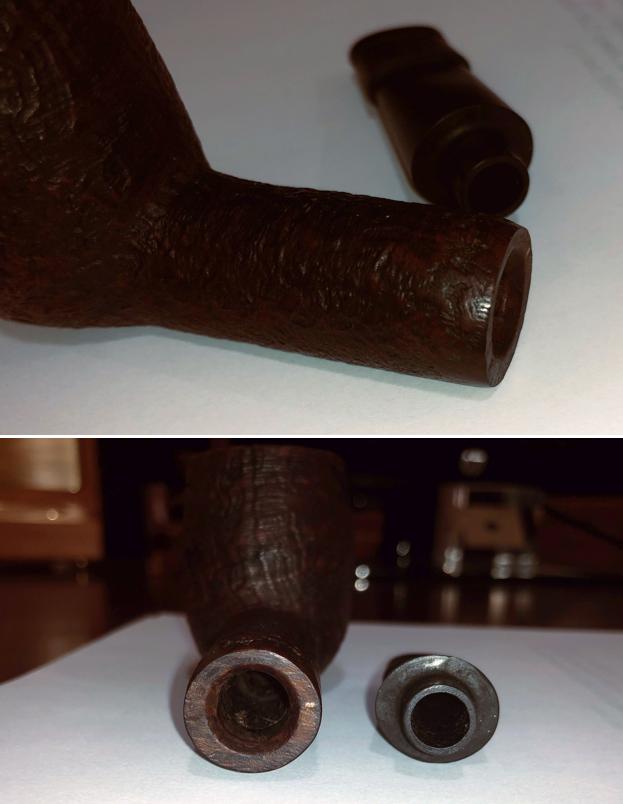
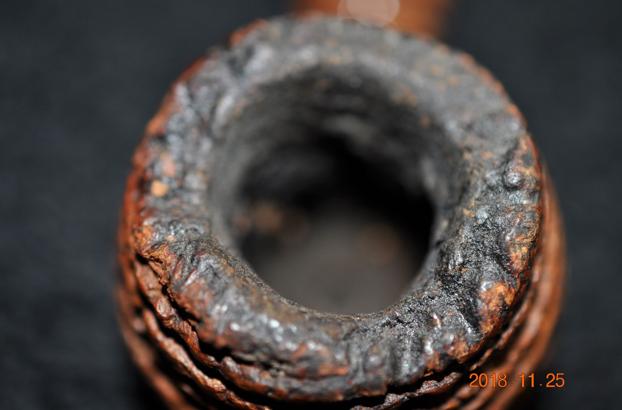
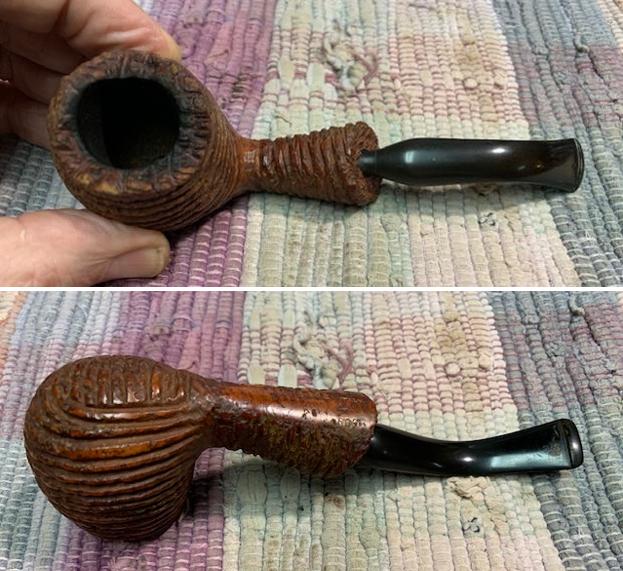
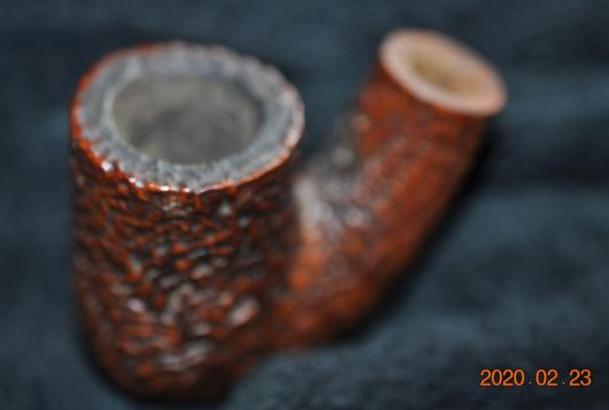
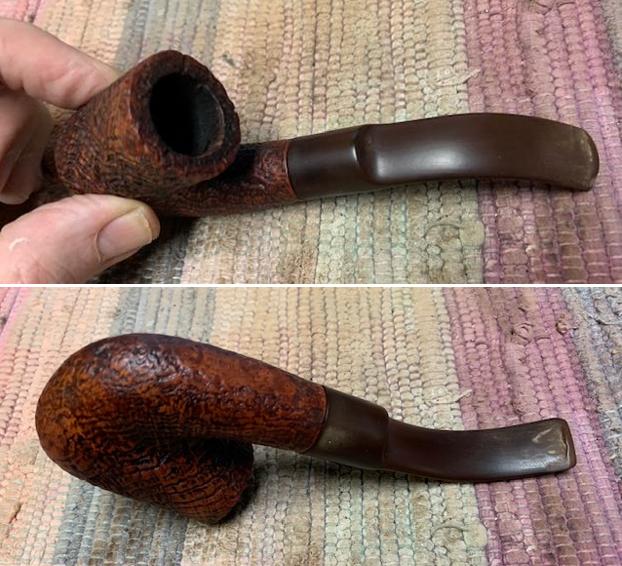
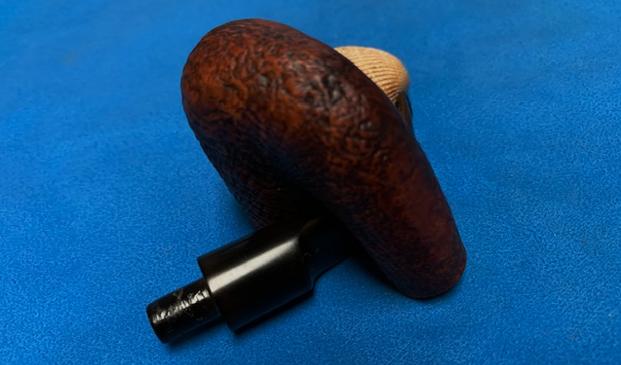
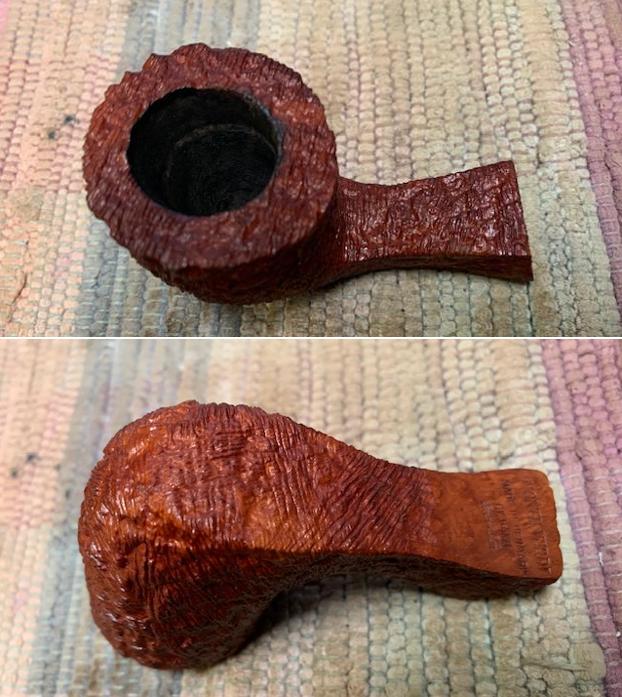
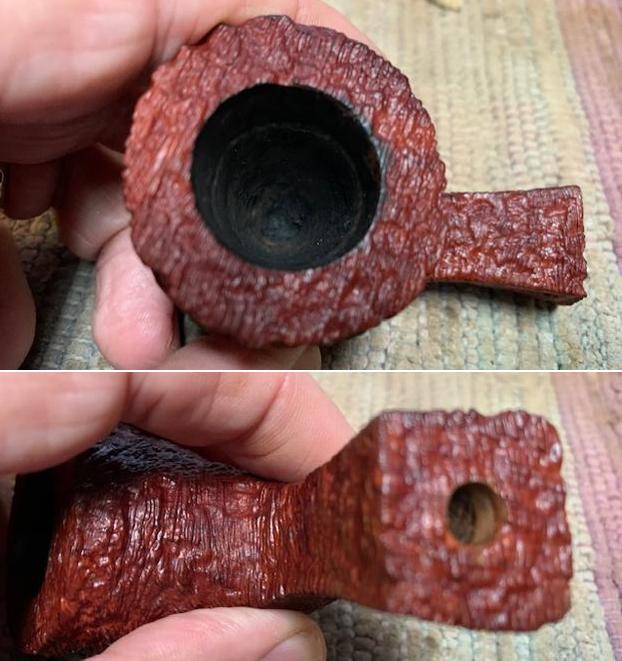
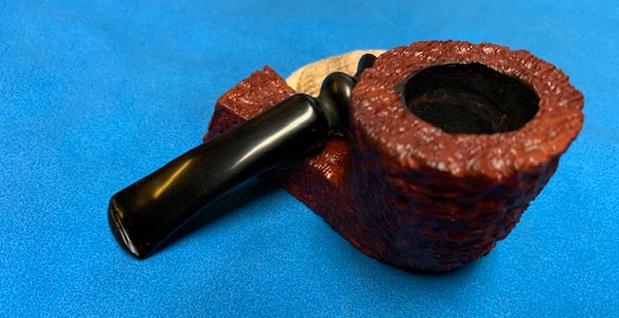
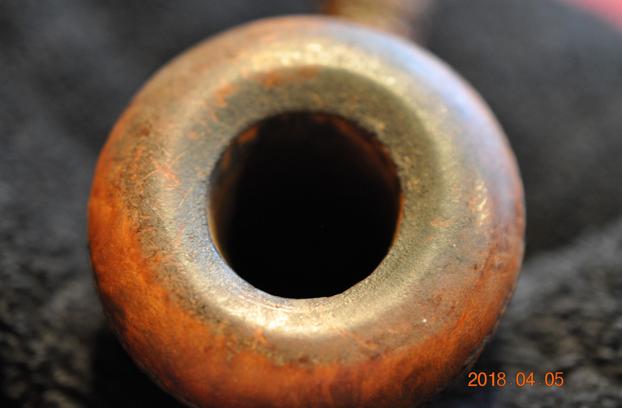
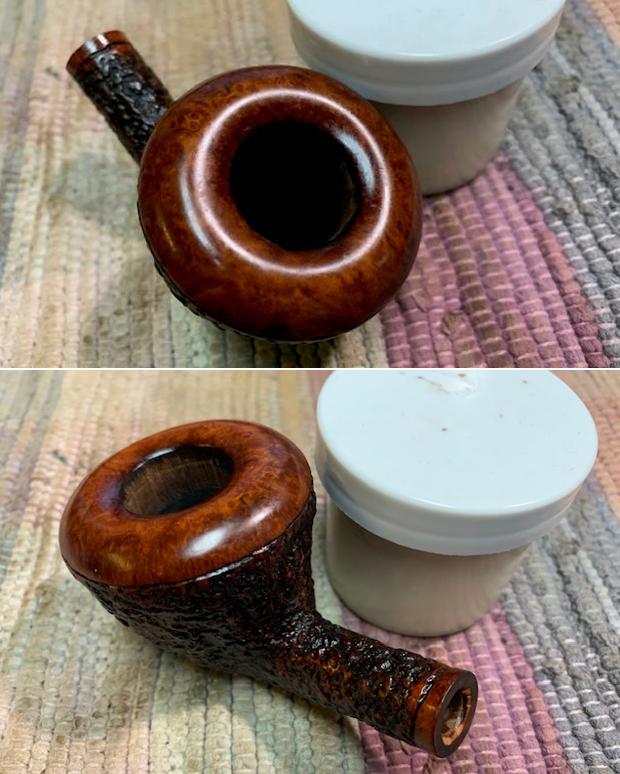
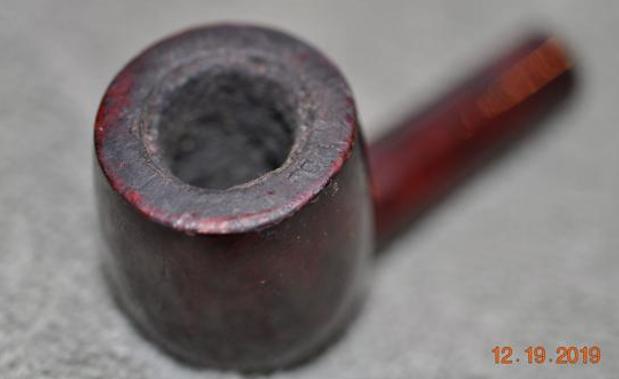
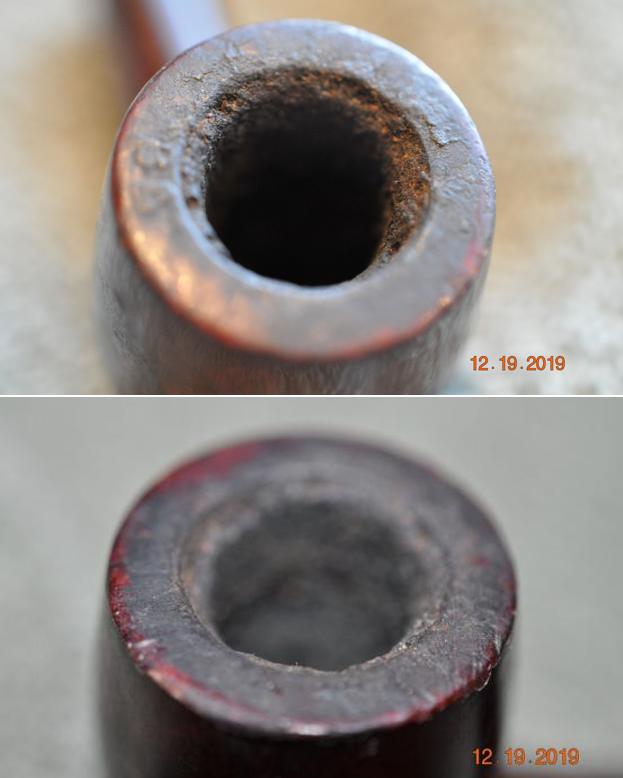
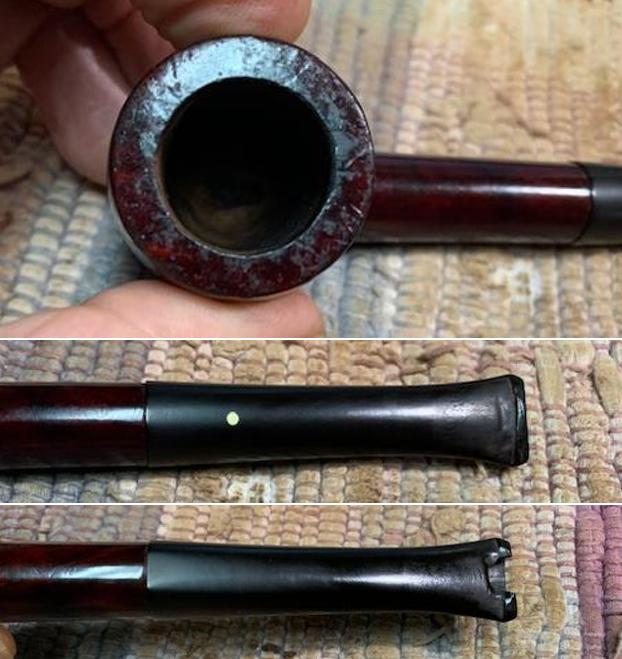
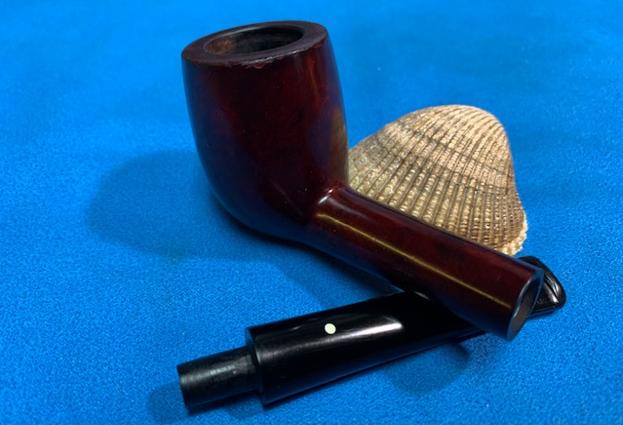
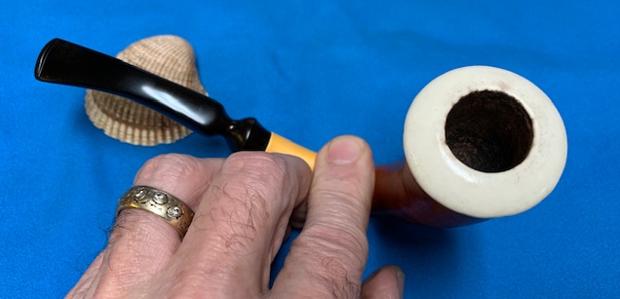
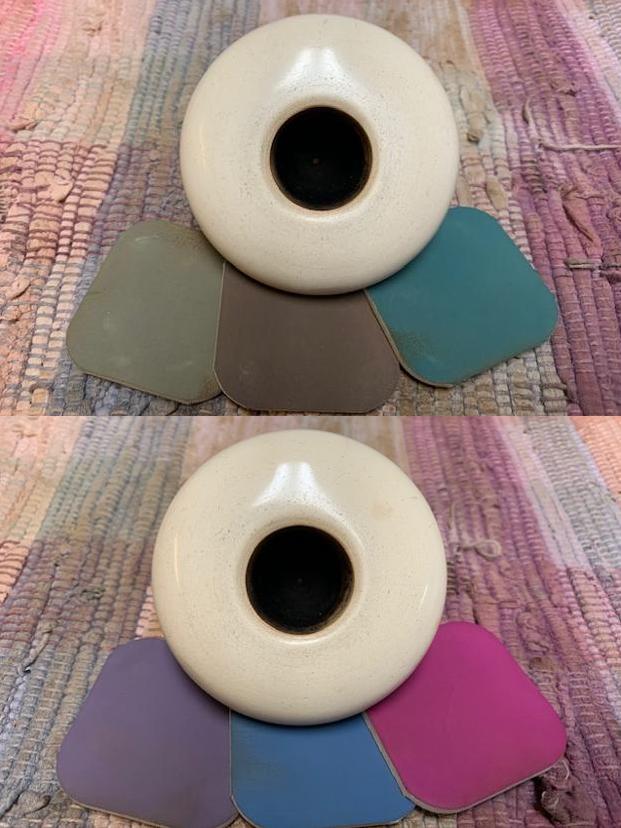
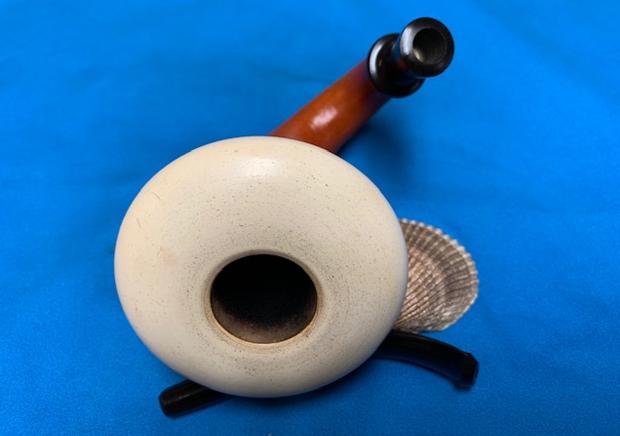
 The seller also included photos of the rim top and bowl to give a clear picture of the condition of the rim top and bowl. It was in very good condition with a light cake in the bowl. He also took photos of the stem that was on the pipe. You can see that the shank and stem have different diameters. You can also see the chip off the end of the stem in rubber Softee Bit.
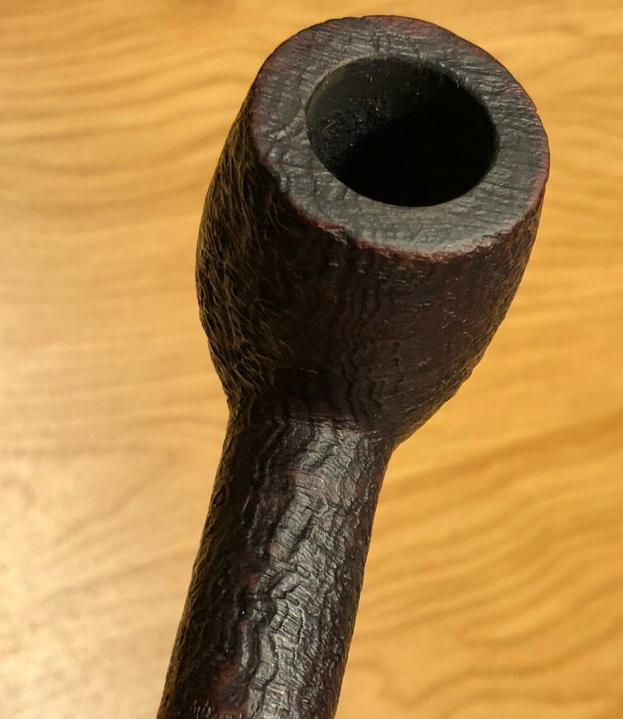
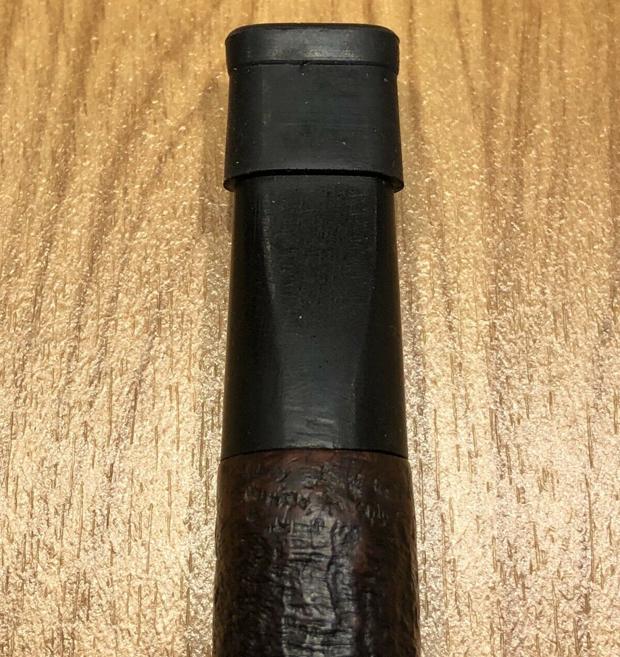
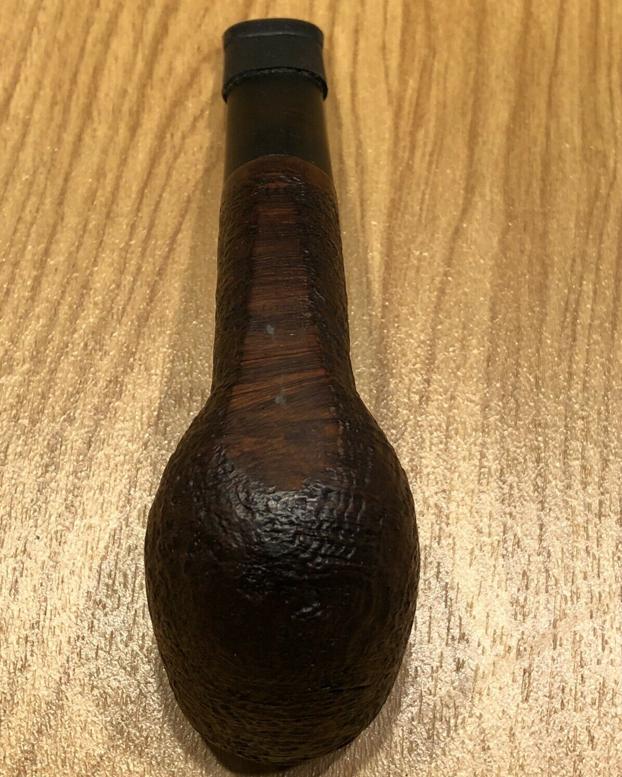
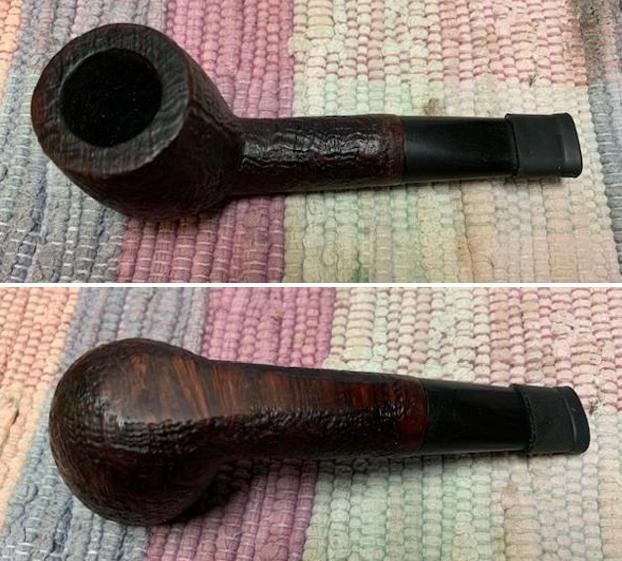
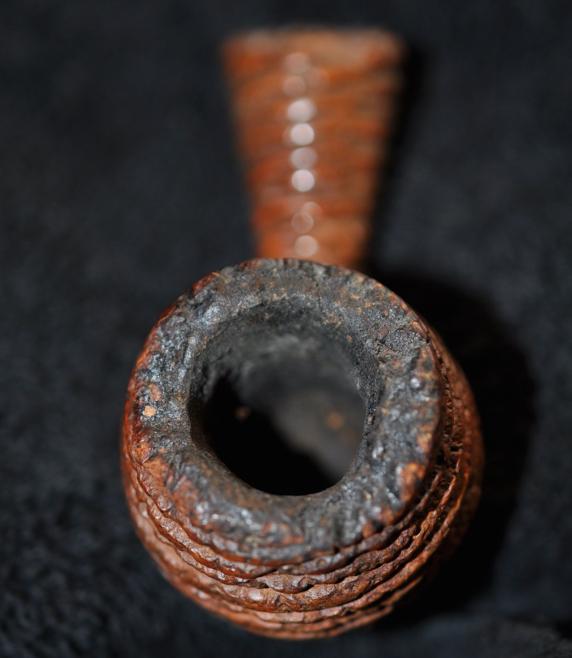
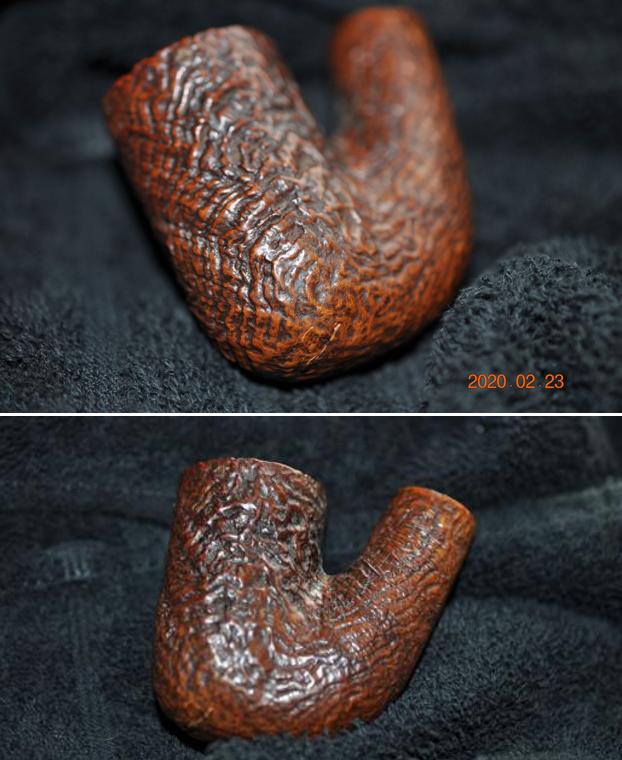
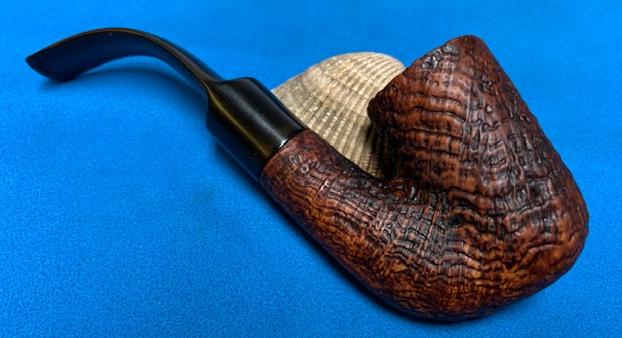
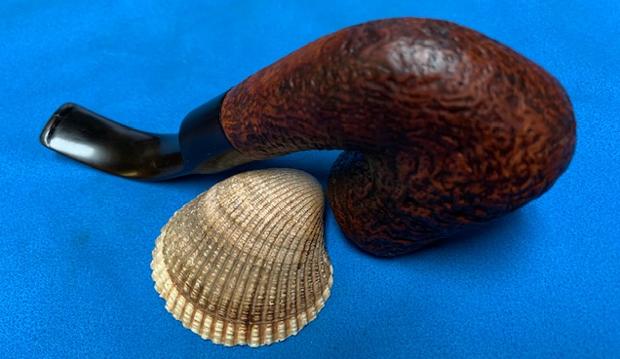
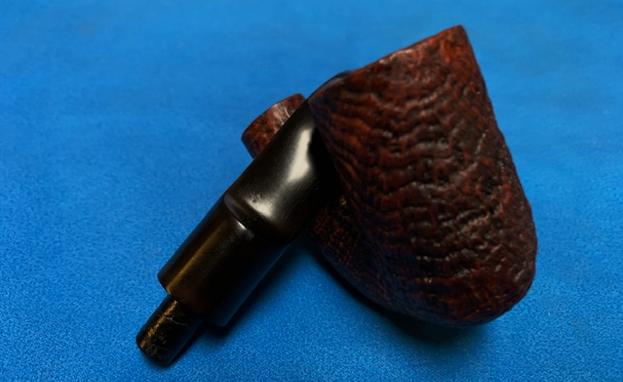
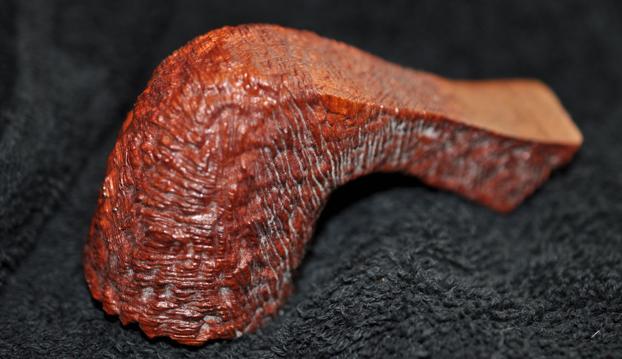
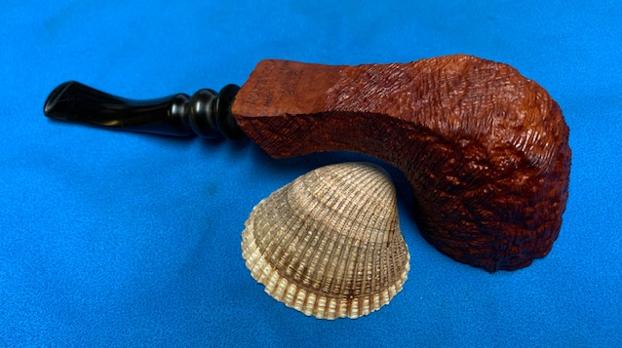
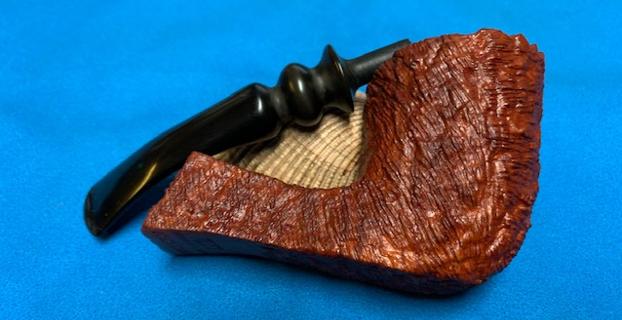
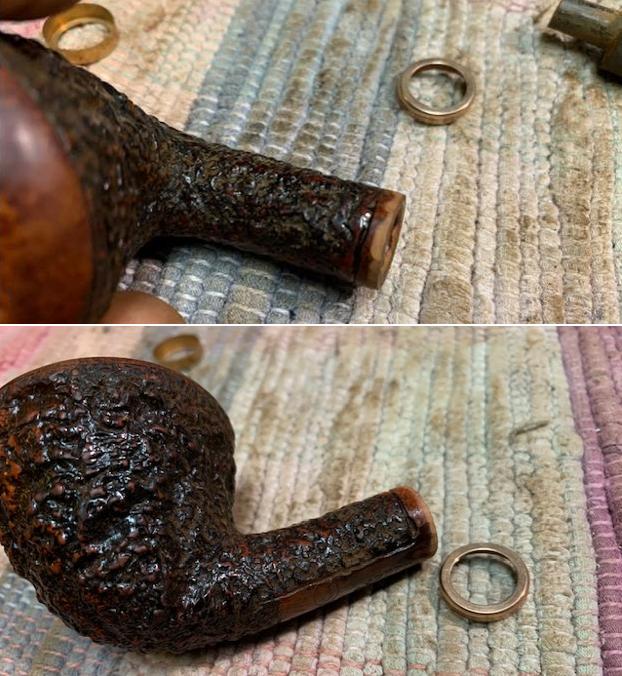
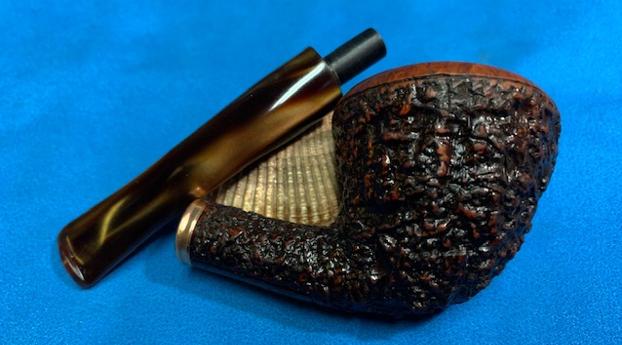
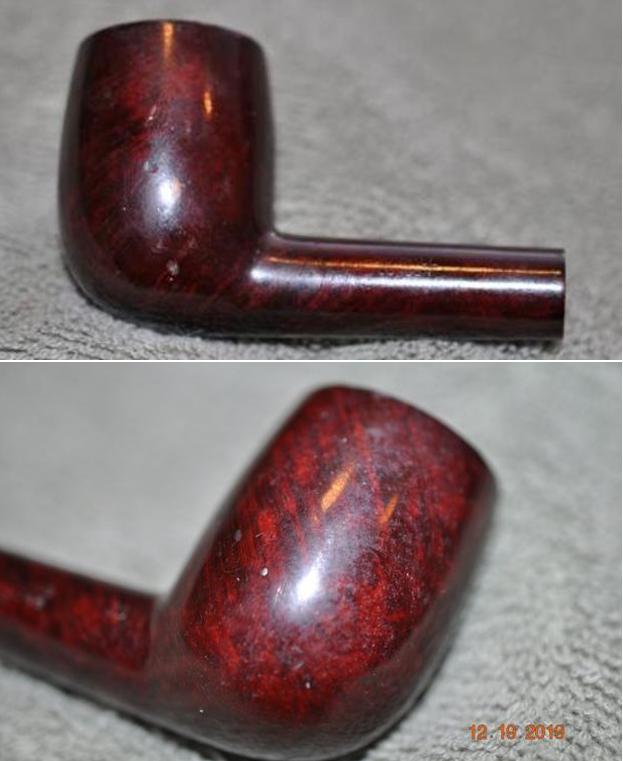
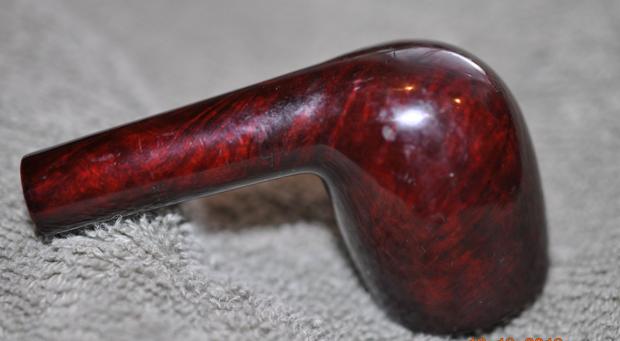
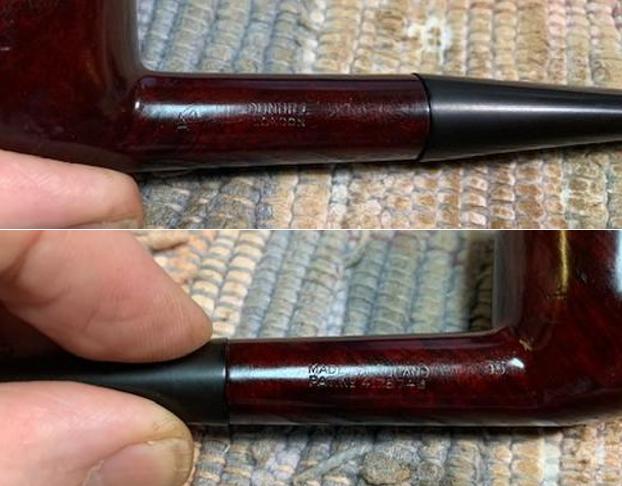
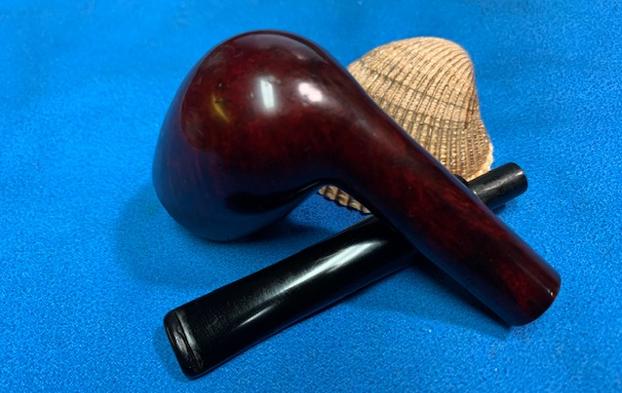
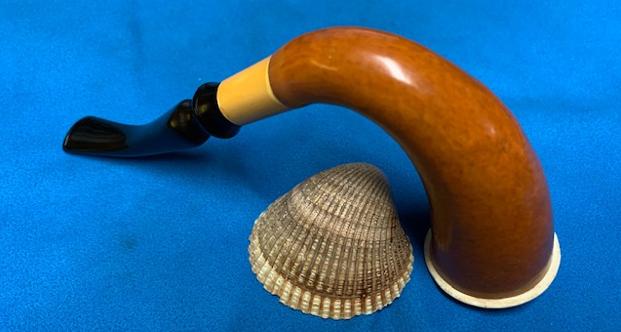
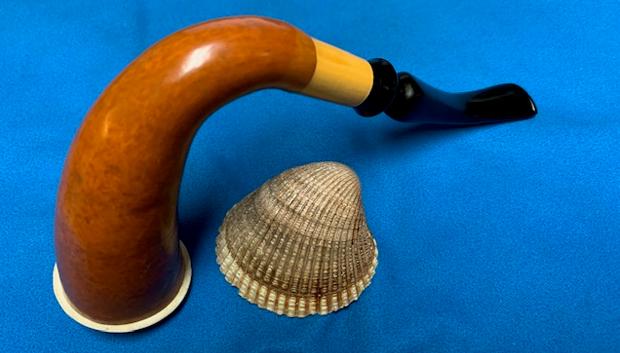
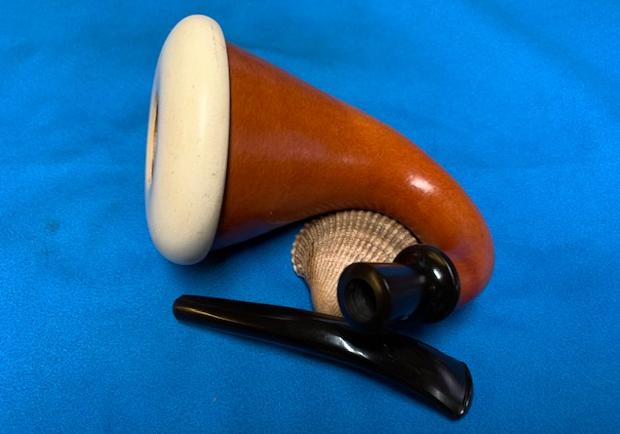
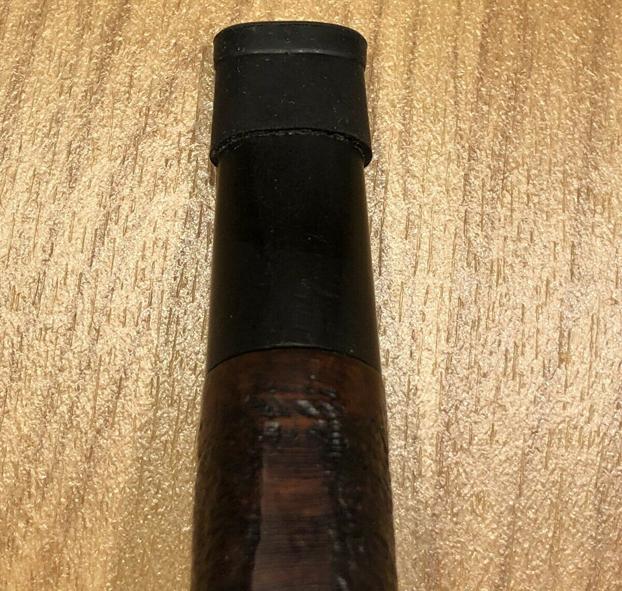 The seller included photos of the sides and heel of the bowl to give a picture of what the briar looked like. There is some nice grain showing through the sandblast around the sides. You can also see the way the shank has been sanded to meet the stem… it is quite obviously a poor fit.
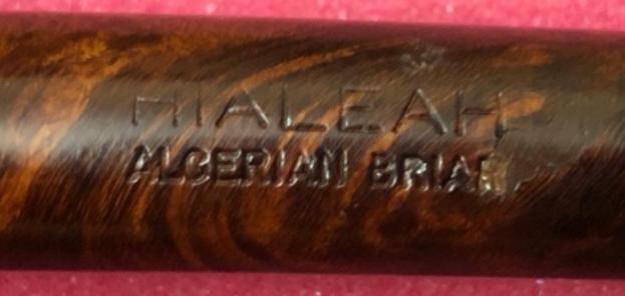
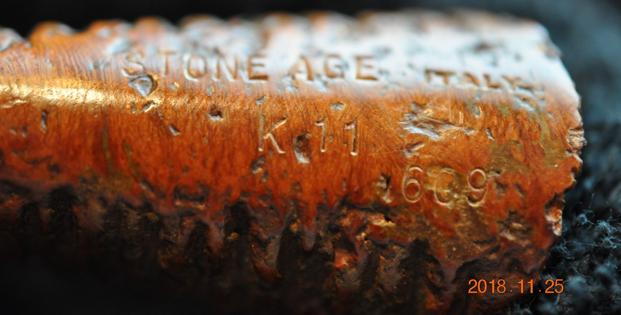
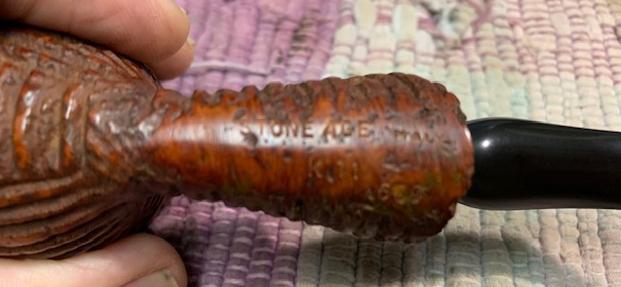
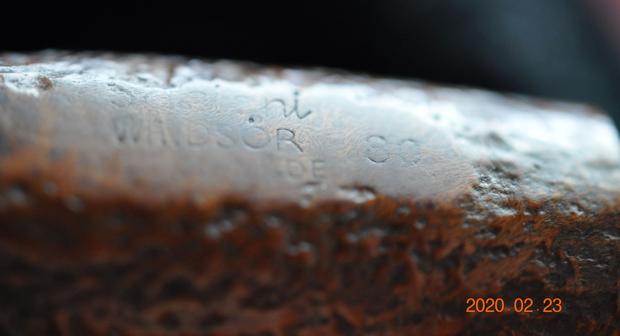
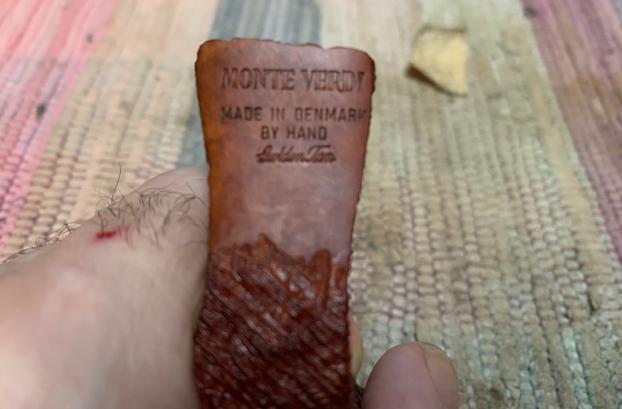
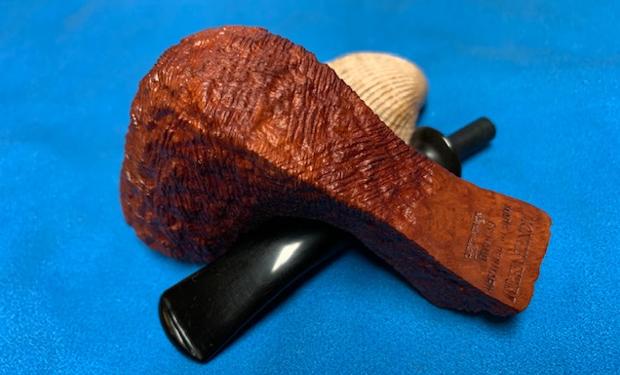
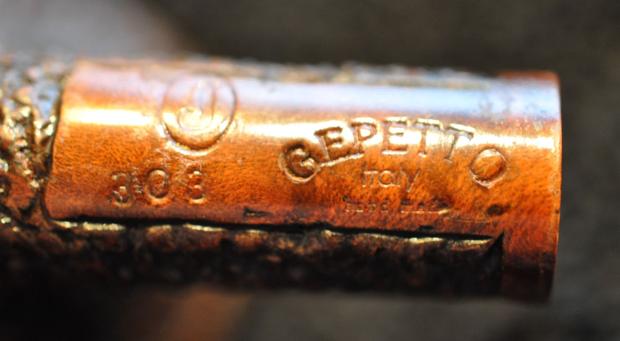
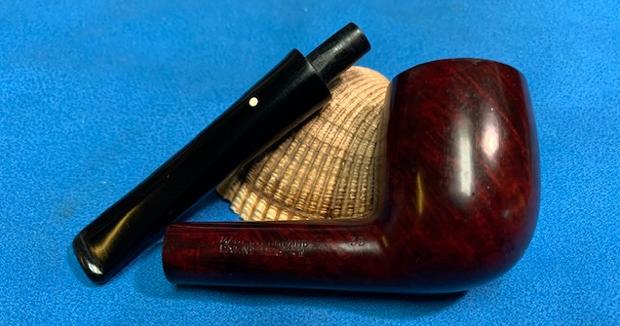
 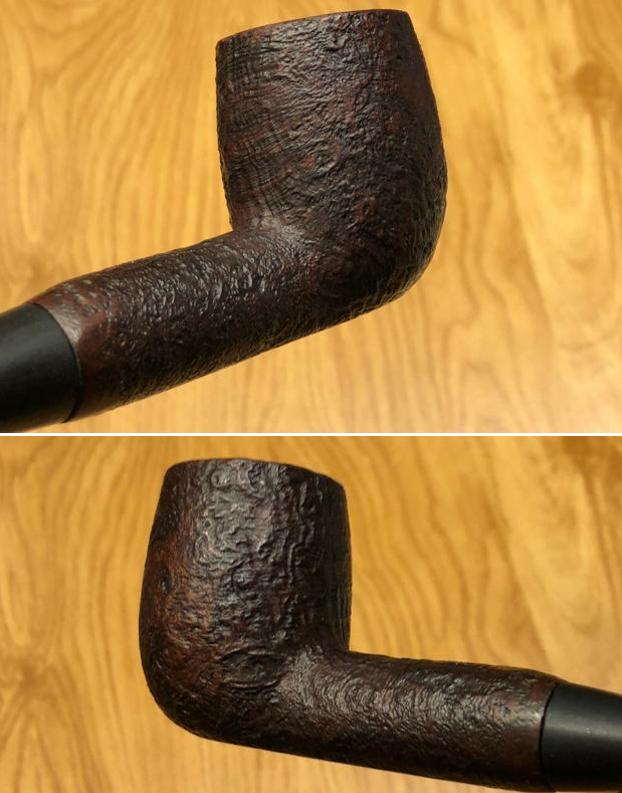 The stamping on the underside of the shank was also shown in the seller’s photos. It was clear and readable – ABDULLA [over] Dribaccy Pipe [over] Shank Skin.
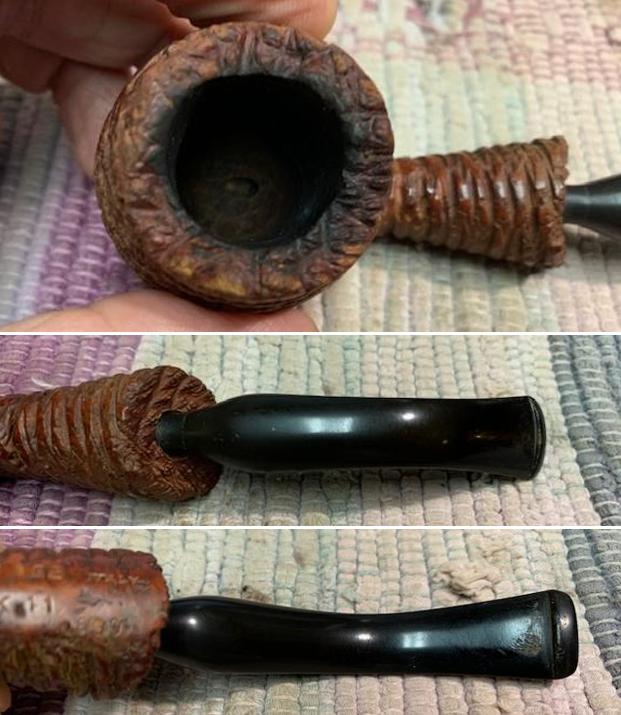
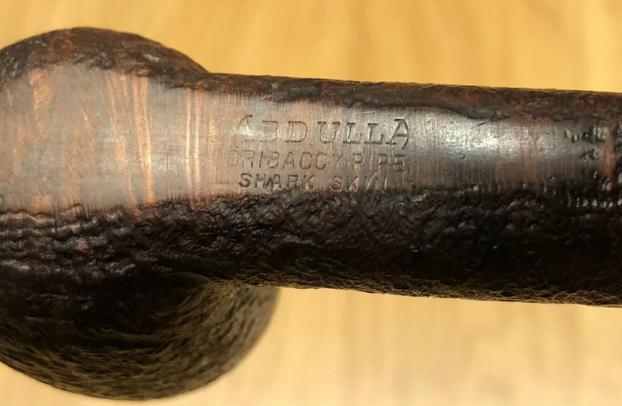 He also took a photo of the bowl with the stem removed. The stem has a very short filter tenon that has been cut down and shortened to fit.
 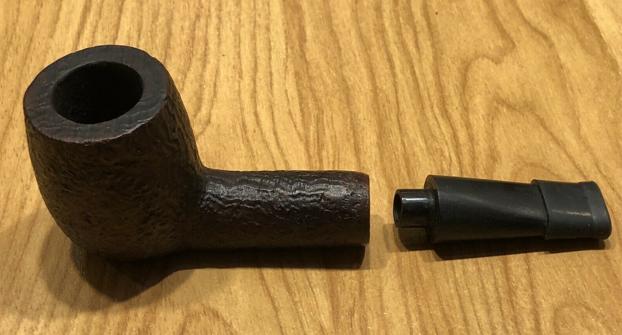 I sent Baker my assessment of the pipe. I let him know what I saw in terms of the bowl and the stem and my thoughts about it being a poorly fit replacement. I also told him about the way that I thought the stem was reshaped and tapered to match the stem diameter. I also mentioned what I thought about the button being broken off and the rubber Softee Bit covering the damaged stem. Baker thanked me and said he was reconsidering about the pipe. Not long after that I received another email from him that I have included below.
Hey Steve…
I received the Abdulla pipe today and have enclosed a few additional photos that may give you a closer look at the suspect areas. The bowl is in good shape but doesn’t show much of a cake. I’m wondering if the original stem wasn’t lost or broken. It’s a filter pipe, which I hadn’t realized but that doesn’t surprise me either.
Are you willing to tackle it? I don’t have a lot invested here. I’d just like to give it a rescue and spend some enjoyable time with it if I can.
Best regards, Baker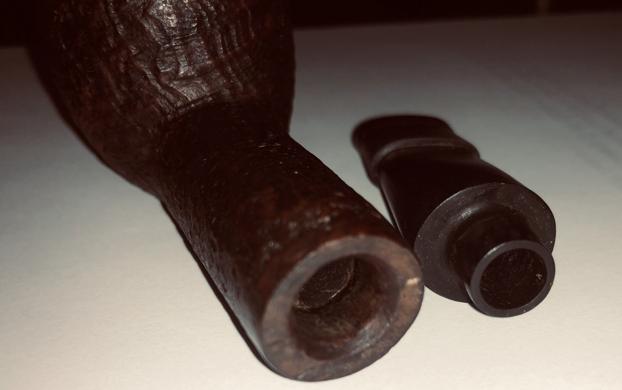
 I wrote back and told him I would take it on and see what I could do. Before it arrived I did a bit of research on the brand and have included that below.
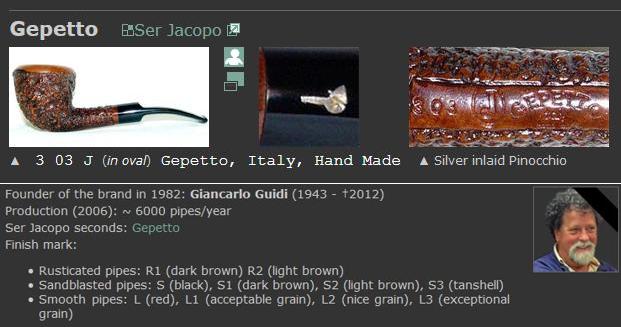
I turned to Pipephil (http://pipephil.eu/logos/en/logo-a1.html) to find if there as any information included on the brand. There was very little information listed. It states that it is a brand of the Abdulla & Co. Ltd. I have included a screen capture of the listing for the brand. I turned then to Pipedia (https://pipedia.org/wiki/British_Pipe_Brands_%26_Makers_A_-_D). There was limited information there on the brand. It stated that it was “A brand of Abdulla & Co Ltd.”
I googled Abdulla & Company Ltd to see what I could find. There were several links that gave some interesting information. The first of these includes some information on the company. It seems to have existed from 1917-1927 when it was purchased by Godfrey Phillips which kept the company name. (http://www.cigarettespedia.com/index.php/ManufacturerAbdulla_&_Co._Ltd).
Abdulla & Company, Ltd. — The company was founded in London, England, in 1902, and were most famous for their eponymous cigarette brand, which they made in various blends (Egyptian, Virginian, and Turkish). In 1917, Abdulla moved their headquarters to 173 New Bond Street in Mayfair (formerly the location of the Fabergé shop, and currently home to Chanel), and opened a branch in the Netherlands in 1923.
Around 1927, Abdulla & Company was purchased by a larger competitor, Godfrey Phillips, which kept the company name and brands going. In 1968, Godfrey Phillips U.K. was purchased by Philip Morris International.
I also found a short listing from the UK National Archives stating that the brand was known as Cigarette Specialists and was at 173 New Bond Street in London, England. (https://discovery.nationalarchives.gov.uk/details/r/ae36e330-54d9-4988-bd5a-ffc87ab77e20).
Abdulla & Co. Ltd. (cigarette-specialists; 173, New Bond St., London, W.1).
Reference: PA/101/12/680
Title: Abdulla & Co. Ltd. (cigarette-specialists; 173, New Bond St., London, W.1).
Date: 28th June, 1929
Finally I found an interesting photo of one of their cigarette boxes that say it is and always has been an Entirely British Firm (https://collection.sciencemuseumgroup.org.uk/objects/co8102857/packet-of-ten-abdulla-cigarettes-cigarette-packet).
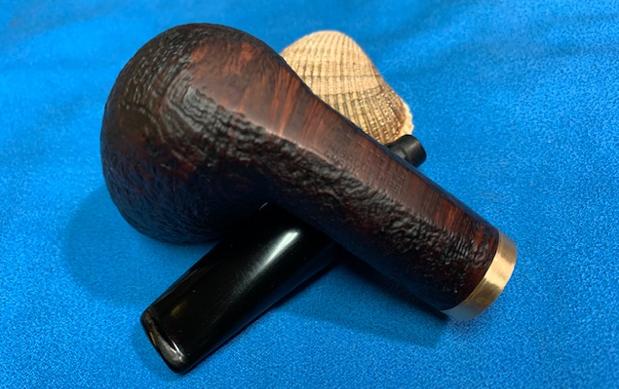
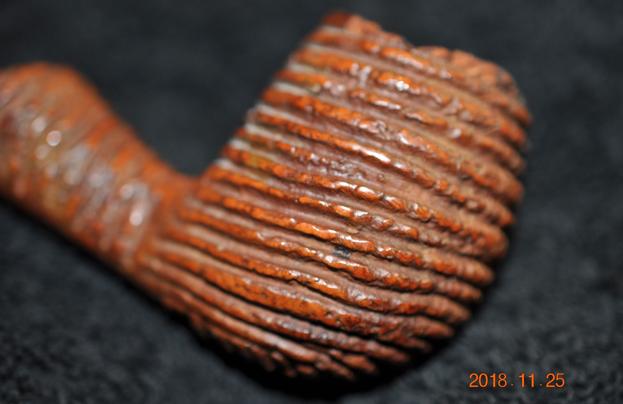
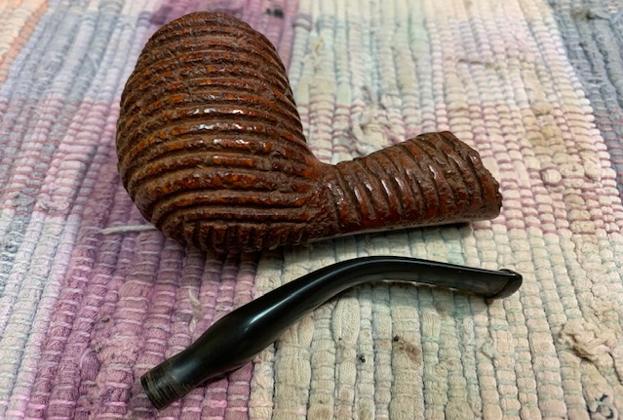
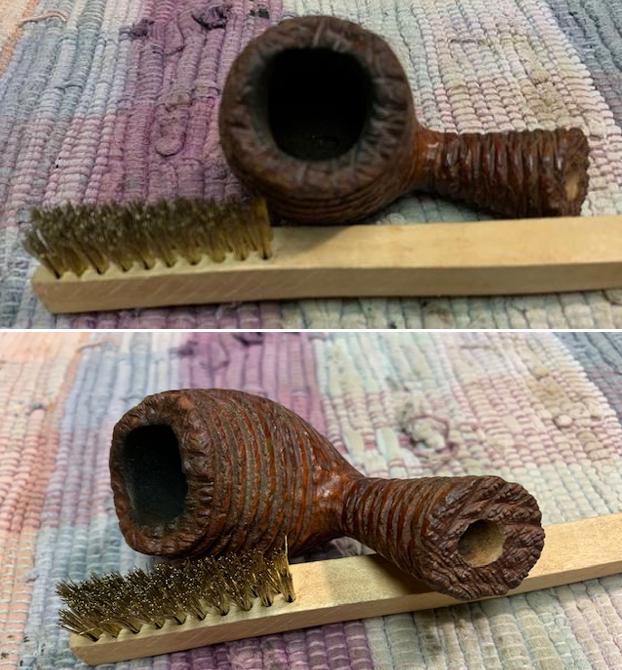
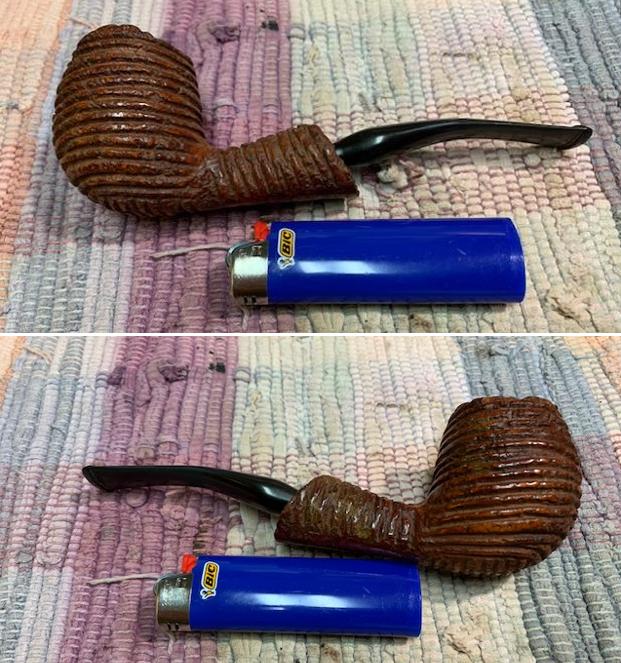
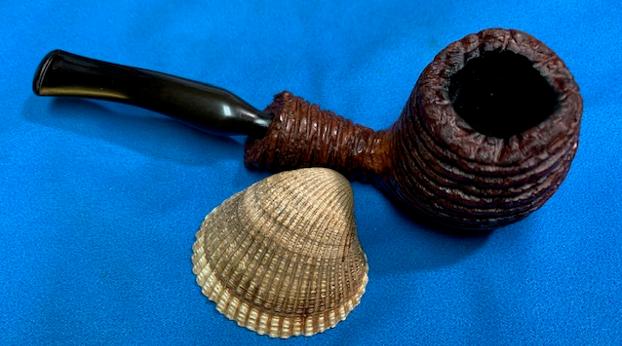
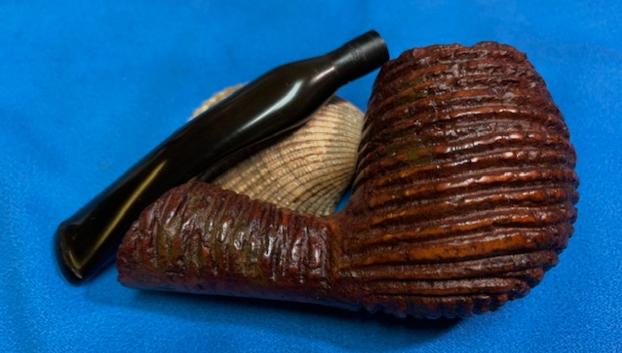
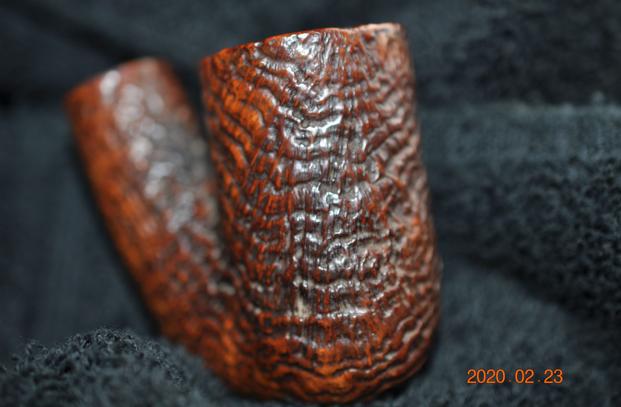
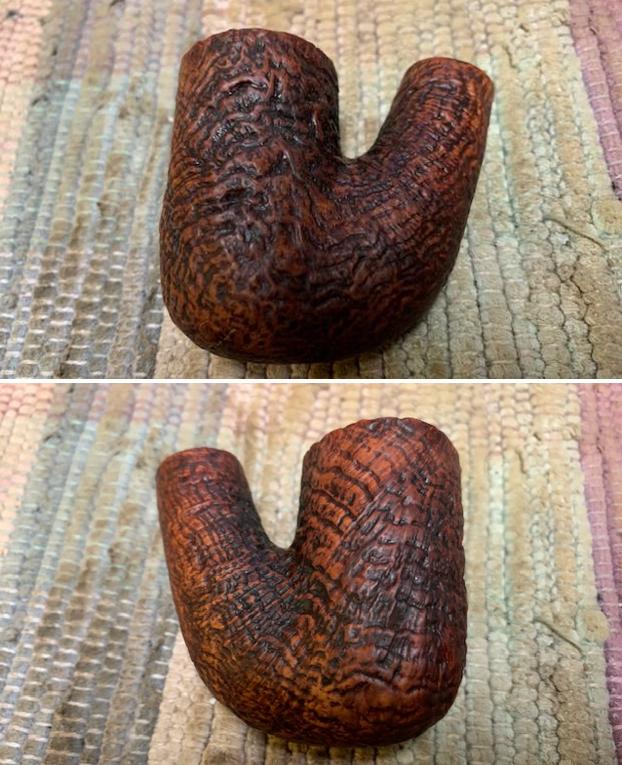
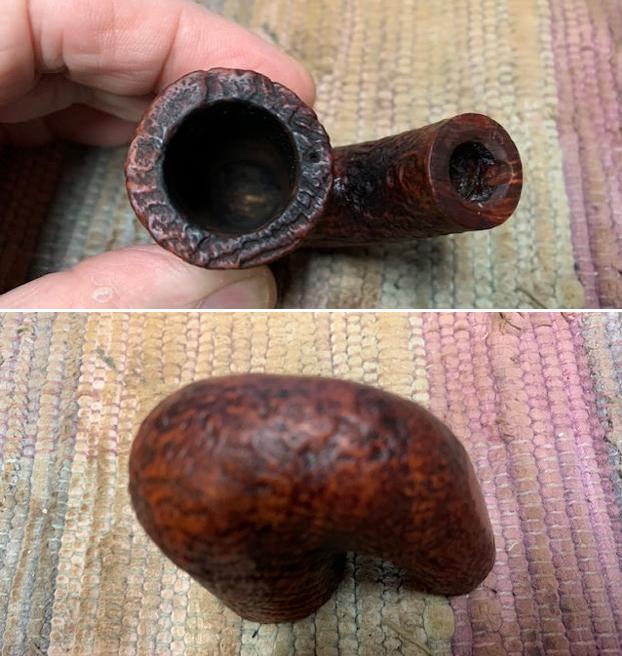
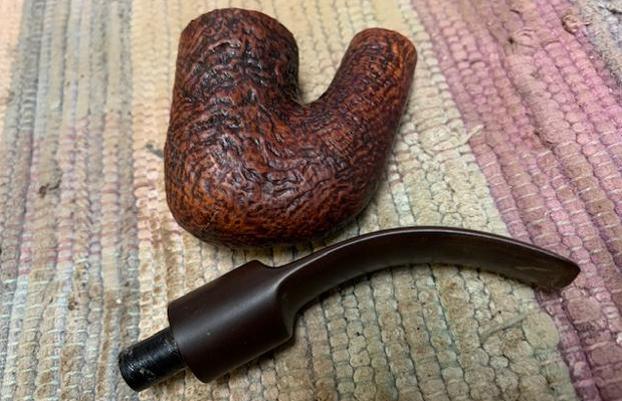
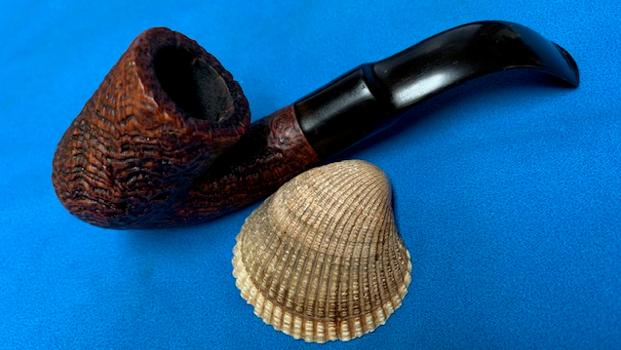
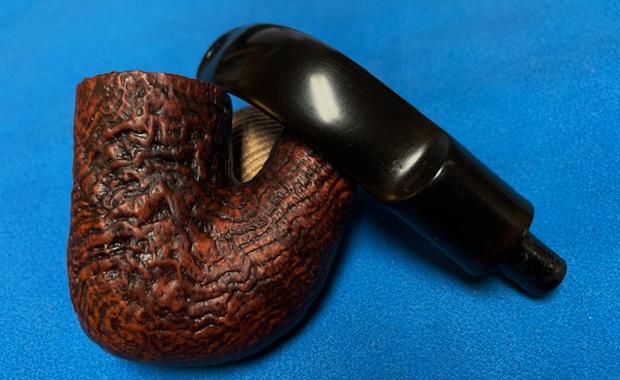
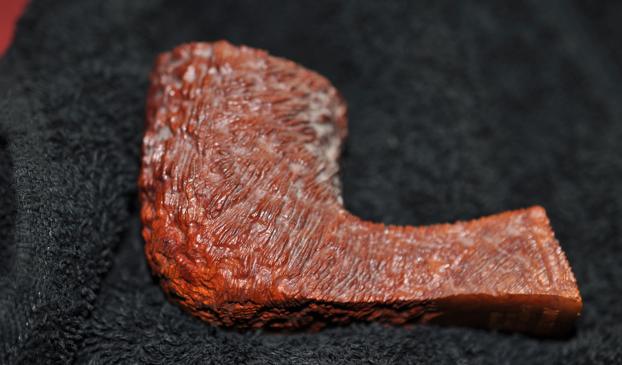
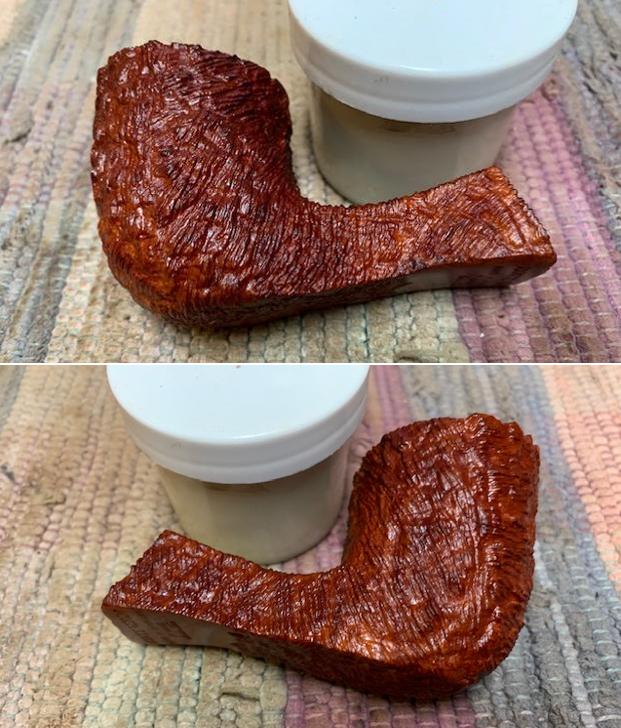
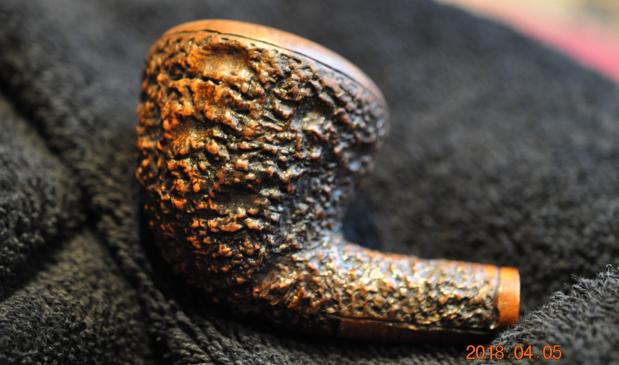
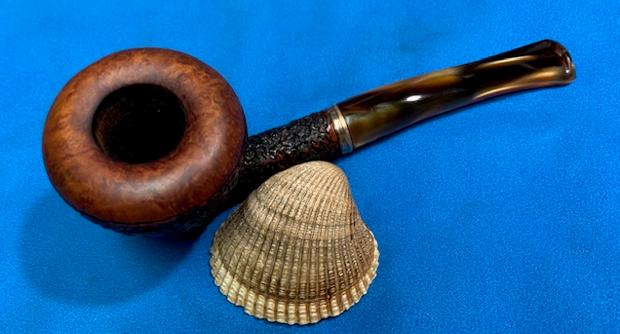
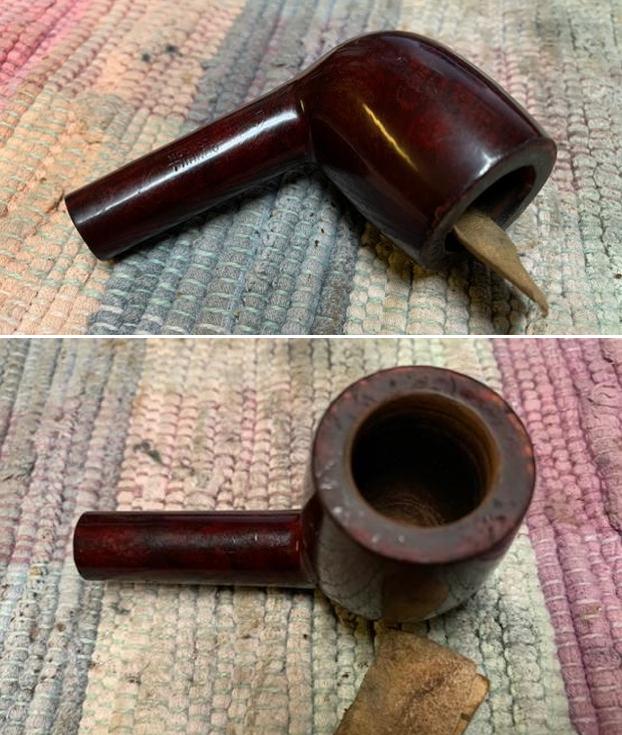
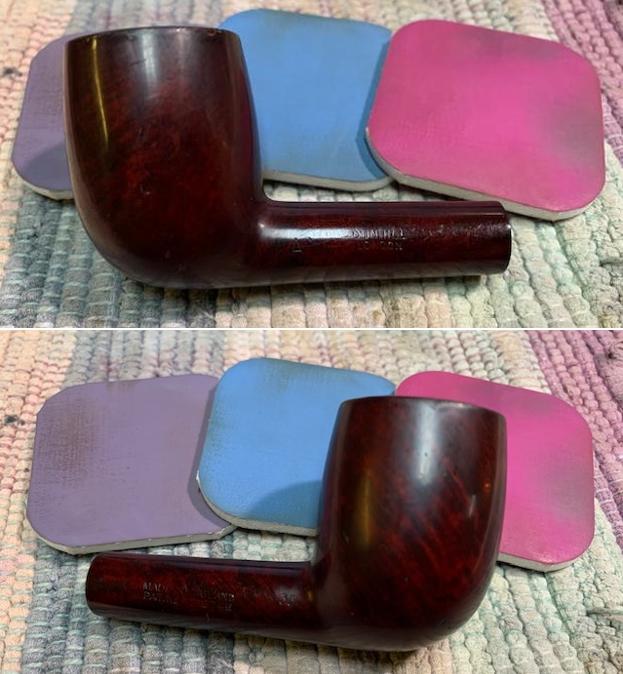
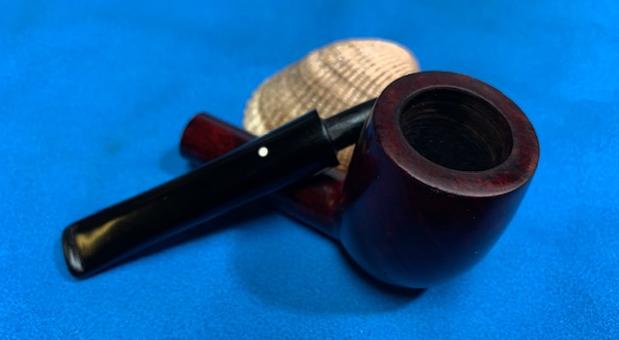
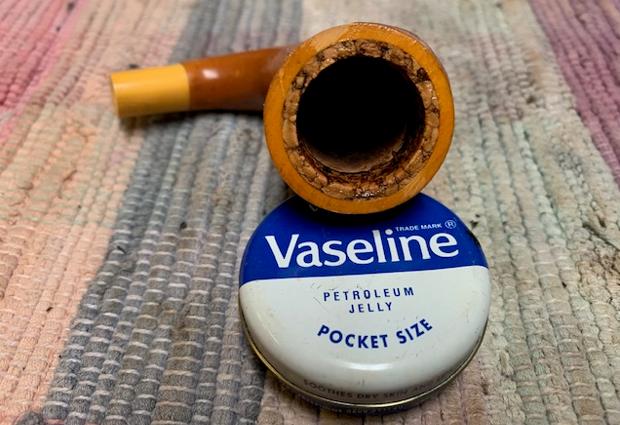
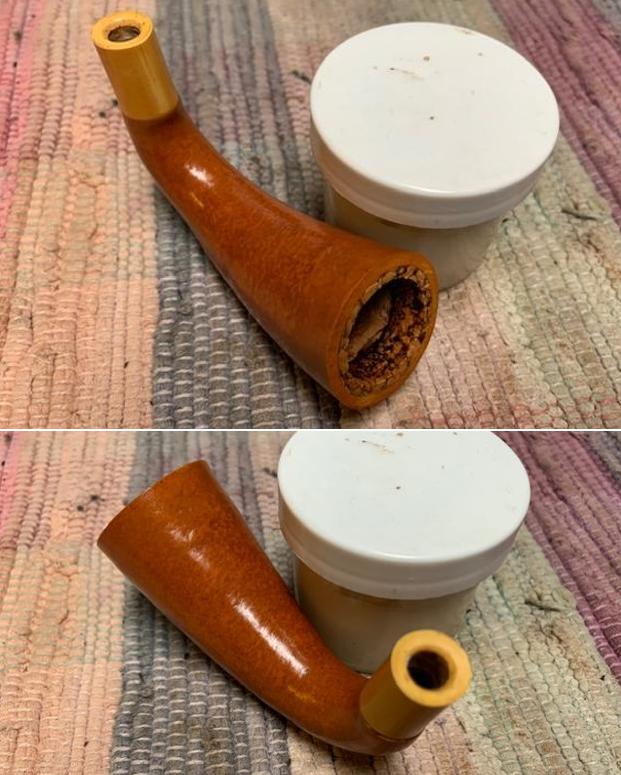
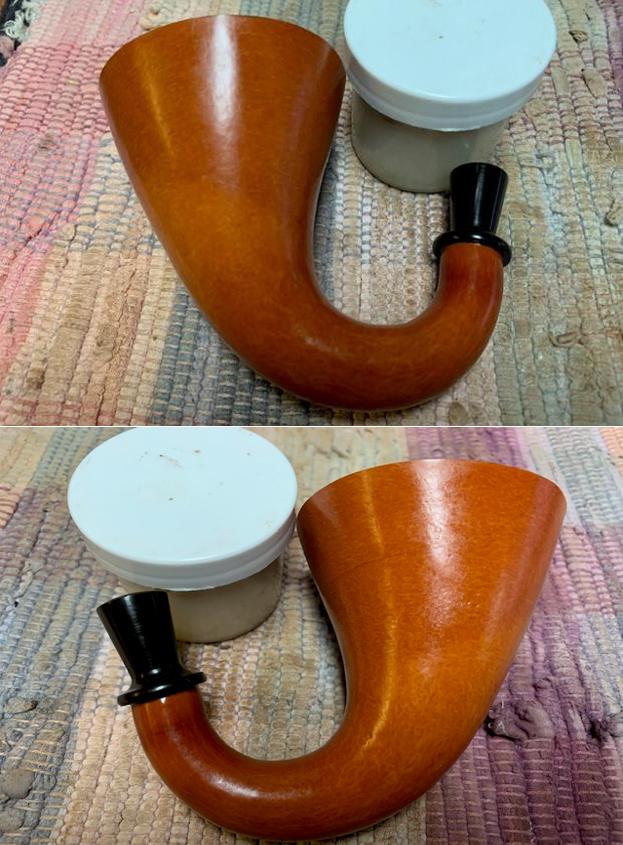
 Now it was time to work on the pipe itself. The pipe arrived this week. It was quite clean on the outside but smelled strongly of English tobaccos (which I think smells good!). The bowl had a light cake in it and the fit of stem was even more obviously wrong when I examined it. The coned end of the shank was odd for this pipe. The stem was in rough condition with a lot of file marks on the flat sides and scratching around the sides. I am always suspicious of rubber Softee Bits as they tend to be a quick fix to a bigger problem underneath. Once I removed it I would have a better idea. I took photos of the pipe when I received it.
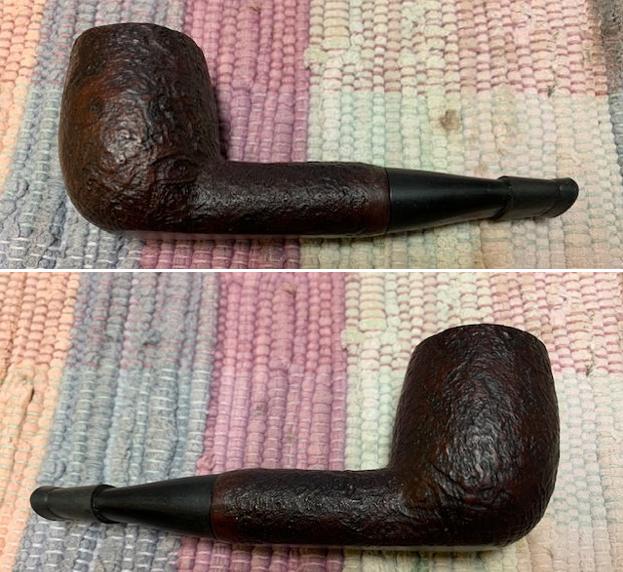
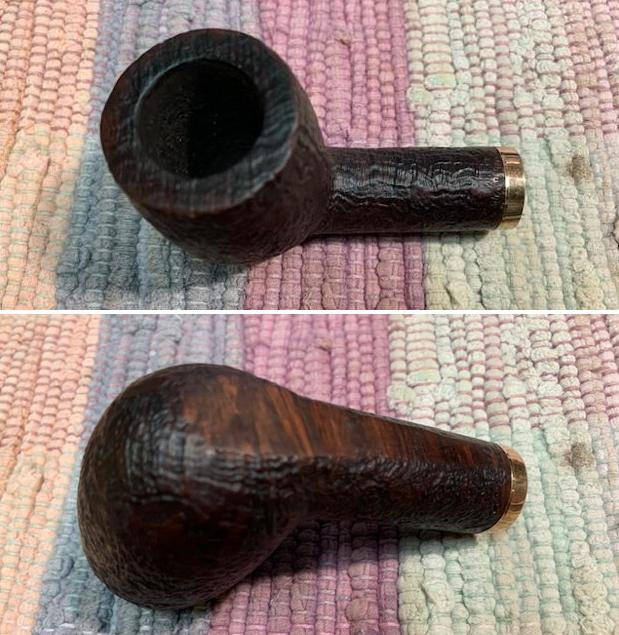
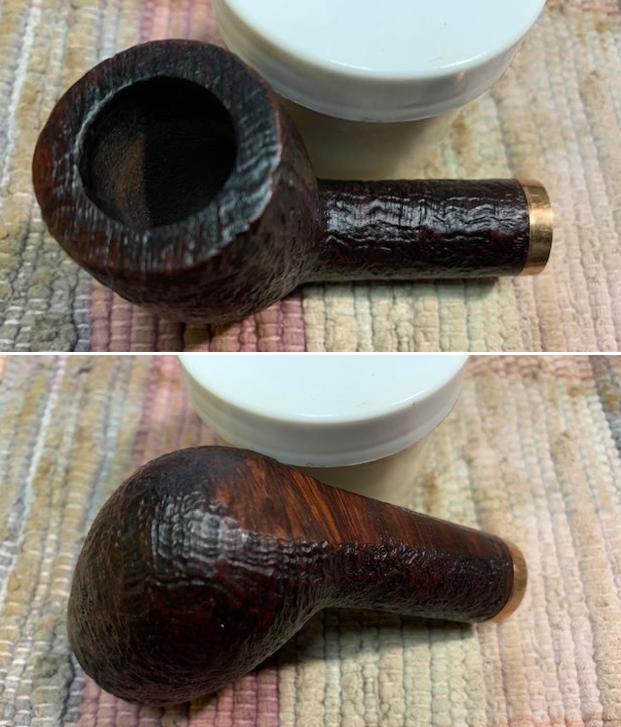
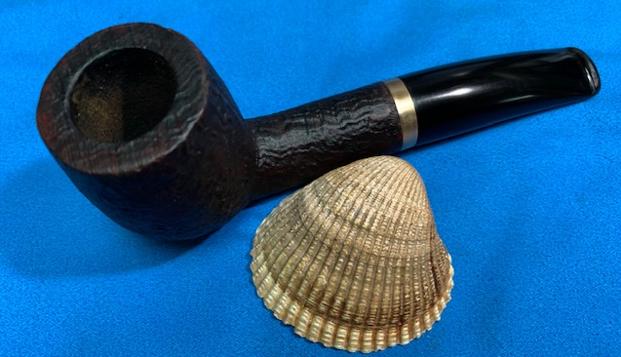
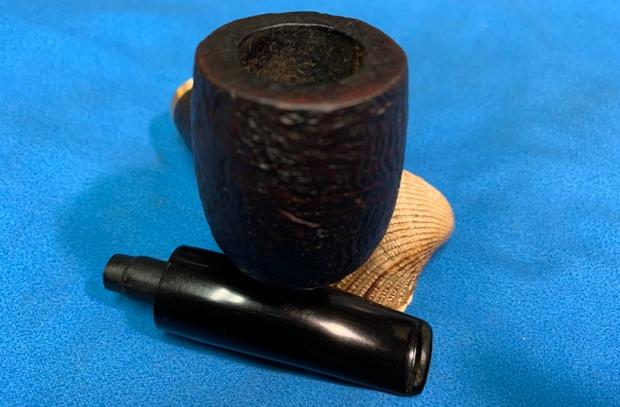
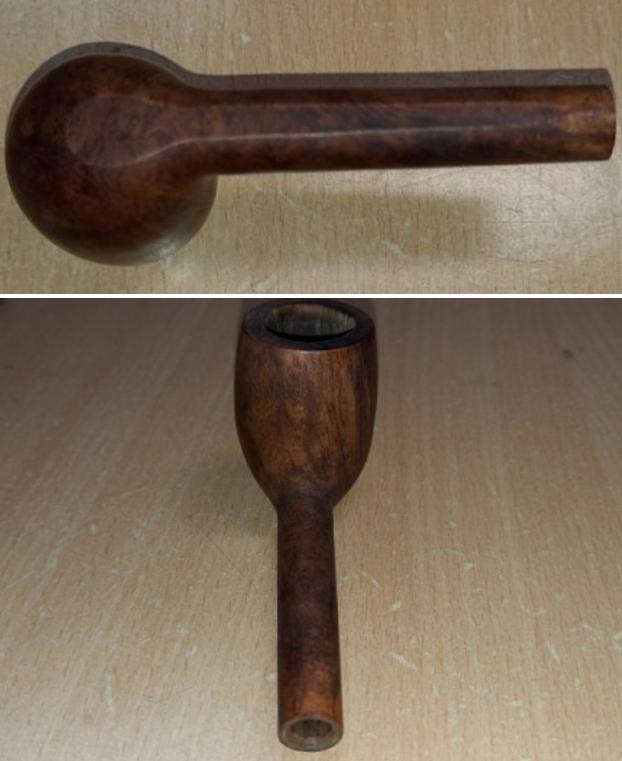
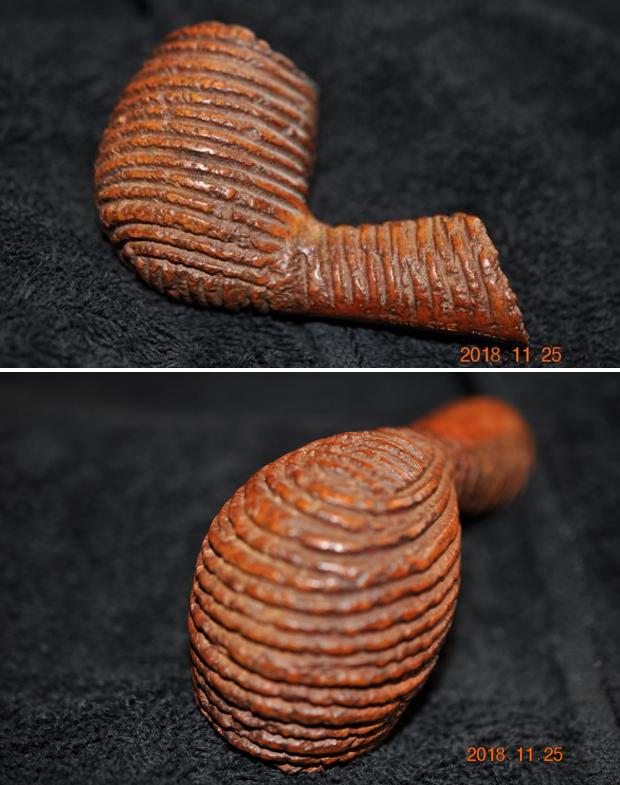
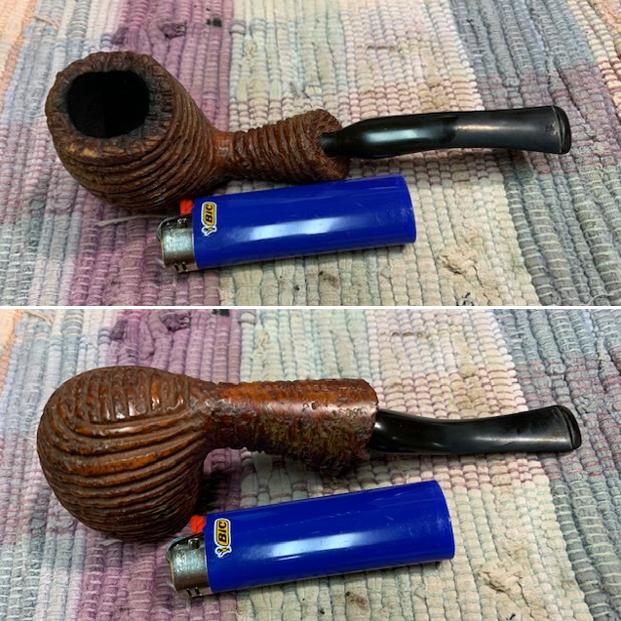
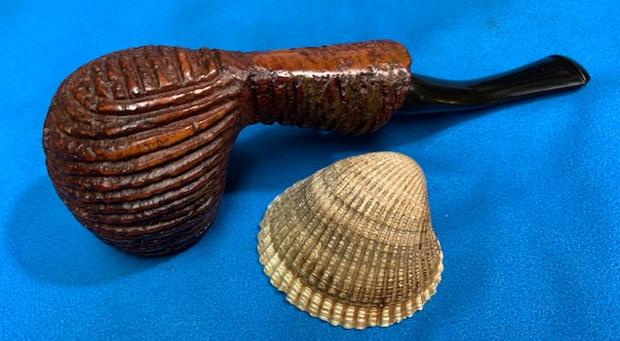
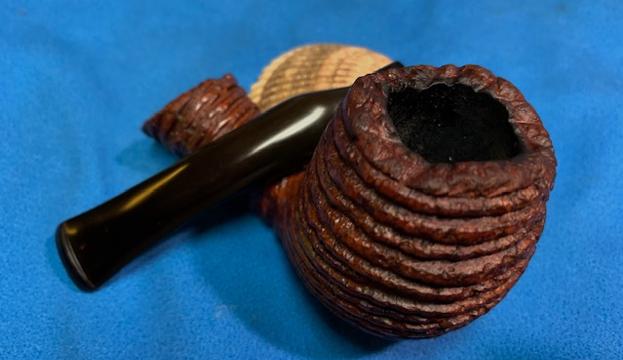
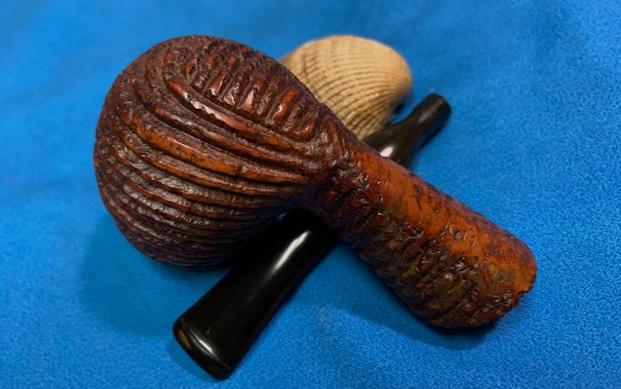
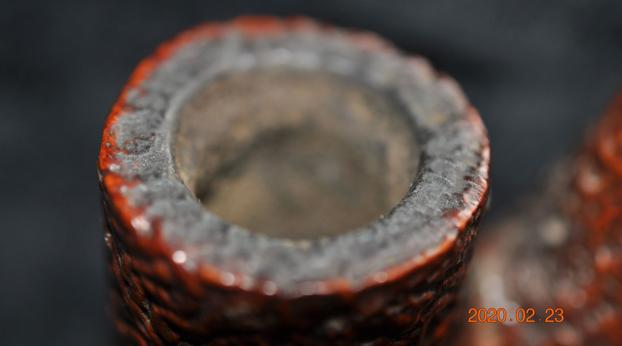
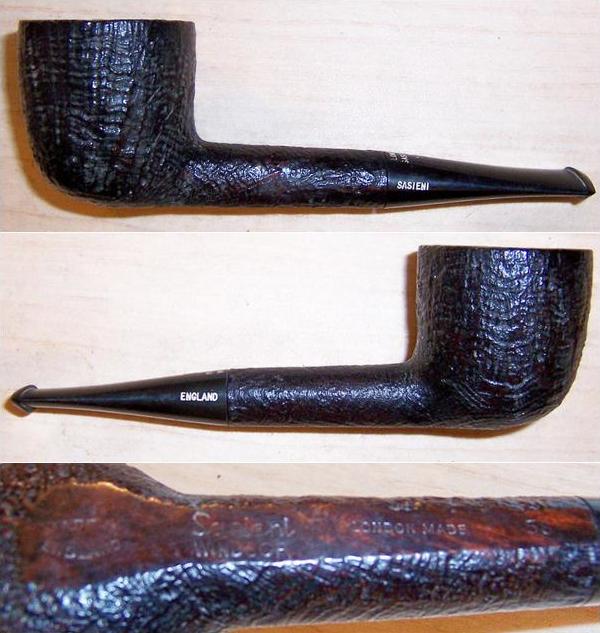
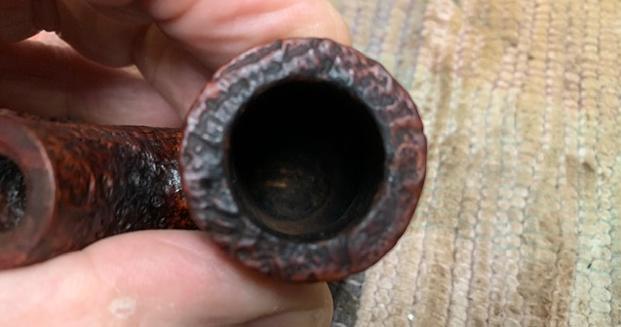
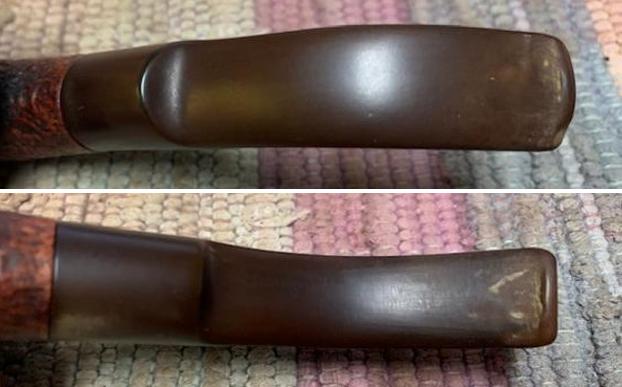
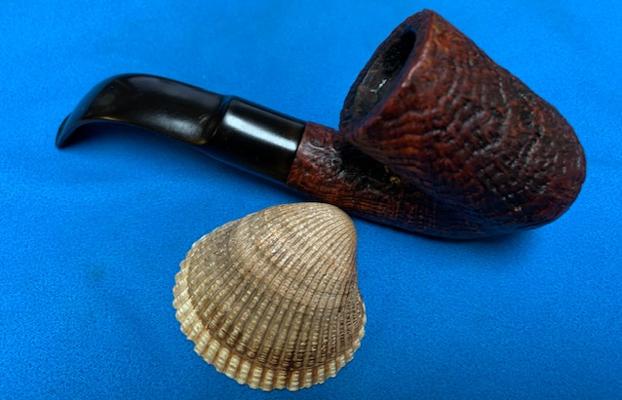
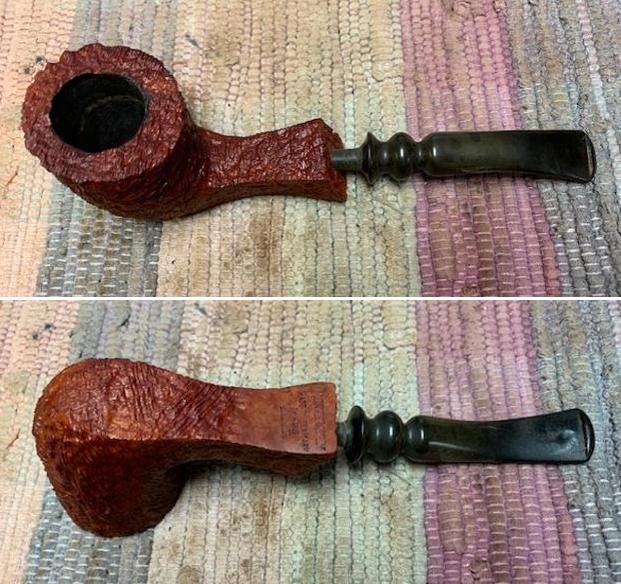
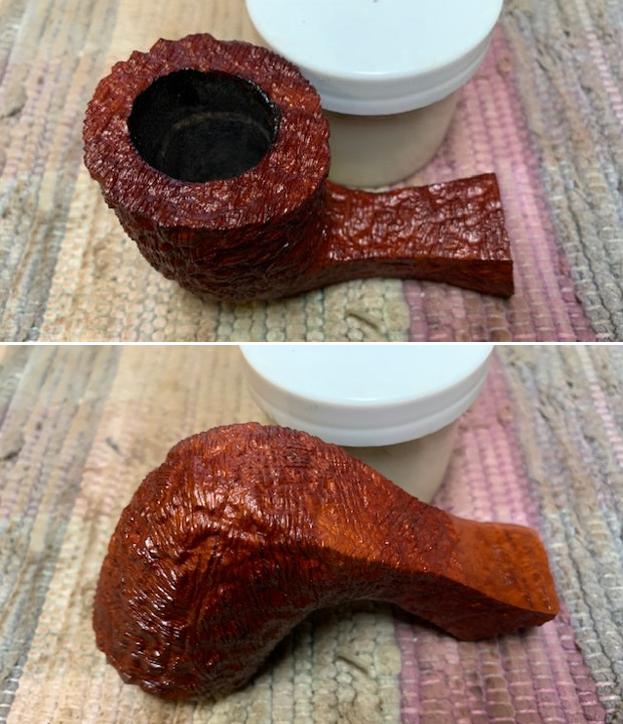
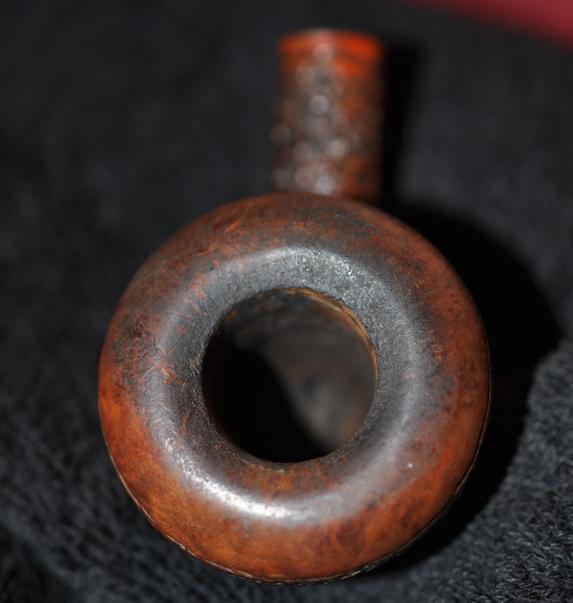
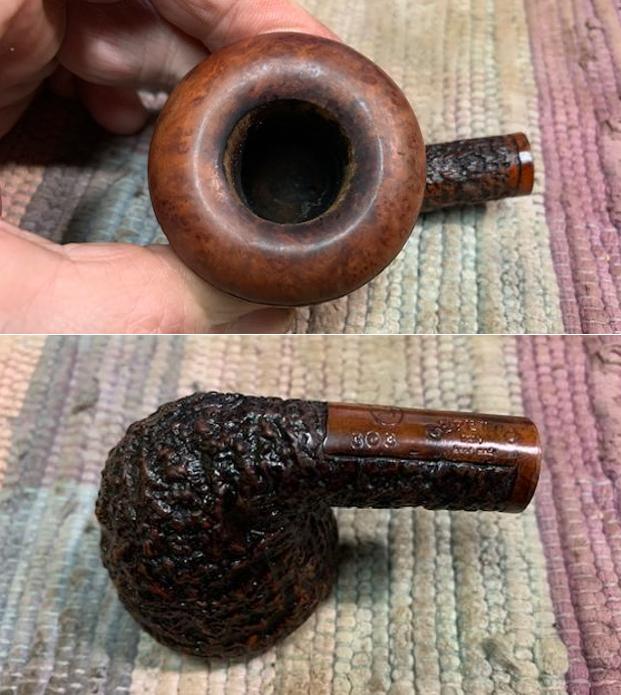
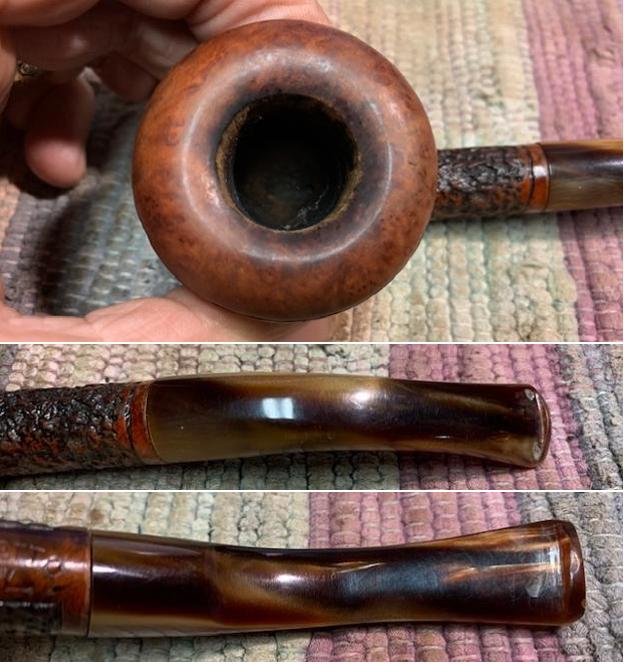
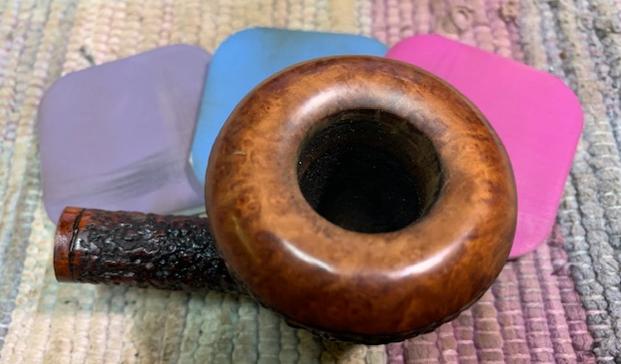
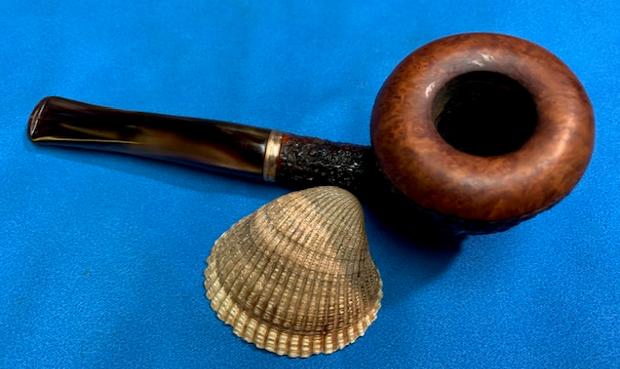
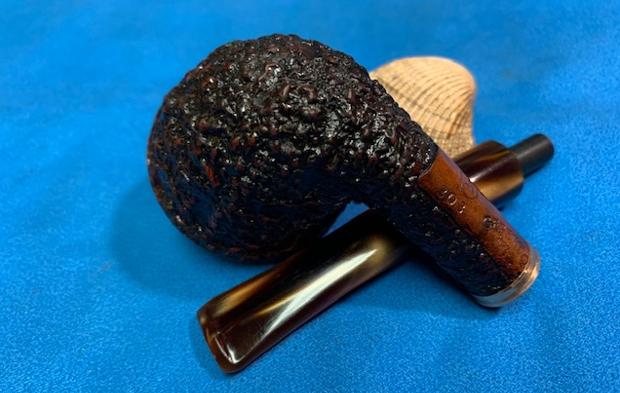
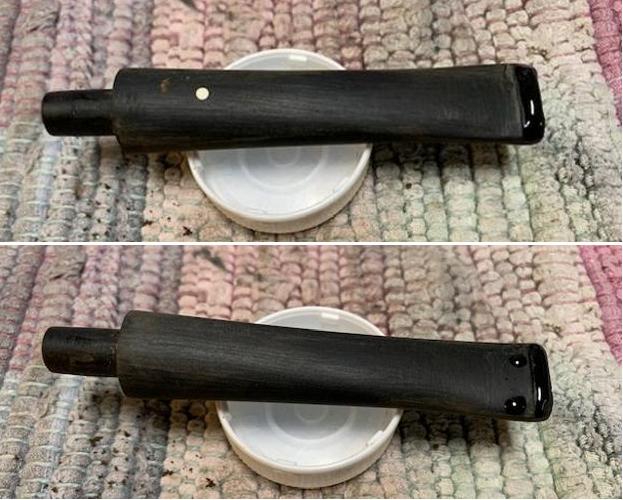
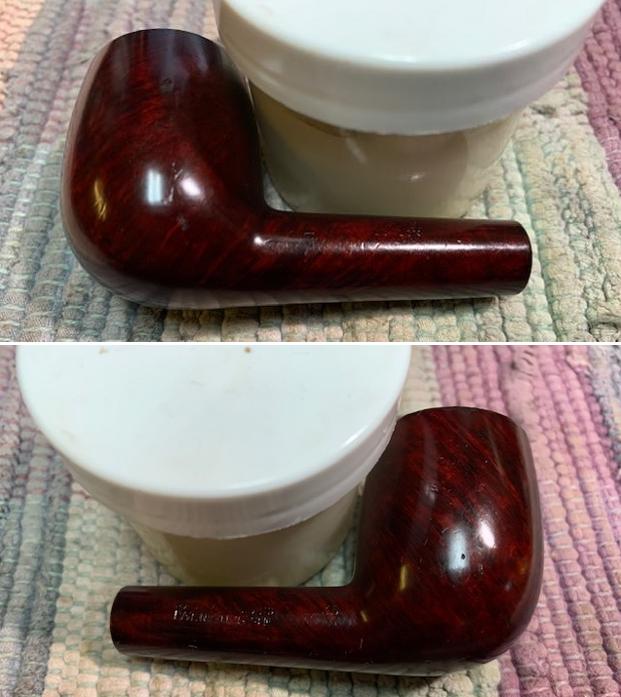
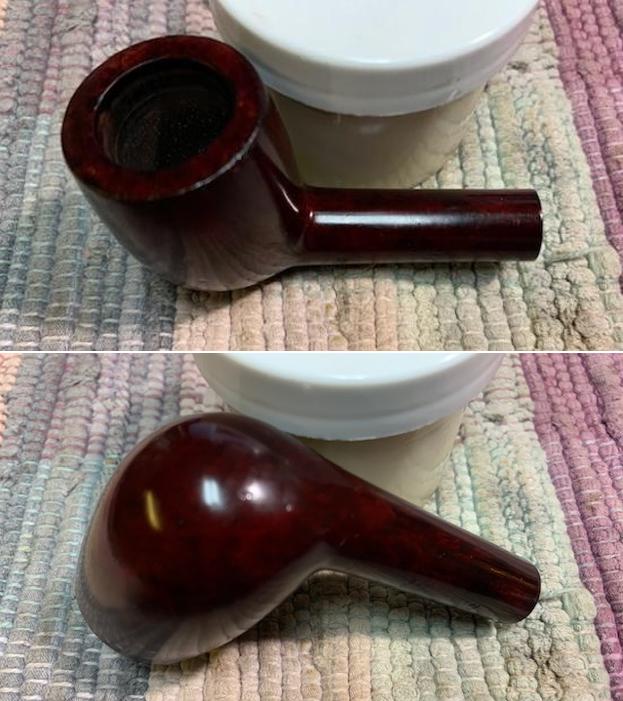
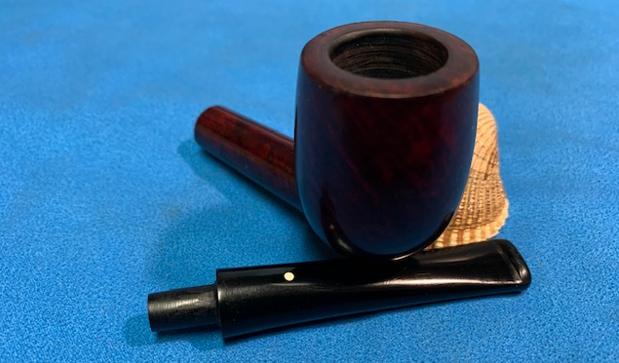
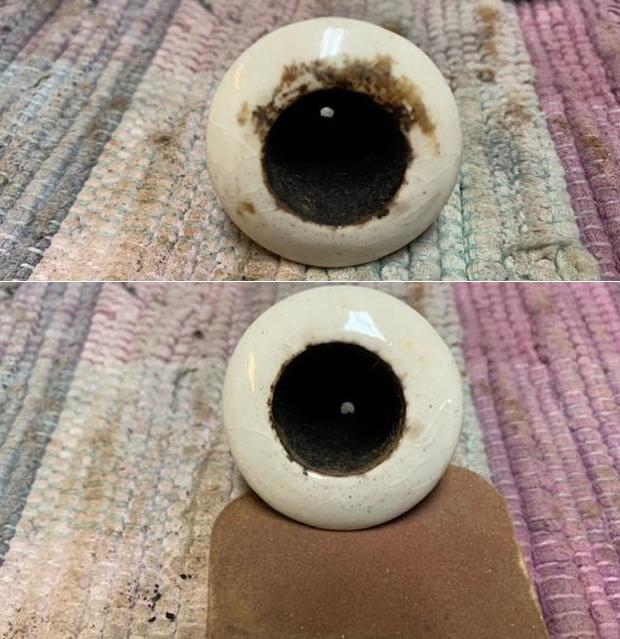
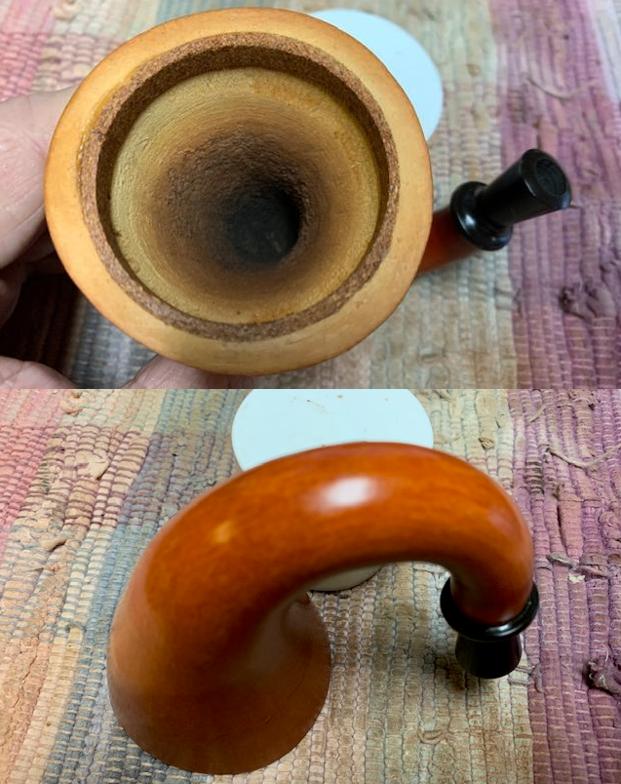
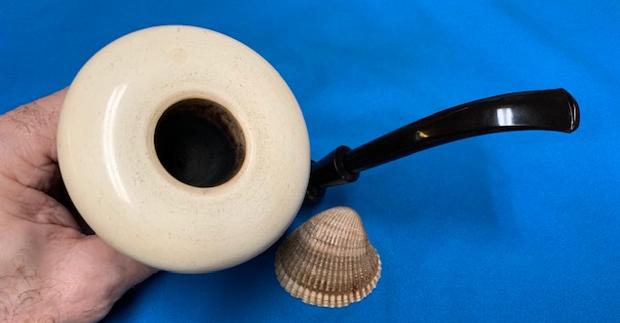
 I took a close up of the bowl and rim top to give a picture of the condition and the light cake in the bowl. I also included photos of the stem that came with it for reference as I was planning on replacing it.
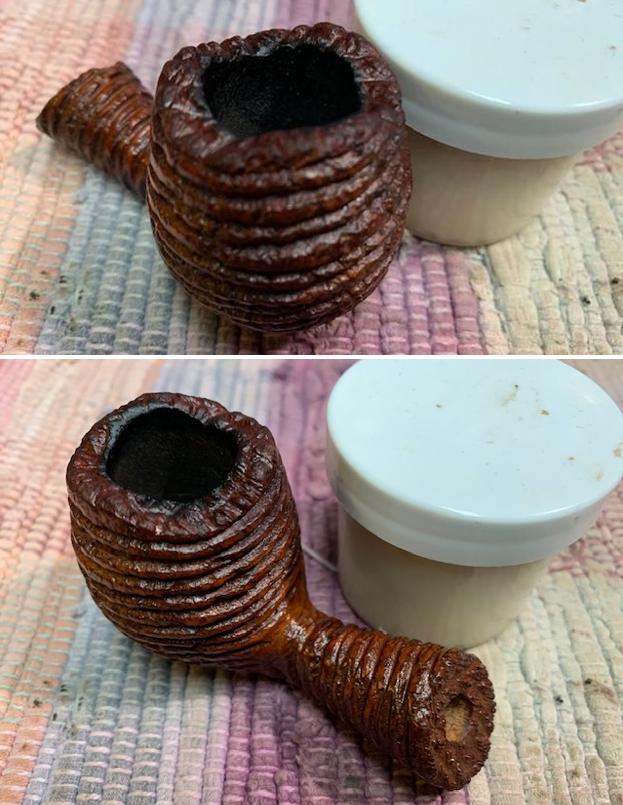
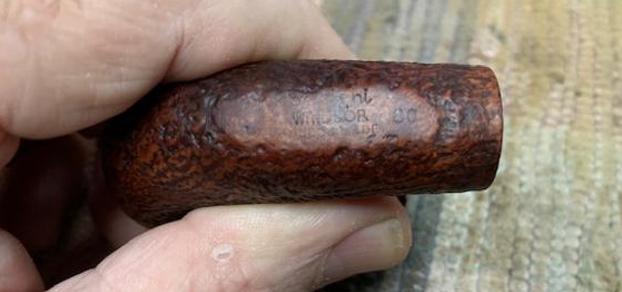
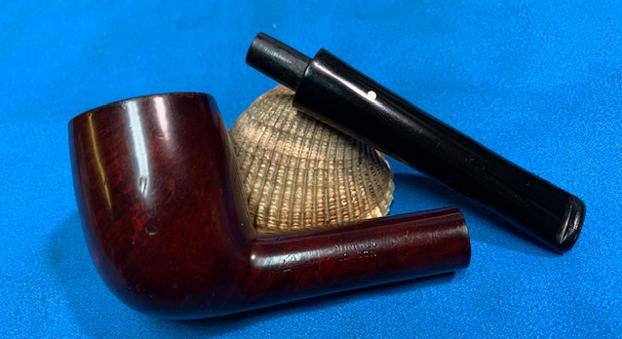
 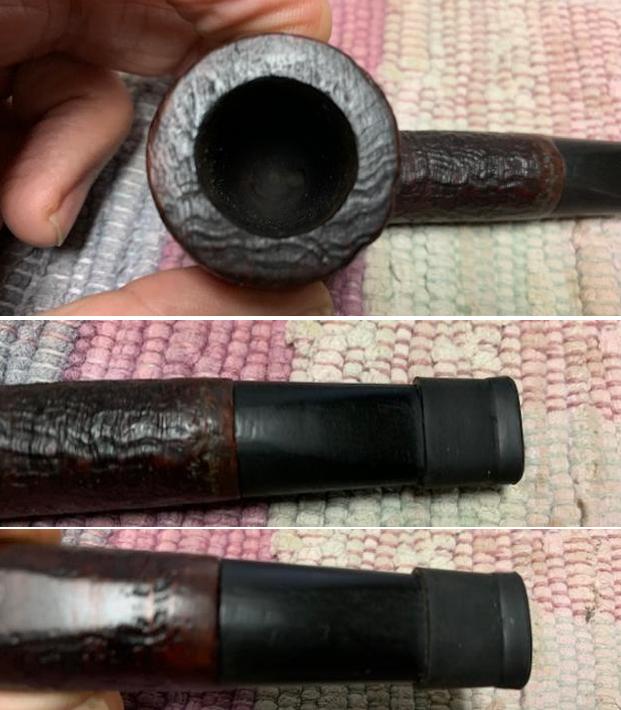 I took a photo of the stamping on the shank that also showed the sanded shank end.
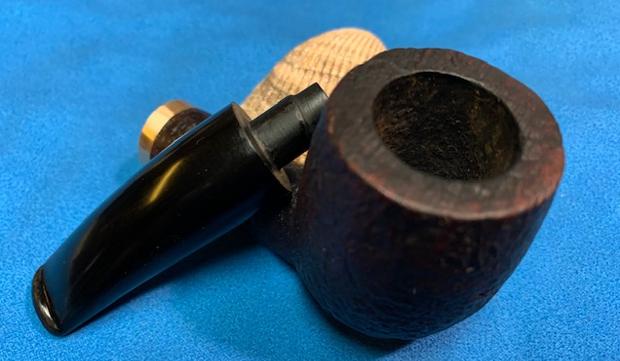
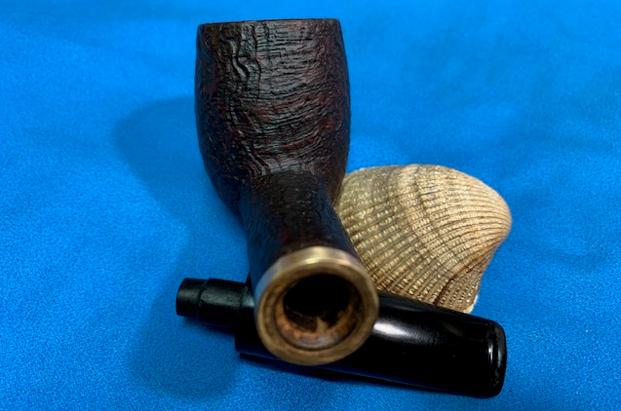
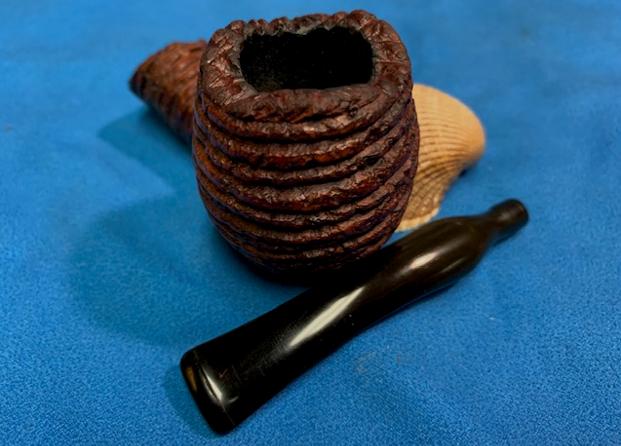
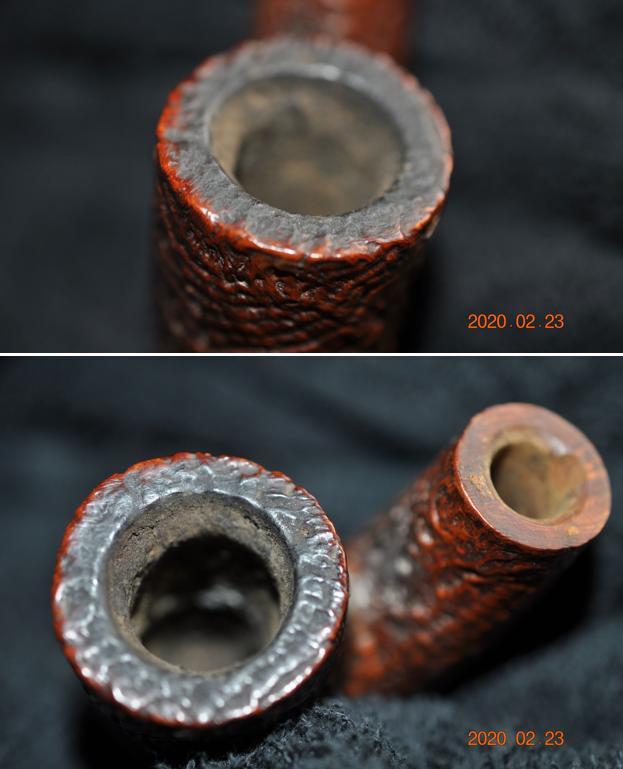
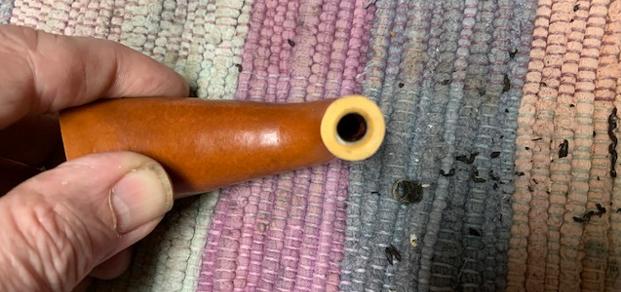
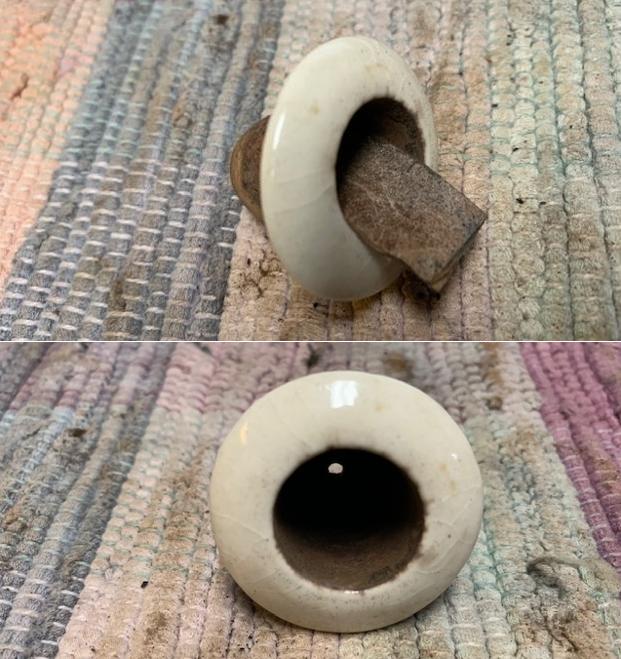
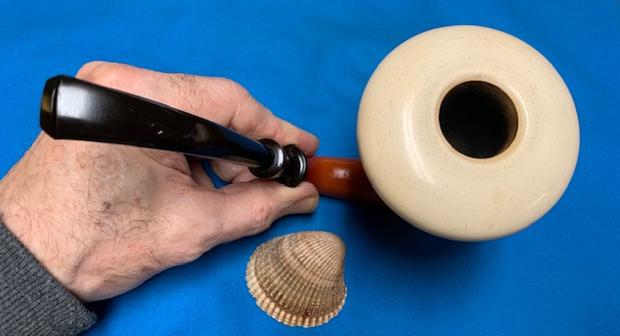
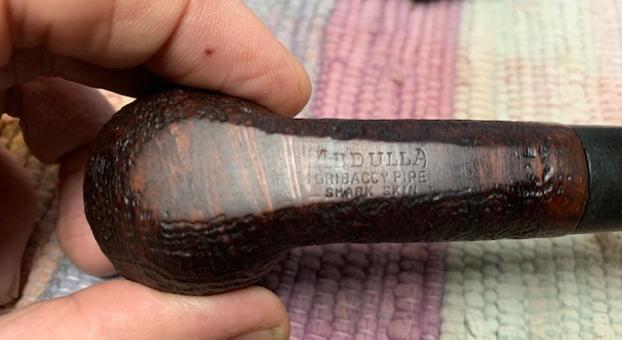 I removed the stem from the shank and took a photo of the short tenon and the poor cut that left it at an angle.
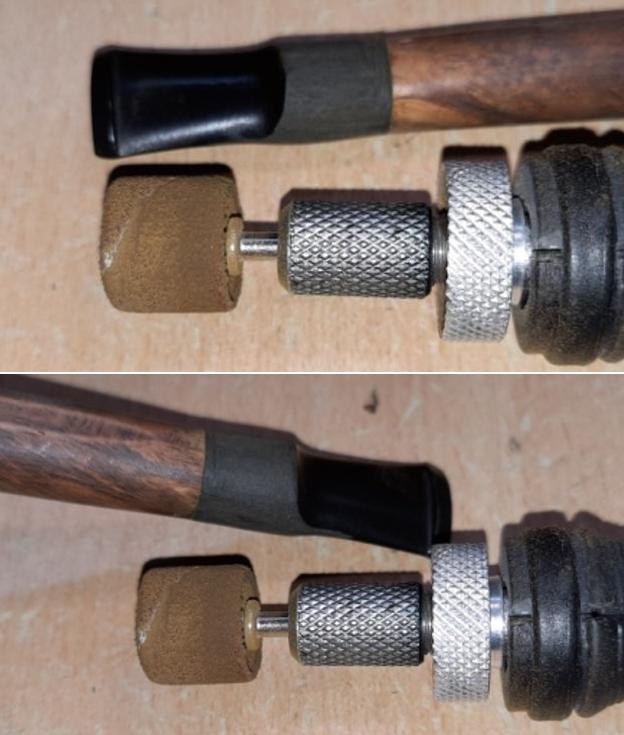
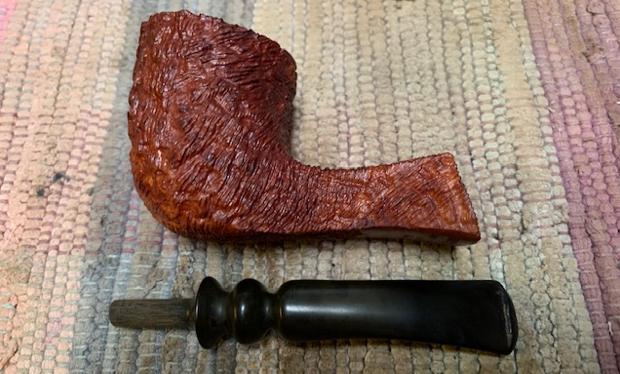
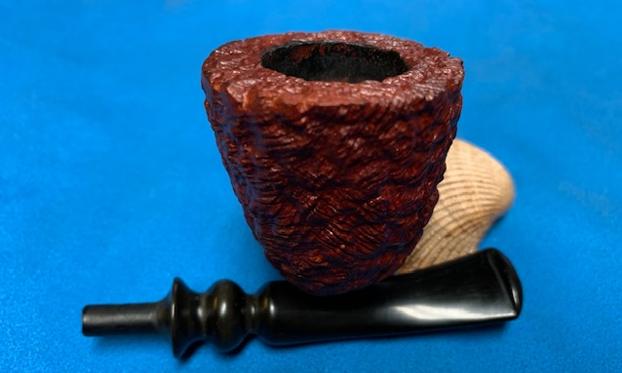
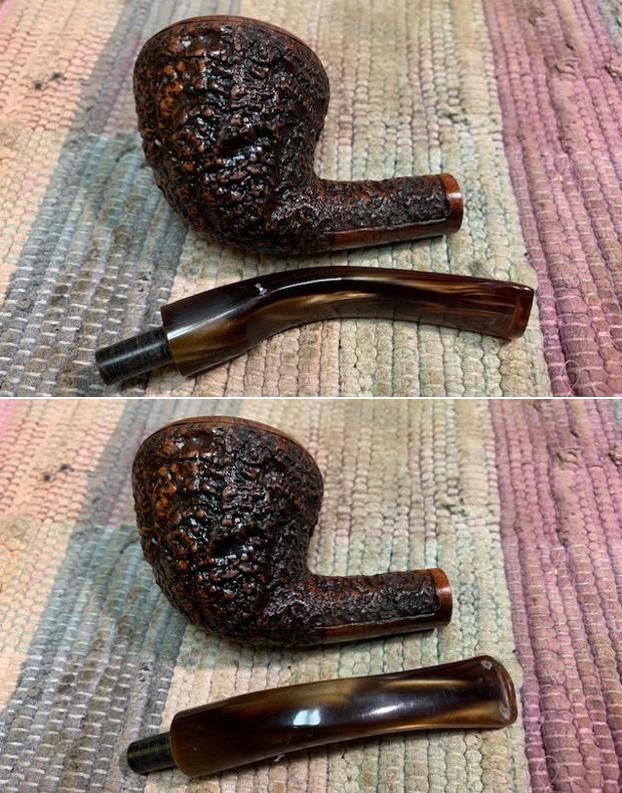
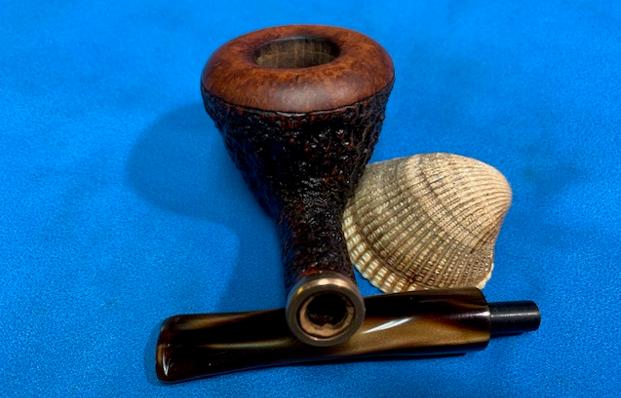
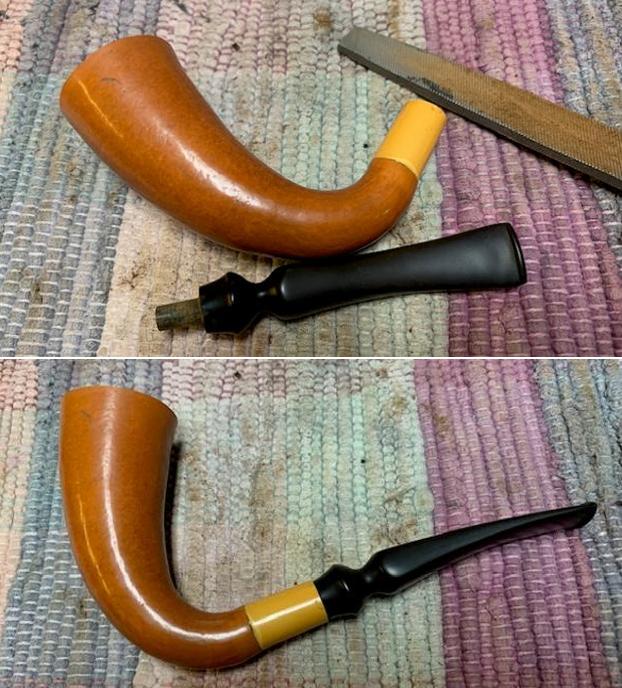
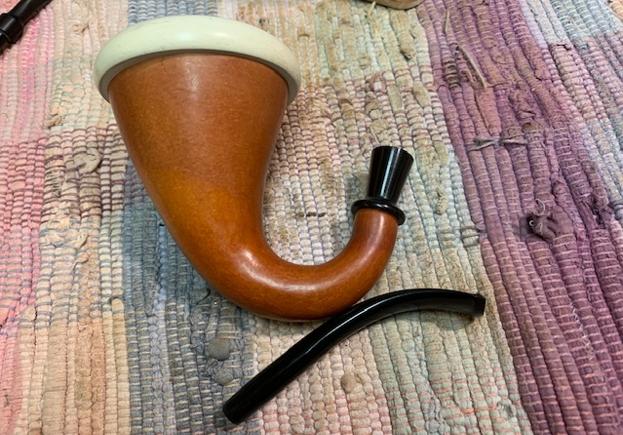
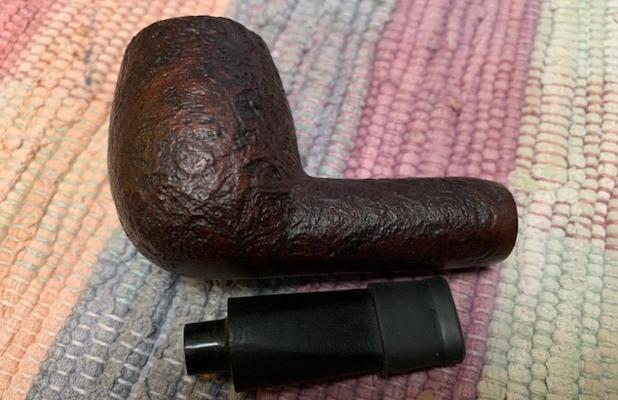 I decided to address the coned shank end but applying a thin brass band that would square it up again and get rid of that damage. I went through my bands and had a perfect one that was brass and thin profile. I went through my stems for a stem that was chunky and tapered and would work with this pipe. I took a photo of the new parts.
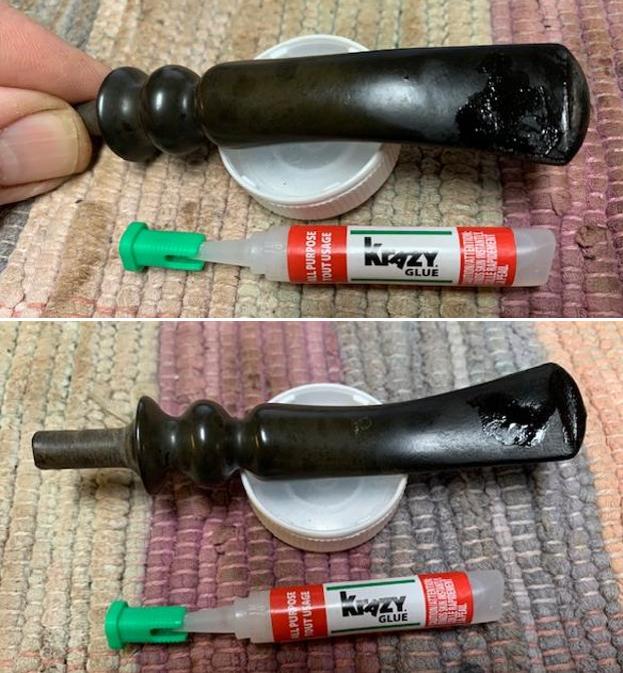
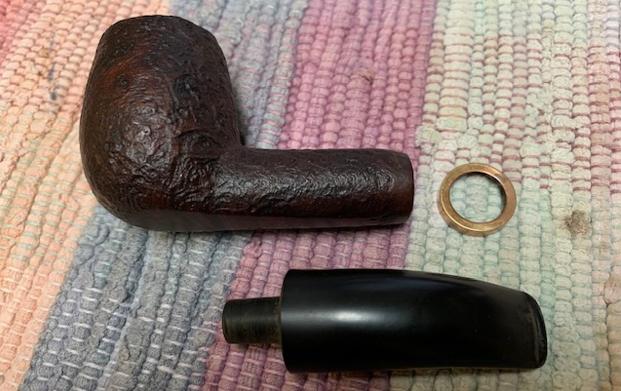 Now it was time to set the new band on the shank. I used a dental spatula to apply all purpose glue to the end of the shank and spread it around. I pressed the band in place and wiped off the excess glue.
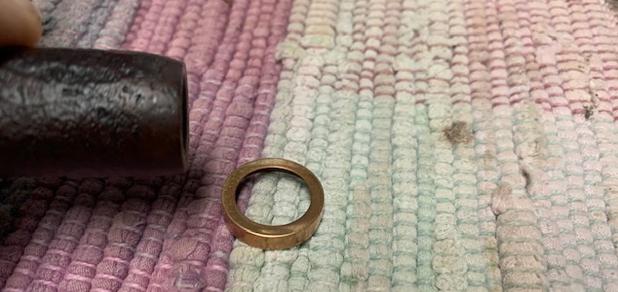
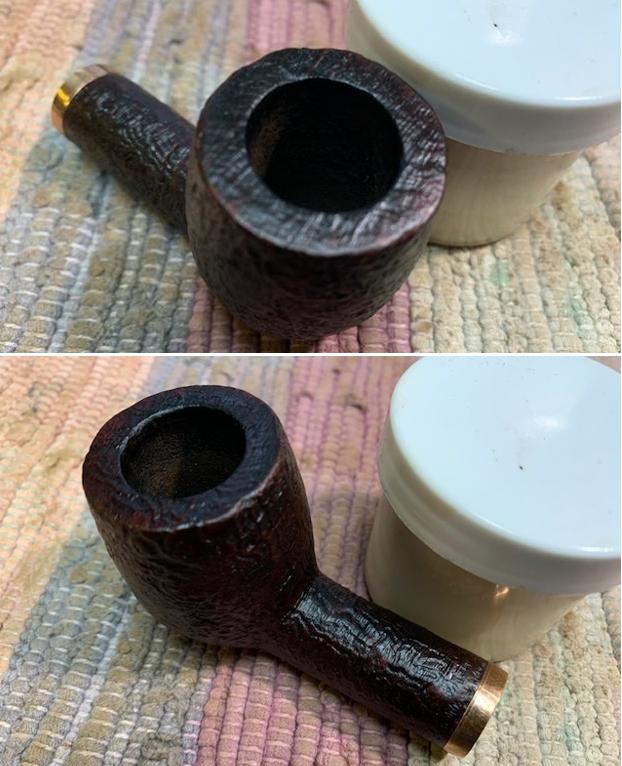
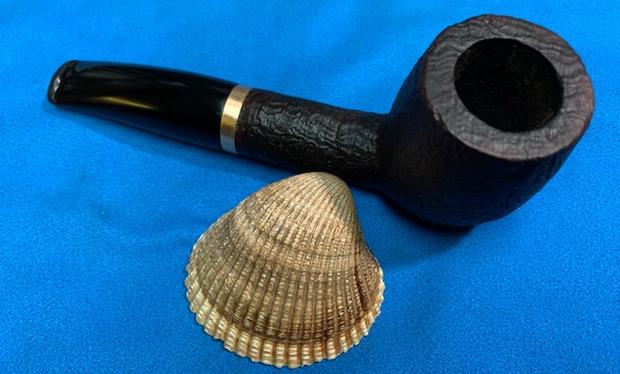
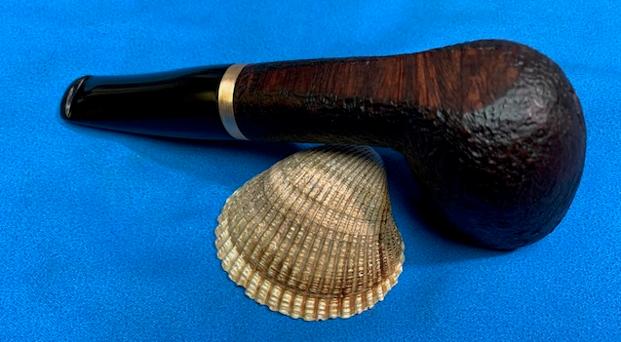
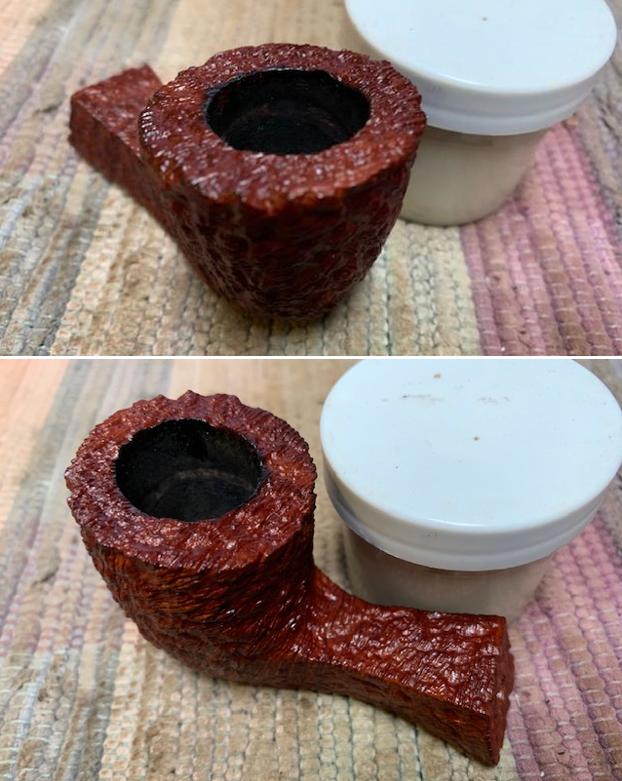
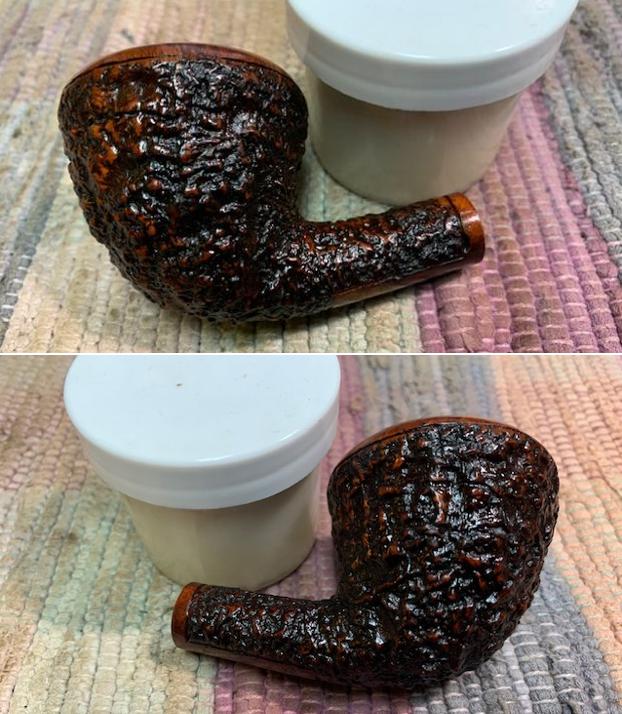
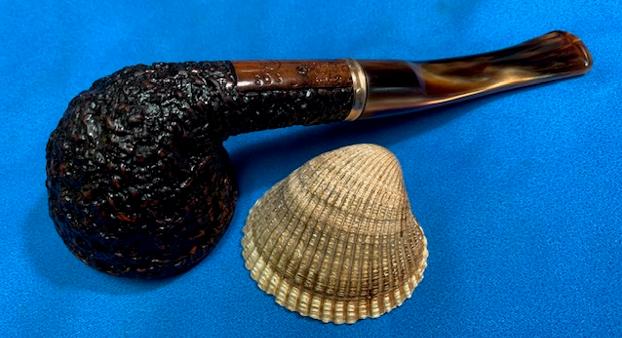
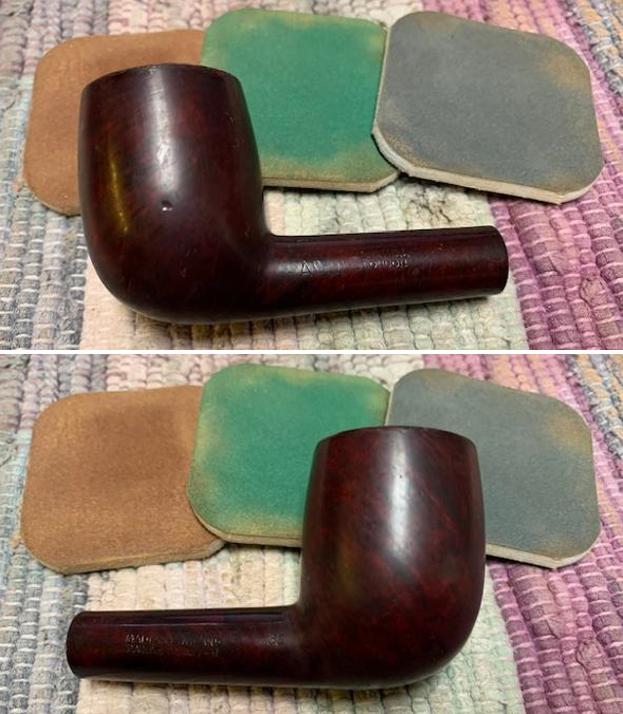
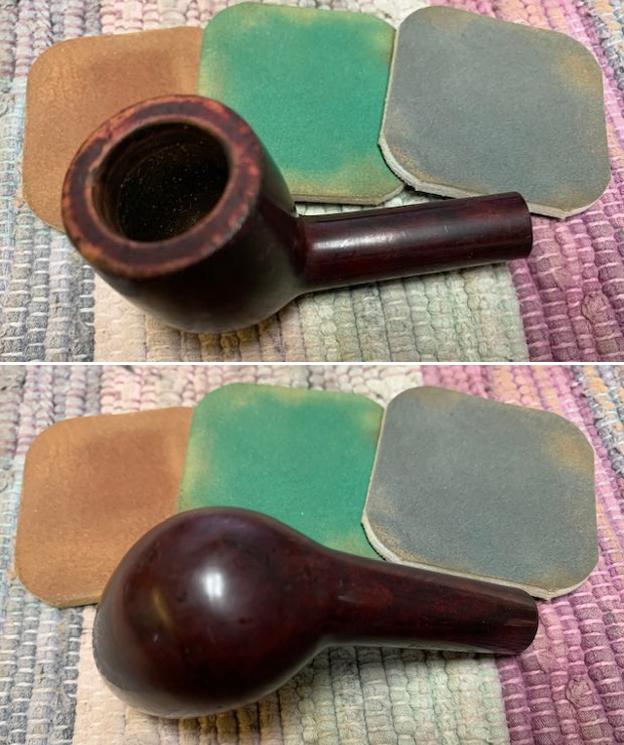
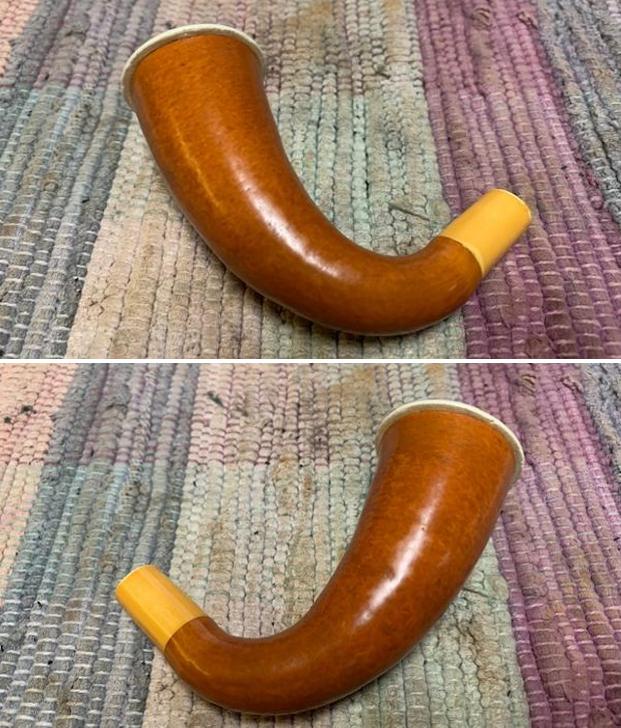
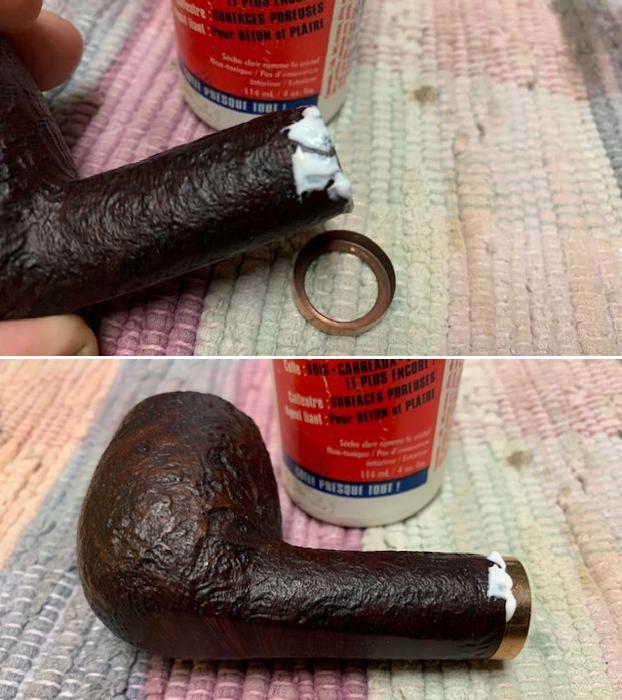 Once the glue cured I took photos of the banded shank to show the change. The coned end had disappeared and the line of the shank was now flat once again from the back of the bowl to the shank end.
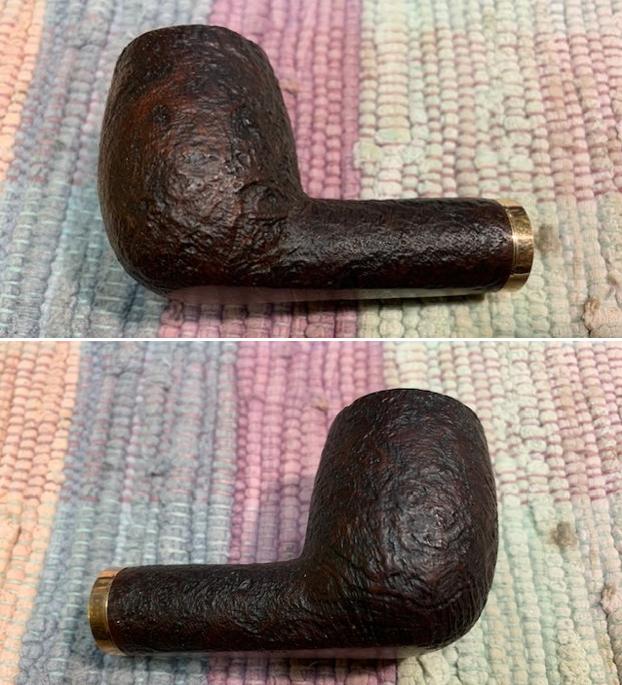
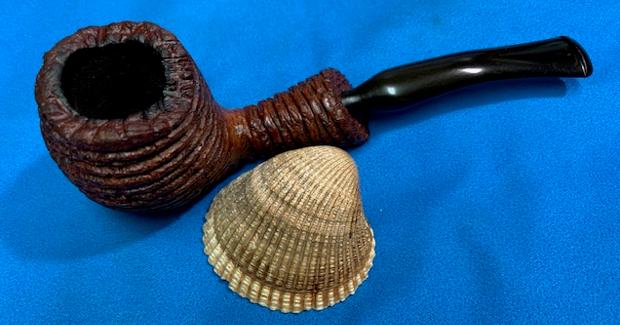
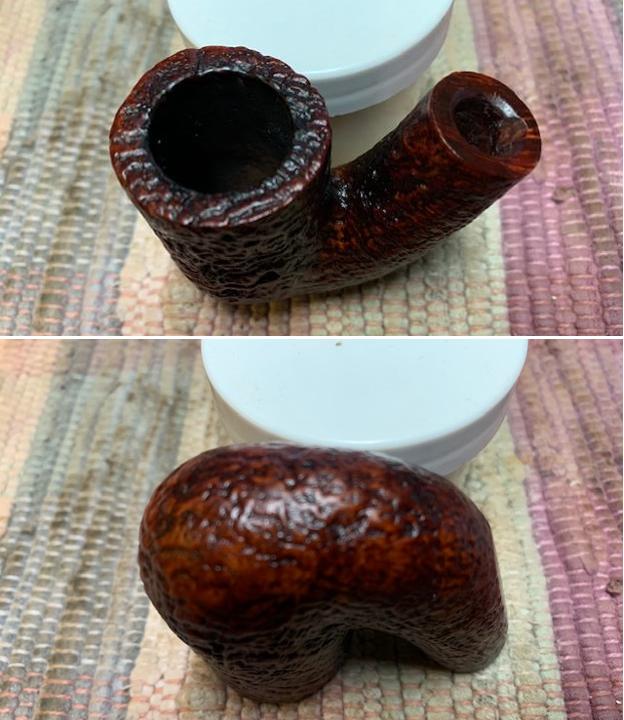
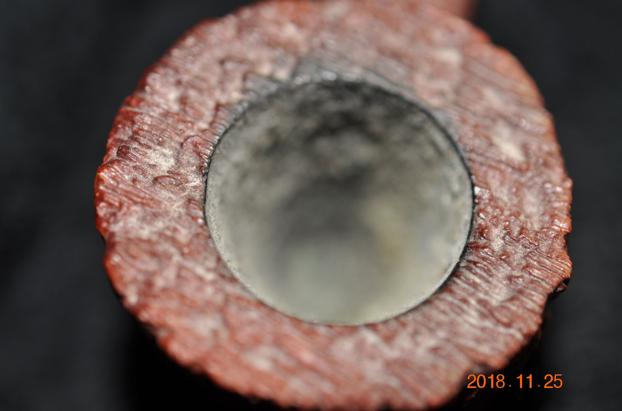
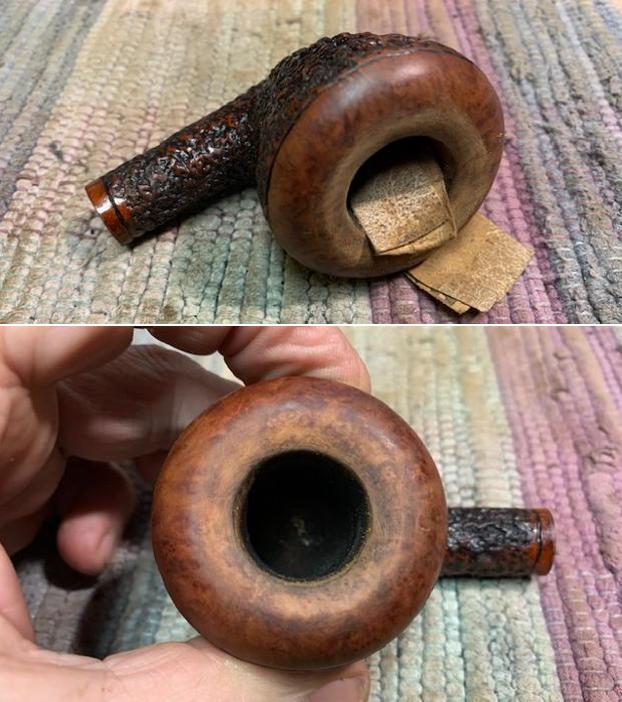
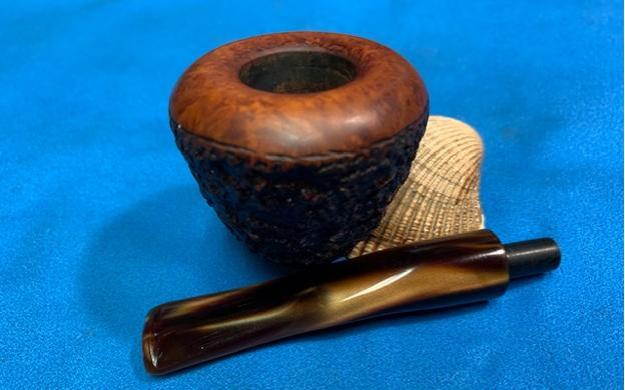
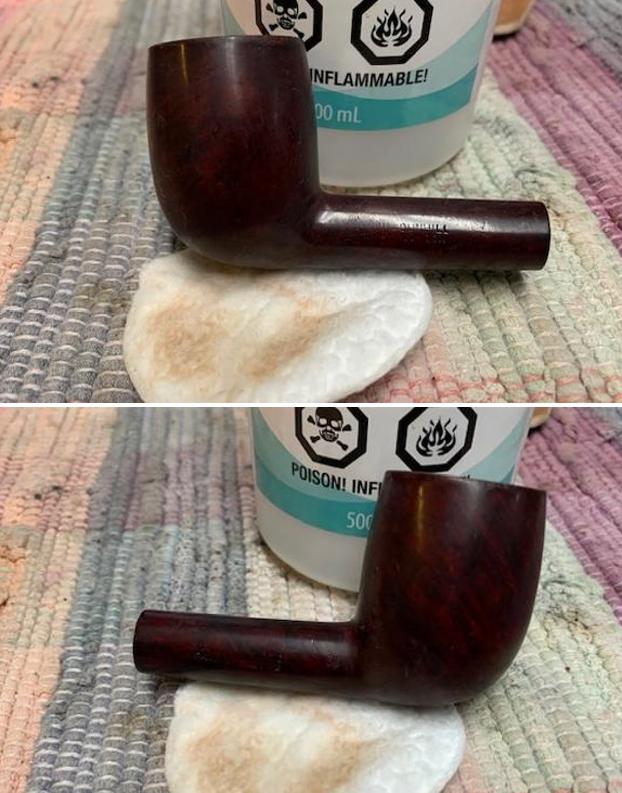
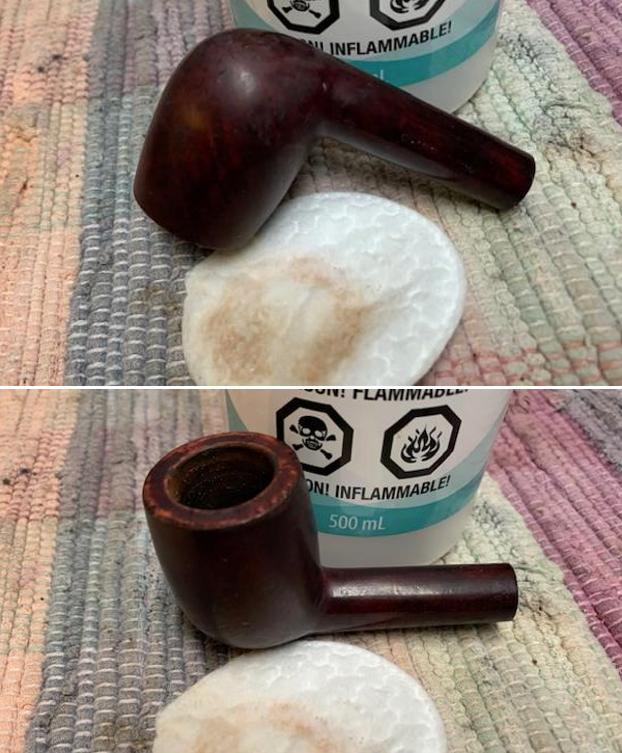
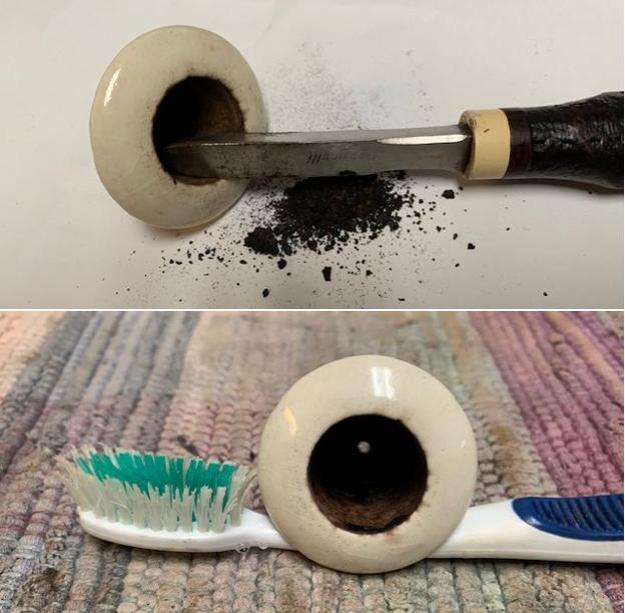
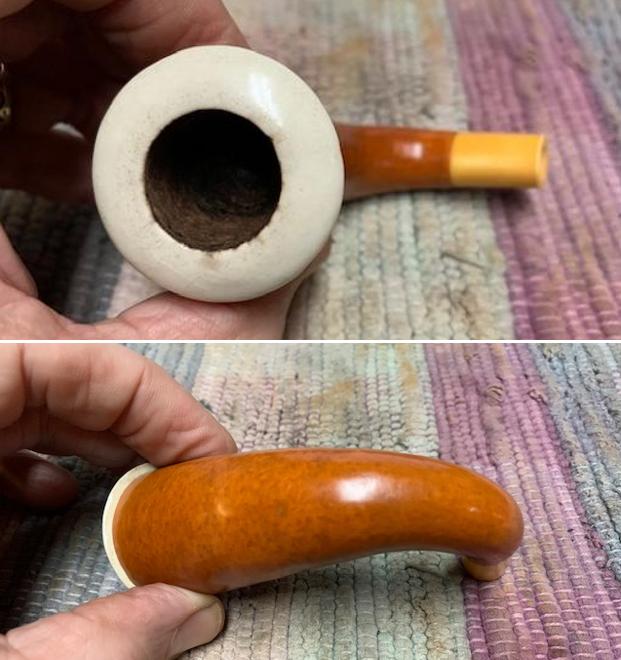
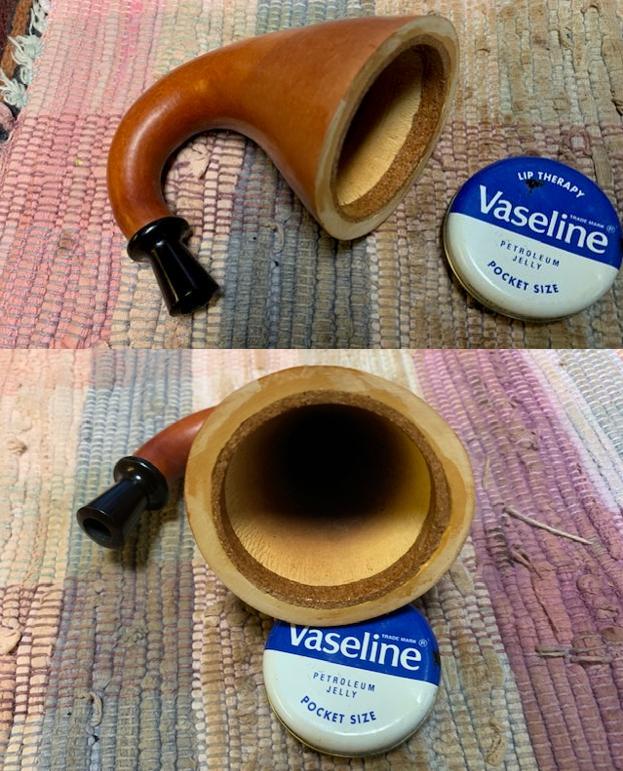
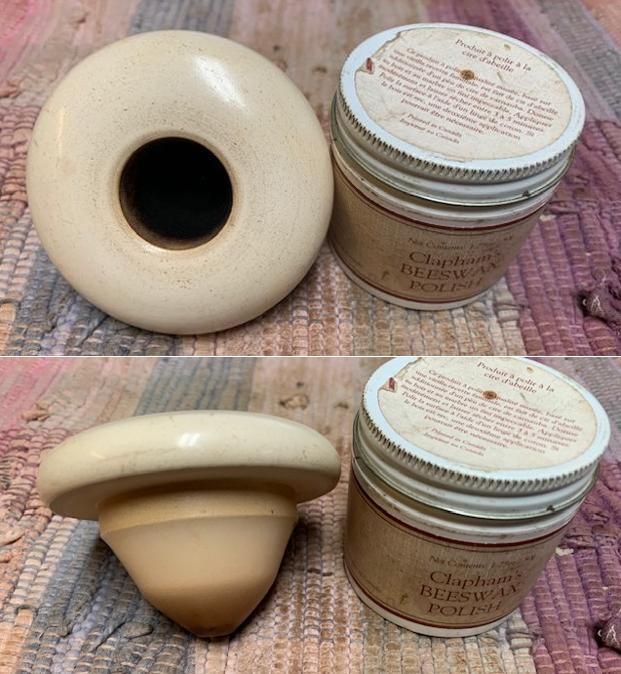
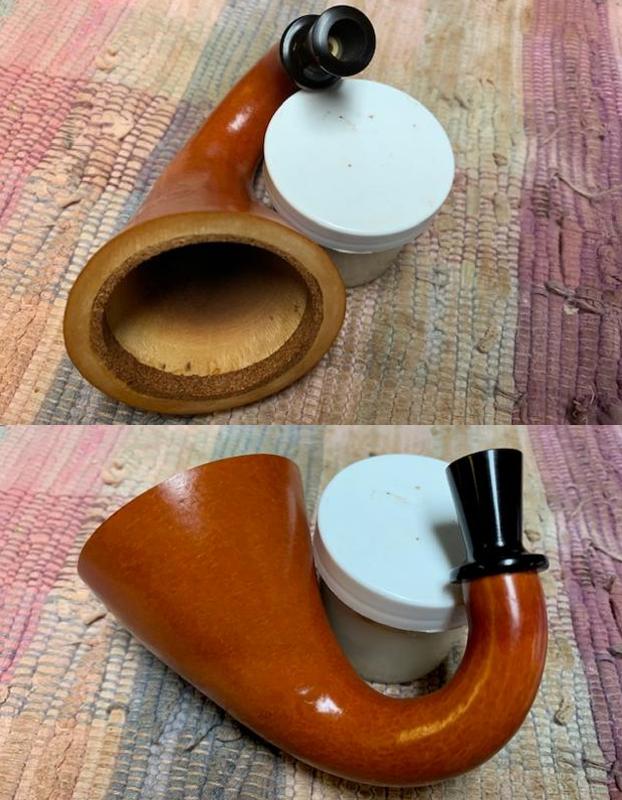
 Now it was time to clean the bowl and shank. I reamed out the light cake with a Savinelli Fitsall Pipe Knife and took it back to bare briar. I cleaned out the shank and airway to the bowl with pipe cleaners, cotton swabs and alcohol to remove the tars and oils.
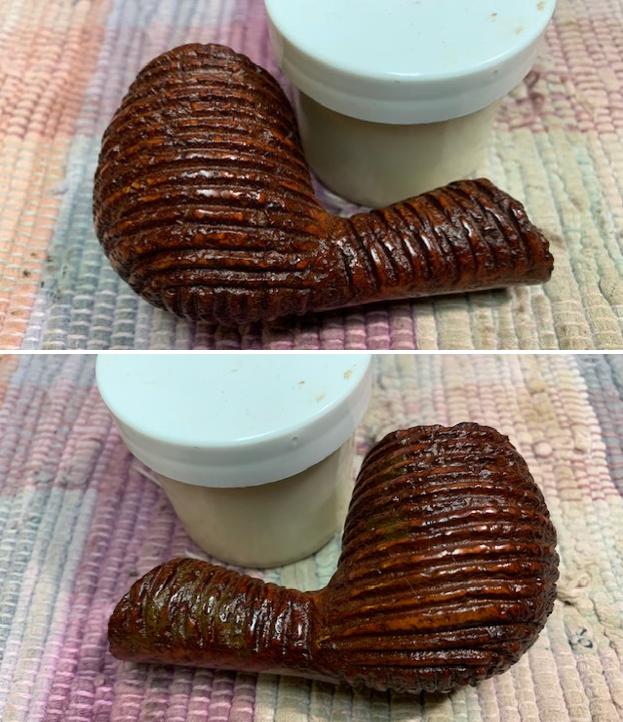
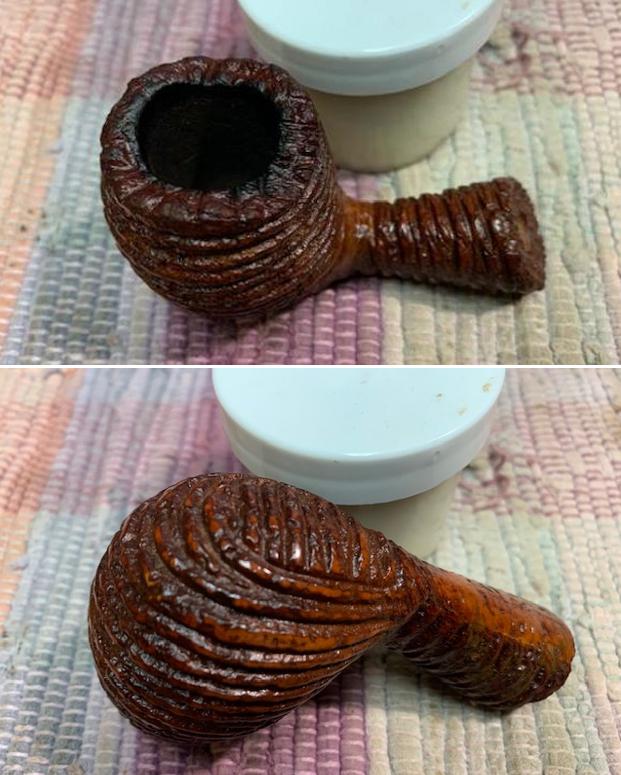
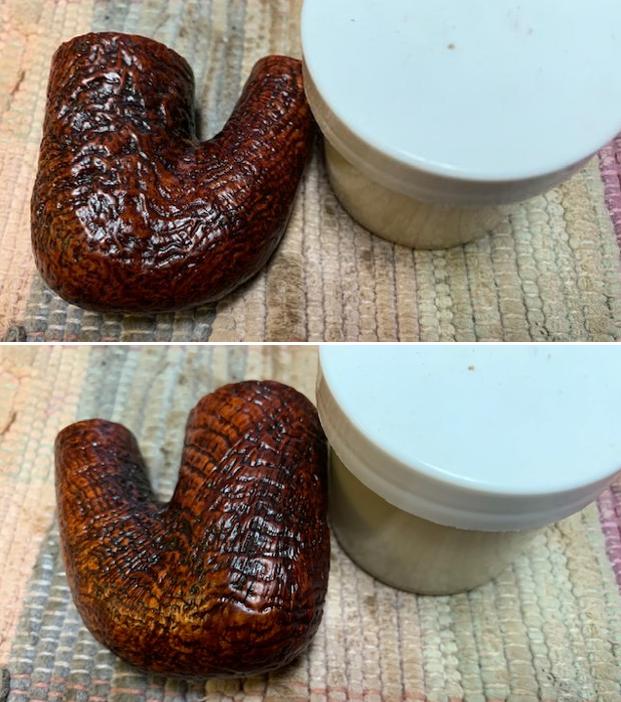
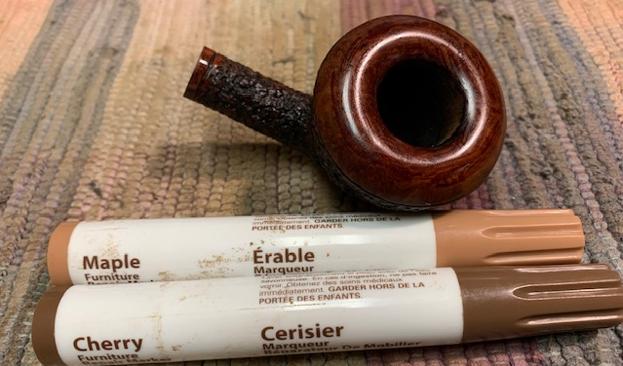
 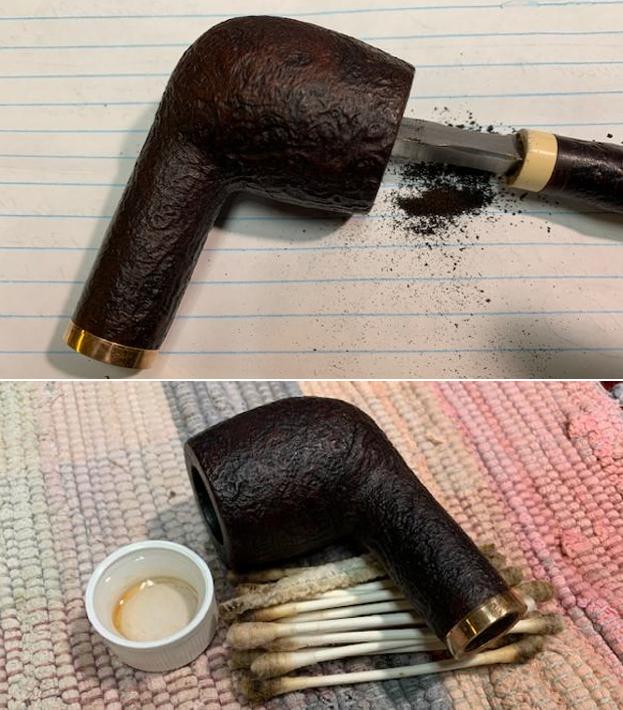 With the internals finished I turned to the exterior of the bowl and shank. I worked Before & After Restoration Balm into the surface of the bowl sides and shank with my fingertips and a horsehair shoe brush to clean, enliven and protect the briar. I let the balm sit for a little while and then buffed with a cotton cloth to raise the shine. The grain came alive and the fills while visible look better than when I began.
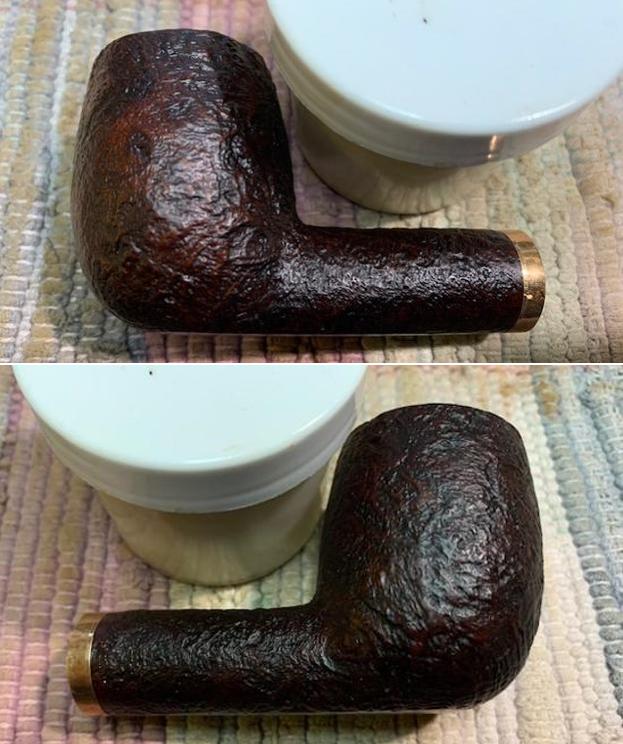
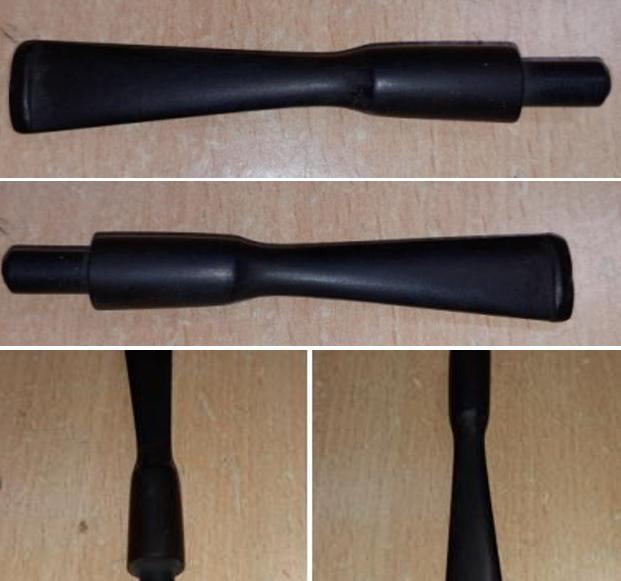
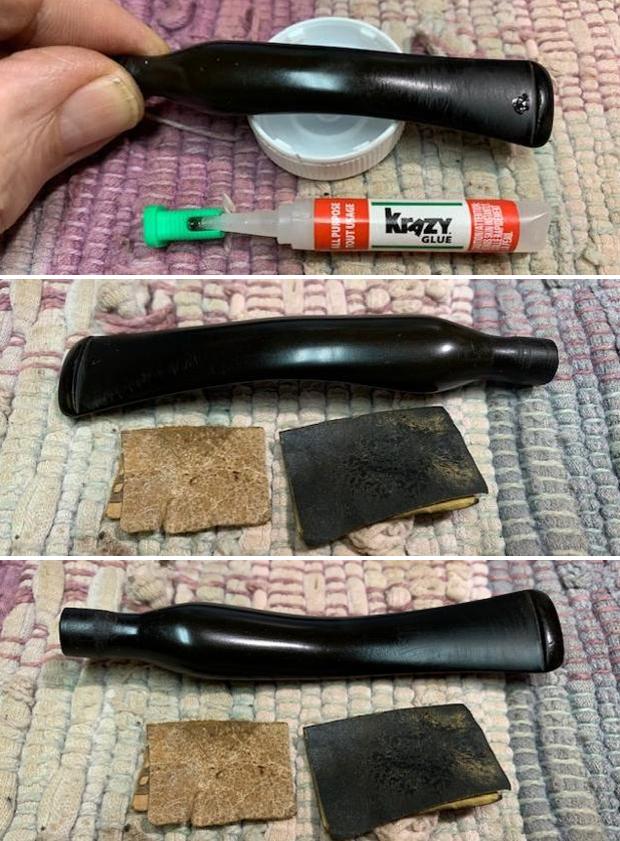
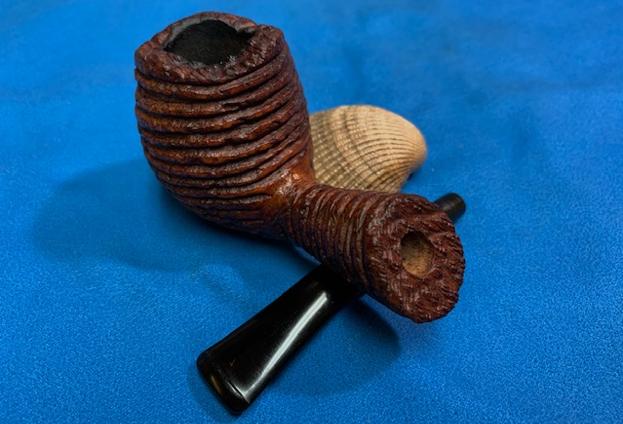
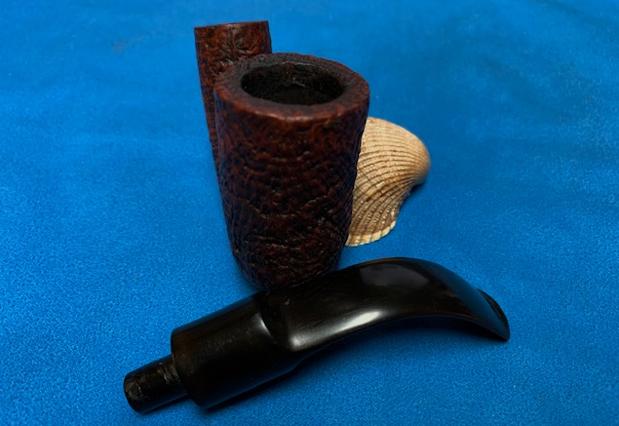
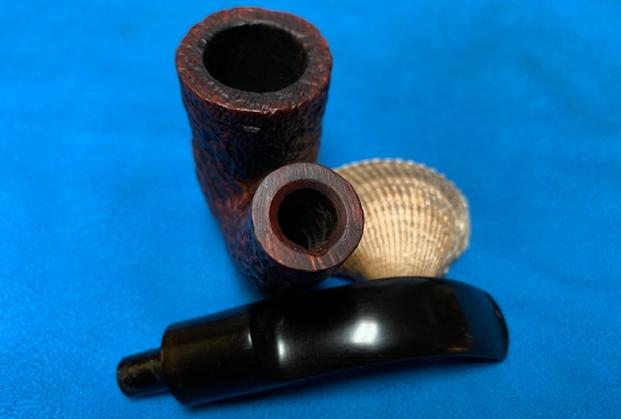
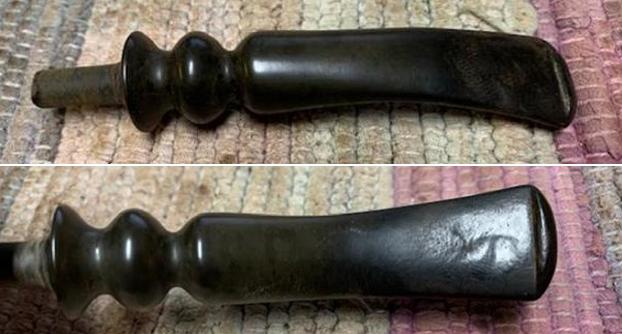
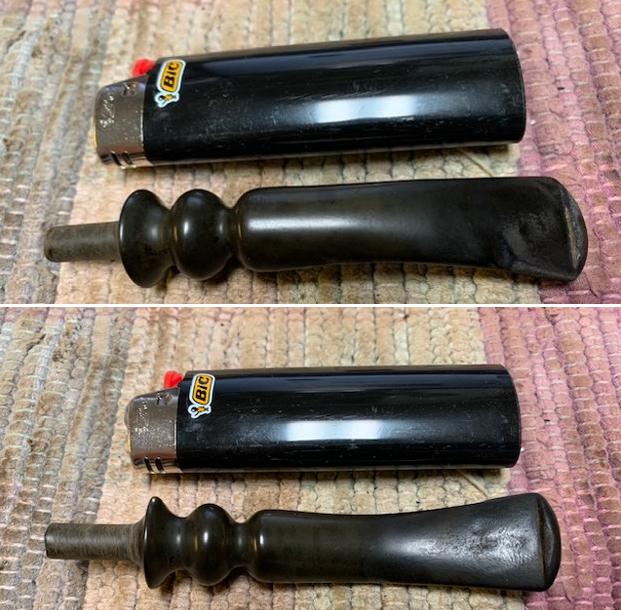
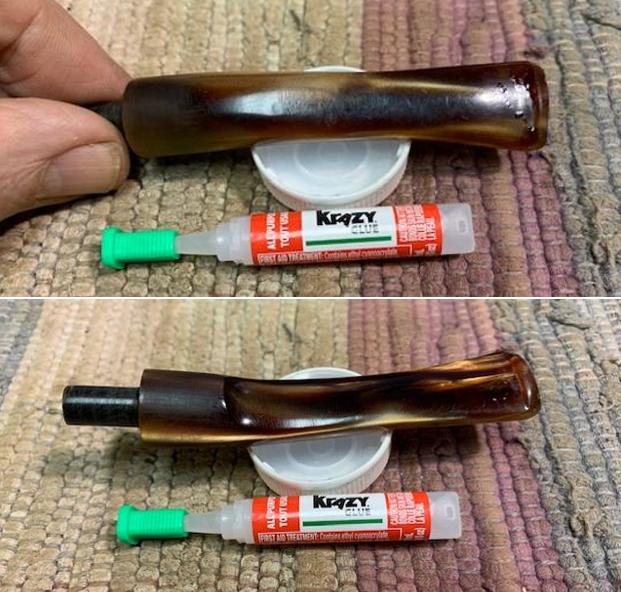
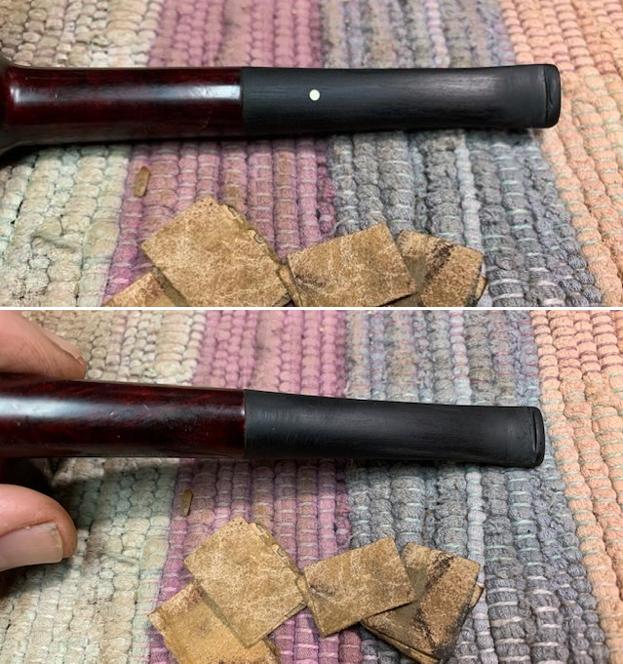
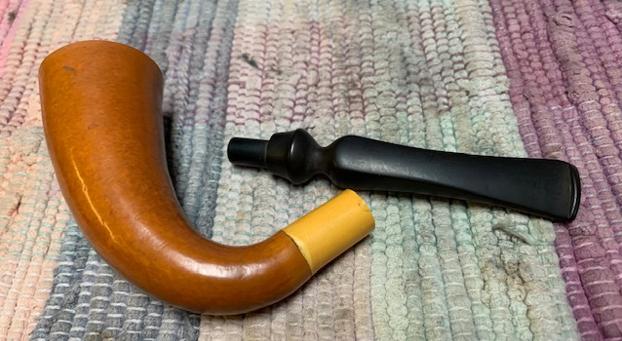
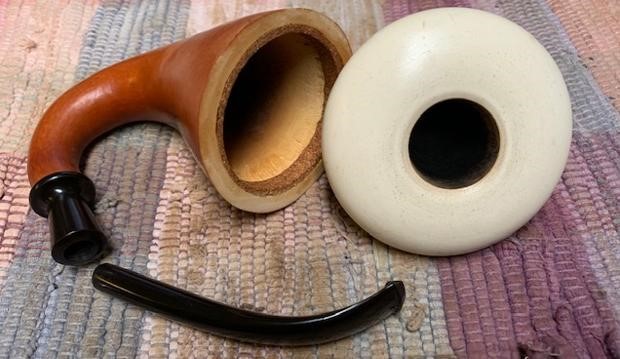
 I set the bowl aside and turned to work on the stem. I decided that before I started on the new stem I wanted to see what was hidden under the Softee Bit. I slipped it off the end of the stem and low and behold I found a broken off stem. No telling if the seller knew this or not but it was clearly not the original stem and definitely needed to be replaced.
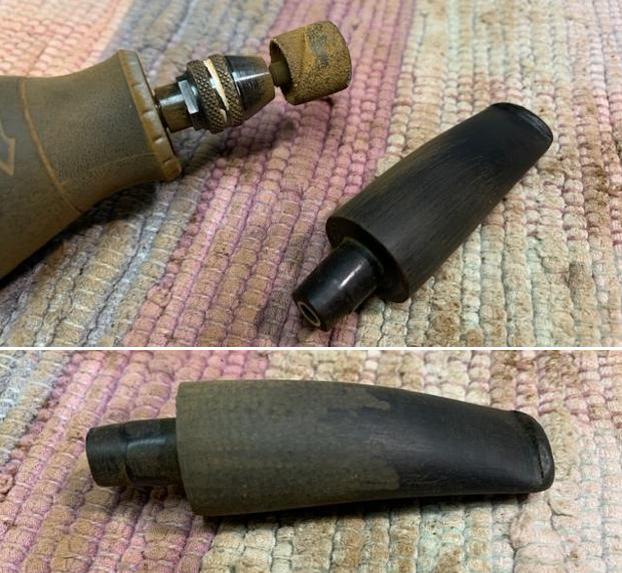
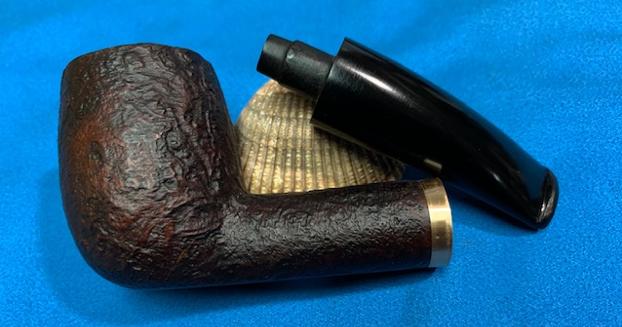
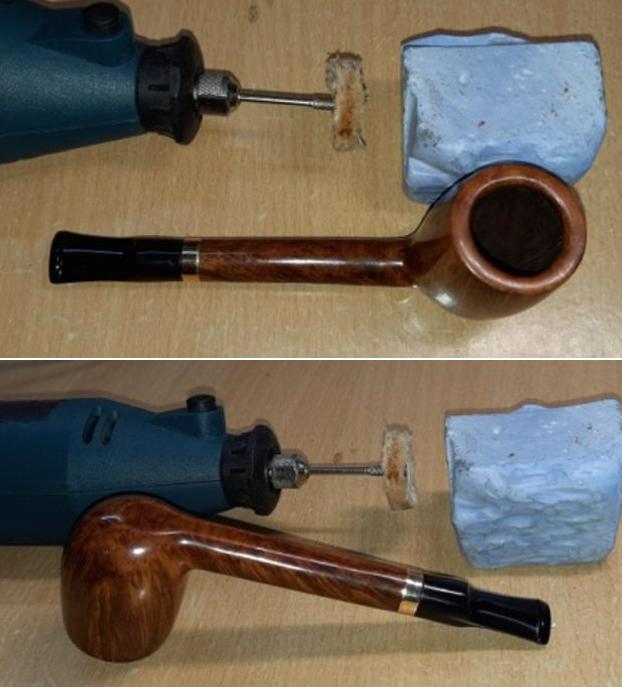
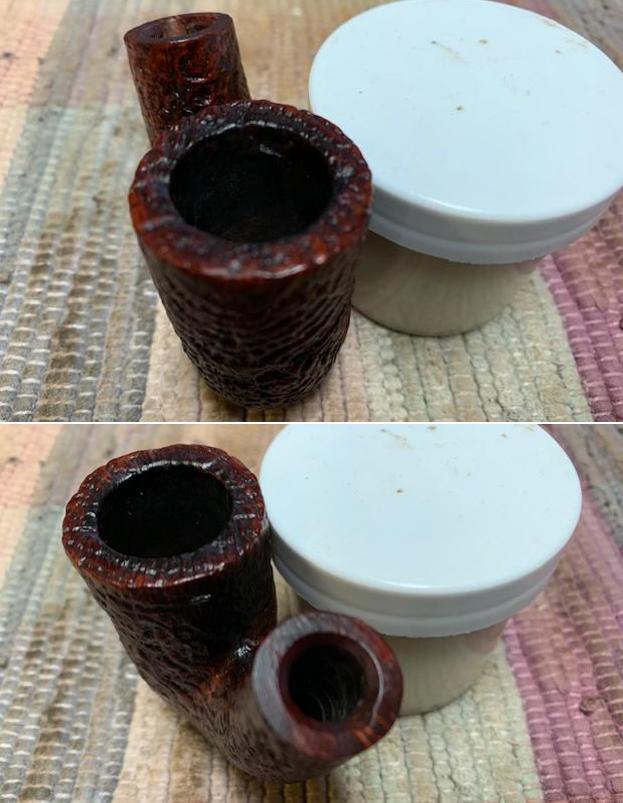
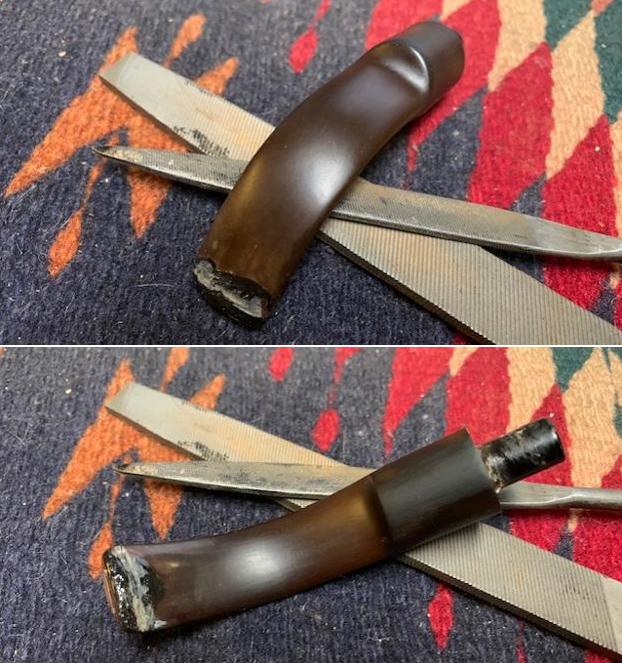
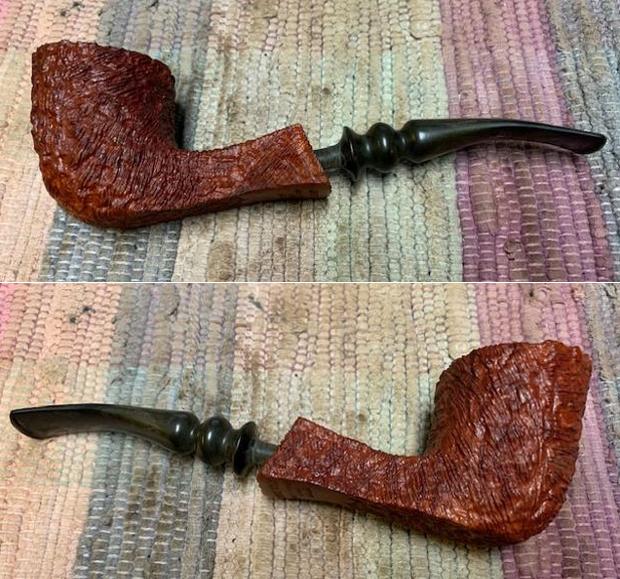
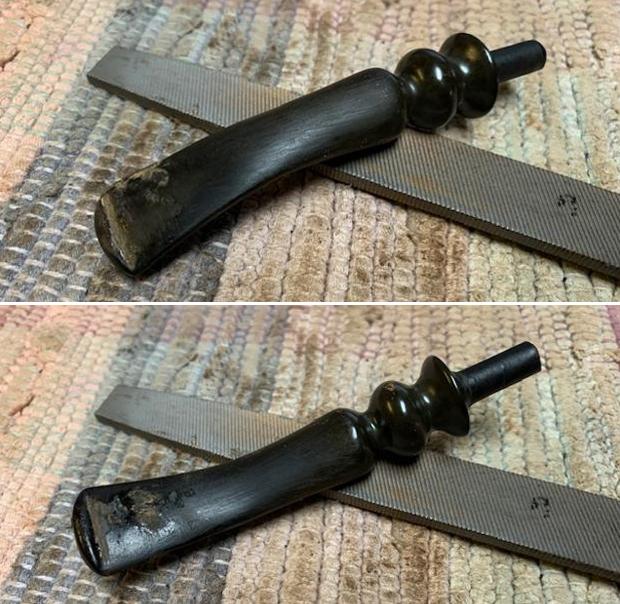
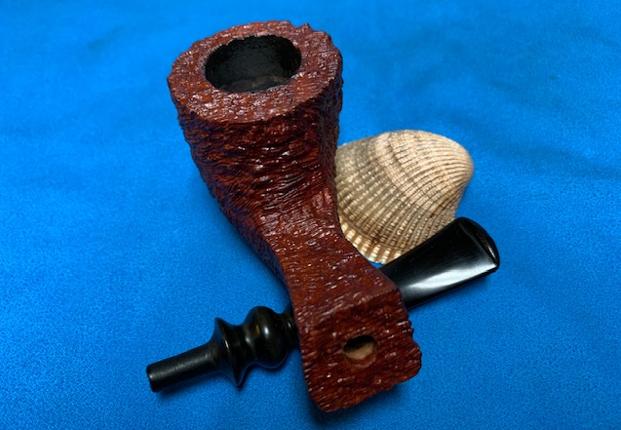
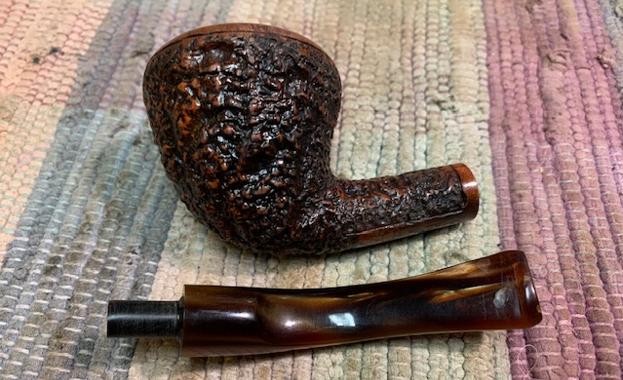
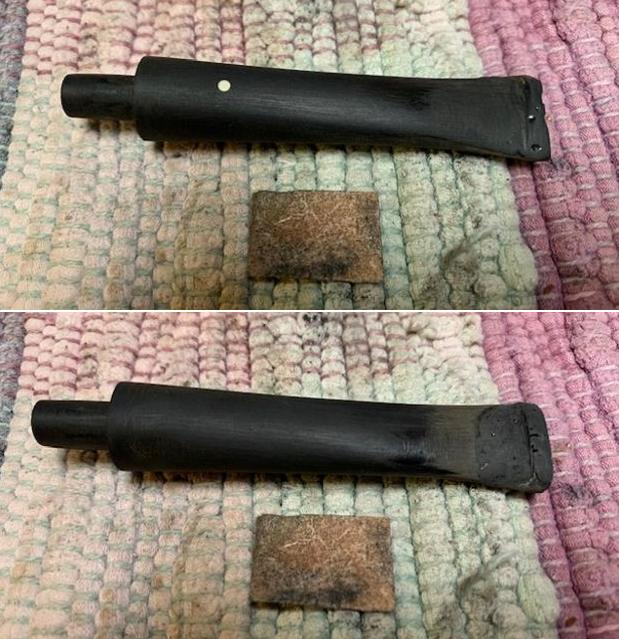
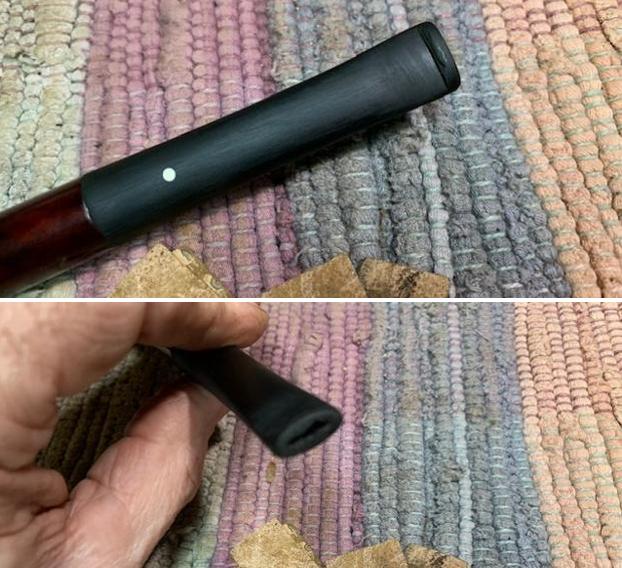
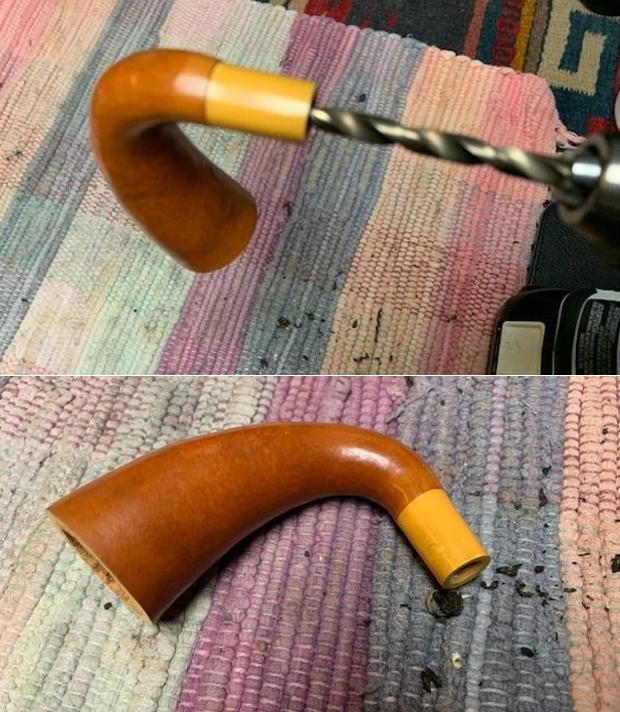
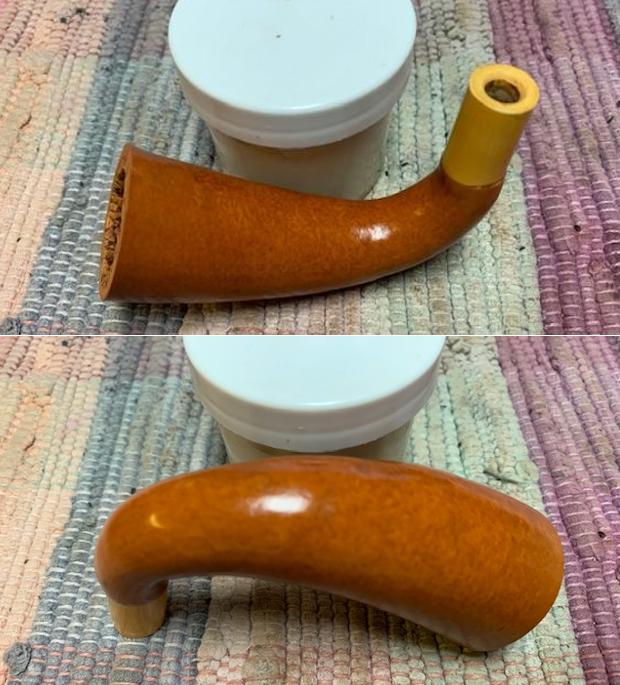
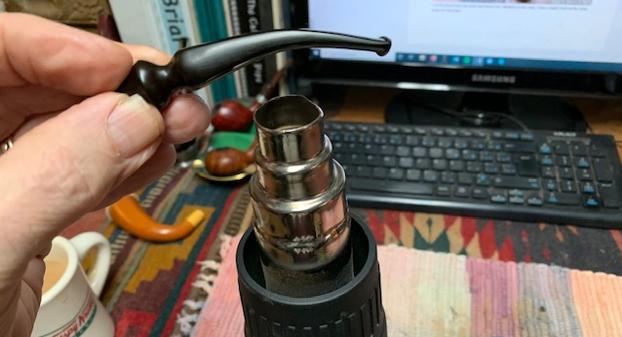
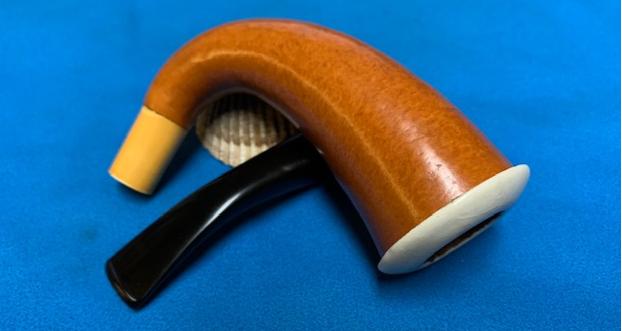
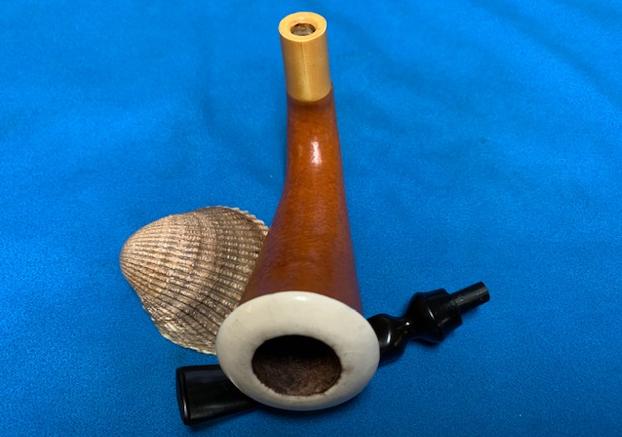
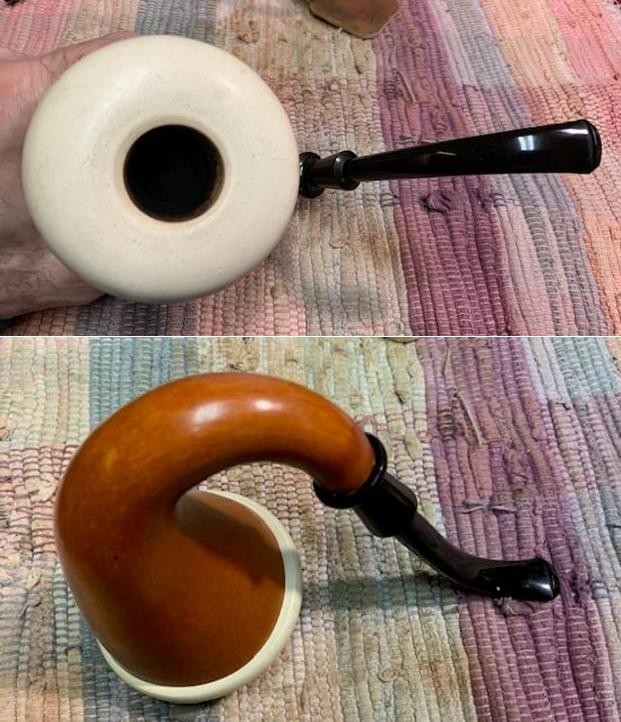
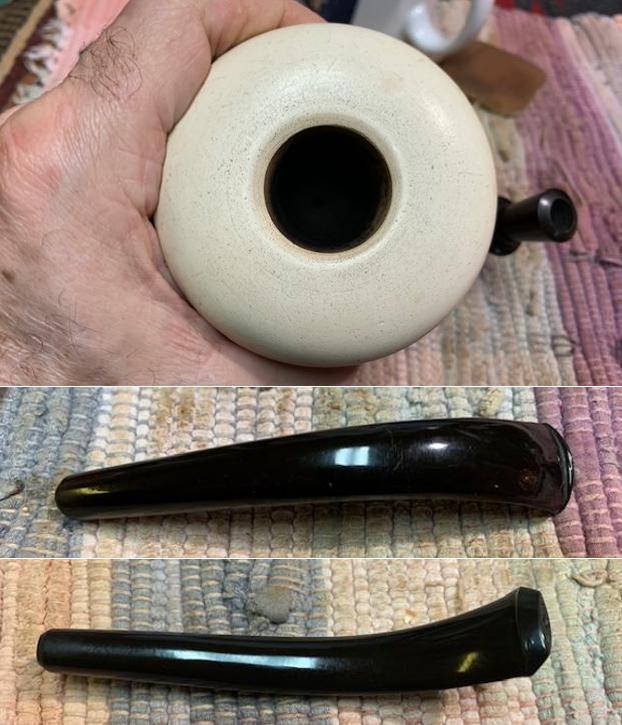
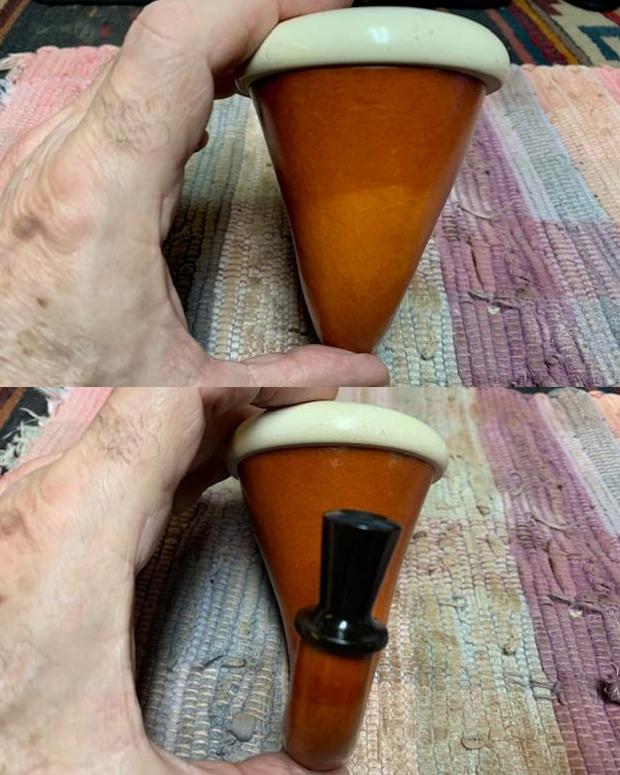
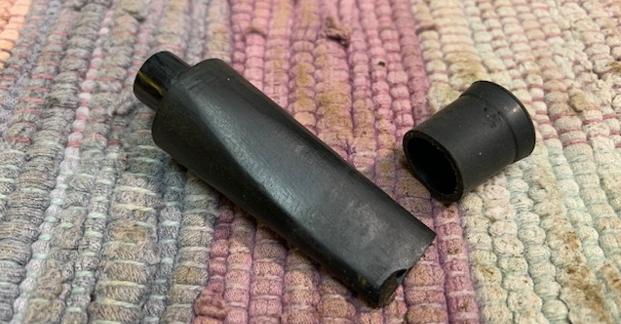 The news stem was definitely going to take a bit of work to get a smooth transition between the shank and the stem. The stem is significantly bigger in diameter than the shank (first picture below). I used a Dremel and sanding drum to start the process of removing the excess diameter of the stem. I also did a bit of step down on the tenon so it would fit the end of the mortise more smoothly (second and third photo below). It was getting there but there was still a lot of work to do to get the fit right!
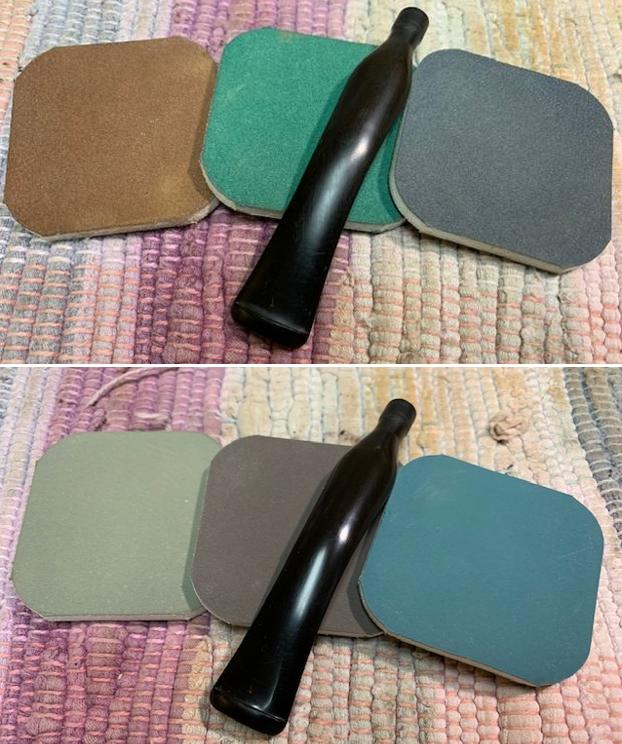
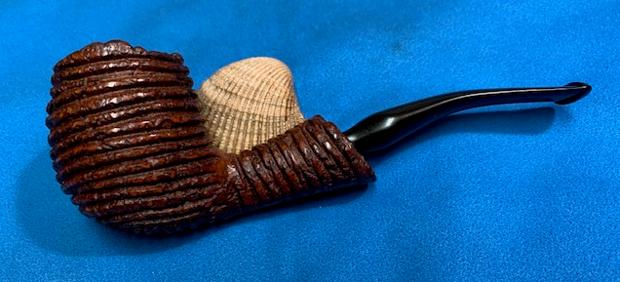
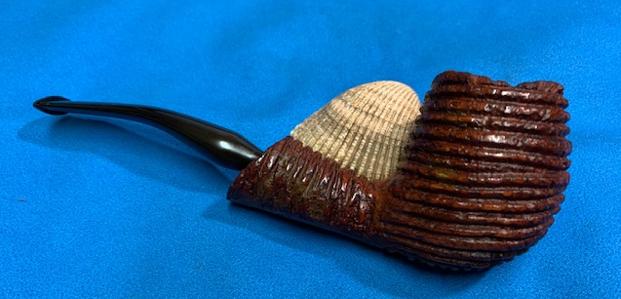
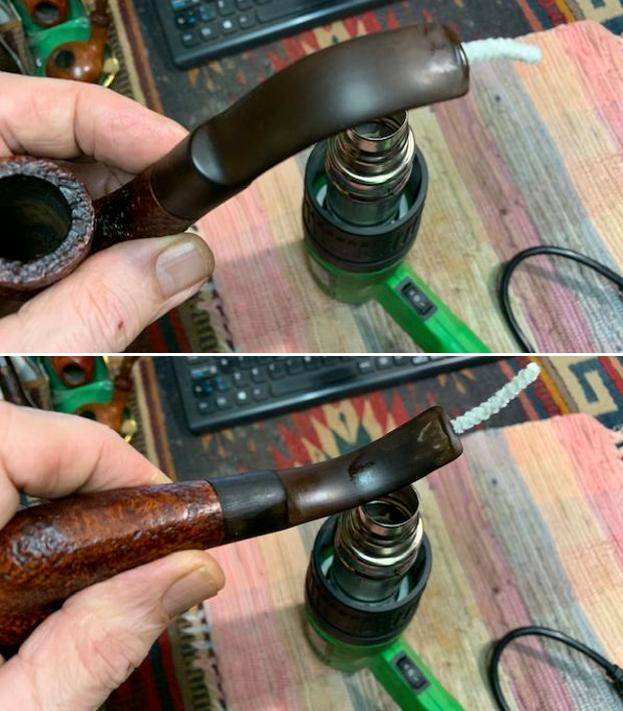
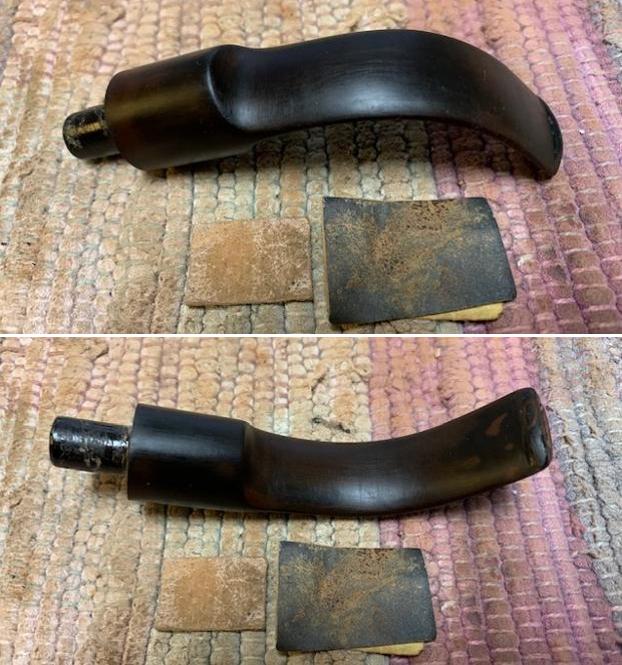
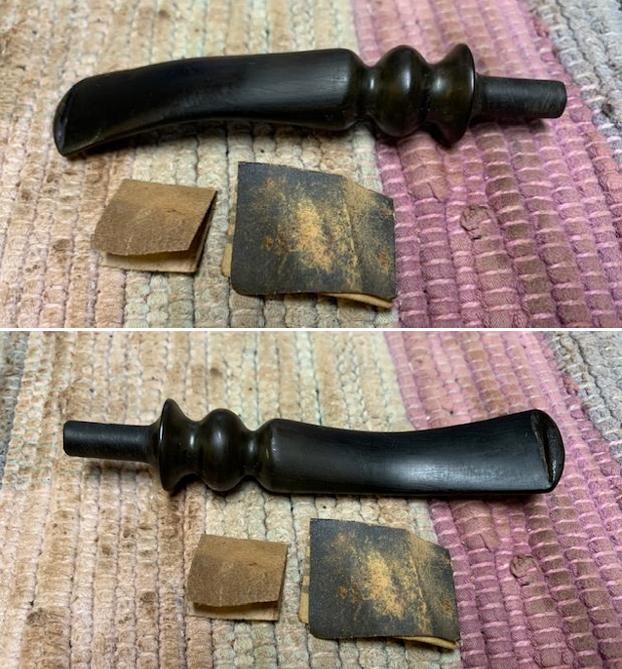
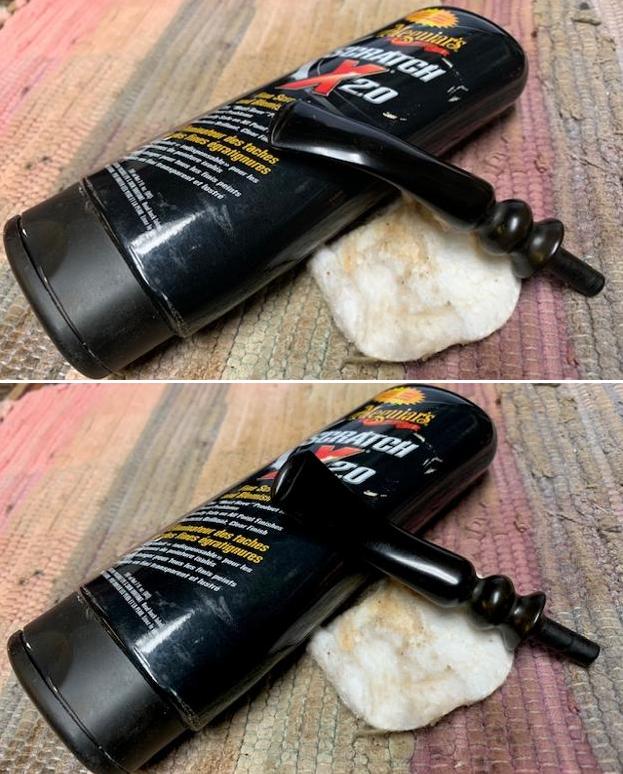
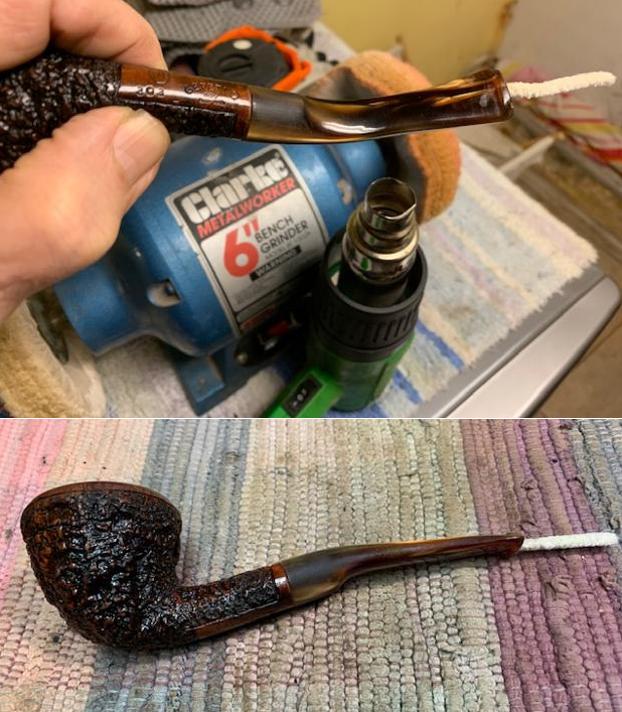
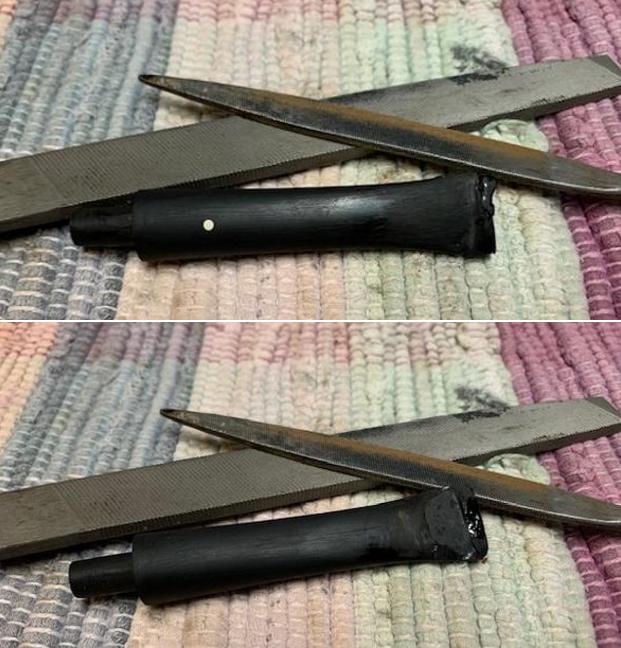
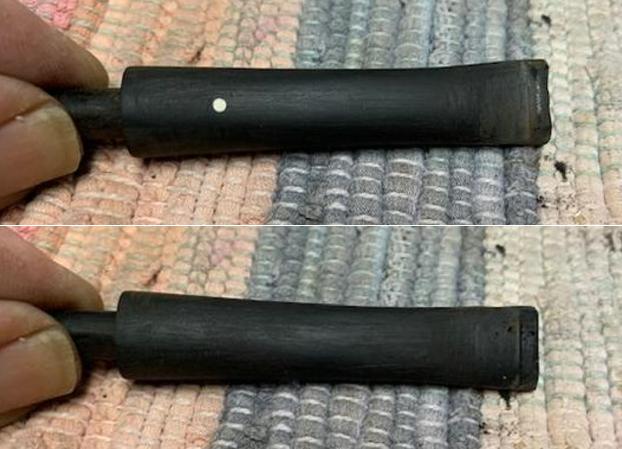
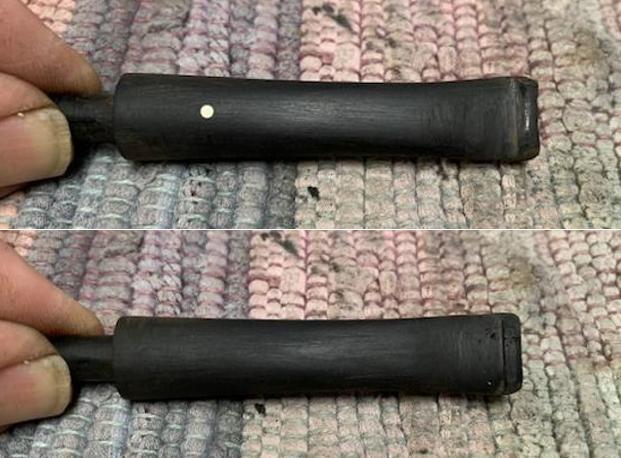
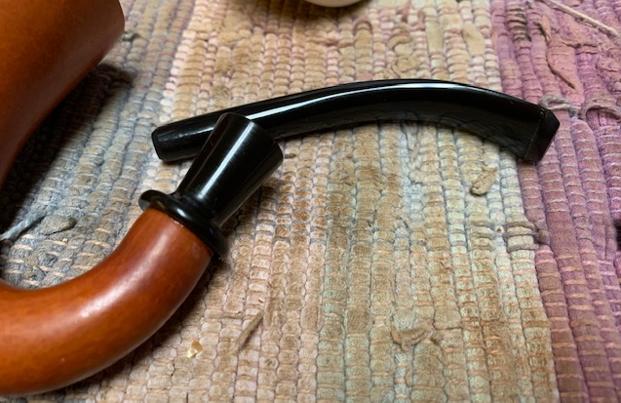
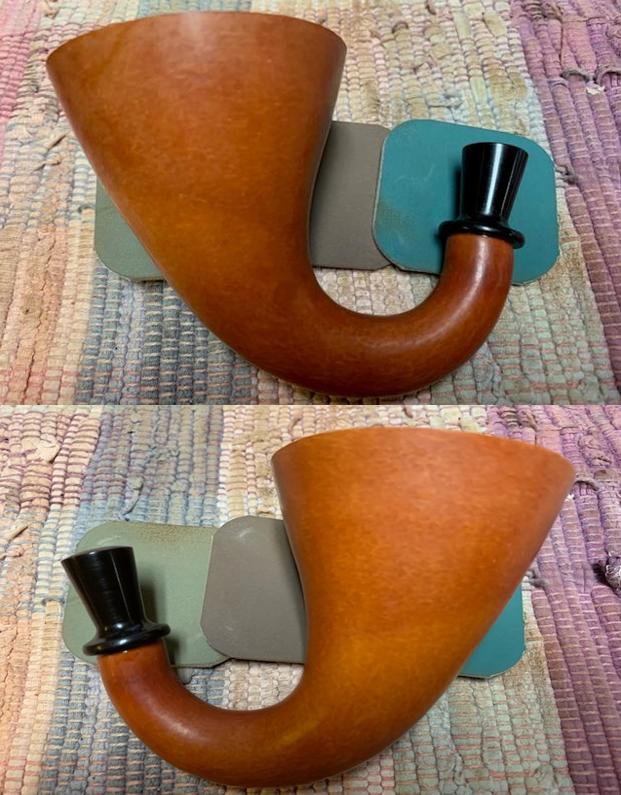
 I used a file to further remove the excess diameter and to shape the stem for smooth flow down the length of the sides. It is too easy to get a great fit at the shank end and then have the stem balloon out on the length of the sides… I was aiming to avoid that. Once I had the transition smooth with the file I finished shaping it with 150 grit sandpaper. Once I had finished the pipe was looking very good. I sent Baker a message with photos asking about the bend in the stem suggesting that we leave it and he was fine with that.
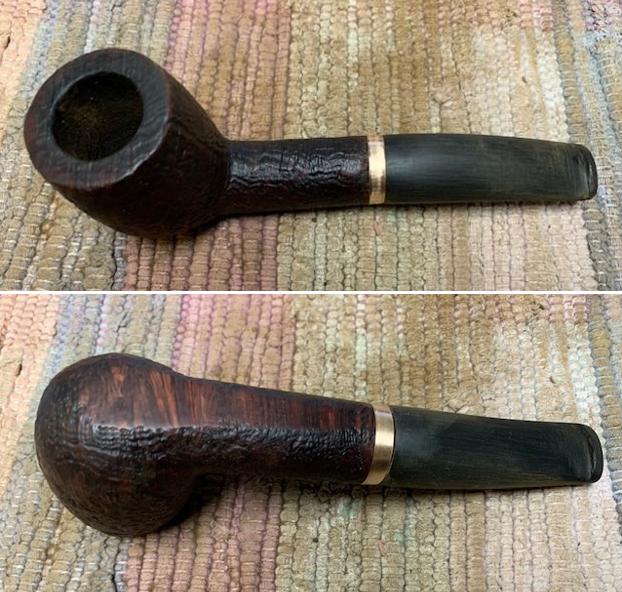
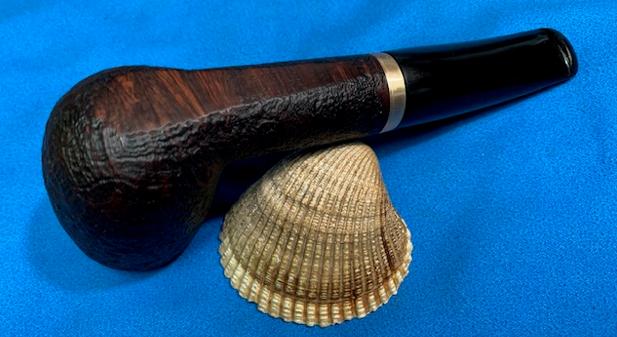
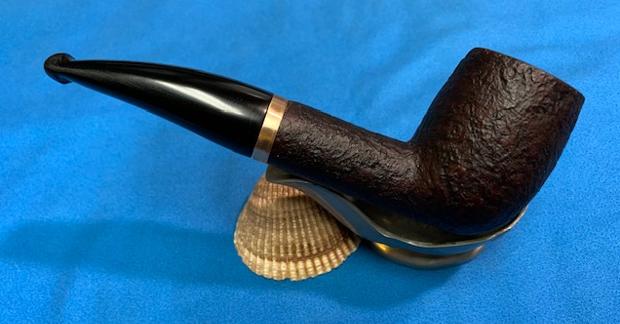
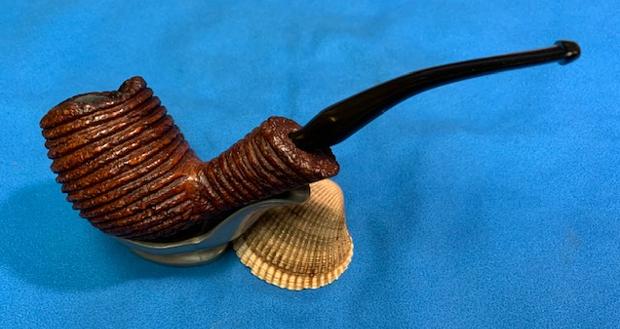
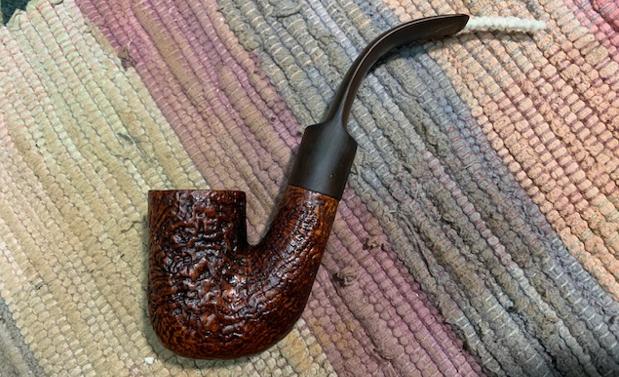
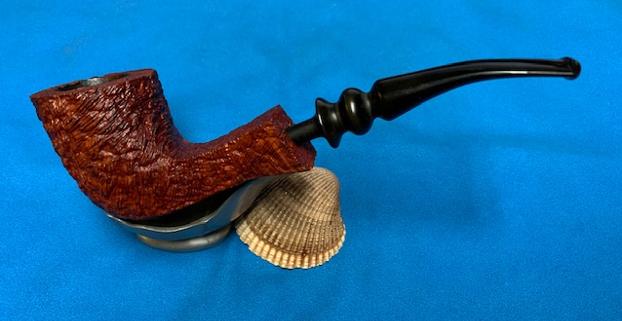
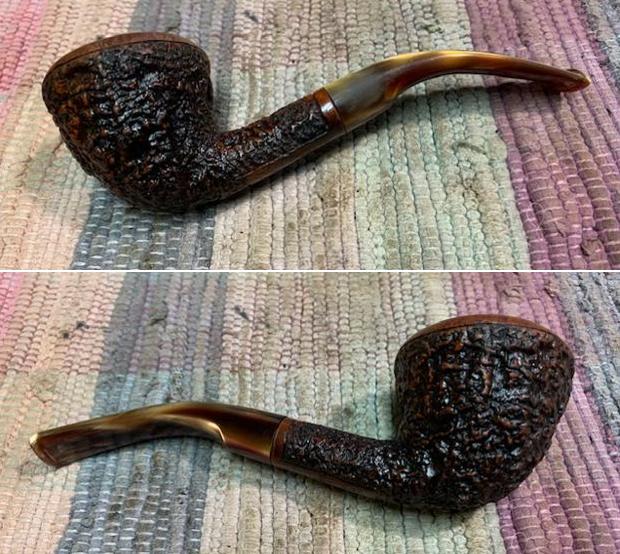
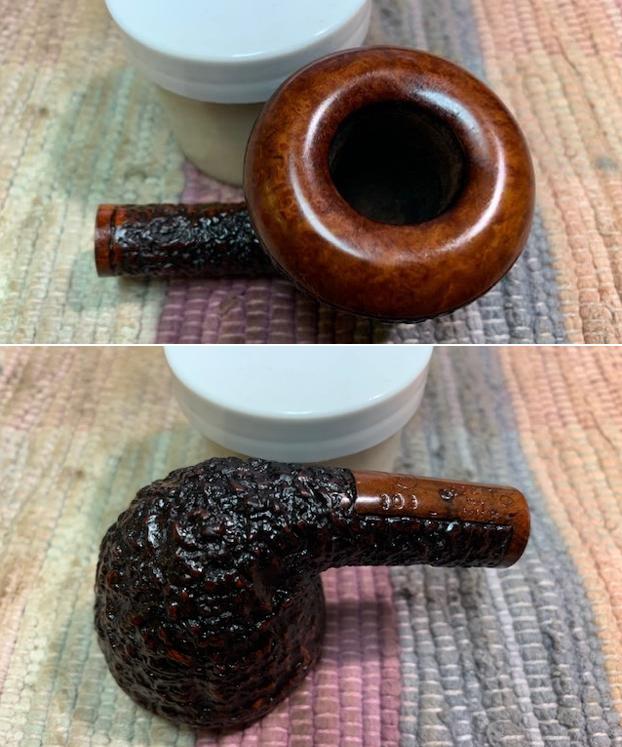
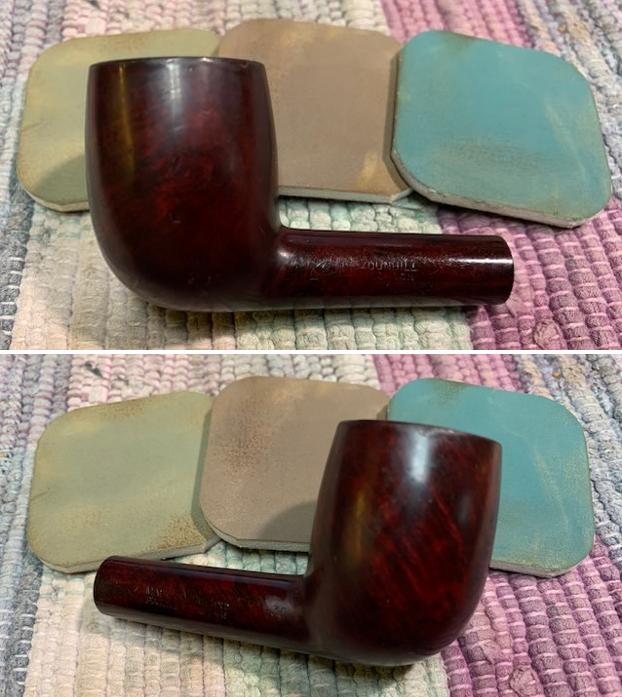
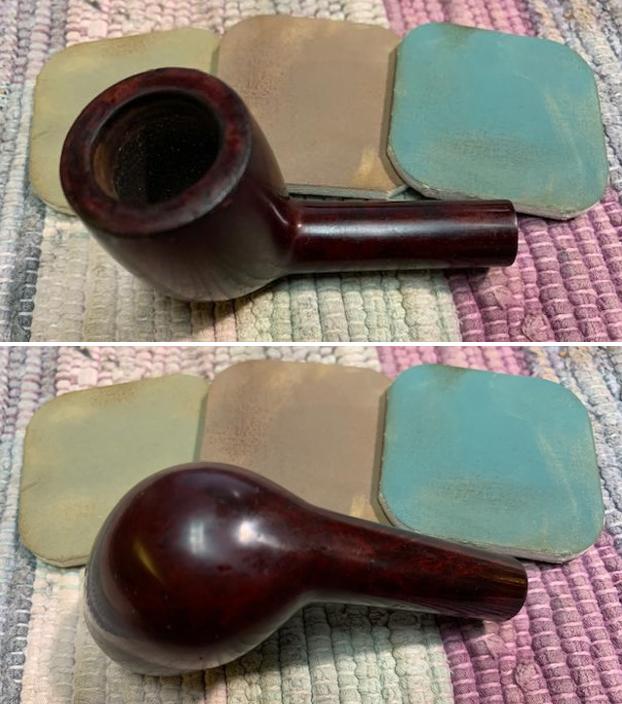
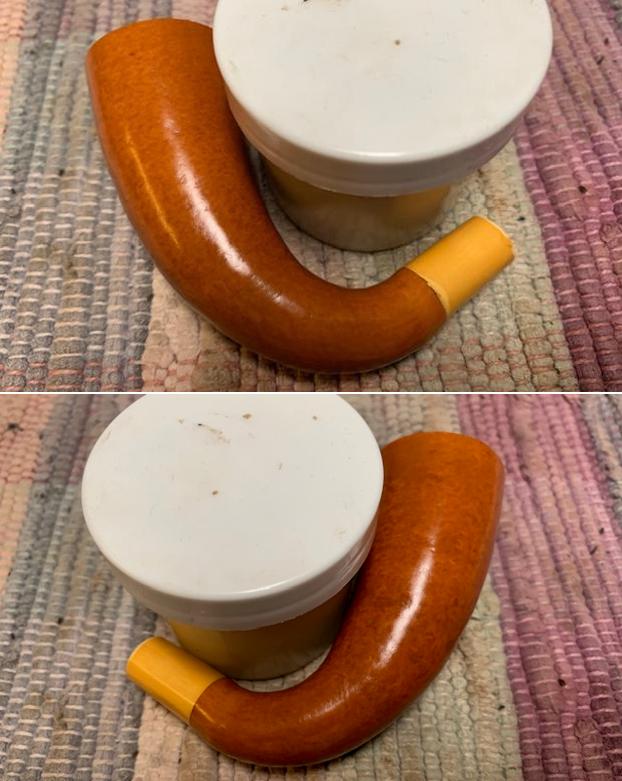
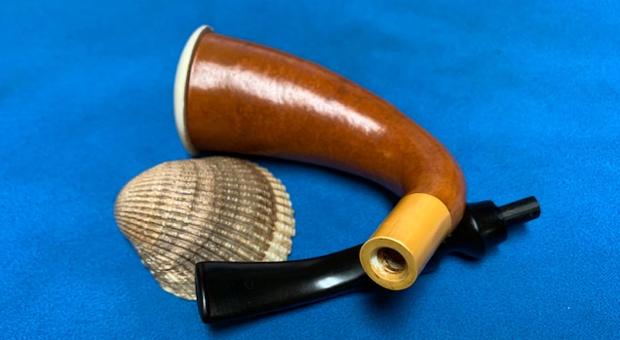
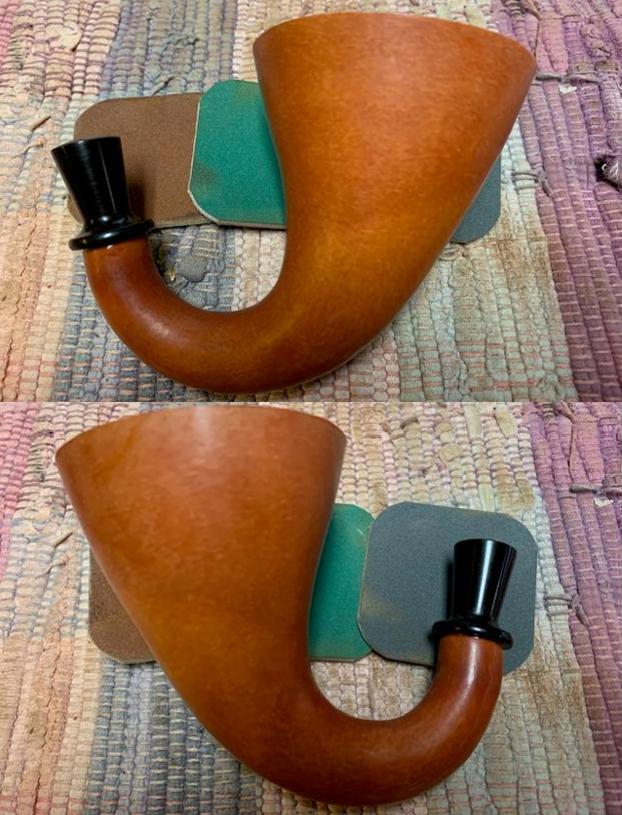
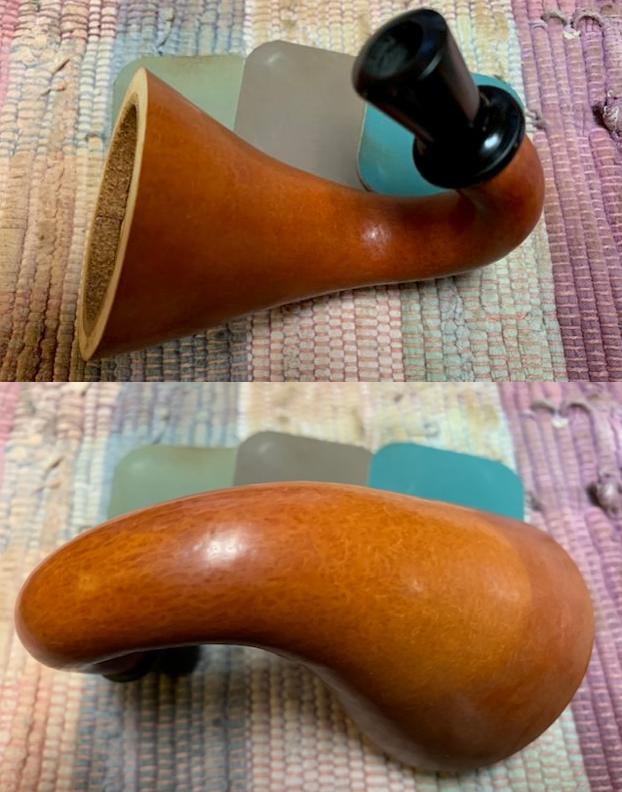
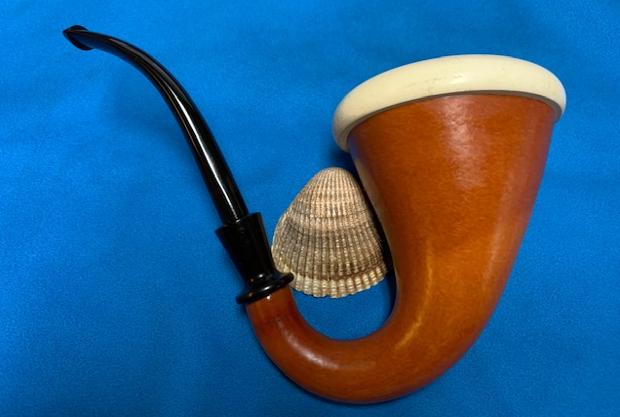
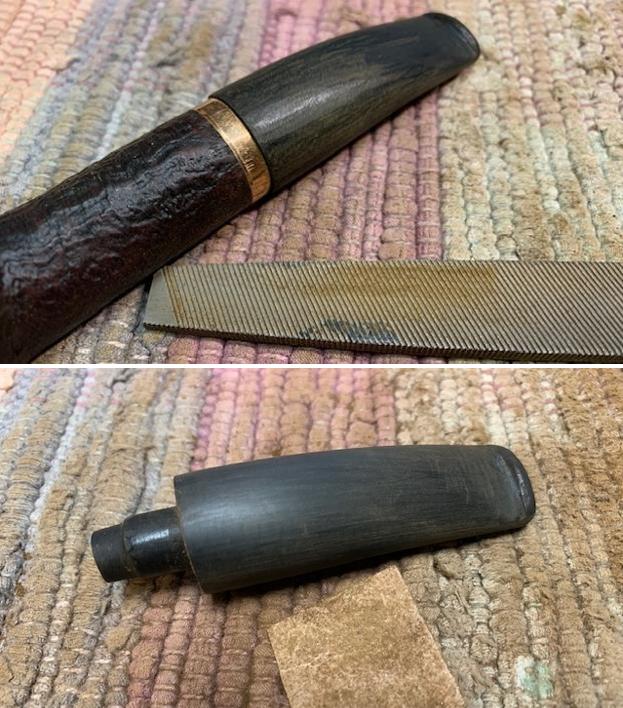 I took some photos of the pipe as it stood before I polished the stem. I liked what I saw and the fit was perfect. The transition was smooth and flawless.
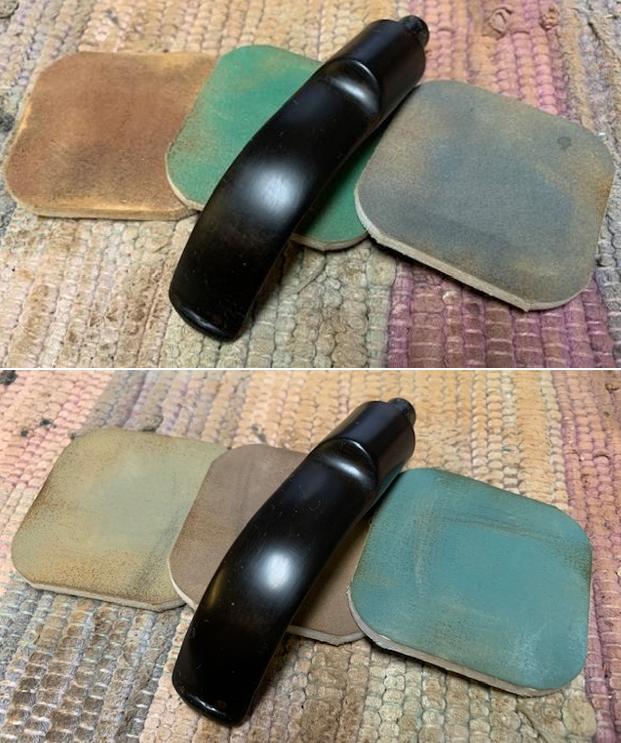
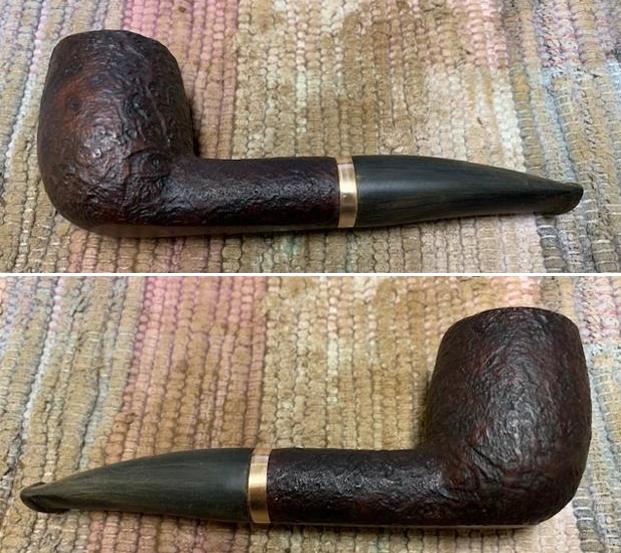
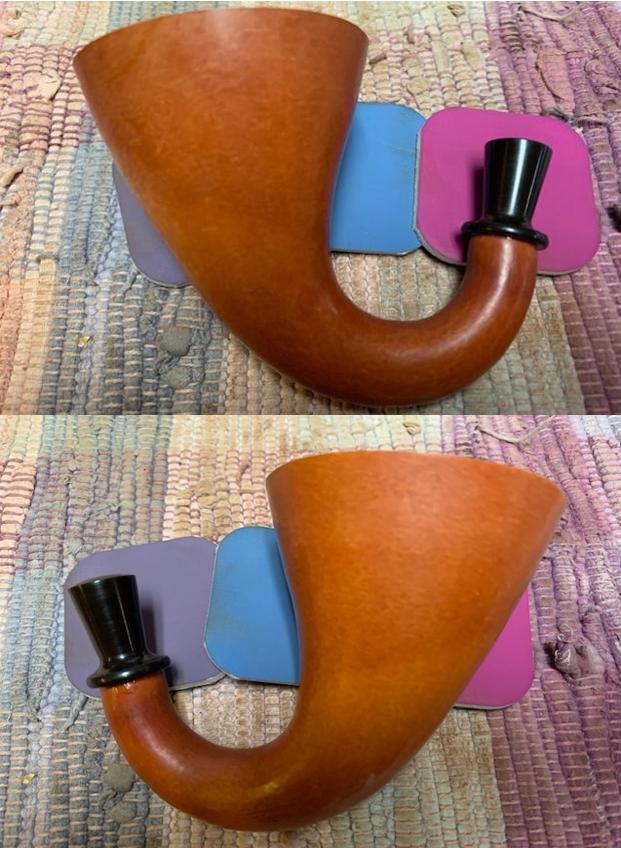
 I polished the brass band on the shank end with micromesh sanding pads. I used 1500-2400 to remove the scratching in the brass. Once I buffed the pipe it would polish the band the rest of the way. At this point it is looking very good.
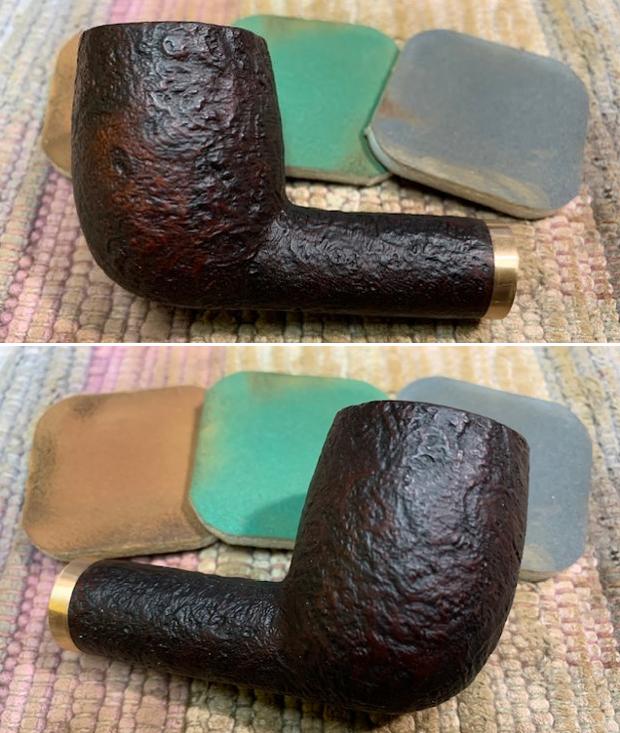
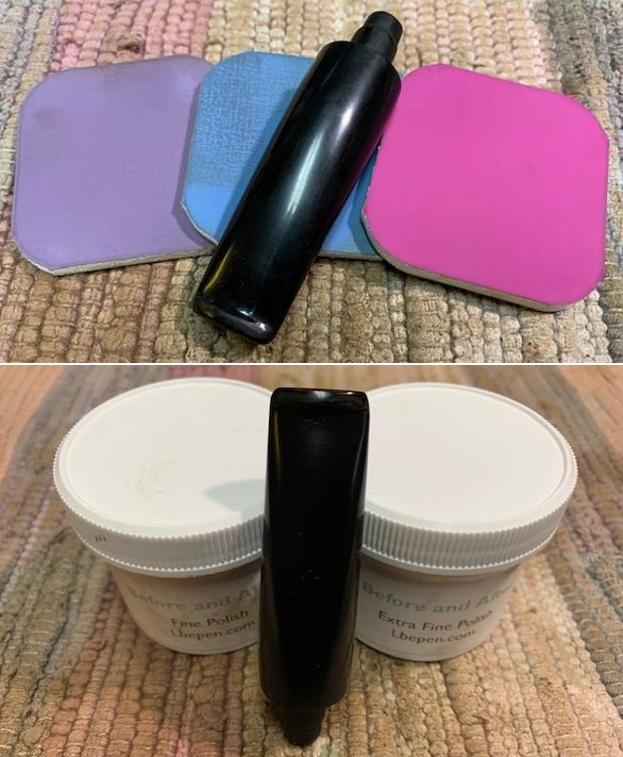
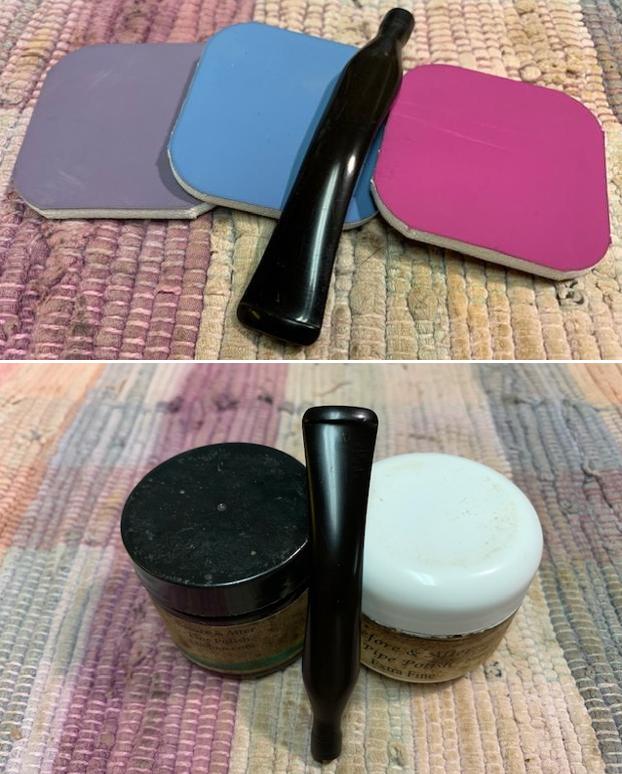
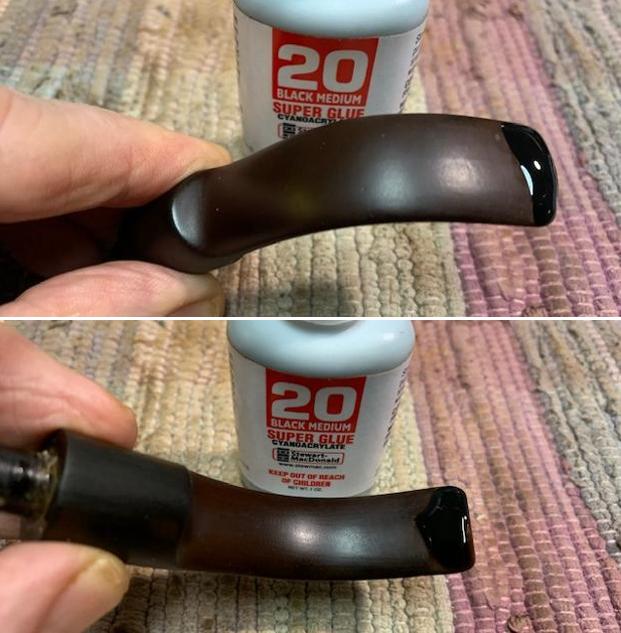
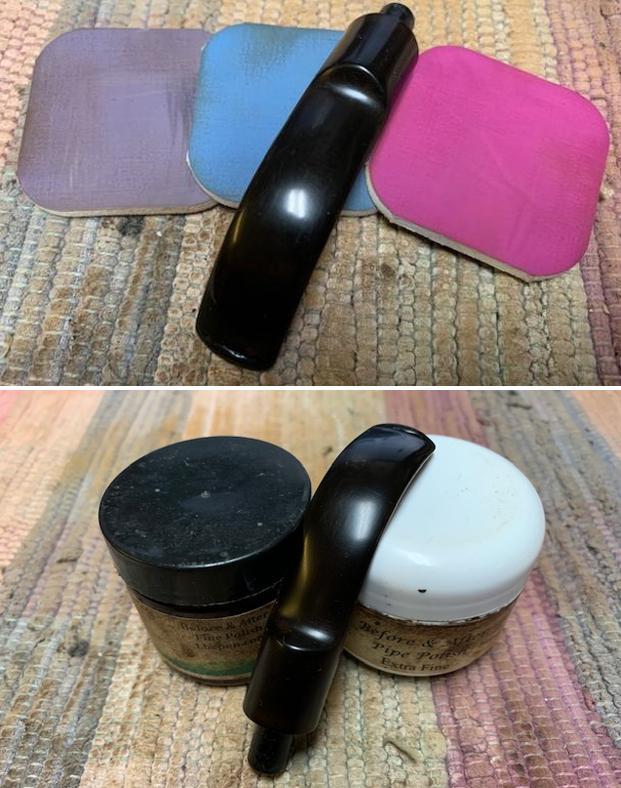
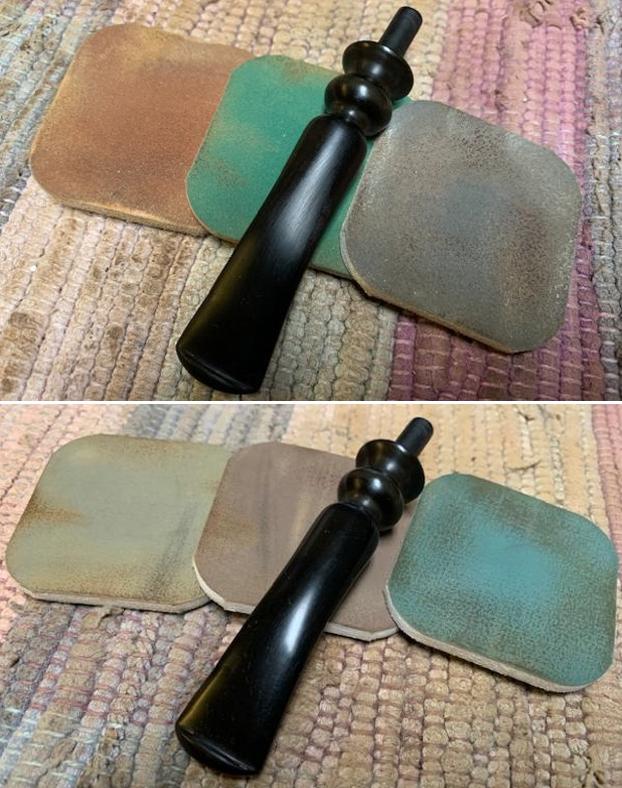
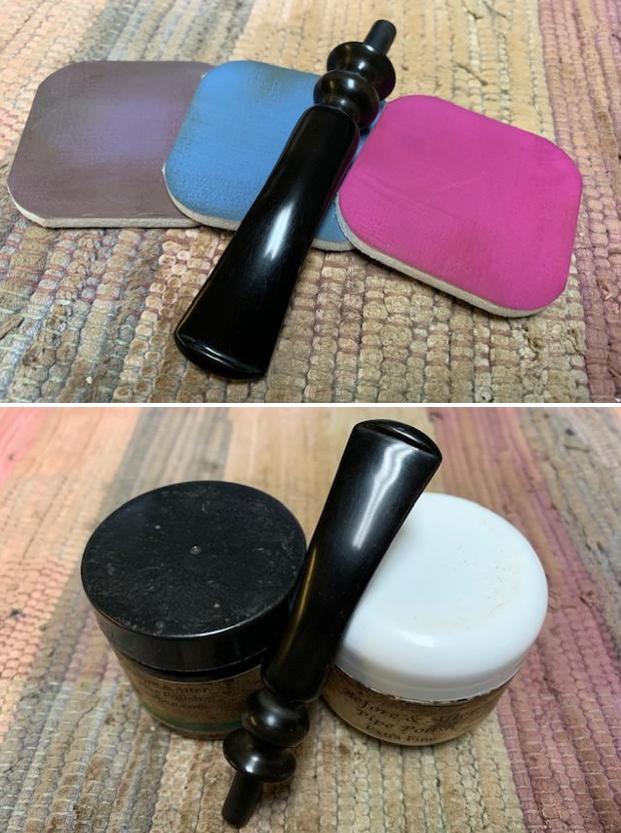
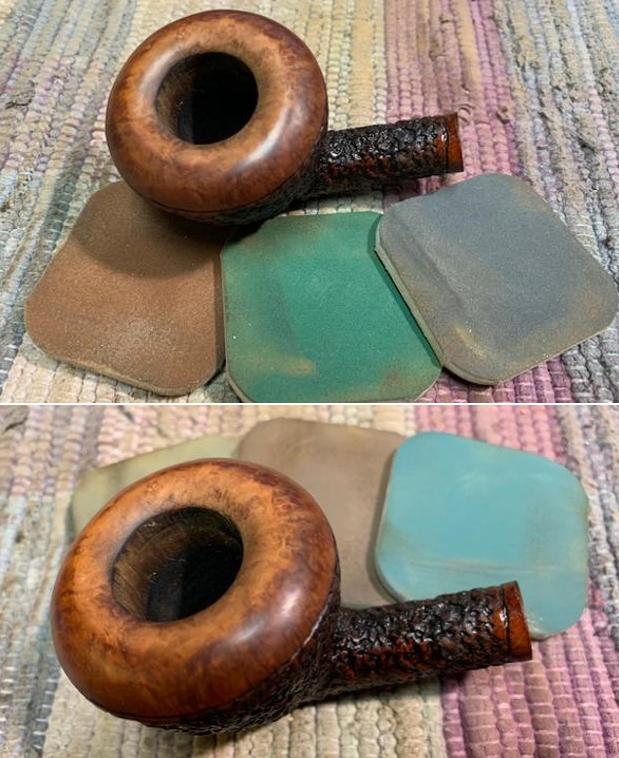
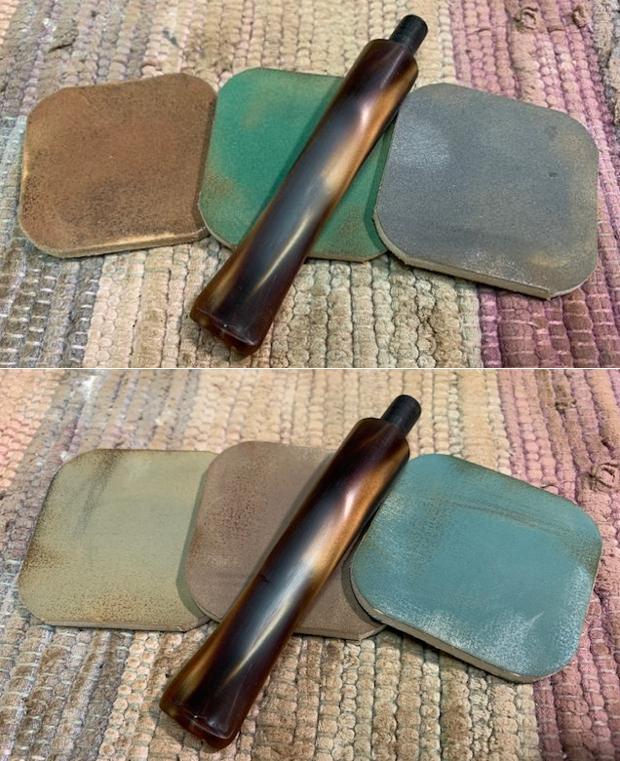
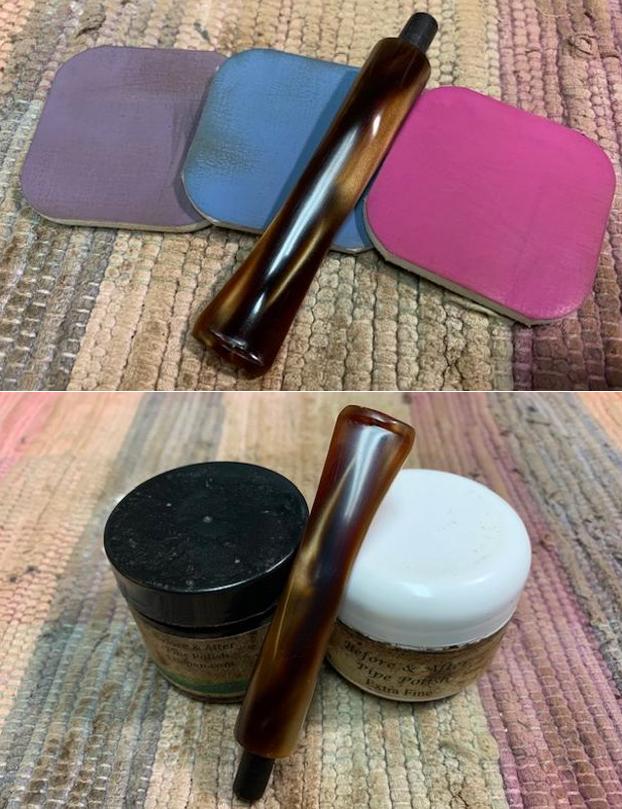
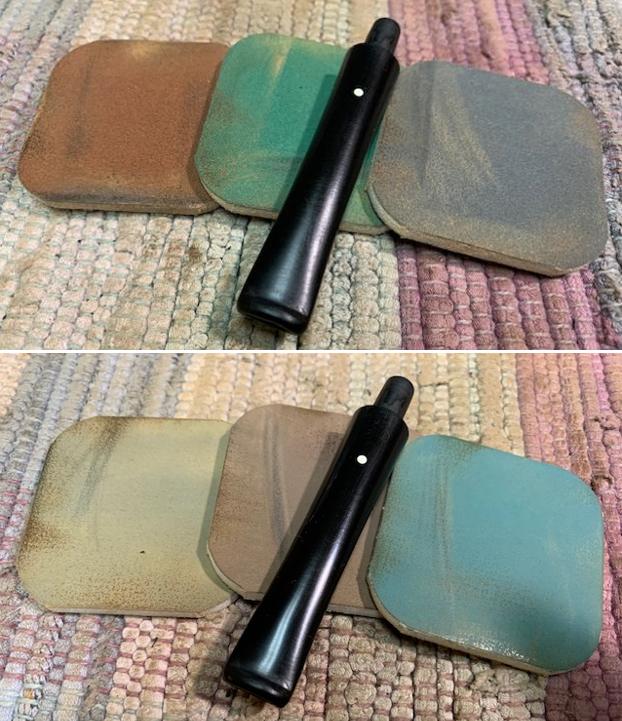
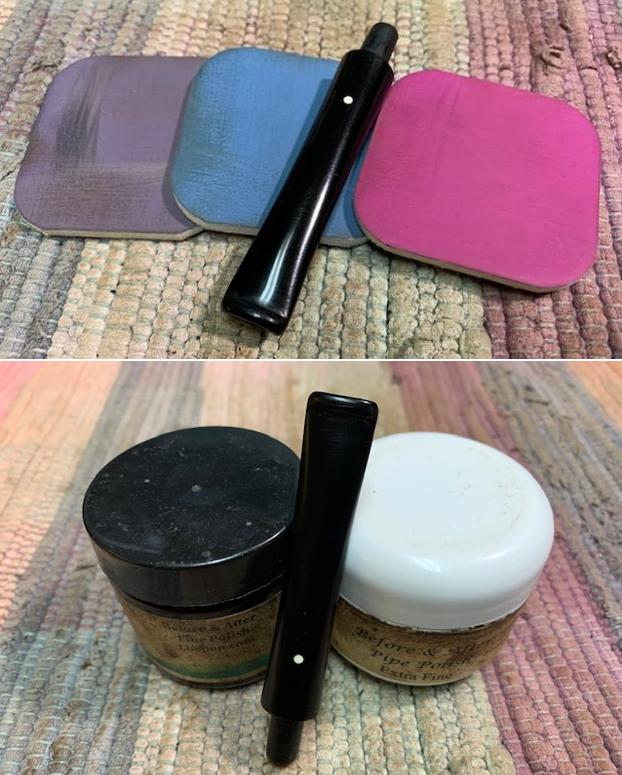
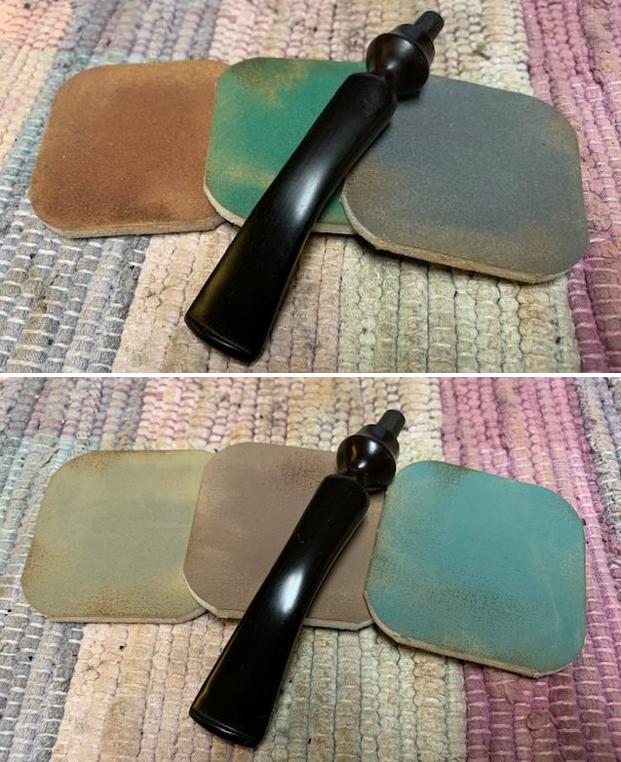
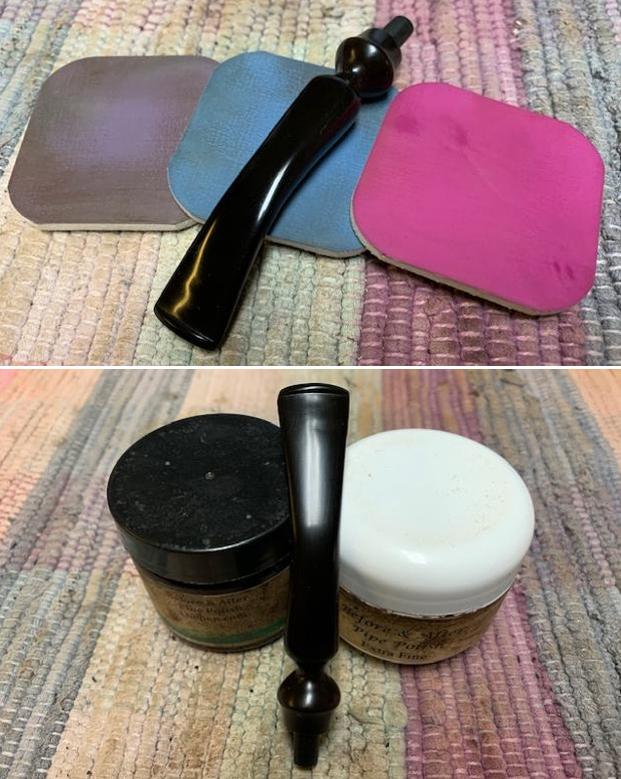
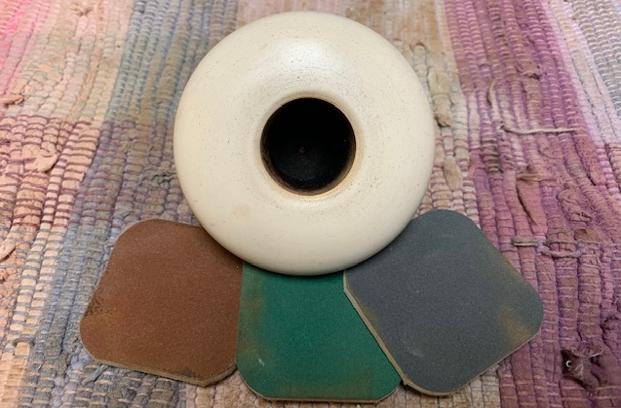
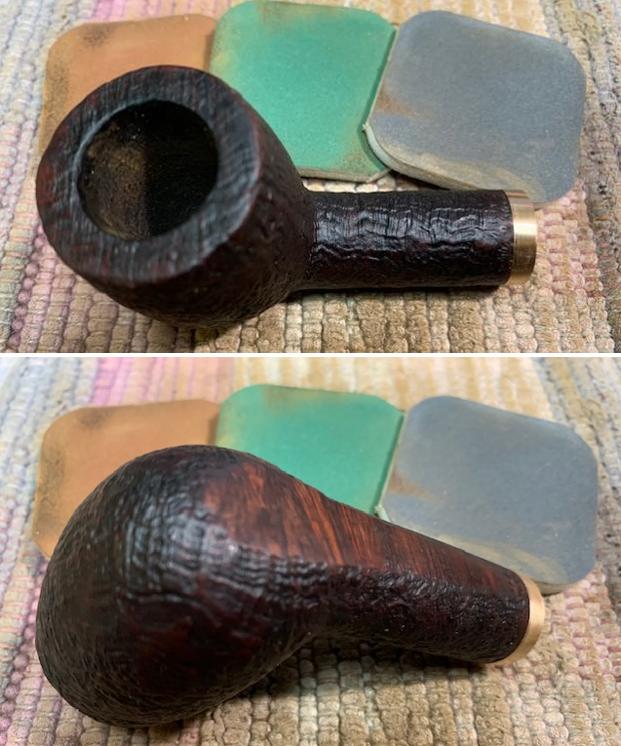 I moved on to polishing the stem with micromesh sanding pads. I dry sanded it with 1500-12000 grit pads to polish it and bring out a shine in the rubber. I wiped it down with Obsidian Oil after each pad. I polished it with Before & After Fine and Extra Fine polishes and gave it a final coat of Obsidian Oil at the end. I was pleased with the look of the stem.
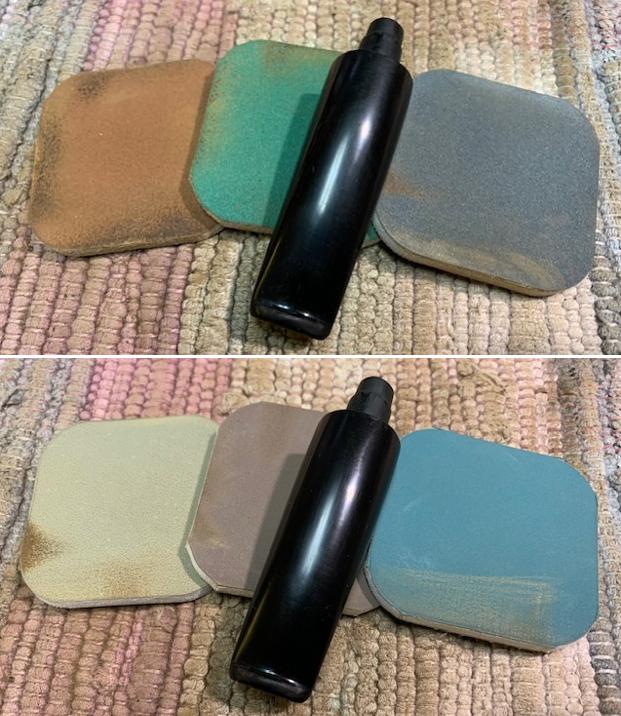
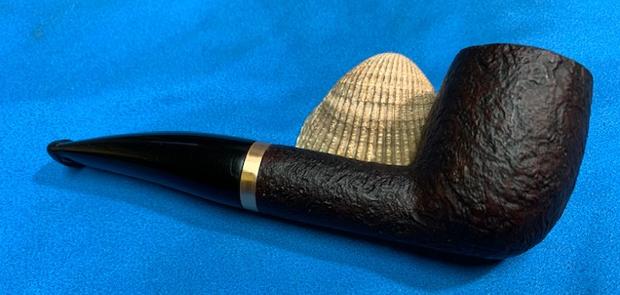
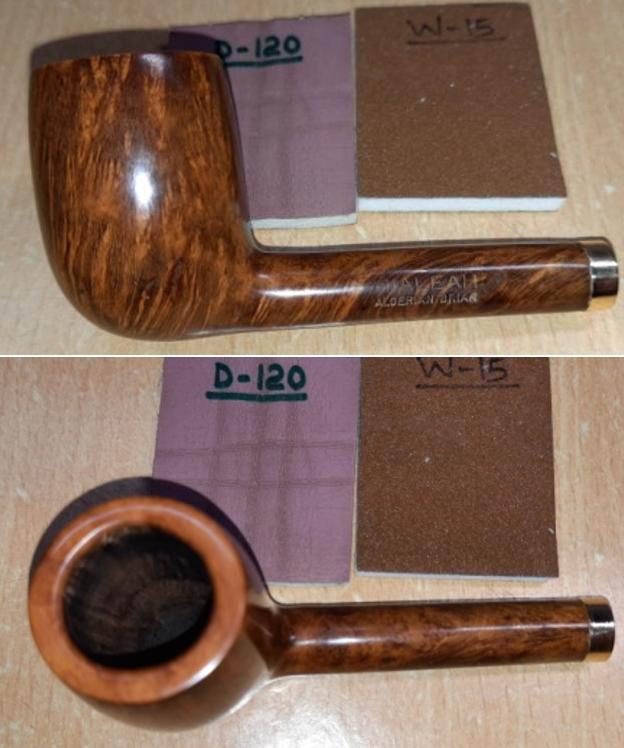
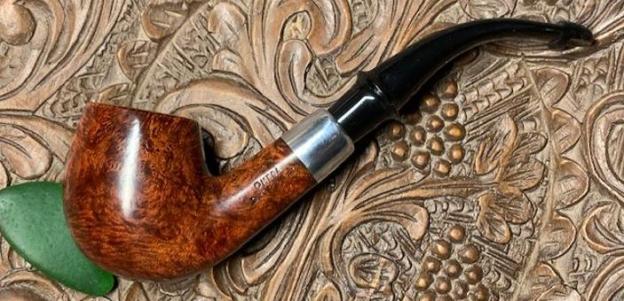
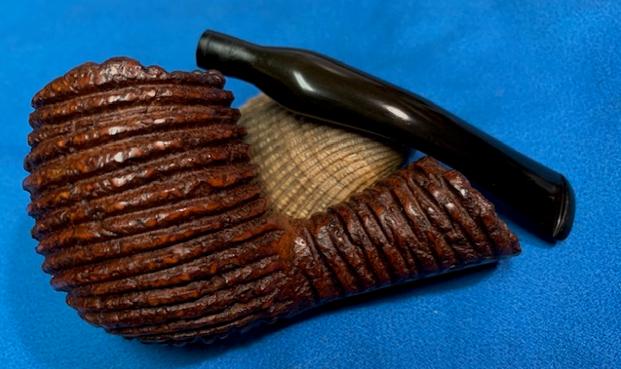
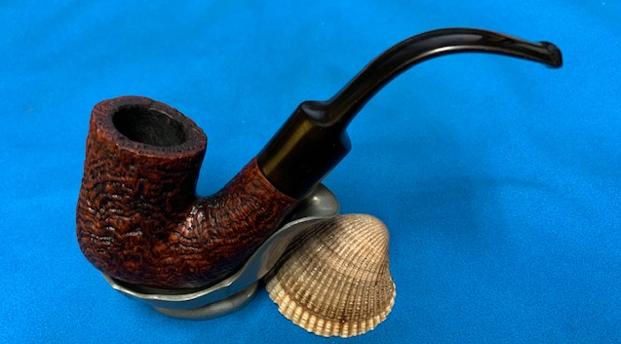
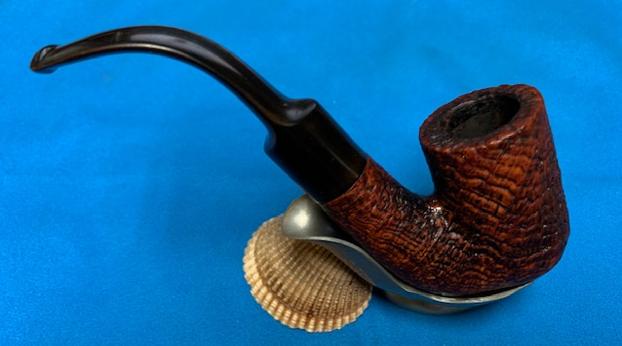
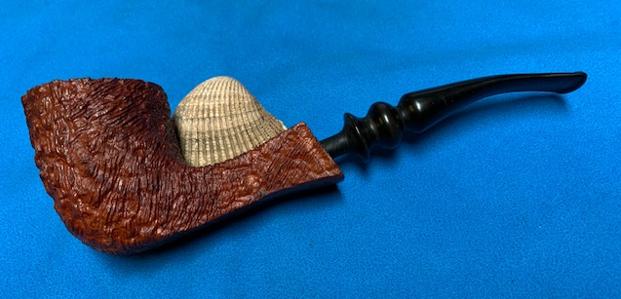
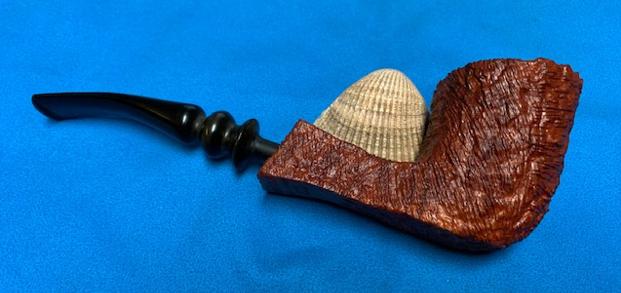
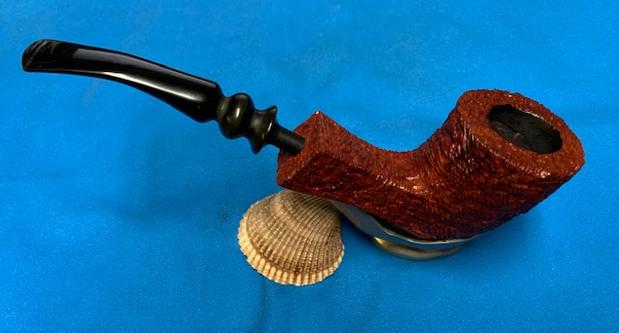
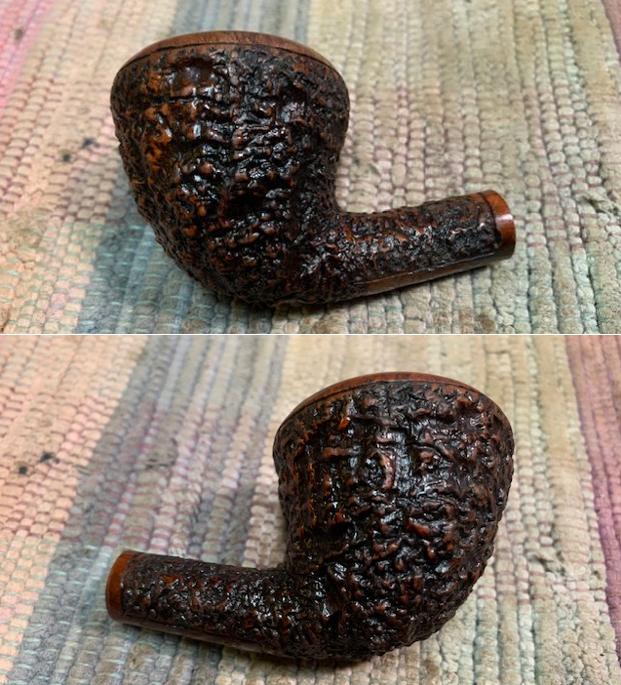
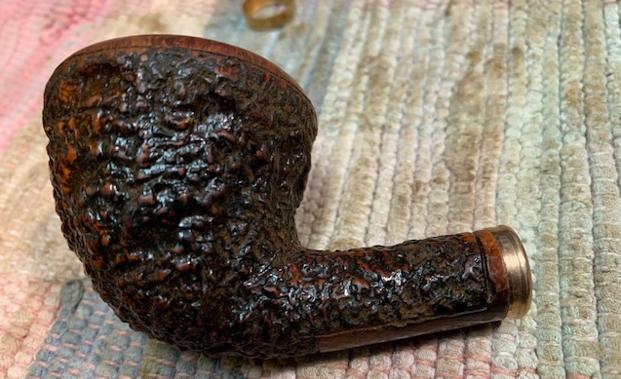
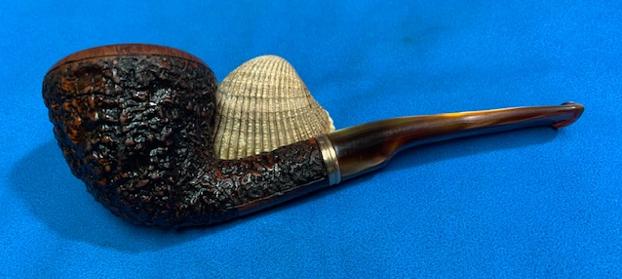
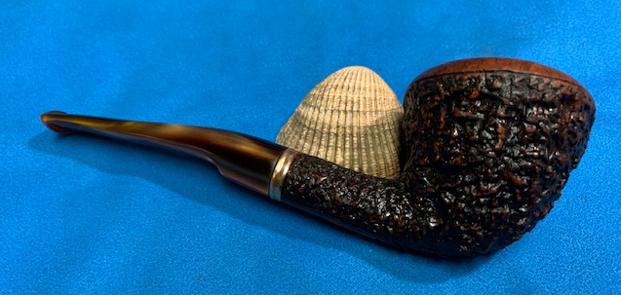
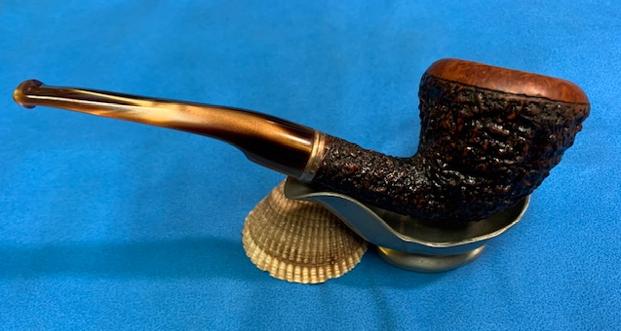
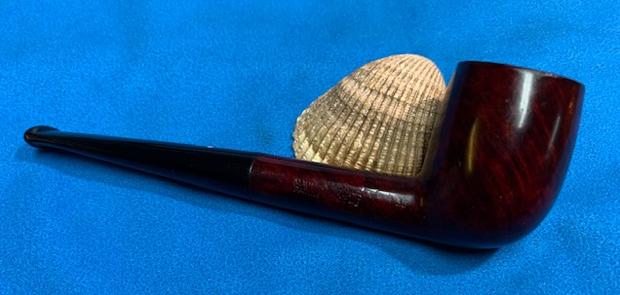
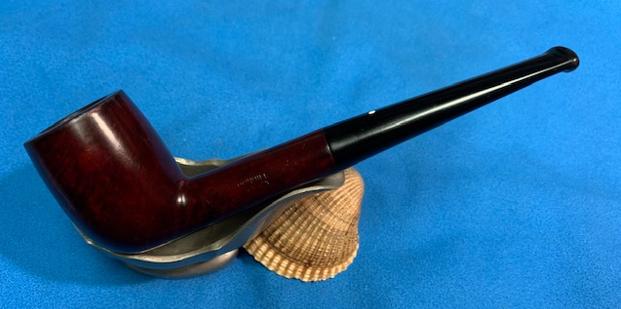
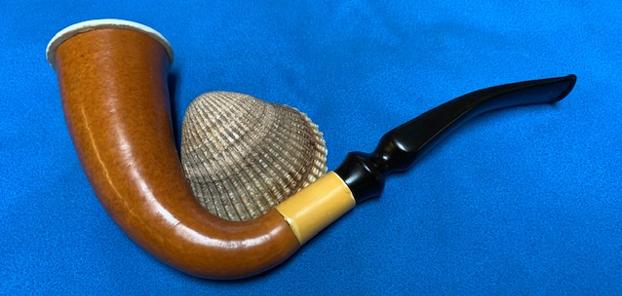
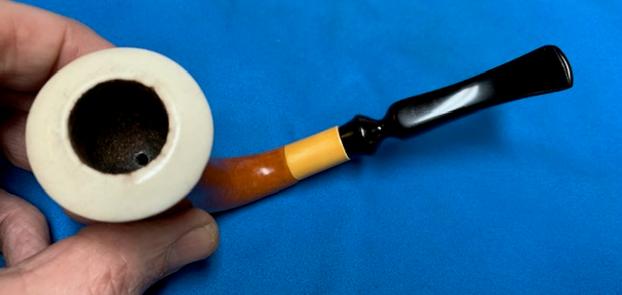
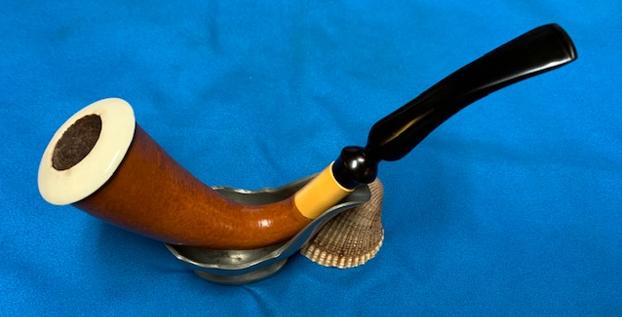
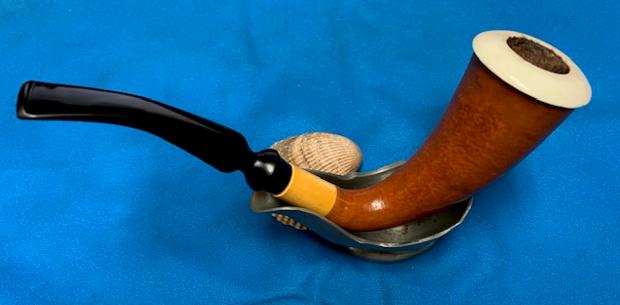
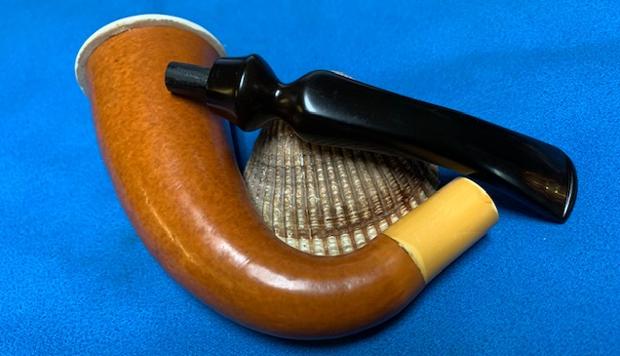
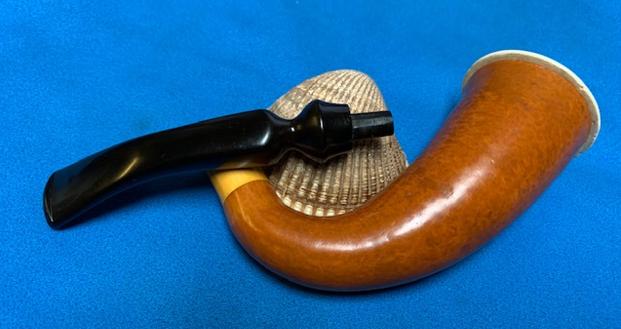
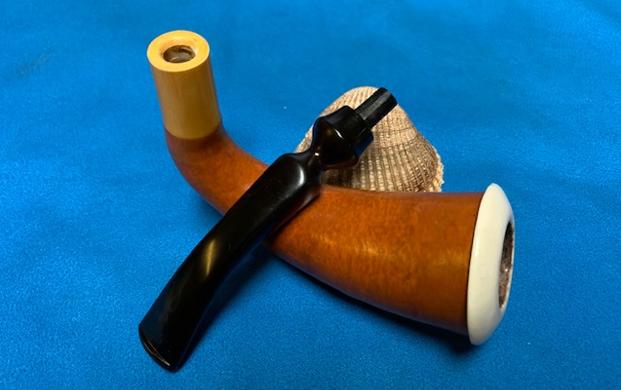
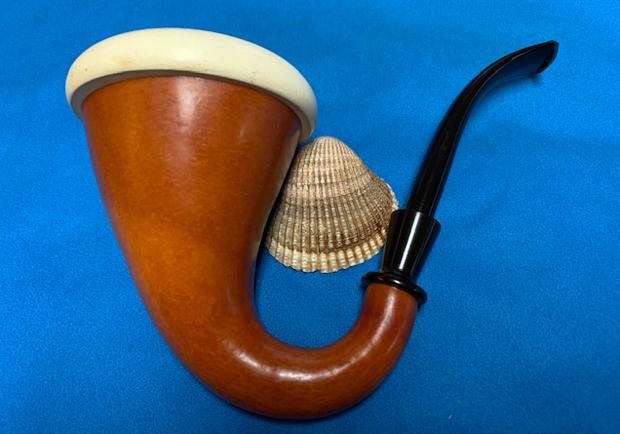
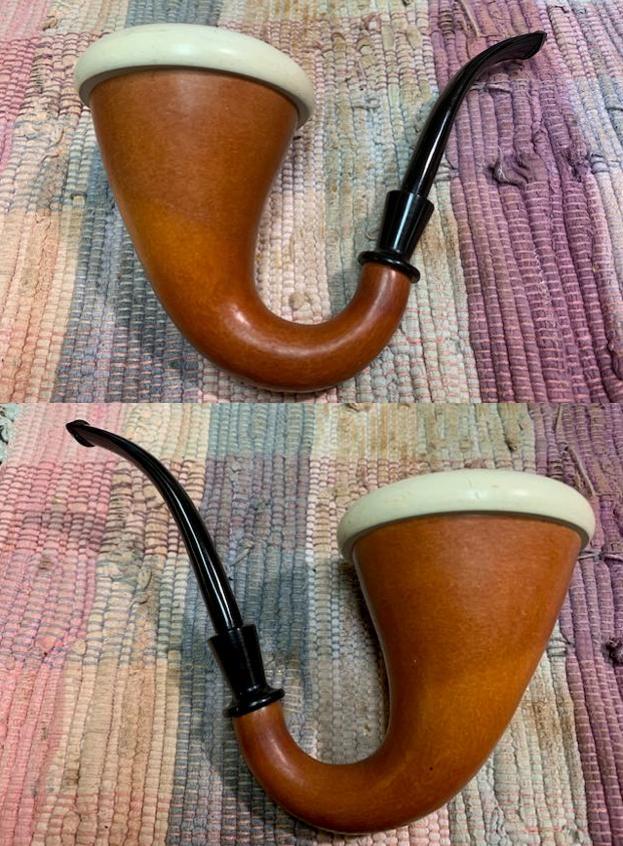
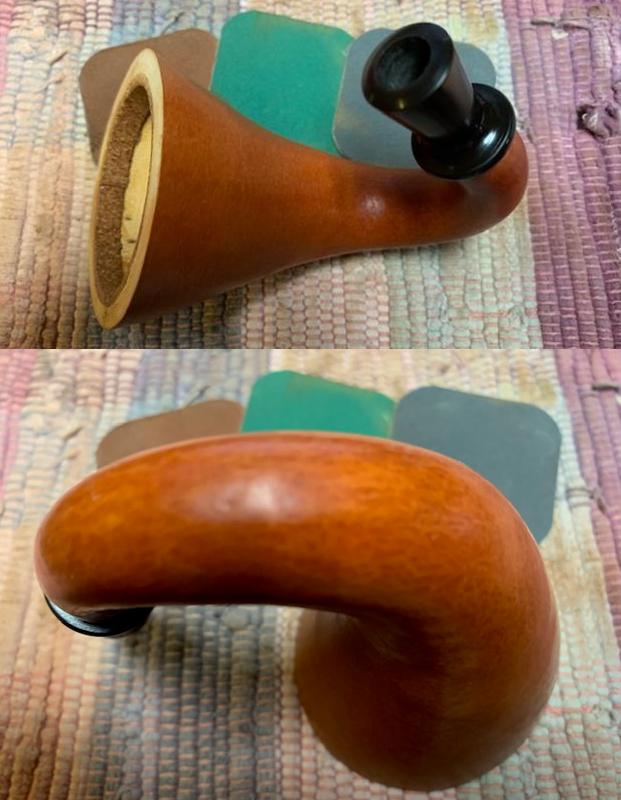
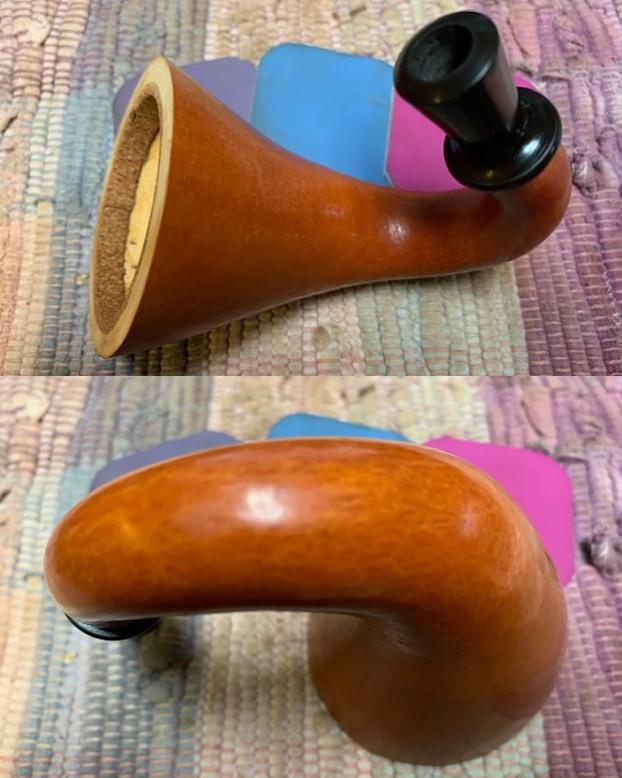
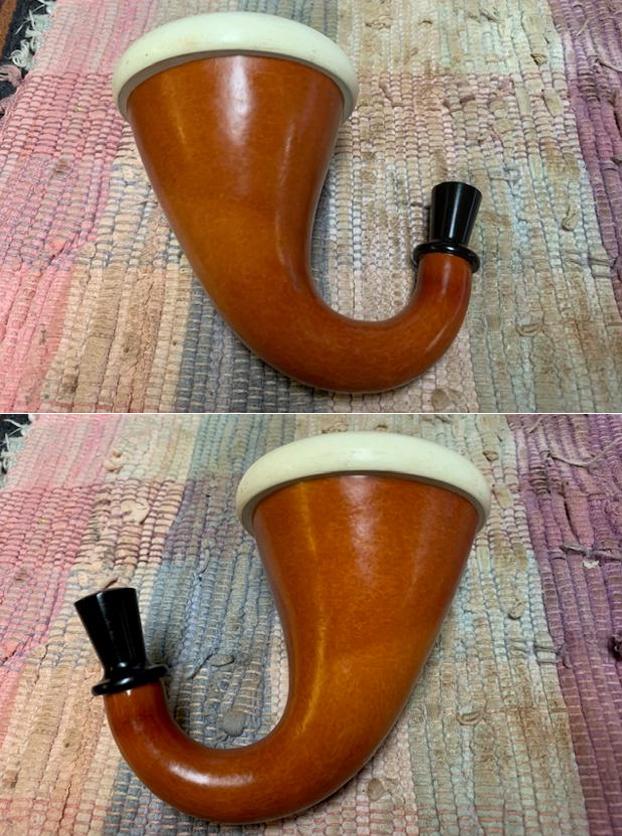
 This Abdulla British Made Drybaccy Shark Skin Billiard is a great looking pipe now that it has been restored, restemmed and banded. It really is a piece of pipe history of a little known brand that was quite well known in its day. The shark skin finish (sandblast) around the bowl is quite beautiful and highlights the grain and works well with the new polished hard rubber taper stem. I put the stem back on the bowl and carefully buffed the pipe with Blue Diamond on the buffing wheel using a light touch on the briar. I gave the bowl multiple coats of Conservator’s Wax and the stem multiple coats of carnauba wax on the buffing wheel and followed that by buffing the entire pipe with a clean buffing pad. I hand buffed the pipe with a microfiber cloth to deepen the shine. The finished Abdulla Billiard fits nicely in the hand and feels great. Give the finished pipe a look in the photos below. The dimensions of the pipe are Length: 5 ½ inches, Height: 1 ¾ inches, Outside diameter of the bowl: 1 ¼ inches, Chamber diameter: ¾ of an inch. The weight of the pipe is 57 grams/ 2.01 ounces. I have one more pipe to restore for Baker and then will be sending them back to him to enjoy! Thanks for reading this blog and my reflections on the pipe while I worked on it. There are many more to come!
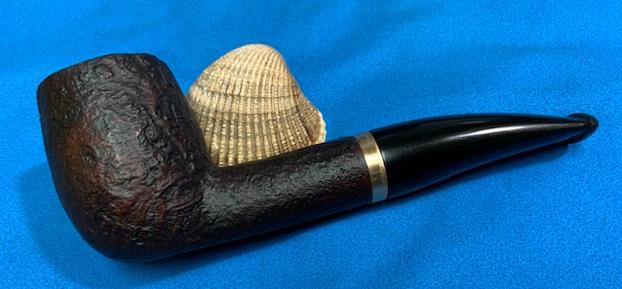


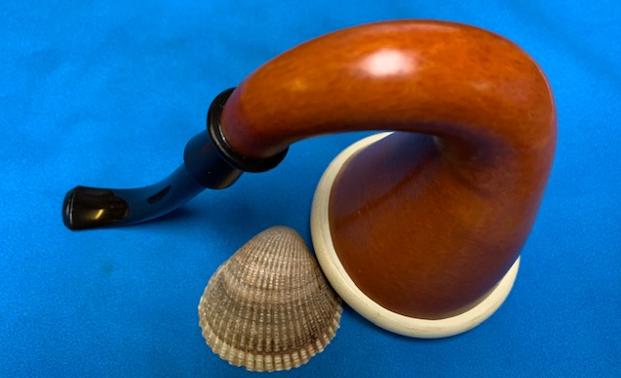
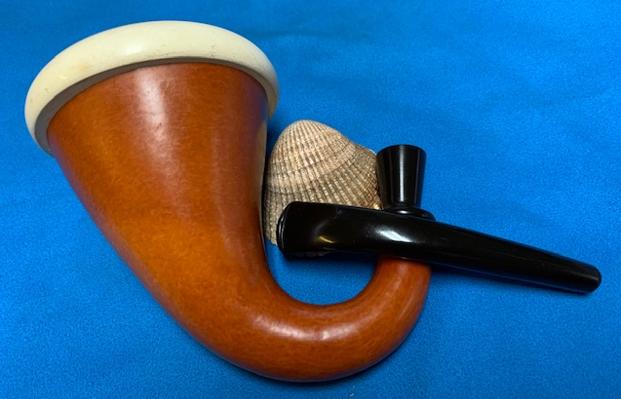
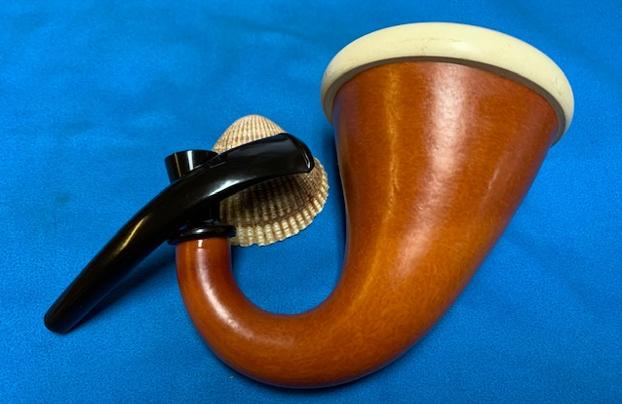
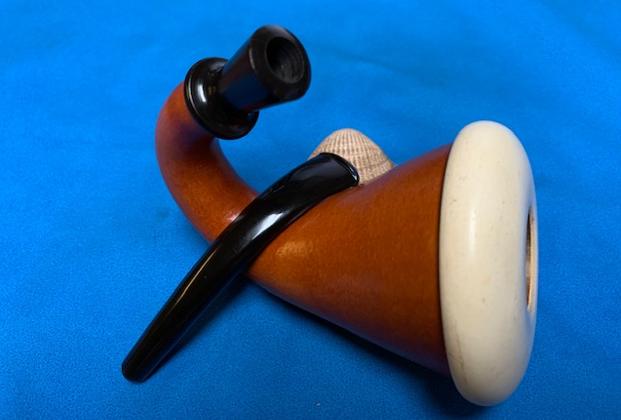
