Tag Archives: restemming a pipe

Reworking a La Strada Staccato 213 Billiard


The last of the bowls that came to me as a gift from Andrew was a La Strada Billiard bowl. It was stamped La Strada over Staccato on the left side of the shank and shape 213 on the right side. It needed a stem and it had a few minor issues that needed to be addressed. The finish was an interesting rope rustication pattern that went around the bowl like a lasso and the finish under the rope pattern was leatherlike in terms of colour and look. Over the top of the finish was a plastic clear coat that added a perma shine to the bowl. The rim was in very rough shape and had been hammered on to hard surface in tapping out the dottle. The build up on the rim covered the damaged roughness of the surface. The bowl was badly caked on only one side of the bowl. The shank was clean and looked undamaged. There was no stem with the bowl and the shank was very clean.
IMG_5072

IMG_5073

IMG_5074

IMG_5075

The La Strada was once again a brand with which I was unfamiliar. I had some vague memory of seeing them sold through Tinderbox but was not sure about that memory. I did a bit of research and found that indeed they had been sold there. They were Italian Made. Here is a page from a Tinderbox catalogue showing the brand. The catalog describes the pipe as “a gracefully conservative style that has today’s favoured matte finish, enhance by the unexpected touch of random routing.” The price was a princely $8.95-$10.00.
5tbox12

4tbox26

I sorted through my stems and found one that fit very nicely in the shank. When I inserted it there were two cracks revealed, one on top and one on the bottom of the shank. I honestly don’t know if they were present or if the happened when I put the stem in place. It was not a tight fit so I am unsure. It honestly did not matter as banding it would not be a problem. I found a silver band I had in my kit that was a good fit and pressed it into place on the shank. I heated the band with a heat gun and then pressure fit it onto the shank.
IMG_5077

IMG_5078

IMG_5079

IMG_5080

I reamed the bowl with a PipNet reamer (this seems to be more and more my reamer of choice in refurbishing).
IMG_5082

I set up my topping board and then topped the bowl with 220 grit sandpaper. I removed enough of the surface of the rim to take away the damage to the top and the front of the bowl. There were also some burn marks on the left side of the rim that I was able to sand out the majority of damage.
IMG_5083

IMG_5084

IMG_5085

I wiped down the bowl with acetone to try to break up the plastic/shiny finish that was on the bowl and was not able to remove it. The thick coat had bubbles that were thick around the rope rustication areas on the left side of the bowl. I finally put the bowl into an alcohol bath and let it soak overnight to try to break up the finish.
IMG_5086

IMG_5087

IMG_5088

IMG_5089

I took the bowl out of the alcohol bath and sanded it with a medium grit and a fine grit sanding sponge and was able to break through the finish and finally remove it. I wiped the bowl down again with acetone on cotton pads and the bowl was clean. I stained it with a dark brown aniline stain mixed 2:1 with isopropyl alcohol and applied and flamed it until the coverage matched the rim to the rest of the bowl. I buffed the bowl with White Diamond on the buffing wheel and brought it back to the work table and set it aside to work on the stem.
IMG_5090

IMG_5091

IMG_5092

IMG_5094

I sanded the tooth marks on the stem with 220 grit sandpaper and then a medium grit sanding sponge until they were no longer visible. I then used micromesh sanding pads to finish the stem. I wet sanded with 1500-2400 grit pads and dry sanded with 3200-12,000 grit pads. I rubbed down the stem with Obsidian Oil and when dry buffed it with White Diamond.
IMG_5095

IMG_5096

IMG_5097

I polished the silver band with silver polish and micromesh sanding pads and then buffed the pipe and stem with White Diamond. I gave the pipe multiple coats of carnauba wax and buffed it to a shine with a soft flannel buffing pad. The finished pipe is shown in the photos below. It is ready for its initial and should make someone a good pipe in the long run.
IMG_5098

IMG_5099

IMG_5100

IMG_5101

Repairing a Tinderbox Monza that Easily Could Have Been Firewood


Blog by Steve Laug

The pipe I repaired today was the one I wrote about earlier entitled When is a Pipe Not Worth Repairing https://rebornpipes.wordpress.com/2014/02/10/when-is-a-pipe-not-worth-repairing/ It was stamped Tinderbox Monza and according to a 1974 catalogue on Chris Keene’s site it originally sold for $15. It could be purchased in a matte finish smooth or a hand rusticated version. The shapes were varied and the sizes also varied. I have repaired one other pipe that had the same rustication but no stamping on it so I would imagine it also is a Monza. Monza pipes were made by Lorenzo for Tinderbox. They were a house line of Italian made affordable pipes during the 70’s.

This particular Monza had seen better days. I described it in my earlier essay as being virtually ready for the scrap heap. The bowl was badly caked and the one inch diameter bowl had been reduced to a hole small enough that I could barely squeeze my little finger in the bowl. The top portion of the cake had been carved or hacked away with a knife and the bottom portion had also been hacked away. This left a solid girdle of carbon cake around the middle of the bowl. The bottom of the bowl had been gouged at and the right side of the bottom had a huge “smile” carved in it. The rim had been hammered into rough shape so that the outer edge was ruined. The lava build up on the rim was very thick and it totally covered striated rustication that had been present when the pot was new.

The stem was chewed and carved with a huge chunk out of the underside making it non-repairable. The stem had then been covered with a softy bit and left to calcify on the stem. The pipe was a mess. Once I removed the stem I could see that the airway had been left immaculate. There were no tars, no oils, no dirt – it literally shined it was so clean. The inside of the stem was the same. This pipe had been cared for in a functional way and probably smoked to death by the original purchaser. It was the clean airway that tempted me to give this pipe a remake. It must have been someone’s favourite pipe for him to go to the extremes that this pipe had seen in terms of treatment. Every action the fellow carried out on this pipe only made sense in a utilitarian sense of prolonging the purpose the pipe was made for.
IMG_5028

IMG_5029

IMG_5030

IMG_5031

The outer edge of the rim on the back of the bowl had a chunk missing and a crack running down the outside of the bowl. It also ran on the top of the rim and had yet to break through on the inside of the bowl. The crack ran down along one of the striations carved in the bowl for about ½ inch. It was not very deep once it moved away from the chip at the top edge of the bowl.
IMG_5032

The close up photo below shows the cake that forms a ridge around the centre of the bowl. The top had been carved away and the below the ring of cake it had also been carved away. The bowl bottom visible on the top of the photo below shows the gouge that had been carved on that side of the bottom. The other side remained intact and hard.
IMG_5033

The front edge of the bowl had been hammered hard or scraped against something and the outer edge was worn and rough feeling.
IMG_5034

I reamed the bowl with the largest PipNet reamer cutting head in the set and was able to scrape the cake back to the wood. I wanted to see if the walls of the bowl were charred or burned. I further scraped it with a knife blade and found that the walls were solid under the cake. The wood did not have burned or charred portions.
IMG_5035

The stem was ruined as can be seen in the photo below. The bottom side was missing a large triangular shaped chunk that went almost from side to side. I thought about cutting off the end and reshaping the button but the damage was extensive and the previous owner had carved the airway in the broken portion so the material left behind on the top and bottom of the stem was scored and very thin. I would need to fit and shape a new stem.
IMG_5036

I picked at the surface of the rim with the dental pick and could see it was not going to work so I topped the bowl. I decided to make a smooth rim to match the smooth band on the shank and the bottom of the shank. They would set each other off well when the pipe was restained. I set up my topping board and a piece of 220 grit sandpaper and twisted the bowl into the sandpaper until I had removed the damaged portion of the rim. The crack on the surface looked as if it had been filled already with some sort of glue and it was solid. This is visible in the photos below.
IMG_5037

IMG_5038

IMG_5039

IMG_5040

Once the bowl was topped I dropped it in the alcohol bath to soak and loosen the grit and grime that filled all of the rustication on the sides of the bowl. It was a sticky and tarry mess and I wanted to soften it. I soaked it for about an hour and then scrubbed it with a brass tire brush. I picked out all of the grooves with the dental pick and then put it back in the alcohol bath for yet another hour. Once it came out of the bath I scrubbed a final time with the brush and then picked out any remaining grit in the grooves. I then wiped the bowl down with acetone on cotton pads to remove the softened finish and the remaining grime.
IMG_5041

IMG_5042

IMG_5043

I used super glue and briar dust to fill the divot/chip on the outer edge of the bowl and make it less ragged looking.
IMG_5044

I found an old stem blank in my can of blanks that would work with the pipe. It was not a saddle stem like the original one but it would work well. It was considerably larger in diameter than the shank of the pipe so not only would I need to use the PIMO tenon turner to fit it in the shank but I would also need to remove the excess vulcanite and match it to the shank.
IMG_5045

IMG_5046

IMG_5047

IMG_5048

IMG_5049

I used the Dremel with the larger sanding drum that comes with the set to cut back the vulcanite and shape the stem. This takes time and a steady hand to keep it from nicking the briar and causing more damage than help.
IMG_5050

IMG_5051

IMG_5052

Once I had the stem close to the diameter of the shank I took it back to the work table and hand sanded it with 220 grit sandpaper to finish the fit. I sanded it until the transition between the shank and the stem was seamless. My fingers needed a break from sanding at this point so I decided to repair the gouged out bottom half of the bowl. I inserted a pipe cleaner in the airway to keep any of the plaster mix getting into the airway. Then I mixed up some plaster of Paris in a shot glass and used the spoon end of a pipe nail to put it in place in the bottom of the bowl. I tamped it with the tamper head of the nail and smooth it out.
IMG_5054

When the plaster had set I stained the bowl with a dark brown aniline stain mixed 2:1 with isopropyl alcohol. I wanted the dark stain in the striations to come through the stain coat and give some contrast to the coloration of the bowl. I applied the stain with a cotton swab, flamed it and reapplied and reflamed it until the coverage was even across the bowl. I worked to get the rim and the smooth portions of the shank to match in colour.
IMG_5055

IMG_5056

IMG_5057

IMG_5059

I sanded the stem with a medium and a fine grit sanding sponge to remove the scratches left behind by the 220 grit sandpaper. I followed that by sanding with micromesh sanding pads – wet sanding with 1500-2400 grit pads and dry sanding with 3200-12,000 grit pads. I rubbed the stem down with Obsidian Oil when I had finished and then buffed it with White Diamond.
IMG_5060

IMG_5061

IMG_5063

The vulcanite stem blank I used was an older one and must have come out during the war years. I had read that in those times there was often piece of metal found in the vulcanite of the stem material. This particular stem had a nice bunch of it on the right side of the stem near the shank. It almost looks like the remnants of a stamp on the stem but it is not. It appeared as I sanded the stem down to fit the shank. The photo below shows it about midway between the top and bottom of the stem near the shank junction. The glare of the flash highlights it as well.
IMG_5071

With the stem polished and ready and the pipe stained it was time to bend the stem. I used a heat gun to heat up the stem until it was pliable and then bent it over the round handle of a chisel that I had on the workbench. I used the original stem as a pattern to determine how far to bend the stem.
IMG_5064

IMG_5065

IMG_5066

I rubbed the stem down with Obsidian Oil a final time and then buffed the pipe and stem with White Diamond to give it a shine. I then gave the stem multiple coats of carnauba wax and applied the wax to the bowl with a light touch on the buffing wheel. I finished with a buff with a soft flannel buffing wheel. The finished pipe is shown in the pictures below. I think it will last a few more years and yet again deliver a good smoke. In fact I would not be surprised at all if it does not last longer than I will.
IMG_5067

IMG_5068

IMG_5069

IMG_5070

Alternative Woods: Refurbishing and Restemming a Black Walnut Pot


I received this pipe bowl as a gift from a friend in exchange for some work I did on one of his pipes. I took it out of the box and put it in the refurbishing box without giving it much of a look. Today I took it out of the box and looked it over. It is well made; the airway is drilled straight and comes out the bottom of the bowl. The drilling is accurate and clean. The mortise is smooth and clean. The bowl has been smoked very little as the bottom half is still fresh wood. The shank is clean and there are no tars. The wood is clean with a few dings and dents. There seems to be a slight finish on the bowl – varnish or something. It also appeared to have a band on the shank originally as there is a stain from the metal on the end of the shank. It came to me without a stem. Today I will take care of that.
IMG_4987

IMG_4988

IMG_4989

IMG_4990

I wiped down the bowl with acetone and cotton pads to remove the finish and sanded it with a medium grit sanding sponge. I wiped and sanded until the finish was gone from the bowl and then wiped it down a final time. The smell of the sanding dust as well as the grain told me that I was dealing with a well made walnut, probably black walnut pipe. This one would clean up very nicely.
IMG_4991

IMG_4992

IMG_4993

IMG_4994

Since I could not remove the stain left behind by the previous band I decided to reband the pipe. I found a nickel band in my band collection that would be a perfect fit. I heated it with the heat gun and the pressed it into place on the shank. I cleaned up the shank end of the pipe once the band was in place and widened the bevel on the inside end of the mortise to fit the new stem that I would fit for the pipe.
IMG_4995

IMG_4996

IMG_4997

IMG_4998

I went through my can of stems and found three different stems that would work with this pipe. Two of them were vulcanite and one was a clear acrylic. I have not done much work with clear acrylic and never turned the tenon to fit a pipe so this one seemed to be the way to go. Each pipe has to be a bit of a learning experience. Besides I liked the way the clear acrylic looked with the walnut bowl and the silver band.
IMG_4999

I drilled the airway in the stem to fit the end of the PIMO tenon turning tool and then put the tool on my drill and slid the stem in place. I adjusted the cutting head on the tool to cut off enough material to get a close fit on the stem. The tool is touchy in terms of accurate adjustments so I eyeball it close and then sand it by hand until it fits the shank.
IMG_5000

I pushed the stem in place on the walnut bowl and set it down to look at the overall appearance of the pipe. The clear stem was going to work well once I had shaped it to fit. The walnut was already darkening from the oils in my hands. This was going to be a beauty once it was finished.
IMG_5001

IMG_5002

IMG_5003

IMG_5004

The diameter of the stem and that of the shank were different. The stem was significantly larger than the shank of the pipe. I used a Dremel with a sanding drum to sand off excess acrylic material. I proceeded with that slowly and carefully as I did not want to nick the band or damage the pipe bowl.
IMG_5006

IMG_5007

I took the material down as close as possible with the Dremel and then did the rest of the sanding by hand with 220 grit sandpaper. It took quite a bit of time and several return trips to the Dremel before I had the shank and the stem diameter matching. The following photos show the progress on the stem with each one taking it a step closer to the finish.
IMG_5008

IMG_5009

IMG_5010

IMG_5011

When I finally had the fit correct with the 220 grit sandpaper I switched to a medium grit sanding sponge to further refine the fit and to remove the scratches left behind by the sandpaper. I finished sanding with the medium grit and used a fine grit sanding sponge to sand the stem again. When finished the stem looked opaque and the shape was done. All that remained was to polish the stem.
IMG_5012

IMG_5013

IMG_5014

IMG_5015

Before sanding it further I used a needle file to smooth out the transition in the airway between the stem airway and the place where the drill bit ended when I worked on the tenon. I was able to even out the transition and taper it for a smooth and seamless transition. The walnut was continuing to darken from my hands as I worked on it. I also stopped and sanded the rim of the pipe to remove the deep scratches that were present when I received it.
IMG_5016

IMG_5017

IMG_5018

IMG_5019

I wet sanded the stem and the band with 1500-2400 grit micromesh sanding pads and then dry sanded with 3200-12,000 grit pads. I wiped the stem down between each grit of micromesh with a damp cloth to remove the sanding dust and to further polish the stem.
IMG_5020

IMG_5021

IMG_5022

After I finished sanding the stem and the band with the micromesh pads I took the pipe to the buffer and buffed it with White Diamond to further polish it. I rubbed the stem down with Obsidian Oil and when it was dry gave the pipe and the stem multiple coats of carnauba wax and a final buff with a soft flannel buff. The finished pipe is shown below. The bowl has only been given a wax coat and no stain. The finish is natural and I believe that it will continue to darken as it picks up the oils from my hands when I smoke it.
IMG_5023

IMG_5024

IMG_5025

IMG_5027

Restemming and Reworking a Rembrandt Bulldog


Blog by Steve Laug

Another bowl that was sent to me was a nice bent bulldog shape that needed a stem. It was in good shape. The bowl needed to be reamed and the top of the rim lightly topped. It was stemless so I needed to make a stem for it. It was stamped on the left side of the shank Rembrandt over Imported Briar. In researching it on the web I found that the company that made the pipe was The National Briar Pipe Co. It was homed in Jersey City, New Jersey. They produced several brands that I have seen over the years: Biltmore, Forecaster, Honeybrook, King Eric, Kleenest, Mayflower, Rembrandt, Sir Sheldon, The Doodler (created and formerly produced by Tracy Mincer, †1966). Typically the original stem of Rembrandt pipes bore a logo on the left side of the stem – a capital “N” in italics. This bowl had some ding marks on the cap on the left side. There was some damage to the briar between the double rings on the cap.

IMG_4952

IMG_4953

IMG_4954

IMG_4955

I sorted through my stem can and found a nice amberoid acrylic stem that would look great with the bulldog bowl. It needed a tenon so I used a piece of white Delrin that was a perfect fit in the hole in the stem. I scored the Delrin with a hack saw so that the glue would have a surface to stick to. I swabbed then tenon down with superglue and pressed it into the stem.
IMG_4956

IMG_4958

Once the glue had set in the stem and the tenon was firmly in place I sanded the tenon down with a folded piece of sandpaper to get a snug fit. I pushed it into the shank and it fit nicely against the shank. The diamond shank was smaller than the diamond saddle on the stem so I needed to sand it down to fit the shank.
IMG_4959

IMG_4960

IMG_4961

IMG_4962

I used 220 grit sandpaper to start the process of shaping the stem and then a sanding drum on a Dremel to bring down the sides of the diamond close to the shank dimensions. I finished the fit with sandpaper and a sanding sponge.
IMG_4963

IMG_4964

IMG_4966

I sanded the stem and the shank with sandpaper and a sanding block until the transition between them was smooth to touch. I reamed the bowl with a PipNet reamer and took the cake back to the wood.
IMG_4967

IMG_4968

I set up my topping board and sandpaper and lightly topped the bowl to remove the nicks and cuts in the surface of the rim. I followed up on the sanding board with a sanding block laid on the board and once again turned the bowl into the sanding block to smooth out the scratches left behind by the sandpaper.
IMG_4969

IMG_4970

I wiped the bowl down with acetone and cotton pads to remove the finish and make the restaining of the bowl more consistent. I have found that when I have sanded the shank and the rim it is easier to remove as much of the finish as possible before I restain the pipe.
IMG_4972

IMG_4973

IMG_4974

IMG_4975

I sanded the stem with my usual array of micromesh sanding pads – wet sanding with 1500-2400 grit pads and dry sanding with 3200-12,000 grit pads. I rubbed the stem down with Obsidian Oil and then did some more work on the bowl.
IMG_4976

IMG_4977

IMG_4978

I stained the bowl with a dark brown aniline stain thinned 2:1 with isopropyl alcohol. I stained and flamed the stain and repeated the process until the coverage on the shank and the rim matched the bowl. I hand buffed the pipe with a soft cotton cloth to see where I stood with the finish on the bowl.
IMG_4979

IMG_4980

IMG_4981

IMG_4982

I gave the pipe another coat of the stain and then took the pipe to the buffer and buffed the bowl and stem with White Diamond. When I had finished I buffed it with multiple coats of carnauba wax and then with a soft flannel buff to finish the shine. The completed pipe is shown in the photos below. I really like the way the stain and the striations in the stem work together. I think that this one may well stay I my own collection!
IMG_4983

IMG_4984

IMG_4985

IMG_4986

Refurbishing an Old Zulu Bowl


I was gifted a few pipe bowls that needed to be restemmed and refurbished by a friend. The first of these that I decided to clean up and restem was an old Zulu bowl. It is stamped Algerian Briar over Made in France on the left side of the shank and no other identifying marks. Thus the maker remains a bit of a mystery that I am not sure can be solved. The bowl itself was in fair shape. The cake in the bowl was not thick but it was particularly crumbly and soft. The finish on the pipe was also shot. The varnish coat was gone and the stain was streaked and damaged. There were a cut groove next to the left side of the stamping and a smaller one on the right side of the stamping. The shank was filthy and caked with oils and tars. The rim was in great shape with no damage to either the inside or outside rim. The grain under the stain coat looked promising with cross grain on the front and back of the bowl and the top and bottom of the shank and mixed birdseye on the sides of the both.
IMG_4862

I had a stem in my can of stems that fit almost perfectly. It was damaged and would need some work but the fit and bend was perfect for the Zulu shape.
IMG_4863

IMG_4864

I fit the stem in place and wiped down the bowl with acetone on cotton pads to remove the remaining finish on the pipe. I reamed the bowl with a PipNet reamer and took the cake back to bare wood. I cleaned out the shank and the bowl with cotton swabs and Everclear.
IMG_4866

IMG_4867

IMG_4868

IMG_4869

I sanded the stem until the transition between the shank and the stem was smooth. I used both 220 grit sandpaper and medium and fine grit sanding sponges to smooth it out. The end of the stem was badly damaged and the button was ruined. I decided to trim off the damaged end of the stem and rework the button. Once it was cut back I cleaned out the stem with Everclear and pipe cleaners. The stem was badly plugged with tars so I had to use a bent paper clip to push through the airway. I used shank brushes and pipe cleaners to remove the tarry build up and open up the stem once again.
IMG_4870

IMG_4872

The airway was still wide and open so I did not need to reshape it. The top and bottom of the button were thin so I could not remove any further material. I reshaped the externals as best as possible by rounding the ends of the stem and making the button more oval in external shape.
IMG_4873

The slight dents in the stem that remained would not lift with heat so I filled them with superglue until they were level with the surface of the stem.
IMG_4874

IMG_4875

I cut the new button with needle files and shaped the end of the stem to have a better flow and taper to the new button. This involved removing some of the thickness of the stem and making the taper more angled. I used files and sandpaper to reshape the stem.
IMG_4876

IMG_4877

With the new button cut I sanded the stem and the entire pipe with 220 grit sandpaper to remove the remaining finish and make sure the flow of the stem was correct to the angles of the pipe. I also sanded it with a medium and fine grit sanding sponge to remove scratches in the briar and vulcanite.
IMG_4879

IMG_4880

IMG_4881

IMG_4882

IMG_4883

IMG_4884

The stain around the stamping on the left side of the shank was very set and stubborn. I lightly sanded it to break through the top coat and then scrubbed it with acetone on cotton pads to match it as much as possible to the unstained briar. I stained the bowl with an oxblood aniline stain, flamed it and restained and reflamed until I had an even coverage on the bowl. I hand buffed it with a soft cloth. I took the pipe to the buffer and buffed the stem and bowl with red Tripoli and White Diamond. The photos below show the pipe after the buffing.
IMG_4885

IMG_4886

IMG_4888

IMG_4889

I sanded the stem with my usual array of micromesh sanding pads – wet sanding with 1500-2400 grit pads and dry sanding with 3200-12,000 grit pads. I rubbed the stem down with Obsidian Oil and when it dried hand buffed the stem.
IMG_4890

IMG_4891

IMG_4892

I buffed the pipe with White Diamond and then gave it multiple coats of carnauba wax. I finished by buffing it with a clean soft flannel buffing pad. The finished pipe is pictured below. It is ready to go into service again. I like the flow of the lines on this pipe. The shape and matte like finish work well together.
IMG_4893

IMG_4894

IMG_4896

IMG_4897

Repairing and Restoring a Lumberman Deluxe Canadian by Comoy’s


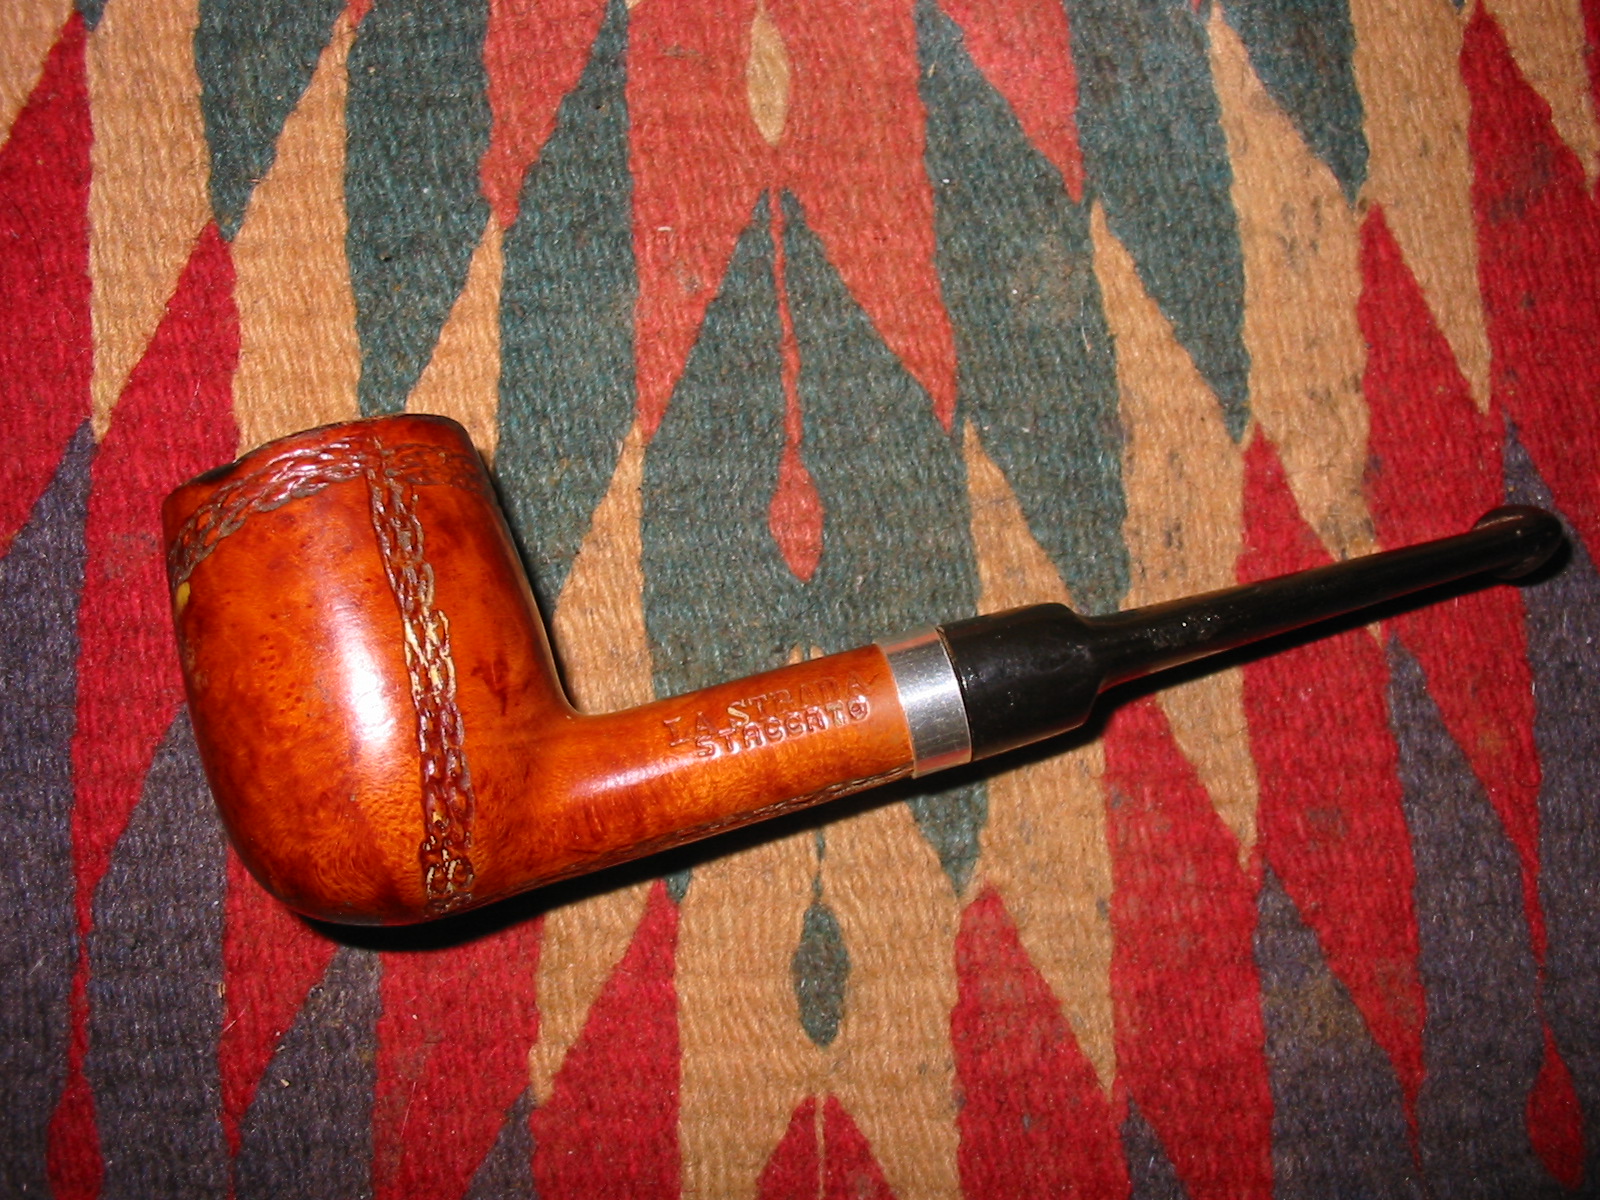
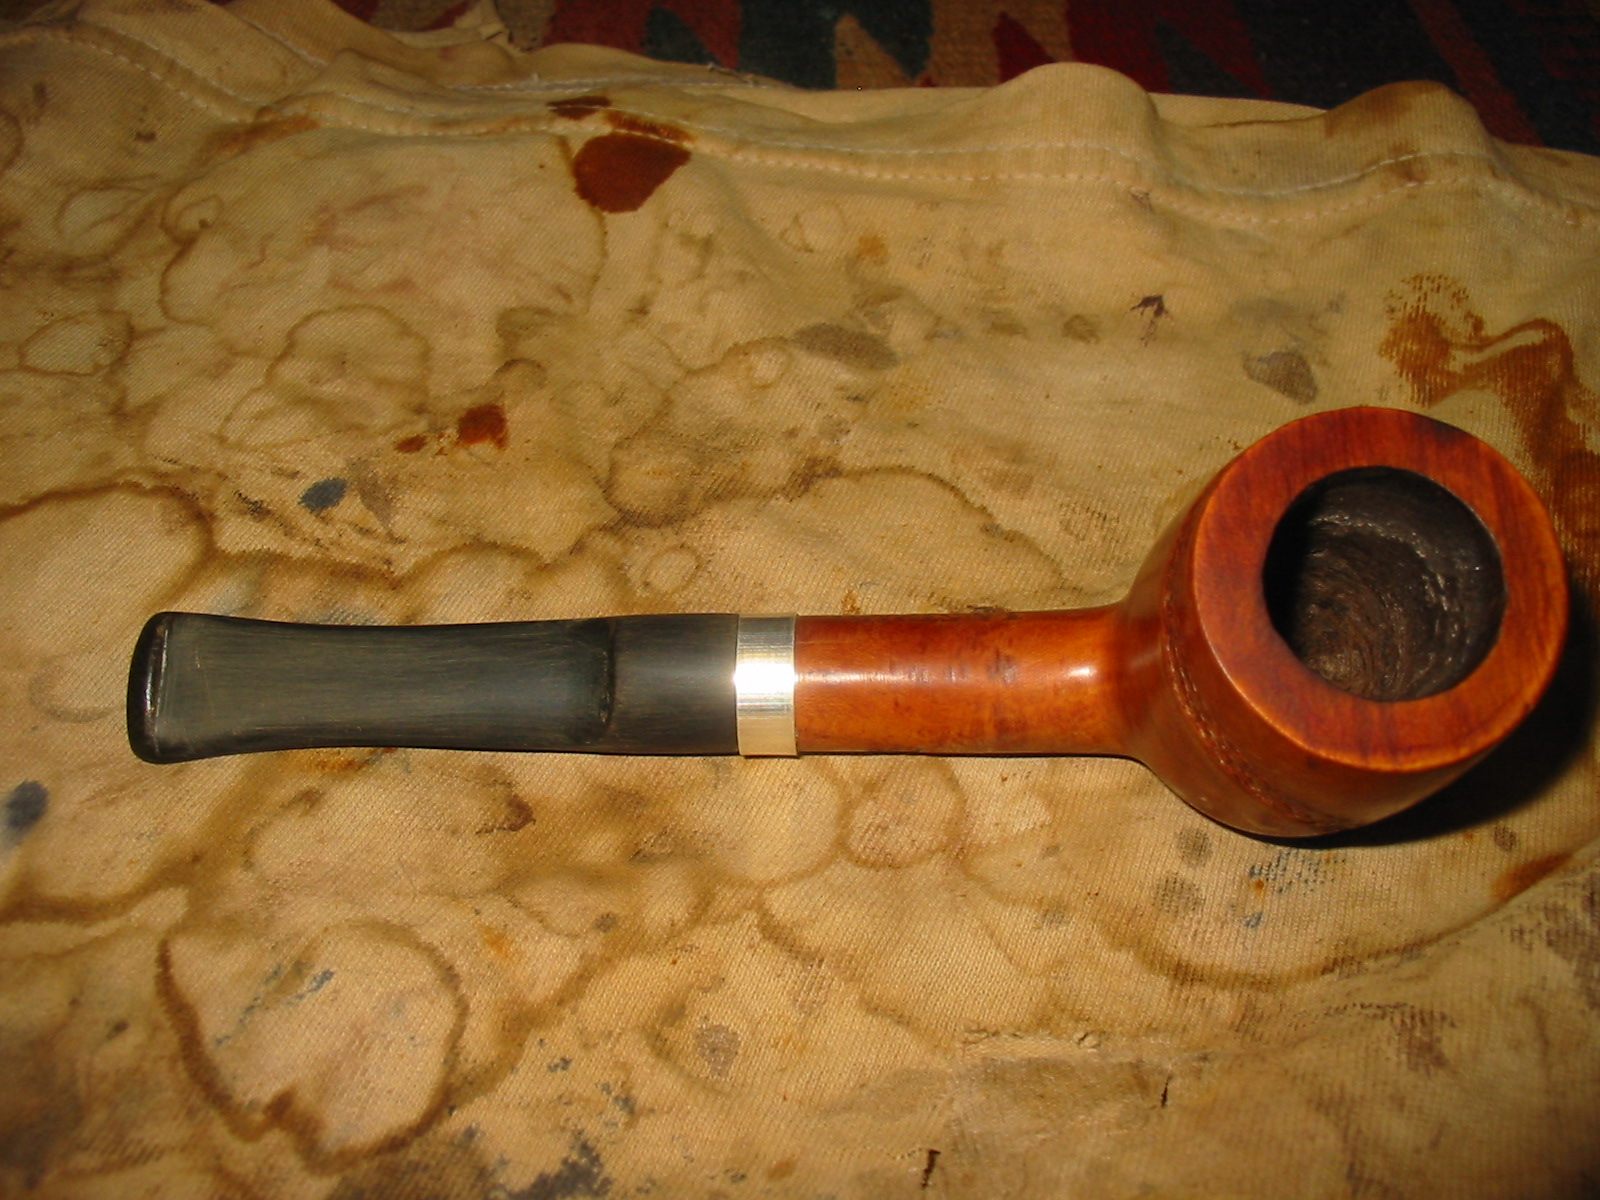
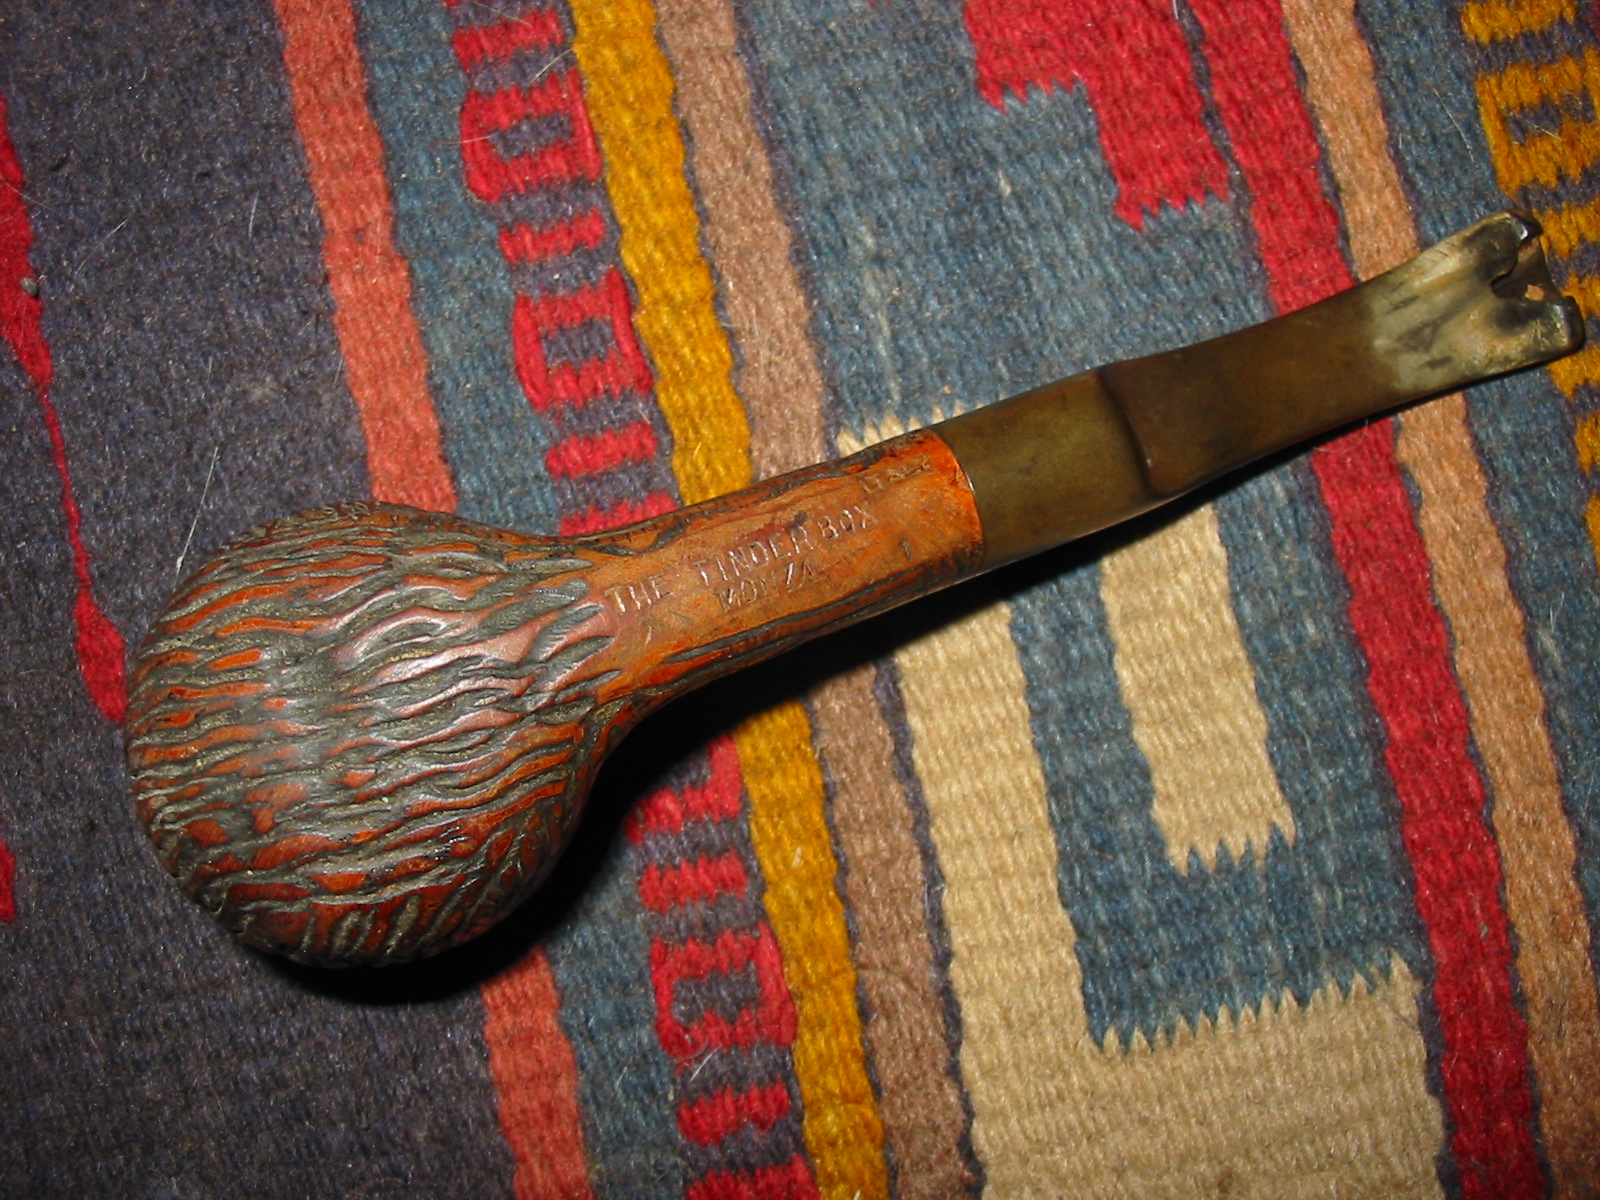
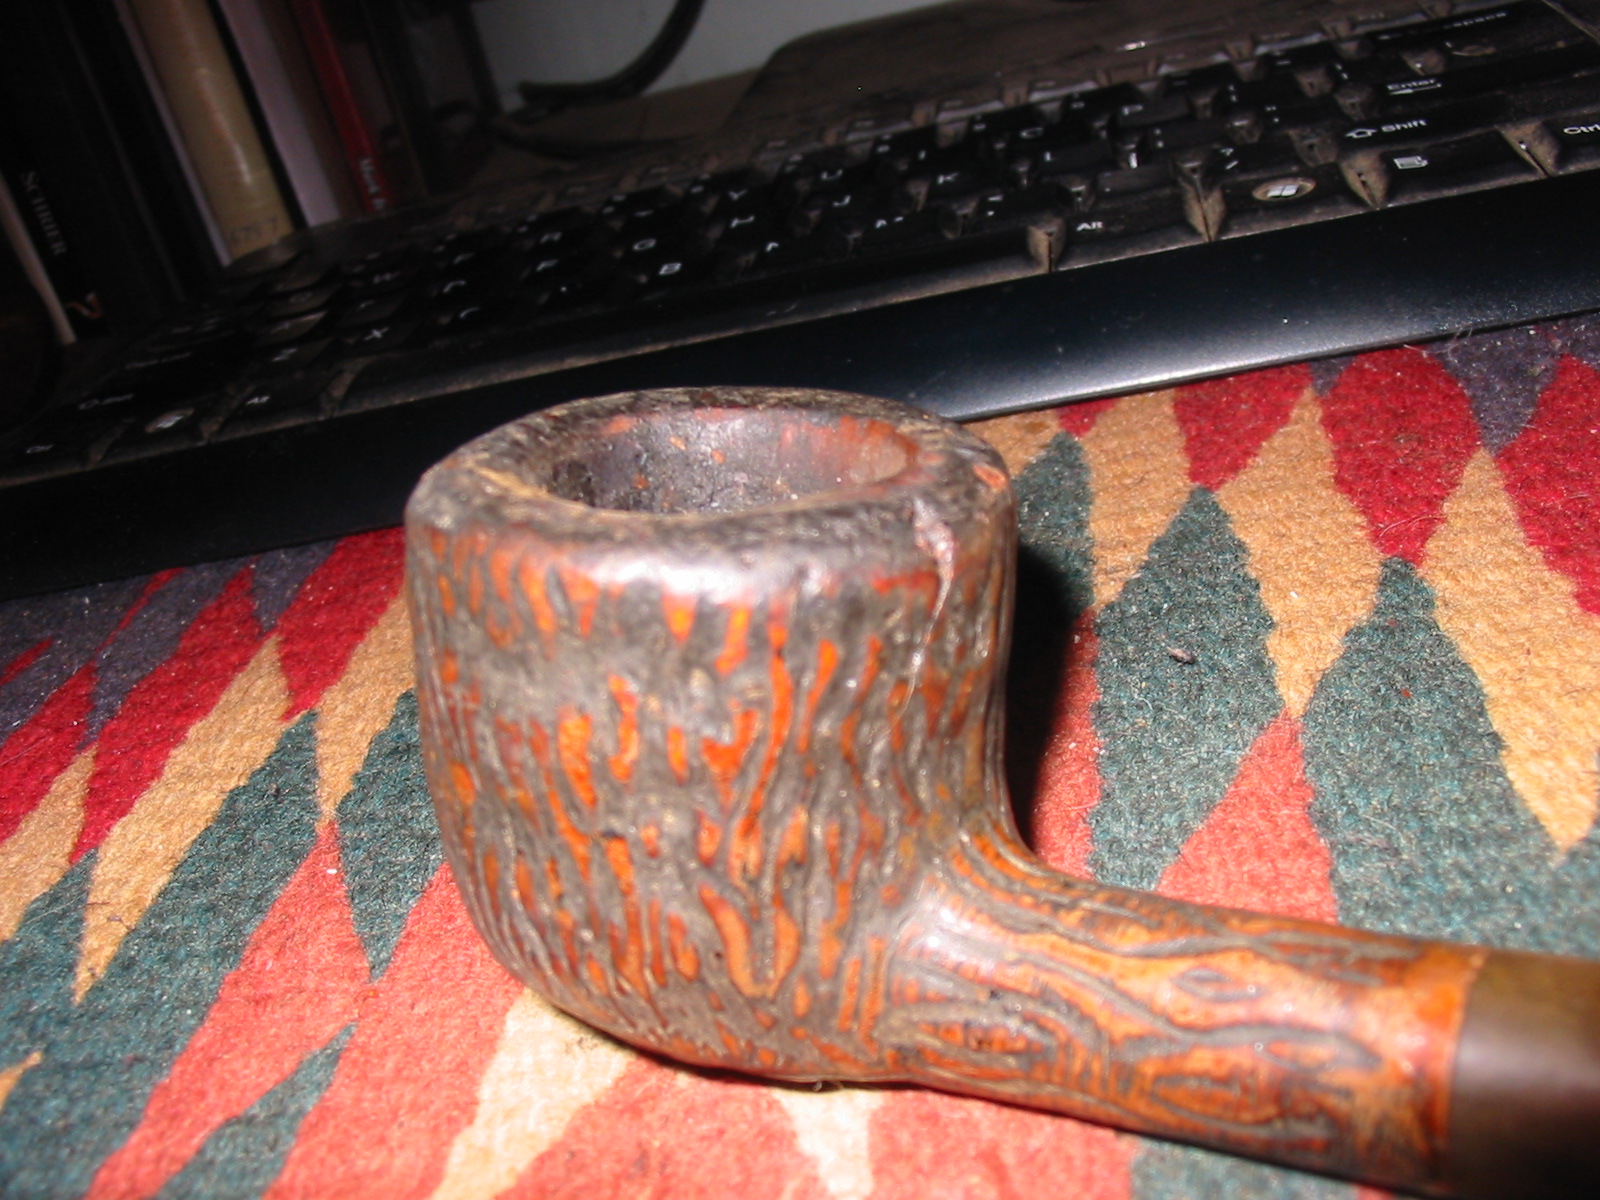
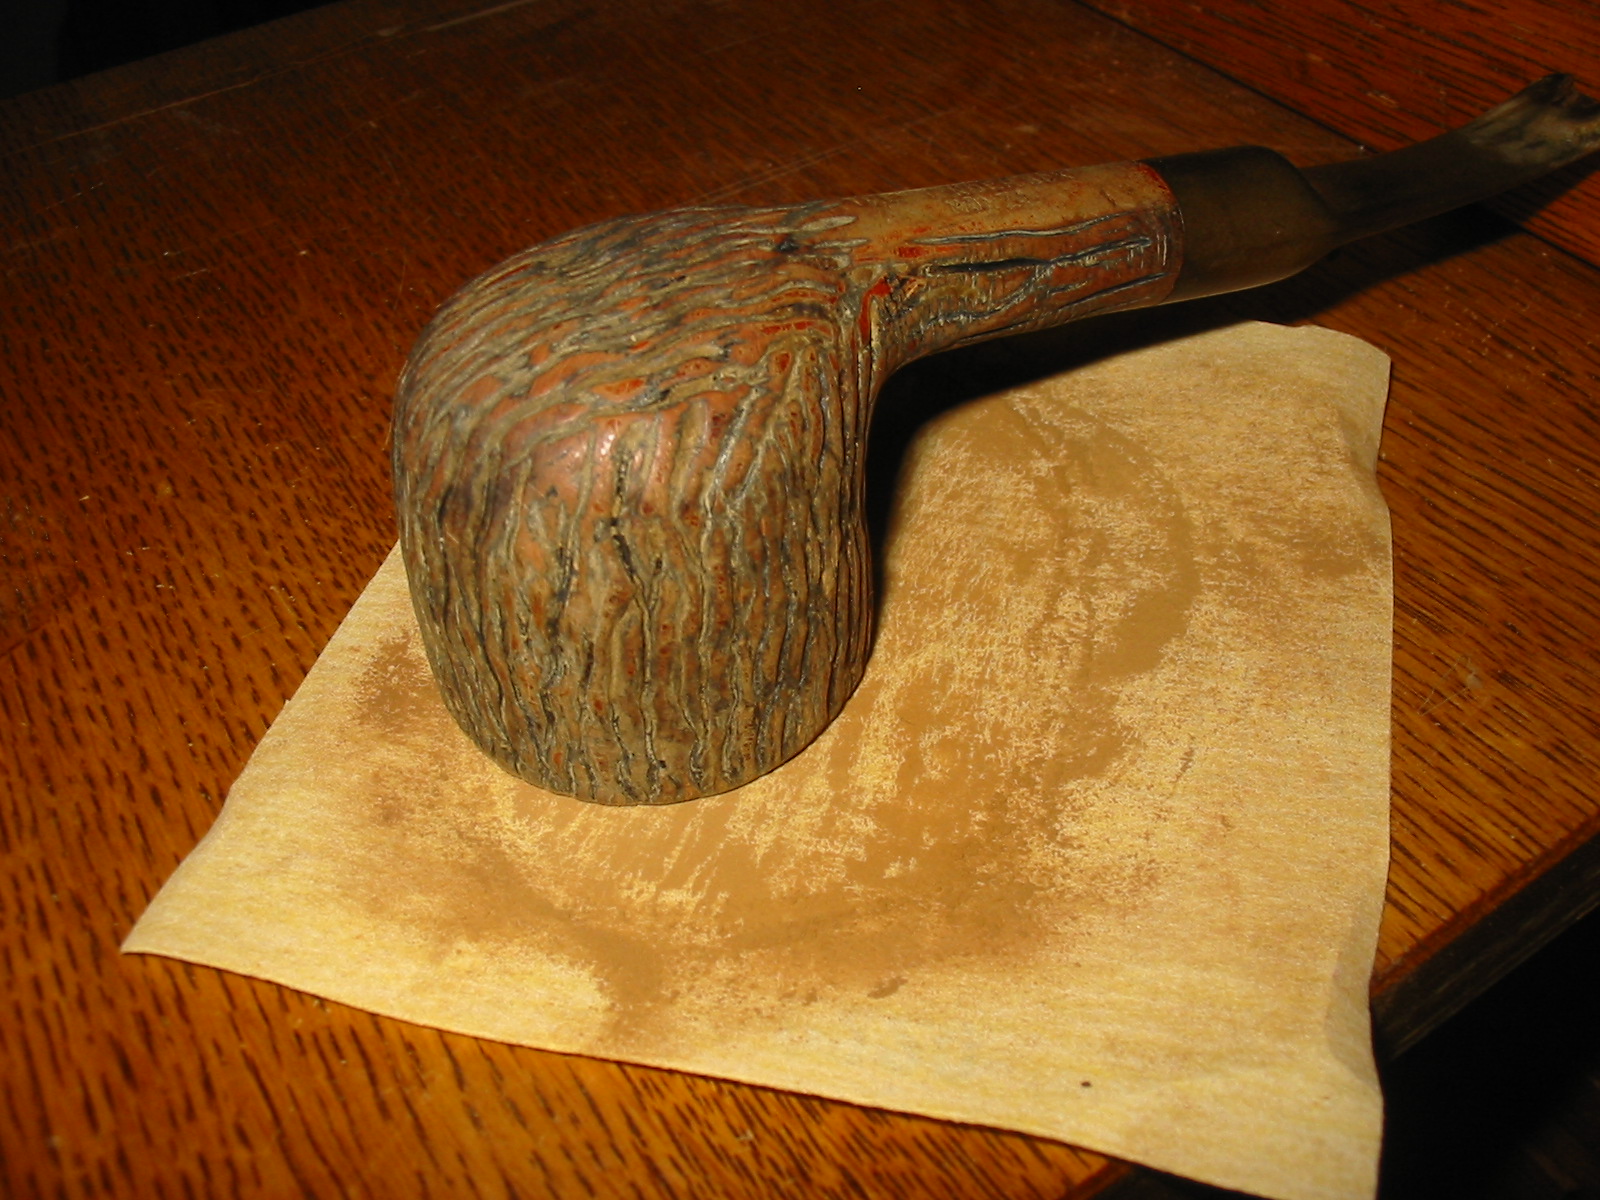
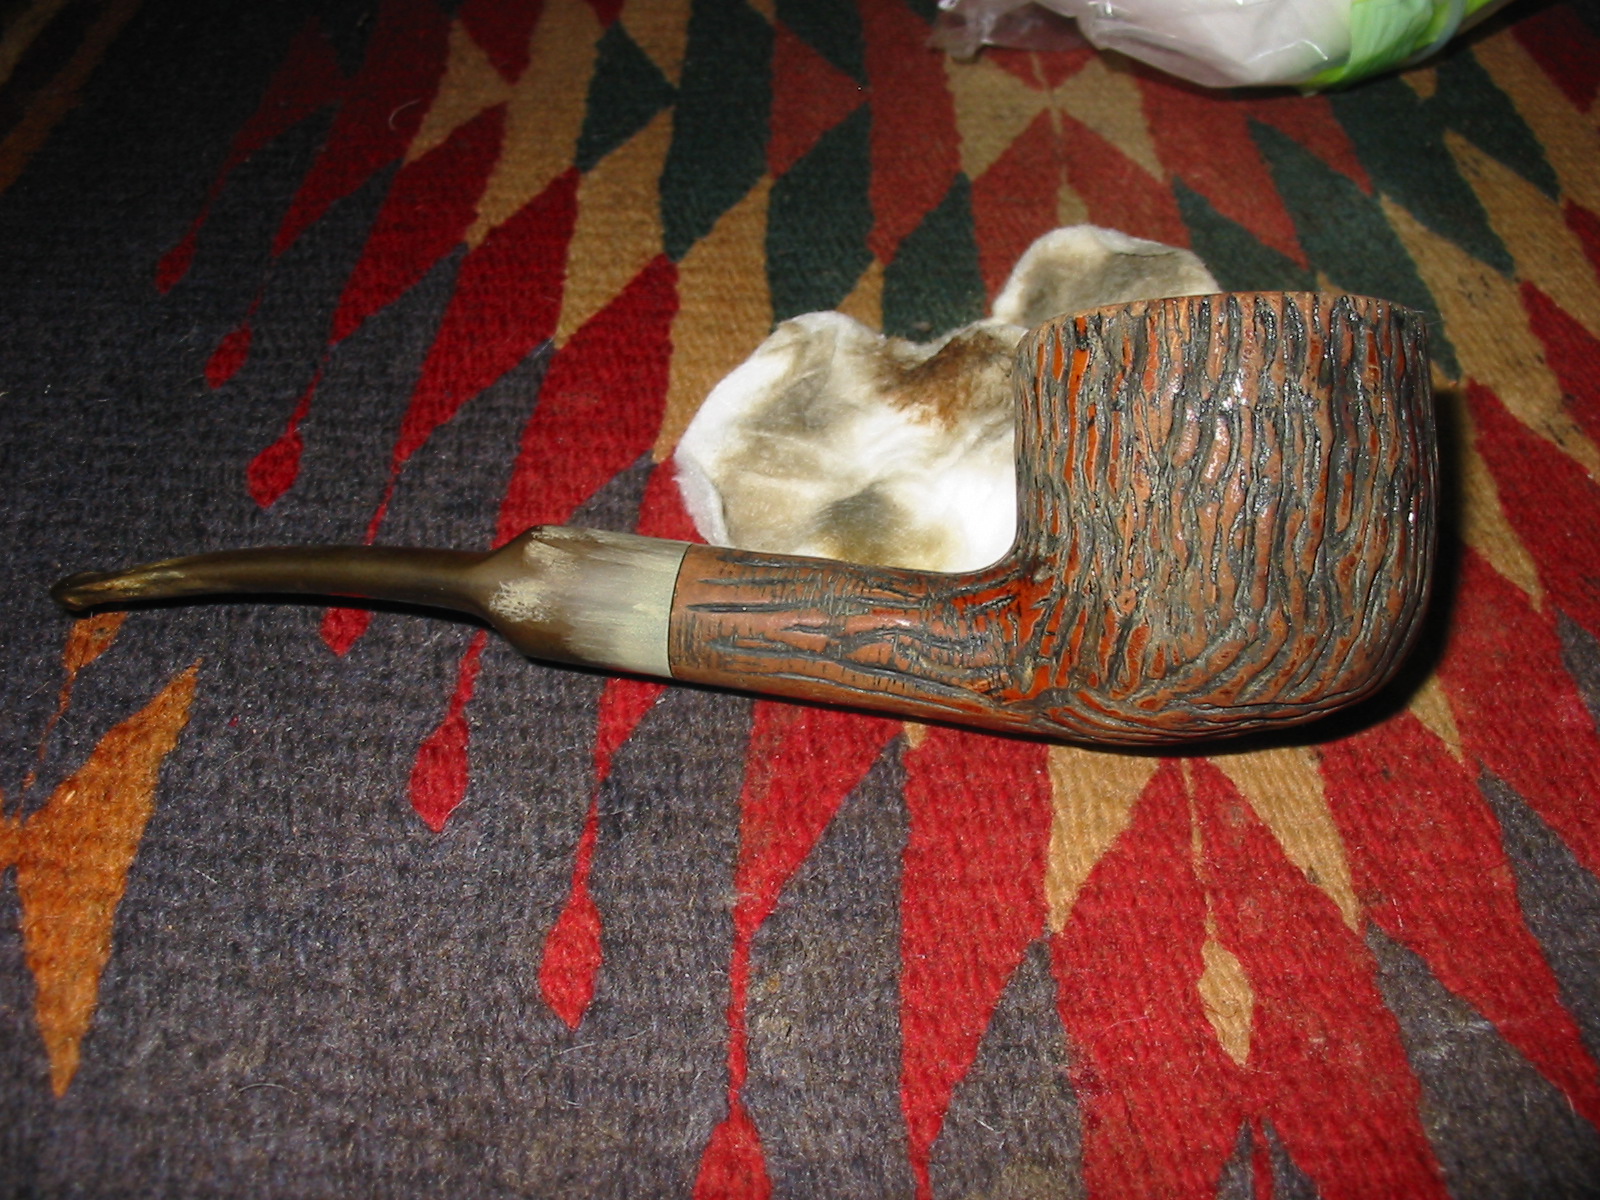
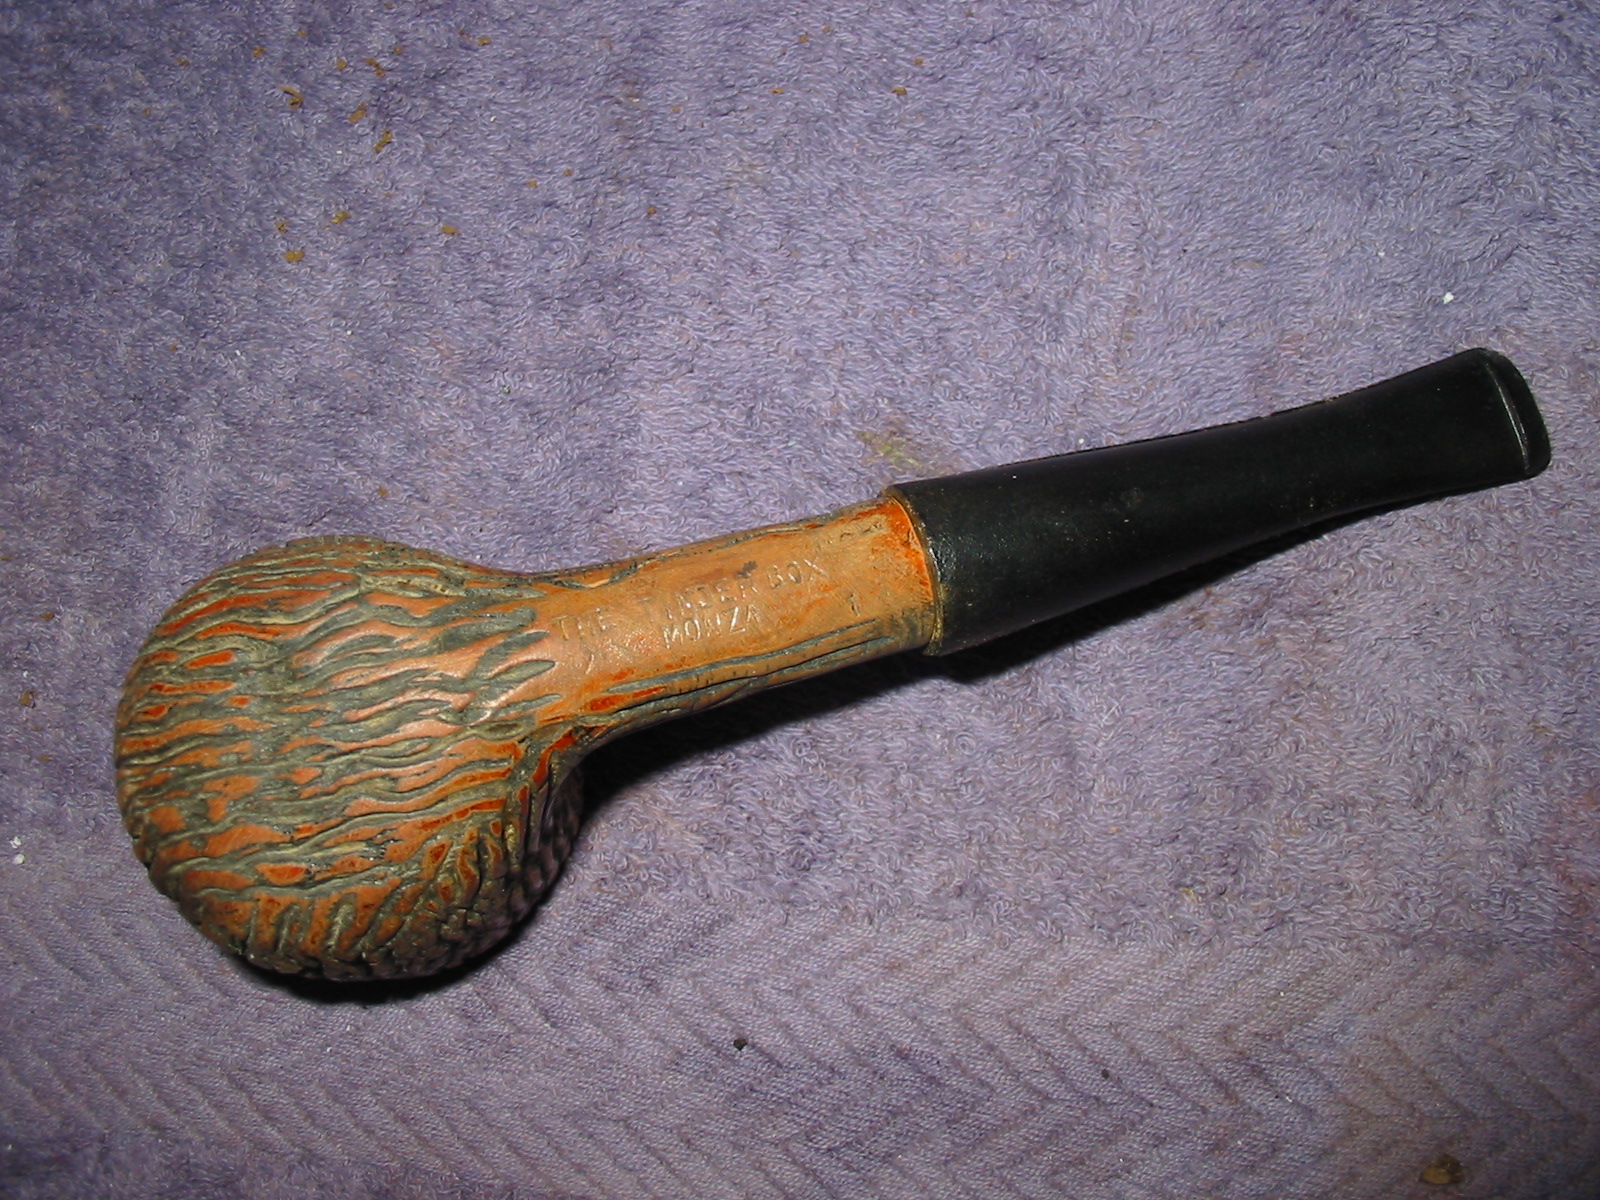
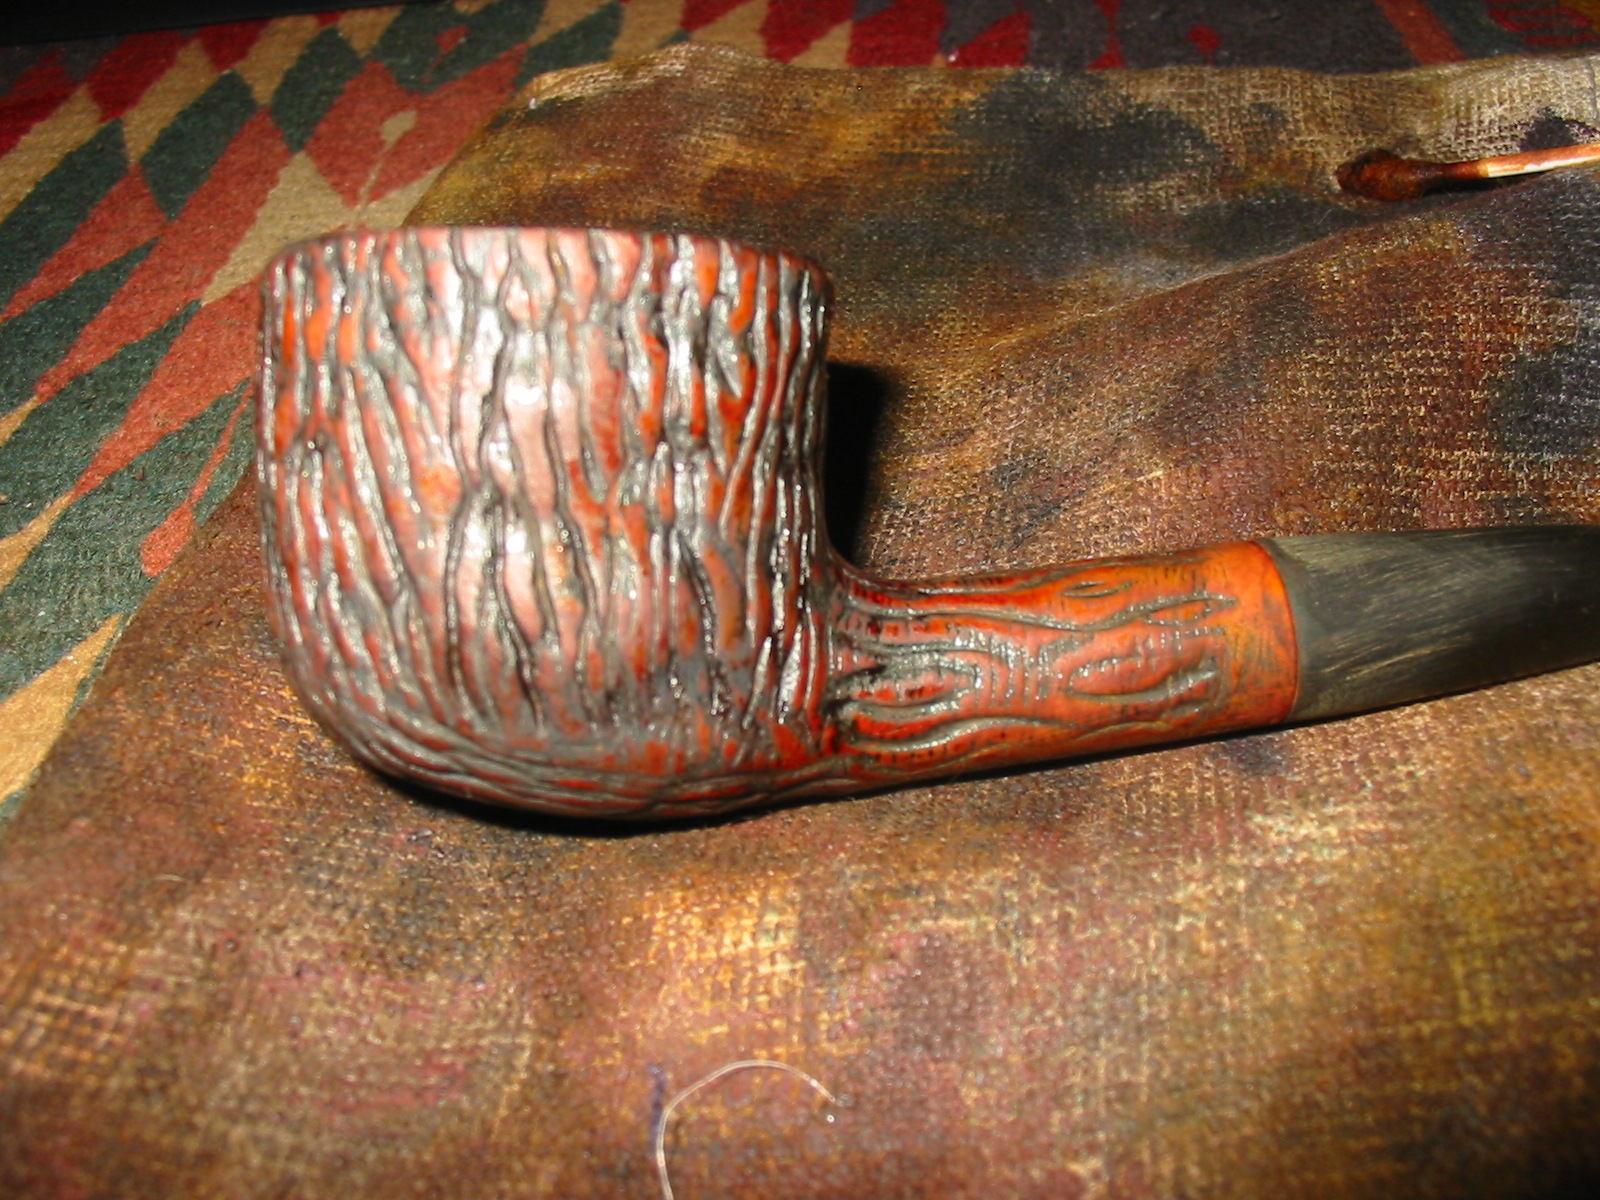
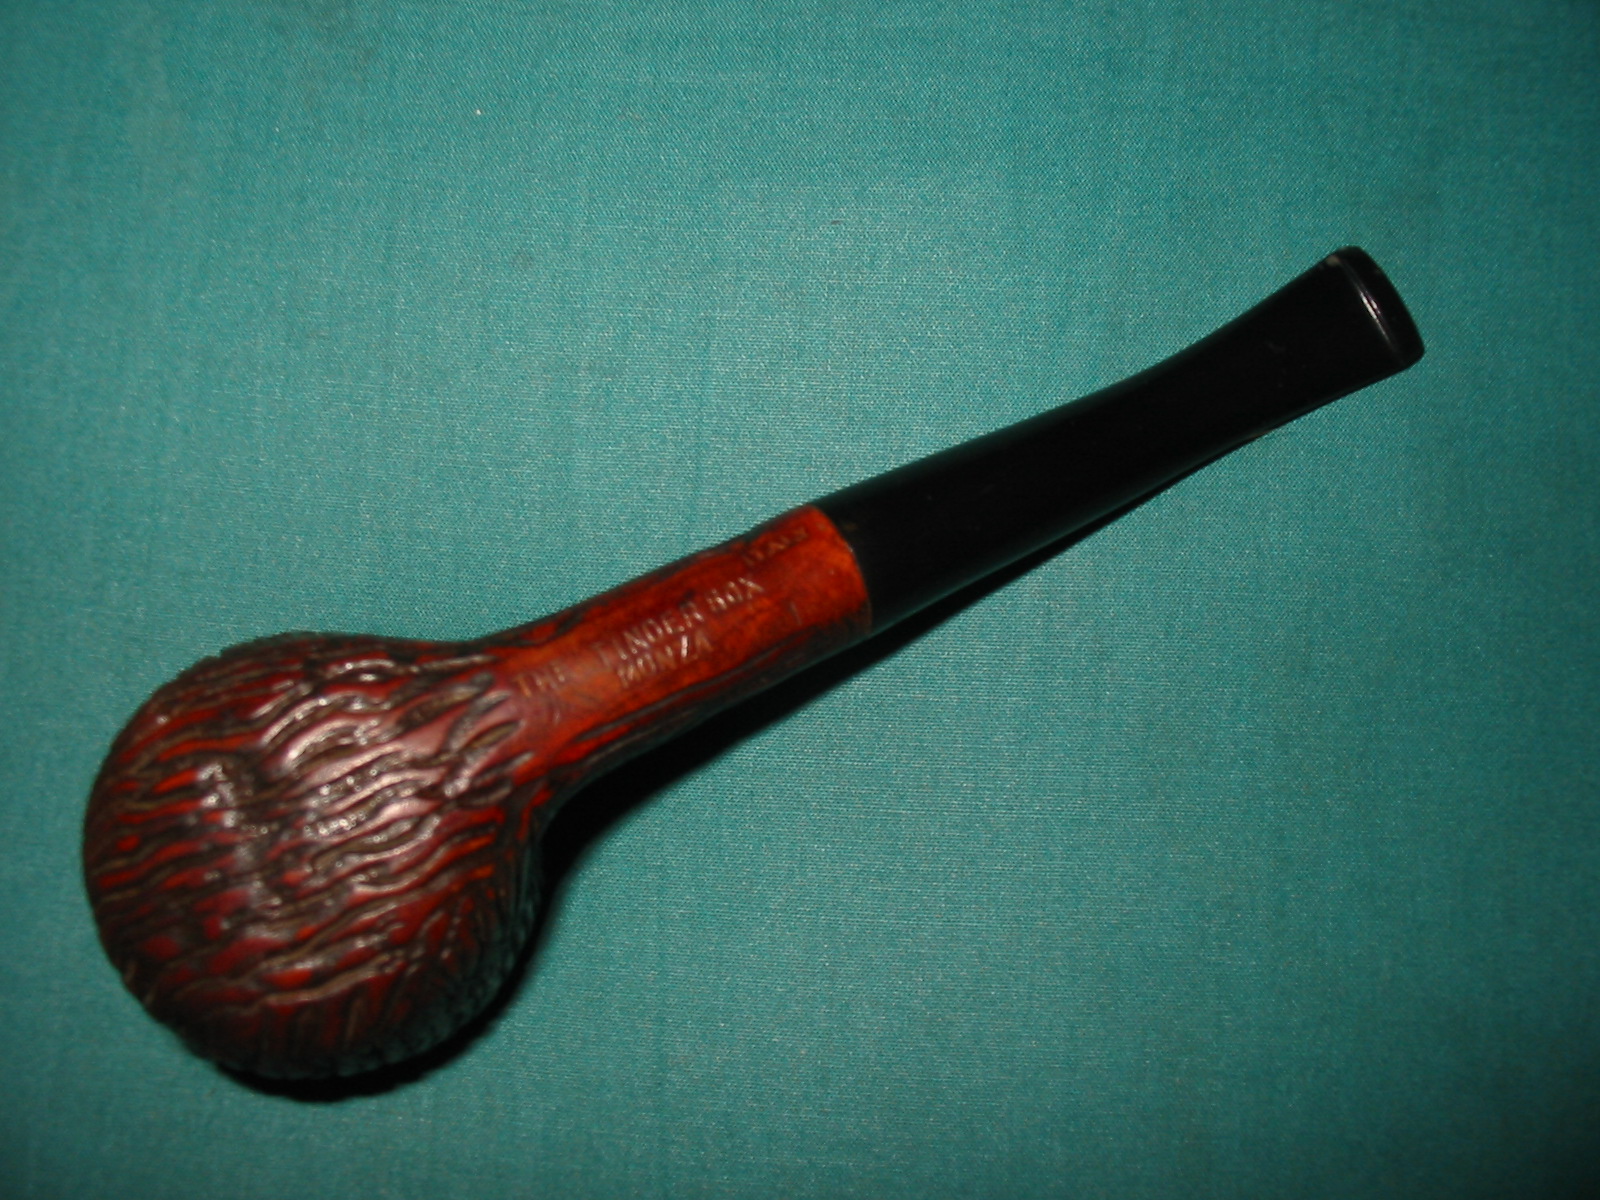
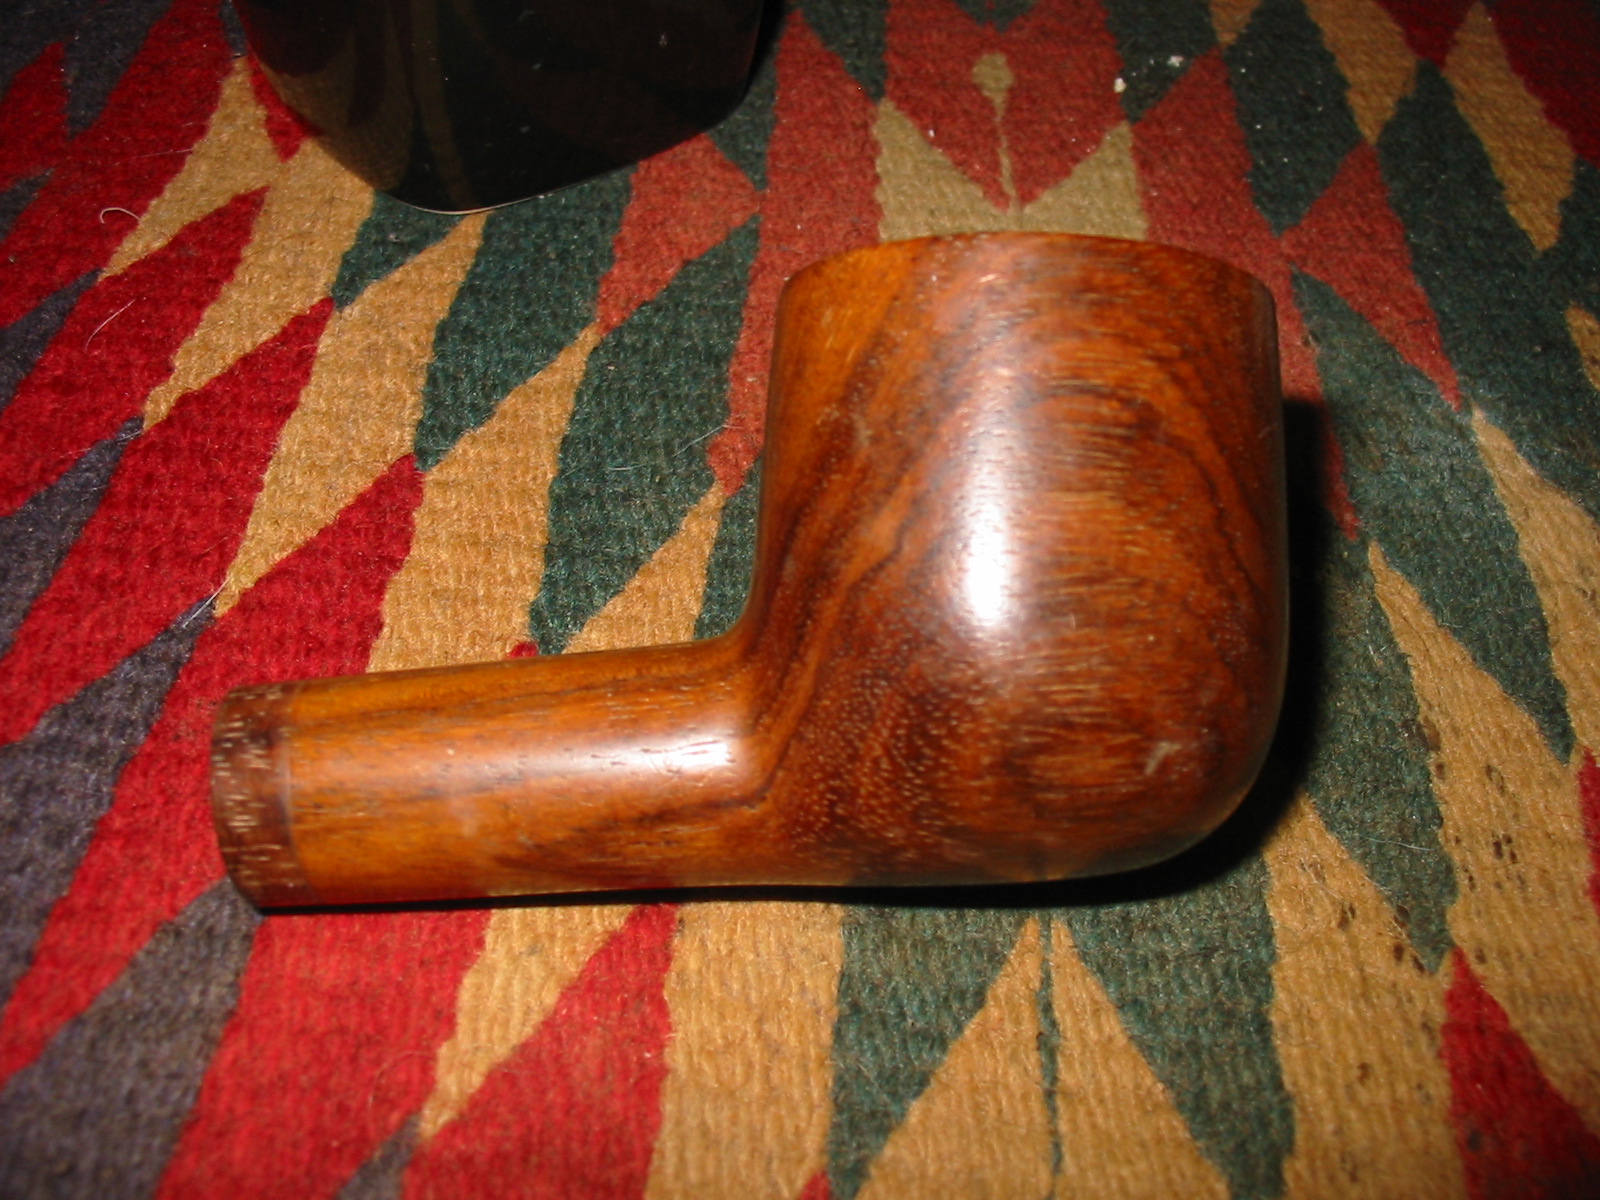
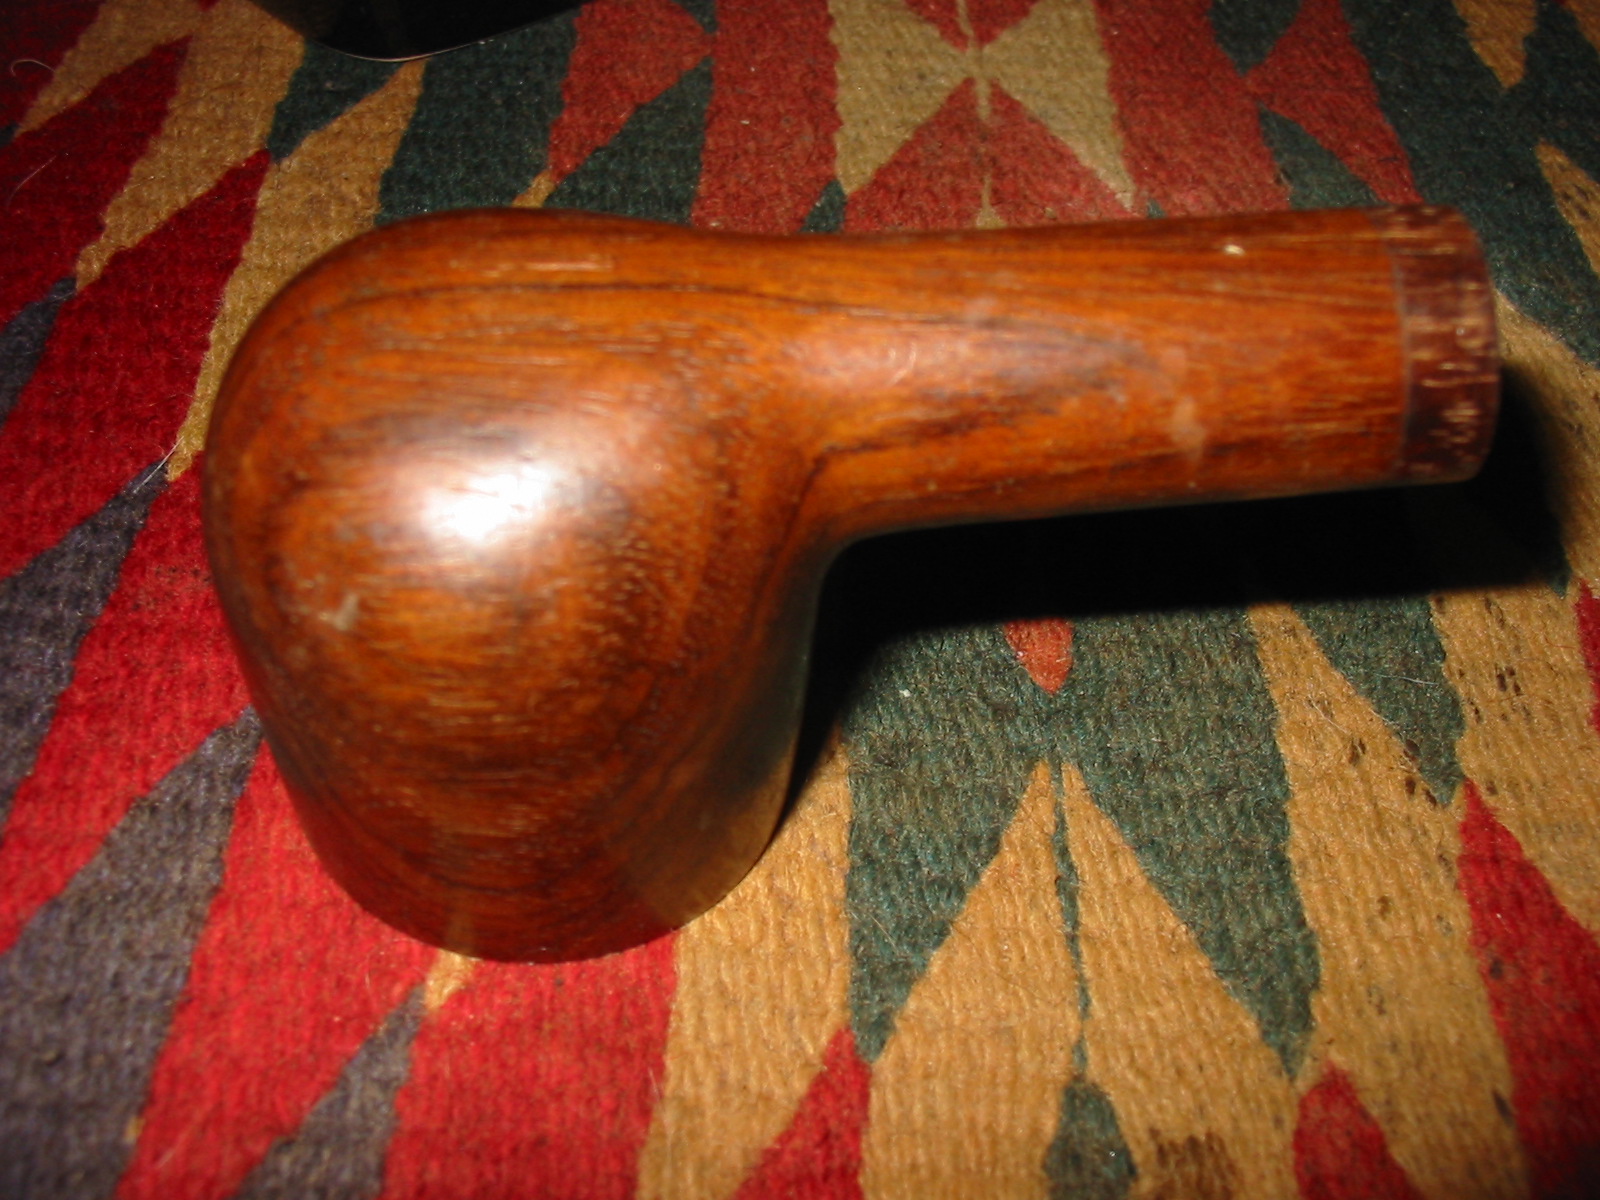
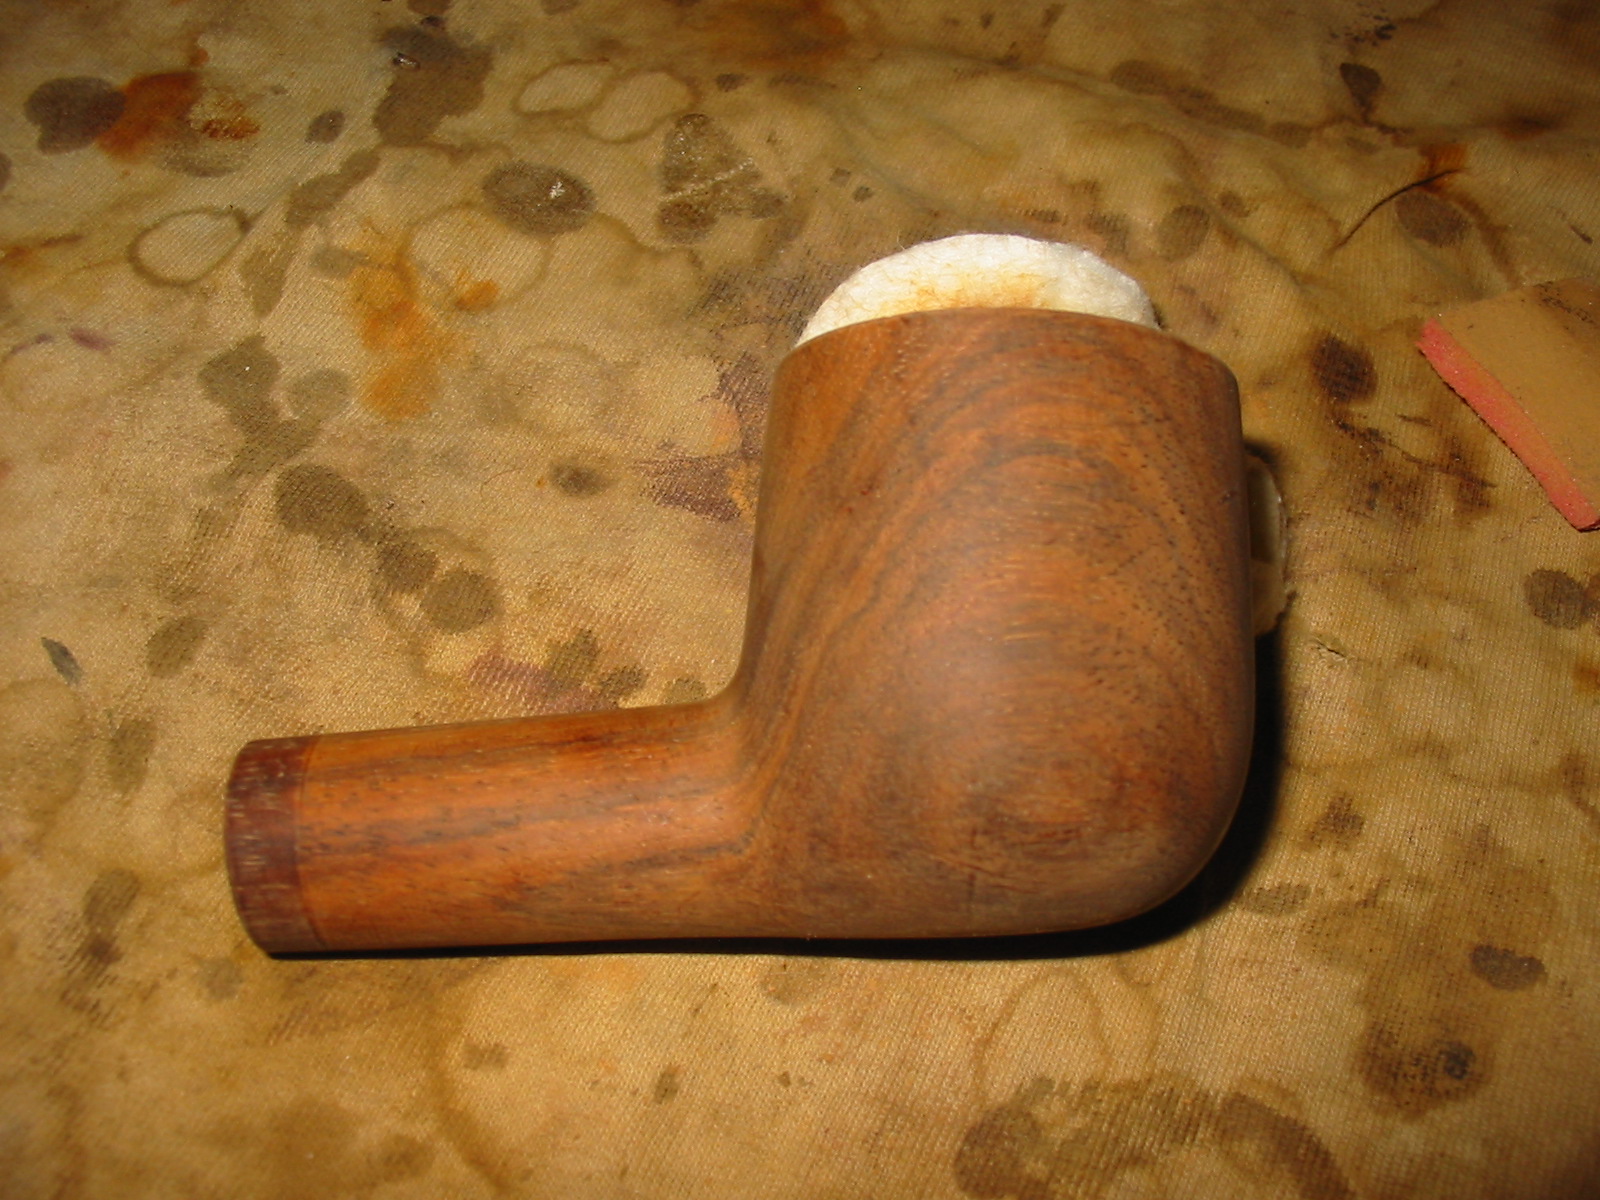
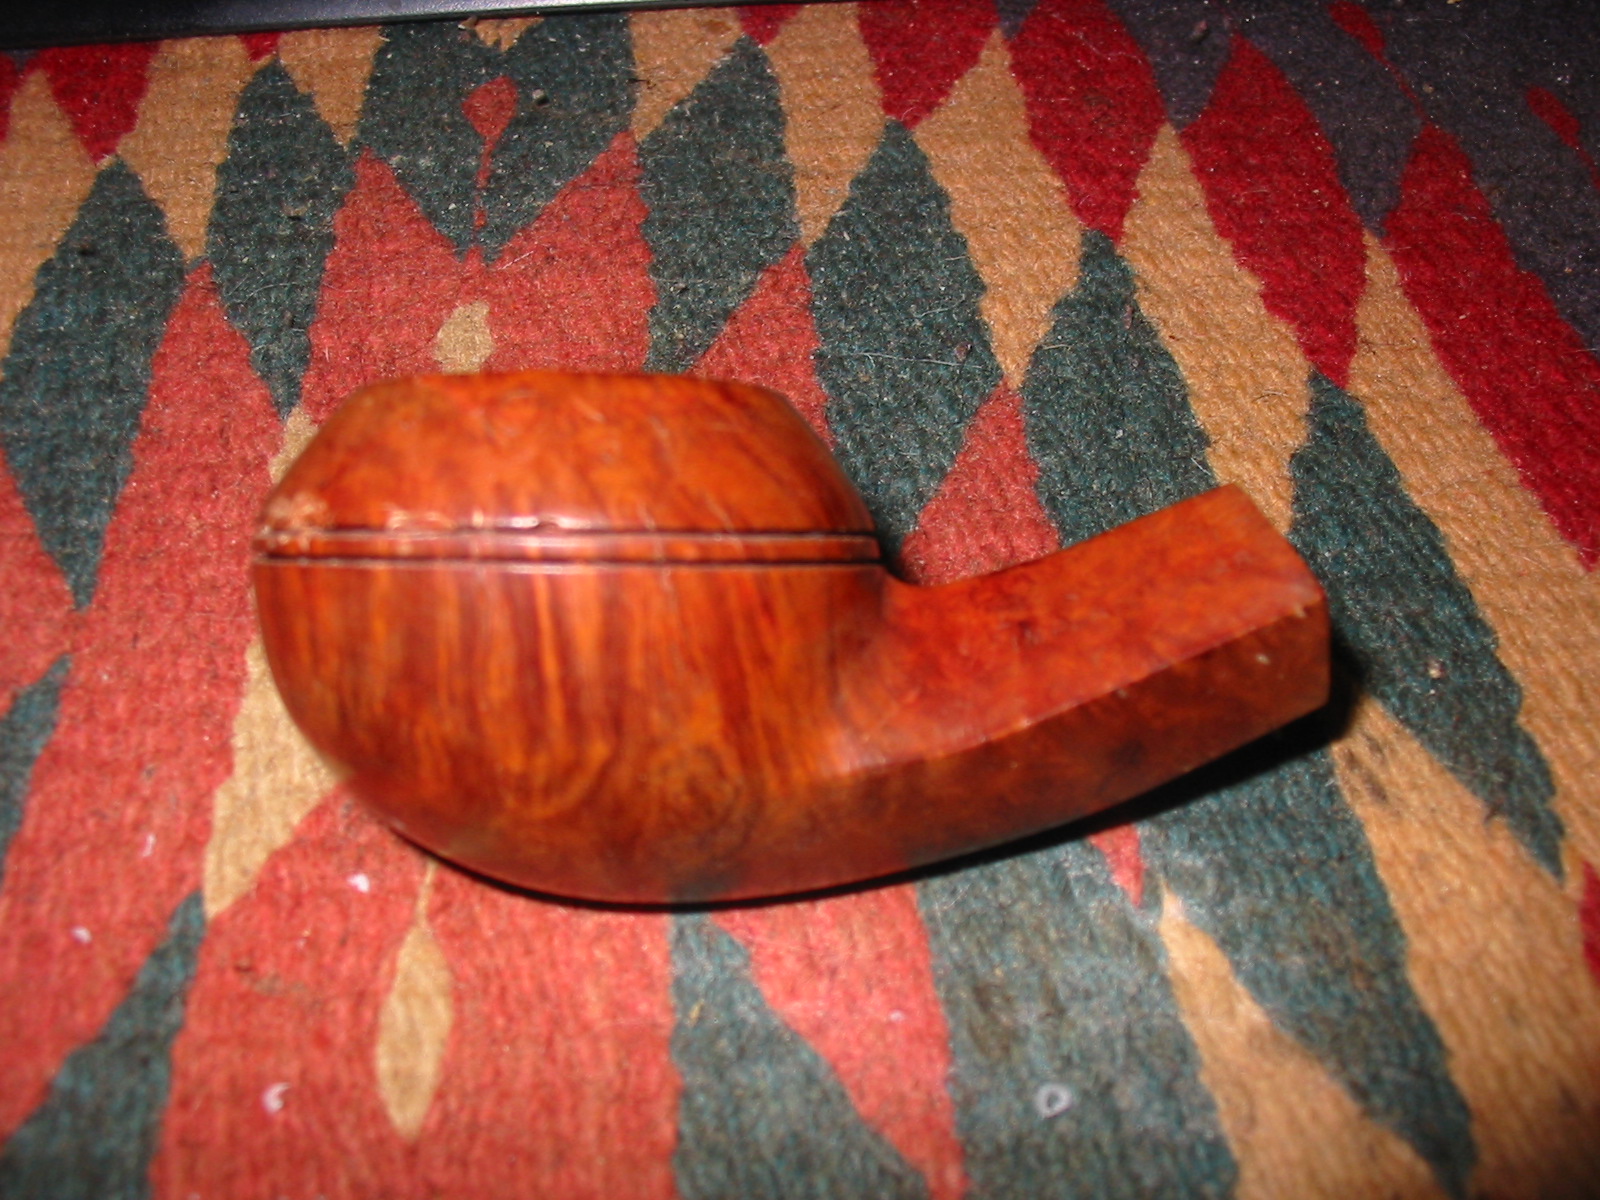
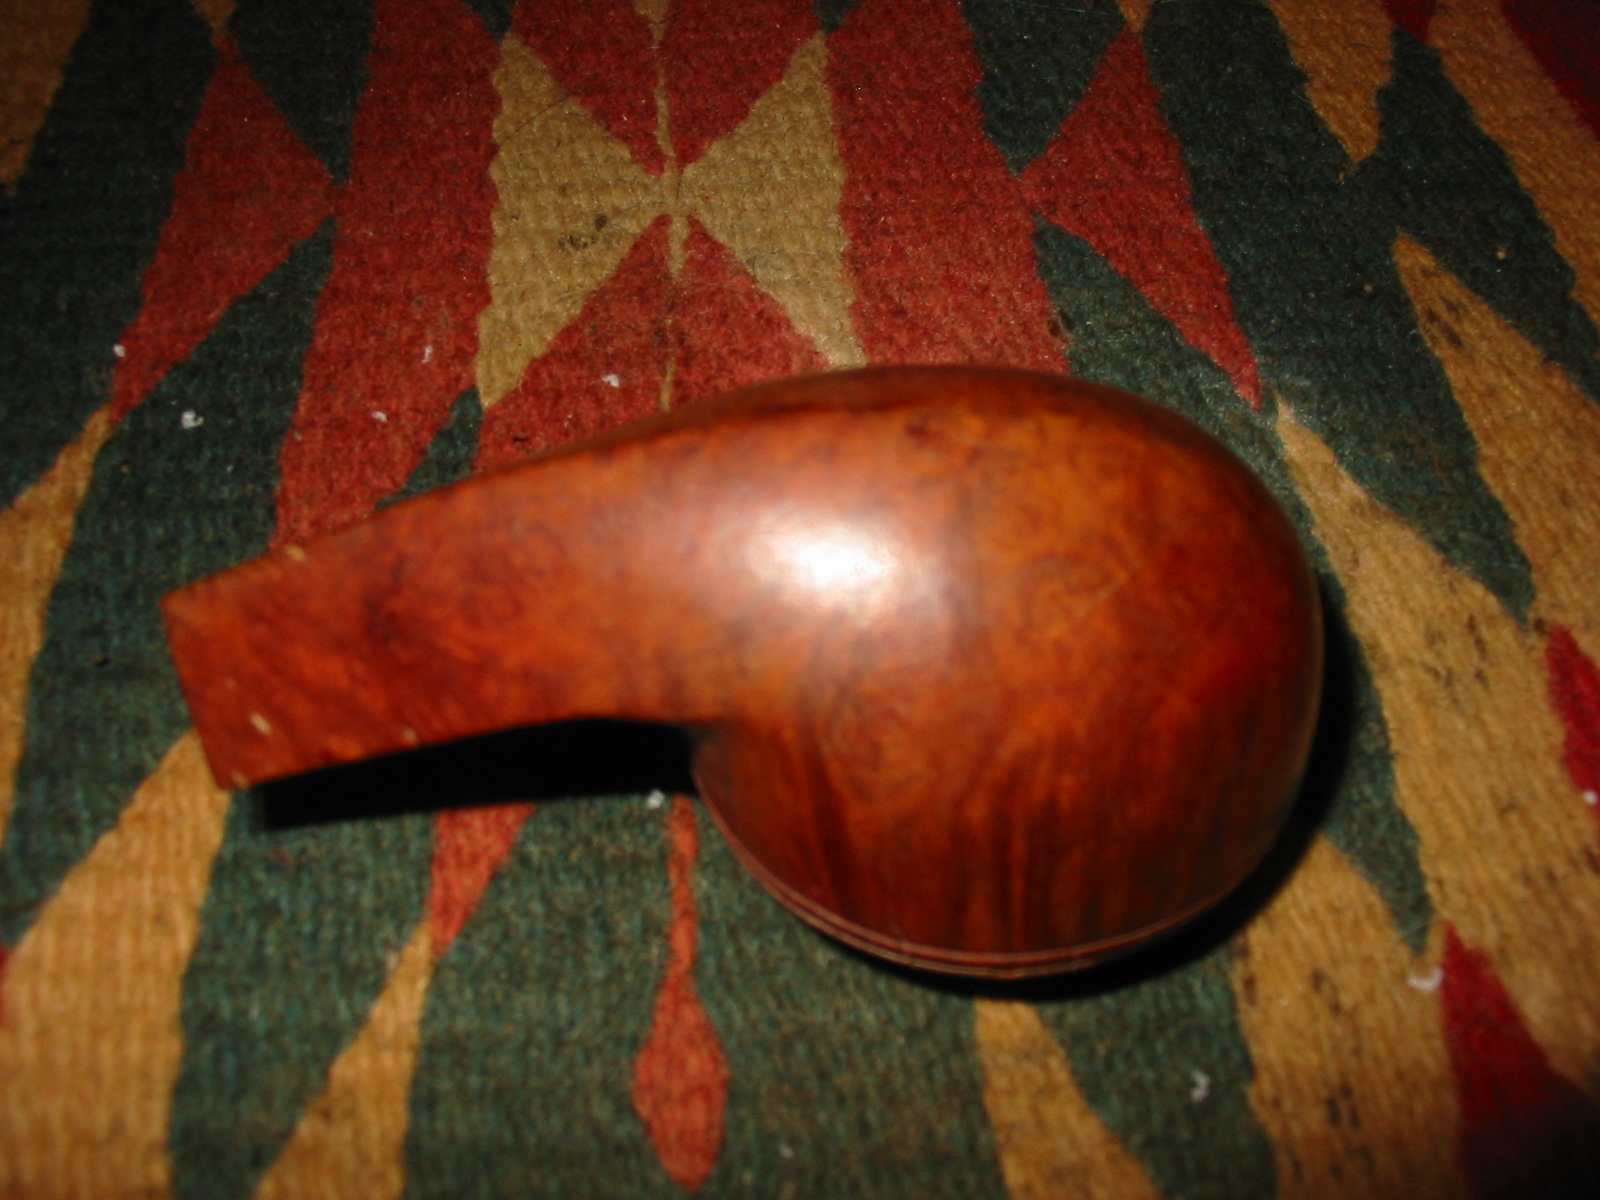
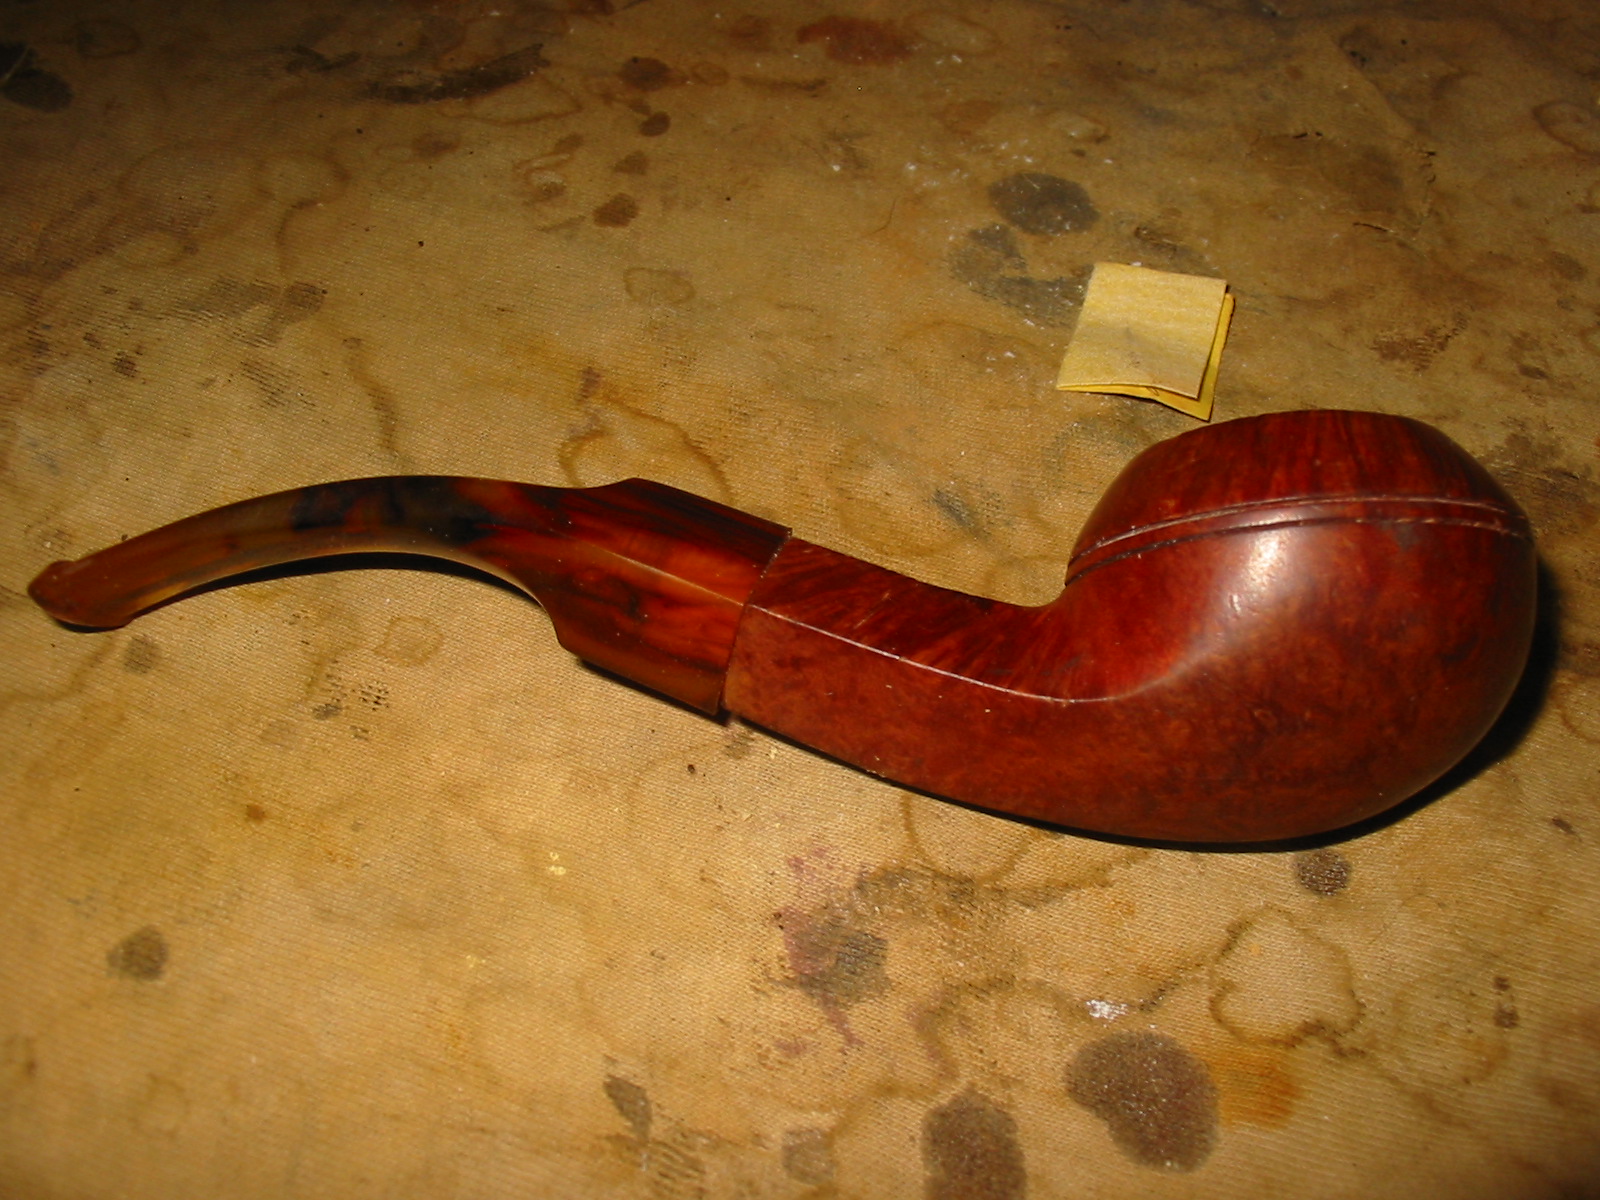
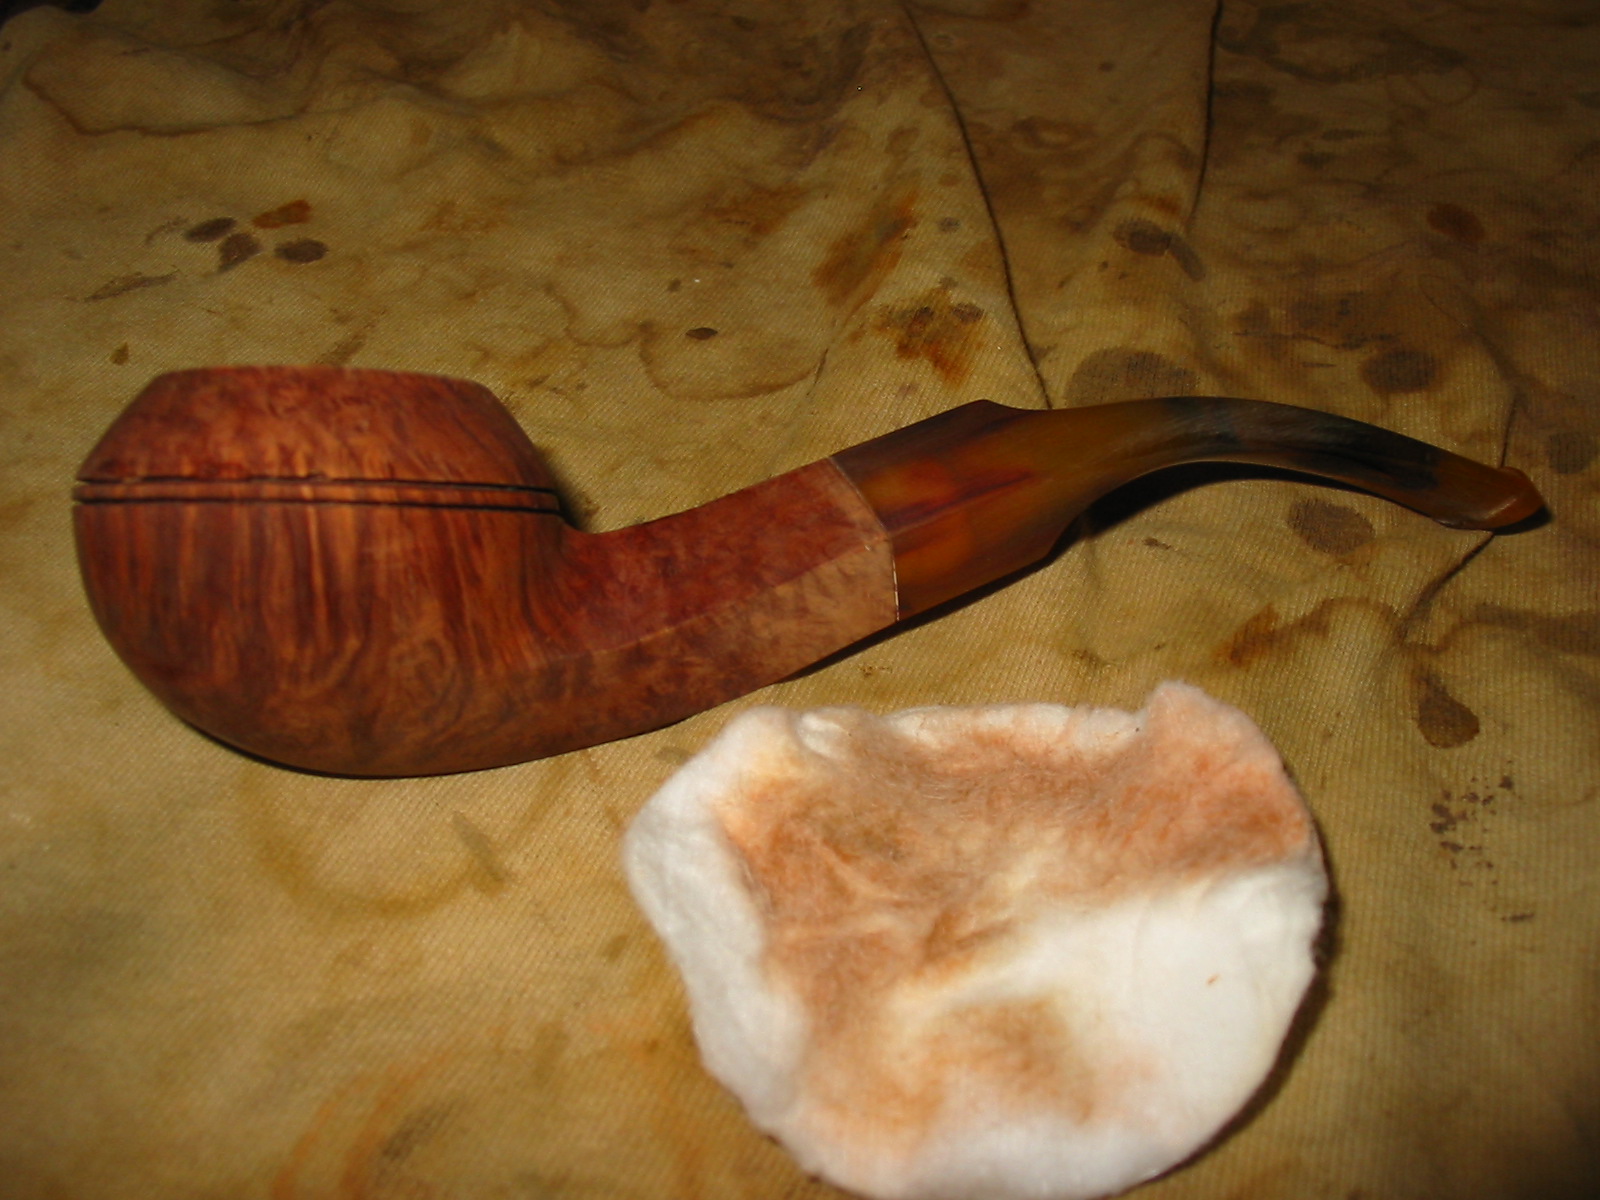
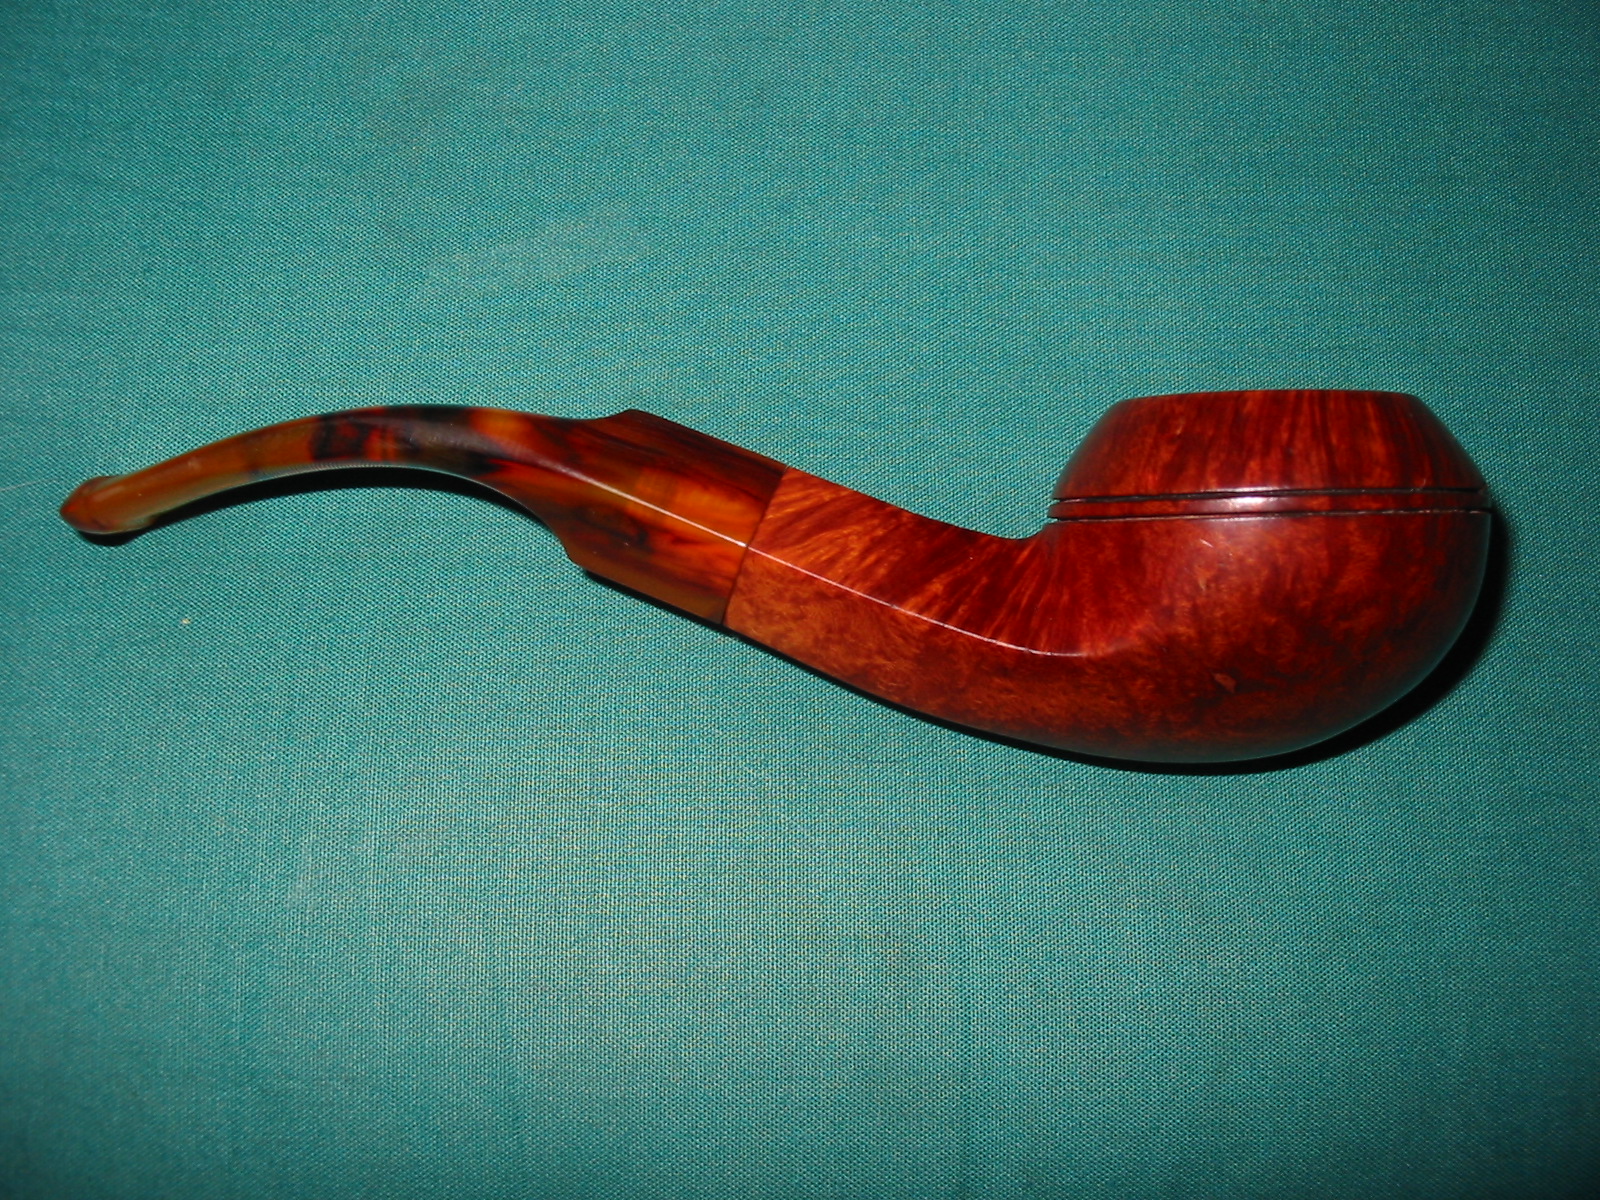
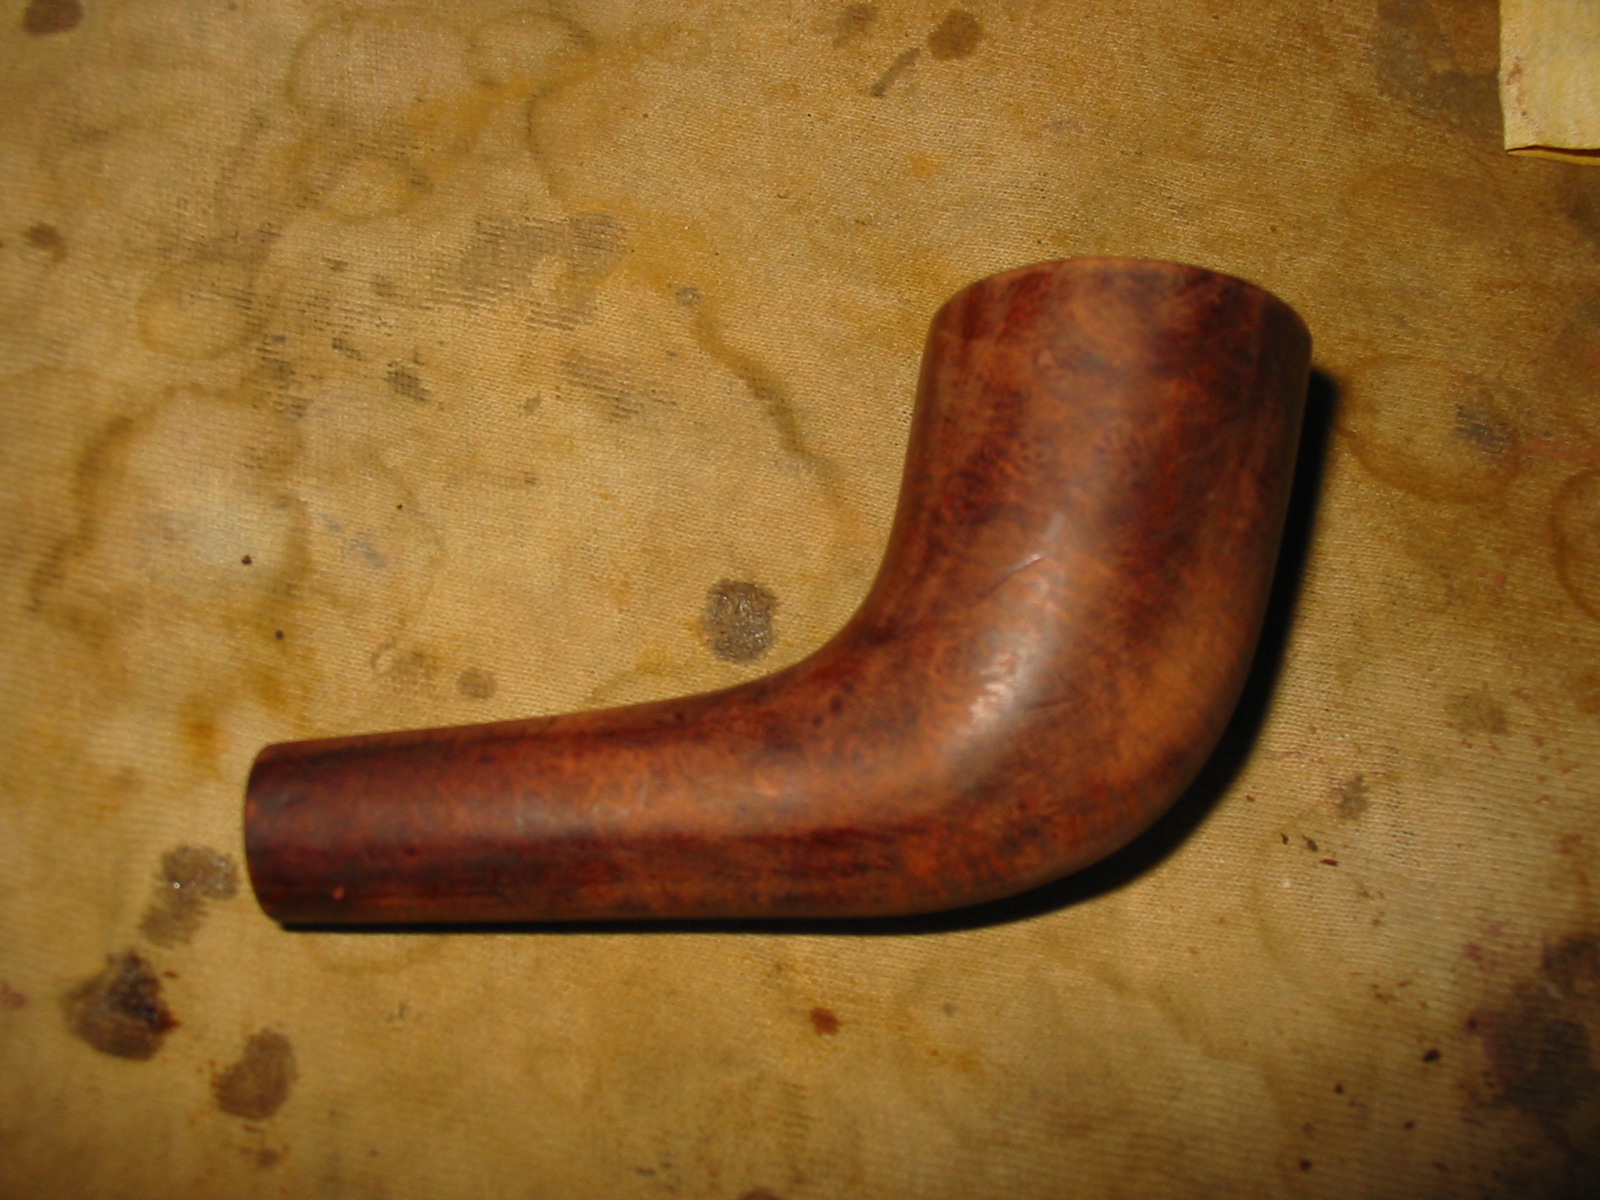
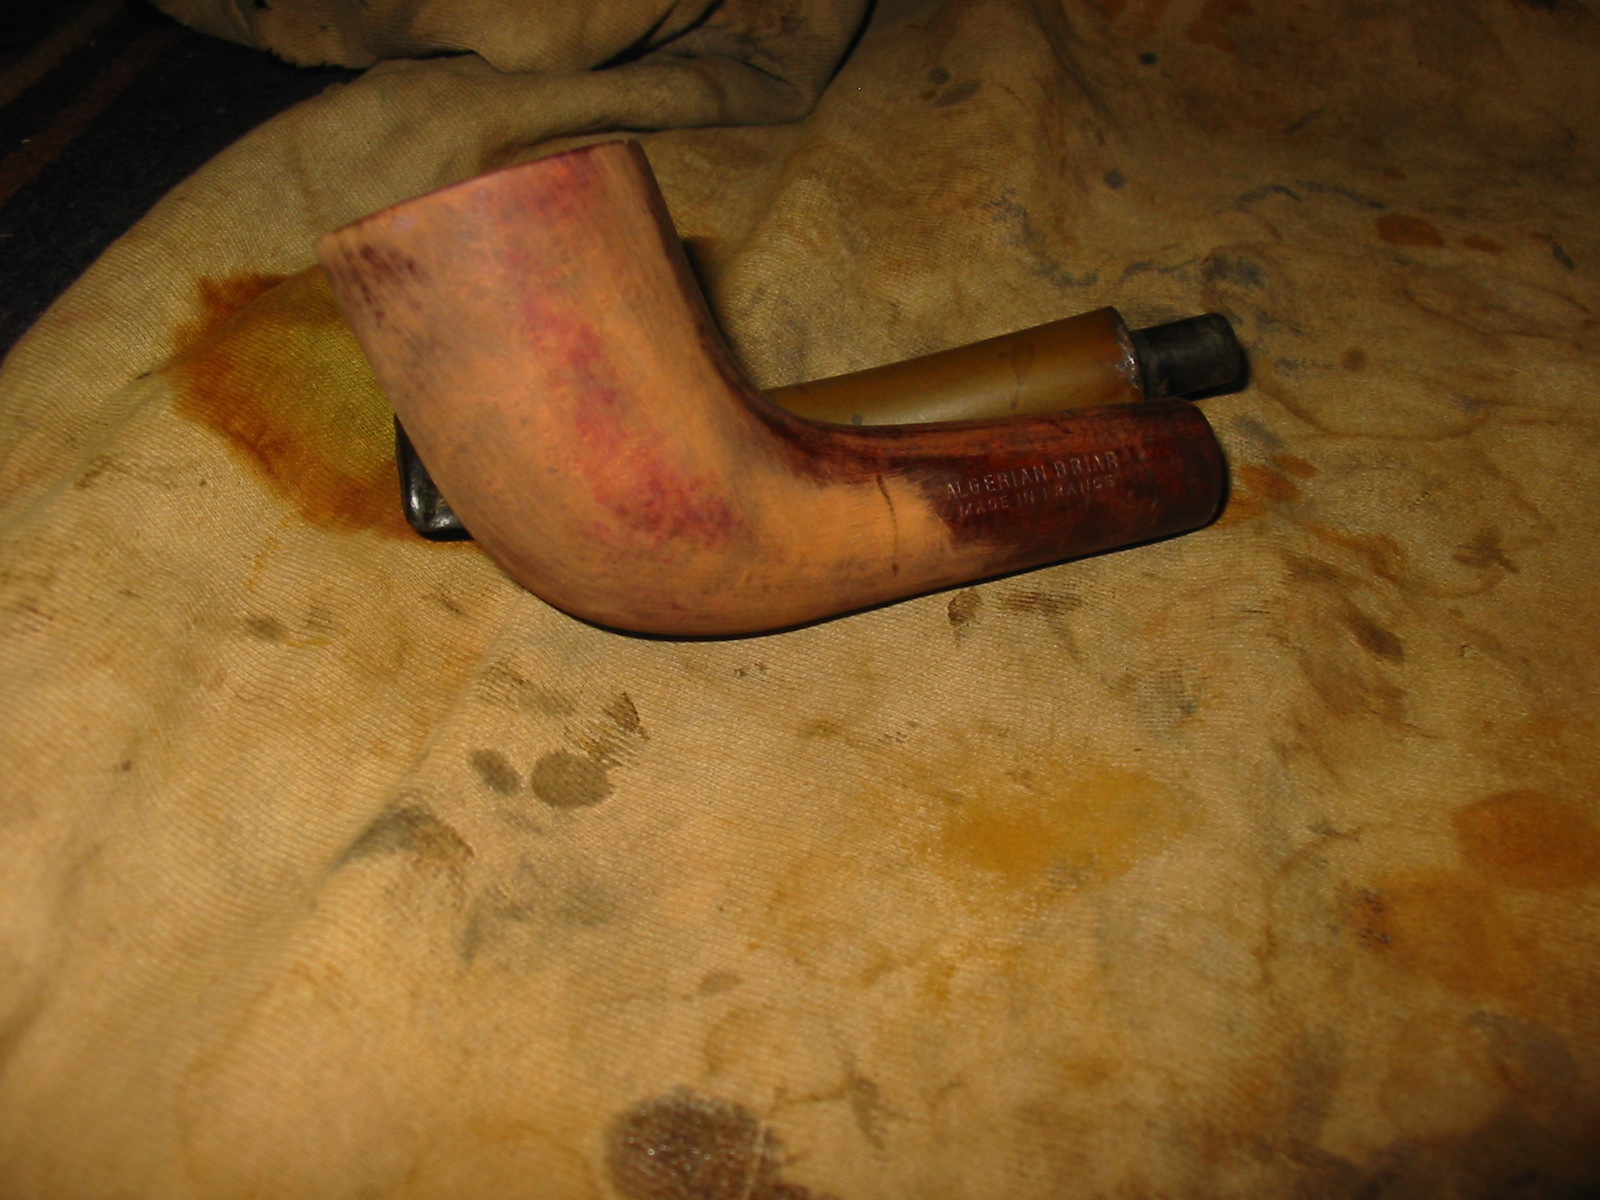
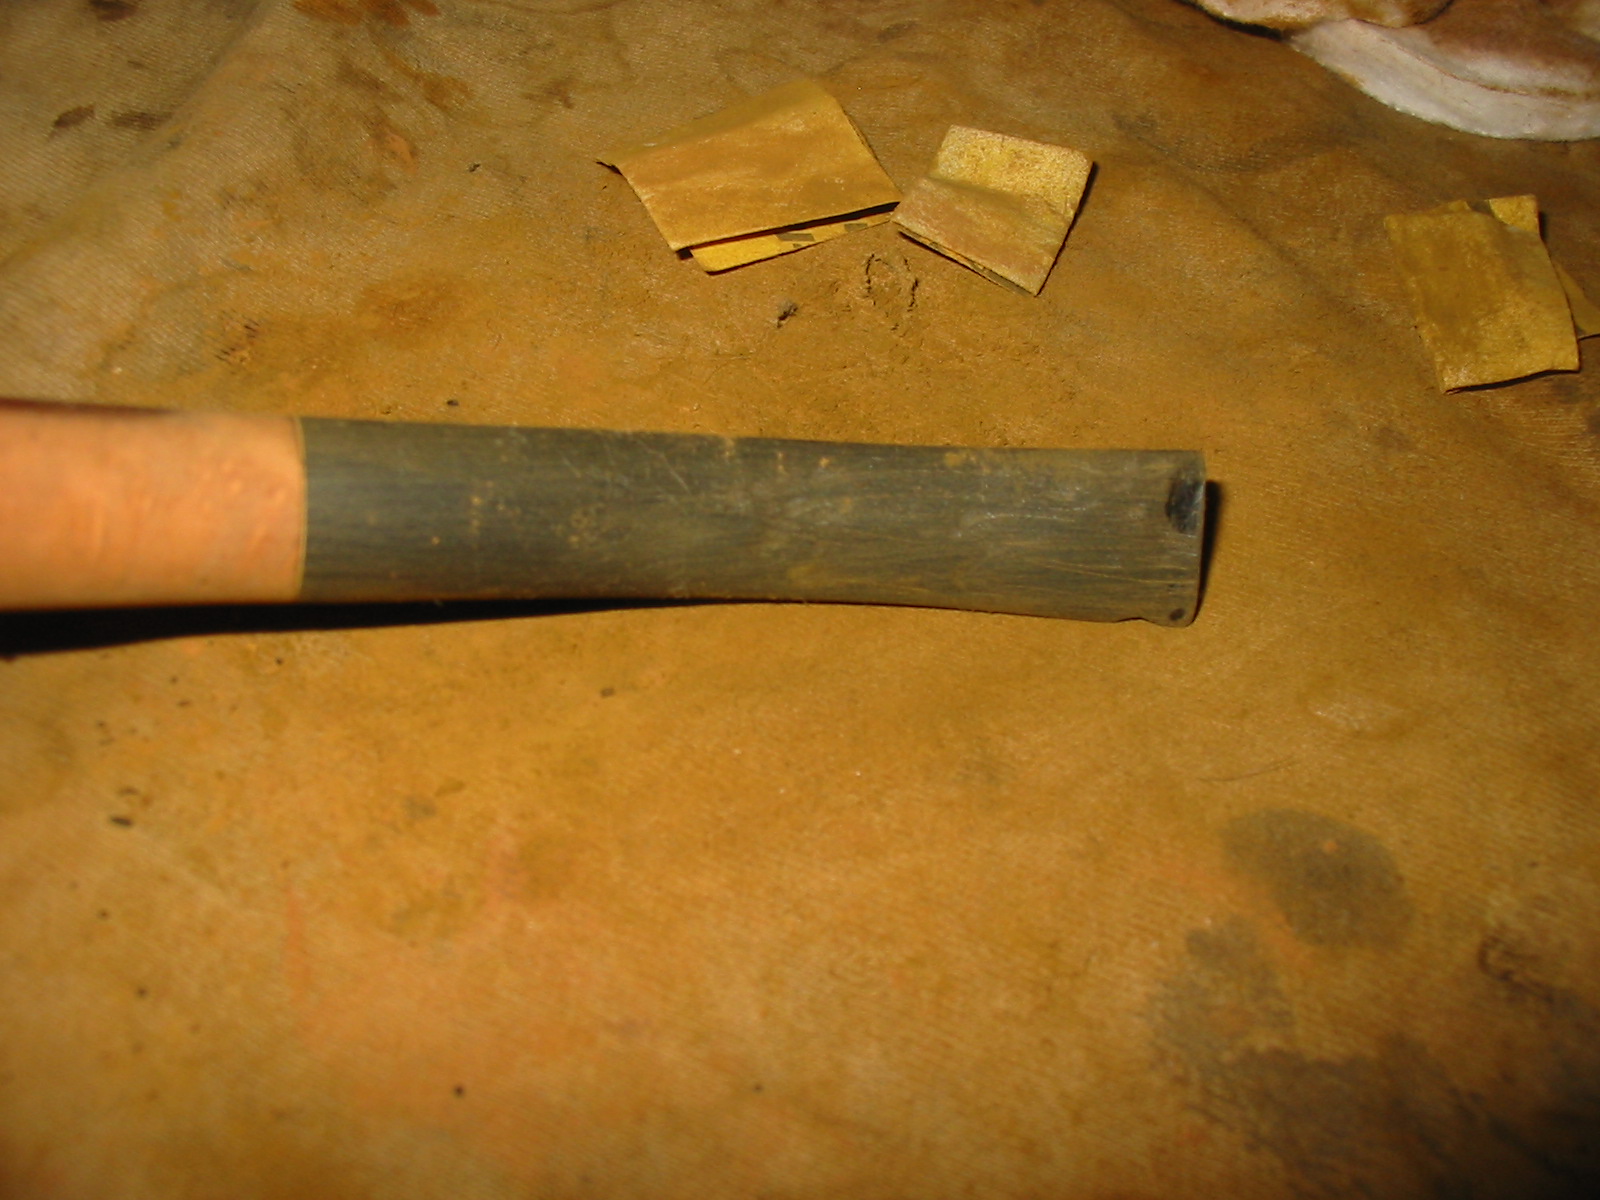
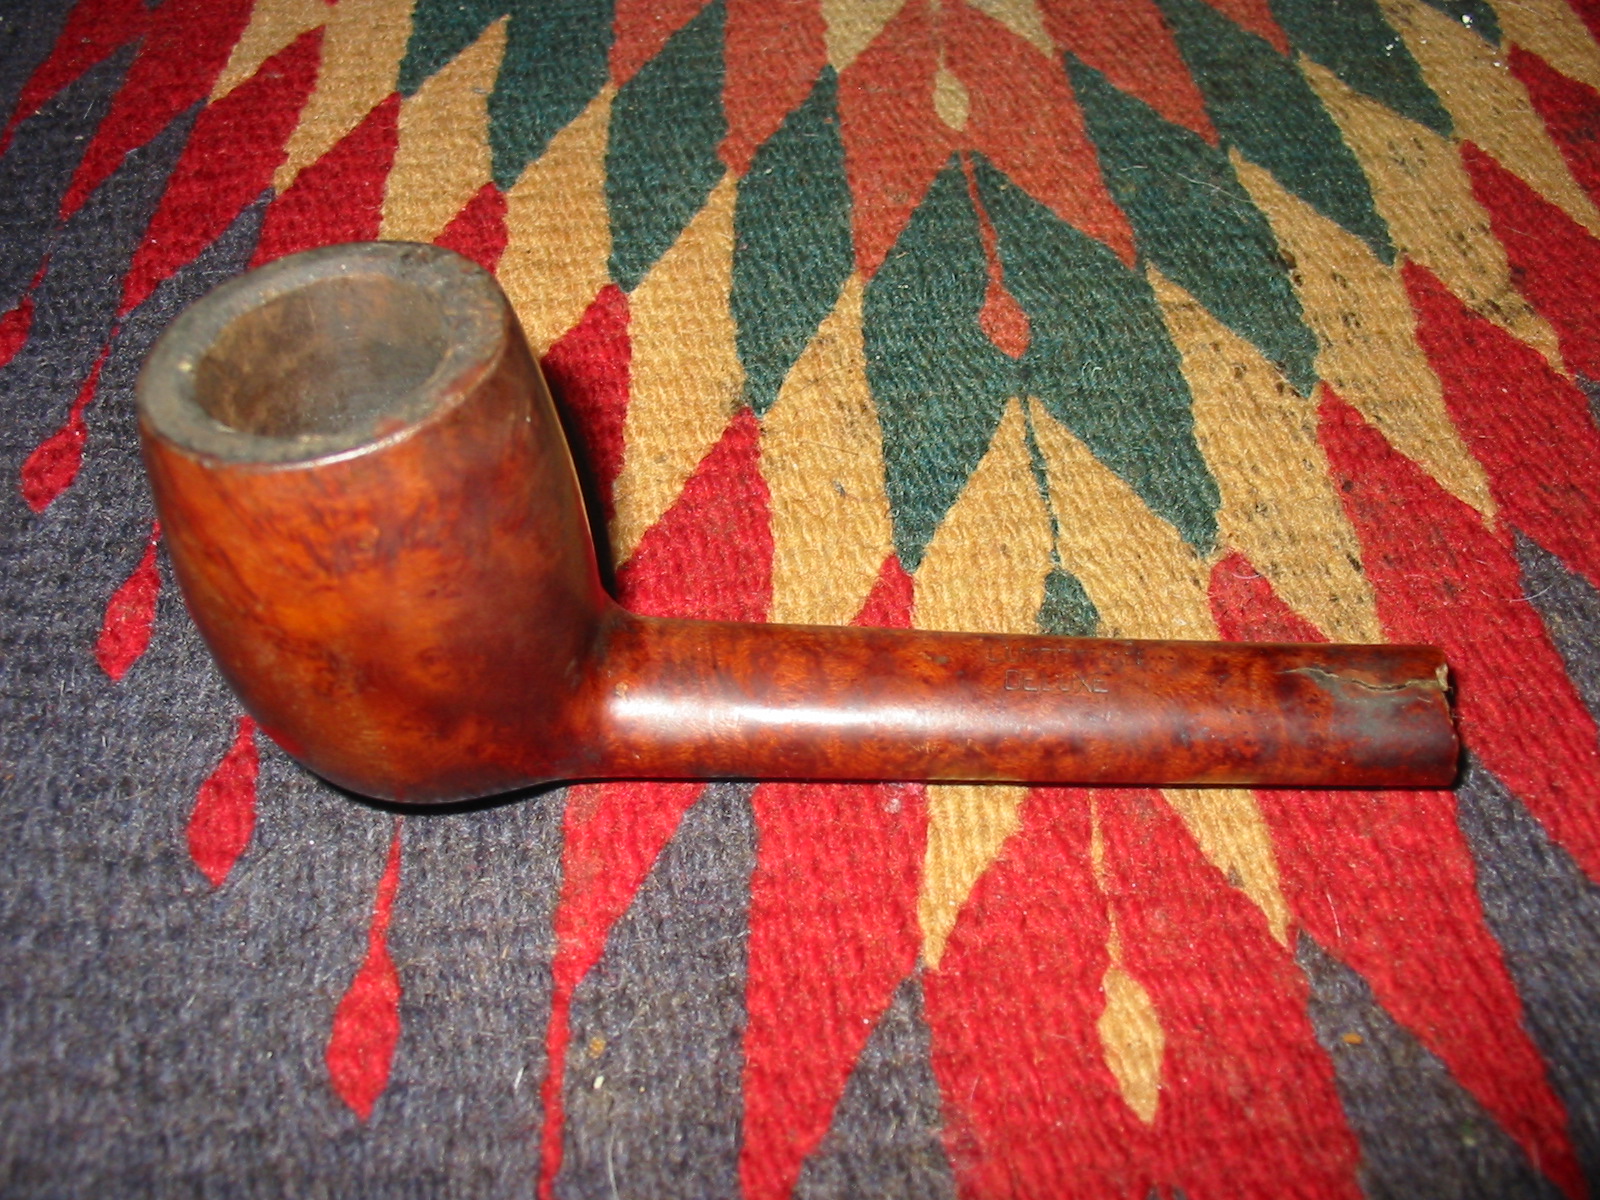
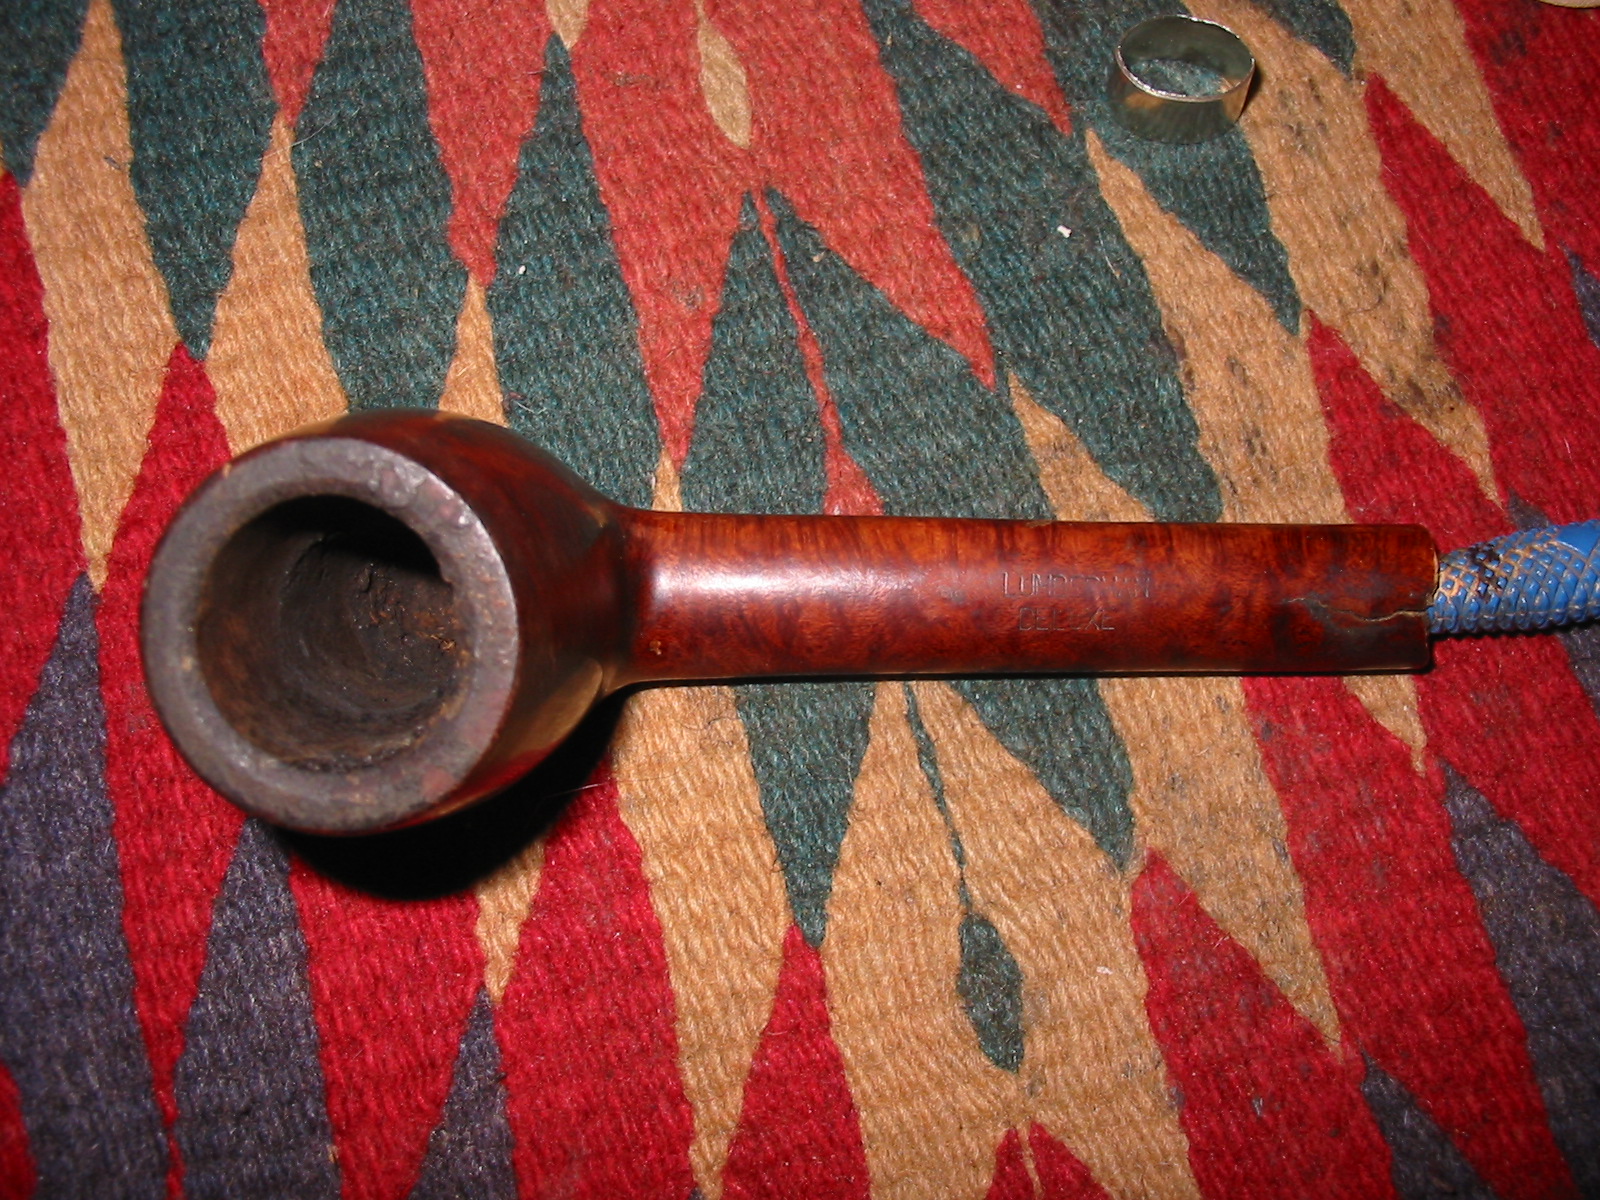
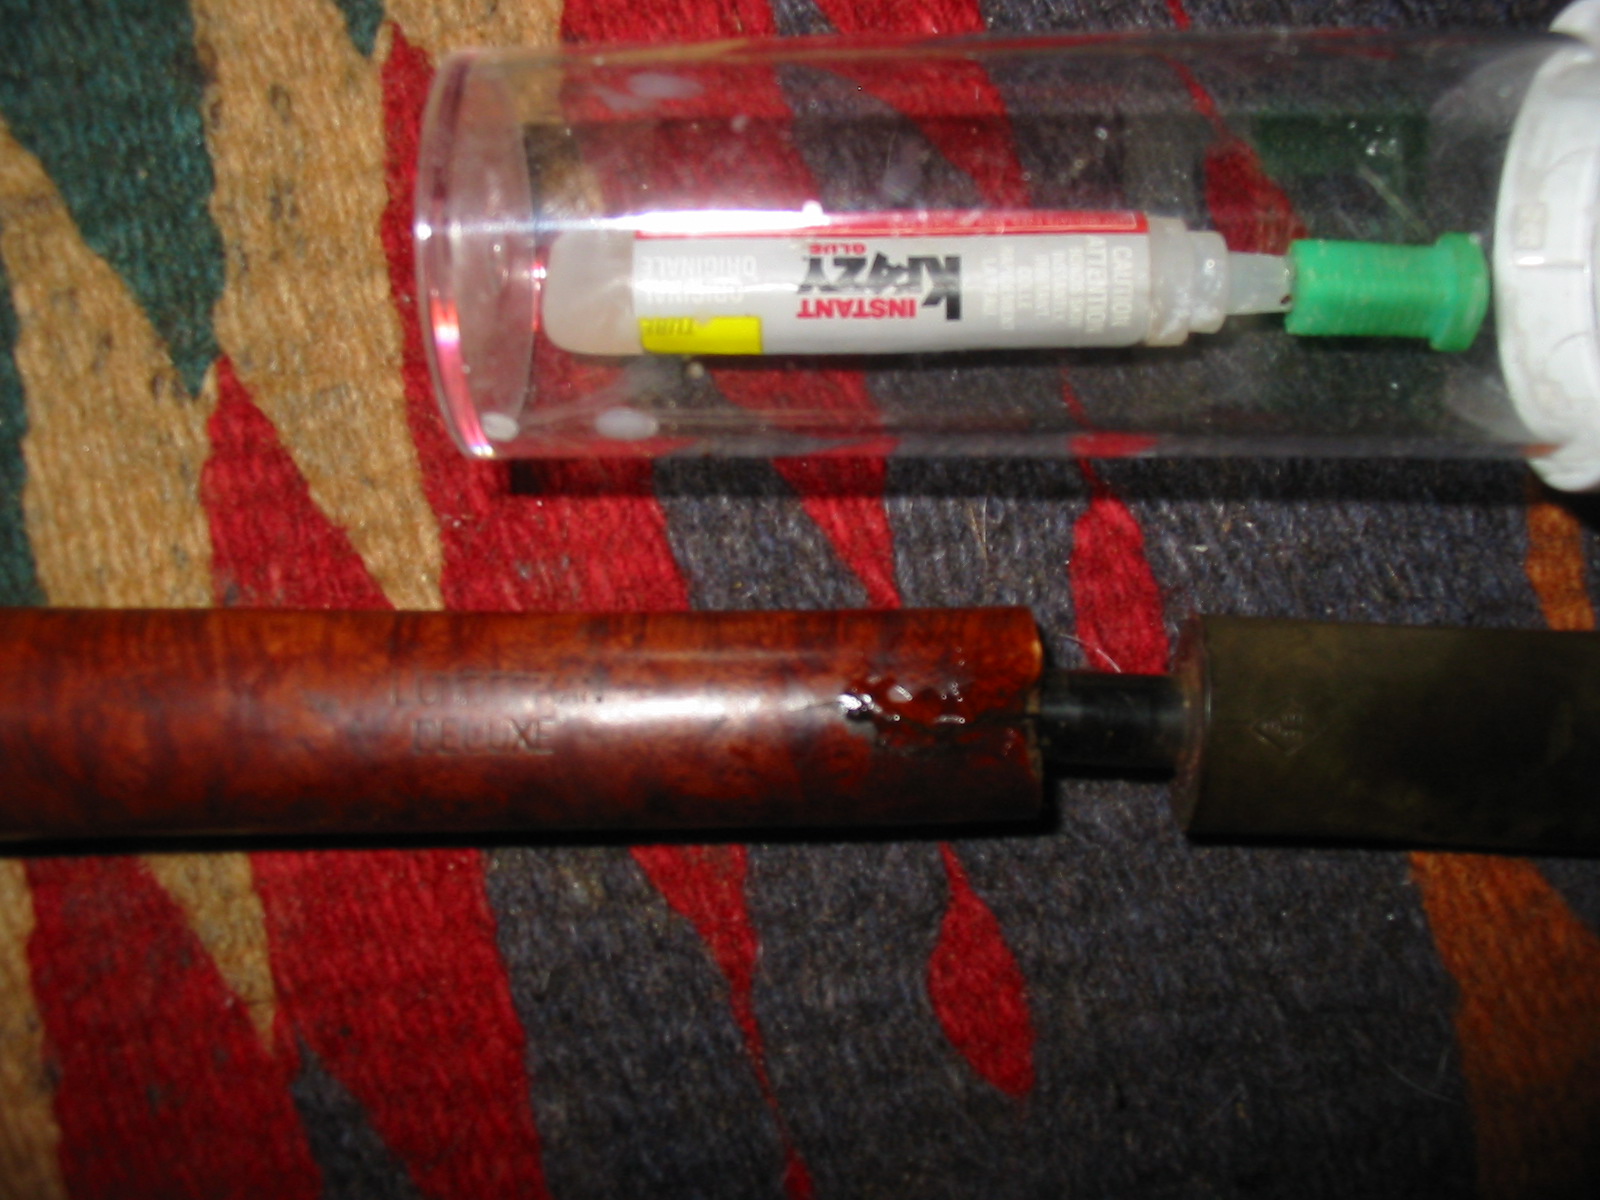
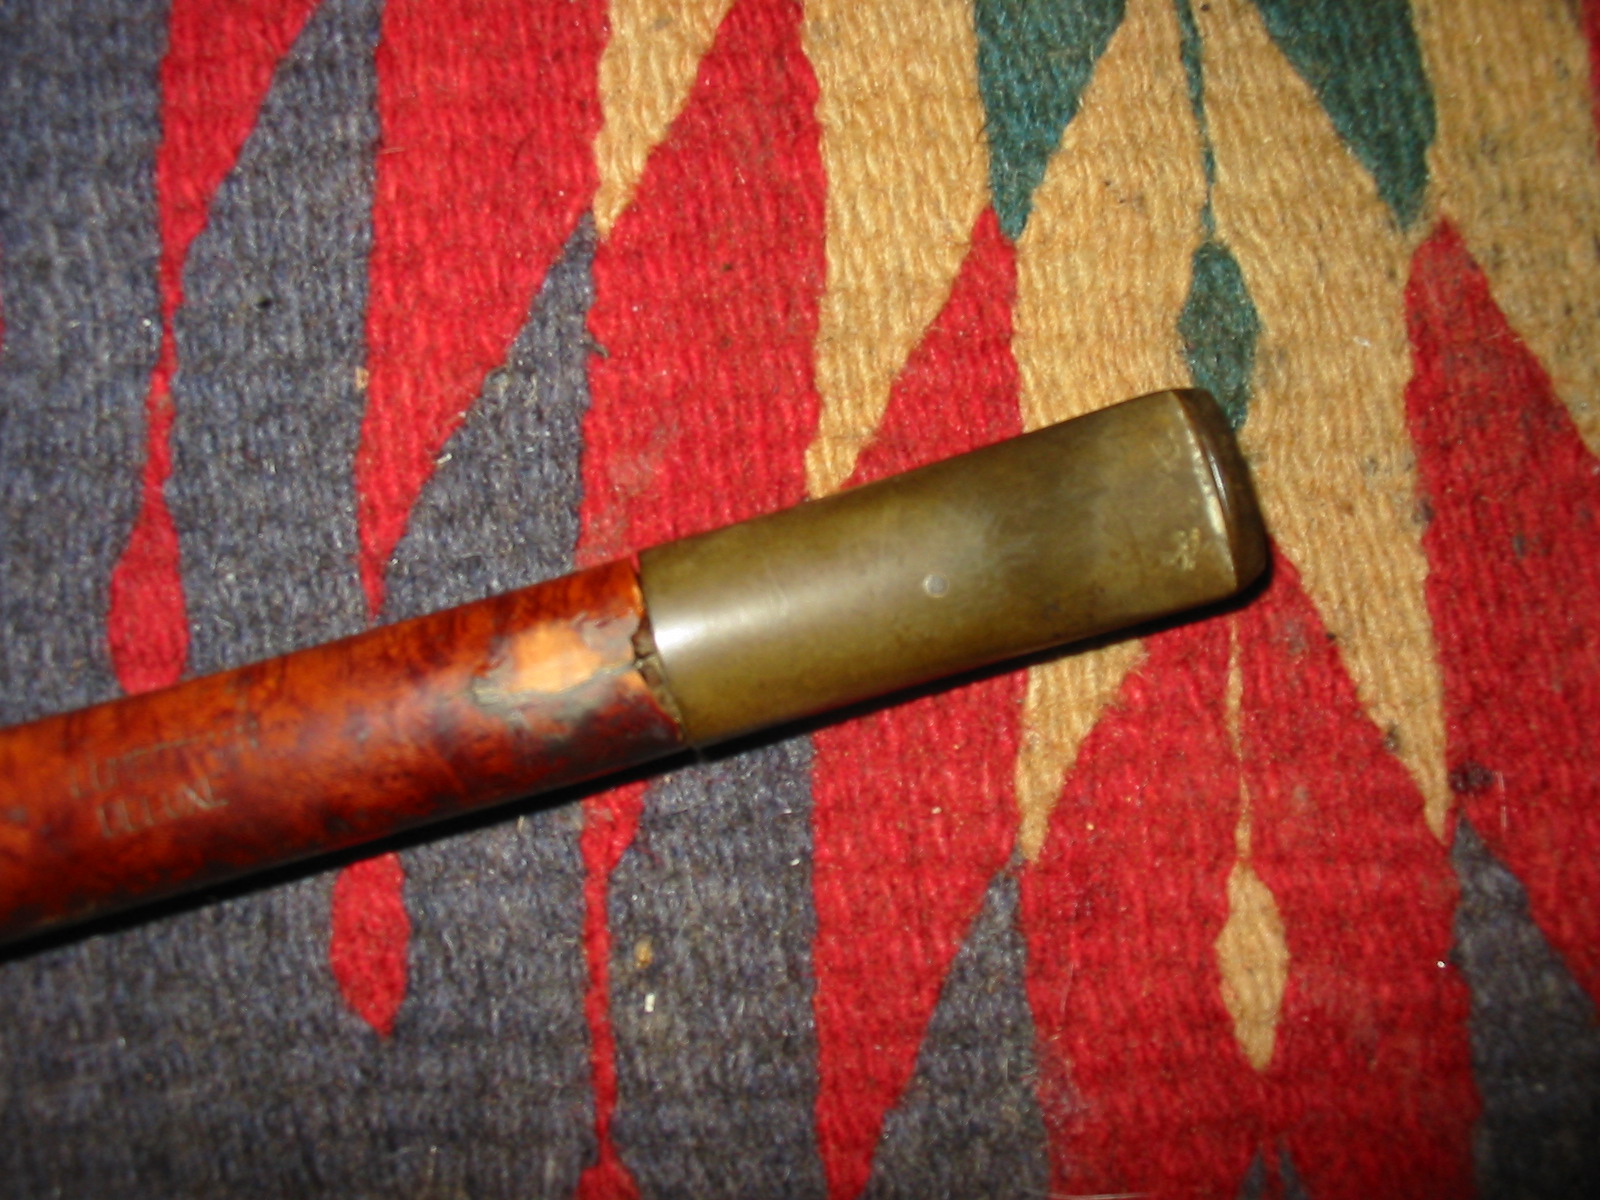
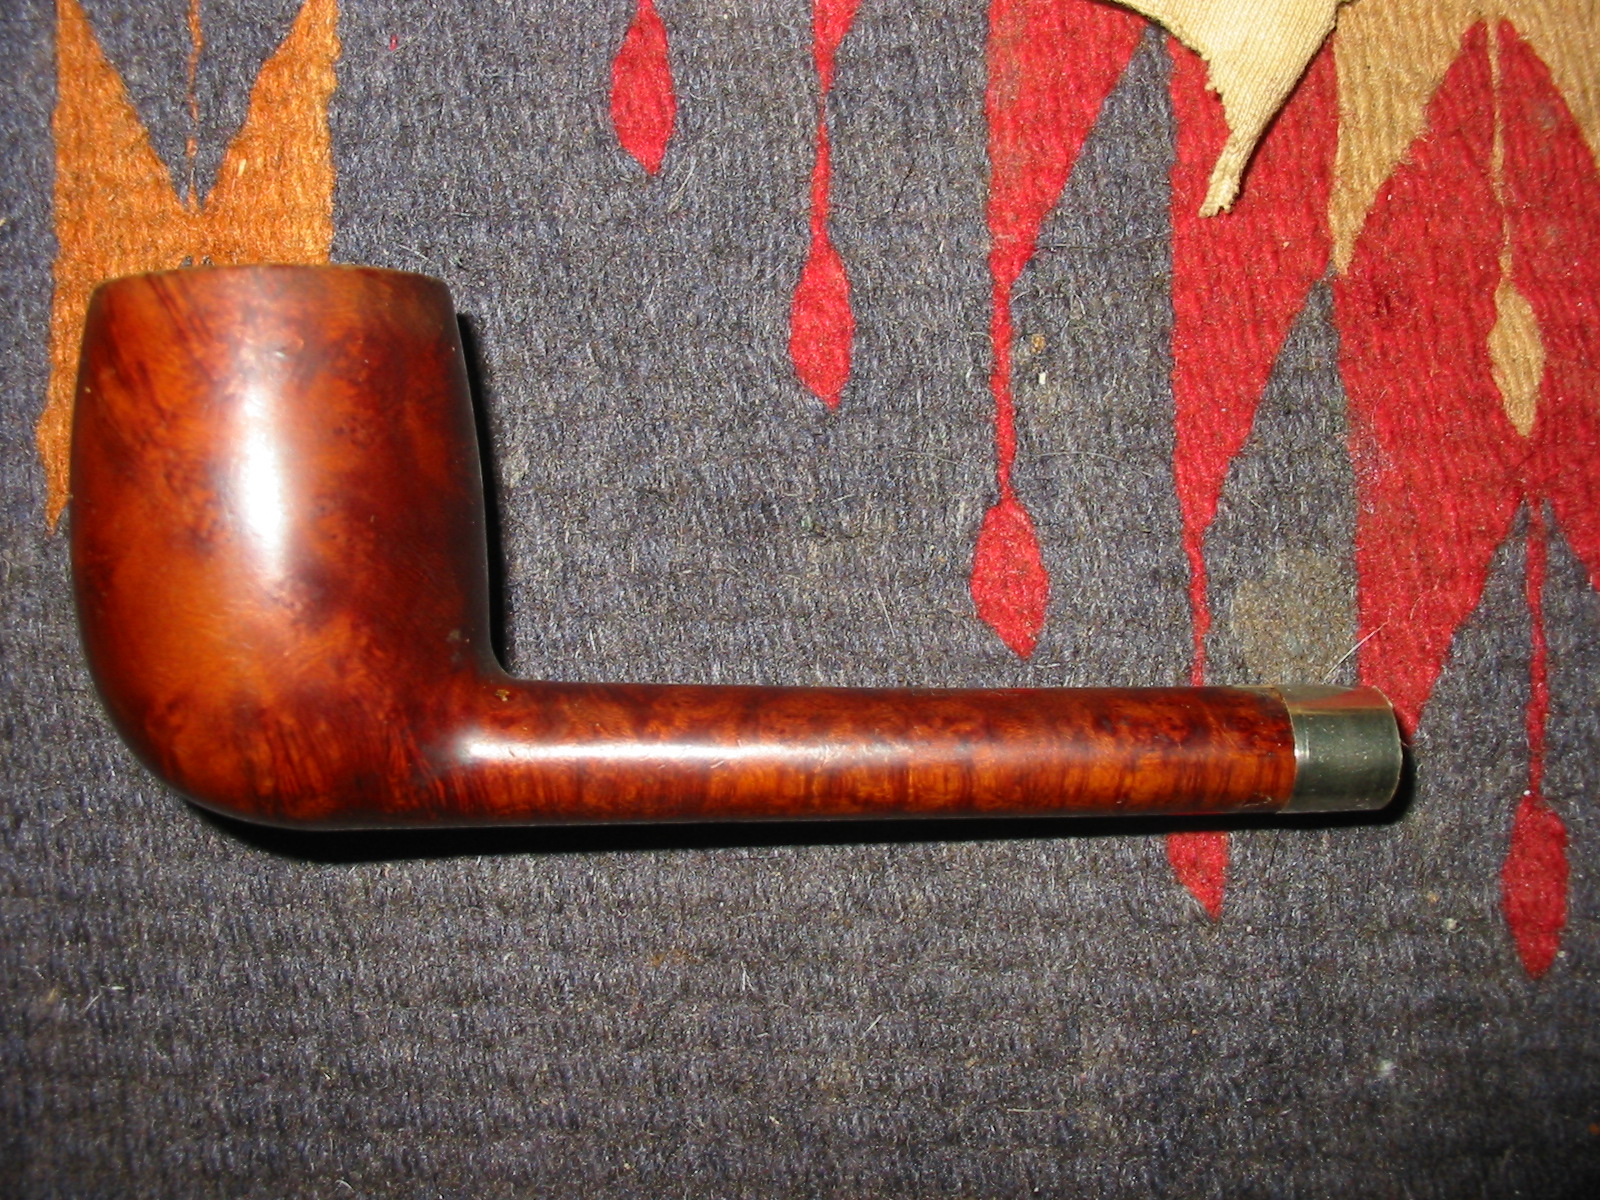
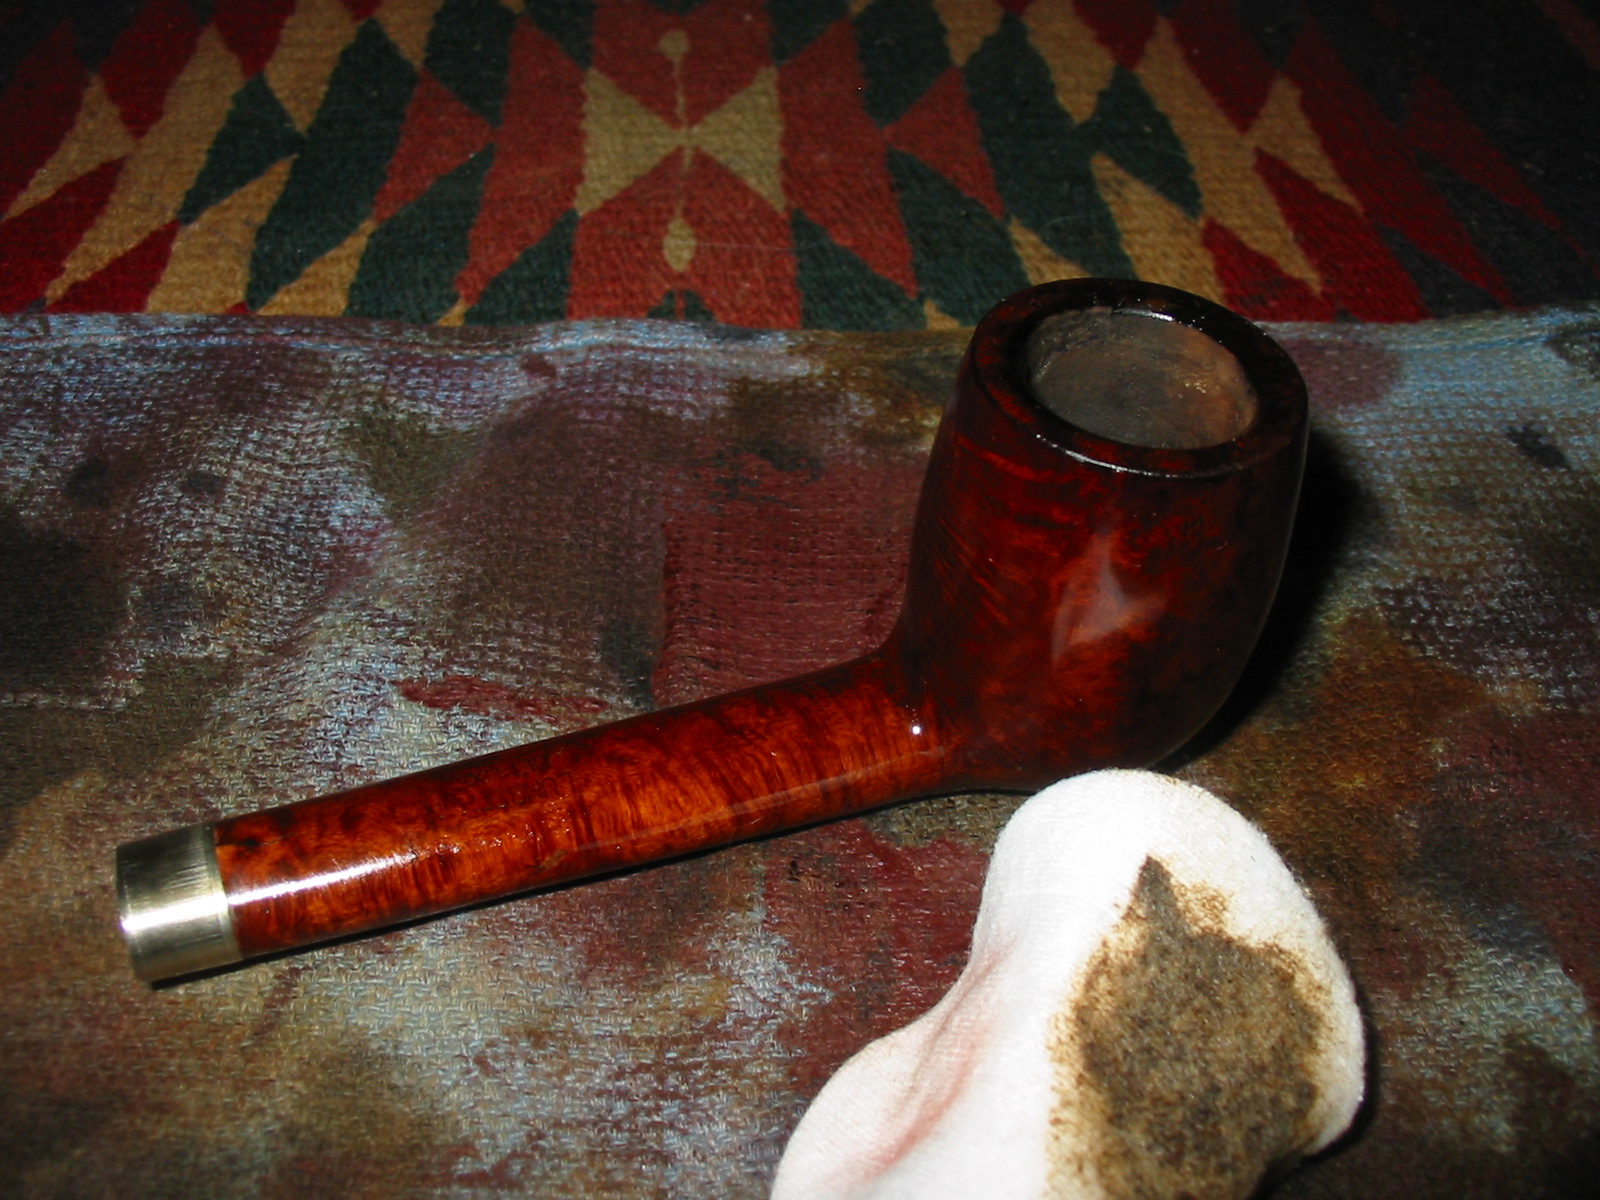
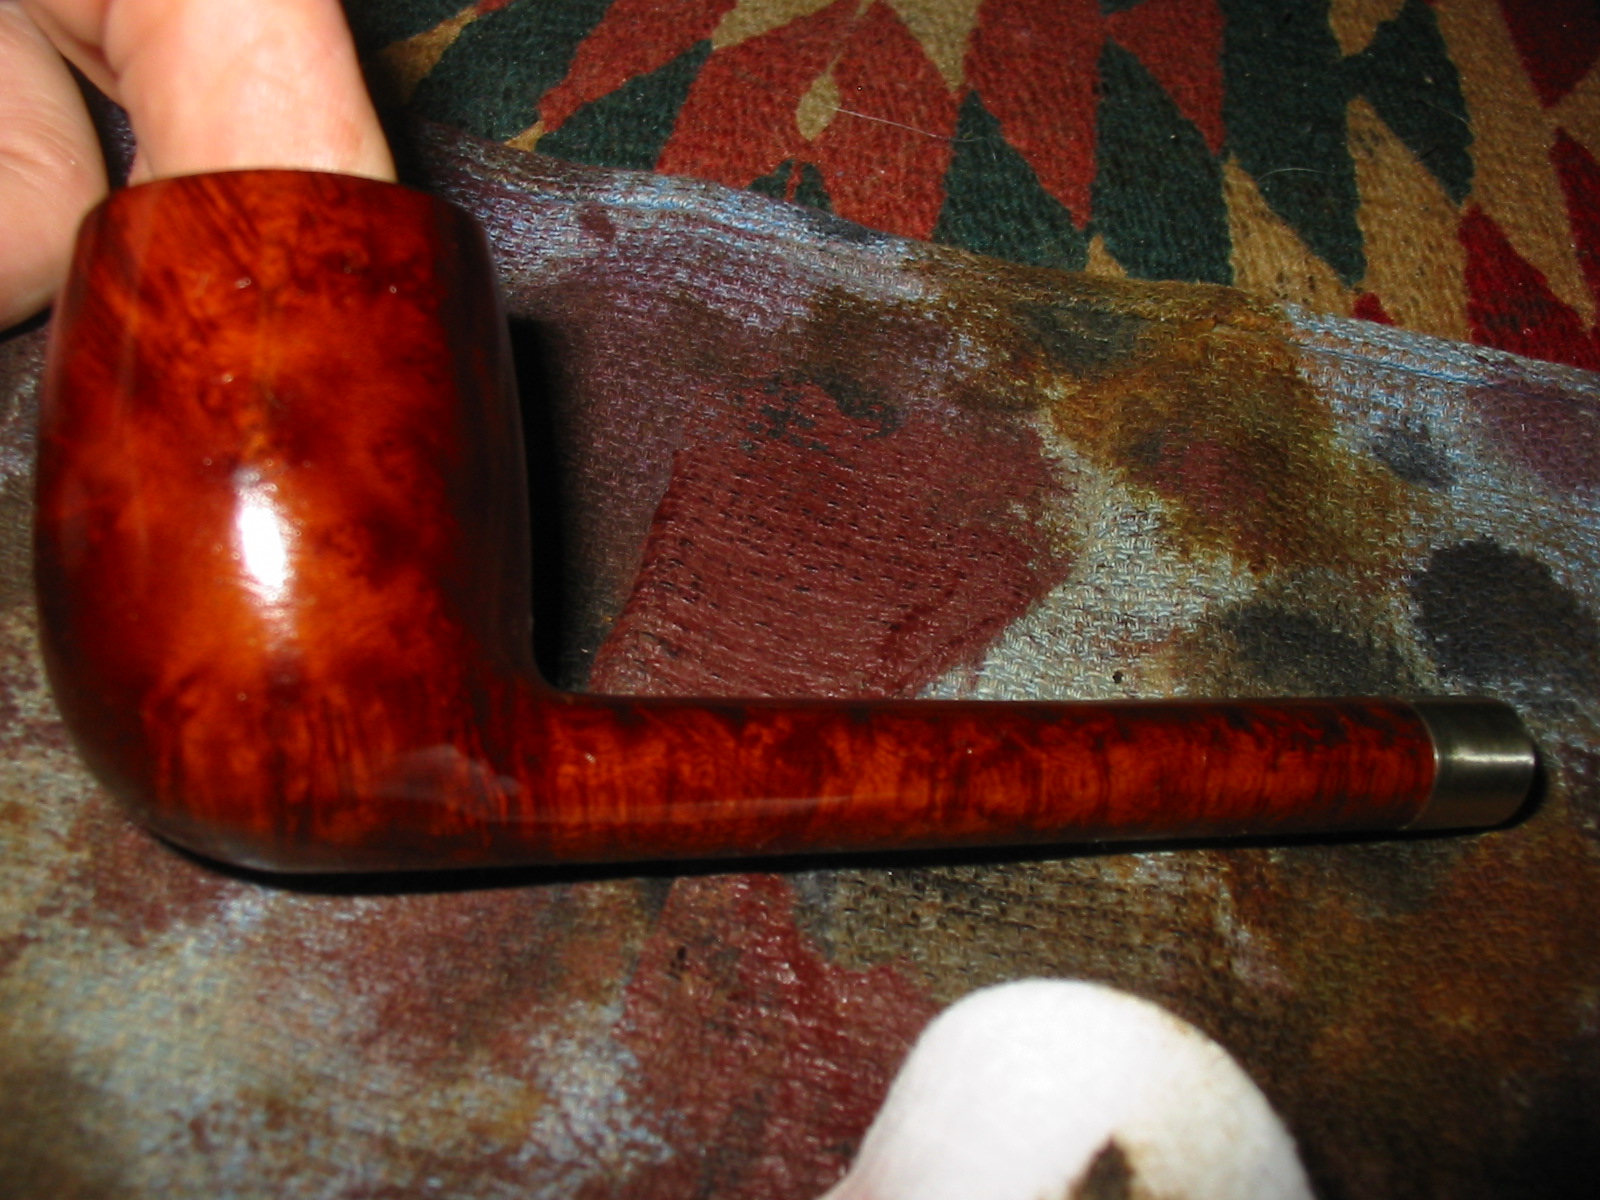
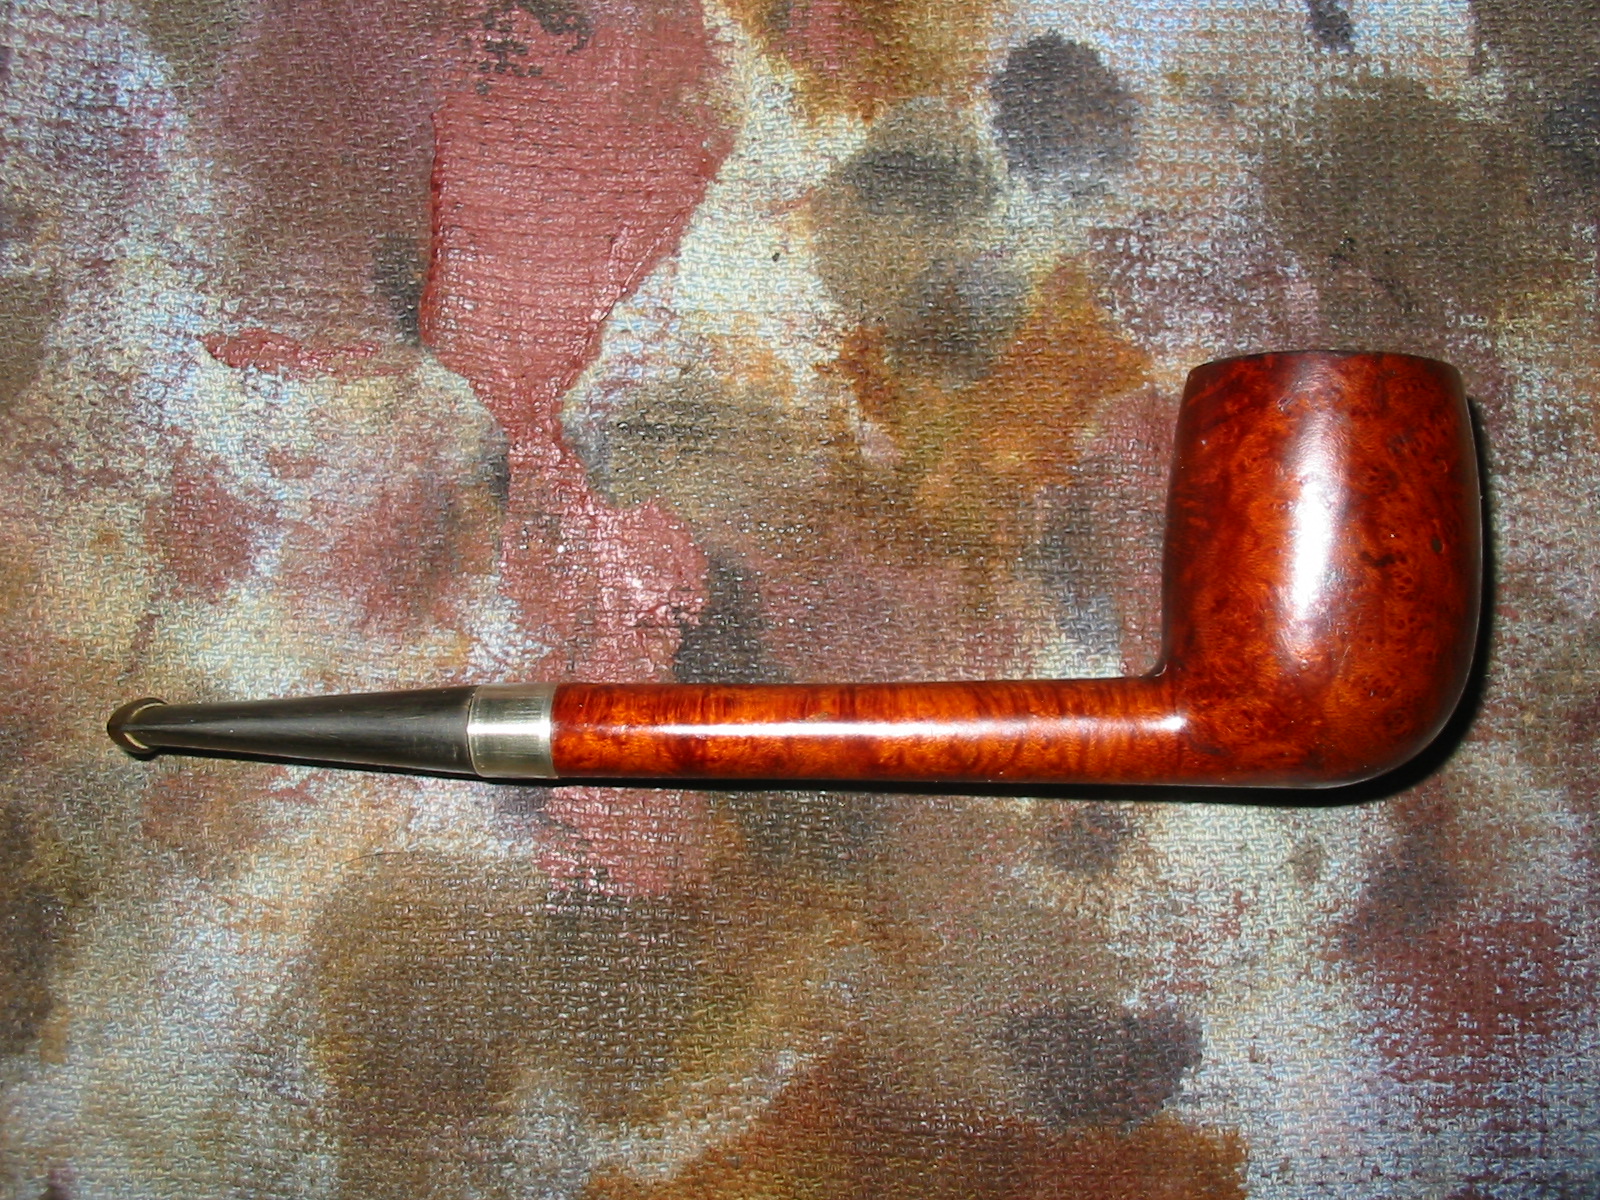
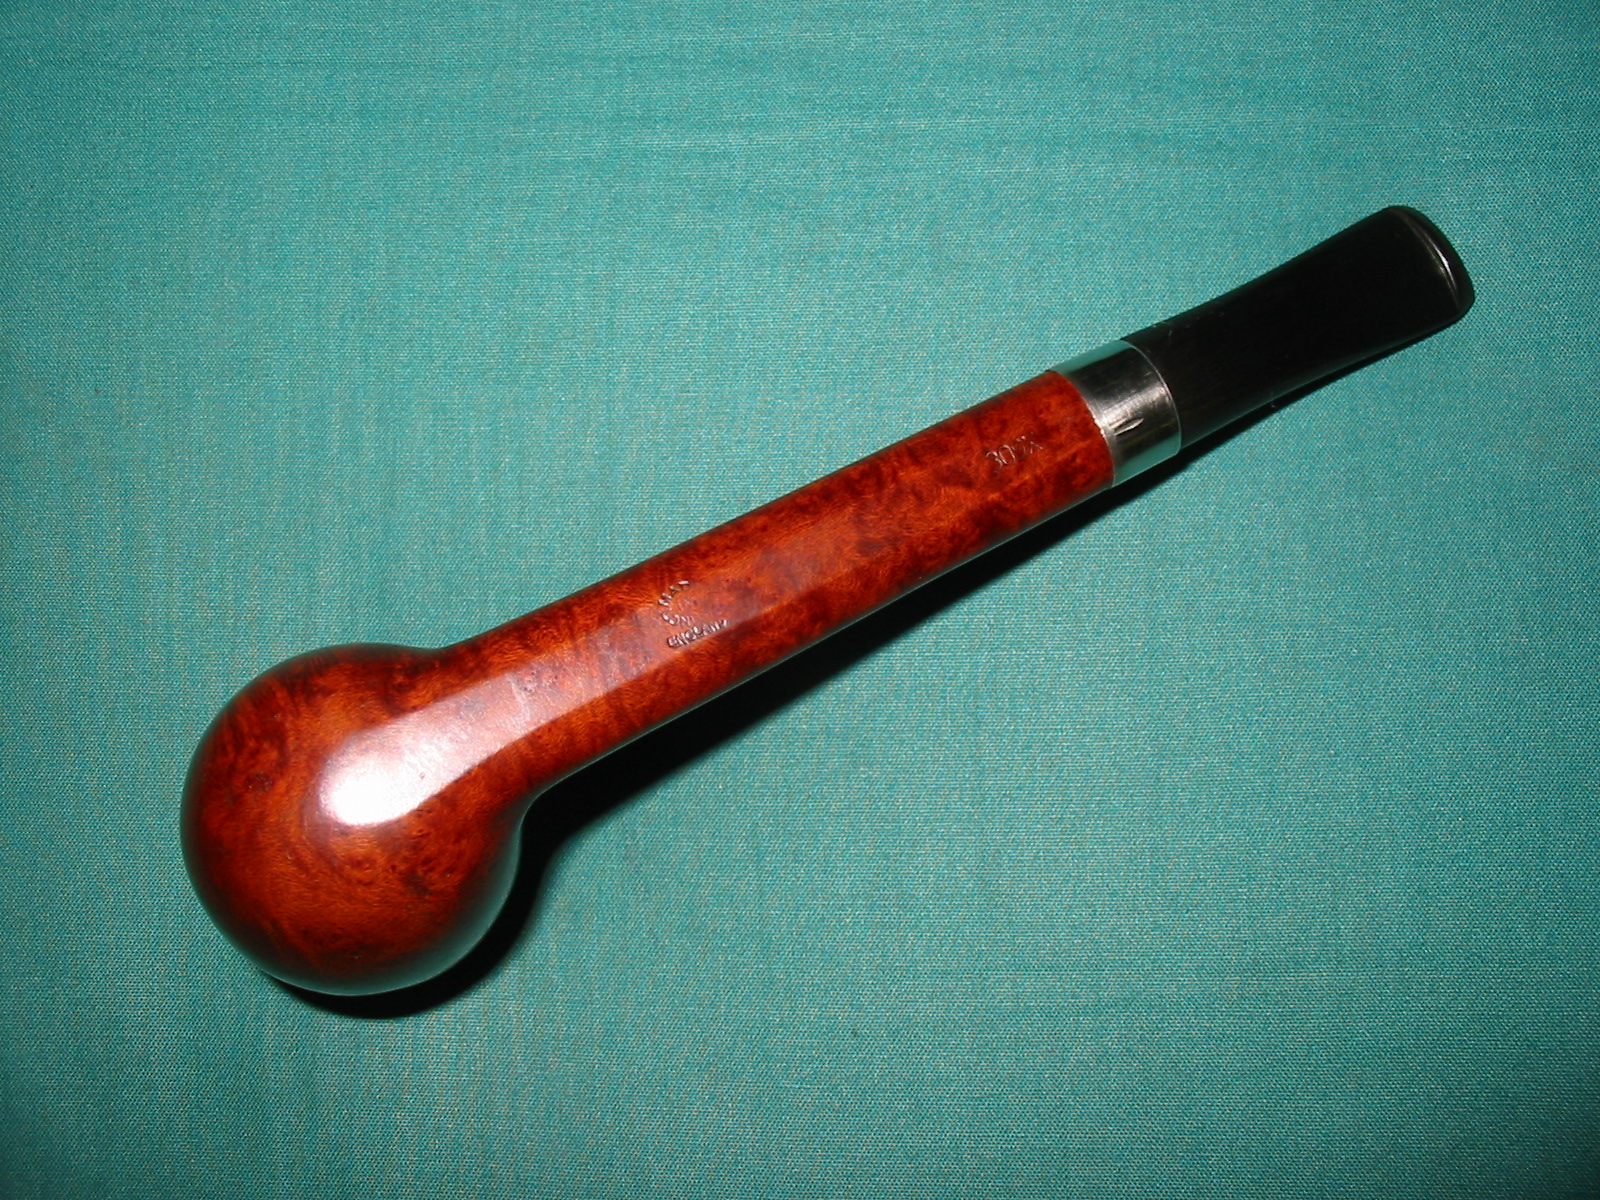
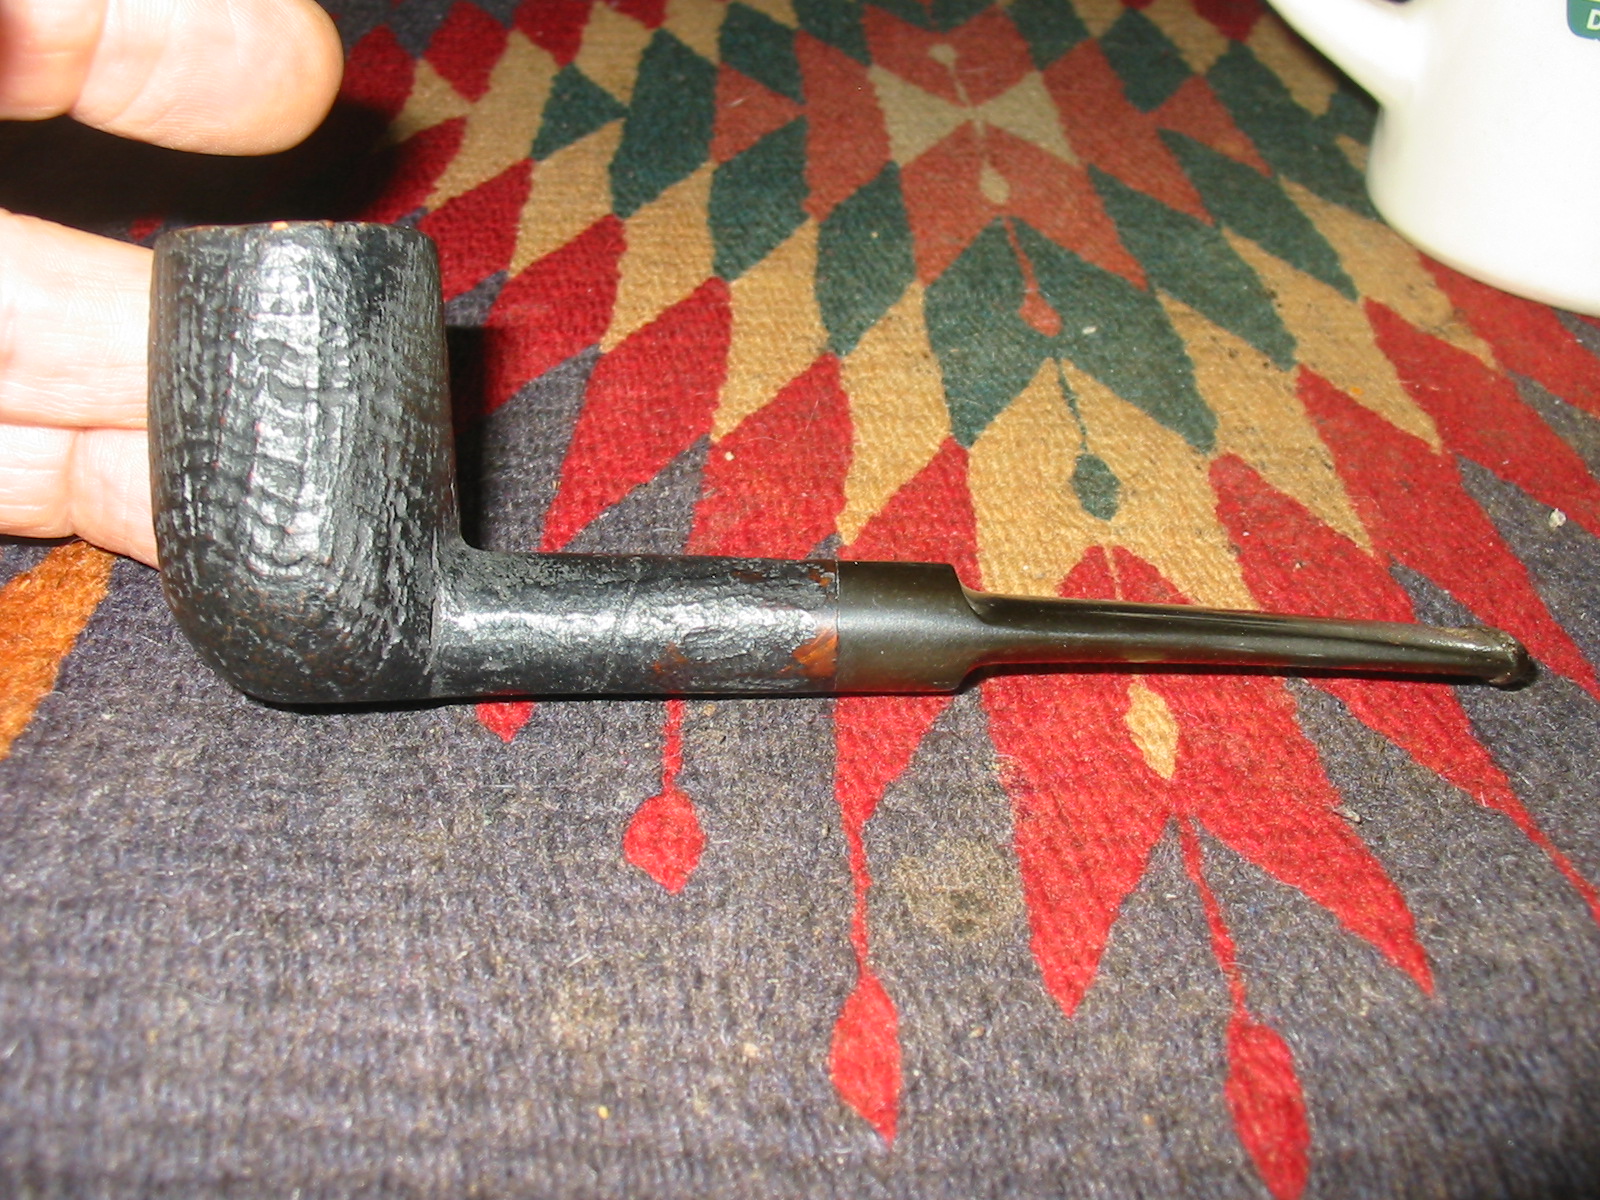
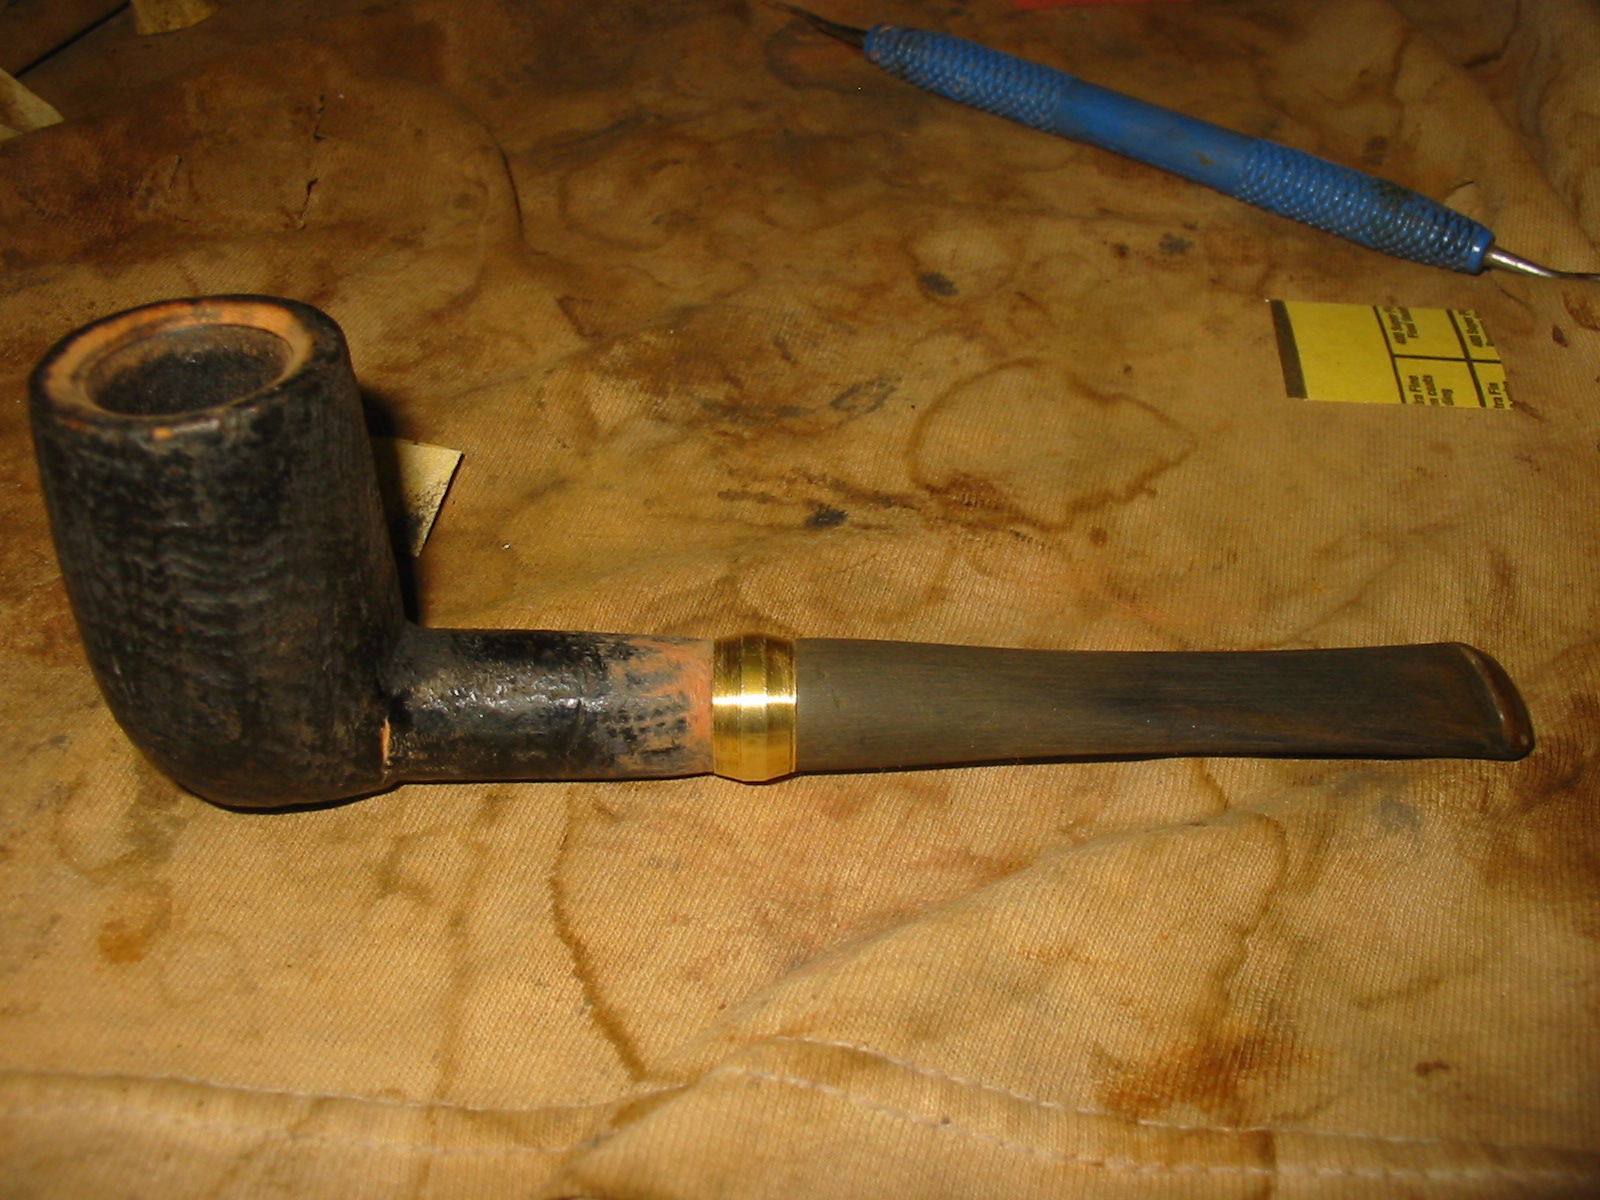
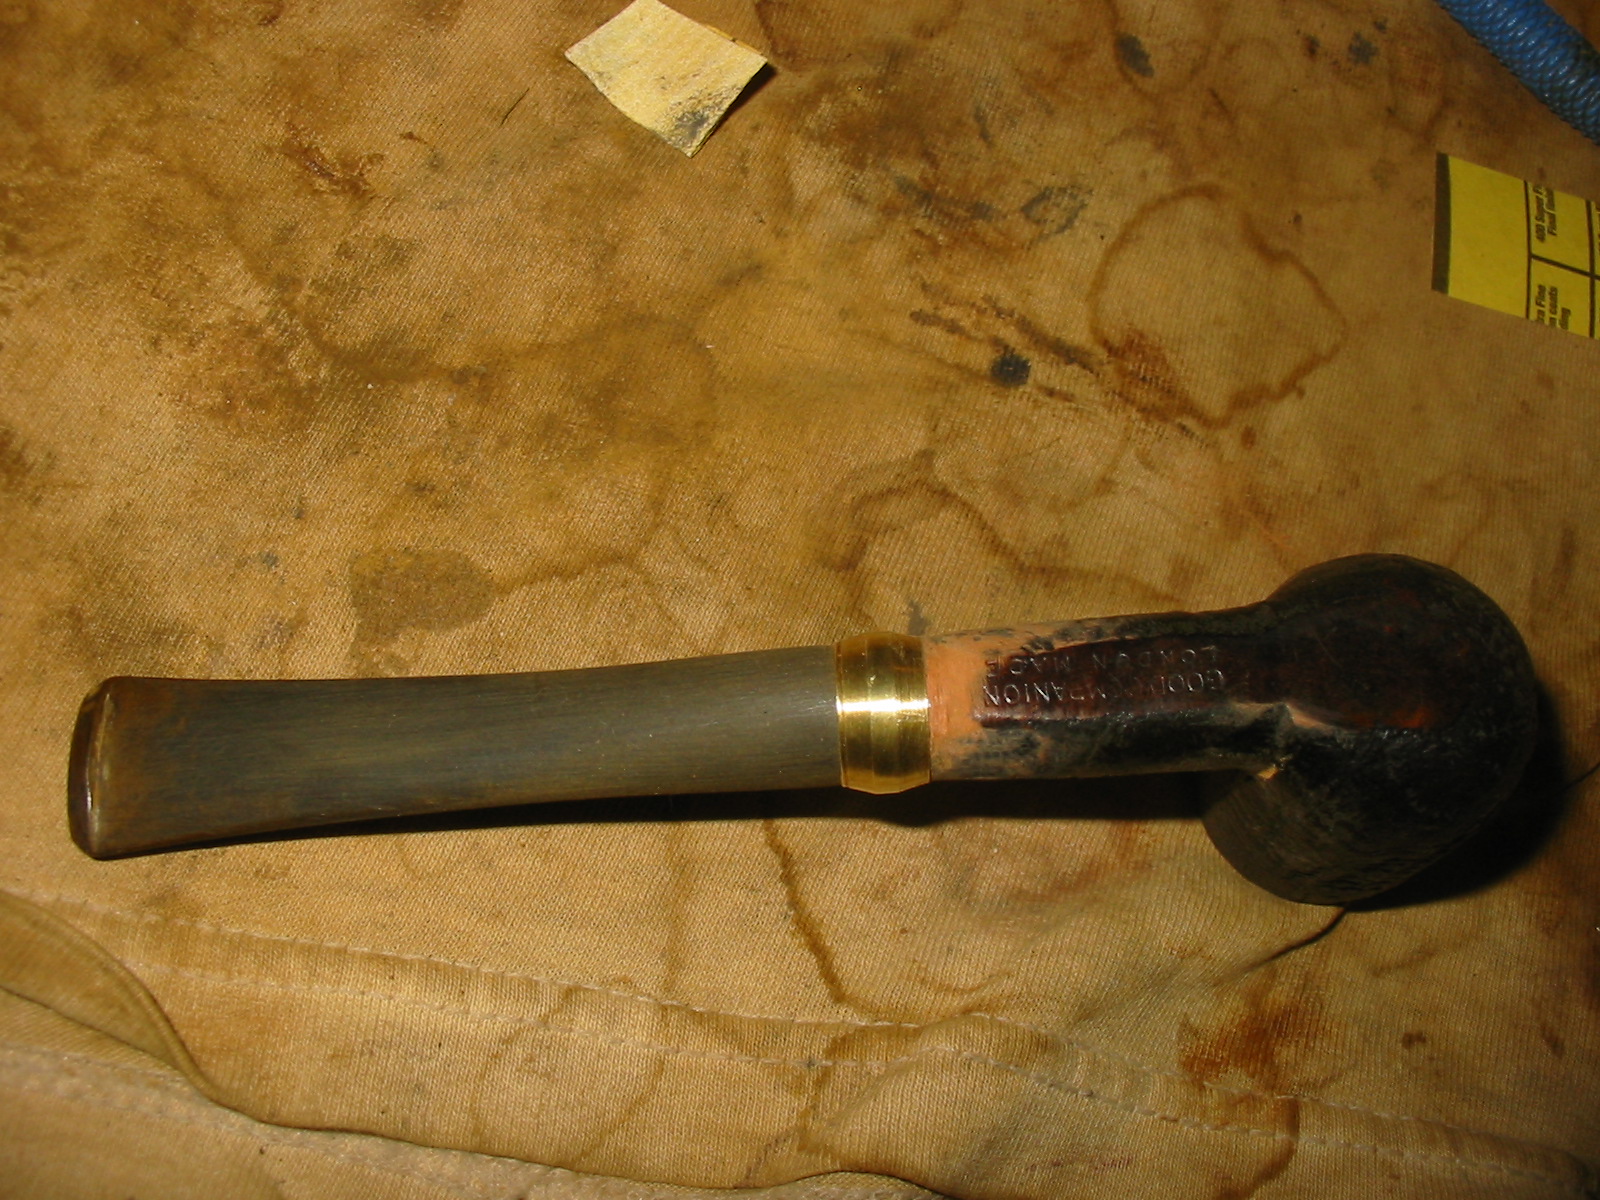
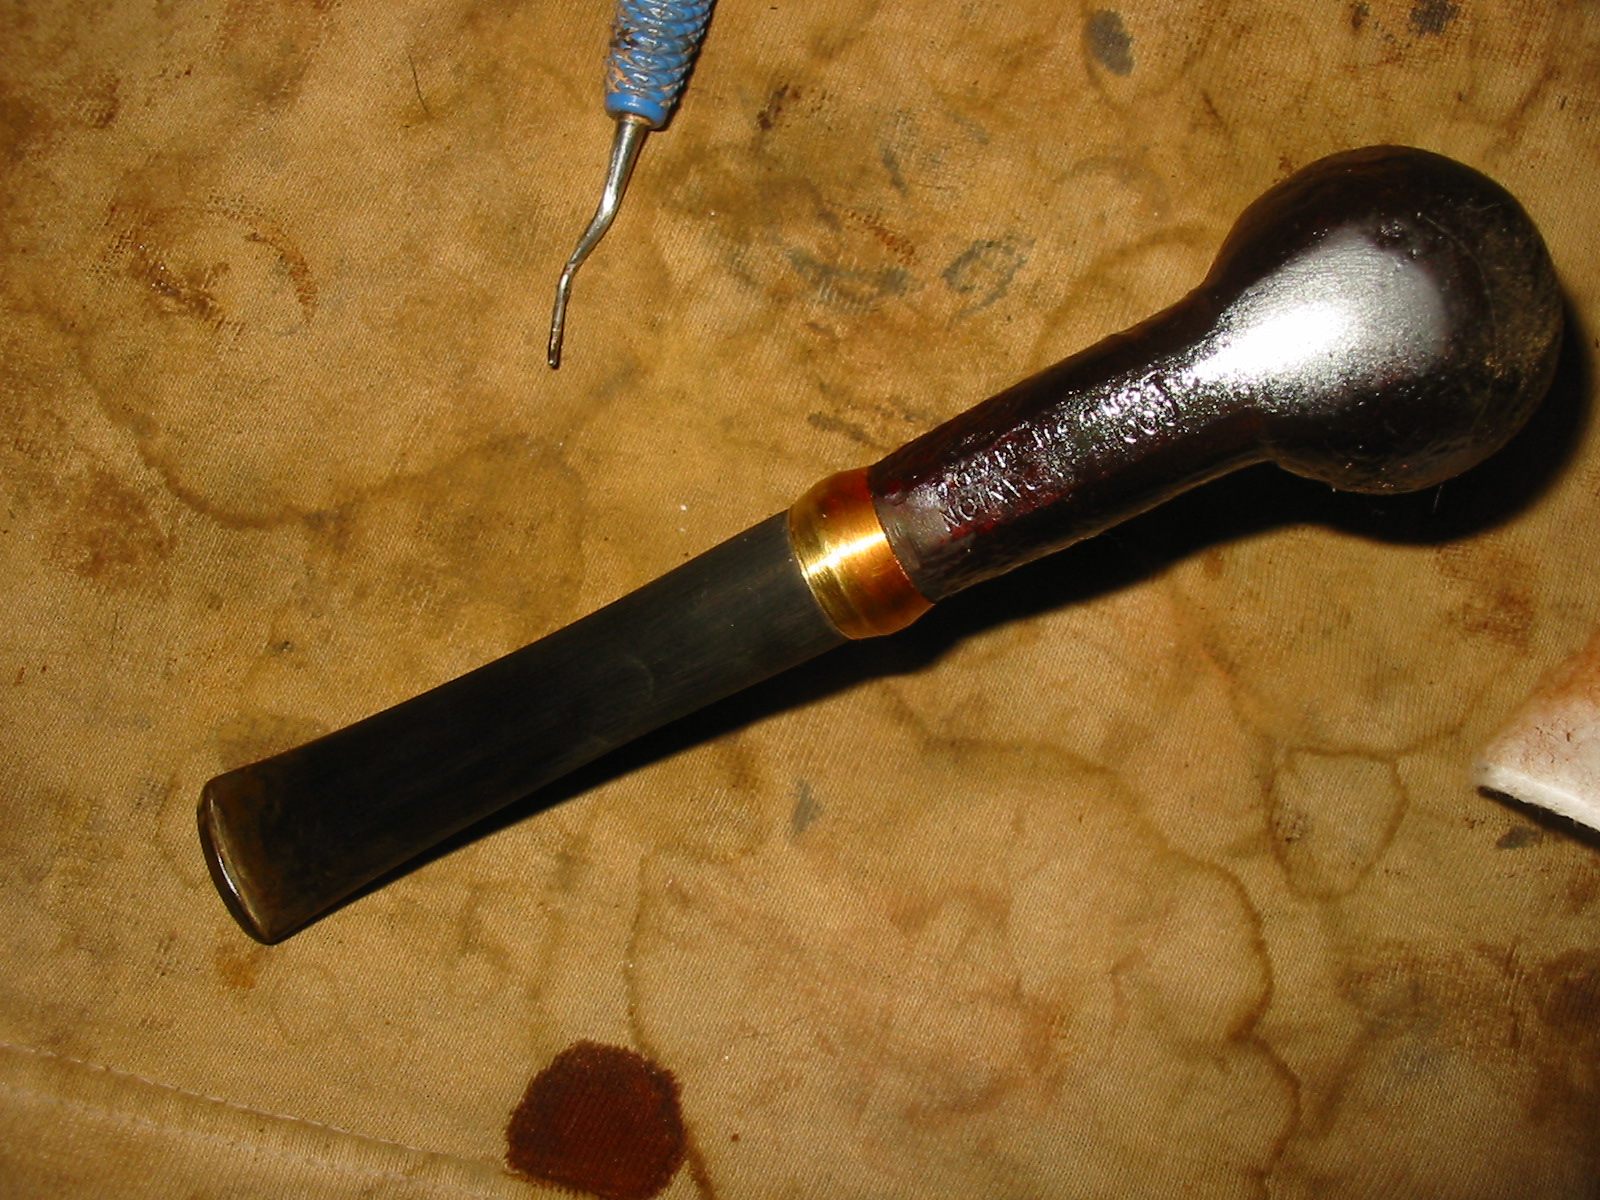
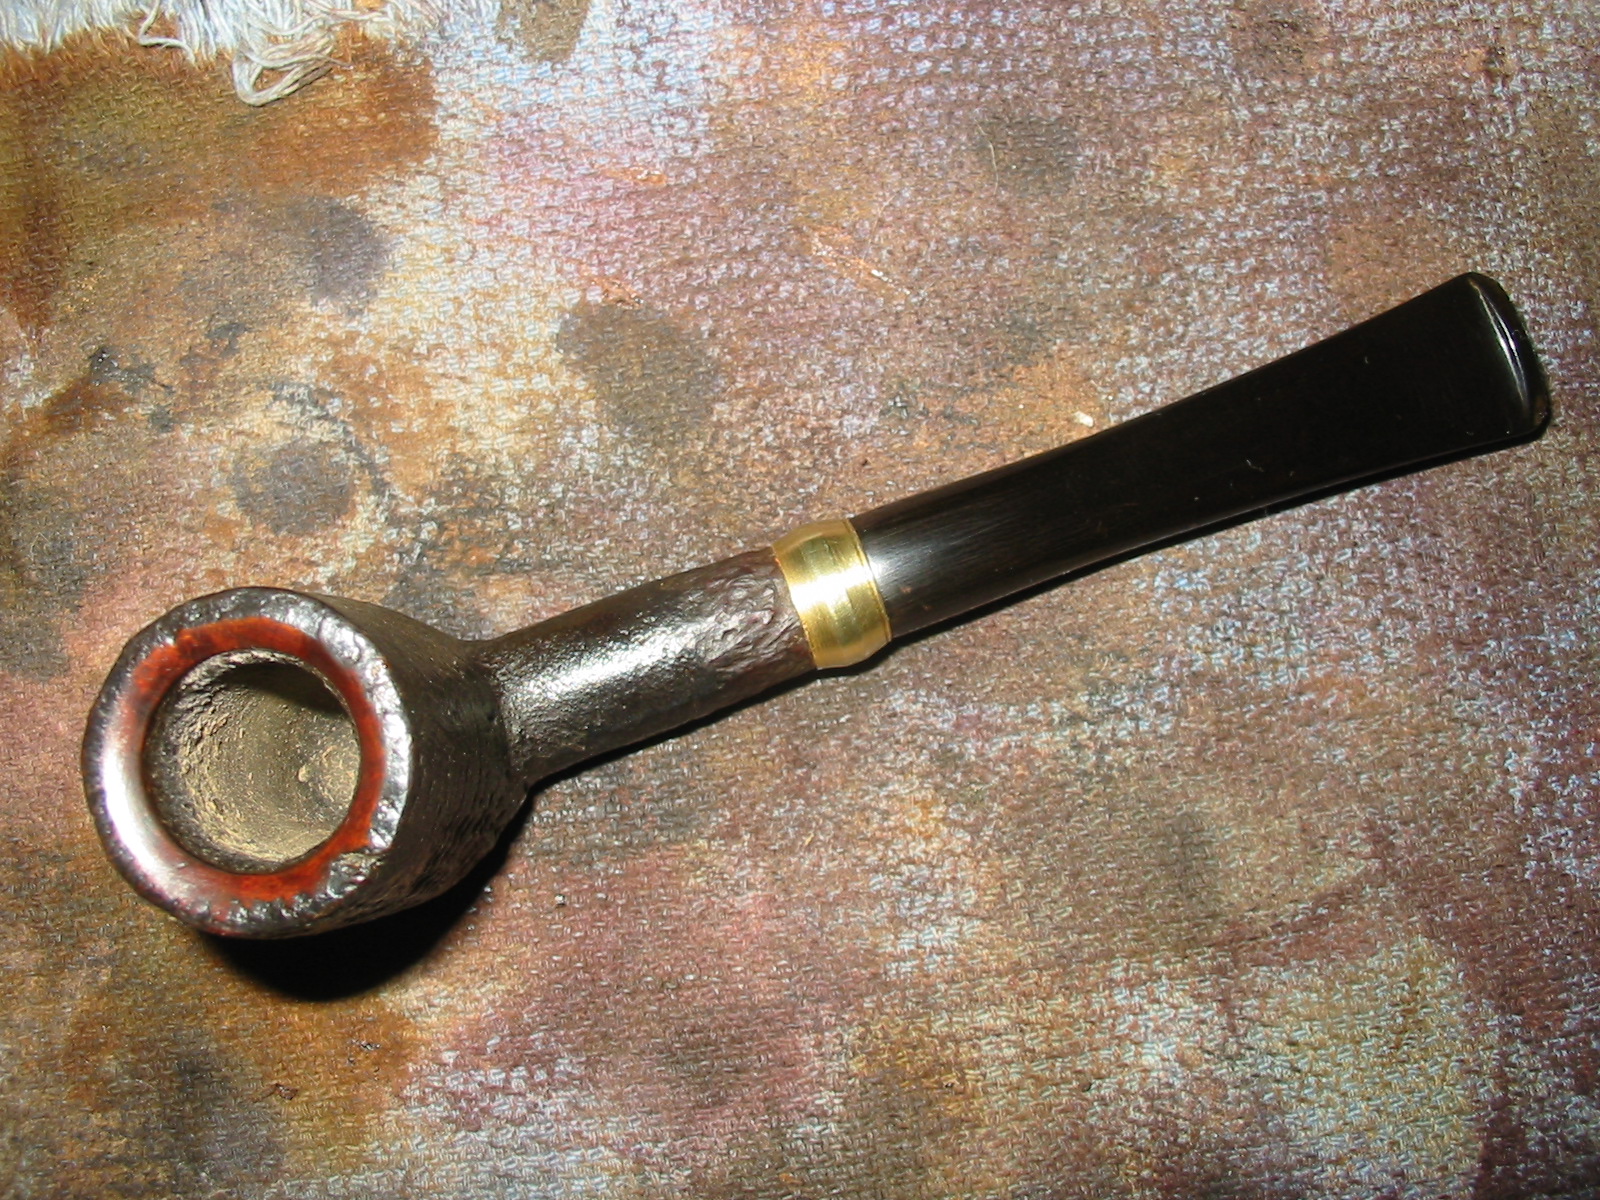
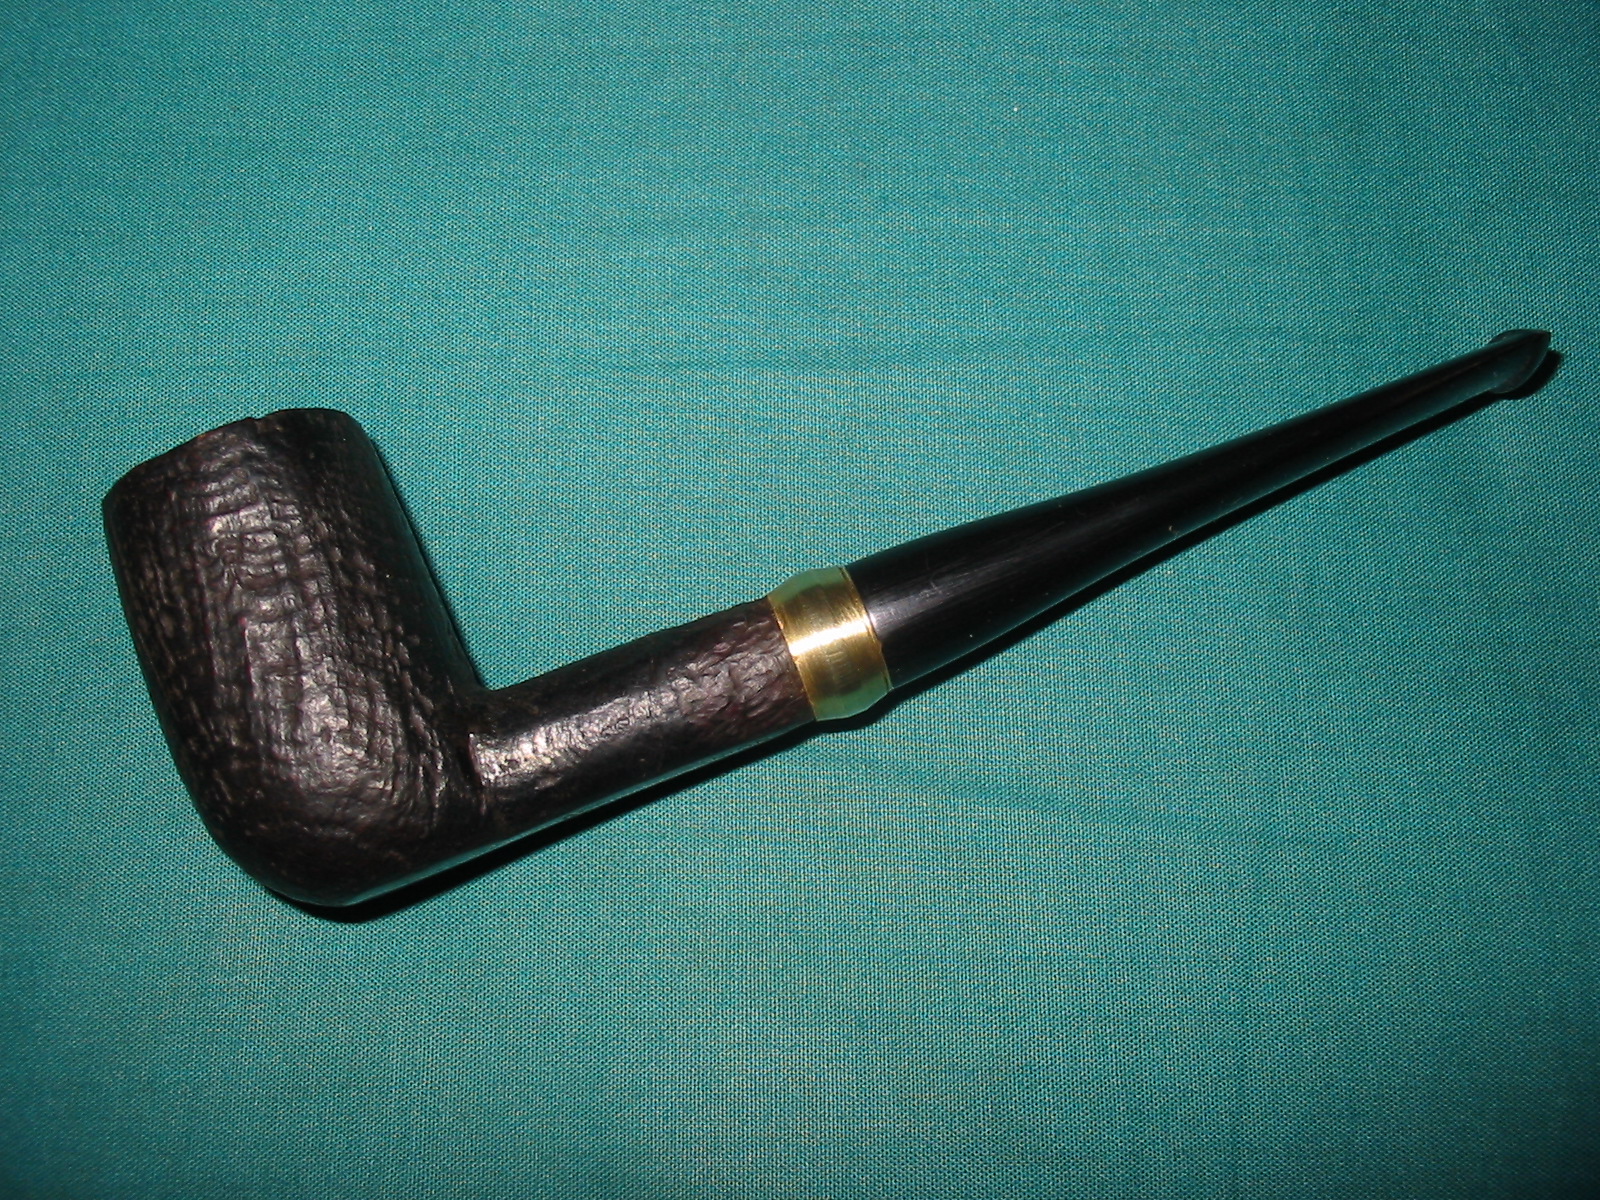
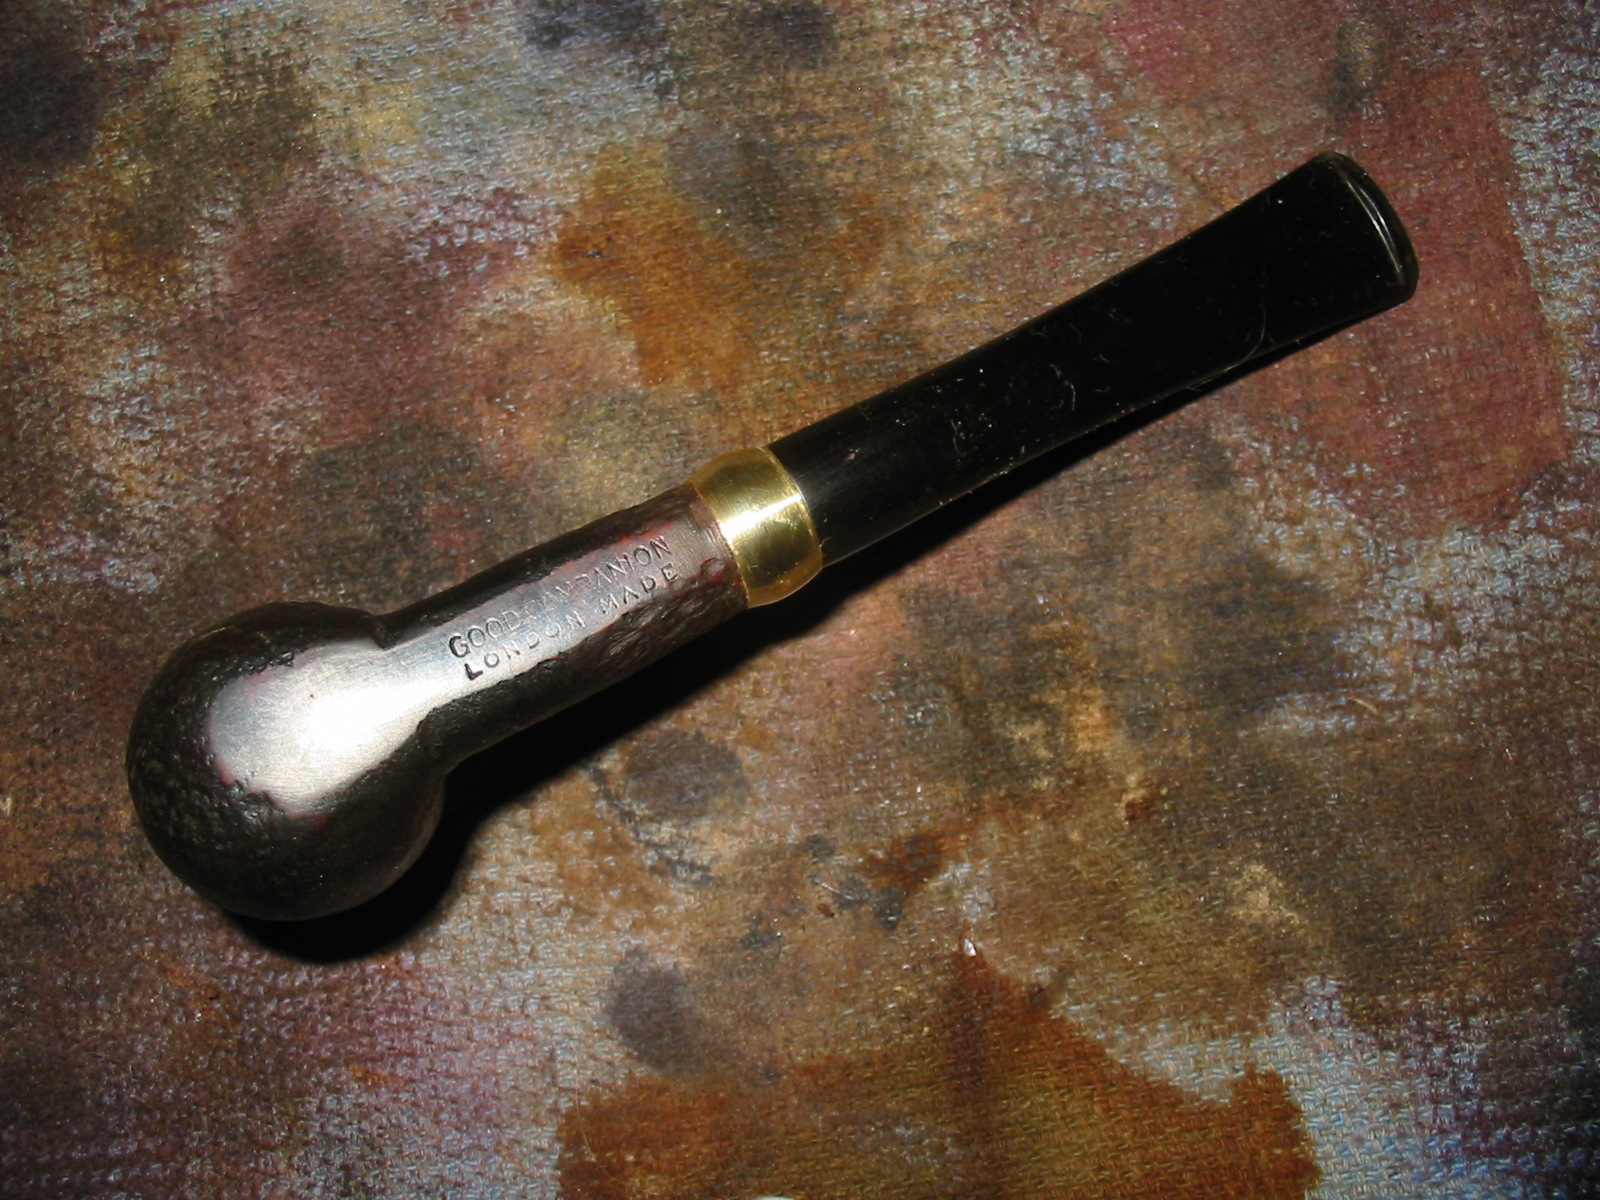
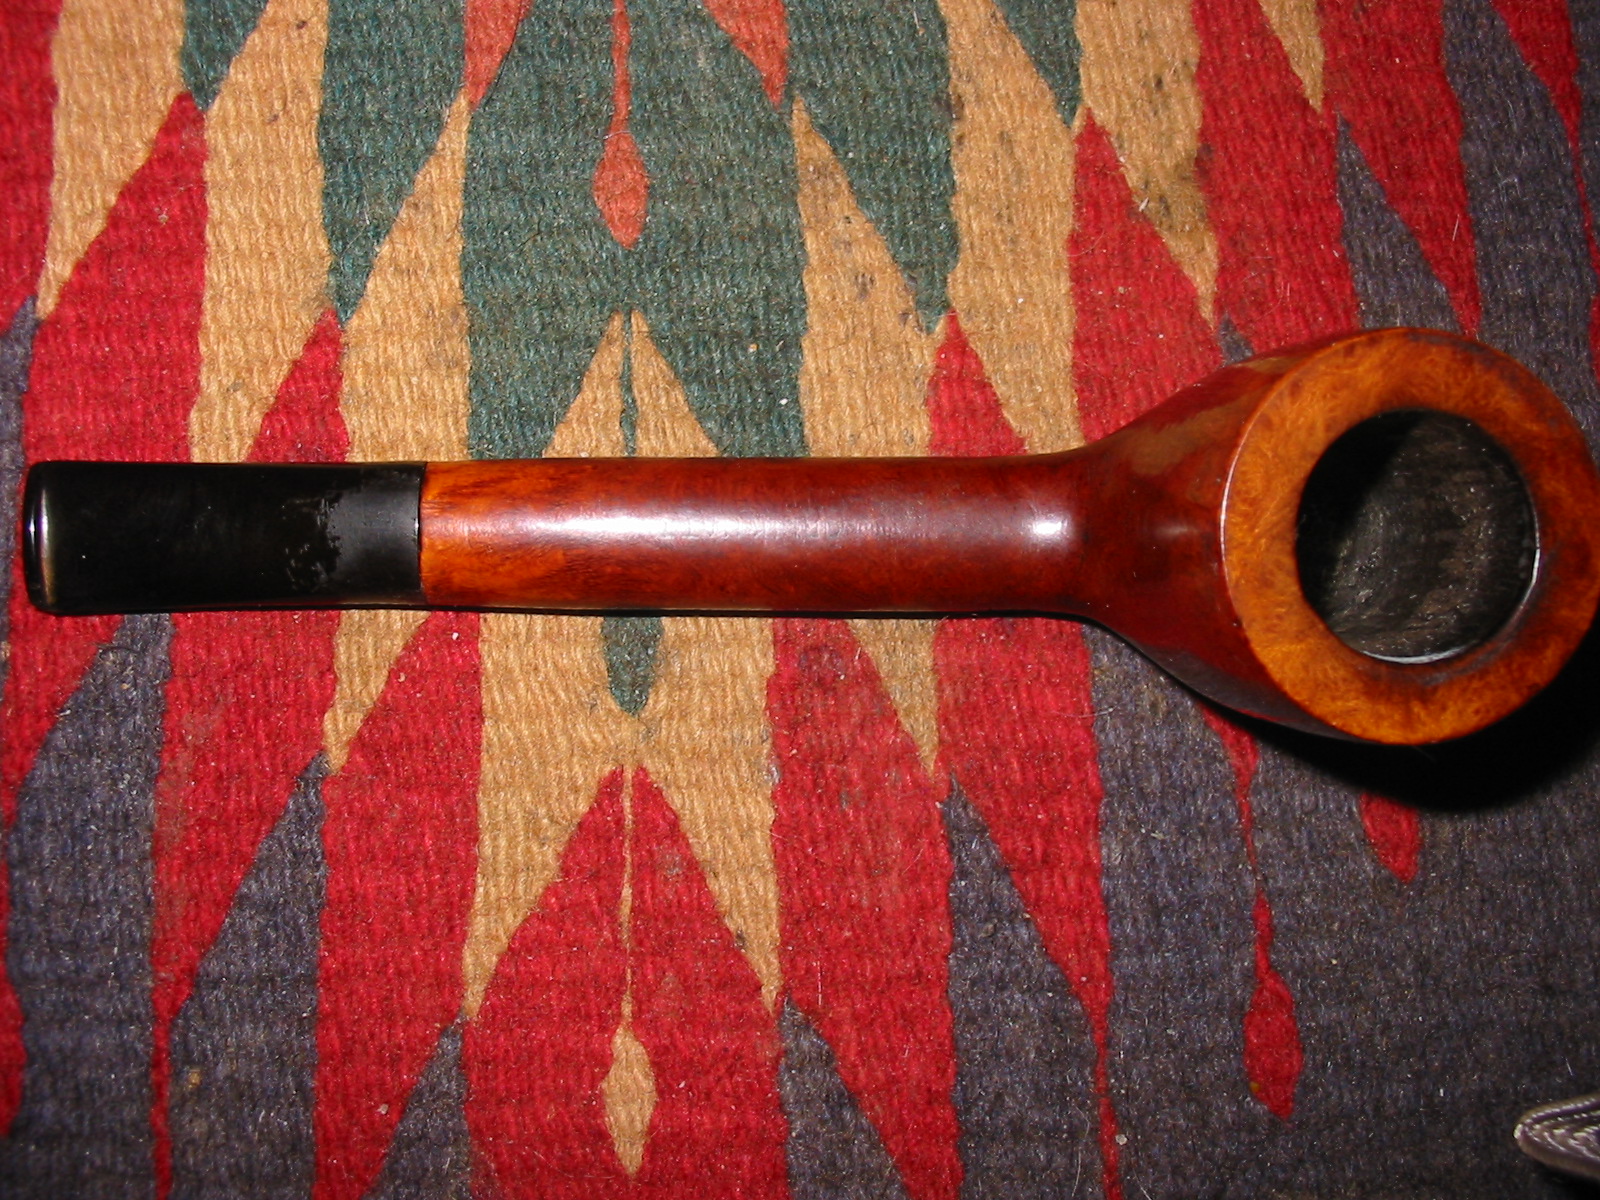
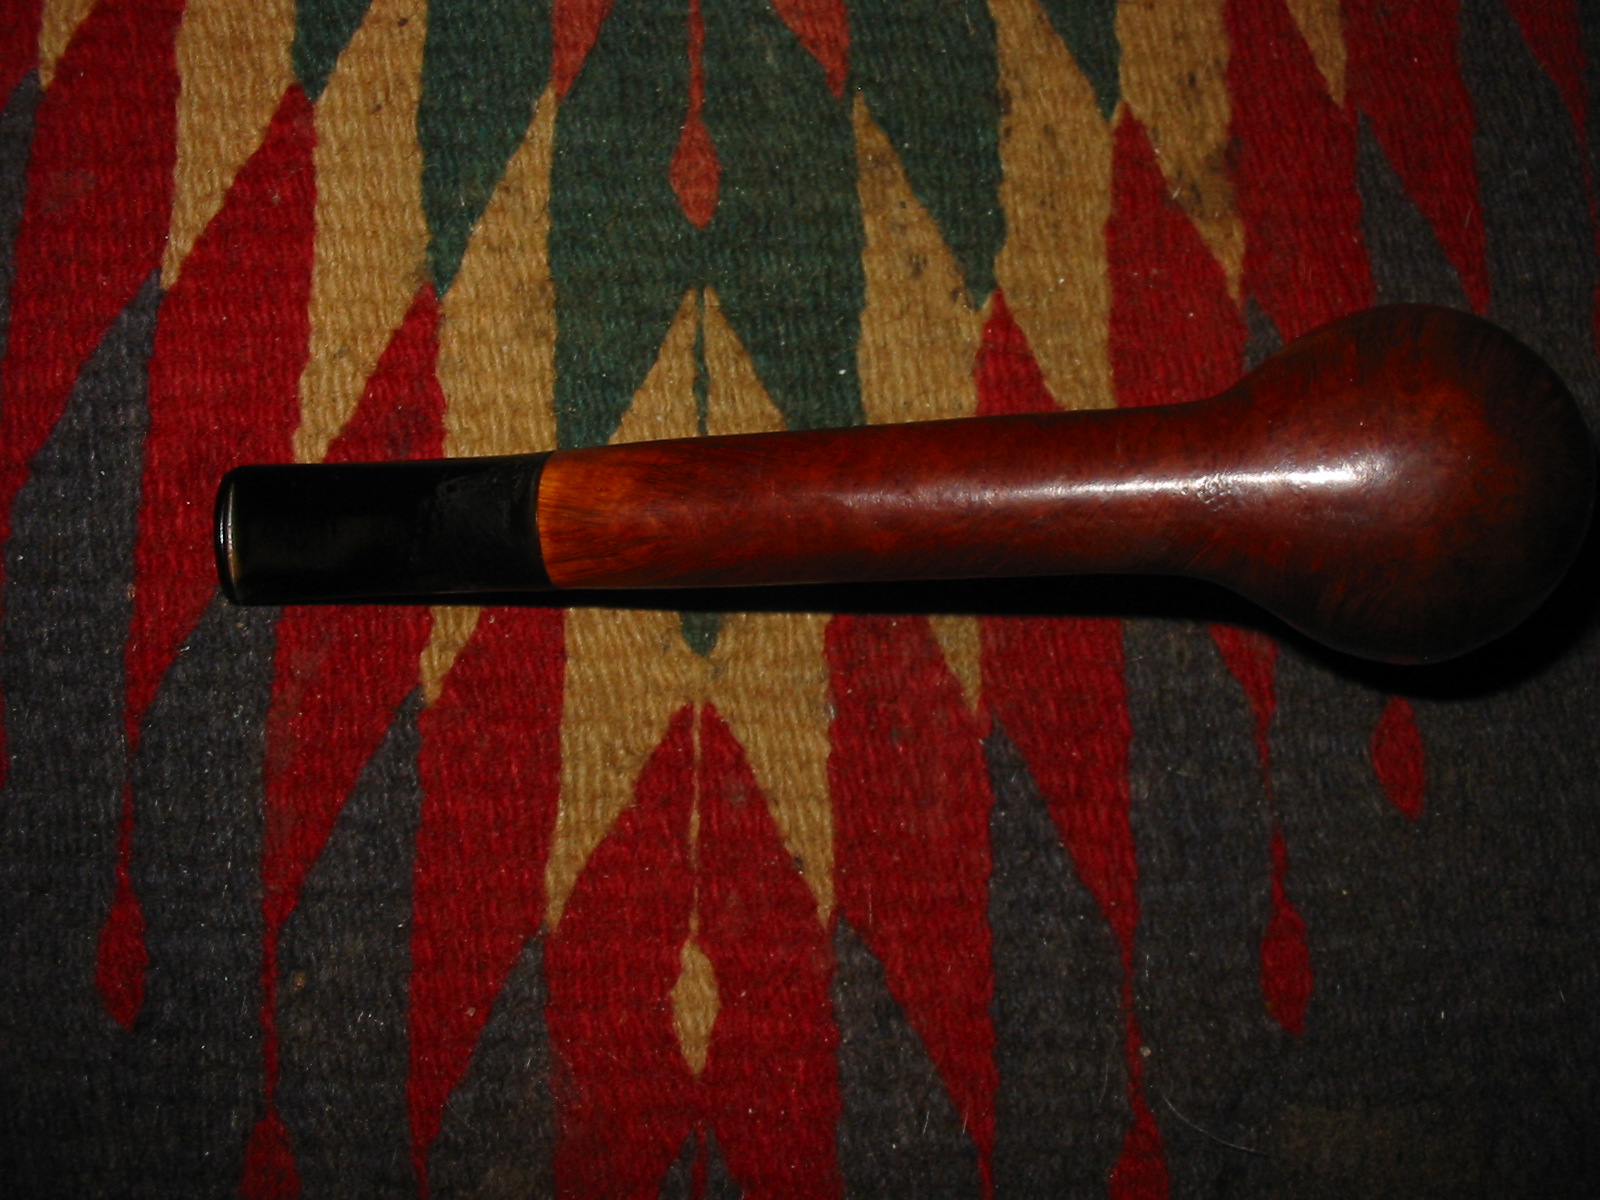
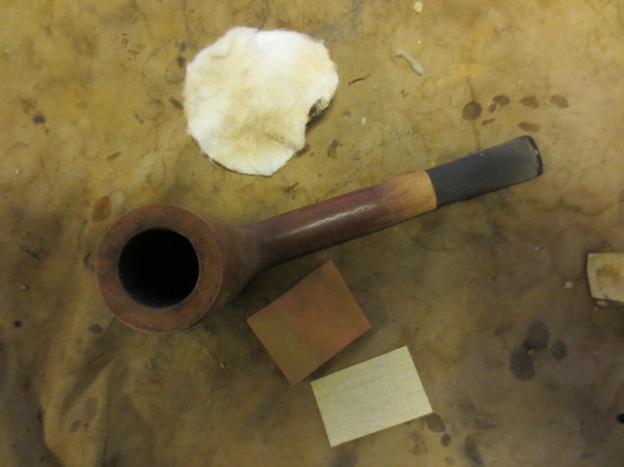
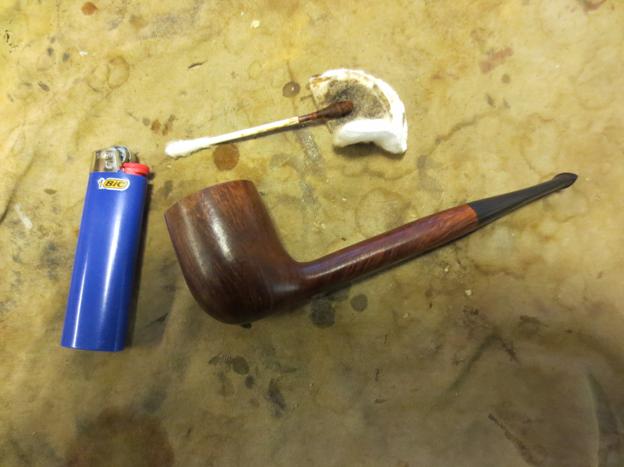
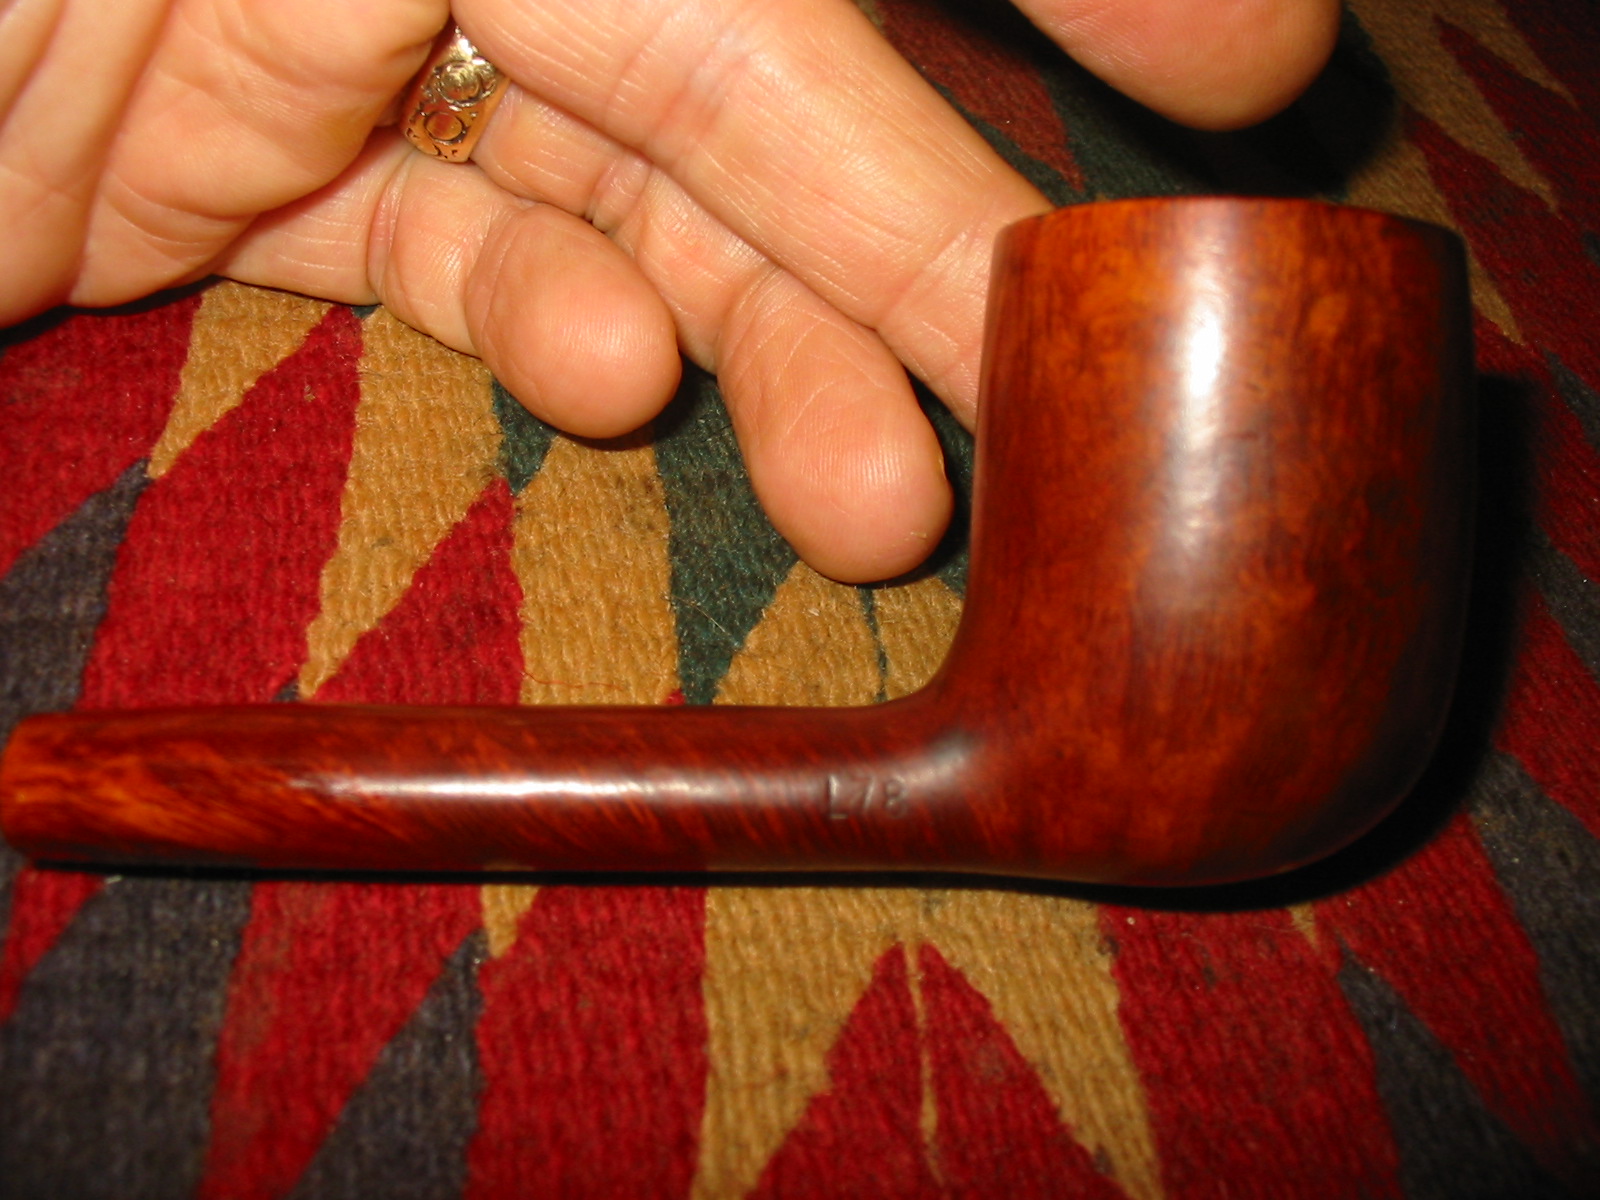
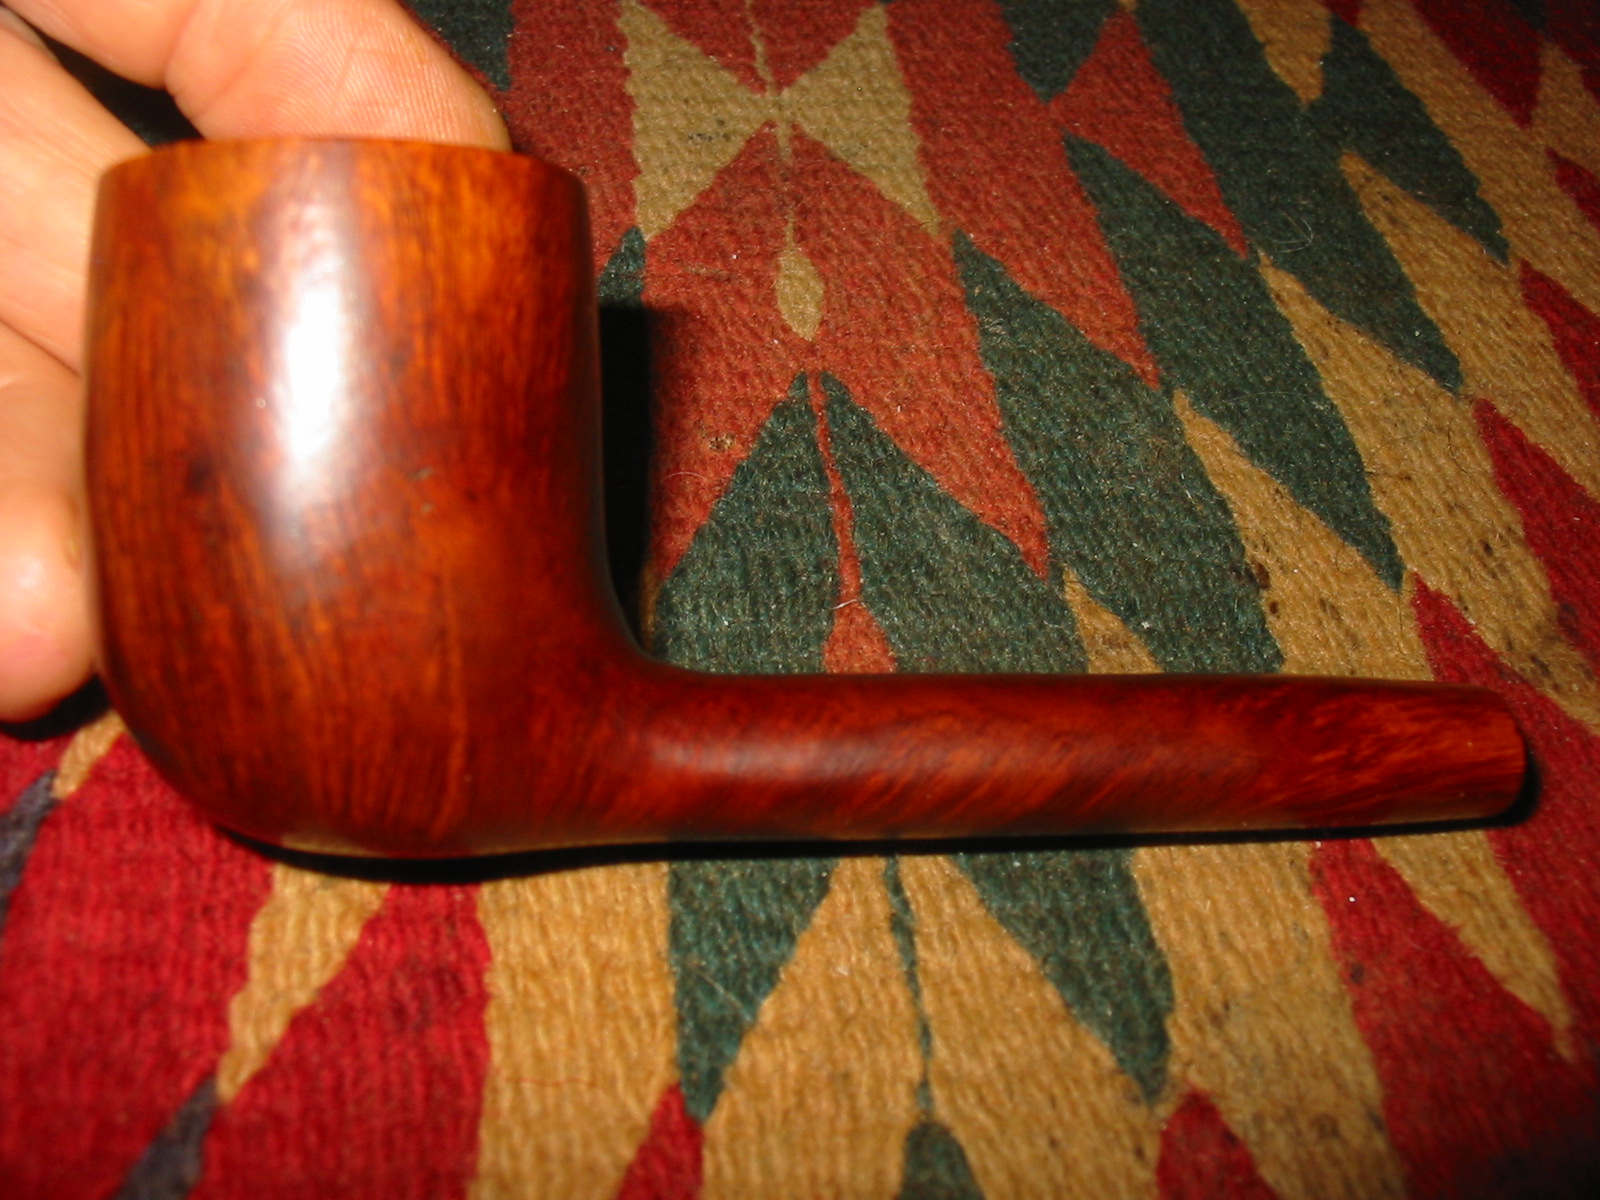
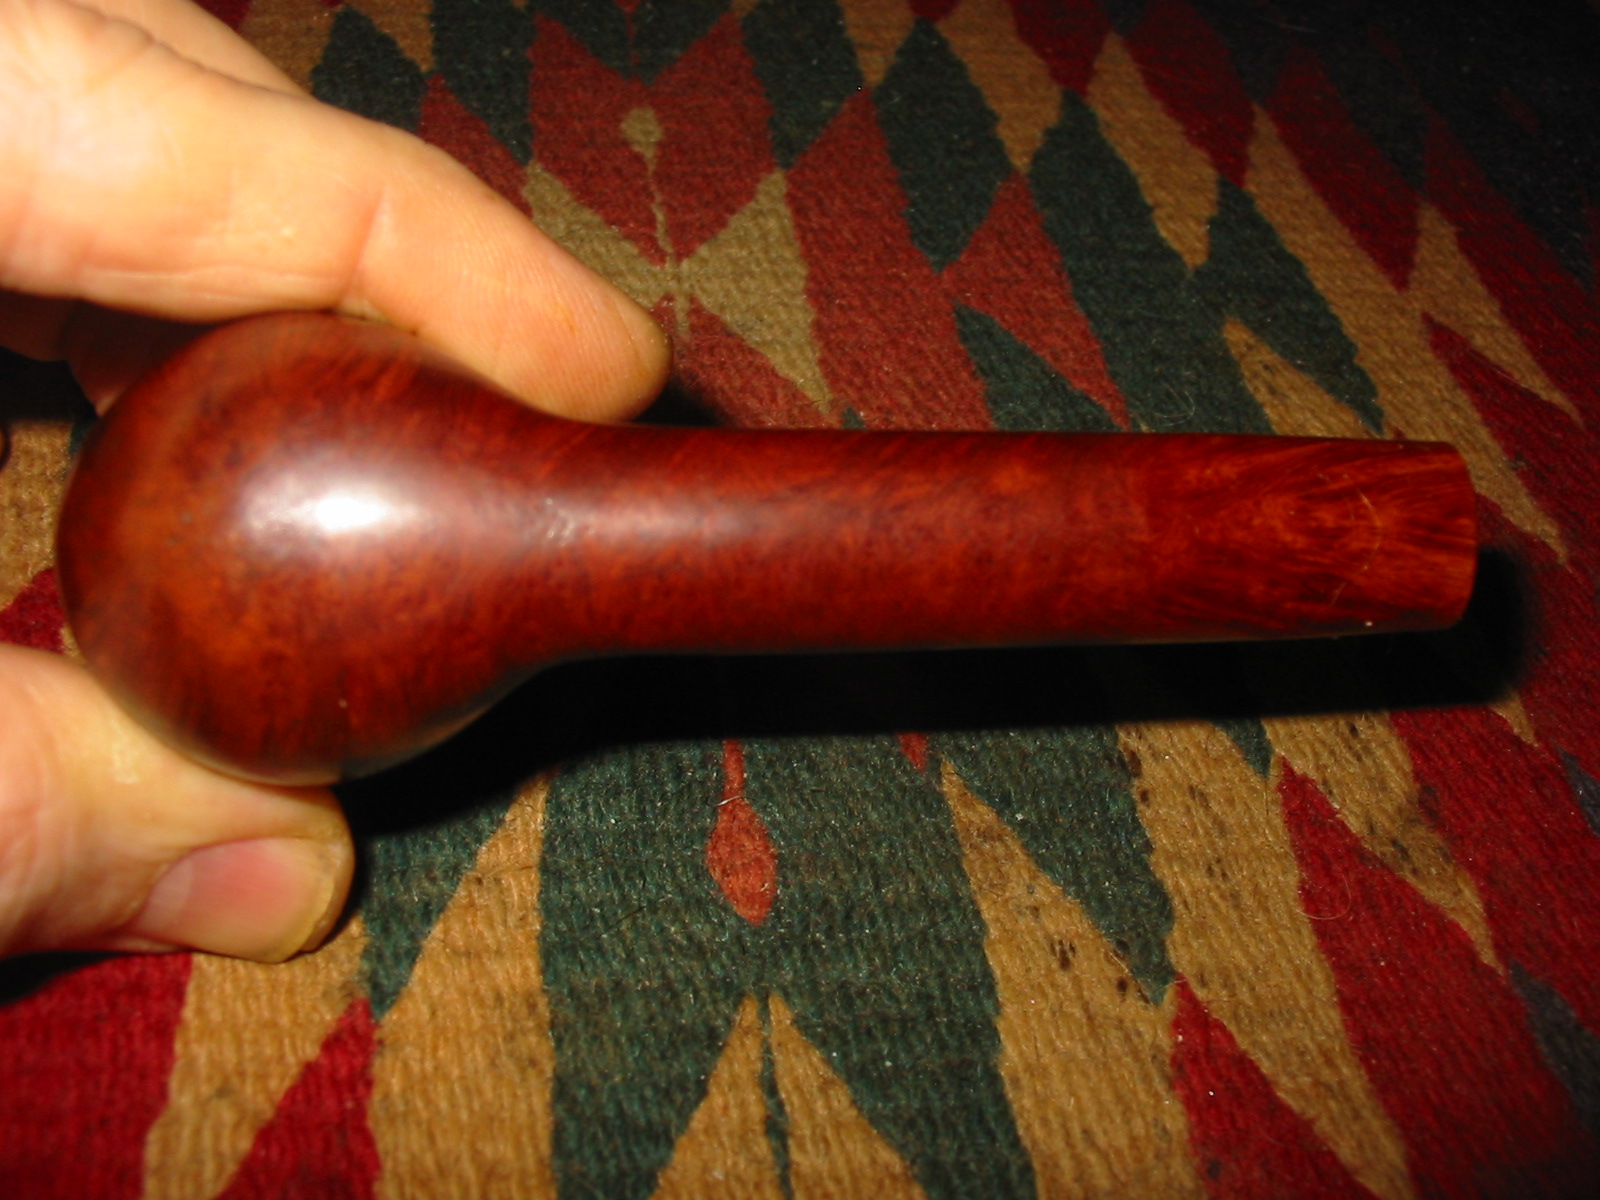
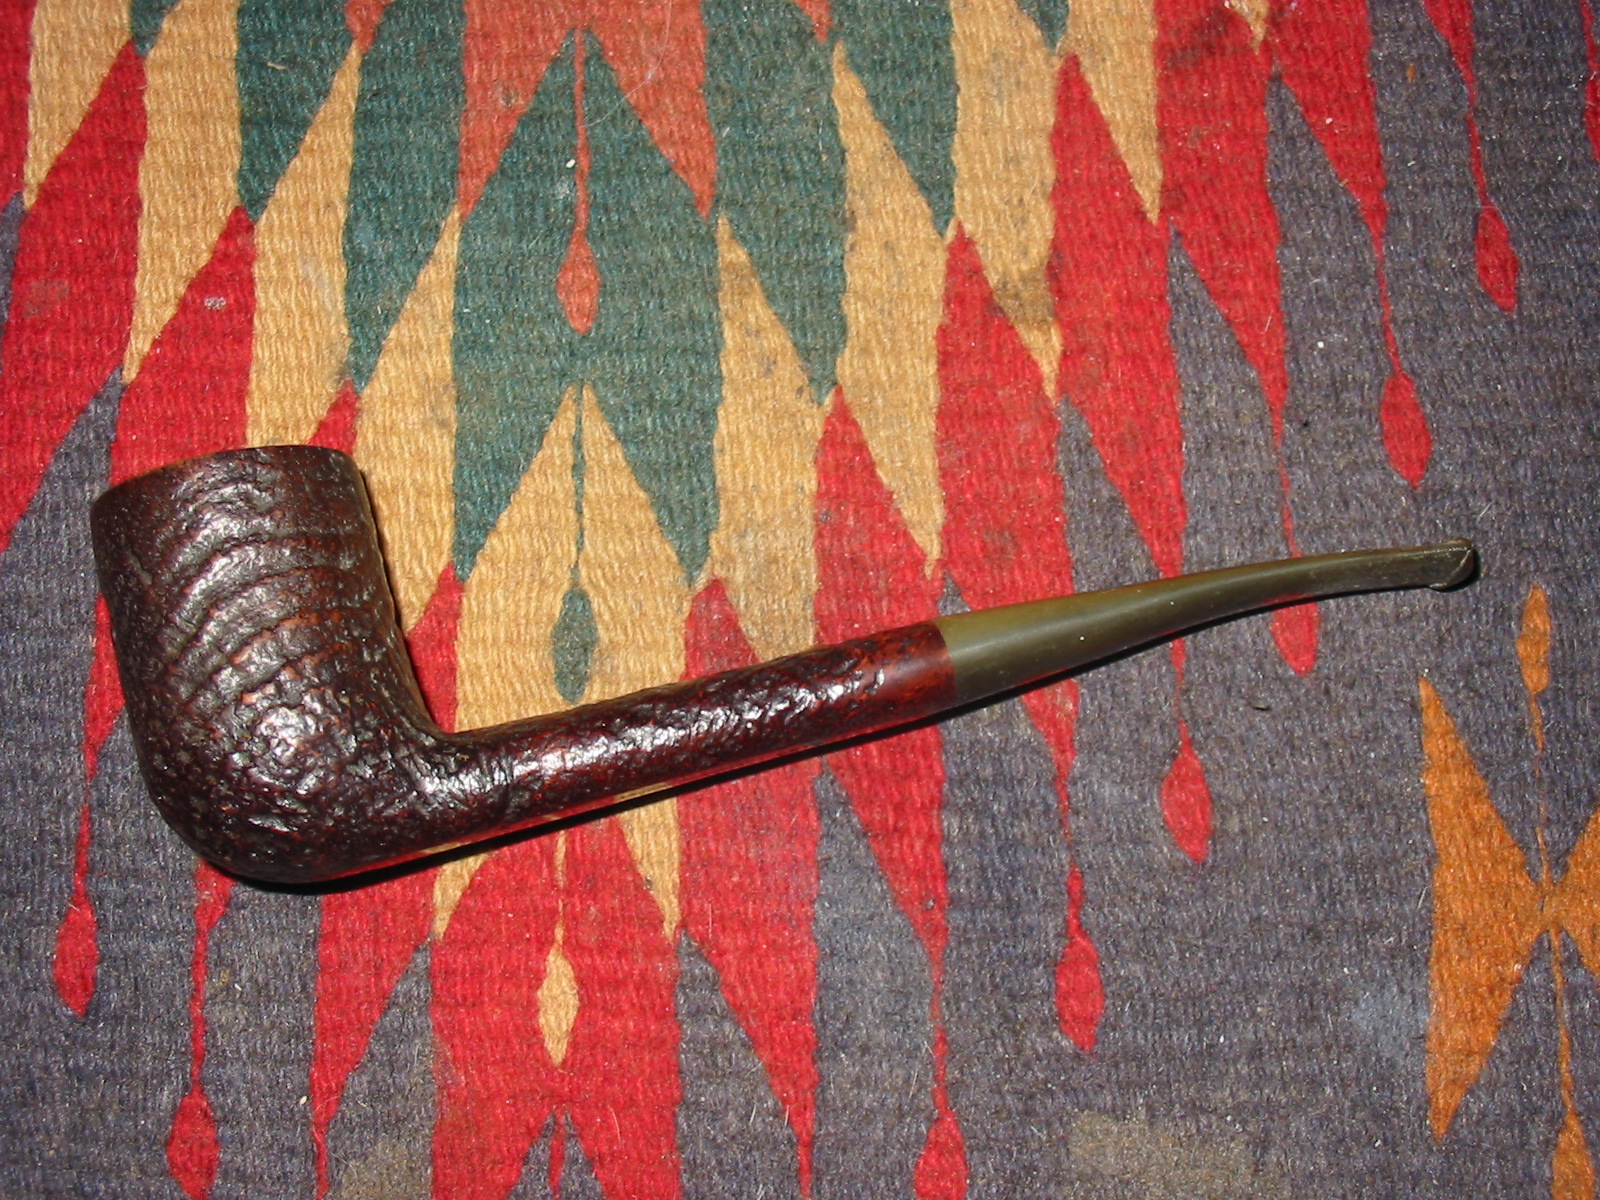
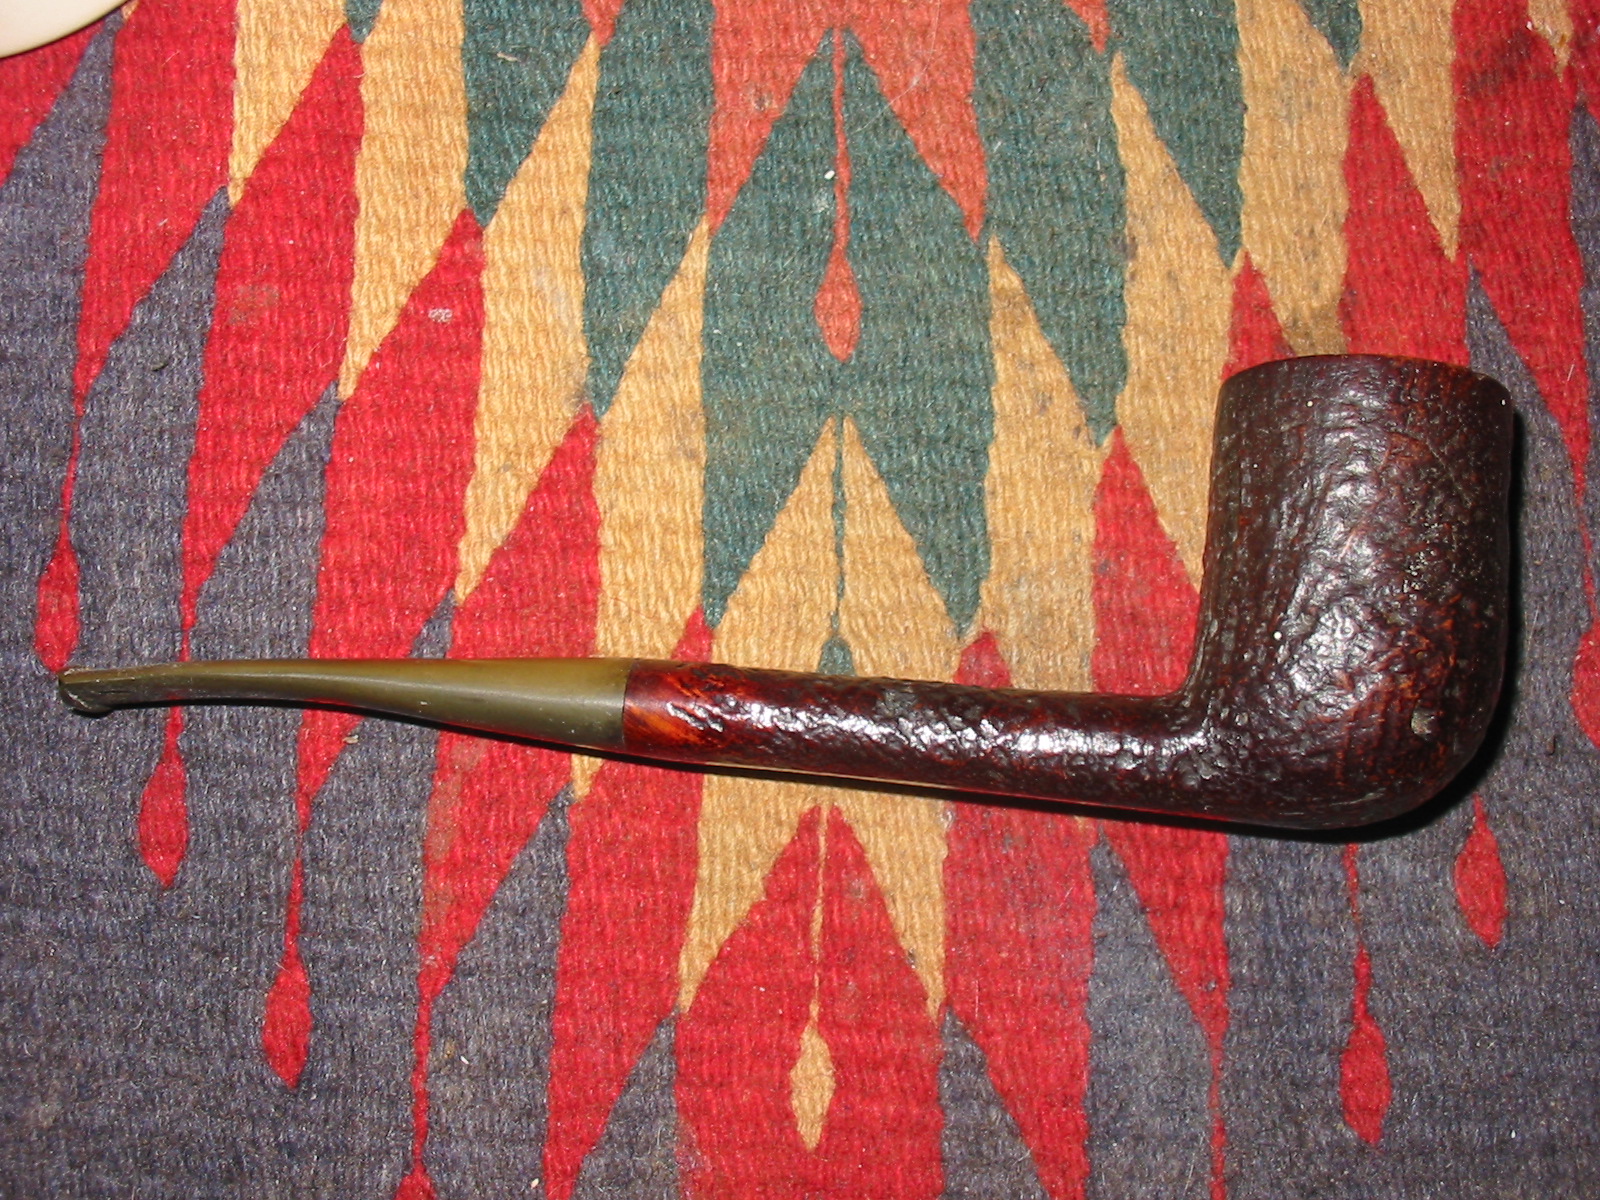
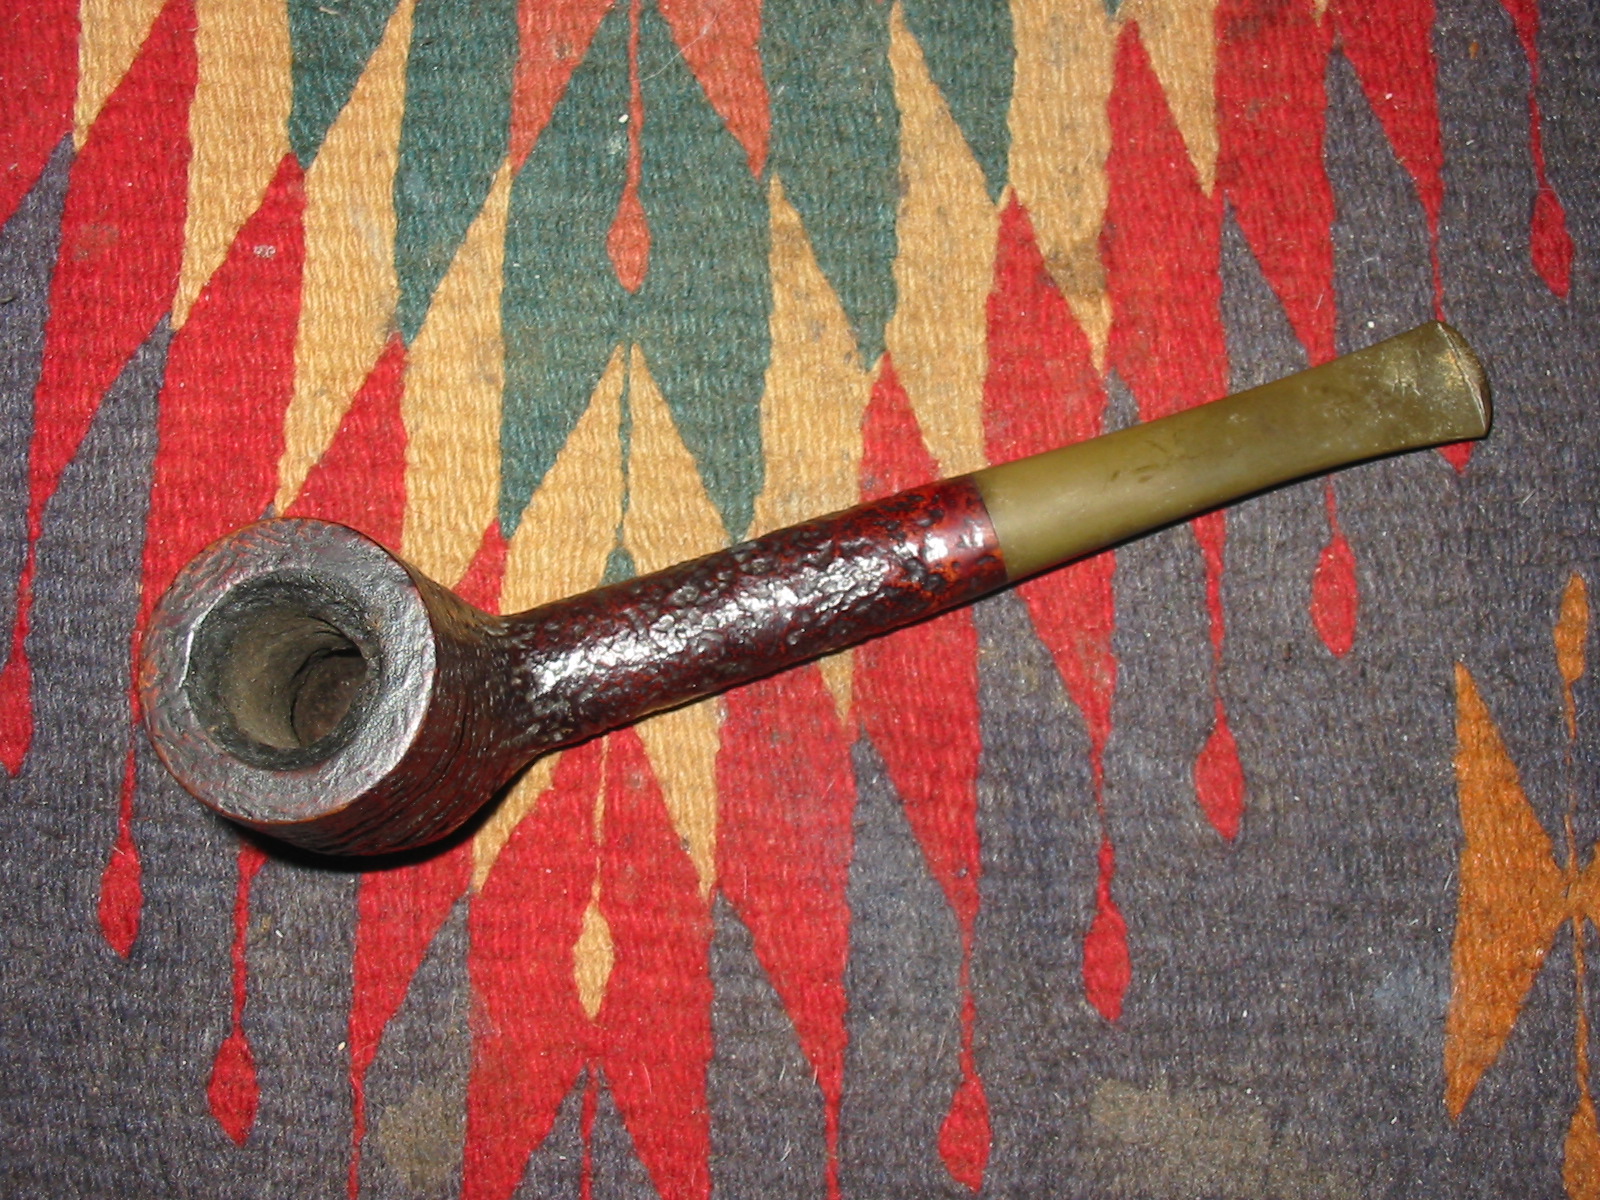
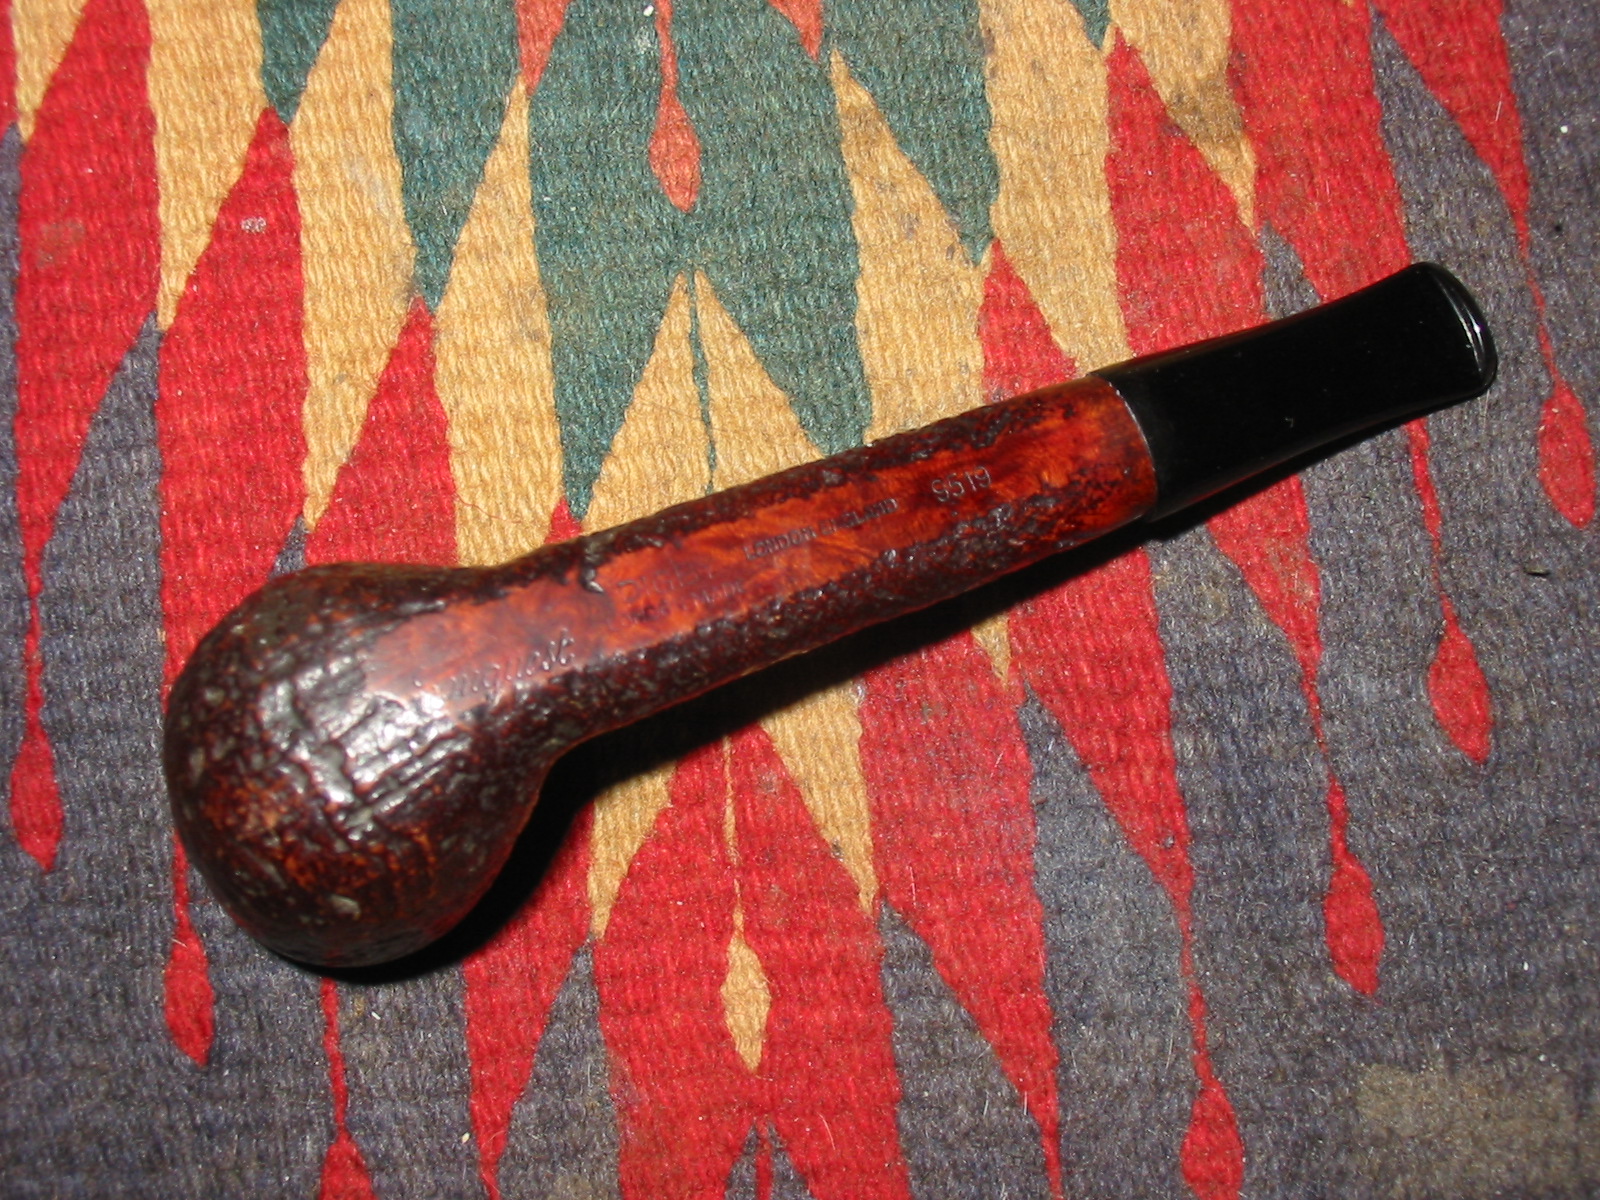
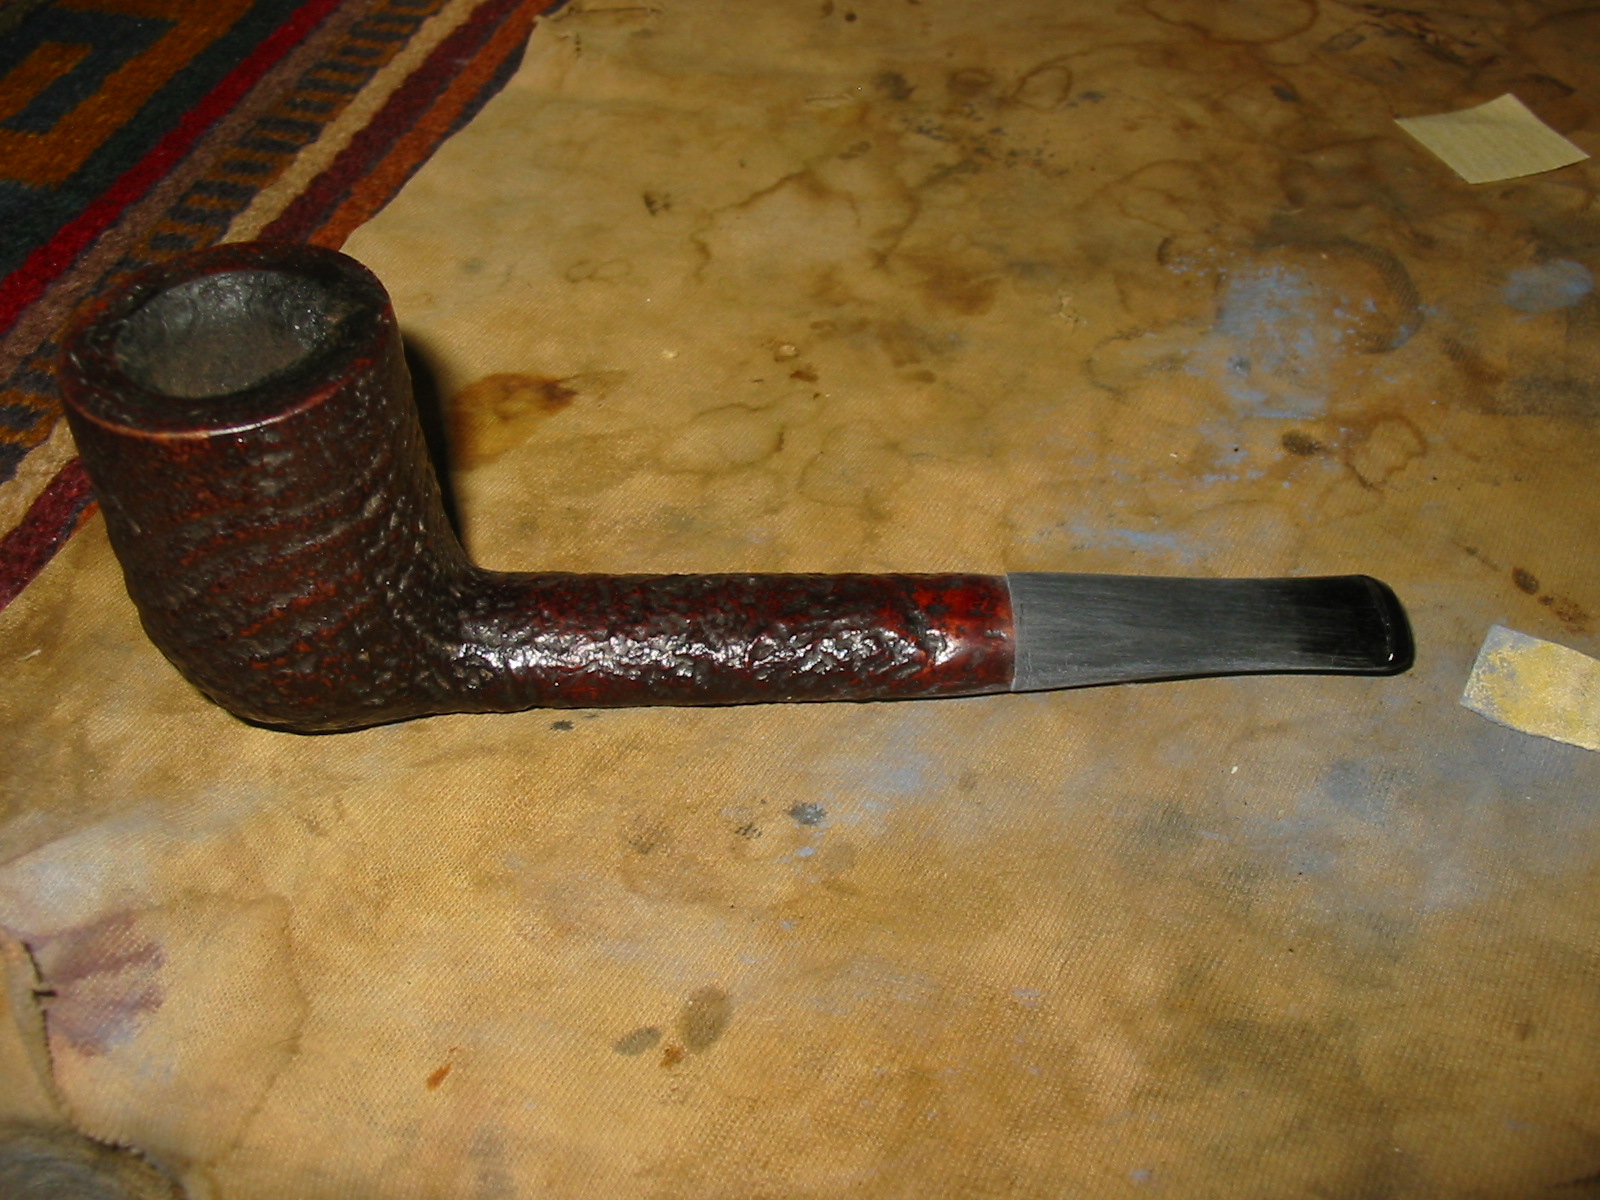
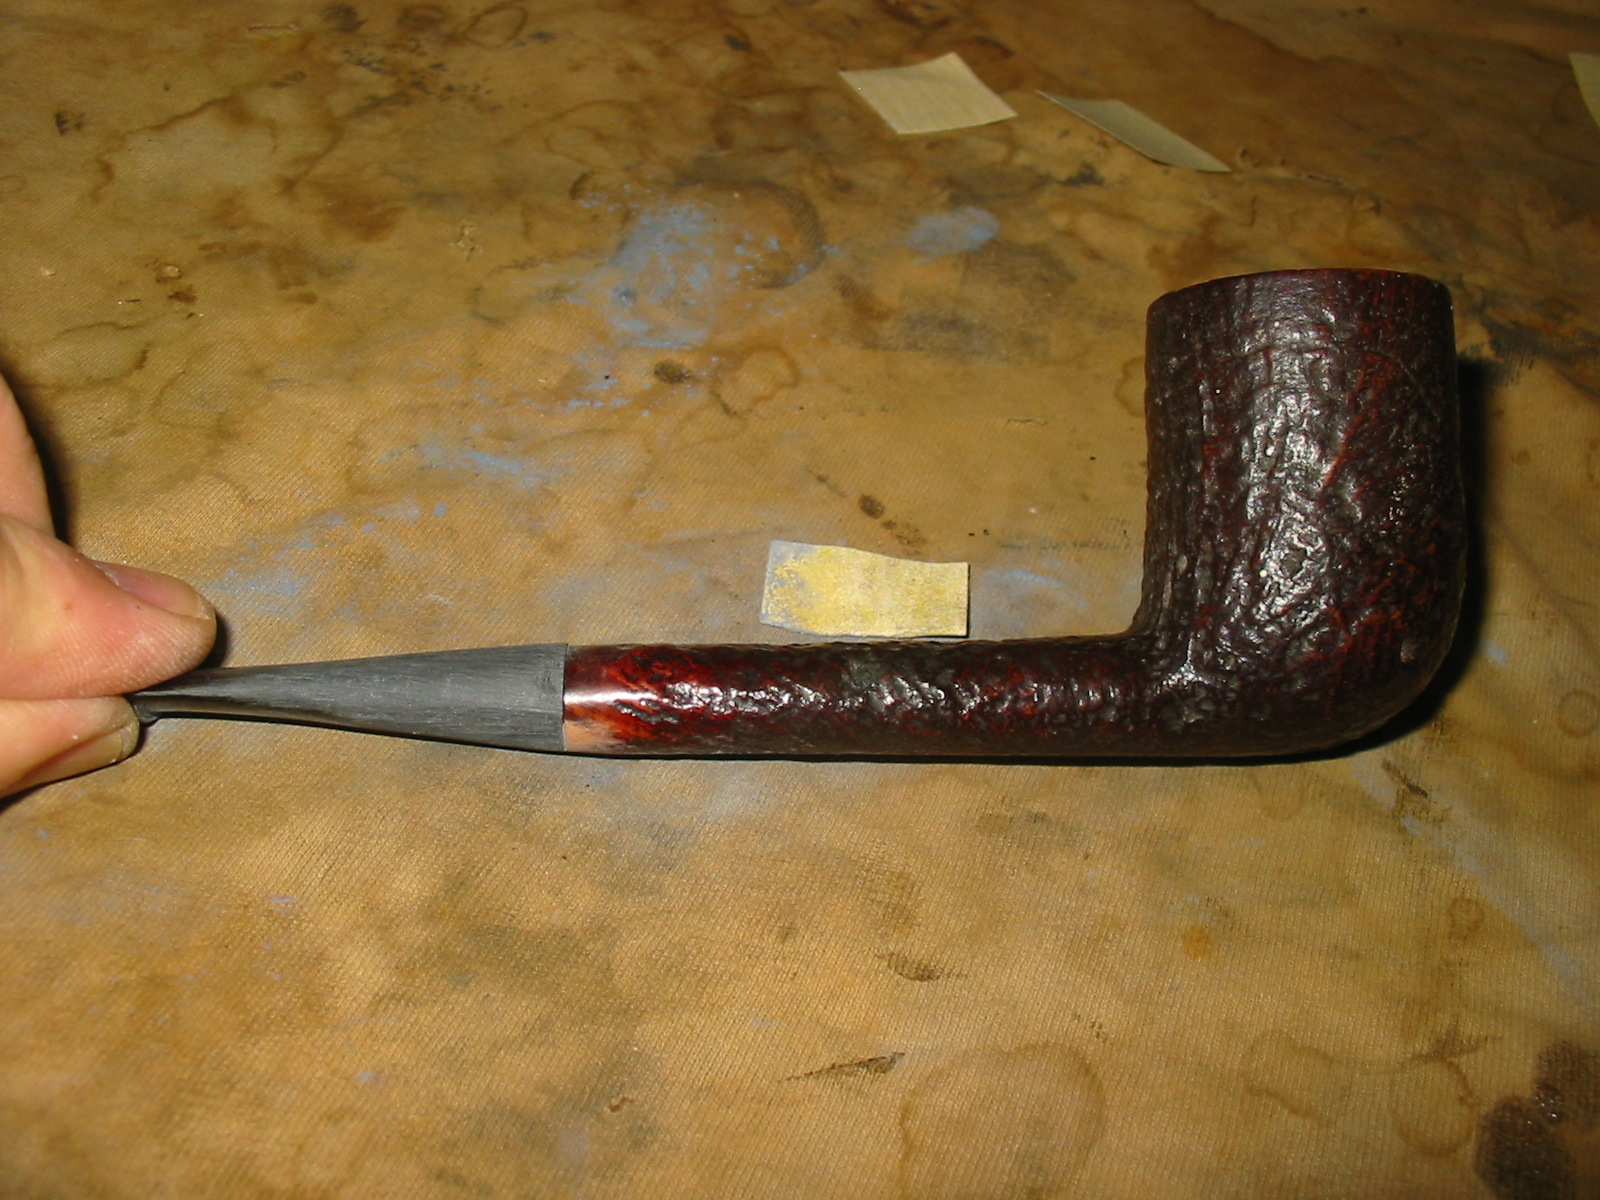
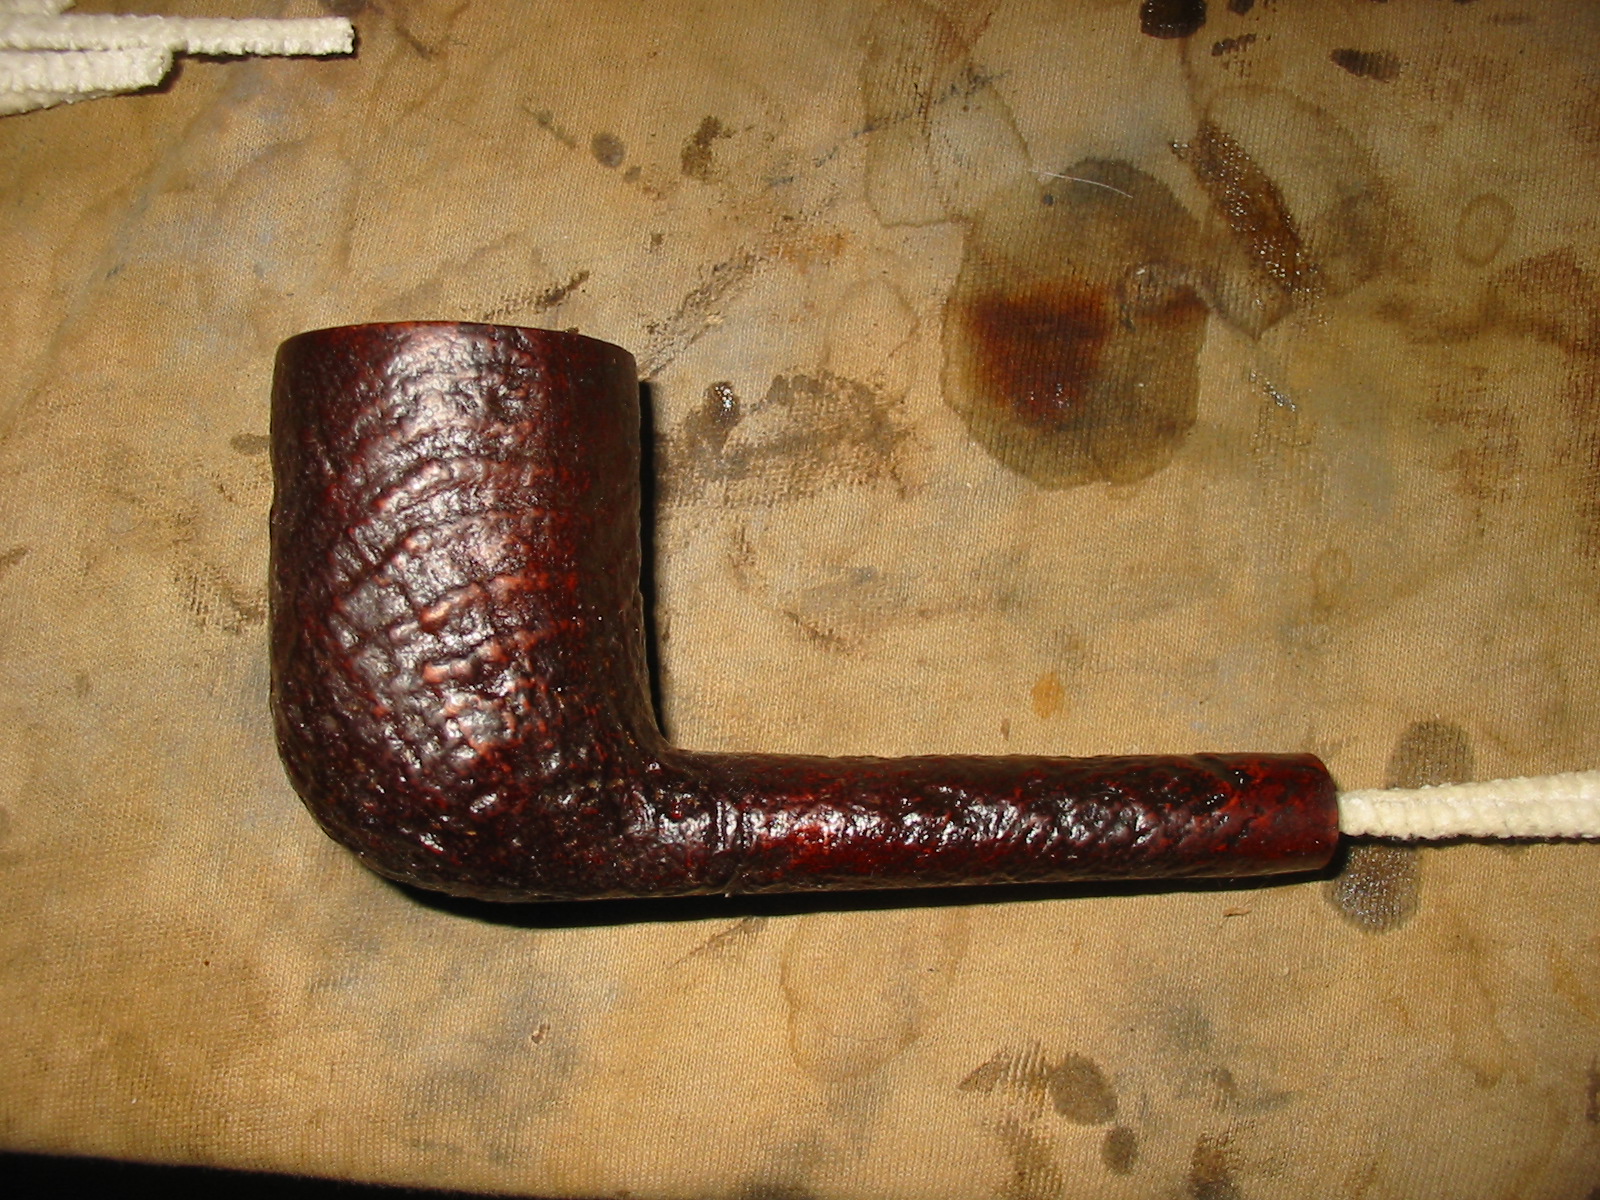
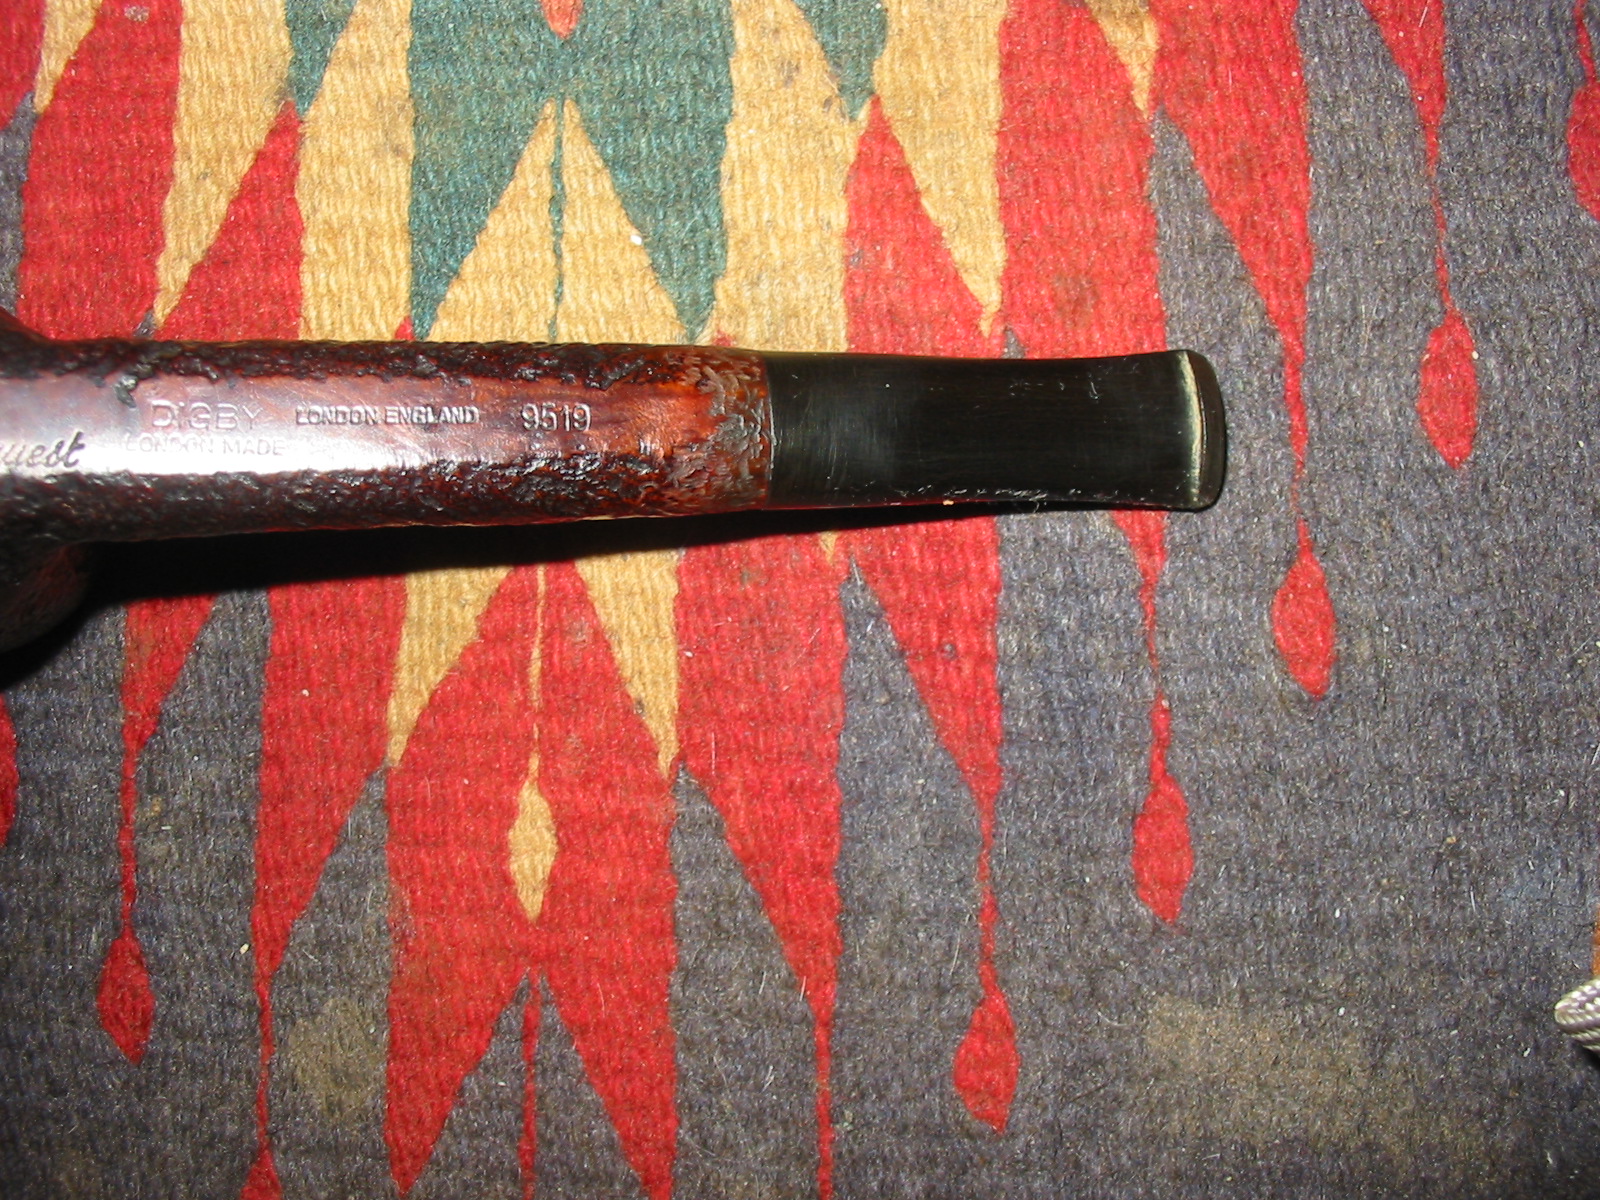
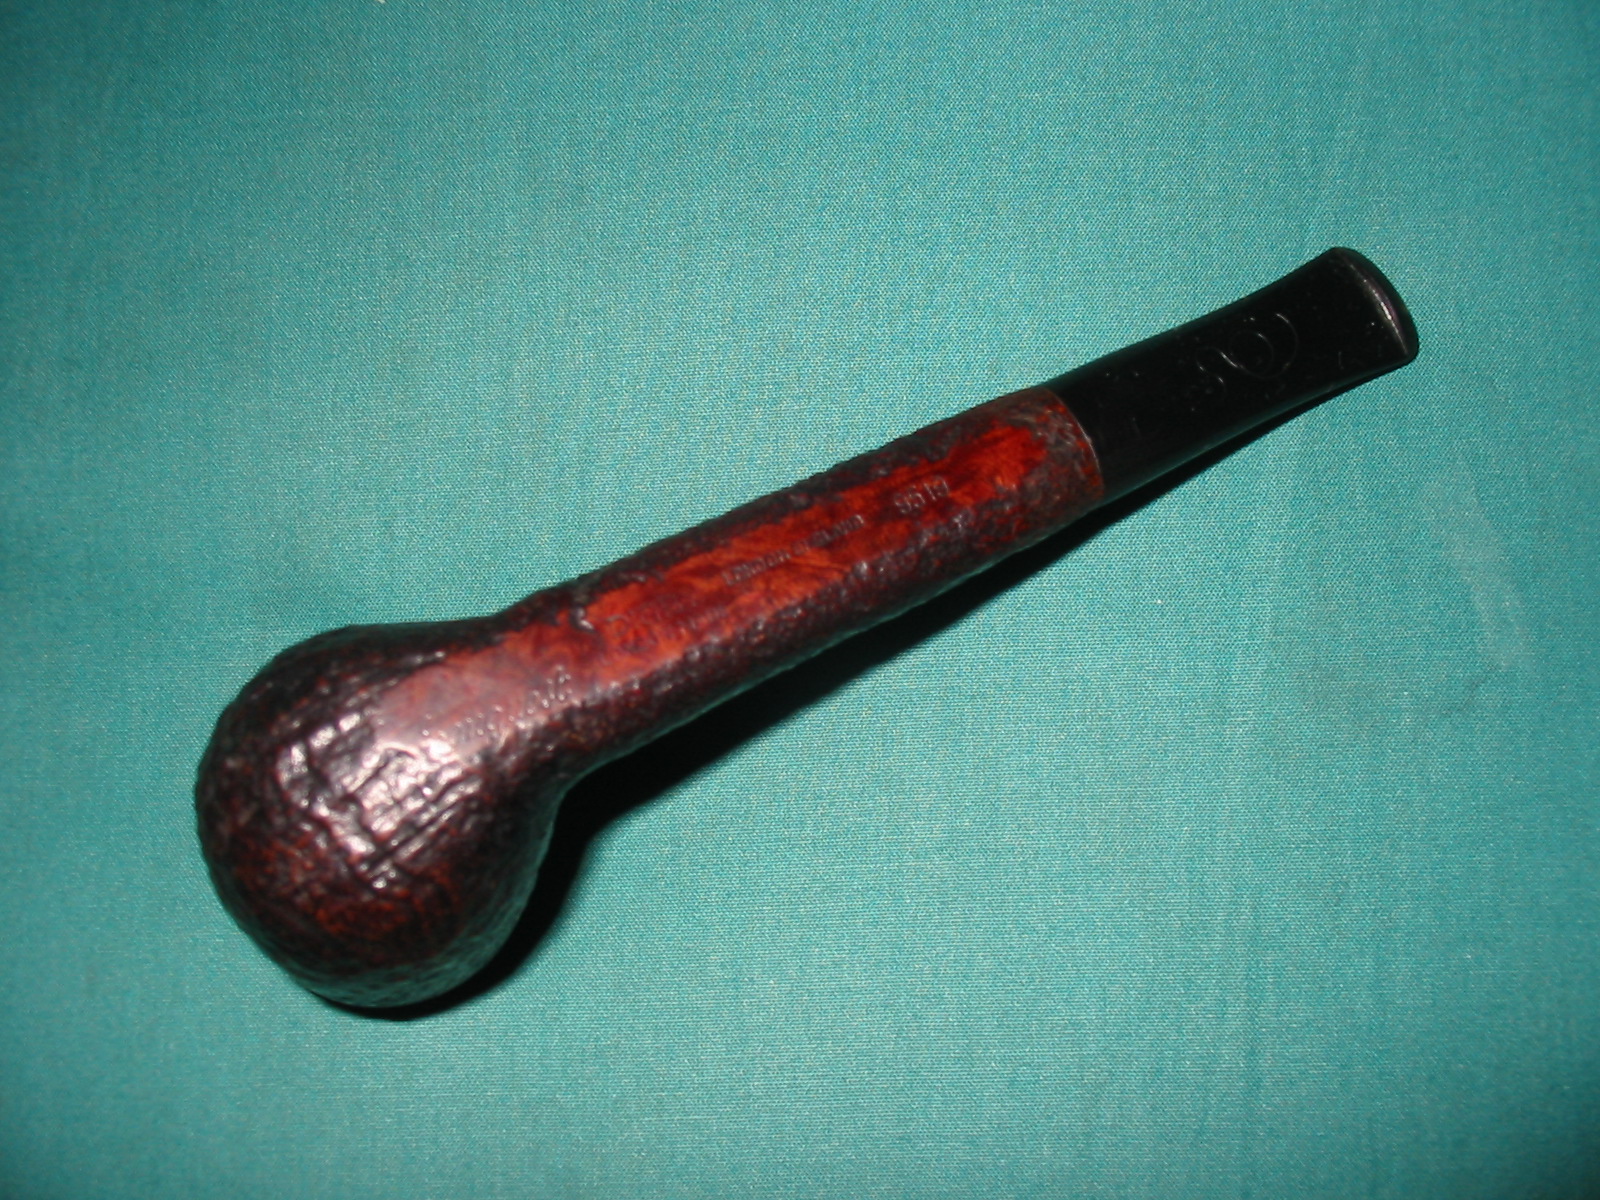
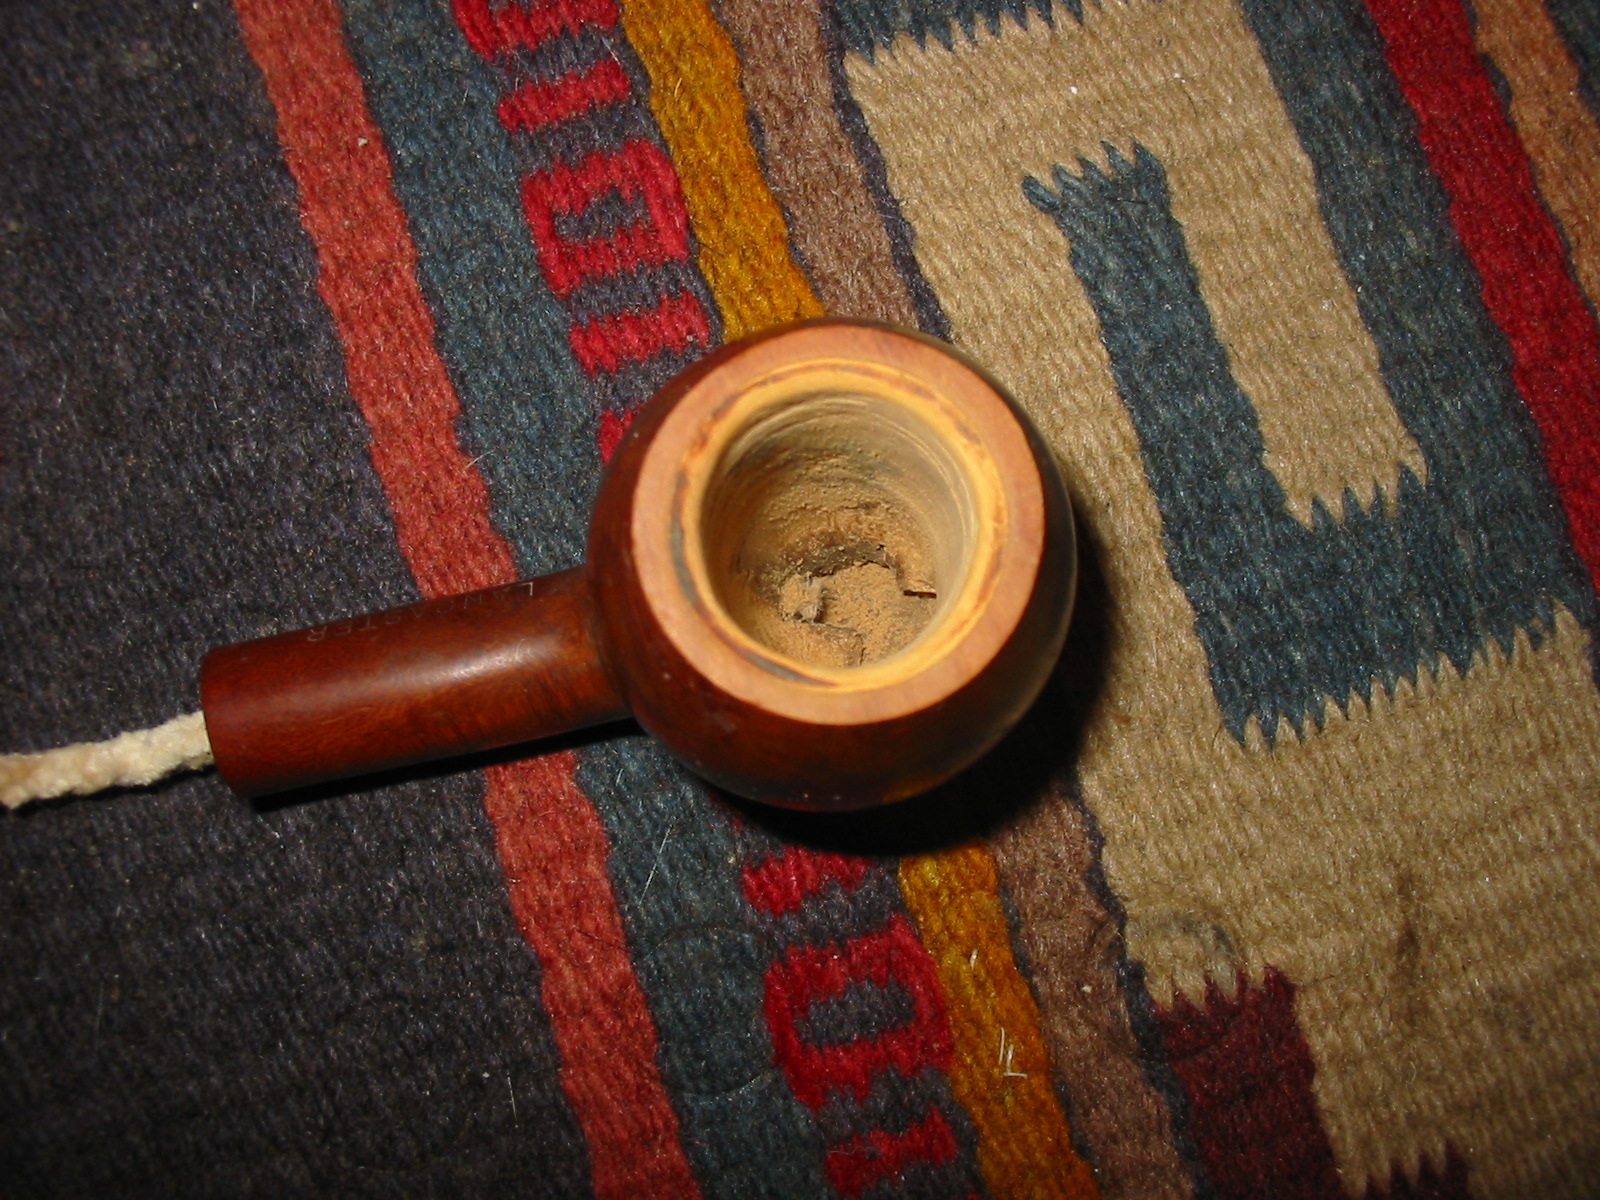
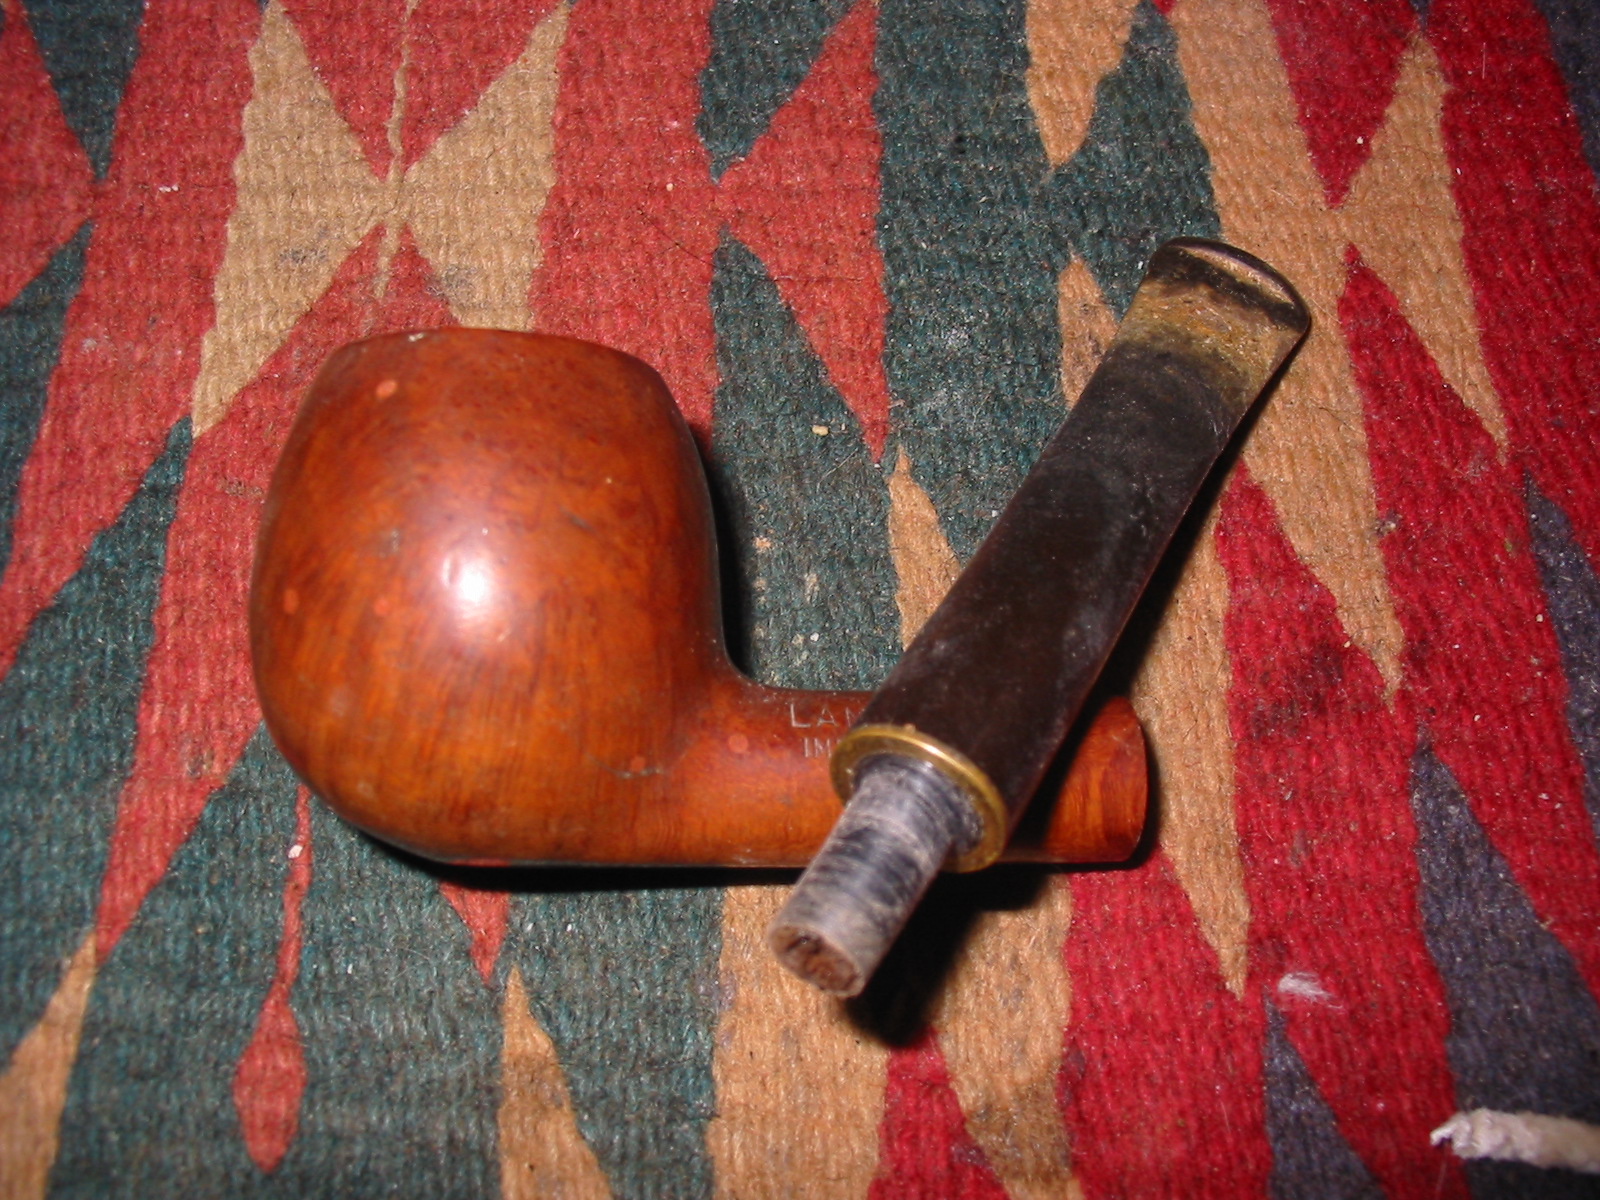
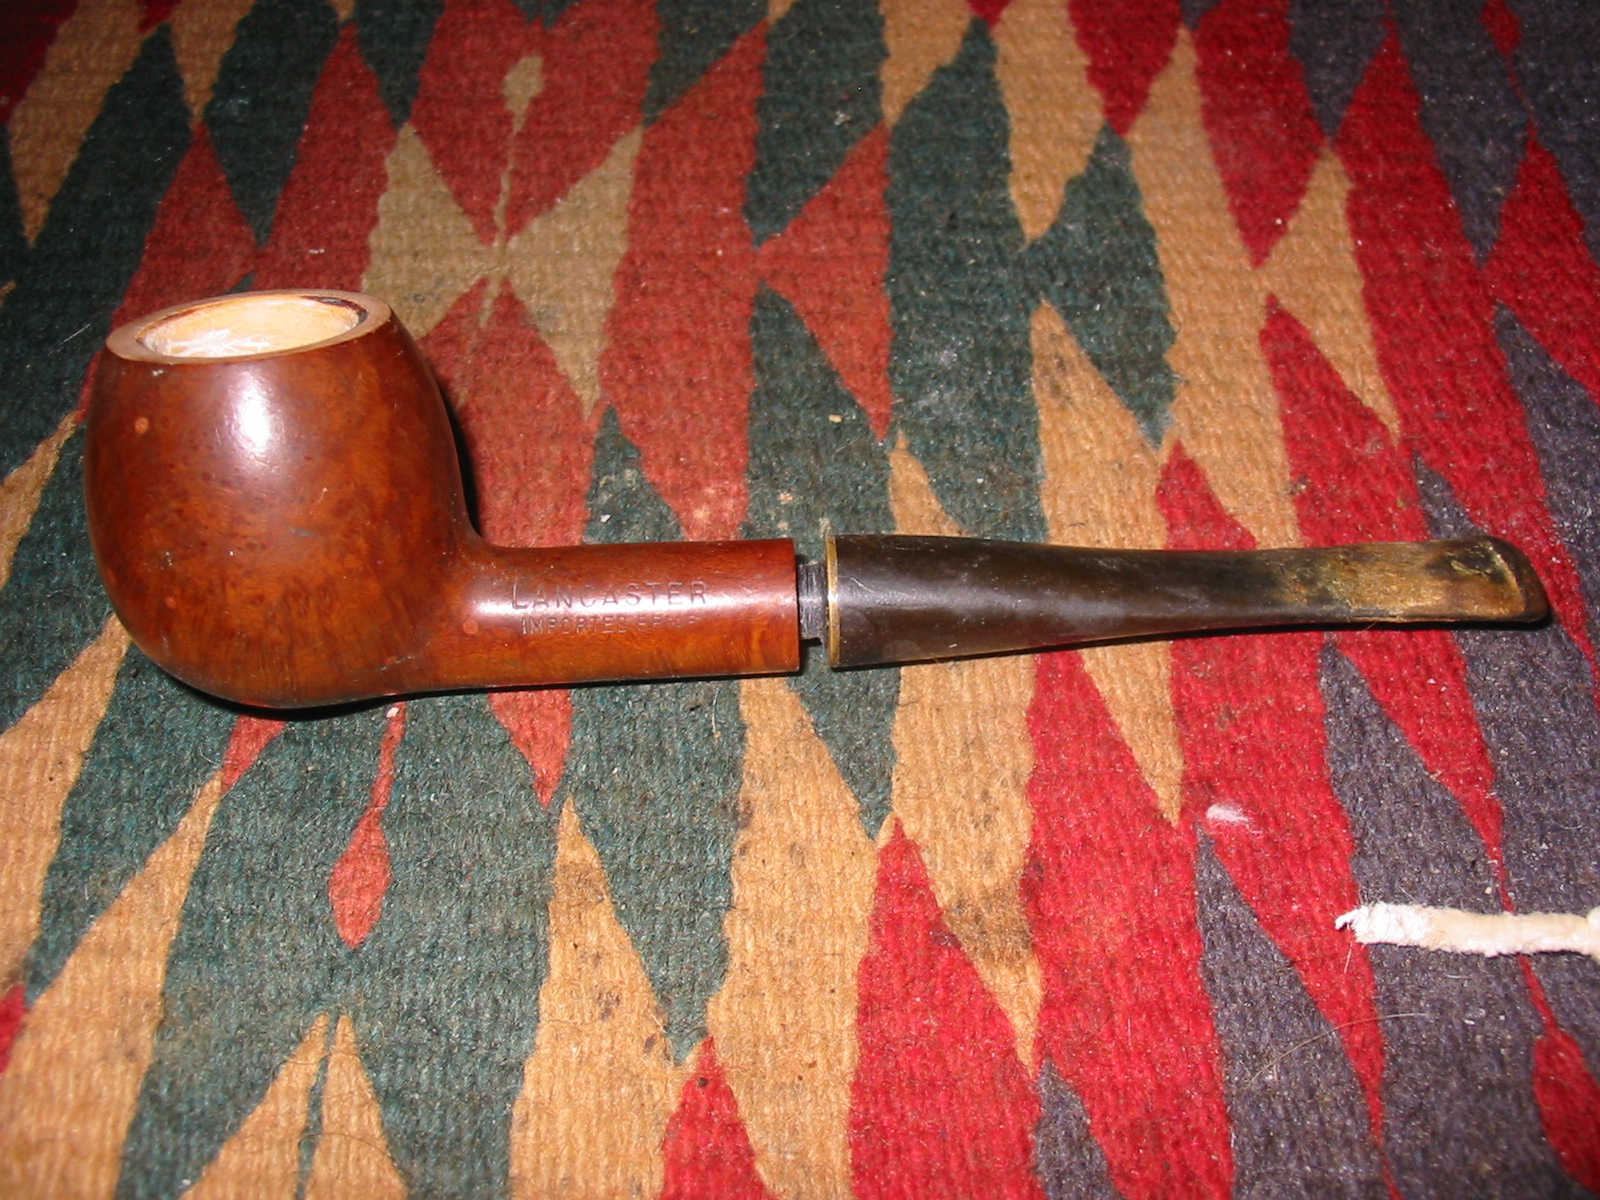
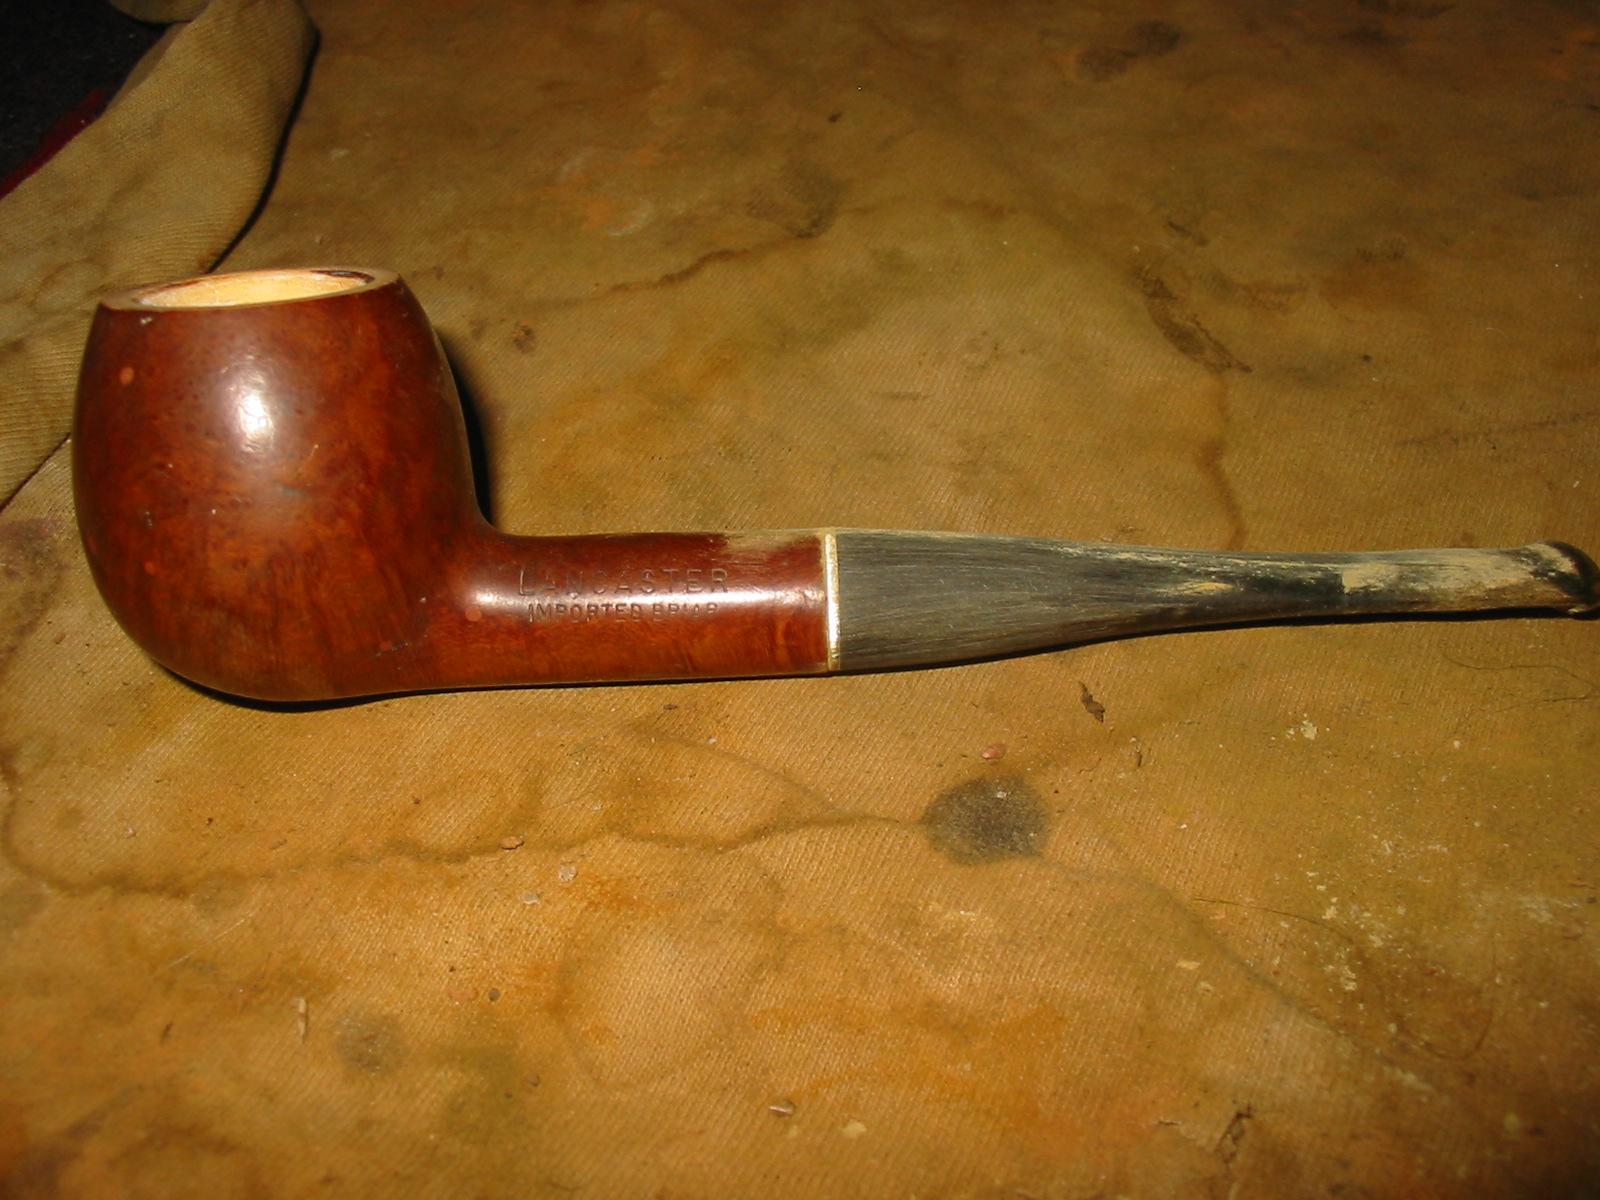
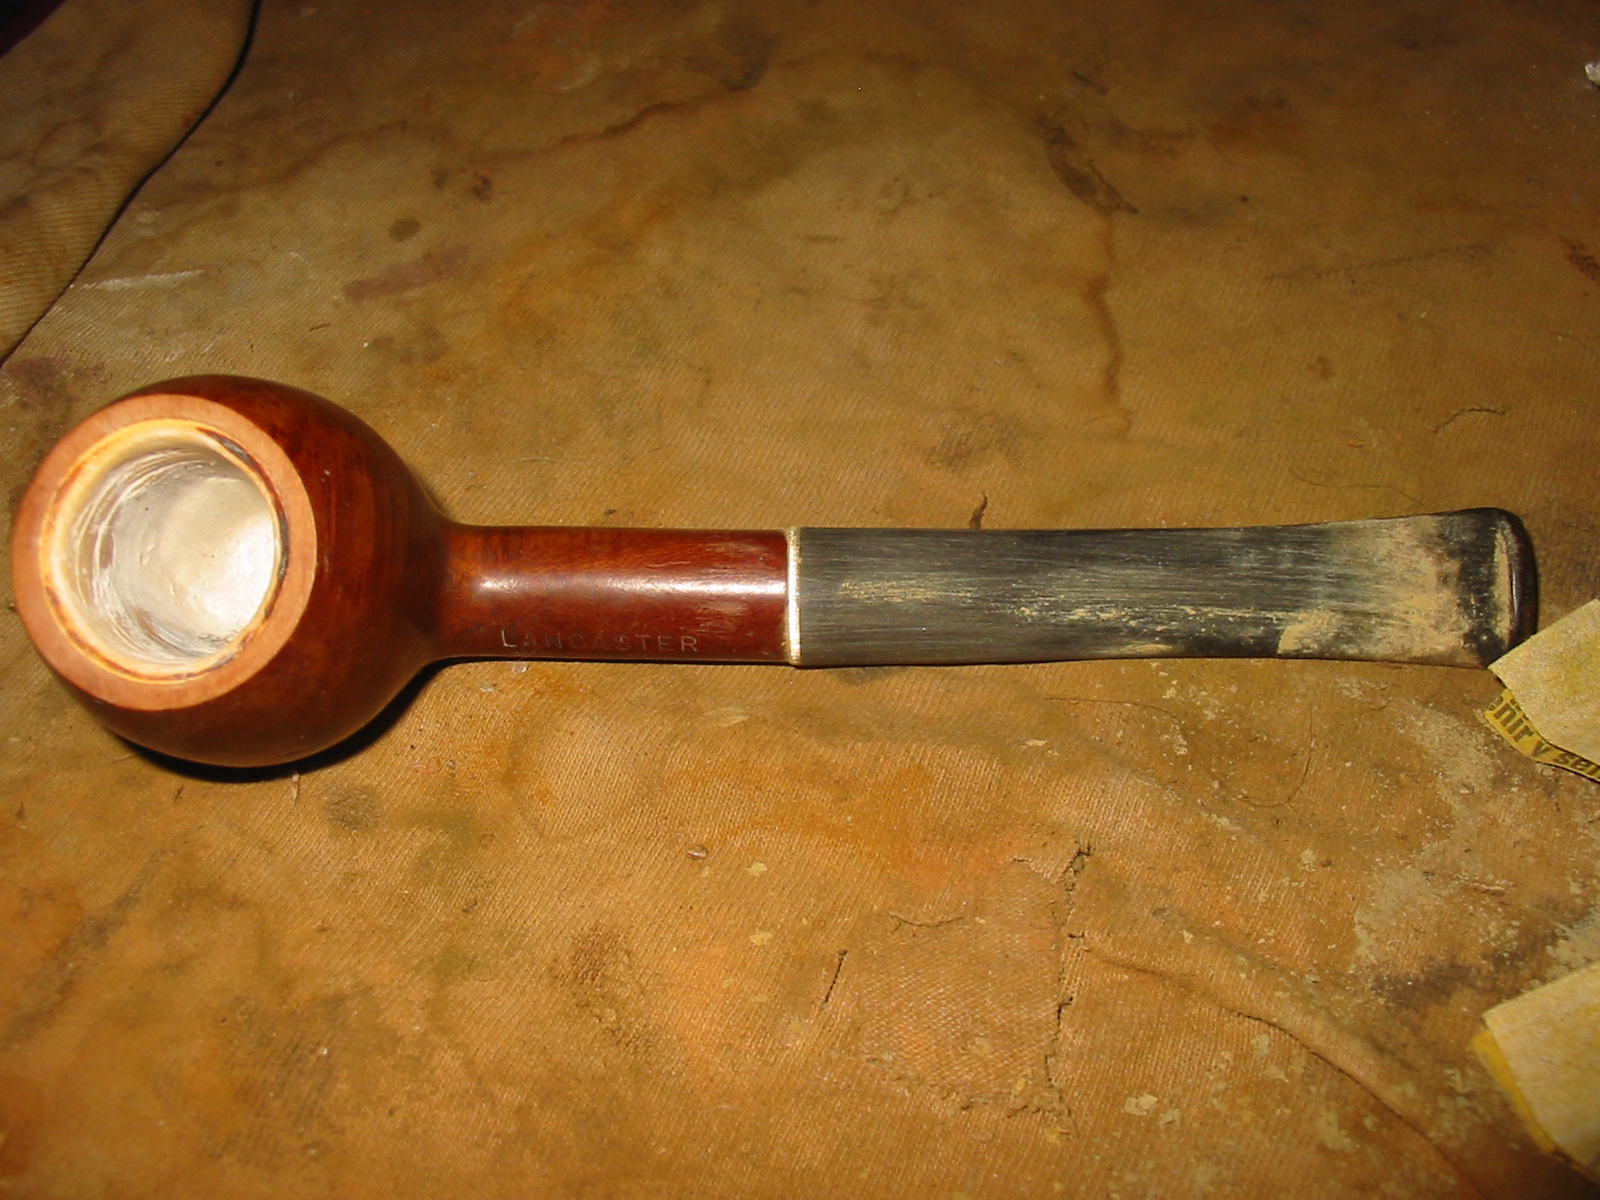
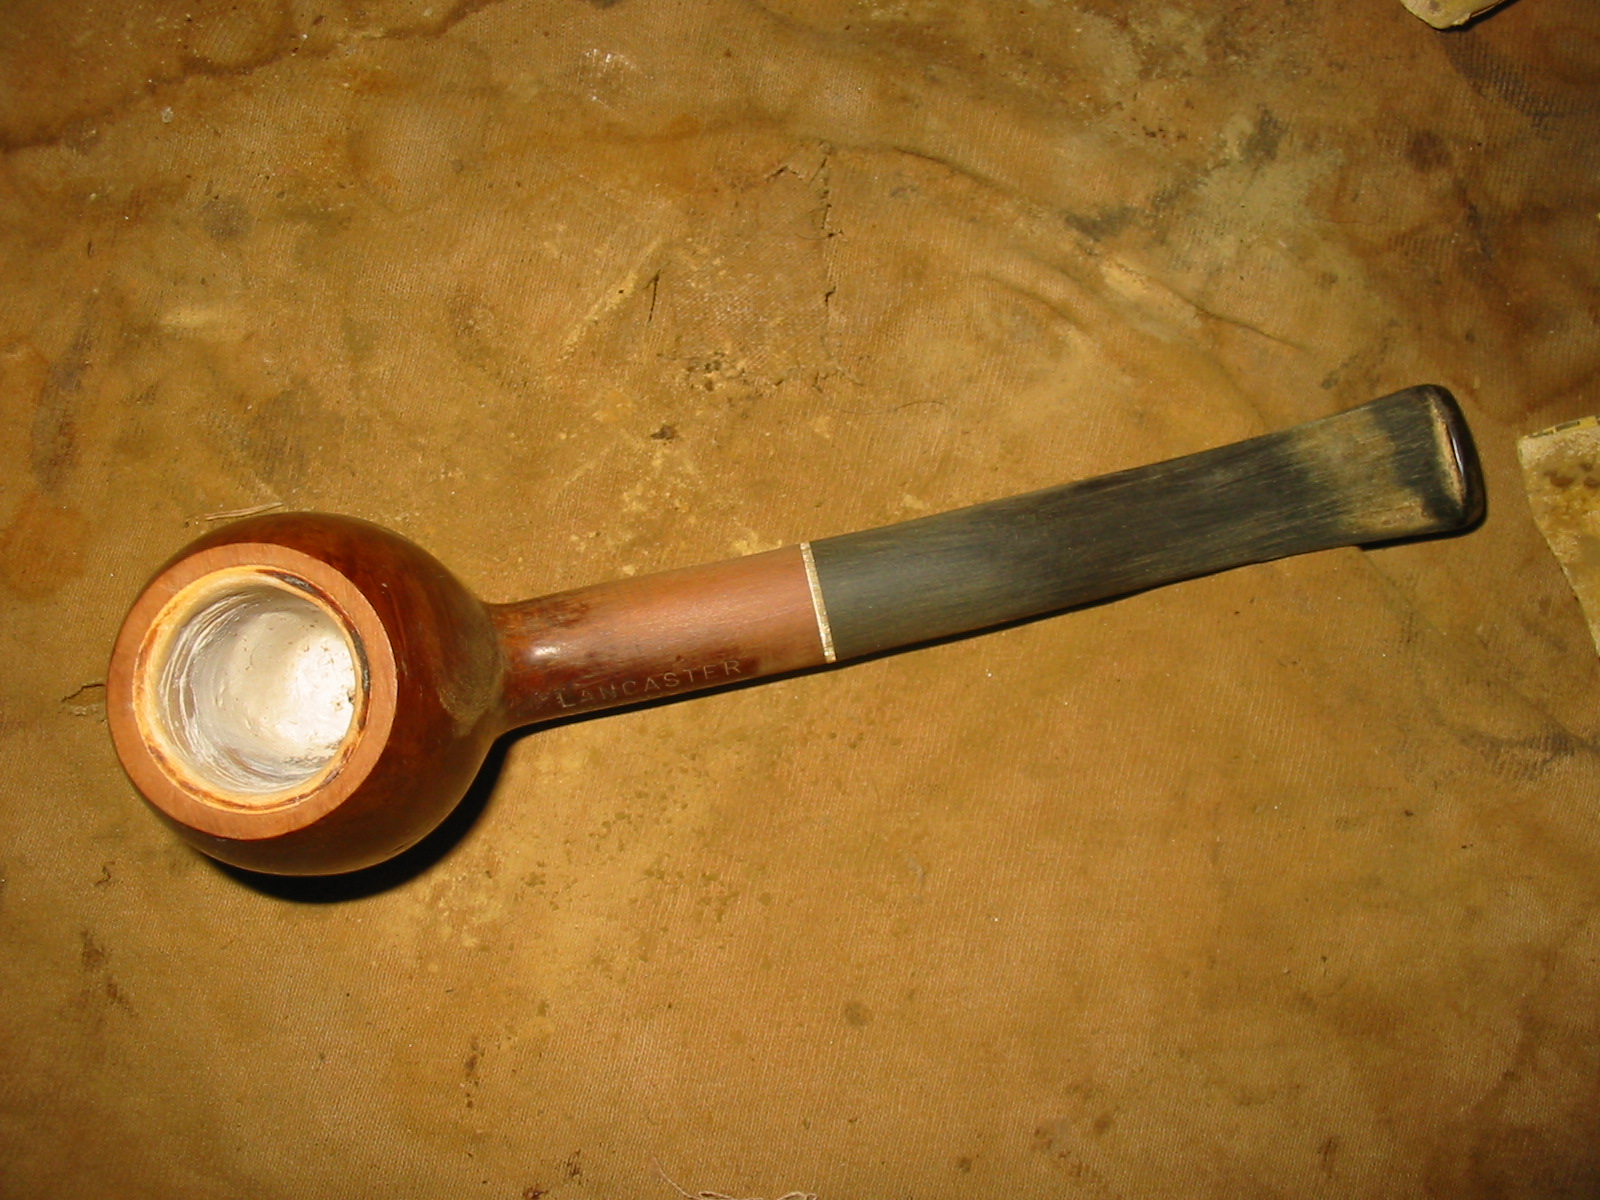
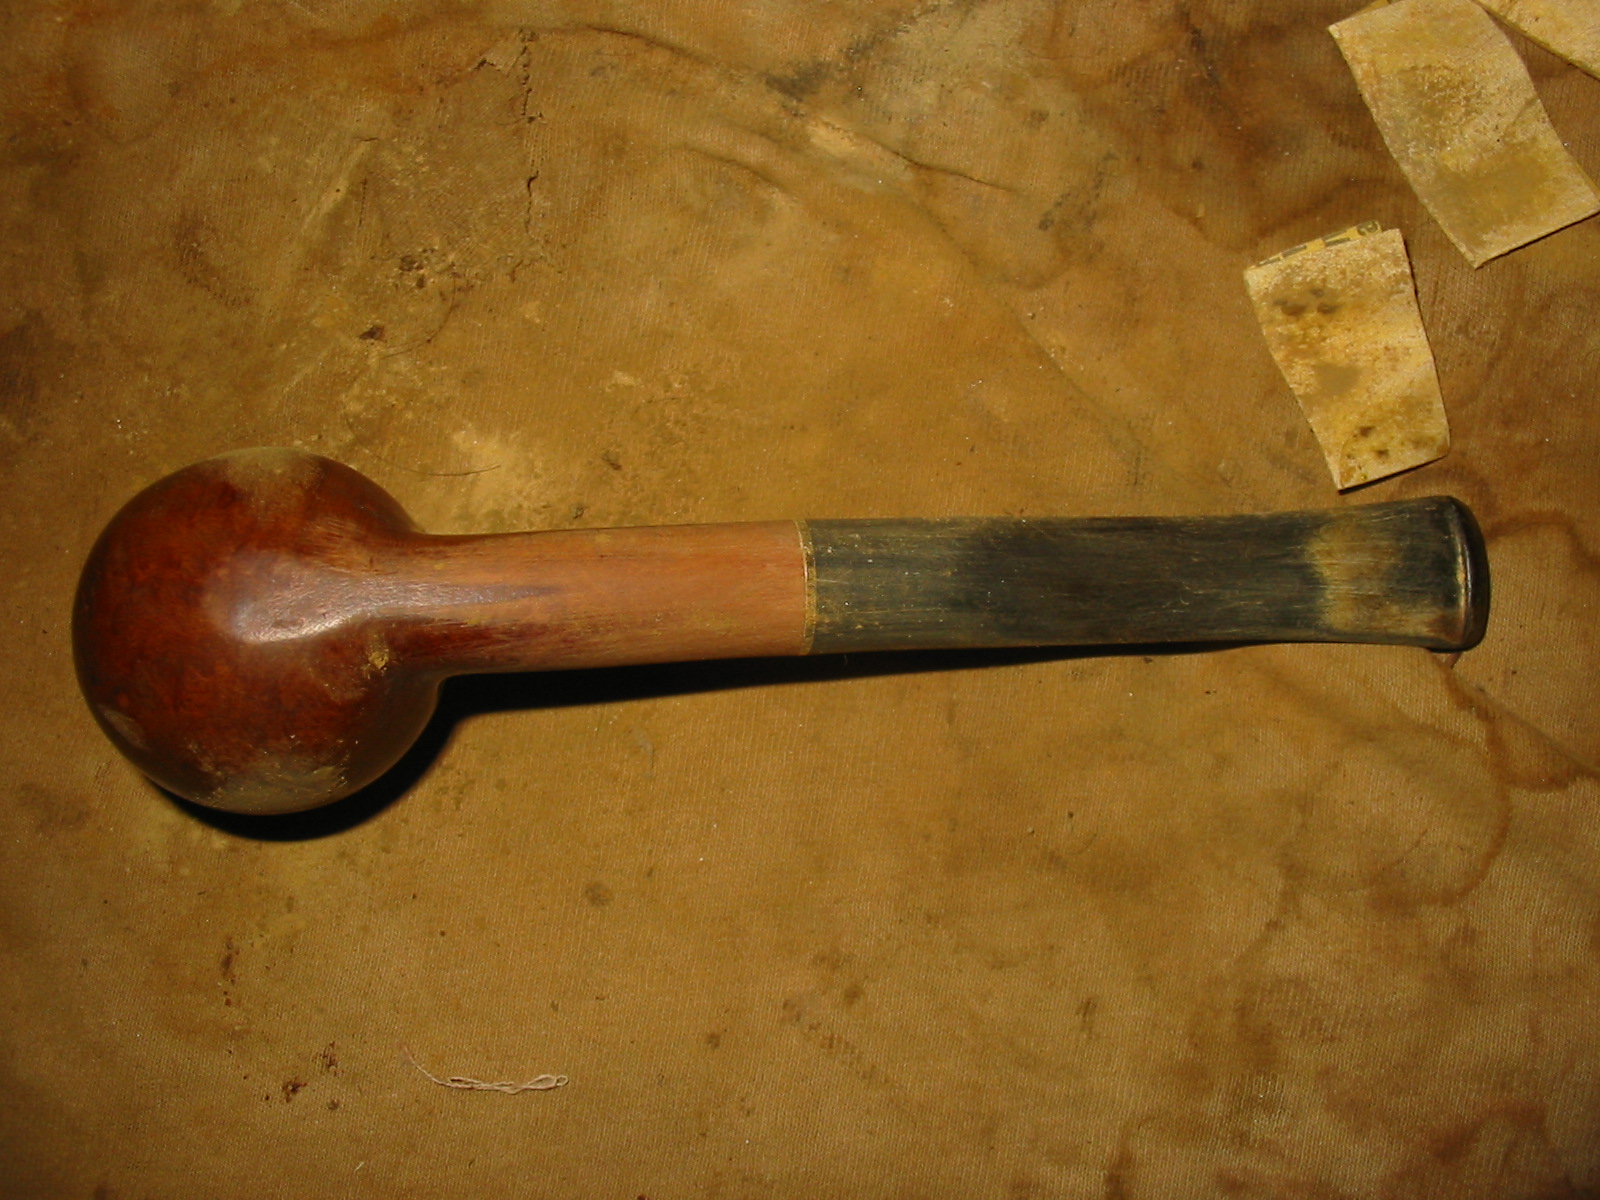
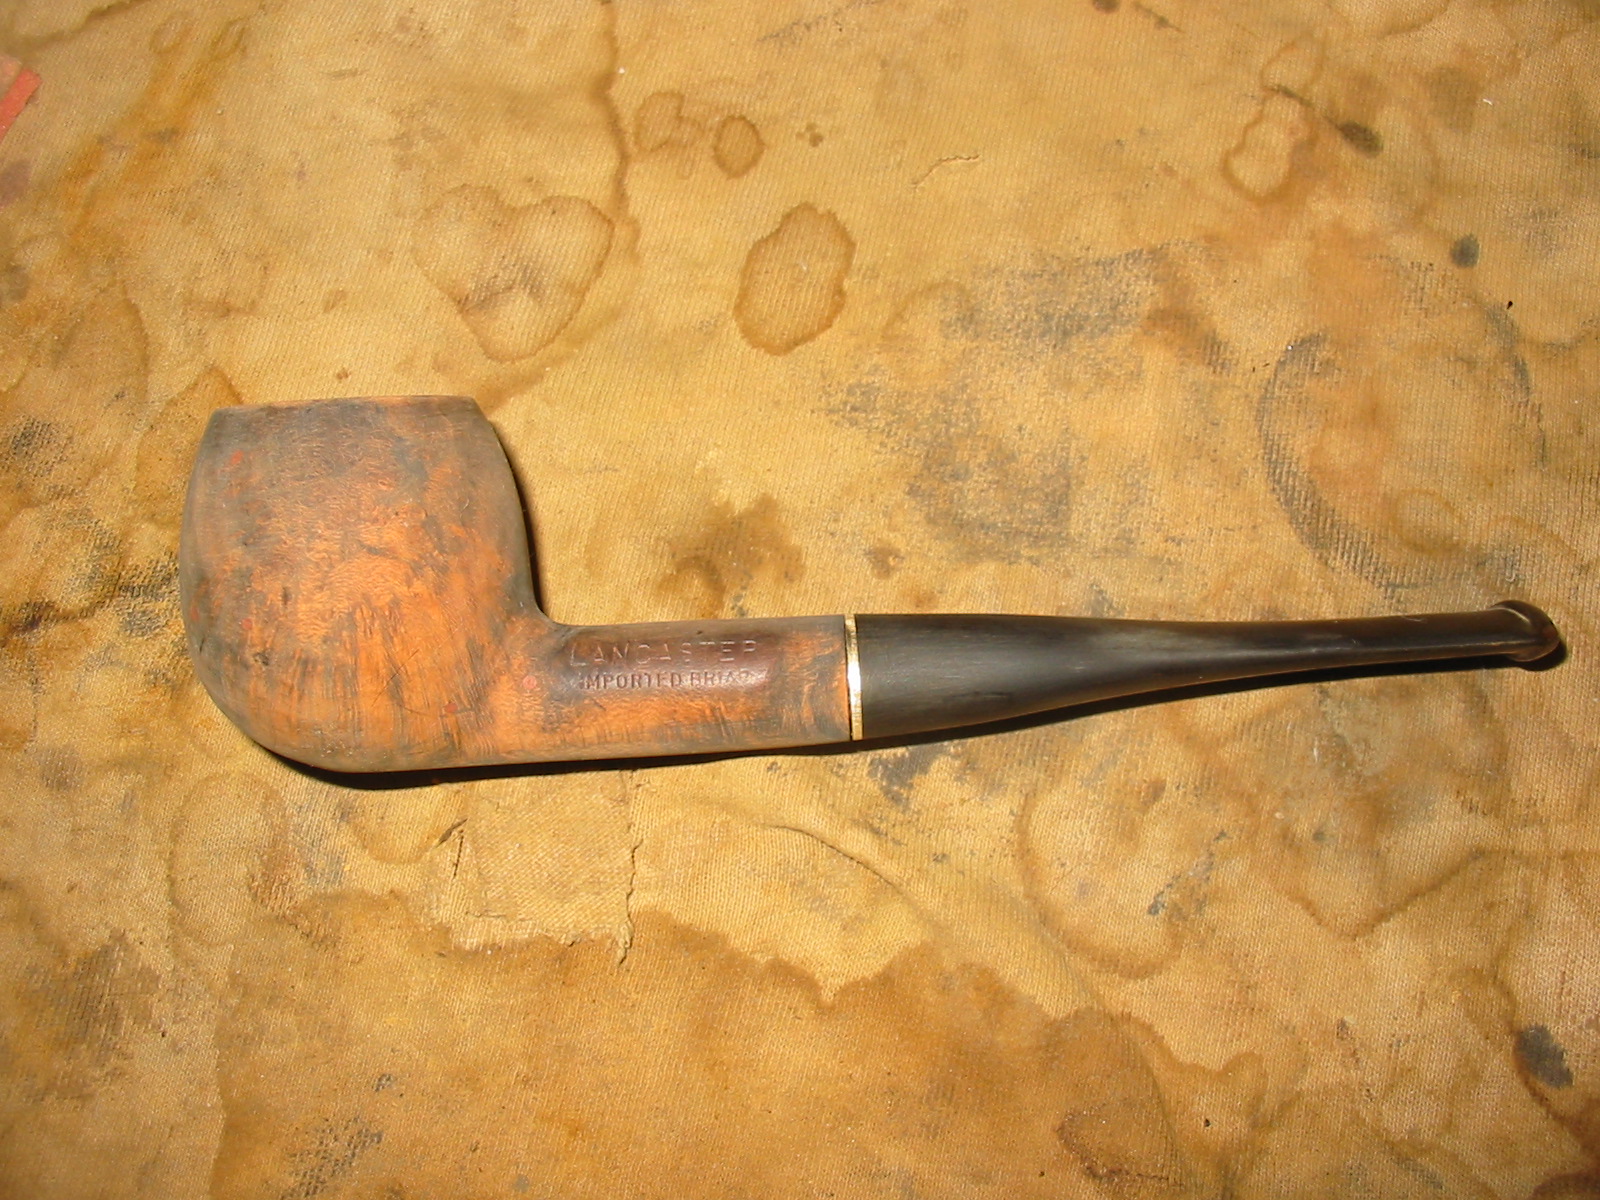
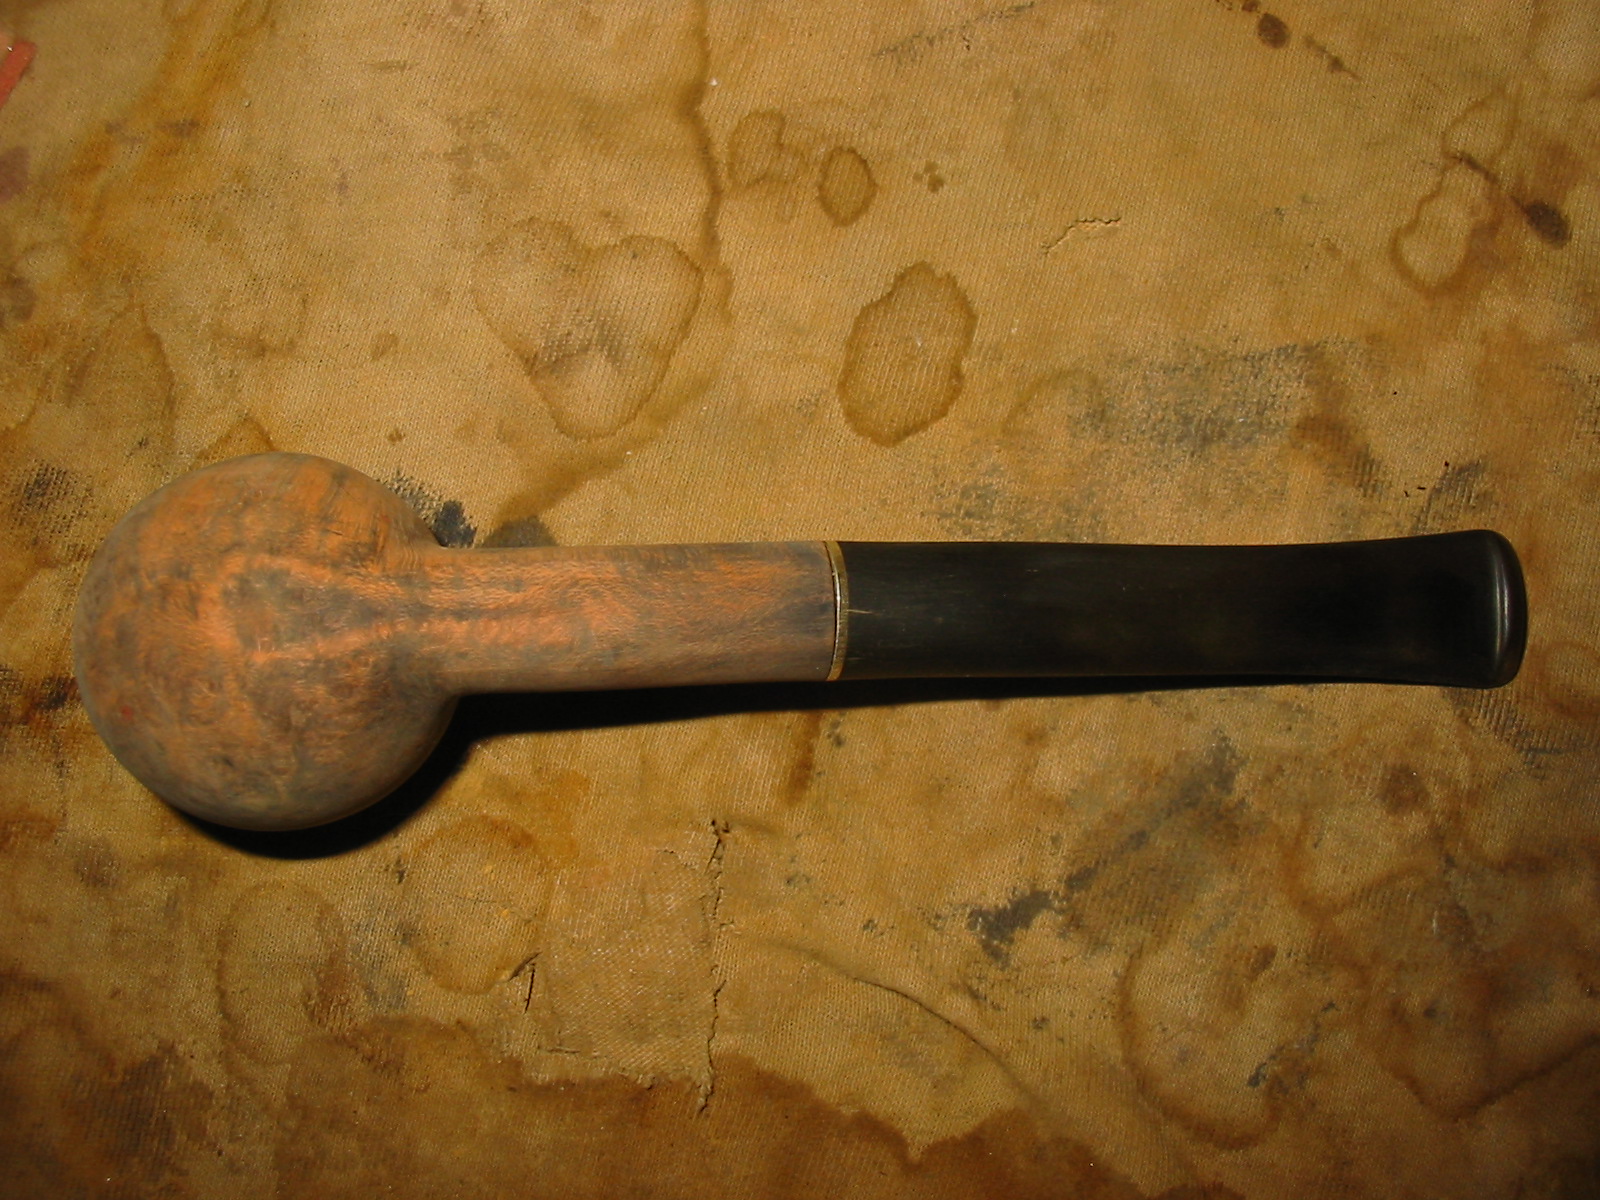
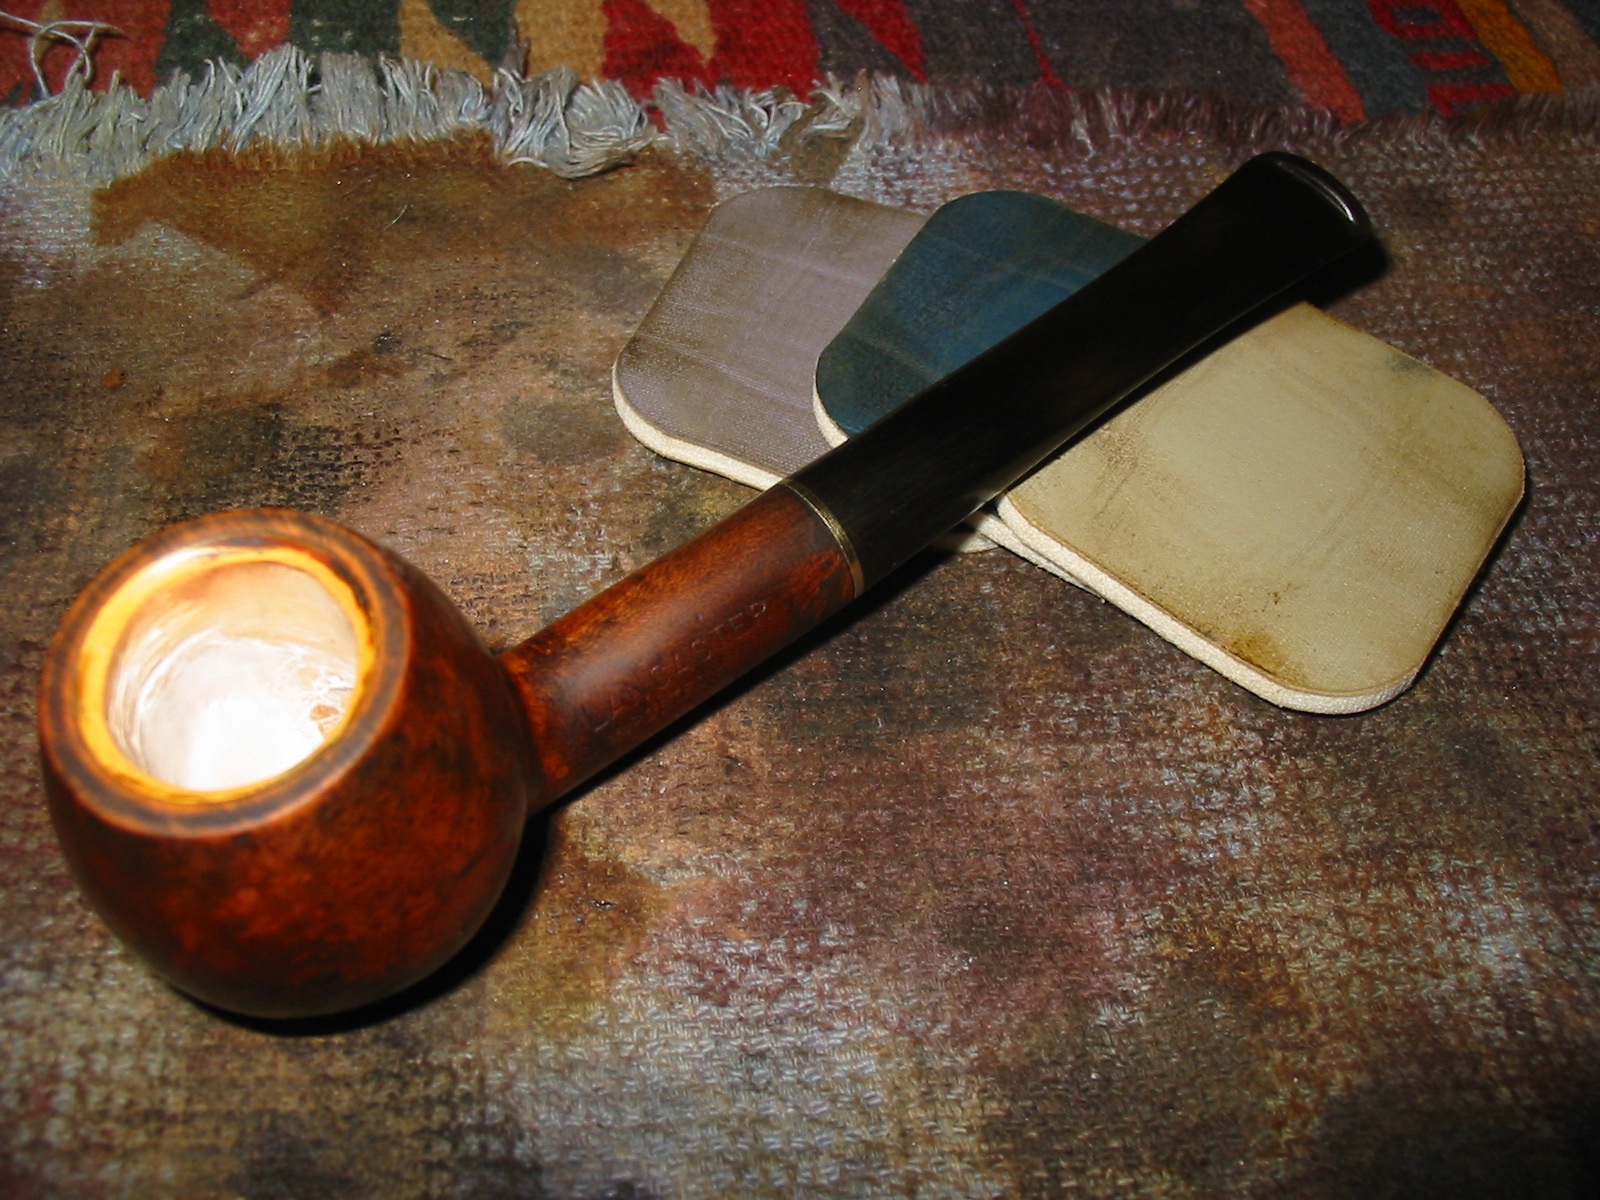
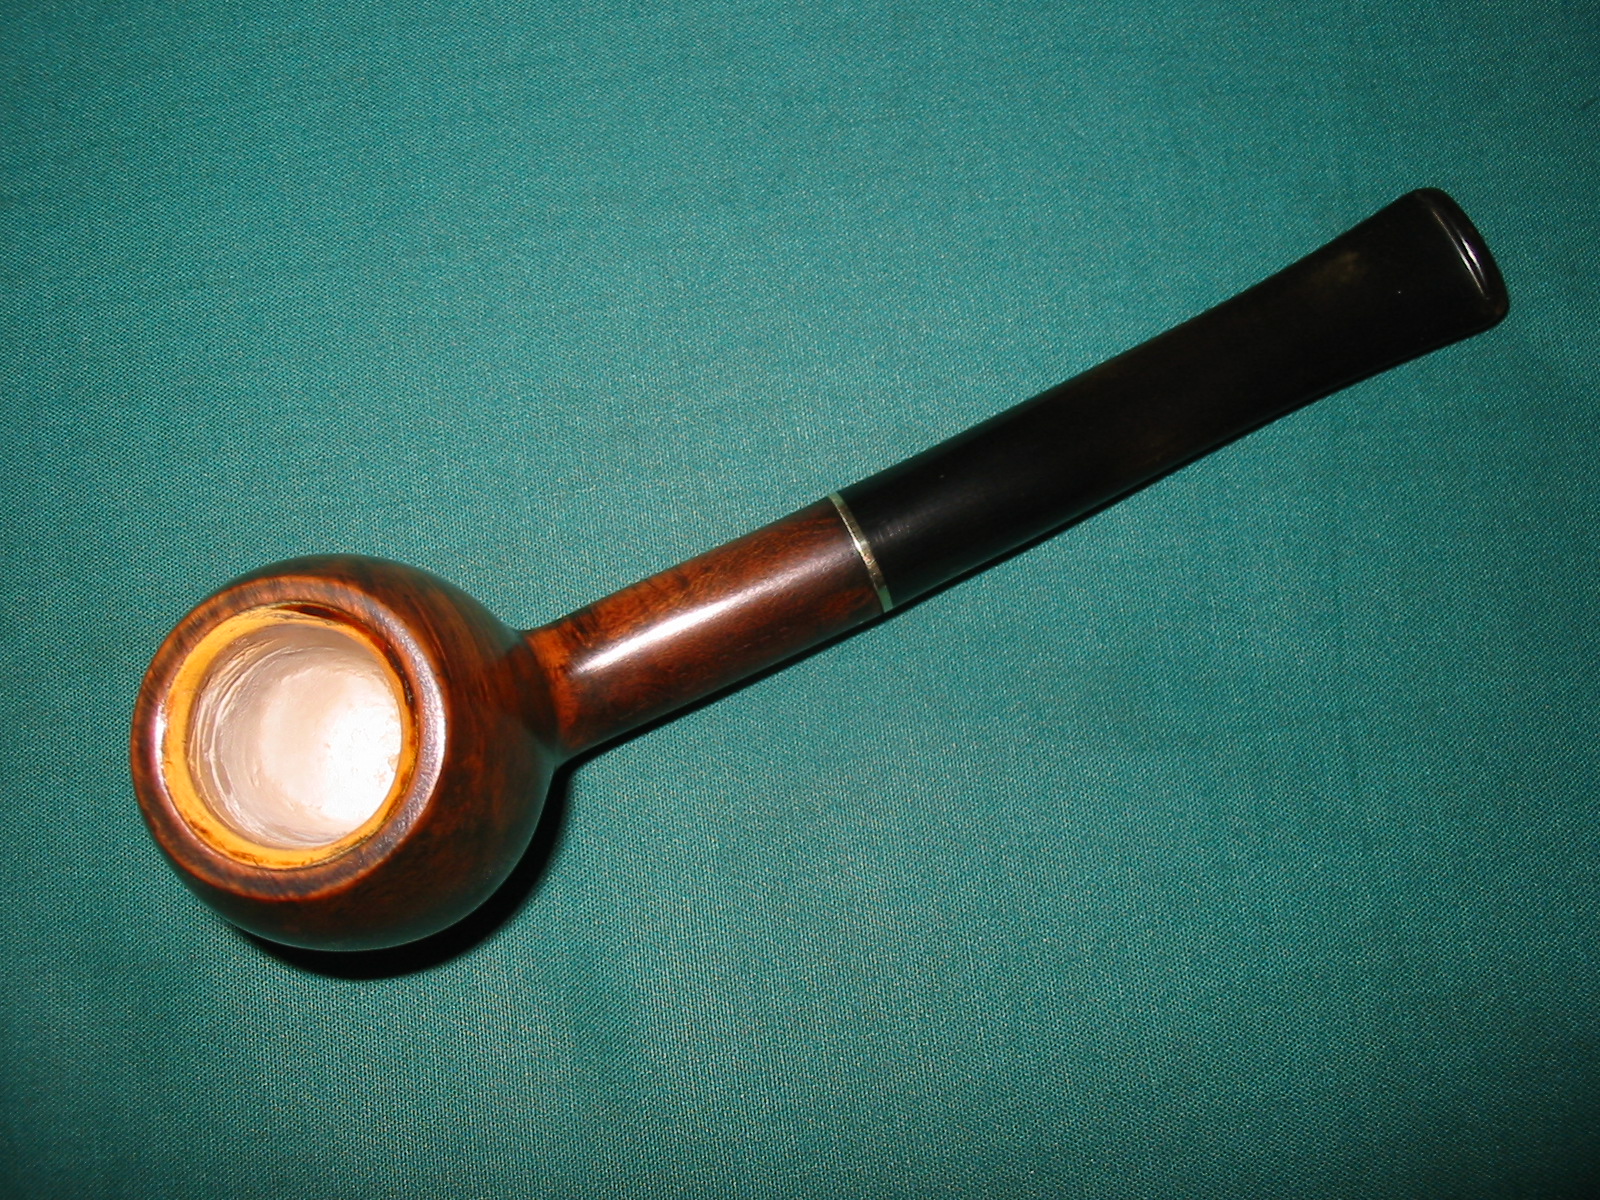
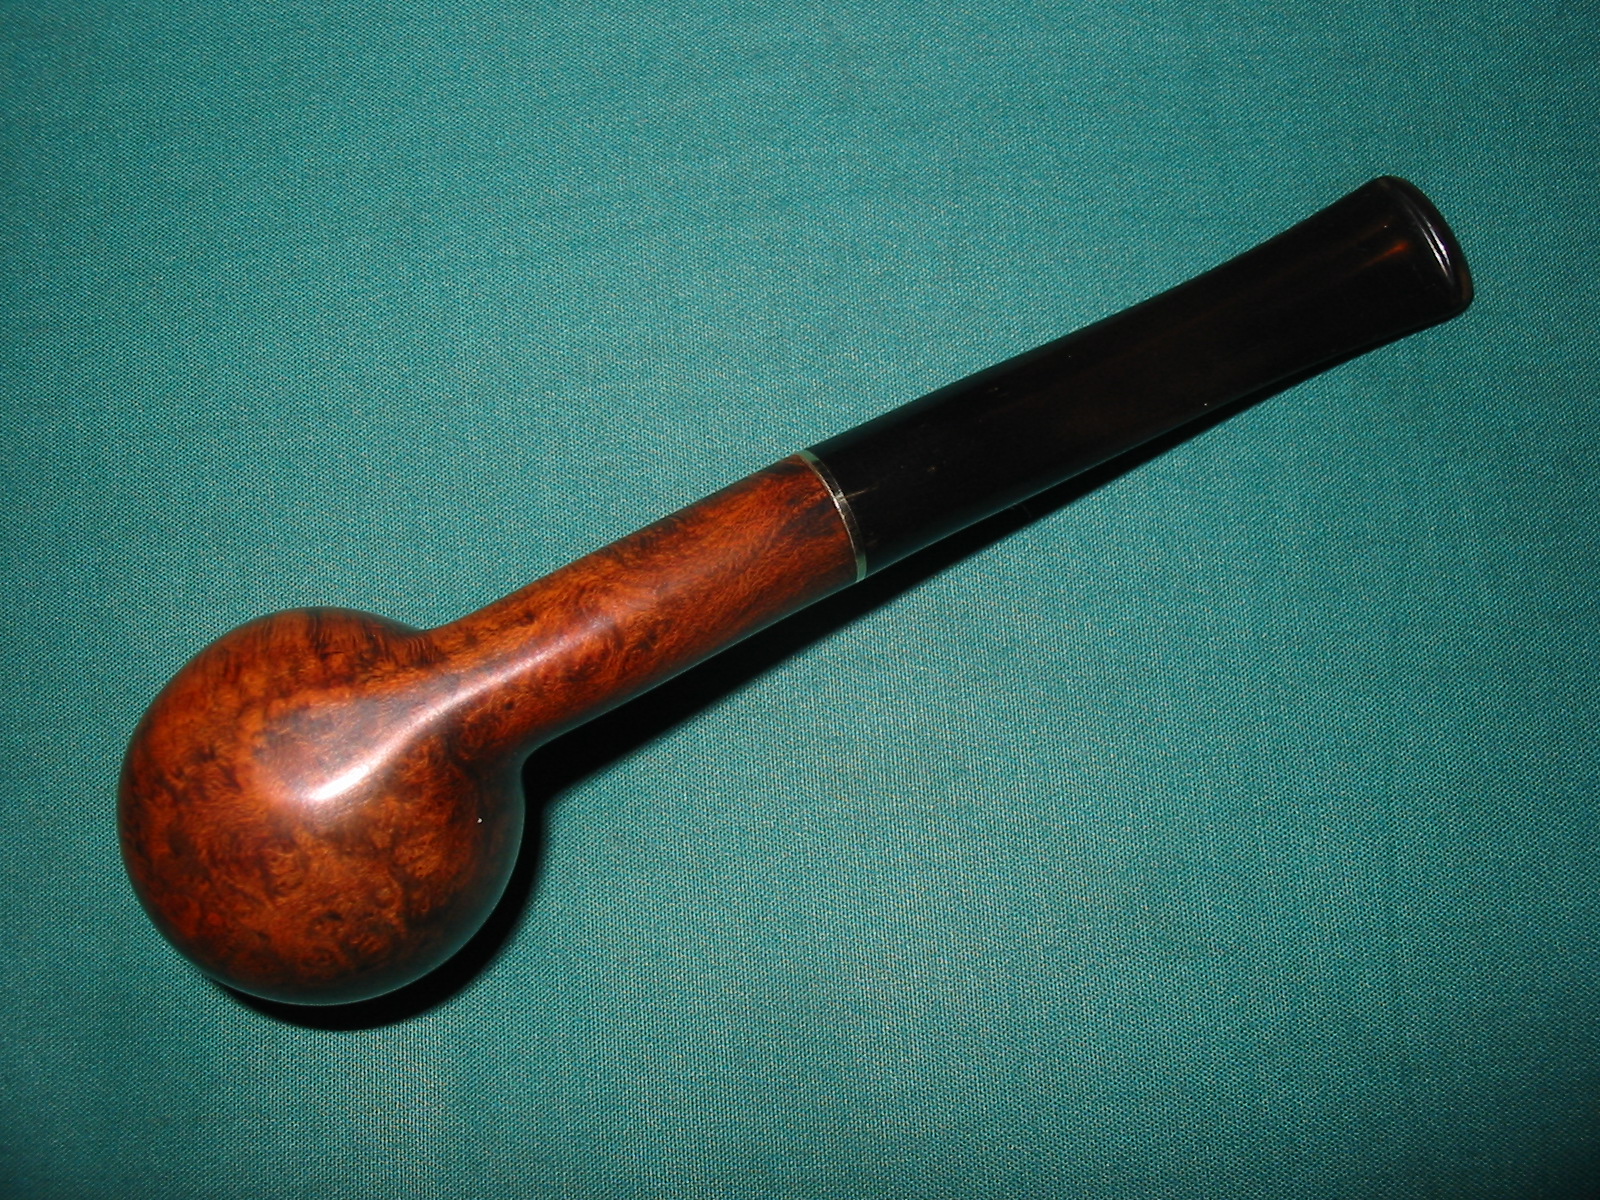
In a batch of pipes I was gifted by Andrew there was a pipe to repair. It is pictured below. The stamping on it was new to me. It is stamped LUMBERMAN over DELUXE on top of the shank and on the underside it is stamped Made and London arced in a circle with “in” at the center of the circle. It is also stamped 309X. I do not see an L after the X in the stamping of the shape number. The shank was cracked and looked like it had been taped from the sticky substance left around the shank and crack. It also was without a stem. Looking it over it appeared that the shank had also been cut off slightly and the cut was crooked. There was a chipped out portion at the end of the crack. All of that would need to be evened out in the repair. The bowl was caked toward the bottom and dirty with a buildup of carbon on the rim and the inner bevel of the rim. The finish was dirty and there were remnants of sticky tape that had been used to repair the shank on both the bowl and the end of the shank. It needed some TLC and work if it was going to be brought back to life.
IMG_4521

IMG_4522
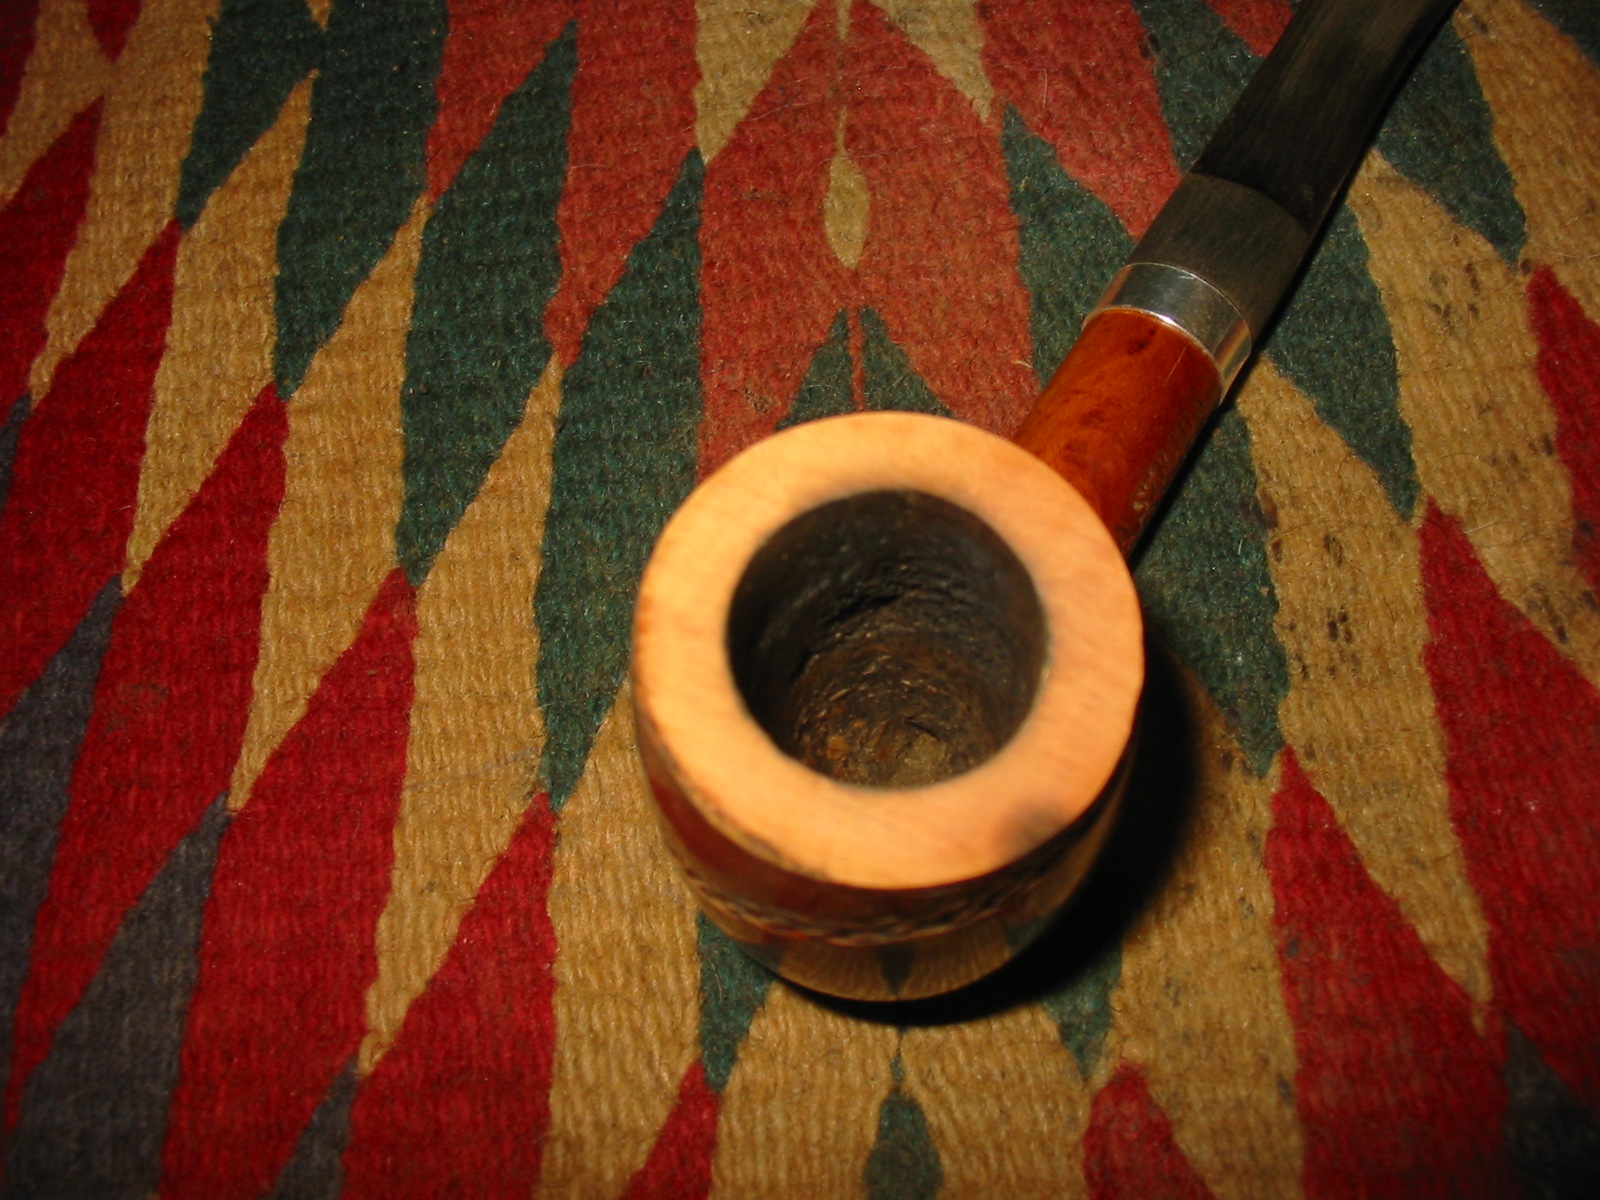
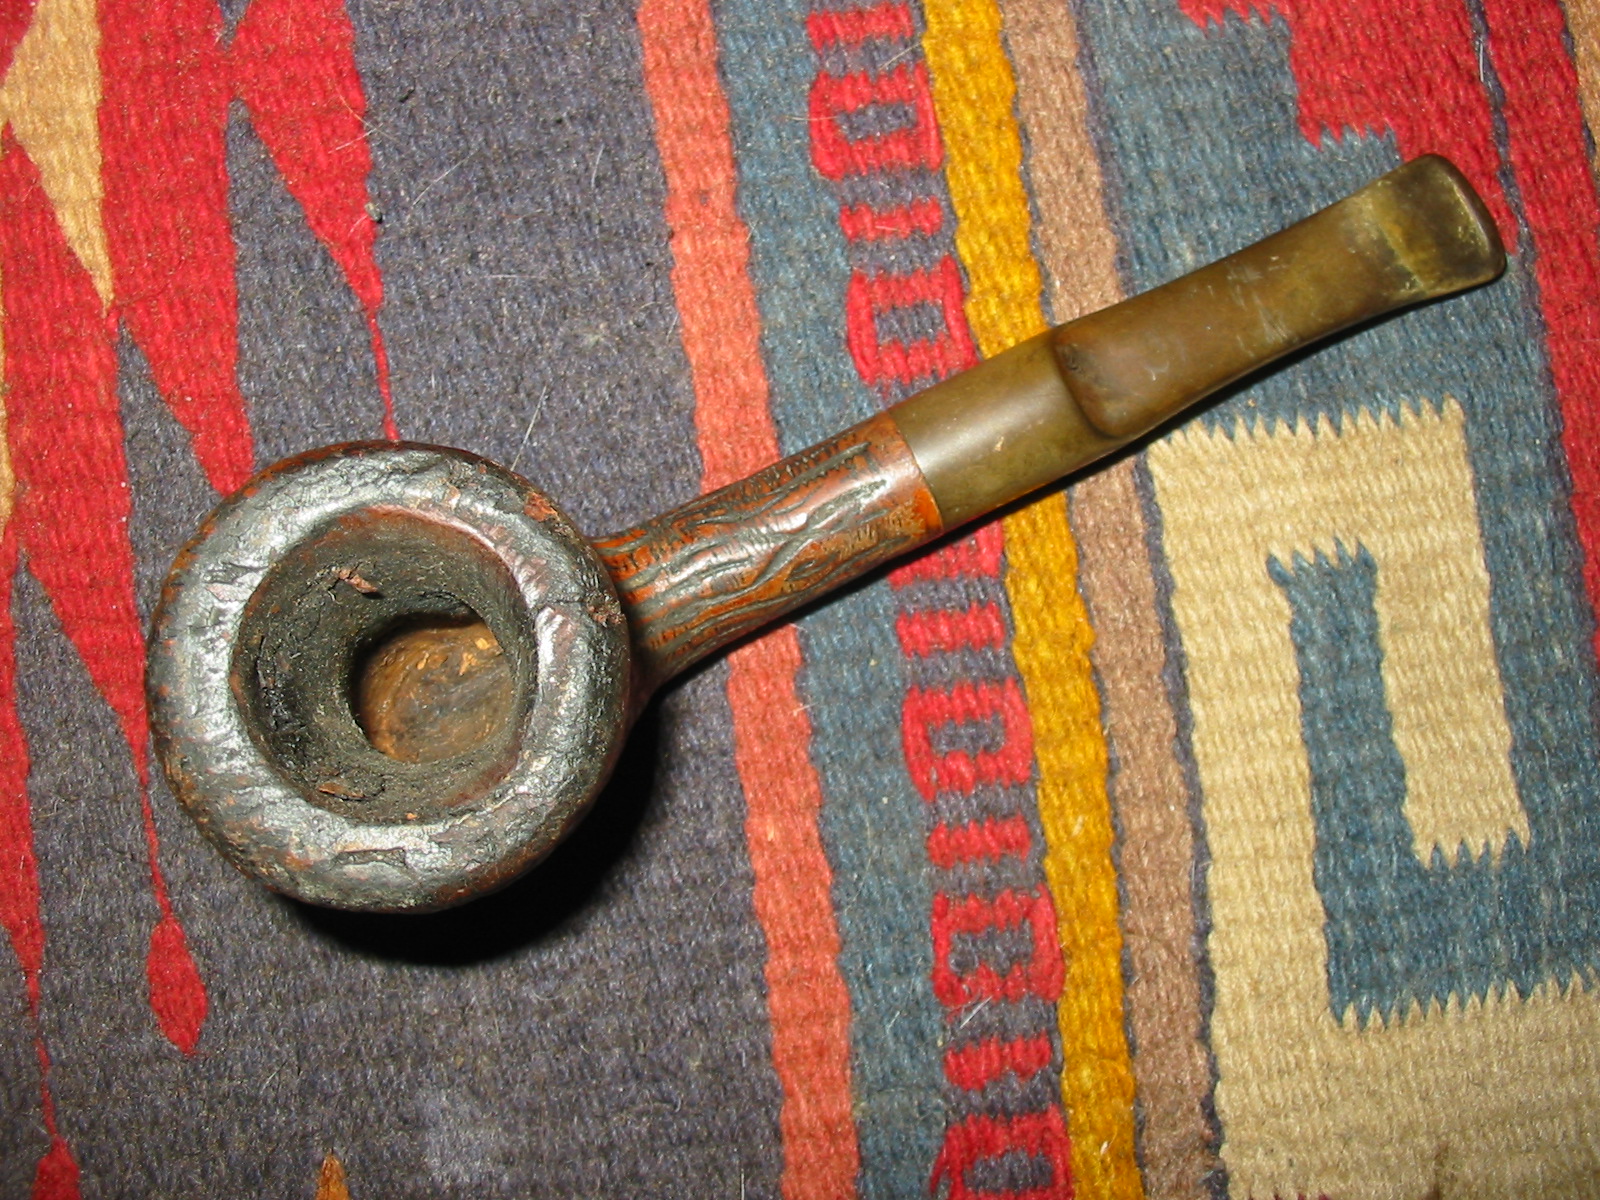
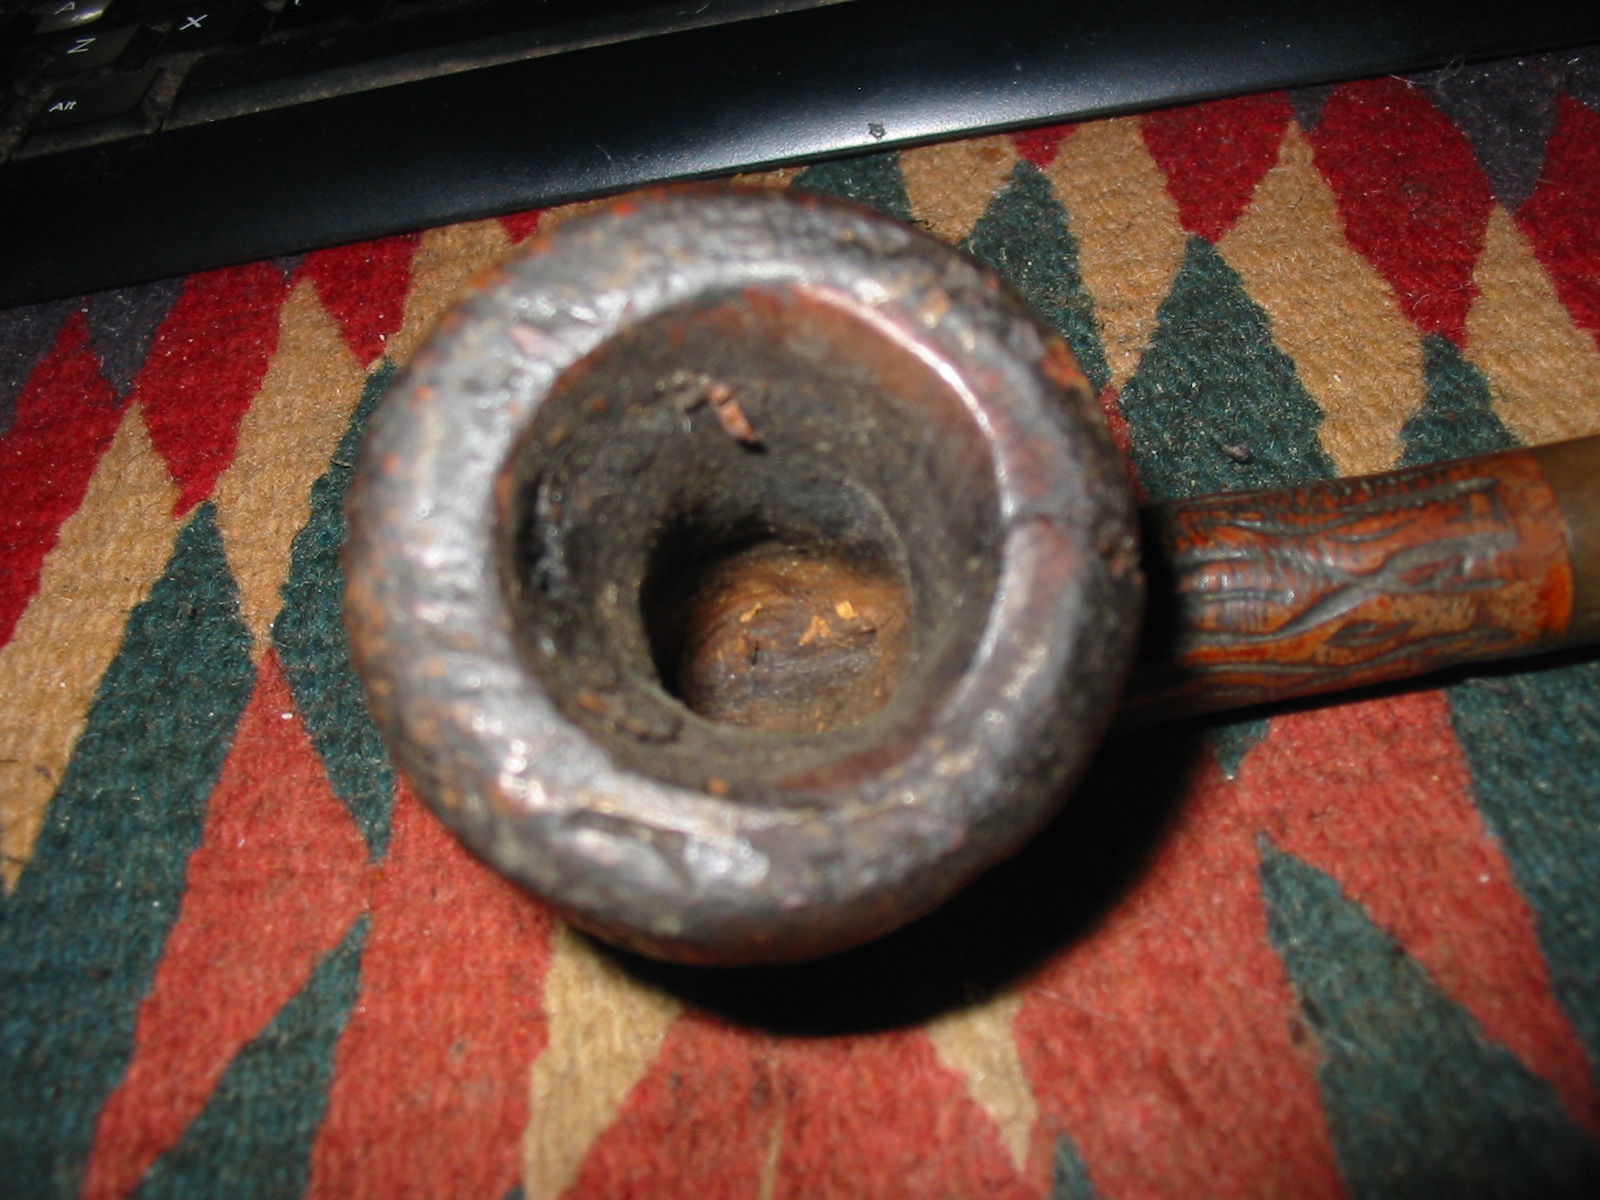
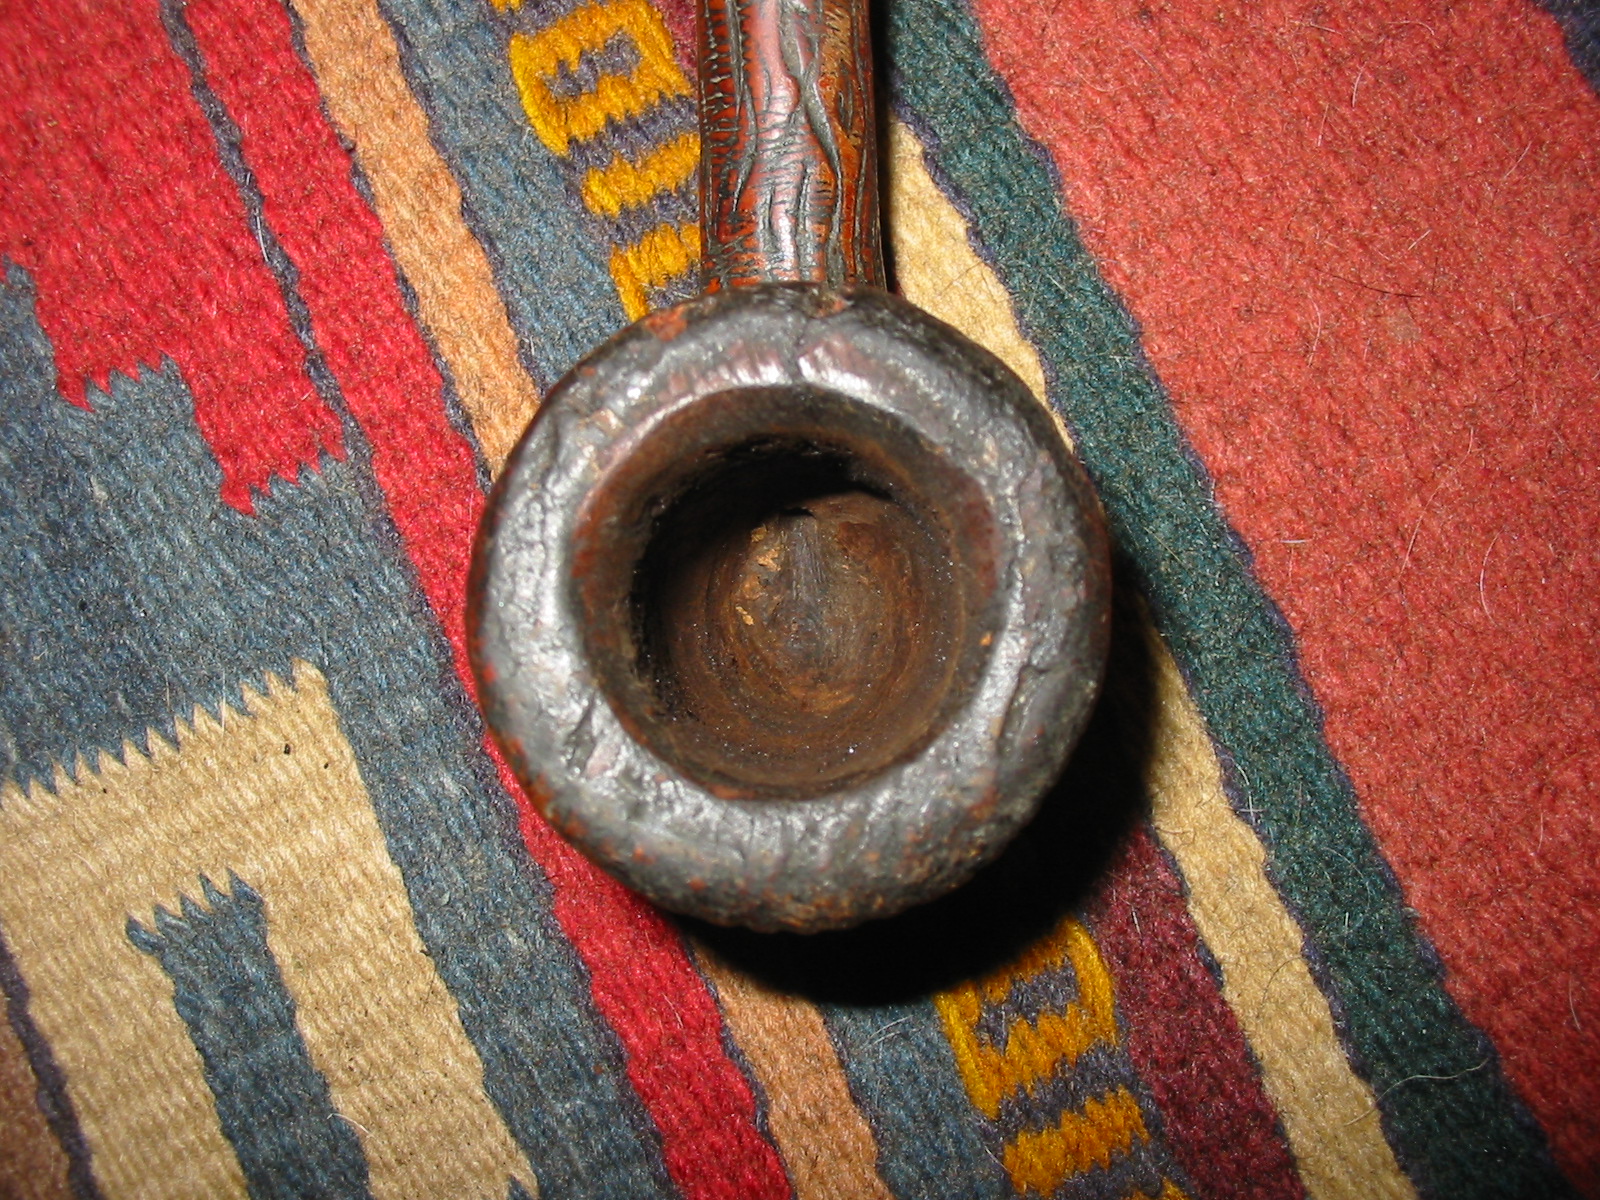
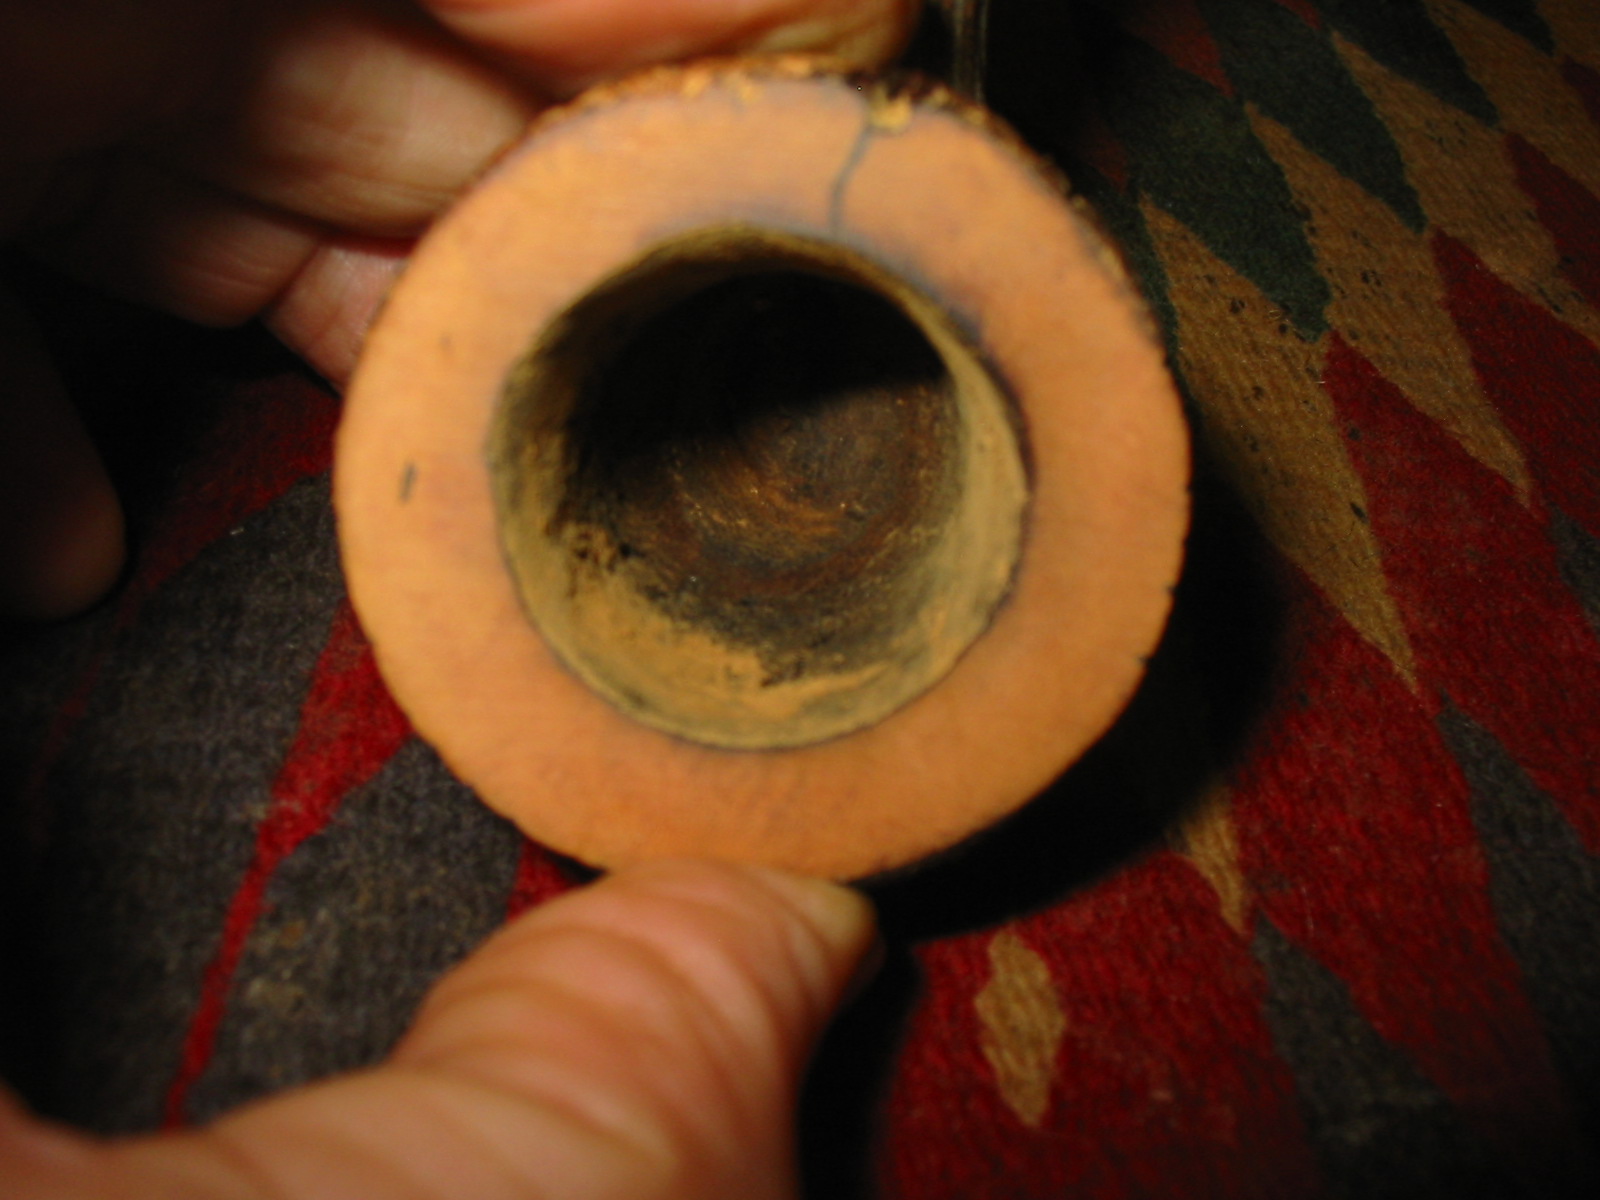
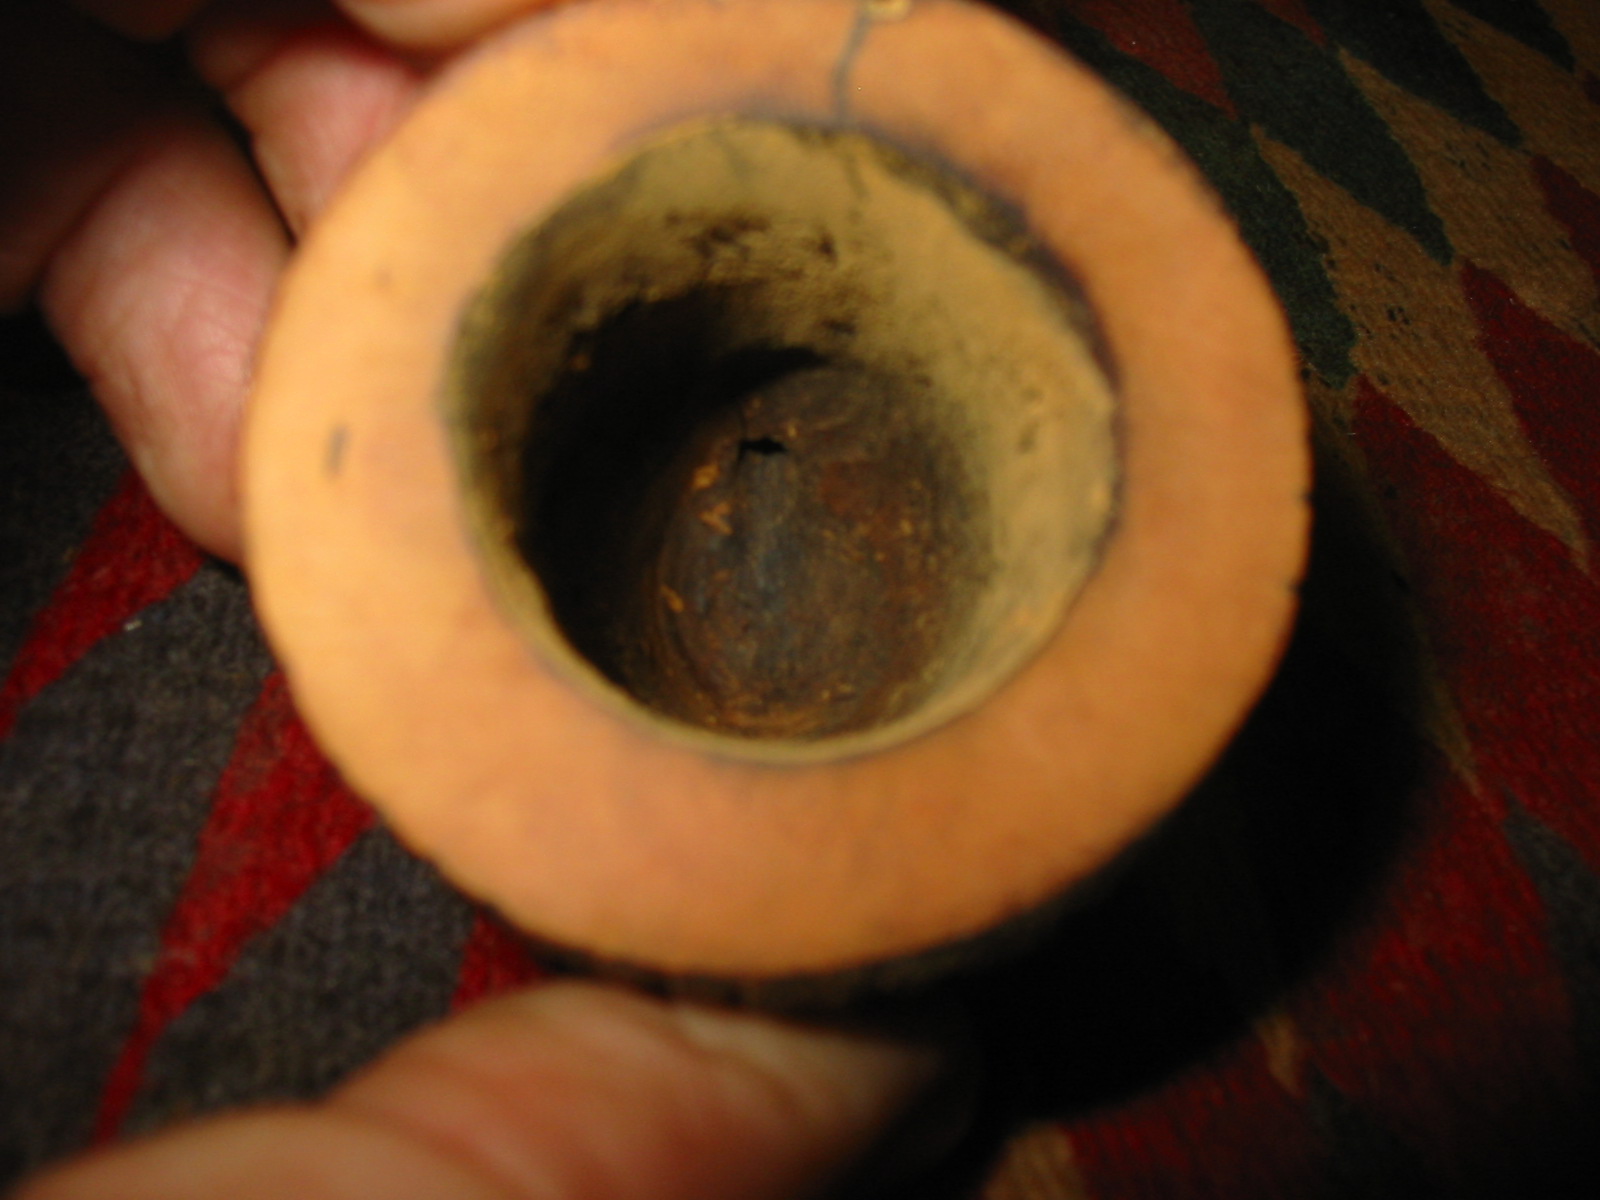
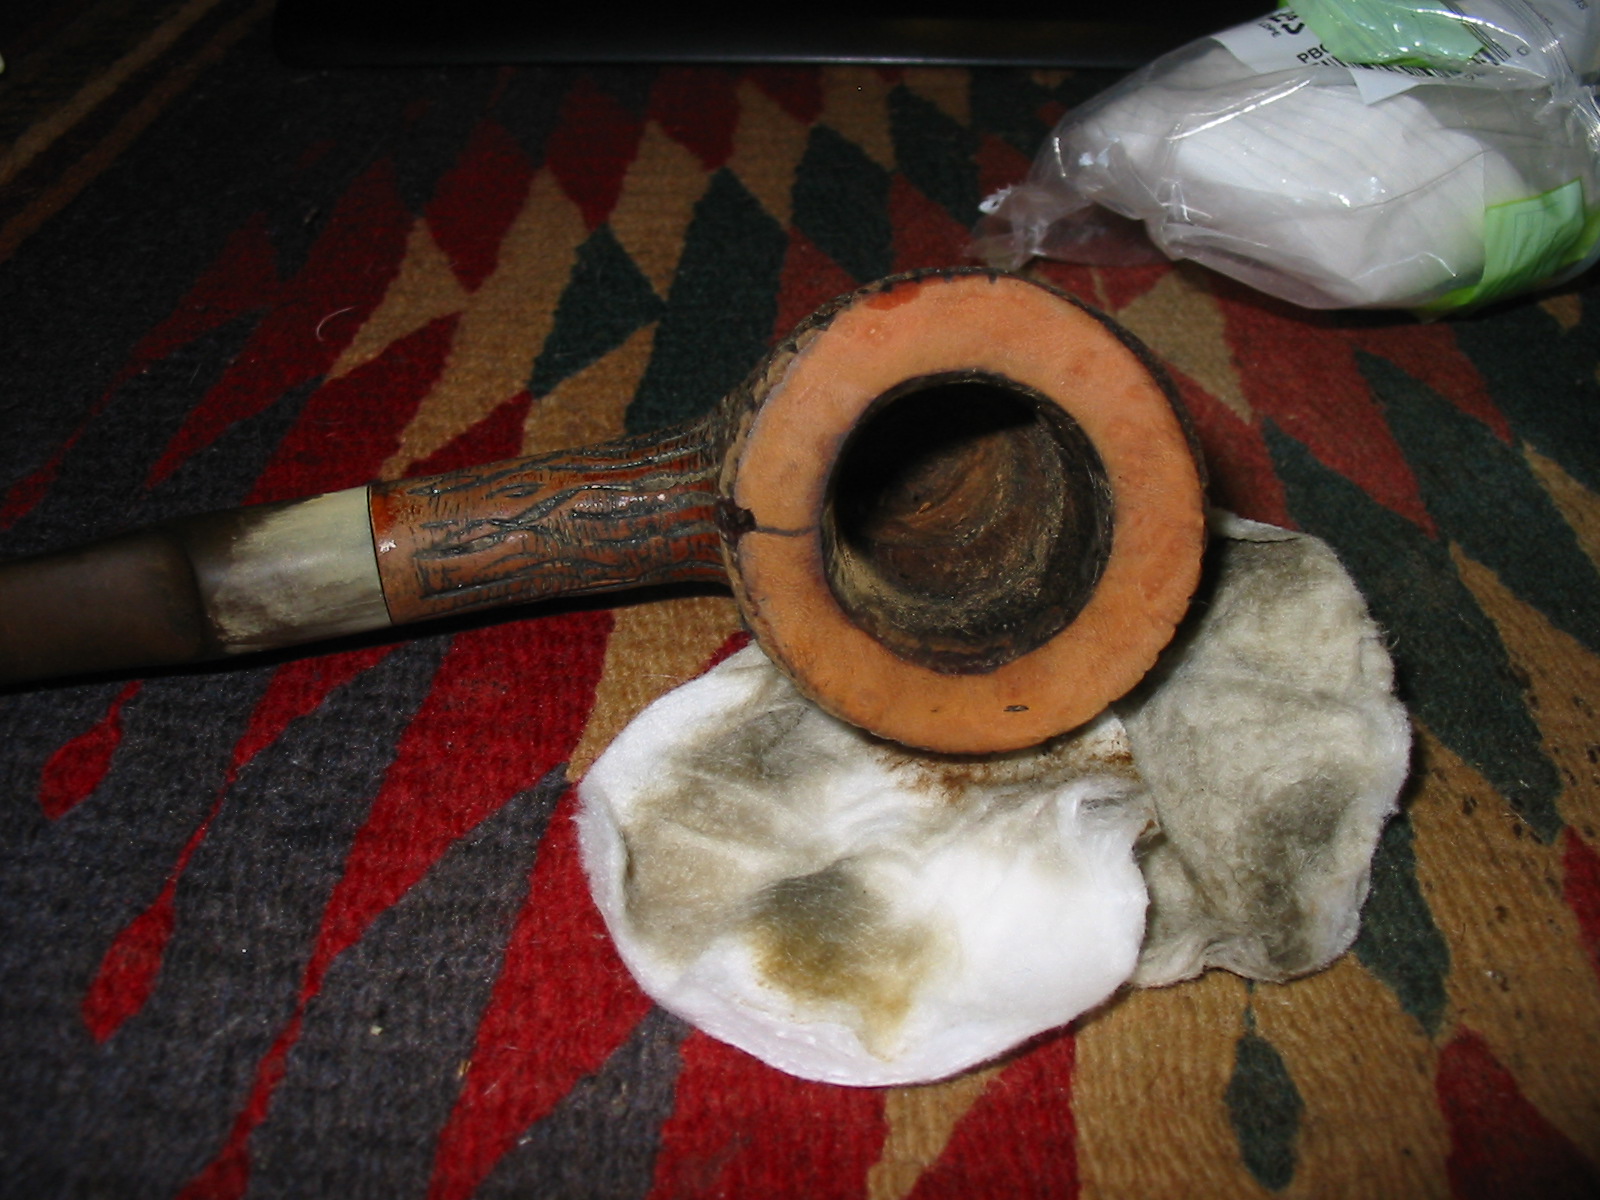
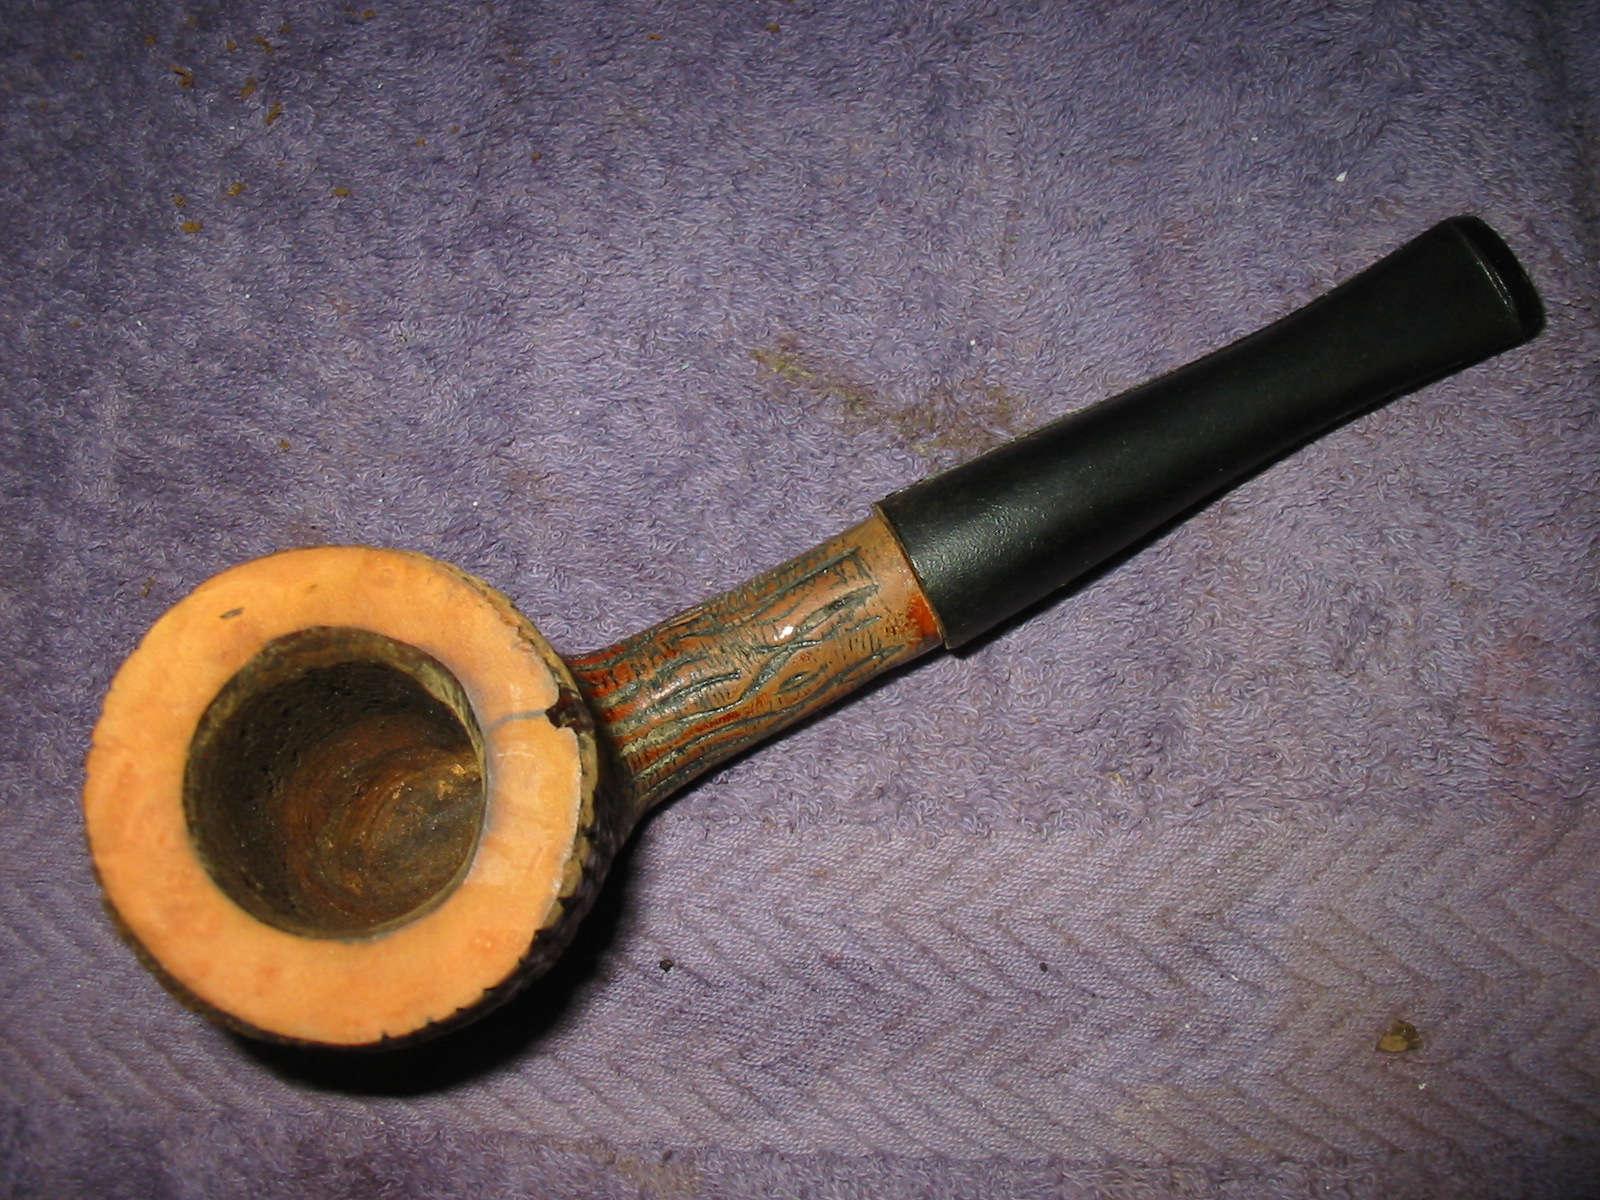
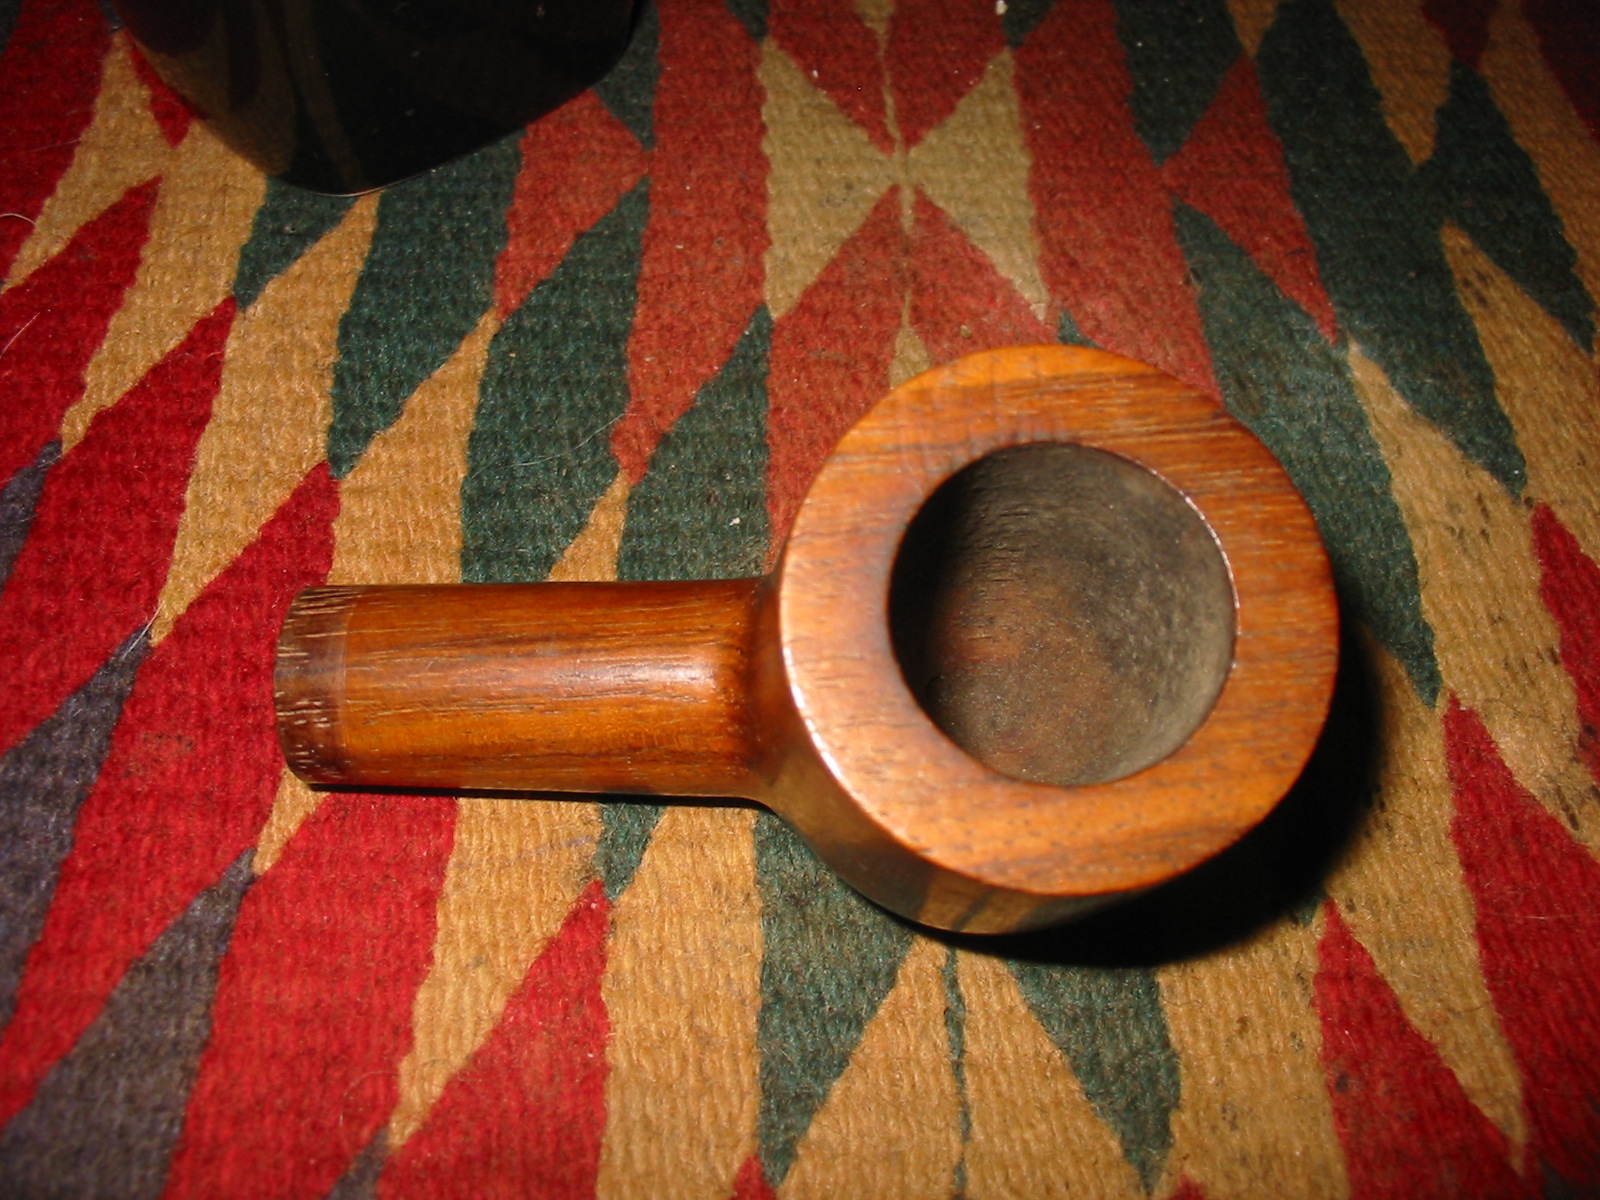
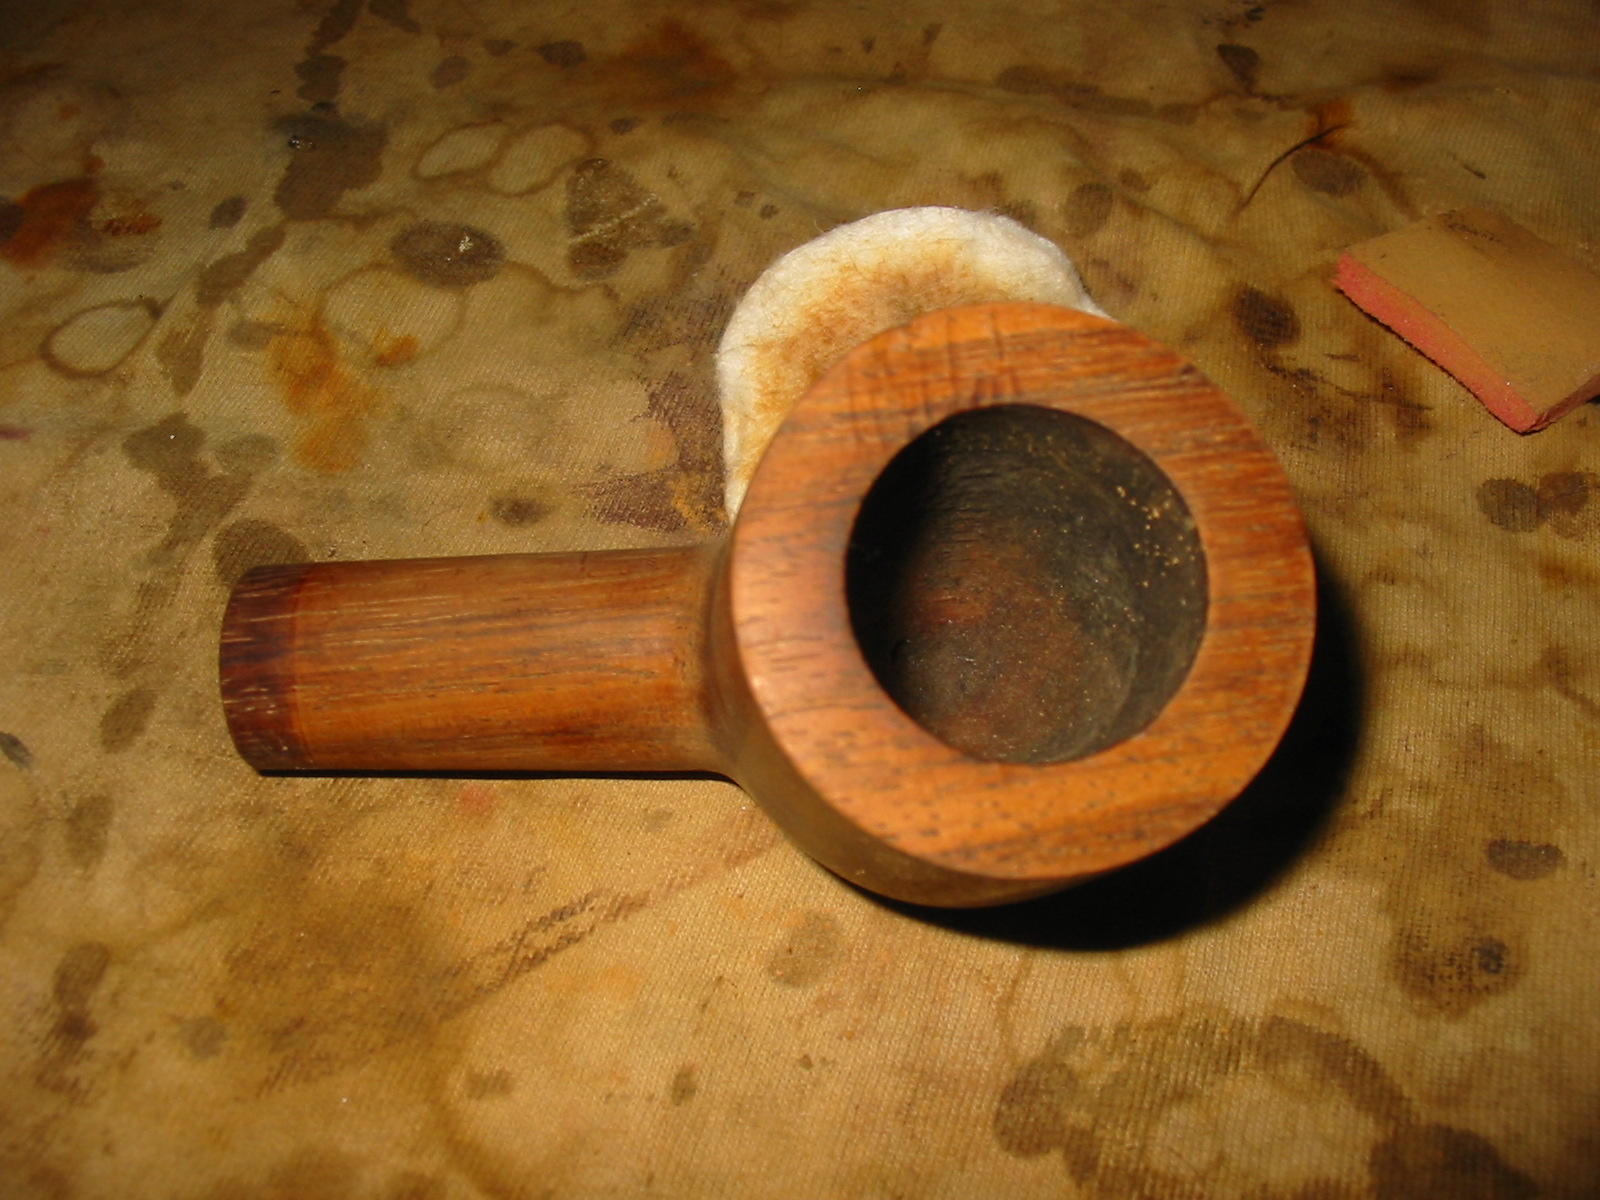
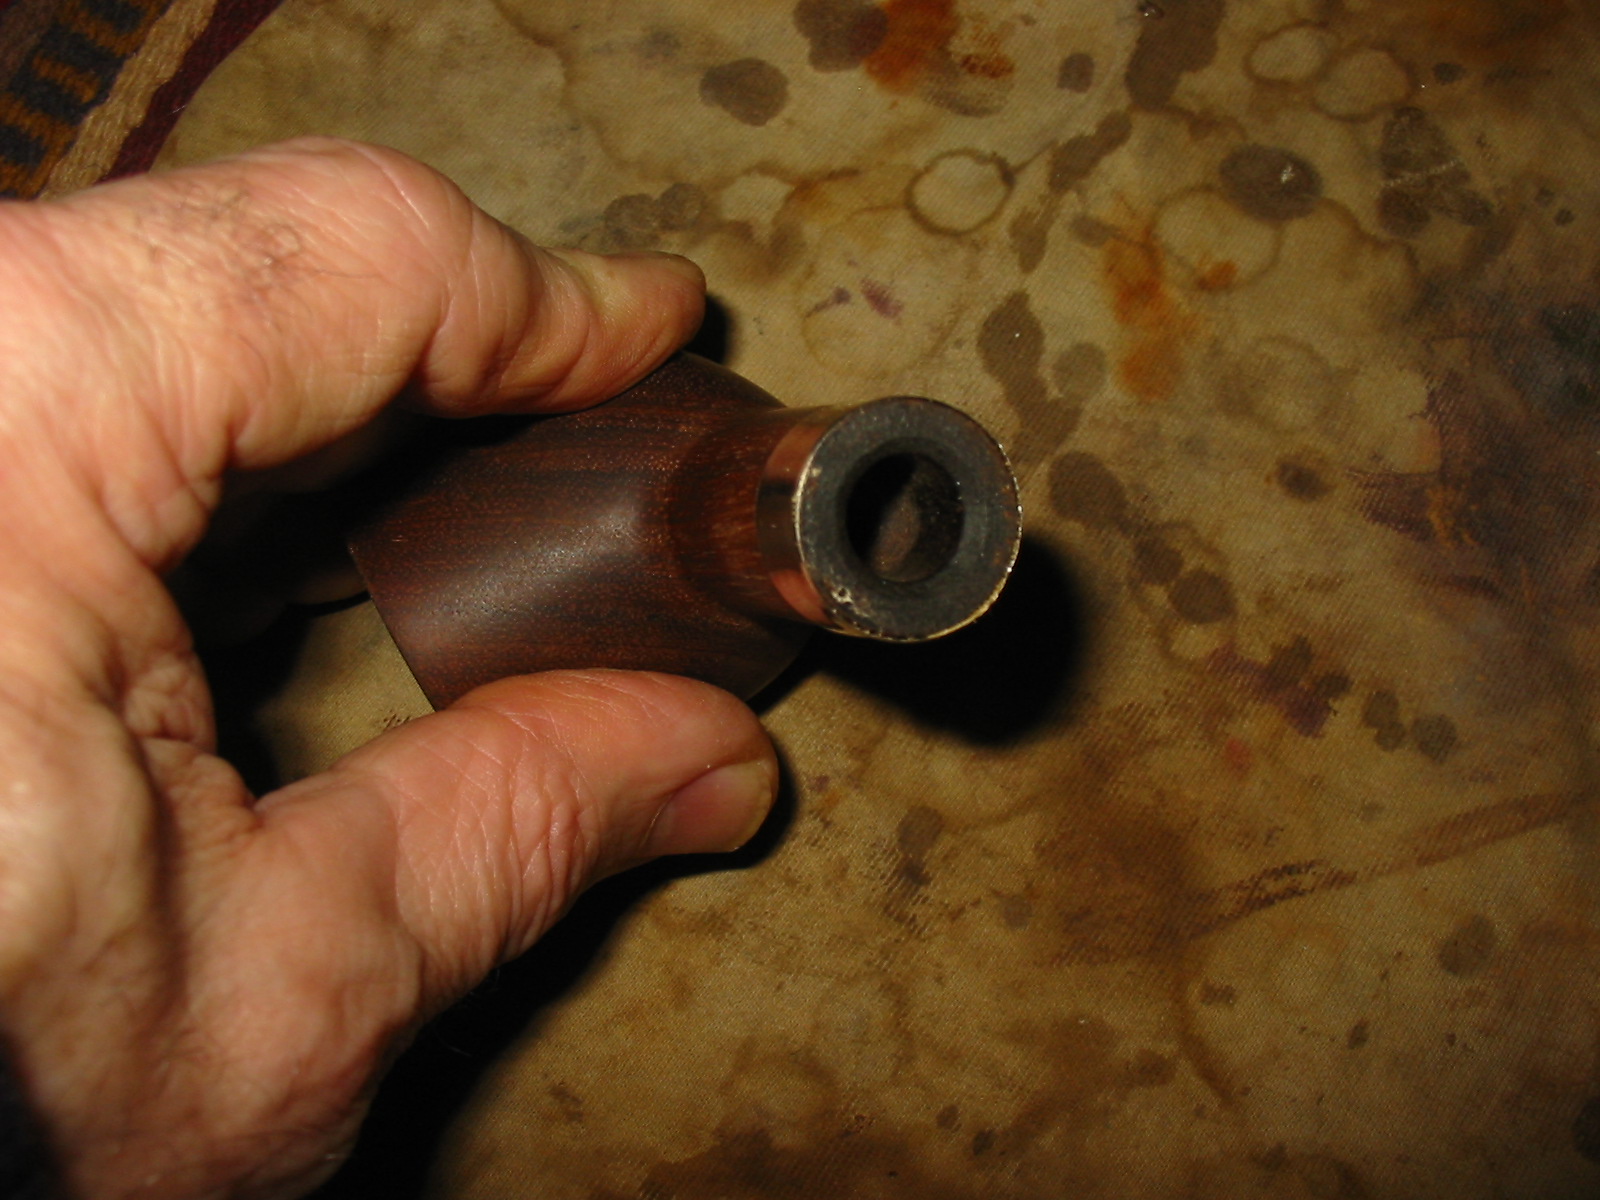
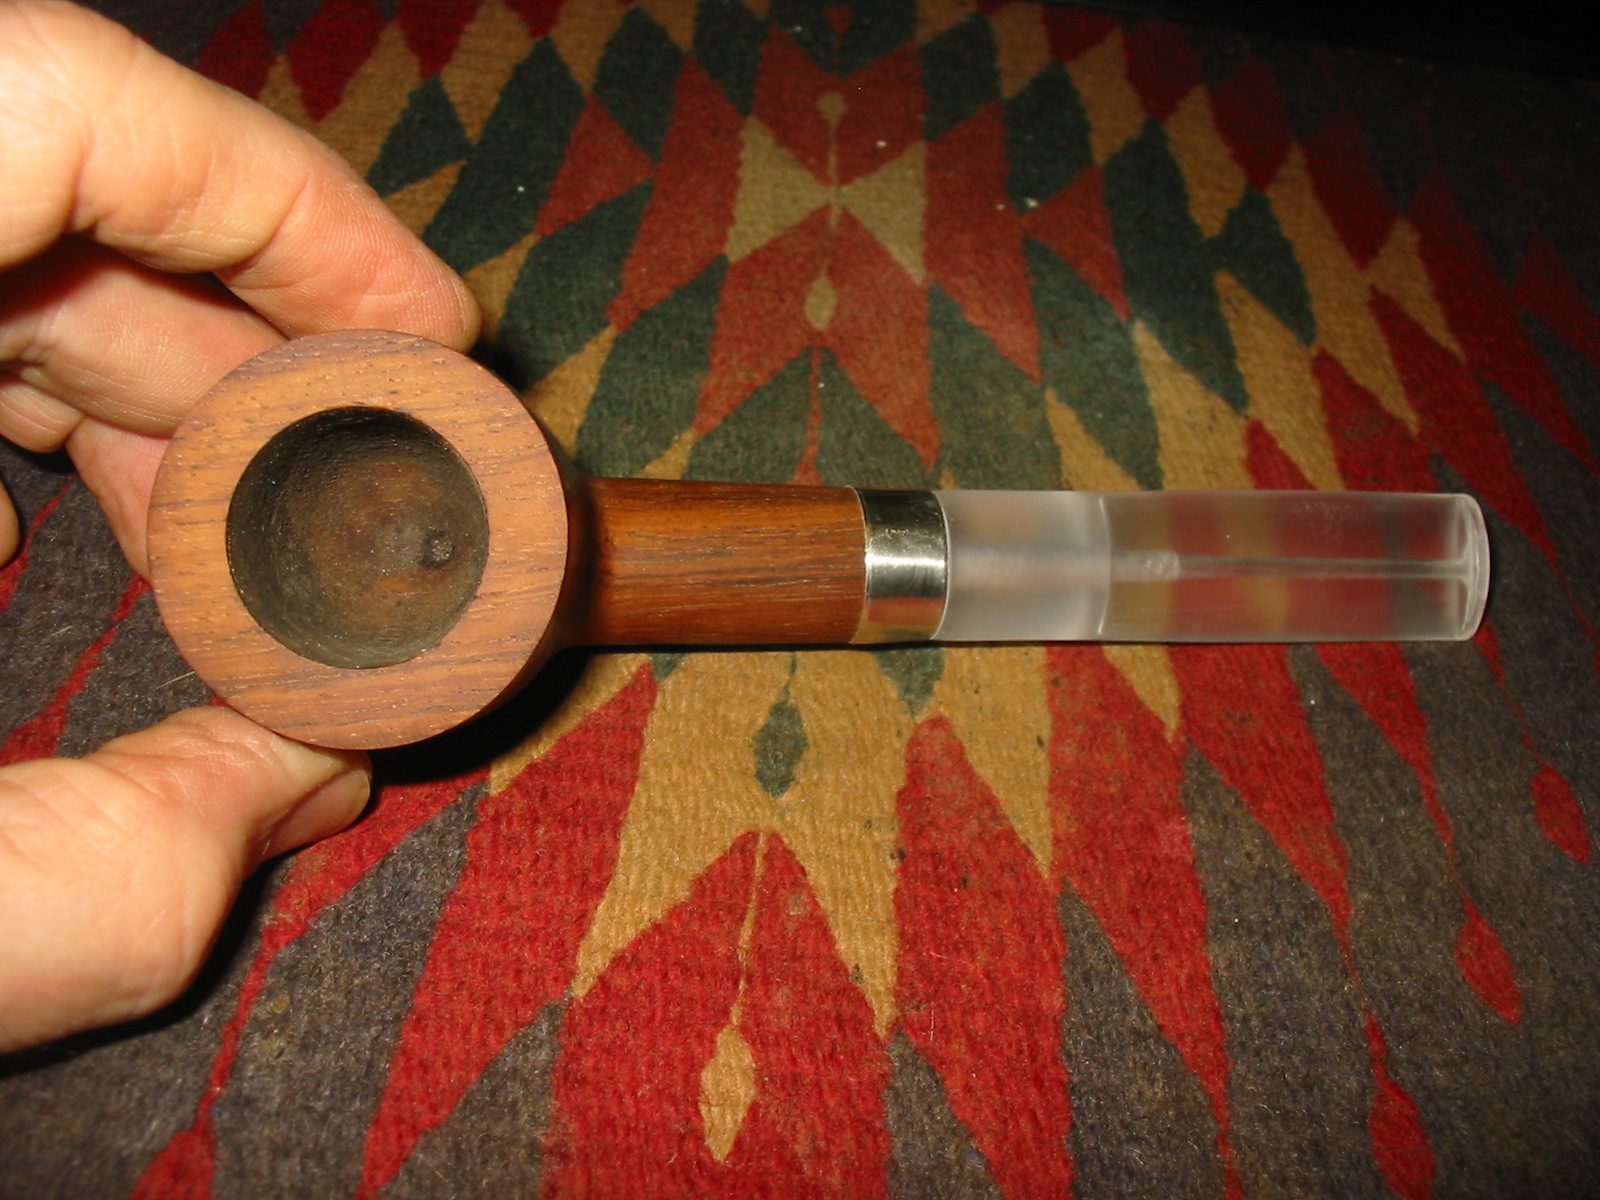
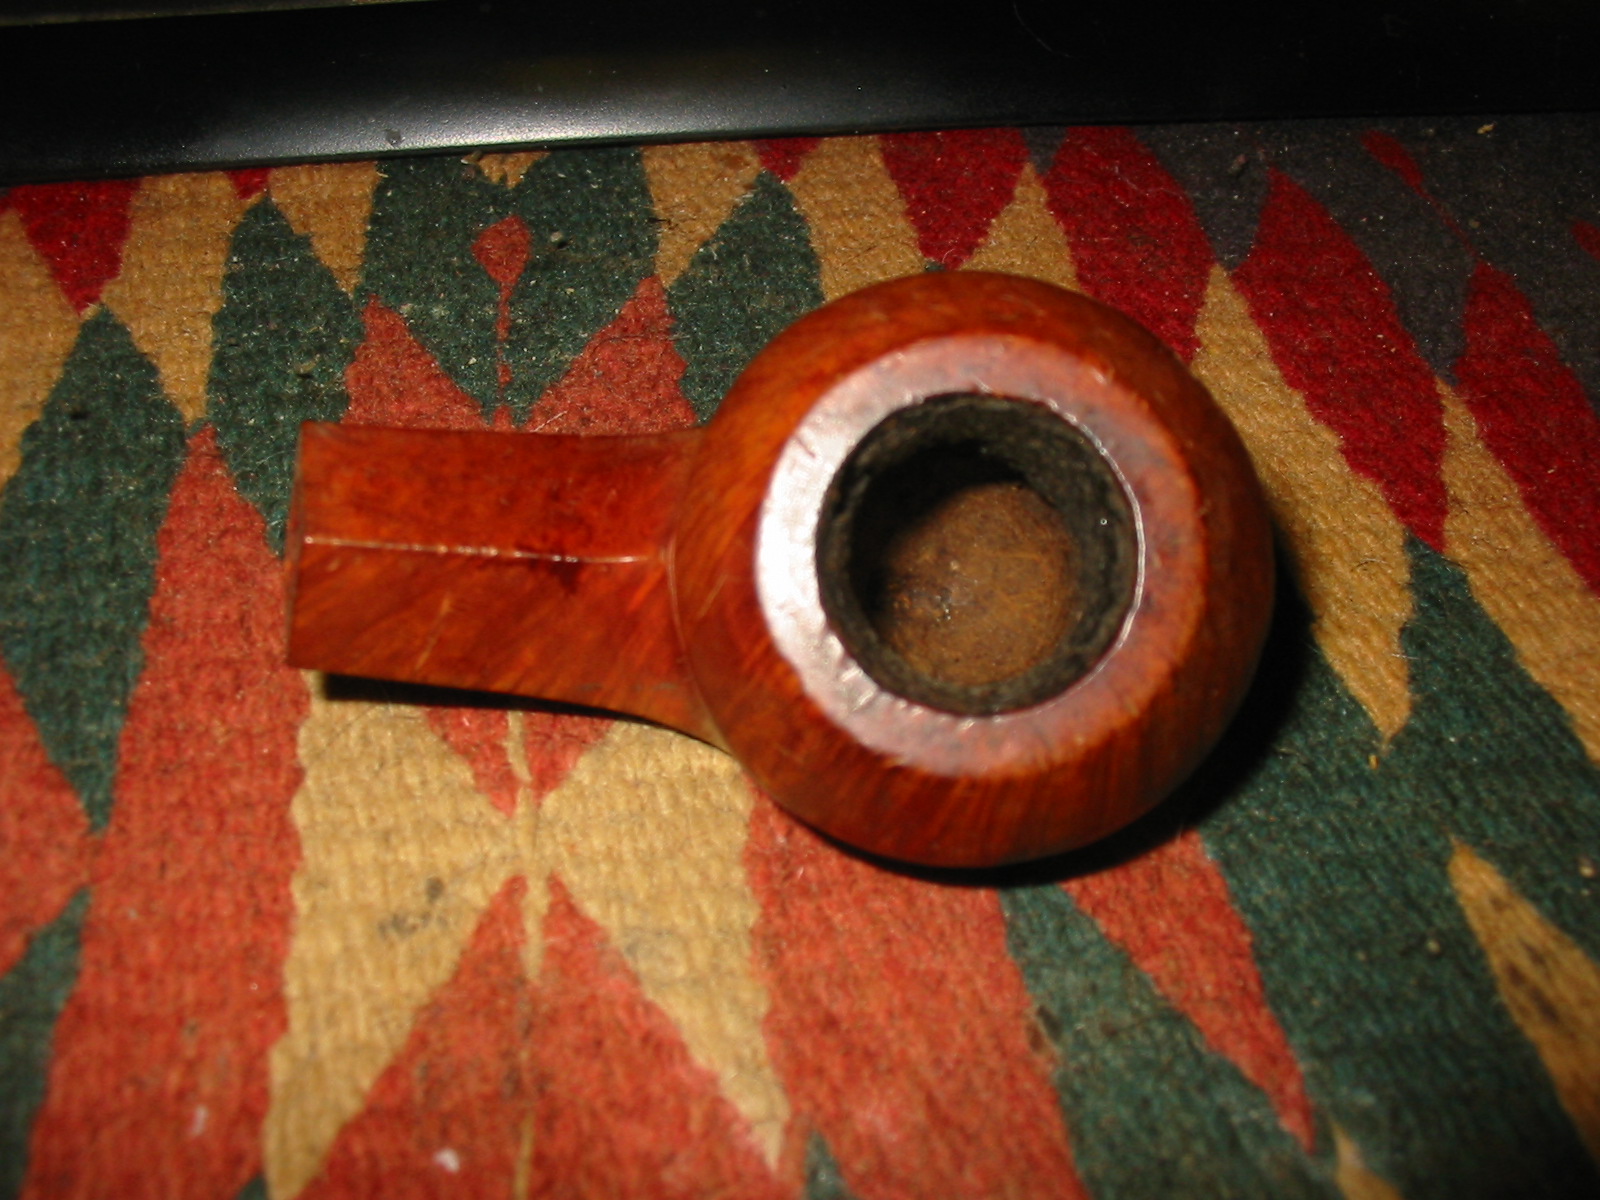
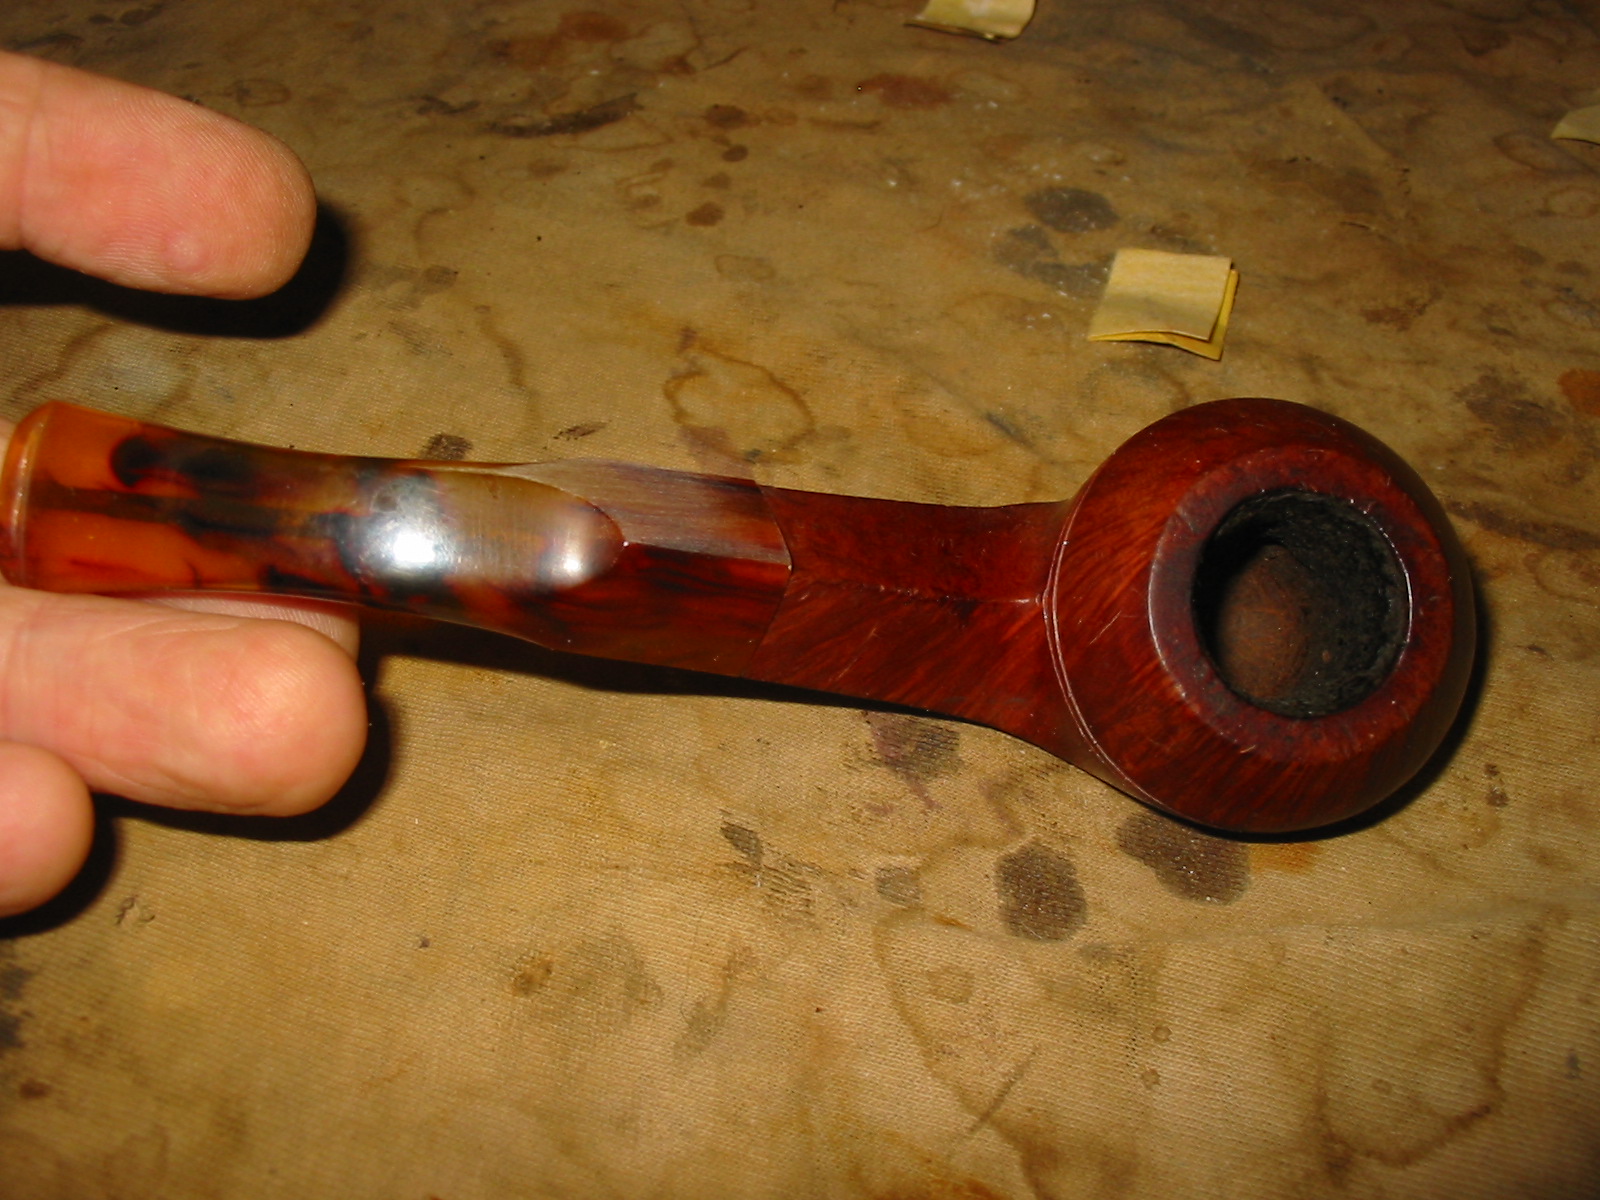
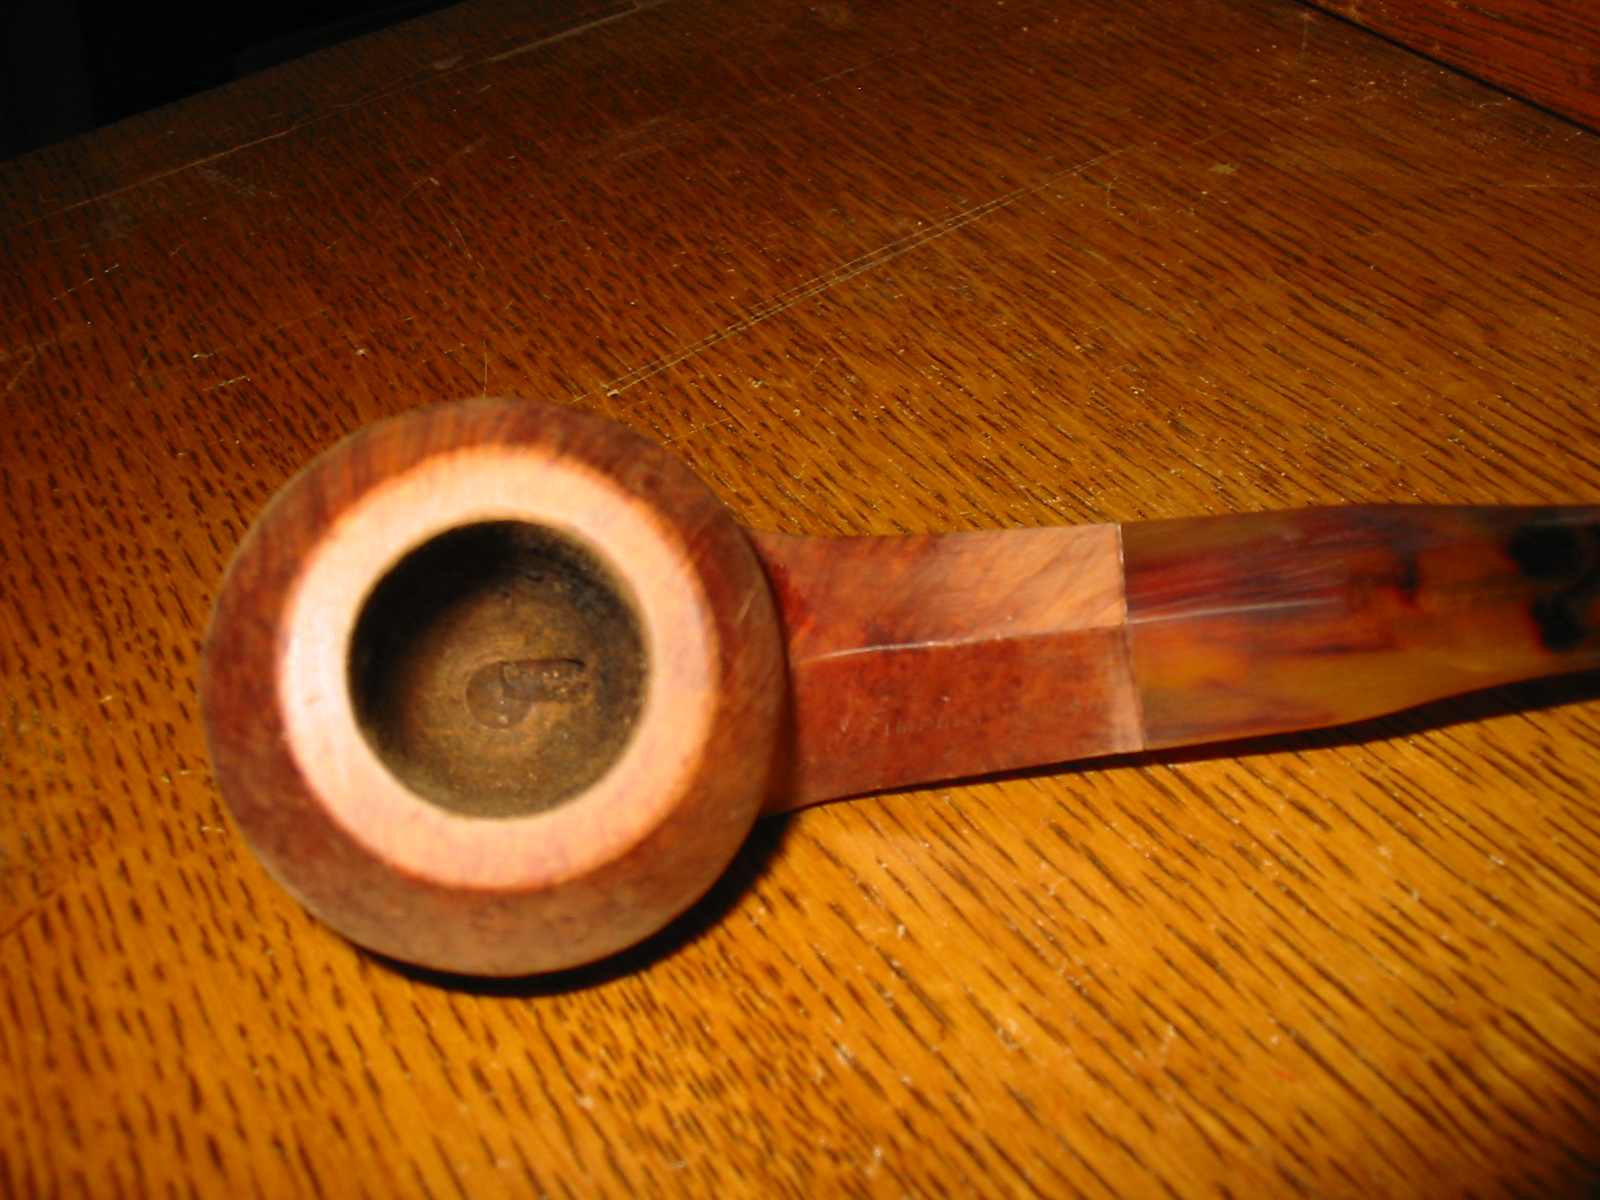
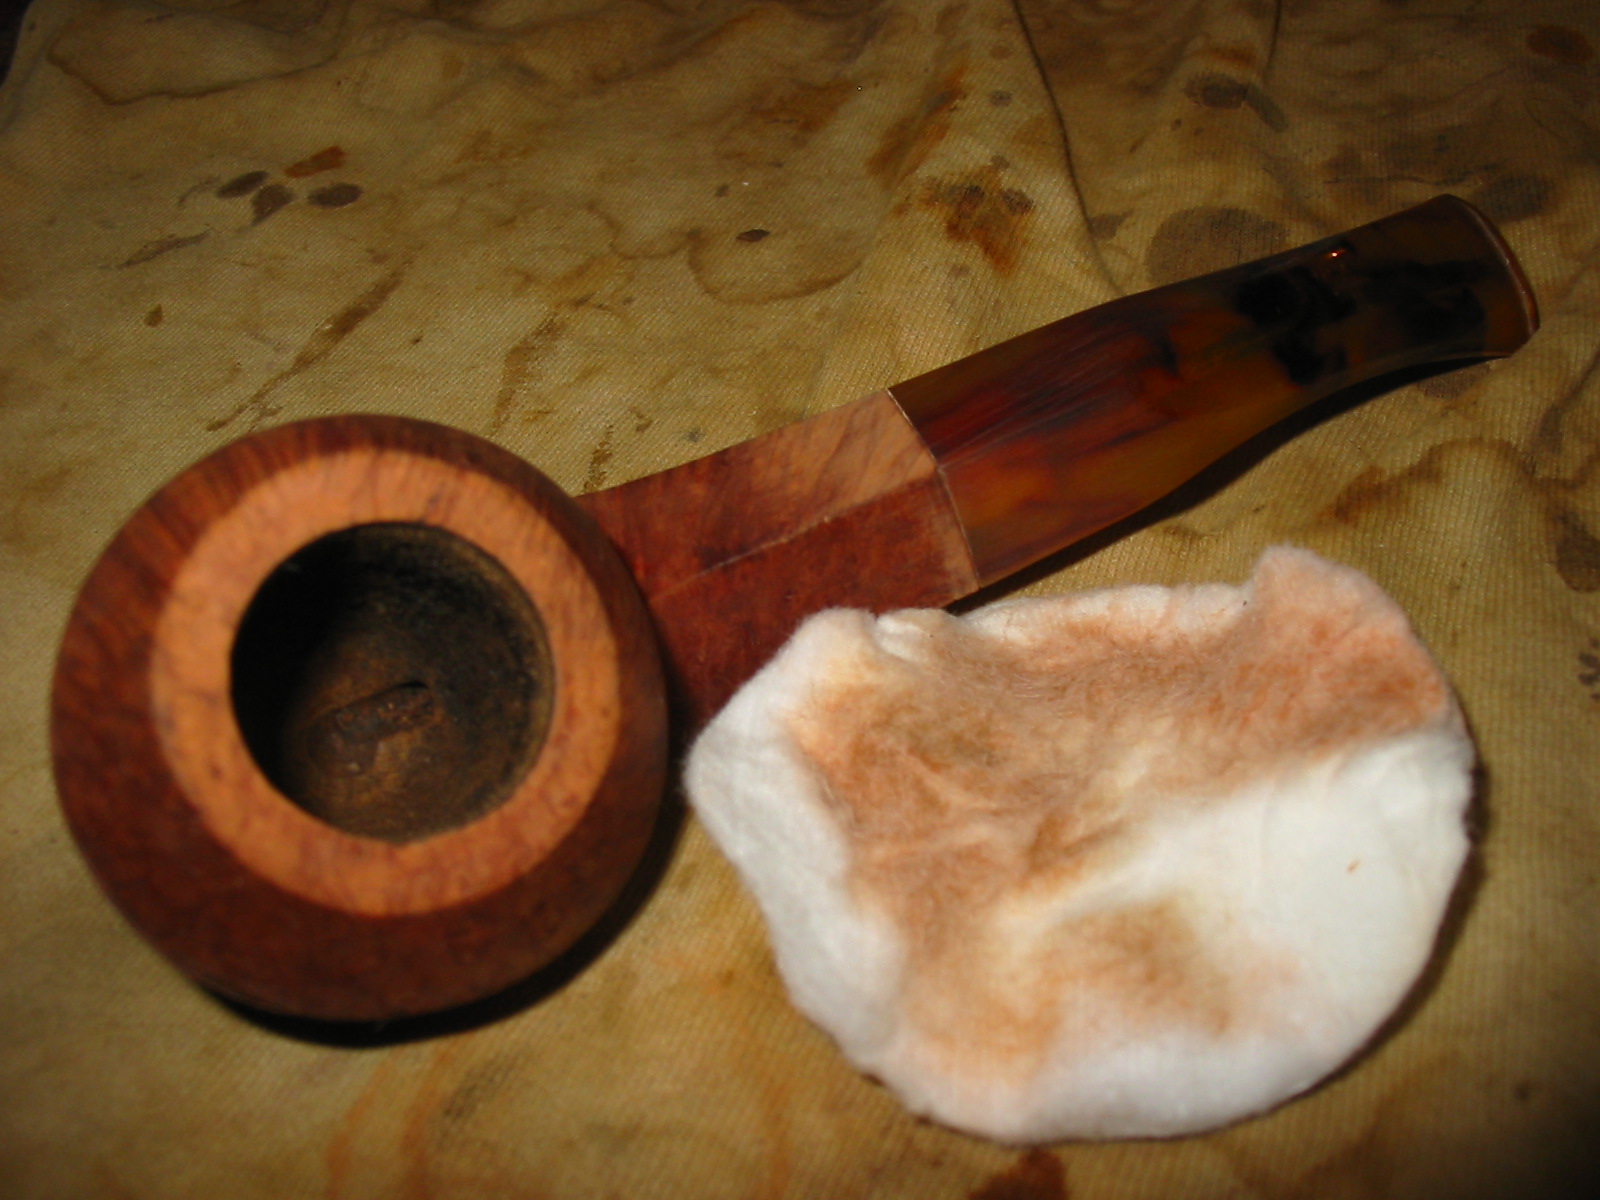
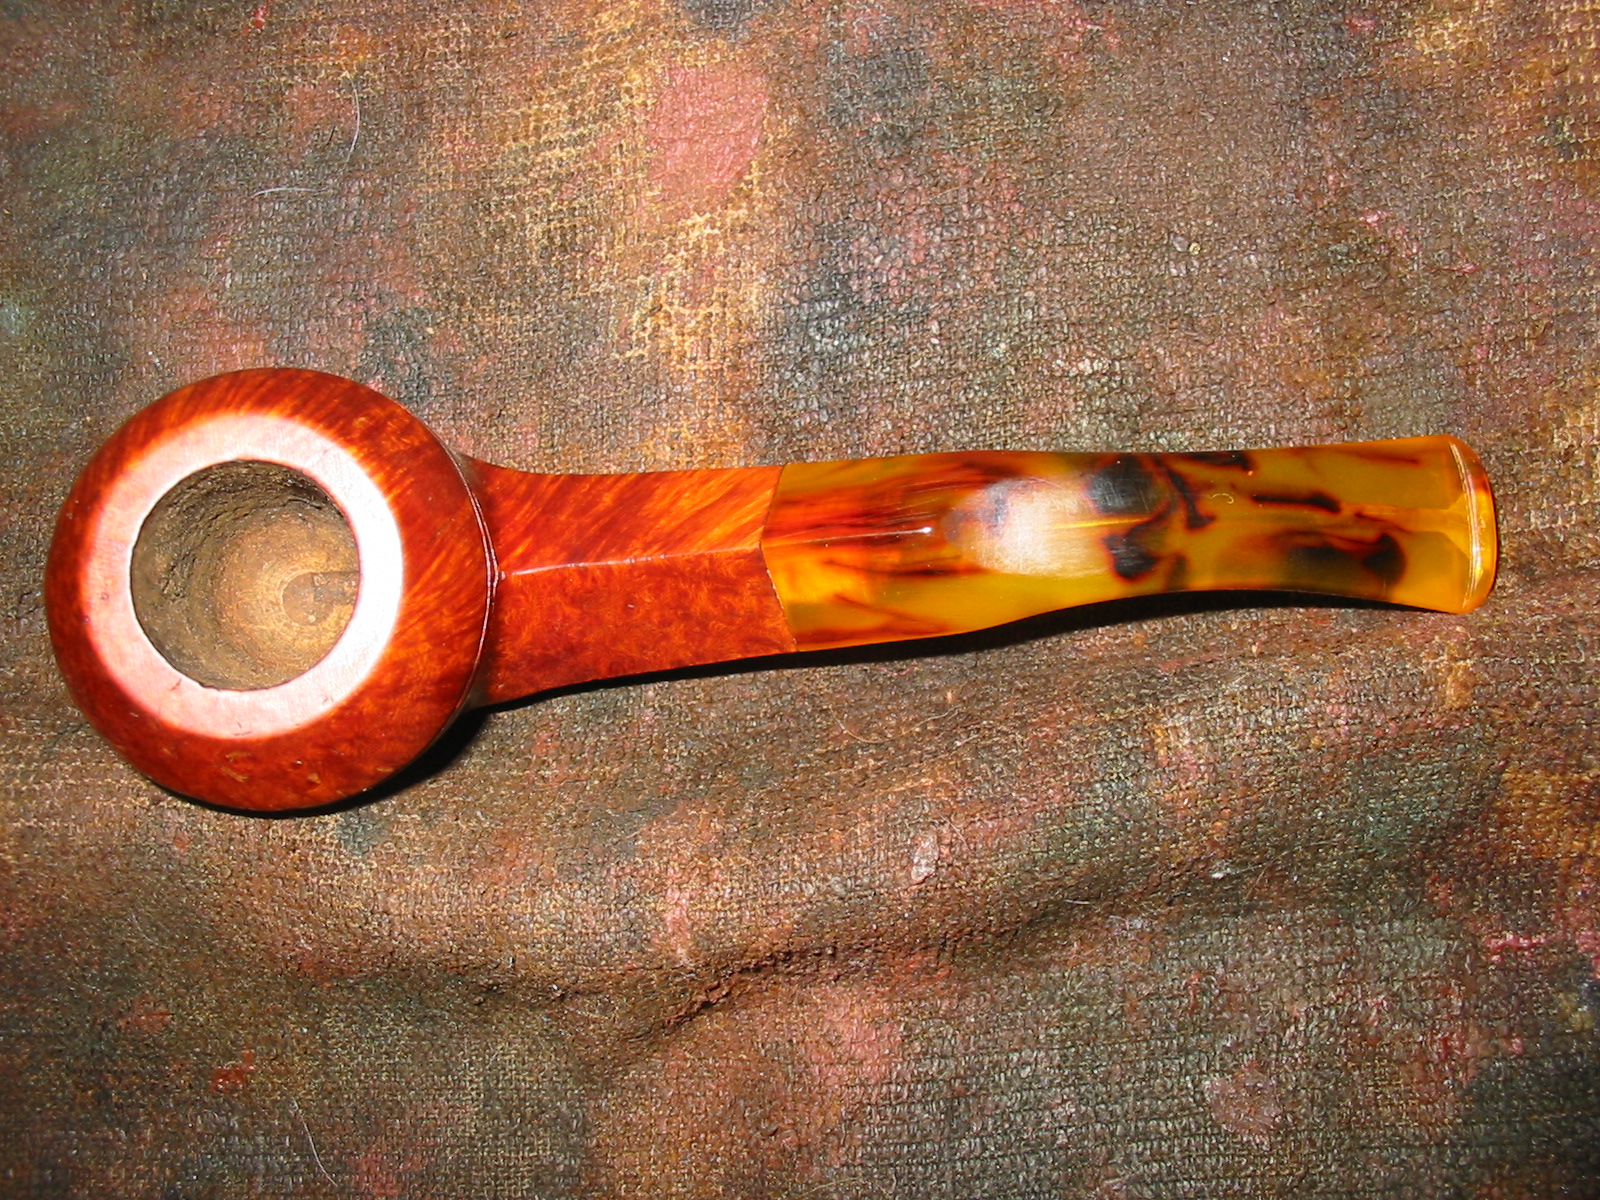
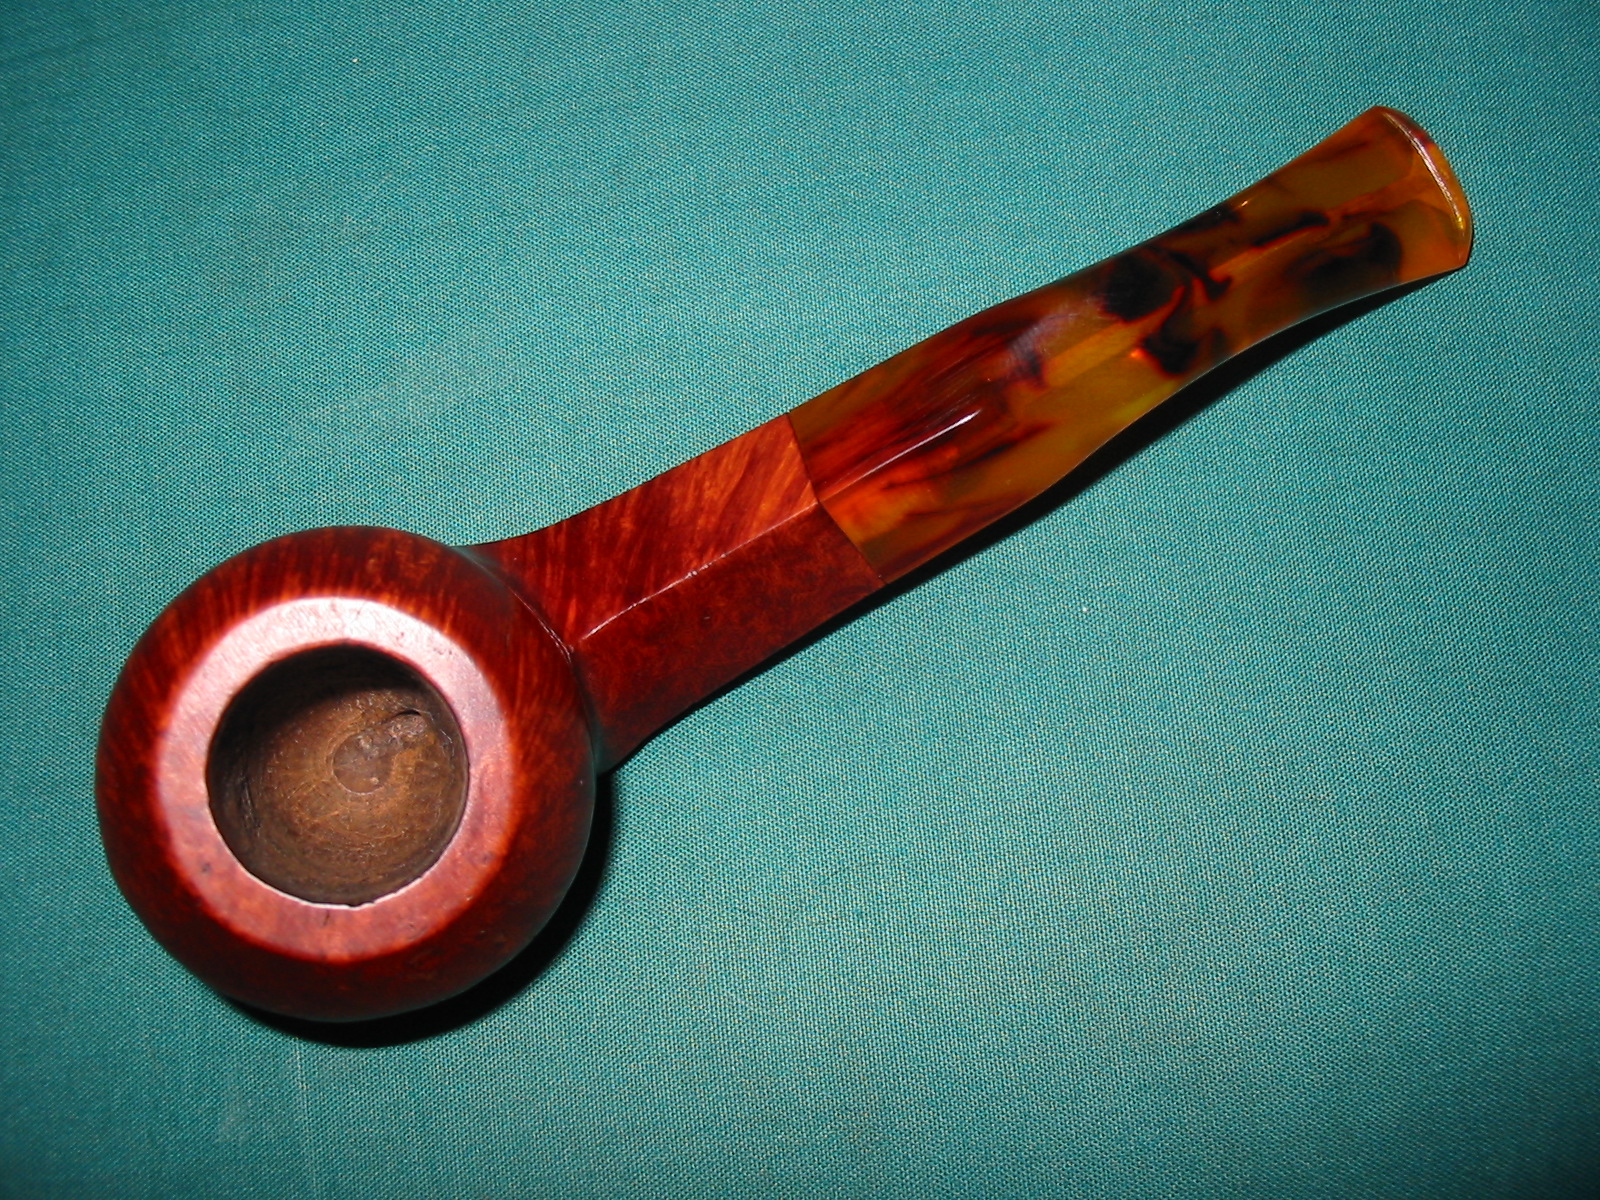
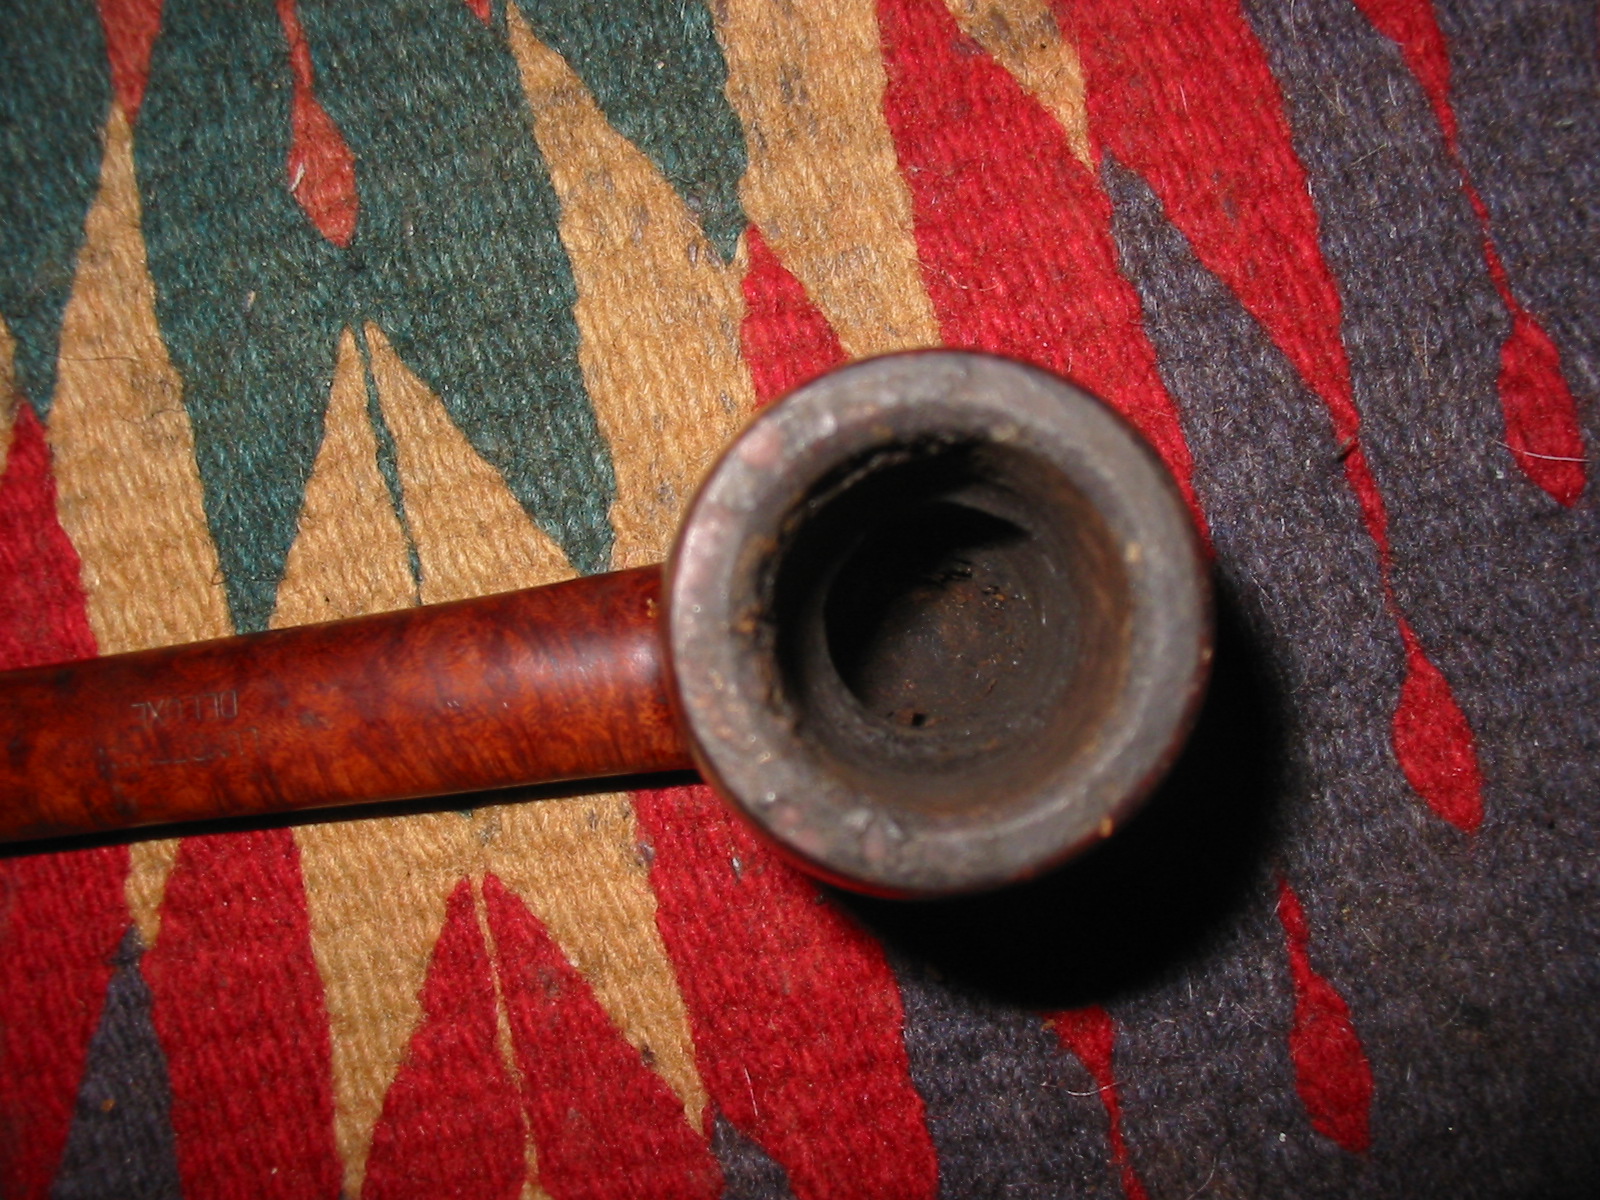
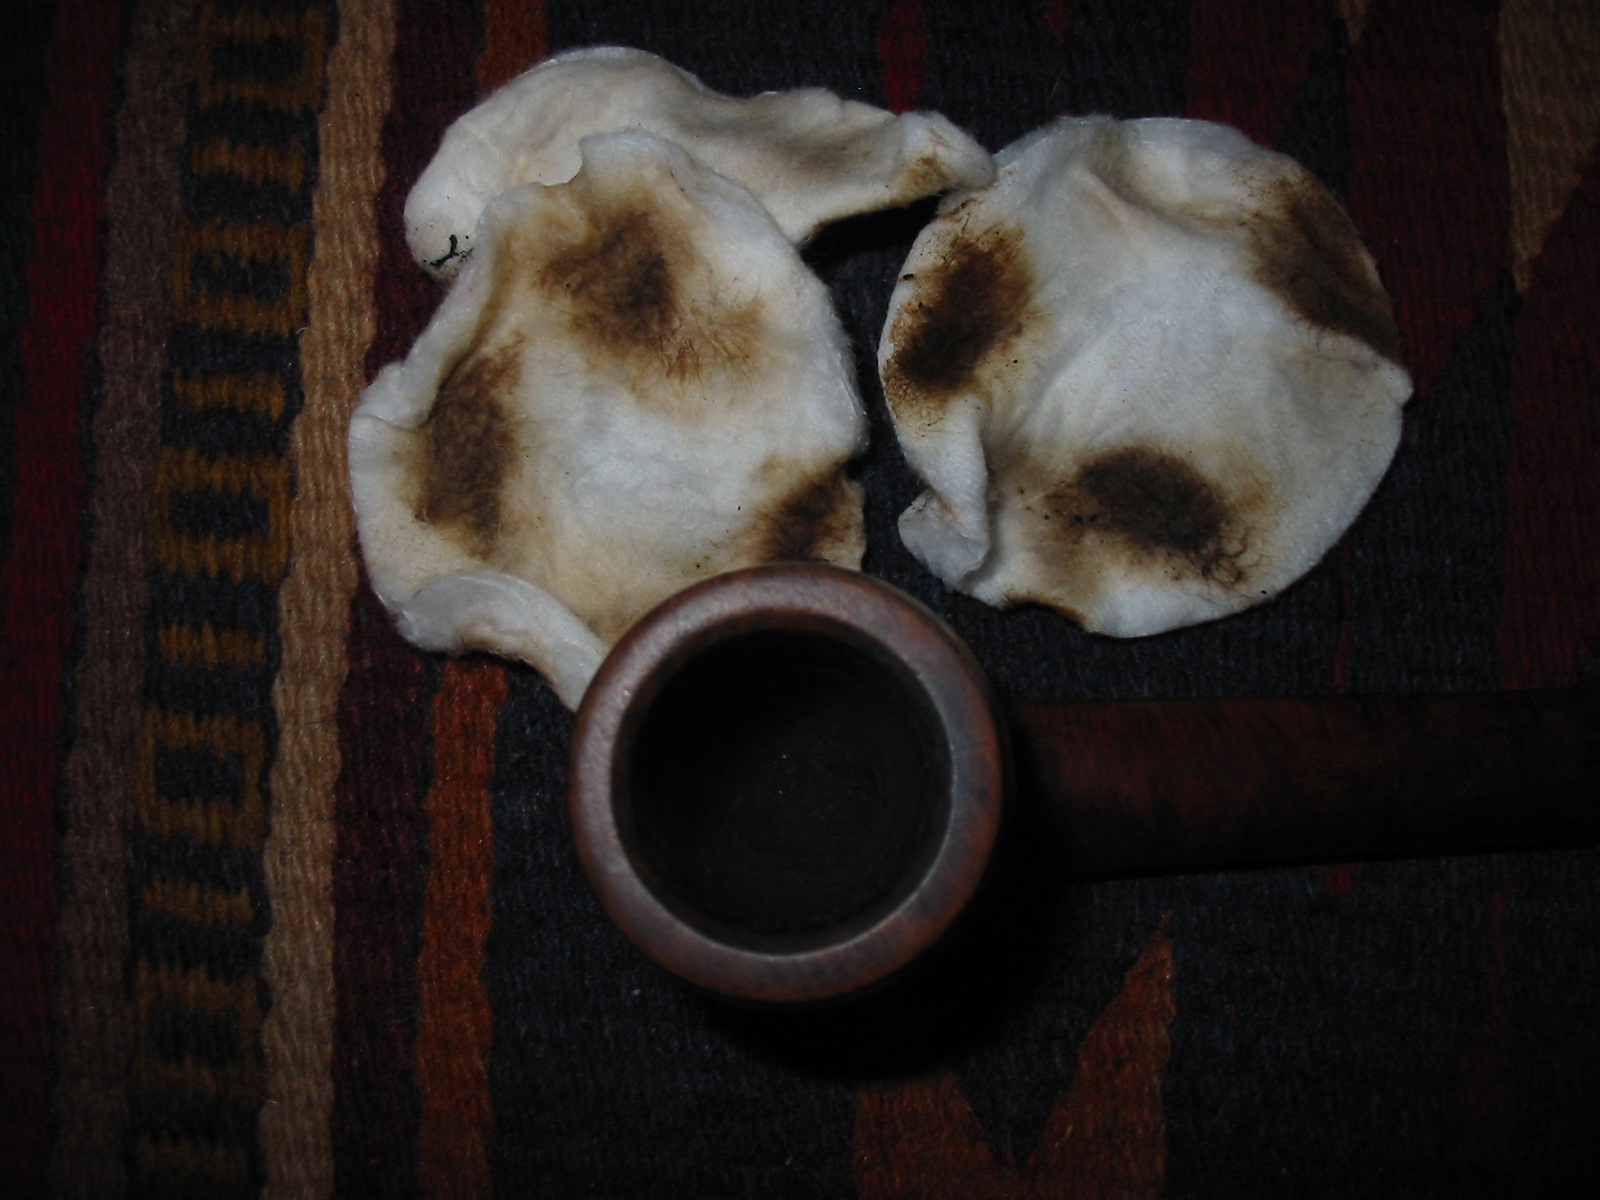
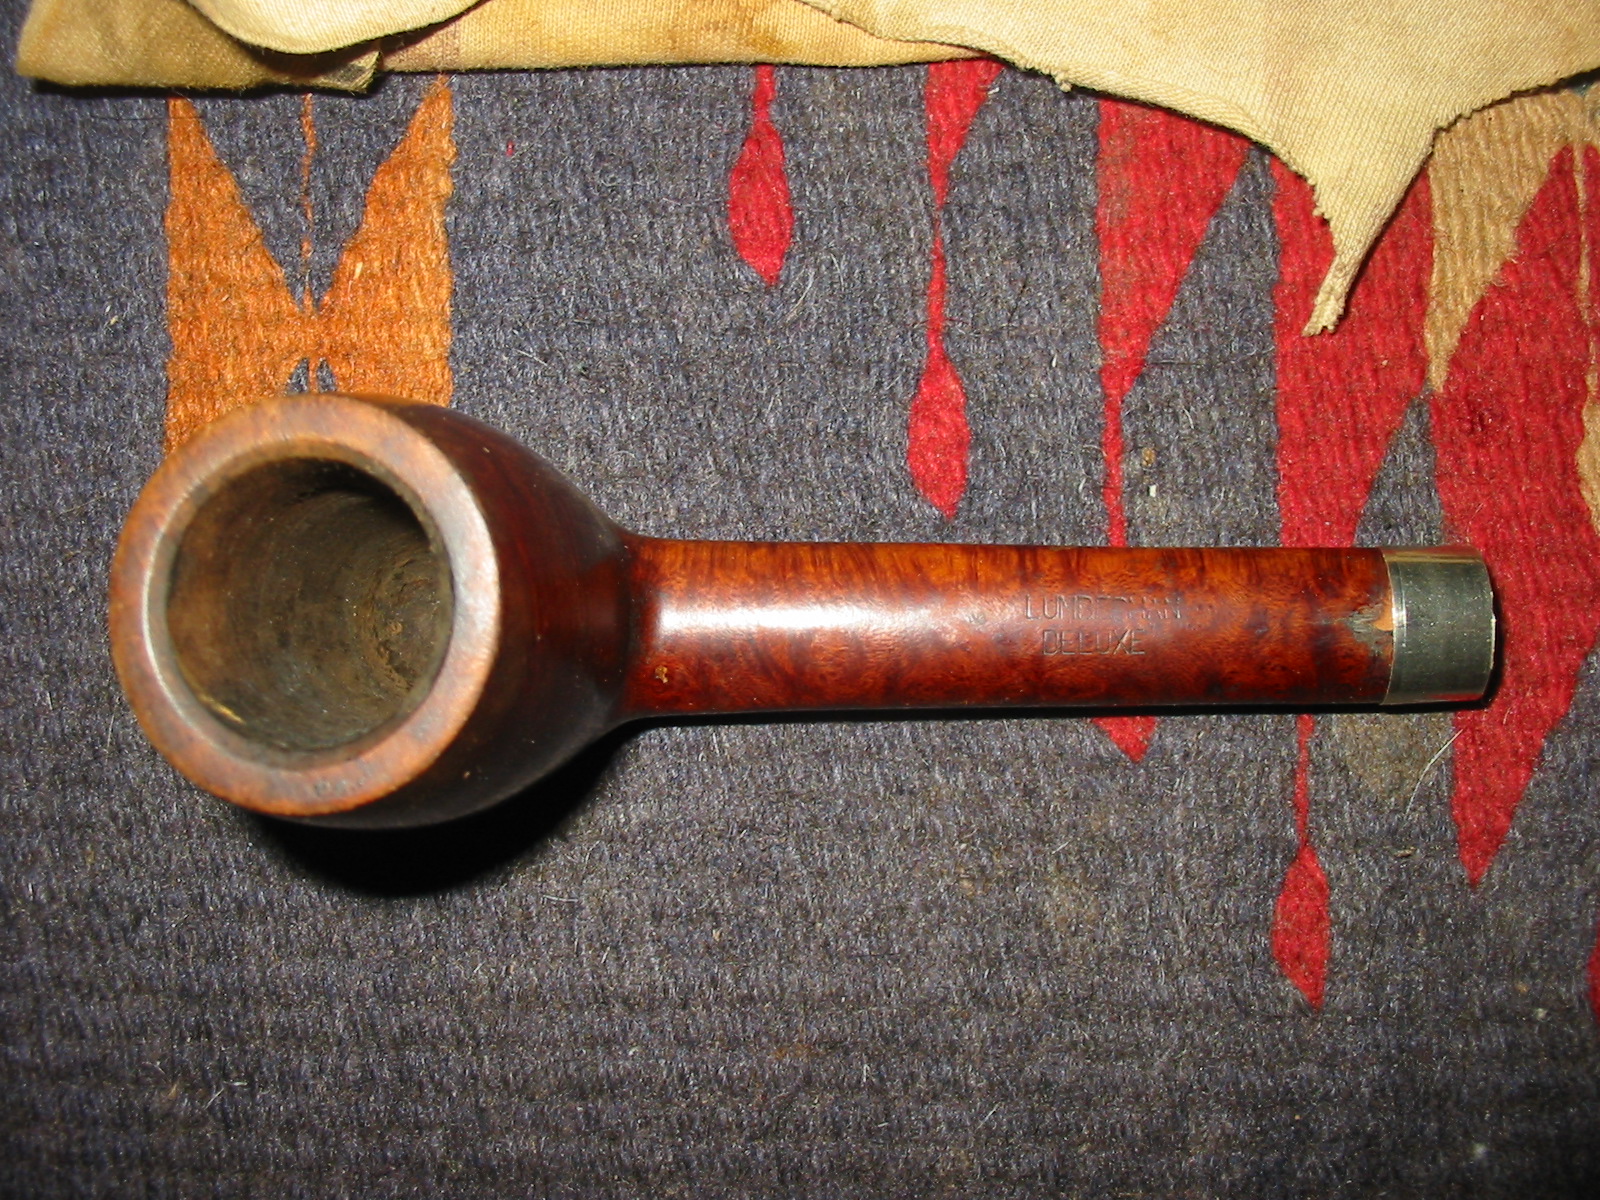
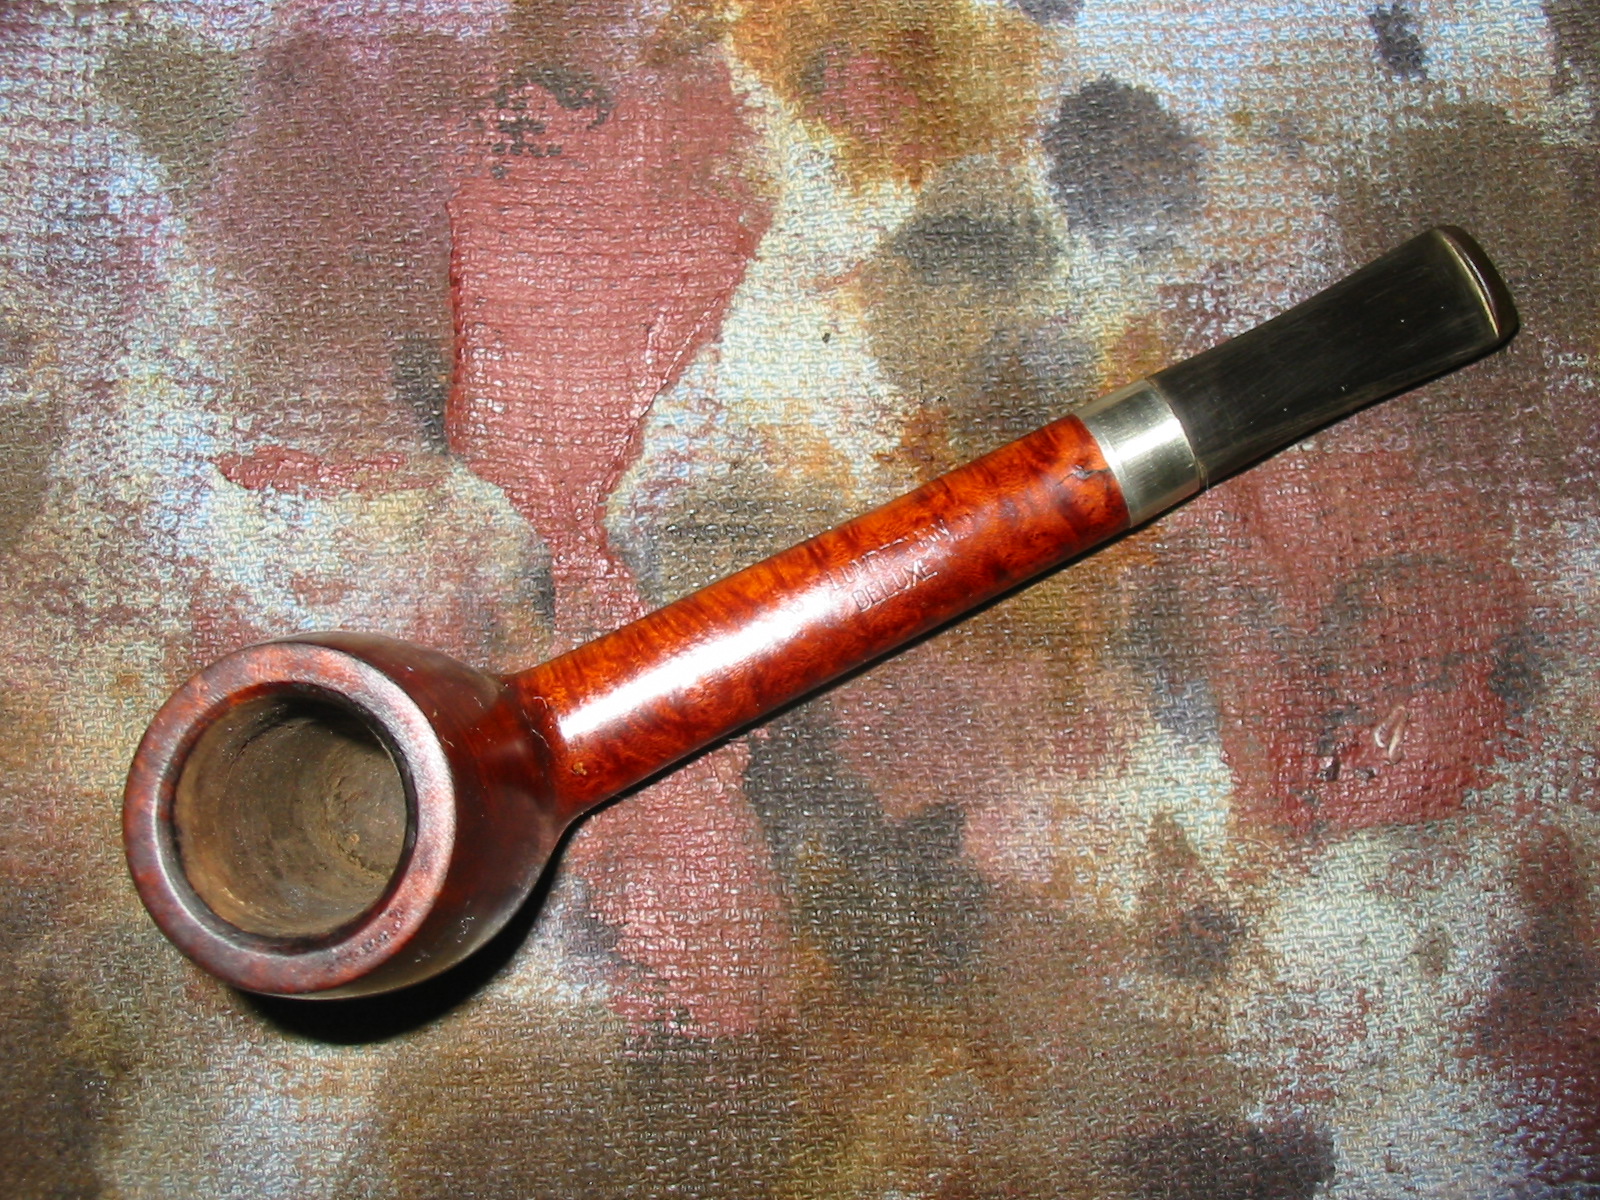
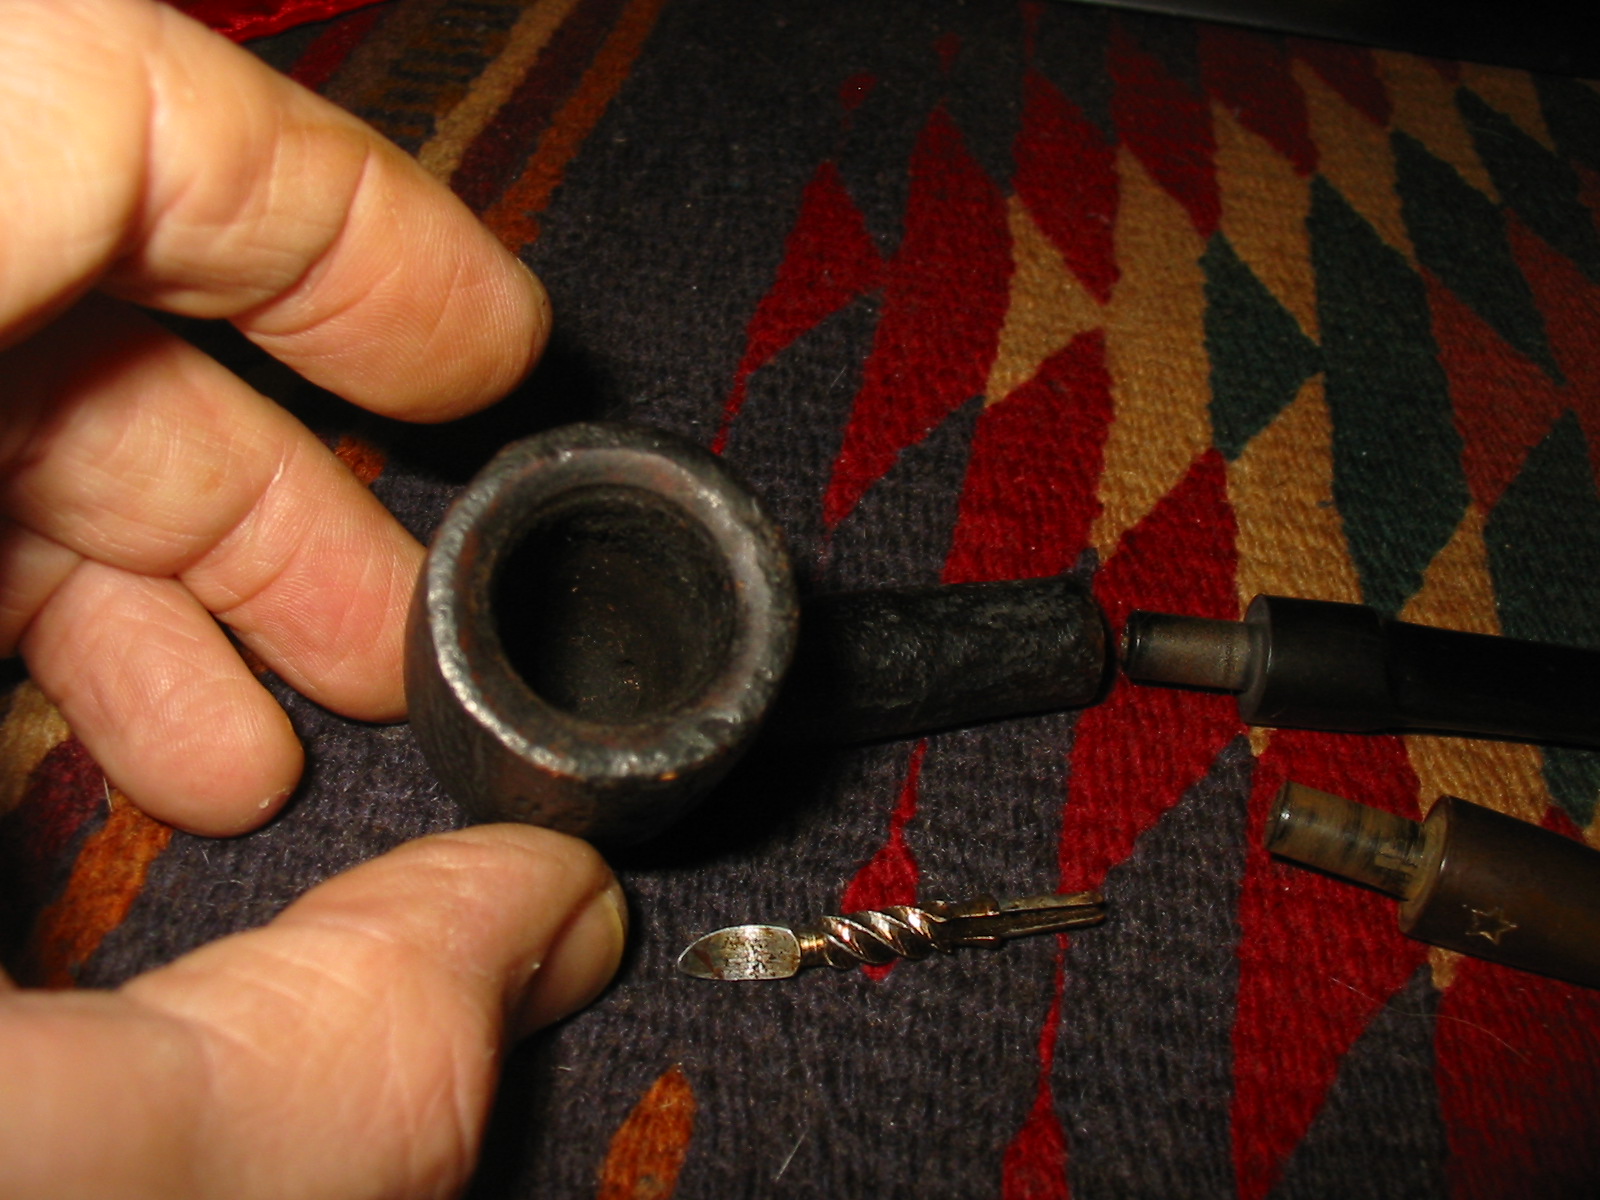
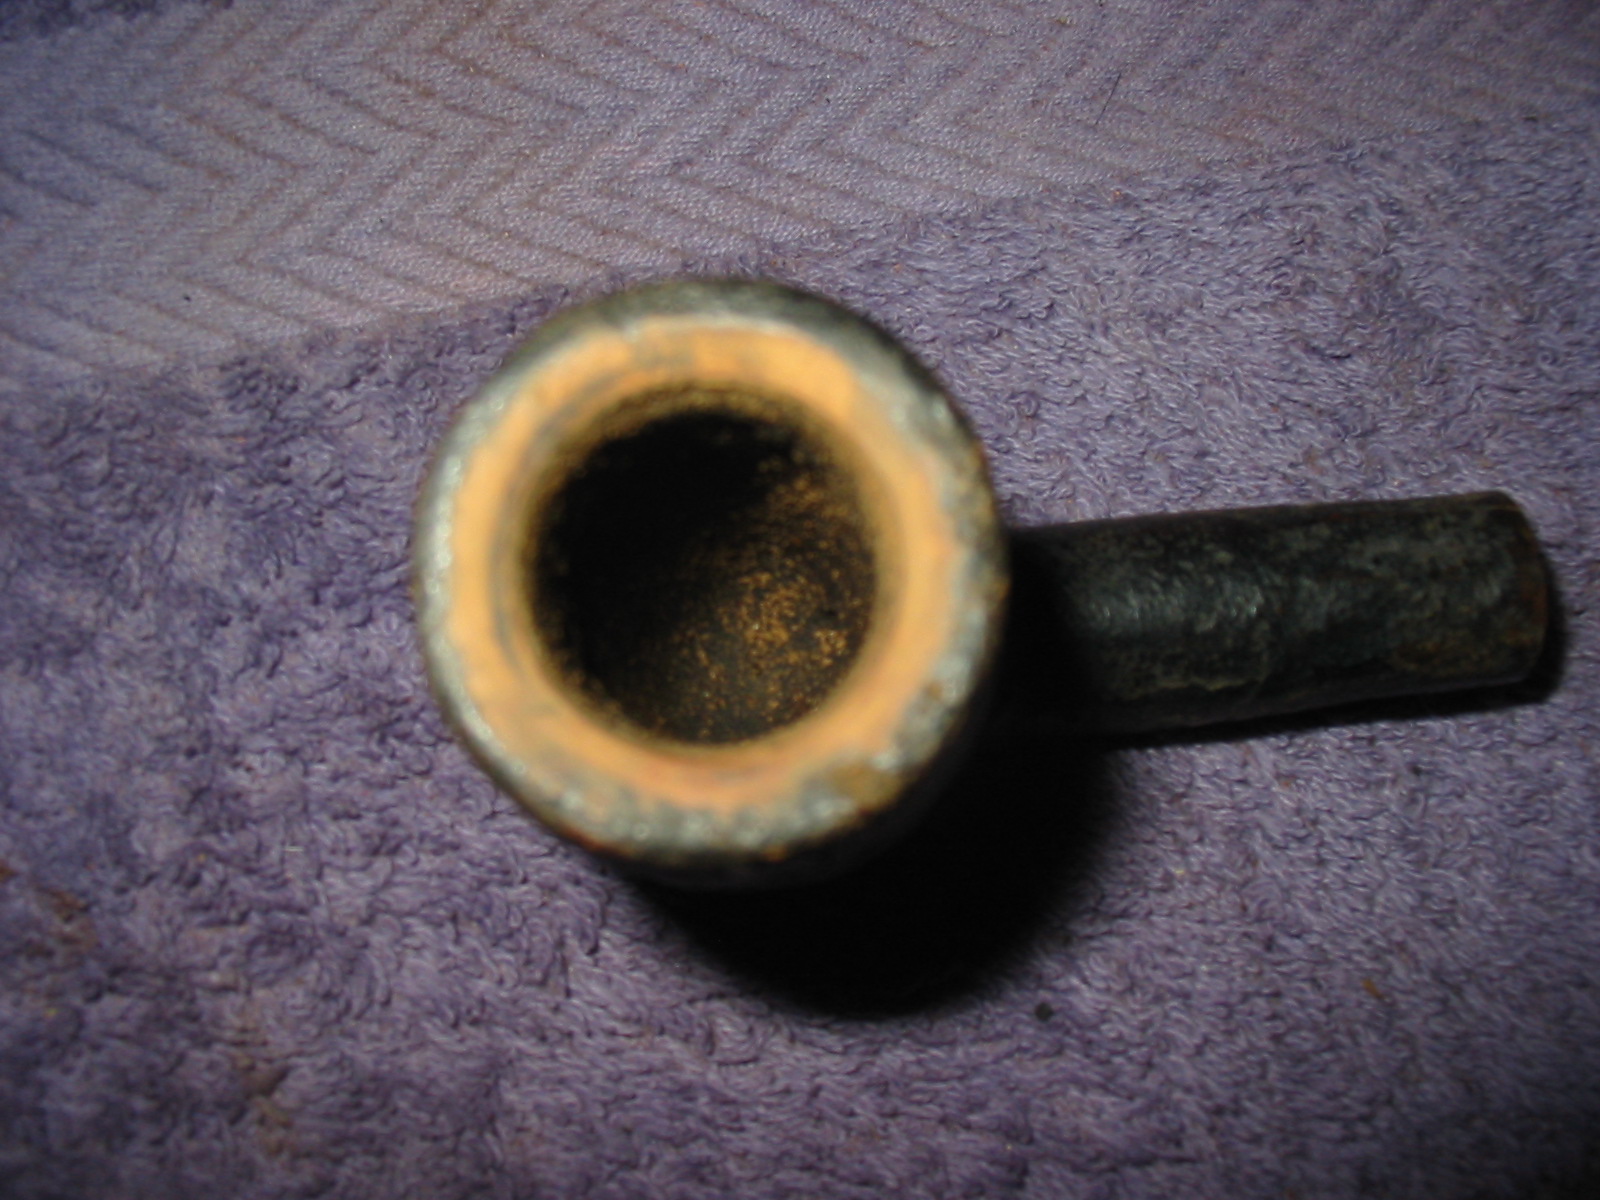
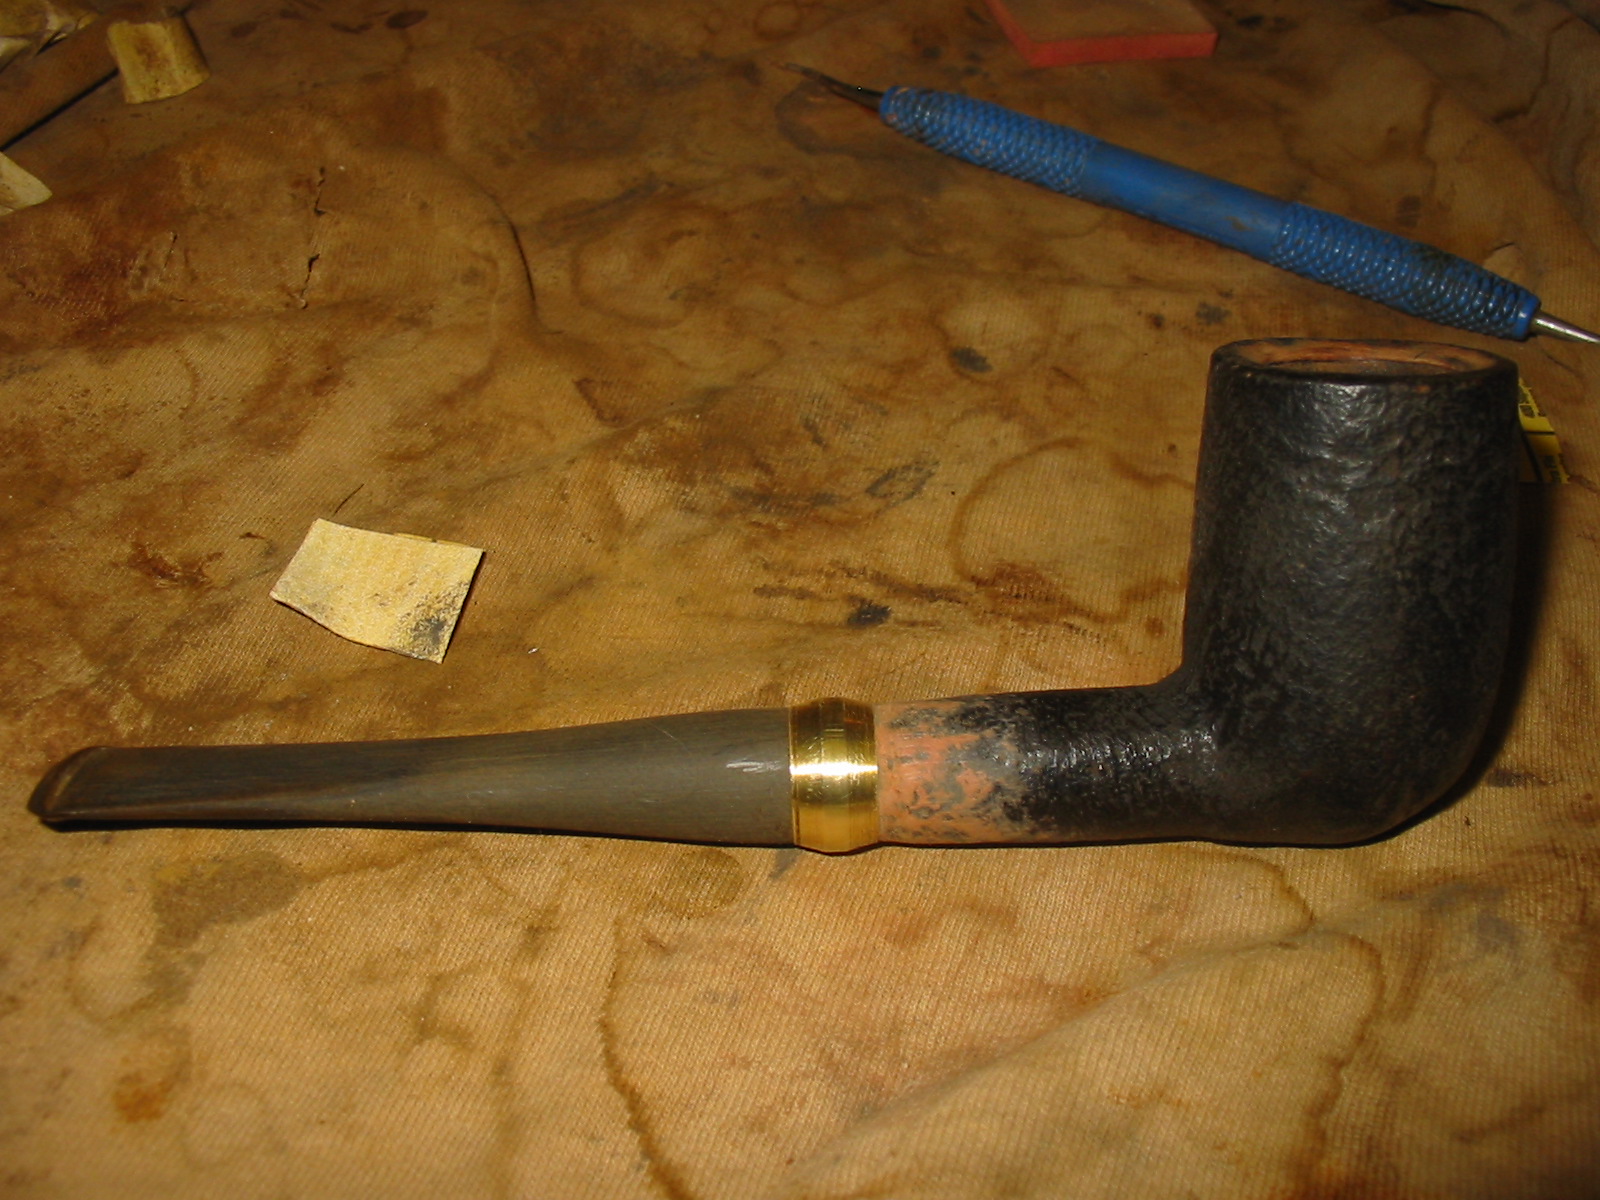
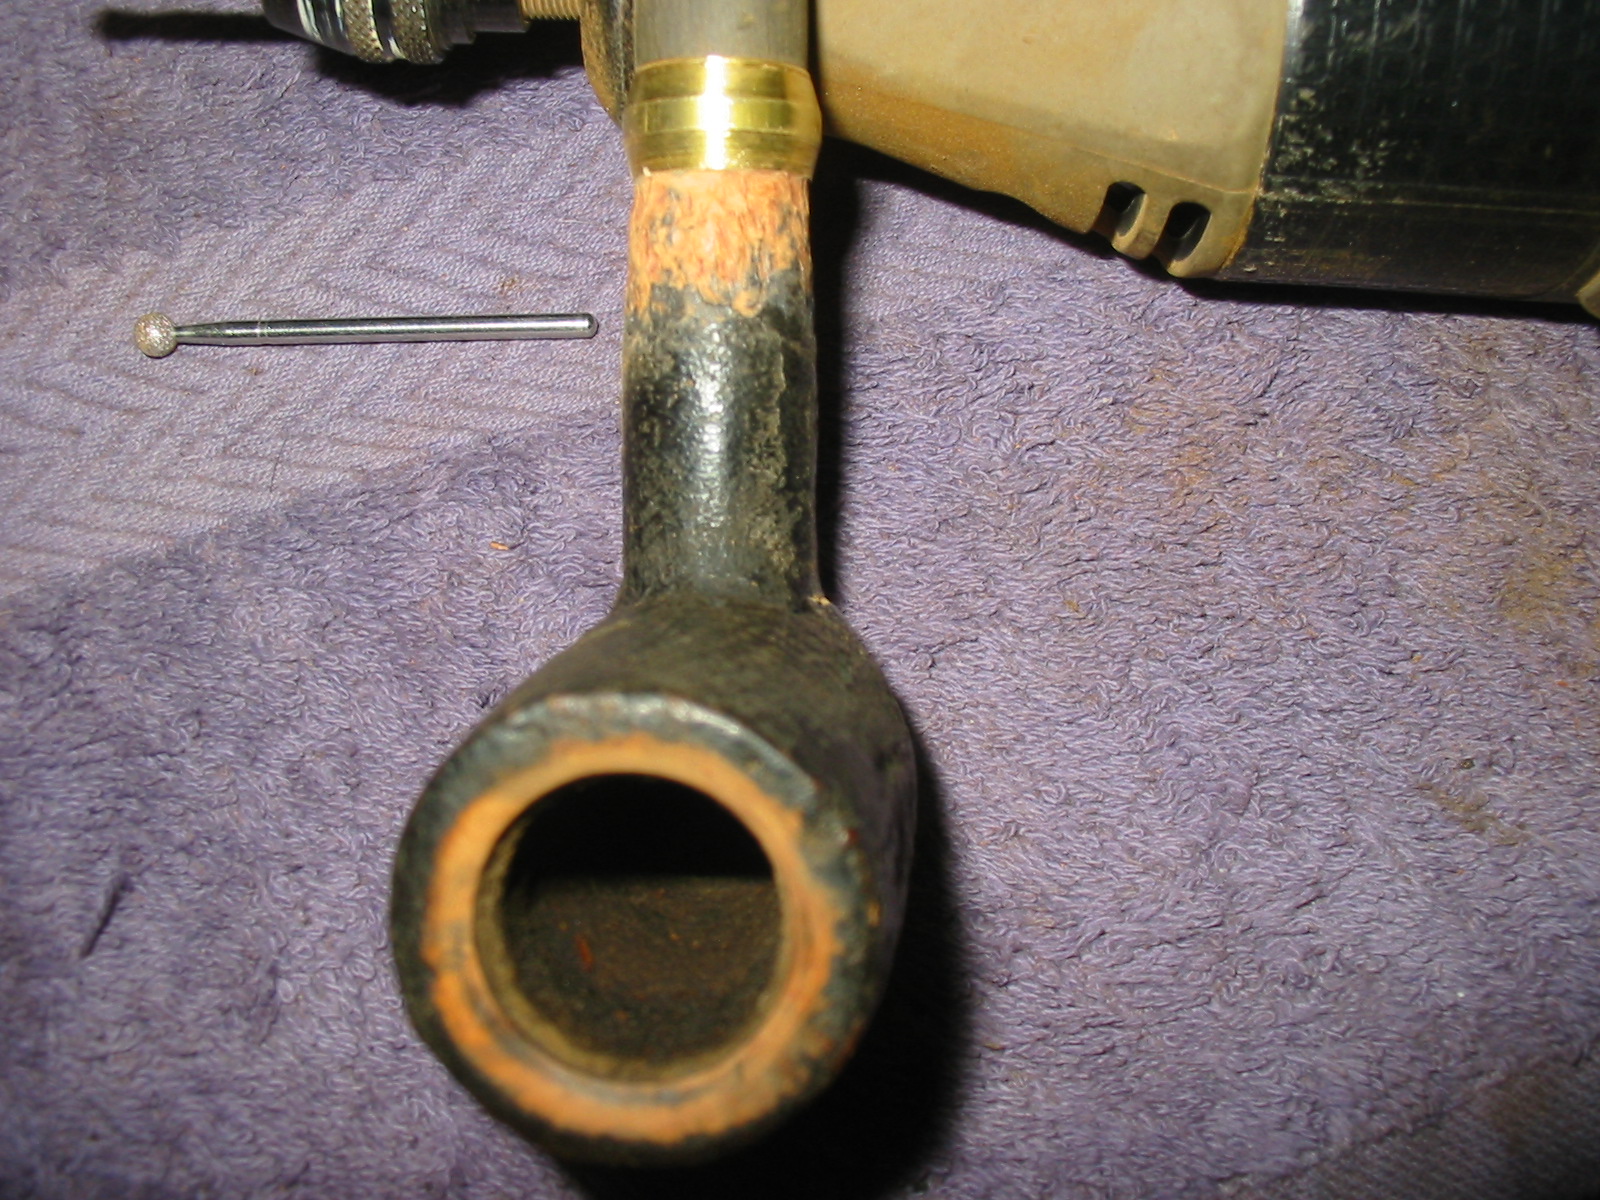
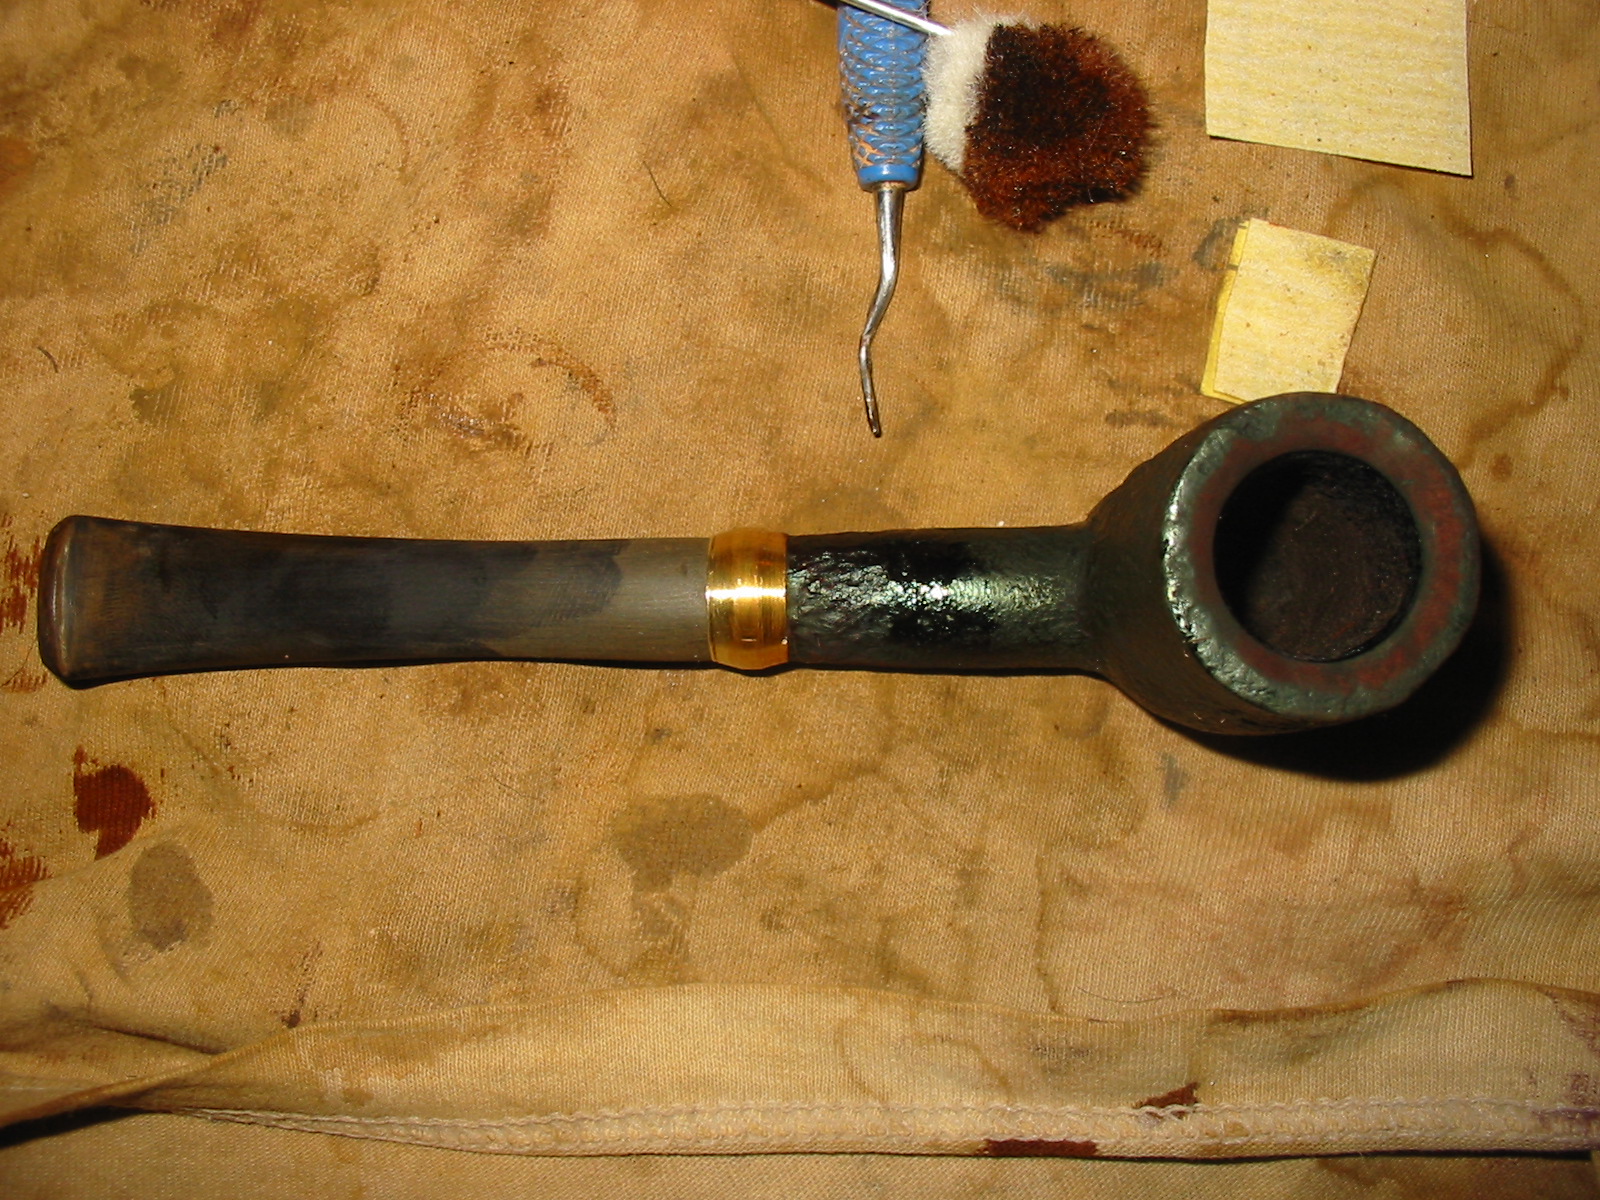
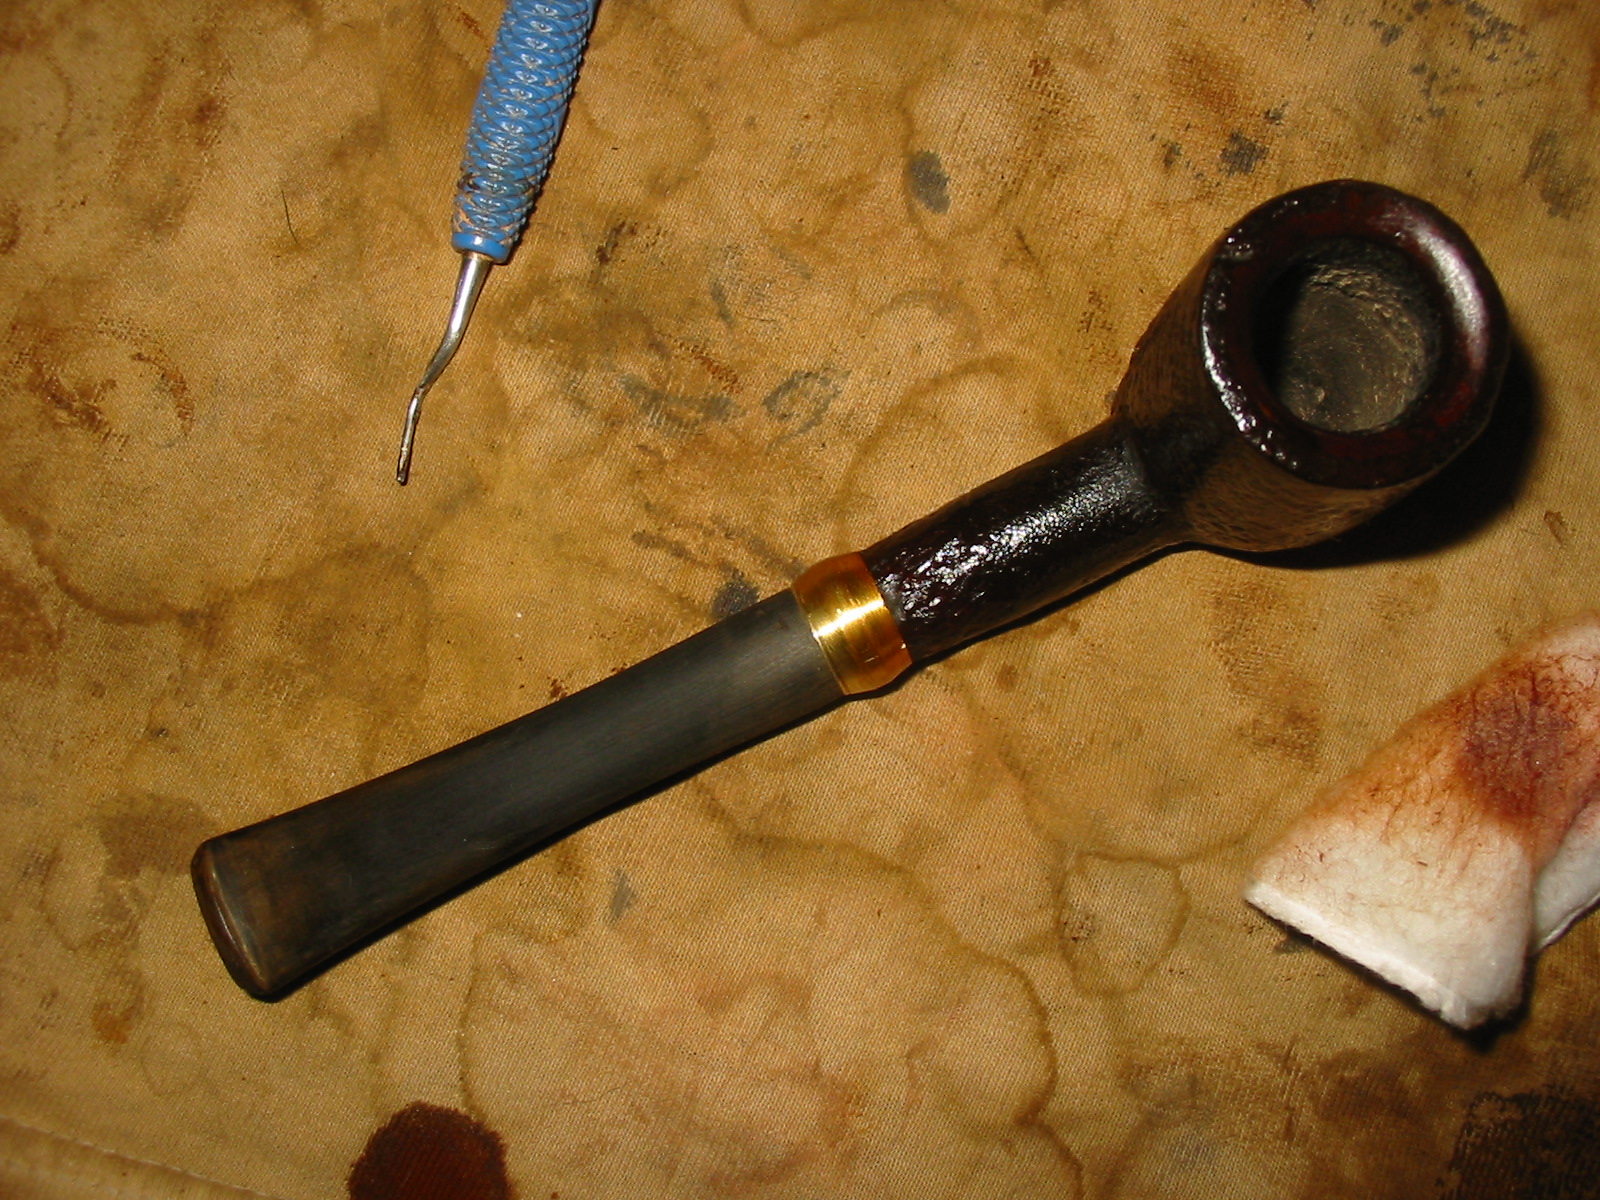
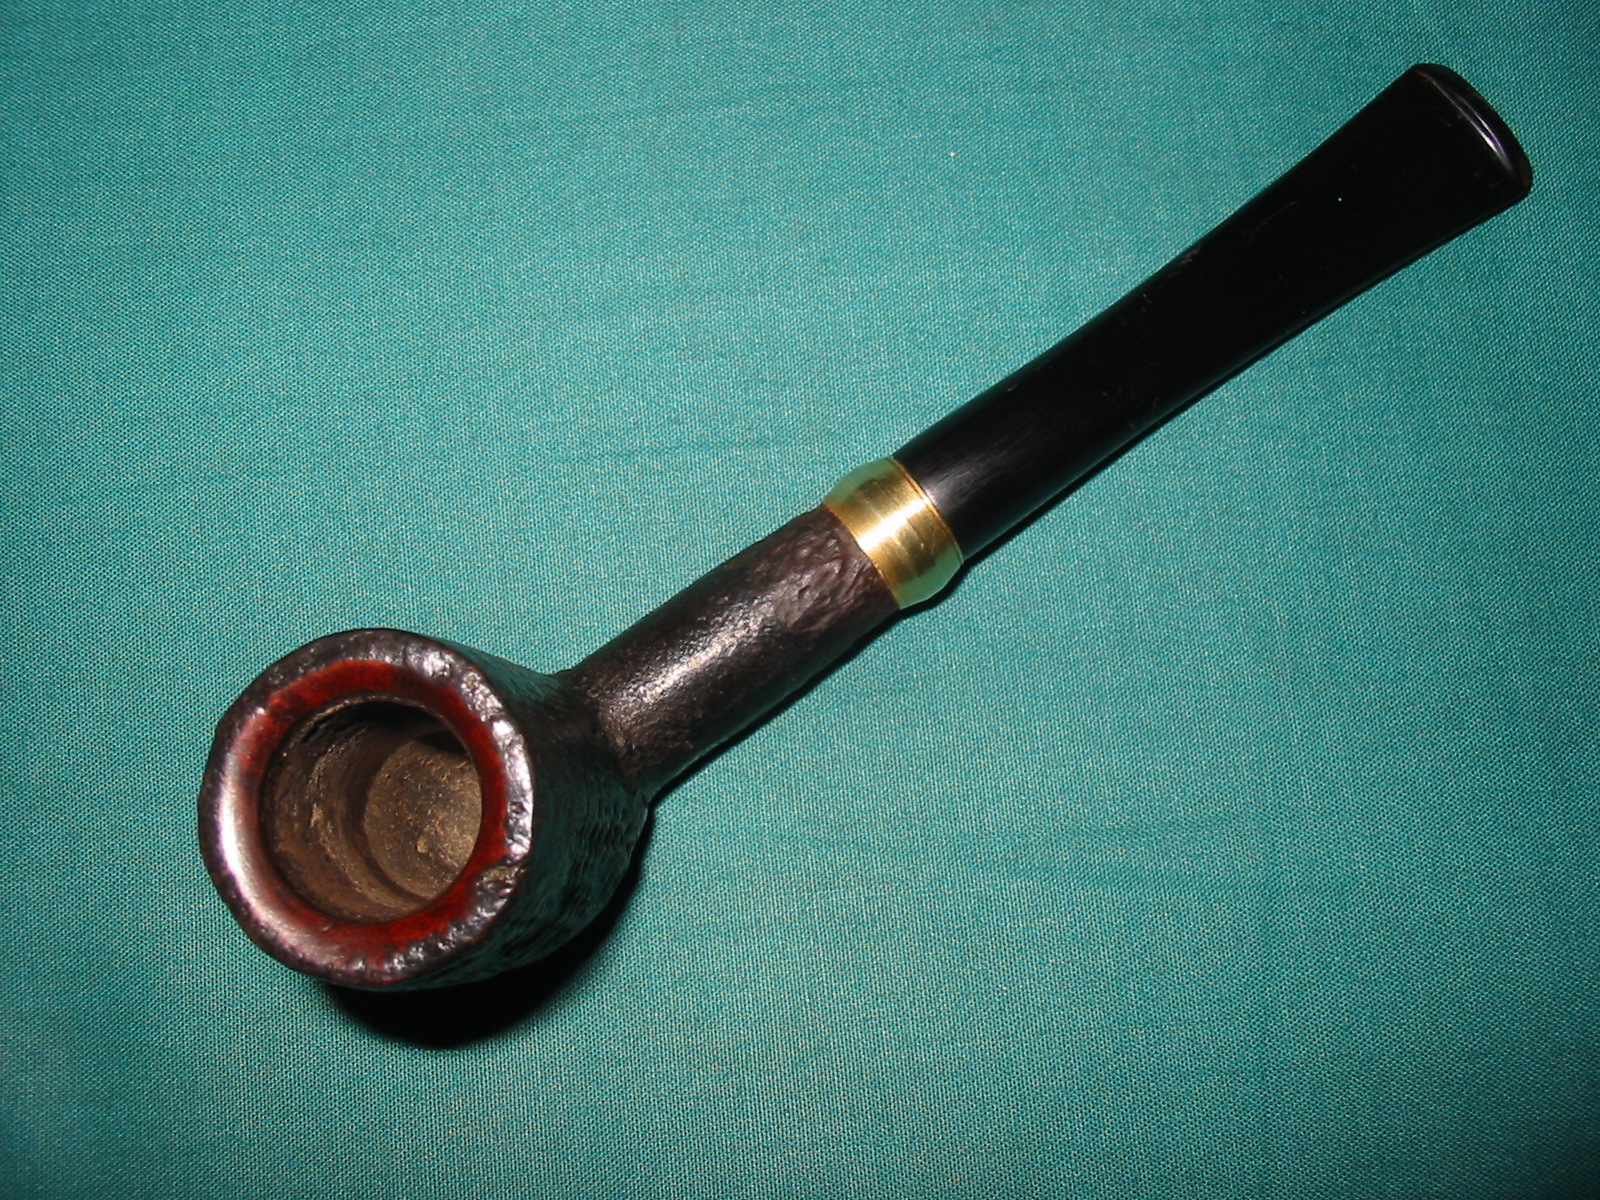
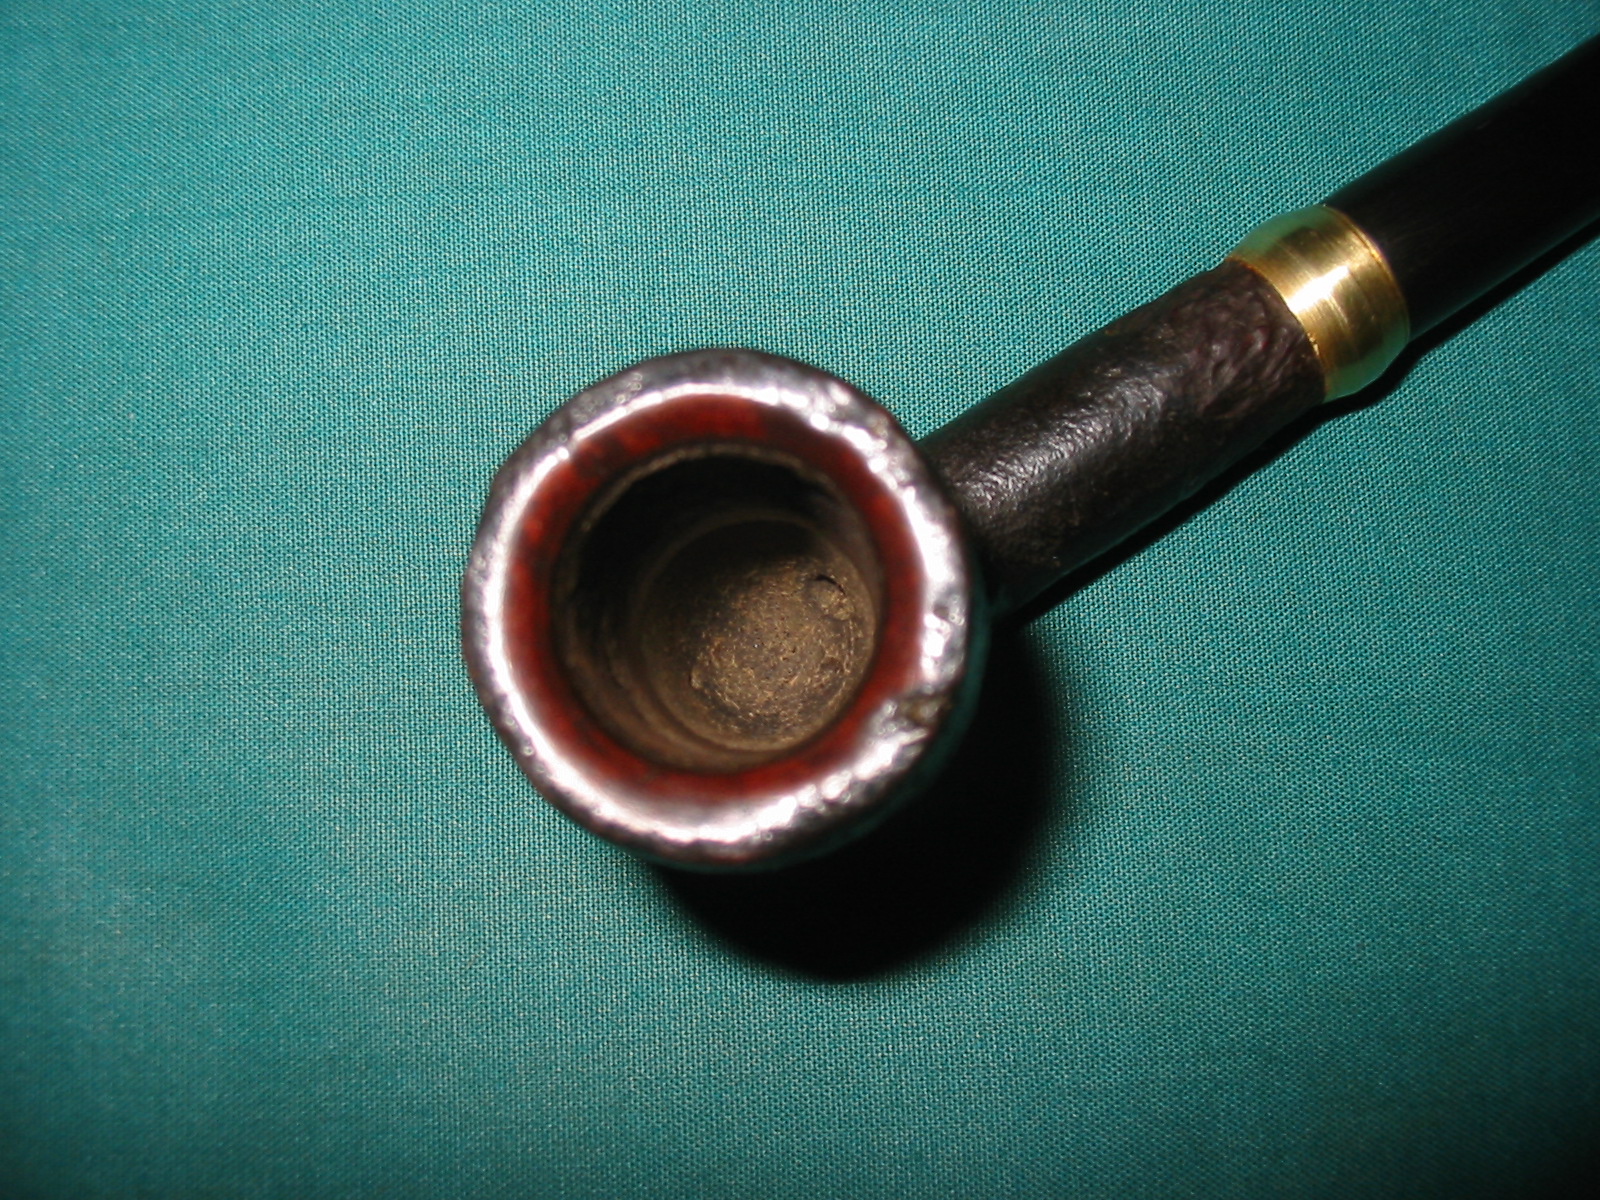
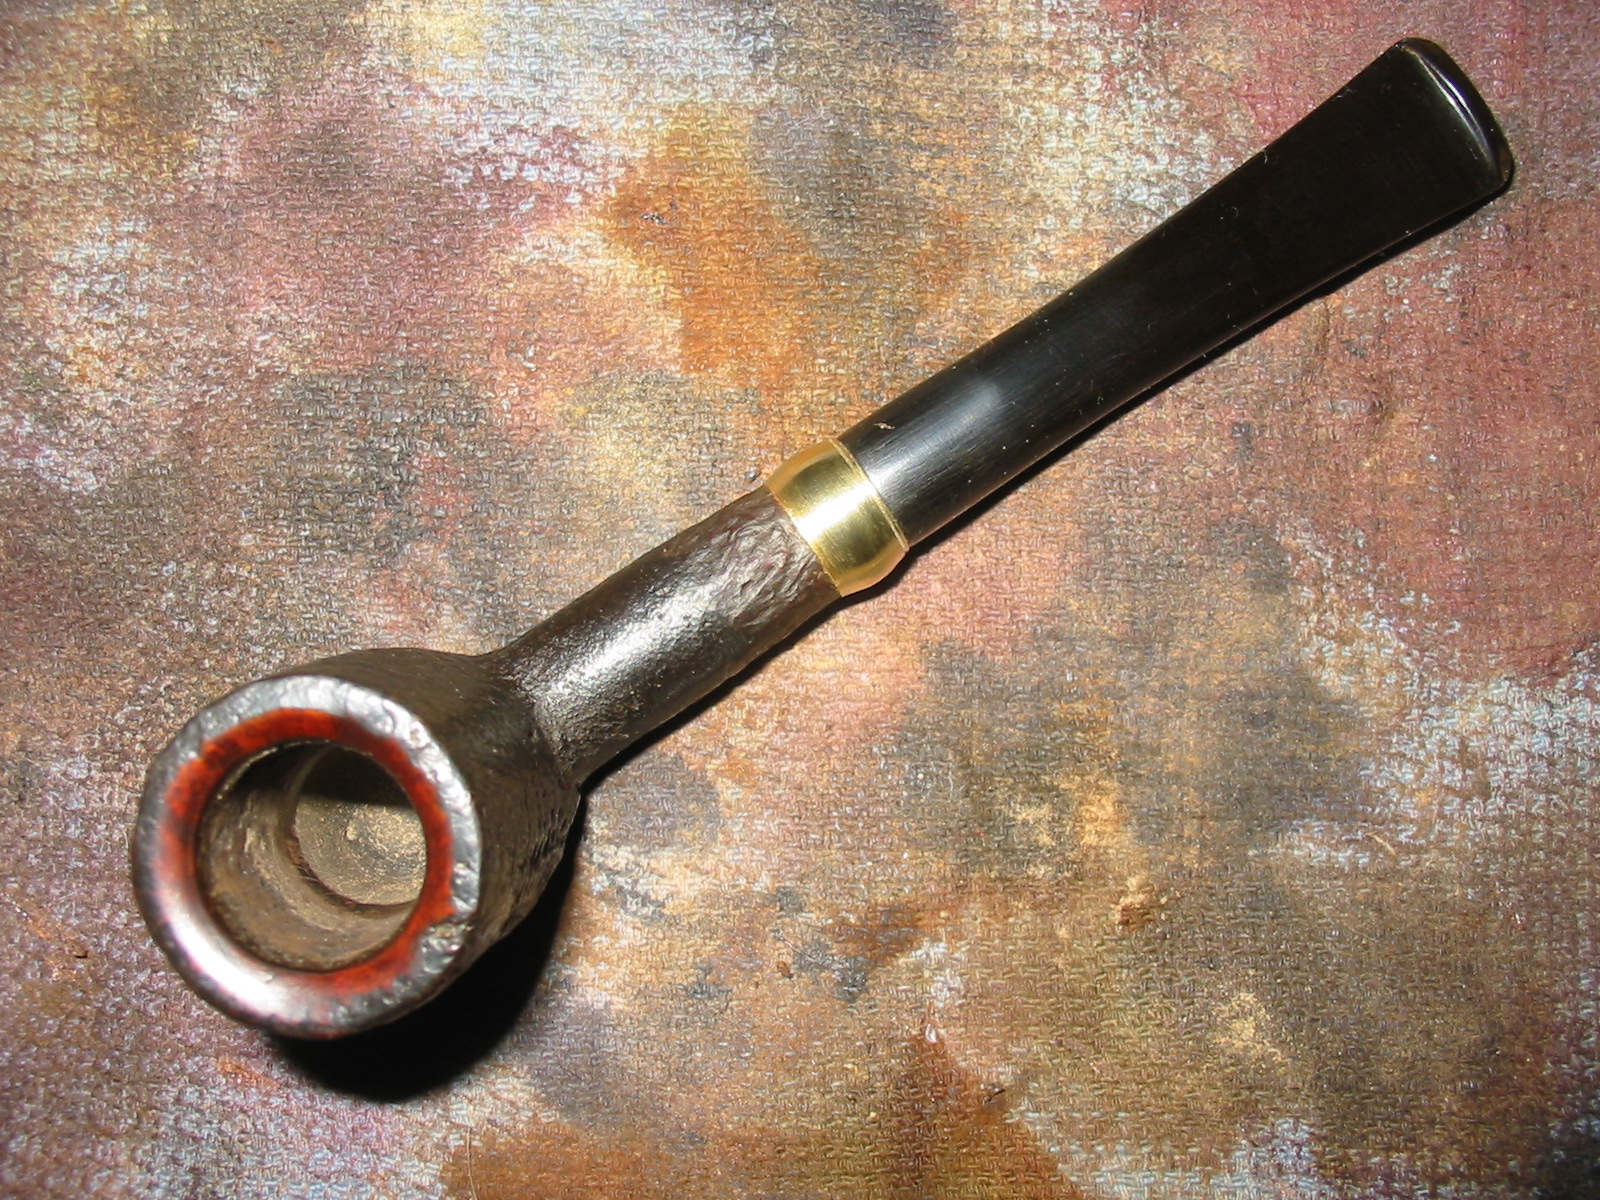
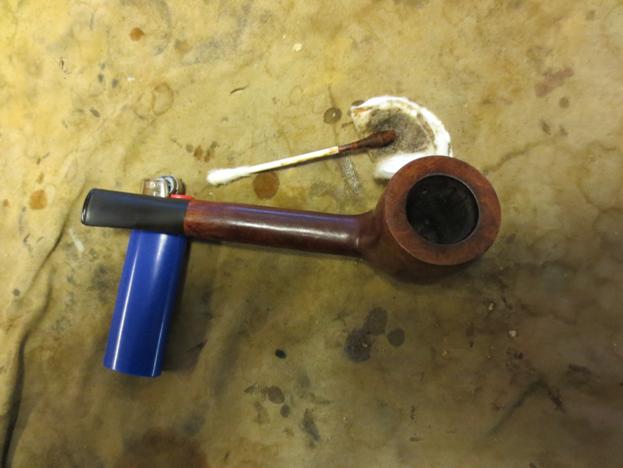
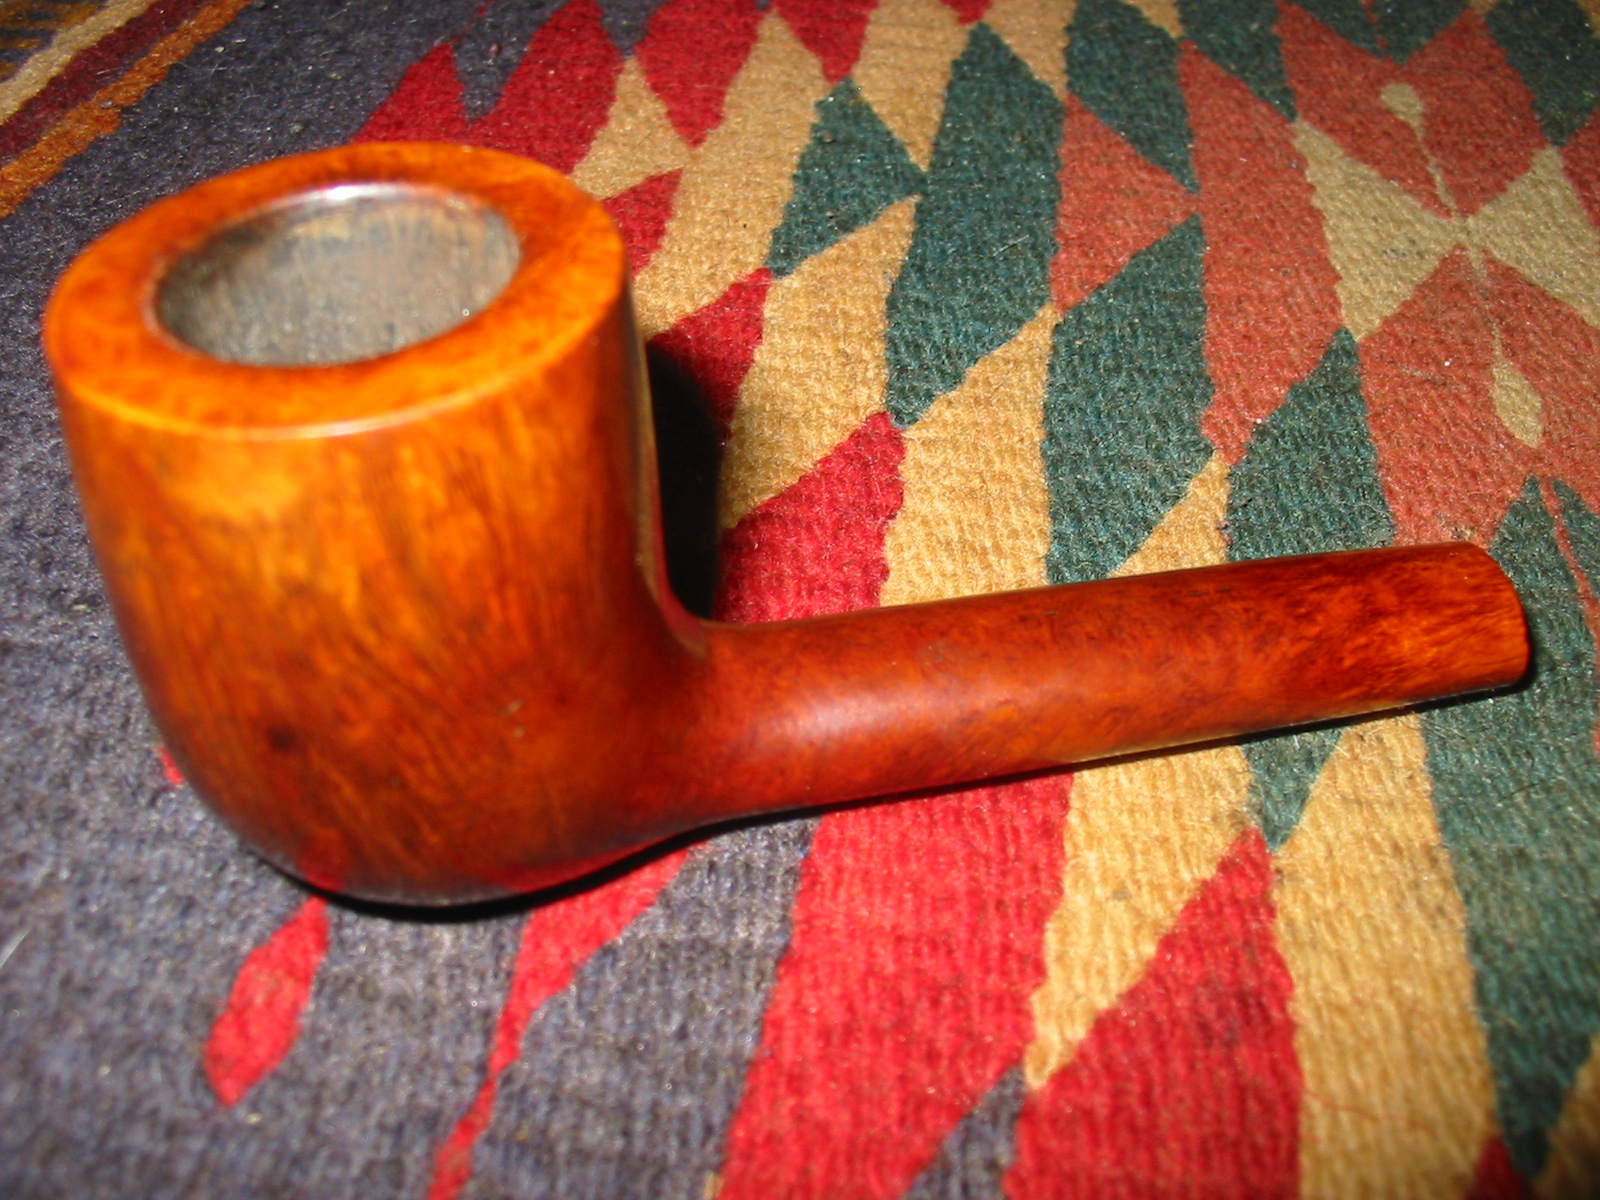
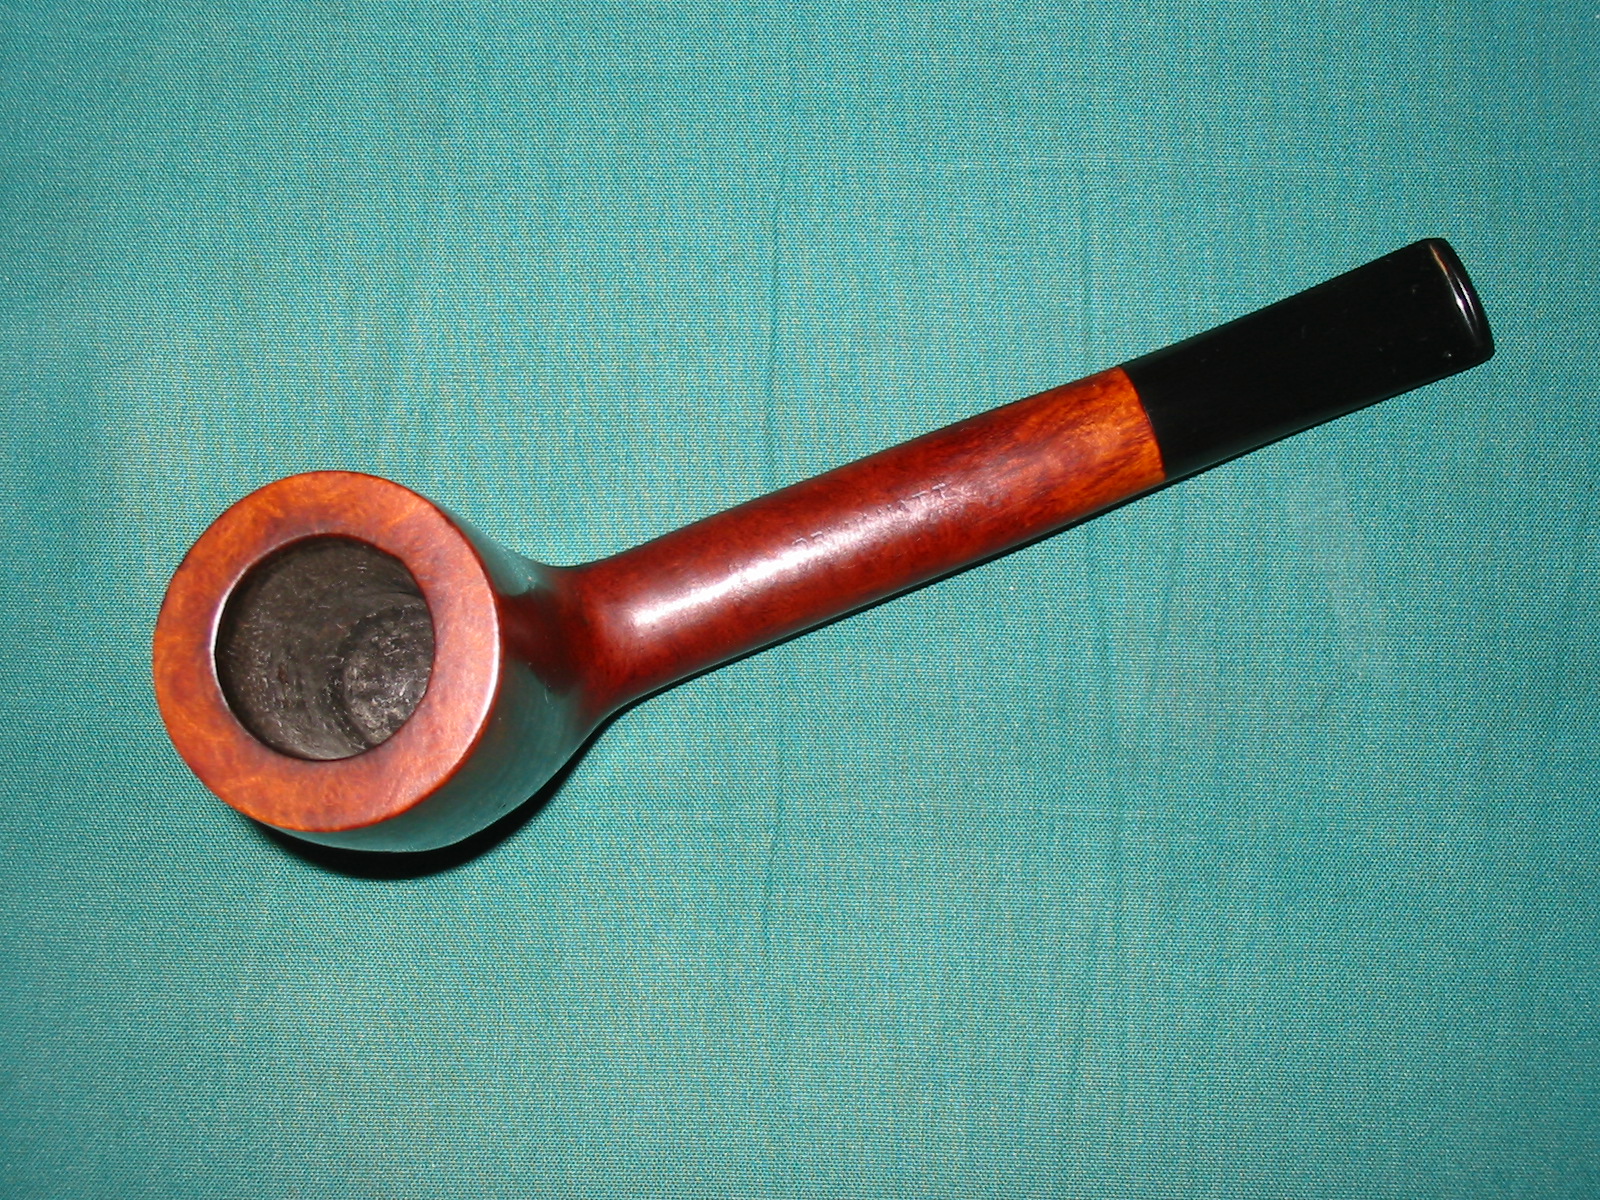
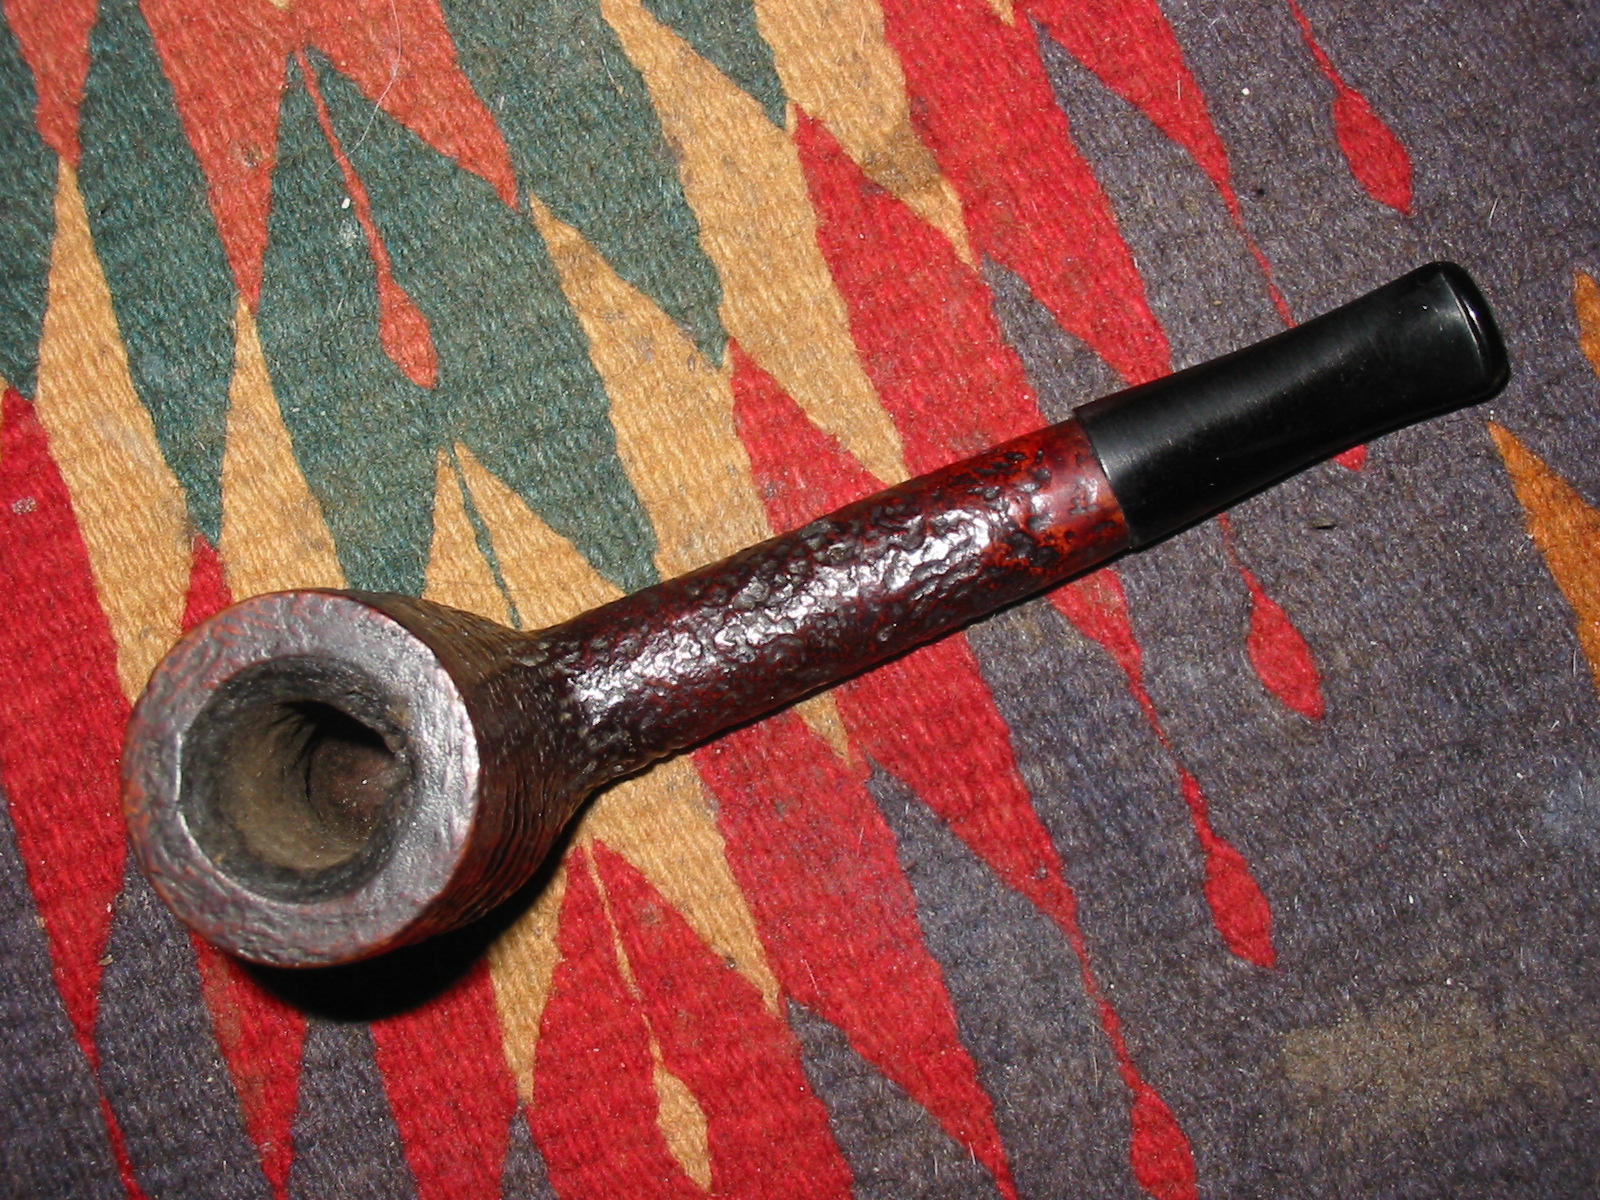
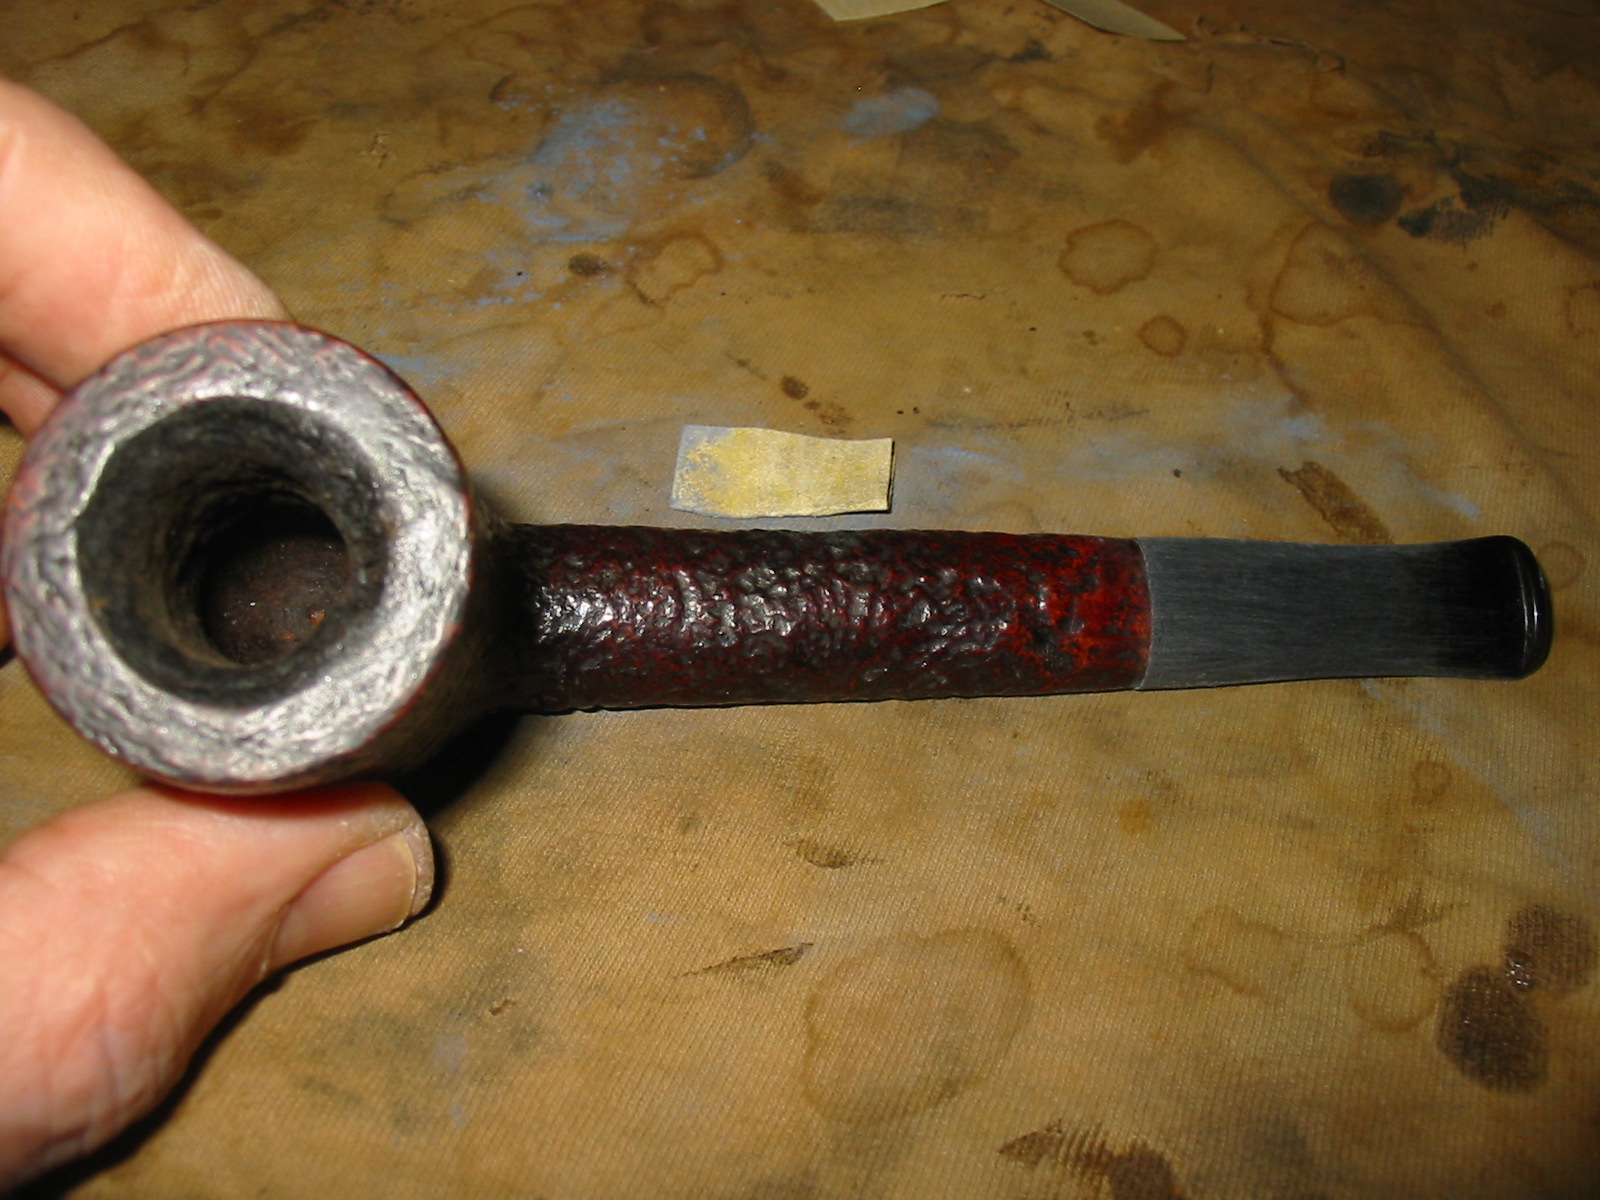
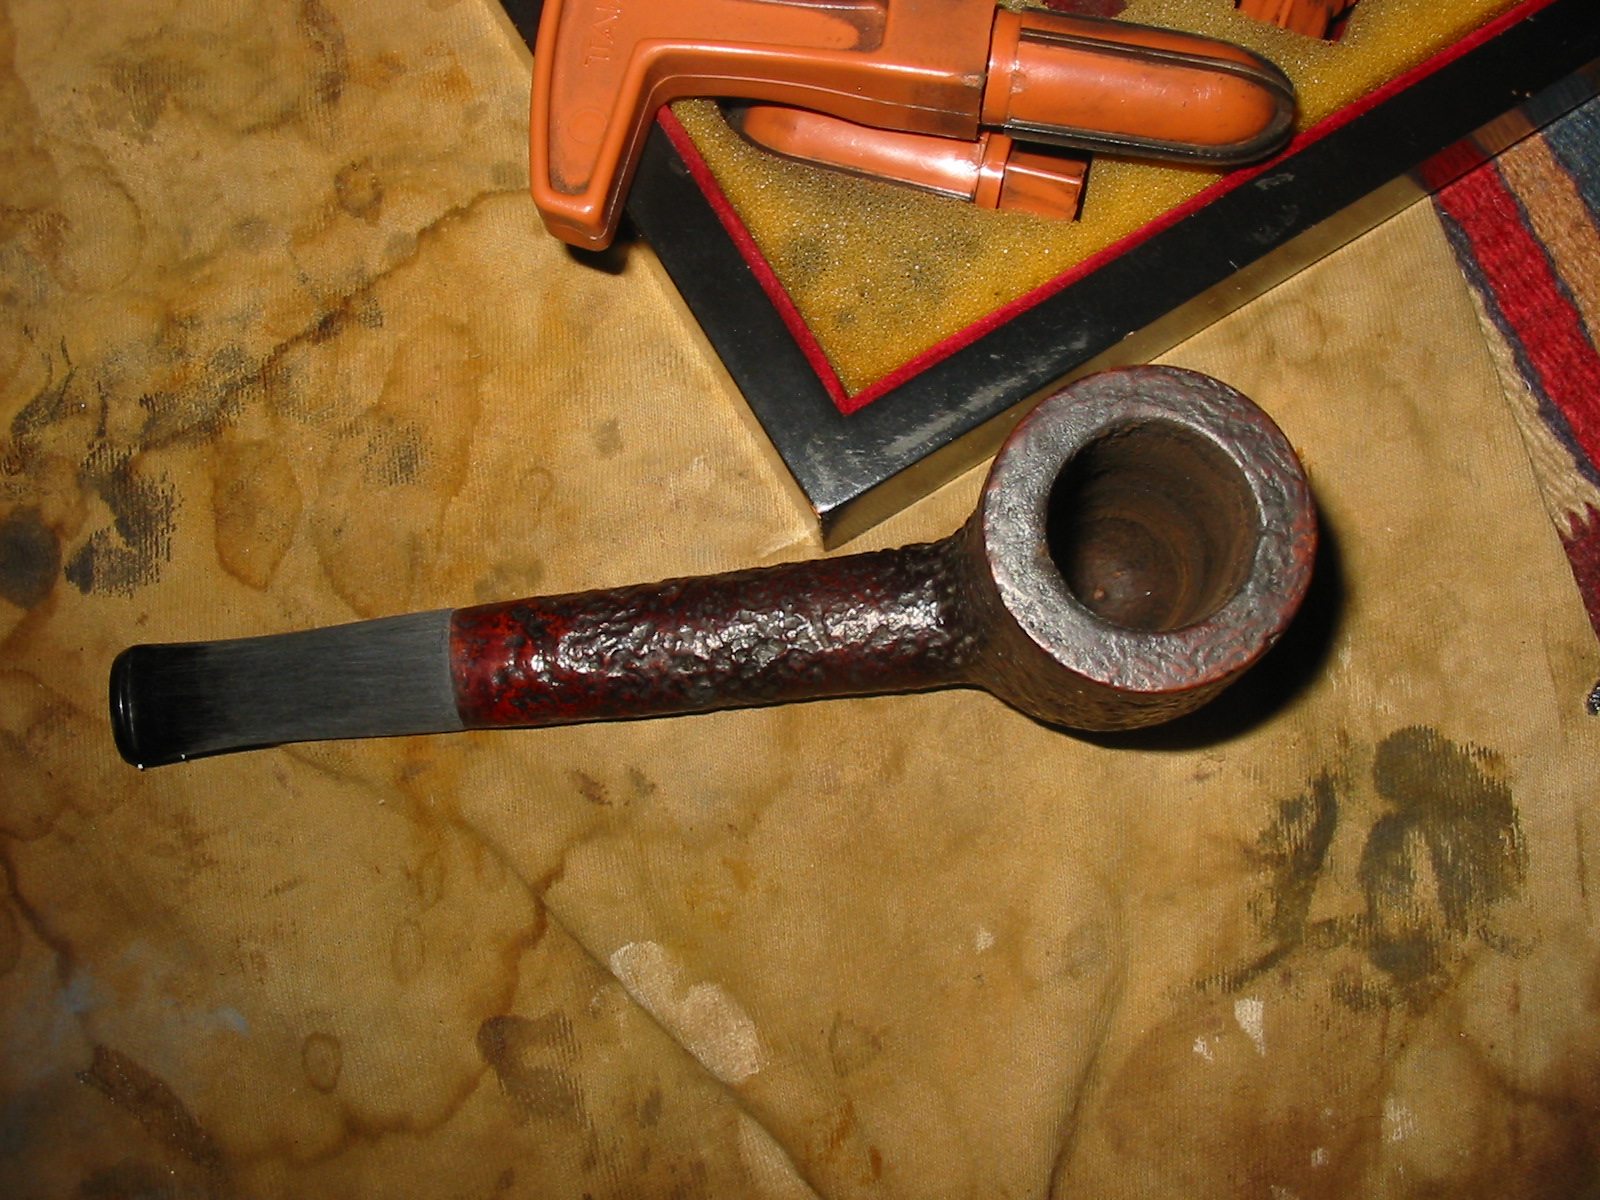
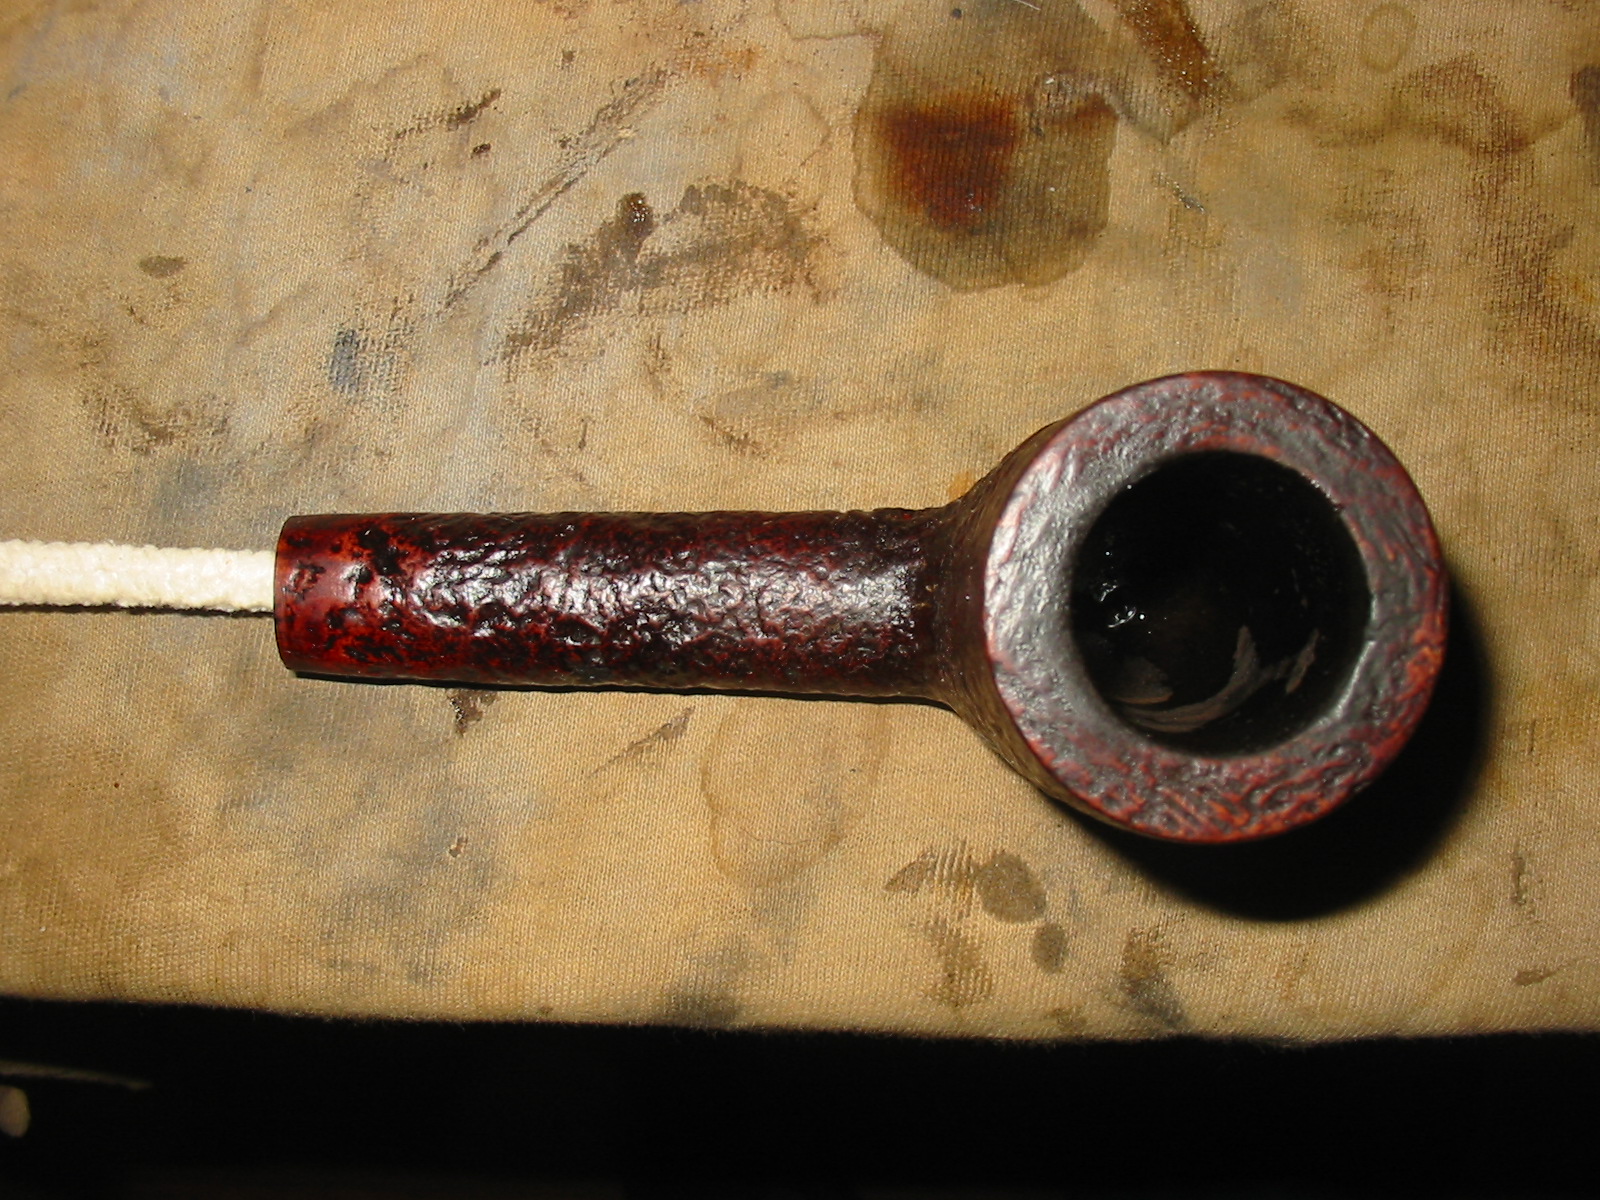
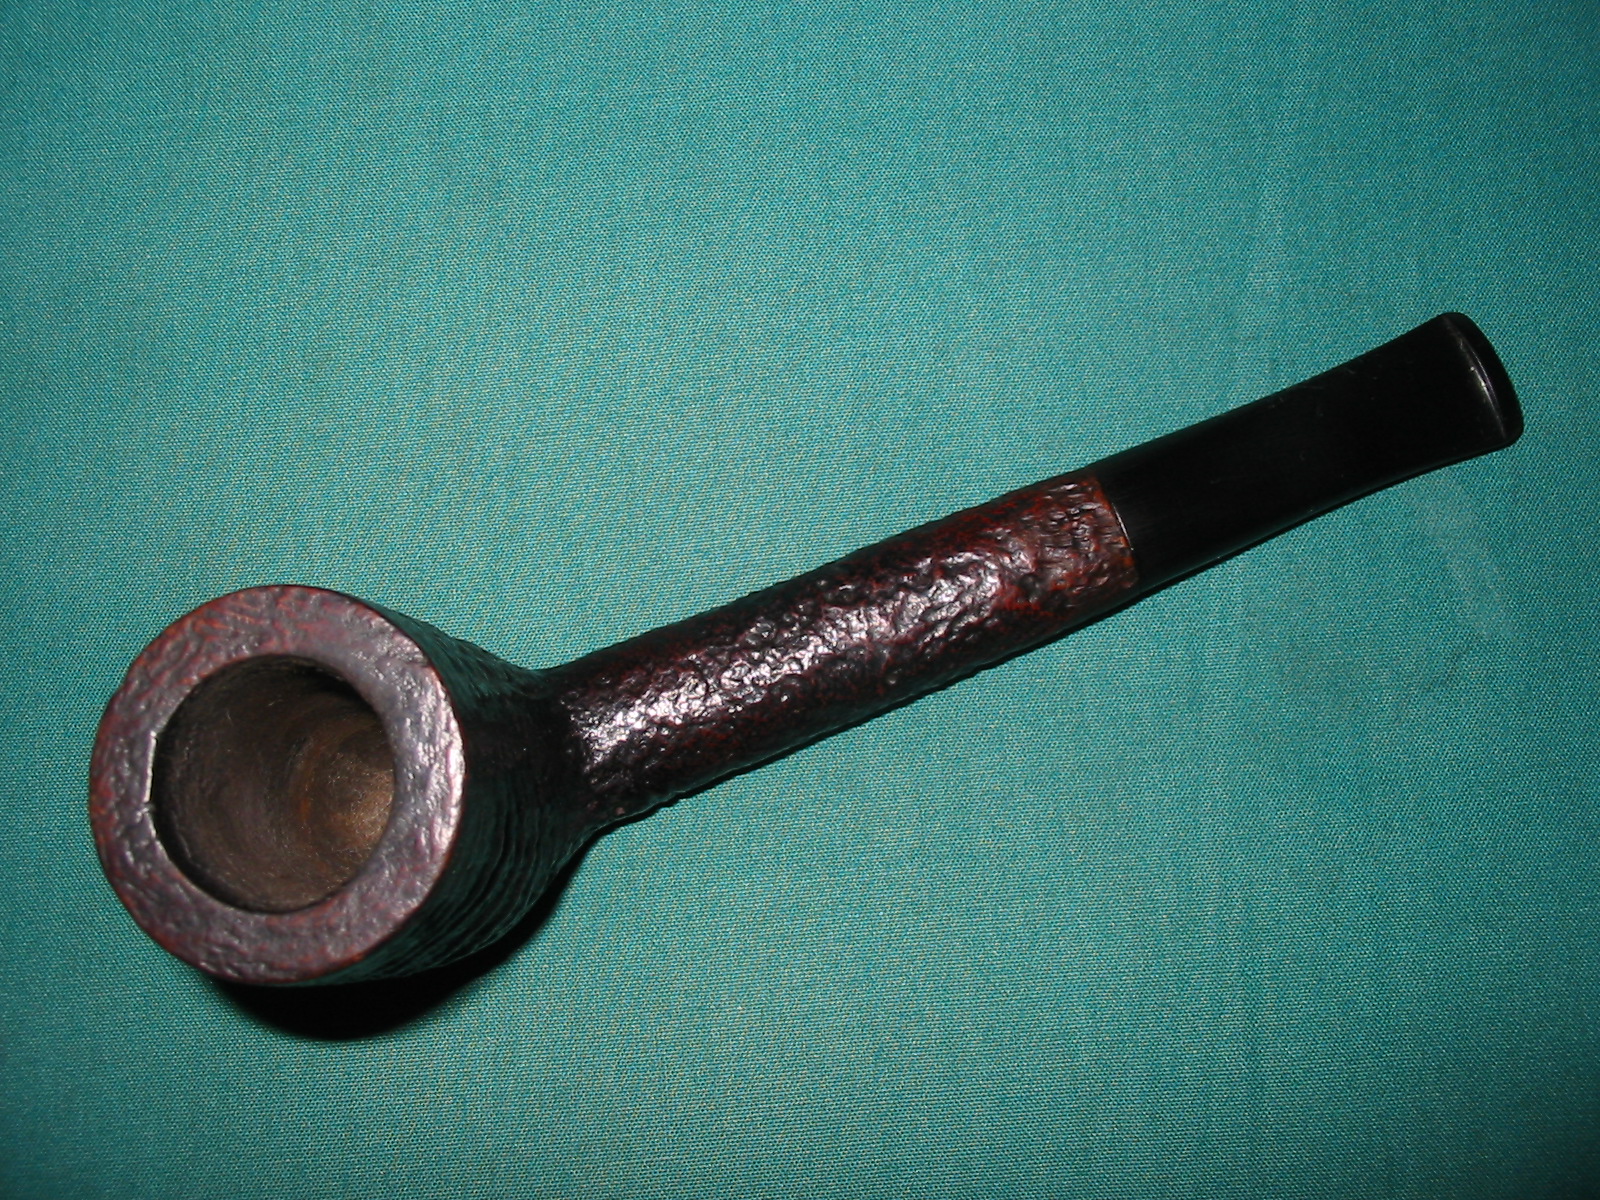
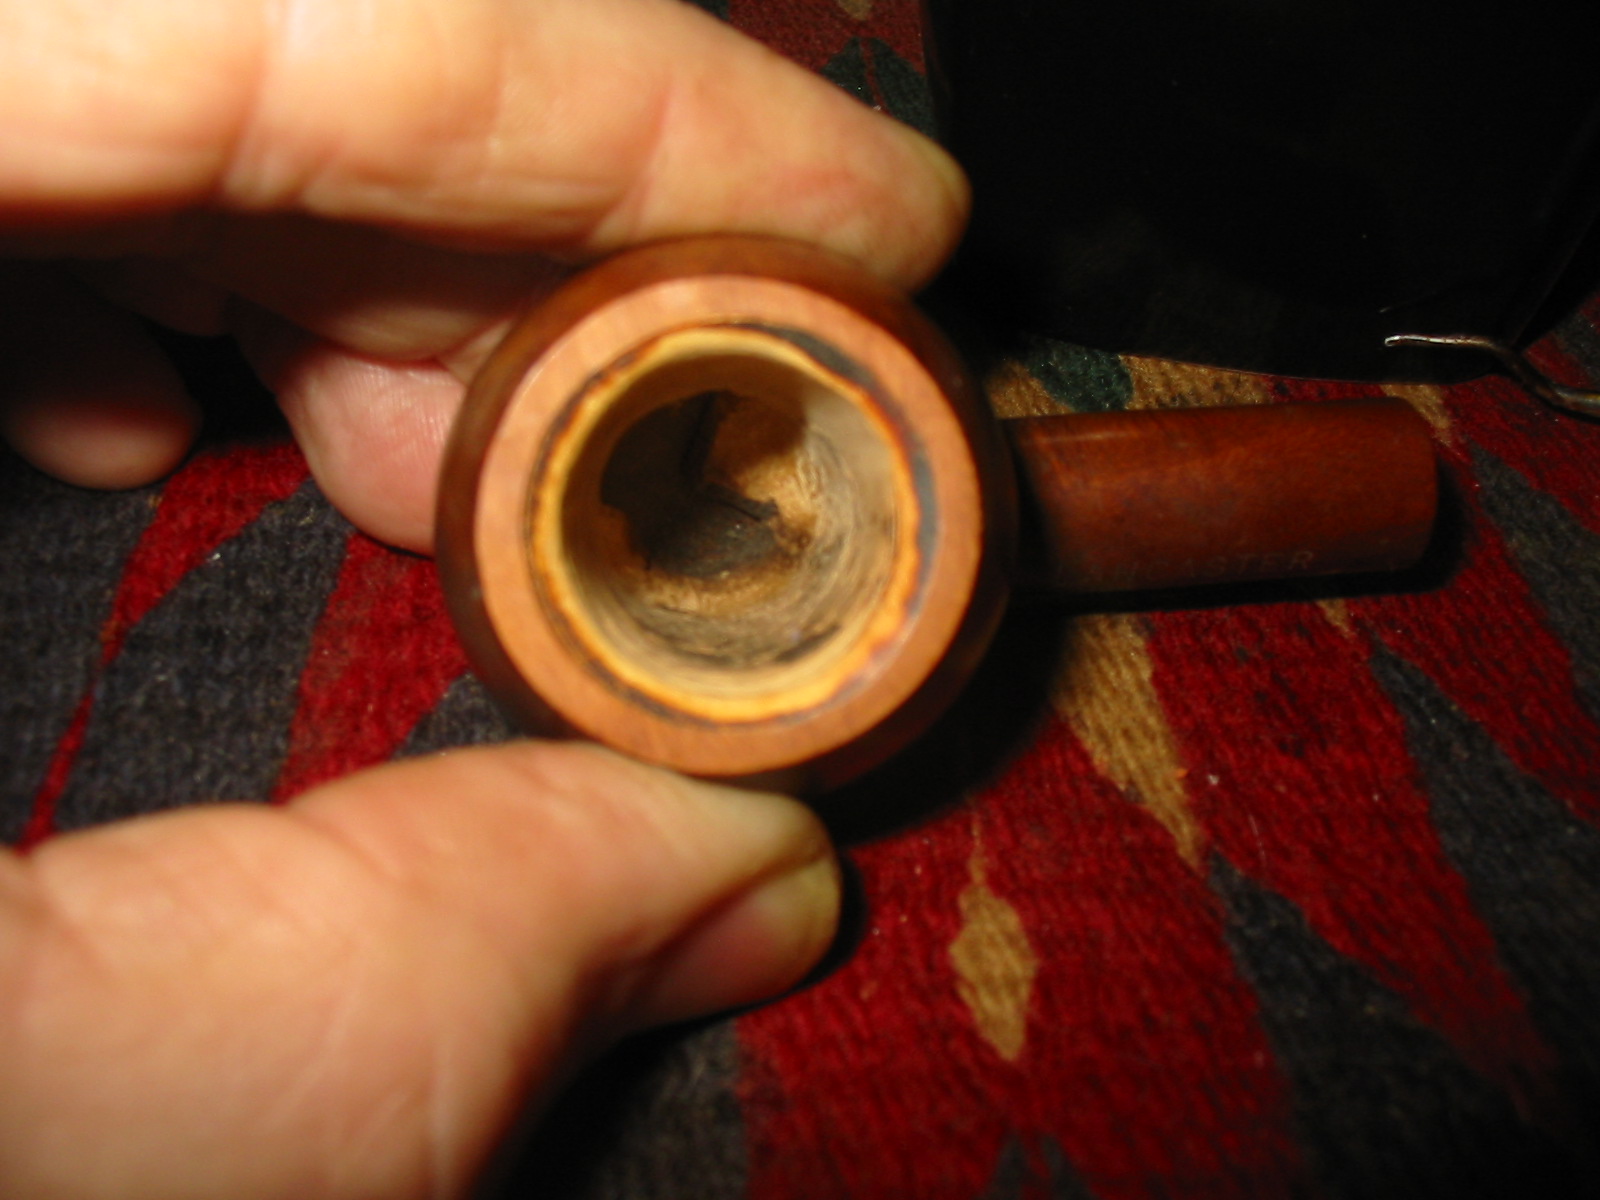
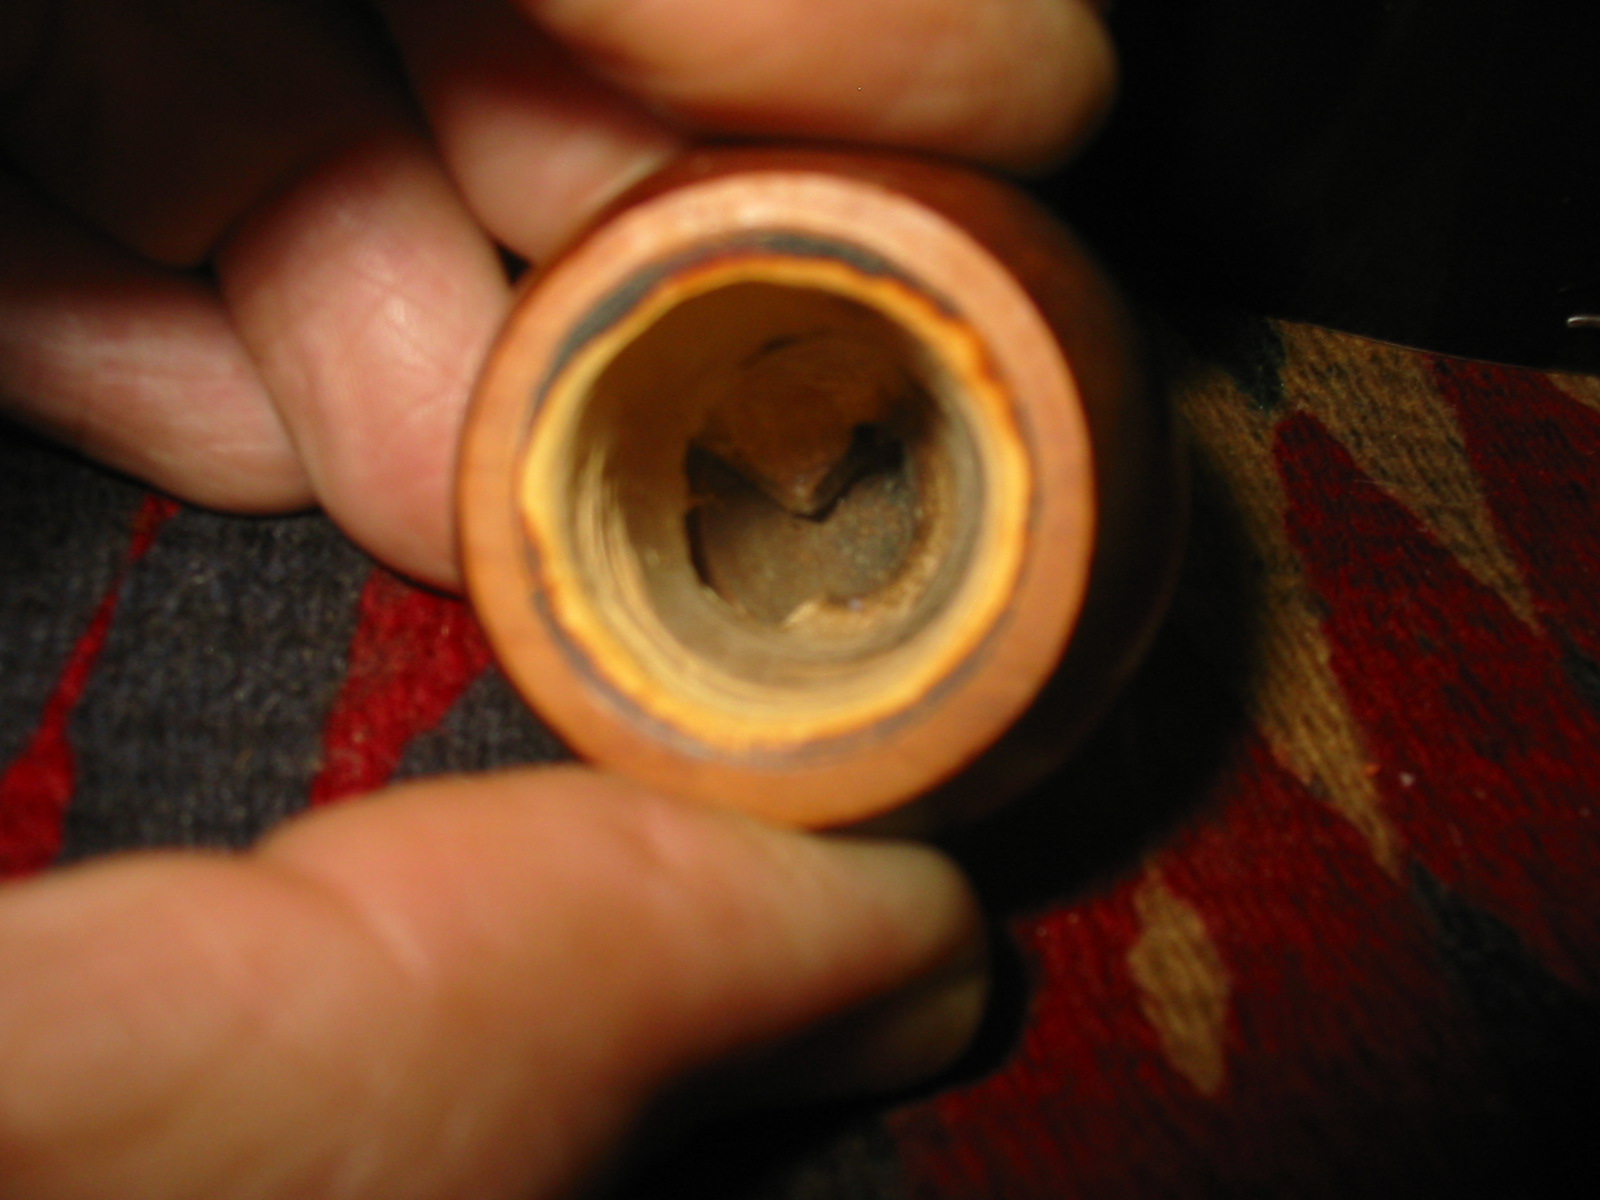
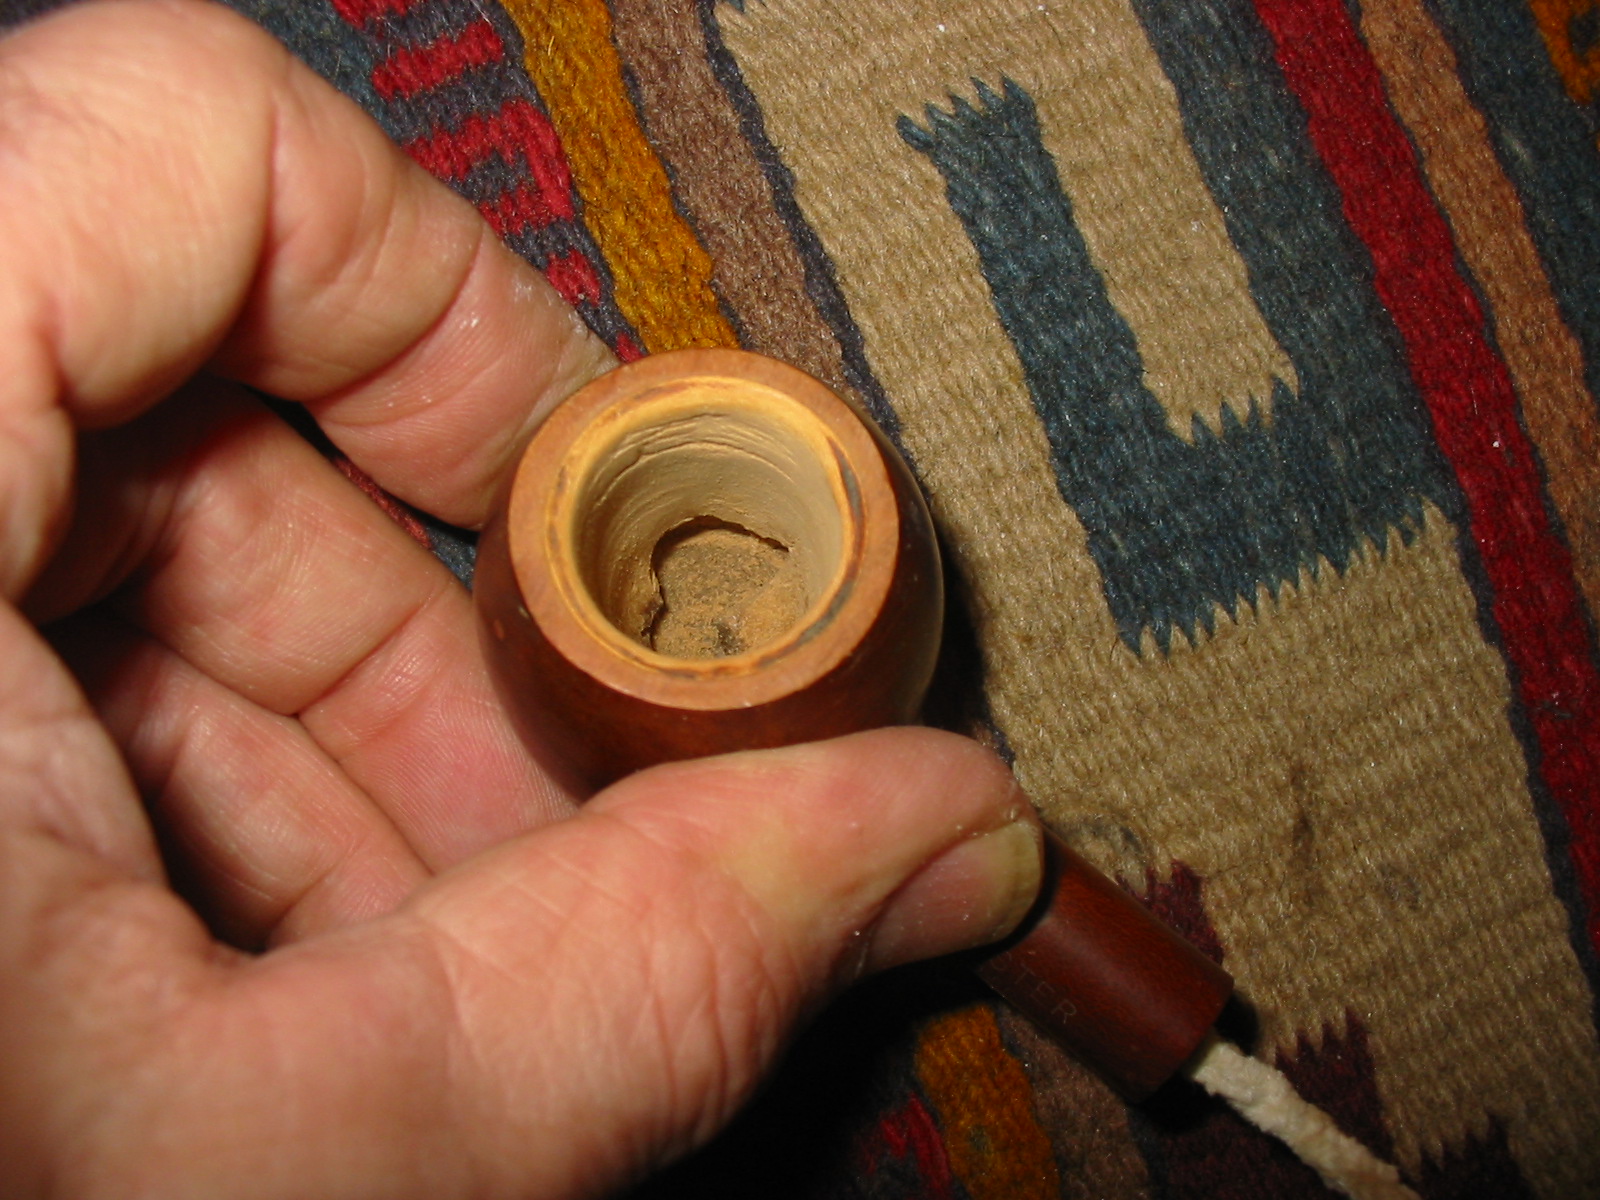
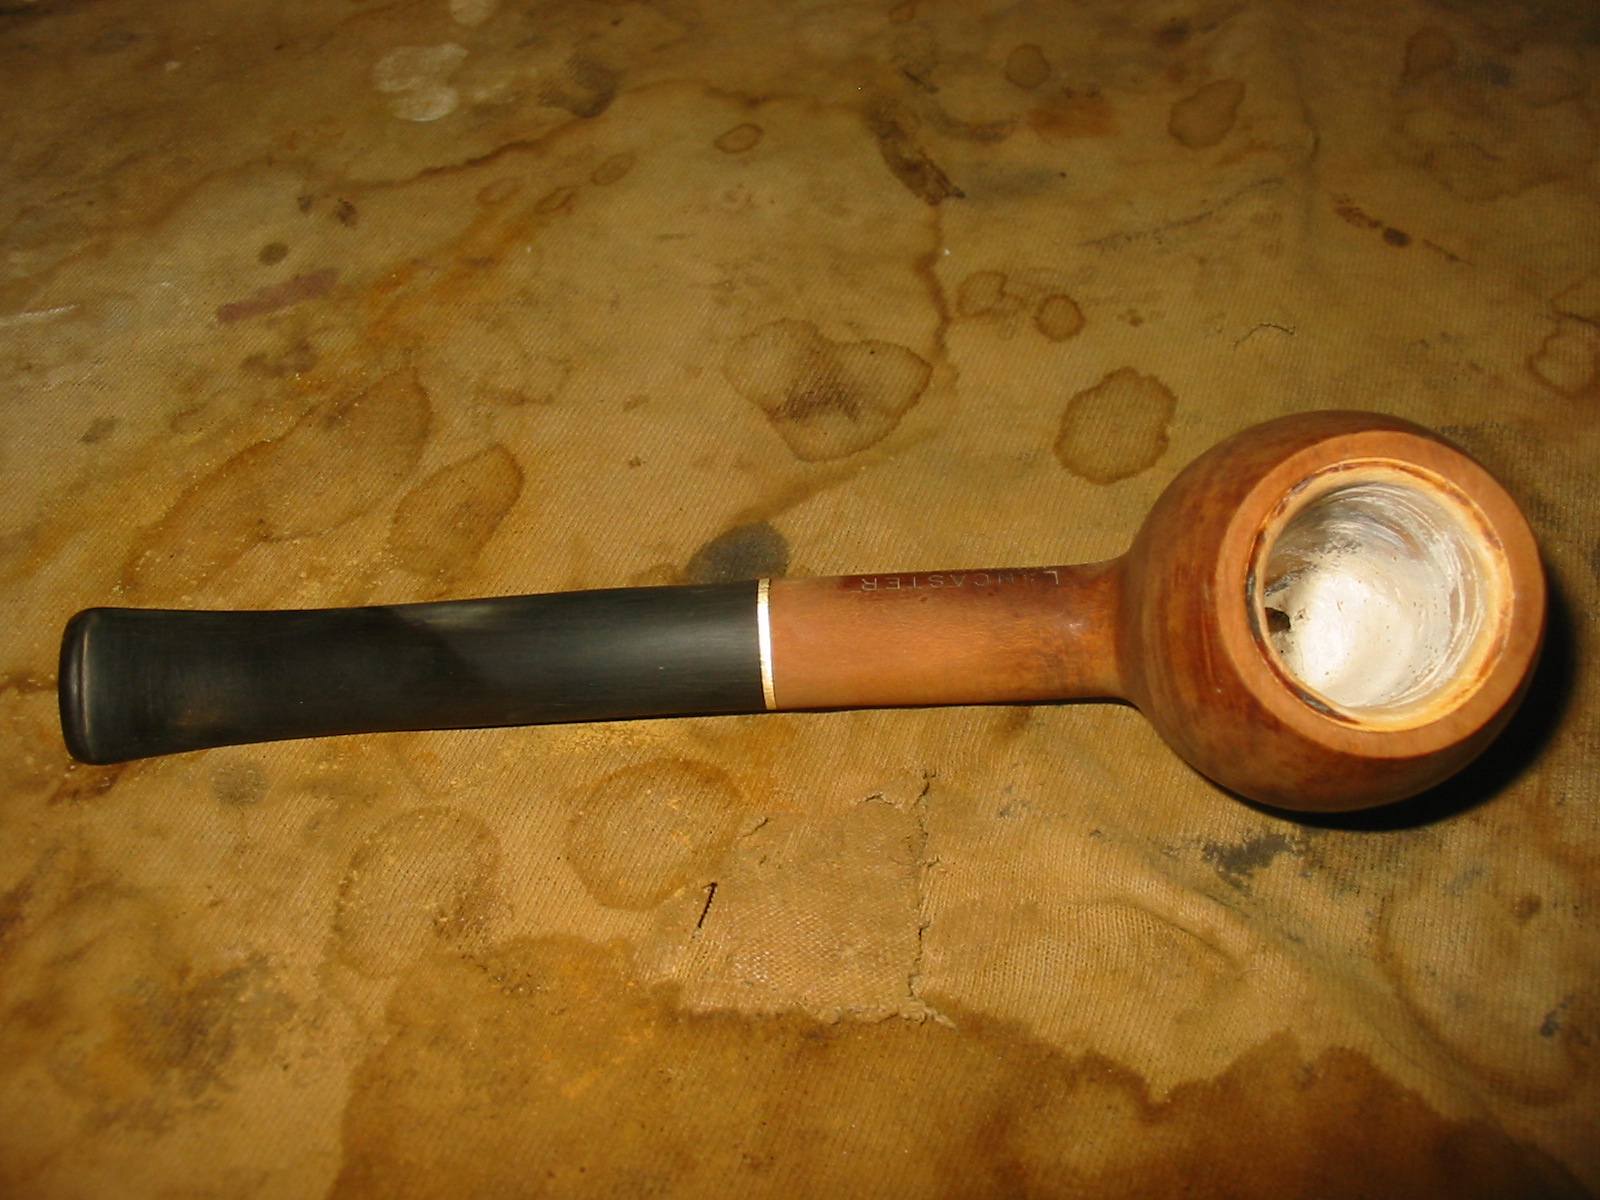
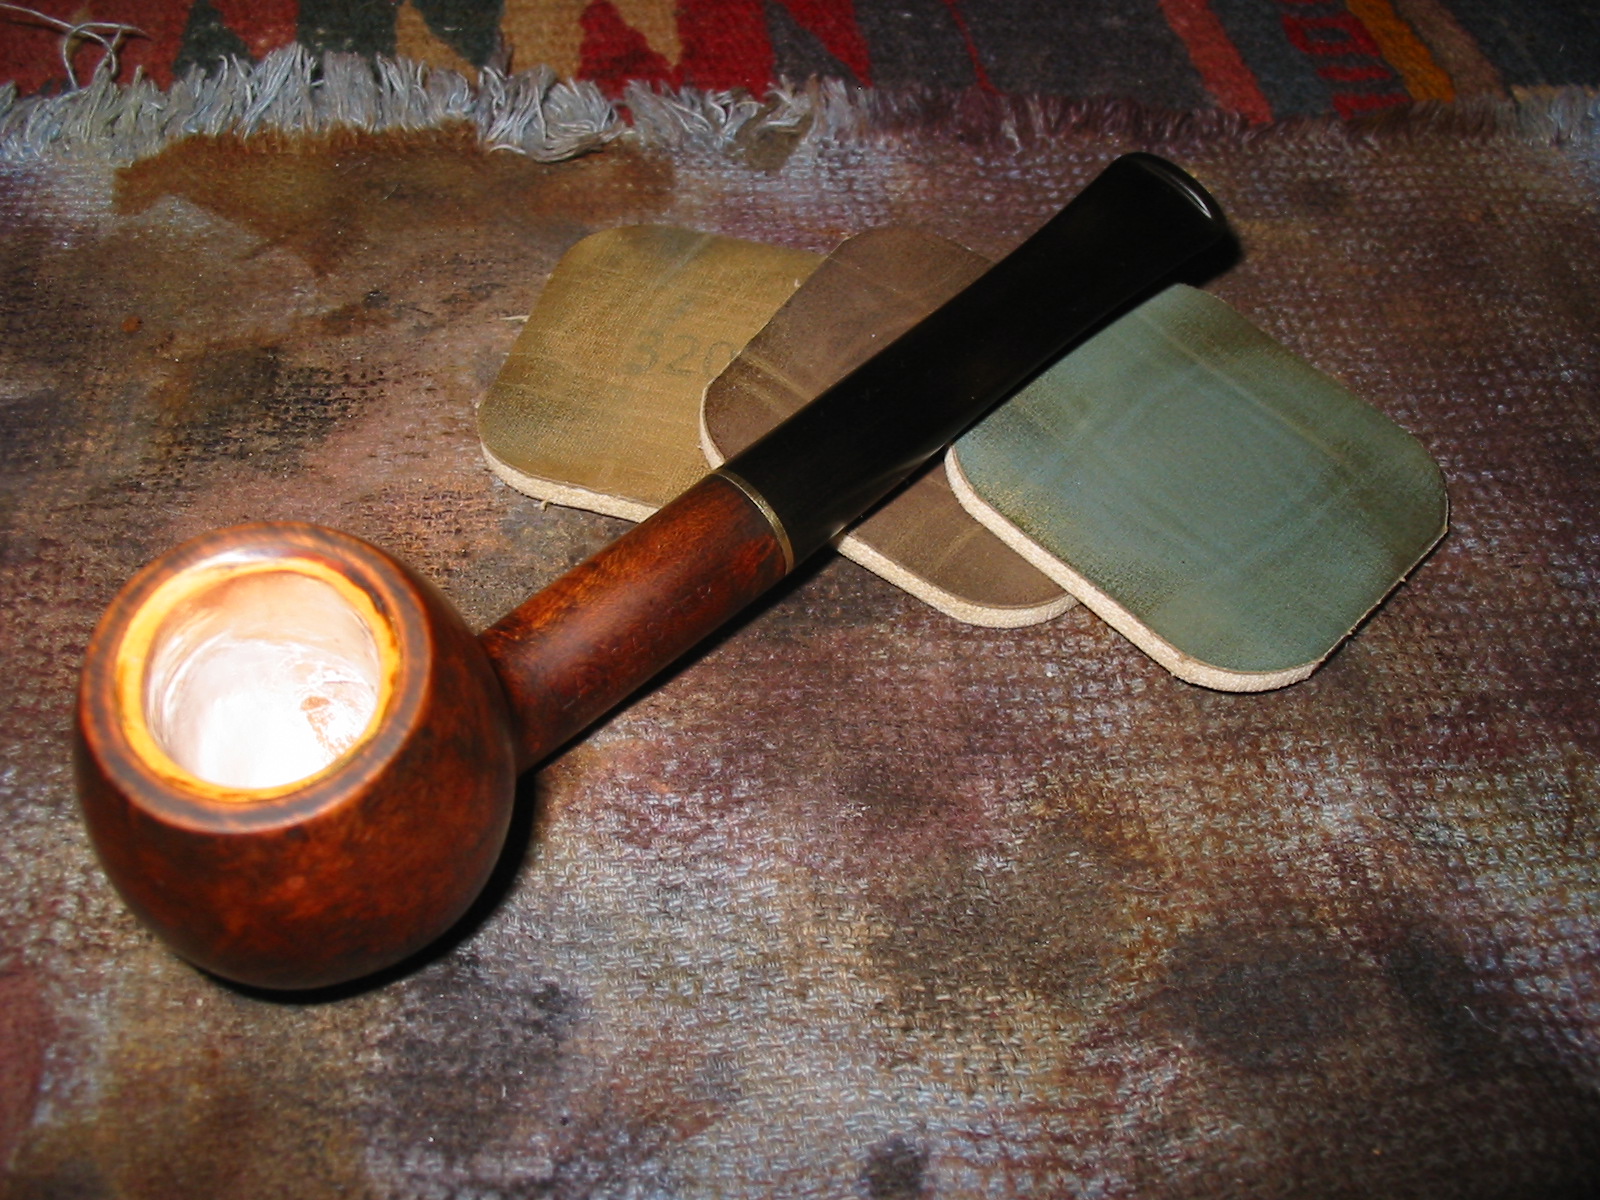
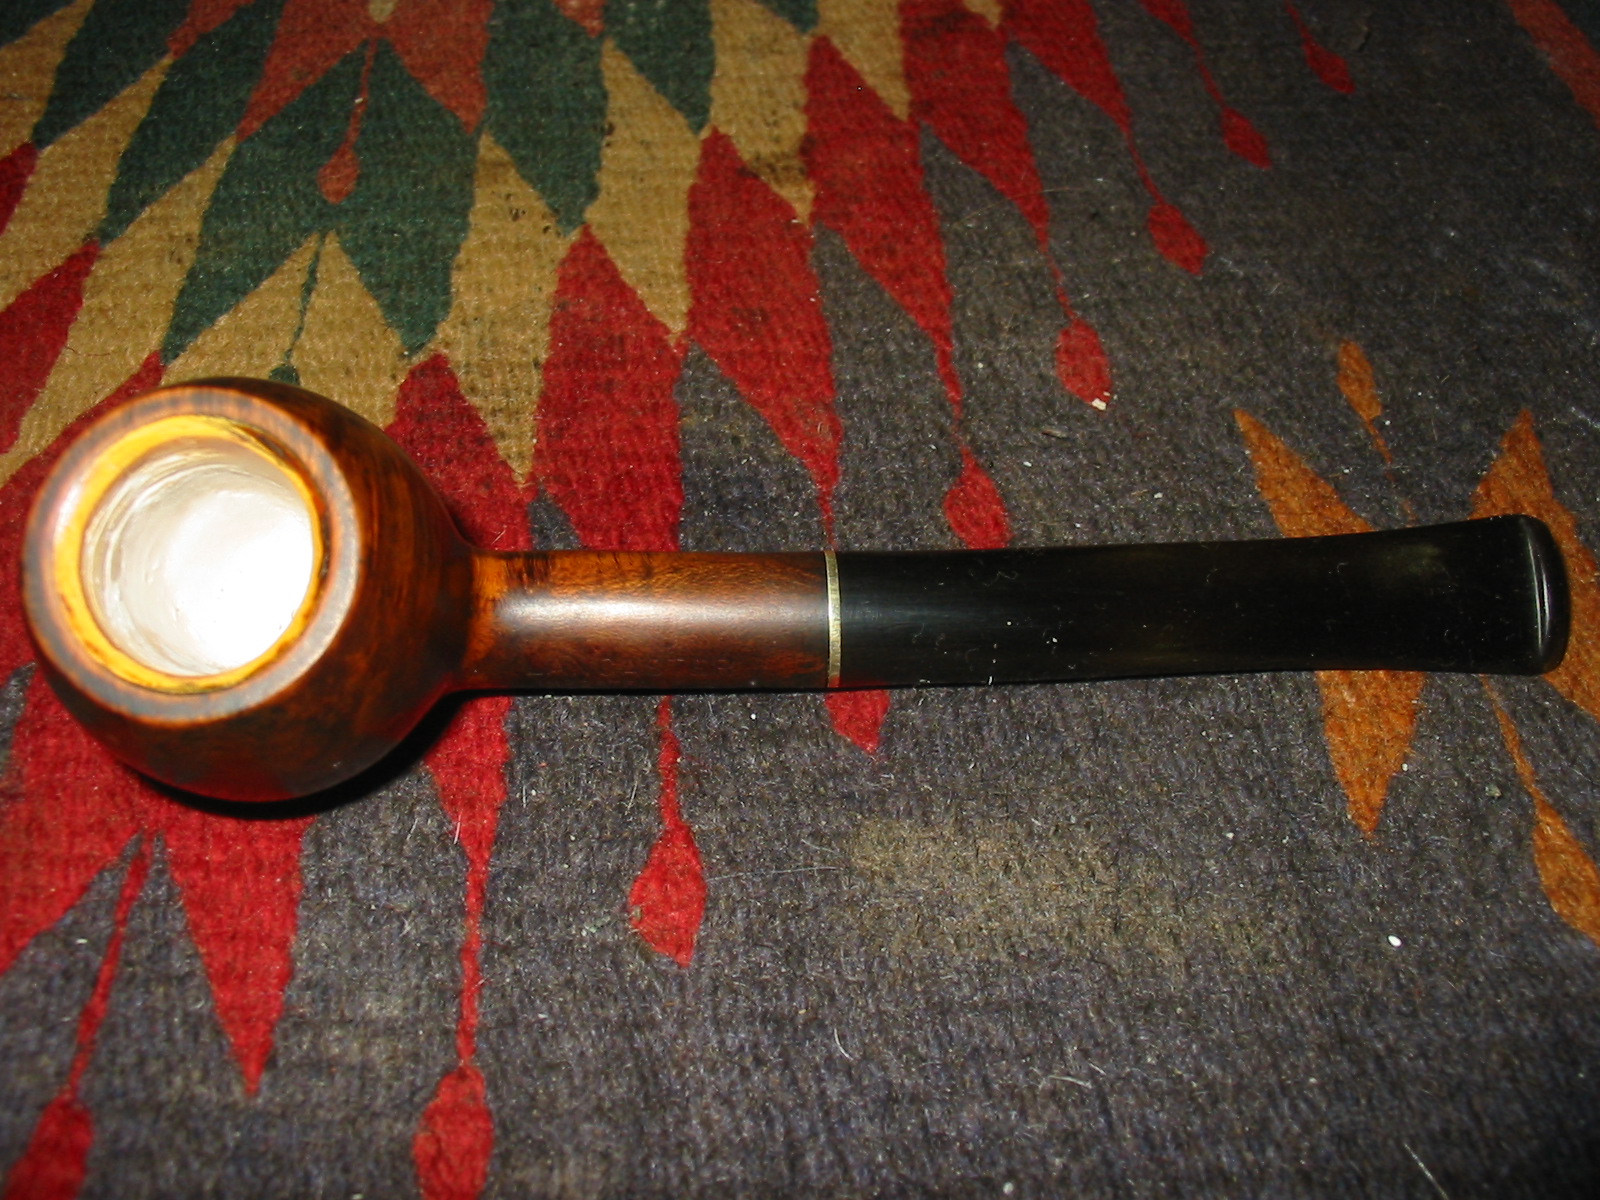
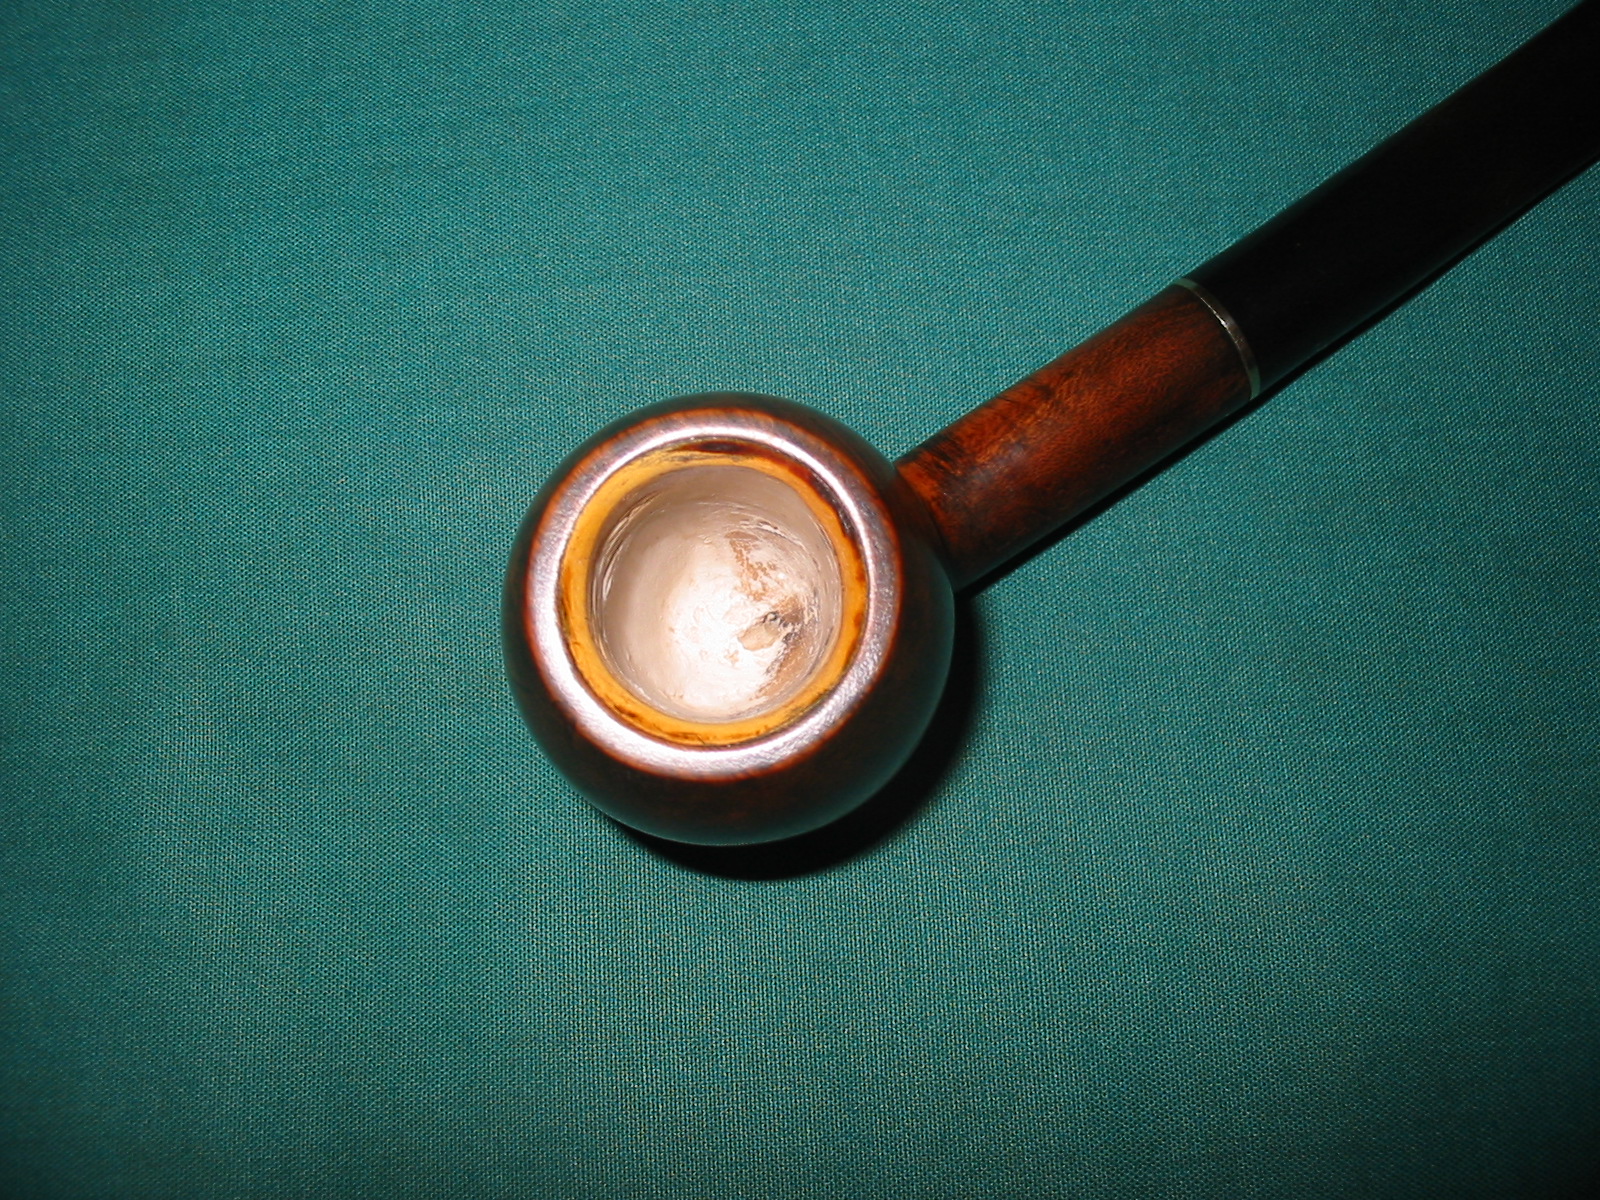
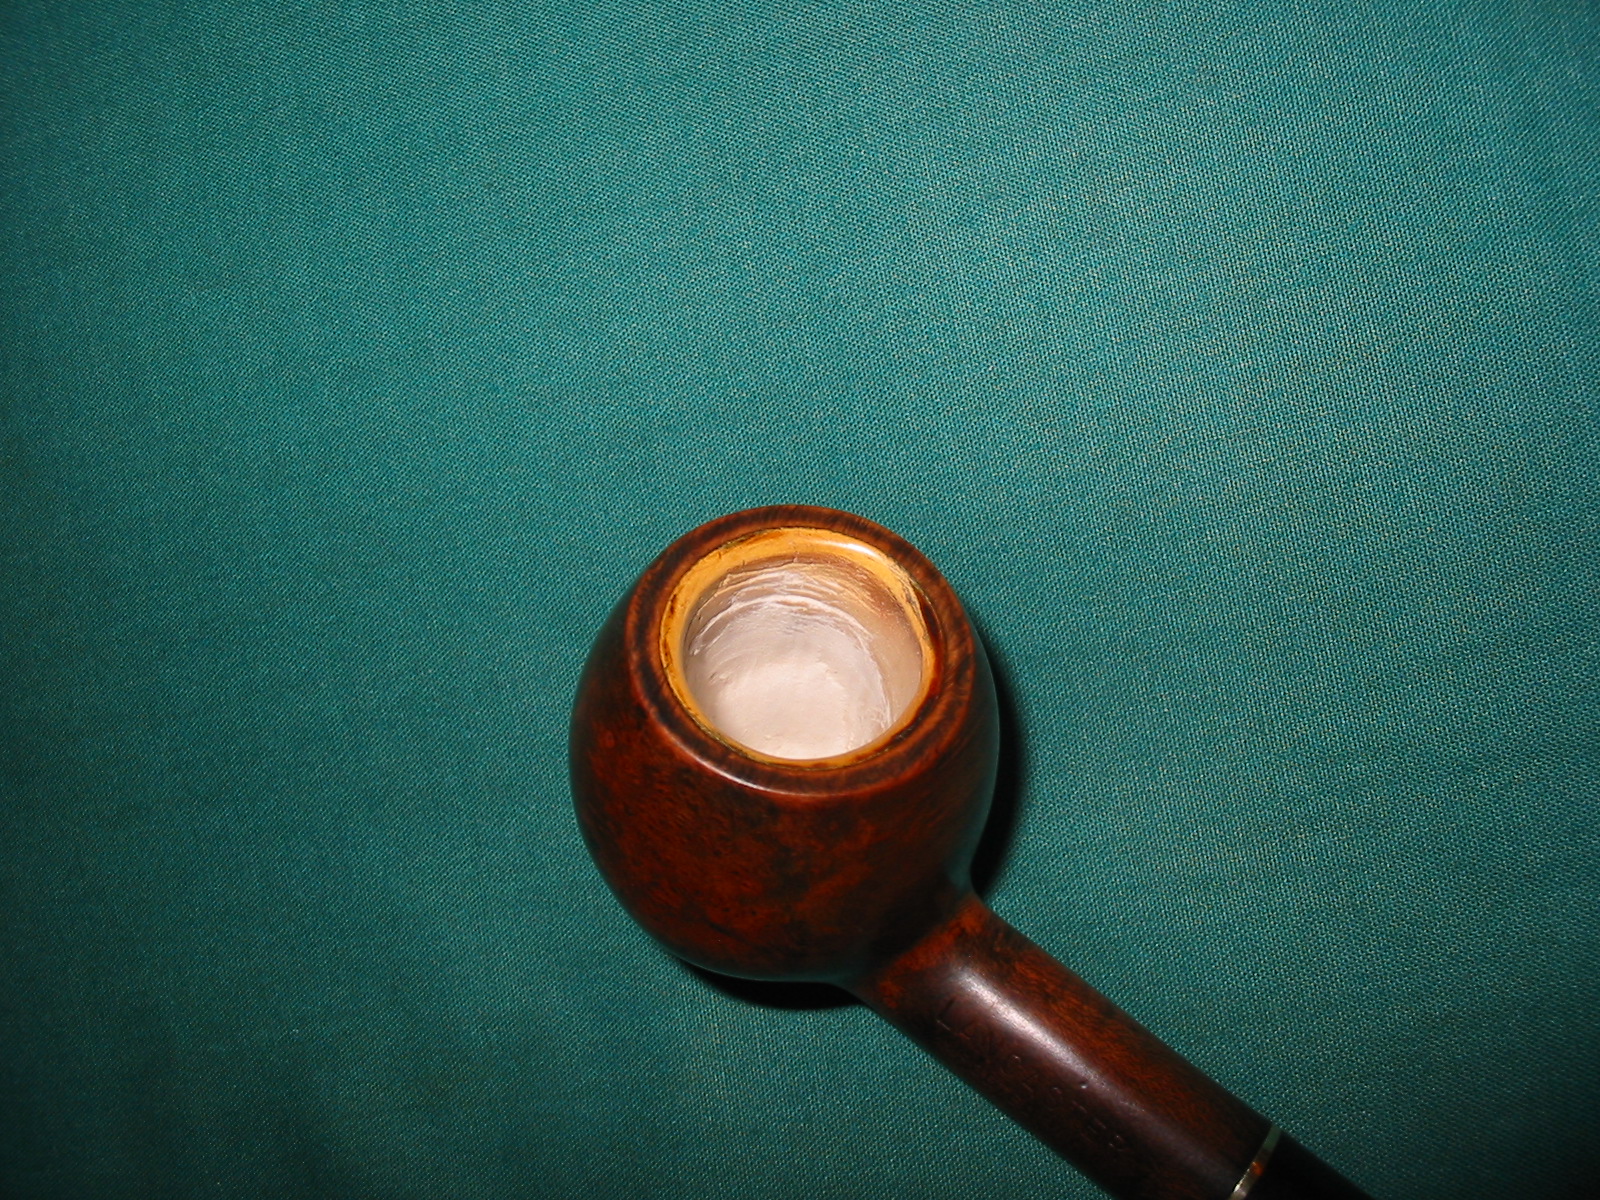
The close up photo below shows the extent of the caking and the buildup on the rim. Note that the inner bevel was intact and the rim itself was undamaged – no nicks or dings on the outer edge and no burn marks. This one would clean up nicely.
IMG_4528

The Lumberman stamping was new to me. I had not heard of it before but it looked interesting in the photos that Andrew sent along. I asked him about the brand so he included some interesting information on the stamping that he had gleaned from a Mr. Can EBay listing. It certainly sheds some light on the brand. Here is how the listing read:

“This Collectible Briar pipe is unique, extremely rare Comoy’s 309XL – a classic Canadian Shape. It has the arched Comoy’s nomenclature stamped over Deluxe (just as it appeared in the early 1930’s) both of which were stamped over Lumberman. For anyone already familiar with the stamping of Comoy Canadians that is enough to recognize that this is a rare and collectible Comoy.”

It appeared that the pipe was made by Comoy’s and well worth the effort to restore it. Andrew also sent along three pages of background information that he had found on the brand. I believe that Mr. Can was also the source of this information. I have included some of it here as it is interesting to those of us who are curious regarding the history of the pipes we collect:

“During its history, Comoy’s has had three distinct sets of nomenclature, though they became somewhat blended in later years. The earliest Comoy nomenclature either had no Comoy stamping or a scripted, signature like forward leaning Comoy’s beneath which were featured names instead of shape numbers. Few of those names (Like Leman, Naval, Adelaide, and so on) are recognized even by the most ardent collectors. Then after World War I when Comoy began introducing what is sometimes called their Old Nomenclature (featuring the Prima, as the Top of the line with other lines like the Old Bruyere, Grand Slam, Lions Head, Lumberman, Lumberman Special and so forth) and arched Comoy’s stamping was used. In the 1930’s the Prima gave way to the Deluxe as the top of the line Comoy. Then just before World War II newer nomenclature started to appear (like Blue Riband, Specimen Straight Grain, and so on) and the Deluxe was replaced by the Royal Comoy. That New Nomenclature expanded dramatically after the War and blended with the modern nomenclature today.”

“The use of the arched Comoy’s ended with World War II and was replaced after the War with a straight line Comoy’s (along with the now famous country of origin stamping of a circular “Made In London” over a straight line “England”.”

“Prior to World War II with manufacturing facilities in both France and England, Comoy had pipes made in both locations. Most were easily identifiable by their country of origin stamping. There were several versions of Comoy’s Lumberman made in France and/or England. (They might have been the dame pipe but with different nomenclature.) “The Lumberman” and “The Lumberman Special were made in both factories. But none had the arched Comoy’s stamping.”

“After WWII Comoy’s reintroduced the Deluxe, discontinued the arched Comoy’s and continued various versions of the Lumberman. Perhaps Comoy’s best graded Lumberman was stamped Lumberman Deluxe – but it had no Comoy stamping. Lumber was always stamped over Deluxe.”

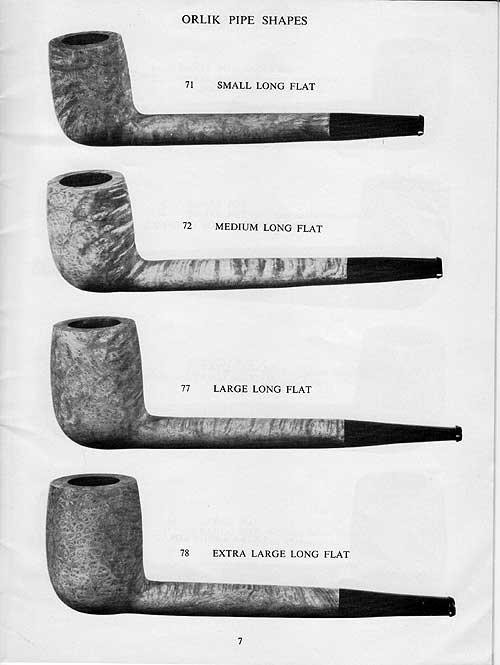
“Normally Comoy offered to Canadian sizes designated by shape numbers 296 and 309. The difference was in the length of the Canadians. The 309 shape was Comoy’s longest Canadian and the 296 was shorter. However, the extra long Canadians were upgraded with the additional stamping of XL and the very longest were sometimes stamped XXL. Either upgrade was rare.” – the above was taken from correspondence Andrew included when he sent the pipe to me.

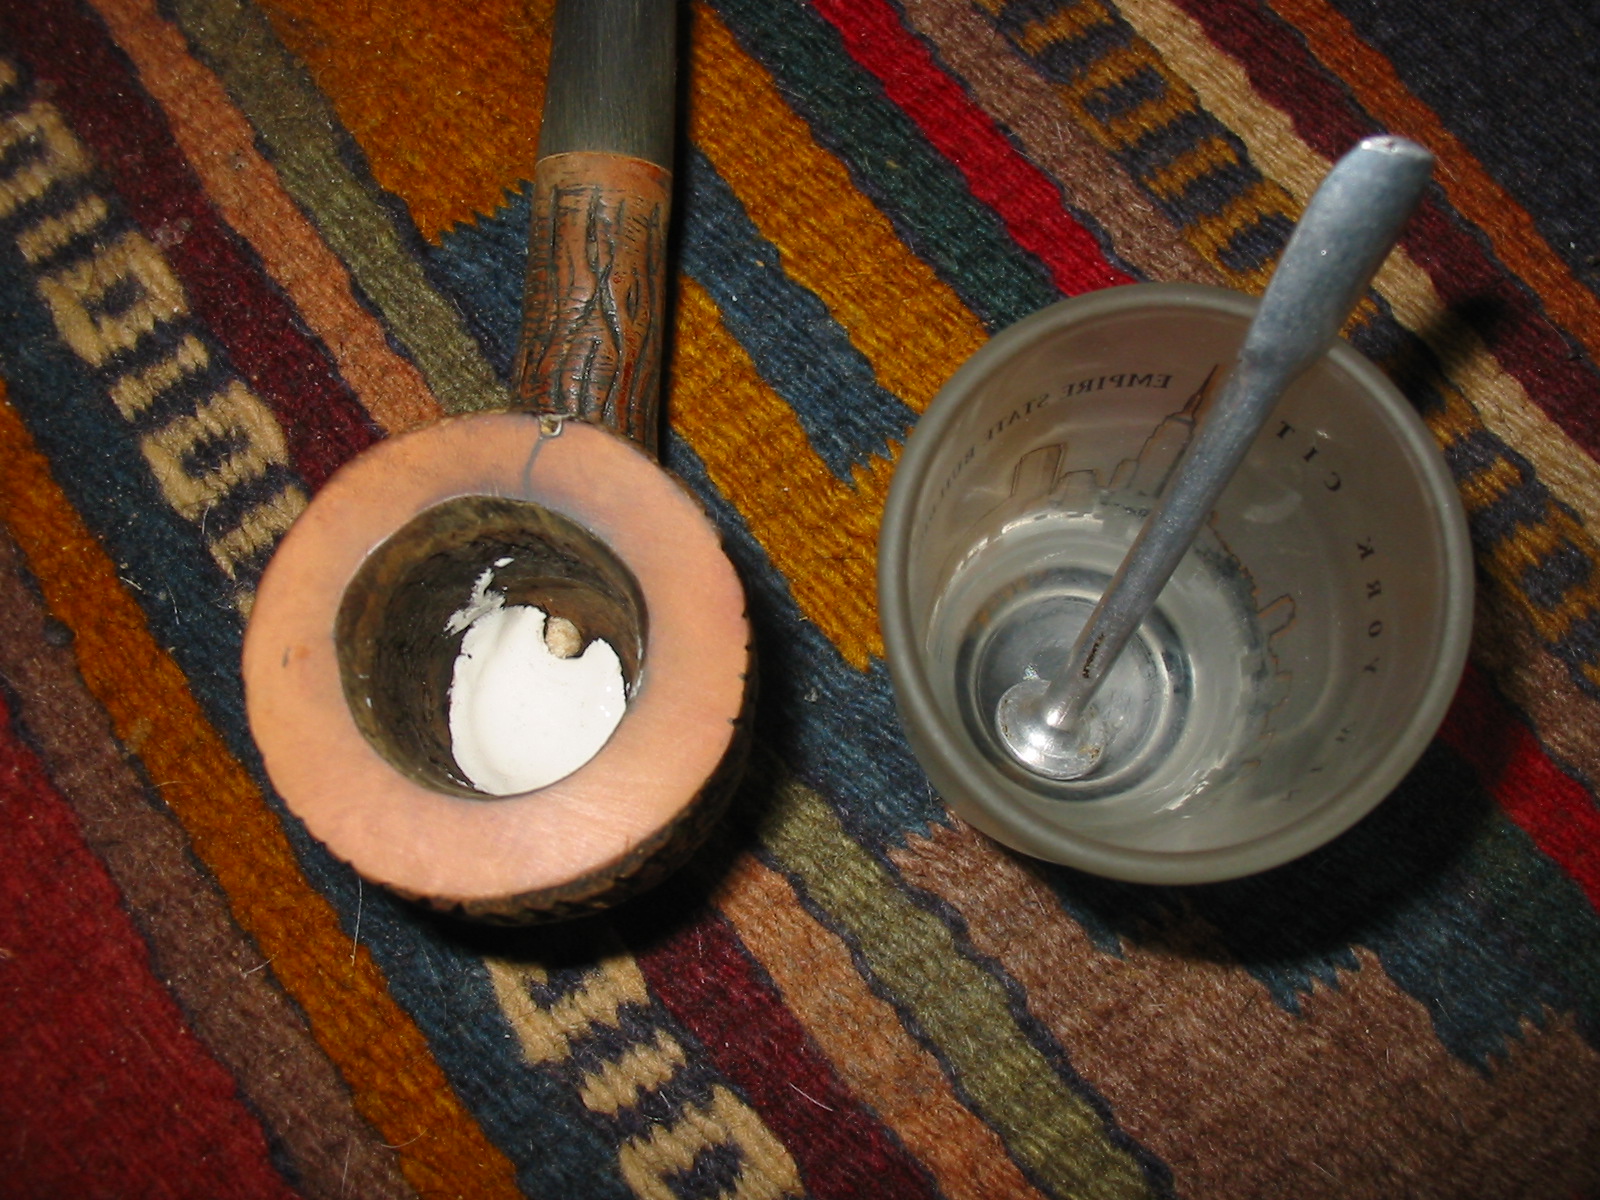
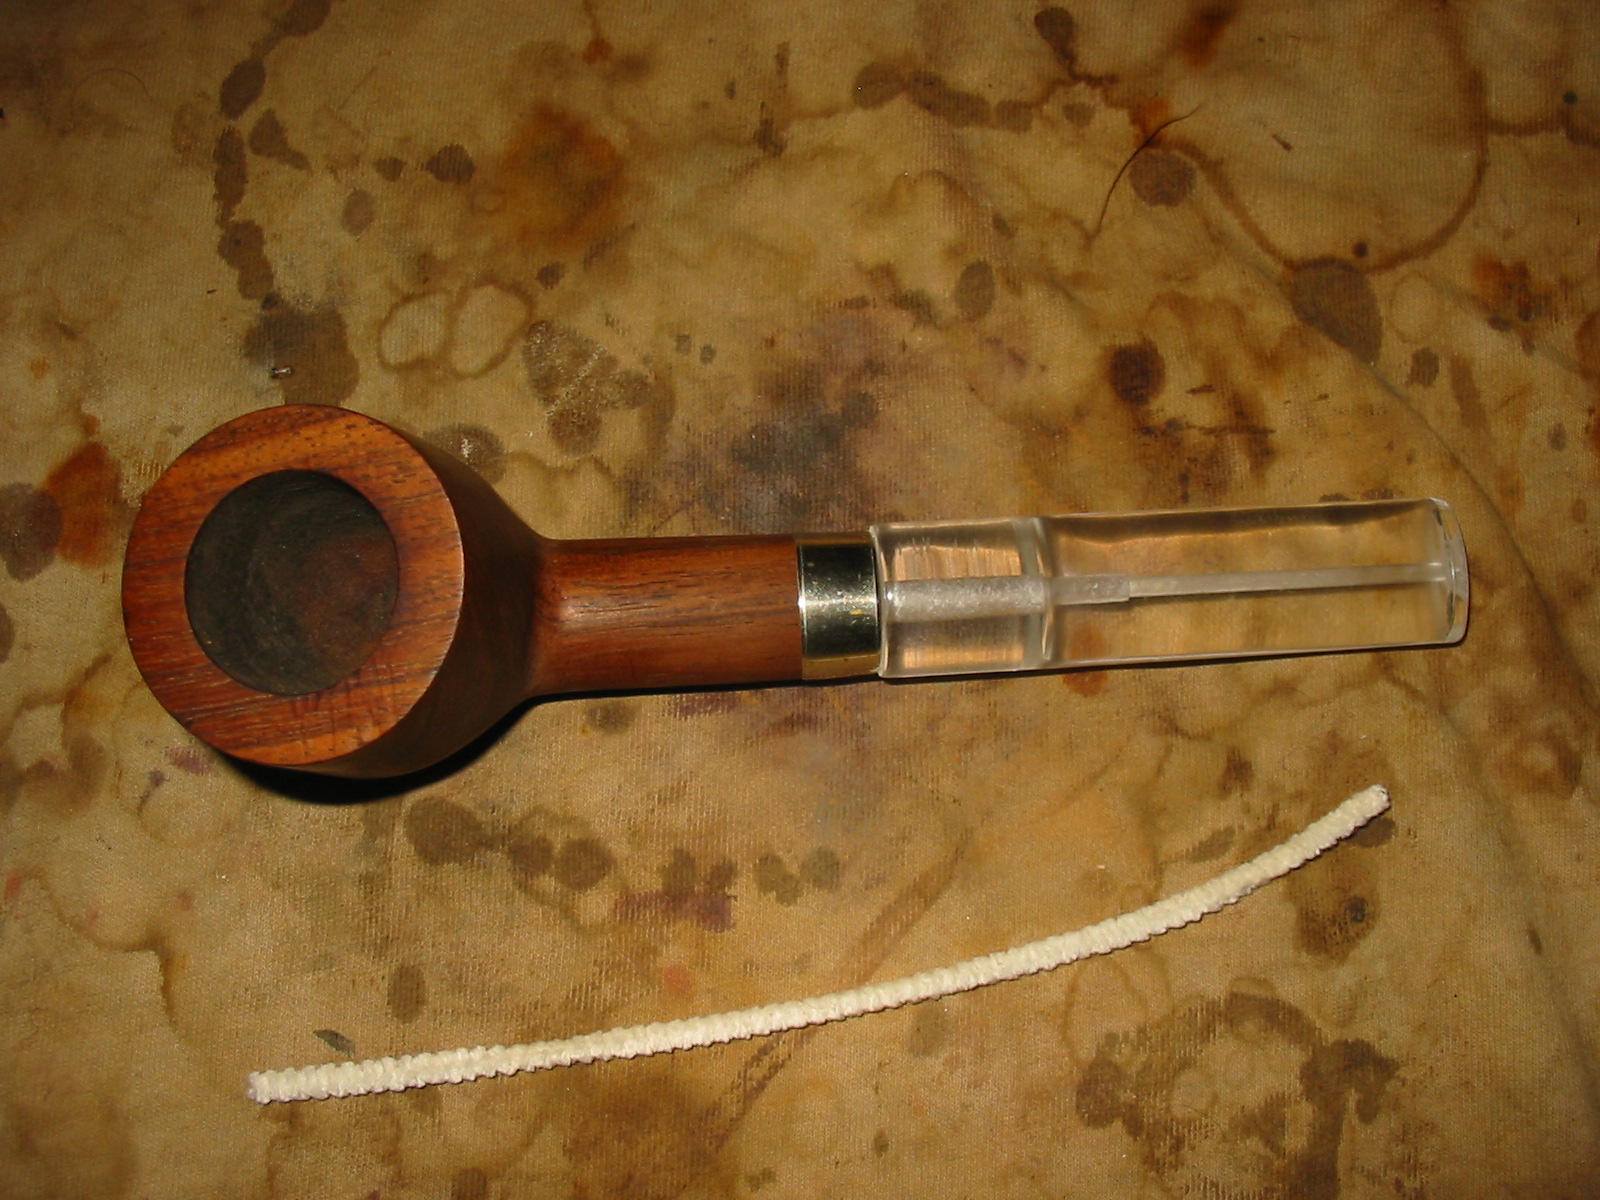
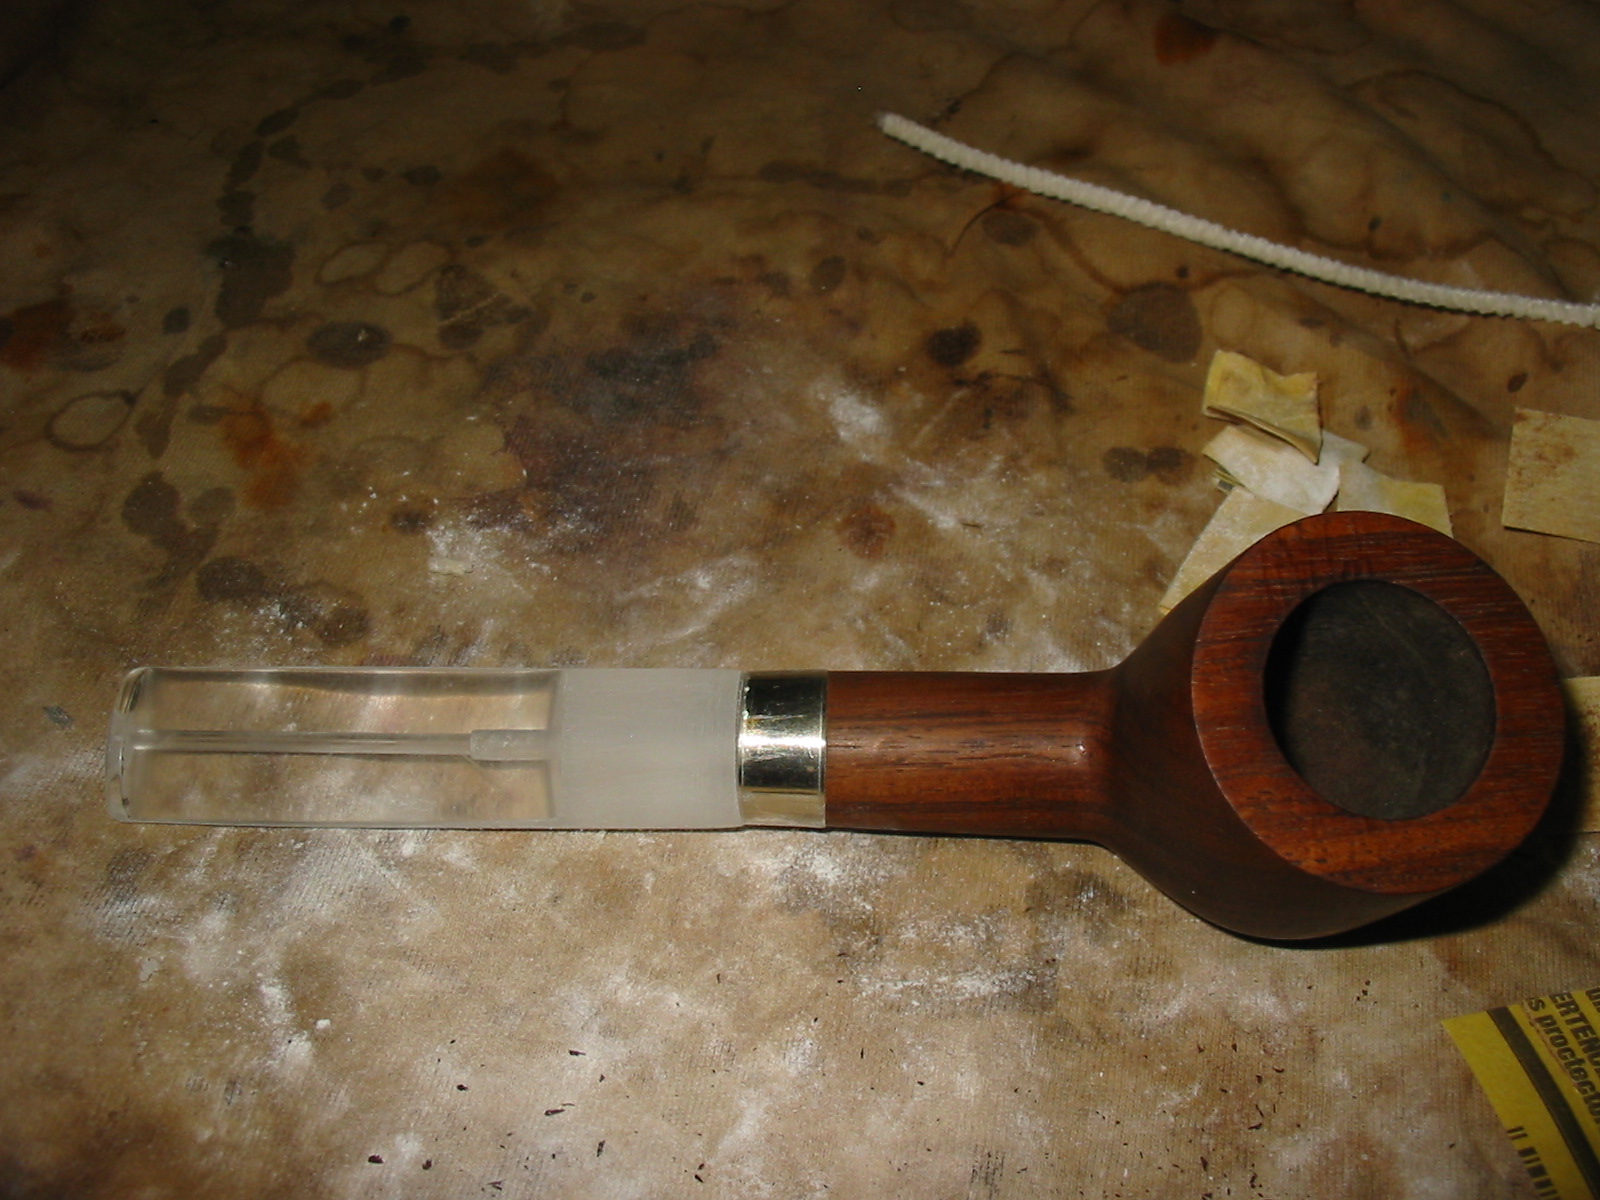
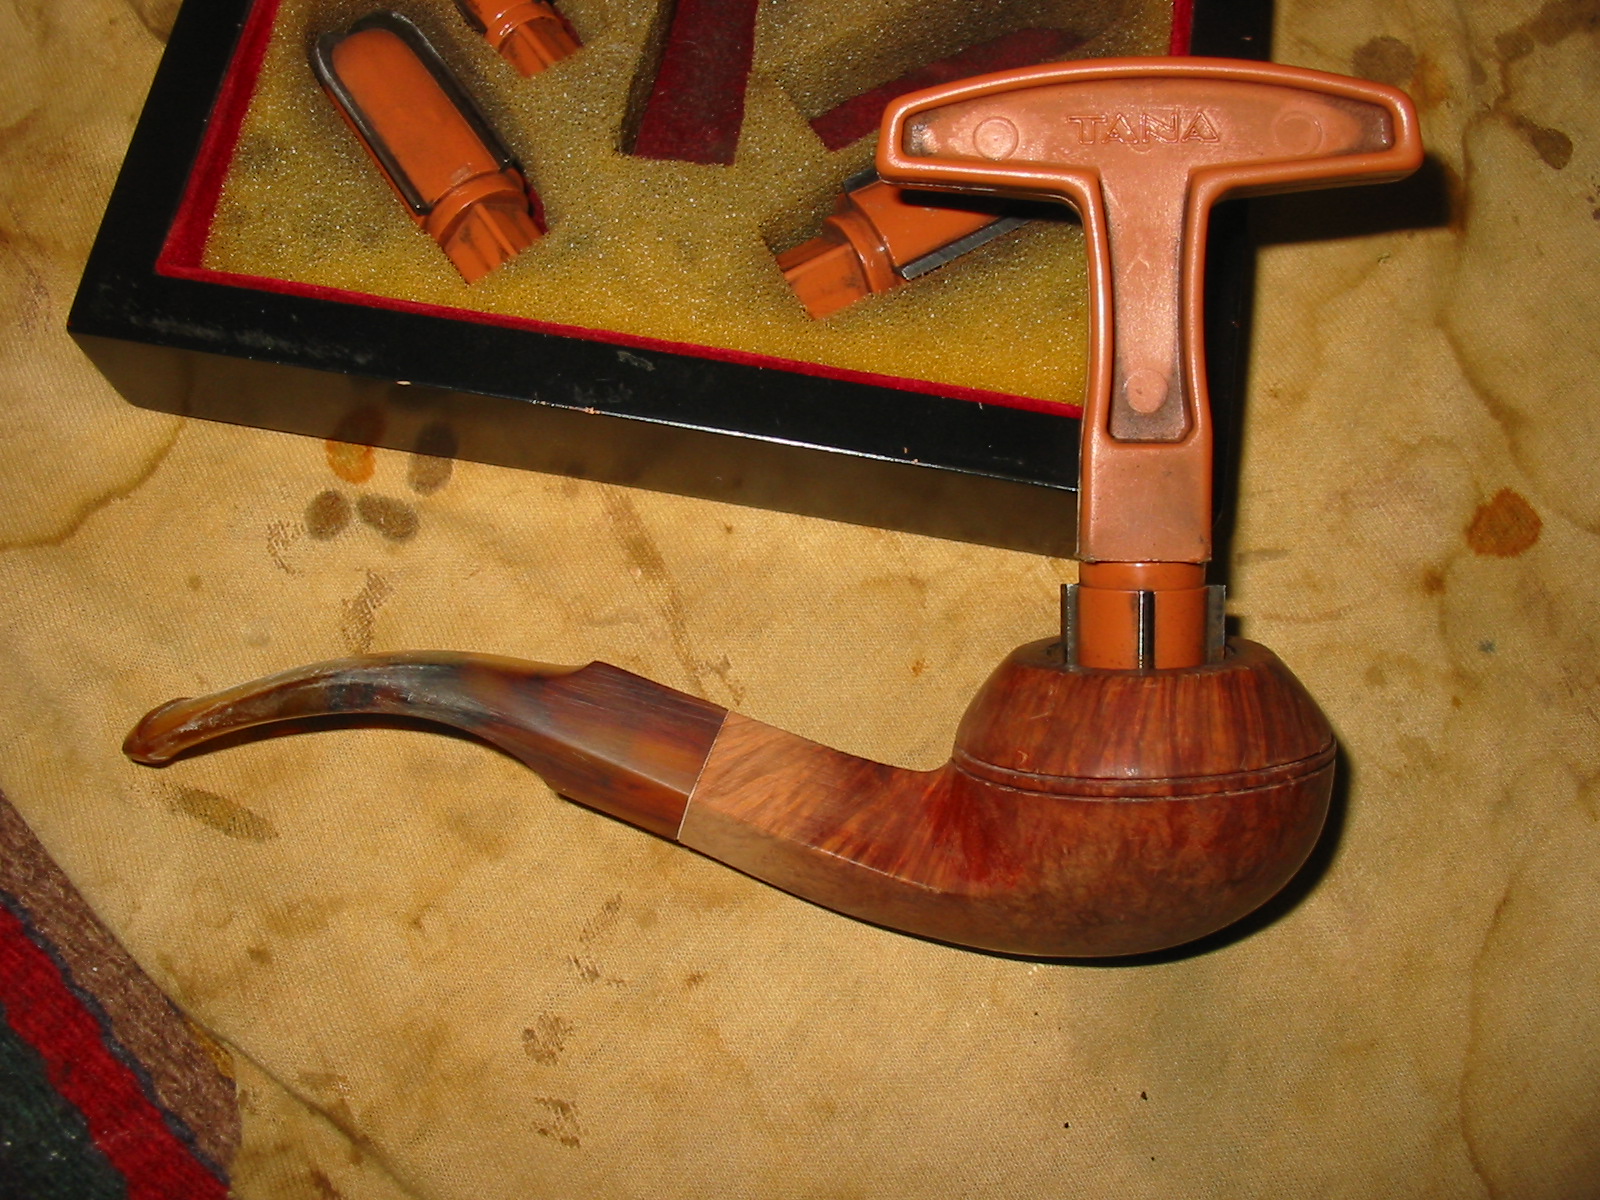
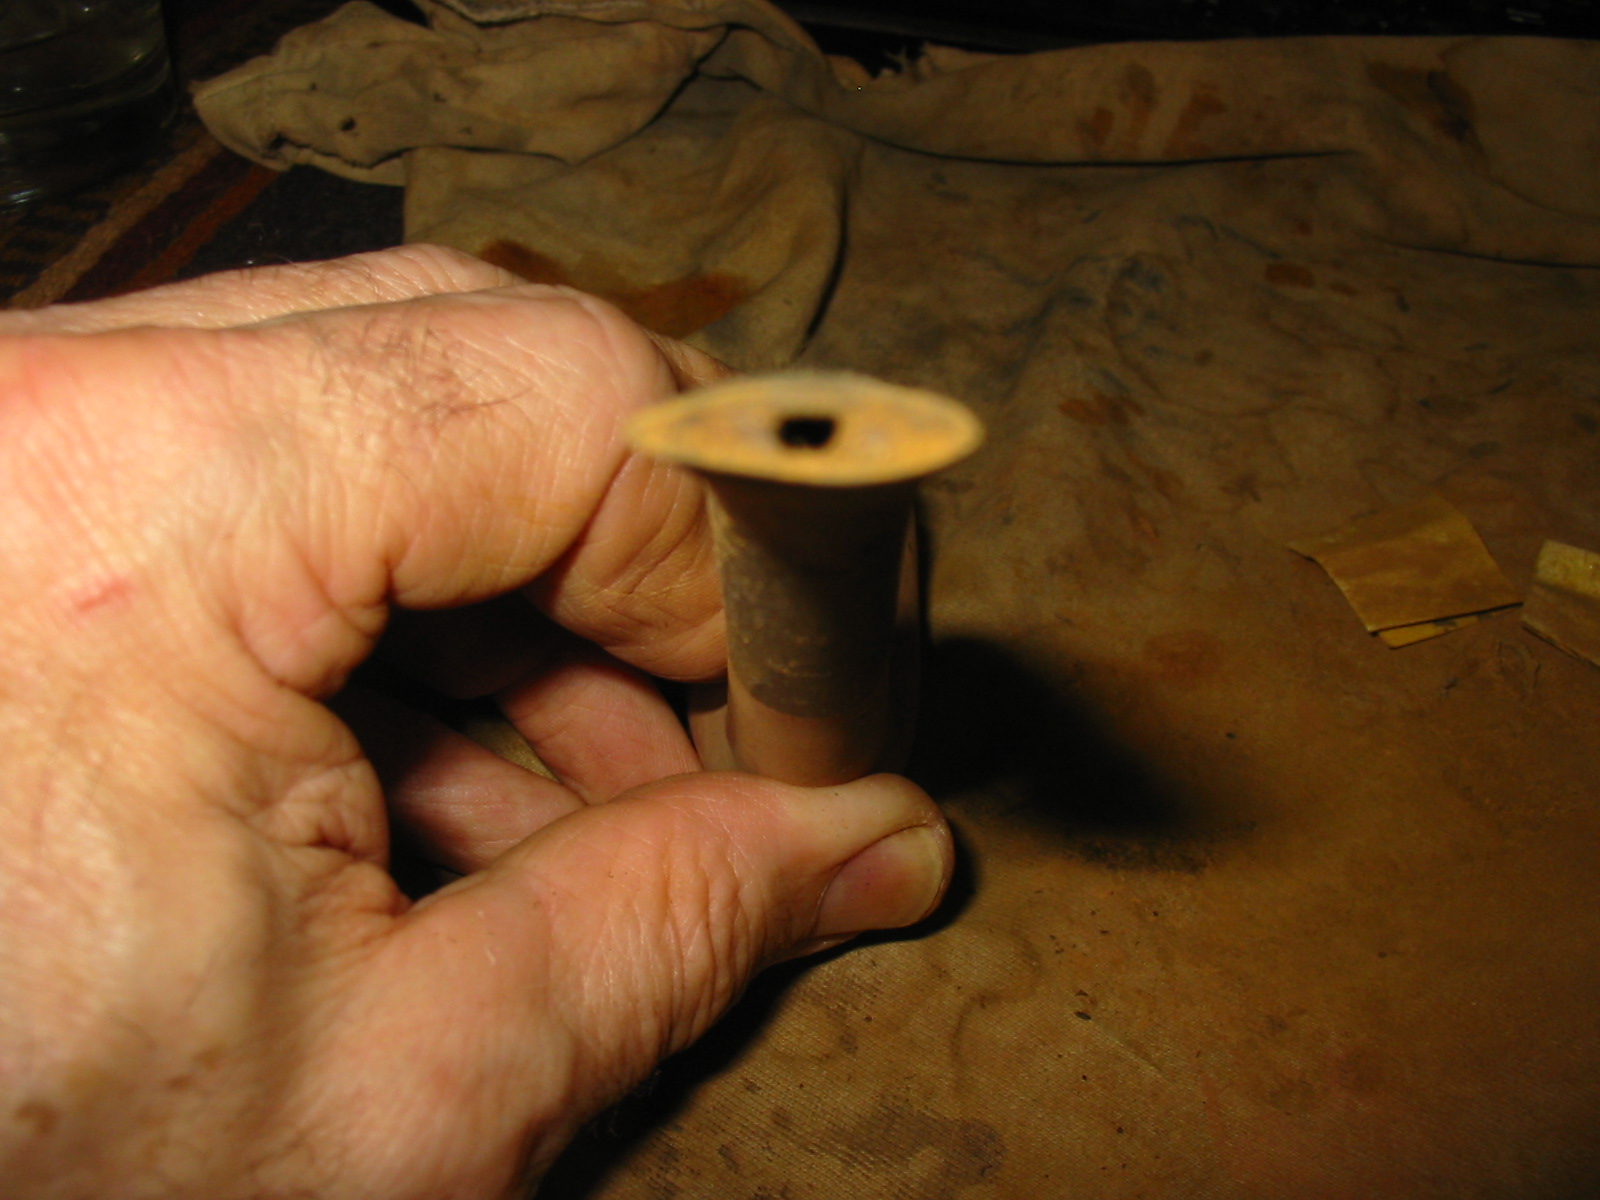
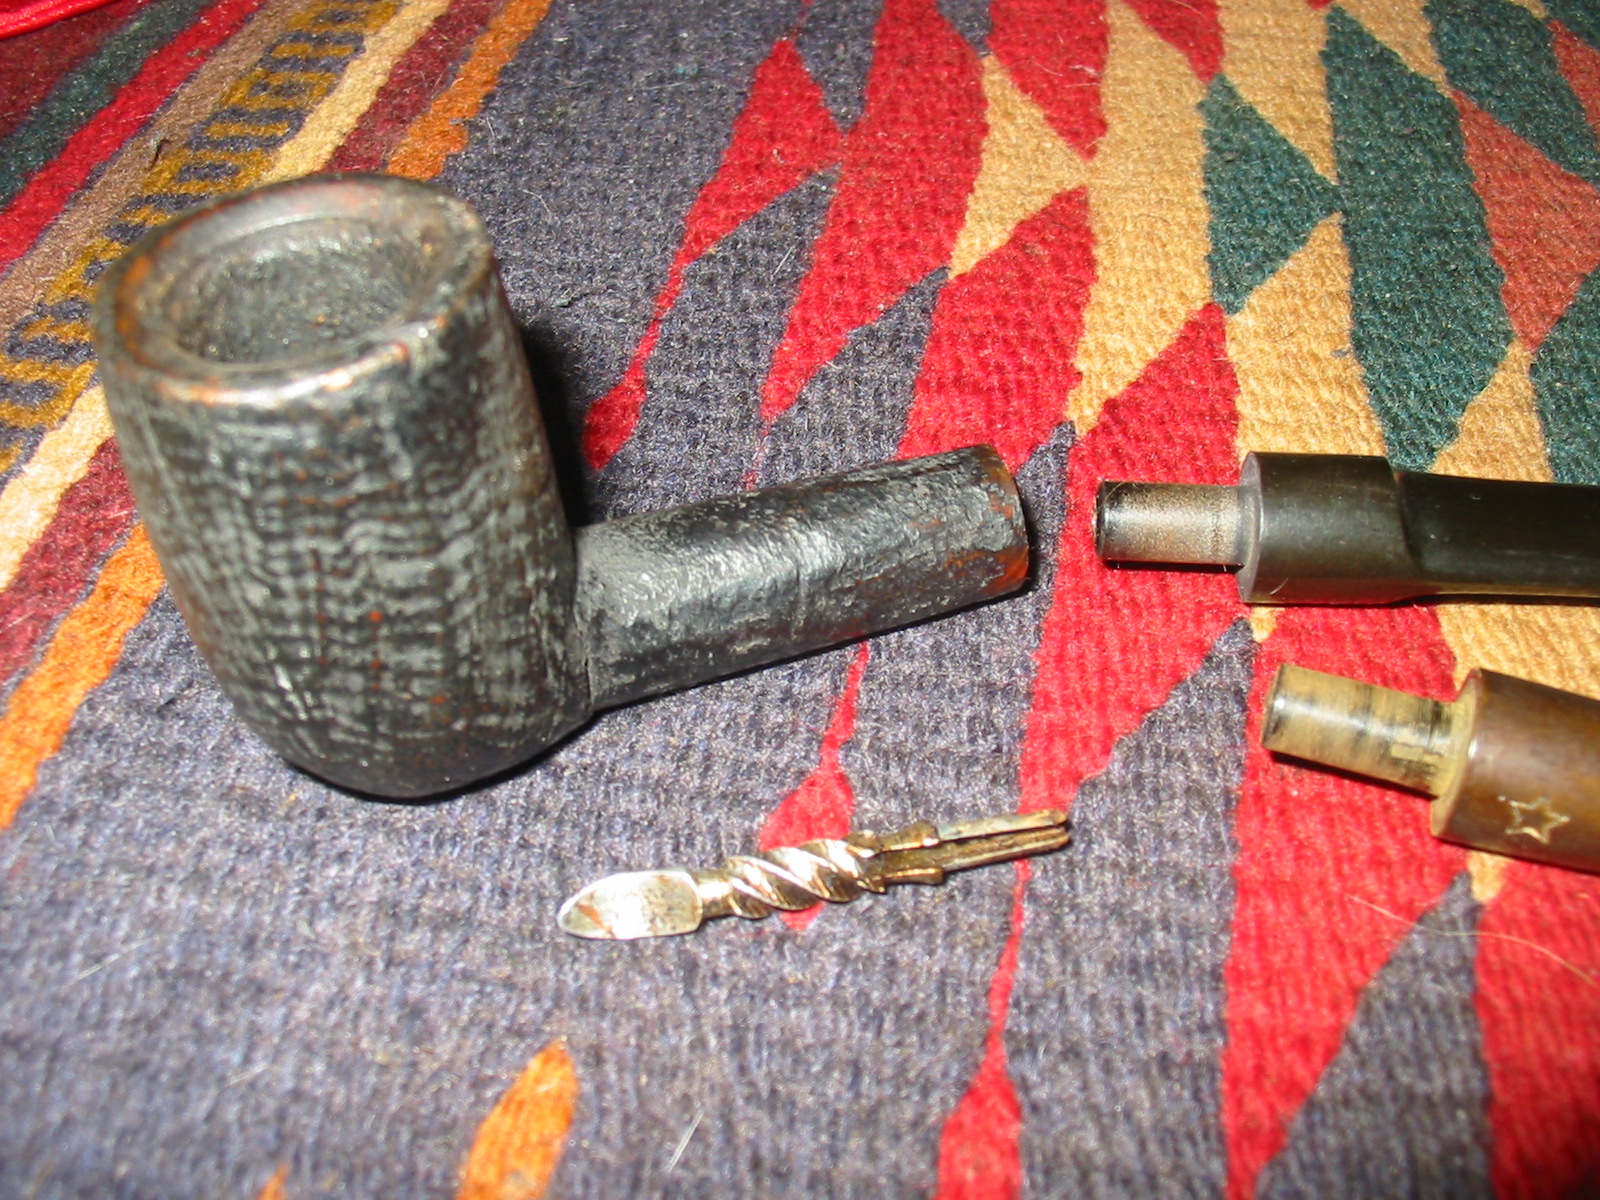
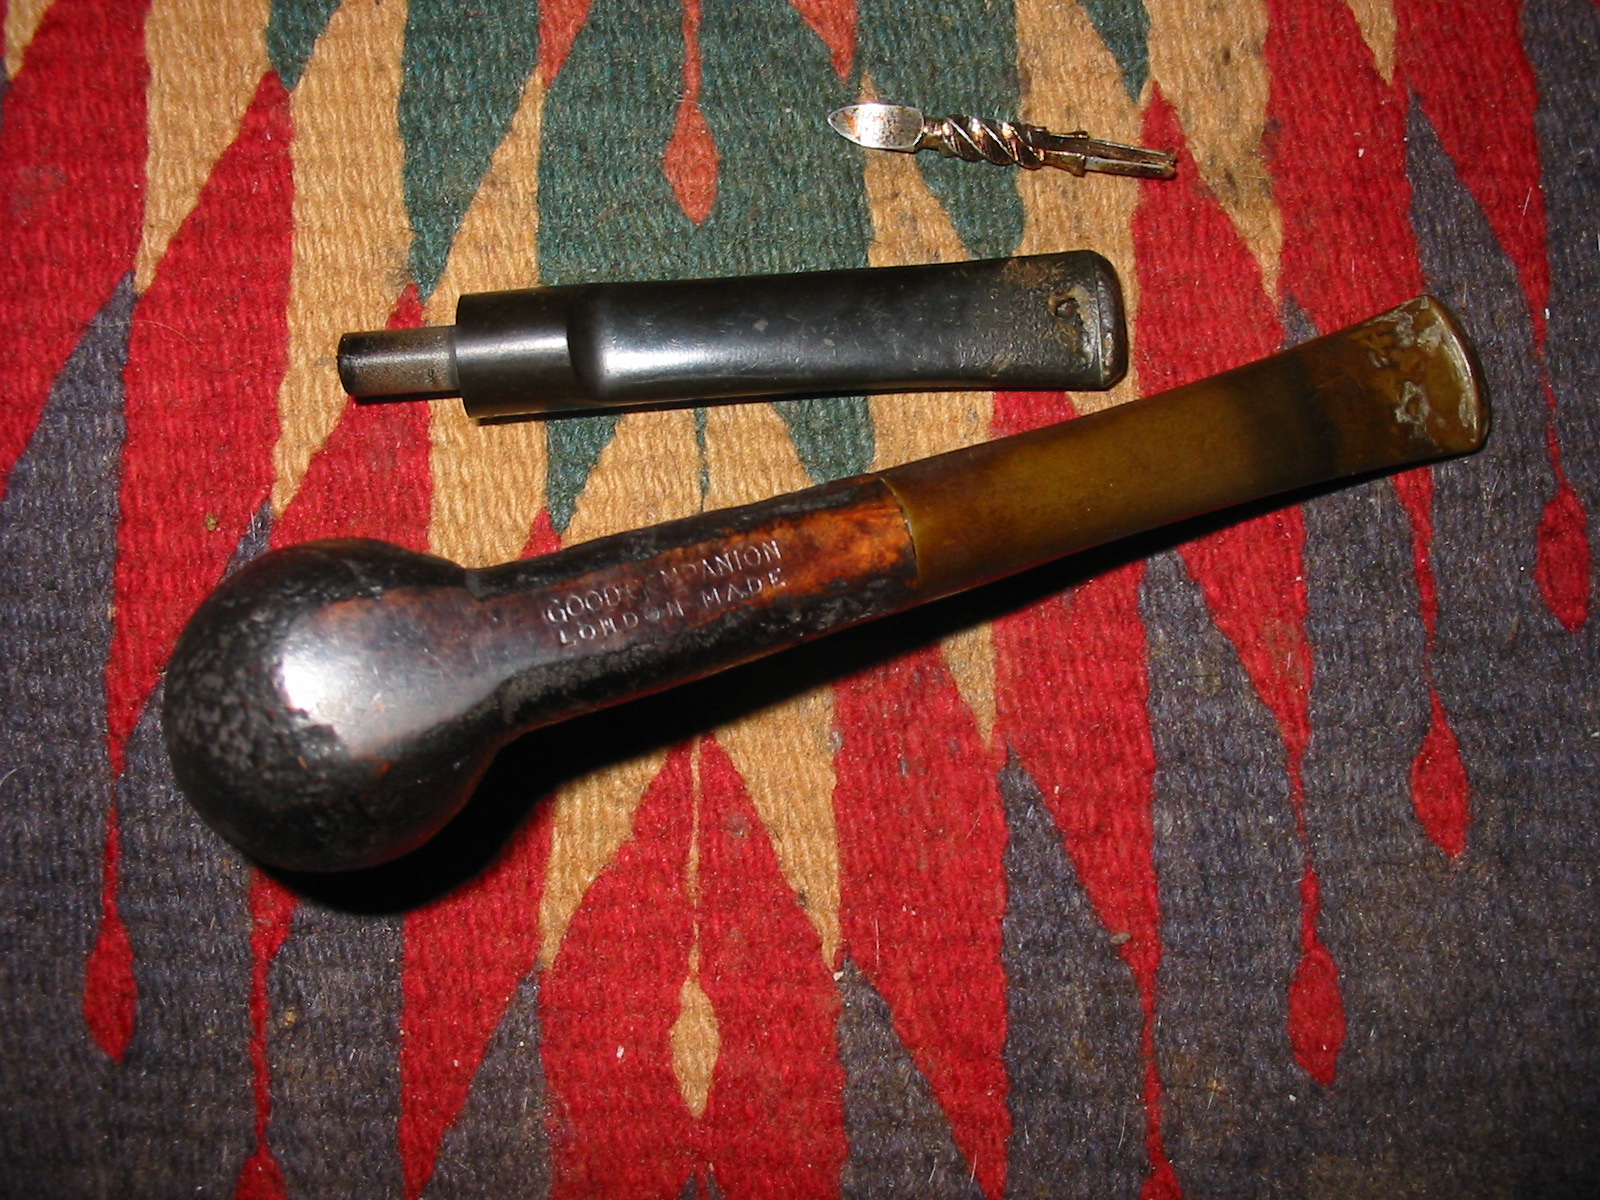
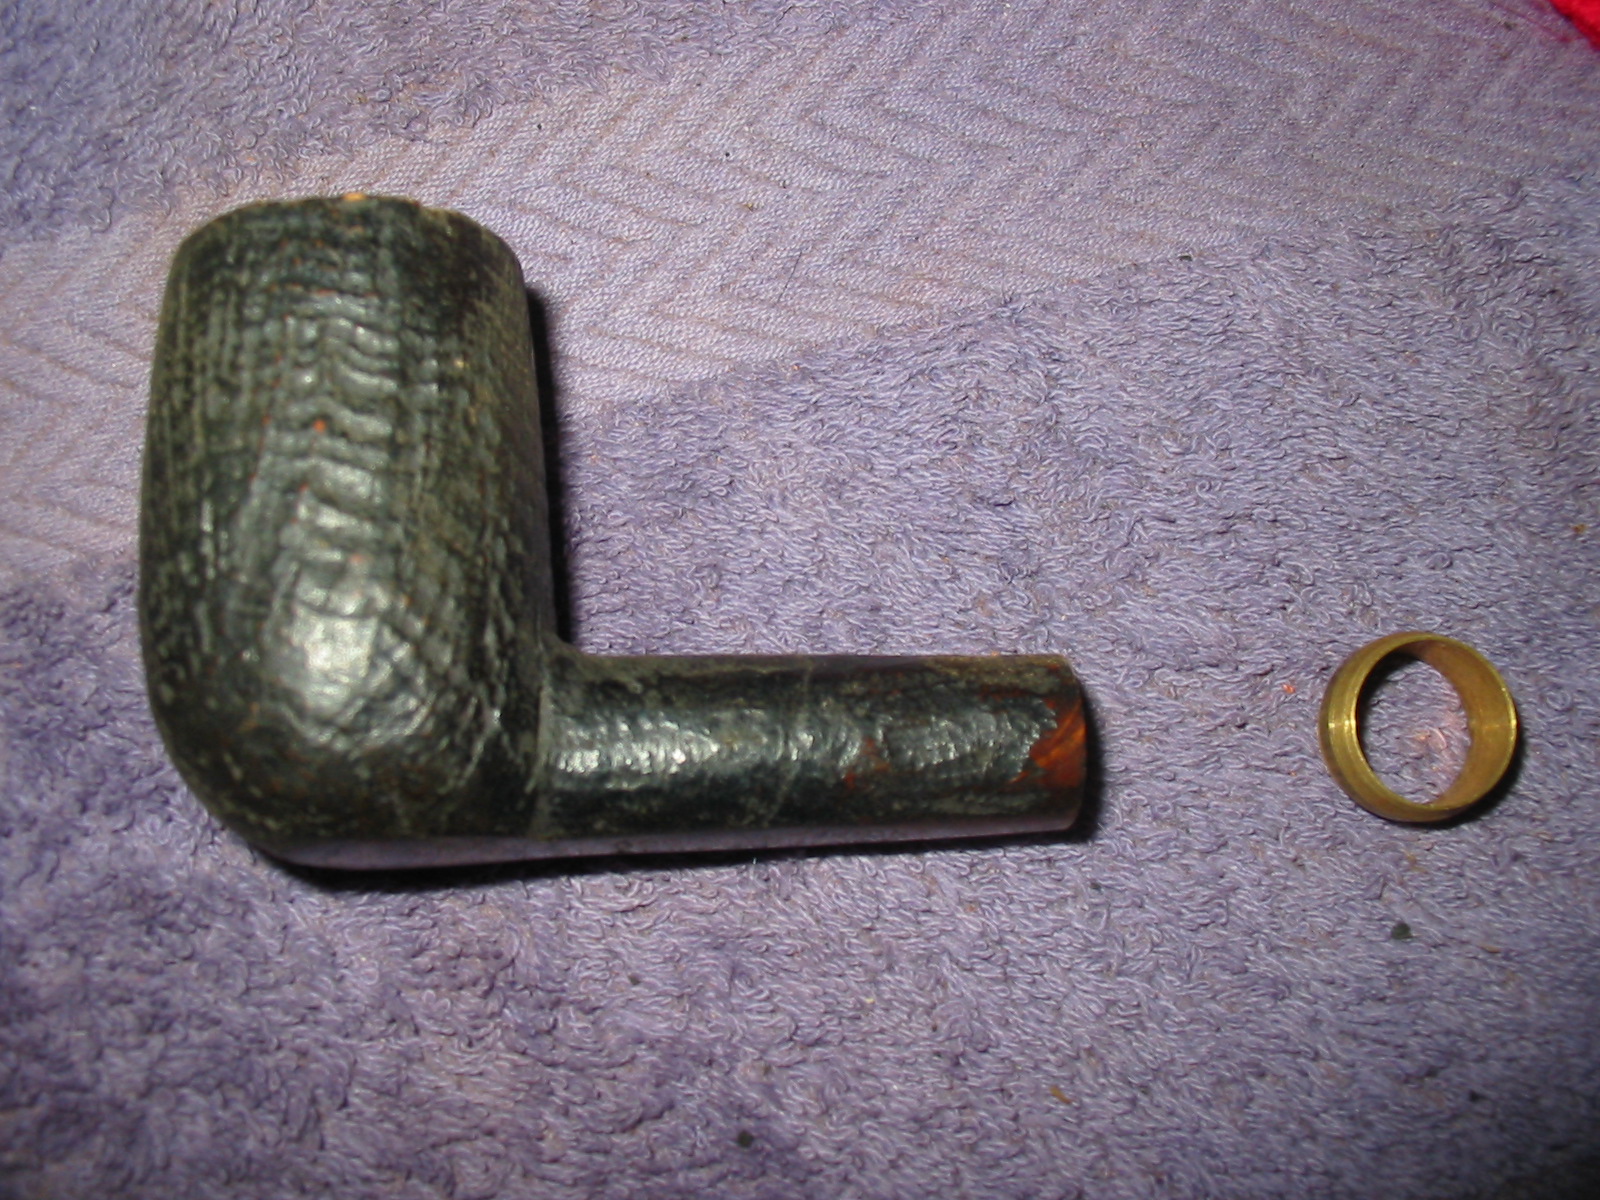
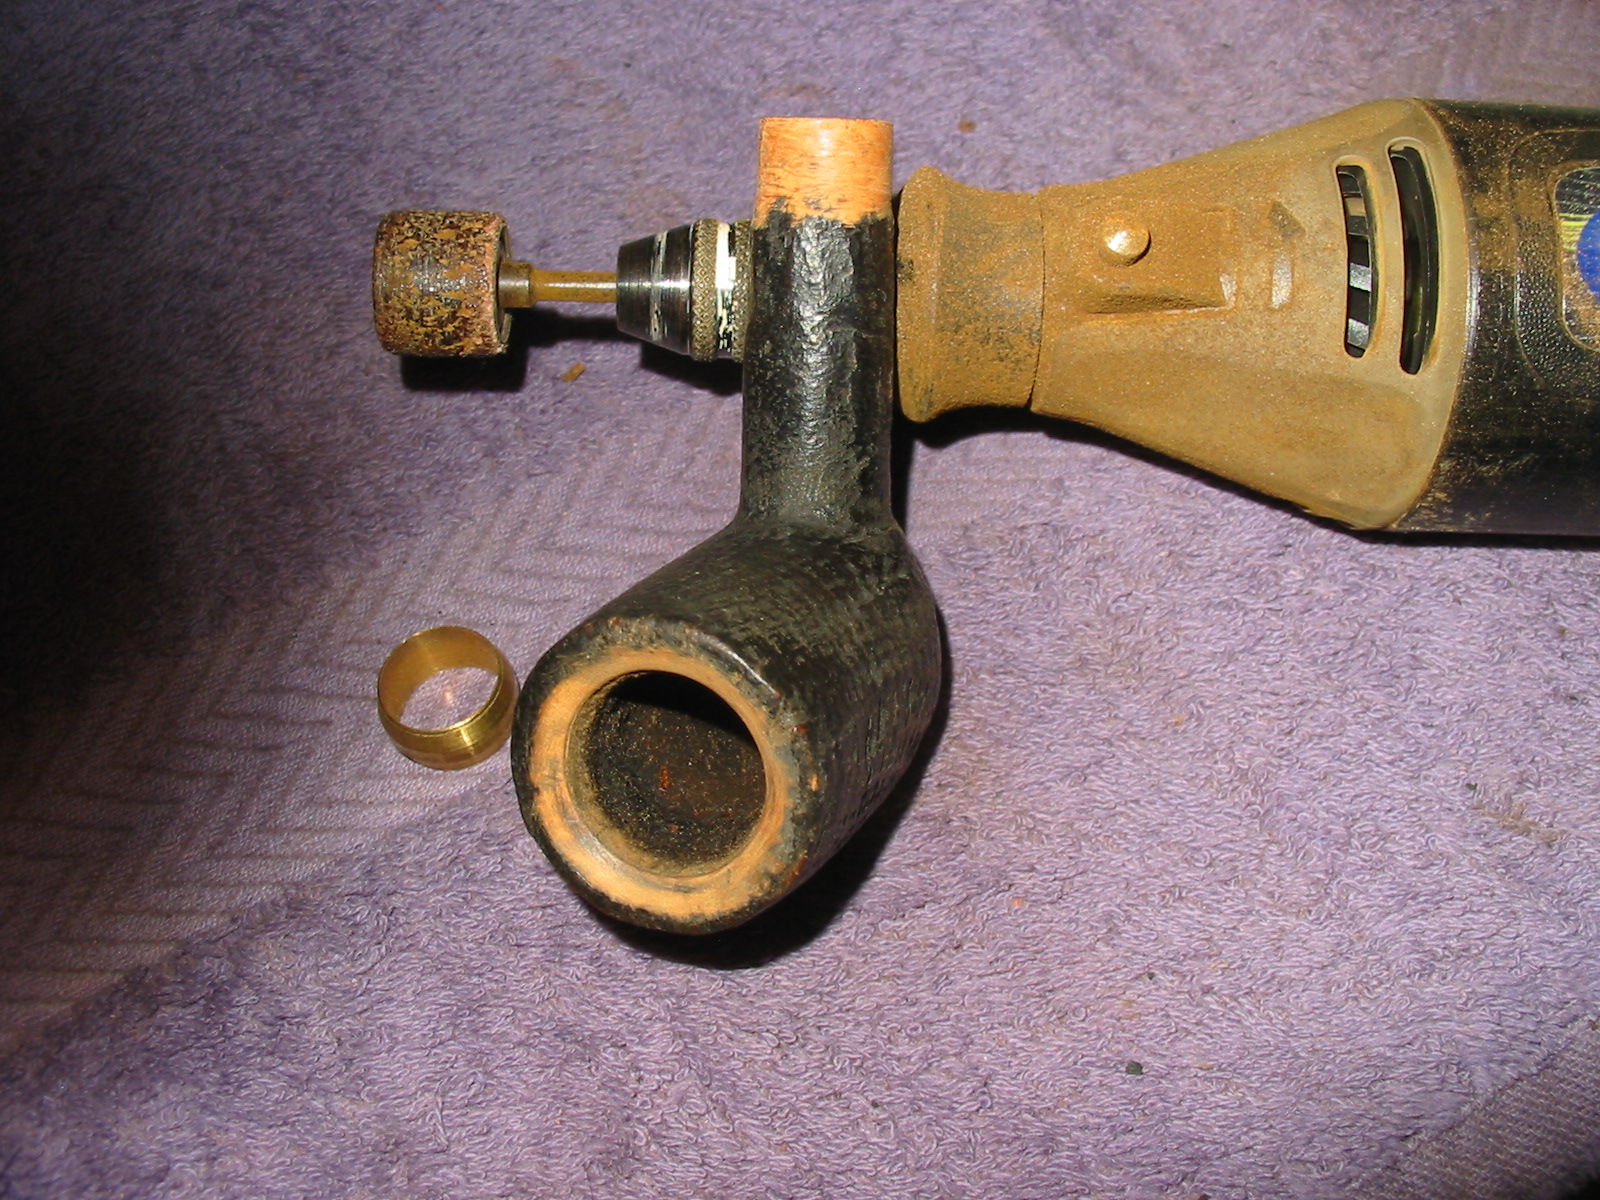
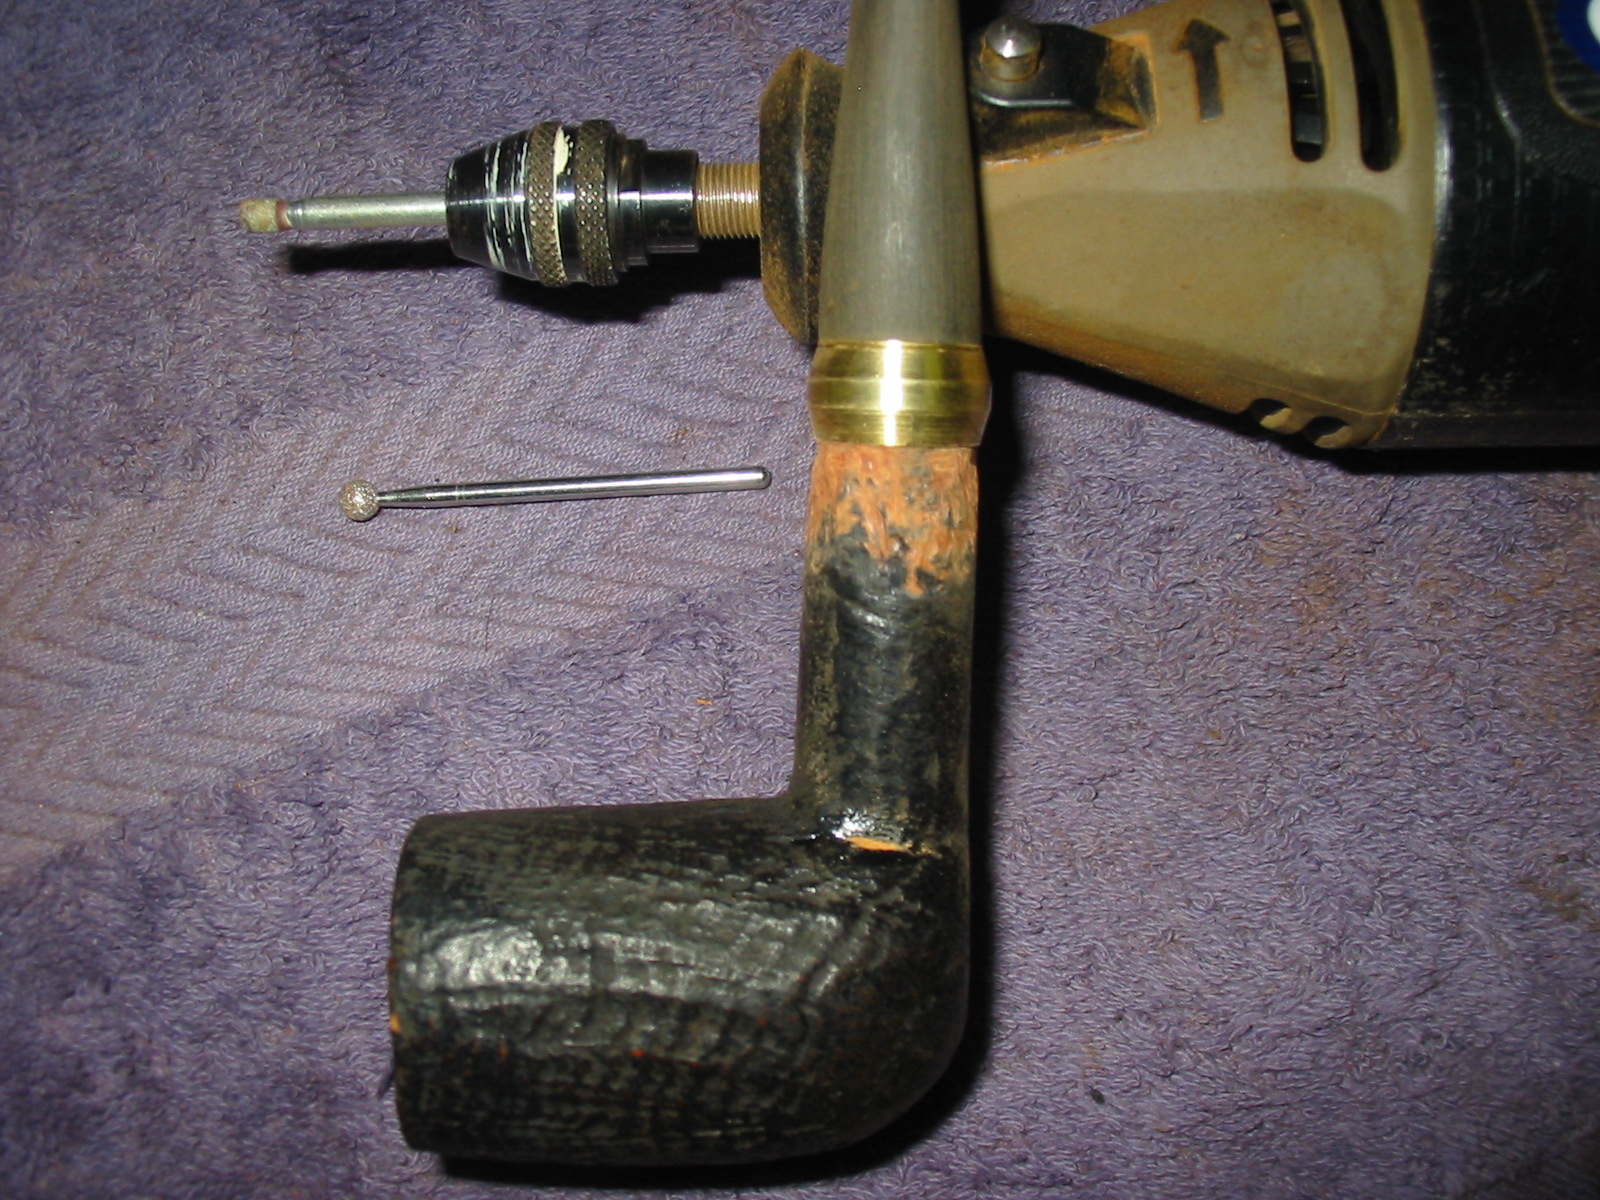
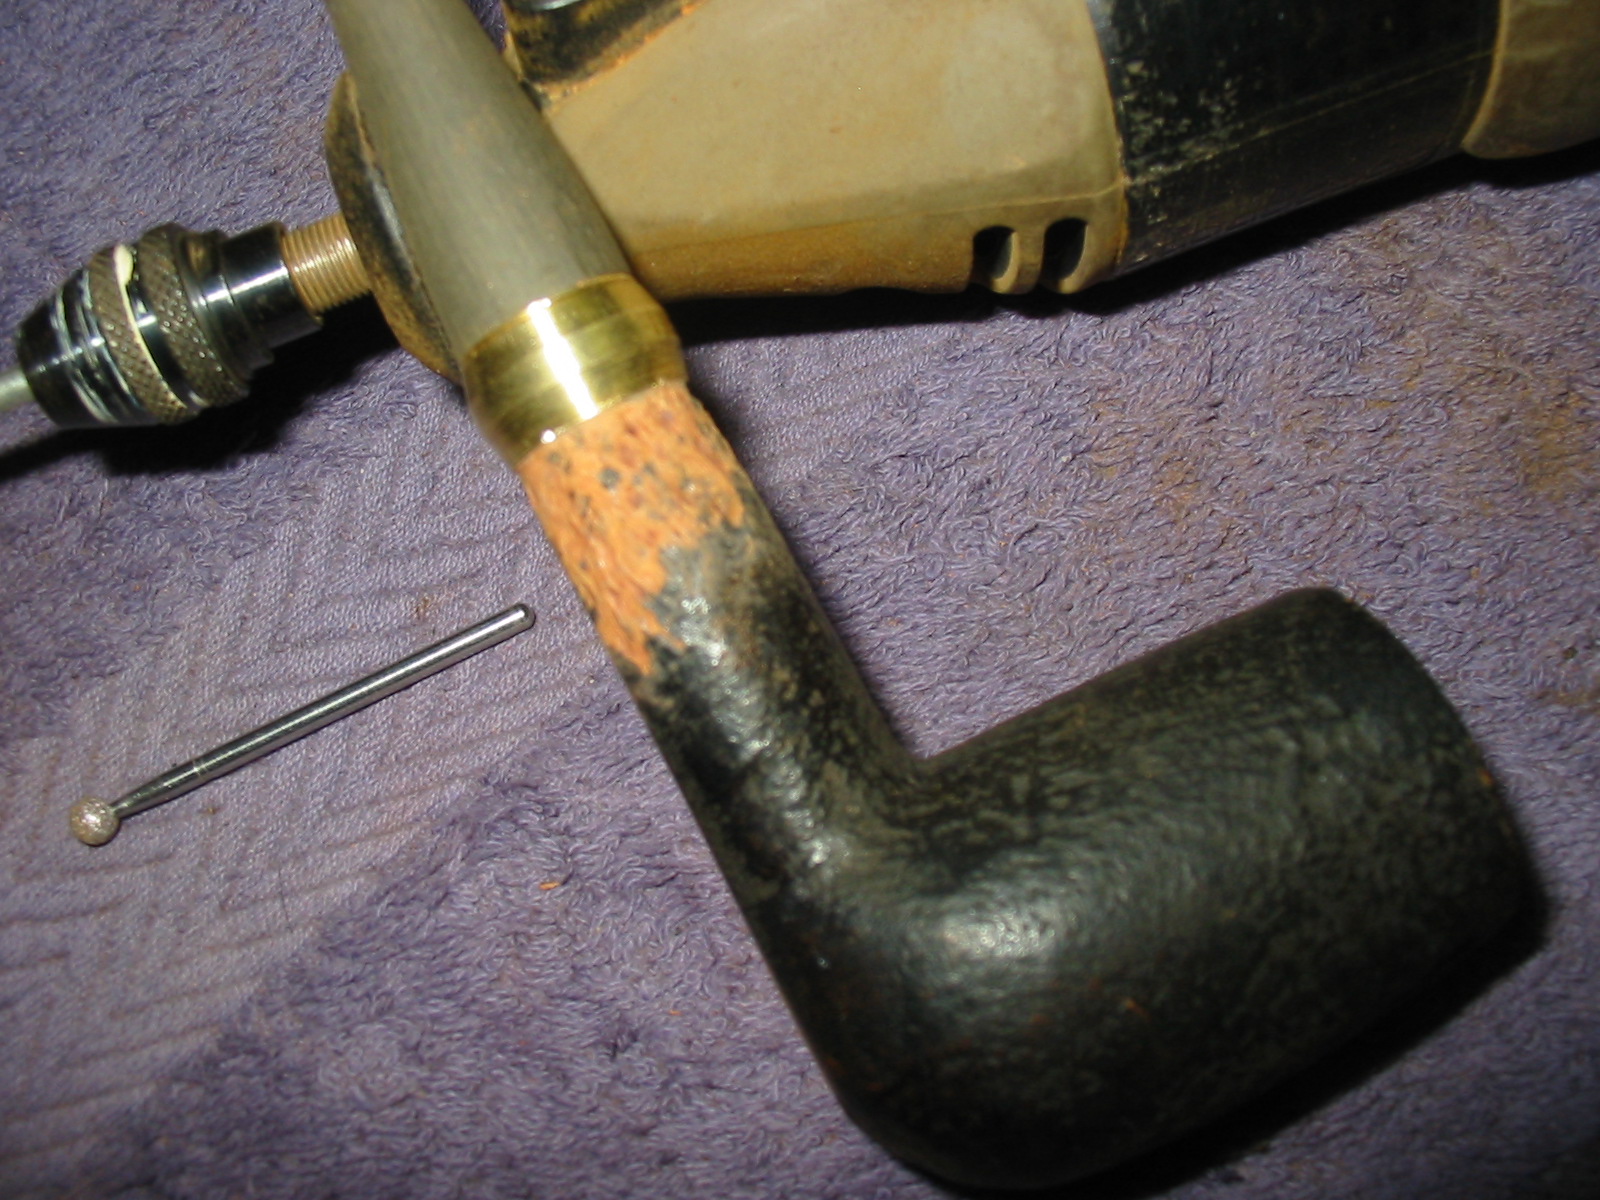
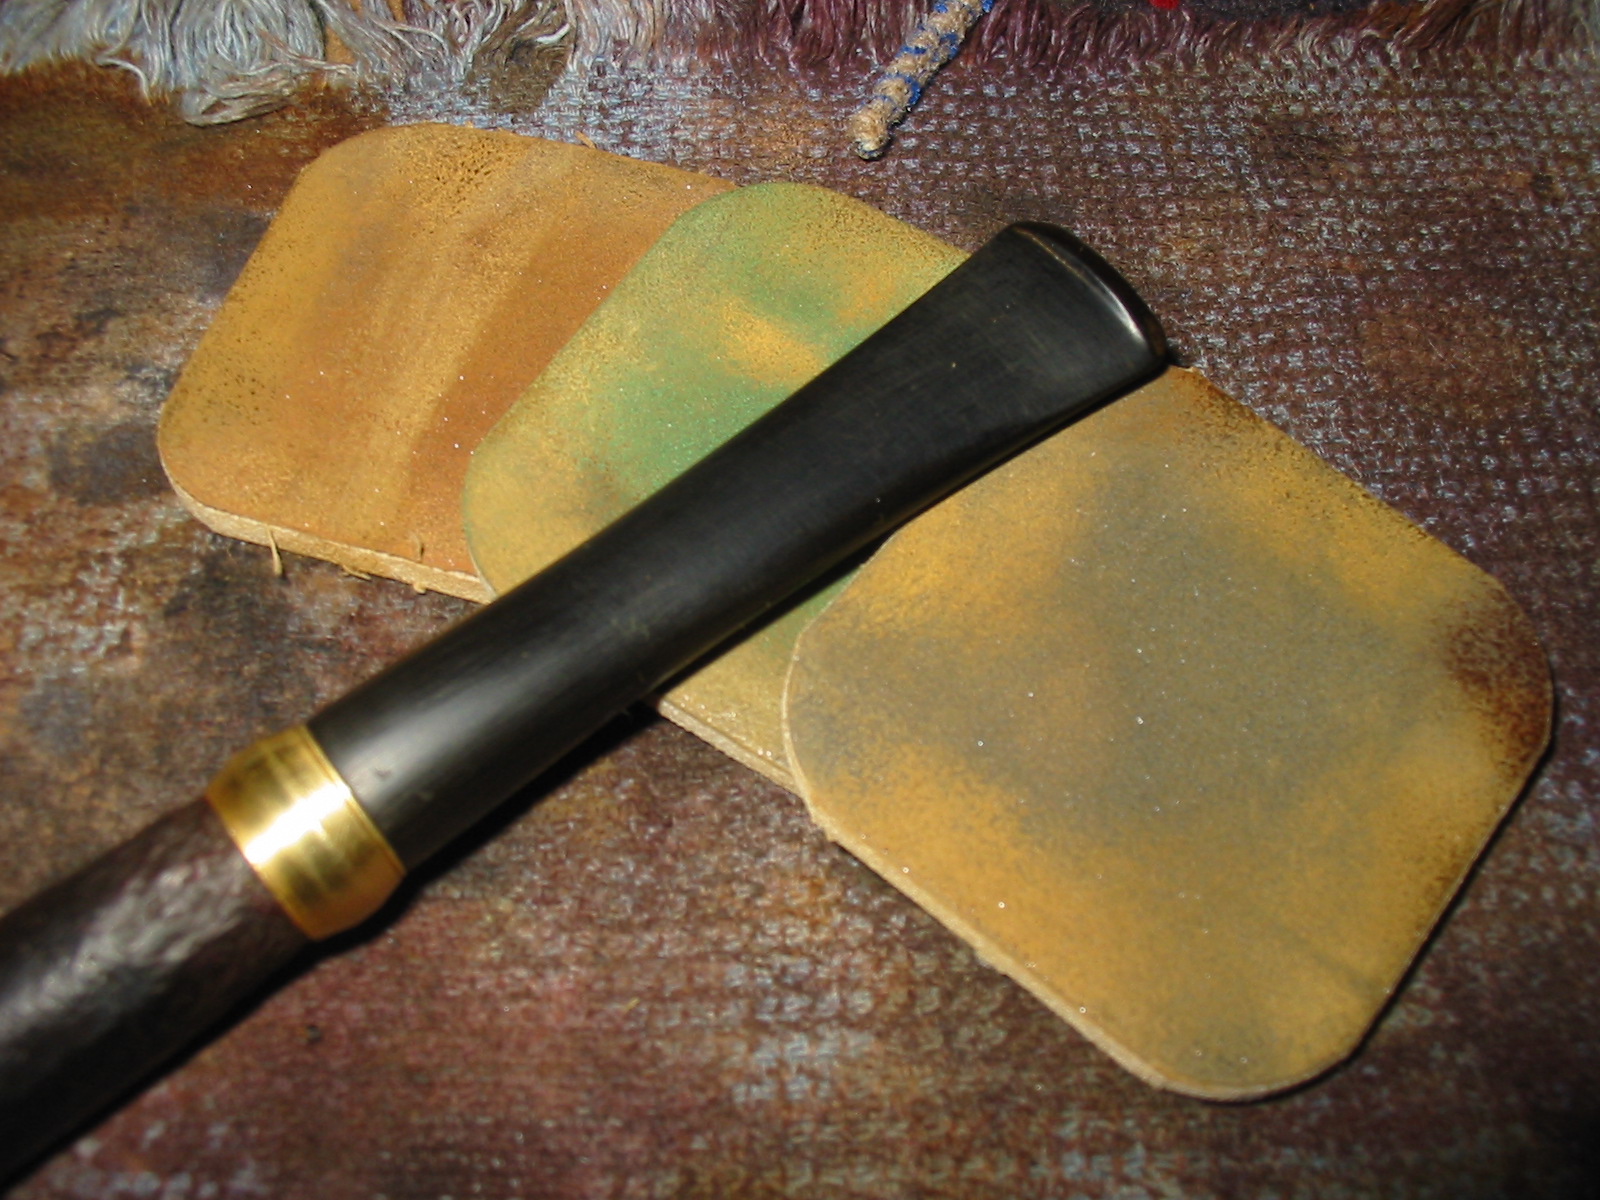
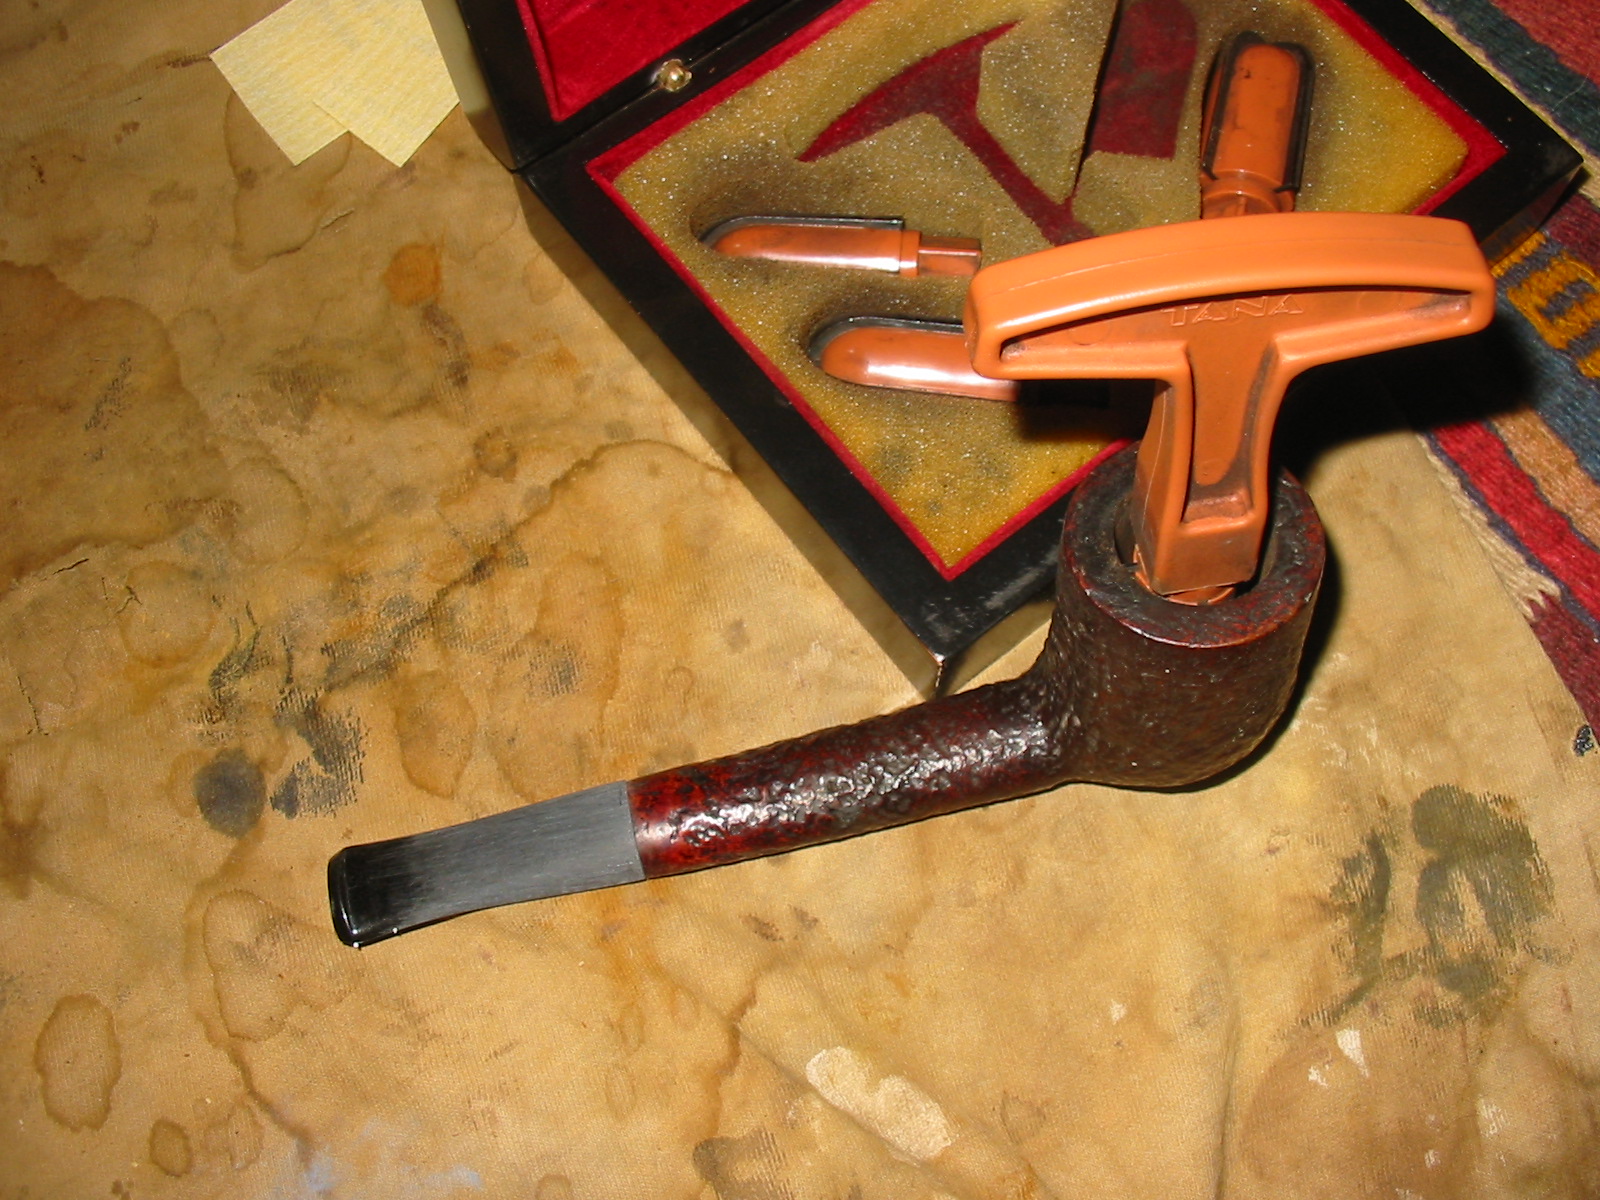
Armed with that information I was ready to work on the pipe. I have included a series of photos below to show the cracked shank and the repair I did to it. In the first photo I inserted a dental pick in the shank to open the crack so that I could clean it out. Also included in that photo is the band that I would use to band the cracked shank.
IMG_4523

I wiped down the shank with acetone on a cotton pad to clean off the grime and build up of material left behind by the tape that had been used to repair the shank. Once it was clean I dripped some superglue into the crack of the shank and held it tightly together until the glue had dried. Once it had dried I inserted the end of the tenon of the stem I was going to fit to the shank of the pipe for the photos.
IMG_4532

IMG_4533

IMG_4534

IMG_4535

I sanded the repair and removed the excess glue from the surface of the top of the shank and wiped the area down with Everclear on cotton pads to clean up after sanding.
IMG_4539

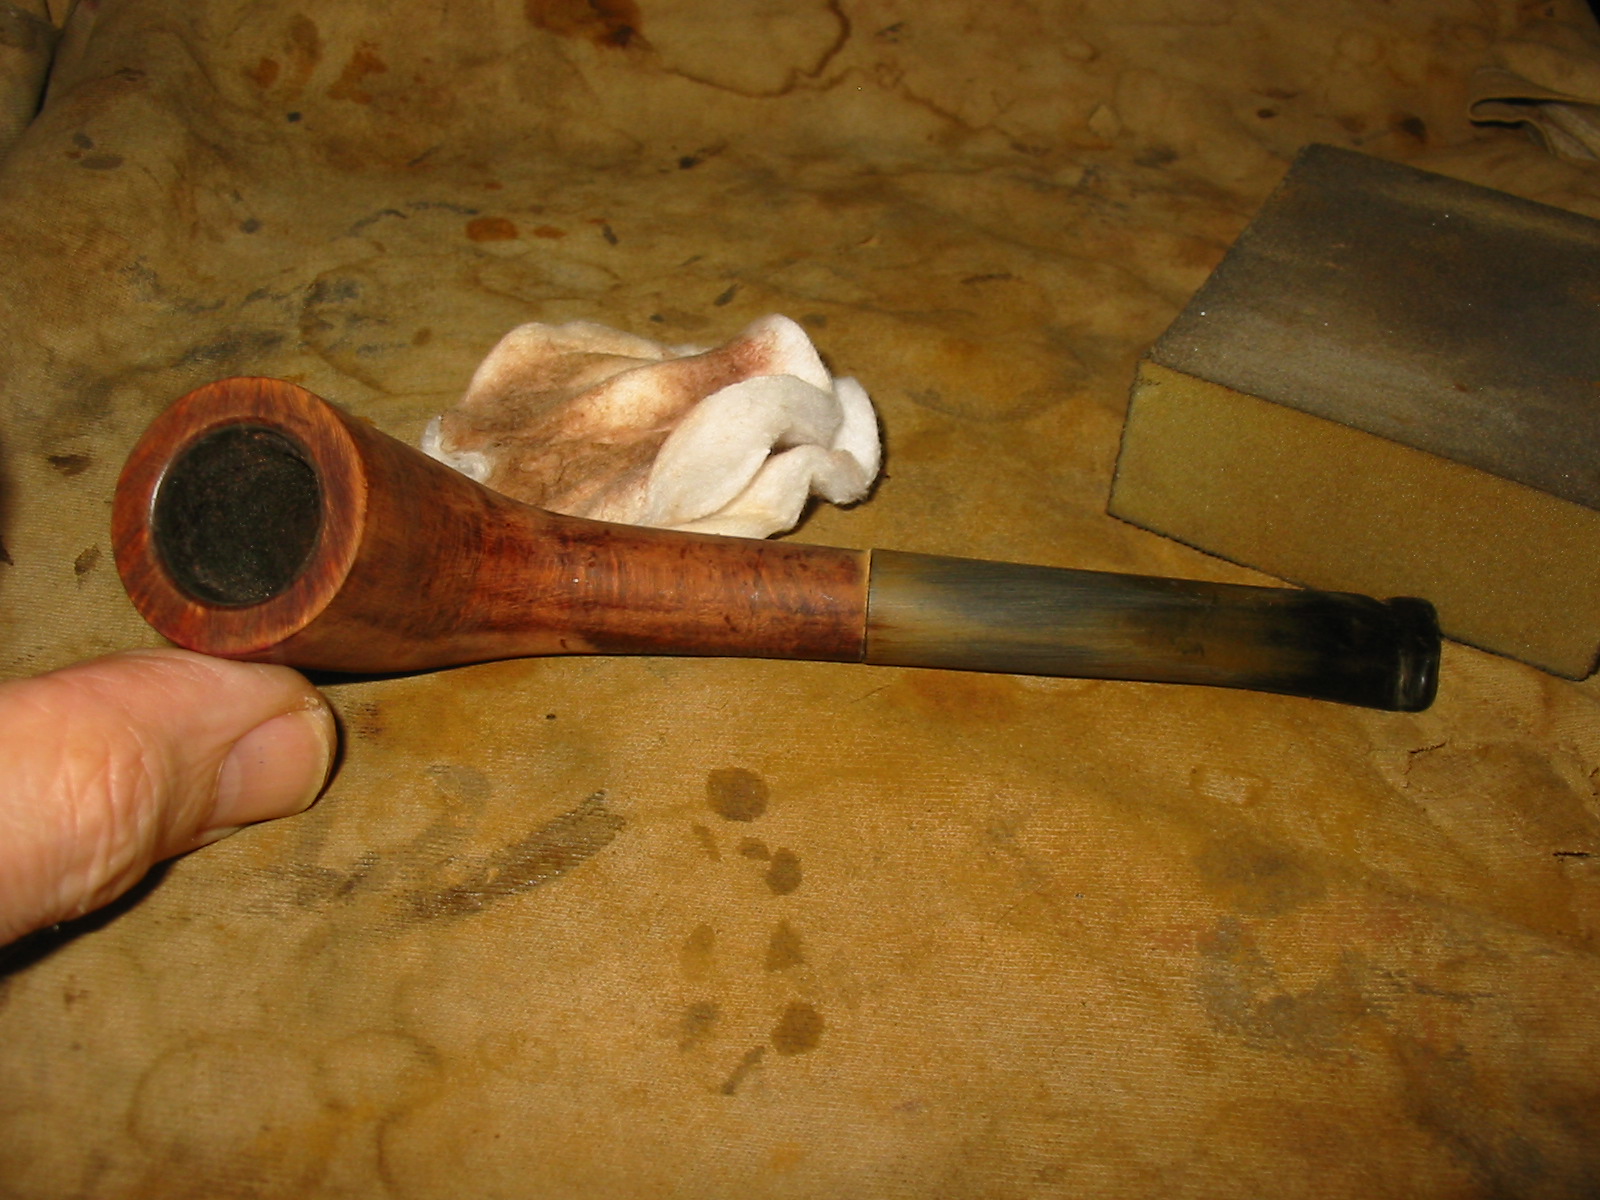
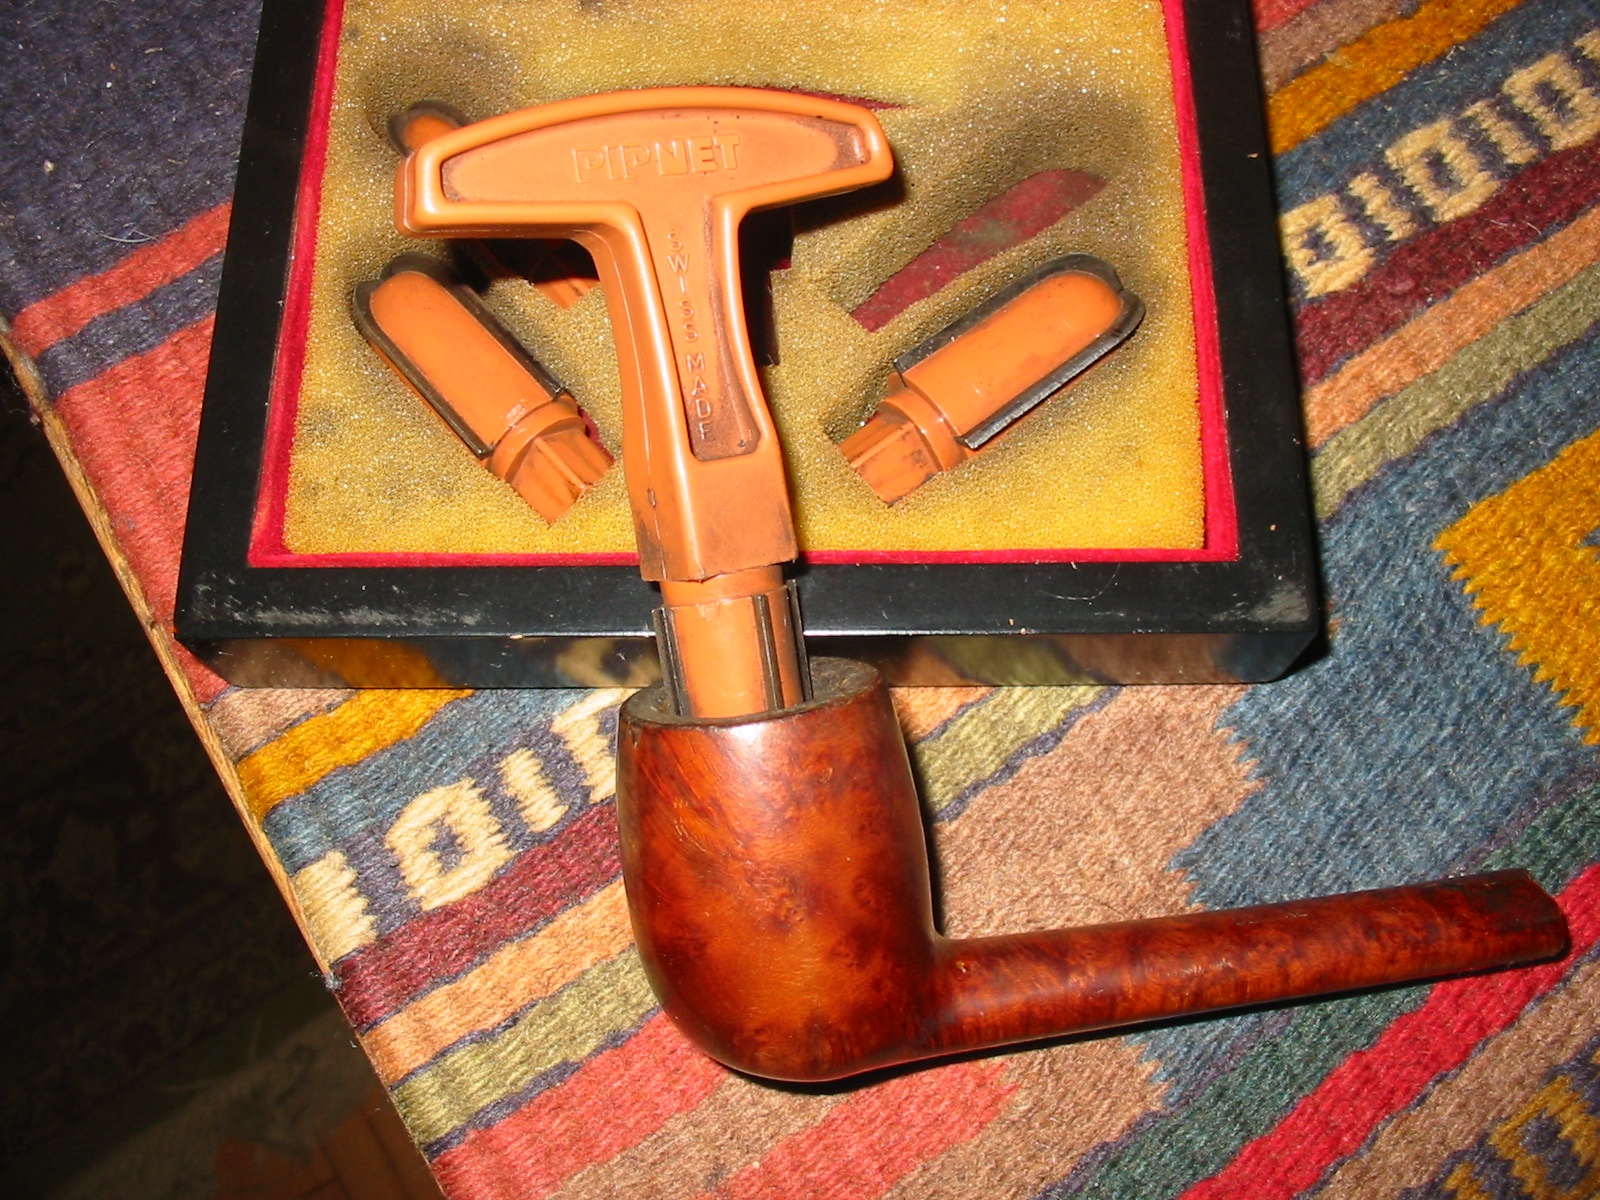
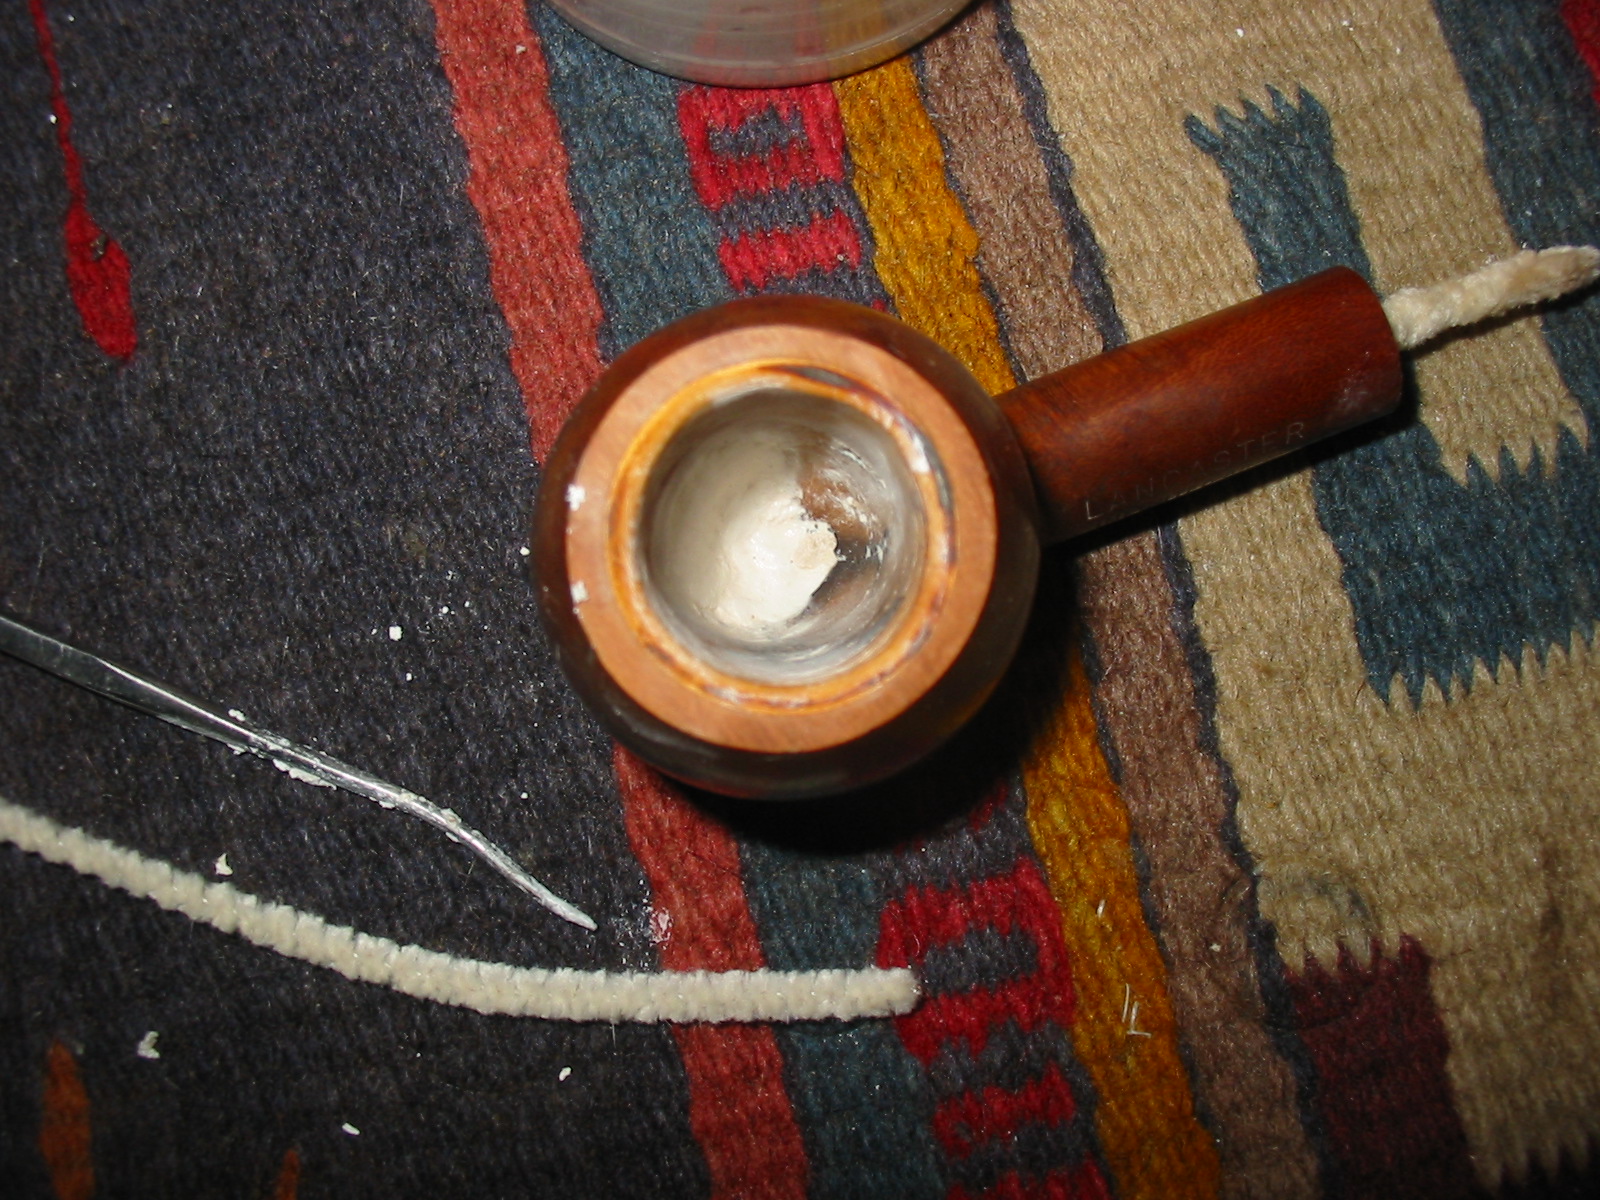
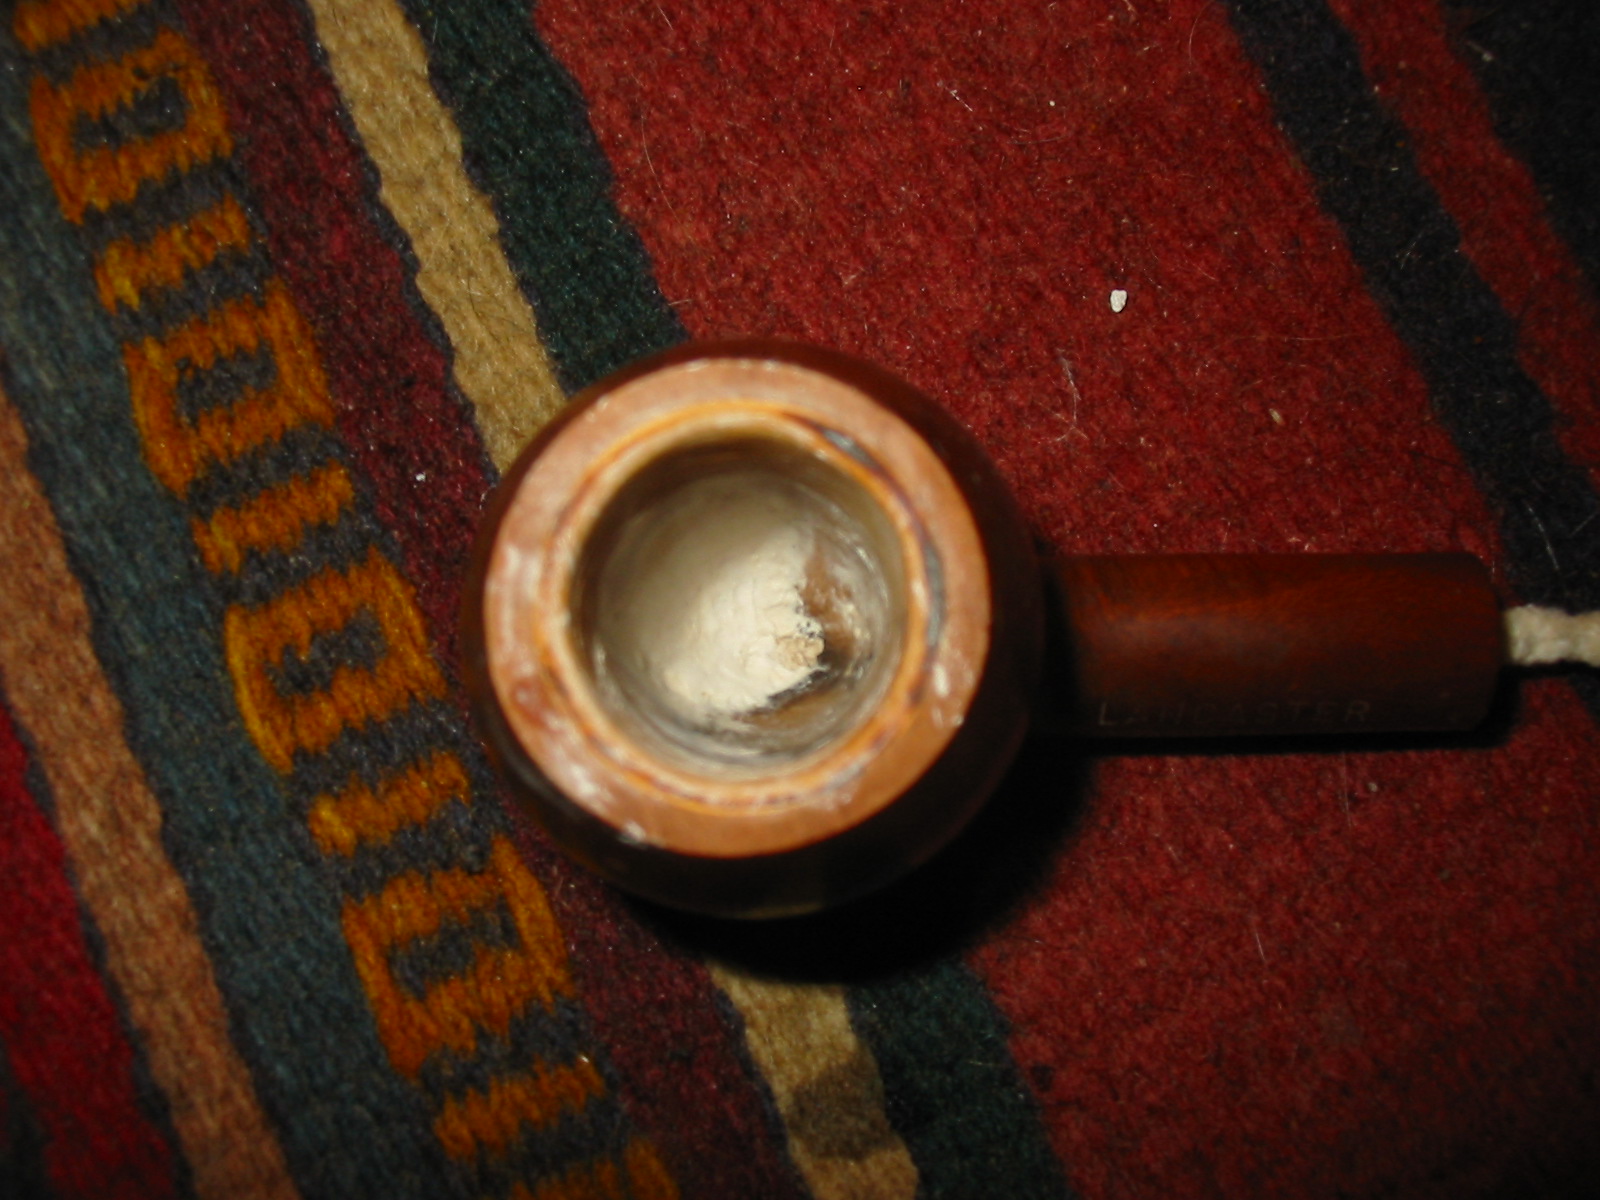
I decided to ream the bowl and clean the rim before I went on to band the pipe. I cleaned the inside of the shank as well as I did not want the grime and build up to run when I heated the shank and the band for the pressure fit. I reamed it with a PipNet reamer and scrubbed the rim with saliva on a cotton pad and good old fashioned elbow grease.
IMG_4537

IMG_4538

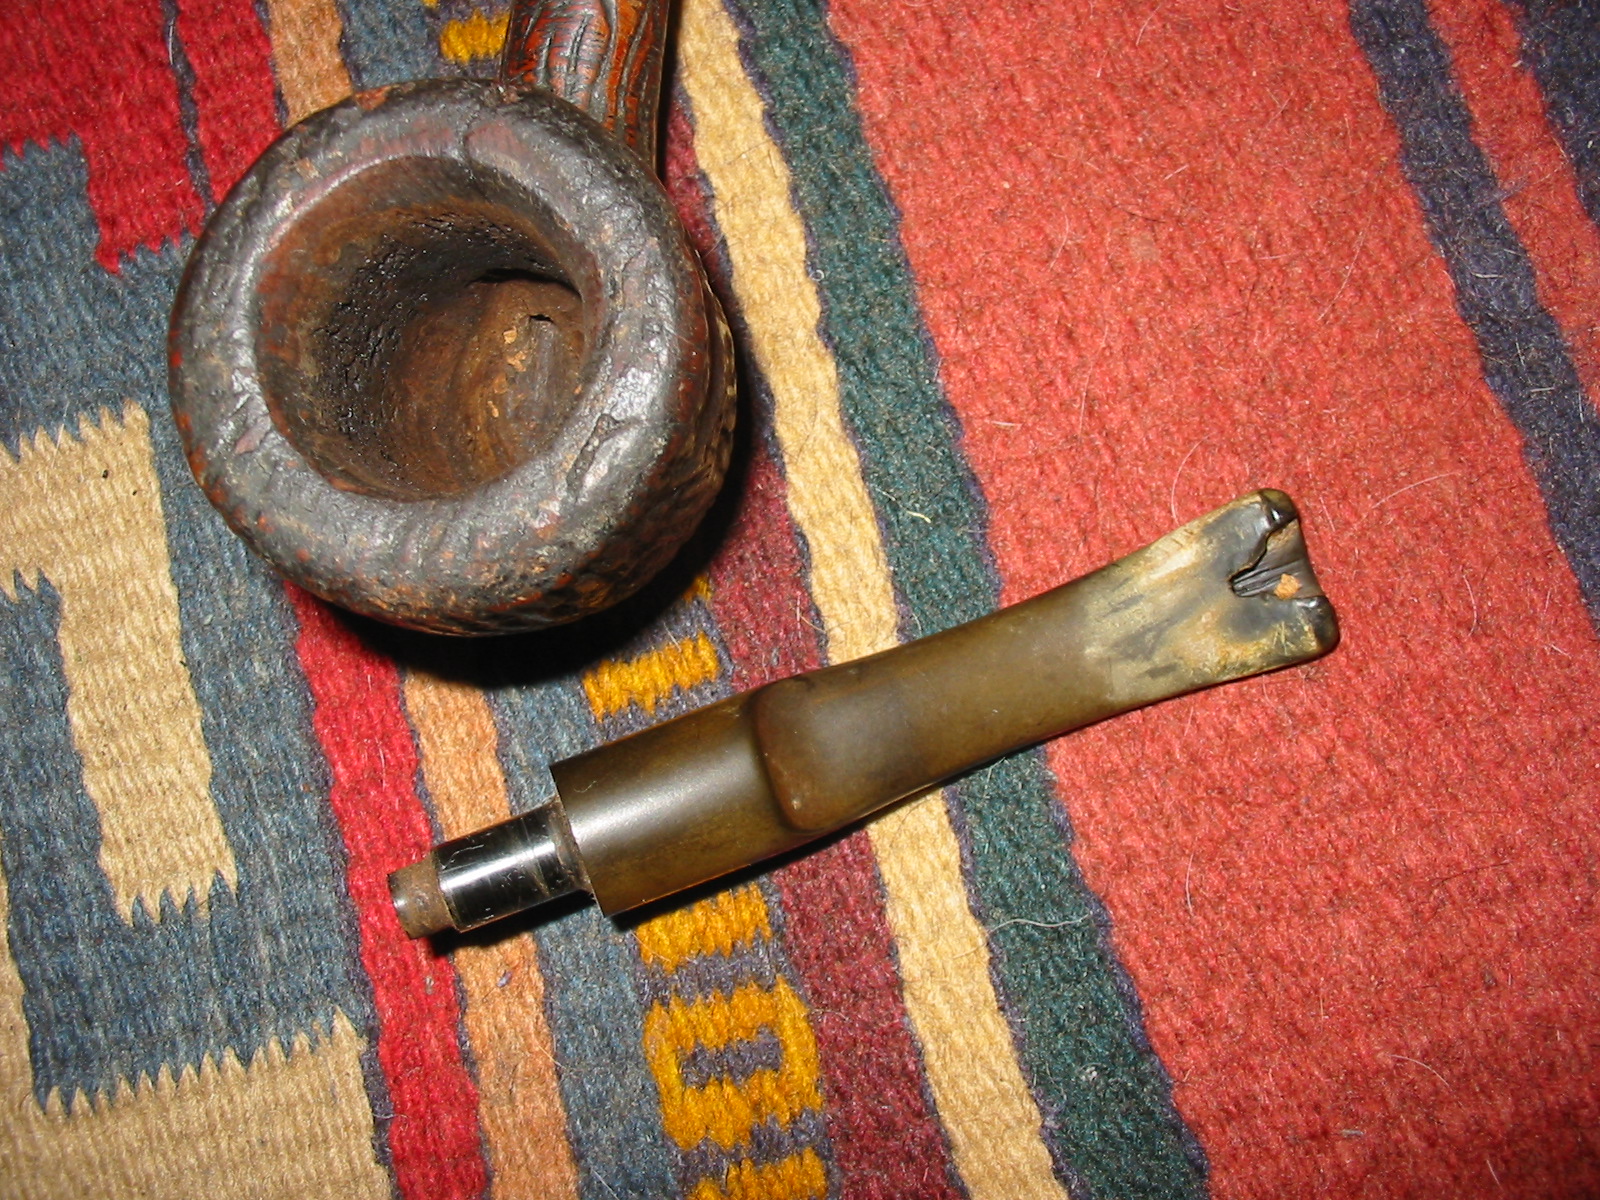
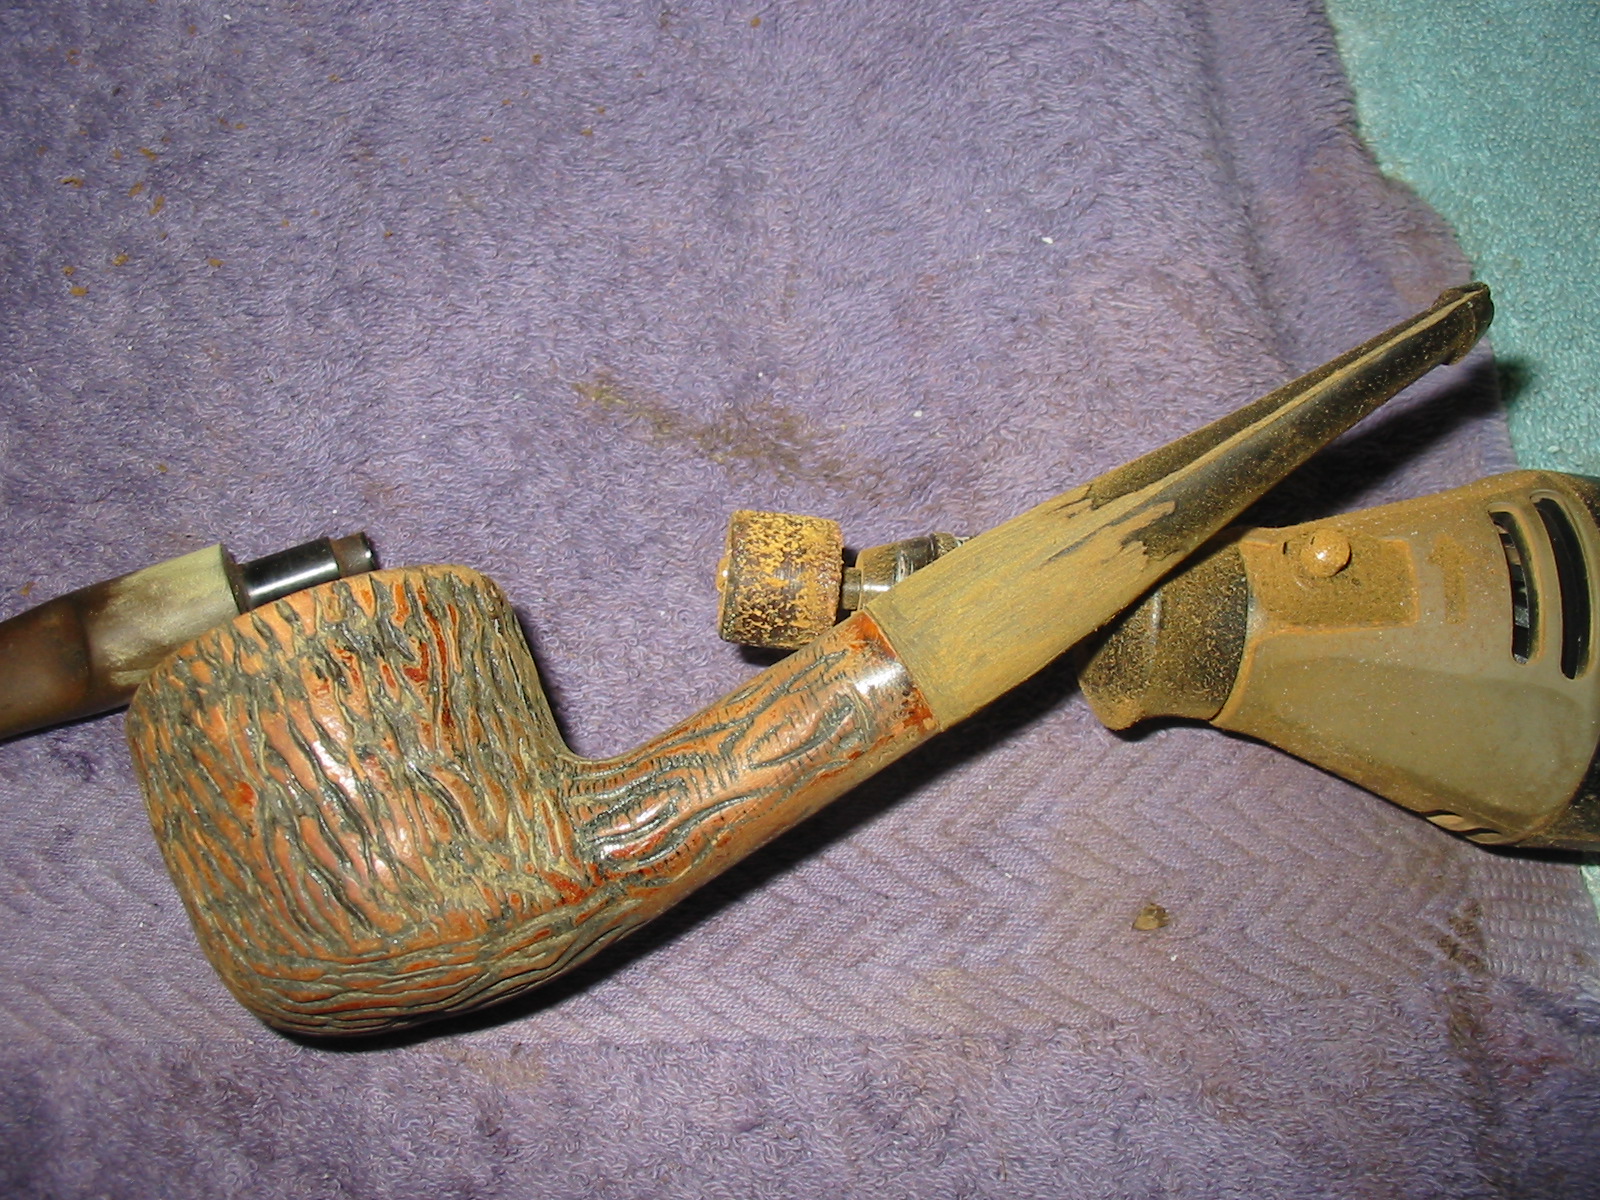
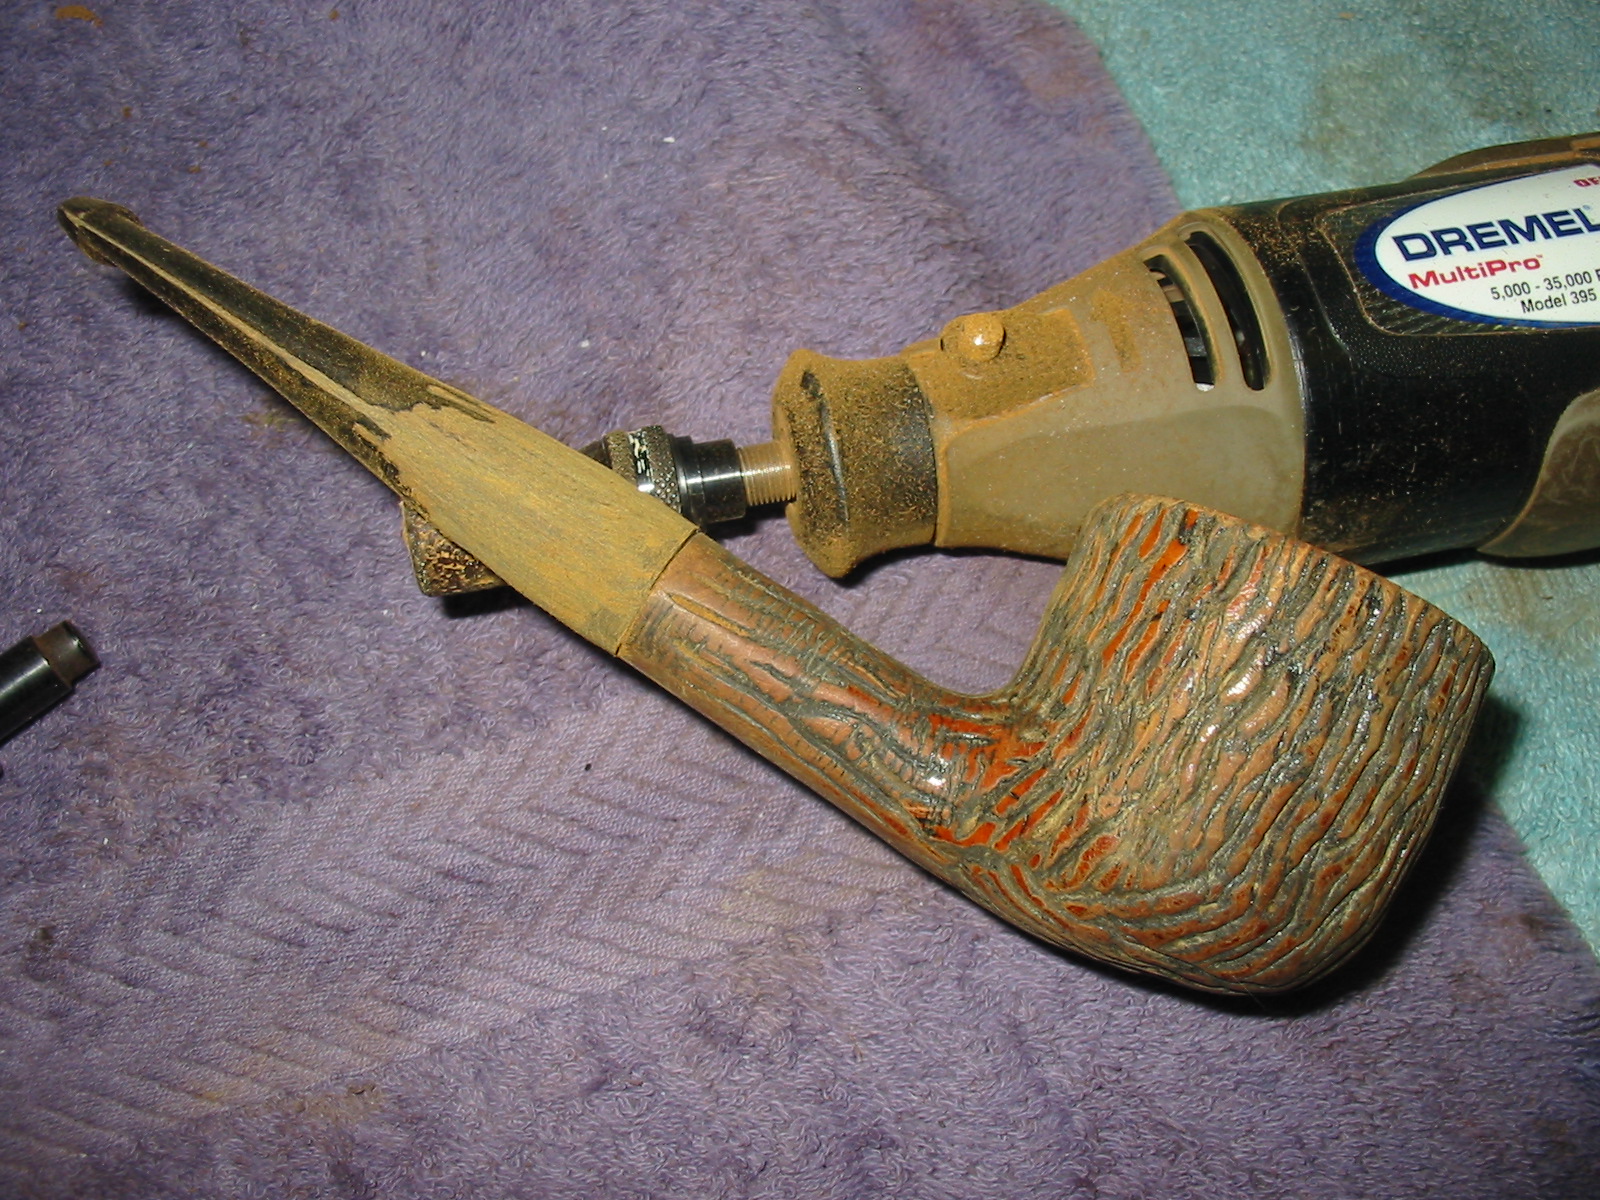
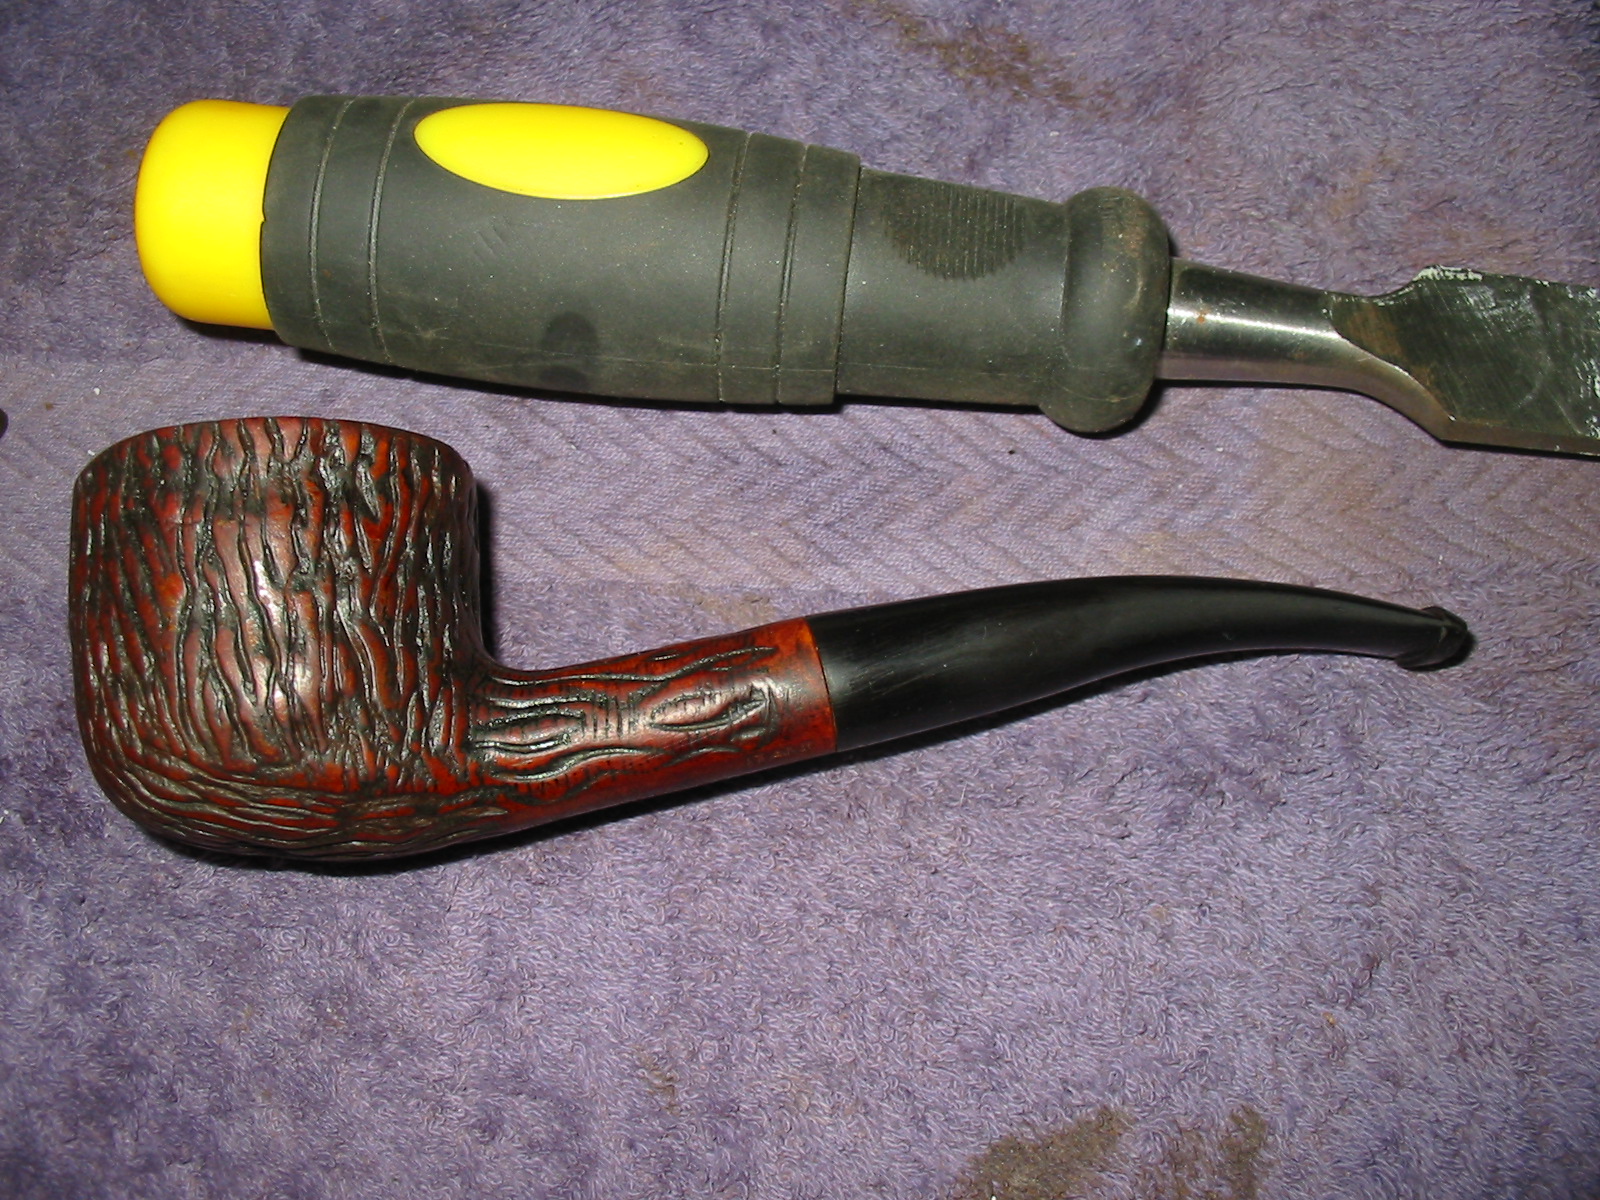
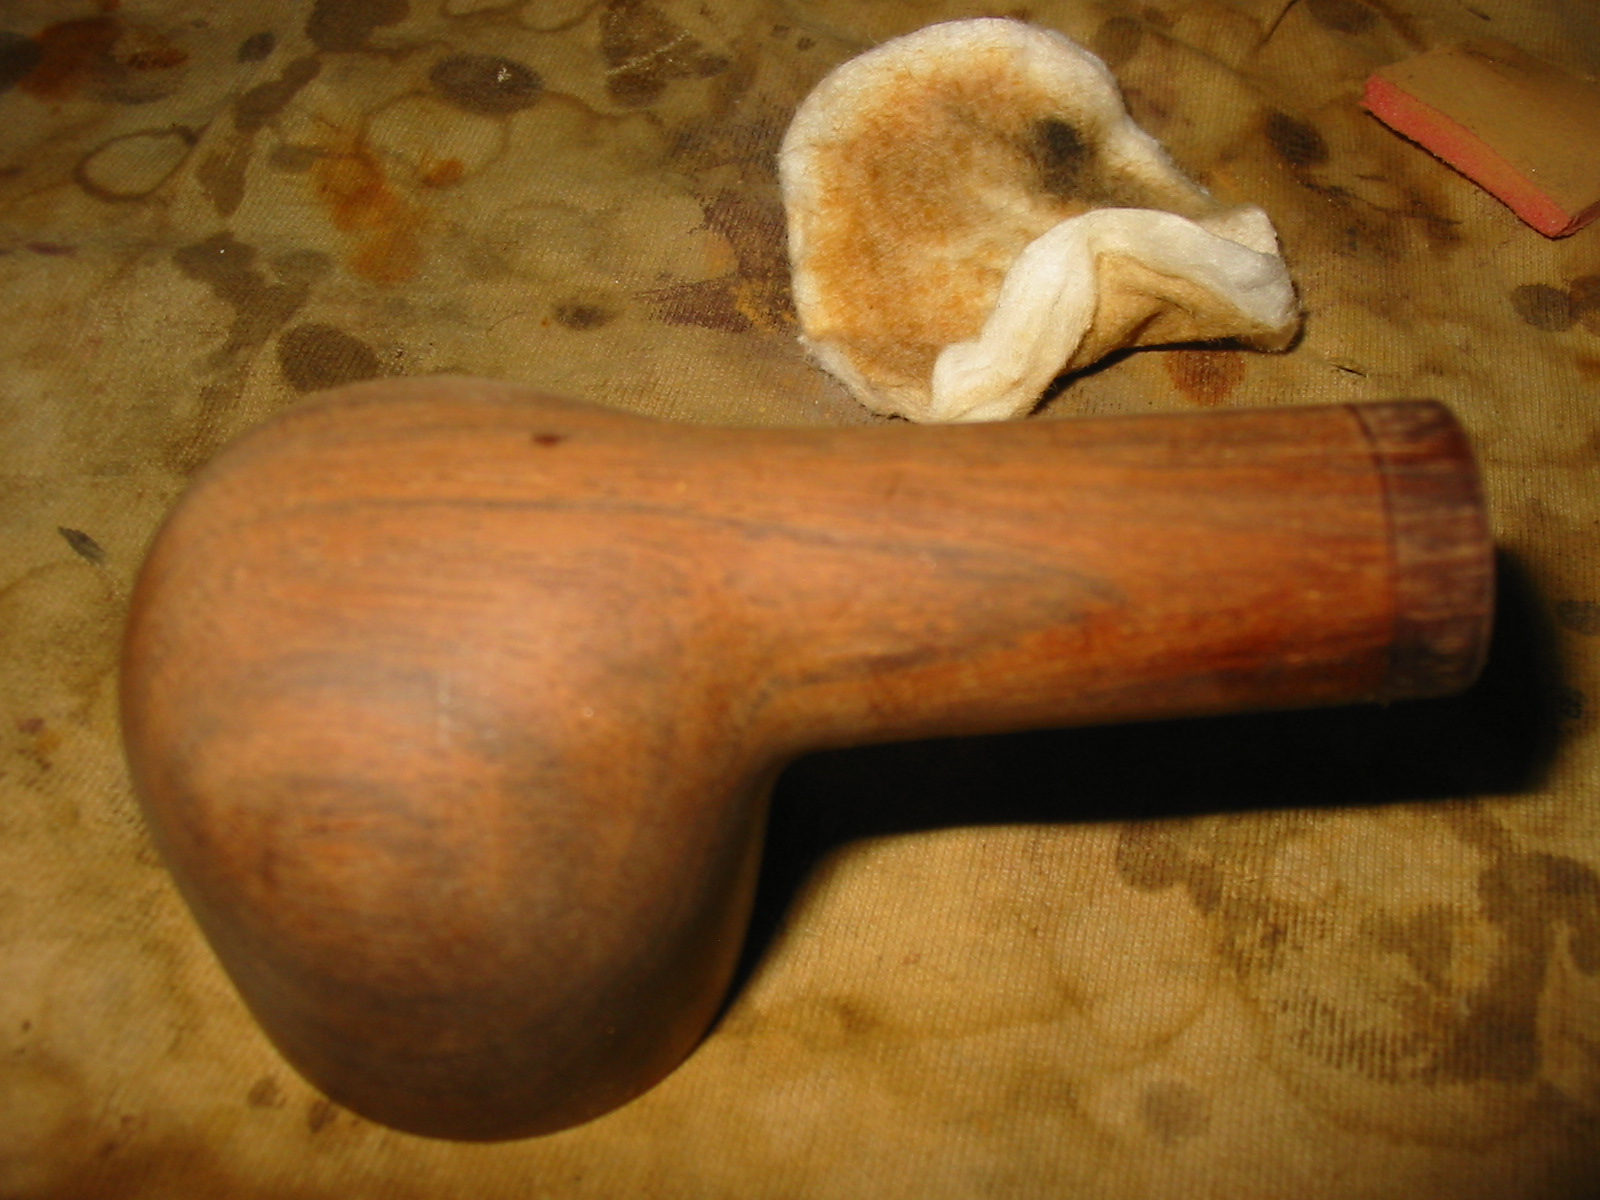
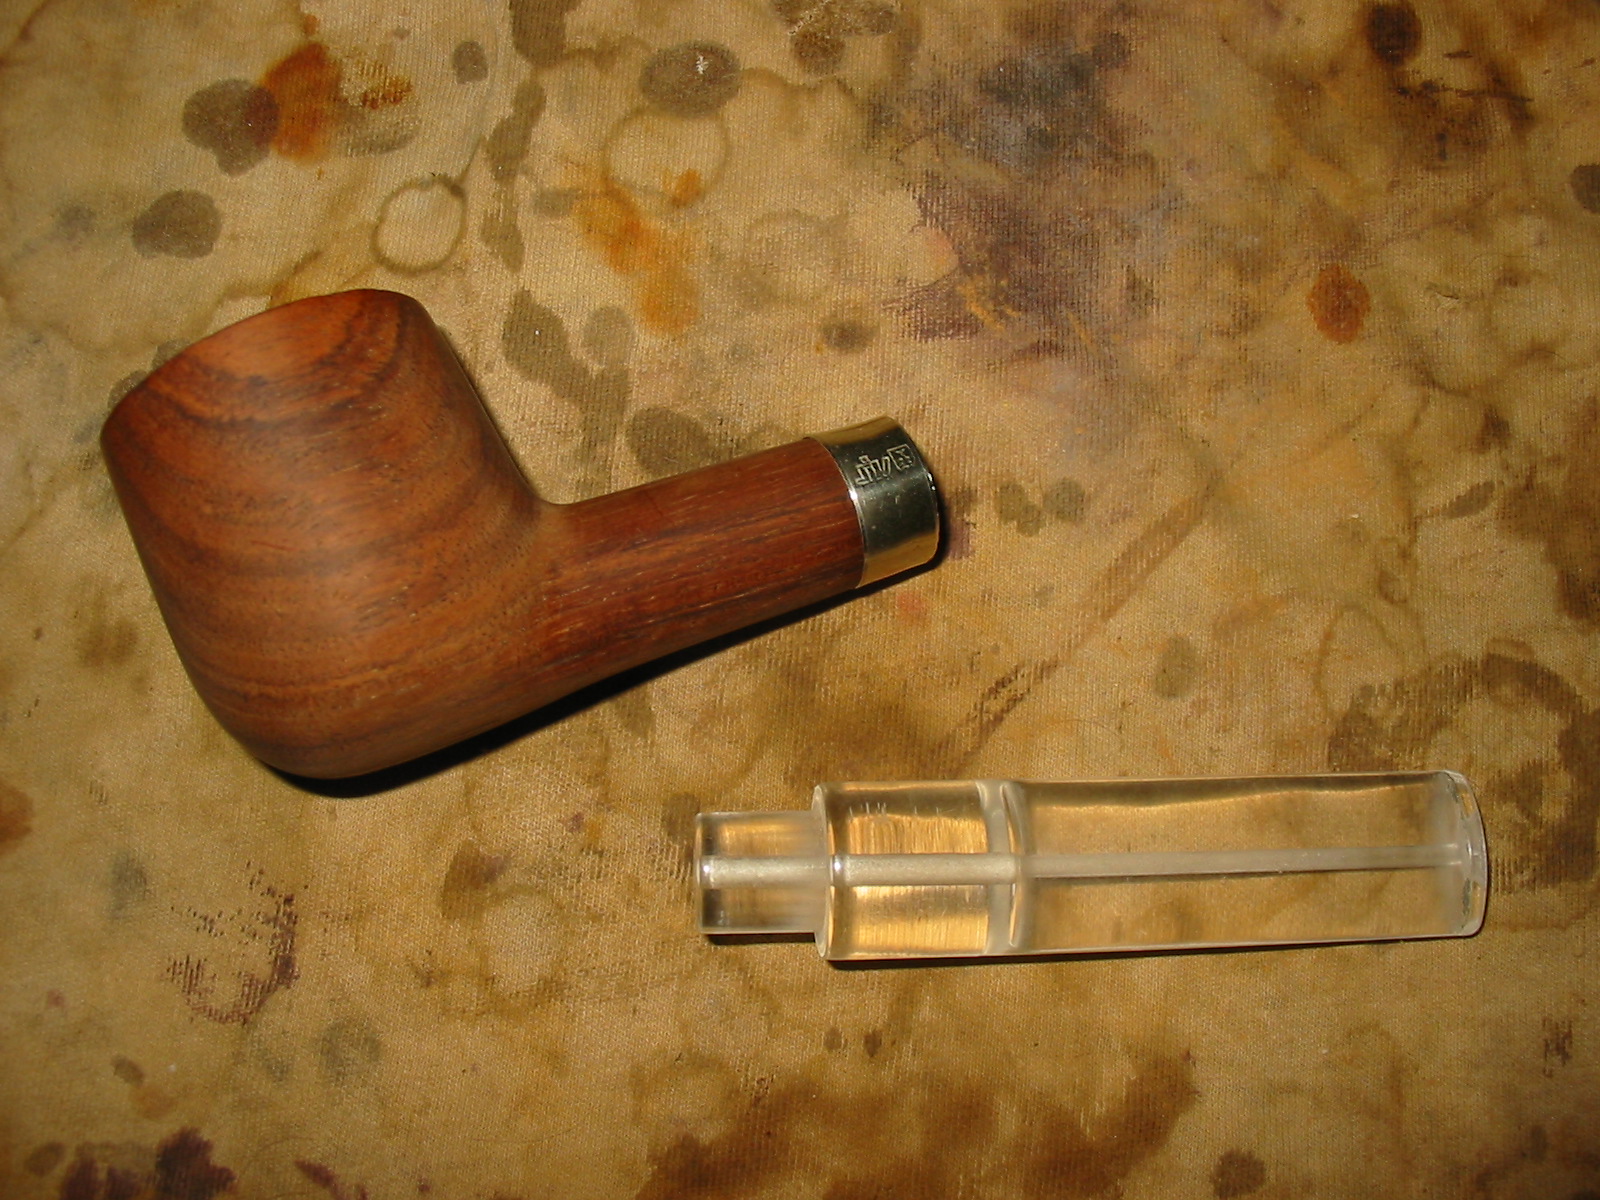
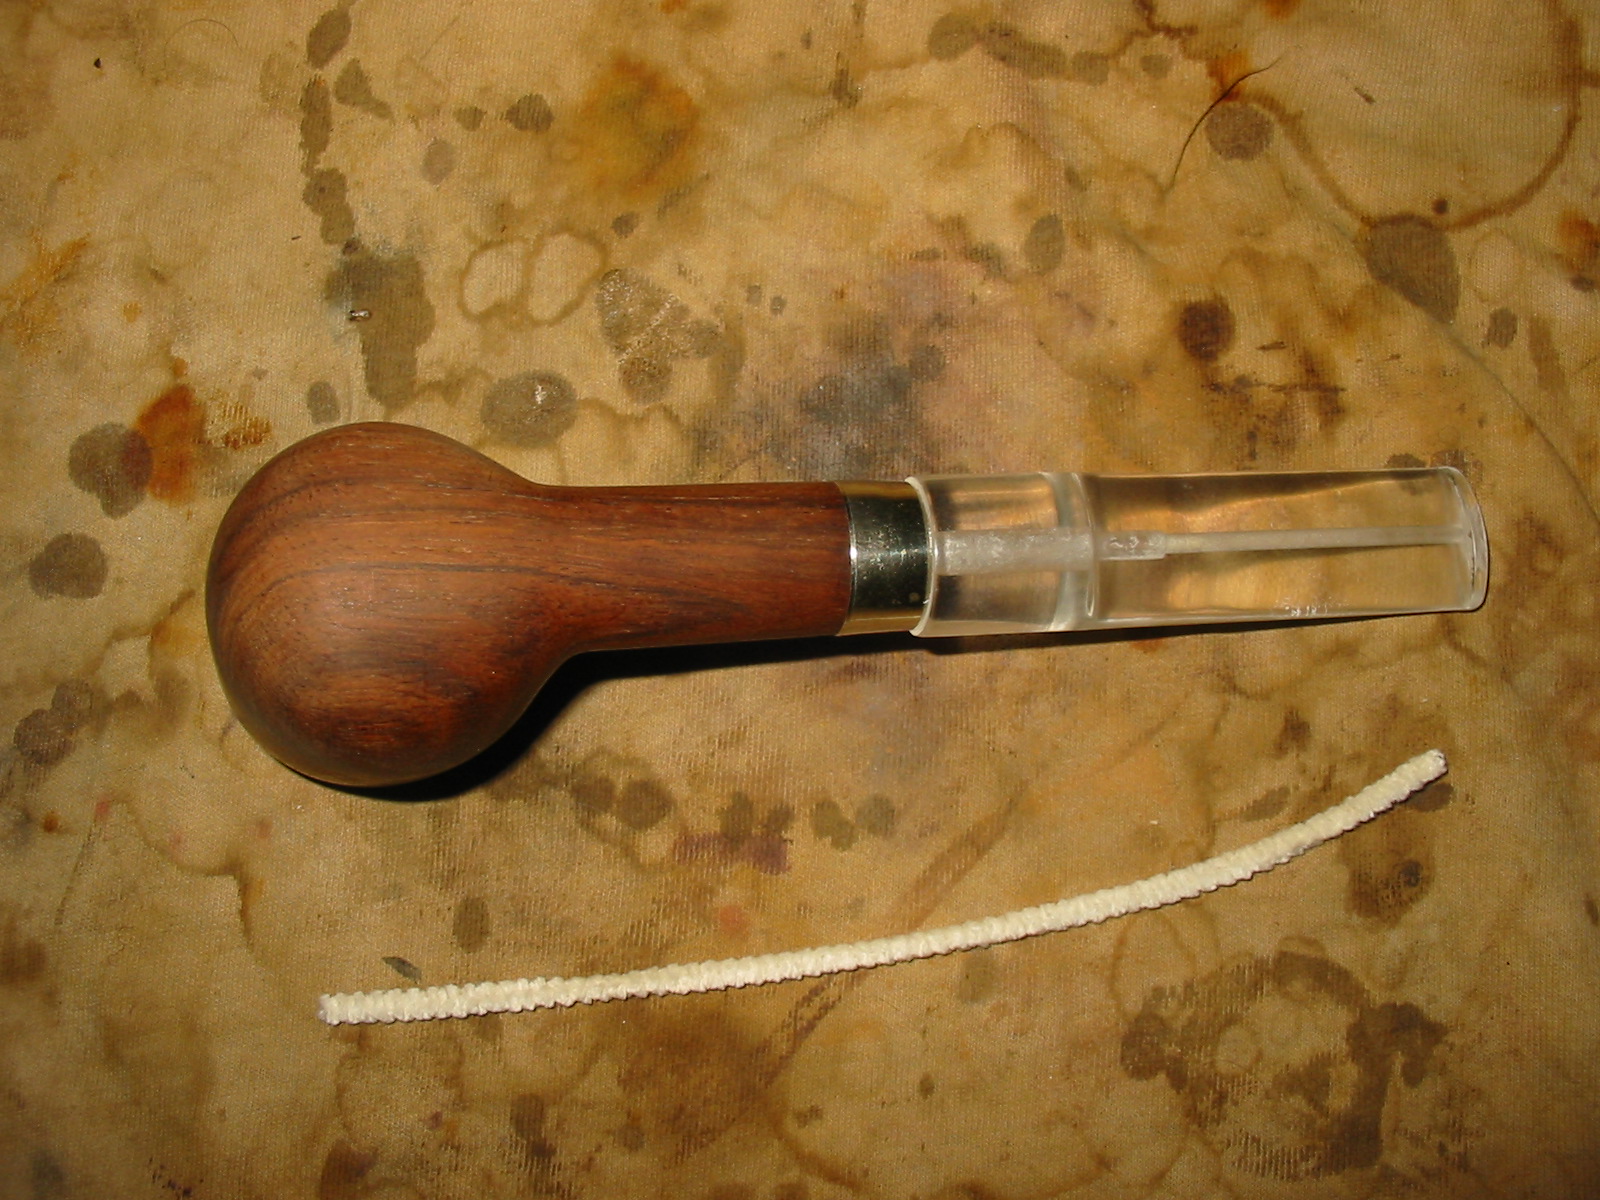
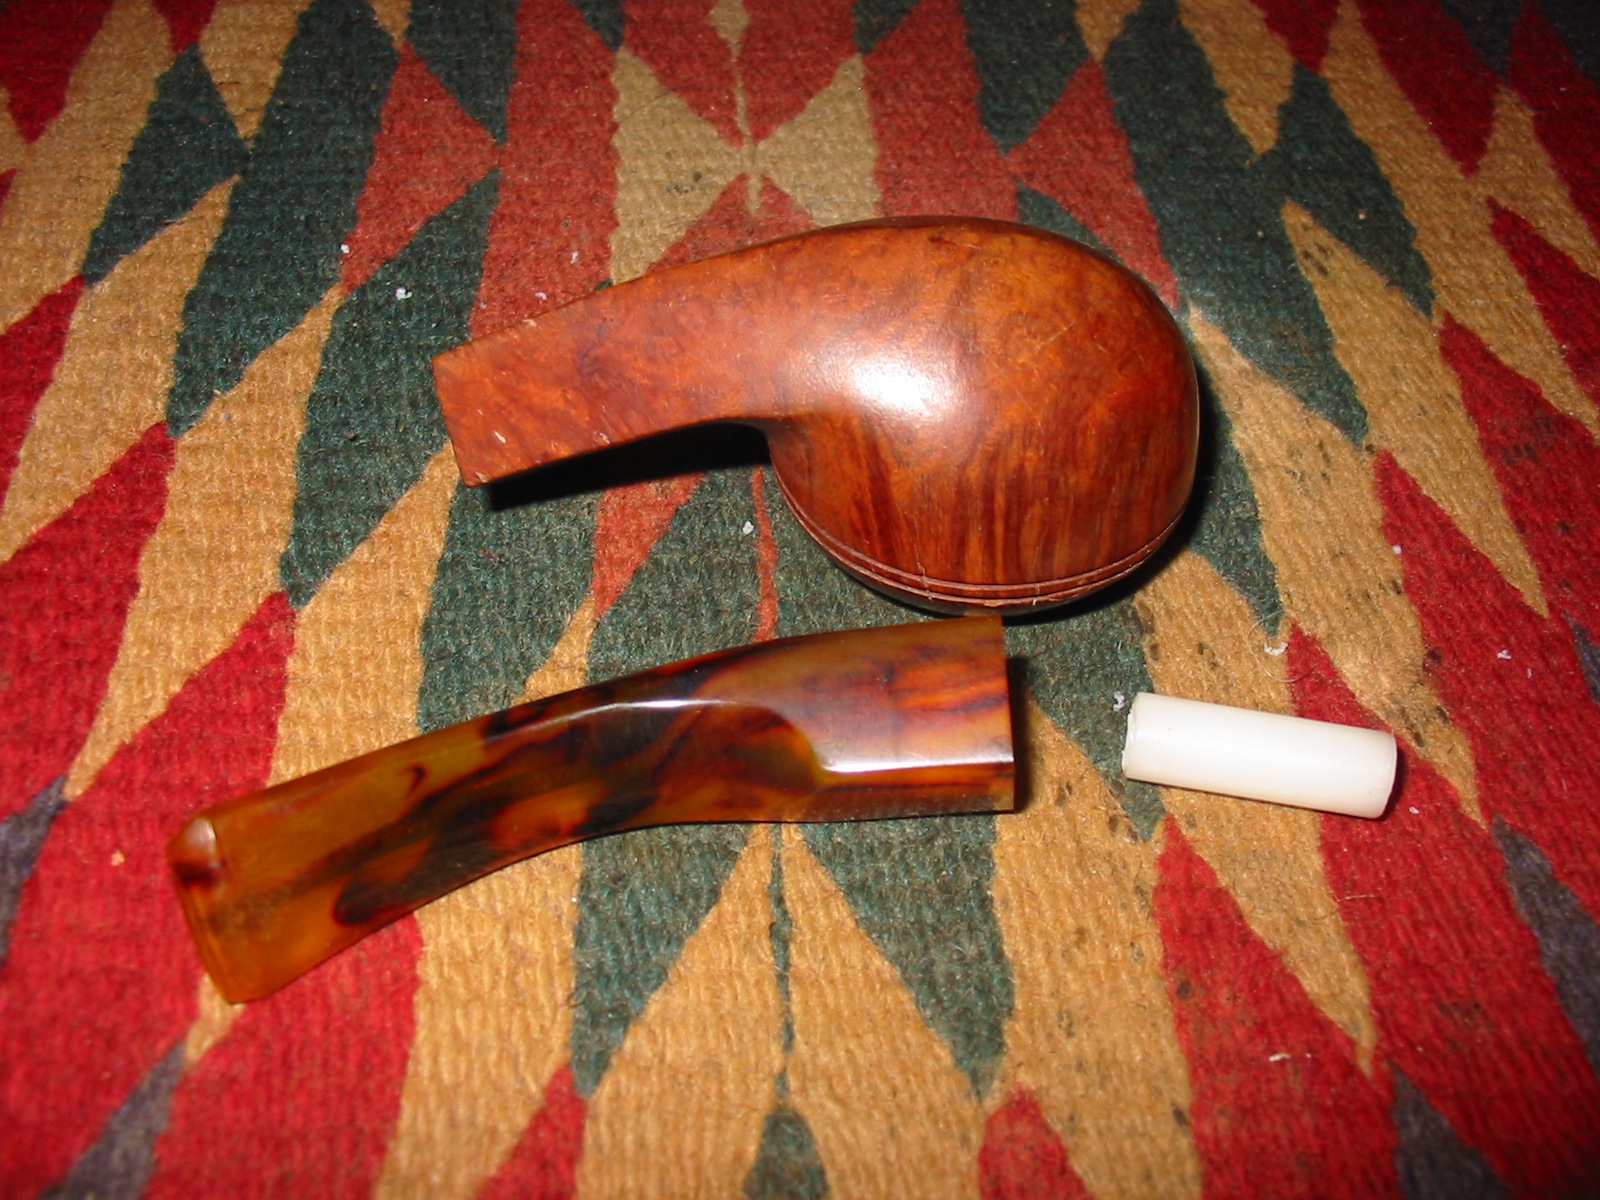
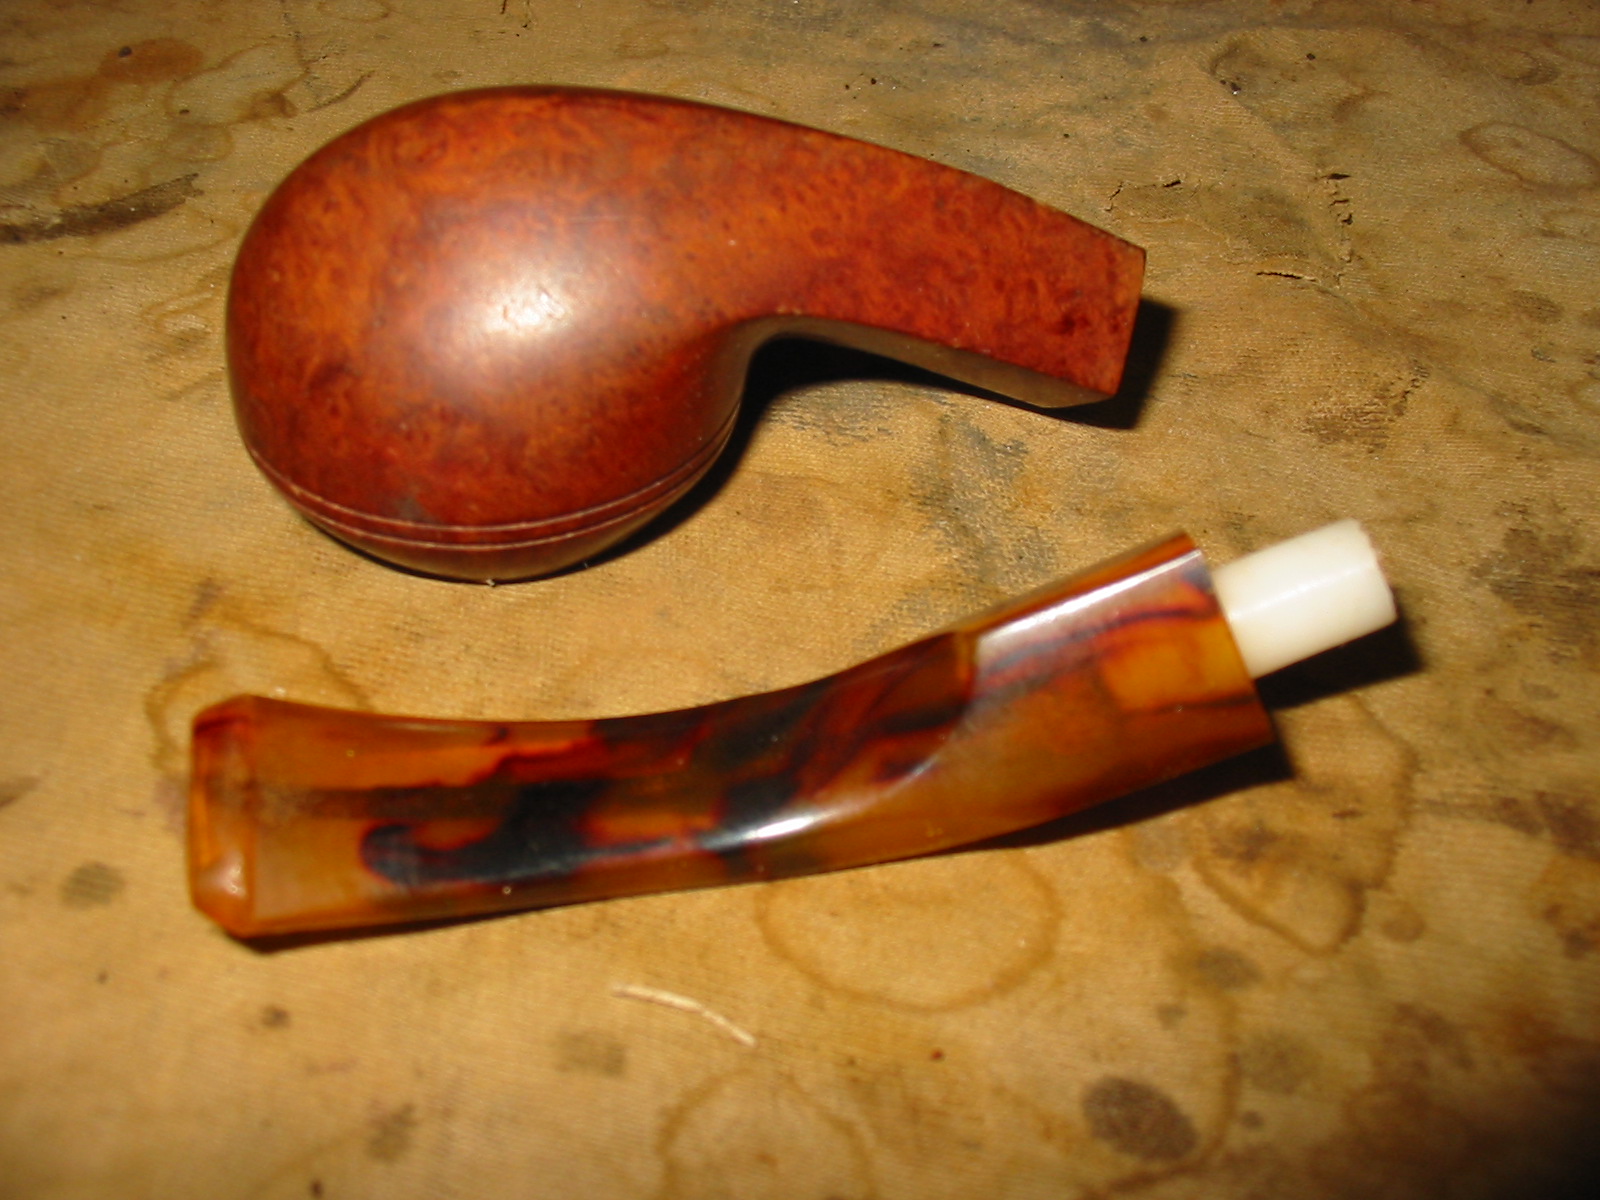
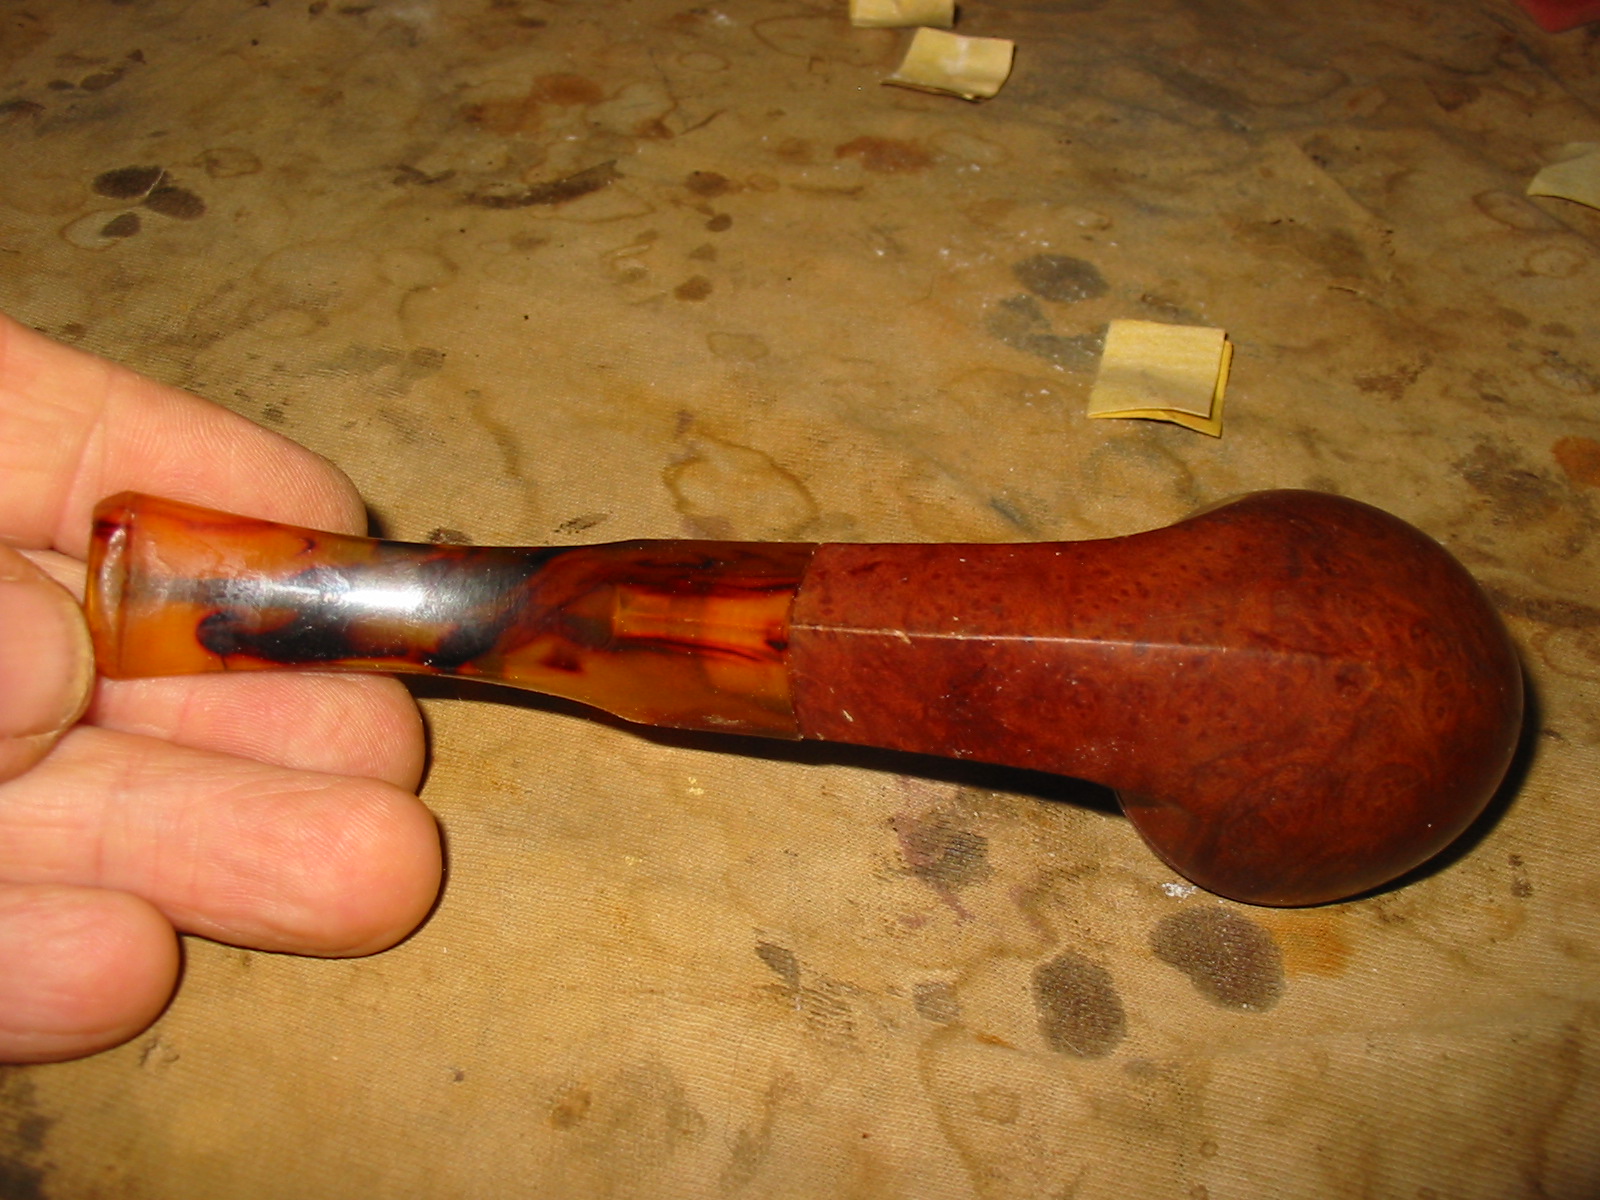
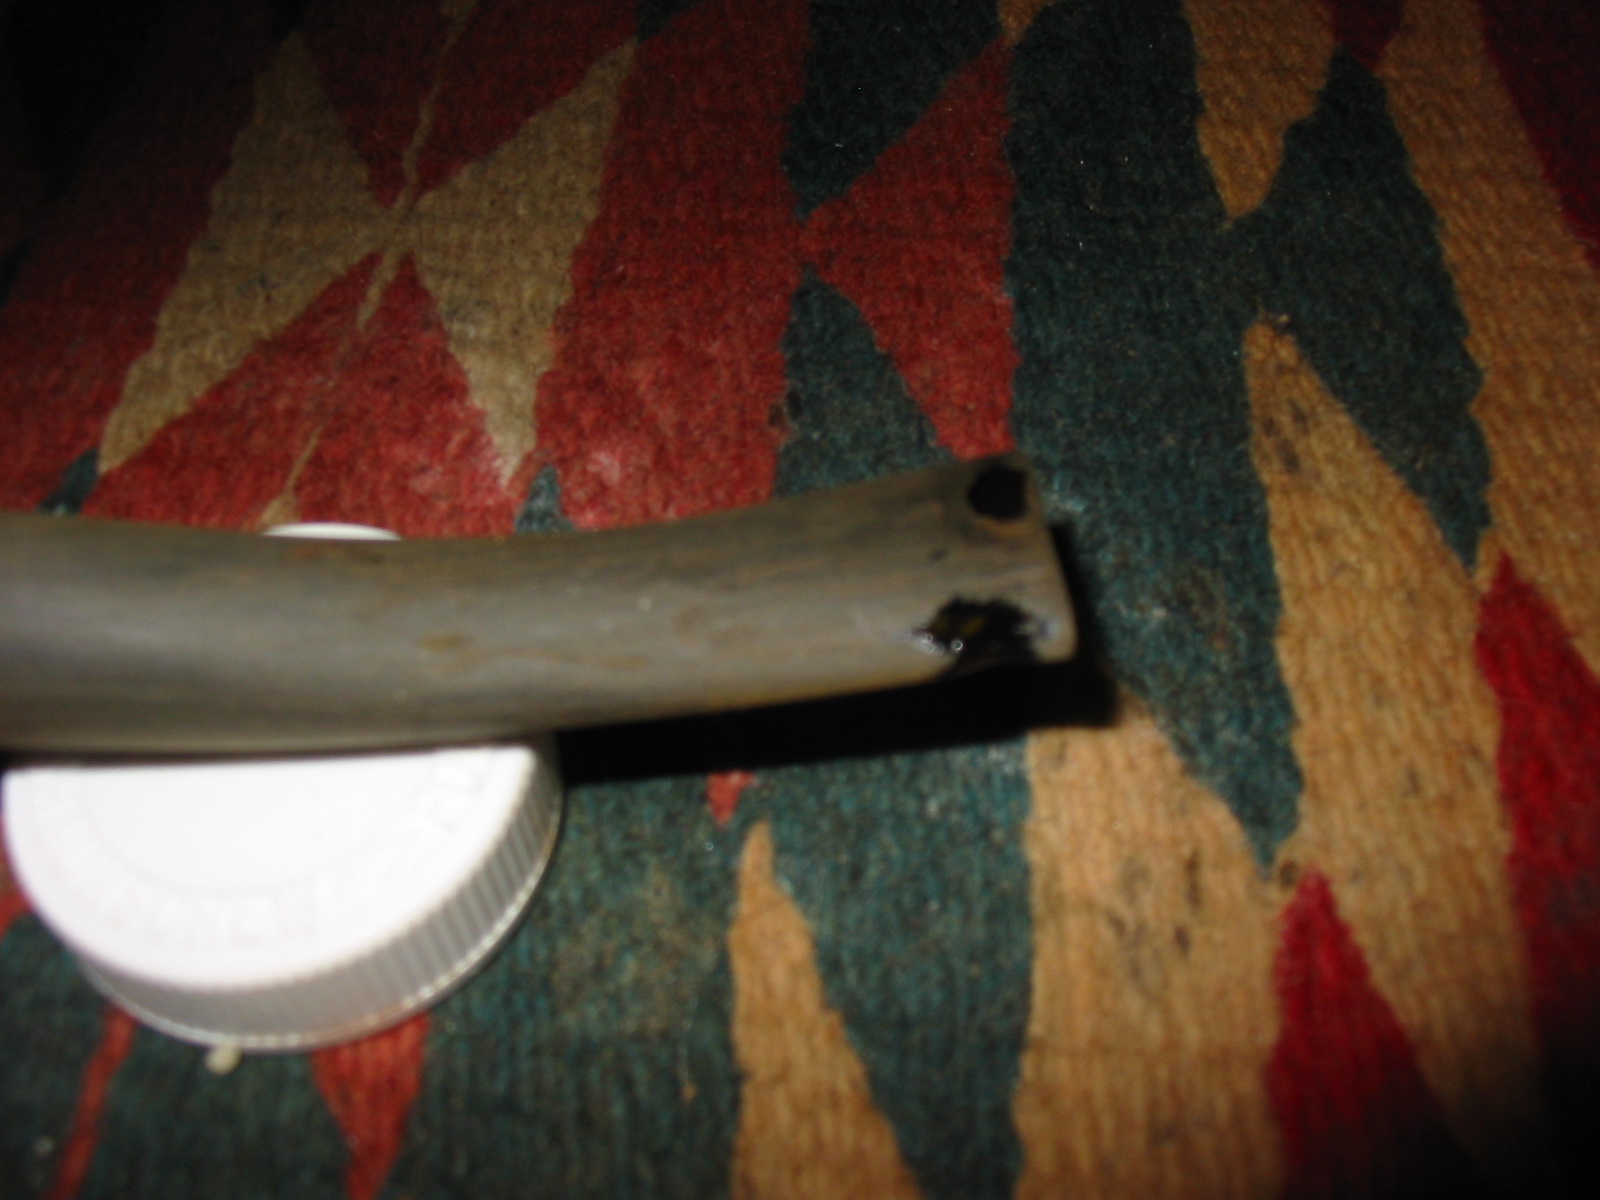
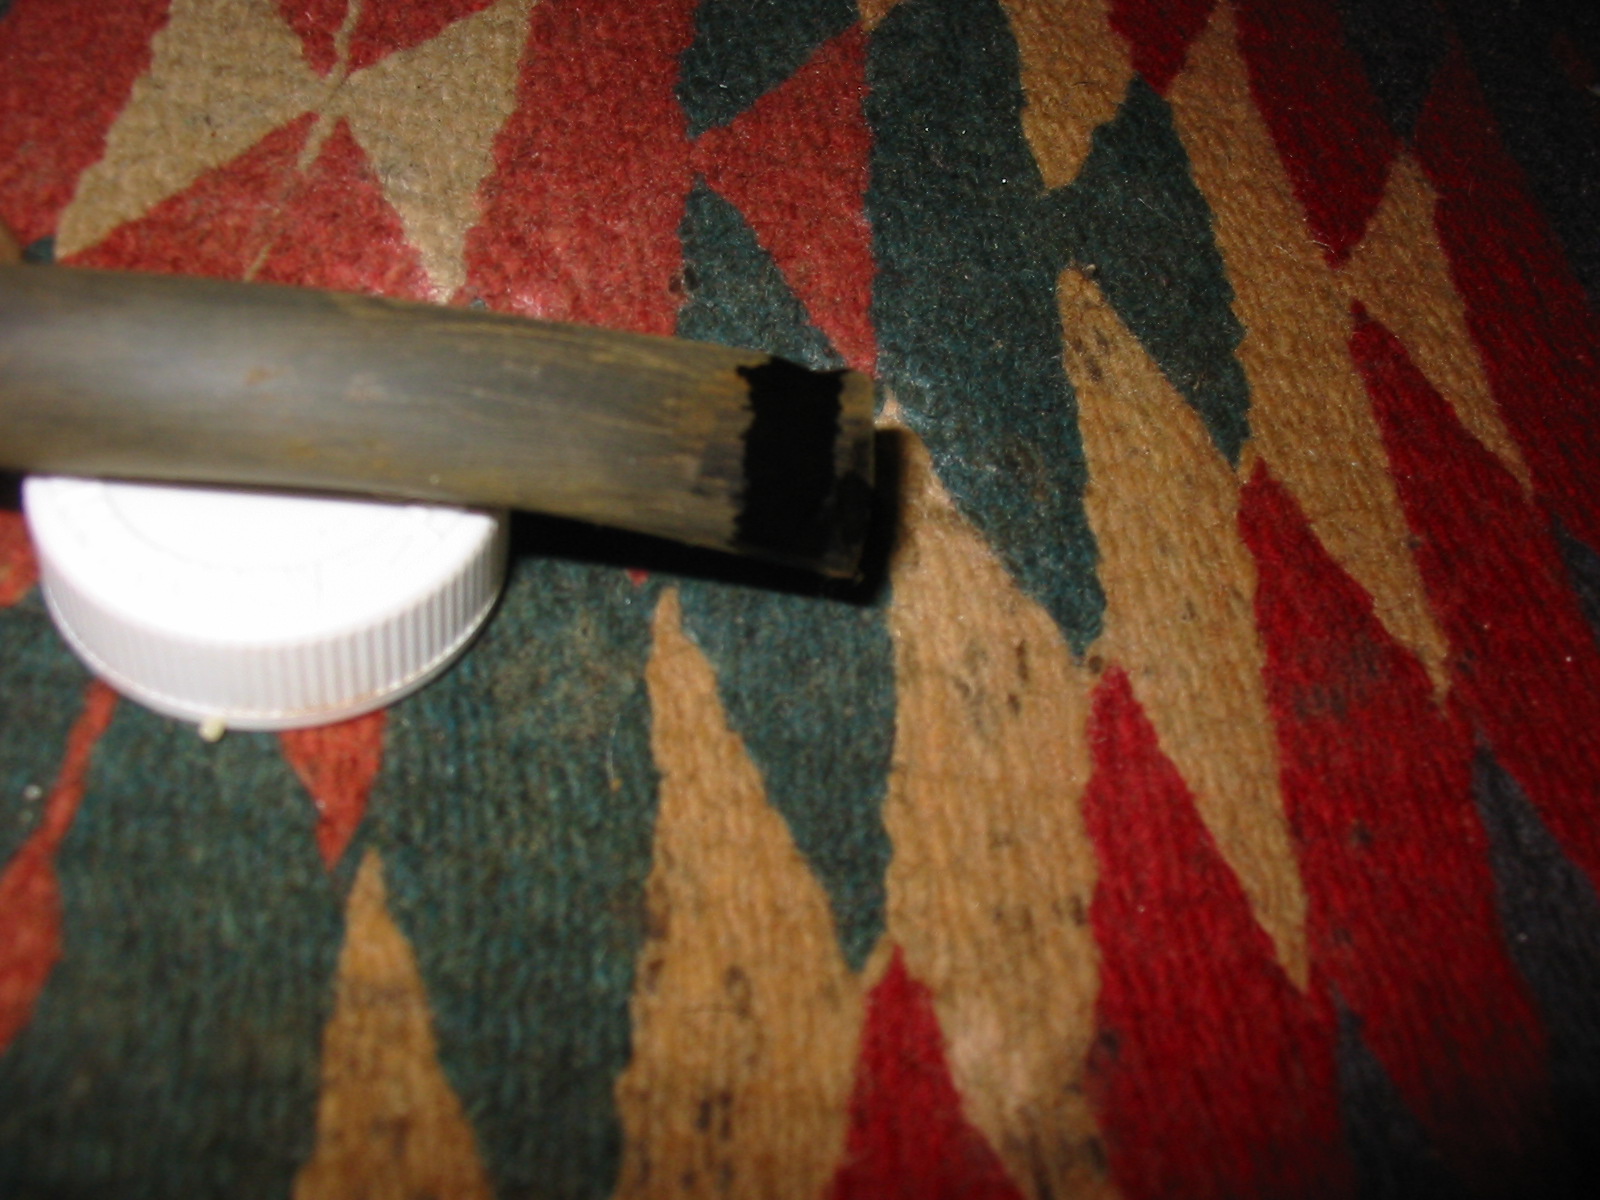
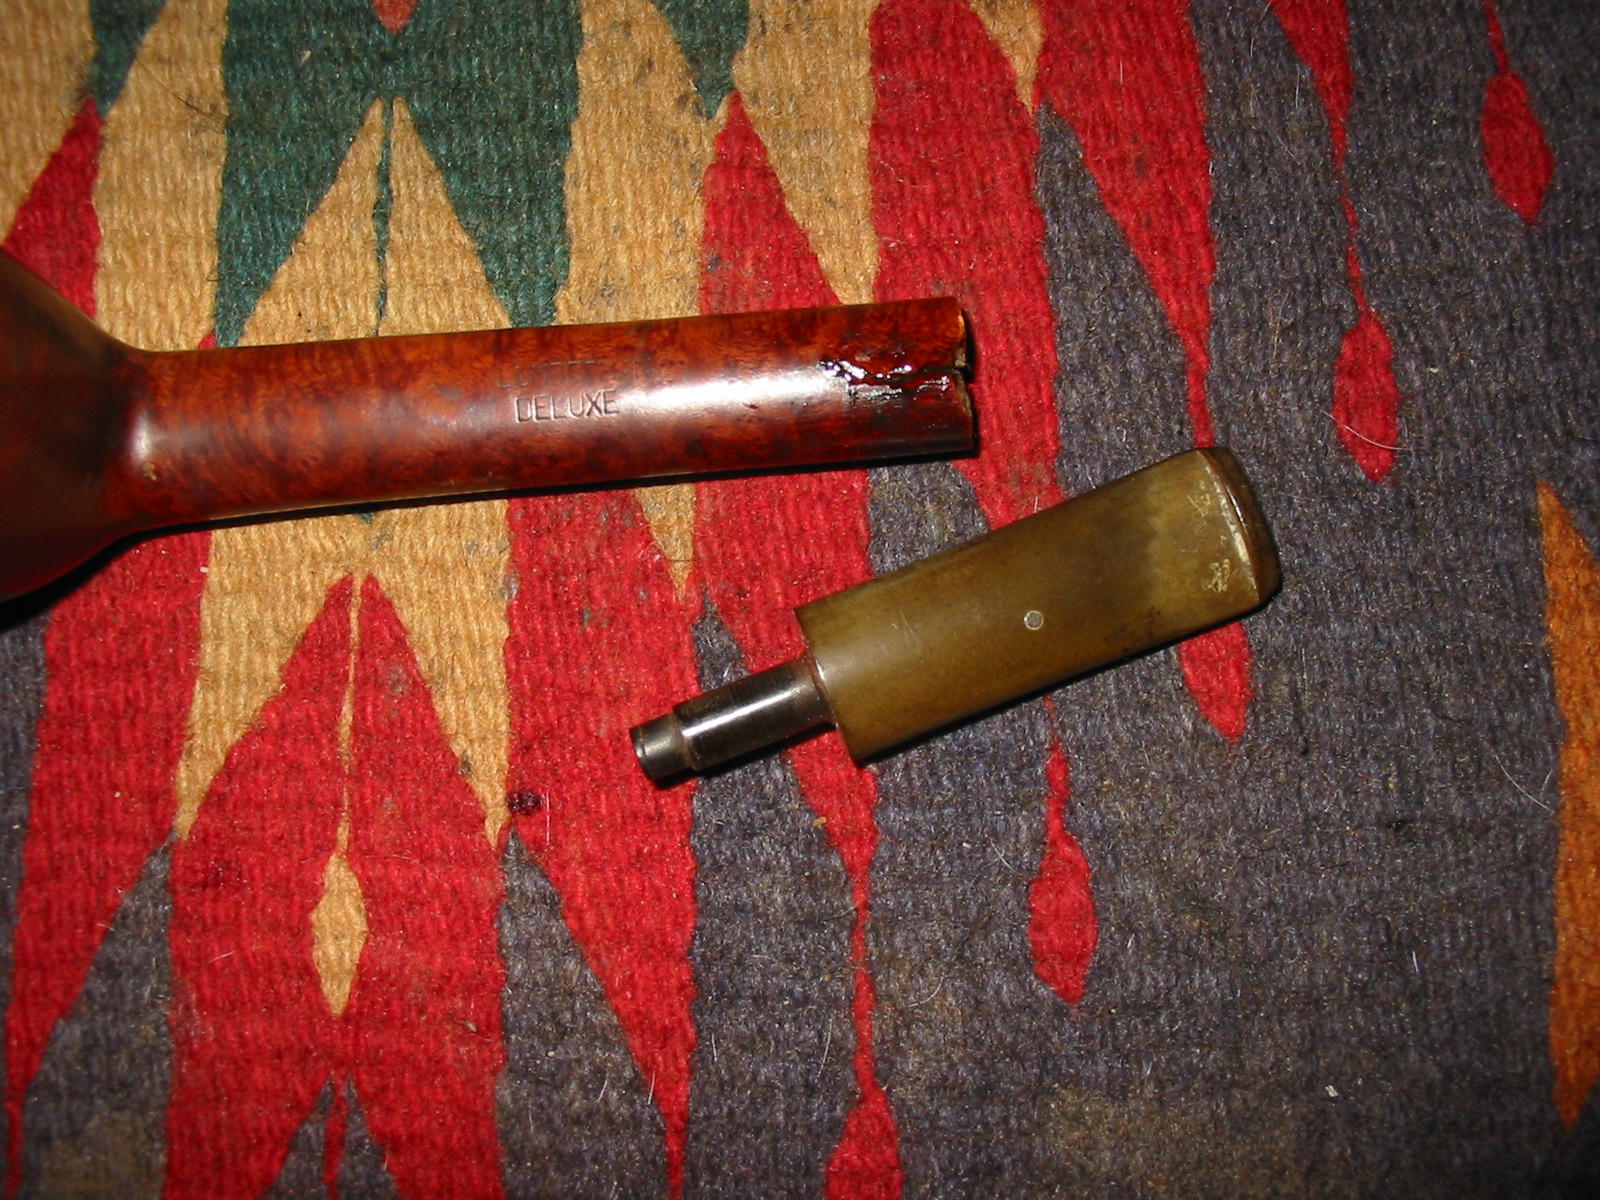
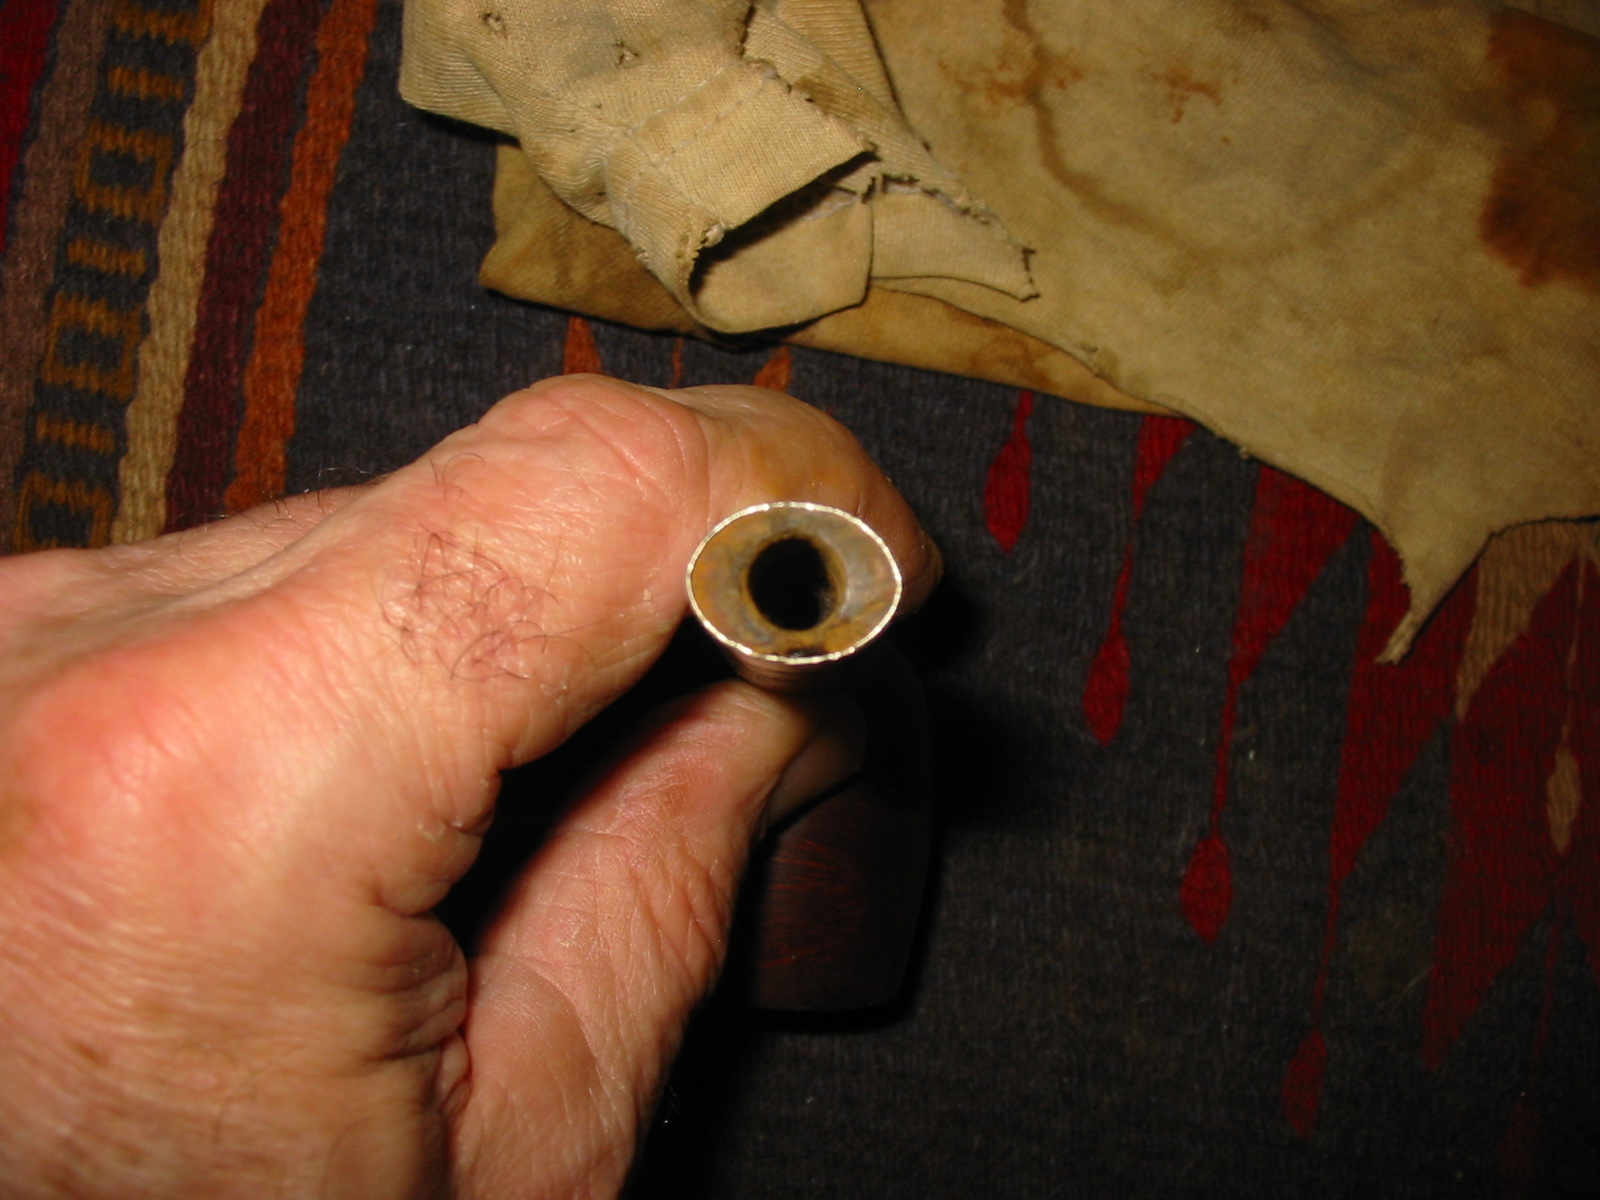
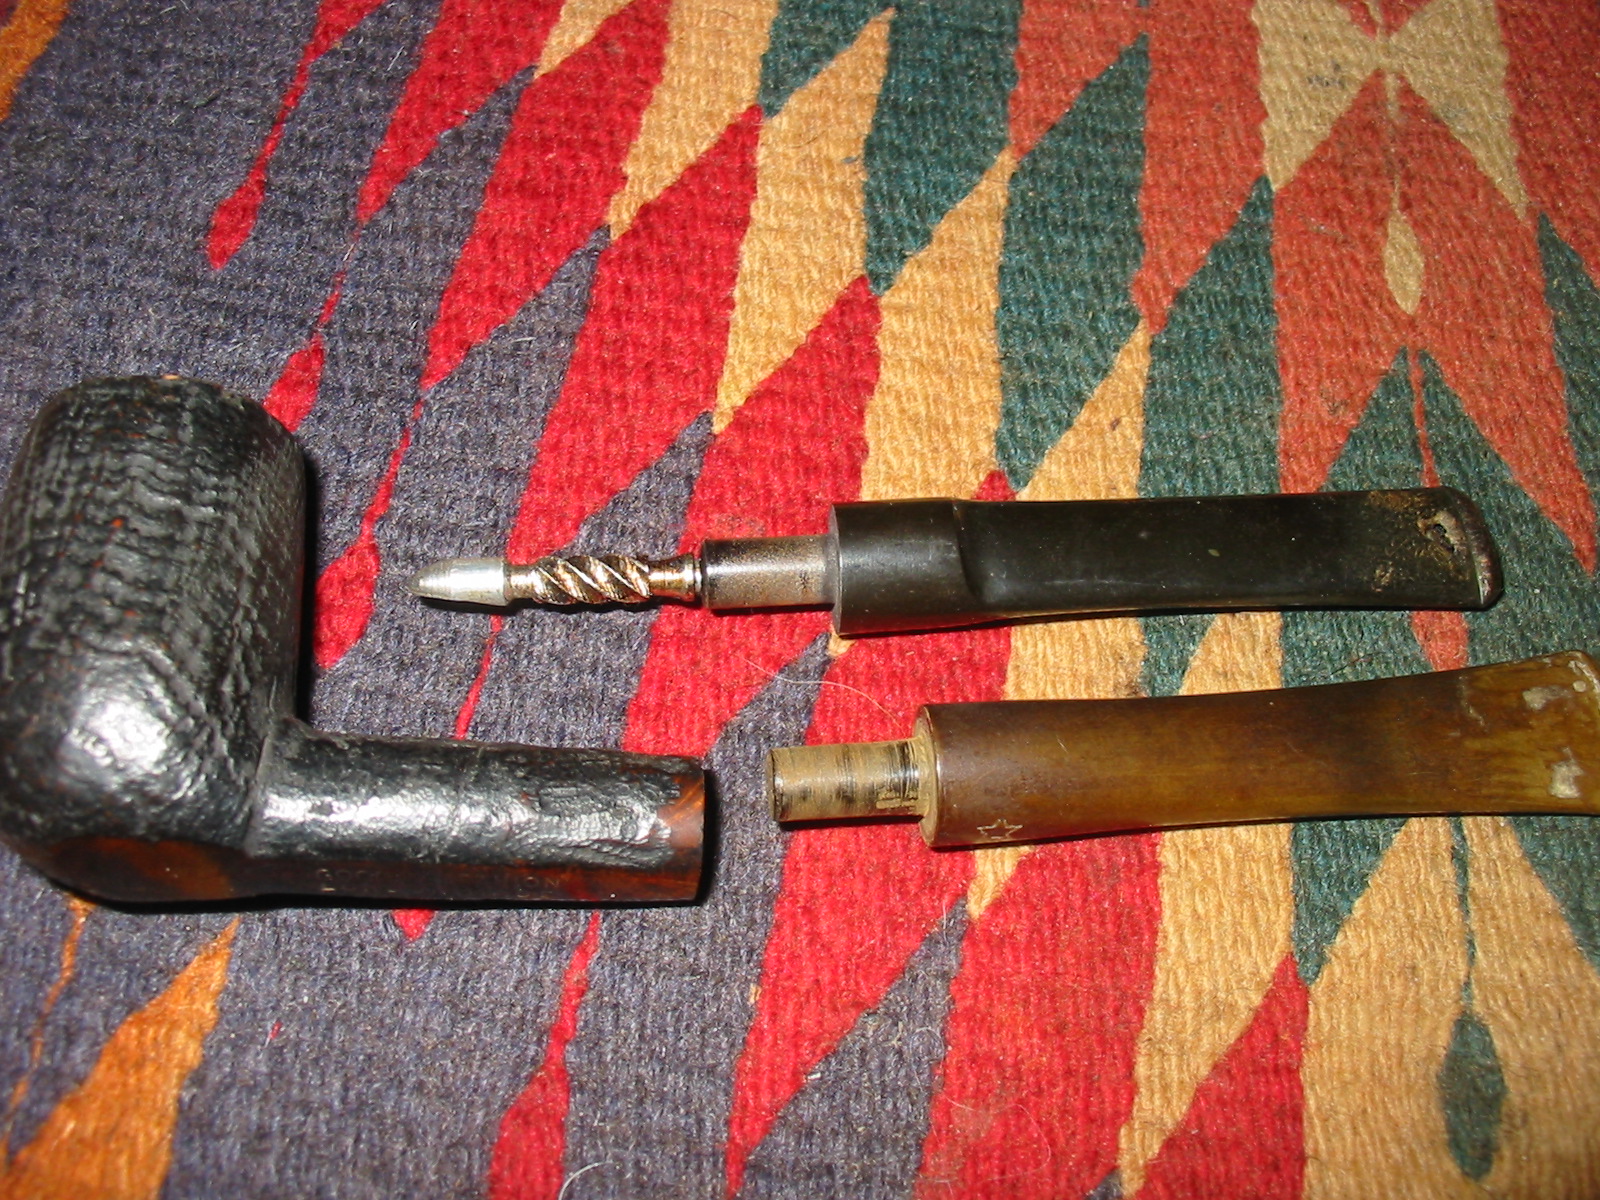
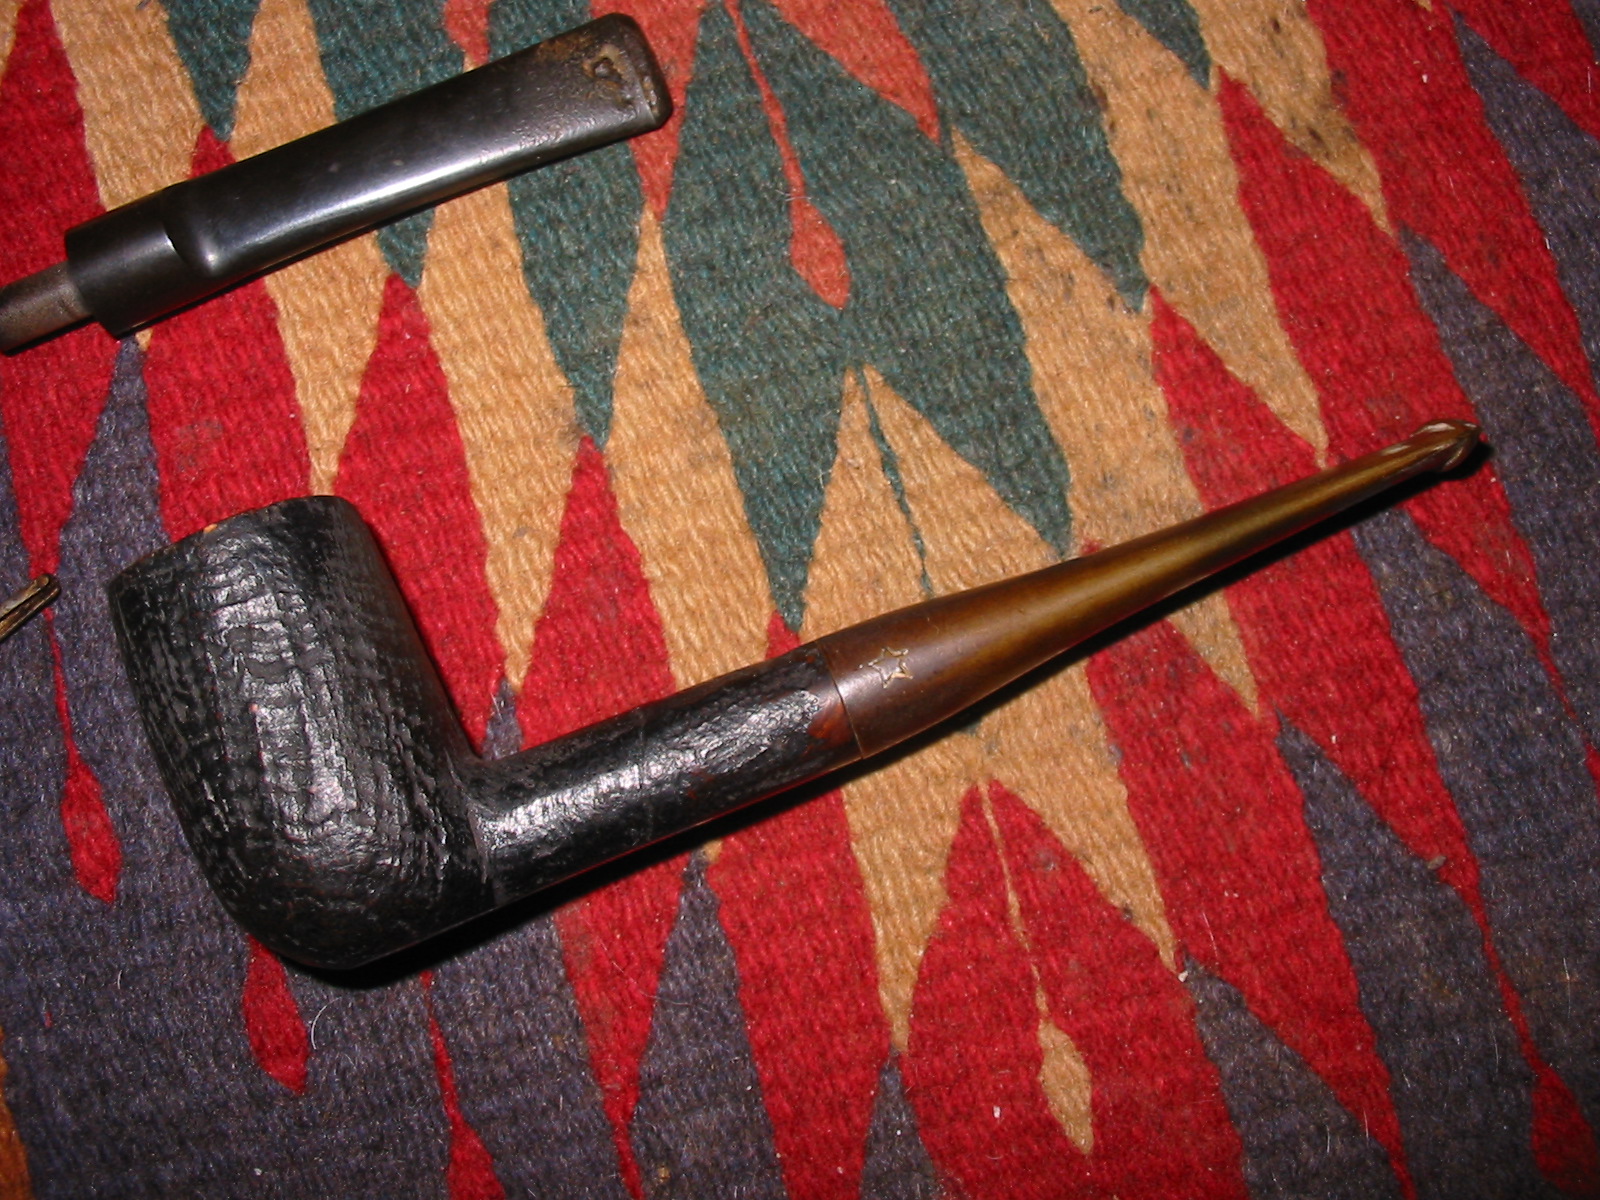
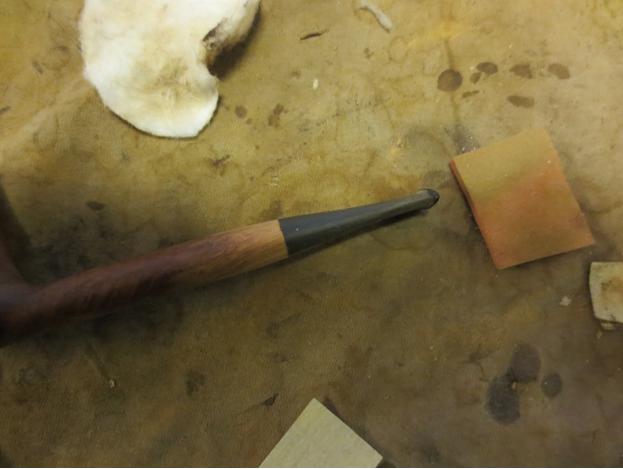
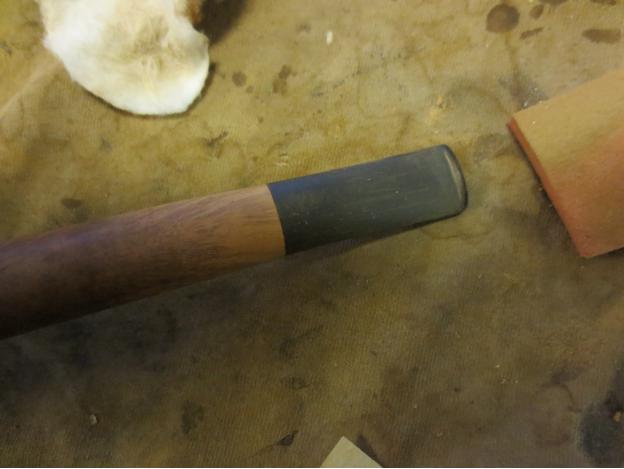
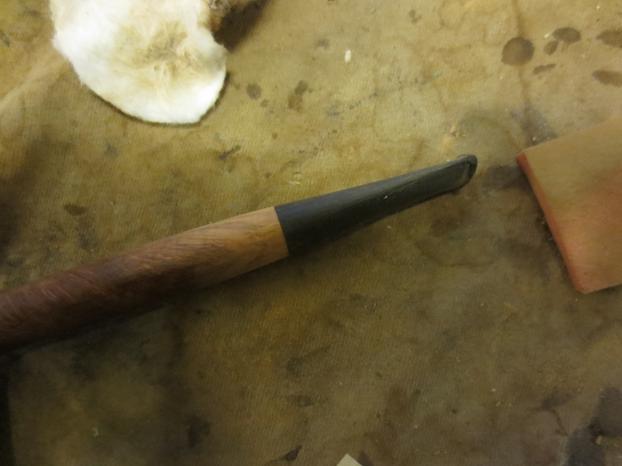
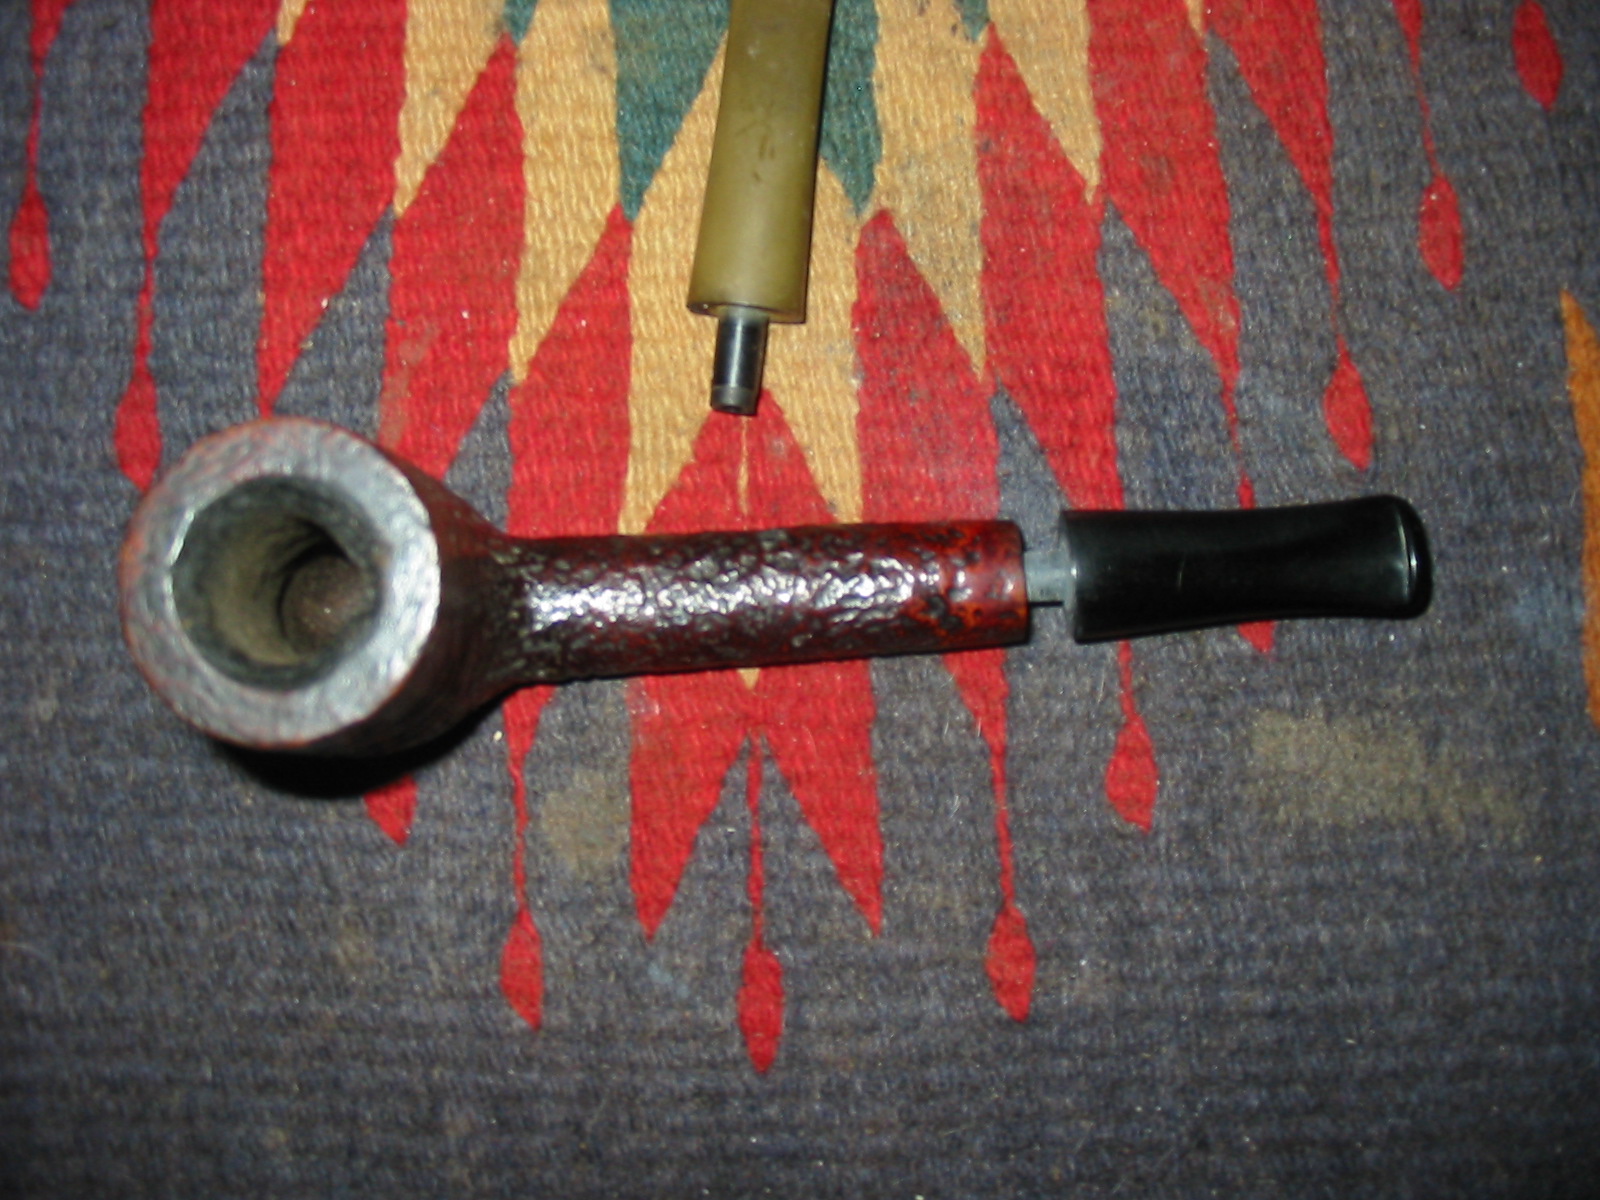
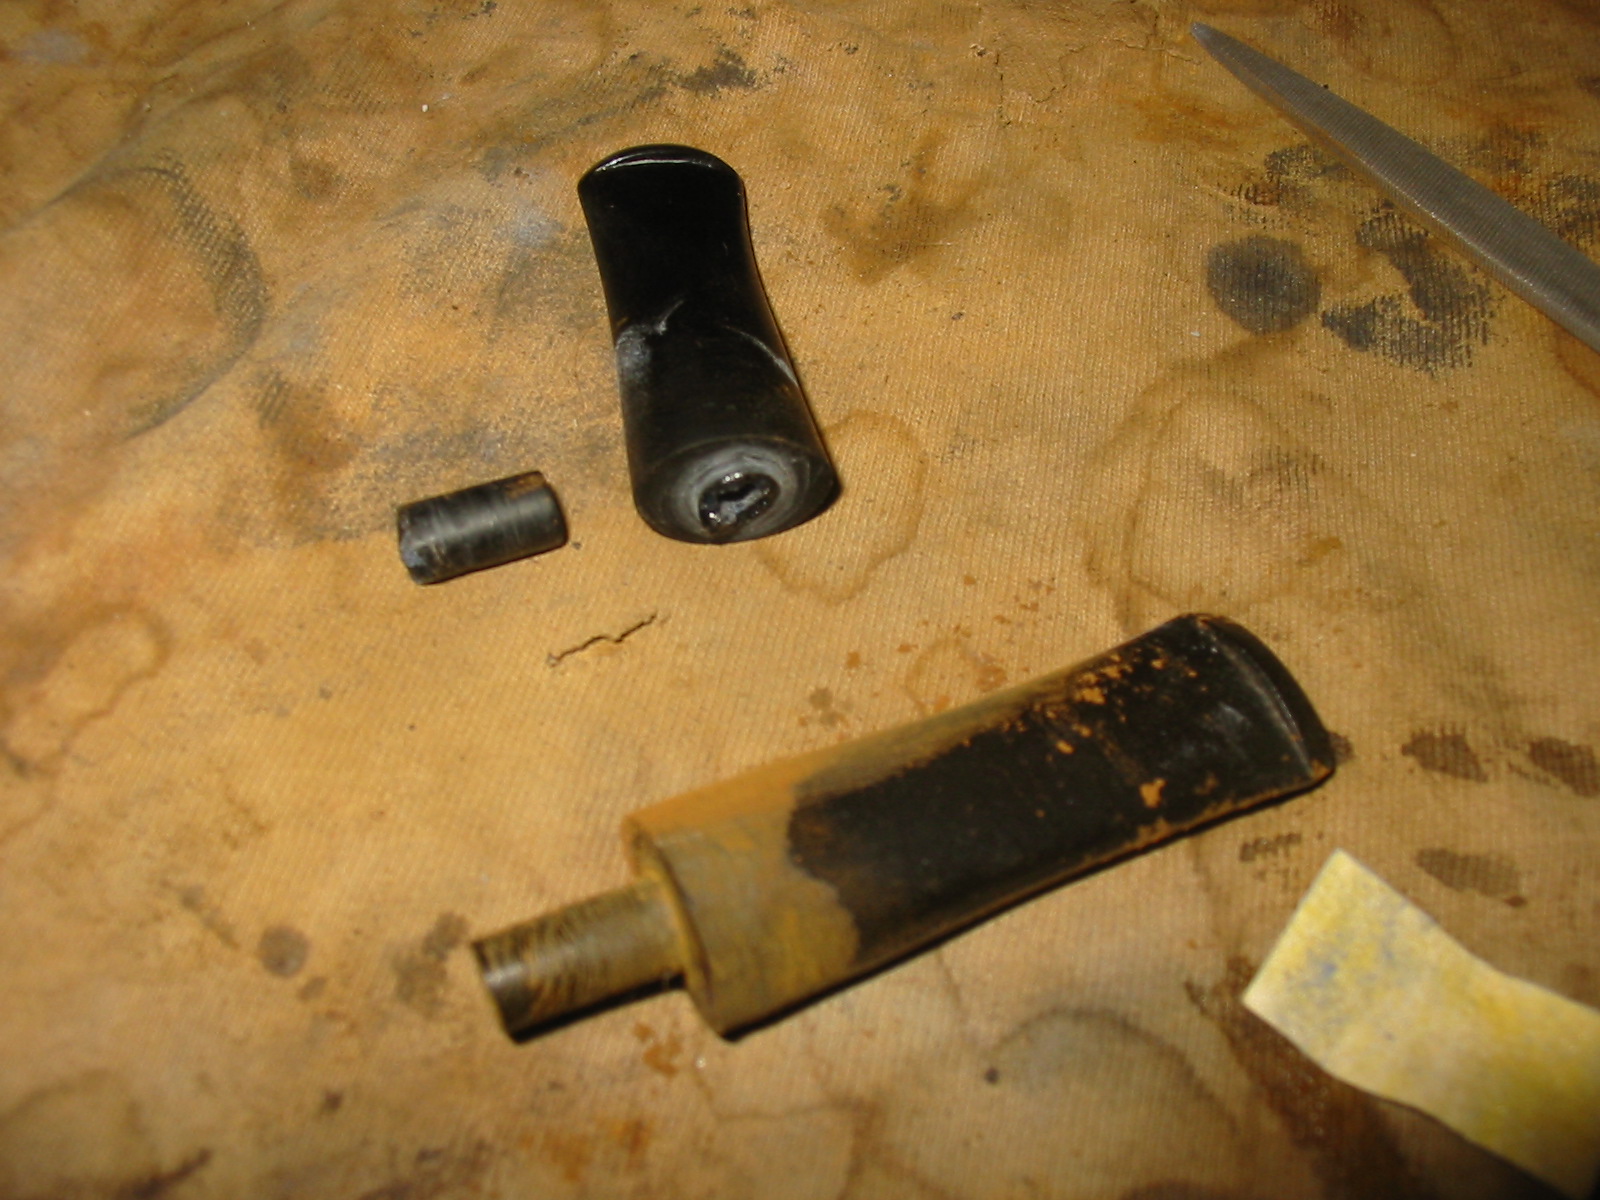
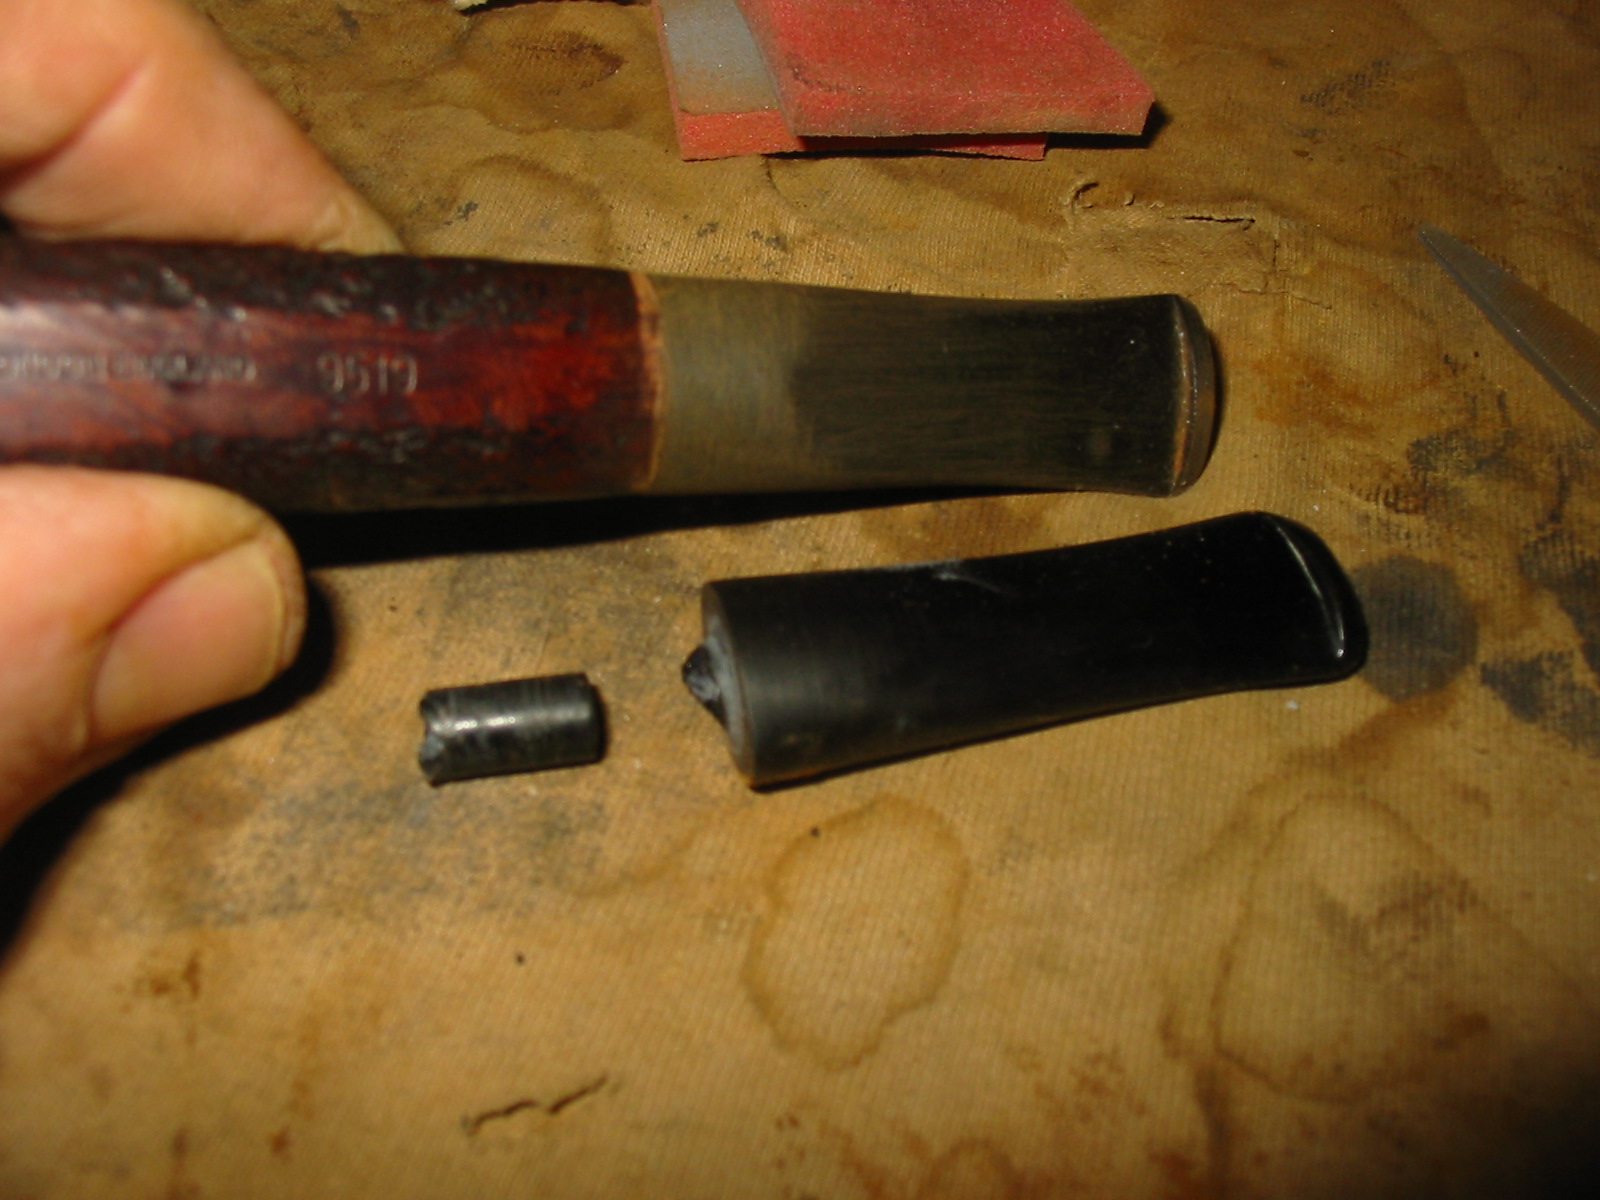
I turned the tenon down to get a good fit in the mortise and against the end of the shank. I wanted to see what I was working with in terms of the cut off shank. I knew that it was not straight but I wanted to see how far off it was. I also wanted to see the damage to the shank from the crack. The next series of four photos shows the damage to the shank. I was able to smooth out some of the damage but the band would certainly help in making the end of the shank smooth. I did not want to cut off any of the length after reading the information that Andrew provided. From photos I looked at on the net the stem was the right shape, taper and angles to fit this age of pipe. The old stem I chose was one that had the BBB diamond stamped on the top of it. The stamping was faint so it was a good one to sacrifice for this Lumberman.
IMG_4540

IMG_4541

IMG_4542

IMG_4544

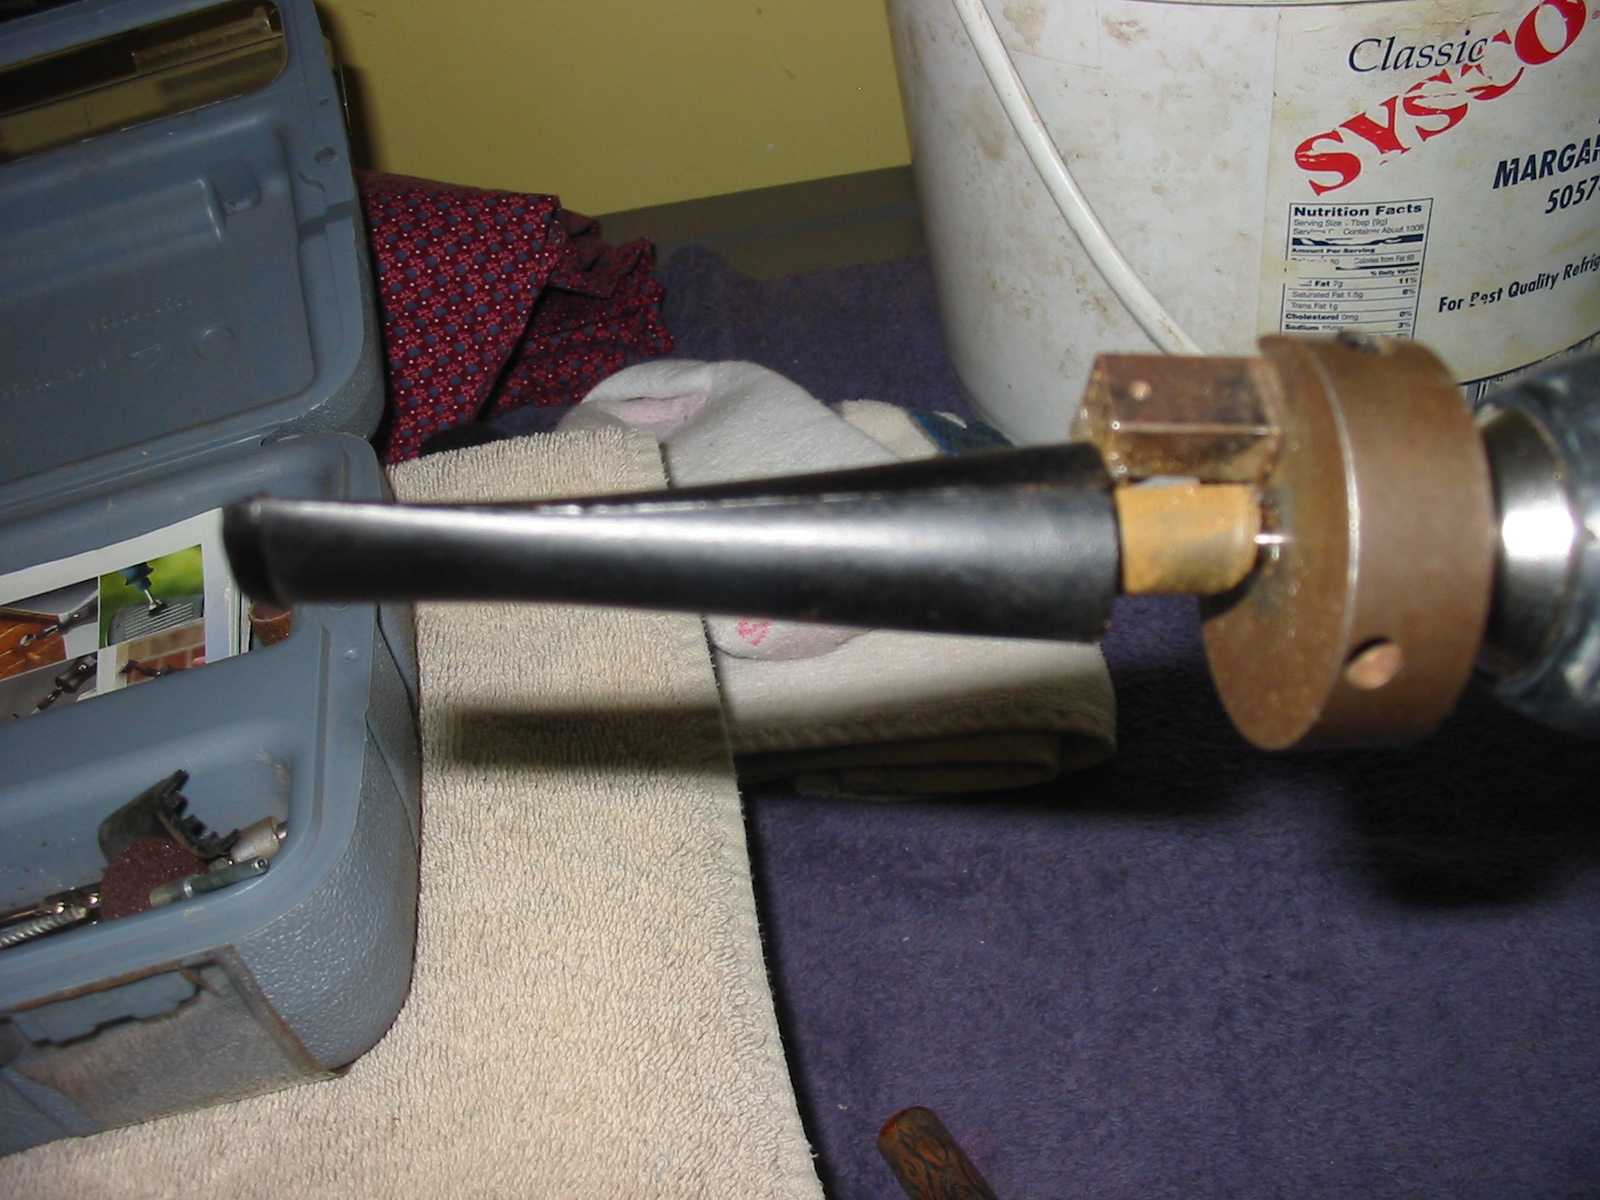
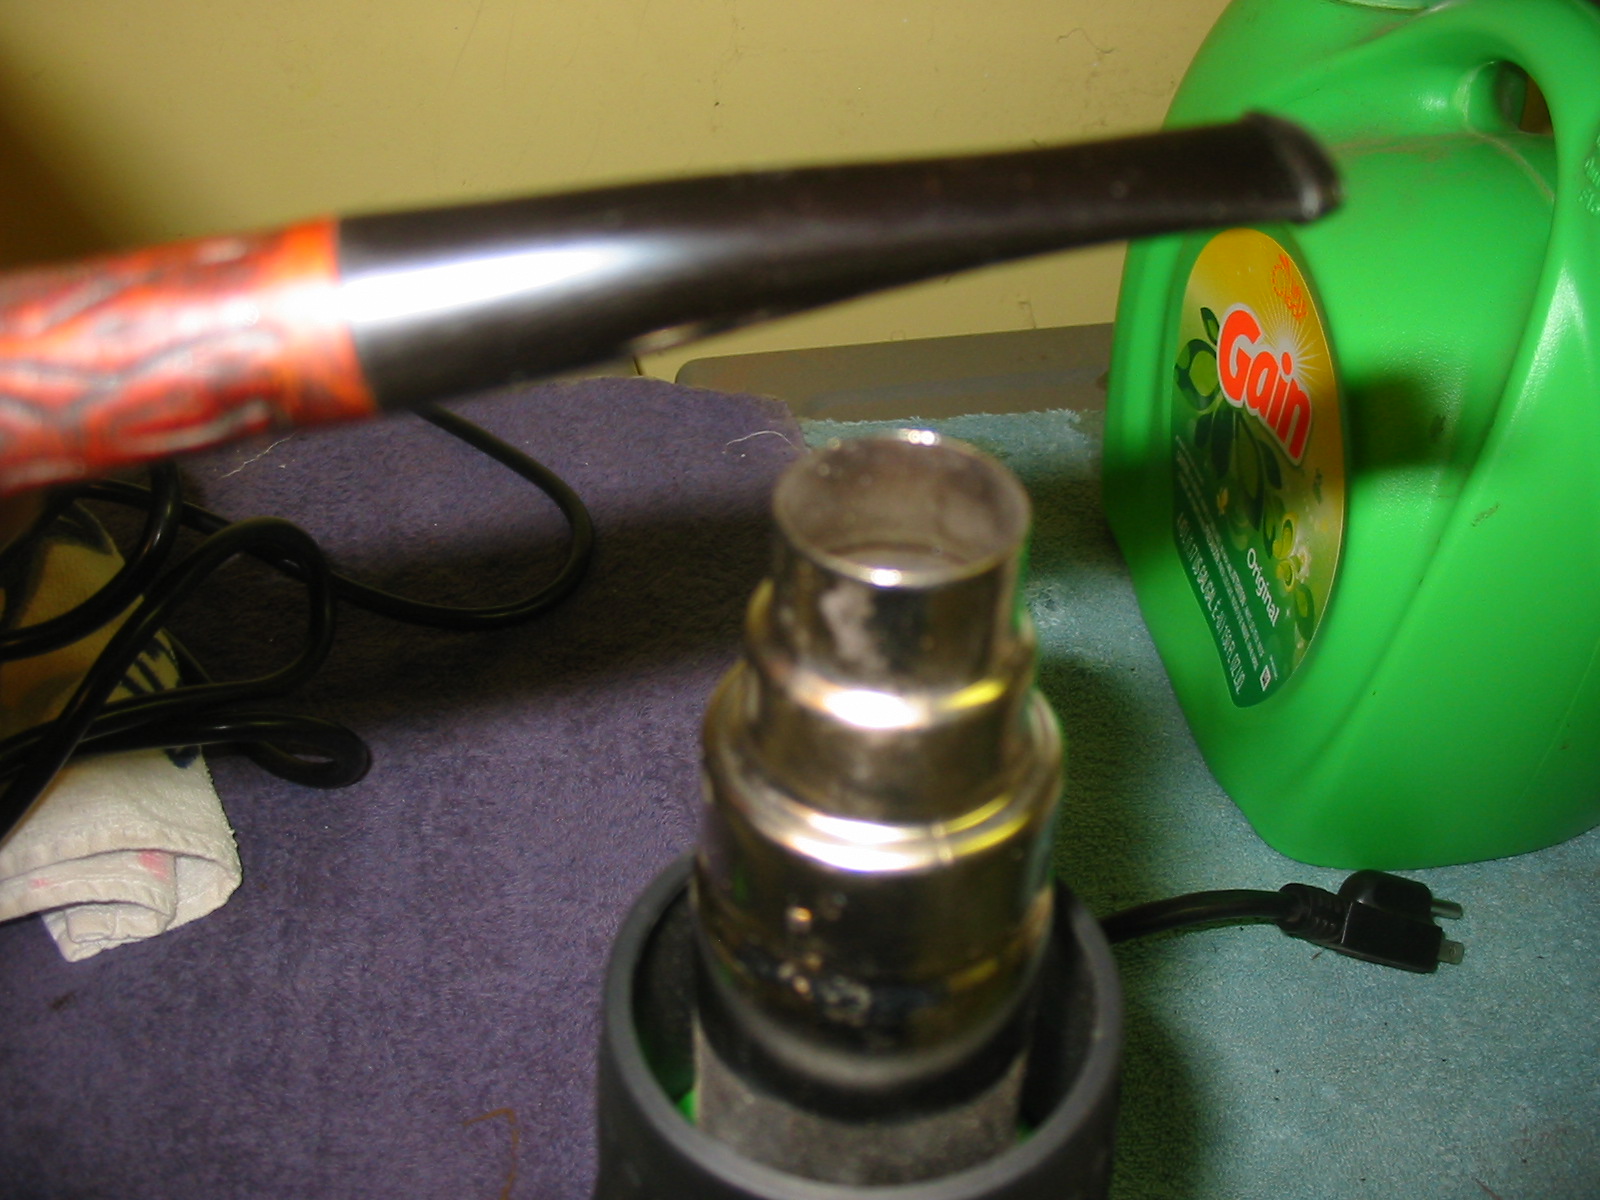
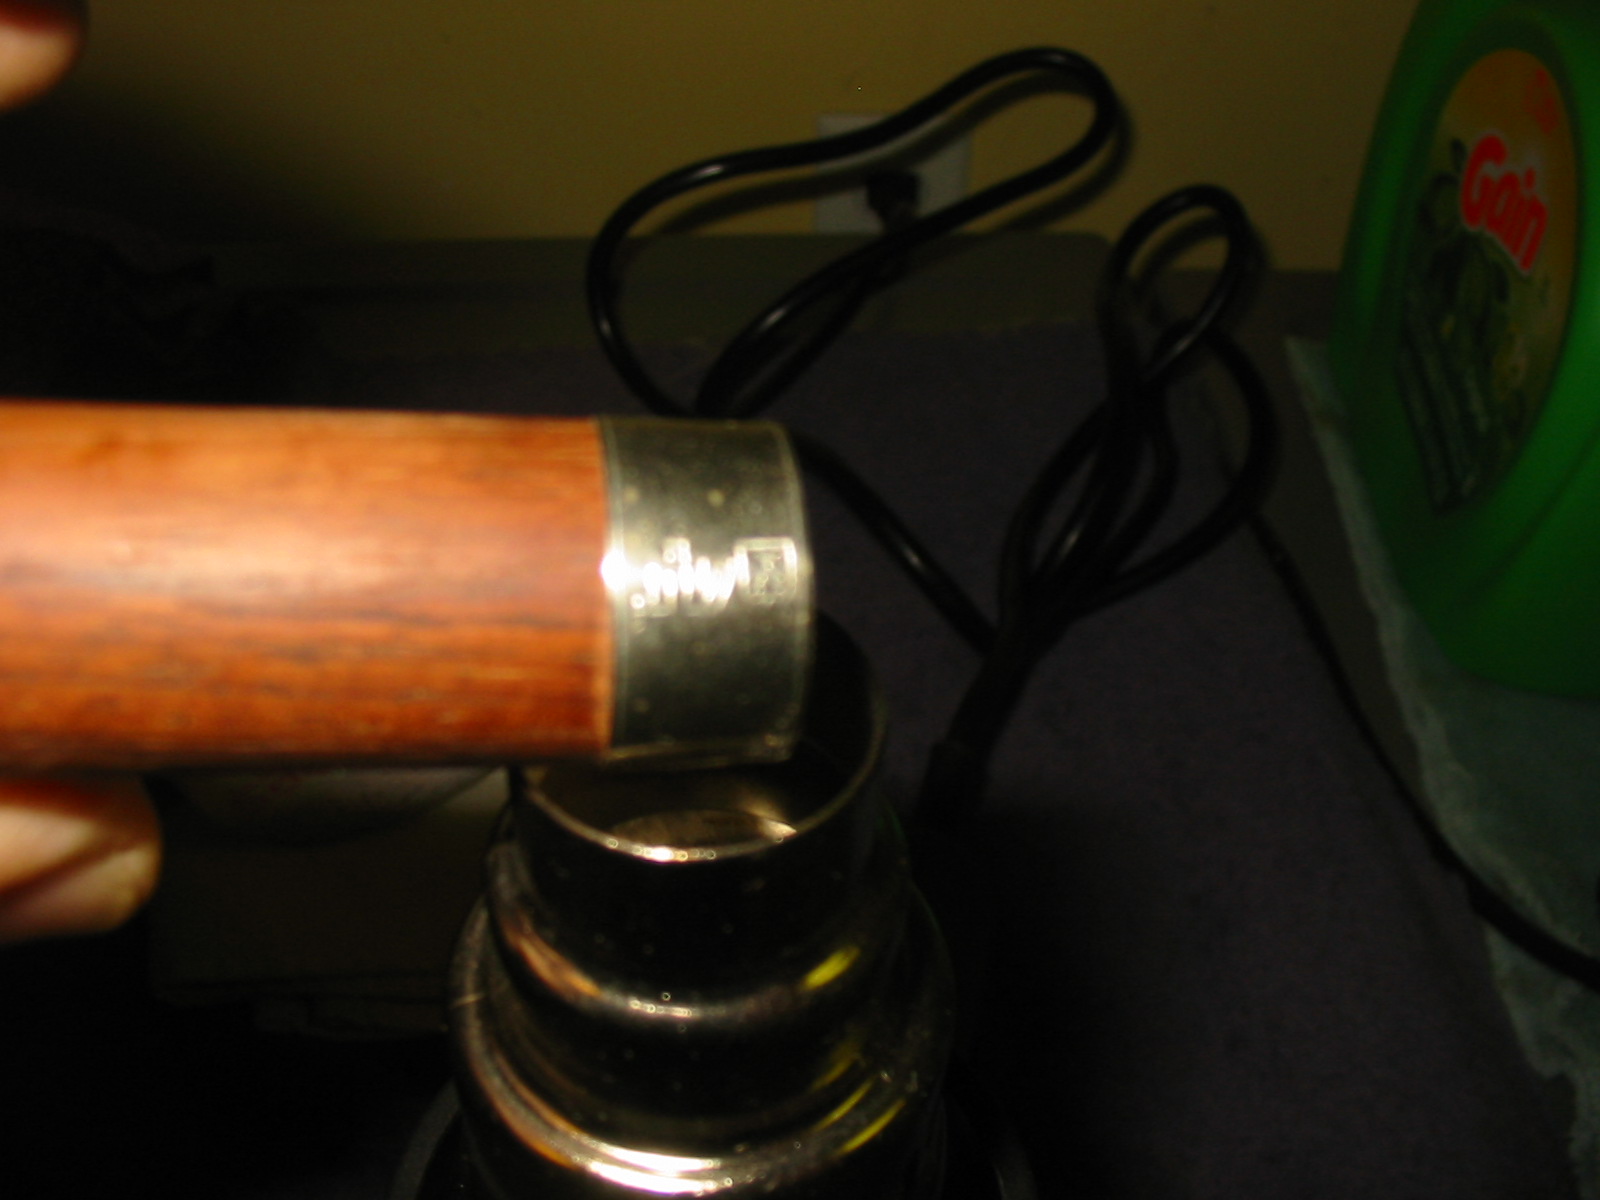
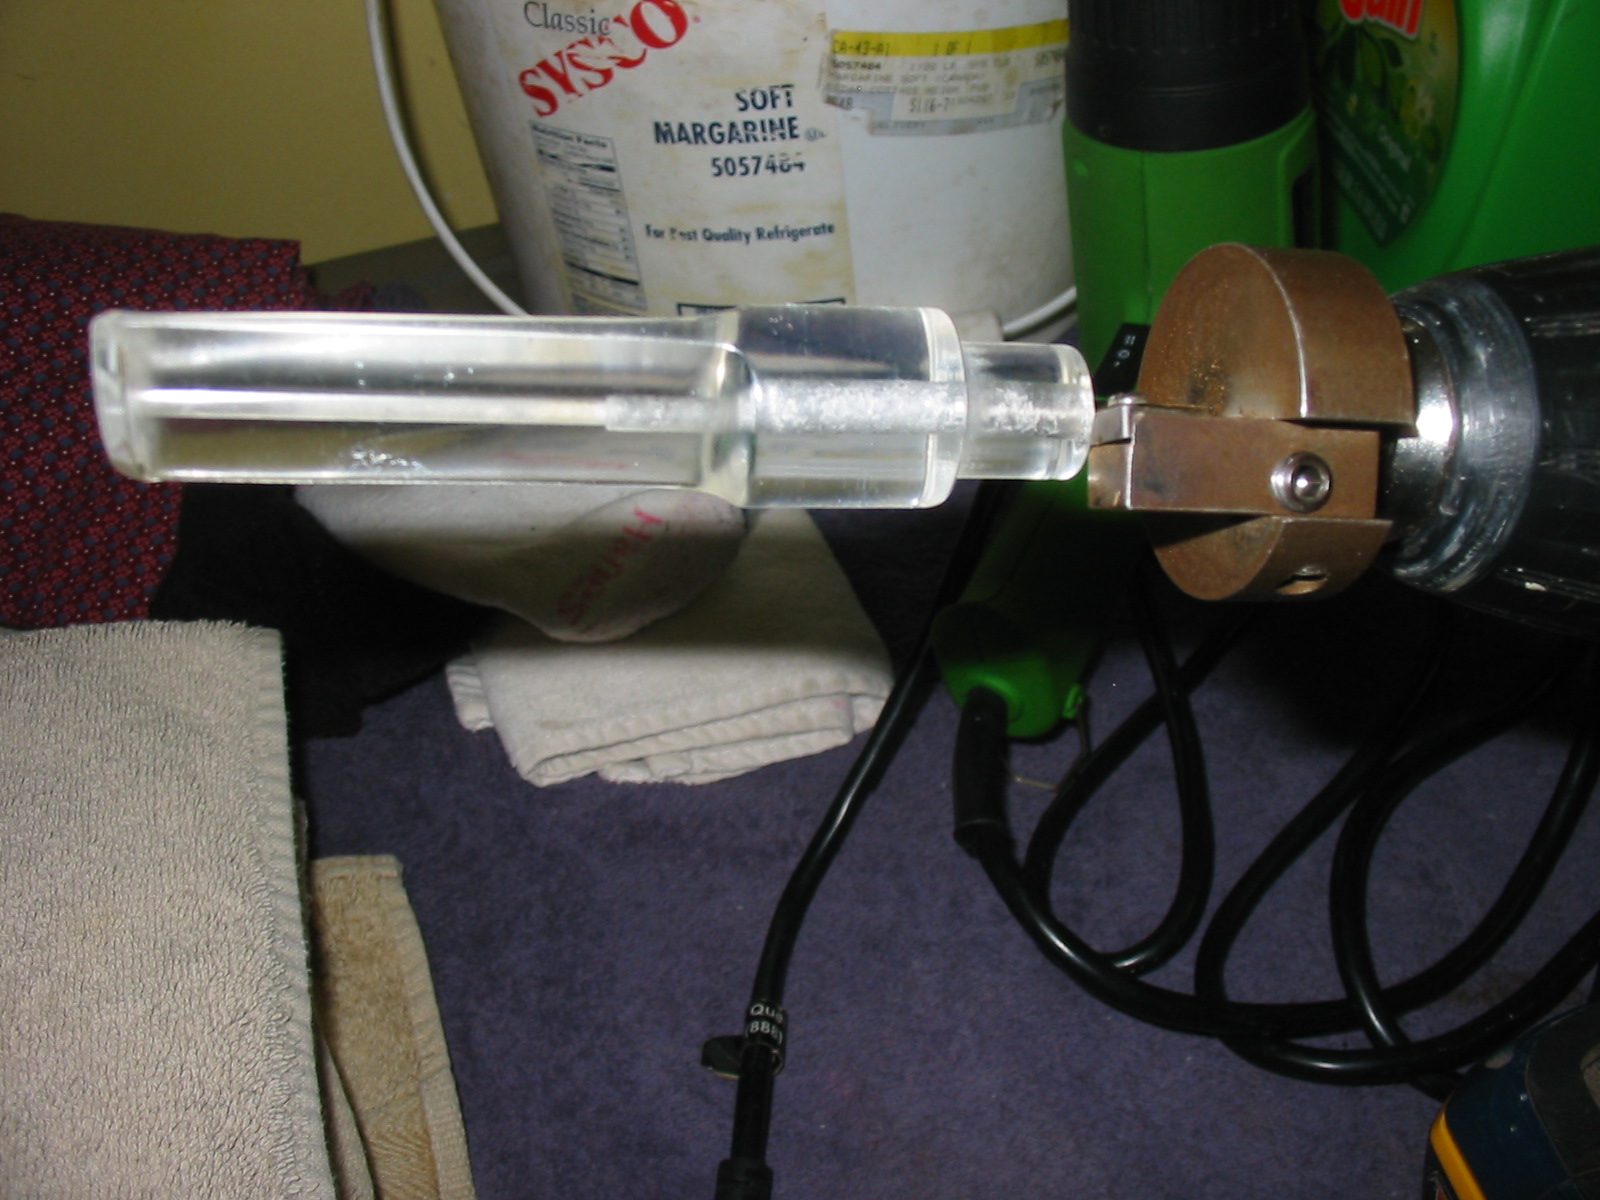
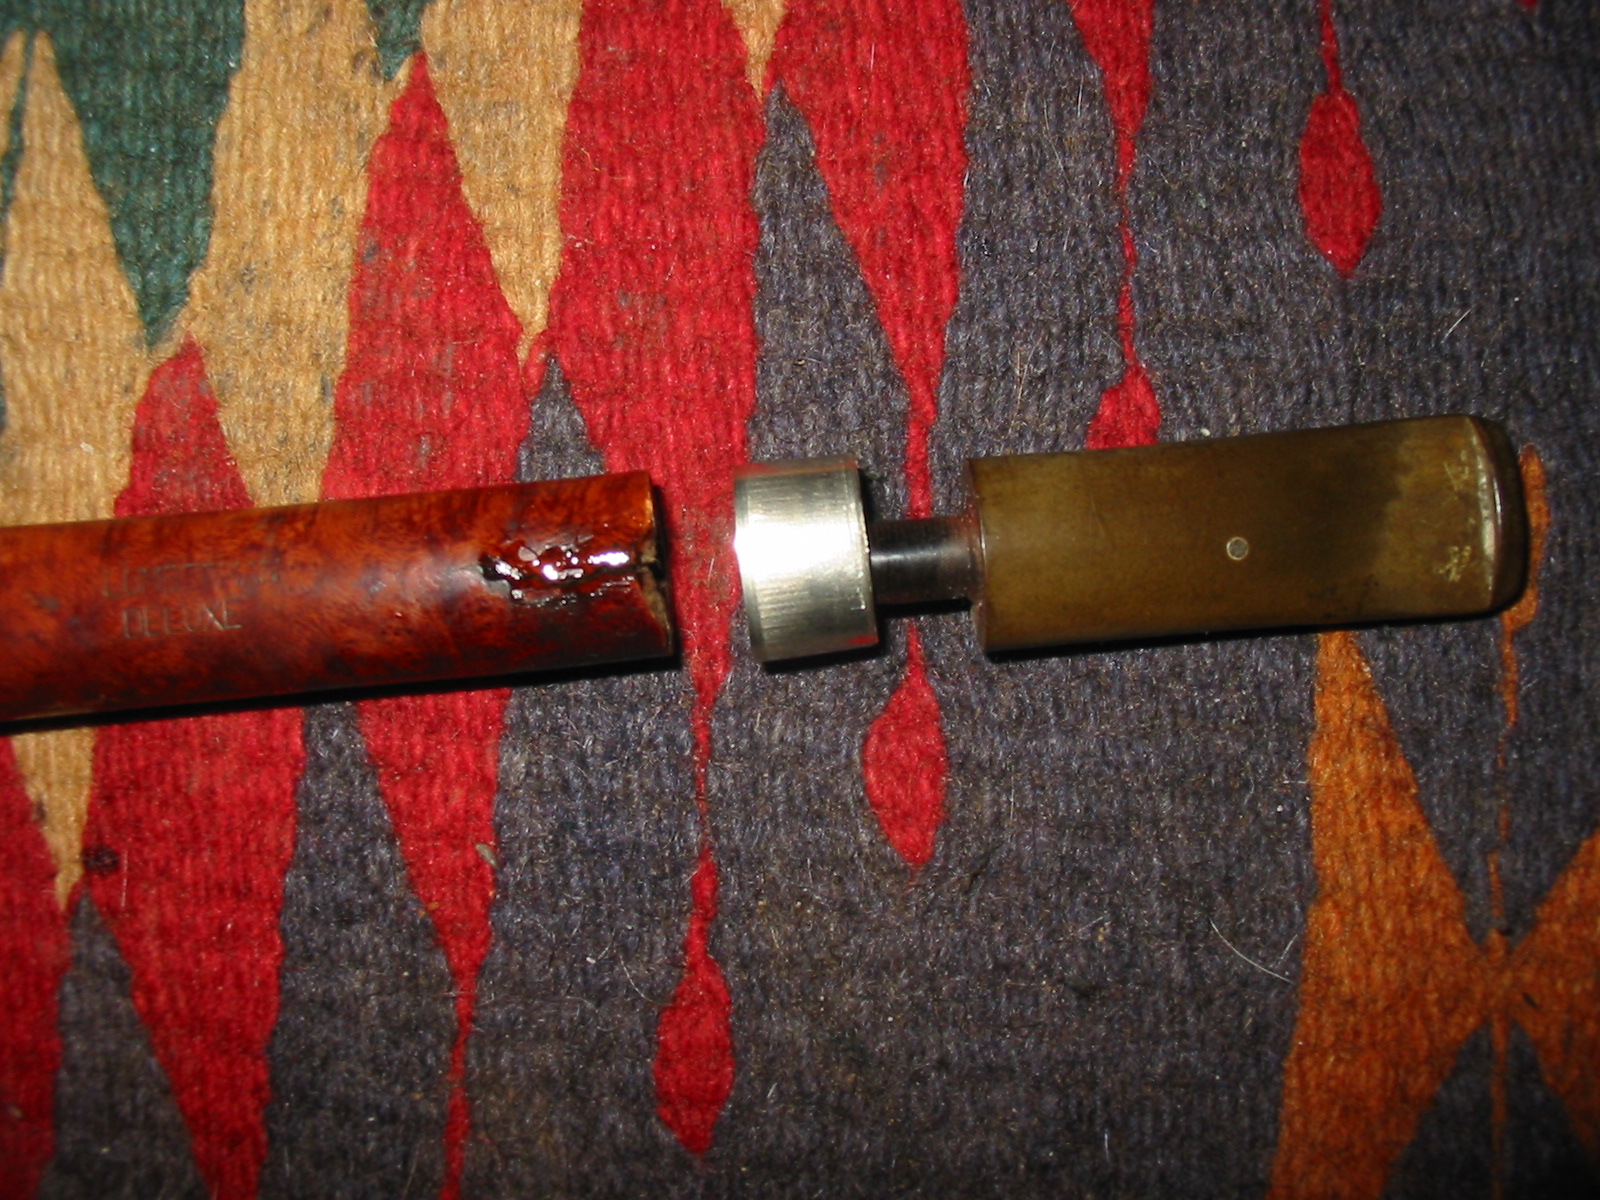
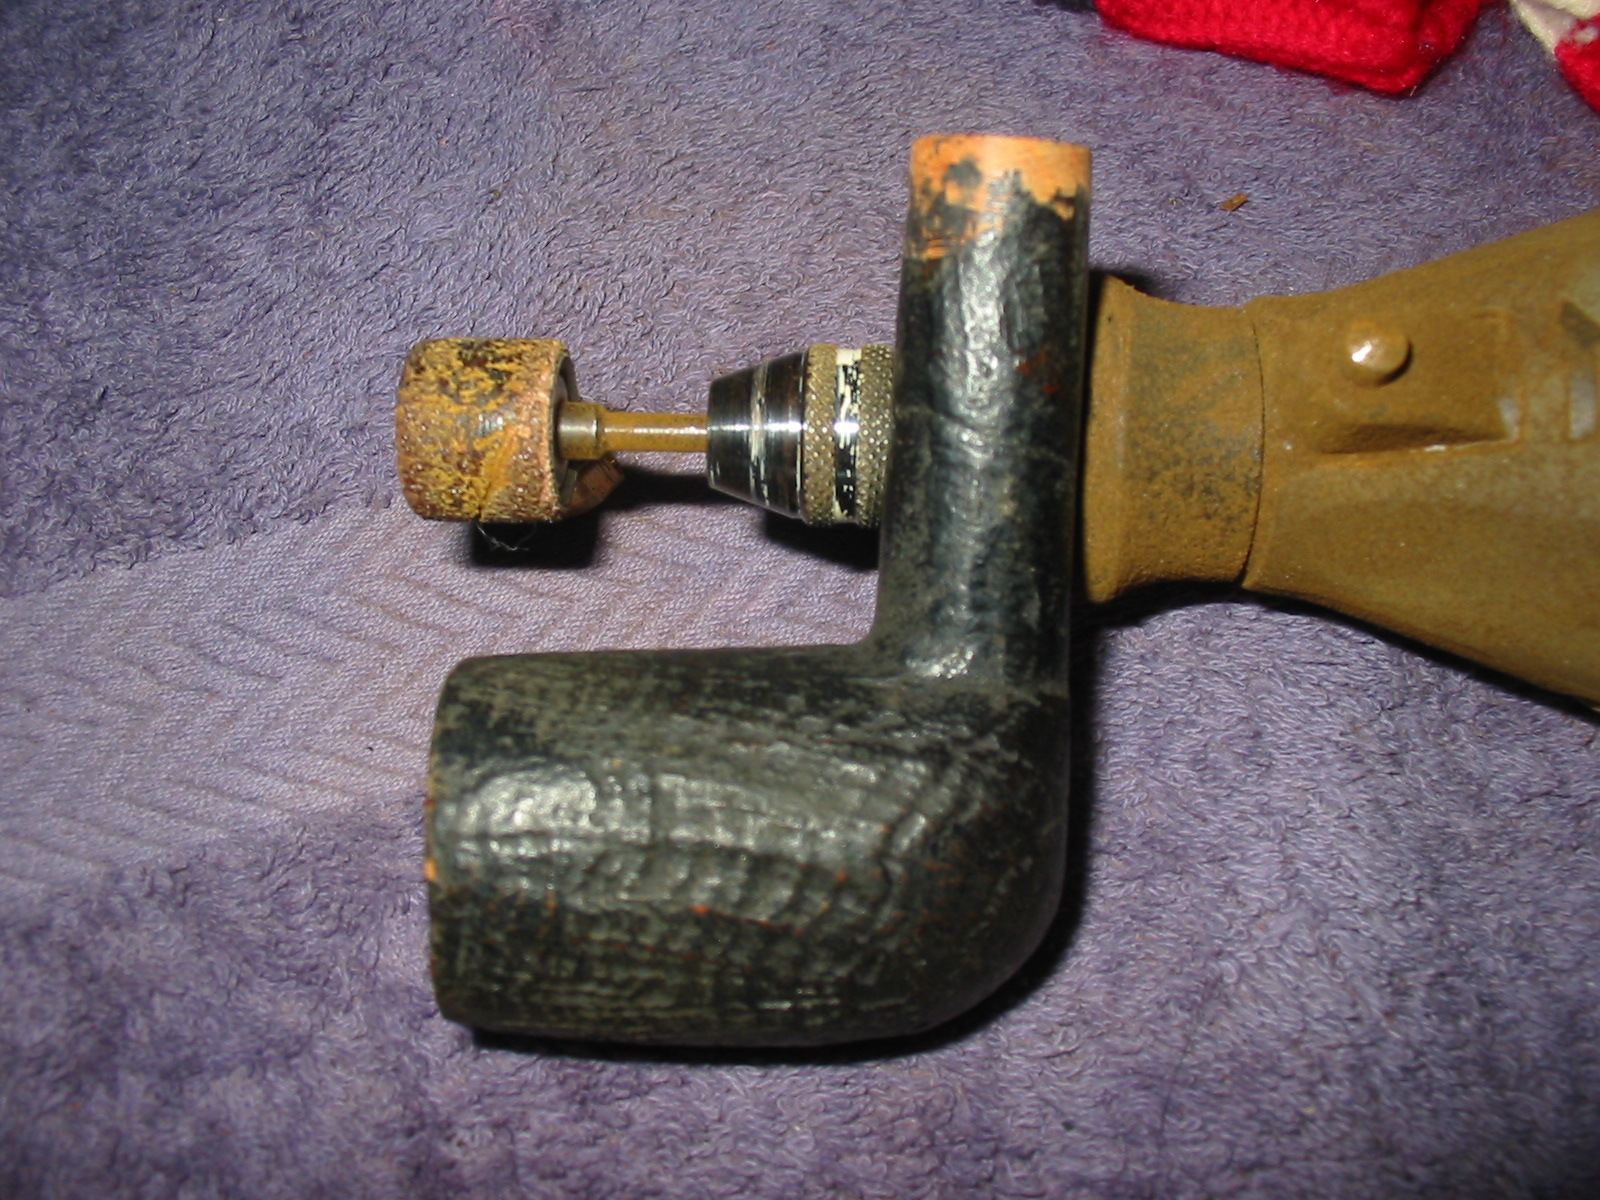
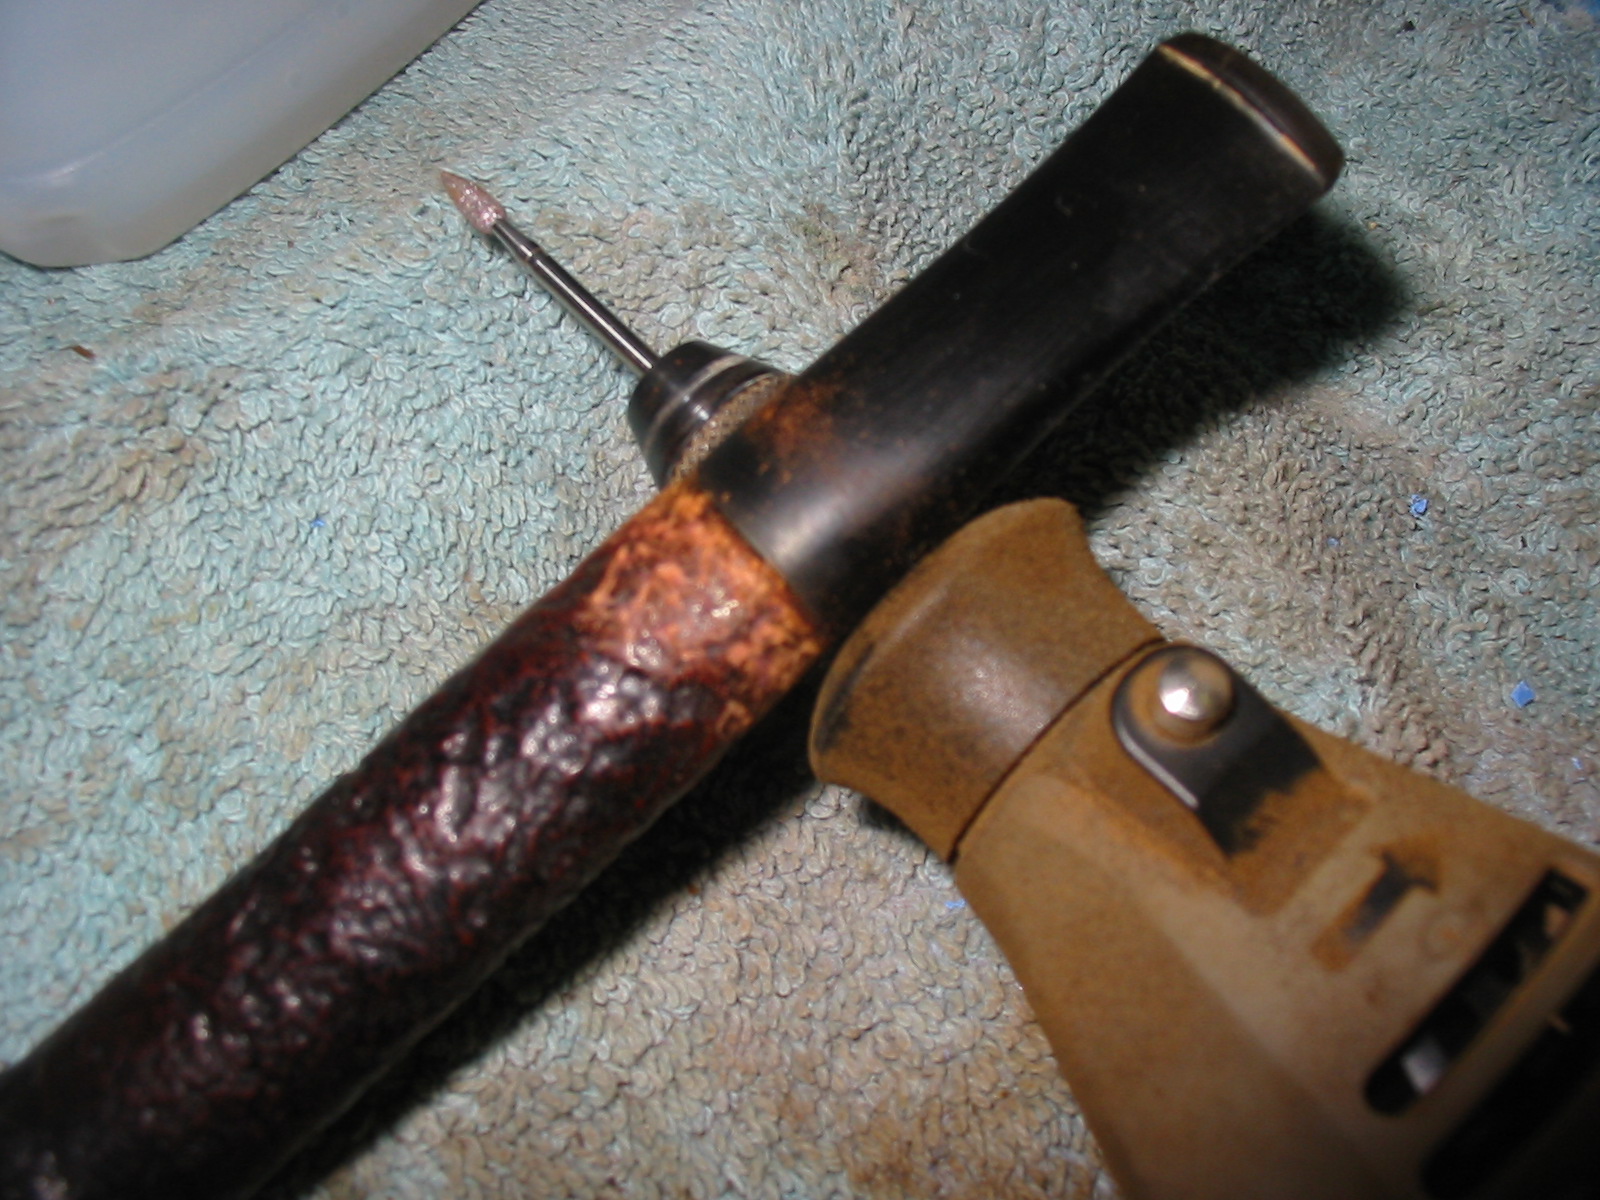
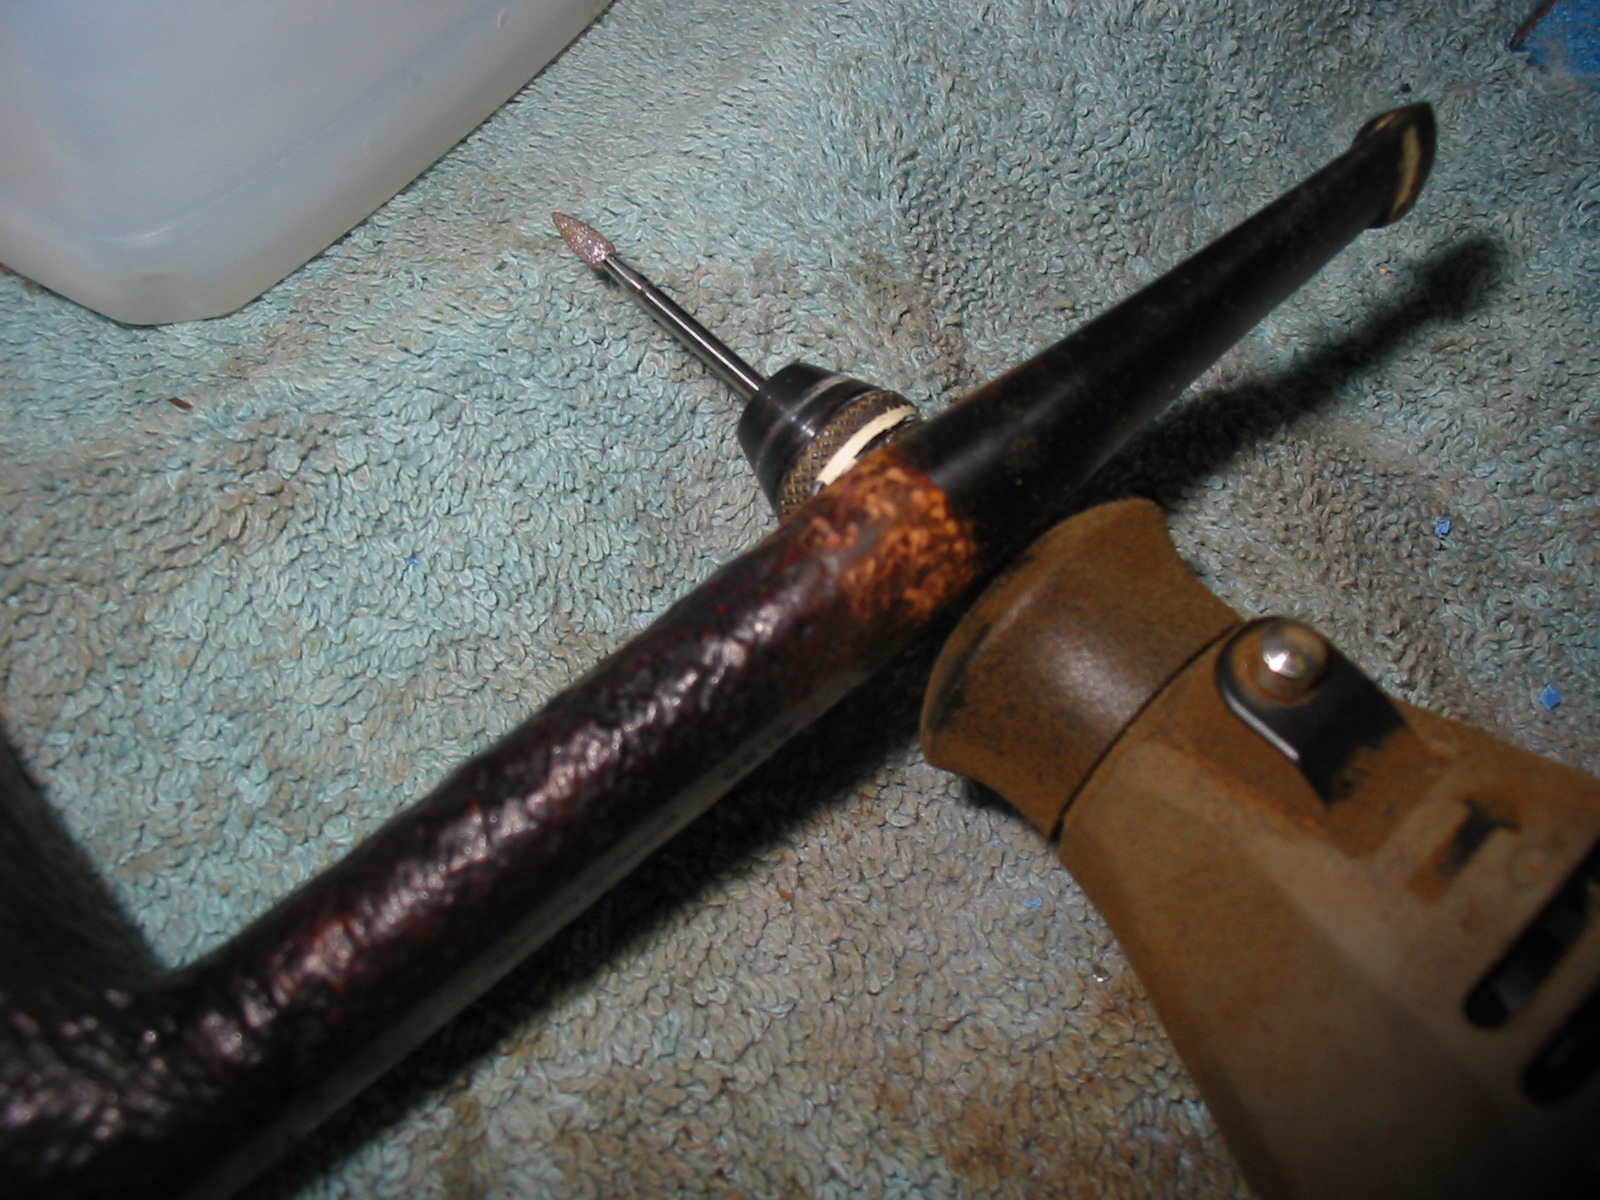
I removed the stem once it fit well and pressed the band onto the shank. I then heated it with a heat gun rotating the shank to evenly heat the band and keep the heat from burning the briar.
IMG_4546

IMG_4547

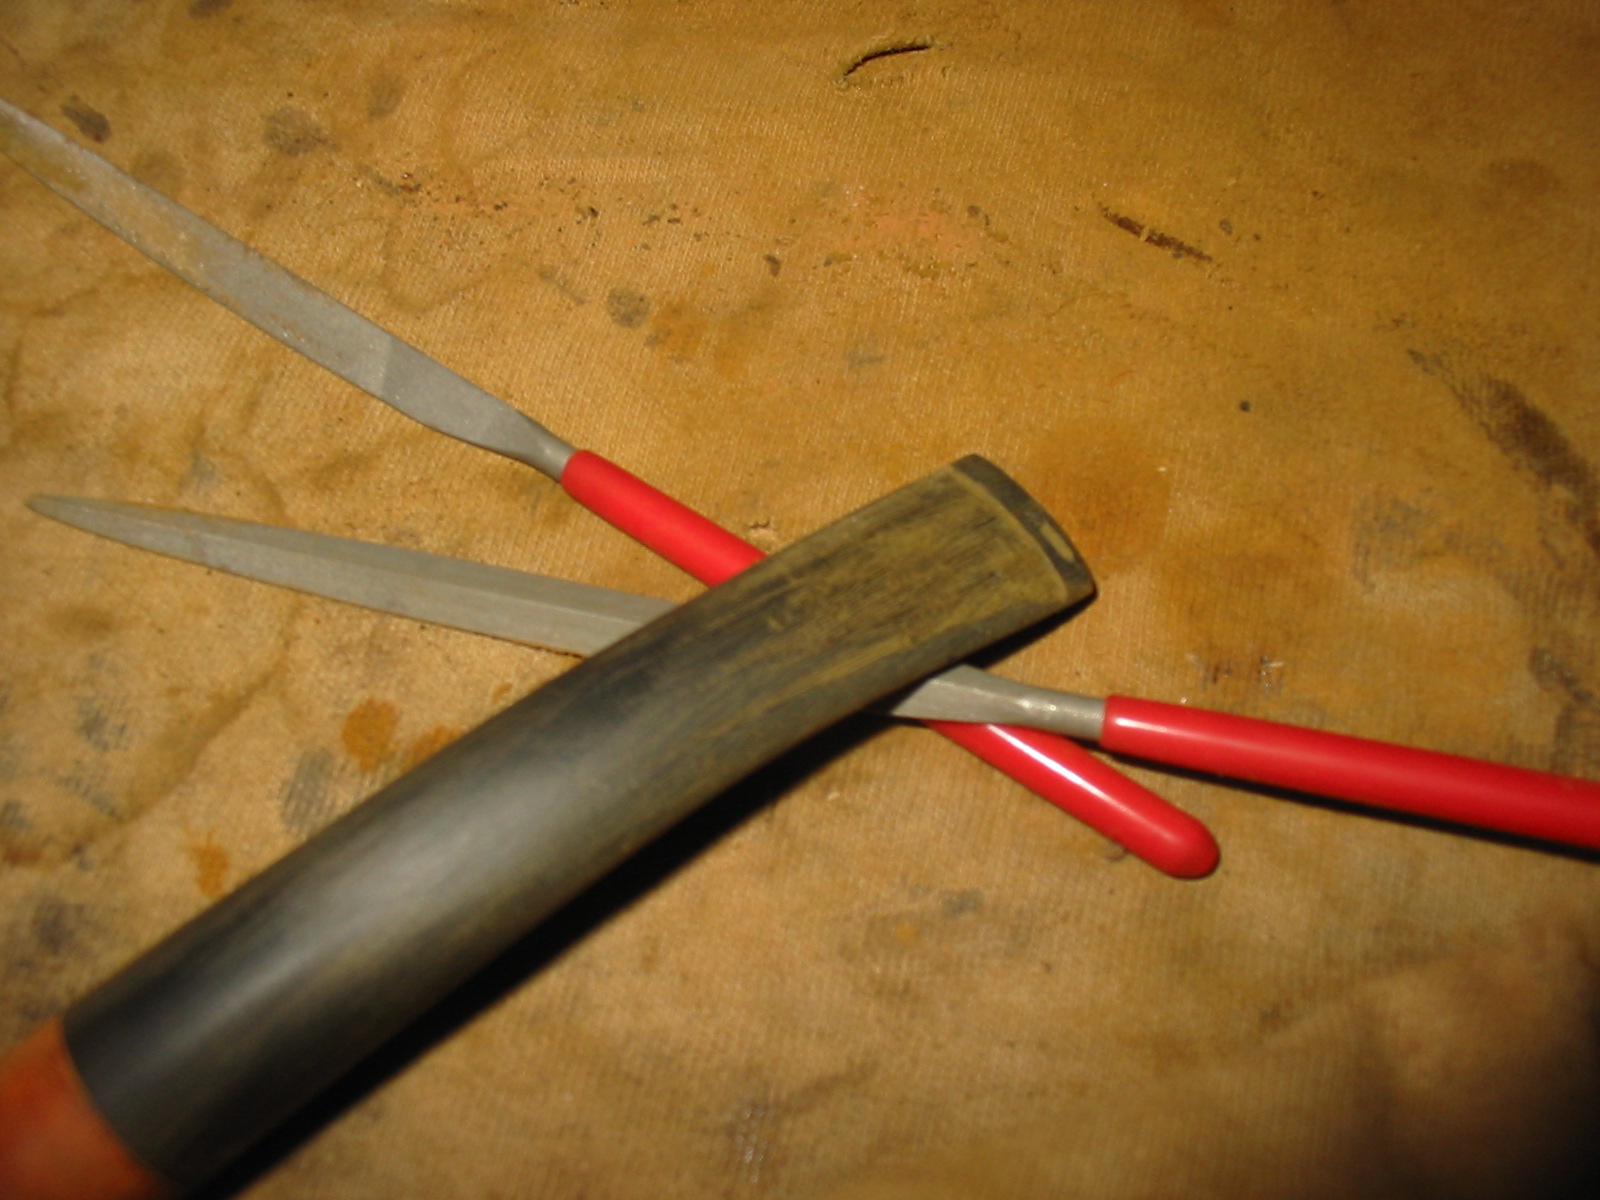
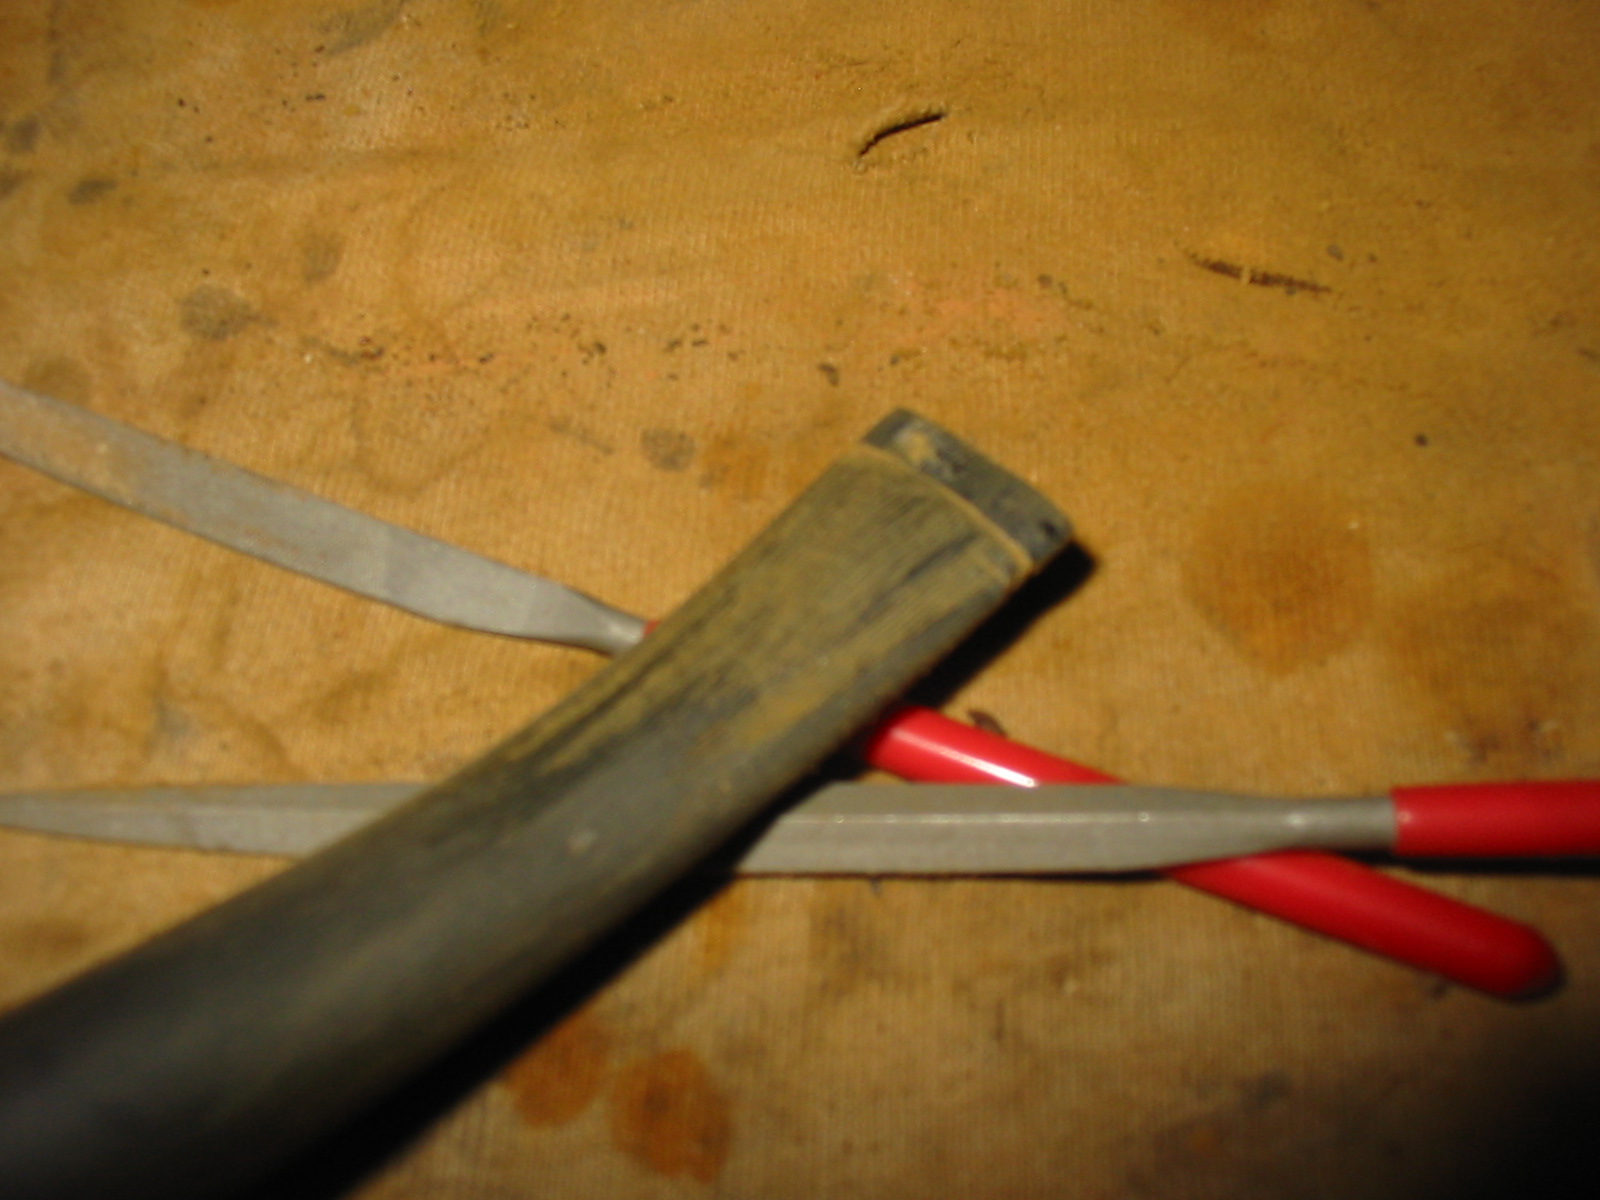
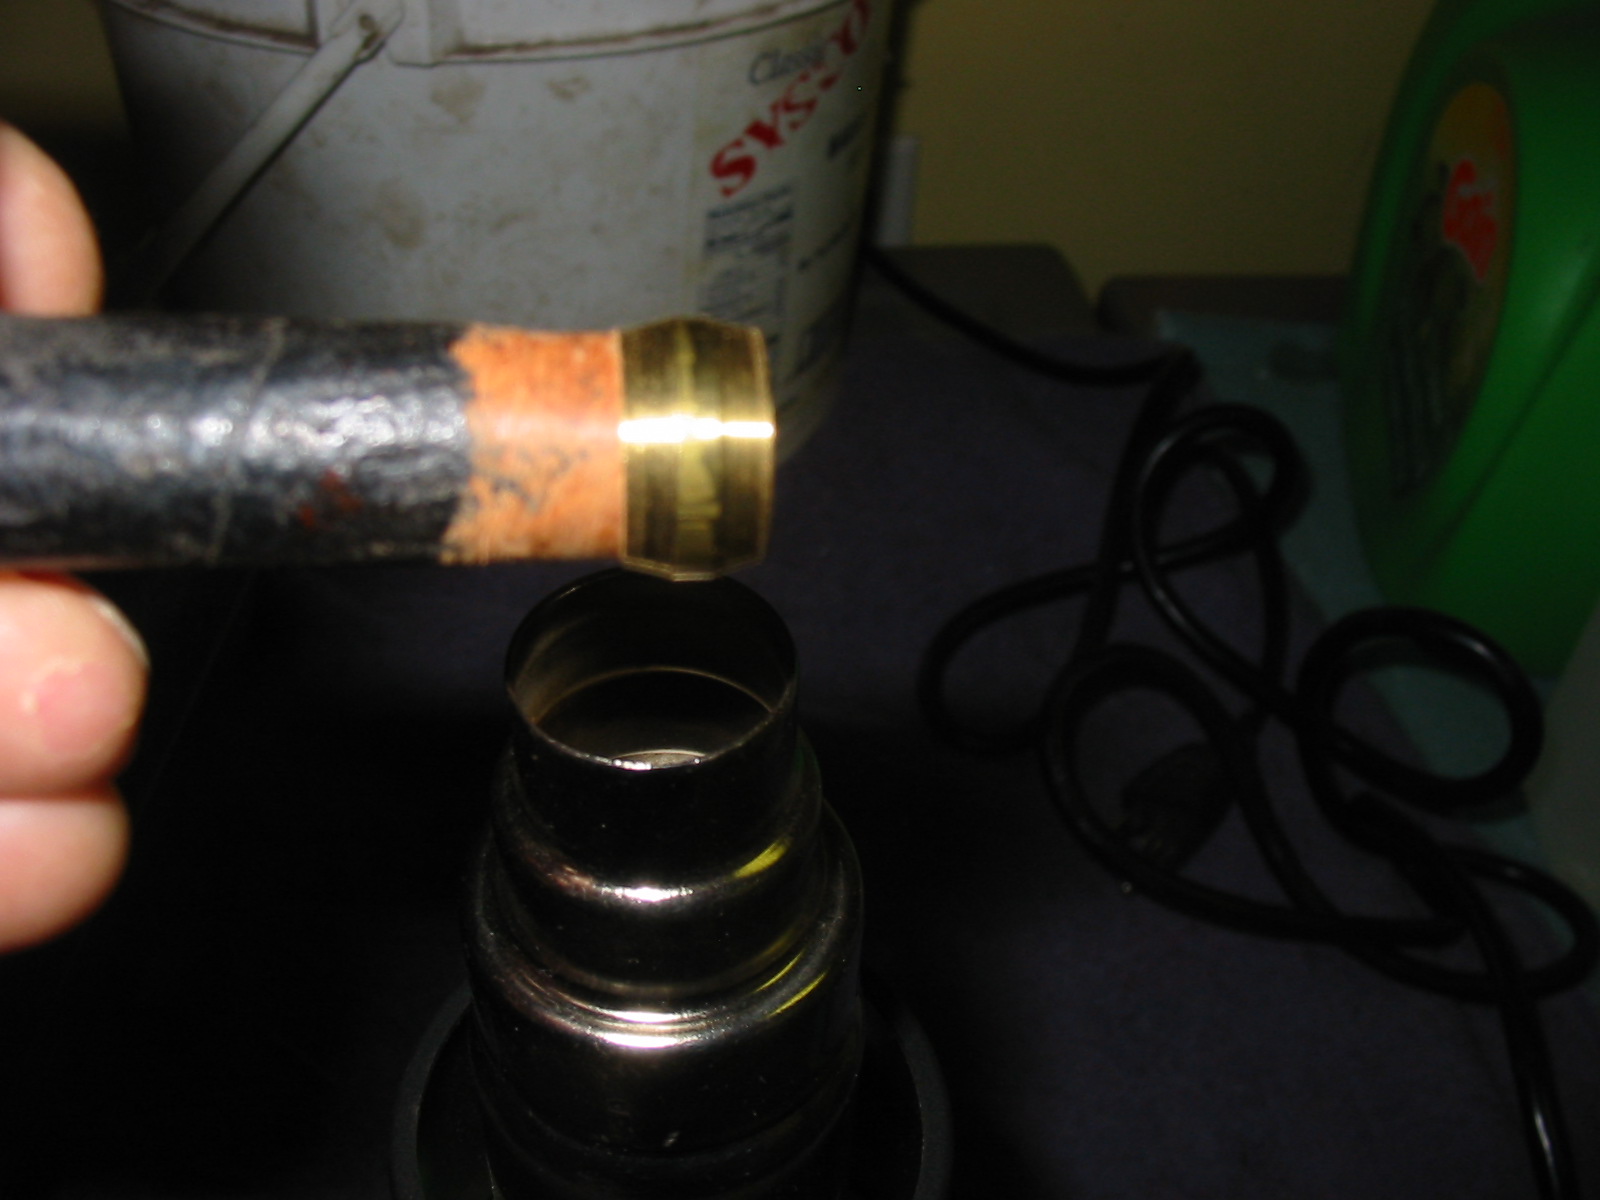
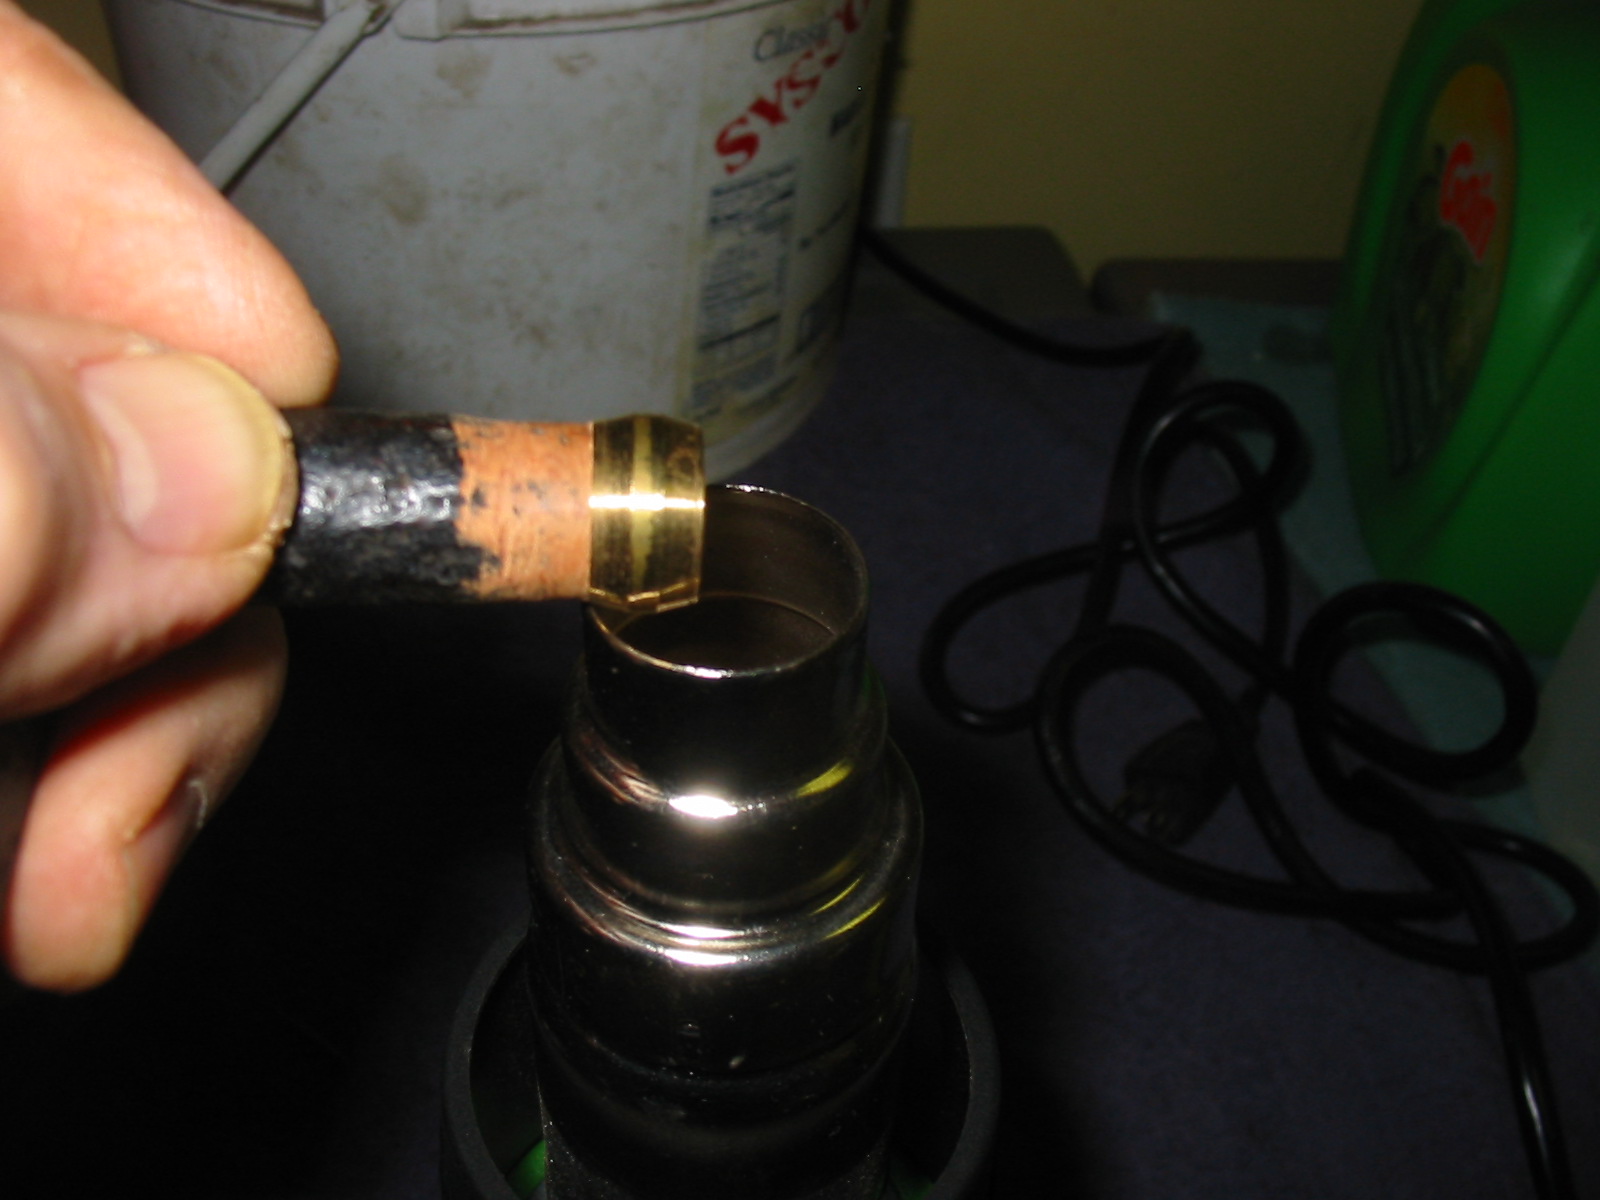
I pressed the band in place while it was still hot. I use a flat board and press down evenly until the band slides into place. This takes repeated heating until the fit is tight and straight against the end of the shank. In the case of this pipe after I pressed it in place I sanded the damaged end of the shank until it was even and then used a knife to cut a slight bevel on the inside edge of the mortise so that the stem would fit properly.
IMG_4548

IMG_4549

IMG_4550

IMG_4551

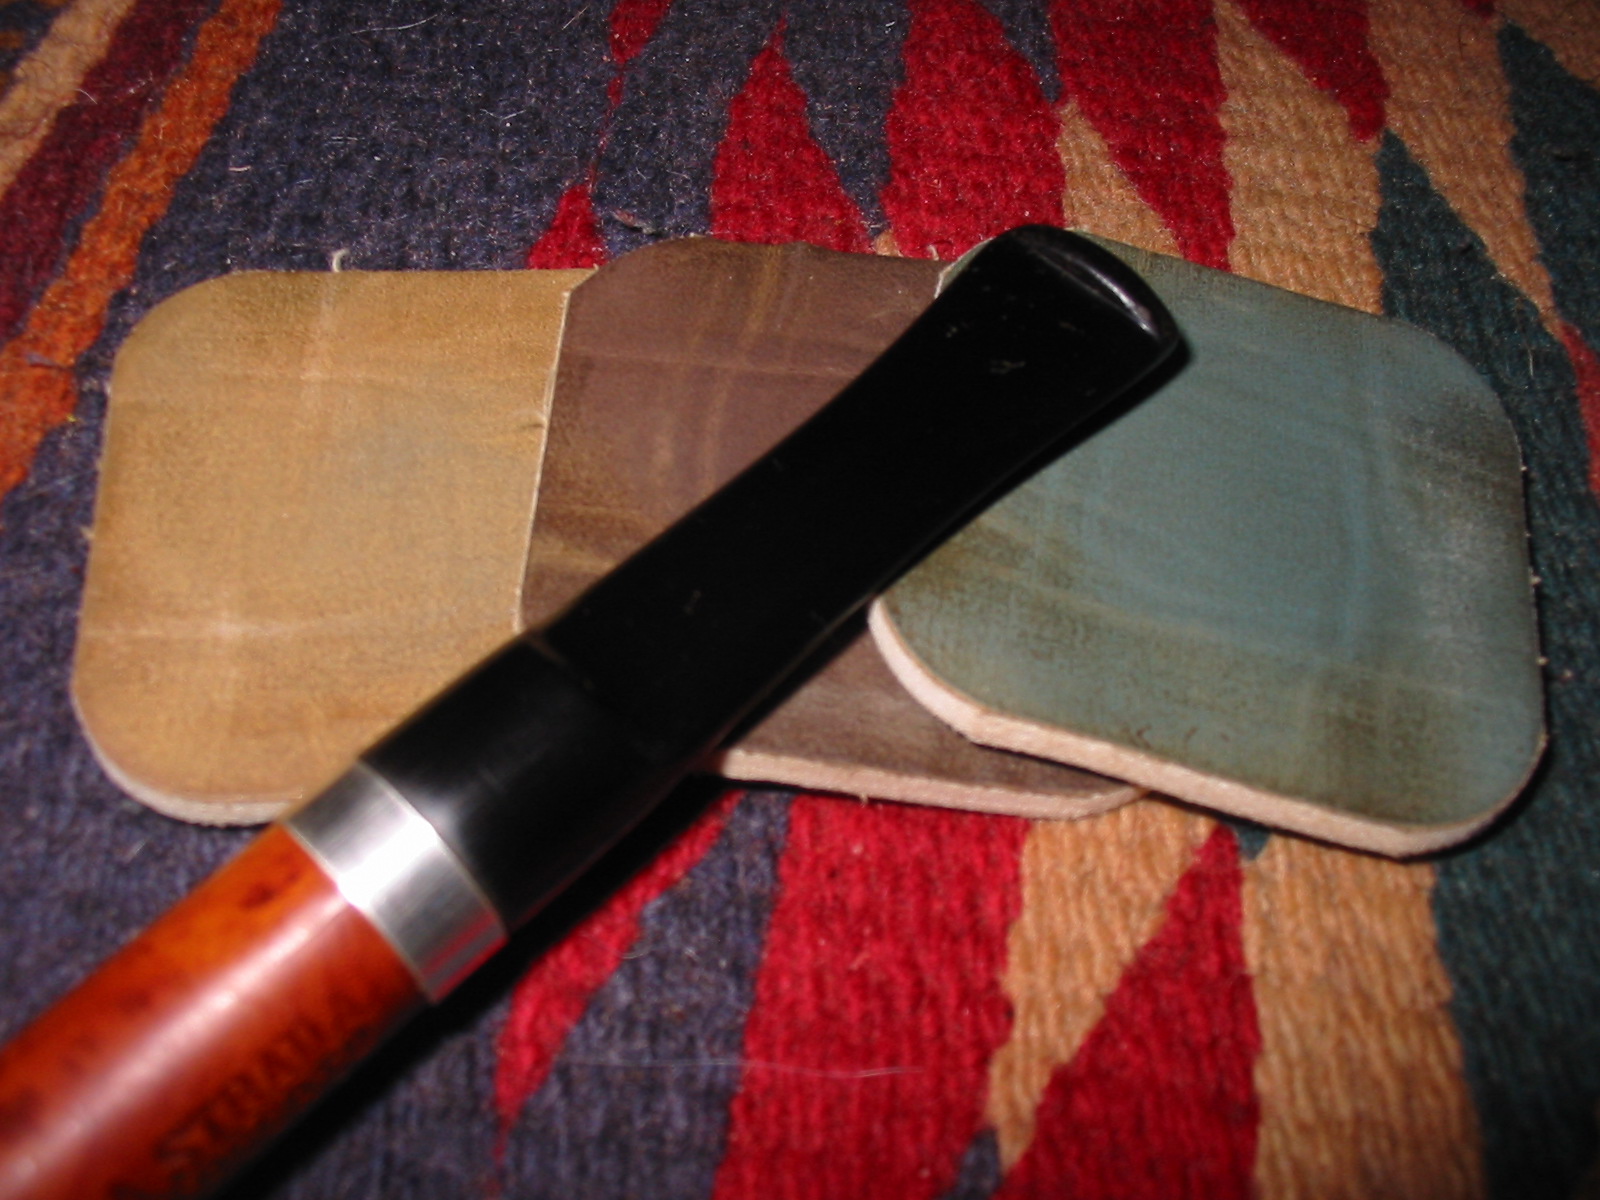
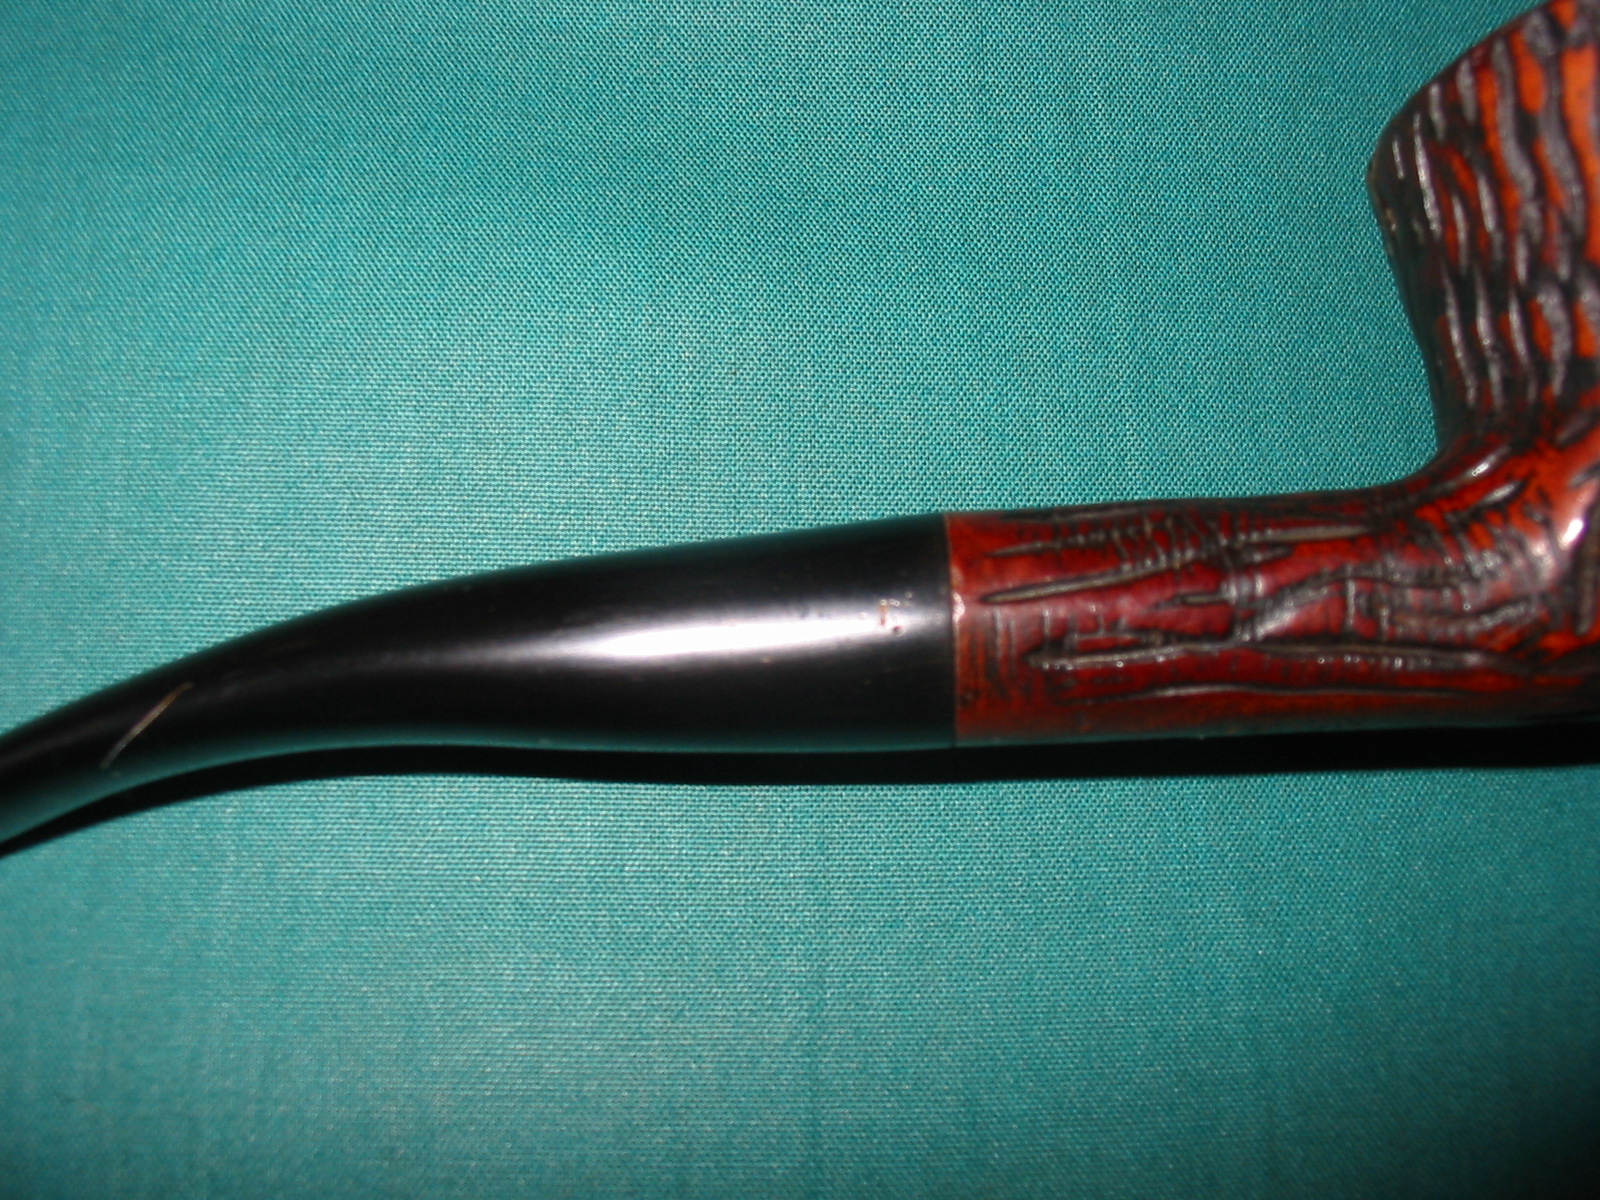
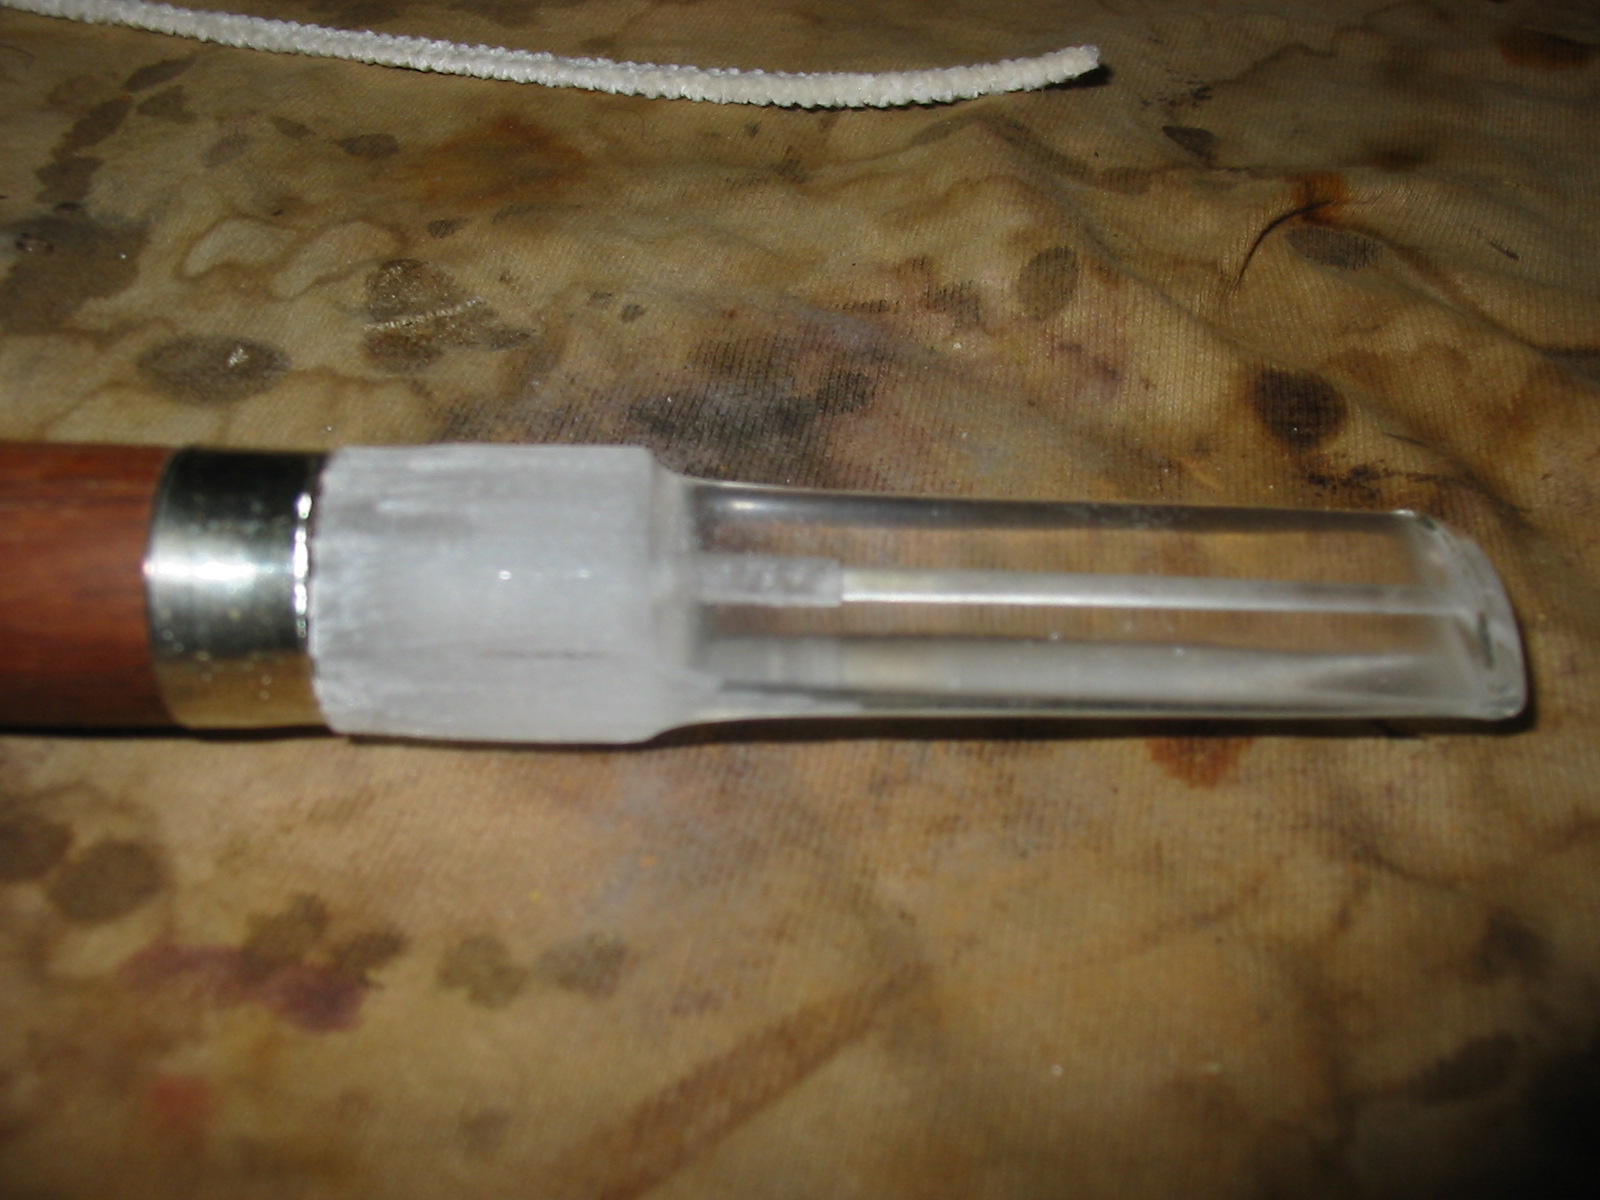
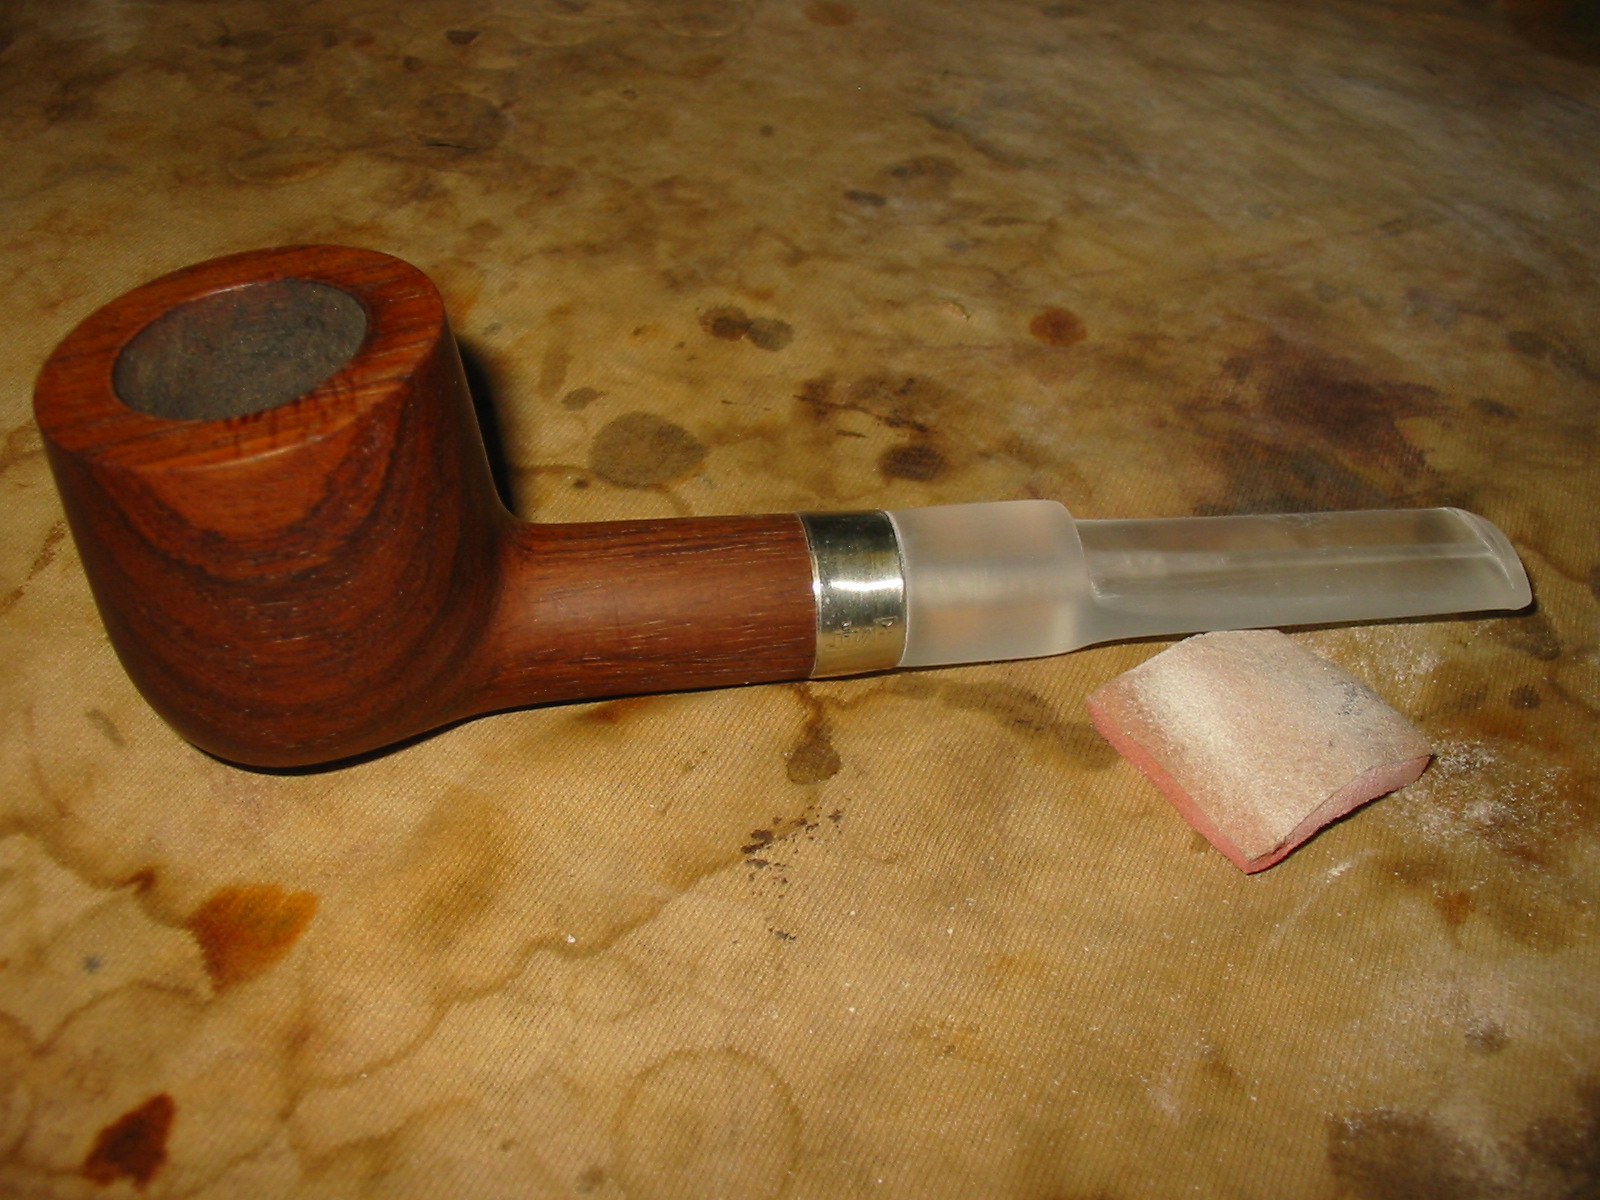
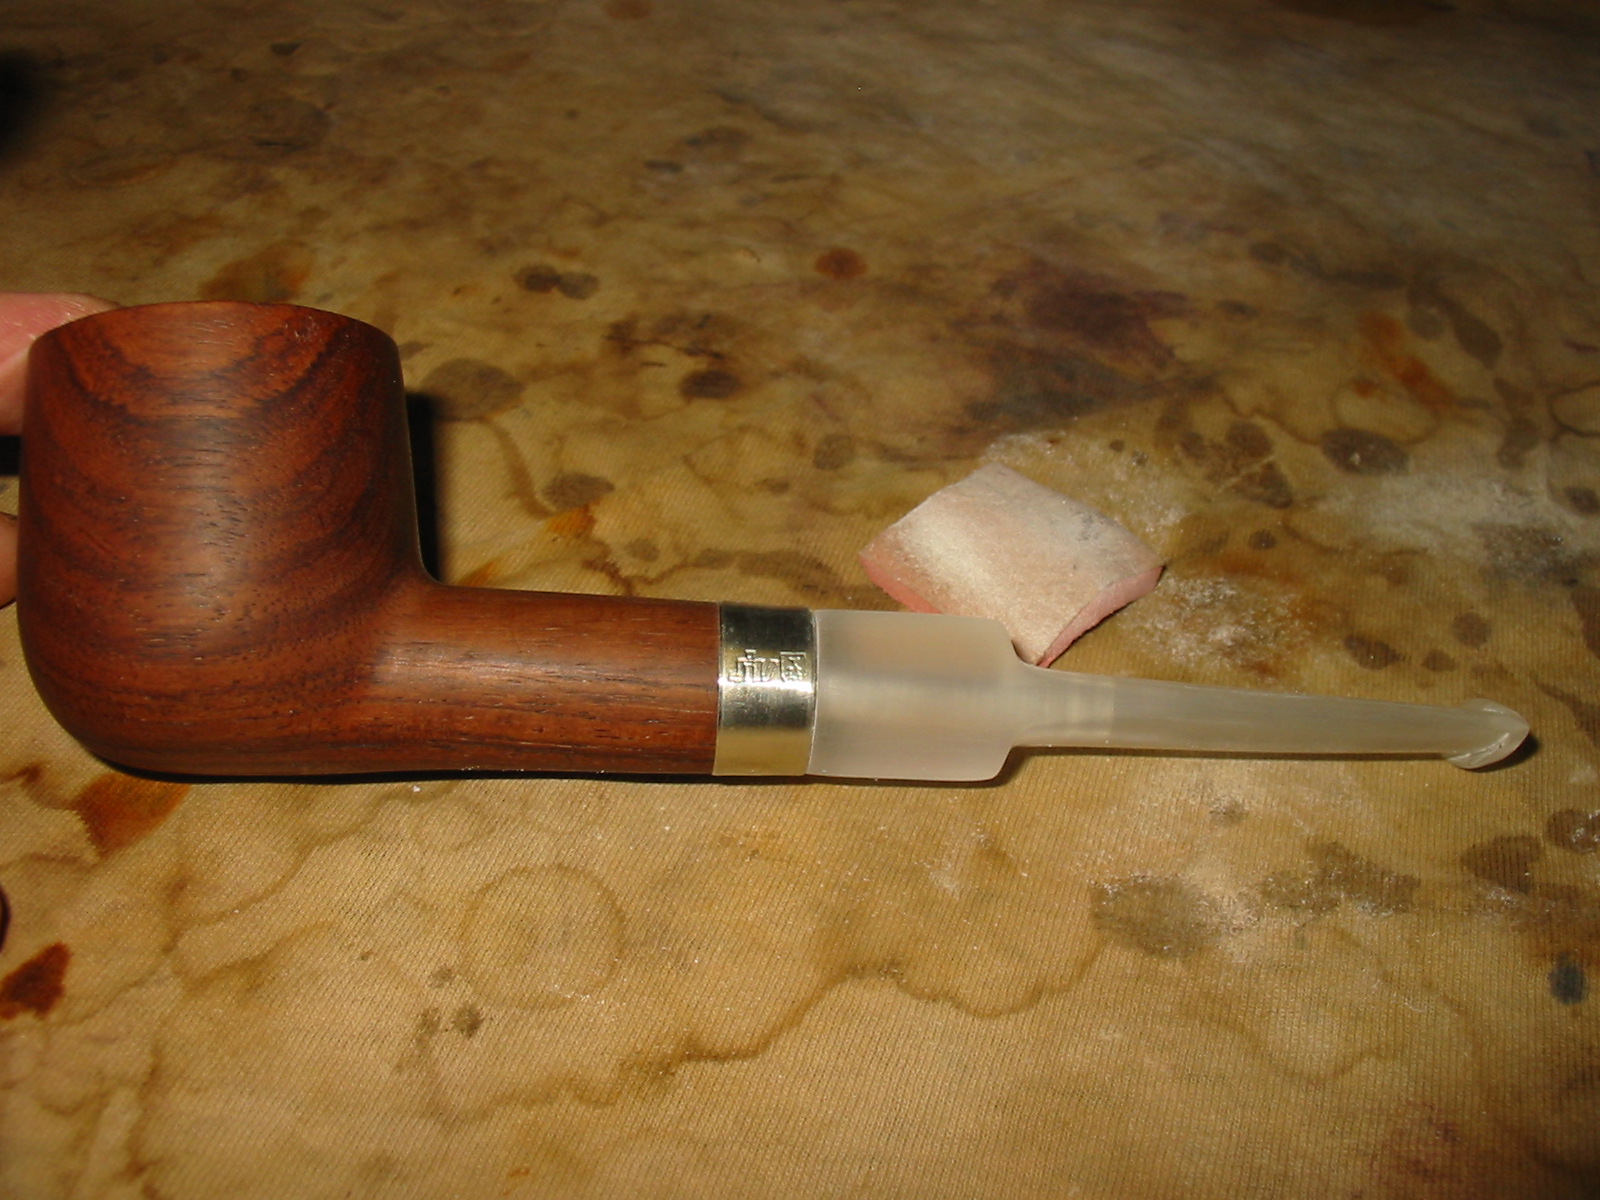
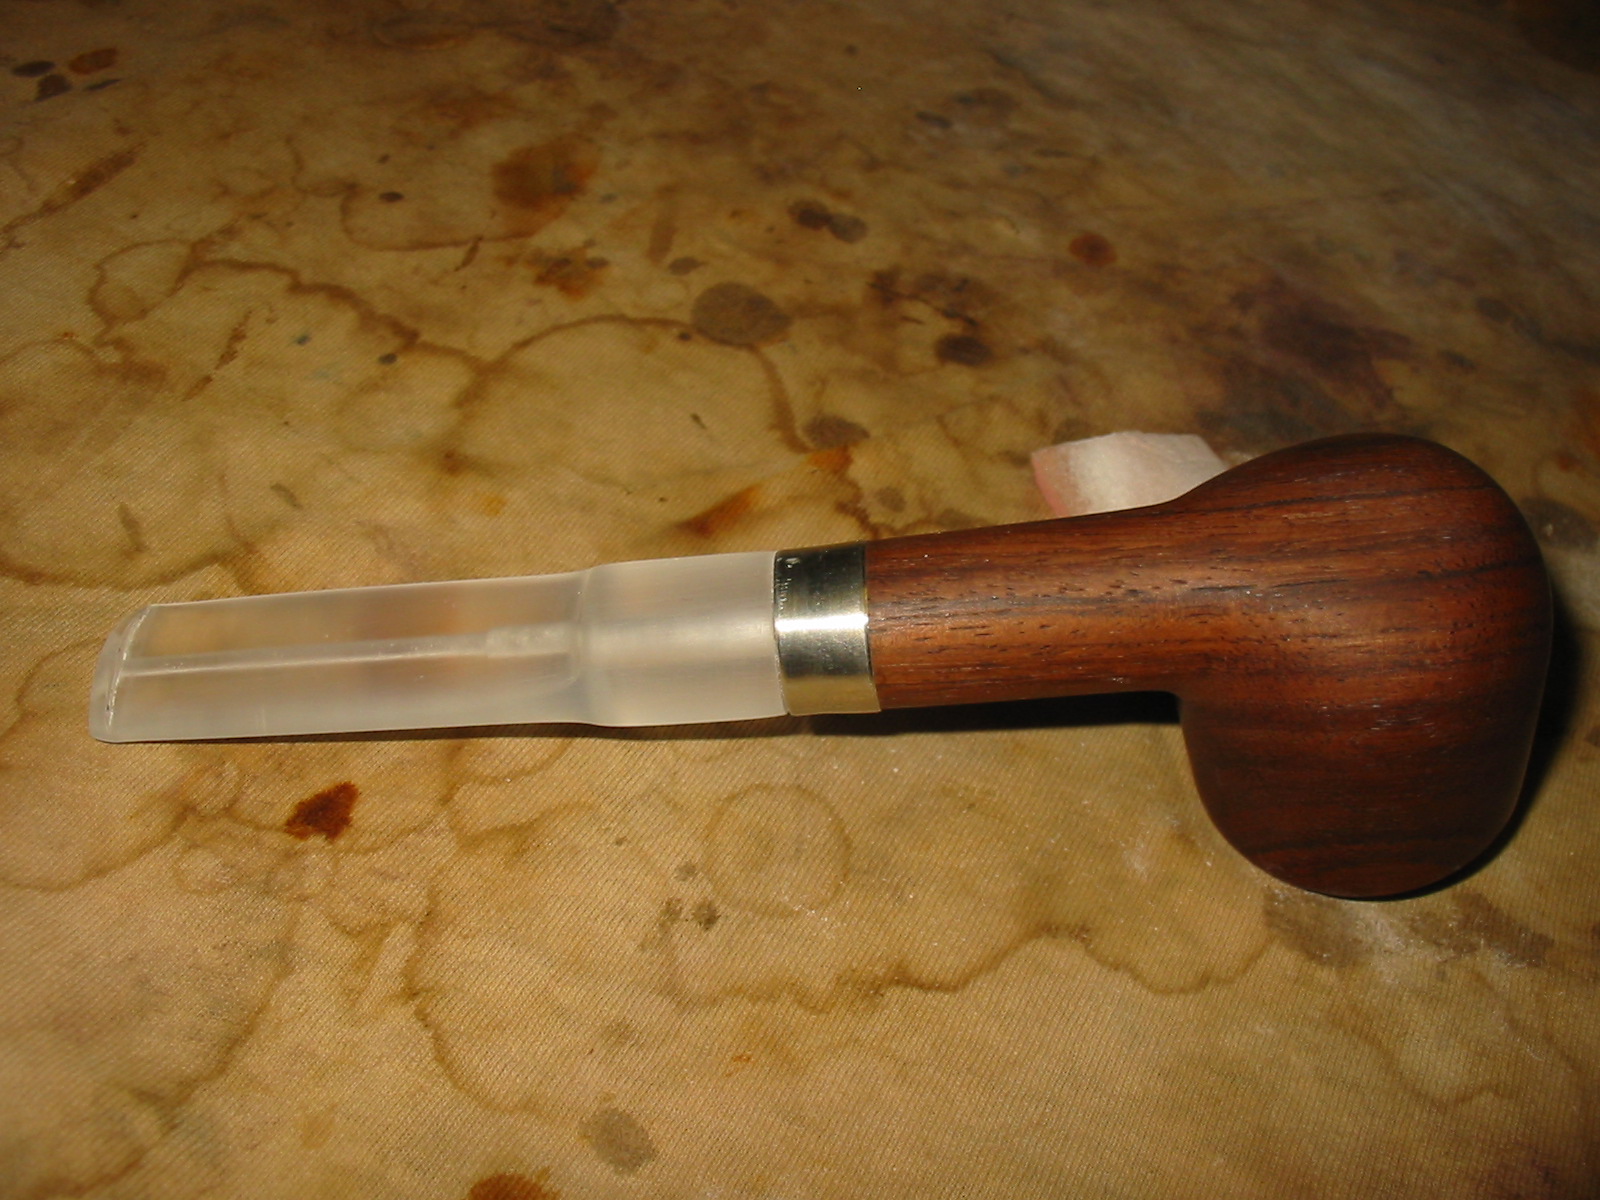
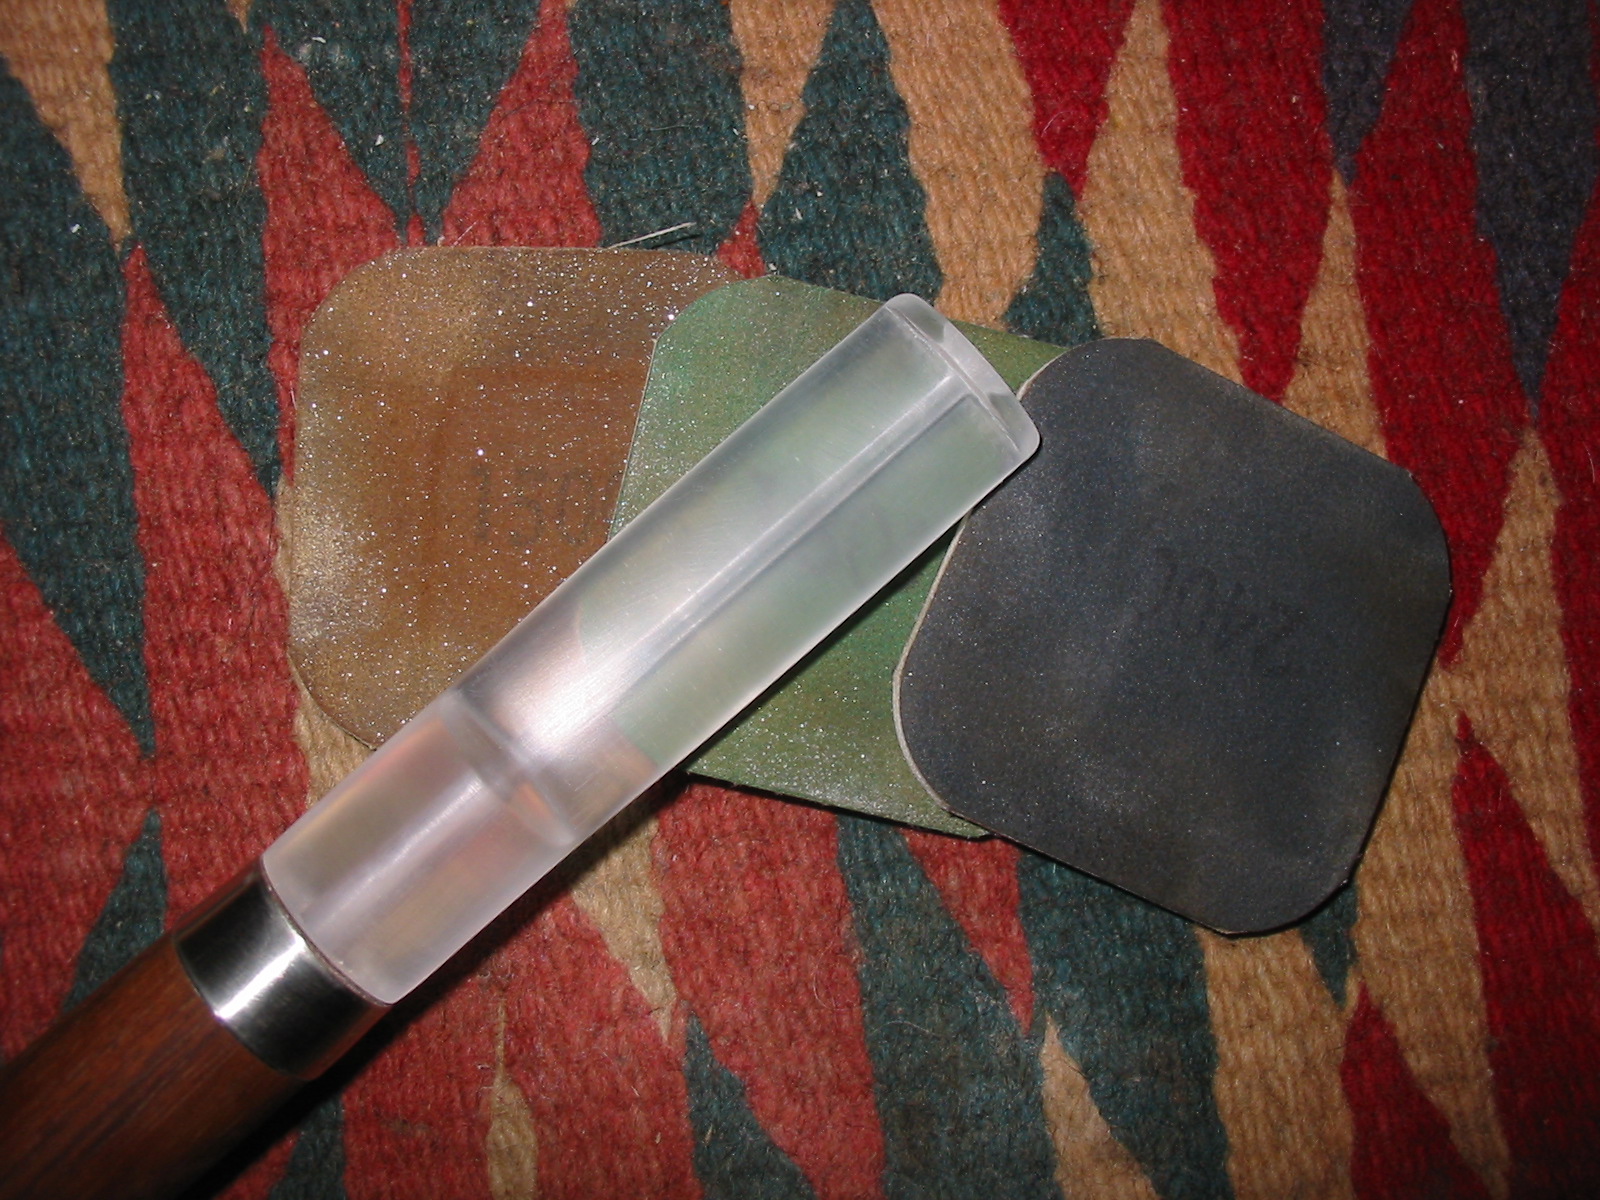
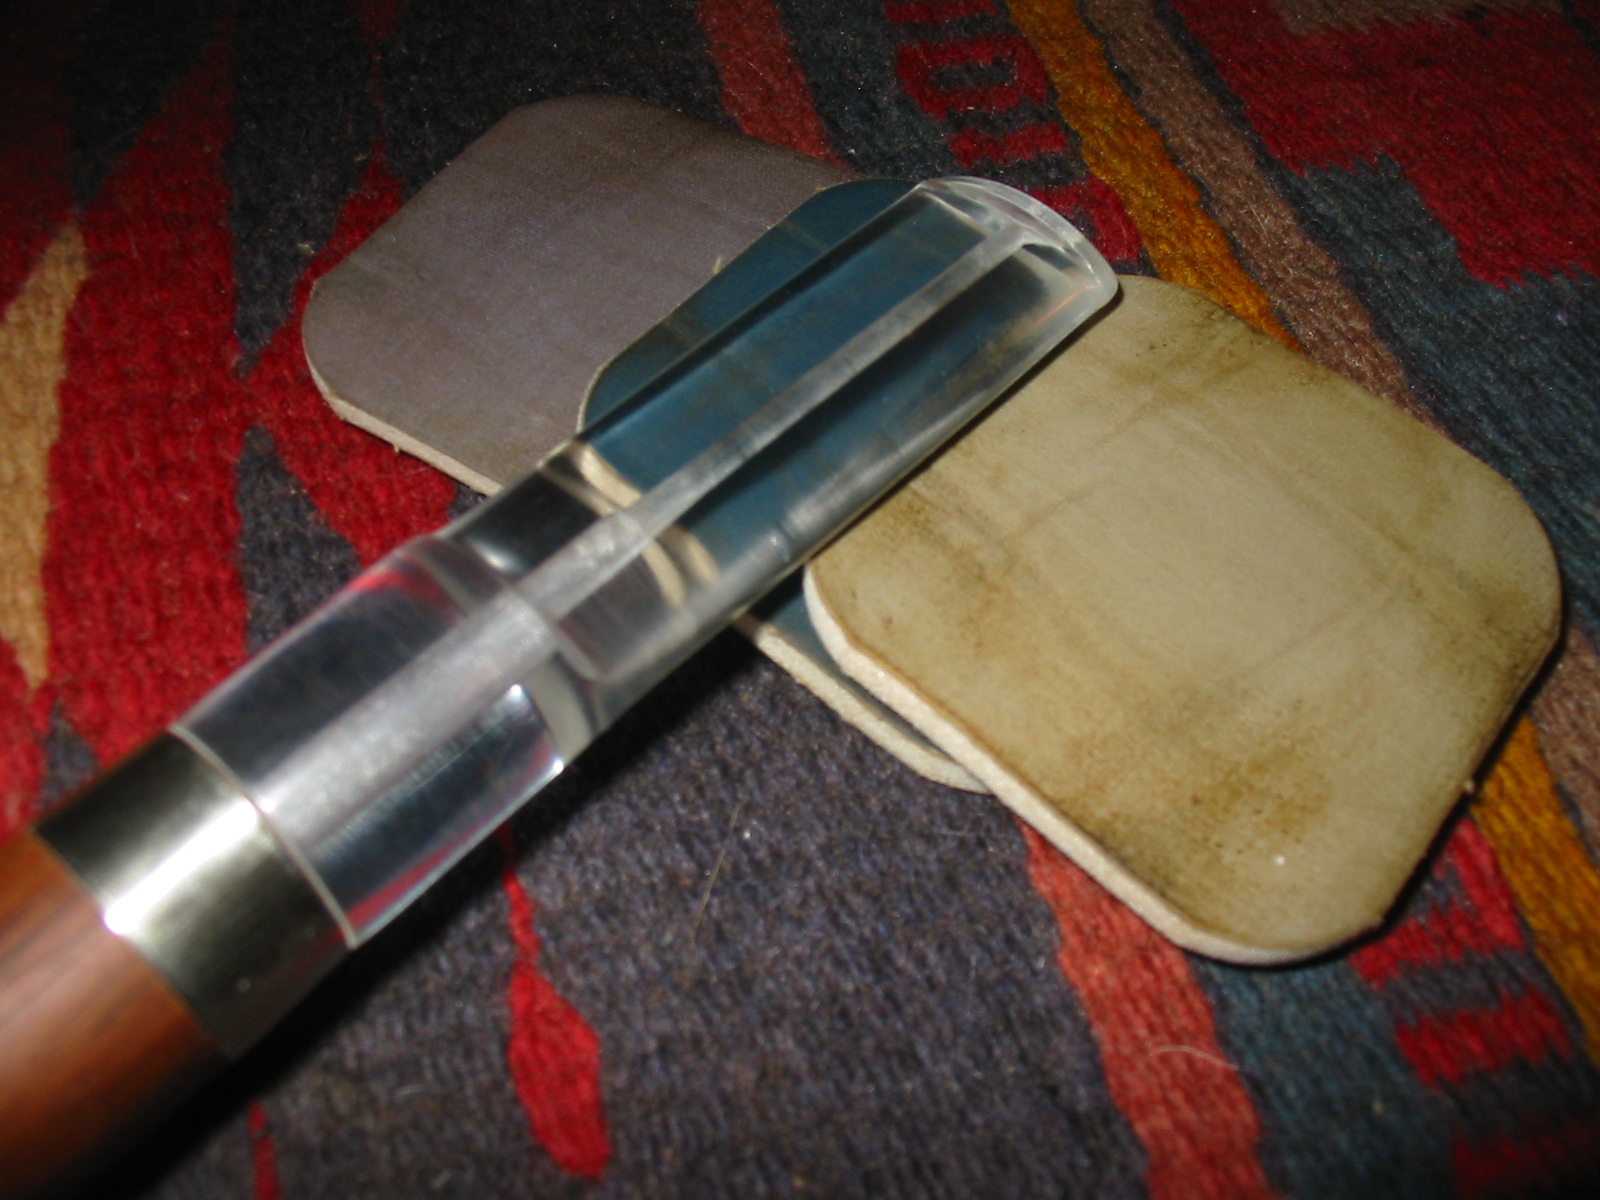
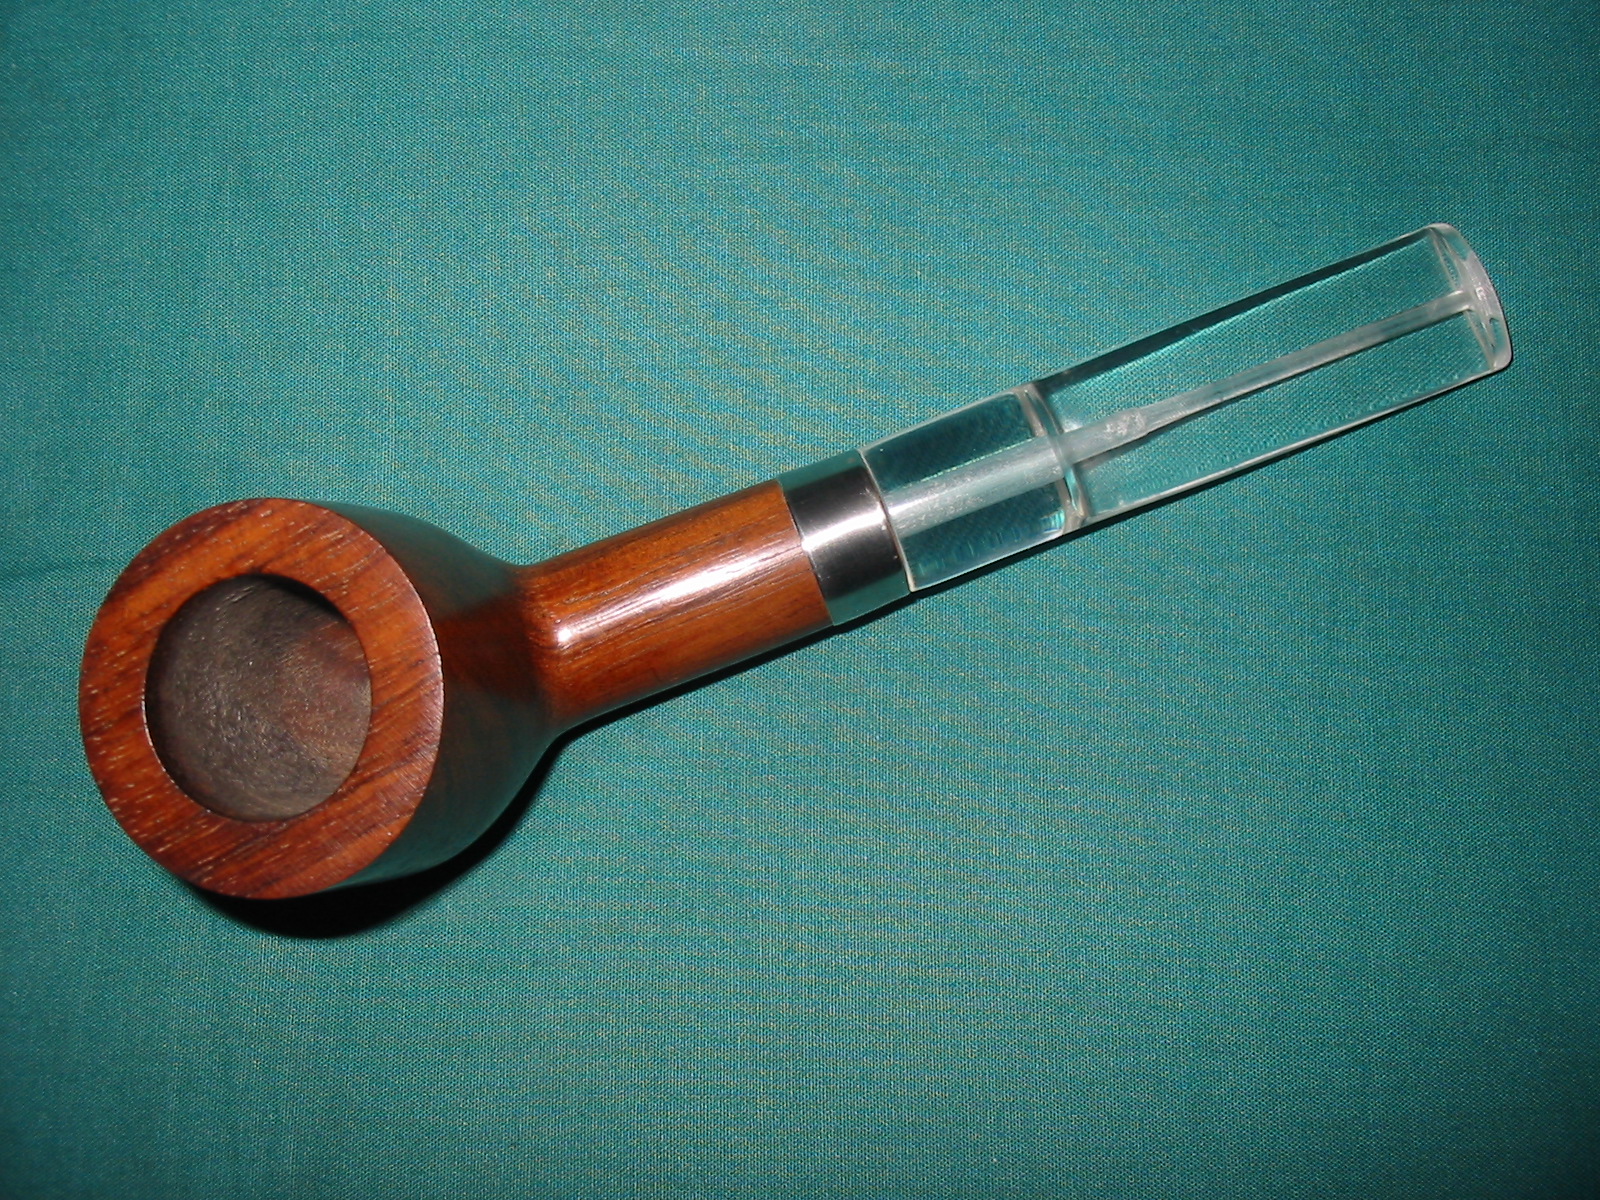
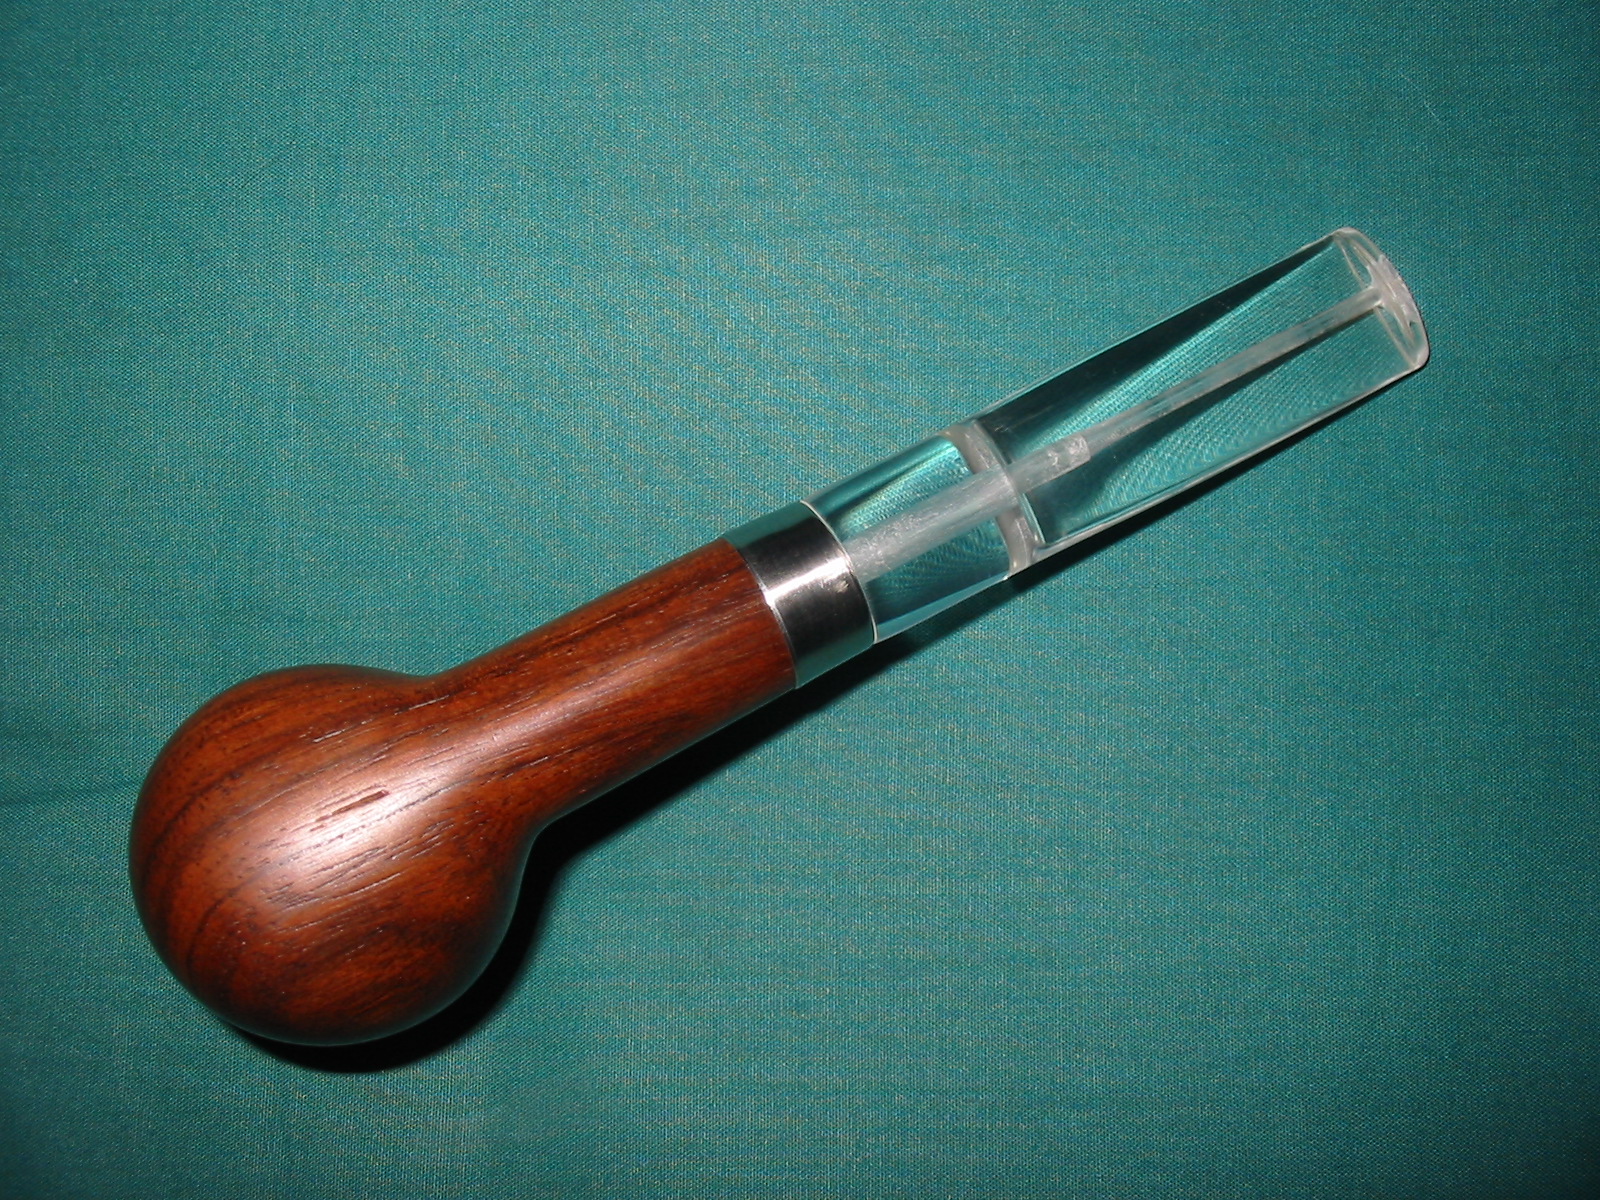
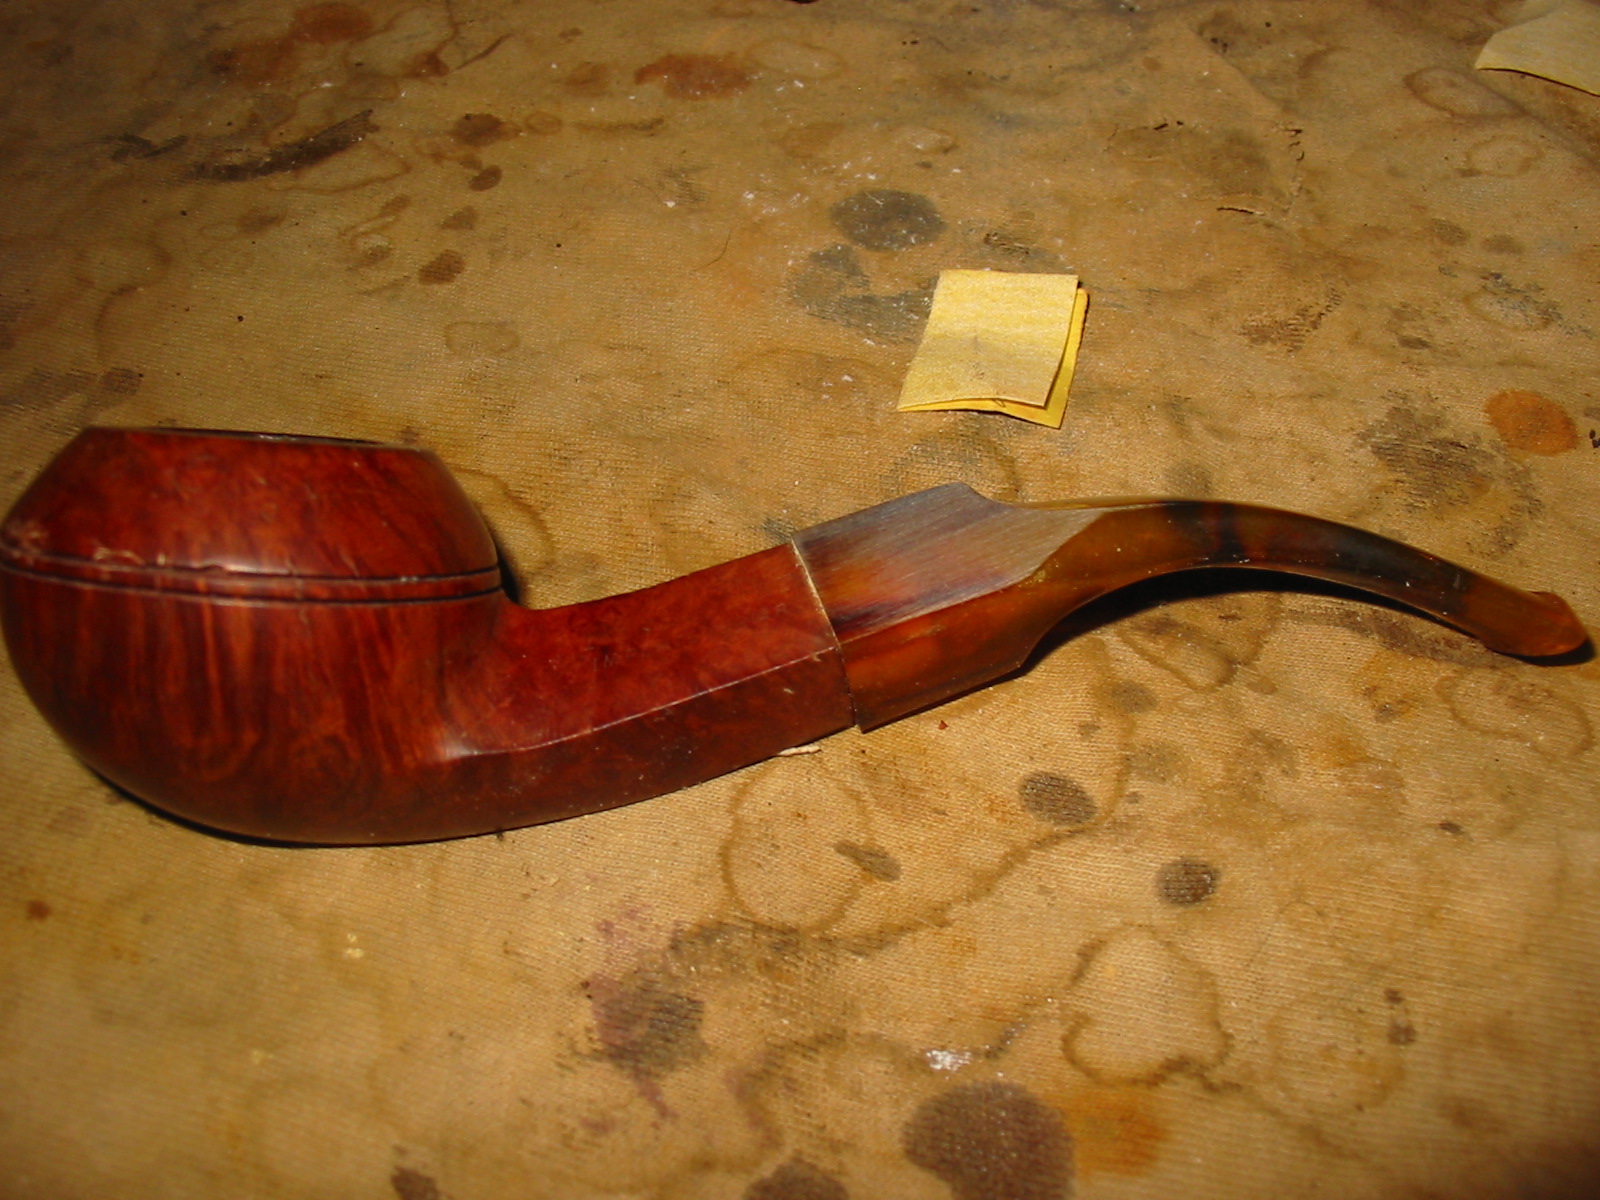
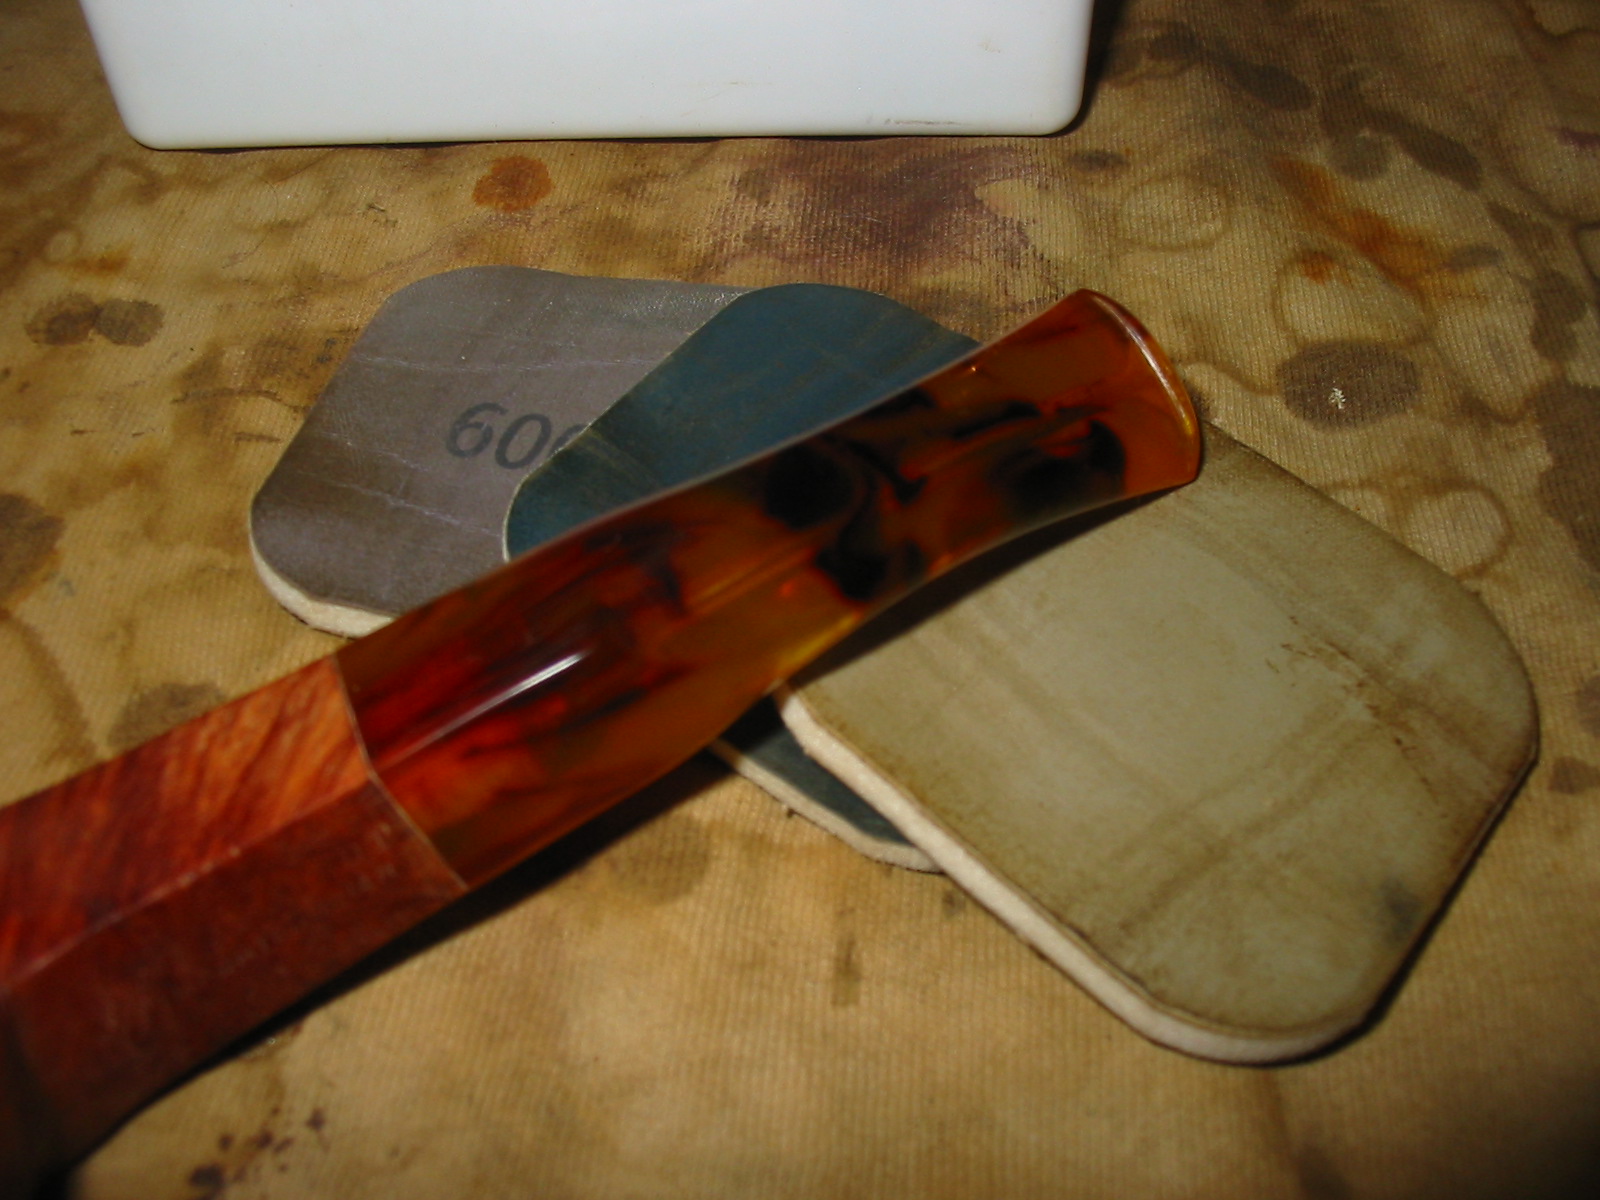
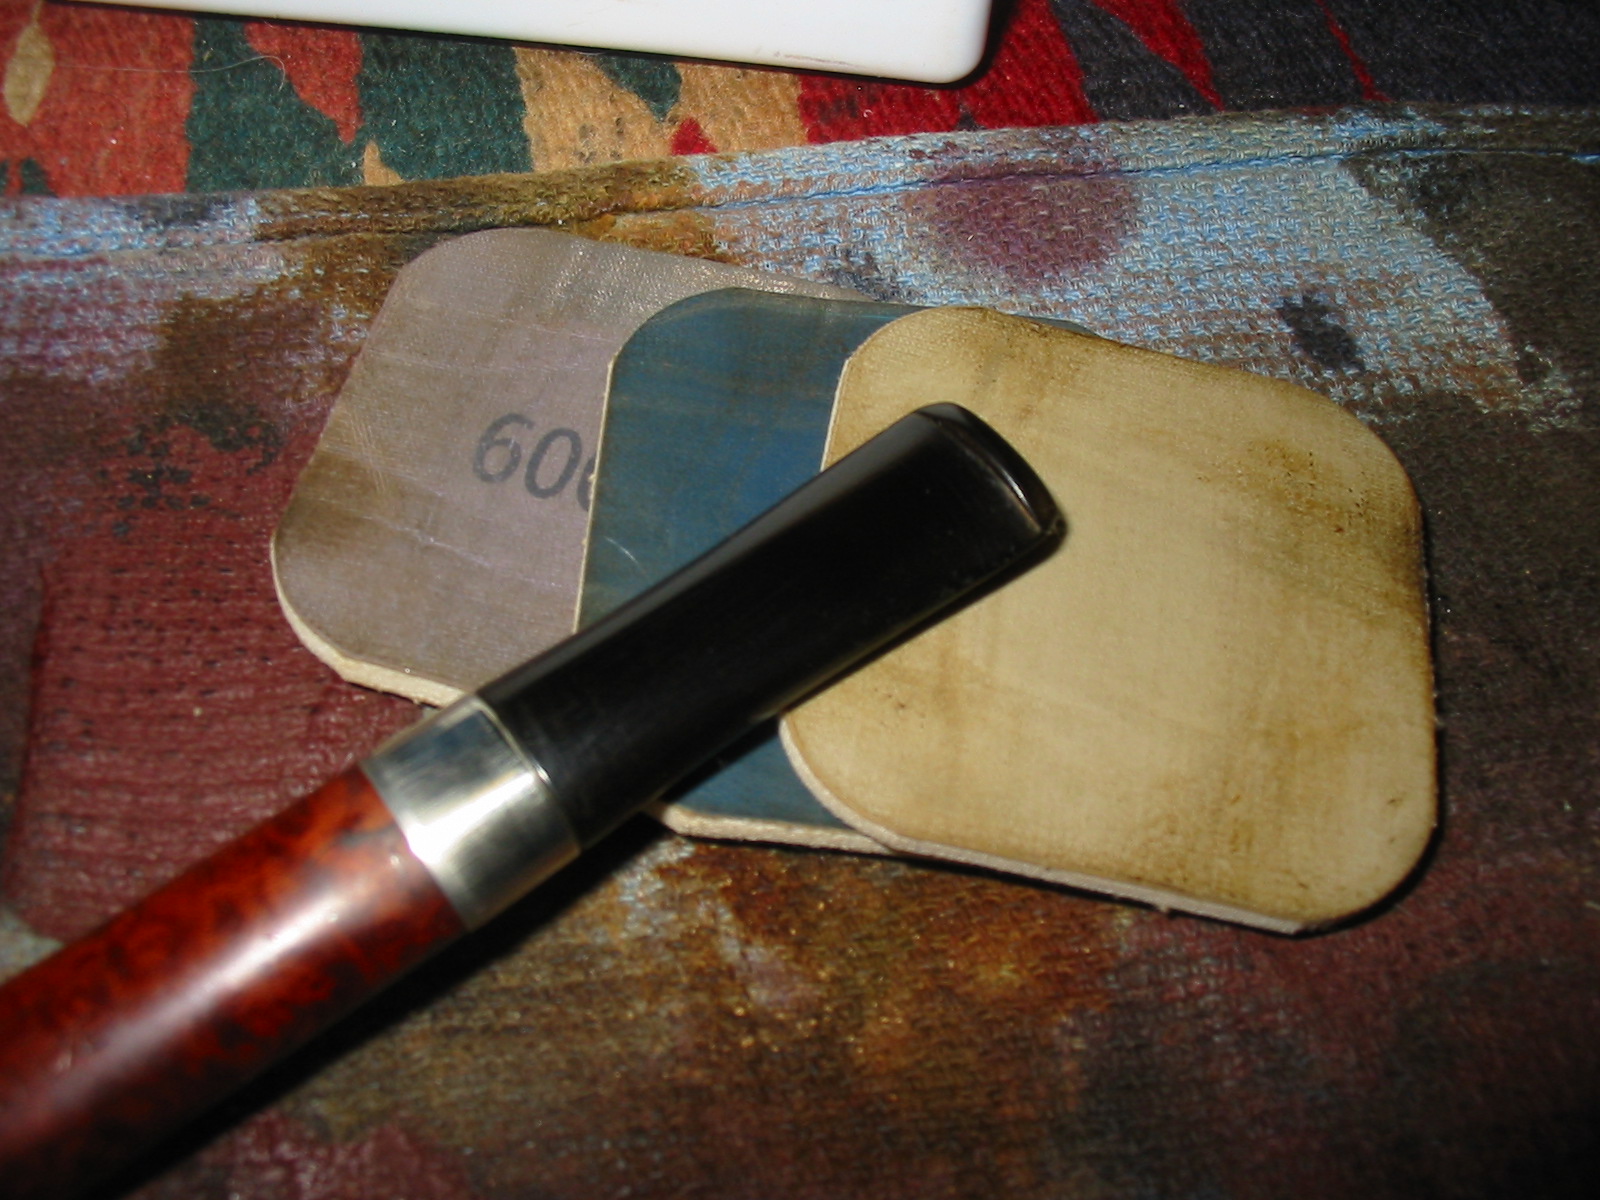
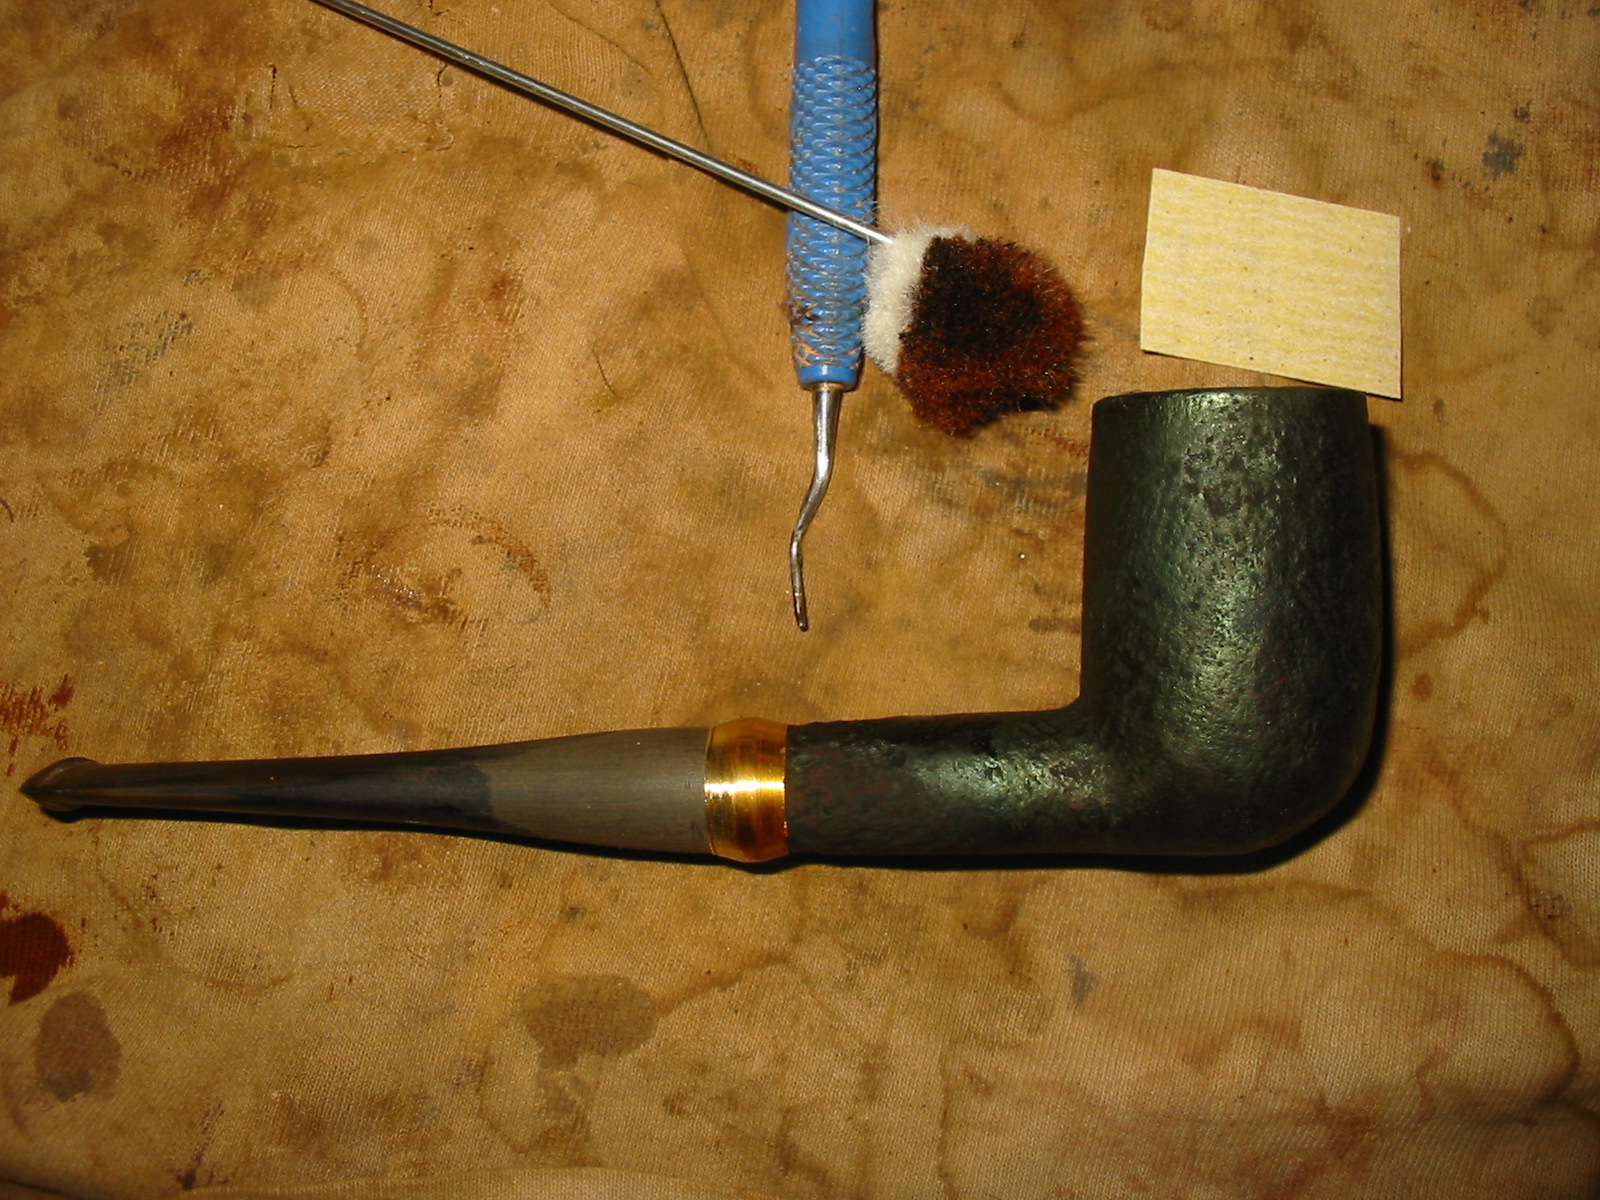
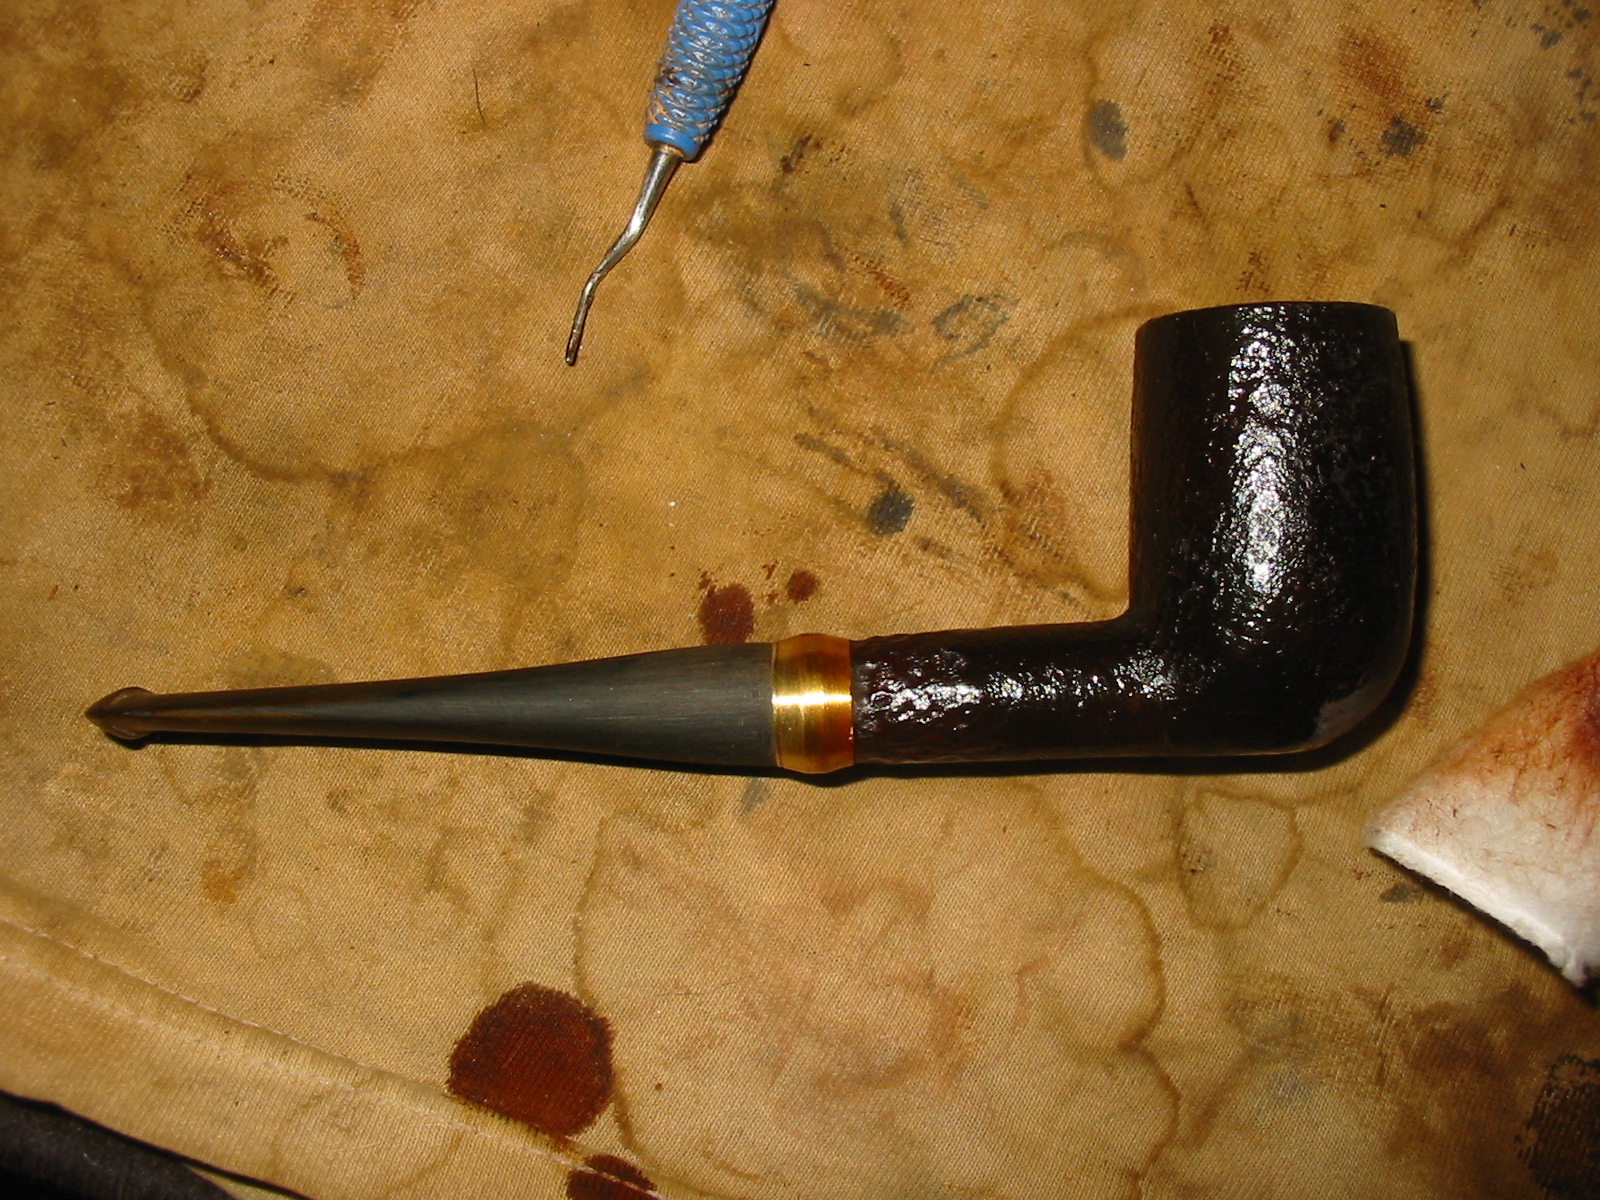
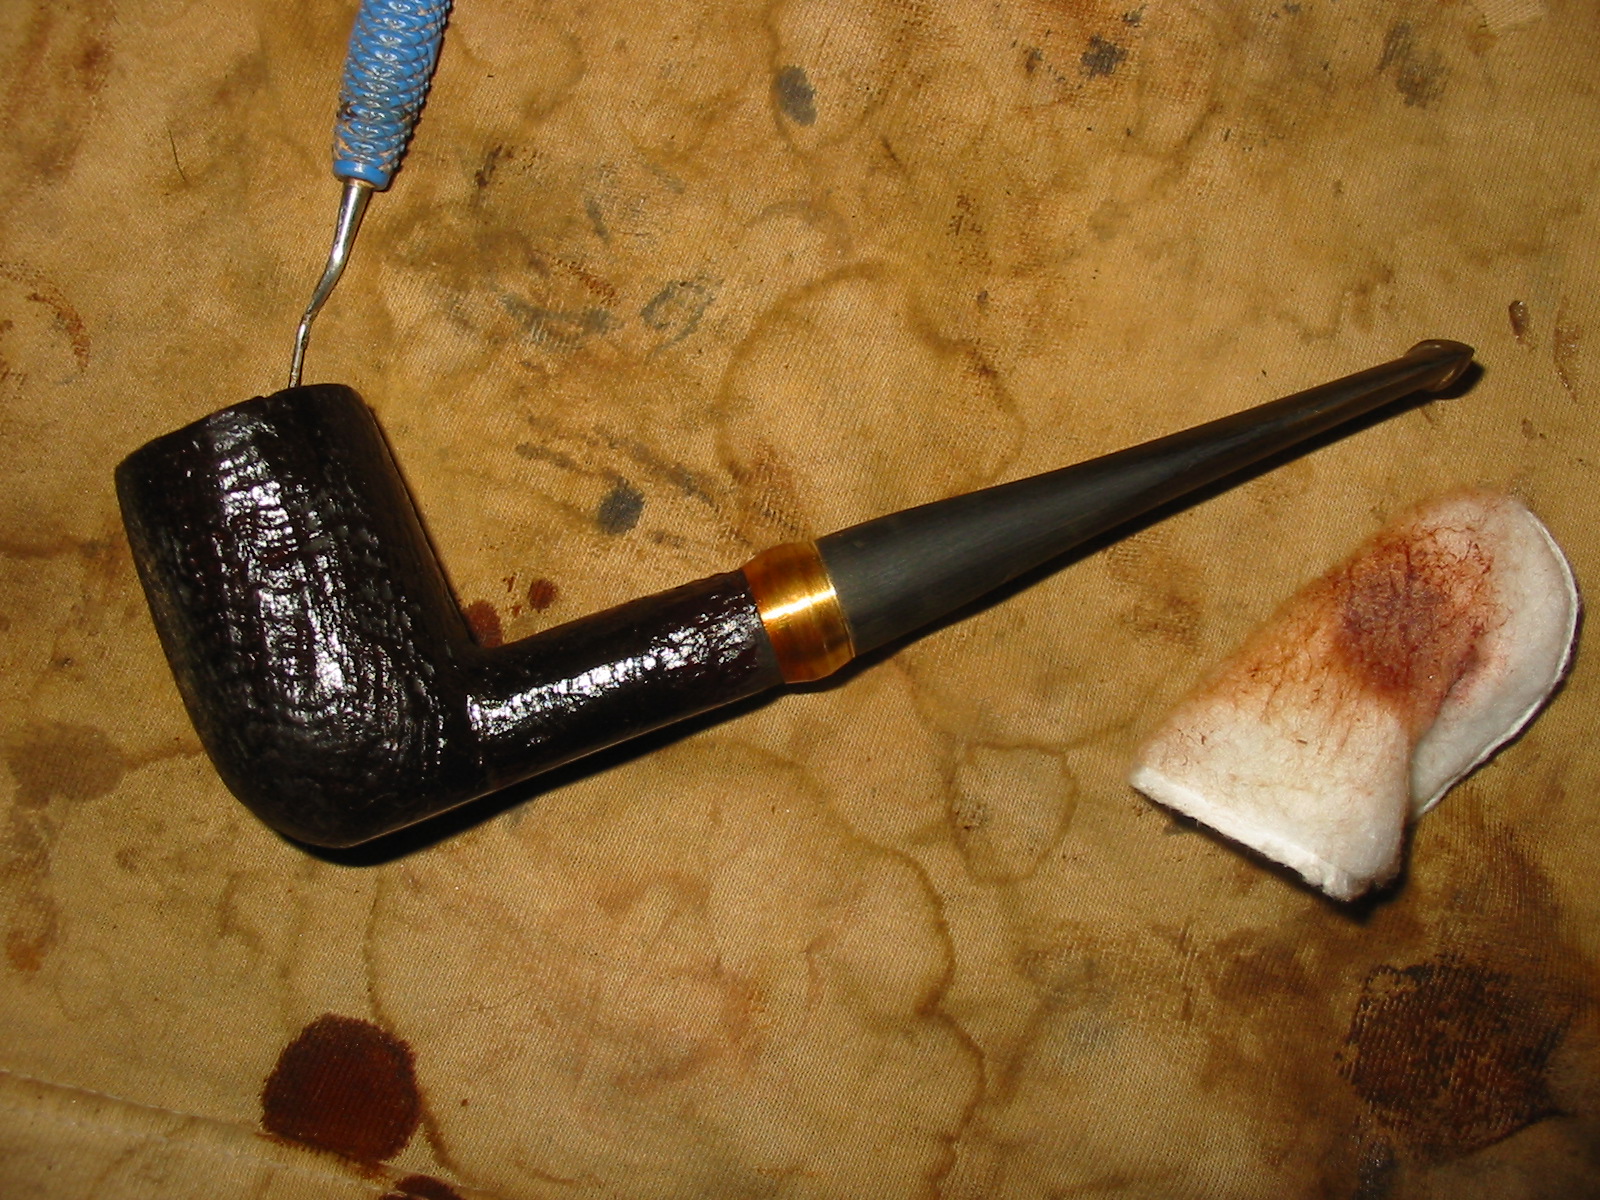
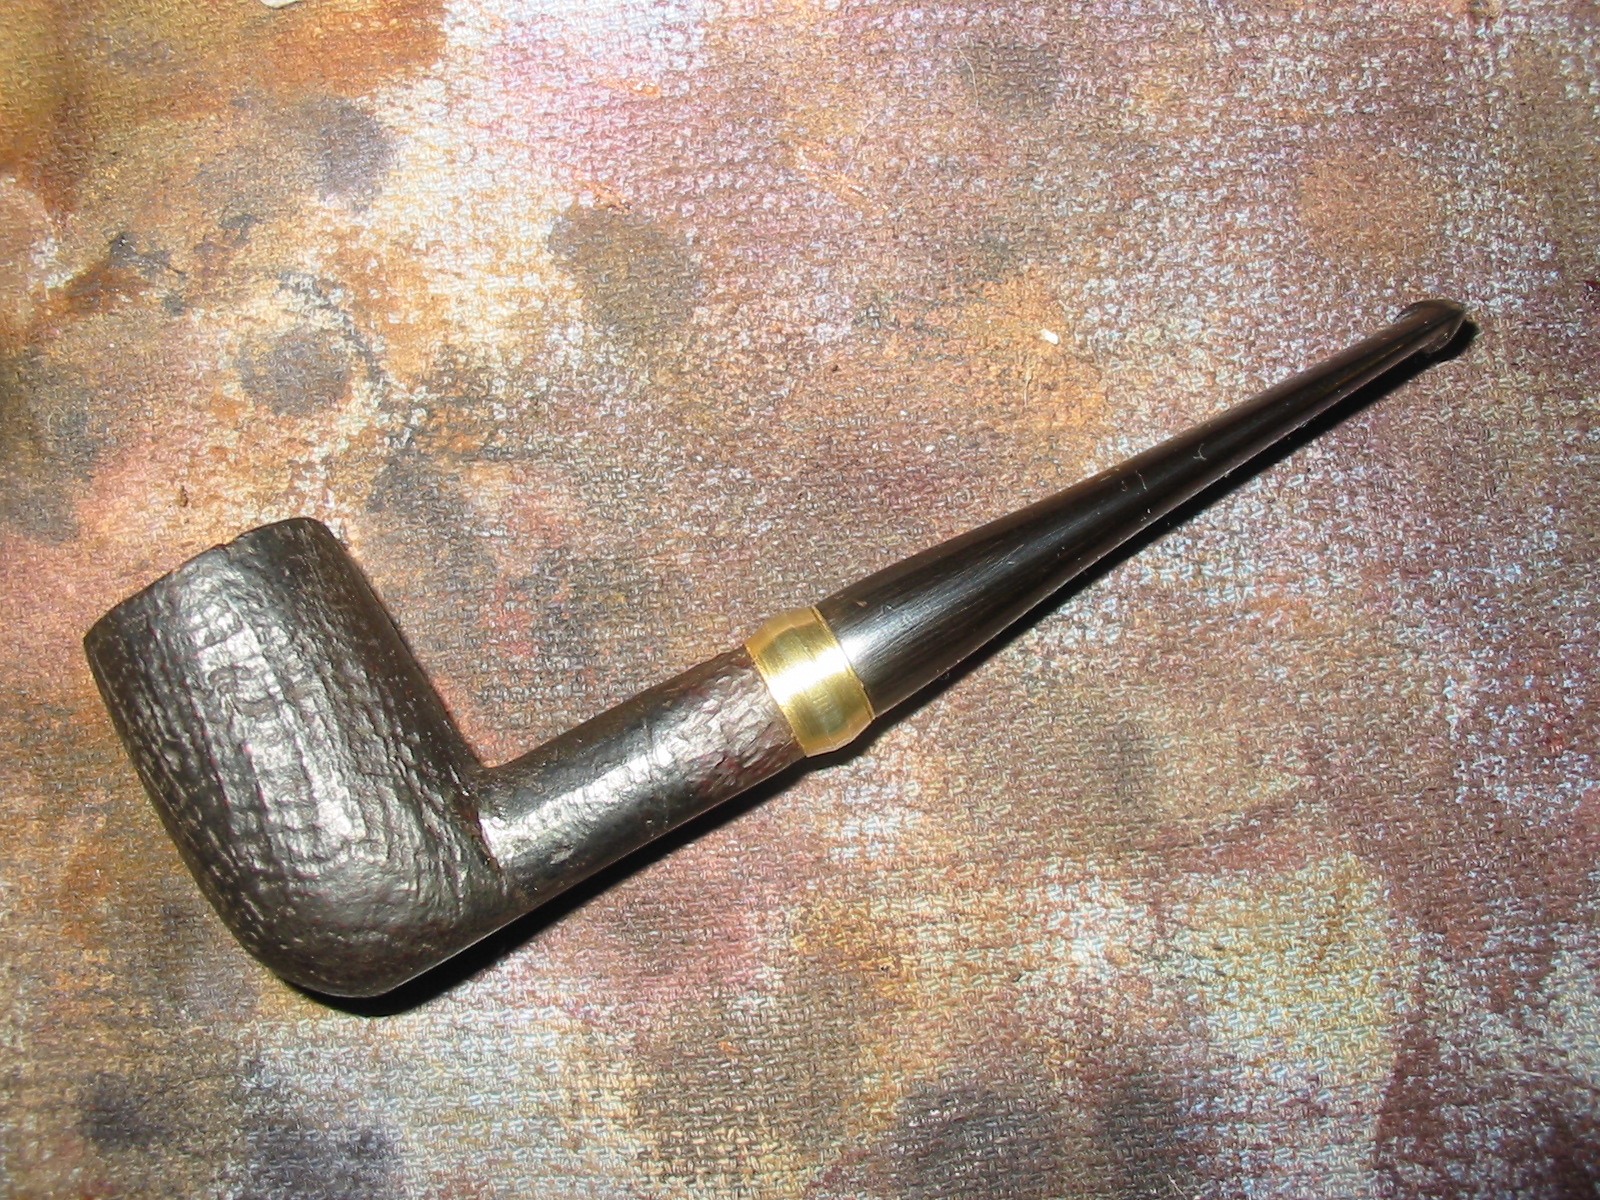
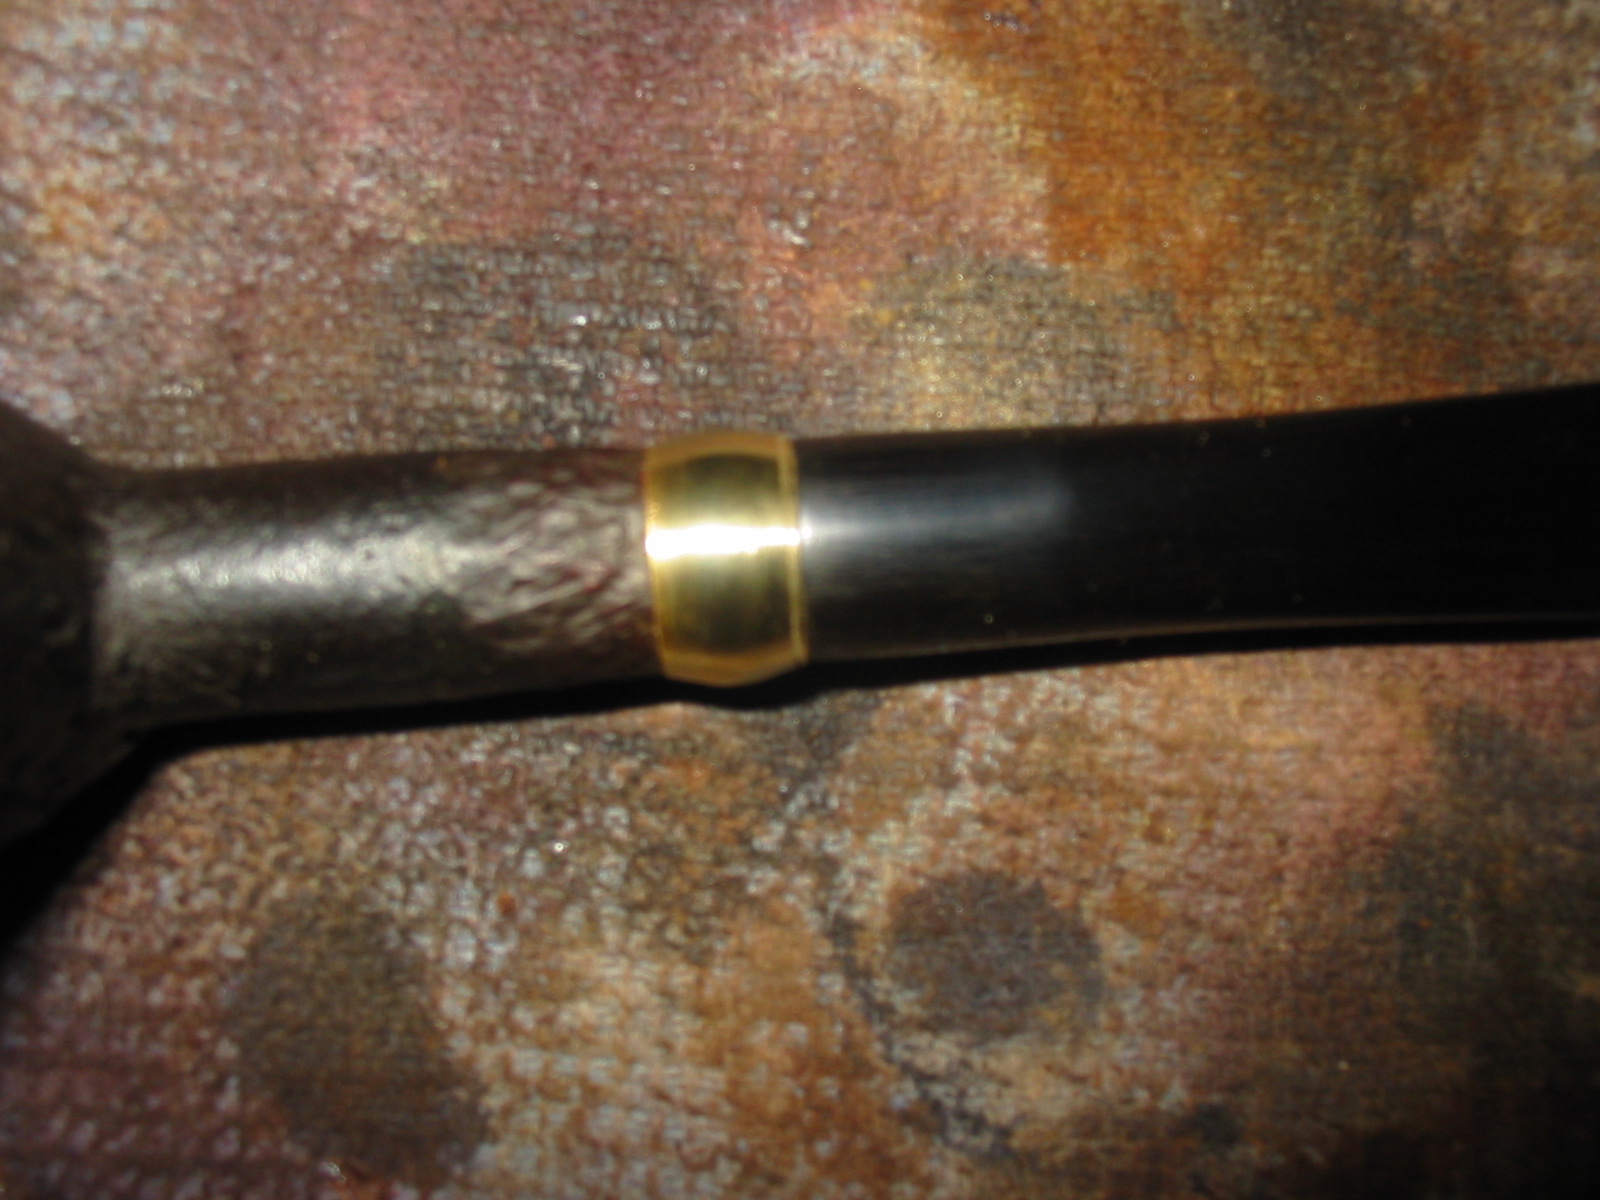
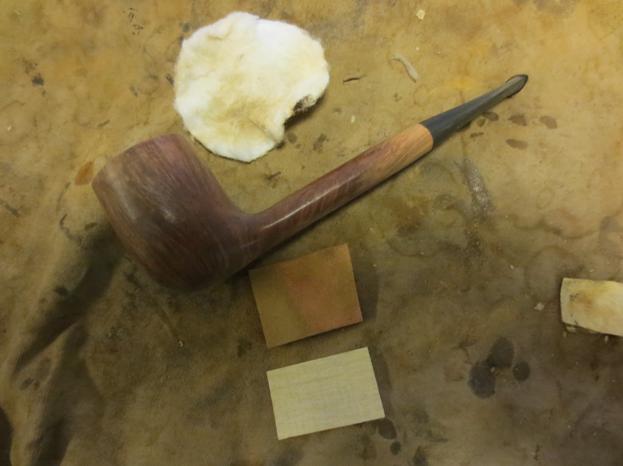
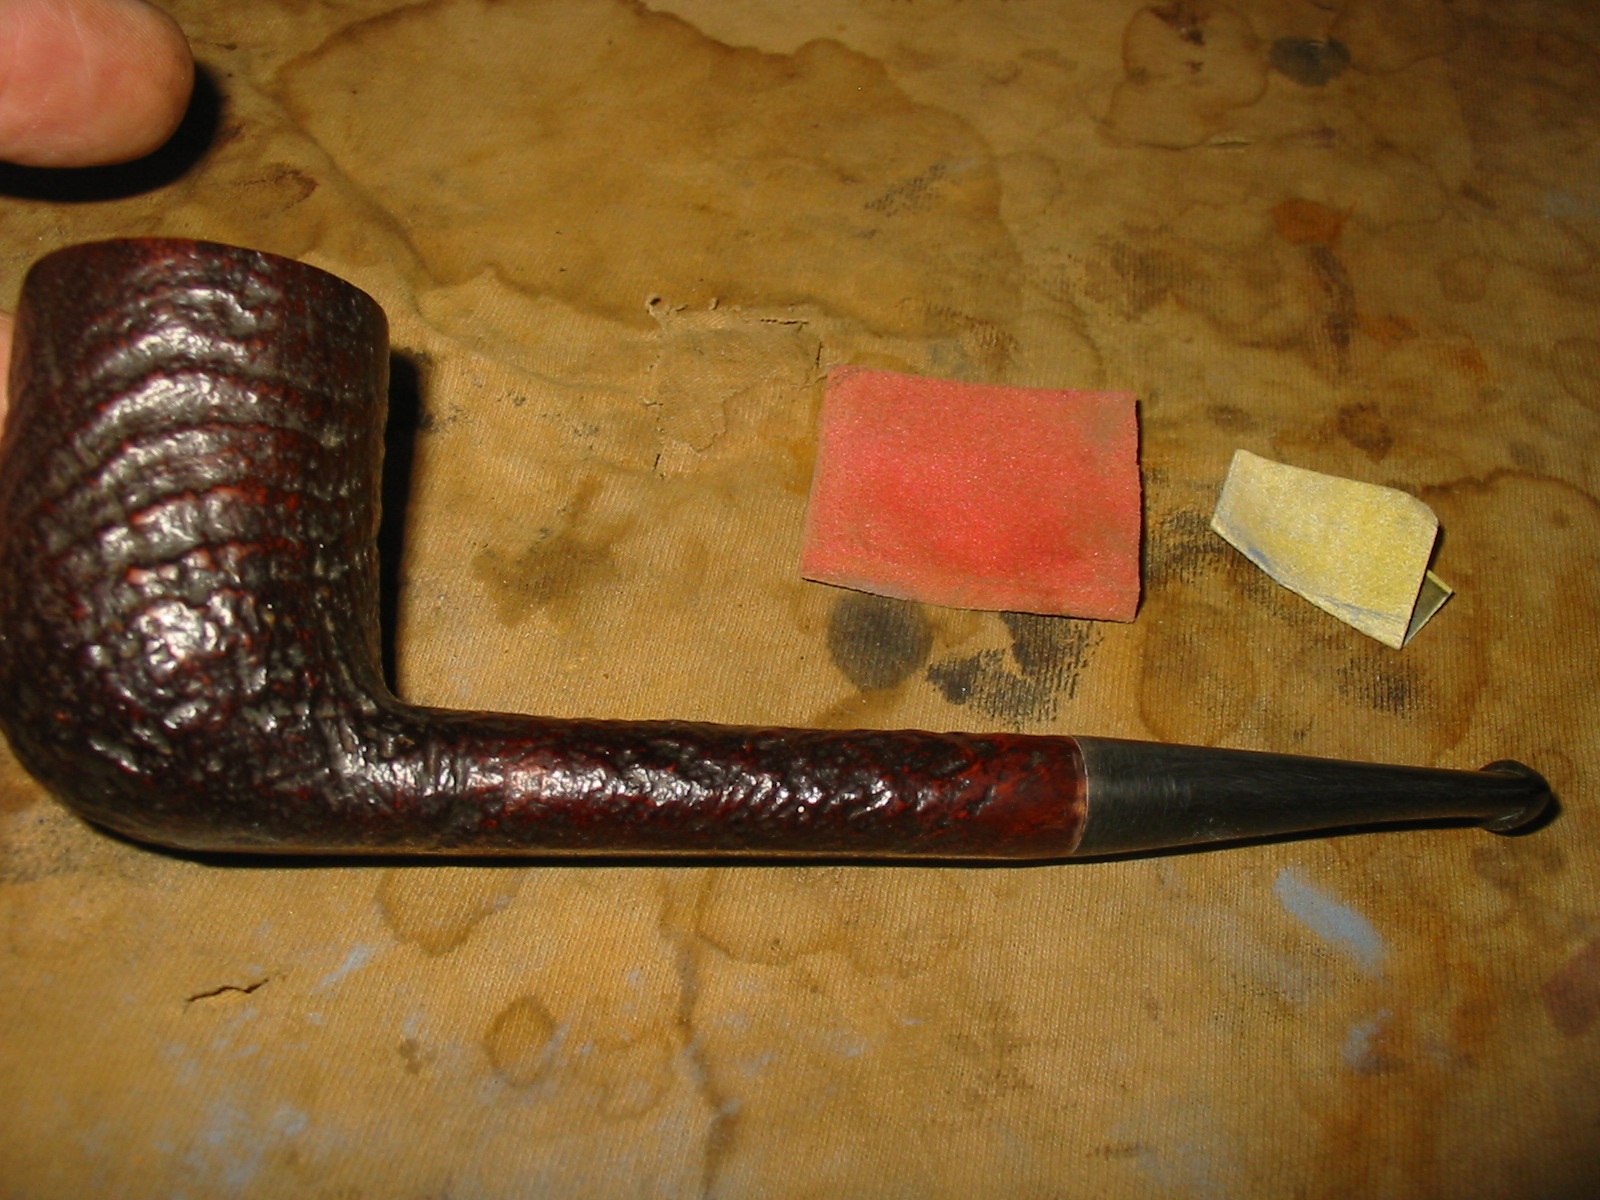
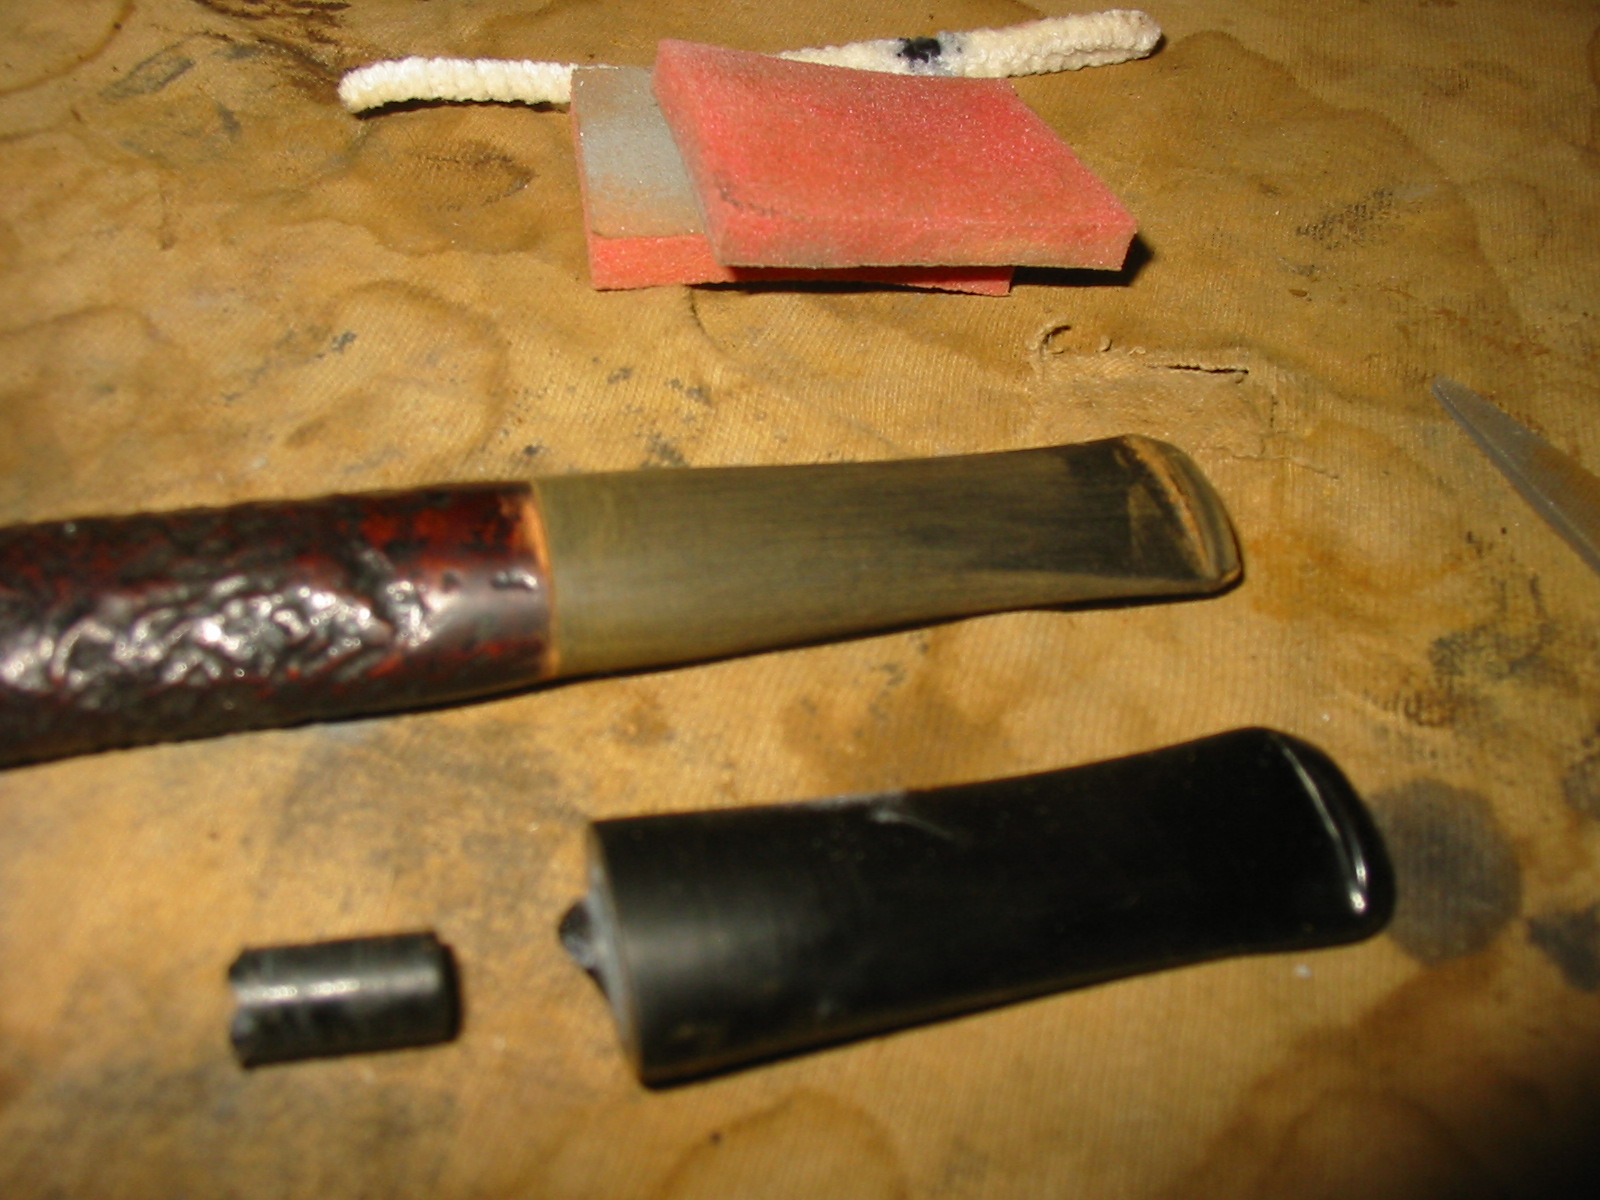
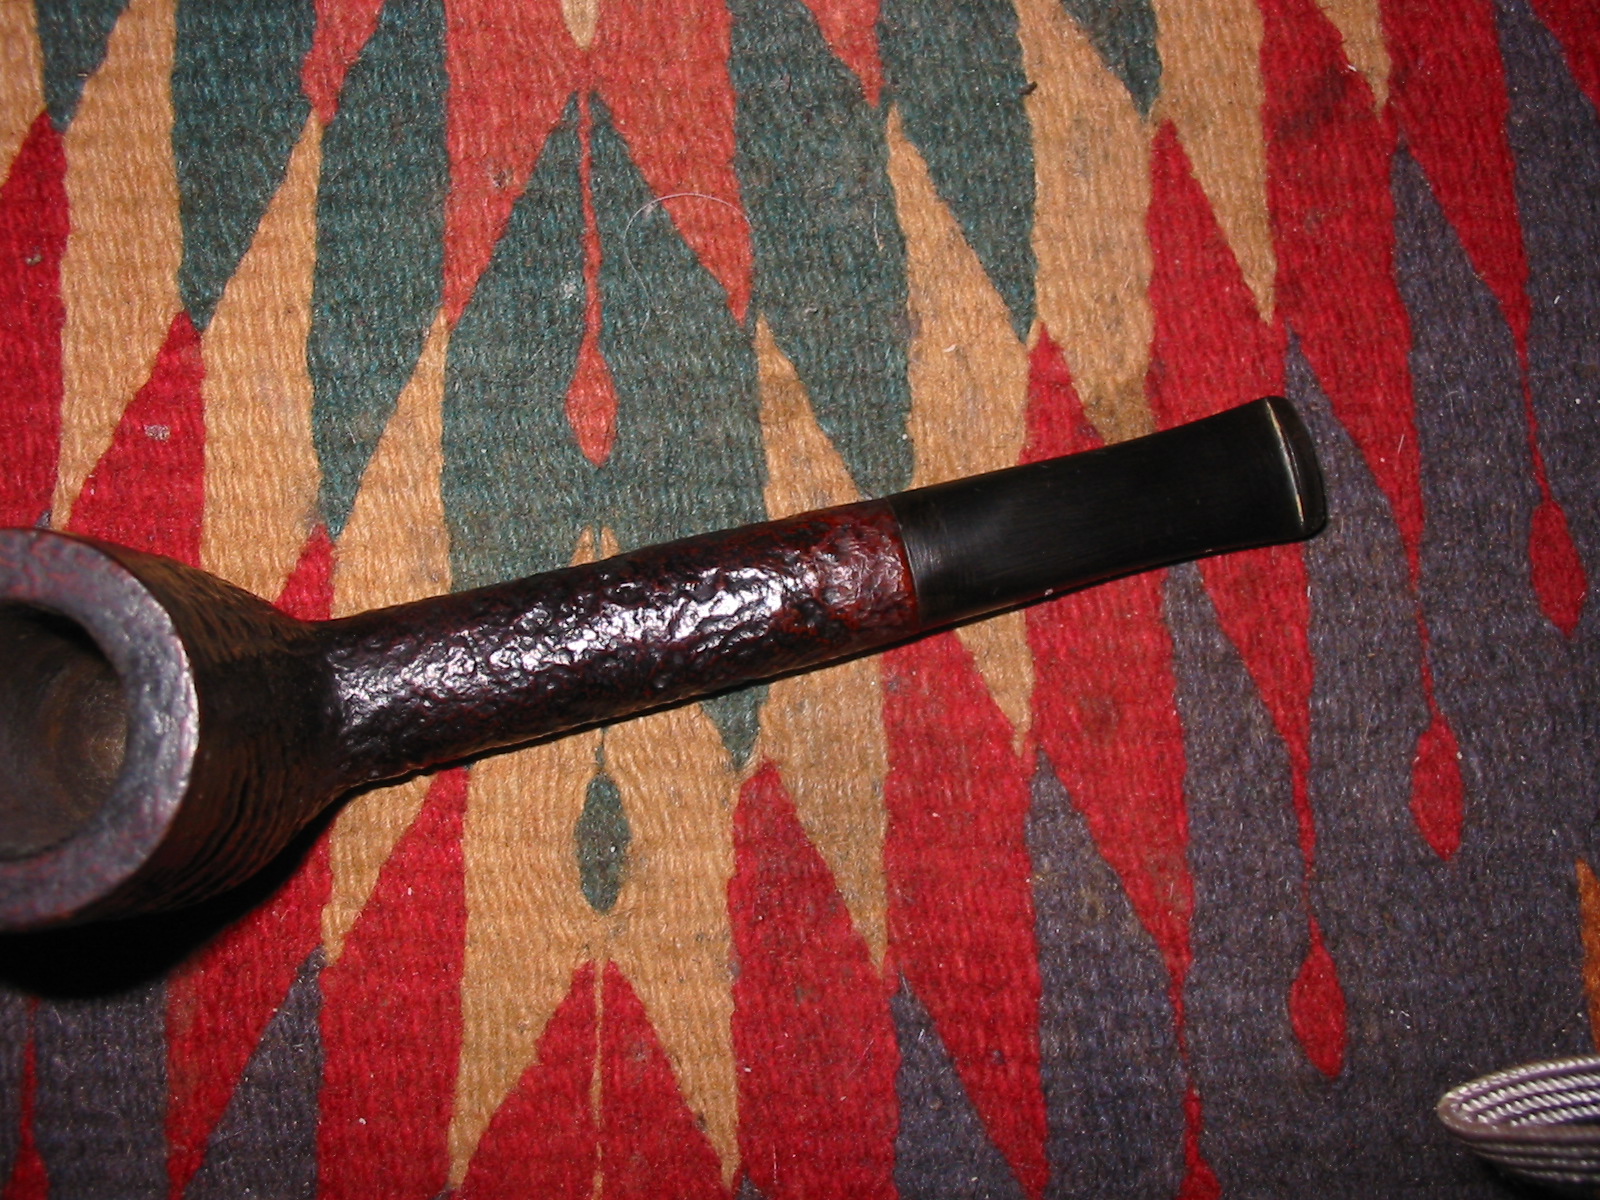
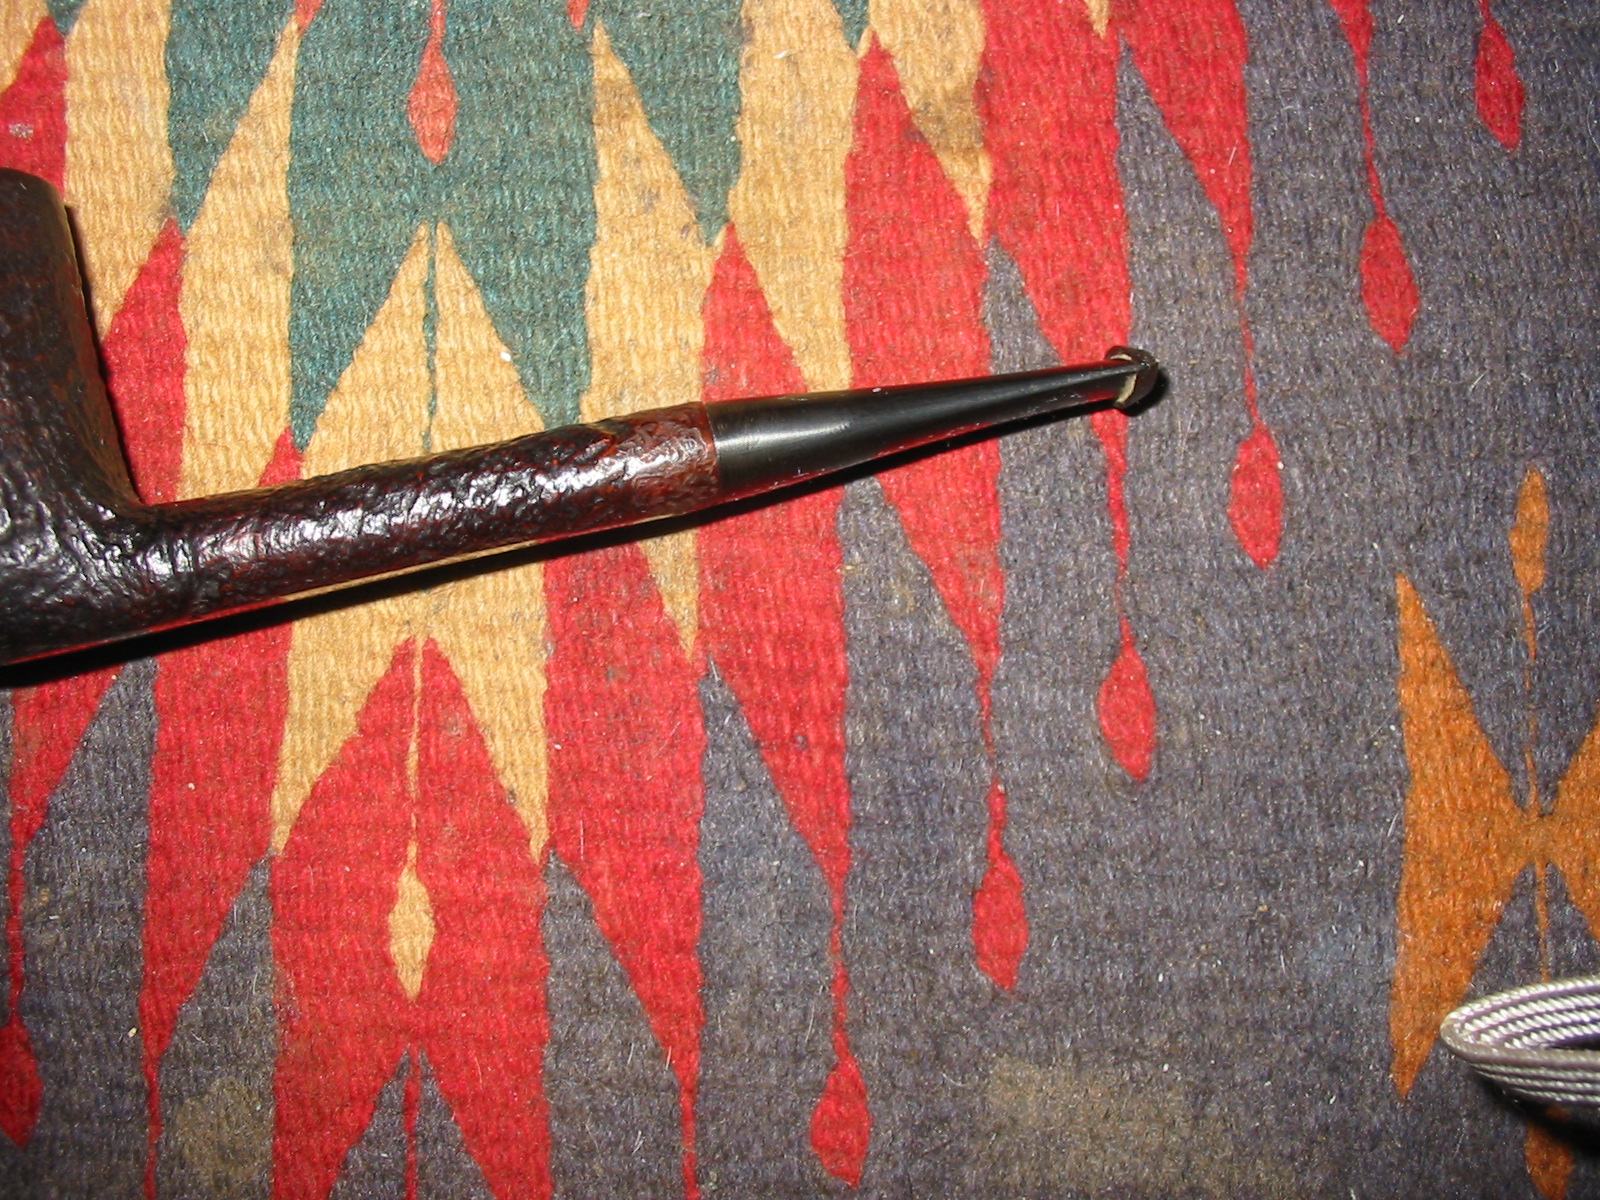
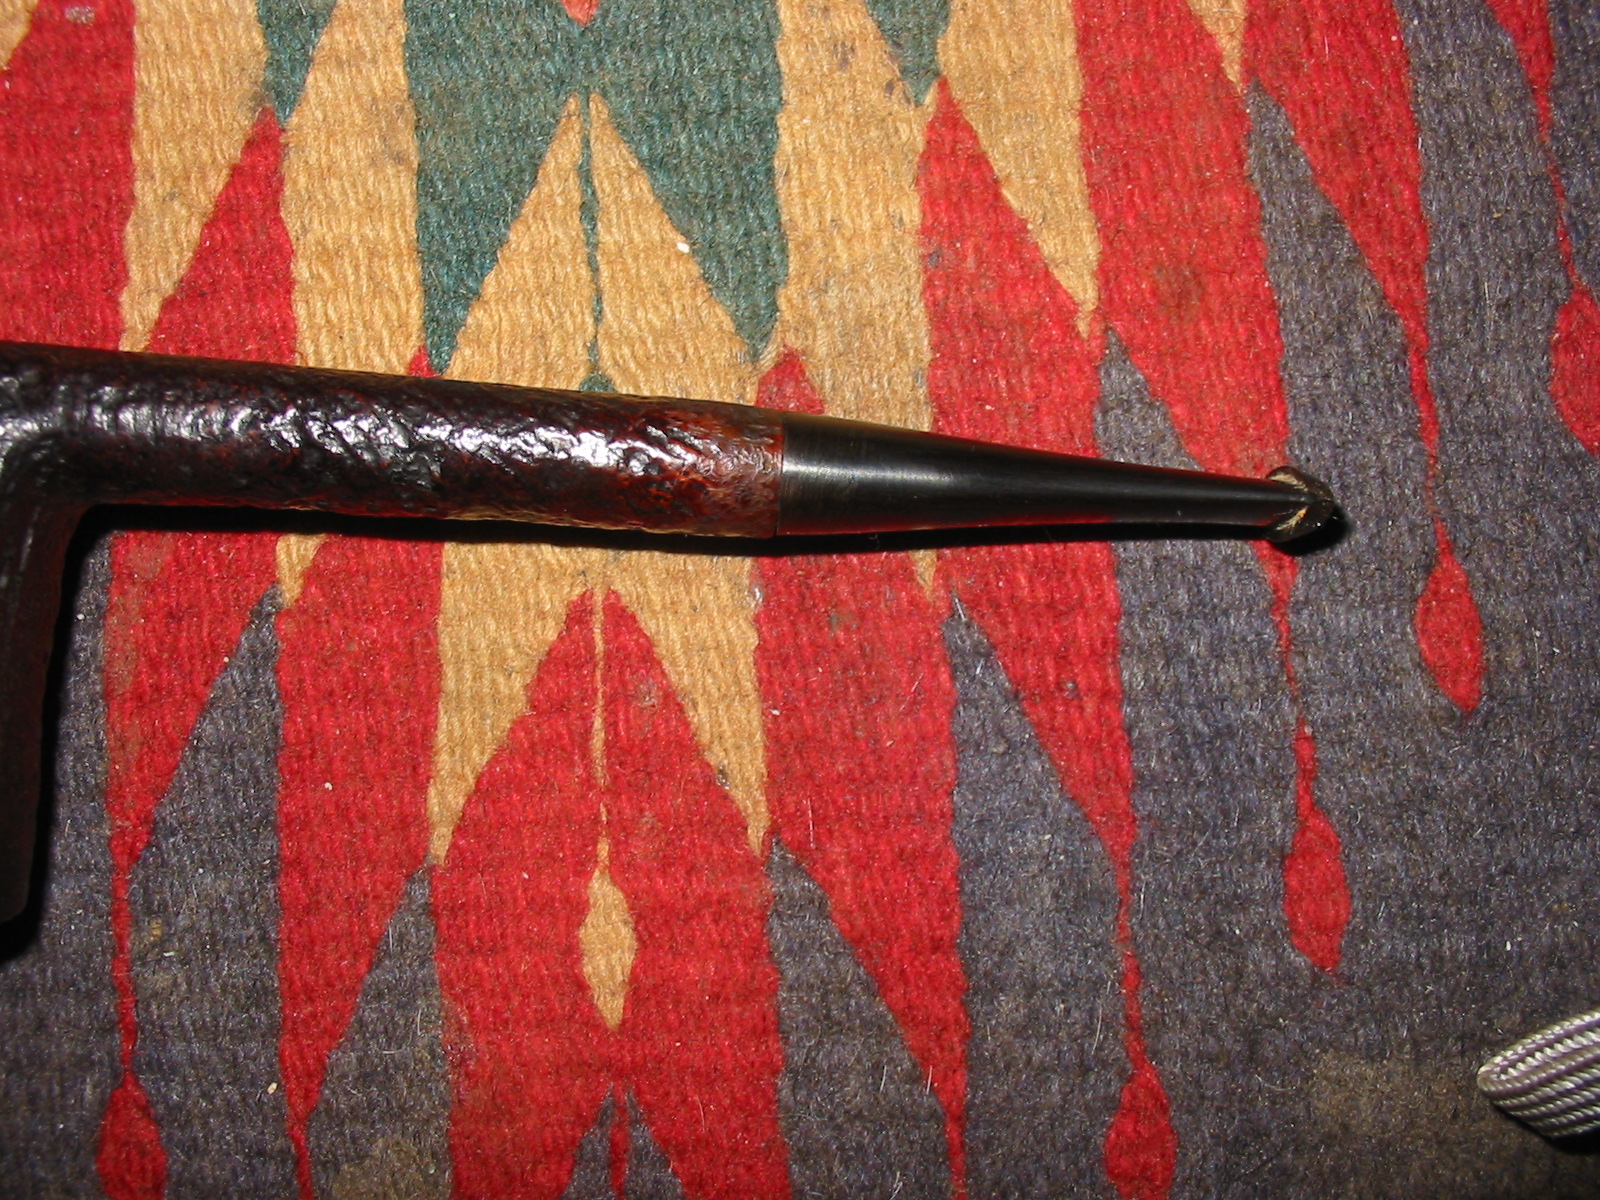
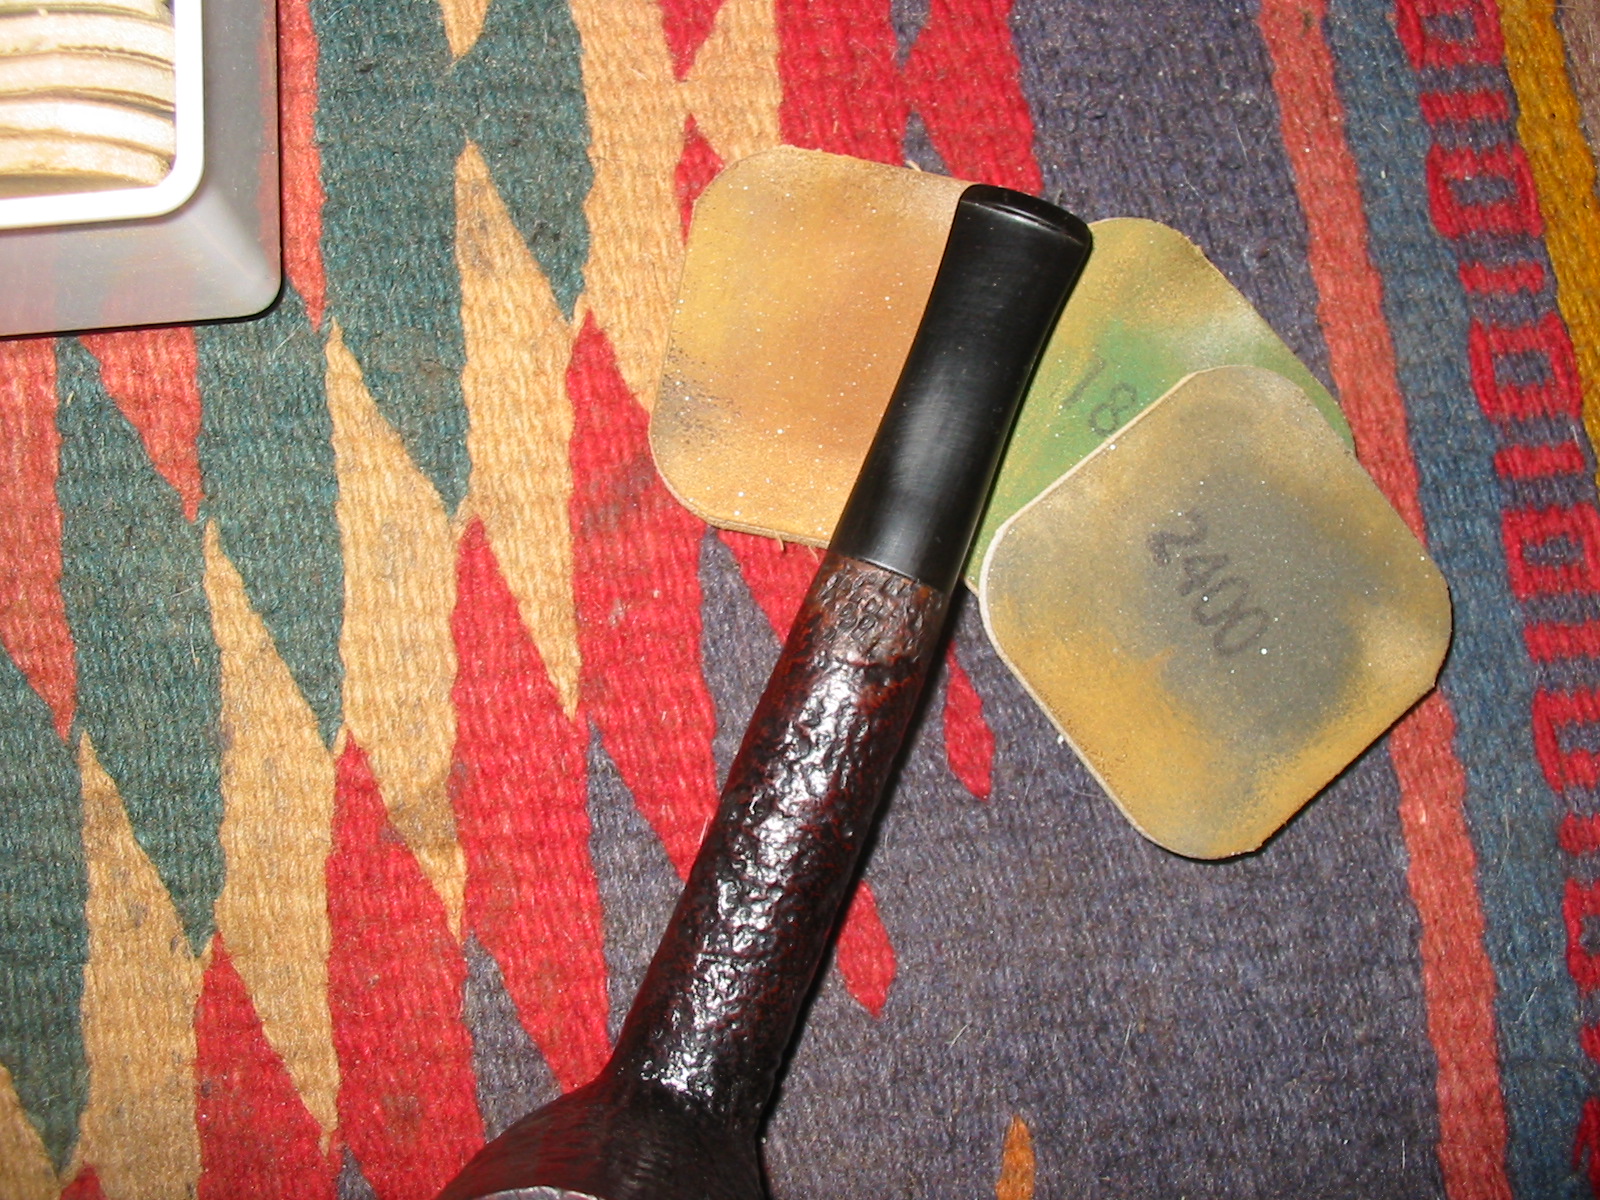
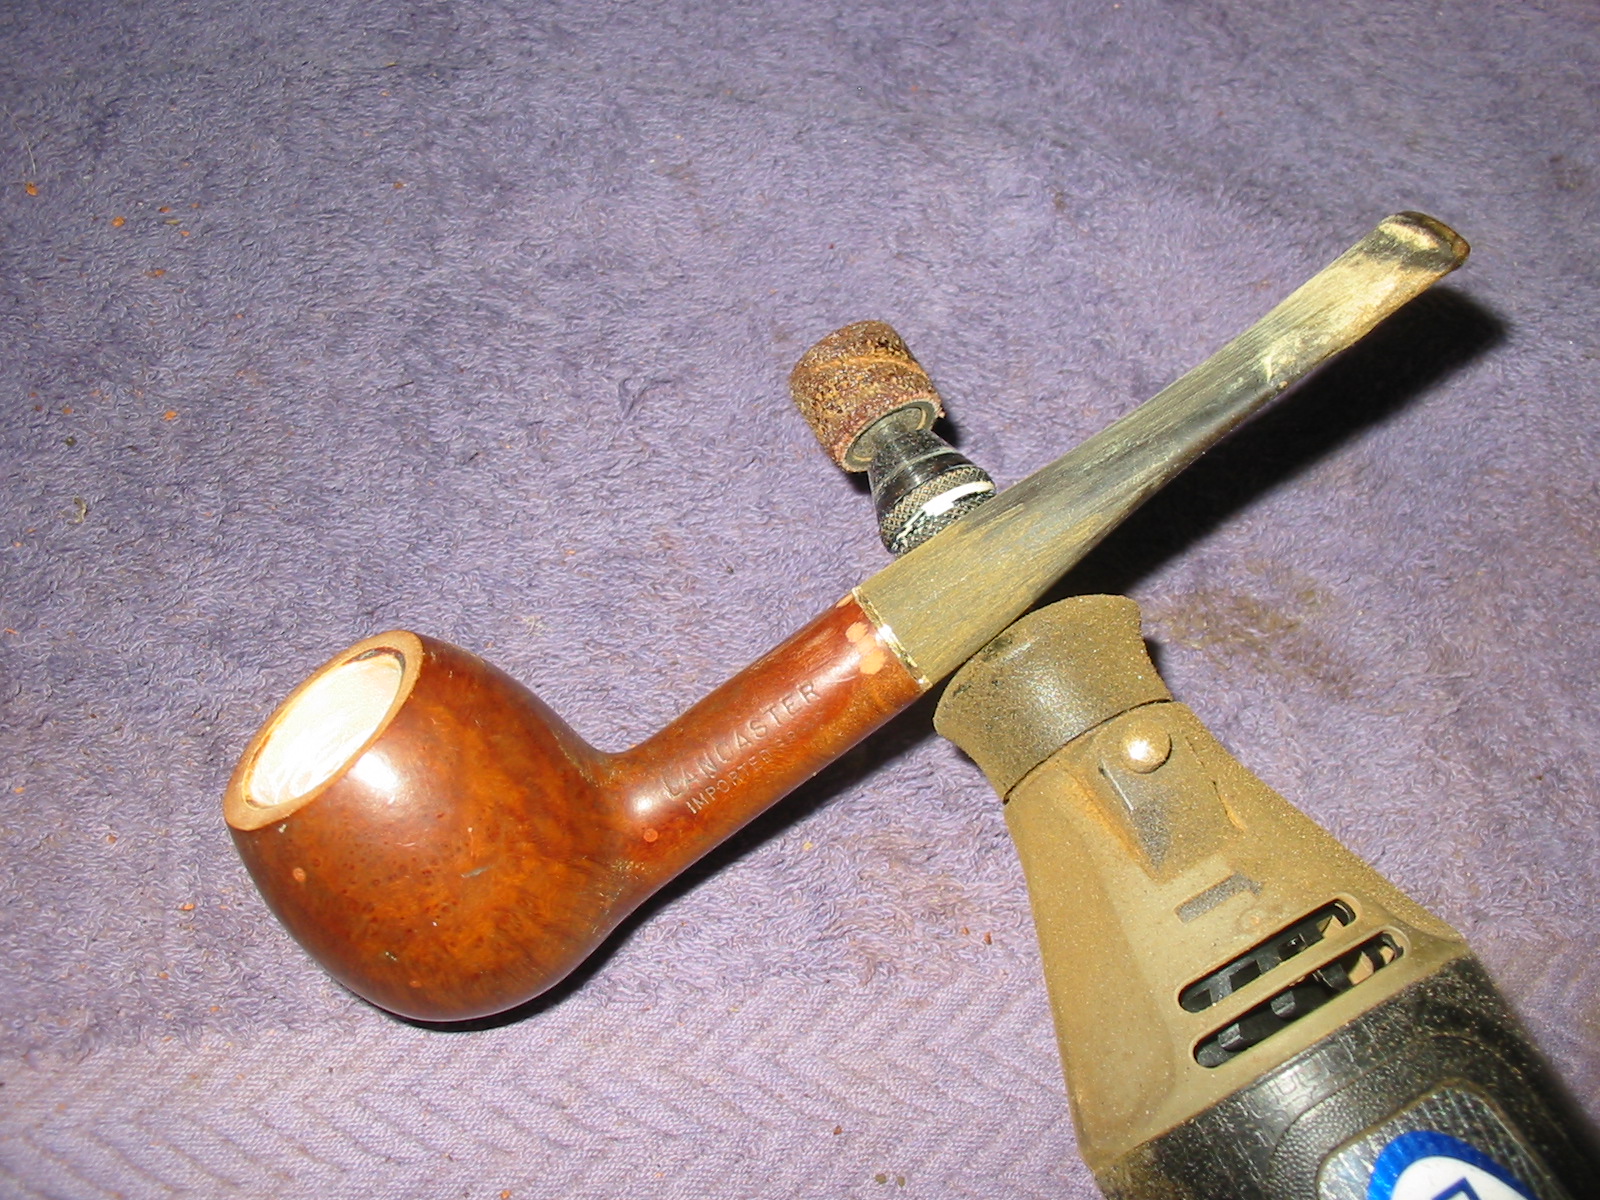
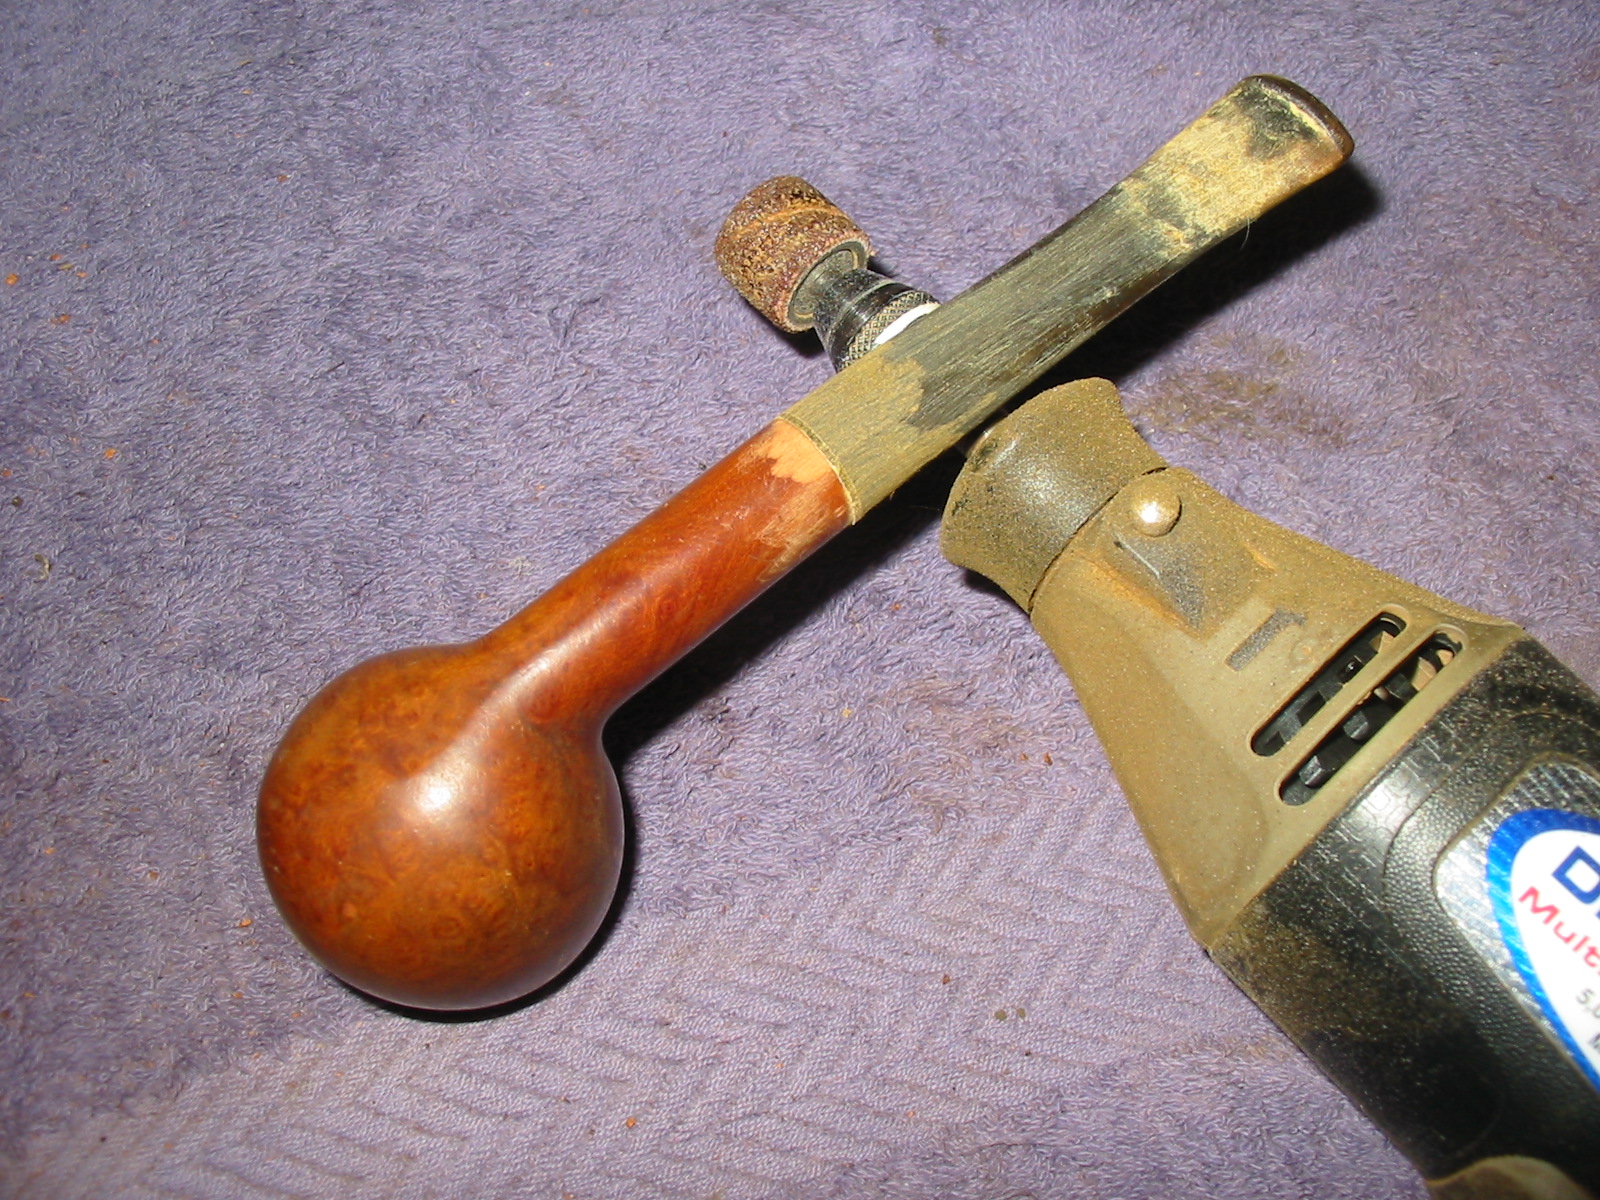
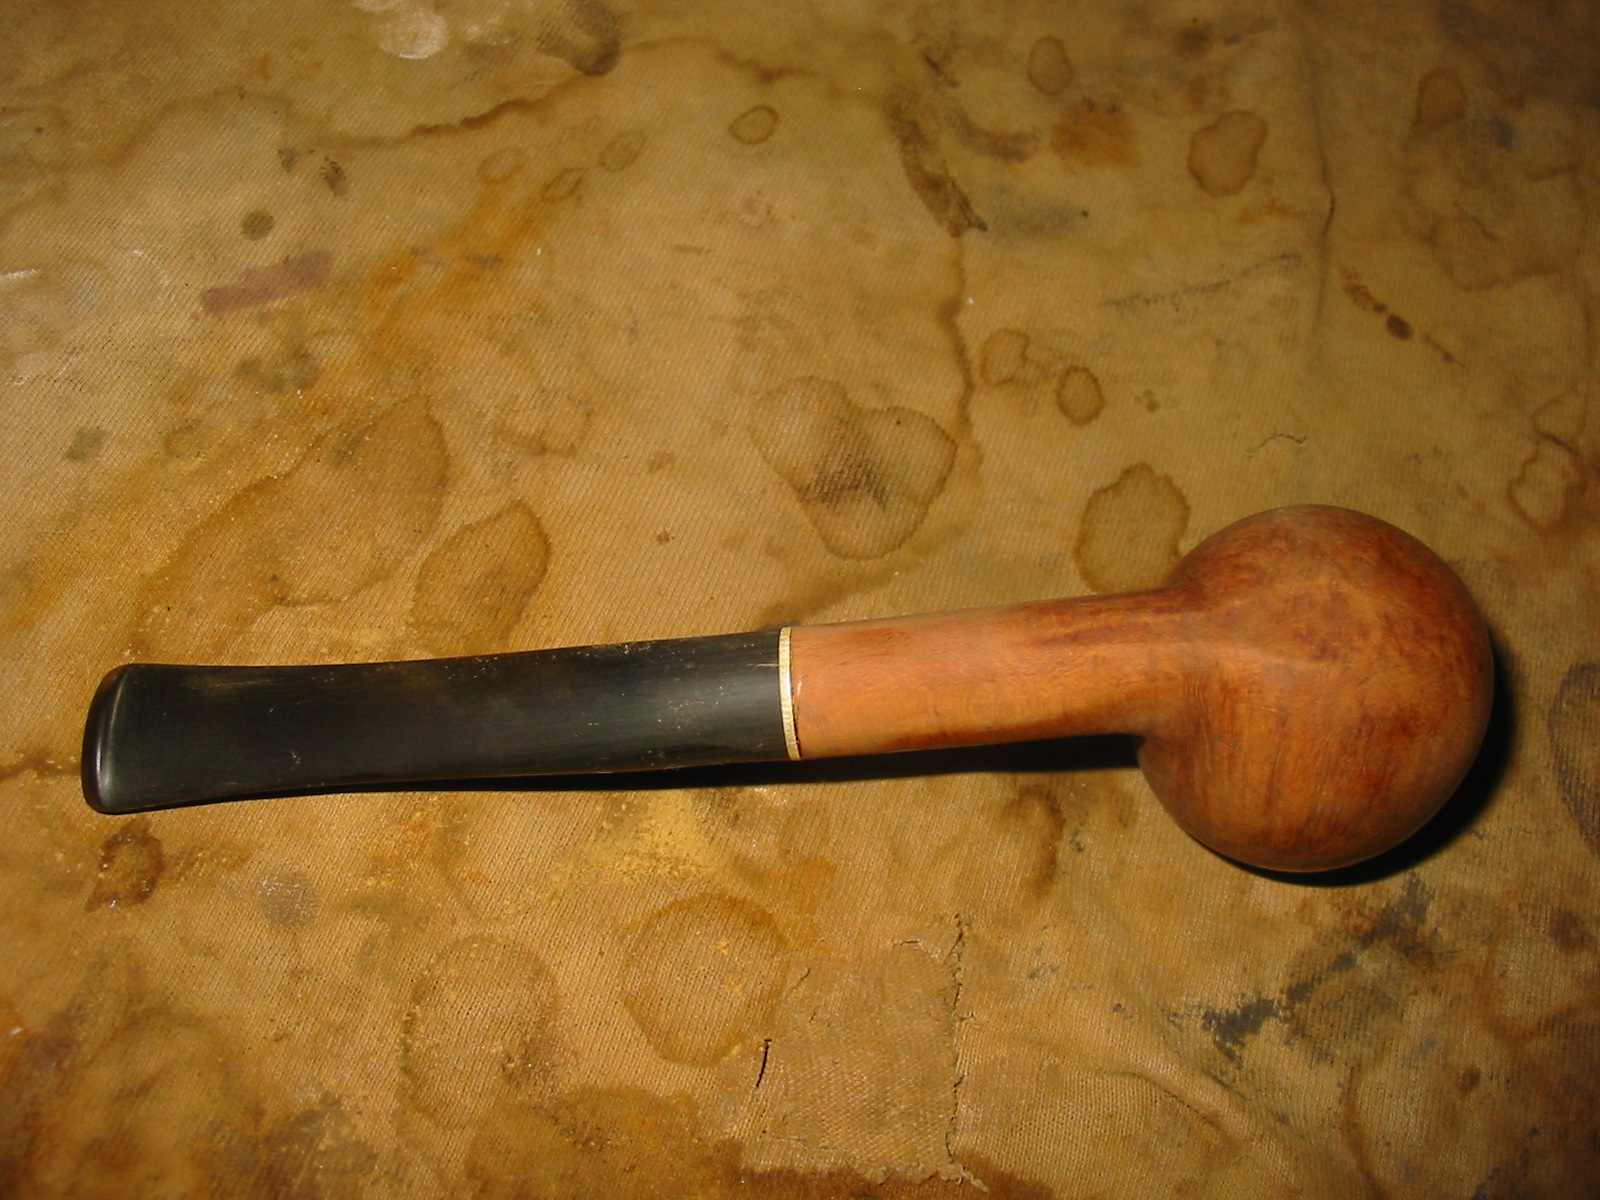
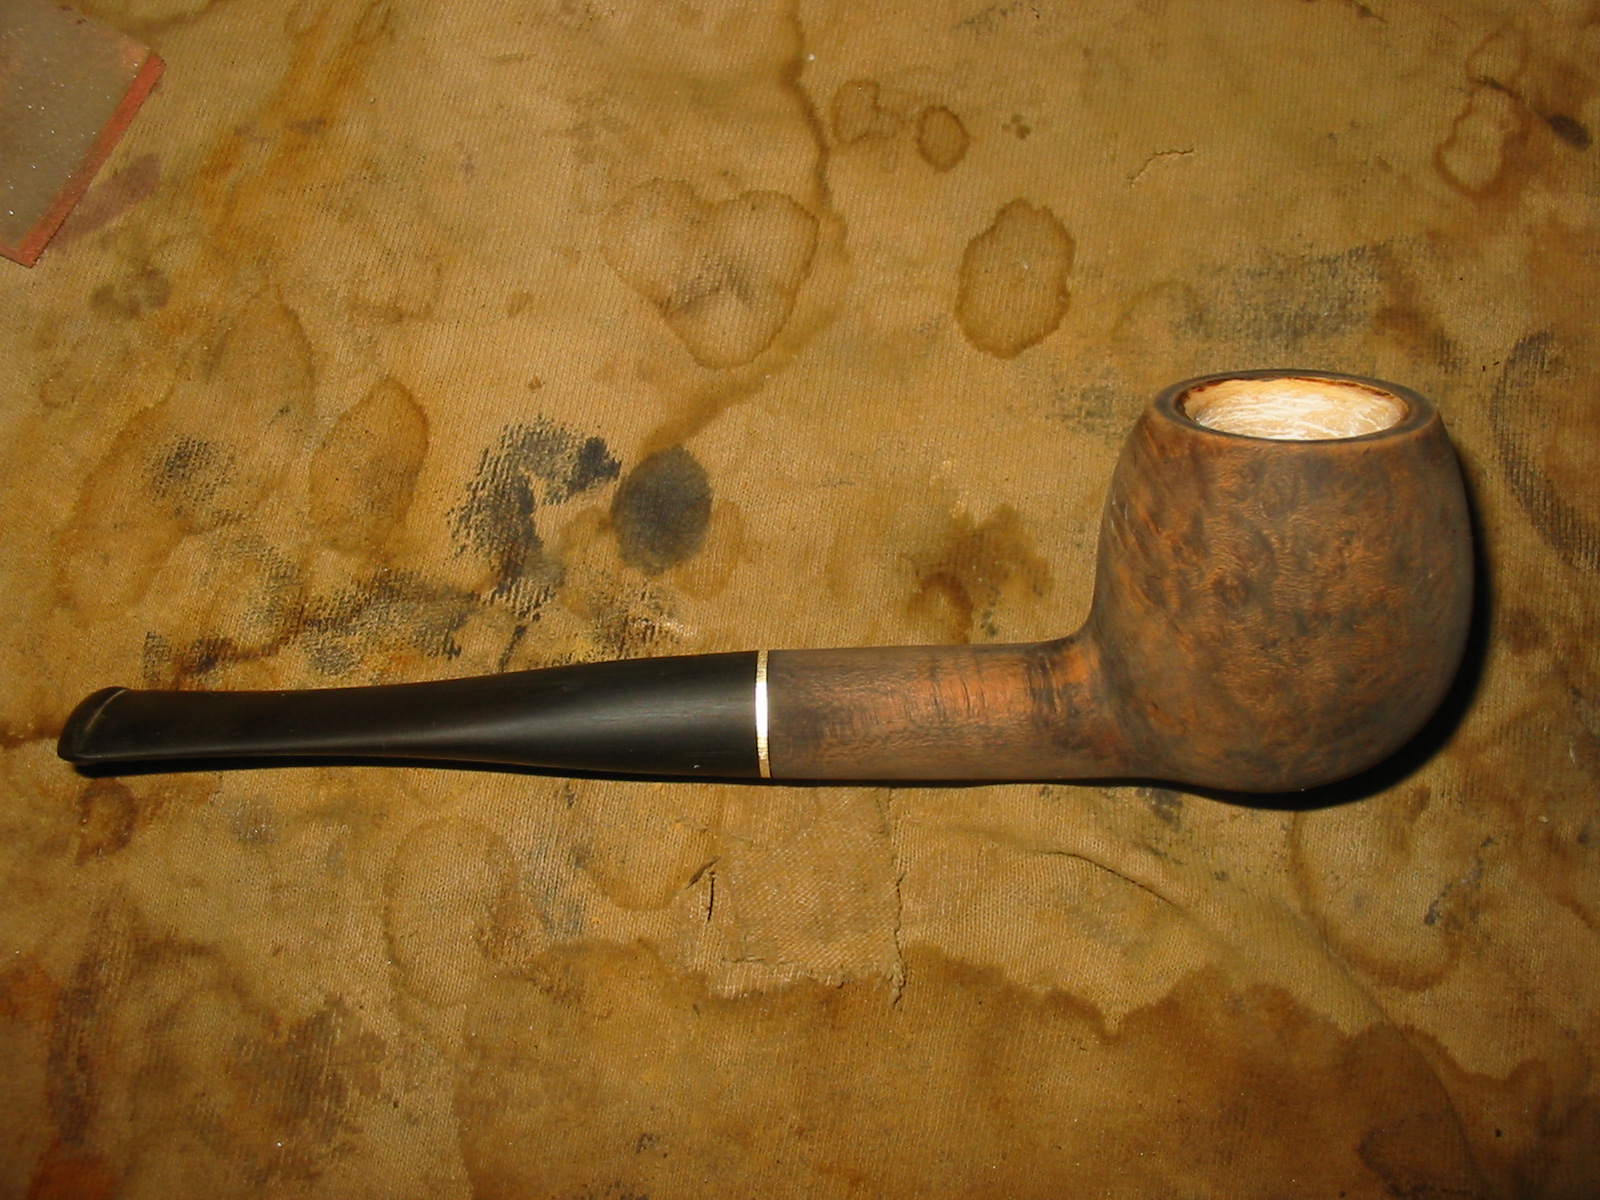
Once the band was in place I needed to sand down the tenon so that it would fit in the newly constricted airway. I used a folded piece of 220 grit sandpaper to sand down the excess vulcanite on the tenon so that the fit would be snug. The next three photos show the new stem in place with the band. The stem had been sanded with 220 grit sandpaper to match the lines of the shank and give a proper taper to the stem from the band to the button. I also sanded it with a medium grit sanding sponge.
IMG_4553

IMG_4555

IMG_4557

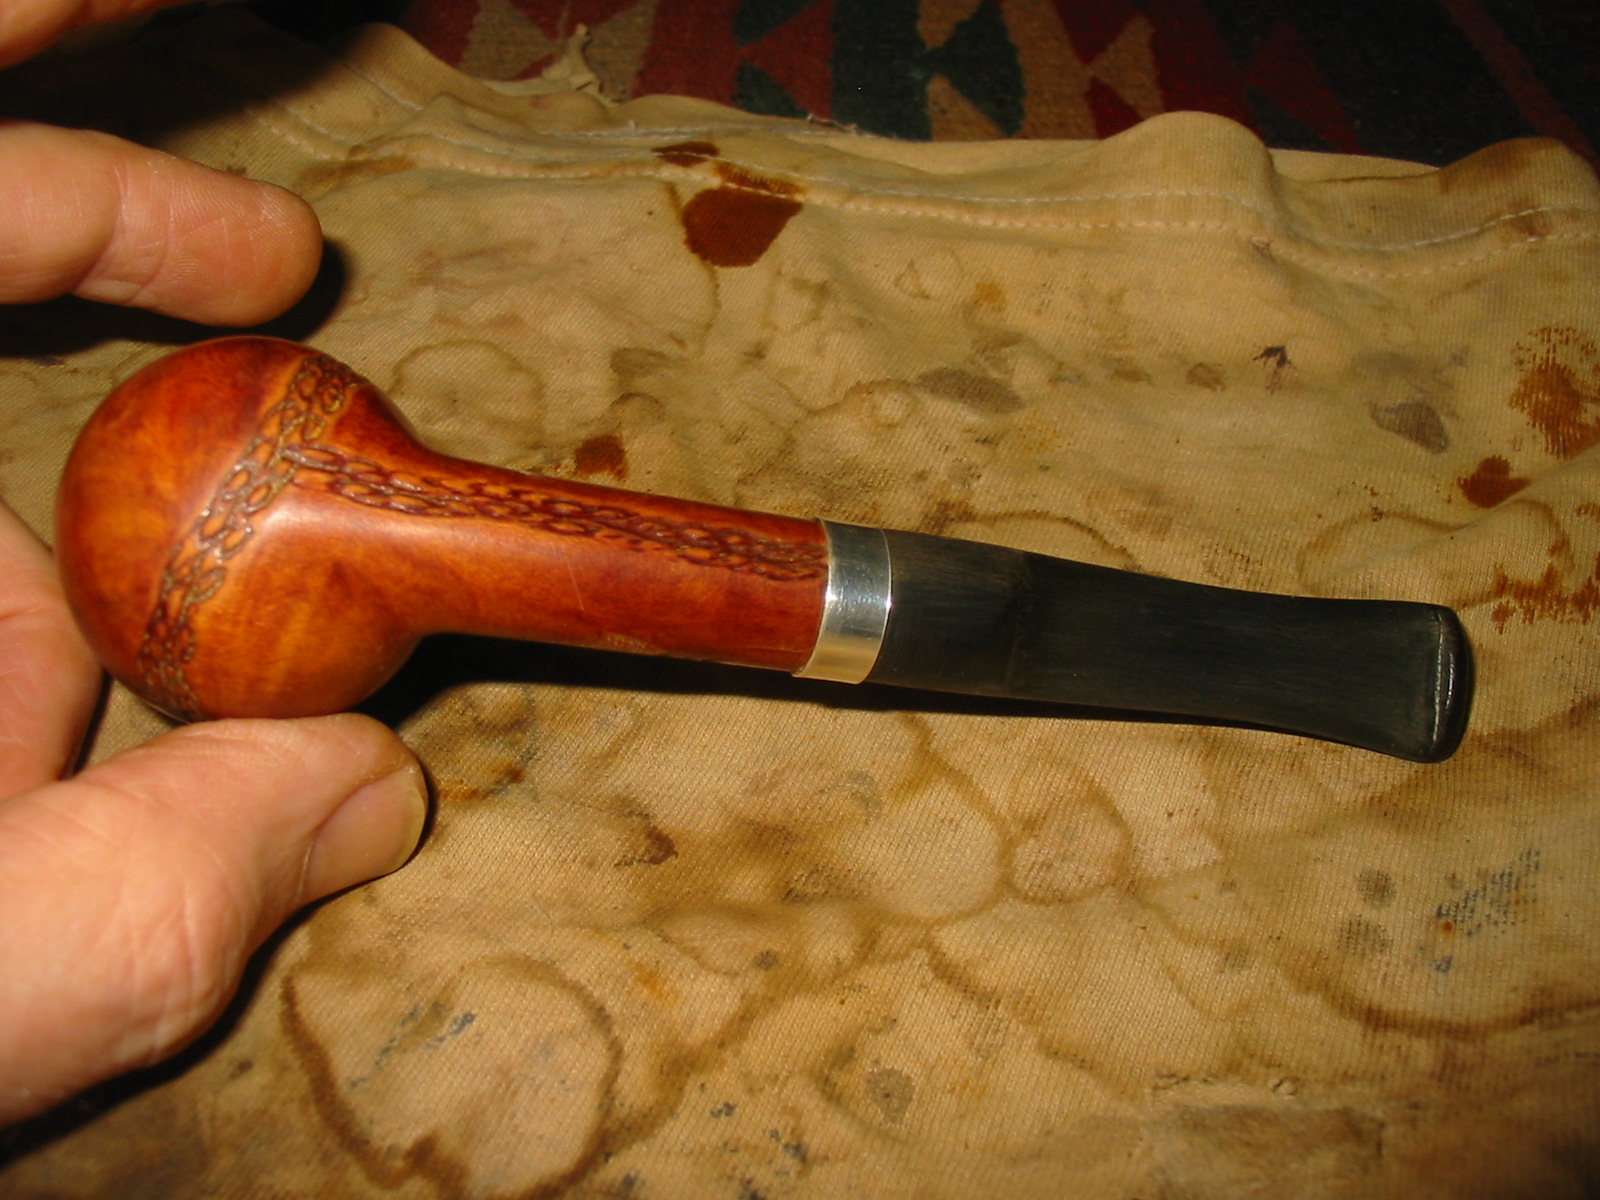
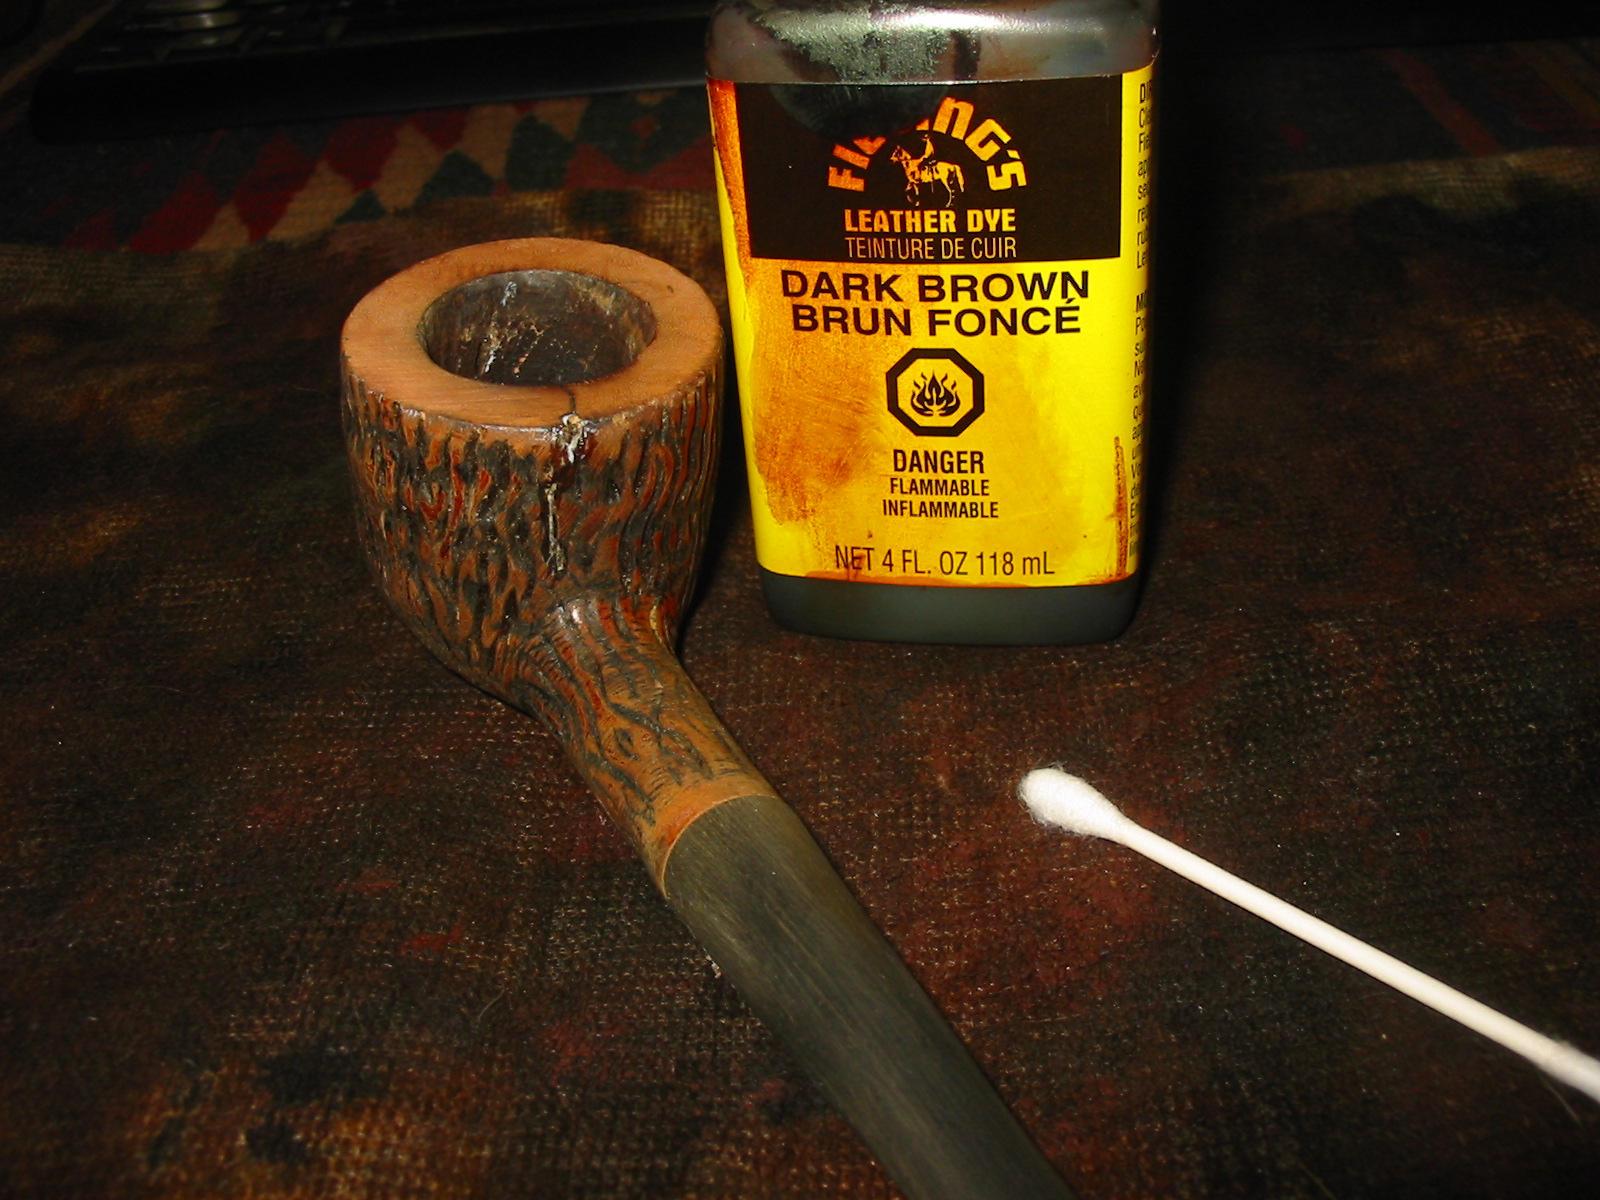
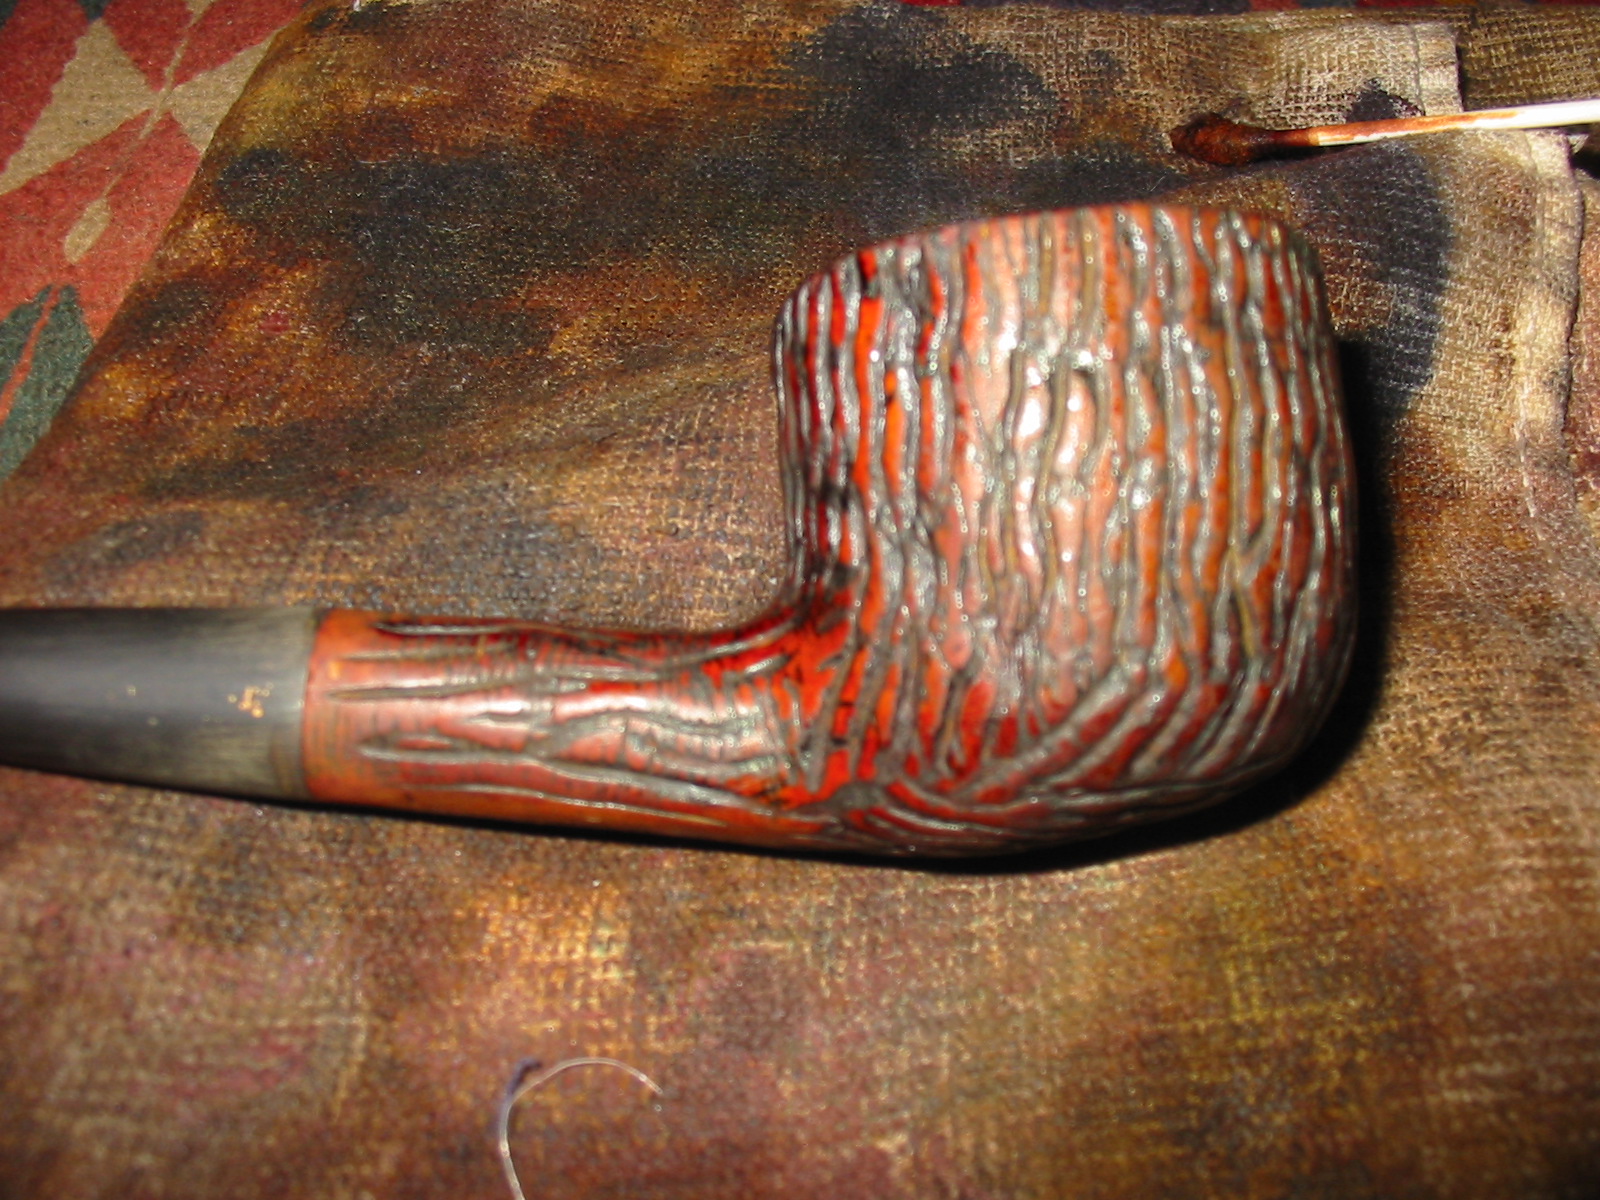
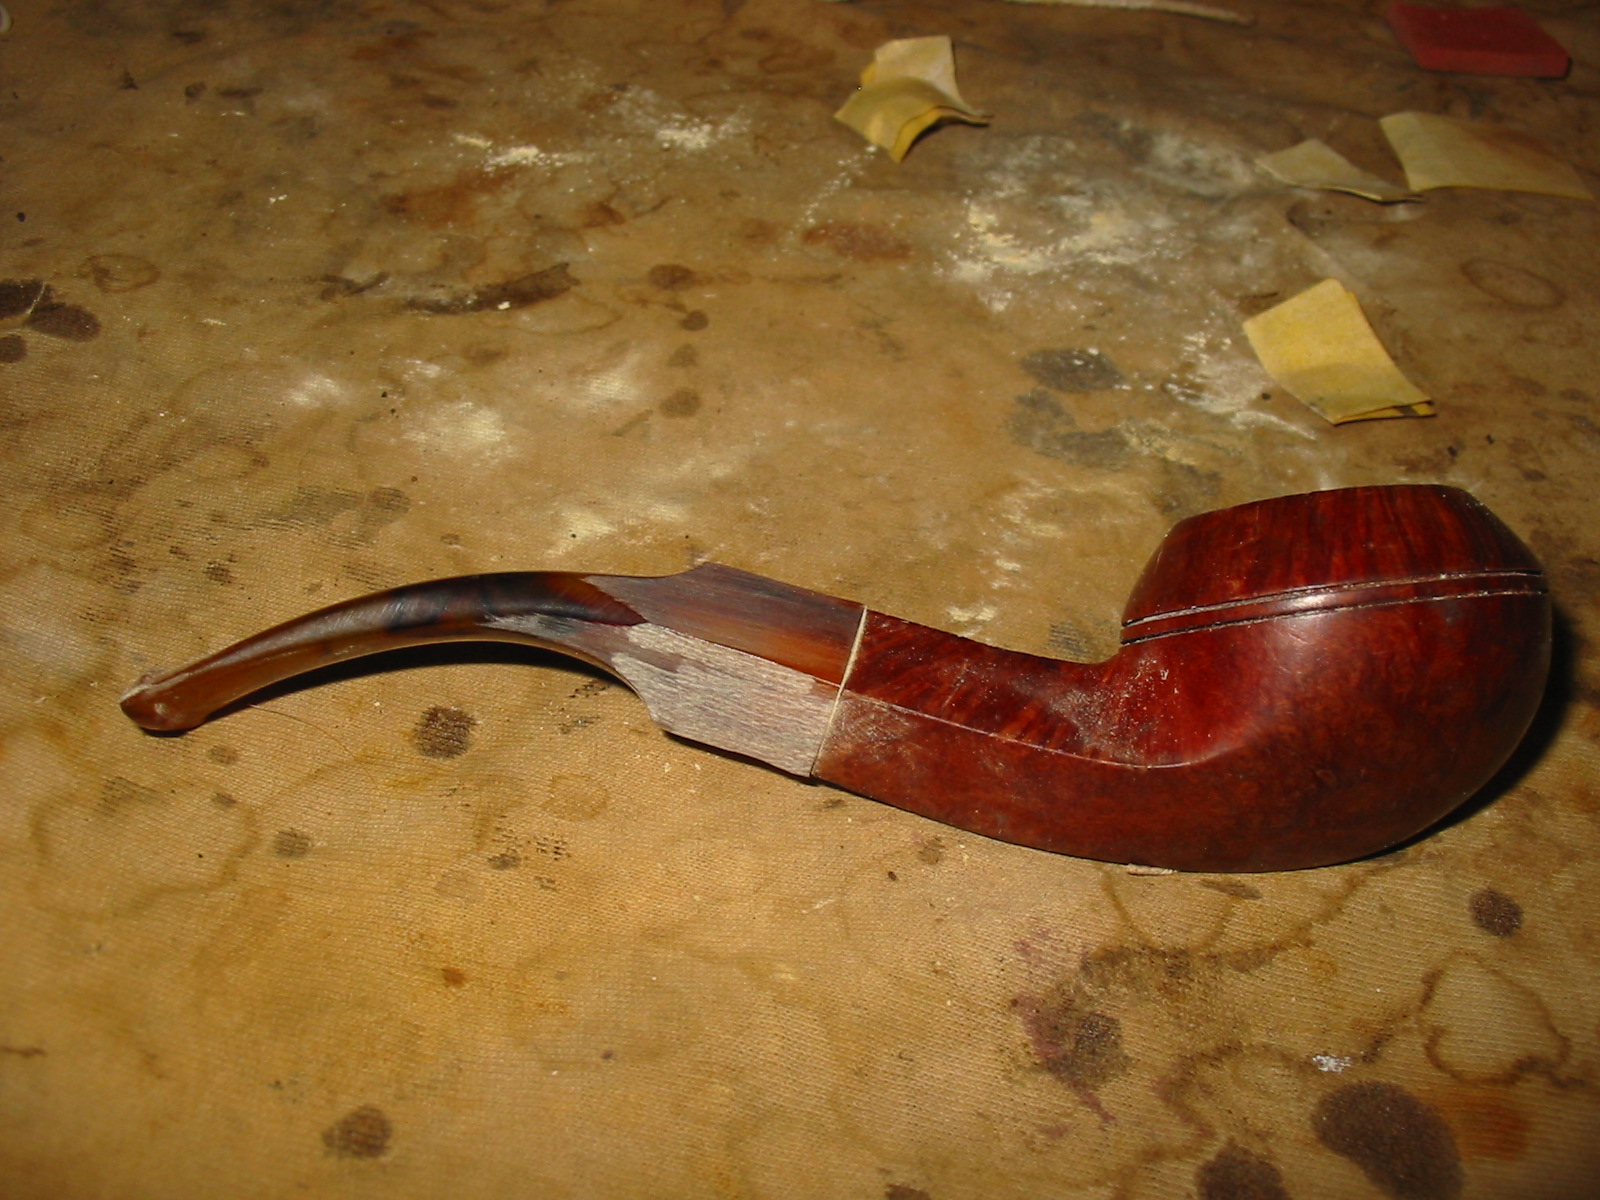
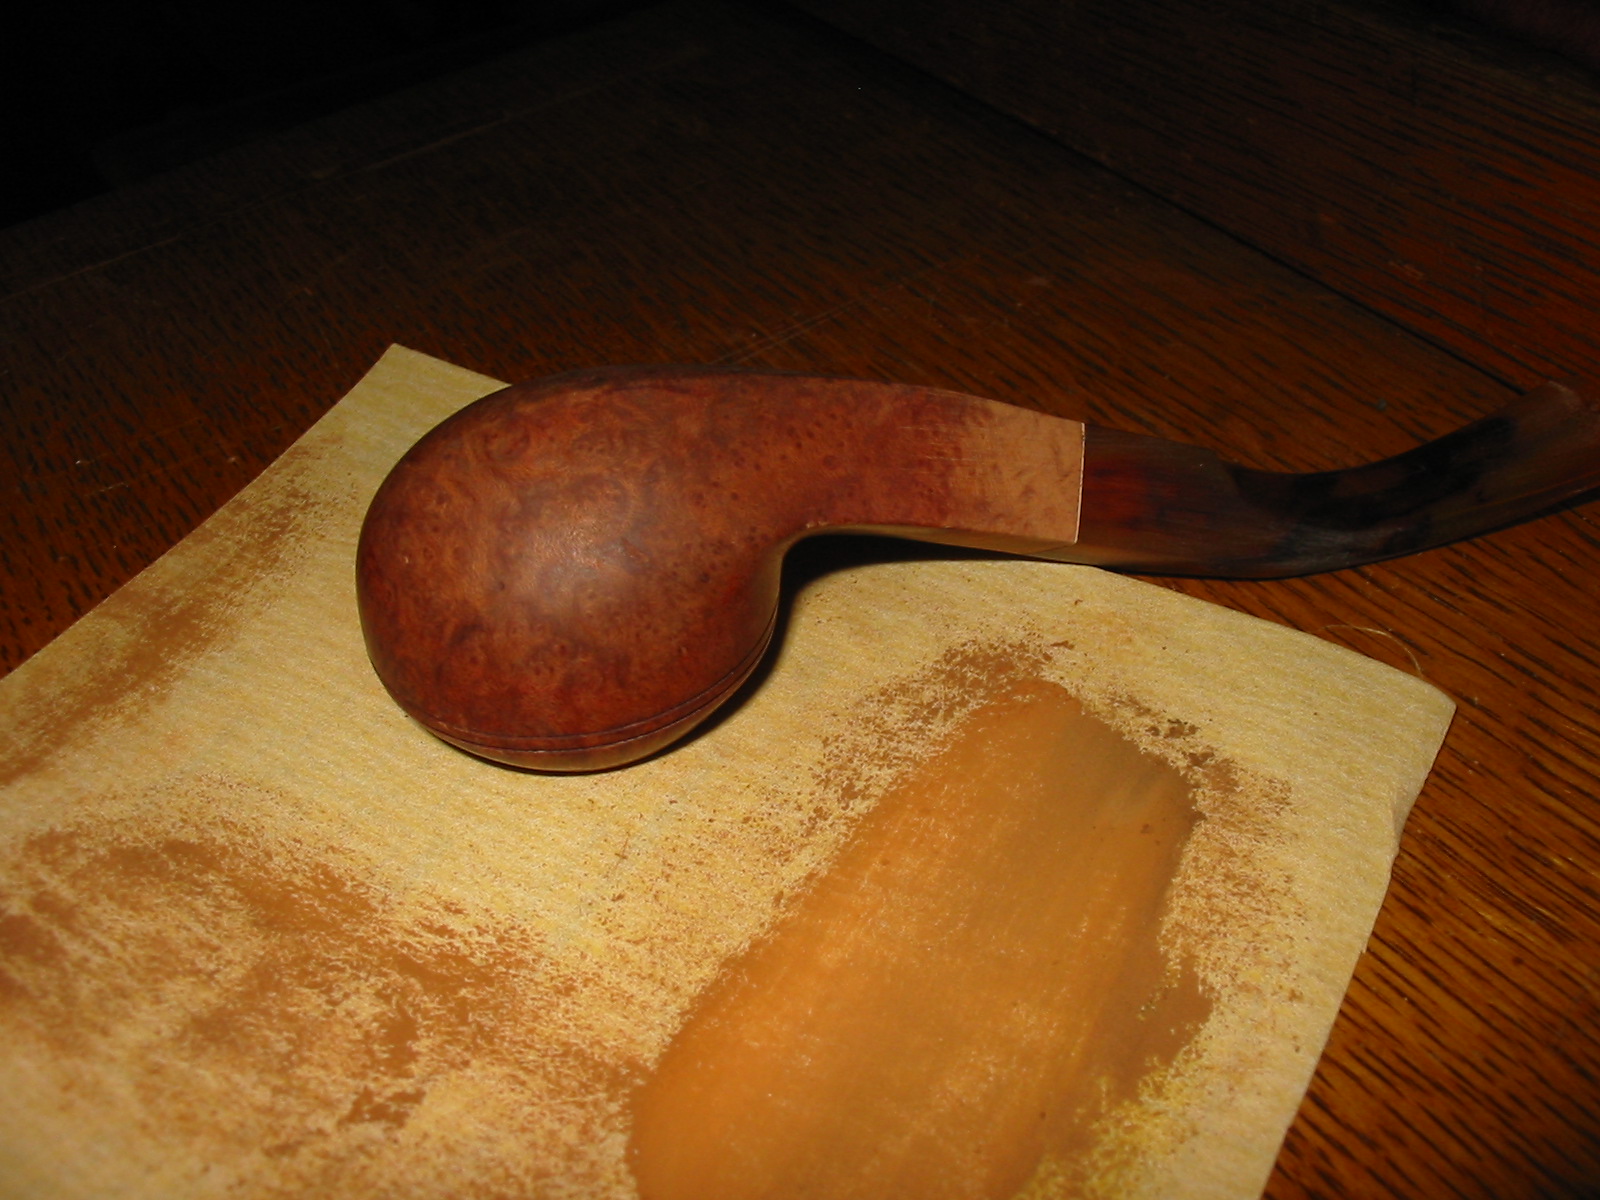
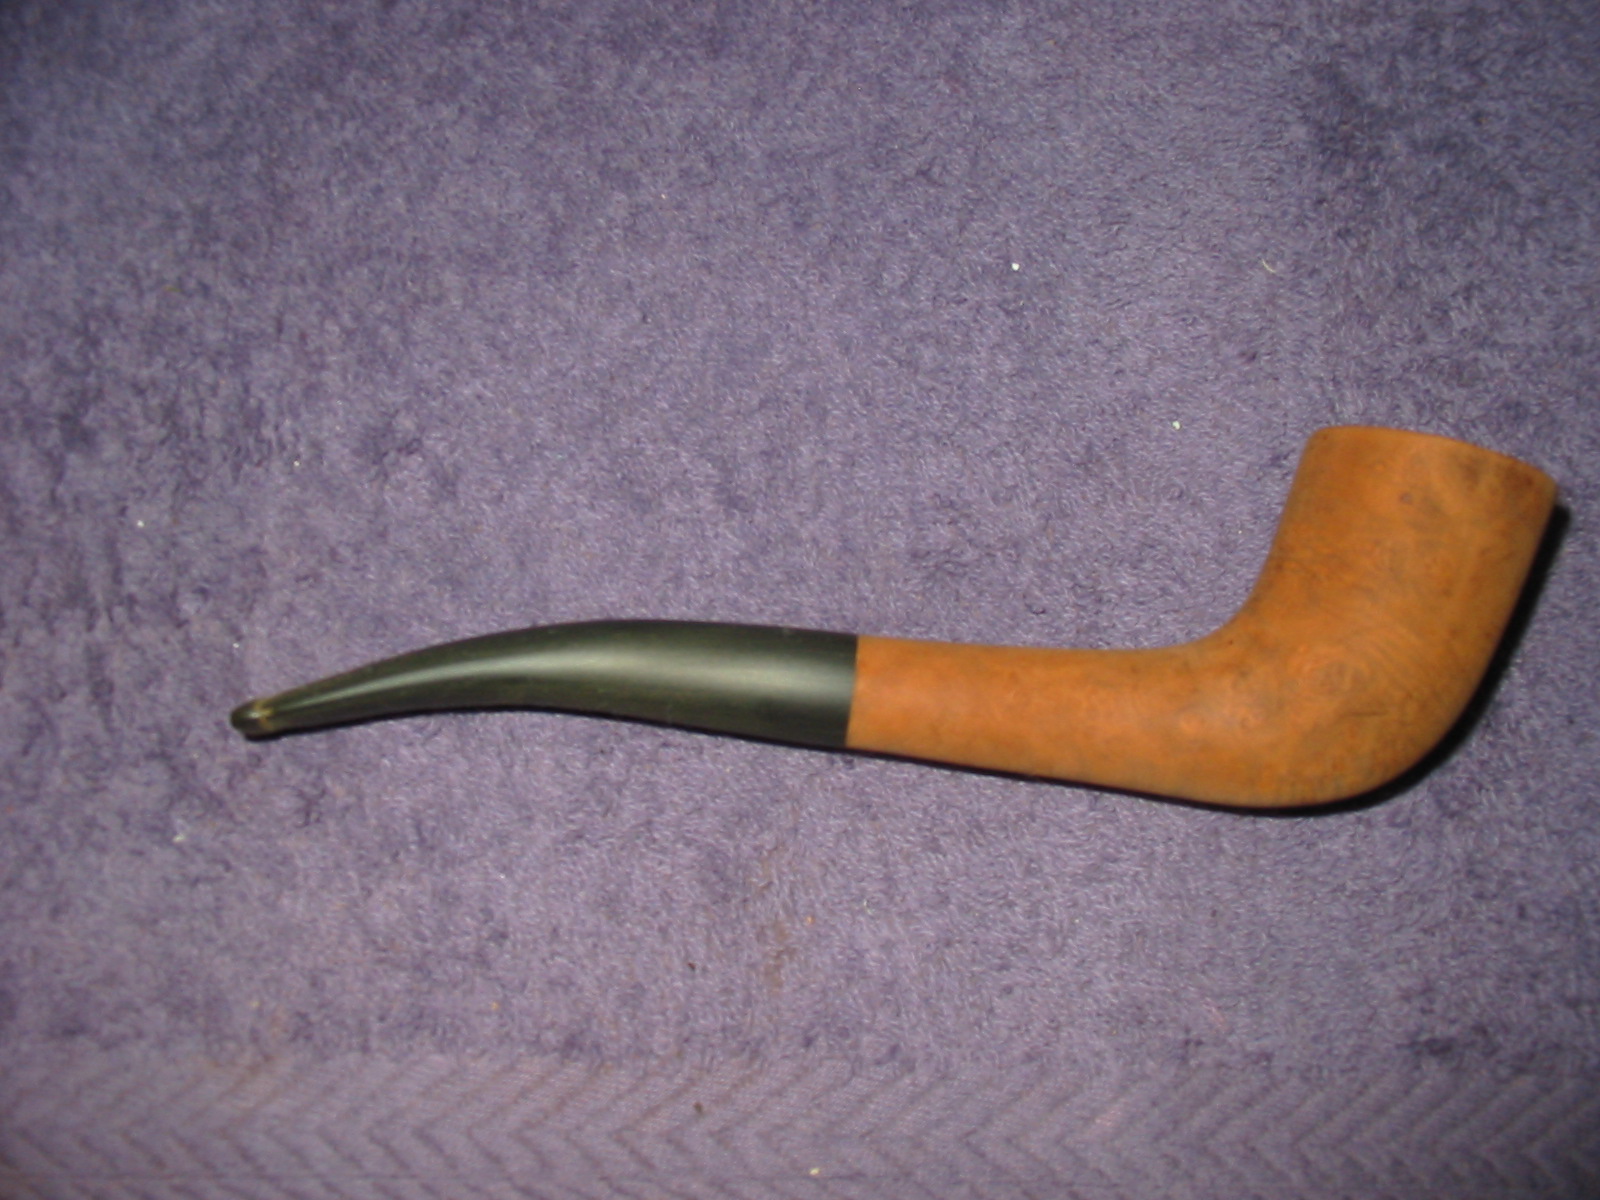
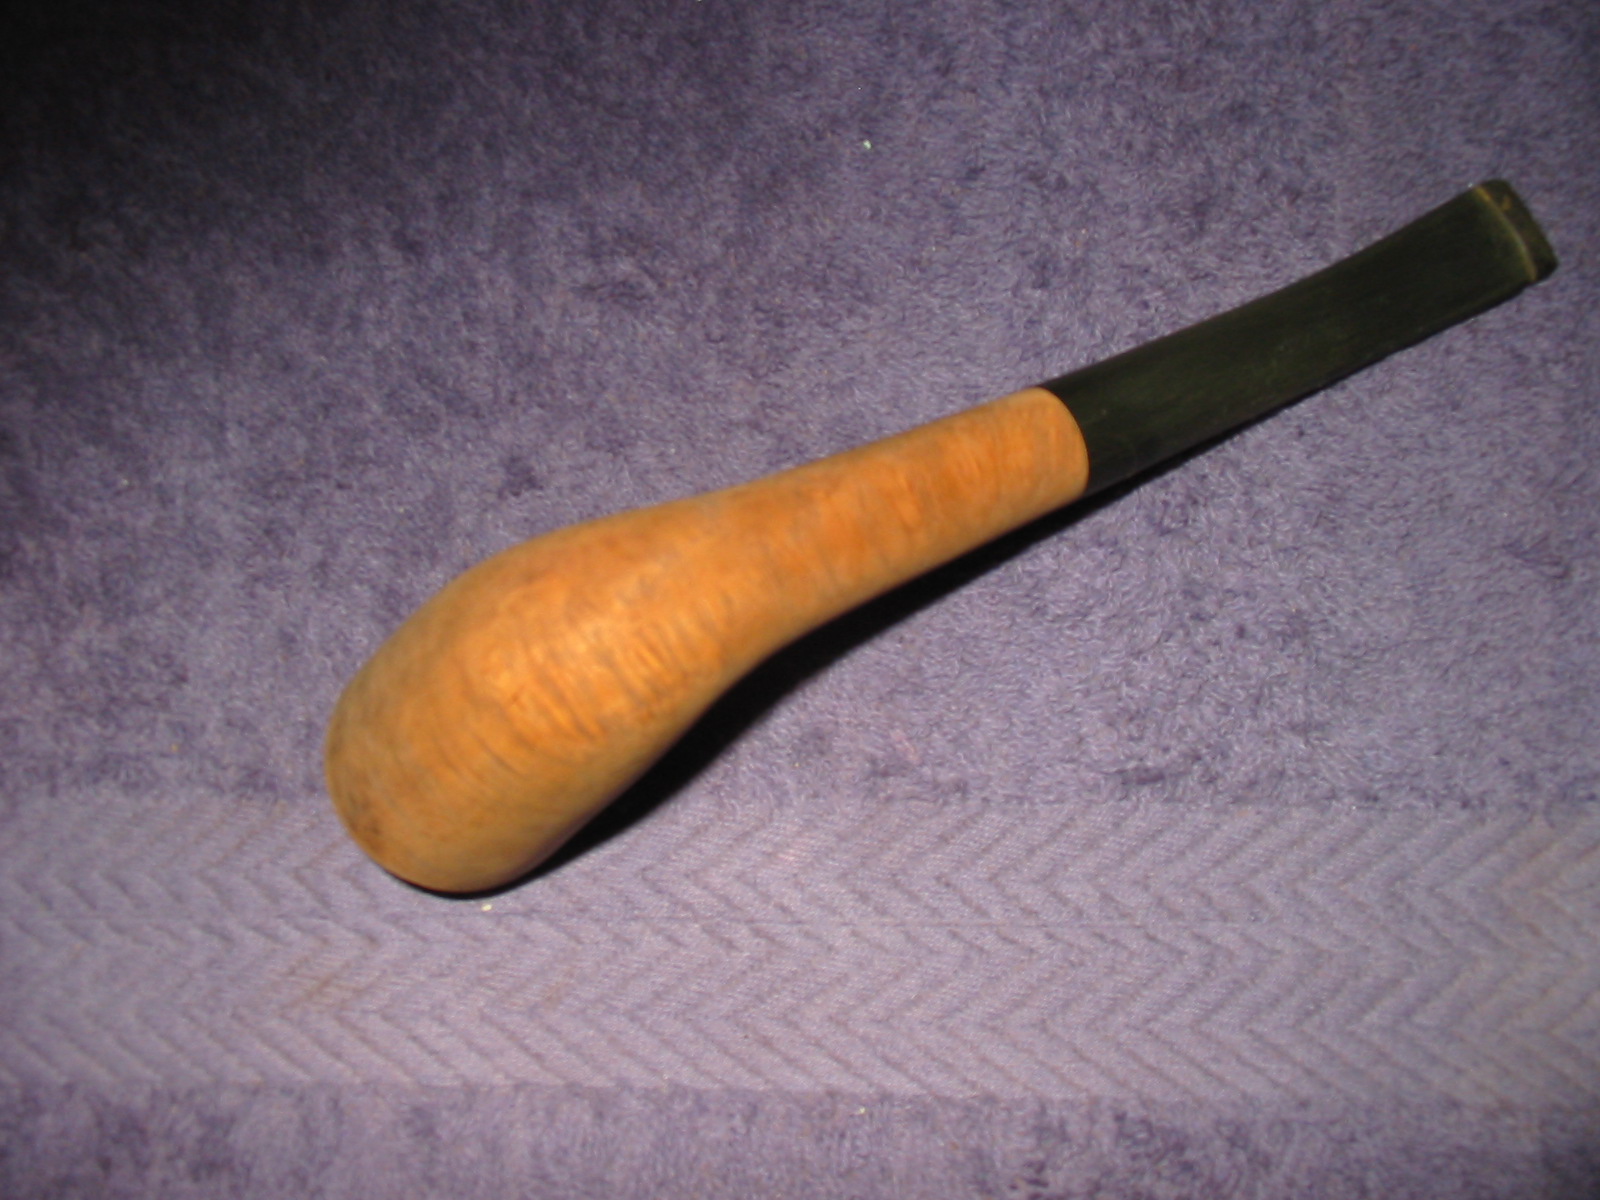
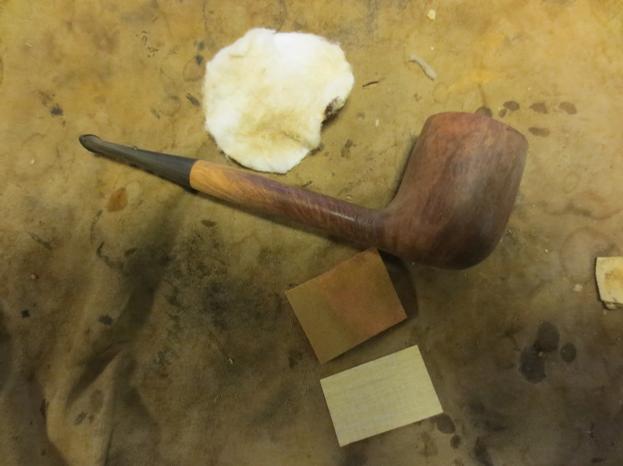
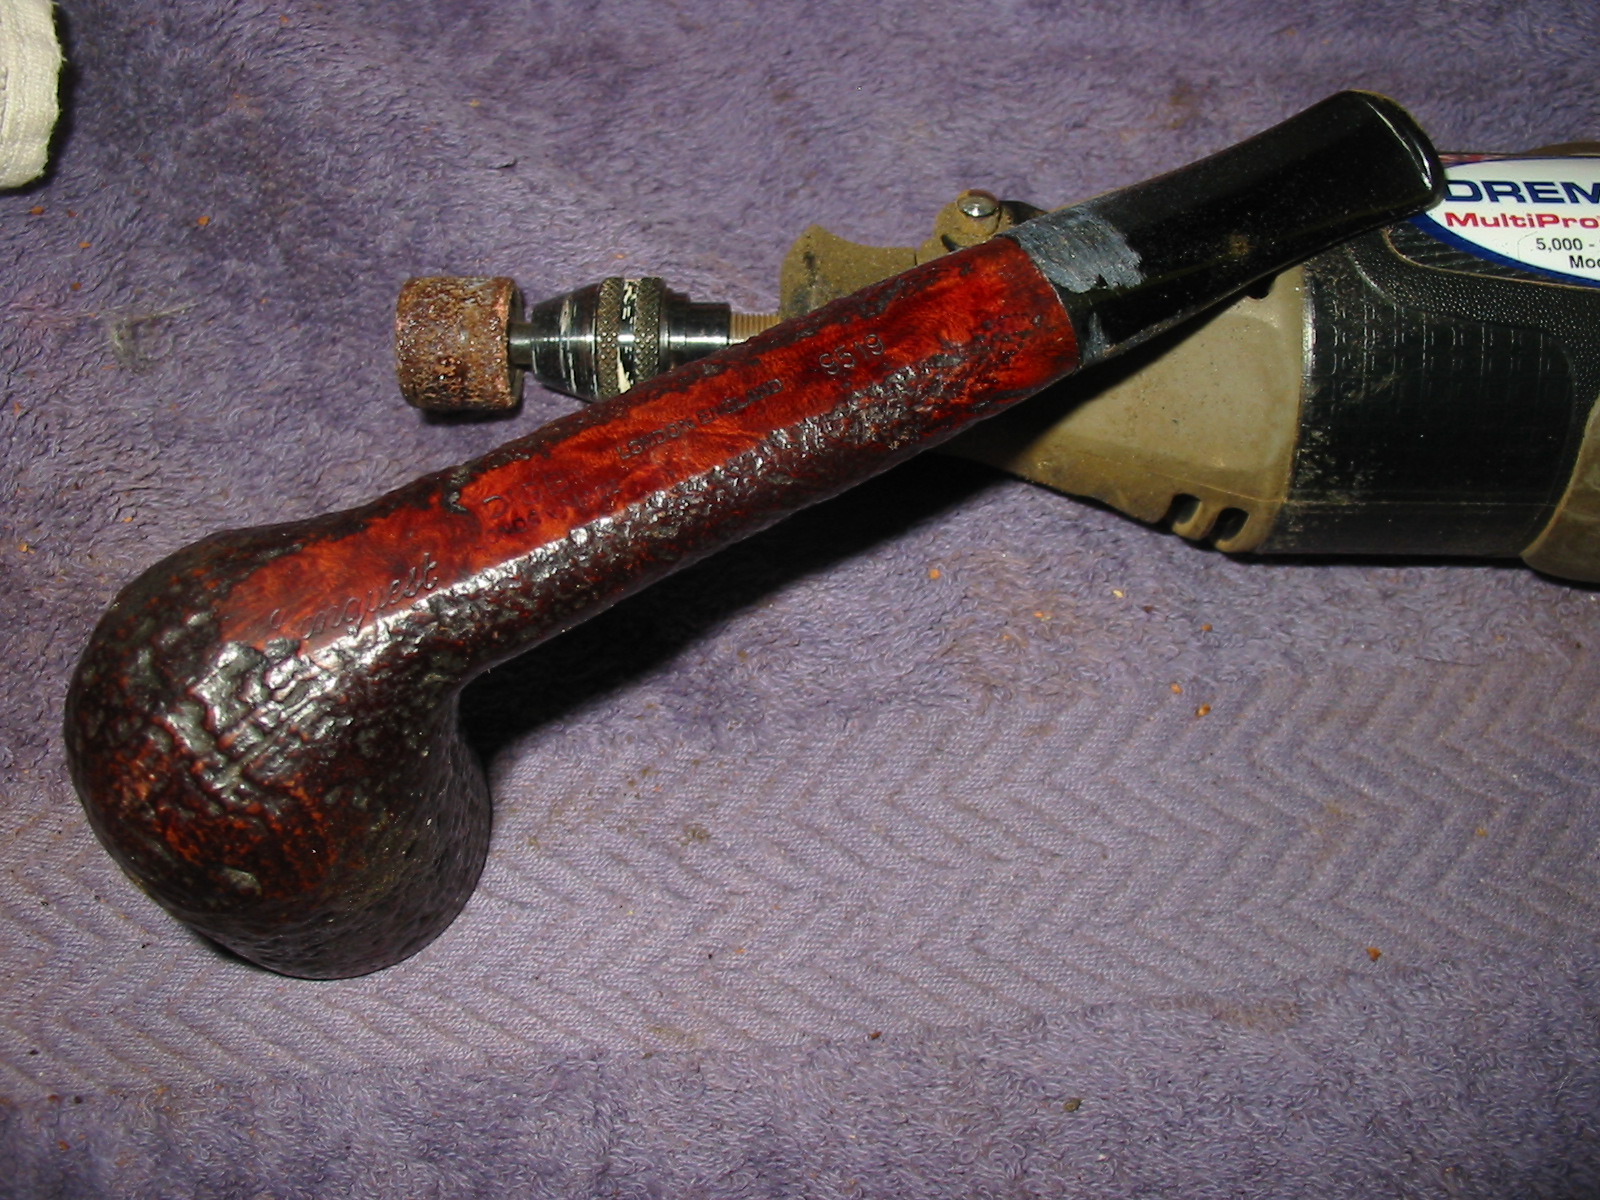
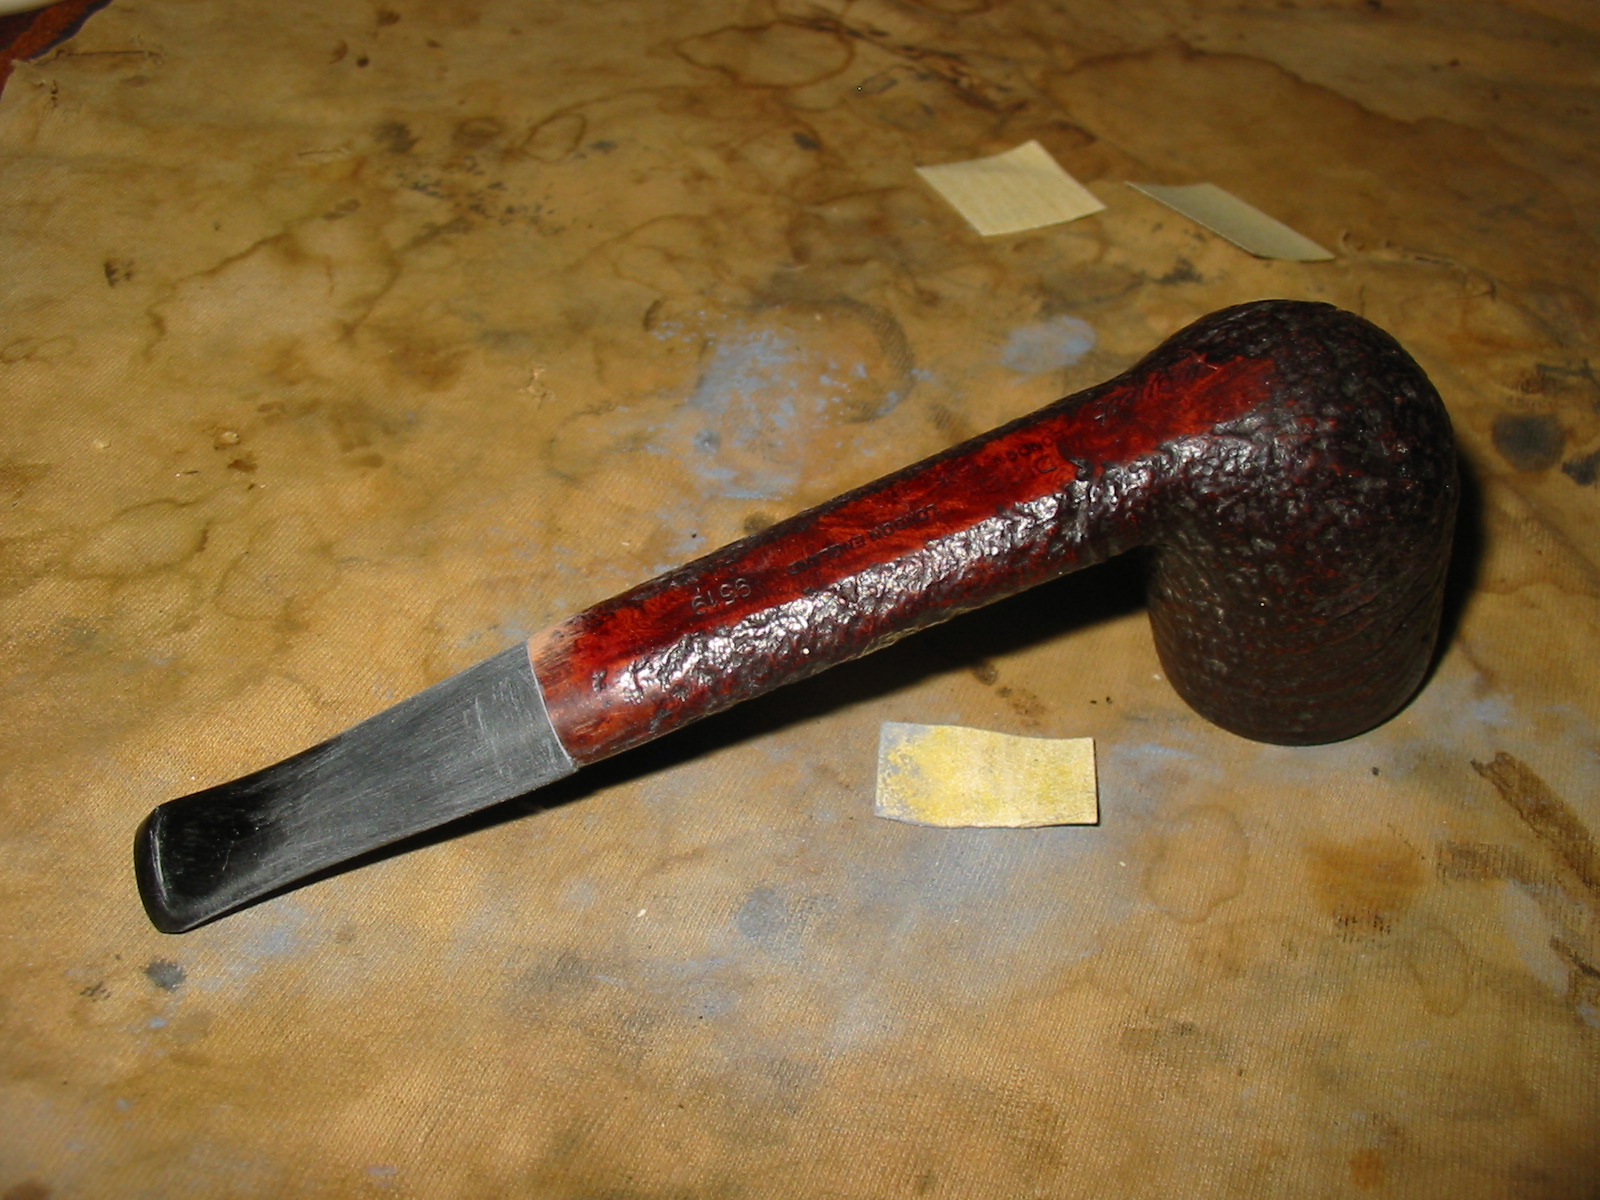
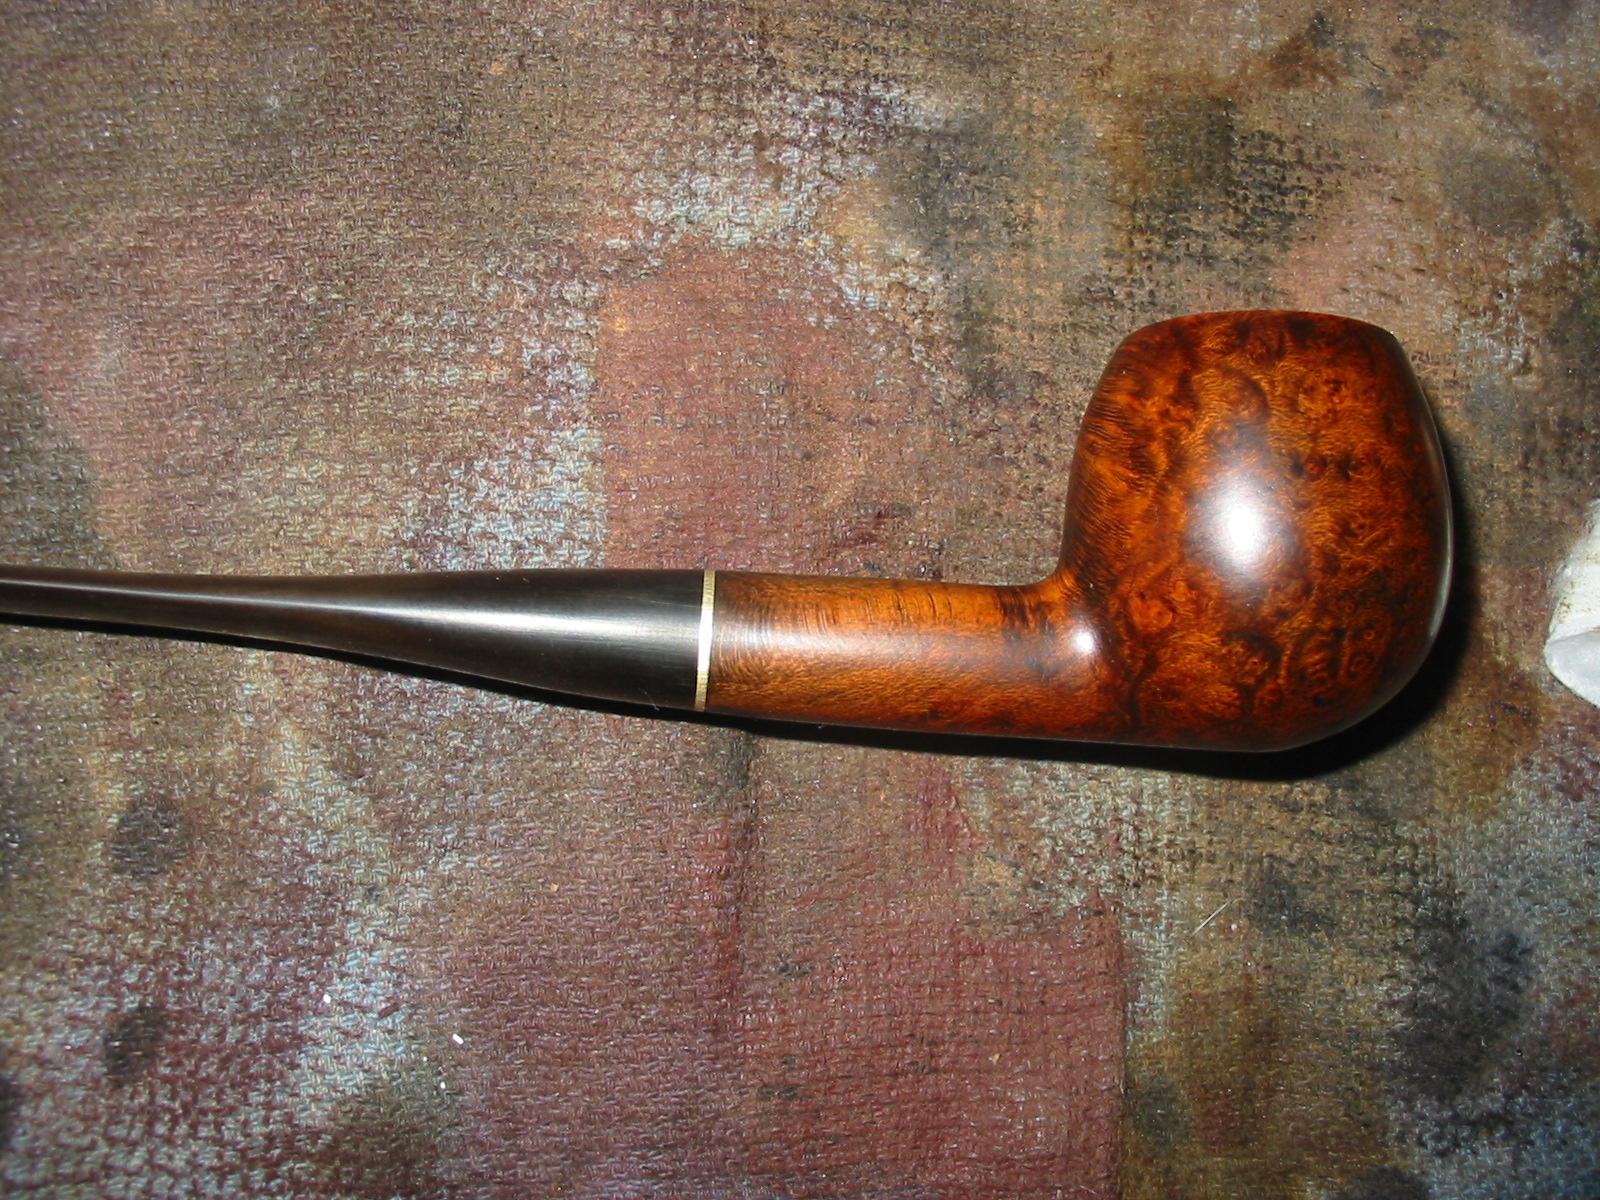
I sanded the area on the top of the shank where the repair extended slightly ahead of the band with 220 grit sandpaper and a medium grit sanding sponge. I followed that by sanding with micromesh sanding pads to smooth out the spot. I wiped down the bowl with acetone on a cotton pad until the surface was clean and free of debris and dust. I stained it with medium brown aniline stain that was thinned 2:1 with Isopropyl alcohol. I wanted the colour to match the tones that were present on the other Comoy’s that I had from this era and the photos I had seen on line. I applied the stain and flamed it. In the photos below the shine is from hand buffing the pipe with a soft cotton cloth.
IMG_4558

IMG_4559

IMG_4562

IMG_4563

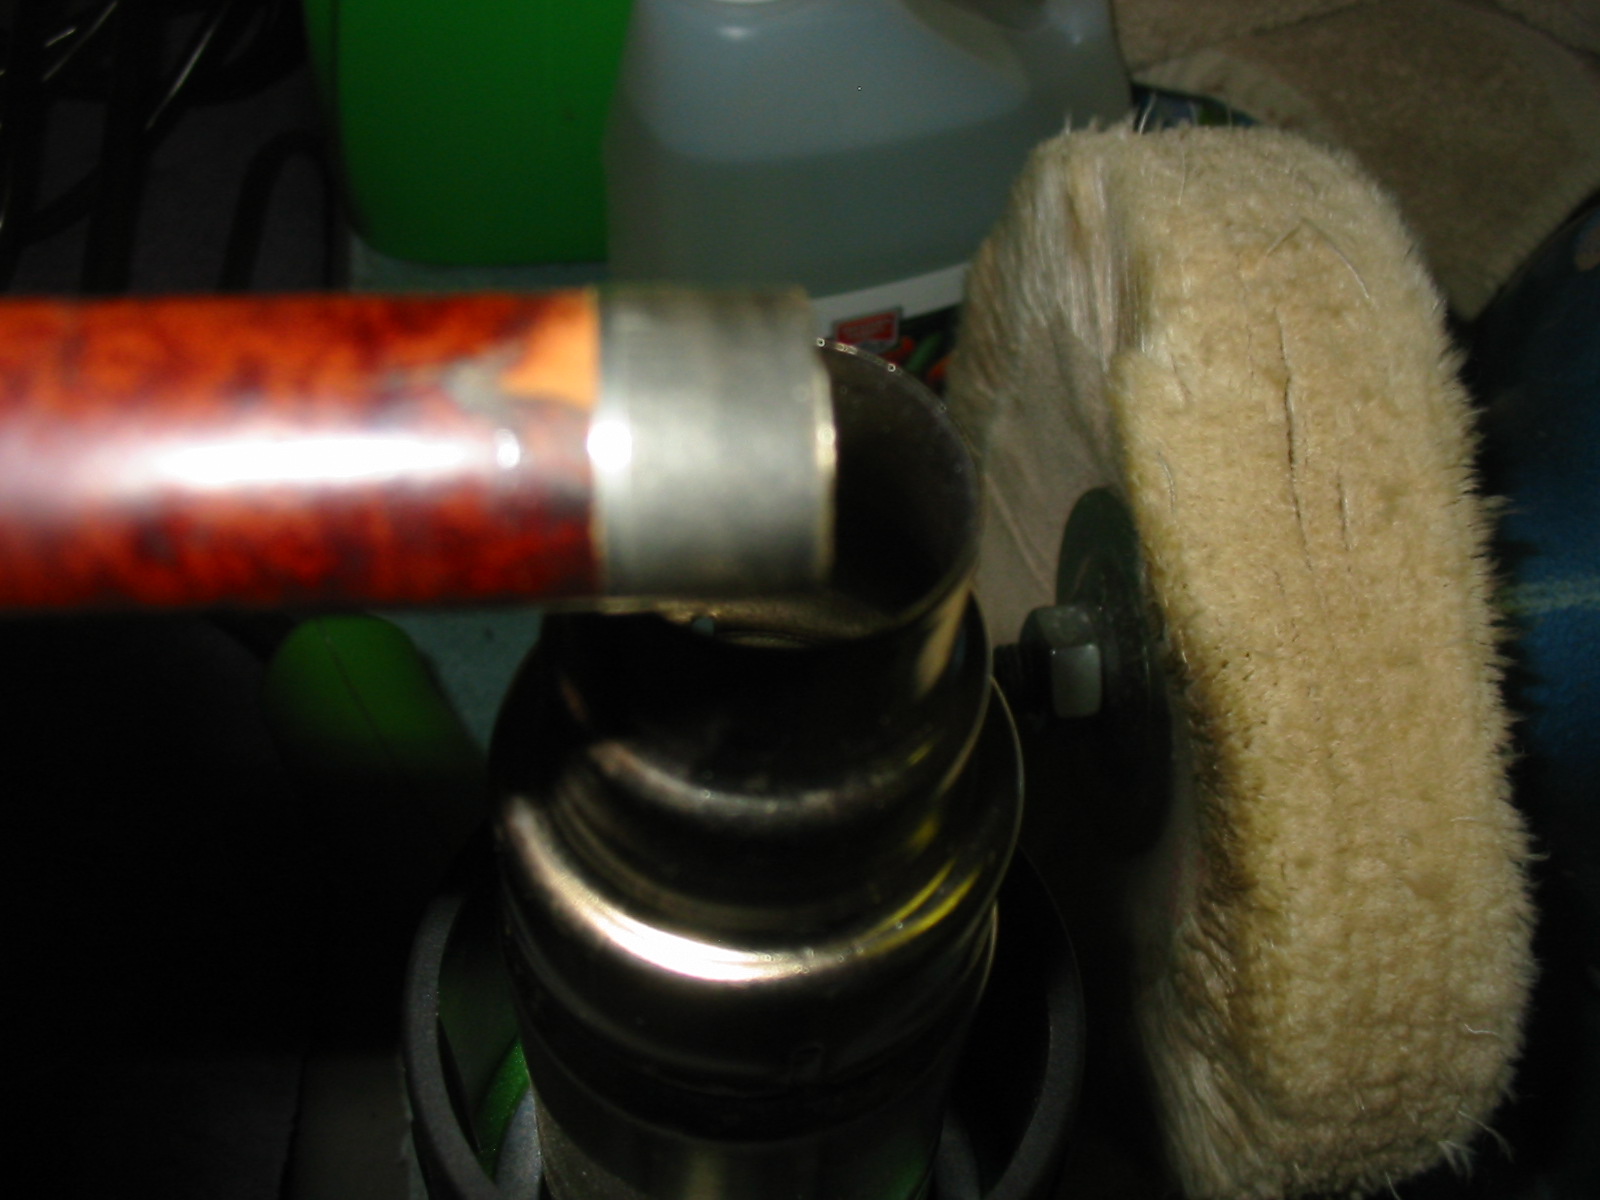
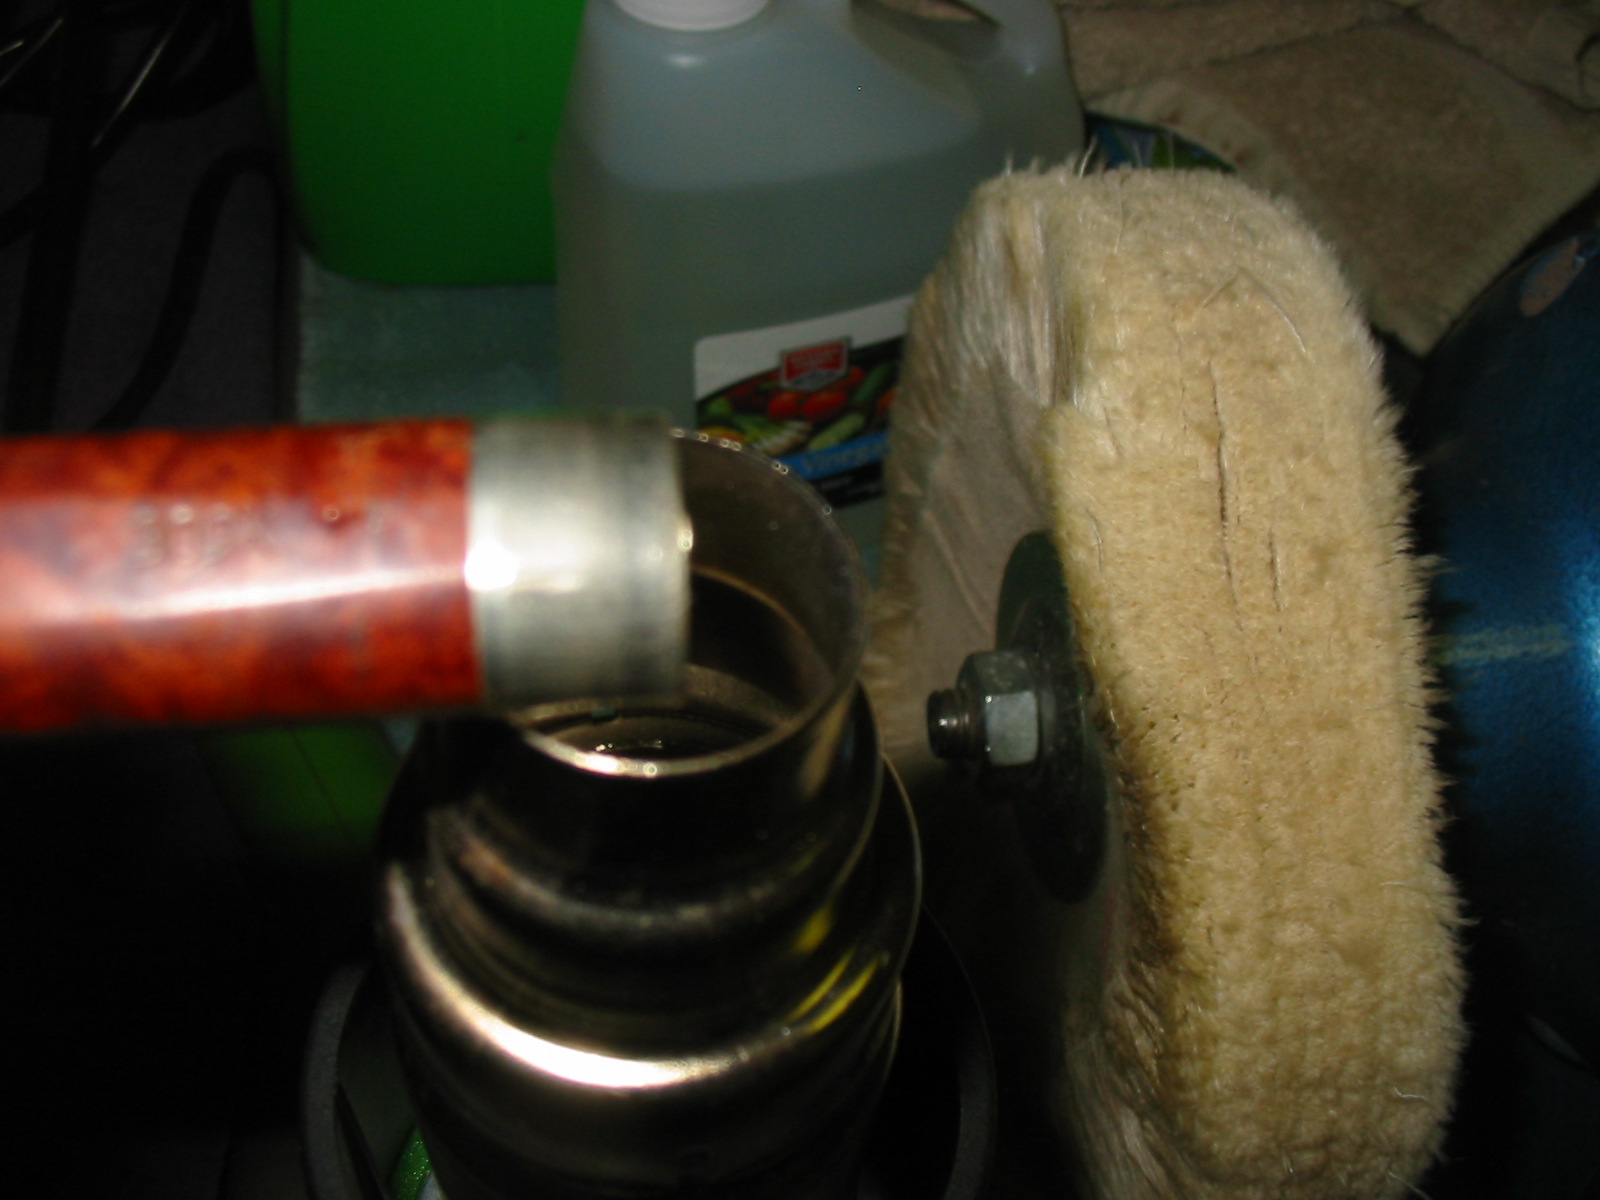
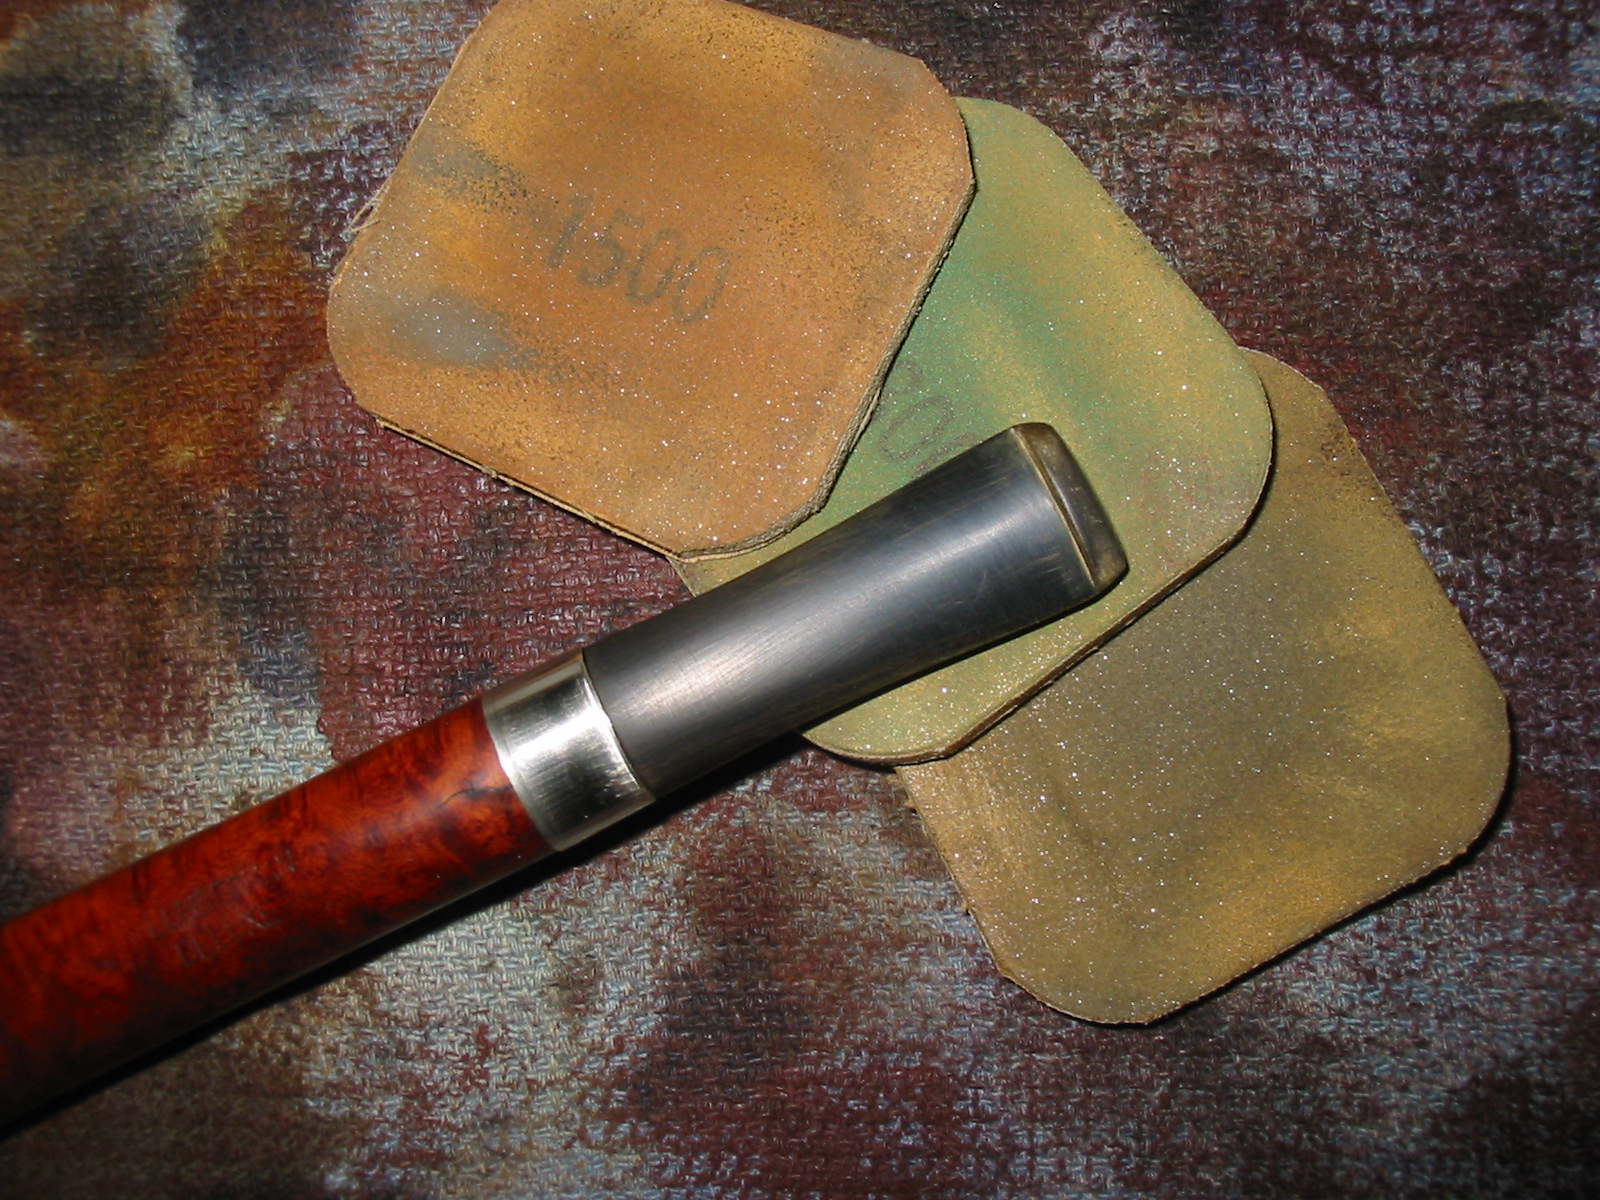
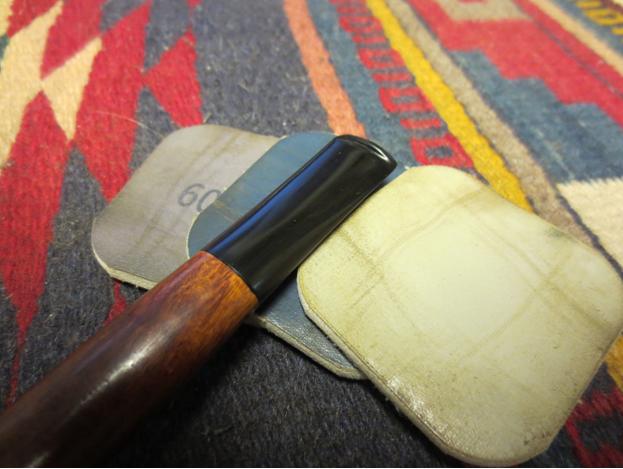
I reinserted the stem and worked on the band and the stem with 1500 grit micromesh to begin the process of removing scratches and polishing. I took the pipe to the buffer and gave it a quick buff with red Tripoli and White Diamond.
IMG_4566

IMG_4567

IMG_4568

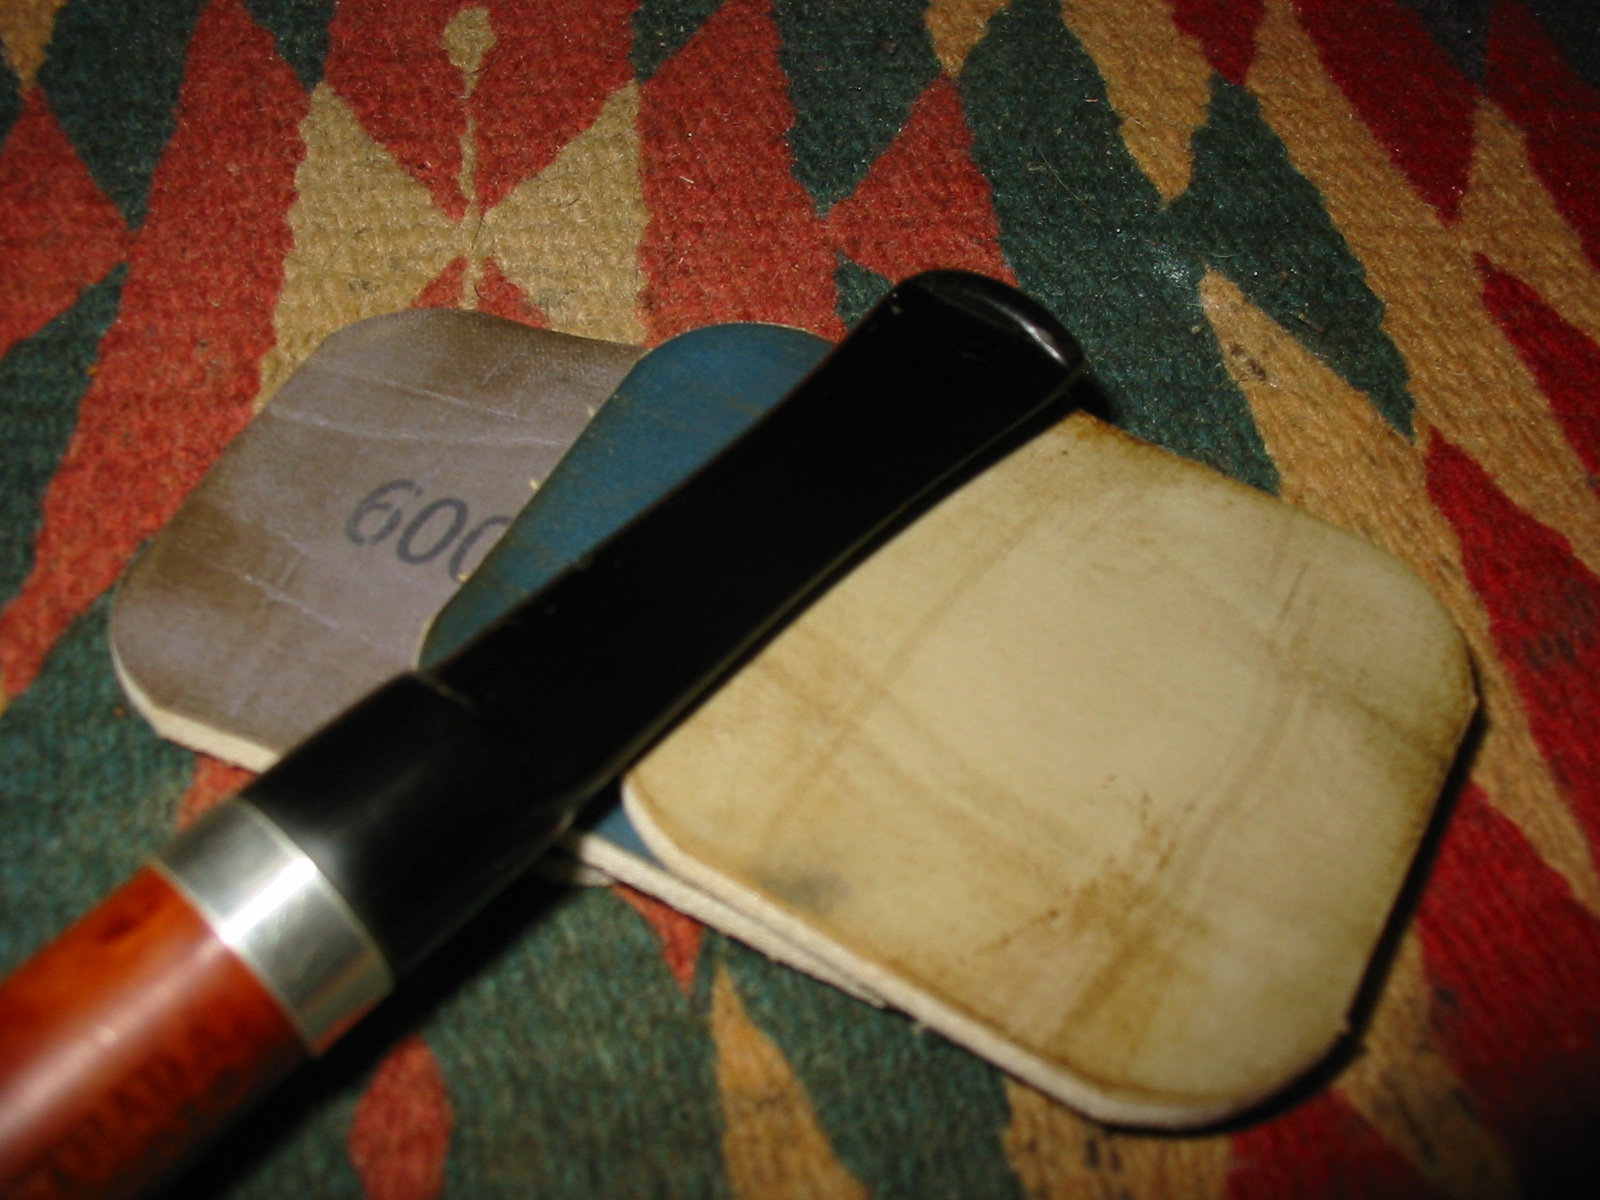
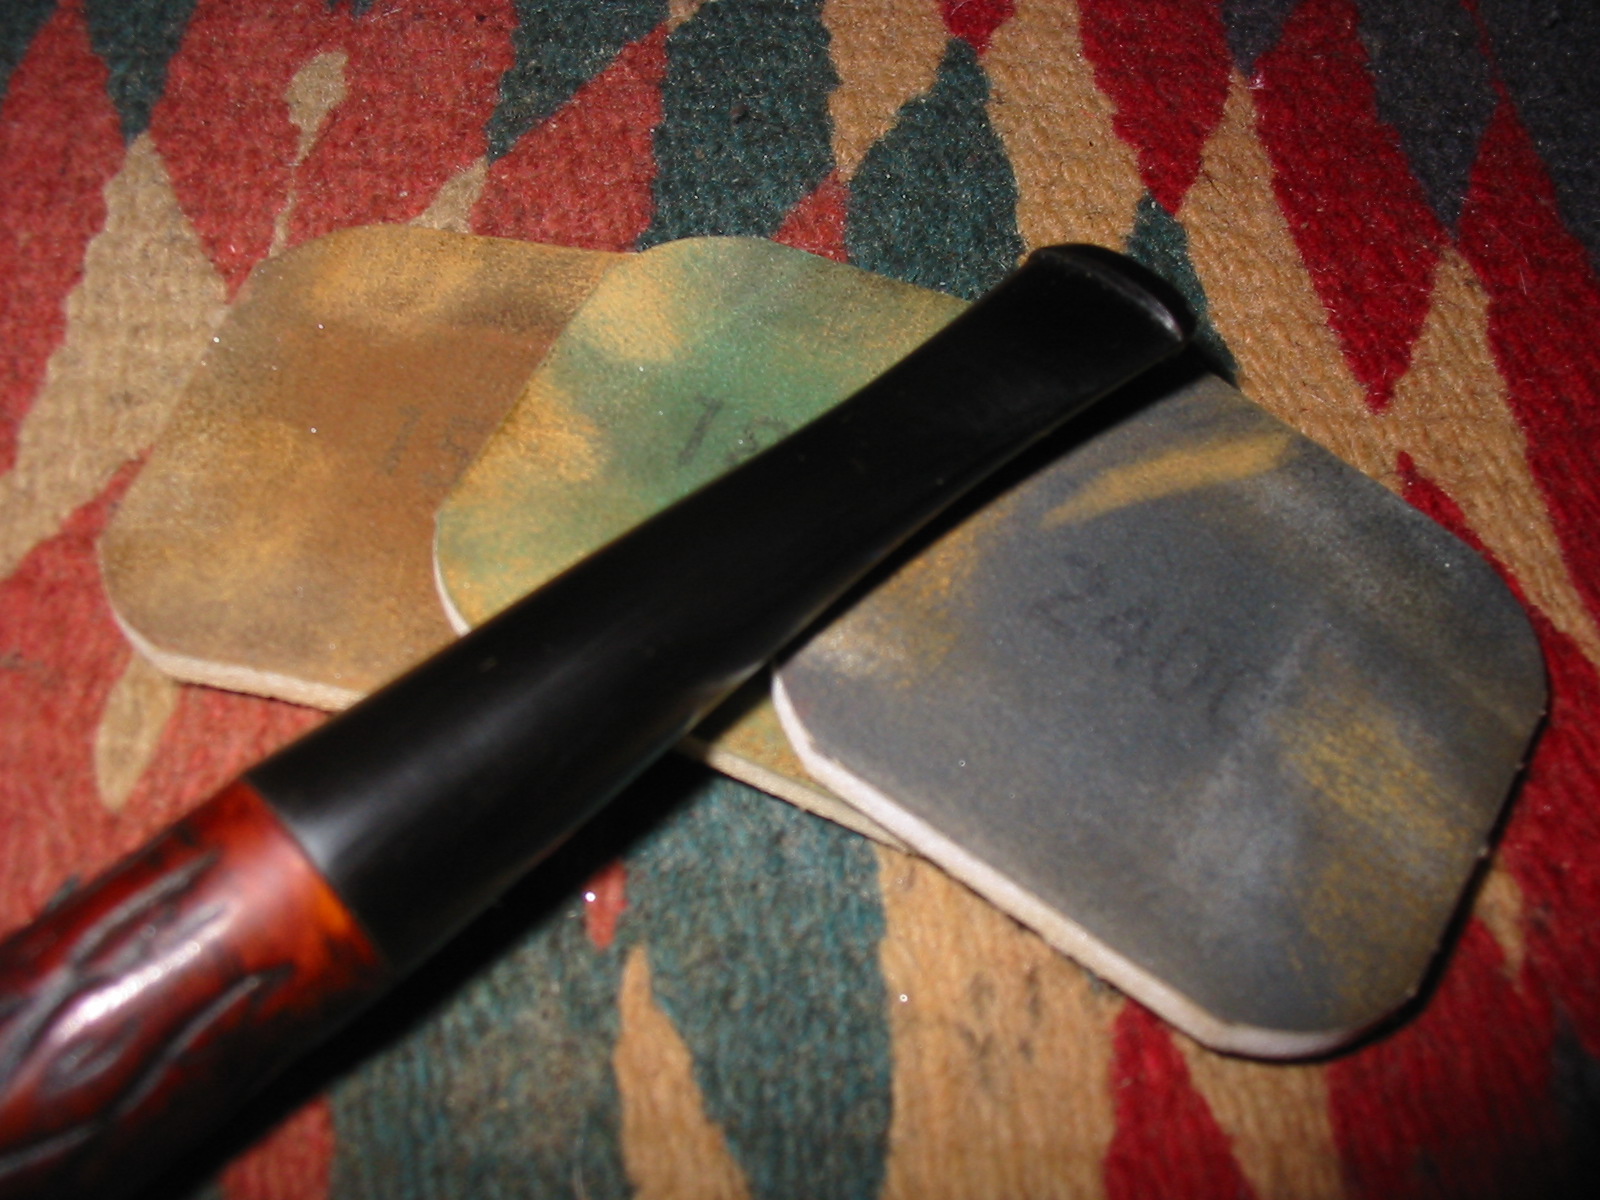
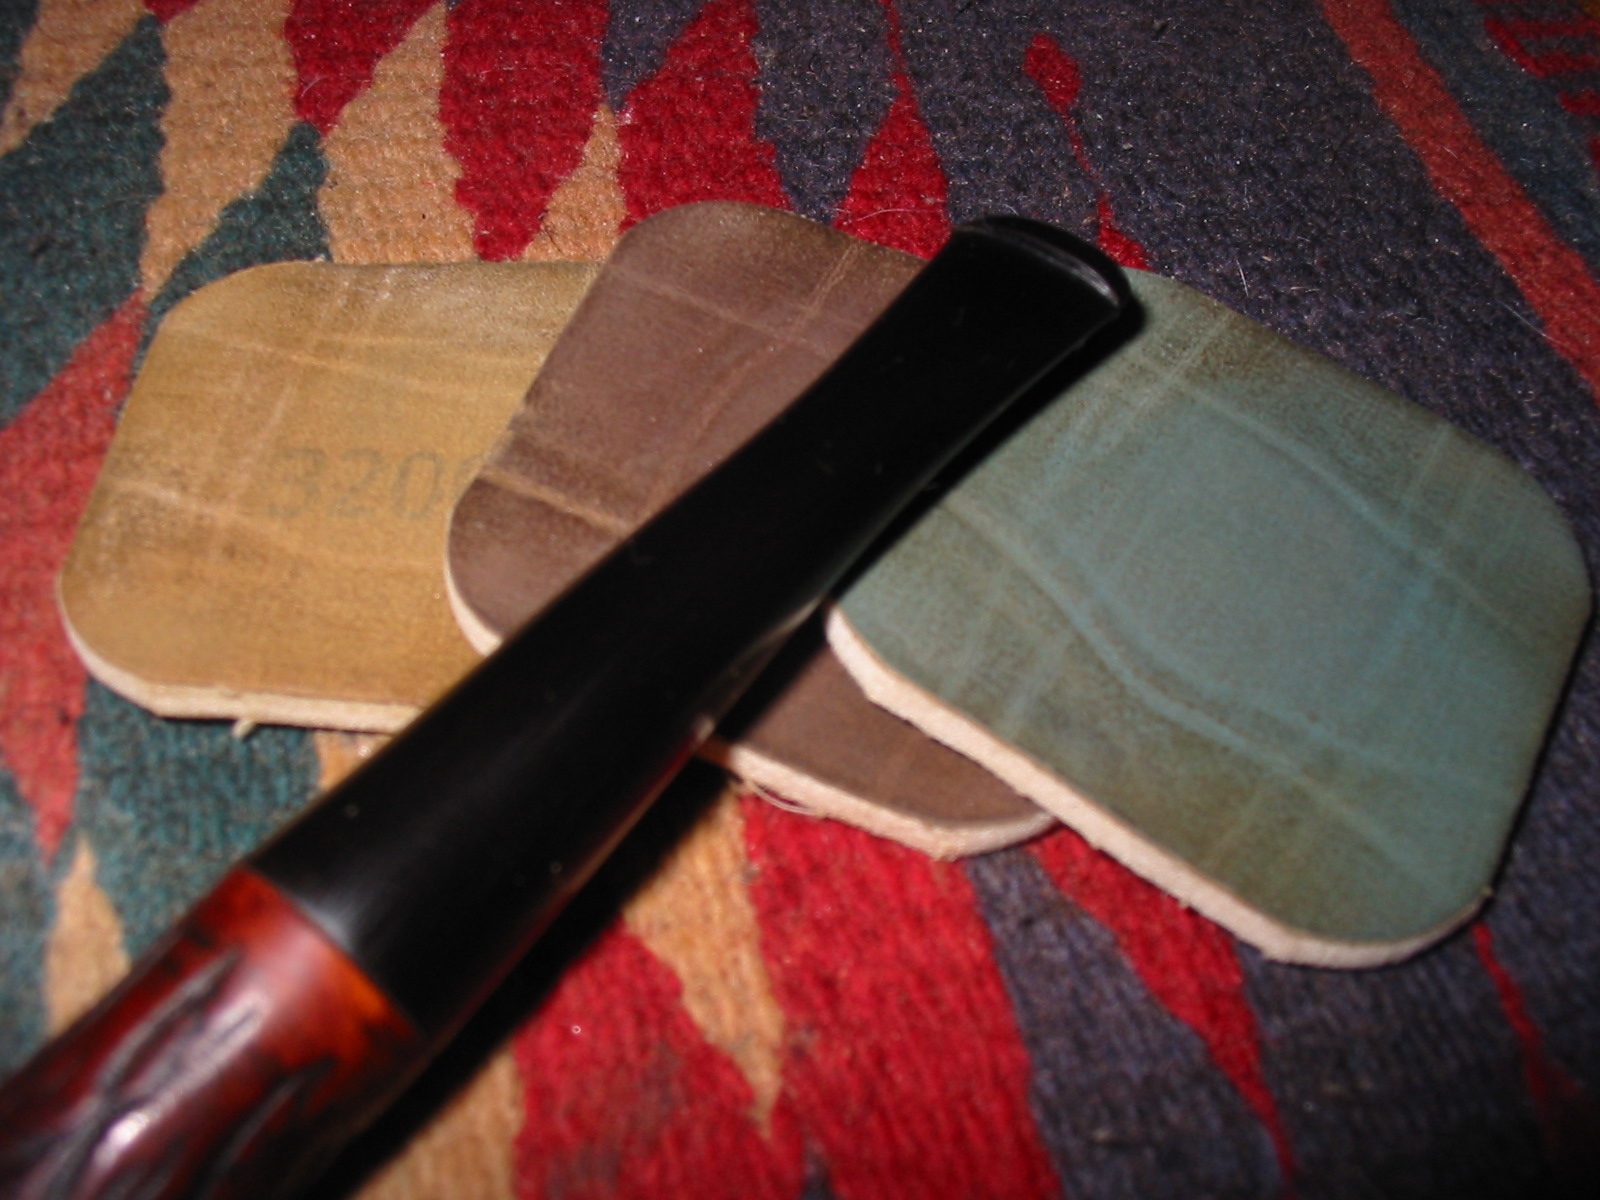
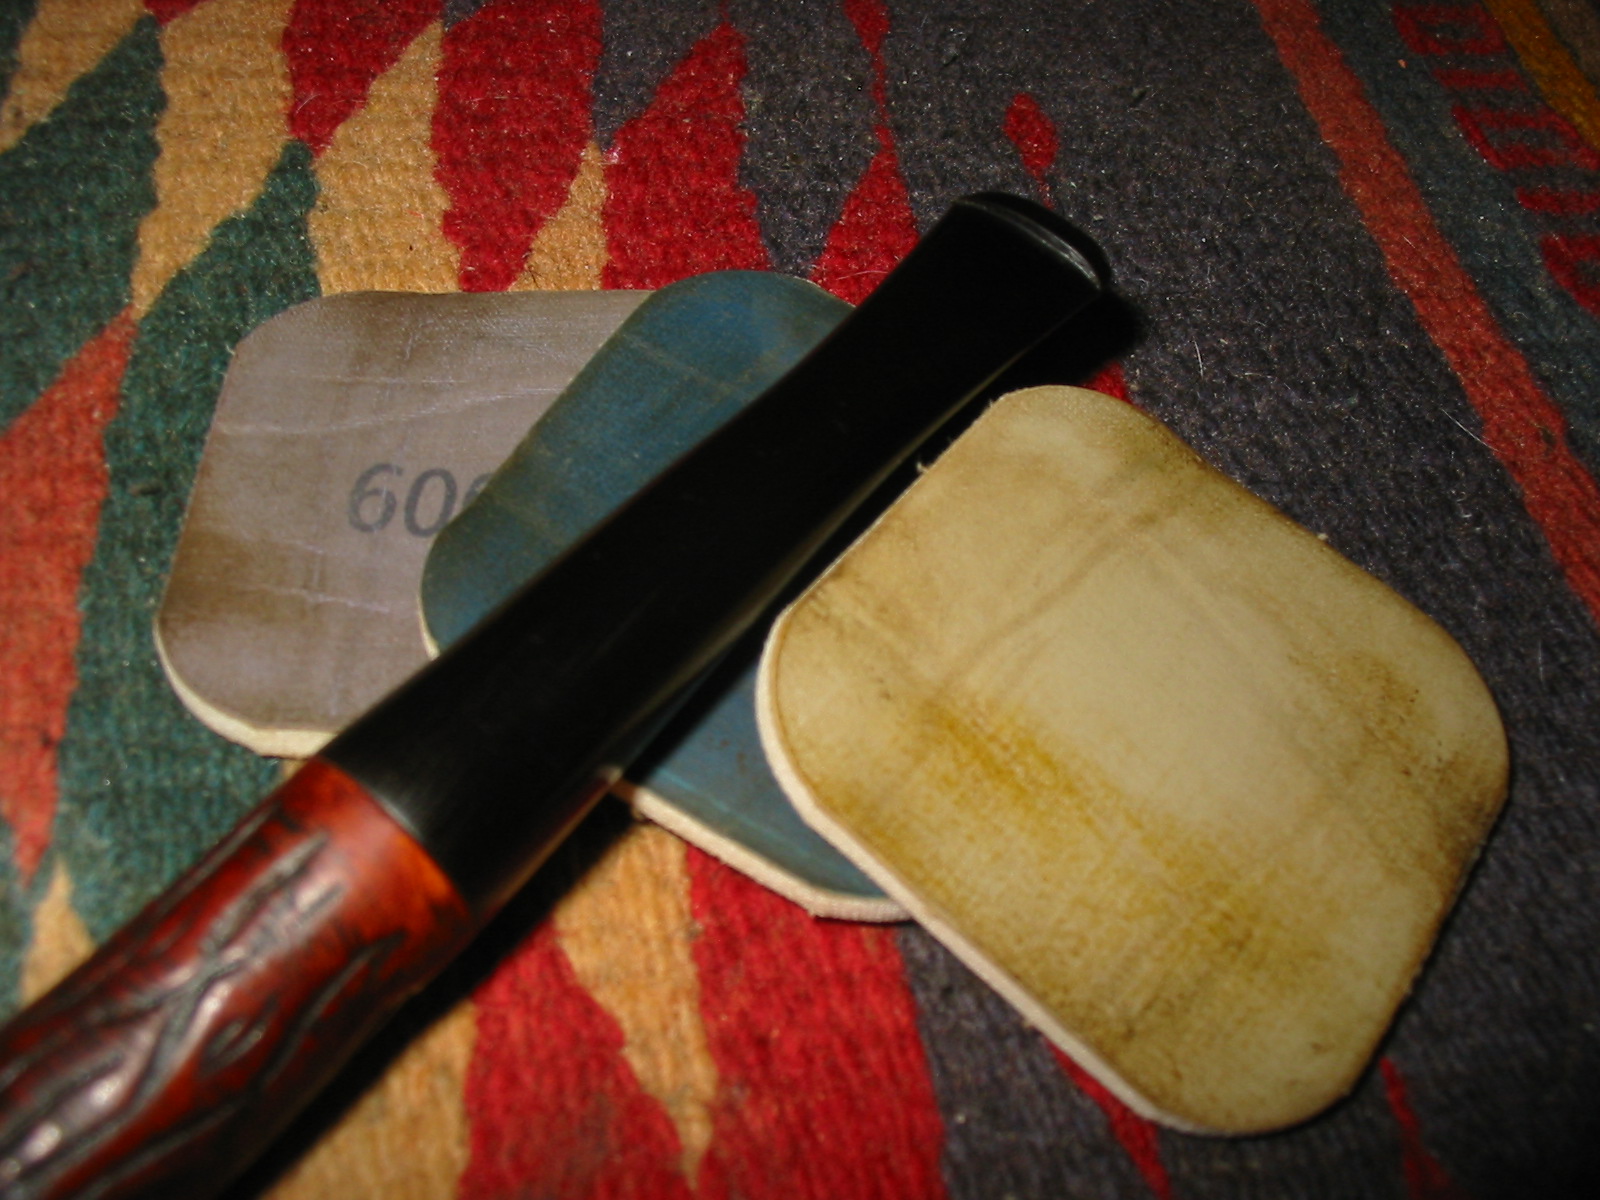
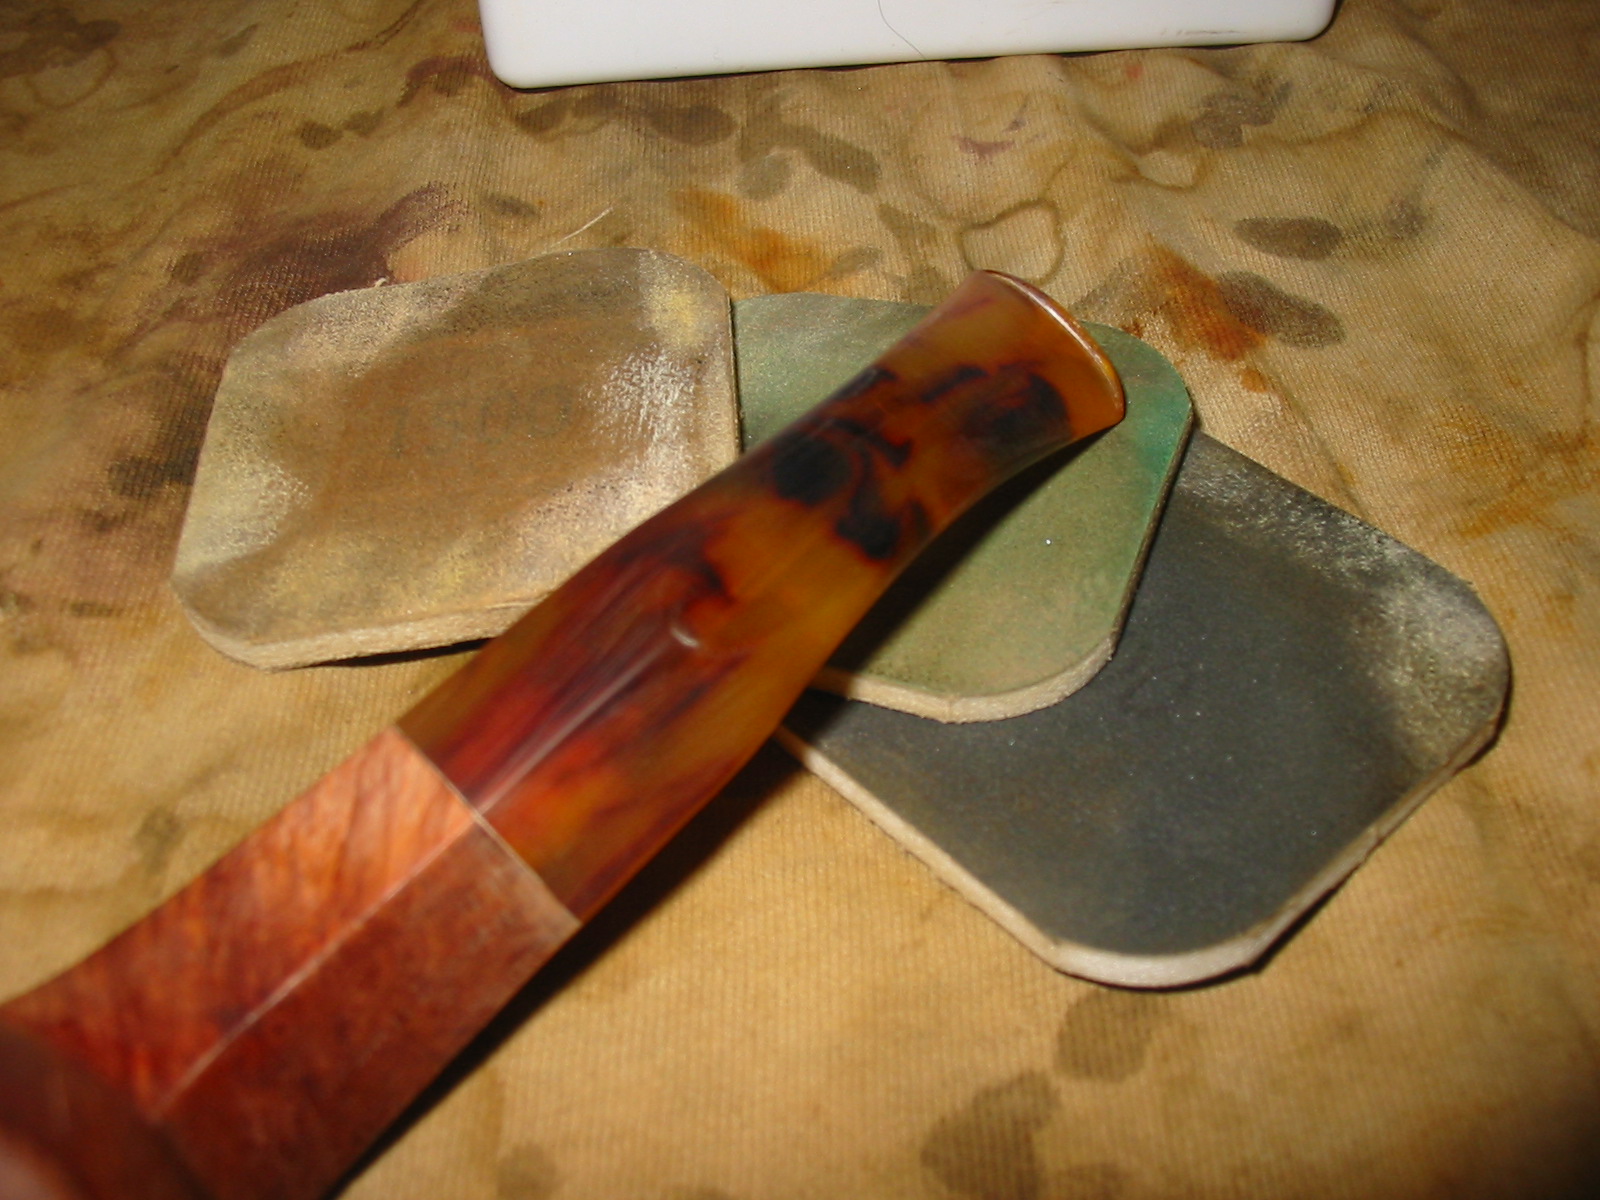
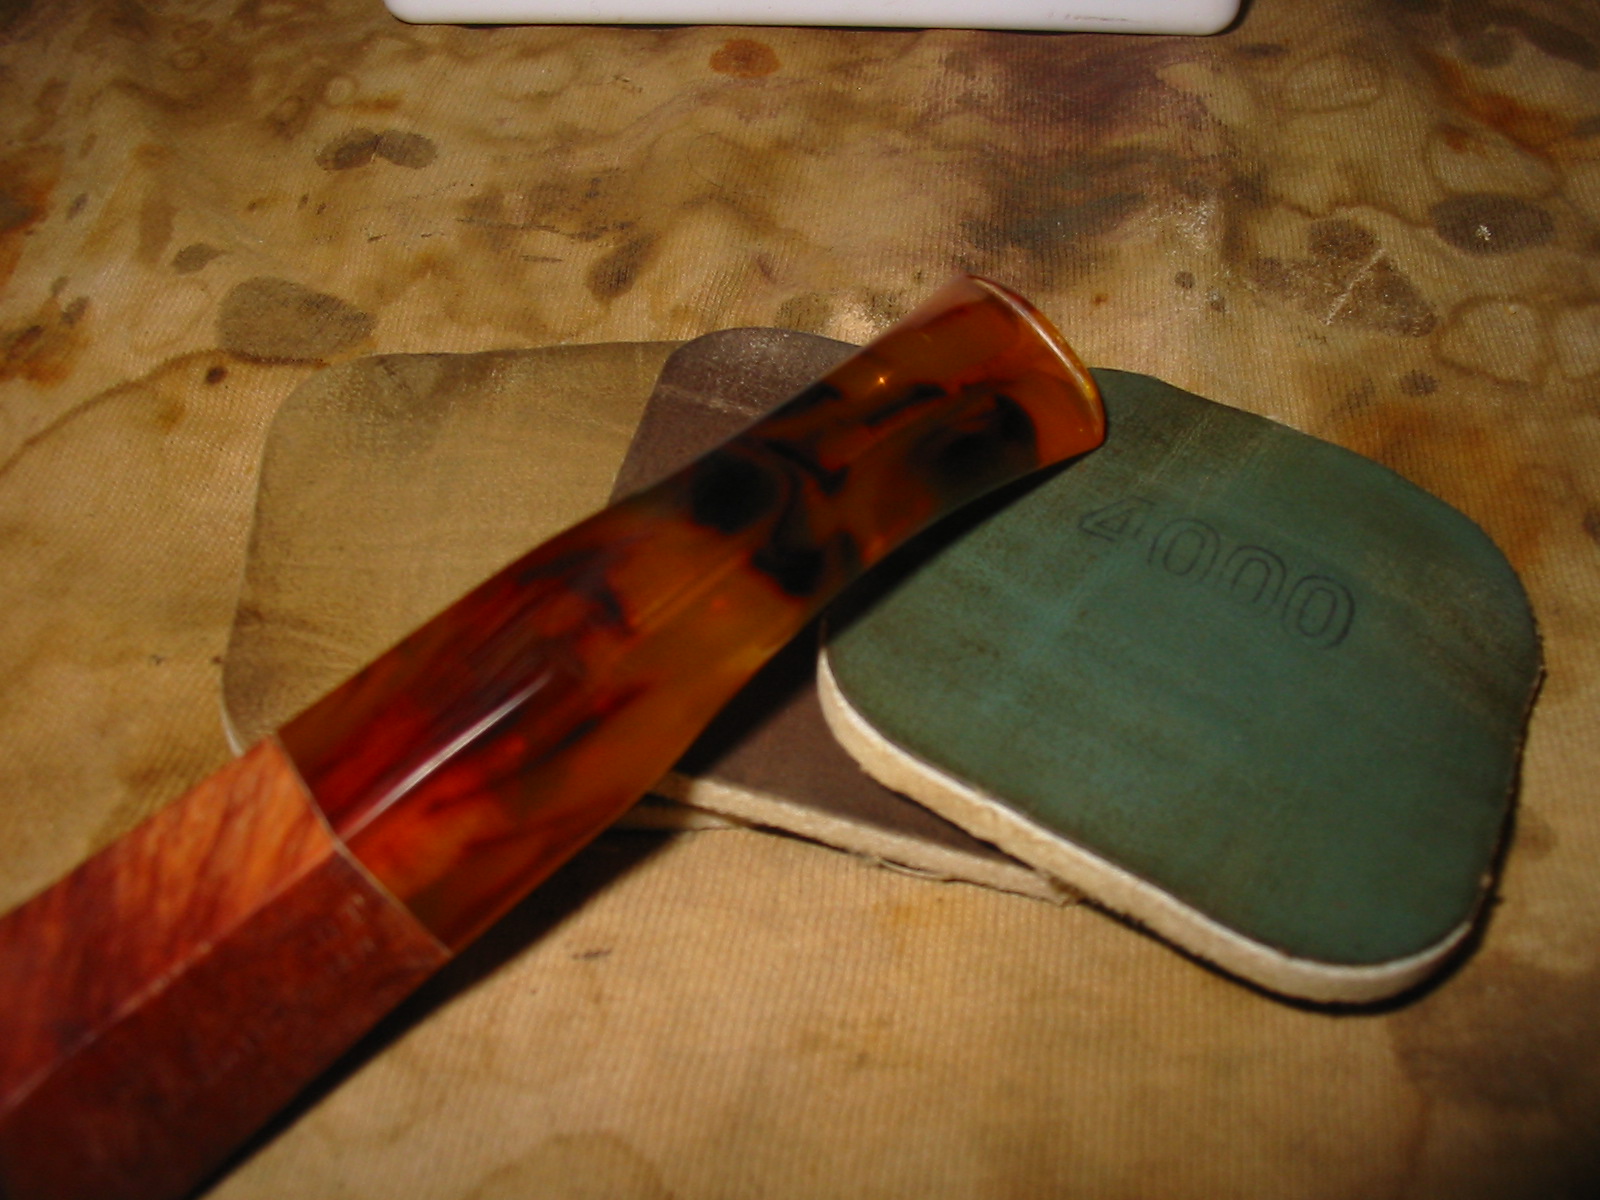
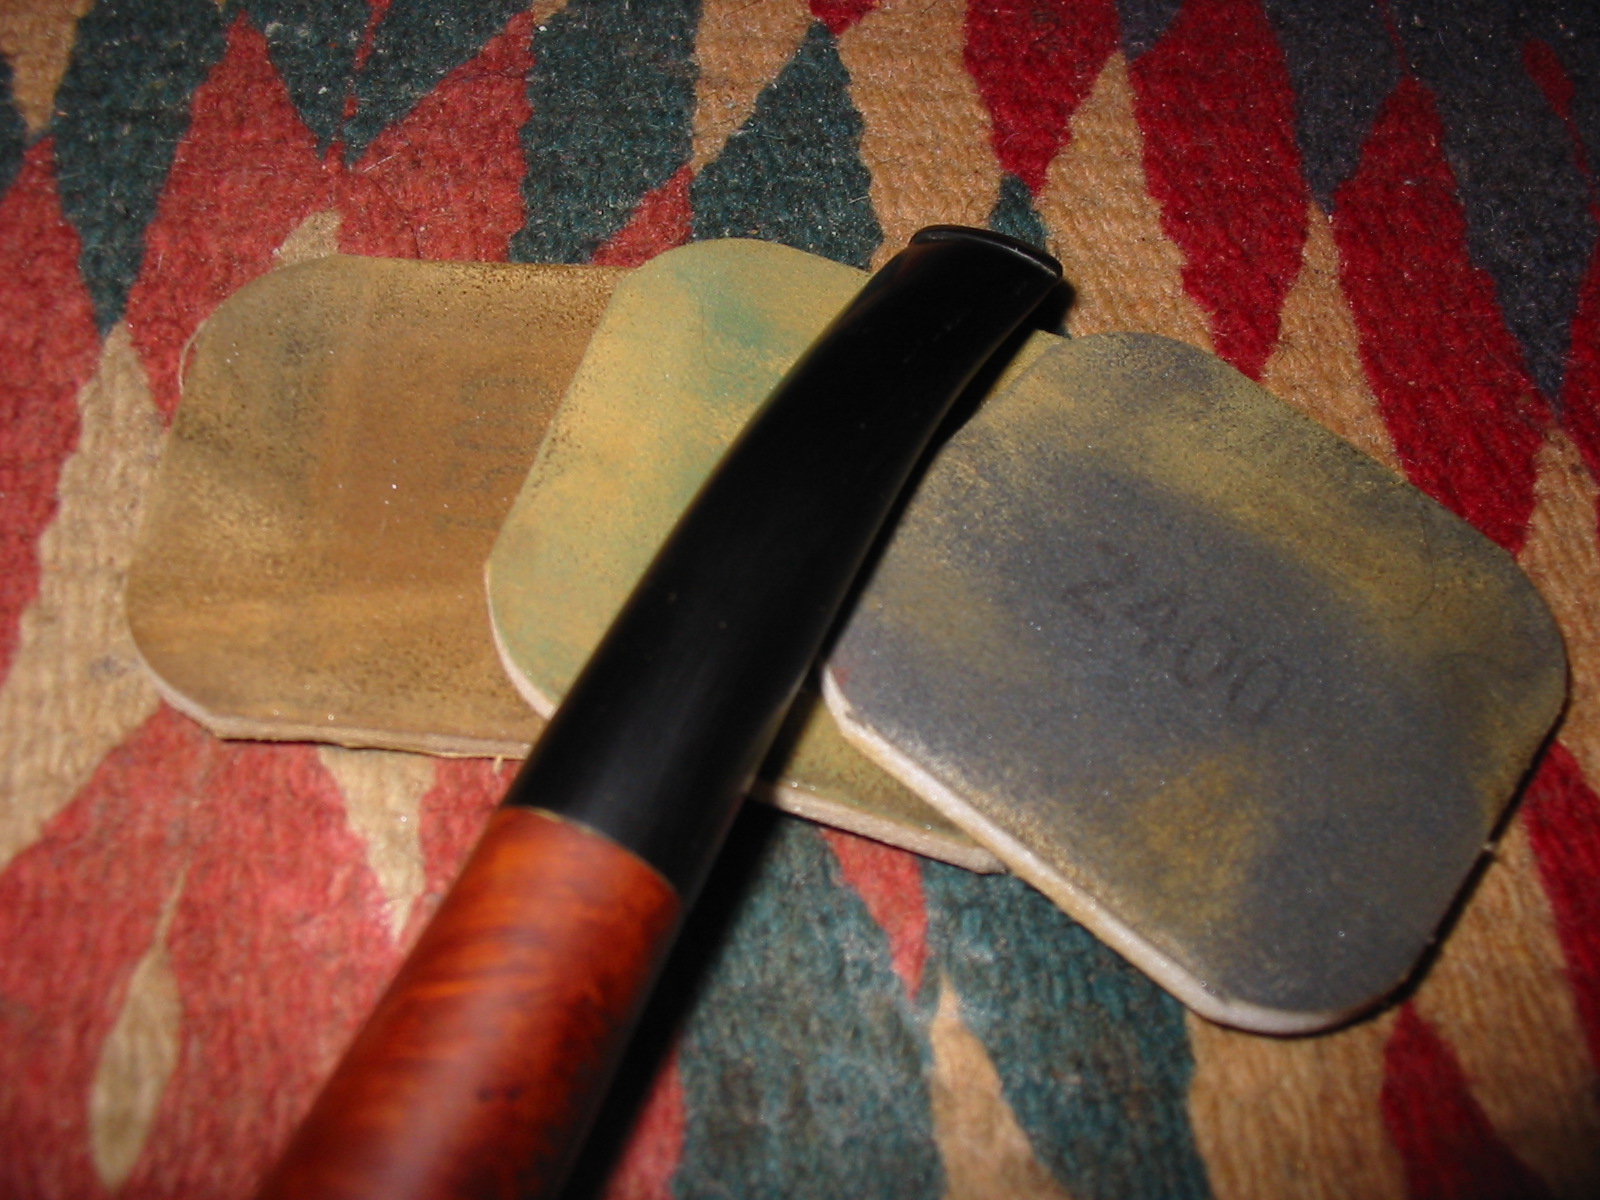
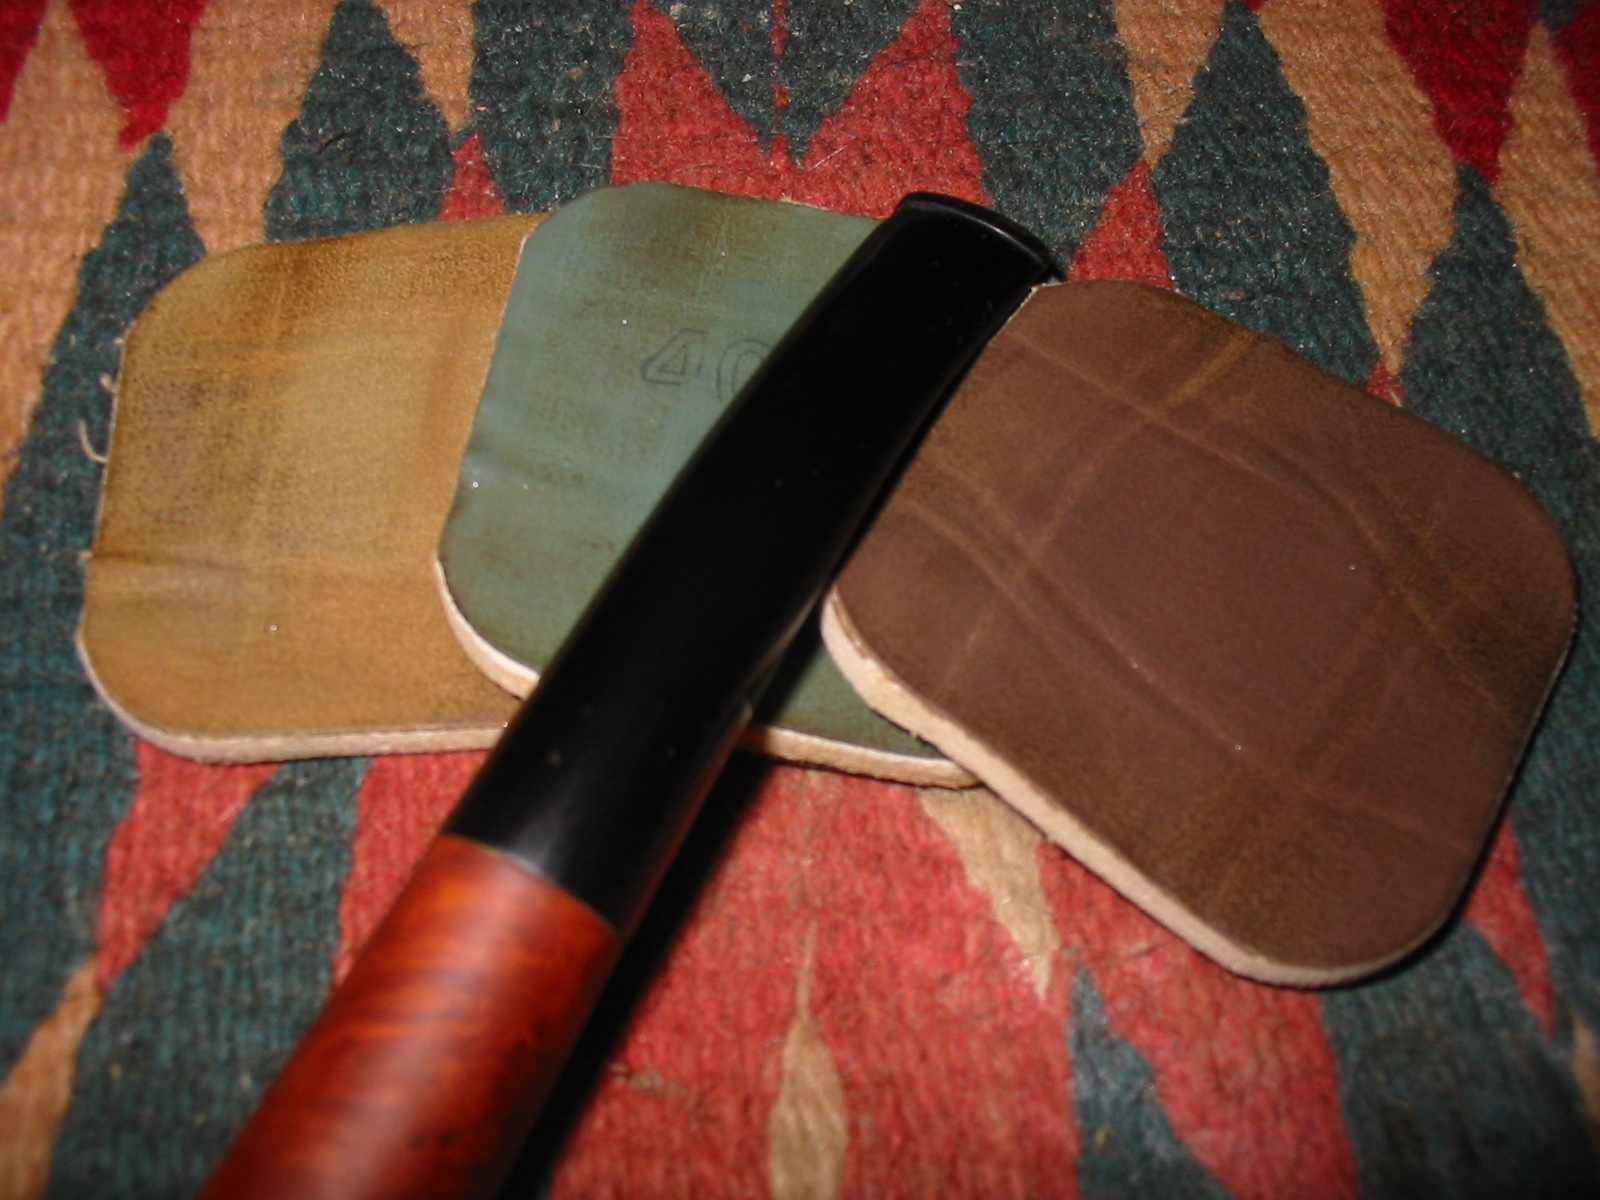
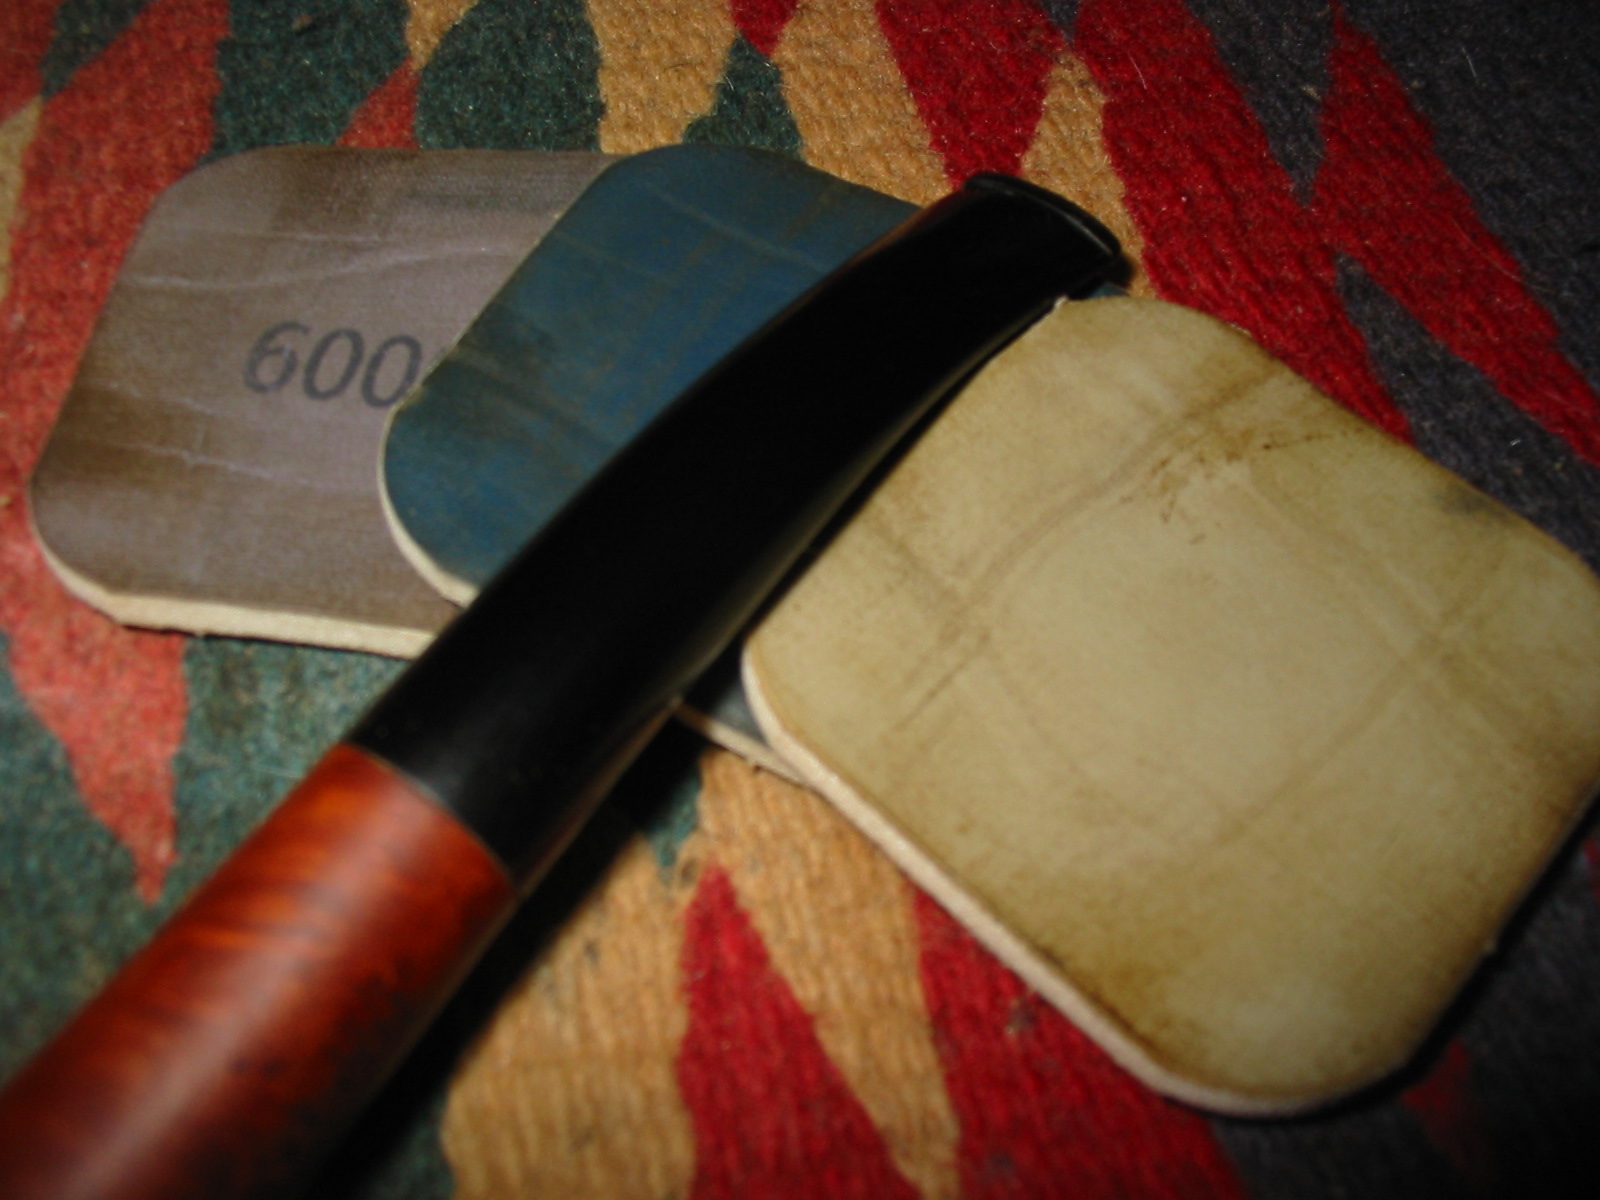
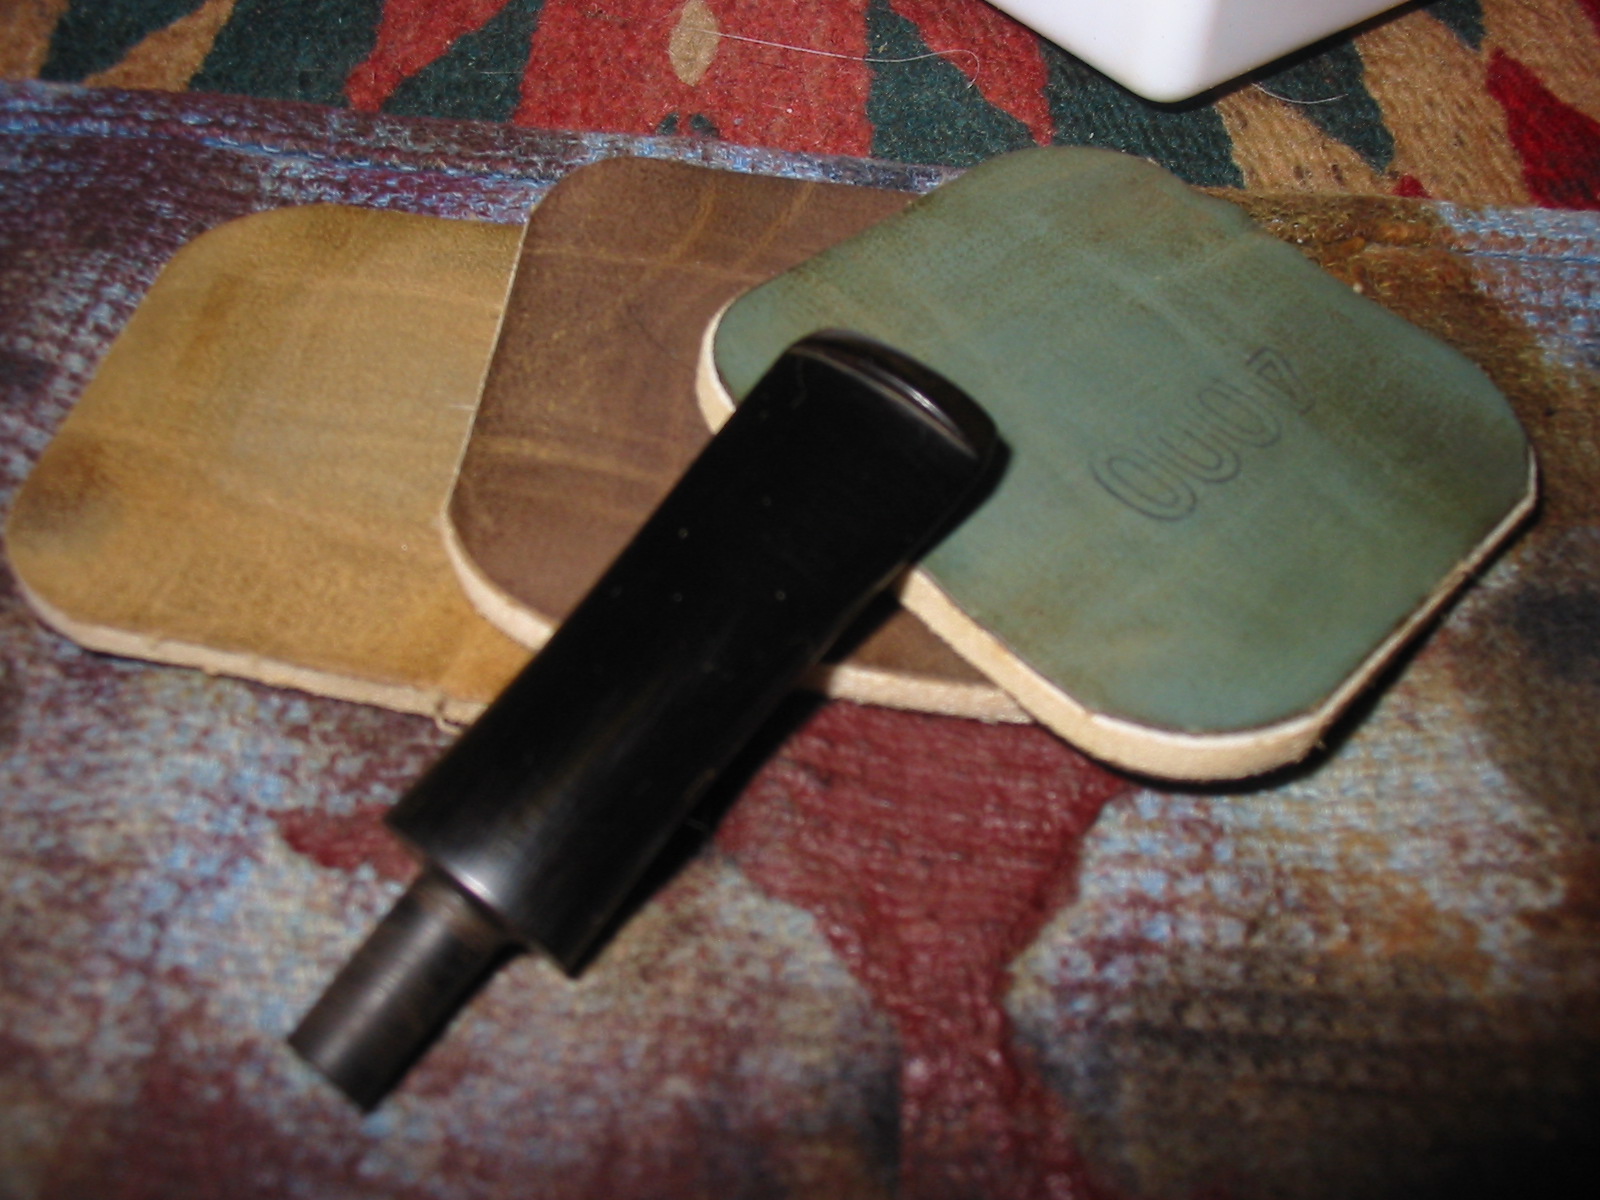
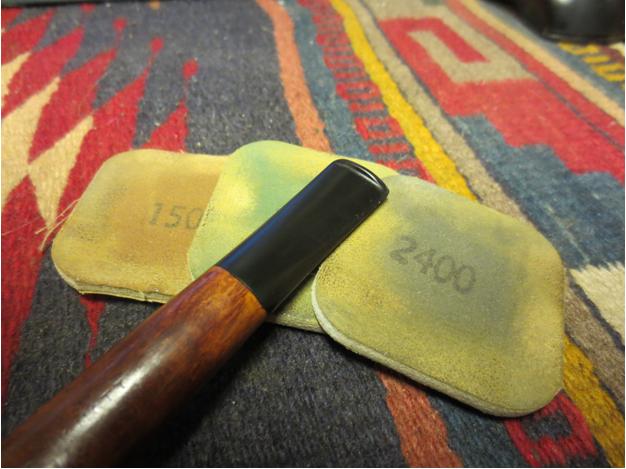
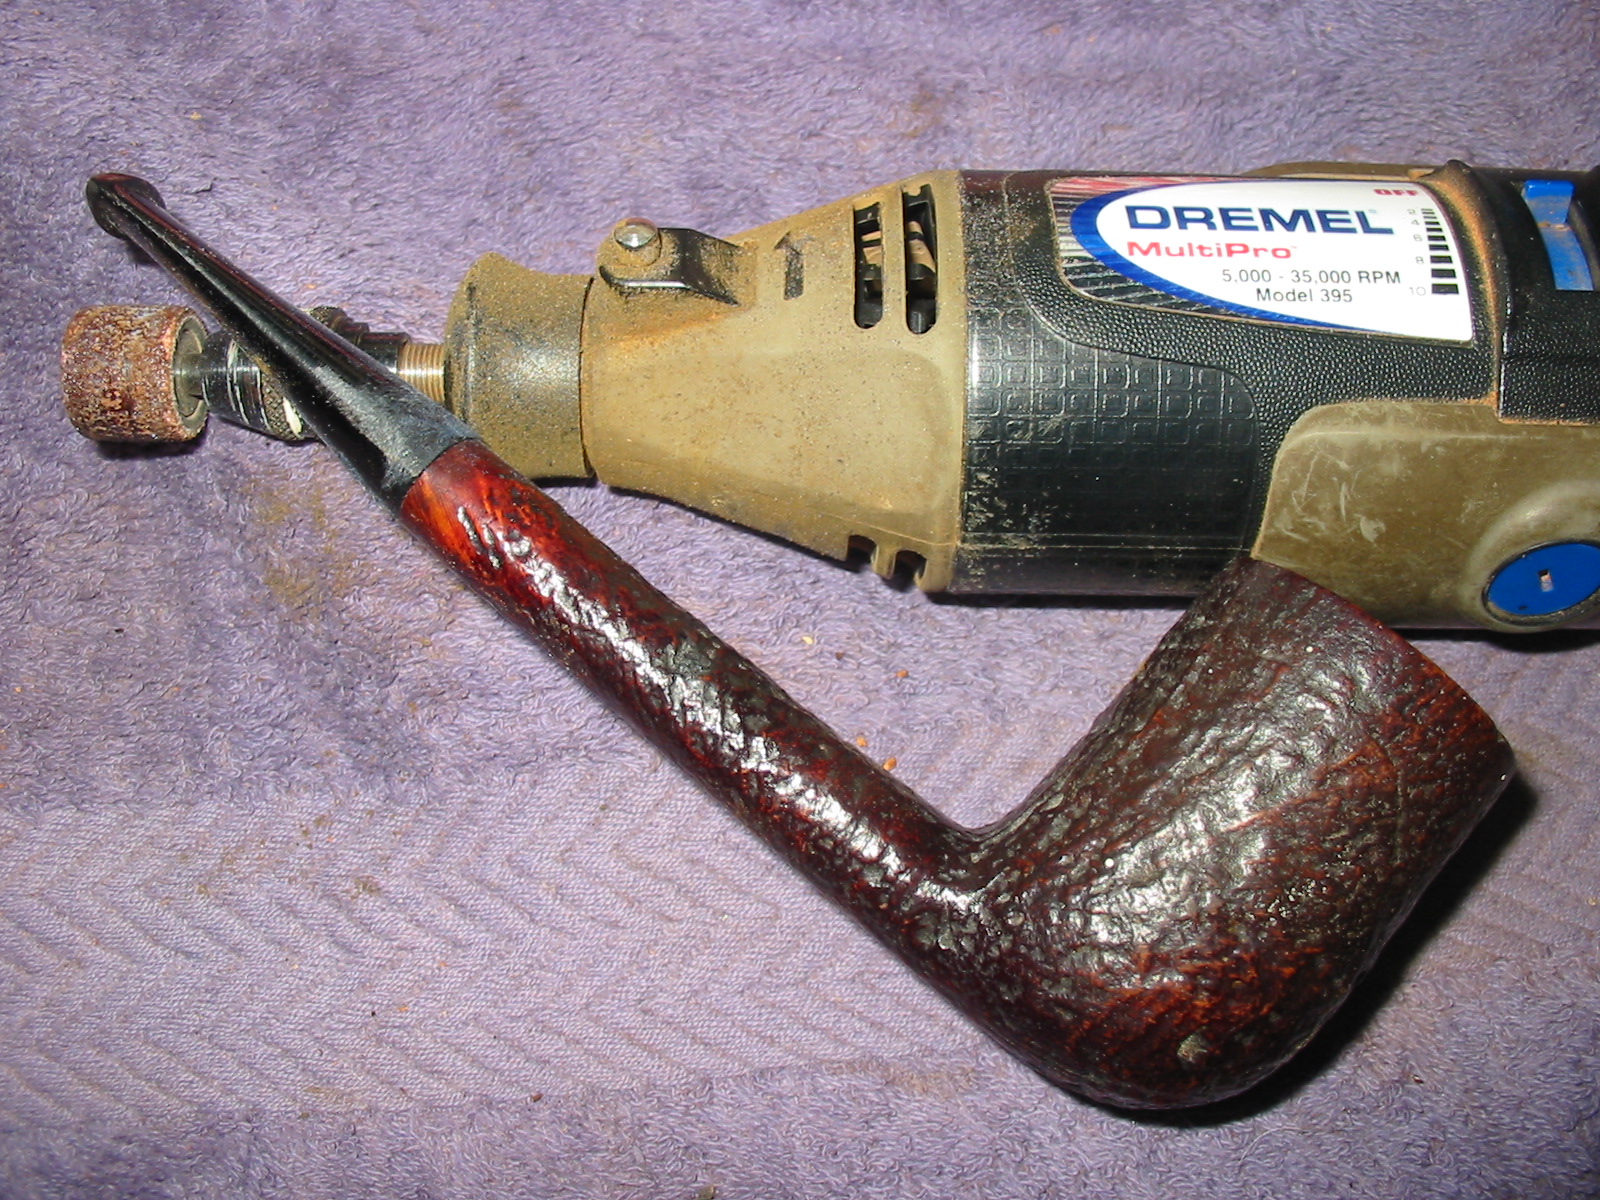
I worked on the stem with my usual array of micromesh sanding pads – wet sanding with 1500-2400 grit pads and dry sanding with 3200-12,000 grit pads.
IMG_4571

IMG_4570

IMG_4569

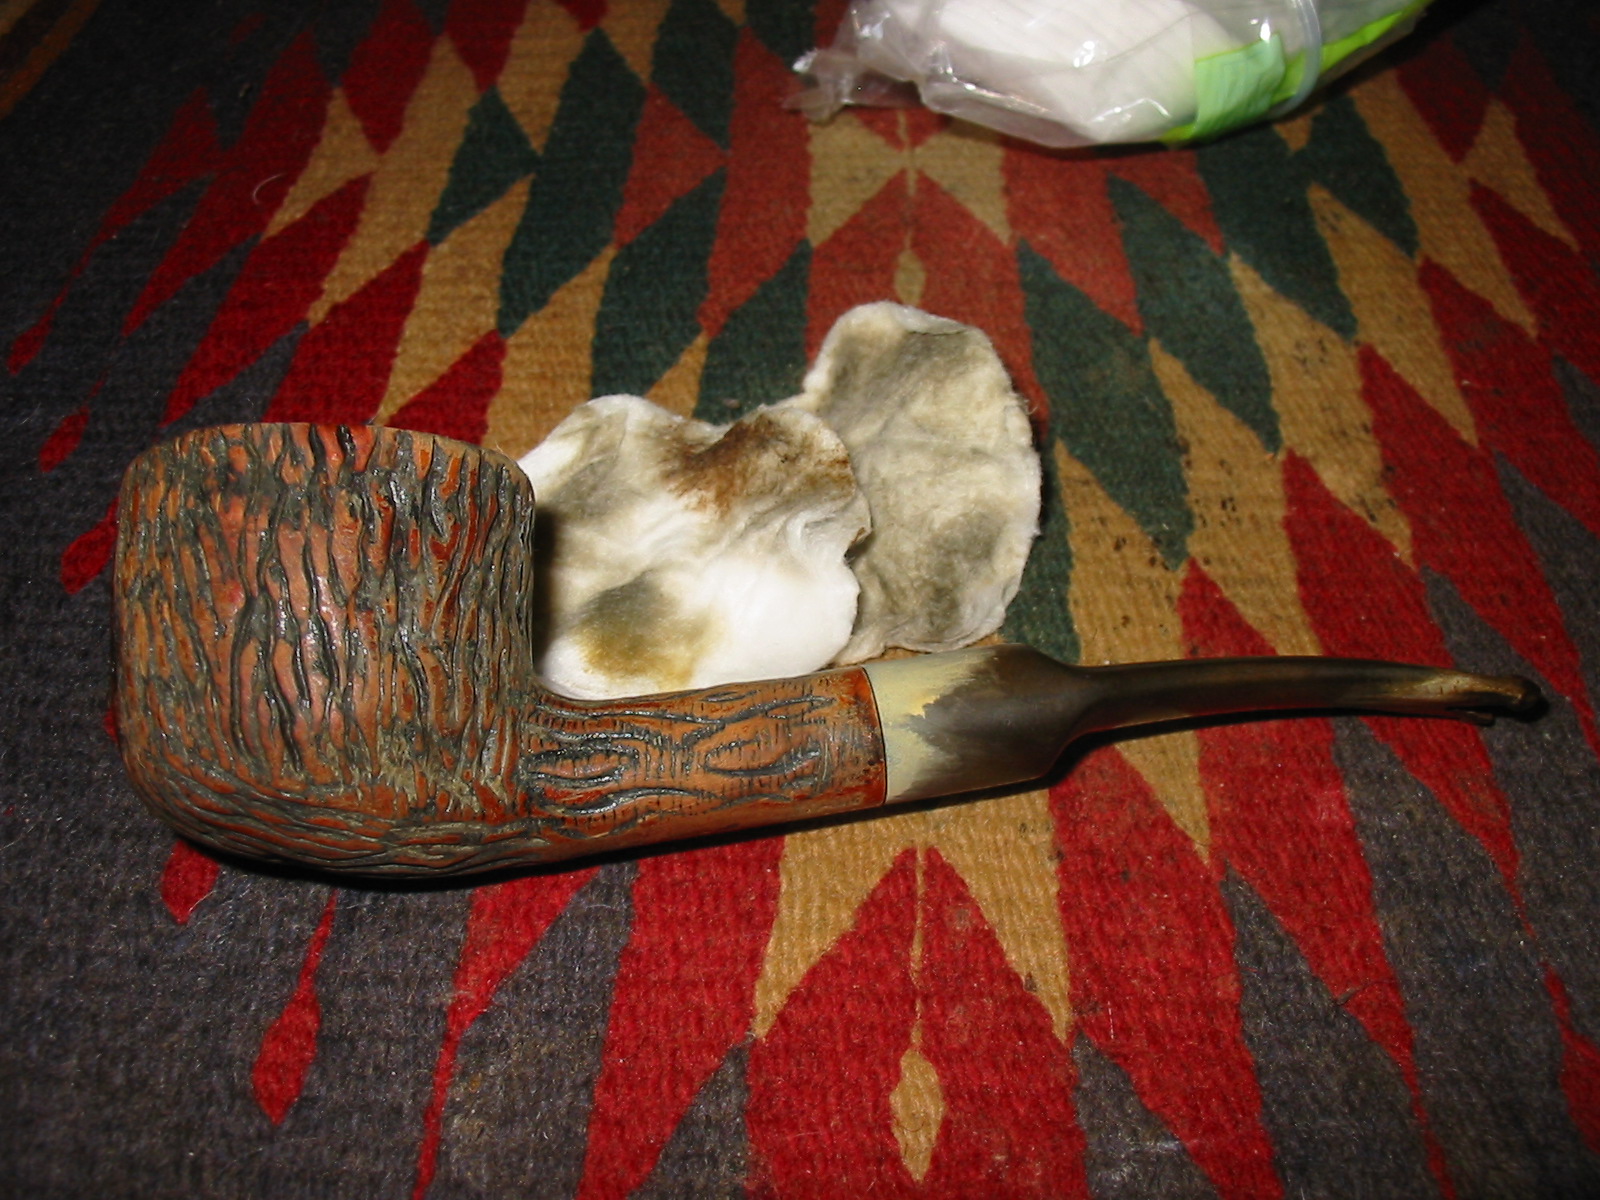
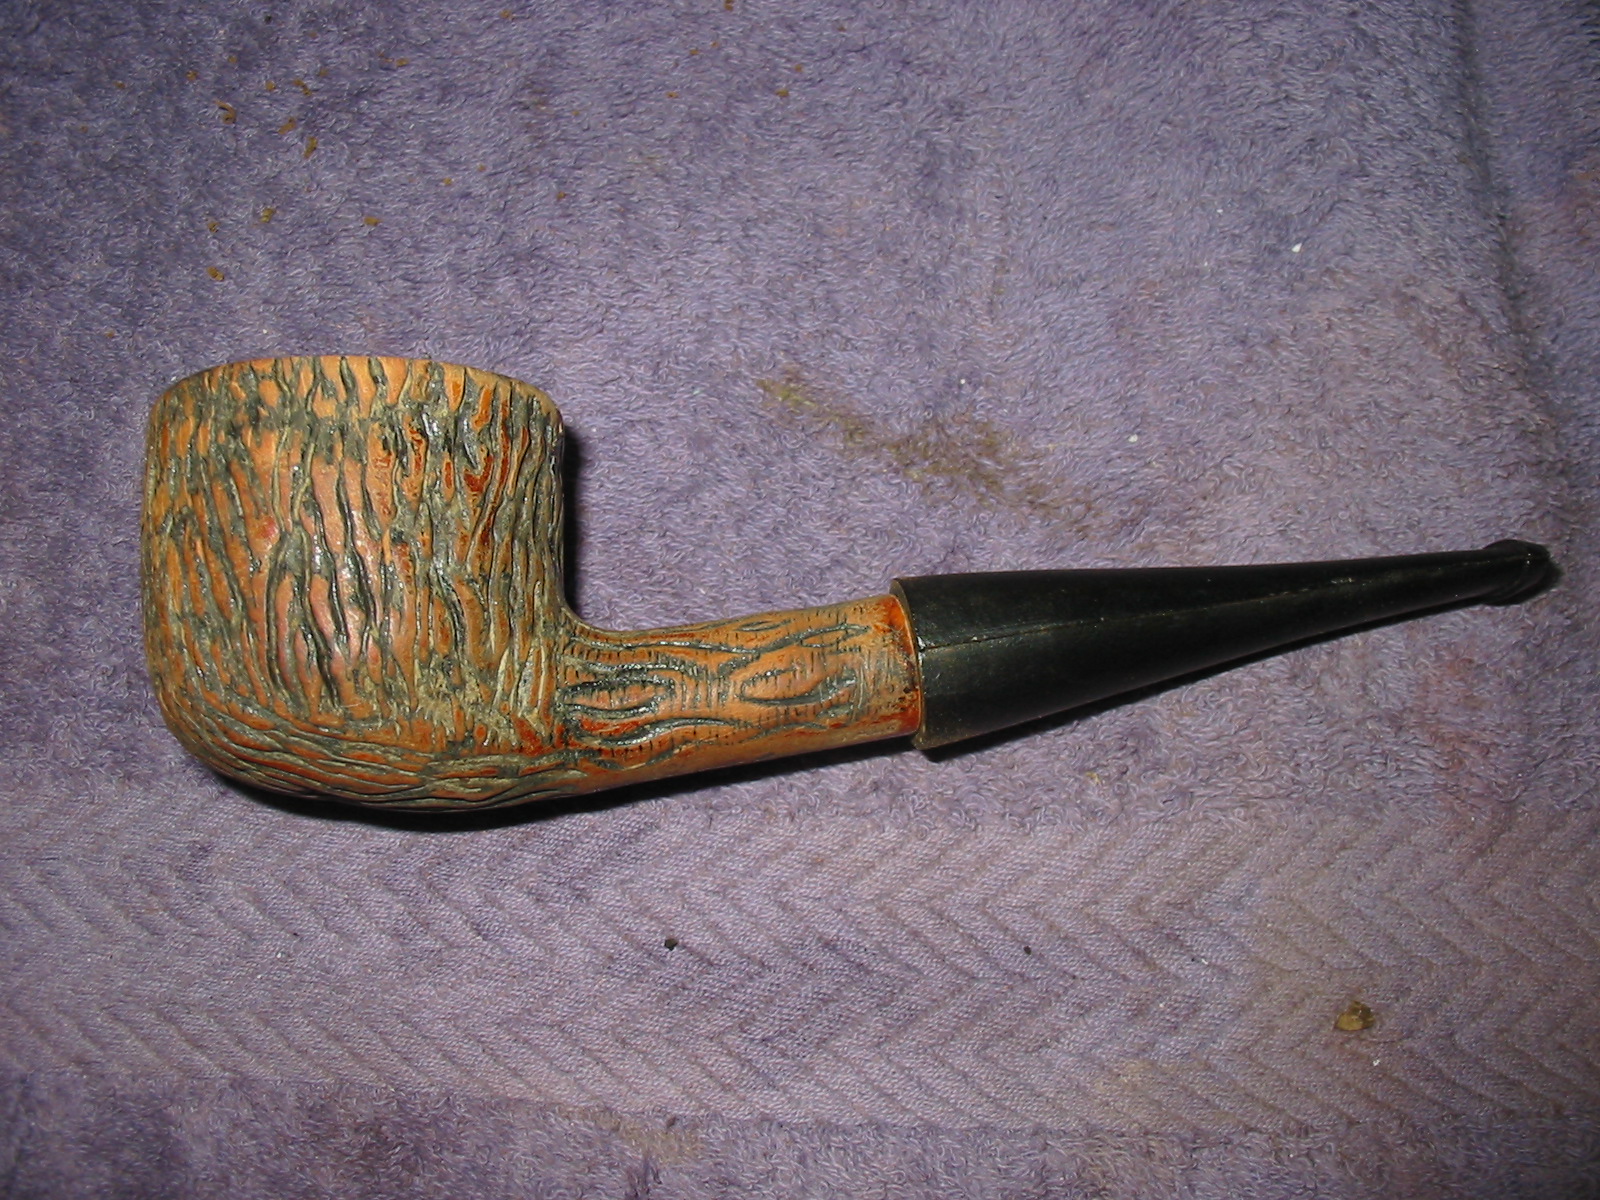
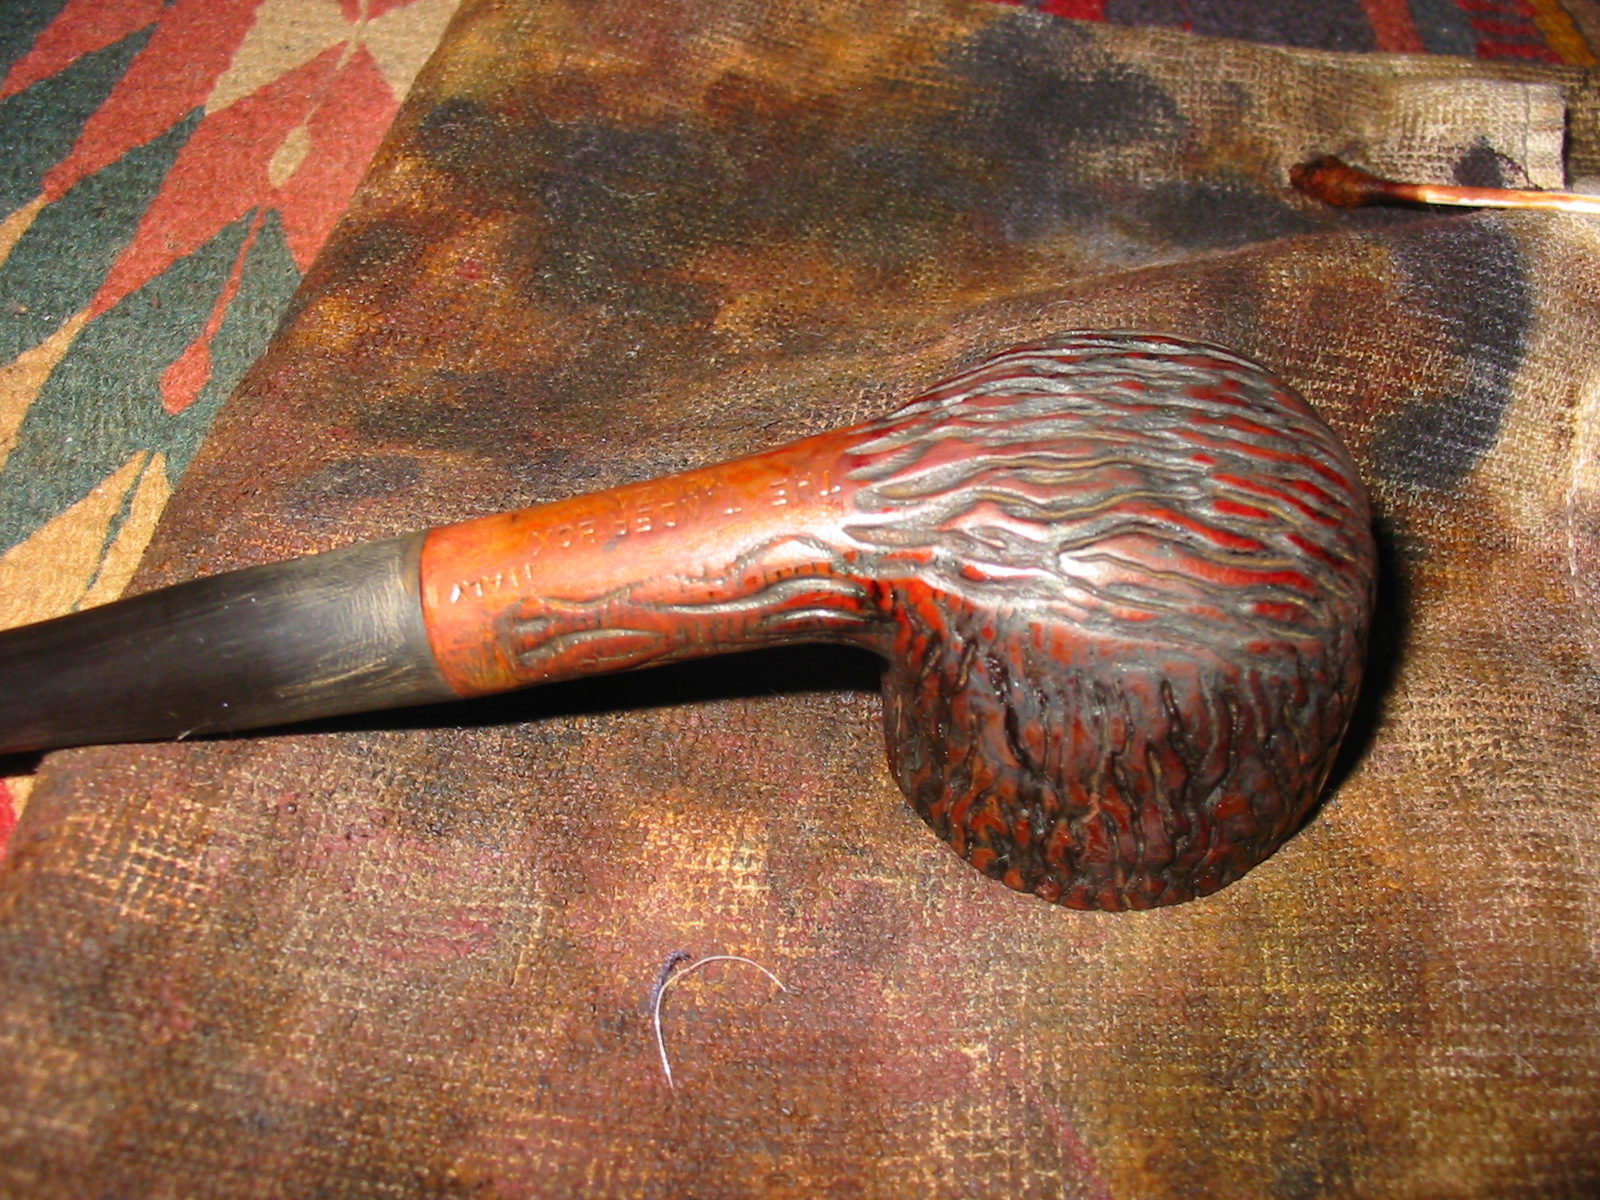
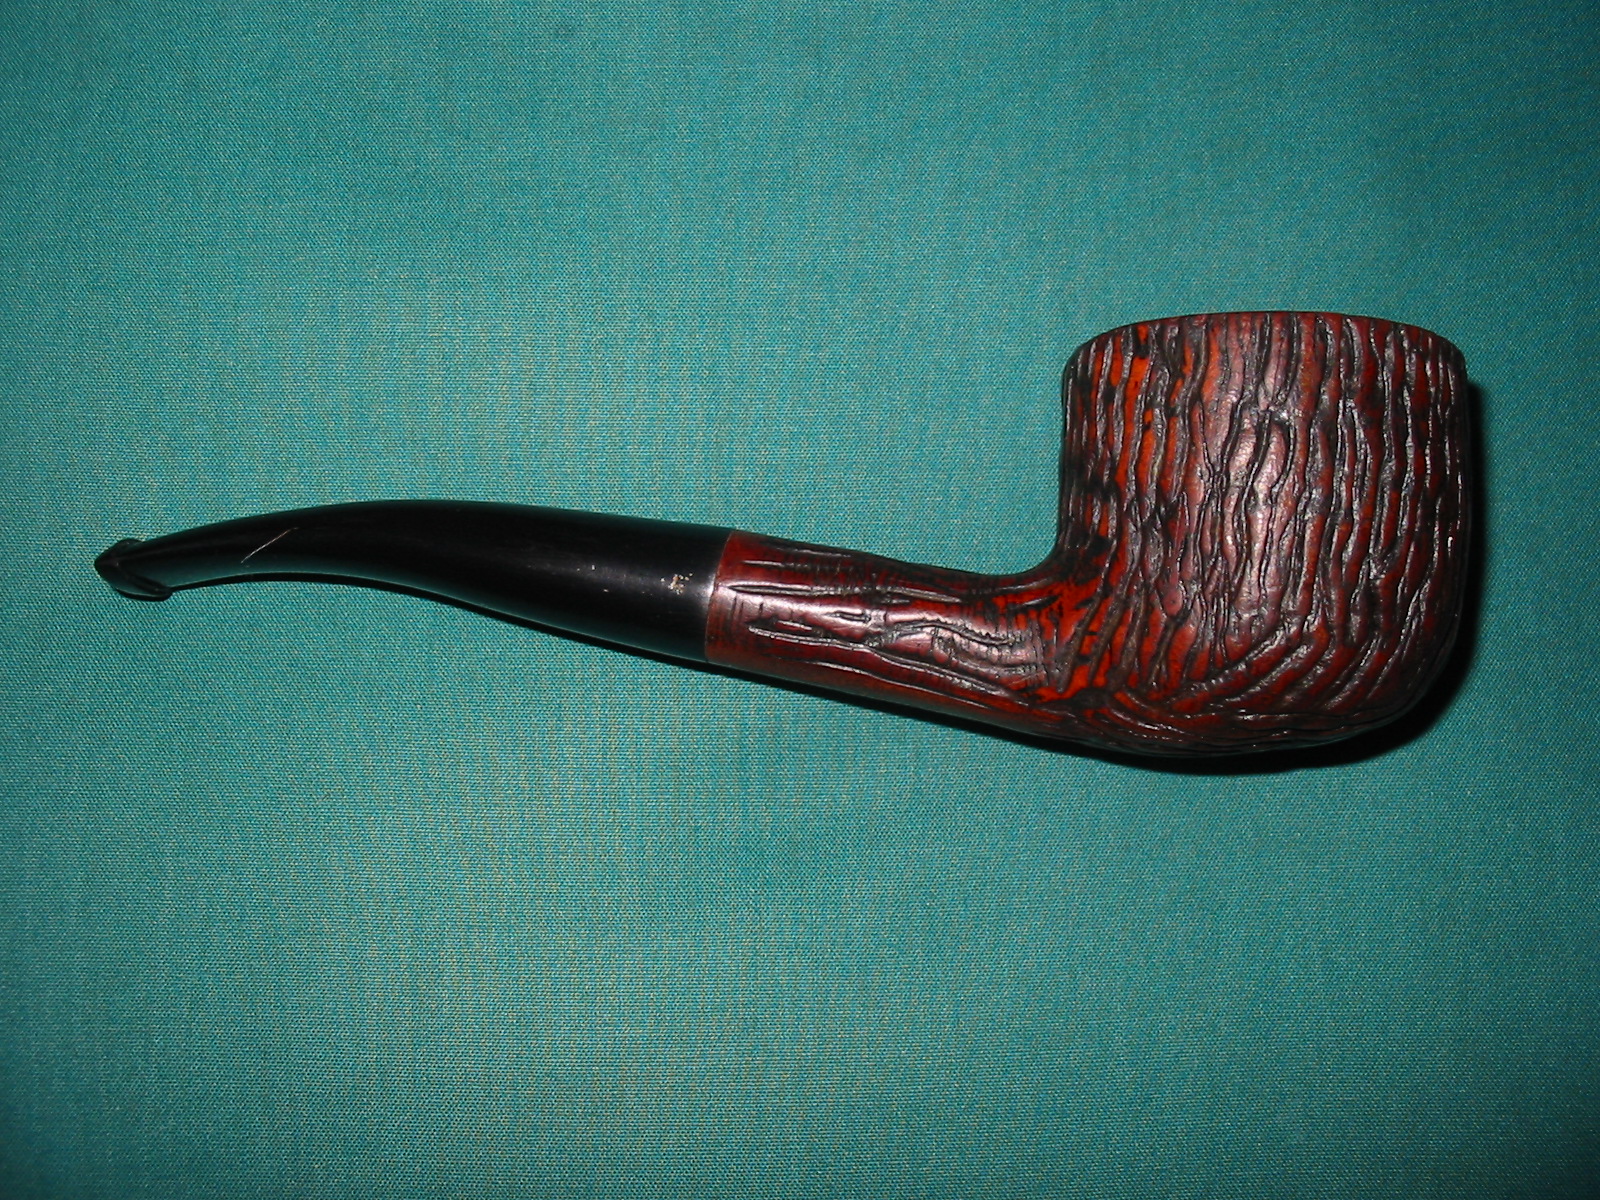
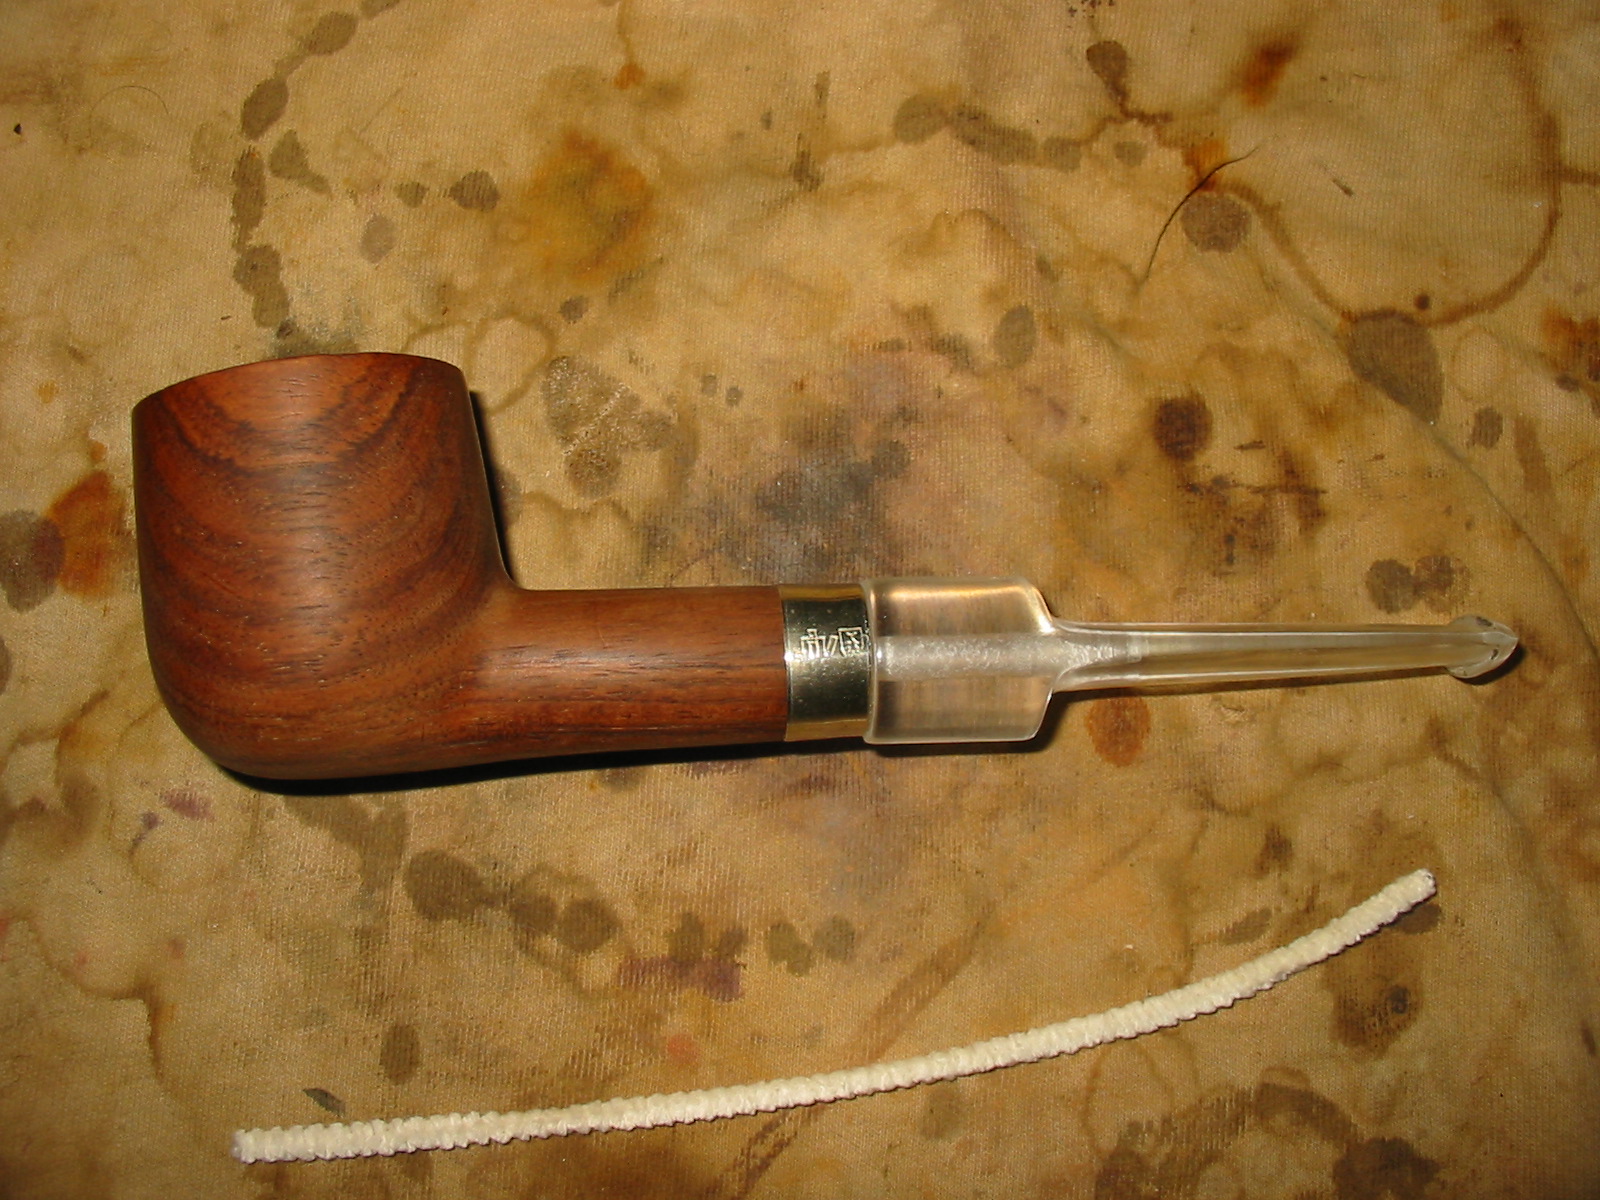
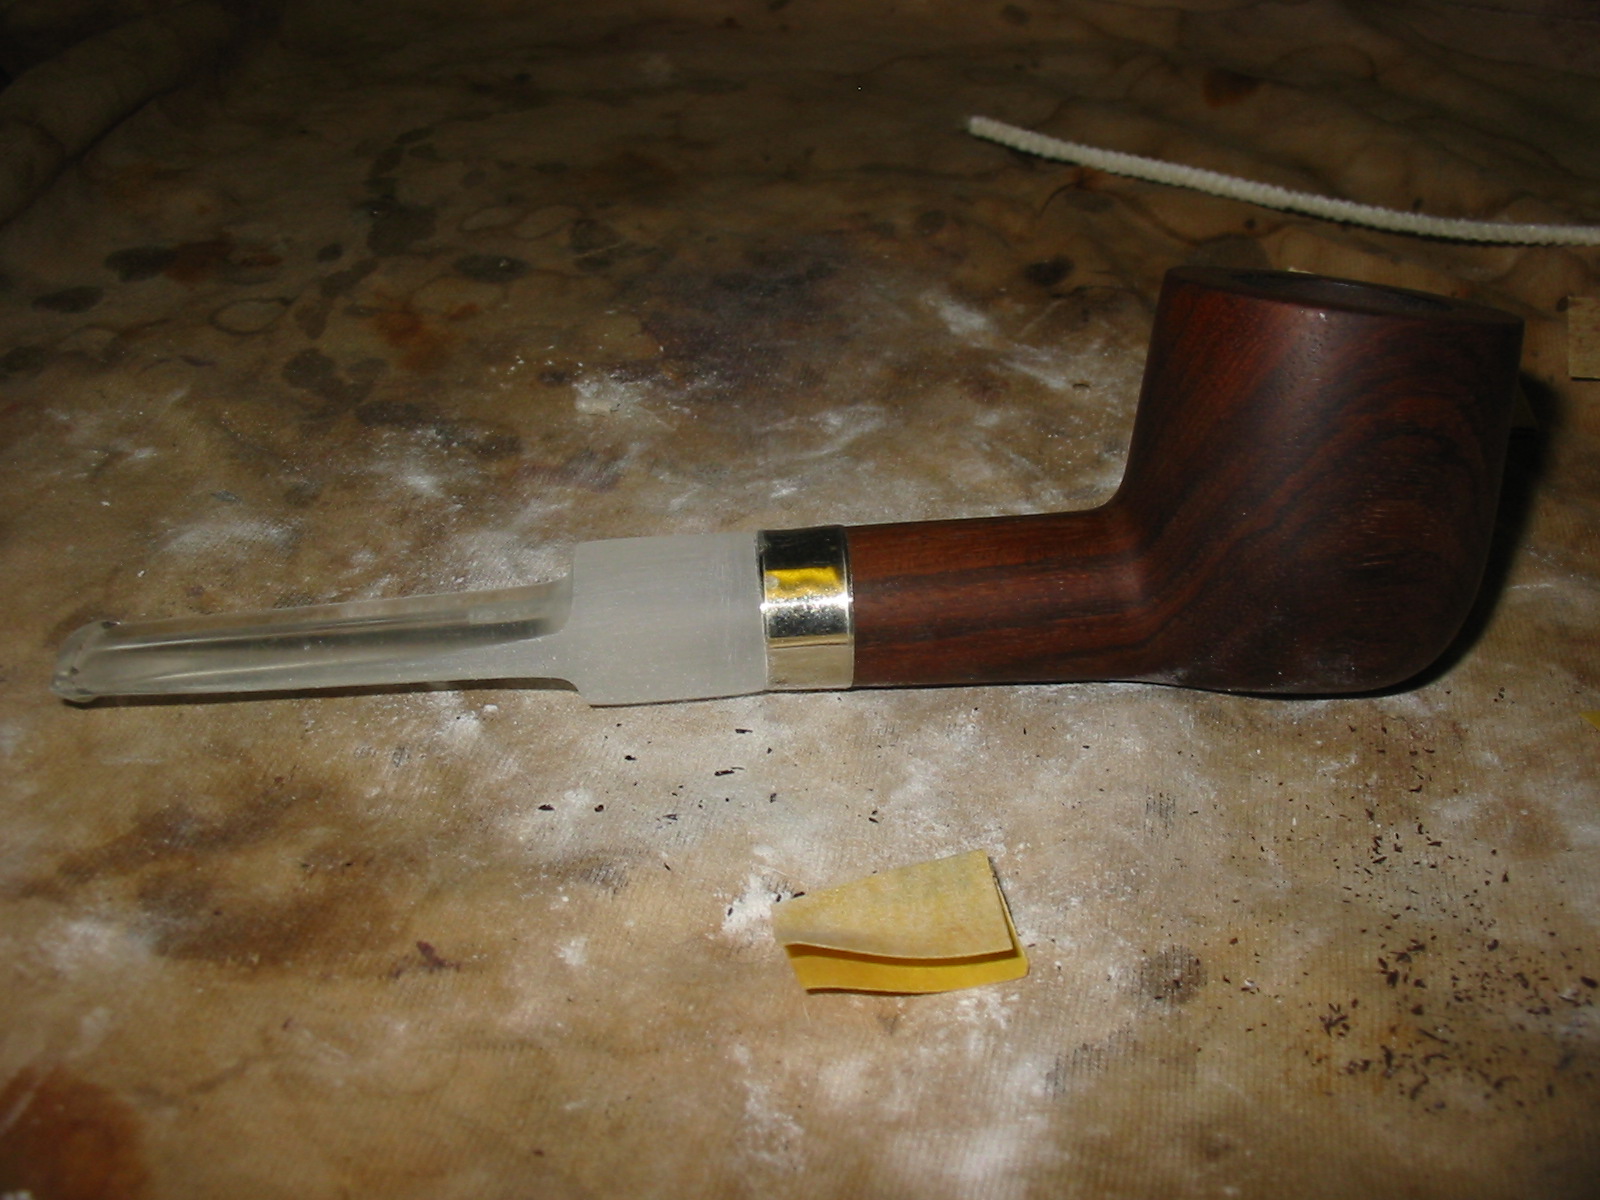
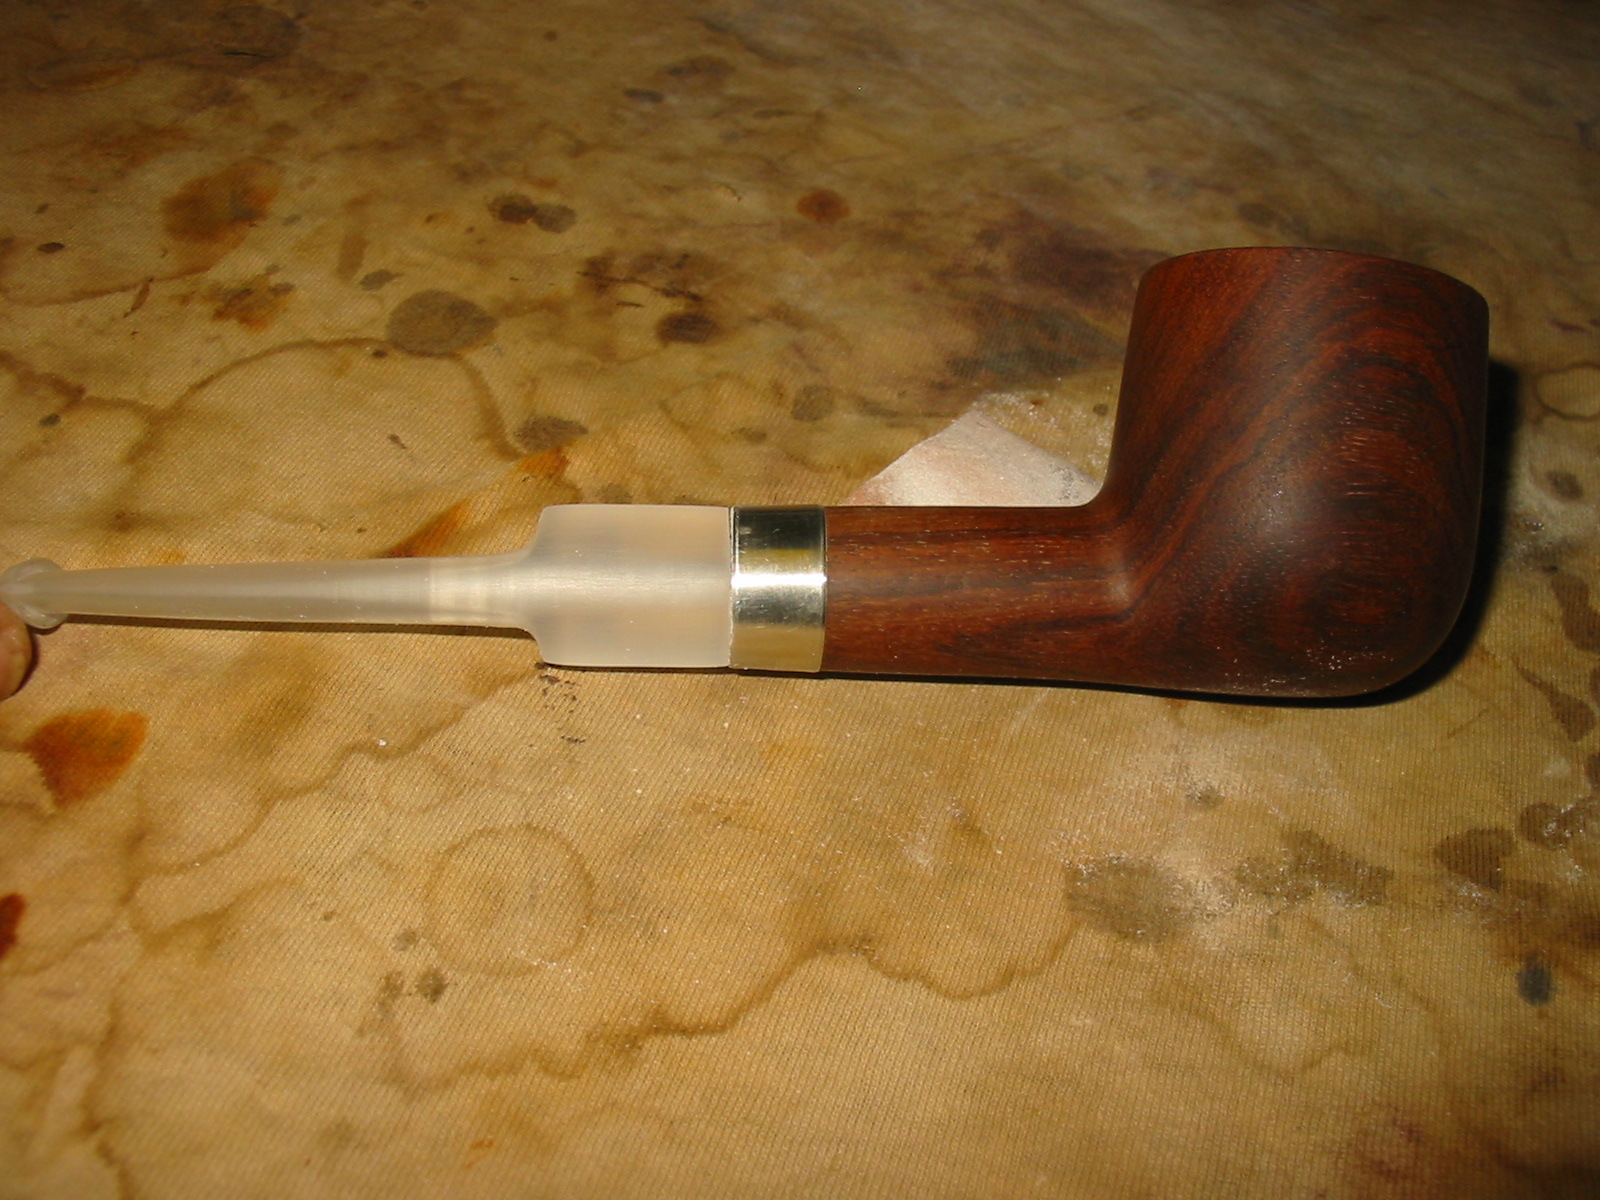
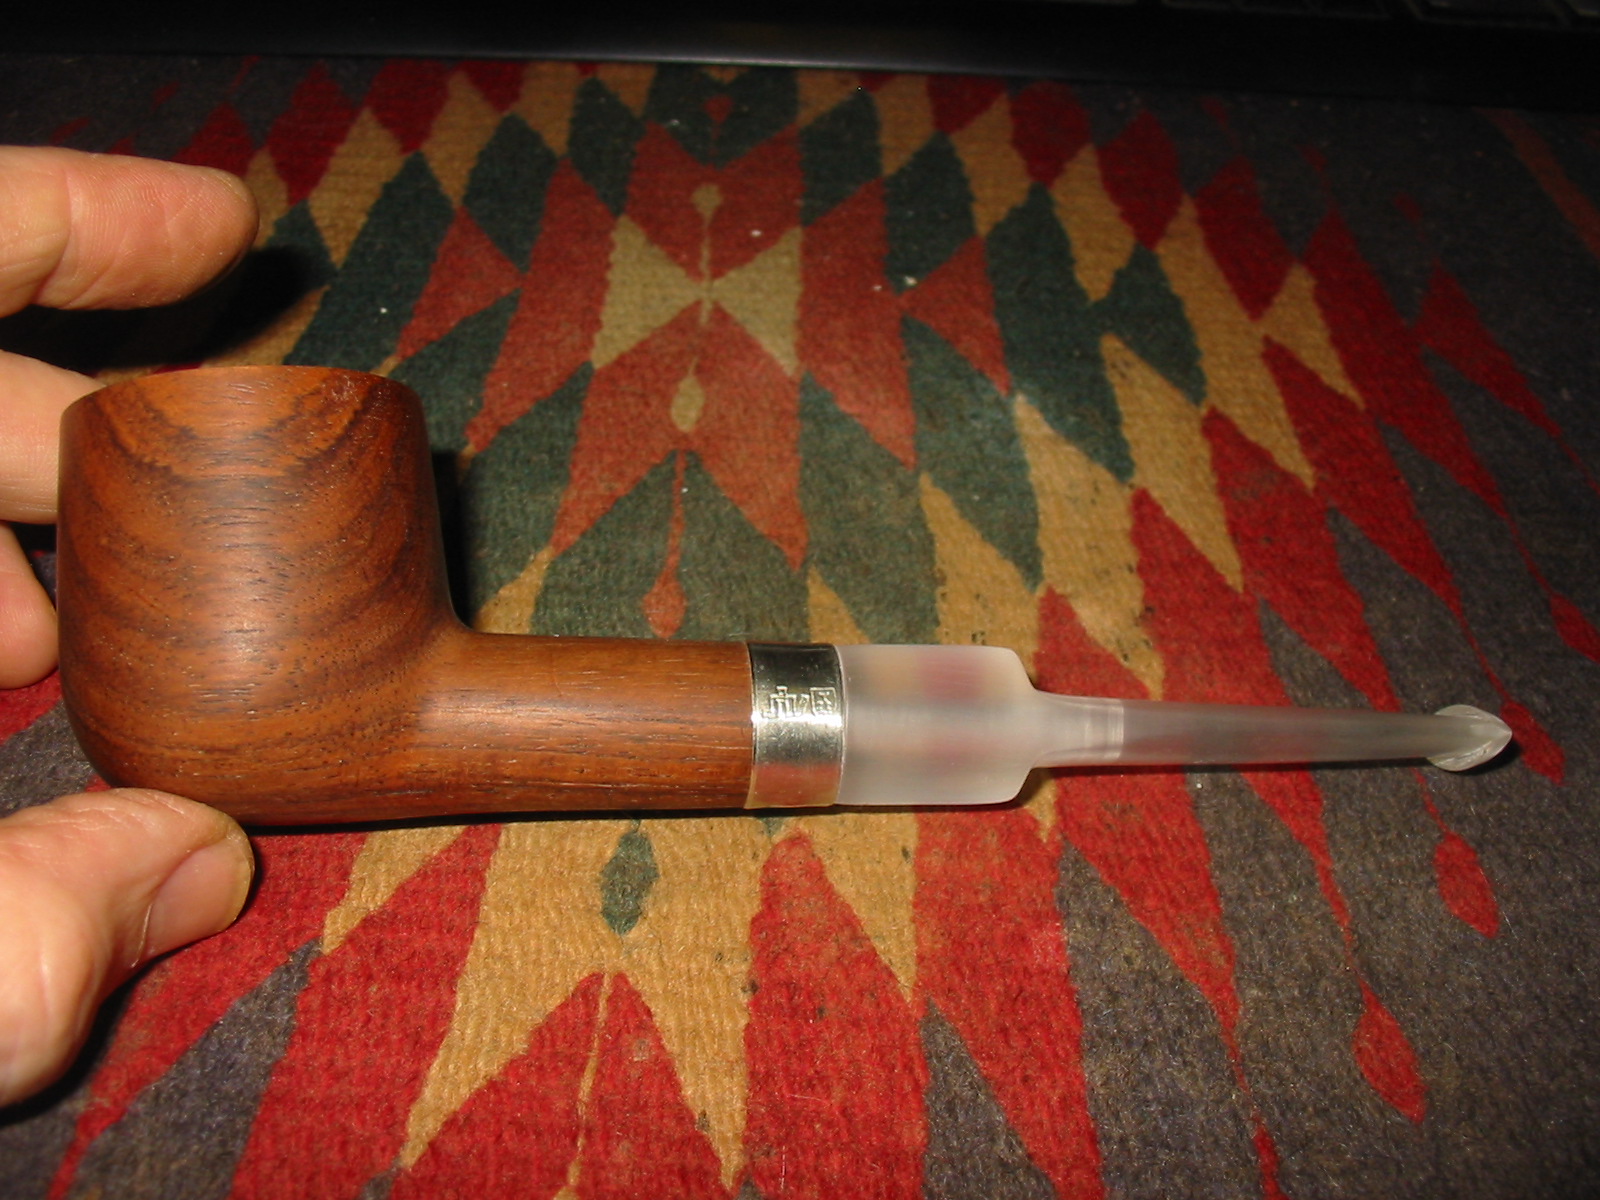
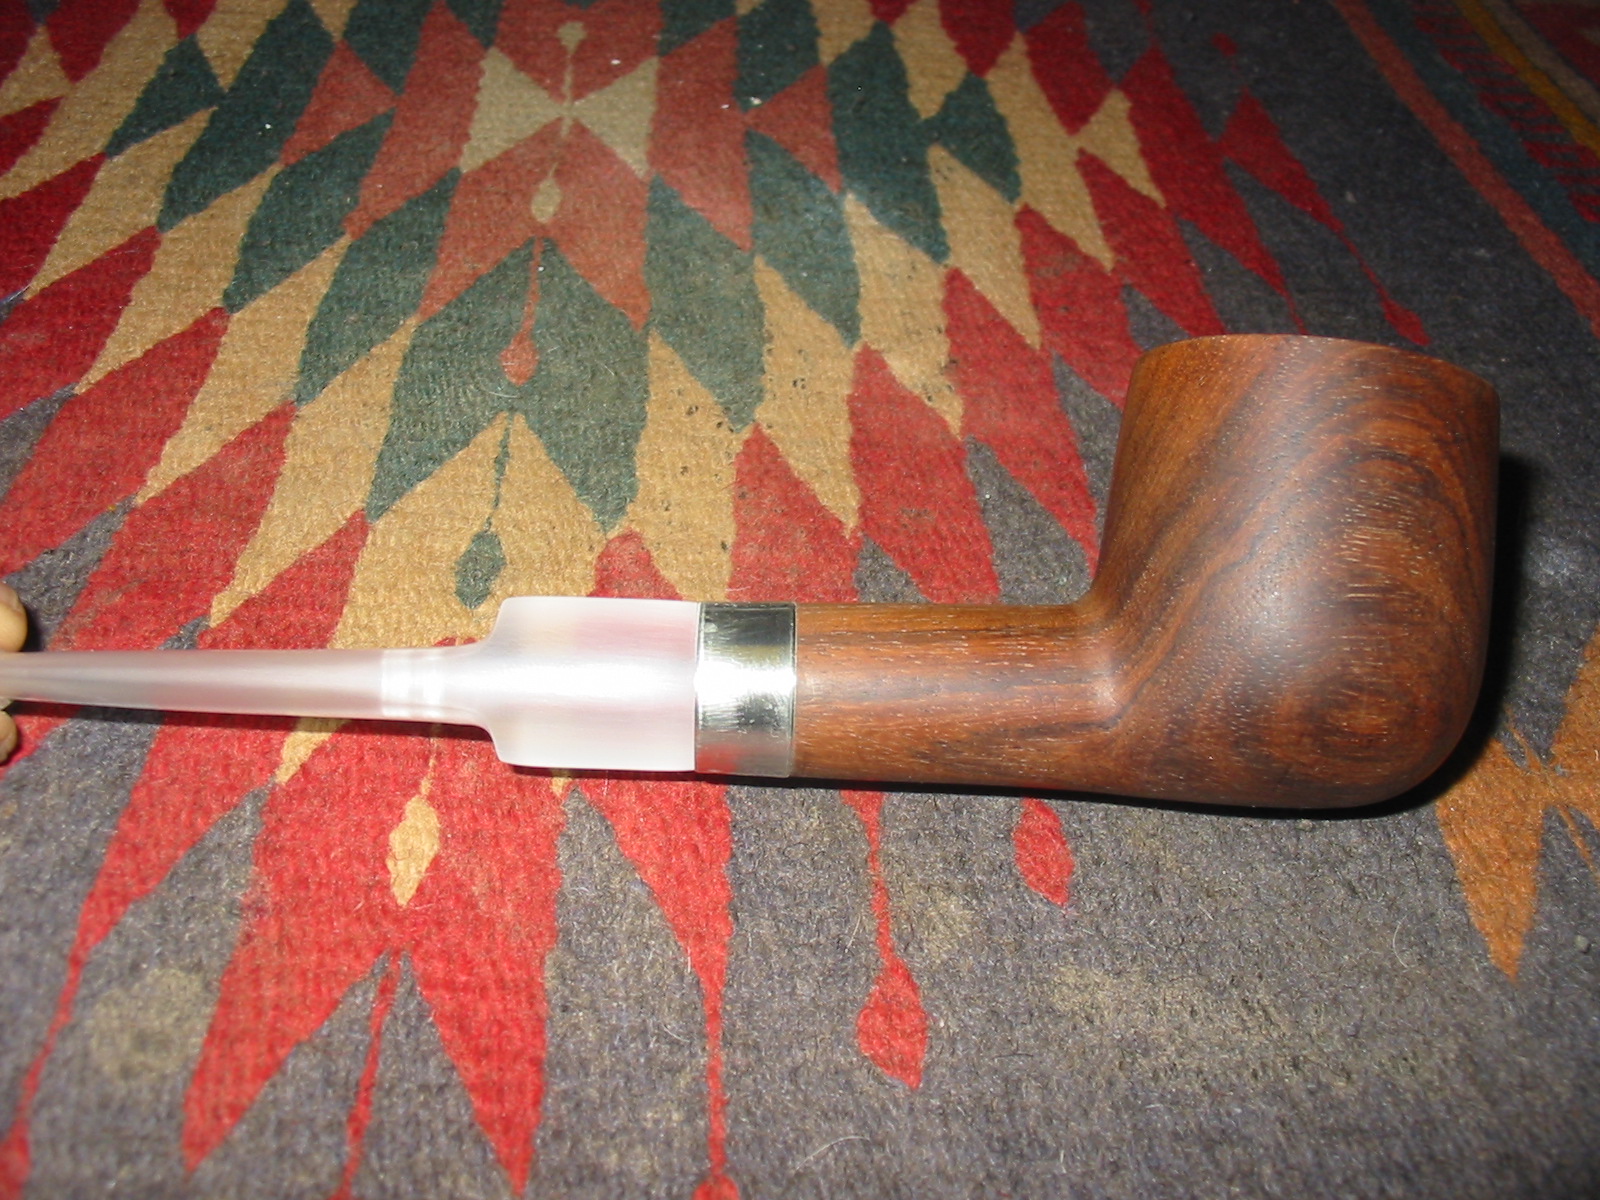
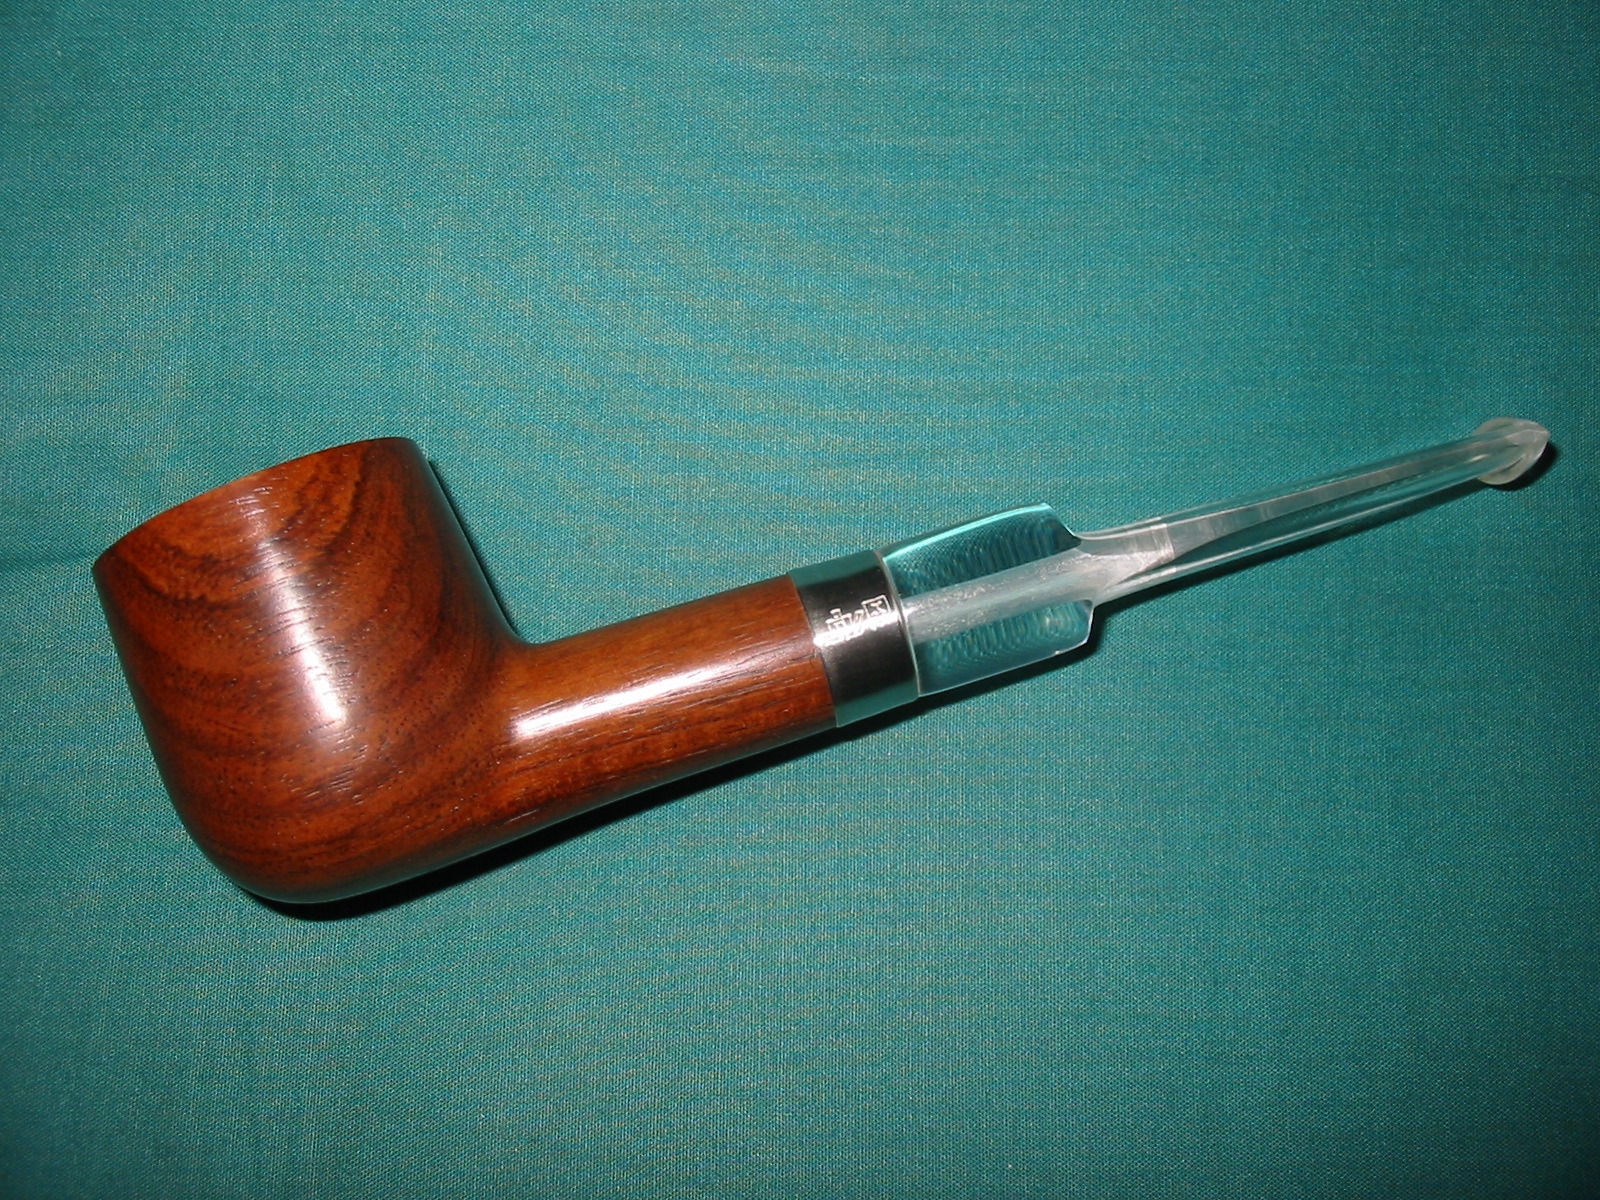
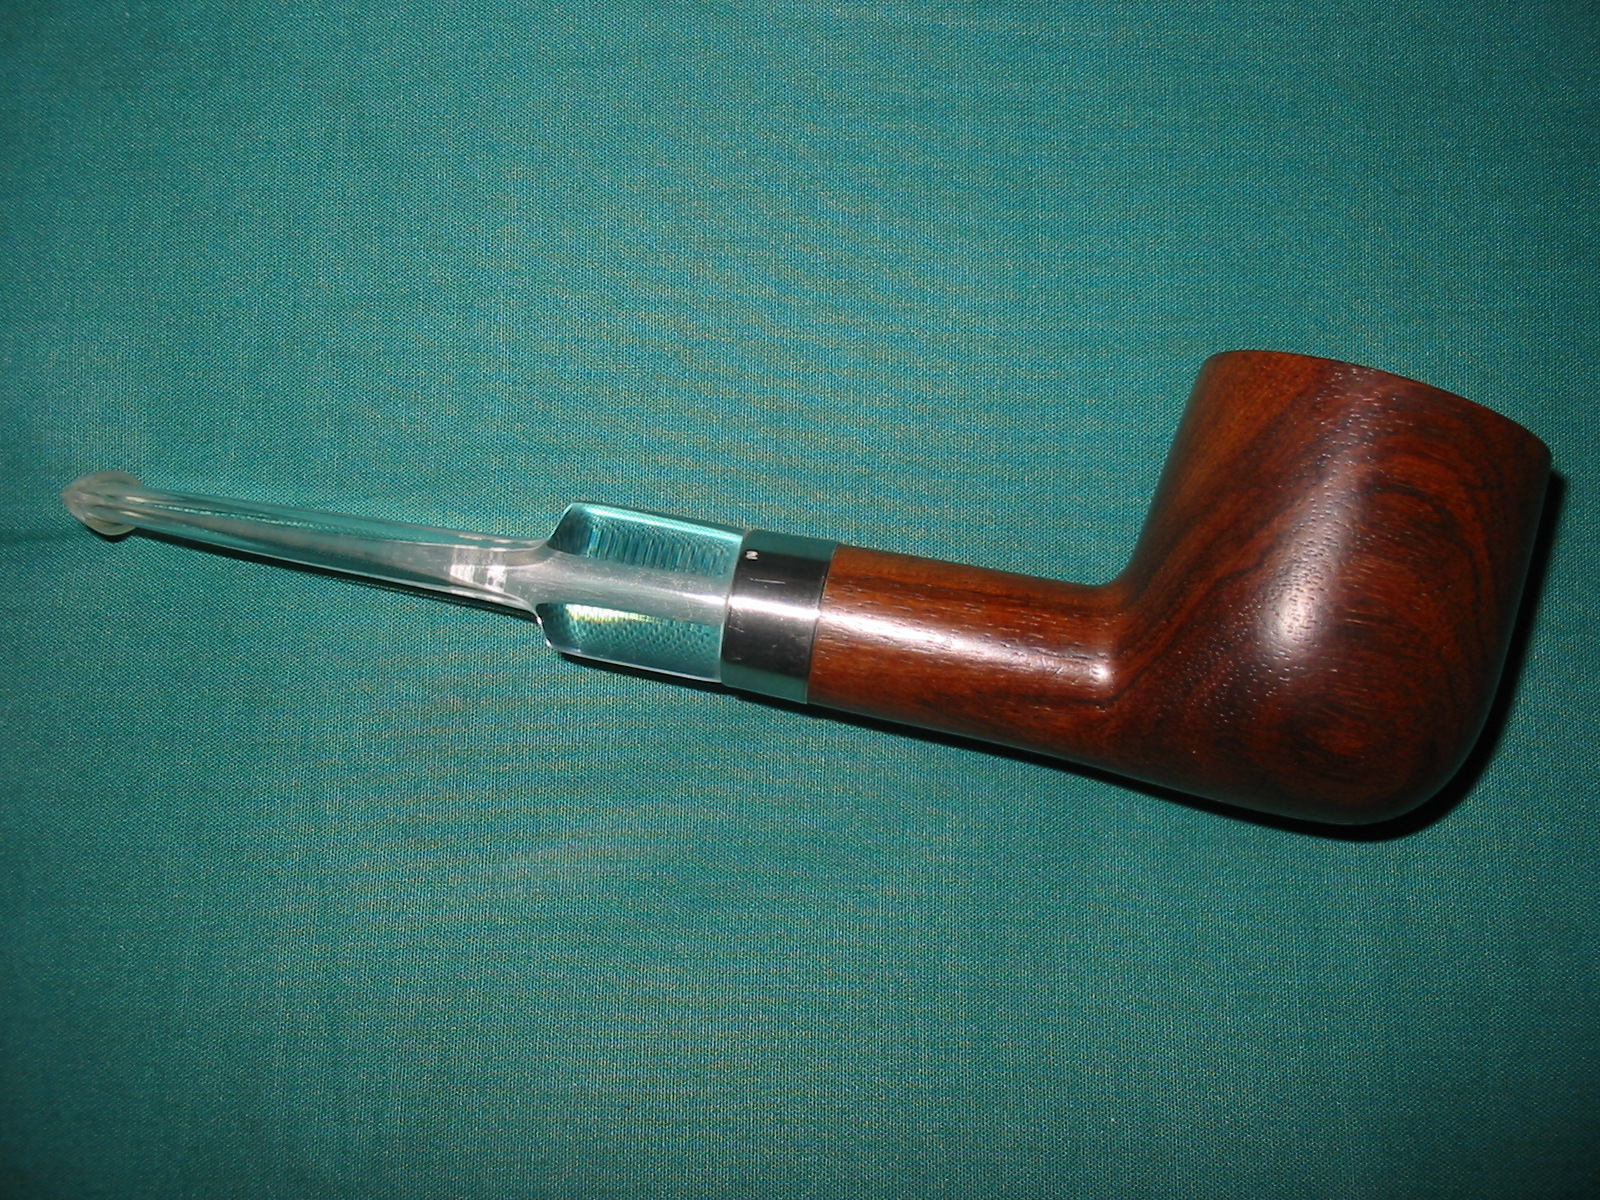
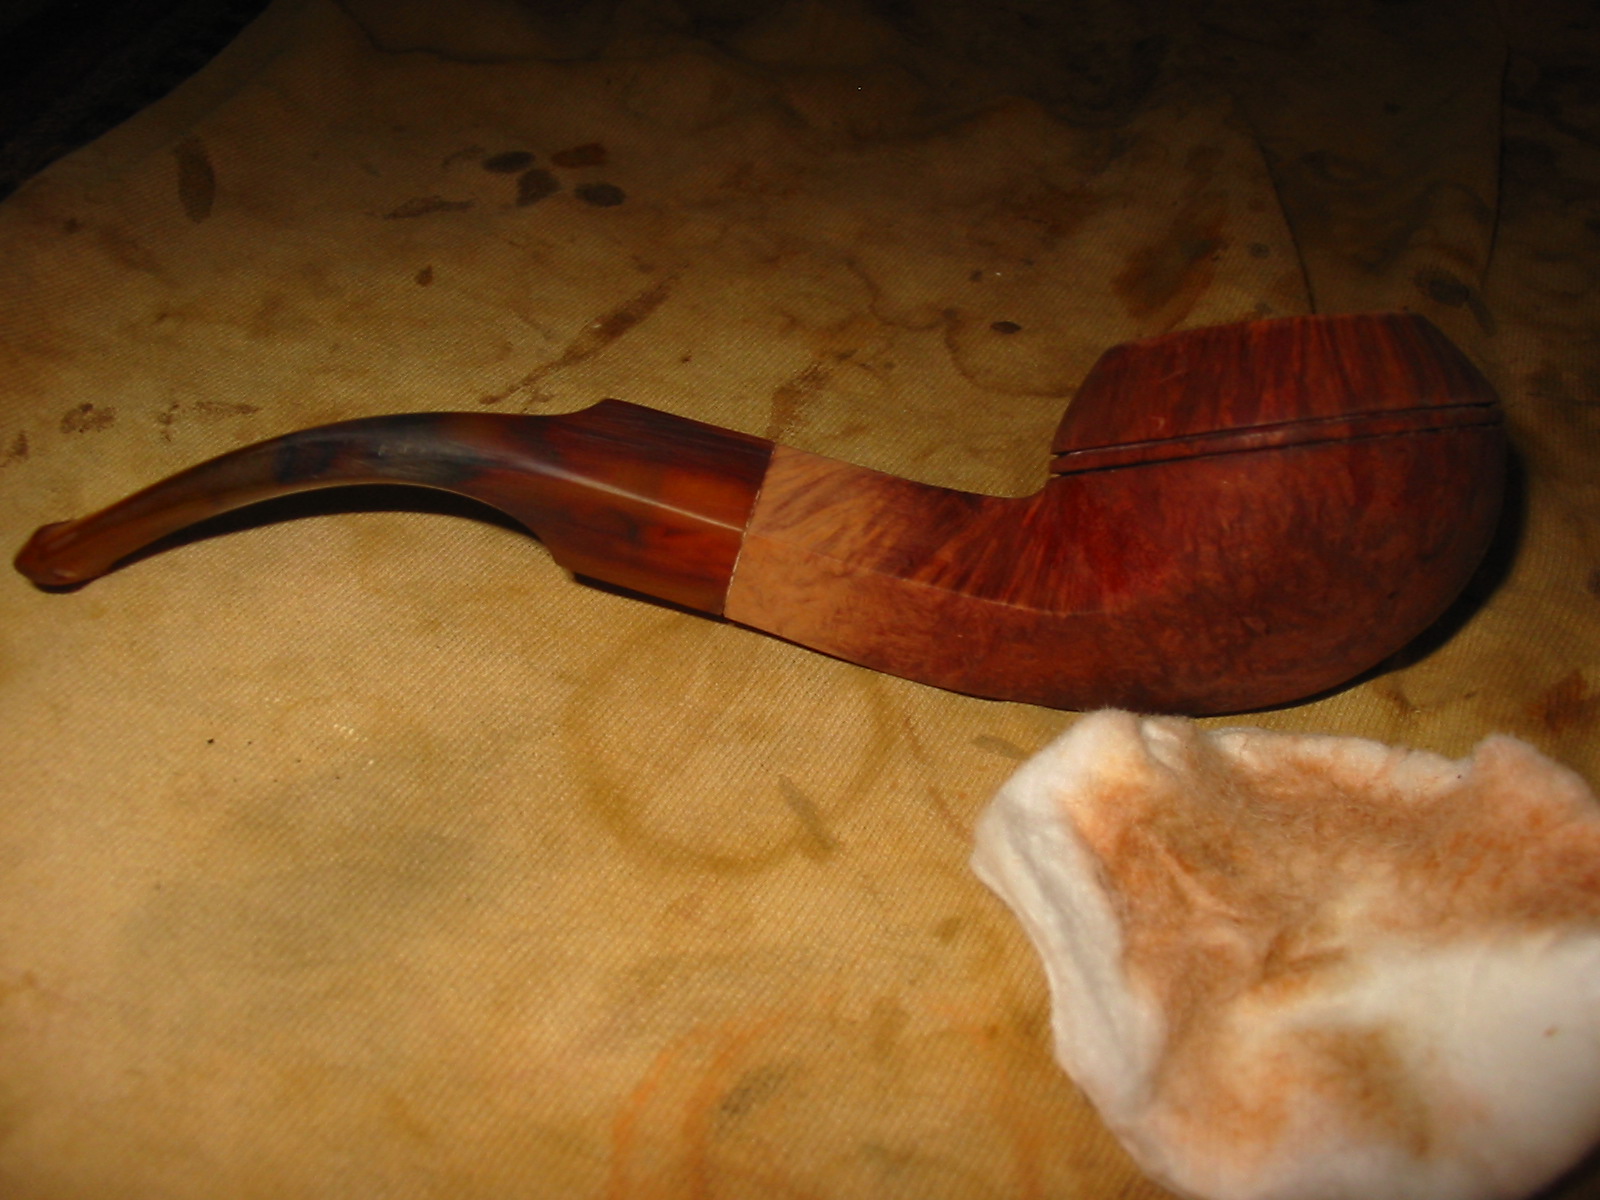
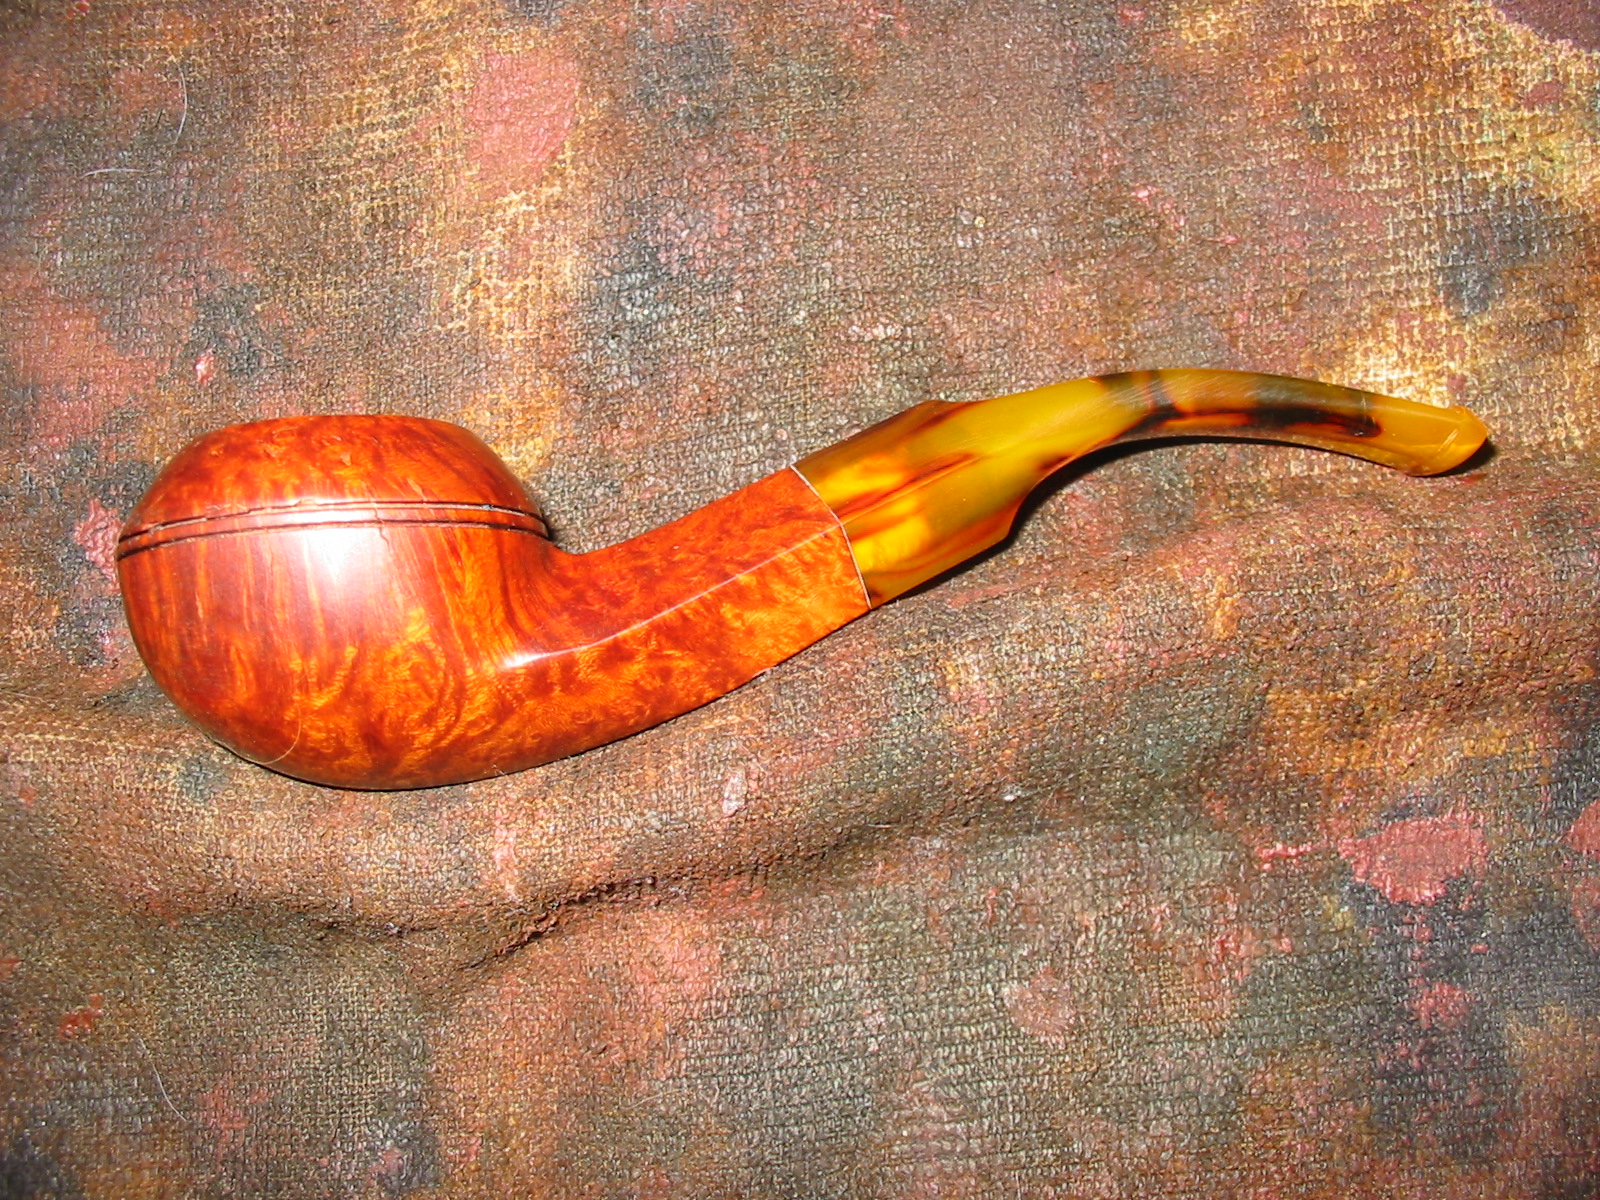
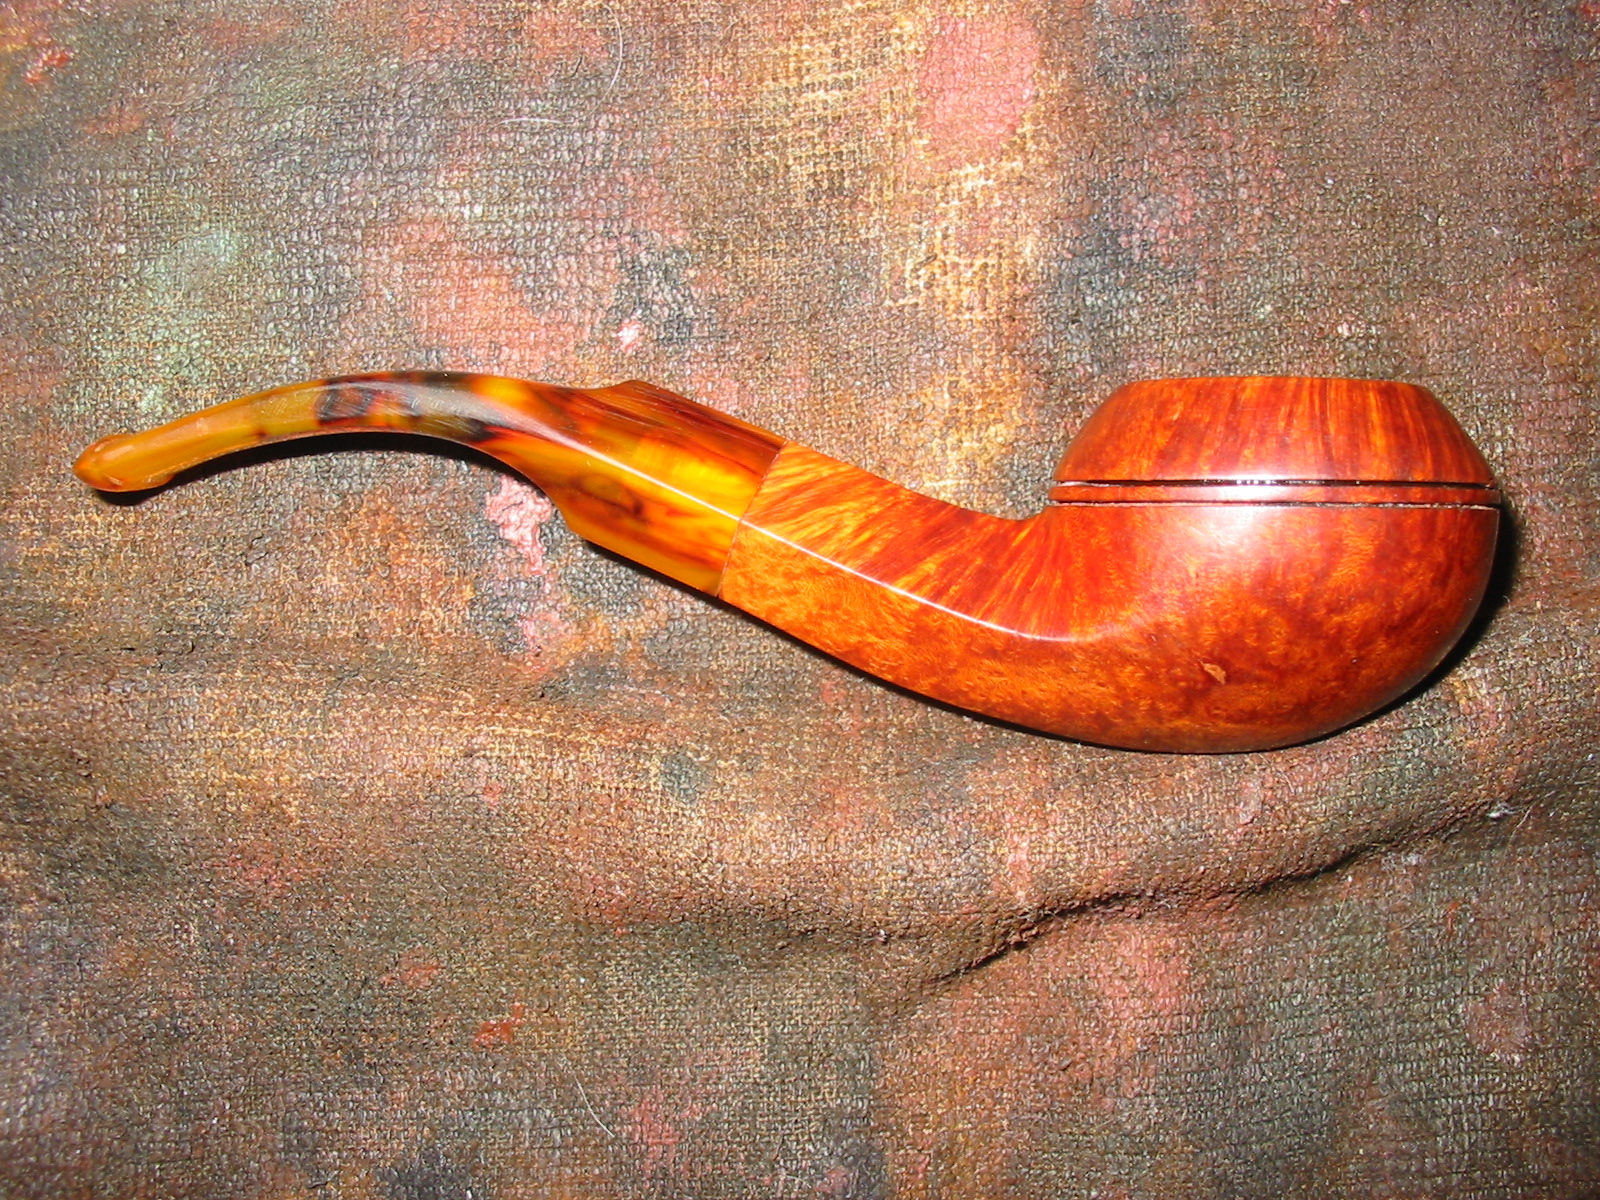
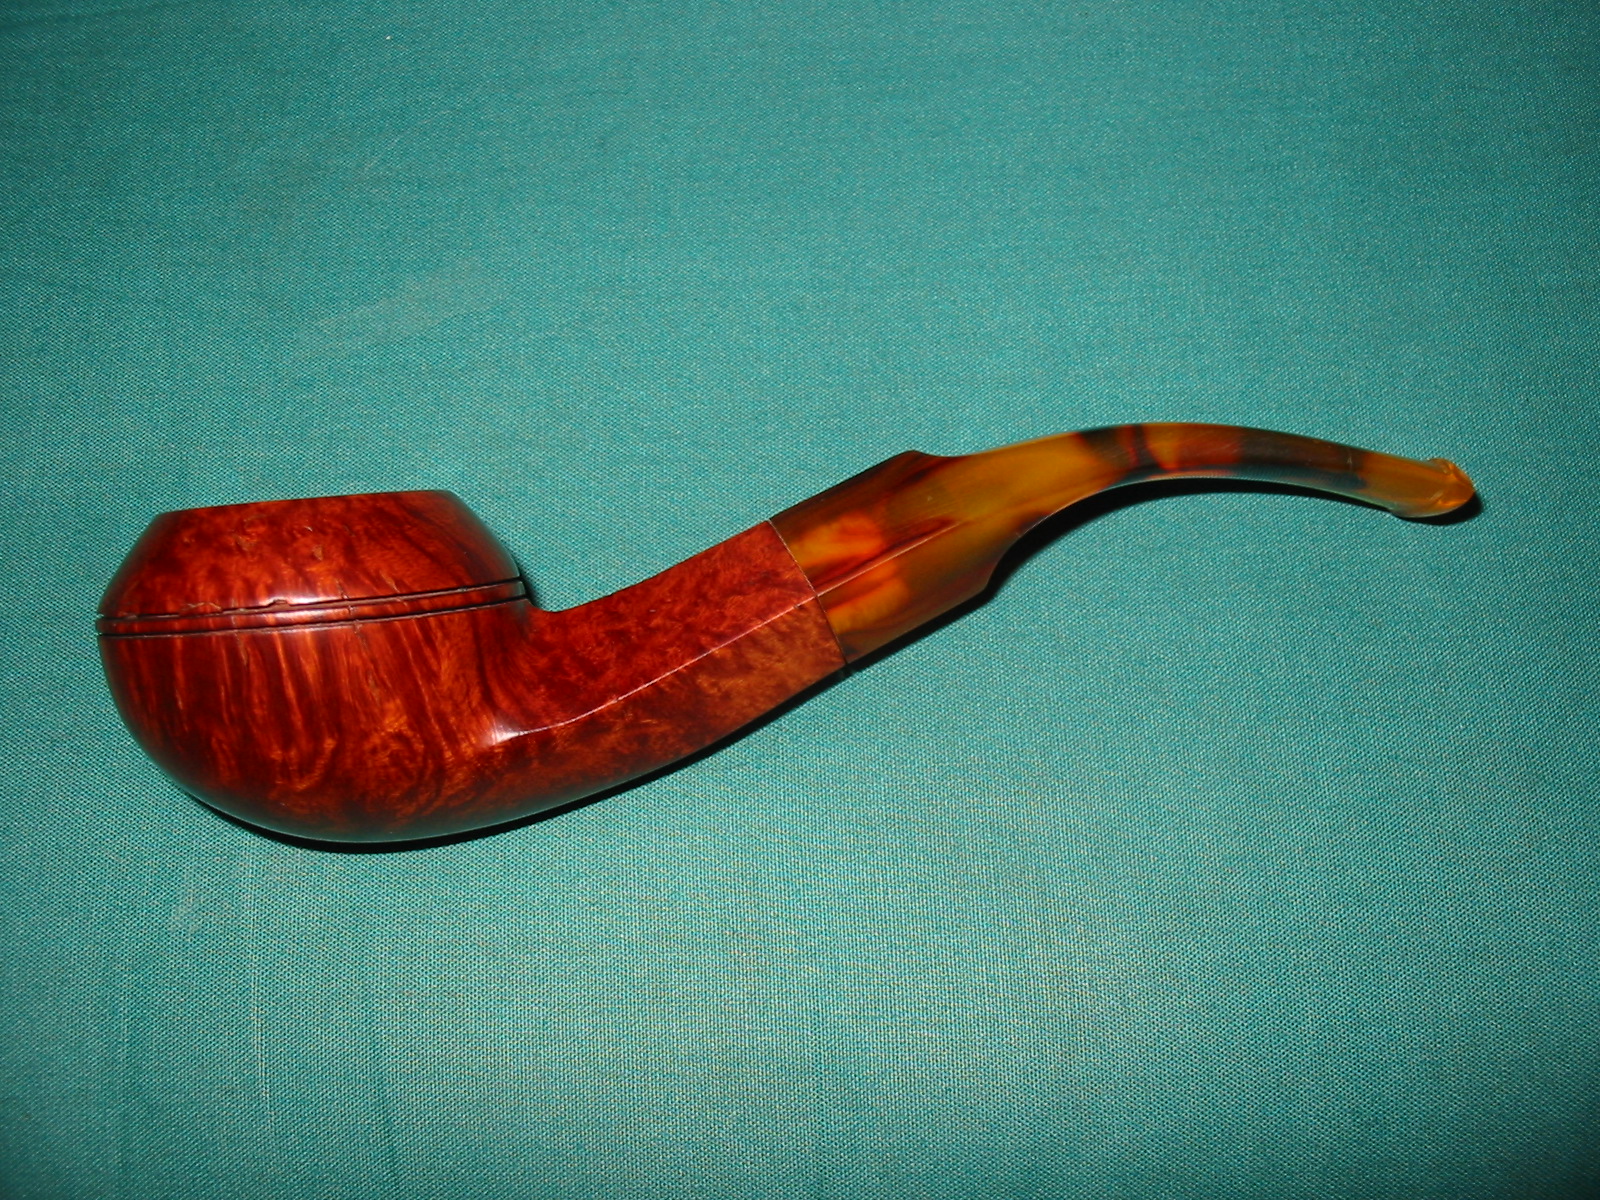
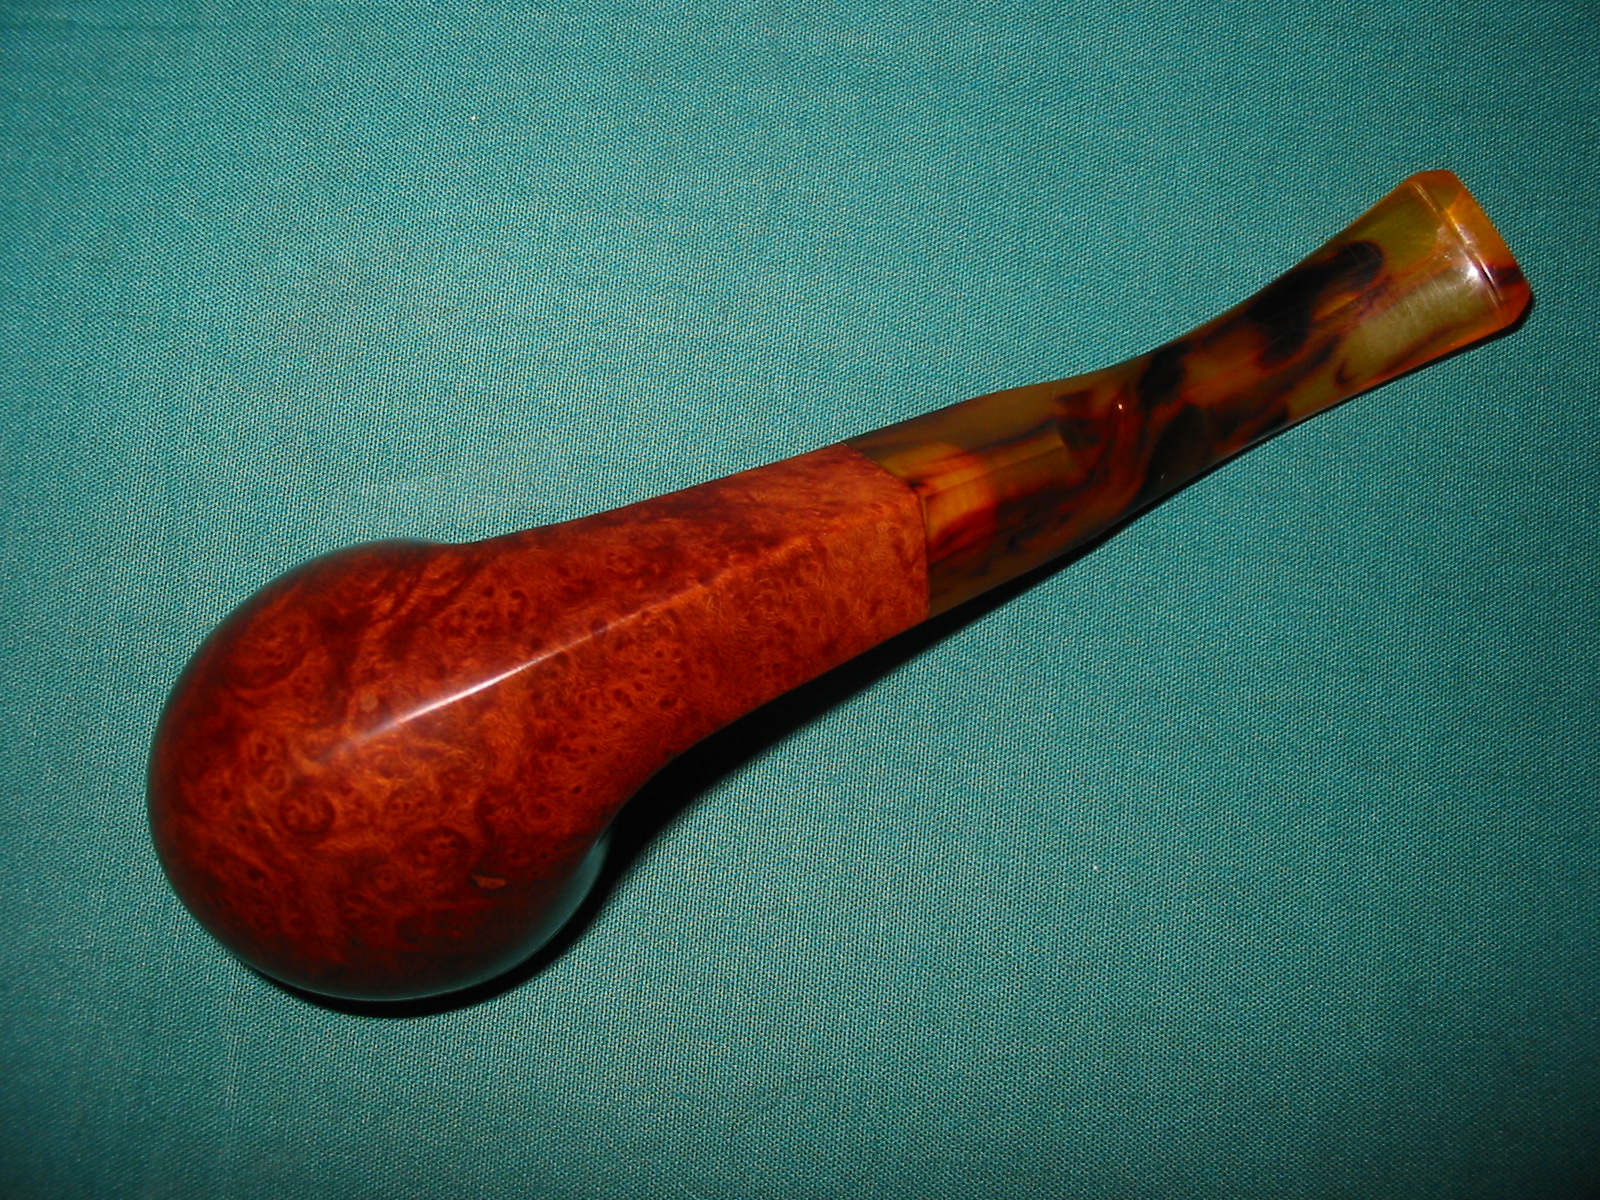
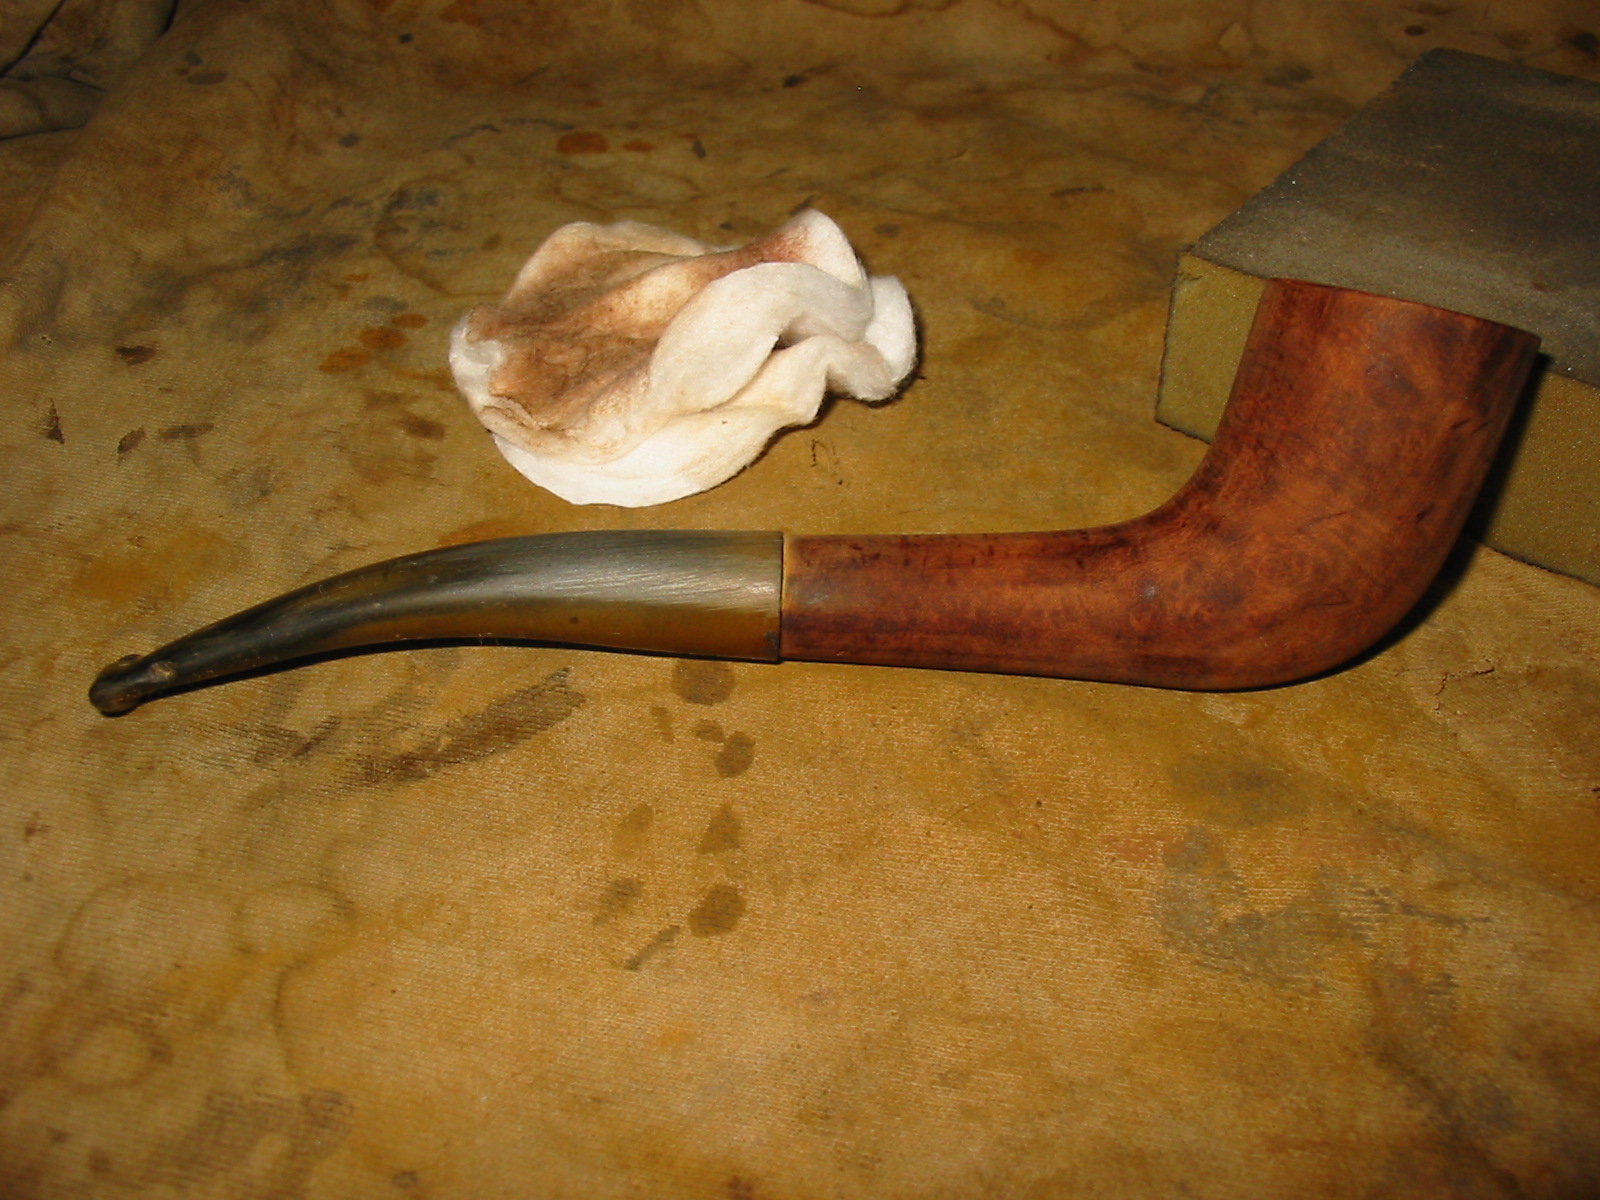
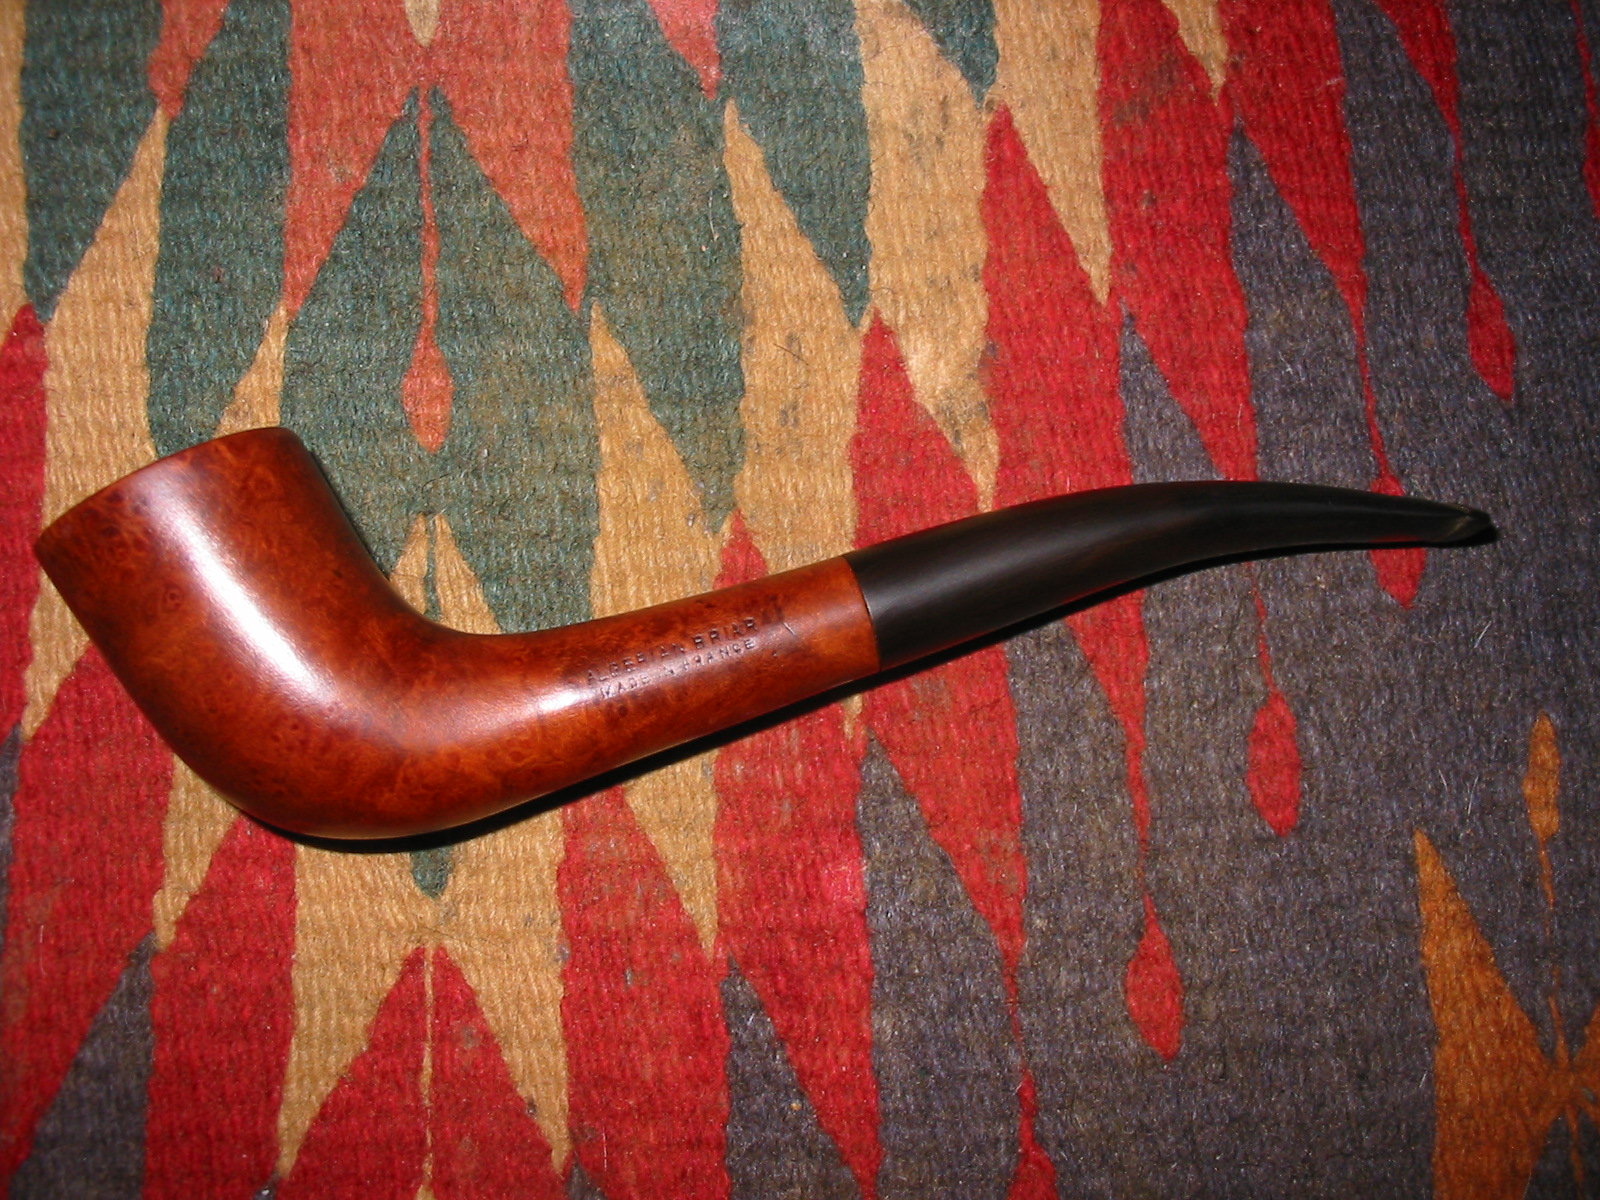
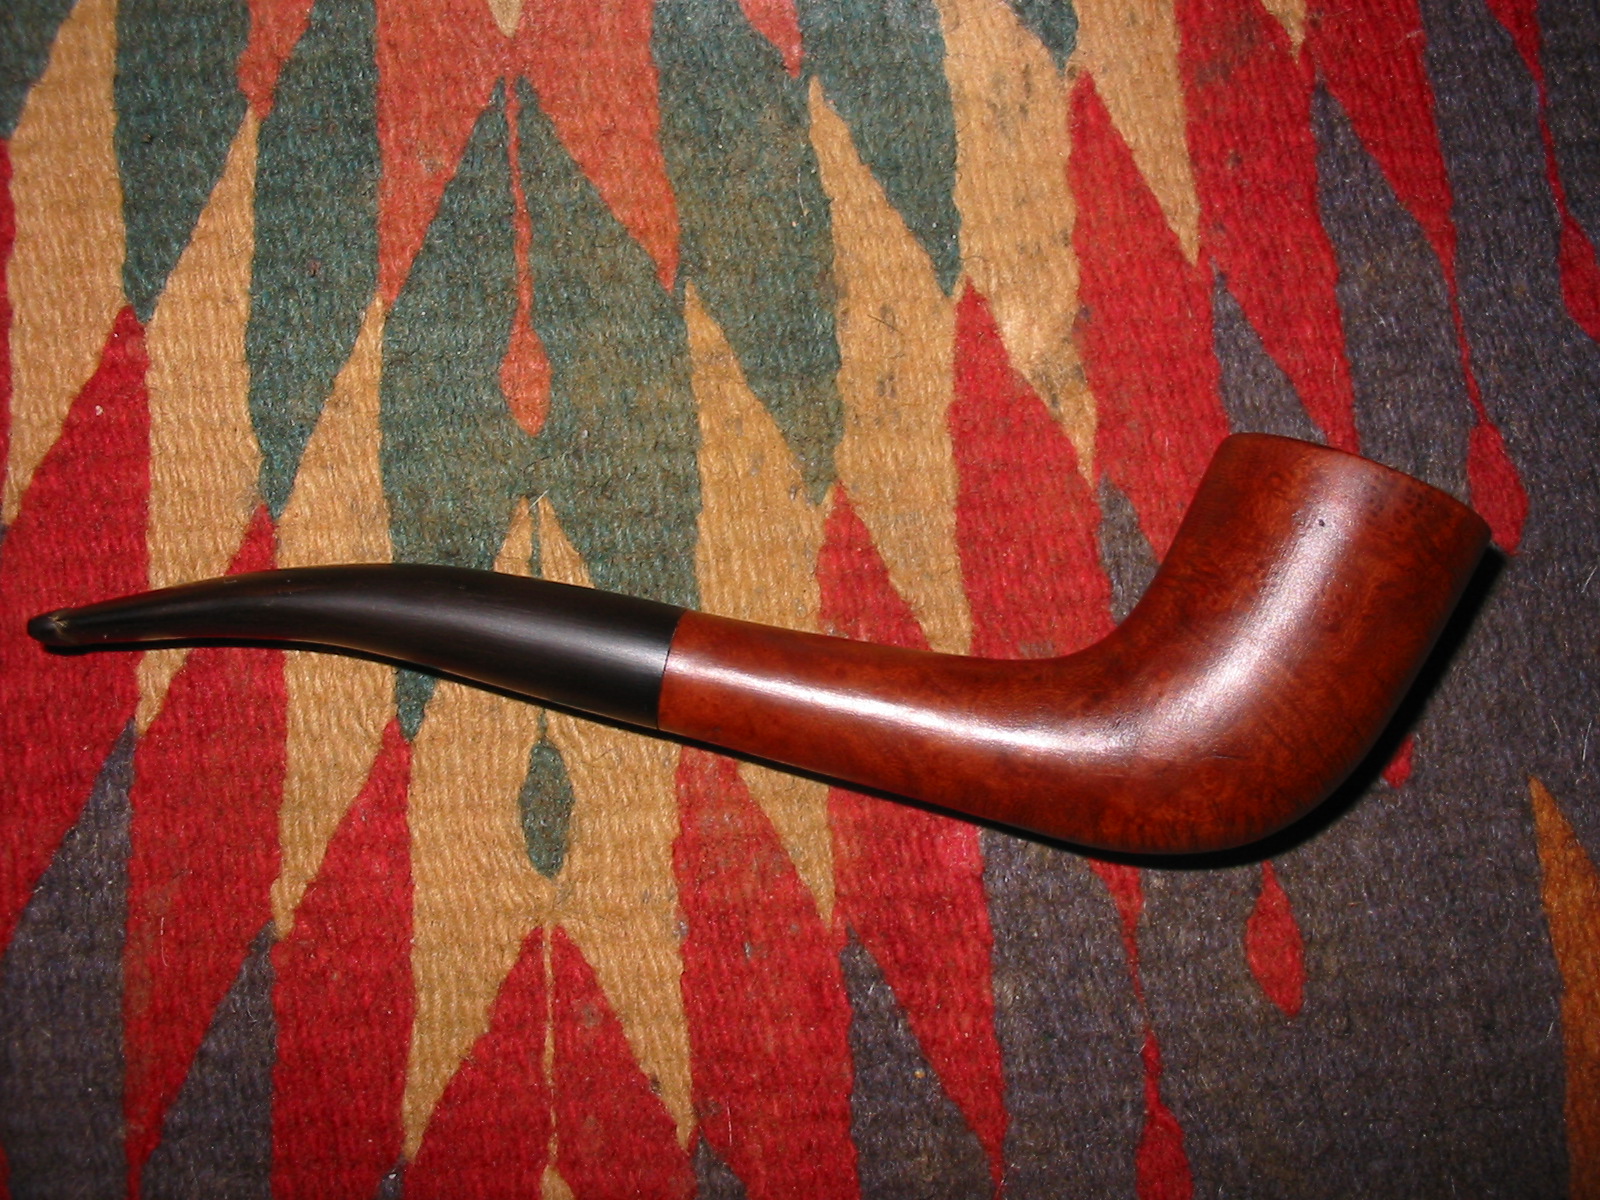
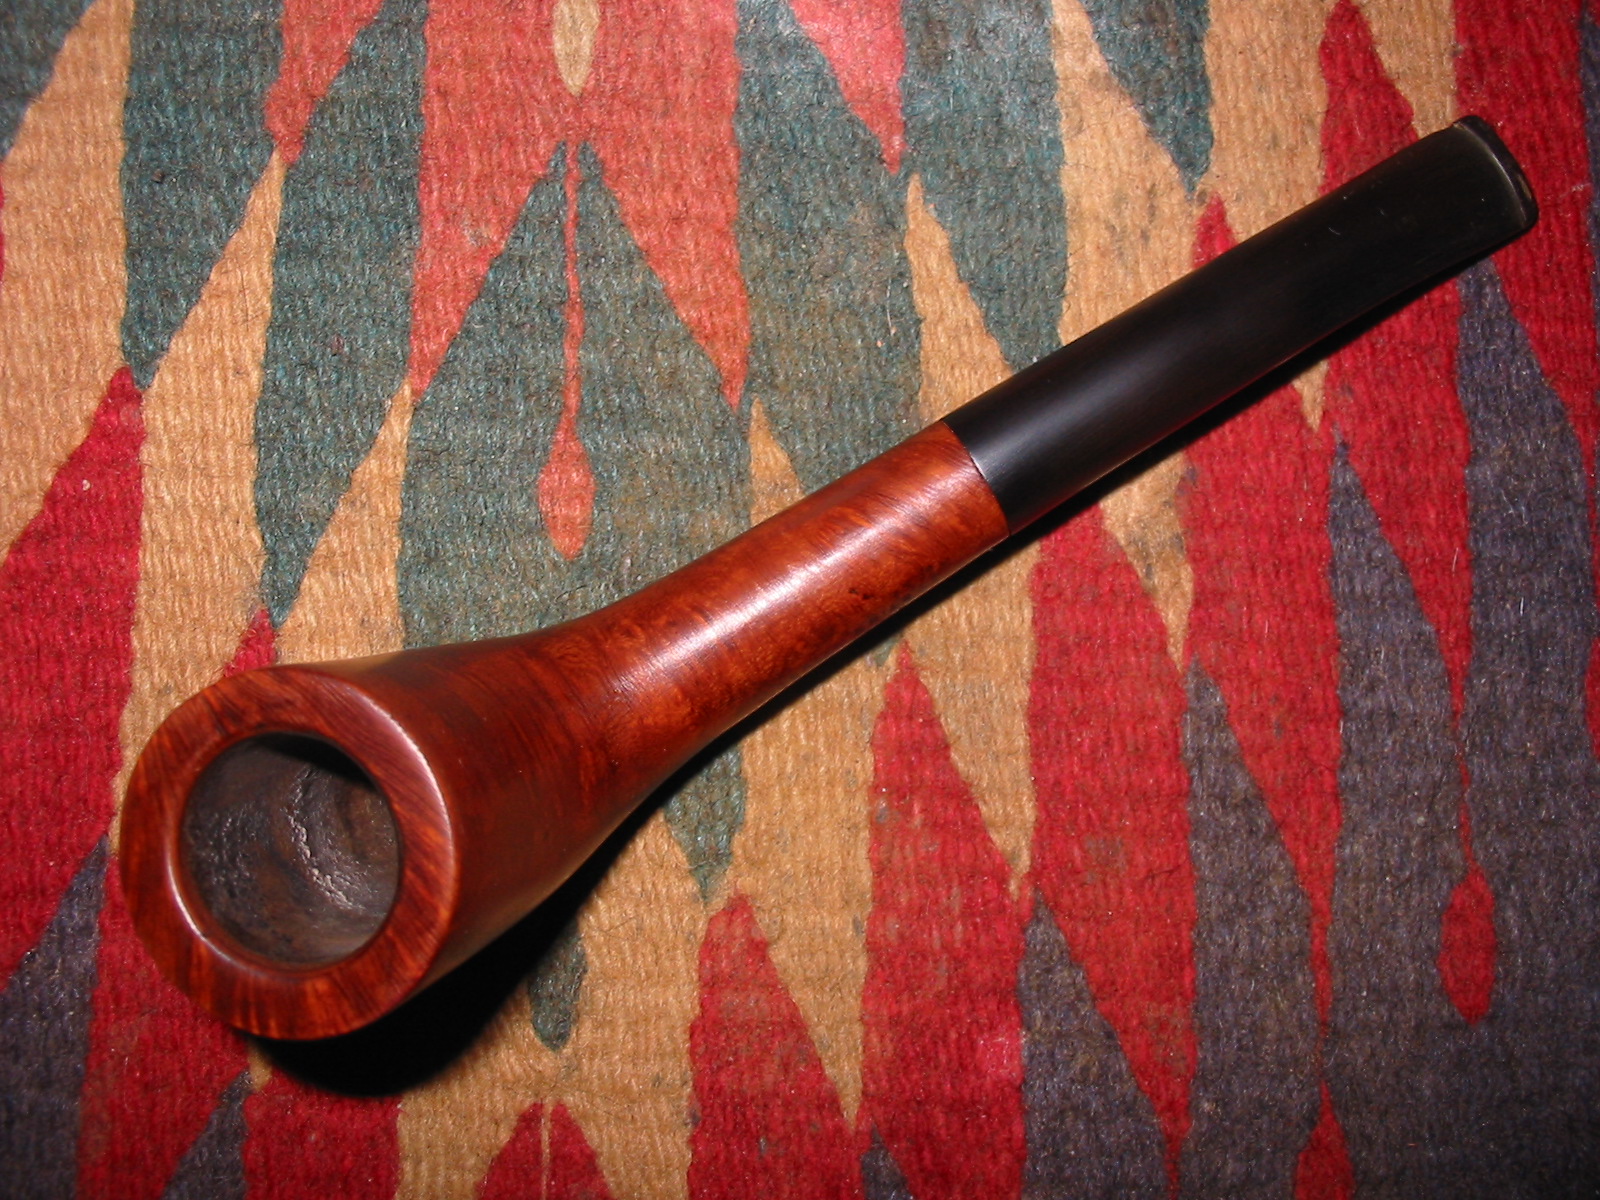
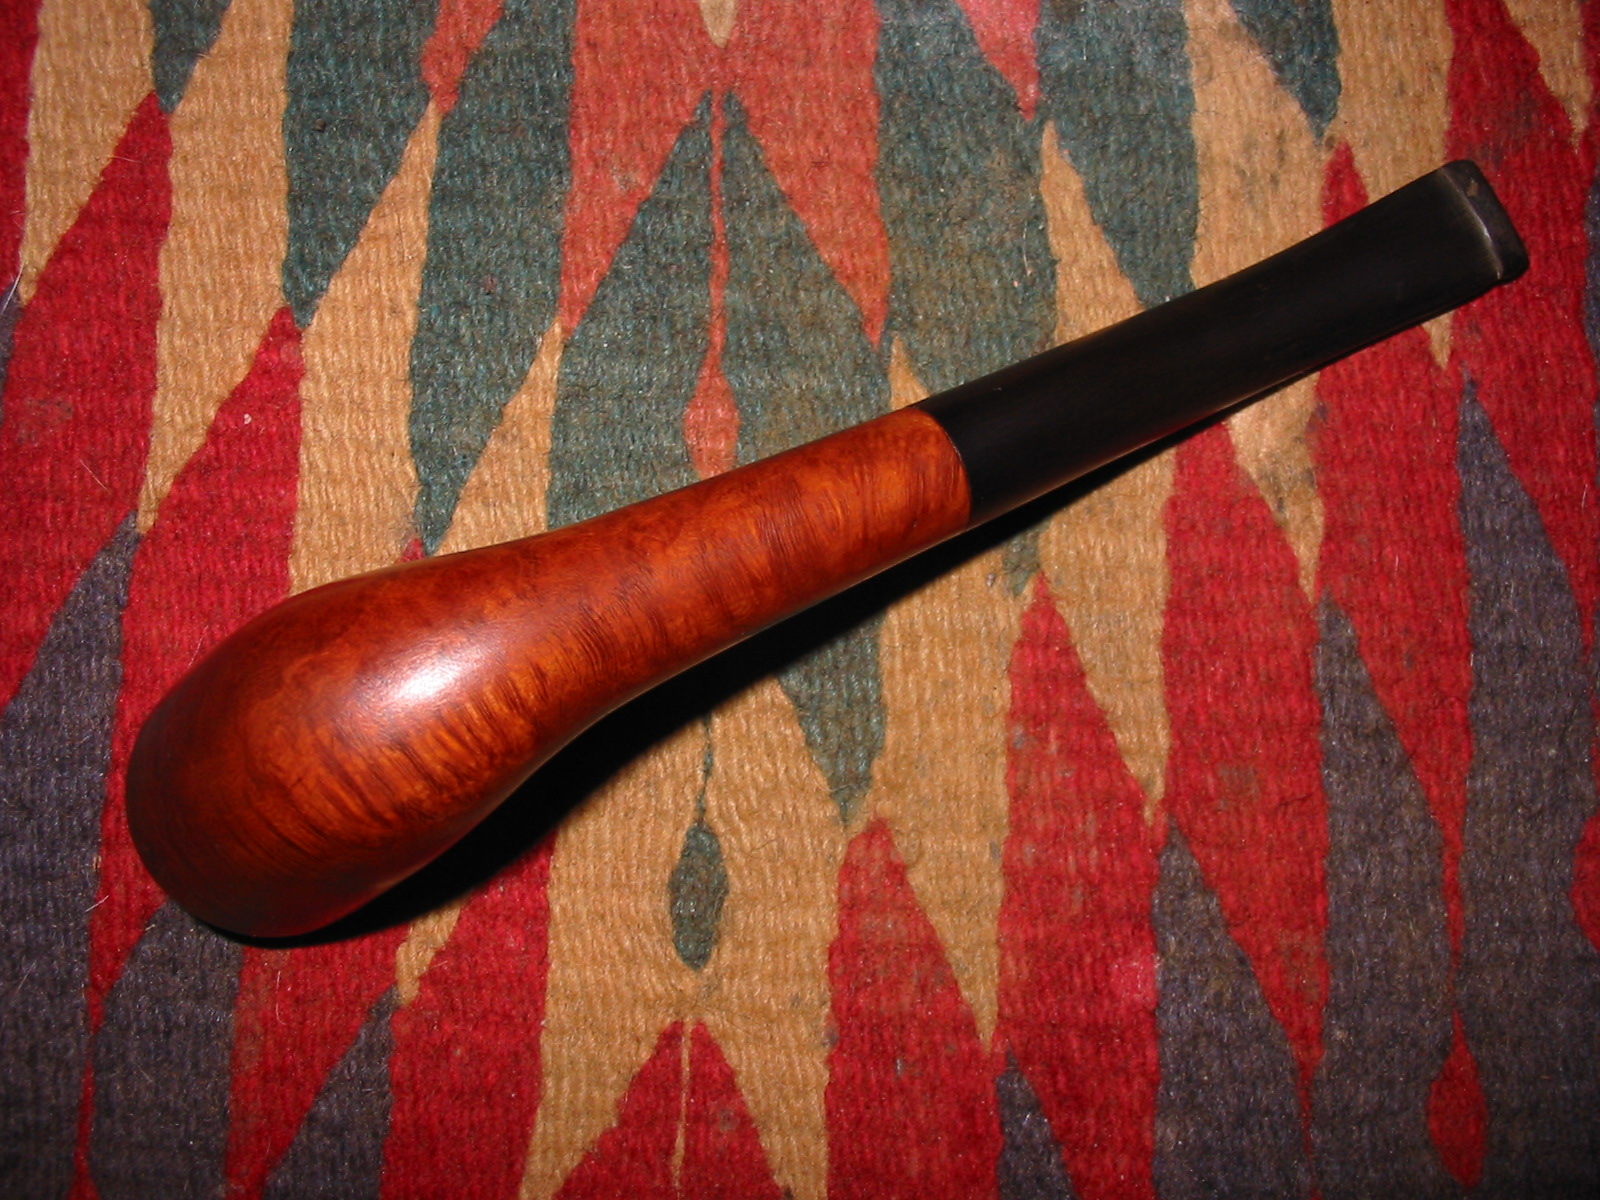
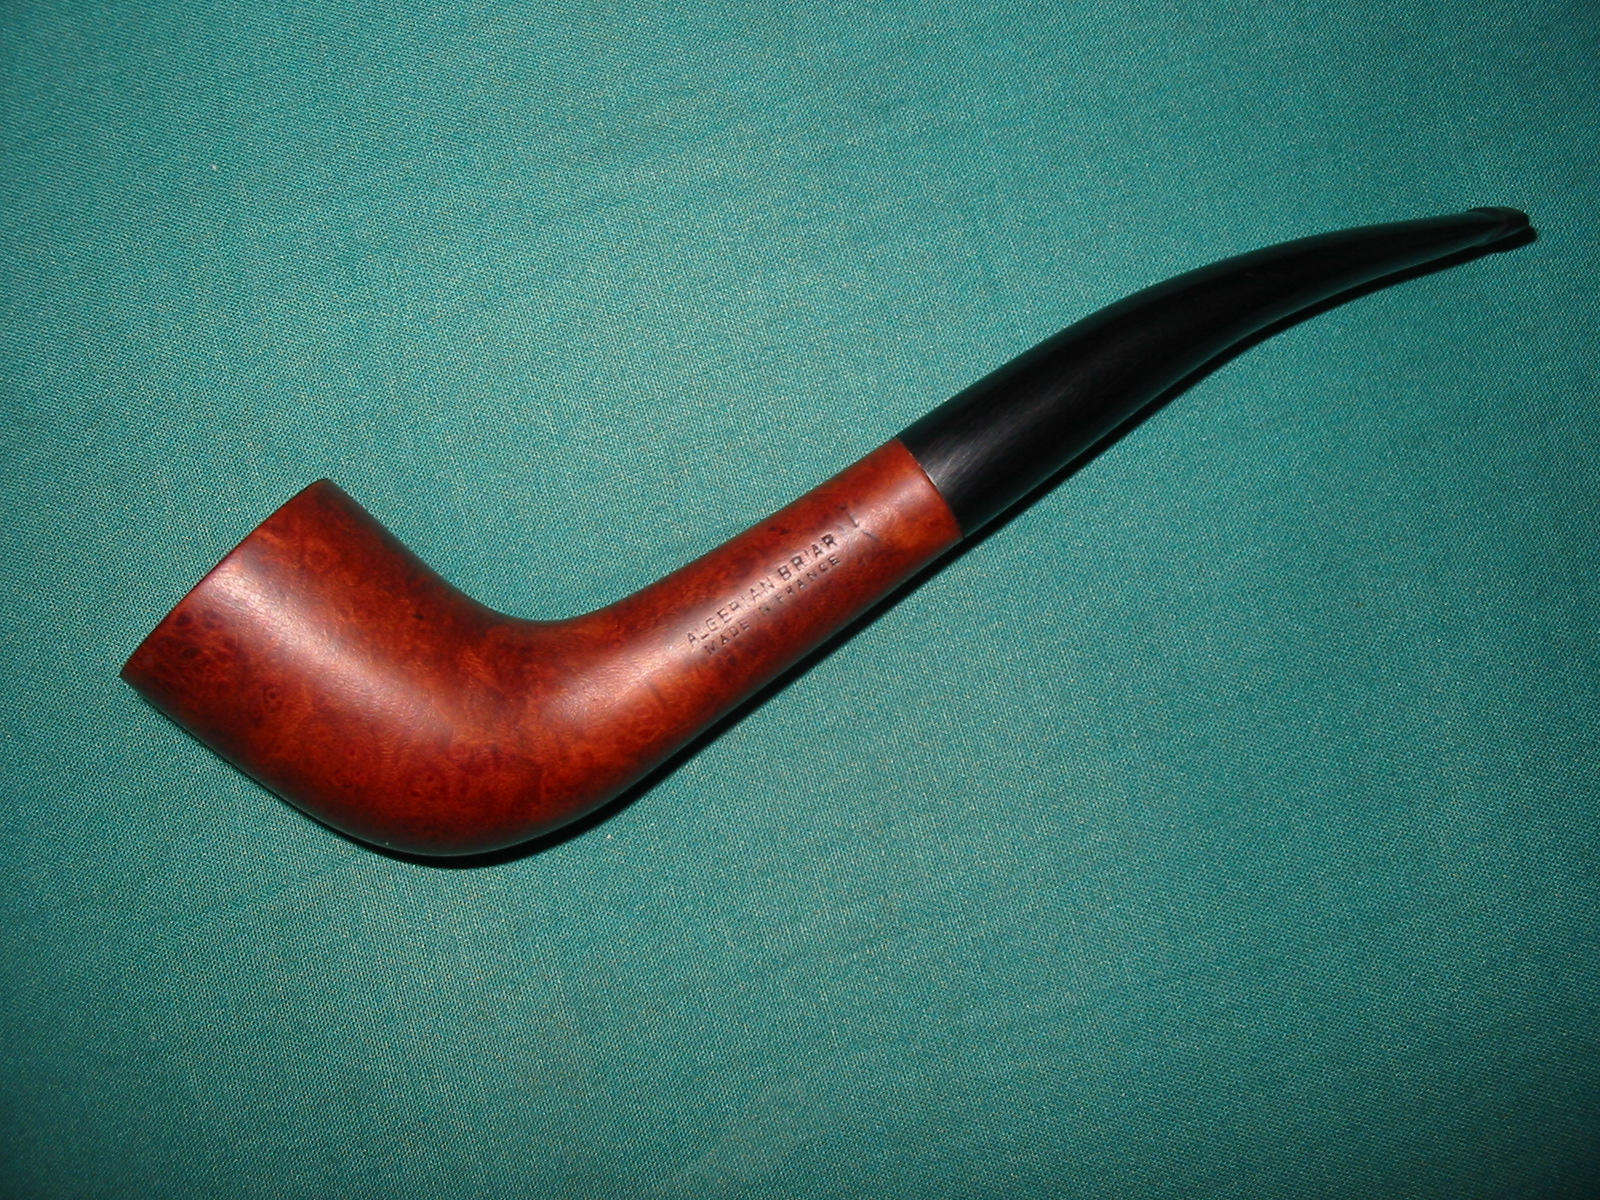
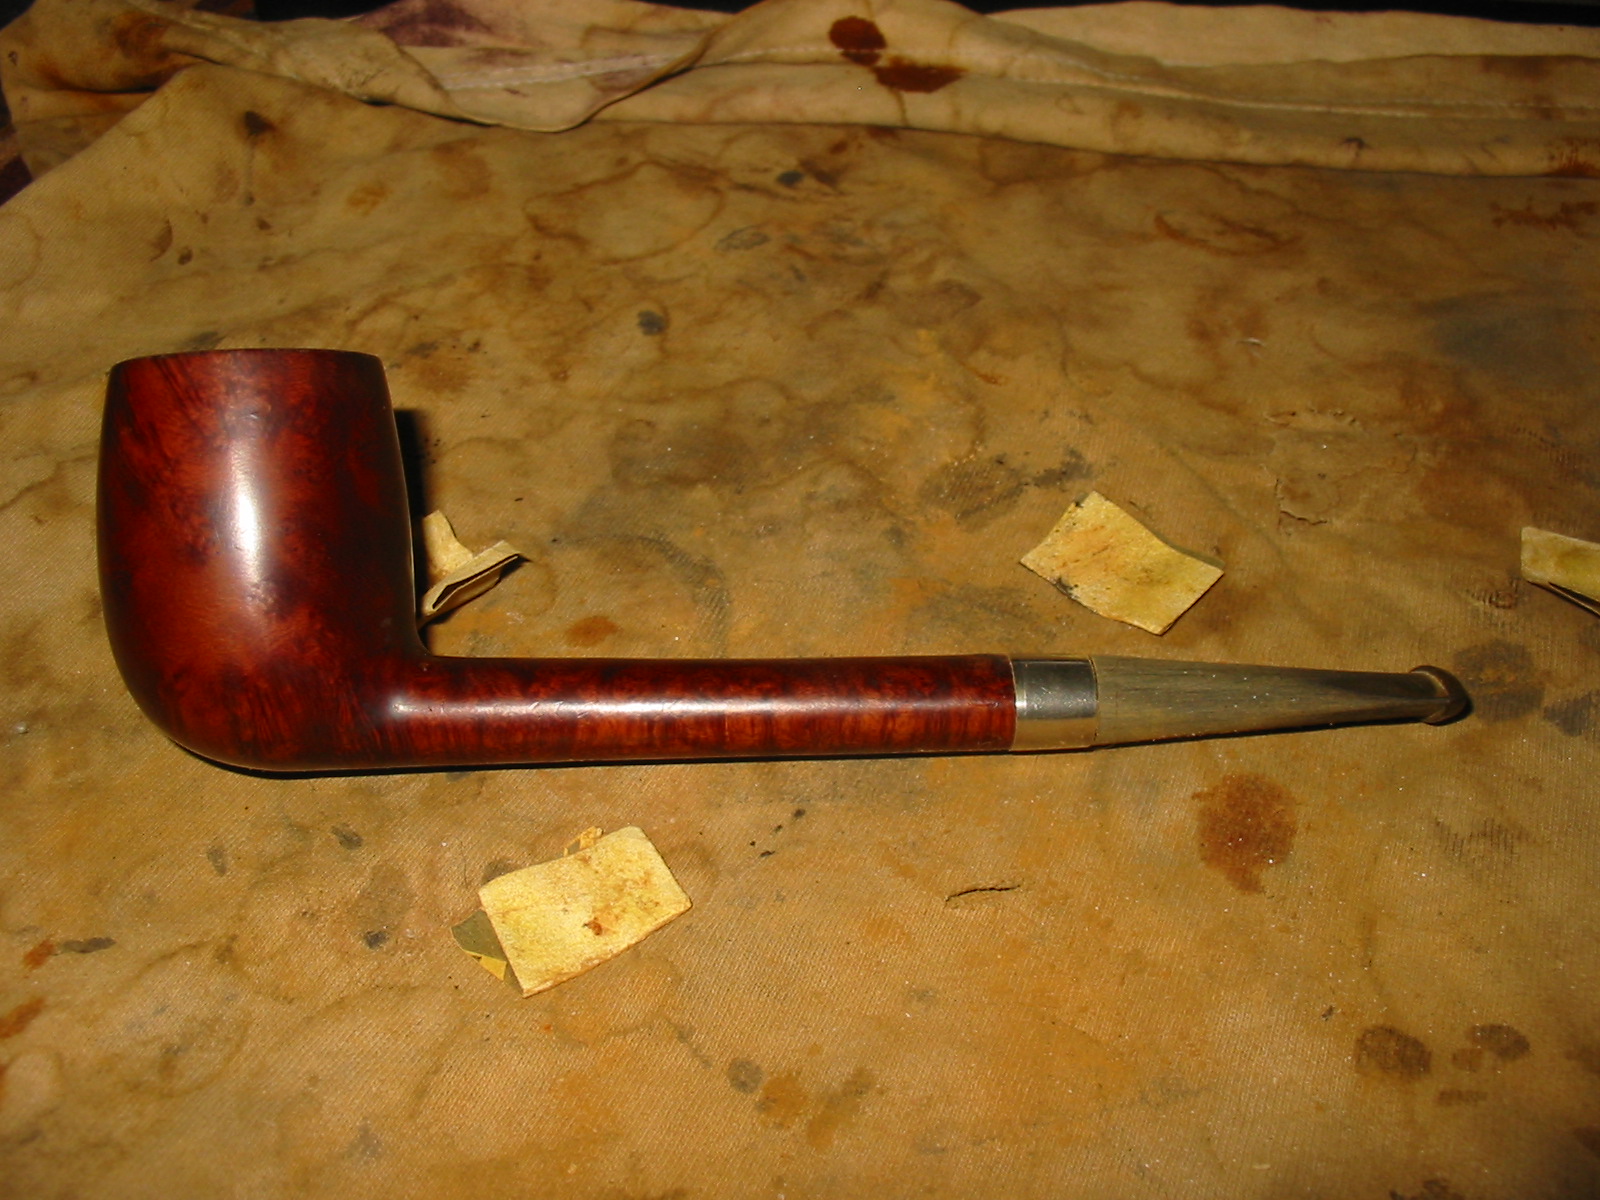
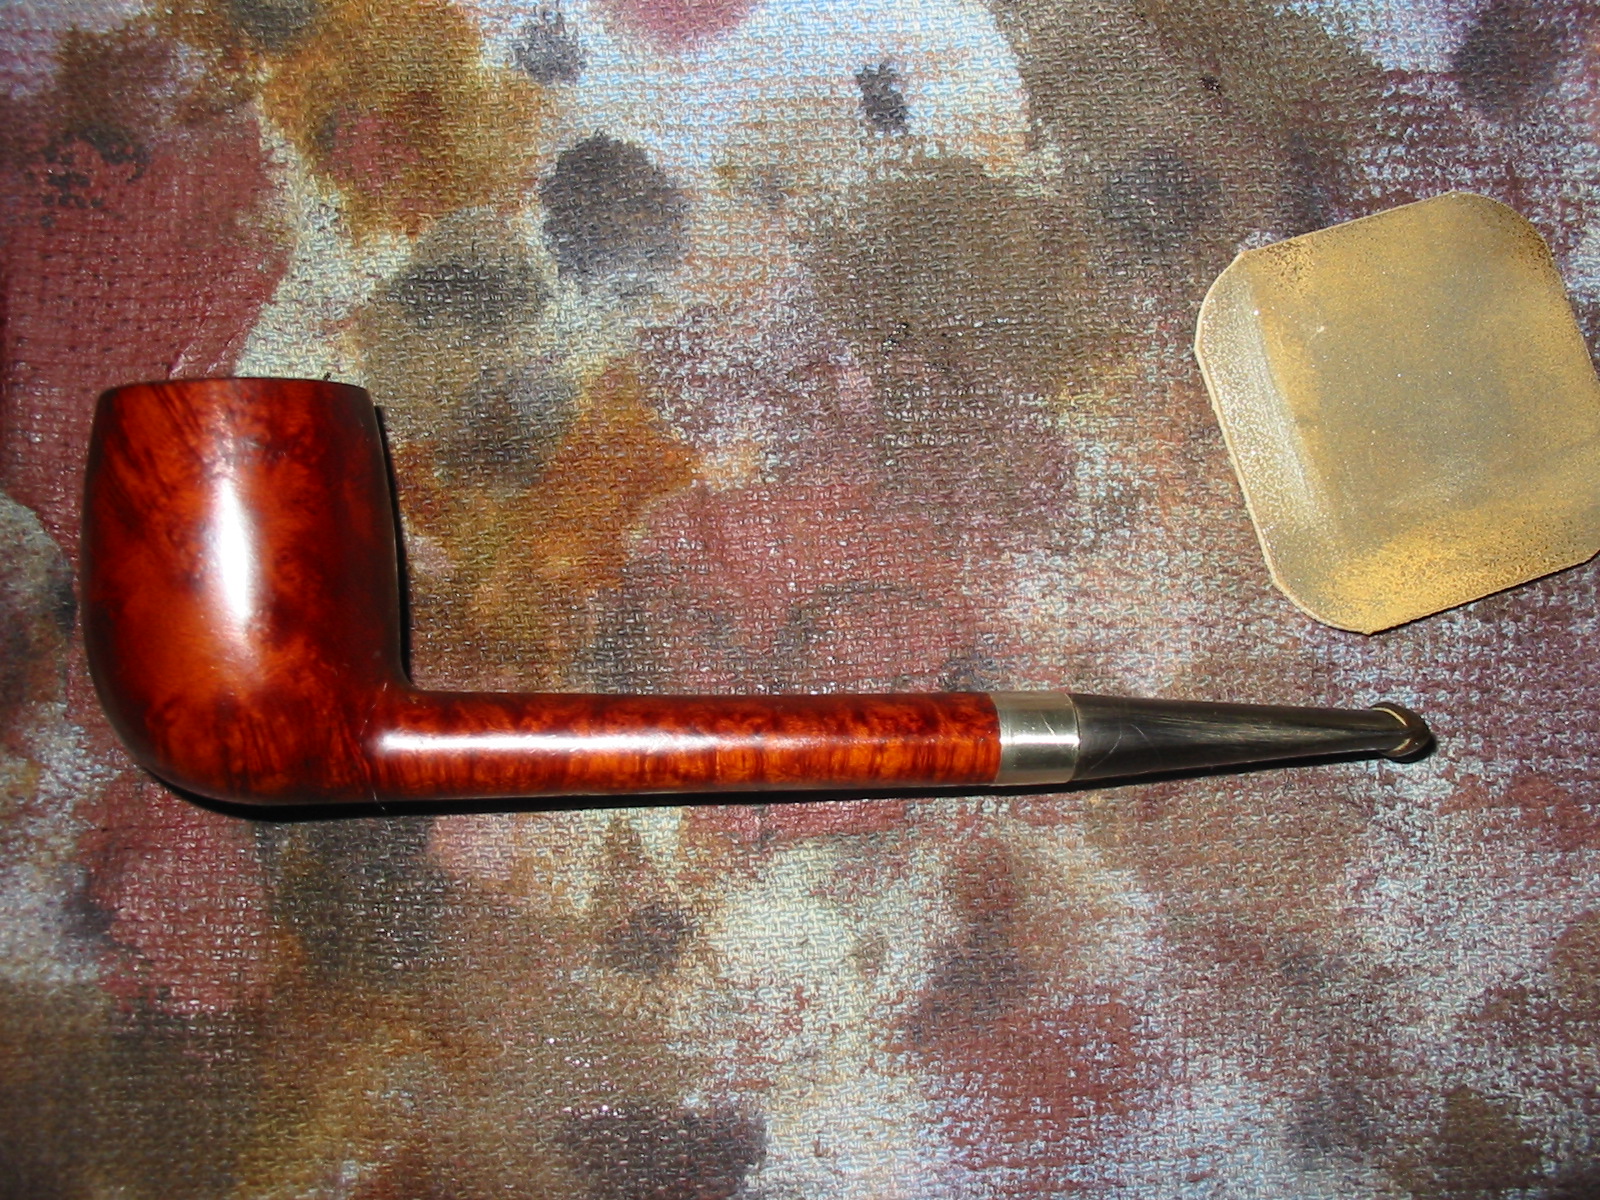
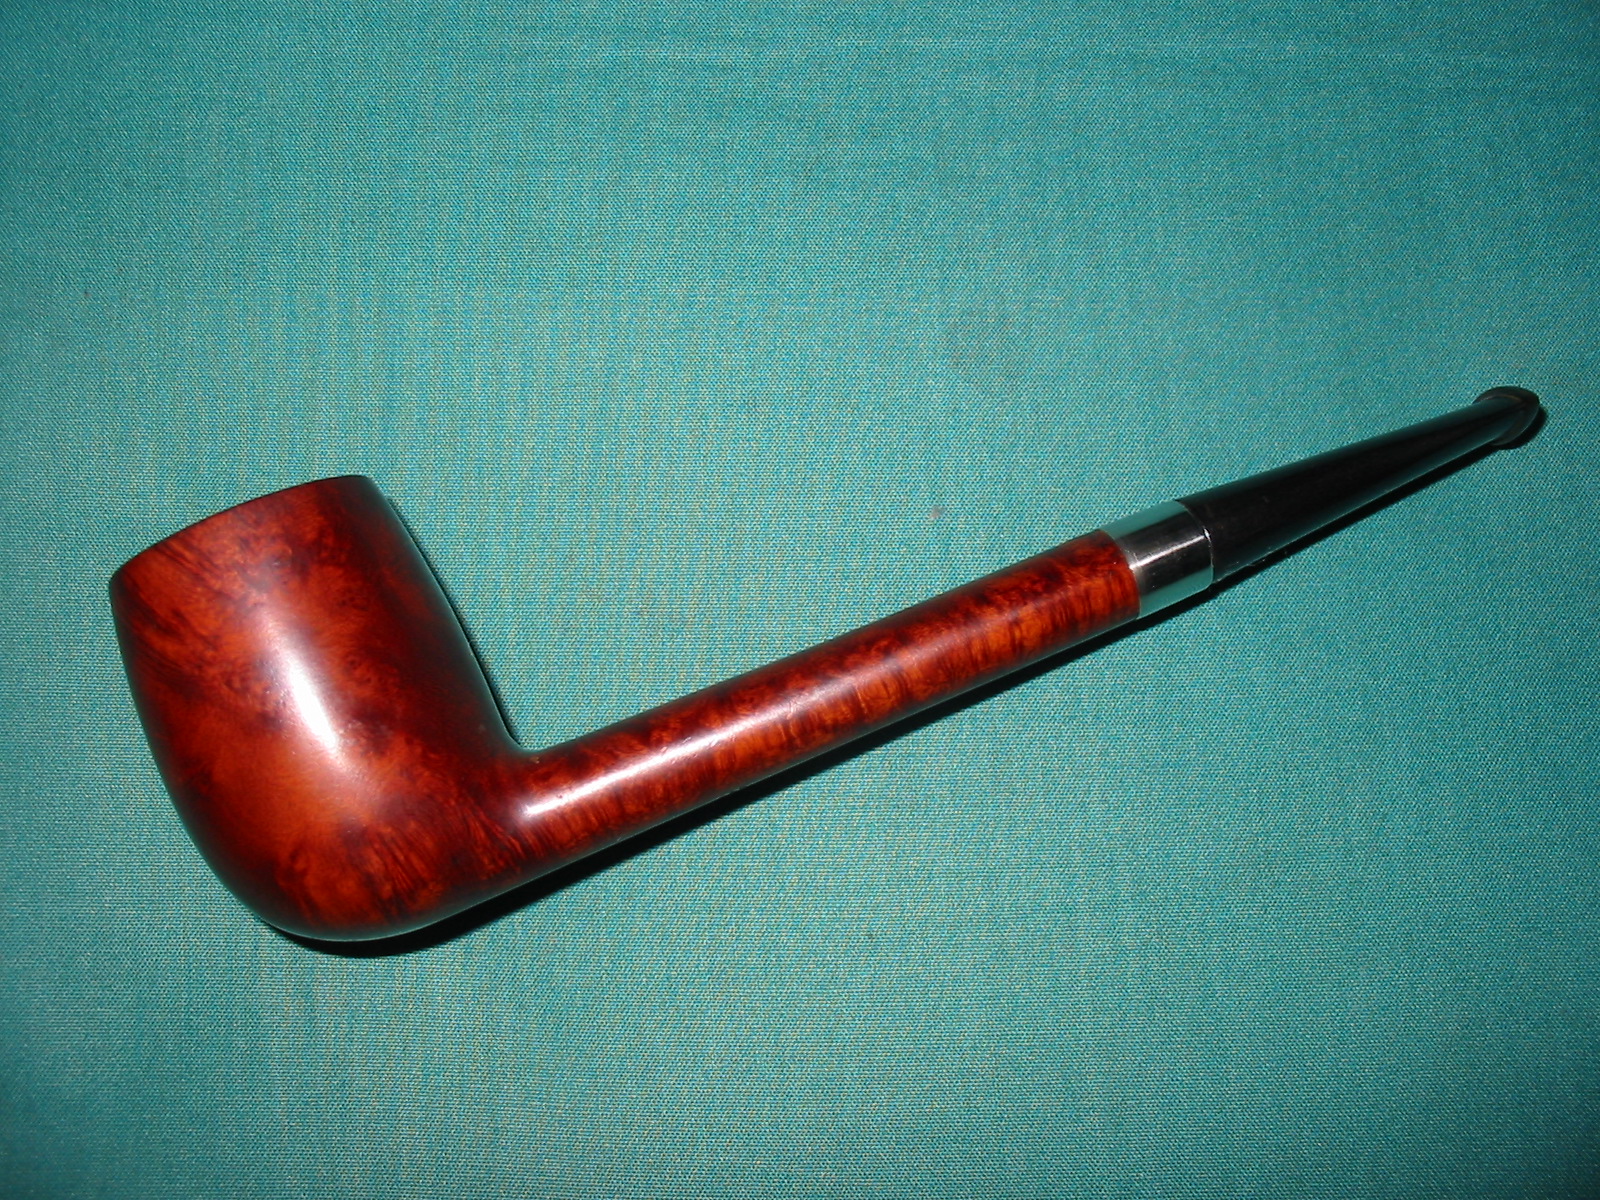
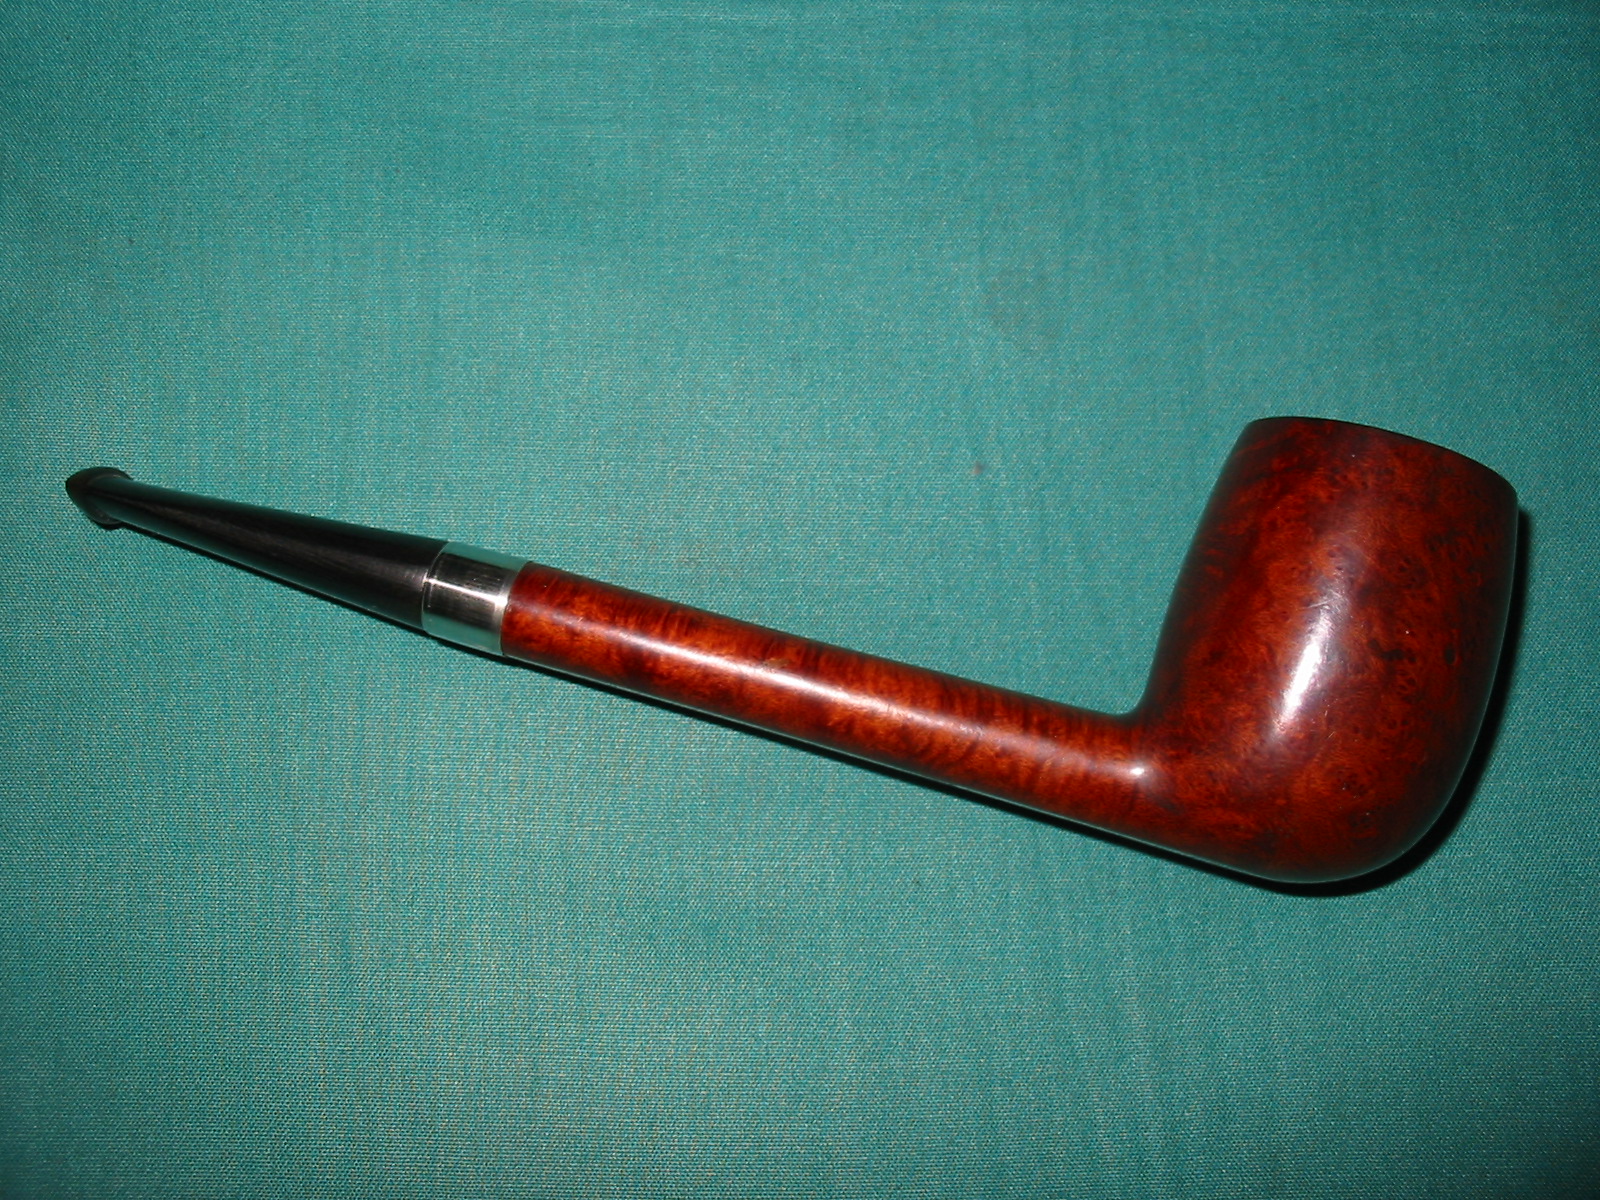
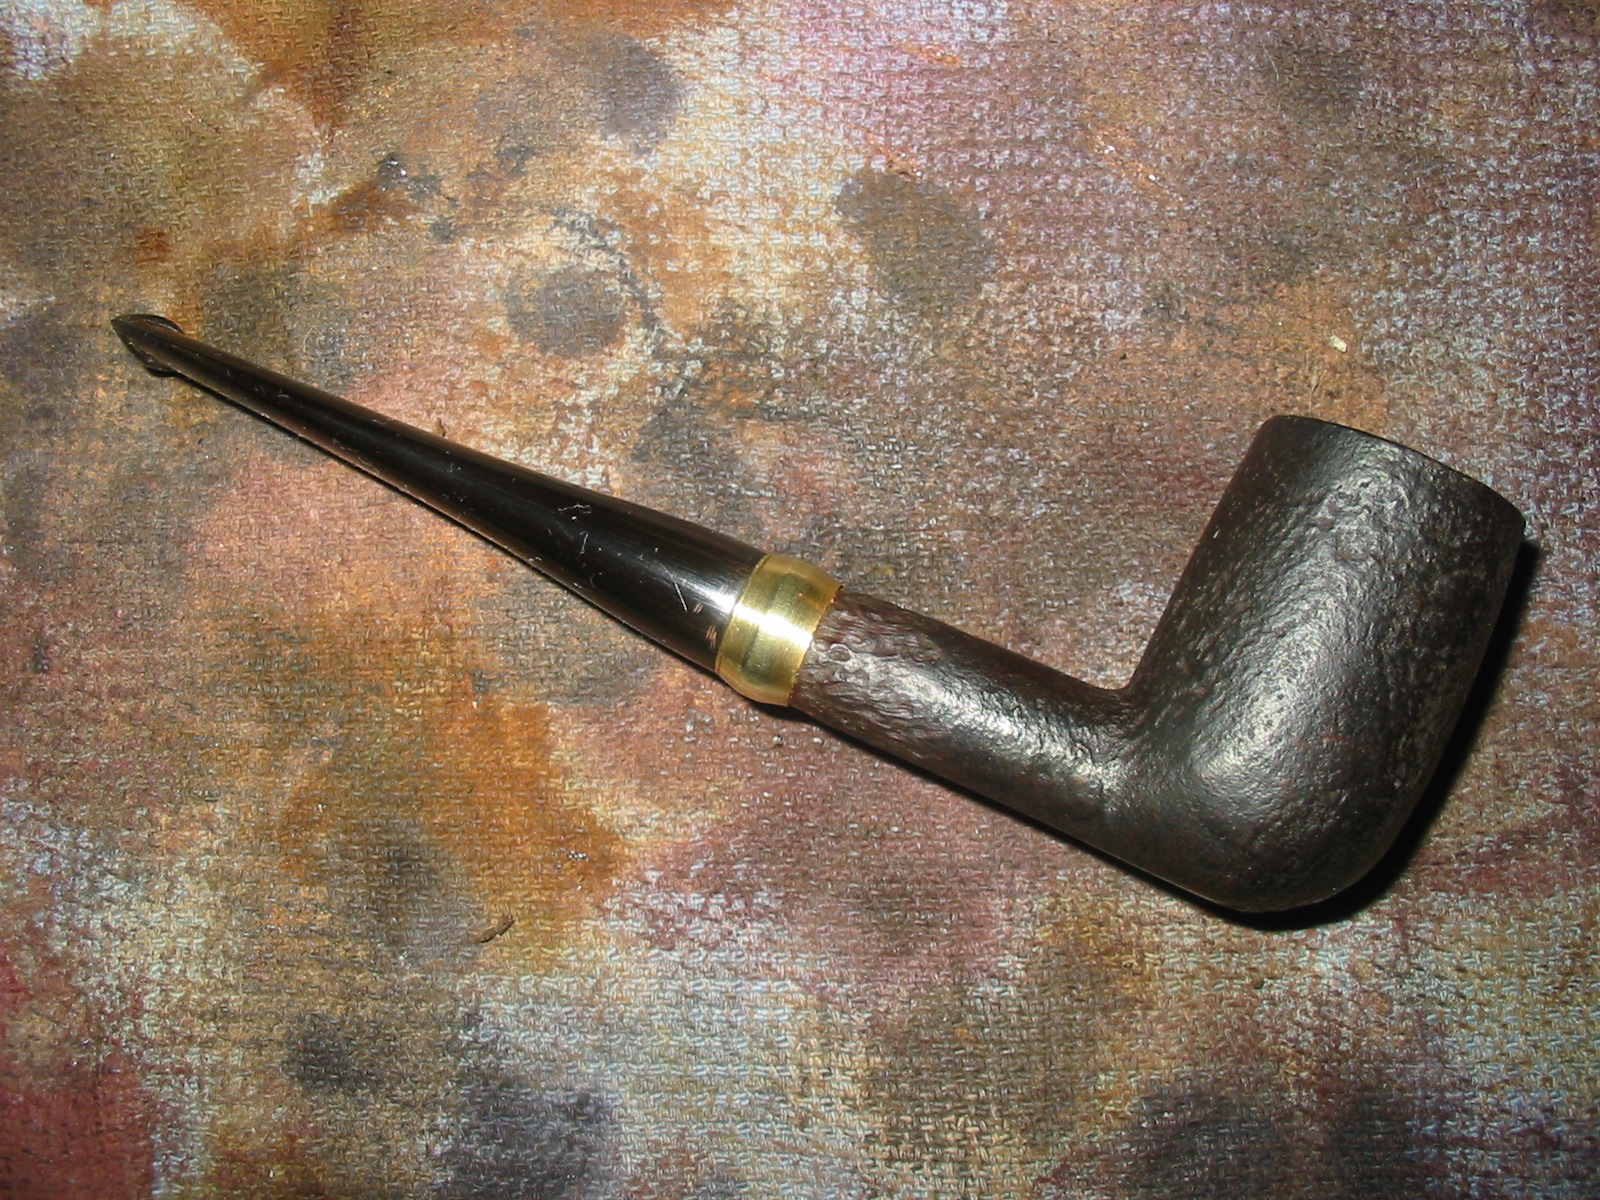
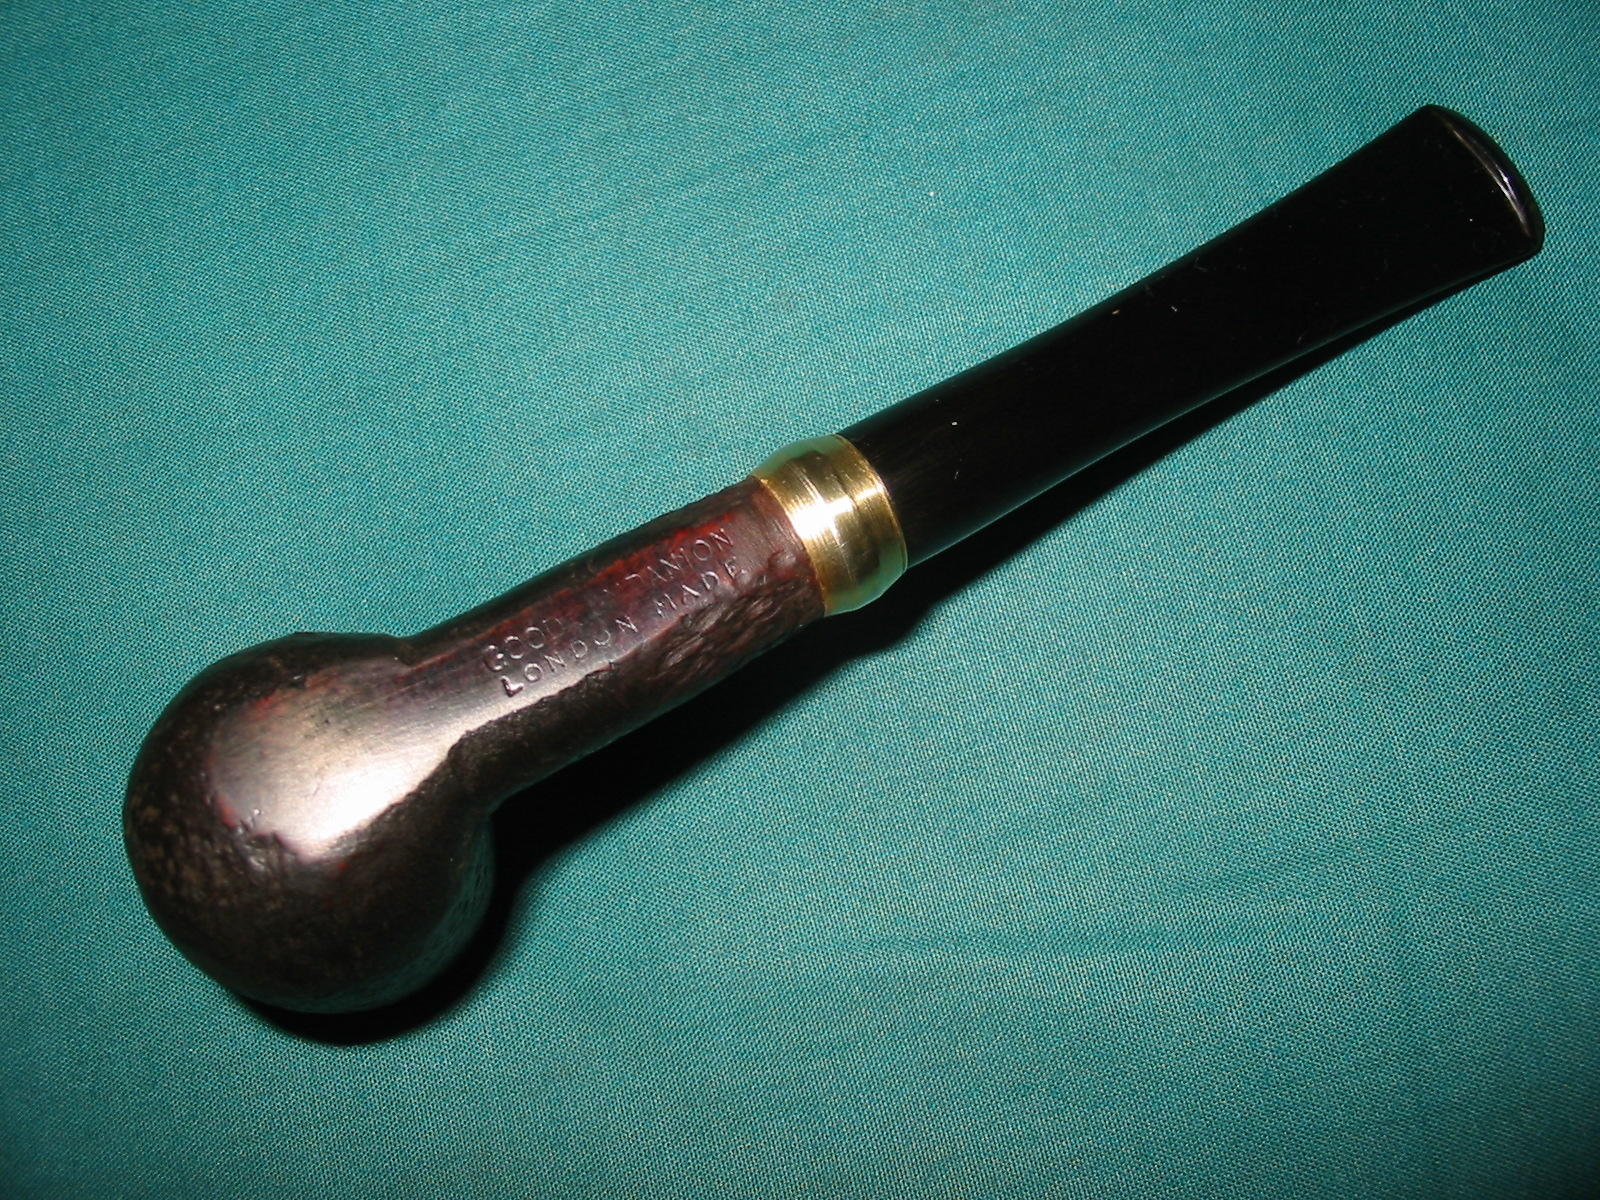
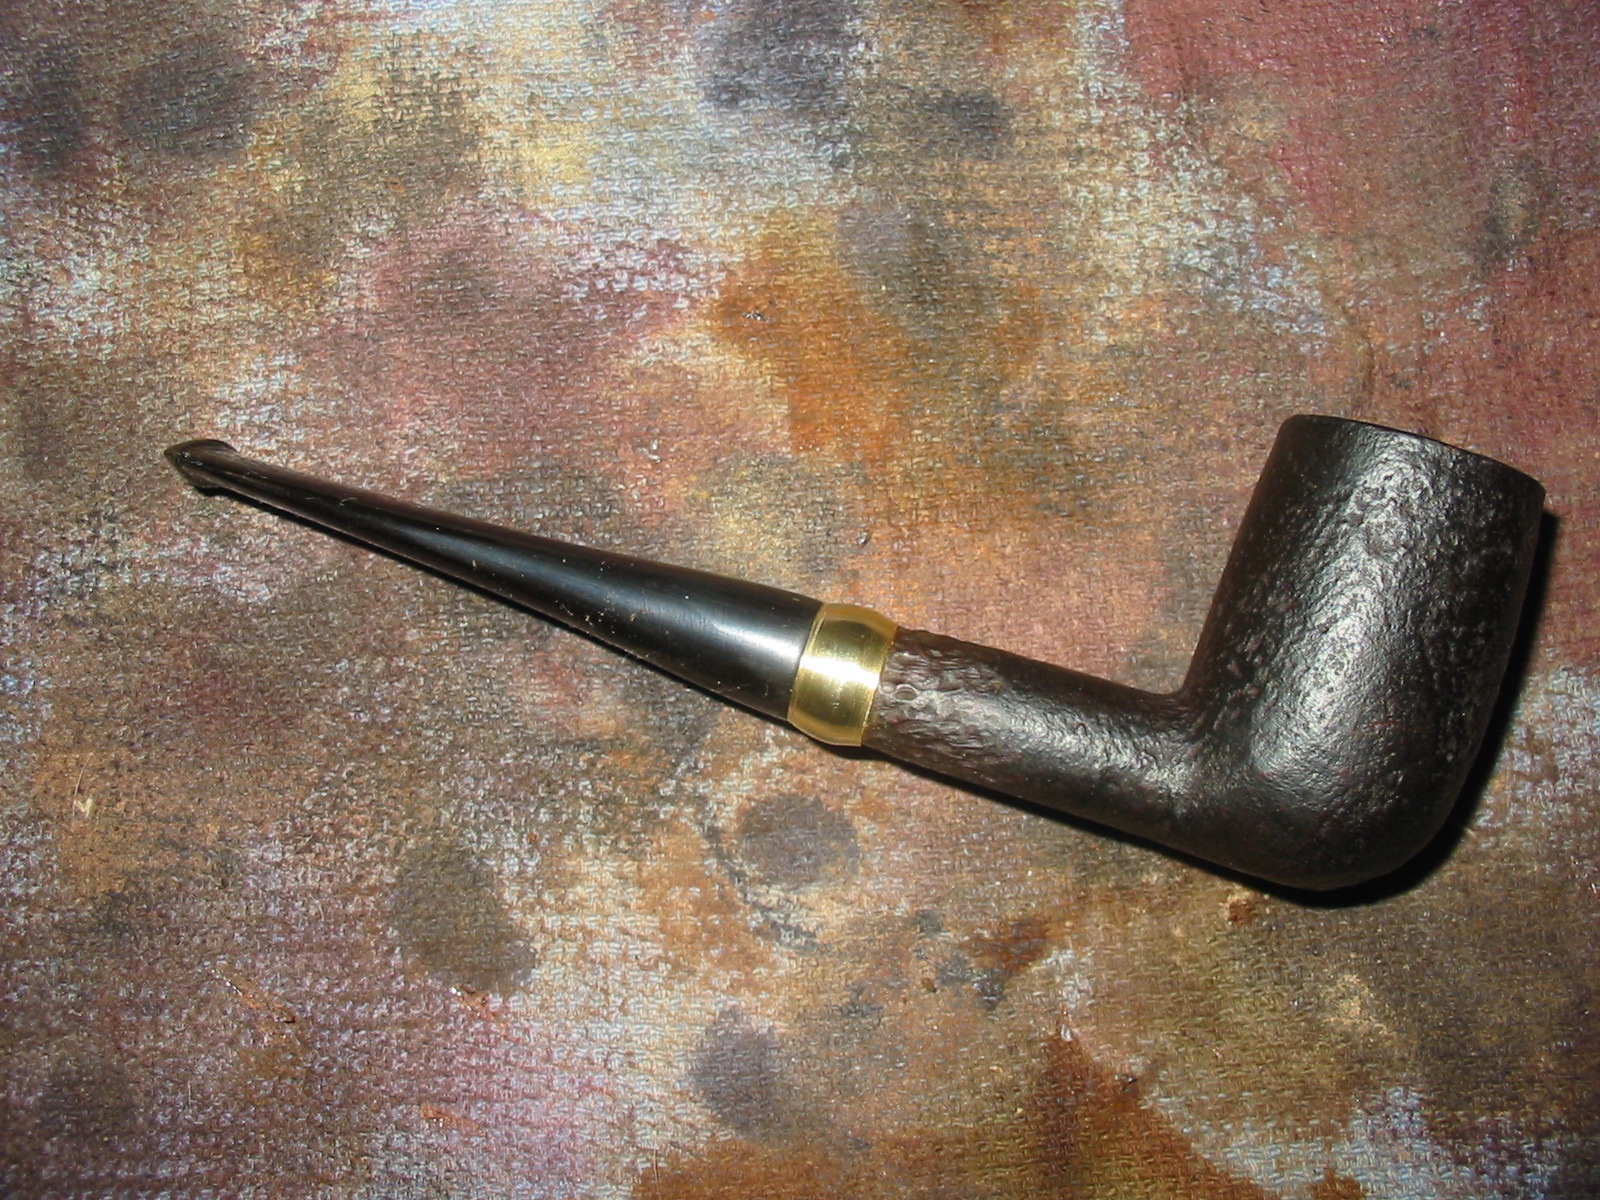
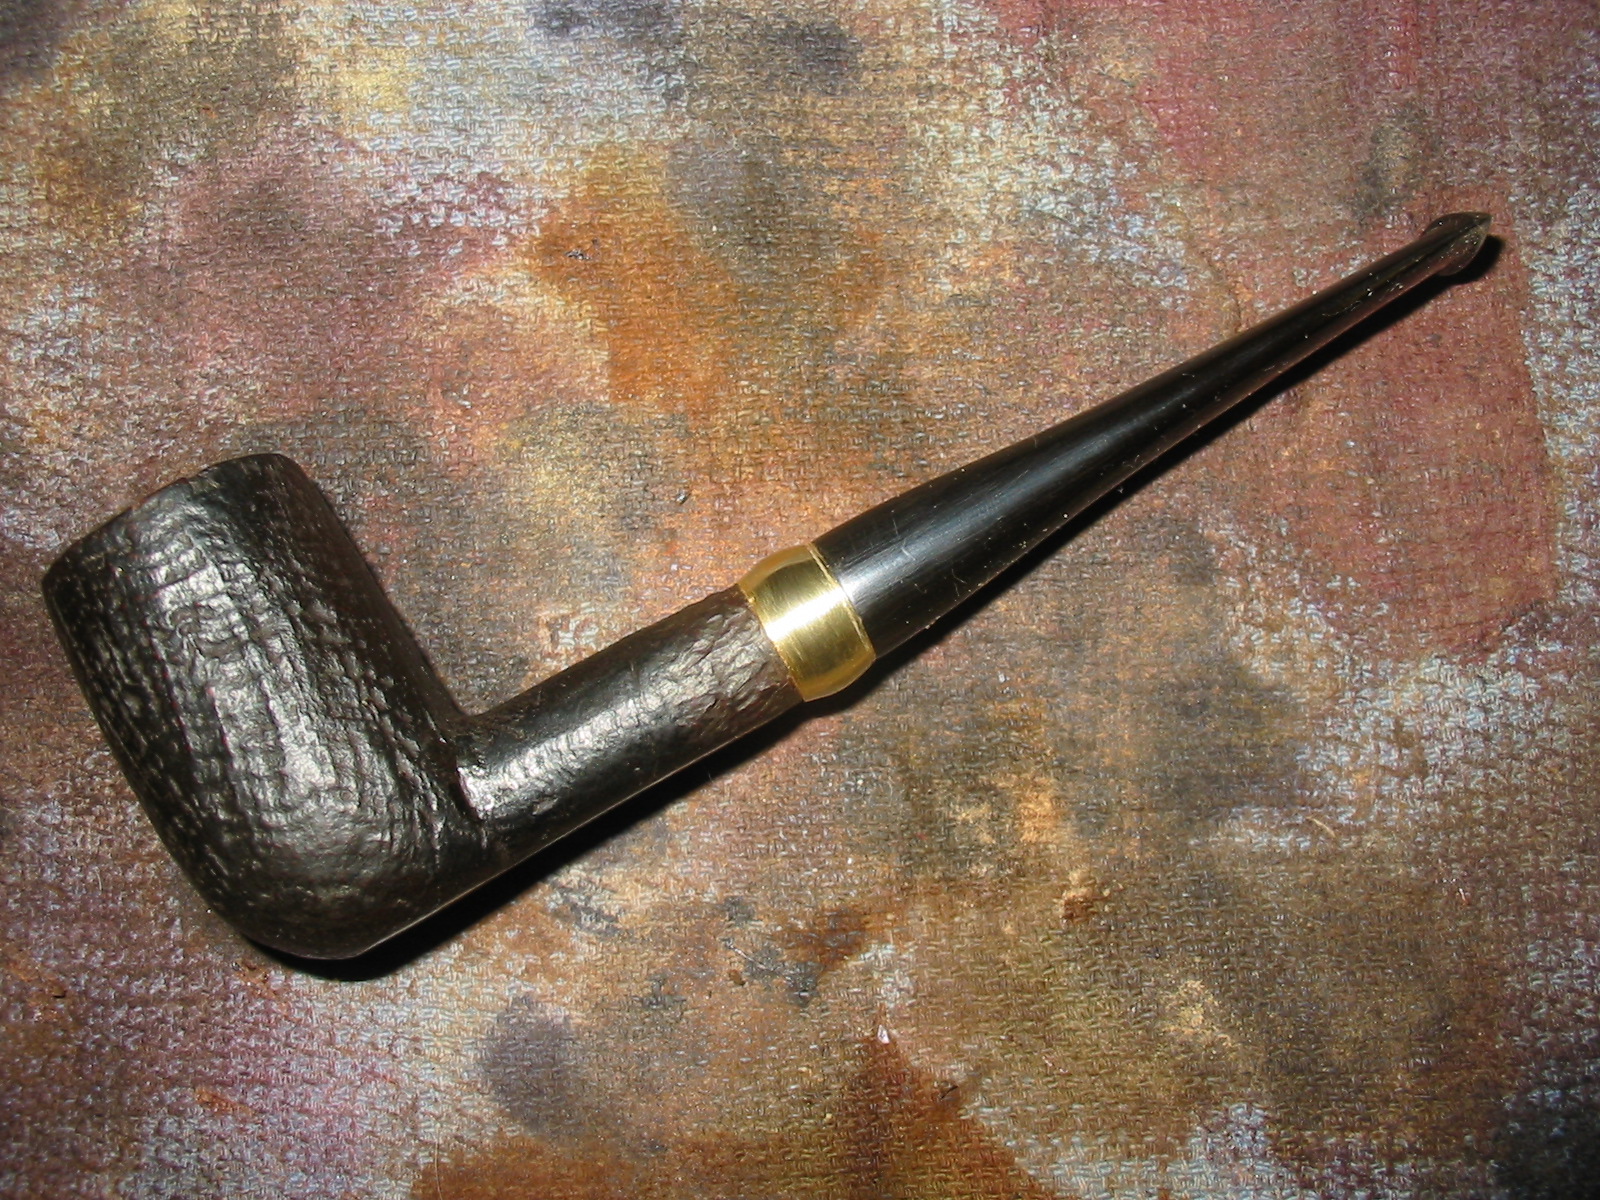
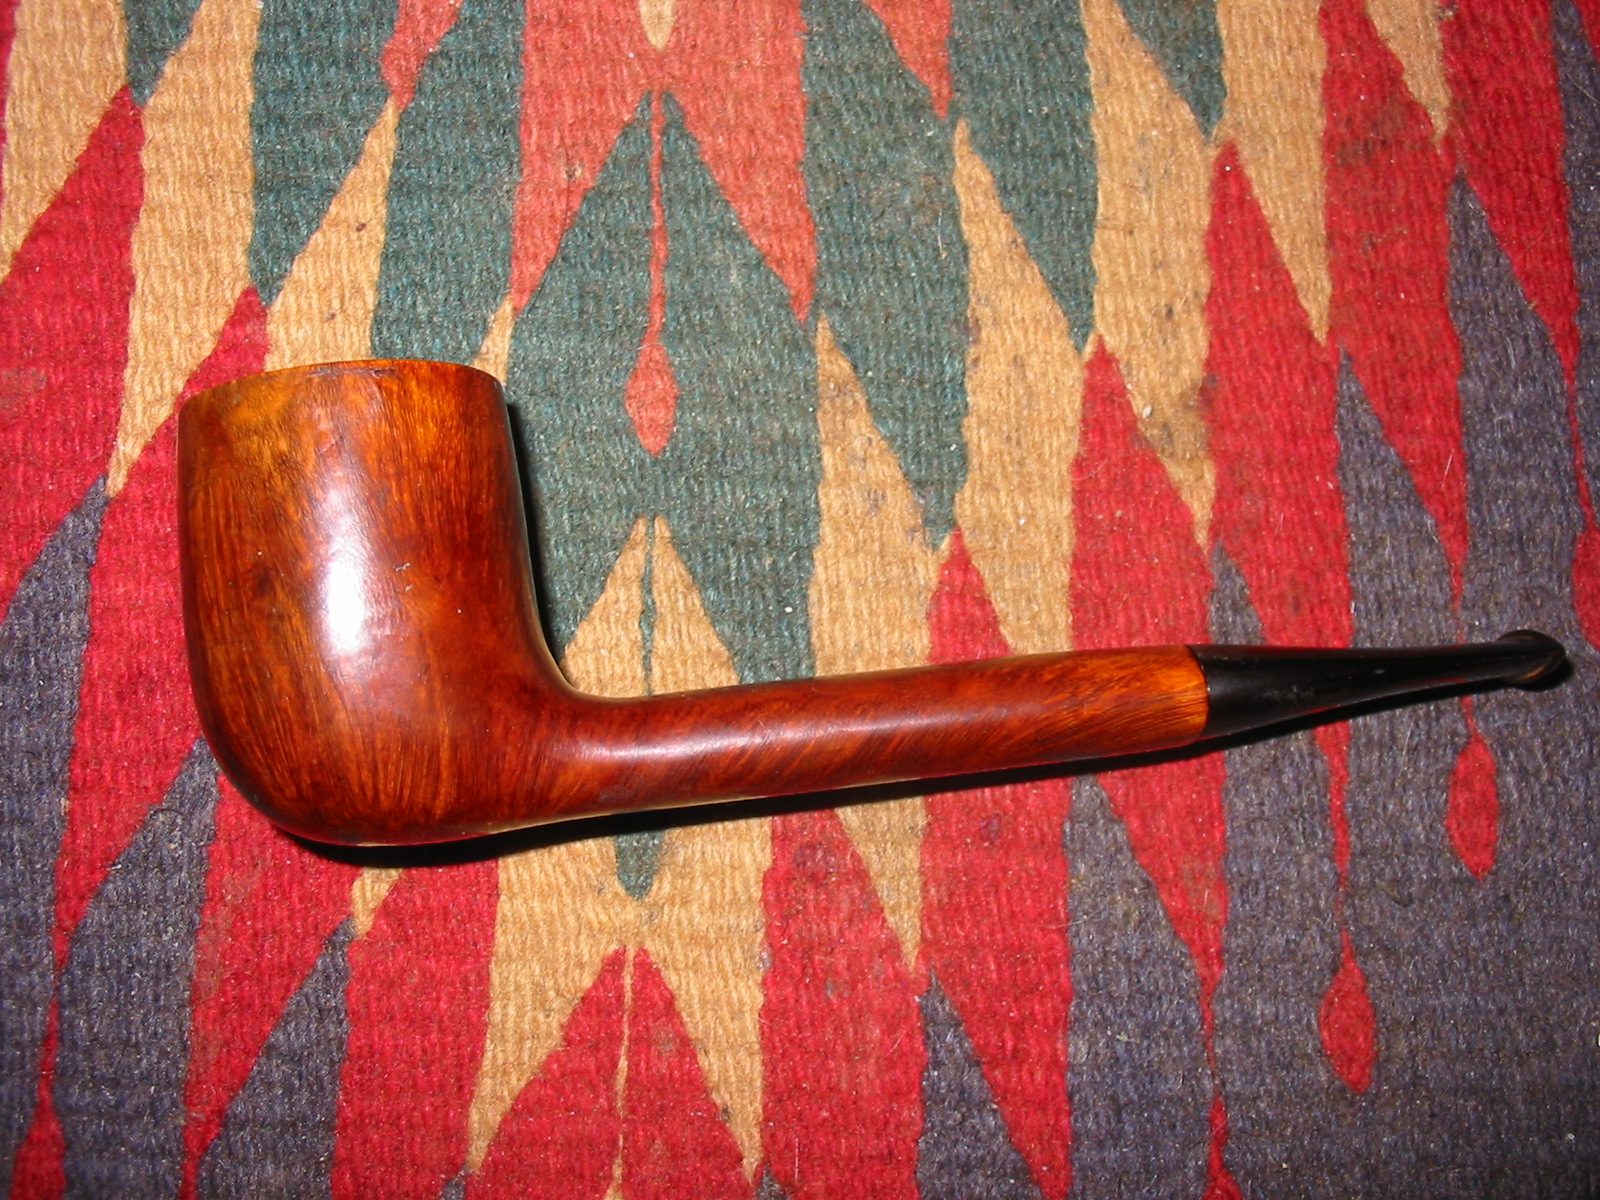
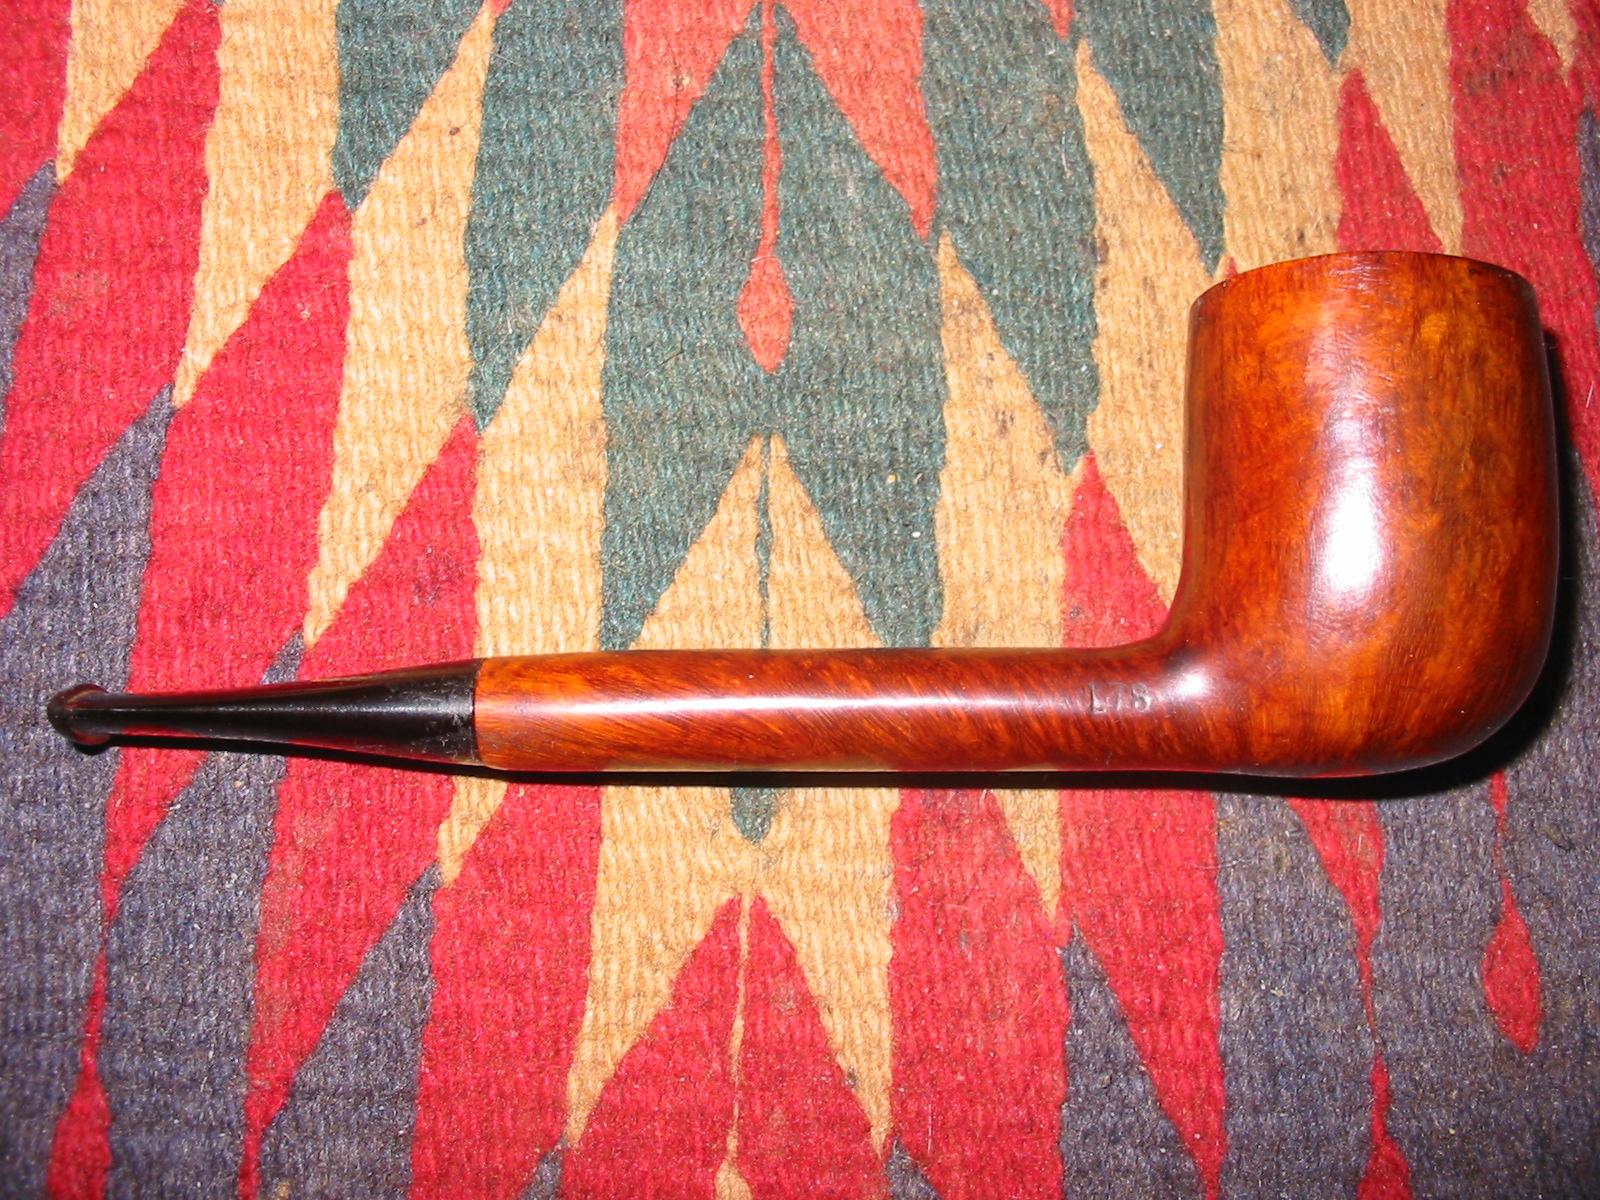
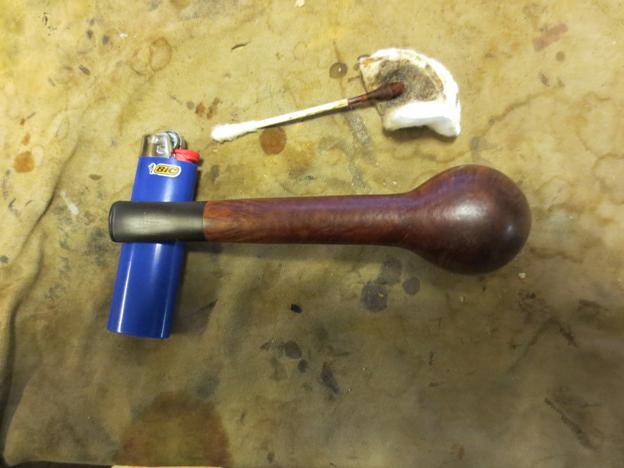
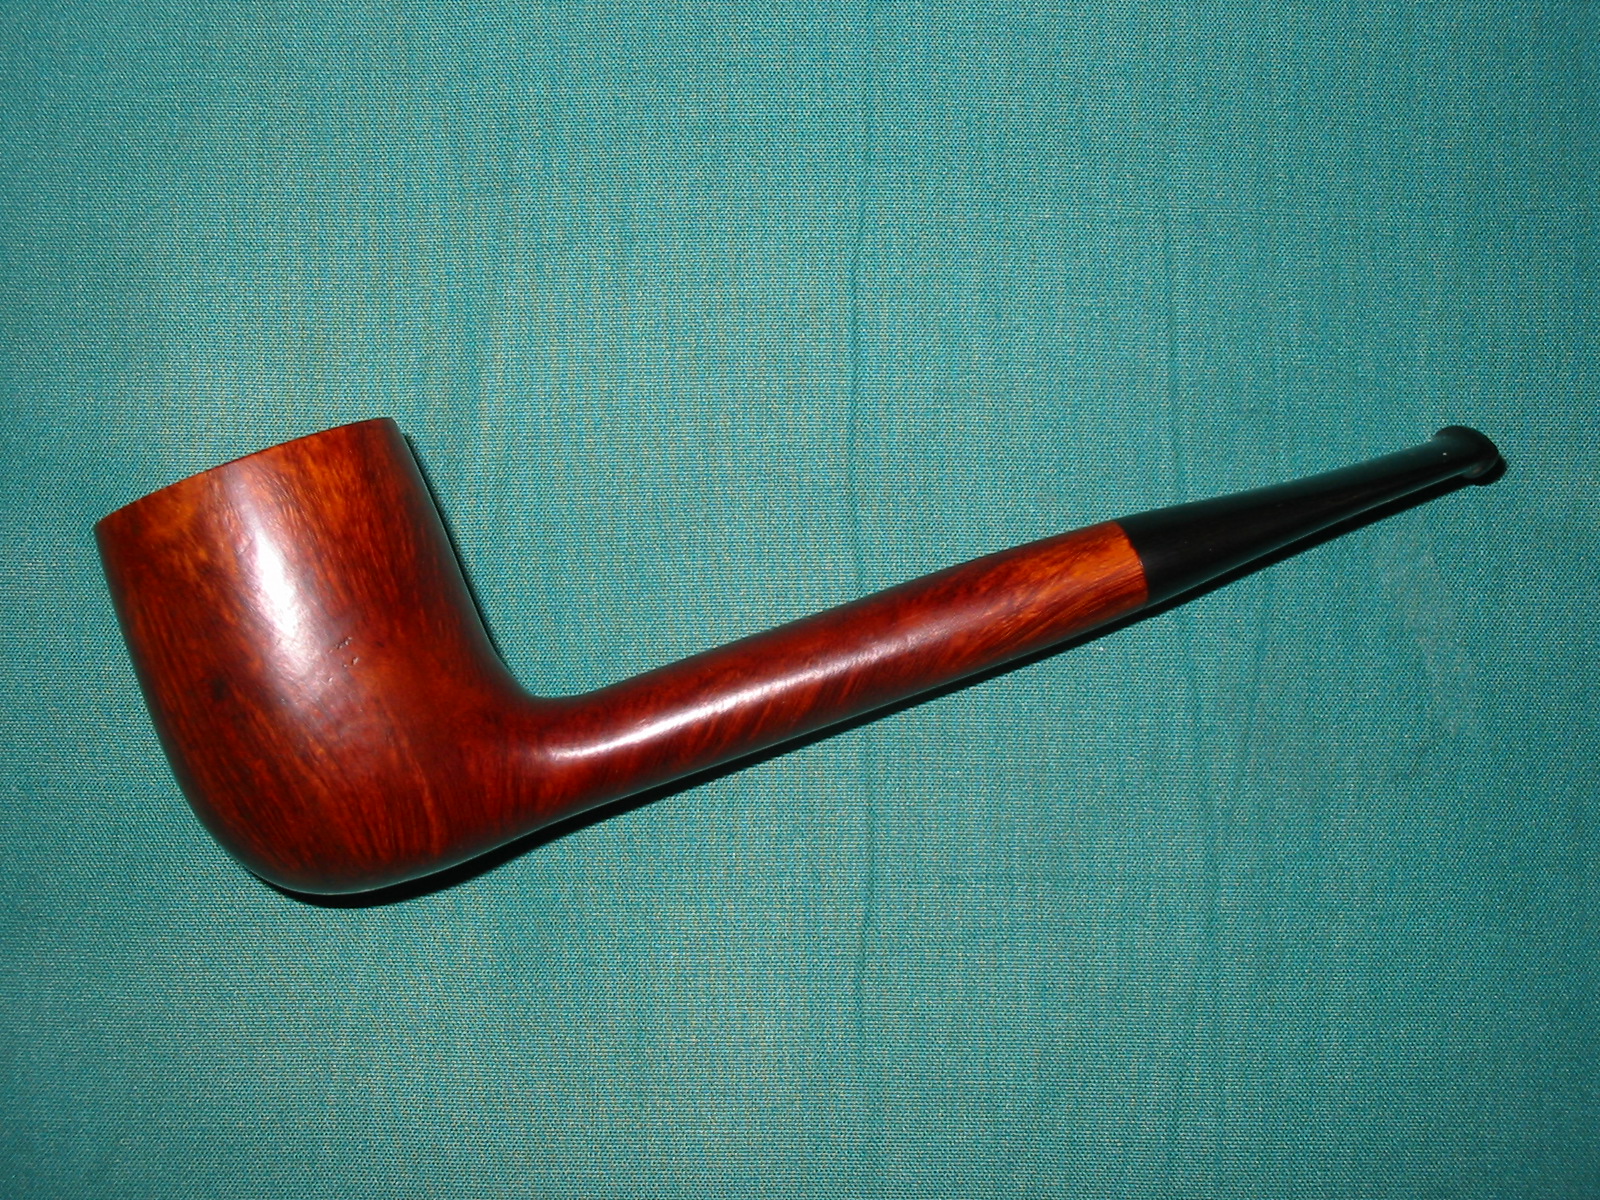
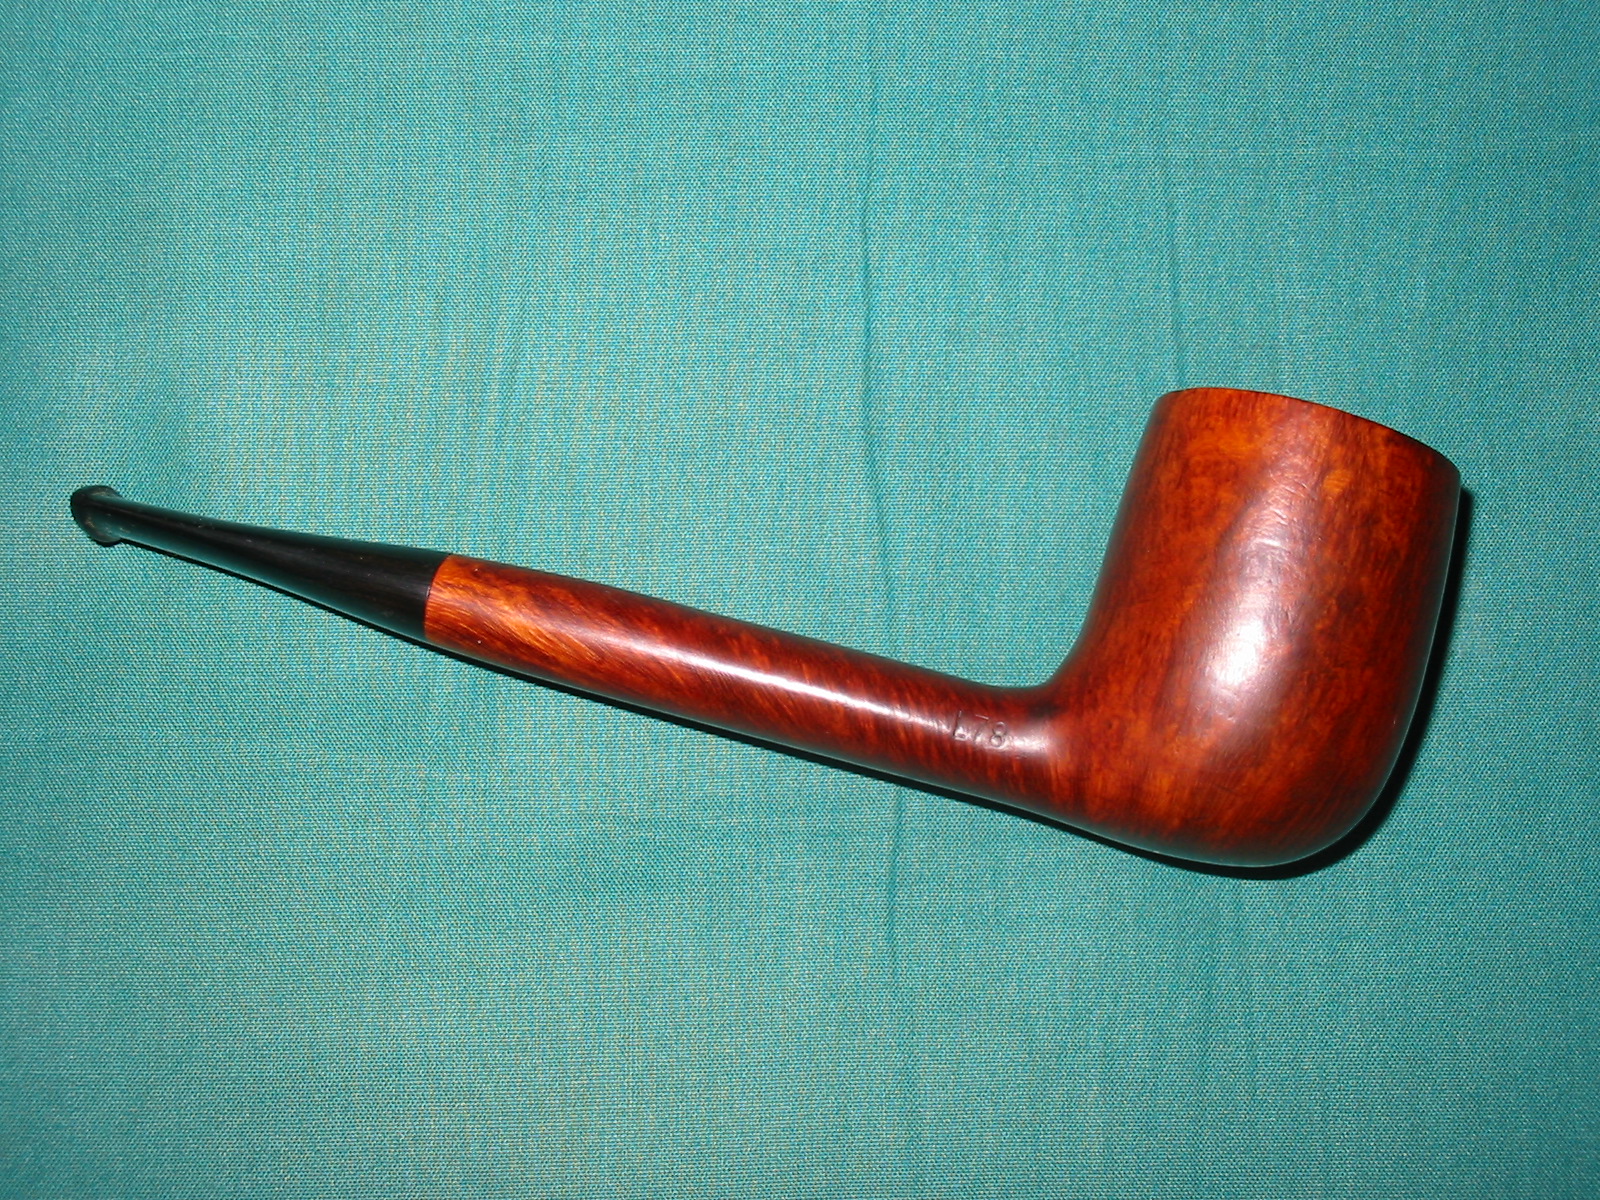
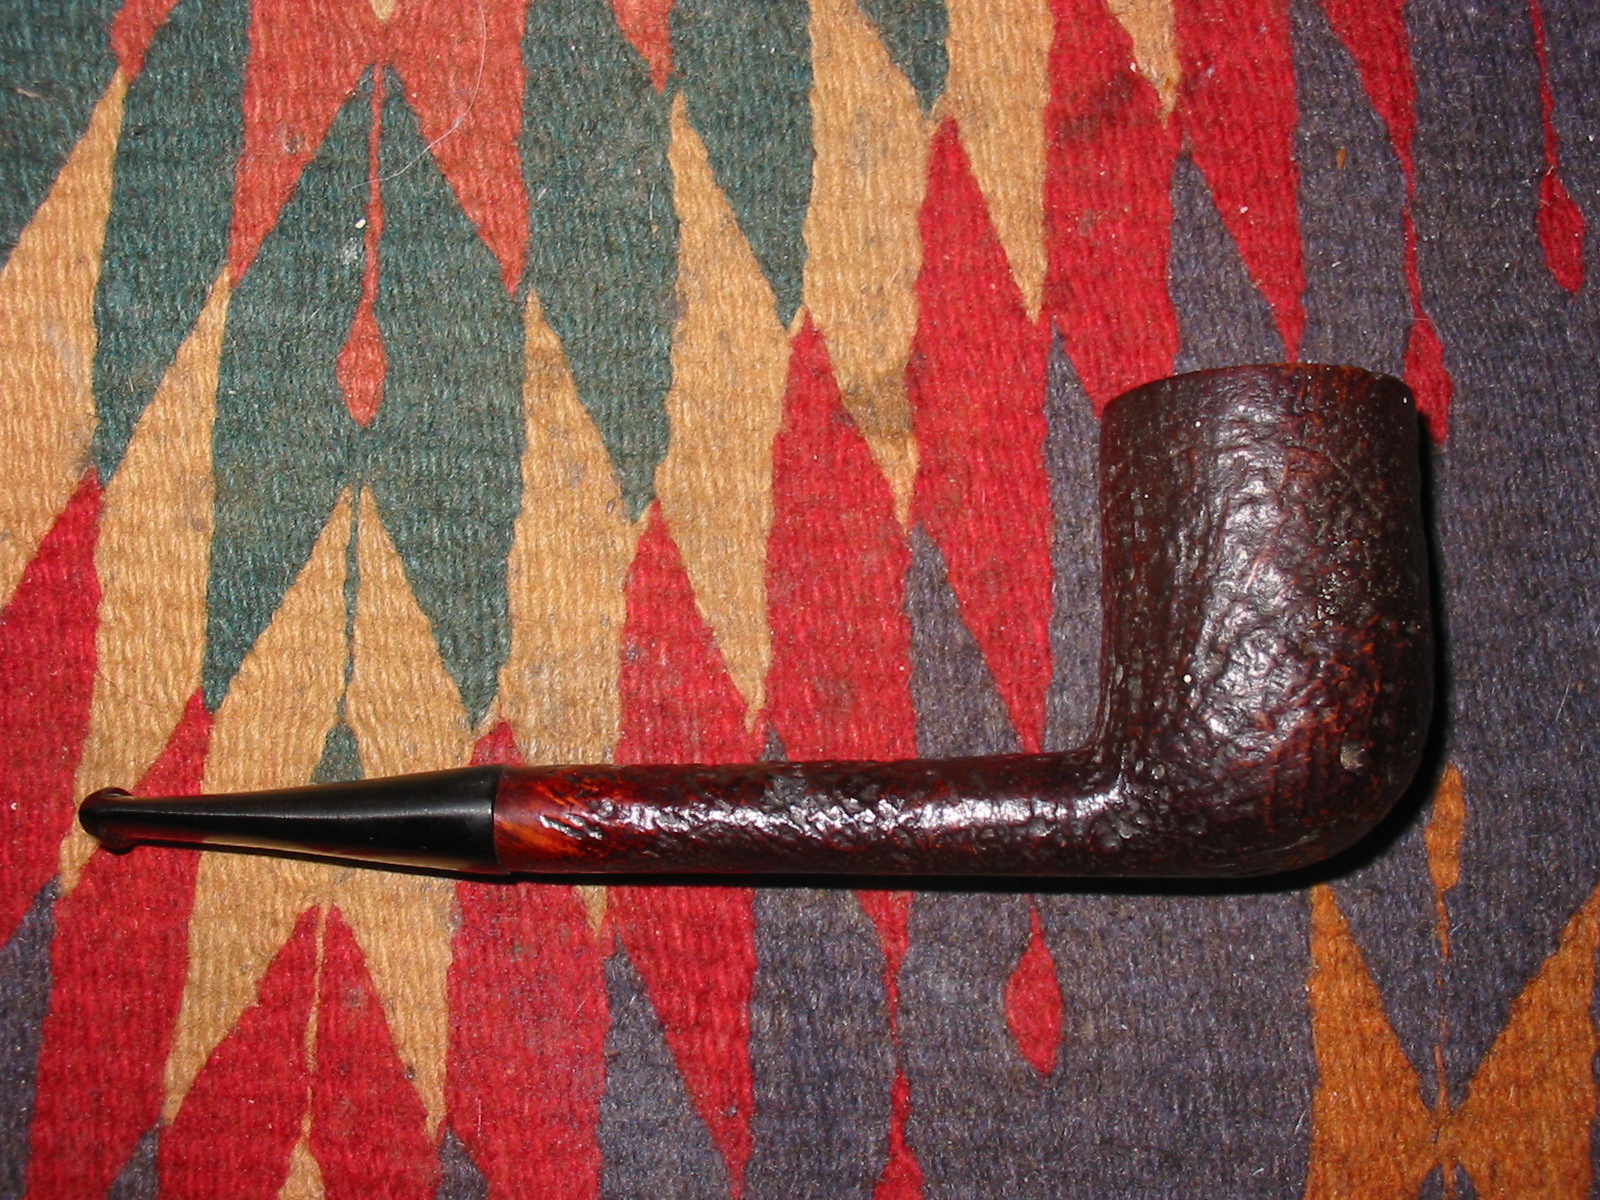
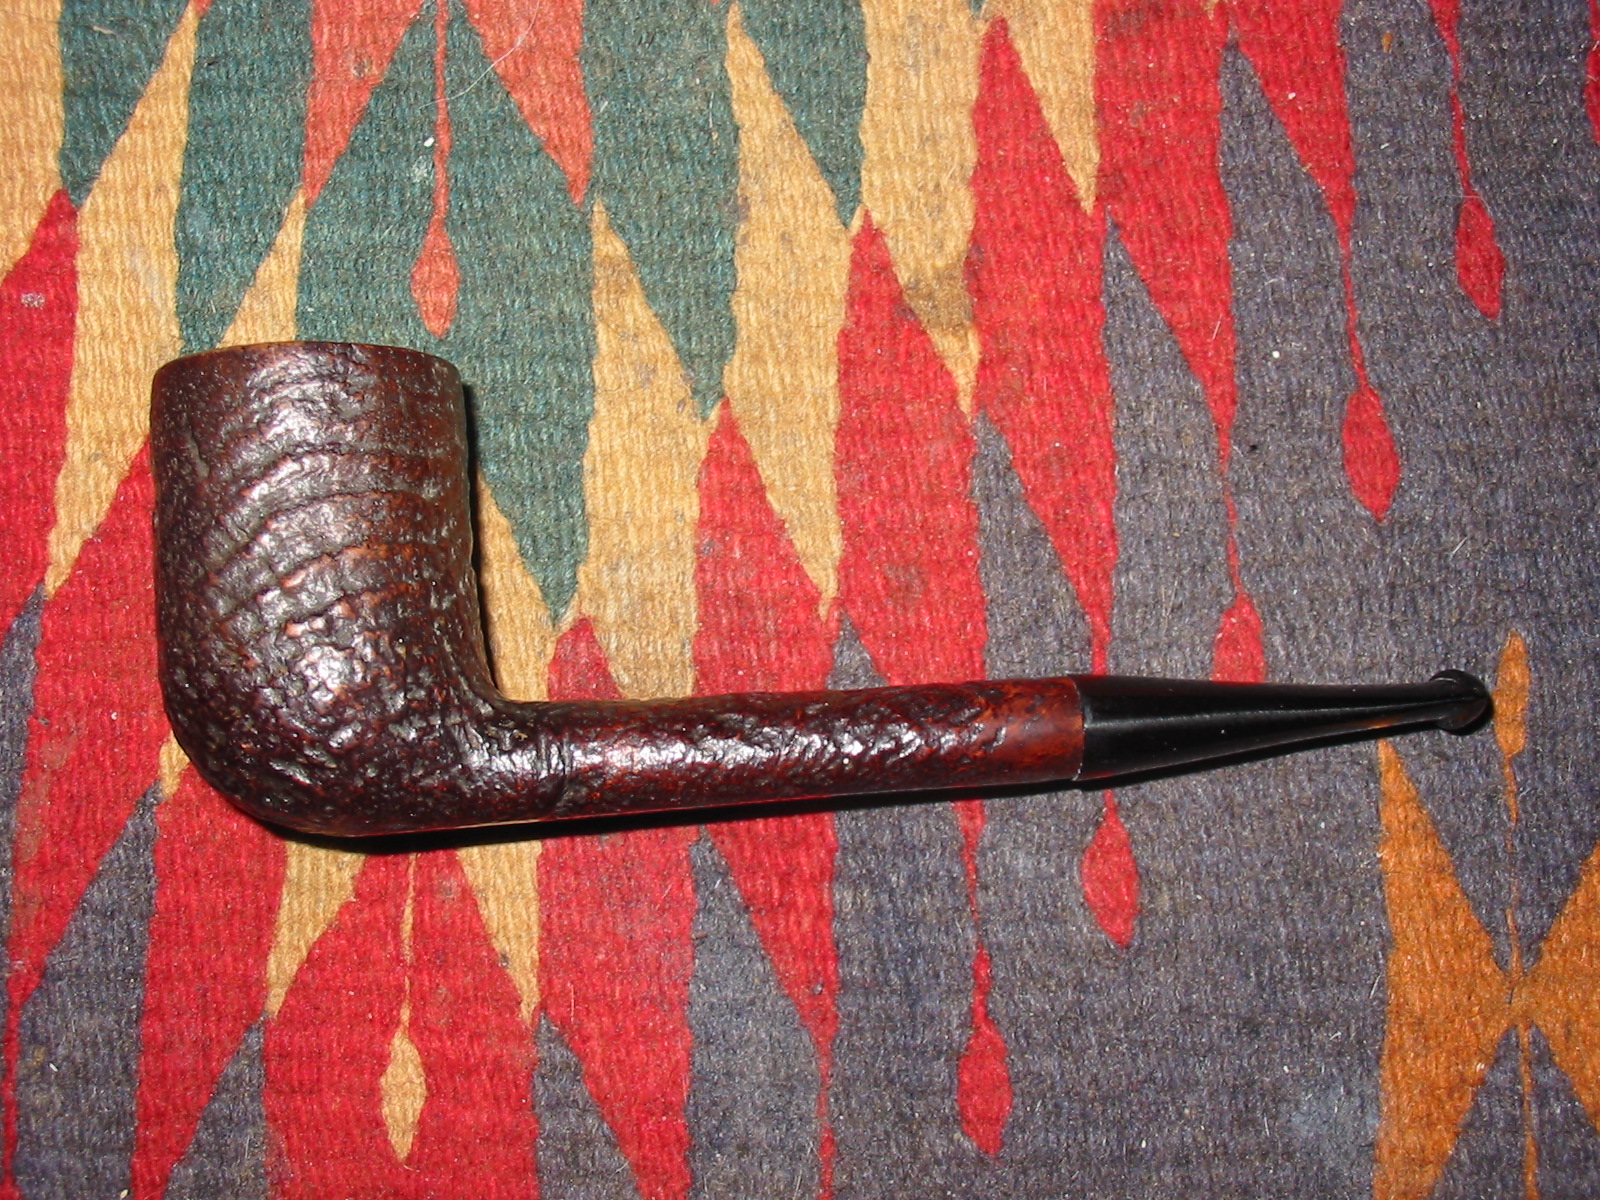
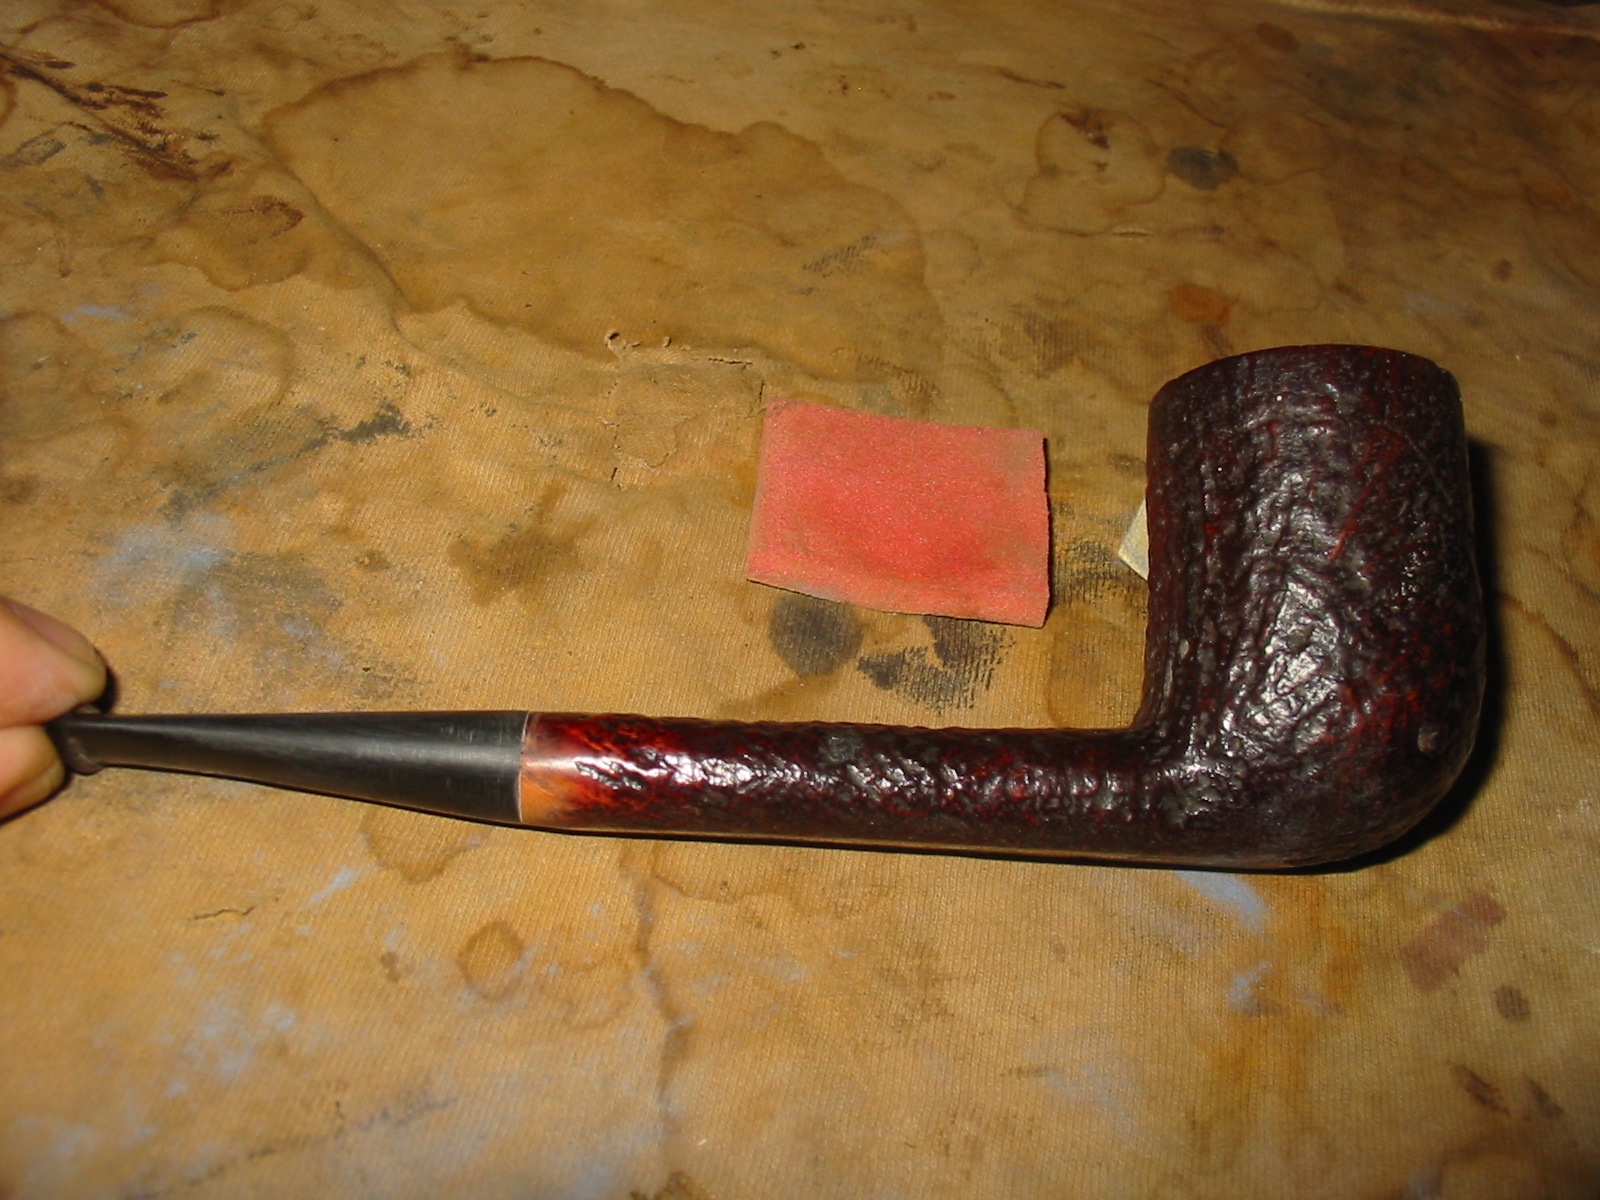
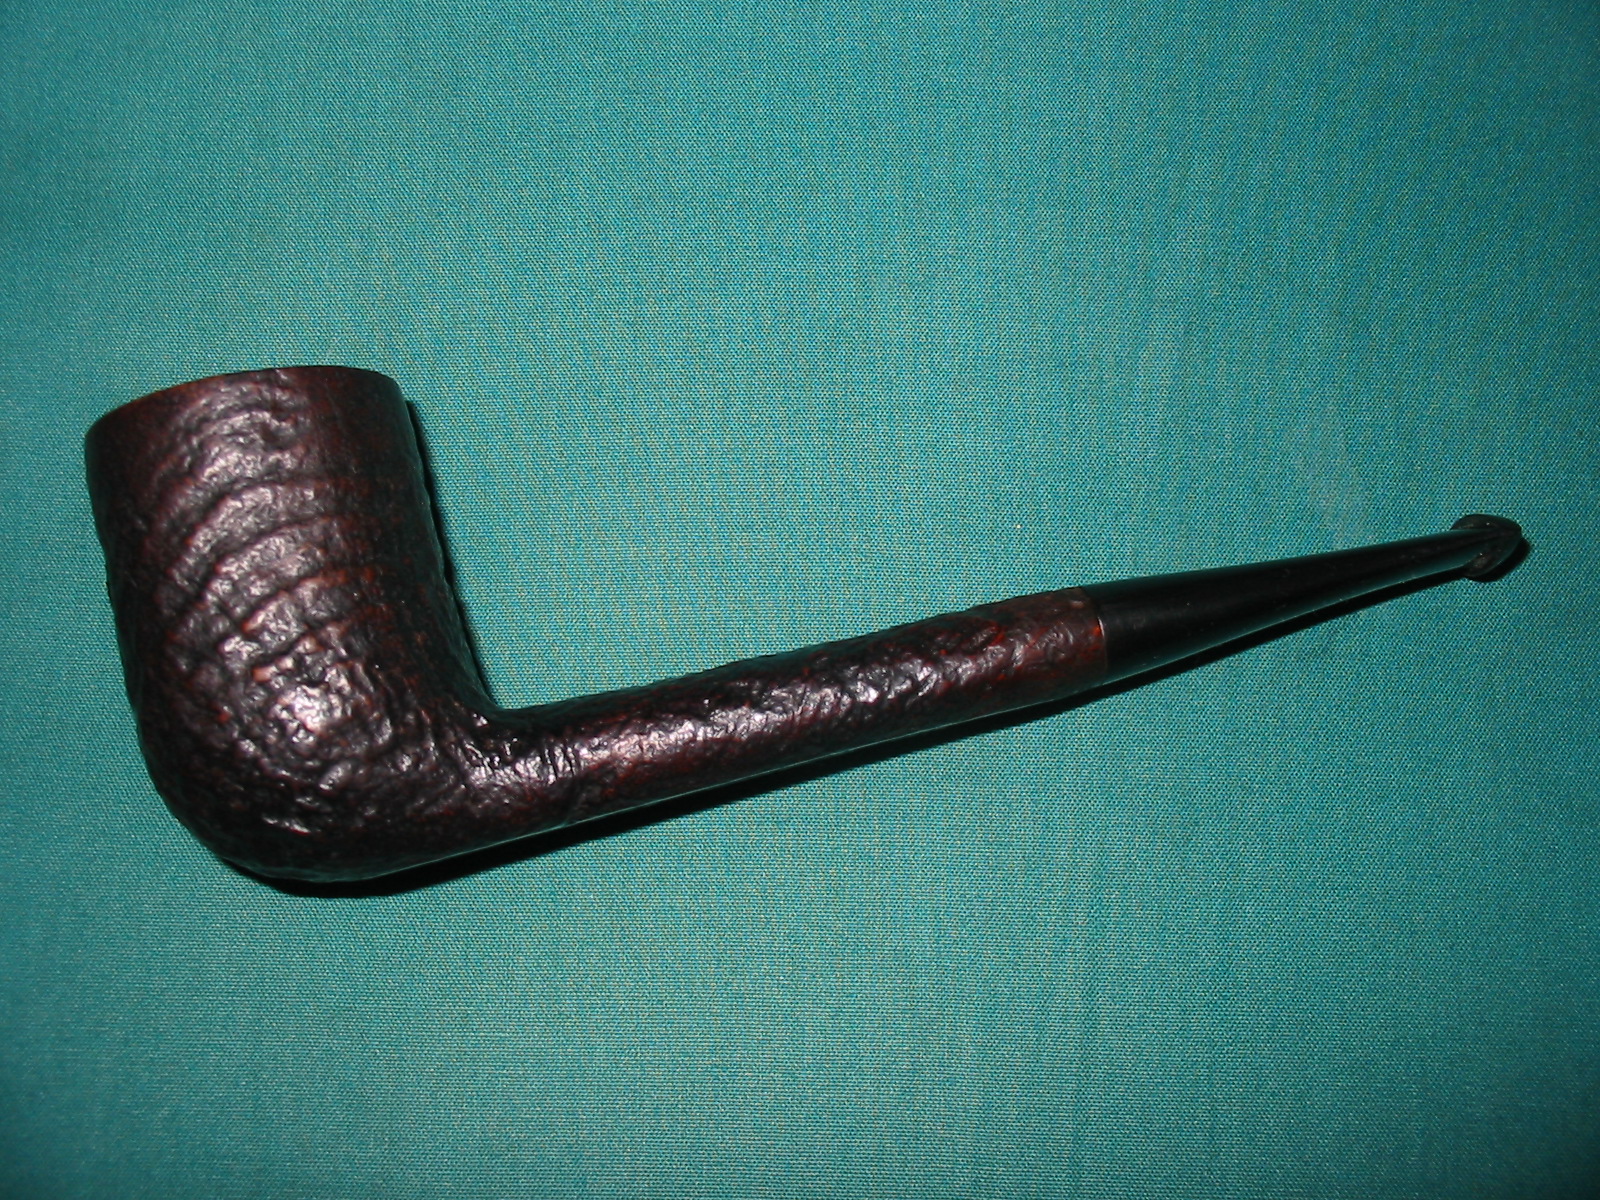
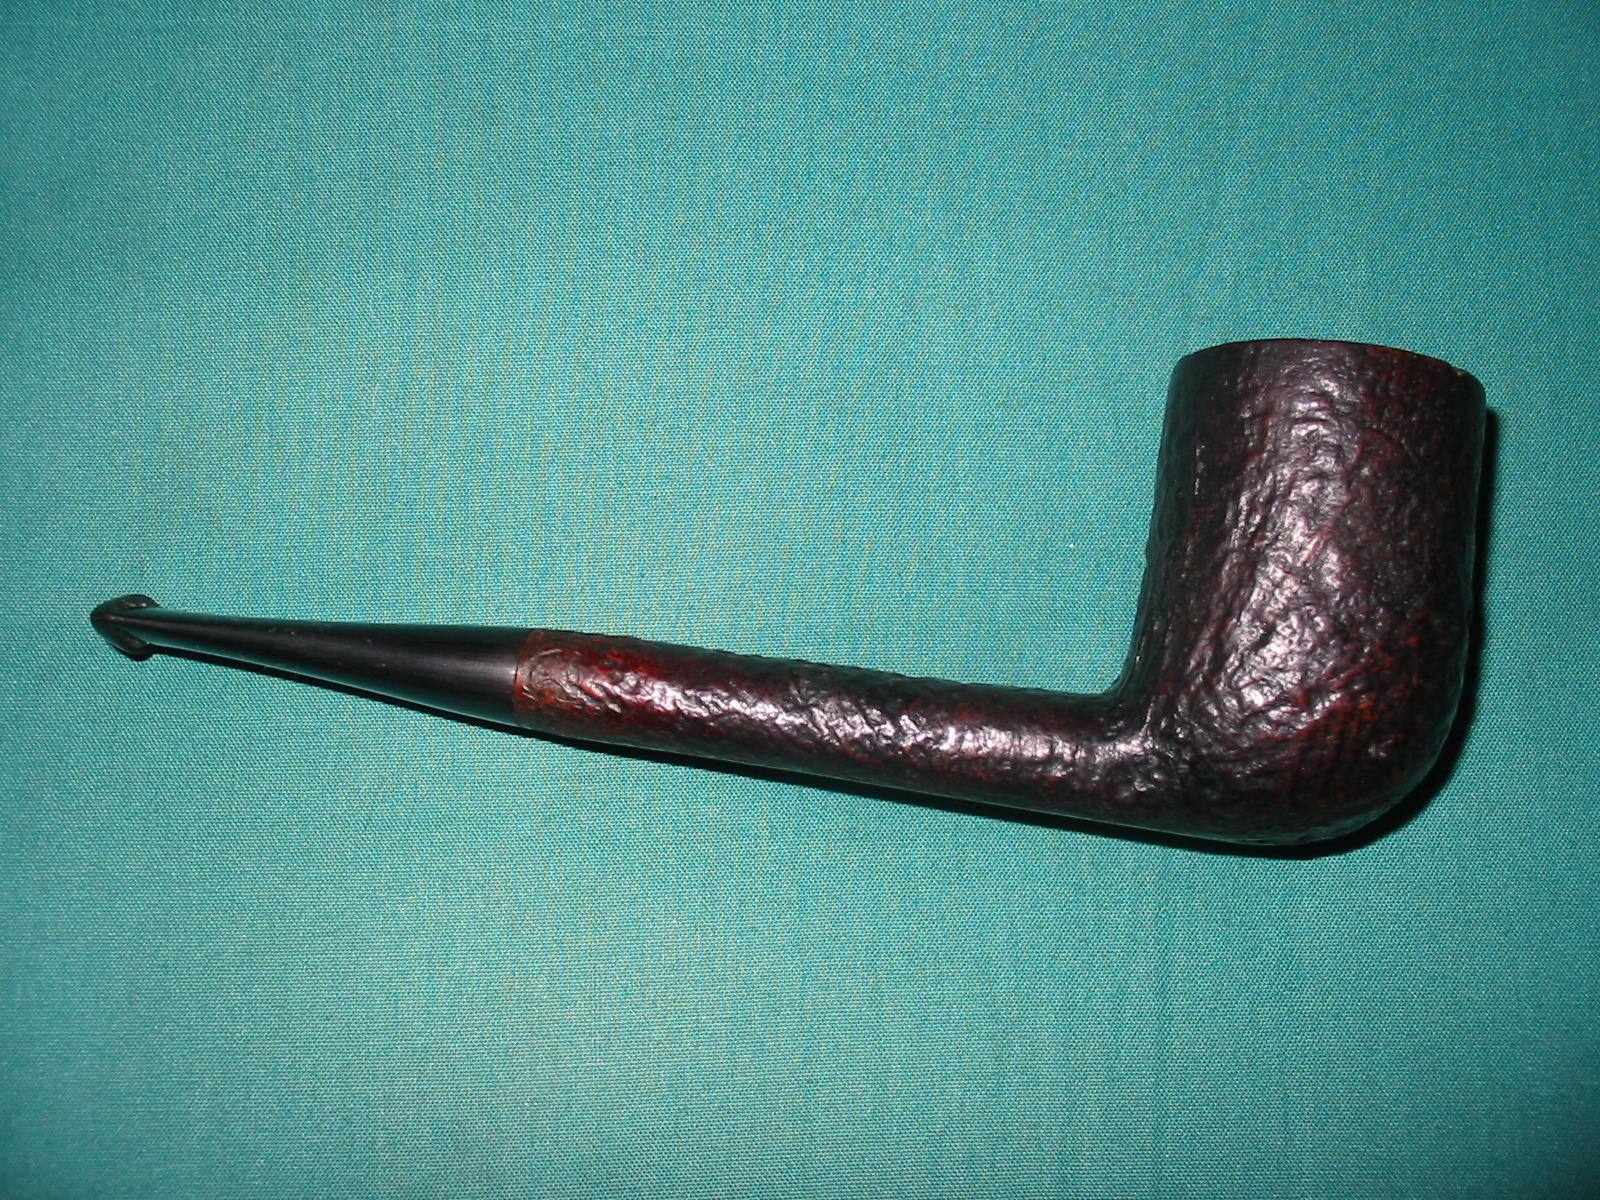
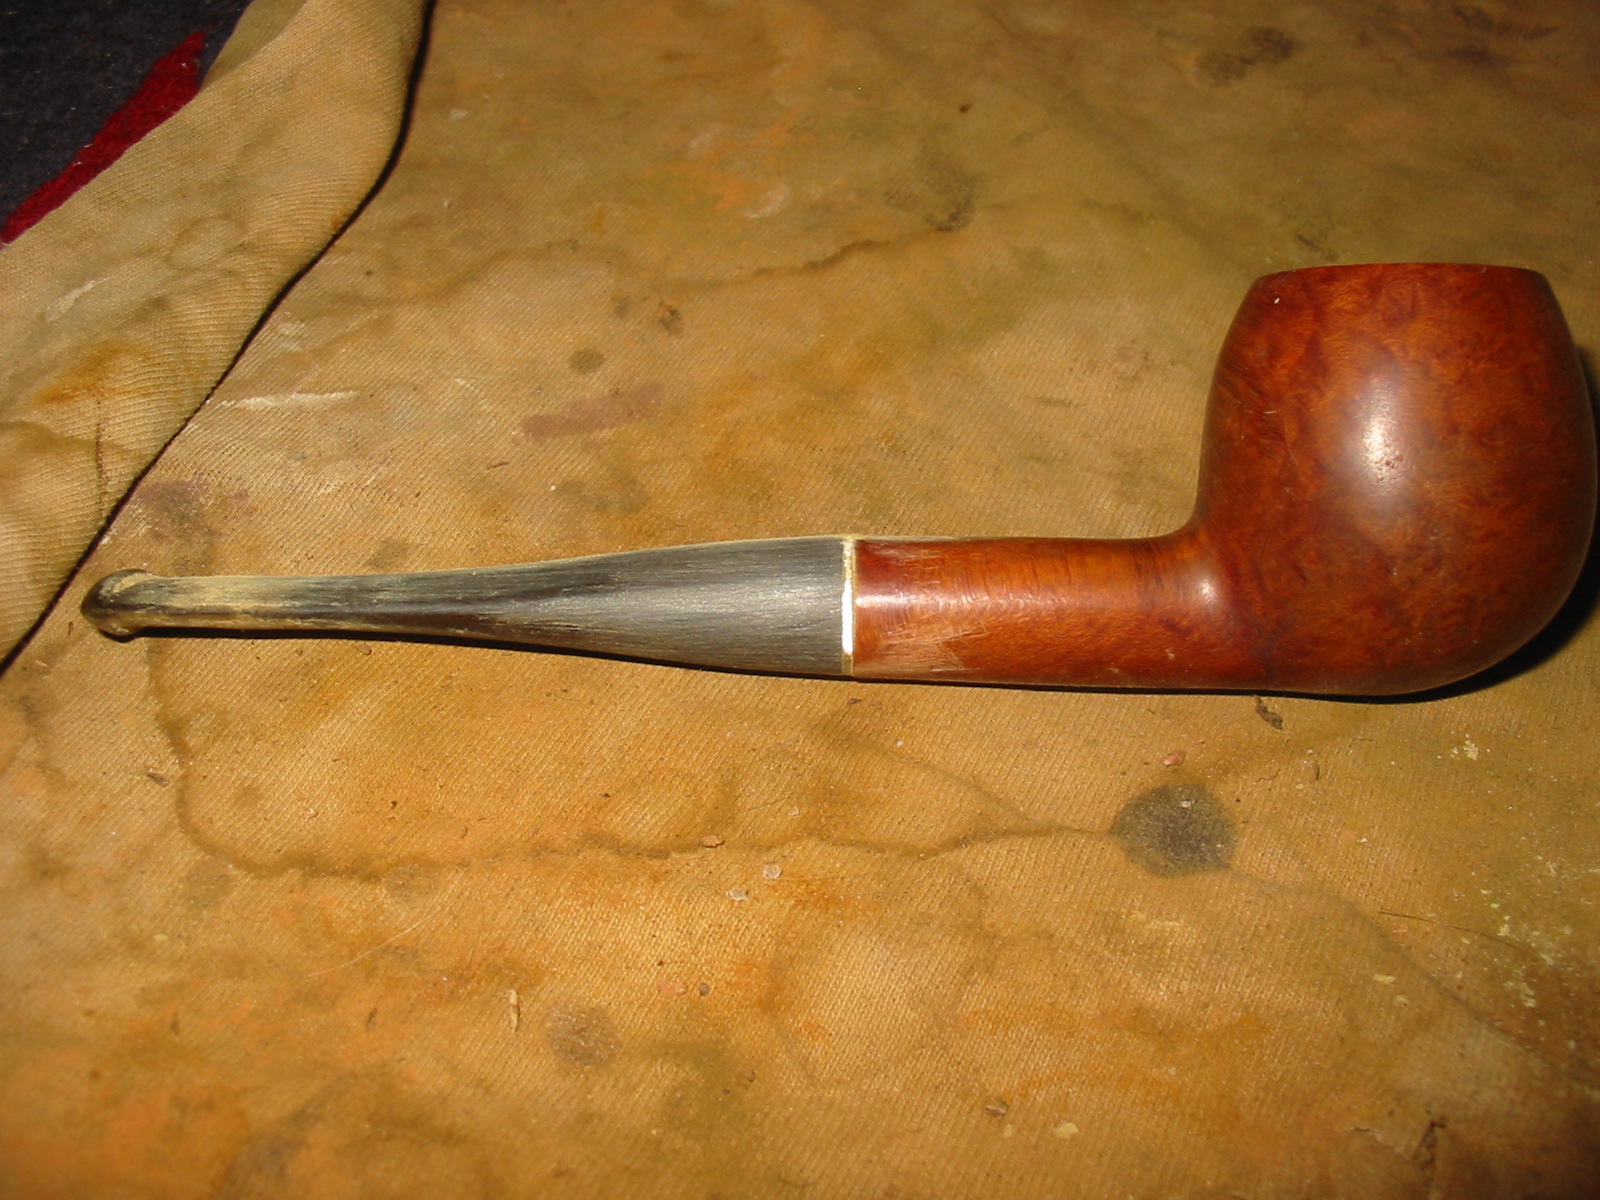
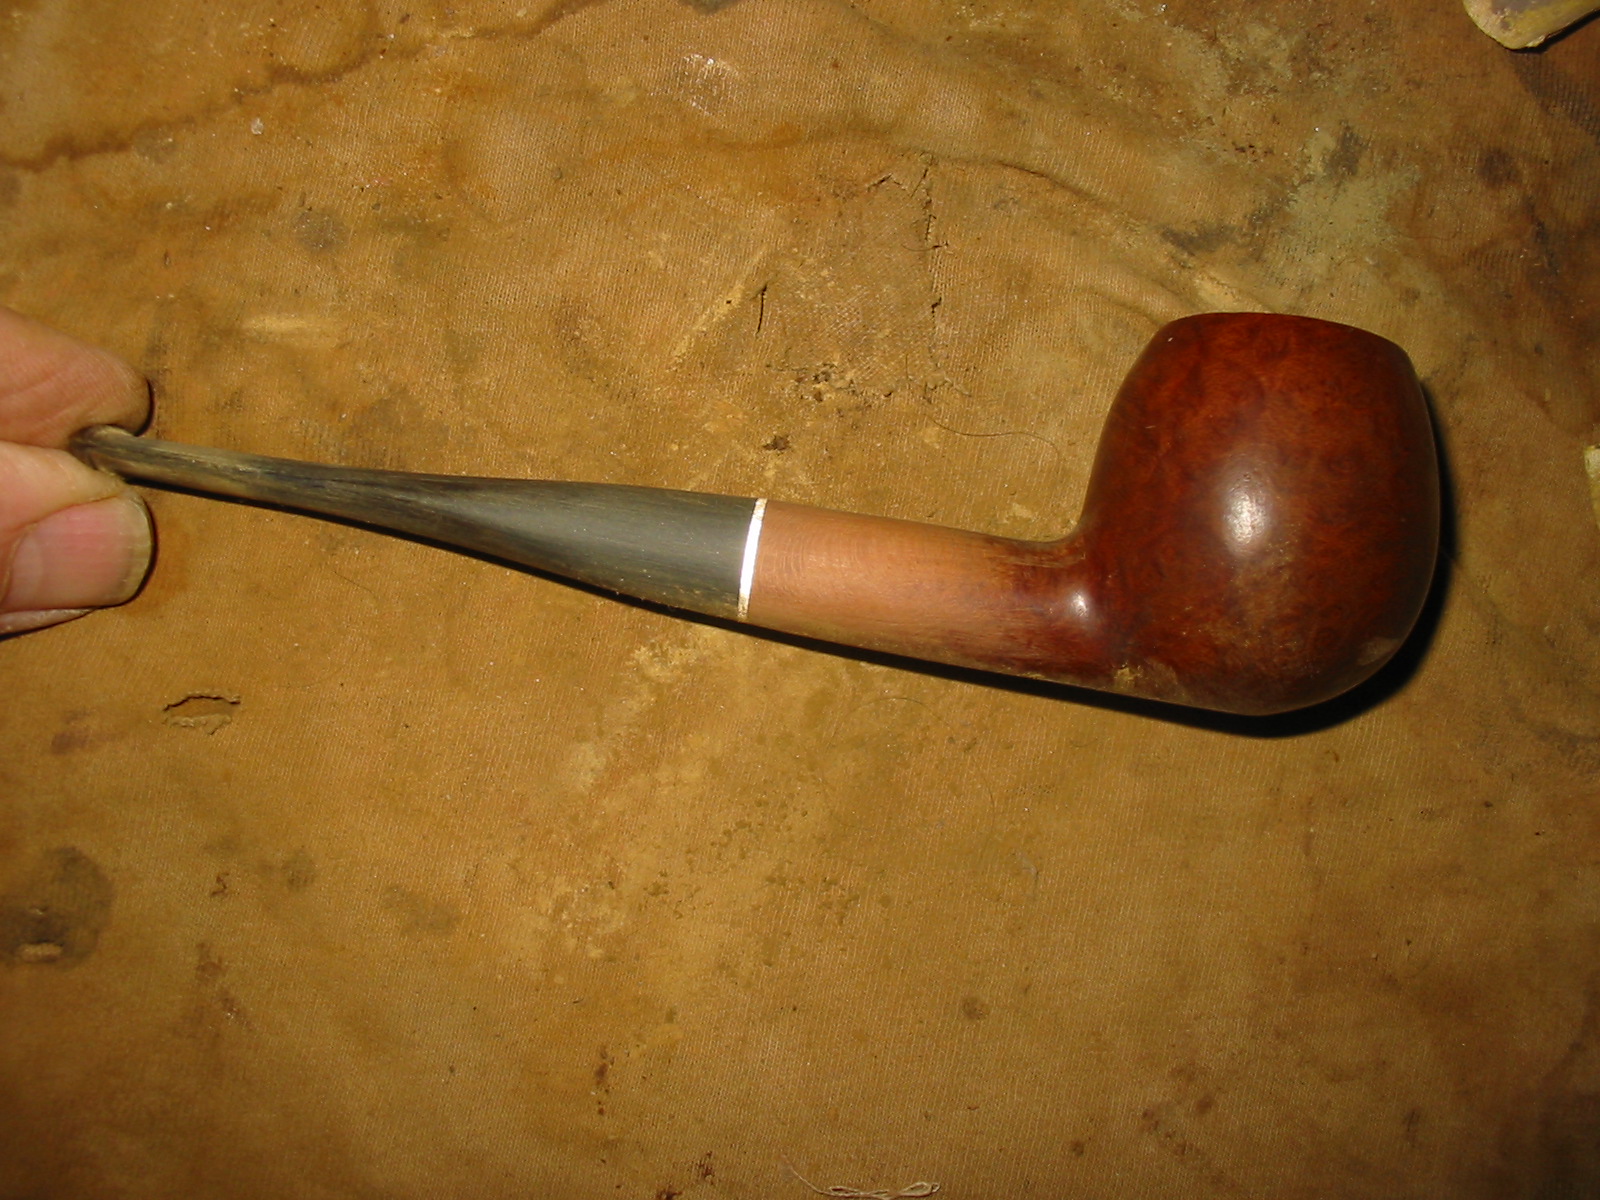
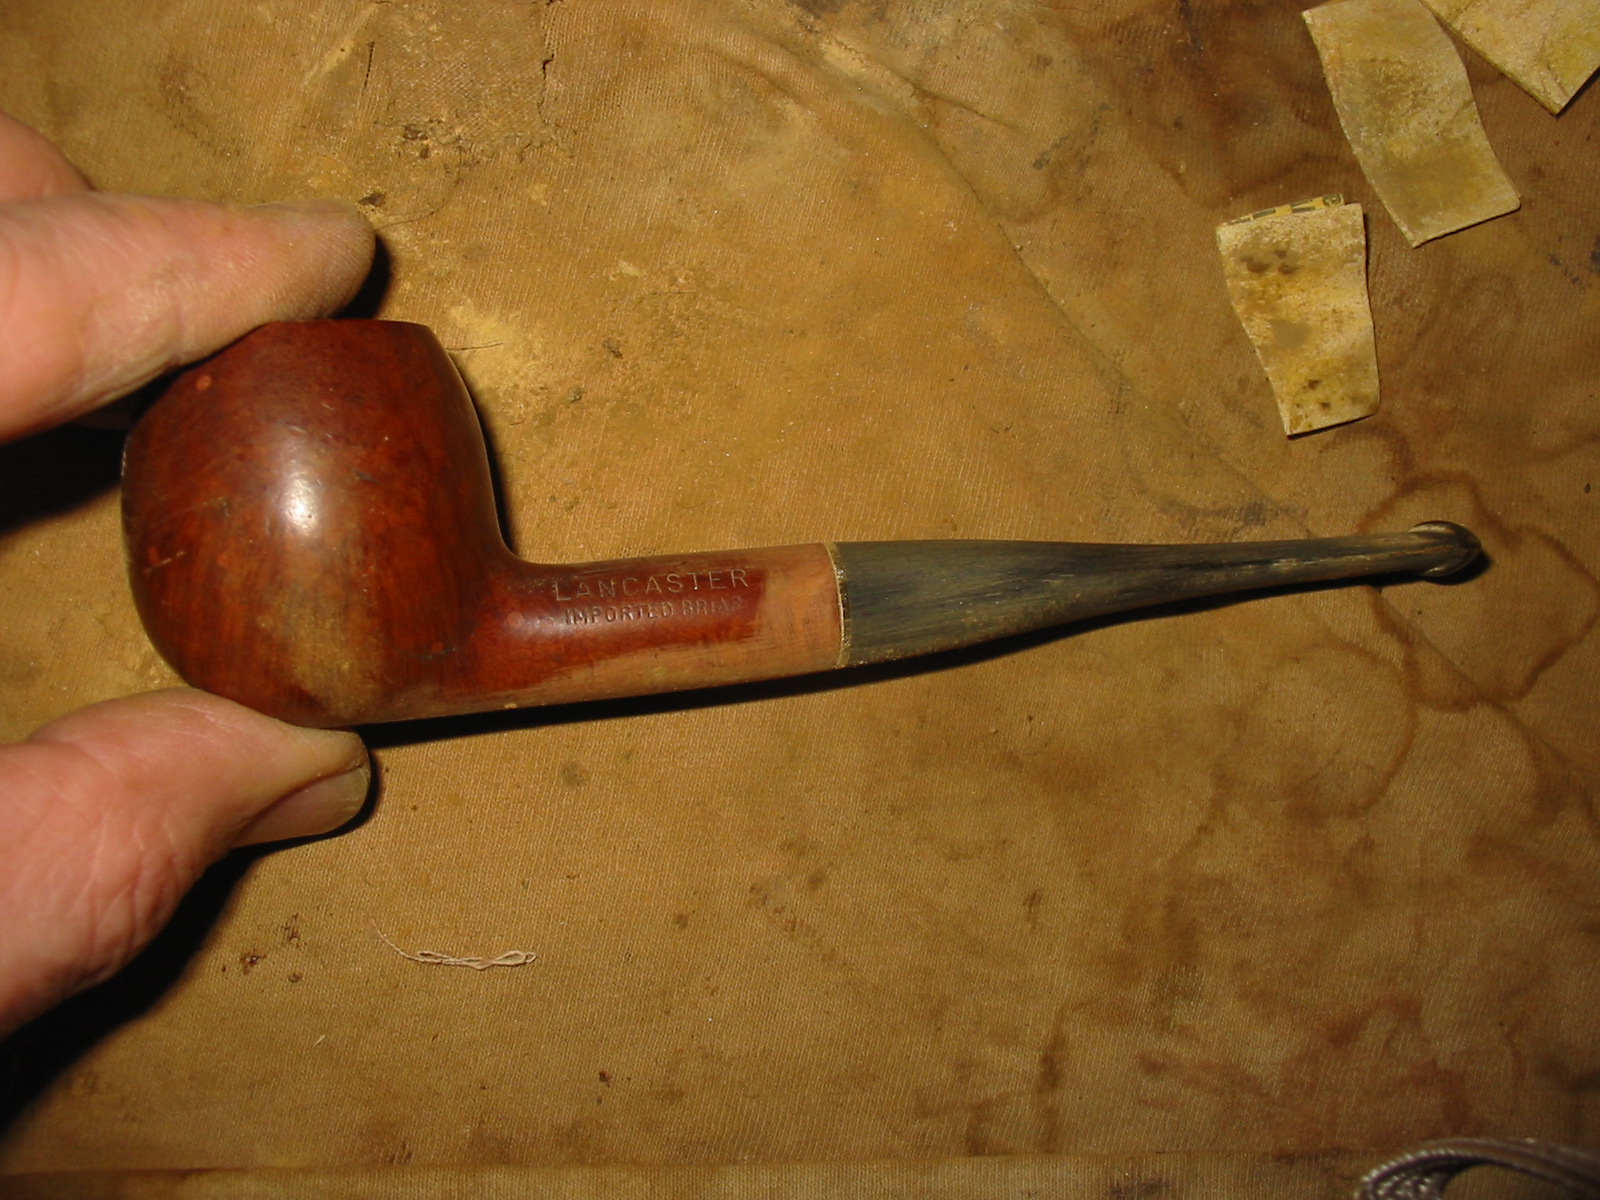
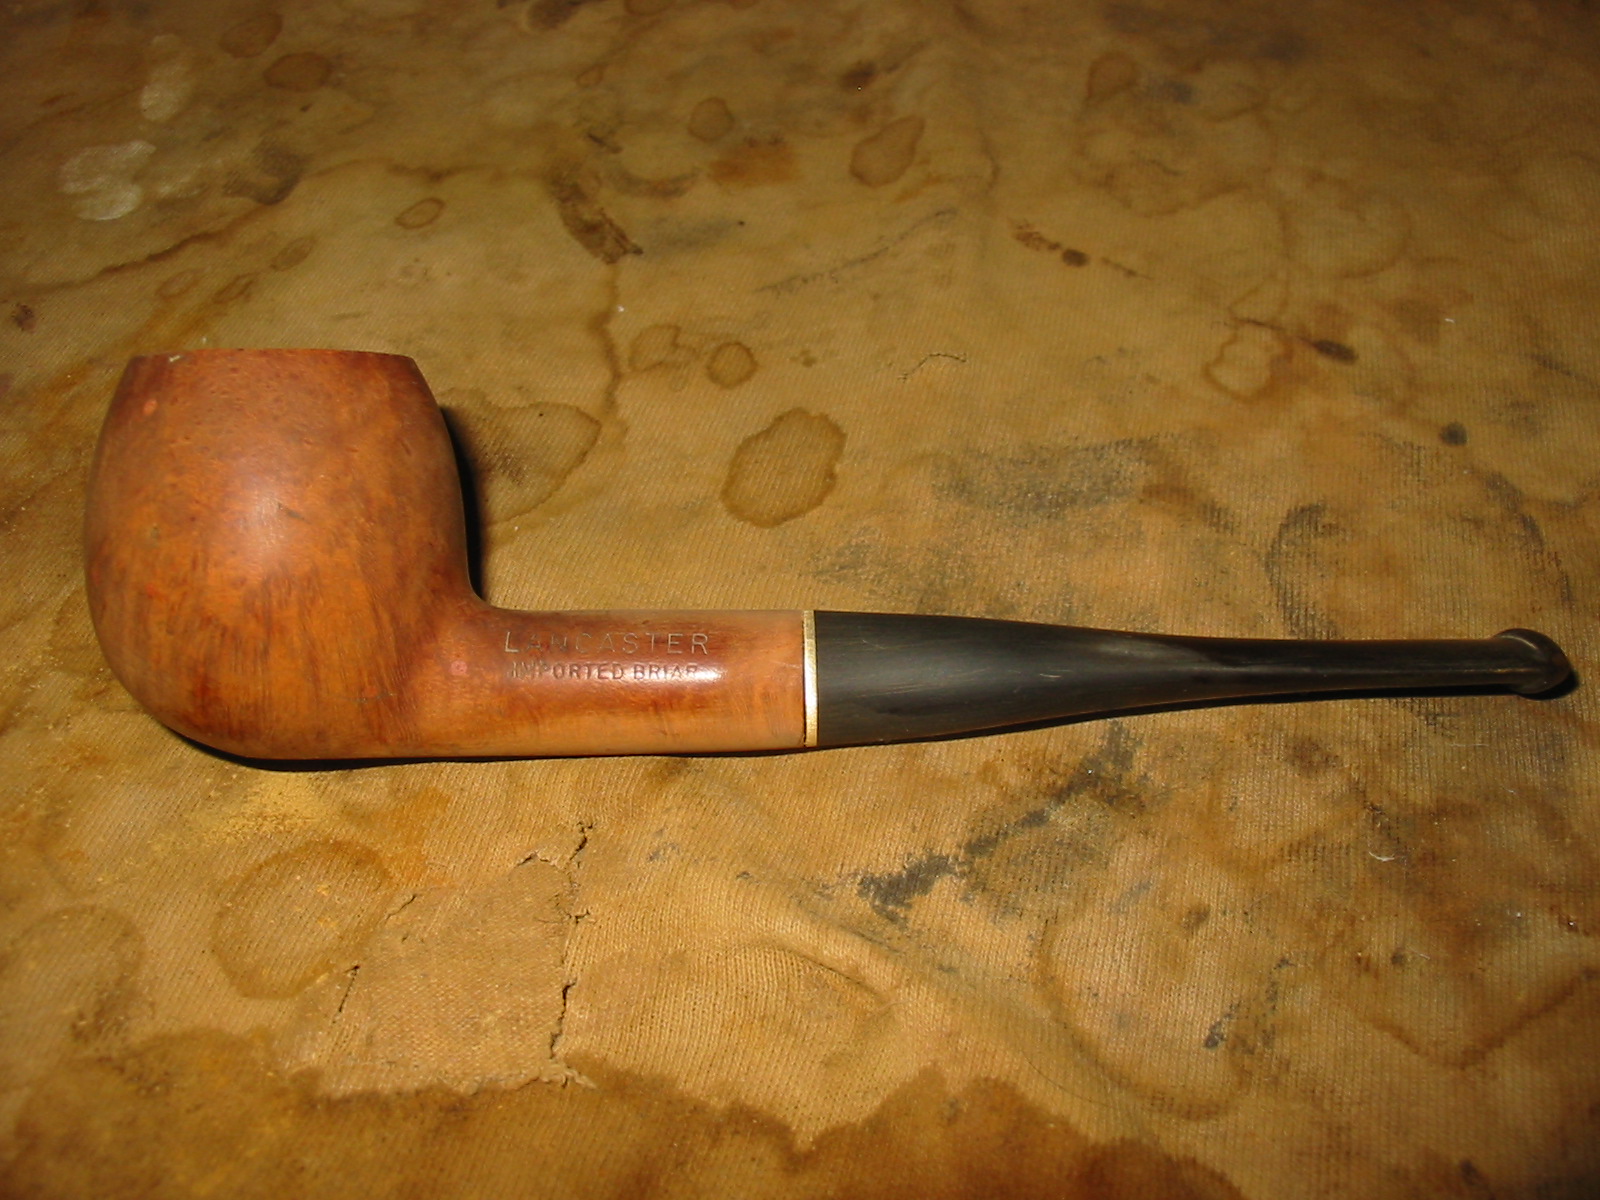
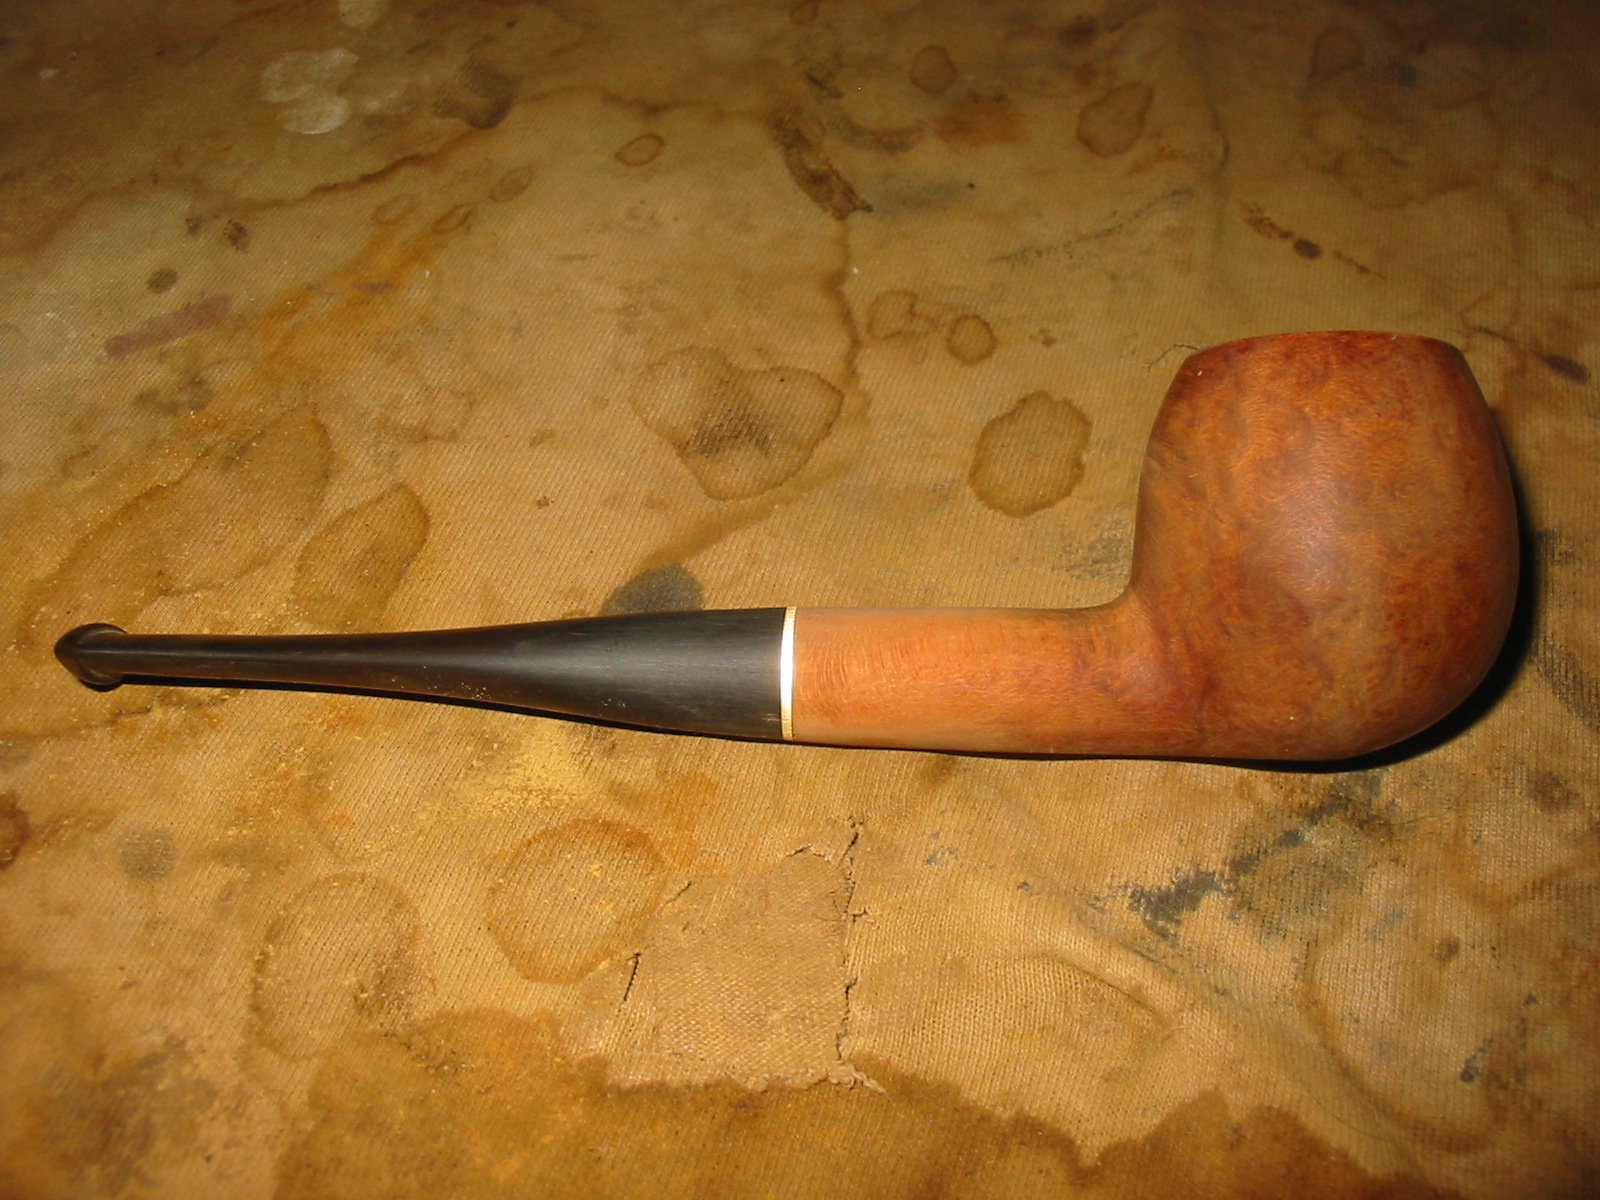
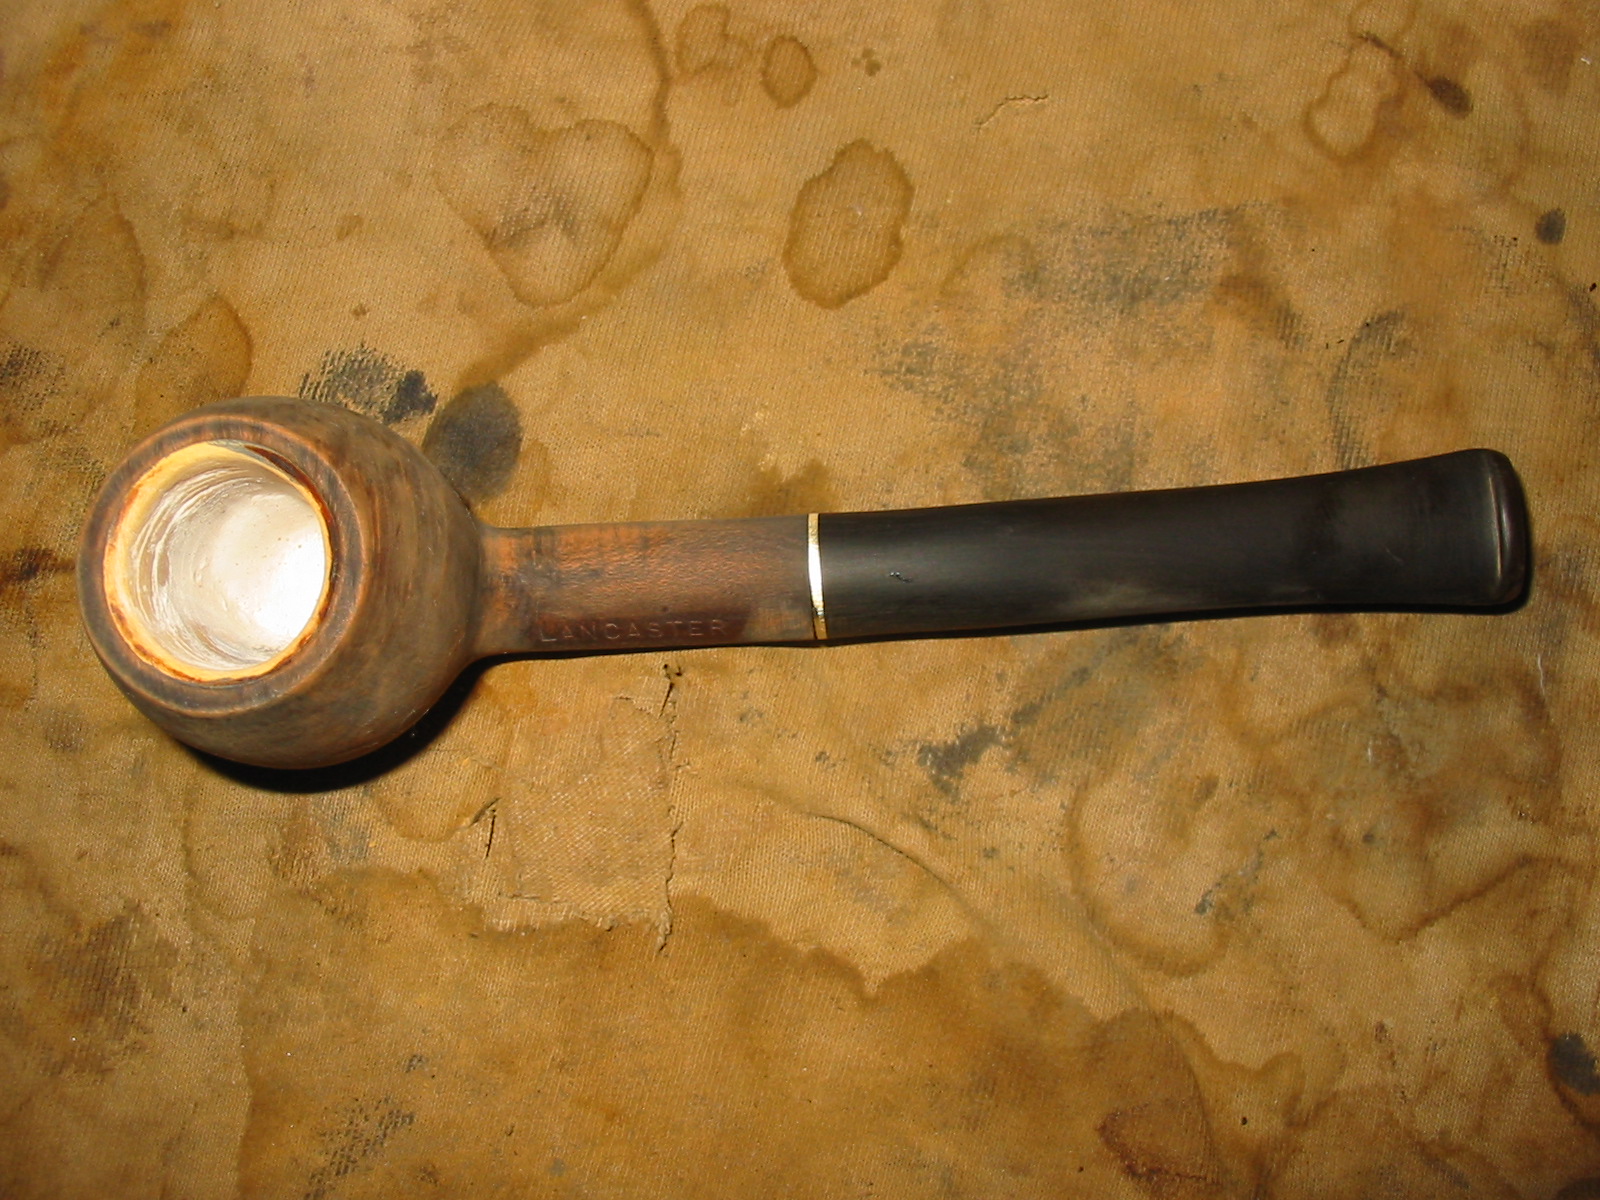
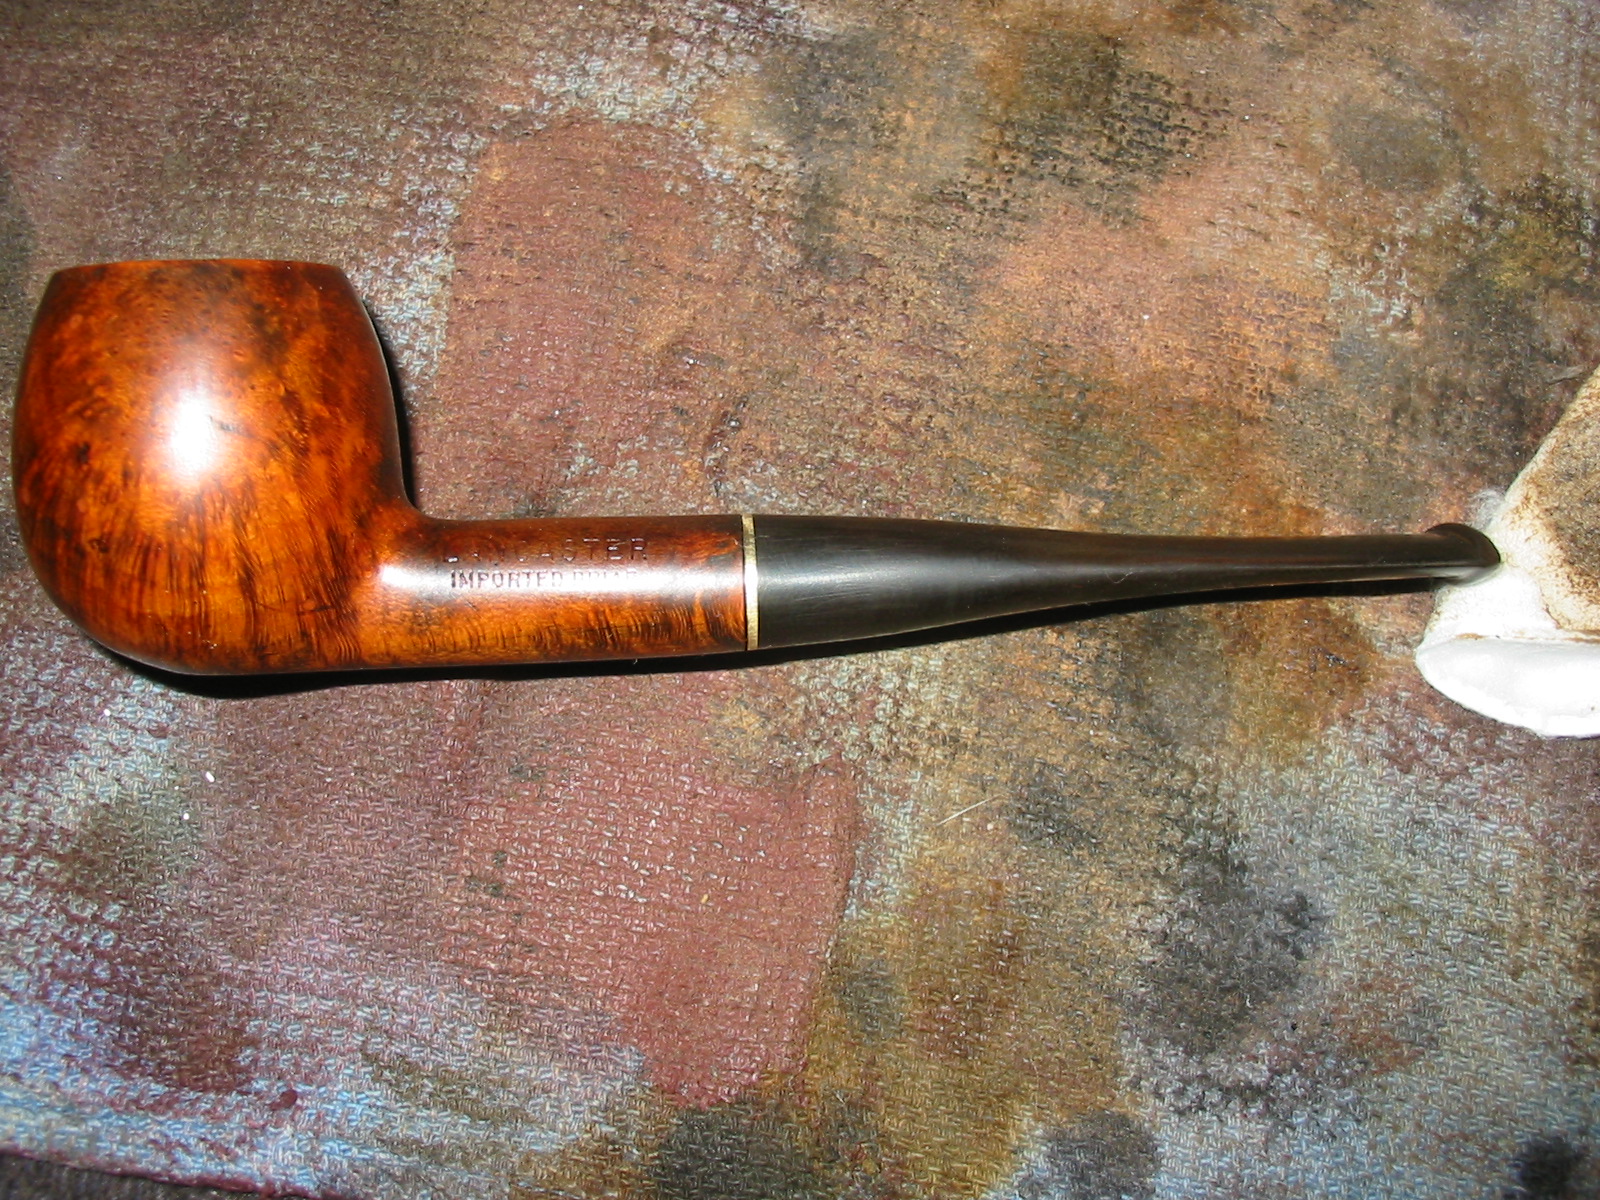
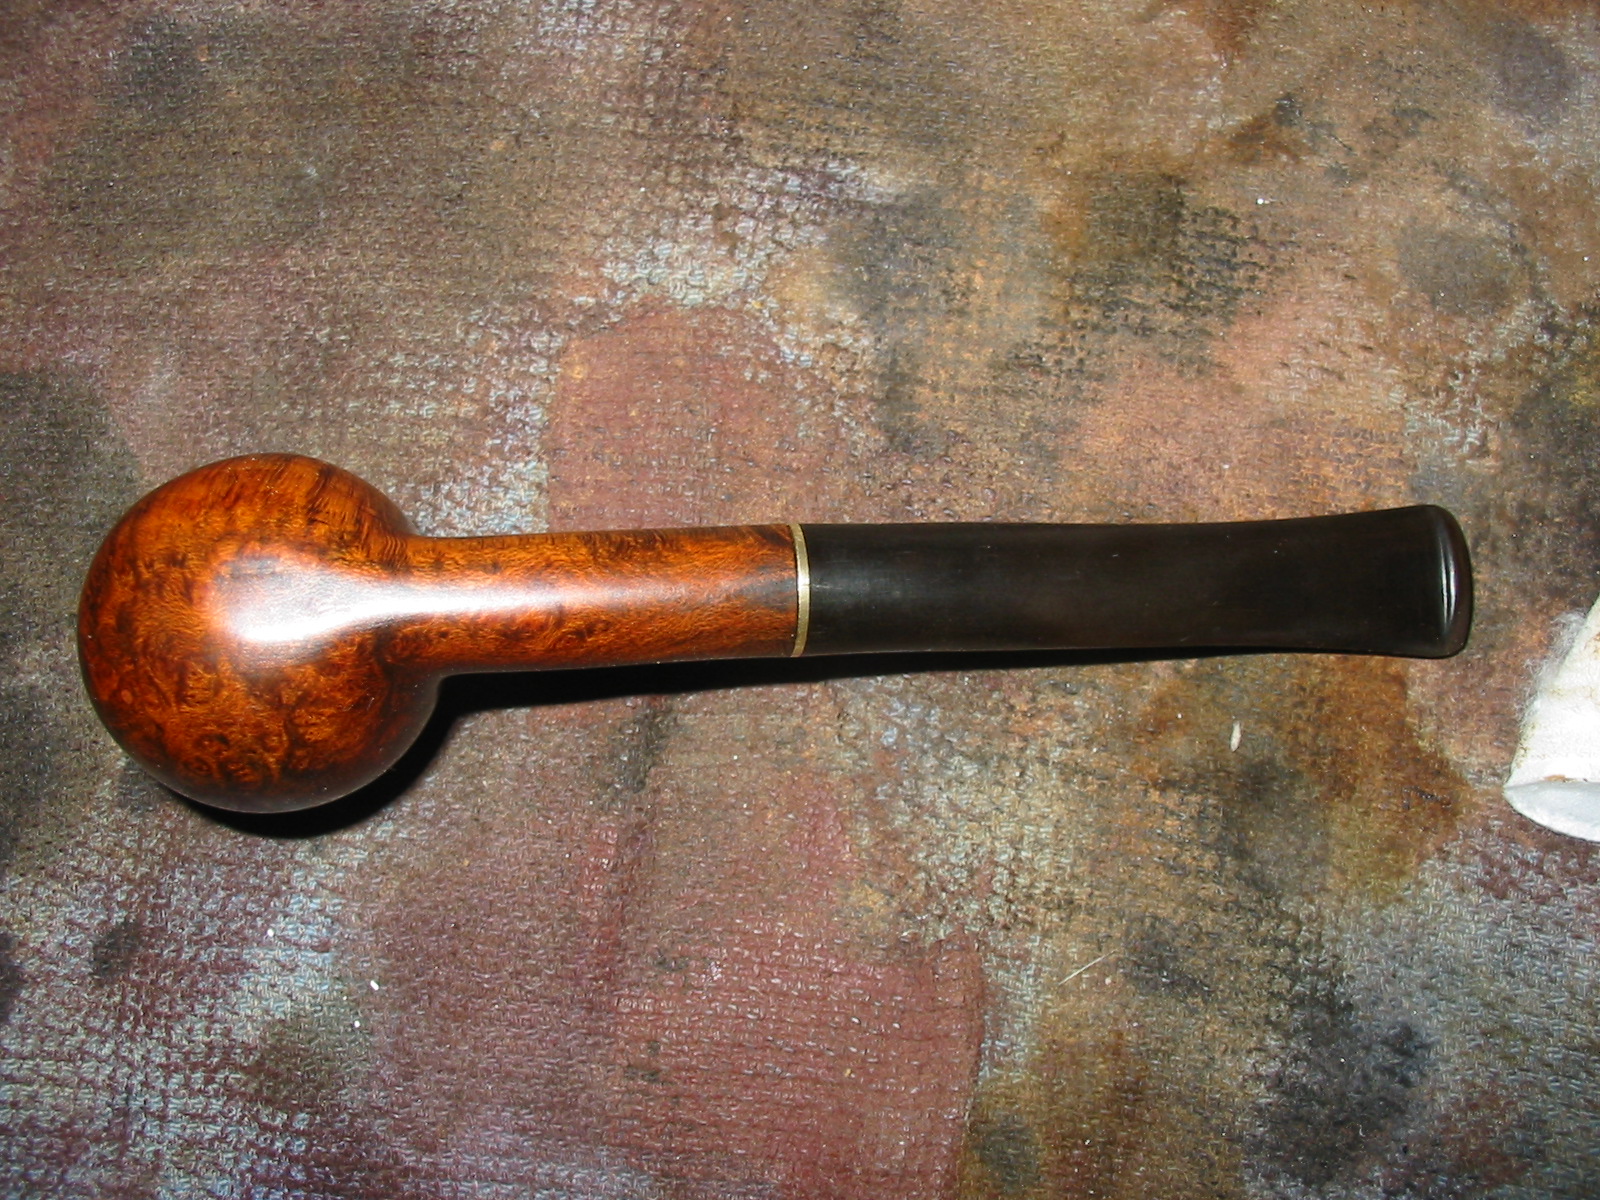
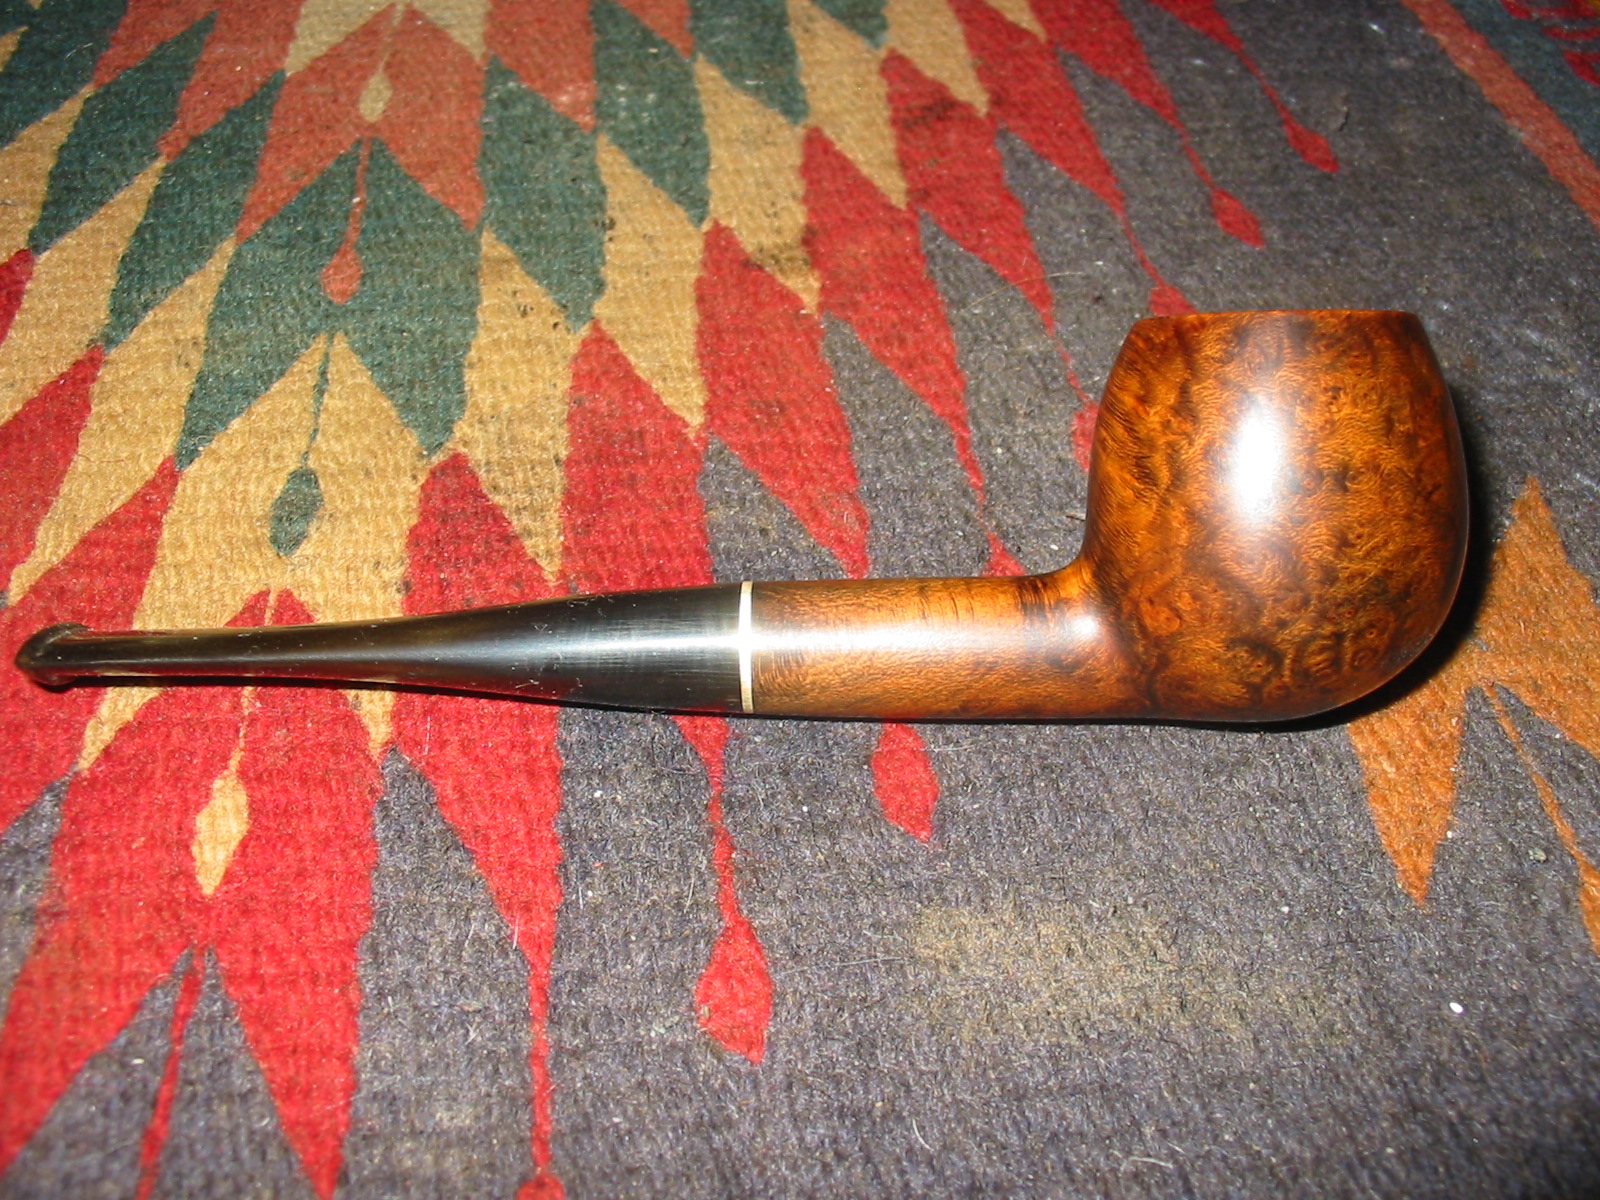
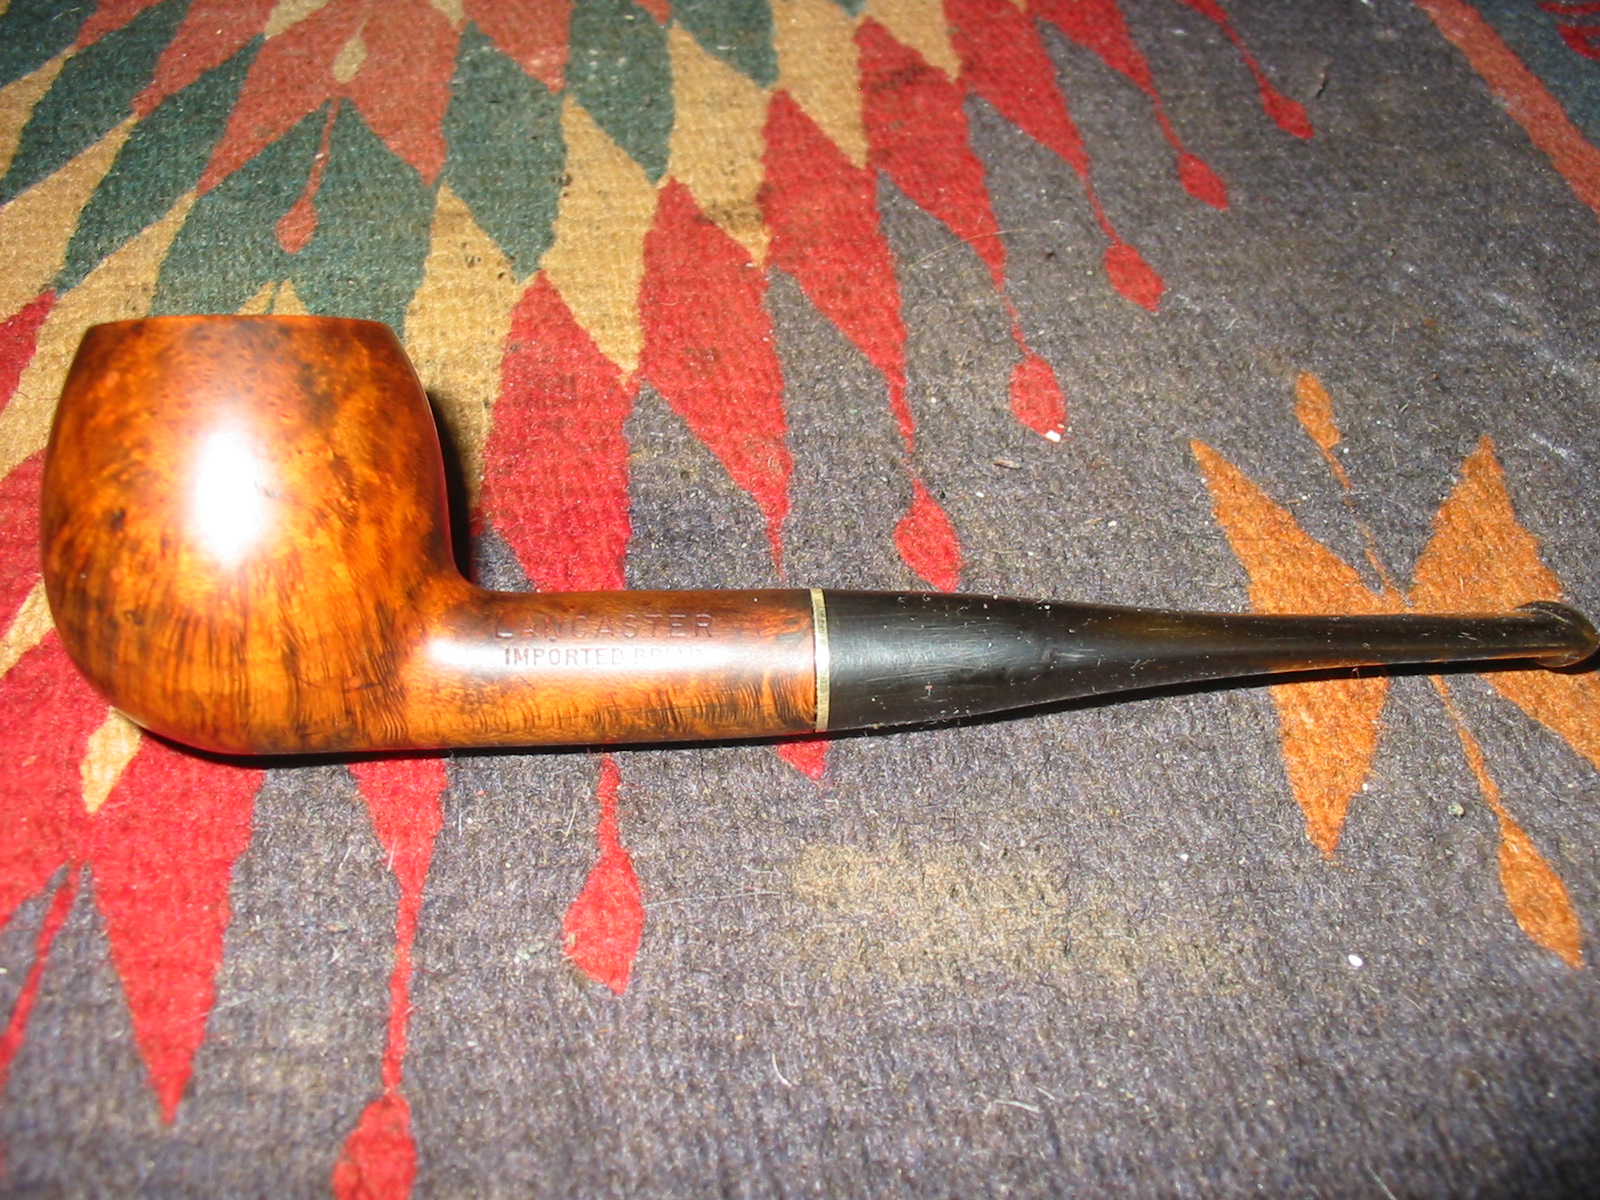
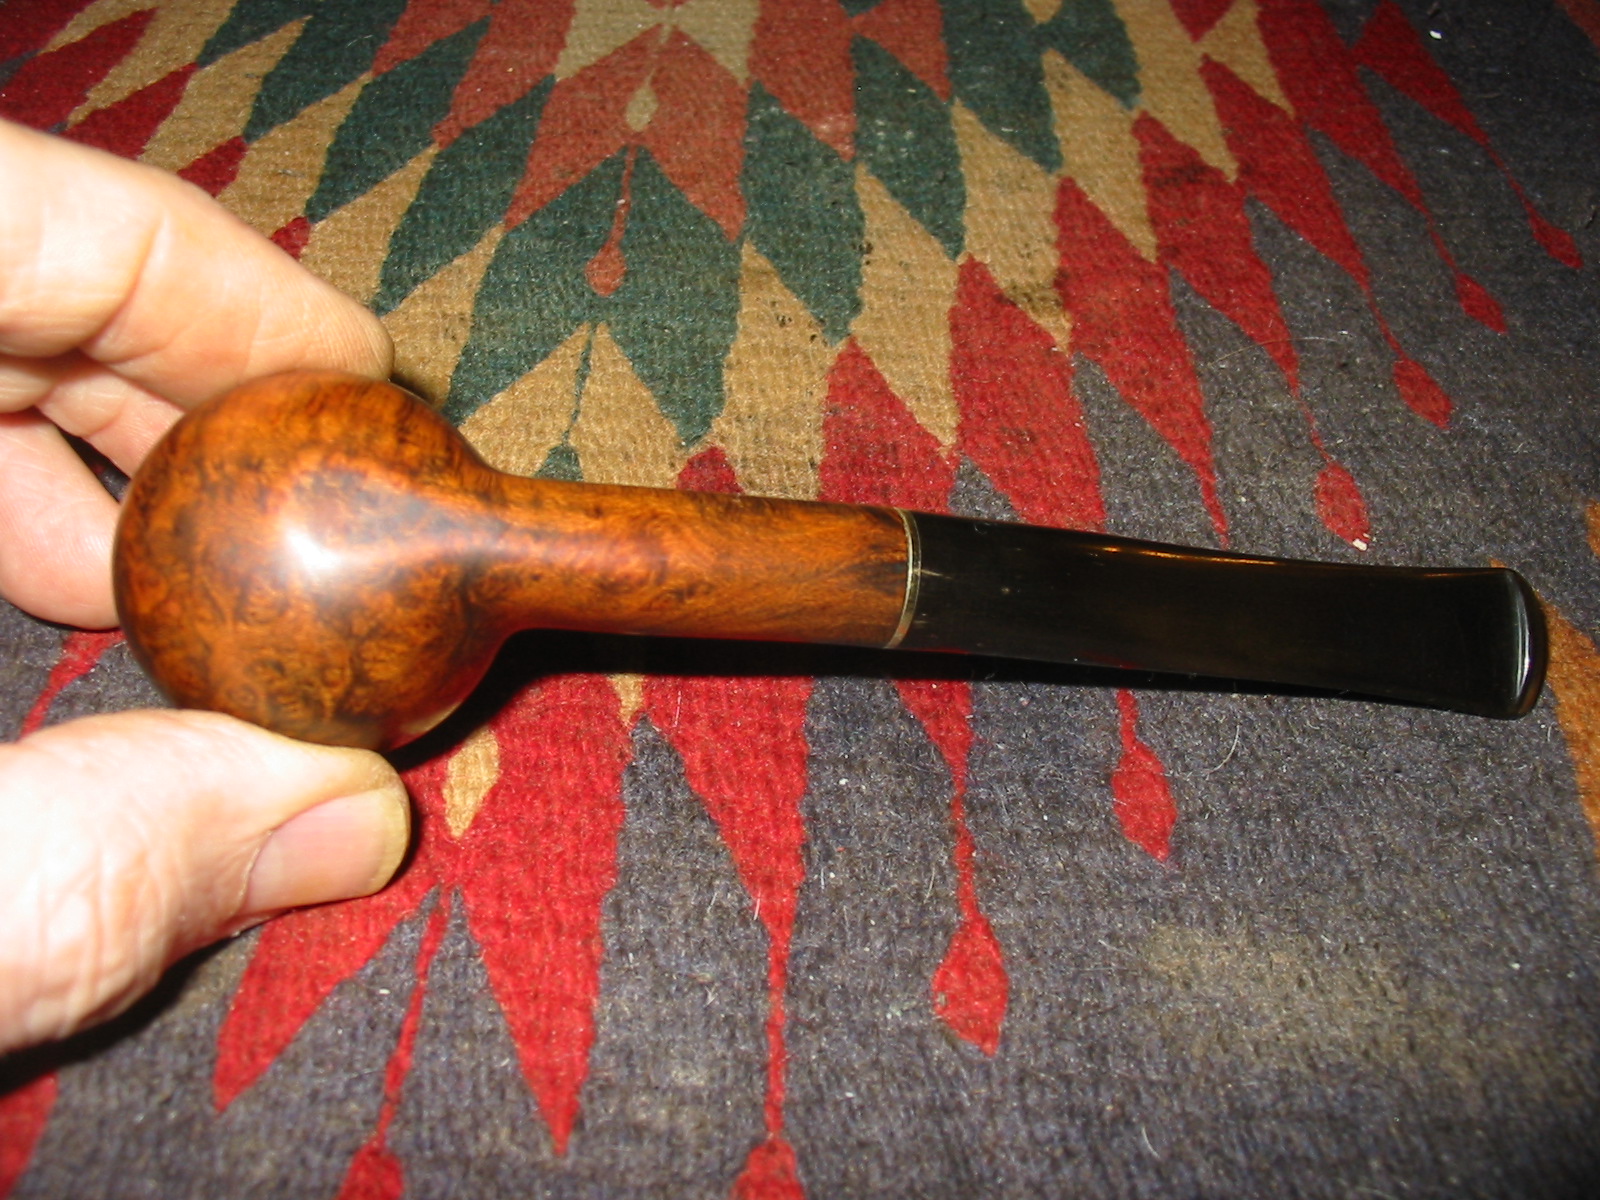
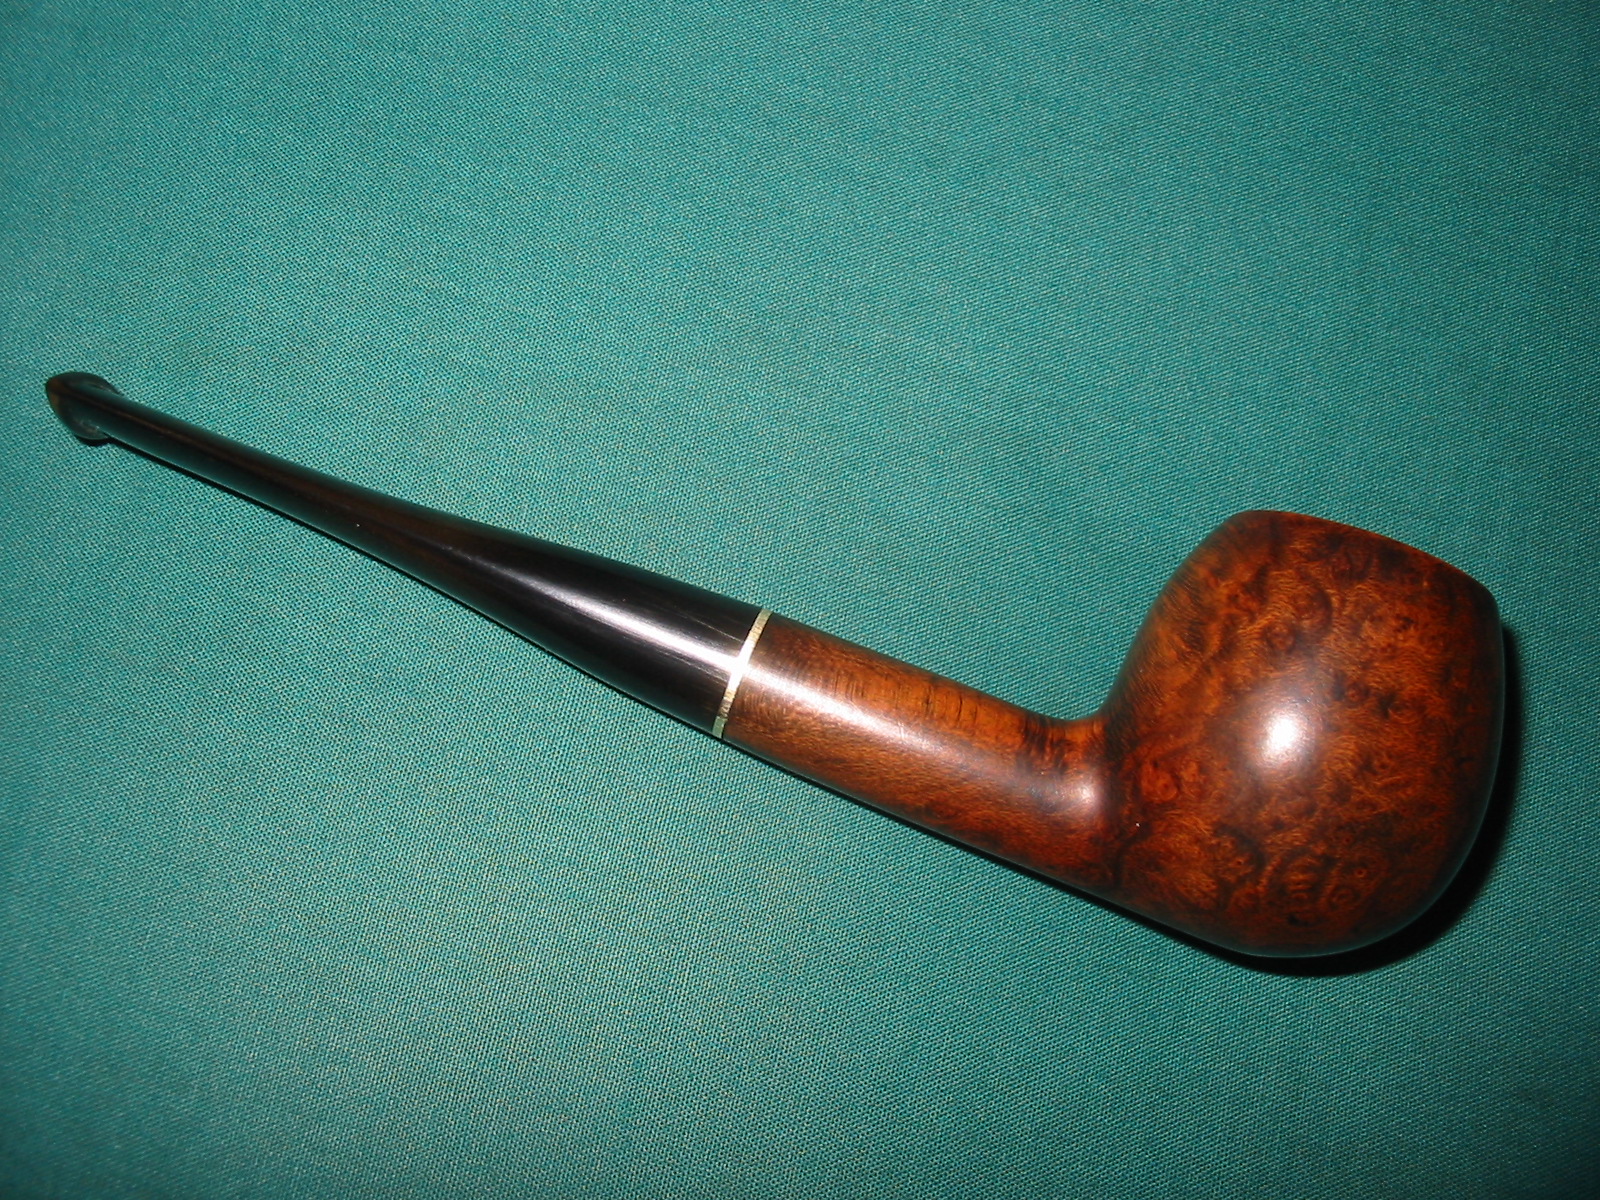
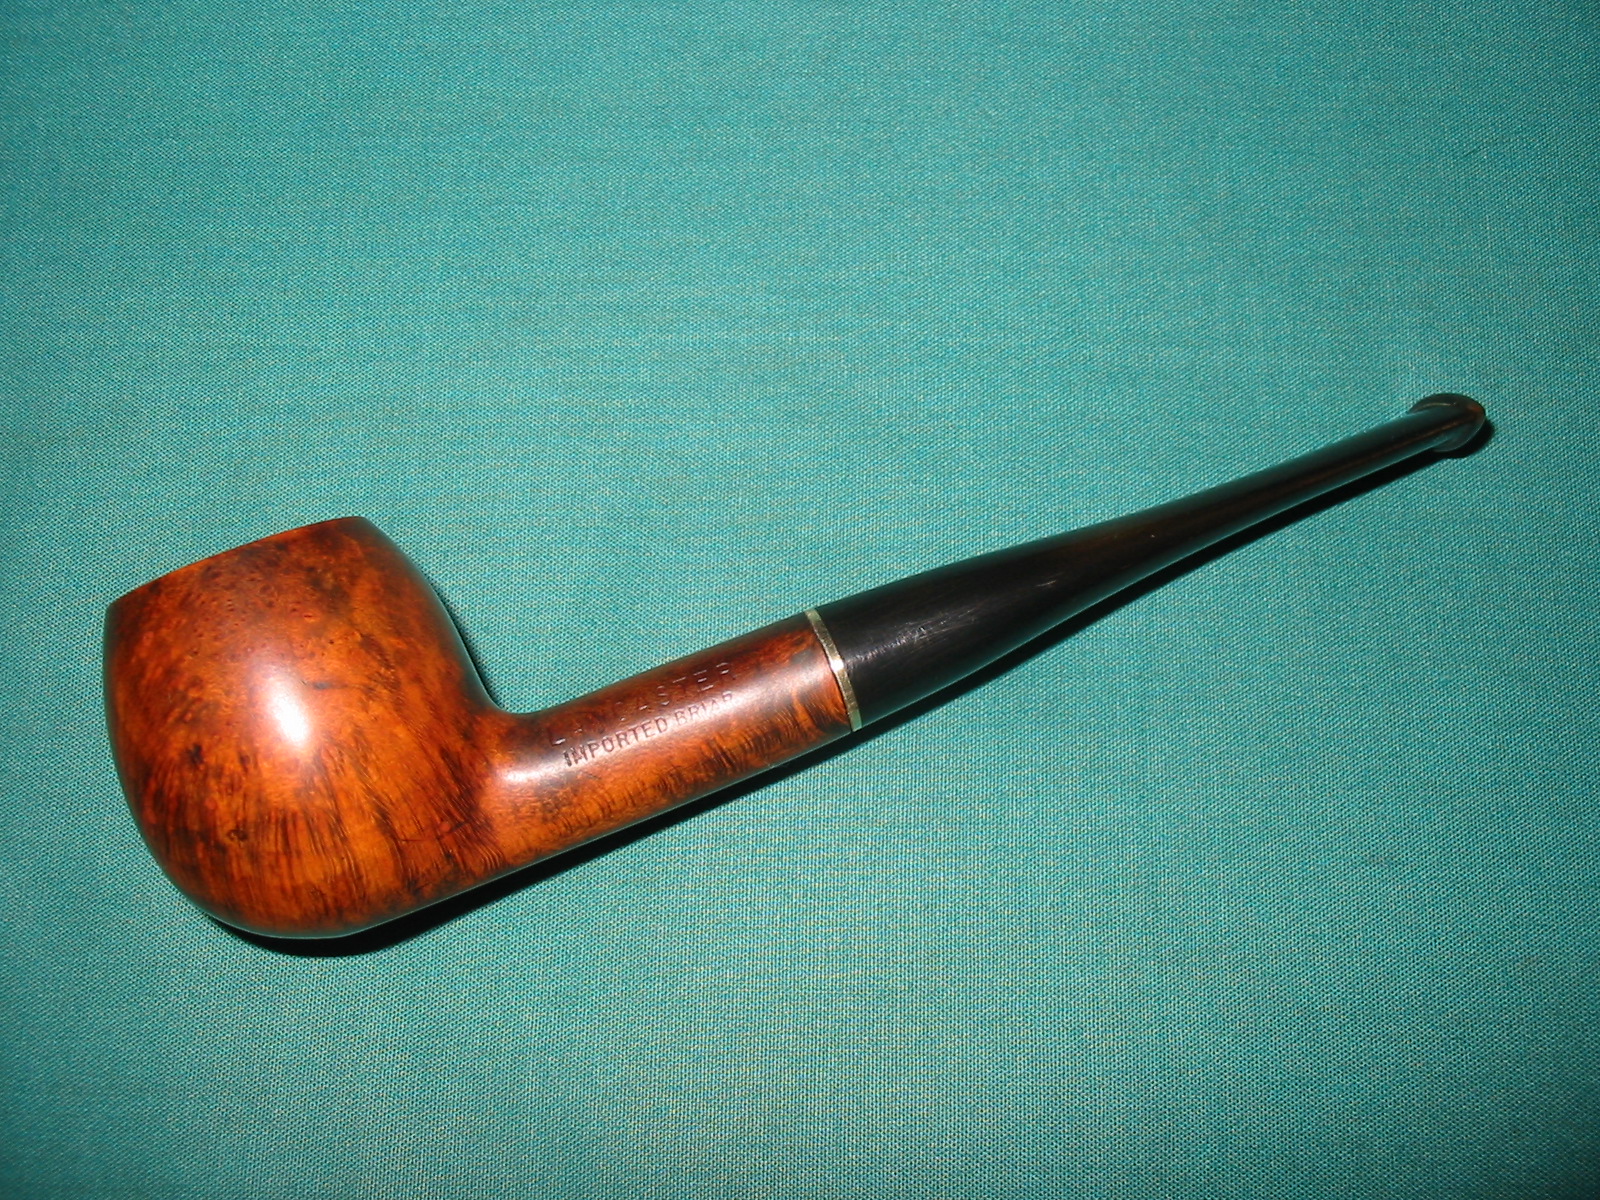
I rubbed the stem down with Obsidian Oil to protect it and when it had dried took the pipe to the buffer. I buffed the stem with White Diamond and gave the bowl and shank a light buff as well. I gave it multiple coats of carnauba wax and finished by buffing it with a clean flannel buff. The finished pipe is picture below.
IMG_4572

IMG_4573

IMG_4574

IMG_4575

A Renovation of a Good Companion London Made Billiard


My wife and I went out for lunch on Saturday and there was an antique shop across the street from the restaurant. After eating we brave torrential downpours and ran across the street check out a shop we had not visited before. We looked through the various display cases and I found the pipe below along with a chewed up Yello-Bole billiard. The pipe was a small group 3 sized billiard. The finish was a dark brown stain on a sandblasted pipe. The left side had great grain pattern and showed deep grooves. The right side was a tight birdseye grain and the blast was shallow and close. The shank was rusticated to look like a sandblast. The stem had a slight bend but seemed be from sitting in the heat rather than intention. There was a bite through on the top surface of the stem that was large enough that it could not have been patched. The rim was originally smooth and beveled inward but the bevel had been damaged and needed to be reshaped and cleaned up. The stamping on the pipe is what ultimately made me spend the $10 to make the pipe mine. It read Good Companion over London Made on the underside of the shank. I just finished reading a new book by Mark Irwin called Pipe Companions. In it he wrote of the relationship between the pipe and the pipeman. I think it was a great coincidence to walk into a pipe stamped Good Companion. I wanted to clean it up and make it my own.
IMG_4177

IMG_4178

When I got home from the visit to the shop I took the pipe apart. The stem had a large spiral stinger apparatus in the tenon. The stem itself was badly chewed. I found a new stem for the pipe in my can of stems and worked on the tenon to make the tapered stem fit the shank.
IMG_4263

IMG_4264

IMG_4265

I pushed the newly fitted stem into the shank to have a look at the shape with a taper stem. I liked the overall look of the pipe with the new stem. I sanded the stem to remove the calcification and the oxidation on it. I also worked on the fit of the stem to the shank. I wanted the transition to be smooth and seamless. I took the stem in and out several times while I worked on it. The last time I pushed it into the shank there was a crack! I don’t know if that has happened to you but when it happens there is a sick feeling in the pit of my stomach. Here the pipe was almost ready to refinish and the stem fit well and then crack. The frustration at that moment is high level. I laid the pipe down and had a coffee while I thought about my next steps.
IMG_4266

IMG_4268

IMG_4269

IMG_4270

I went through the box of nickel bands that I have here and I did not have any the correct size for the shank. All of them were either too huge or too small. I did remember however that I had some brass plumbing pressure fitting pieces that would make a great band on the pipe and create a totally different look on this old pipe. Before fitting the band I worked on the bevel of the inner edge of the rim. I used a folded piece of sandpaper to smooth out the rim damage and reshape the bevel.
IMG_4271

IMG_4272

I used a Dremel and sanding drum to sand back the shank so that the band could be pressure fit against the cracked shank. I took back the rustication until the finish was gone and the shank area was smooth. When the band fit tightly on the shank I heated the brass band with a heat gun and then pressed it into place on the shank.
IMG_4273

IMG_4274

IMG_4276

IMG_4278

I pressed the band into place on the shank and then hand sanded the area in front of the band smooth so that I could rework the taper of the shank and the finish to match the rest of the pipe.
IMG_4279

IMG_4280

IMG_4281

IMG_4283

I used the two Dremel diamond cutting heads pictured below to rusticate the finish on the shank. I used the cylinder first and then the ball. I worked it into the briar to make the smooth area match the rest of the bowl.
IMG_4284

IMG_4285

IMG_4287

After rusticating the shank I stained it with a dark brown aniline stain and flamed it to set it deep within the grain. I stained the rest of the pipe as well and the rim with multiple coats of the dark brown.
IMG_4288

IMG_4289

IMG_4290

IMG_4291

Once the stain was dry on the bowl I hand buffed it with a cotton cloth and then stained it a second time with MinWax Red Mahogany stain. I rubbed it on and then rubbed it off. I repeated the process until I had the colour that I wanted.
IMG_4293

IMG_4294

IMG_4295

IMG_4296

I buffed the bowl on with White Diamond and to evenly distribute the stain coat and give the pipe a rich shine. When I had finished I worked on the stem with 220 grit sandpaper, a medium grit sanding sponge and micromesh sanding pads. I used my usual array – wet sanding with the 1500-2400 grit pads and dry sanding with the 3200-12,000 grit pads. I rubbed down the stem with Obsidian Oil and rubbed it into the vulcanite.
IMG_4297

IMG_4298

IMG_4299

I sanded the bevel on the bowl and the brass band on the shank with the 1500-2400 grit micromesh pads.
IMG_4300

IMG_4301

IMG_4302

I buffed the pipe with White Diamond and then gave the stem multiple coats of carnauba wax. I used Halcyon II wax on the sandblast finish of the bowl. I buffed the pipe with a clean flannel buff. I have to say though I would have liked to keep the pipe unbanded and pristine, the crack that happened in the shank made me try something a little different. I actually like the finished look of the pipe with the brass band. The combination of the two stains give the blast finish depth that changes with different lighting and the tapered stem adds some panache to this Good Companion.
IMG_4309

IMG_4310

IMG_4311

IMG_4312

IMG_4313

Looking at the photos I decided to do a bit more work shaping the brass band. I sanded the band with 220 grit sandpaper to remove the ridges in the brass. I followed that by sanding with a medium and fine grit sanding sponge. I finished sanding the band with micromesh sanding pads from 1500-3200 grit polish it.
IMG_4314

IMG_4315

IMG_4316

IMG_4317

IMG_4318

IMG_4319

With the band finished I will give the pipe another buff to polish the handling that it received working over the stem.

Reworking an Orlik Matt Canadian Shape L78


A few years ago I was gifted a small box of English pipes. I had truly forgotten about it but my daughters were cleaning out our storage room under the front porch (interior room) and came across the box. So now I have five more pipes to restore. The pipe on the table this morning was a Canadian with a poorly fitted replacement stem. It was not the same oval as the shank. The shank had been sanded down to fit the stem and done in such a way that it was no longer an even taper. Even in doing so the stem still was larger on the top and bottom where it met the shank. The transition was thus rough and uneven. The stem also had significant scratches on it and a spot at the top and bottom where there was an uneven bump near the shank. The bowl had been topped and then the rim and shank restained but they did not match the rest of the pipe. The stamping though faint on the top of the shank reads Orlik Matt over Made in England in block letters. There is also a shape number on the right side of the shank as noted in the title – L78. I did a bit of checking to see if the shape number matched what I had. I have included a page of shapes – the one I have is at the bottom of the page.
orl7

Here are some photos of the pipe when I started.
Orlik1

Orlik1b

Orlik2

Orlik3

I wiped the bowl and shank down with acetone on a cotton pad to remove the spotty finish. I cleaned out the shank and stem as they were filthy and prohibited a true fit on the stem. Once I had the stem sitting in the stem correctly I sanded the shank and stem junction with 220 grit sandpaper to smooth out the transition and even out the taper from the bowl to the stem. I wanted to also remove the excess vulcanite and to reshape the oval of the stem and shank. I wanted the transition to be smooth to the feel. I think that whoever restemmed and restored this pipe the first time gave the bowl a coat of varnish so I removed that with the acetone.
Orlik4

Orlik5

Orlik6

Orlik7

I sanded the stem shank union with a medium grit sanding sponge and a fine grit sanding block to further smooth out the transition and lines. I wanted a smooth flow of line from the bowl to the button.
Orlik8

Orlik9

Orlik10

Orlik11

Once I had finished sanding the stem and shank and the briar was smooth and unscratched it was time to stain the shank and rim. I gave the shank end and the rim a coat of dark brown aniline stain to try to bring it back to the same hues and the rest of the bowl and then stained the entire bowl and shank with a Minwax Medium Walnut stain. The first time I did it the stain still did not match well so I heated the end and the rim with a lighter and reapplied the dark brown aniline. Then stained them both again with the Minwax stain. When I had finished they were closer than before.
Orlik12

Orlik13

Orlik14

Orlik15

I sanded the stem and the bowl with micromesh sanding pads. I wet sanded the stem with 1500-2400 grit pads and then dry sanded the bowl and stem with 3200-12,000 grit pads. I rubbed the stem down with Obsidian Oil and then took the pipe to the buffer to give it a light buff with White Diamond to polish. I was careful in the buffing to avoid the already light stamping on the top of the shank. I had buffed that section with a soft cotton cloth.
Orlik16

Orlik17

I still was not happy with the stain coverage on the sanded portions of the pipe as they appeared lighter than the body of the pipe. I brought it back to the work table and touched up those two areas – the stem shank junction and the rim – with Minwax Red Mahogany Stain then set it aside to dry.
Orlik18

Orlik19

Orlik20

Orlik21

Orlik22

Once the stain was dry I lightly buffed the pipe with White Diamond and then gave it multiple coats of carnauba wax with the buffer. I polished the finished pipe with a clean flannel buff to protect it and give a shine. Even with the buffing I was seeking more of a matt look to the pipe than a shiny one. The finished pipe is pictured below.
Orlik23

Orlik24

Orlik25

Orlik26

Reclaiming a Digby Conquest Canadian


Blog by Steve Laug

On the weekend I went pipe hunting to refill my box of pipes for refurbishing. I found some nice ones to add to the box. The first one that I took on was odd looking when I picked it up. The stem on it was an aftermarket replacement that proportionally was all wrong. The addition of the stem made the pipe over seven inches long. The stem was also a twin bore which was not standard on GBD line pipes. The stamping on the bottom of the shank is Conquest in script followed by Digby over London Made. That is followed by London England and the shape number 9519. Digby is a GBD second line. It has the same blast as a GBD Prehistoric which lends one more question mark to what makes a pipe a second. In checking the GBD shape numbers there is no shape #9519 listed on the GBD shape site. http://www.perardua.net/pipes/GBDshape.html

The blast on the bowl was quite nice while the shank was rusticated. The person who added the new stem to the pipe changed the shank to fit the new stem rather than the other way around. In doing so they sanded the shank and removed the blast/rustication on the end of the shank. They also tapered both sides and top and bottom to meet the new stem. While both of these “errors” in fitting a stem are a pain to deal with they are not irreparable. It just means that any new stem must follow the new lines of the pipe and that the rustication pattern needs to be repaired as well. The bowl itself was thickly caked and the rim dirty and with a slight buildup of tars. The finish was spotty and the reddish brown stain was worn.
IMG_3467

IMG_3468

IMG_3469

IMG_3470

I went through my can of stems to find one that would properly fit a GBD style Canadian with an oval shank and found several. I chose the acrylic one in the photo below and used the PIMO Tenon Turning tool to reduce the diameter of the tenon. I also used the Dremel and sanding drum and hand sanding to further fit the tenon to the shank.
IMG_3471

IMG_3460

With the tenon fitting well, the overall diameter of the stem needed to be reduced to fit the shank diameter. It was just slightly bigger so the work on it would not be difficult. The excess is visible in the four photos below. Note also the smoothing of the shank that had been done in the previous repair.
IMG_3463

IMG_3464

IMG_3465

IMG_3466

I used a Dremel with a sanding drum to remove the excess acrylic material and bring the stem into line with the shank. I took care to not nick the shank even though I later planned to rework the rustication on it.
IMG_3472

IMG_3473

IMG_3474

IMG_3476

With the fit roughed in I took it back to the work table to hand sand the stem and make fit seamless. To begin the process I used 220 grit sandpaper to do the hand work. On the right side bottom of the shank I noted that the oval was slightly out of round with the stem removed and gave the new tapered stem a bulge in that area. I sanded the shank and the stem together at that point to correct the previous damage.
IMG_3477

IMG_3478

IMG_3479

IMG_3480

With the fit nearly finished on the stem I reamed the bowl of the pipe with a PipNet reaming set. I began with the smallest cutting head and then ended with the proper sized head for the bowl. I cut the cake back to bare wood.
IMG_3481

IMG_3482

IMG_3484

I worked some more on the stem shank junction with a fine grit sanding sponge to remove the scratches in the briar and the stem. I was more concerned with the briar as I wanted to give it a coat of stain.
IMG_3493

IMG_3494

IMG_3495

IMG_3496

Staining would be a complicated process of using a variety of stains to match the original stain colour on the prehistoric. For the first stain colour I used an oxblood aniline stain. I would use other stains later in the process to get the colour I was aiming for.
IMG_3504

IMG_3506

As I put the newly fitted stem in place so that I could lay it down to dry the tenon snapped on the new stem. As I examined it I could see the many small fractures in the acrylic. This is one of the frustrations of pipe repair. You get a pipe on its way to the finish line only to have something like this happen and have to begin again. I took another stem out of my can of stems. I once again had to go through the process of turning the tenon, using the Dremel and sanding drum and finally hand sanding to fit the tenon in the shank. I also had to trim back the diameter of the new stem to match the shank with the Dremel. One good thing is that doing it the second time everything is set up to do it again more quickly the second time.
IMG_3508

IMG_3509

IMG_3510

Once I had a good fit on the stem it was time to re-rusticate the shank using an etching head on the Dremel. In the next two photos the cutting tool is visible and the rustication of the shank is completed. I did both sides of the shank and the top to match the pattern on the upper portion of the shank. On the underside I brought the pattern around the flattened oval stamping area of the shank and matched the pattern around that area.
IMG_3511

IMG_3513

I stained the newly rusticated shank area with the oxblood stain. The stained rustication is visible in the next four photos. I am pleased with the match on the pattern of the rustication on the shank that I was able to achieve with the tool.
IMG_3515

IMG_3516

IMG_3517

IMG_3518

I still needed to use several more colours of stain to achieve a match to the bowl. I used aniline black and an aniline dark brown stain to approximate the mix of stains to blend the repaired portion with the remainder of the pipe. I would still need to do a top coat of oxblood to truly blend in the repair.
IMG_3519

I sanded the stem with the usual regimen of micromesh sanding pads. I wet sanded with 1500-2400 grit pads and dry sanded with 3200-12,000 grit pads.
IMG_3520

I gave the shank a final coat of the oxblood stain and lightly buffed the shank with White Diamond to blend the wear of the older portion with the new rustication. I rubbed down the stem with Obsidian Oil and then buffed the stem with White Diamond as well. Once the buffing was done I gave the stem multiple coats of carnauba on the wheel and then buffed it with a soft flannel buff. I rubbed in Halcyon II wax on the bowl and shank and then lightly buffed the bowl with a soft flannel buff. The “new” Digby Canadian is now ready for its inaugural smoke. It is shown below in the final four photos.
IMG_3540

IMG_3541

IMG_3542

IMG_3543

Restemming and Repairing a Meerschaum Lined Lancaster Billiard


I have had this old meerschaum lined bowl for many years now. It has been sitting in a cupboard and should have rightly been pitched several times over. For some reason I could not bring myself to throw it away. I kind of figured that one day when I had nothing else to do I would experiment on a repair of the meerschaum lining. I had read of several repairs in the past and experimented with one of them previously. The two methods I had read of involved a non-acrylic tile grout without sand while the other one involved Plaster of Paris. I had used the tile grout on a pipe many years ago and still smoke it. The bowl has long since look repaired and you would be hard pressed to see where the repair was in the bowl. This old bowl had much the same damage as that one so I decided to experiment with the Plaster of Paris method. The pipe did not have a stem so I would also need to restem it once the patch was finished. The bowl is stamped Lancaster over Imported Briar on the left side of the shank and has no stamping on the right side. There were small fills present on the bowl – almost like small pin pricks that had been filled in the manufacture of the pipe. The finish on the bowl was virtually not present except for a few spots where the stain had held on stubbornly over the years.
IMG_3352

IMG_3353

I mixed a small batch of Plaster of Paris and water and stirred it with a dental pick. I also had some sanding dust from a meer bowl that I had save so I mixed it in with the Plaster of Paris mixture. I inserted a pipe cleaner into the airway to keep it open when I packed in the mixture to the bowl bottom and side. Once I had a good paste mixed up I used the dental pick to put pieces of it into the bowl. I used the head of a tamper to pack the Plaster of Paris into the bowl bottom. I also pushed the Plaster mixture into the side of the bowl and used the spoon end of the tamper to push it into place. I used the dental pick to carve the airway open at the bottom of the bowl and then a wetted pipe cleaner to smooth out the bowl wall and shape the bottom of the bowl in a slight cup shape. Once that was completed I smoothed out the whole bowl with the wetted pipe cleaner and feathered the edges of the patch into the existing meerschaum material.
IMG_3402

IMG_3403

IMG_3404

IMG_3406

IMG_3407

IMG_3408

I cleaned up the top of the bowl and the tools and set the bowl aside to dry. After one hour the Plaster of Paris set and I removed the pipe cleaner from the shank. I used the dental pick to shape the airway after removing the pipe cleaner. The bowl was ready to restem. I went through my can of stems and found an old stem that was the right length and close to the correct diameter of the shank. It had a brass stem band that would look great on the old pipe bowl. When I cleaned it up I found that it had a Delrin tenon. I used the tenon tool to turn the tenon down enough to fit the shank snugly. When I cleaned out the end of the tenon after turning it I found that it was set up for a nine millimeter filter.
IMG_3409

IMG_3410

I fit it into the shank and used the Dremel with a sanding drum to sand down the diameter of the brass band and stem to fit the shank. I nicked the shank a couple of times lightly with the drum as I worked on the brass band. The nicks were not deep but merely surface so they would clean up when I sanded the stem and shank for a smooth transition.
IMG_3416

IMG_3417

IMG_3418

IMG_3419

I took the pipe back to the work table and sanded the stem and shank with 220 grit sandpaper to make a smooth transition between the shank and the stem. I also sanded off the calcification that had built up around the button at the same time.
IMG_3411

IMG_3412

IMG_3413

IMG_3415

IMG_3420

IMG_3421

IMG_3422

IMG_3423

I sanded the bowl with the 220 grit sandpaper and then the stem and the bowl with a medium grit sanding sponge to smooth out the scratches left behind by the sandpaper. I wet sanded the bowl with 1500-2400 grit micromesh sanding pads to smooth out the finish before I stained it. I then wiped the bowl and shank down with acetone on a cotton pad to clean off the sanding dust.
IMG_3424

IMG_3425

IMG_3426

IMG_3427

I stained the bowl with a black aniline stain, flamed it and repeated the process until the coverage was even. I heated the bowl with a lighter to set the stain into the grain of the pipe. I wiped the freshly stained bowl with Everclear to remove the top coat of stain and reduce the black stain. The next series of three photos shows the bowl after the wash.
IMG_3428

IMG_3429

IMG_3430

I sanded the bowl with 220 grit sandpaper and then a medium grit sanding sponge to further remove the black stain. The next four photos show the pipe after I had sanded it and wiped it down with Everclear.
IMG_3432

IMG_3433

IMG_3434

IMG_3436

I dry sanded it again with 1500-2400 grit micromesh sanding pads and then stained it with a coat of Minwax red mahogany stain. I rubbed it on the bowl and rubbed off again to give a contrast look to the briar and to hide some of the fills that were present. I sanded it with 3200-4000 grit micromesh to polish the remaining scratches in the briar.
IMG_3437

IMG_3438

IMG_3439

IMG_3440

I wet sanded the stem with 1500-2400 grit micromesh and then dry sanded it with 3200-12,000 grit micromesh sanding pads.
IMG_3441

IMG_3442

IMG_3444

I finished the bowl by giving it a final coat of Minwax medium walnut stain. I rubbed it into the bowl and wiped it off and then hand buffed the pipe with a shoe brush. The rich red brown stain on the bowl turned out well with a variety of highlights.
IMG_3445

IMG_3446

IMG_3447

IMG_3448

I rubbed the stem down with Obsidian Oil and then buffed the whole pipe with White Diamond to polish it. I finished by giving it multiple coats of carnauba wax to build a shine and protect the finish. The completed pipe is visible in the next four photos.
IMG_3449

IMG_3450

IMG_3451

IMG_3452

I also sanded the top of the rim and the inner bevel of meerschaum with the 1500-2400 grit micromesh sanding pad to polish the meerschaum edge. I gave this top edge a final coat of carnauba wax and buffed it to a shine. The Plaster of Paris patch is drying and needs to cure for 24 hours before it is good to go. The box says that it does not shrink as it dries and so far it is good to its promise. I will have to see if it holds true tomorrow after it has cured a full 24 hours. If so, then it is time to fire it up and check out if it holds as well as the tile grout patch has held up over all these years.
IMG_3453

IMG_3454