Tag Archives: restaining

Repairing a Cracked Bowl on a GBD London Made Canadian


Blog by Steve Laug

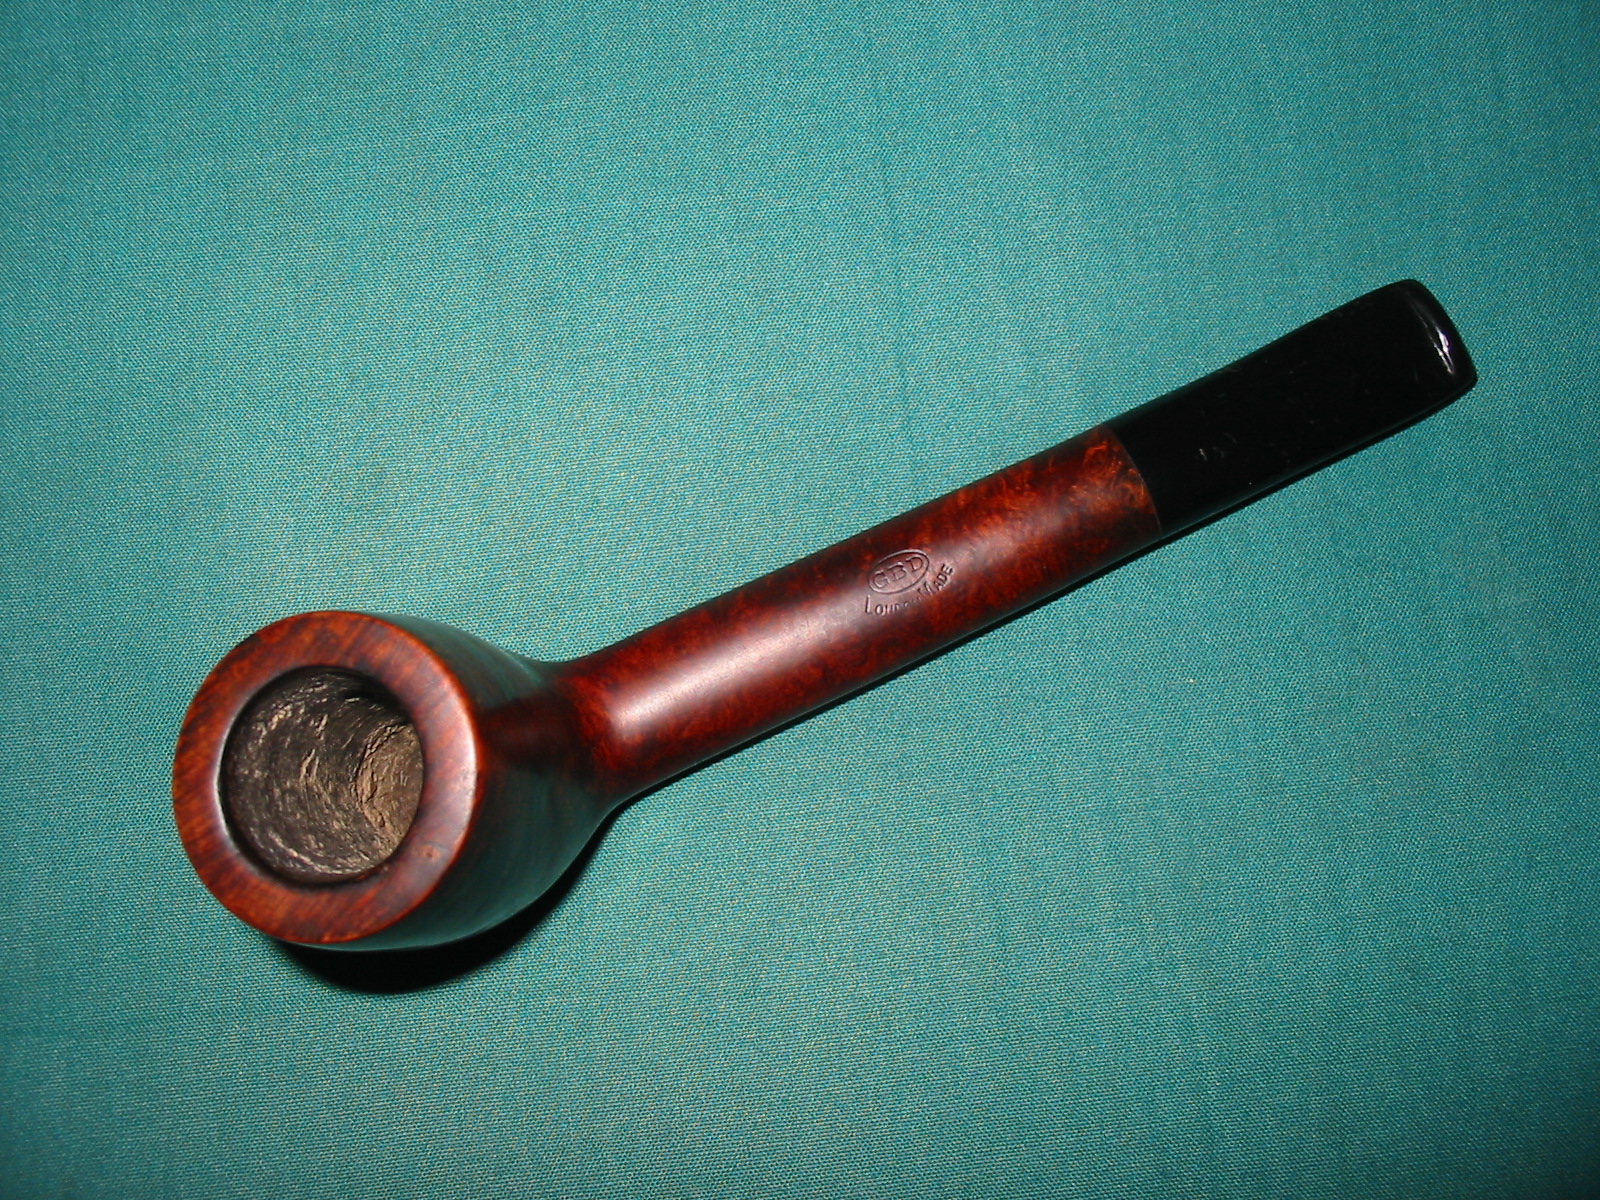
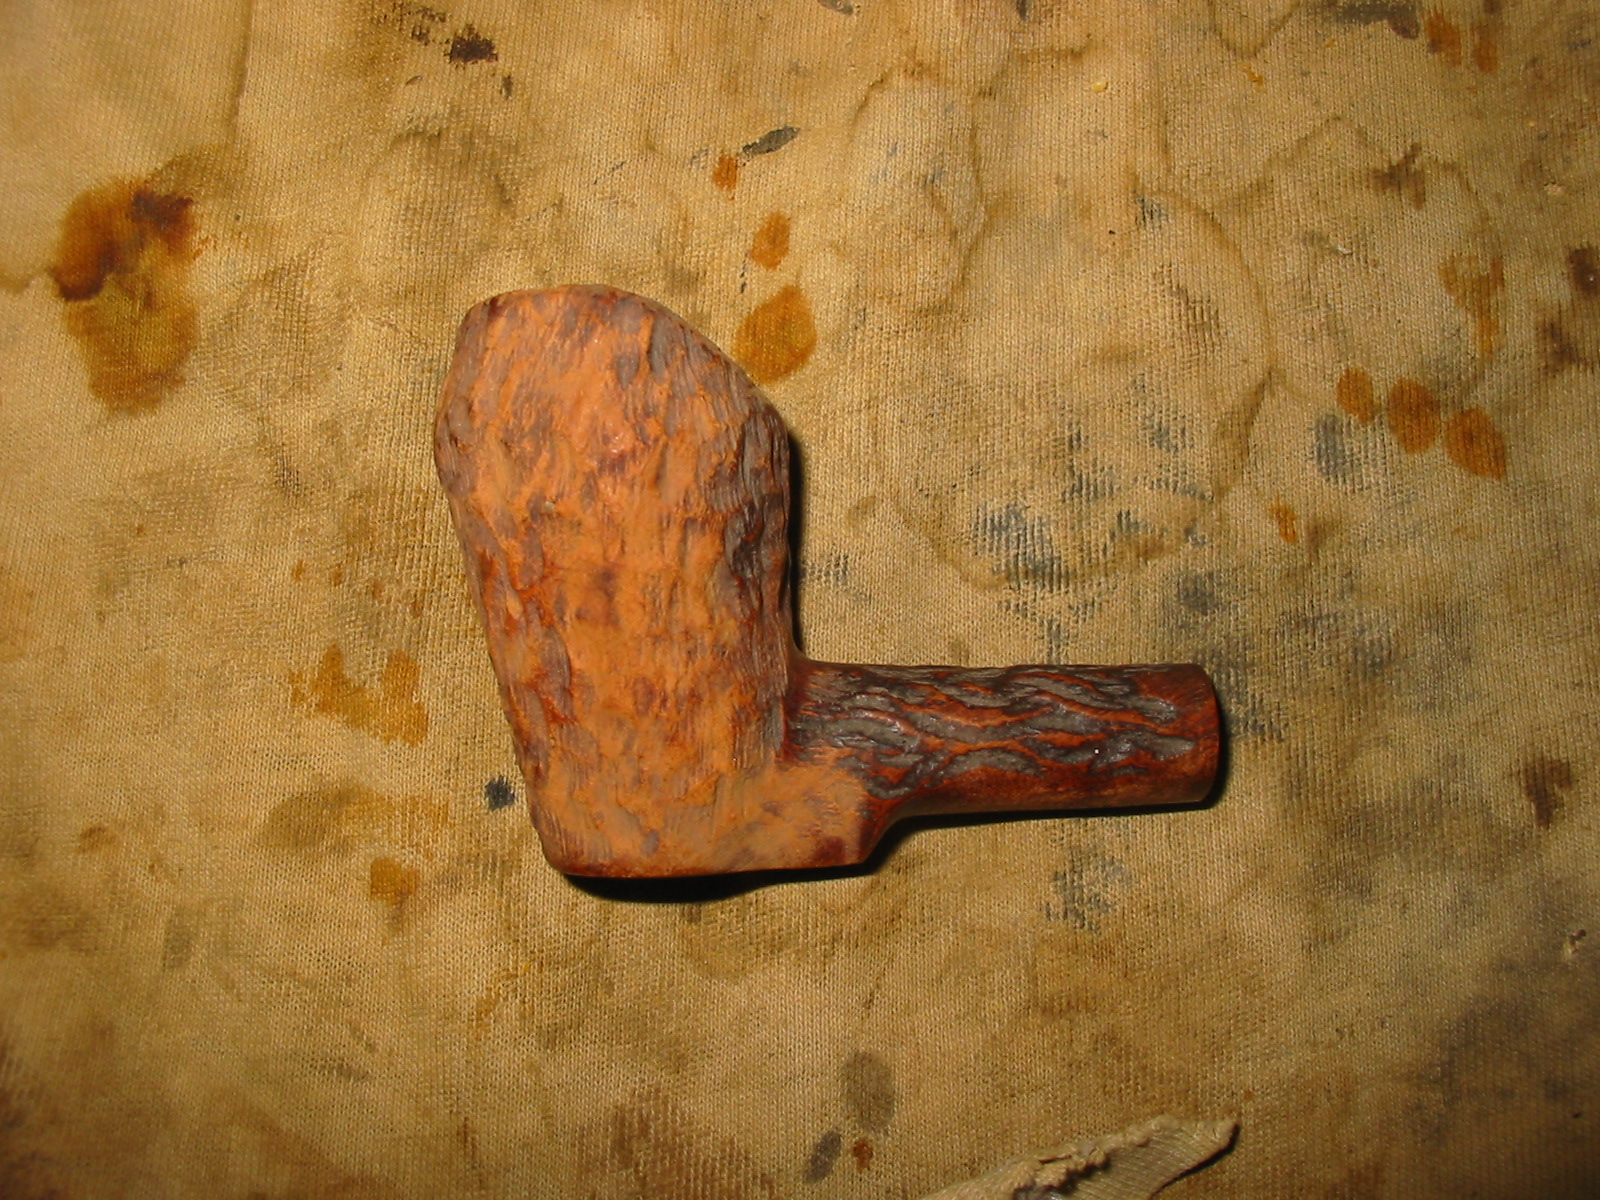
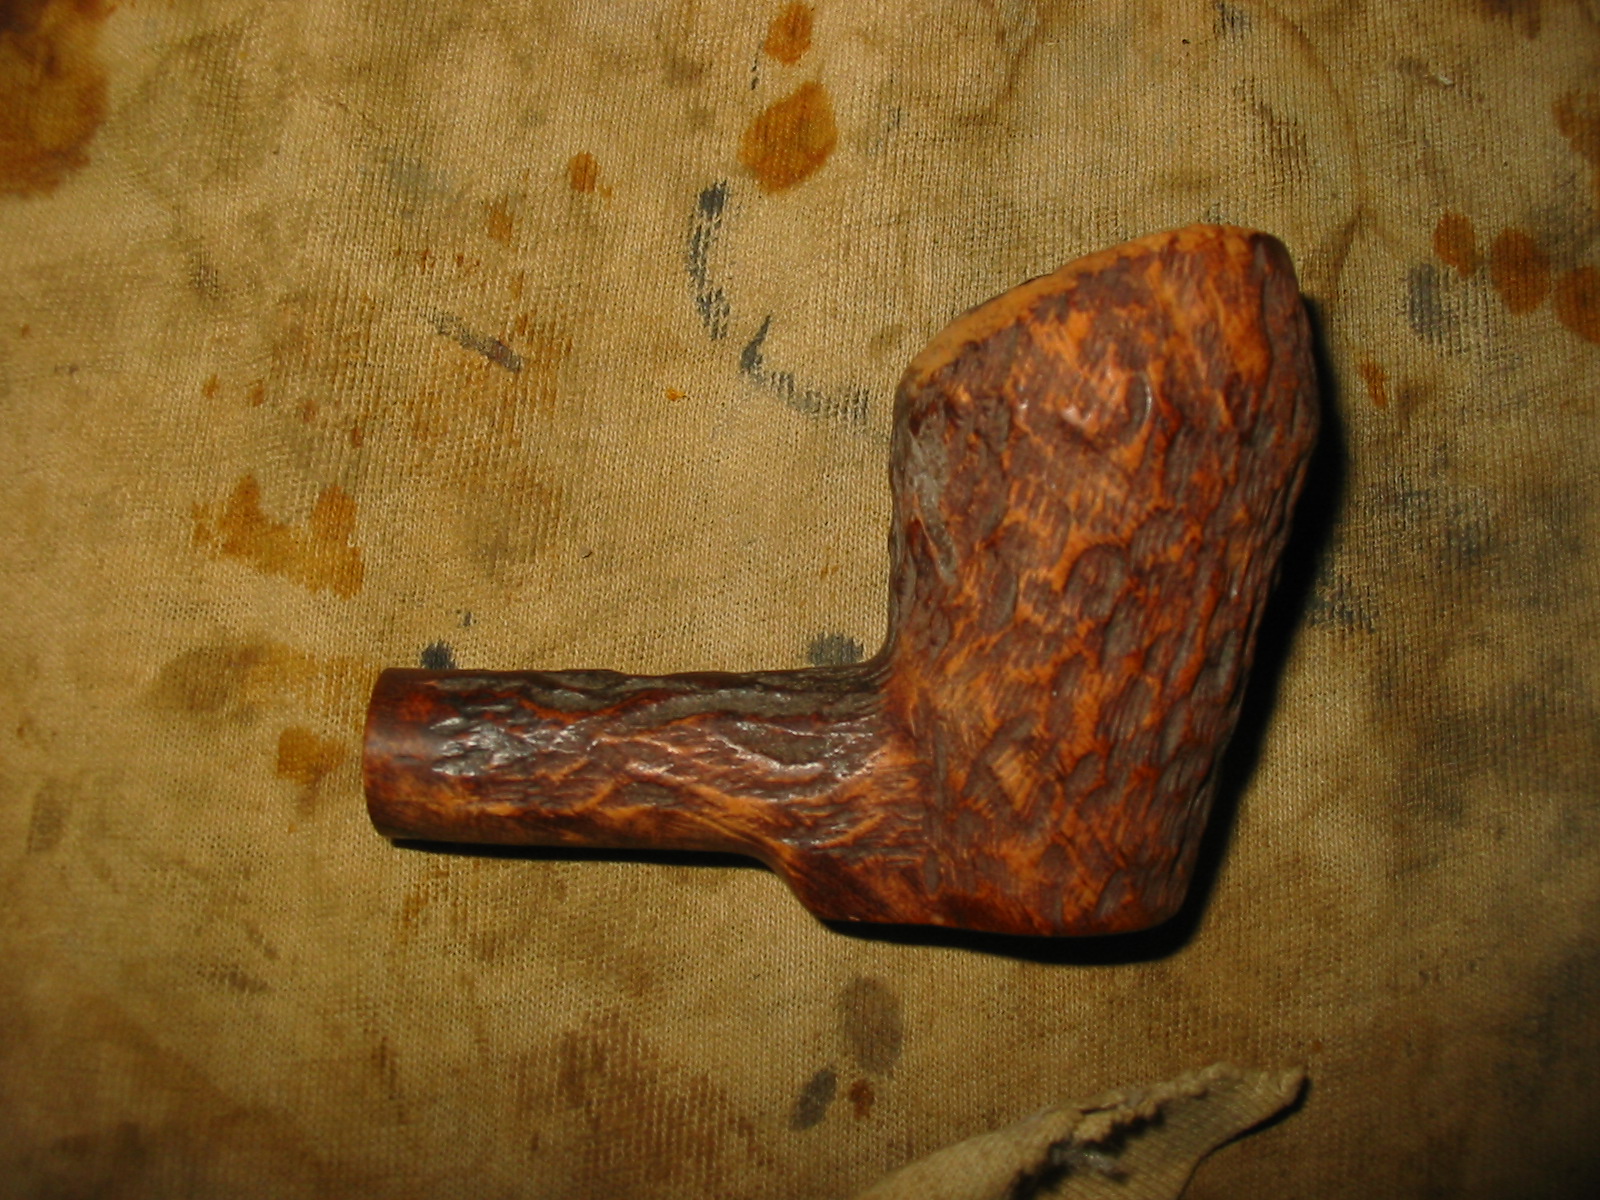
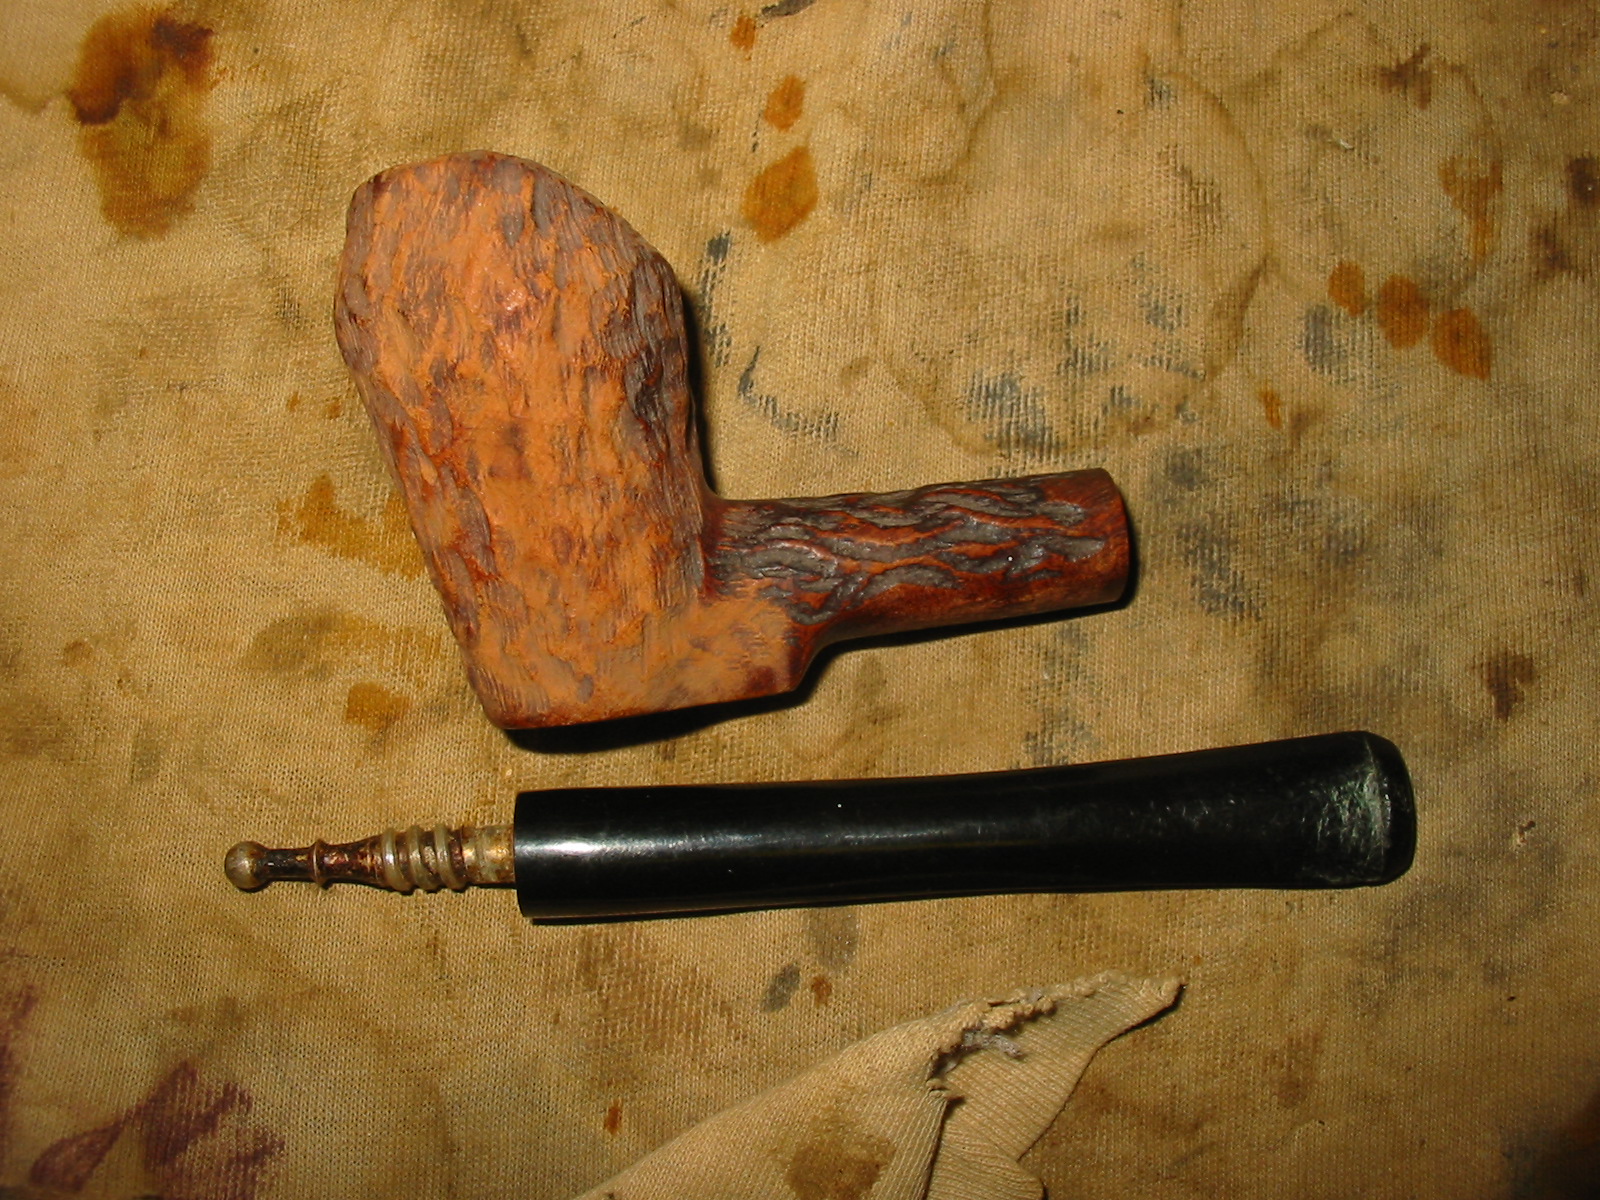
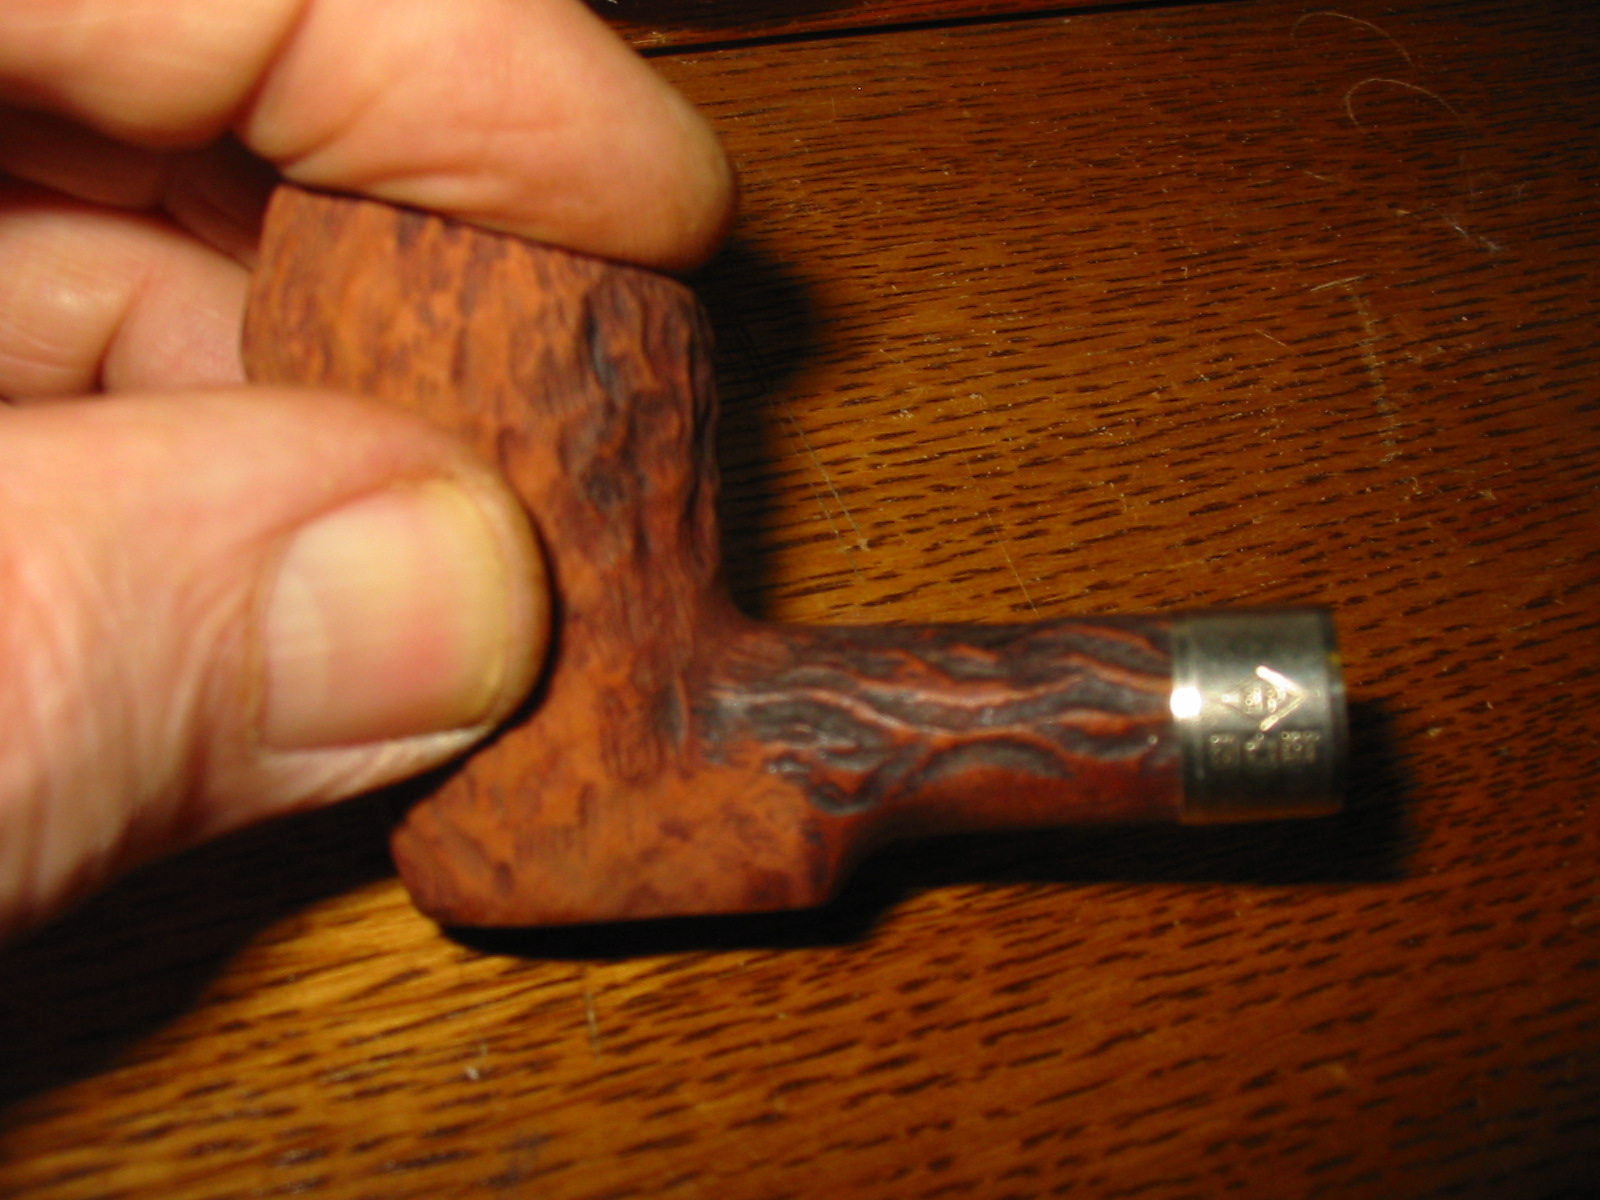
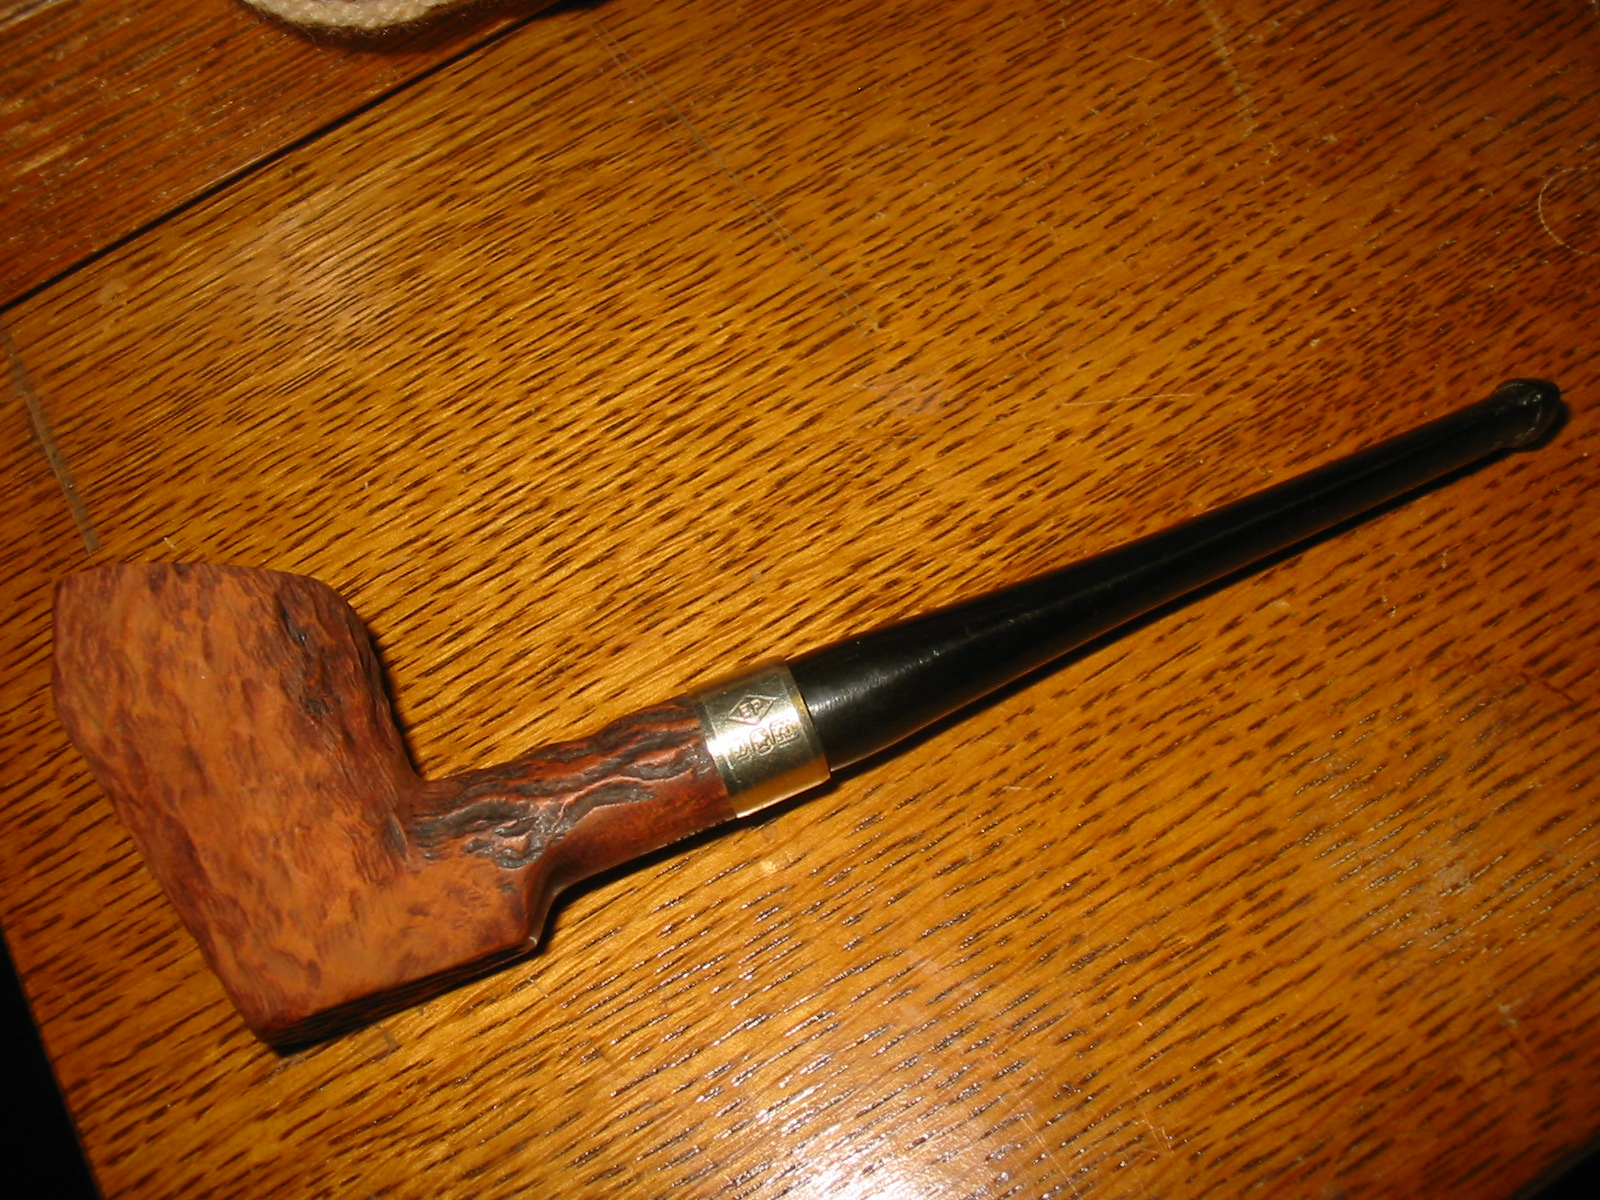
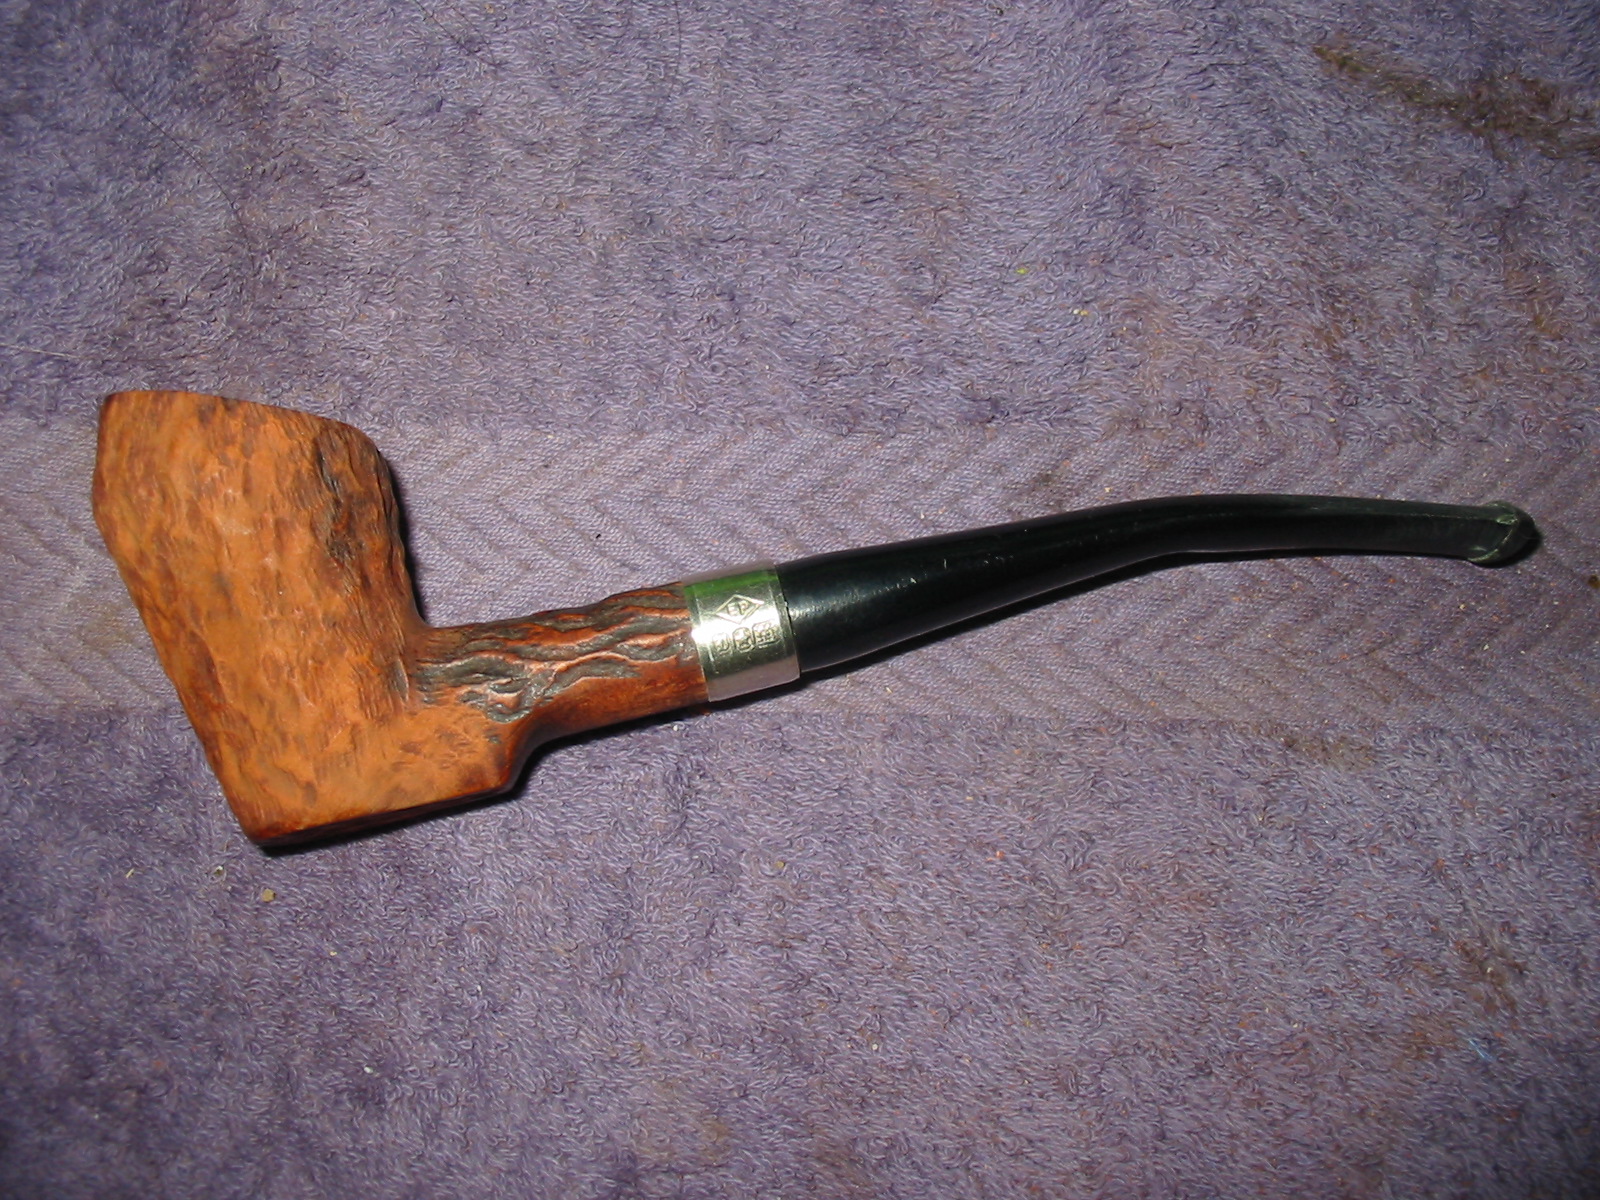
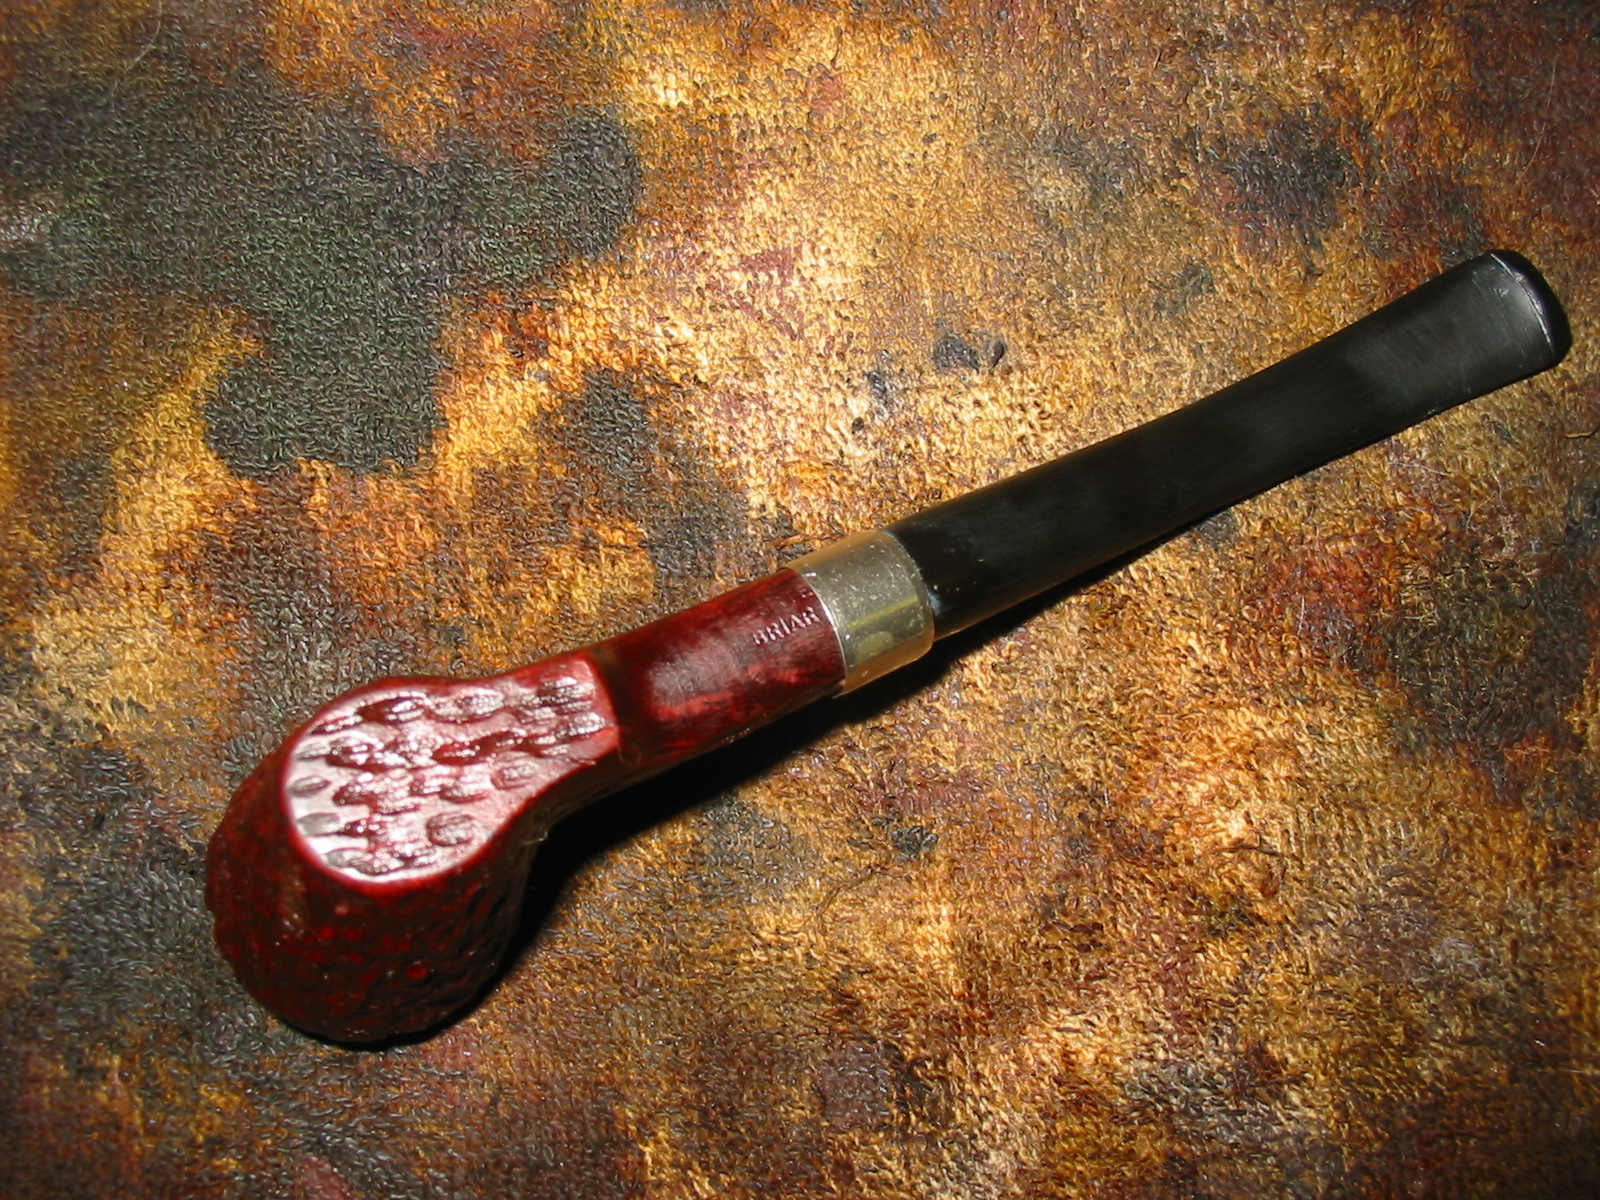
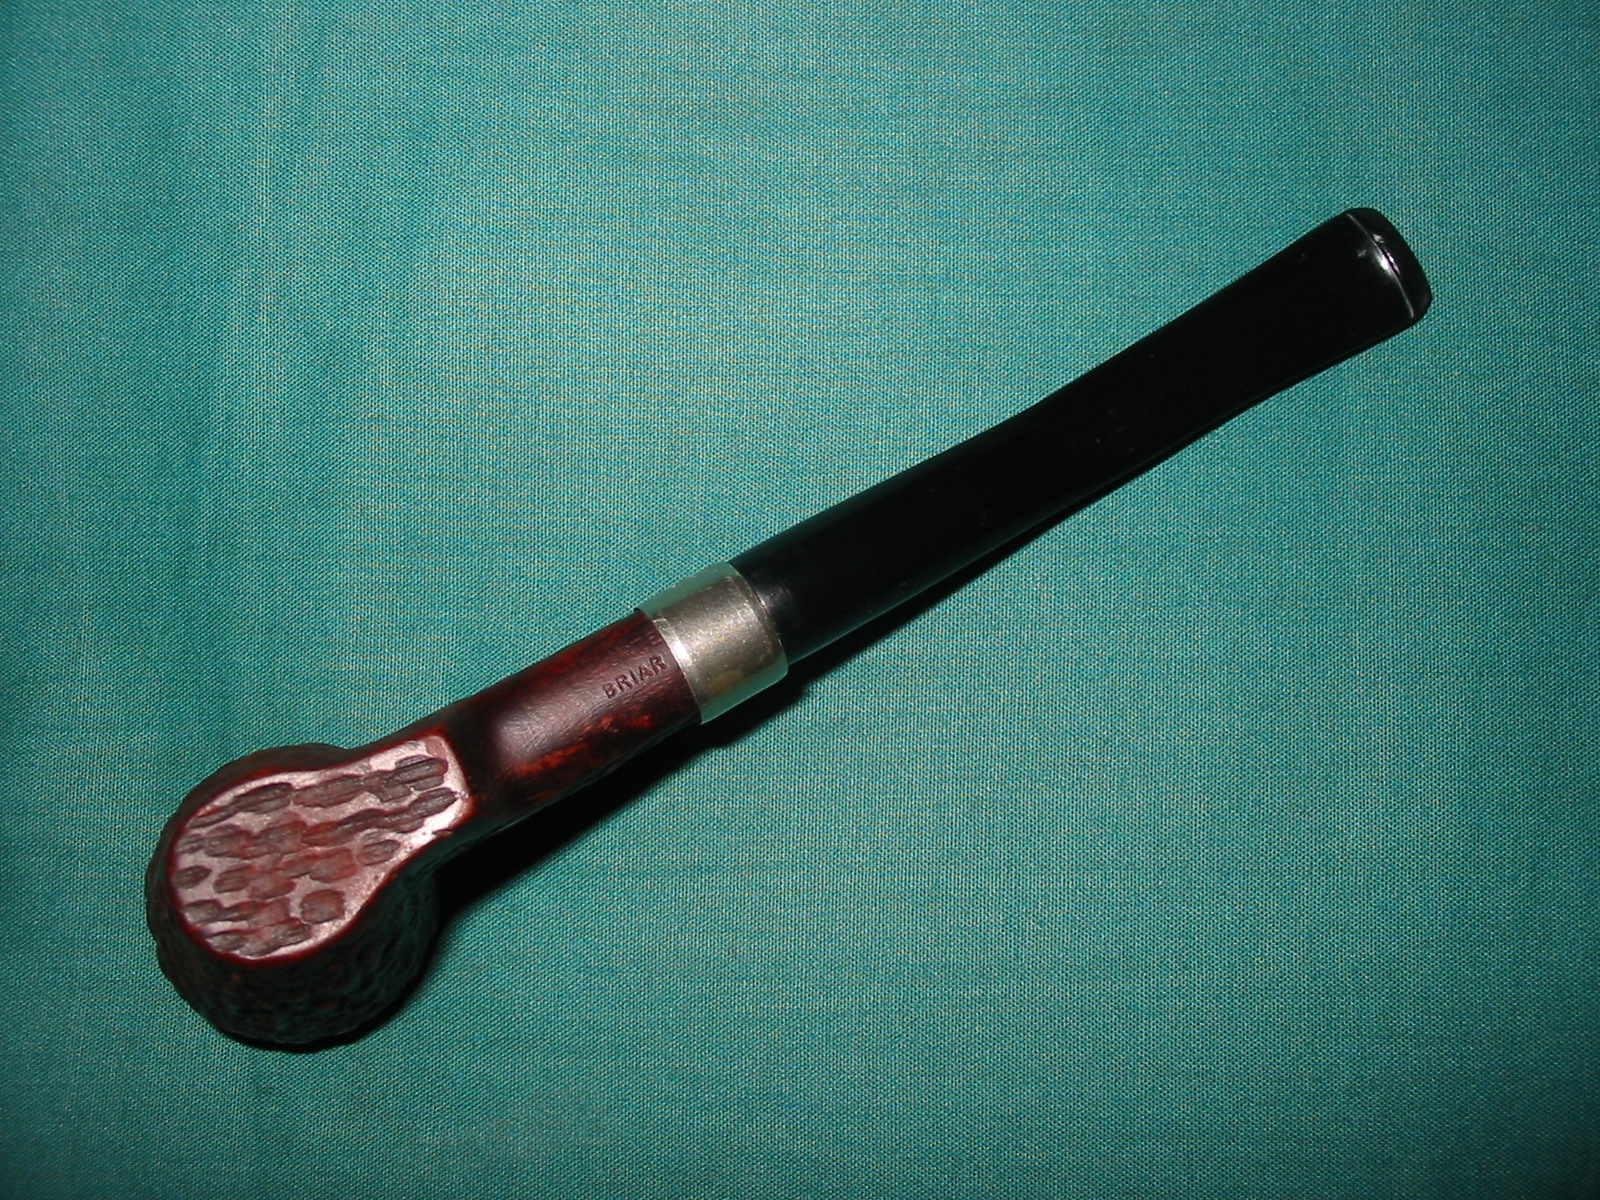
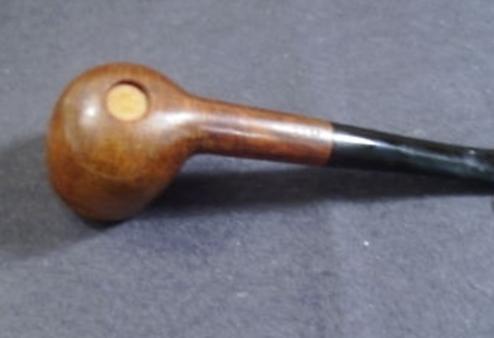
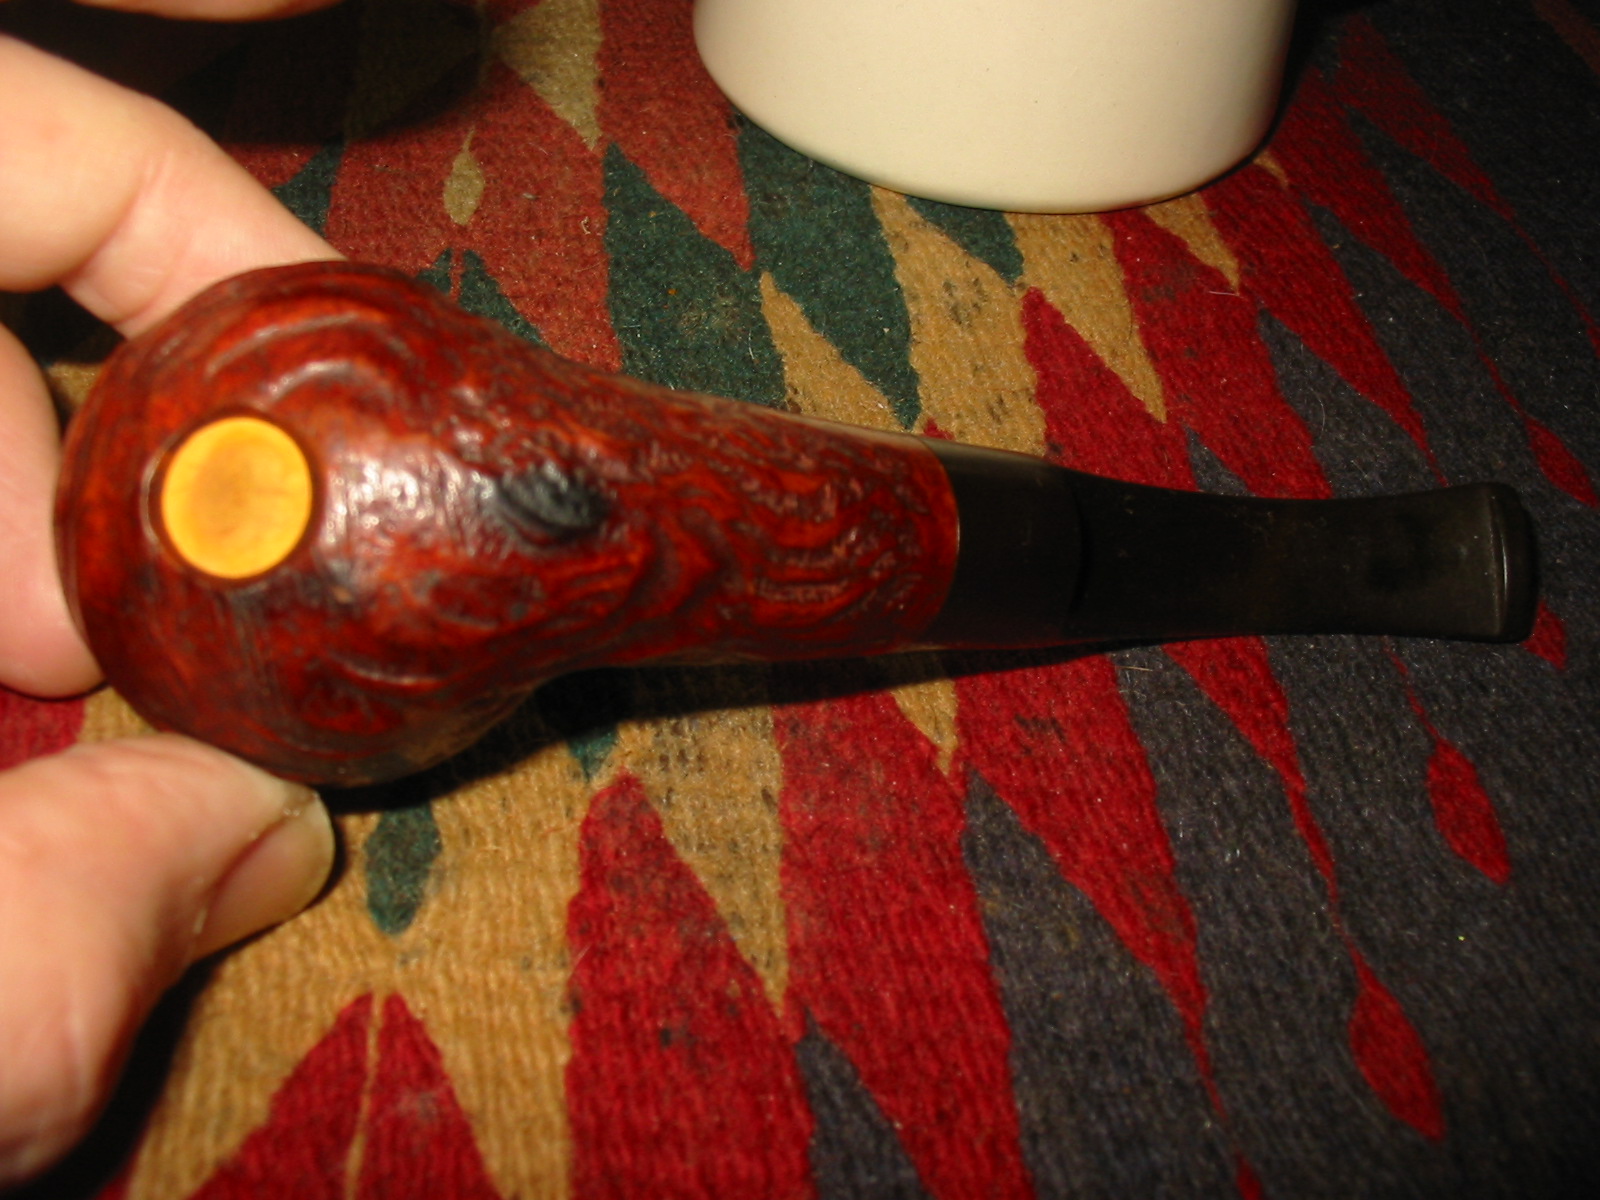
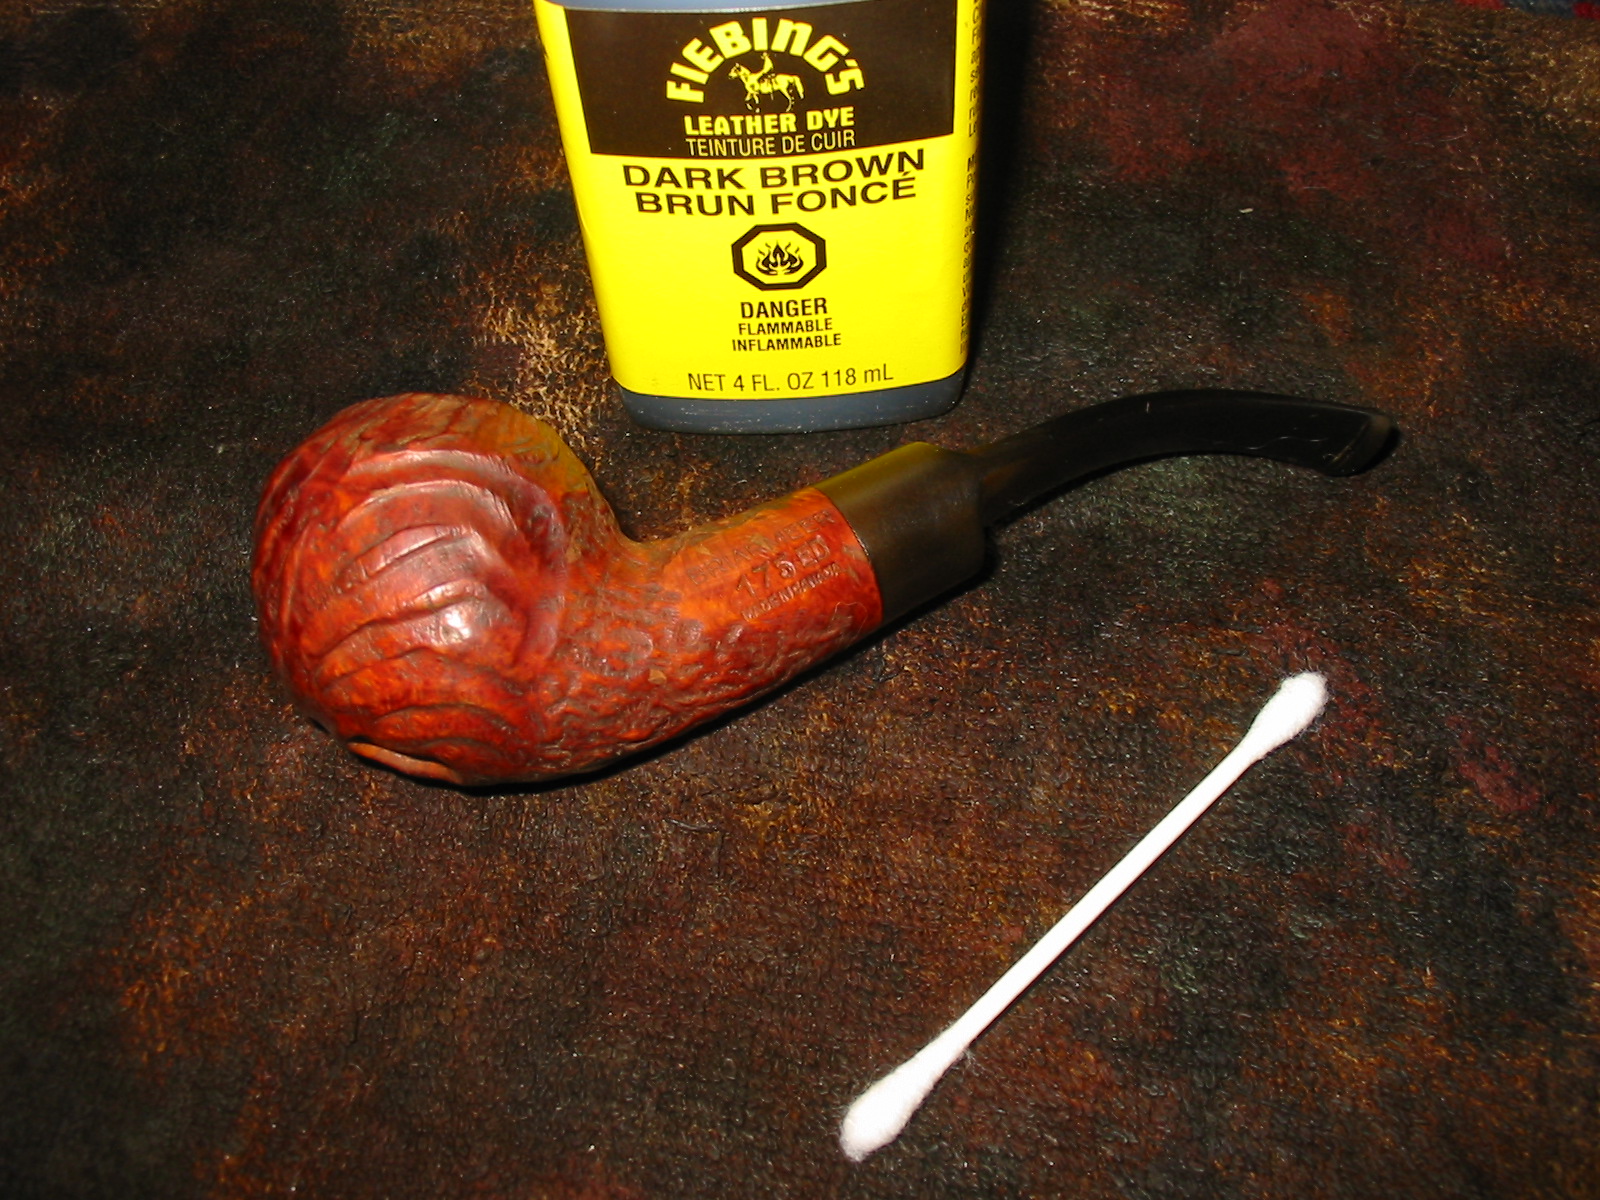
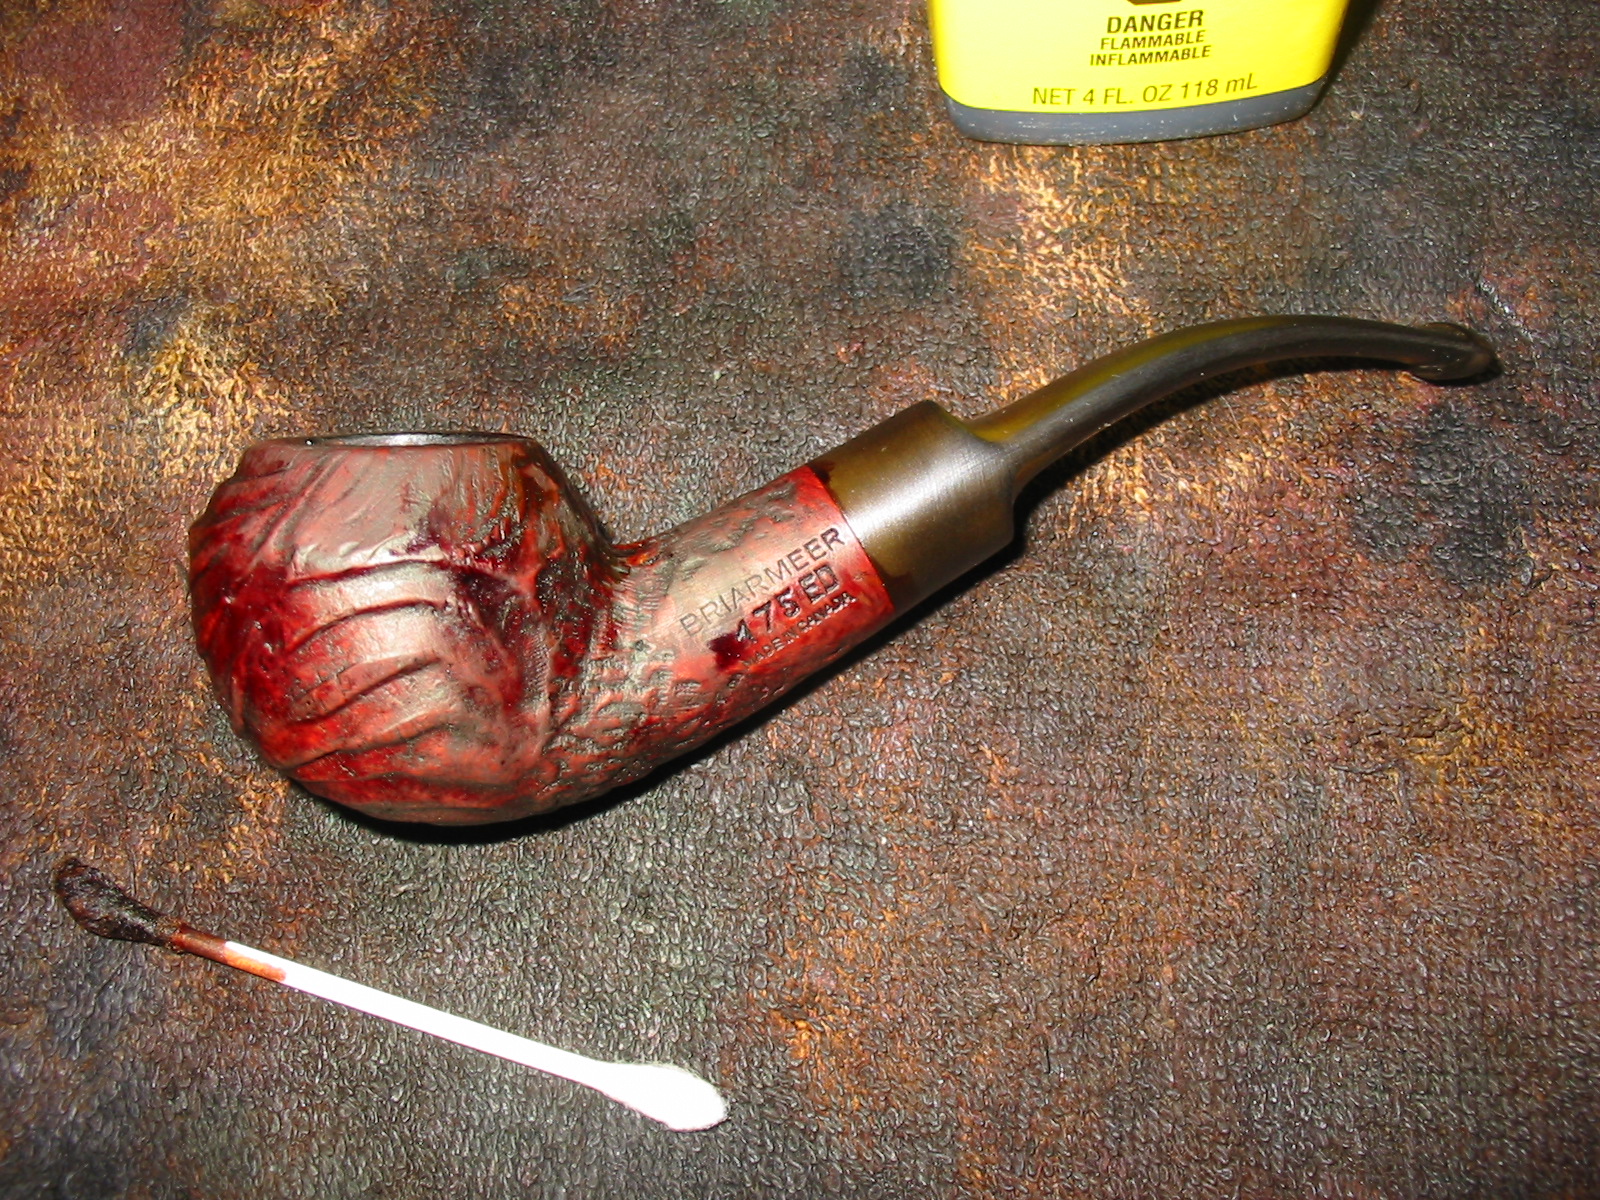
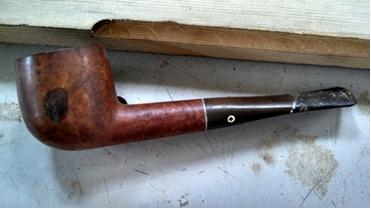
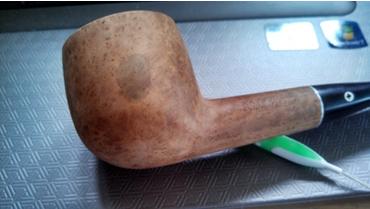
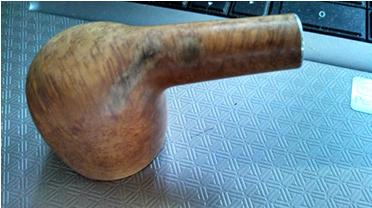
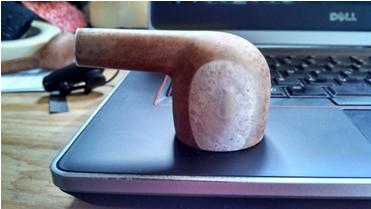
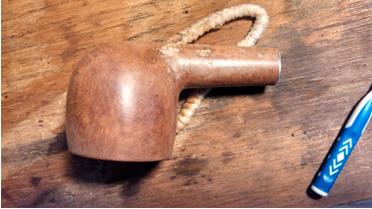
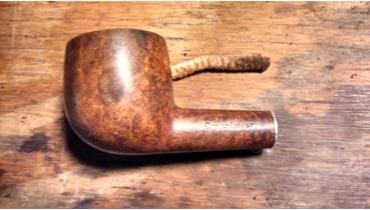
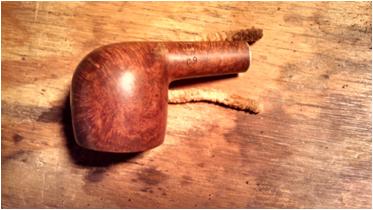
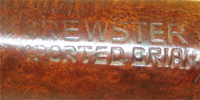
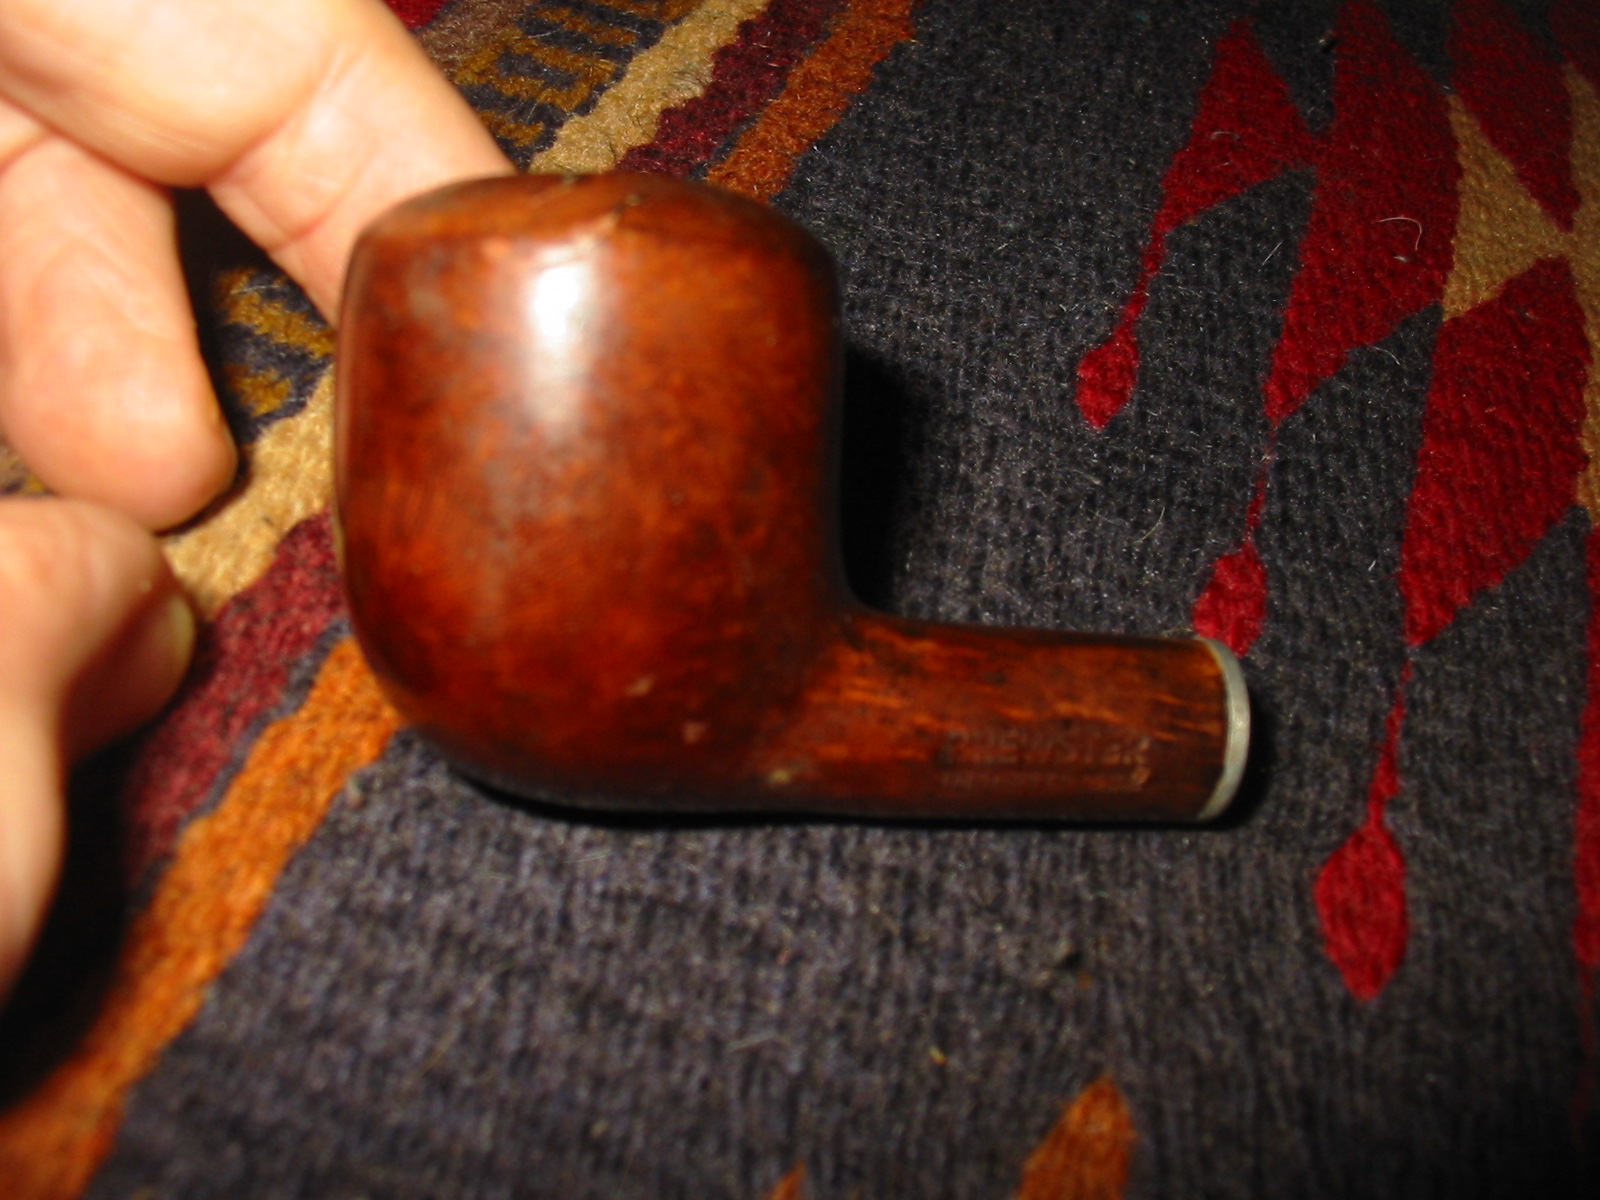
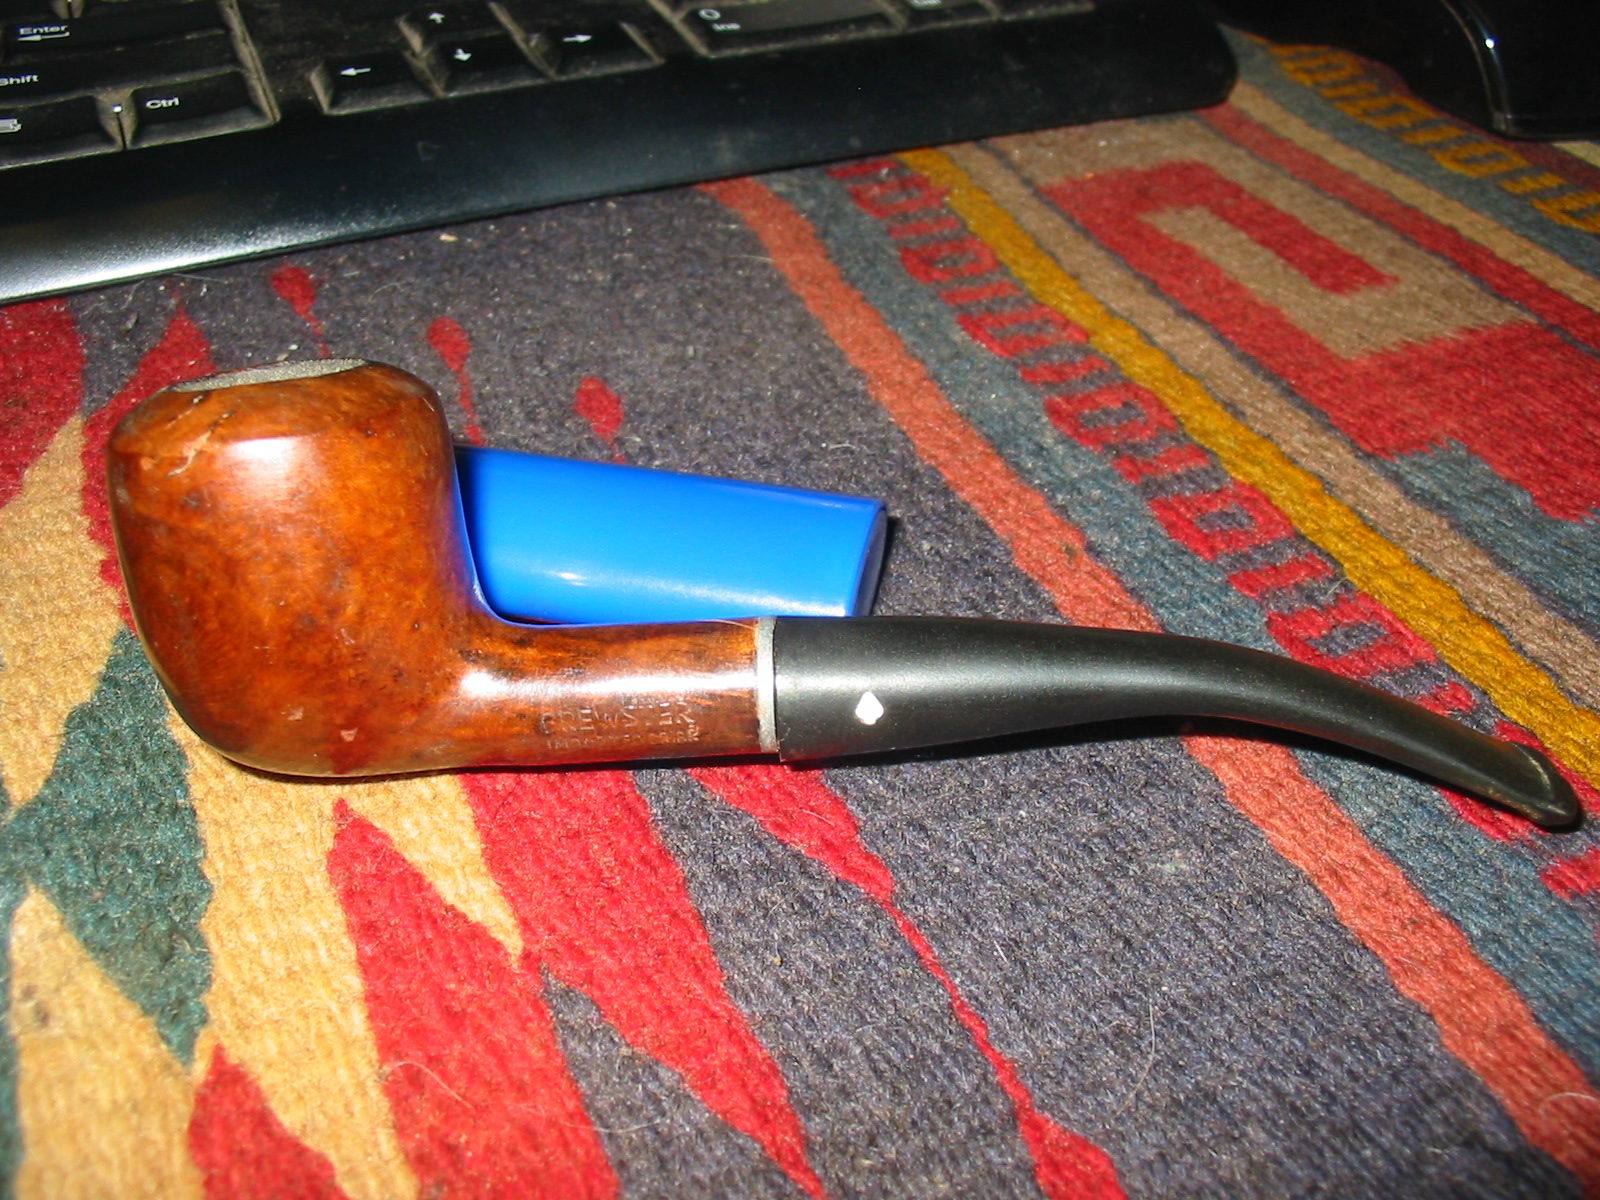
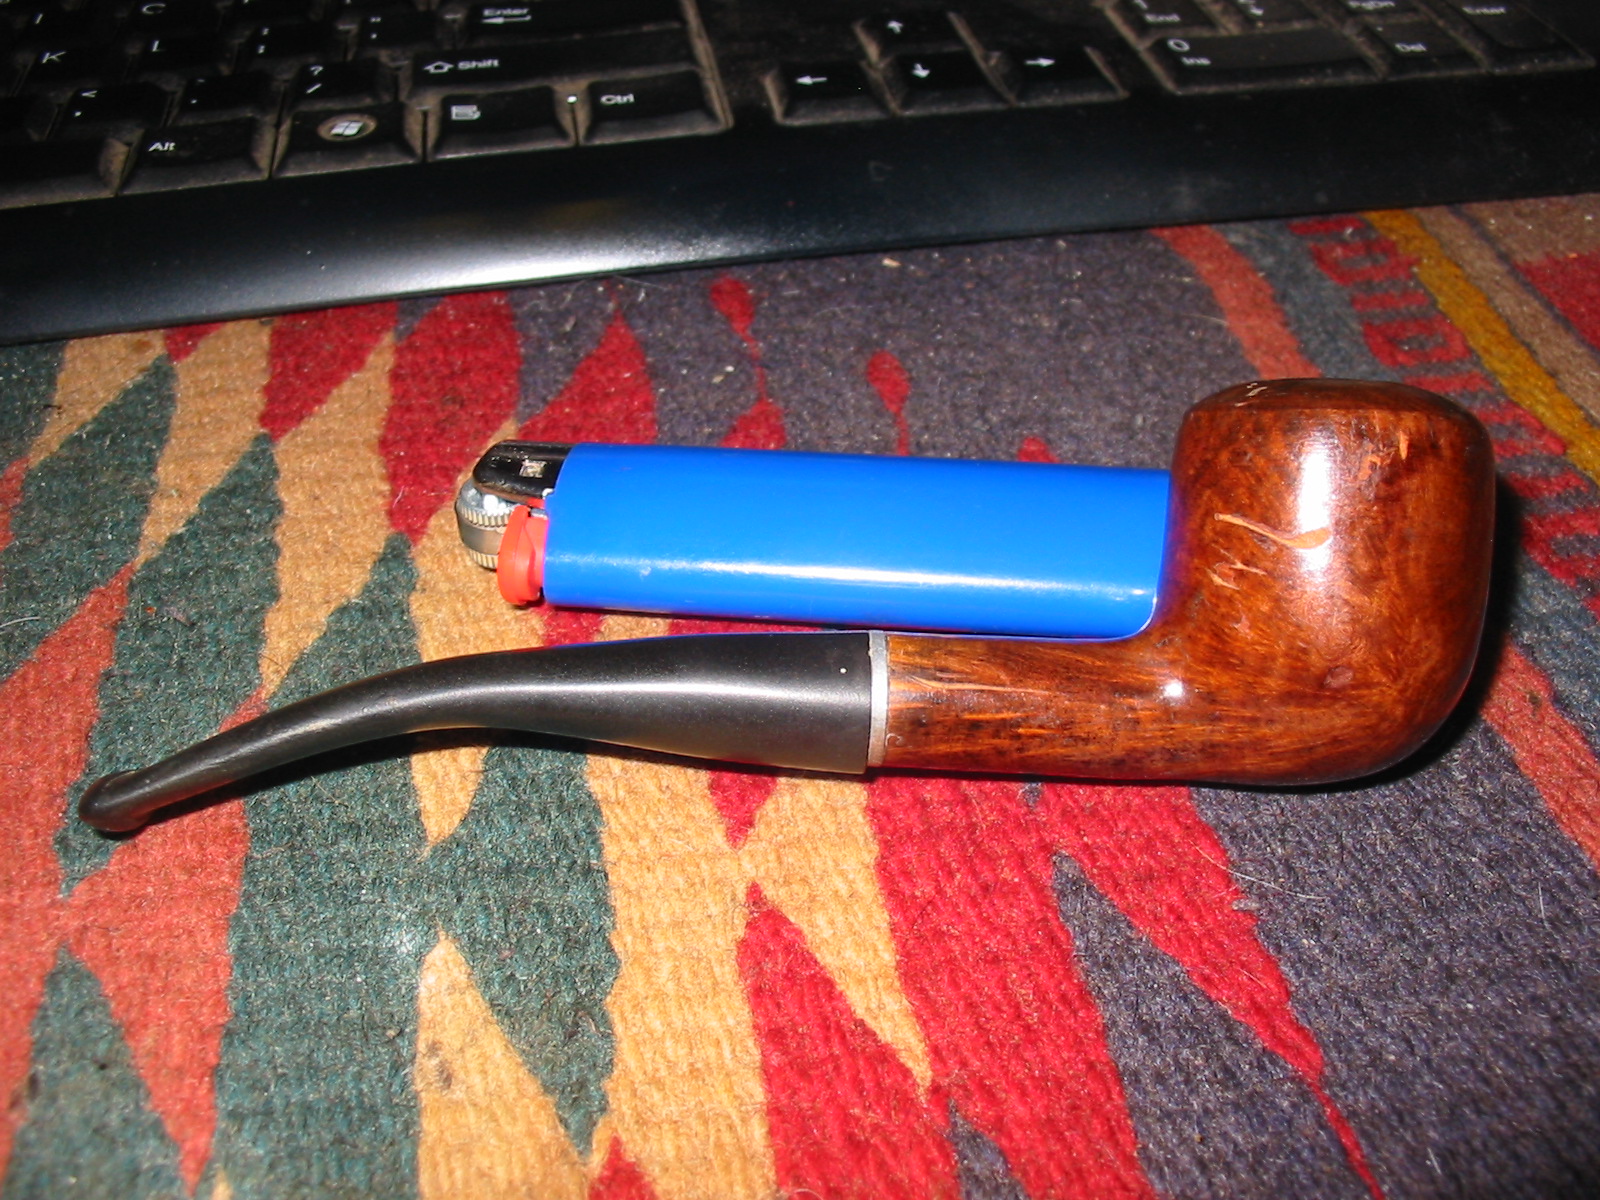
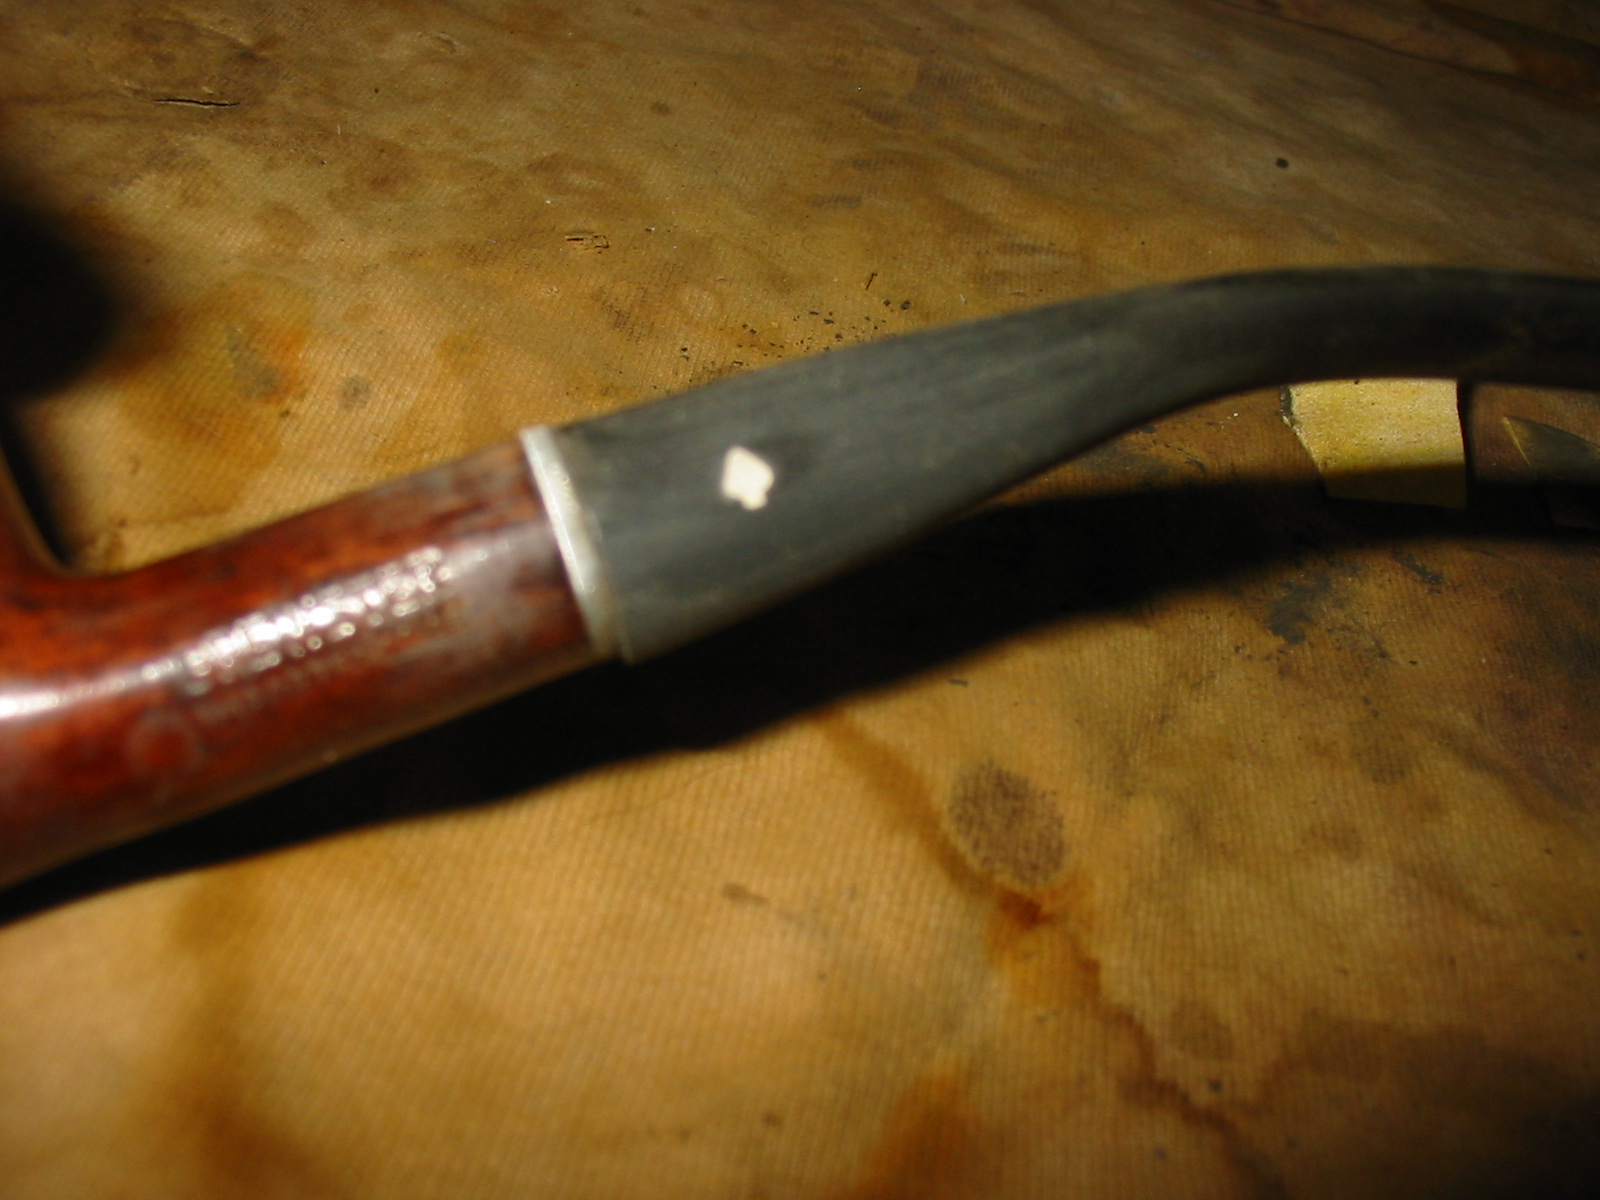
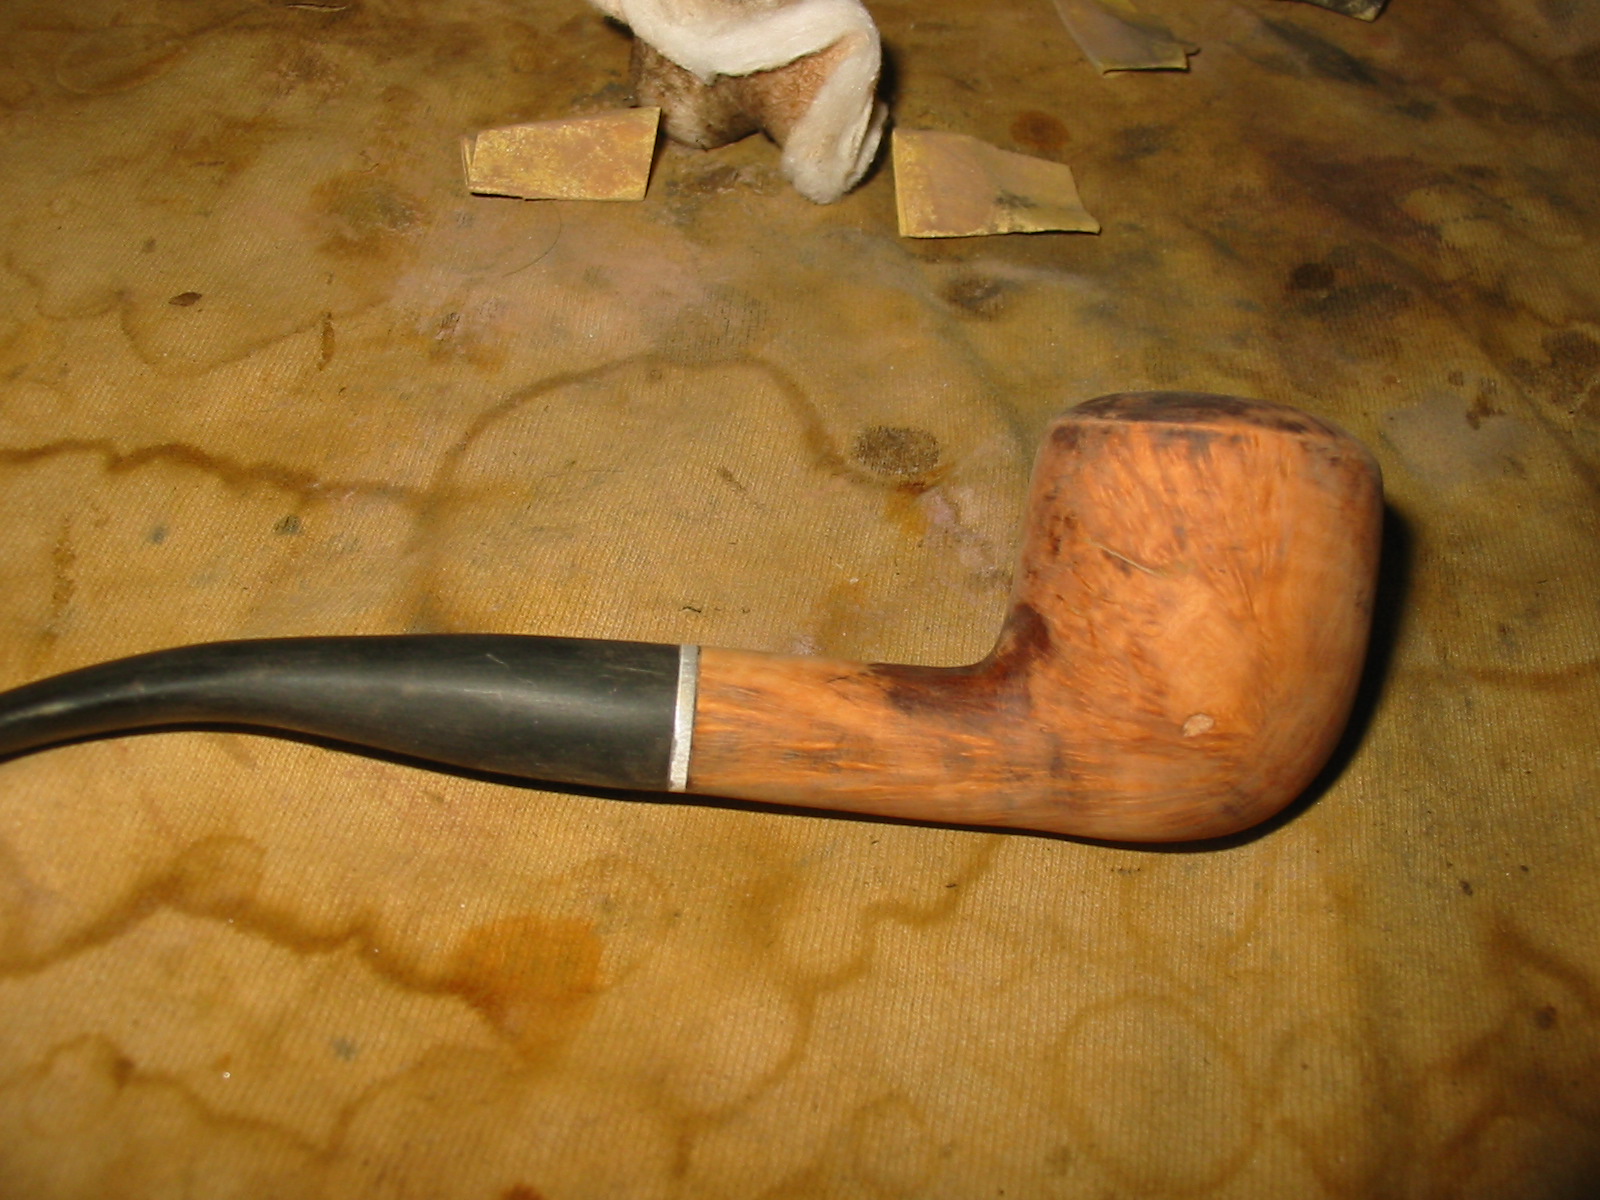
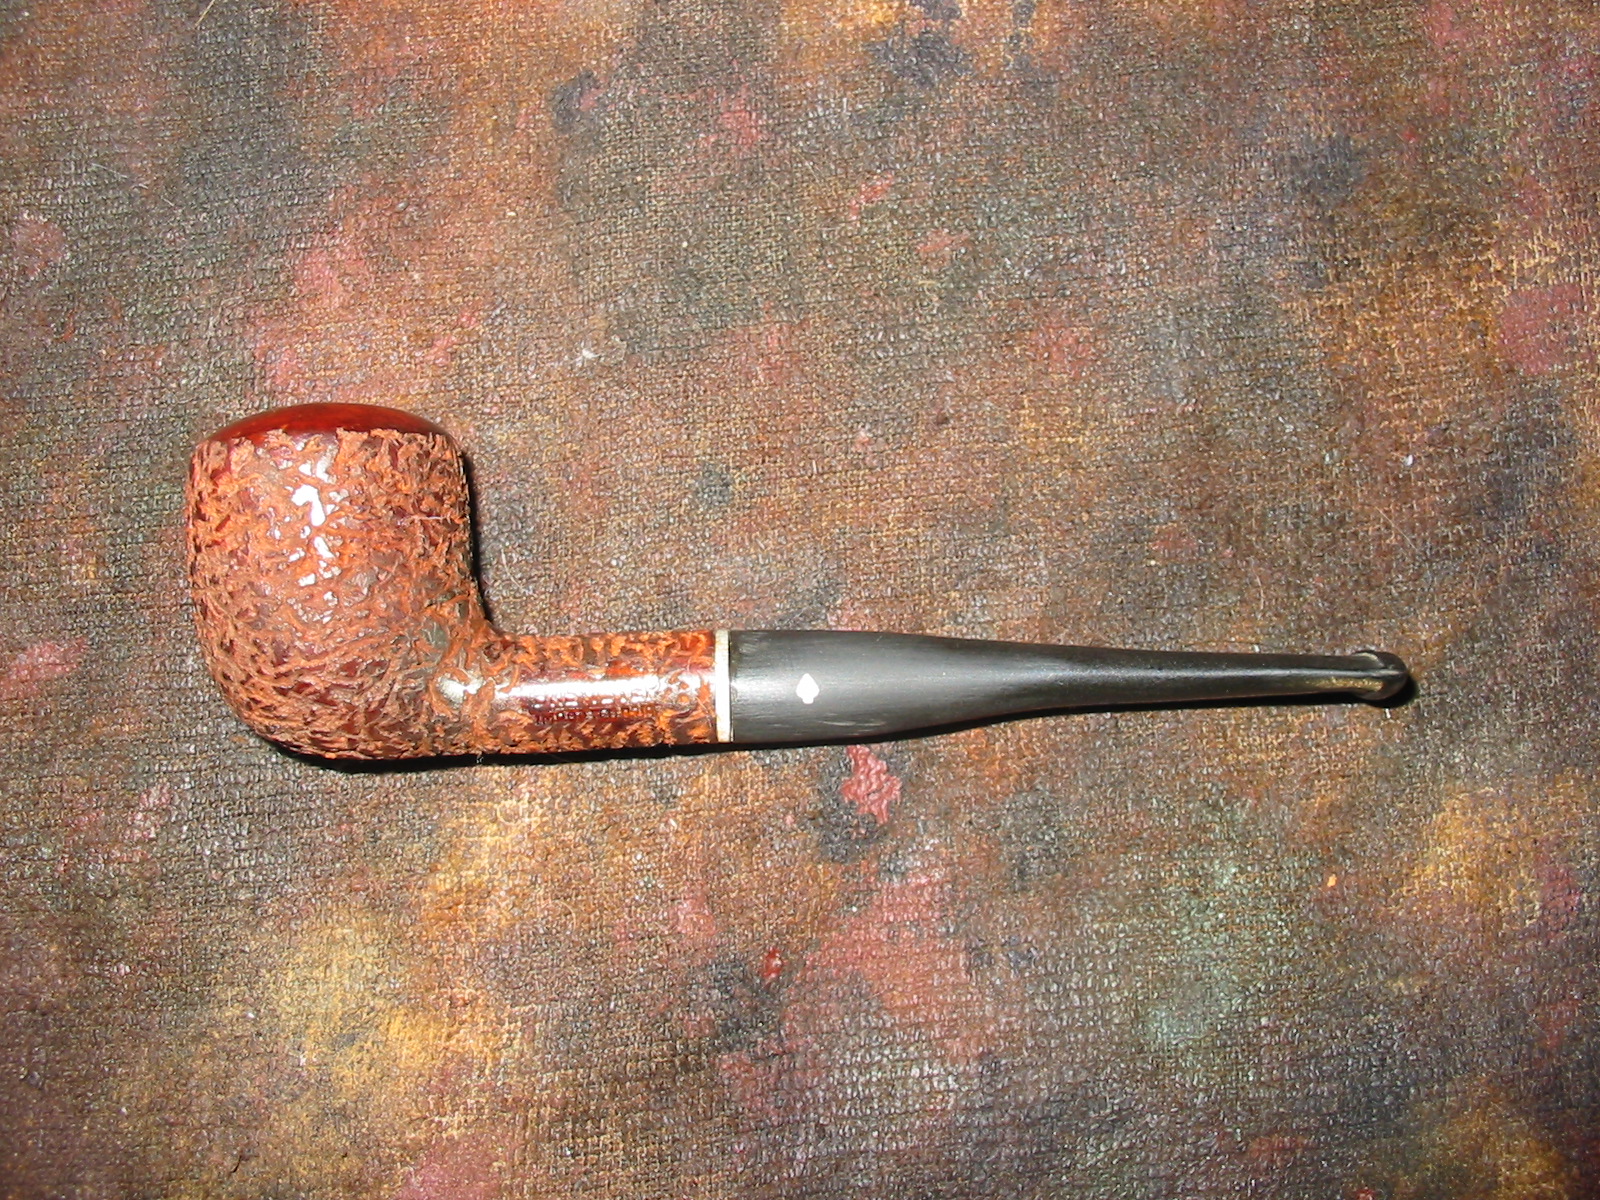
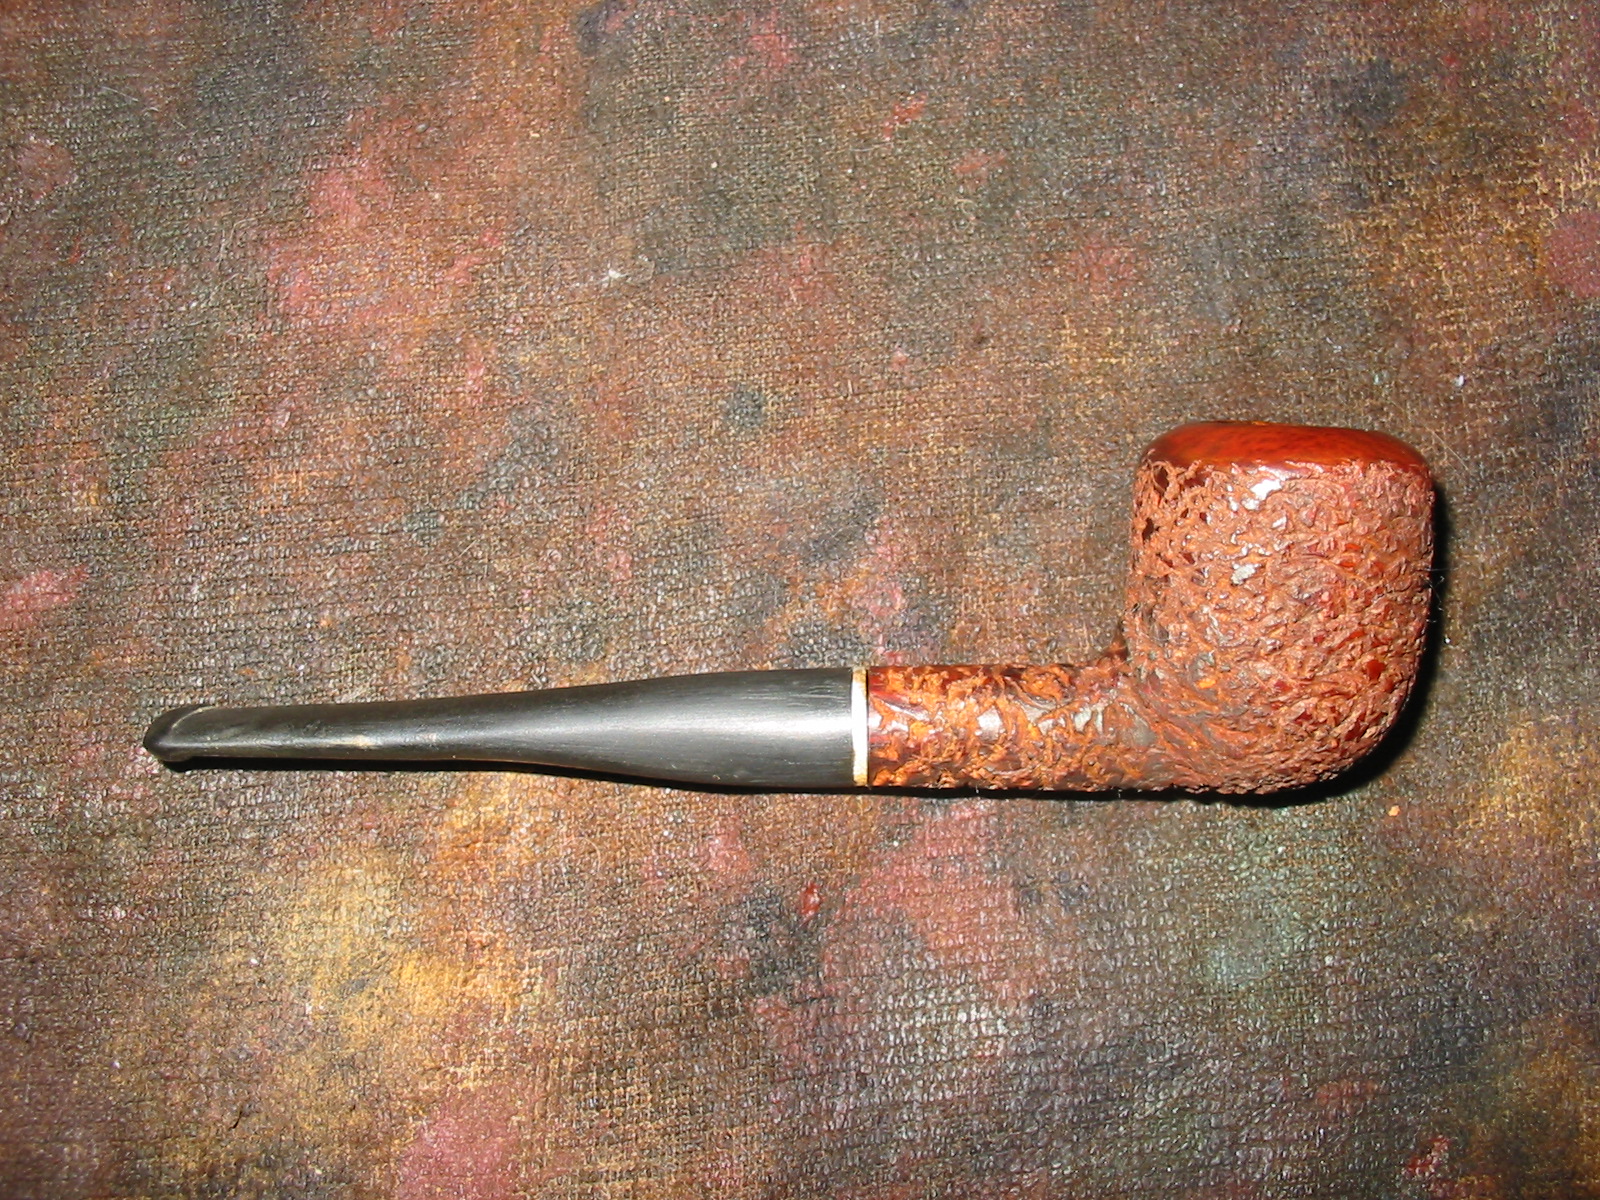
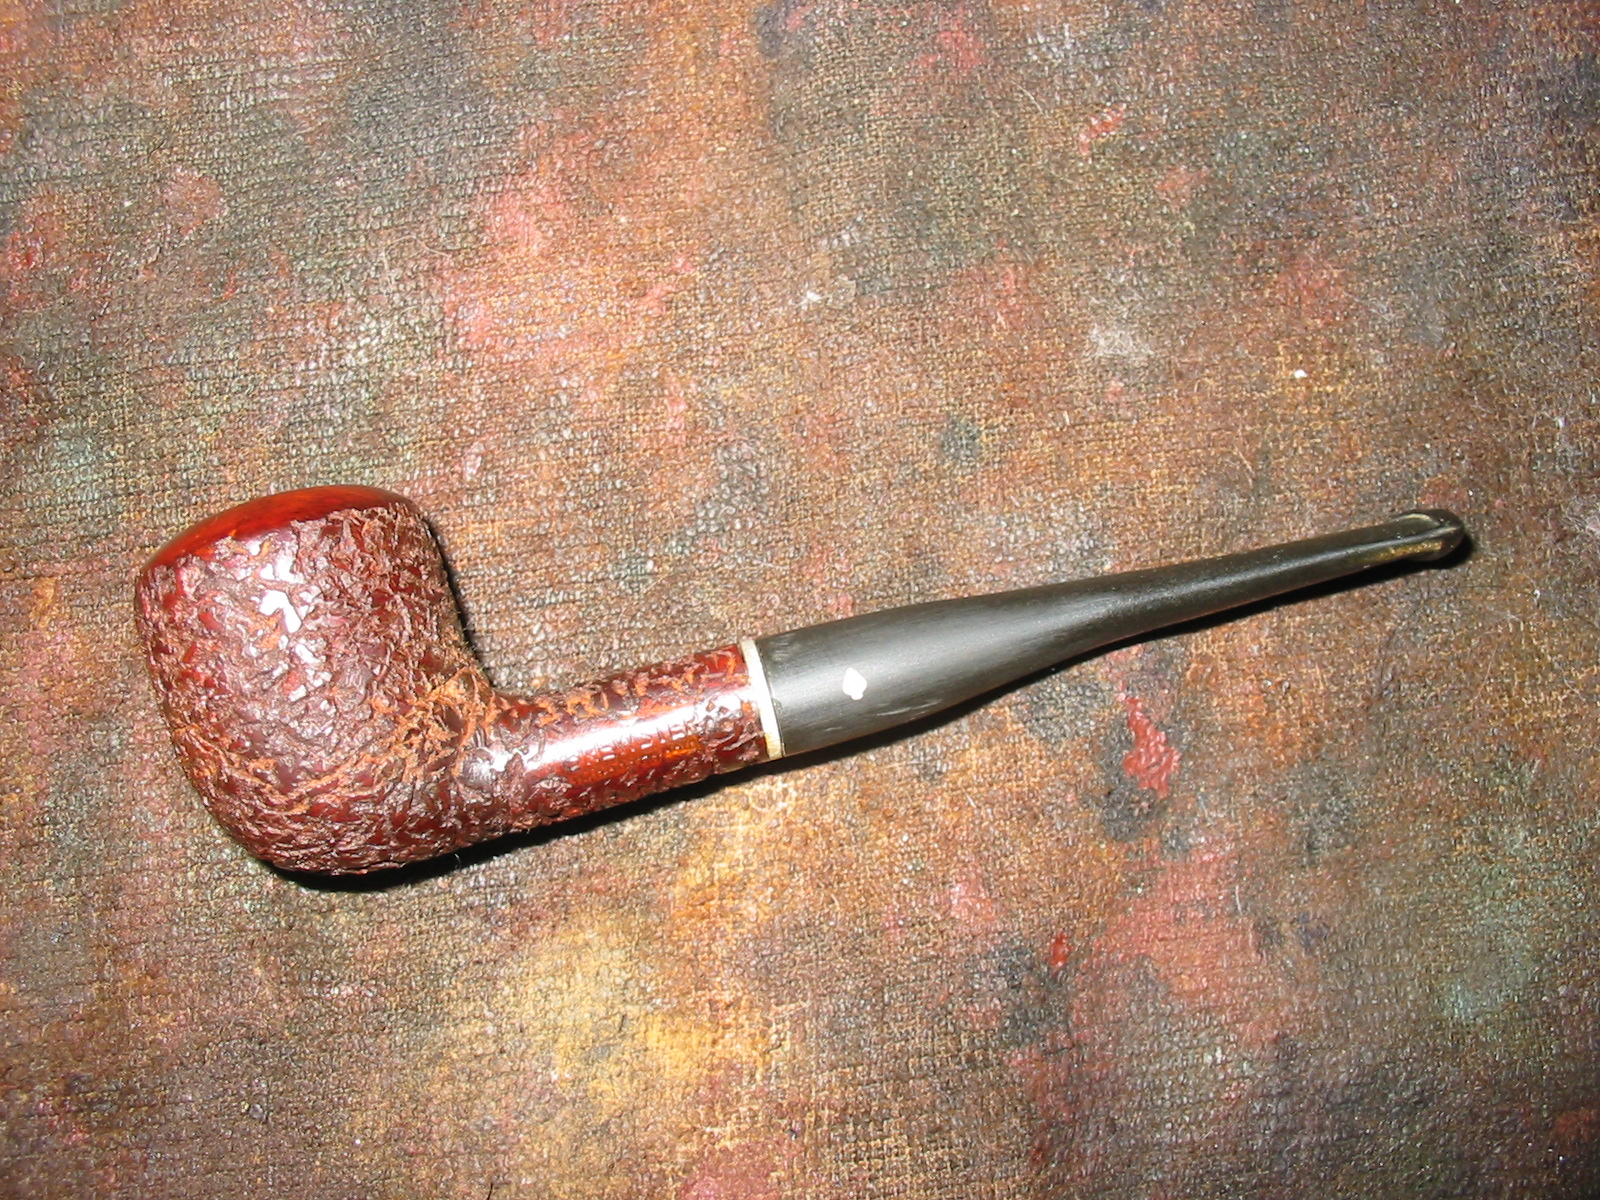
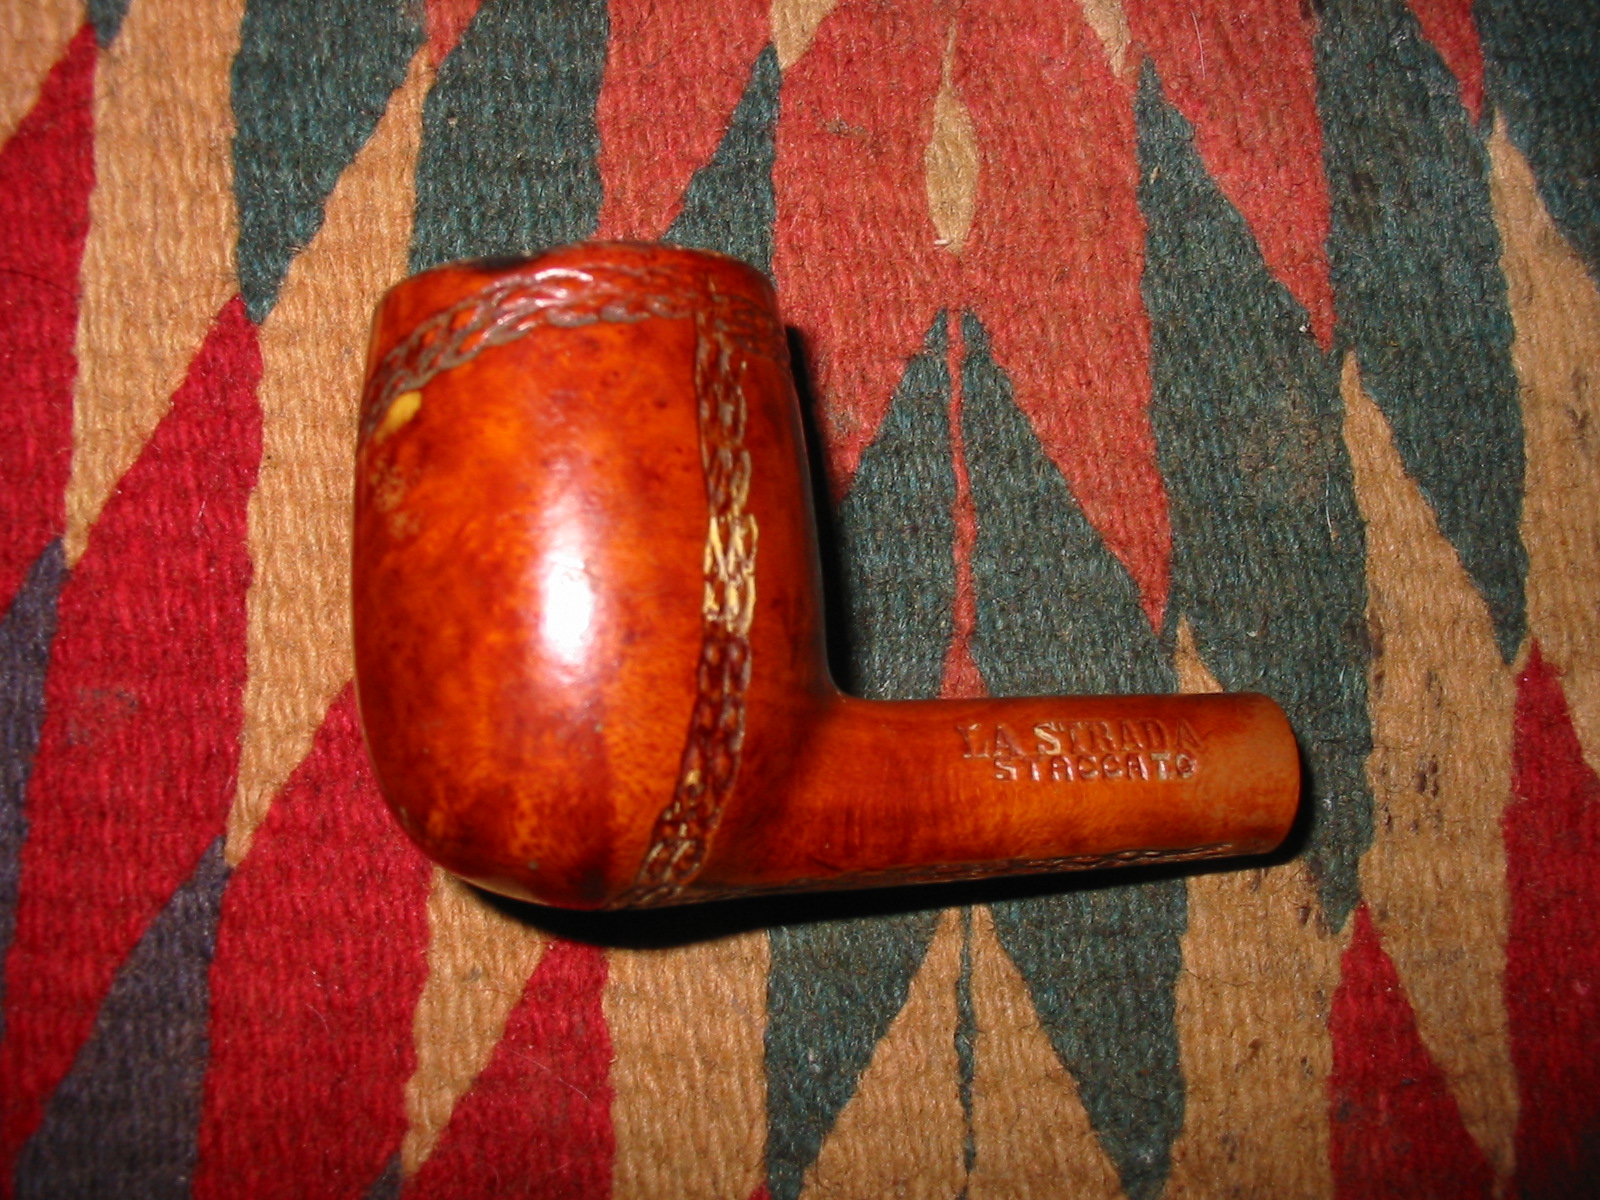
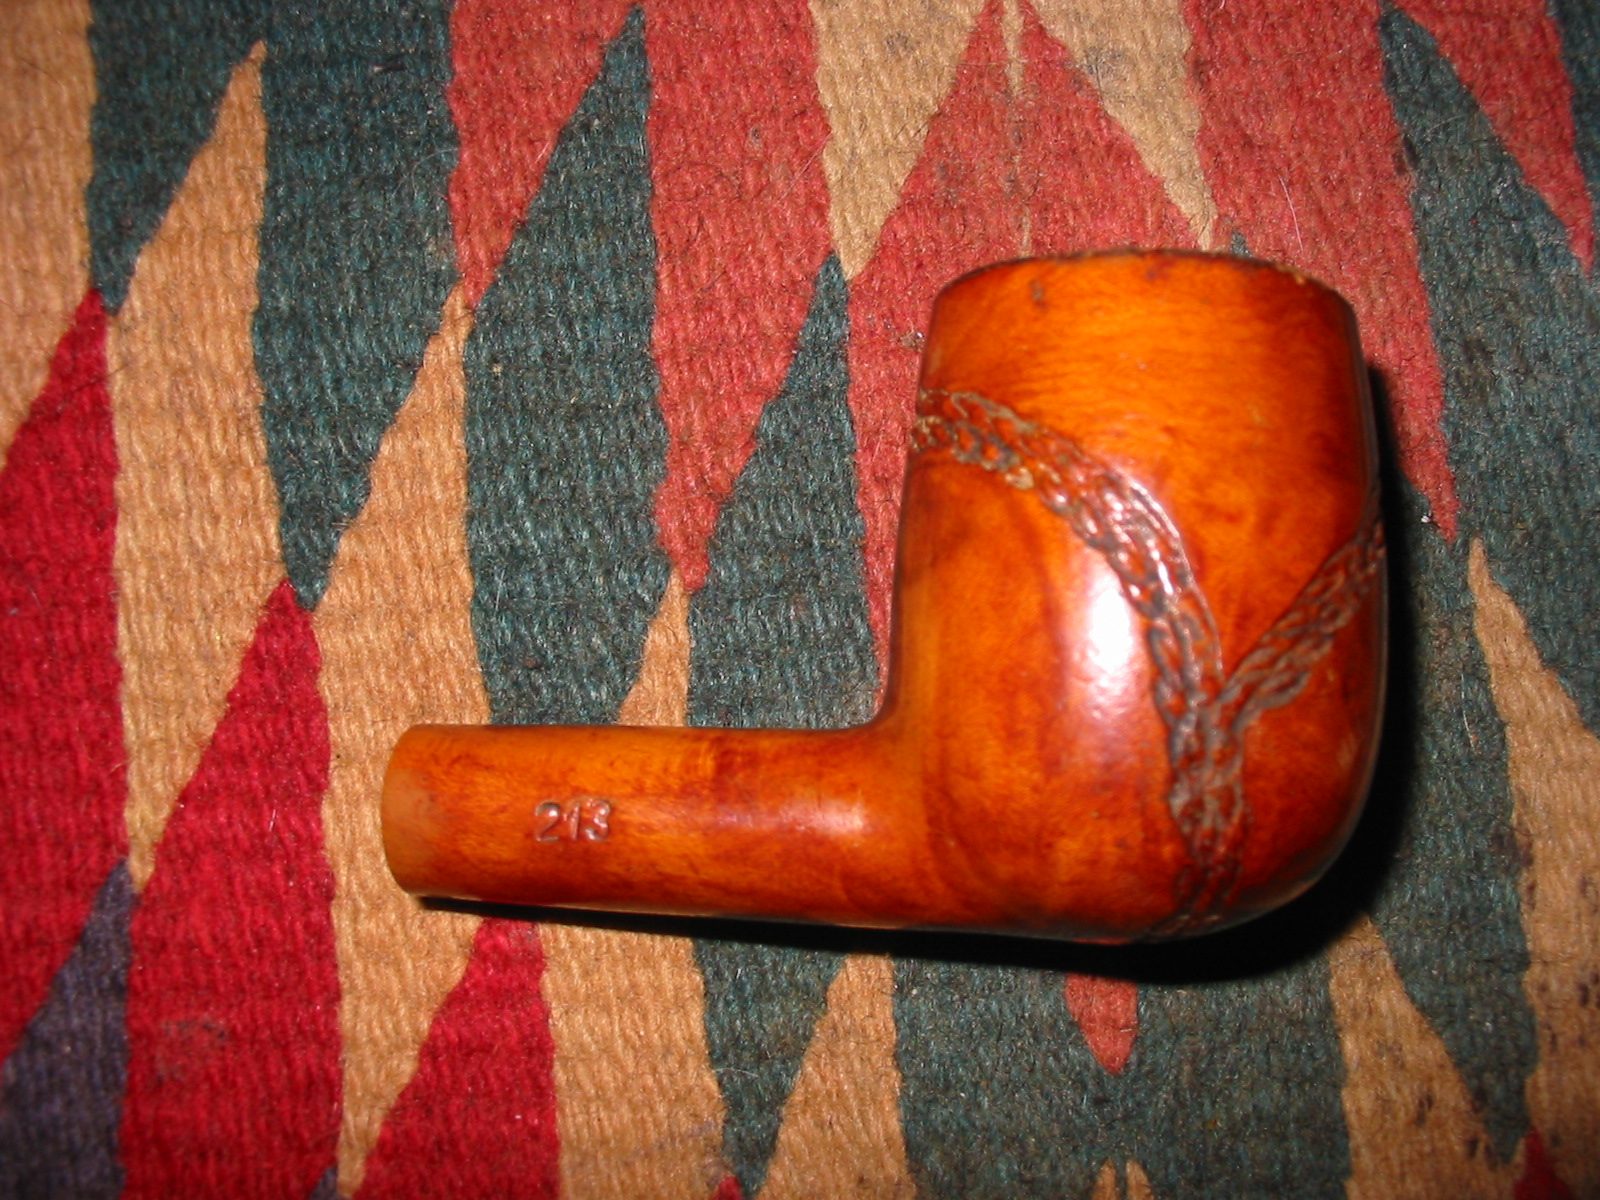
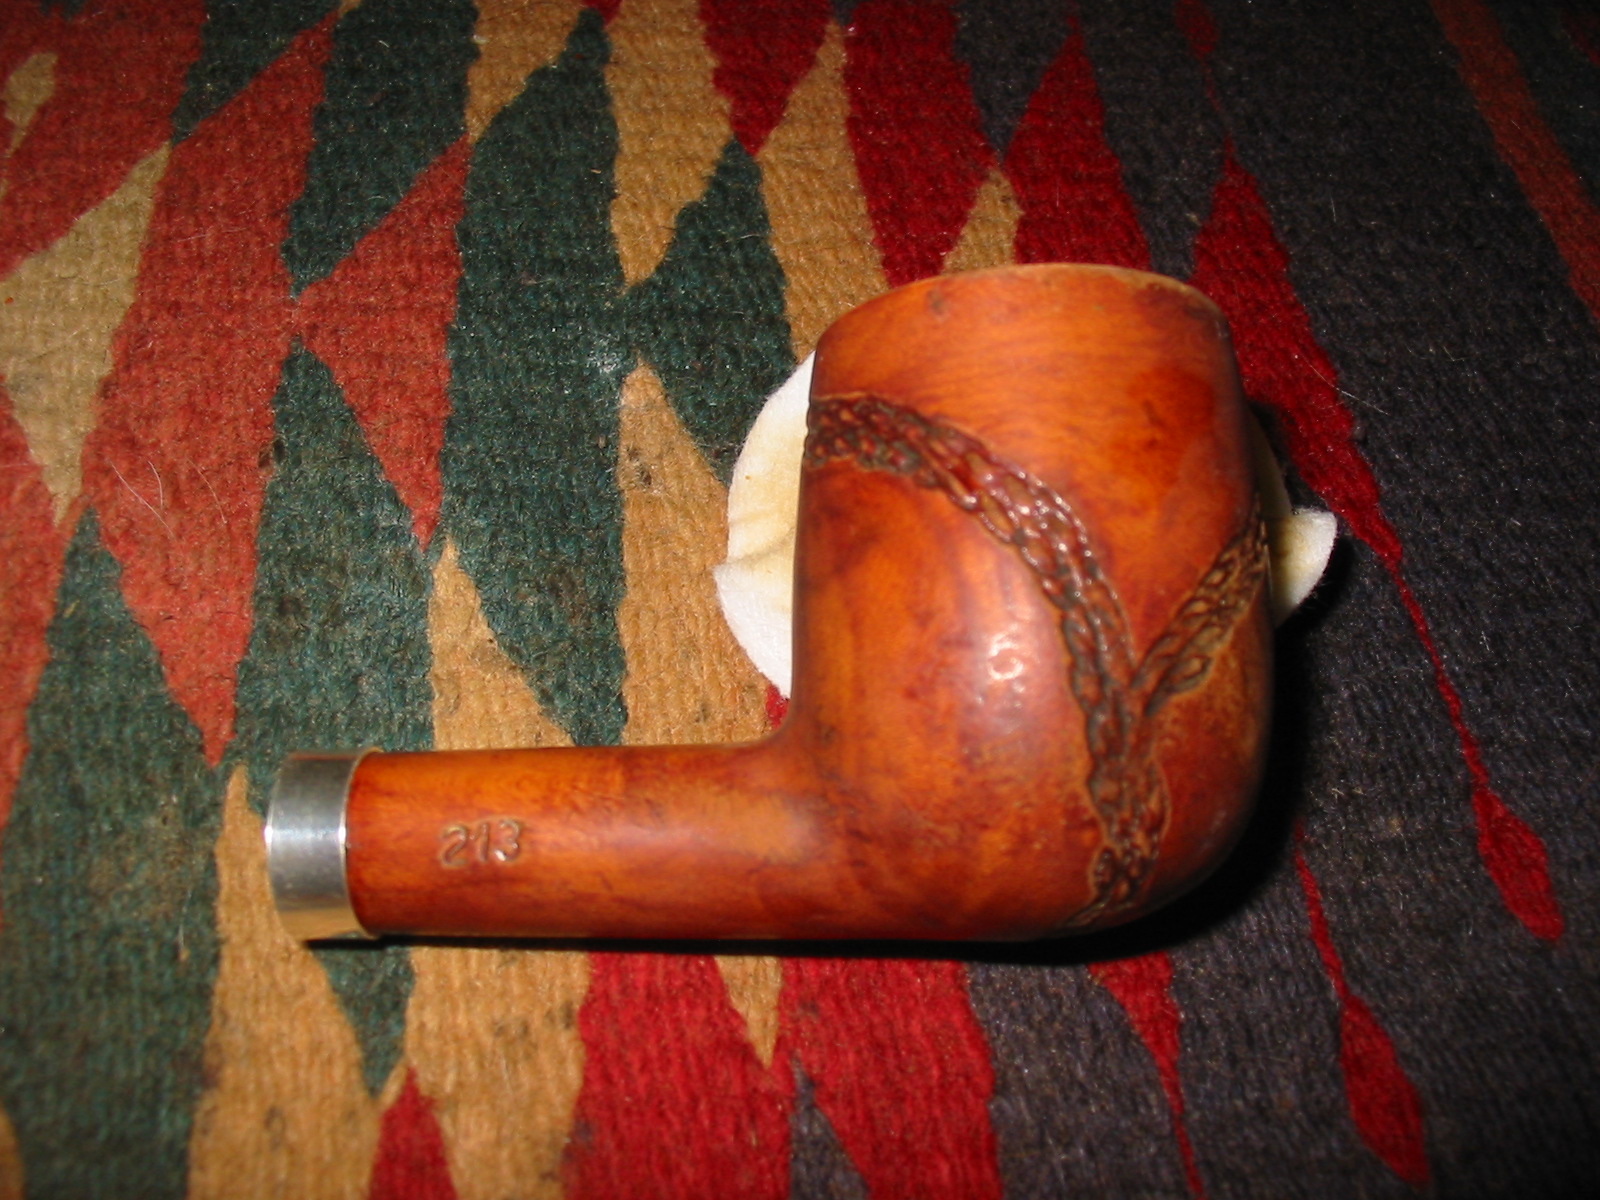
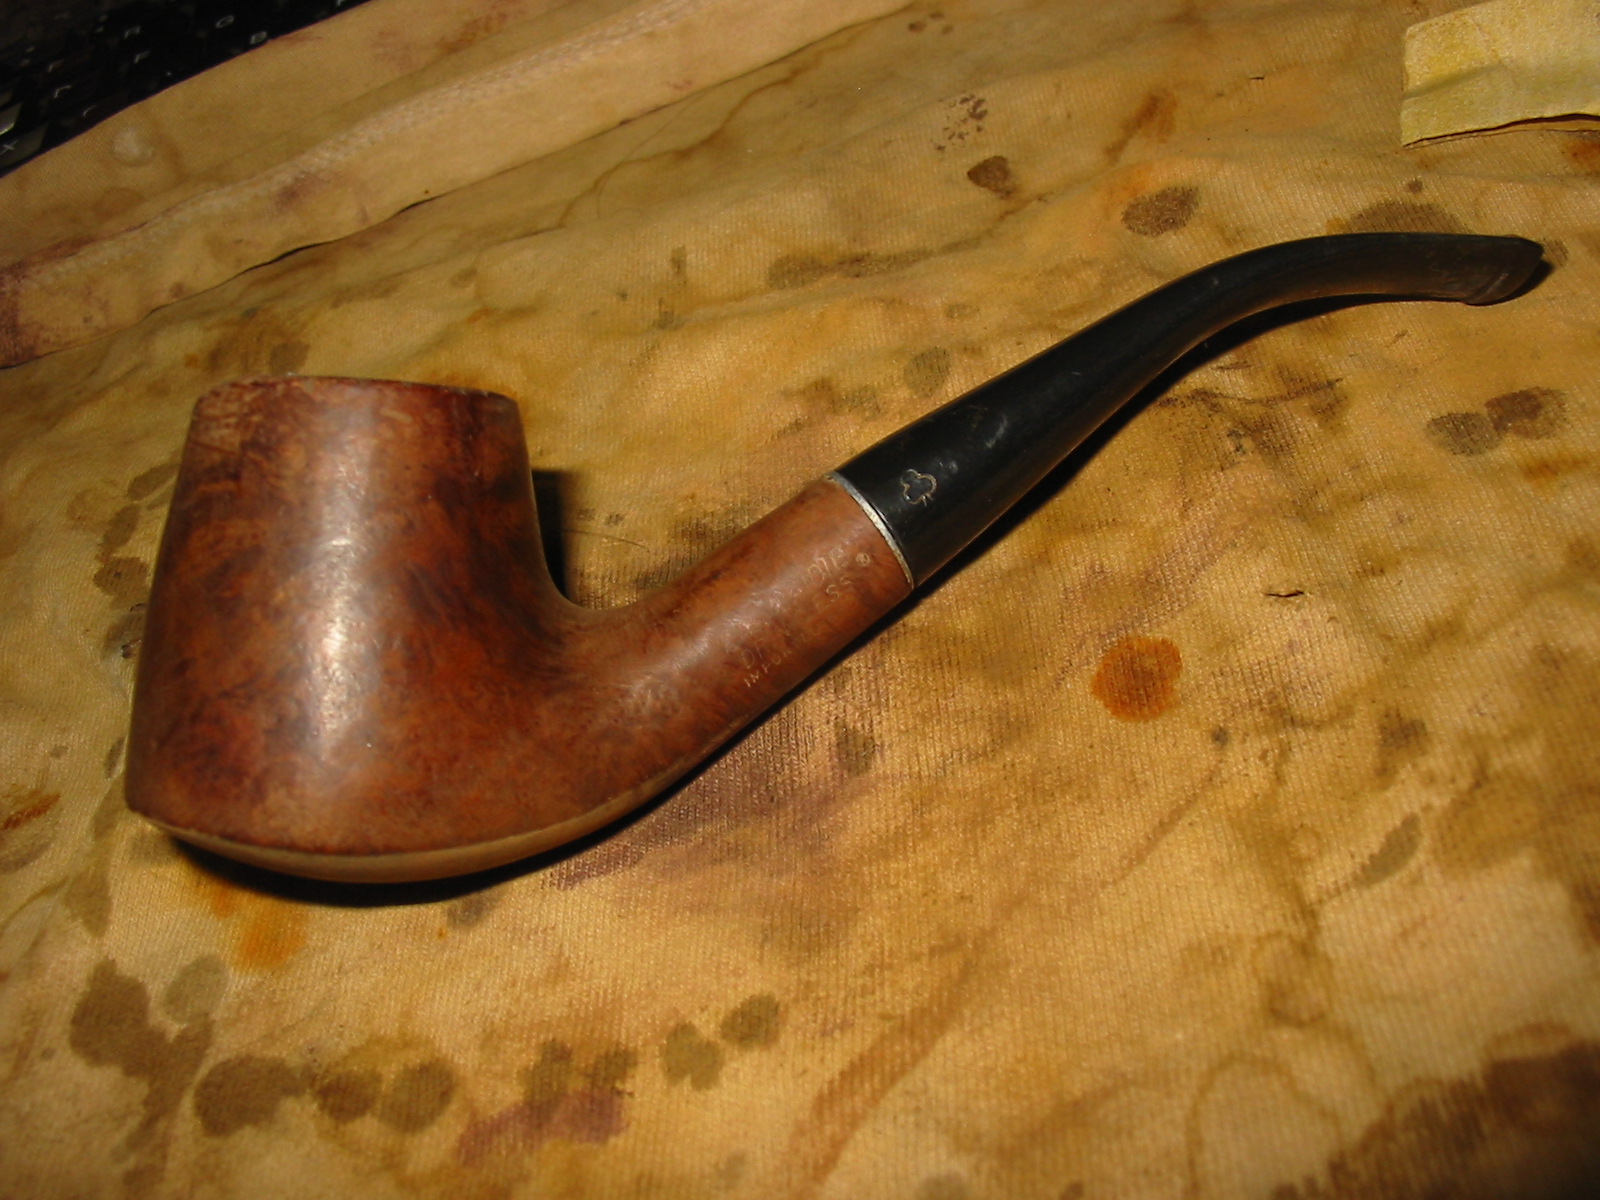
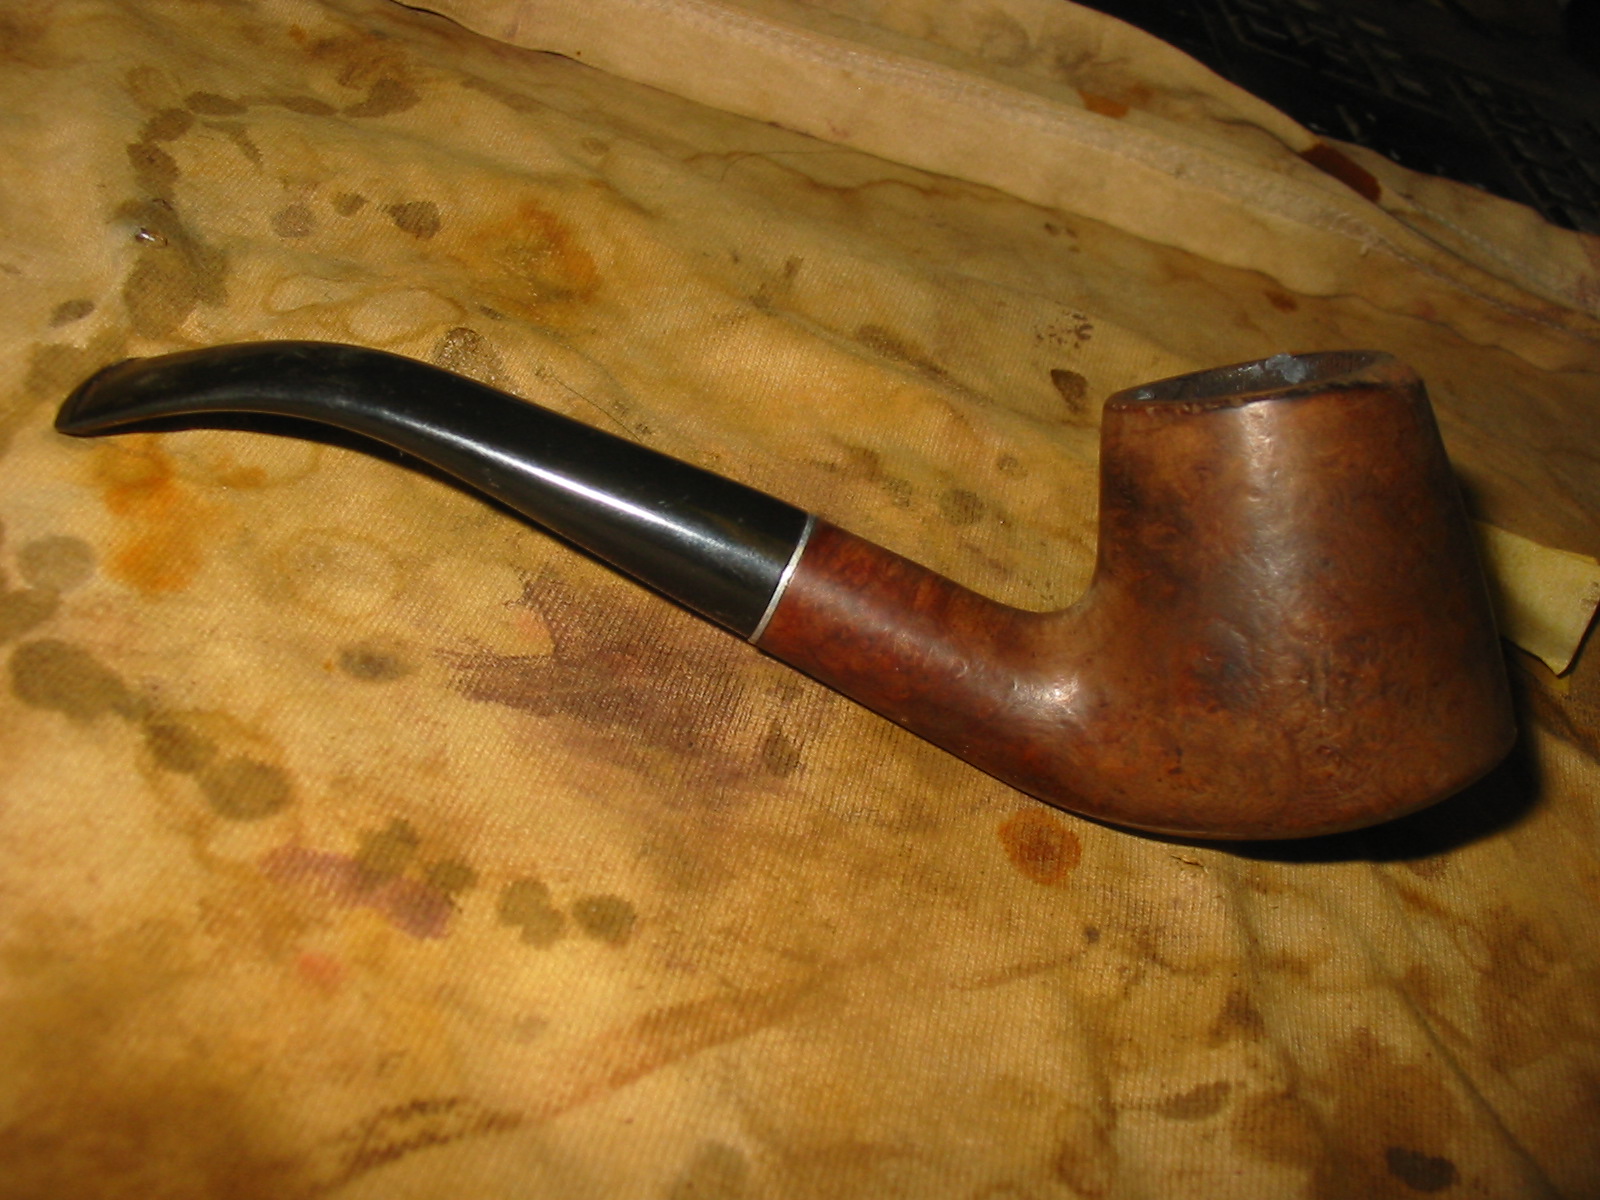
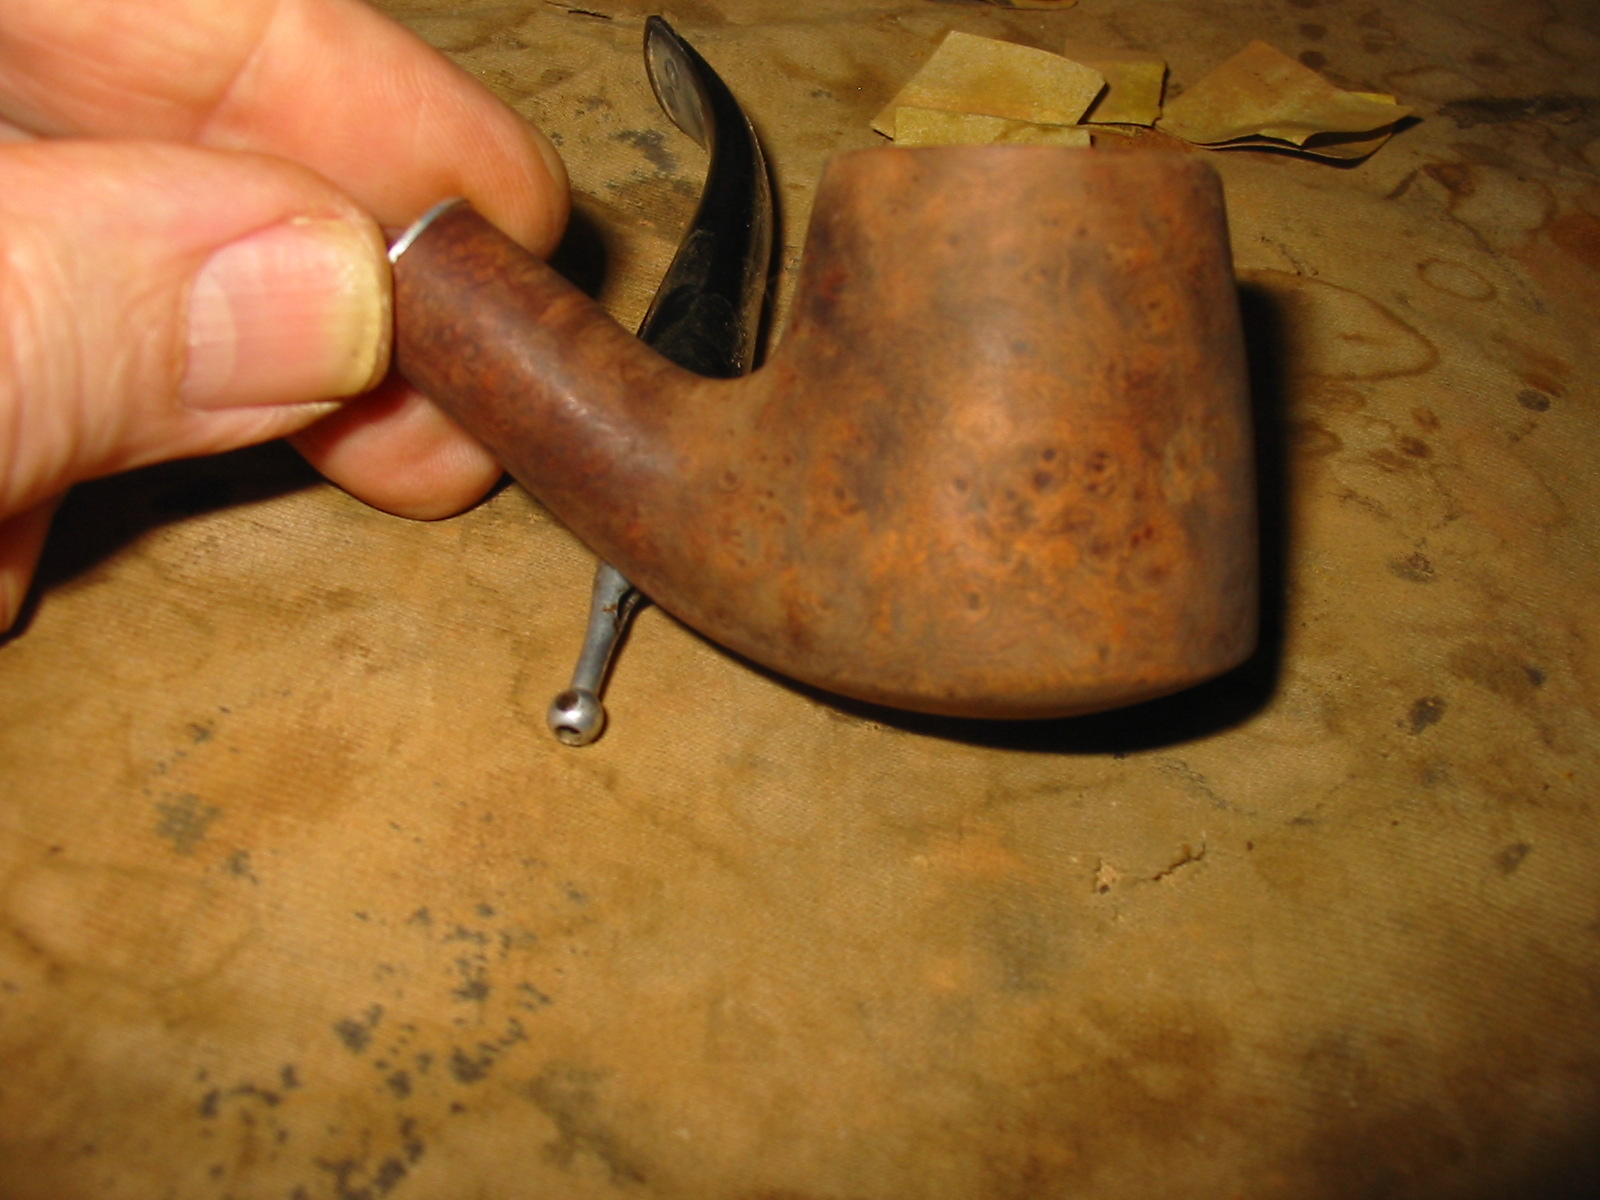
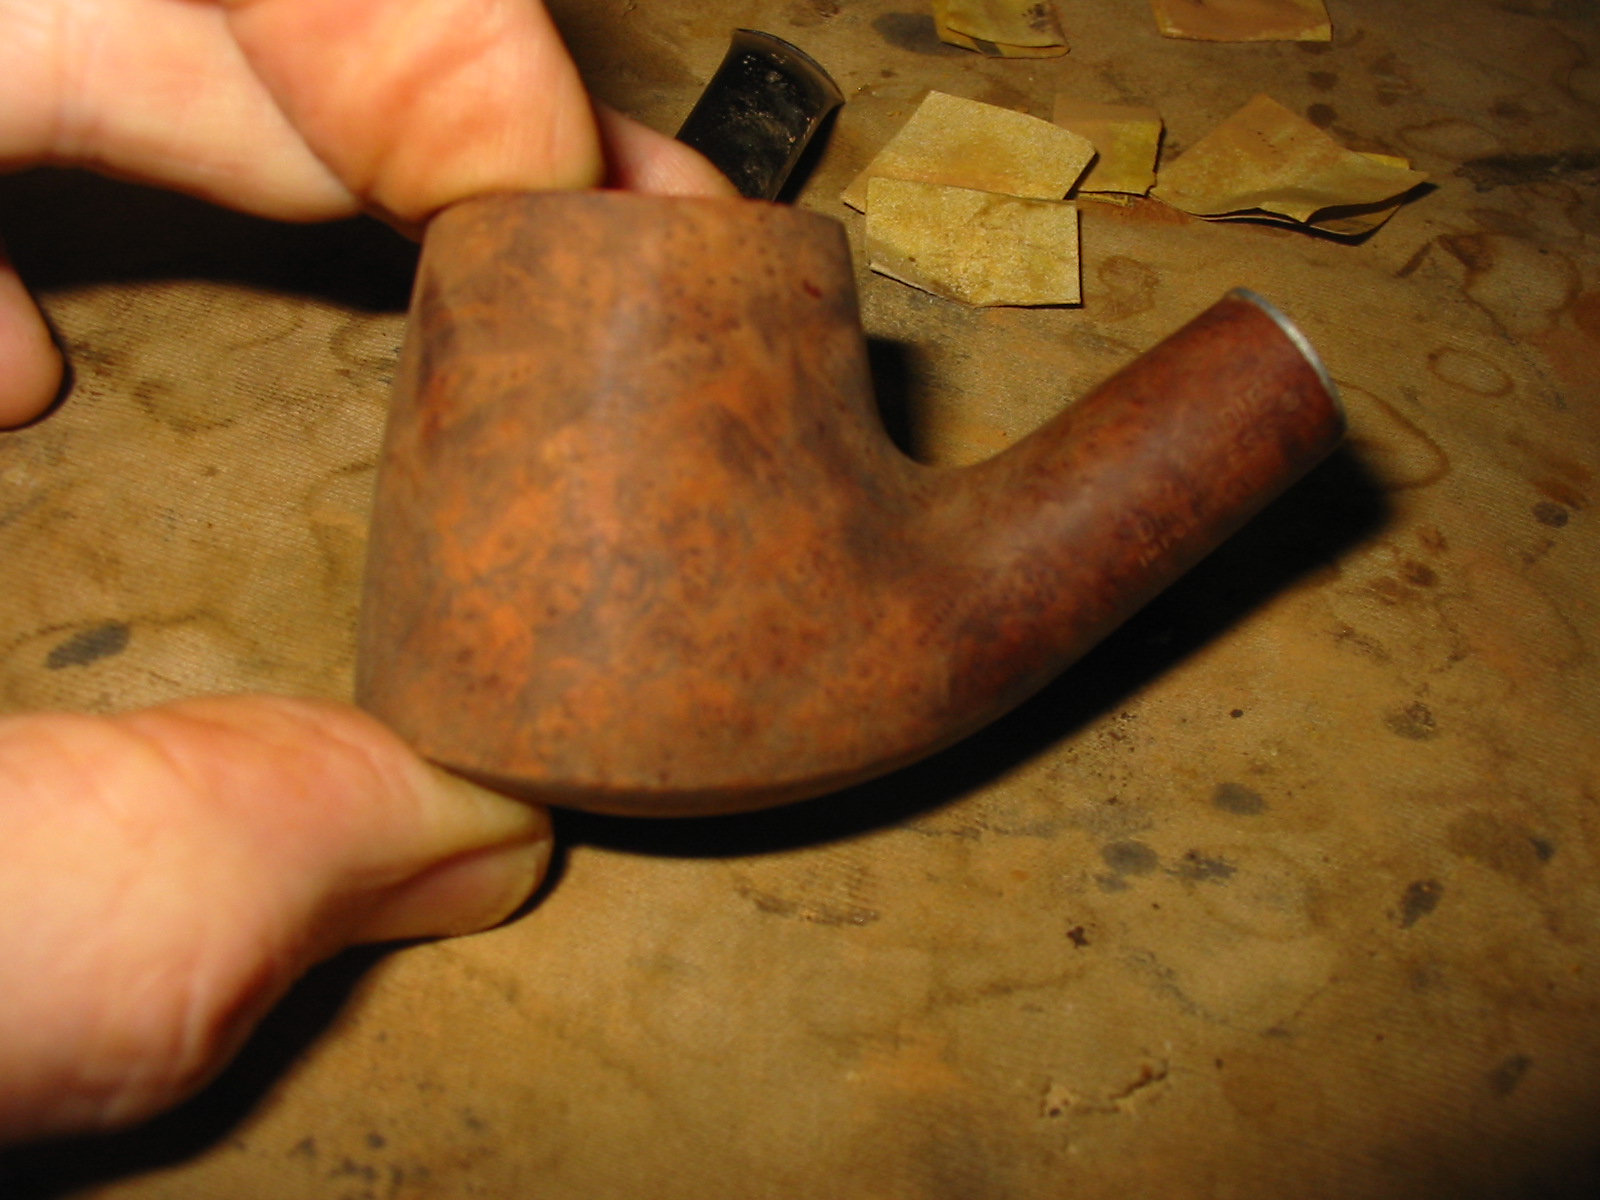
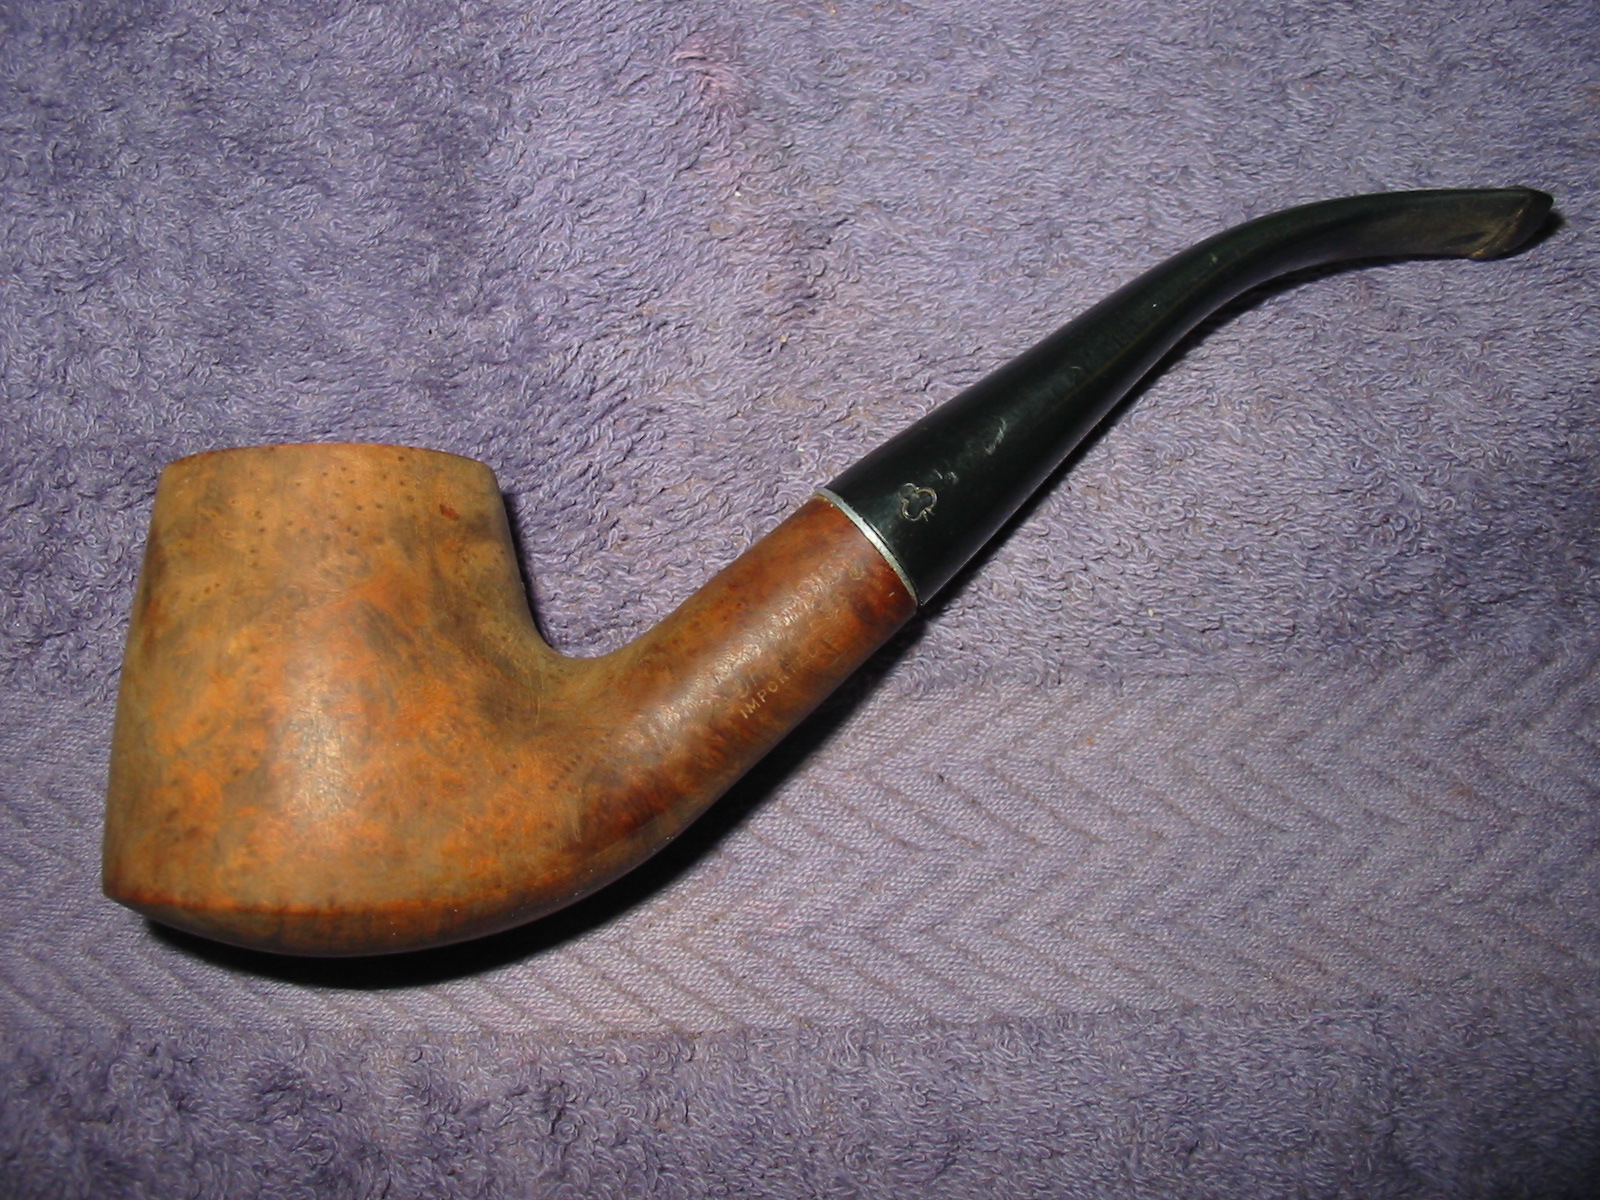
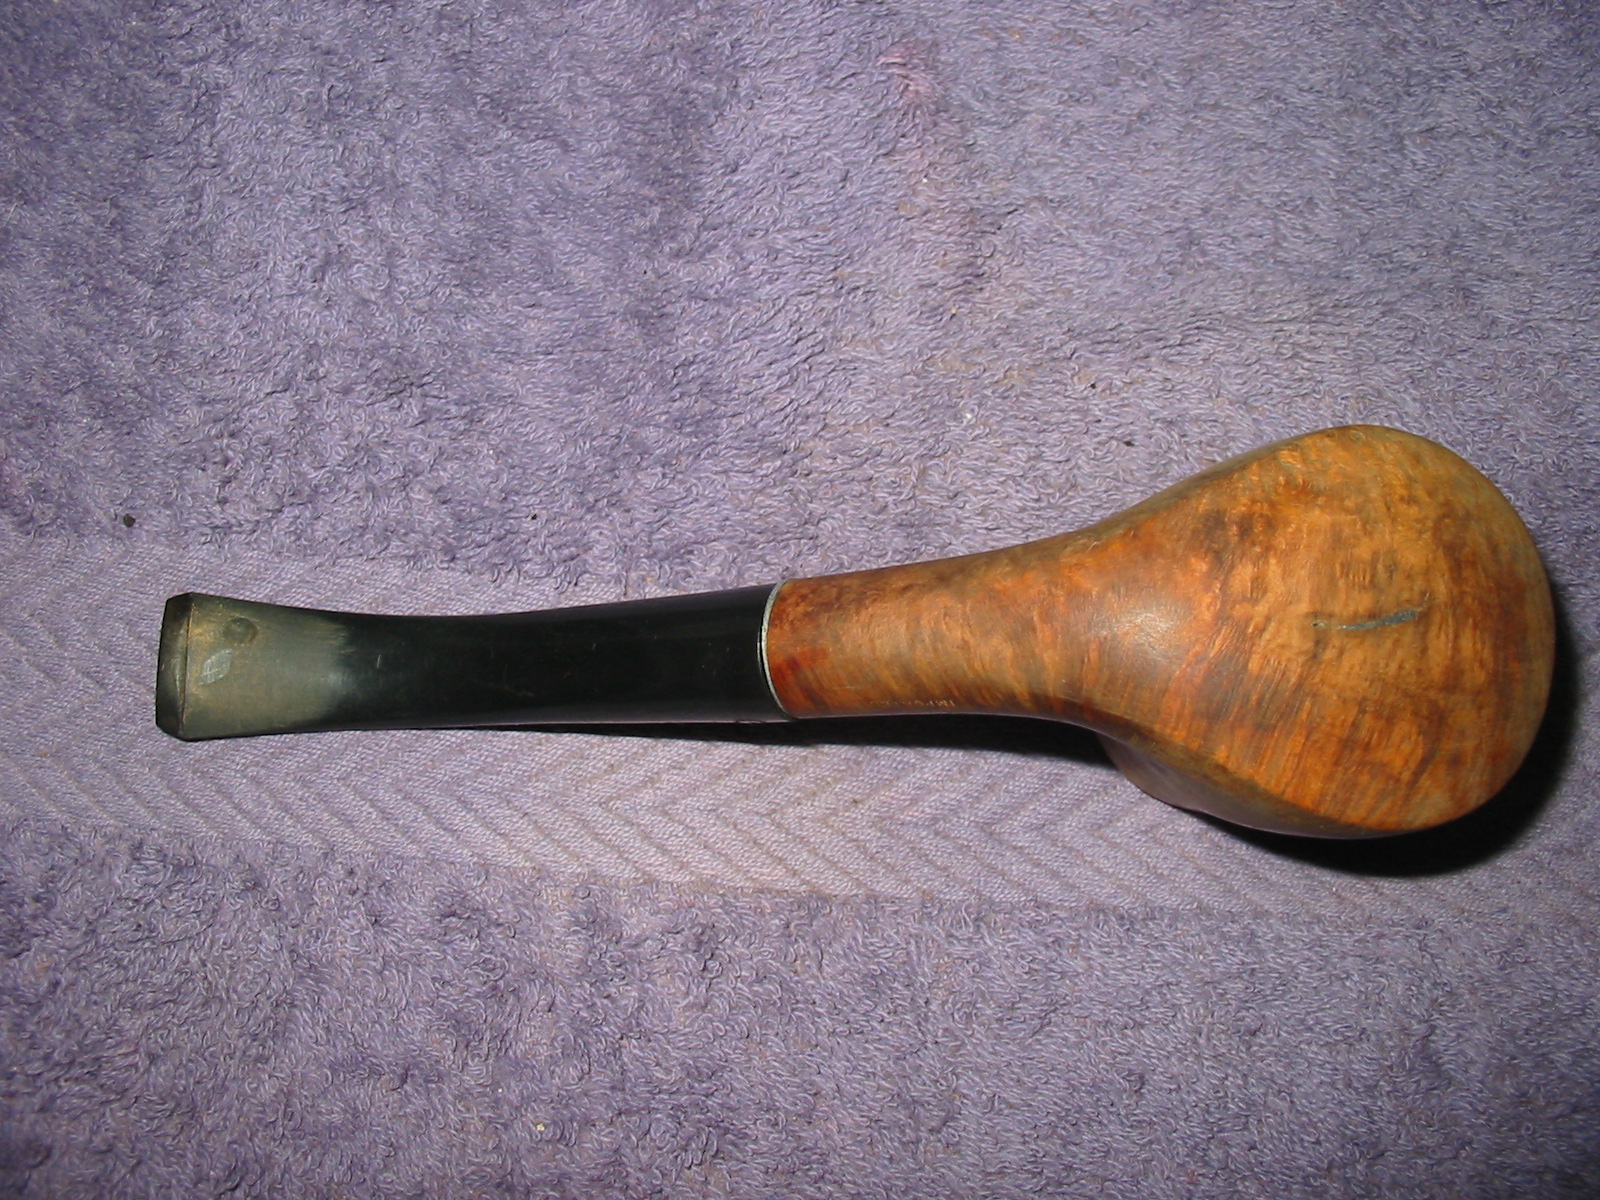
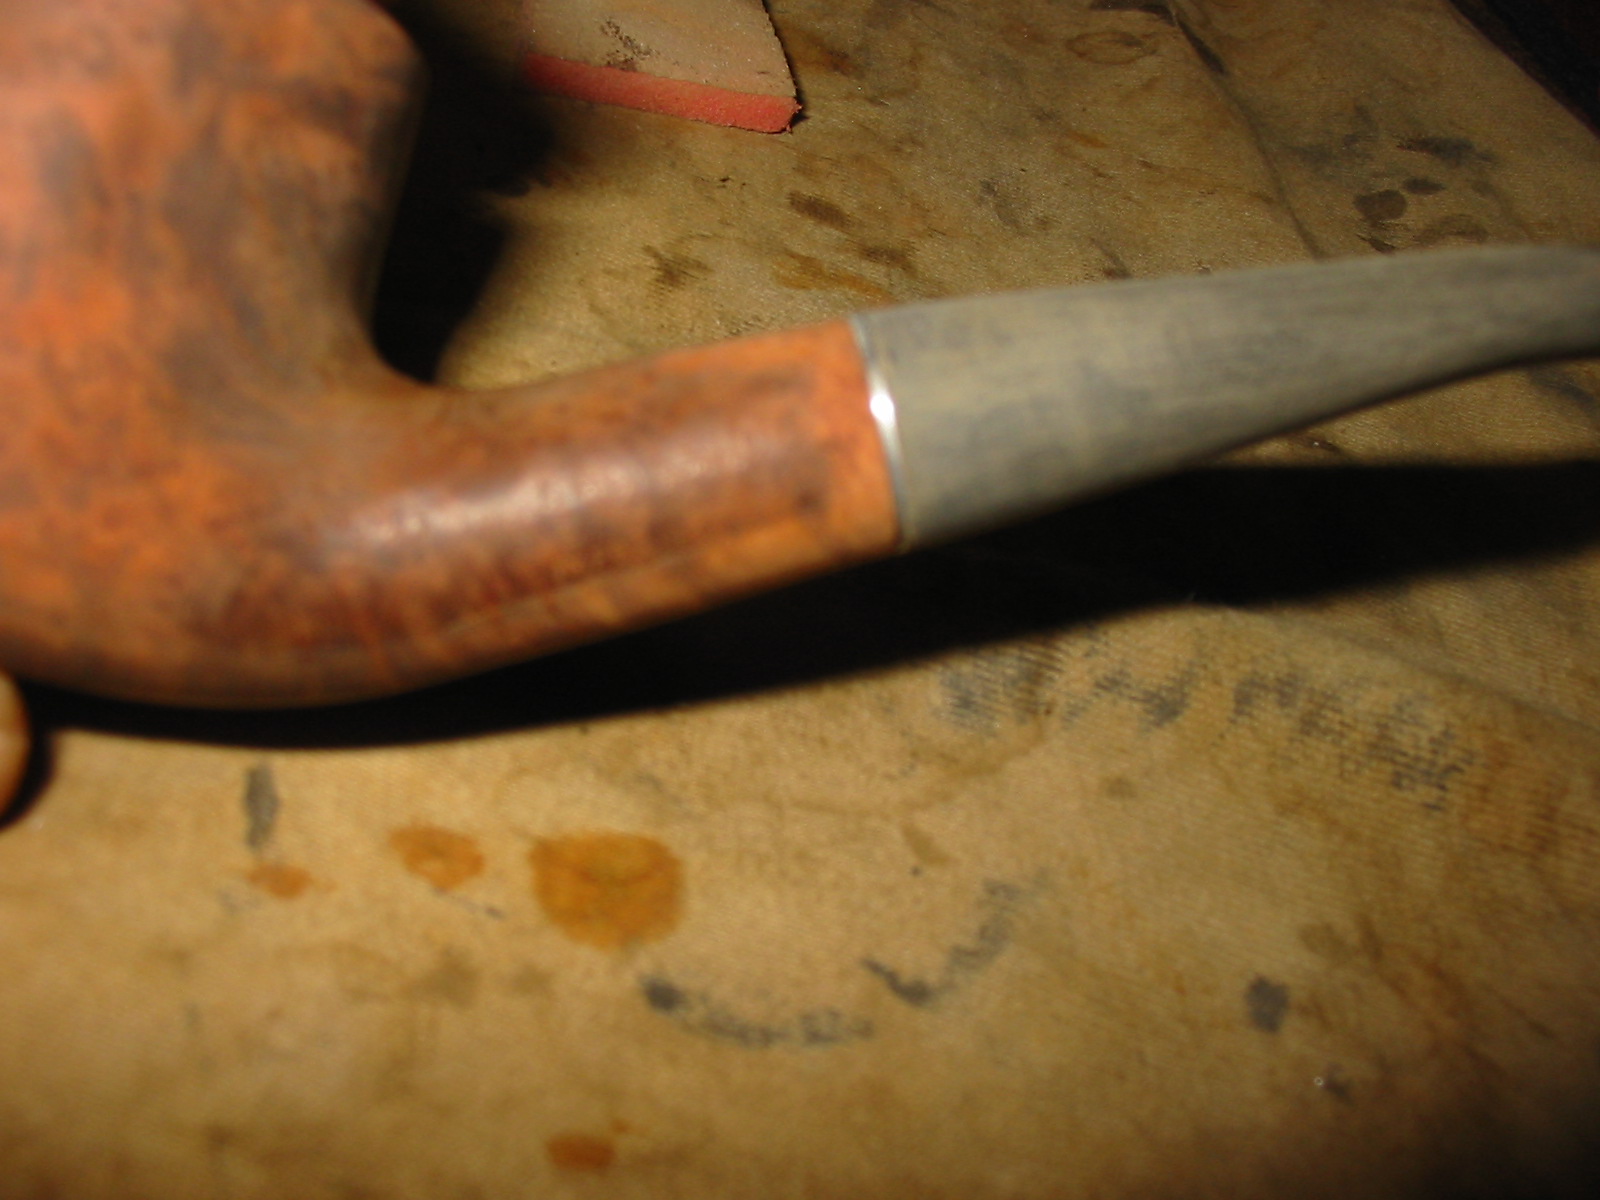
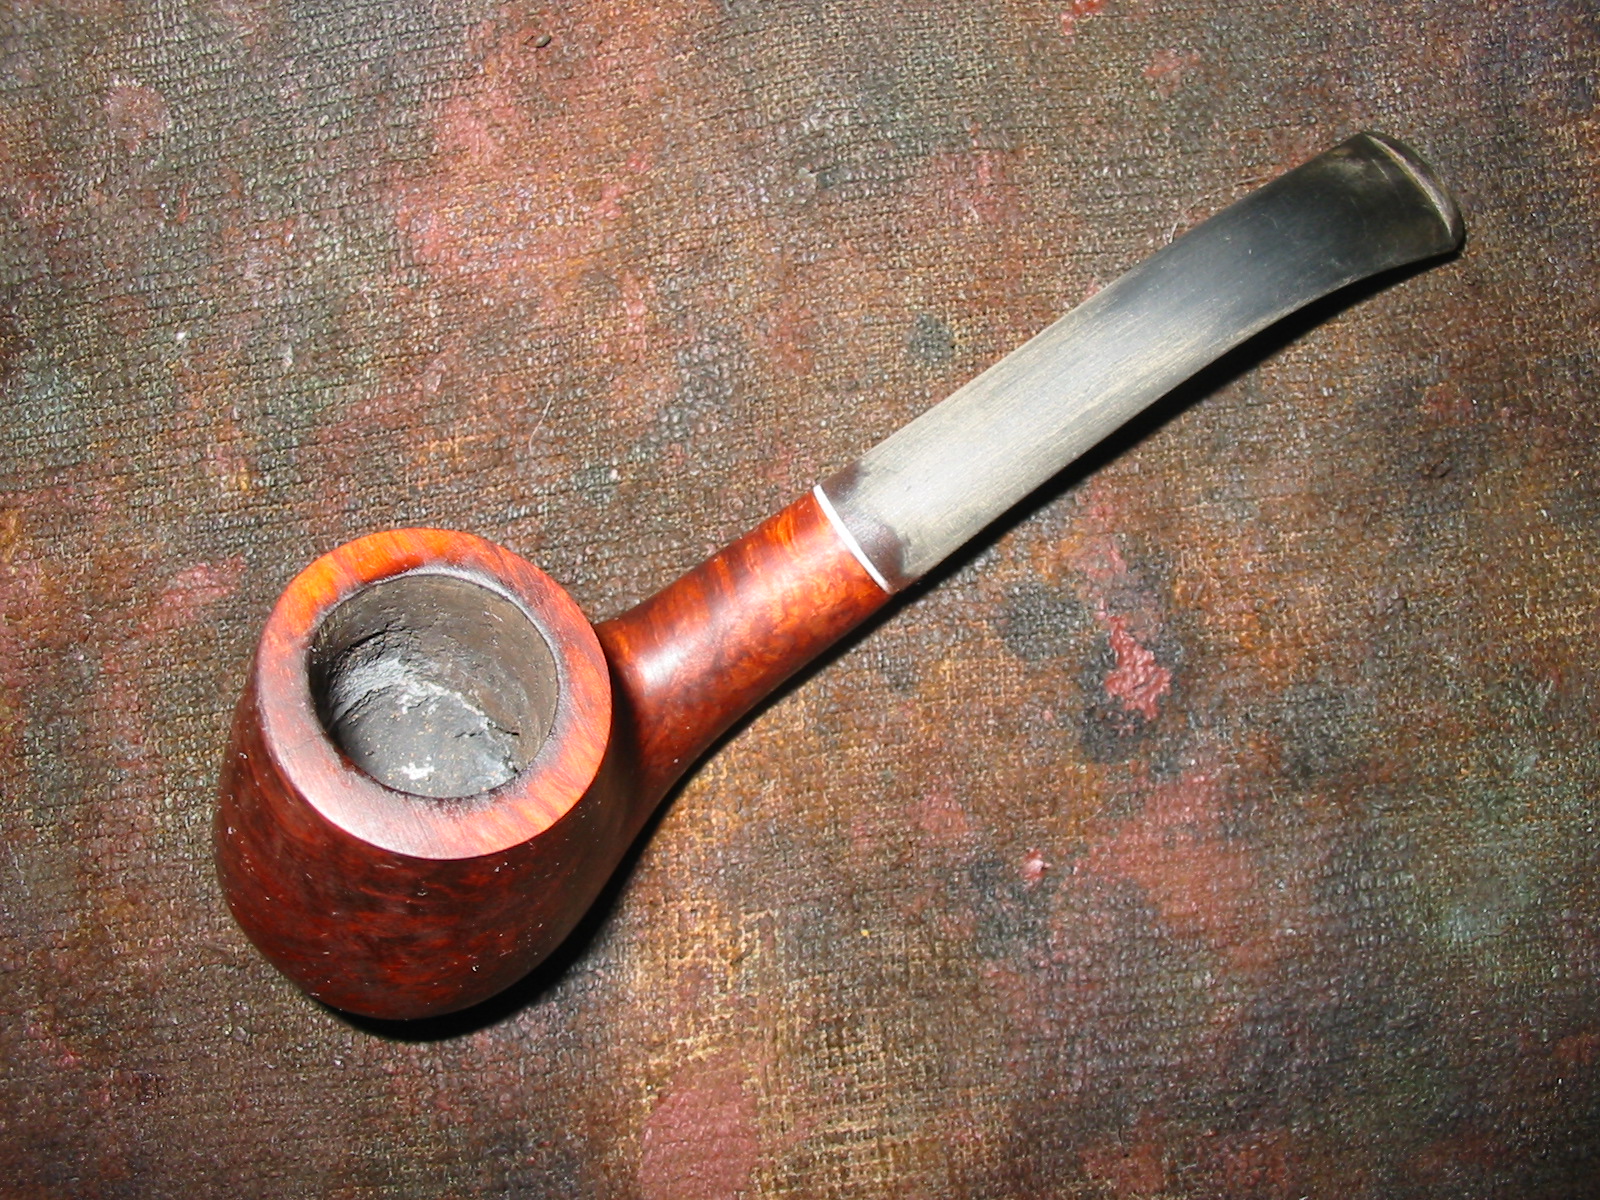
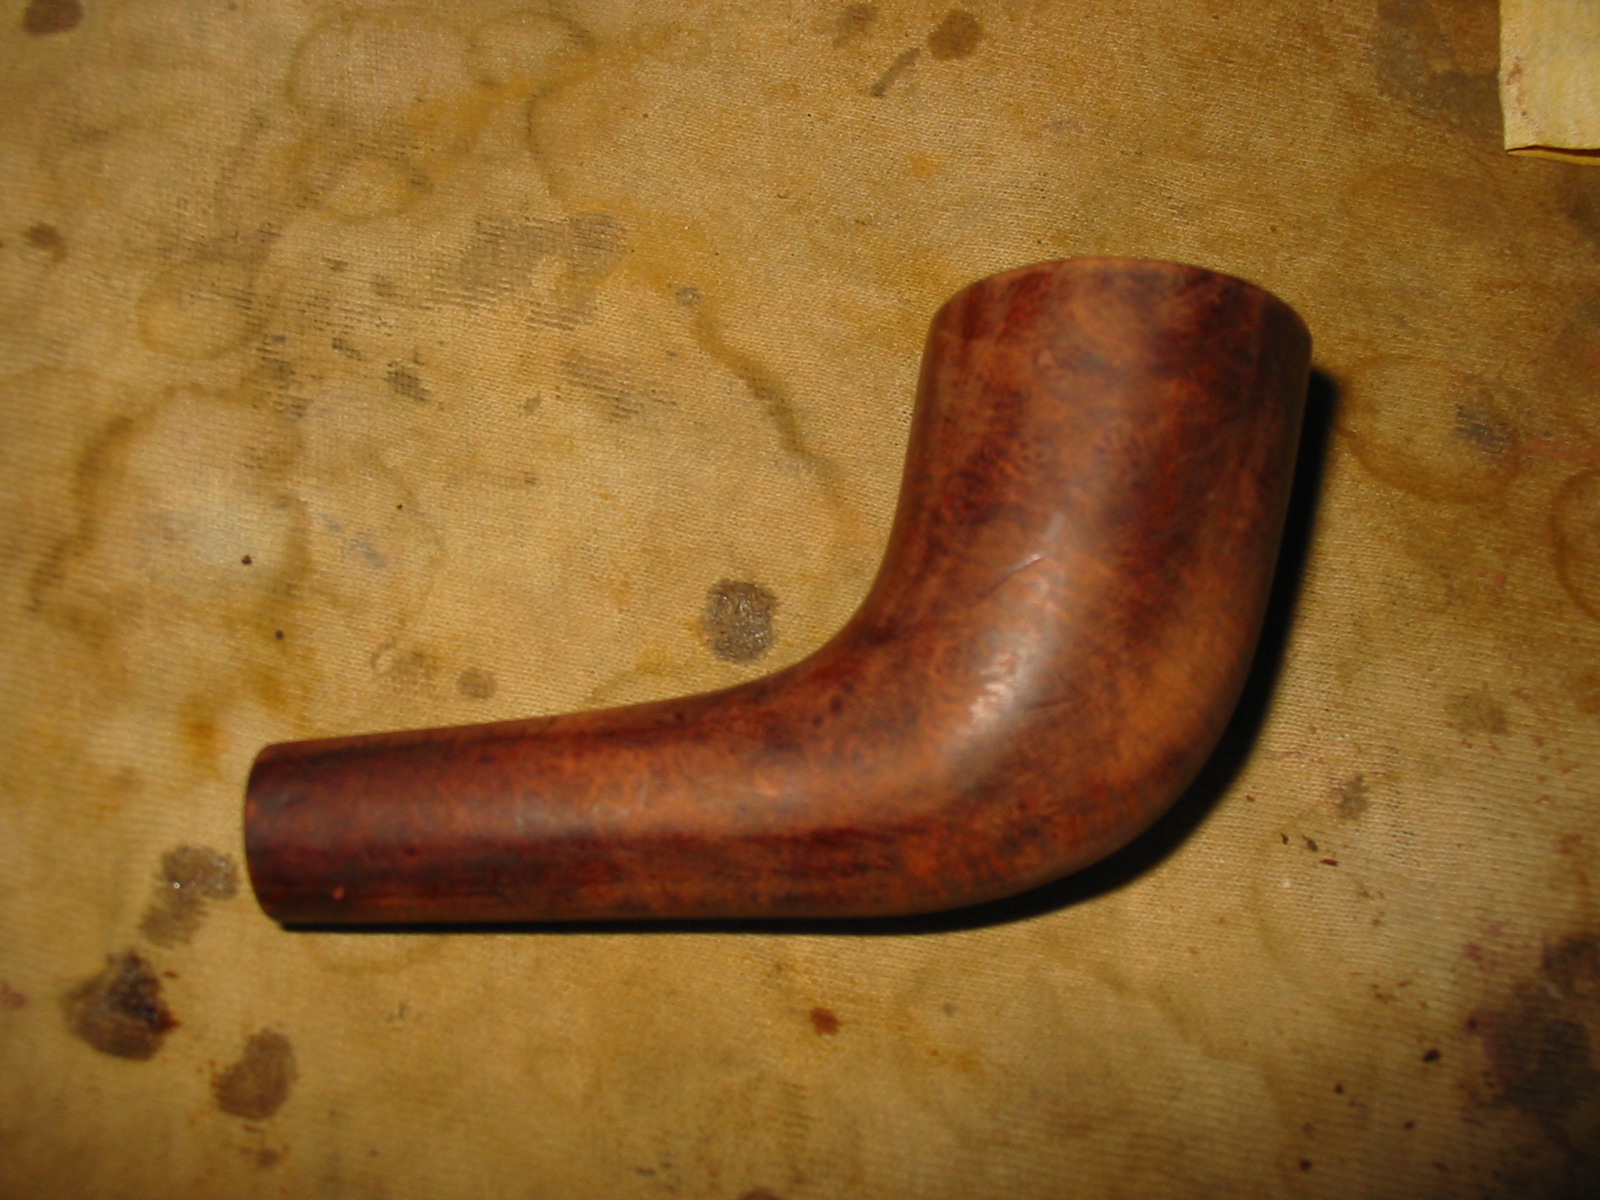
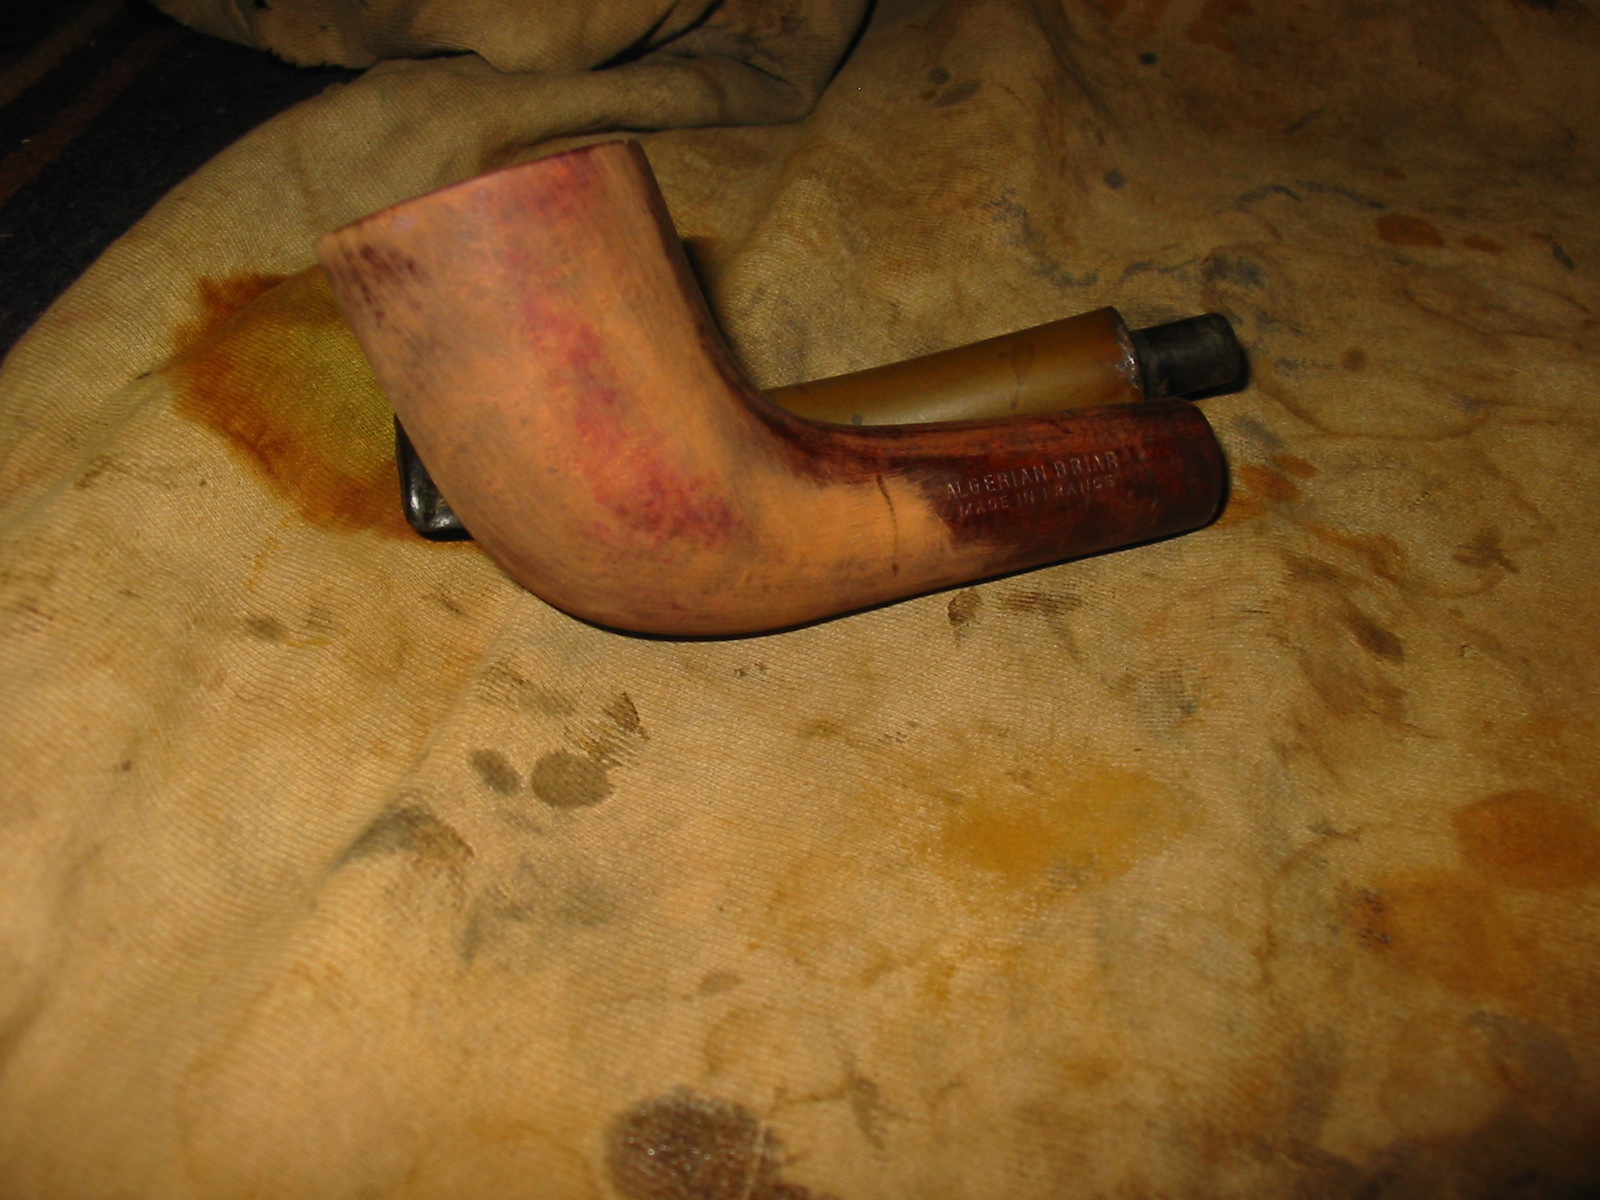
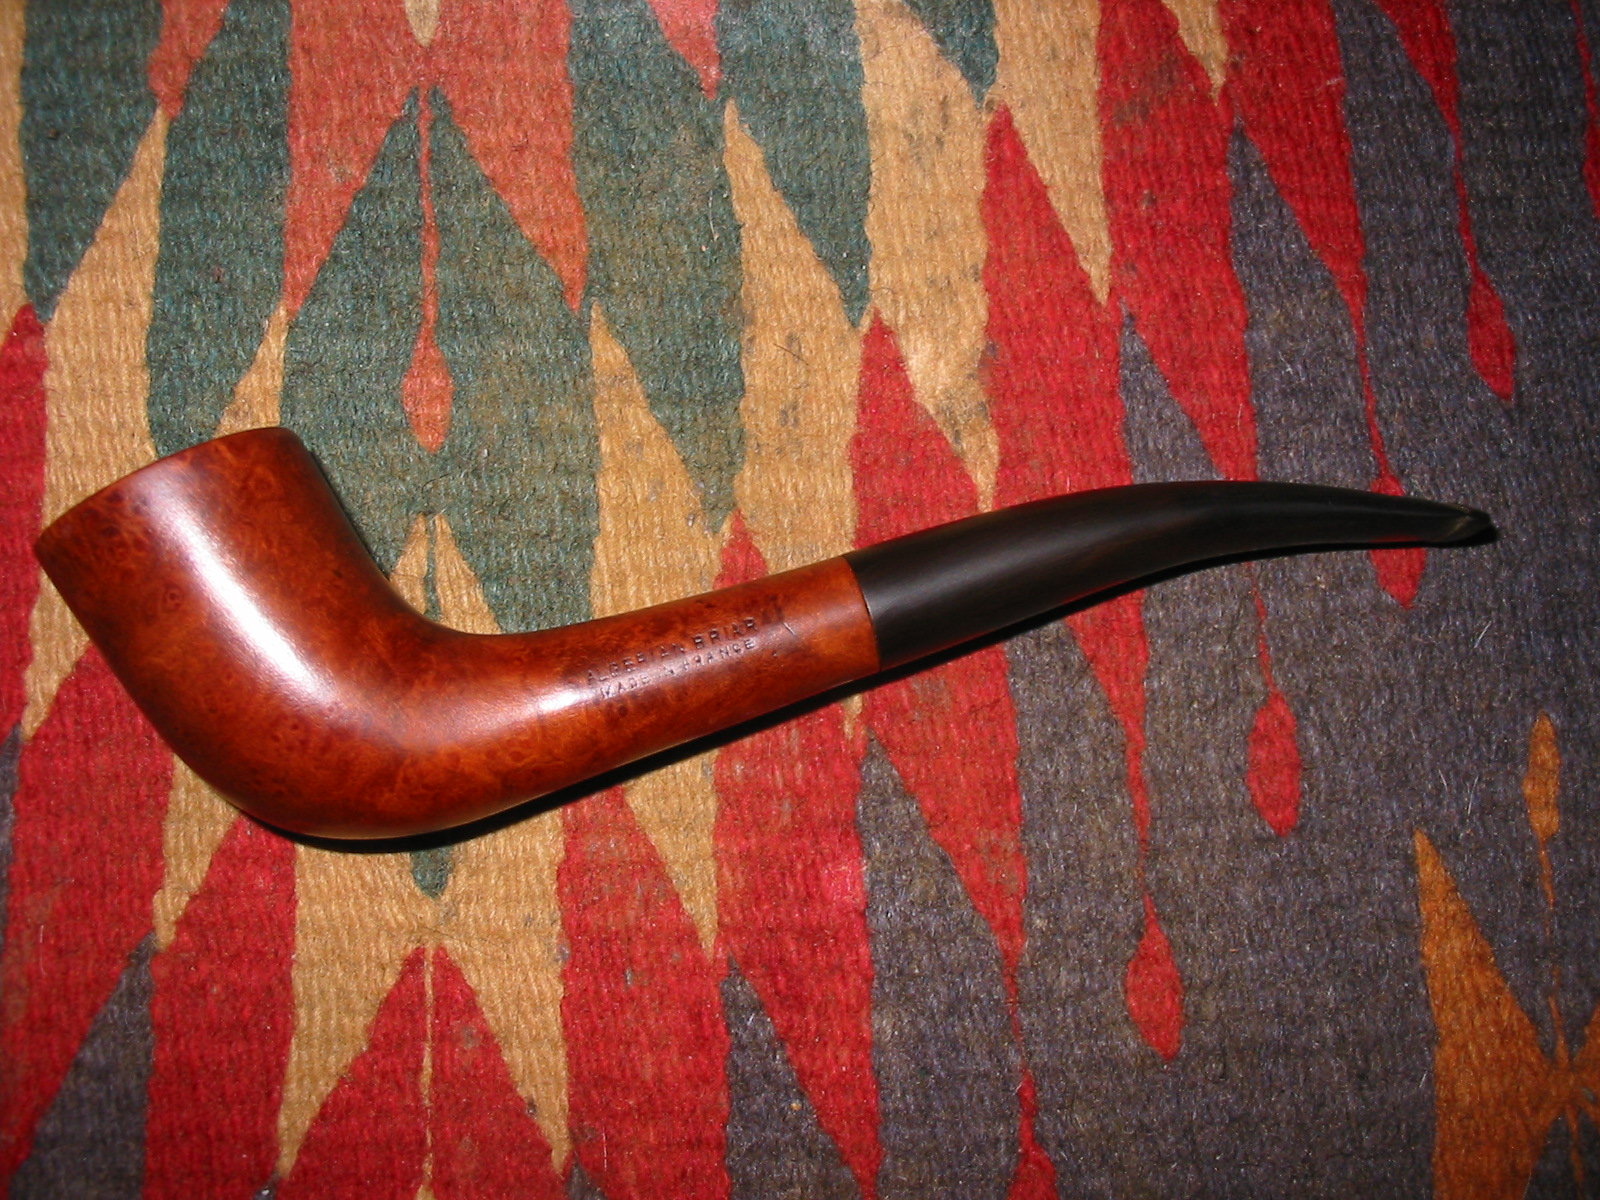
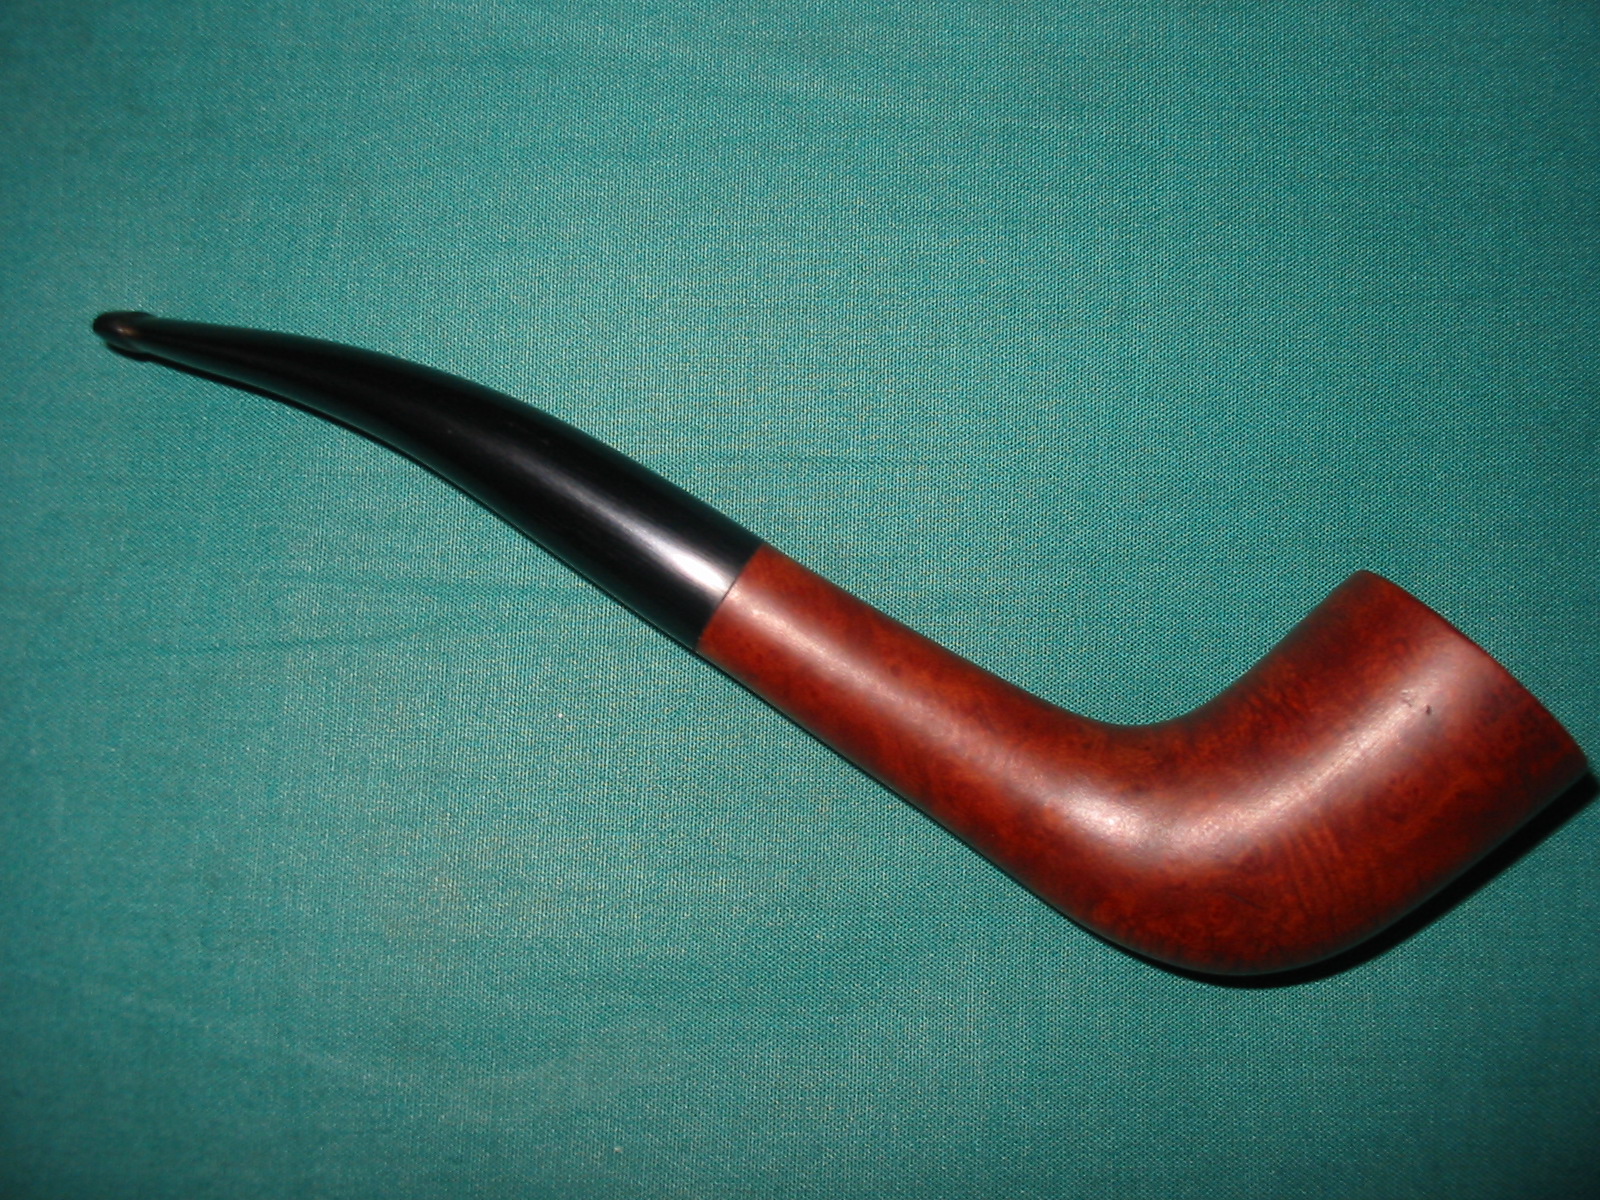
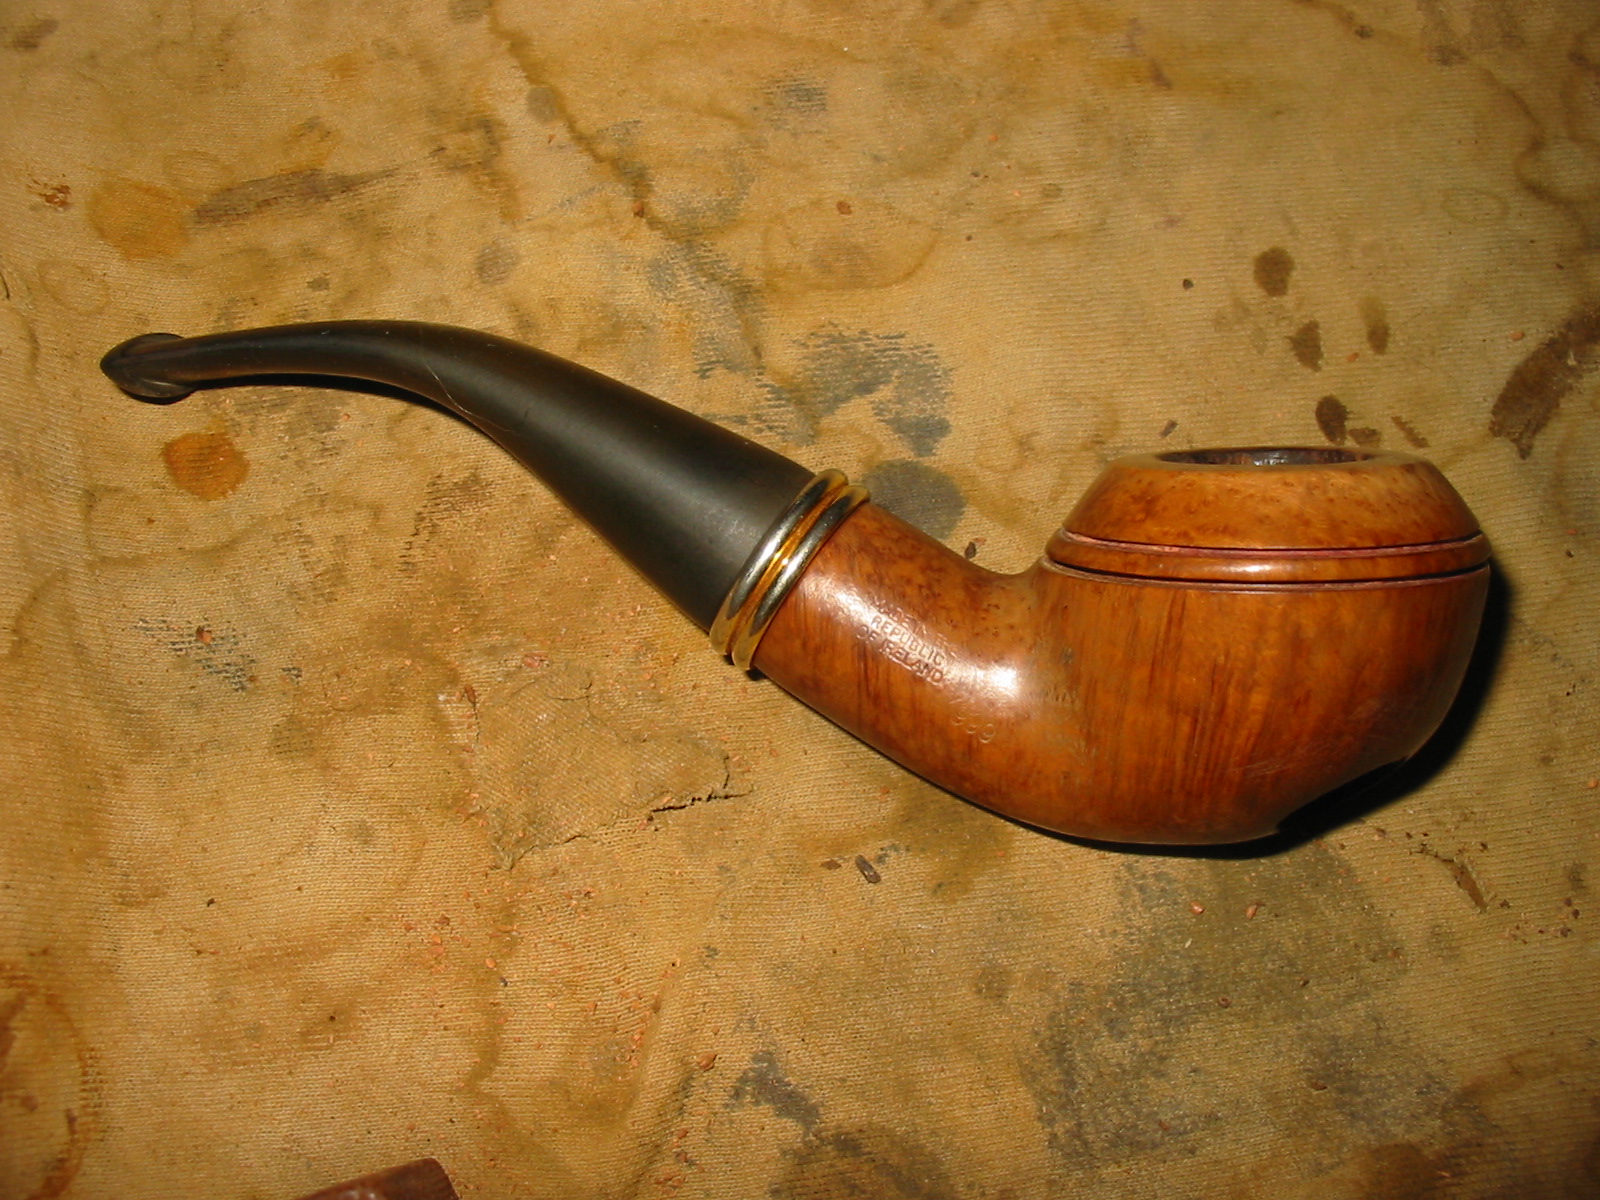
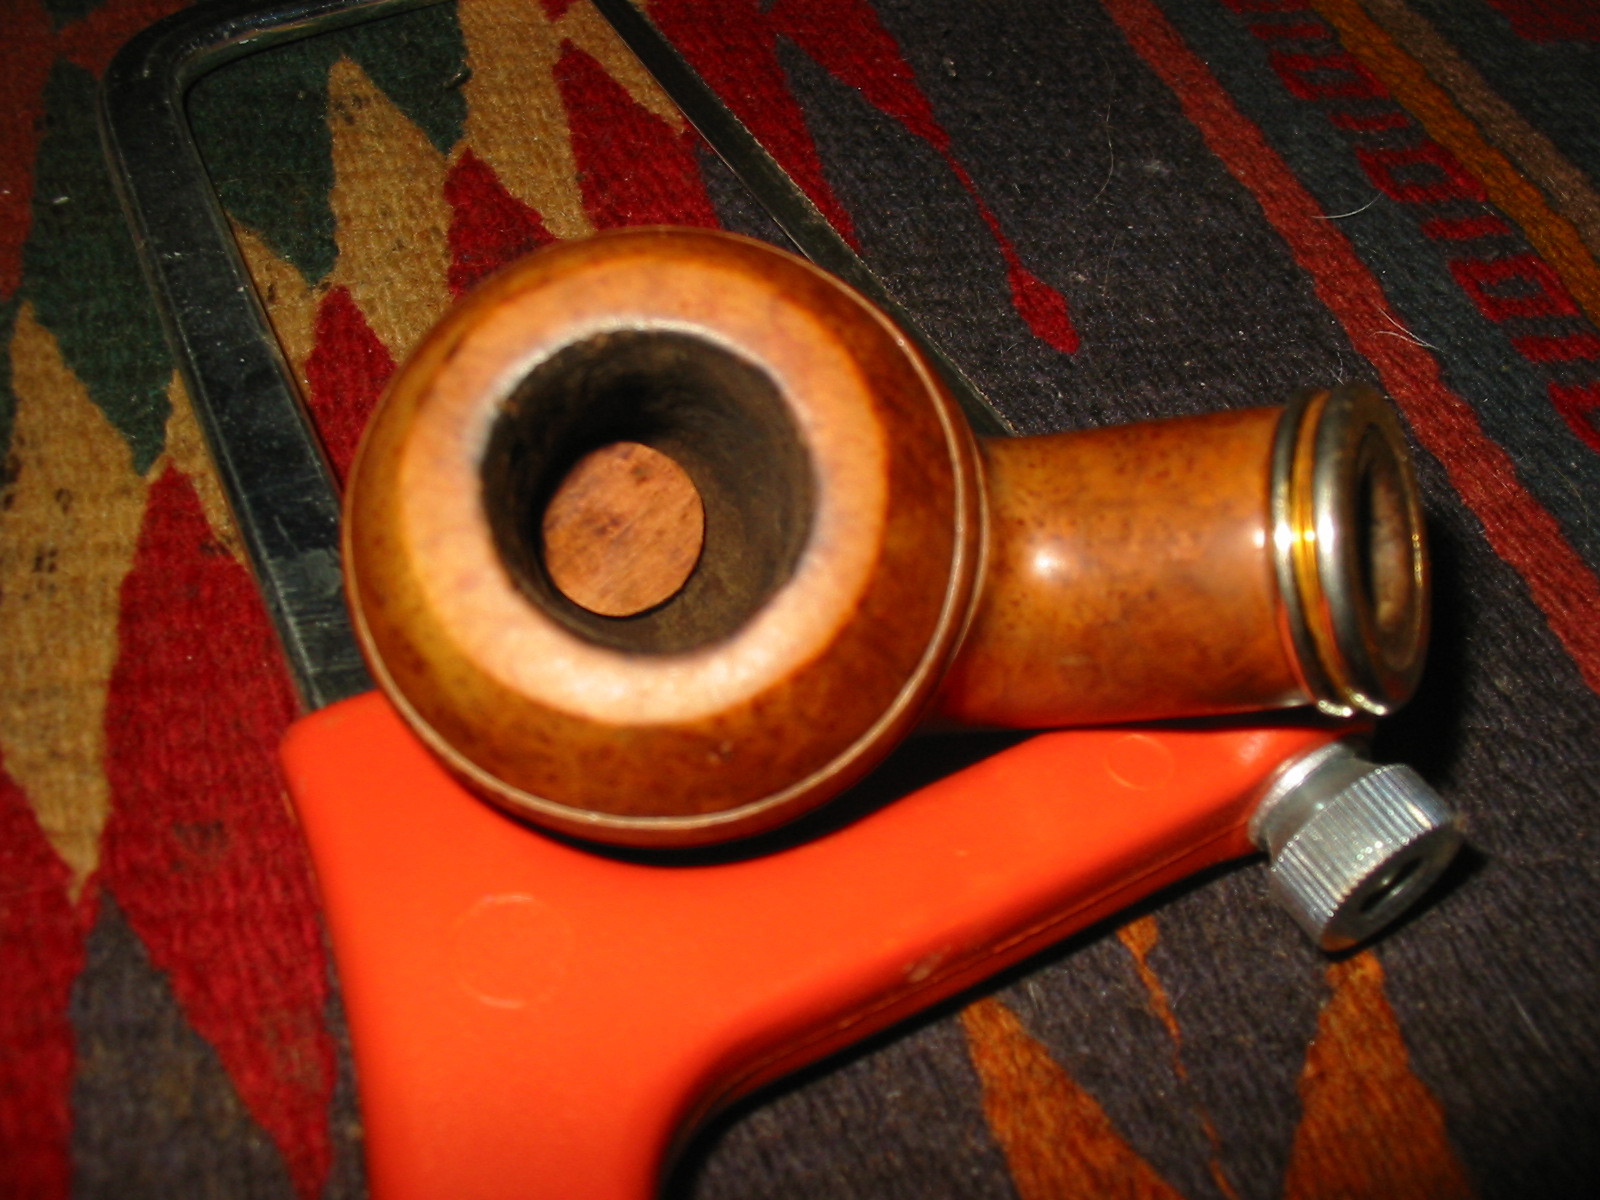
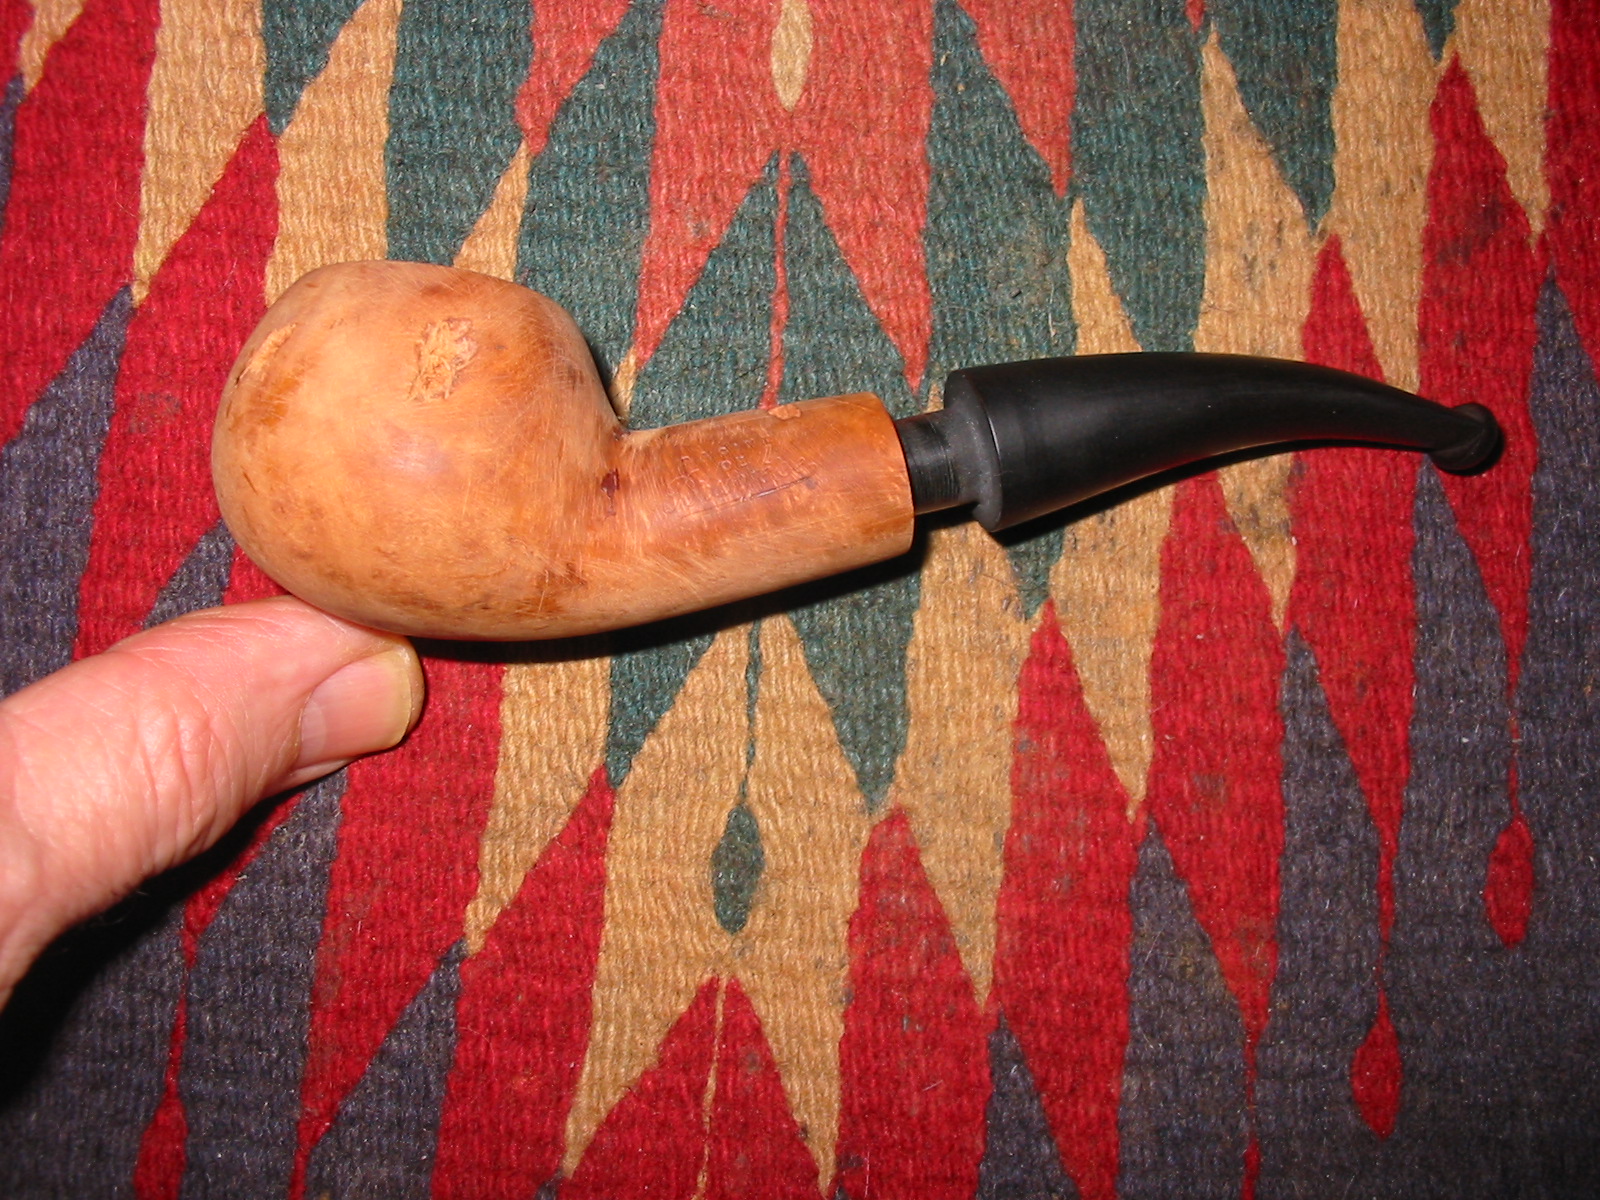
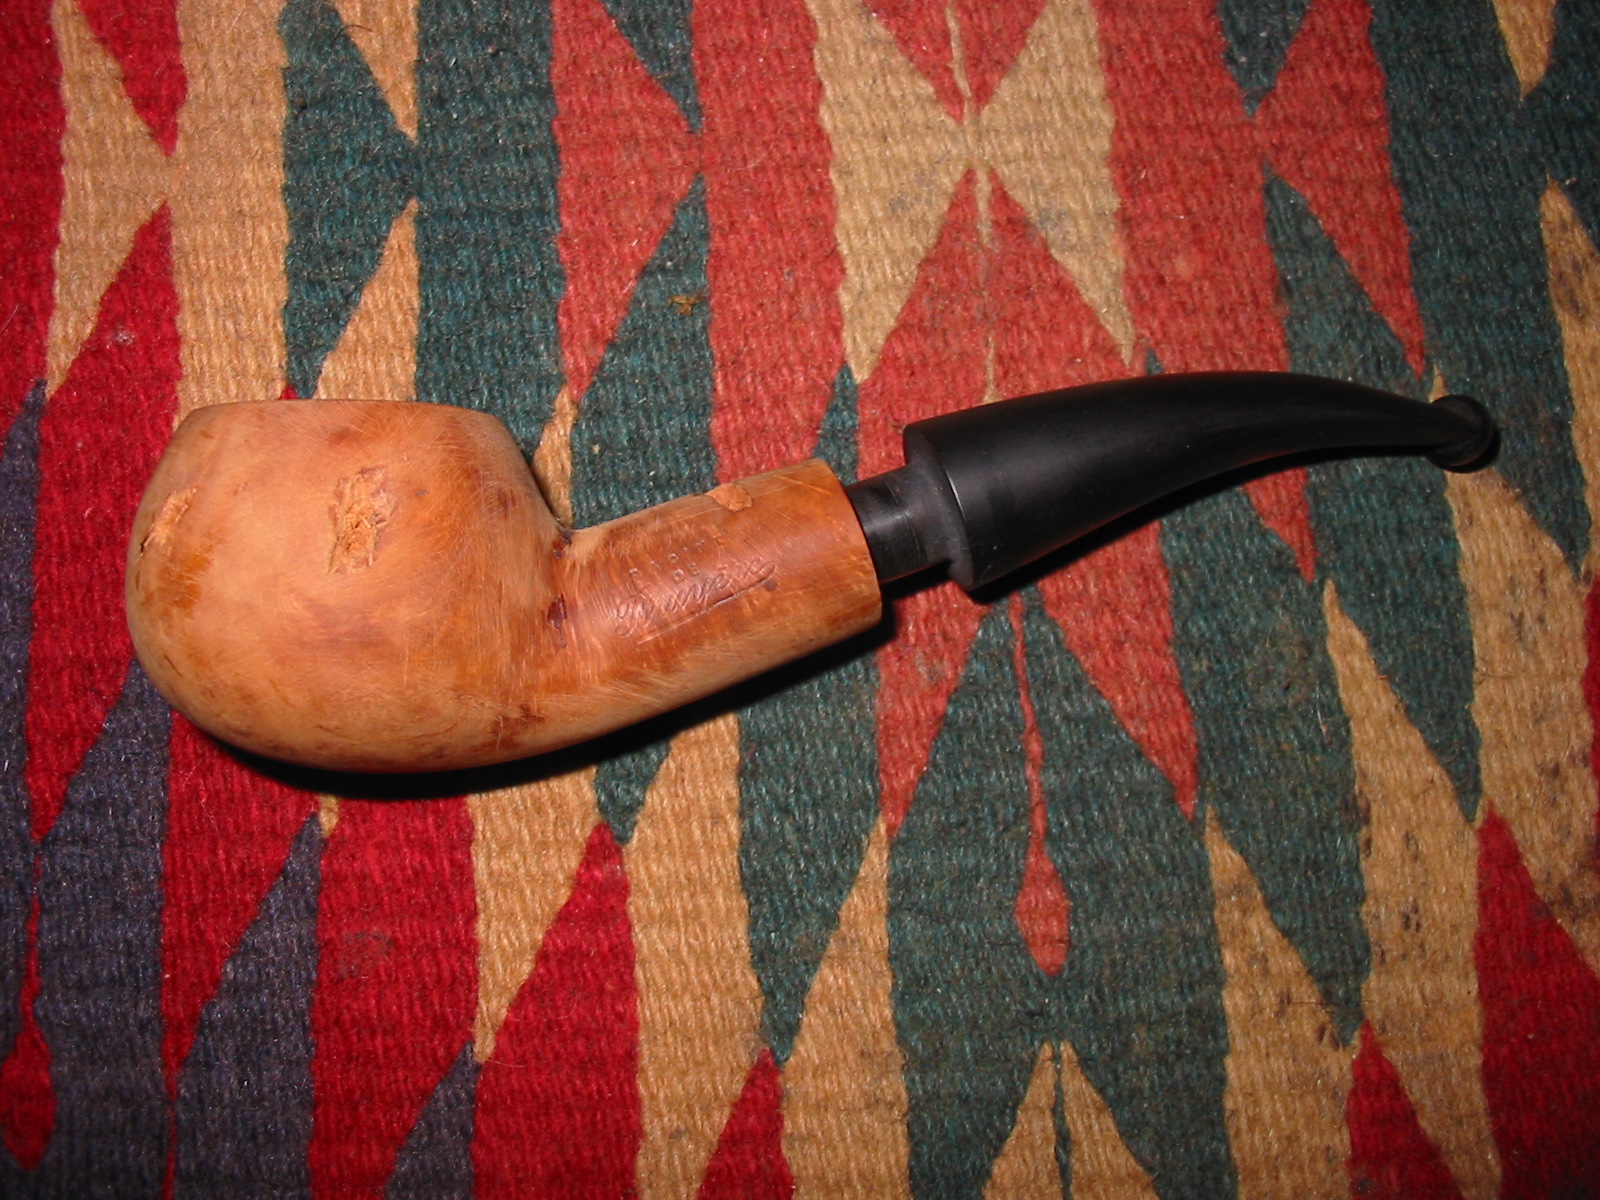
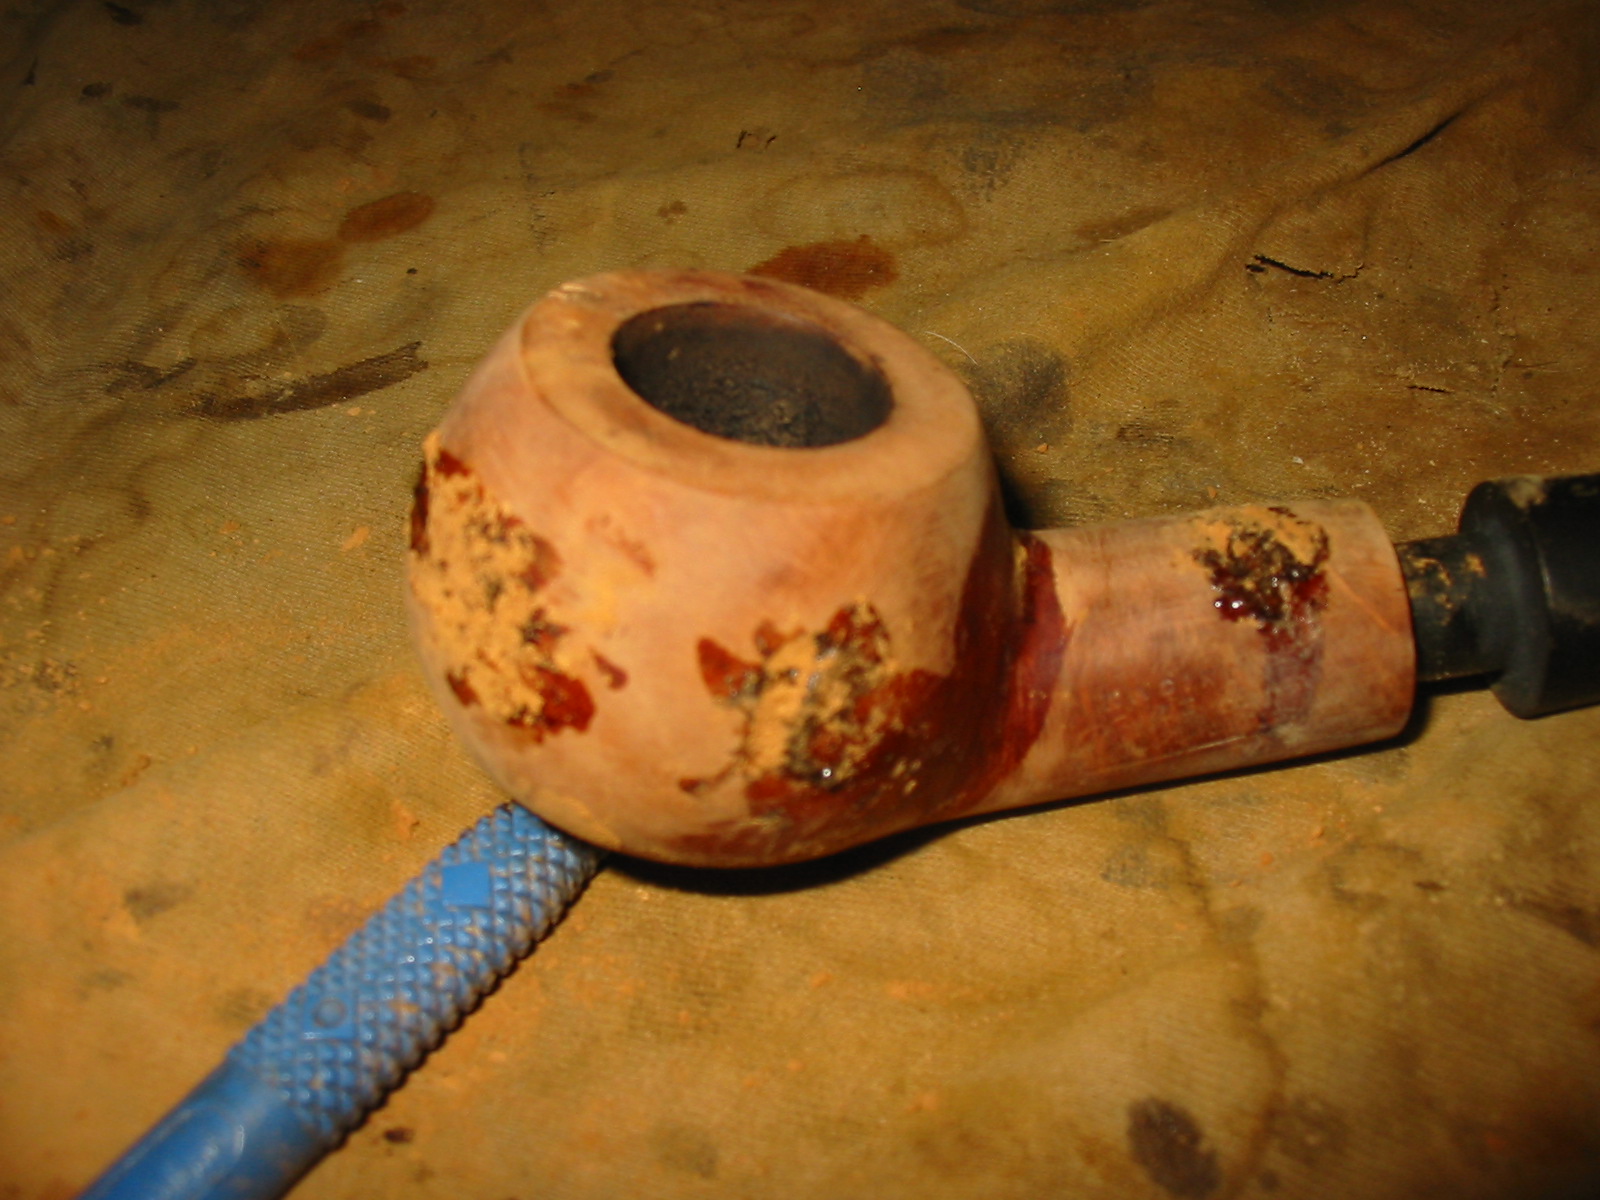
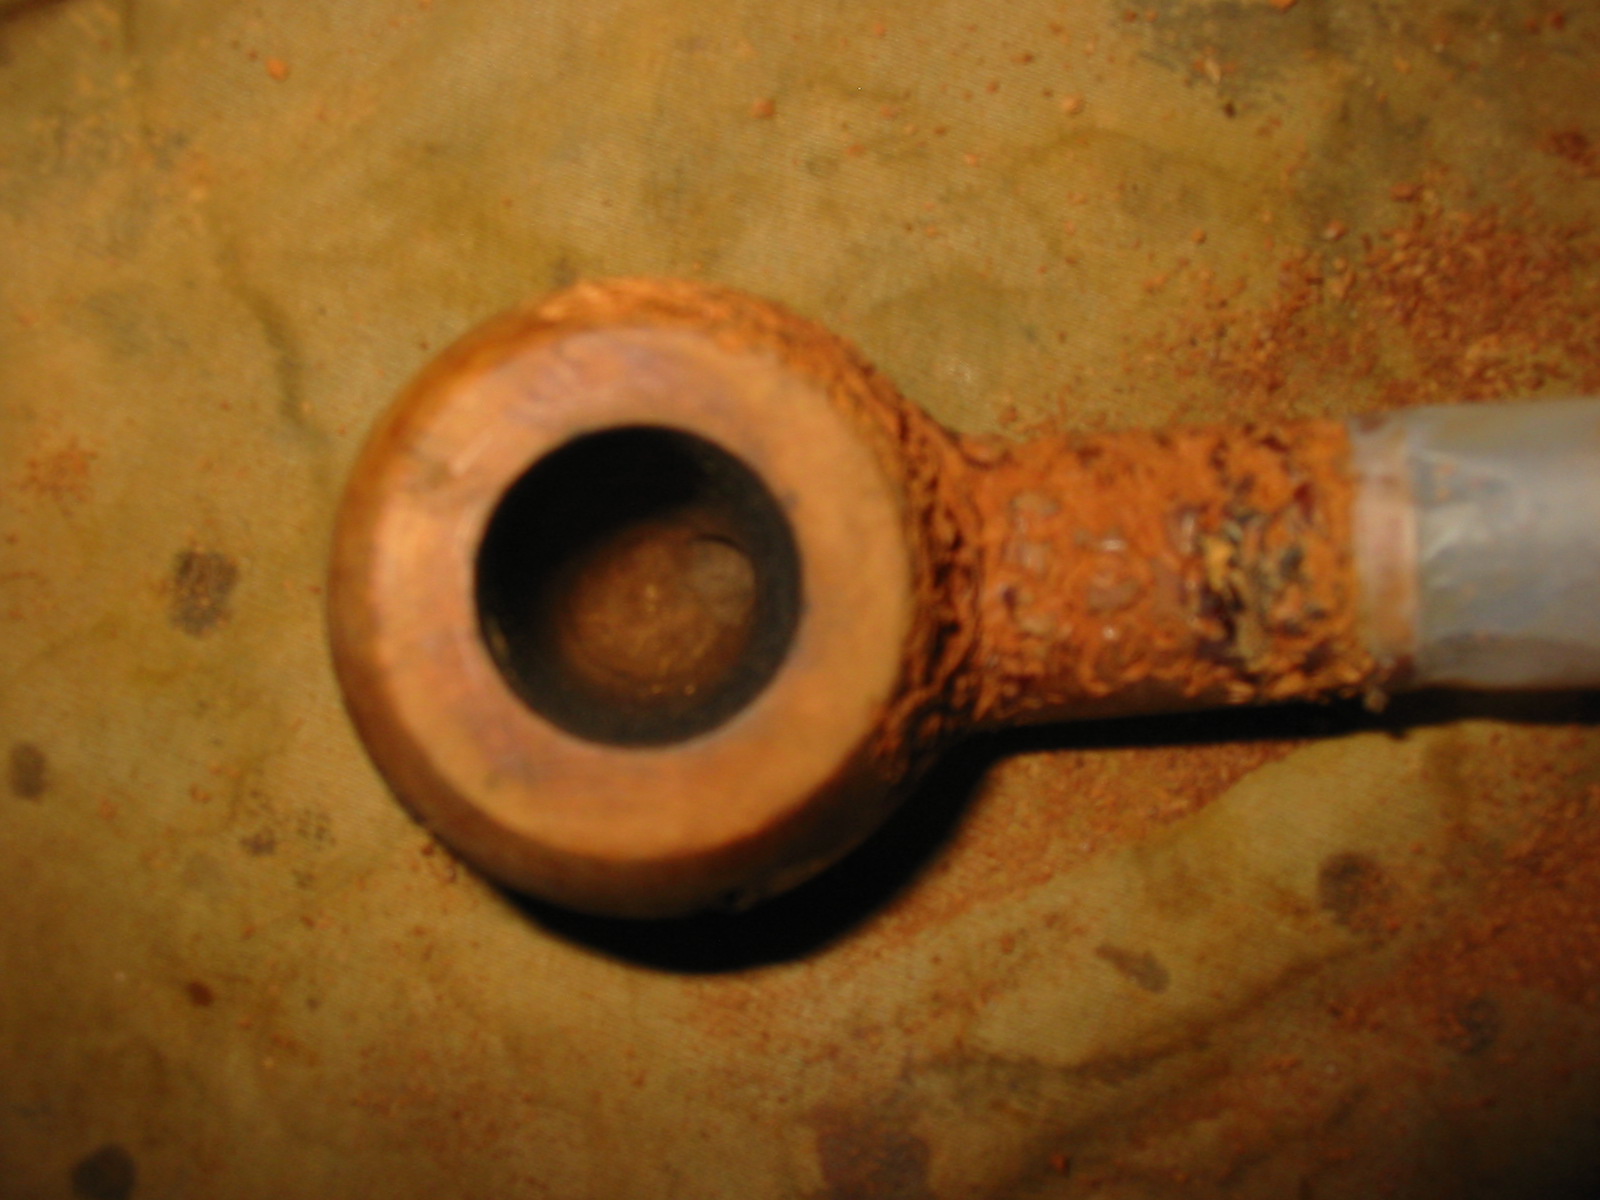
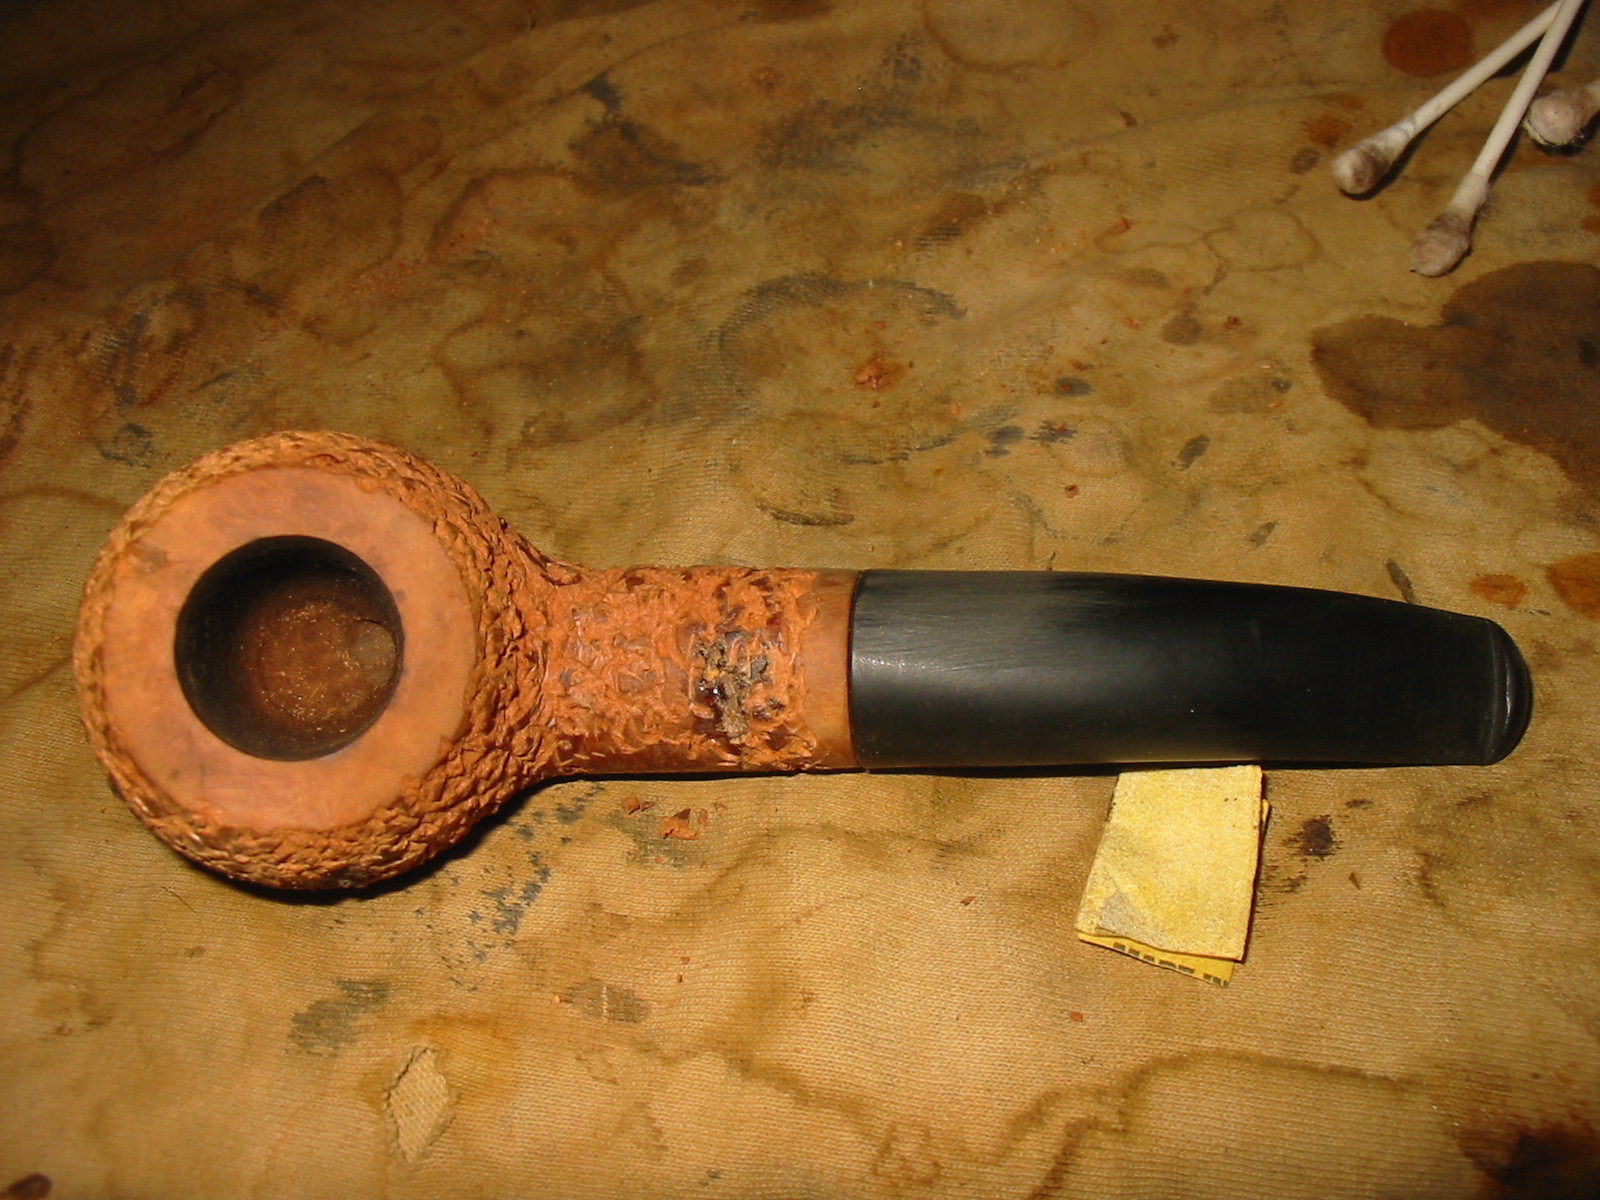
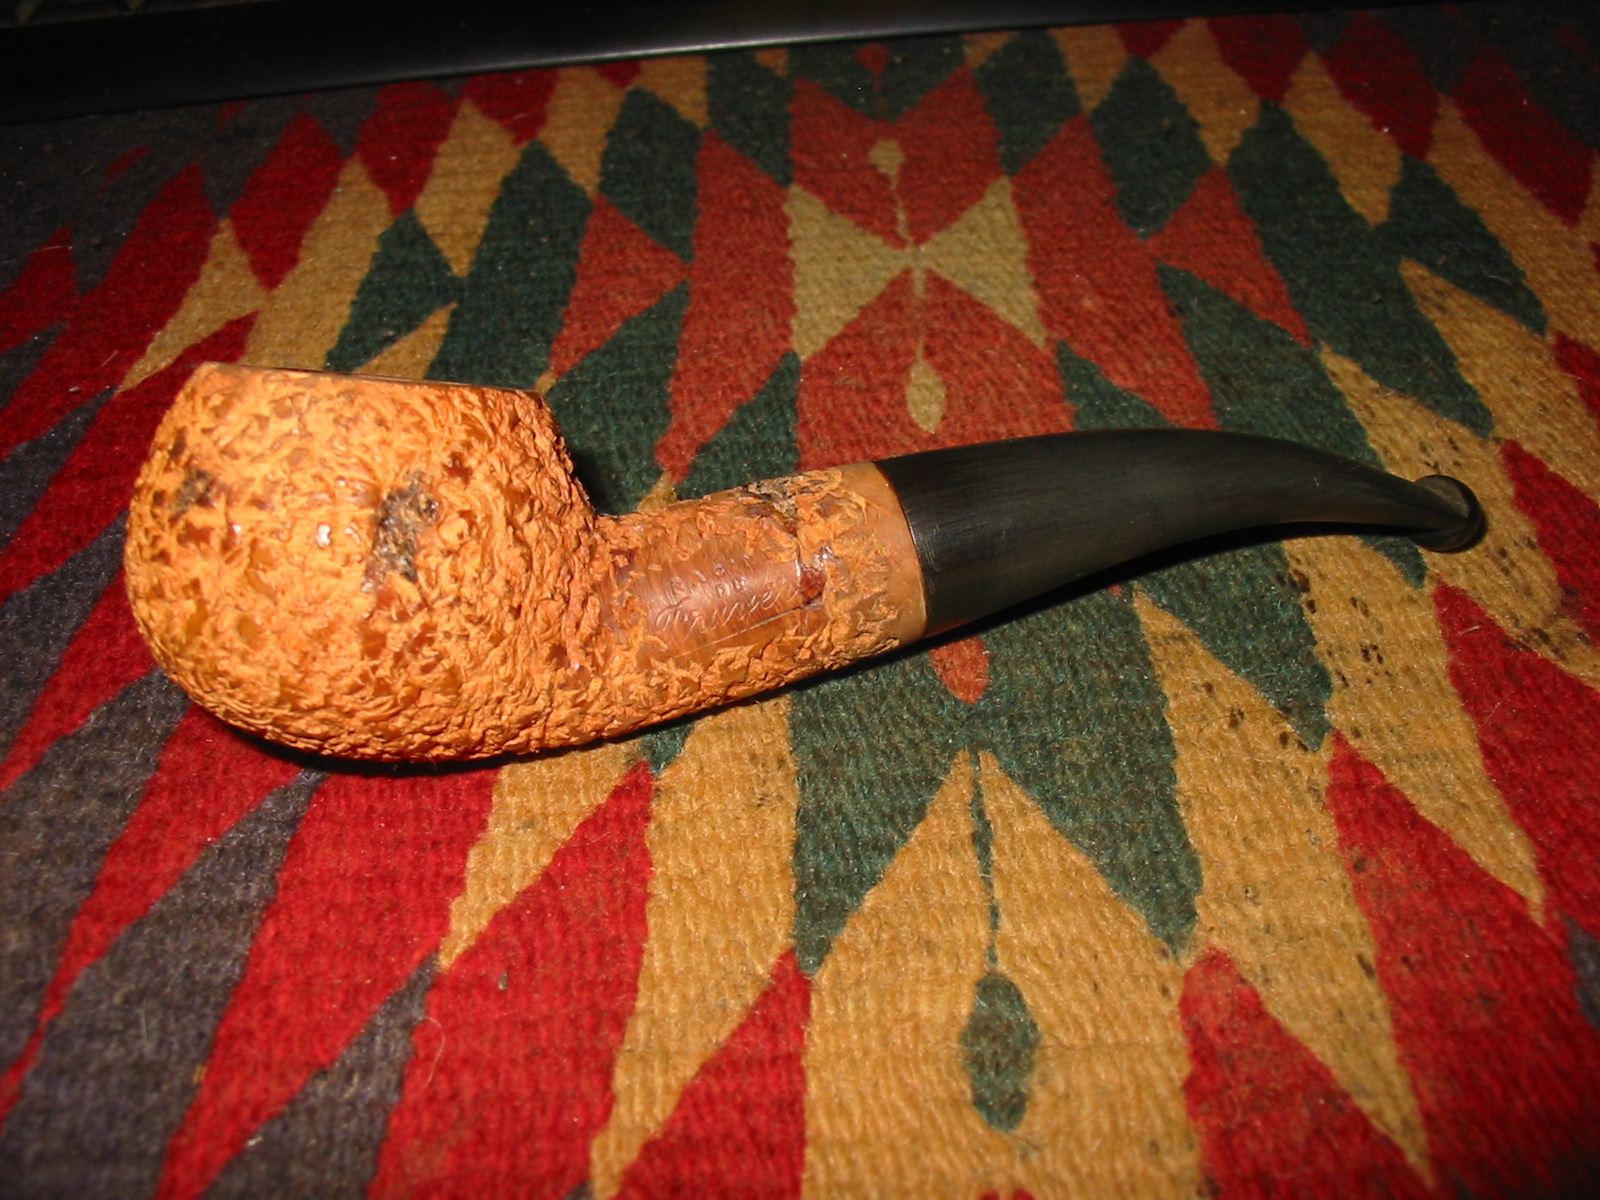
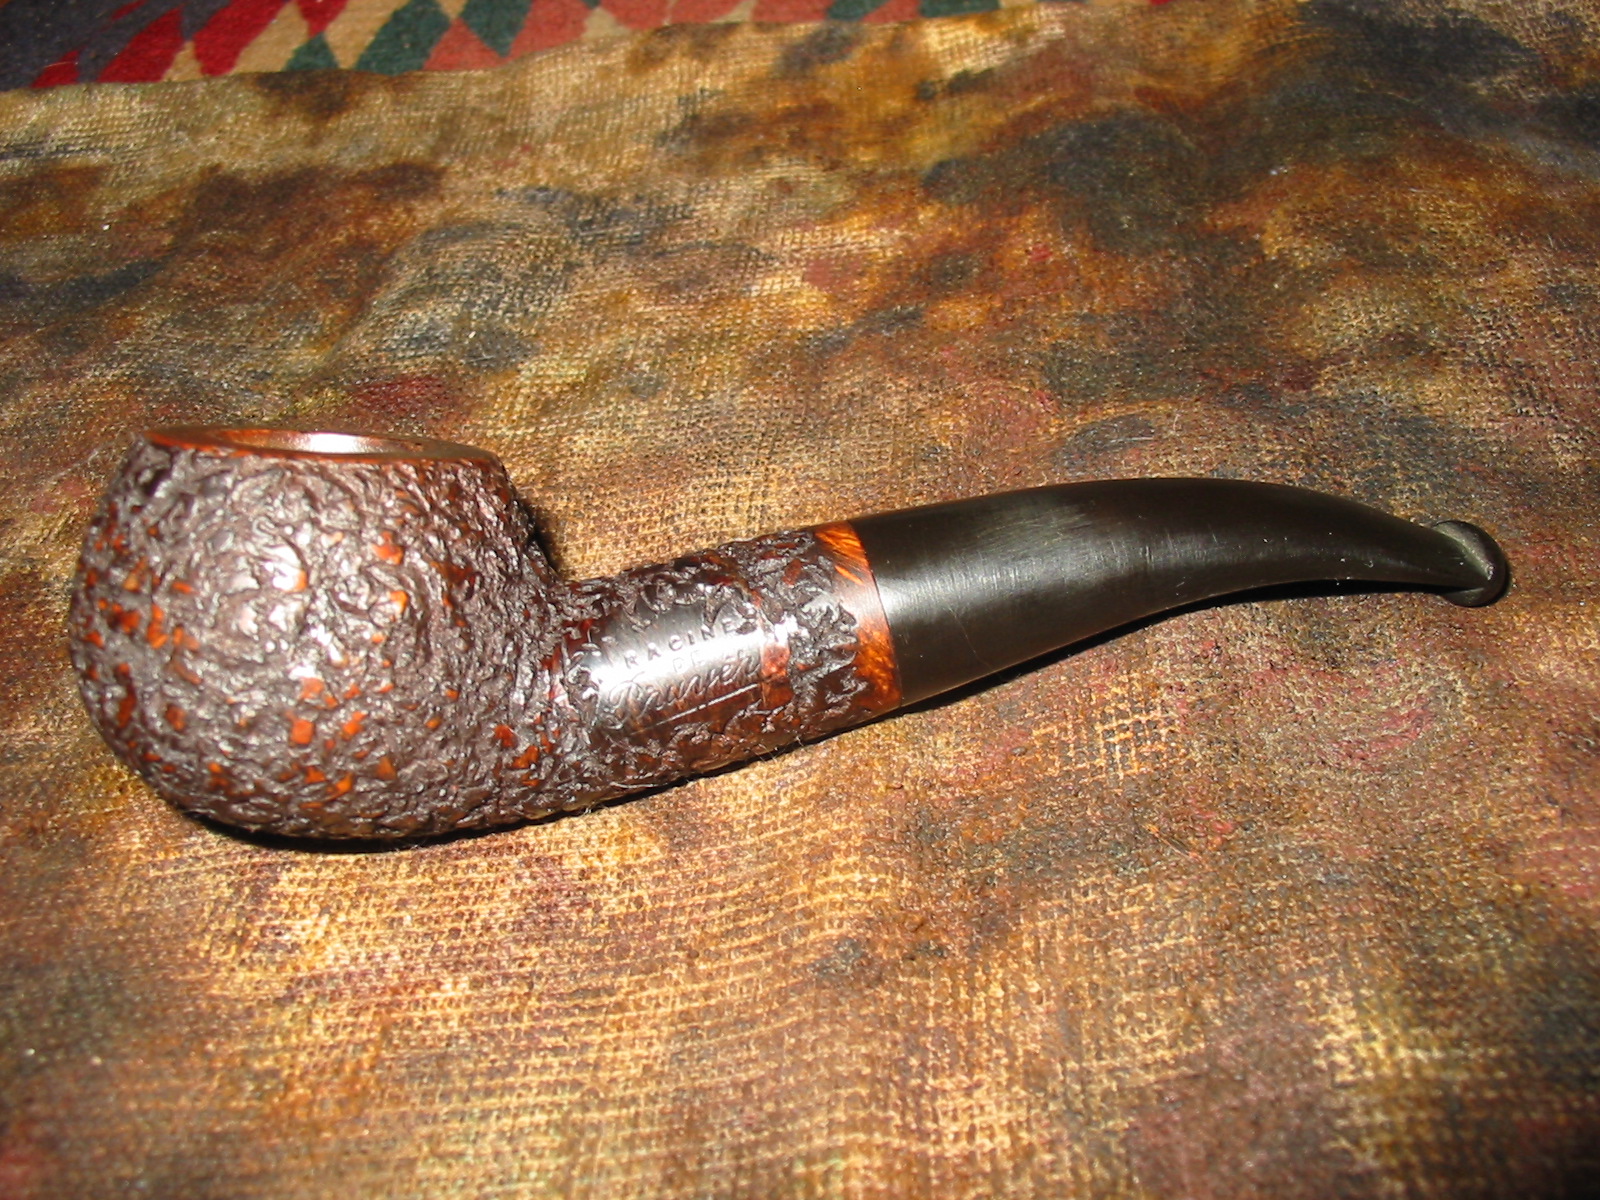
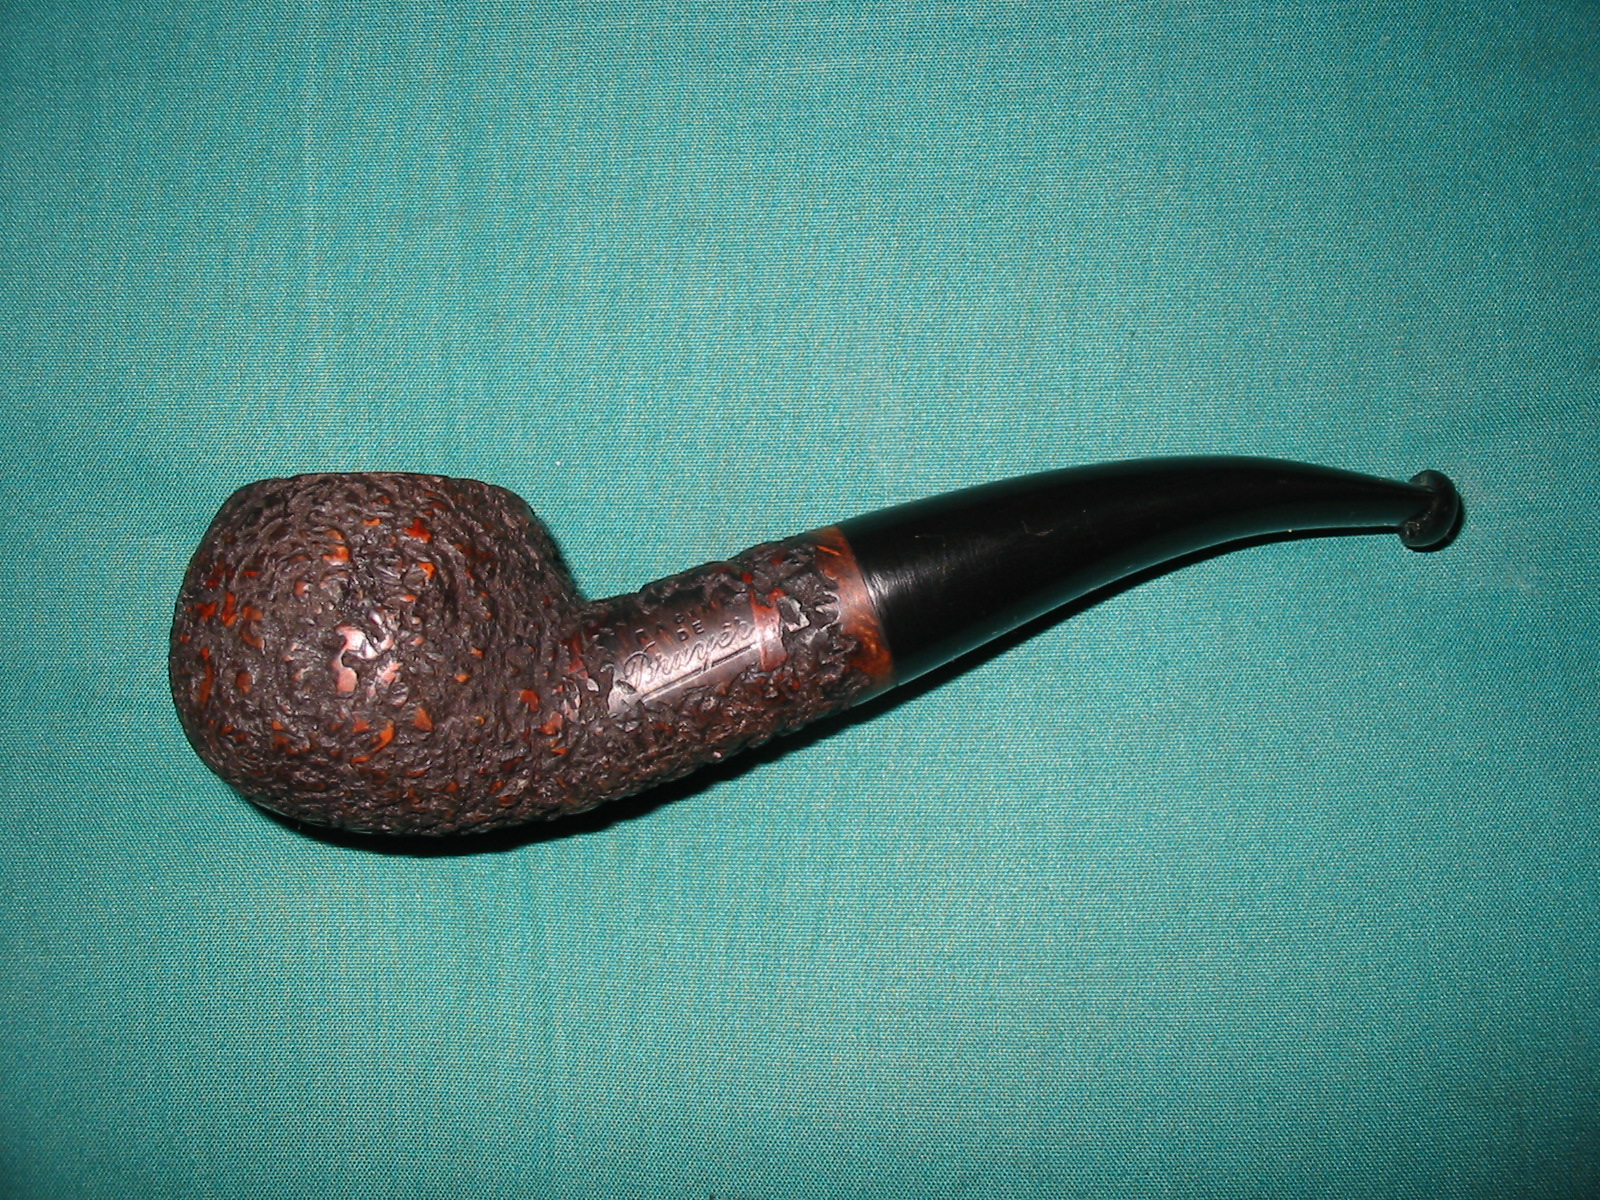
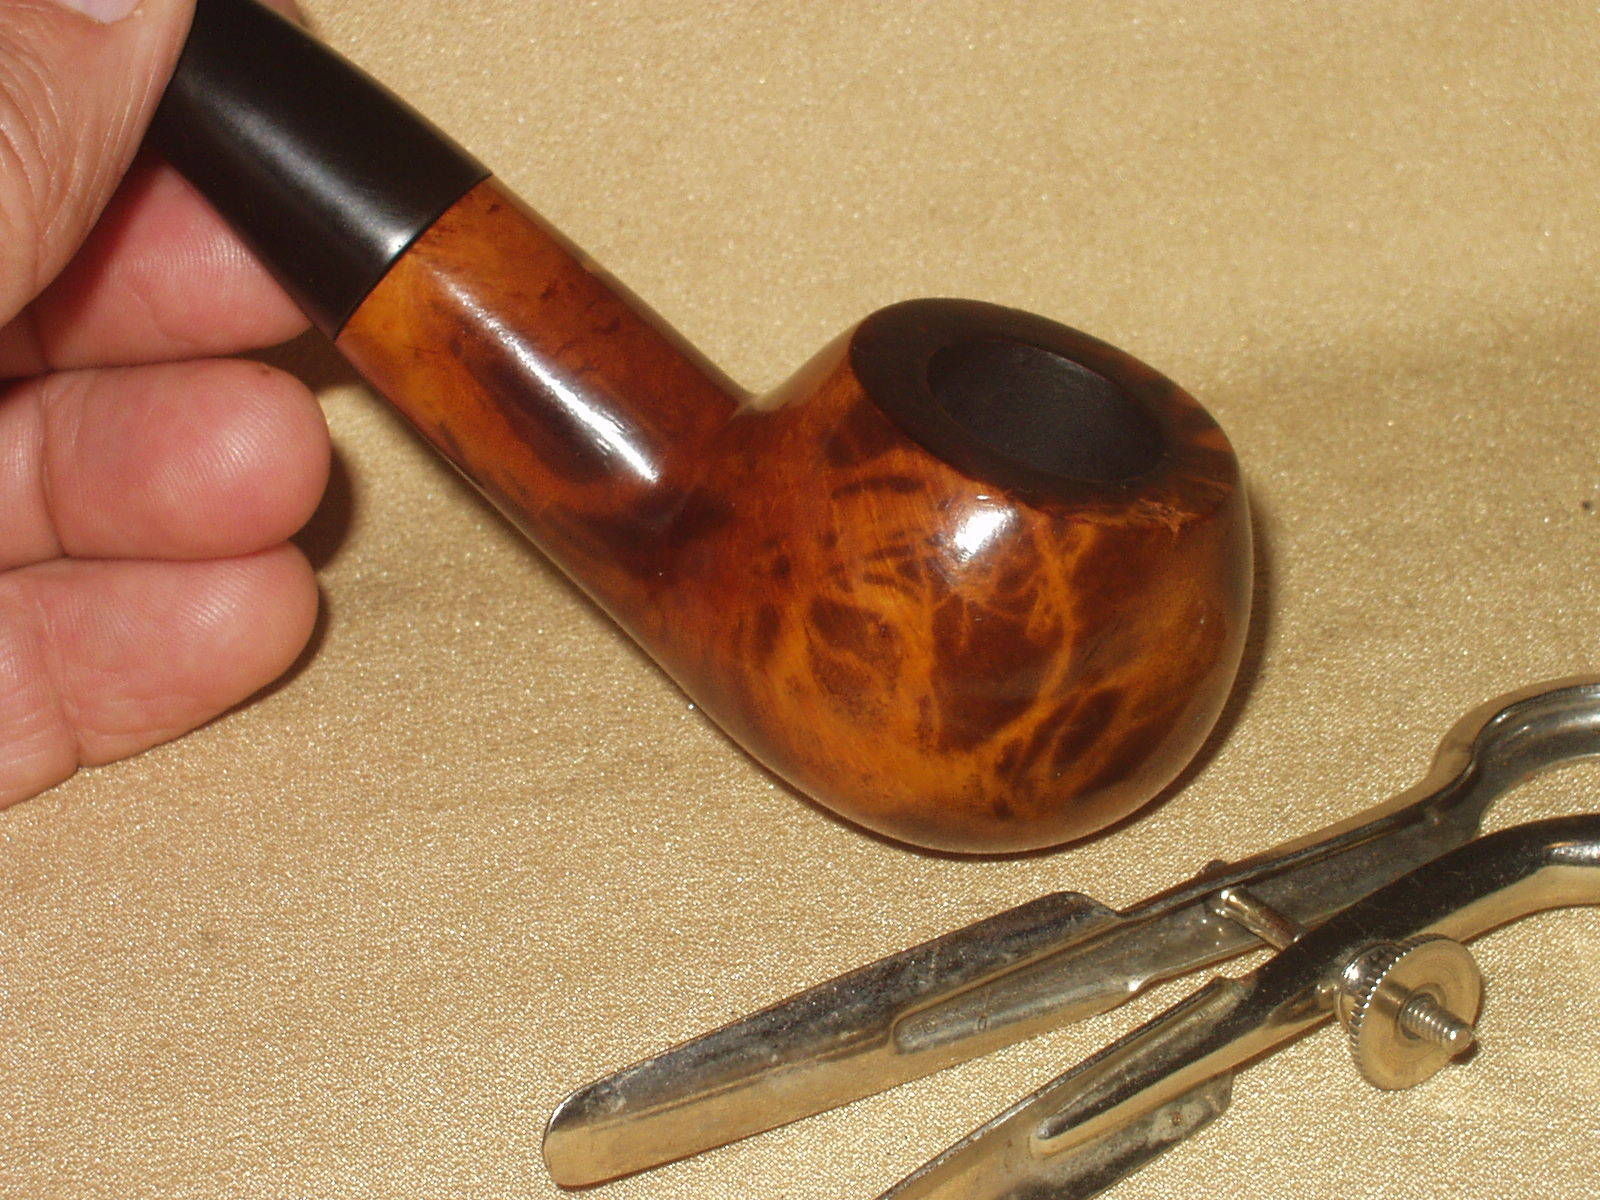
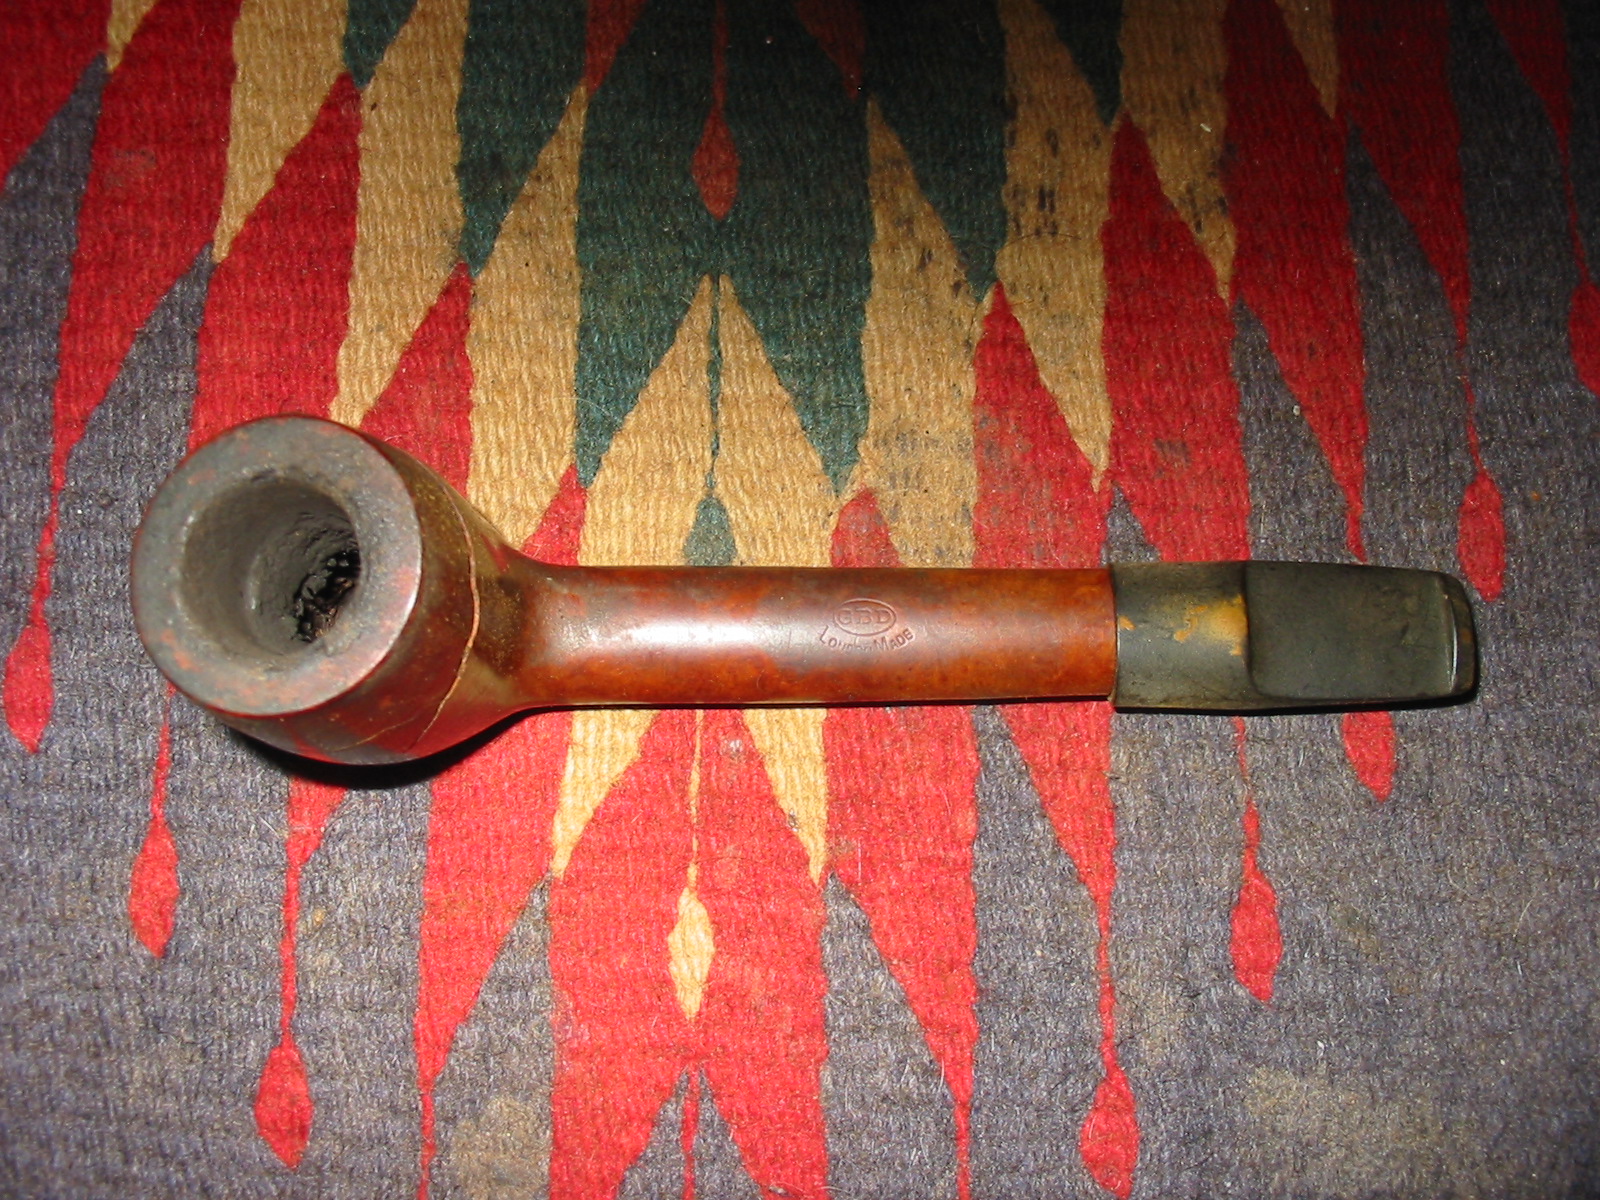
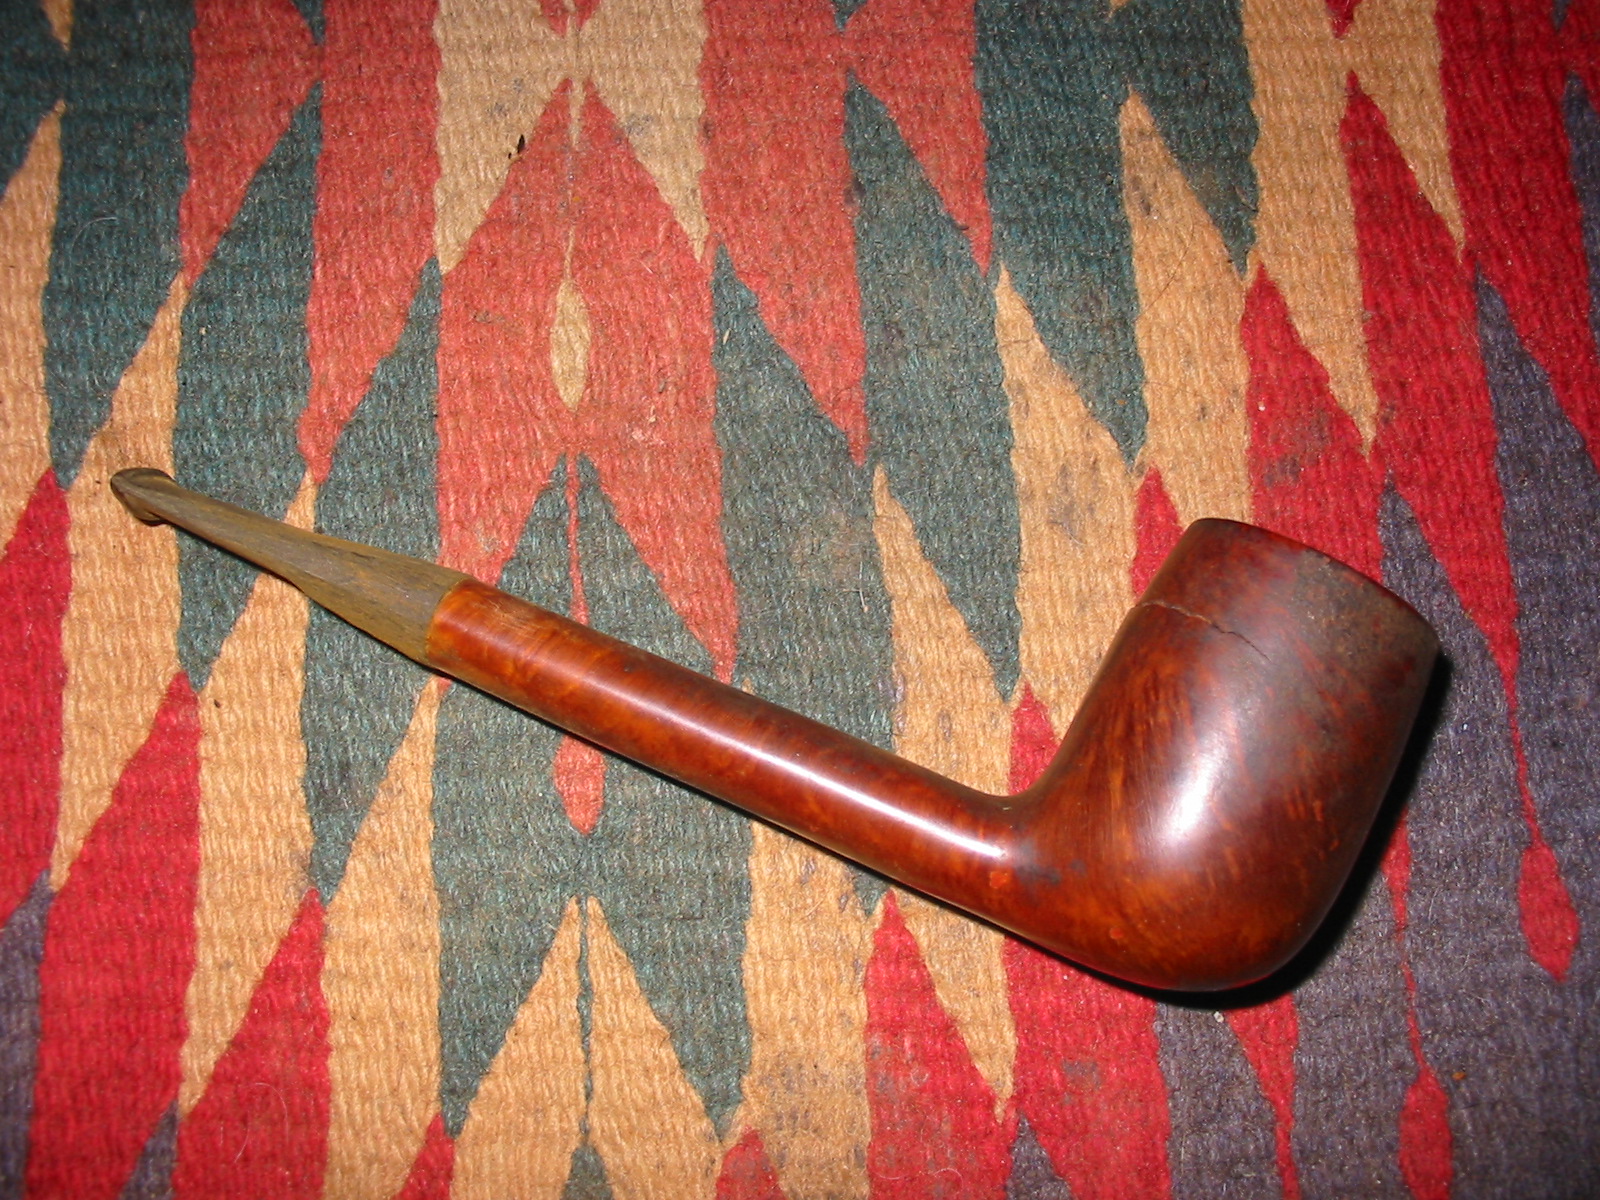
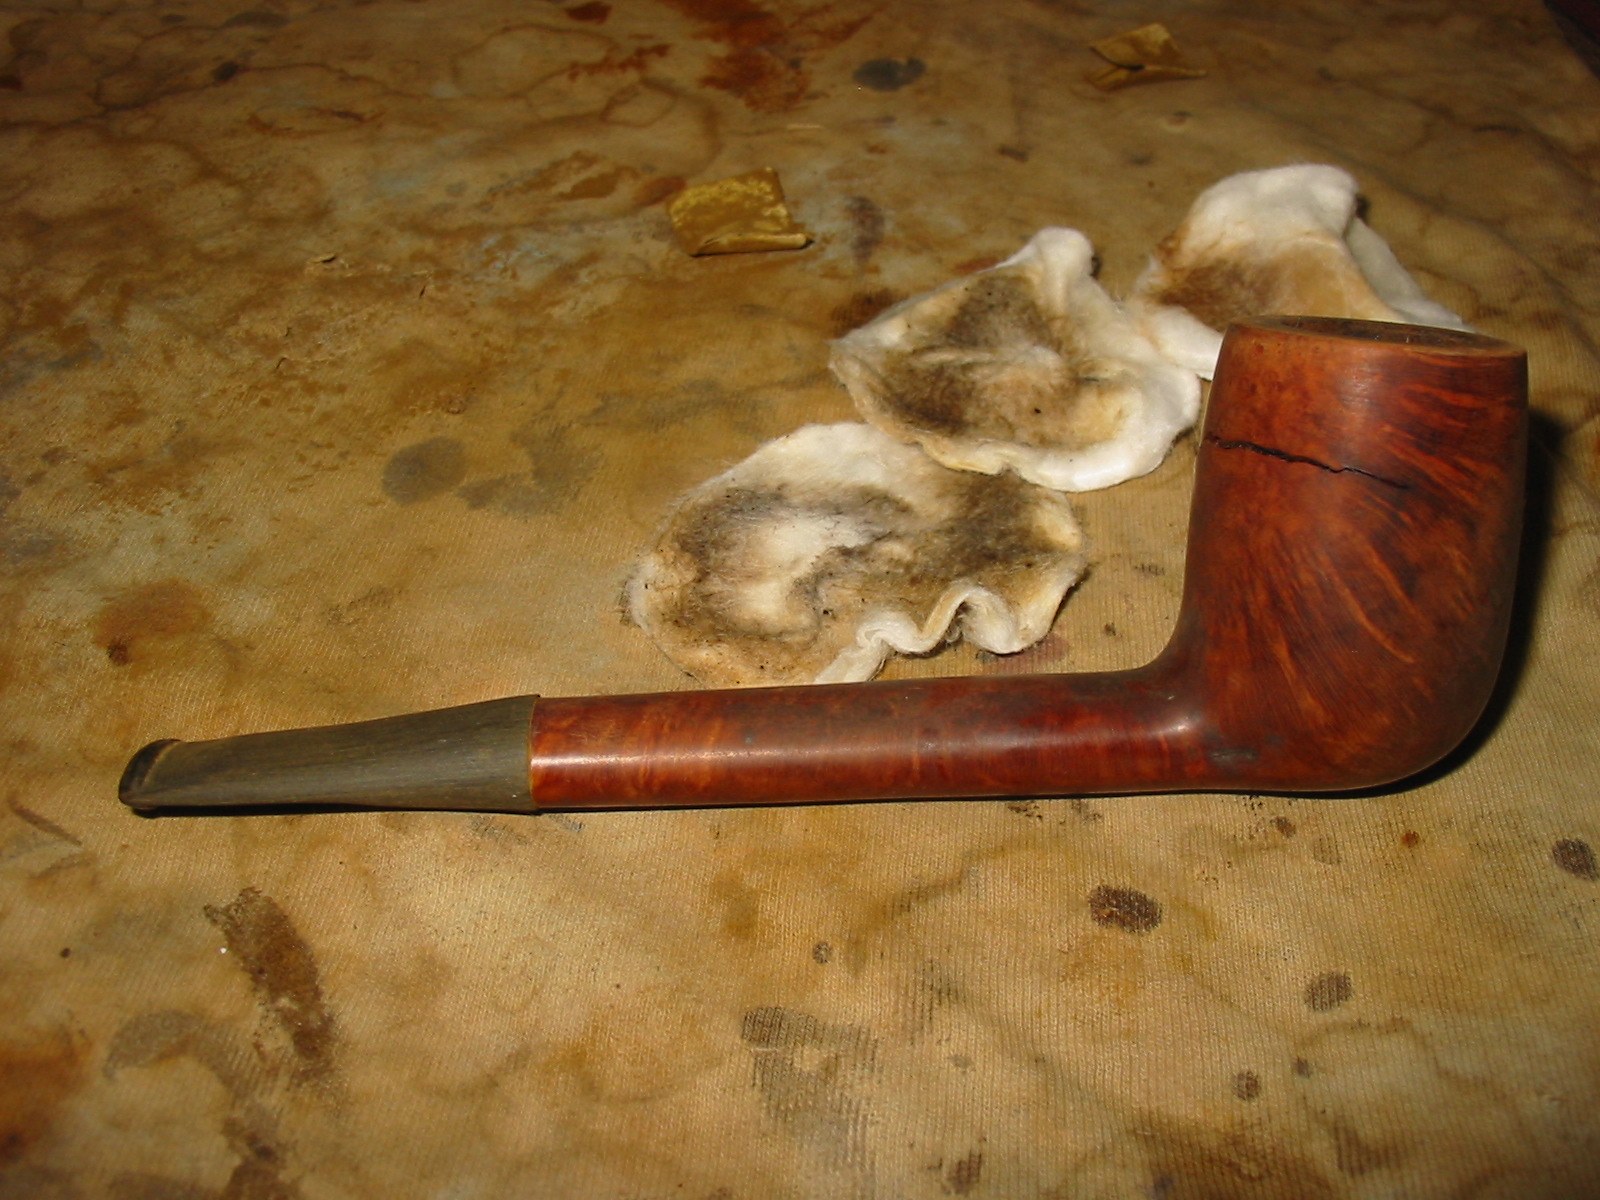
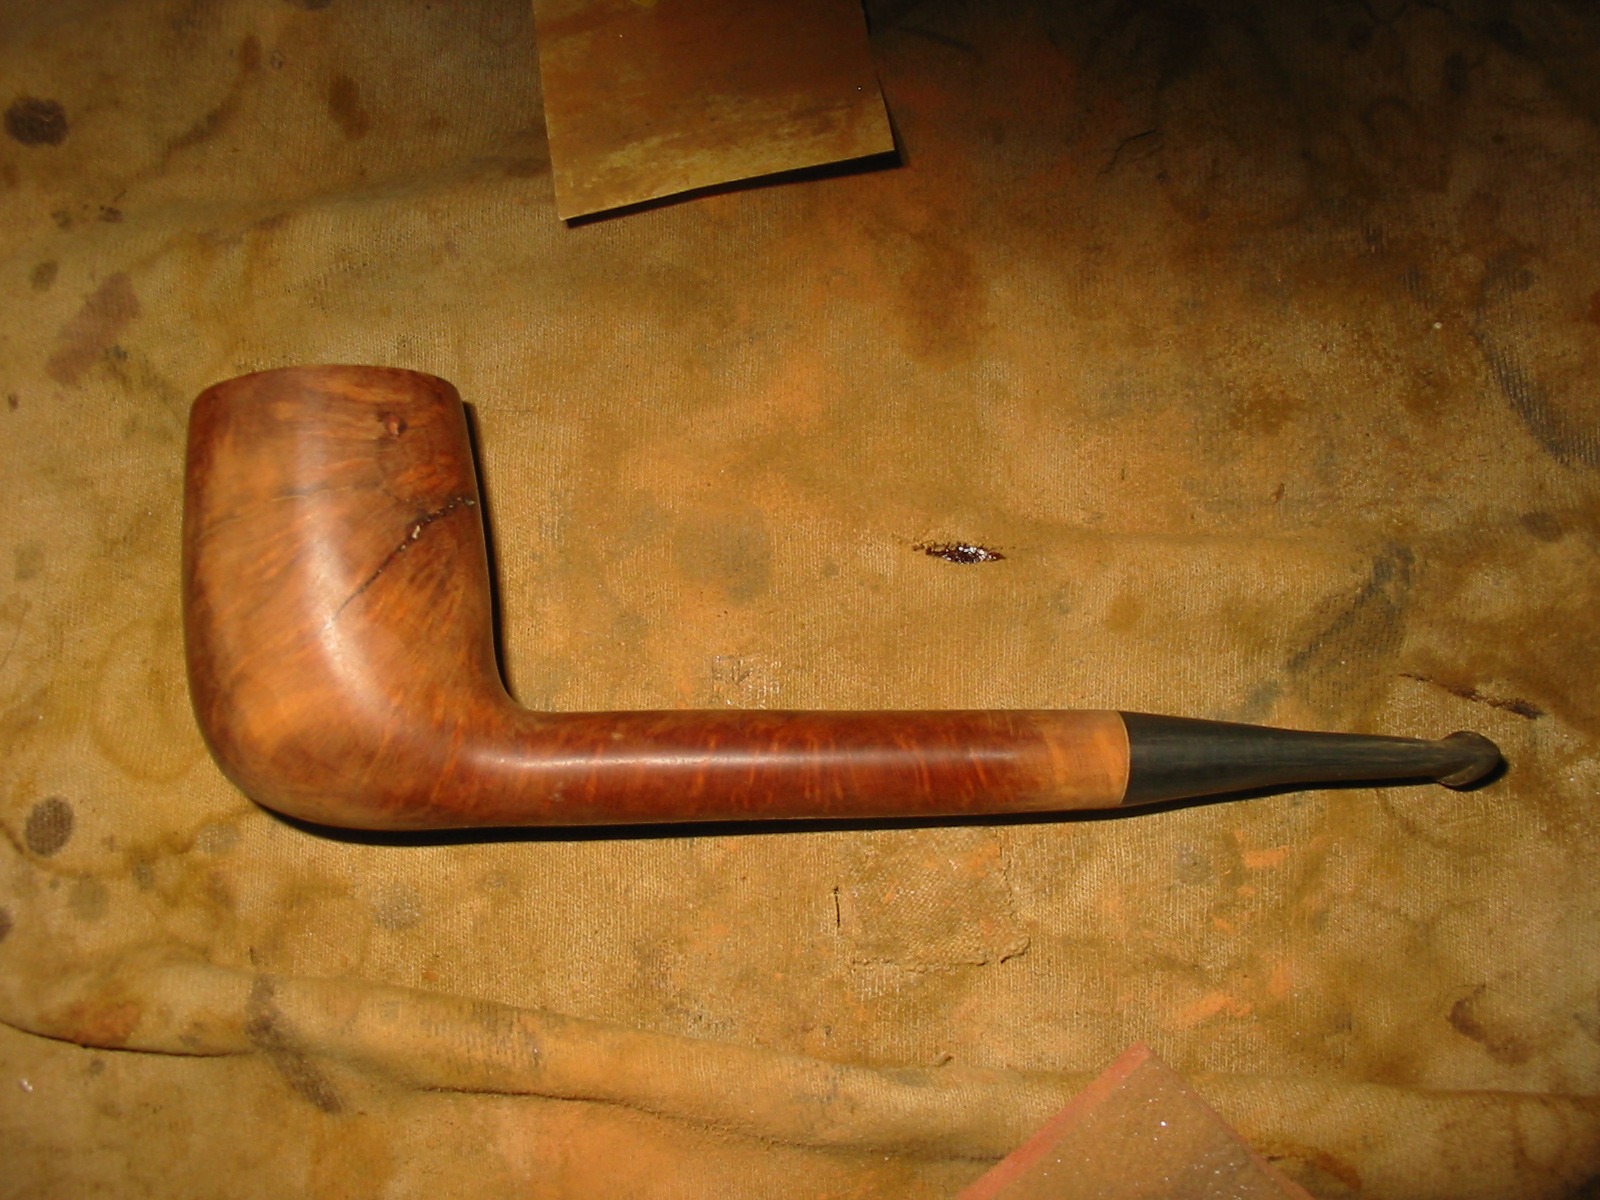
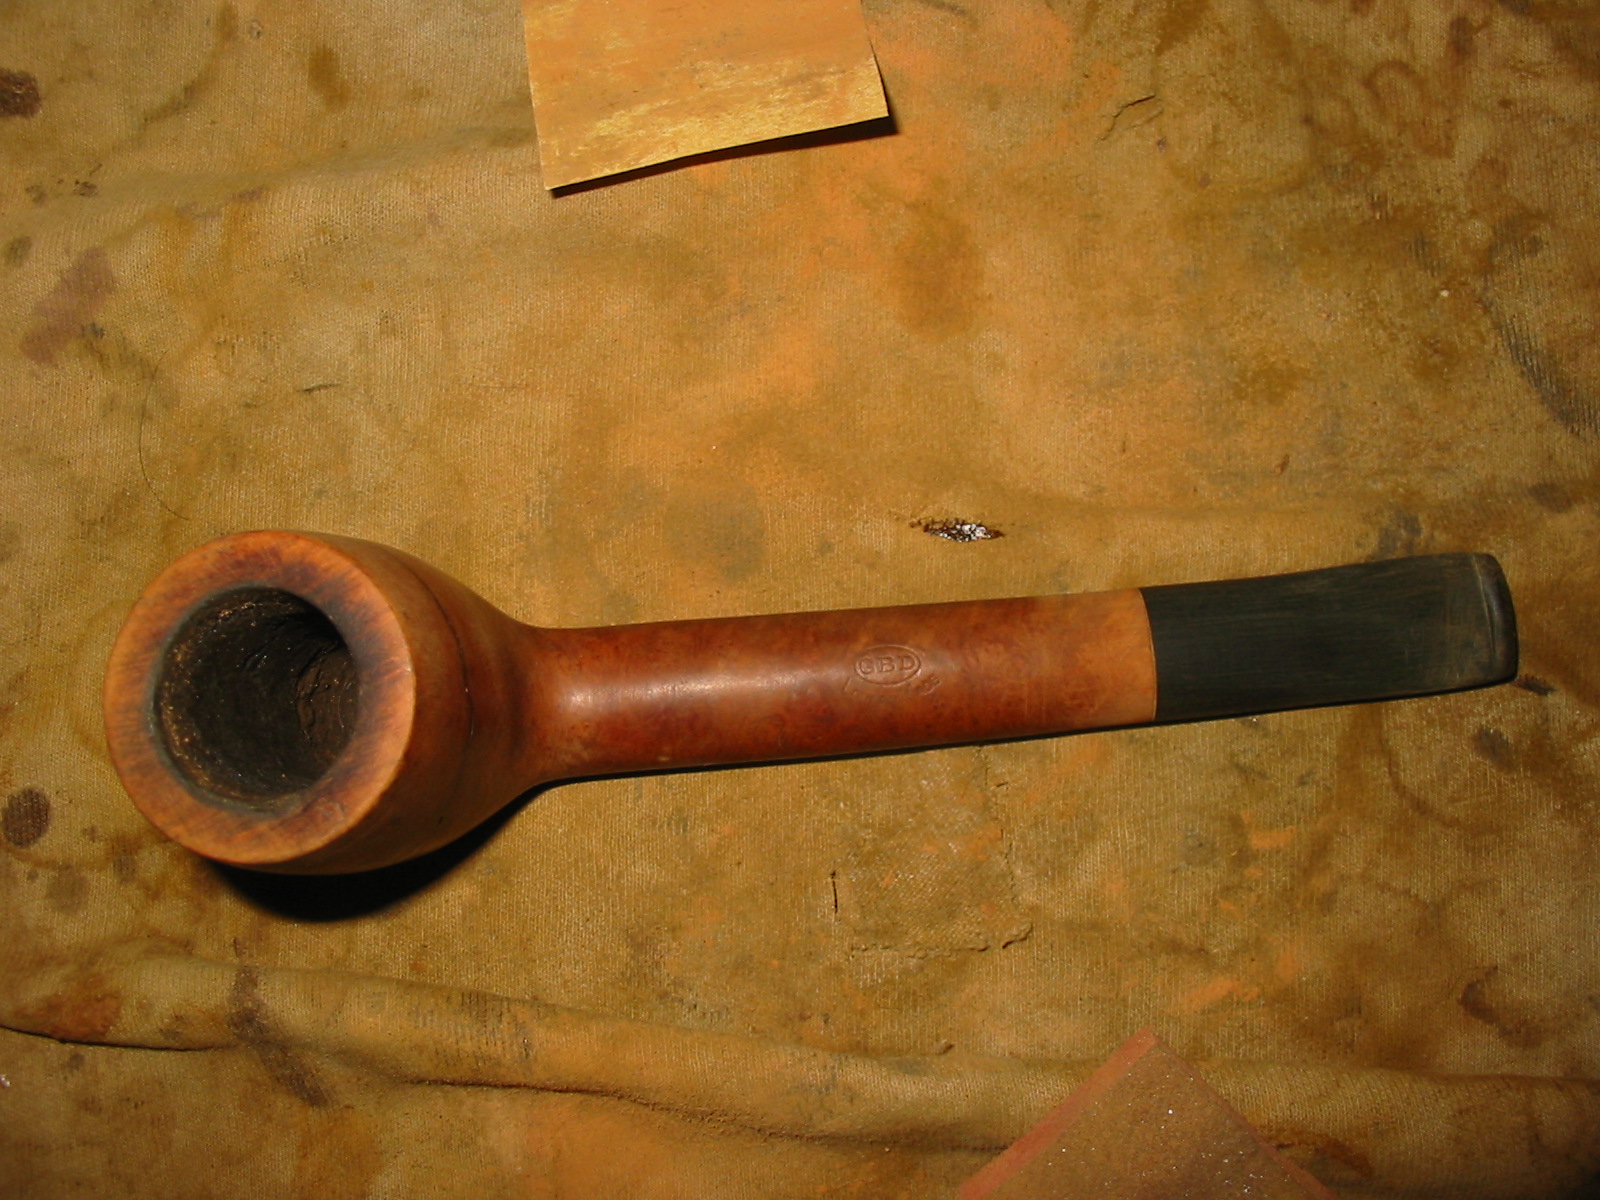
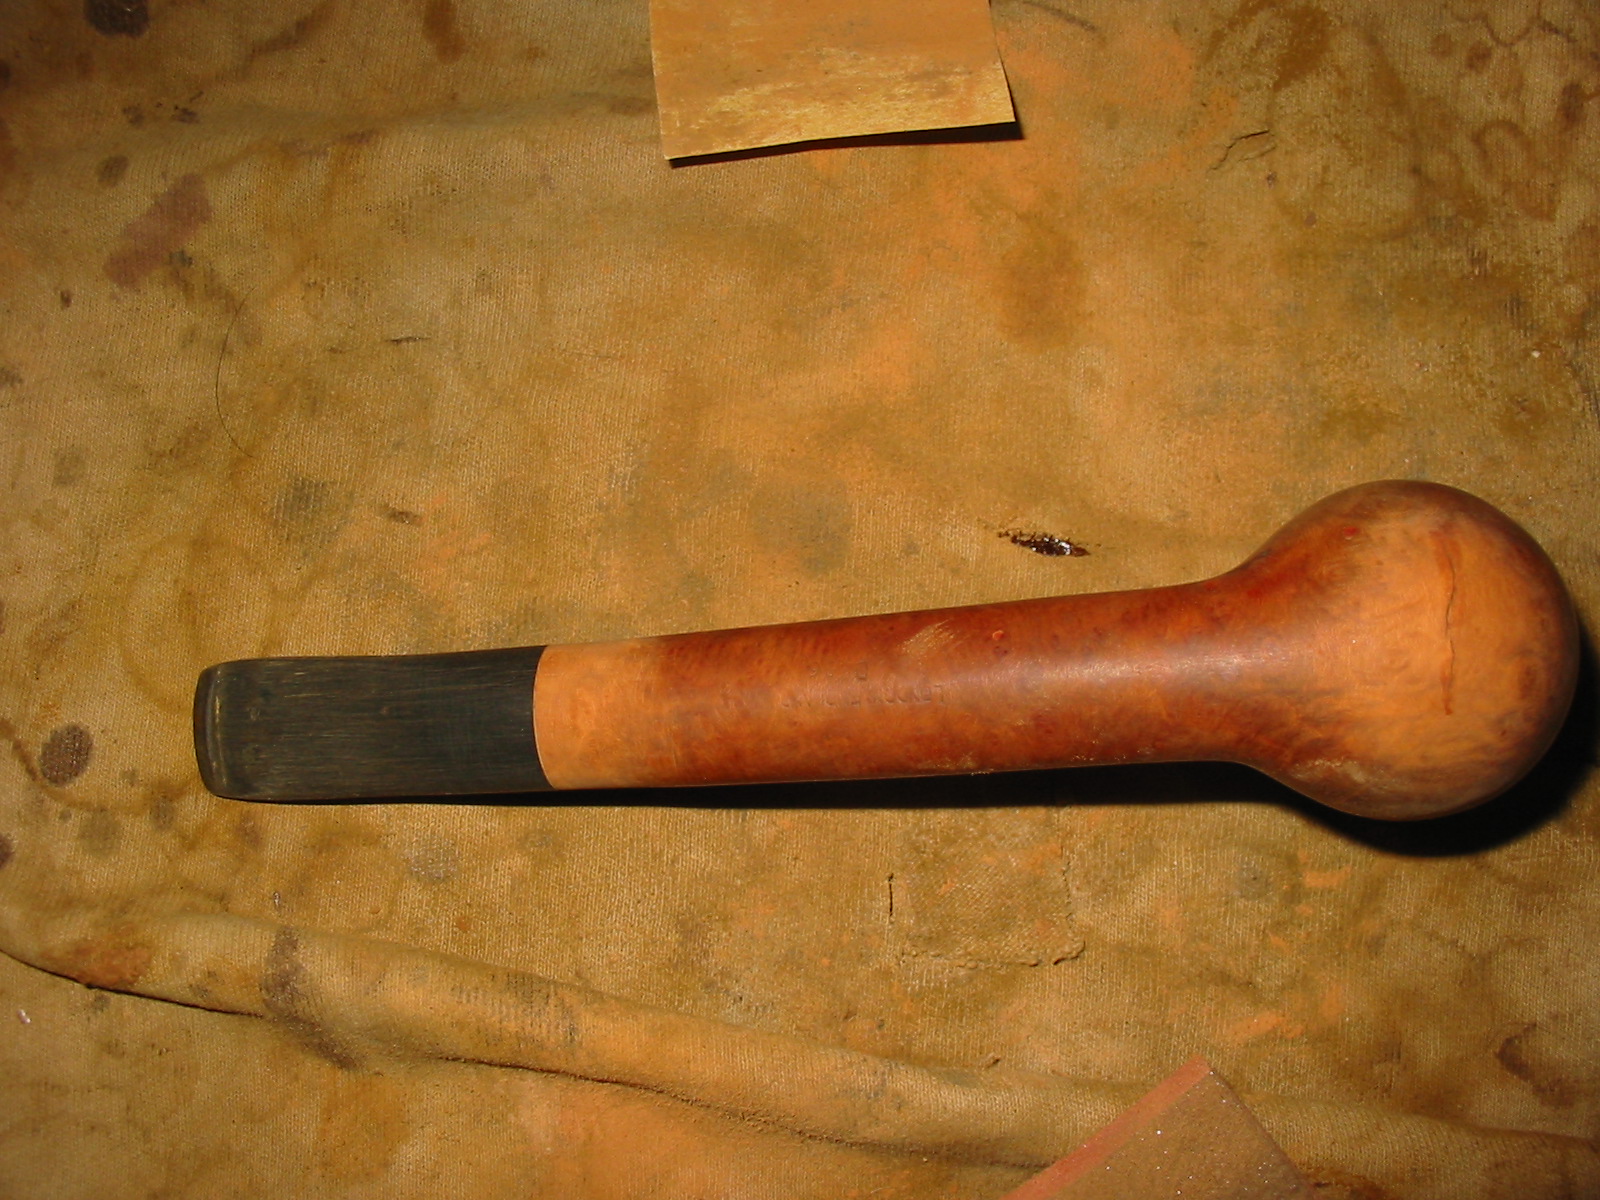
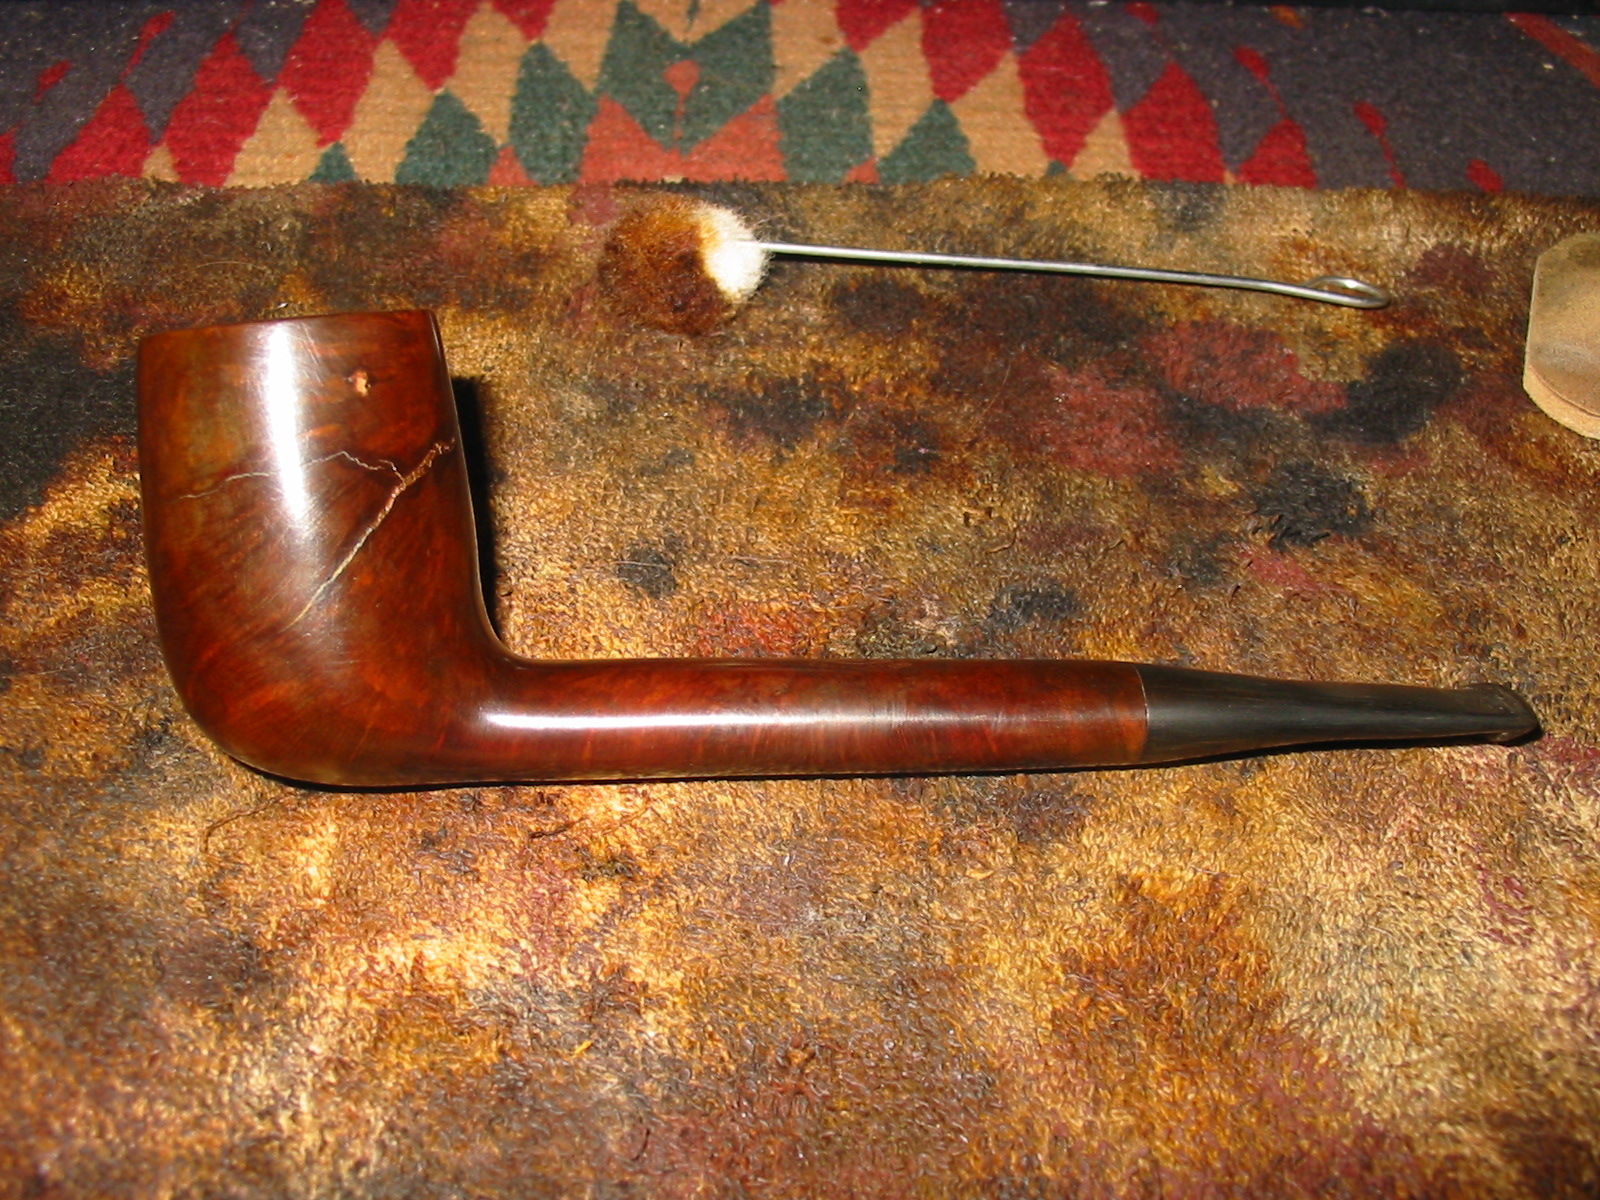
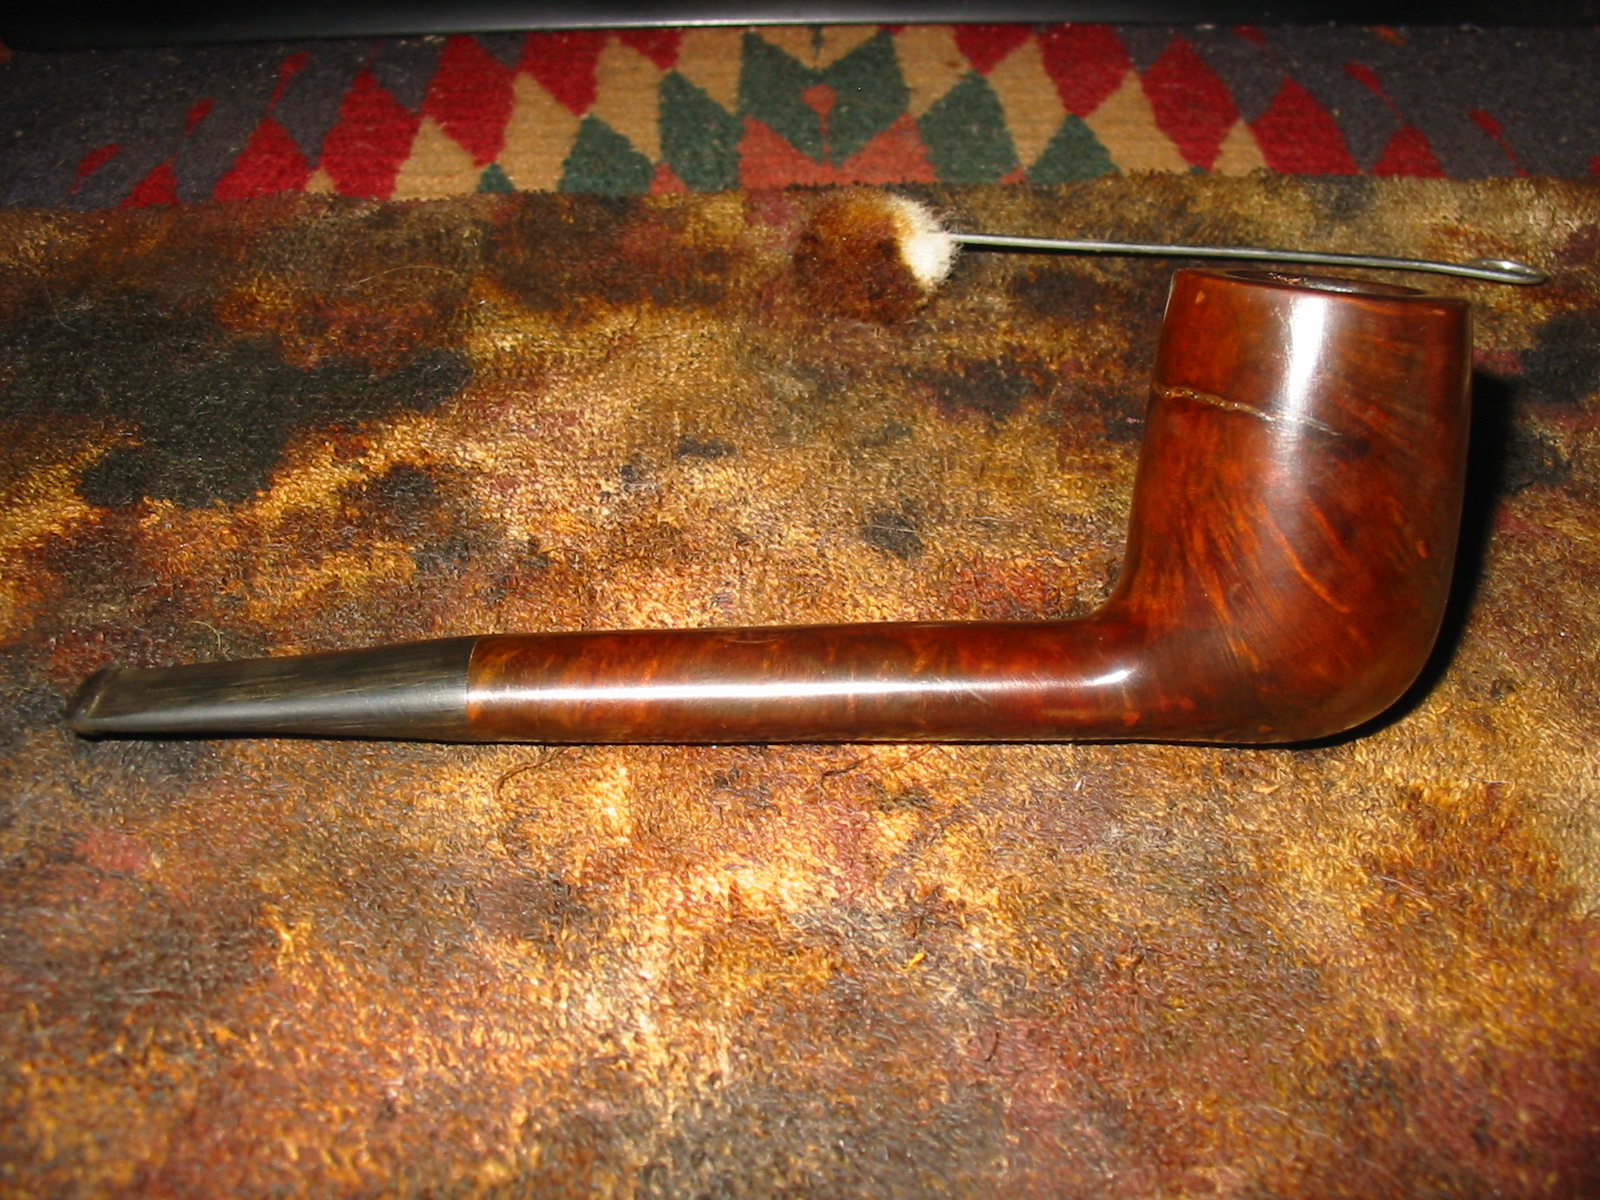
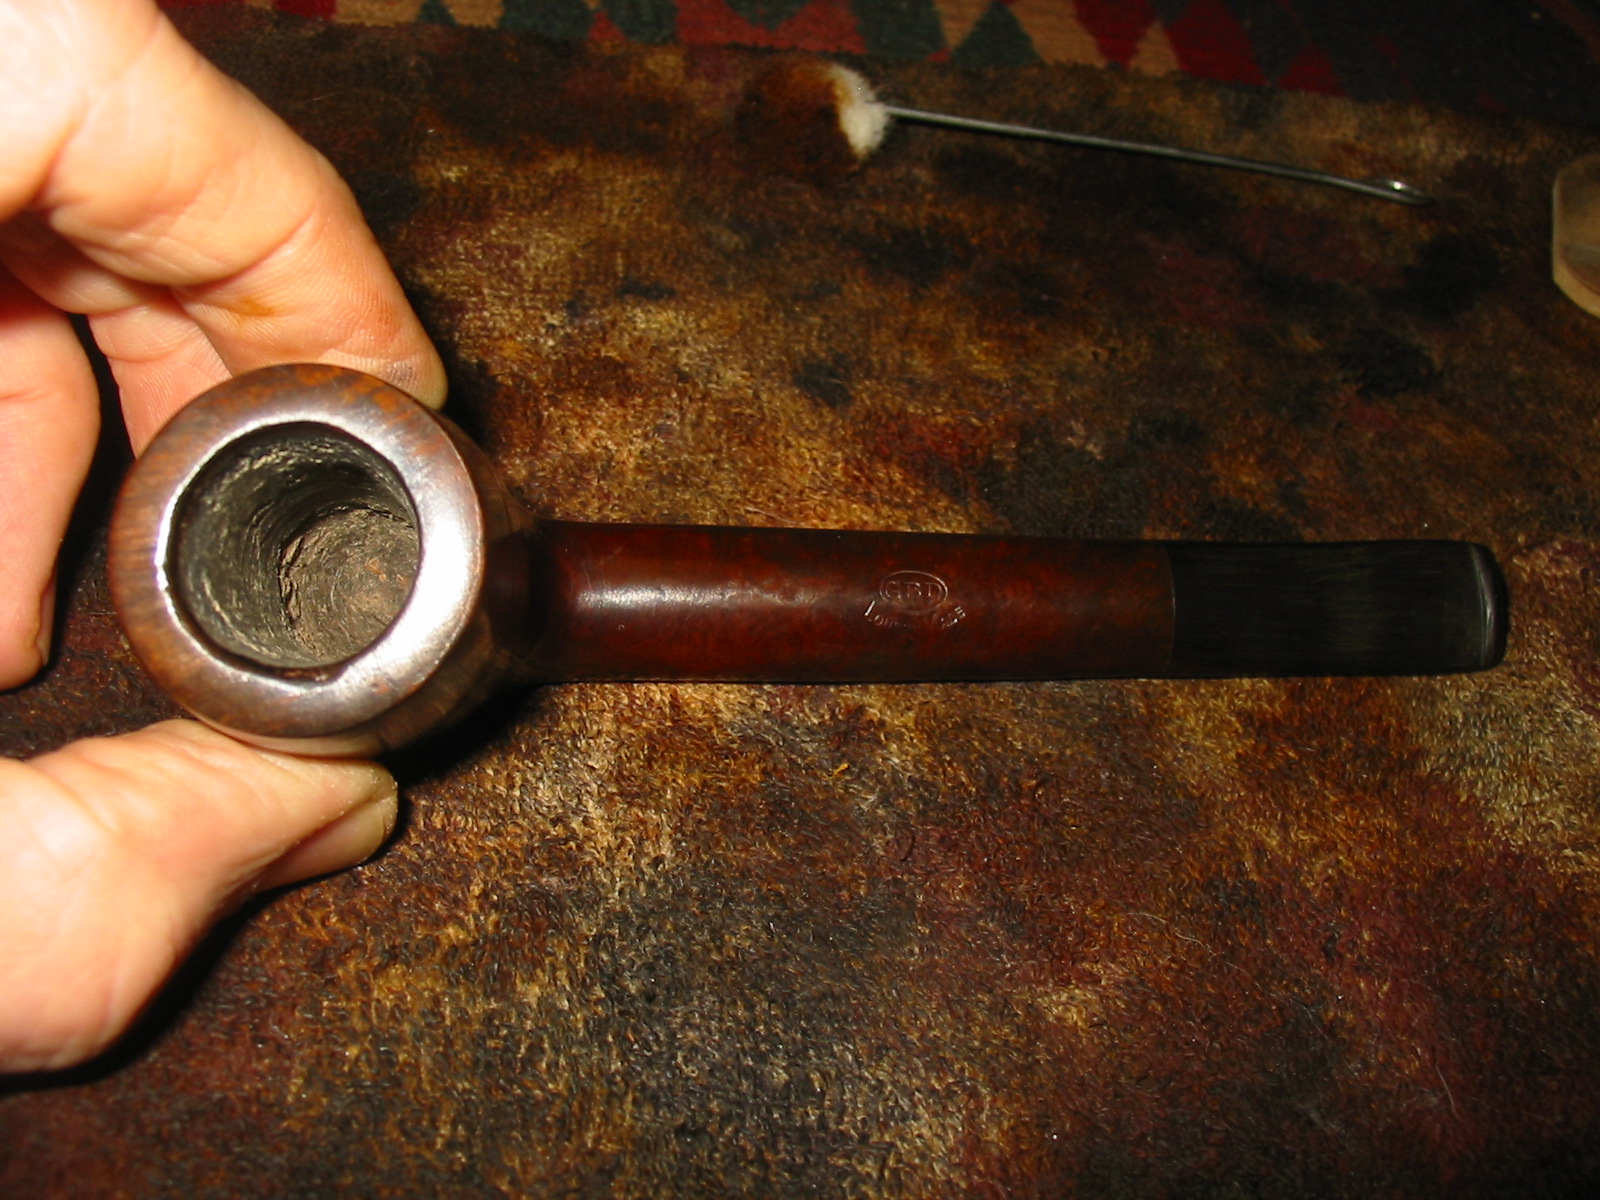
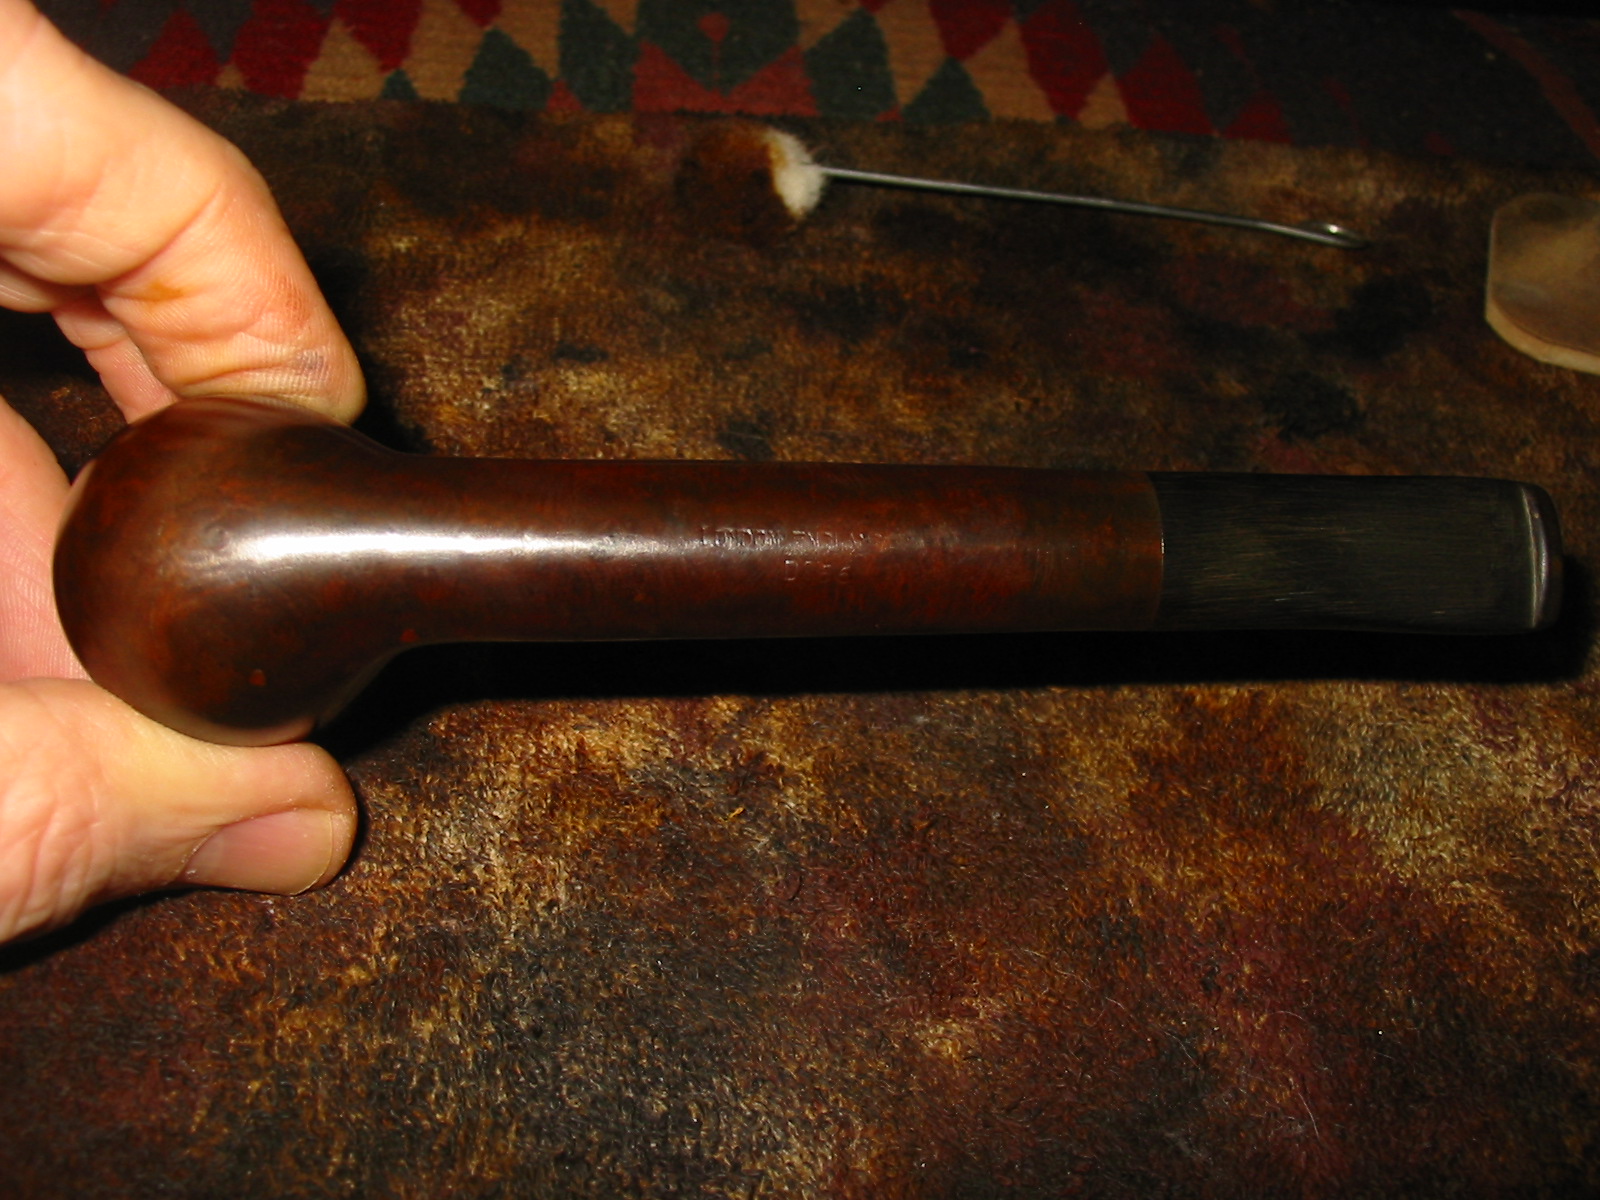
Andrew sent me this old pipe as a bit of a challenge and I thought I would give it a go. This was a great looking pipe at one point in its life – nice grain. It is stamped GBD in the oval on the top of the shank with LONDON MADE in an arc under the oval. That leads me to believe the line is the LONDON MADE rather than the location. On the underside of the shank it is stamped: LONDON ENGLAND over D256. The 256 is the correct shape for an oval shank Canadian but I had not seen the D stamping before a number on GBD pipes.

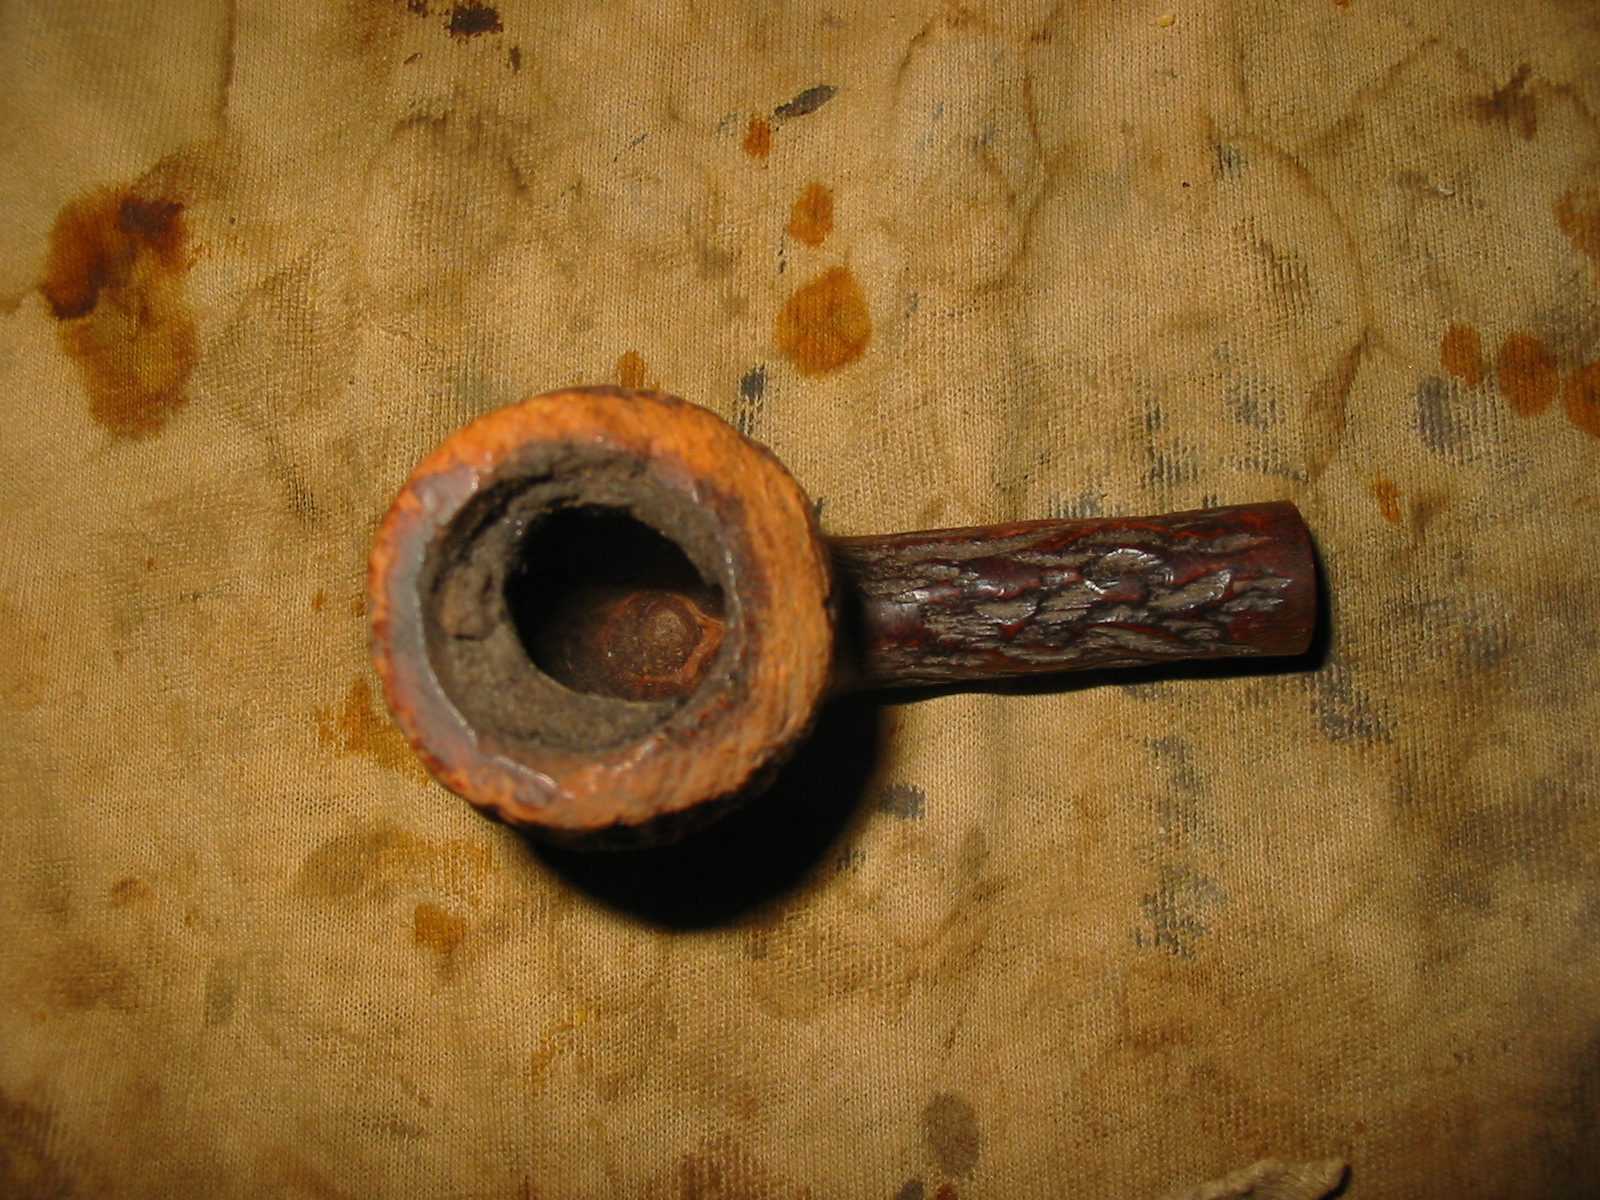
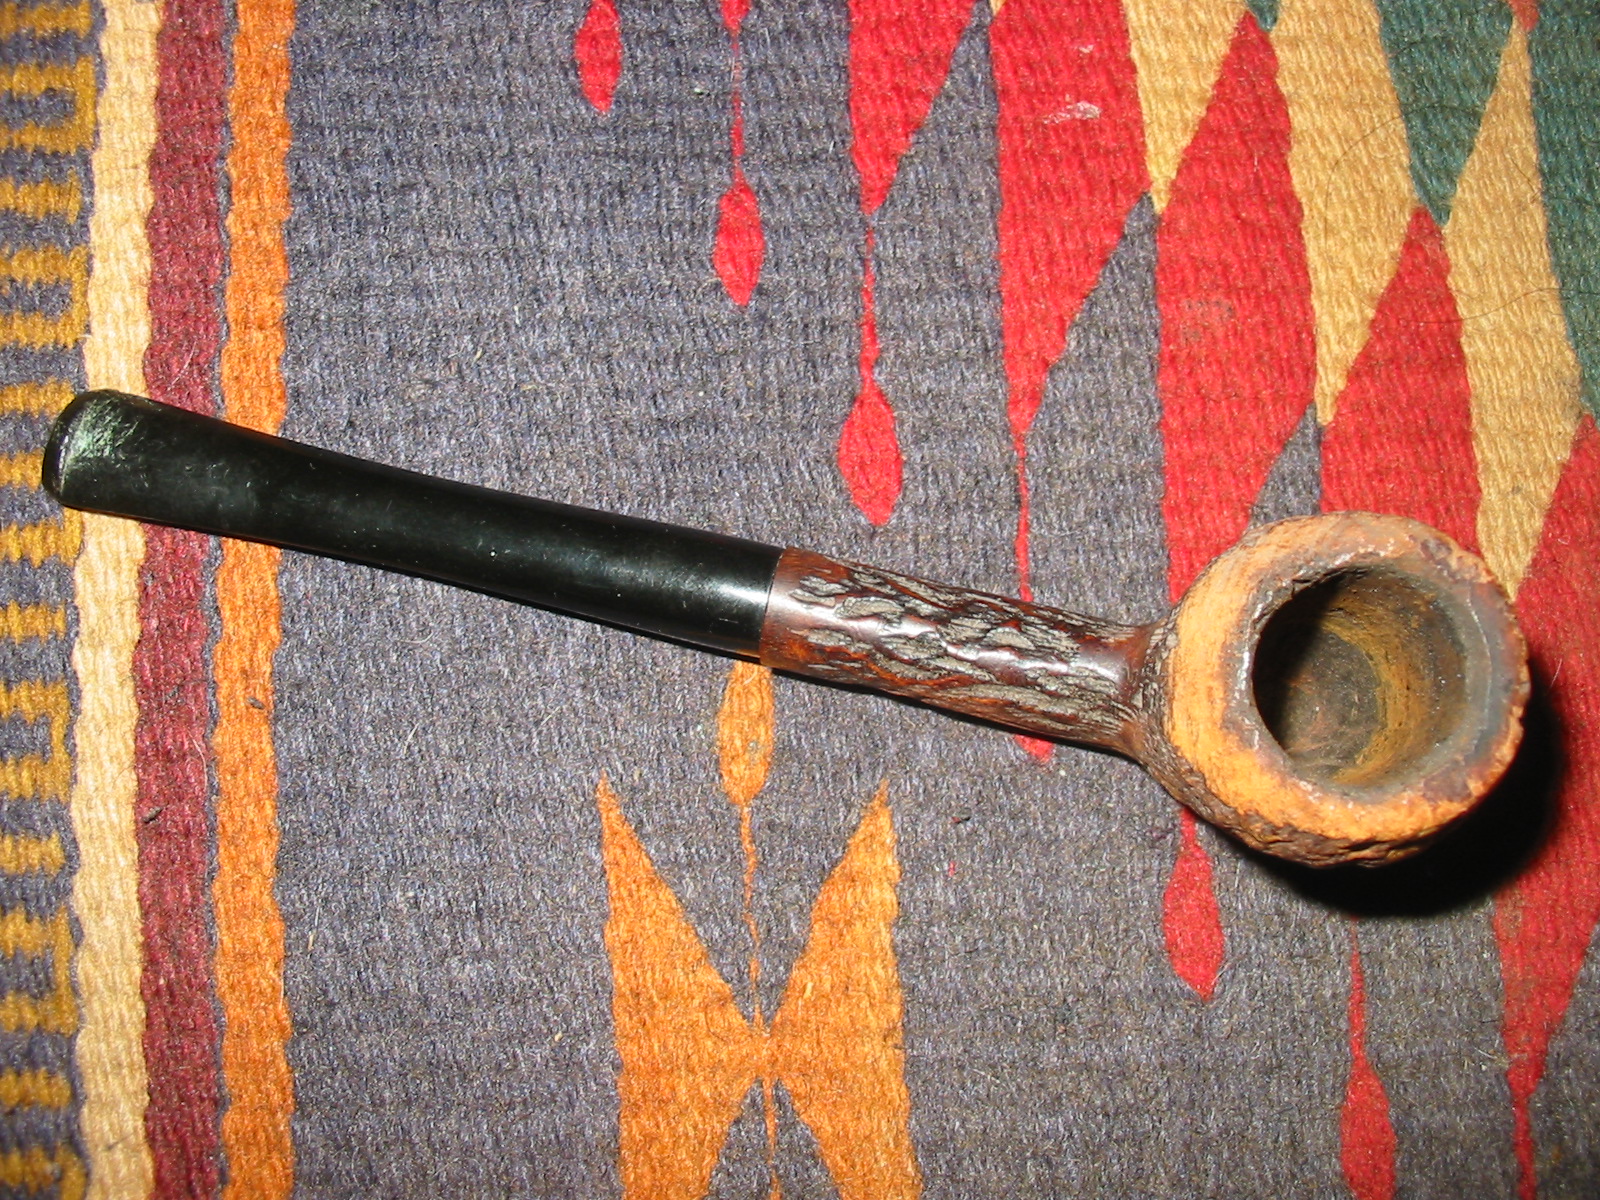
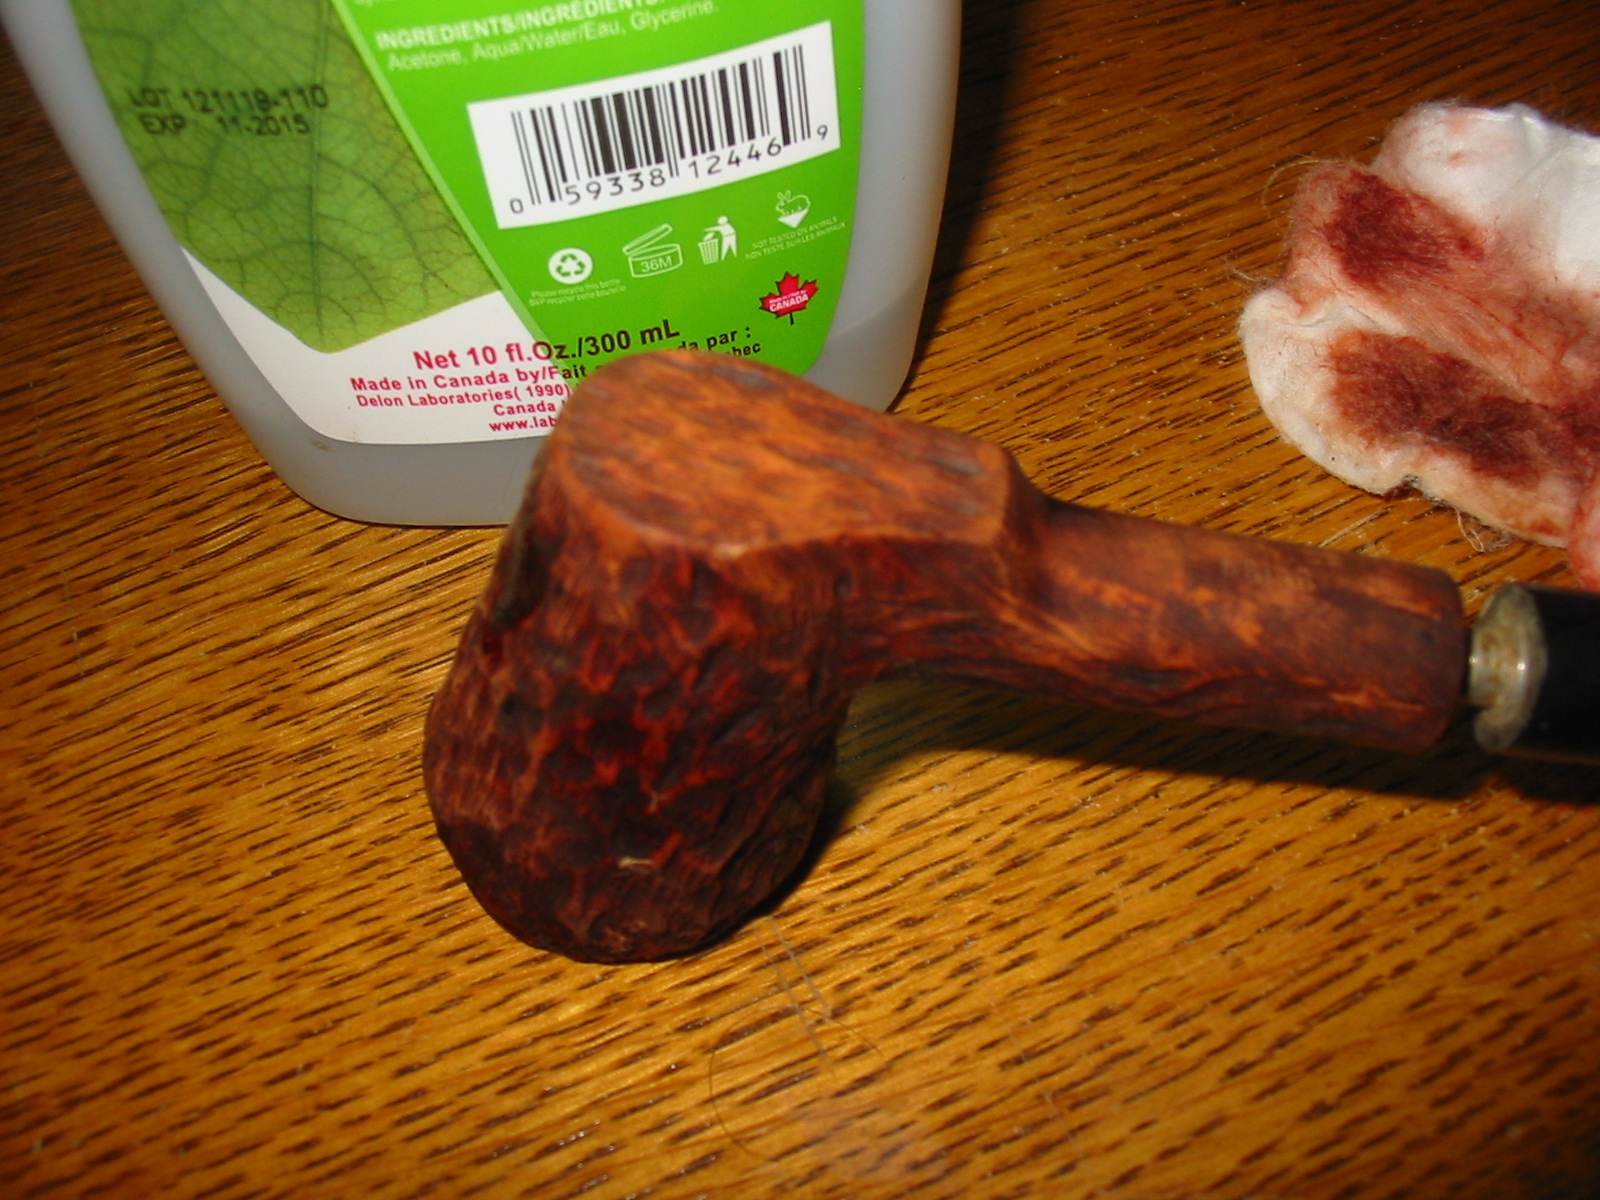
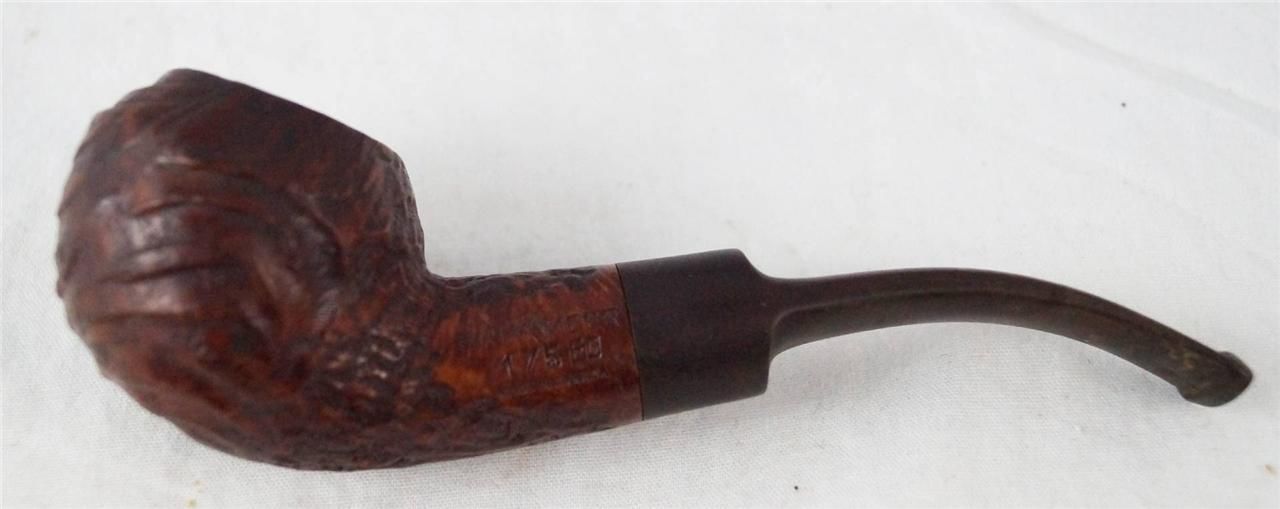
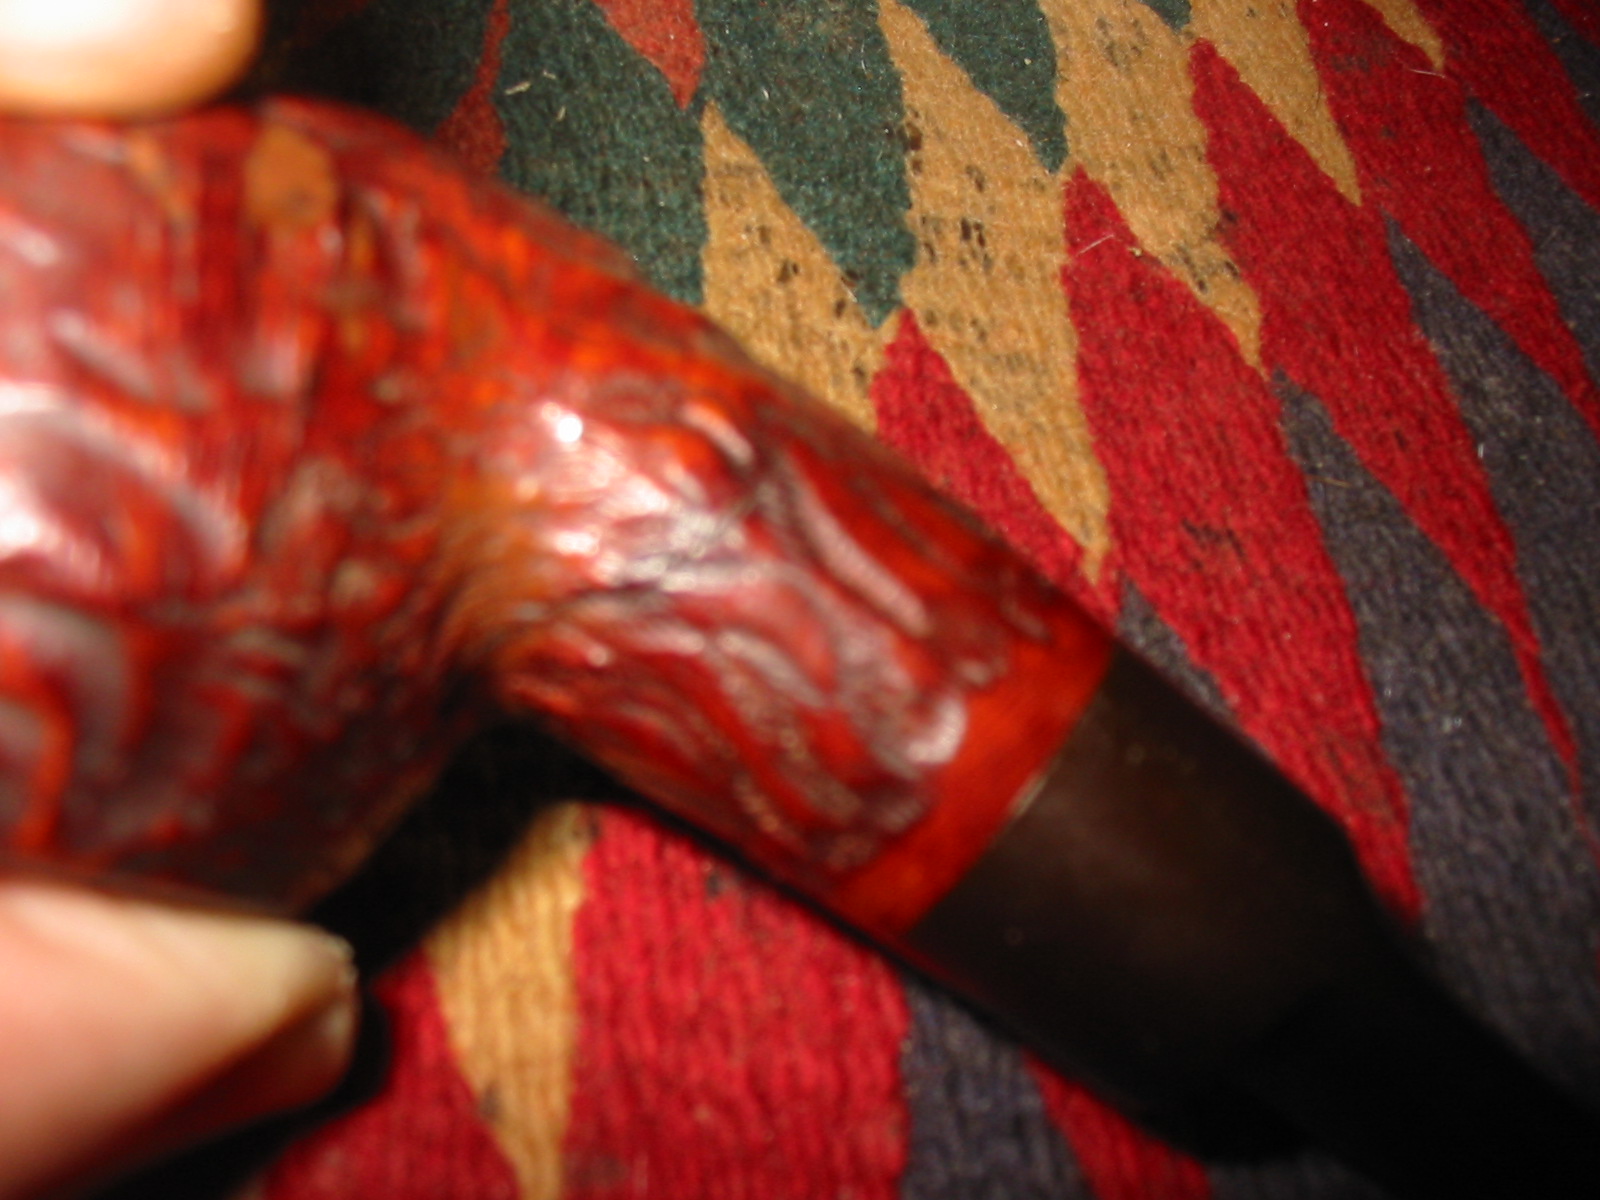
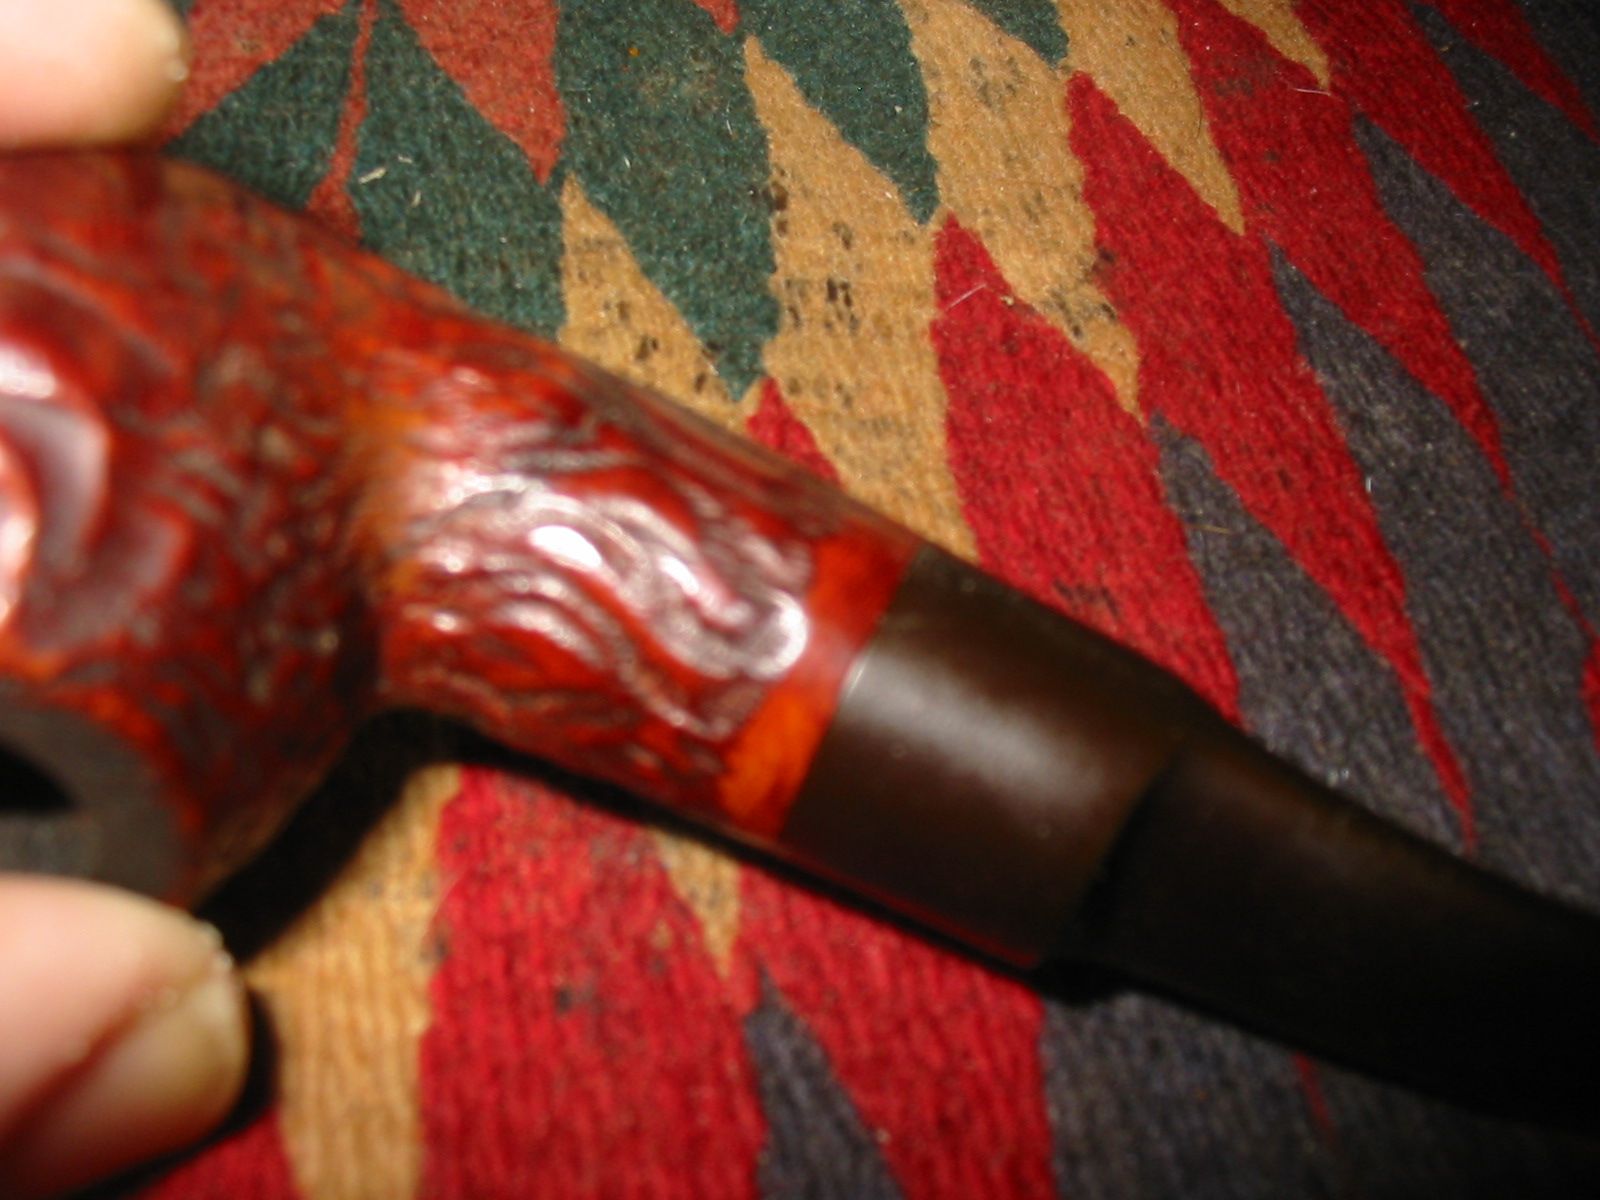
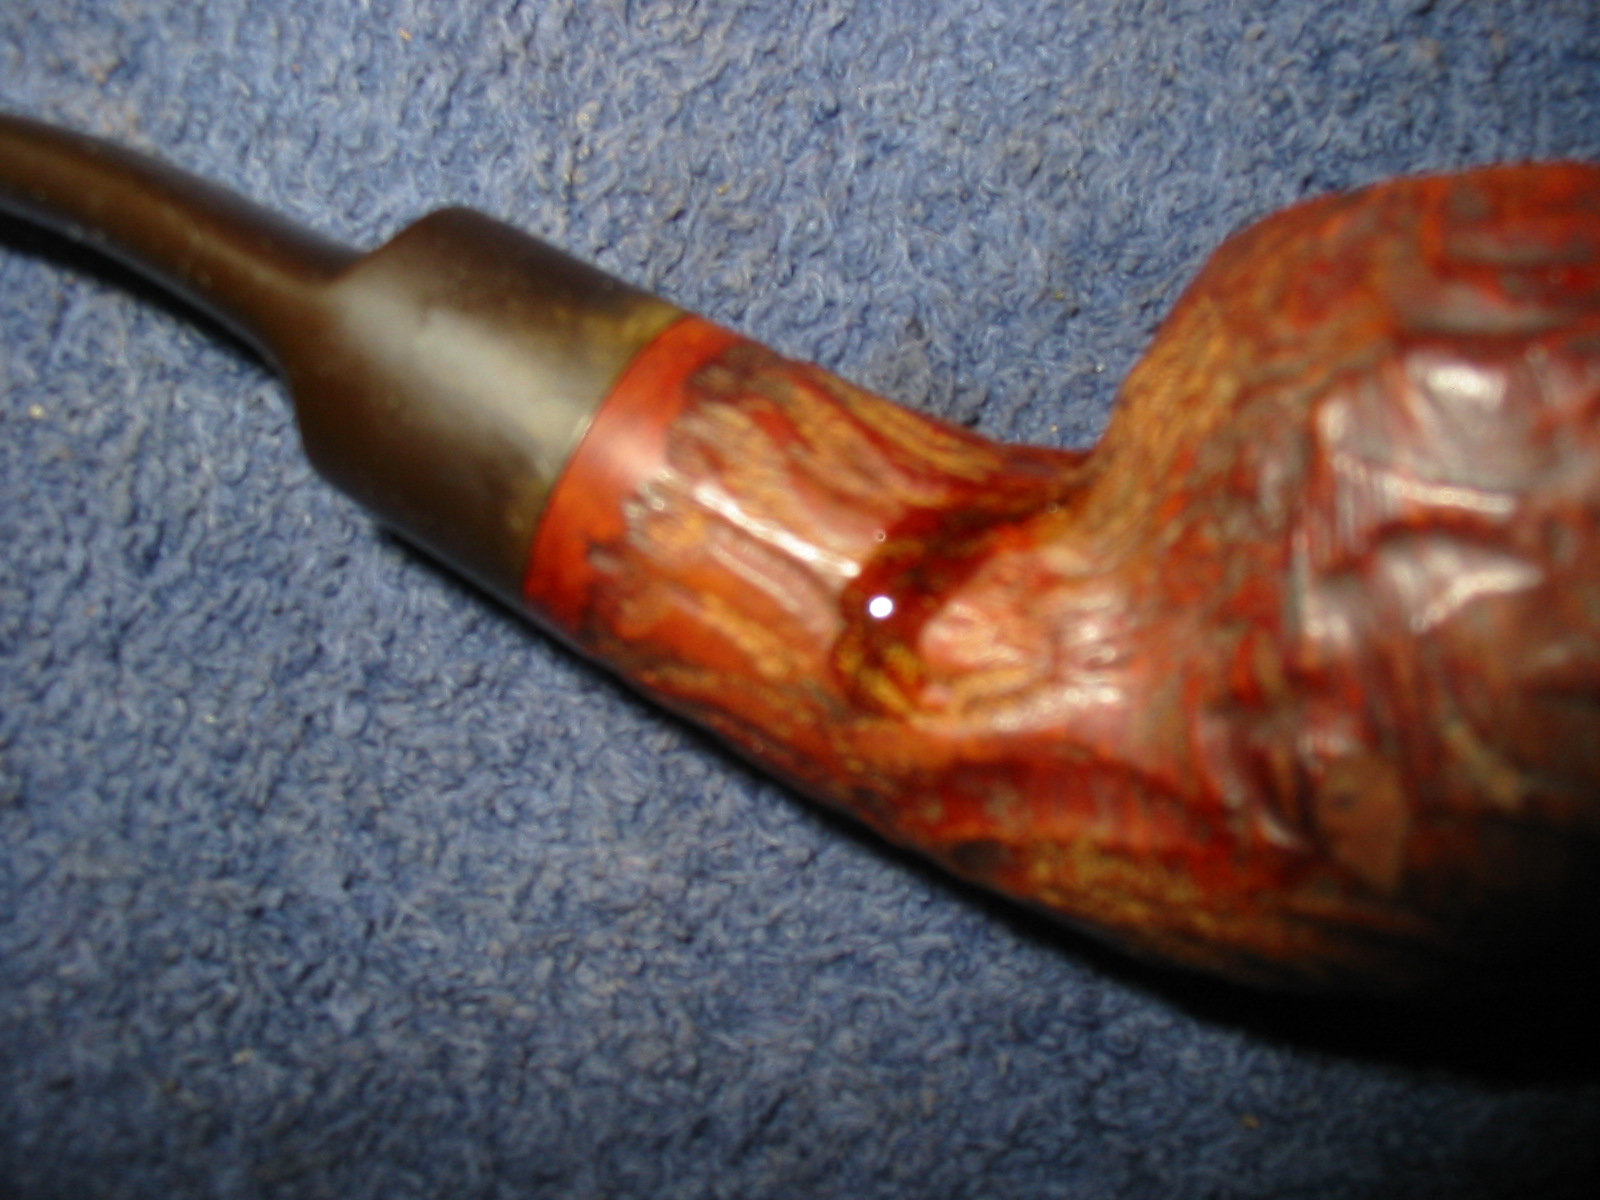
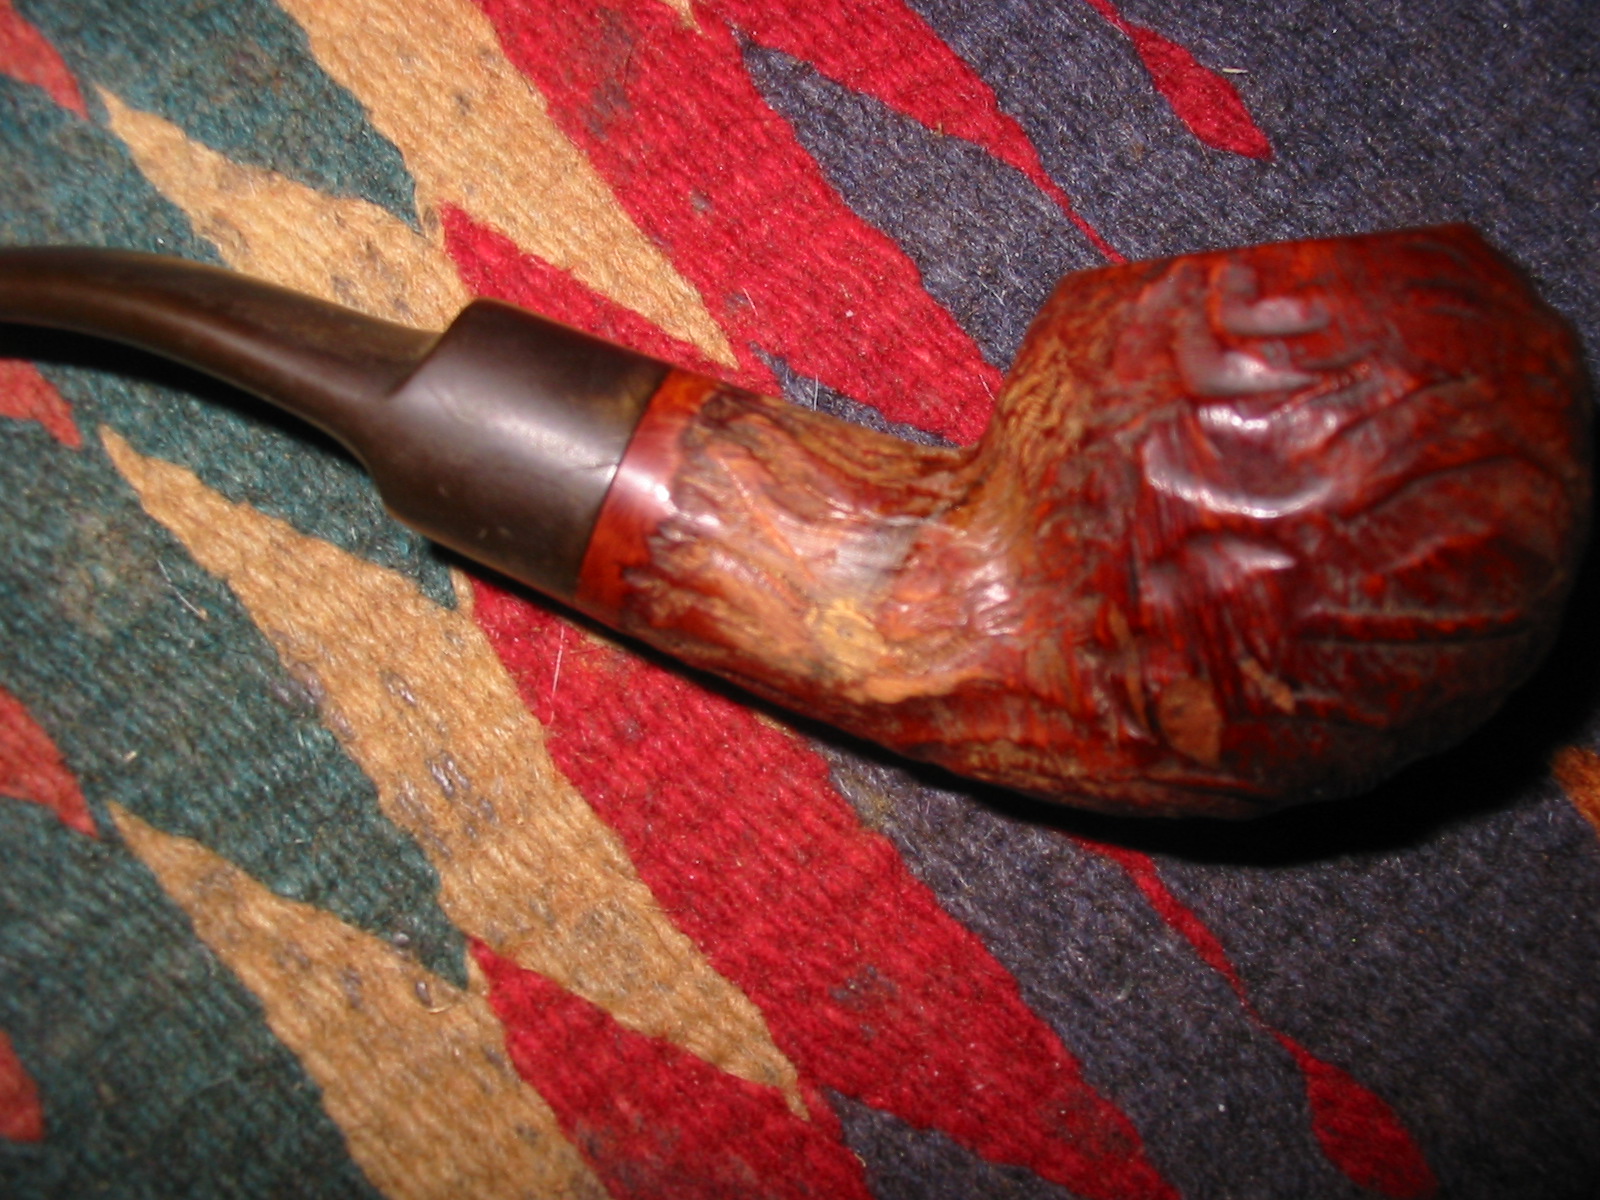
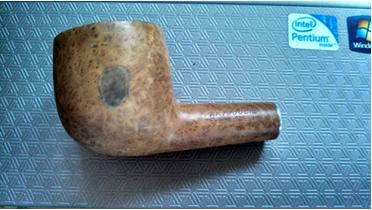
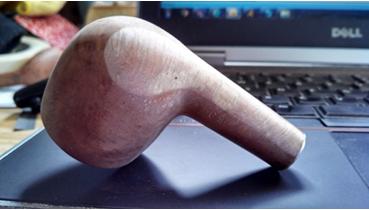
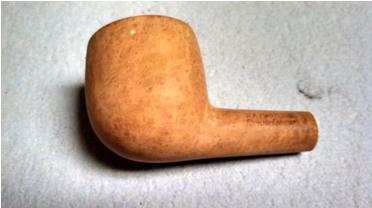
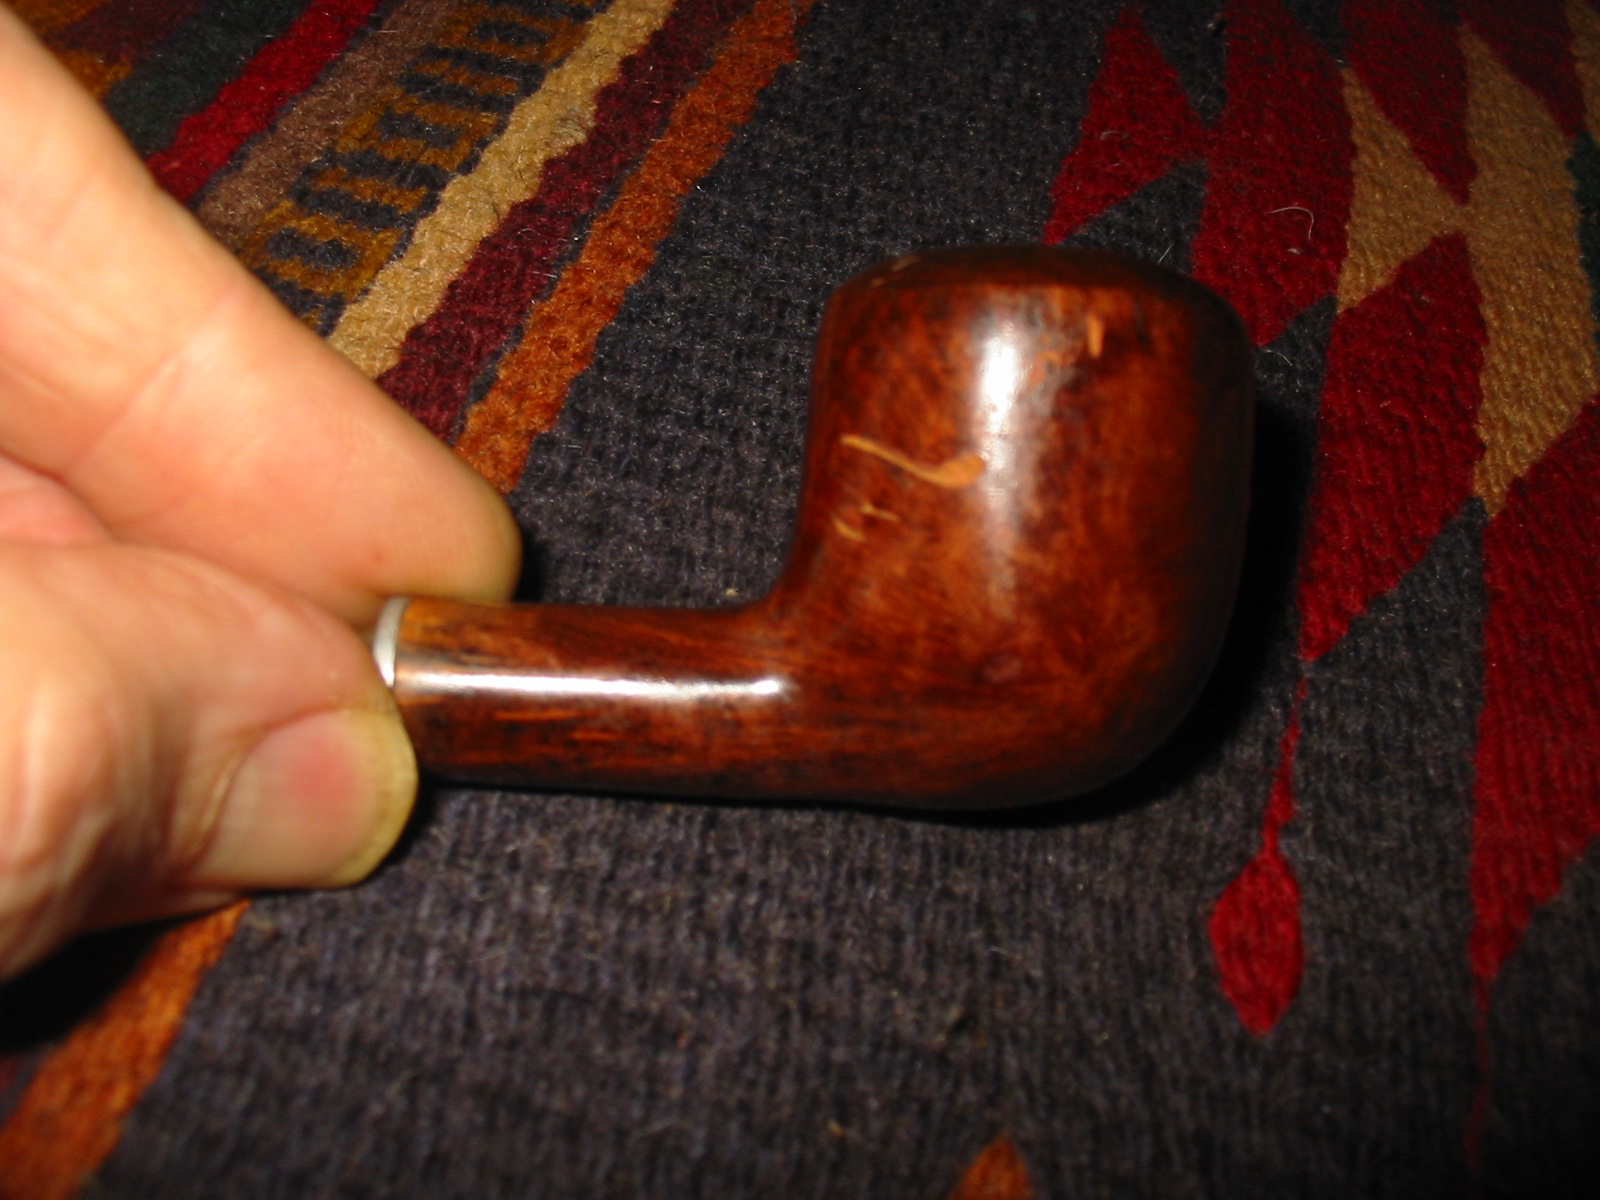
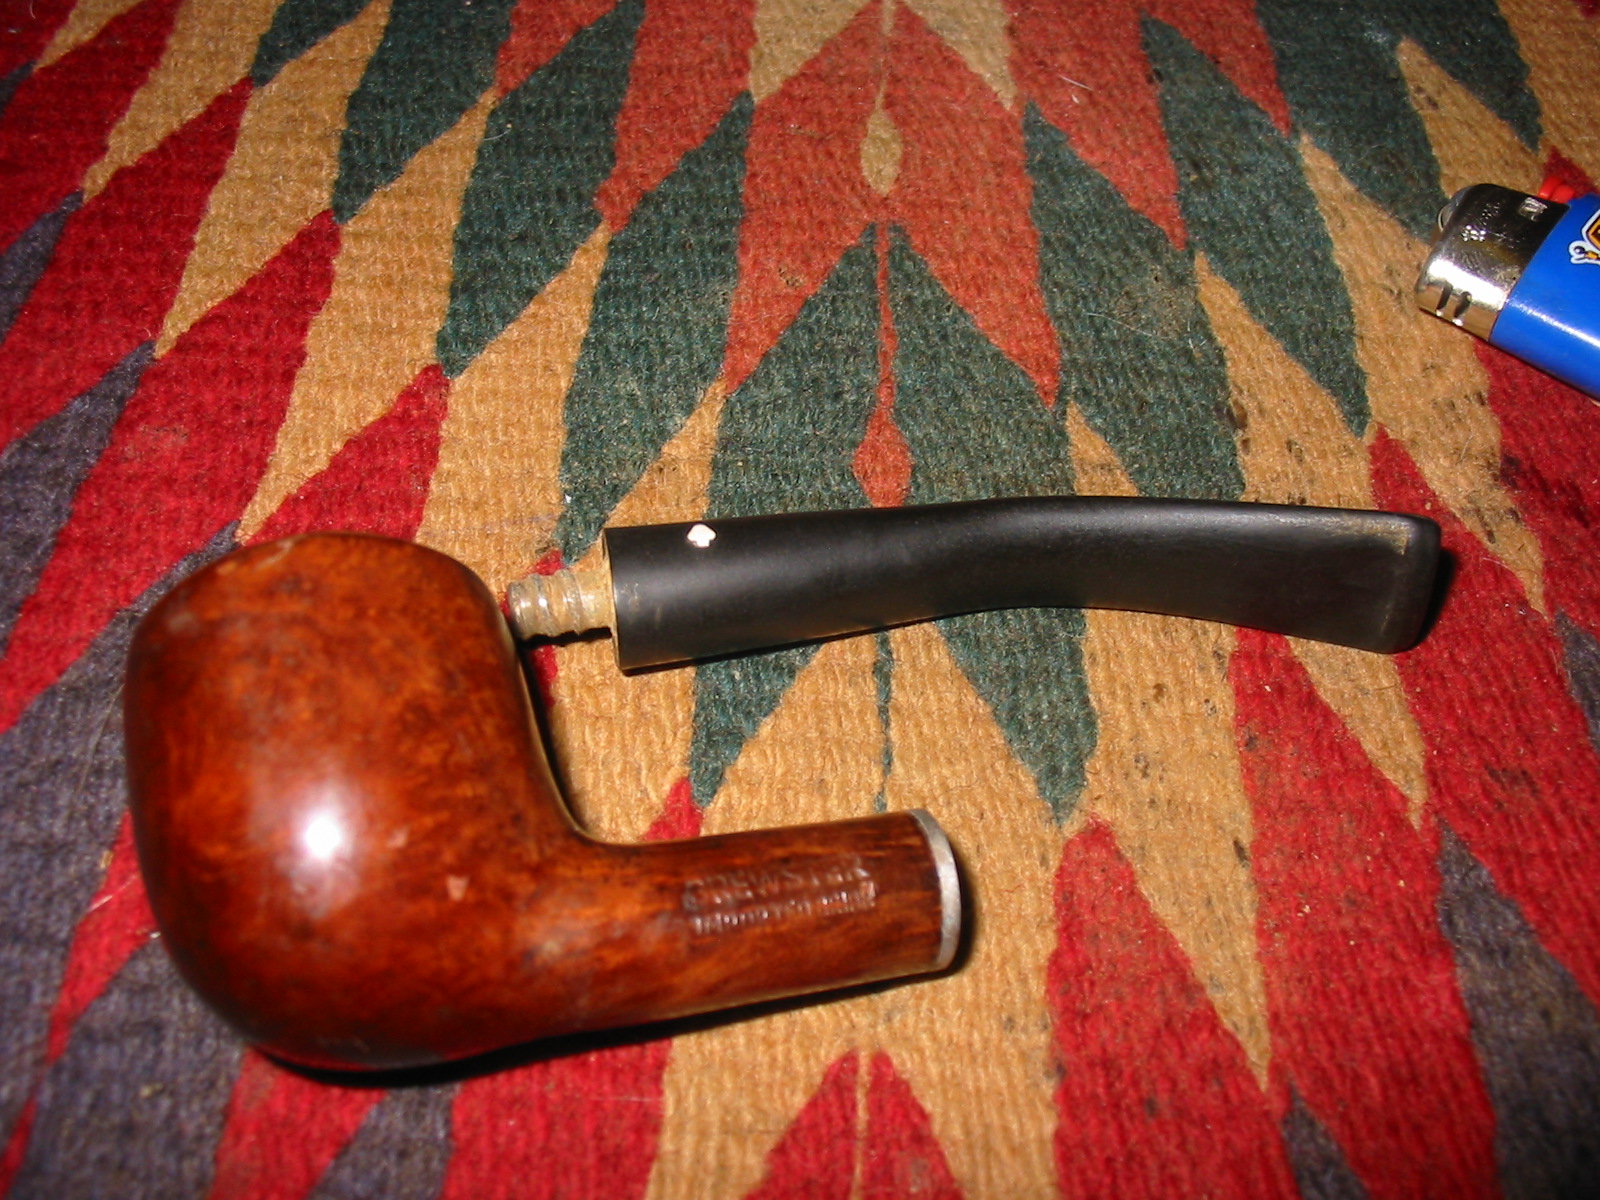
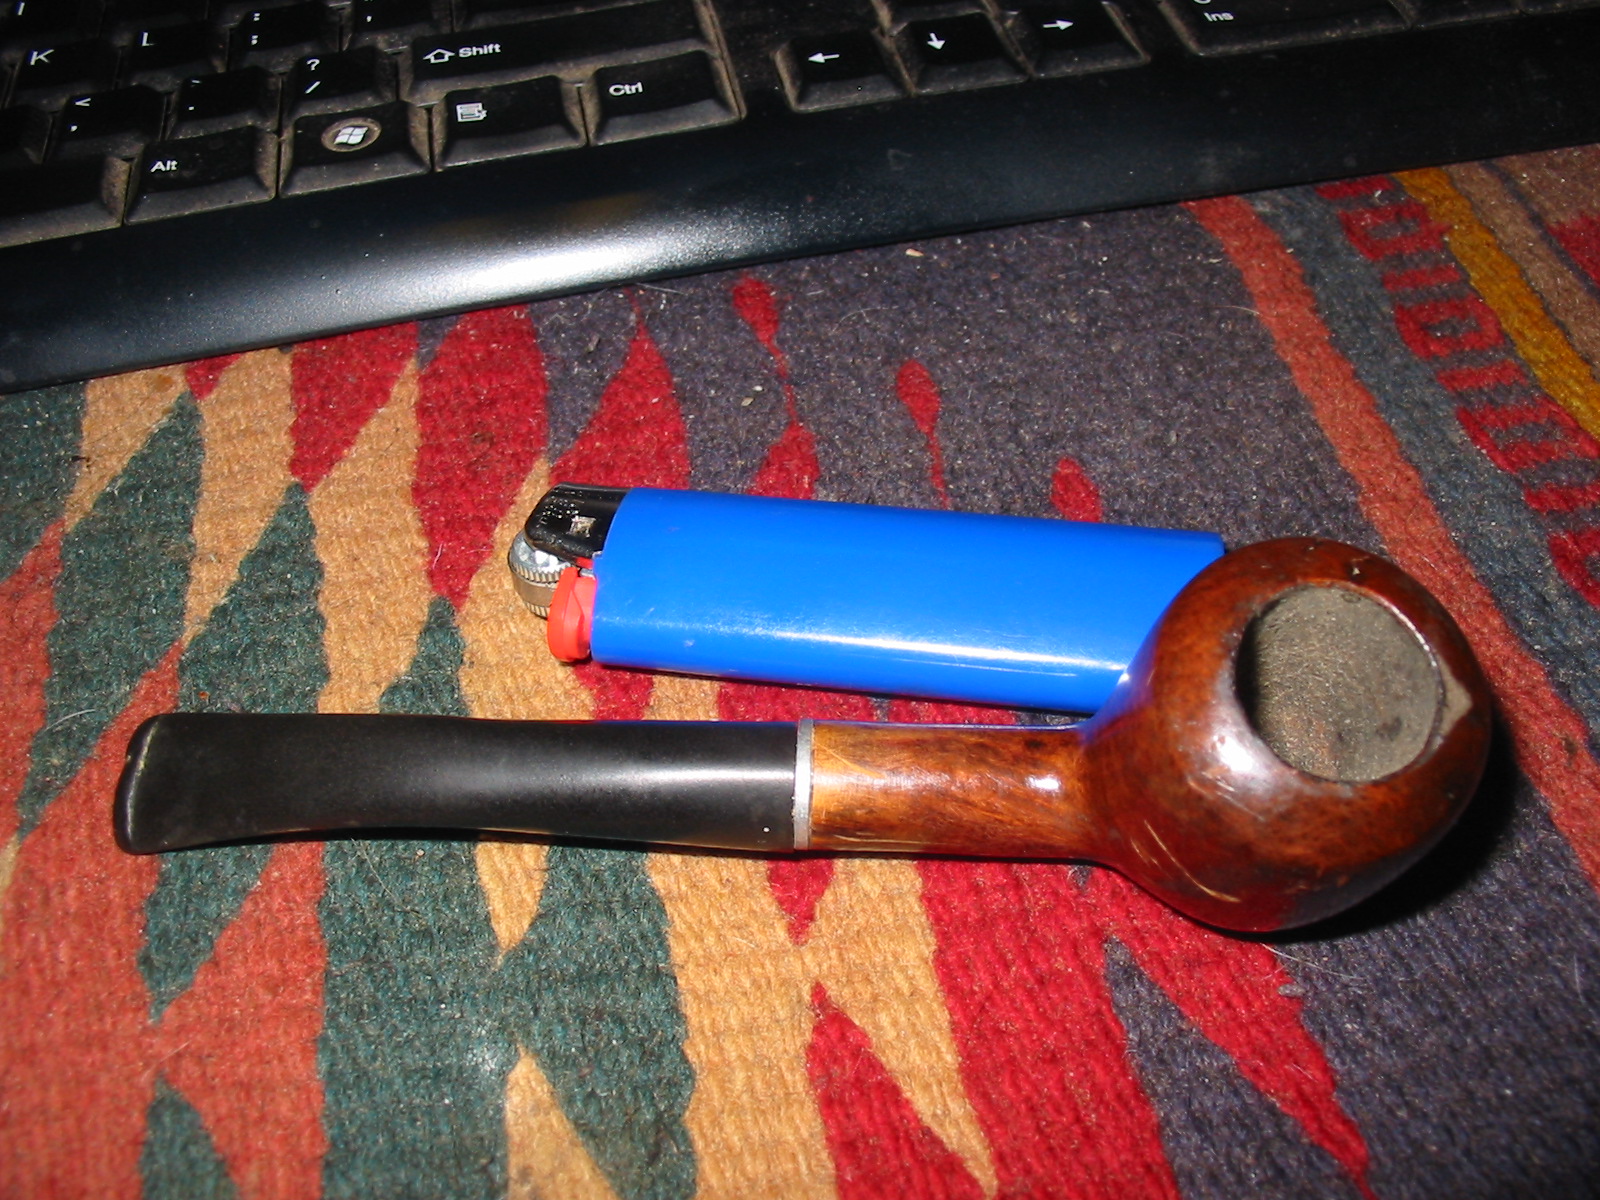
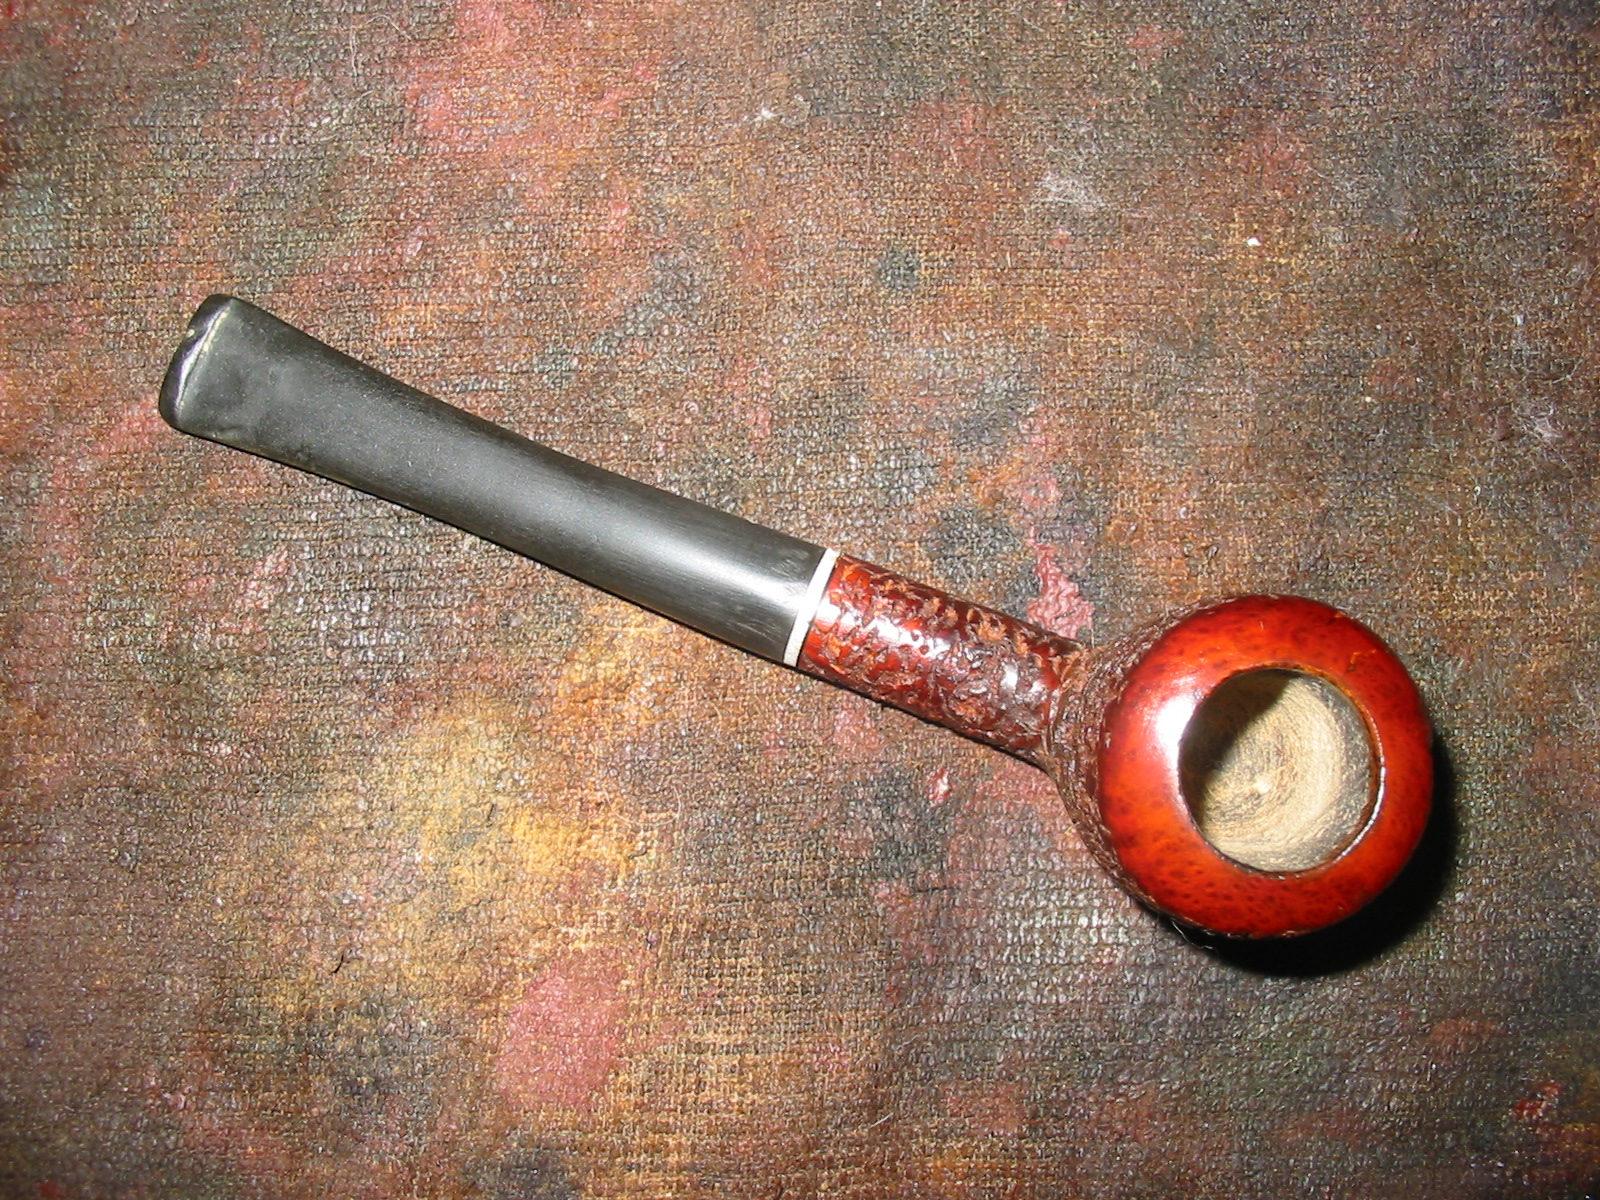
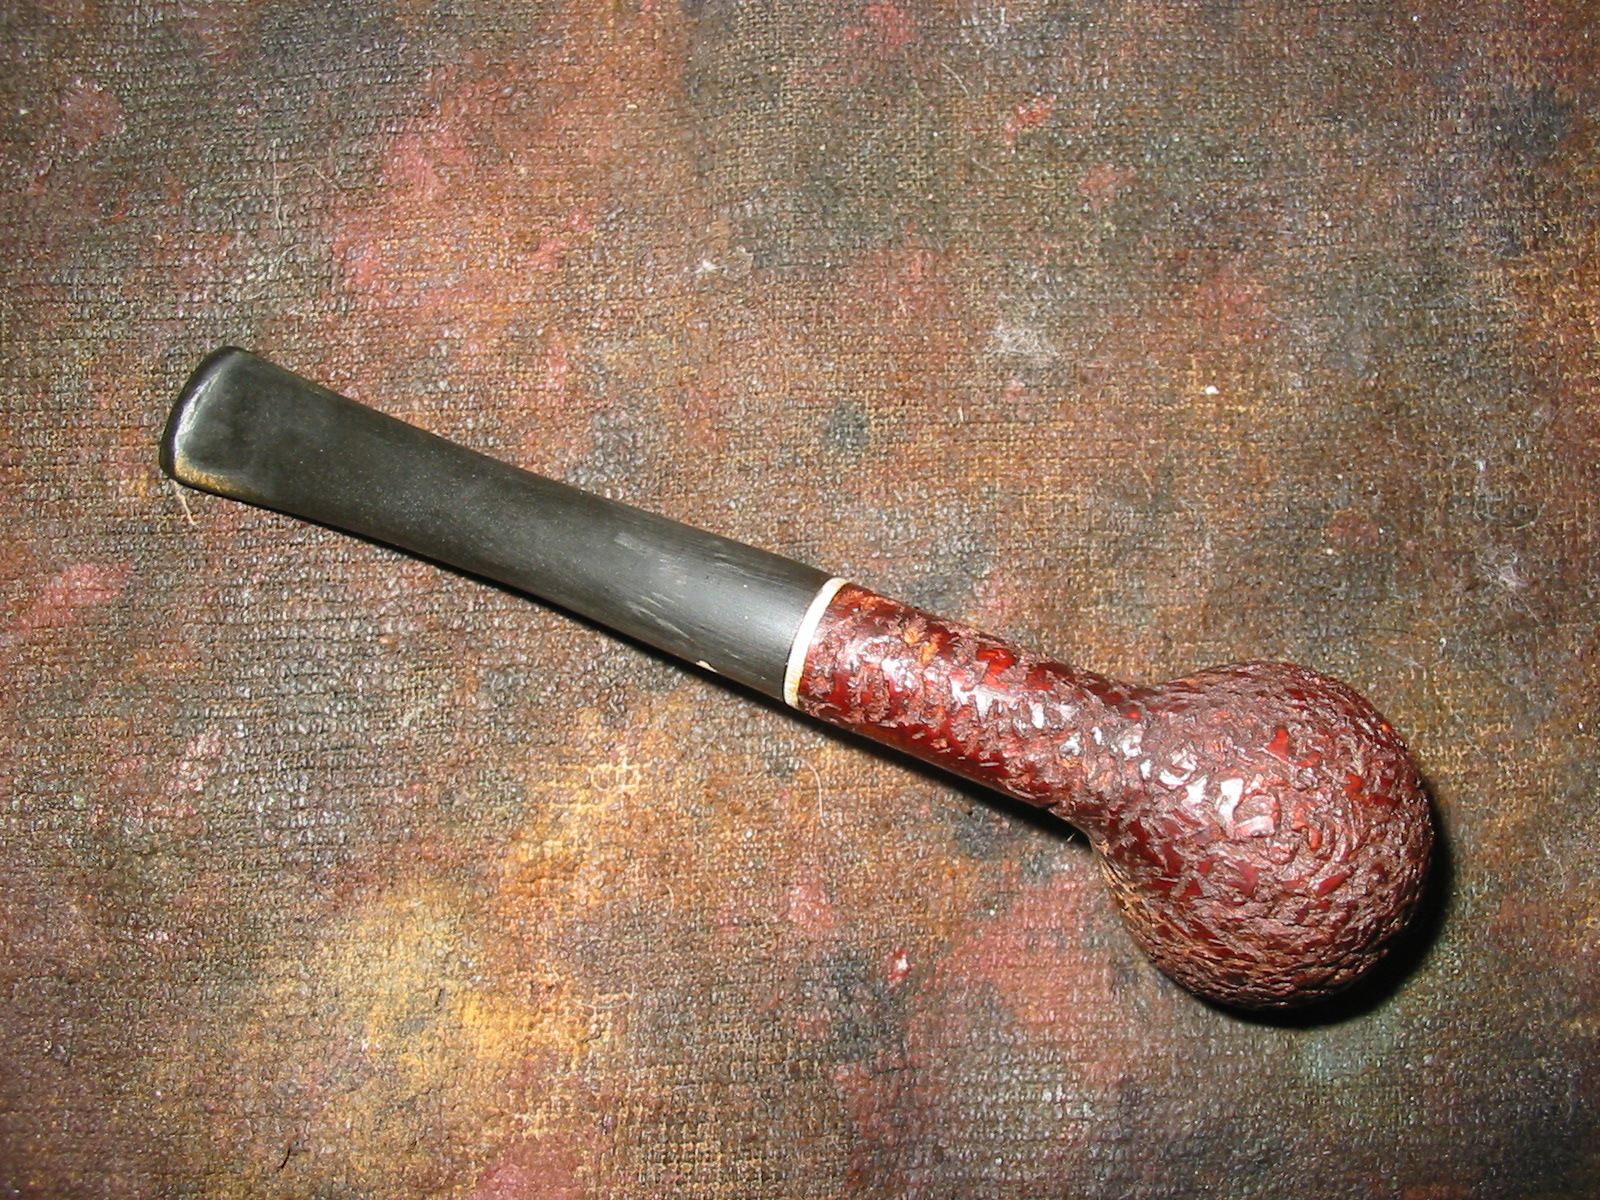
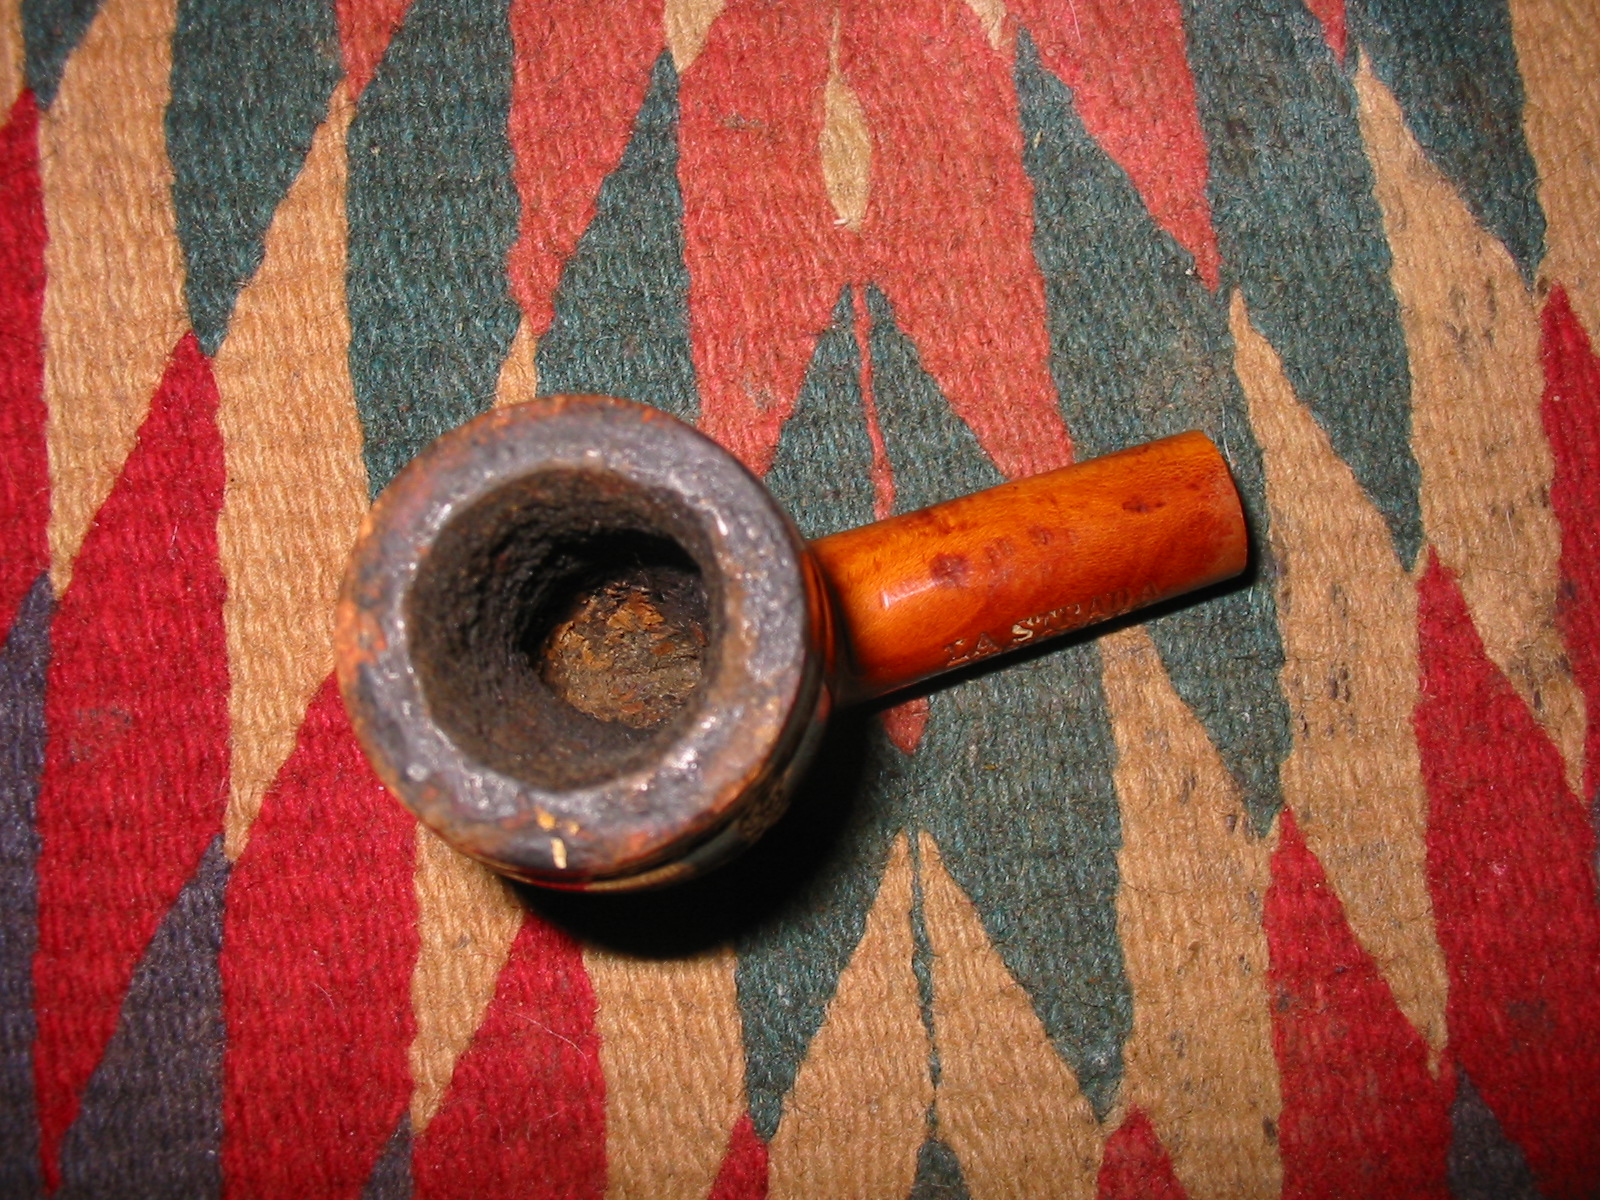
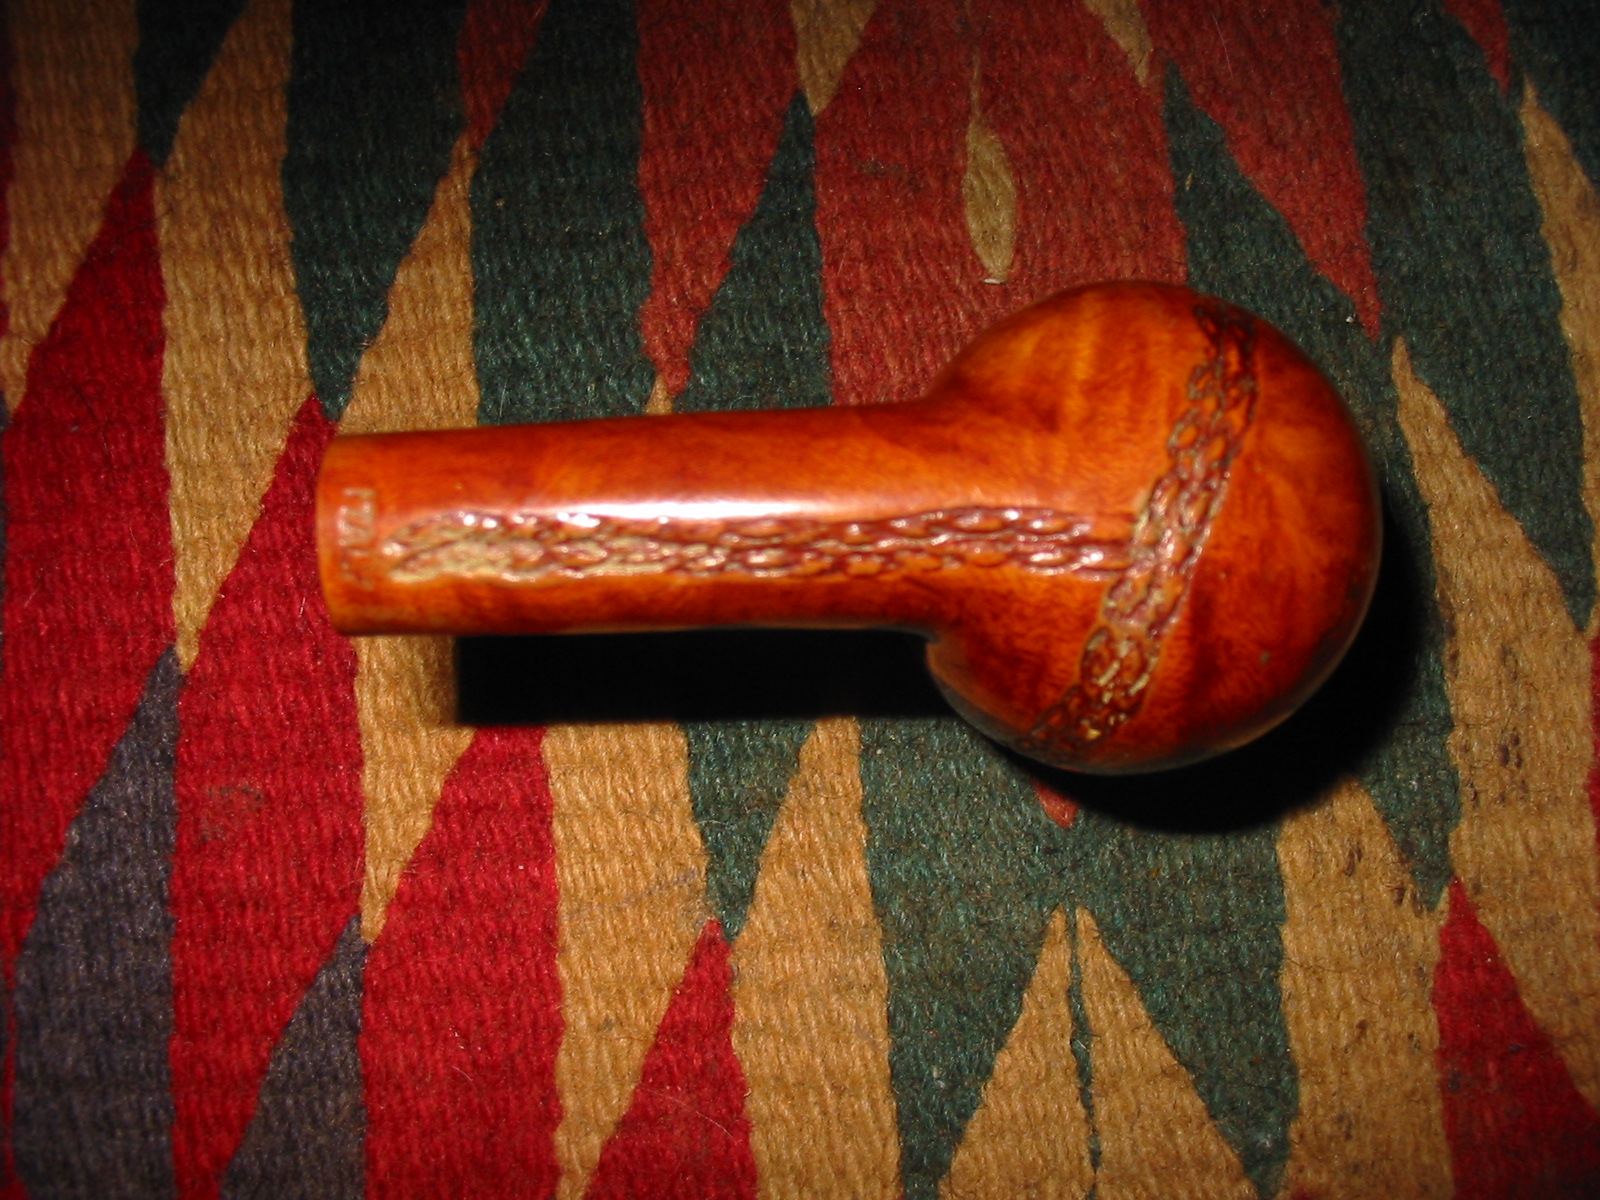
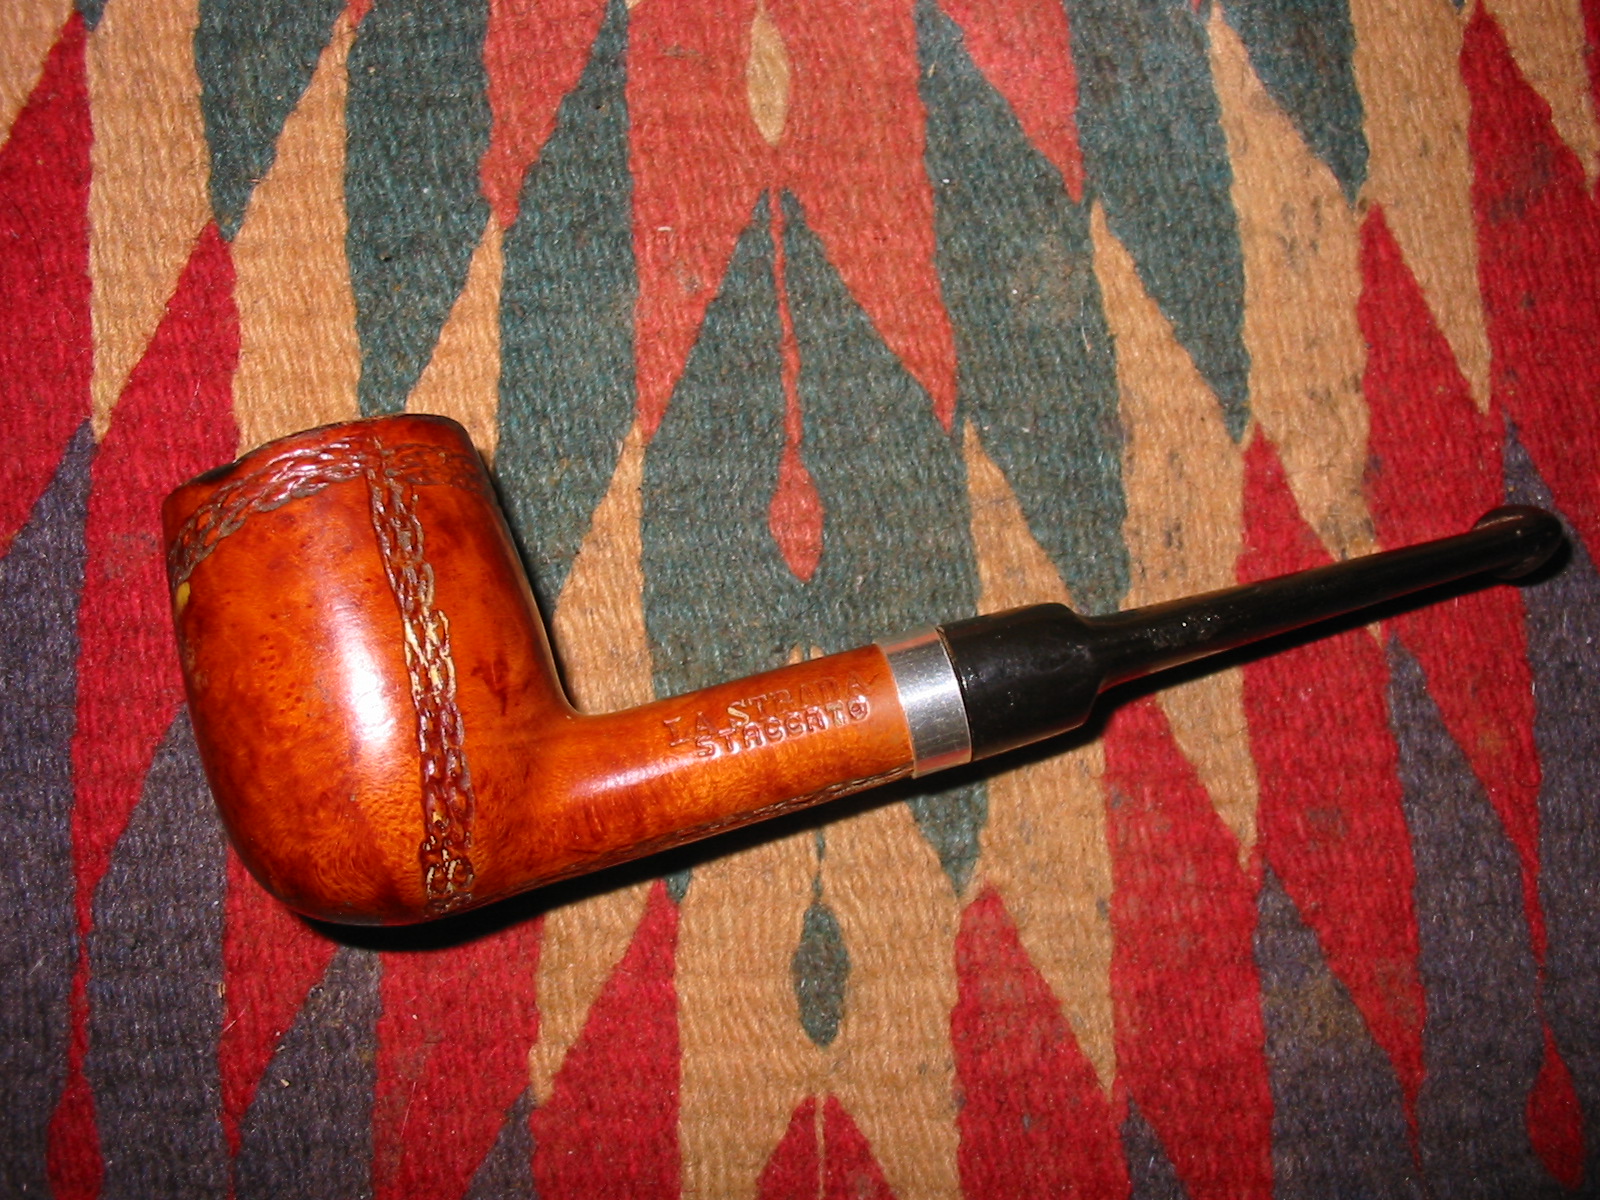
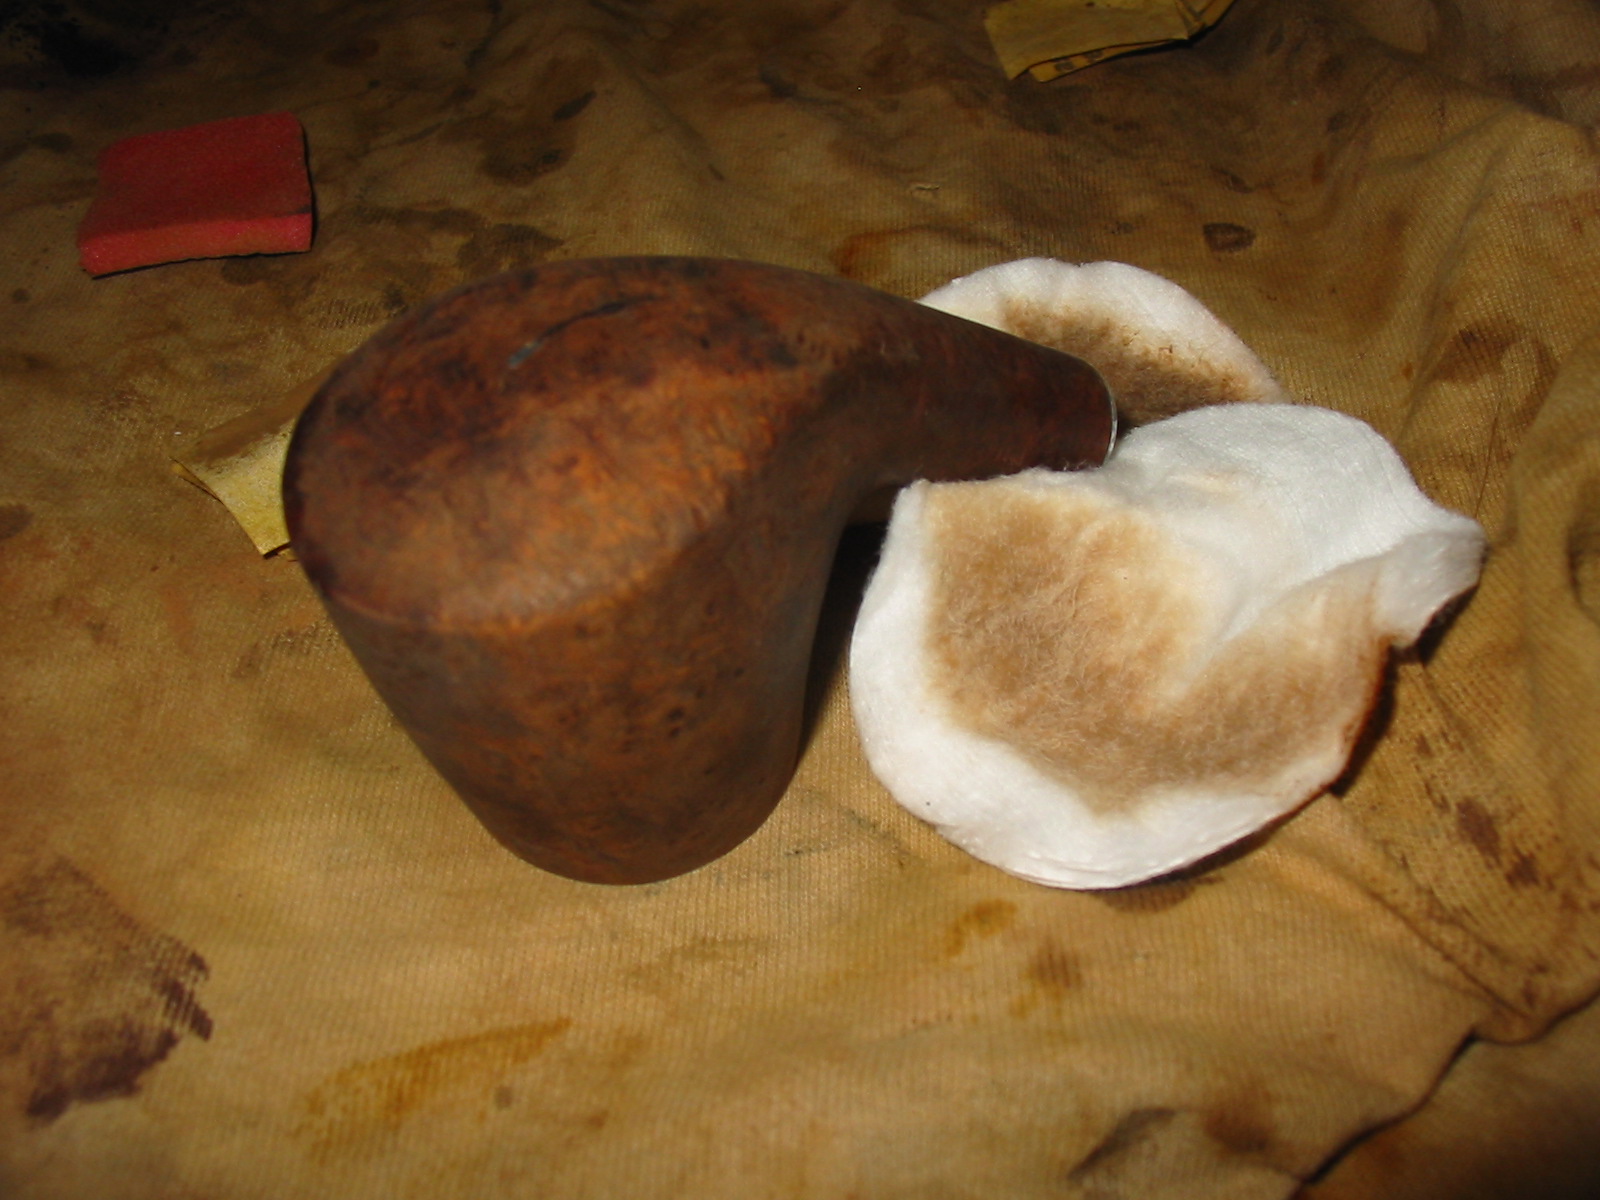
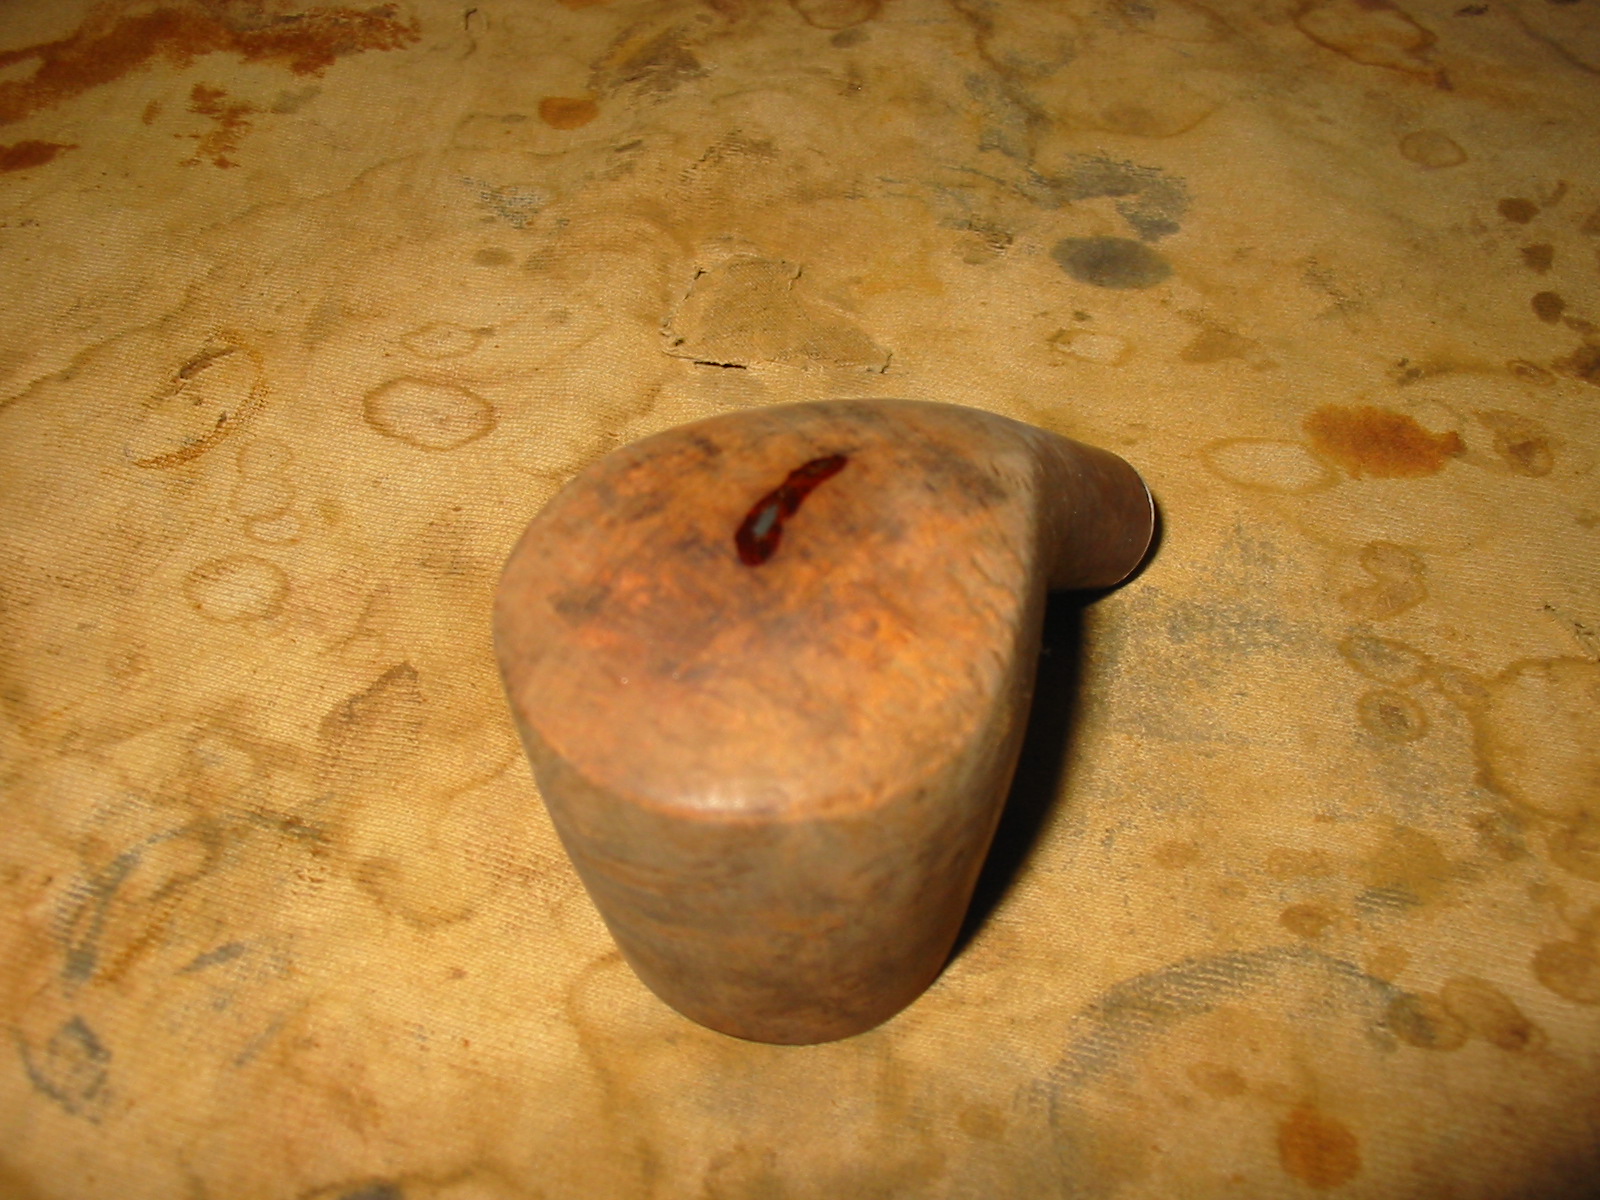
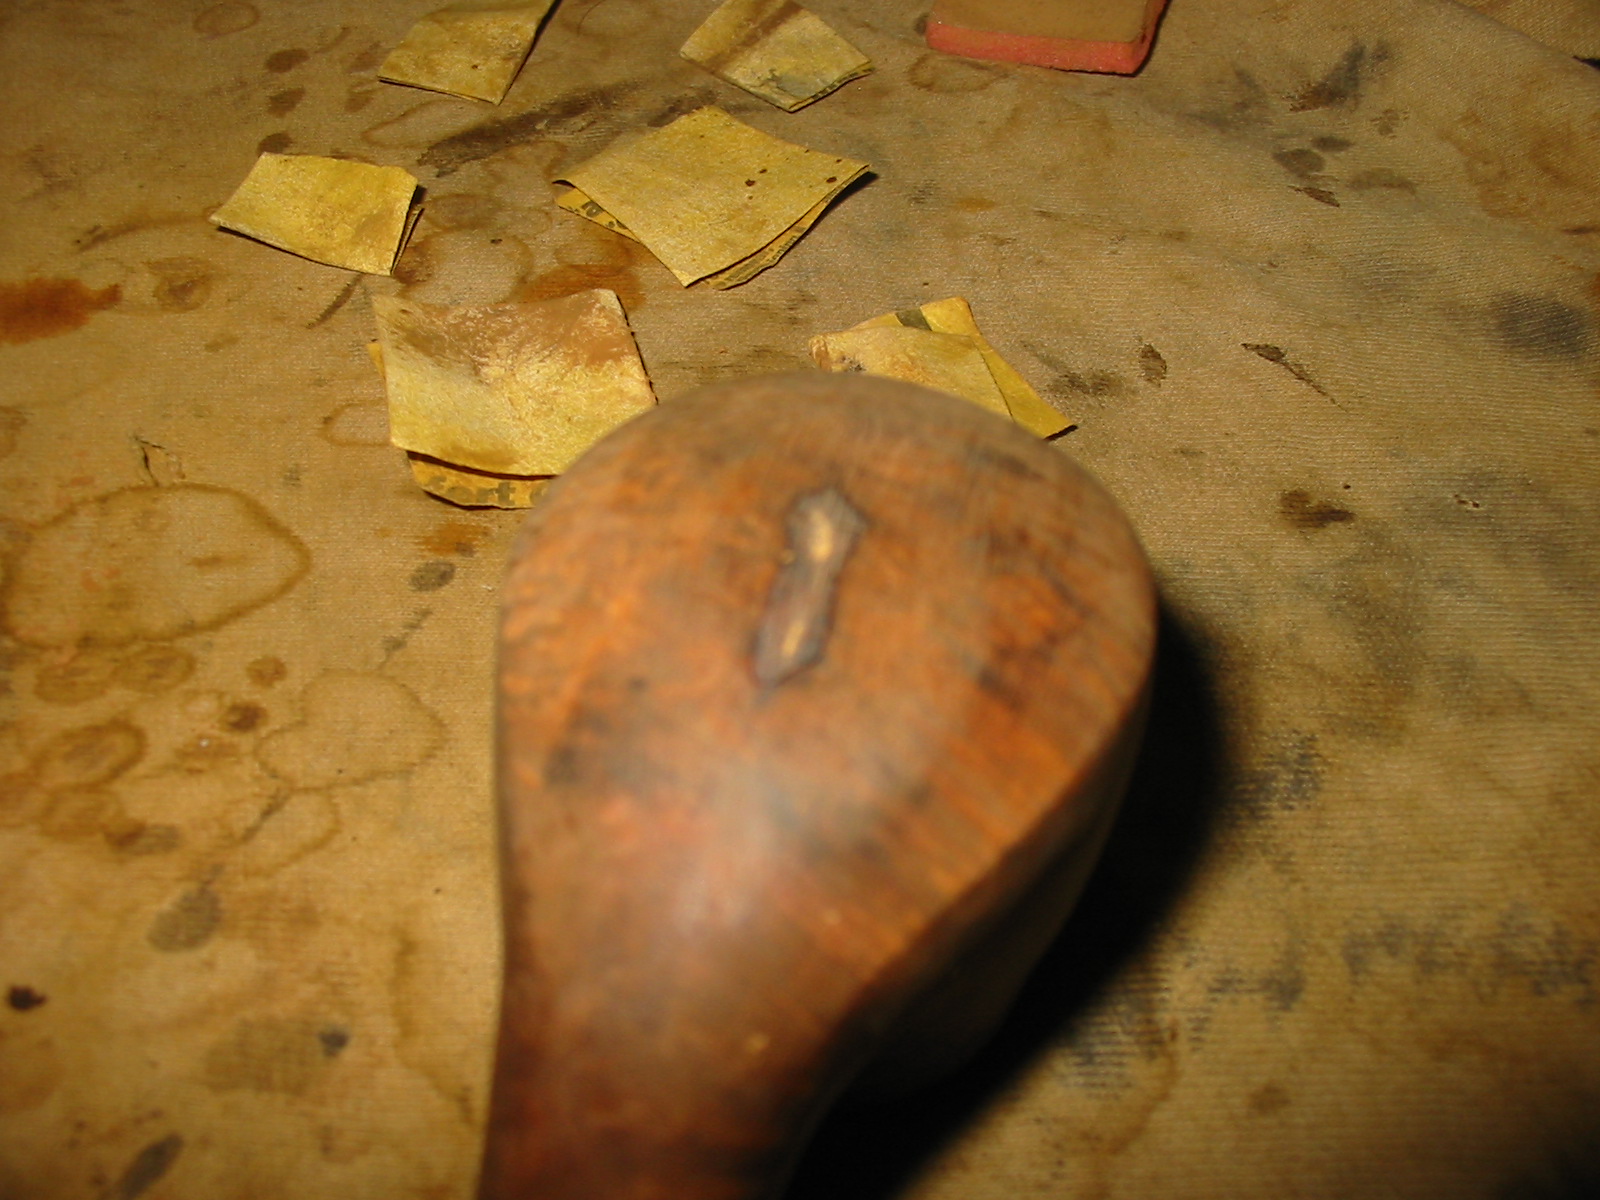
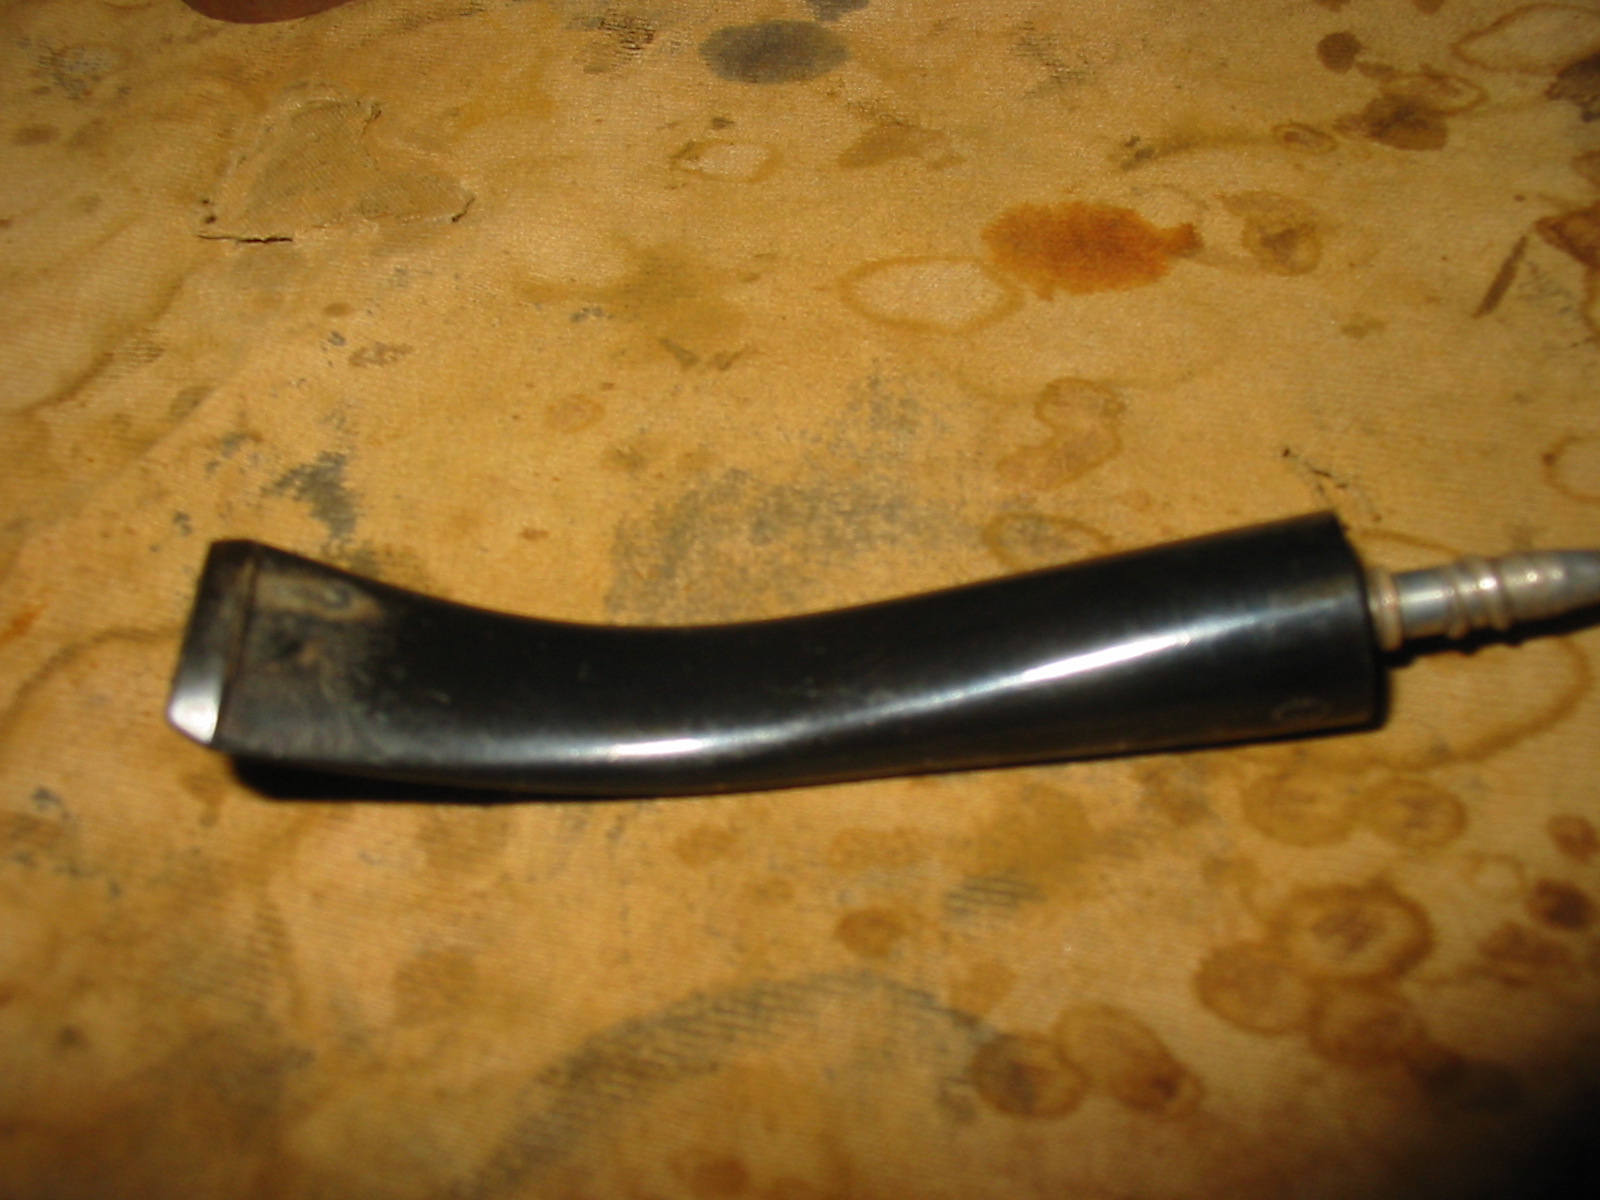
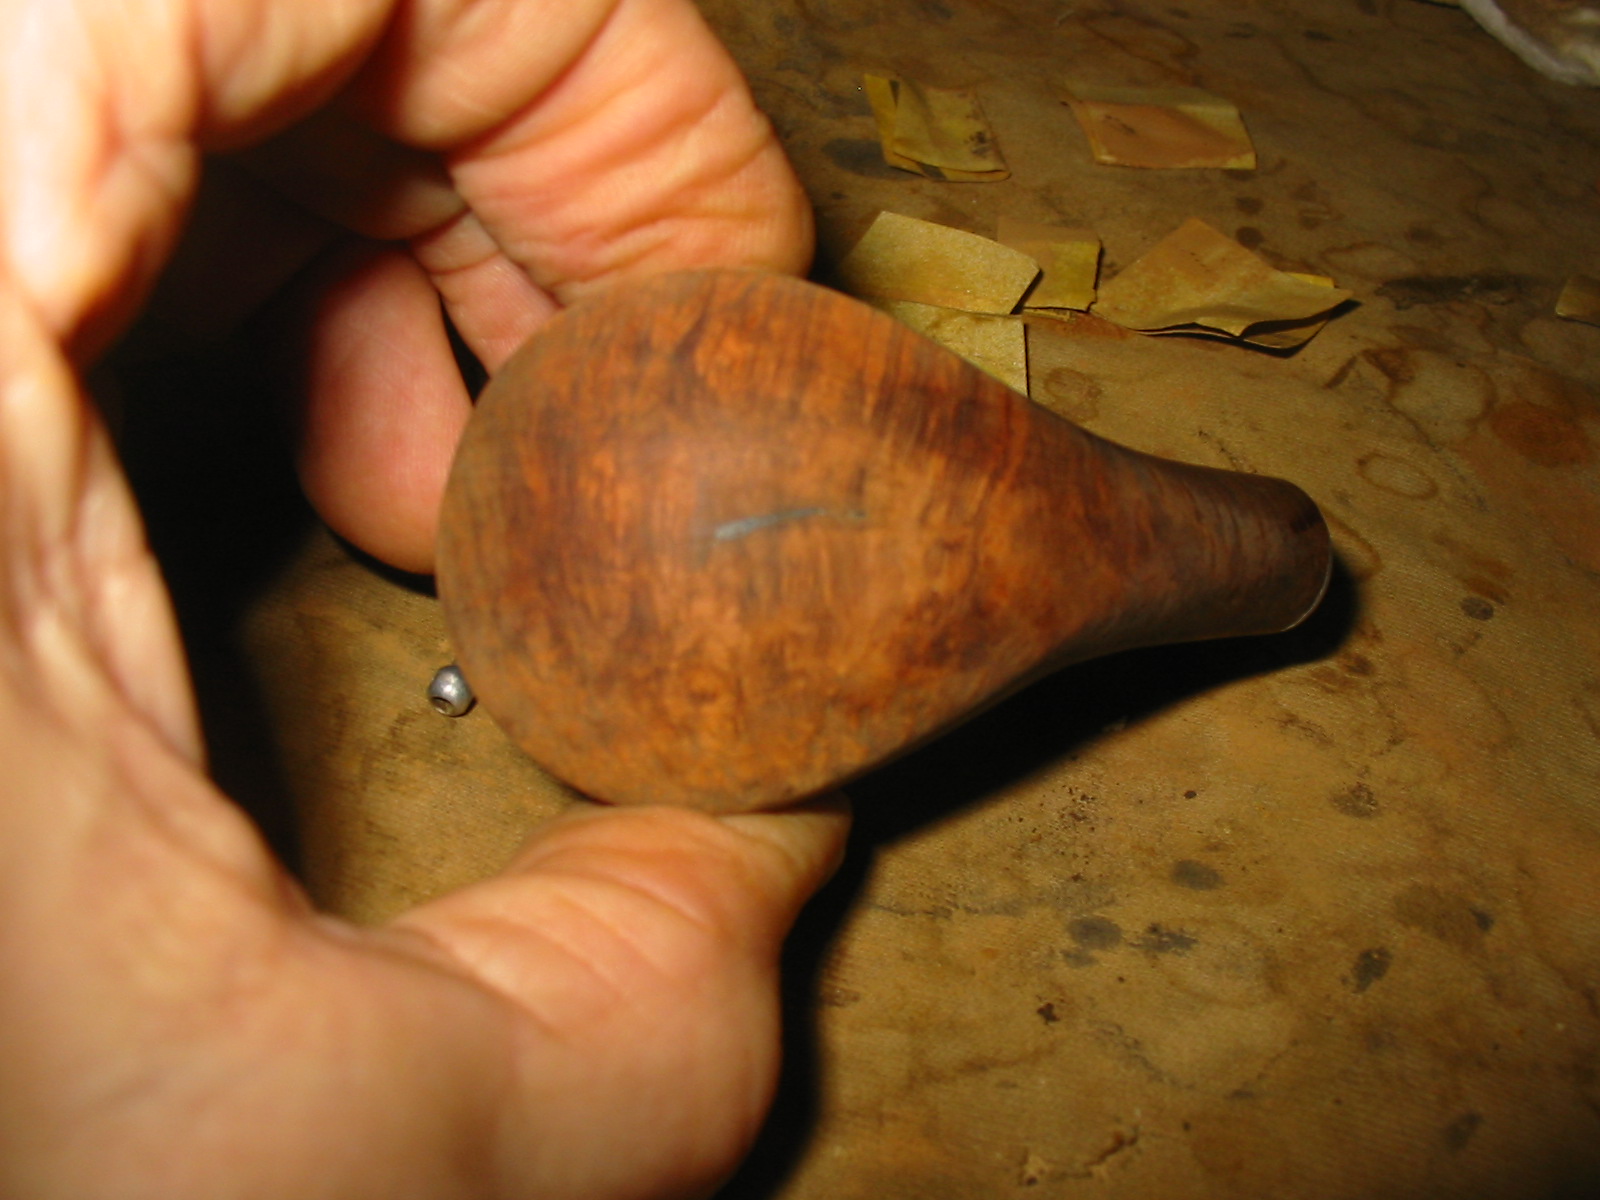
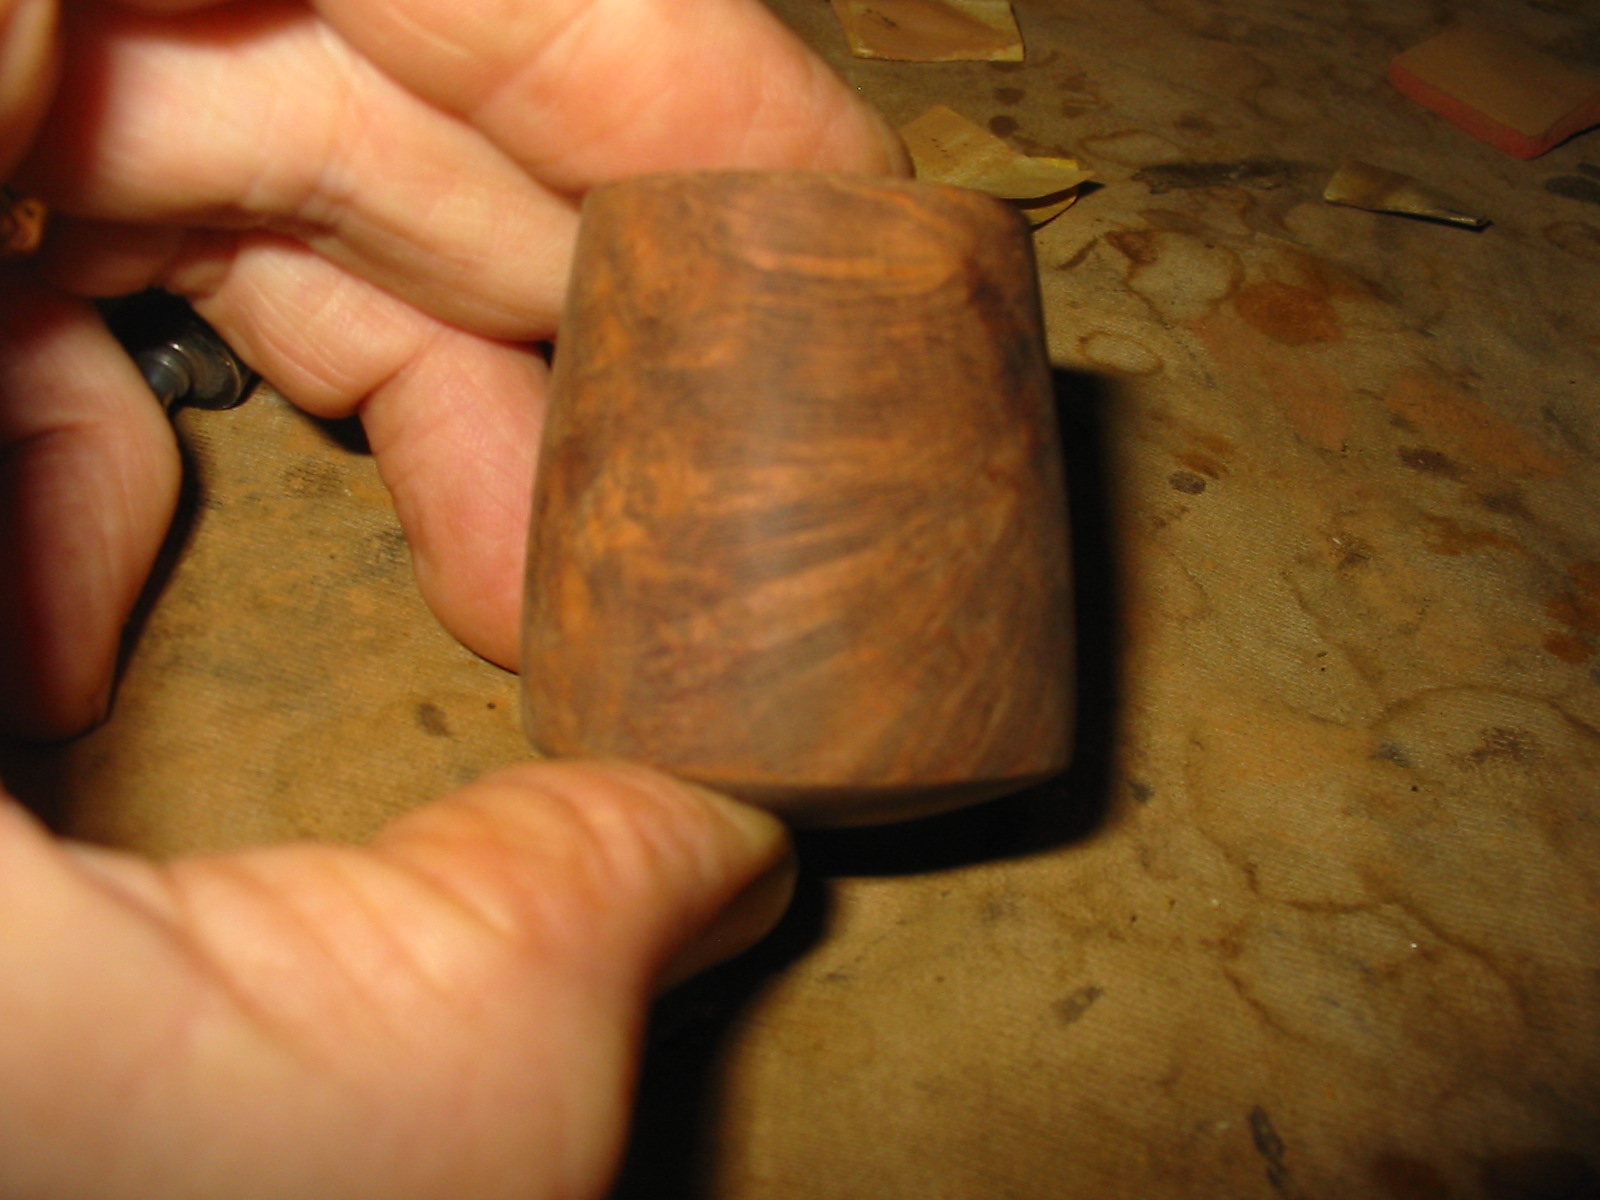
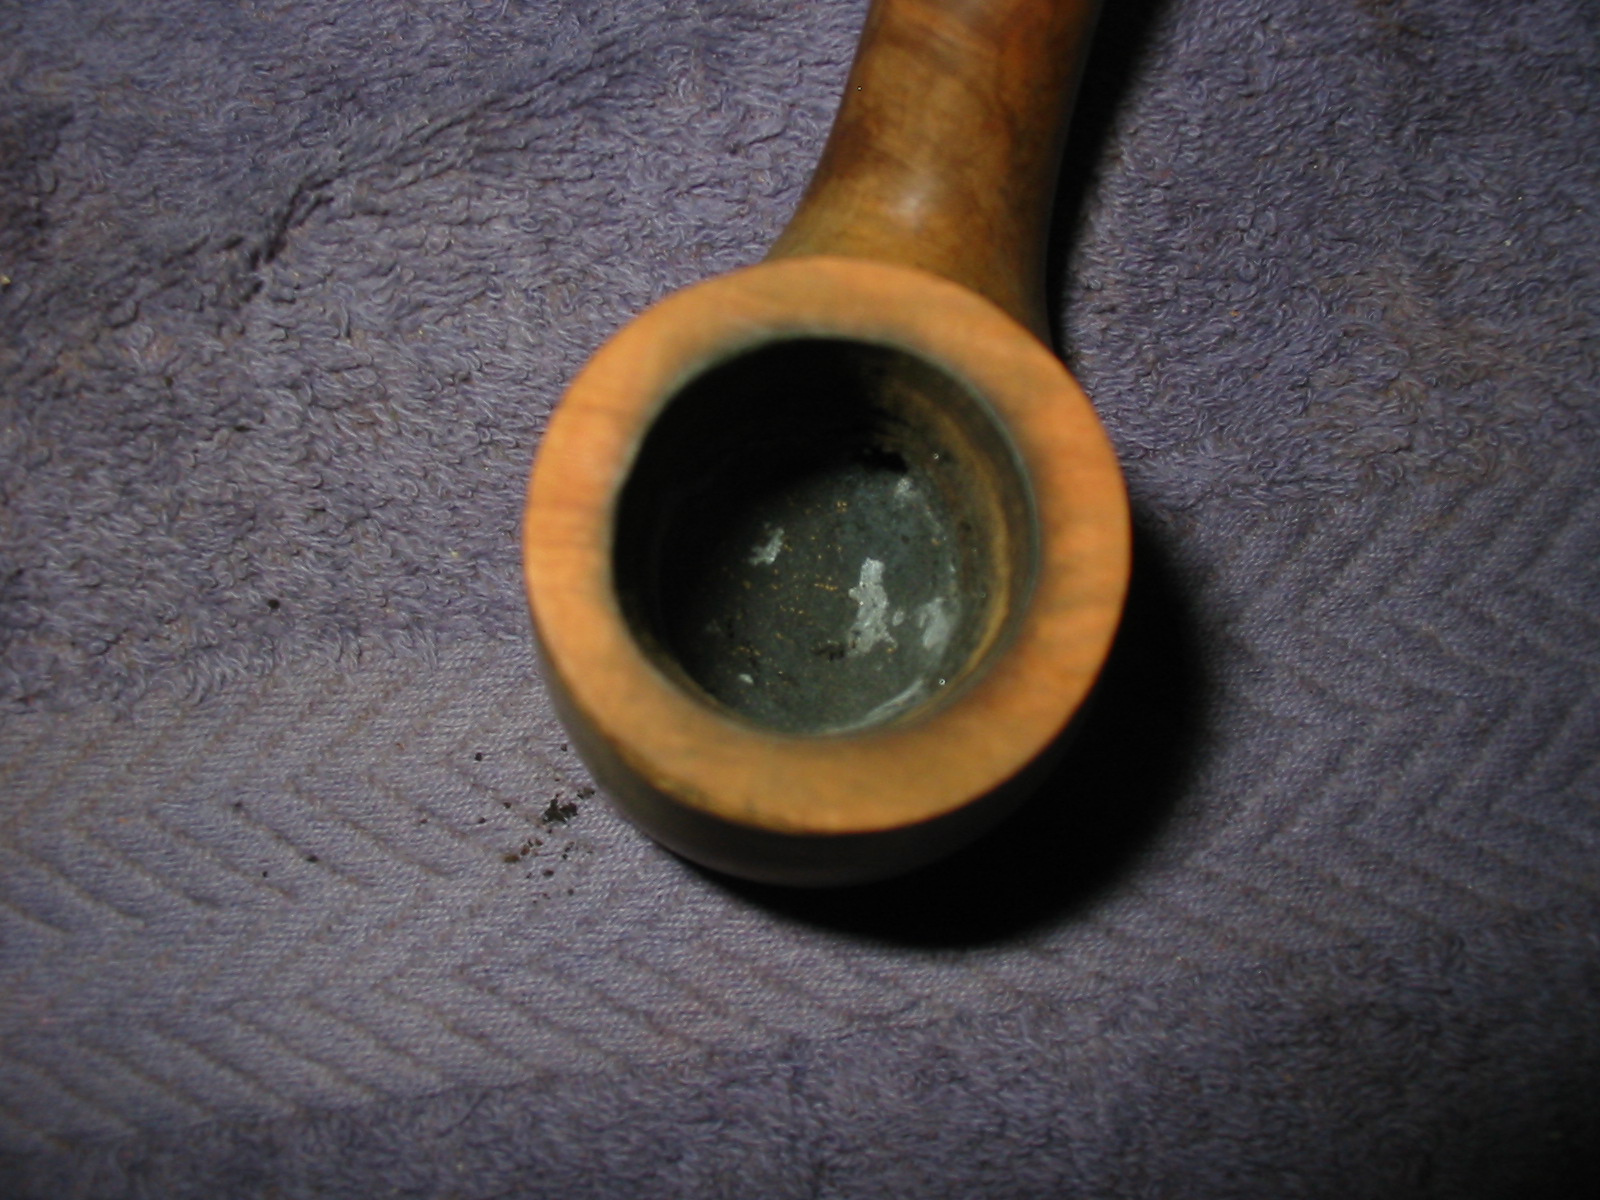
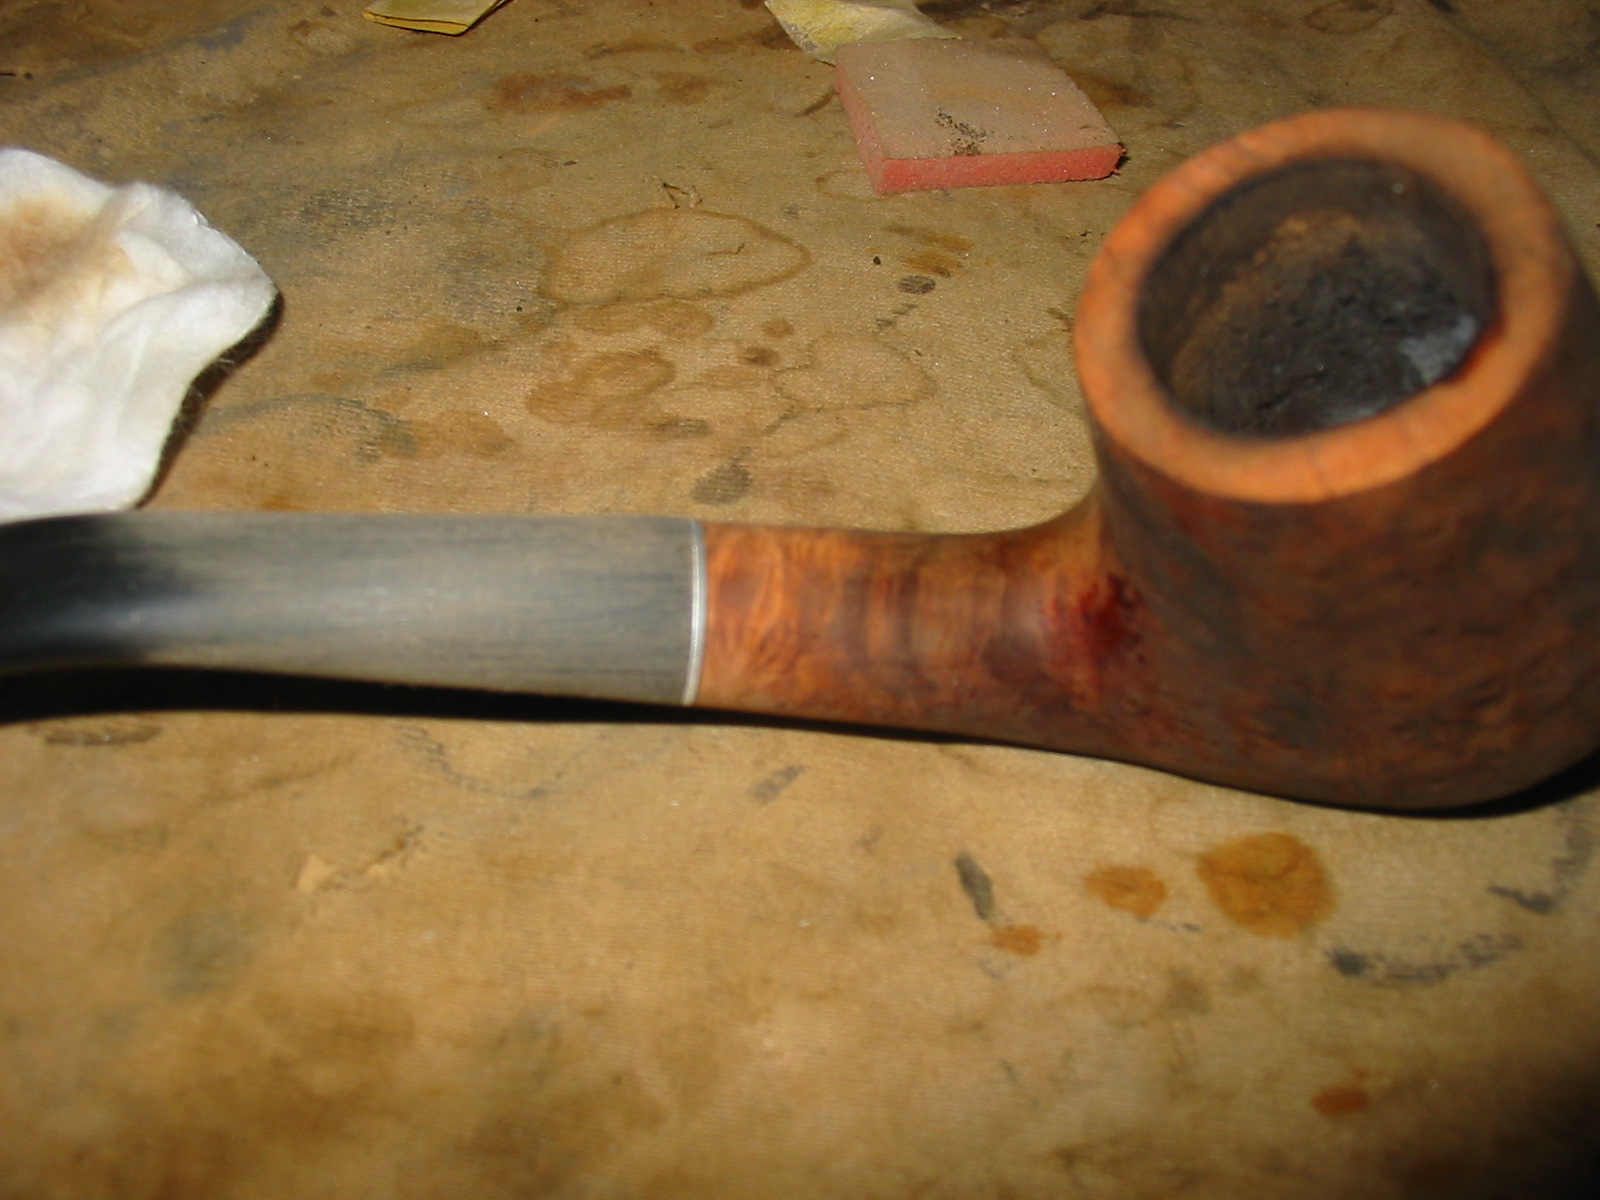
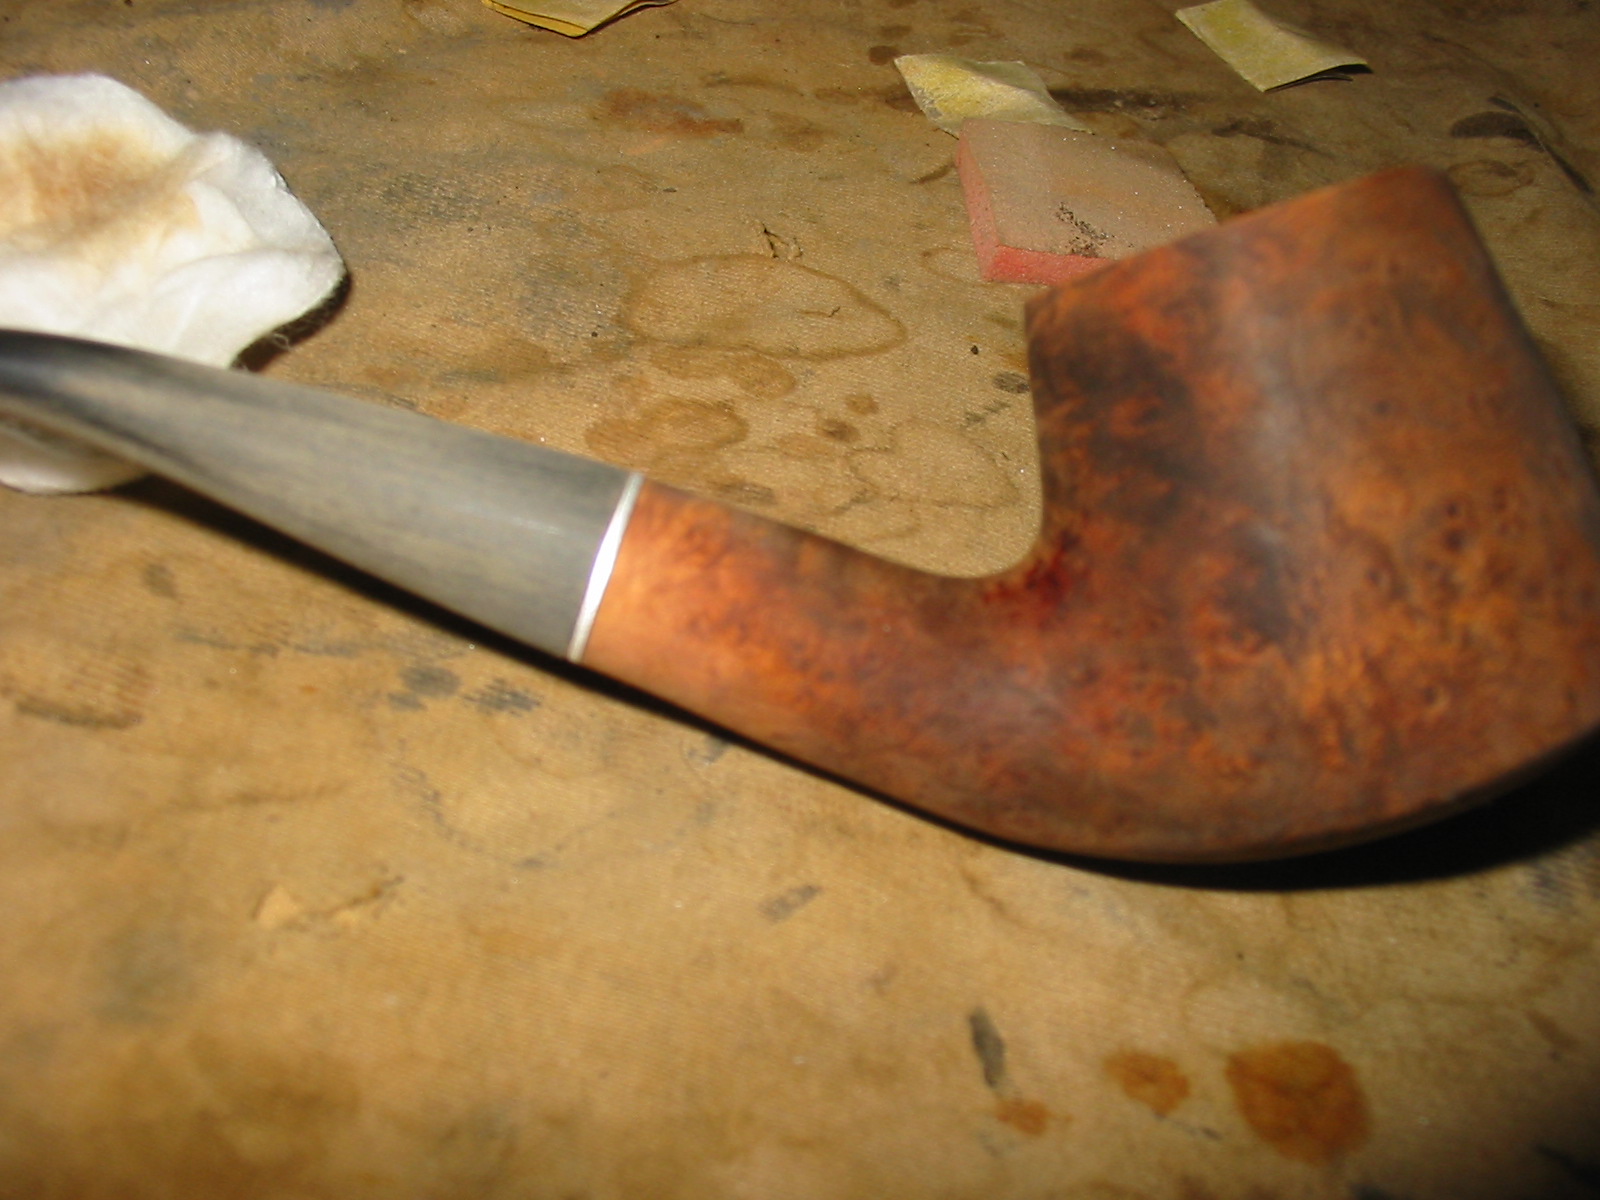
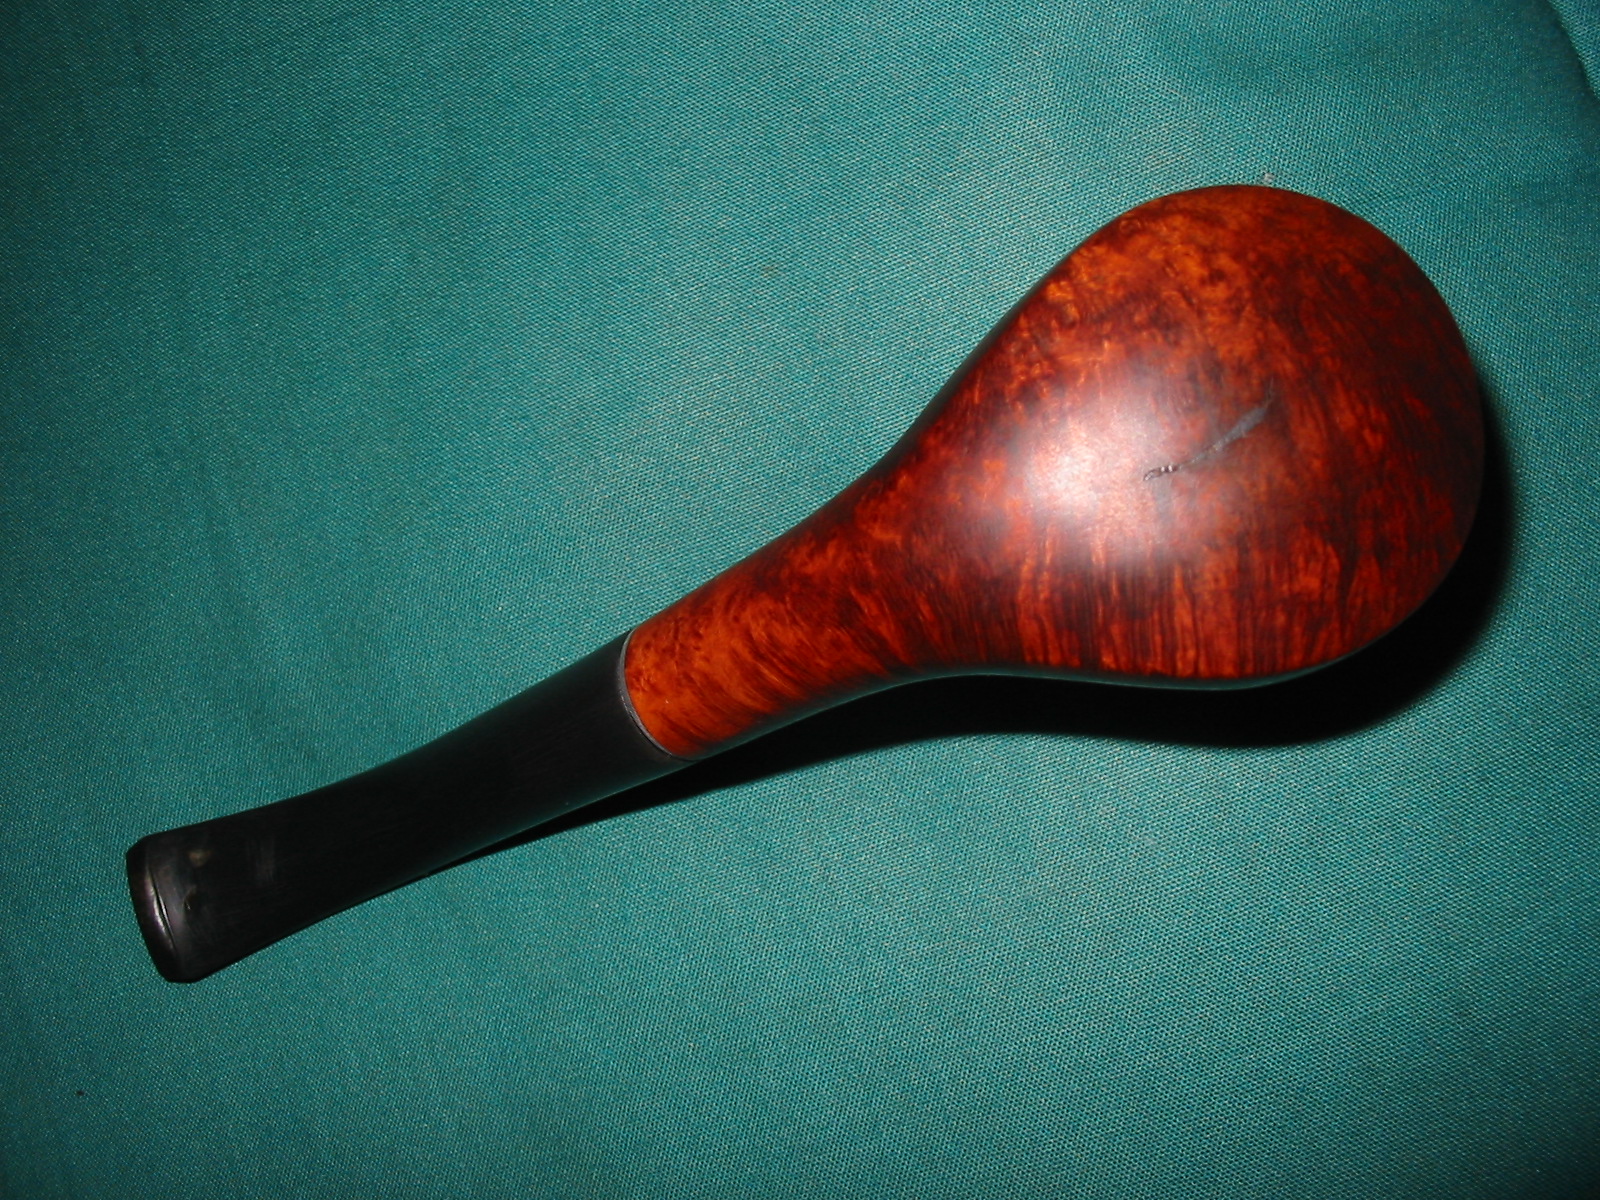
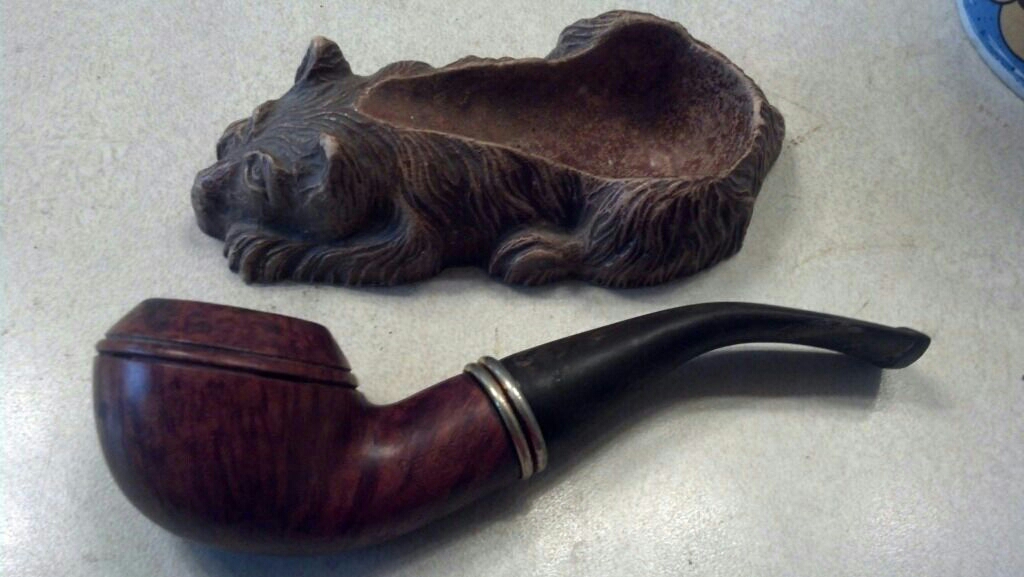
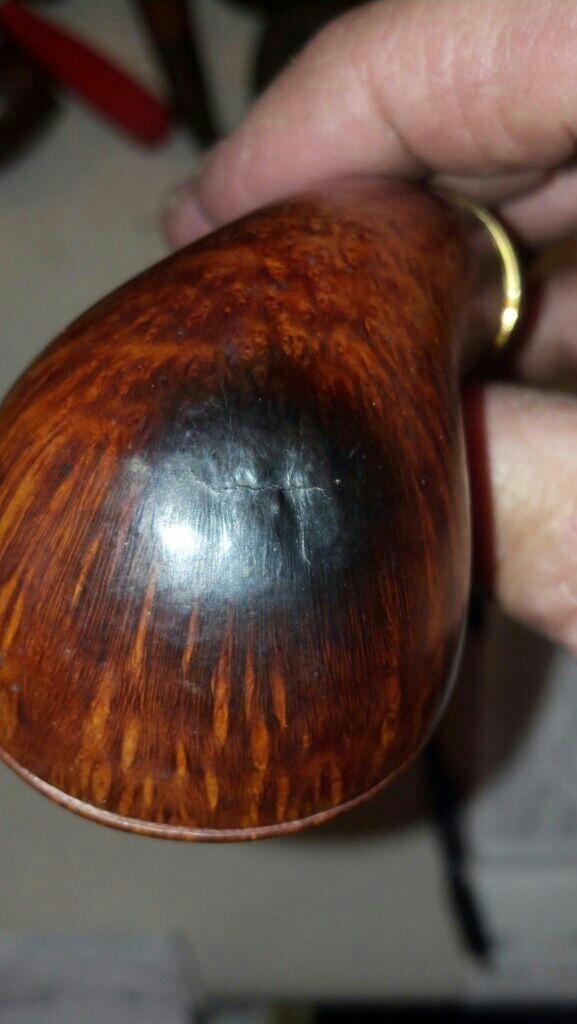
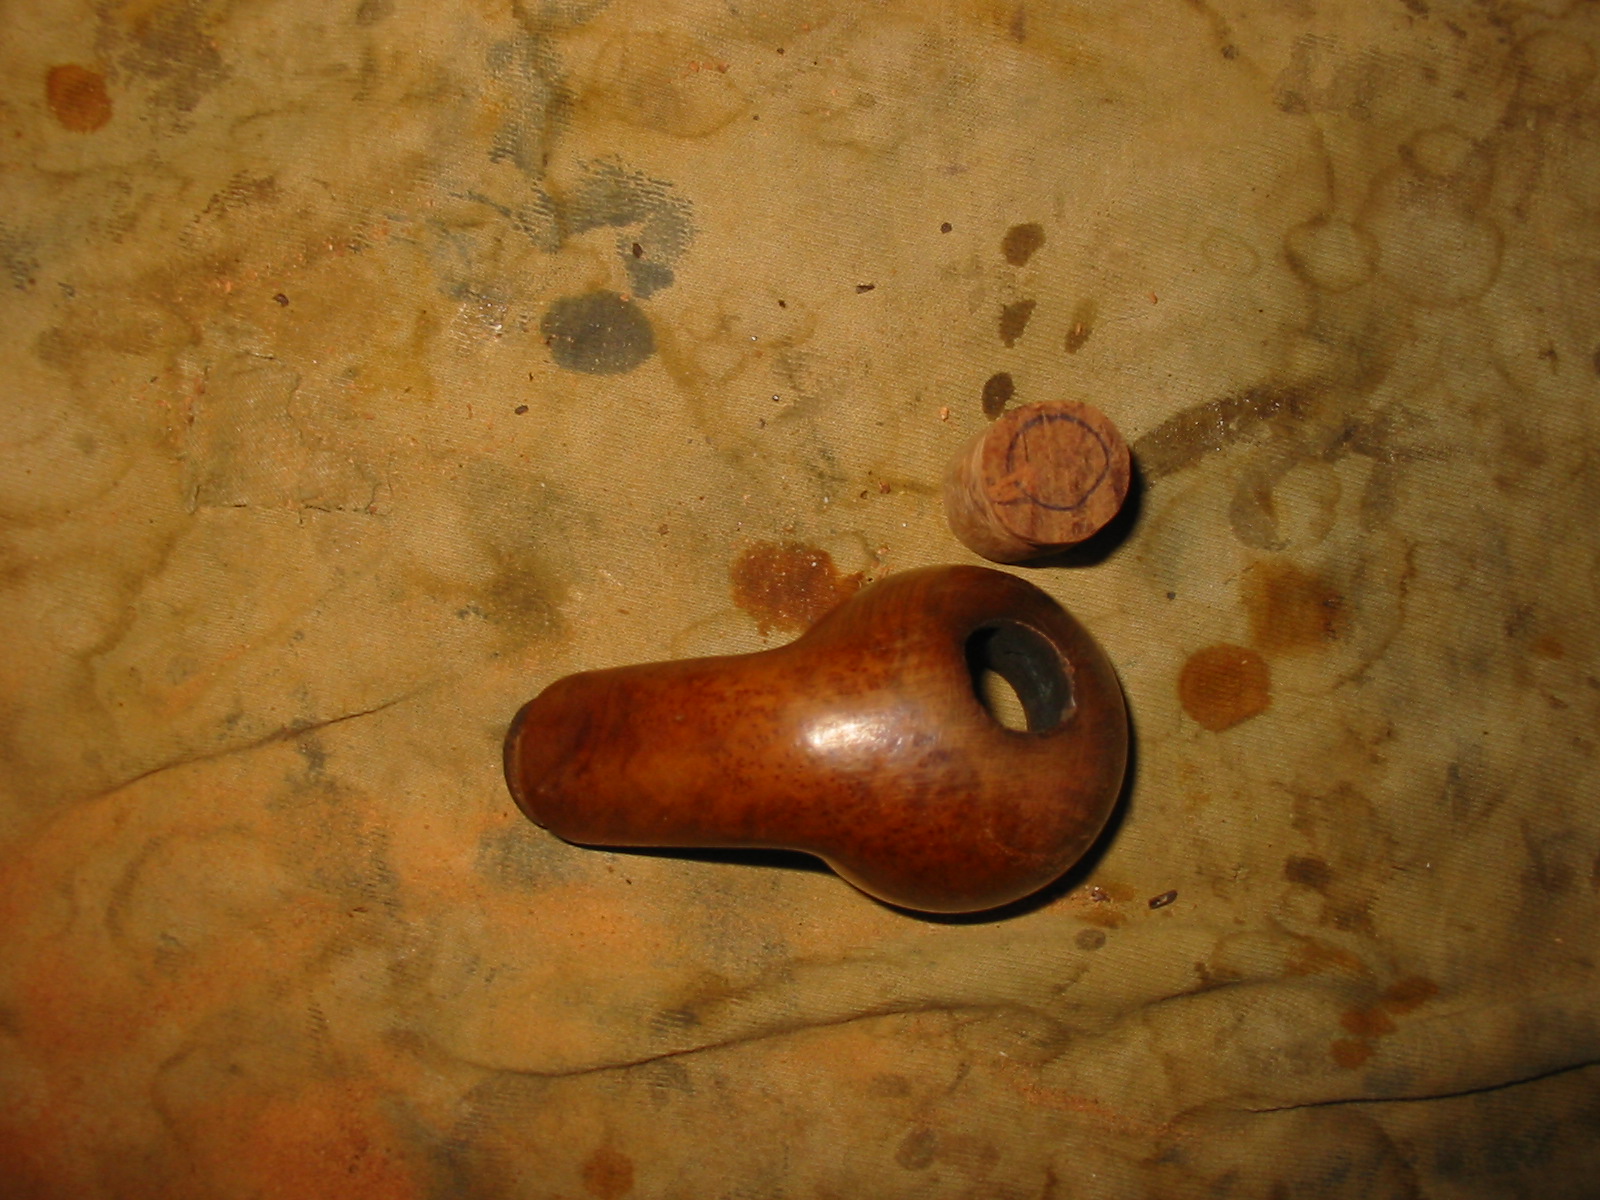
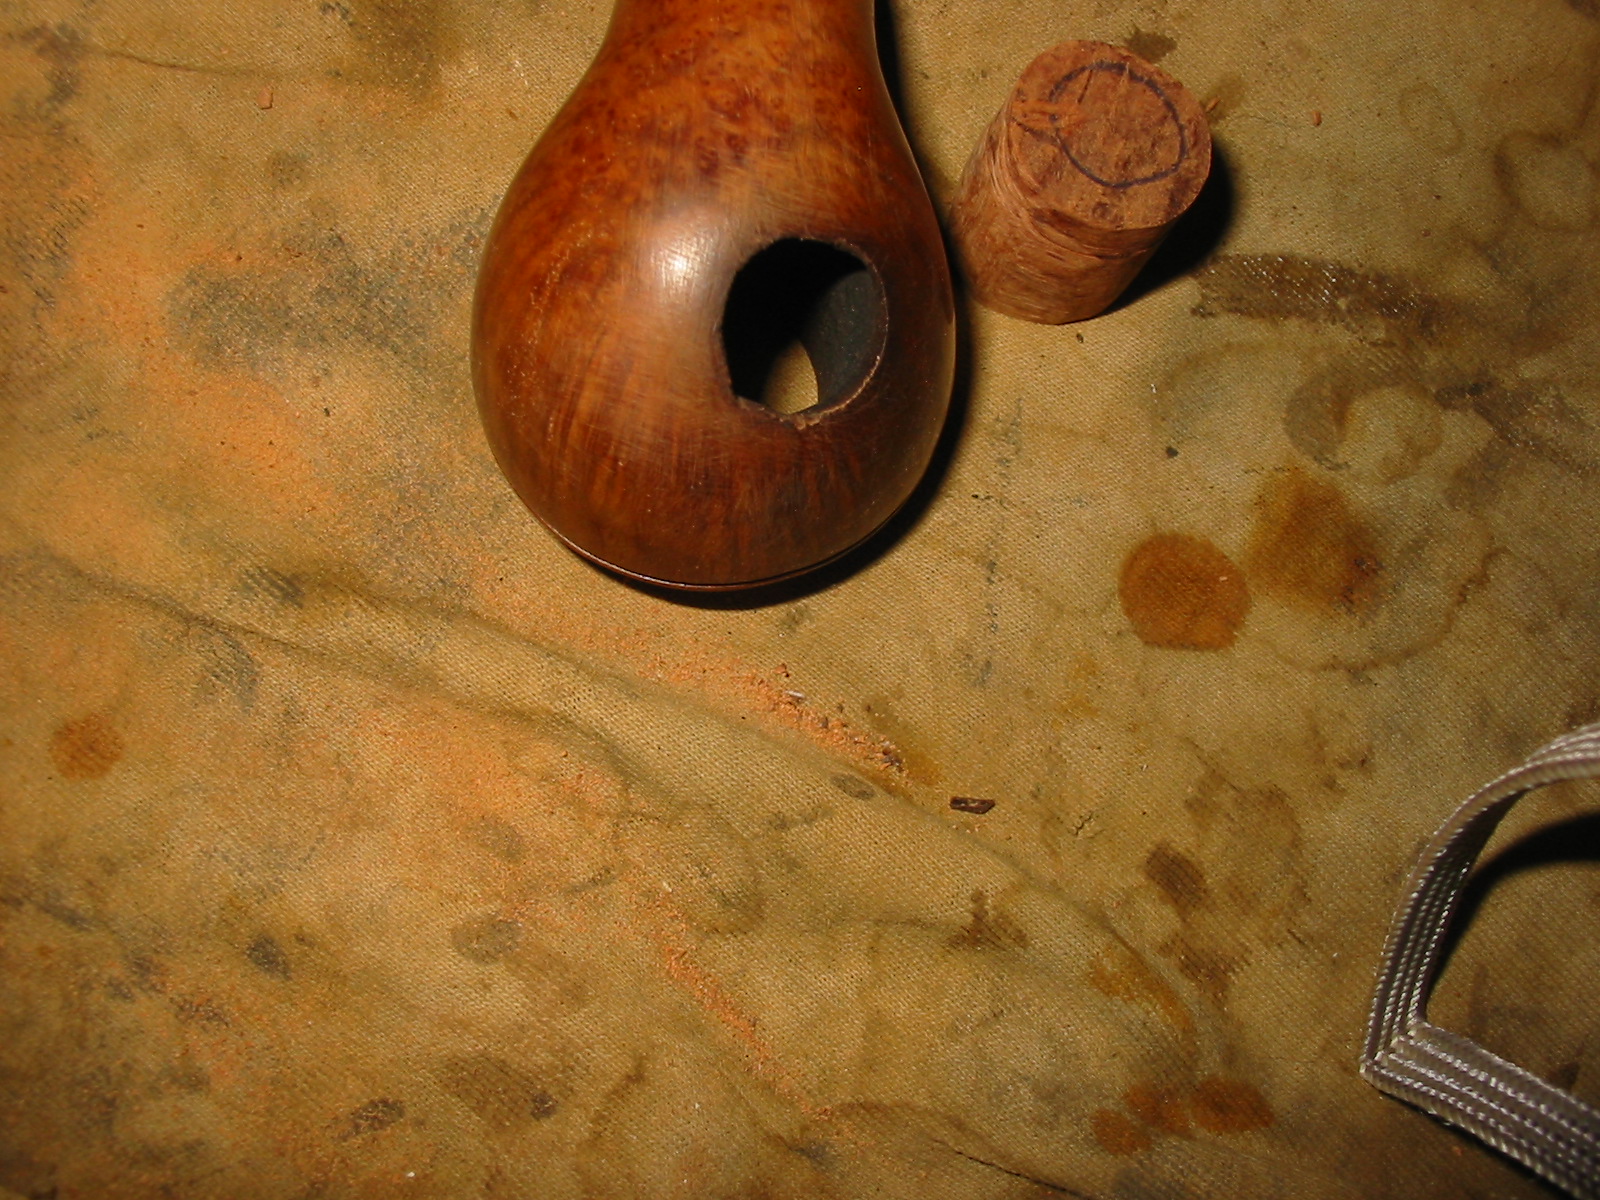
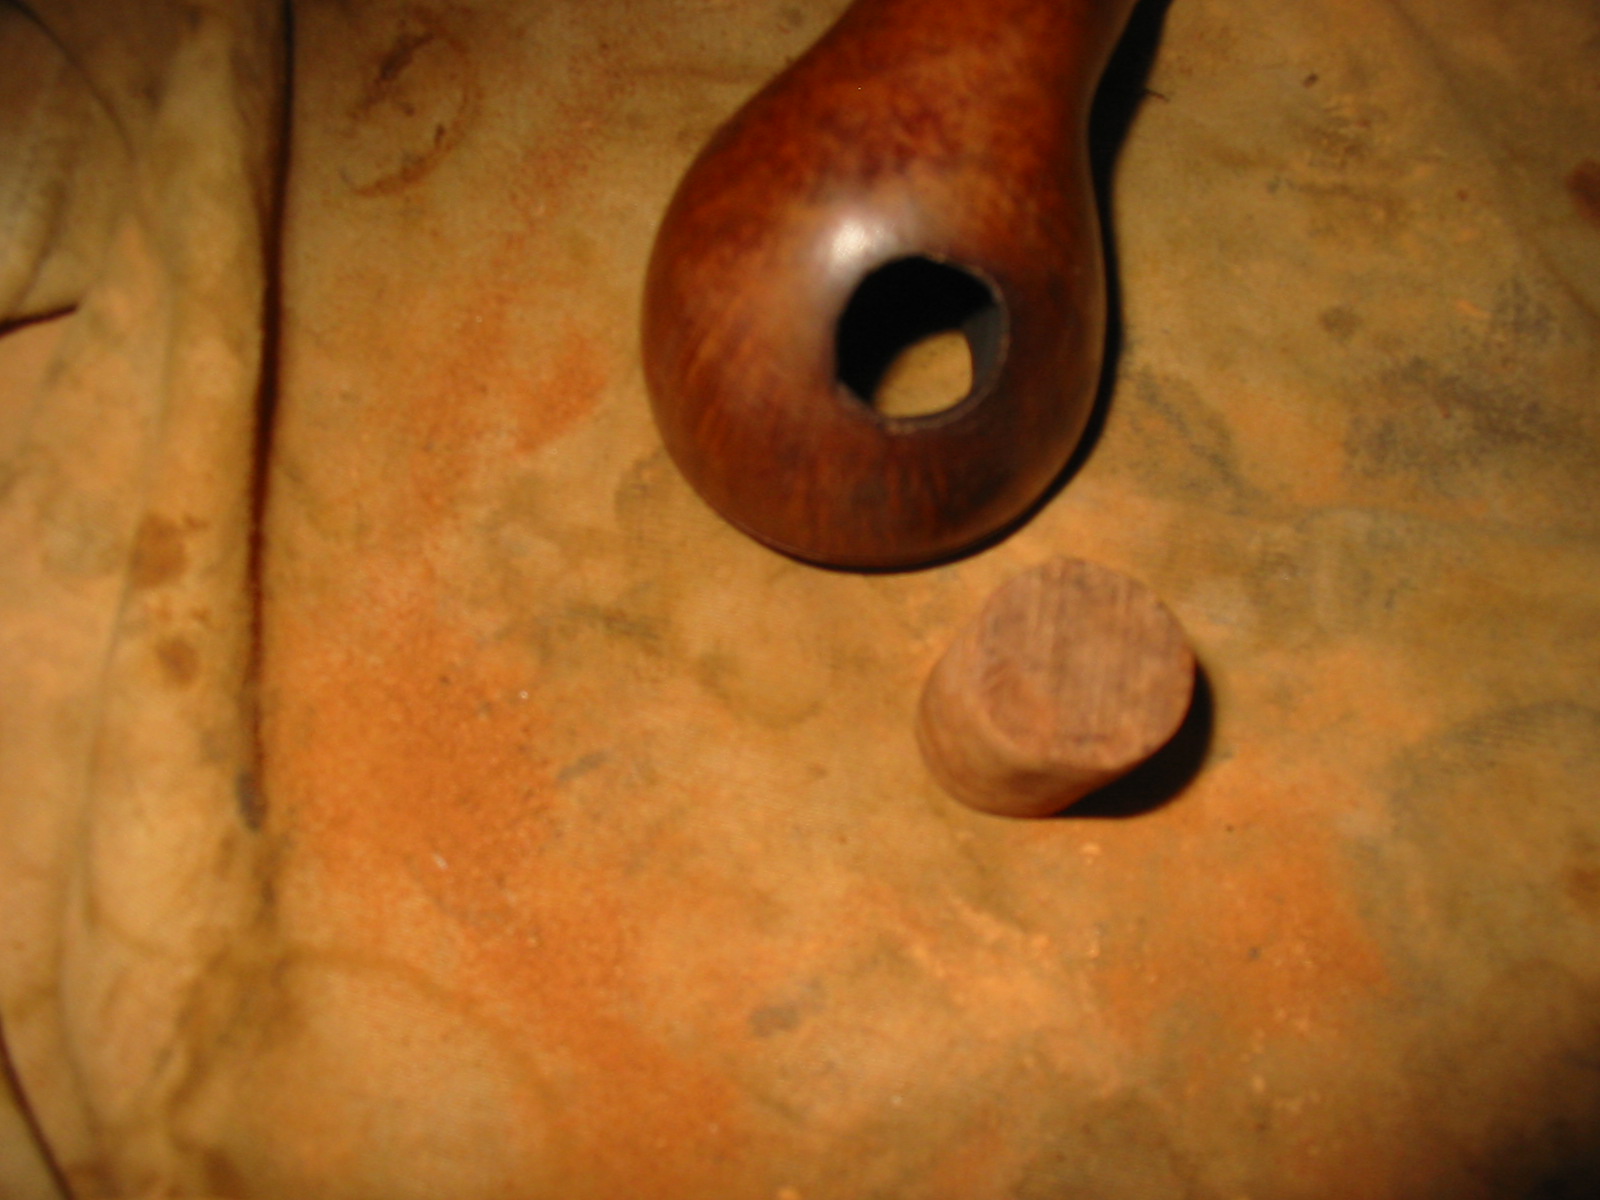
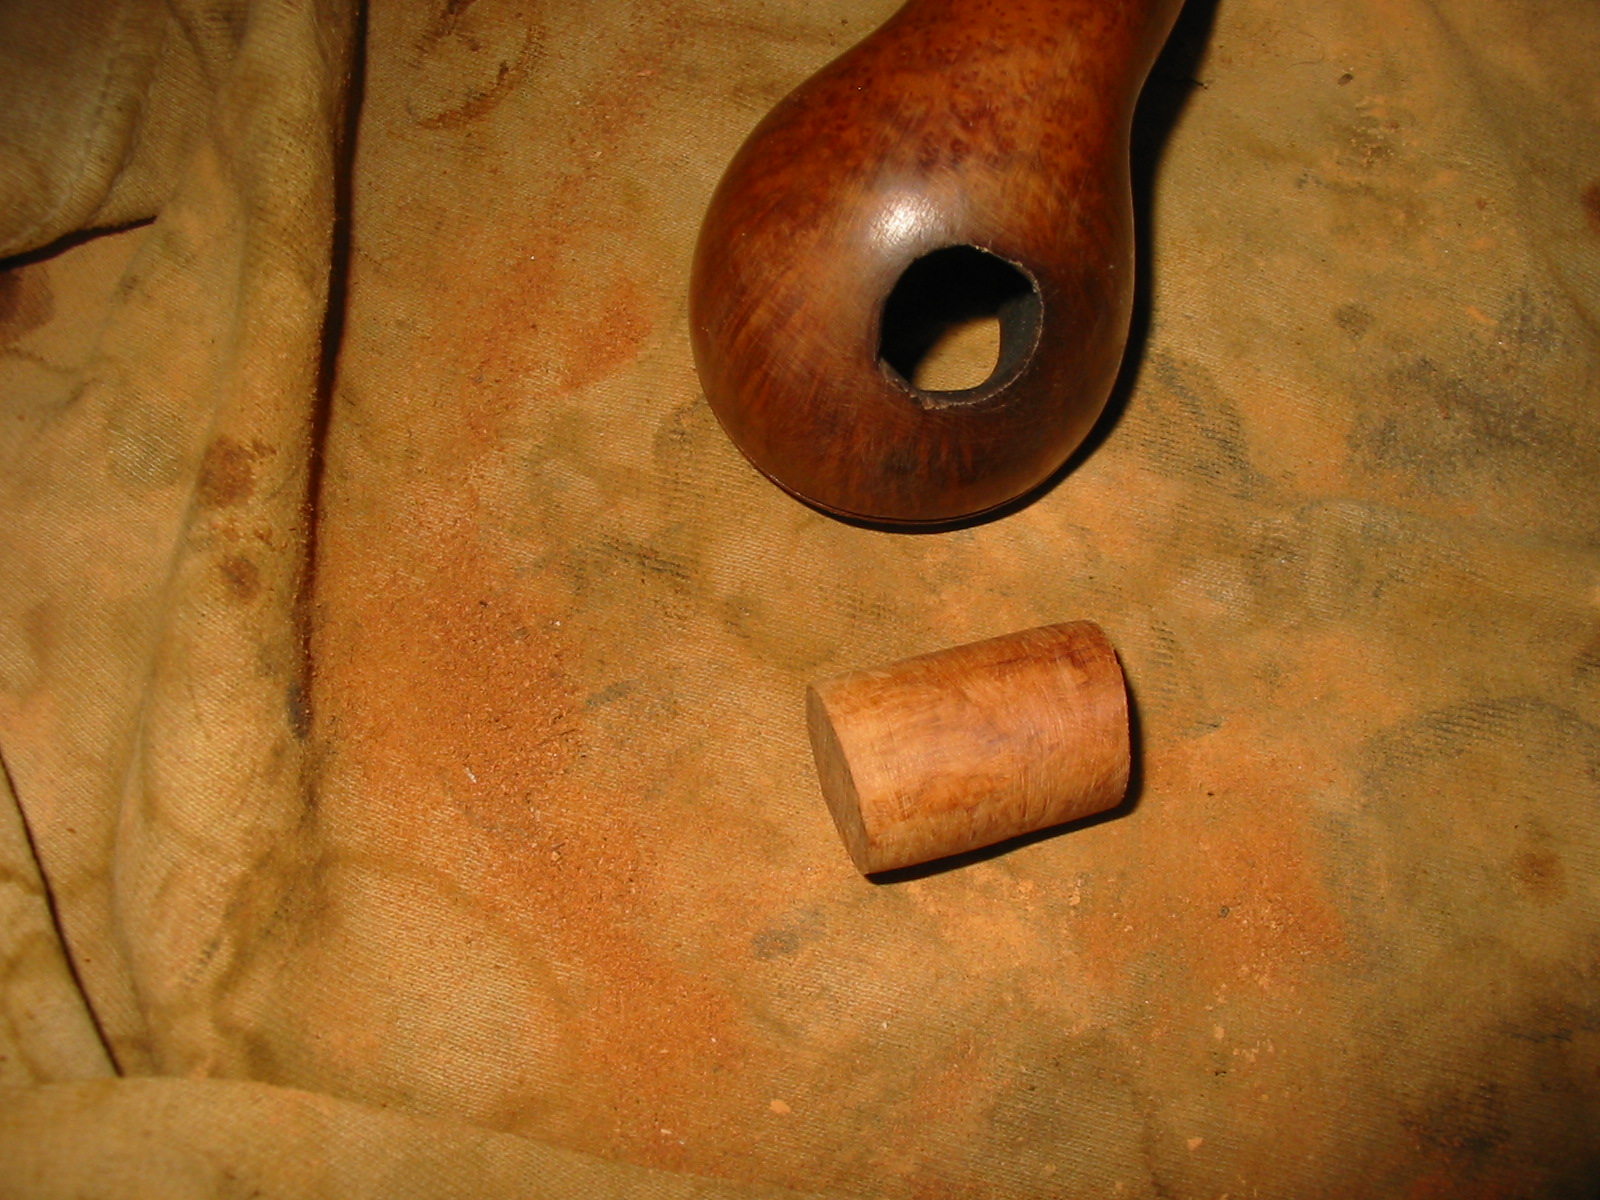
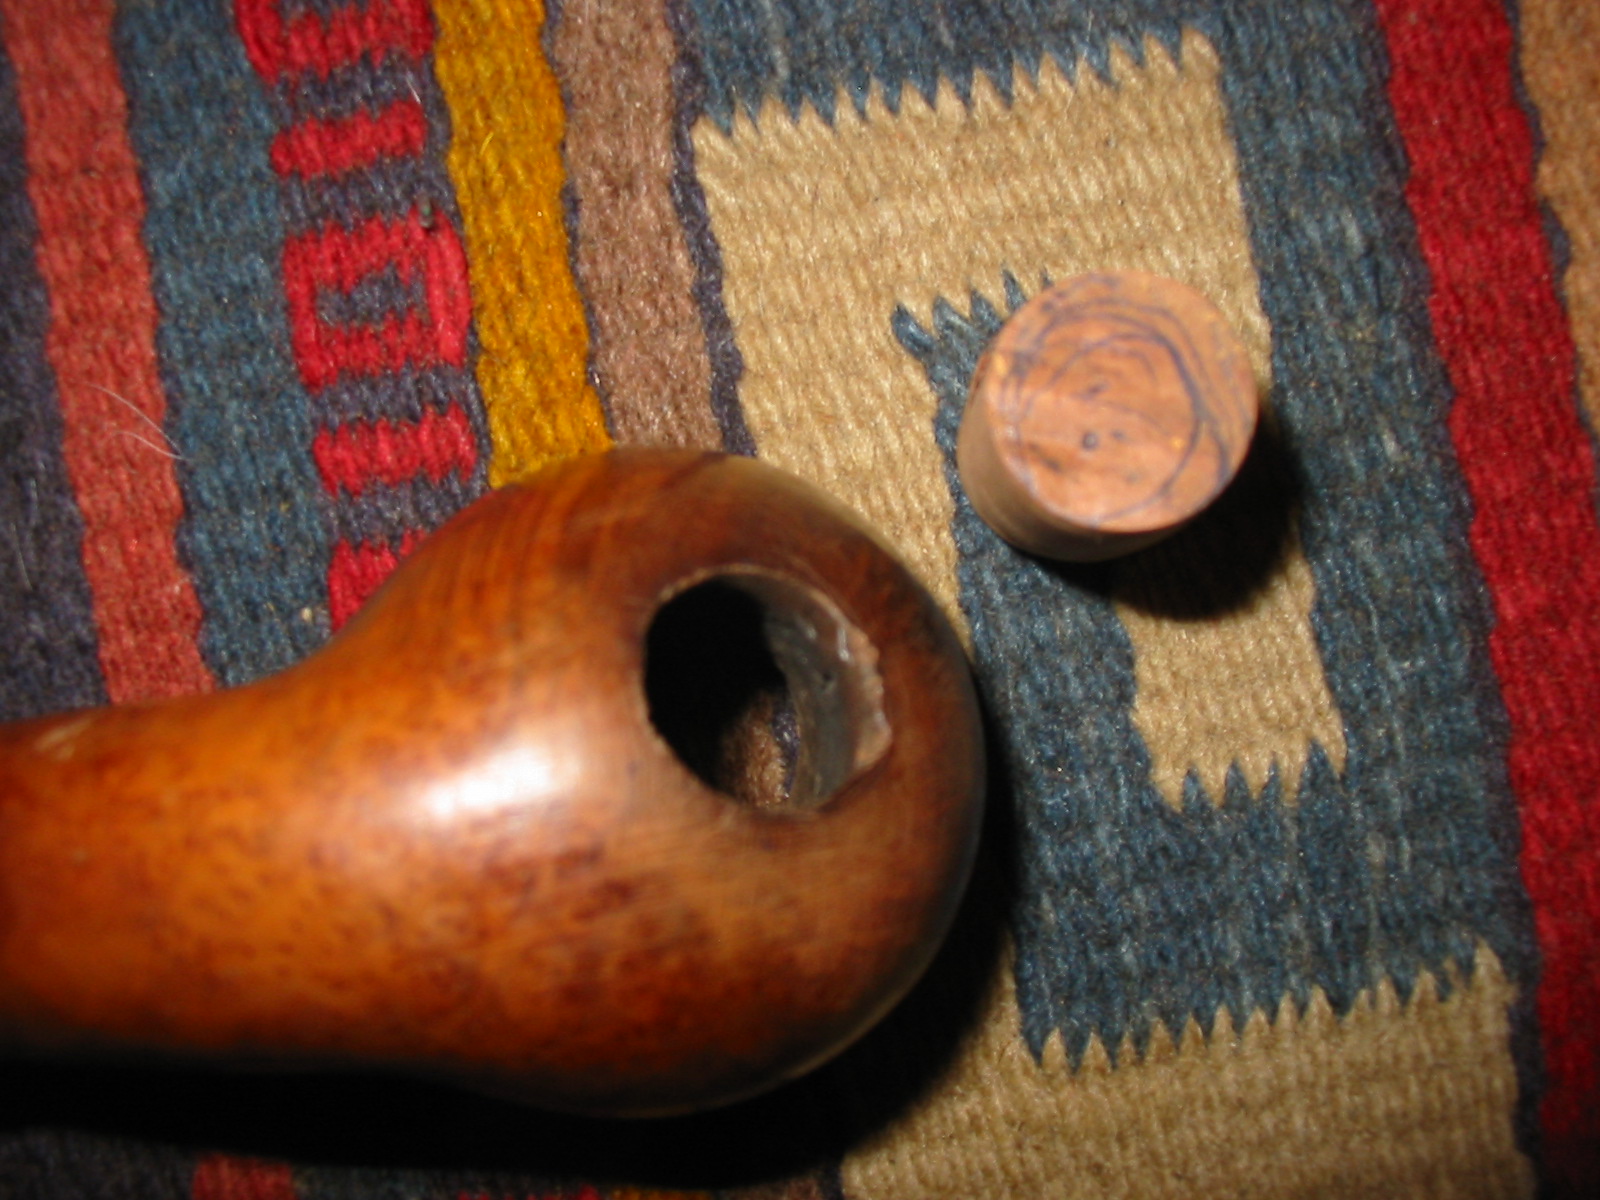
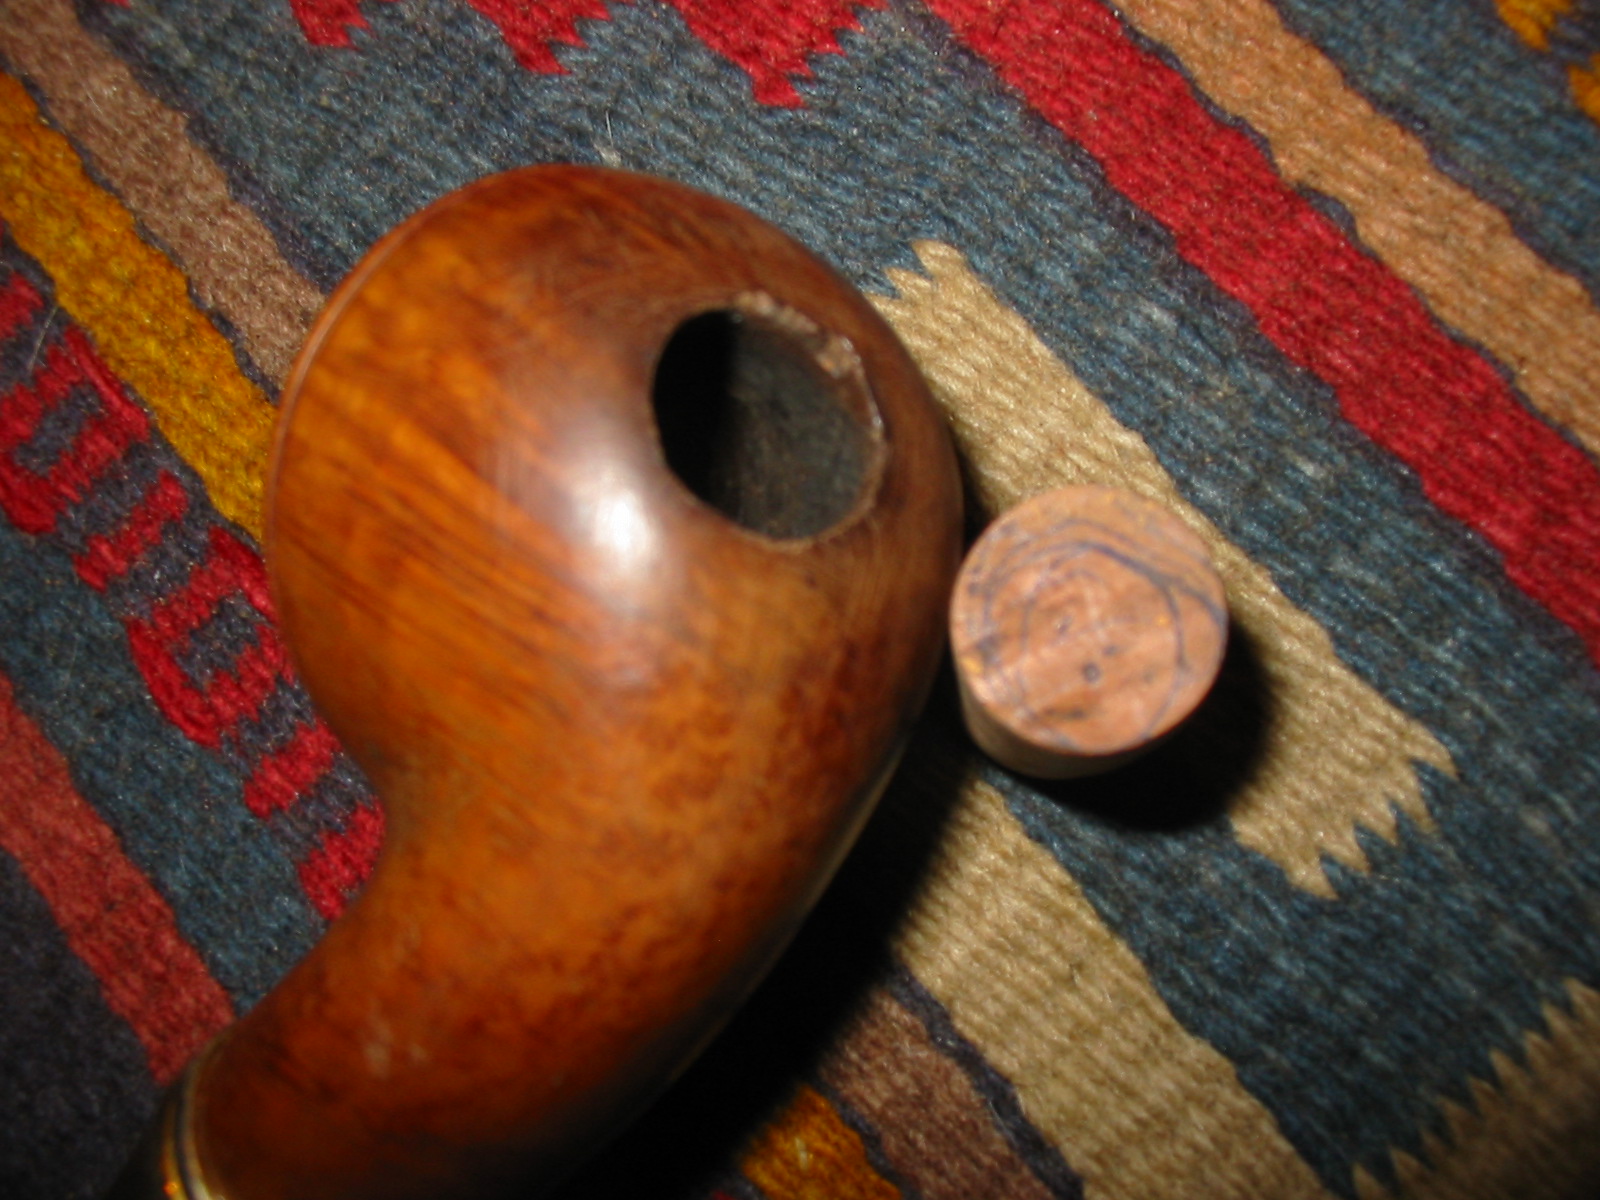
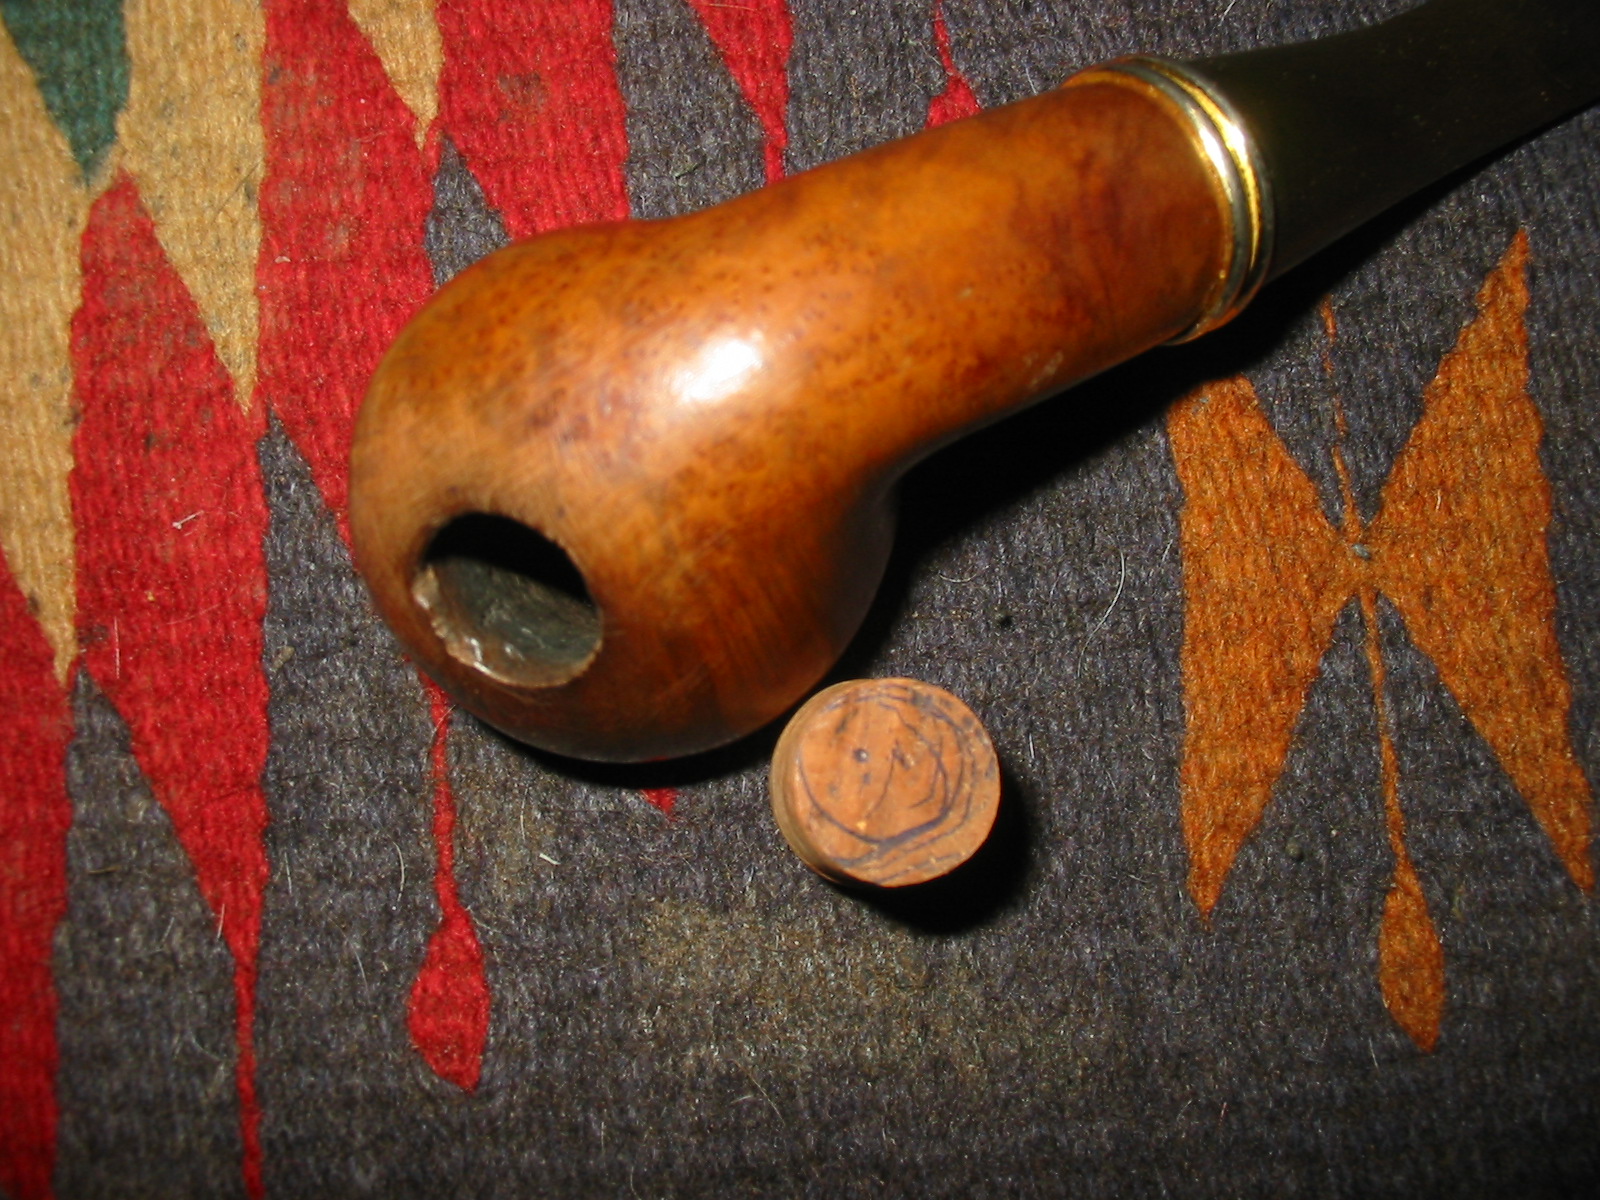
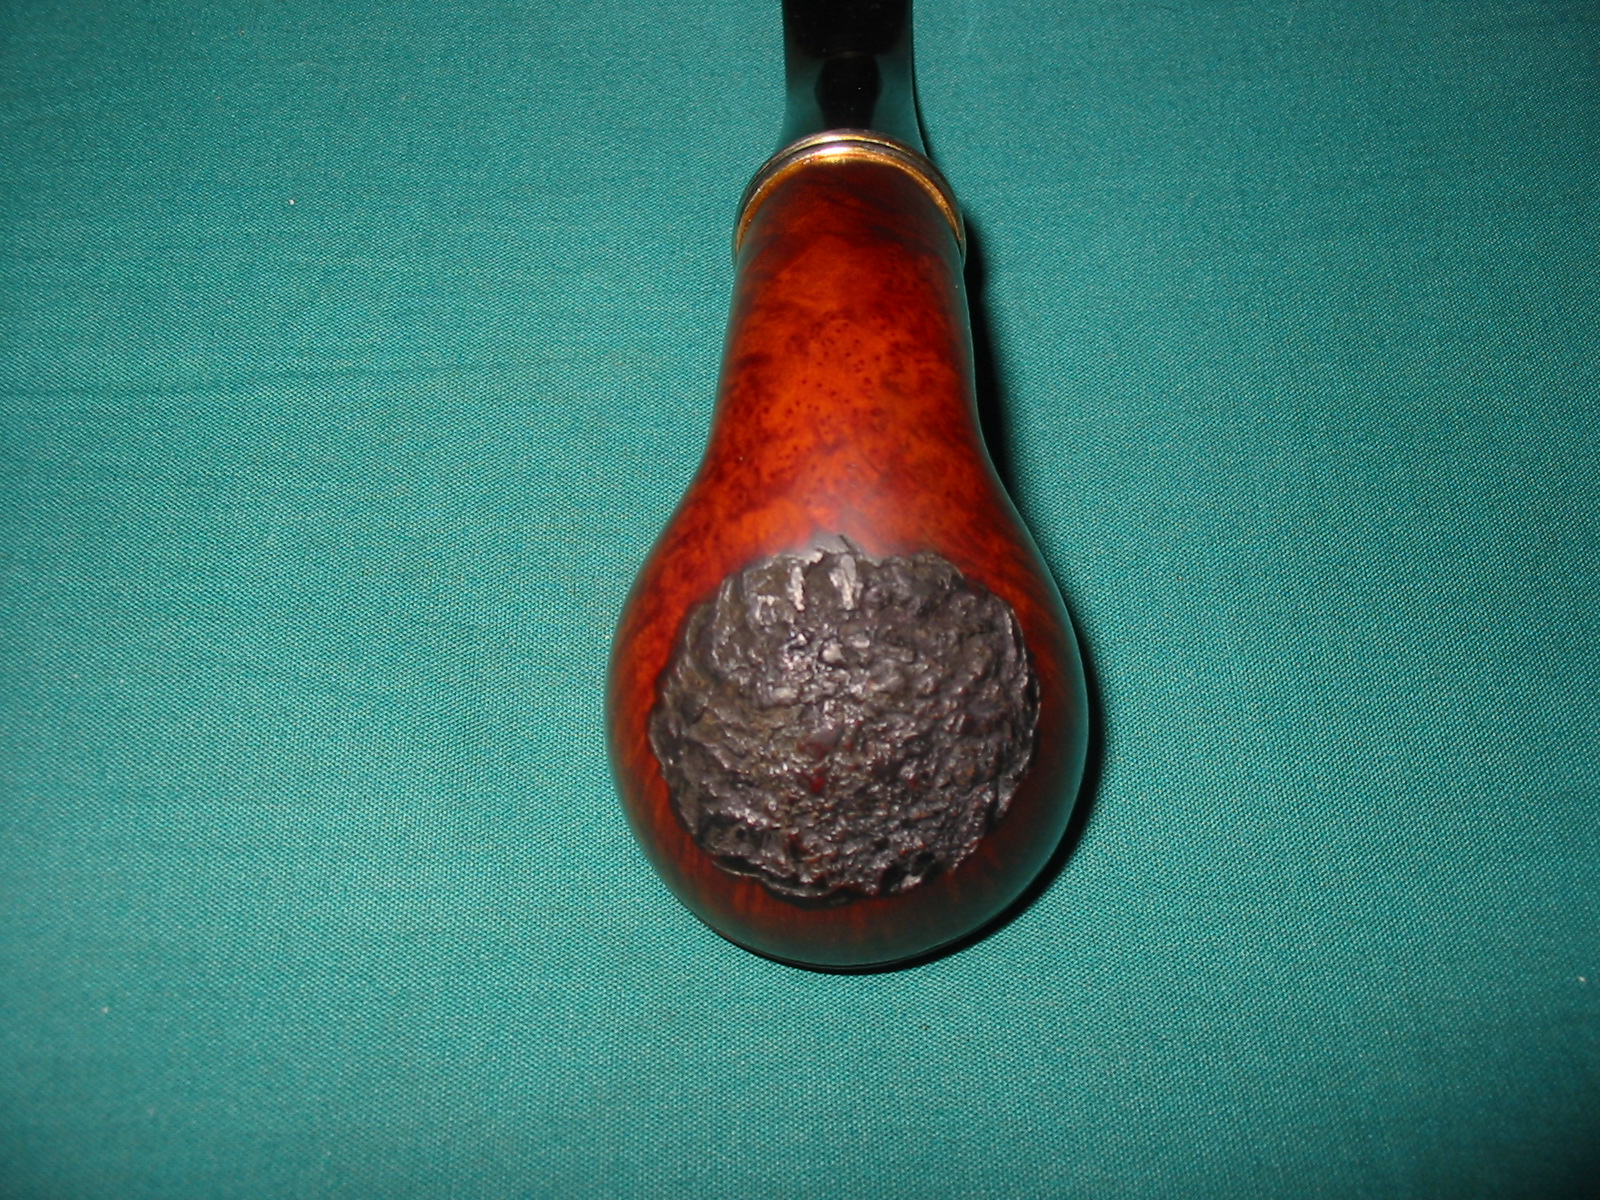
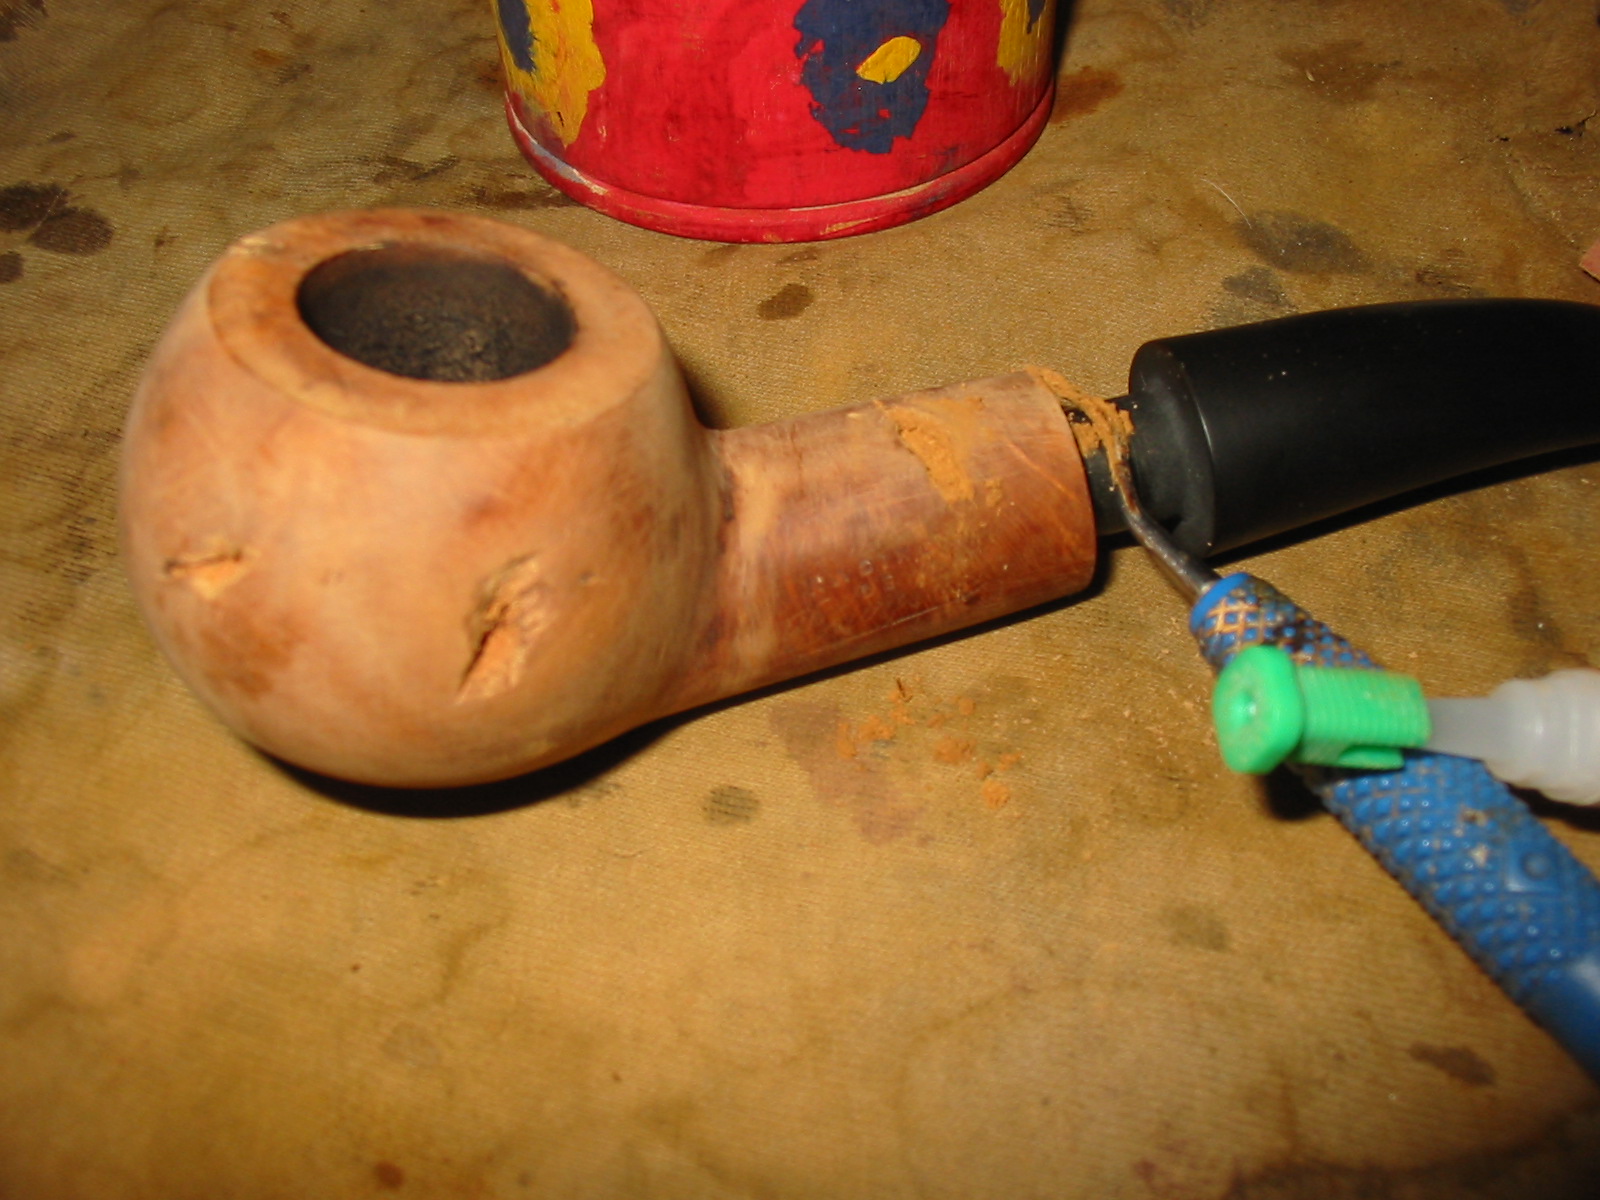
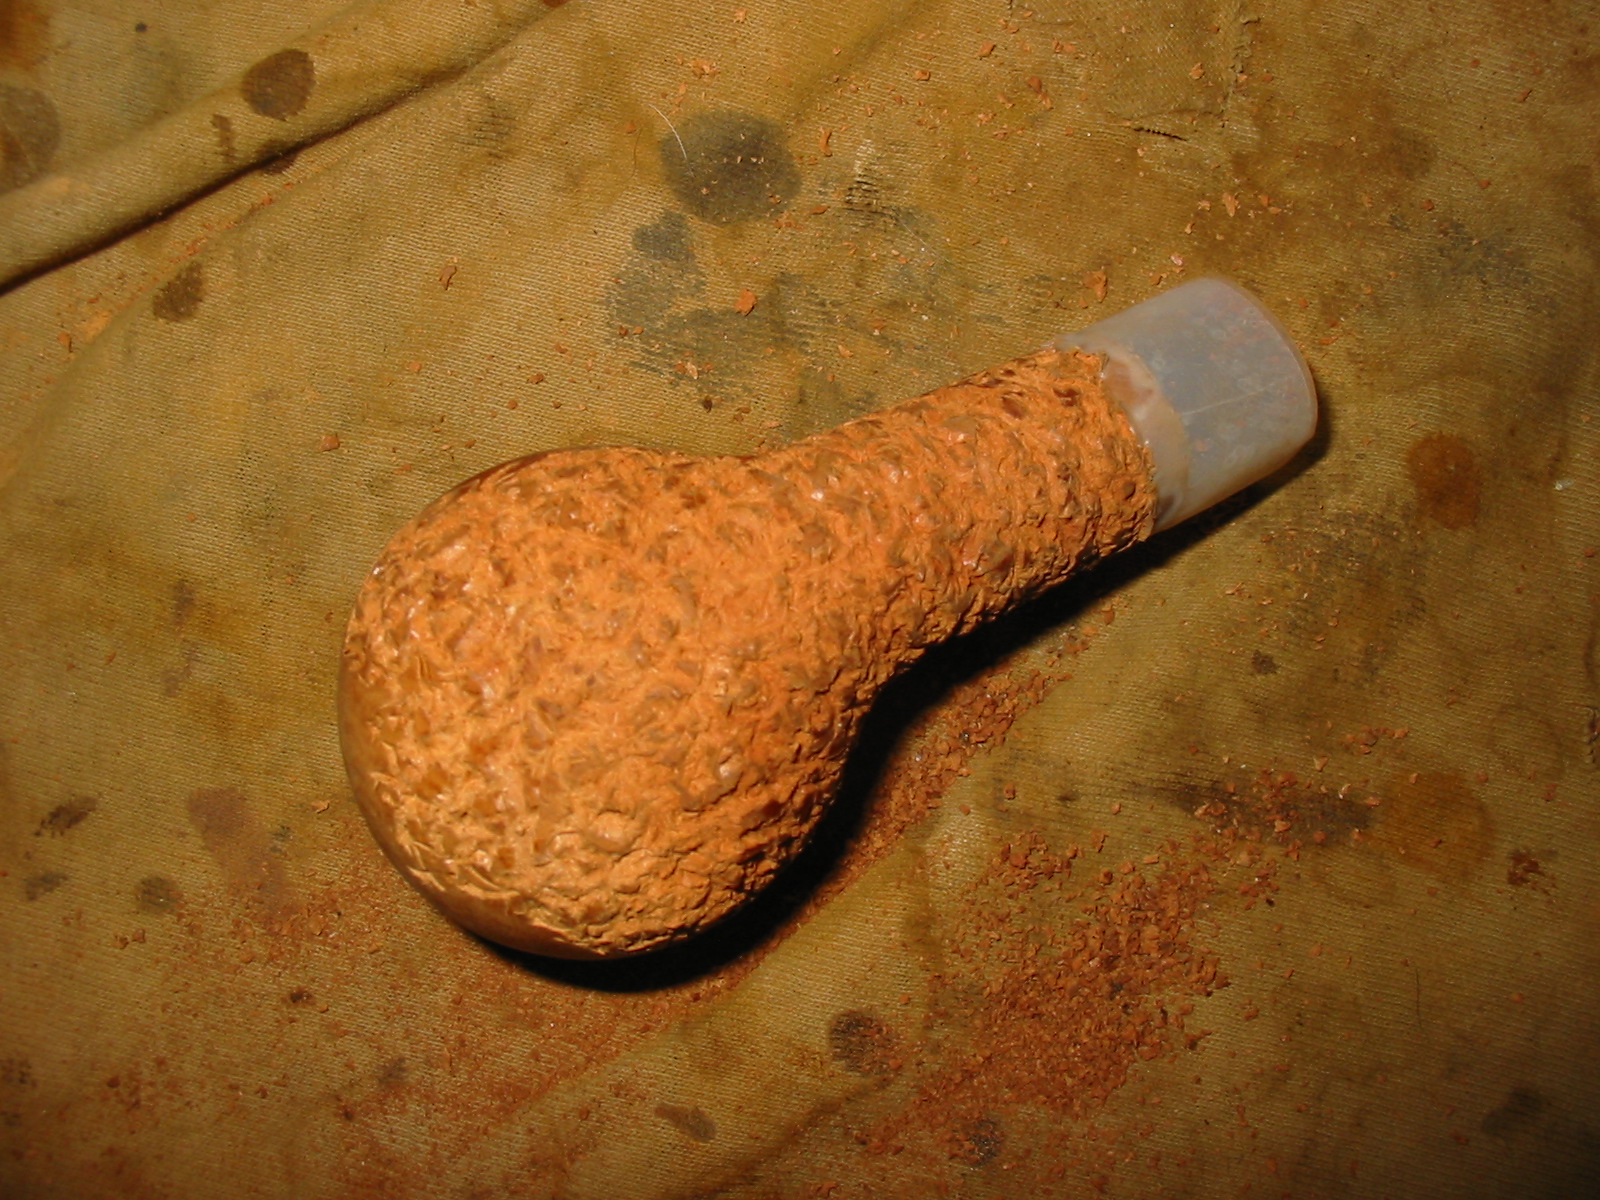
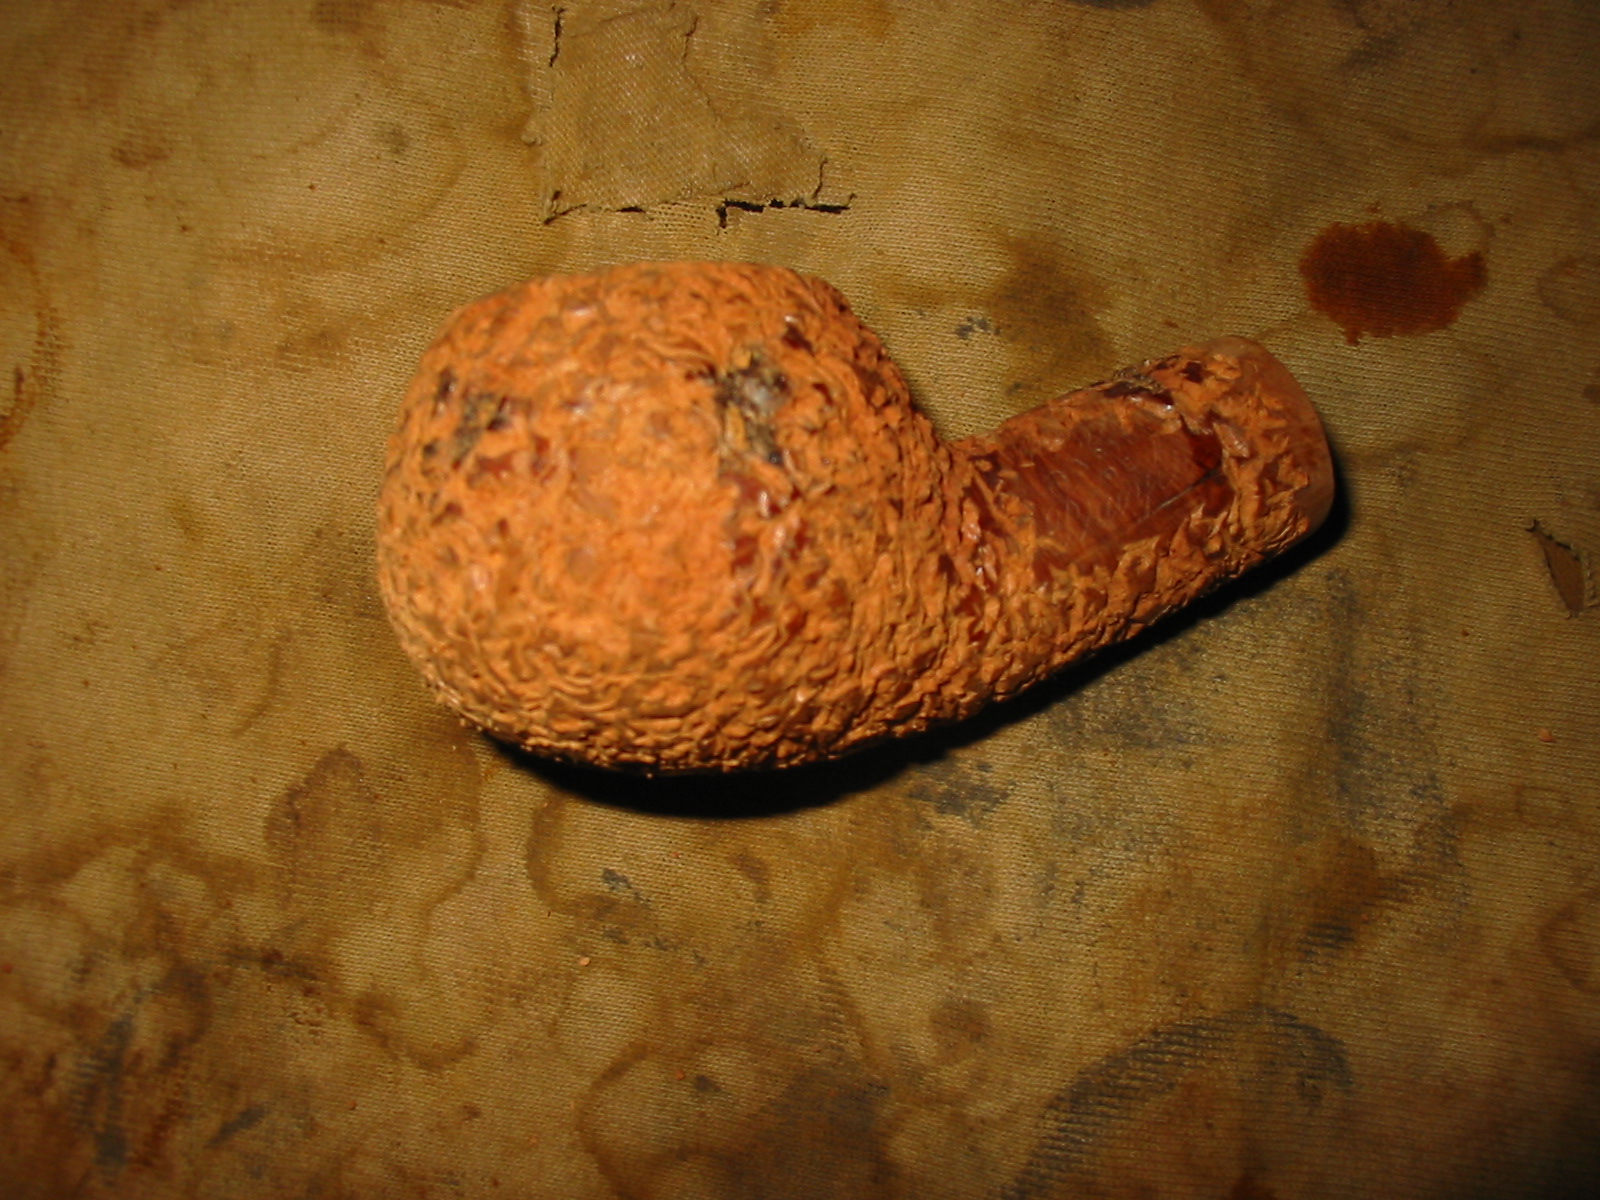
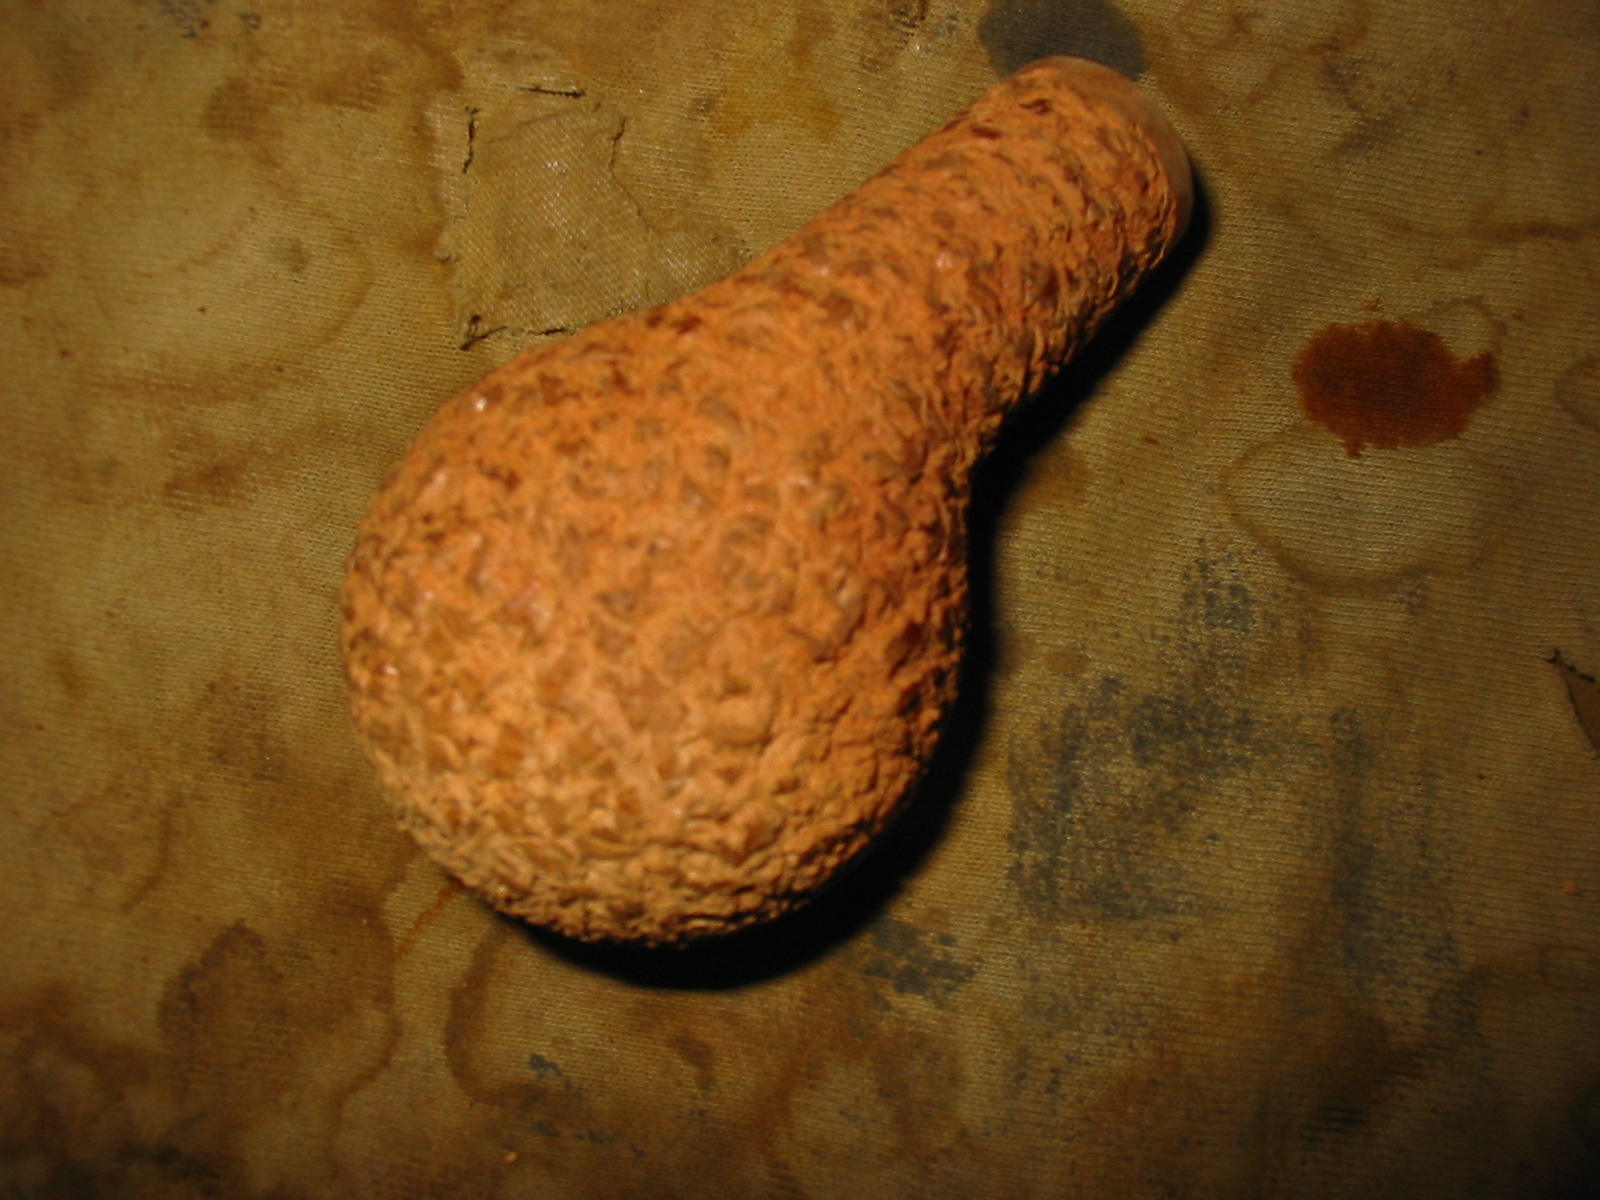
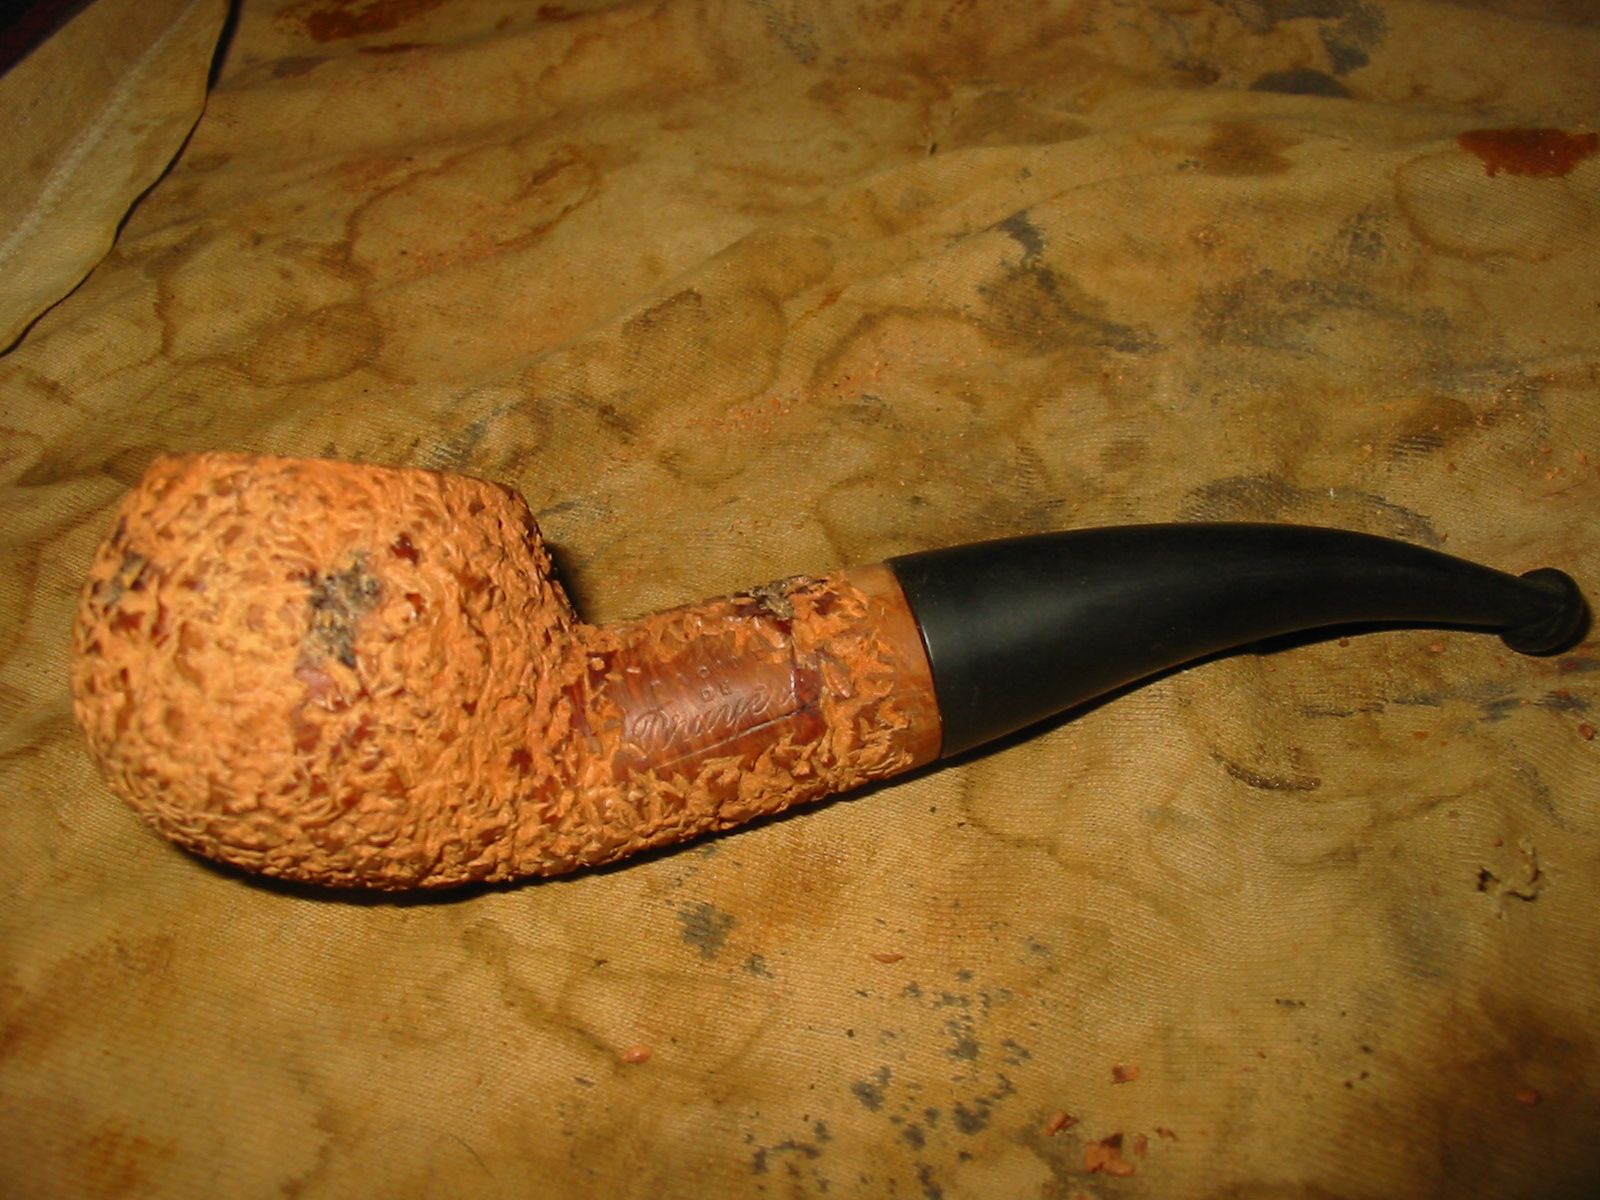
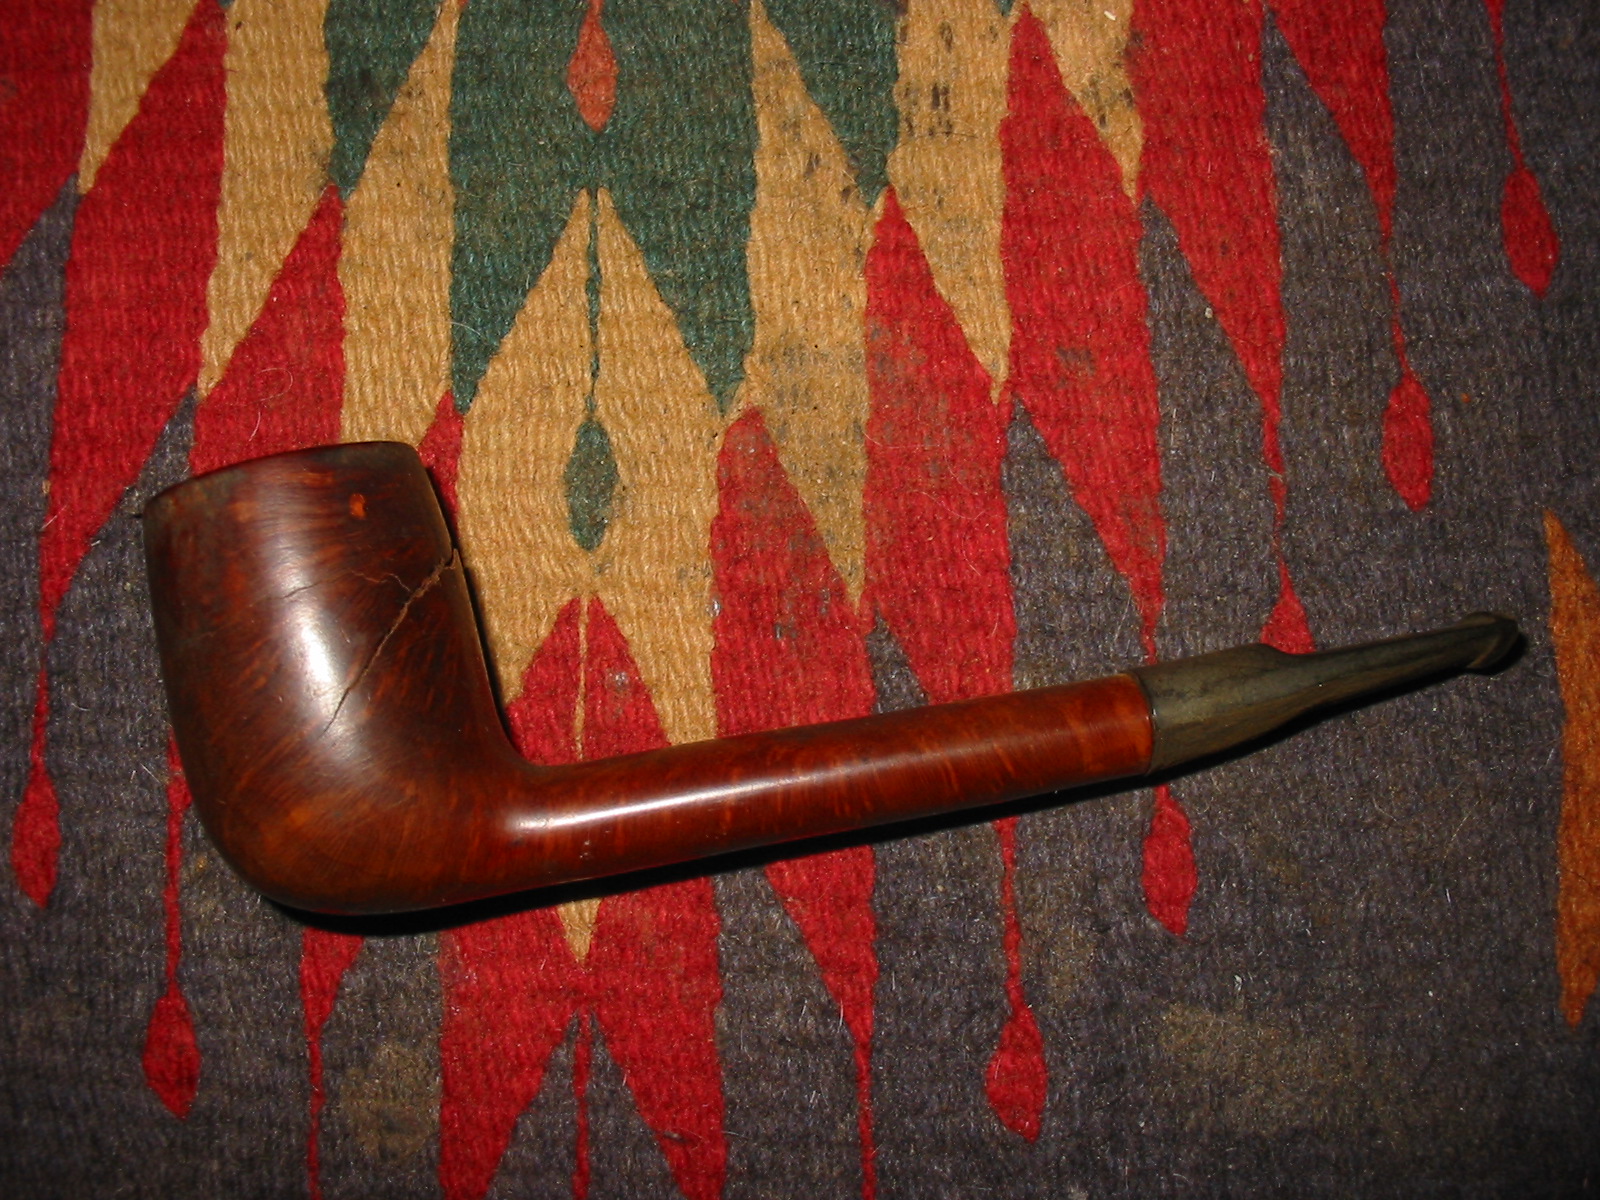
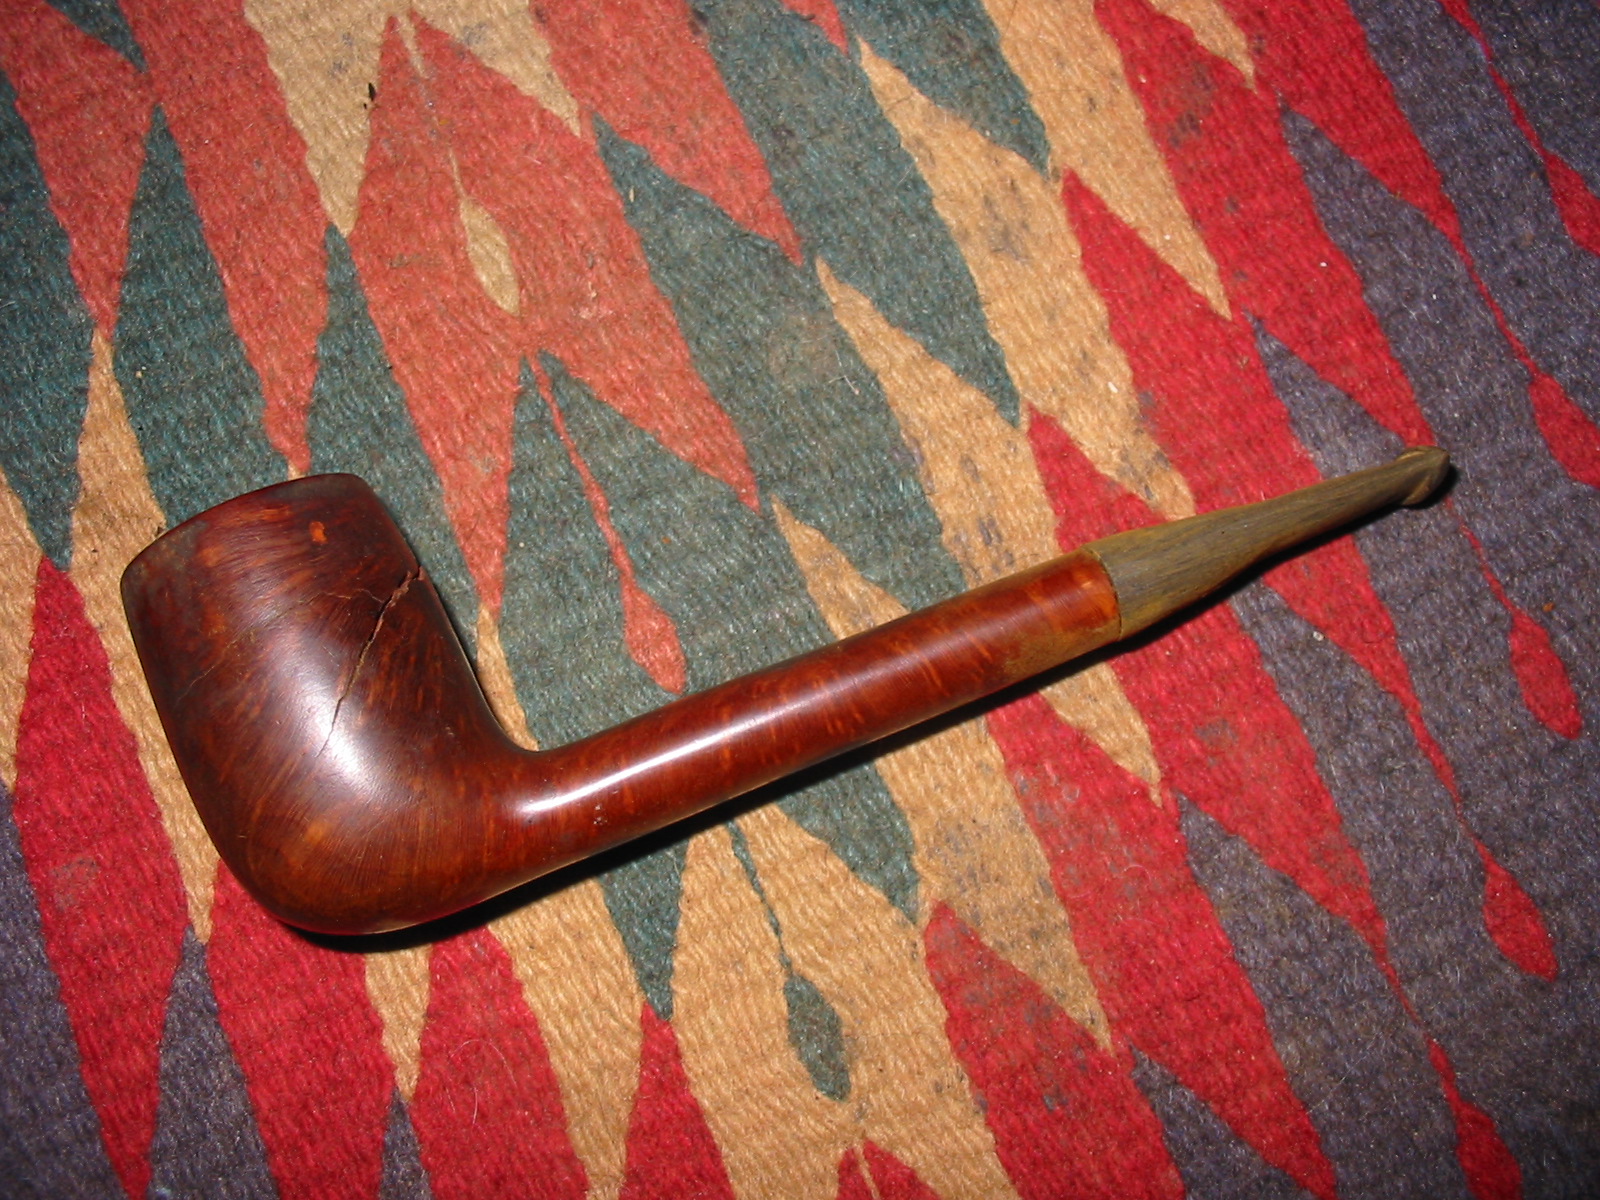
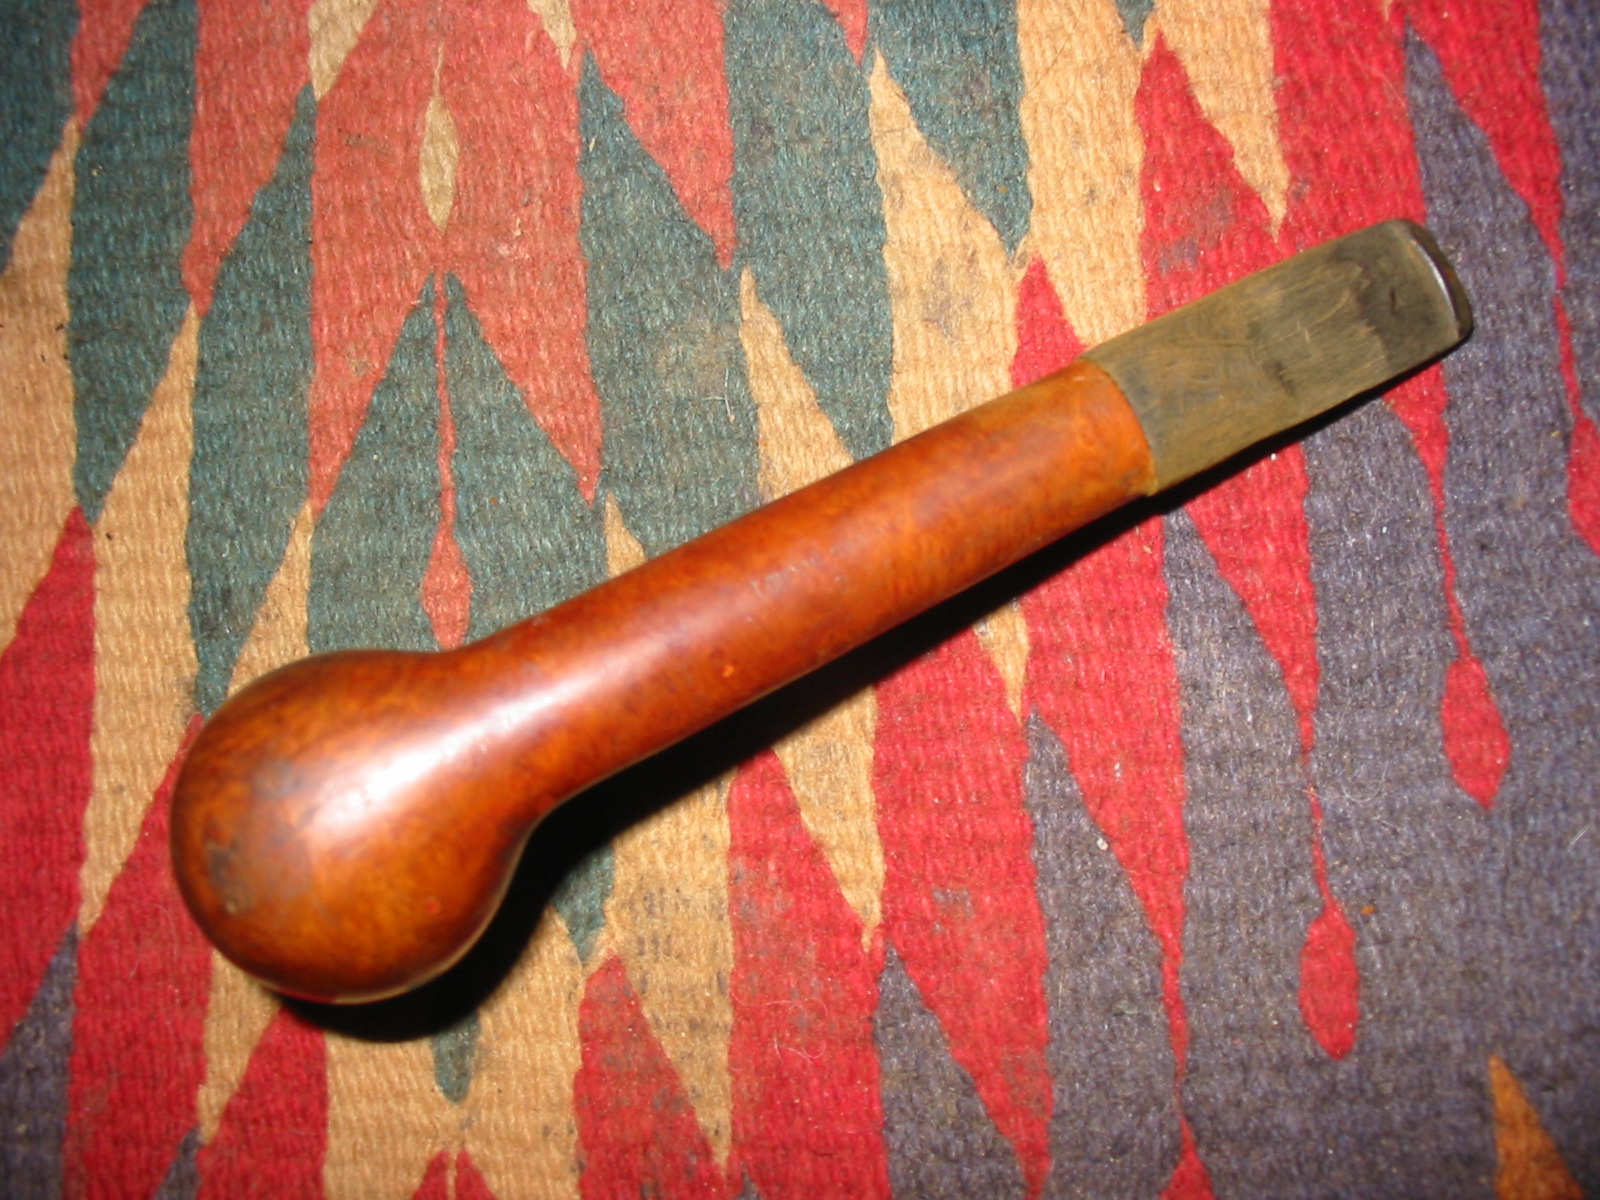
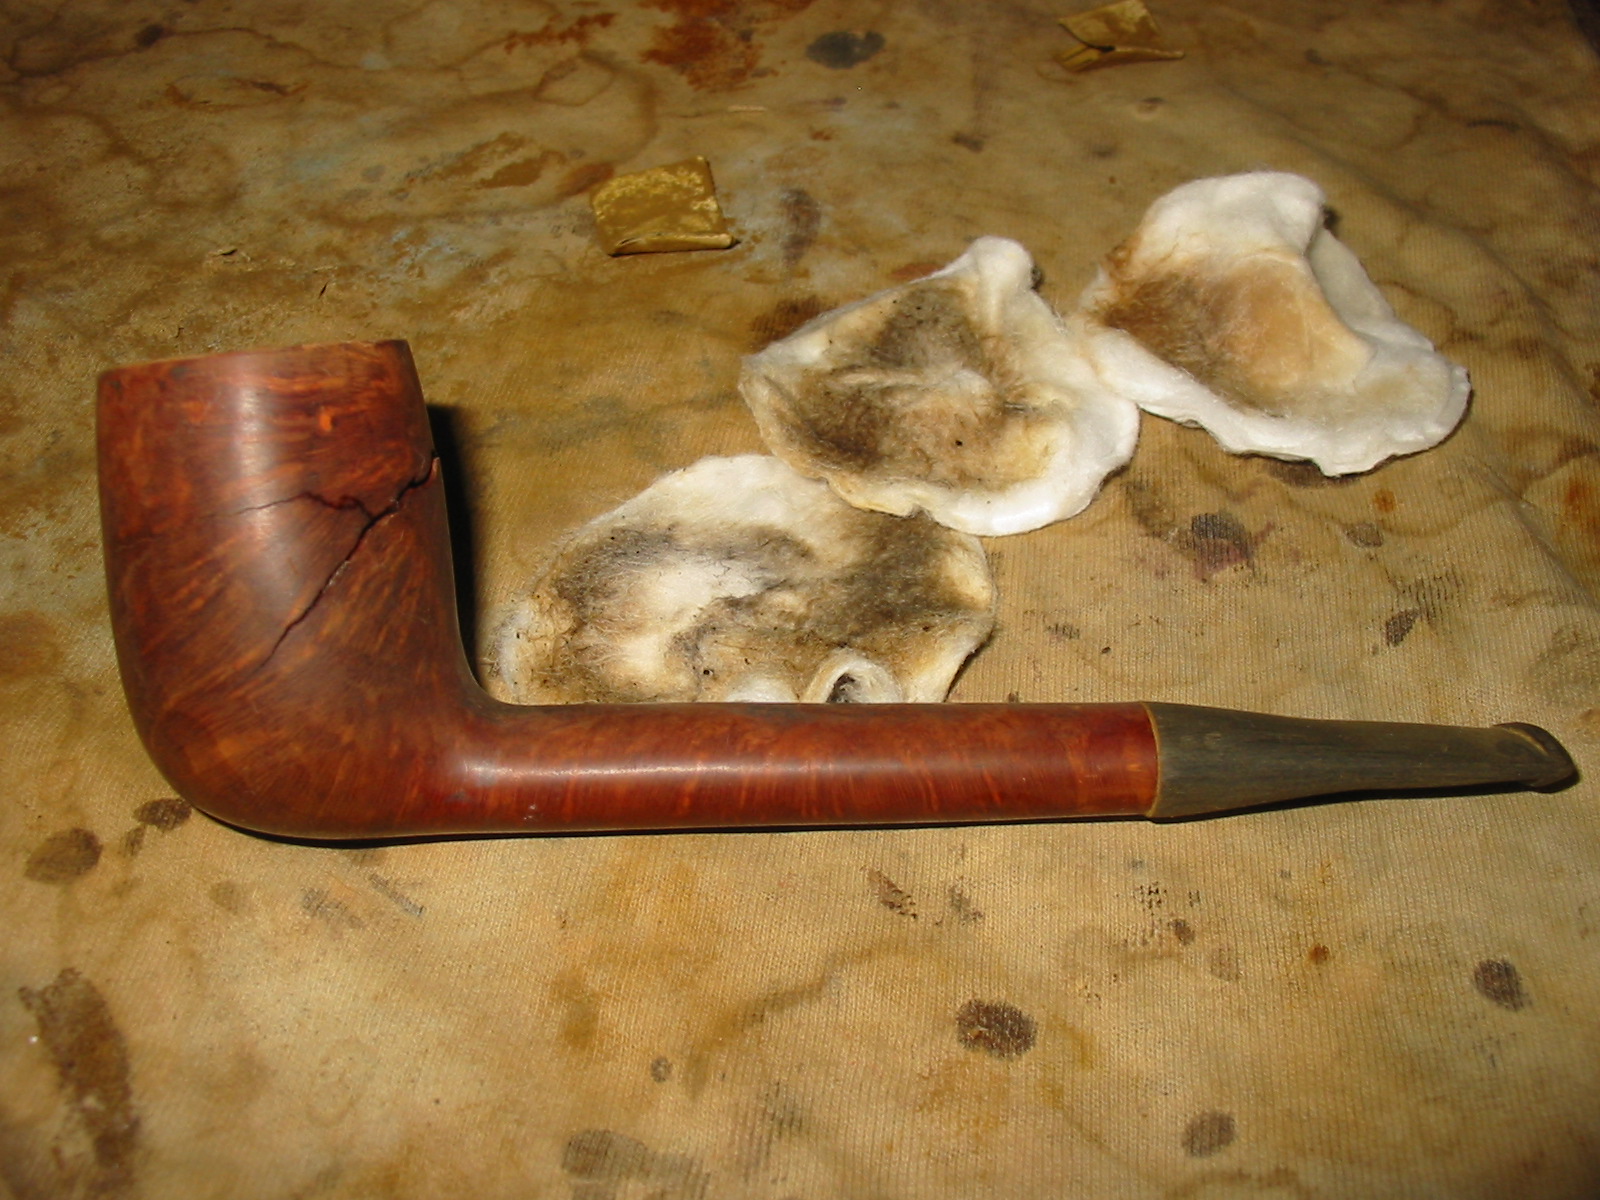
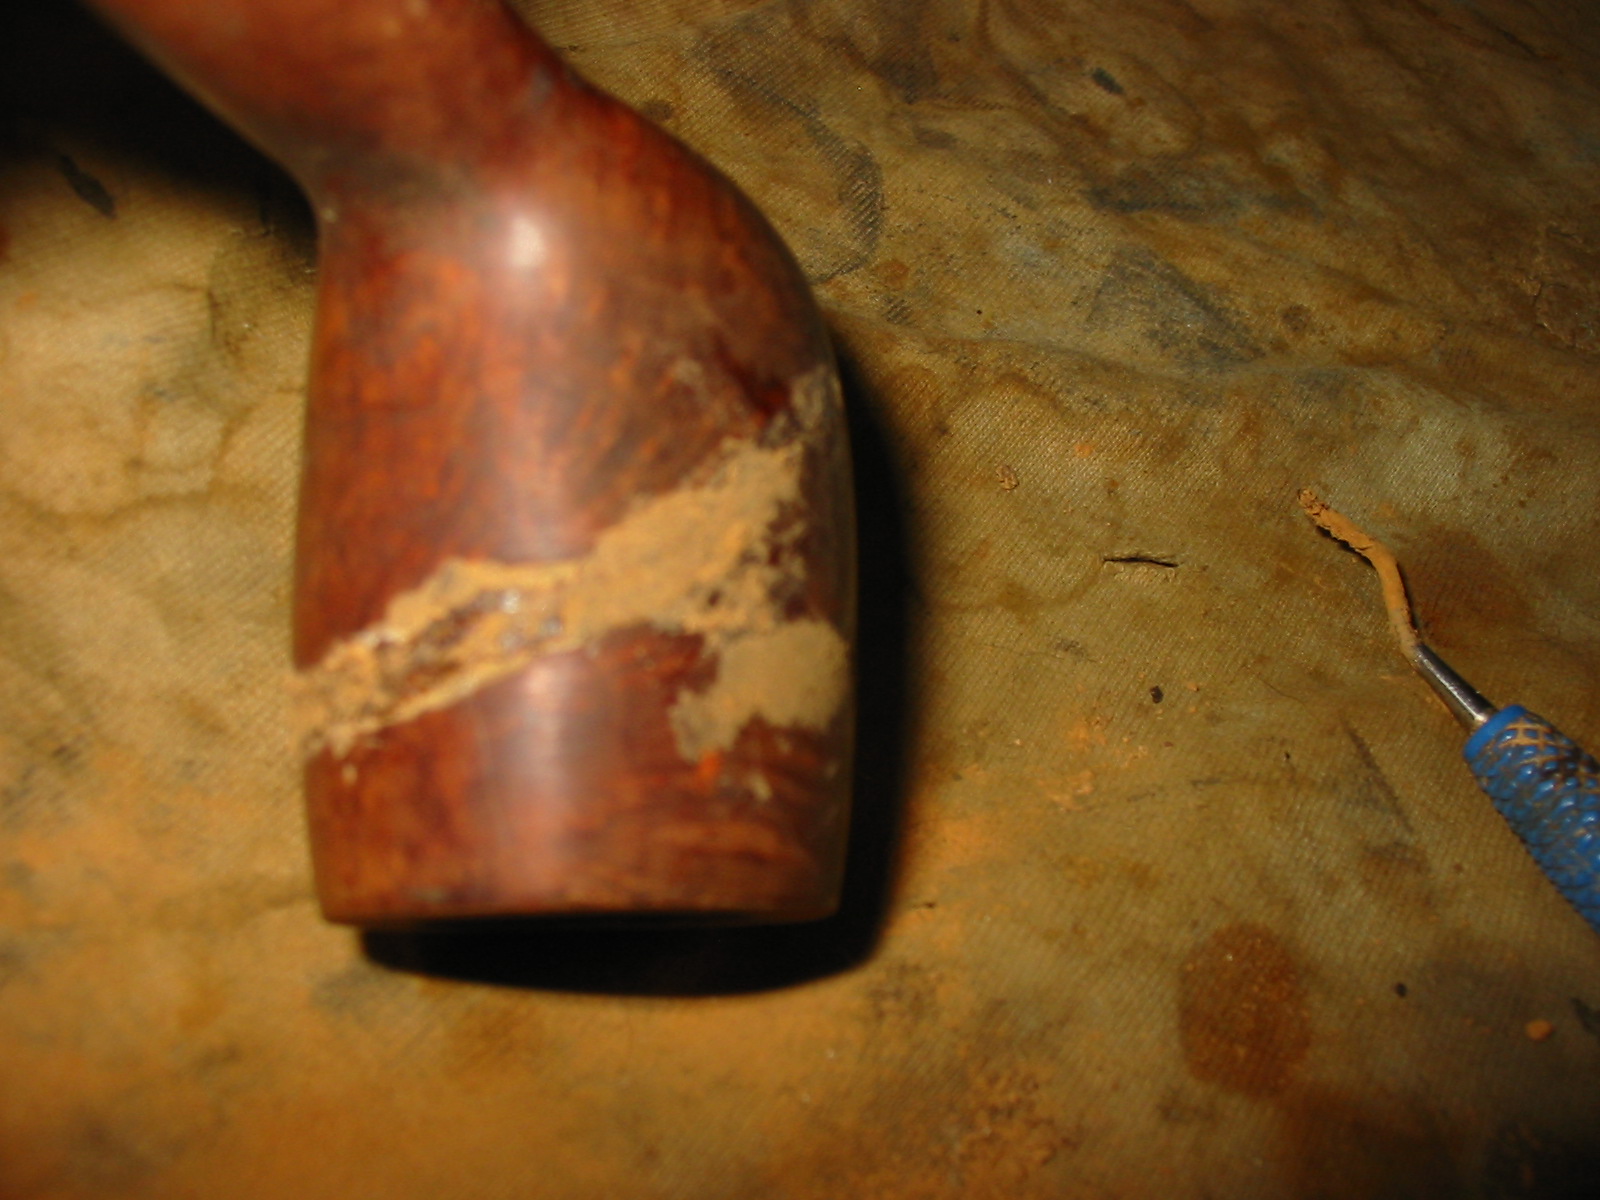
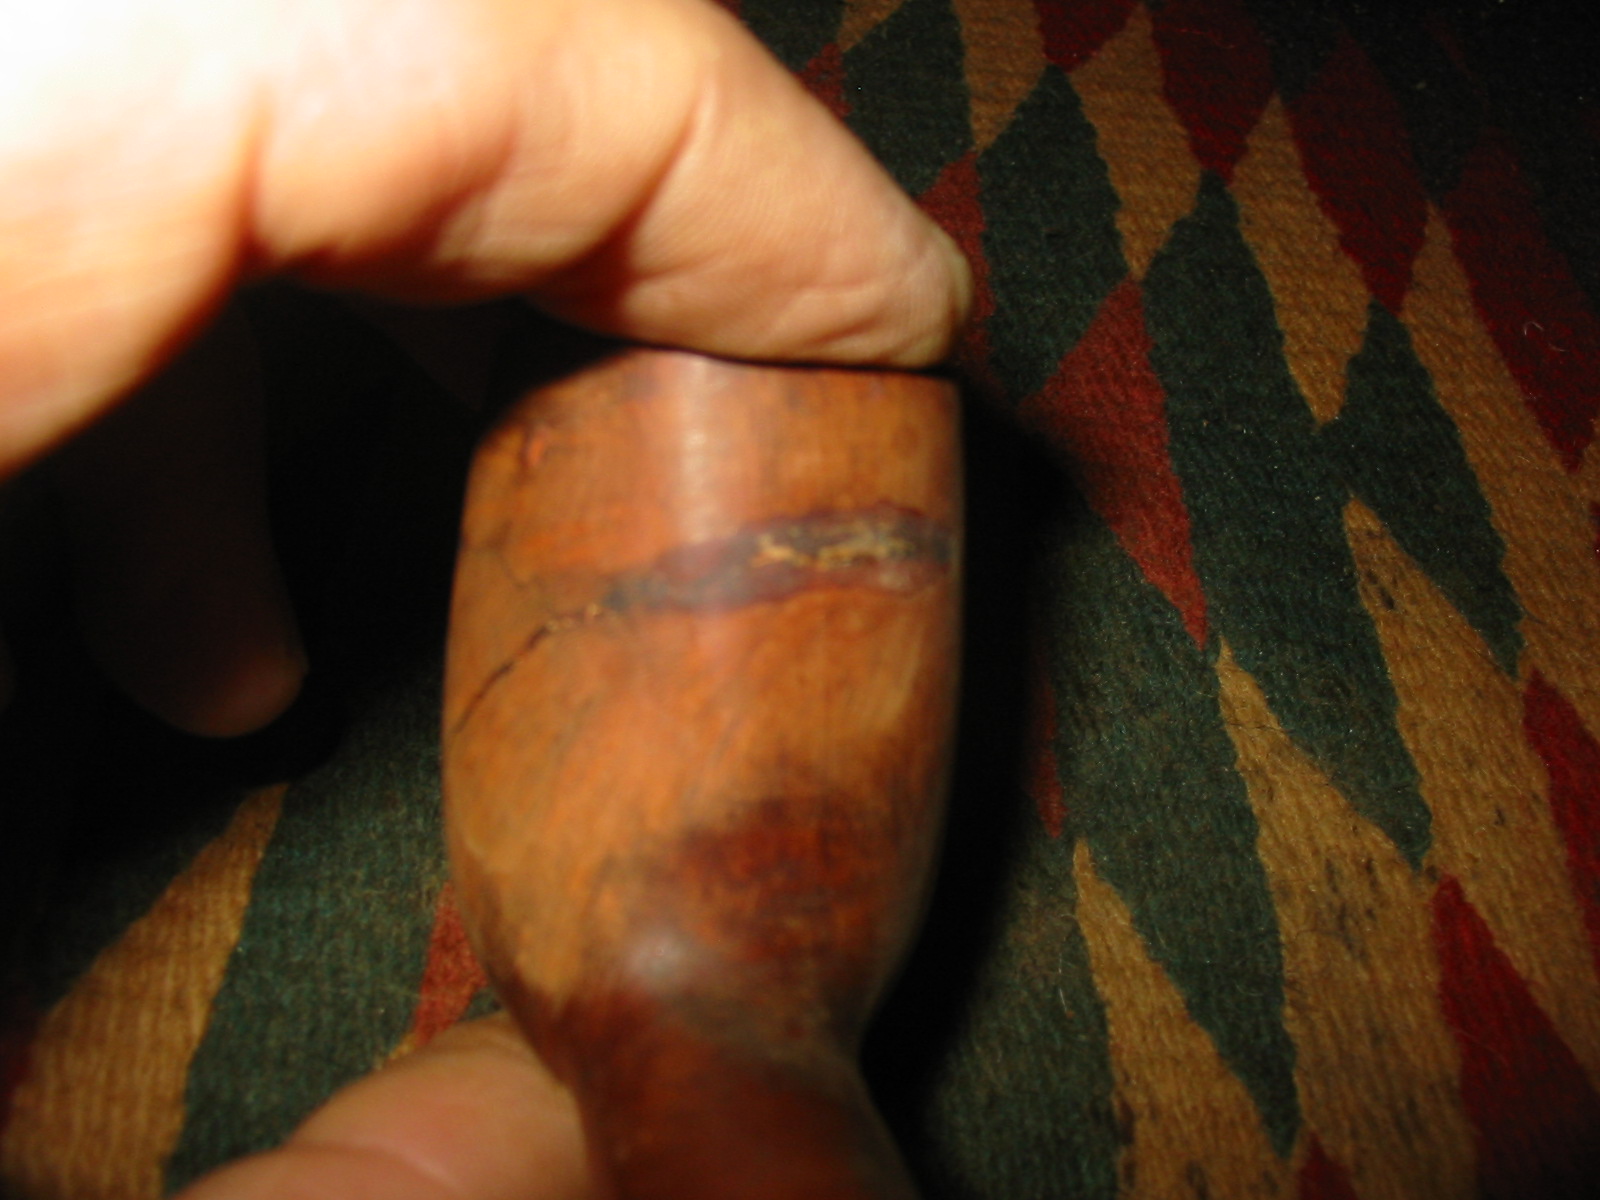
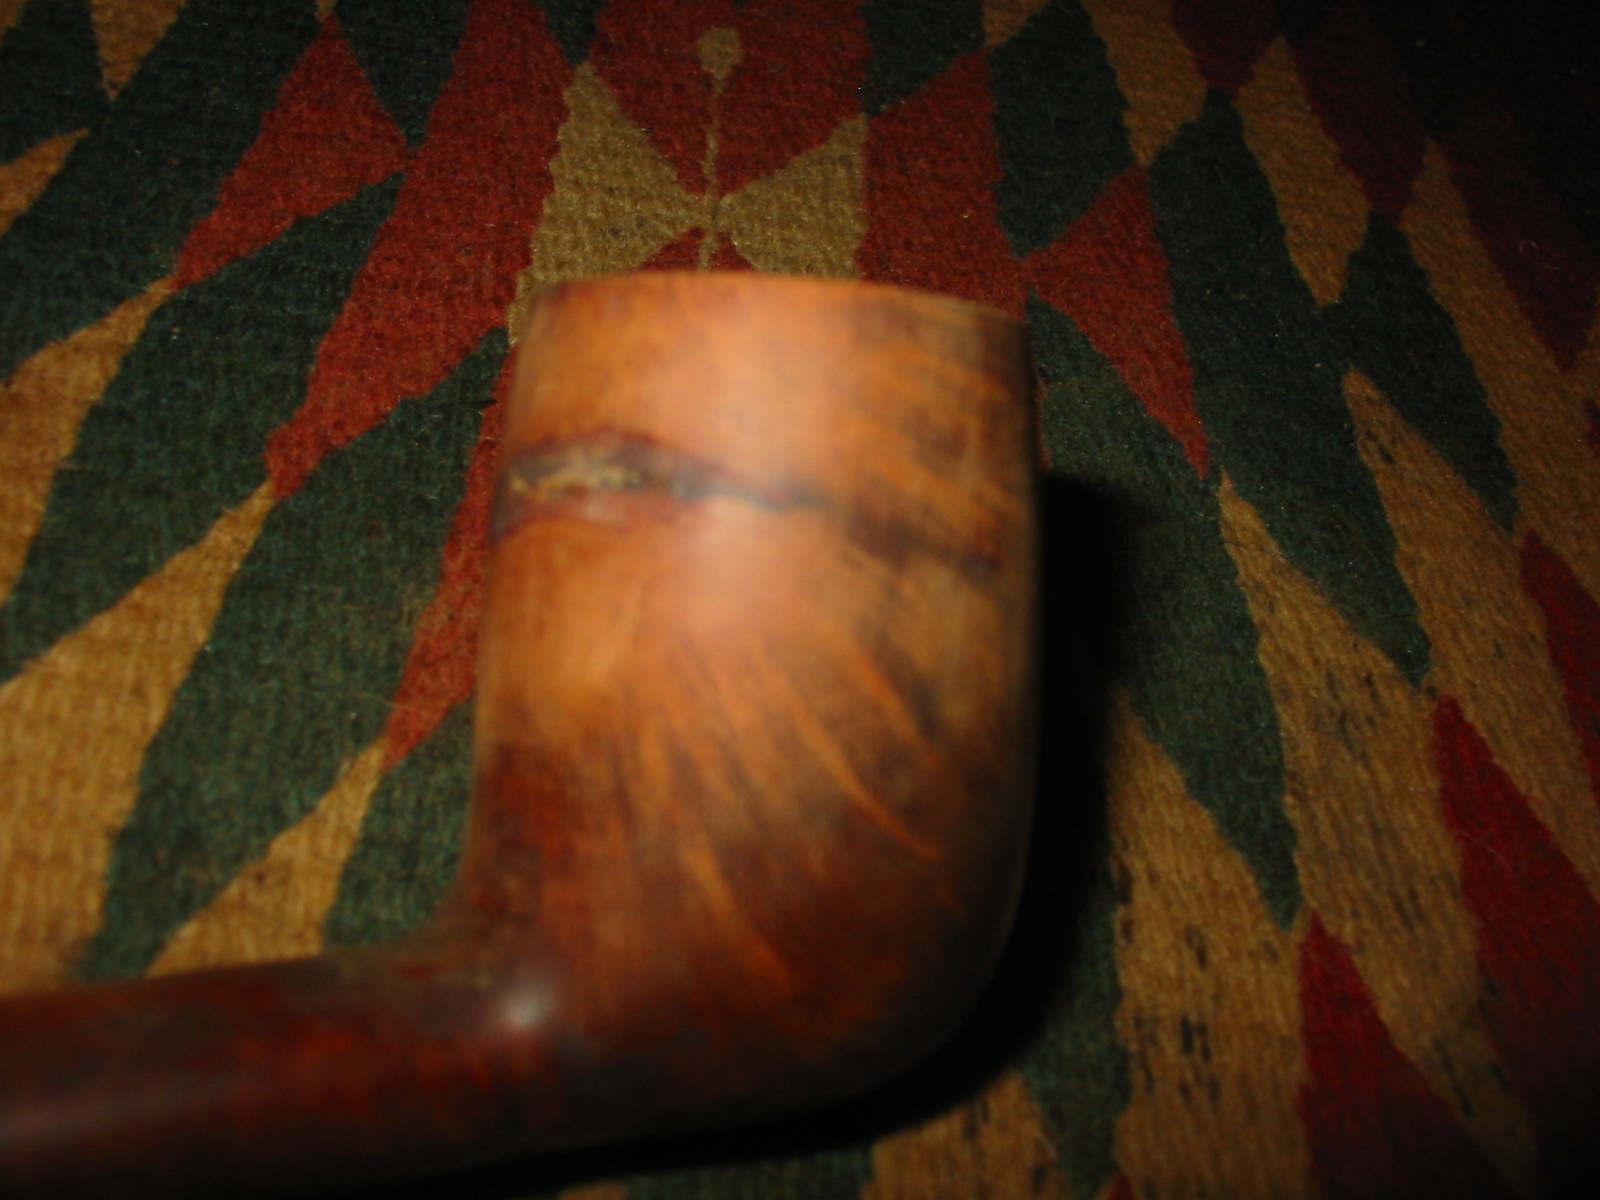
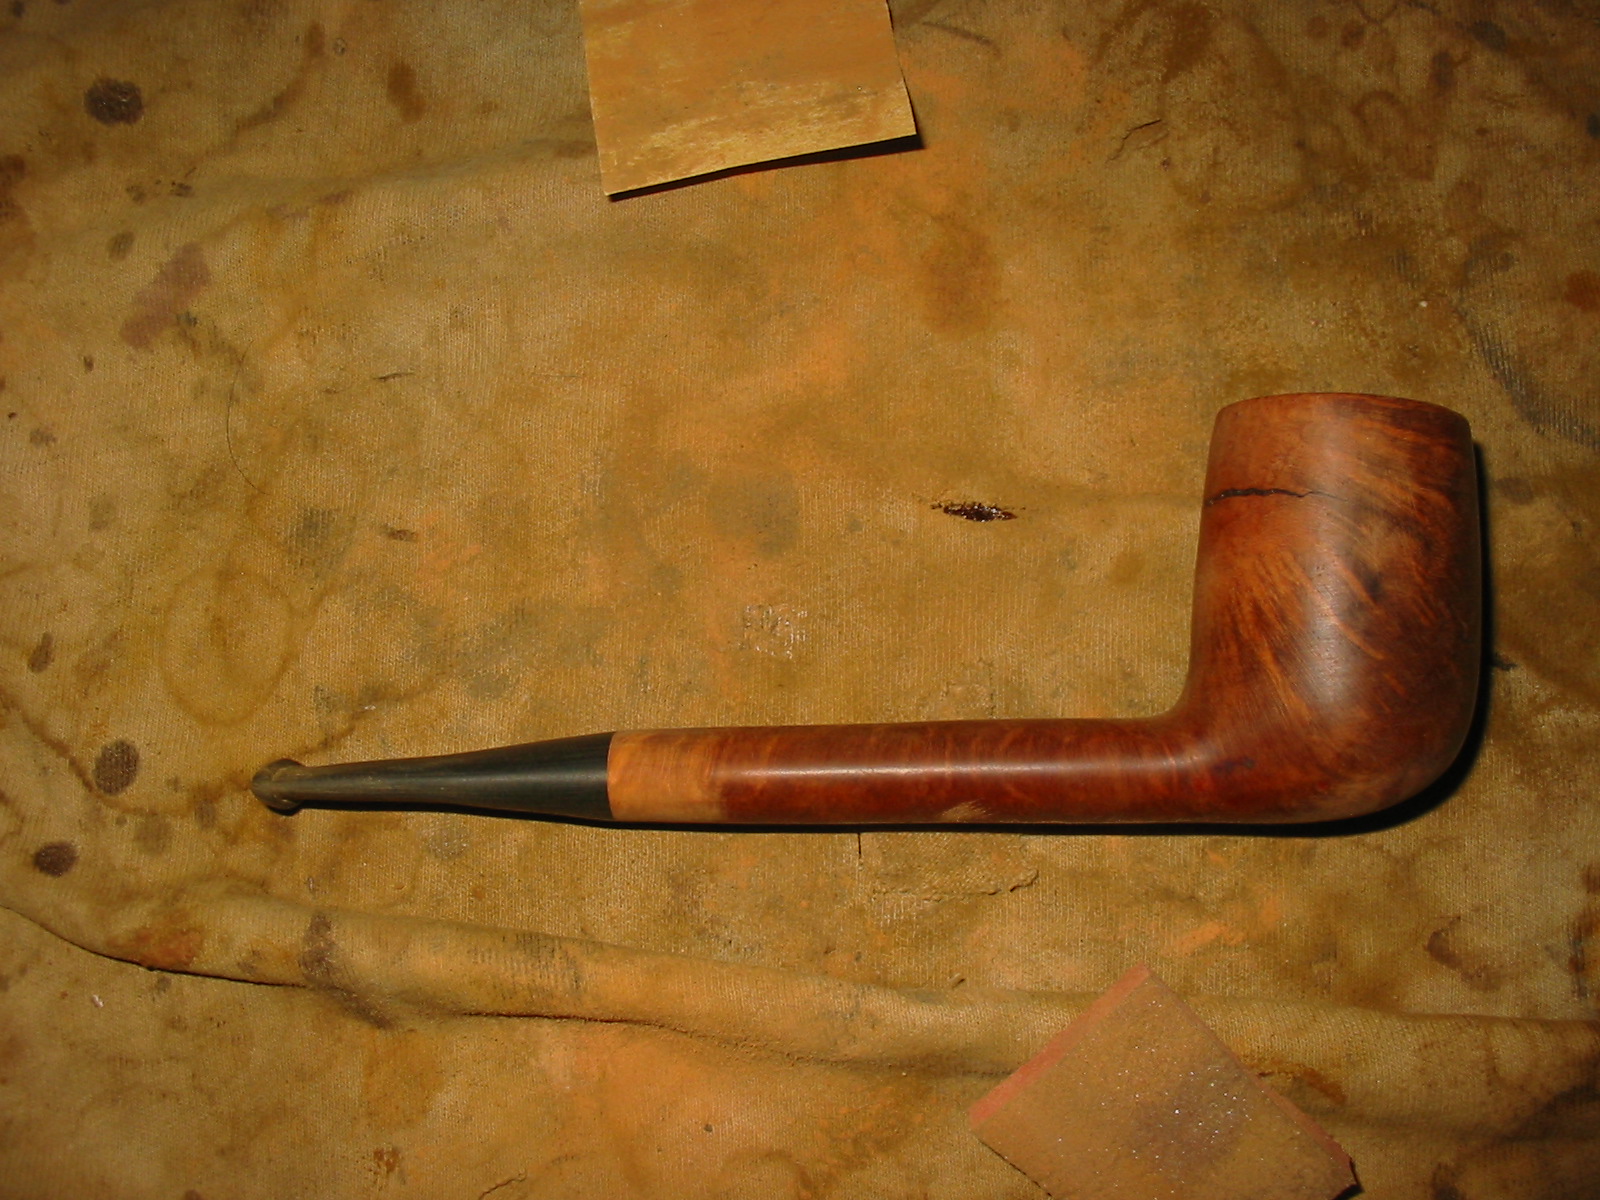
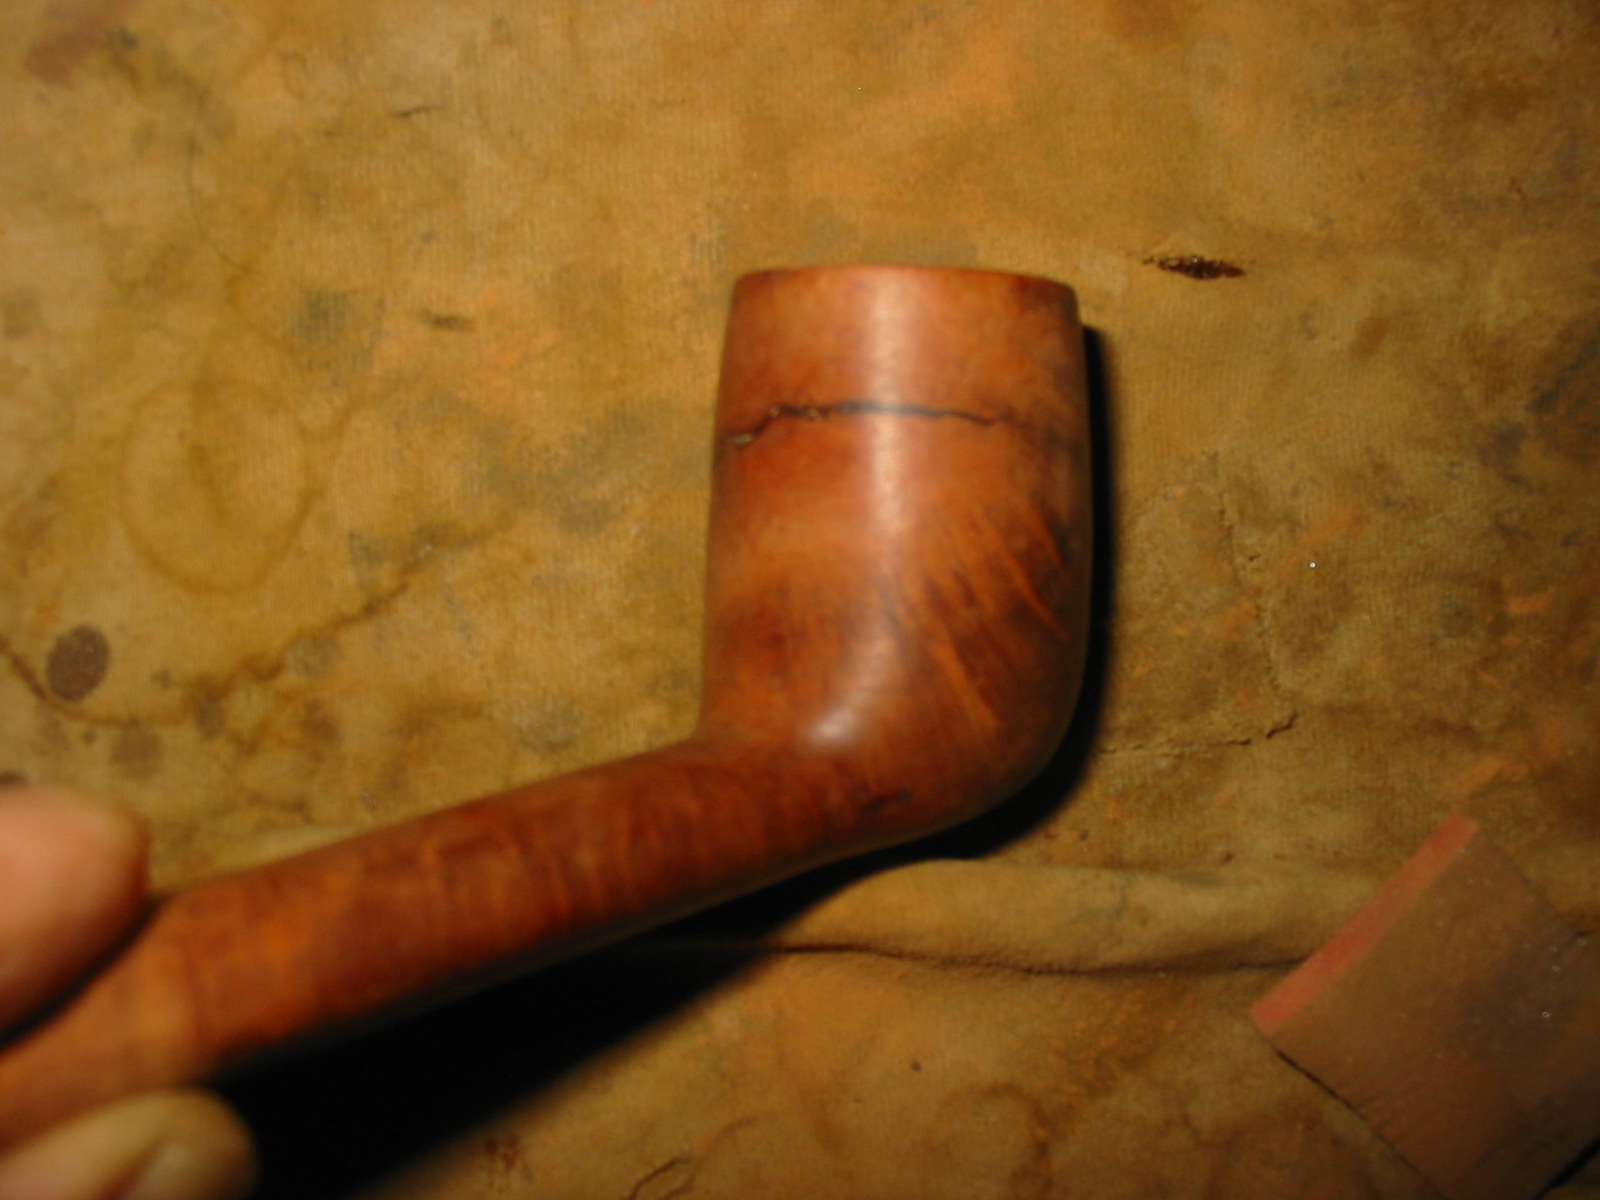
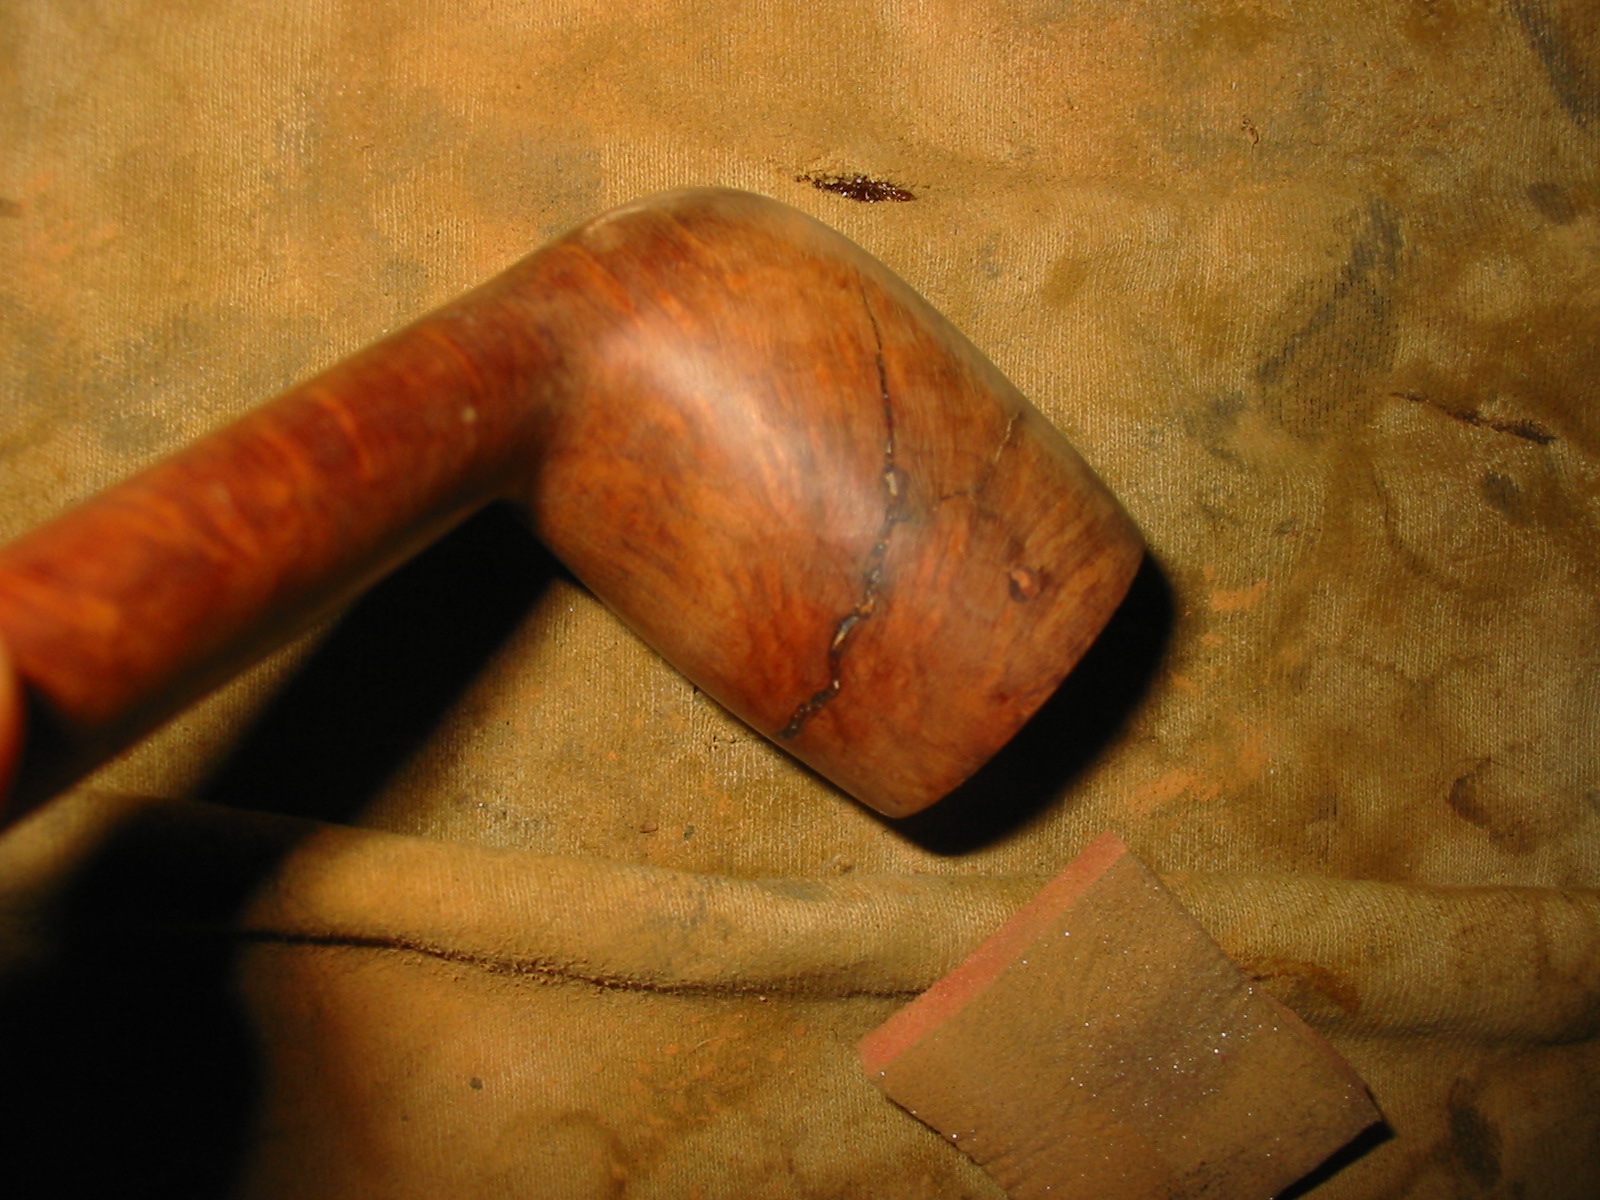
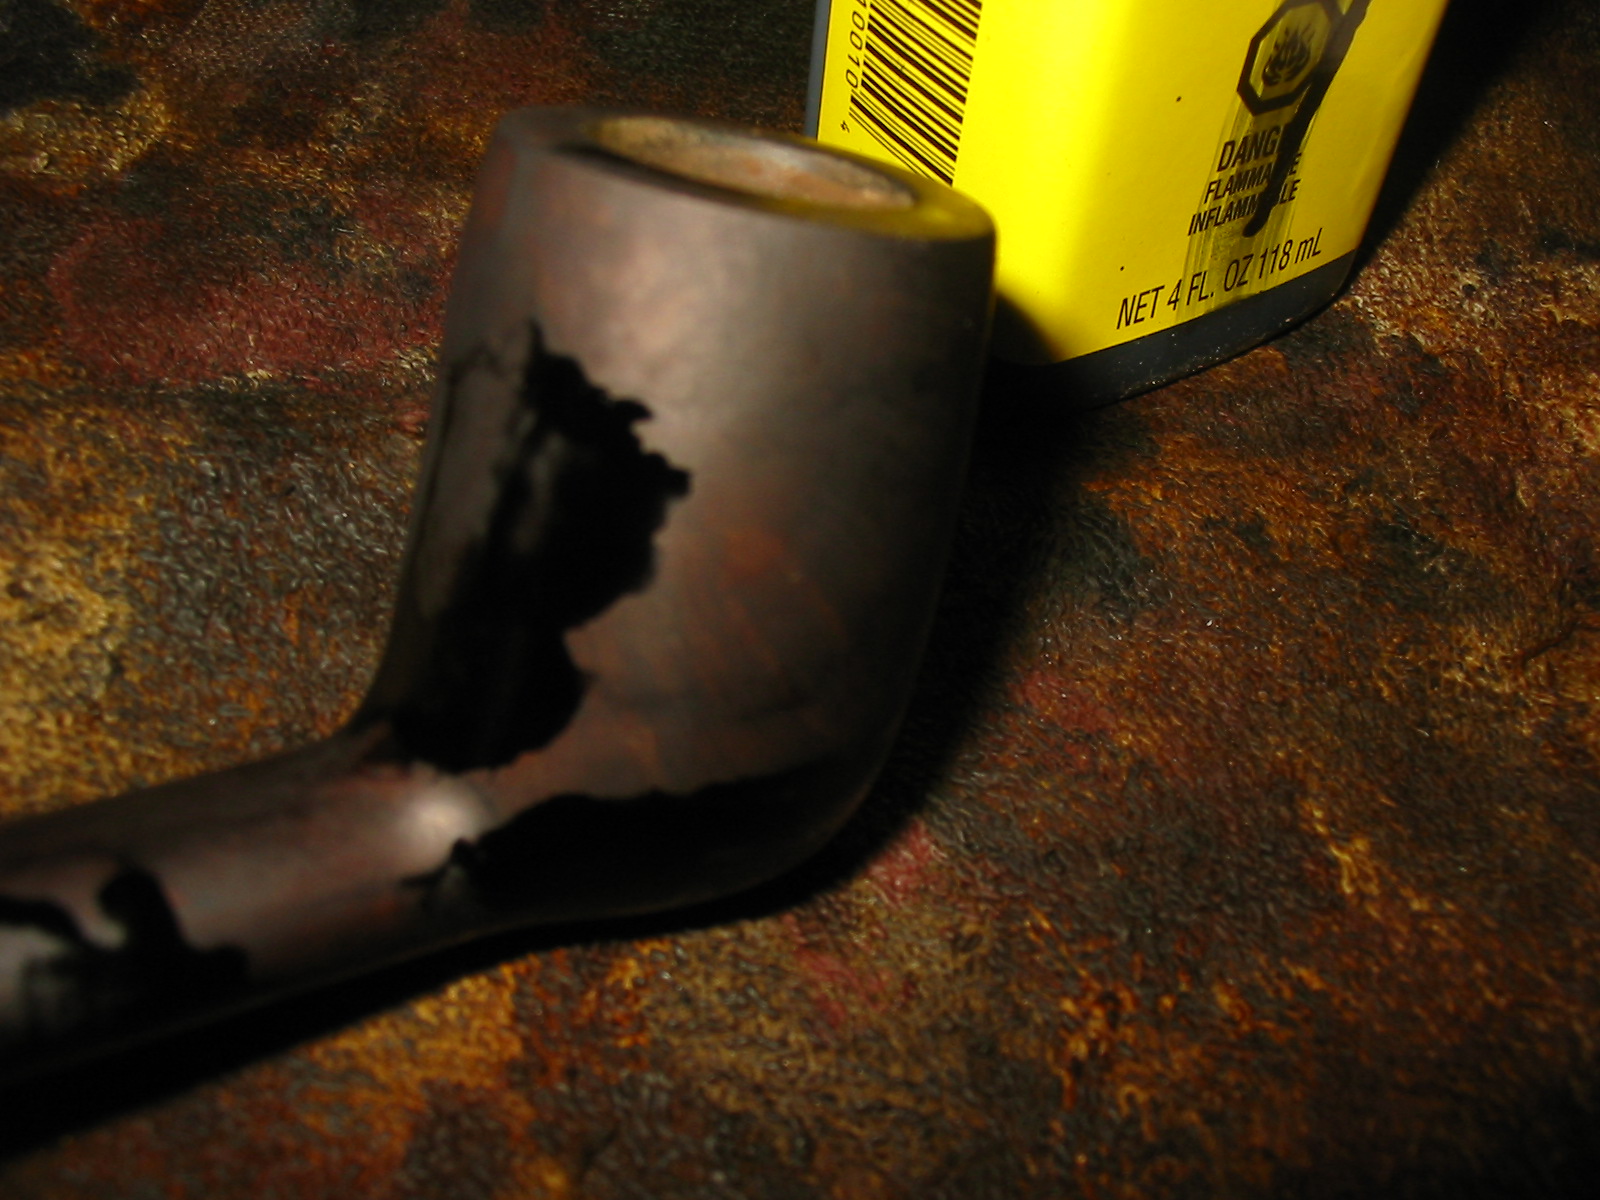
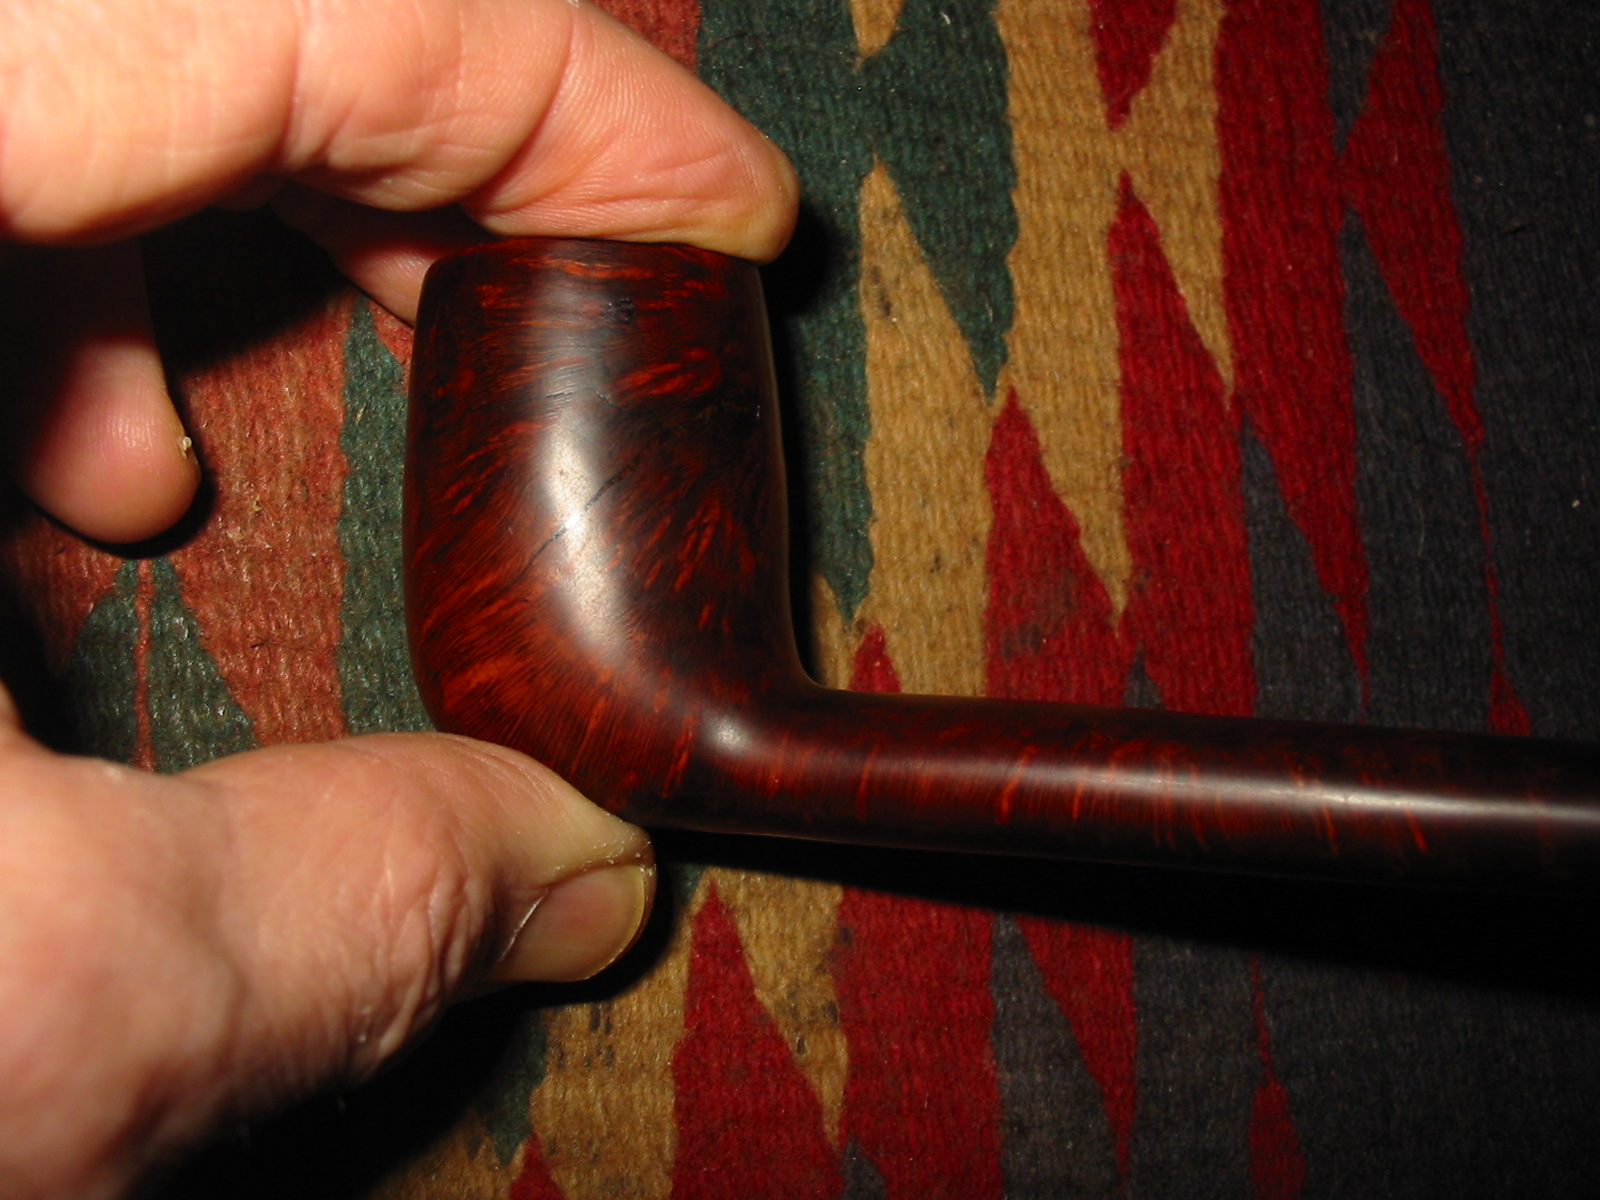
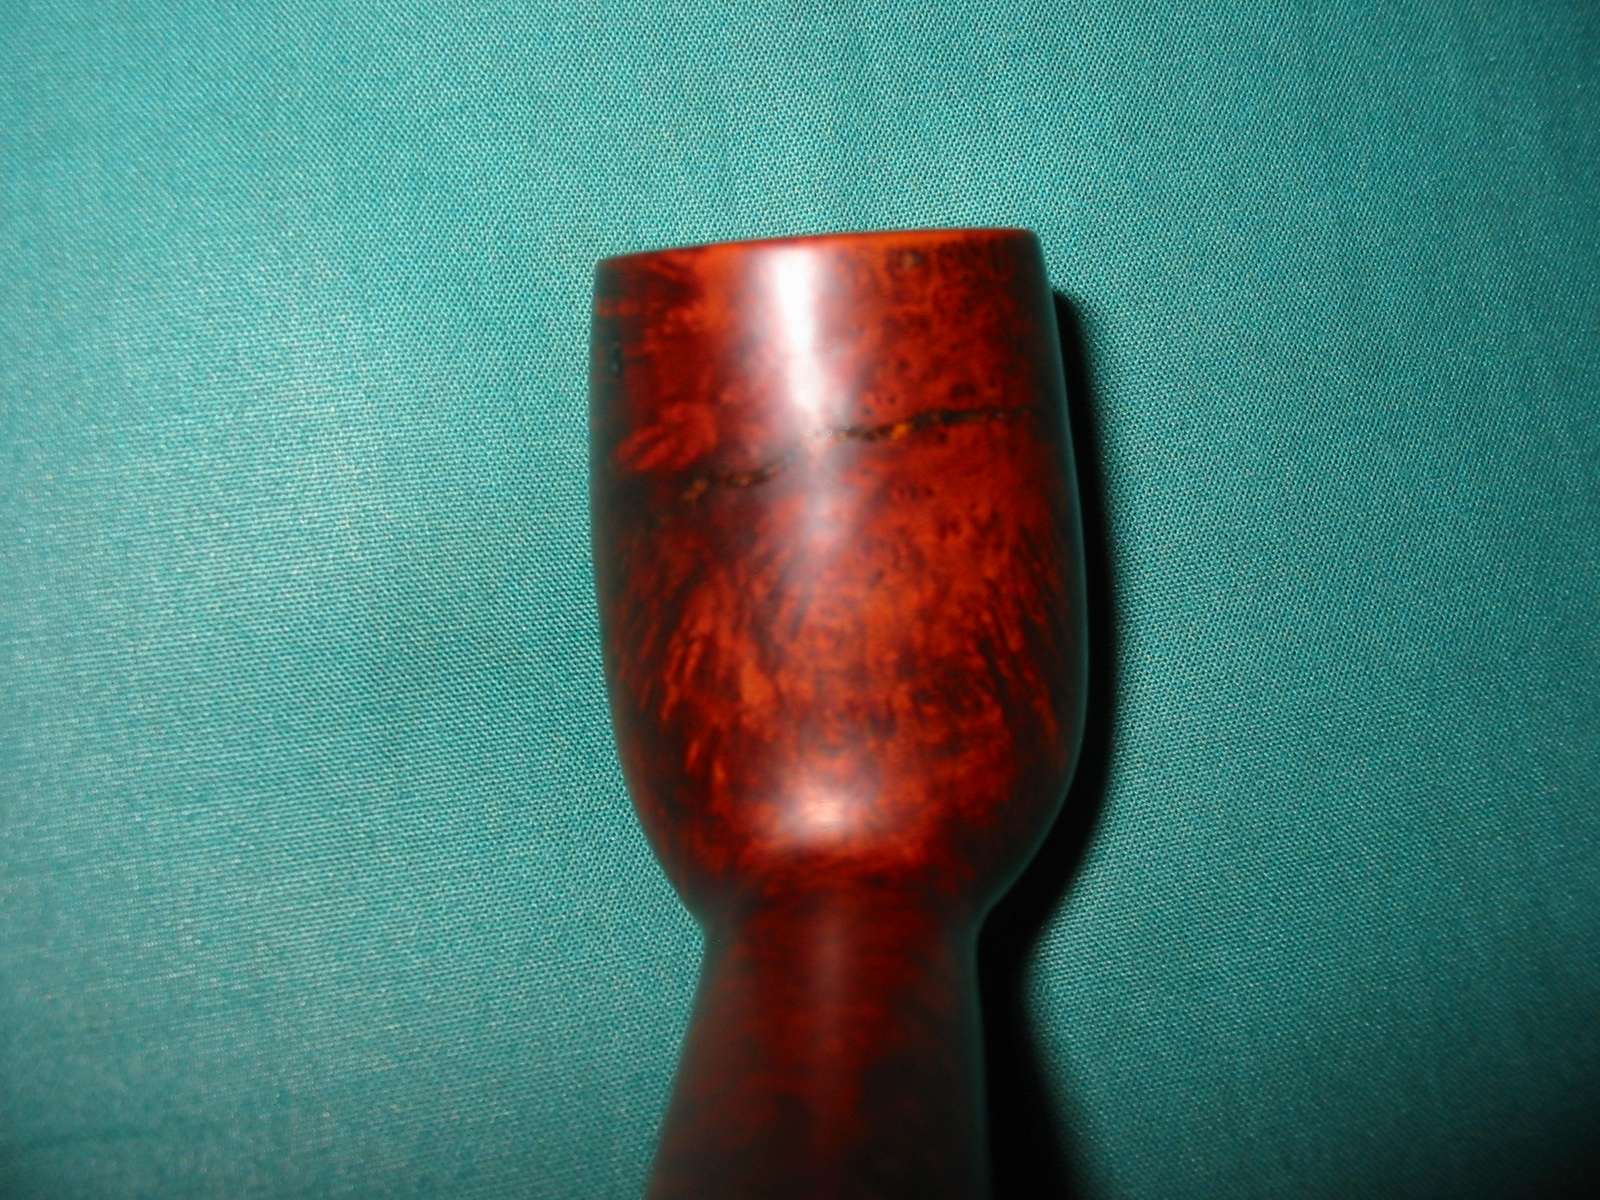
The finish was rough and there was split in the back side of the bowl that ran horizontally in an arc across the bowl about ½ inches from the top. It was as if the grain had separated that way across the back of the bowl. It follows the arc of the grain in that part of the briar. From the main split there was a tiny crack branching off into another line of grain on the left side of the bowl. The weird thing about the split is that it was only external. There was no sign of it inside the bowl after removing the thin cake. The stem was not with the pipe so it would need to be restemmed. I found an old saddle stem in my can of stems that would work for this pipe after I modified it.
IMG_5336

IMG_5337

IMG_5338

IMG_5339

In talking on the phone with Tim West last evening while I was ordering parts for repairs I discussed this pipe with him. He said that in his estimation the crack being only on the outside of the bowl suggested that the issue was a moisture problem.

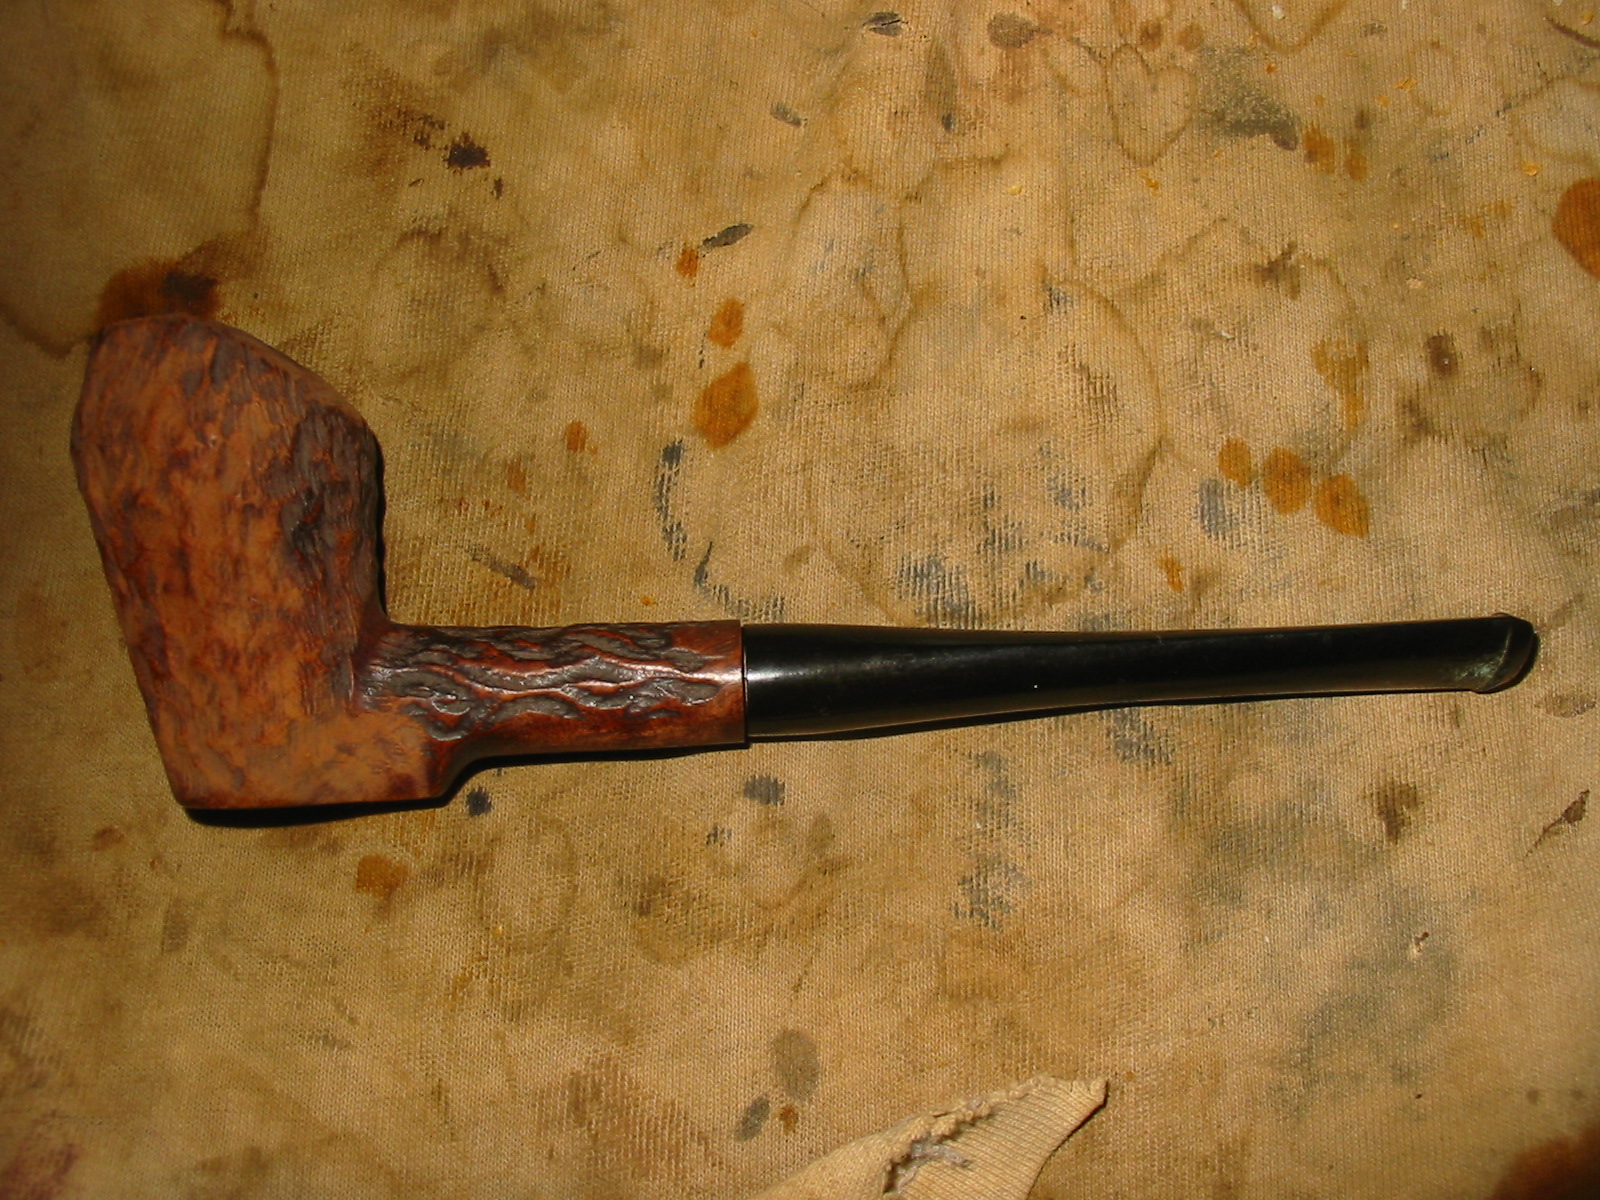
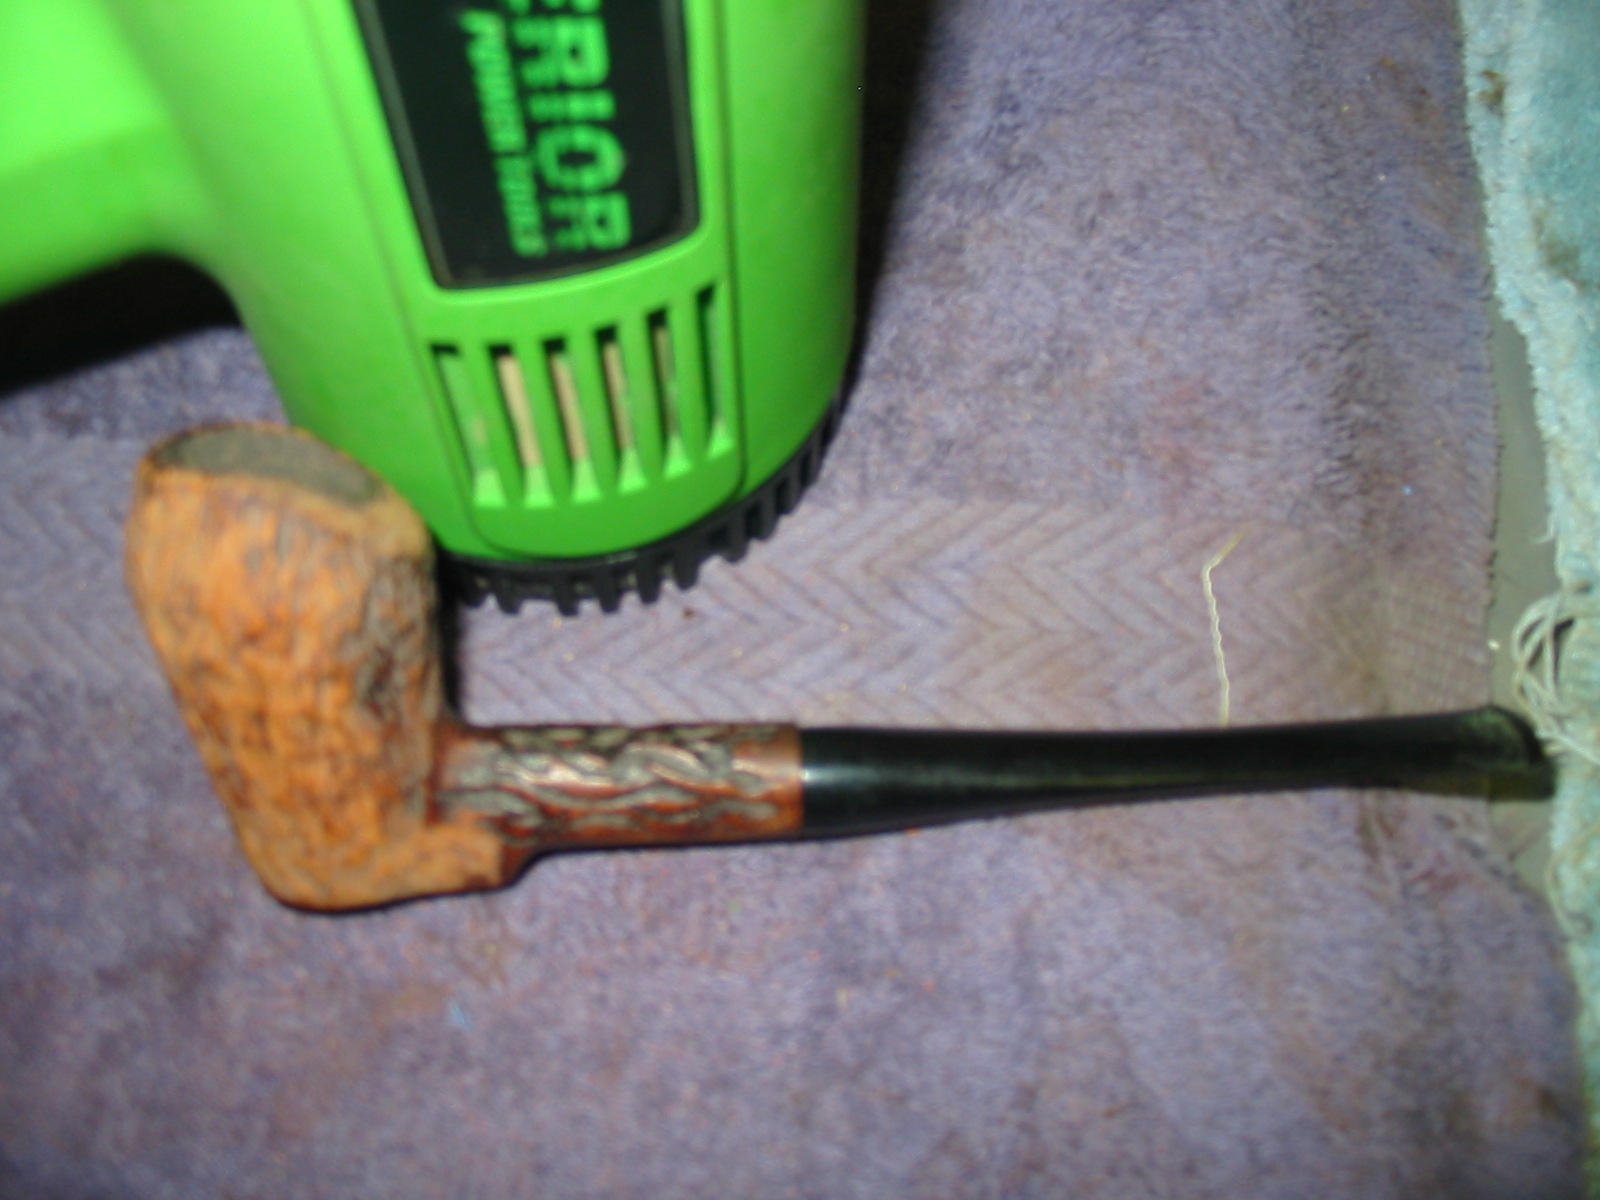
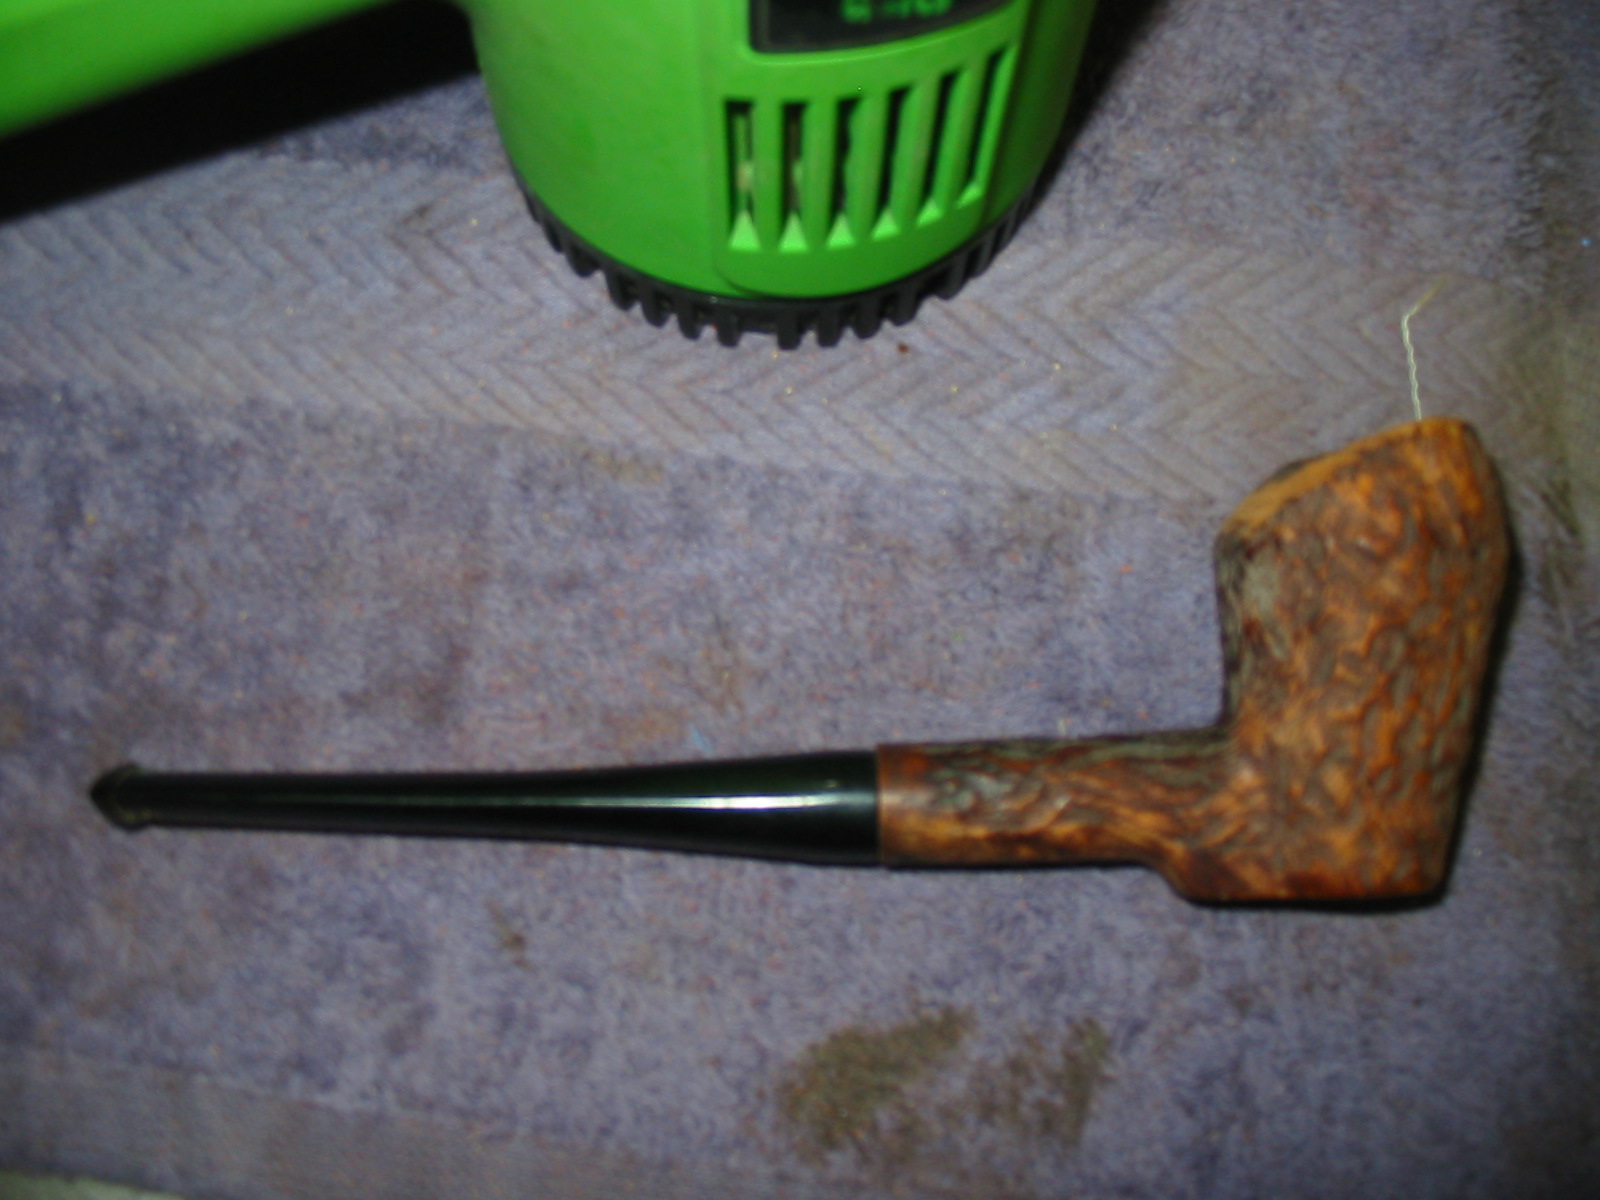
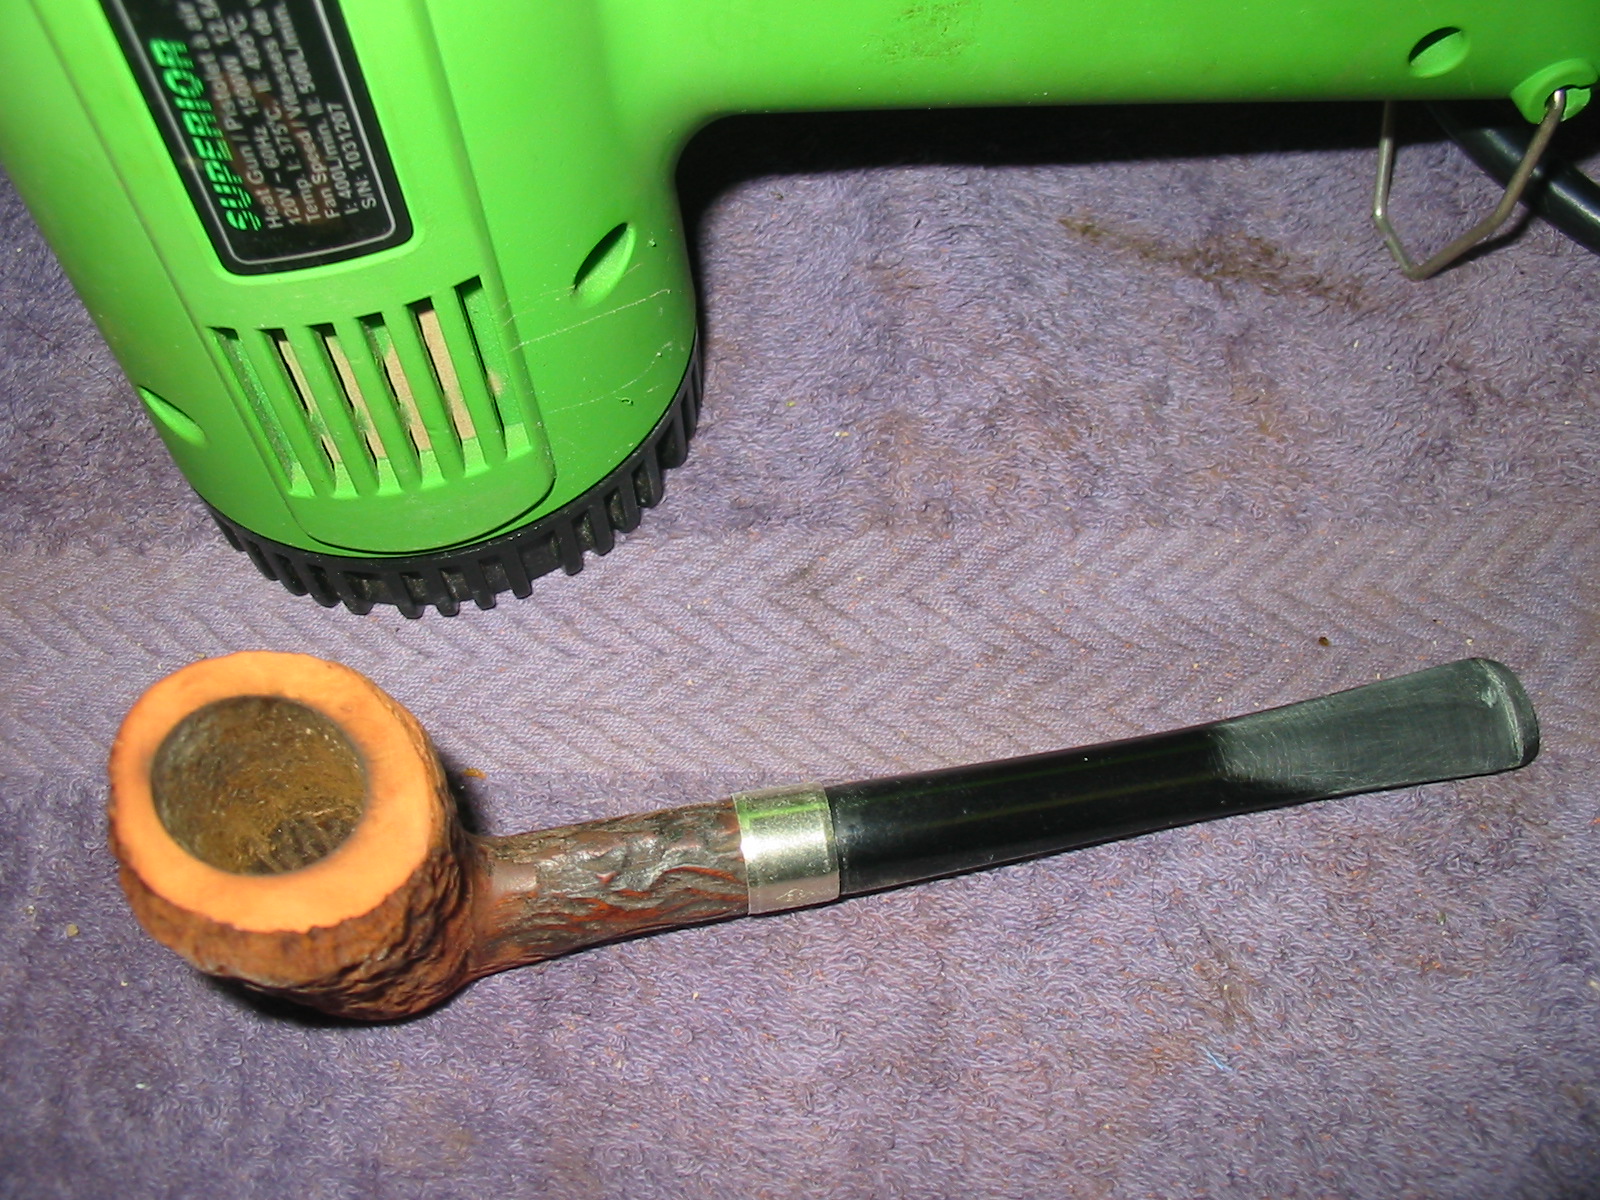
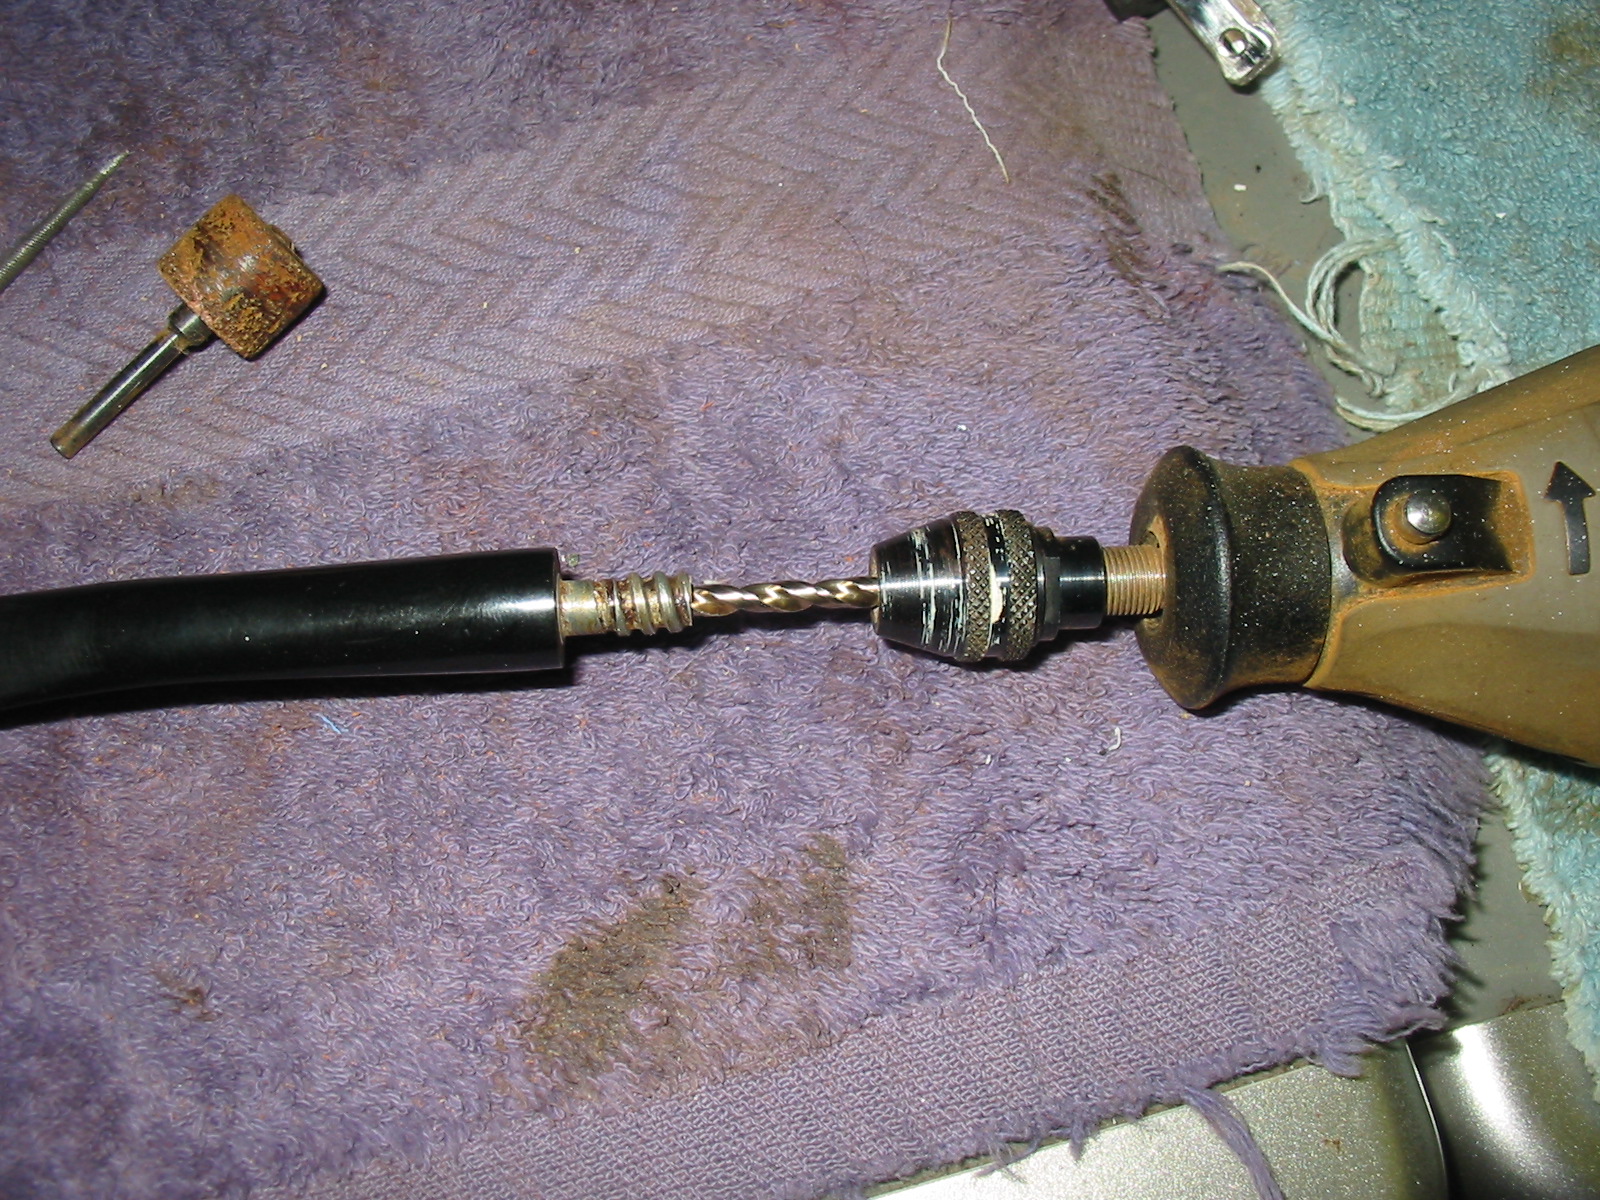
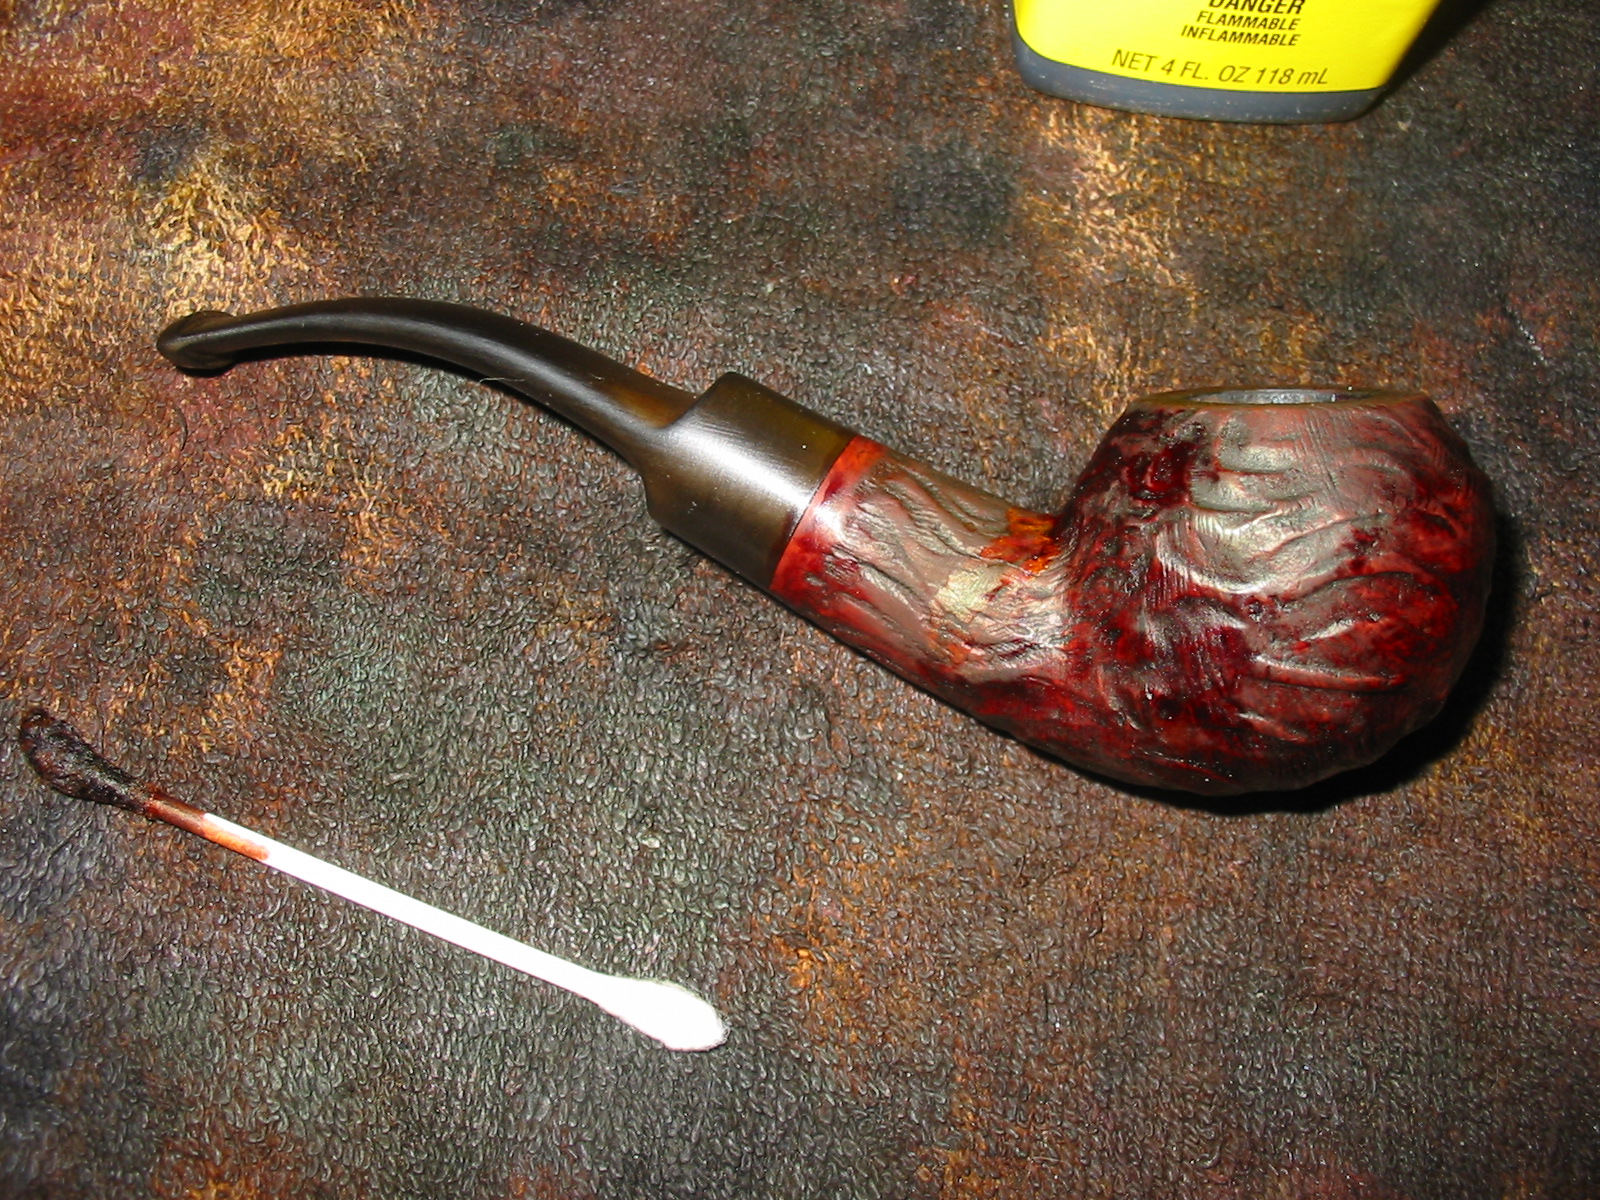
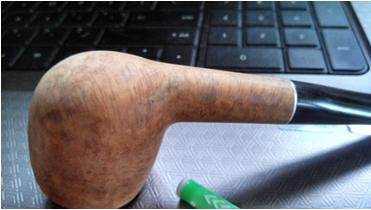
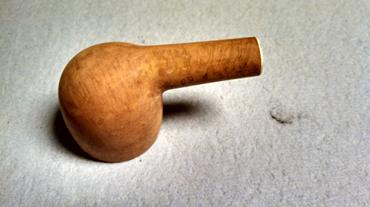
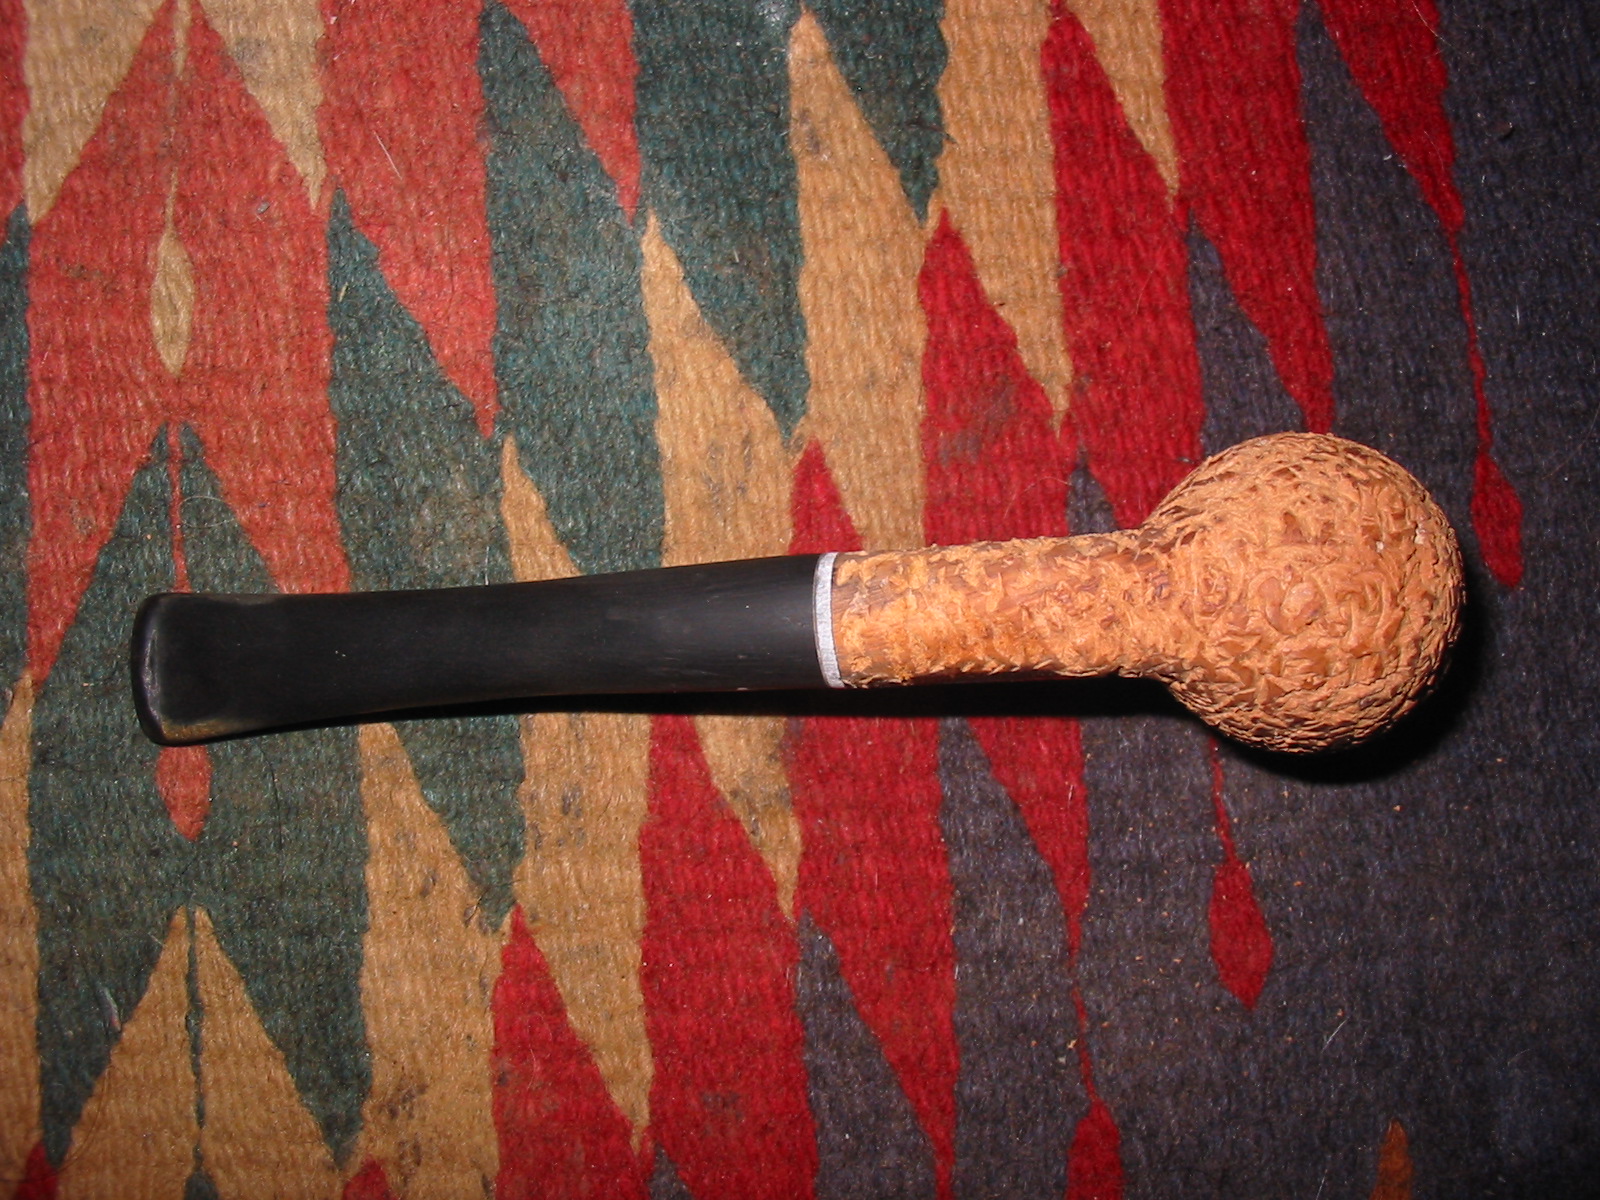
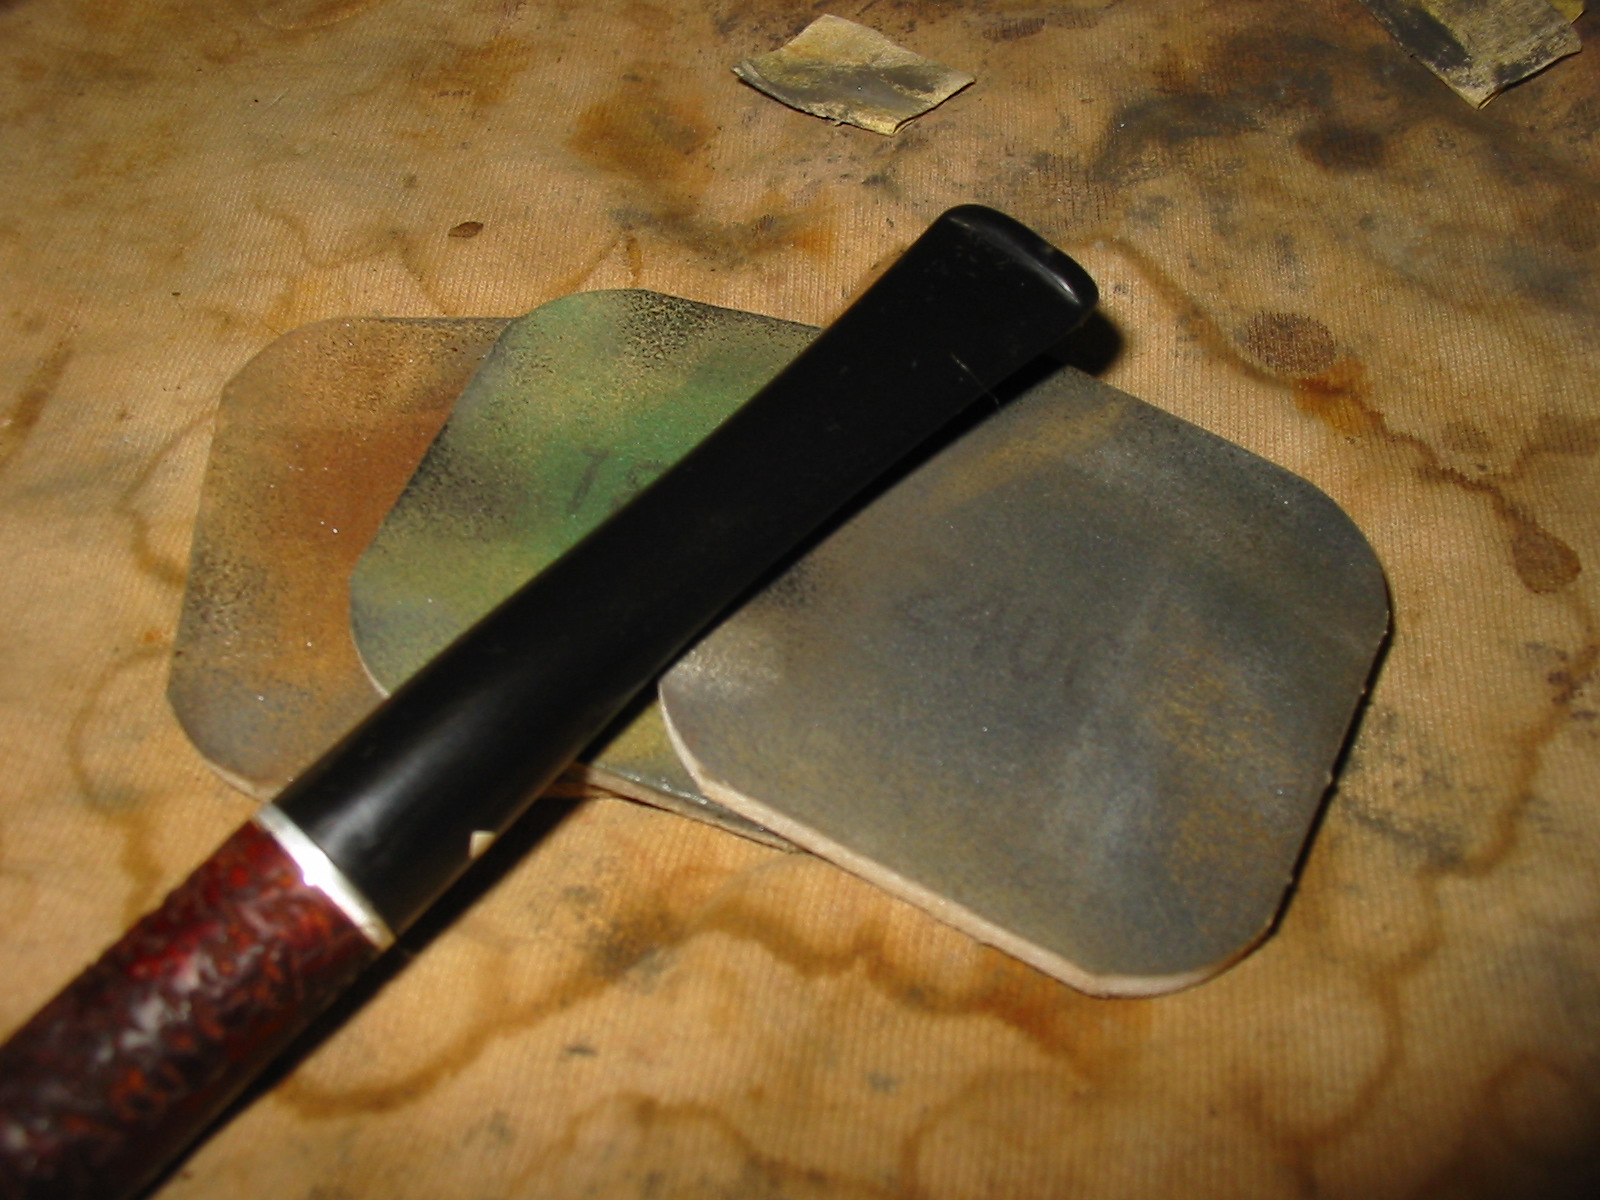
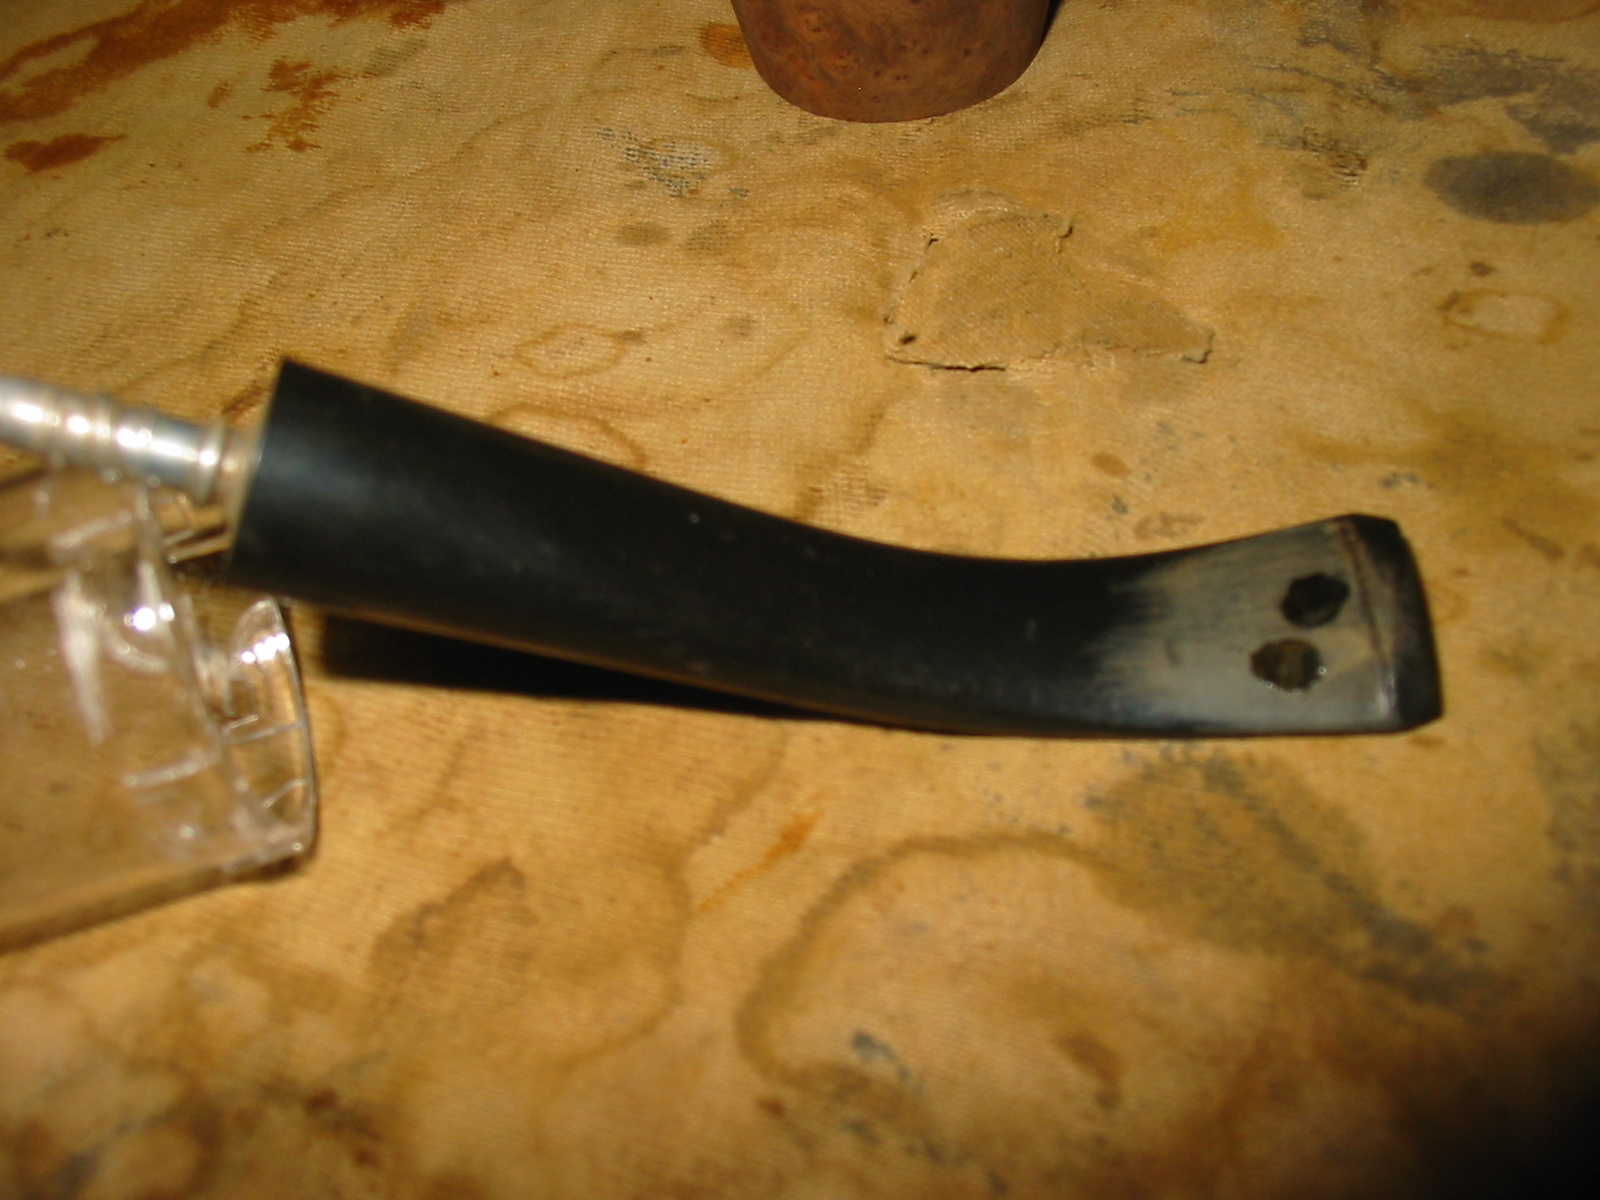
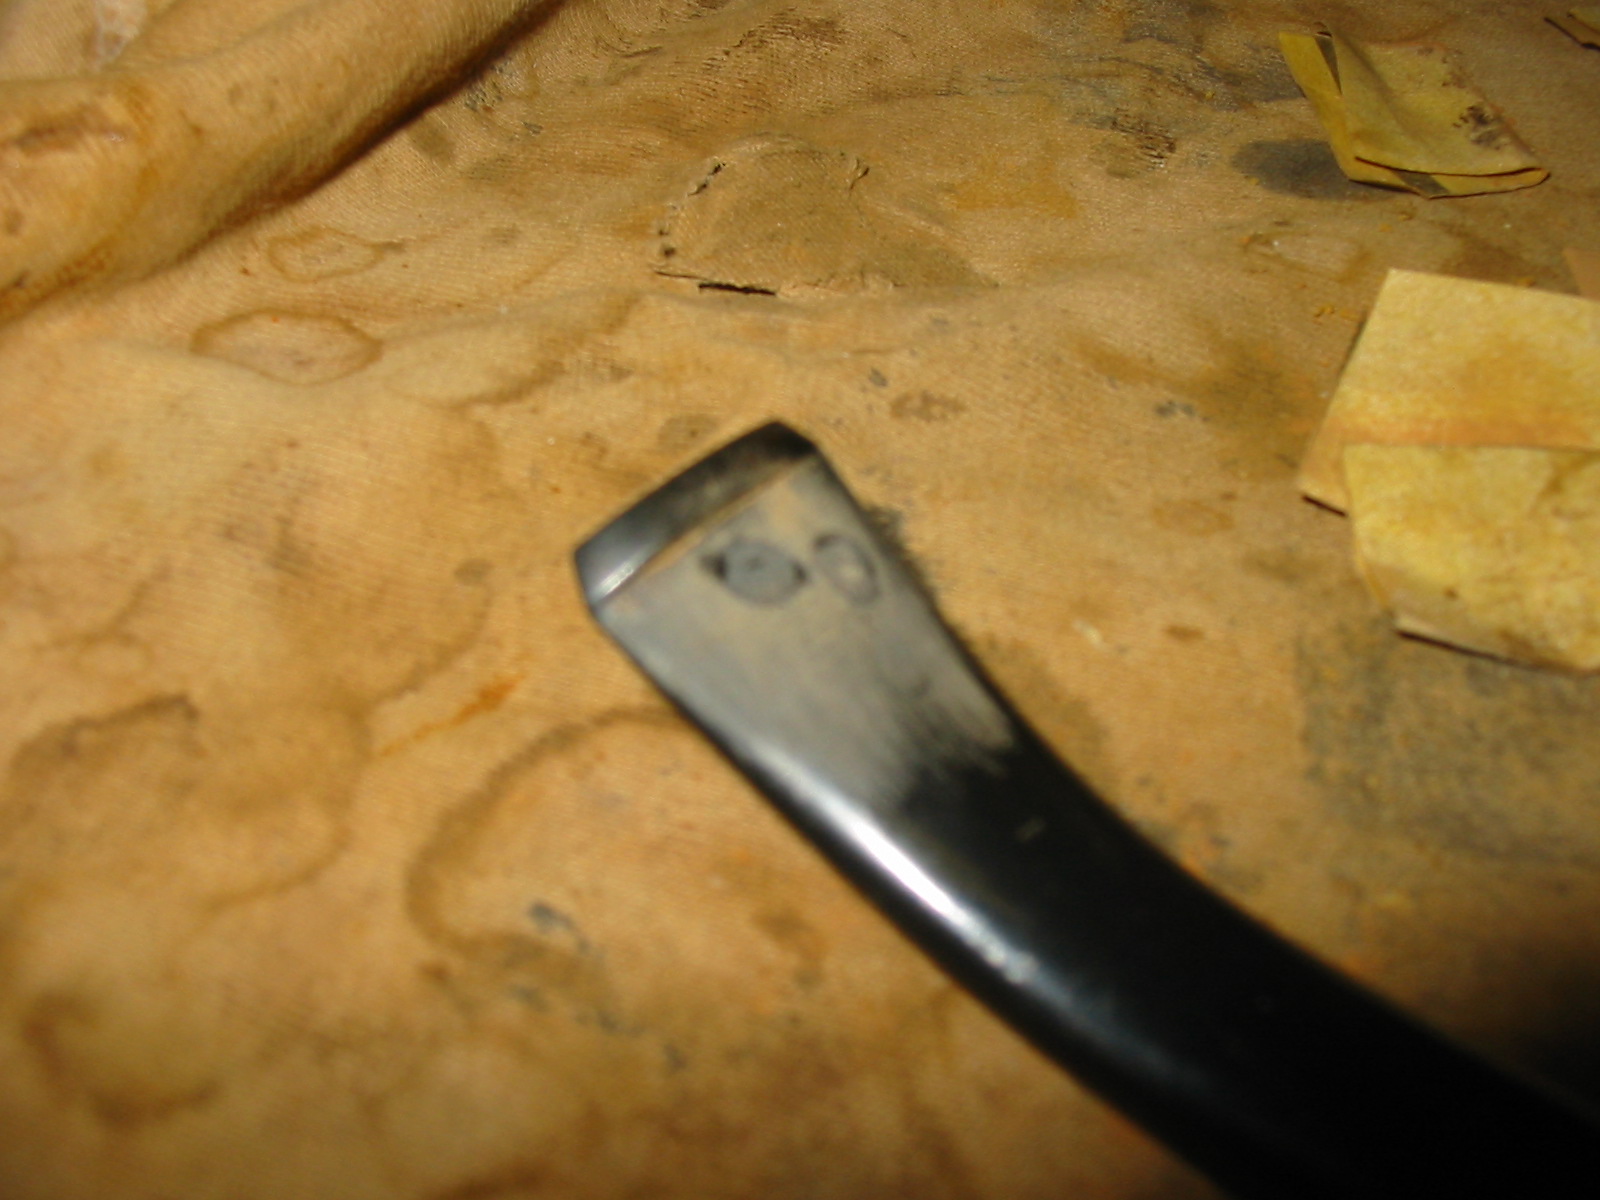
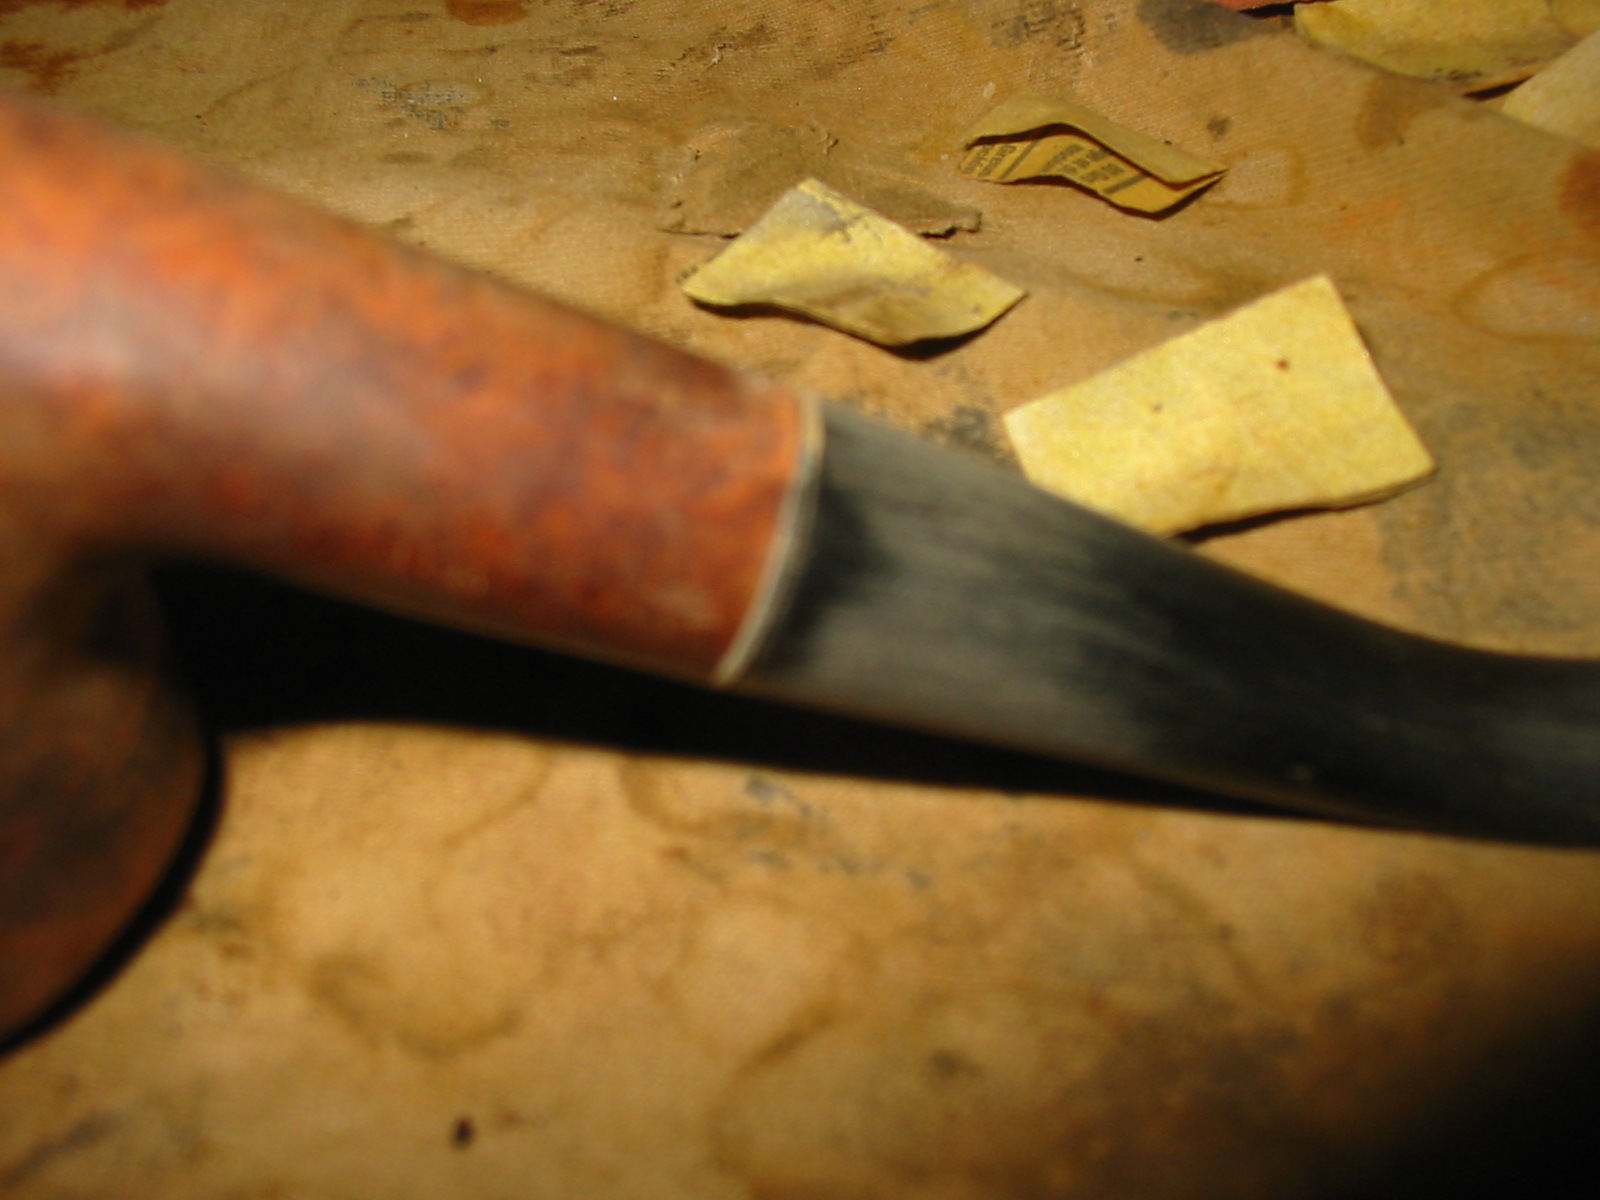
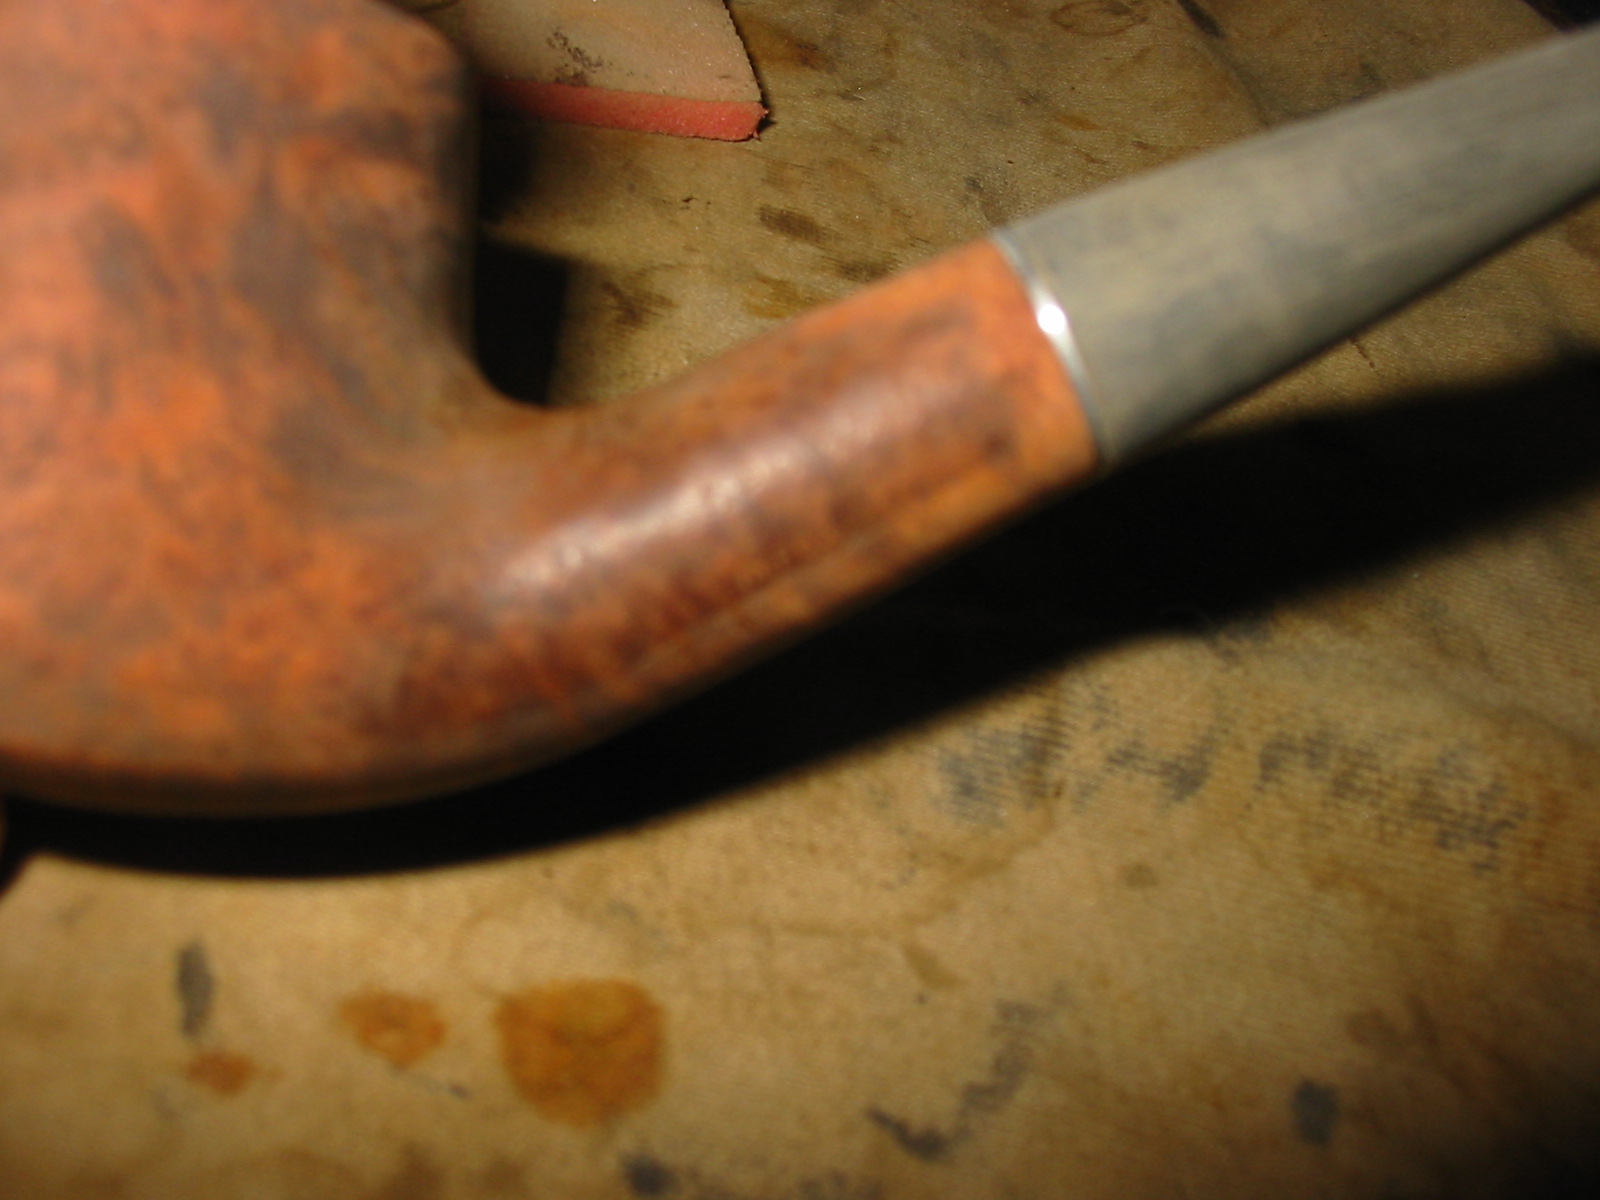
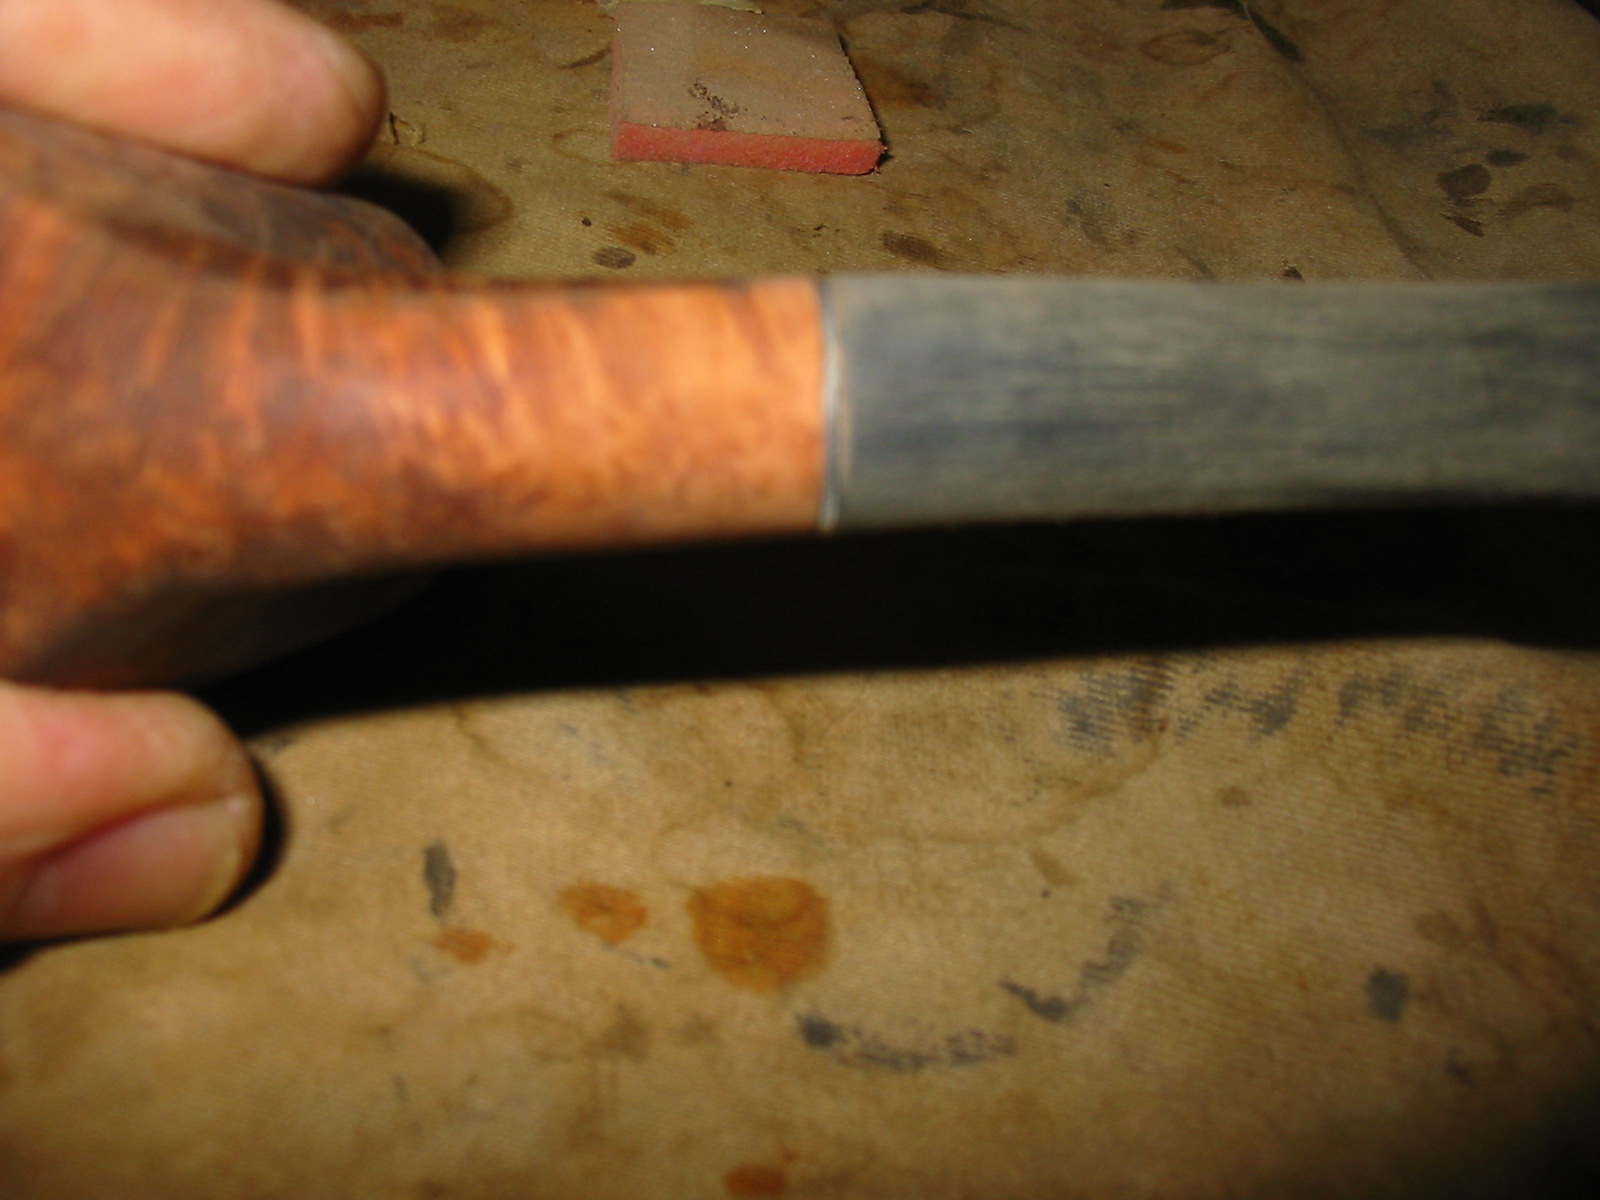
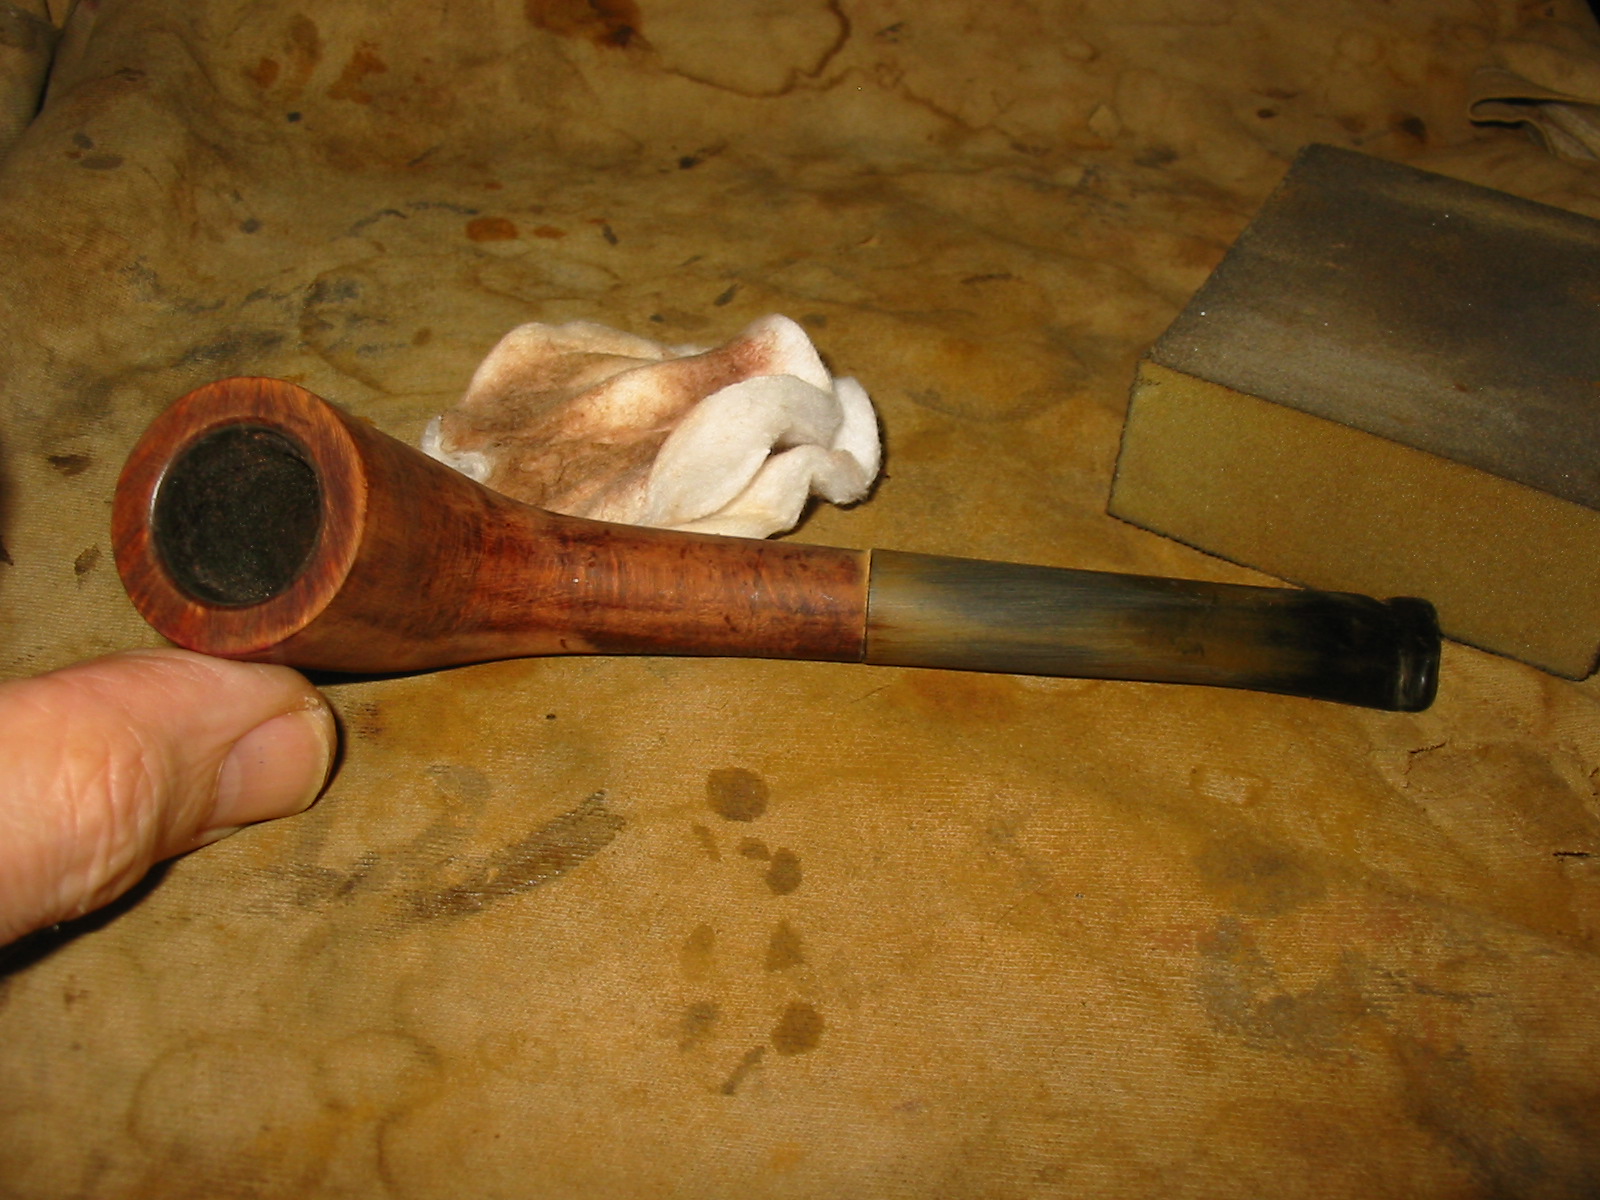
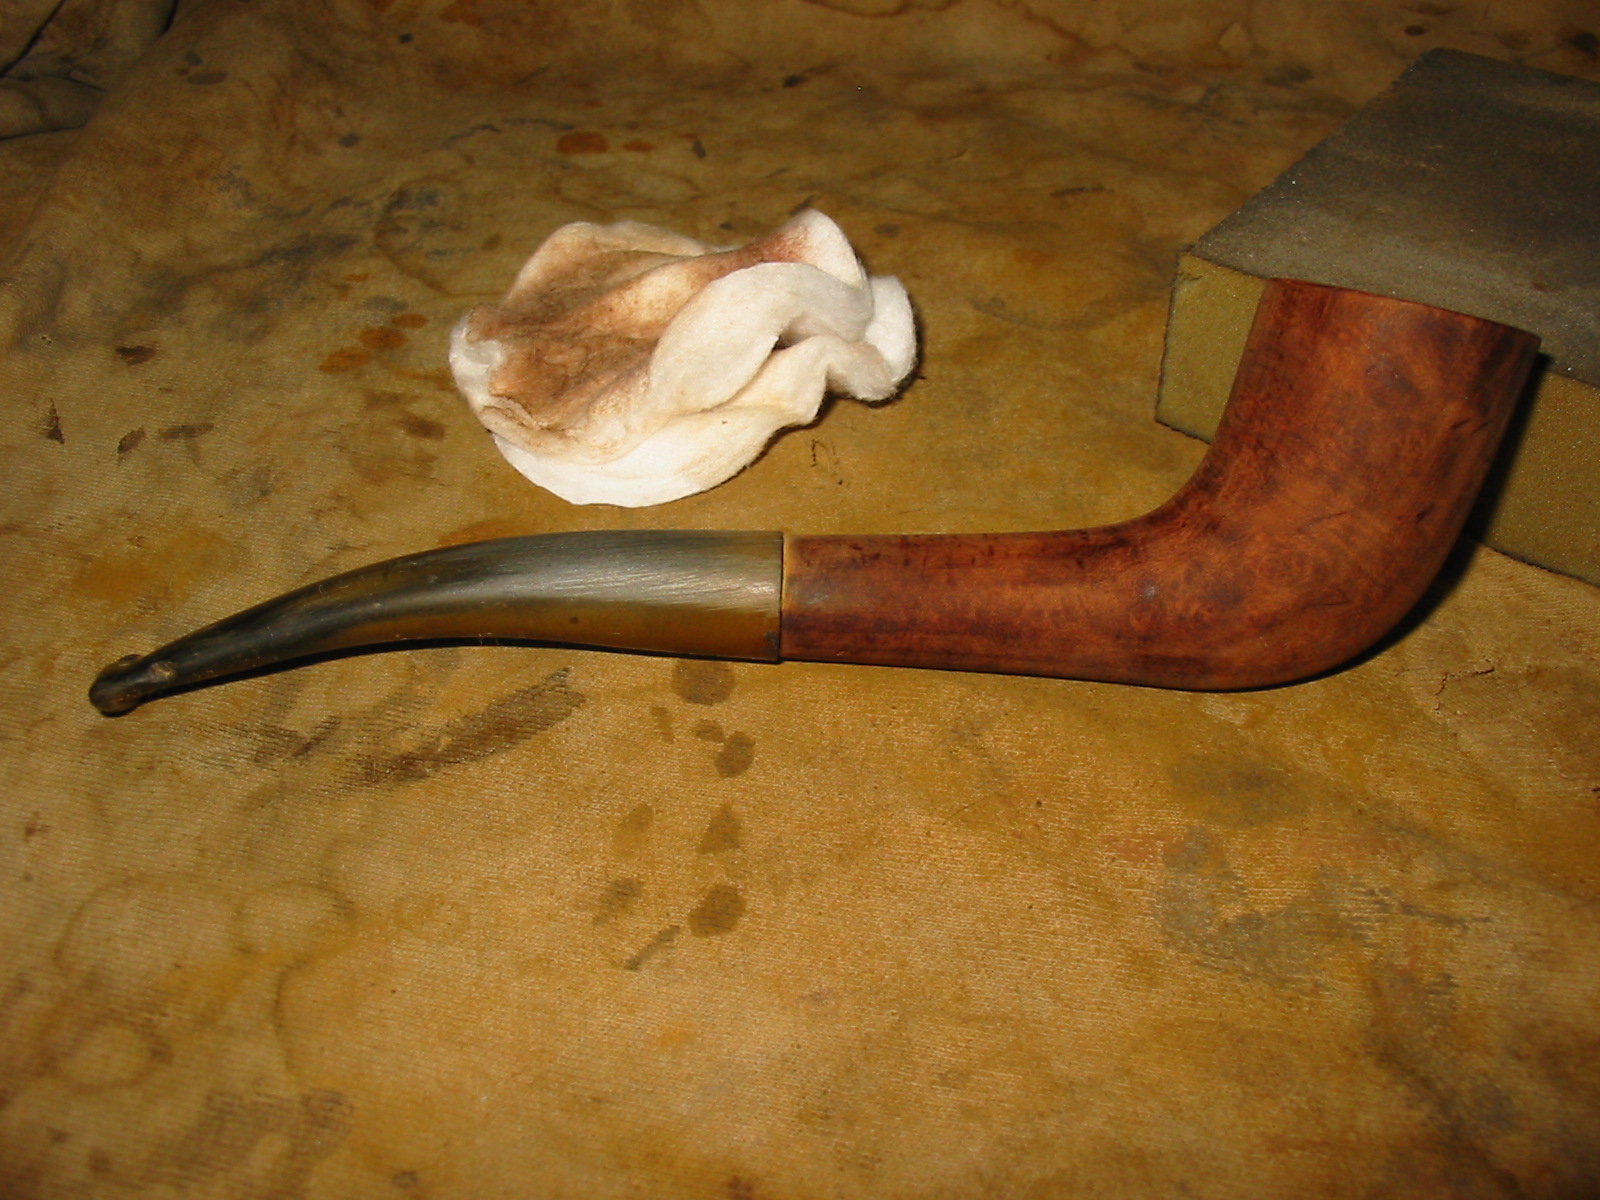
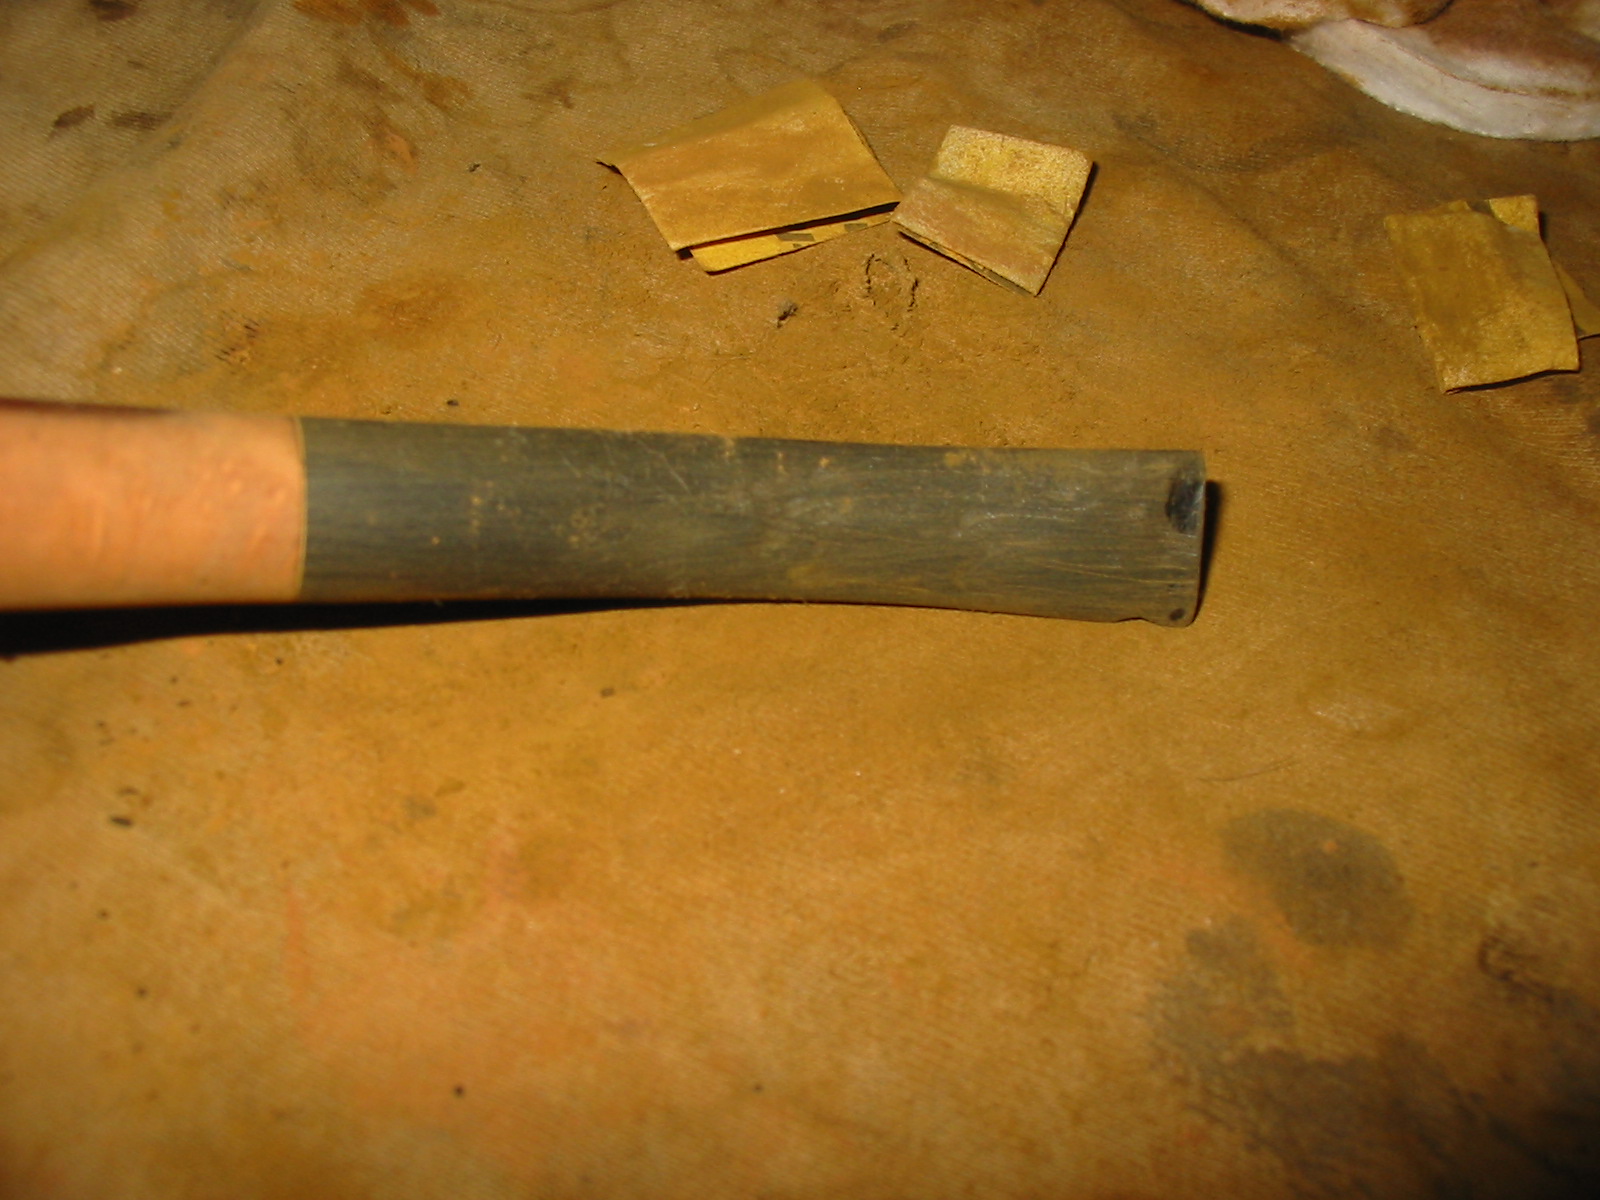
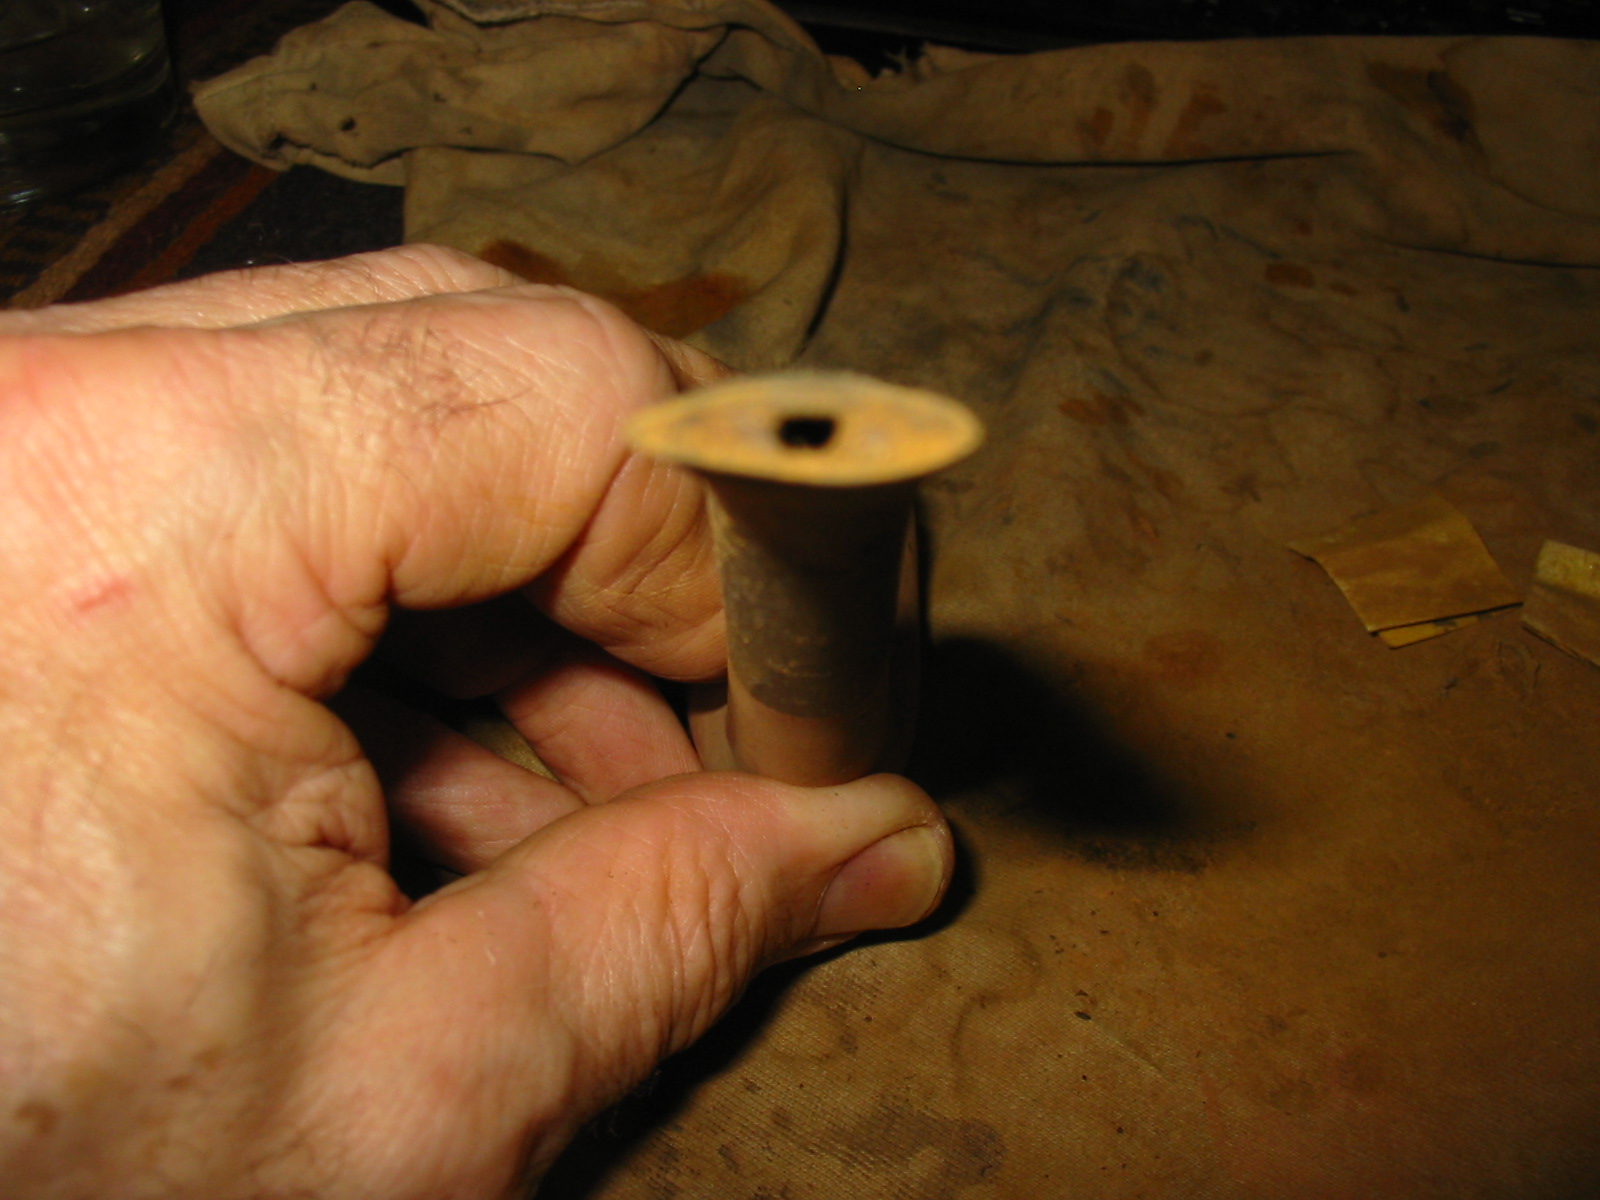
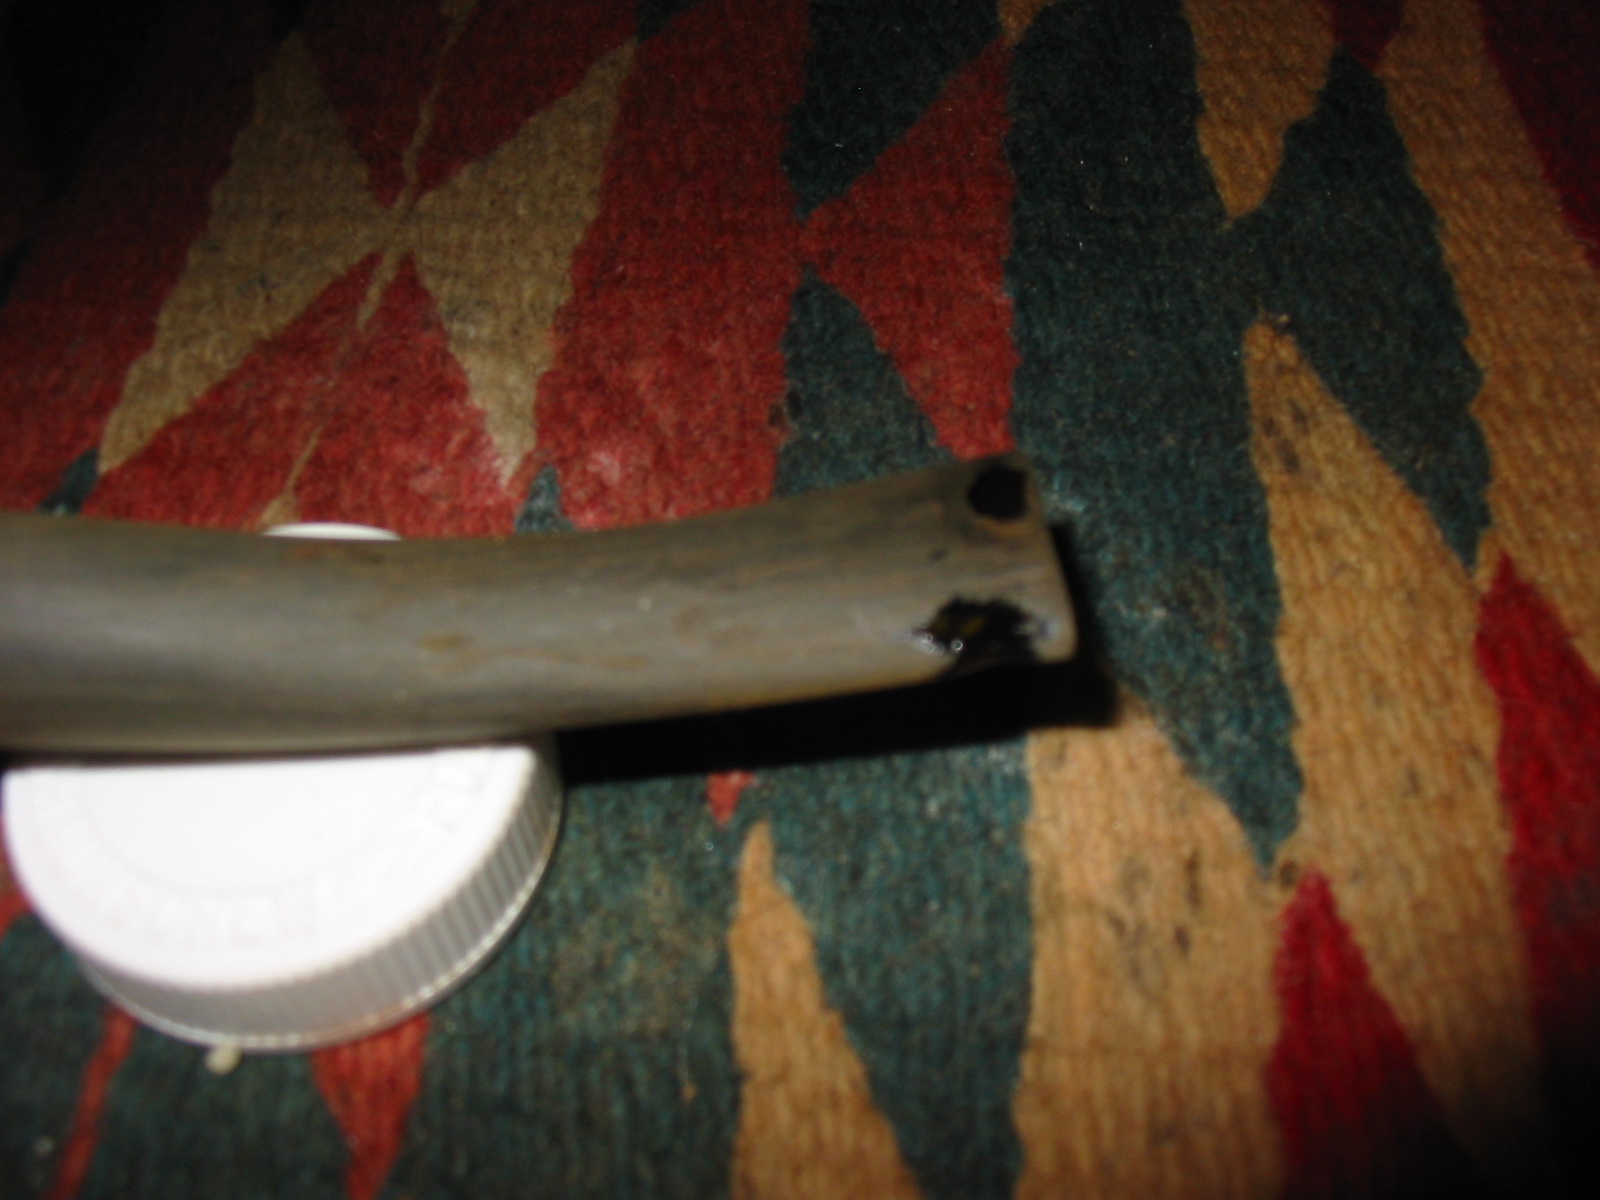
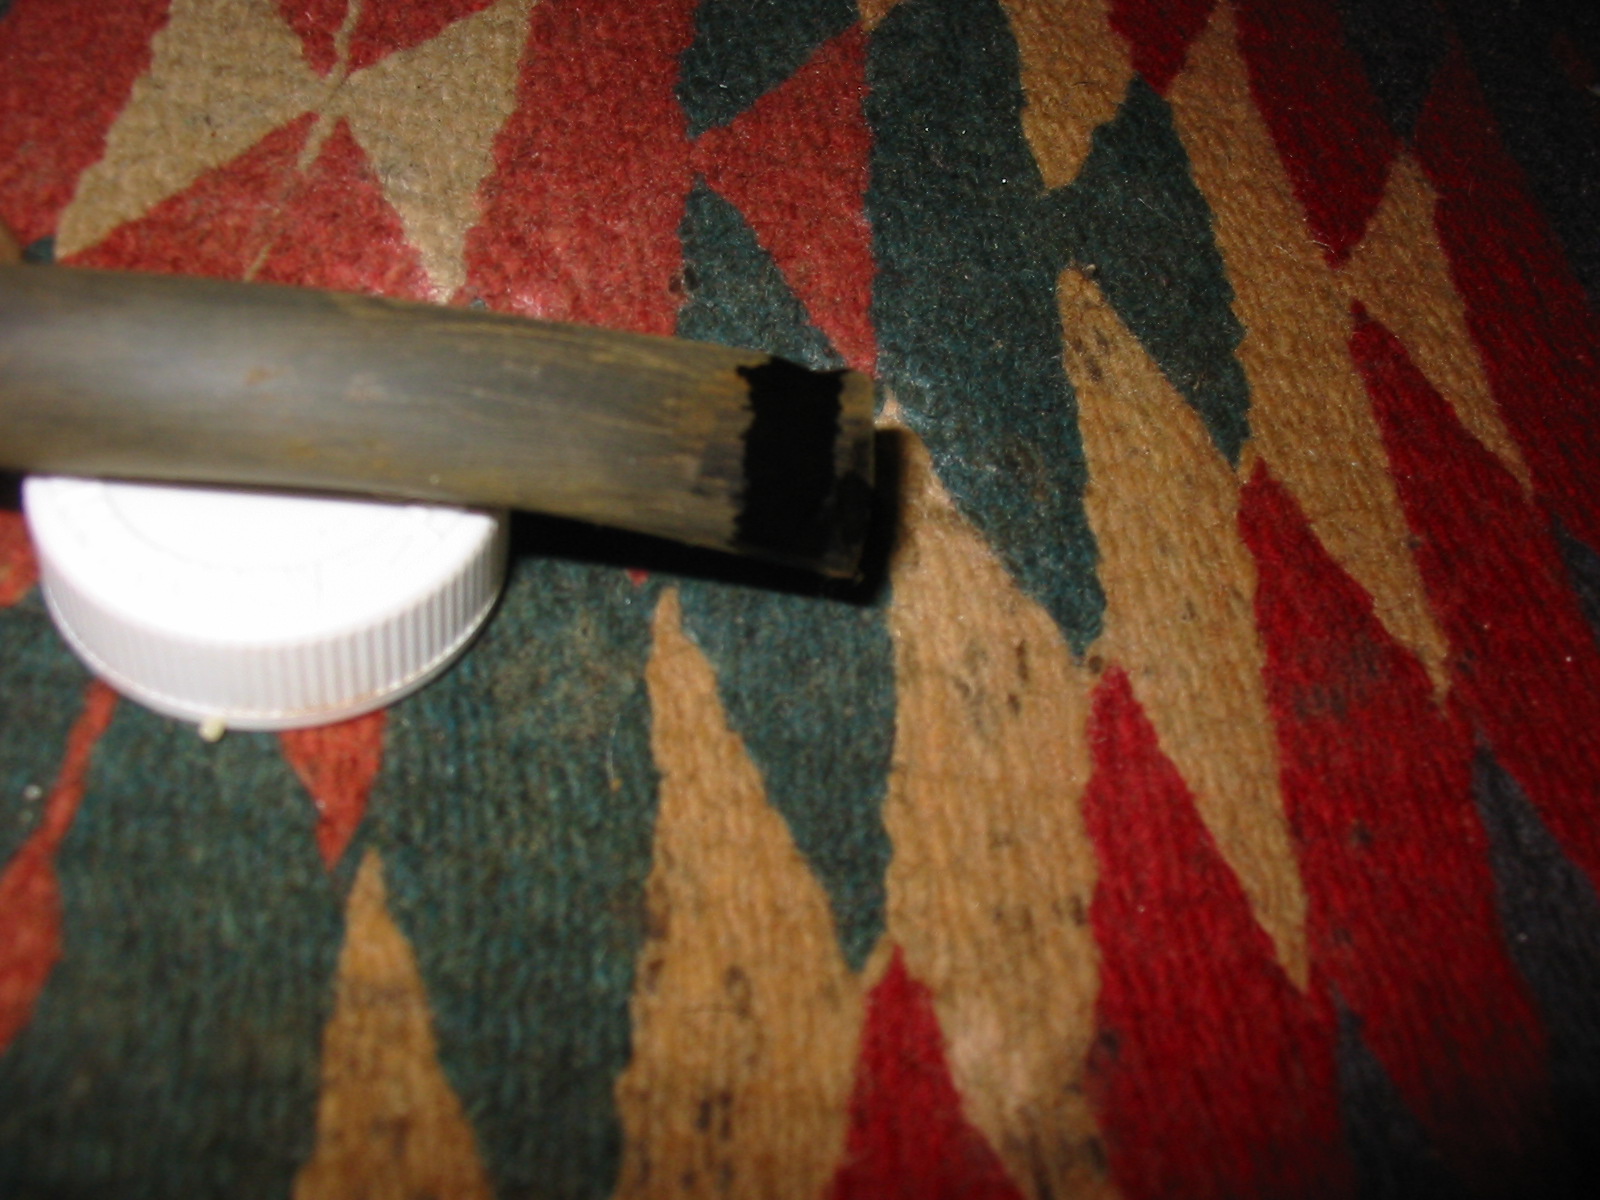
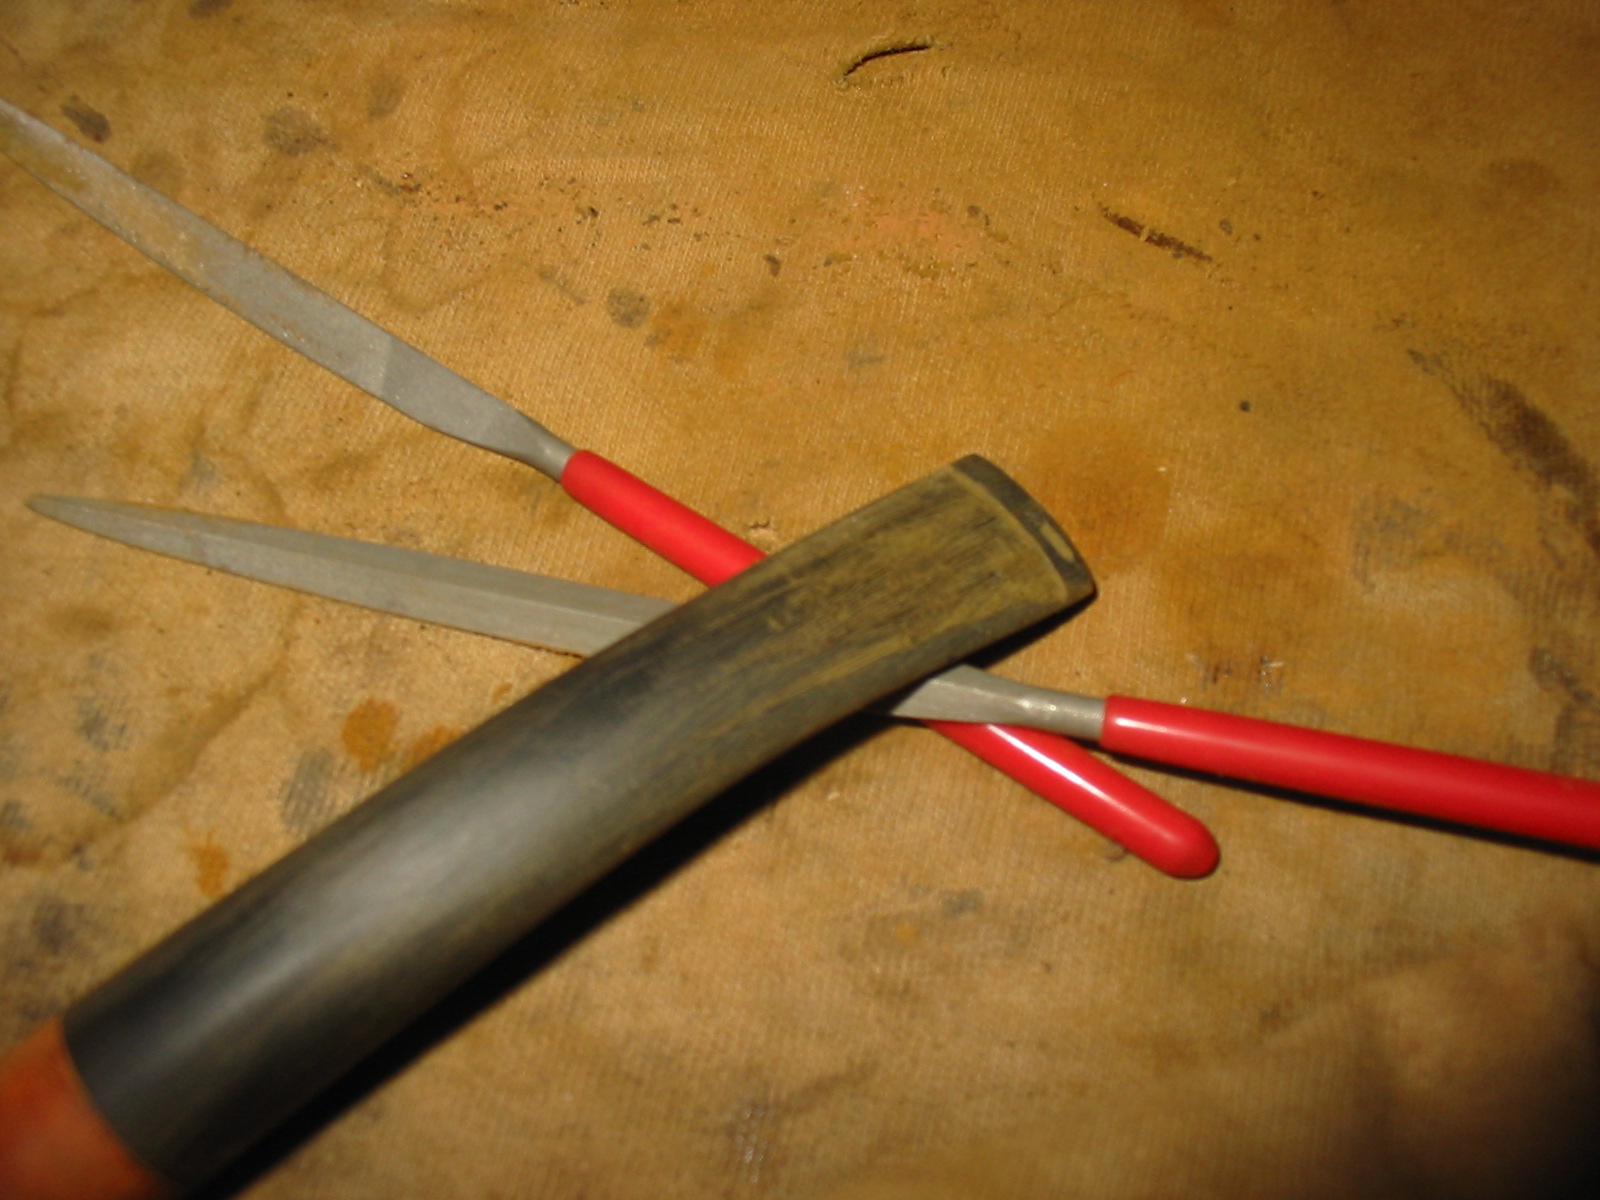
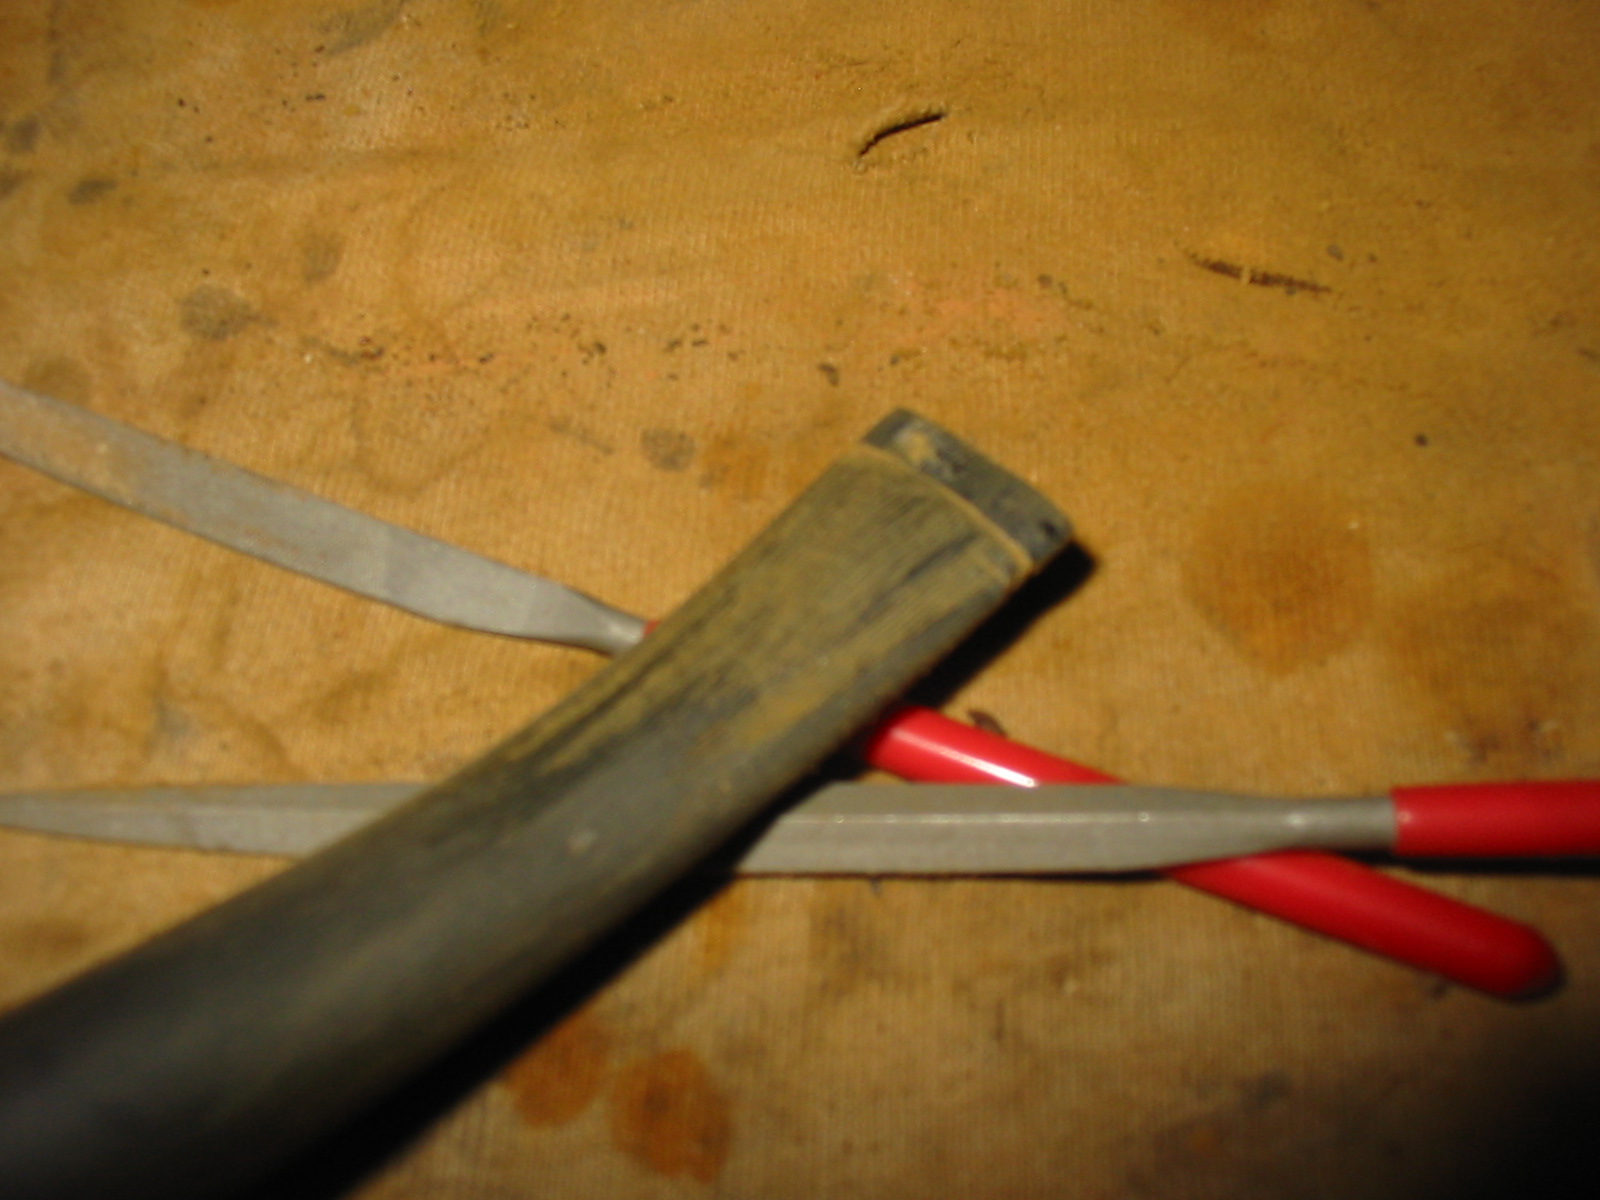
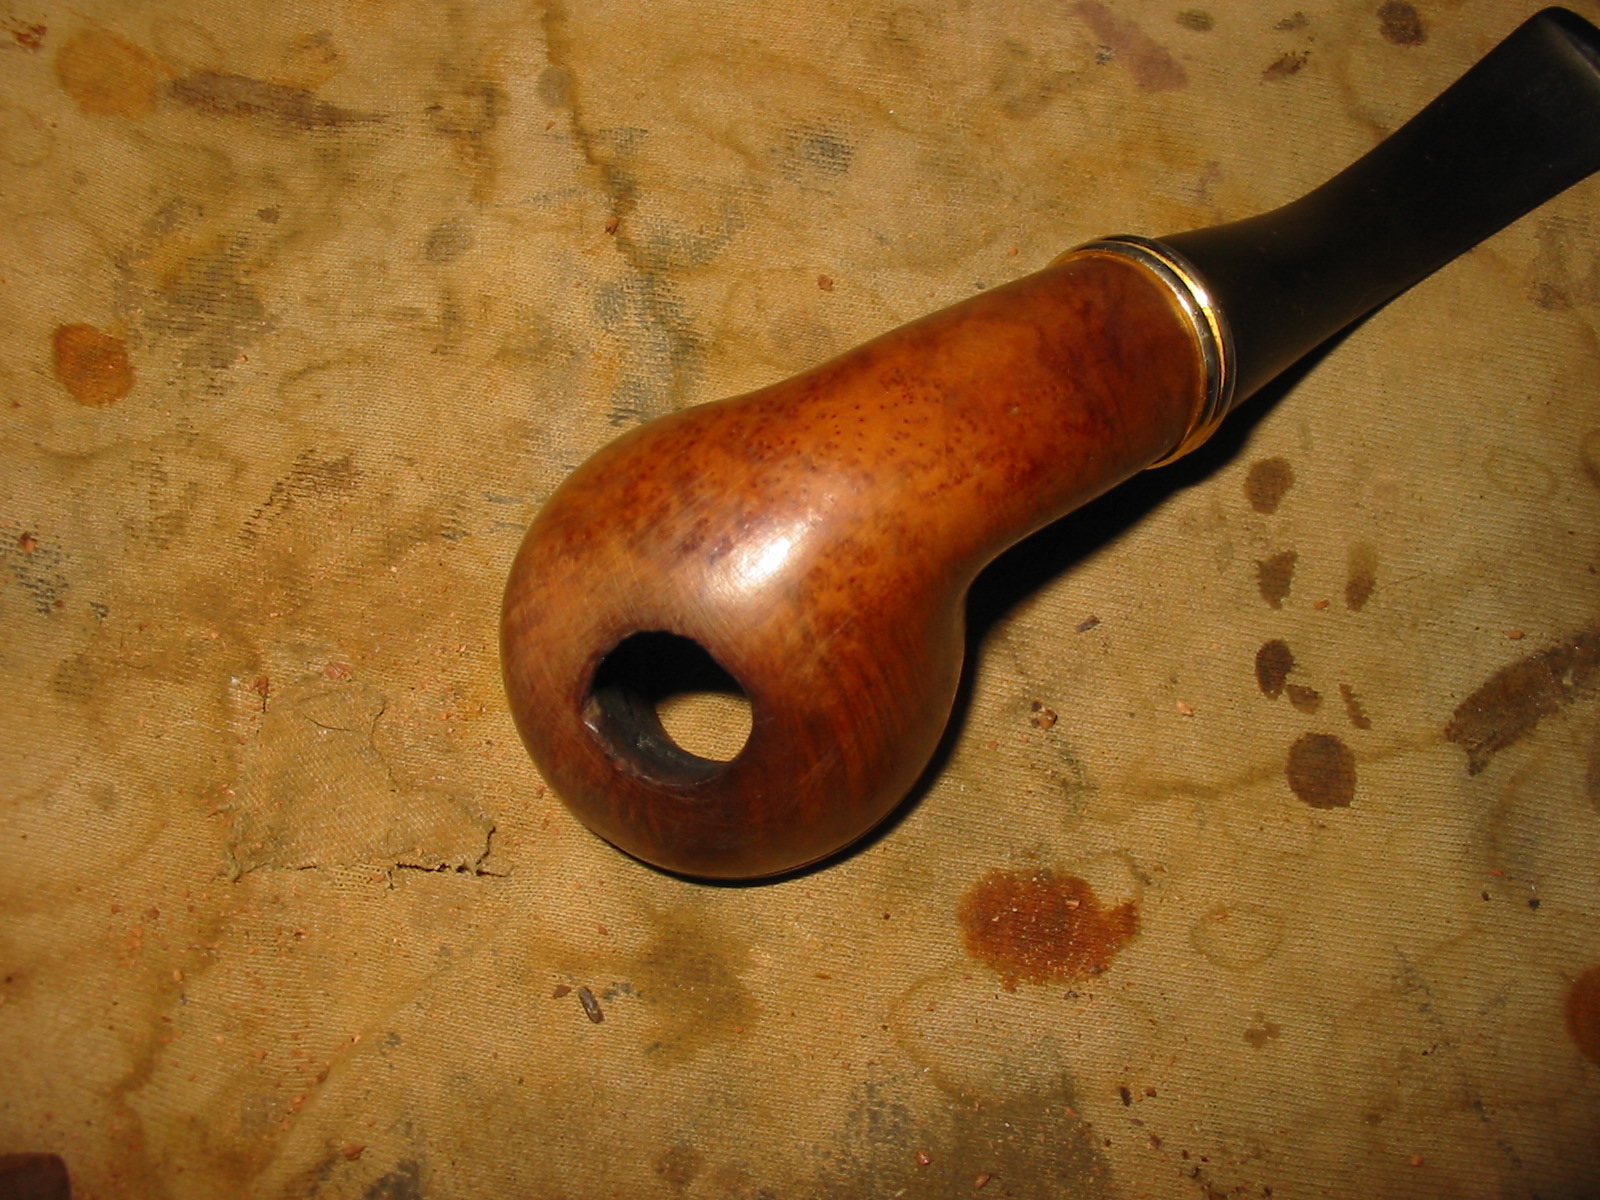
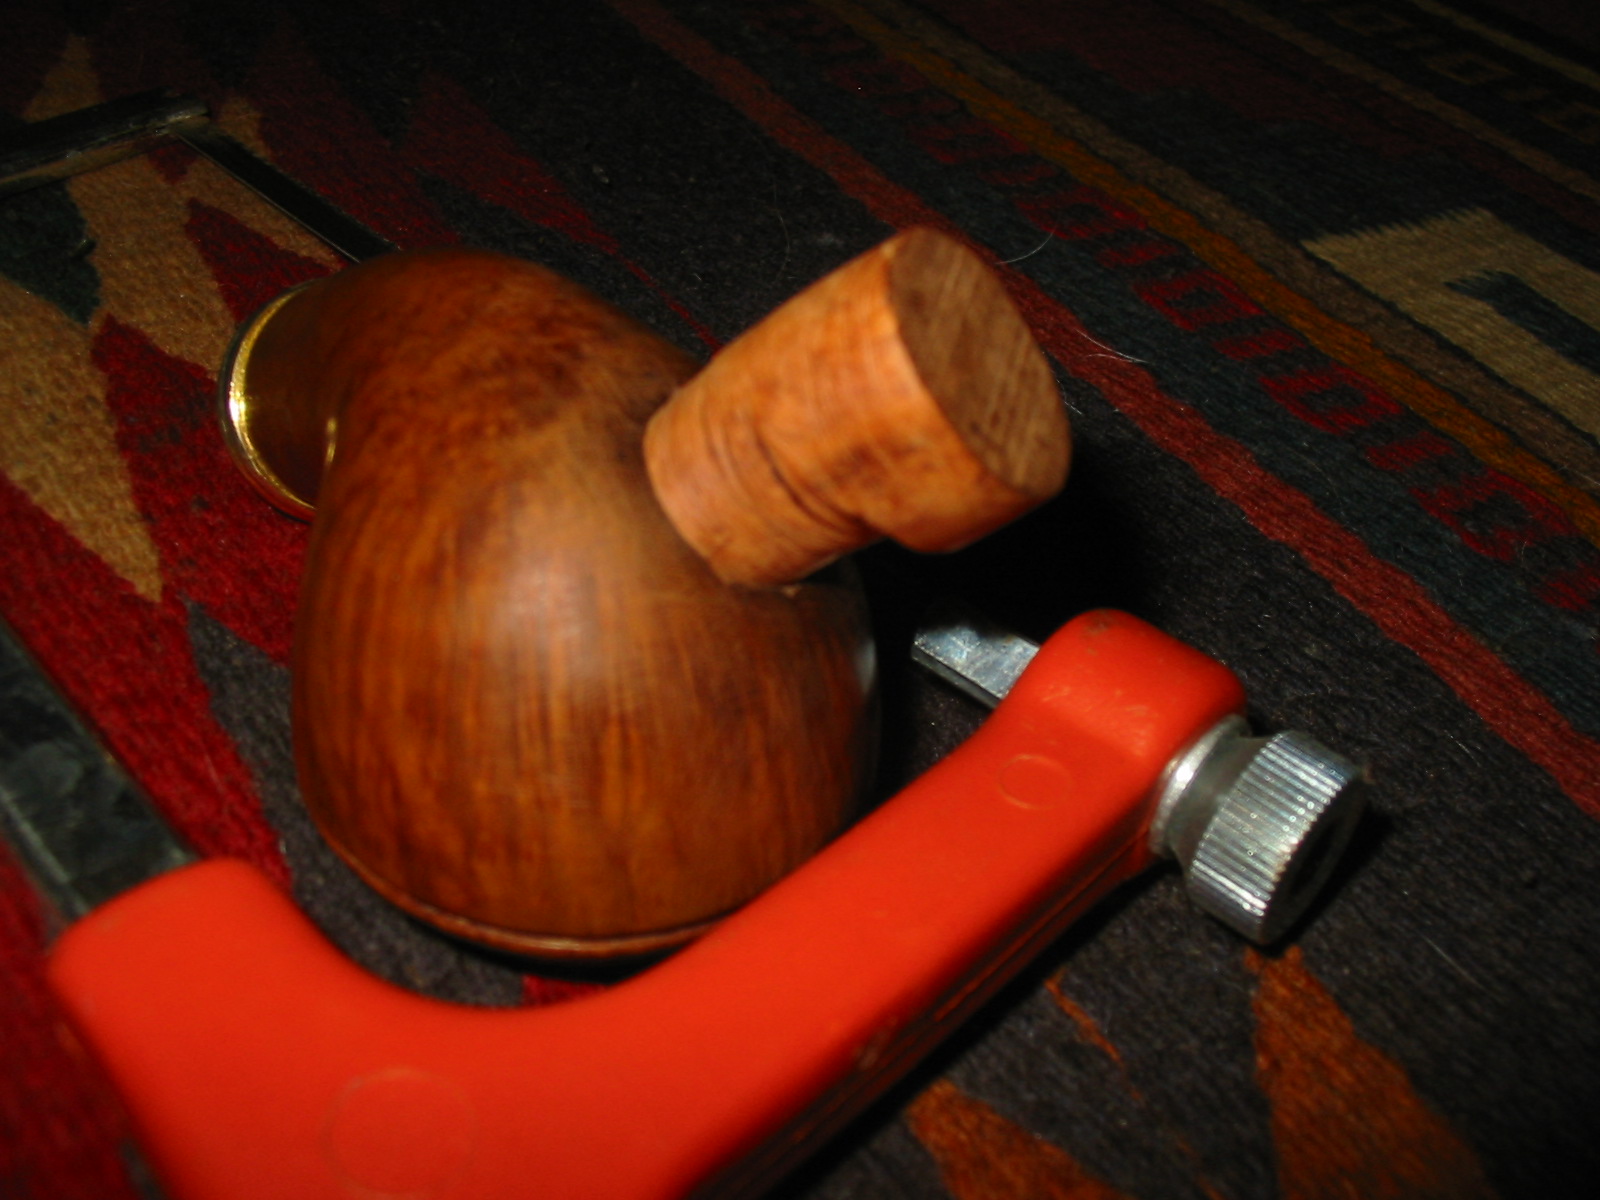
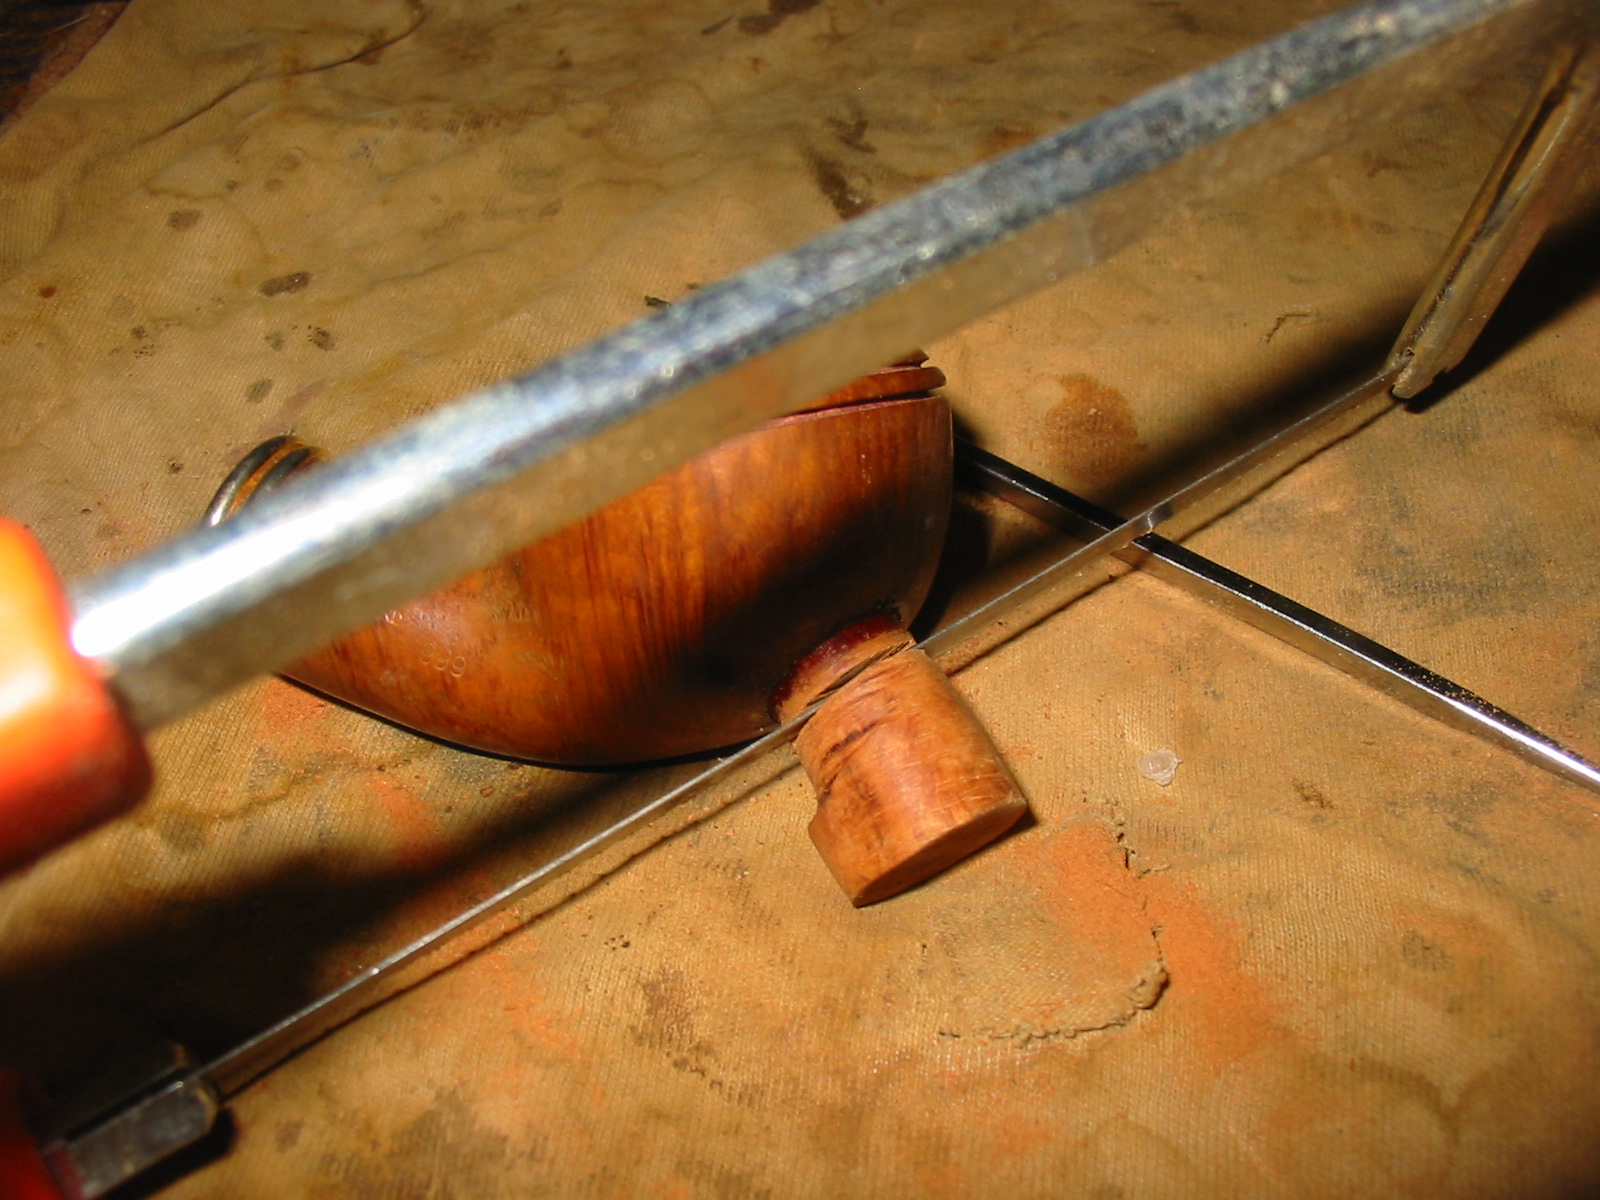
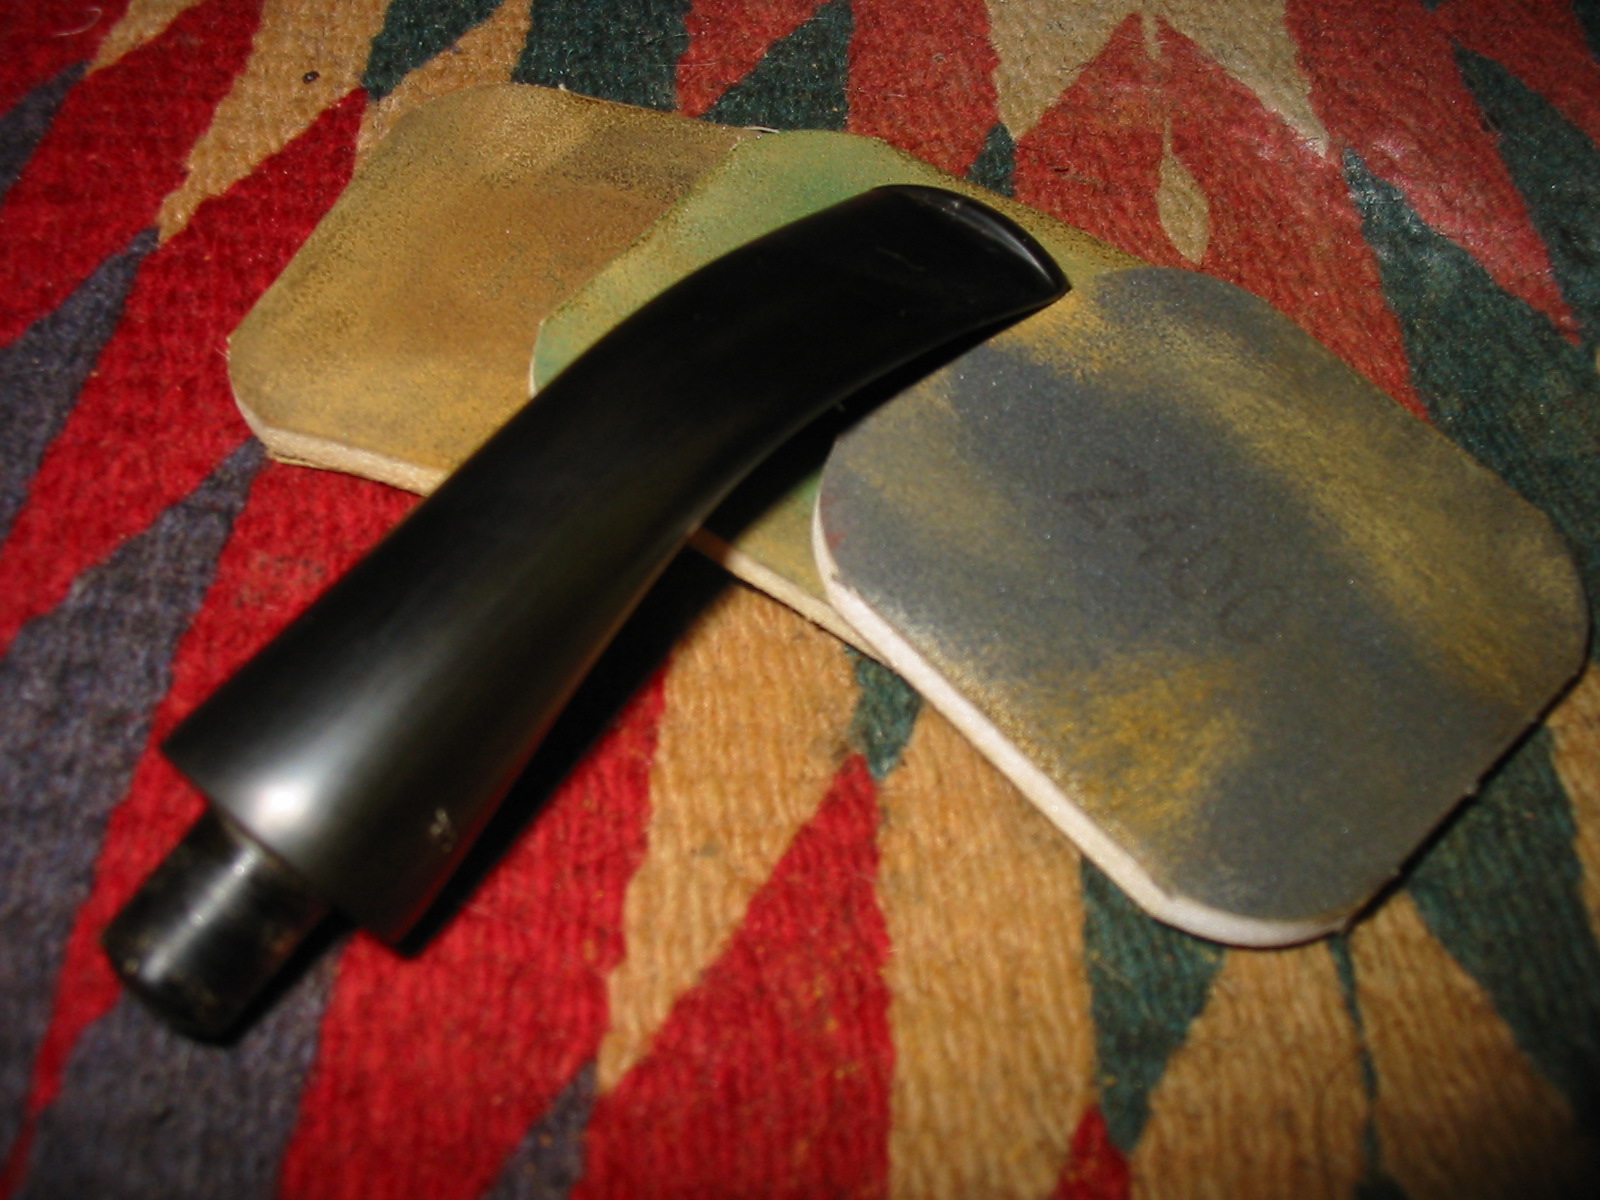
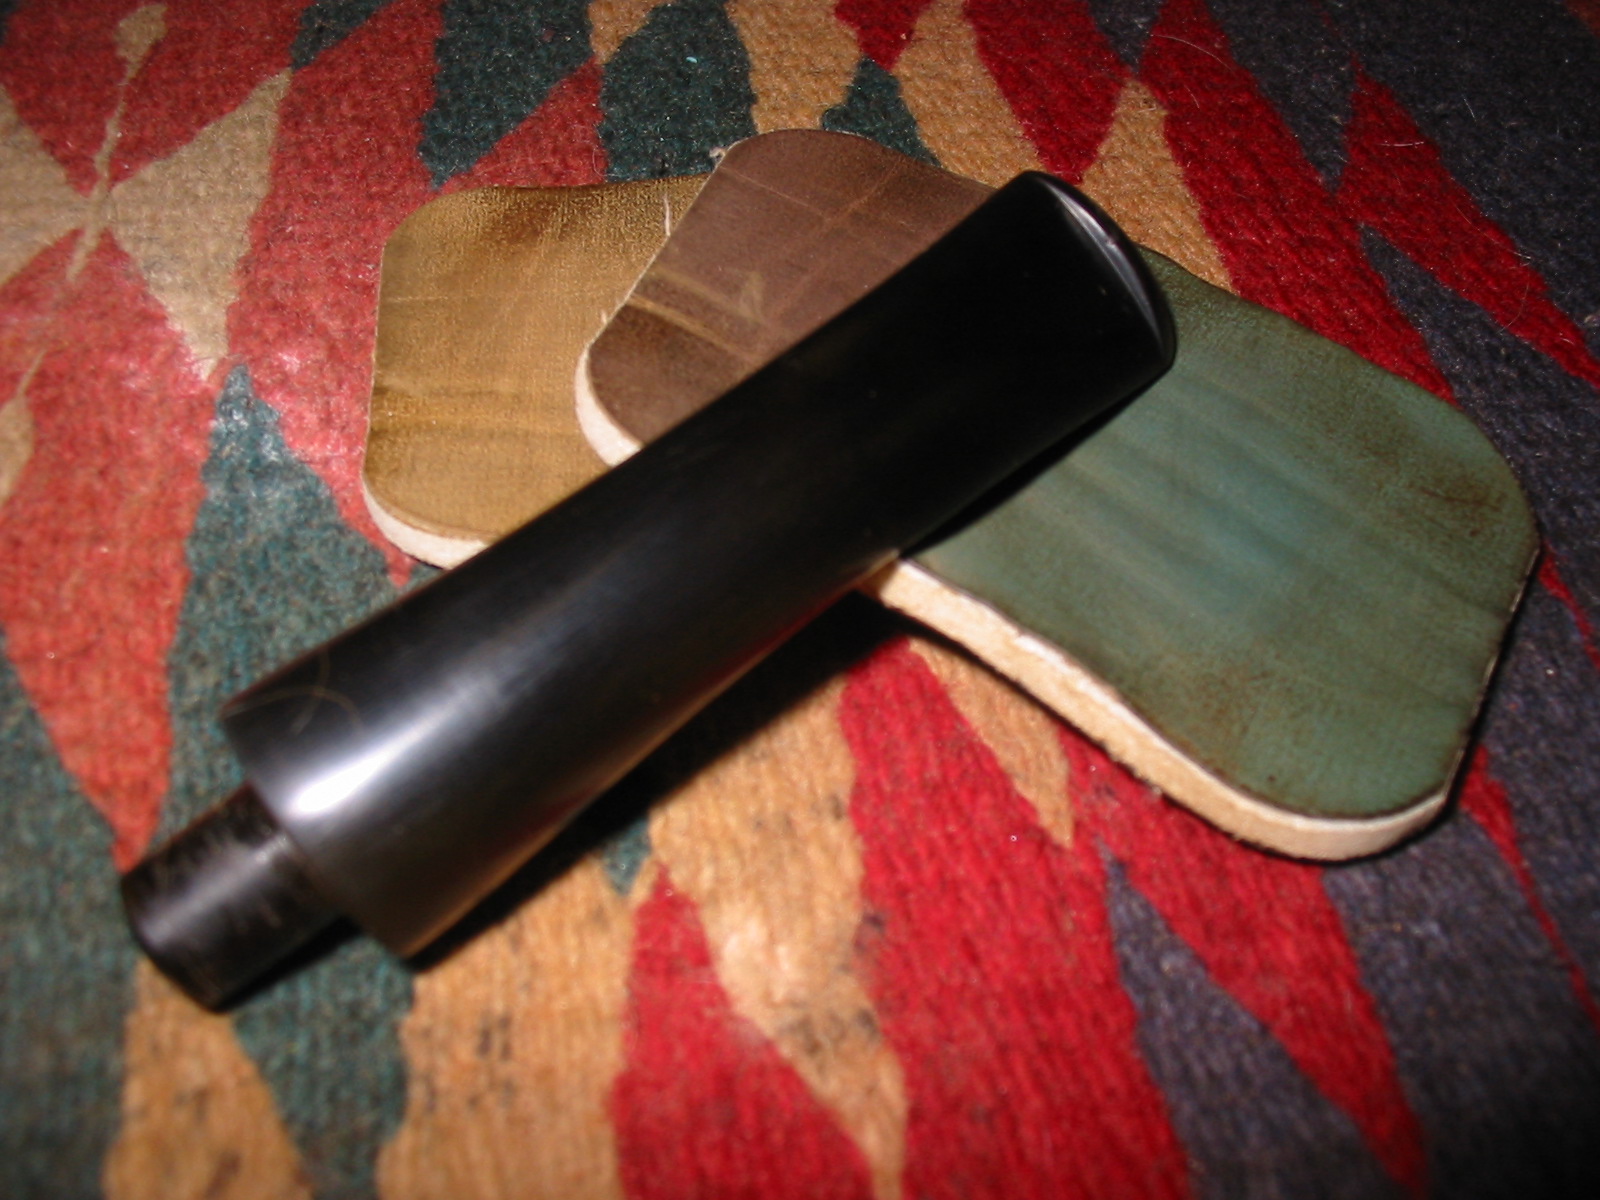
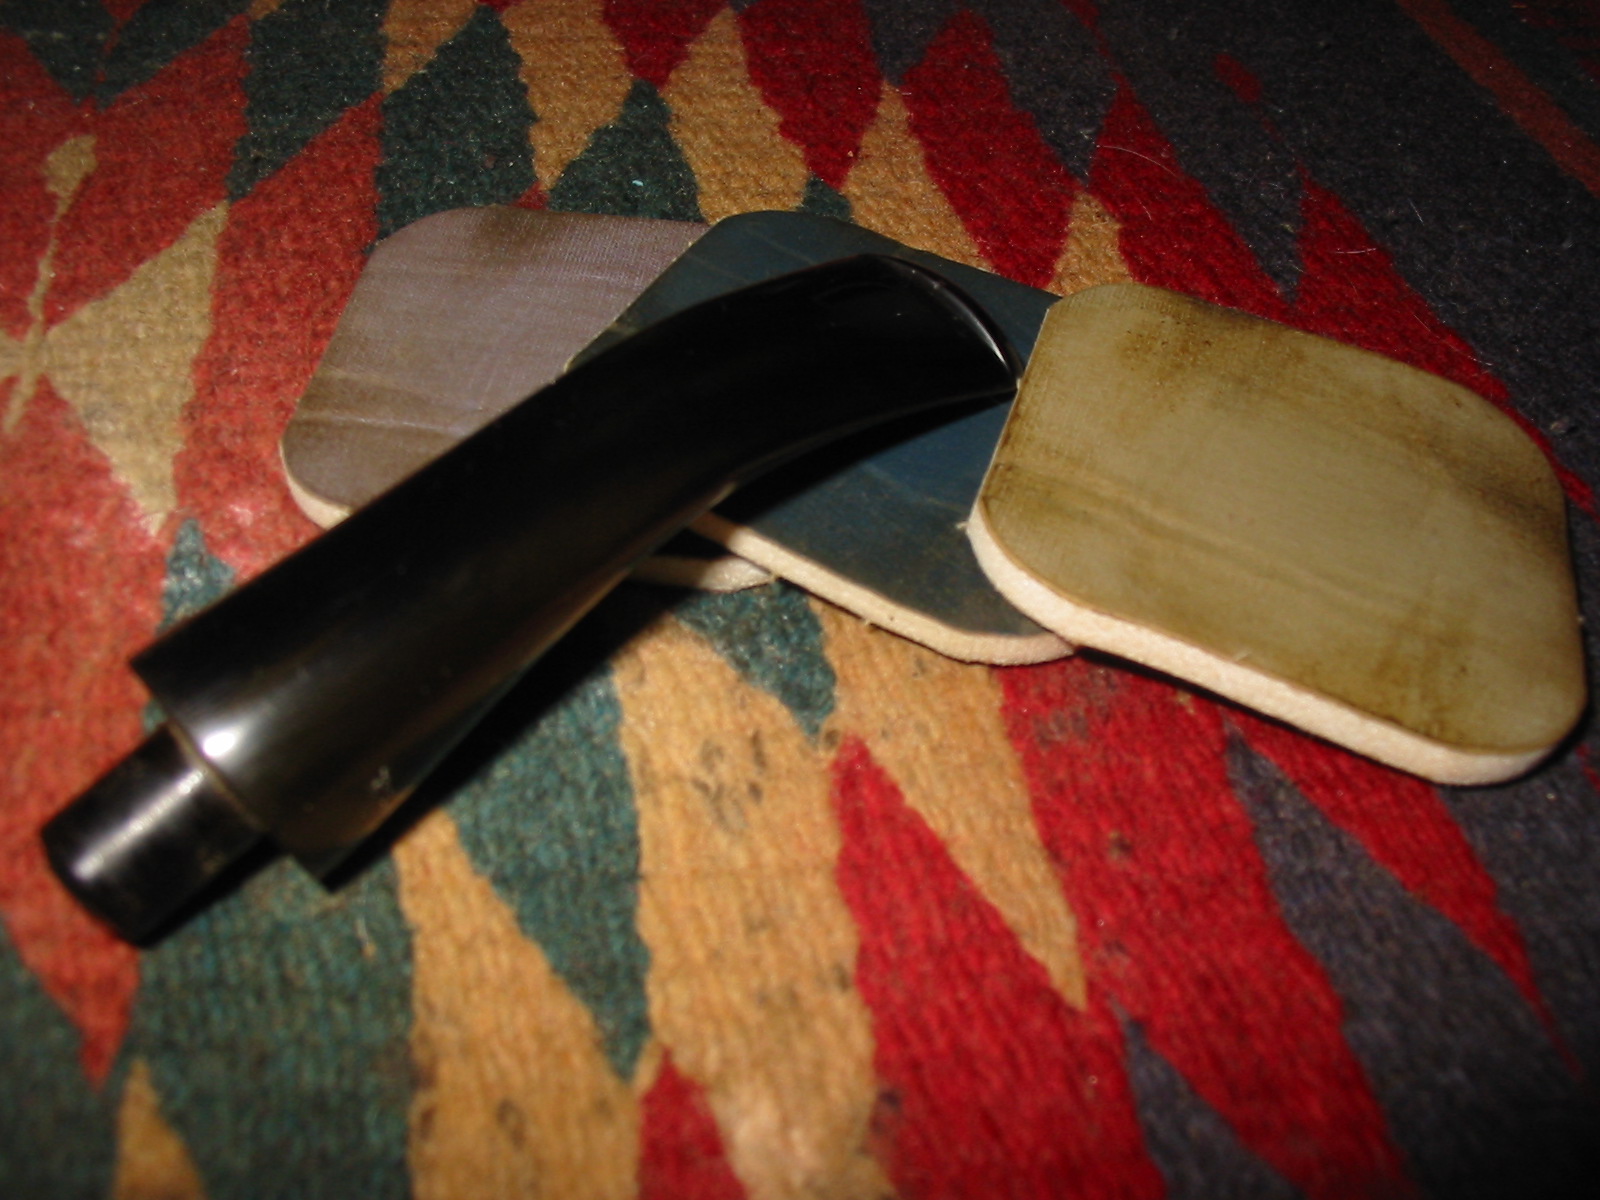
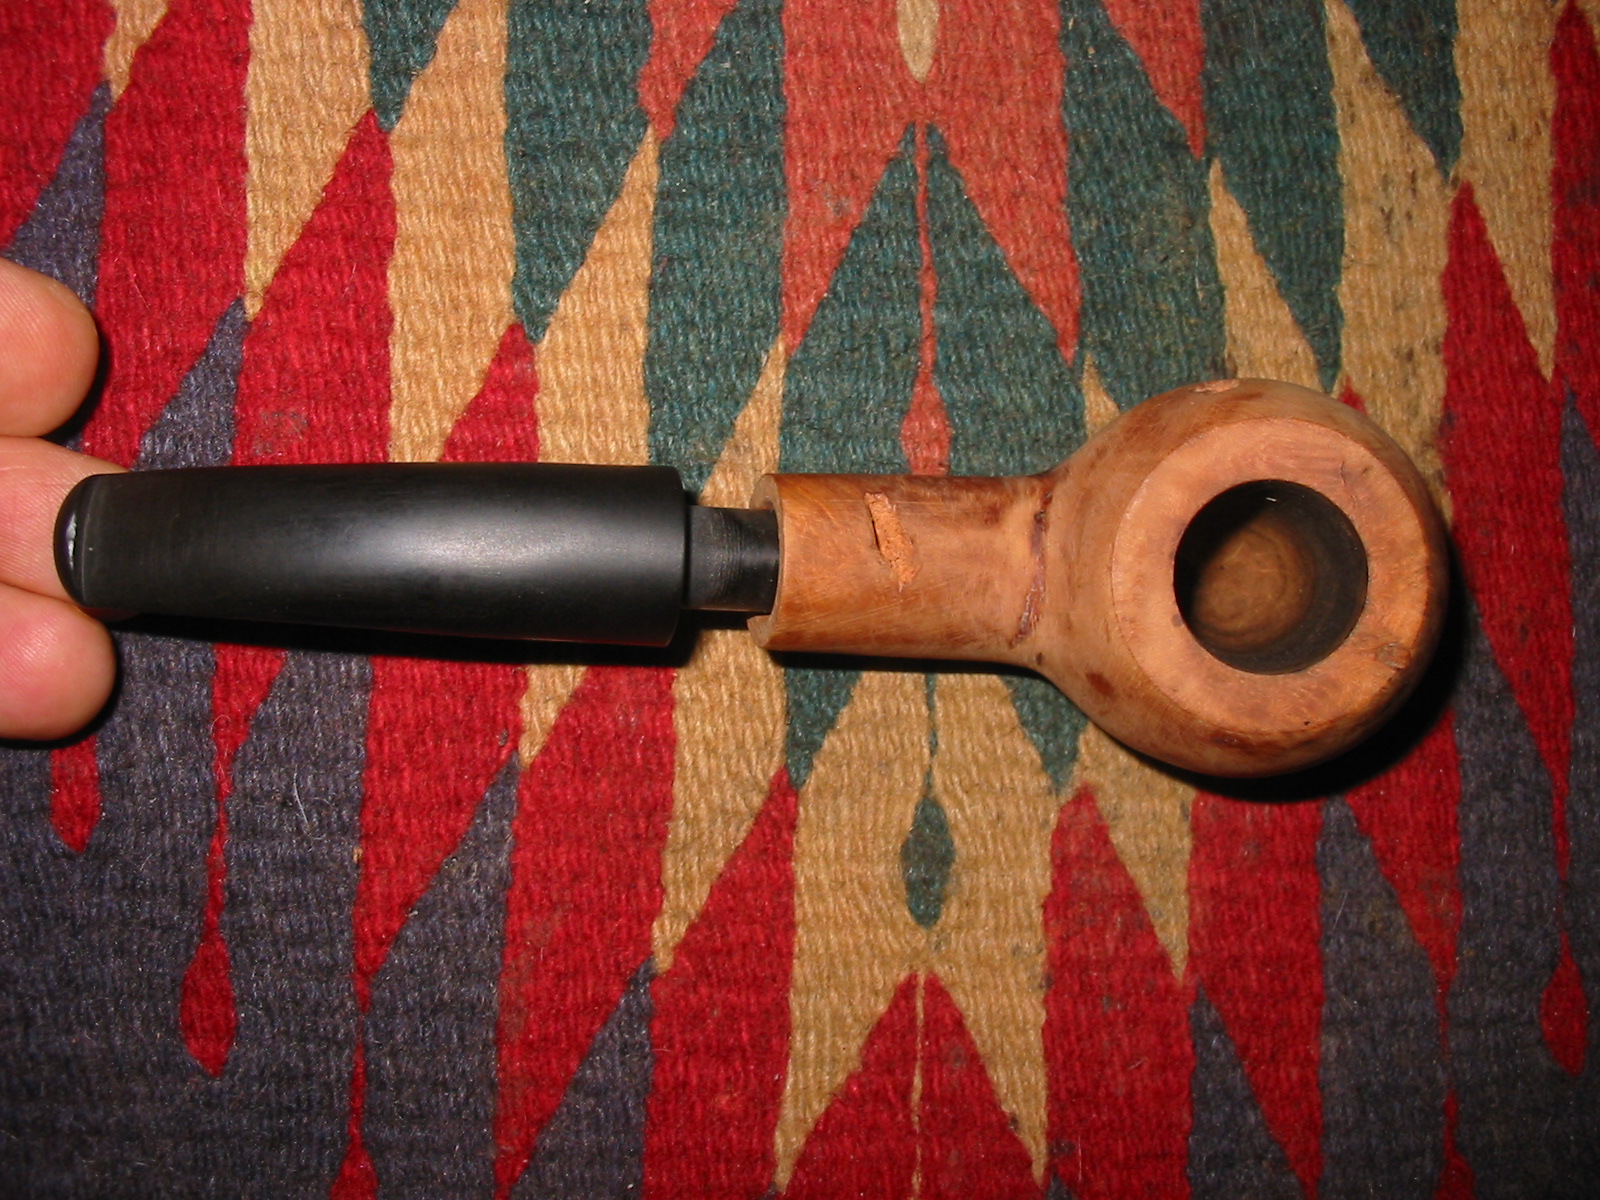
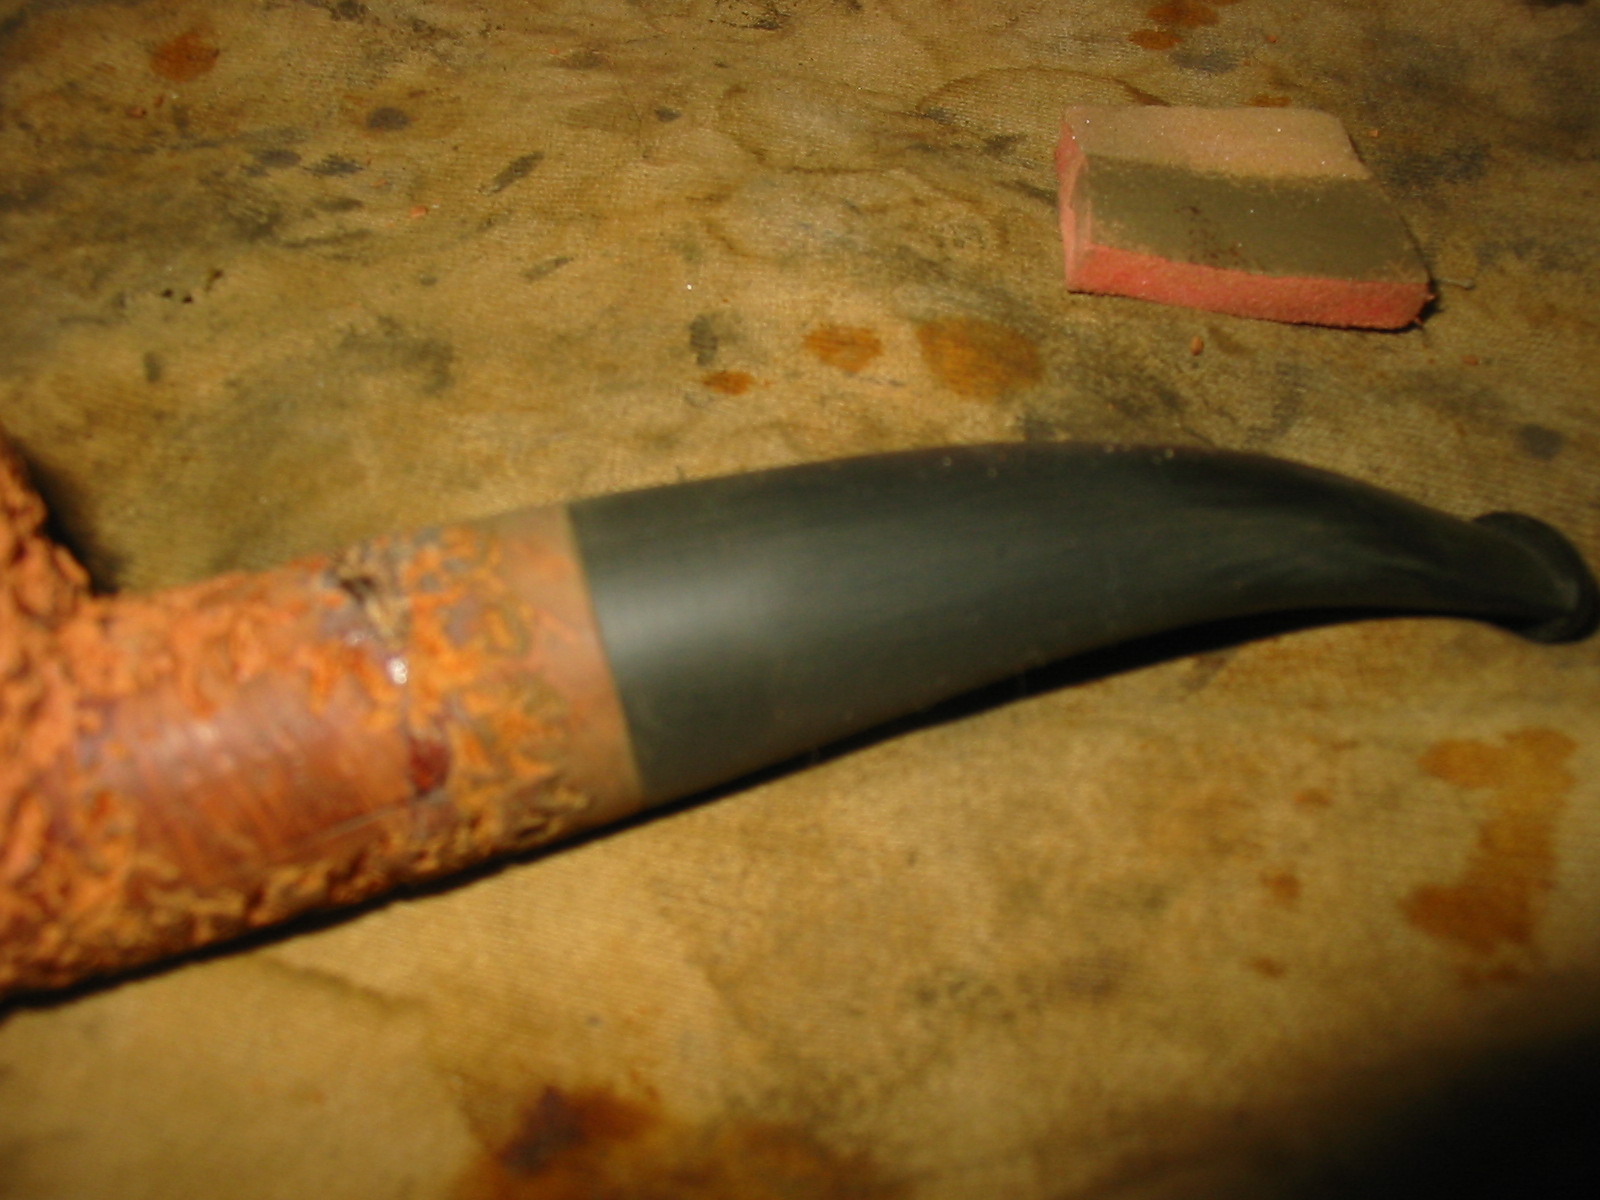
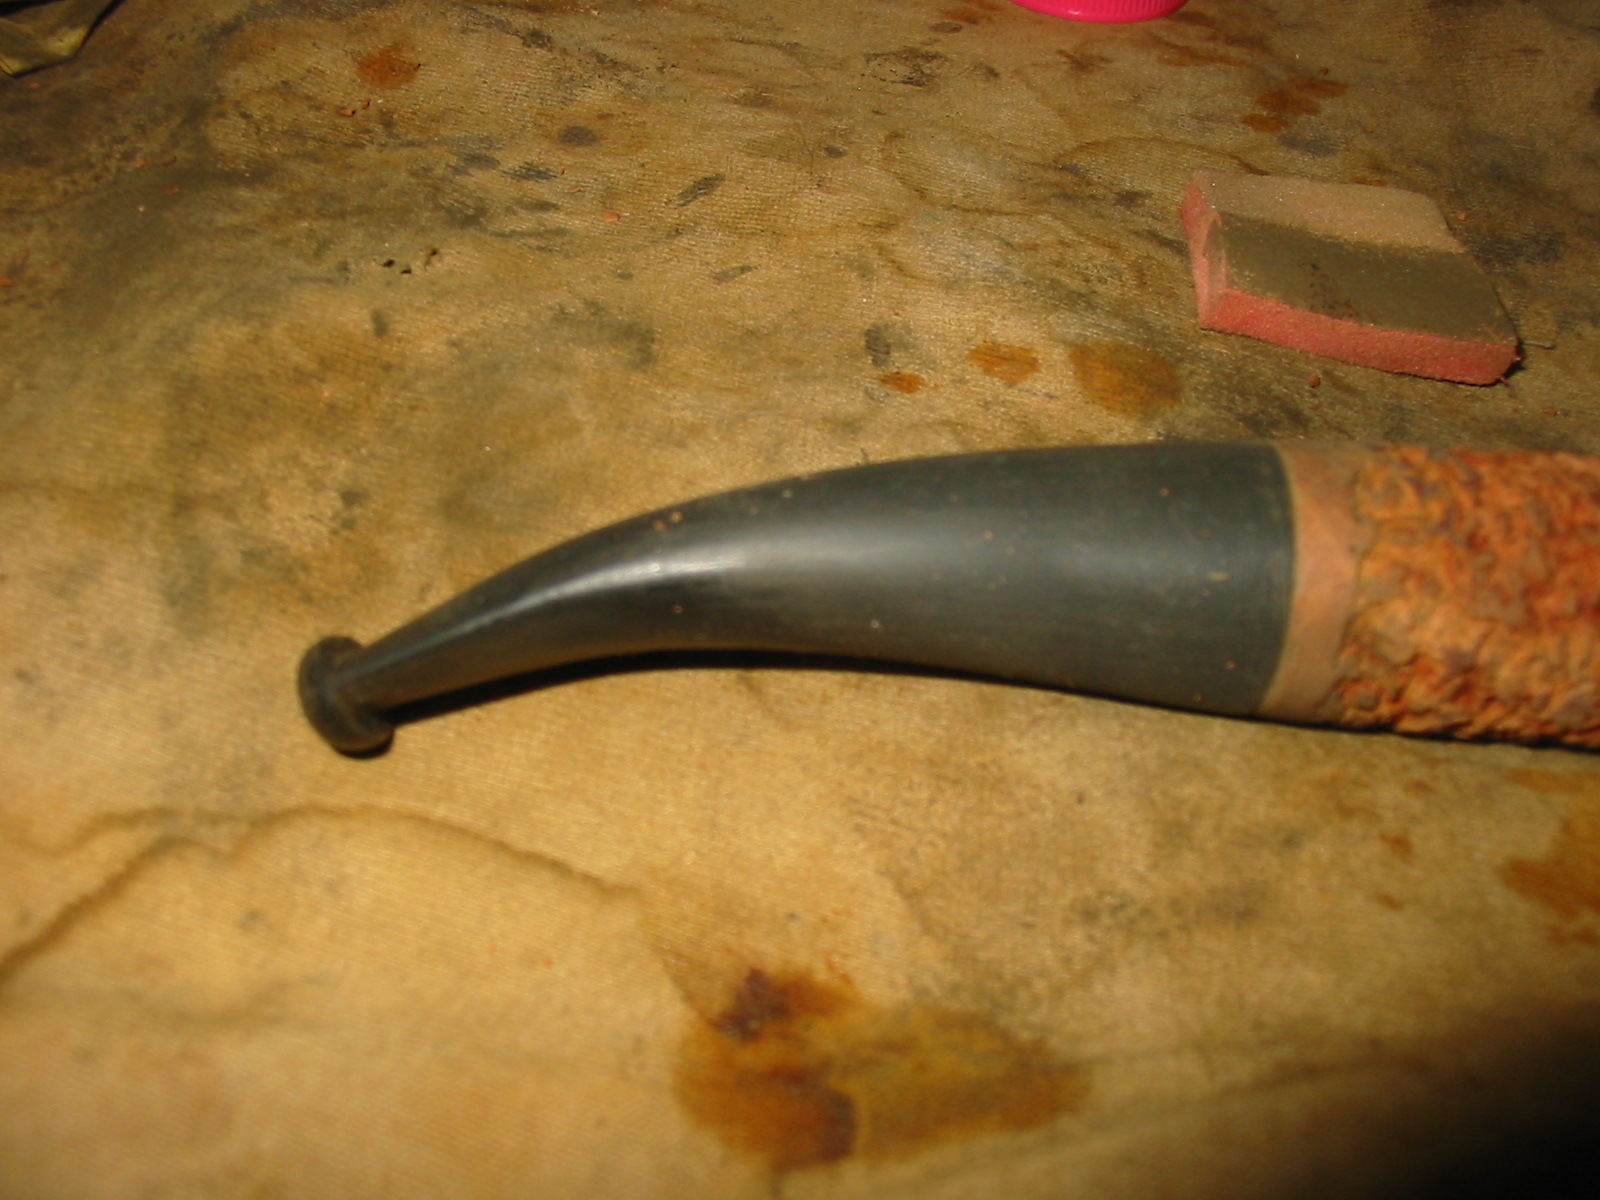
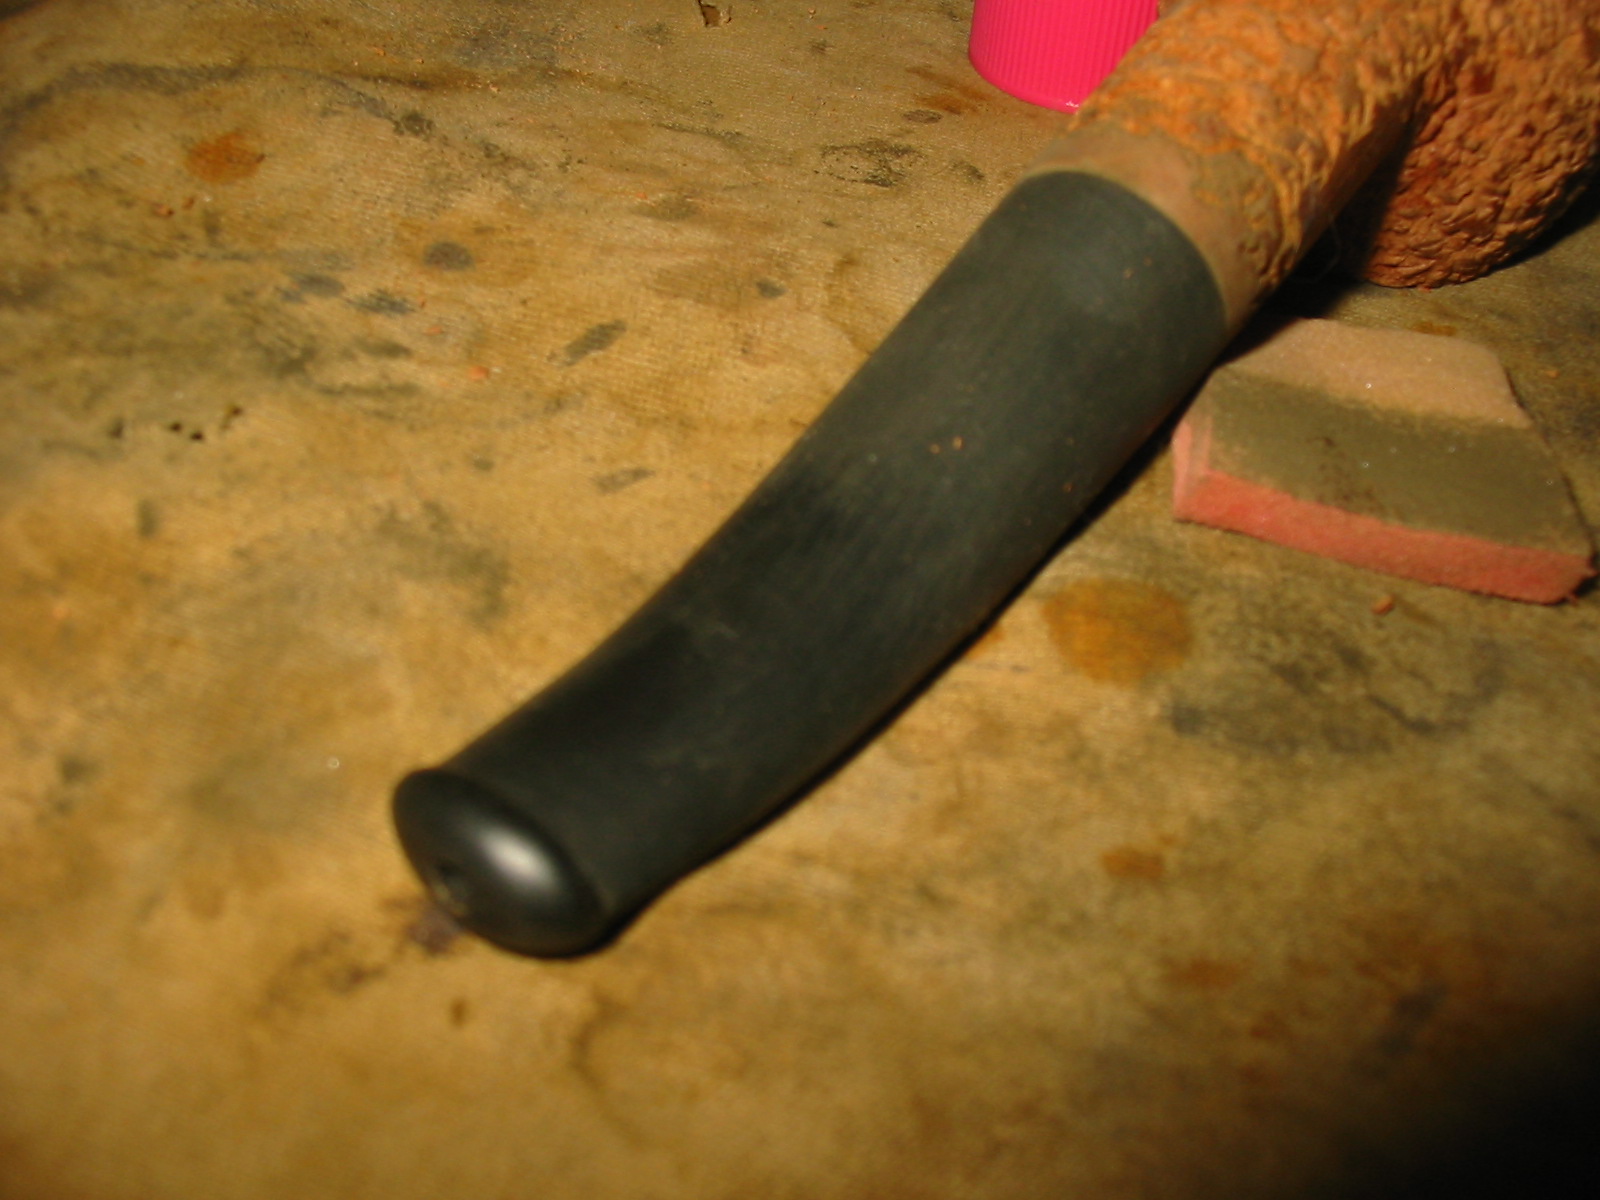
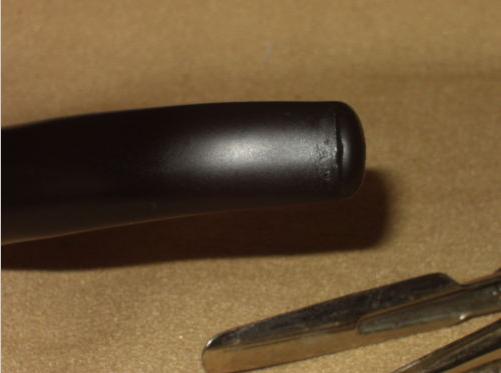
I shaped the stem with a Dremel and a sanding drum. I removed the saddle on the stem and converted it into a taper shape and also narrowed it to fit the dimensions of the oval shank. The next four photos show the newly fit stem and the rough shaping that I did with the Dremel. All that remained in the stem fit was a lot of hand sanding!
IMG_5343

IMG_5344

IMG_5345

IMG_5346

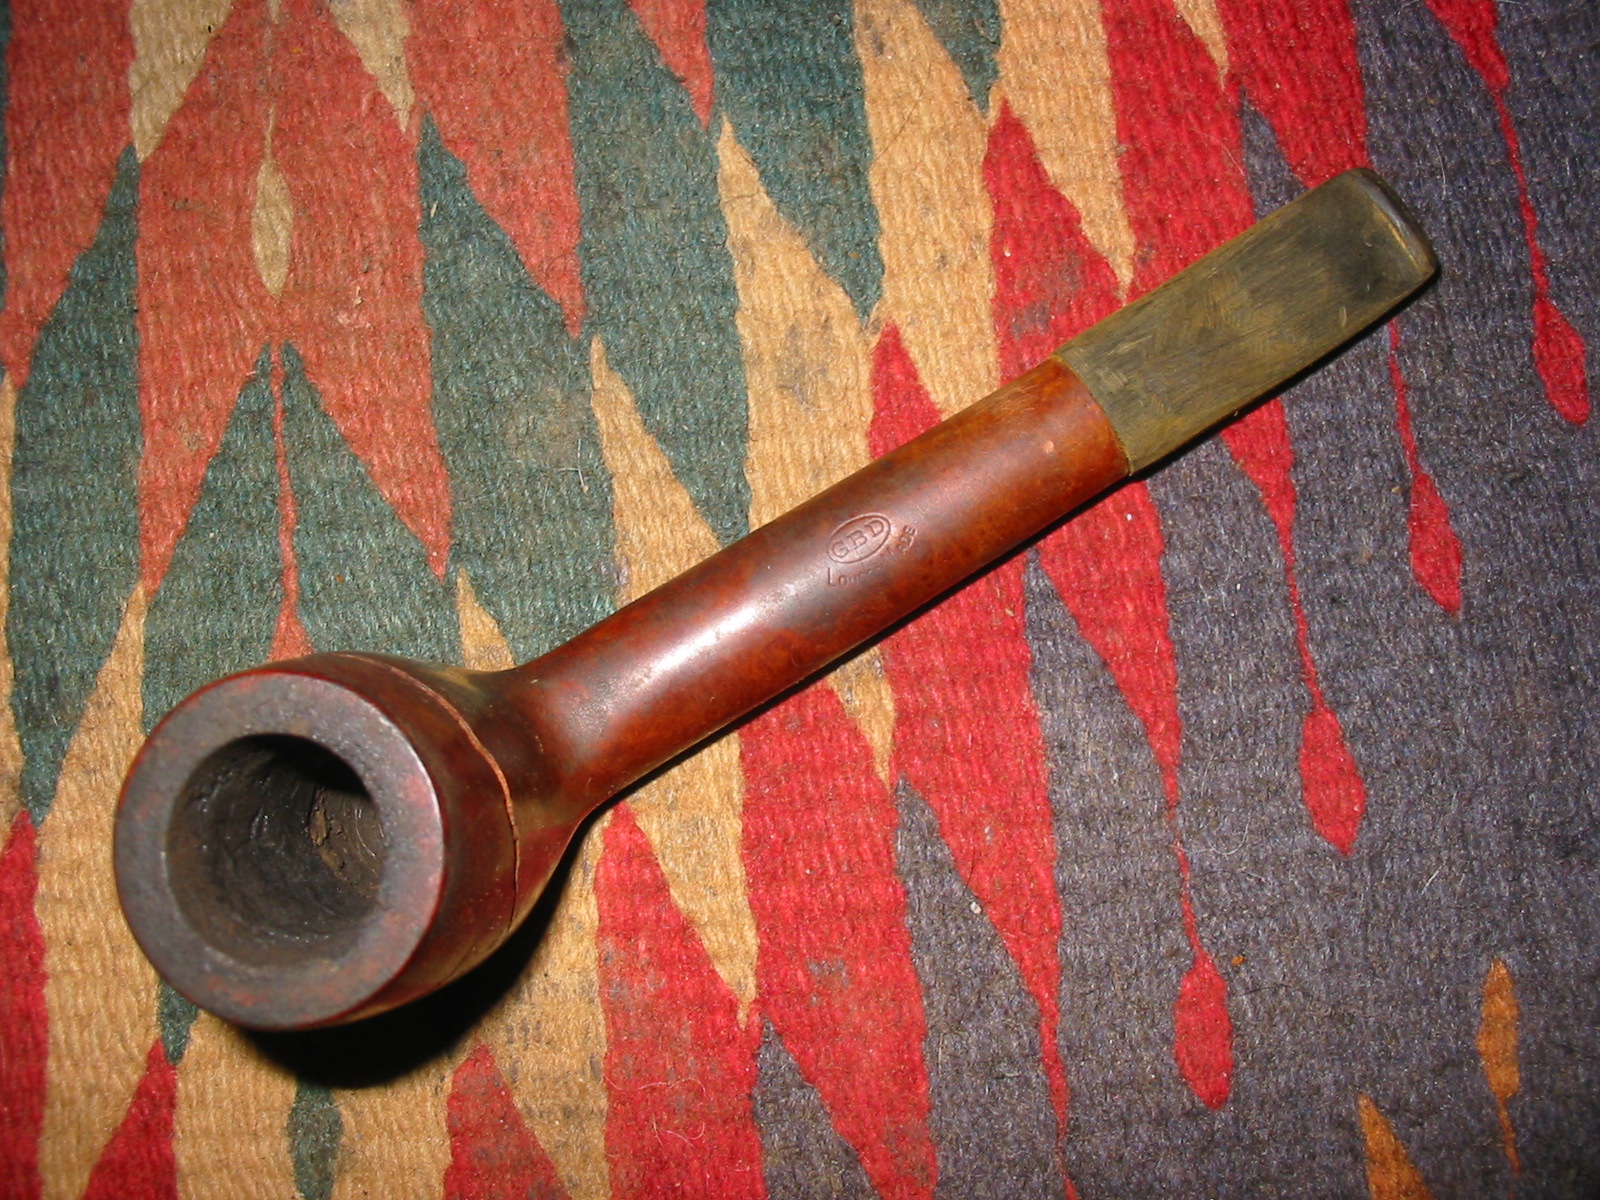
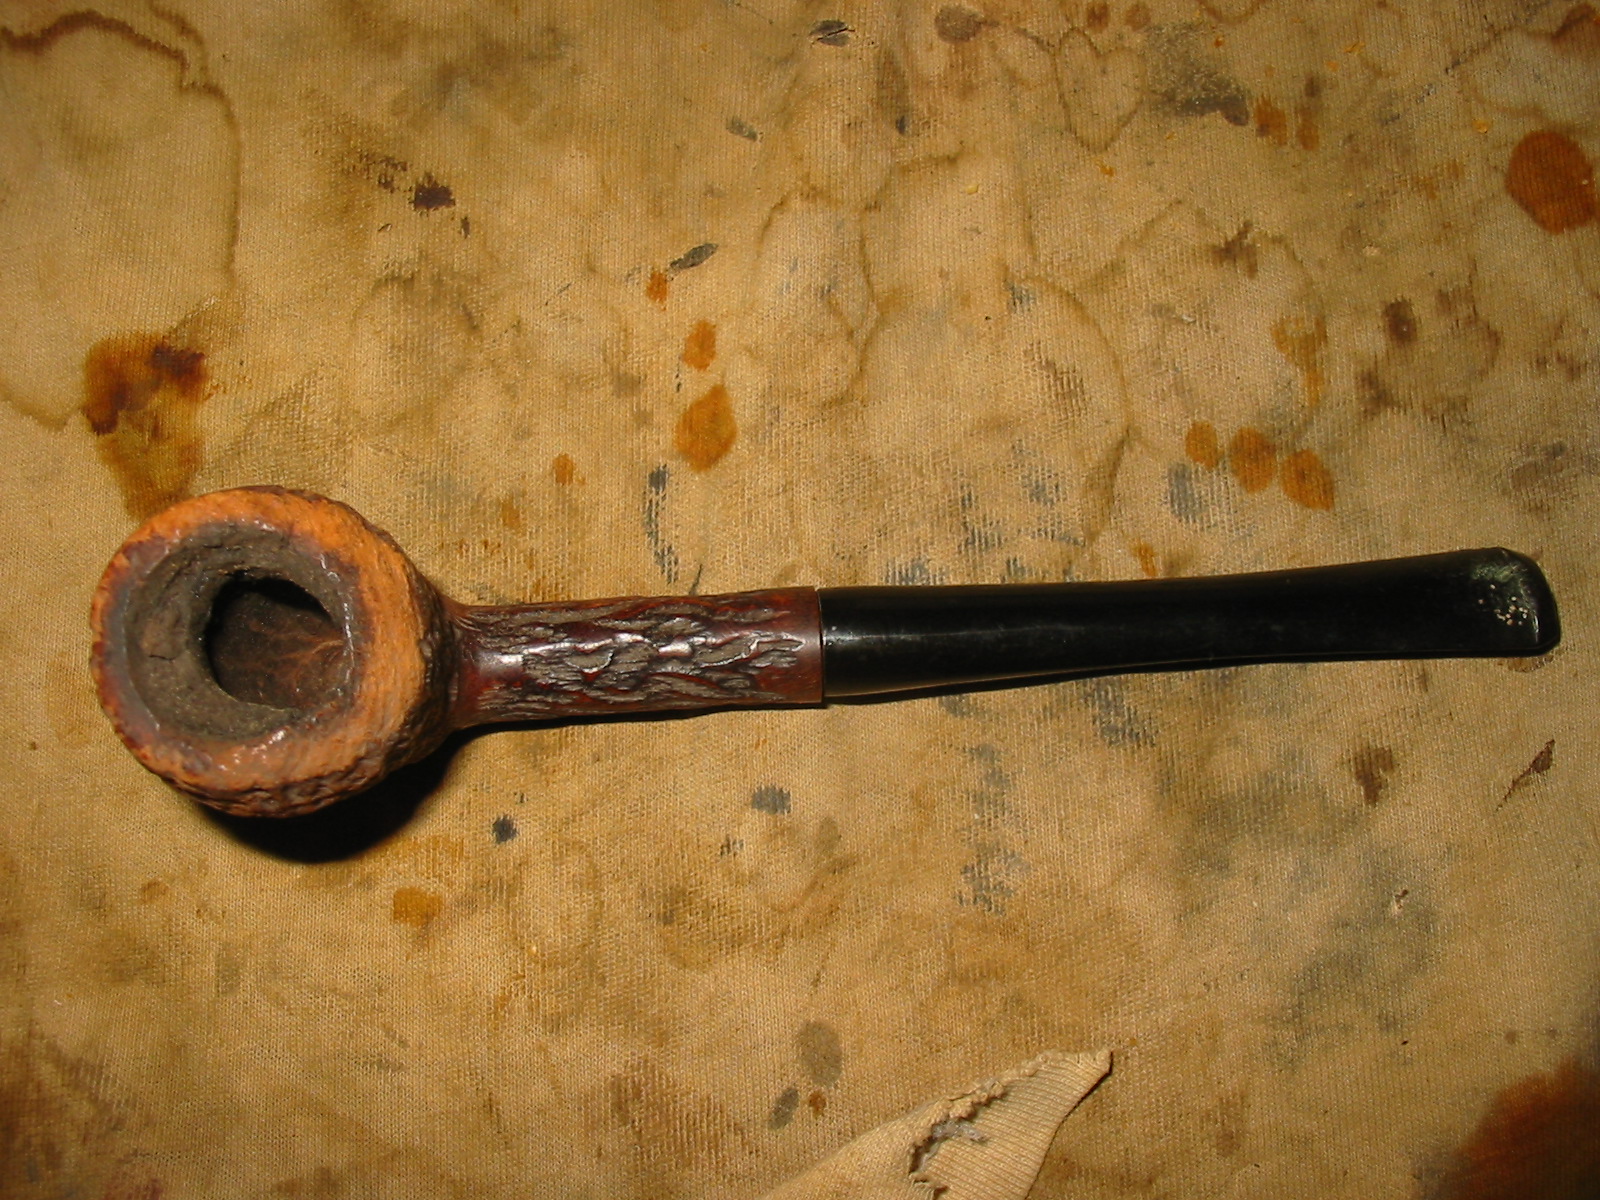
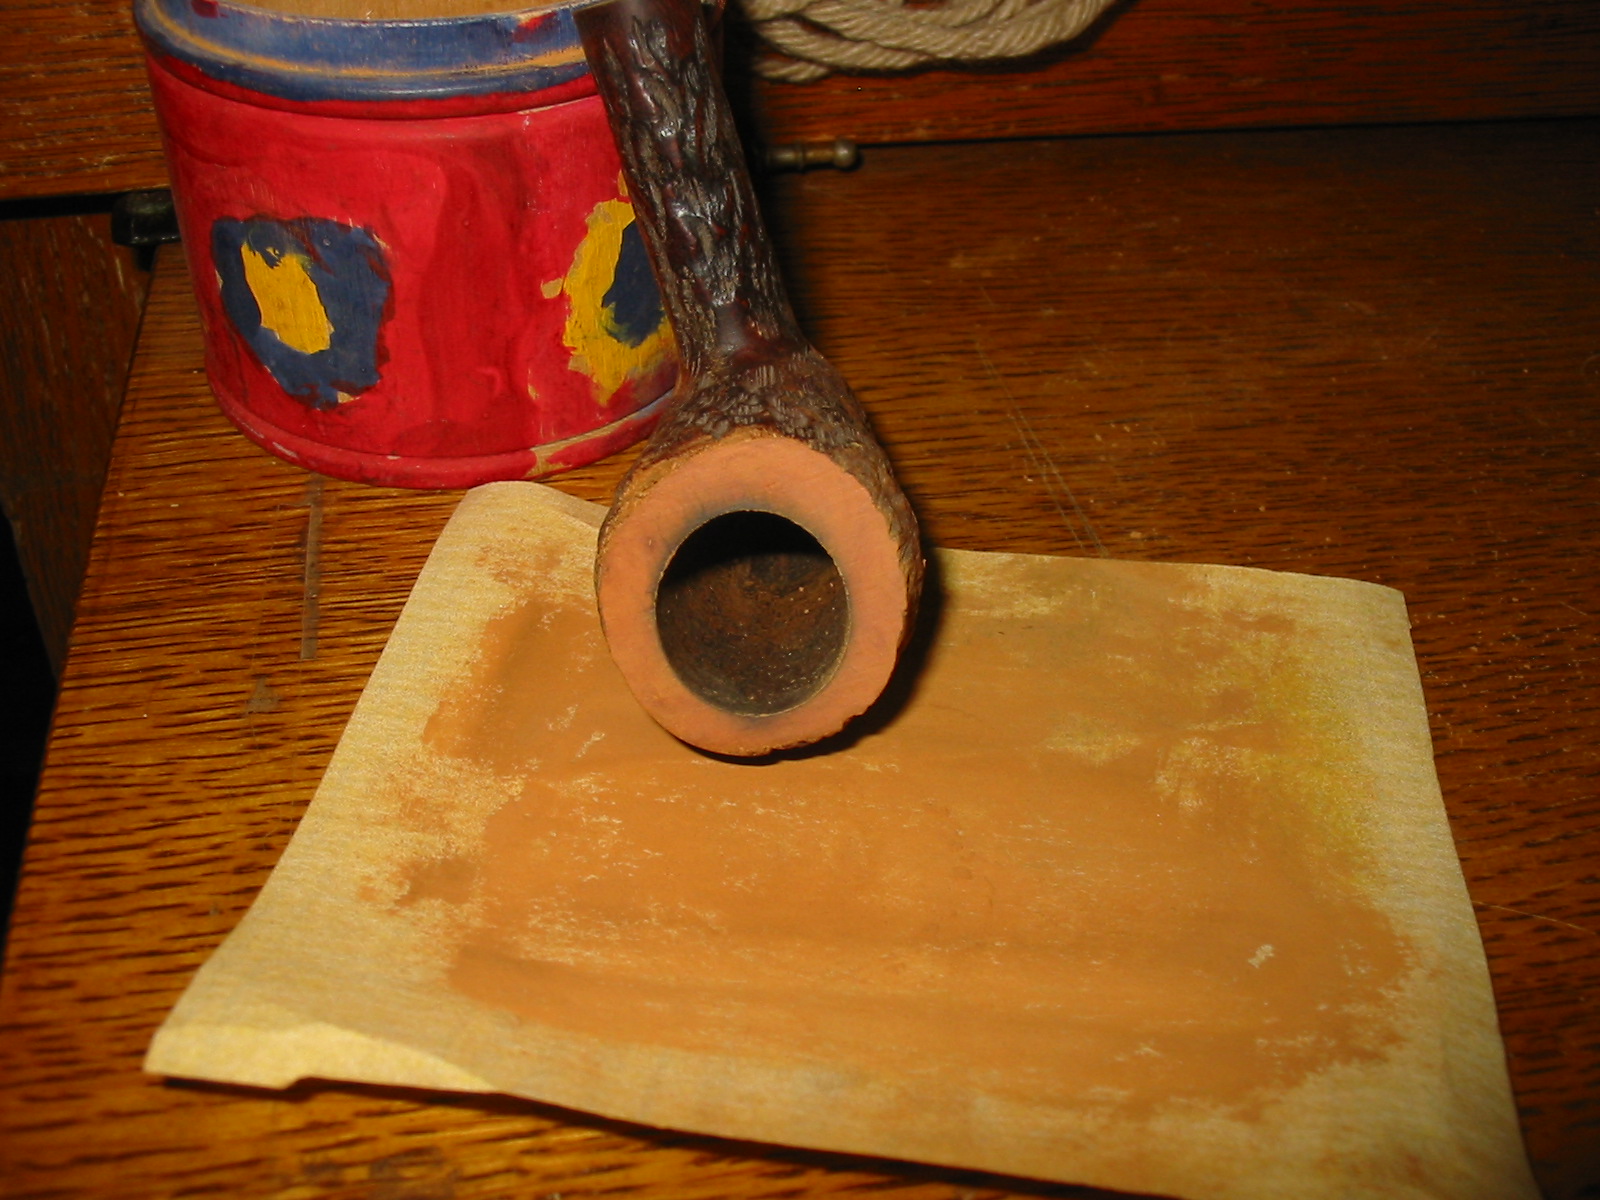
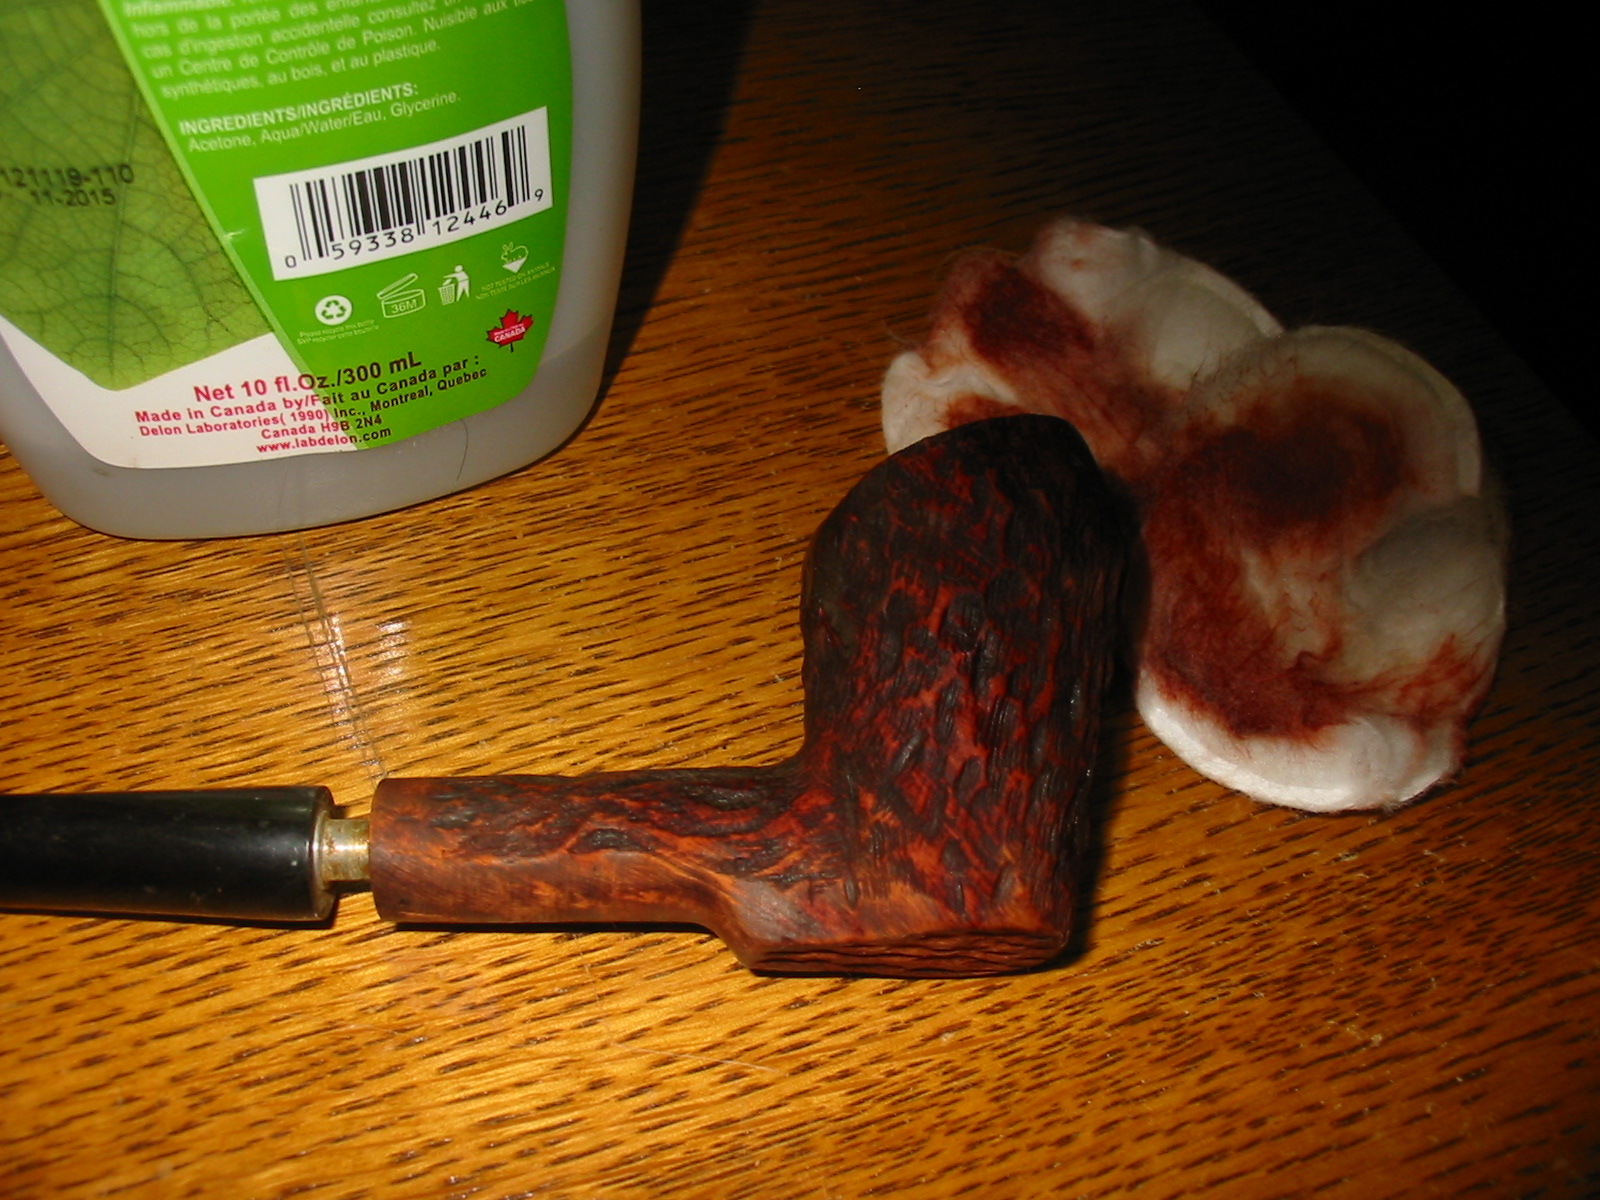
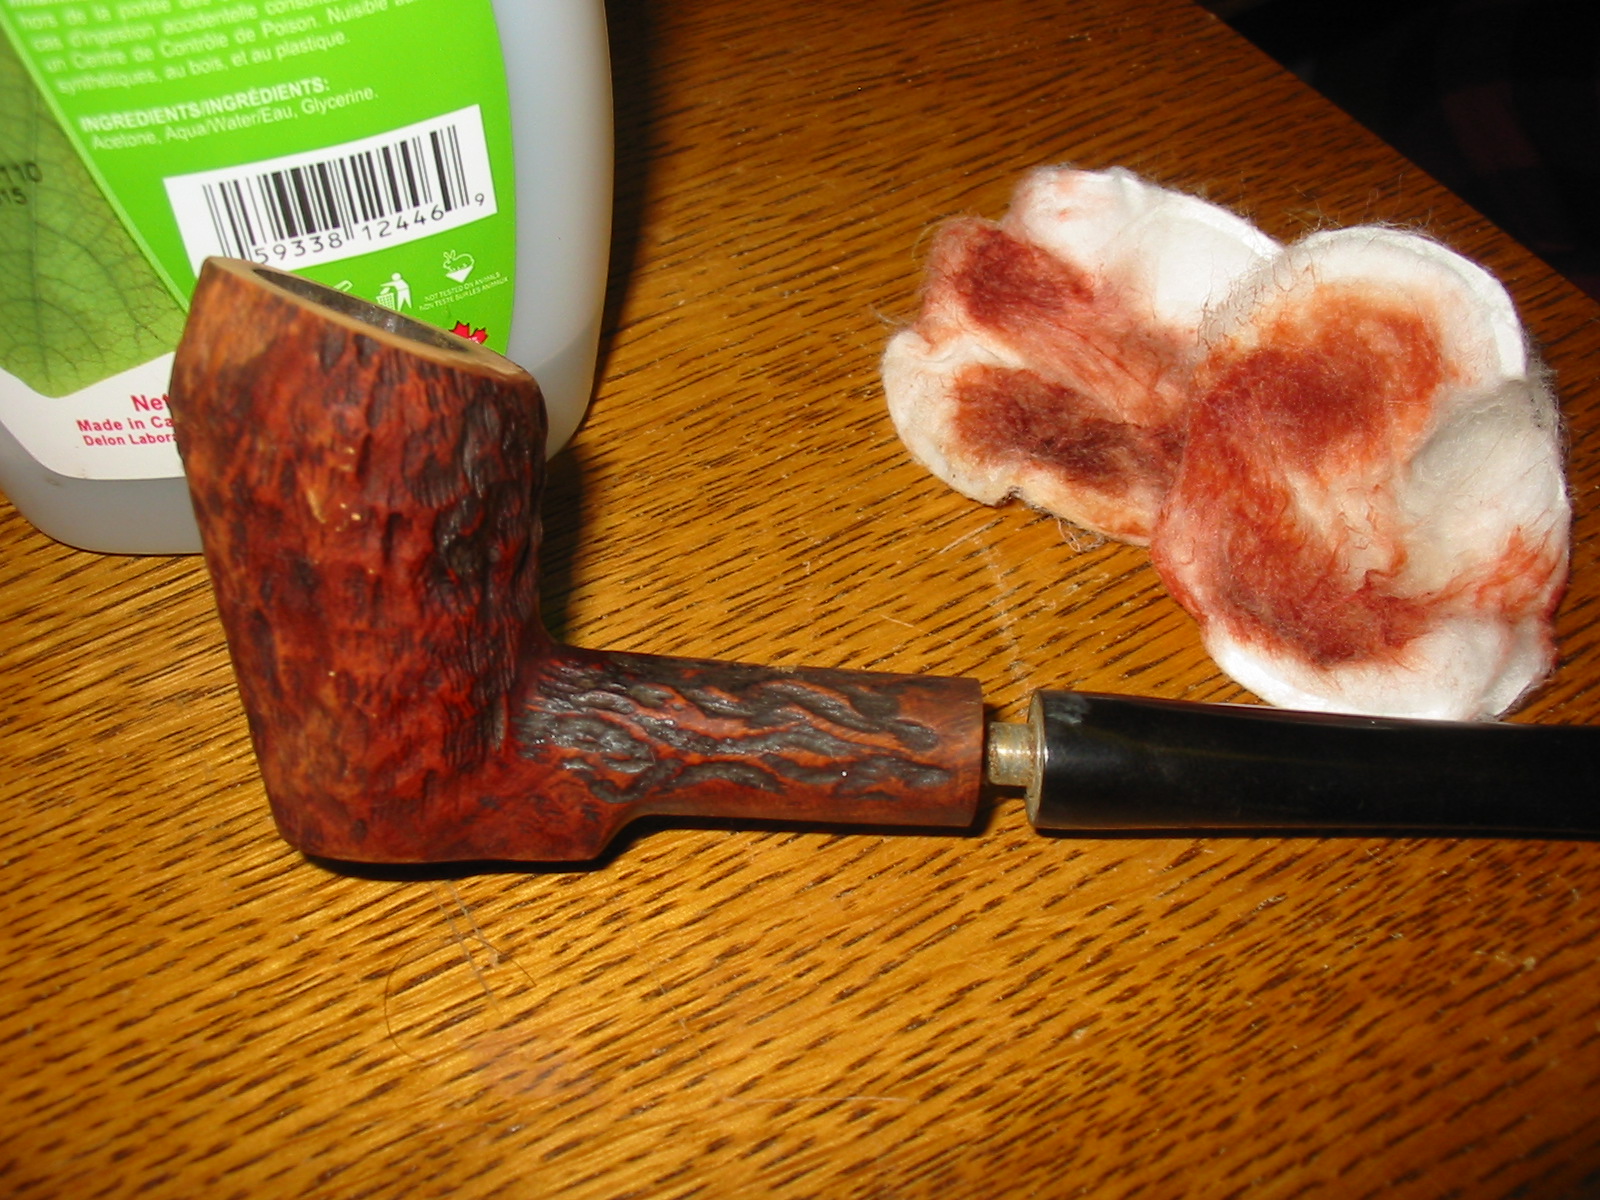
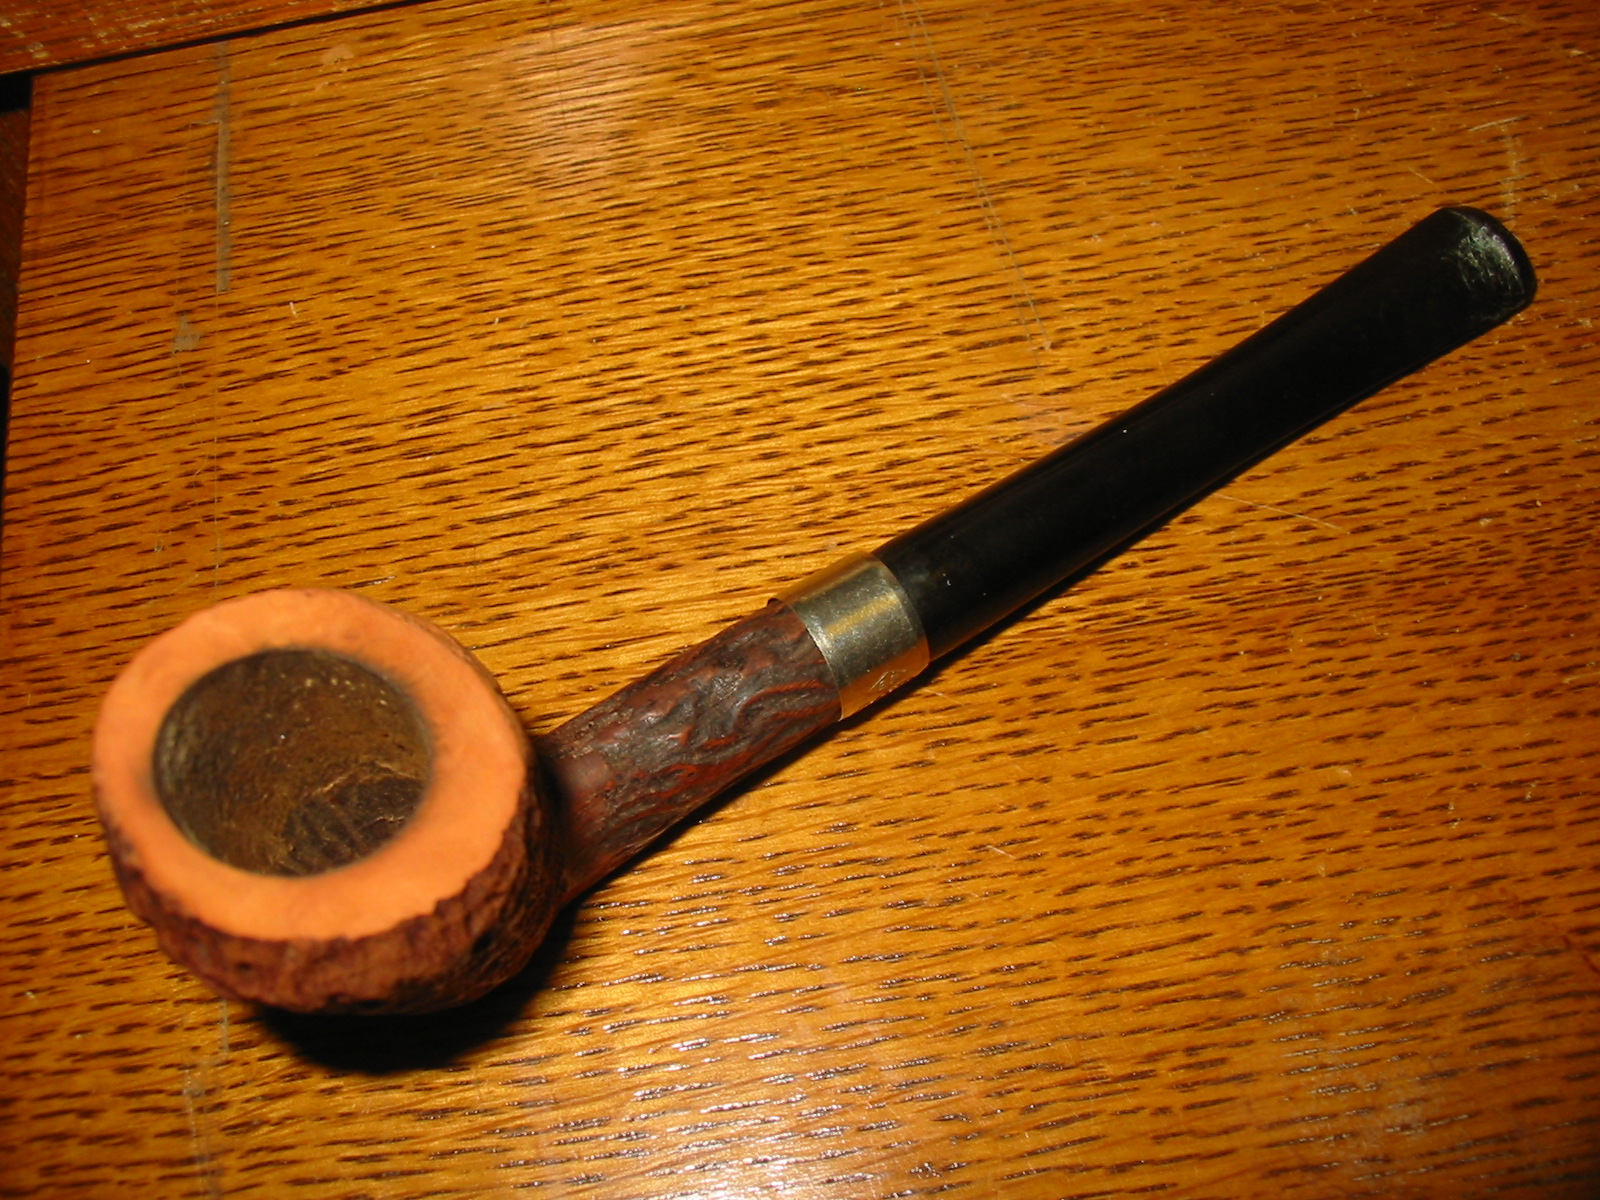
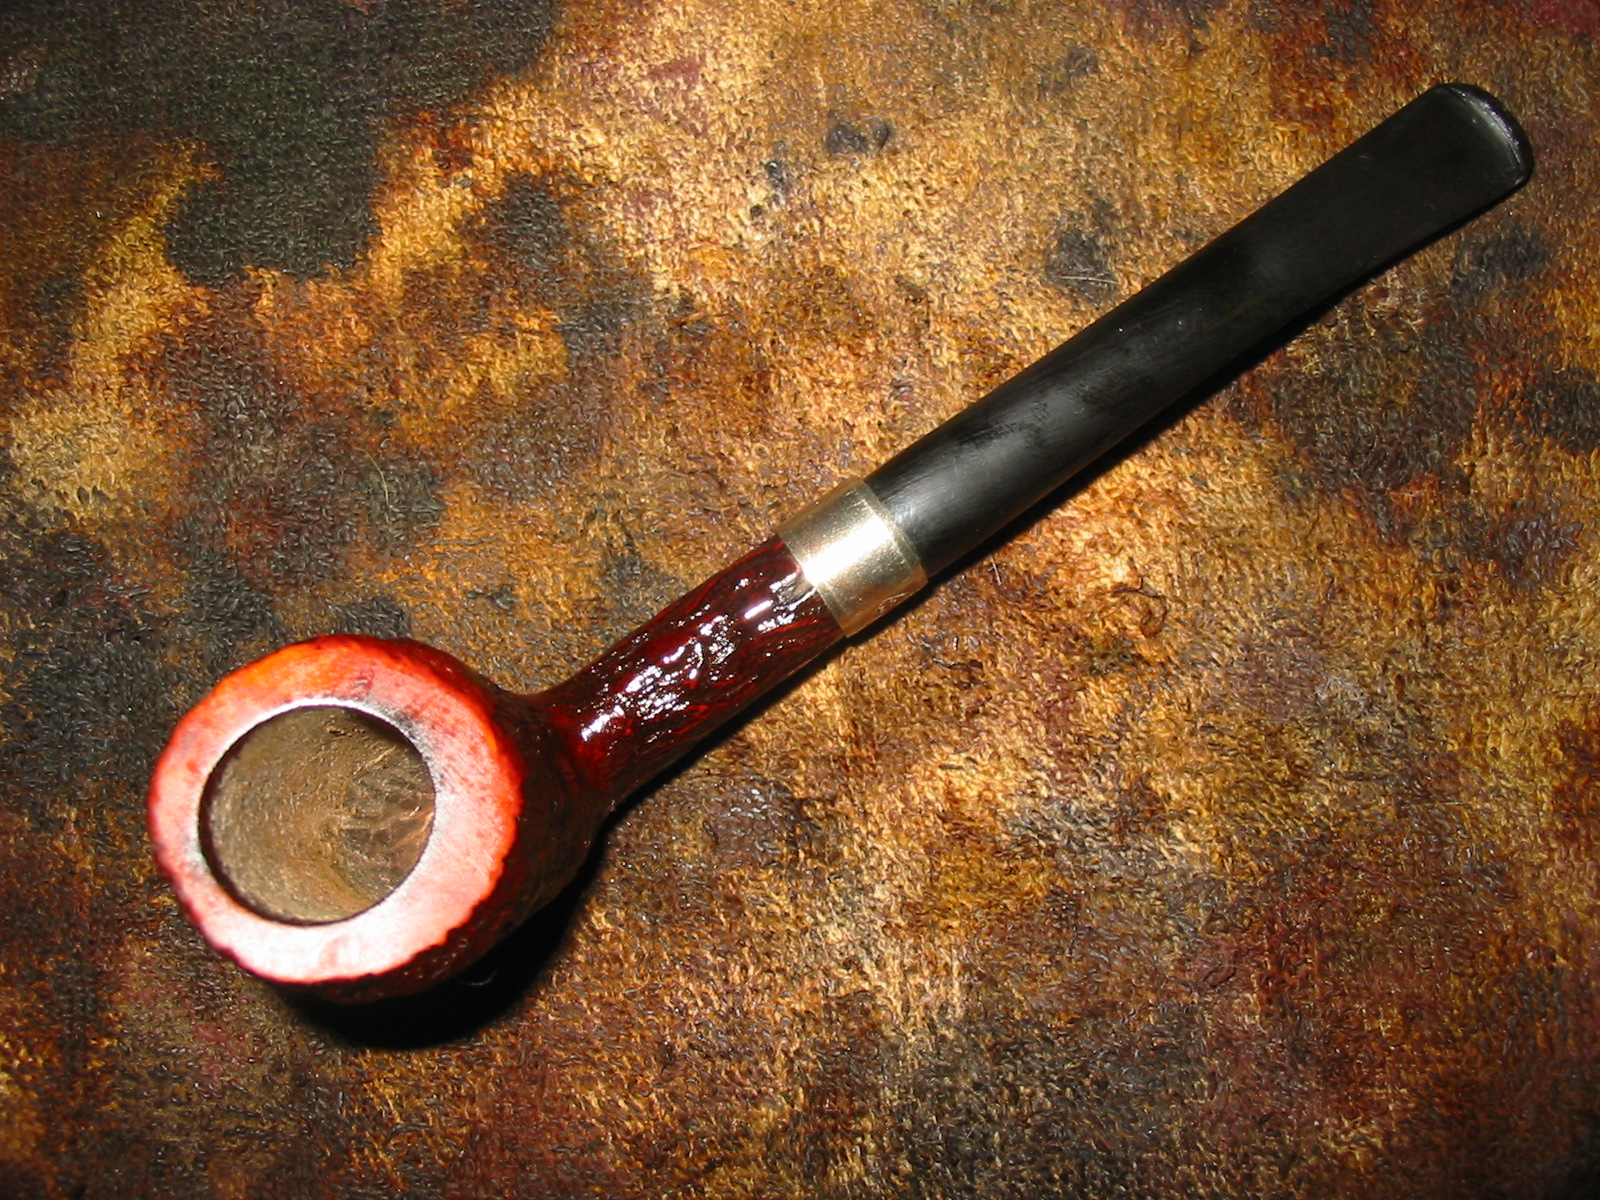
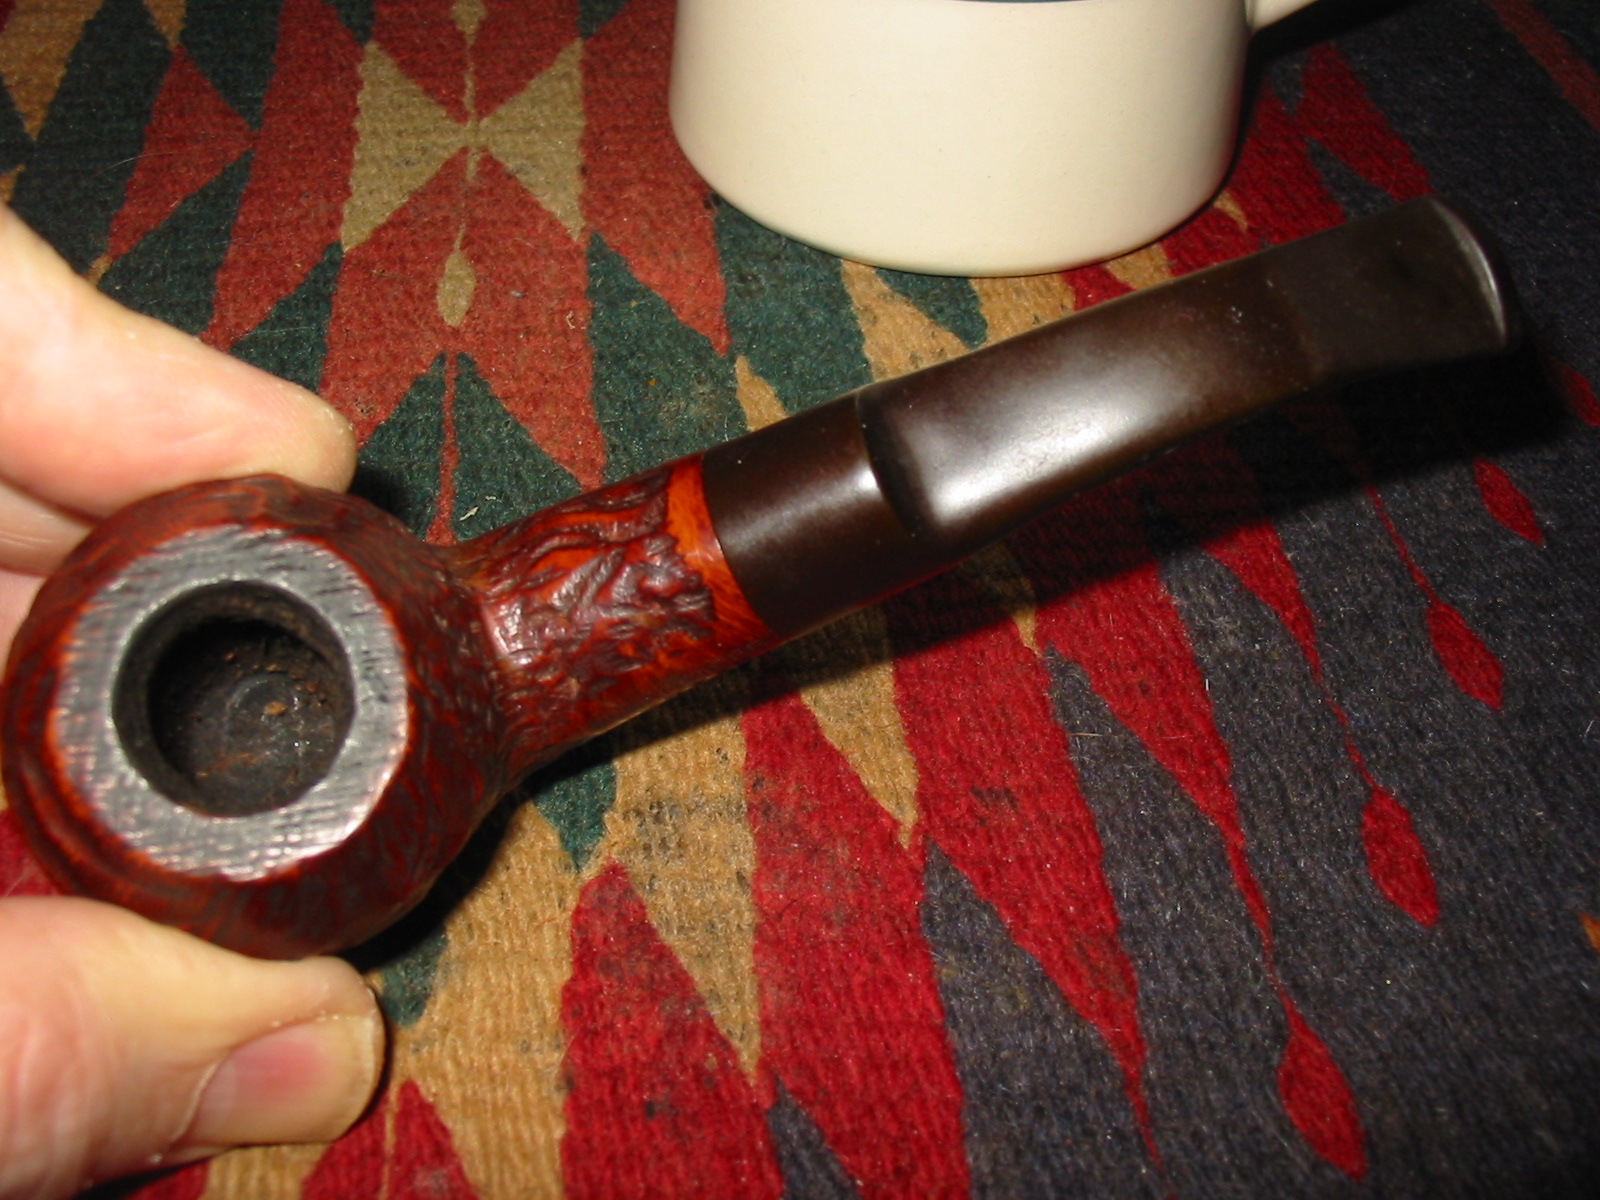
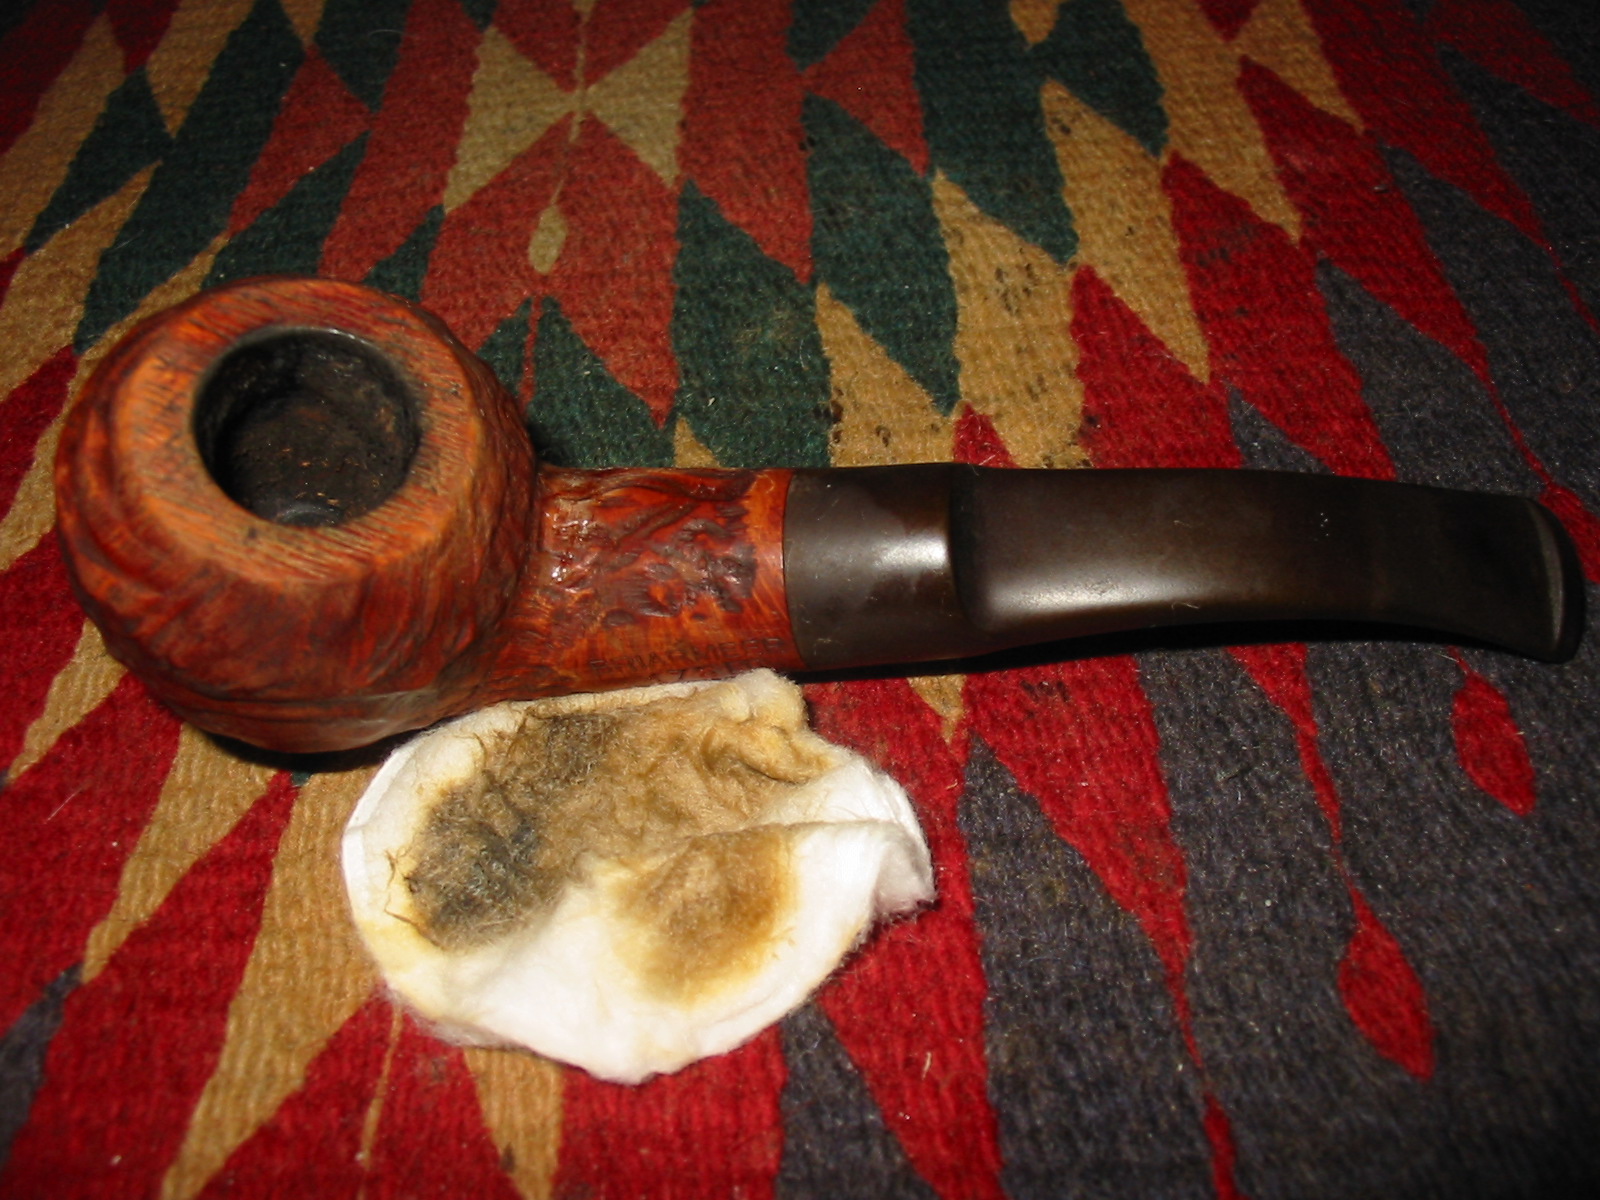
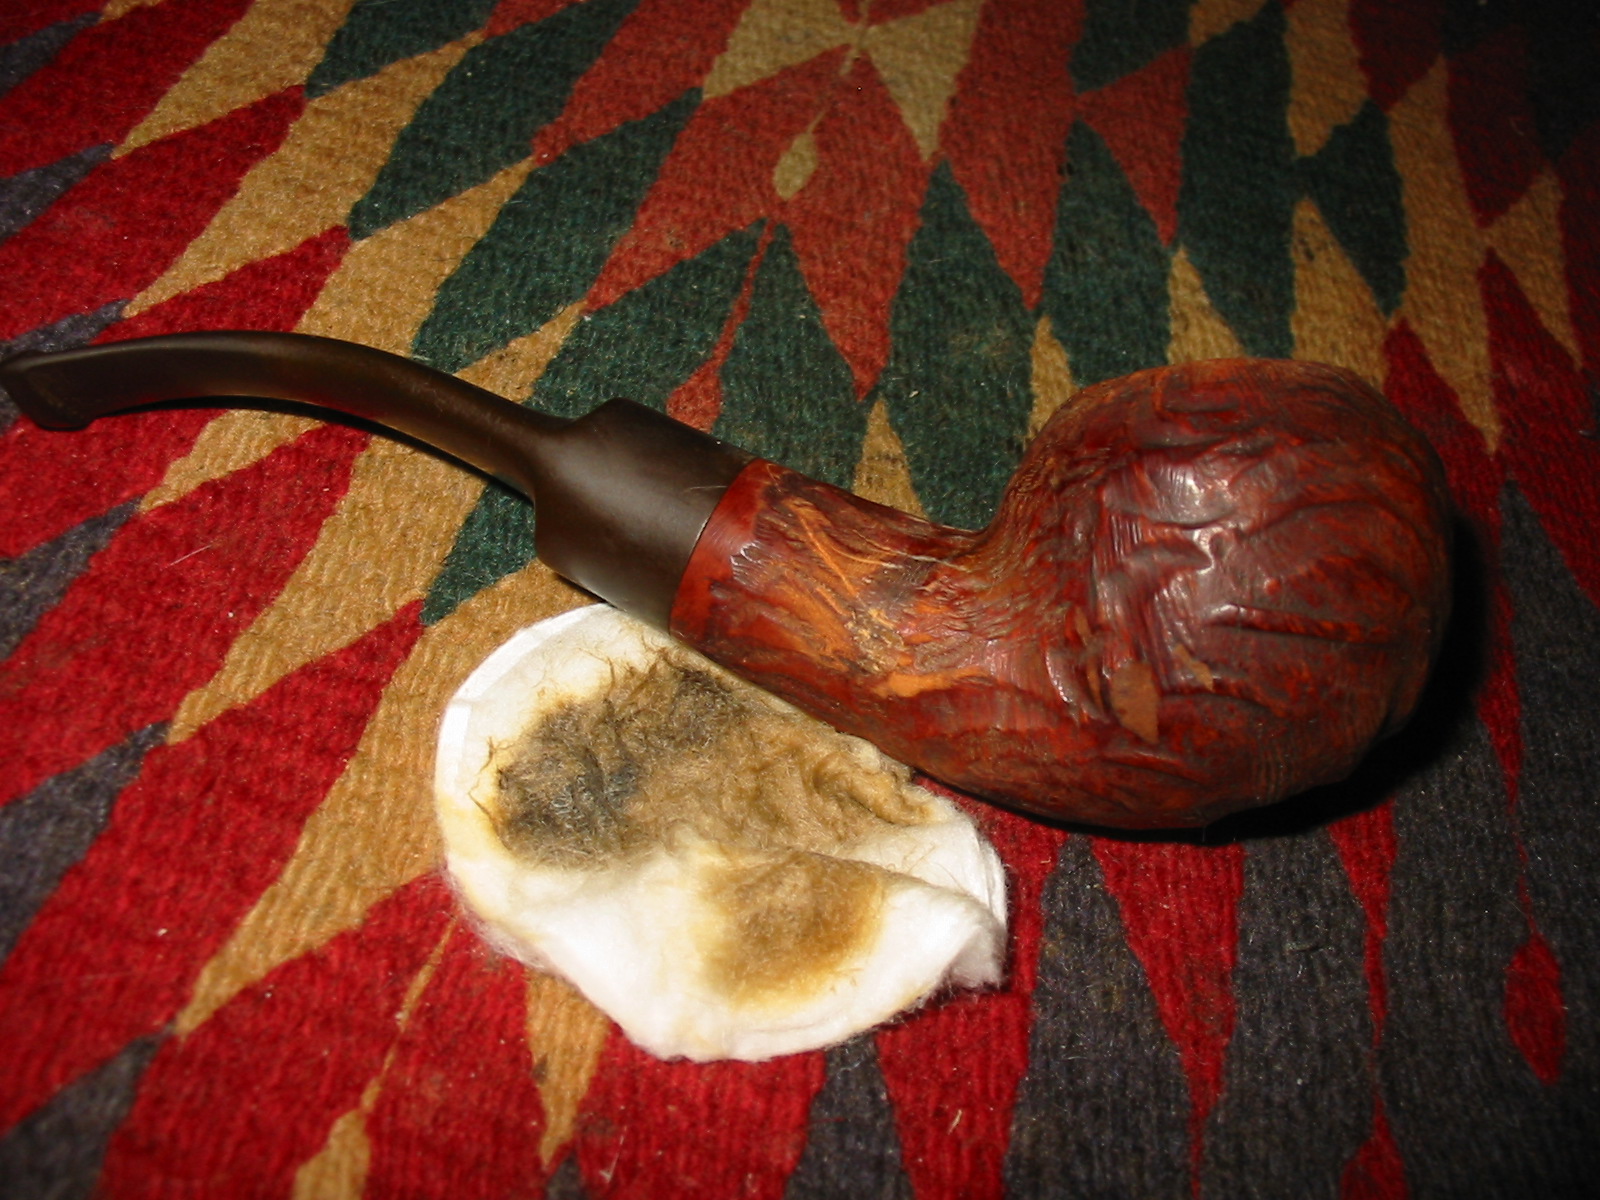
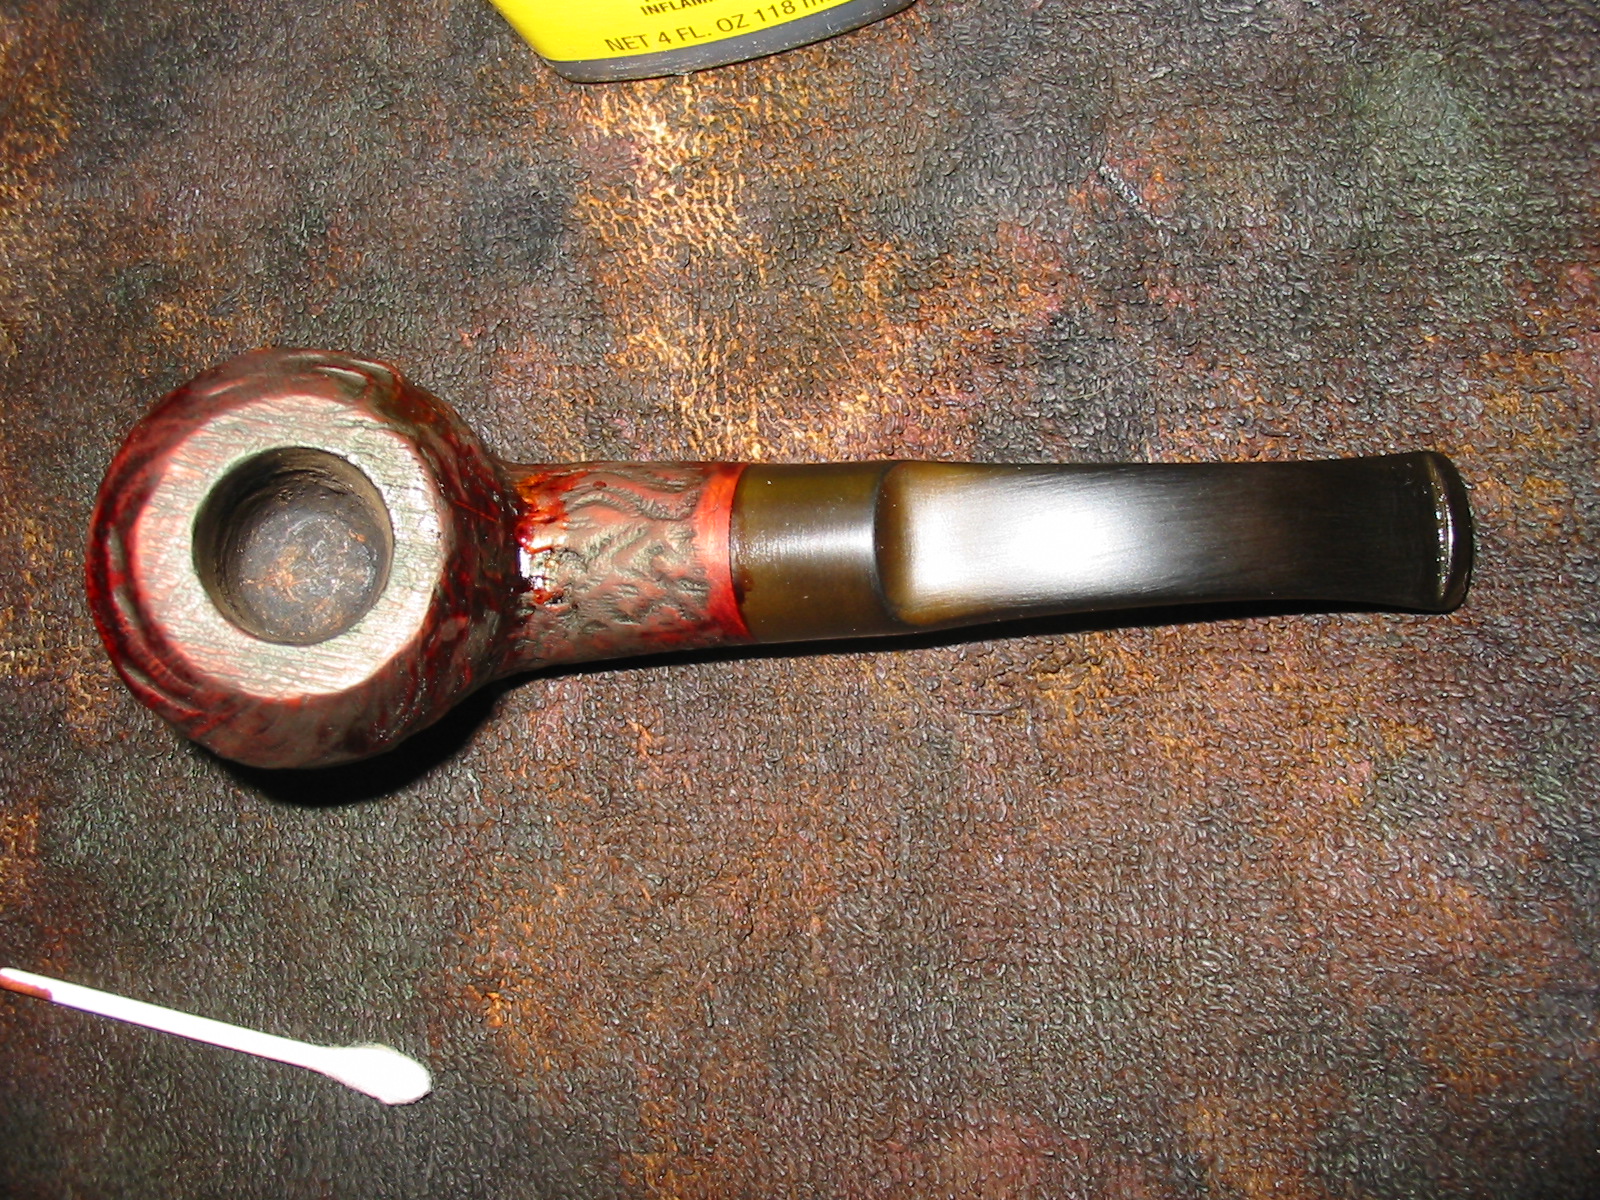
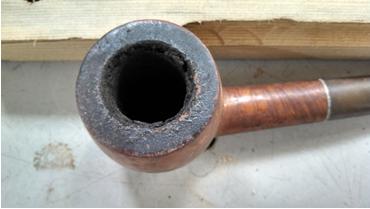
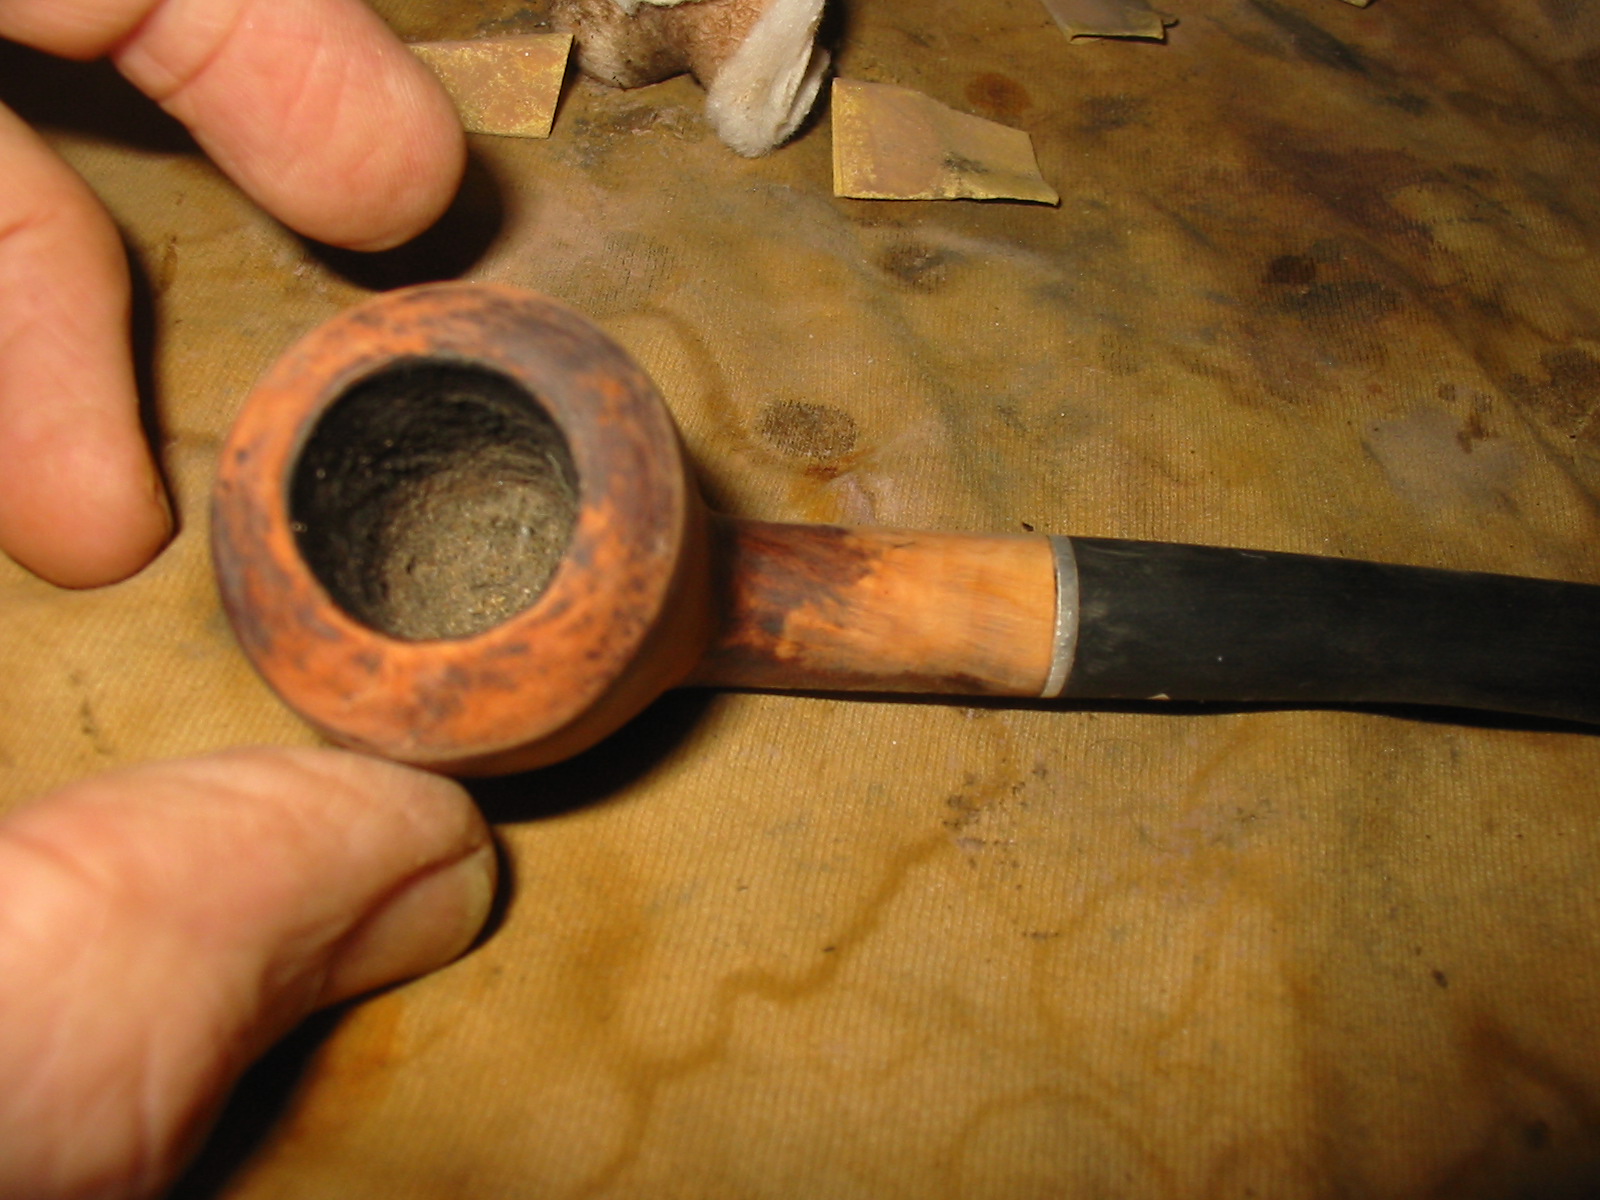
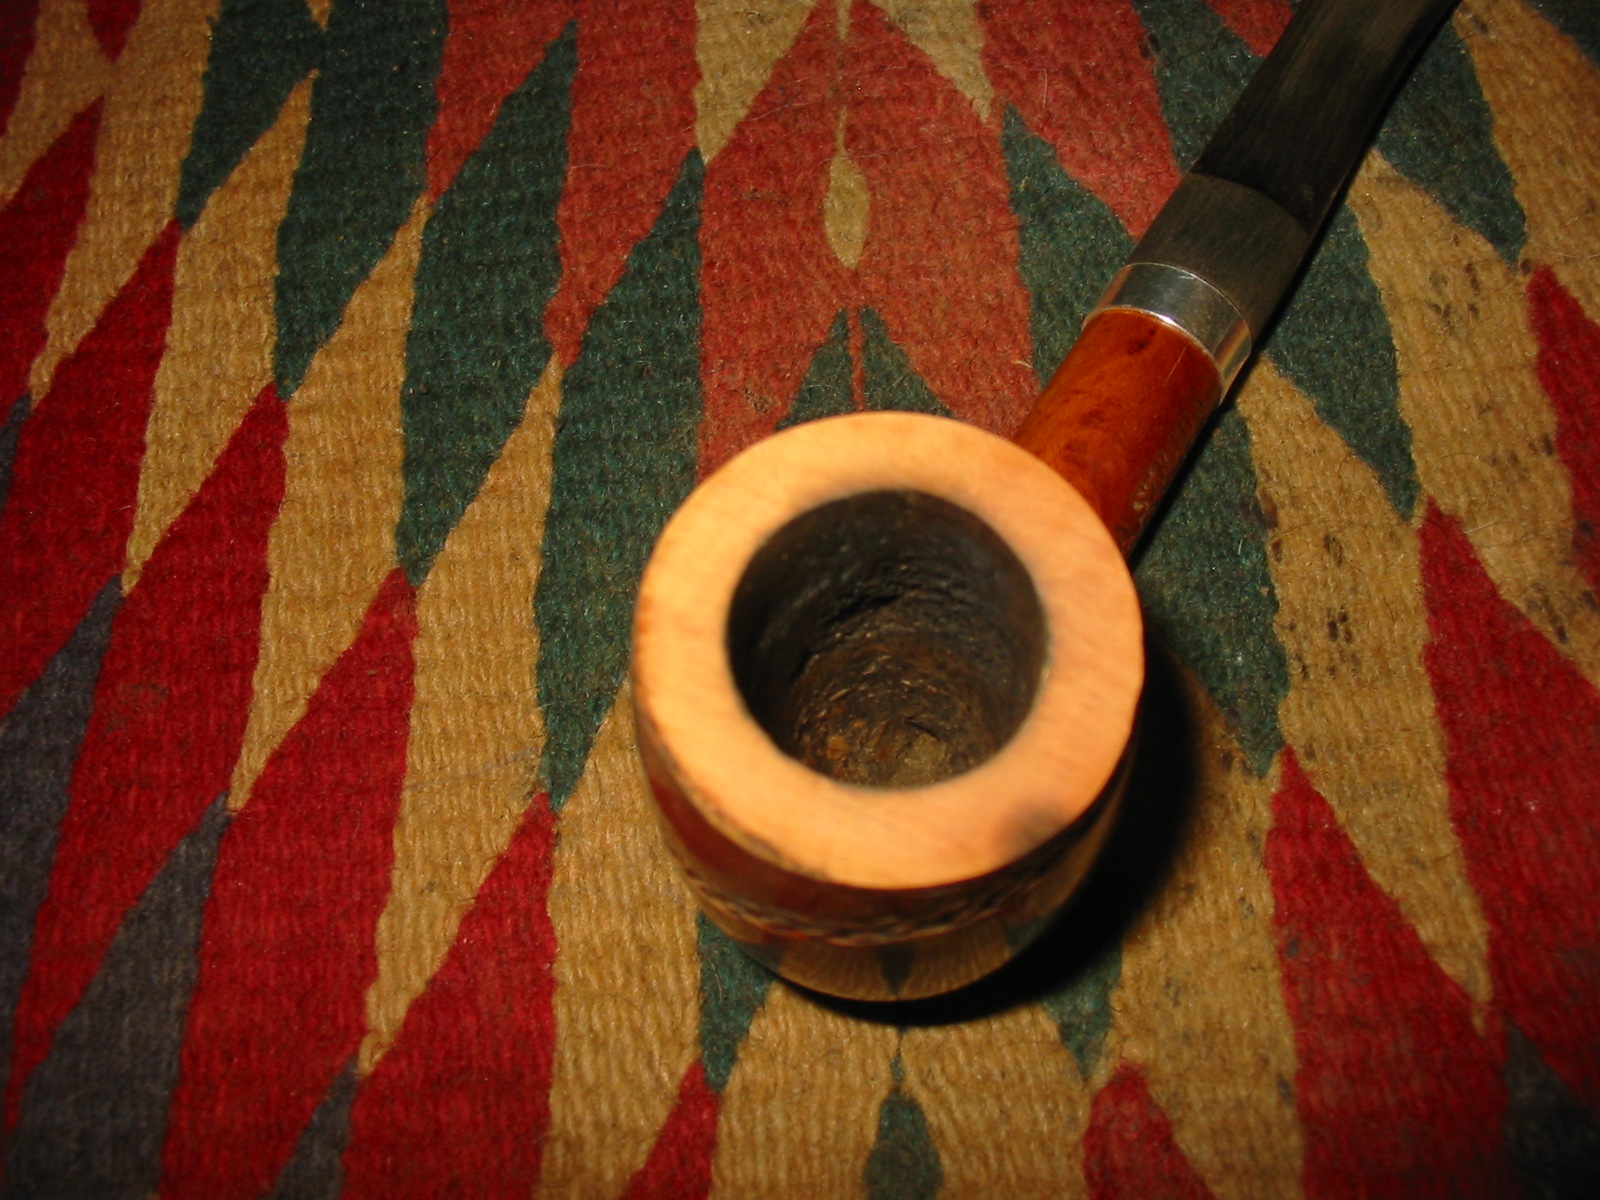
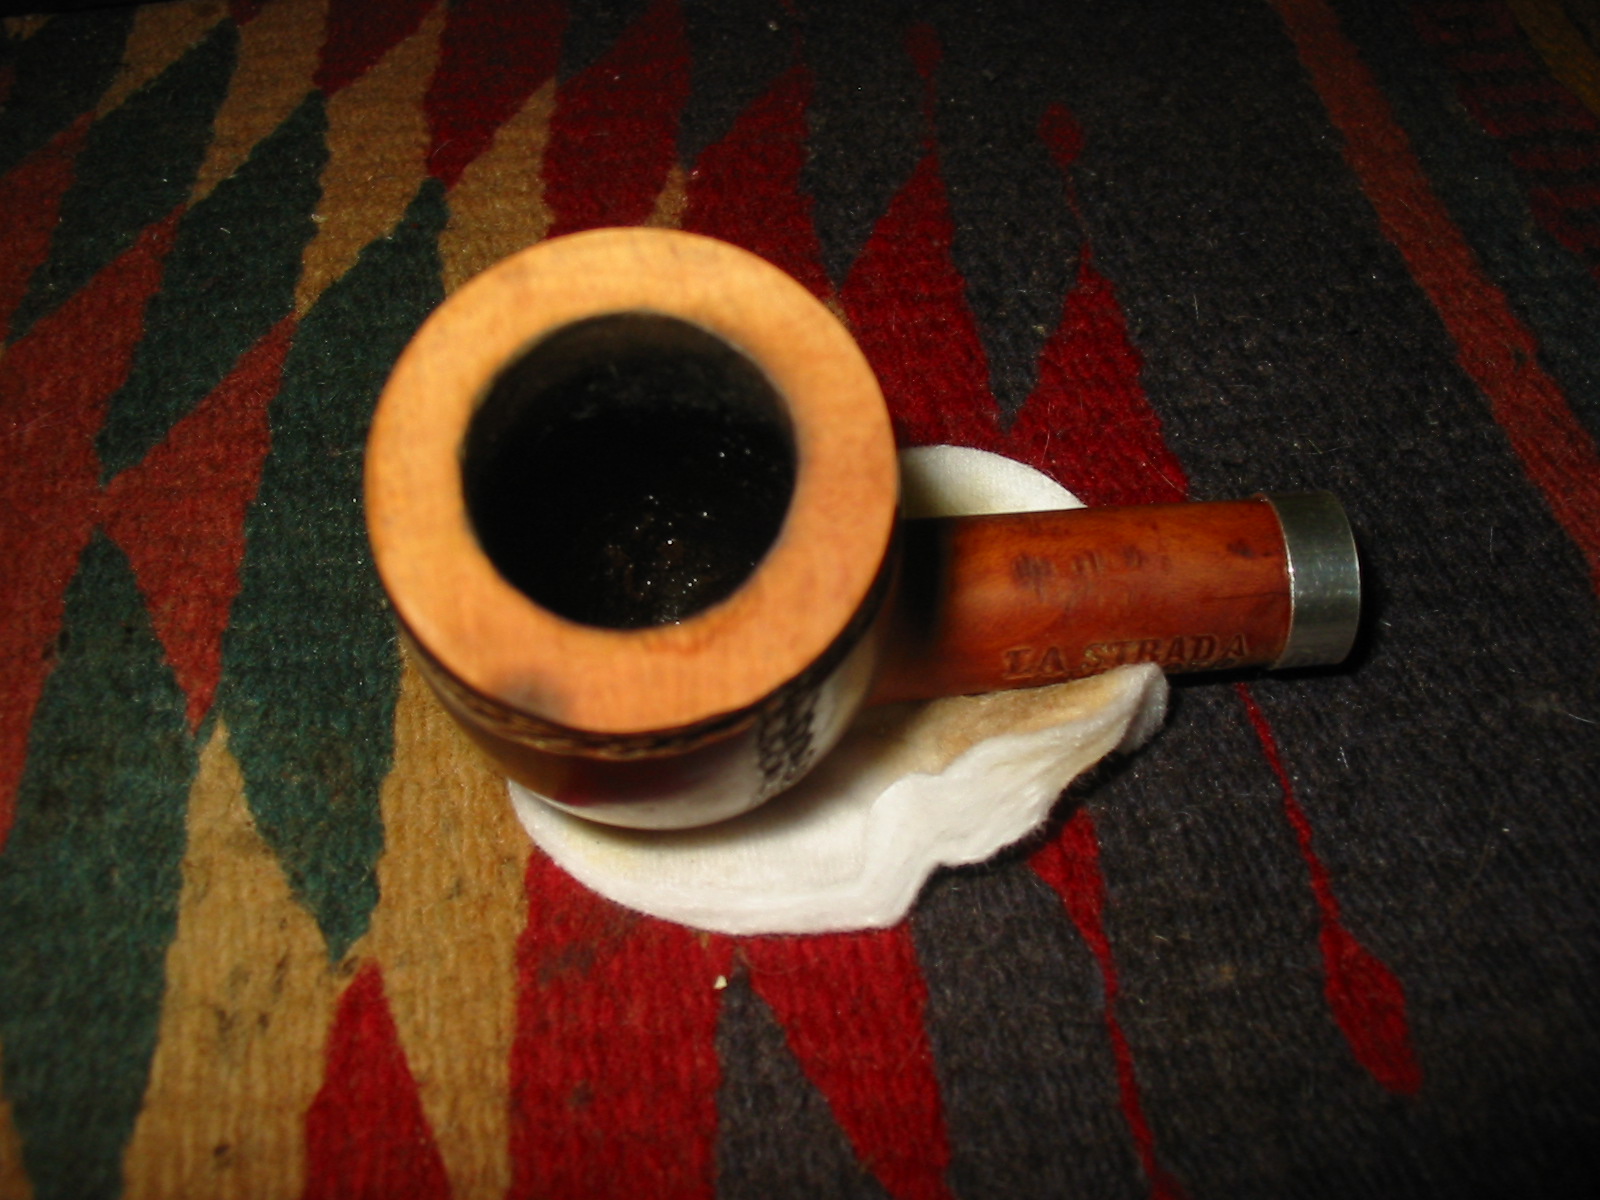
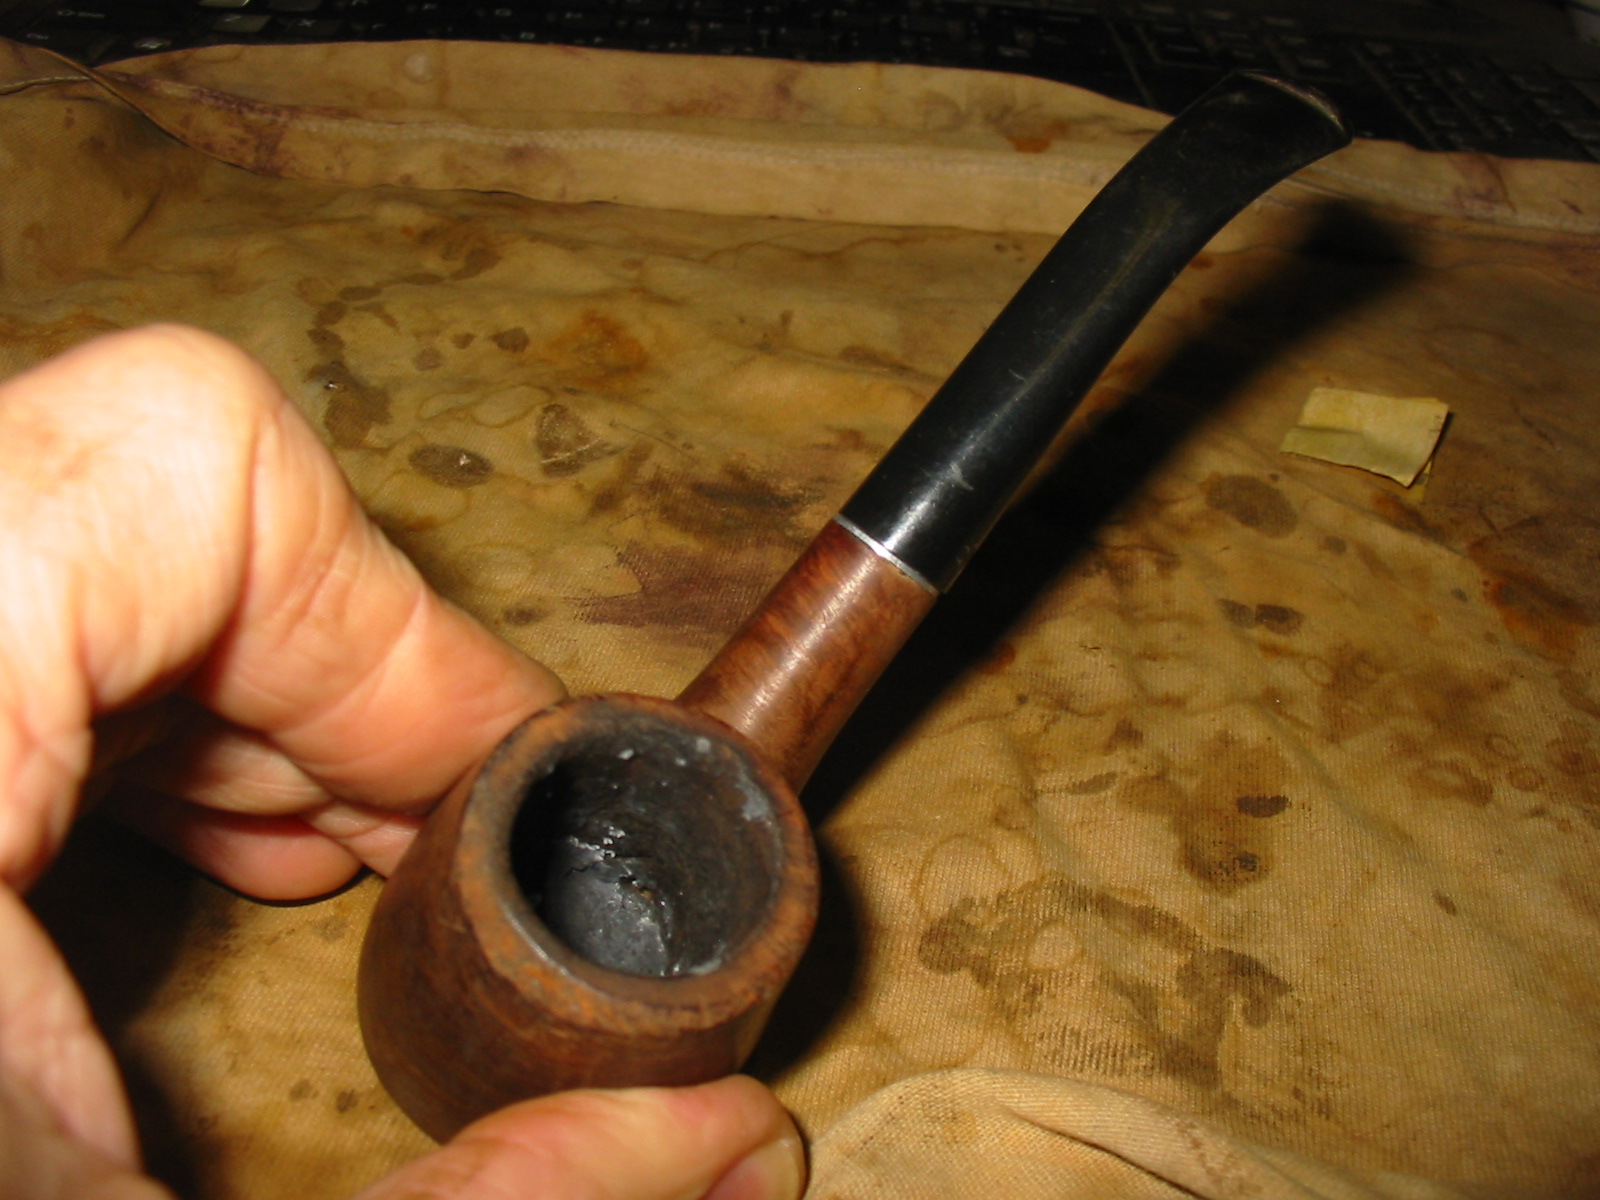
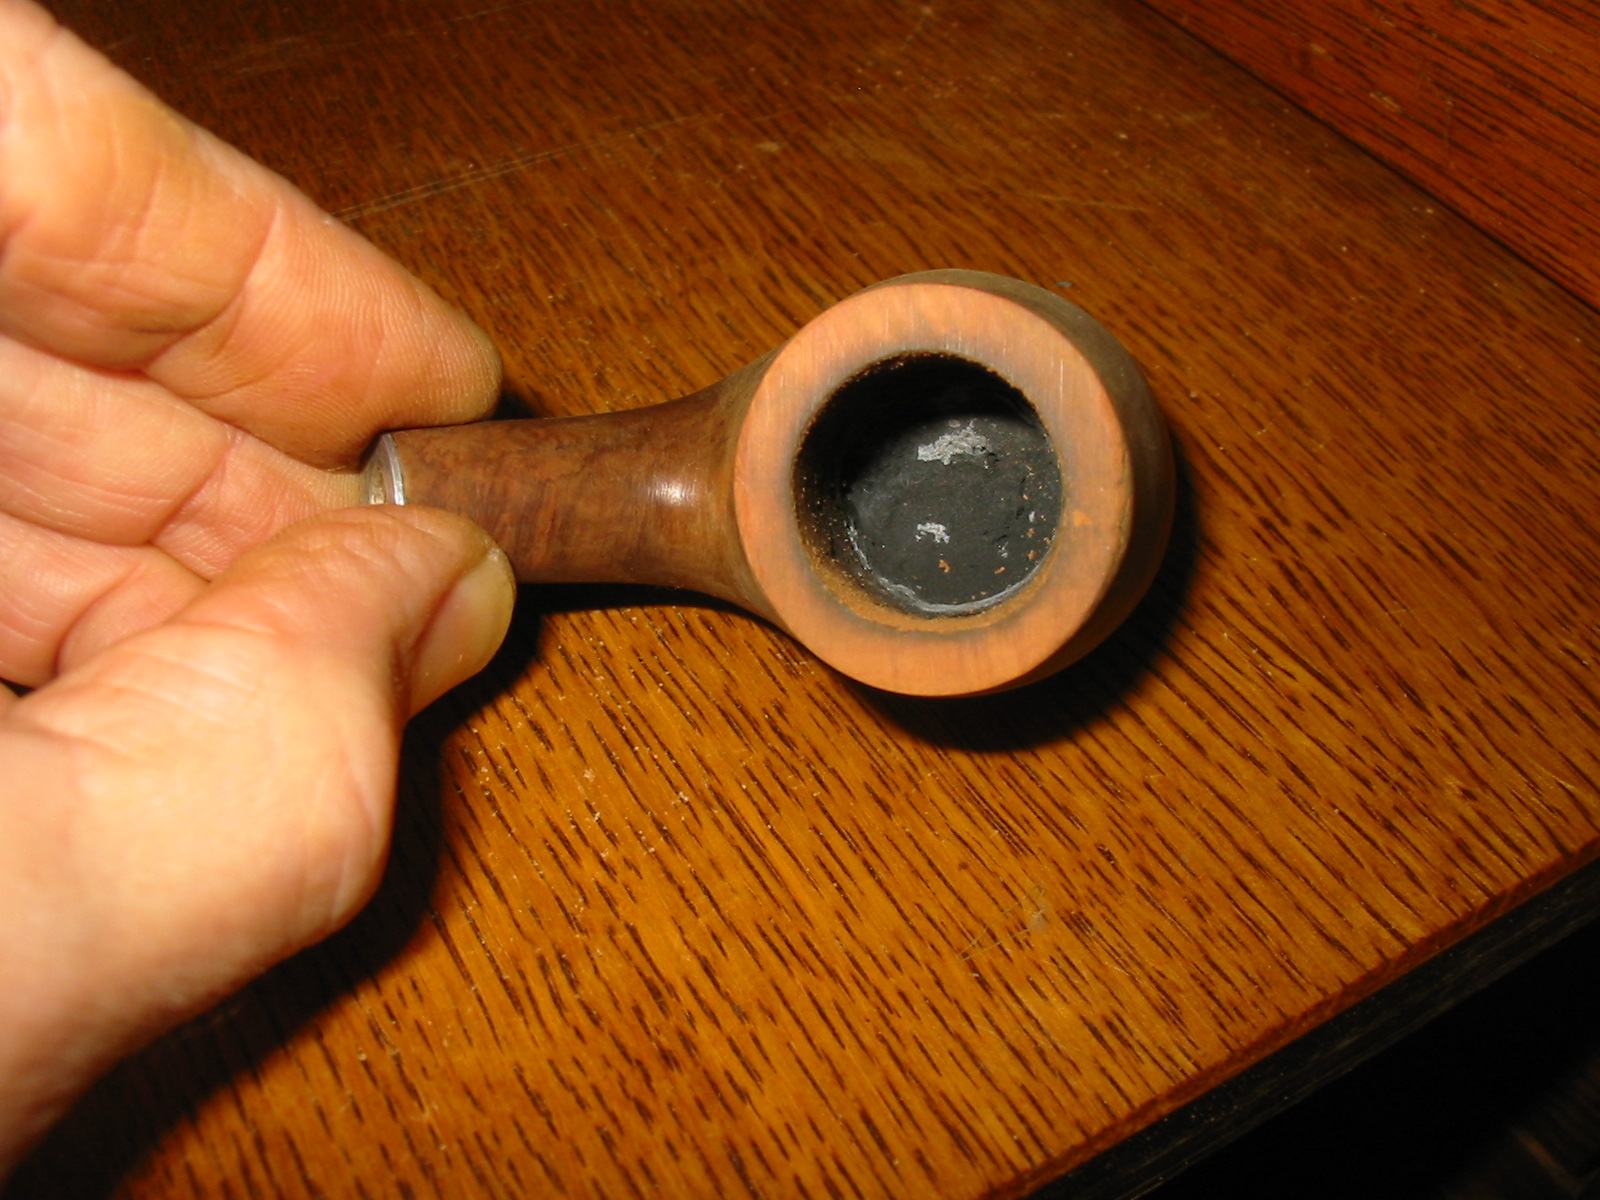
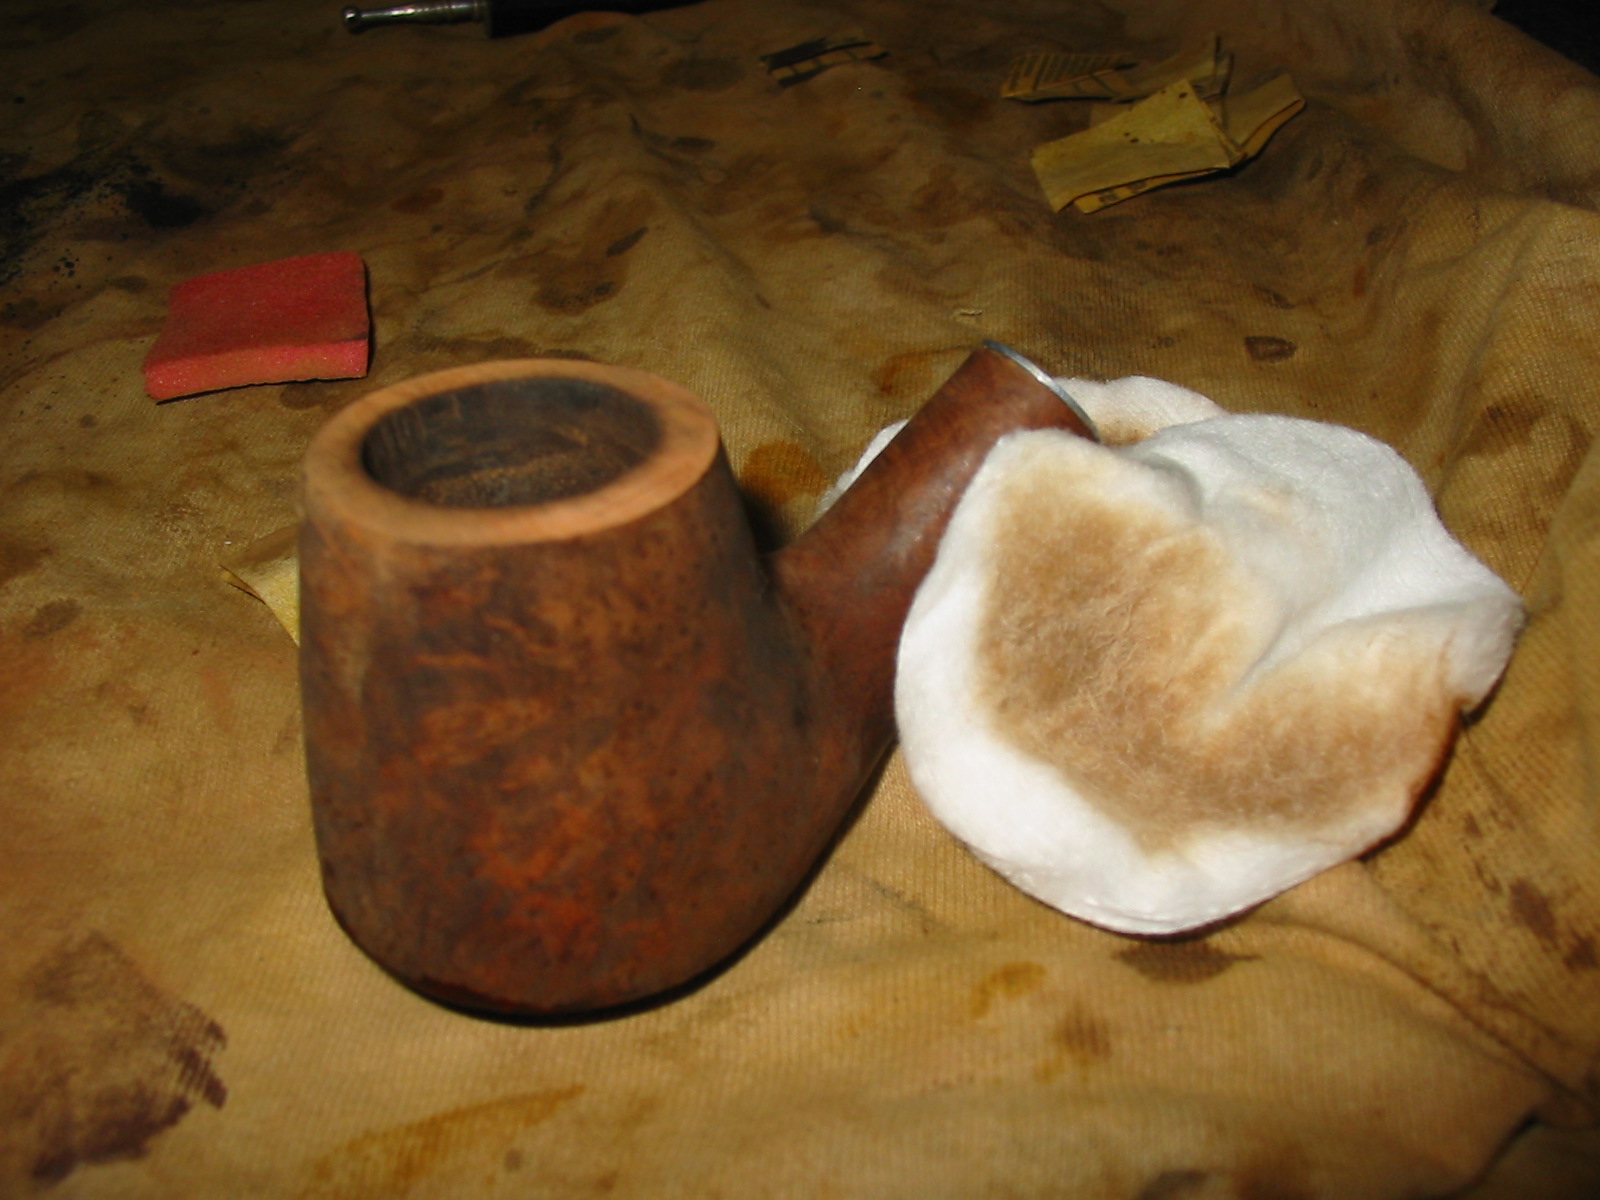
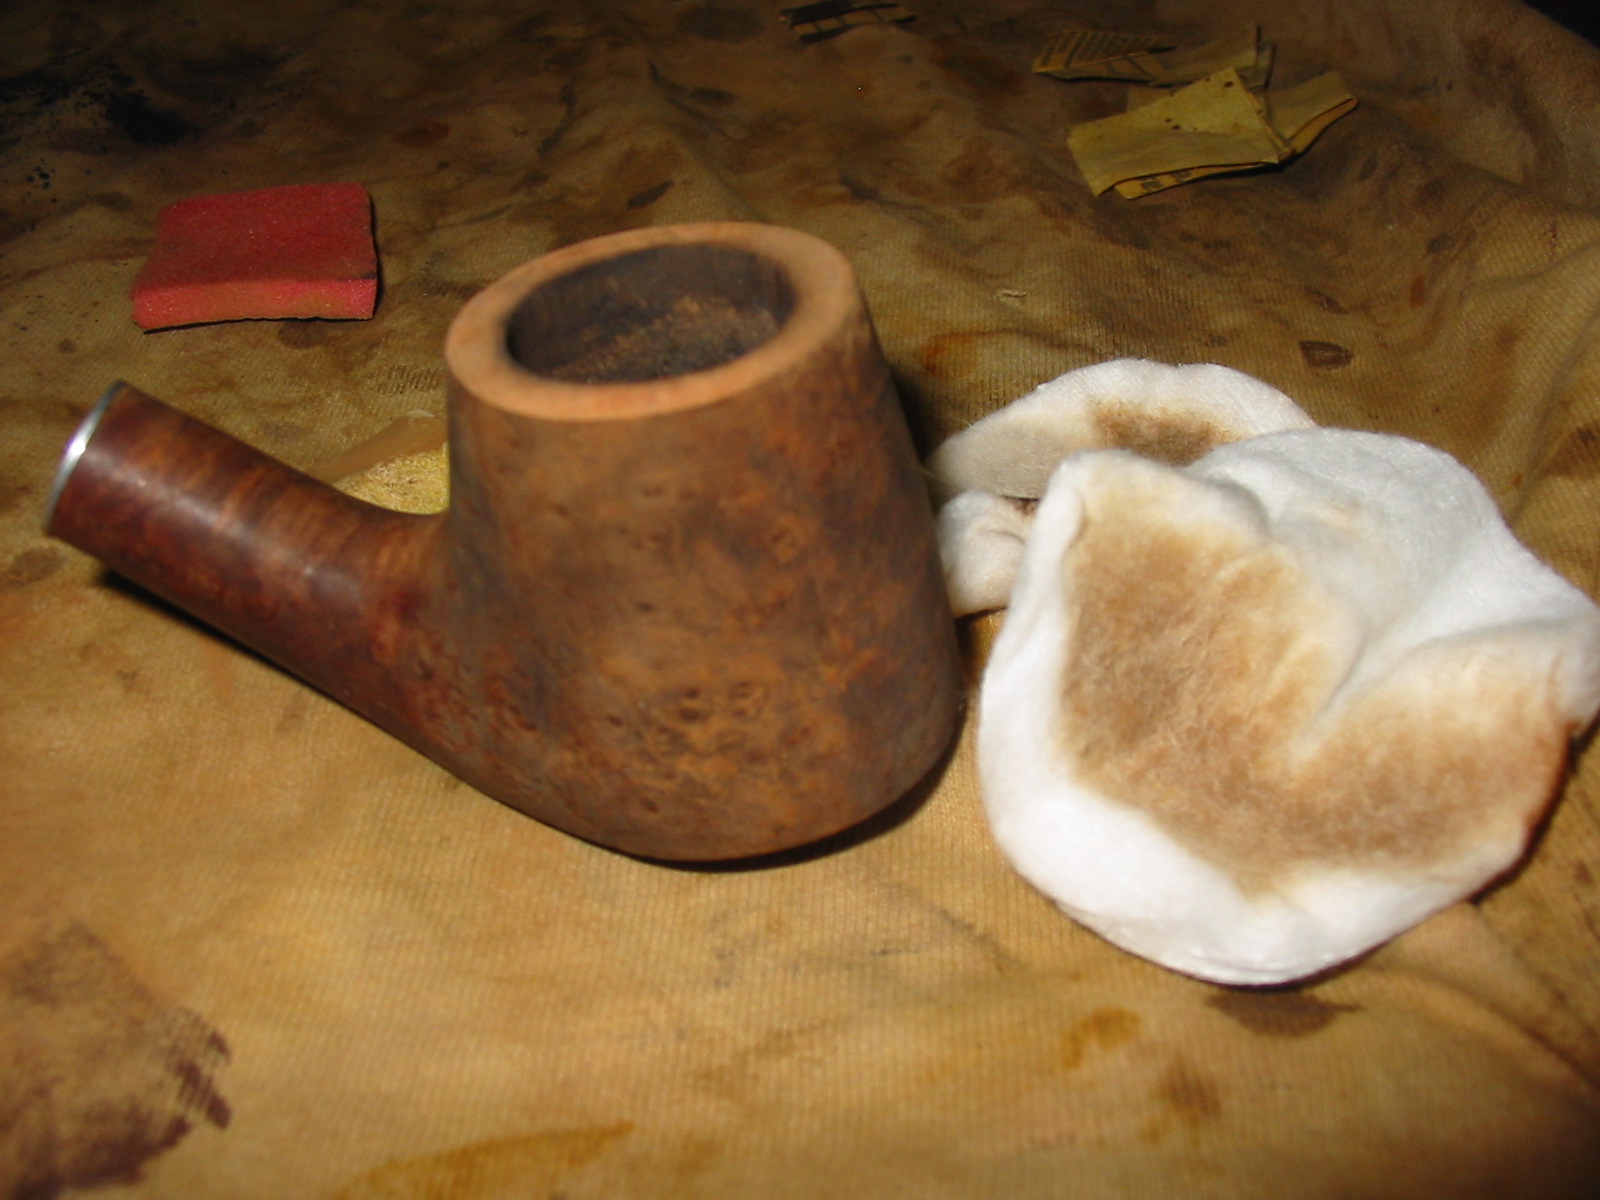
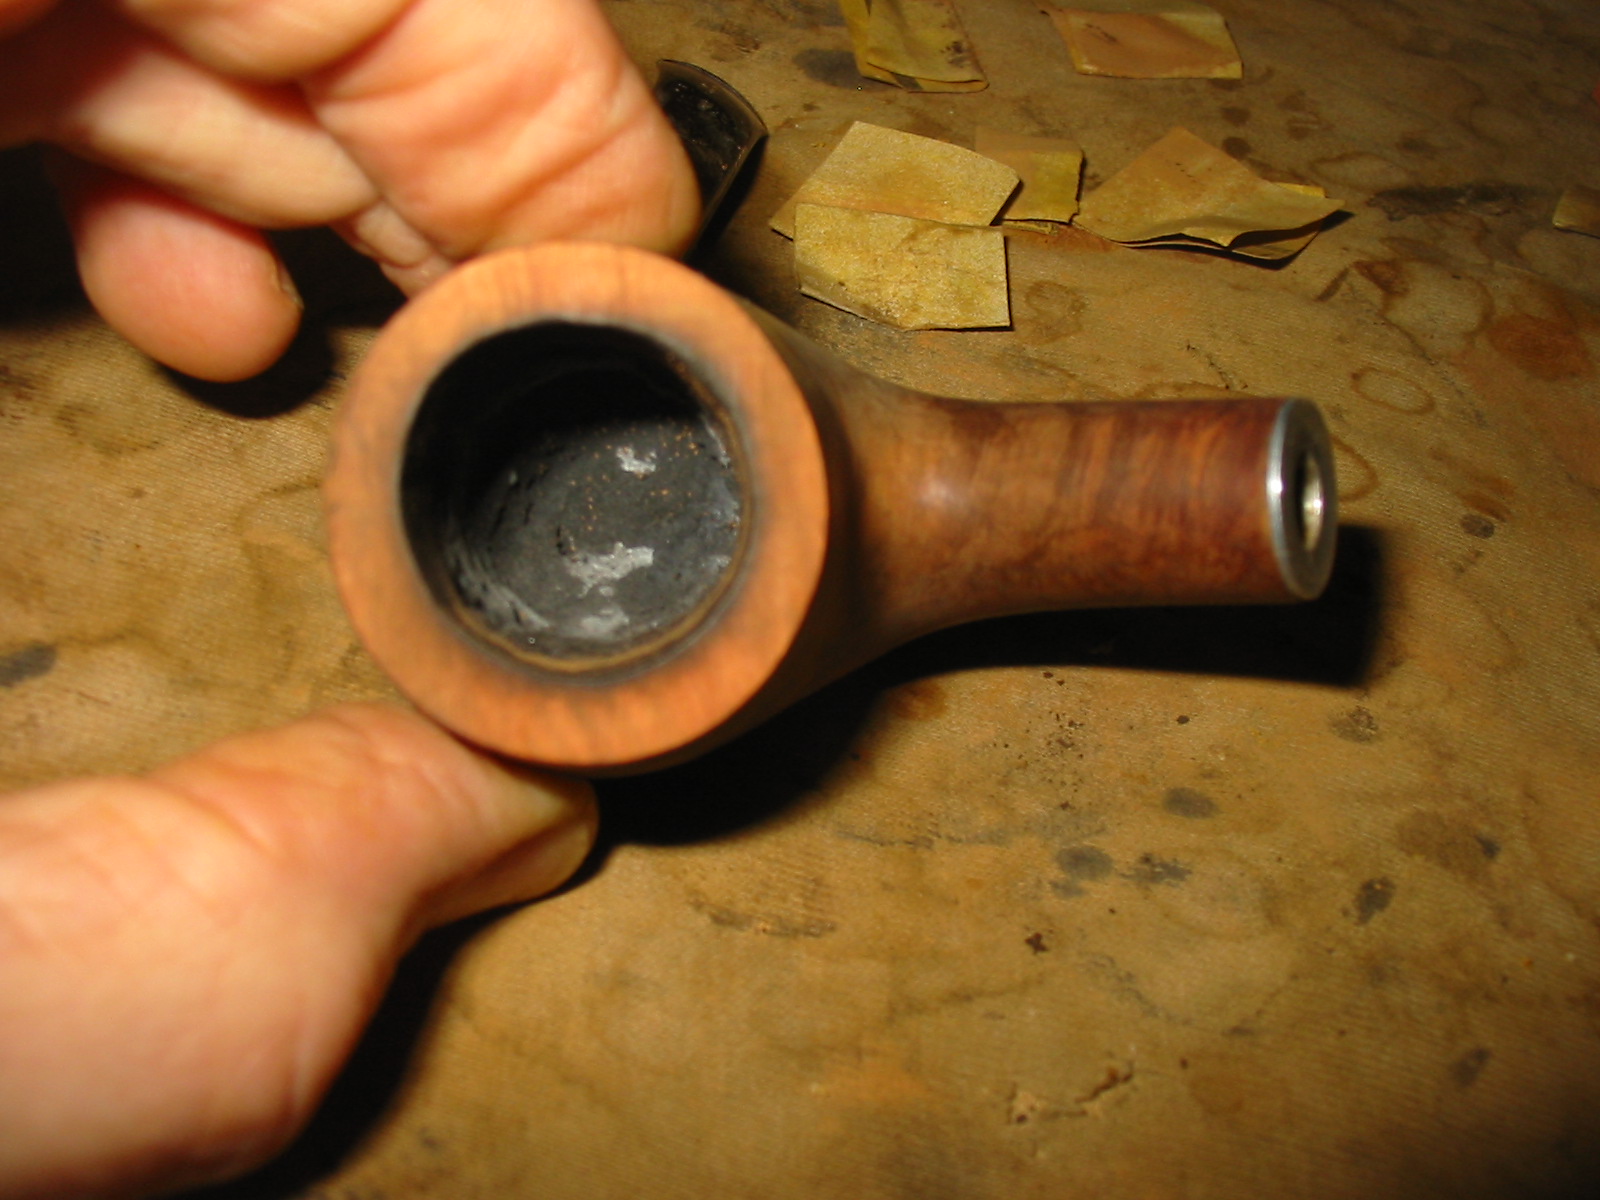
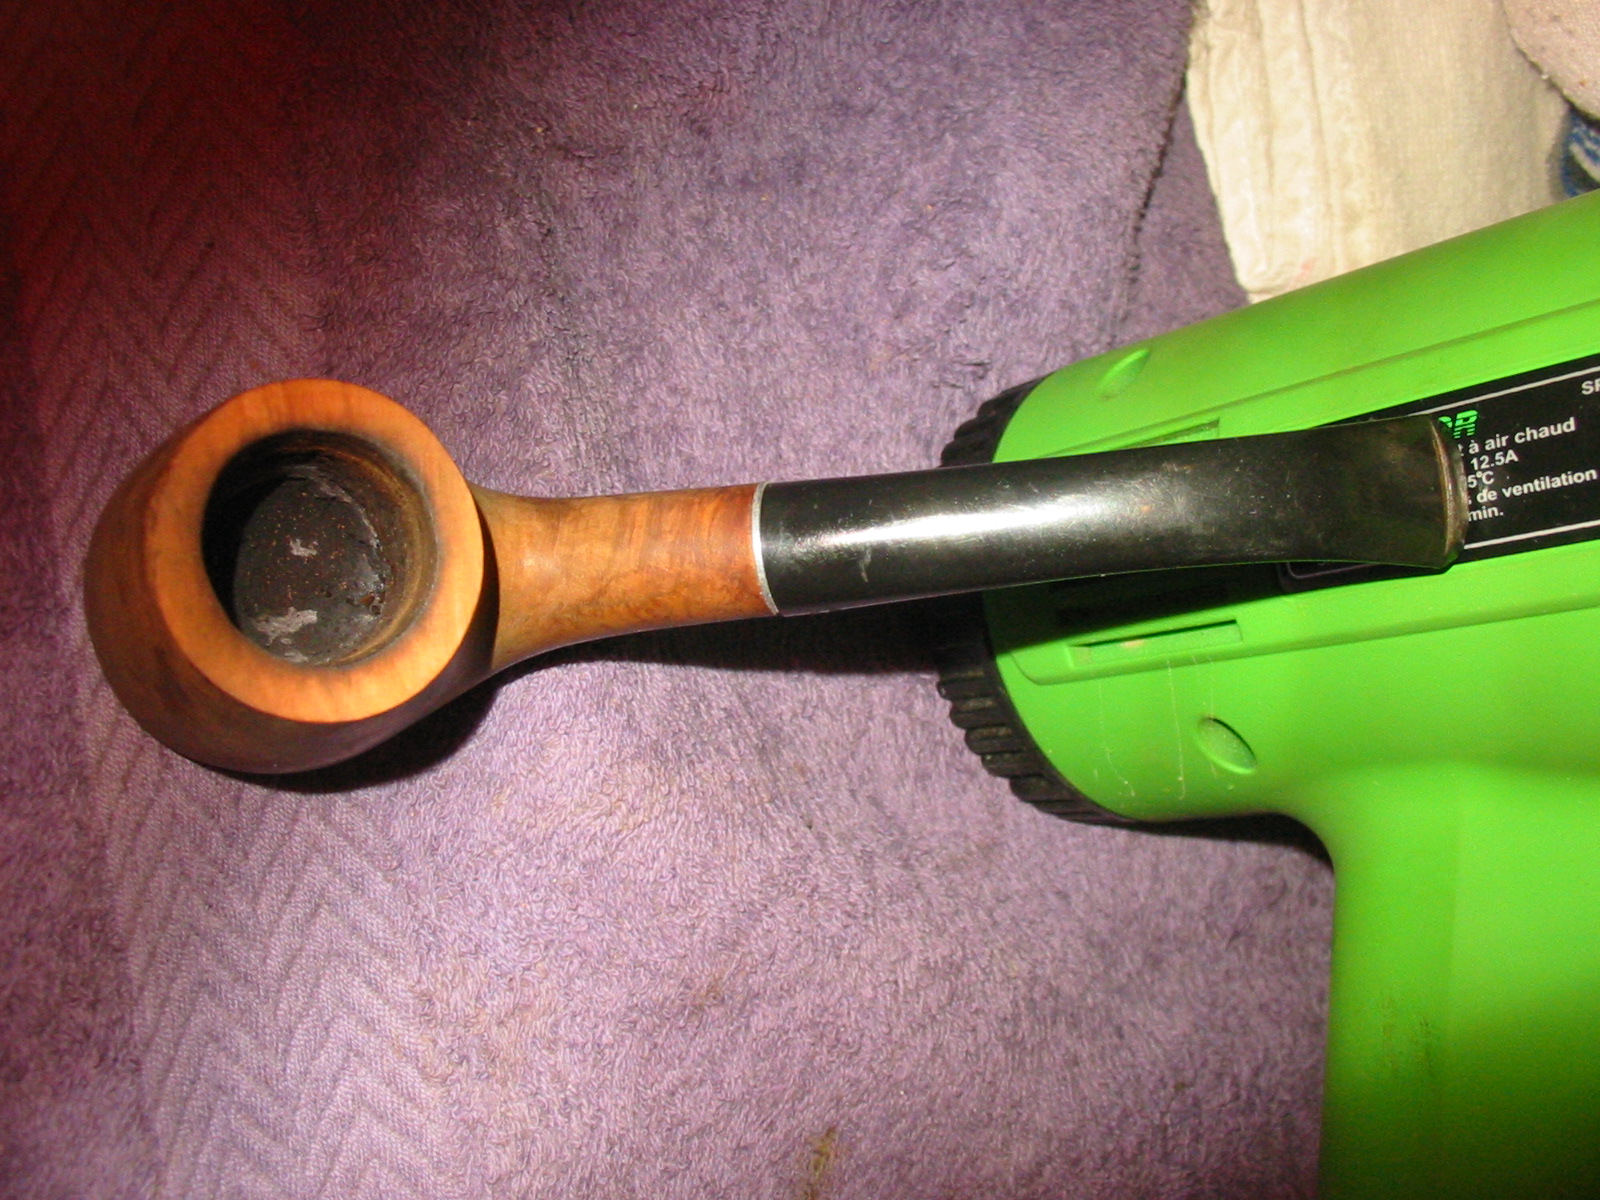
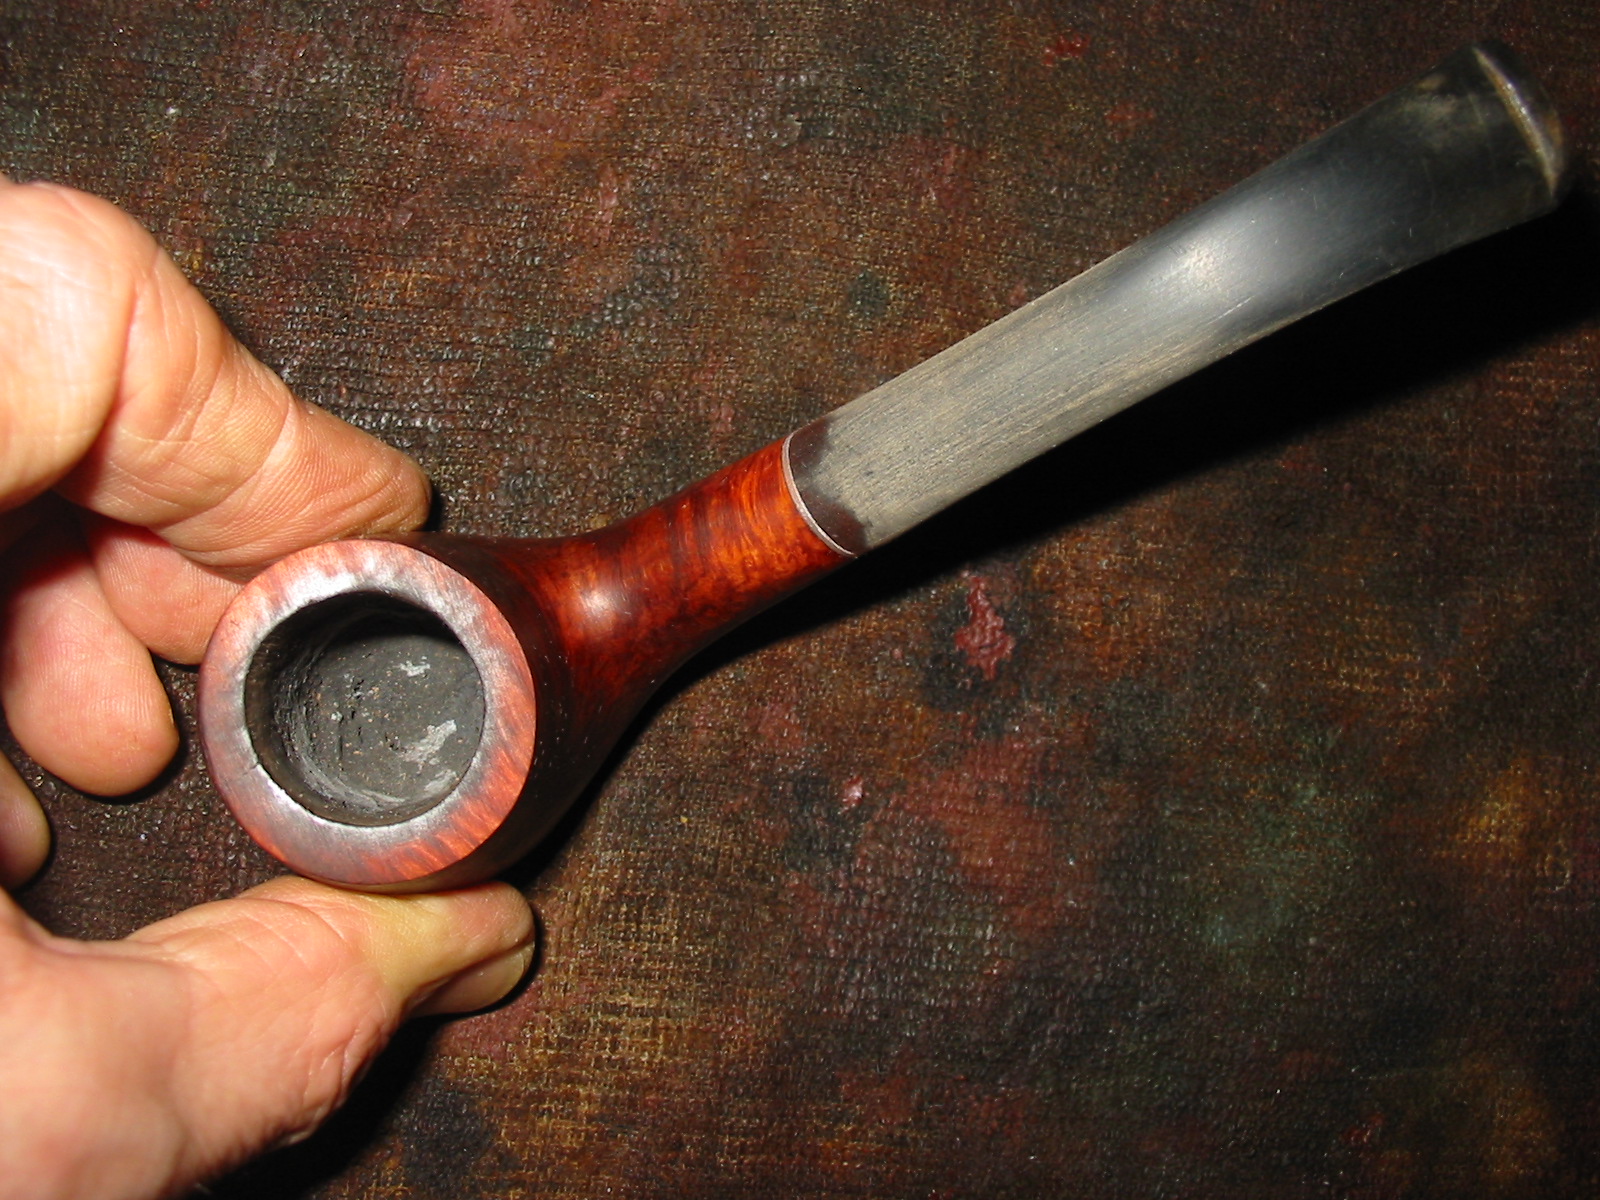
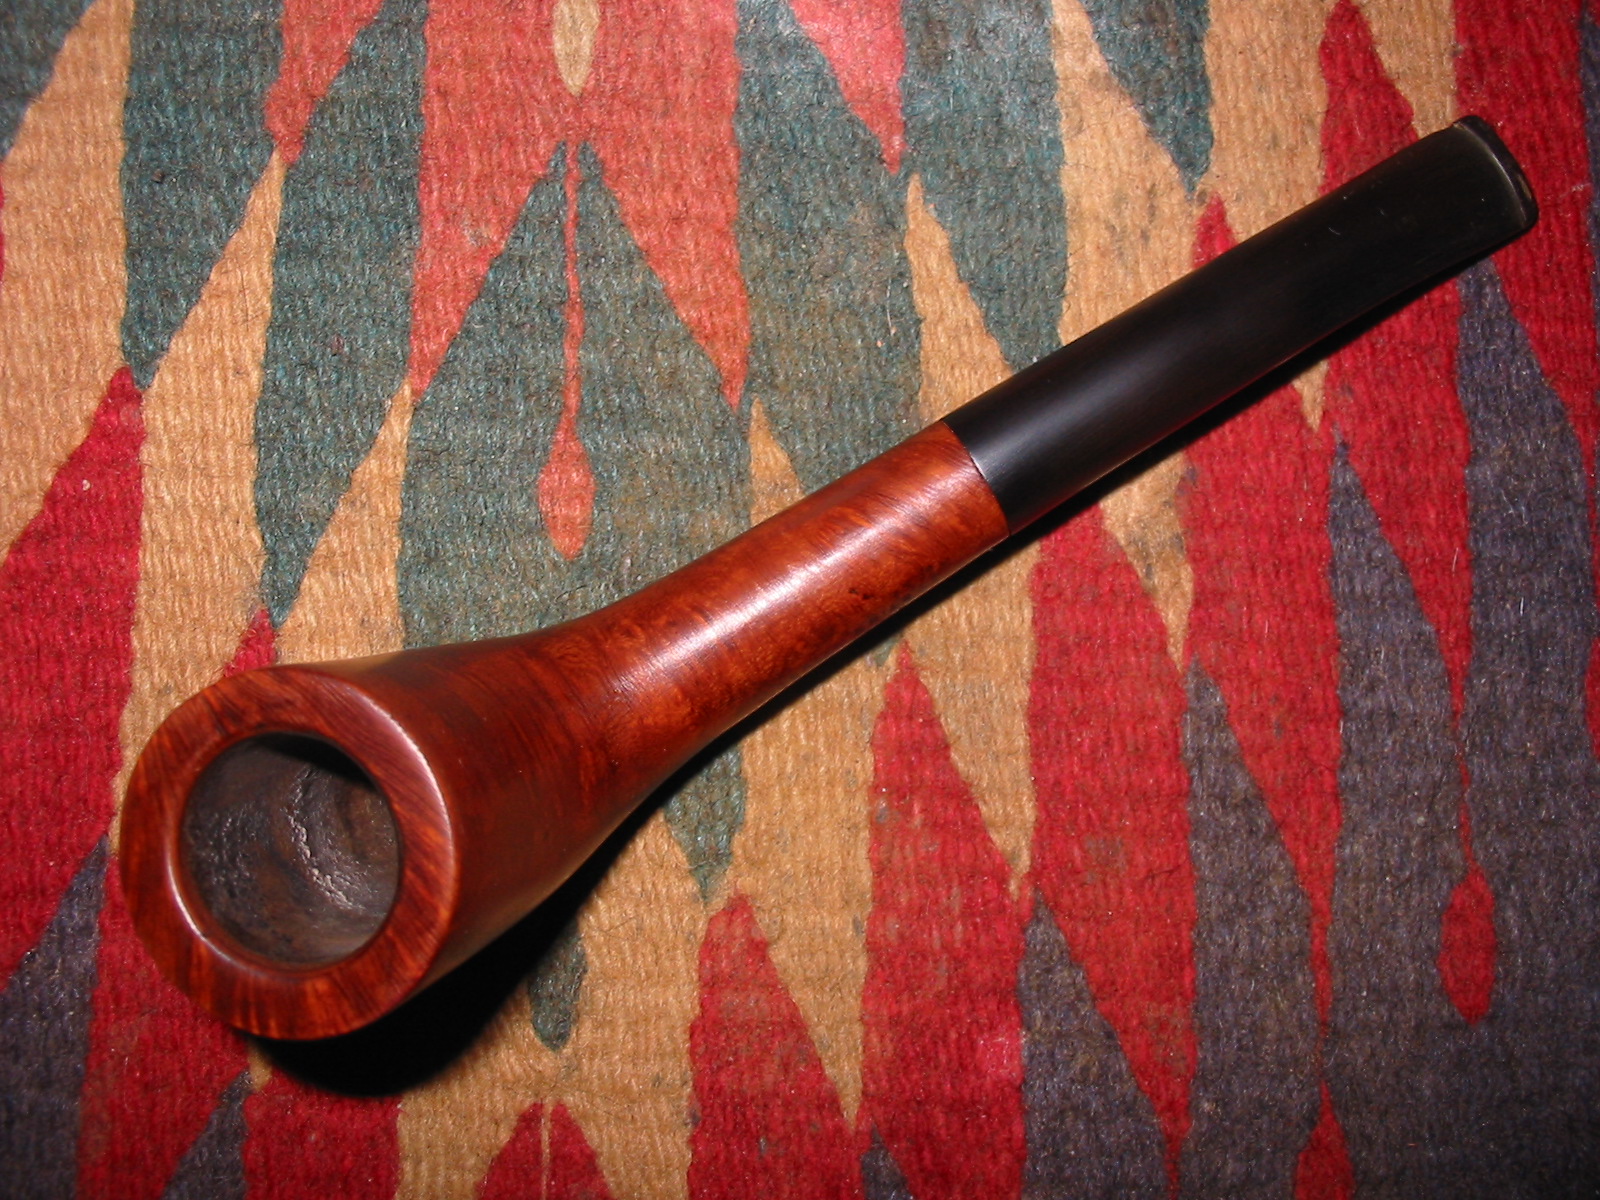
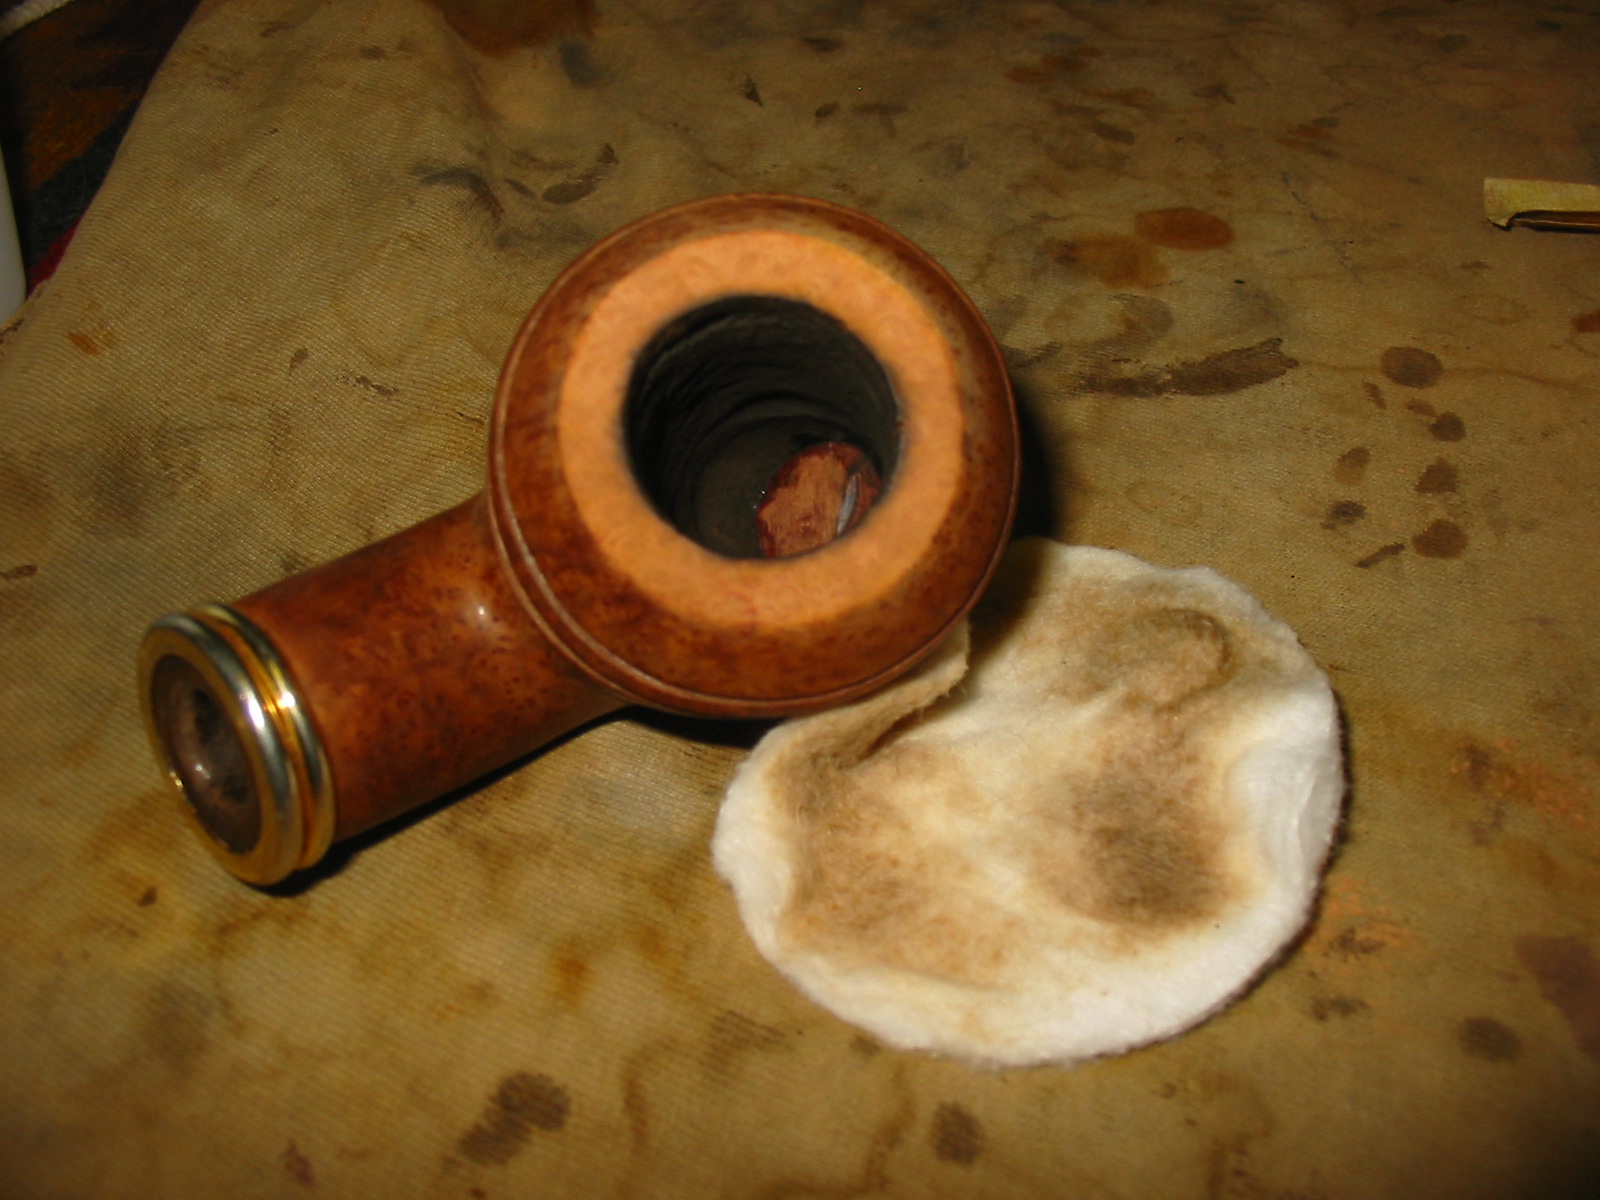
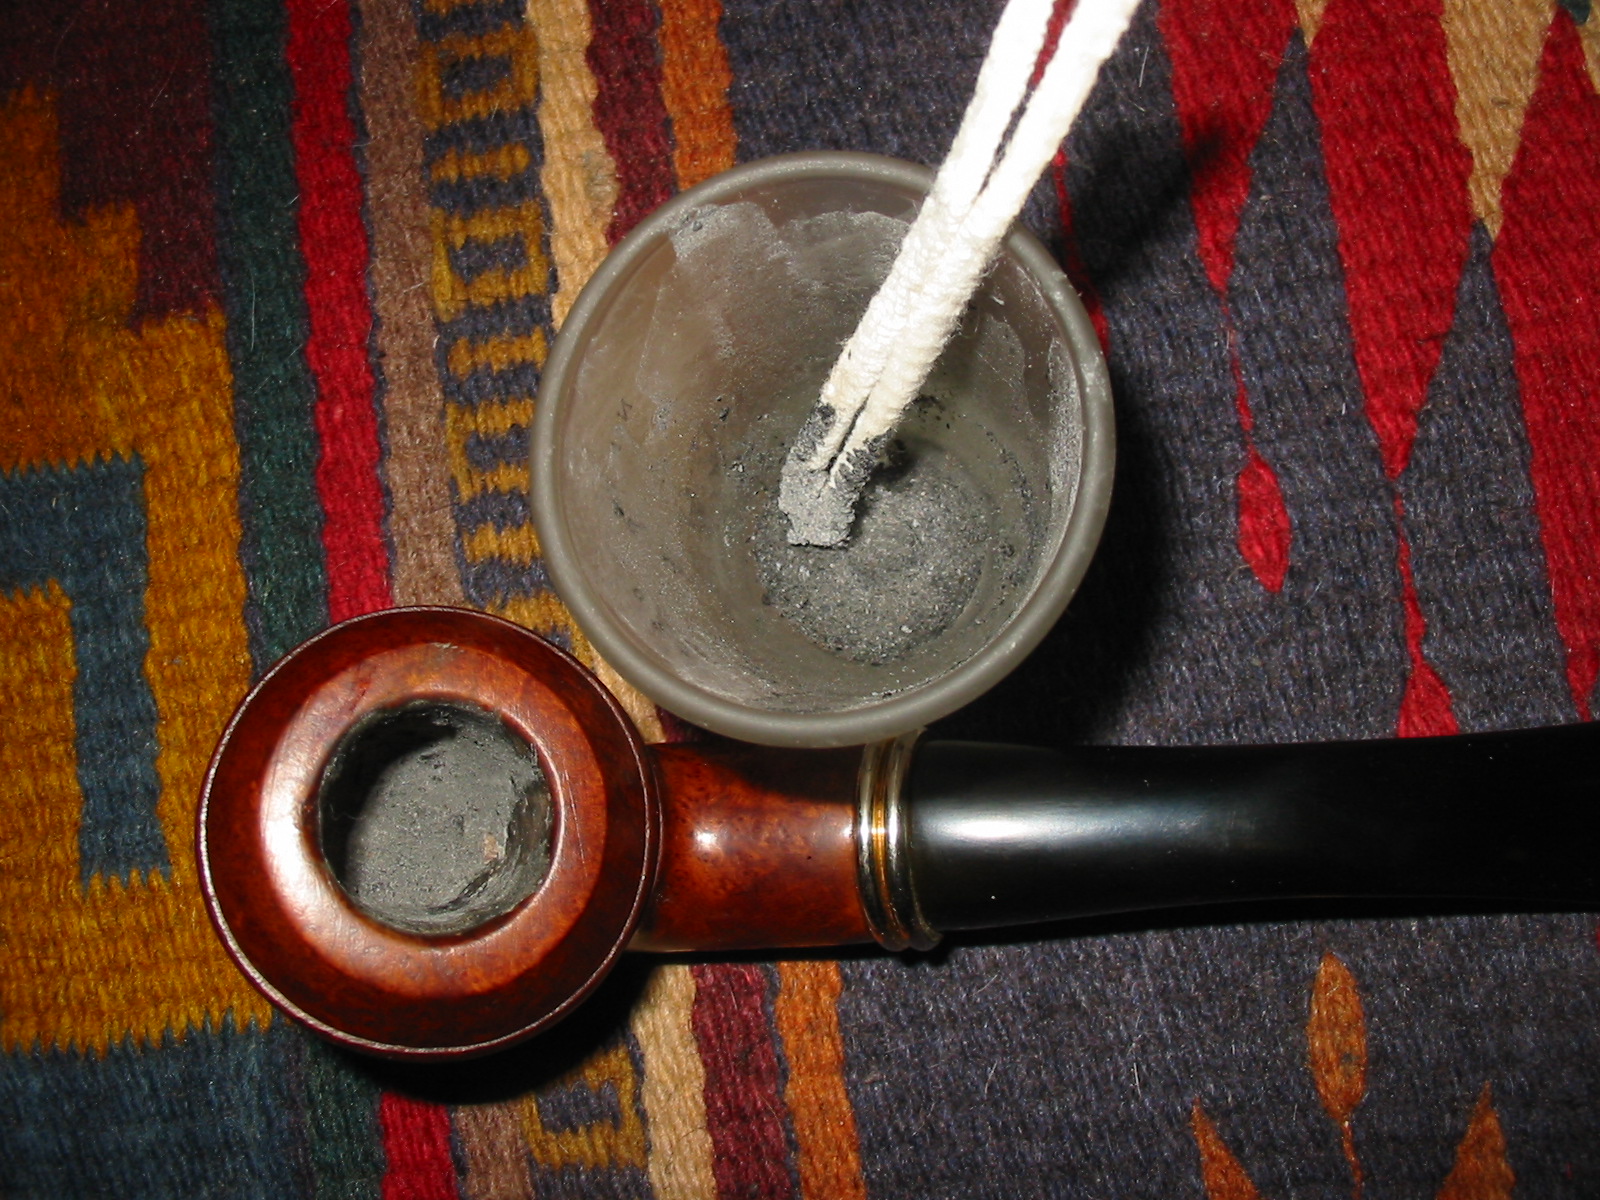
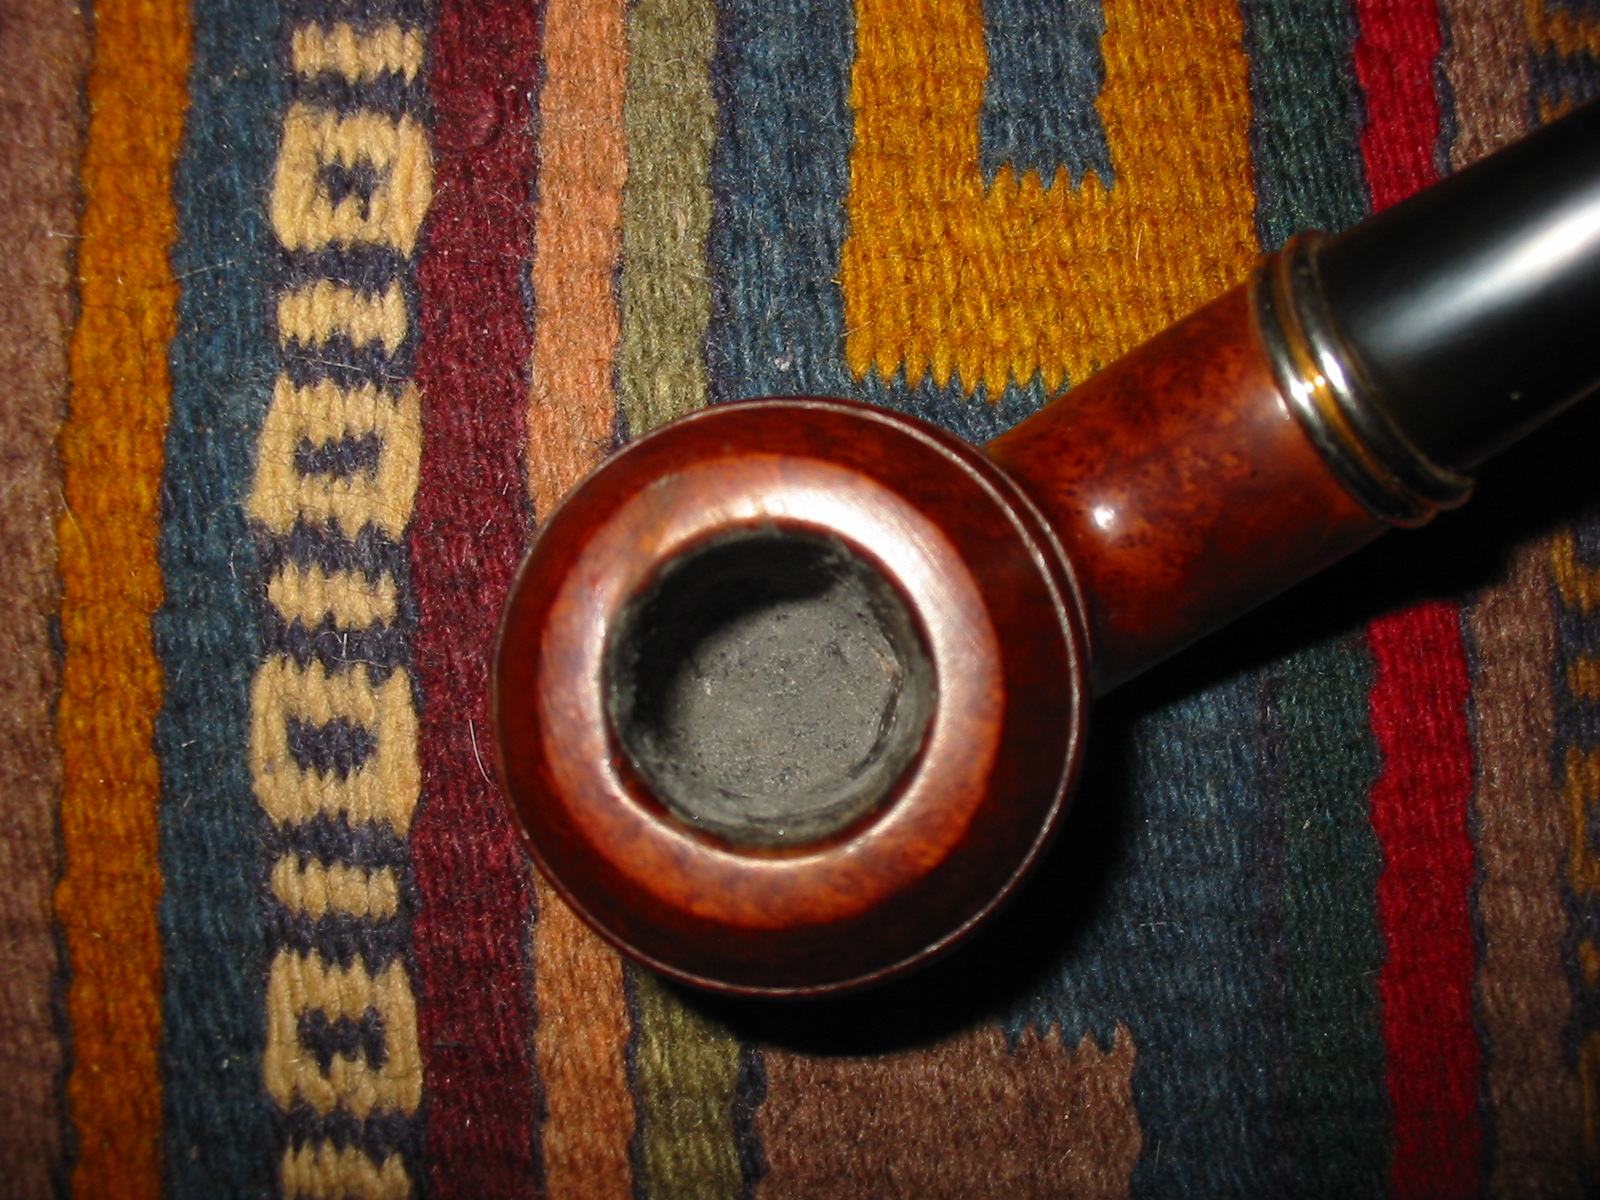
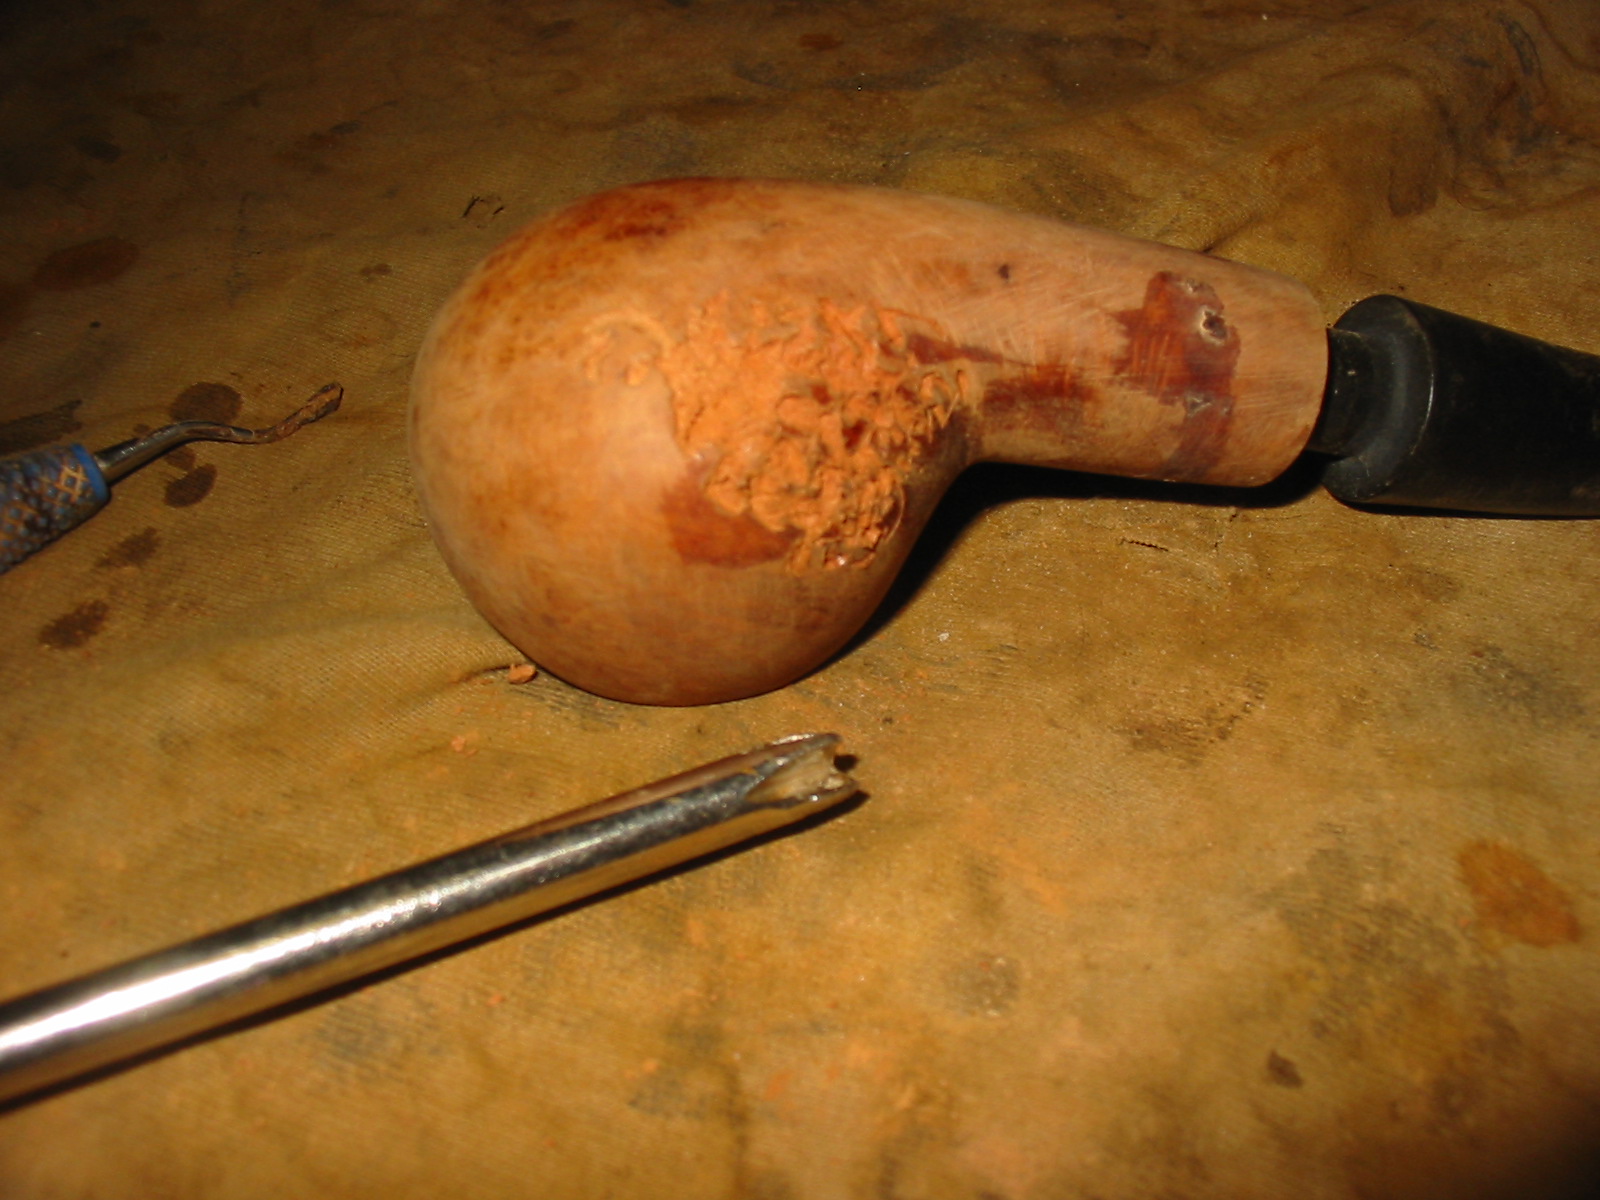
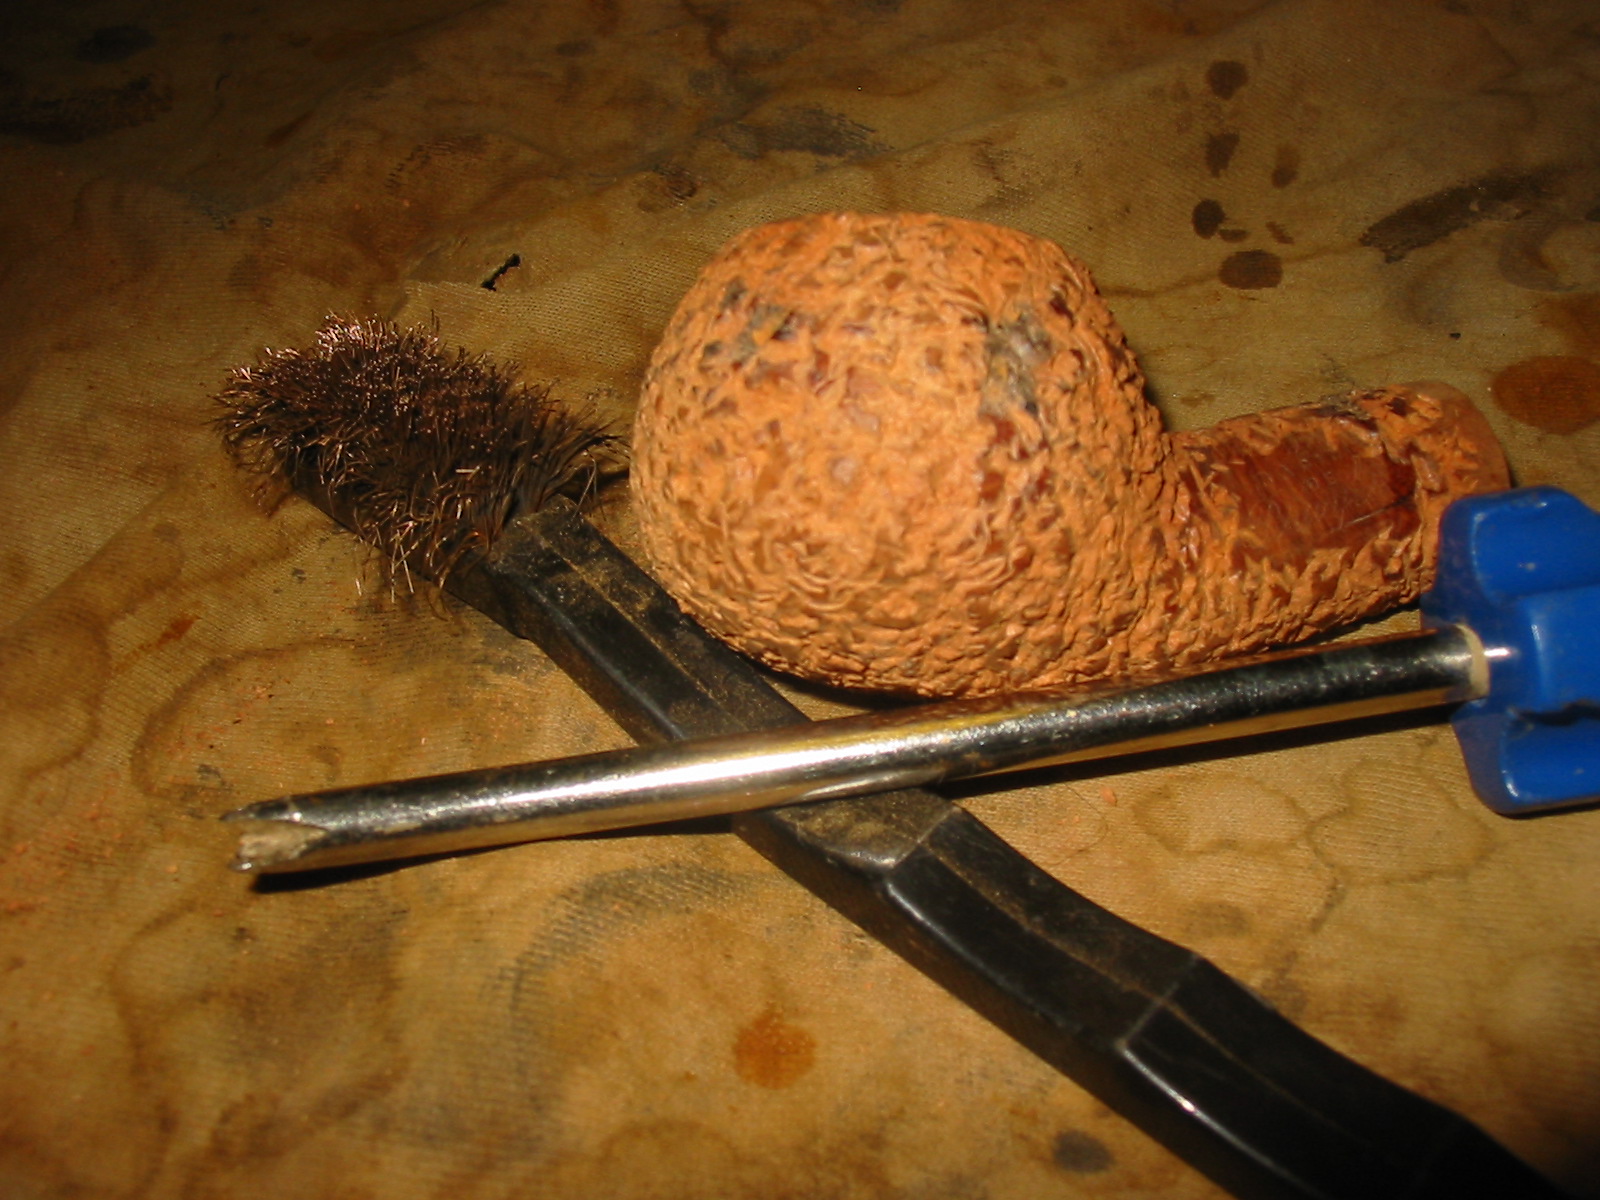
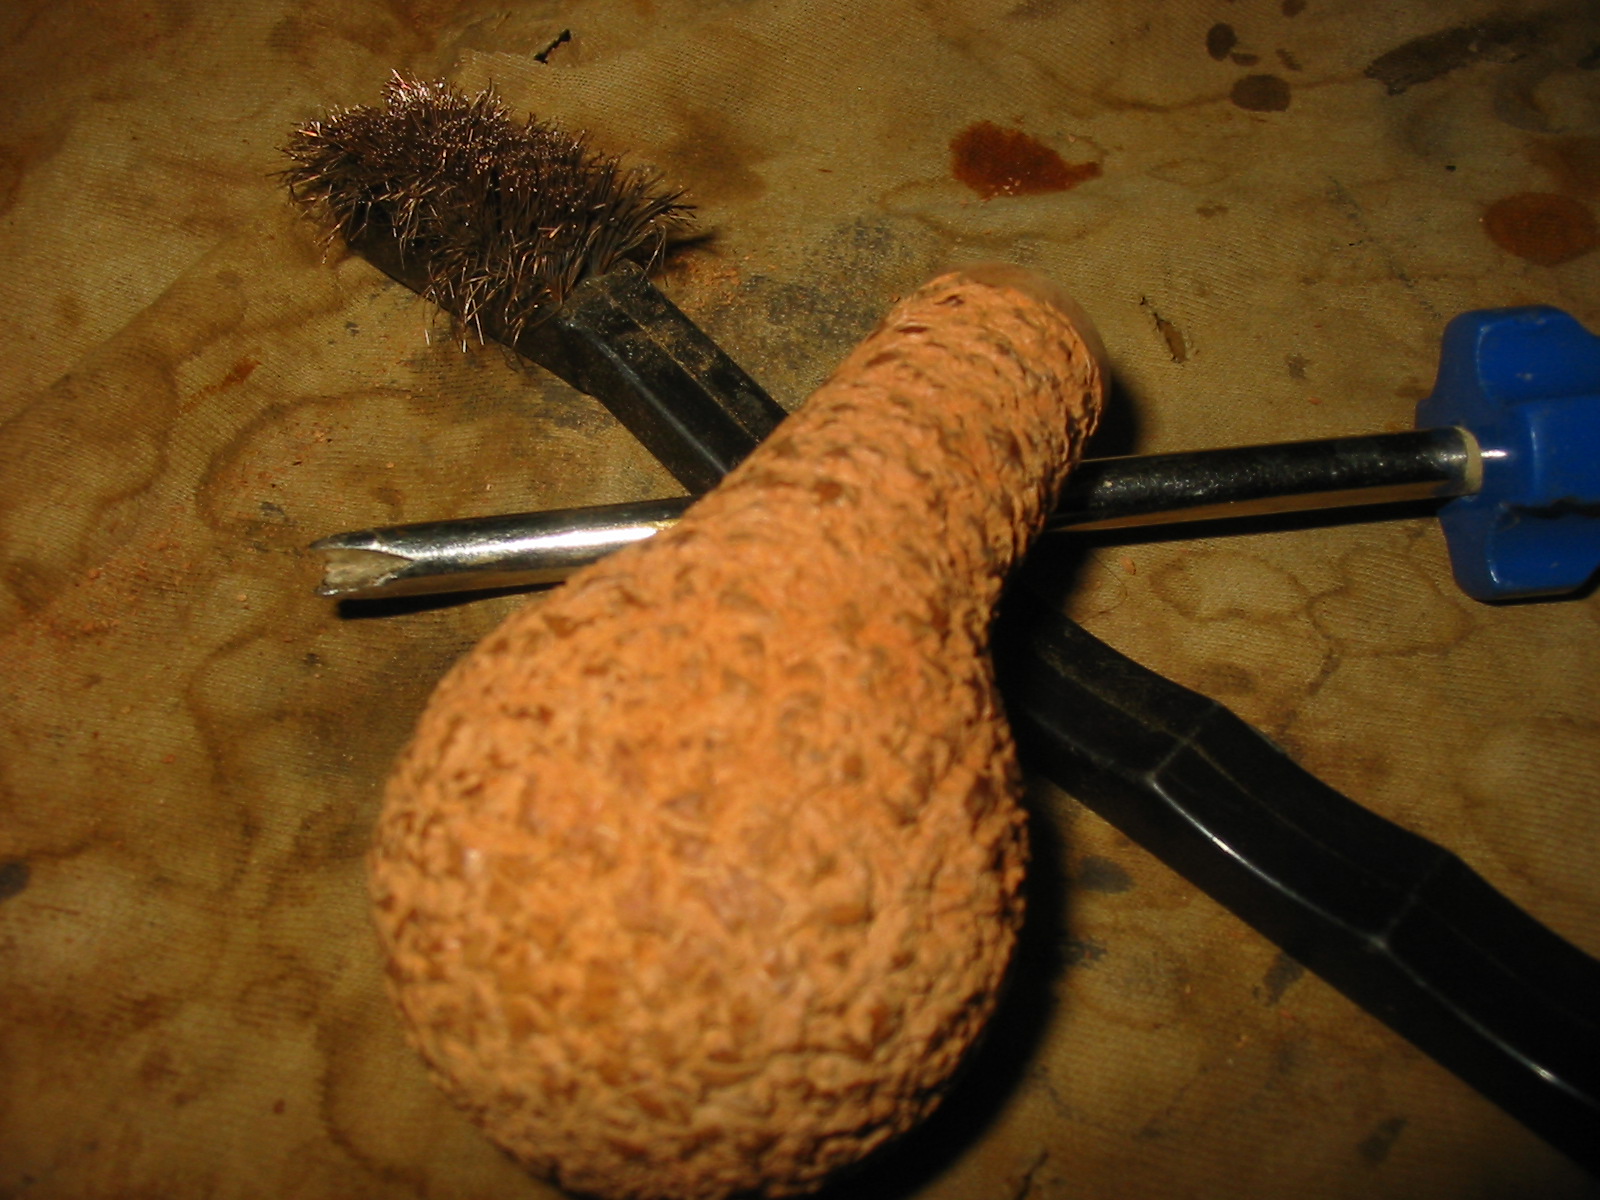
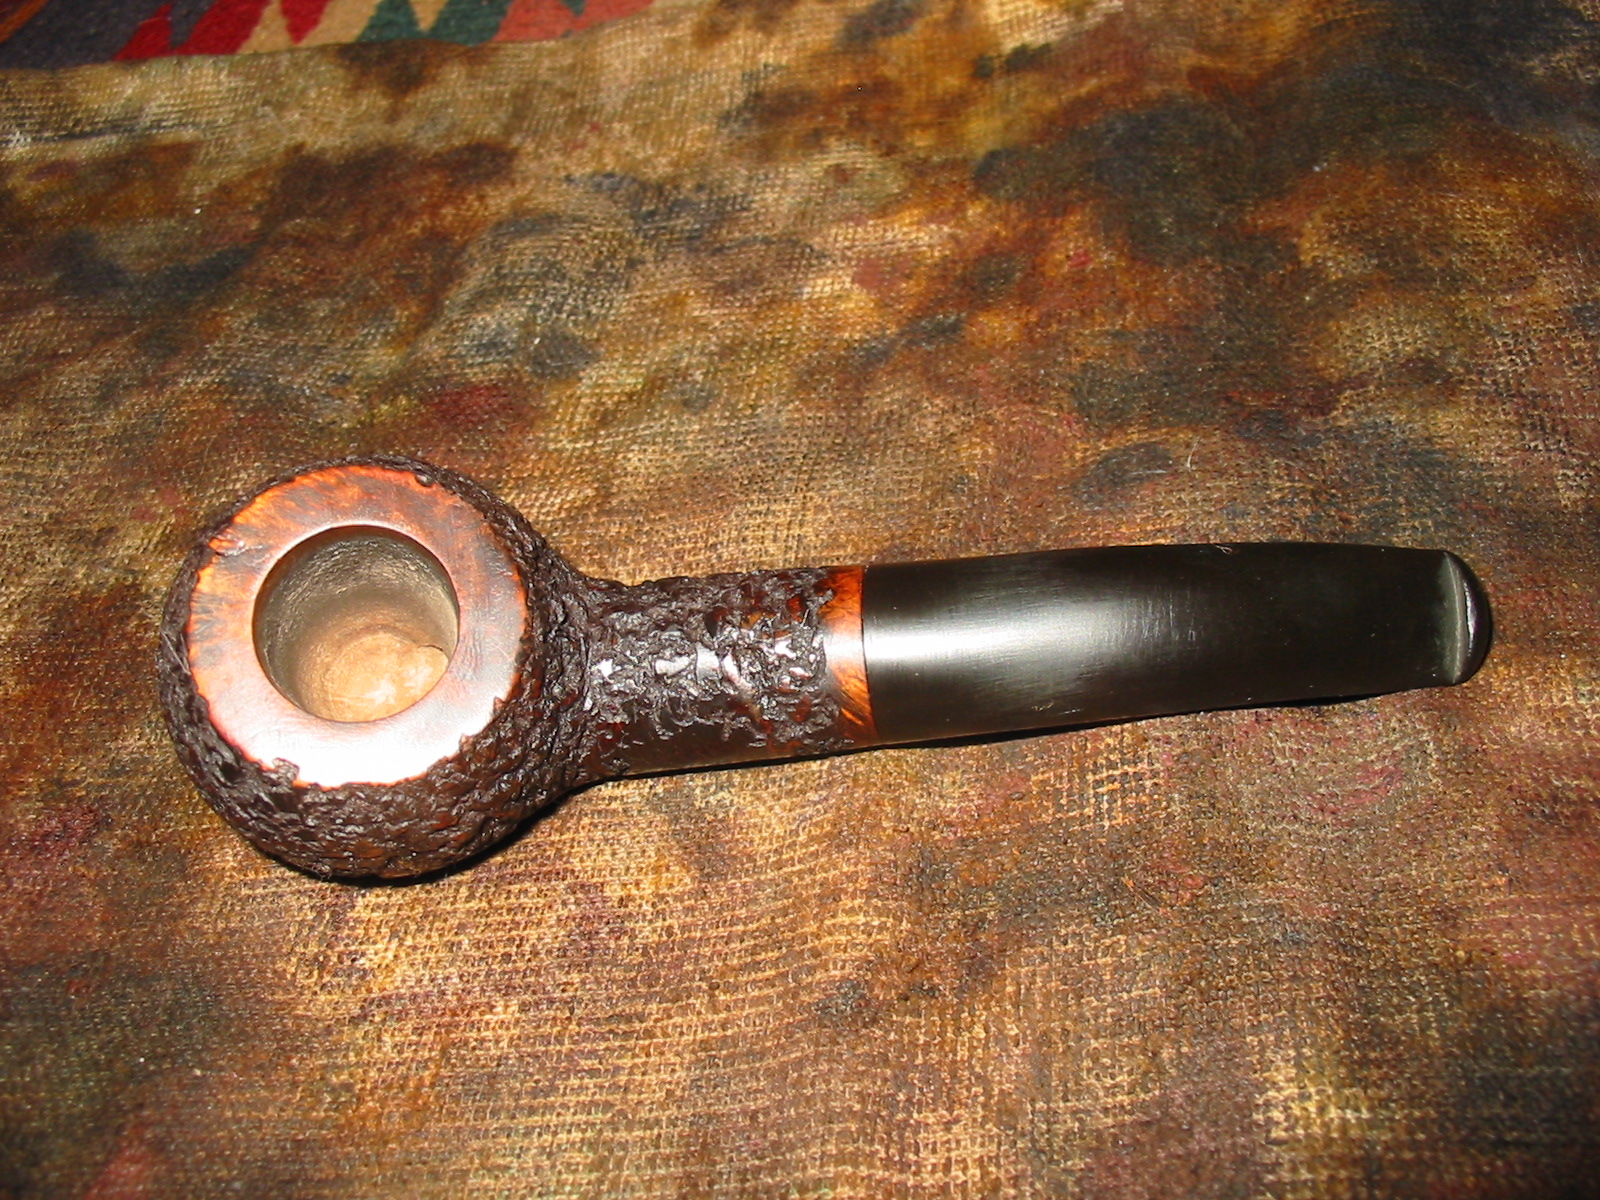
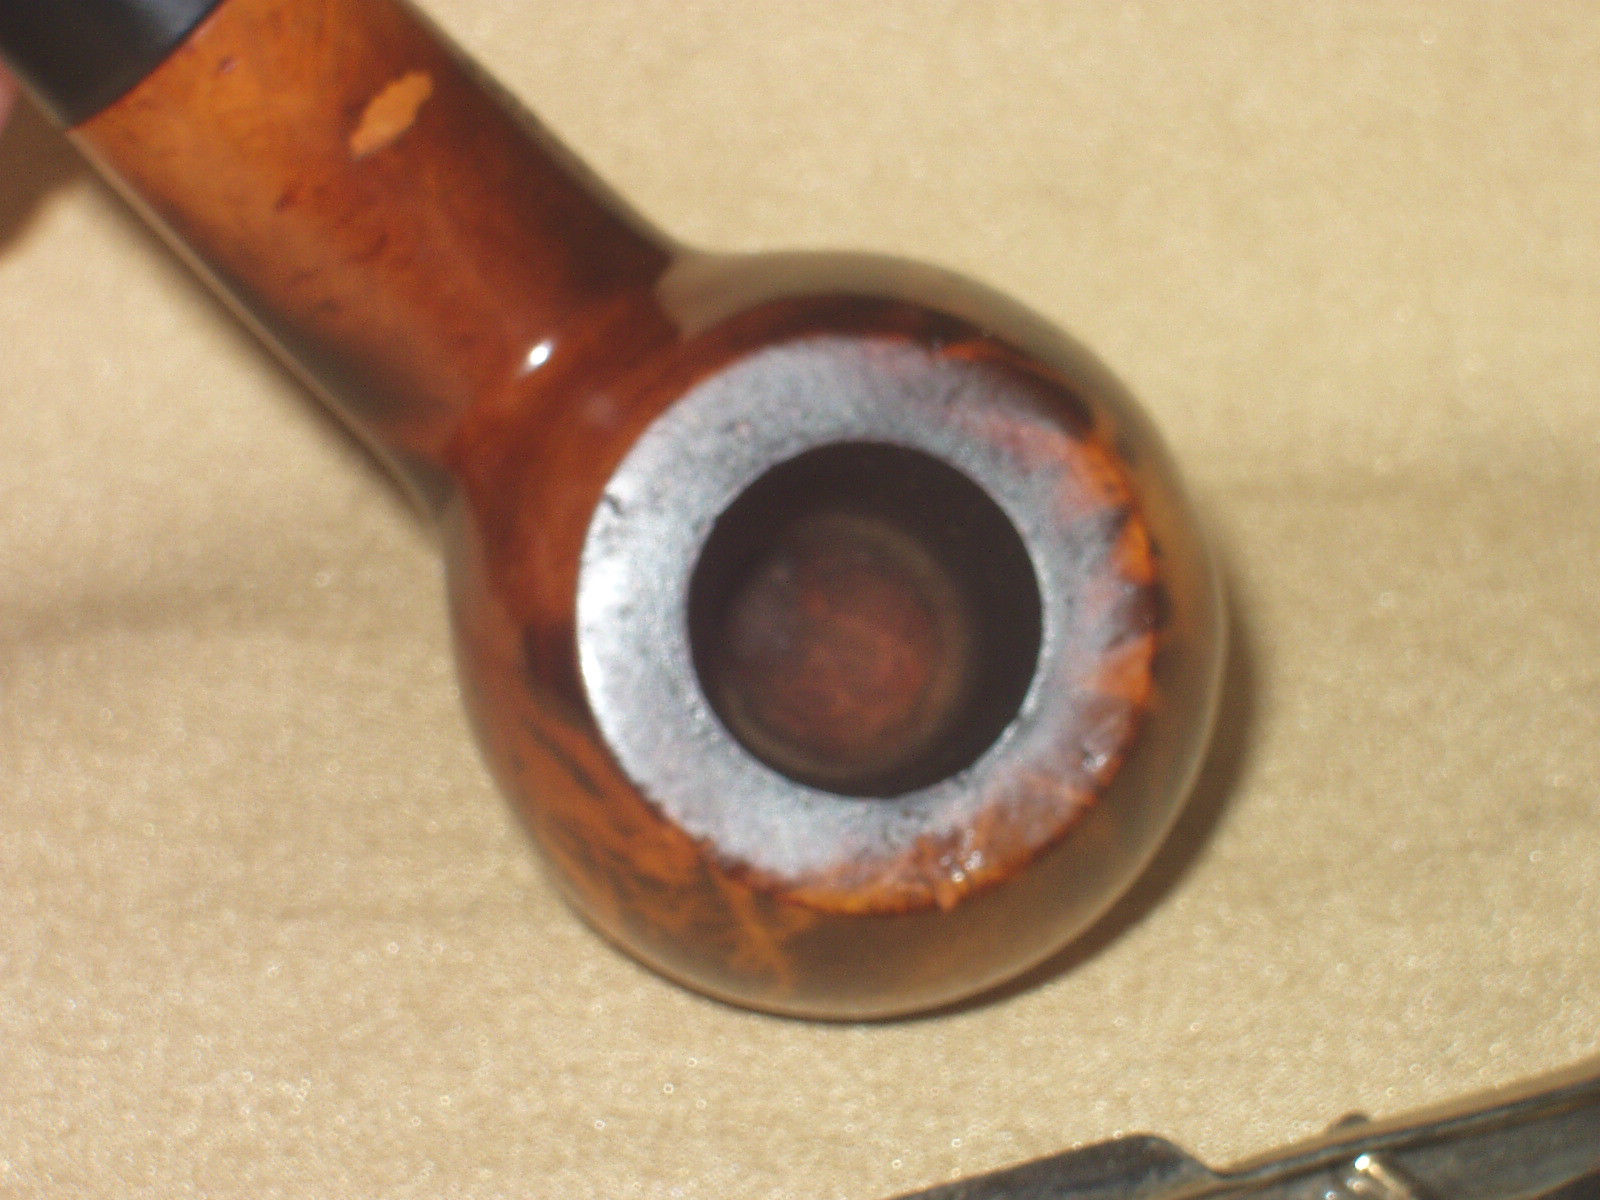
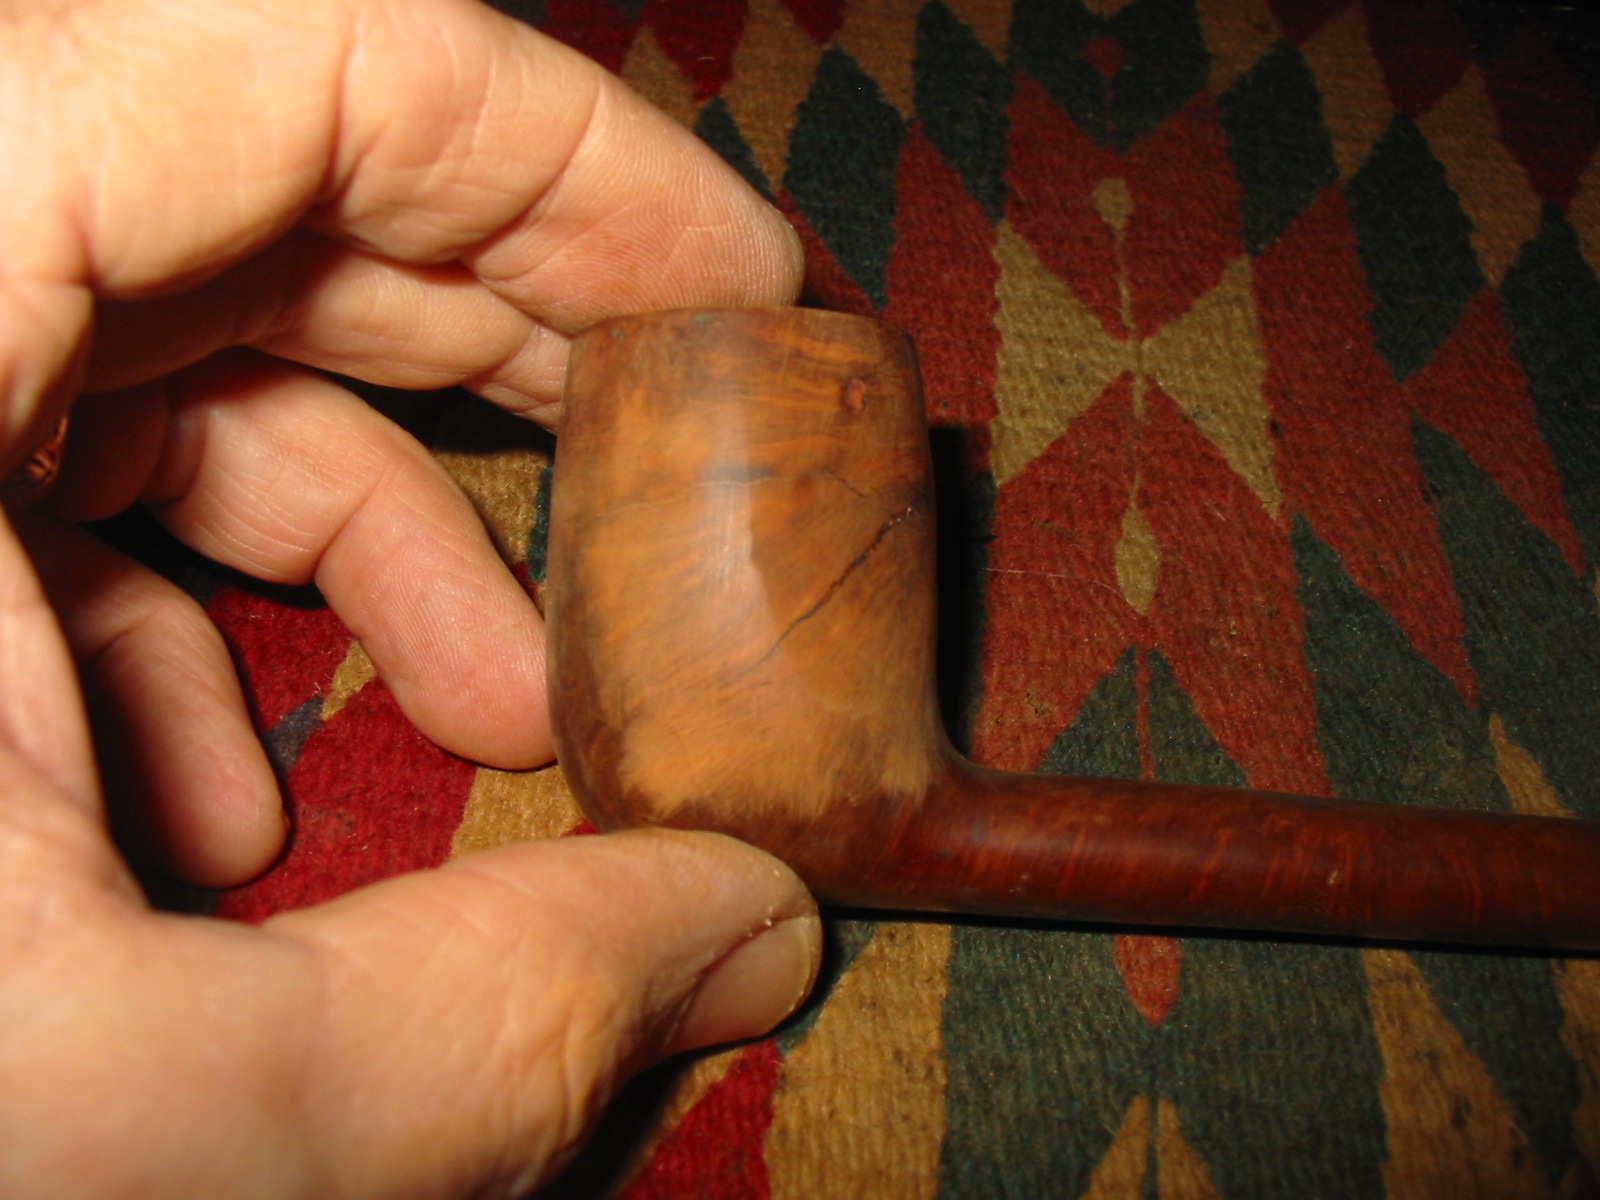
I reamed the bowl with a PipNet reamer to remove the existing cake and to check the interior walls of the bowl. They were not cracked as noted above. I washed down the pipe with acetone on cotton pads to remove the grime and the finish in preparation for doing the repair on the cracks. I picked out the debris in the cracks with a dental pick and cleaned out the sides and interior of the cracks. I washed that part of the bowl down a final time with acetone to clear away any debris left behind by my picking at it.
IMG_5348

IMG_5349

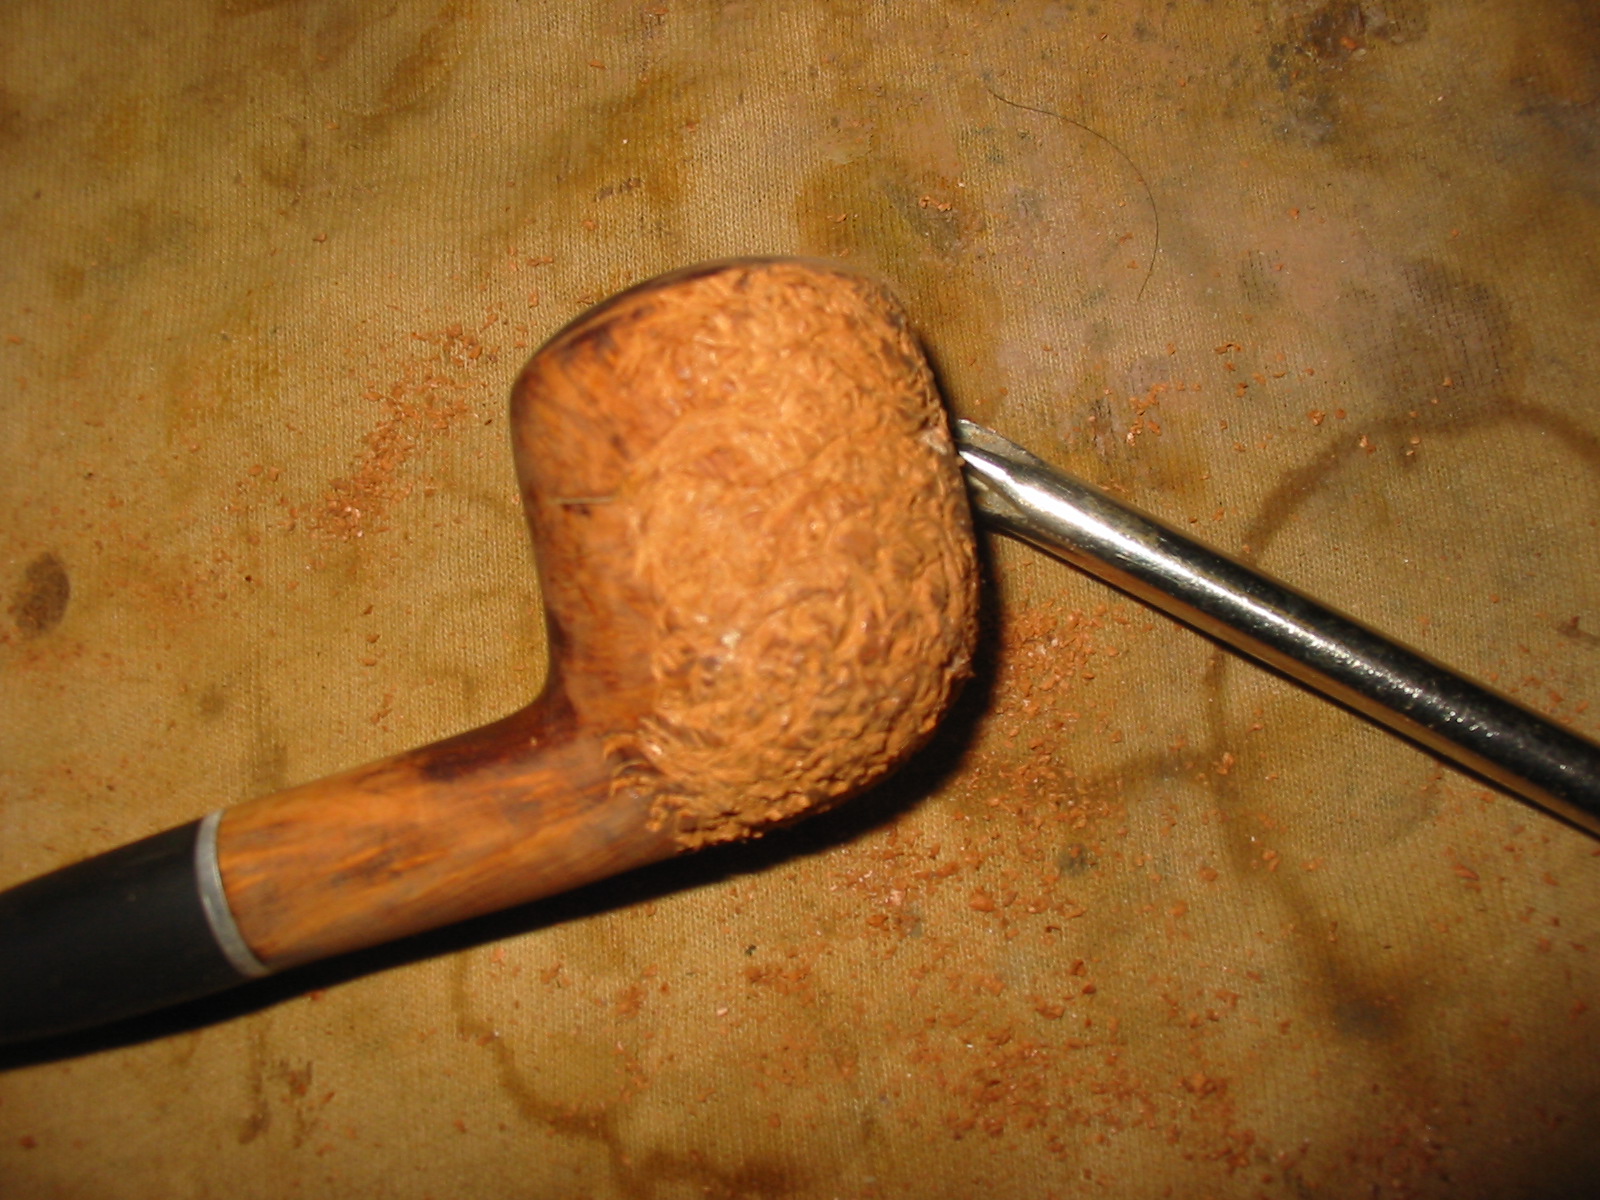
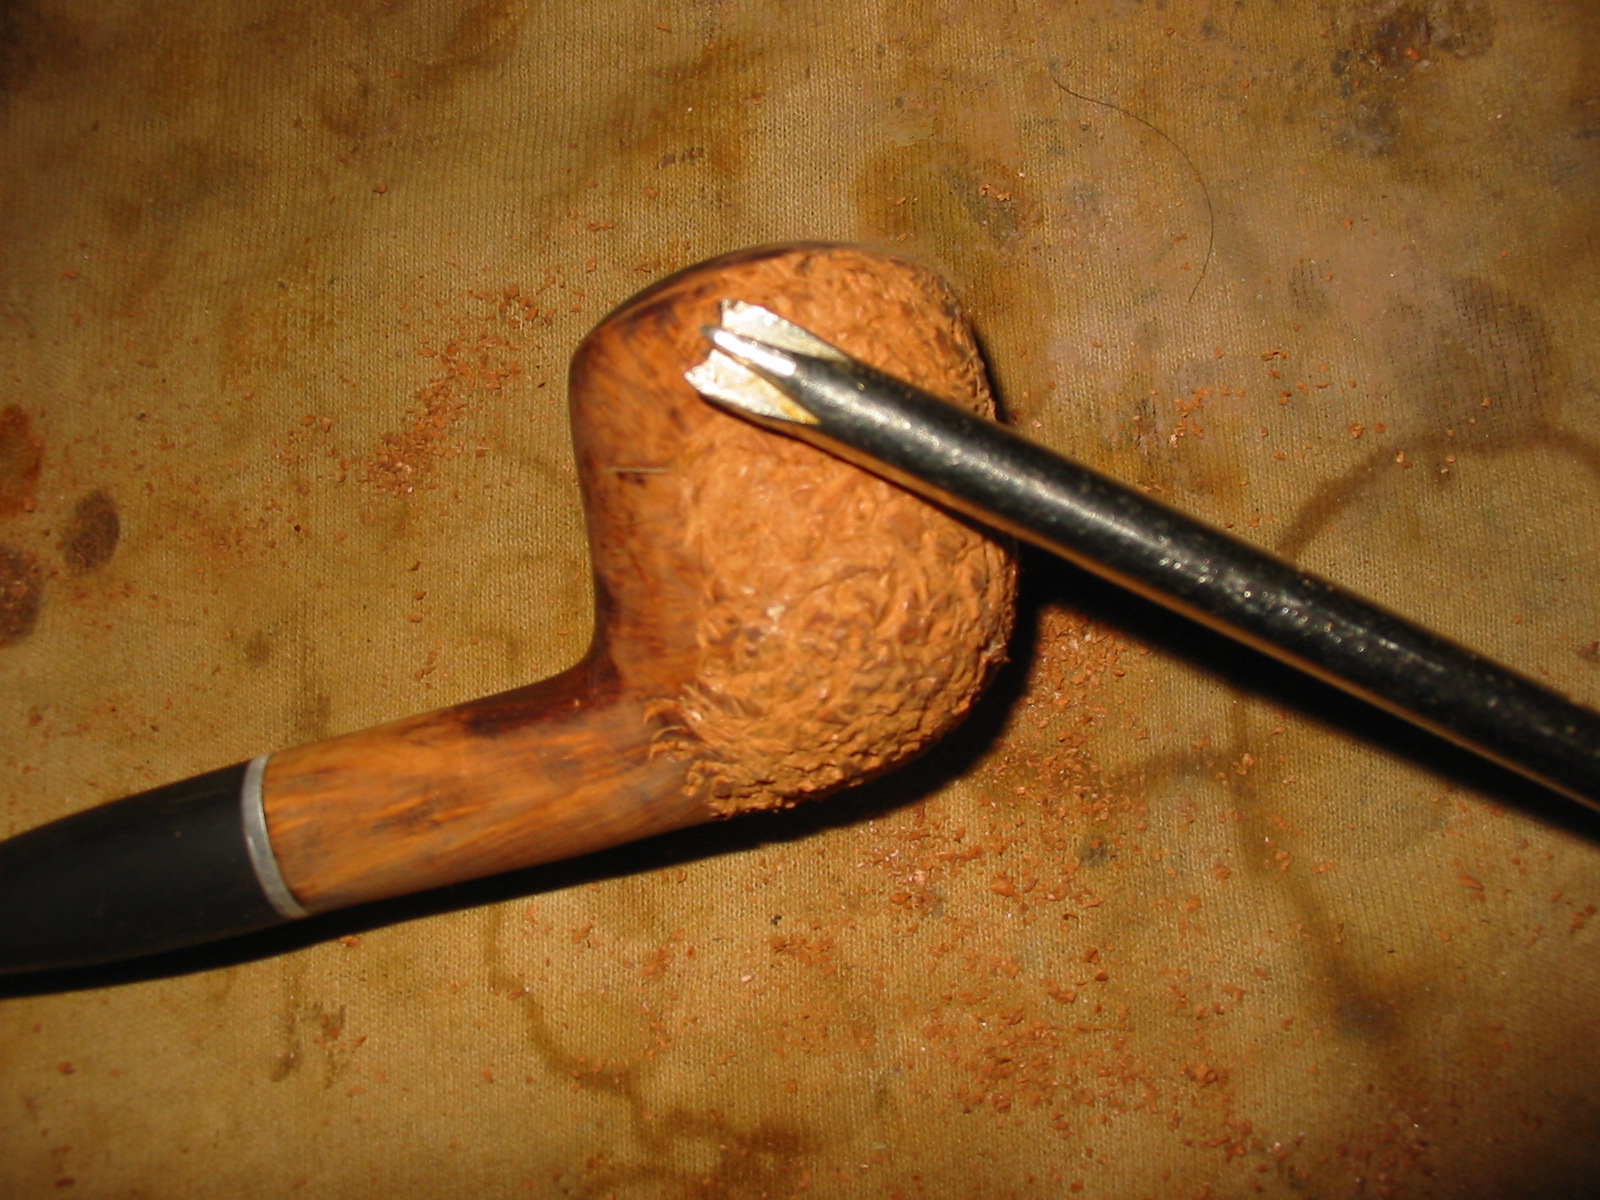
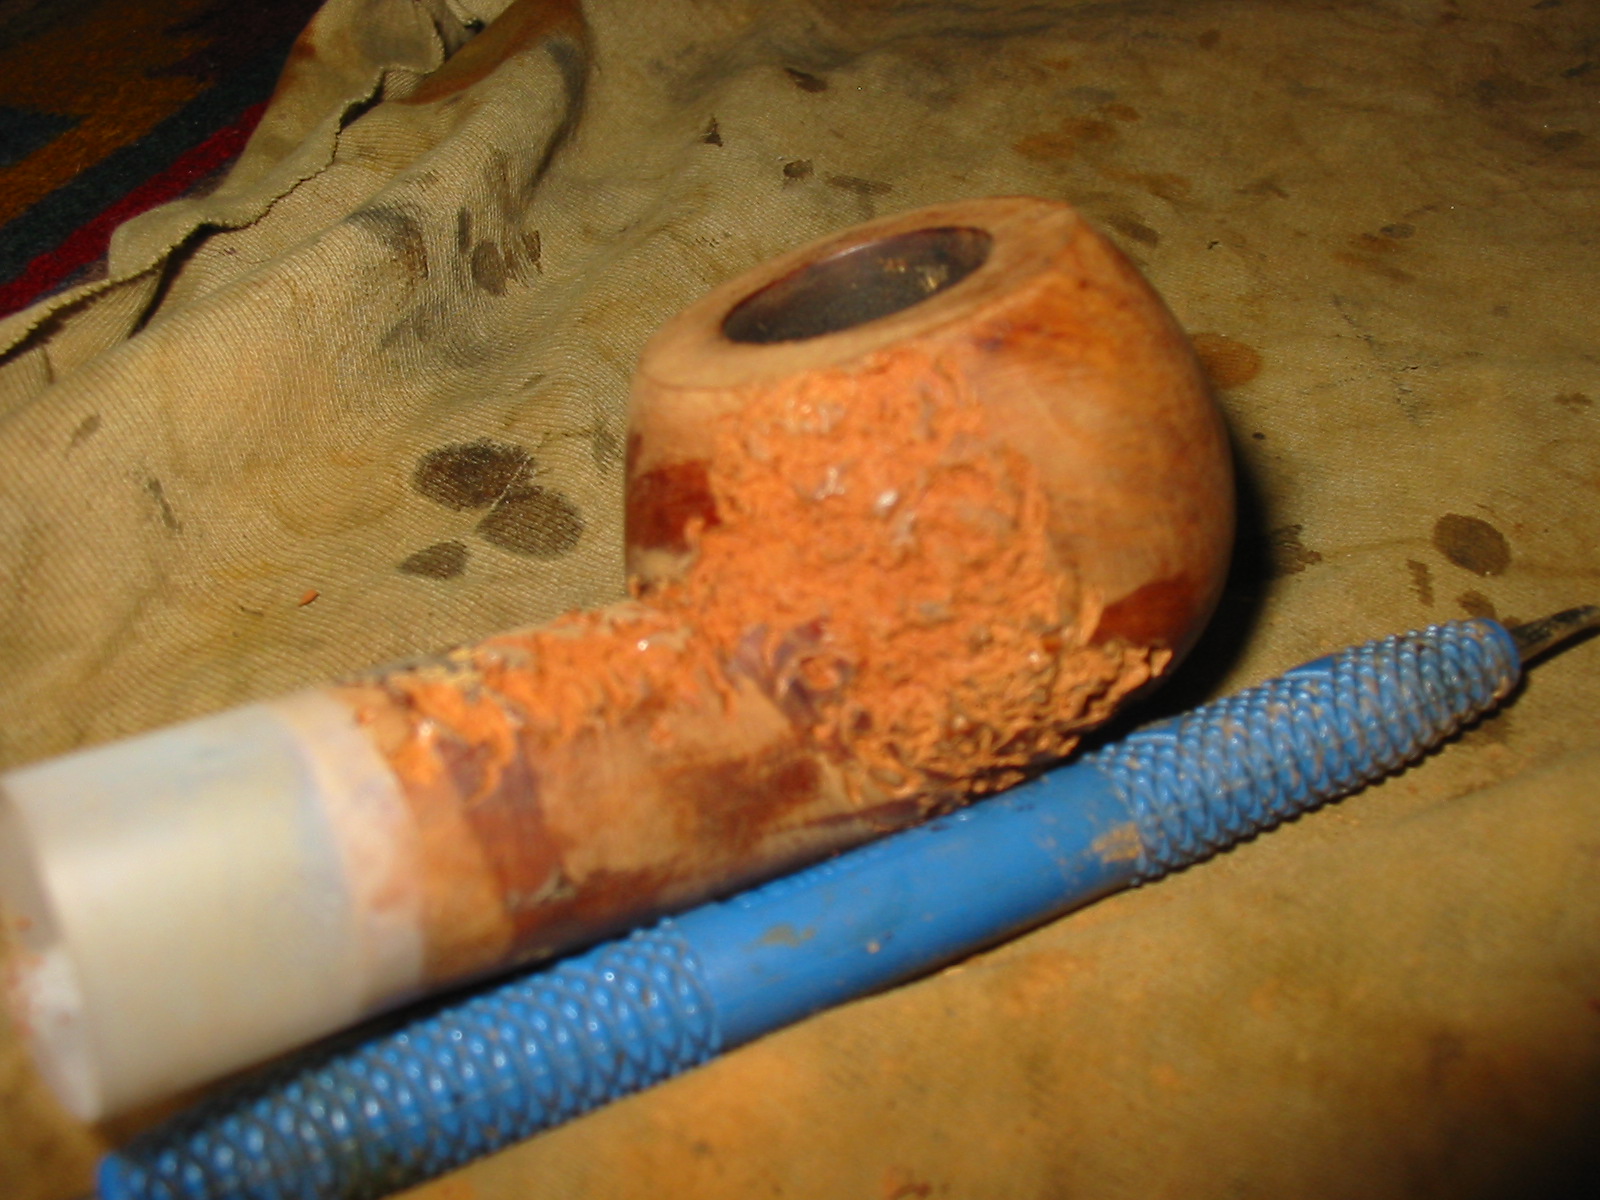
I packed briar dust into the cracks with a dental pick and then dripped super glue on top of the briar dust to bond it and make a fill for the crack. The next series of photos show the repair at this point from various angles.
IMG_5350

IMG_5351

IMG_5352

Once the glue was dry and the patches were solid I sanded the patch with 220 grit sandpaper to smooth it out to match the surface of the bowl. I sanded it with medium and fine grit sanding sponges afterward to smooth it out further. The next photos show the initial sanding of the patches. There was still much sanding to do and some more filling in spots that were low.
IMG_5353

IMG_5354

IMG_5355

IMG_5356

I sanded the bowl and the new stem further with 220 grit sandpaper to remove the finish and smooth out the transitions. On the crack repair I wanted to even out the transition between the fill and the surrounding briar. On the new stem shank union I wanted to make that transition between the briar and the vulcanite stem seamless.
IMG_5357

IMG_5358

IMG_5359

IMG_5360

The next series of three photos show the newly sanded repair. It looks better but there are still a few areas that will need to be filled and sanded some more.
IMG_5361

IMG_5362

IMG_5363

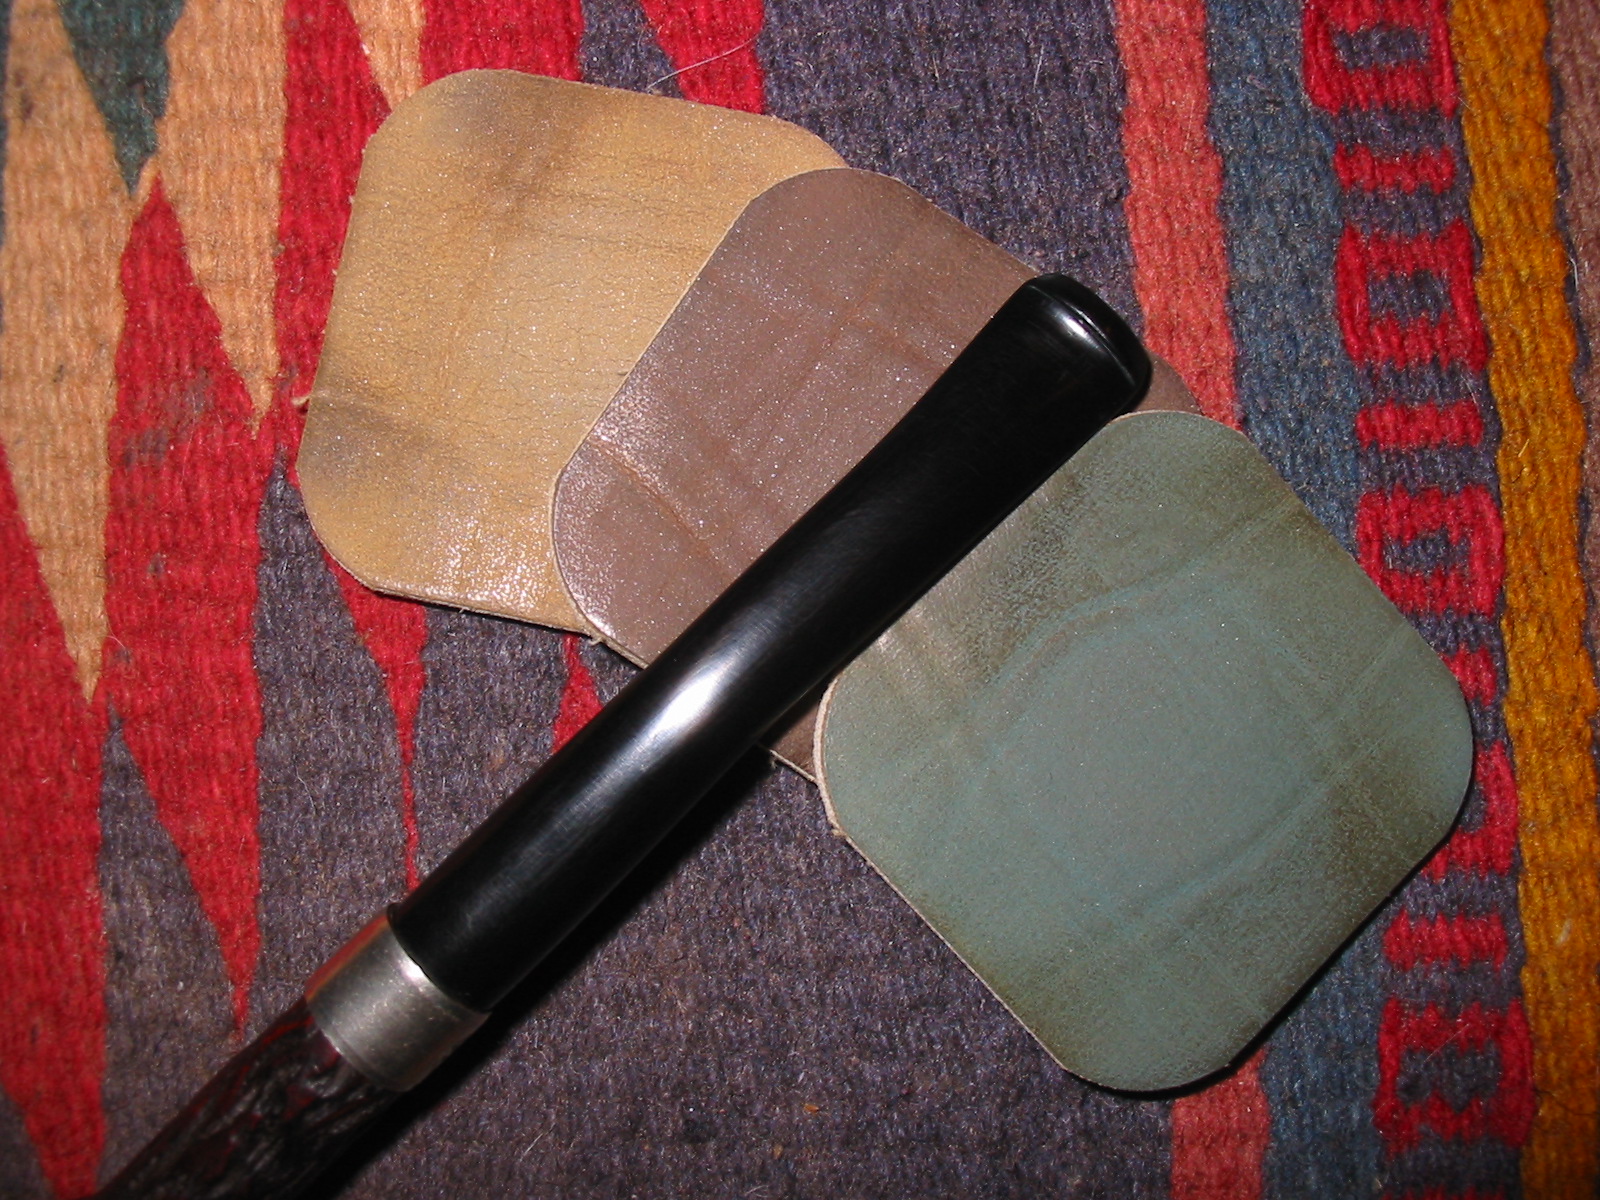
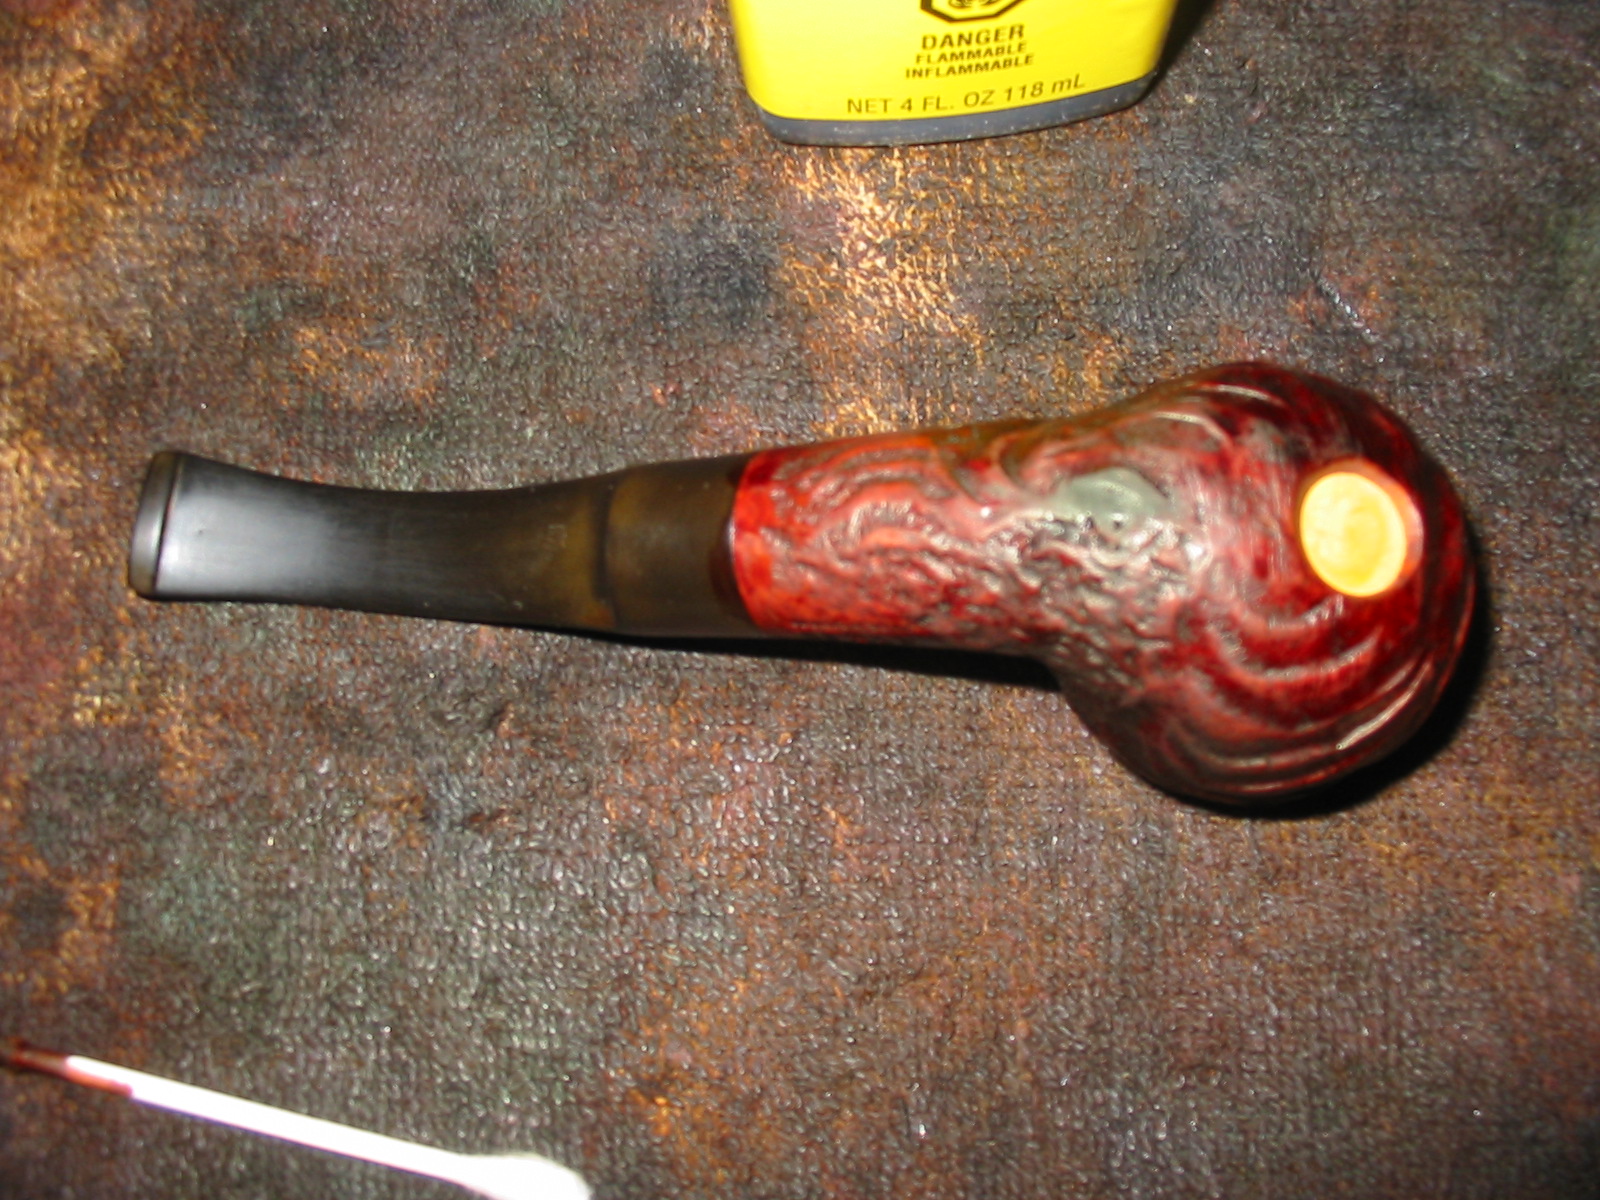
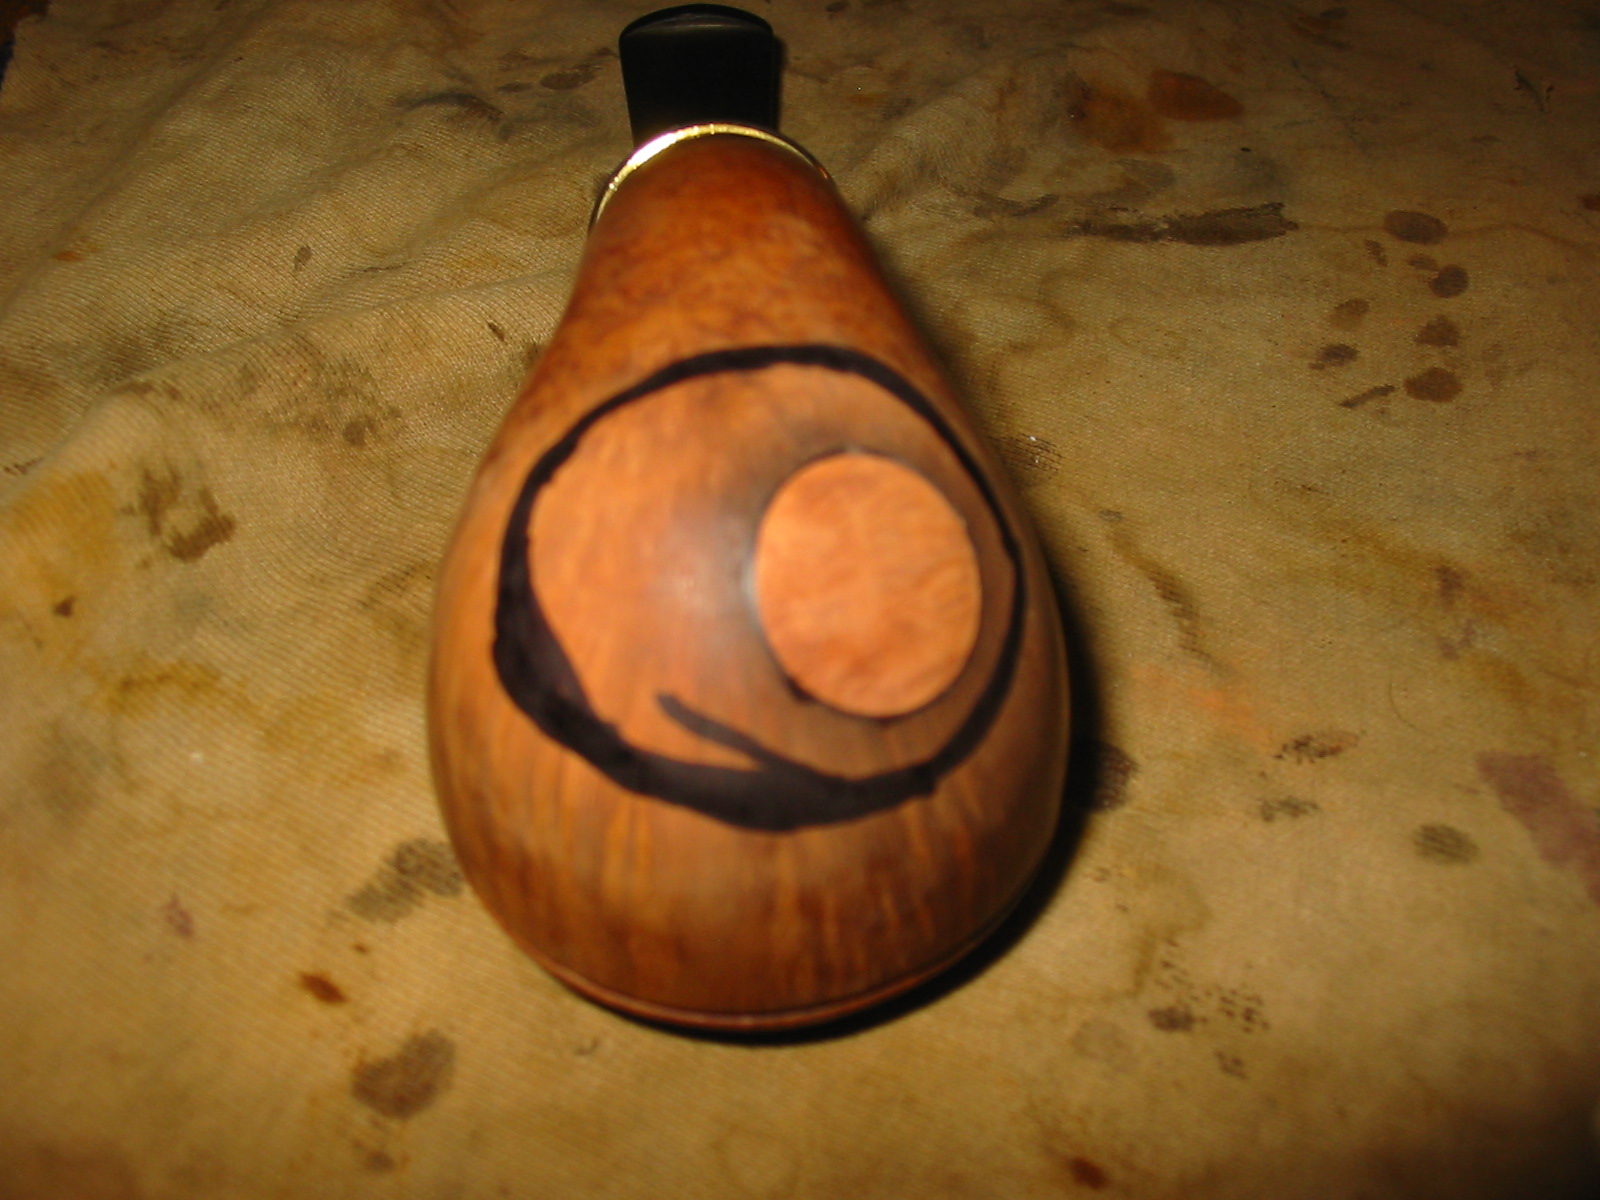
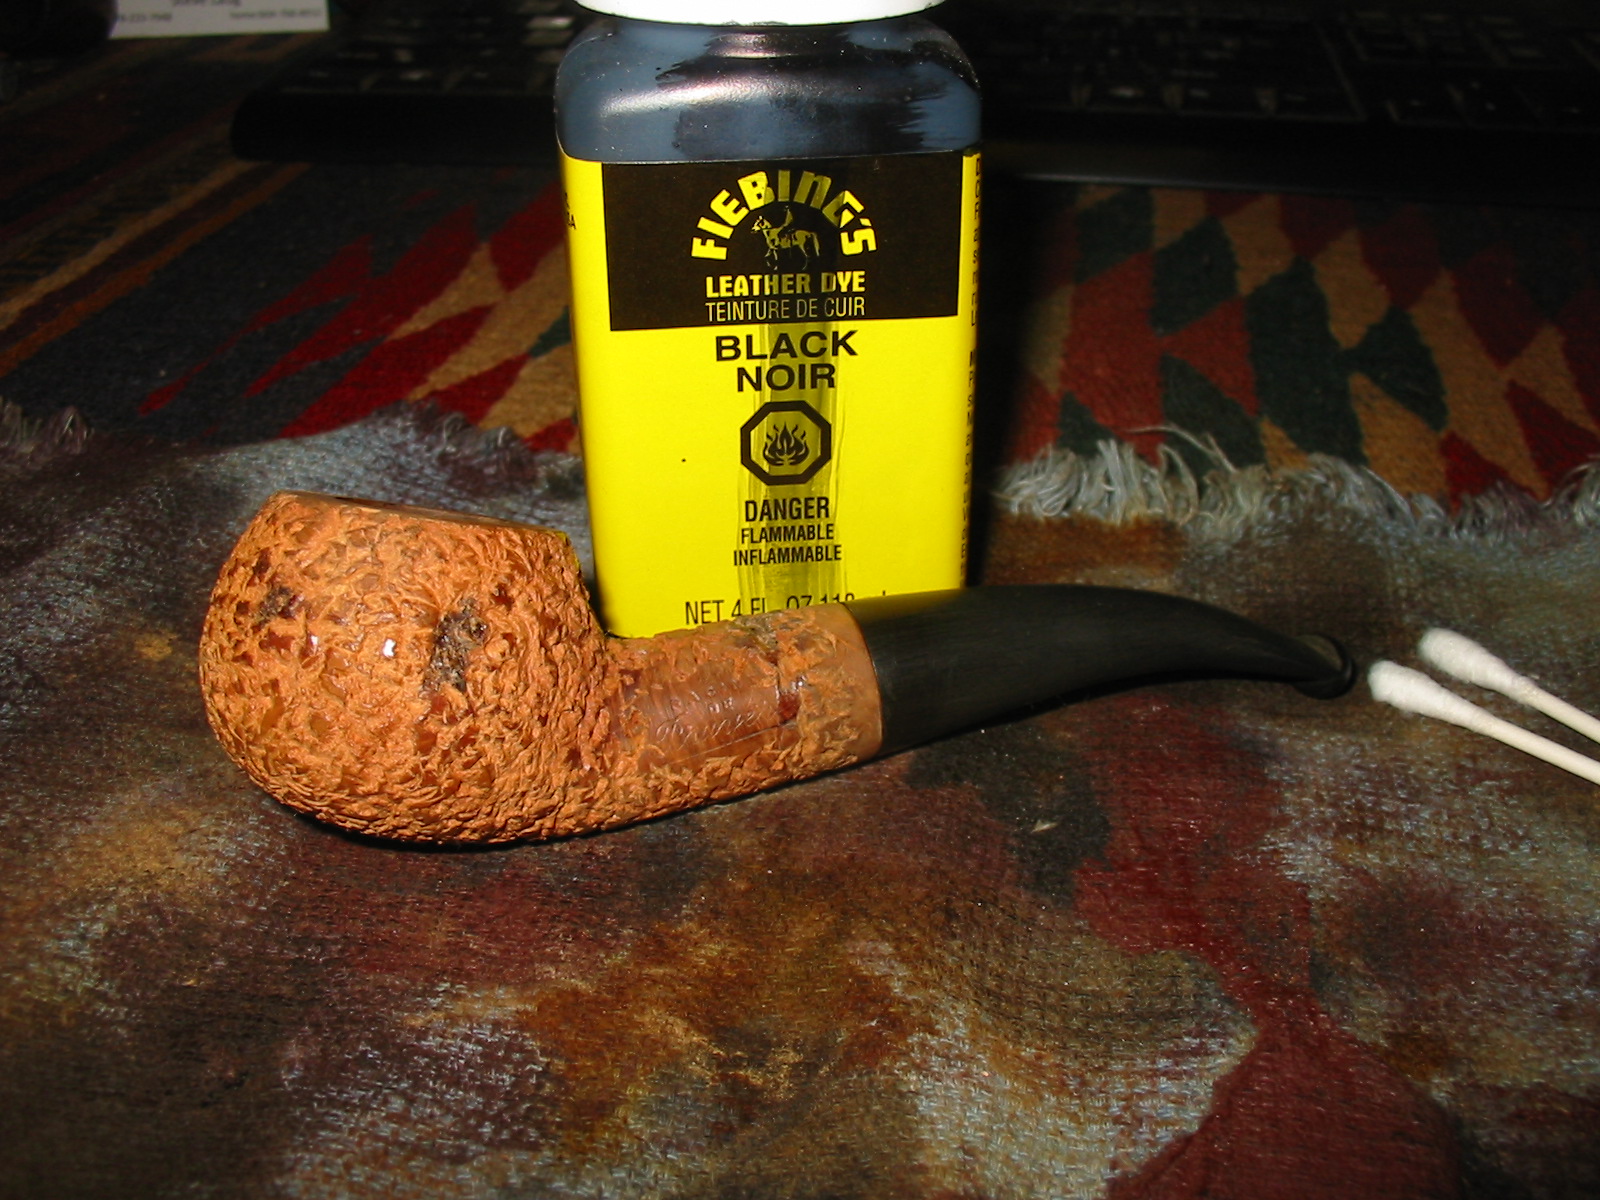
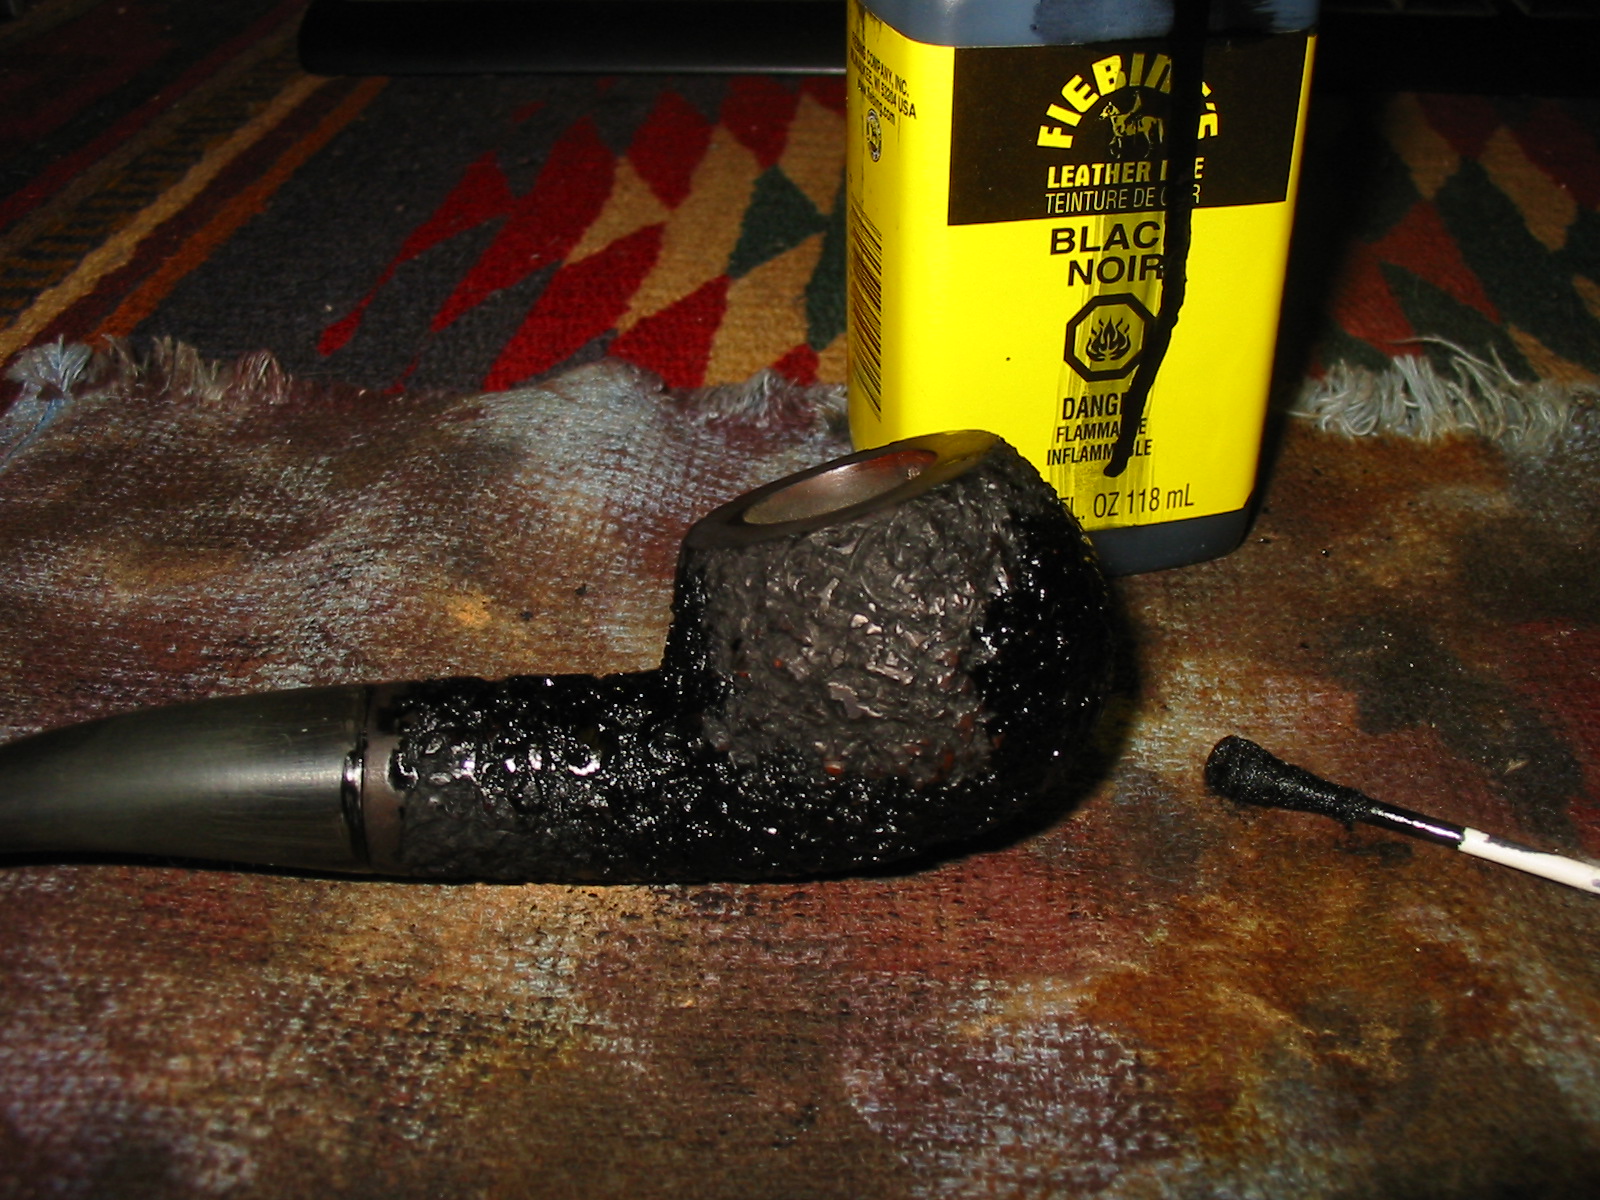
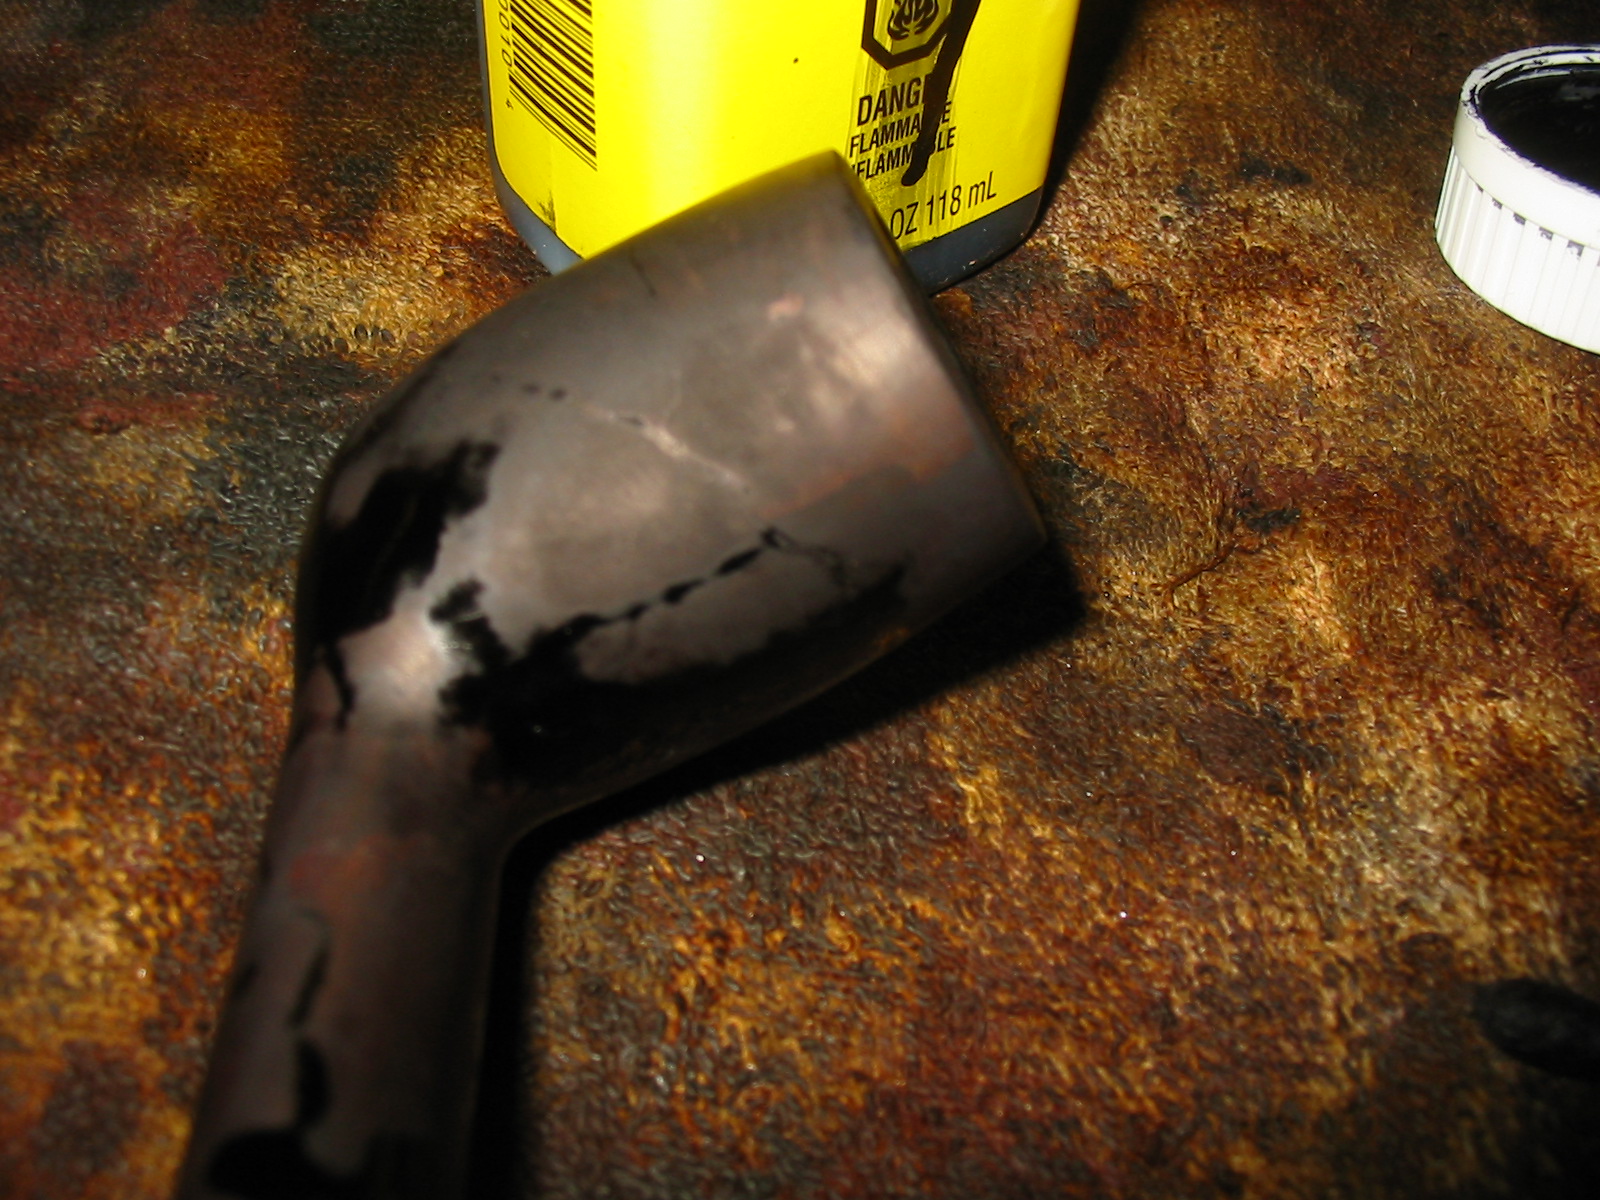
At this point in the process I was still undecided as to whether I would stain the repaired bowl or rusticate it. I posted on an online forum to see what others thought and the audience was split. I decided to stain it and see how the repair looked. If I changed my mind I could rusticate it later. I wanted to use a contrast stain on the bowl to minimize the look of the crack so I used a black aniline stain to do the undercoat. It would also highlight any areas on the repair that needed more attention. I applied the stain, flamed it and did the same again until the coverage I was looking for was achieved.
IMG_5364

IMG_5365

I took three photos of the repair after staining to show what the repair looked like at this point.
IMG_5366

IMG_5367

IMG_5368

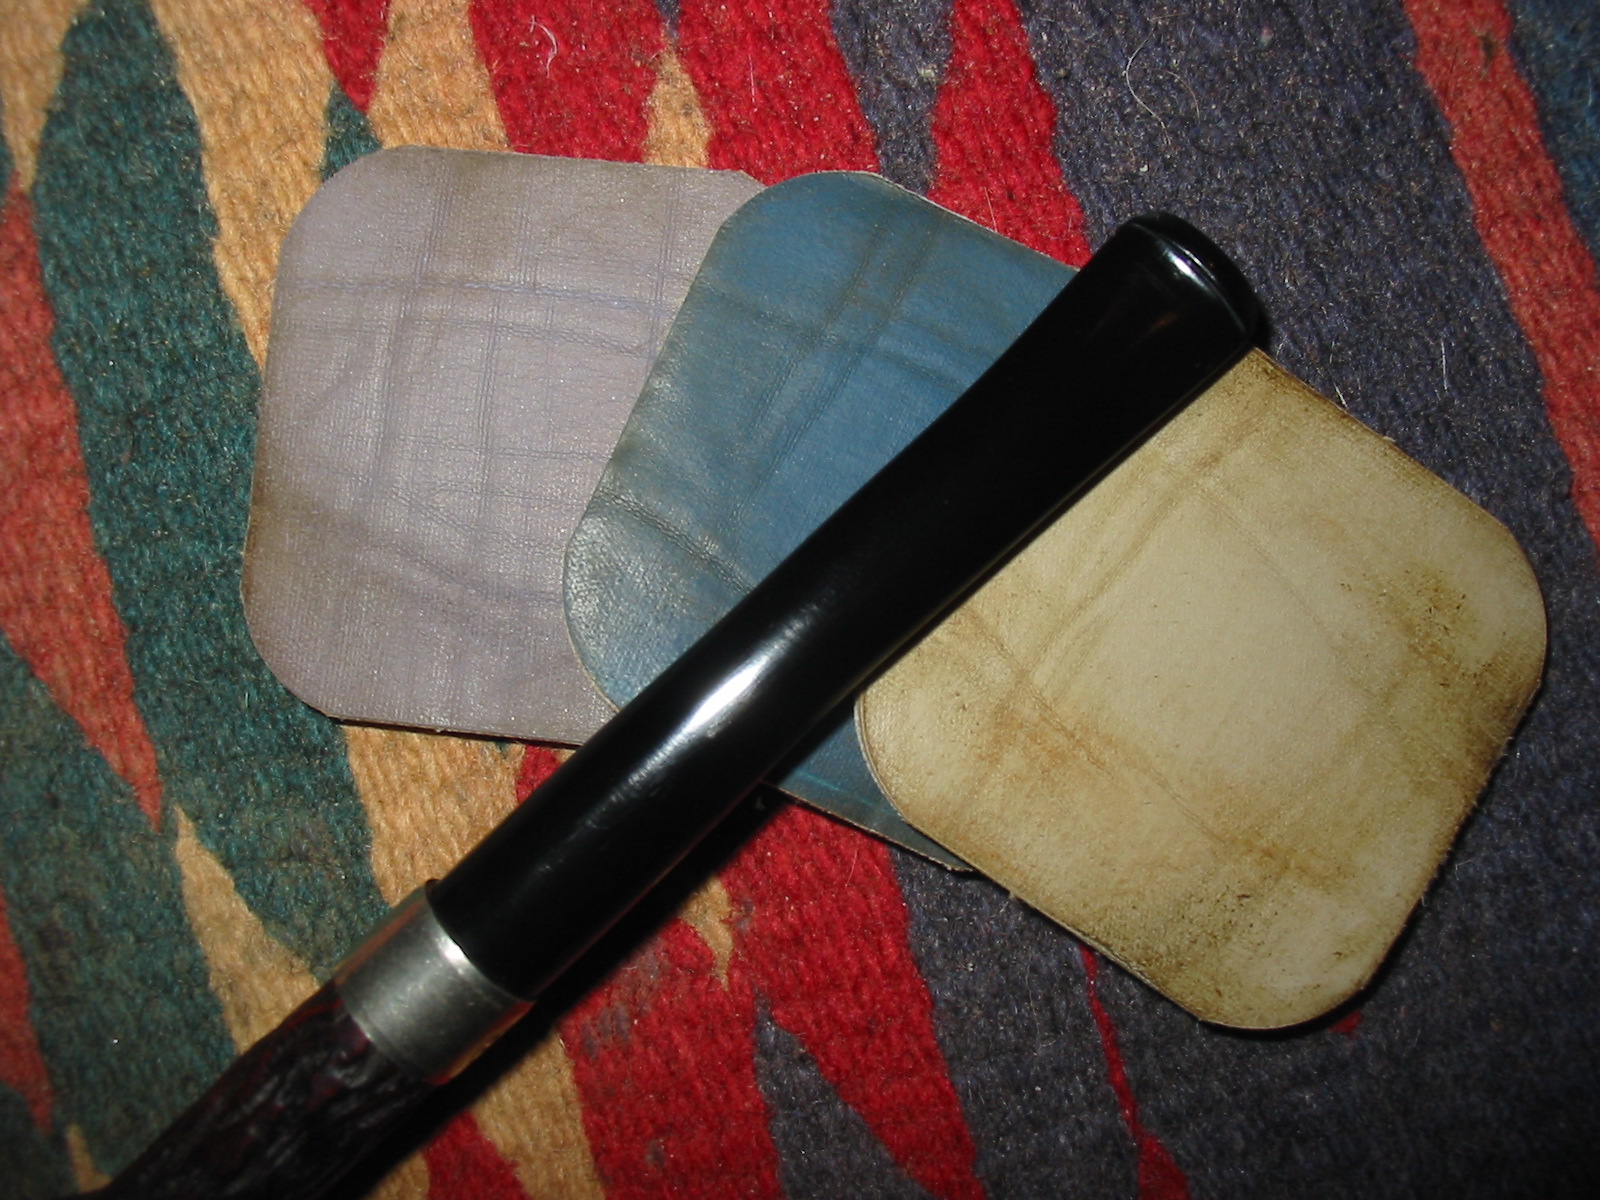
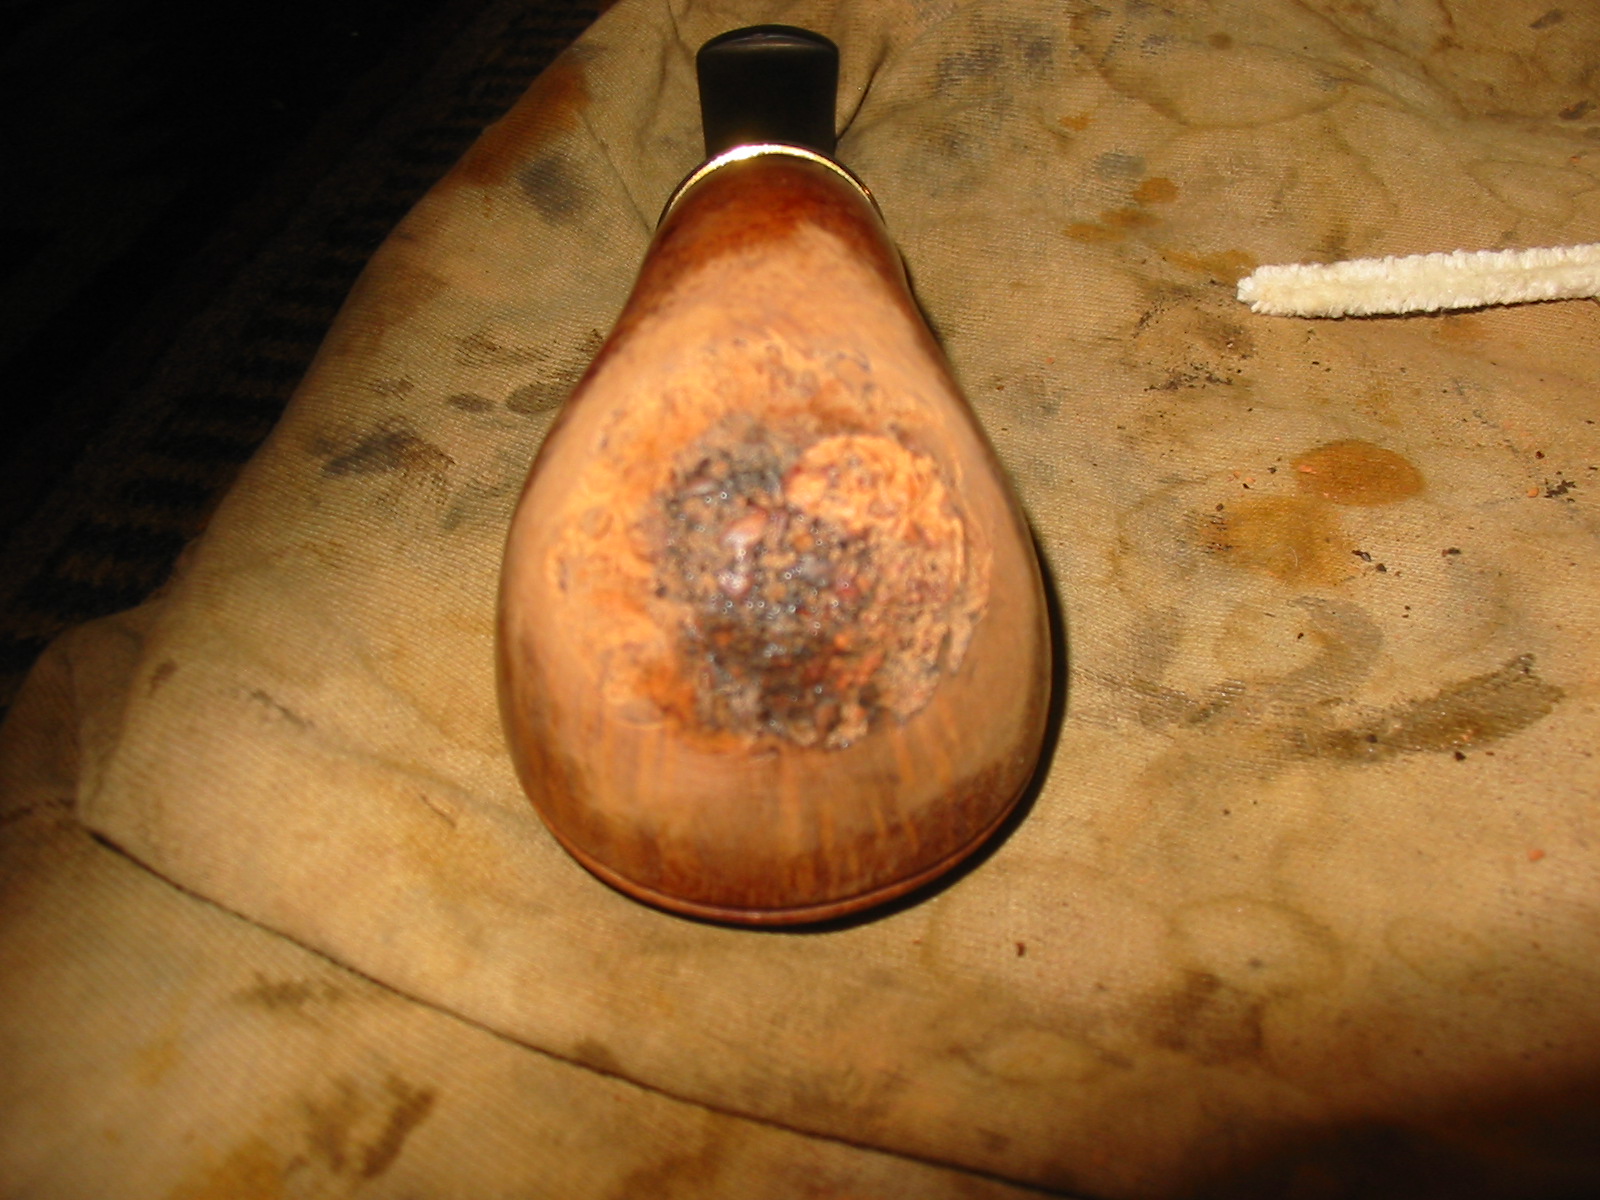
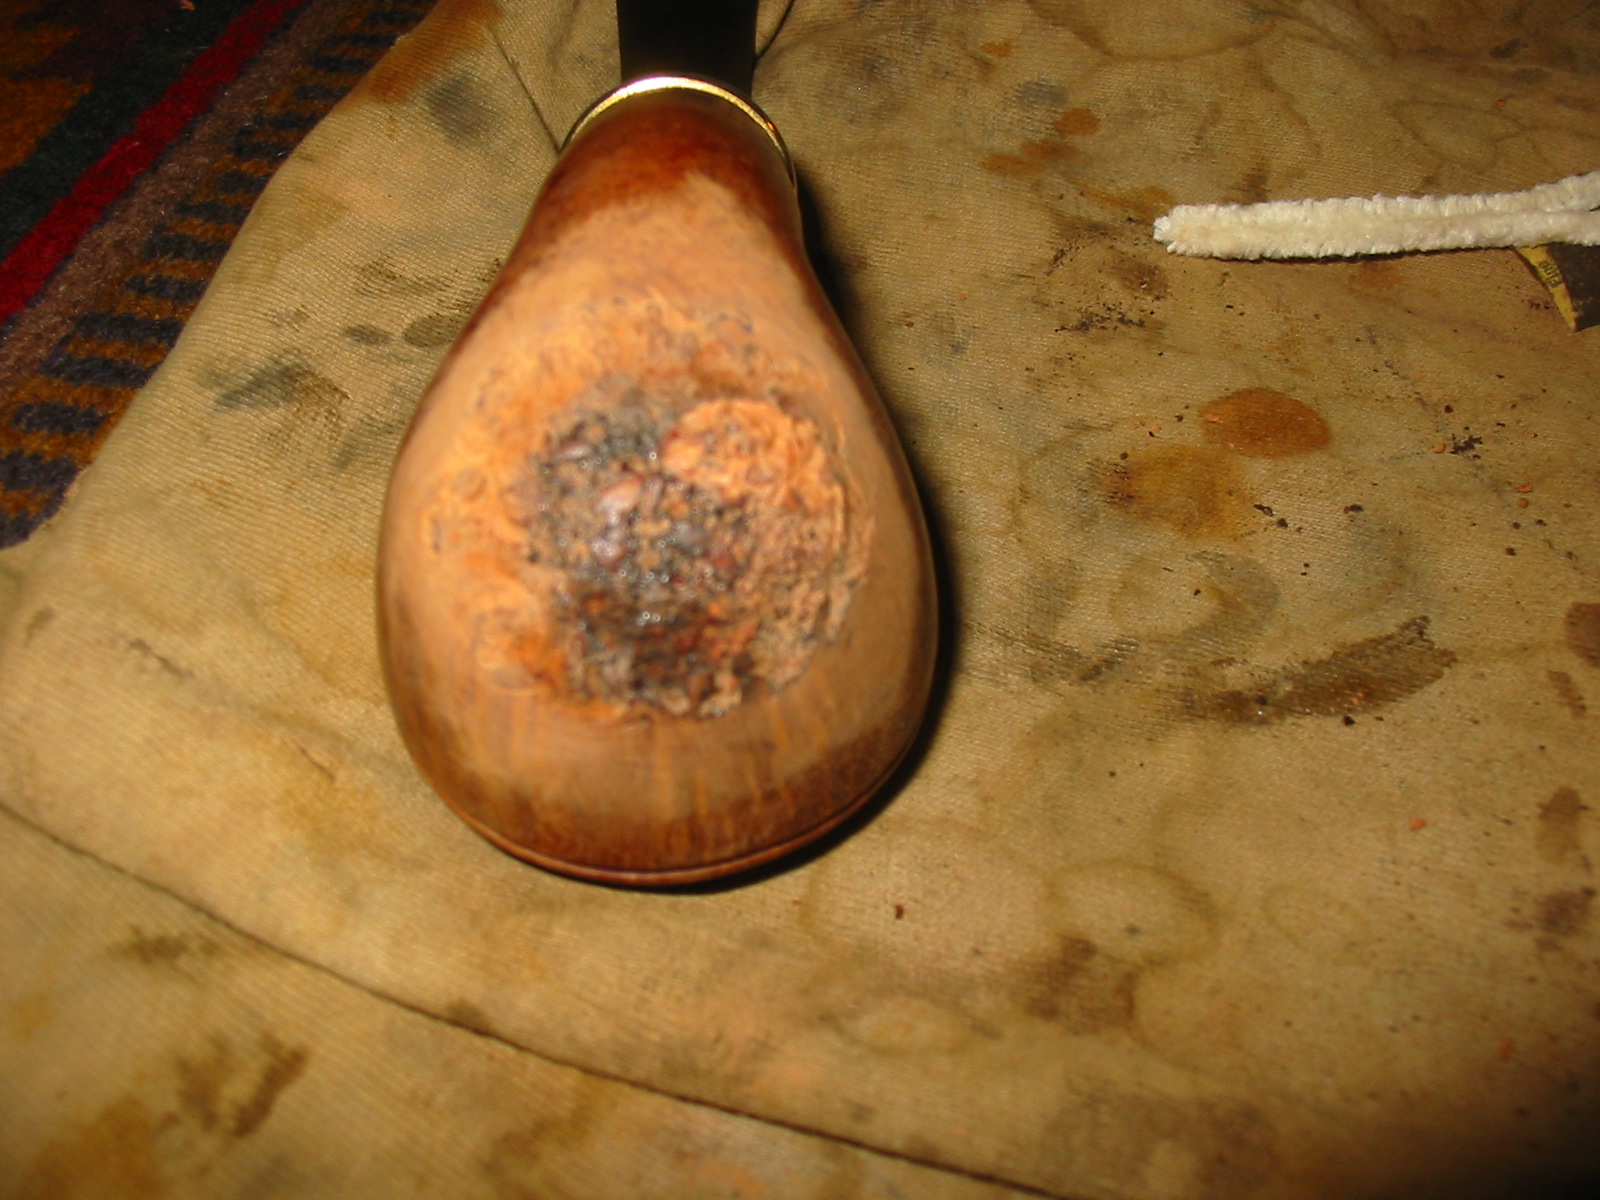
When the stain was dry I wiped it down with isopropyl alcohol to lighten it and bring out the grain. I wanted the black stain to settle into the grain and highlight the stripes. I wiped it down with acetone as well to further lighten the stain. I buffed the pipe with red Tripoli and White Diamond to further lighten the black undercoat. I stained it with a top coat of dark brown aniline stain, flamed and restained it for the coverage I wanted. It must be remembered at this point that this was not the finish coat but merely the way in which the repair is highlighted and makes it clear where I still need to do some work on the fills. The photos below show the repair and make it very clear where there was still work to do. This meant more filling of the crack with briar dust and superglue and more sanding. It also meant that I would need to restain that particular area of the pipe
IMG_5369

IMG_5370

IMG_5371

IMG_5372

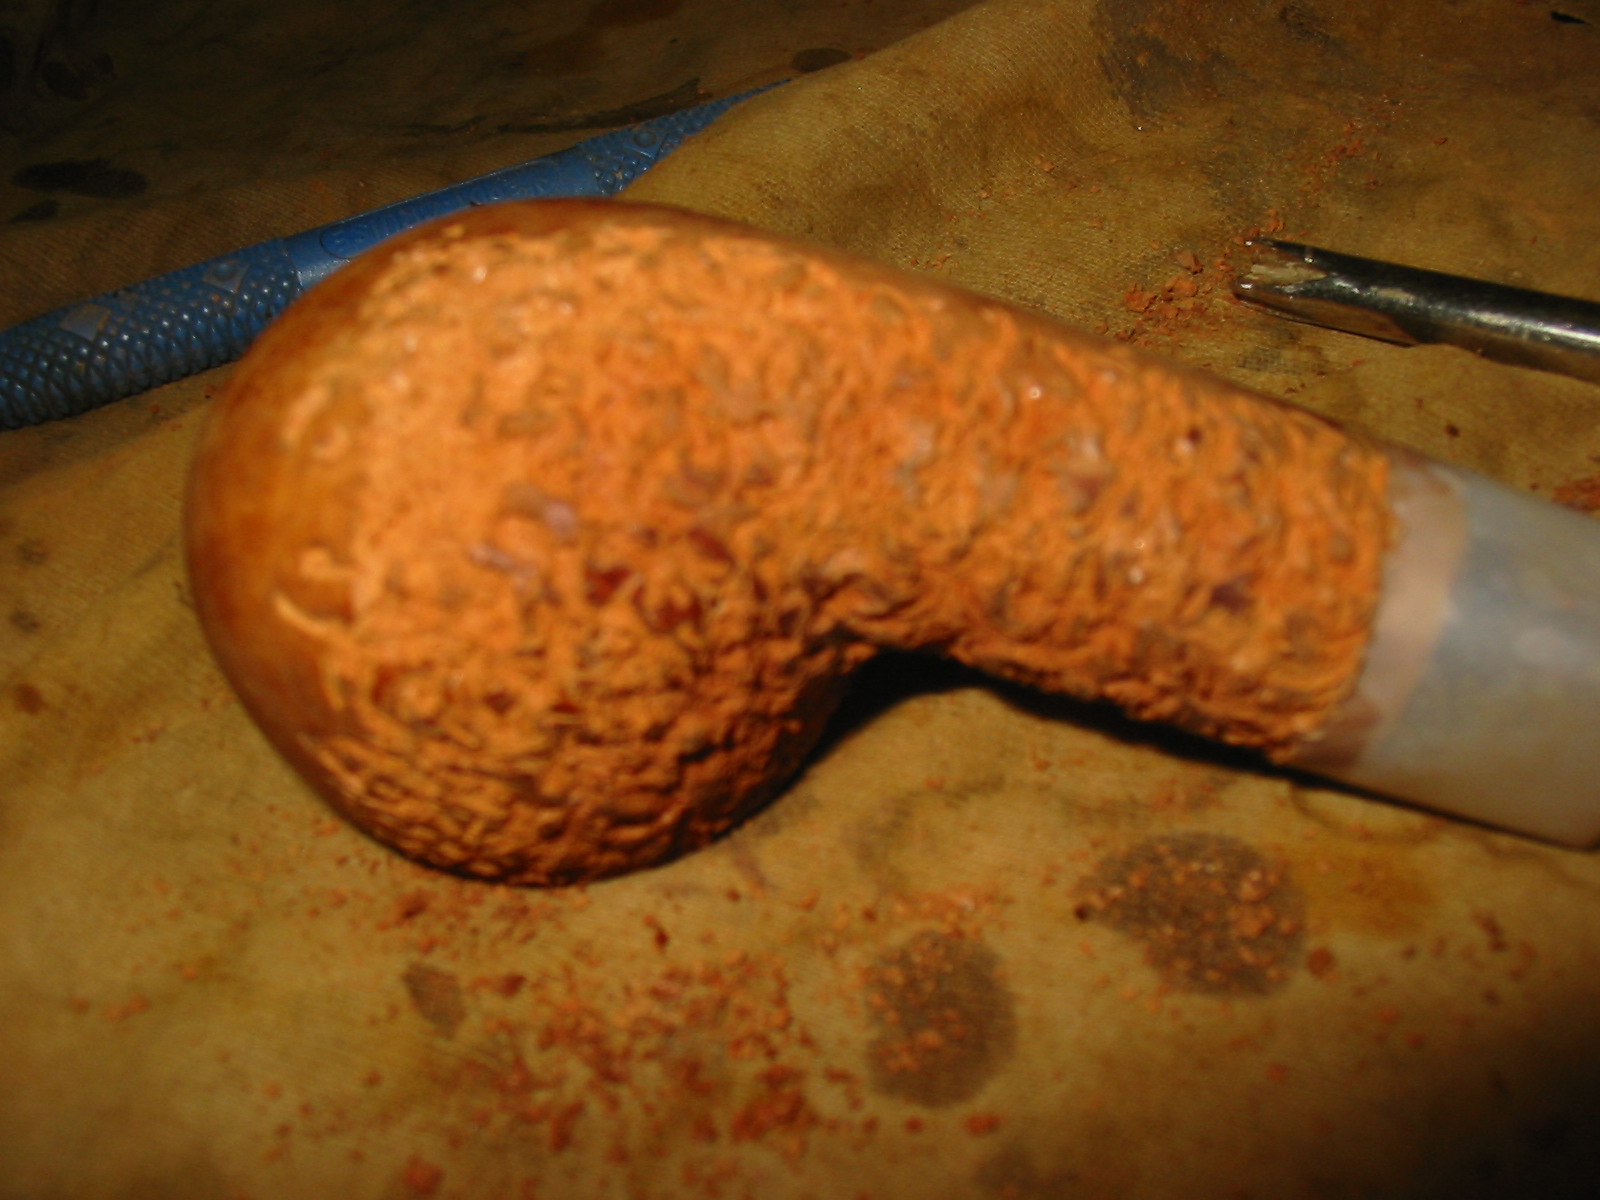
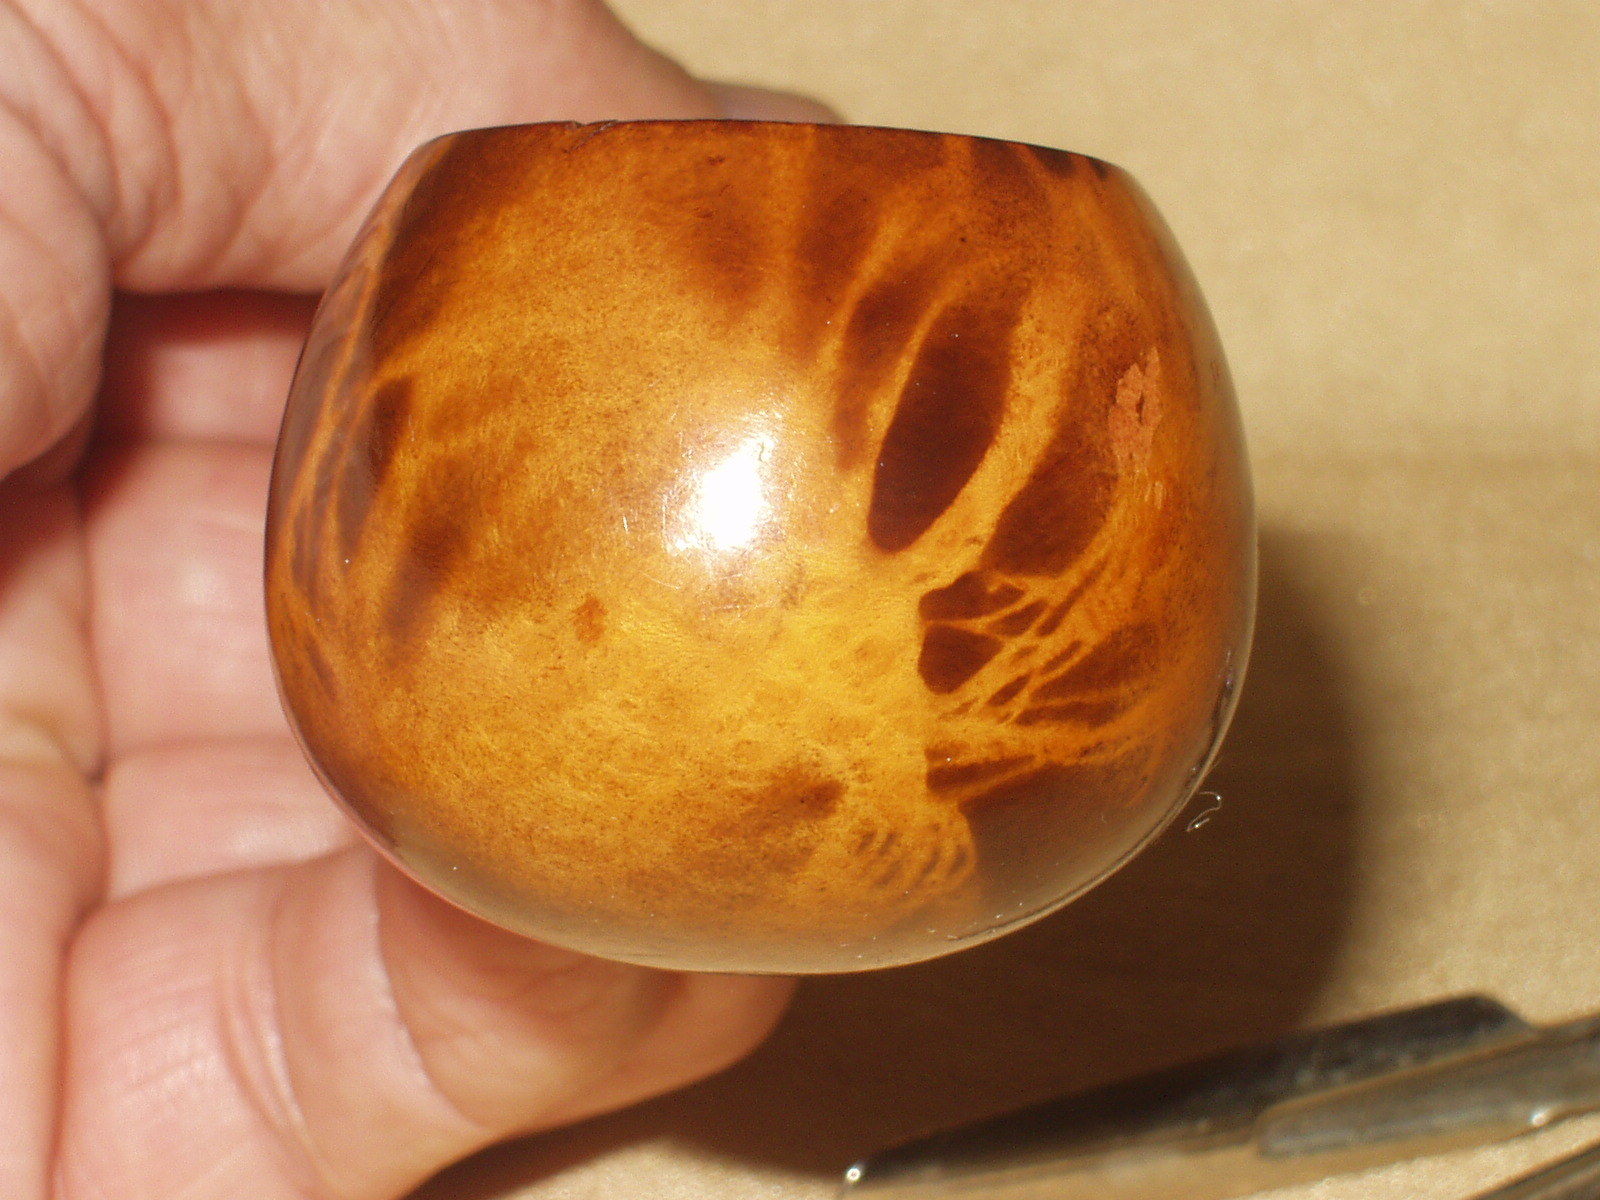
Once the pipe was at this point several things stood out to me. I really like the grain patterns on the bowl and shank and I need to continue to work on the patch until it was well blended. So I took it to the buffer and buffed it with White Diamond and then took it back to the work table to do some more work on the patch.I sanded down the area around the repair with 220 grit sandpaper and then packed in more briar dust with the dental pick. I added more superglue until the repair was mounded slightly. While this would take more work in terms of sanding, I knew it would make the patch as perfect as possible.

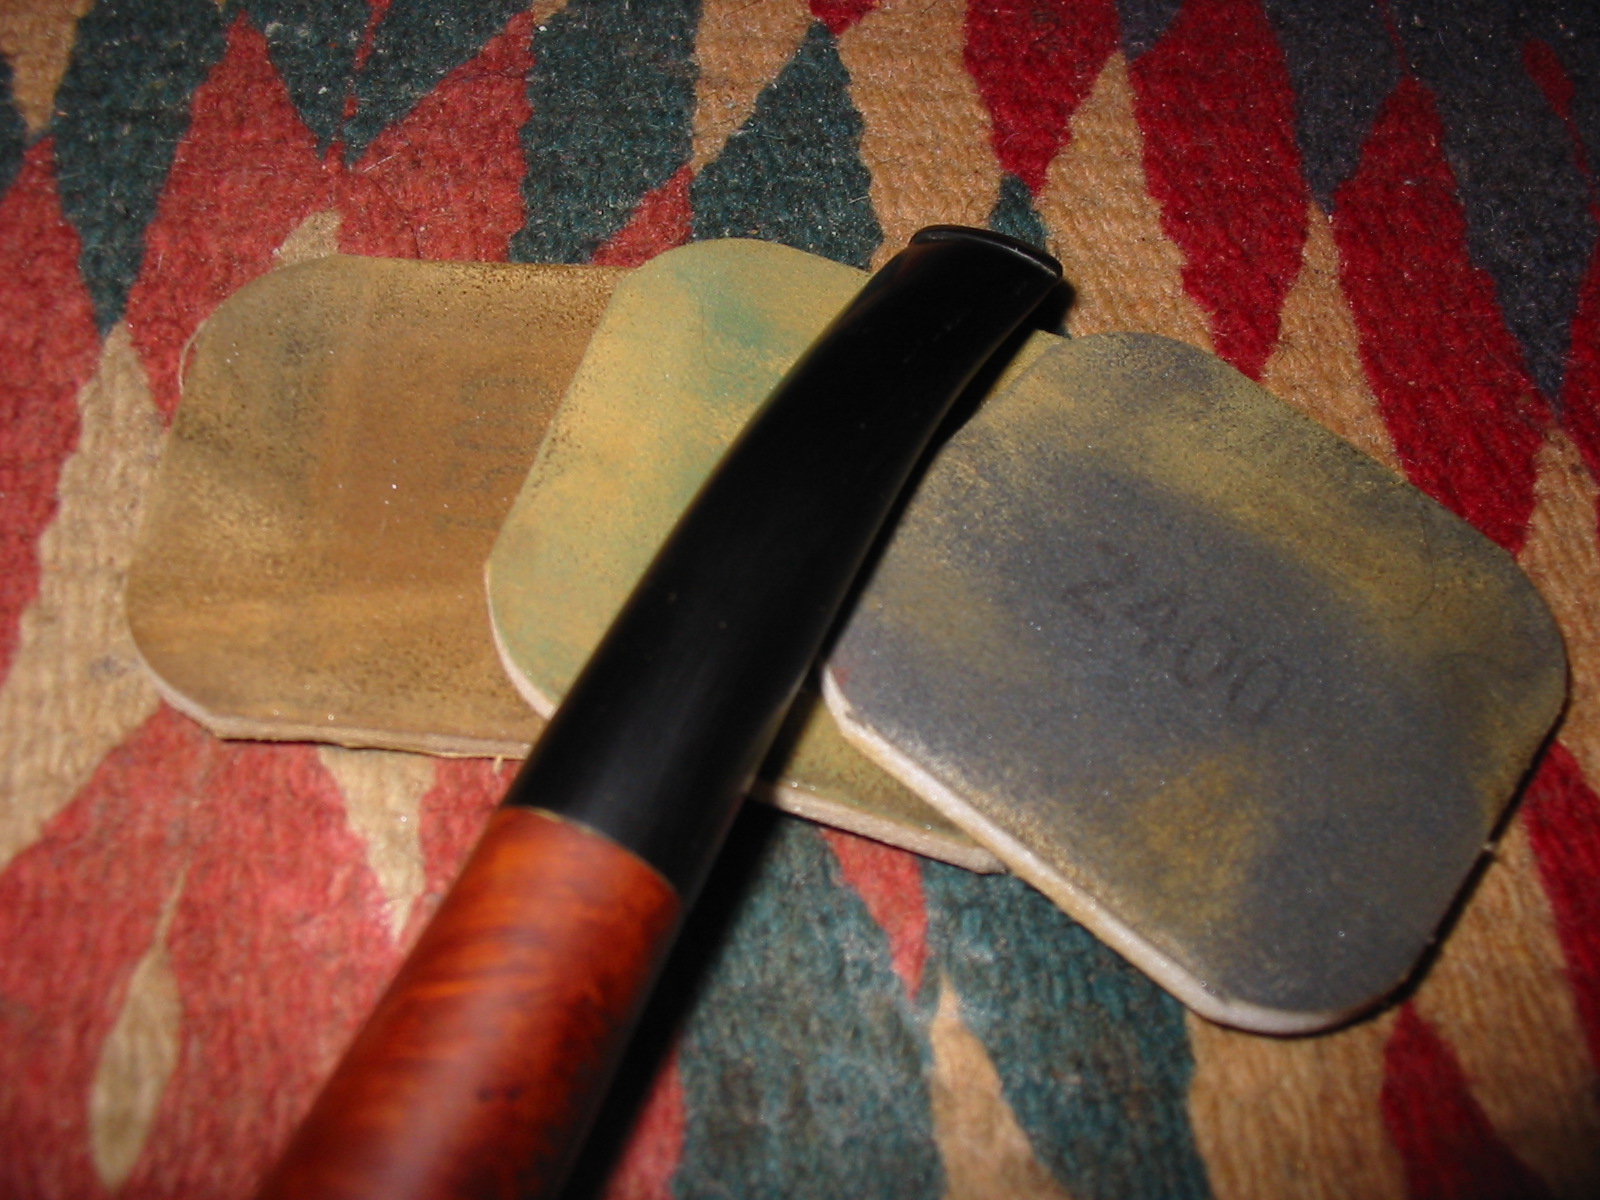
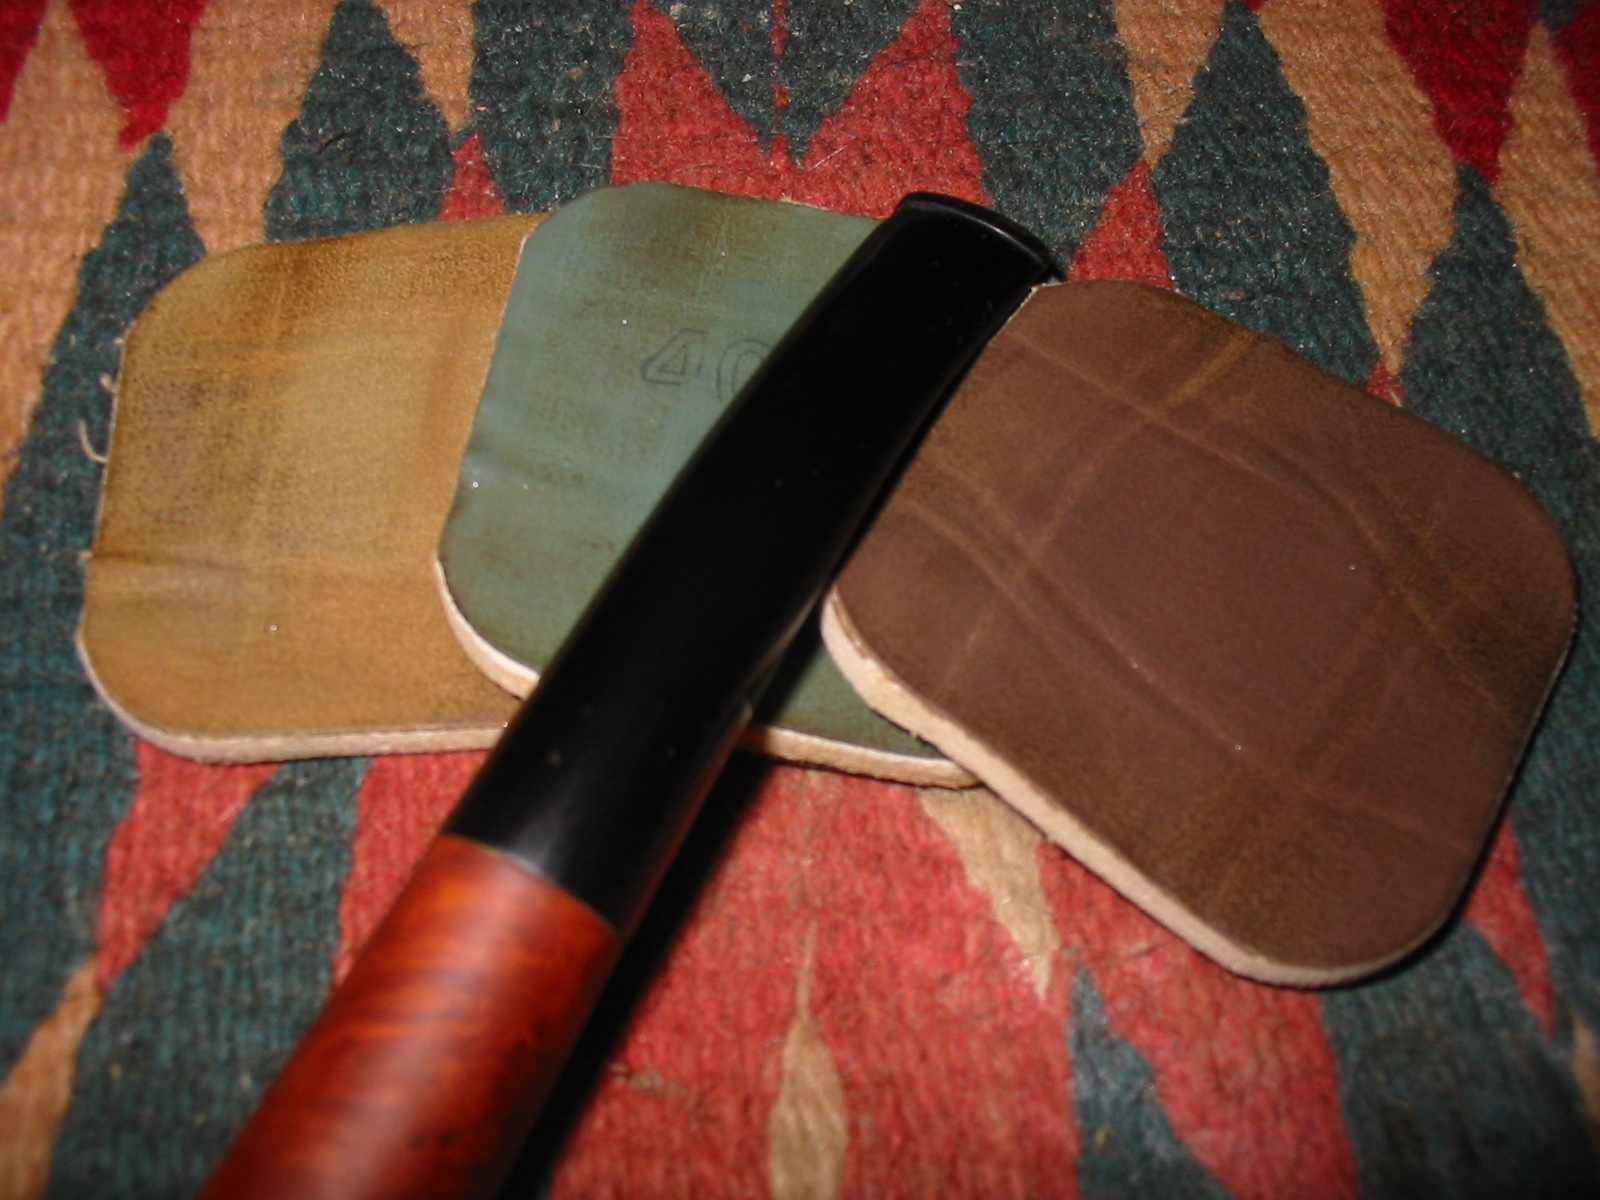
Once I had the patch sanded back to match the surface of the surrounding briar with the 220 grit sandpaper, I sanded it further with medium and fine grit sanding sponges and then with 1500-2400 grit micromesh sanding pads. The scrathes left behind by the sandpapers disappeared with the micromesh sanding. I restained the area with the black undercoat, sanded it again and then gave it a topcoat of dark brown aniline stain a second time. I did not bother sanding and restaining the whole pipe as my plan was to sand the entire bowl to create the contrast I wanted with the two stains. I sanded the pipe with 1500-2400 grit micromesh sanding pads to blend in the freshly stained portion of the pipe with the rest. The next three photos show the status of the repair at this point.
IMG_5377

IMG_5378

IMG_5379

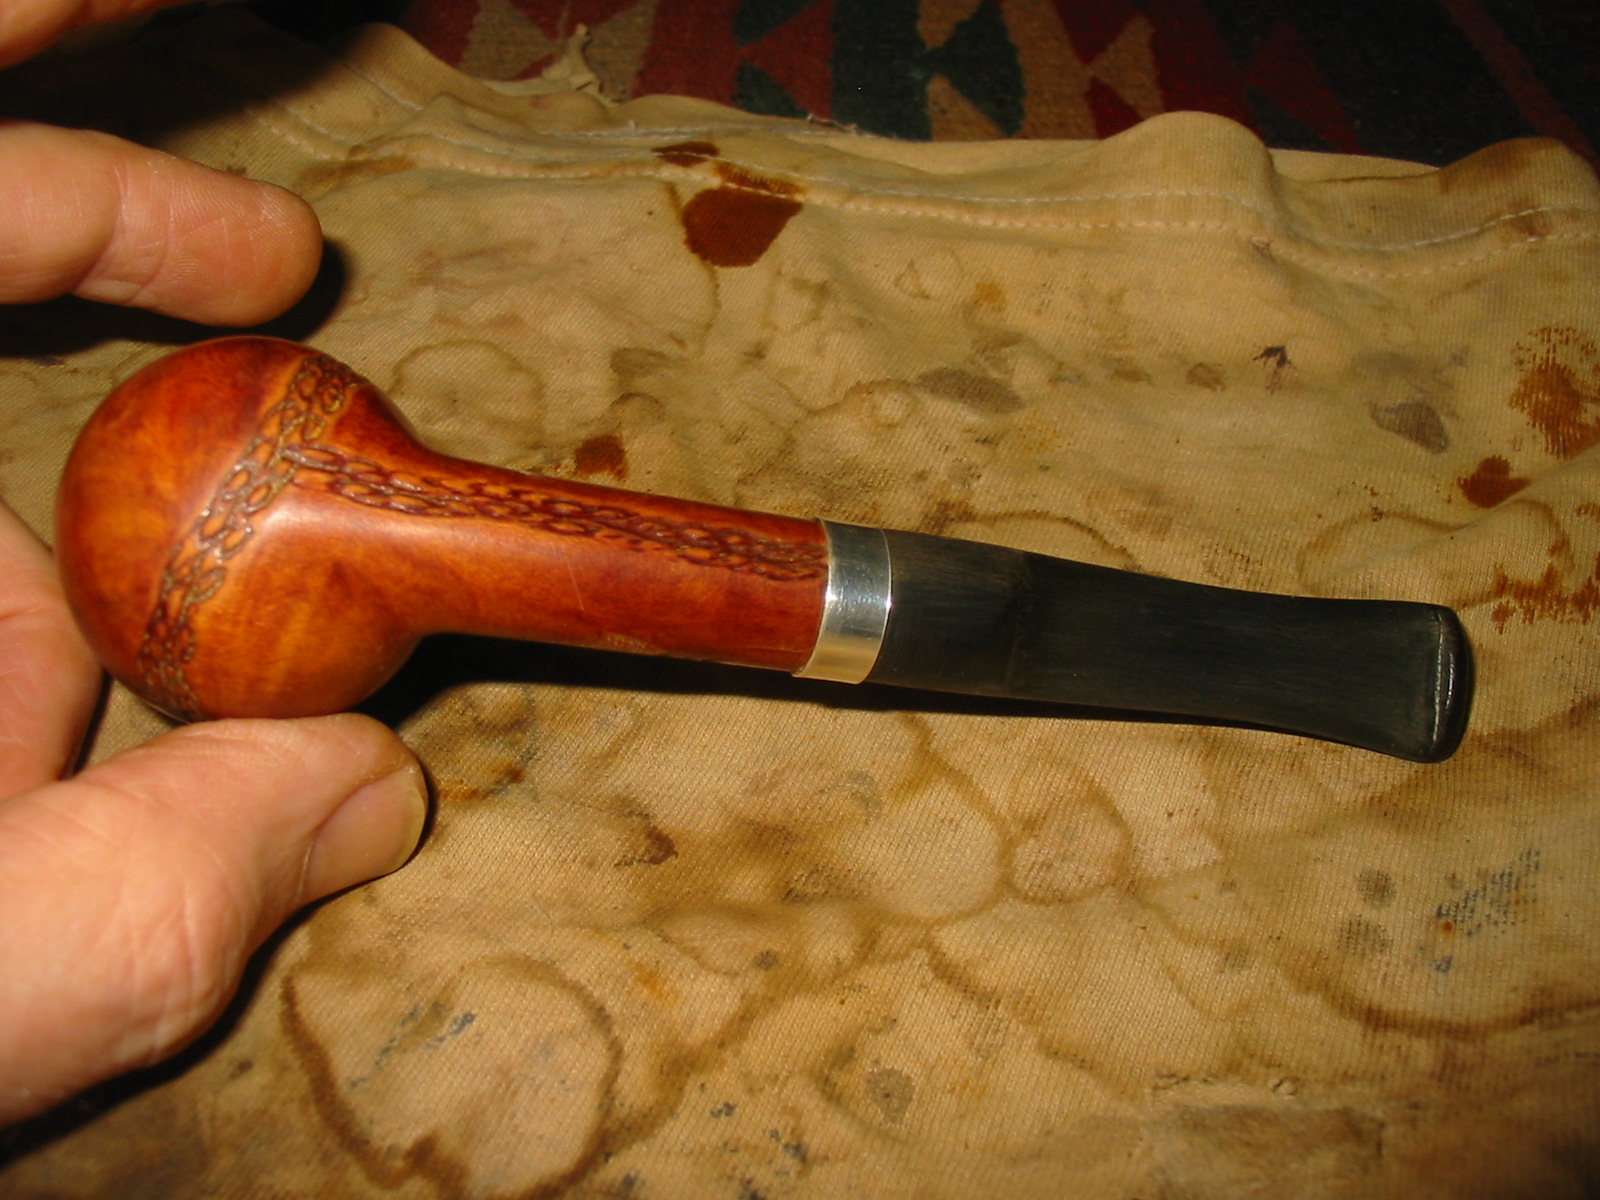
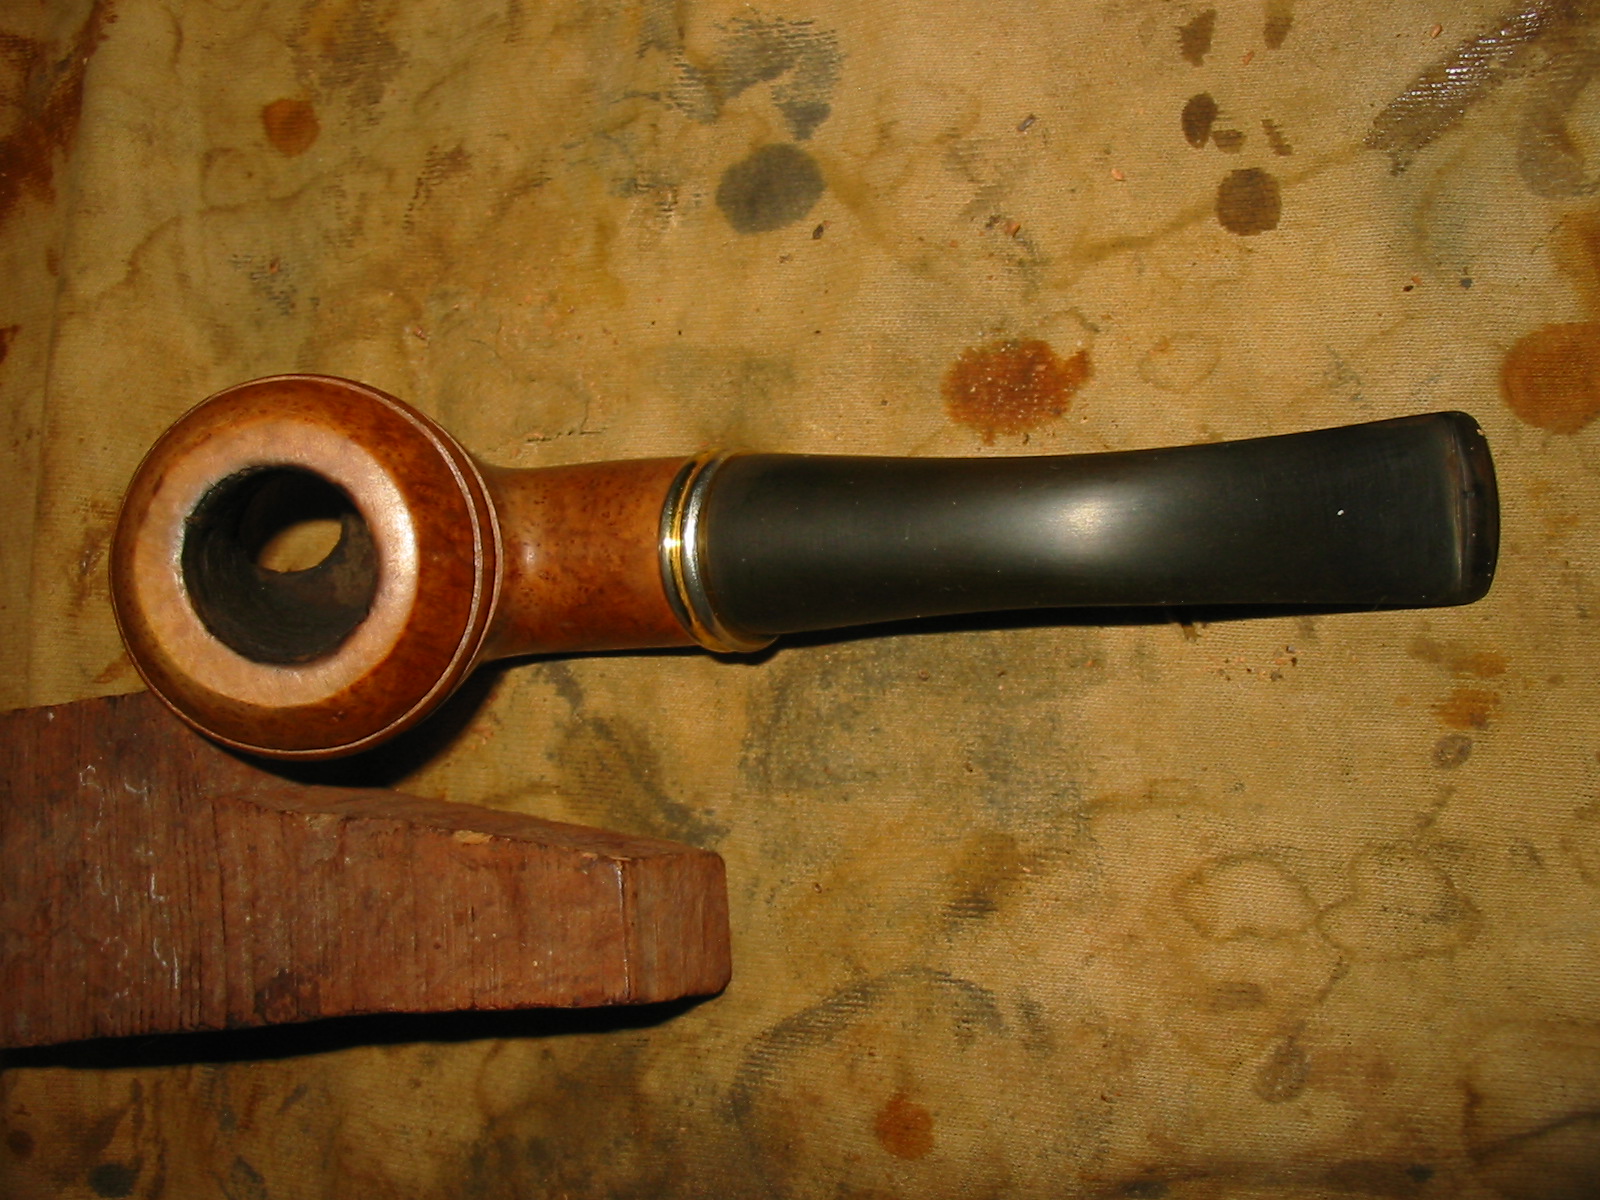
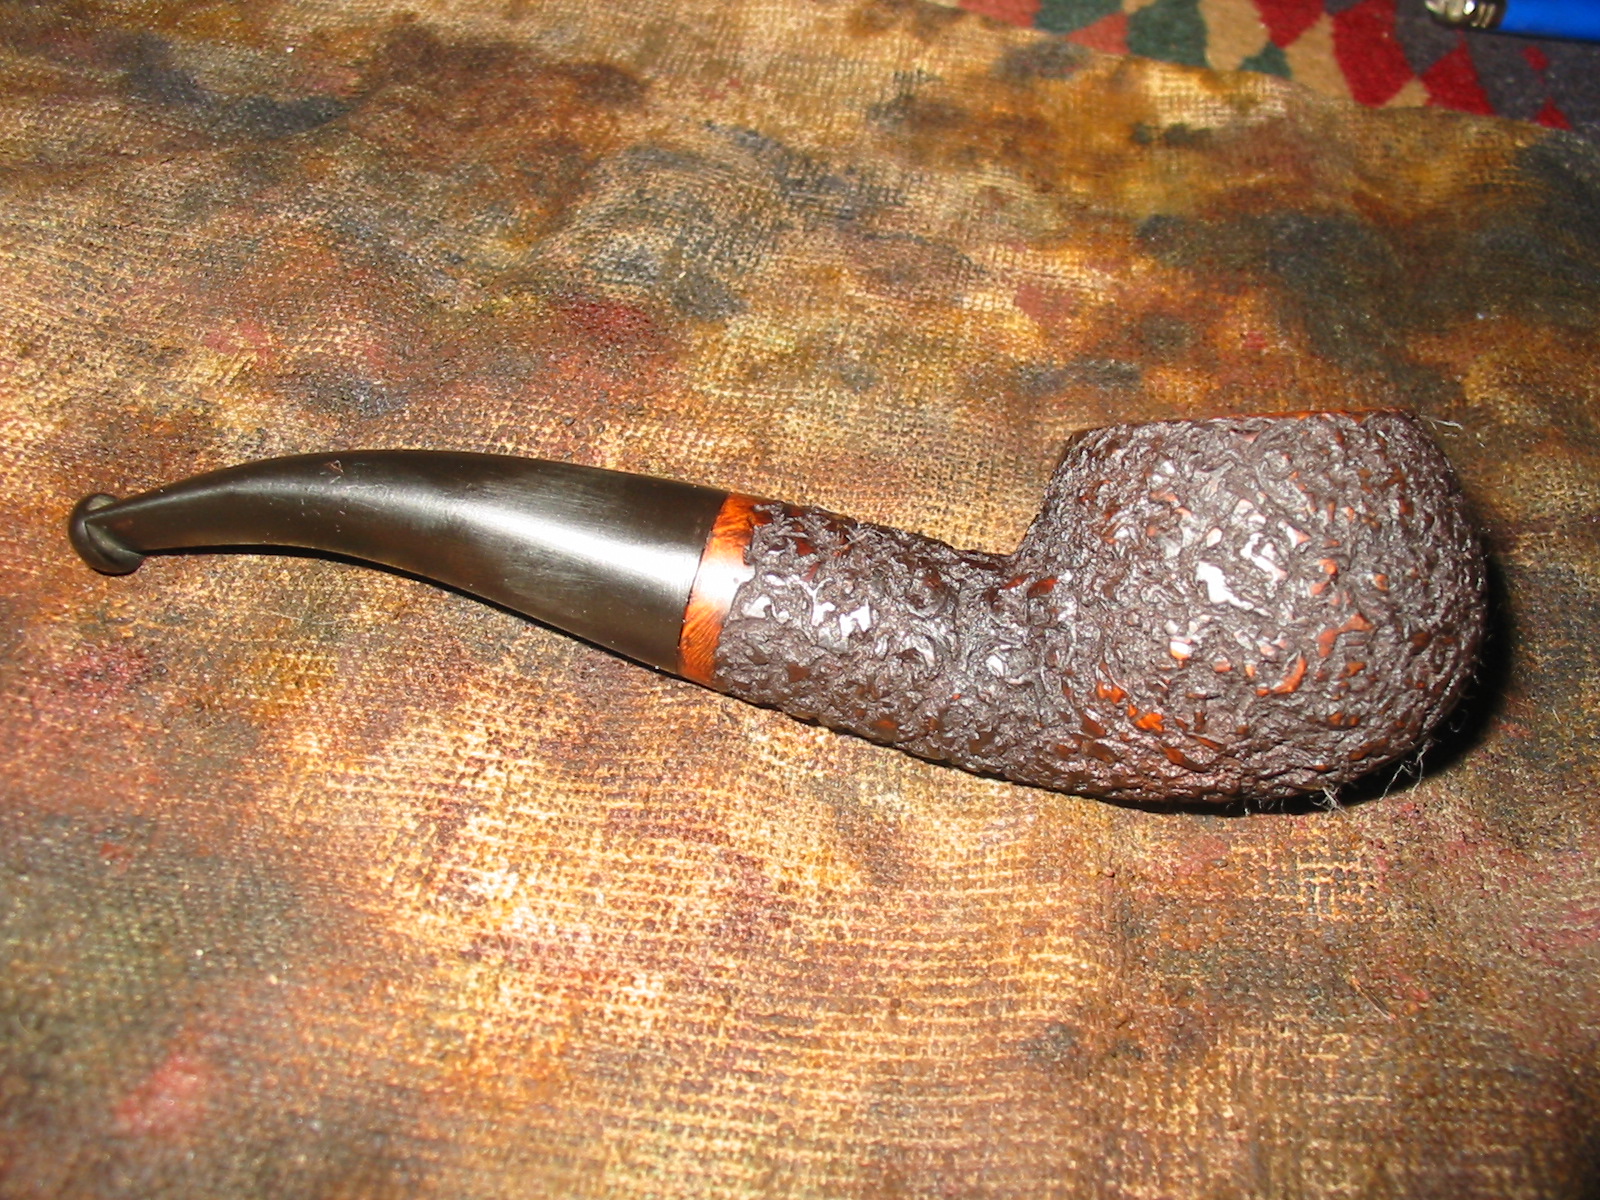
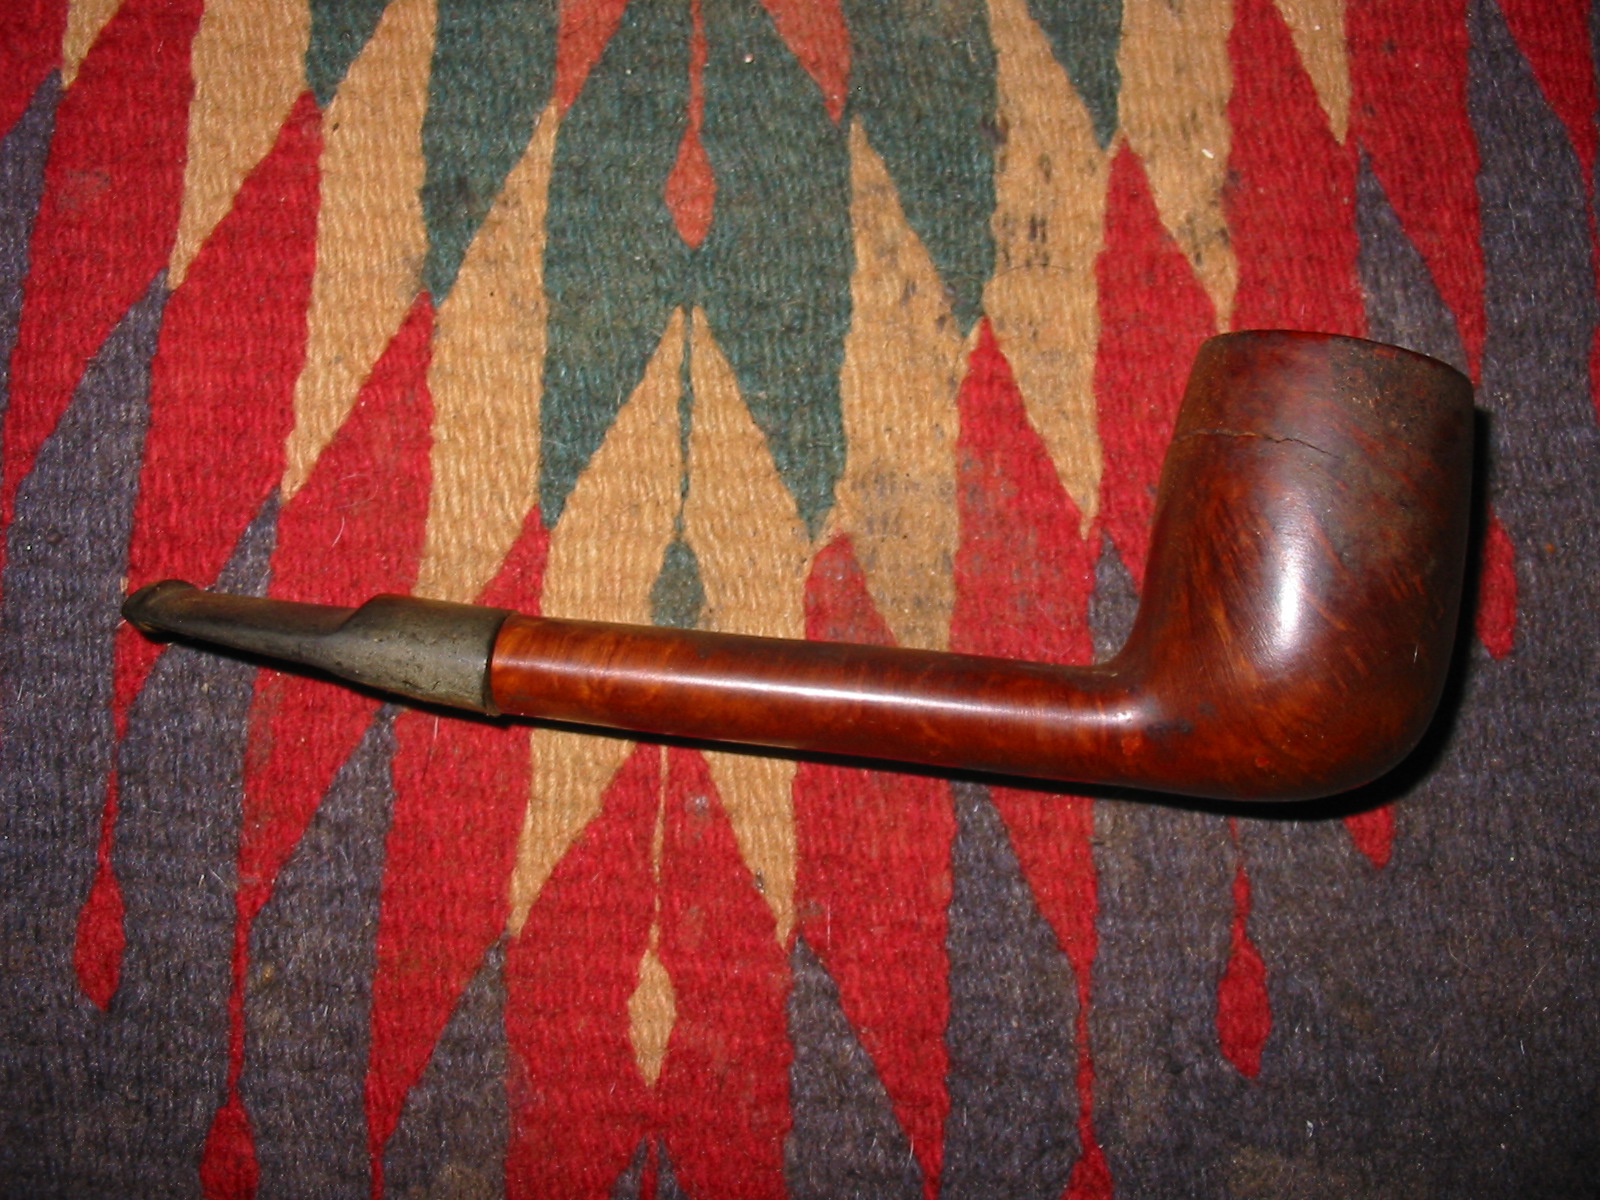
I continued to sand the bowl and shank being careful around the stamping on the top and bottom of the shank with the micromesh sanding pads until the top stain was almost translucent. I wanted the top coat to be there but I wanted the grain to pop through it. I also wanted the colour to blend in such a way that the dark repair would not be hidden completely but would be minimized. The next four photos show the pipe after all of the sanding and a buff with White Diamond to enhance the shine.
IMG_5373

IMG_5374

IMG_5375

IMG_5376

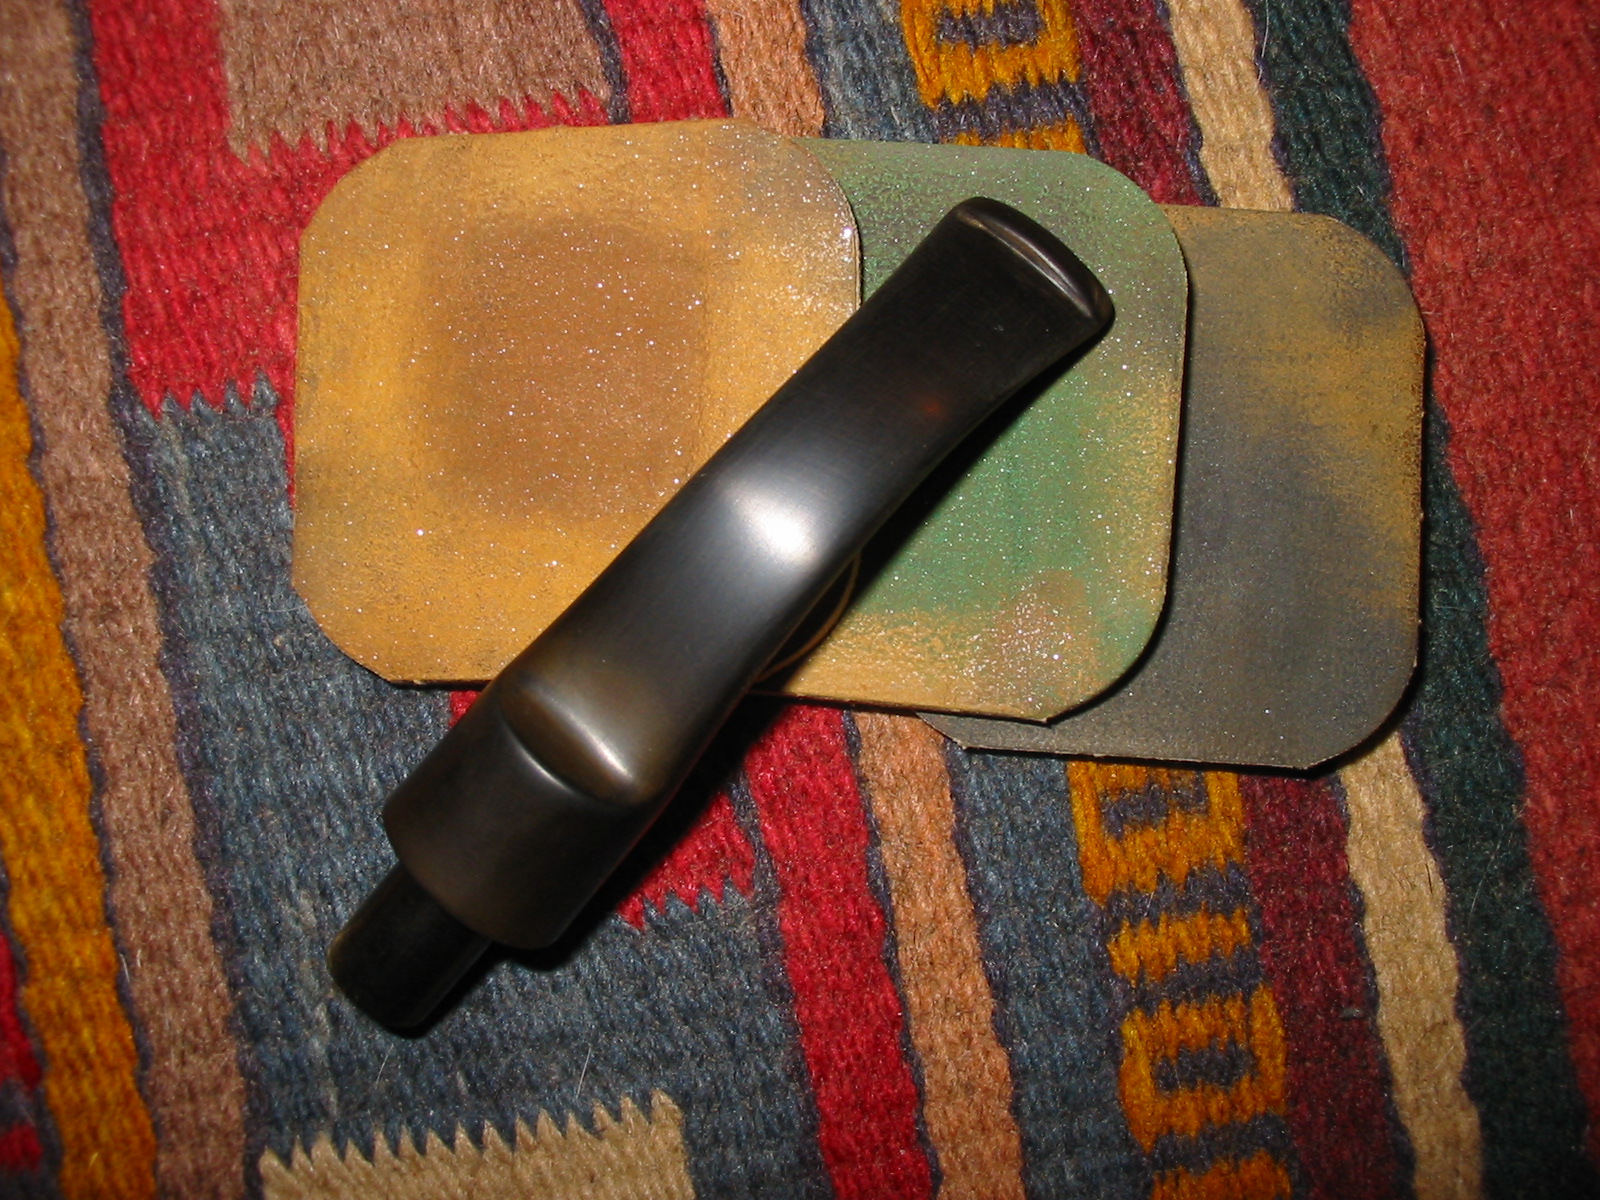
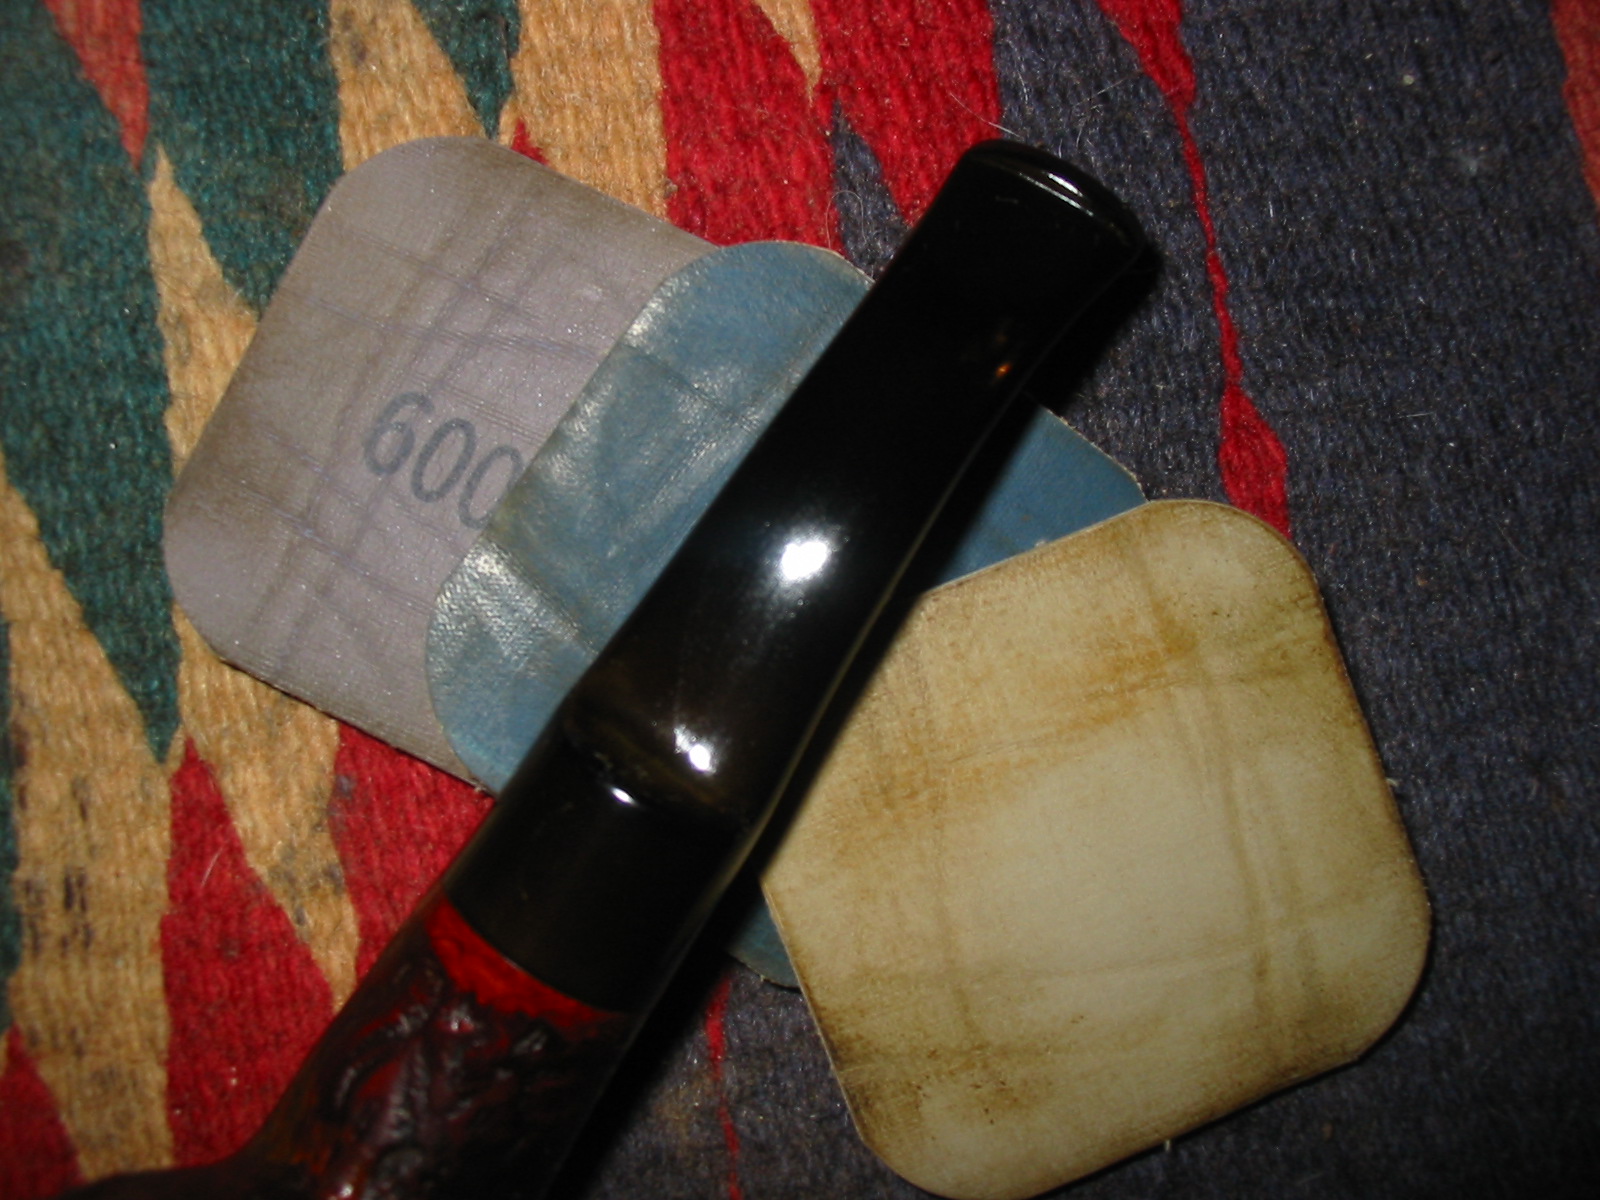
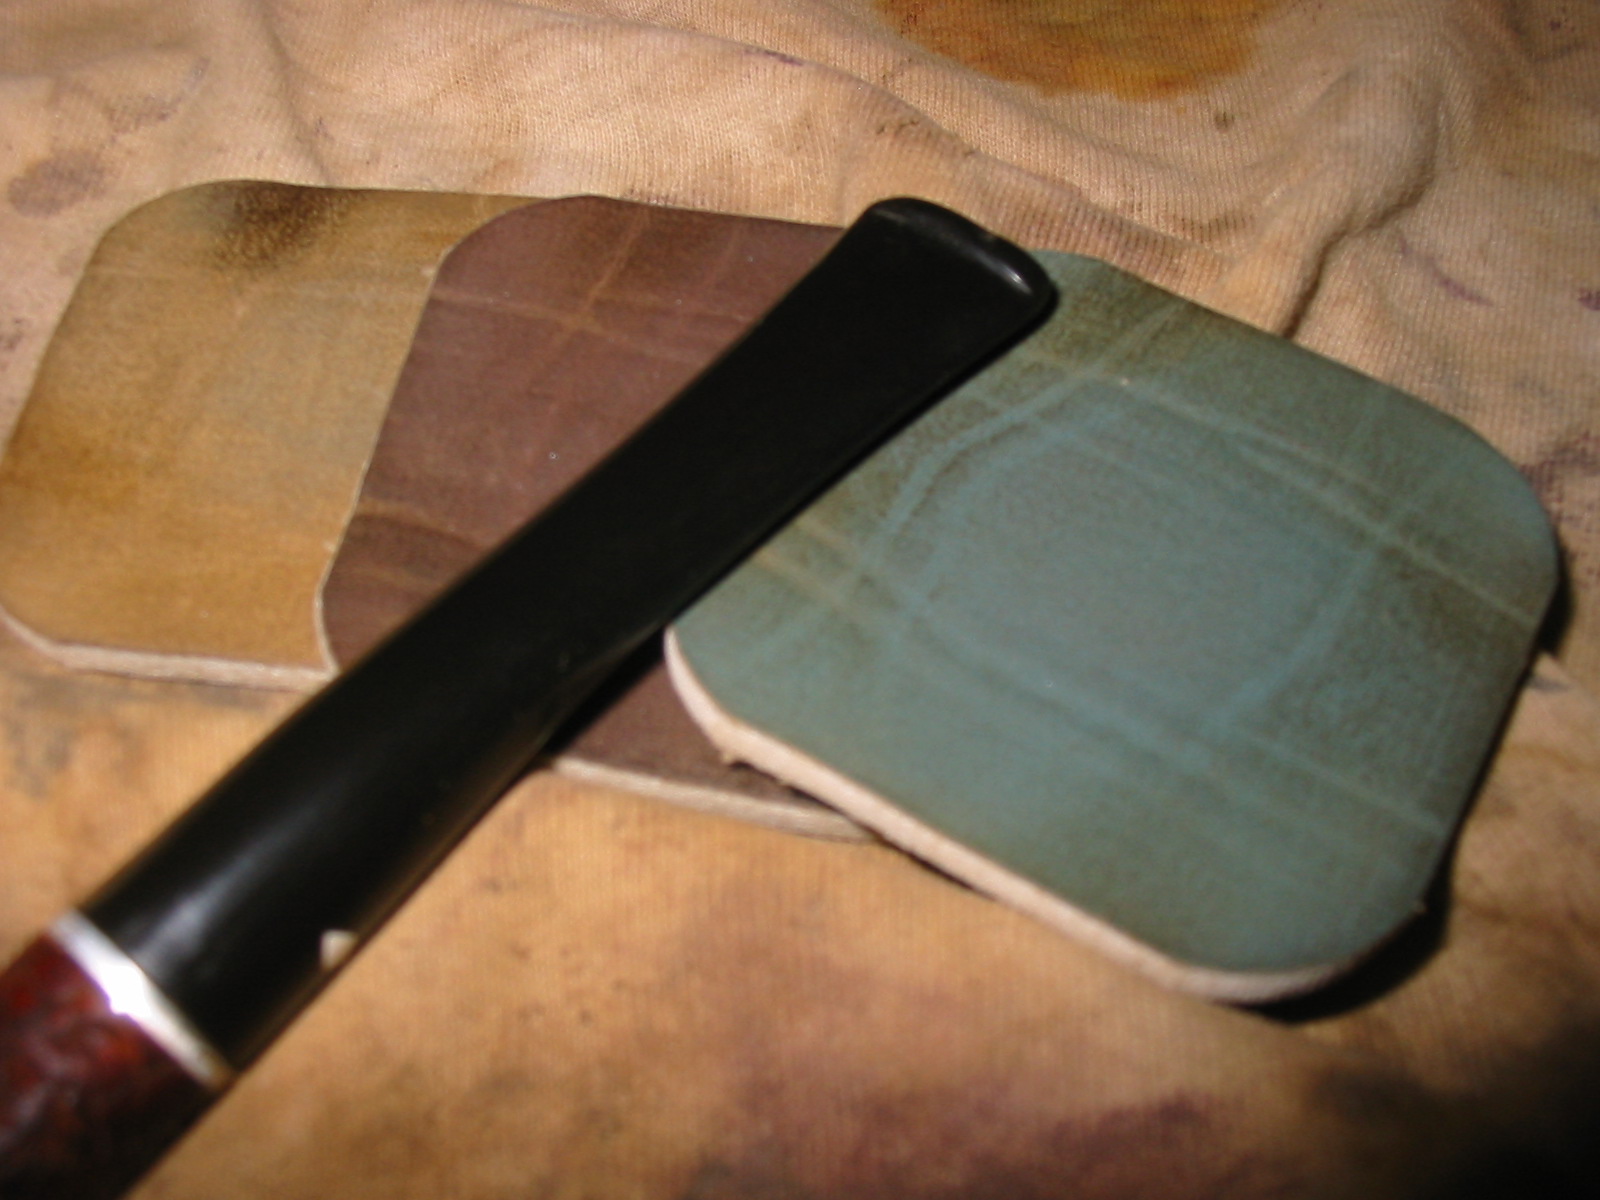
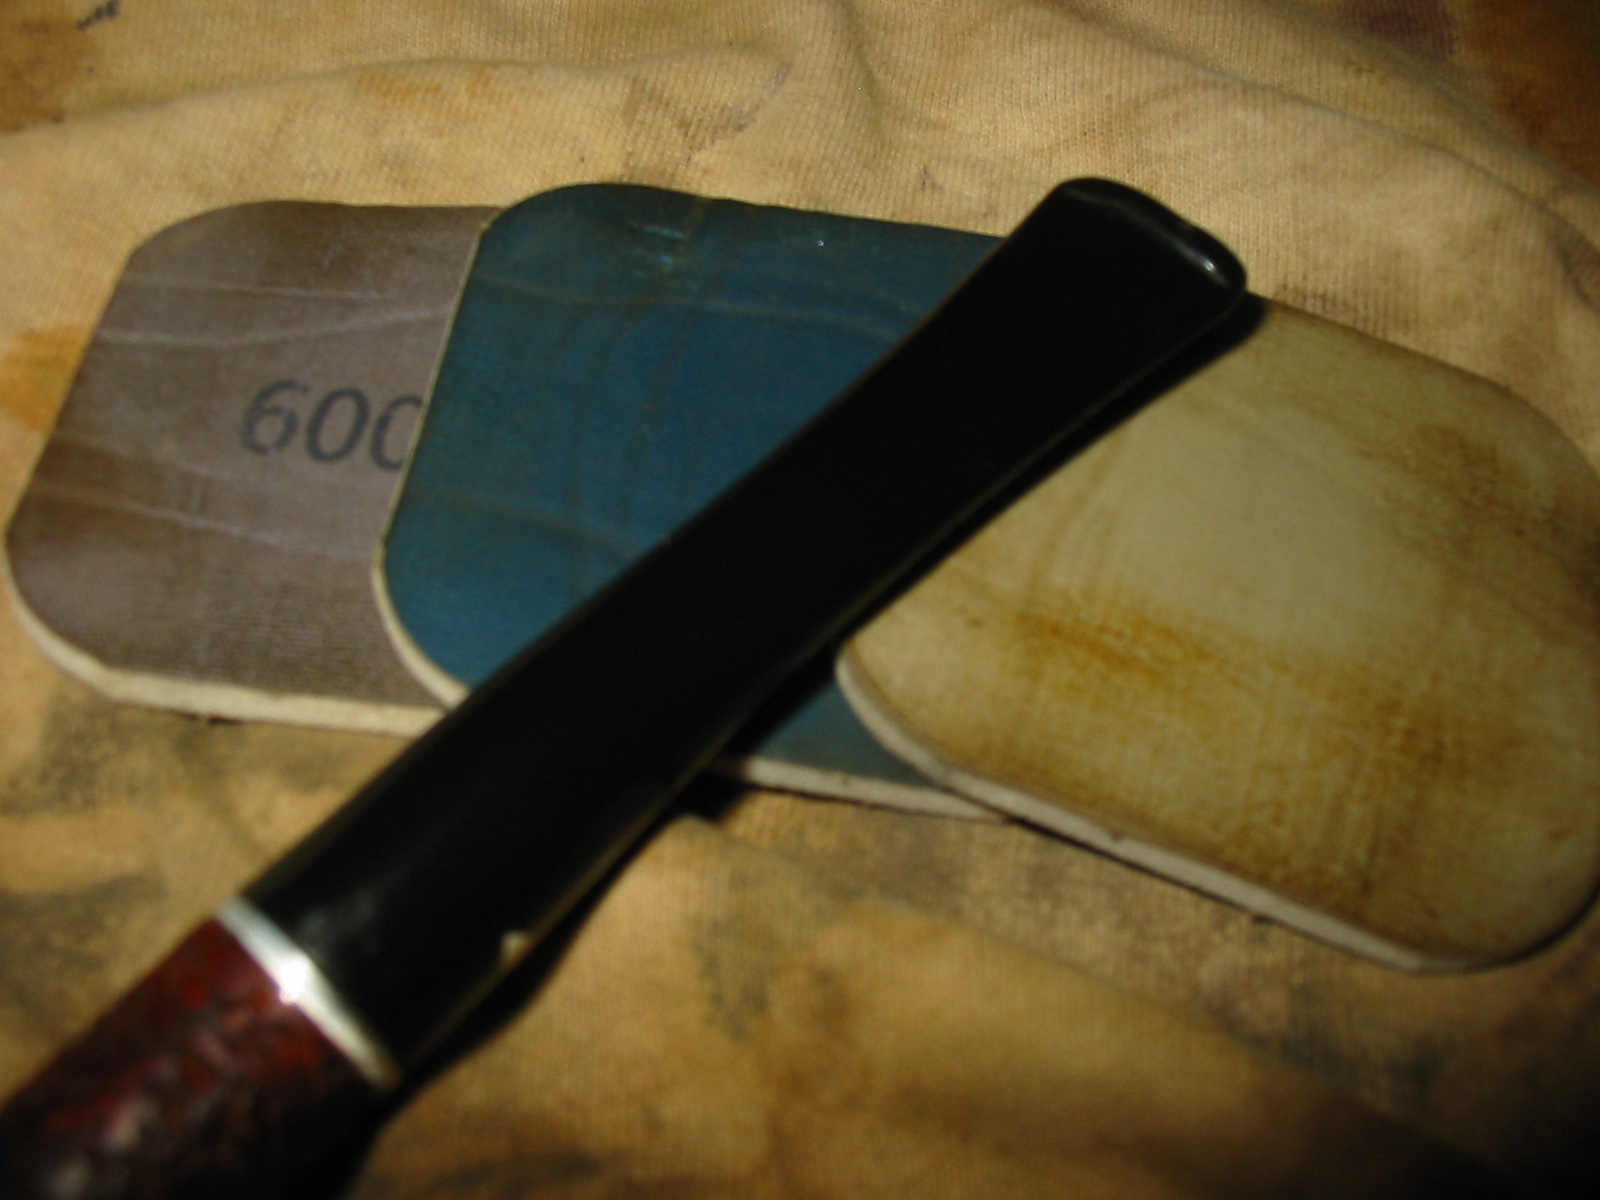
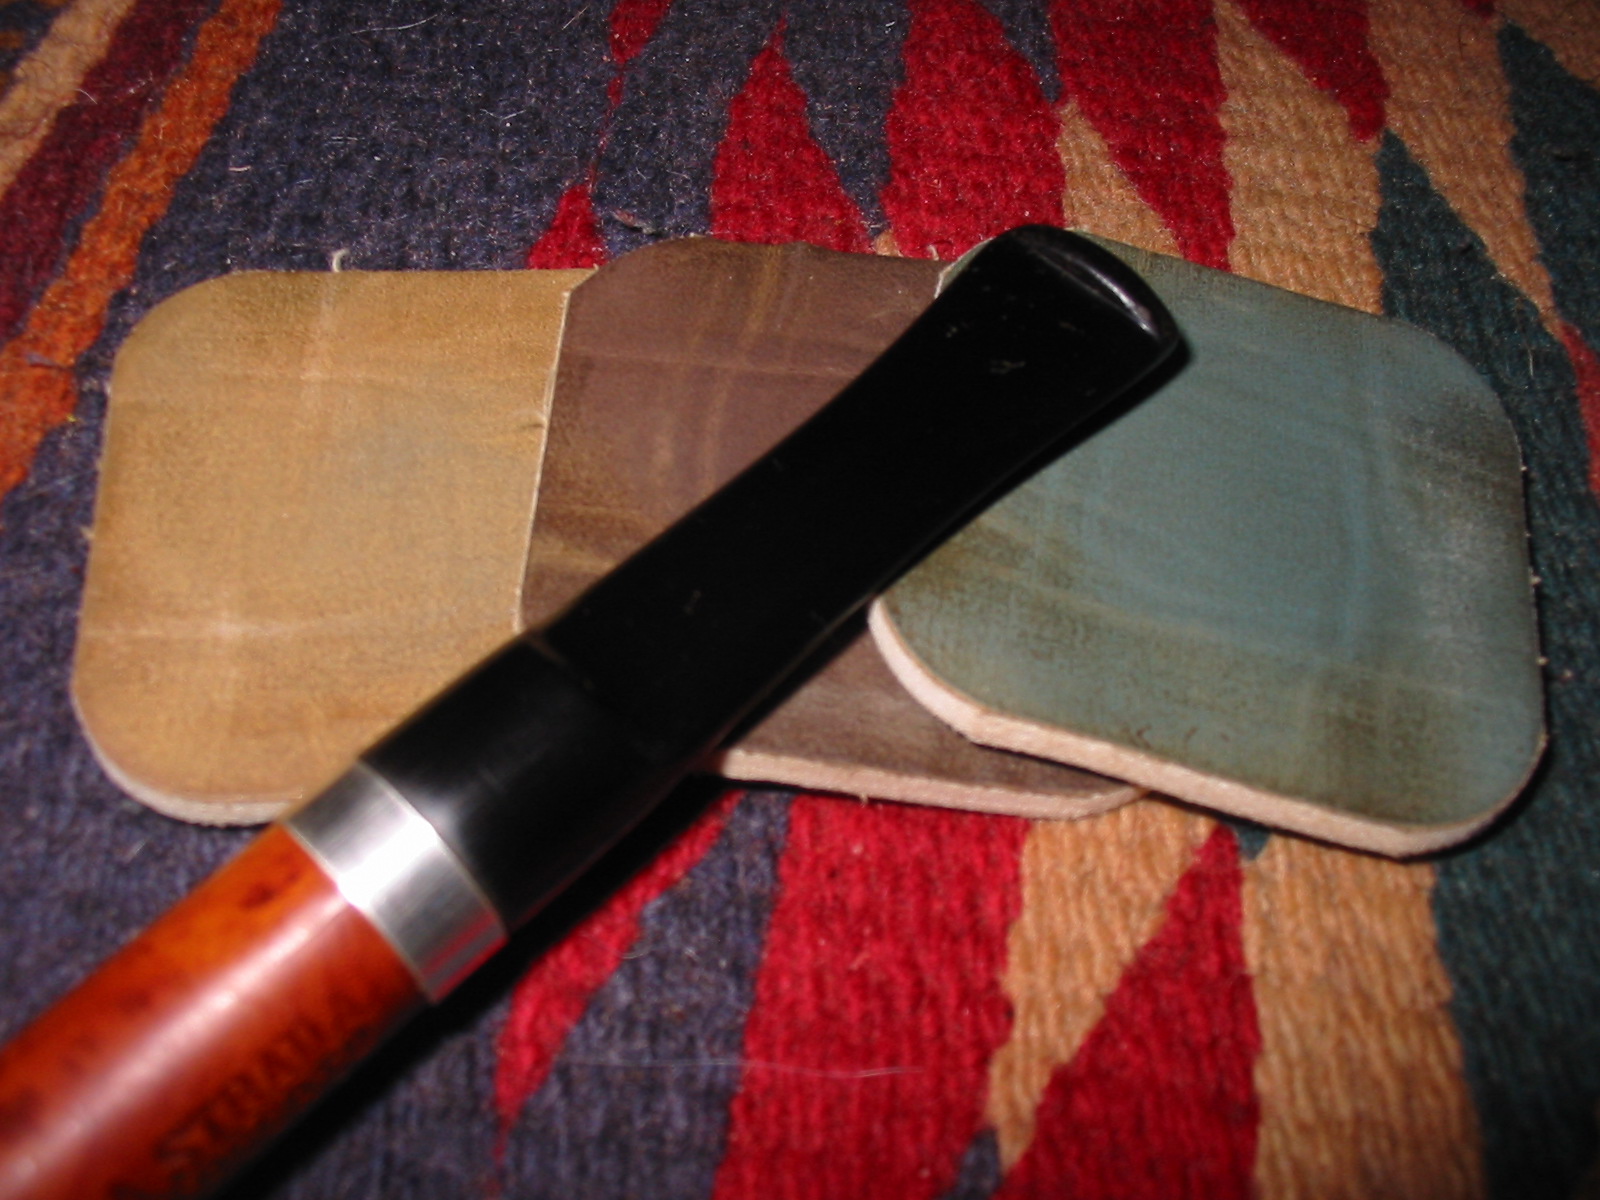
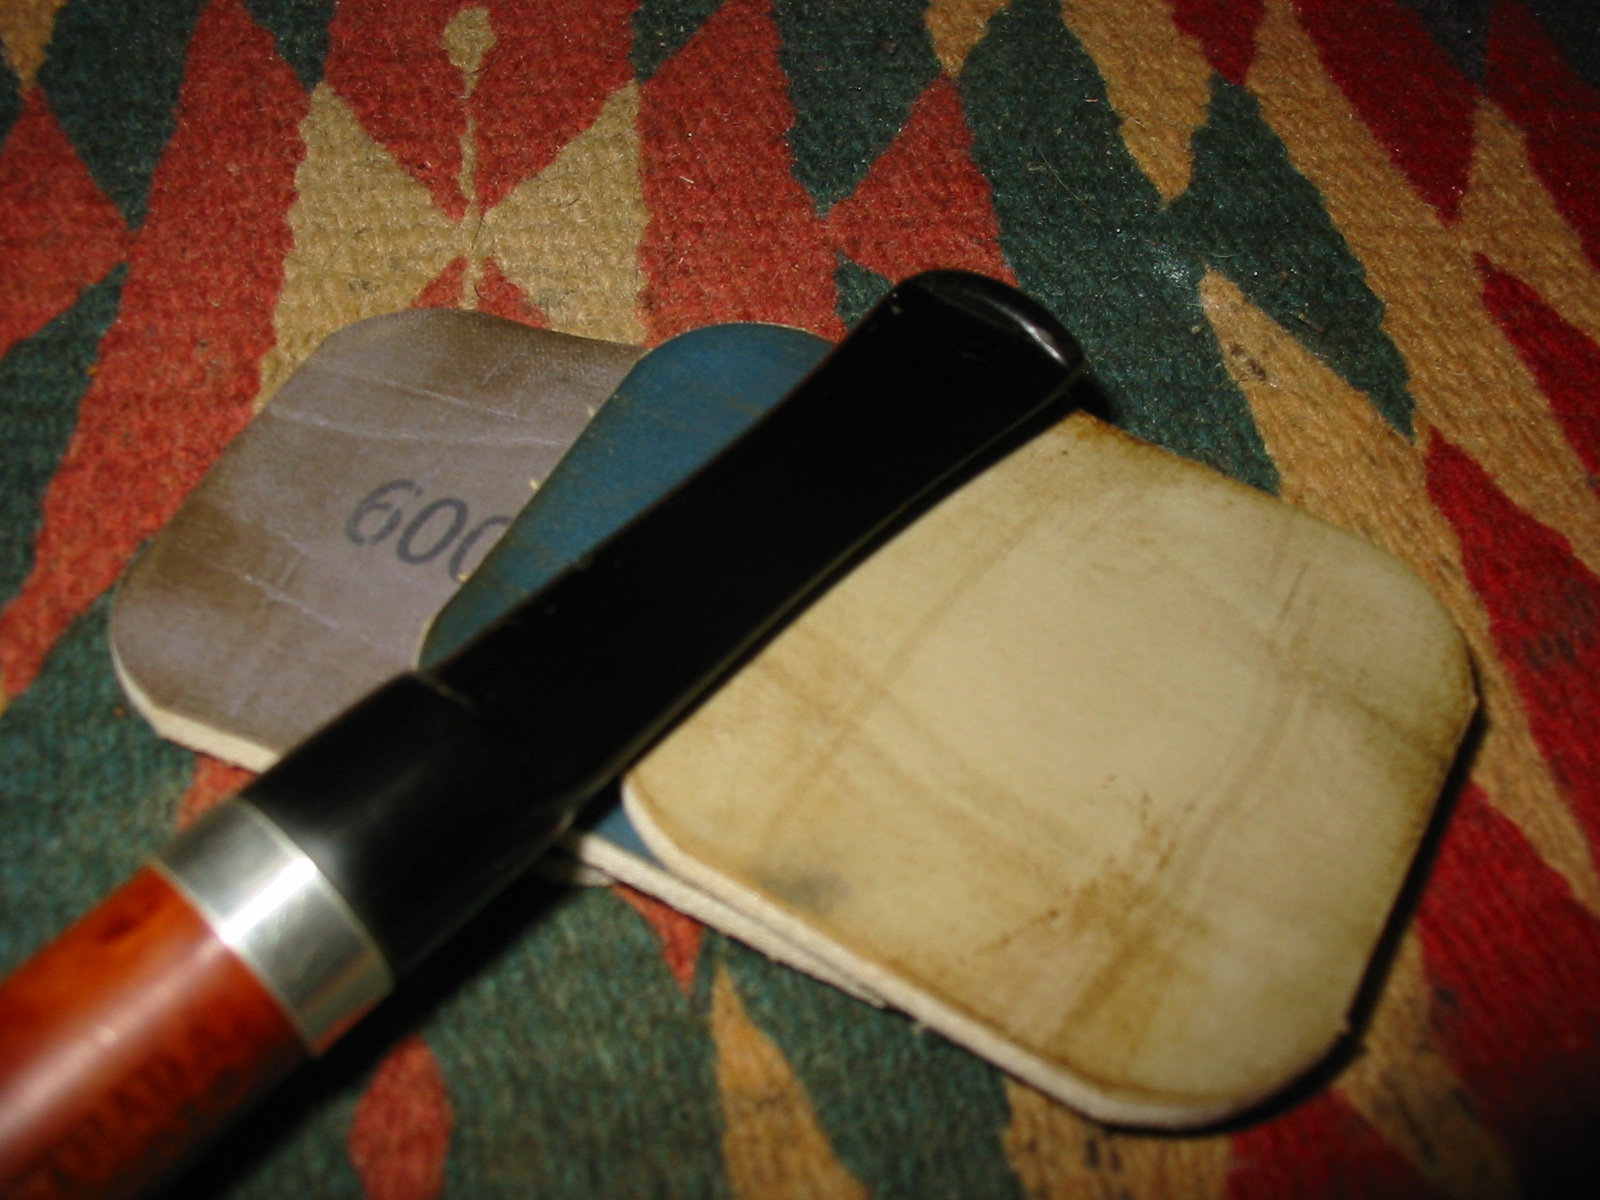
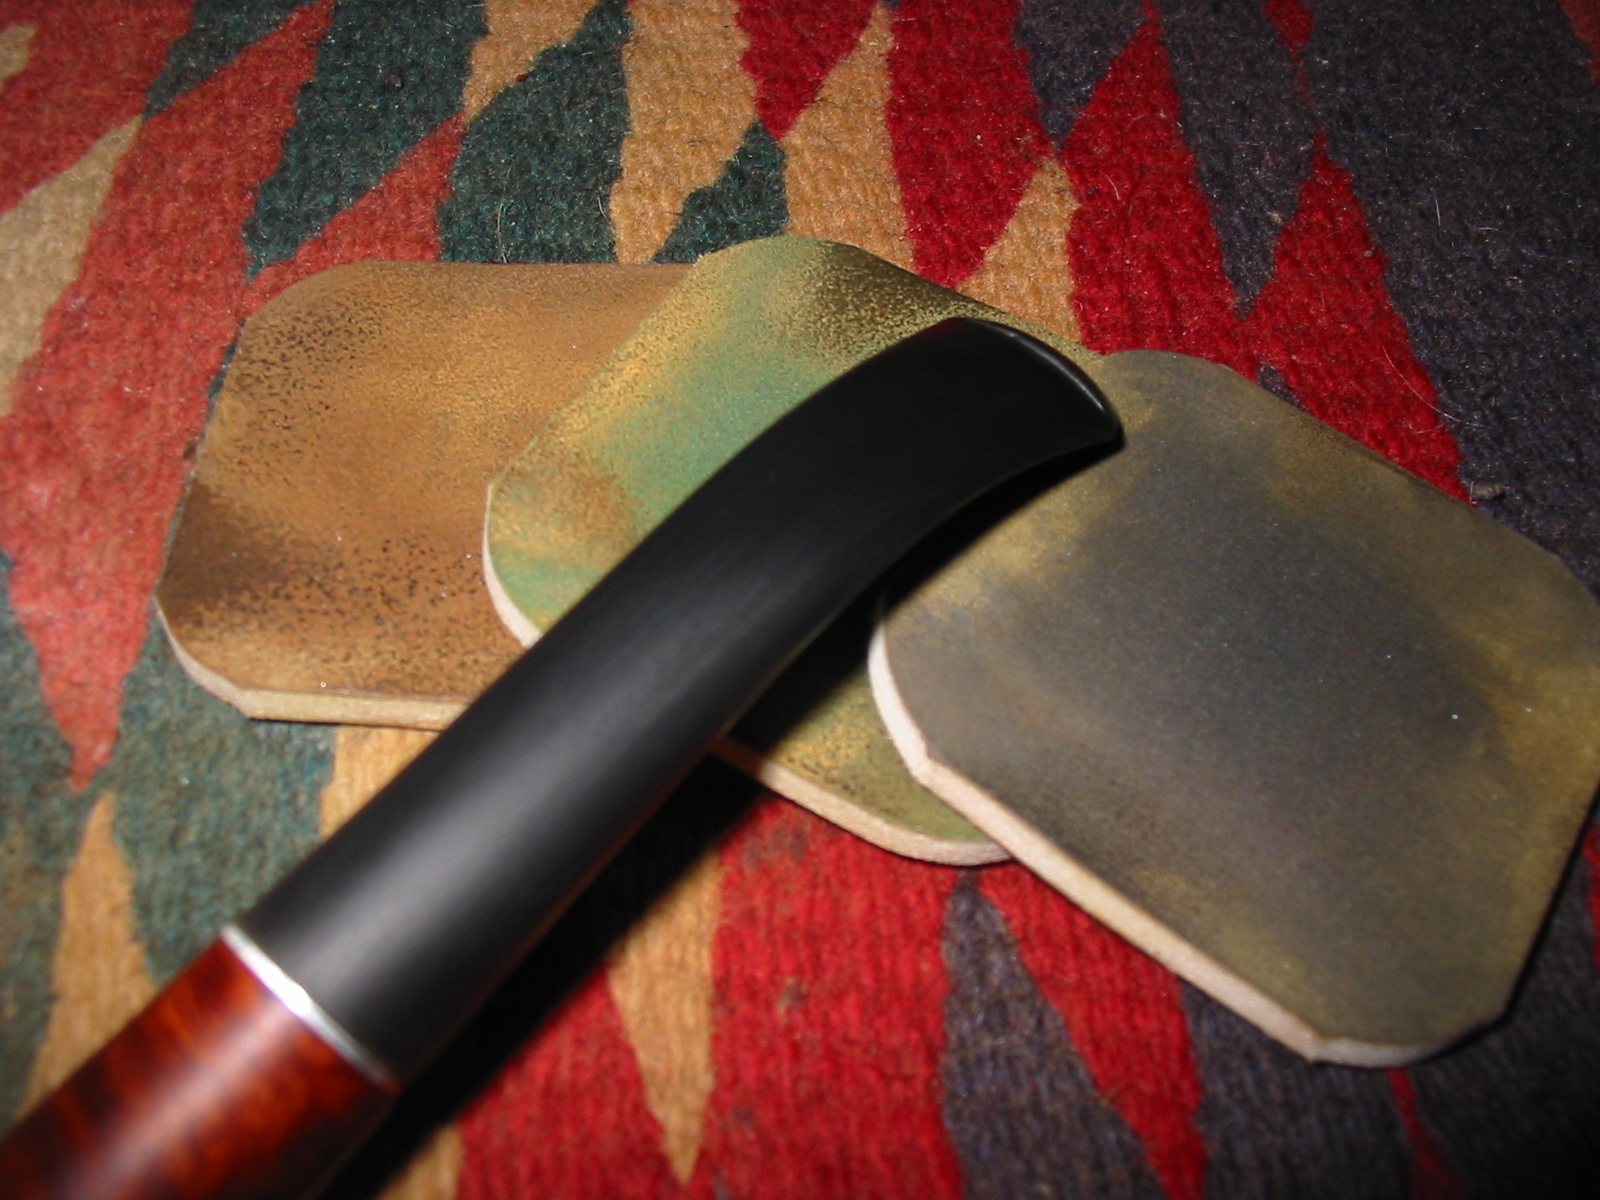
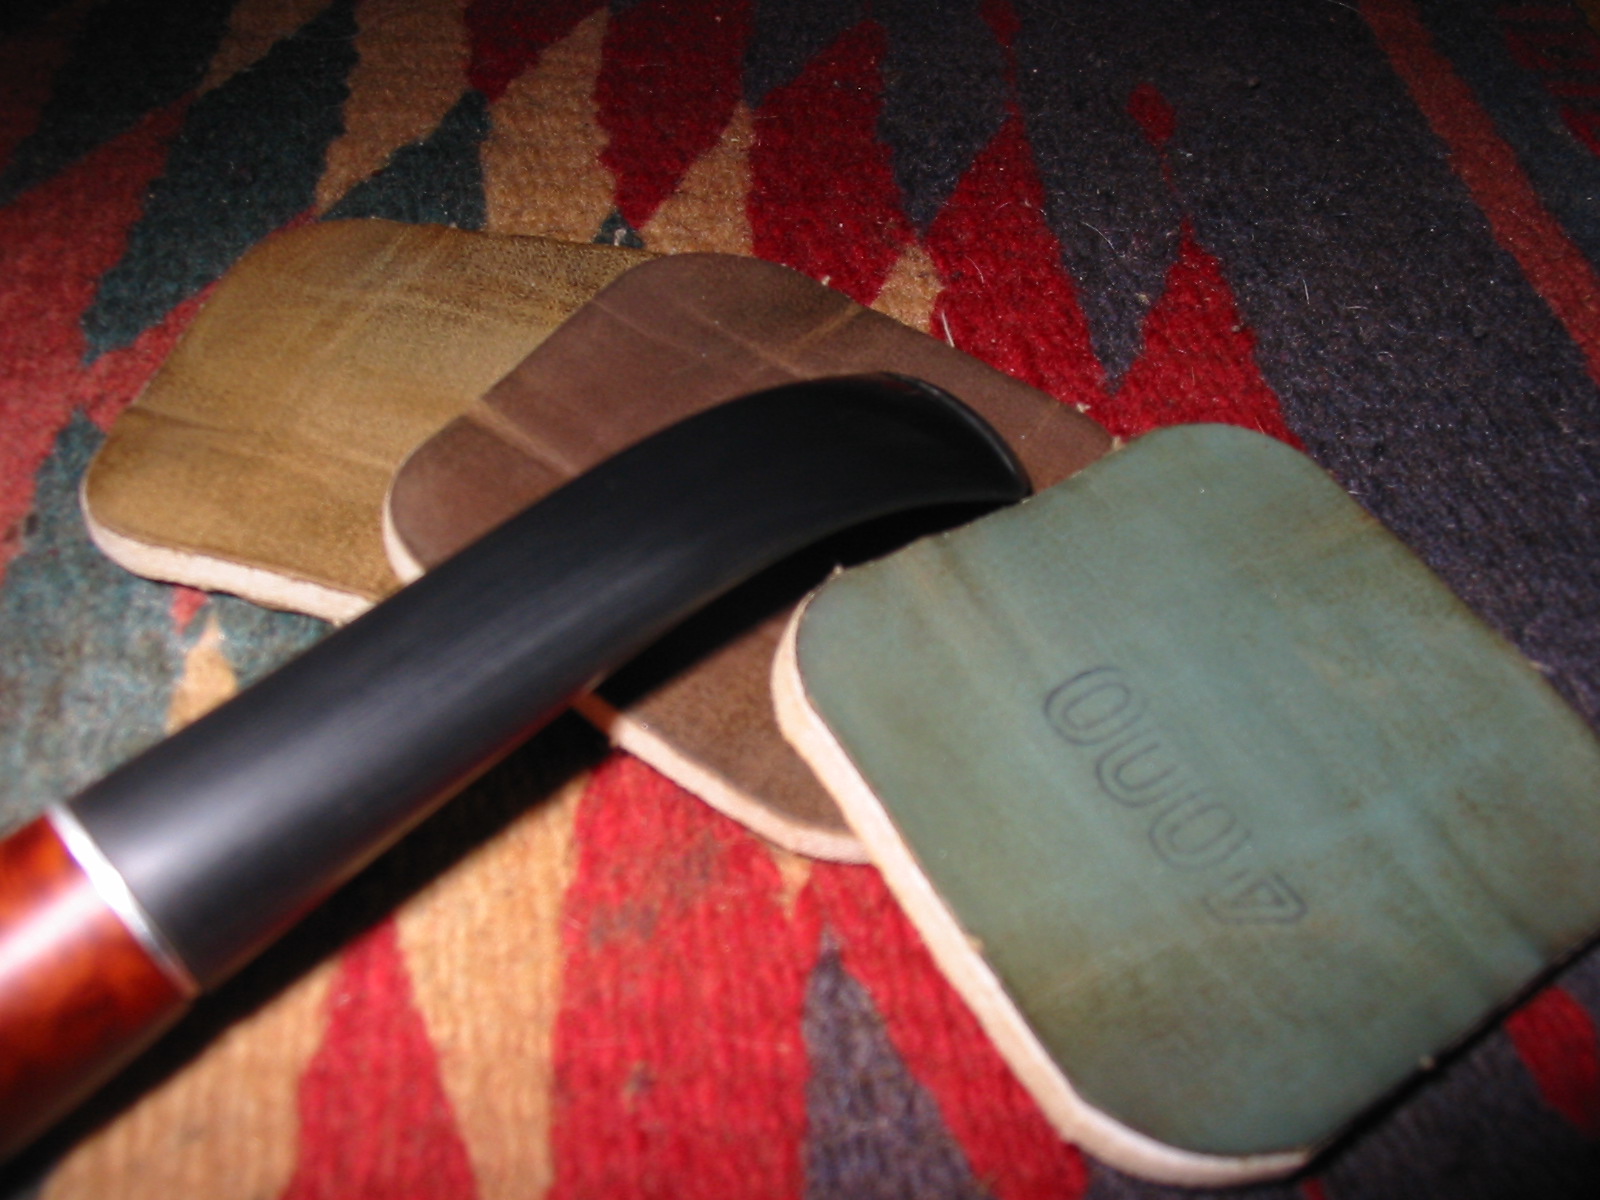
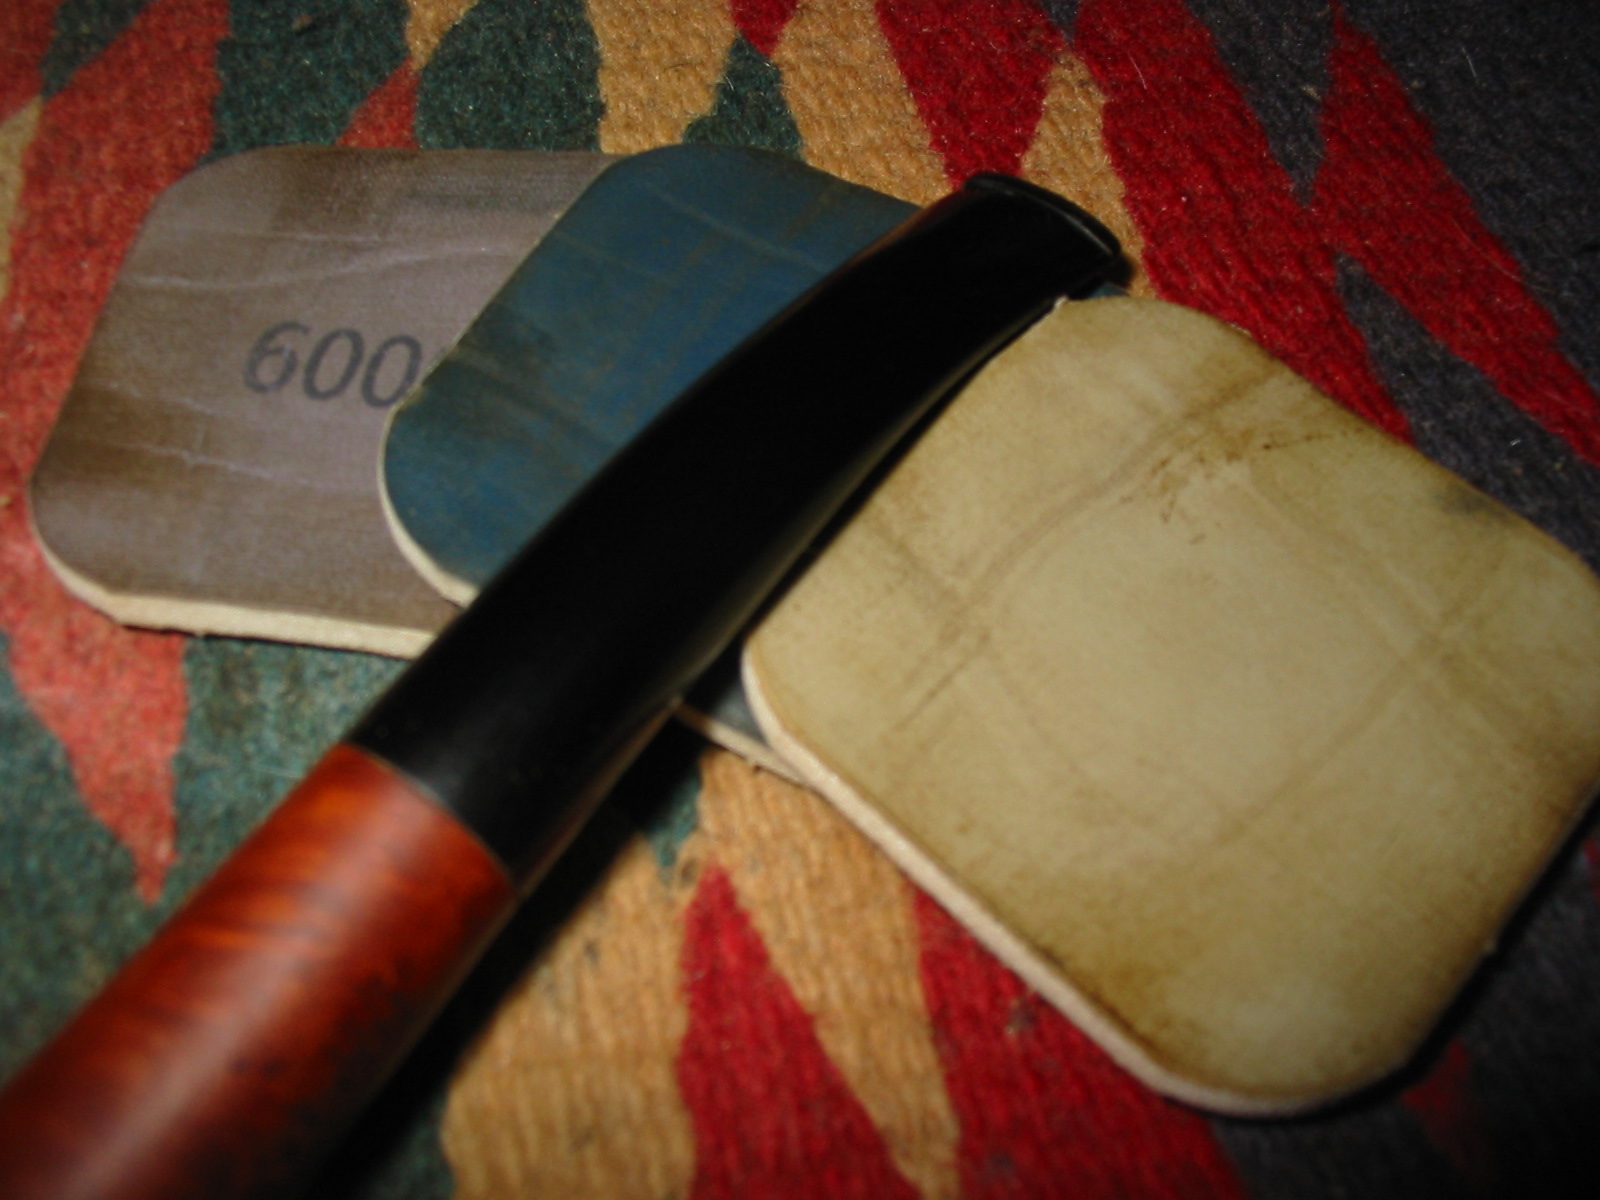
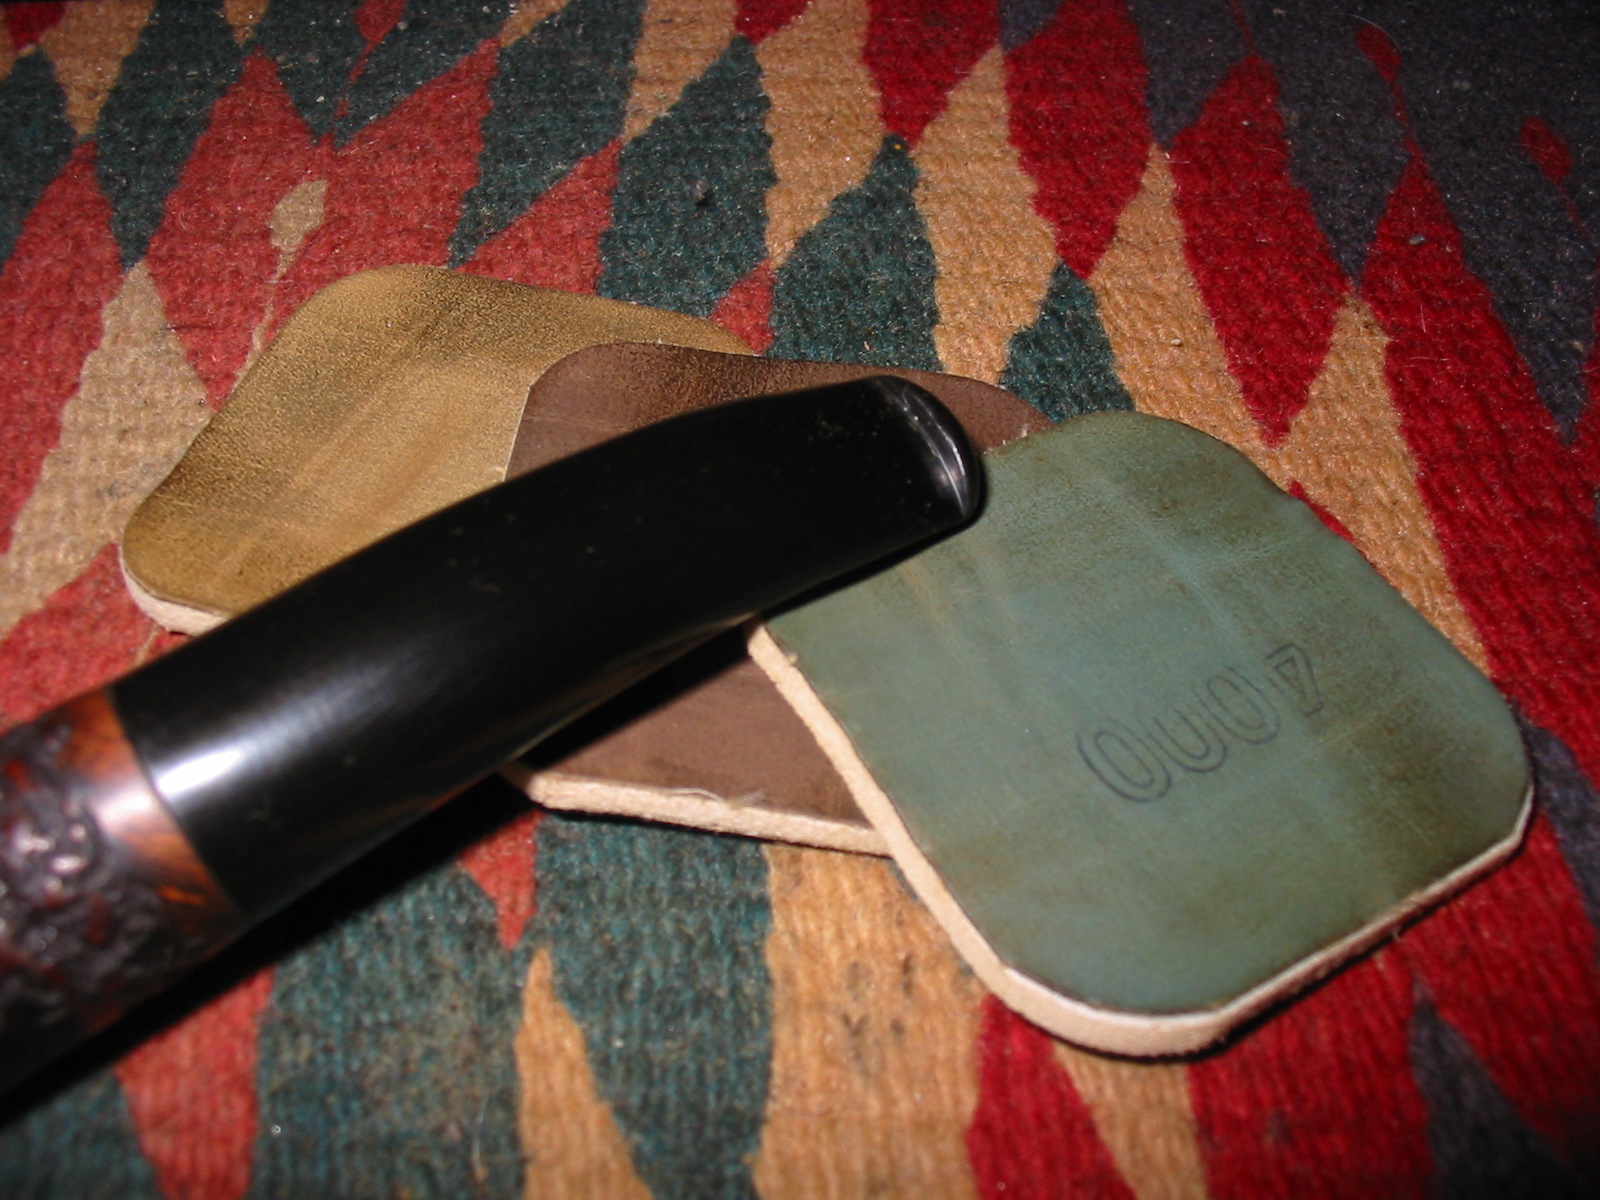
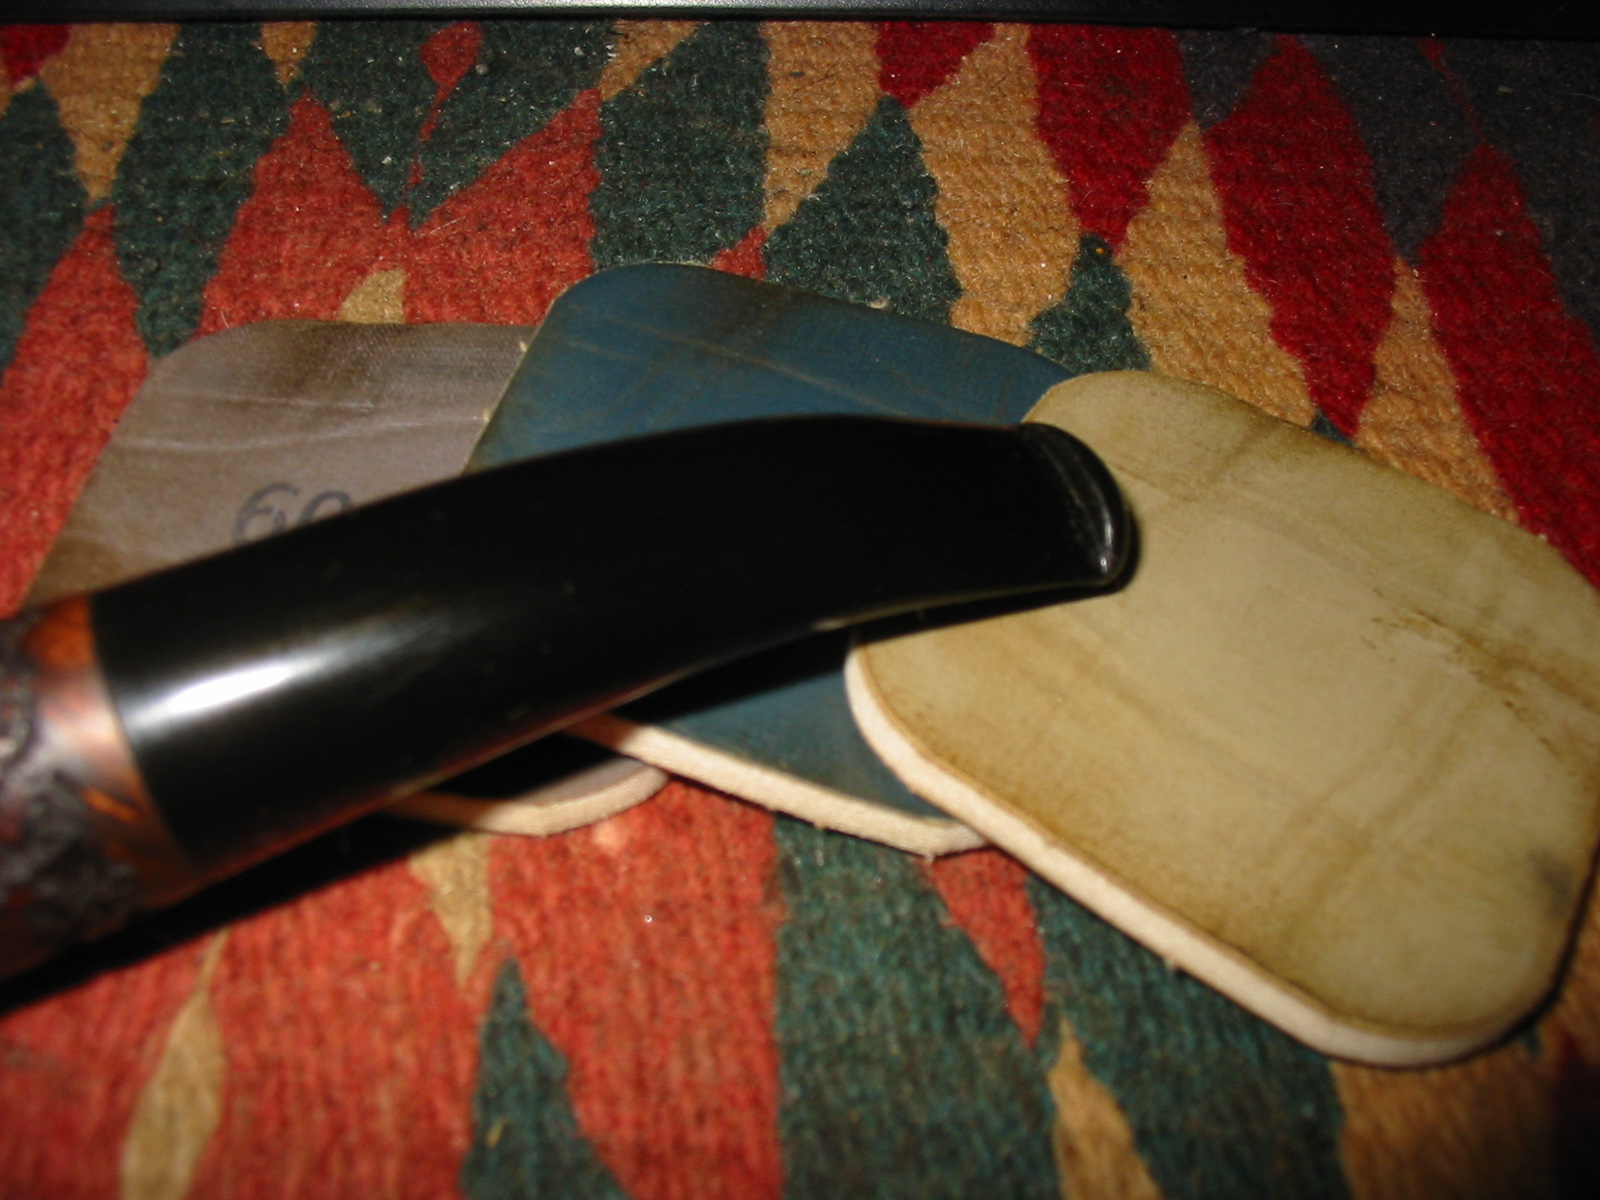
I worked on the stem to remove several small tooth marks on the underside and one on the topside of the stem. I then sanded the stem with 220 grit sandpaper to further shape it and get the flow of the taper just right. I sanded it with medium and fine grit sanding sponges and then used my normal range of micromesh sanding pads to finish the work. I wet sanded with 1500-2400 grit and then dry sanded with 3200-12,000 grit pads. I rubbed the stem down with Obsidian Oil and let it soak into the vulcanite.
IMG_5382

IMG_5383

IMG_5384

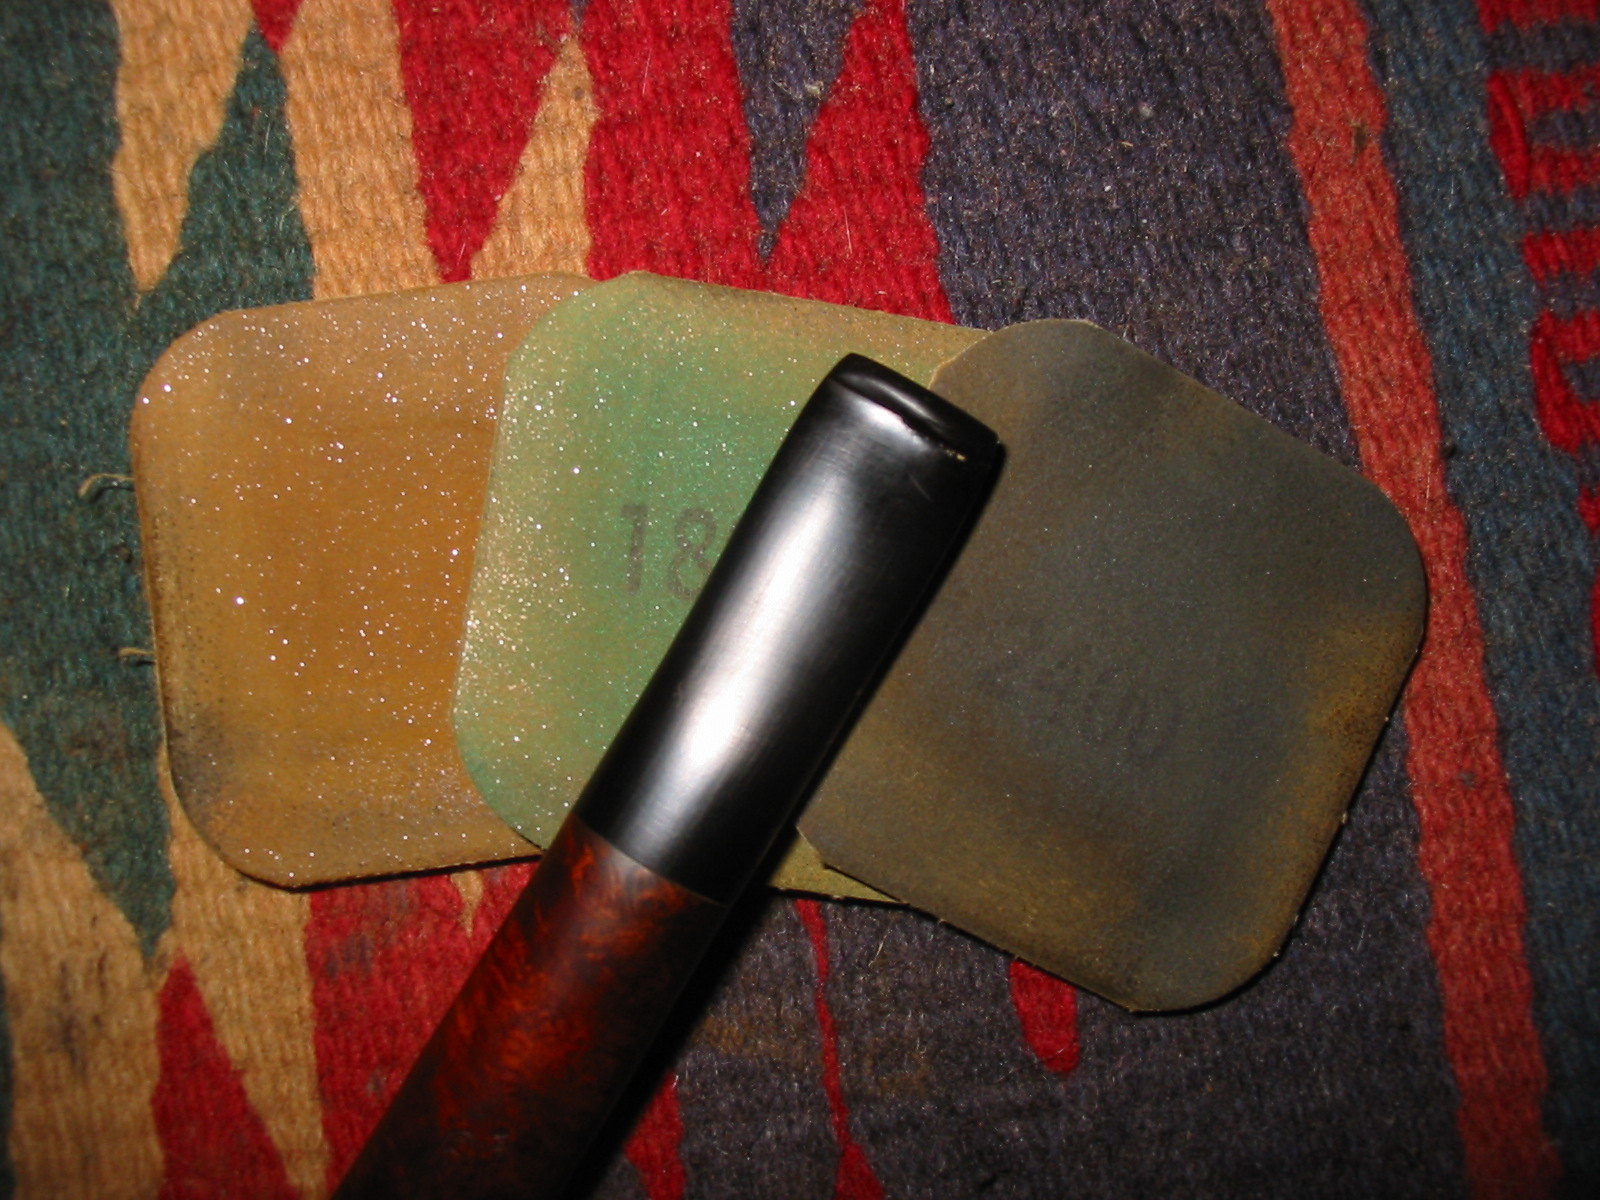
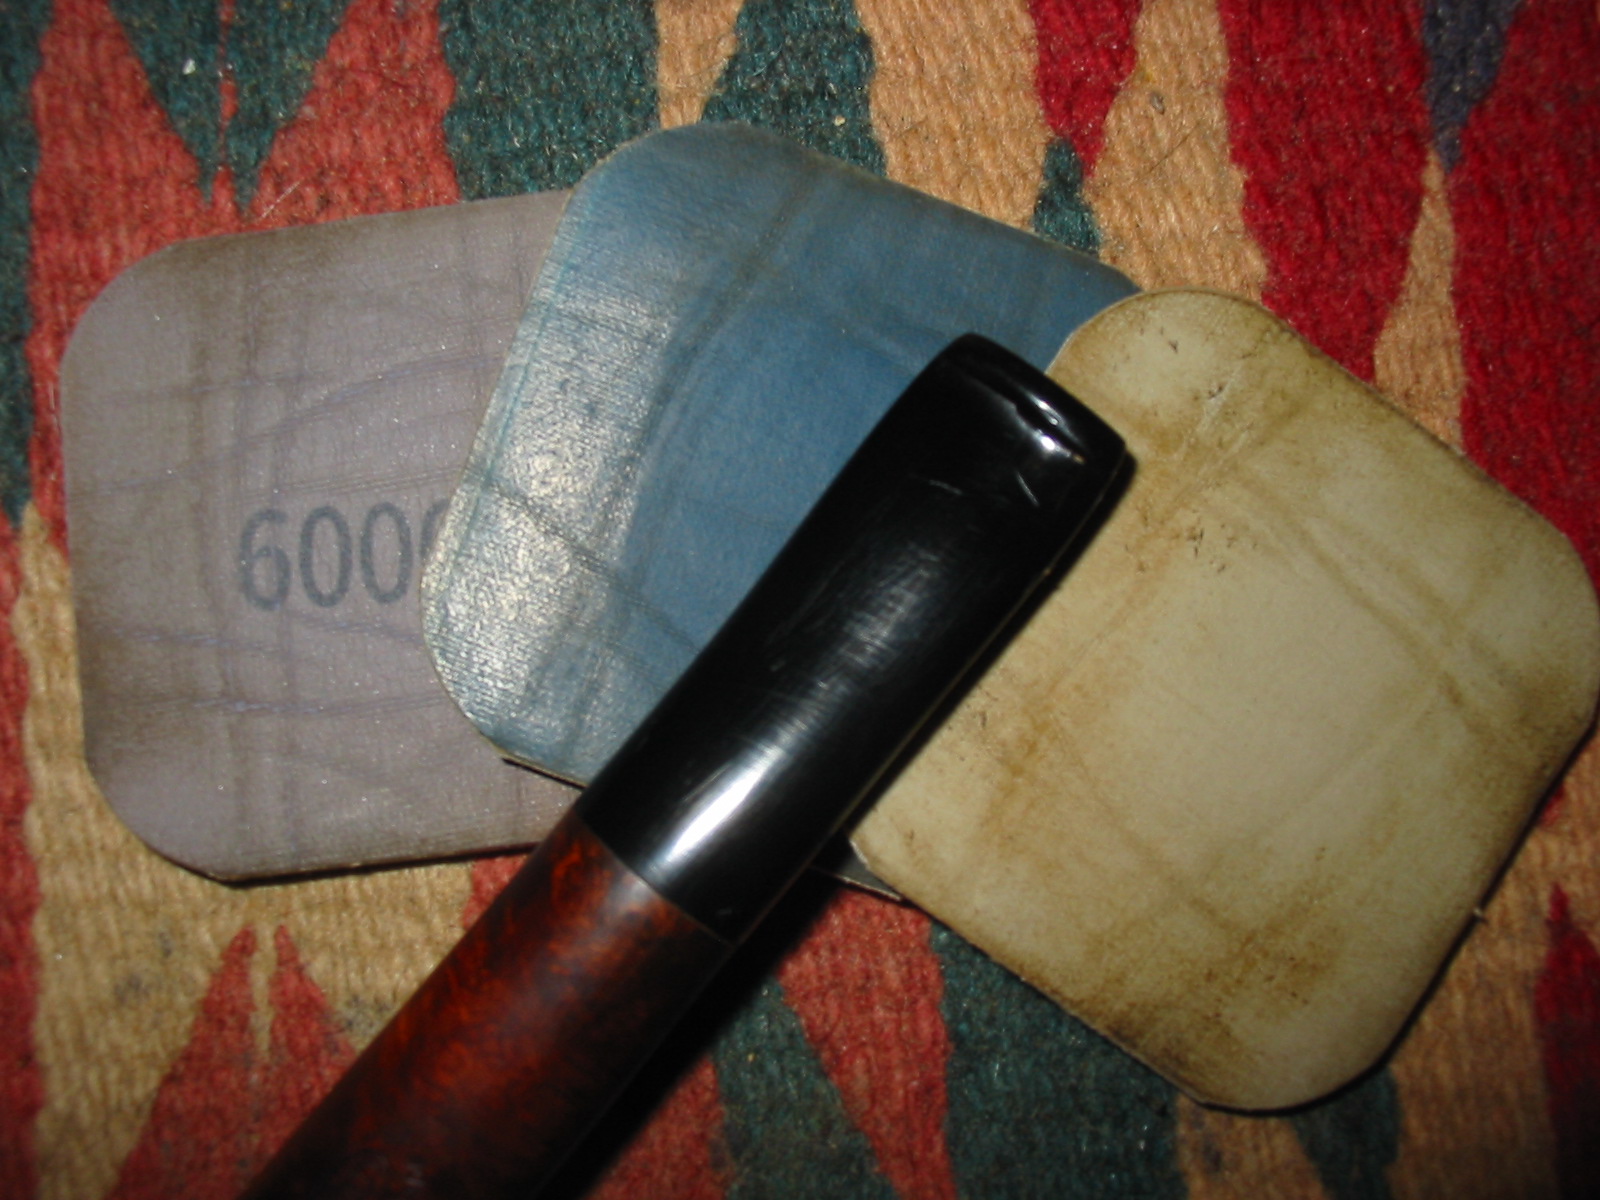
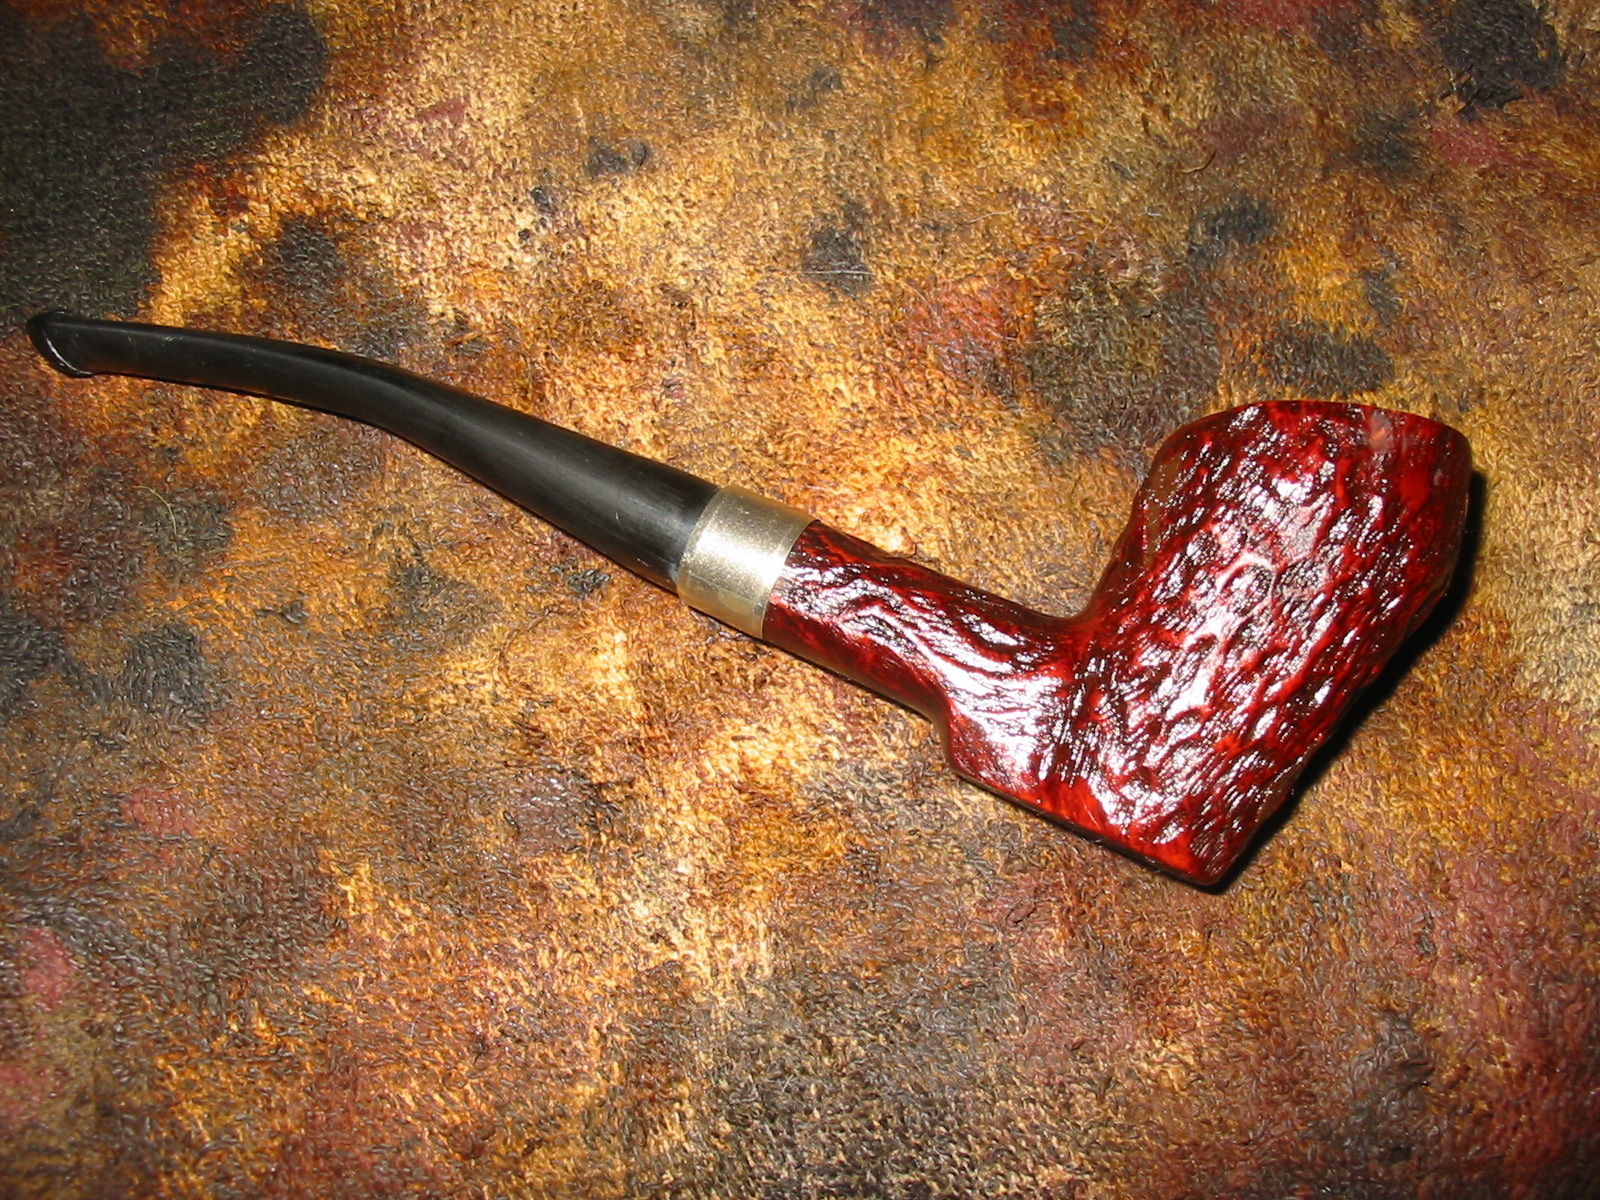
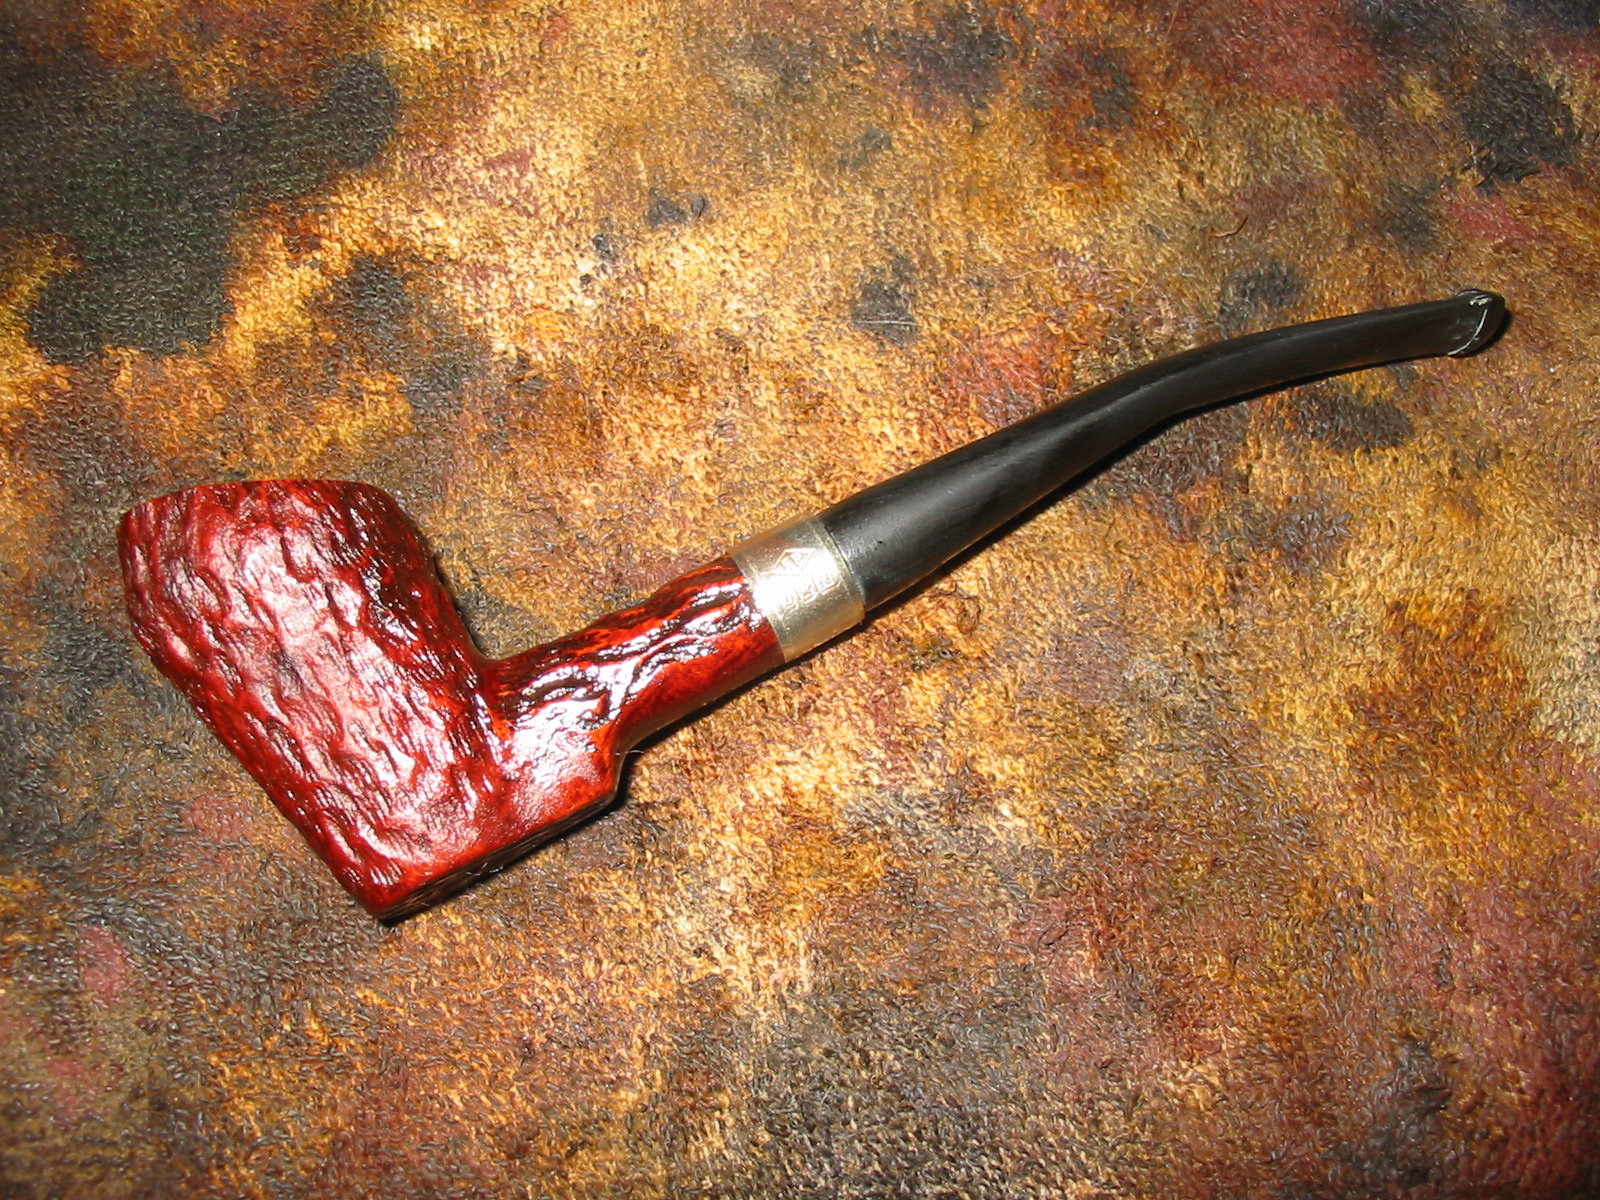
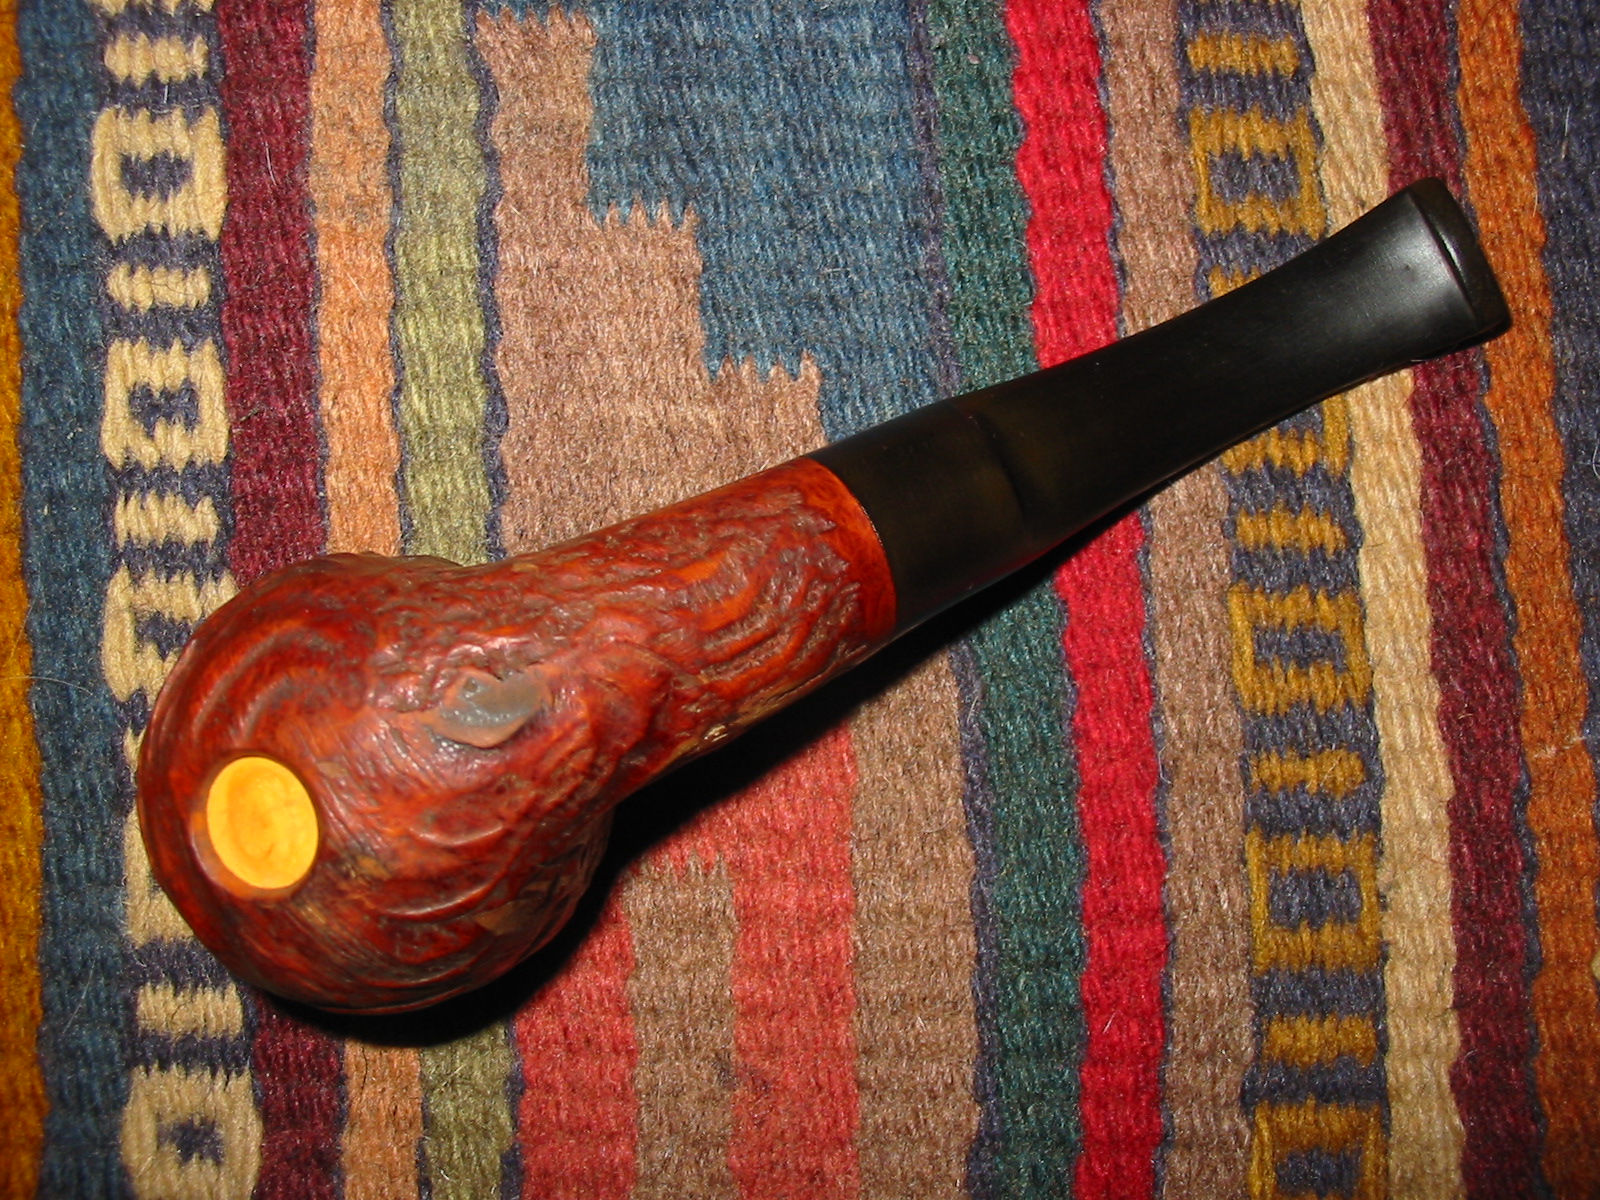
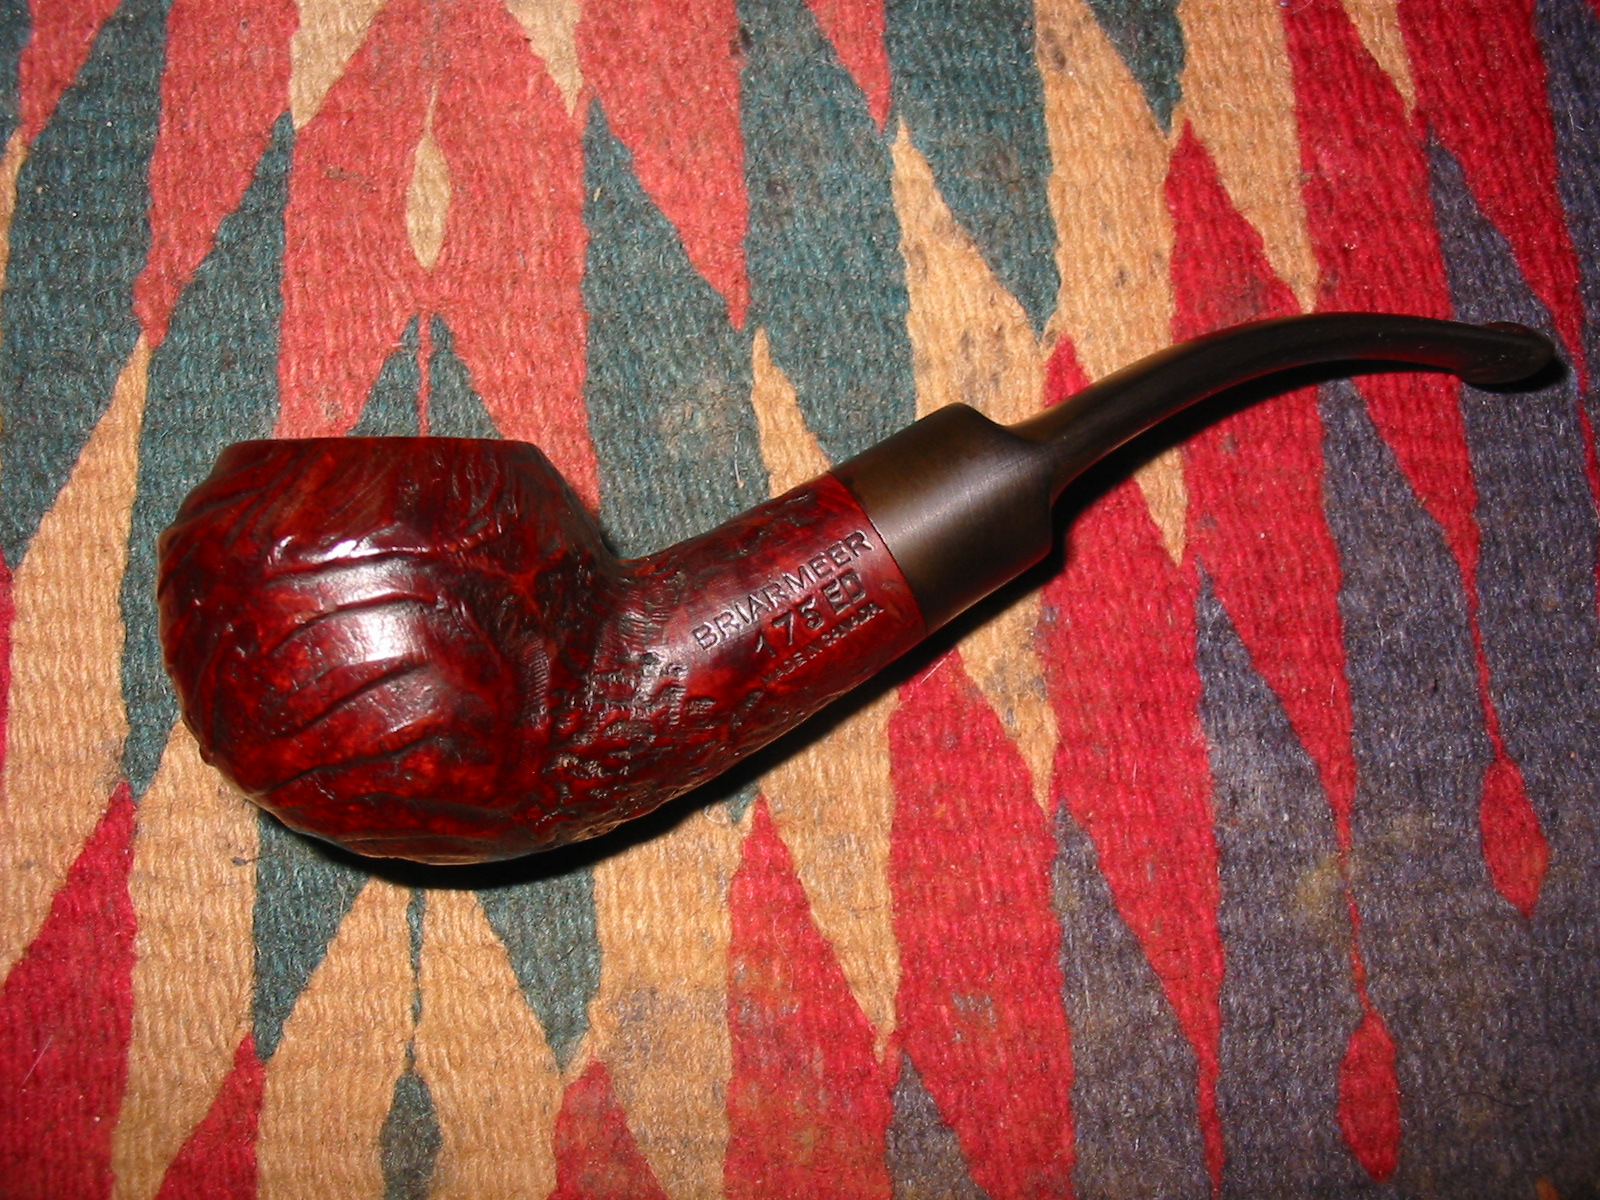
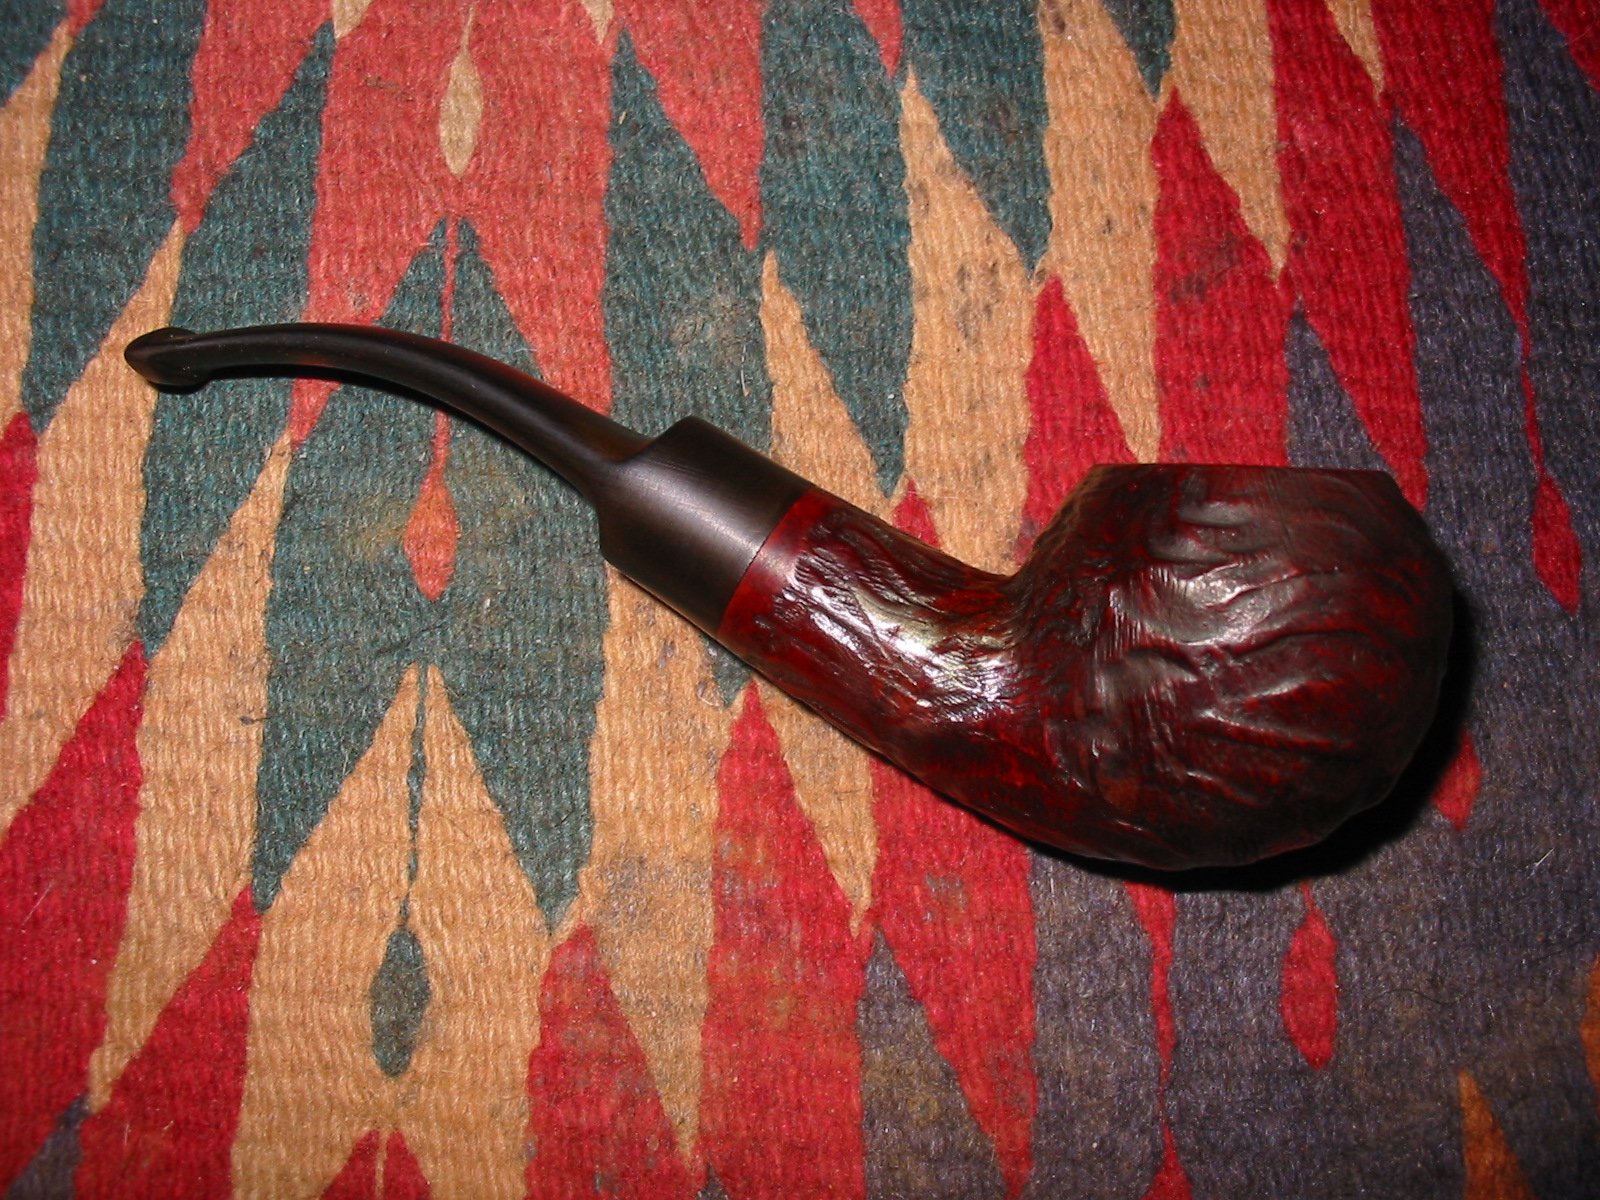
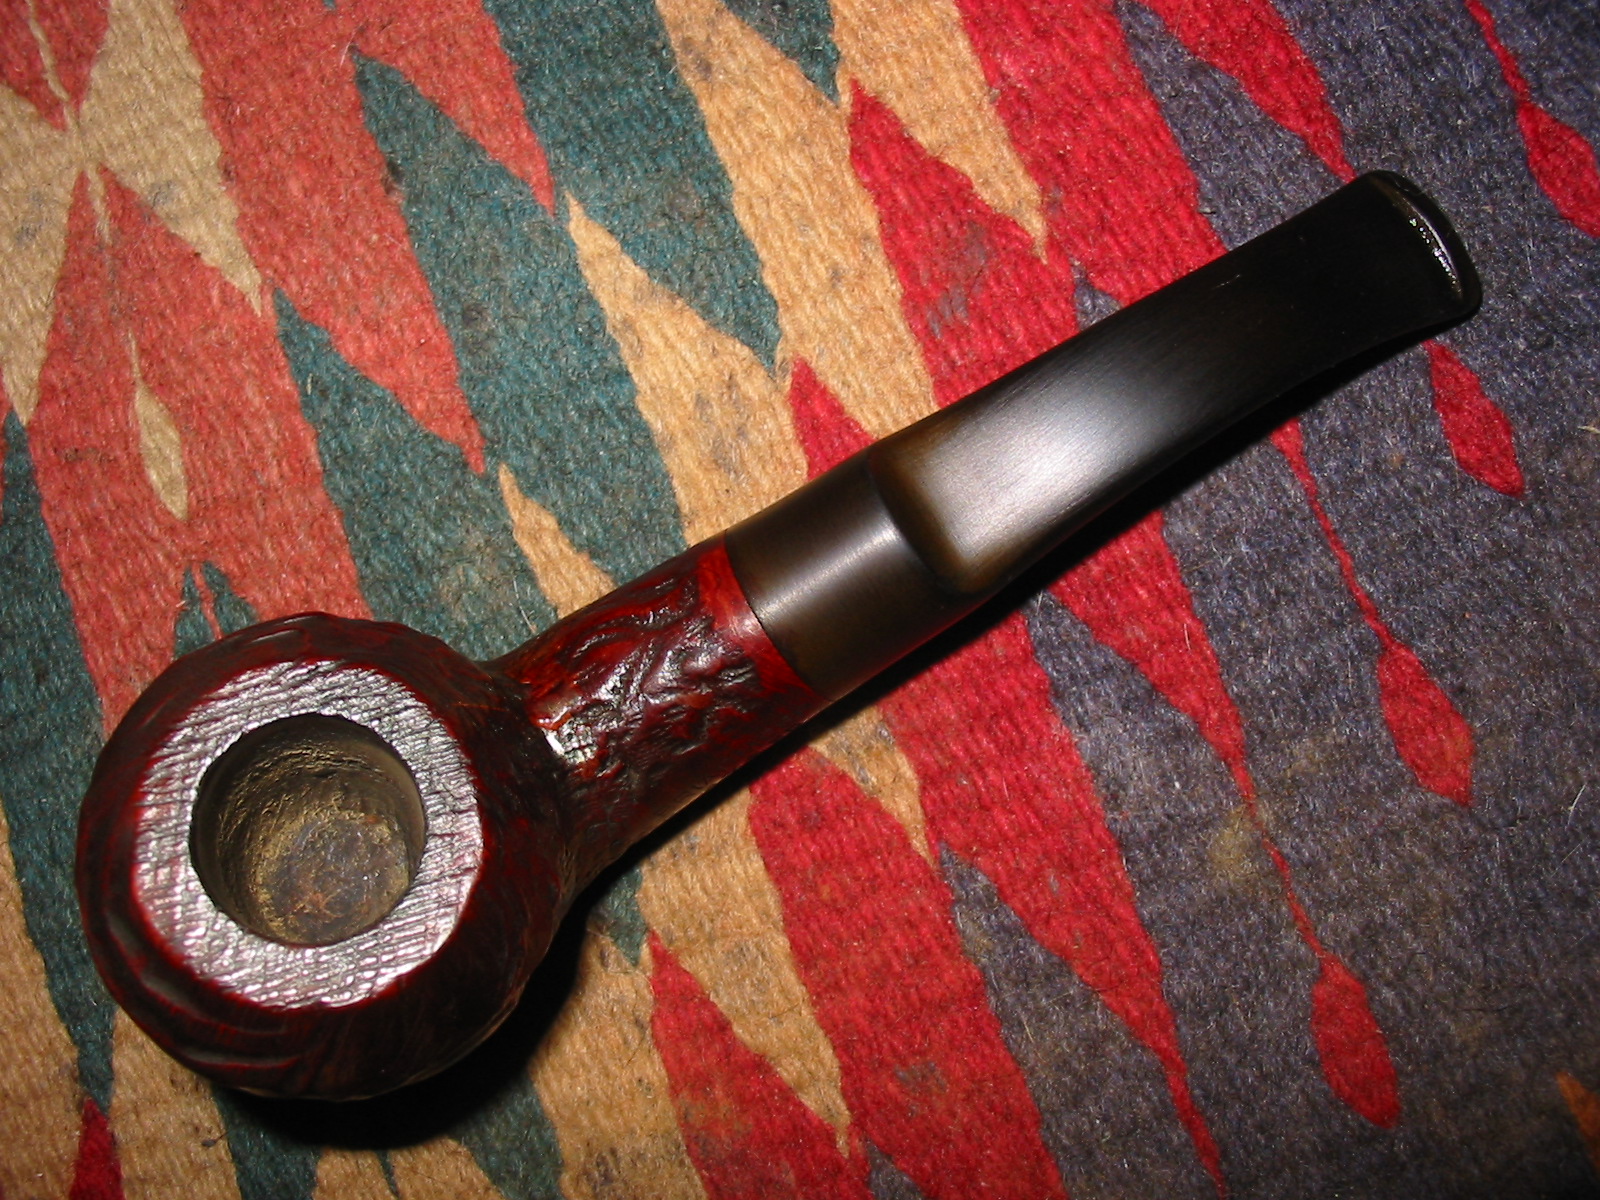
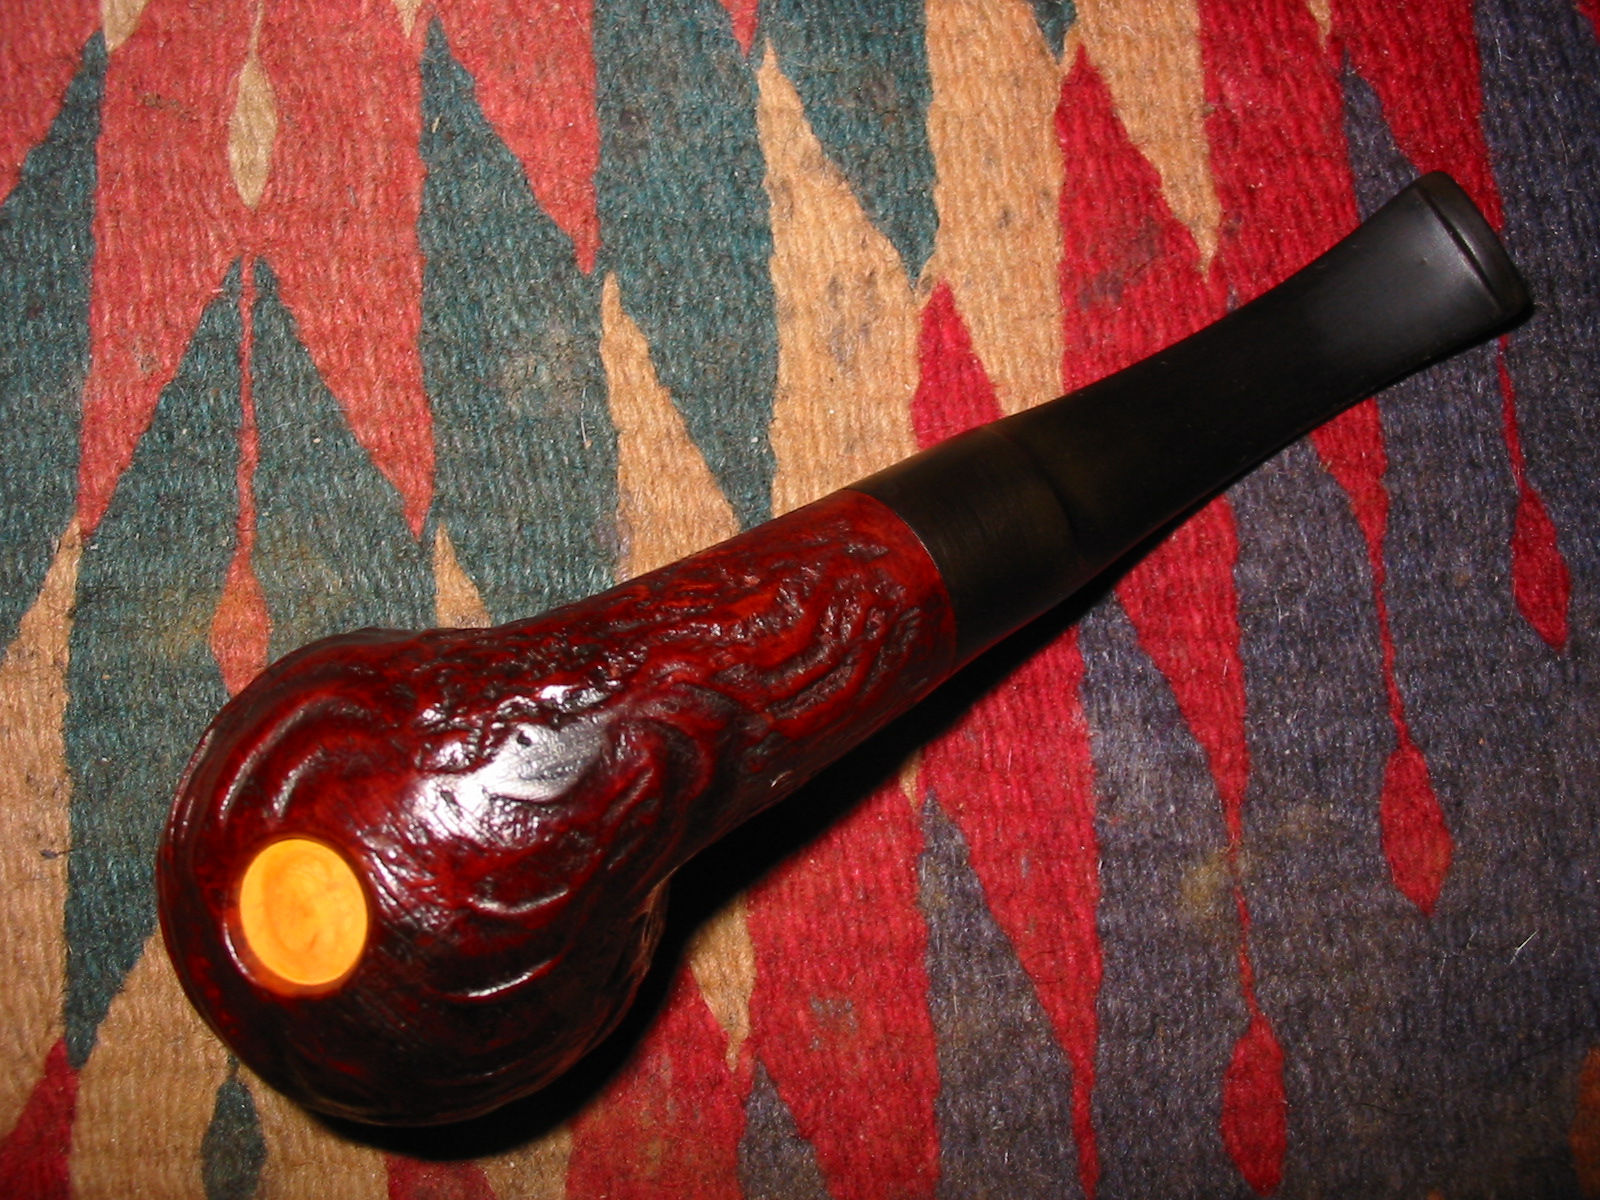
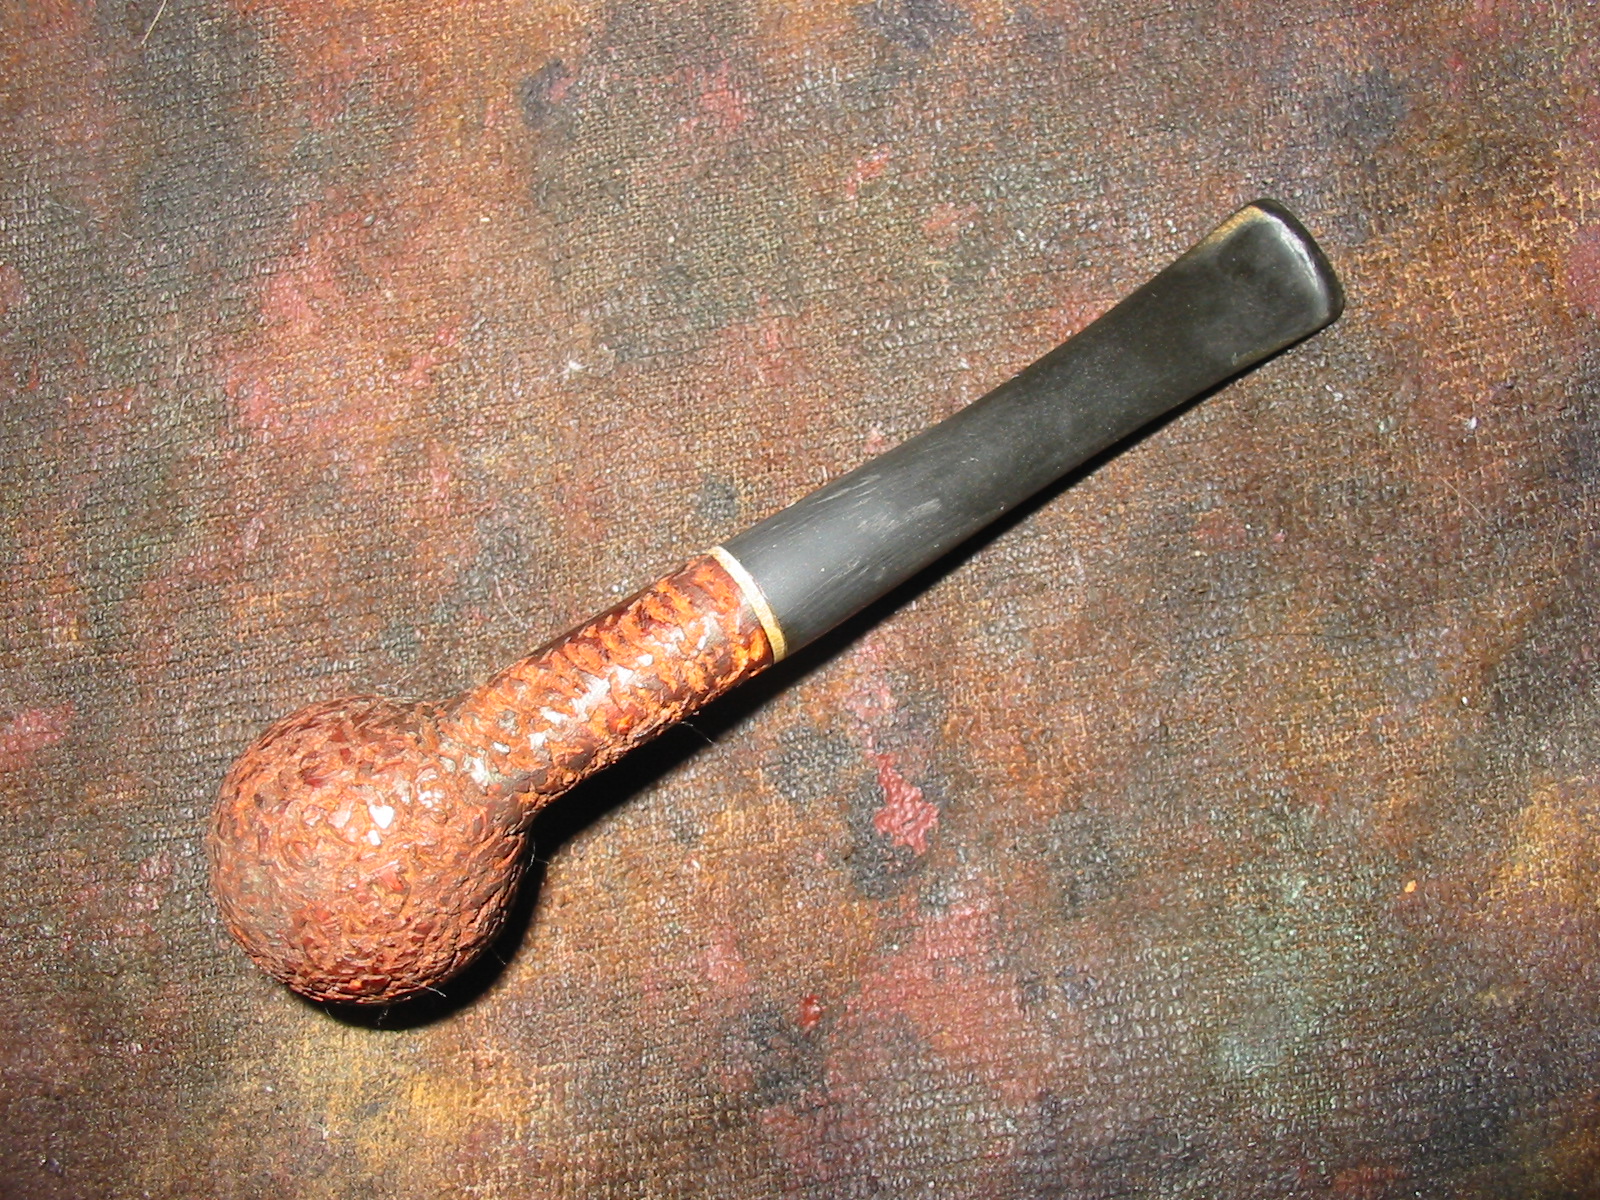
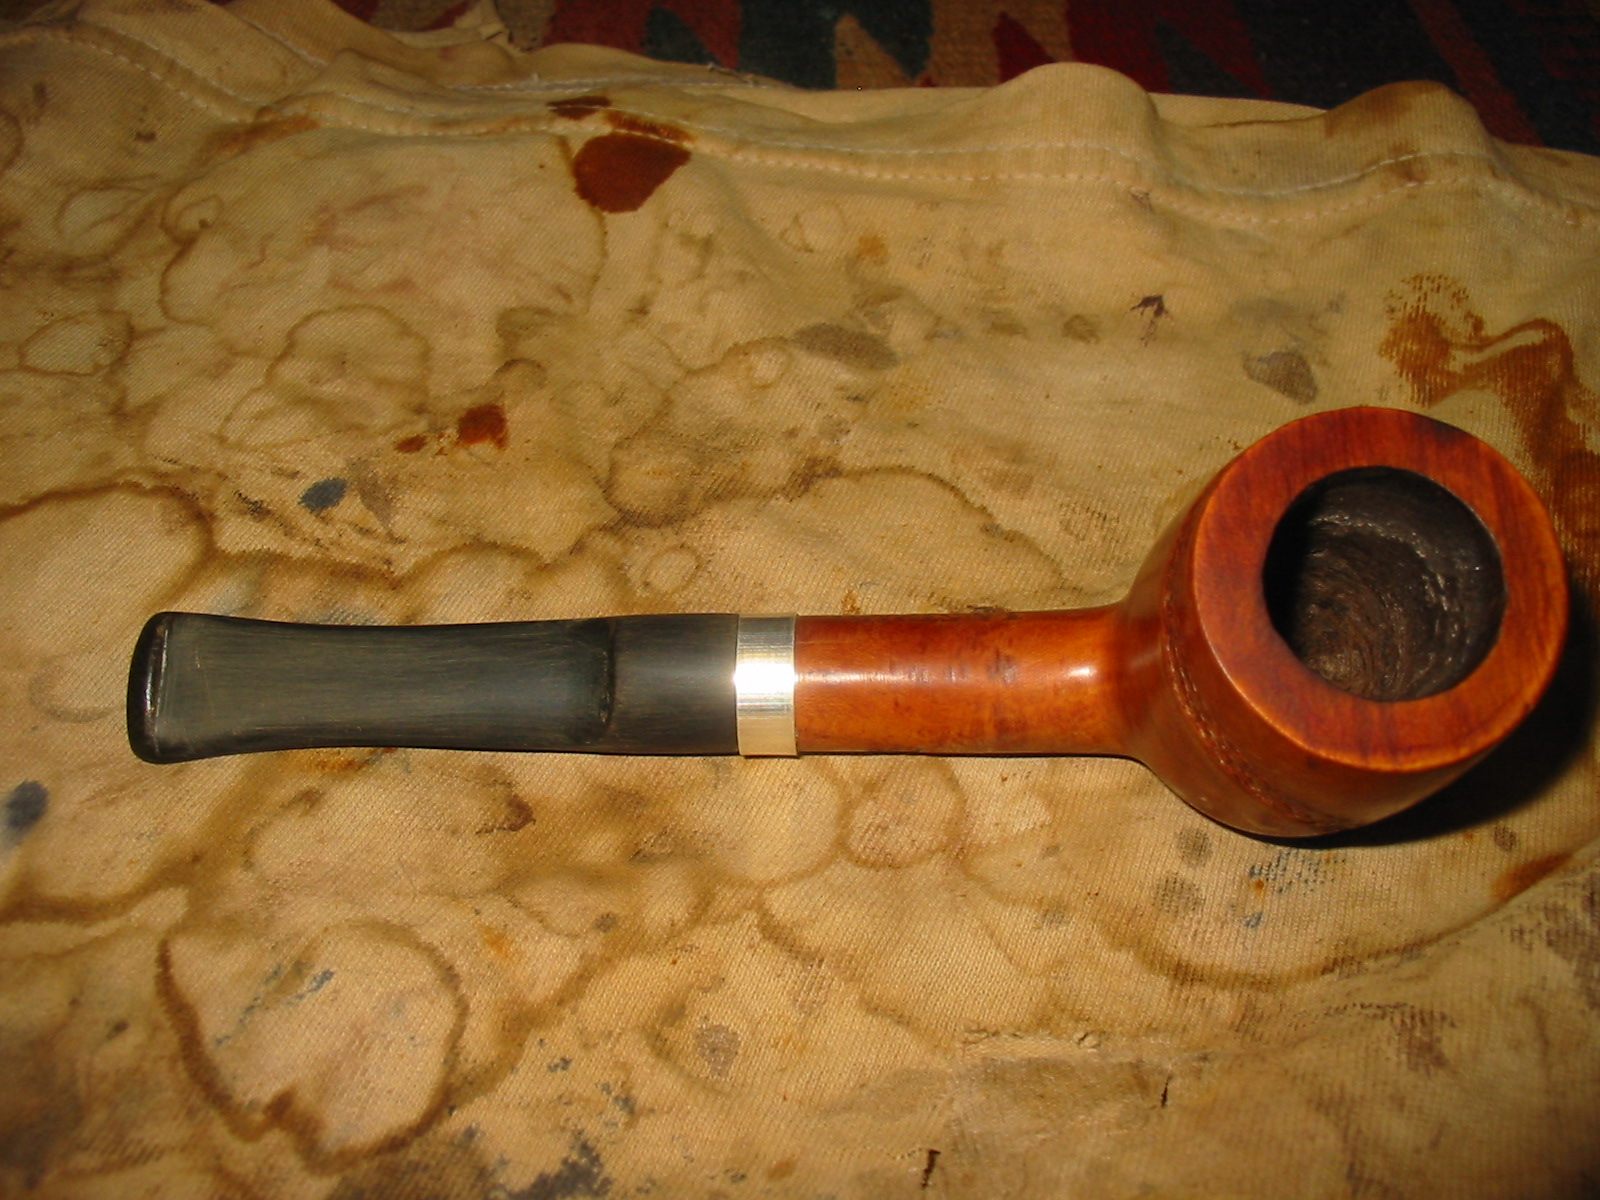
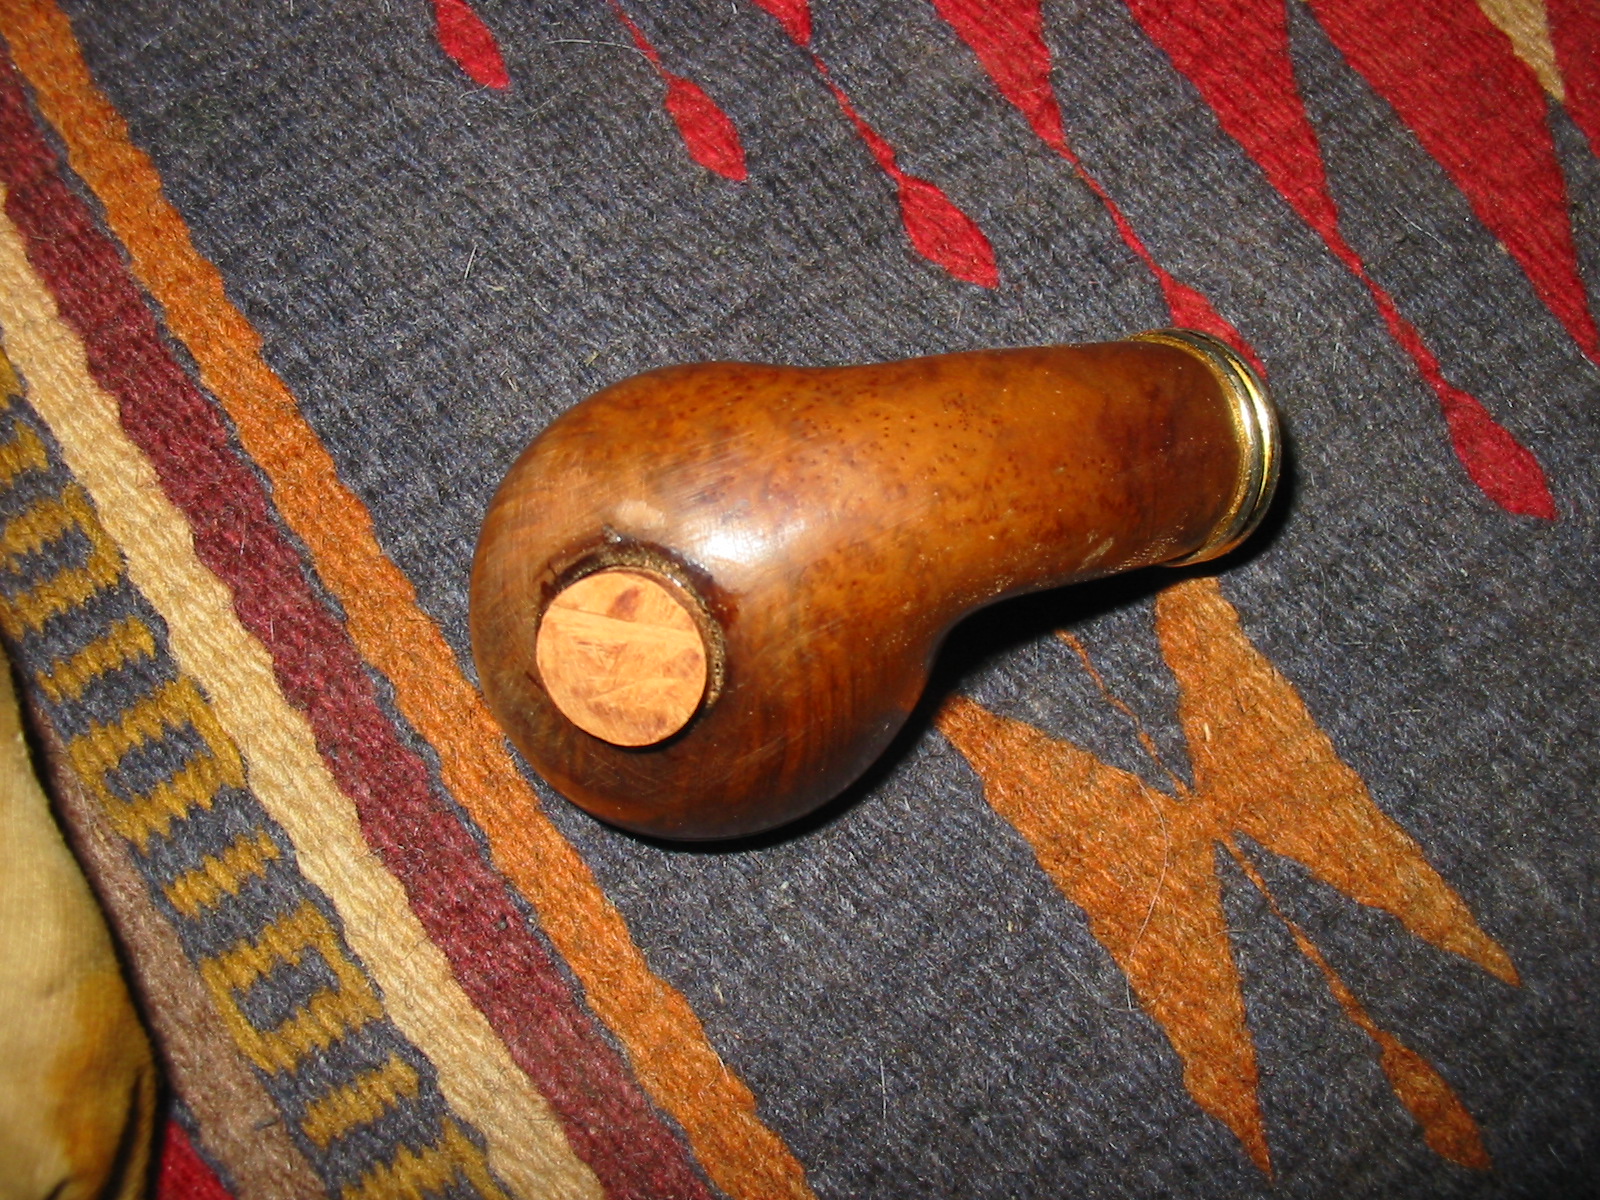
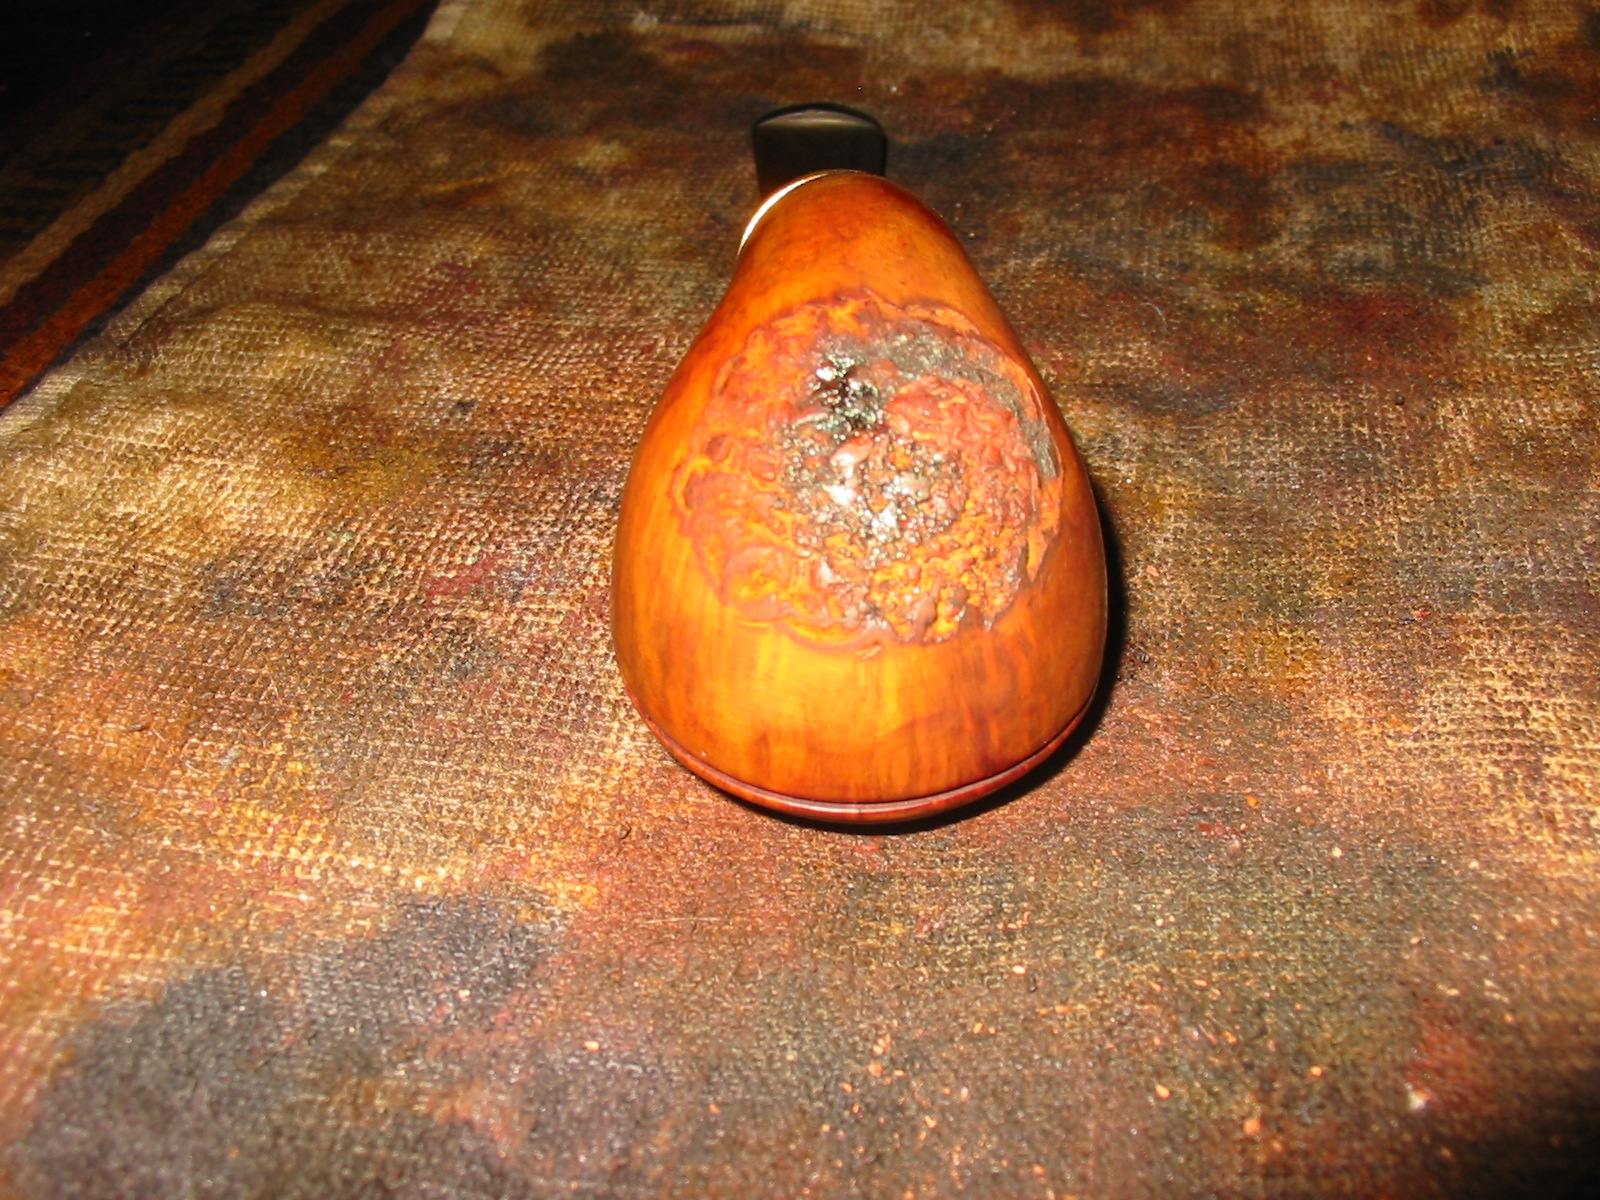
I did some more sanding with micromesh sanding pads on the stem to remove some of the light scratching that showed up under the flash and then buffed the stem and bowl with White Diamond. I gave them both multiple coats of carnauba wax to protect and give it a shine. The first three photos below show the repair as it stands now. The surface of the bowl is smooth to the touch. The light and the dark spots on the repair are some of the briar dust in the patchwork. Some takes the stain and is dark and there seem to always be light spots as well. This old pipe has come a long way since I received it in the mail.
IMG_5389

IMG_5390

IMG_5392

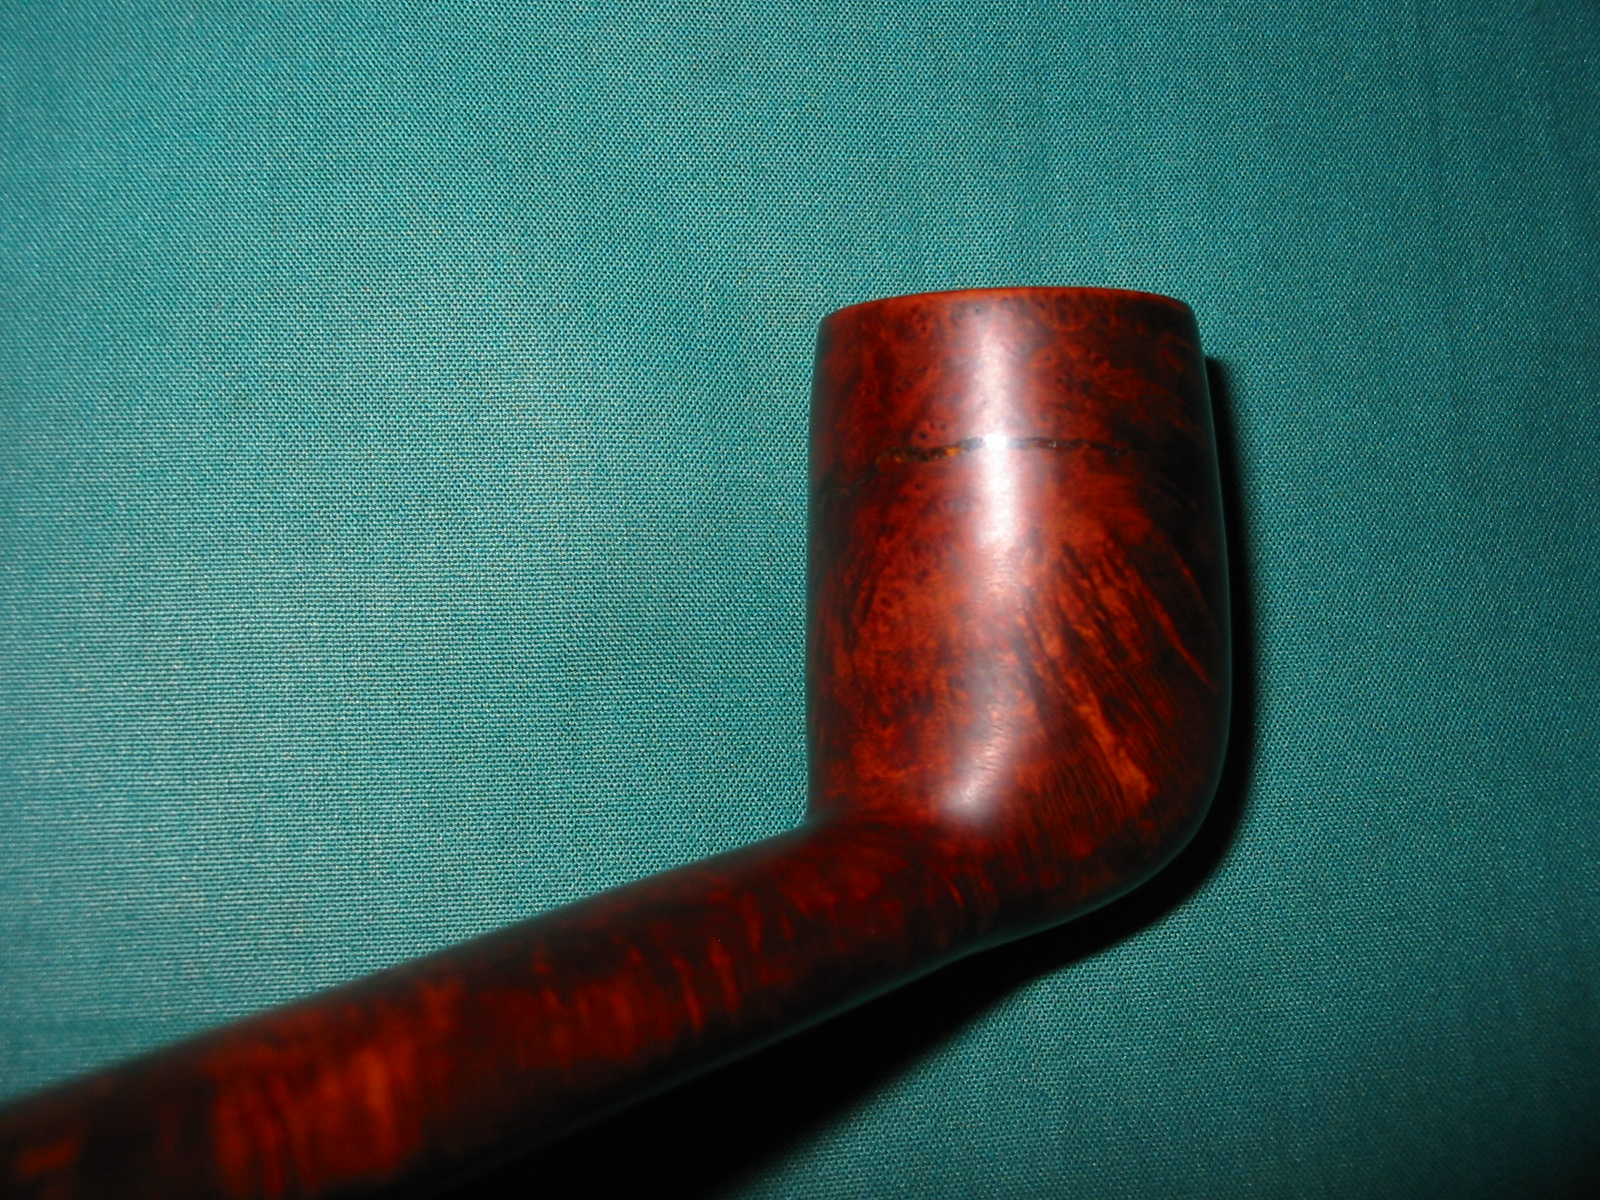
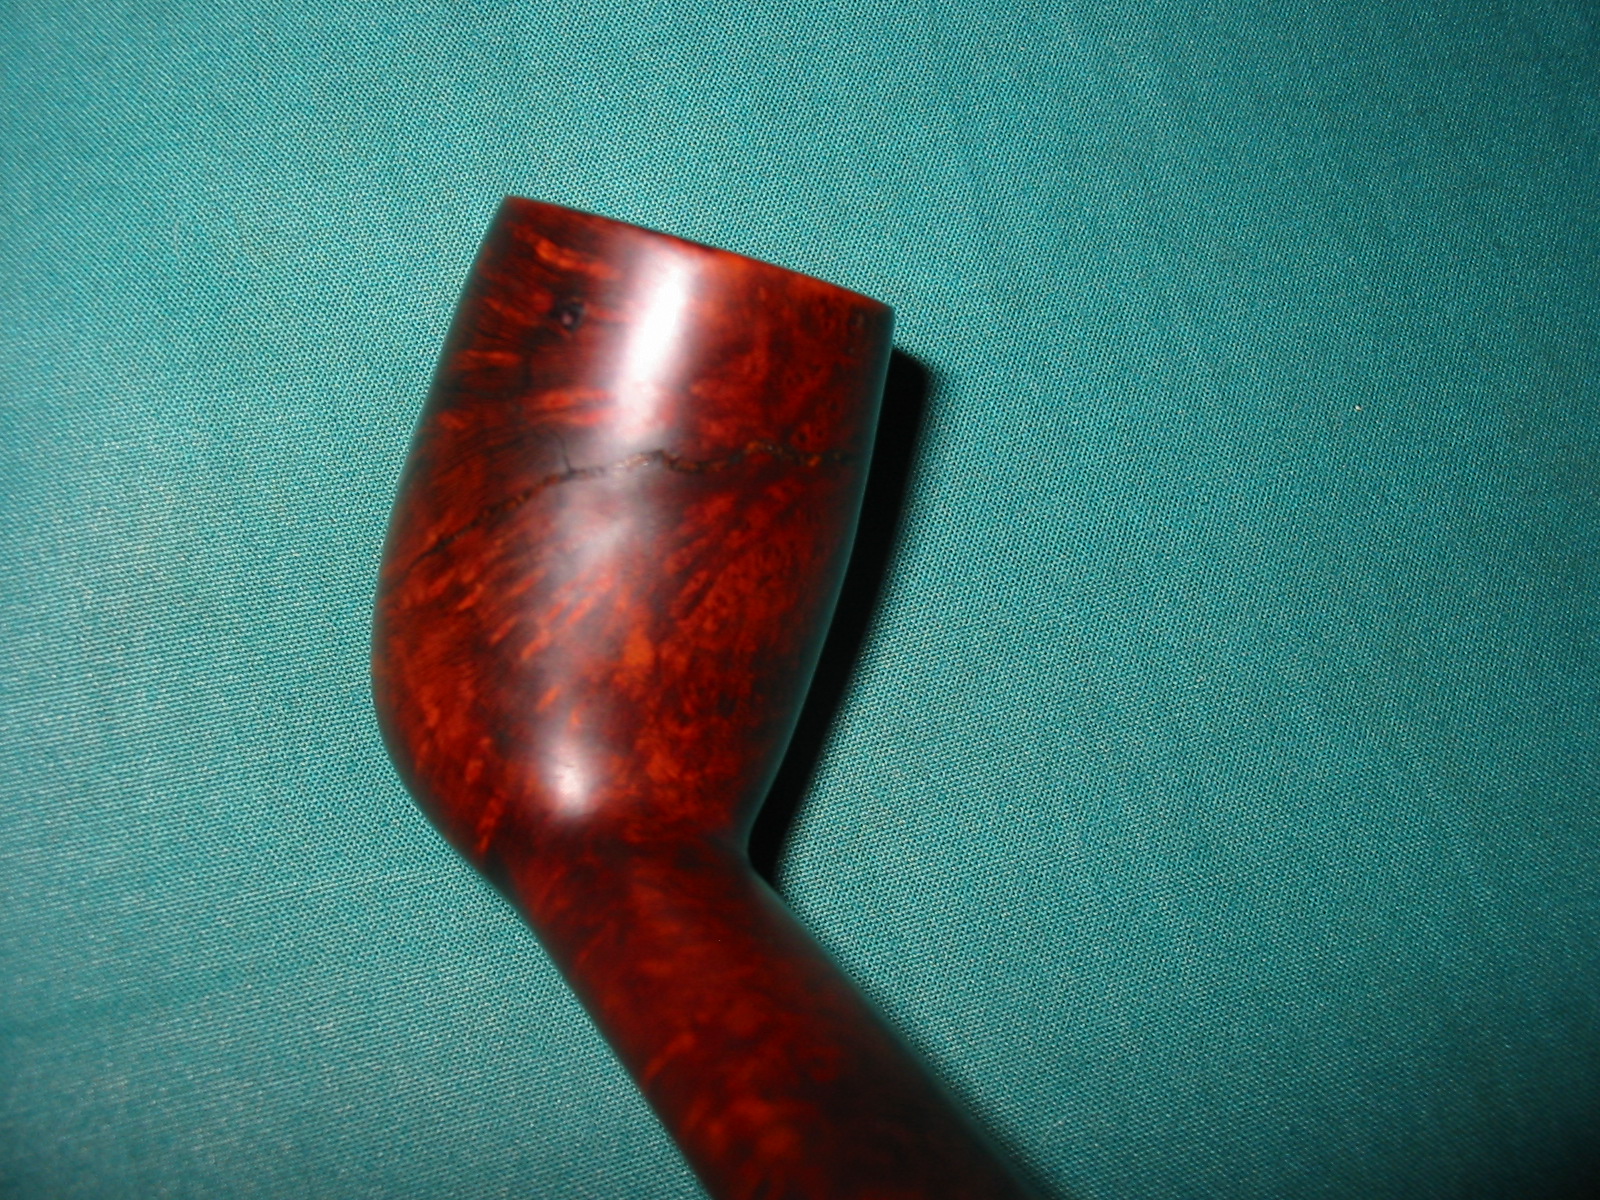
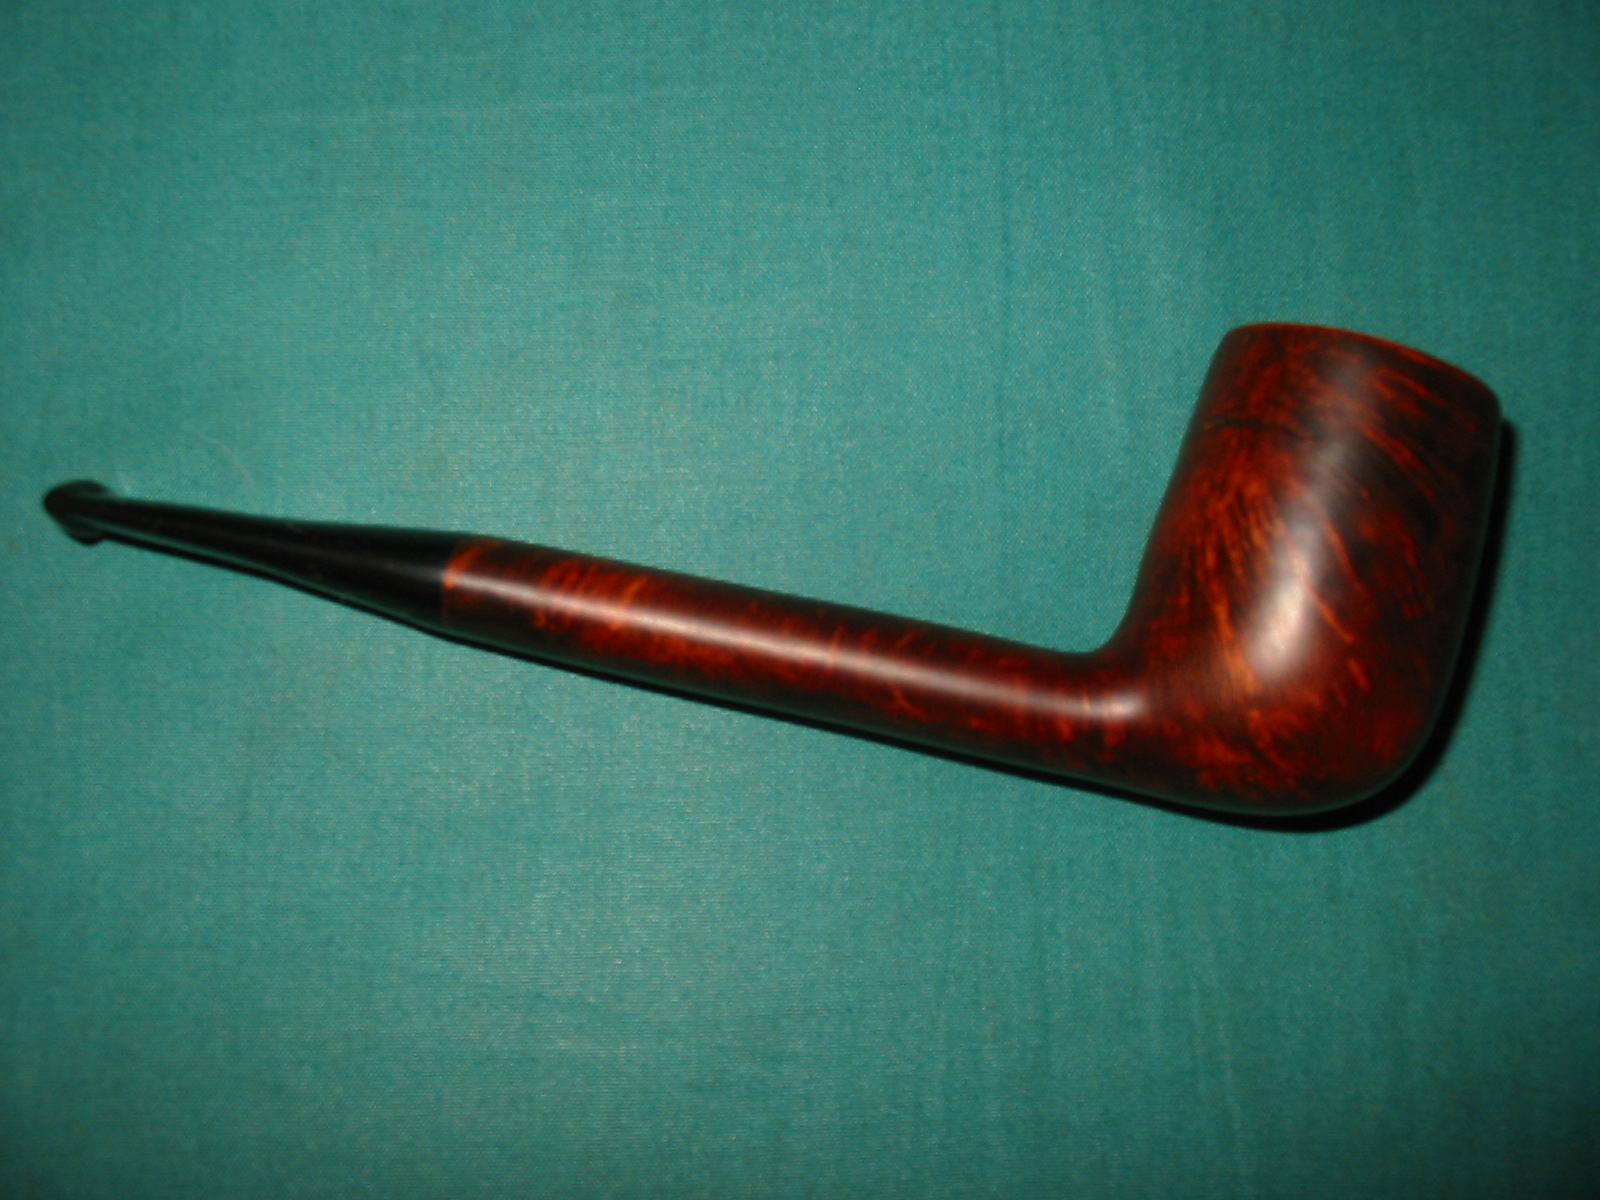
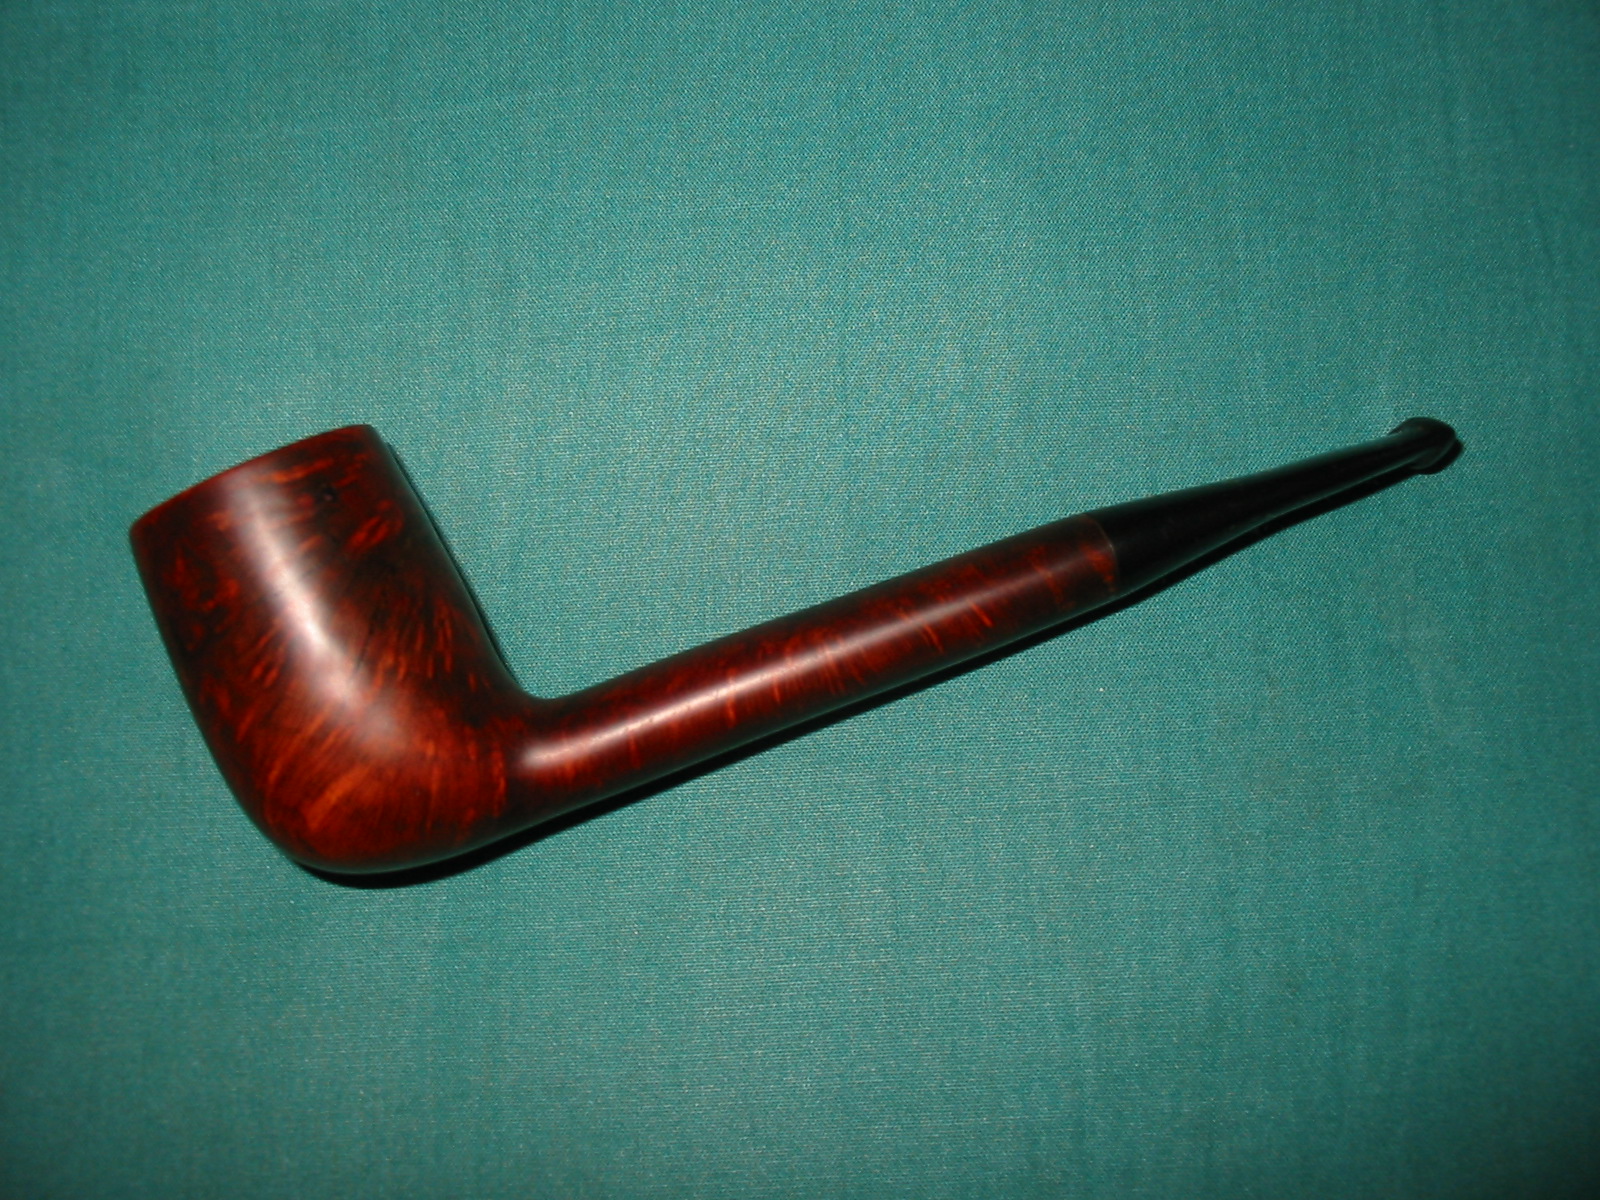
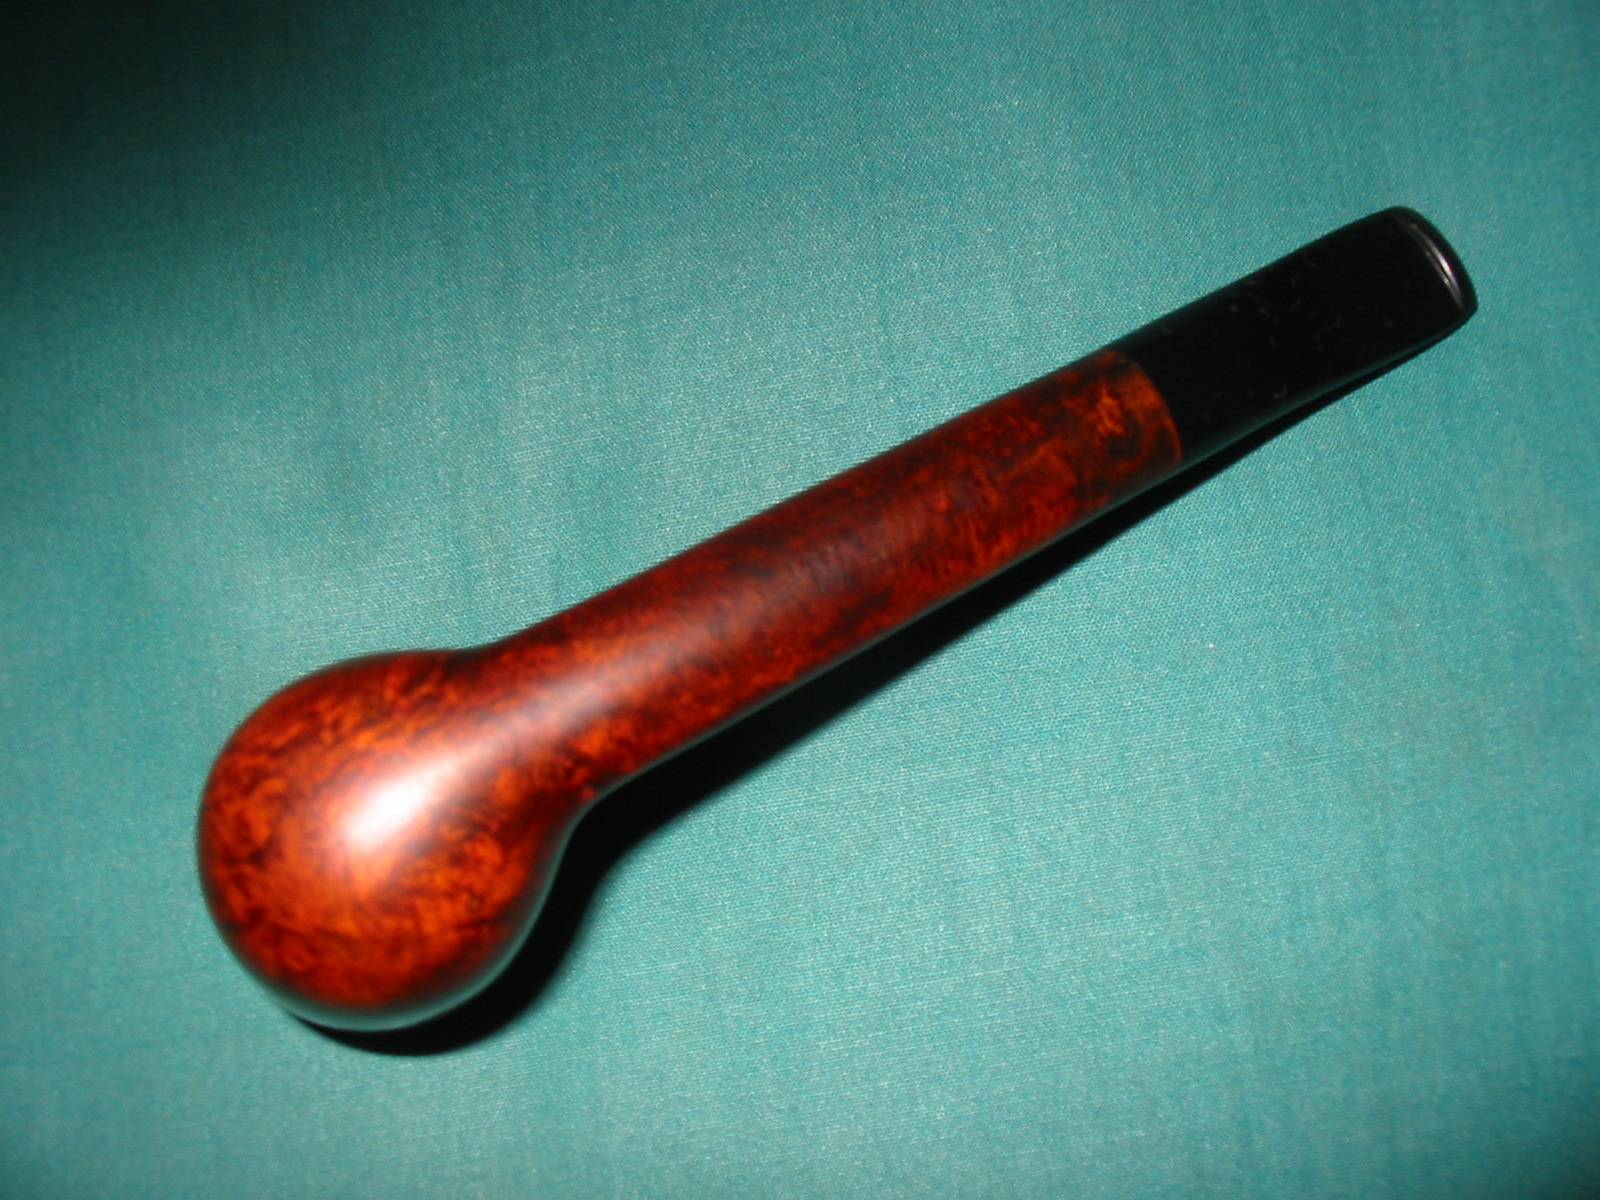
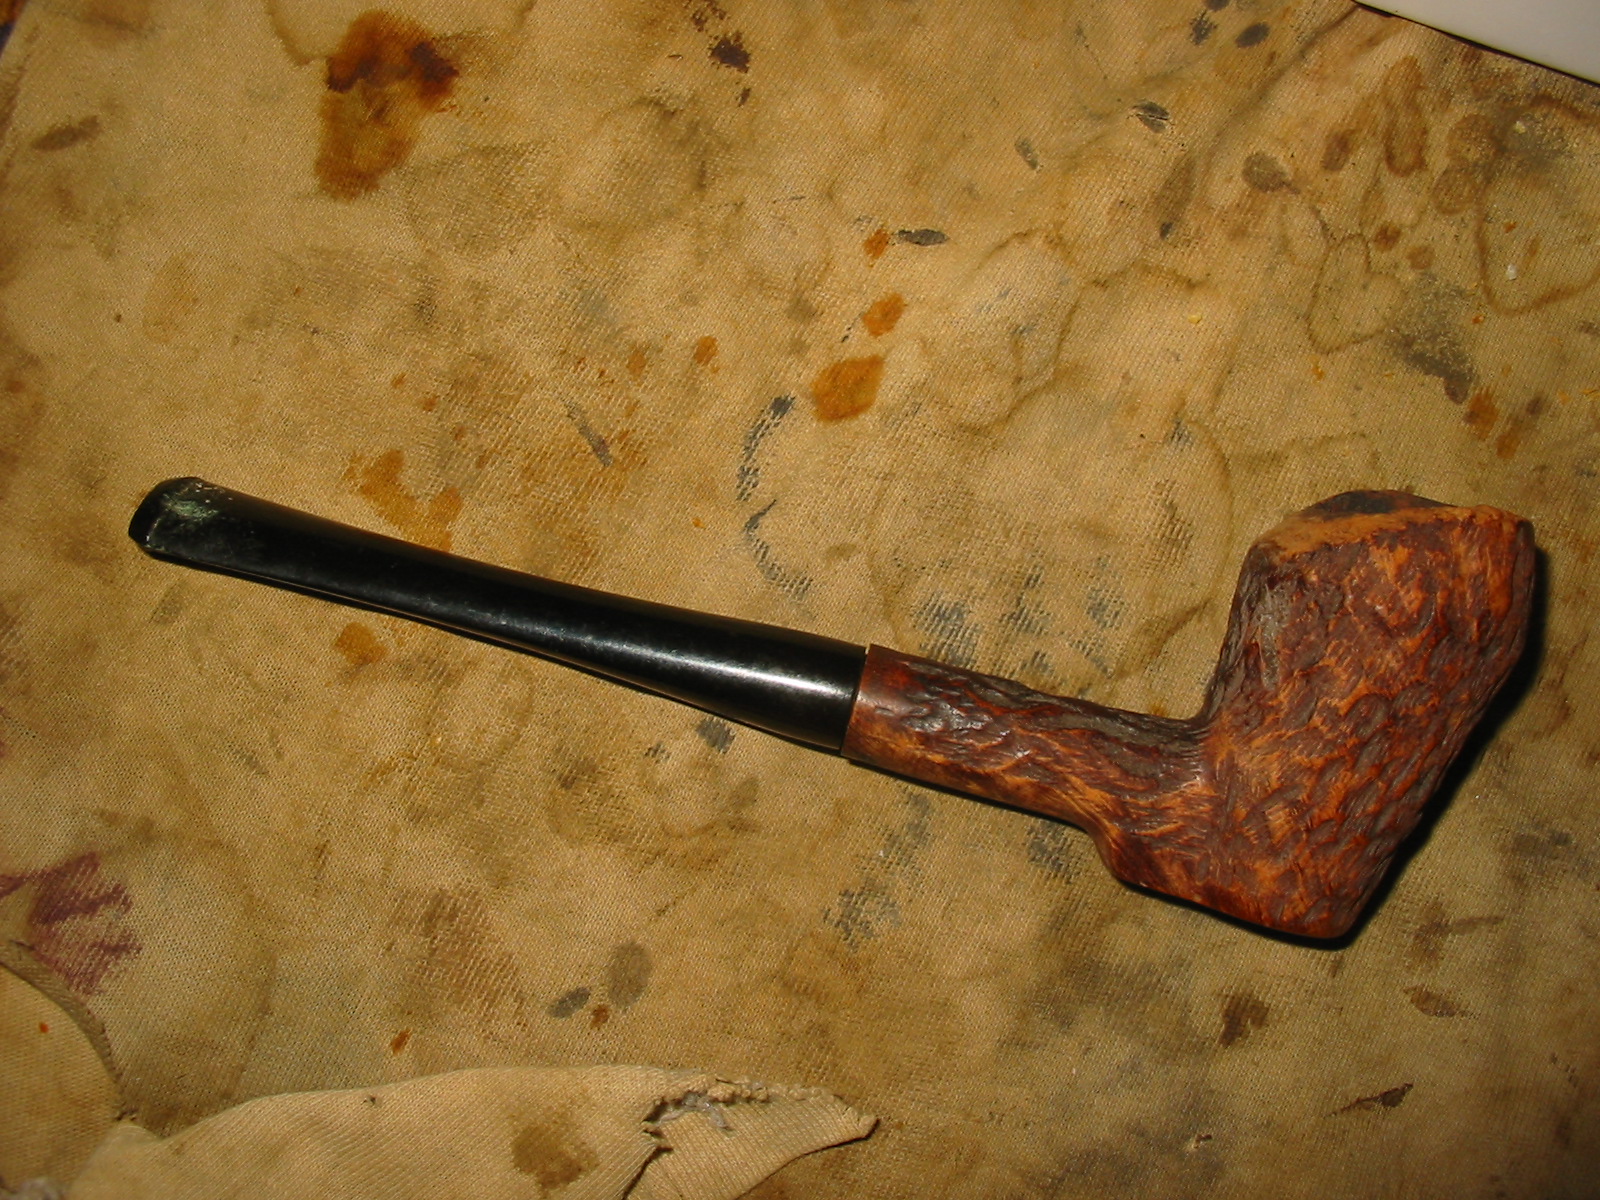
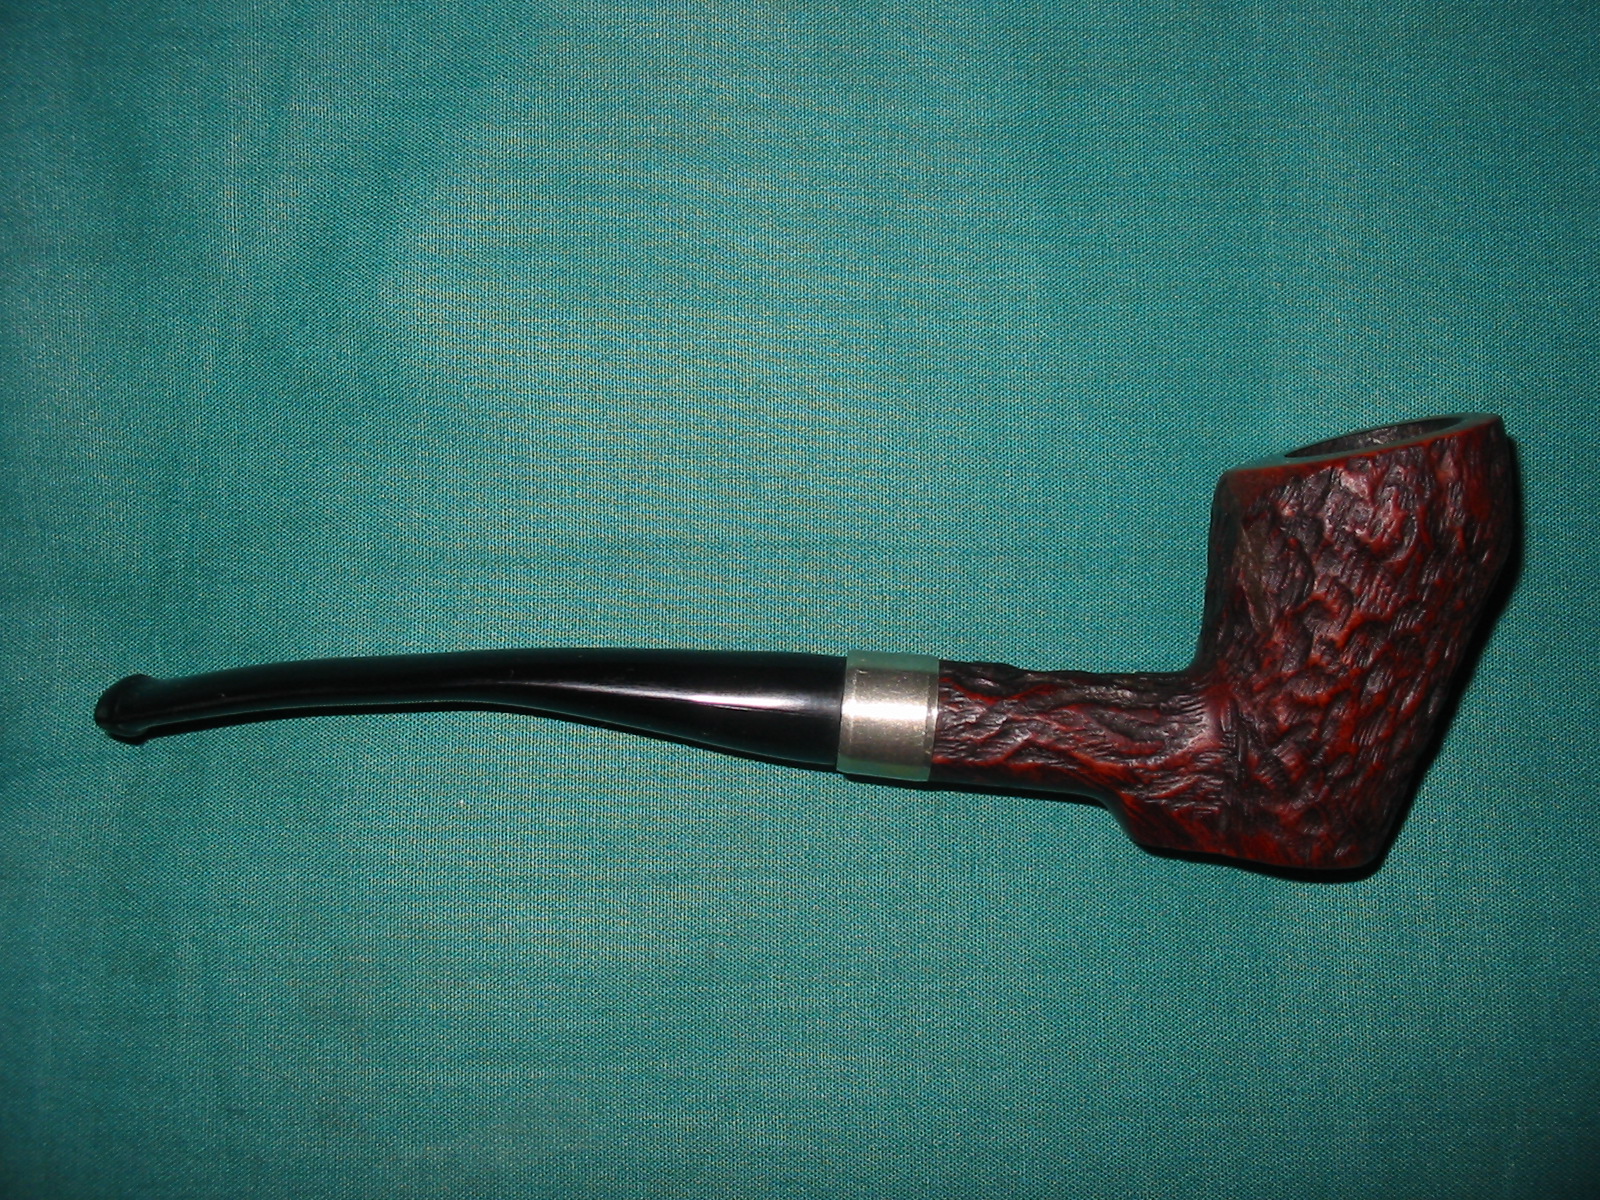
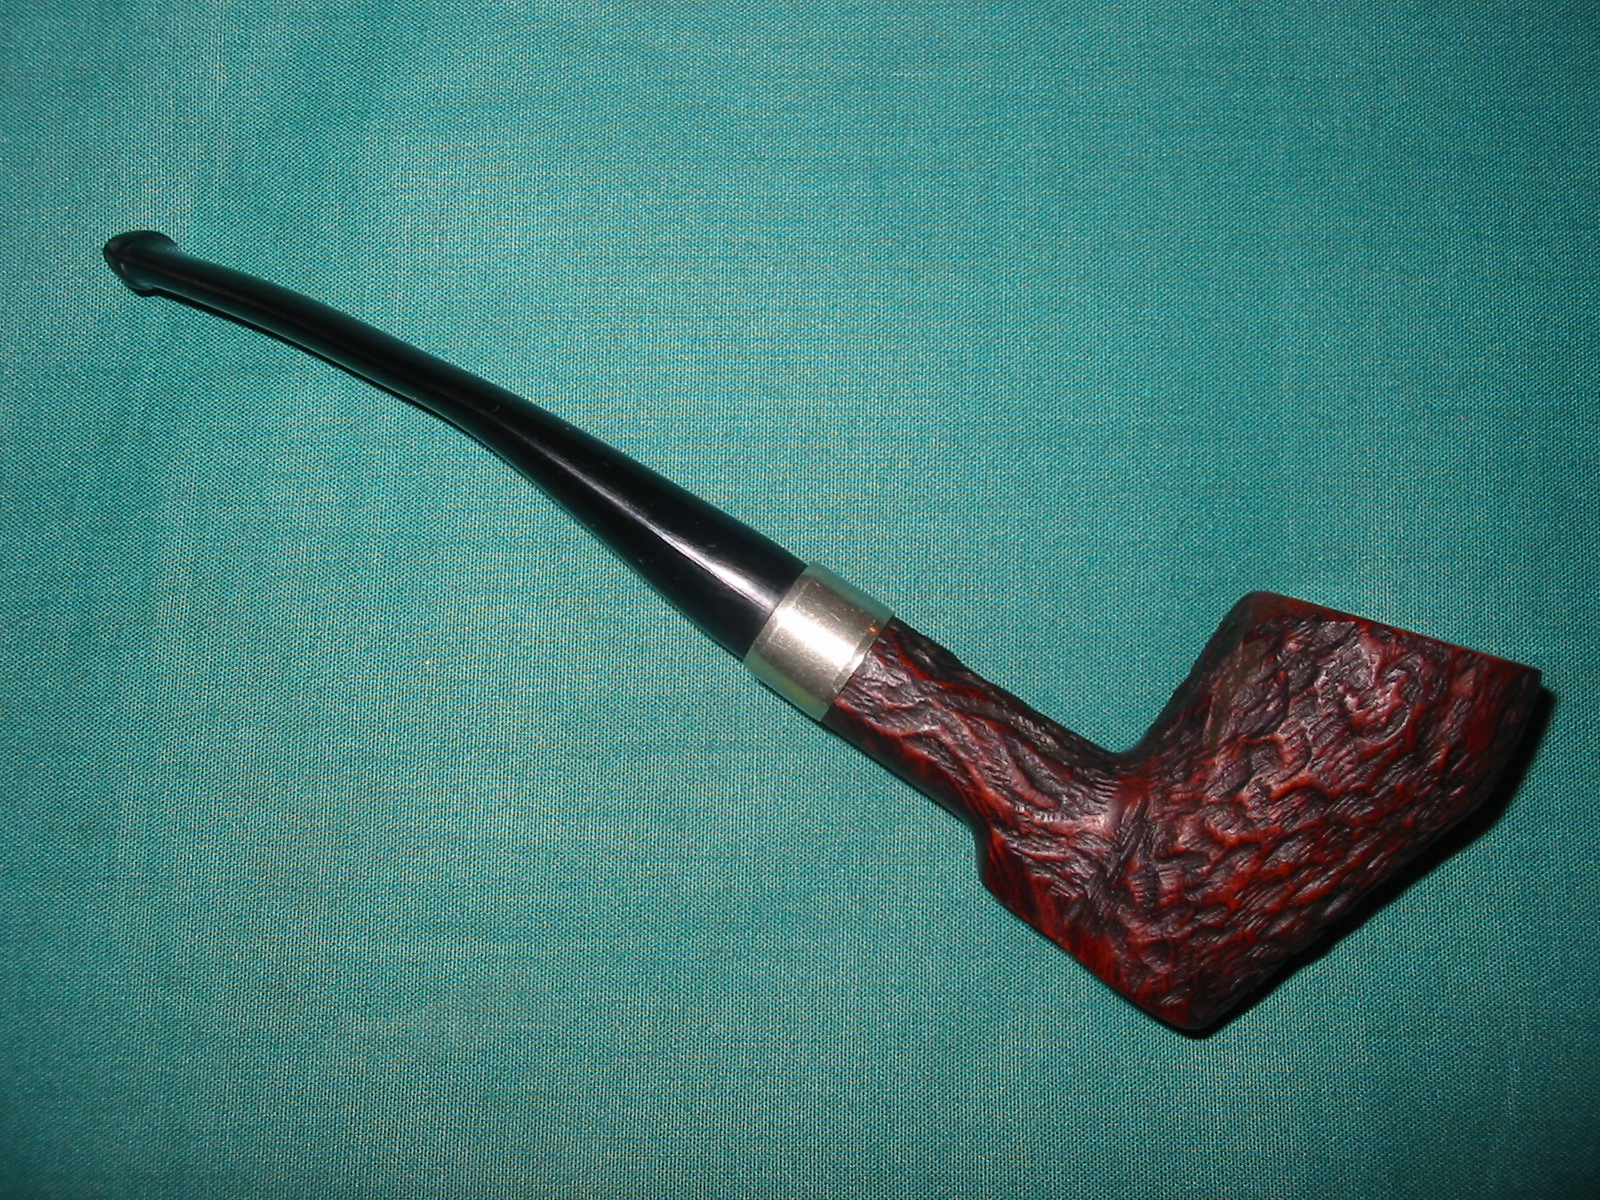
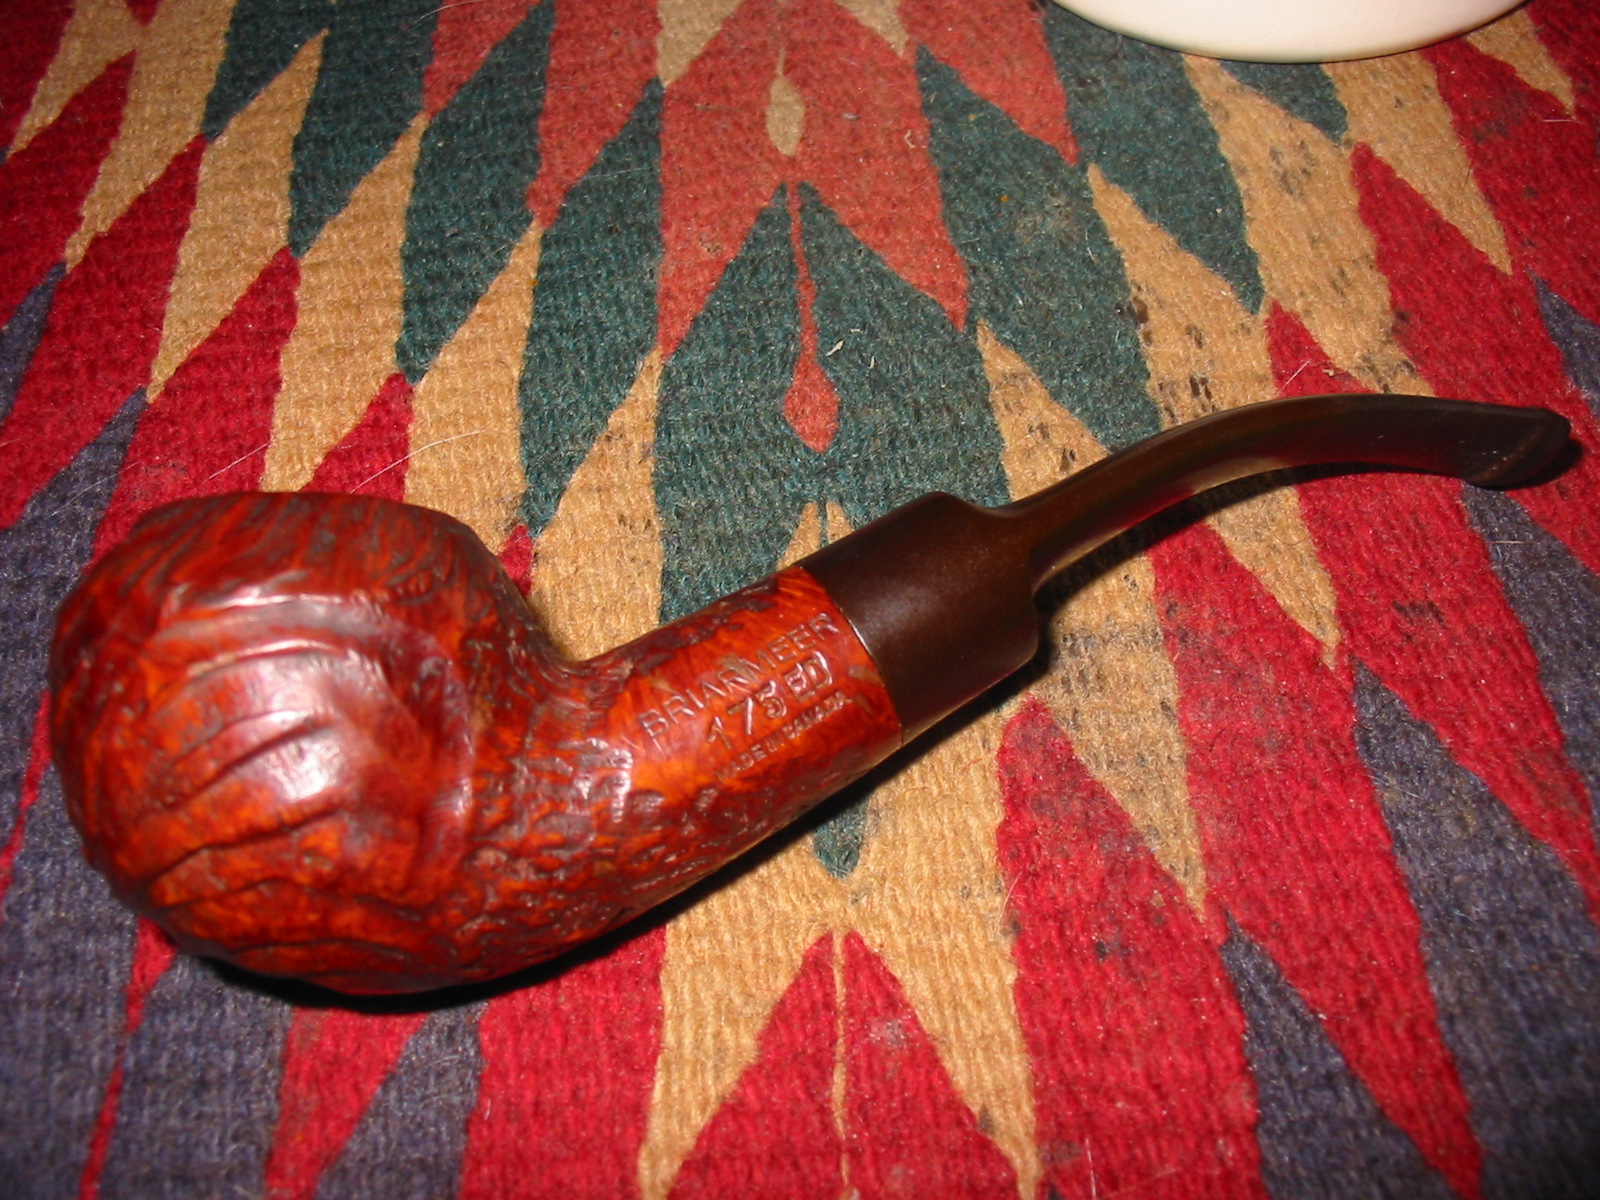
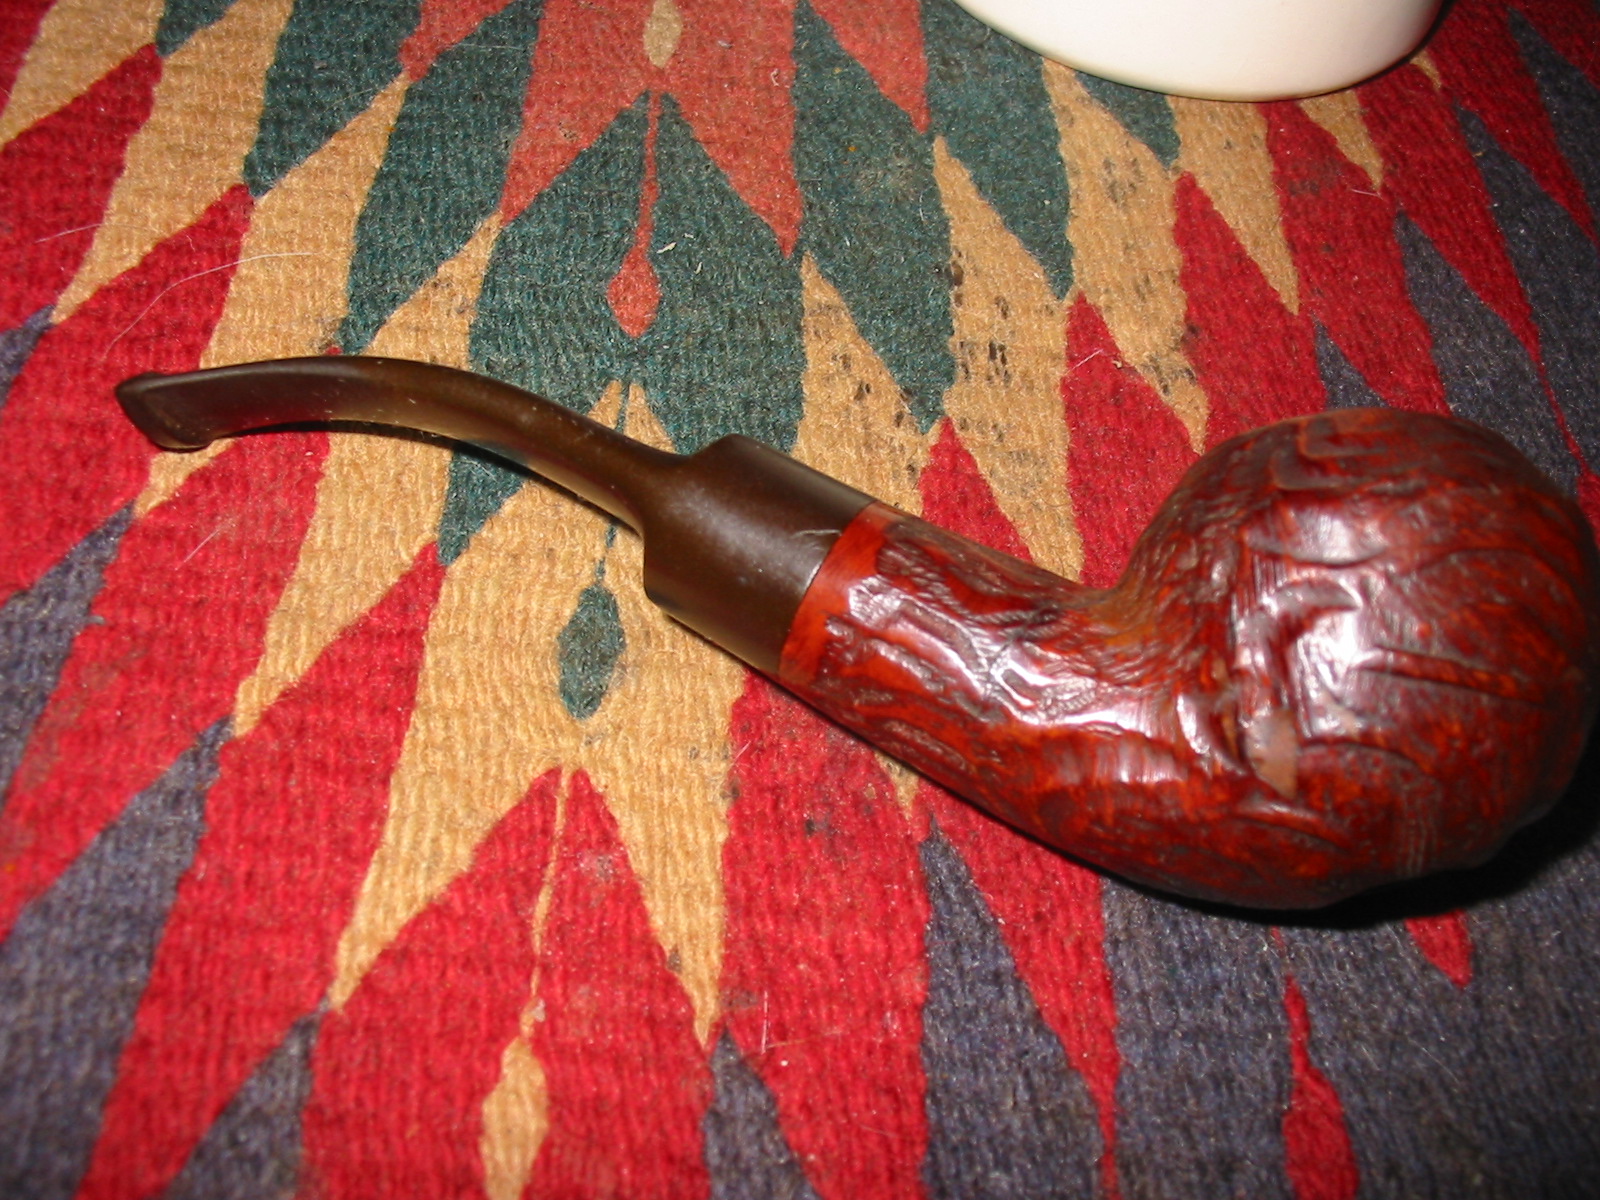
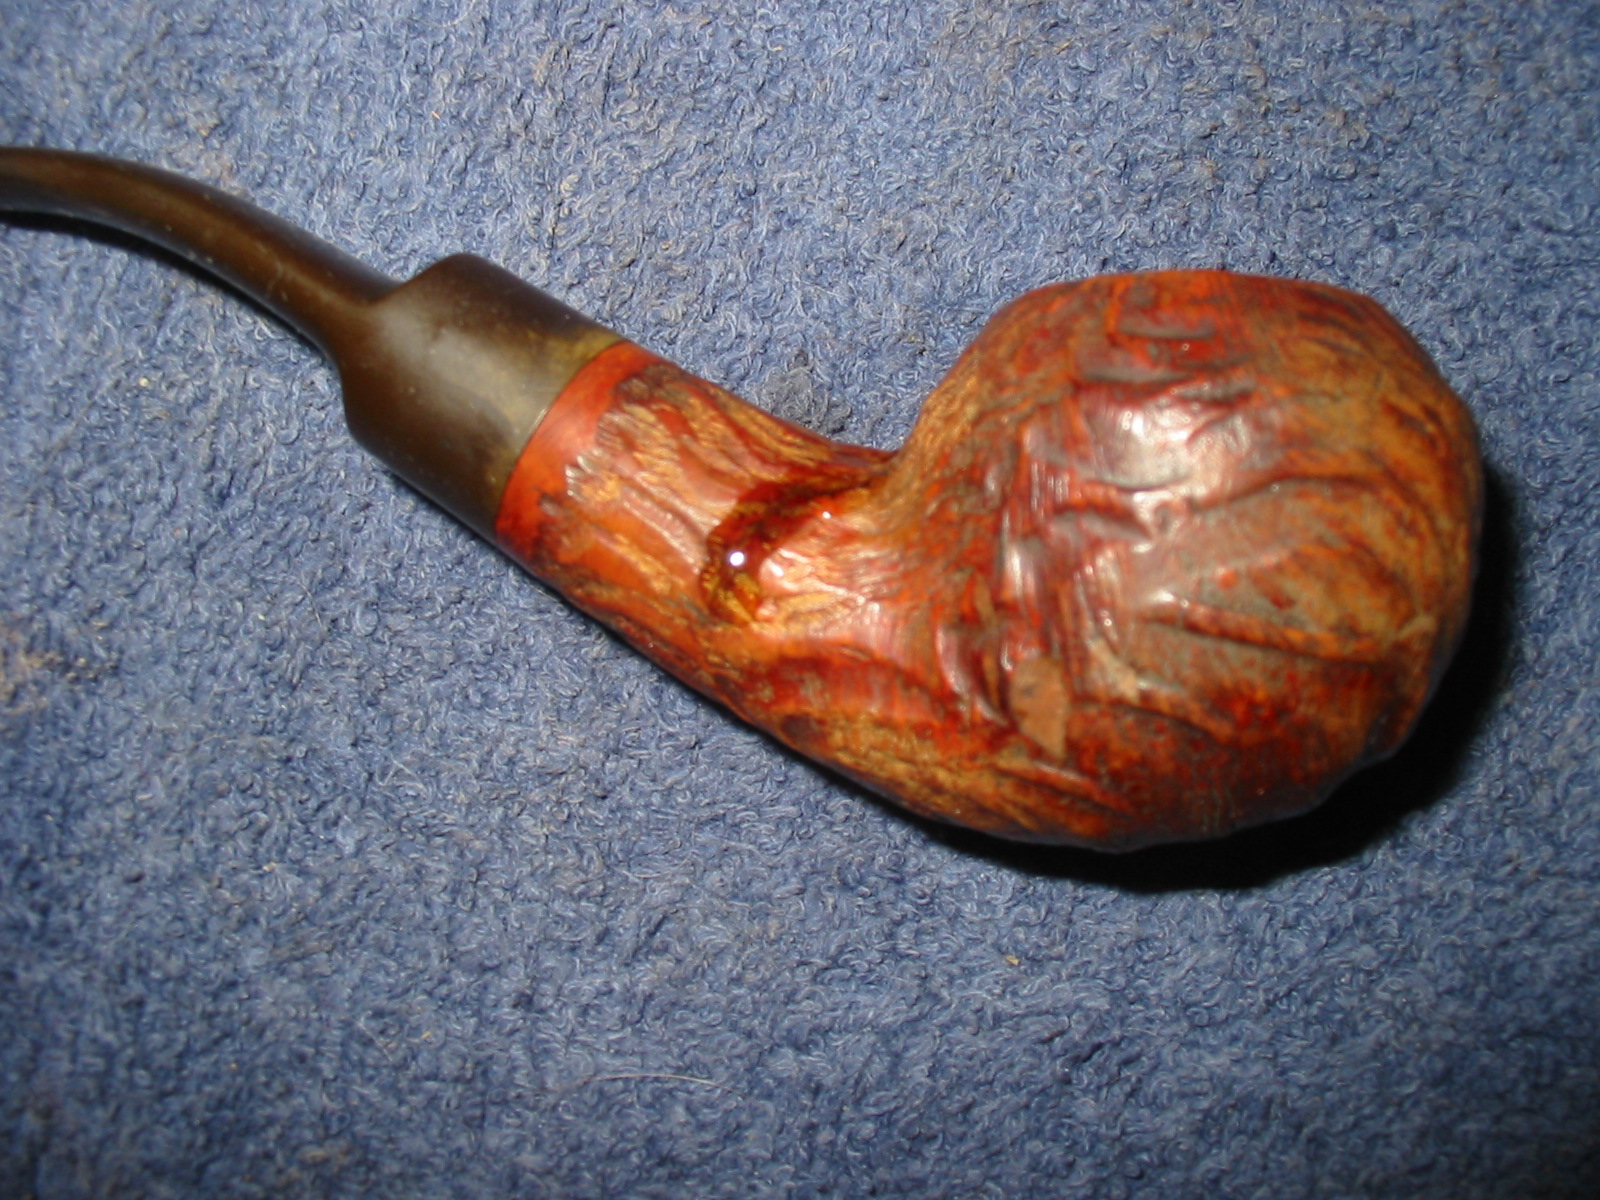
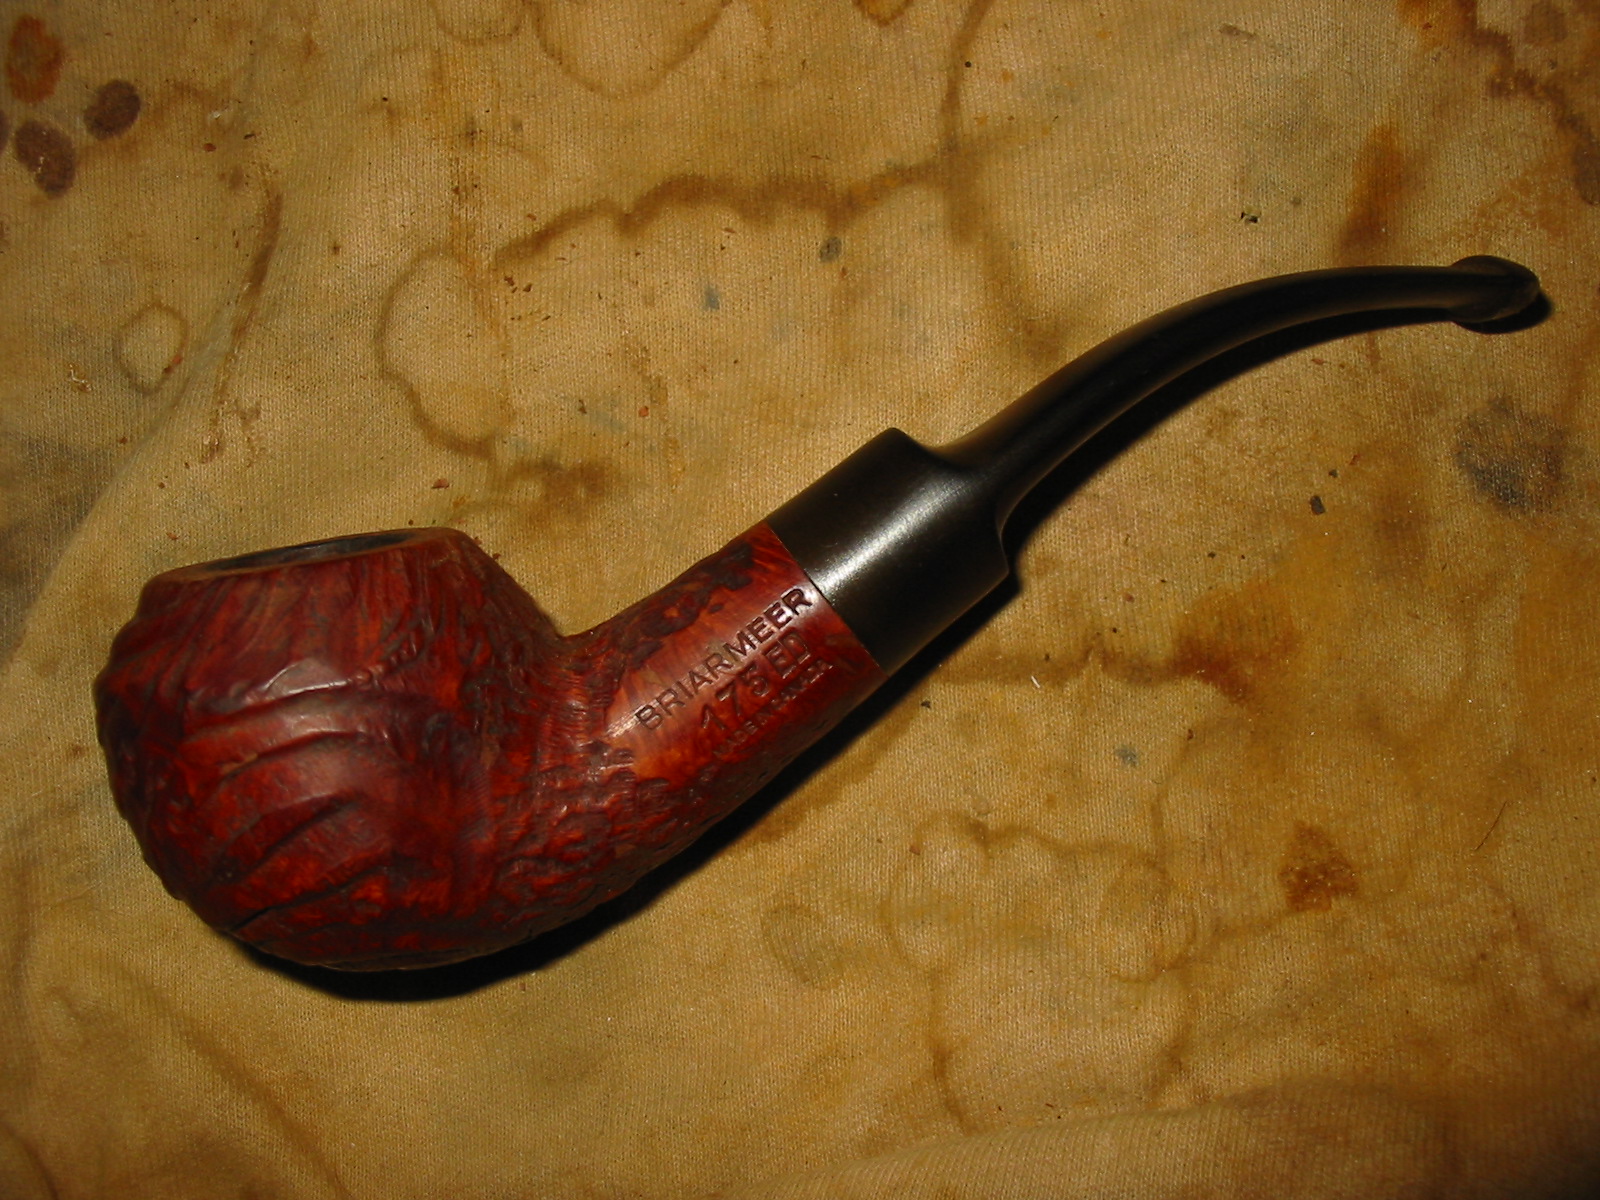
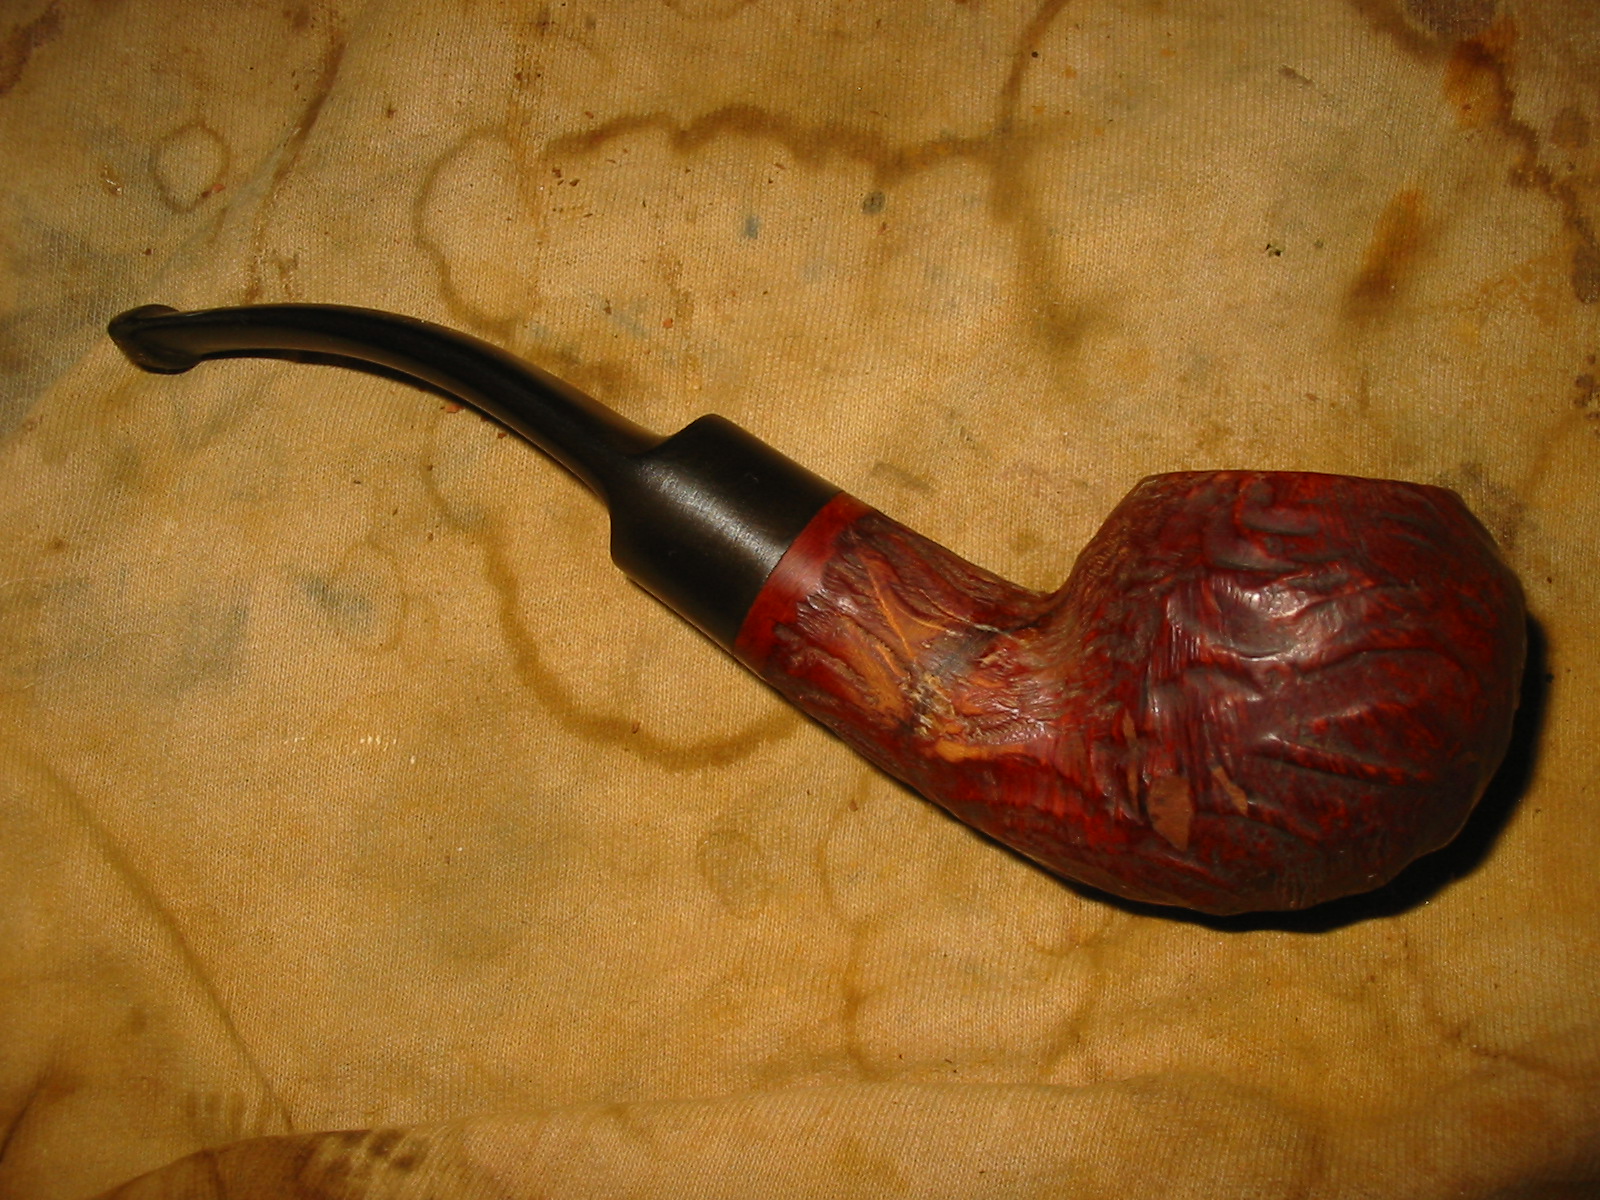
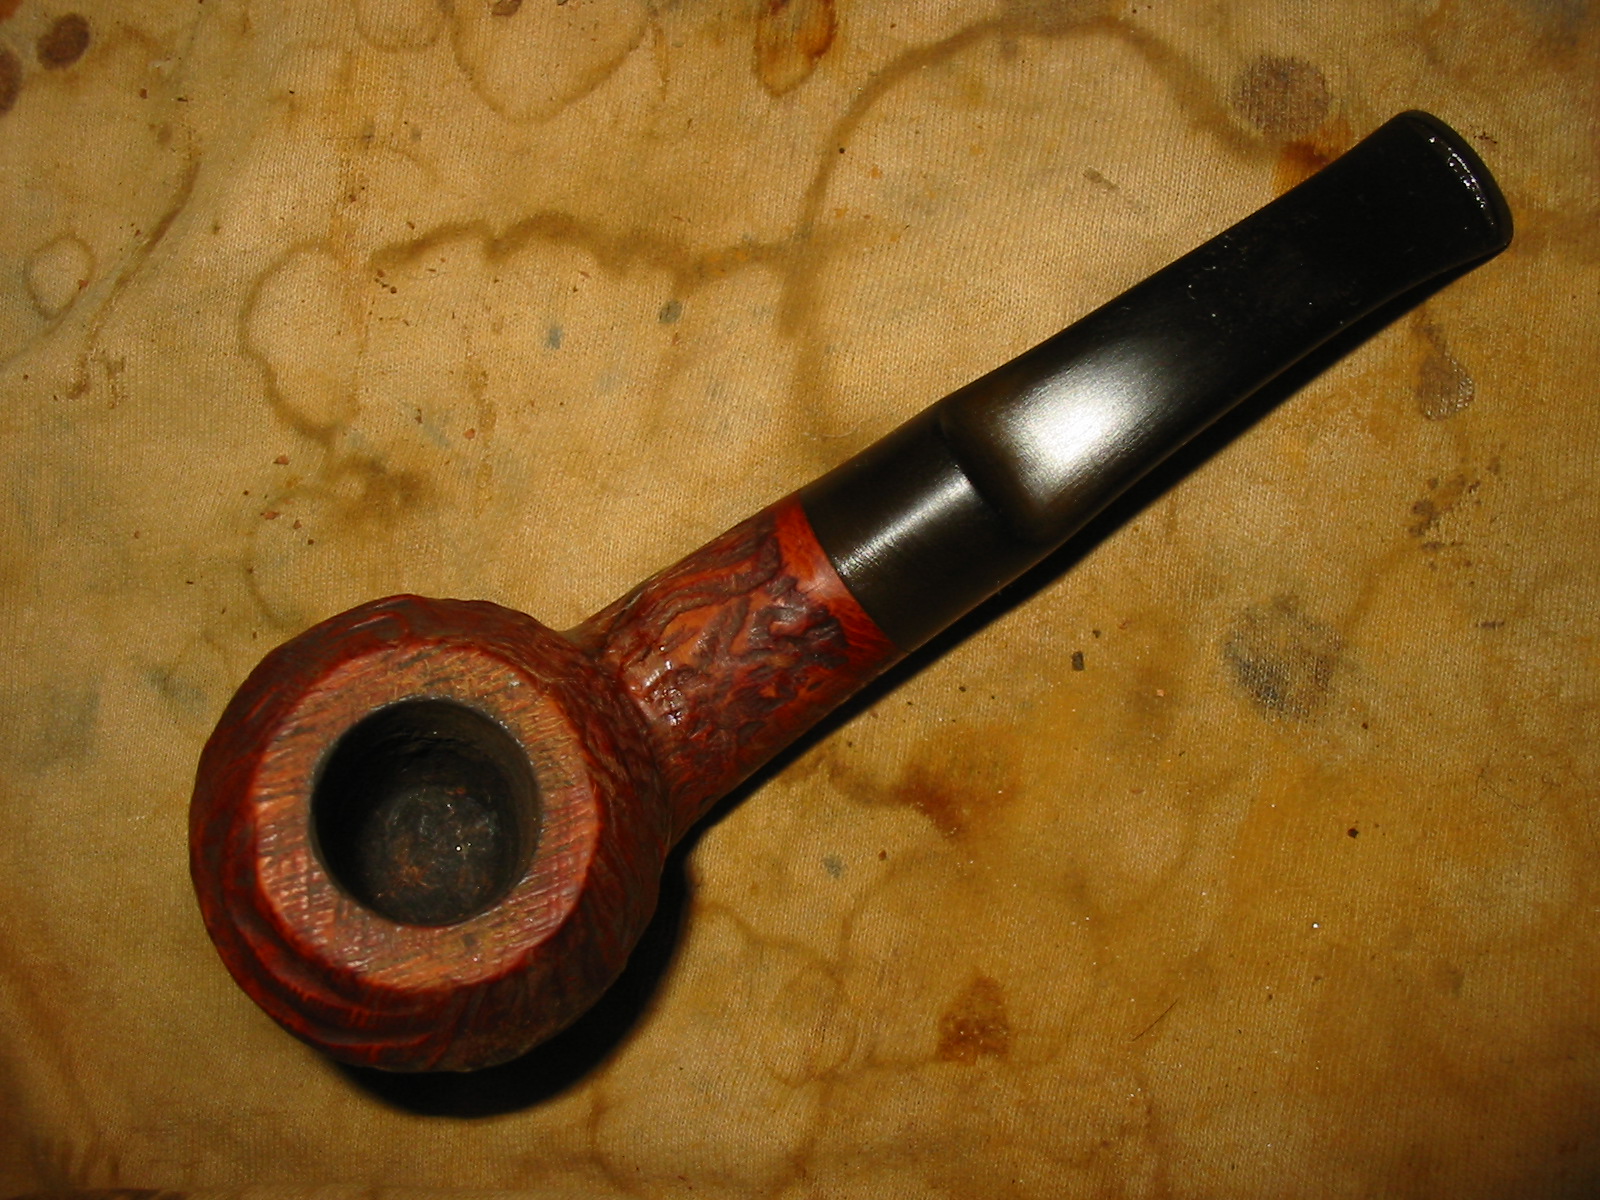
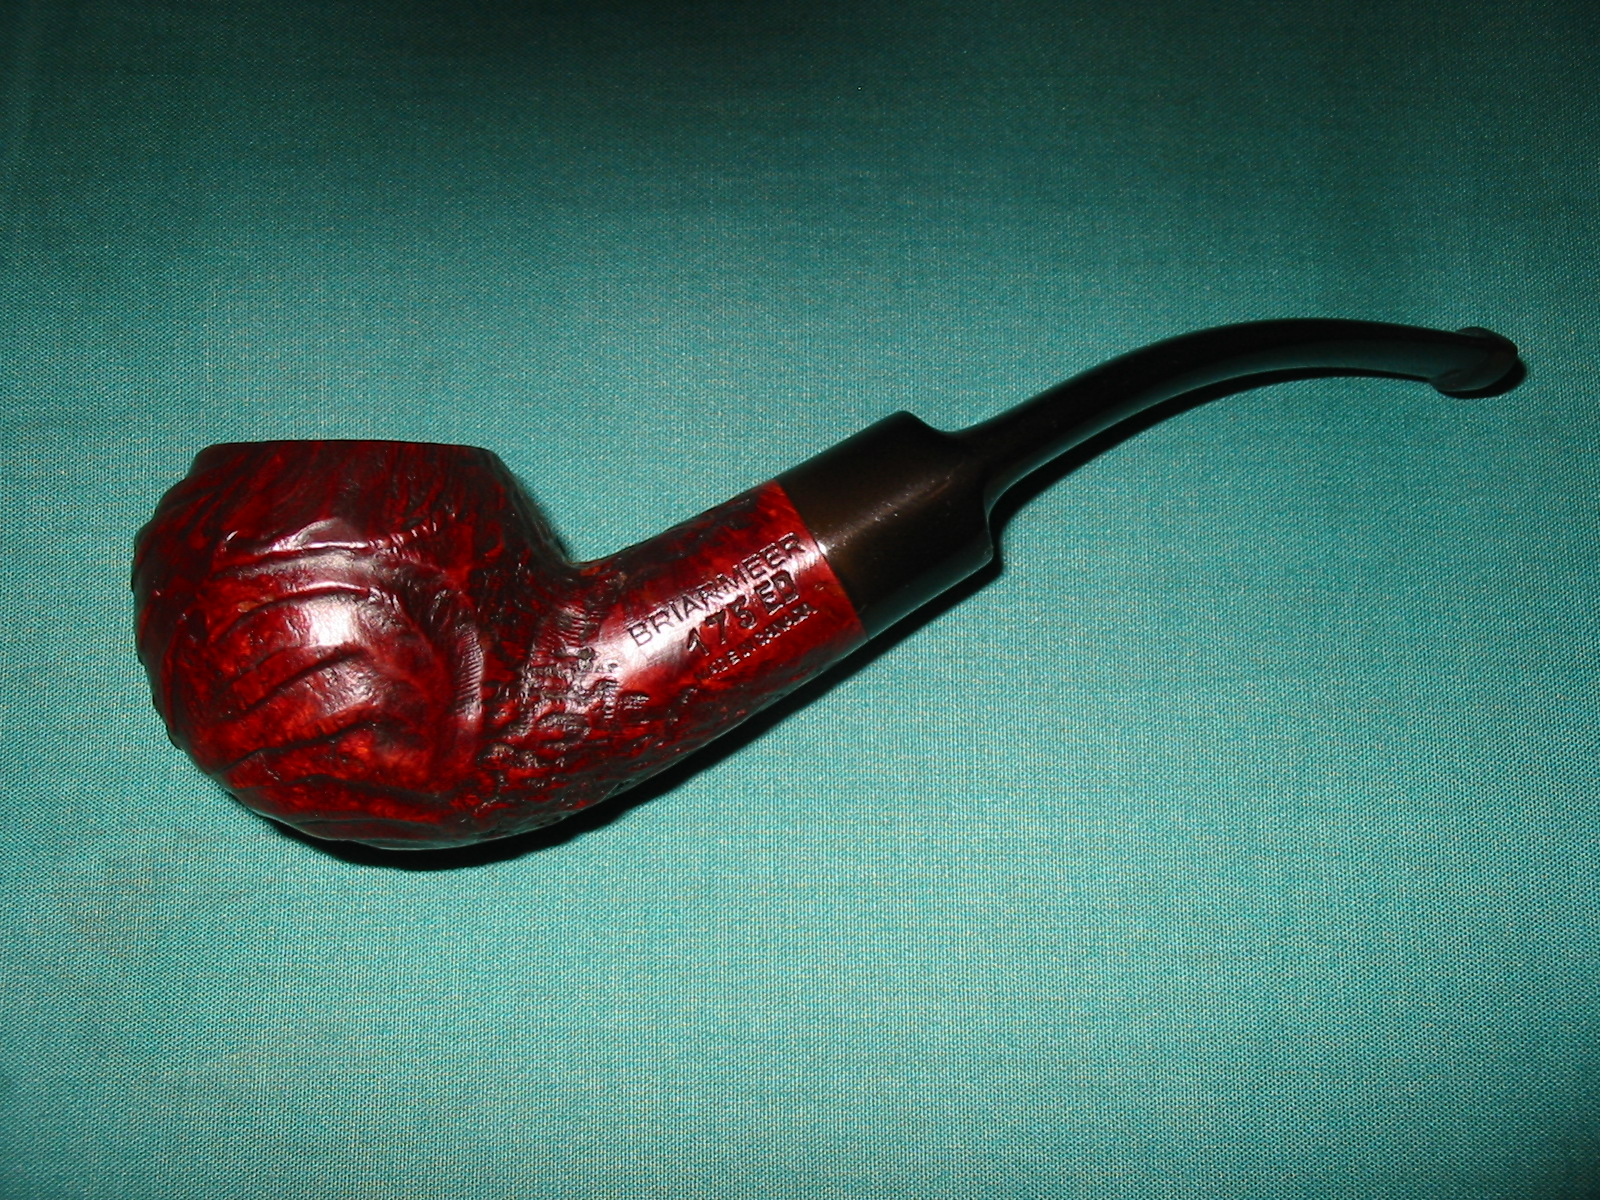
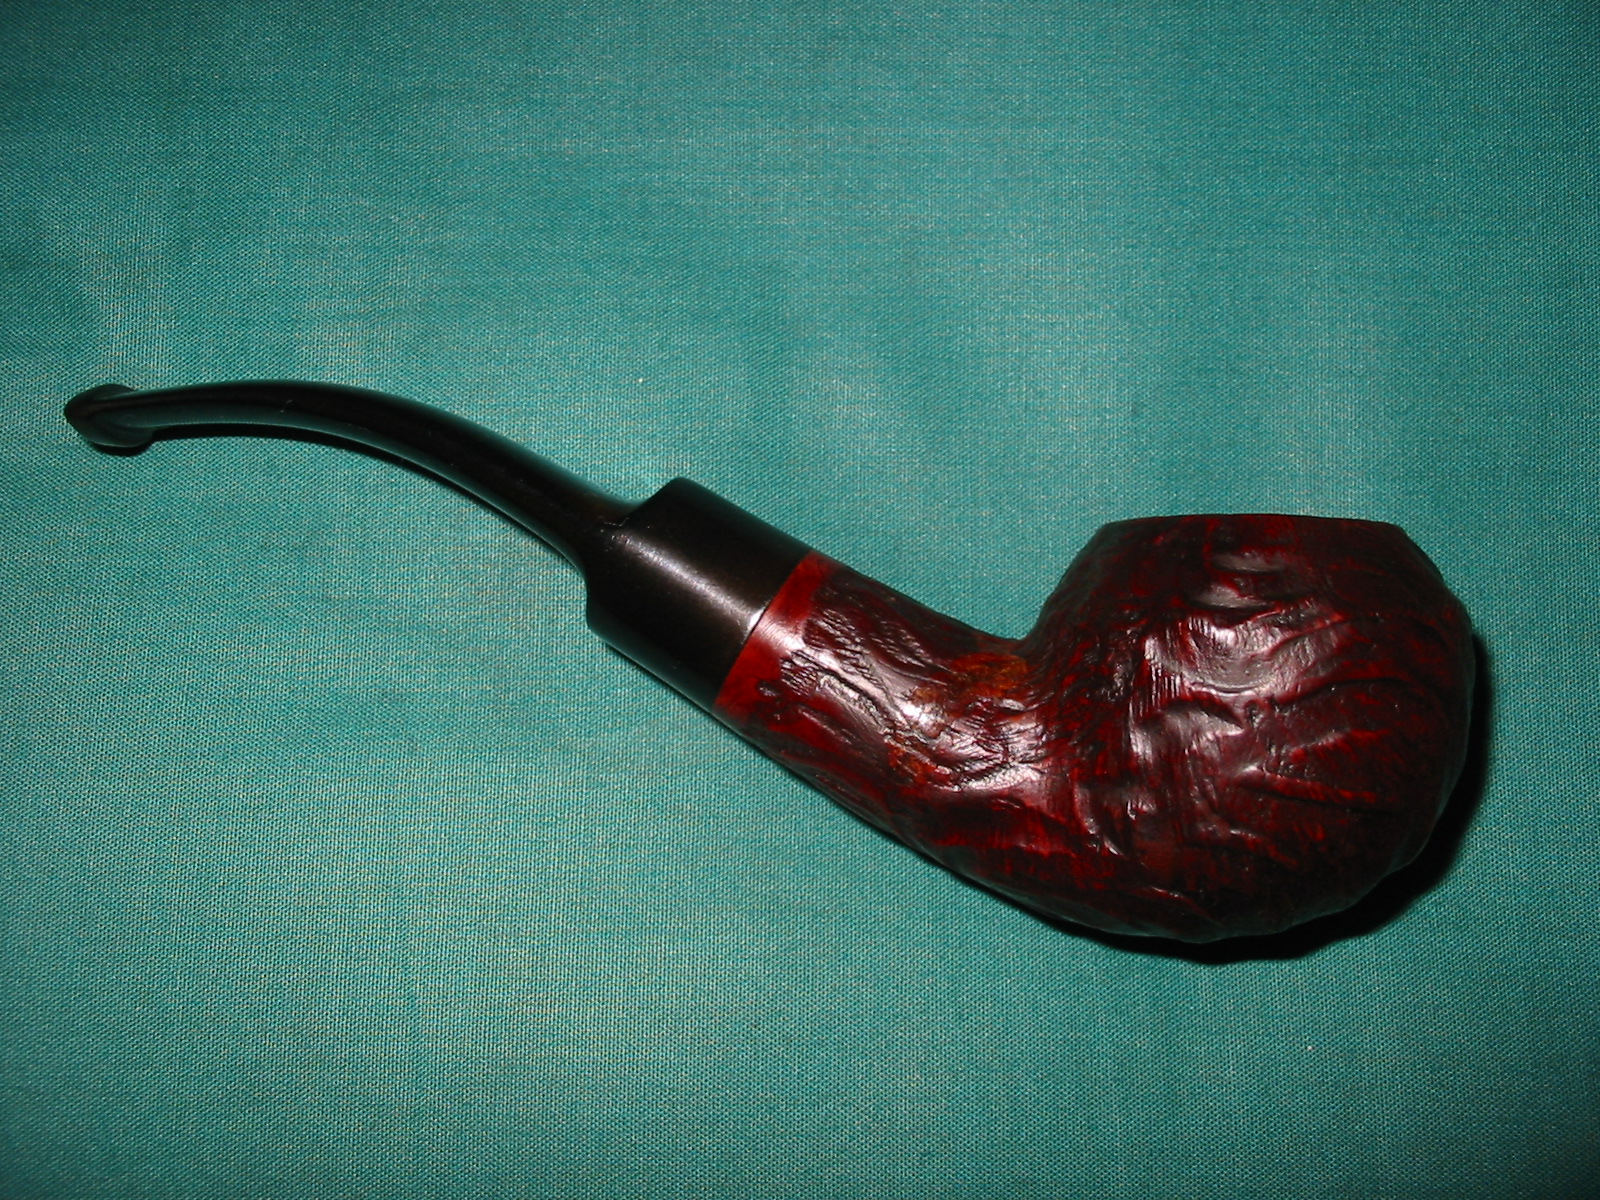
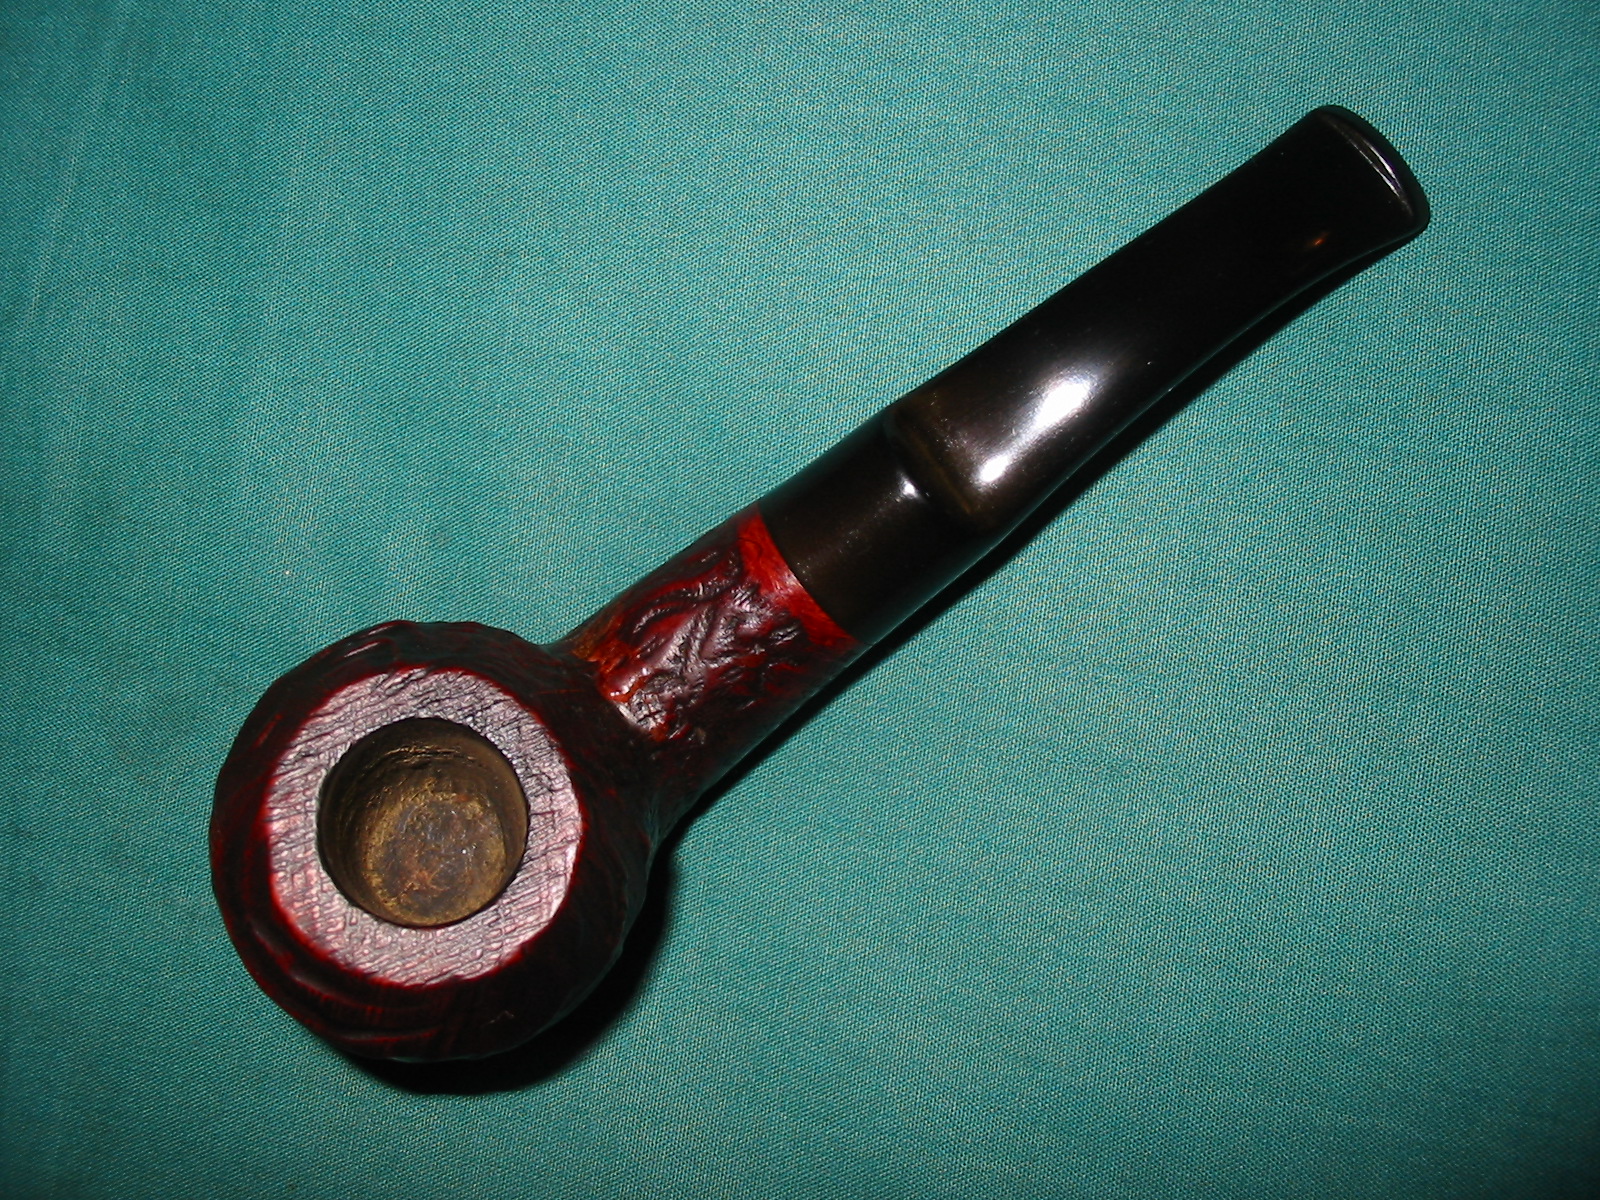
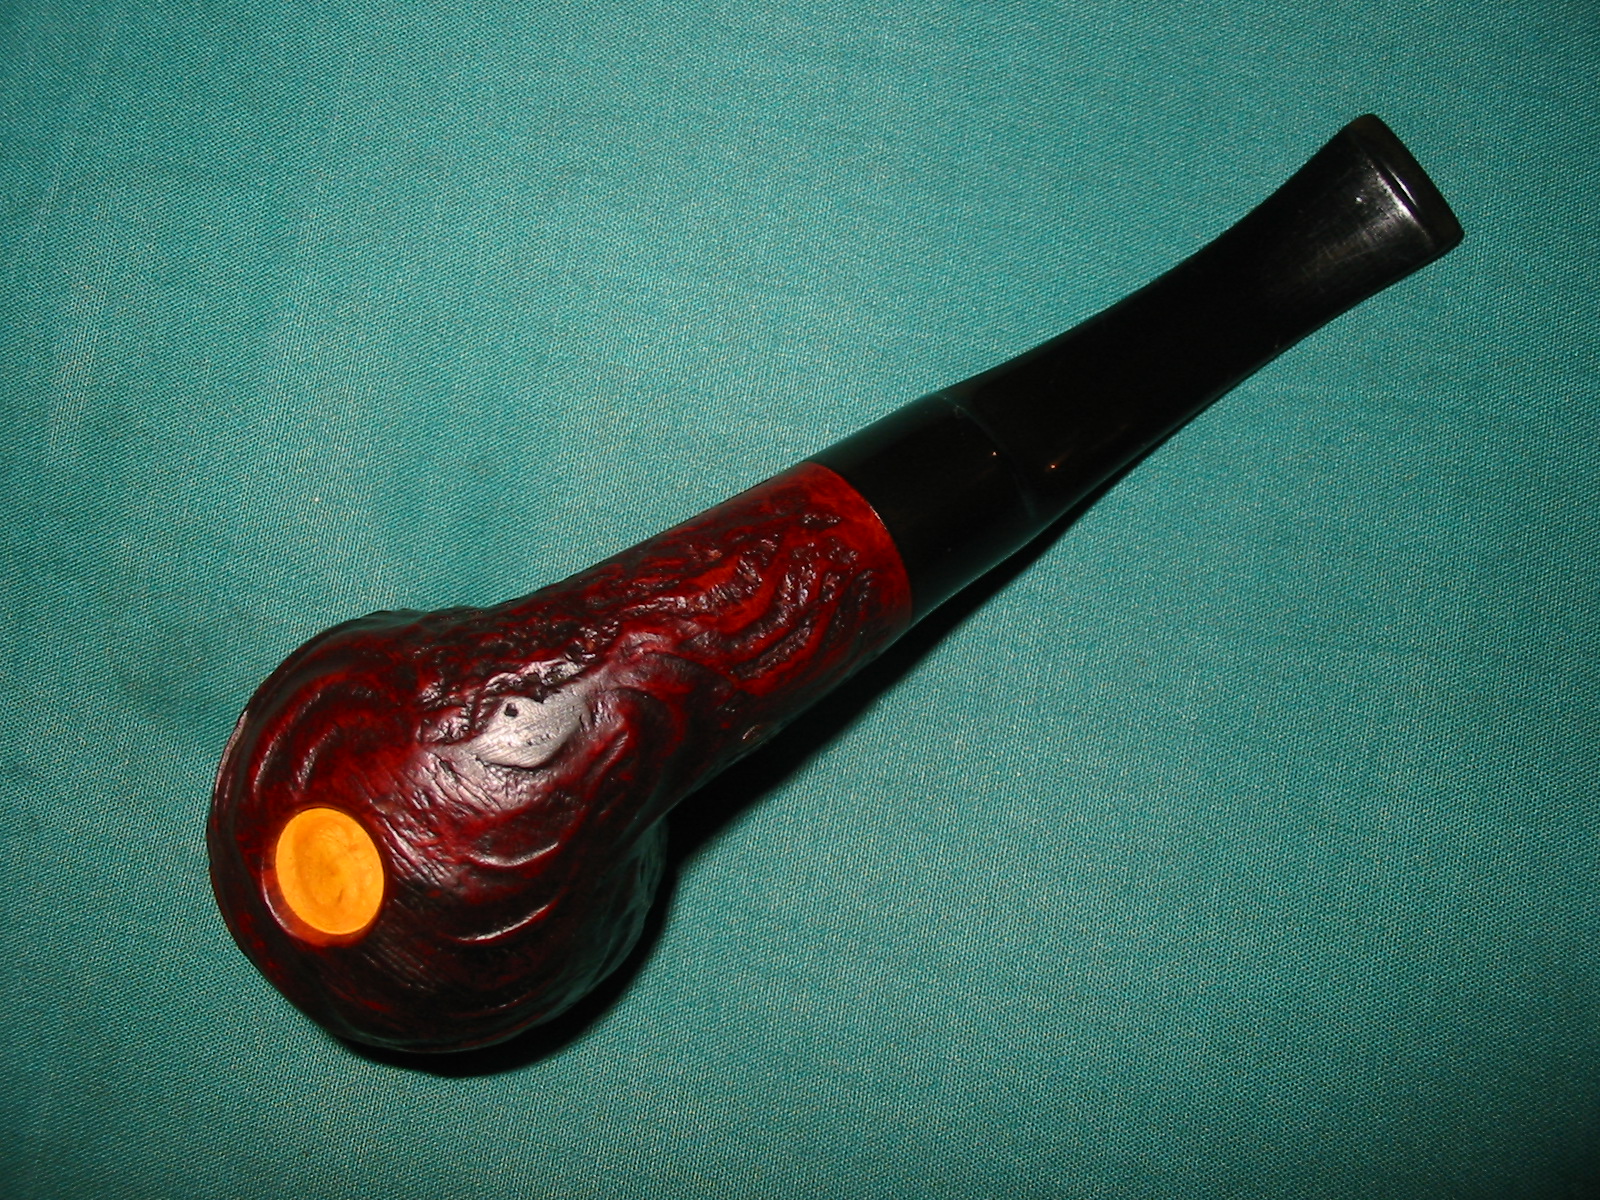
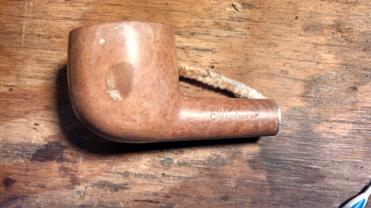
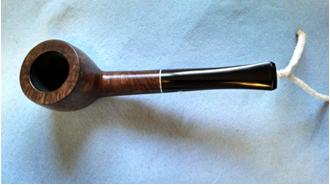
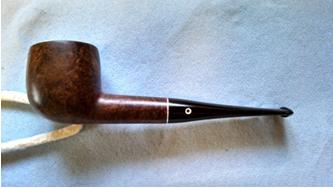
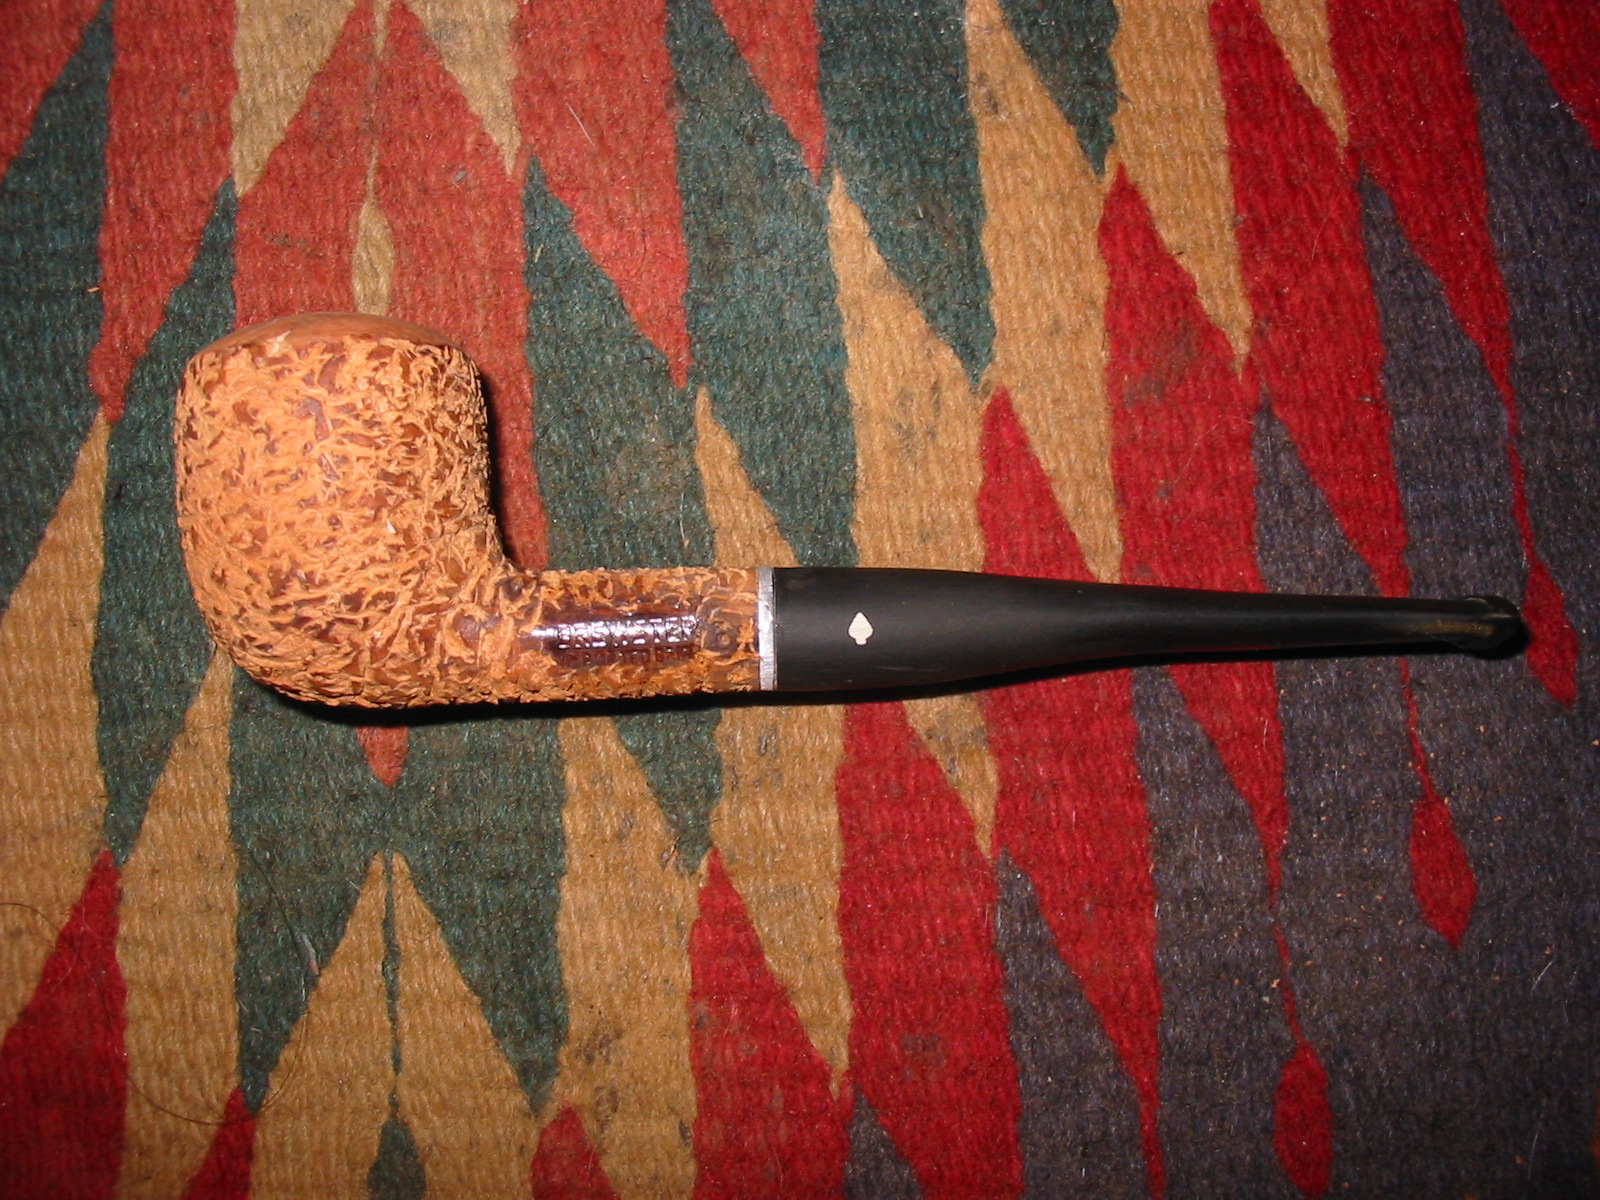
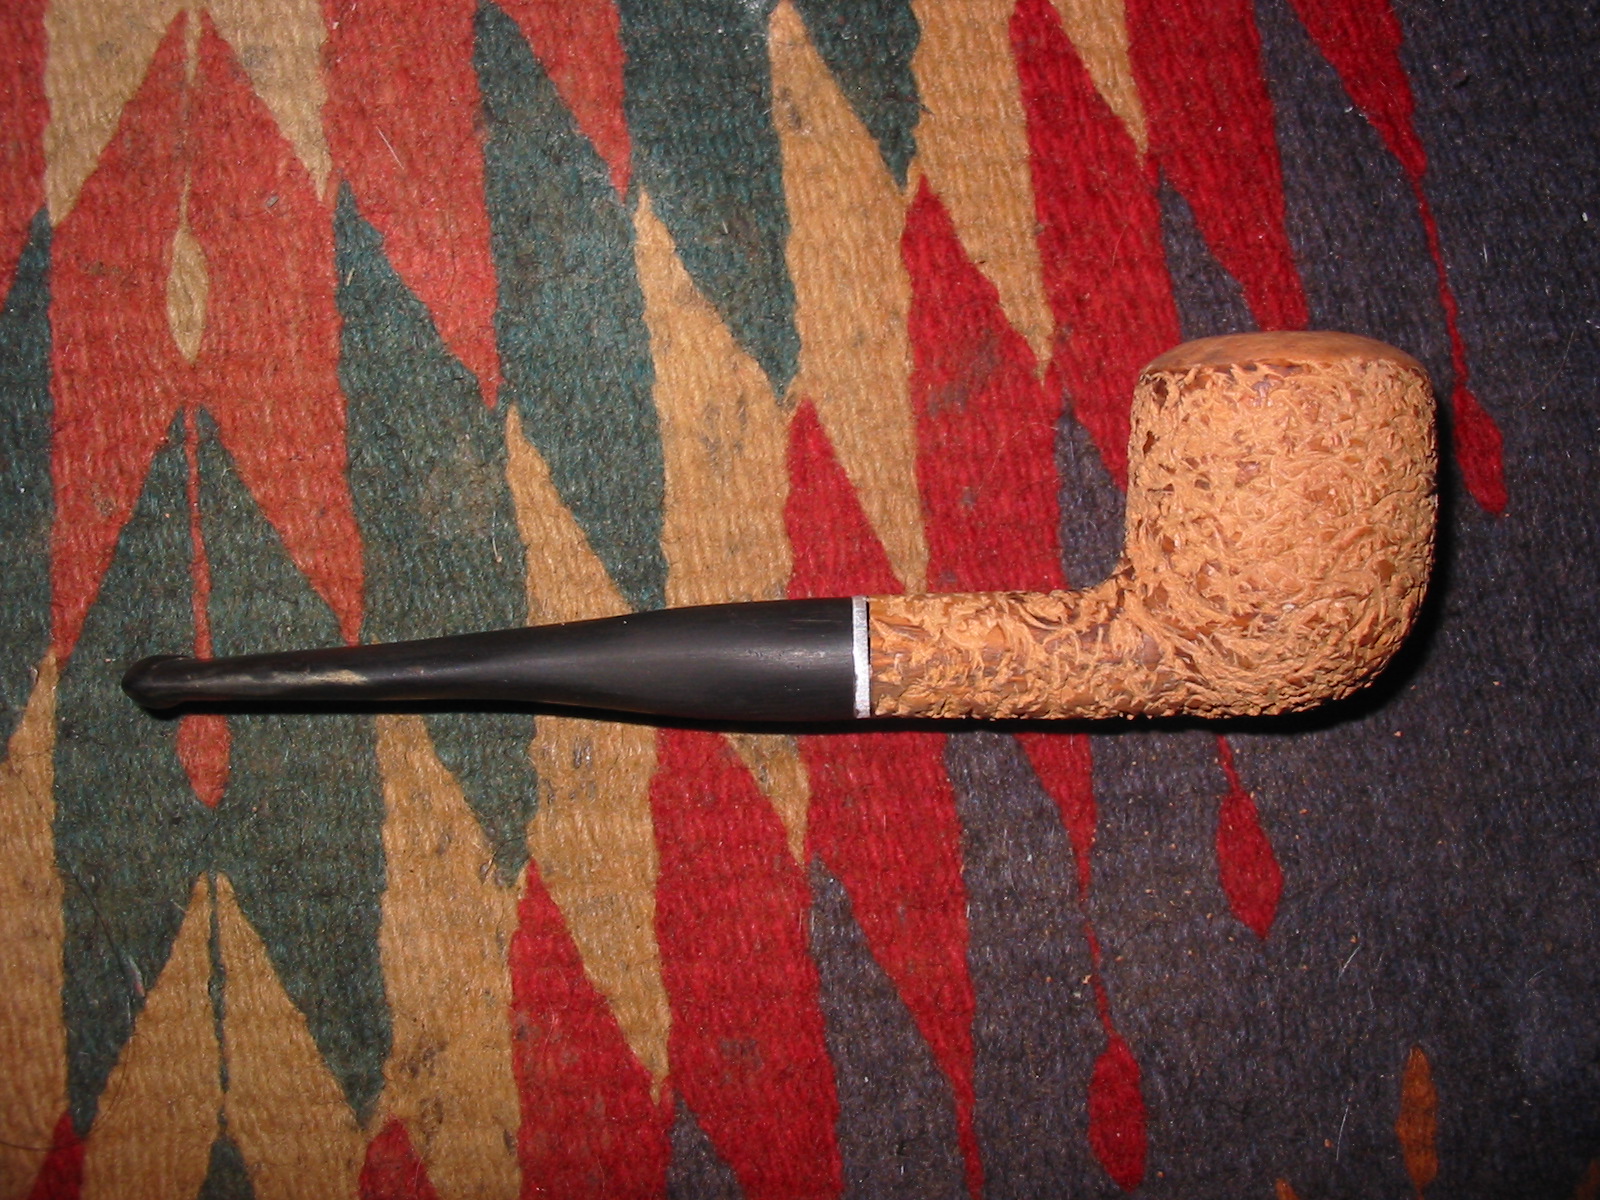
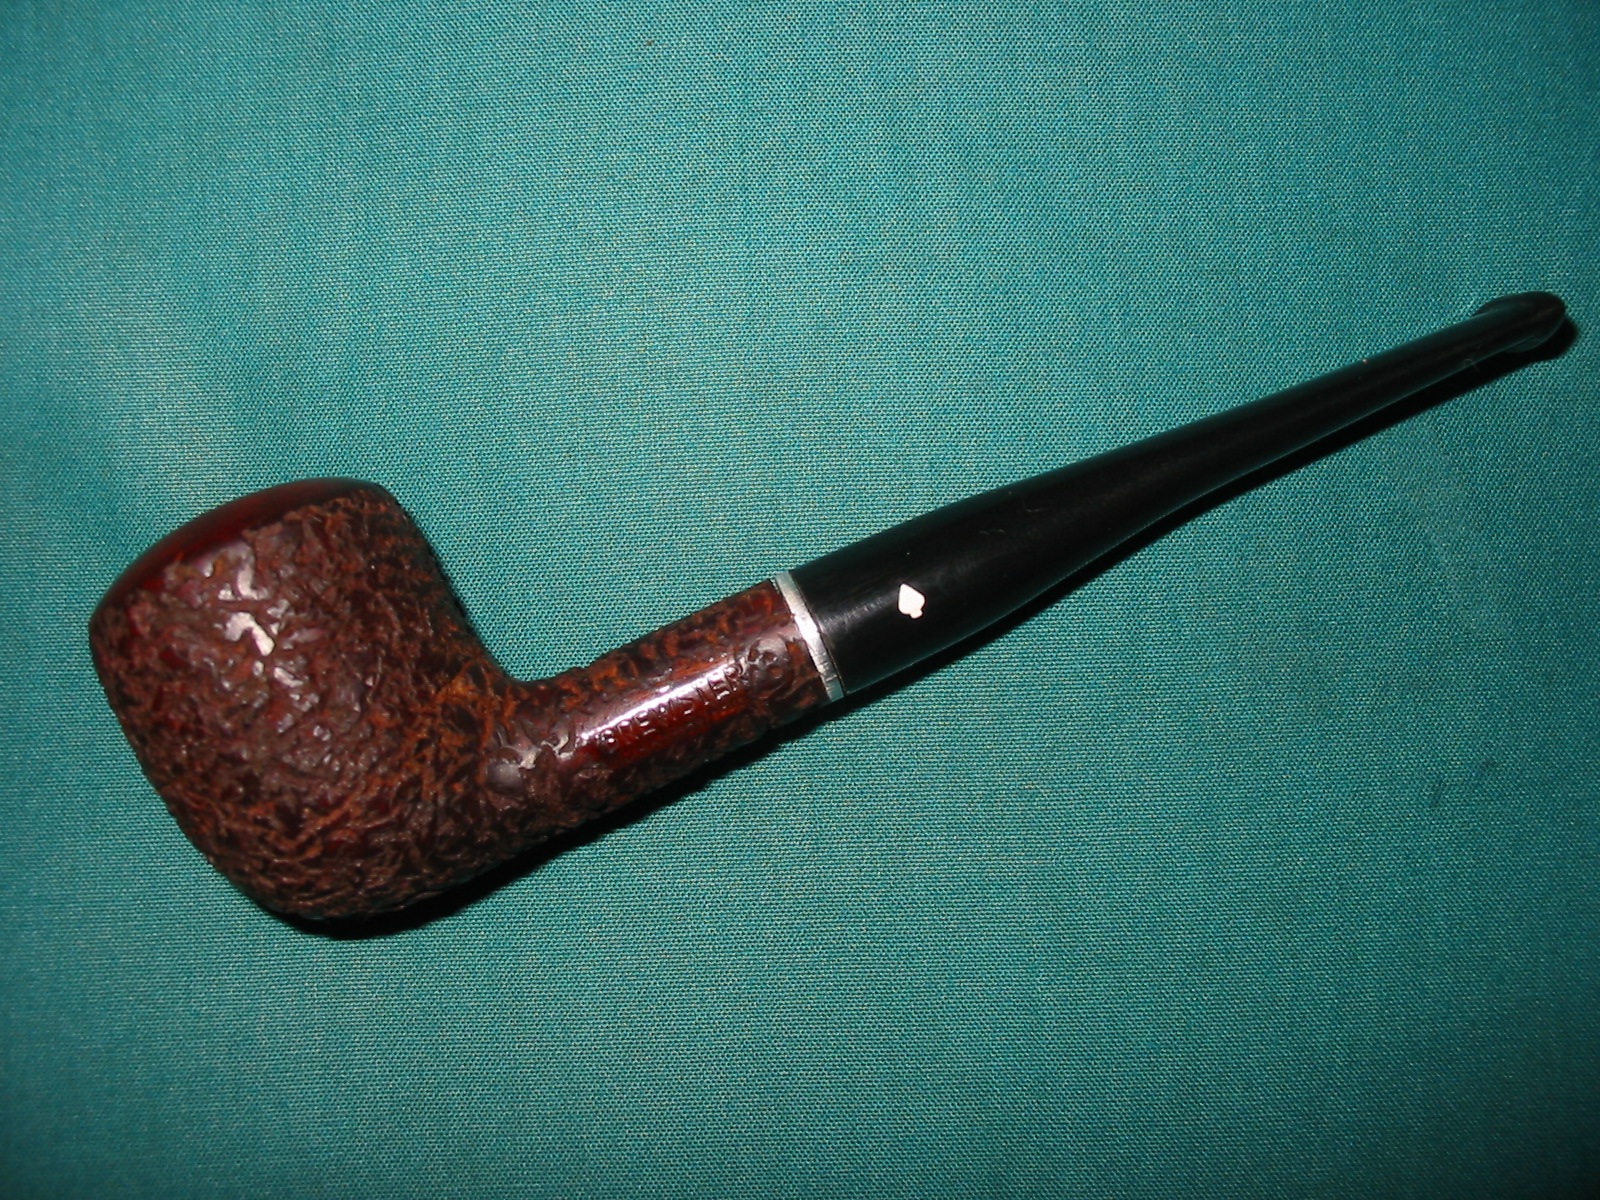
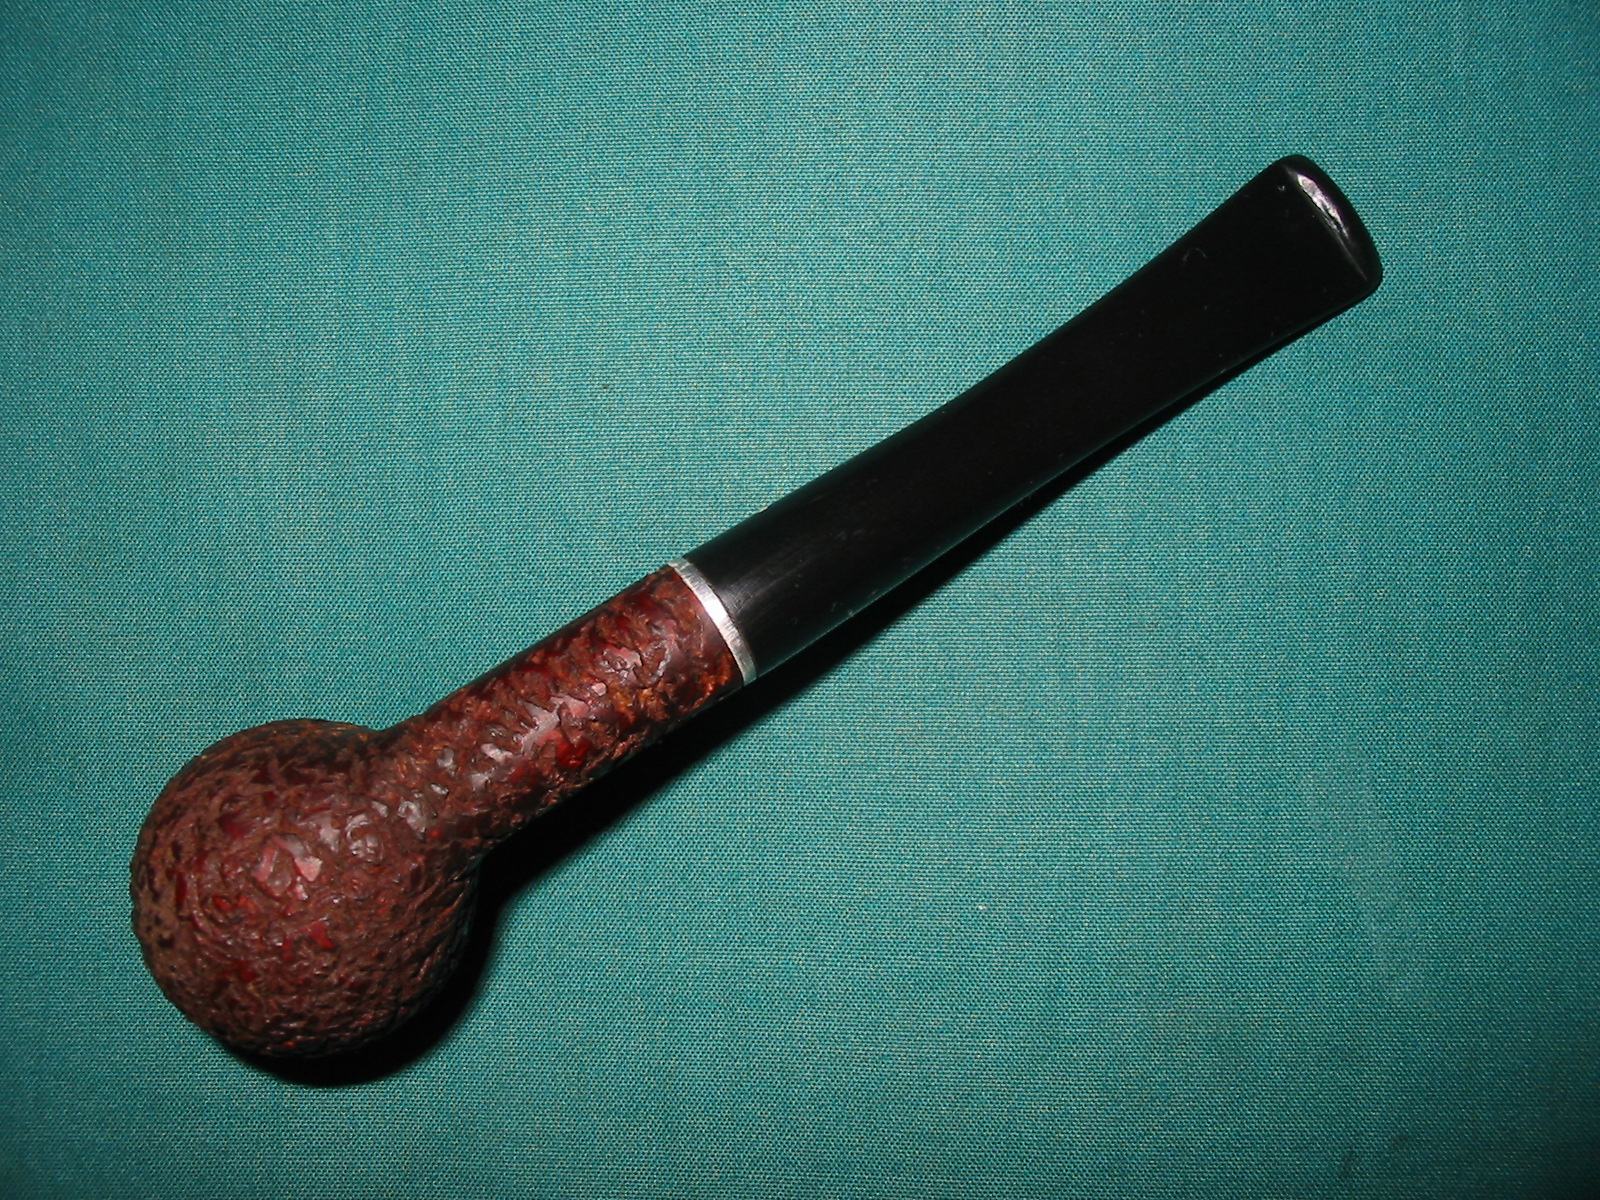
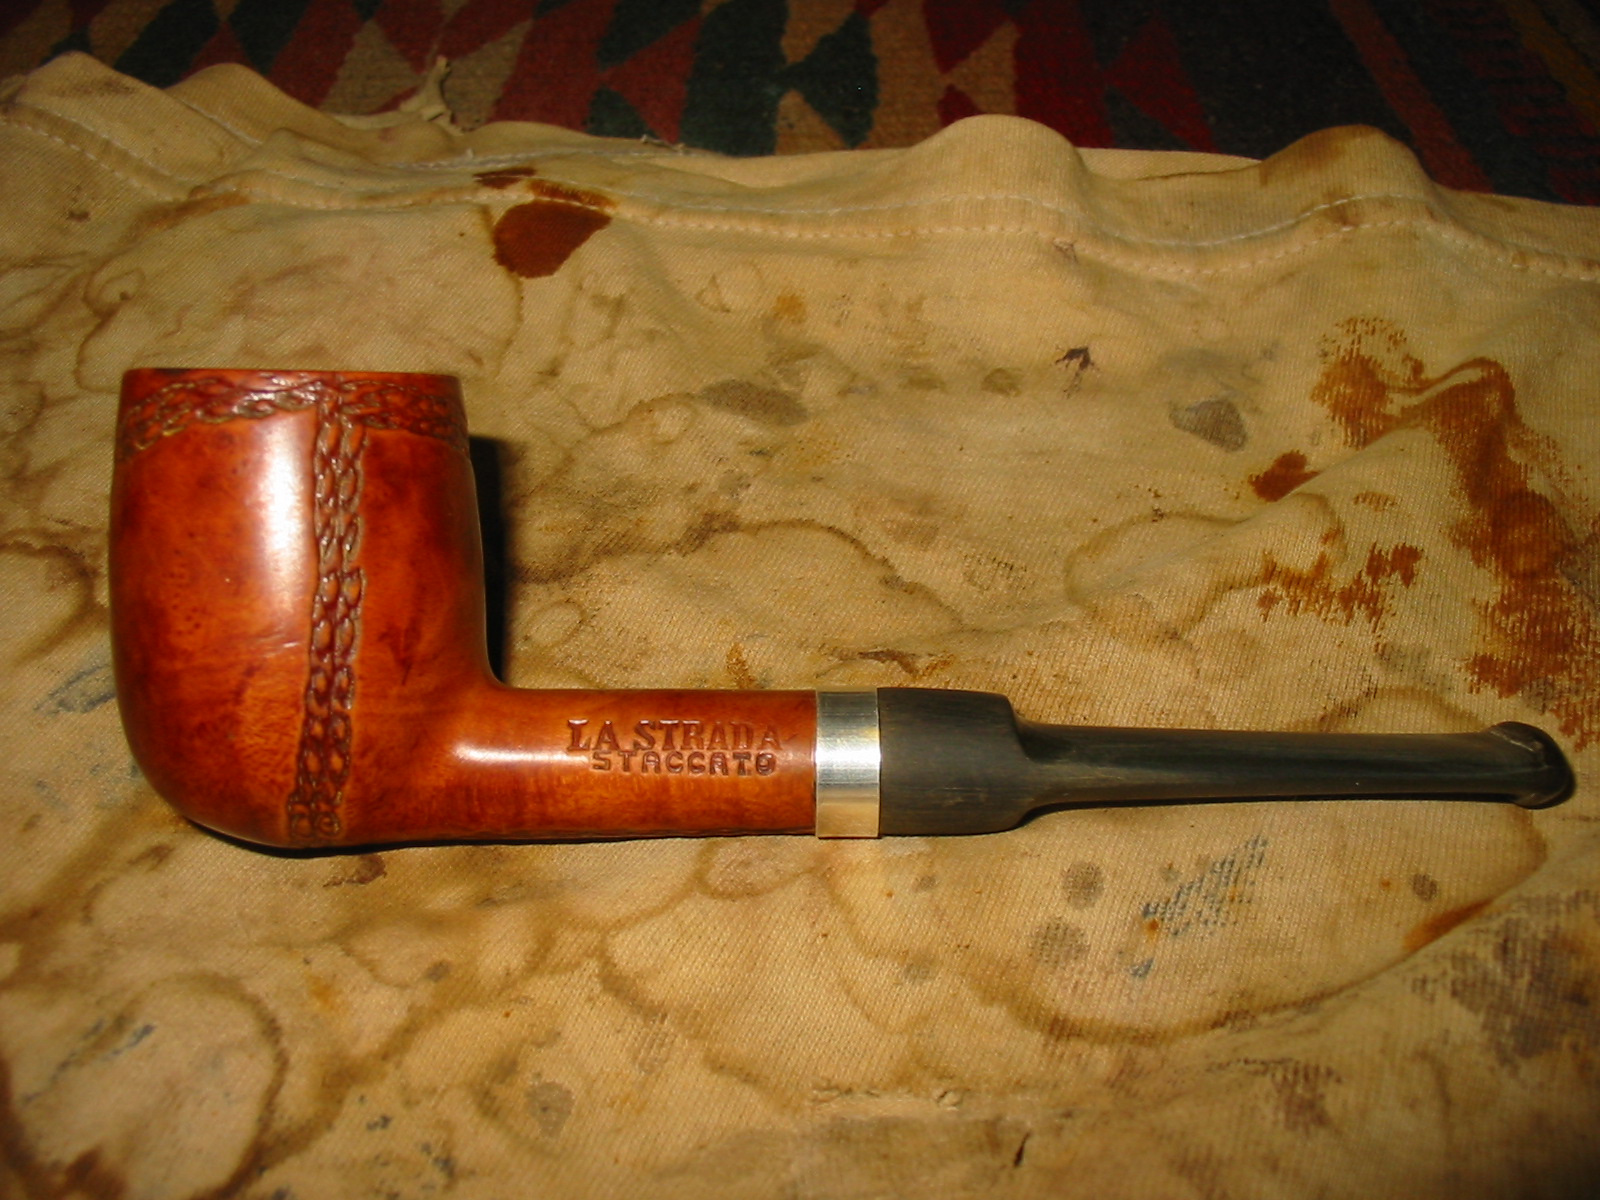
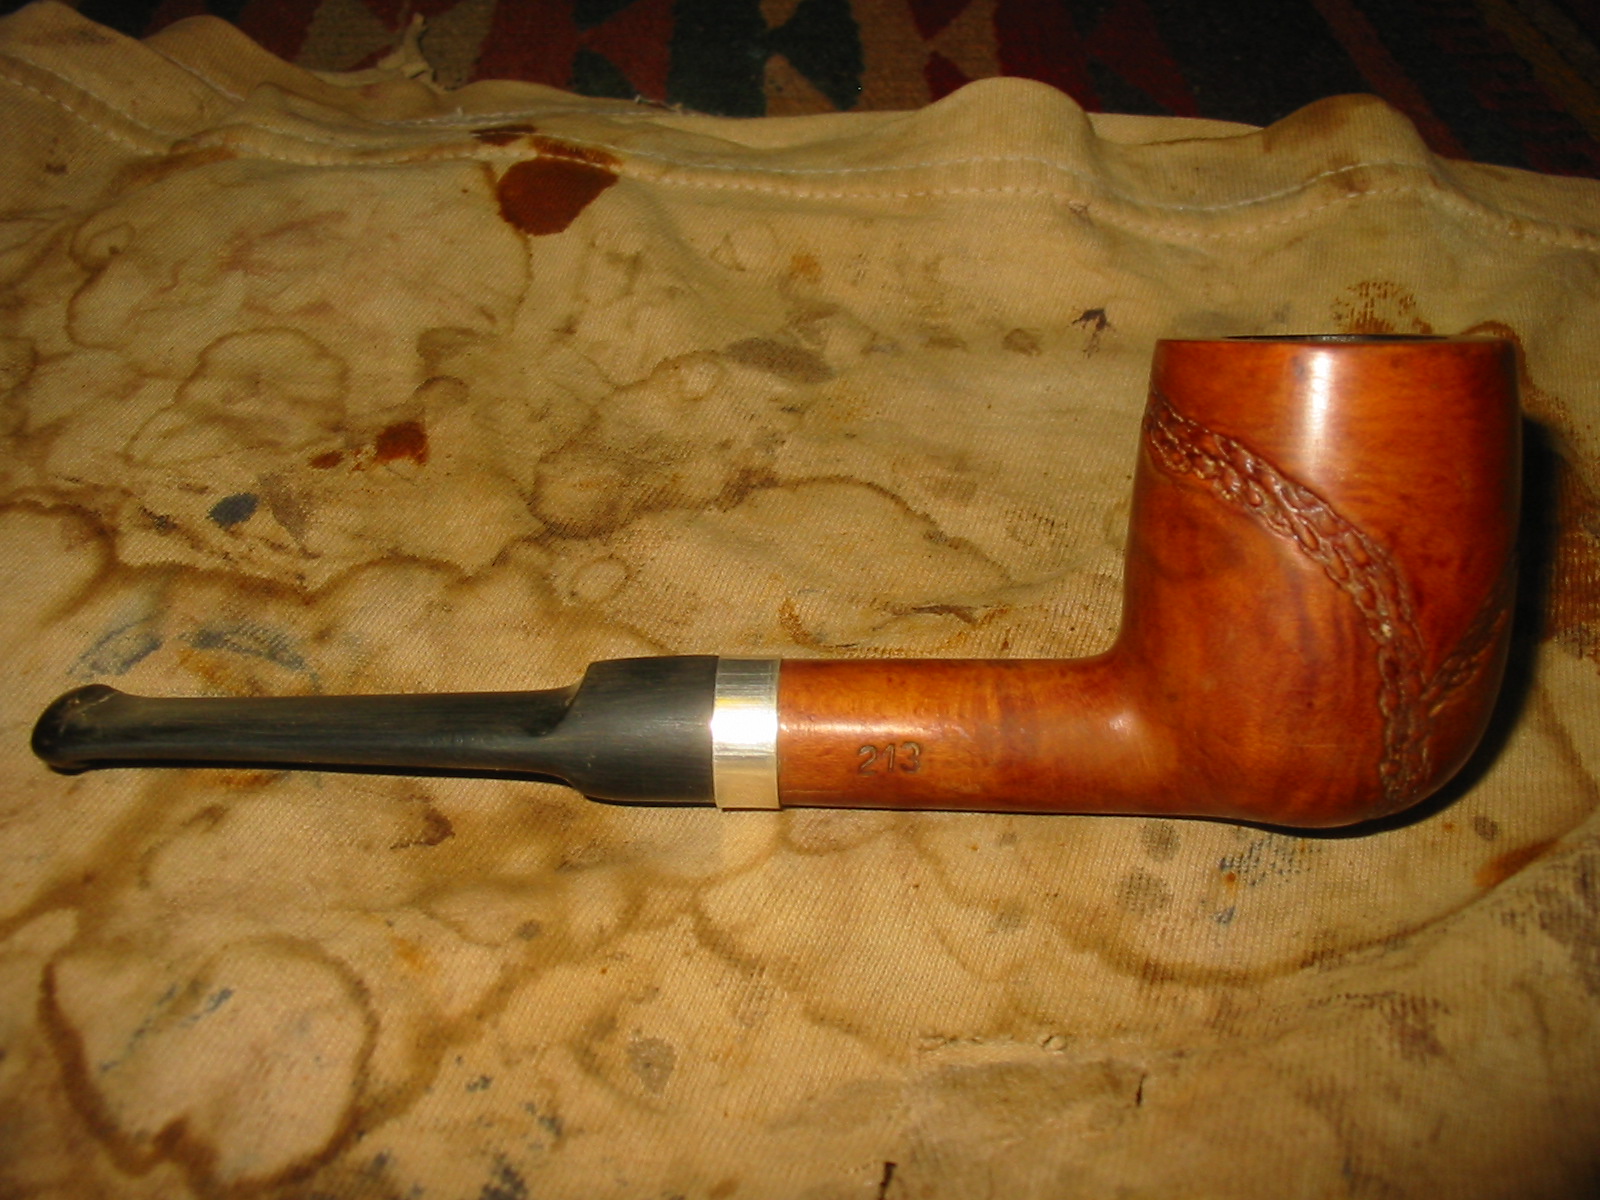
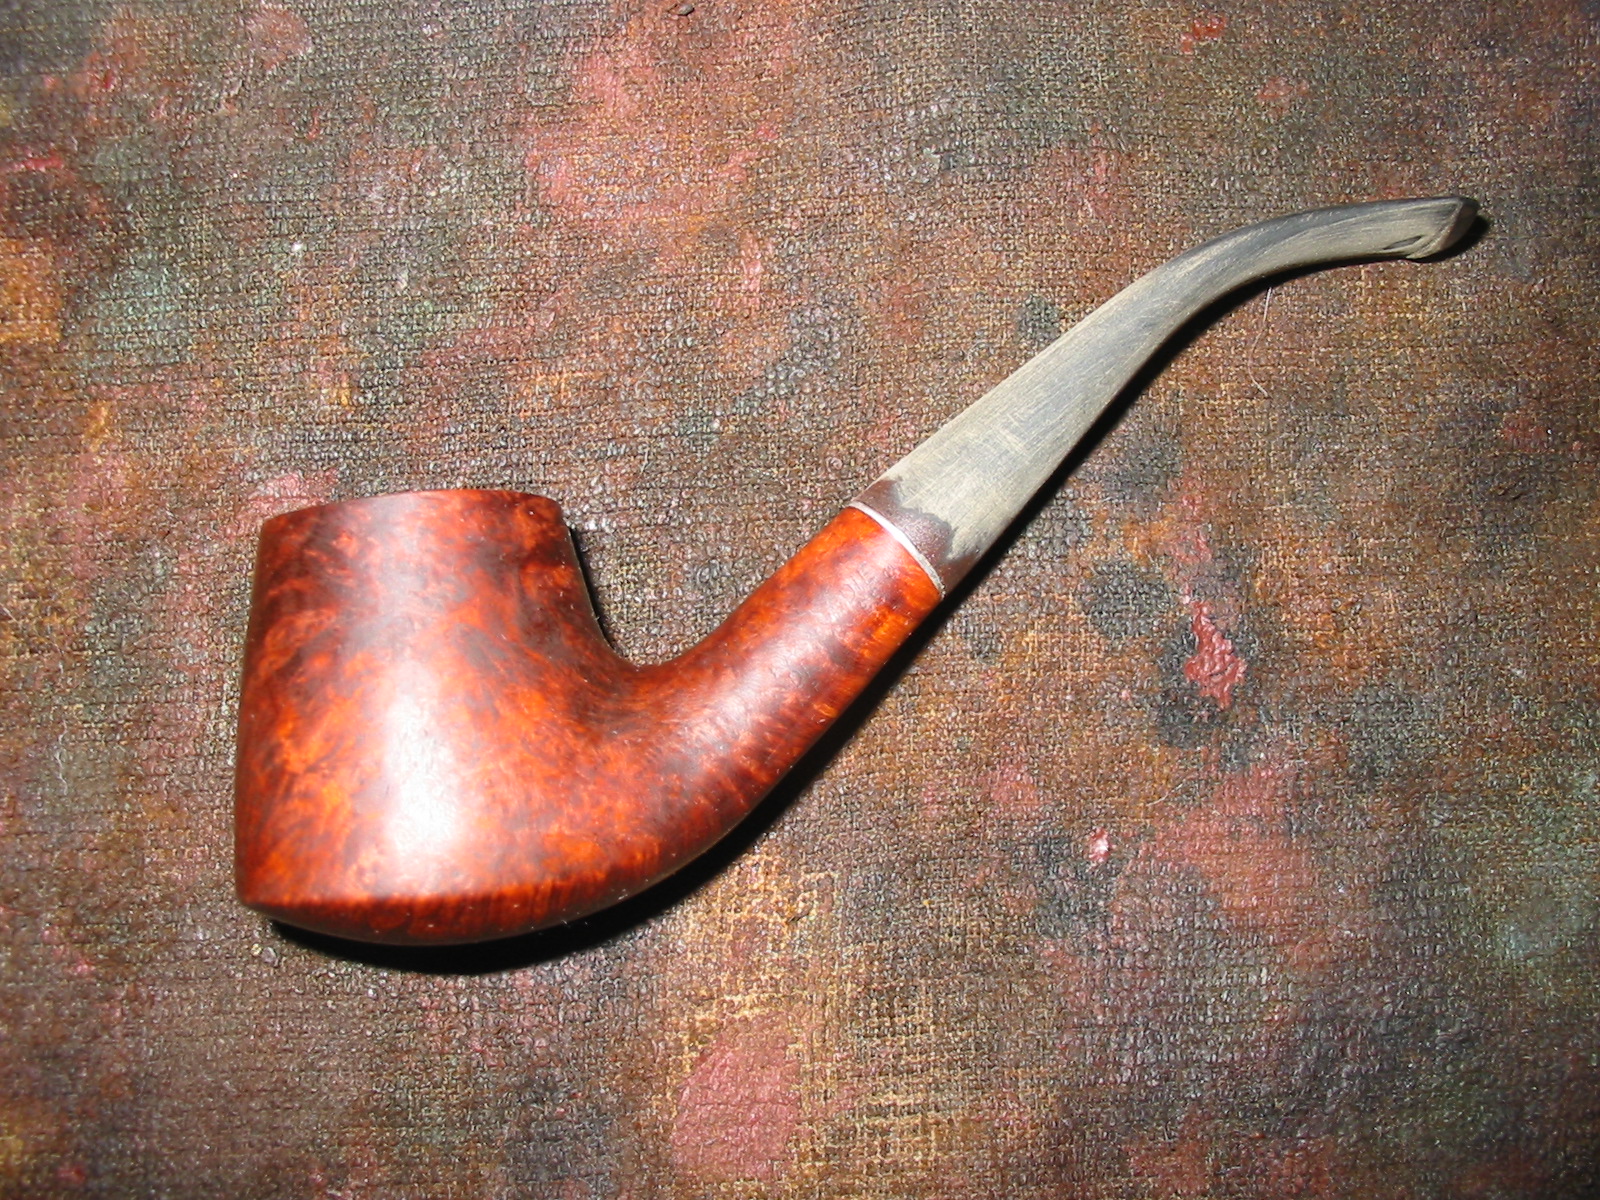
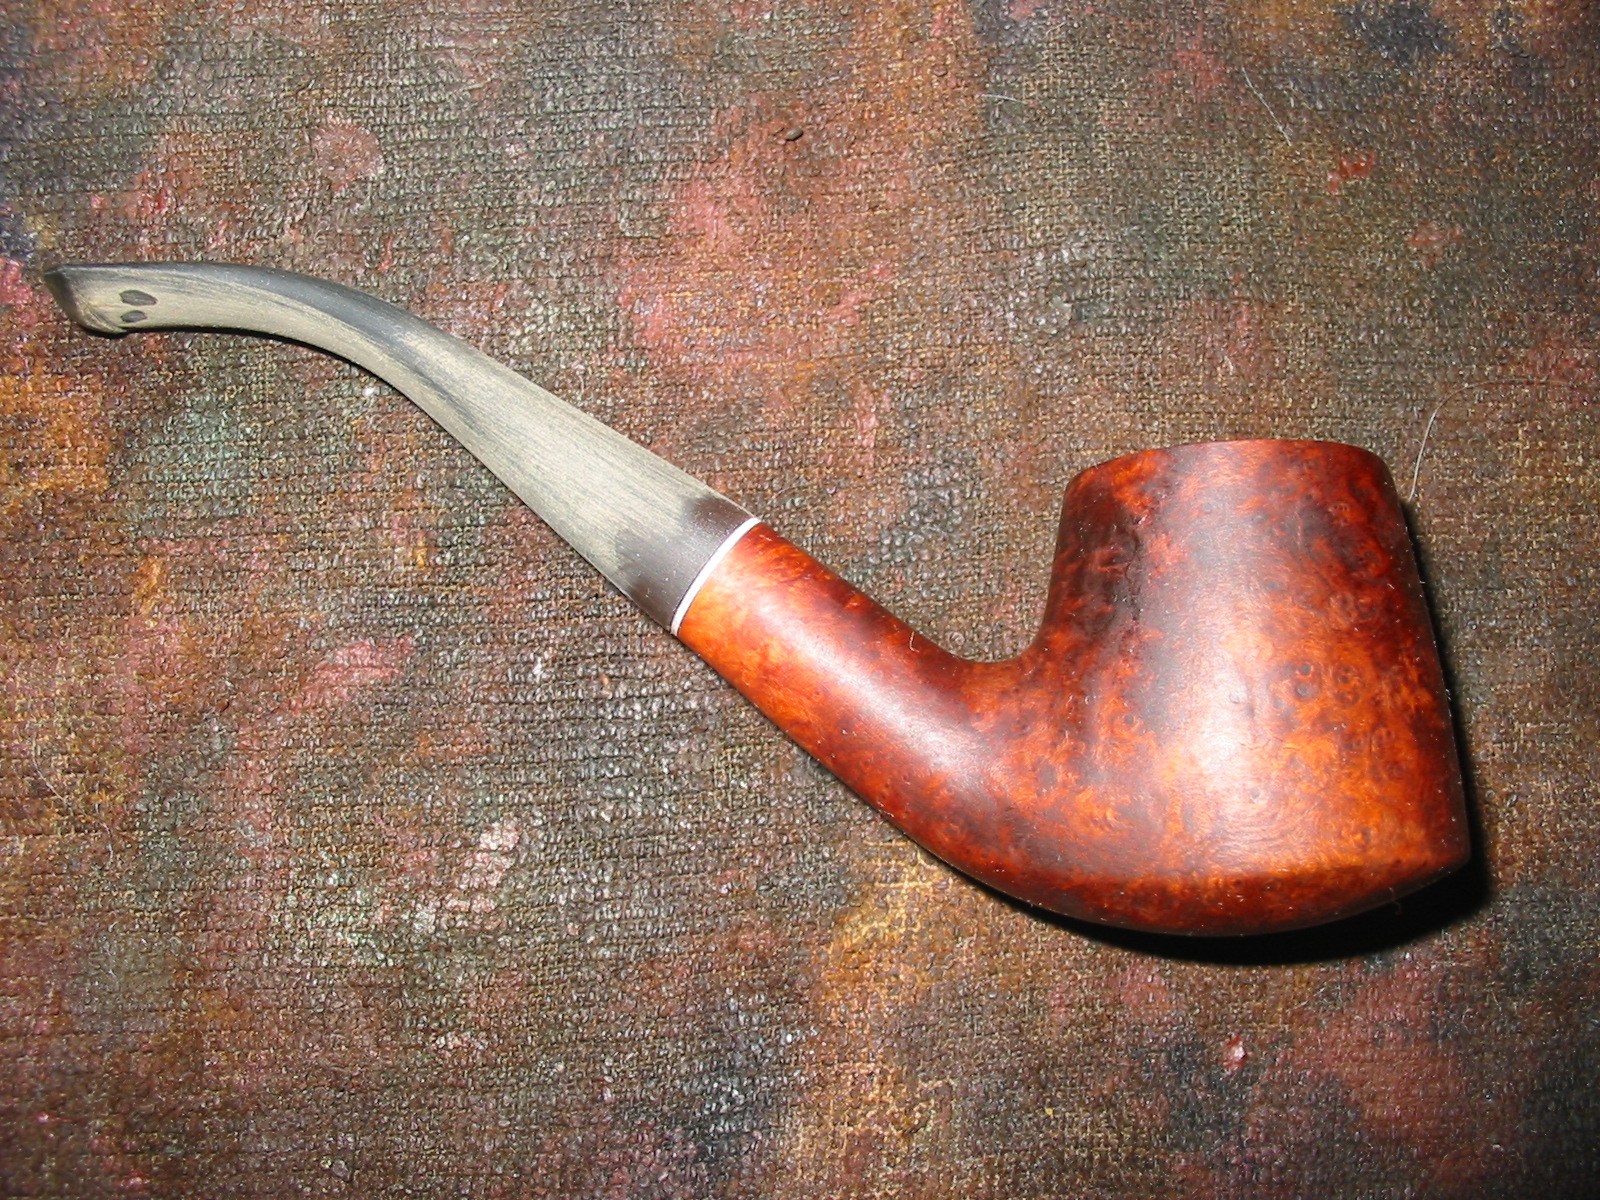
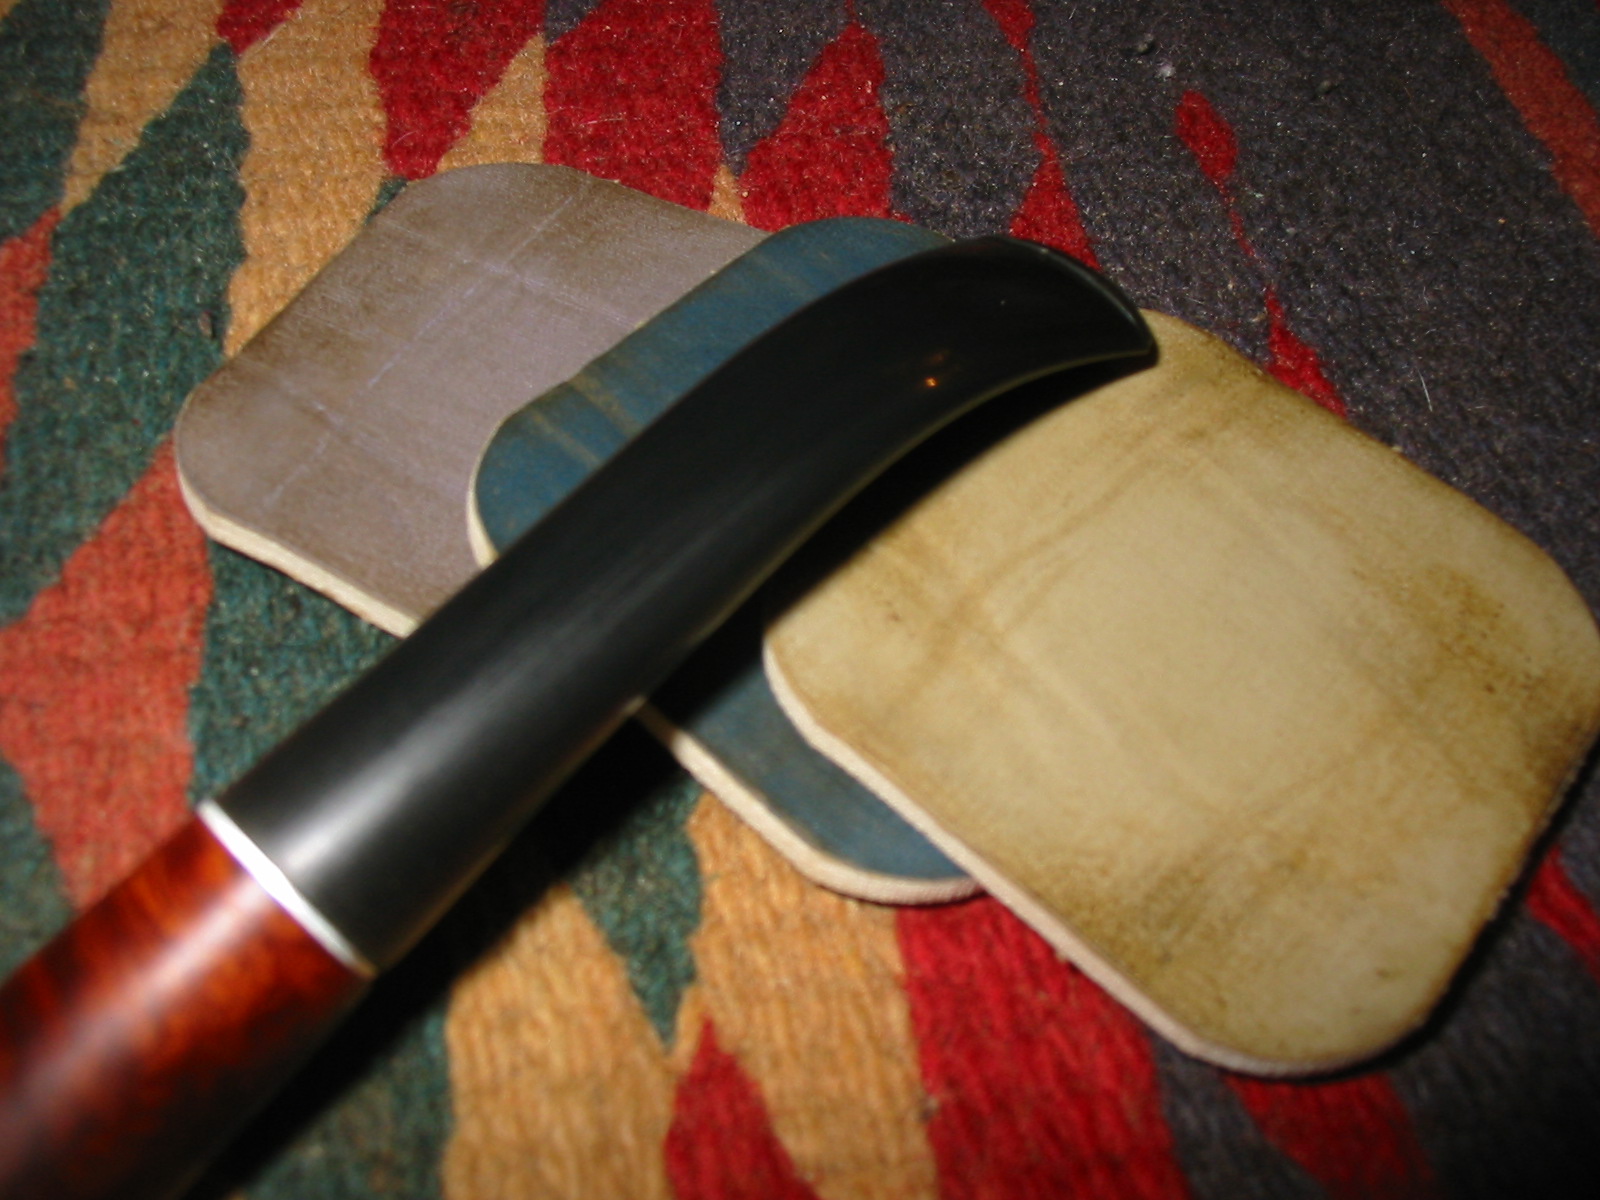
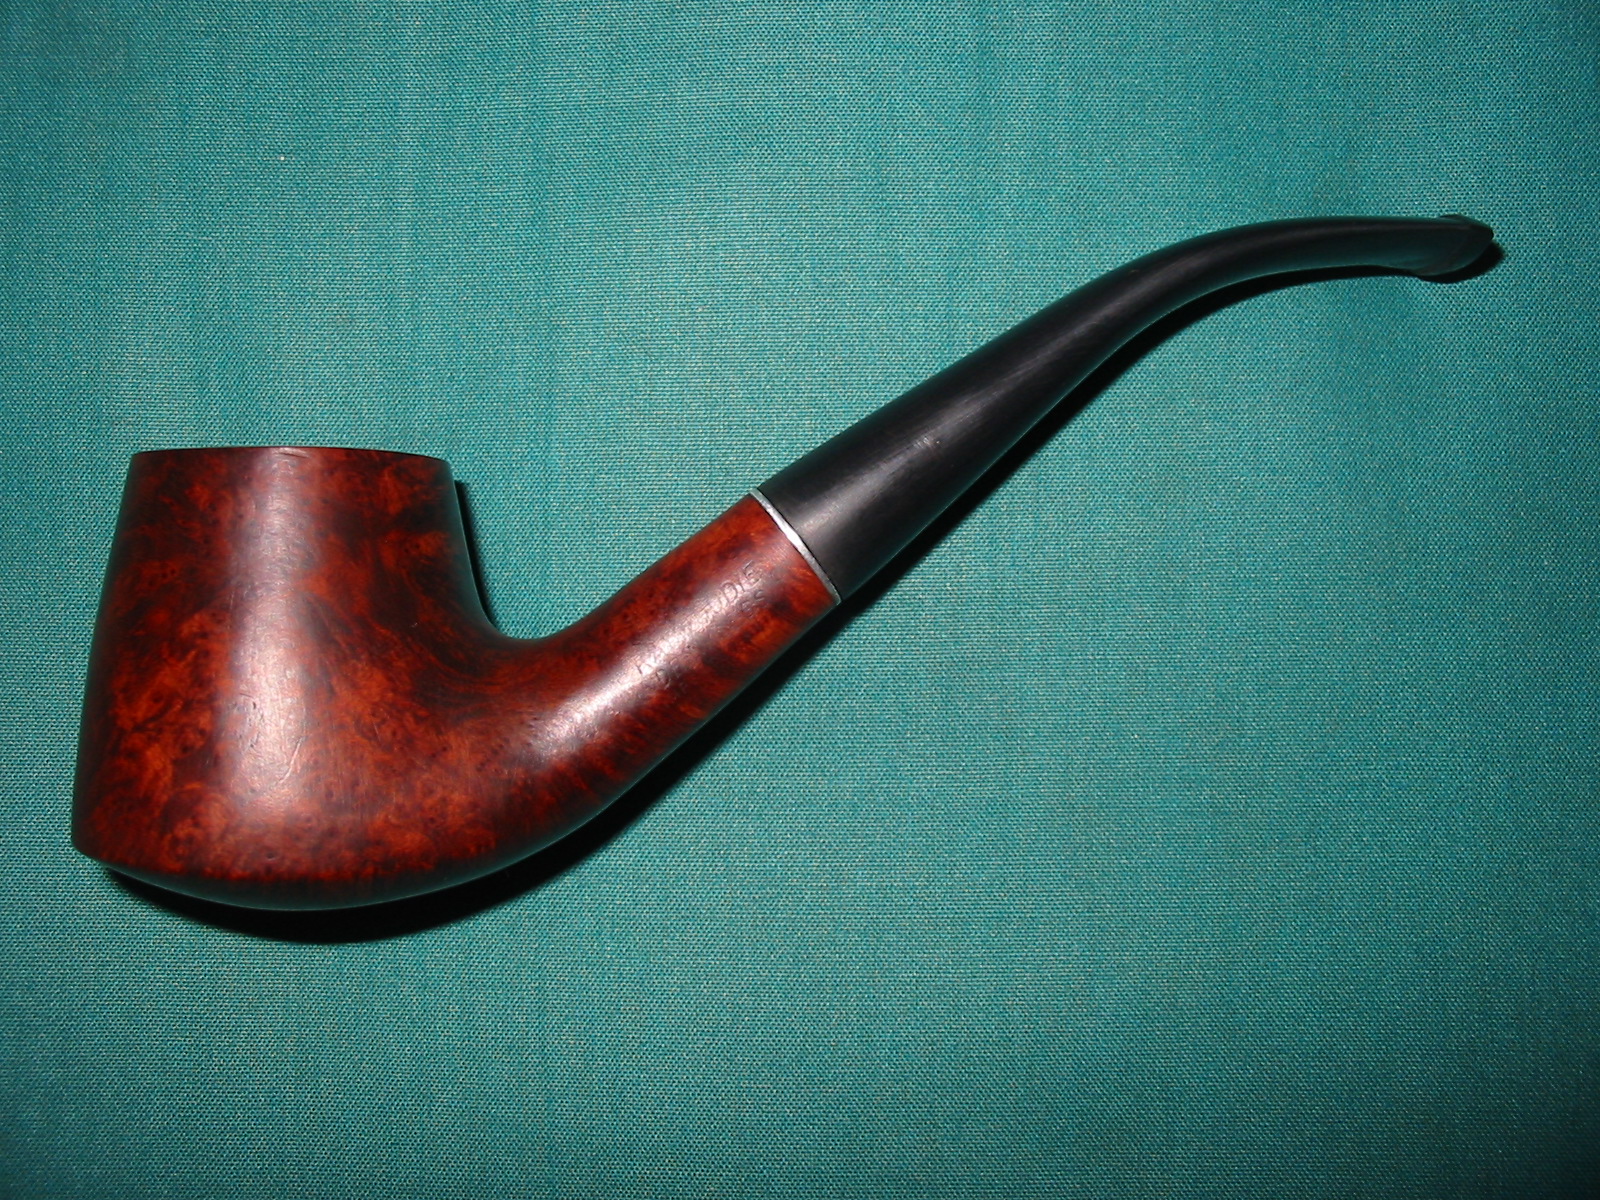
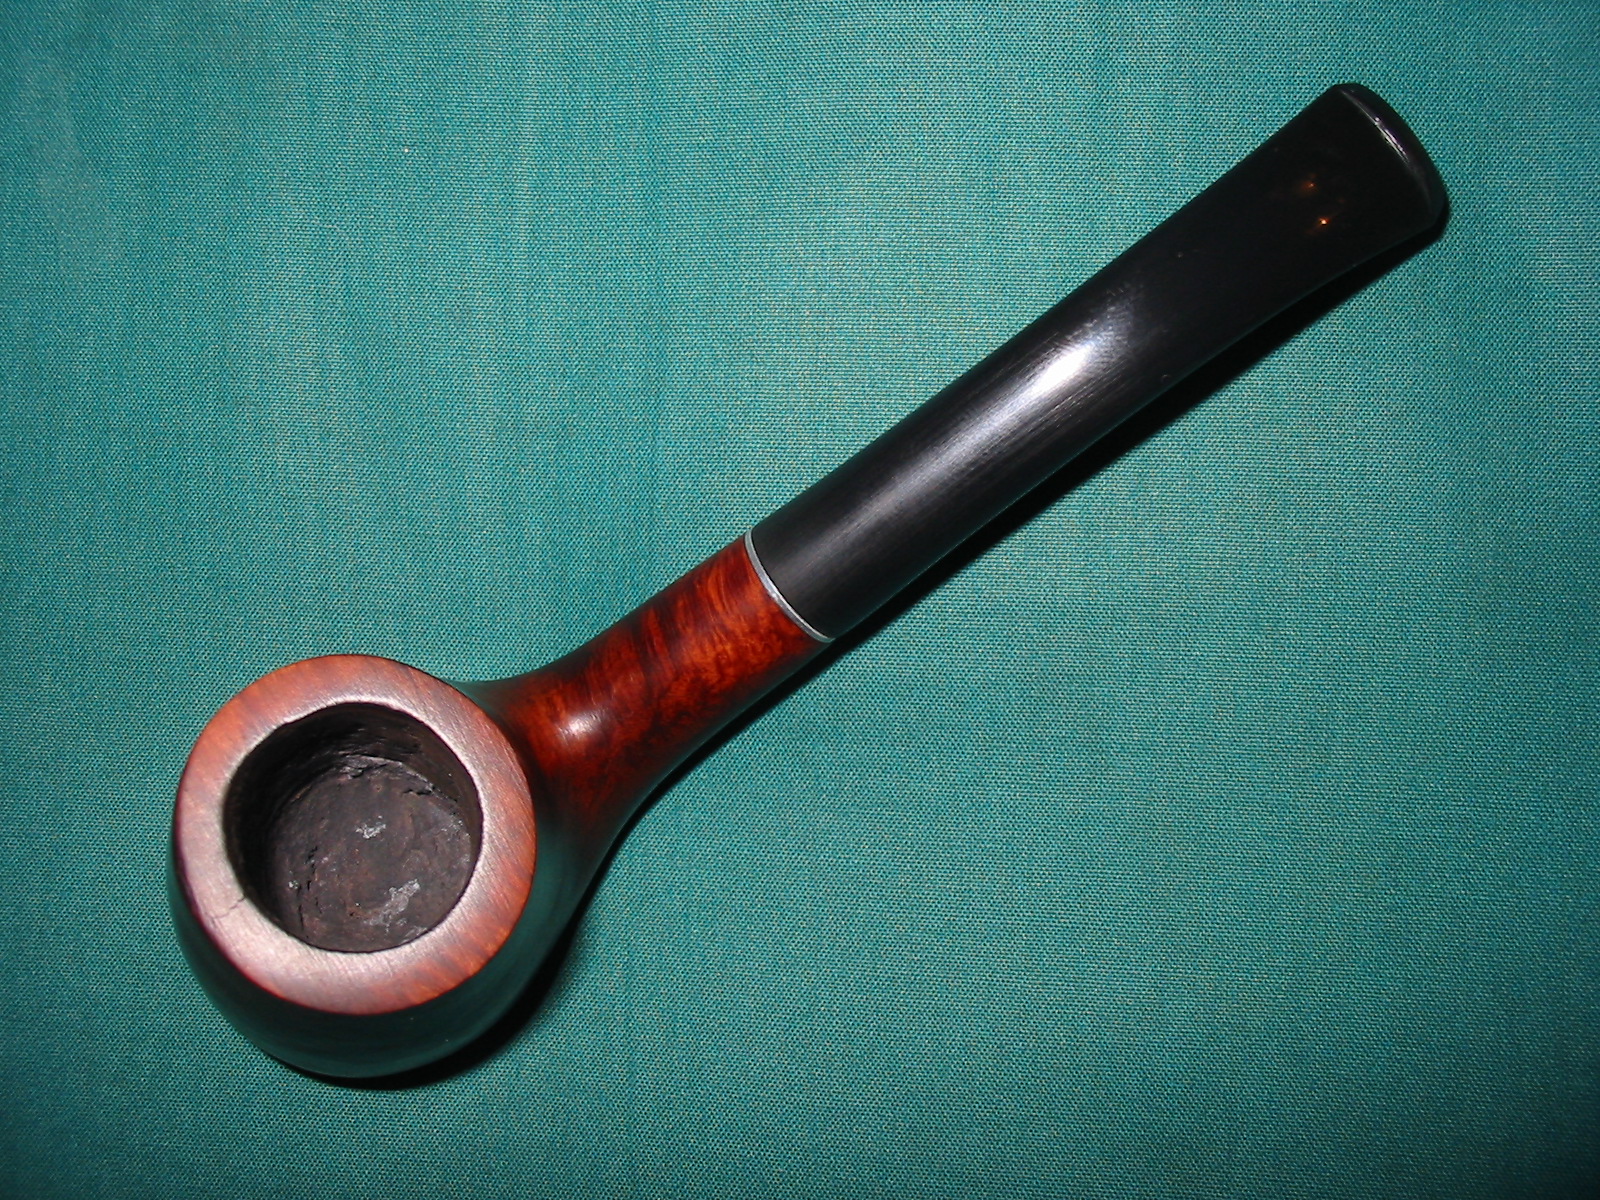
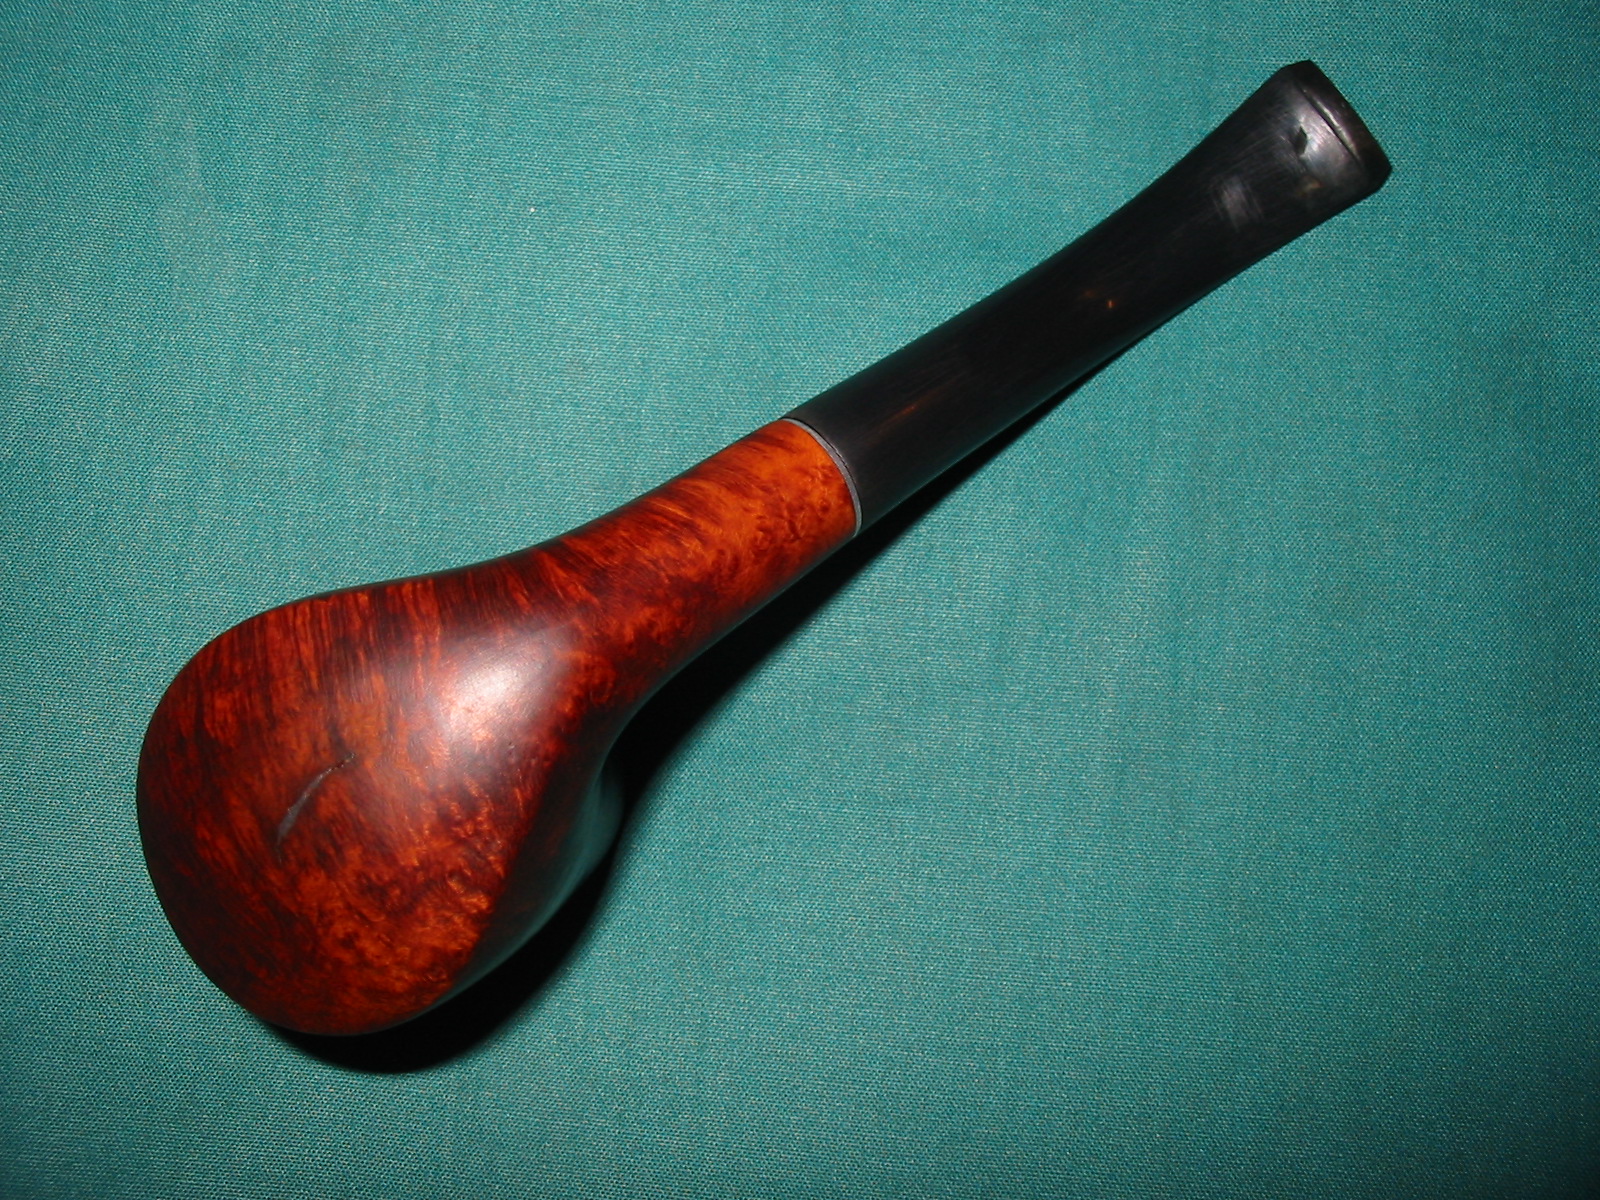
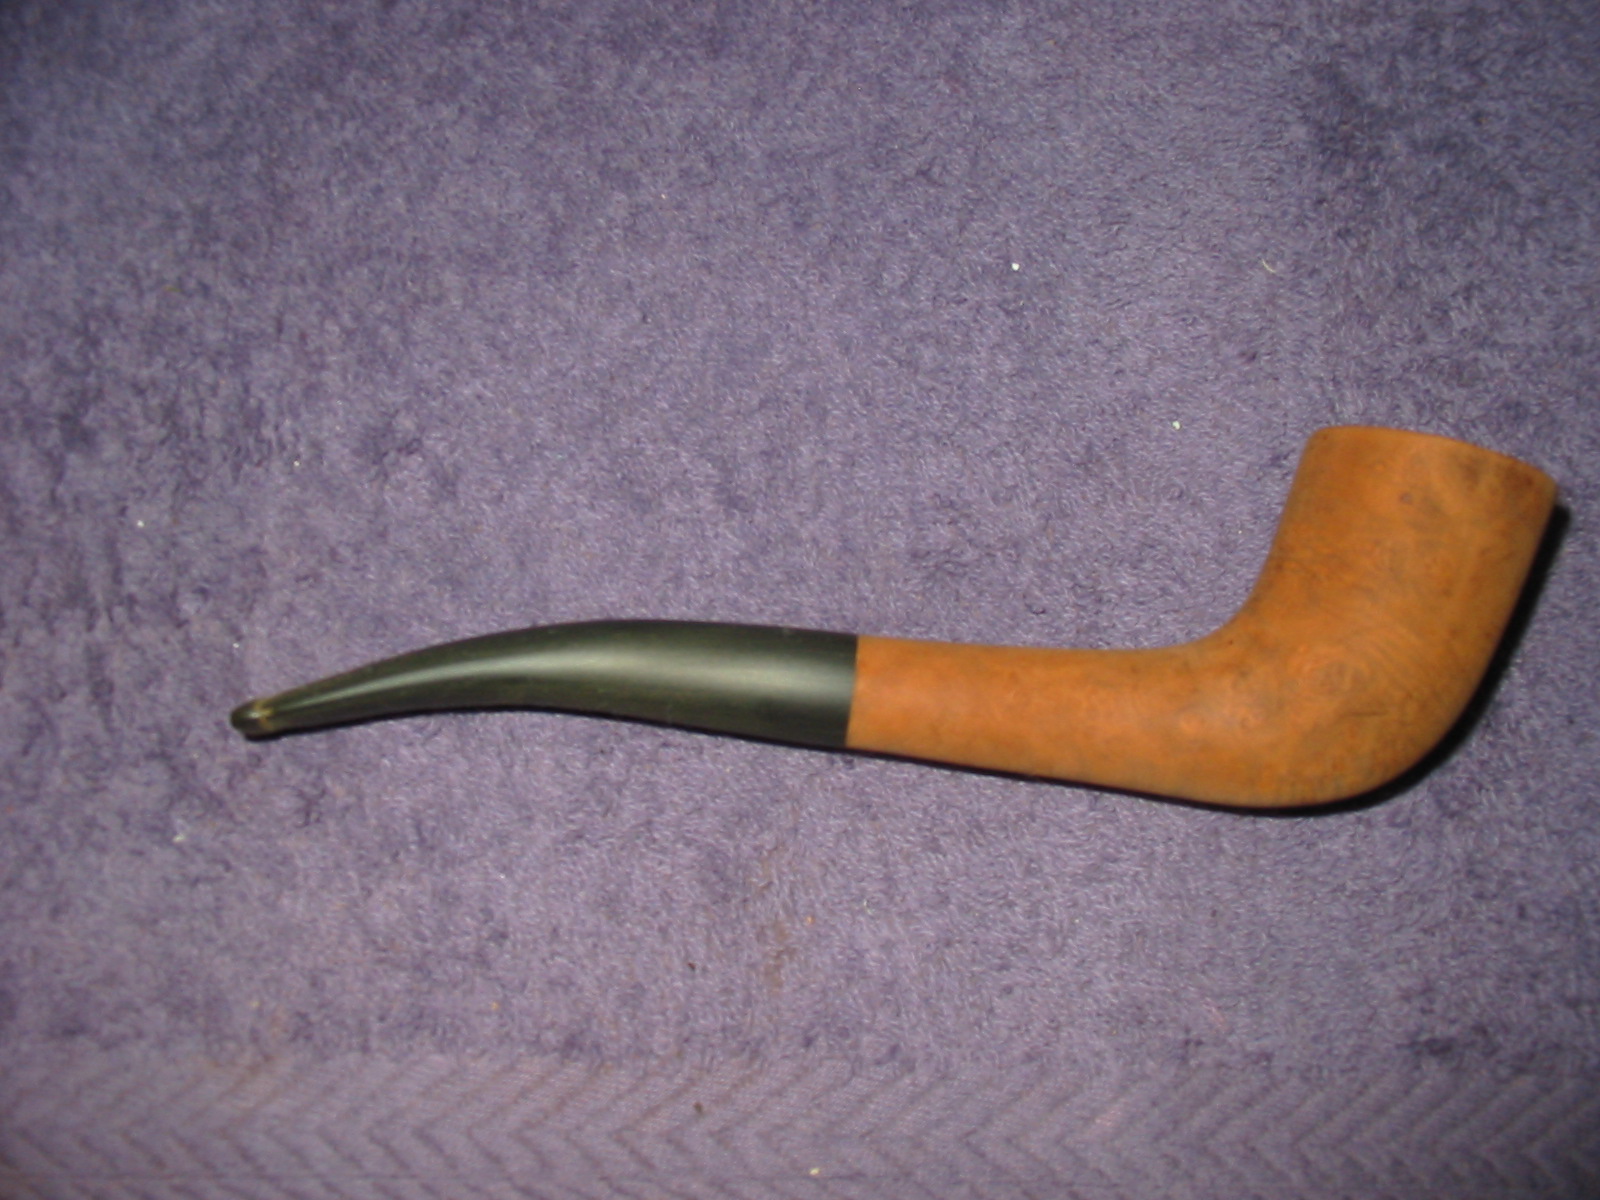
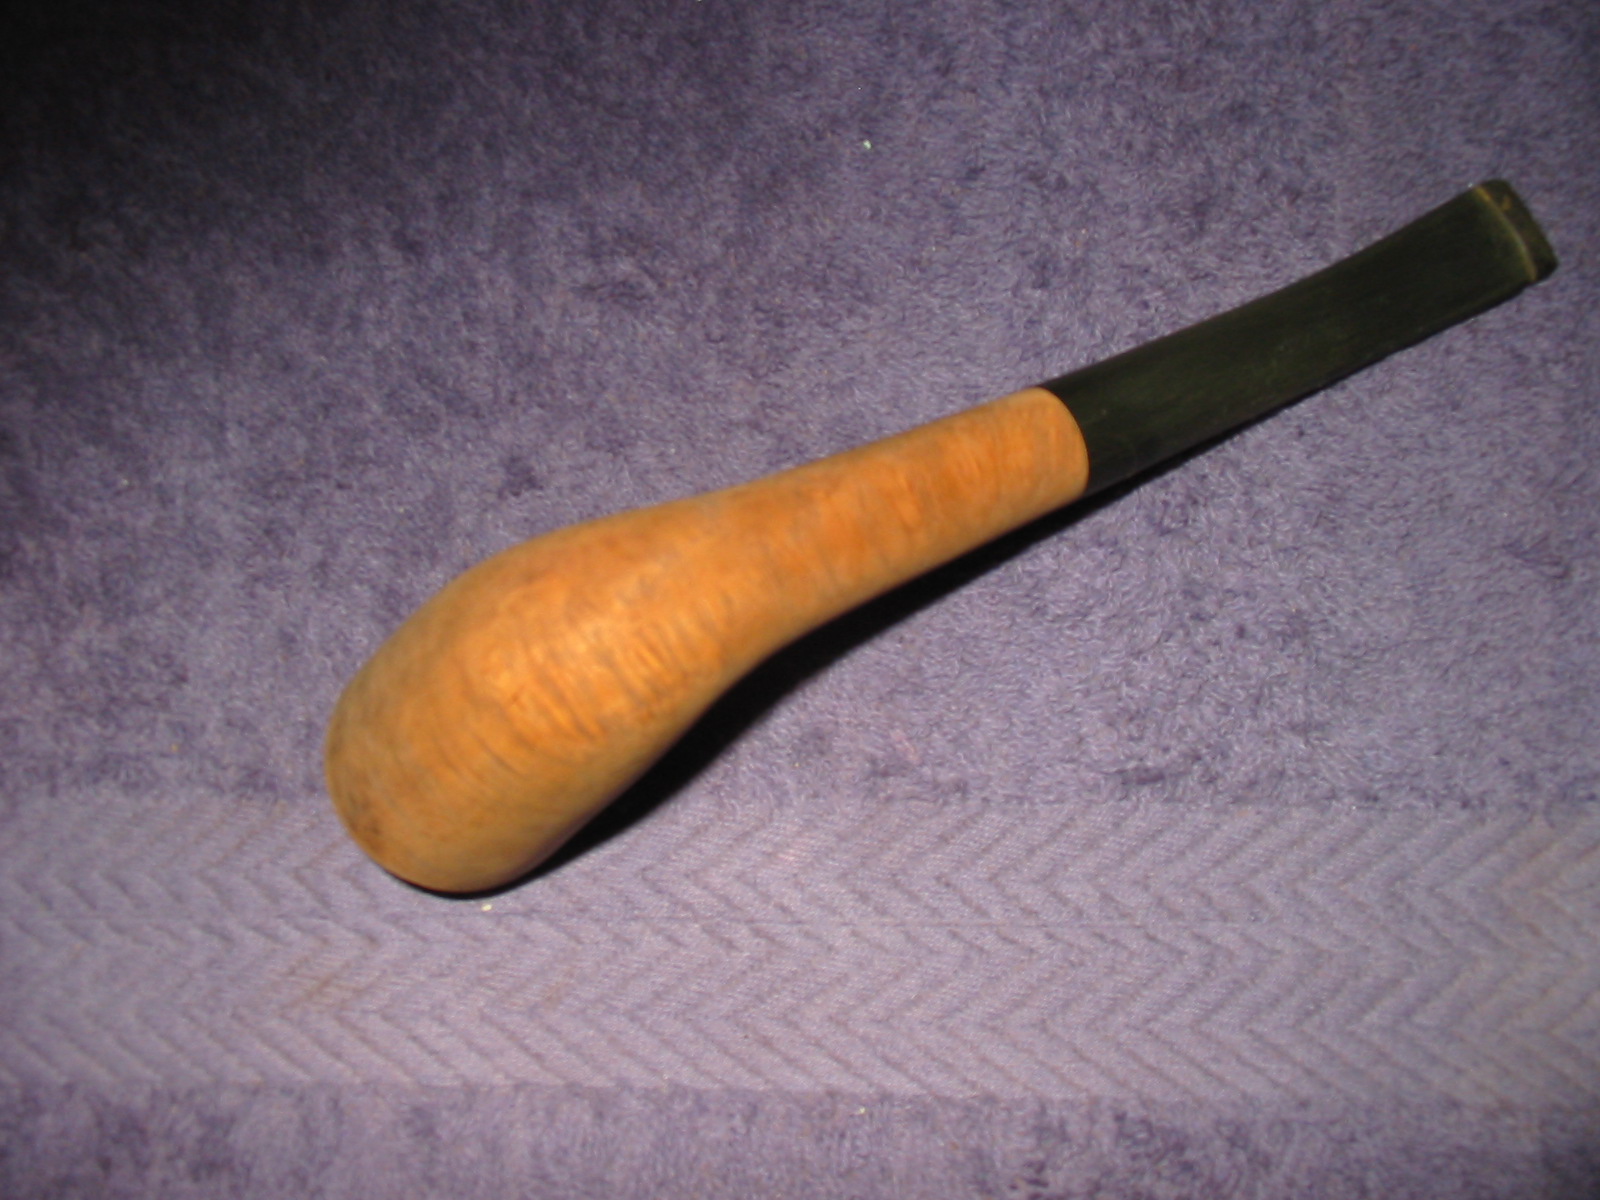
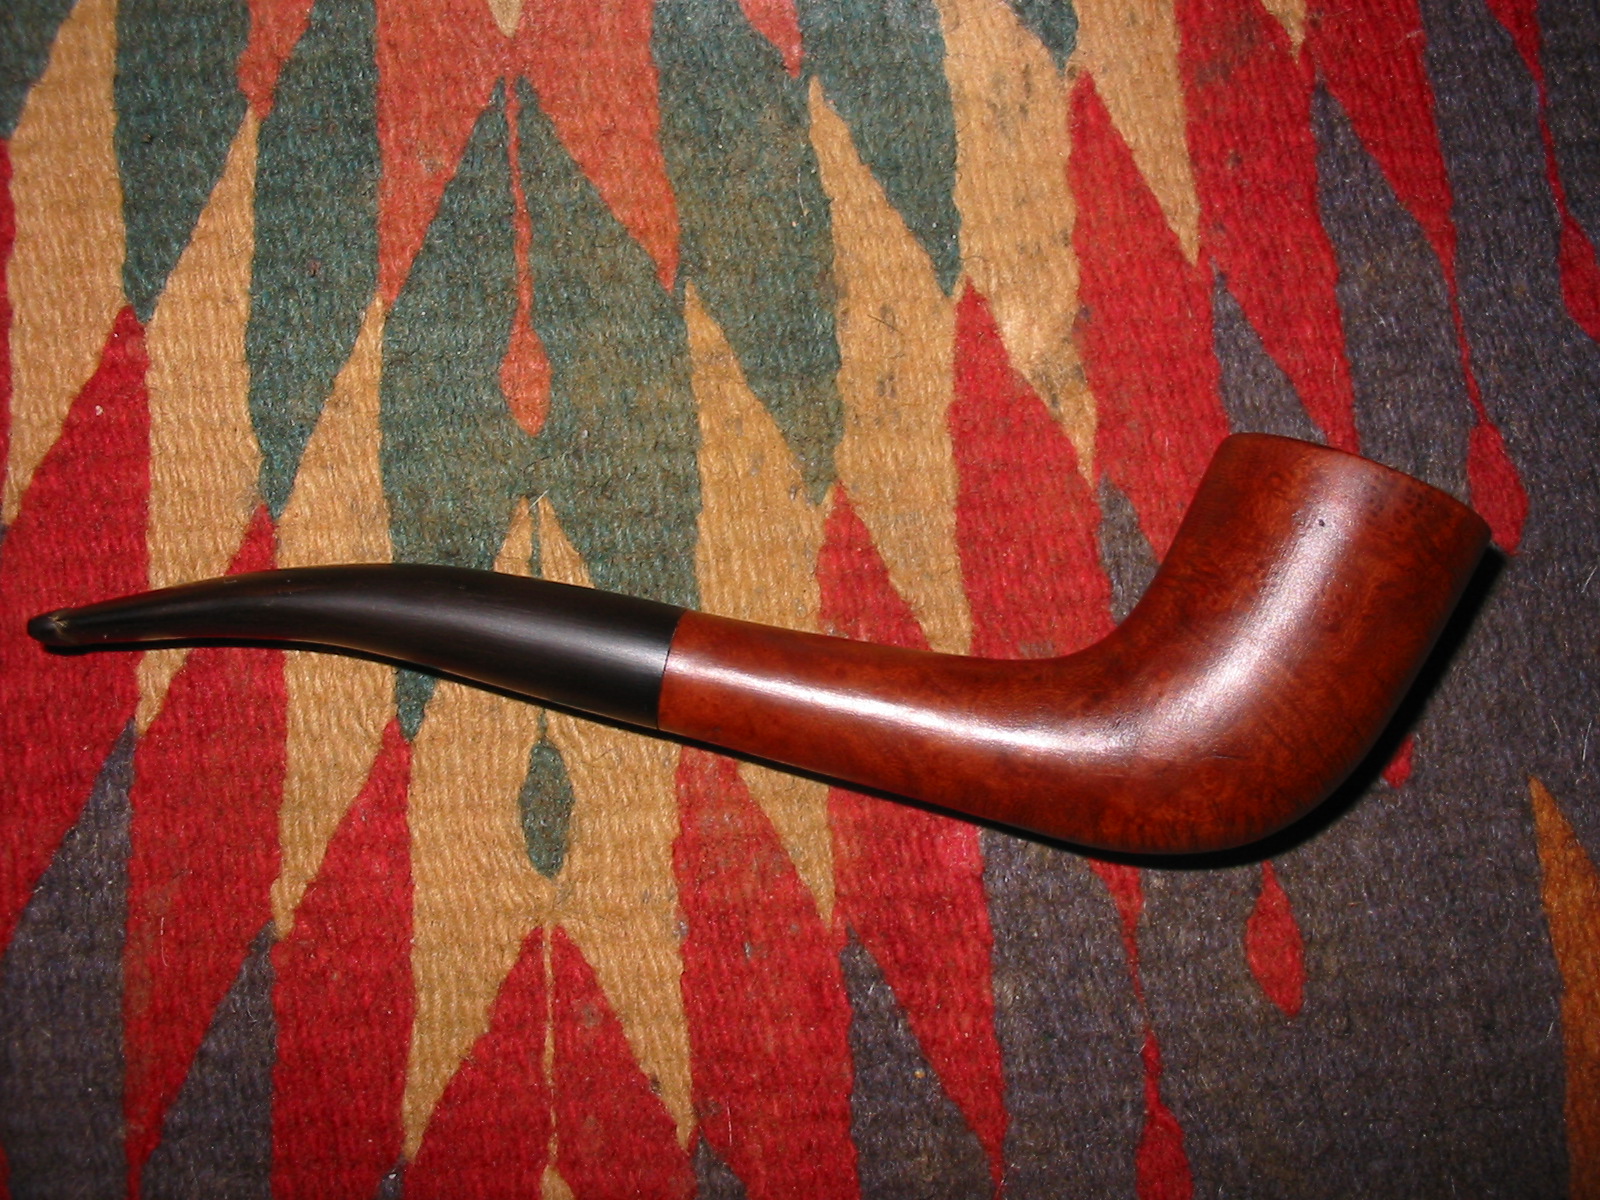
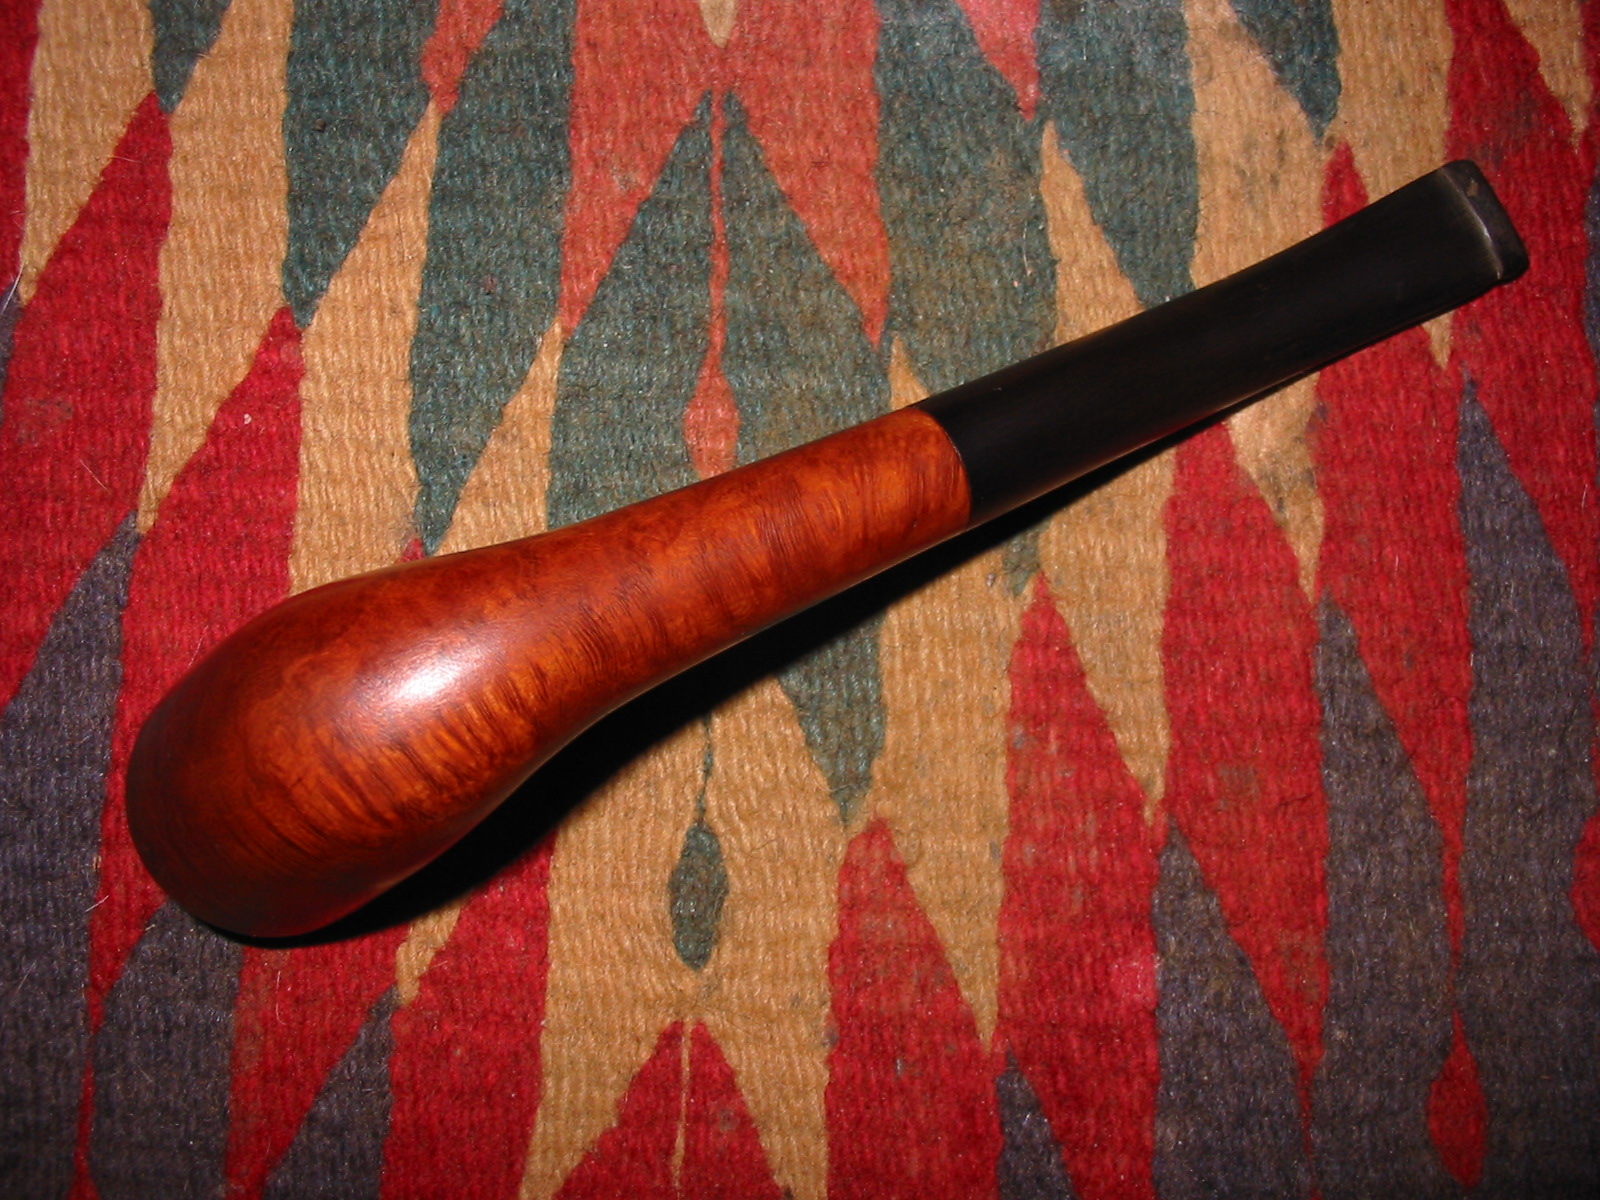
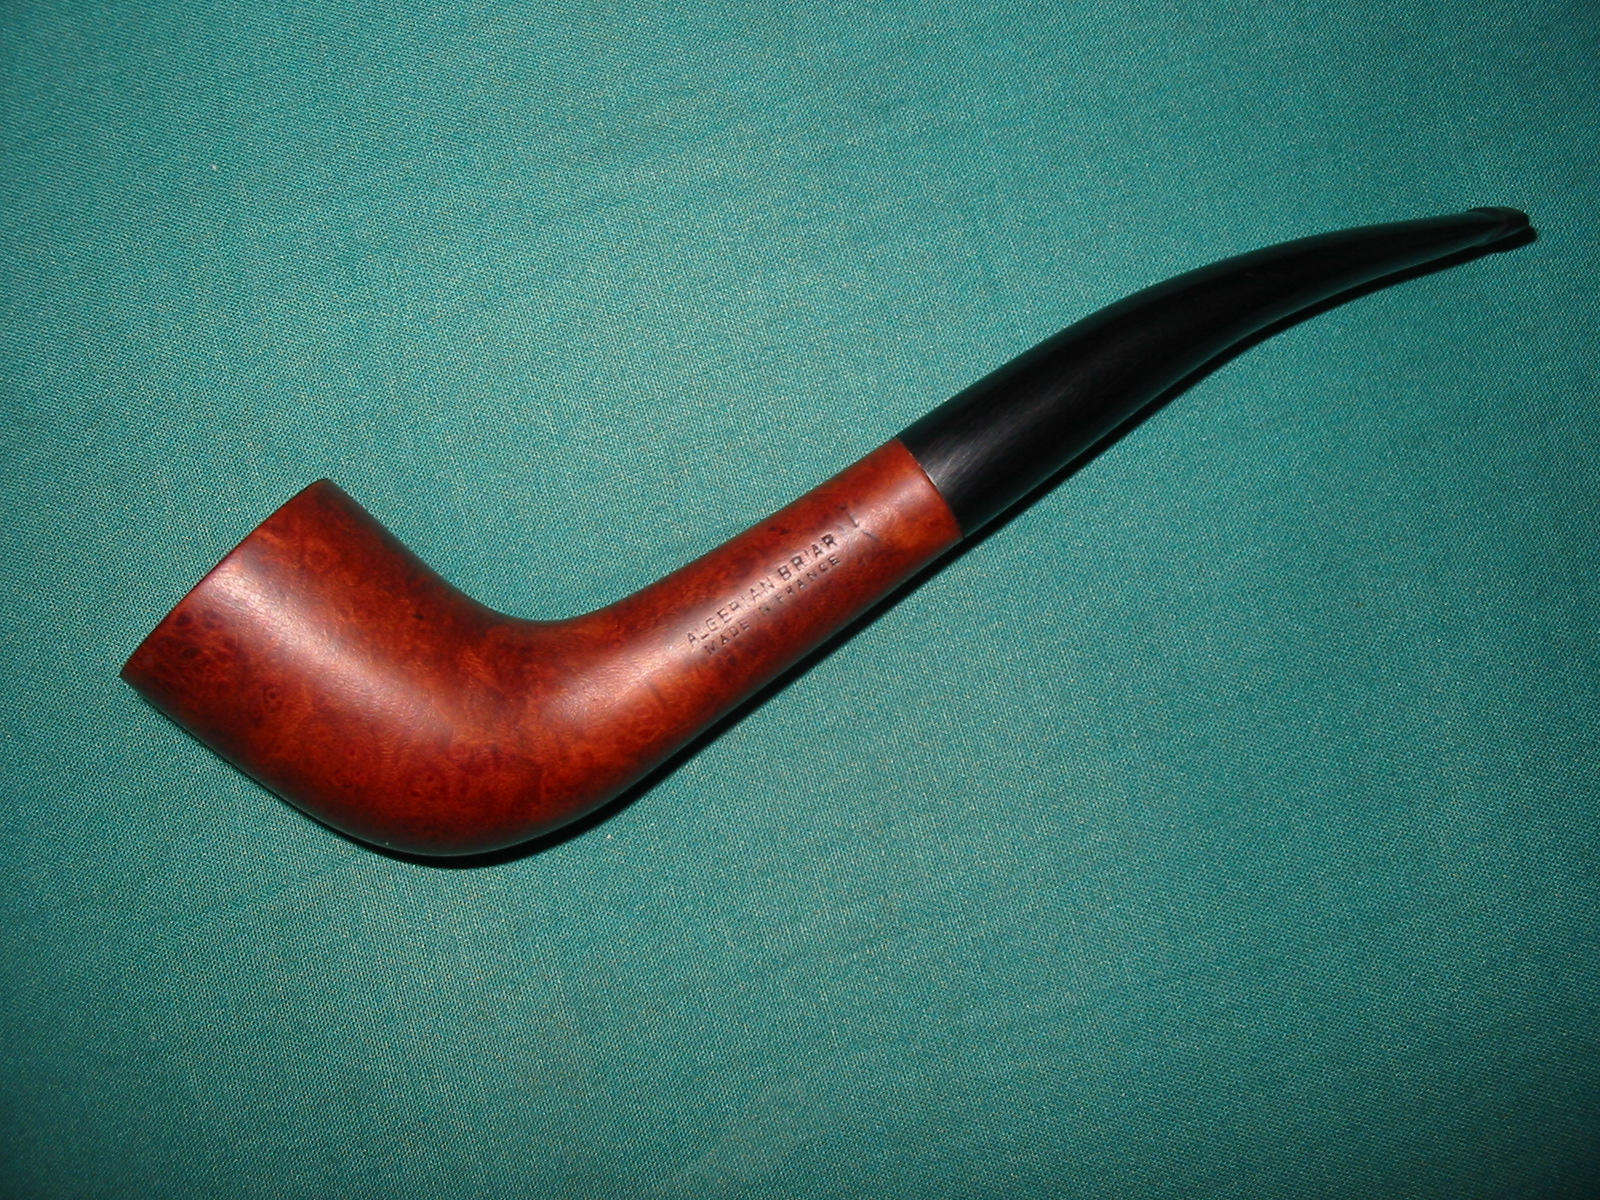
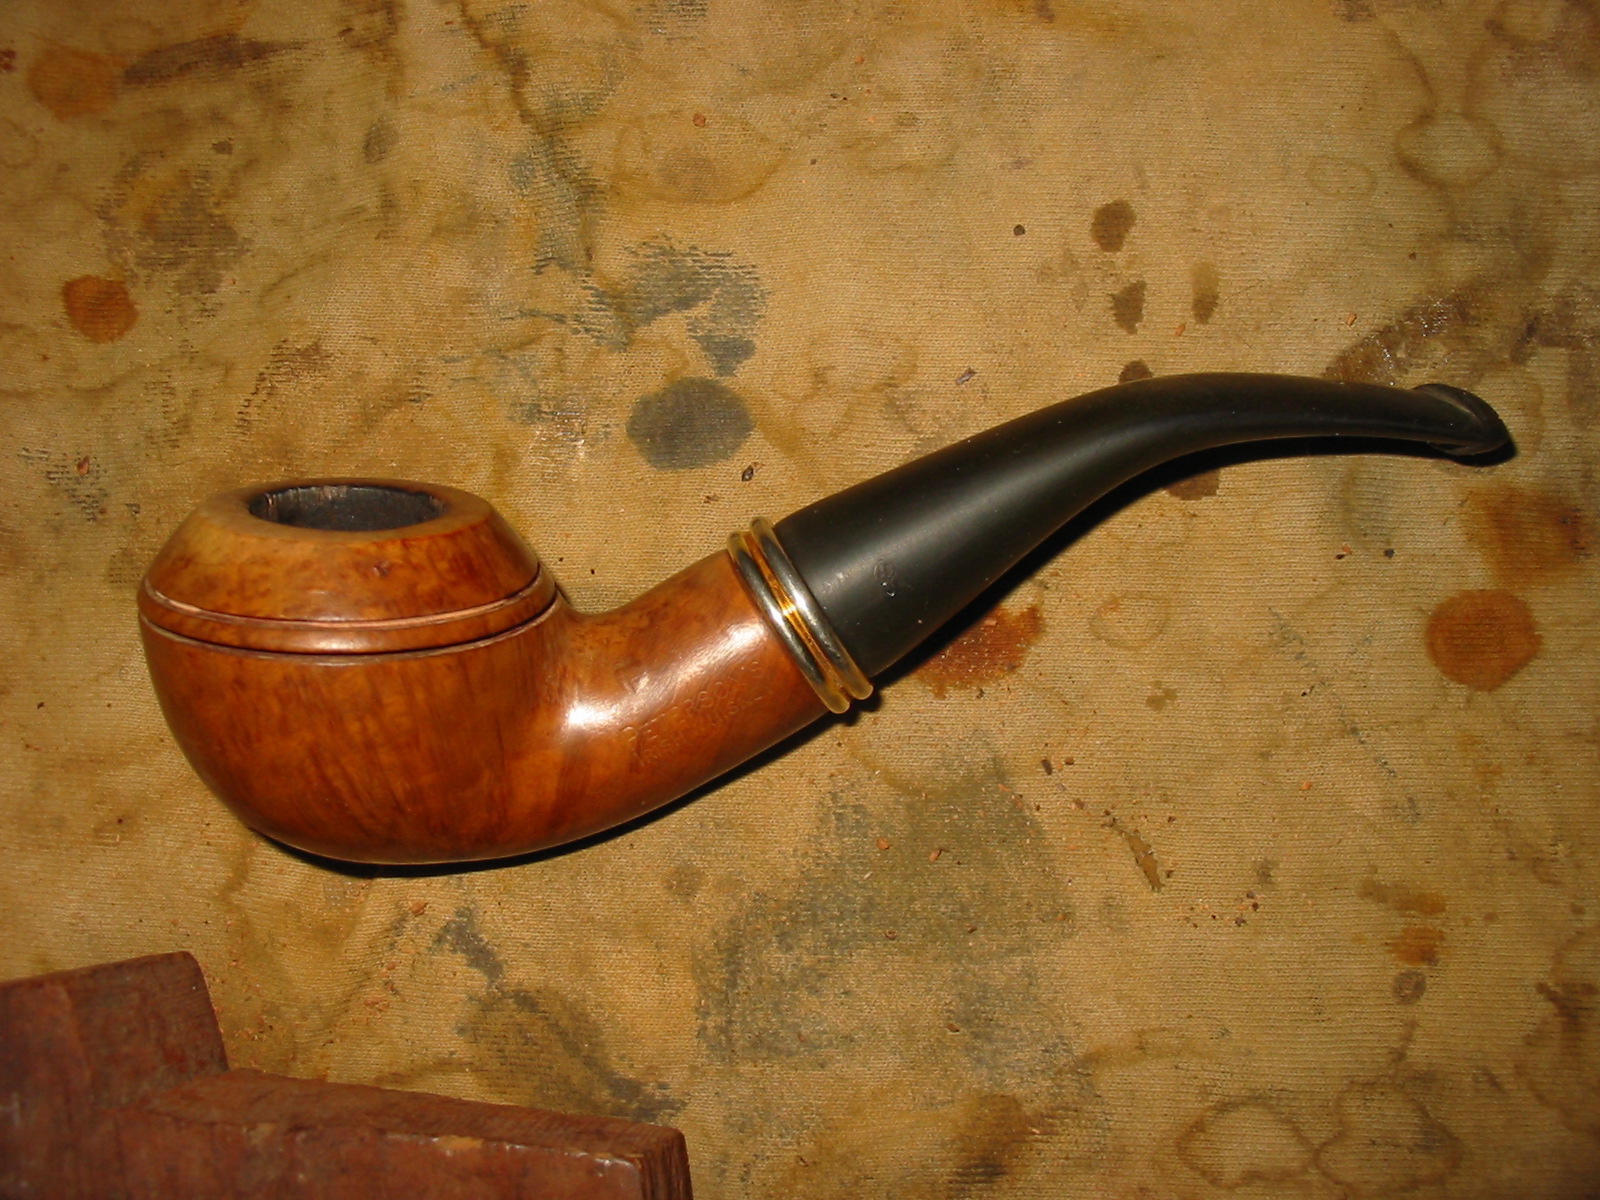
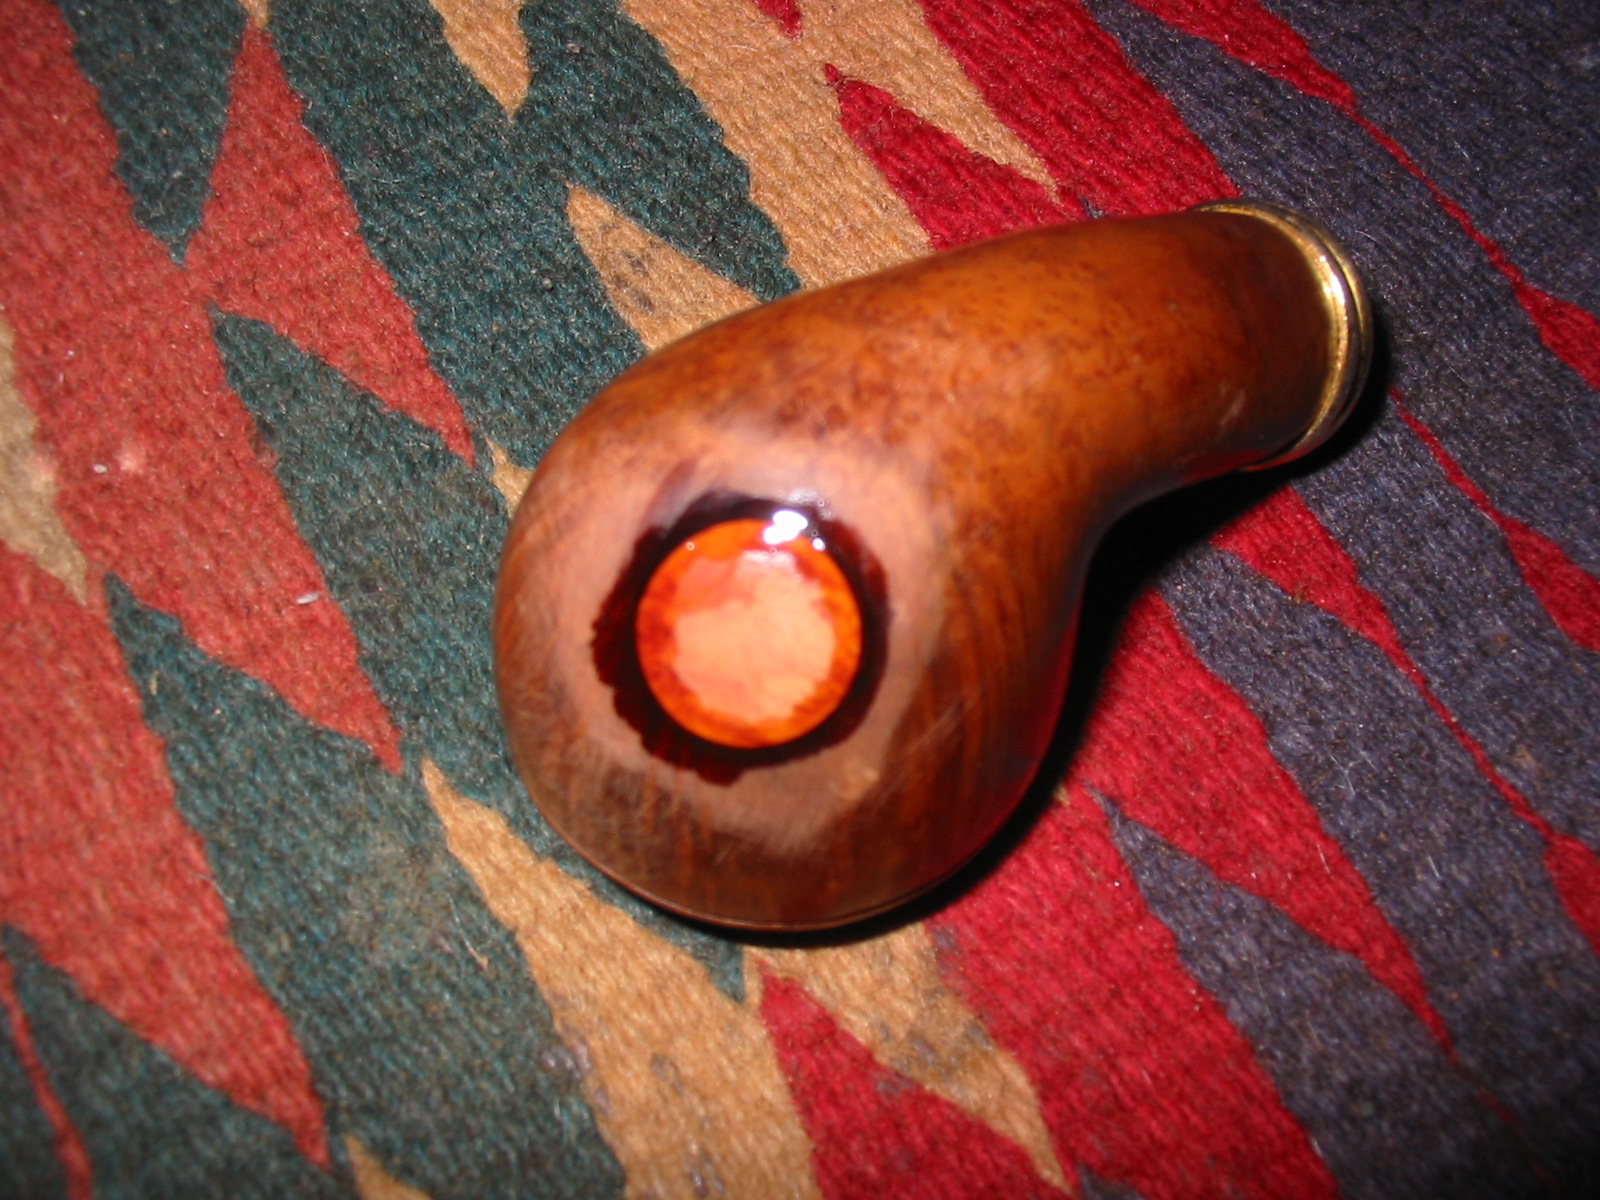
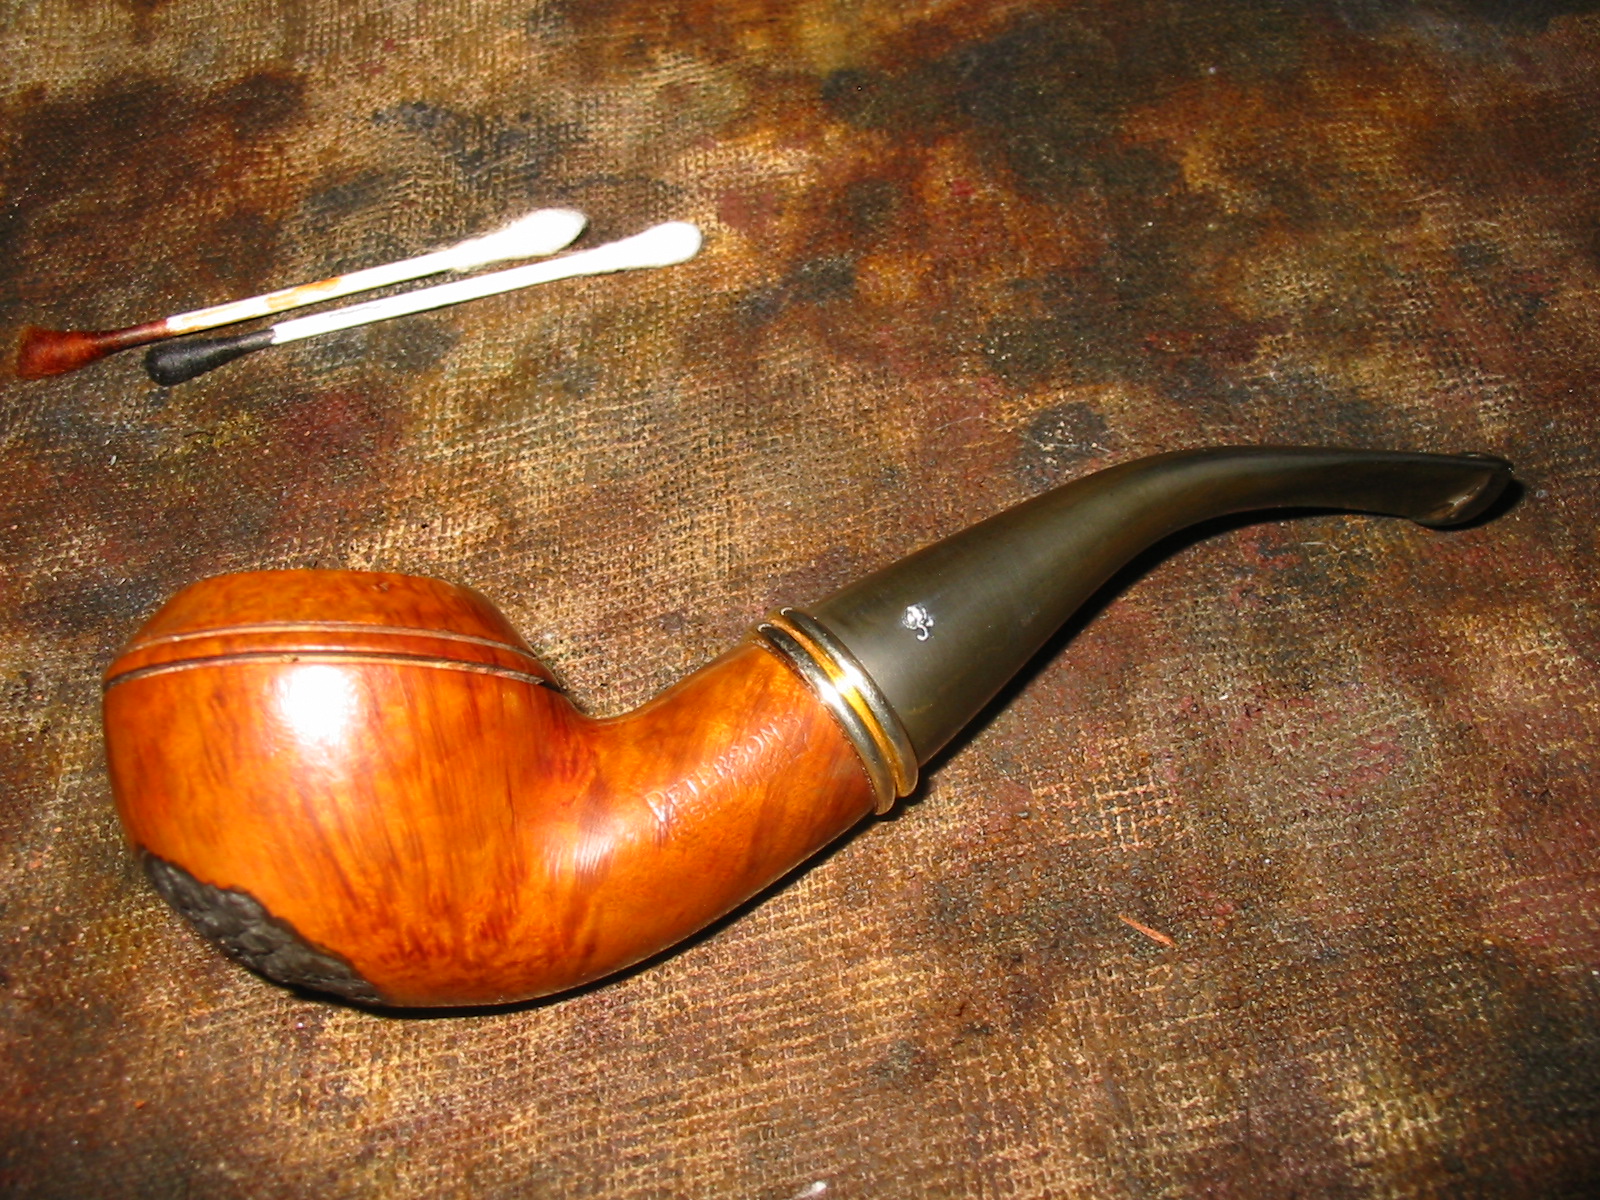
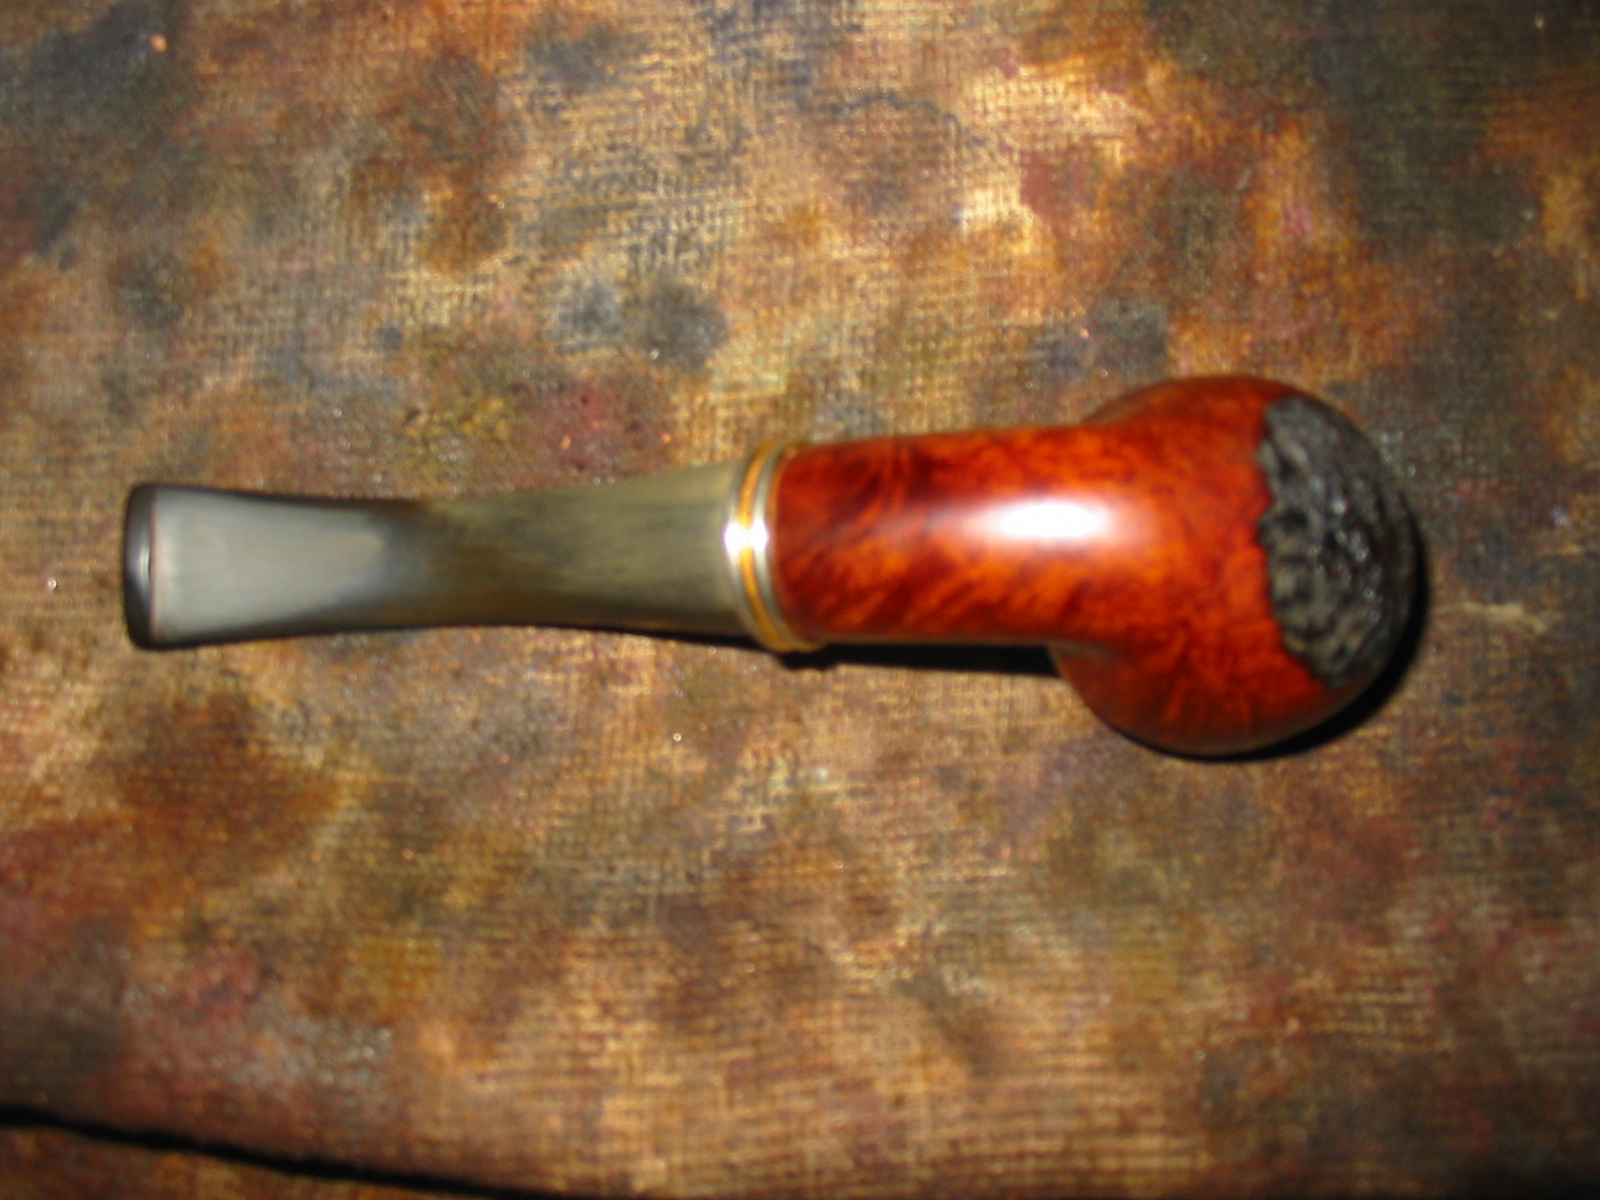
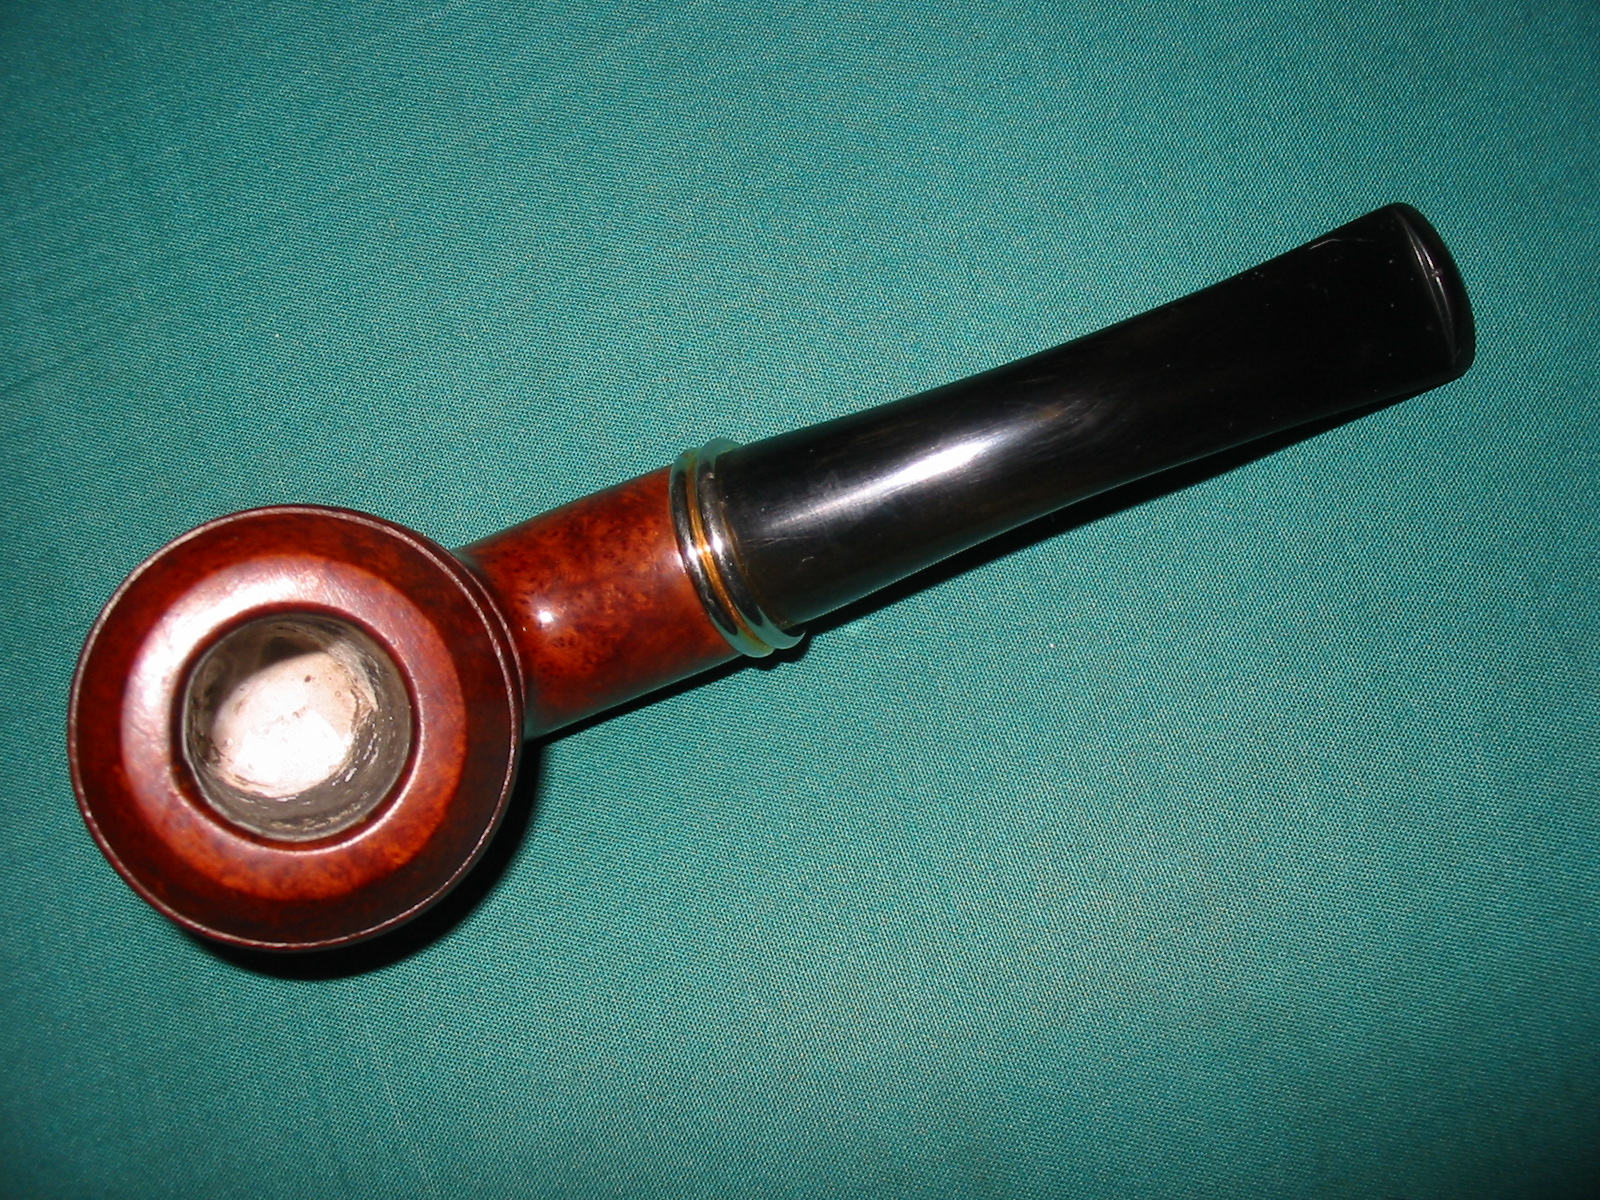
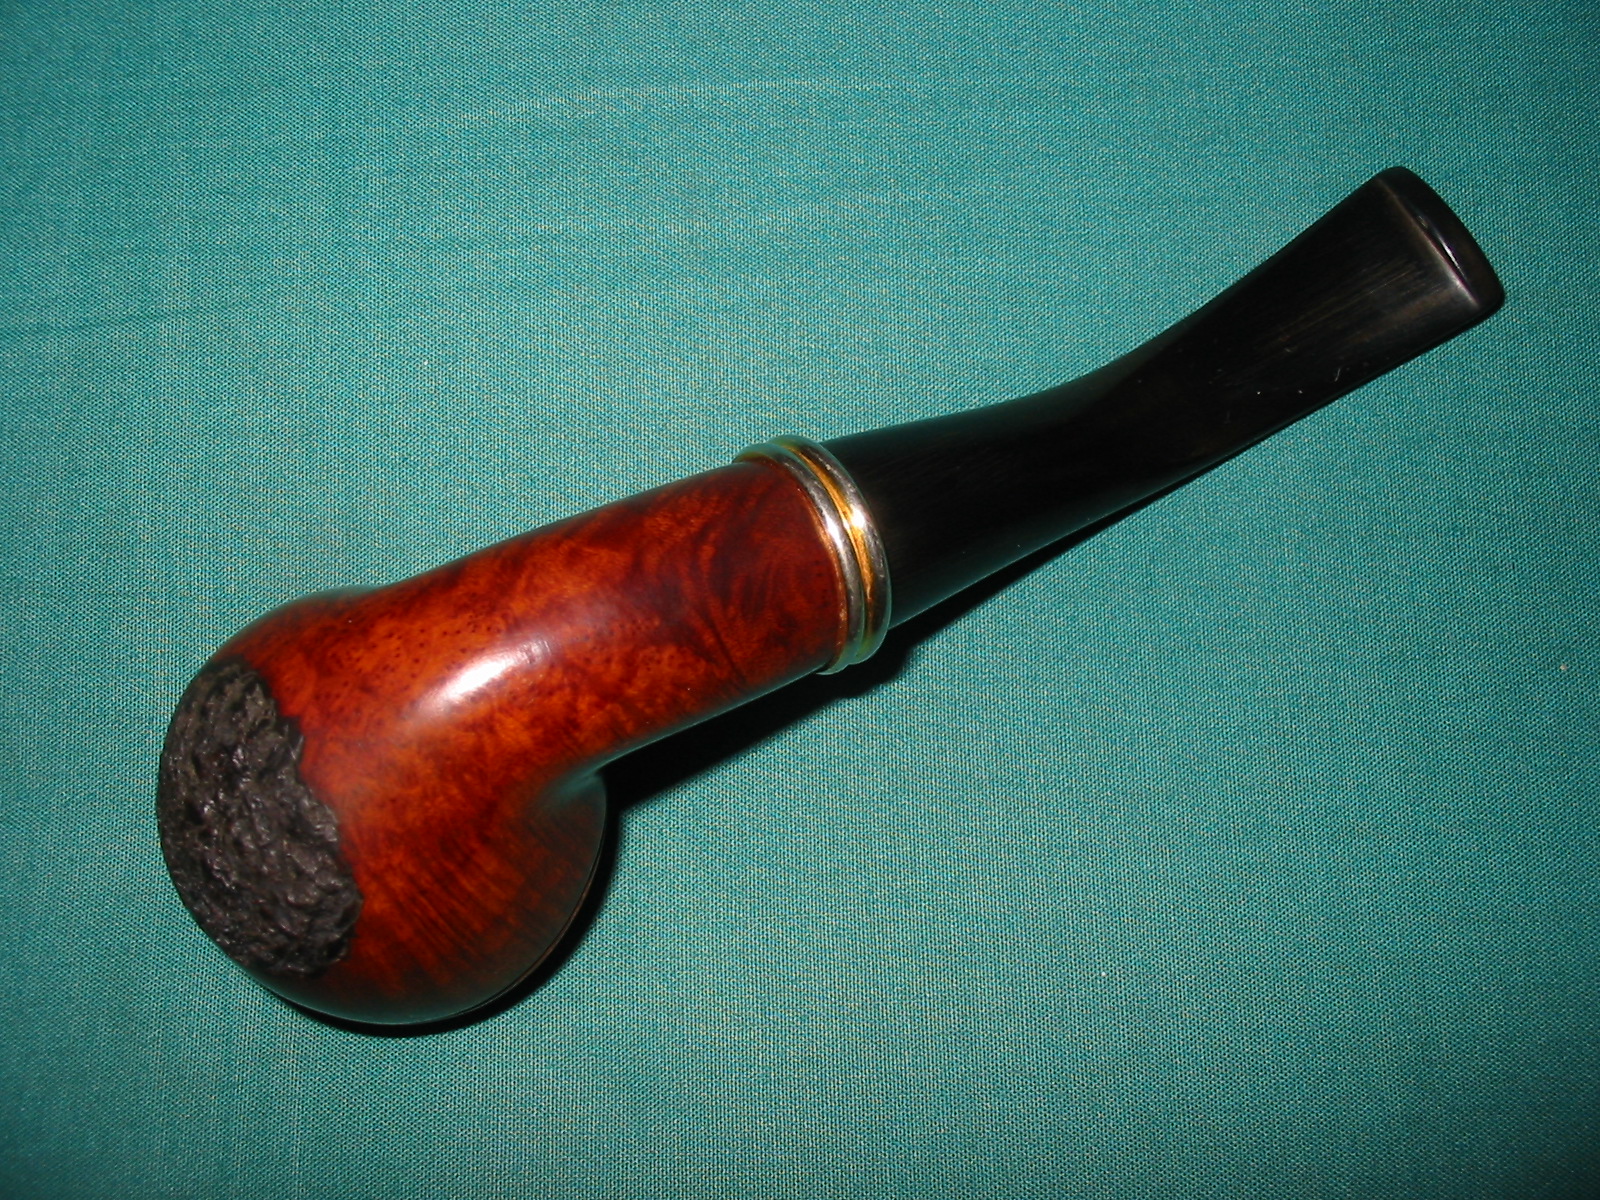
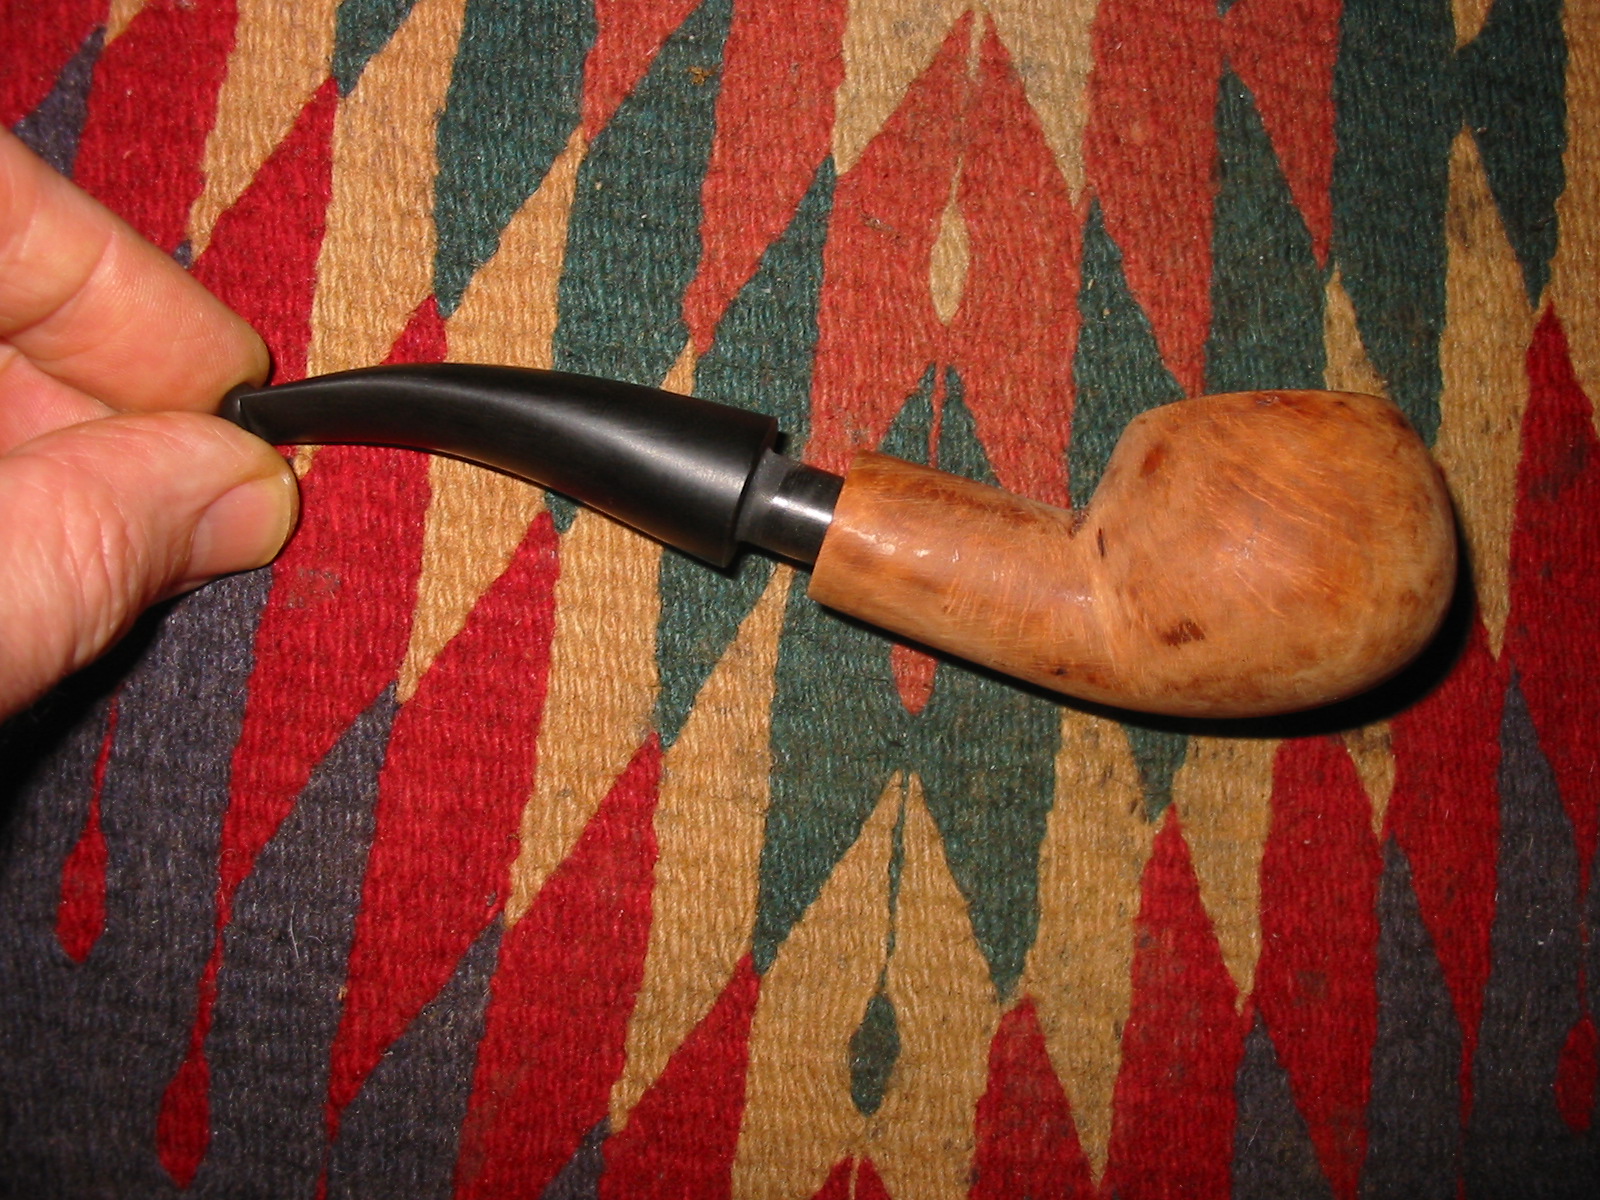
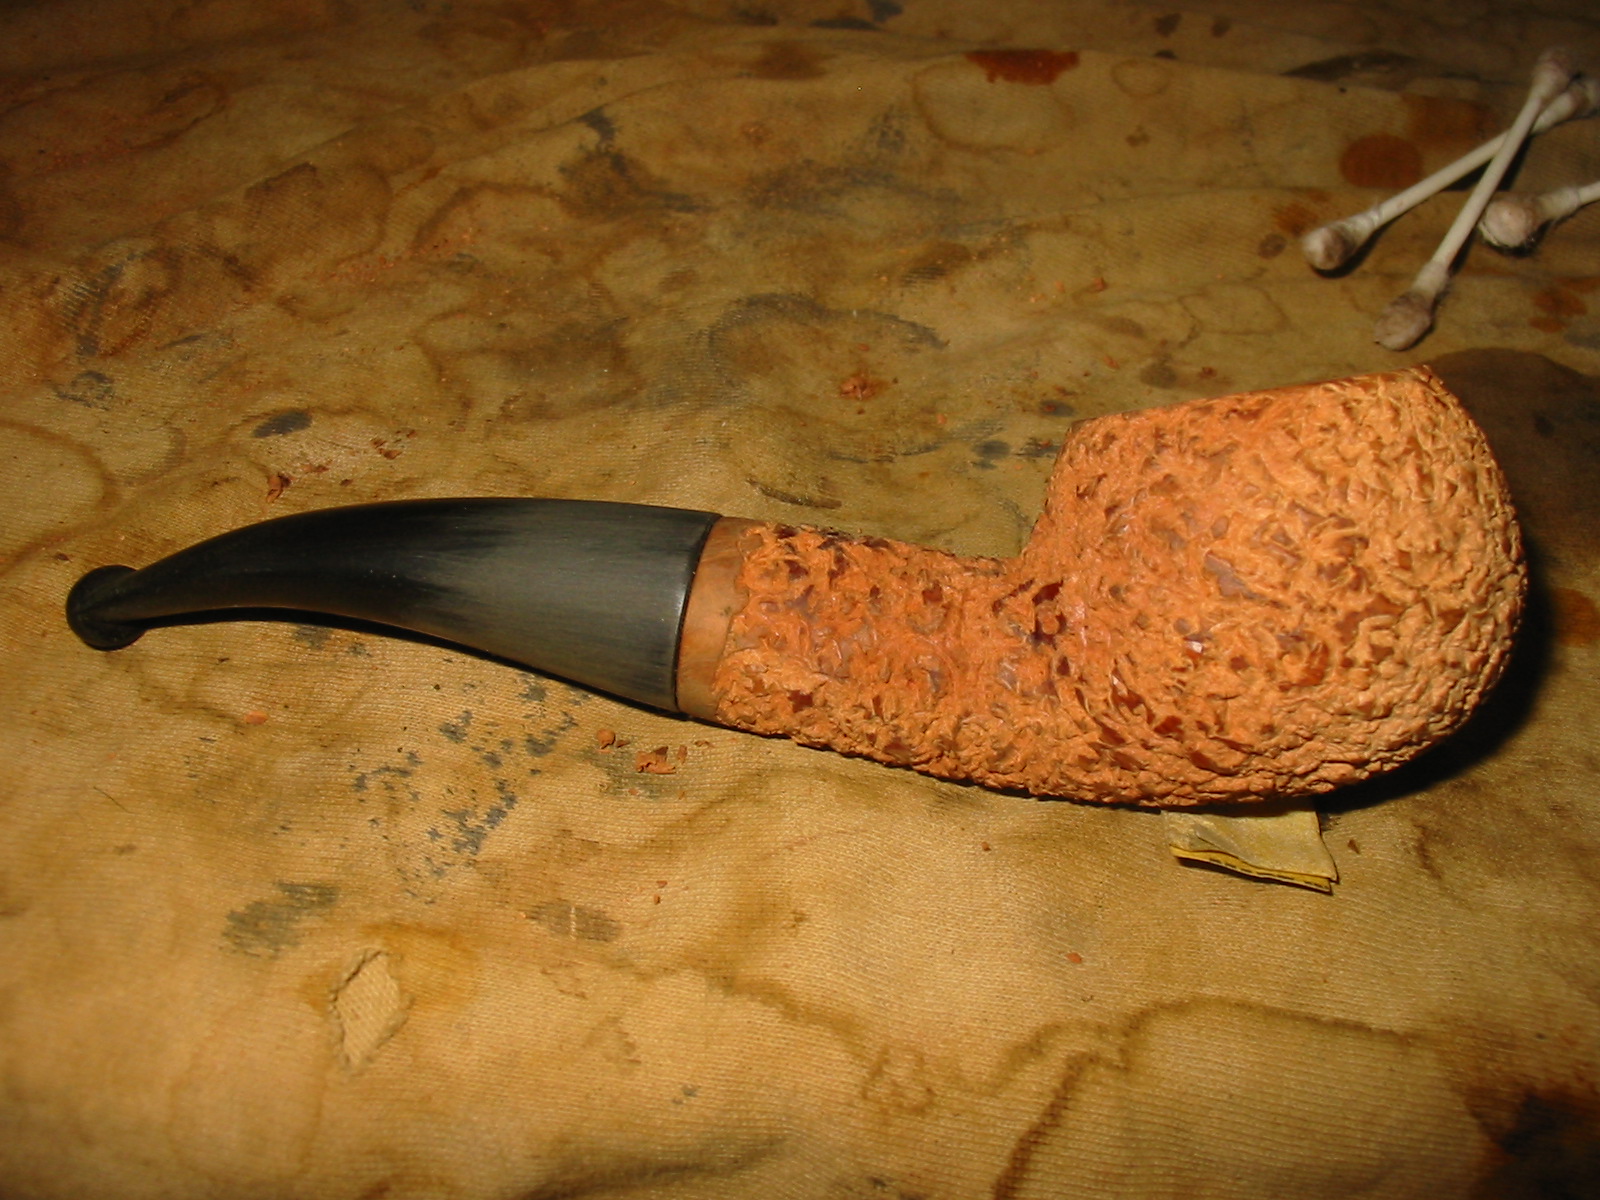
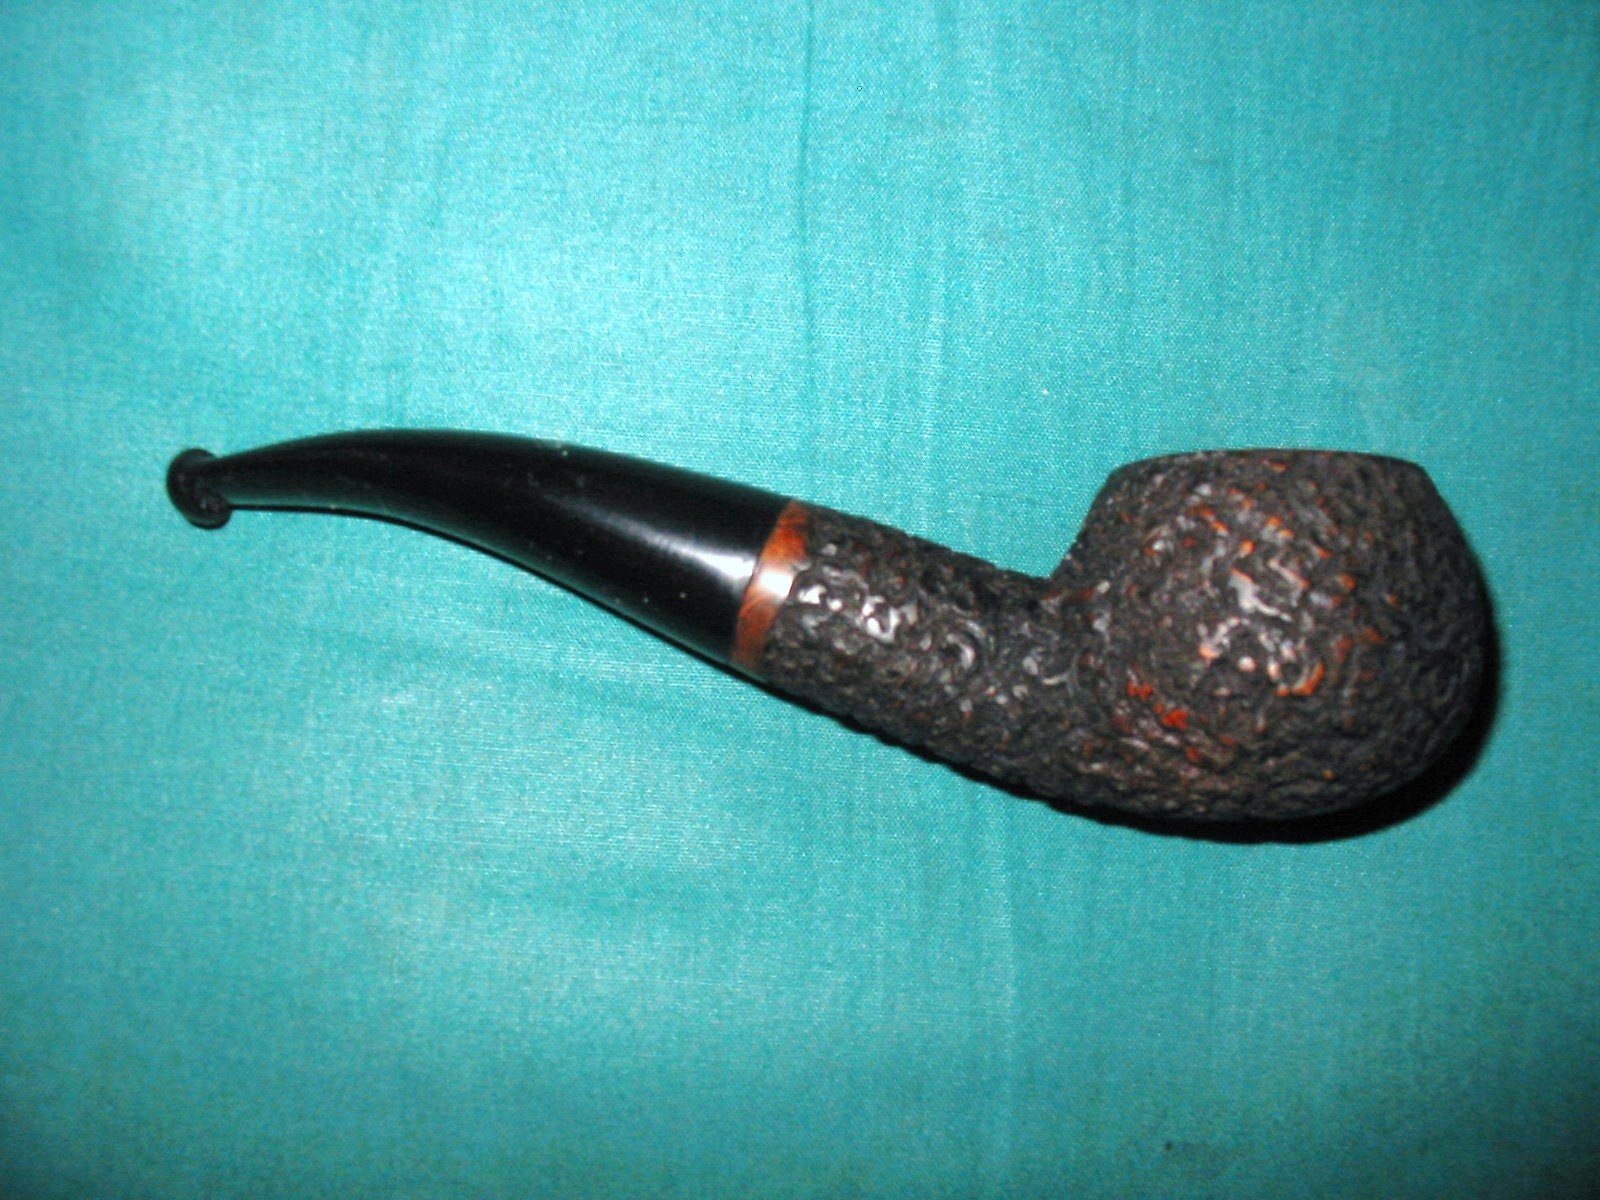
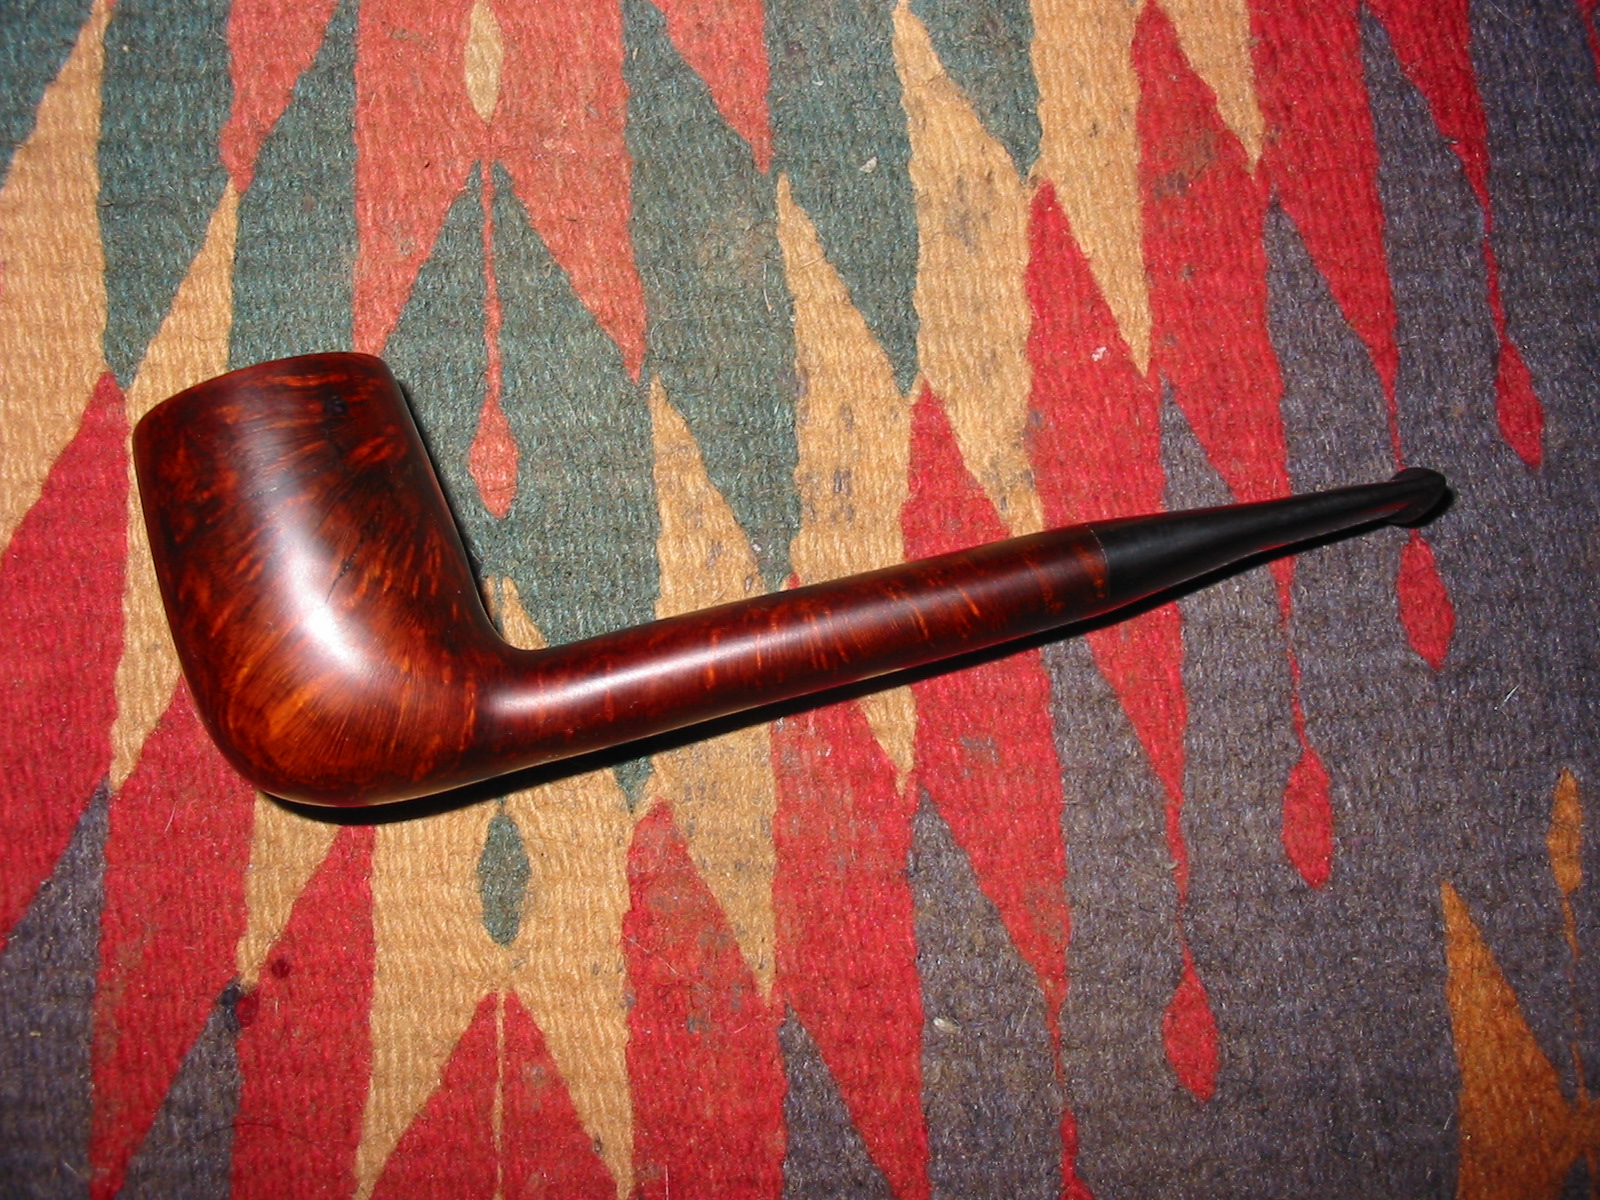
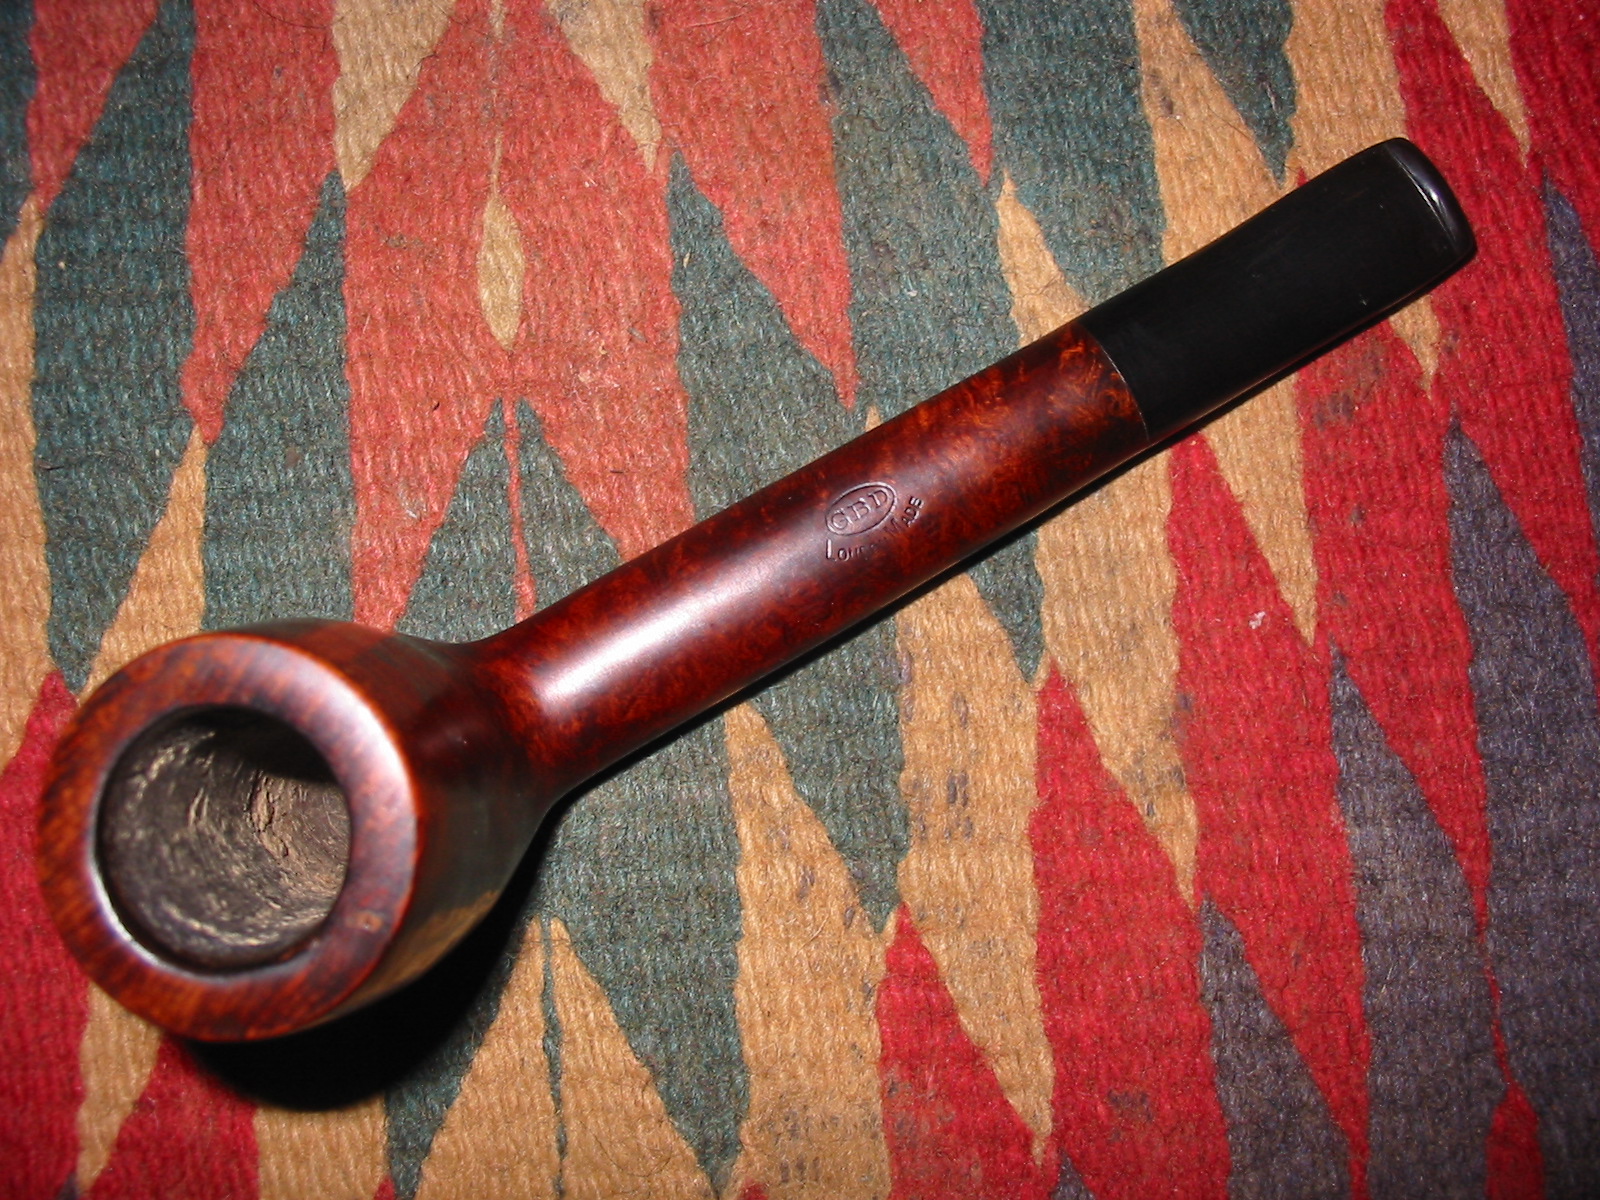
The finished pipe is shown in the next series of four photos. The stem fit came out nicely. The change from a saddle to a taper style worked well. The contrast stain looks great on the pipe. Over all I am well pleased that I decided to stain it and not rusticate it. I look forward to loading up a bowl and enjoying the “new” pipe.
IMG_5385

IMG_5386

IMG_5387

IMG_5388

Giving New Life to an Old, Tired Unique


I am not sure who the maker of this pipe original was. It has some rustication patterns that remind me of Dr. Grabow. It has a metal screw mount mortise. The flat base that extends from the bottom of the bowl backward toward the stem also has similarities to a Grabow shape. But this one is only stamped Imported Briar on the bottom of the shank. When I received it the bowl was in rough shape. The finish was gone. The stem was gone, the rim was a beaten and worn down mess. I think originally the rim was probably straight across but it was worn and beaten to the point that it was now angled. If indeed it was originally angled then the rim was badly beaten. Either way it was rough. The cake in the bowl was quite thick. The internals of the shank and airway were quite clean – that was a surprise. The briar was solid and relatively thick and sound.
IMG_5281

IMG_5282

IMG_5283

IMG_5284

As I looked at it and studied it there was something about it that drew me to the shape. The wear and tear still did not hide the fact that there was some life still left in this old pipe. I went through my can of stems and found an old screw mount stem. The stinger apparatus on it was slightly different than the old Grabows that I had seen but it would work. The draw on the stem was very constricted anyway so I figured I would end up cutting the stinger off and drilling out the metal tenon. The stem has lots of tooth marks and chatter but was solid. It was a nylon stem and not vulcanite so it was a little trickier to work with. The diameter was also slightly off and the stem was overturned once it was on the shank.
IMG_5285

IMG_5286

IMG_5287

IMG_5288

I heated the metal tenon with a heat gun until the glue softened and then turned it in the shank until it lined up. This type of tenon is actually very easy to realign.
IMG_5290

IMG_5291

IMG_5292

Once the stem was aligned I reamed the bowl with a PipNet reamer and heads taking the bowl back to bare wood. I wanted to see what the shape of the bowl under the cake was like to assess whether I wanted to continue to put time into the pipe. The interior bowl was actually in excellent shape under the cake. This pipe must have been a good smoker – someone’s favourite pipe.
IMG_5300

IMG_5301

I set up a topping board and sanded the rim at the angle of the bowl to even out the top and to minimize the damage. The back edge was very ragged from tapping the pipe out, or using it as a hammer! It took some time to get the top flat and the angle correct from the back of the bowl to the front edge.
IMG_5302

IMG_5303

I wiped the bowl down with acetone on cotton pads to clean up the grime in the grooves of the rustication and to even out the remaining stain coat. There was also some varnish left on the shank that I wanted to remove.
IMG_5304

IMG_5305

IMG_5306

Once the finish was gone I experimented with a metal band. The shank was not cracked or broken. It was solid but I wanted to see what the shiny silver would look like against the rugged rustication. I also wanted to minimize the slight difference in the diameter of the shank and the stem. I decided I liked the look of the band so I heated it with the heat gun and pressed it into place on the shank. I liked the finished look of the nickel band. I feel it gives a bit of bling to a rough looking pipe.
IMG_5307

IMG_5308

I screwed the stem in place to have a look at the fit and finish of the pipe as a whole. I thought to myself that it would work well. I would need to give the stem a bend to make a correct fit to the sitter style of the bowl but it would work.
IMG_5309

IMG_5310

I decided to sand out the tooth marks and chatter as much as possible. I was hoping that the heat would lift the marks a bit. I heated the stem with a heat gun to do the bending. I bent it over a rolling pin. It took awhile for the nylon to be flexible enough to bend. Bending nylon stems is far trickier than vulcanite. It does not seem to have the memory of vulcanite so once bent it remains even if heated and has to be pressed back into shape. It also kinks very easily so you have to be very careful when bending it. I have also found that the wire in a pipe cleaner heats up and the pipe cleaner can stick to the inside of the stem. All of the above make it a pain to bend this type of stem.
IMG_5313

IMG_5314

IMG_5315

I finished the bend and set it with cold water. I was not happy with the overall look and flow of the stem. The bend was correct in terms of allowing the pipe to sit flat on the bottom of the bowl with the tip of the button arching to touch as well but the flow/arch of the stem was not right. I reheated and tried it a second time and still it did not quite work. I decided to stop and revisit that later.
IMG_5316

The draught on the pipe bowl was wide open and easy but the stem itself was very constricted. The stinger apparatus had a slotted entry into the stem. It was very narrow and seemed to extend quite a distance up the stem. A pipe cleaner would not pass through the stem and the stinger. I decided to sacrifice the stinger end so I sawed it off with a hack saw and then drilled out the airway in the metal tenon. As can be seen in the photo below the drill bit went a long ways into the stem before it broke through the slotted airway. Once I had opened the airway in the stem and removed the stinger the draught on the pipe was excellent – open all the way and passing a pipe cleaner with ease.
IMG_5317

I stained the bowl with an oxblood aniline based stain. I flamed it and restained until it was well covered. I then buffed the bowl with White Diamond on the buffing wheel. The photos below show the bowl after the staining and buffing. The colour of the briar after the stain coat was workable. The black undertones that were deep in the grooves of the rustication worked well with the red of the oxblood stain. The rim colour matched the bowl and the birdseye grain showed nicely on the flat of the rim.
IMG_5318

IMG_5319

IMG_5320

IMG_5321

The stem being nylon required all handwork. I could not use the buffer on it as it would melt and make more work than I desired to do on this pipe. Before I sanded it I used the heat gun to rebend the stem and get the angles and bend correct. Once I had that done I sanded it with 220 grit sandpaper and then with a medium and a fine grit sanding sponge. I then sanded the stem with my usual array of micromesh sanding pads – wet sanding with 1500-2400 grit pads and dry sanding with 3200-12,000 grit pads.
IMG_5325

IMG_5326

IMG_5327

I rubbed the nylon down with Obsidian Oil and once it was soaked in I hand buffed it with Paragon Wax. I gave it multiple coats of the wax to preserve it. I buffed the bowl with White Diamond and then gave it multiple coats of carnauba wax with a light touch to keep the wax from building up deep in the grooves of the rustication. The next series of photos show the finished pipe. The side profile photos show the pipe in the sitter position and also from an angle. The top and bottom view photos show the new finish on the rim and the shape of the bottom of the pipe. This old worn pipe is now freshly reworked and ready to give many more years of service.
IMG_5328

IMG_5333

IMG_5329

IMG_5332

IMG_5330

IMG_5331

Restoring a Briarmeer Rhodesian 175 ED that was Made in Canada


Blog by Steve Laug

I received an email from Andrew saying that he had a pipe he wanted to send my way. It was my kind of shape – a Rhodesian. He said that it was an odd pipe in that on the bottom of the bowl it had a slightly inset circular divot. The round inset was almost like a poorly made plug on the bottom of the bowl, or one that had shrunken with time. He thought that it would be a great challenge for me to do a repair on it. The stamping on the pipe shank was Briarmeer 175 ED Canada.
Briarmeer1

The brand was one I had not heard of before. And since I am in Canada I wanted to try to figure out where the pipe was made and what the plug was about. The name seemed to suggest that it was a meerlined pipe or at least included meerschaum in some form or fashion. Yet when I emailed Andrew about it he replied that there was no meerschaum lining present in the bowl. Instead it was just a nice looking briar pipe with the strange, misfit looking round plug on the bottom of the bowl.

This would require some research to see what I could find out. I went online and searched for any information that I could find regarding the brand. I wrote to the trademark attorney who was listed as the representative of the brand and received a very cryptic answer that was not helpful at all. I did learn however that Briarmeer pipes were made by Briarmeer Pipes Limited, 226 Park Street, Brockville, Ontario. The business was no longer present at that address and did not show up in any Brockville Business Directories available online or through the Yellow Pages .I searched the Canadian, American and British patent sites hoping to find a patent registration for the pipe but was not able to find one. I found a trademark registration document from the US patent office that showed that the brand or trademark was registered in the US in 1973. The document pictured below gives that information as well as the Canadian Registration Number 180,805 and that it was registered in Canada on January 21, 1972.
Briarmeer US Trademark patent

Using these registration numbers I searched both the Canadian and US patent records but could find no patent information available. From the public records it appears that the Briarmeer Company went out of business sometime in the late1980’s or early 1990’s and the name became public domain.

I was able to find out through further digging that the pipe is a variation on what Kaywoodiedid with its famous Carburetor.Kaywoodie had drilled a hole in the bottom of the bowl and inserted a metal airhole to introduce air into the bottom of the bowl to enhance burning of the tobacco. In the Briarmeer the drilled out area in the bottom of the bowl was significantly larger.It had been drilled out and a meerschaum disk inserted in the resultant hole. The draw hole was to be perfectly centered at the bottom of the bowl. From what I could find out the idea of using the meerschaum insert came to a Canadian engineer about 30+ years ago. He reasoned that the meerschaum bottom of the bowl would allow for a drier and cooler smoke while the briar would be sturdier than the meerschaum for the walls of the bowl.Now I knew what the inset on the bottom of the bowl was and where the Meer portion of the Briarmeer name came from.

I decided to see if I could hunt down some photos of the pipe. I had not noticed them before and did not figure I would find many available. I was wrong. I found quite a few clear photos online that showed the novel meerschaum insert with clarity. In all of the photos it was clear that the insert sits inset into the bottom of the bowl and there is a variance in the external bowl bottom and the depth of the inset meerschaum disk. I have included four of the photos I found to show the insert in the exterior bowl bottom. Some of the photos show a new and unsmoked pipe and other show an estate pipe. All have the pipes show the same variation in the depth of the bottom of the bowl and the depth of the meerschaum disk.
Briarmeer6

Briarmeer8

Briarmeer3

Briarmeer pipe bottom

I also learned that the American Company, Briarcraft who made the Smokemaster pipe also made a pipe with called the Briarmeer Acadian. The Briarcraft version of the pipe was a meerschaum lined pipe and was stamped with the Briarcraft logo, a B in a diamond on the shank and on the stem.However, the pipe I was gifted was not a meerschaum lined briar and it did not have the B stamp on either the shank or the stem. The stem appears to be original and the stamping on the shank clearly says that the pipe is Canadian made.

The pipe from Andrew arrived and it was indeed one of my favourite shapes. The finish was a little dirty and the rim had some carbon build up. The stem was oxidized and had some tooth marks on the underside of the stem near the button. There was also a darkened spot like a burn mark on the underside of the shank near the insert. There were several fills in the grooves of the rustication but I was fairly certain that when I restained the pipe they would be hidden. The meerschaum insert looked to be in very good shape from the outside of the bowl. Inside was caked with a fair amount of carbon and the insert was not visible looking into the bowl.
IMG_5192

IMG_5193

IMG_5194

IMG_5195
Upon closer examination it was evident that there was a crack in the shank on the right side that ran at an angle from mid-shank toward the back of the bowl shank union. The crack did not start on the bottom of the shank but rather started midway up on the right side of the shank and ended near the top middle of the shank. It was very clear under a lens that it was present. The next two photos, though slightly out of focus show the crack. It runs across the rustication pattern mid-shank.
IMG_5196

IMG_5197

I cleaned out the crack with a dental pick to remove the buildup of grime that filled it. The grime was evident through the lens. Once I had it clean when I viewed it through the lens I used superglue to repair the crack. Fortunately the crack did not go all the way into the airway. I checked the inside of the airway with a penlight and it was smooth and flawless. The repair externally would remove the visible damage.
IMG_5218

IMG_5219

I left the superglue to cure overnight and in the morning used the dental pick to clean out the grooves of the rustication and sanded the smooth portions of the briar surface with 220 grit sandpaper and then medium and fine grit sanding sponges. The photo below shows the repair after sanding and shaping.
IMG_5227

I wiped the surface of the bowl down with acetone on cotton pads to remove the damaged finish and enable me to blend in the patch when I restained the pipe. I scrubbed the rusticated rim of the bowl with the pads as well and was able to remove the carbon build up.
IMG_5228

IMG_5229

IMG_5230

I sanded the darkened area (burn?) on the bottom of the bowl to lighten it in preparation for staining. I wiped that area down with acetone on cotton pads afterward.
IMG_5231

I sanded the stem with 220 grit sandpaper and a medium and fine grit sanding sponge to remove the oxidation. I sanded the tooth marks on the underside of the stem near the button and was able to remove them.
IMG_5233

IMG_5234

IMG_5235

IMG_5236

I wiped the bowl down a final time with acetone, being careful not to scrub the insert with it. Once it was cleaned off I stained it with a dark brown aniline stain applied with a cotton swab. I avoided the meerschaum insert as I did not want to have the stain penetrate the meerschaum. I flamed the stain and reapplied it. I flamed it again and reapplied it again. After the final flaming of the bowl I set it aside to dry.
IMG_5238

IMG_5239

IMG_5240

IMG_5241

IMG_5243

When the stain had dried I buffed it with White Diamond on the buffer to even out the stain and give it a shine. I also applied a coat of Halcyon II wax to the rusticated surface and hand buffed the bowl with a shoe brush. The next four photos show the bowl after the buffing and waxing.
IMG_5244

IMG_5245

IMG_5246

IMG_5247

I worked on the stem with my usual group of micromesh sanding pads – wet sanding with 1500-2400 grit pads. I then buffed the stem with red Tripoli and White Diamond before going back to the work table and dry sanding with 3200-12,000 grit micromesh pads. I rubbed the stem down with Obsidian Oil and let it soak into the vulcanite.
IMG_5248

IMG_5249

IMG_5250

I buffed the finished pipe with White Diamond and then gave it multiple coats of carnauba wax. The finished pipe is shown in the photos below. The meerschaum disk inset into the bottom of the bowl is an interesting touch. I look forward to loading up a bowl and giving it a test run very soon. At the very least this is a great piece of tobacciana that still leaves a bit of mystery unsolved.
IMG_5251

IMG_5252

IMG_5253

IMG_5254

Out Damned Spot!…or at Least Hide – By Josiah Ruotsinoja


Josiah and I have been emailing back and forth on this old Kaywoodie for quite a while now. I asked him to do a write up for the blog on it as he tried some different ways of minimizing stains to the briar. Each method he used has its own application and effect. Josiah did a great job writing this up and demonstrating the way the method worked and the results of the application. Thanks Josiah for the great work. I look forward to reading more about your refurbishing in the days ahead.

This last August, I acquired a Lot of estate Kaywoodies. All were in fair condition. Some looked like old, loved friends and a couple hardly smoked at all. One was unsmoked with the price sticker still on the stem. I’m guessing that all came from the same estate judging from the burn pattern on the rims. The main issues to be dealt with were the moderate burns on the rim and some spots from sitting in something wet. These spots proved to be the more serious problem, as you may gather from the title.
Among them was this Connoisseur #69 pot.
Josiah1

Josiah2

As you can see, there was quite a lot of grime and a large dark spot on the left side of the bowl. Another, less severe spot was on the bottom of the shank. However, it appeared to be in good condition overall with nice thick walls and no deep dents or scratches. The bowl had some very nice birdseye on both sides. Visions of a nice blond or honey colored stain immediately jumped into my head.

Time to restore! My first steps were to ream the bowl and put it in an alcohol bath and soak the stem in an Oxyclean solution. The stem came clean and polished up nicely without much trouble. I heated up the stinger and screwed it in to the mortise while still warm to correct the alignment.

The grime on the rim came off quickly, but there were a couple pretty deep scorch marks. I started off topping the bowl with 220 grit sandpaper, but it quickly became apparent that it was going to take forever with that fine a grit. So I started over with 80 grit until most of the burn was removed and worked my way up through 600 until it was gone. Then I put a slight bevel on the outer and inner rim.

Now for the real problem. The water marks (I kinda think old motor oil) hadn’t come out in the alcohol bath as I had hoped it would. Having never dealt with removing such marks from wood, I decided I needed to consult someone with more experience. I sent an email off to Steve here at the blog for advice. In response he suggested a few options: lemon juice, bleach, oxalic acid and as a last resort sand paper.

First, I tried lemon juice.That worked to a degree, but the stains were still clearly visible. Here are the marks after the lemon juice.
Josiah3

Josiah4

I figured anything I could see would be more visible after applying stain, but I decided to give it a try anyway. I sanded the entire surface from 220 up to about 6000 grit. I applied stain and flamed it to set the stain. Below is the first attempt…not so successful.
Josiah5

Josiah6

So I sanded off the stain again and went for bleach. I almost ruined the whole project here by leaving the bowl in the bleach too long. It raised the grain quite a bit and penetrated further than I expected.
Josiah7

Josiah8

After sanding, I managed to get most of the white patched off and the surface smooth again.
Josiah9

Josiah10

On to attempt #2 with stain…
Josiah11

Josiah12

Better results, but the stains were still clearly visible. I moved on to oxalic acid crystals. I mixed a paste of crystals and water, applied it, let it dry and sanded the dried mixture off. Use a particle mask when sanding this stuff. It’s not something you want to inhale.
Josiah13

Josiah14

I tried once more with stain and the results were similar to the second attempt. I seem to have lost the pictures for this, but by this time, you get the idea. This last unsuccessful attempt made it clear to me that I must admit defeat and give up my dreams for a shapely blond and give a brunette a try. The repeated sanding, staining and sanding again had taken its toll on the nomenclature and the side profile was starting to flatten out. In order to save the now faint stampings, I chose a nice deep espresso color and success! The pesky spots are now hiding well in the rich stain. I think that only a very well trained eye, or one that knew the stains were there in the first place, would be able to spot them.
Josiah15

Josiah16

So after a lot of work, I have myself a beautiful Kaywoodie pot. Disaster almost struck in its inaugural smoke, however, when the Kaywoodie club fell out of the stem, the original glue having lost its glue-iness after the soak in the Oxyclean. I managed to find it where I had been sitting and it’s safely superglued back in place.

Many thanks to Steve for his suggestions. Even if it didn’t turn out the way I planned originally, I now have options for tackling similar problems in the future and about a pound of oxalic acid to try to remove the stains my 13 year old has left on her bedroom window sill.

Giving a Brewster Round Top Billiard a Face Lift


Blog by Steve Laug

I was gifted a pipe bowl from a friend in exchange for some work on his Peterson. He had no idea of the brand or maker but thought I could have some fun with it. I dug it out of the refurb bin the other evening and began to work on it. I would need to clean it up and then restem it in the process as it did not come with a stem. It was stamped Brewster over Imported Briar on the left side of the shank with no other identifying stamping.
brewster1b
The finish seemed to be a very heavy lacquer that was cloudy with age. The shape was very interesting to me – a billiard like shape with a crowned rim, rounded and quite elevated. I like the looks of it. It is a small pipe – group 2 sized. There were a lot of putty fills on both sides of the bowl, the shank and the rim that would definitely show up once the lacquer finish was removed.
IMG_5103

IMG_5105

The bowl was in great shape with a light build up of cake that was the right thickness. There was no heavy smell of aromatics clinging to the pipe. The shank was clean and the metal insert in the mortise was also clean and in good shape. The thread pattern and the look of the metal fitment looked exactly like a Dr. Grabow set up.
IMG_5104

IMG_5106

I had an old Dr Grabow stem here that was missing the stinger apparatus but the threaded tenon was in working order. I took it from the can of stems I have and gave it a try on the shank. It threaded in perfectly. It was overturned but it fit. This added some objective evidence to my assumption that this pipe had some connection to Dr. Grabow.
IMG_5107

Back Story of Brewster Pipes (If you get bogged down in the history you can skip ahead to the section on the refurbishing process).

At that point in the process I slowed down the cleanup and went to the computer. I was hooked and wanted to see what I could find out about the Dr. Grabow connection to Brewster, if there was one. I wanted to know who made the pipe so I did some research on the web and in some of my books to see what I could find out about the brand. From the book Who Made that Pipe I learned that the brand was Italian made followed by the words unknown maker. I looked on Pipedia and there found much the same information – Italian made followed by question marks as to the maker. After working the web with Google and other search engines the most I could find out was that slight information – the pipe was an export brand of an unknown Italian company.

I decided to take a different tack. I found the Grabow Company site online and wrote an email to their information centre seeking information on the brand. I decided to follow-up on my hunch from the stamping and the metal insert in the shank that somehow this pipe was related to Dr. Grabow pipes. I had no clue how but it certainly had the signs so I went to the Dr. Grabow forum on-line and posted my questions http://drgrabows.myfreeforum.org/index.php . I also did some reading on the forum of back posts and found one series of posts on the brand. I read the following and immediately had more questions. The Grabow connection was not clear but I had found that the pipe may have been a promotional item. Here is the quote that gave me the information”

“A couple months back, I scored a Brewster off eBay for five bucks. Research on this forum and the wild, untamed internet tells me the Brewster pipes were all made in one batch in 1964 as a promotional item for Sir Walter Raleigh.”

Last evening while relaxing, my iPhone vibrated notifying me of a new email. I picked up the phone and saw that I had a response to the questions that I had posted on the forum. Dave Whitney, author of the book on refurbishing called Old Briar, had responded to my request for information. What he sent me was extremely helpful and a true goldmine of information. His answer affirmed the Grabow connection and gave critical information that I had not been able to find anywhere. I have included that information in part below.

Dave Whitney: Here’s what I have from my accumulated notes on Brewster – much of it looks like it came off this forum, ted/td being one of the early ones to help build this forum and a former Sparta CEO:

All the Brewsters were “made” in about 64’… Brewster… is probably from Fratelli Rossi from 64’… Ted, an older pipe smoker than me, suggested the Brewster pipes are comparable to the Willard pipes, and that Brewsters were often sold either with tobacco, or in a coupon offer. For example Brewster was sold as a redemption offer with Brown and Williamson for Sir Walter Raleigh tobacco.

Further information came from Dr. B… I think (in my feeble state of mind, after today) that Brewster was sold as a redemption offer with Brown and Williamson for Sir Walter Raleigh tobacco. But, Mastercraft in 74 had a LOAD of them left. We (Mastercraft) sold them as closeouts along with several pipes in baskets of 4 dozen at $3.98. We also included a bunch of Mastercraft from F. Rossi at the same price……..Rossi pipes are another story……Remind me of the “sticky lacquer” and I’ll tell it…….ted

Mastercraft was founded by Bernard Hochstein, an Orthodox Jew. Old, White Haired, Santa Claus looking (still alive at 96, last time I knew), and he was REKNOWNED for his ability to “strong arm” the European pipe suppliers into selling pipes to M/C at a bargain. Probably the best (never say nothing) negotiator that I’ve ever met. He sold a business (Mastercraft) to UST for 6 million in STOCK. He’s probably worth 60 million today. Mr. Hochstein could negotiate a peace in the Middle East in a very few days, and talk all parties outta’ their pants in the process.

OK, so Mr H “rapes” the Italian suppliers even up till 1964 when the Surgeon General’s (SG) report comes out. As it turns out, “rape” works both ways. A supplier, Fratelli Rossi, (still in business) took an order in 1963 for over 1 million pipes at 1/2 dollar (US) per pipe. When the SG’s report comes out, Rossi has filled a small part of the order for Hochstein, and had orders for a great many more pipes than Hochstein ordered. Rossi decided to experiment with his lacquer …Whose pipes did he experiment on? Hochsteins.

When I started at Mastercraft we had 1215 cartons of pipes from Rossi…Mastercraft Standard….72 dozen per carton, with lacquer so “tacky” that if you held the pipe as if you were smoking it, you’d have to “shake” it out of your hand. Rossi left out the curing agent. Ever touched wet paint?……..After 10 years they were still STICKY…..after 20 years, they were still STICKY.

We fought these SOB’s for years, when finally Luther Marlow (you’ll see topics about him) concluded that we could re-spray them with the Grabow lacquer and sell em’. We did, and we did. Through a “drive” by the UST salesforce, we sold every one. So if you have a Mastercraft Standard with what looks to be “heavy” lacquer, you are probably right.

Hussar…..Rossi also made Brewster. Better lacquer job though… Brewster was sold as a redemption offer with Brown and Williamson for Sir Walter Raleigh tobacco. But, Mastercraft in 74 had a LOAD of them left. We (Mastercraft) sold them as closeouts along with several pipes in baskets of 4 dozen at $3.98.

When I started with Mastercraft in the early 70’s we had over 400 cartons of pipes from Hully. Each carton contained 60 to 80 dozen, most of which were stamped Brewster or Stetson and these had a base cost (from the 60’s or earlier) of $2.80 /dz. Some of the smaller pipes, called Southern Assortment were $1.90 / dz. May be partly to blame for them going out of business.

That was very helpful information on the brand. It gave a definitive date and origin to the pipe. The Italian connection was also clear. The Dr. Grabow link was also clear in Dave’s answer. Now I wanted to know something about maker, Rossi. Dave kindly included that information in his answer as well. It is as follows:

From approximately 1946 up to the end, Ferdinando Rossi II, a grandchild of the founder, headed the company. But after World War II the world of the pipe changed dramatically. Especially in Italy, where those big pipe factories mainly turned out pipes for the lower priced segments of the international mass markets. The demand for these pipes shrunk considerably as more and more smokers turned to cigarettes. Rossi got into this vortex as well. Little by little the number of pipes produced sank. This evolution was accelerated by the upcoming fame of pipes from Denmark. As well, new Italian brands established after the war like Castello, Brebbia or little later Savinelli operated cleverer and thus were more successful.

So the decline went on through the 1960’s and 1970’s, even though Rossi offered more than 800 possible shapes in dozens of lines and uncounted finishes. Besides the completely machine made pipes there were also some lines of semi-freehands and even quite considerable freehands were made. But all these efforts could not stop the fall anyway. Due to increasing financial difficulties Rossi closed down in 1985, just one year before the 100th anniversary.

In the years around 1870 and still later the bulk of Italian pipes was made by time taking and laboriously manual work. Mainly based on families who sold their pipes to travelling purchasers handing them on to some wholesaler. Most pipes were still made of box or olive wood.

Ferdinando Rossi from Milan was one of the most important wholesalers for tobacco related goods of northern Italy. When he attended one of his pipe suppliers in Saint-Claude in 1880 he got hooked on the idea to establish this manner of industrialised briar pipe production in Italy as well. Rossi went abroad several times to buy the hardware here and there because the special features of machines for pipemaking were secrets – well kept by the French in those days. Many machines and tools had to be modified on Rossi’s defaults.

[From the Catalogue “La Regina della Pipa” (1896)] He acquired a large area of land in Barasso in the province of Varese and founded the Fabbrica di Pipe di Radica Rossi in 1886. For sure there was no lack of skilled workers and Rossi personally recruited 30 craftsmen of different occupations from the environment to get started. After a few years the enterprise had developed well and entered into export trades. In 1892 e.g. the ledgers registered the first pipes shipped to Brazil.

One reason of success was the ultramodern conception of the factory and its equipment at the given time. To give an example: a system of canals invented by Rossi drove water to turbines propelling downstream generators, which supplied the entire machinery with electricity. Also lighting and heating were already electrically operated.

In the first years after 1900 Rossi grew steadily and became one of the ten biggest pipe manufacturers of the world. Rossi’s rapid ascent produced further foundations of pipemaking firms in the area.

I love finding out the old company histories of the pipes that I refurbish. I find that it gives a colour and flavour to the pipe I hold in my hands and rework. It gives me the back story on the pipe and adds another dimension to the work of refurbishing. I have included it here for those who enjoy the same kind of history.

The Refurbishing Process (for those of you who have skipped ahead to see the work here is where it begins.)

I screwed the old Grabow stem into the mortise fitment and found that it was overturned. I used a Bic lighter to heat the metal tenon in the stem to loosen the glue. I put the stem back in place and tried to turn it straight, to clock it, but it was not loose enough. I reheated and retried until it was loose. I then turned the stem into place and aligned it with the bowl. I then cooled it under cool running water to set the glue. From the photos below it can be seen that the diameter of the stem was off. In looking at it from the tenon end it was also not round. The bottom part of the stem and the sides were wider than the top portion.
IMG_5108

IMG_5109

IMG_5110

I sanded the stem with 220 grit sandpaper to decrease the diameter but soon grew tired of hand sanding and decided to give myself a head start on the work. I used a Dremel with the sanding drum to remove the excess vulcanite of the stem. I then brought it back to the work table and sanded the shank to make the transition between the shank and the stem smooth and the bowl to remove the lacquer finish.
IMG_5112

IMG_5113

IMG_5114

IMG_5115

IMG_5116

Once I had removed the finish I could see that the number and the size and shape of the fills would make them hard to blend into the new stain. I made a decision to rusticate the bowl at that point in the process. I used the modified Philips screw driver to rusticate the bowl.
IMG_5117

IMG_5118

With the bowl rustication finished and the stem fit finished I set up my heat gun and heated the stem to take out the bend. This particular Brewster shape had a straight stem. I held it above the heat gun until the vulcanite softened and the stem began to straighten on its own.
IMG_5119

IMG_5120

Once it was straight I set the shape by putting it under running water. The straightened stem can be seen in the photo below.
IMG_5121

I took the pipe back to my work table and went over the surface with a brass bristle brush to knock off the rough spots on the surface of the bowl. I also buffed it with Tripoli to smooth it out. I took the photos below to show the new look of the Brewster. The stem and the rustication looked good to me. The smooth rim and the patch with the stamping would look good once the pipe was restained.
IMG_5122

IMG_5123

IMG_5124

I decided to give the pipe a contrast stain. For the bottom coat I used a dark brown aniline stain. I applied it with a cotton swab and flamed it. I repeated the process until the stain had covered the bowl evenly. The dark brown went deep into the crevices of the rustication.
IMG_5127

IMG_5128

IMG_5129

IMG_5130

For the topcoat of stain I chose an oxblood aniline stain. I rubbed it onto the high points of the rustication with a cotton pad. My plan was to leave the dark brown in the crevices and the oxblood on the high points. I flamed the stain and then buffed the pipe with Tripoli.
IMG_5131

IMG_5133

IMG_5134

I sanded the stem with 220 grit sandpaper to finish the shaping and then used medium and fine grit sanding sponges to removes the scratches left behind by the sandpaper. I followed that up by sanding the stem with micromesh sanding pads. I wet sanded with 1500-2400 grit micromesh pads and dry sanded with the 3200-12,000 grit pads. I rubbed the stem down with Obsidian Oil and when it was dry buffed the stem with White Diamond.
IMG_5136

IMG_5140

IMG_5141

I put the stem back on the bowl and buffed the whole pipe with White Diamond. I then lightly buffed the bowl and buffed the stem with carnauba wax. I wanted to preserve the vulcanite and give it a shine. I also wanted to give a shine to the high points of the rustication on the bowl and also polish the rim. The finished pipe is shown in the pictures below. The old Brewster, with all of its history since 1964, is ready to enter a new phase of its own personal history. The face lift I gave it brings it to a new place. It is my hope that this old timer will give someone a great smoke and endure beyond me. That, after all, is what refurbishing work is all about – extending the life of the old pipes and delivering them intact to the next generation of pipemen.
IMG_5142

IMG_5143

IMG_5144

IMG_5145

Reworking a La Strada Staccato 213 Billiard


The last of the bowls that came to me as a gift from Andrew was a La Strada Billiard bowl. It was stamped La Strada over Staccato on the left side of the shank and shape 213 on the right side. It needed a stem and it had a few minor issues that needed to be addressed. The finish was an interesting rope rustication pattern that went around the bowl like a lasso and the finish under the rope pattern was leatherlike in terms of colour and look. Over the top of the finish was a plastic clear coat that added a perma shine to the bowl. The rim was in very rough shape and had been hammered on to hard surface in tapping out the dottle. The build up on the rim covered the damaged roughness of the surface. The bowl was badly caked on only one side of the bowl. The shank was clean and looked undamaged. There was no stem with the bowl and the shank was very clean.
IMG_5072

IMG_5073

IMG_5074

IMG_5075

The La Strada was once again a brand with which I was unfamiliar. I had some vague memory of seeing them sold through Tinderbox but was not sure about that memory. I did a bit of research and found that indeed they had been sold there. They were Italian Made. Here is a page from a Tinderbox catalogue showing the brand. The catalog describes the pipe as “a gracefully conservative style that has today’s favoured matte finish, enhance by the unexpected touch of random routing.” The price was a princely $8.95-$10.00.
5tbox12

4tbox26

I sorted through my stems and found one that fit very nicely in the shank. When I inserted it there were two cracks revealed, one on top and one on the bottom of the shank. I honestly don’t know if they were present or if the happened when I put the stem in place. It was not a tight fit so I am unsure. It honestly did not matter as banding it would not be a problem. I found a silver band I had in my kit that was a good fit and pressed it into place on the shank. I heated the band with a heat gun and then pressure fit it onto the shank.
IMG_5077

IMG_5078

IMG_5079

IMG_5080

I reamed the bowl with a PipNet reamer (this seems to be more and more my reamer of choice in refurbishing).
IMG_5082

I set up my topping board and then topped the bowl with 220 grit sandpaper. I removed enough of the surface of the rim to take away the damage to the top and the front of the bowl. There were also some burn marks on the left side of the rim that I was able to sand out the majority of damage.
IMG_5083

IMG_5084

IMG_5085

I wiped down the bowl with acetone to try to break up the plastic/shiny finish that was on the bowl and was not able to remove it. The thick coat had bubbles that were thick around the rope rustication areas on the left side of the bowl. I finally put the bowl into an alcohol bath and let it soak overnight to try to break up the finish.
IMG_5086

IMG_5087

IMG_5088

IMG_5089

I took the bowl out of the alcohol bath and sanded it with a medium grit and a fine grit sanding sponge and was able to break through the finish and finally remove it. I wiped the bowl down again with acetone on cotton pads and the bowl was clean. I stained it with a dark brown aniline stain mixed 2:1 with isopropyl alcohol and applied and flamed it until the coverage matched the rim to the rest of the bowl. I buffed the bowl with White Diamond on the buffing wheel and brought it back to the work table and set it aside to work on the stem.
IMG_5090

IMG_5091

IMG_5092

IMG_5094

I sanded the tooth marks on the stem with 220 grit sandpaper and then a medium grit sanding sponge until they were no longer visible. I then used micromesh sanding pads to finish the stem. I wet sanded with 1500-2400 grit pads and dry sanded with 3200-12,000 grit pads. I rubbed down the stem with Obsidian Oil and when dry buffed it with White Diamond.
IMG_5095

IMG_5096

IMG_5097

I polished the silver band with silver polish and micromesh sanding pads and then buffed the pipe and stem with White Diamond. I gave the pipe multiple coats of carnauba wax and buffed it to a shine with a soft flannel buffing pad. The finished pipe is shown in the photos below. It is ready for its initial and should make someone a good pipe in the long run.
IMG_5098

IMG_5099

IMG_5100

IMG_5101

Restoring a Kaywoodie Drinkless Volcano


I was gifted this Kaywoodie Drinkless Volcano with a three hole stinger by Andrew, a reader of the blog. He wrote me an email about the pipe as follows:

Steve, I have this Kaywoodie Volcano shape with a 3 hole stinger, so probably 70’s or newer. It was burned out when I got it. I ended up slopping some fireplace cement in the bottom of it trying to fix it but it didn’t come out well as I was trying to form it with a pipe tool and it is rough. The stem is over turned as well. I figure this might “challenge” you as far as trying to bring it back to life somehow. Is this is something you might be interested in trying to some how to fix? — Andrew

I wrote back that would gladly see what I could do with it so he sent it out to me to work on. When it arrived I saw that he had begun the work on it already and had reamed and cleaned the bowl. He had mentioned that when he bought it there was a small burn out area on the bottom of the bowl. When I got it the inside of the bowl was actually quite alright. His repair looked quite good. A little cleanup of the bowl would bring things in order. The fireplace cement needed to be cleaned off the walls and rounded a bit in the bottom of the bowl but it was not bad.

Besides the obvious damage to the bowl there was some other damage to the pipe as well. The outer edge of the rim was damaged on the front and the inner edge was slightly out of round. The external bottom of the bowl had a half-inch long crack that had been cleaned out and repaired but there was still a slight groove in the crack. The sides of the crack had been joined and repaired so what remained was cosmetic. The stem was overturned and slightly out of round in comparison to the round metal insert in the shank. The stem had a partial stamp of the KW cloverleaf but was in bad shape in terms of appearance.
IMG_4899

IMG_4900

IMG_4901

IMG_4903

I set up my topping board and topped the bowl of the pipe to remove the damaged portion of the inner and outer edge of the rim. I sanded the top of the bowl, pressing it against the board and turning it in a clockwise direction until the damaged briar was removed. I used a PipNet reamer with a cutting head that fit the bowl diameter and turned it against the cement until it was removed from the sides of the bowl and the bottom of the bowl had a slight indentation.
IMG_4904

IMG_4905

IMG_4906

I wiped down the bowl with acetone and cotton pads to remove the remaining finish on the bowl and to clean up the partial repair to the bottom crack. I continued to wipe it down until the briar on the bowl was almost the same colouration as the sanded rim of the pipe.
IMG_4907

IMG_4908

IMG_4909

I scratched out the surface of the crack with a dental pick and packed in some briar dust that I had left from sanding the rim of the pipe. I tamped it and then dripped some superglue into the briar dust until it formed a bubble over the crack. I always overfill the crevices and fills to make sure that when they dry they do not shrink and make a second fill necessary. When the glue had dried I sanded it with 220 grit sandpaper and also with a medium and fine grit sanding sponge to smooth out the bubble and blend it into the surface of the bowl.
IMG_4910

IMG_4915

IMG_4916

On the bottom of the stem there were also two very deep tooth indentations that would not lift when heated with a heat gun. I sanded the area around the dents and dripped clear superglue into the dents. I chose clear superglue as the stem did not appear to be vulcanite. When I sanded it the dust was grey rather than brown. I have found that the clear glue blends very well on this material. When it dries and is sanded it blends in quite well to the surrounding stem material.
IMG_4911

IMG_4913

IMG_4917

I wiped down the bowl again with acetone and sanded the whole bowl with a medium and fine grit sanding sponge.
IMG_4918

IMG_4919

IMG_4920

IMG_4921

IMG_4922

The overturn on the stem is something that is easily corrected. I heated the stinger with a heat gun until the glue holding it in place was softer and then turned it in the metal inserted mortise until it lined up correctly with the bowl. I was almost a quarter turn to the right so I needed to turn it all the way around. Once it was aligned I laid it aside to cool. The final photo gives a clear view of the inside of the bowl. The repaired bowl bottom with the minor adjustments I had made with the PipNet reamer are visible.
IMG_4923

IMG_4924

IMG_4925

IMG_4926

IMG_4927

IMG_4928

With the stem aligned it was evident that the diameter of the stem was different than that of the shank. In looking at the stem from the stinger end I could see that the left side was slightly larger than the right side. There was an overhang passed the metal insert in the shank. The next photos show that the left side would need to be sanded to fit properly.
IMG_4929

IMG_4930

I sanded the stem and shank with 220 grit sandpaper folded and was careful to not sand the stamping on the left side of the shank. I wanted the transition to be perfectly smooth to the touch. I sanded it with medium and fine grit sandpaper to smooth out the scratches left behind by the sandpaper.
IMG_4932

IMG_4933

IMG_4934

IMG_4935

IMG_4936

IMG_4937

I stained the bowl with an aniline oxblood stain. I applied it and flamed it and reapplied it and flamed it again until I had a good even coverage across the bowl. I hand buffed the finish with a soft cloth.
IMG_4938

IMG_4939

IMG_4940

IMG_4941

IMG_4942

I sanded the stem with medium and fine grit sanding sponges and then followed up with my usual array of micromesh sanding pads – wet sanding with 1500-2400 grit pads and dry sanding with 3200-13,000 grit pads.
IMG_4943

IMG_4944

IMG_4945

I rubbed the stem down with Obsidian Oil and then sanded it a final time with the 4000-13,000 grit pads. I lightly buffed the stem with White Diamond. I screwed the stem back into the shank and then buffed the entirety with White Diamond and then gave the pipe multiple coats of carnauba wax. I buffed it with a clean flannel buff for the final shine and protection. The finished pipe is pictured below and is ready for more years of service. The bowl repair done by Andrew provides a solid base in the bowl and the external repair and stem repair makes the pipe cosmetically more pleasing. Thanks Andrew for a good challenge. The pipe is ready for its inaugural smoke. I am sure it will last far longer than I do!
IMG_4946

IMG_4947

IMG_4948

IMG_4949

IMG_4950

IMG_4951

Refurbishing an Old Zulu Bowl


I was gifted a few pipe bowls that needed to be restemmed and refurbished by a friend. The first of these that I decided to clean up and restem was an old Zulu bowl. It is stamped Algerian Briar over Made in France on the left side of the shank and no other identifying marks. Thus the maker remains a bit of a mystery that I am not sure can be solved. The bowl itself was in fair shape. The cake in the bowl was not thick but it was particularly crumbly and soft. The finish on the pipe was also shot. The varnish coat was gone and the stain was streaked and damaged. There were a cut groove next to the left side of the stamping and a smaller one on the right side of the stamping. The shank was filthy and caked with oils and tars. The rim was in great shape with no damage to either the inside or outside rim. The grain under the stain coat looked promising with cross grain on the front and back of the bowl and the top and bottom of the shank and mixed birdseye on the sides of the both.
IMG_4862

I had a stem in my can of stems that fit almost perfectly. It was damaged and would need some work but the fit and bend was perfect for the Zulu shape.
IMG_4863

IMG_4864

I fit the stem in place and wiped down the bowl with acetone on cotton pads to remove the remaining finish on the pipe. I reamed the bowl with a PipNet reamer and took the cake back to bare wood. I cleaned out the shank and the bowl with cotton swabs and Everclear.
IMG_4866

IMG_4867

IMG_4868

IMG_4869

I sanded the stem until the transition between the shank and the stem was smooth. I used both 220 grit sandpaper and medium and fine grit sanding sponges to smooth it out. The end of the stem was badly damaged and the button was ruined. I decided to trim off the damaged end of the stem and rework the button. Once it was cut back I cleaned out the stem with Everclear and pipe cleaners. The stem was badly plugged with tars so I had to use a bent paper clip to push through the airway. I used shank brushes and pipe cleaners to remove the tarry build up and open up the stem once again.
IMG_4870

IMG_4872

The airway was still wide and open so I did not need to reshape it. The top and bottom of the button were thin so I could not remove any further material. I reshaped the externals as best as possible by rounding the ends of the stem and making the button more oval in external shape.
IMG_4873

The slight dents in the stem that remained would not lift with heat so I filled them with superglue until they were level with the surface of the stem.
IMG_4874

IMG_4875

I cut the new button with needle files and shaped the end of the stem to have a better flow and taper to the new button. This involved removing some of the thickness of the stem and making the taper more angled. I used files and sandpaper to reshape the stem.
IMG_4876

IMG_4877

With the new button cut I sanded the stem and the entire pipe with 220 grit sandpaper to remove the remaining finish and make sure the flow of the stem was correct to the angles of the pipe. I also sanded it with a medium and fine grit sanding sponge to remove scratches in the briar and vulcanite.
IMG_4879

IMG_4880

IMG_4881

IMG_4882

IMG_4883

IMG_4884

The stain around the stamping on the left side of the shank was very set and stubborn. I lightly sanded it to break through the top coat and then scrubbed it with acetone on cotton pads to match it as much as possible to the unstained briar. I stained the bowl with an oxblood aniline stain, flamed it and restained and reflamed until I had an even coverage on the bowl. I hand buffed it with a soft cloth. I took the pipe to the buffer and buffed the stem and bowl with red Tripoli and White Diamond. The photos below show the pipe after the buffing.
IMG_4885

IMG_4886

IMG_4888

IMG_4889

I sanded the stem with my usual array of micromesh sanding pads – wet sanding with 1500-2400 grit pads and dry sanding with 3200-12,000 grit pads. I rubbed the stem down with Obsidian Oil and when it dried hand buffed the stem.
IMG_4890

IMG_4891

IMG_4892

I buffed the pipe with White Diamond and then gave it multiple coats of carnauba wax. I finished by buffing it with a clean soft flannel buffing pad. The finished pipe is pictured below. It is ready to go into service again. I like the flow of the lines on this pipe. The shape and matte like finish work well together.
IMG_4893

IMG_4894

IMG_4896

IMG_4897

Plugging a Burnout on a Peterson’s Irish Whiskey 999


Blog by Steve Laug

Lately several of the pipes that I have refurbished were part of a trade with Mark Domingues for work on this pipe. It is a beautifully grained Peterson’s Rhodesian 999 – one of my favourite shapes. The grain on this thing is beautiful. The photo below shows what drew Mark to bid on this pipe in the first place. What the photo does not show however, is the incredibly horrible shape that this pipe was in when it came to Mark.
IMG_20131124_082613_134_zps6ef902eb

The problem with the pipe became obvious when Mark took it out of the shipping package to enjoy the “new” Peterson that he had purchased. The pipe had a serious burn through on the front right side of the bowl toward the bottom. That damage was quite extensive and either the pipe could be thrown away or the burn through drilled out and the damaged briar replaced with a briar plug.
IMG_20131125_123925_638_zps0ff2fe98

Mark decided to drill out the damaged portion of the bowl. We talked back and forth via email about the steps to take to fix it. He toyed with it and then one day asked if I wanted to do the work on it. He would send the pipe, a chunk of briar some pipes that he thought I might enjoy working on in exchange for the repair. After emailing back and forth we agreed to the terms and he sent the bowl on to me to do the repair in exchange for a few pipes for my refurbishing box. Here is what the pipe looked like when it arrived in Vancouver. Mark had cleaned up the exterior of the pipe and also the interior and drilled out the burnout. The brass/gold band on the shank was loose and the stem was in decent shape with two minor tooth marks.
IMG_4808

IMG_4809

IMG_4810

The top view of the pipe, shown in the photo below, also highlights several others issues with the pipe. First, the bowl itself was not drilled straight into the briar but at a slight angle from left to right. Second, the stem was totally out of round and the right side of the stem fit against the band far differently than the left side. Looking at the stem from the tenon end it was clear that the stem was not round but rather oblong. The small block of briar in the photo was sent along by mark for me to use in cutting a plug for the bowl.
IMG_4811

I used a small hacksaw to cut off a small chunk of briar. I then shaped the briar chunk into a cylinder. I always cut the plug long to give me something to hold onto when I am shaping it. I am sure others do it differently but I shape the plug with a Dremel by hand and I hold the piece of briar with my fingers while I shape it. The next series of eight photos show the progressive shaping of the cylinder to fit the drilled out hole in the bowl of the pipe.
IMG_4814

IMG_4815

IMG_4818

IMG_4819

IMG_4821

IMG_4822

IMG_4823

IMG_4824

The next four photos show the final shape of the cylinder. I left a slight handle on the top of the plug to hold onto while I turned the cylinder with the Dremel. I tapered the plug slightly so that it would fit into the hole but not extend to far into the bowl itself. Once I had the shape correct and the piece extending into the bowl smoothed to fit the shape of the bowl I glued it in place with superglue.
IMG_4825

IMG_4826

IMG_4827

IMG_4828

I used the hacksaw to trim off the excess briar in the plug as close as possible to the surface of the bowl.
IMG_4829

IMG_4830

Once I had it trimmed back to that place I used the Dremel and sanding drum to sand it down to the surface and then hand sanded with 220 grit sandpaper to make the surface of the plug and the bowl match. I used superglue around the circumference of the plug to hold it tightly in place.
IMG_4831

I washed down the surface of the bowl with acetone on cotton pads to remove the grit and the remaining finish on the bowl. I also sanded the plug and the rim with 220 grit sandpaper and then medium and fine grit sanding sponges to smooth out the scratches. I sanded the inner rim with a folded piece of sandpaper to remove the damage to that portion of the bowl. In the photos below the fit and finish of the plug is clearly visible. The grain on the plug and that on the bowl did not match but the fit was nearly perfect.
IMG_4832

IMG_4833

IMG_4834

IMG_4835

Mark and I had talked about rusticating the whole bowl but I could not bring myself to do that to such a beautiful piece of briar. I marked the area that I planned on rusticating with a black permanent marker to give myself an outlined area that I would rusticate. I find that setting up parameters and boundaries for the rustication helps me to keep it in a defined space more easily.
IMG_4836

I used the modified Philips screwdriver with the four points to rusticate this part of the bowl. The next two photos show the rusticated portion of the bowl. The area of the older briar showed dark spots in the rustication and the new fresh plug showed almost white after rustication.
IMG_4837

IMG_4838

I decided to try and use a dark brown aniline stain thinned 2:1 with isopropyl alcohol on the whole pipe to see what would happen with the rustication. I wanted to see if the dark areas on the rustication would blend into the briar of the lighter parts. I did not really expect it to work but thought I would give it a try.
IMG_4840

IMG_4841

IMG_4842

IMG_4843

The dark portions of the old briar still showed dark after staining. I decided to use a black aniline stain on the rusticated portion of the bowl and leave the smooth part of the bowl the brown colour. I applied the stain with a cotton swab and flamed it, reapplied it and reflamed it until the coverage was even.
IMG_4844

IMG_4845

IMG_4846

The inside of the bowl then needed to be addressed. The drilling of the bowl was not only angled from left to right but the airway entered the bowl over 3/8 inches above the bottom of the bowl. Whether this was caused by drilling or over reaming is not clear to me. My problem was that the angle of the patch on the side did allow me to shape the patch to provide a new bottom for the bowl. I could have cut another piece of briar and inserted it into the bottom of the bowl but the strange angles of the bowl made that a task that I did not want to tackle. I opted to build up the bottom of the bowl with Plaster of Paris instead of pipe mud because of the depth of the buildup. My fear was that the pipe mud would have to be almost ½ inch thick and I was not sure if it would hold. I have used Plaster of Paris to repair meerlined pipes and it is durable and gives a solid base. I intend to use pipe mud on top of the repair and also reshape the bowl sides.

I glued the band on the shank with wood glue before I restained it with another coat of the medium brown aniline stain. I flamed it and then buffed it with White Diamond. I gave the smooth portions of the bowl several coats of carnauba wax and hand buffed the rusticated portion with Halcyon II wax.
IMG_4850

IMG_4851

IMG_4852

IMG_4853

I sanded the tooth marks and chatter out of the stem with 220 grit sandpaper and a medium grit sanding sponge. I reshaped the stem to fit more proportionally against the band. I made it round instead of oblong so that the fit against the band was even all the way around giving it a more finished look. I then sanded it with my usual array of micromesh sanding pads – wet sanding with 1500-2400 grit pads and dry sanding with 3200-12,000 grit pads. I rubbed the stem down with Obsidian Oil and when it was dry buffed it with White Diamond. I gave the stem multiple coats of carnauba wax to finish and protect it.
IMG_4854

IMG_4855

IMG_4856

The next series of five photos show the finished exterior and stem of the pipe. The stain and the patch rustication are completed. The interior of the bowl still only bears the plaster repair. Once it cures for several days I will give it a coating of pipe mud to finish the job.
IMG_4857

IMG_4858

IMG_4859

IMG_4860

IMG_4861

The pipe is finished other than the pipe mud and soon it will go back to Mark for its inaugural smoke. I am looking forward to hearing his response once the pipe is in his hands and he has smoked it.

UPDATE: I applied the pipe mud to the bowl last evening. It was a great day to fire up a Cohiba Habana and save the ash to mix. I use a shot glass to collect the ash and add the water with an ear syringe. Once the mix is the right consistency I apply it with a folded pipe cleaner. I apply it and let it set and then follow up with a second or third coat as necessary.
IMG_5172

For this particular pipe mud application I built up the right side of the bowl toward the bottom to compensate for the angular drilling of the bowl. I was able to smooth out the wall and that side is as straight as possible.
IMG_5173

Rustication & Rebirth of a Racine de Bruyere Author


Another pipe that Mark included in the trade was stamped Racine de Bruyere. I have no idea about the maker or the time period of the pipe. The stem is an older style orific button (round hole in an end cap style button). Ron had stripped the finish off of the bowl and also had picked out the fills. The flaws in the briar that remained behind sans fills were deep crevices. The stem was stuck in the shank and would not insert the whole way. The stem itself was in great shape – good, hard older vulcanite. There was minor tooth chatter at the button on the top and the bottom of the stem. Once I had removed the stem the tenon was in great shape with a Dunhill style inner tube that extended all the way from the tenon into the airhole in the bowl. The photos below show the extent of the damage to the bowl in terms of the serious flaws in the briar. On top of the shank, on the left side and on the front of the bowl there were deep holes. There were also minor holes in other areas around the bowl. The shape is actually one of my favourite shapes so it would of course be worked on and brought back to life.
IMG_4748

IMG_4749

IMG_4750

IMG_4751

IMG_4752

IMG_4753

I used a dental pick to scrape away the debris in the pits. There were loose bits of briar and dust build up. I wiped the bowl down with acetone on a cotton pad to remove surface grit. I packed briar dust in layers alternating with superglue into the pits. Once they were filled to the top I tamped them down and then dripped superglue into the briar dust. I added more briar dust and also more superglue.
IMG_4754

IMG_4755

The sandpits, even with the fills, were large and there were many other small pits around the bowl. It made it an easy decision to rusticate the bowl. I used the modified Philips screwdriver to rusticate the bowl. I wrapped several layers of tape around the end of the shank so that I could leave a smooth band there making a stem fit more simple. I also put a piece of tape over the stamping on the left side of the shank. The next series of thirteen photos shows the progressive rustication of the bowl. I decided to do a deep rustication so I worked the tool deep into the wood of the bowl.
IMG_4756

IMG_4757

IMG_4758

IMG_4759

IMG_4760

IMG_4761

IMG_4762

IMG_4763

IMG_4764

IMG_4765

IMG_4766

IMG_4767

IMG_4768

When the rustication was complete I used a brass tire brush on the surface of the briar to knock off the sharp points and loose pieces of debris from the work of the tool. My aim was to leave behind some smooth spots that would end up have a contrast stain on them when I was finished.
IMG_4769

IMG_4770

IMG_4771

In order to get the stem to seat properly in the shank I used a knife and beveled/chamfered the inside edge of the mortise so that the stem would sit well. I also found in measuring the tenon that it was slightly too long for the mortise and the original manufacturer had left the end slightly at an angle so that it did not seat well in the mortise. I used a file to reseat the tenon and then put the stem in place. The fit was good, but the diameter of the stem was slightly more than the diameter of the smooth band on the shank so I sanded the band and the stem with 220 grit sandpaper. I was able to remove the excess diameter and bring the stem into line with the shank. I finished sanding it with a medium and fine grit sanding sponge to remove scratches.
IMG_4772

IMG_4773

IMG_4774

IMG_4775

IMG_4776

IMG_4777

IMG_4778

With the sanding finished the fit was tight and the transition was smooth. I scrubbed down the shank and the stem with some Everclear on a cotton pad to get rid of the sanding dust from the stem. With that done the pipe was ready to stain.
IMG_4779

IMG_4780

IMG_4782

IMG_4783

I decided to use a black aniline stain as the undercoat of the pipe. The stain would hide the repaired flaws well as they were also dark. I applied the stain with a cotton swab and made sure that it went into all the nooks and crannies of the briar.
IMG_4784

IMG_4785

IMG_4786

IMG_4787

IMG_4788

Once the stain was applied I flamed it with a lighter to set the stain and then took it to the buffer to see if I could buff away the stain on the higher parts of the rustication. I used red Tripoli to do the buffing. I kept a pretty light touch as I did not want the Tripoli to build up in the rustication. With that done, the finish was closer to what I was aiming for. I still wanted a few more of the high spots showing.
IMG_4790

IMG_4791

IMG_4792

IMG_4793

I wiped the bowl down with Everclear on a soft cloth to remove some more of the black and then buffed it with White Diamond. I then gave it a top coat of oxblood stain to bring out the contrast and highlight the high portions of the rustication. I buffed it again with White Diamond.
IMG_4794

IMG_4795

IMG_4796

IMG_4797

To remove the tooth chatter and the scratches from fitting the stem to the shank I used my usual array of micromesh sanding pads. I wet sanded with 1500-2400 grit pads and dry sanded with the 3200-12,000 grit pads. I rubbed the stem down with Obsidian Oil and let it dry.
IMG_4798

IMG_4800

IMG_4802

Once the stem was done I used 2400 grit micromesh sanding pads and dry sanded the high spots on the rustication on the bowl and the shank to further accentuate the contrast. I buffed the bowl lightly with White Diamond and then buffed the pipe as a whole with White Diamond yet again. Once it was done, I gave the stem multiple coats of carnauba wax. I also gave the bowl a very light buff with the carnauba wheel – too heavy a touch and the wax fills in the crevices of the rustication. I then hand buffed it with a shoe brush to finish the shine. The completed makeover is shown in the photos below. The pipe is ready to enter into a new chapter of its life.
IMG_4803

IMG_4804

IMG_4806

IMG_4807

Since posting this I have found out some information about the stamping. Racine de Bruyere means Genuine Briar. It was stamped on pipes coming out of St. Claude. The stamping does not define the maker but the region. The pipe was probably made in late 20’s to early 30’s. I found the original eBay sale description that showed the pipe as it was when Mark received it. I have included those pictures below. Note the gold leaf/paint in the stamping.
Racine2

Racine3

Racine4

Racine5

Racine6

Racine7

Racine8

Racinea