Blog by Steve Laug
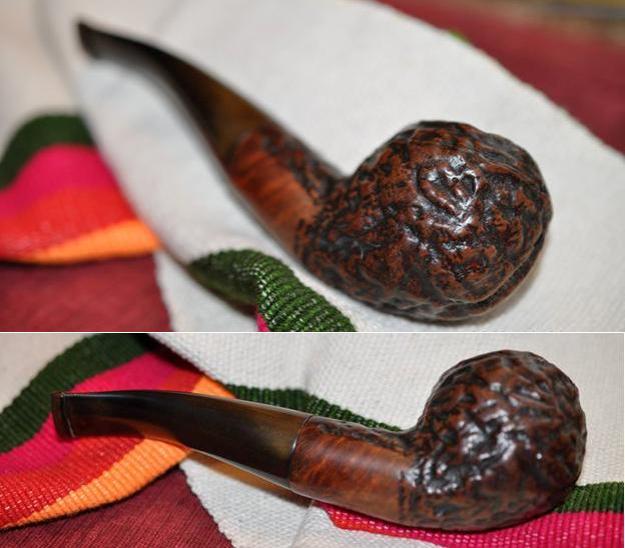
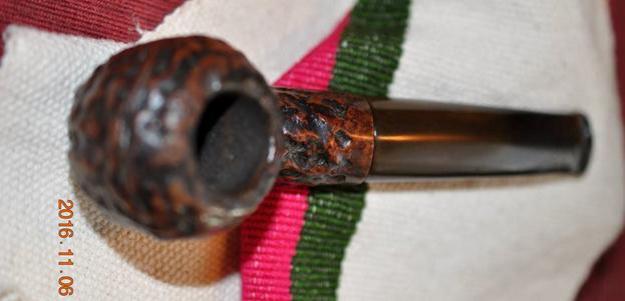
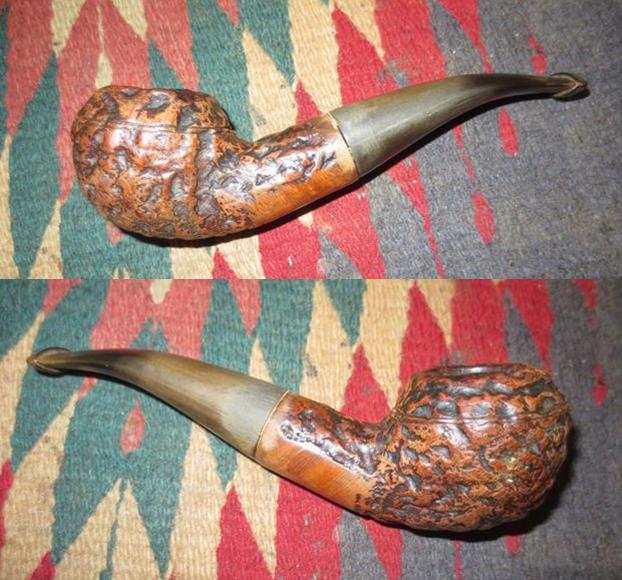
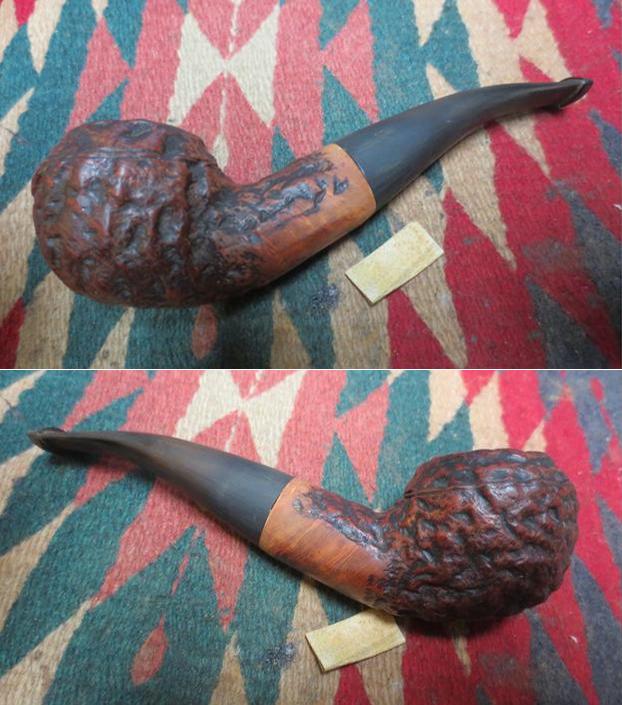
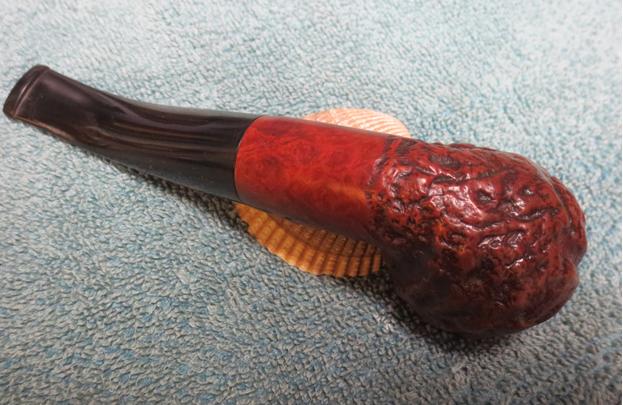
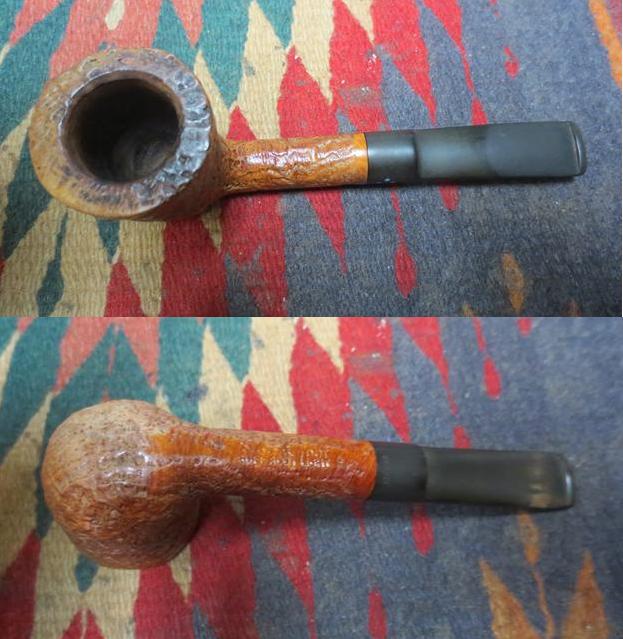
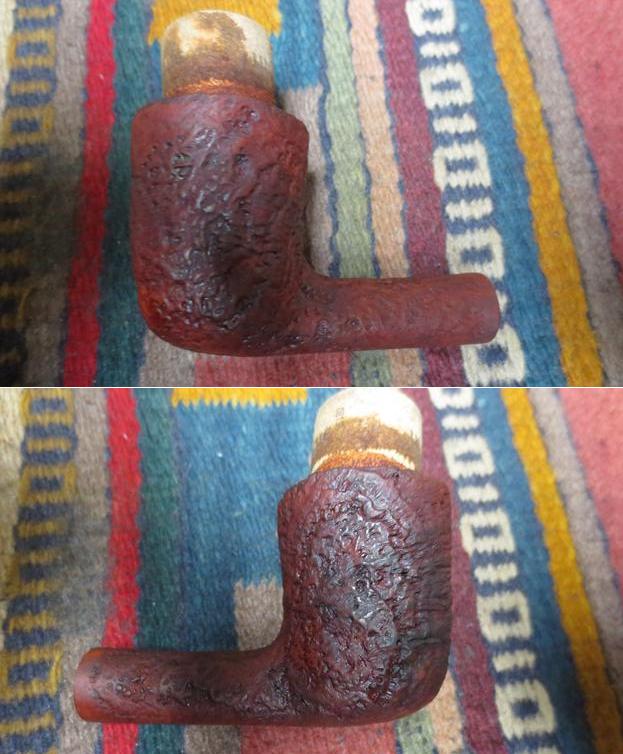
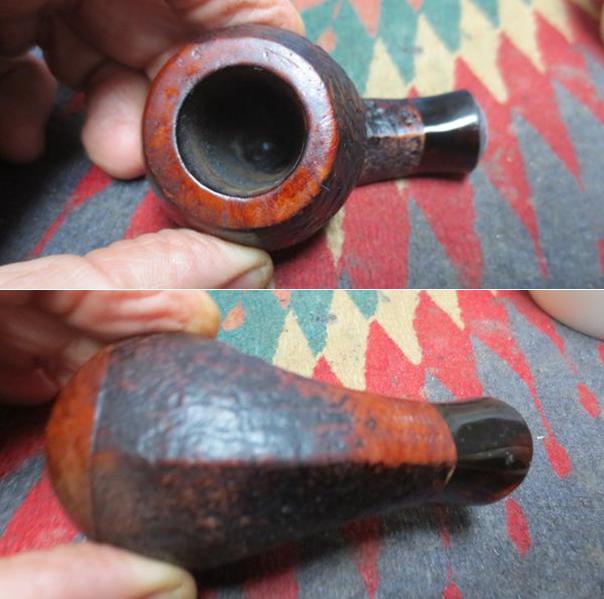
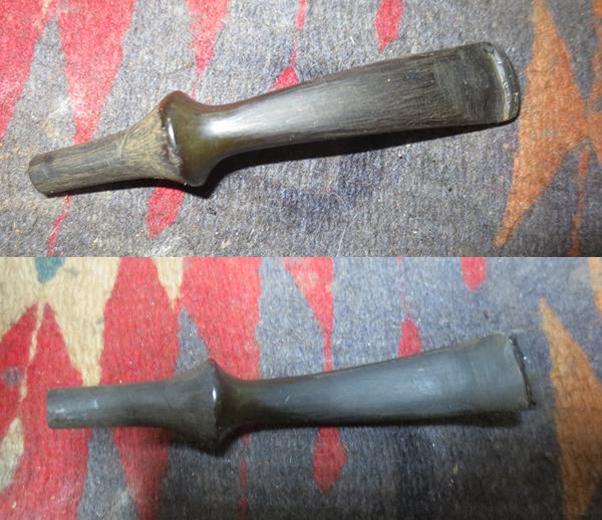
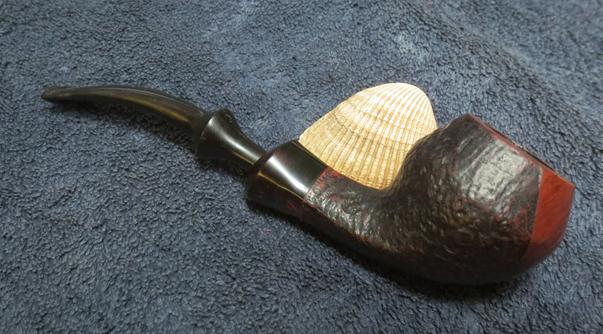
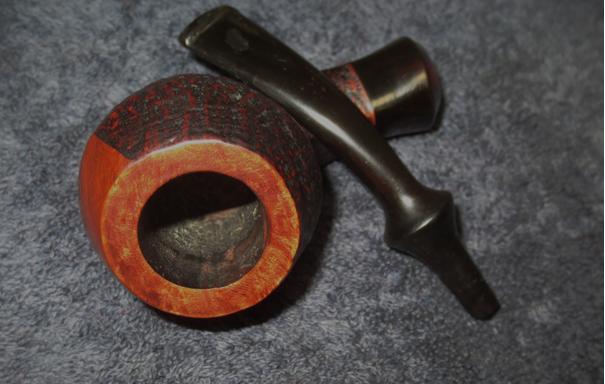
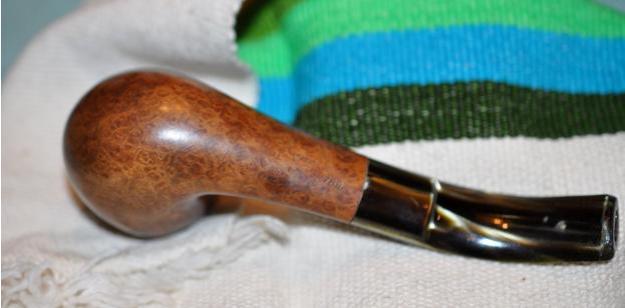
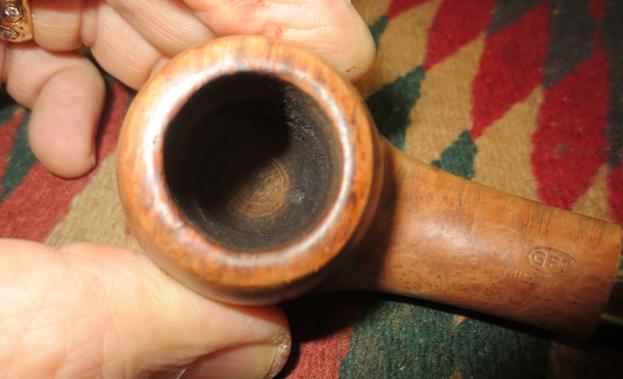
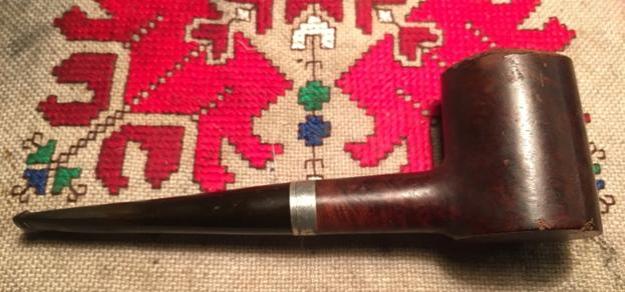
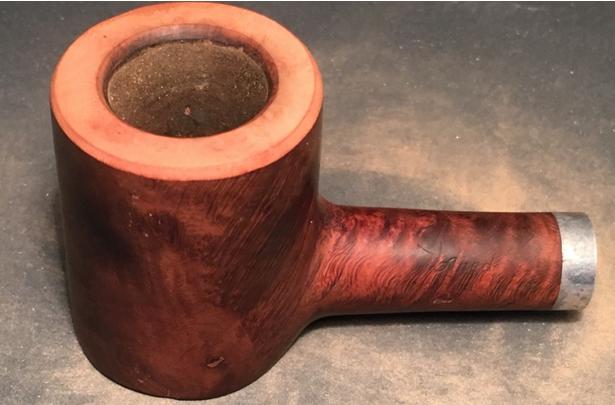
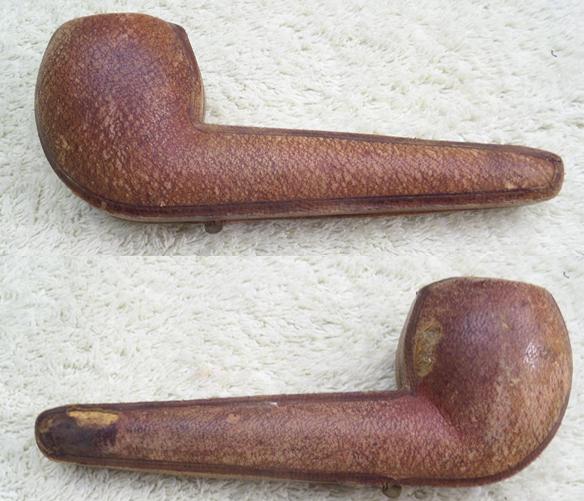
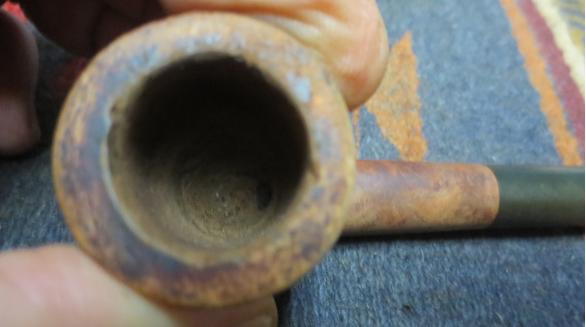
Have you ever been pipe hunting in an antique shop and in your conversation with the clerk at the checkout have them tell you that they have a pipe at home that they would love to have you see? If not I assure you that you will. It seems to happen to me and certainly to my brother. Sometimes going back to see the pipe is a good thing and sometimes it is not worth the trip. My brother recently went through this very thing in a shop on the Oregon Coast. The clerk said that he had an old pipe – thought it was a churchwarden – at home and he would love to see it go to someone who would restore it. He said it was interesting but it was in rough shape. He told my brother that he would bring it to the shop the next day. He lived a fair ways away from the shop so he could not go and get it at the moment. My brother left the shop knowing that he would need to go back and have a look at the pipe. Two days later he made the drive back to the shop. The seller had left it behind the counter for him. The person at the counter took the pipe out and handed it to him. The clerk had been right – it was in rough shape but it was not a churchwarden but old WDC Wellington House Pipe. (I have included the photos that my brother took of the pipe before he cleaned it and sent it to me in Vancouver.)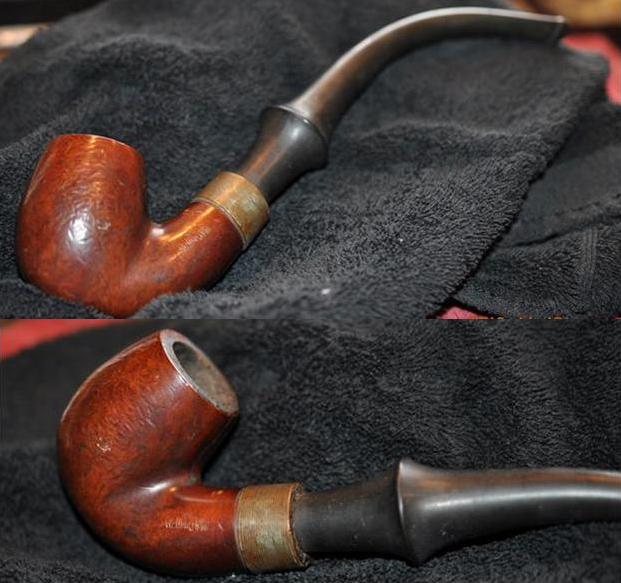 Even at first glance it was rough but he did not expect what he found as he went over it. As he turned it in his hands he saw that the bowl had a large crack on the back side of the bowl that went from the rim to the shank bowl junction. It went all the way through and ran down the inside back of the bowl to a spot just above the airway. This was not good.
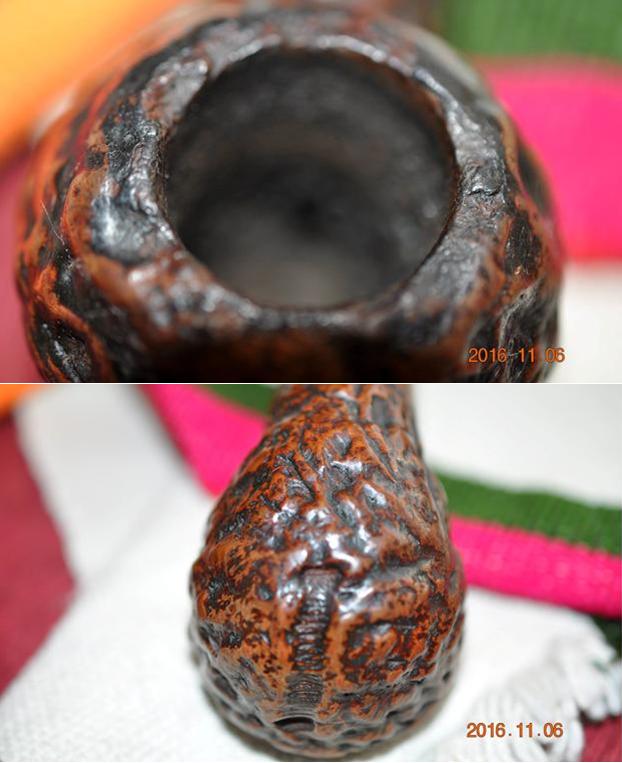
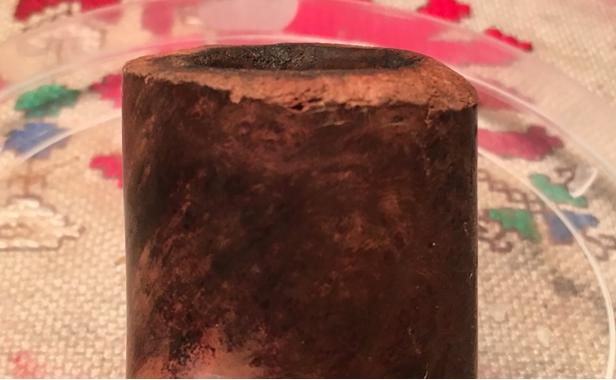
 The bowl was caked and dirty and the cake had flowed over the top of the rim leaving a hard rough surface. Even through the grit he could see that there were a lot of nicks, scratches and dents in the rim top. On top of that the left side of the bowl was rough and seemed like it had road rash. It appeared that someone had tried to smooth it over but it was till rough to touch.
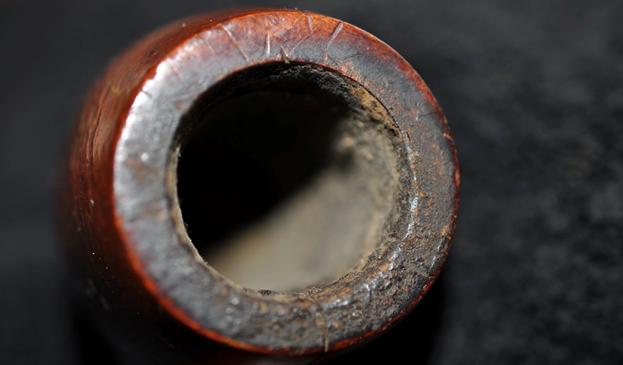
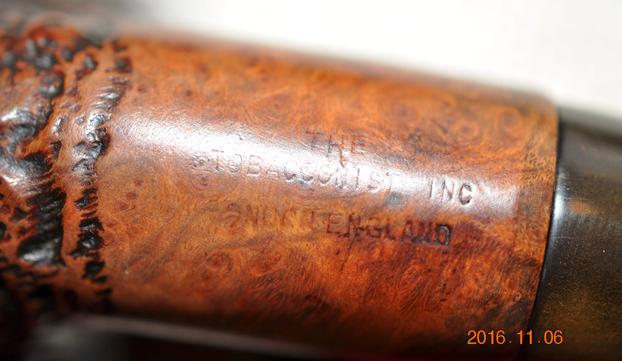
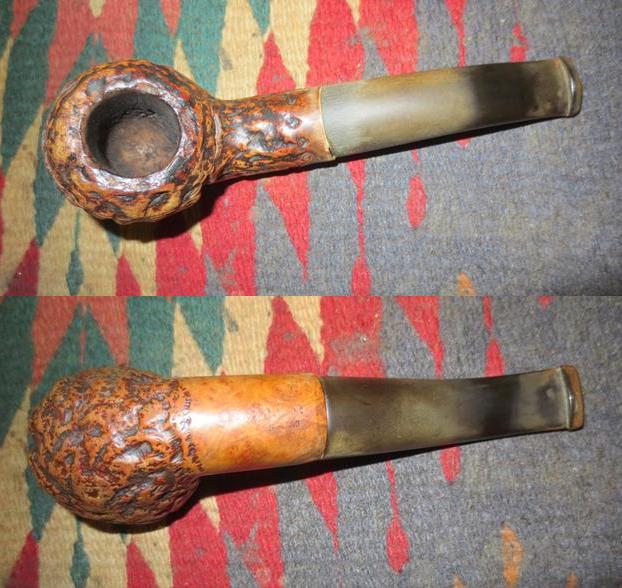
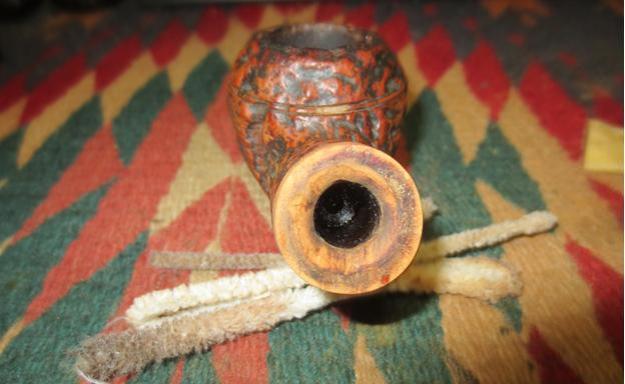
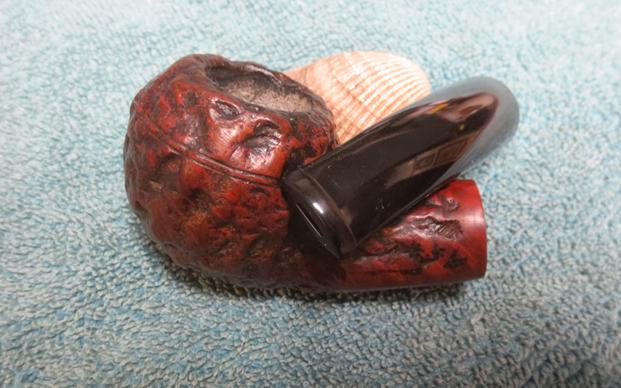
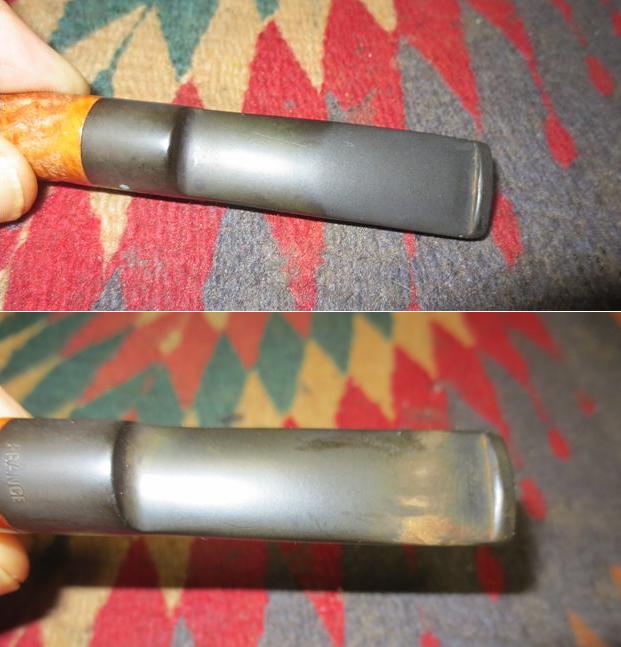
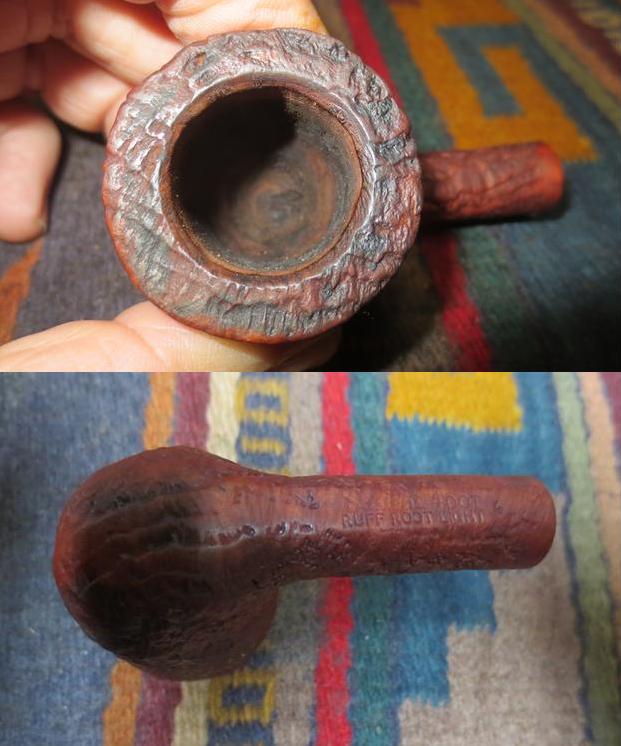
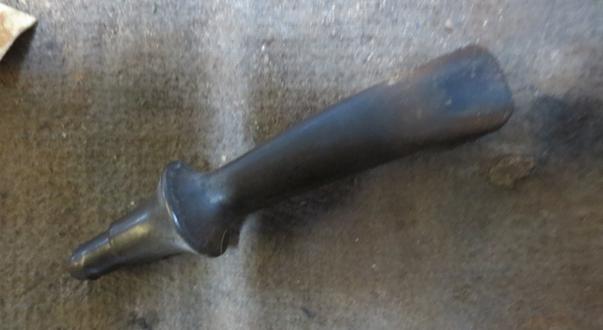
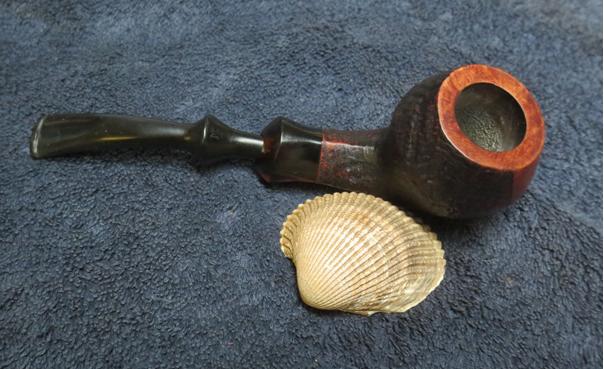
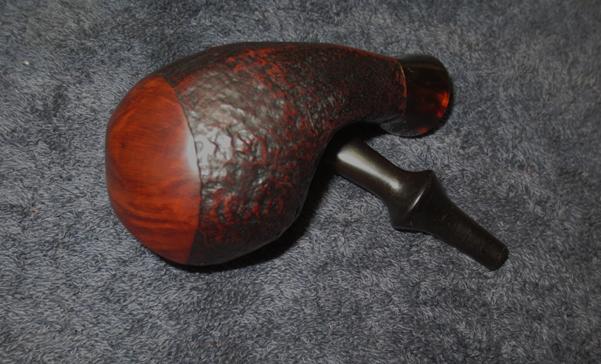
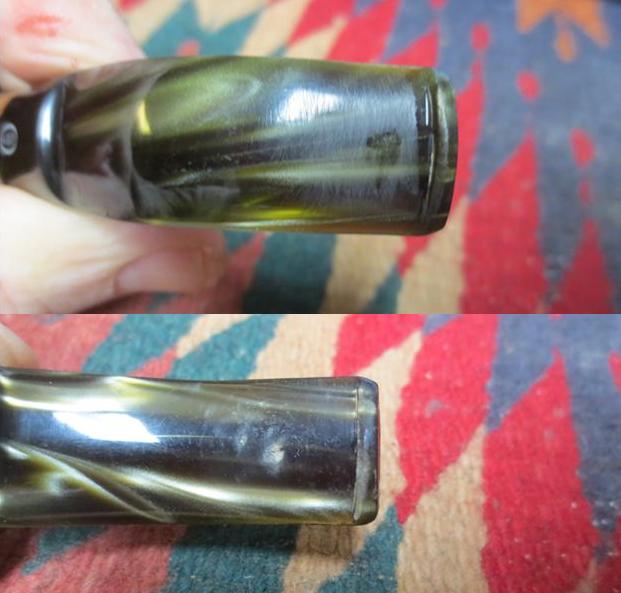
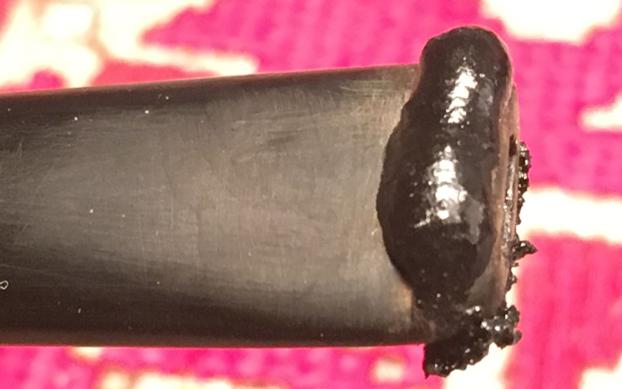
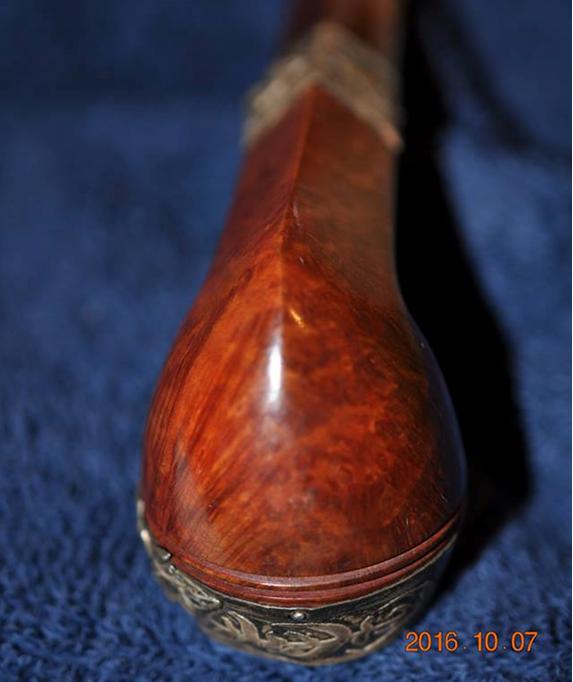
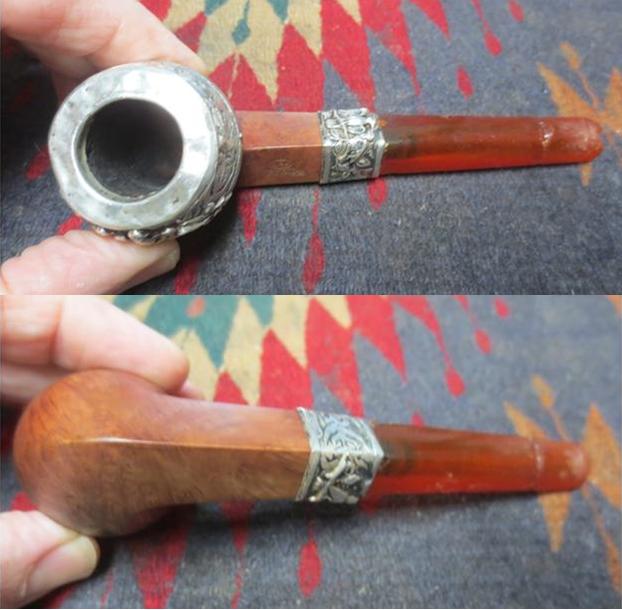
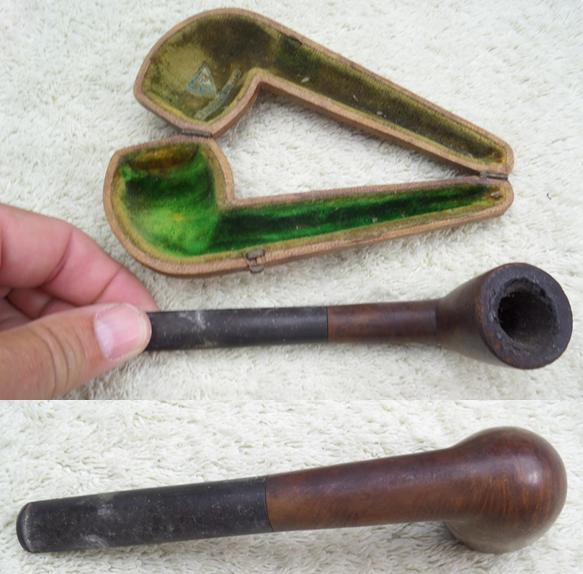
 The Wellington ferrule was gone and had been replaced with a piece of what appeared to be a cut off piece of pipe glued and pressed onto the shank end. Looking at the pipe from the shank end you could see why the band had been as a lot of small cracks could be seen that extended down into the mortise. The cut off piece of pipe literally bound the shank together tightly with no give. The stem was the only part of the pipe that was in excellent condition. It bore the Solid Rubber stamp on the underside but the topside was missing the WDC Wellington stamp. It was obvious to me that someone had loved this old pipe and that they had done whatever was necessary to keep it functioning. The repair work was solid but it really was a mess. After the fellow had gone to the effort to bring the pipe to the shop my brother felt obligated to buy it. The deal was struck and the pipe came home with him.
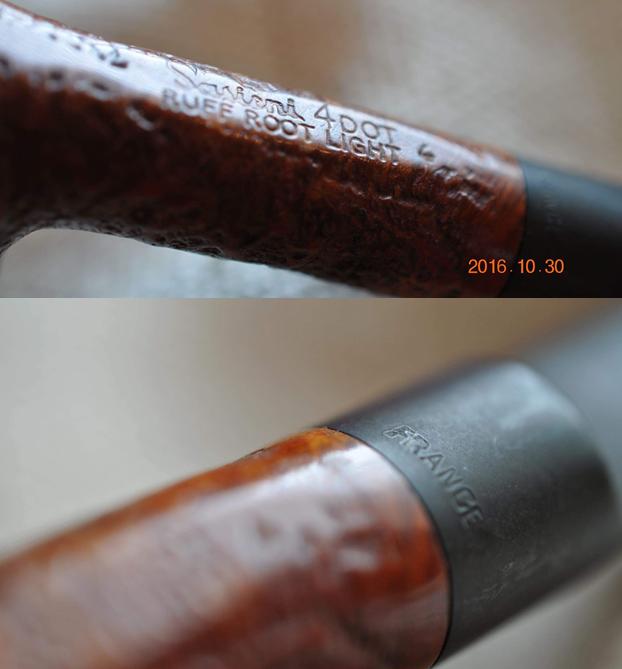
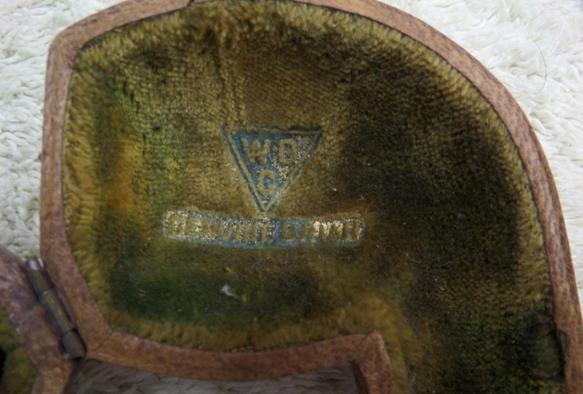
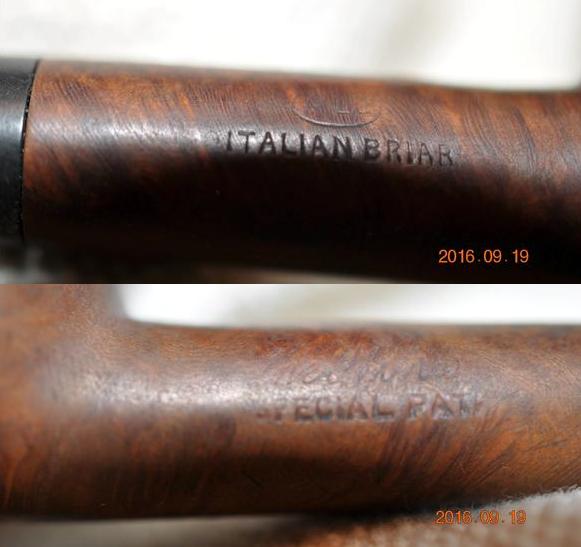
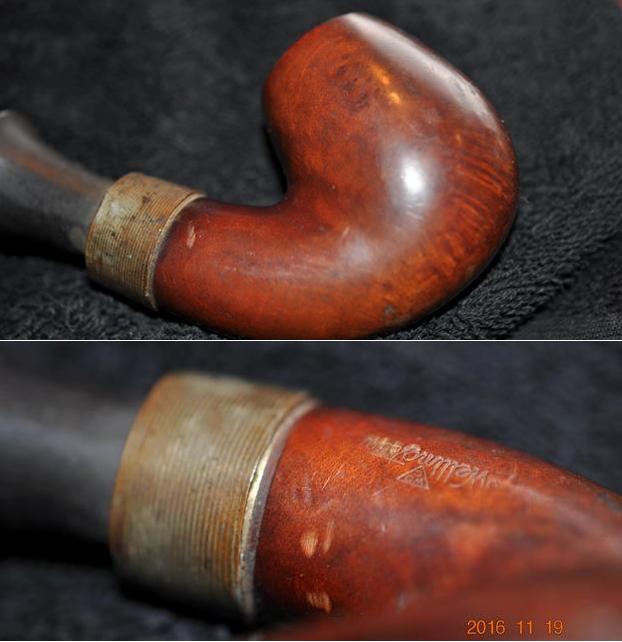 The next two photos show the stamping on the shank. It reads Wellington under the WDC triangle on the left side of the shank. There are a lot of nicks and scratches around the shank that look like damage done when the band was glued in place. The Solid Rubber stamping on the can be seen in the second photo below.
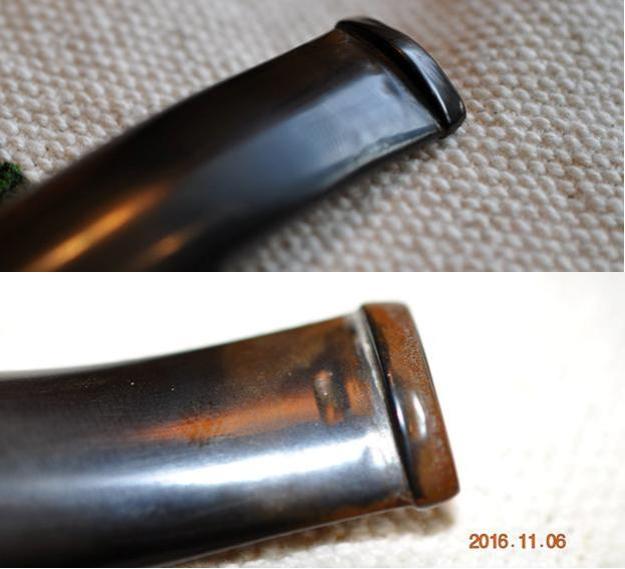
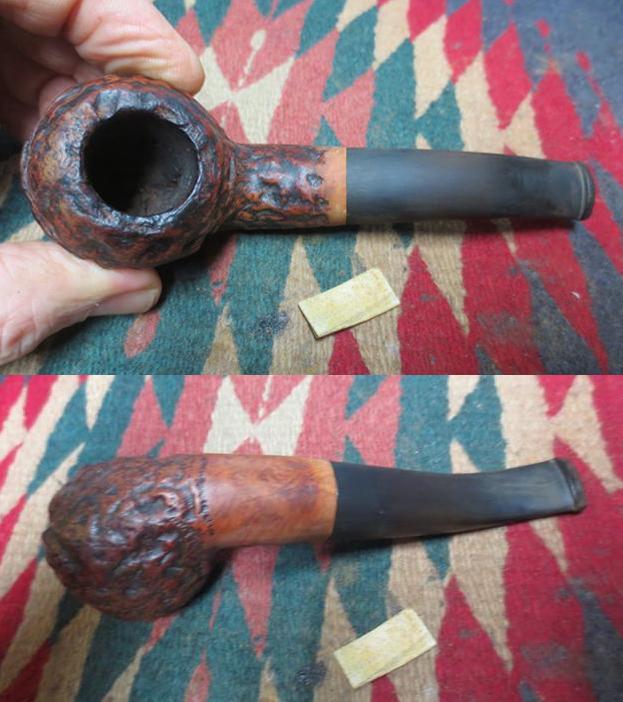
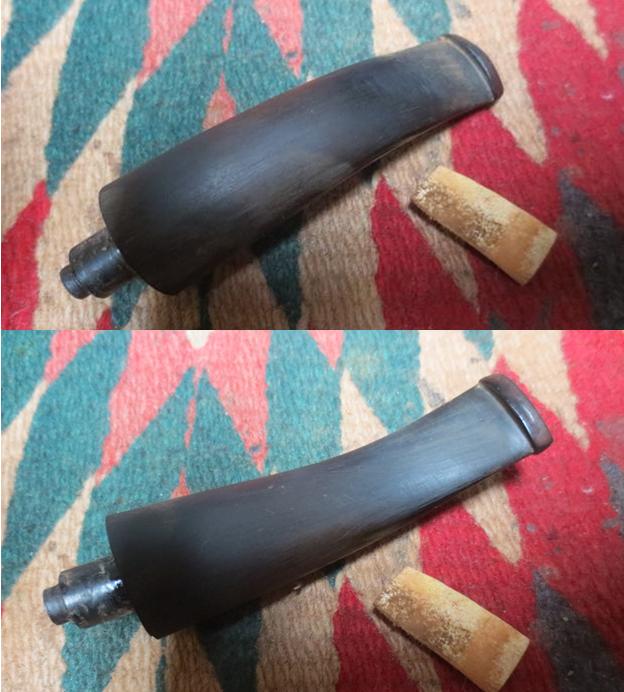
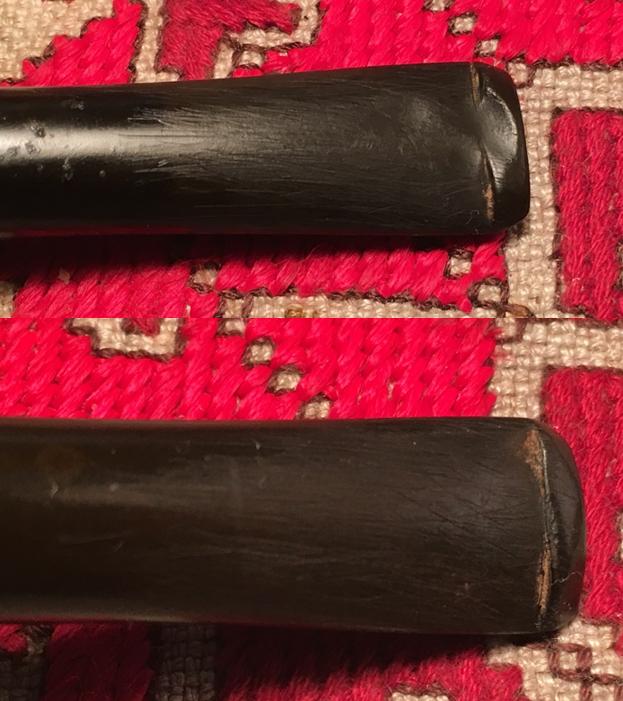
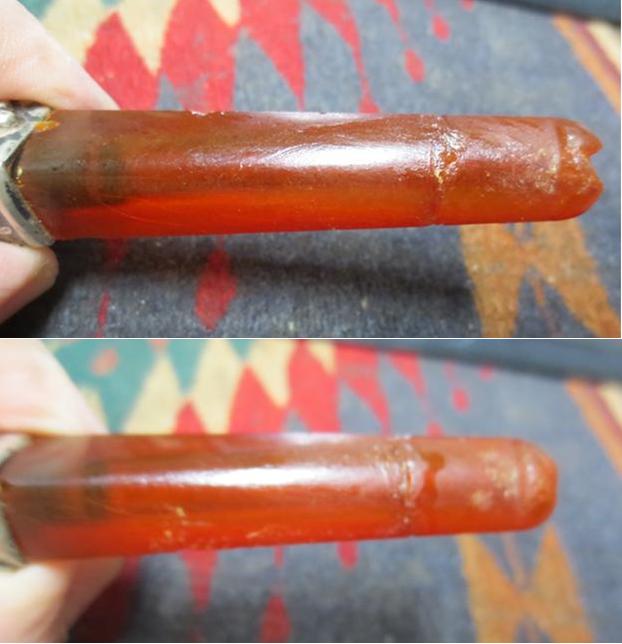
 The stem was actually in the best condition of the entire pipe. There was very little tooth chatter and marks near the button. There were some marks on the ridge on the underside and there was a spot of metal shining through the rubber there as well. The entire stem was lightly oxidized and pitted.
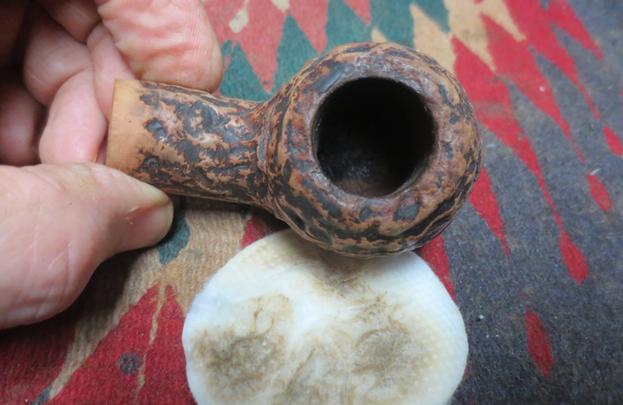
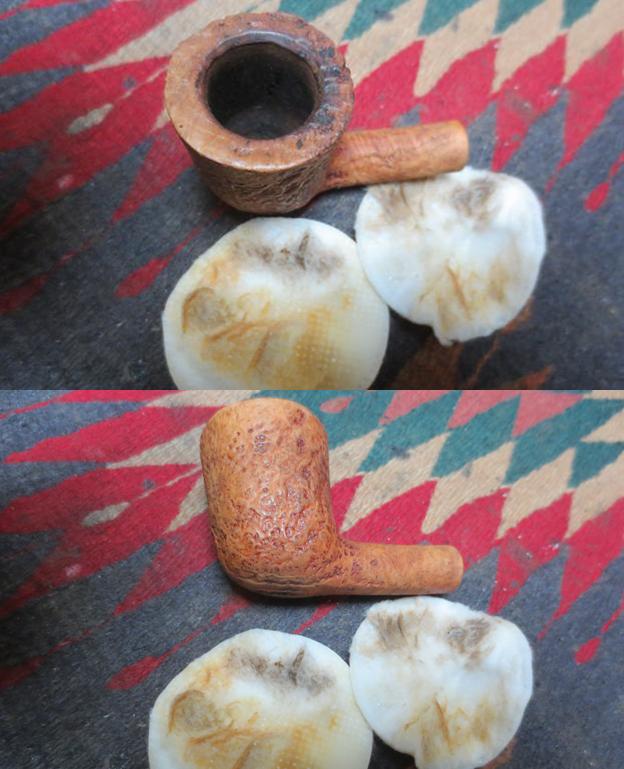
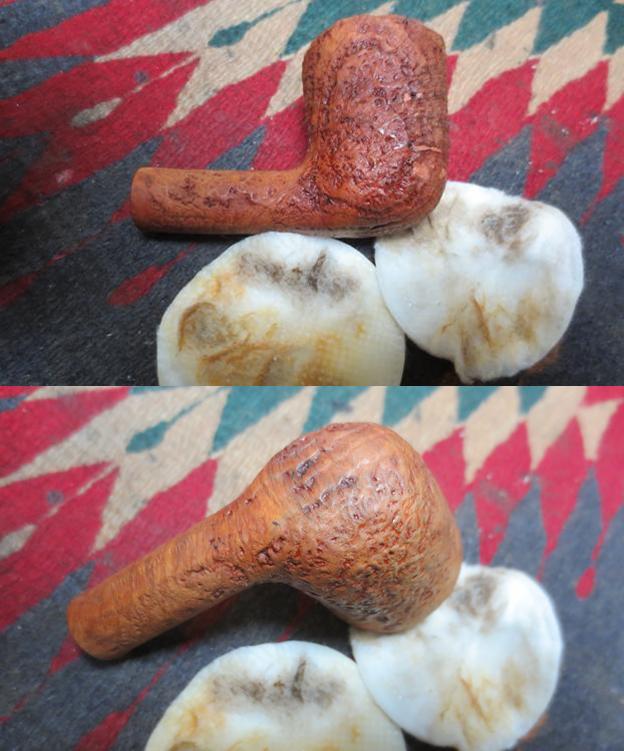
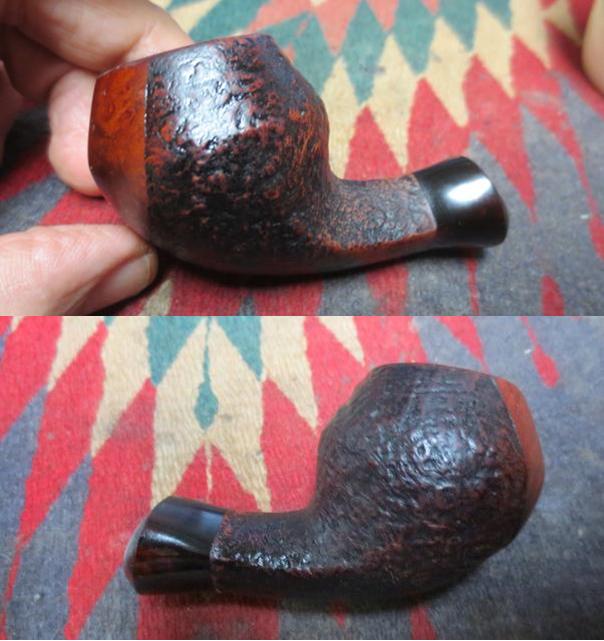
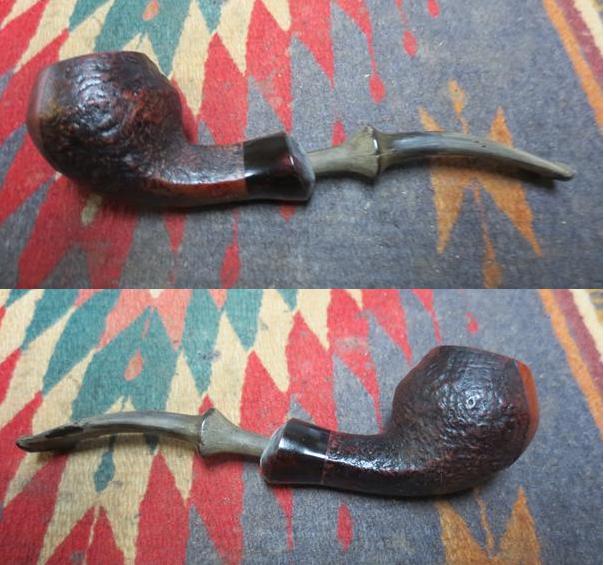
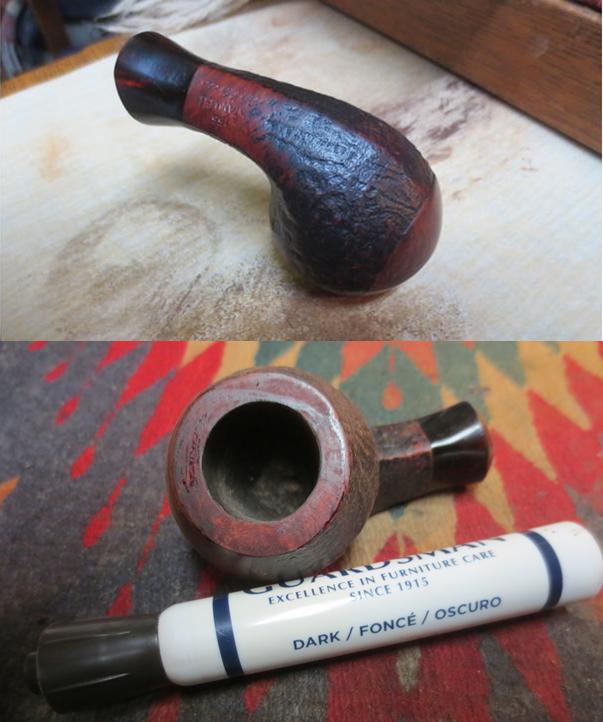
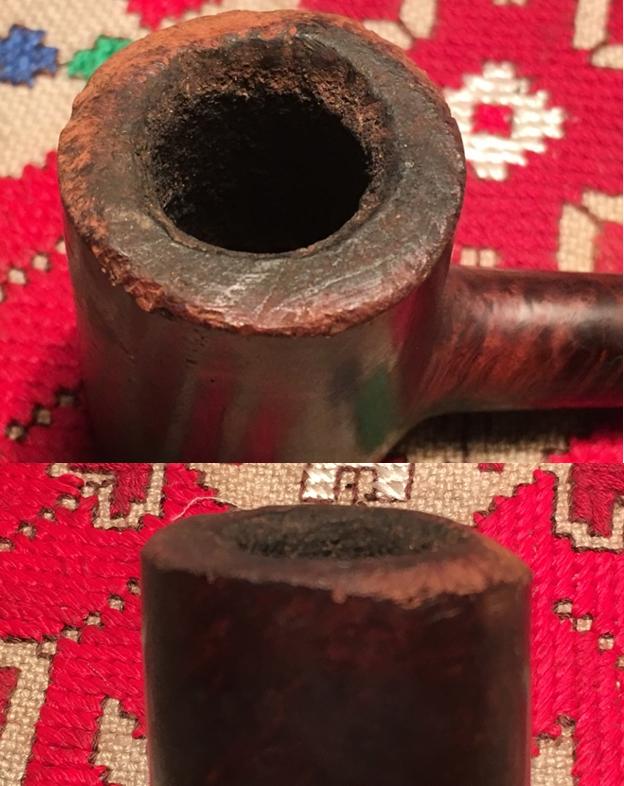
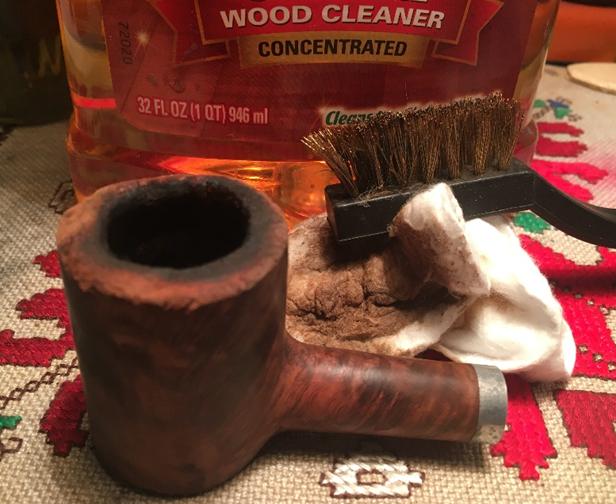
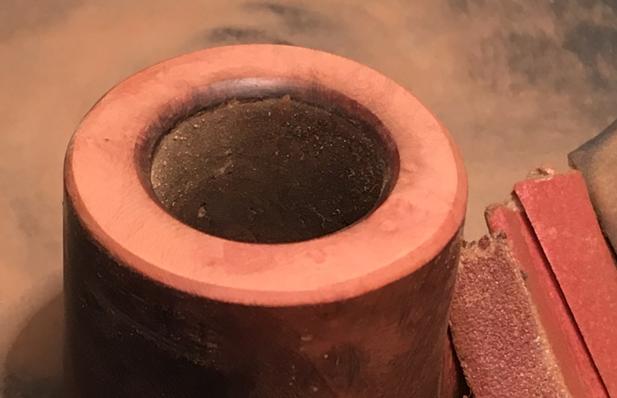
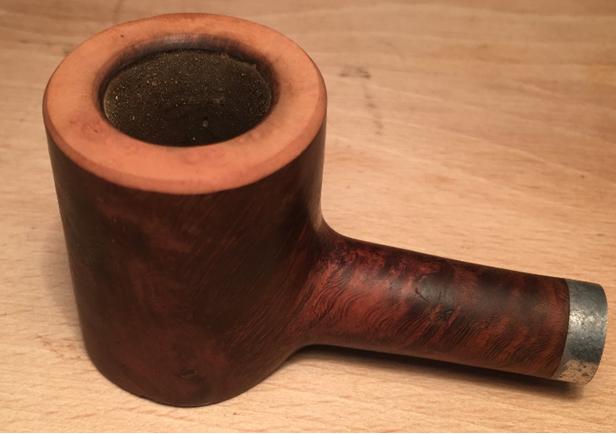
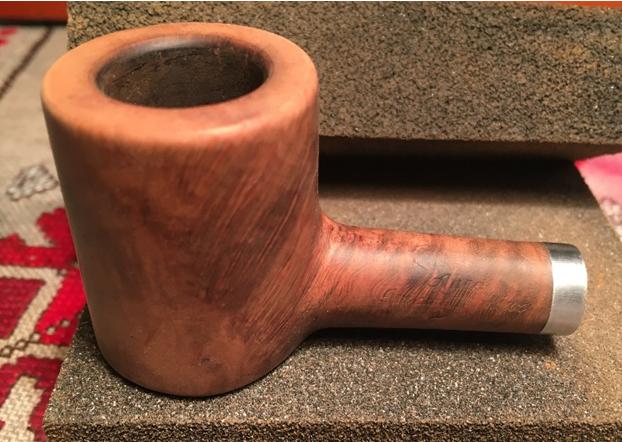
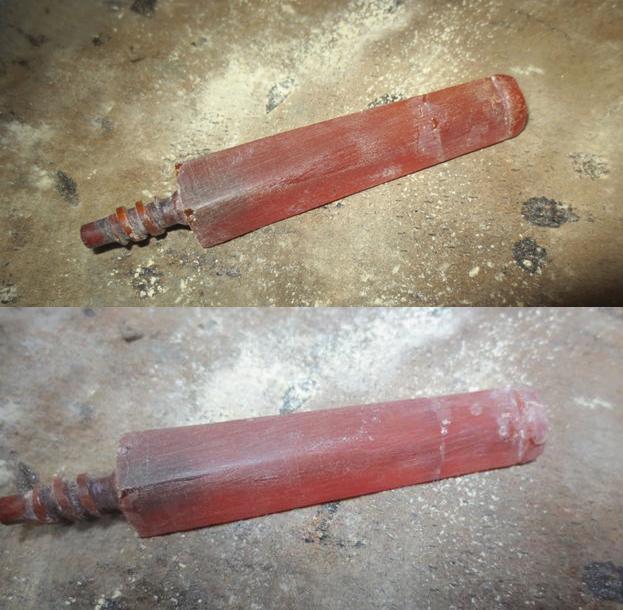
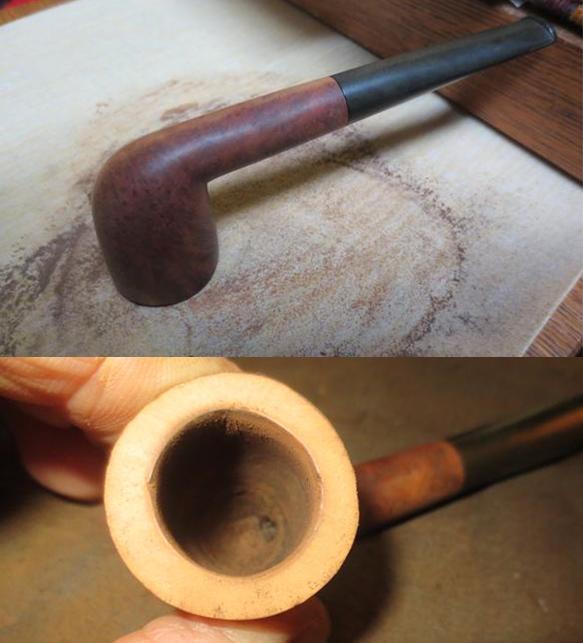
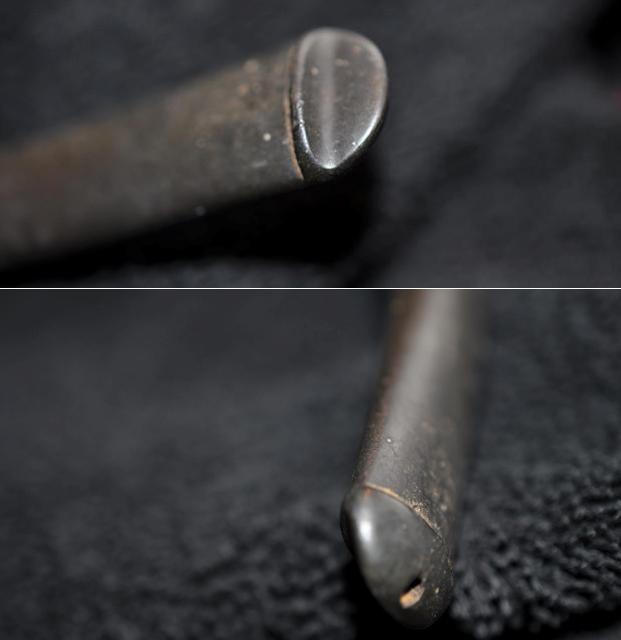 My brother did his usual thorough clean before sending it to Vancouver. He reamed the bowl and removed the cake that was built up on the walls and had overflowed onto the rim of the bowl. He cleaned out the mortise, the airway in the shank and the stem with alcohol, pipe cleaners and cotton swabs. He scrubbed the exterior of the bowl with Murphy’s Oil Soap and was able to remove the grime and dirt and the chipped and damaged finish. The next four photos show what the pipe looked like when it arrived.
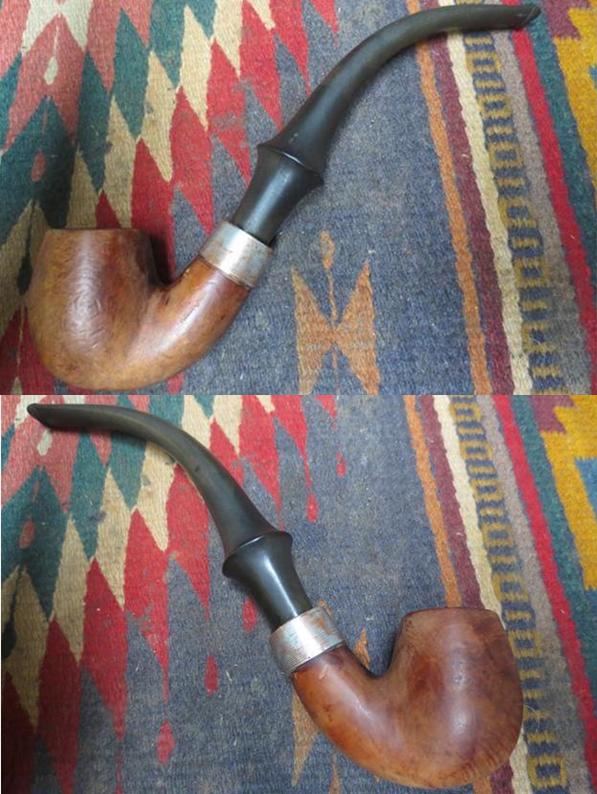
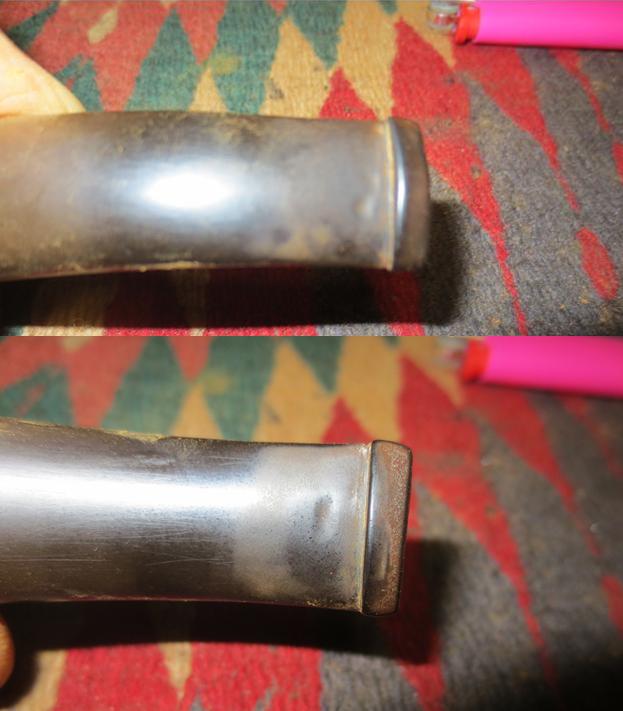
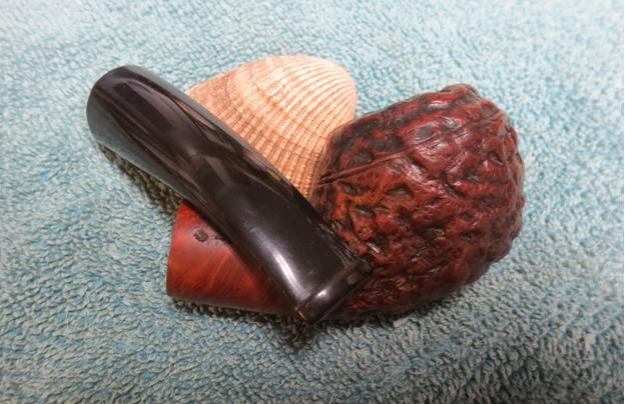
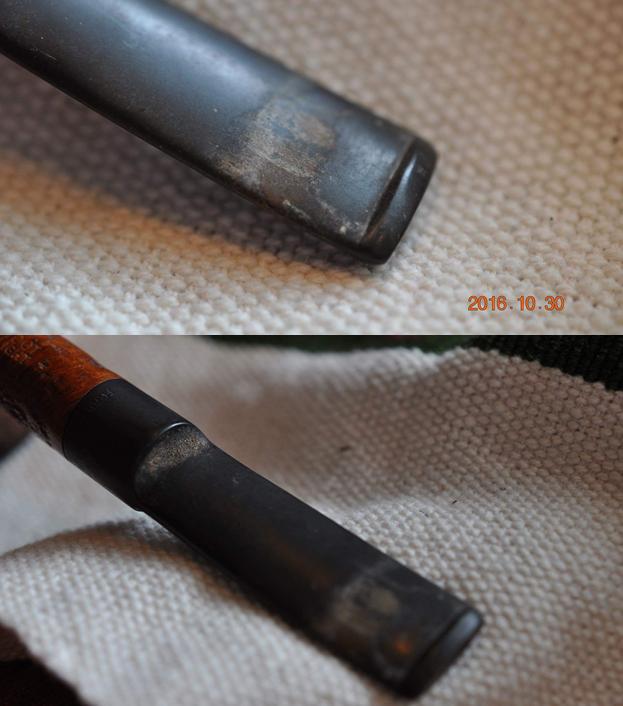
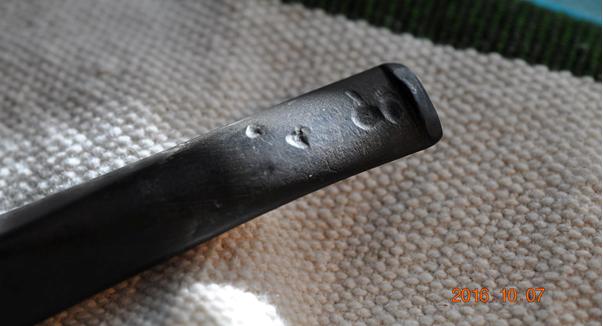
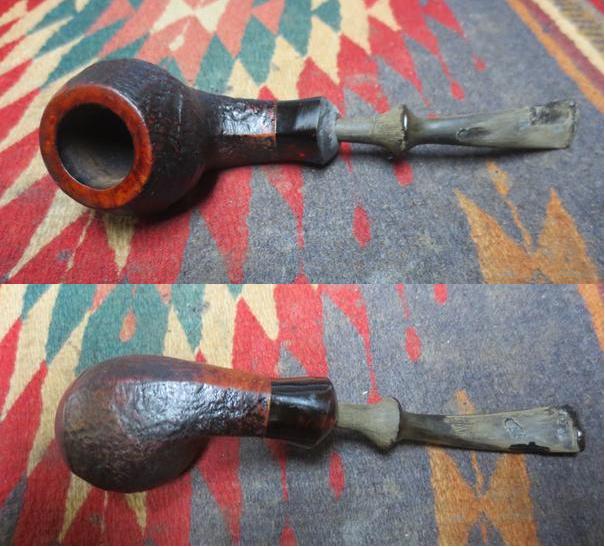
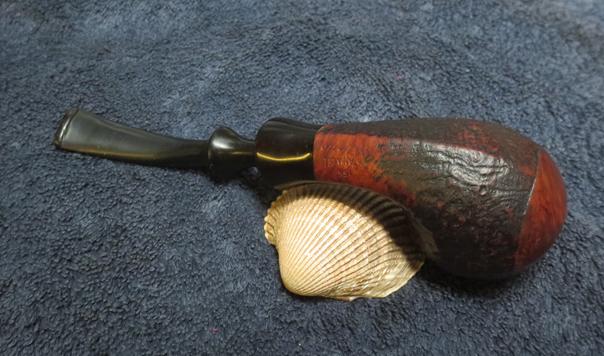
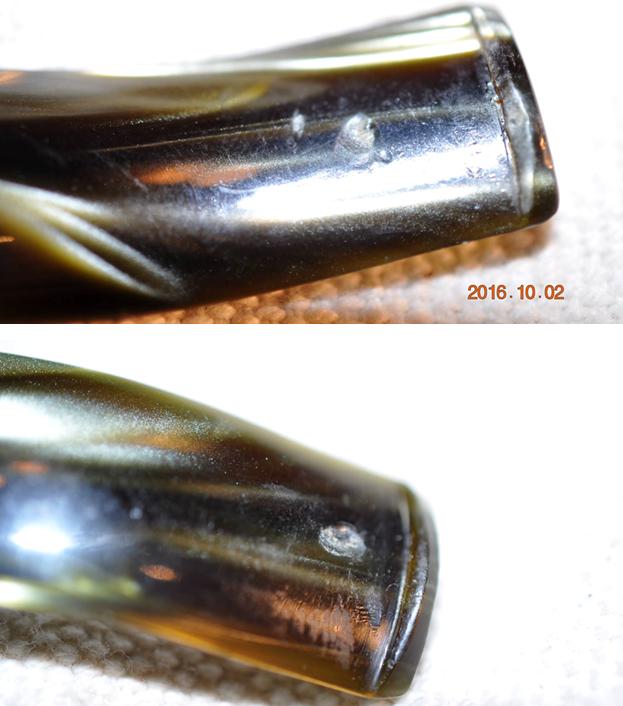
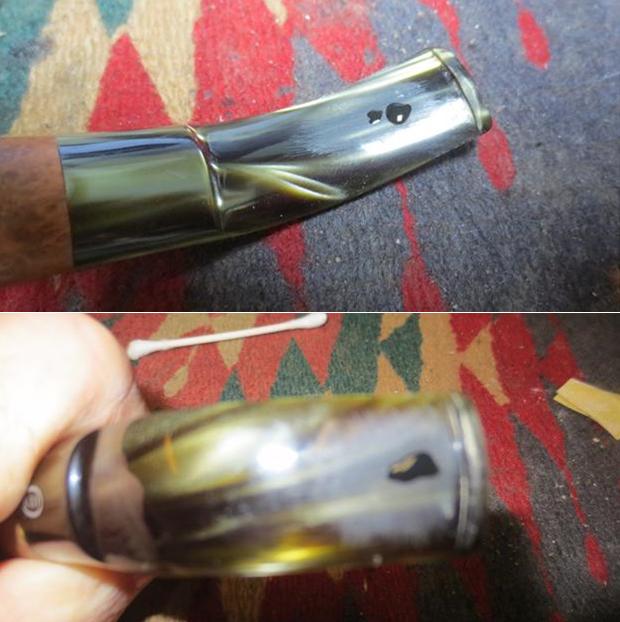
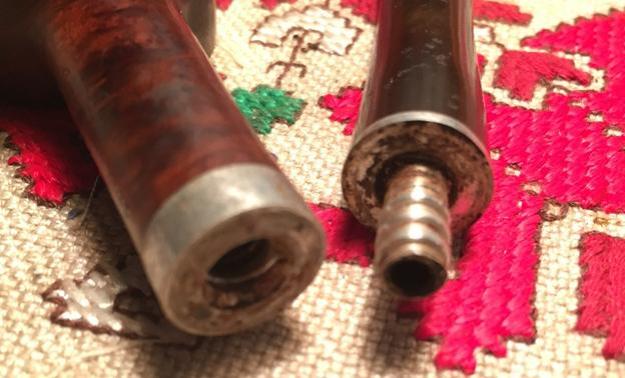
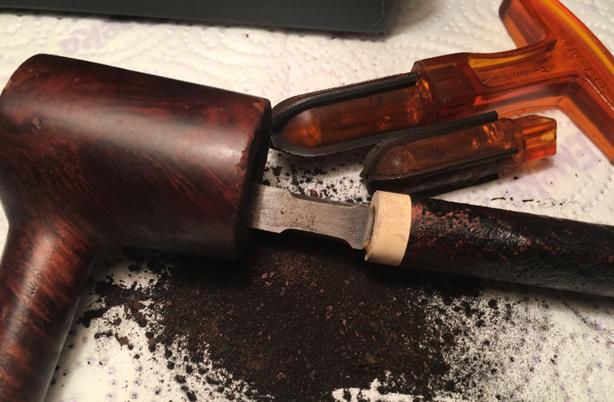
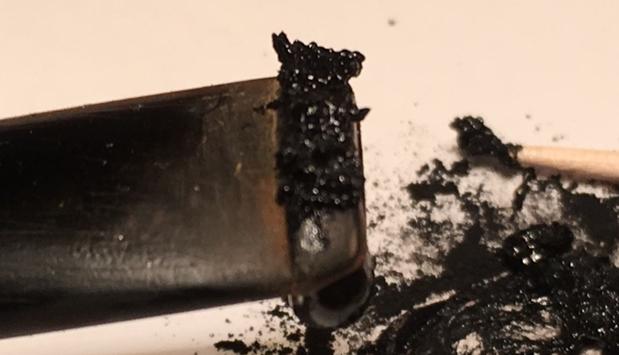
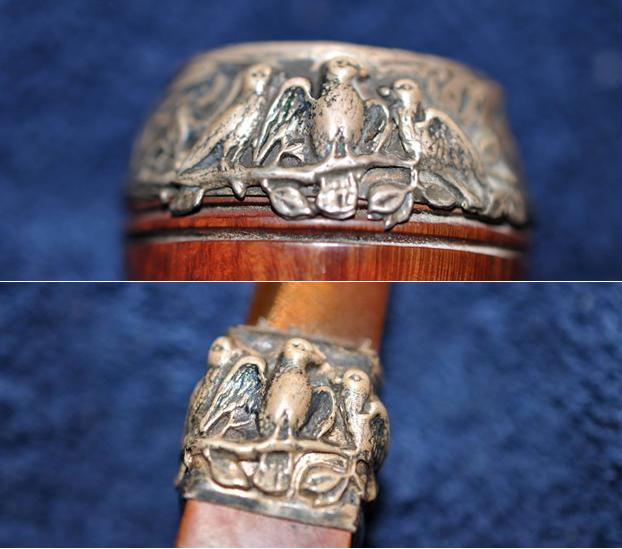
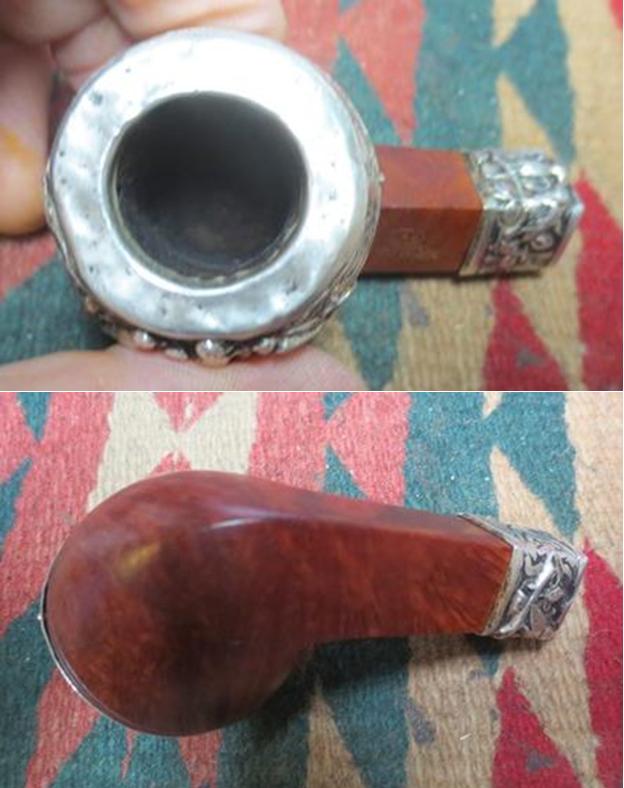
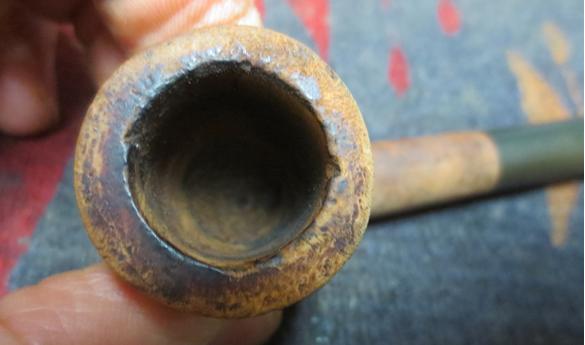
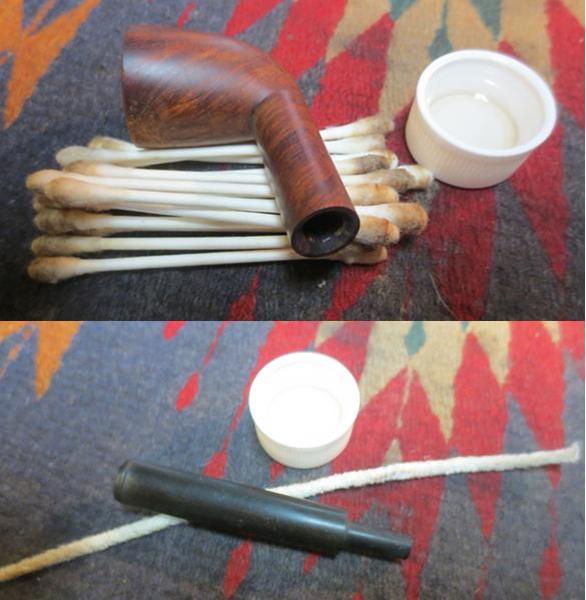
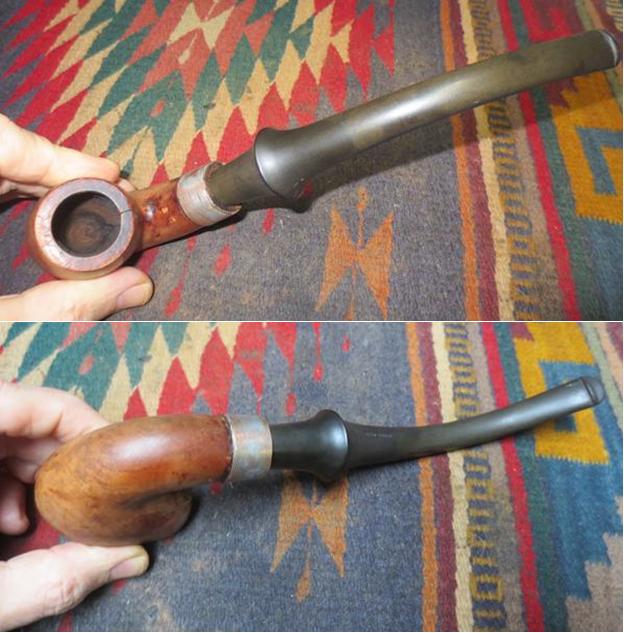 I took some close up photos of the shank band. It is obvious to me that the repair on the shank was home done and involved cutting a piece of pipe and gluing and pressing it onto the shank. The third photo shows the shank end and there are at least 4-6 cracks showing that previous owner had glued and repaired with the cut off piece of pipe as a band. The band repair had been finished off with a bevel of glue banked against the band and shank. The piece of pipe that functioned as the band was striated and copper colour peeked out from under the surface oxidation. The crack on the back of the bowl is visible in the second photo below.
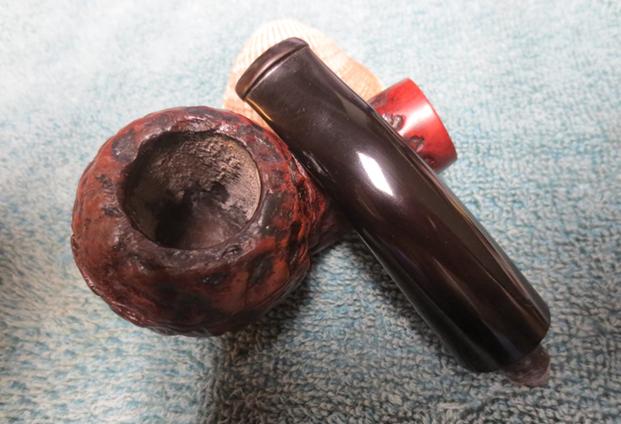
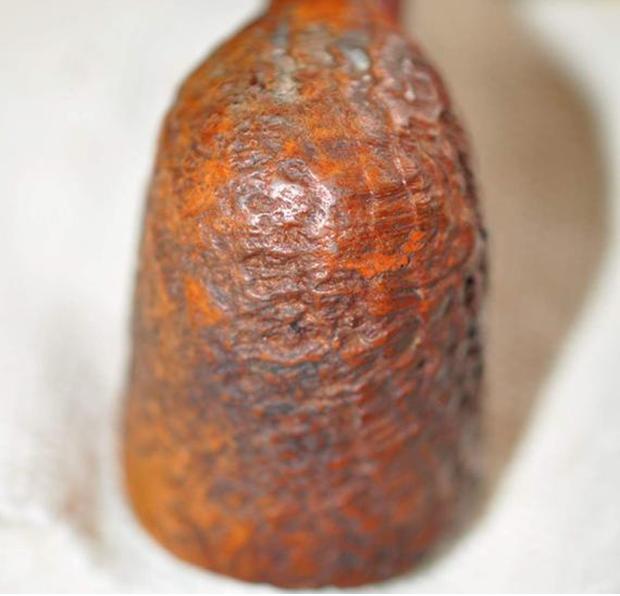
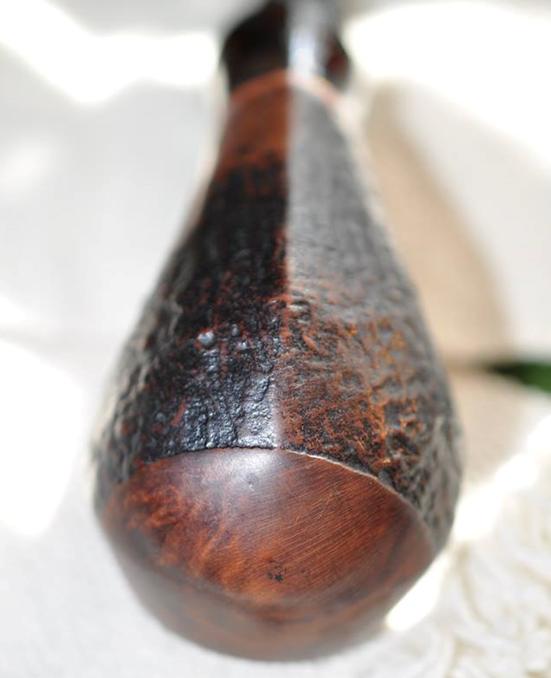
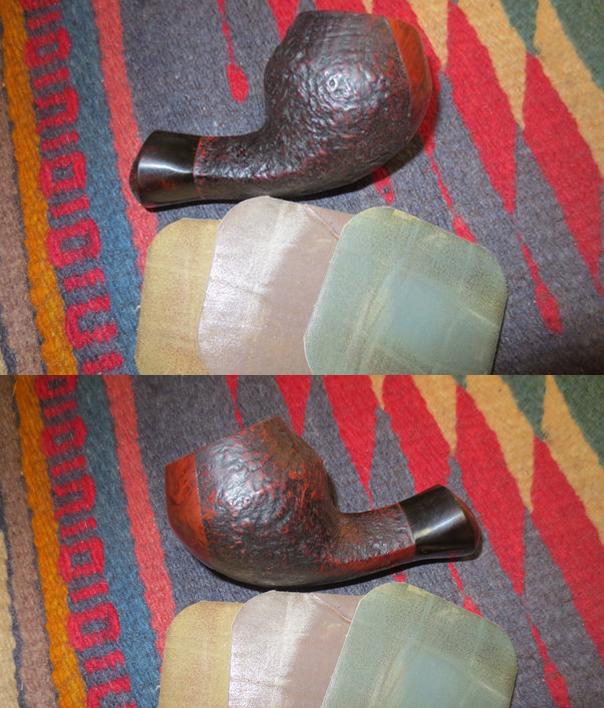
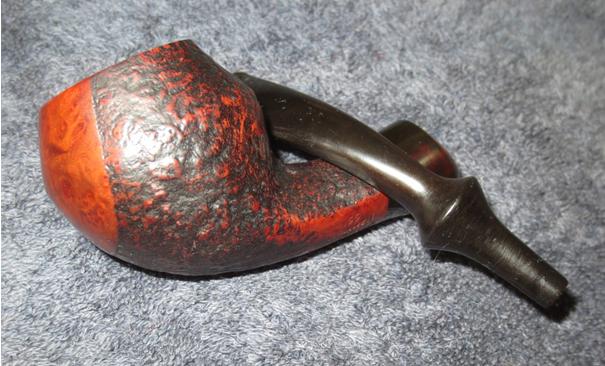
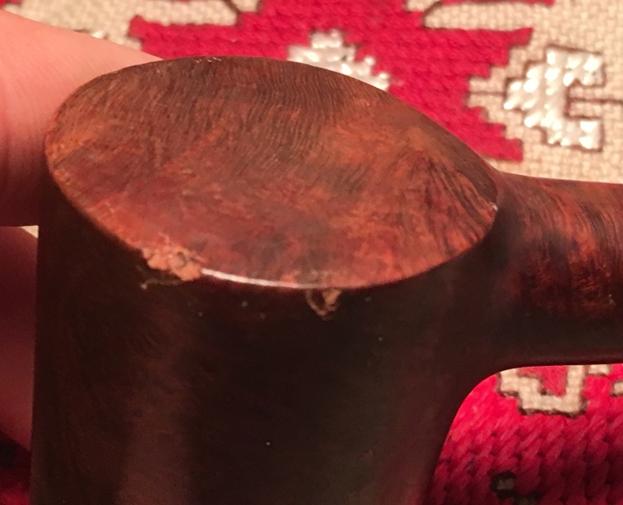
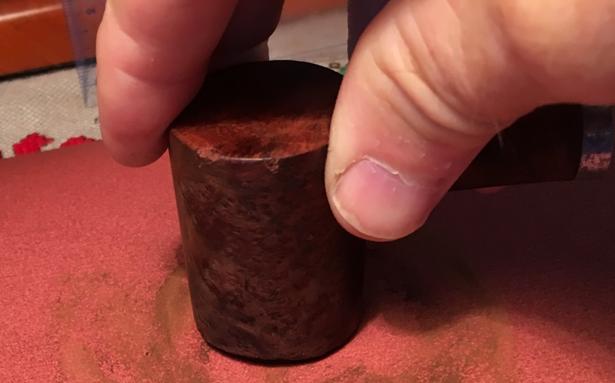
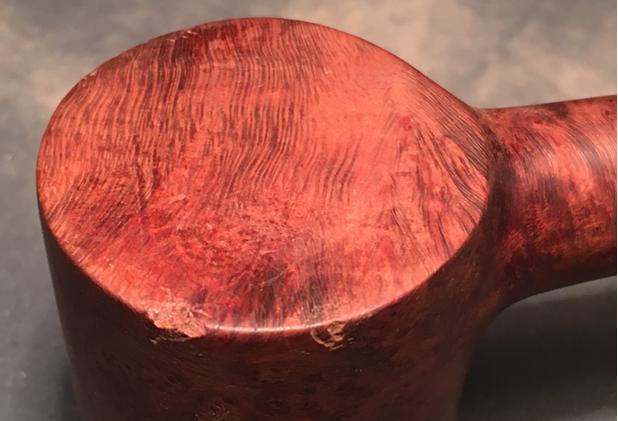
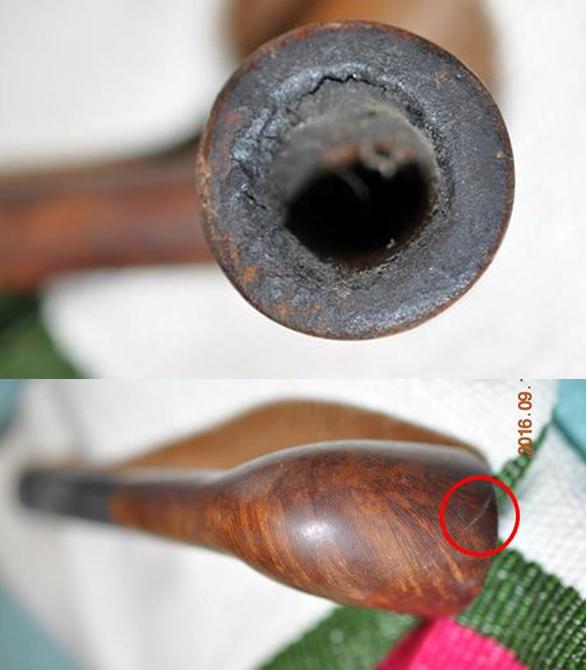
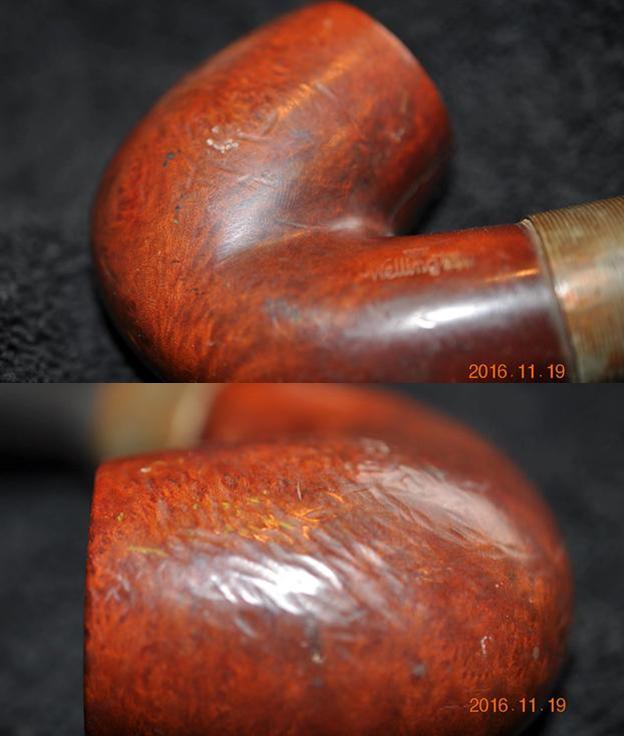
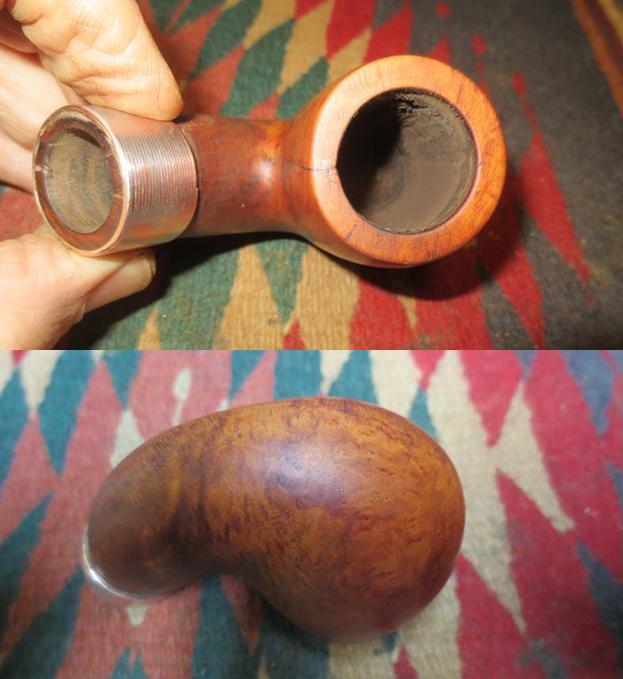
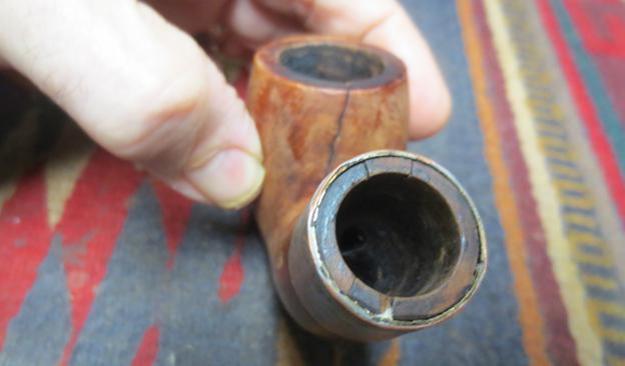 I took a close up photo of the left side of the bowl to show the rash on the side of the bowl. It was very rough and scored. It would need to be sanded smooth to repair the amount of damage.
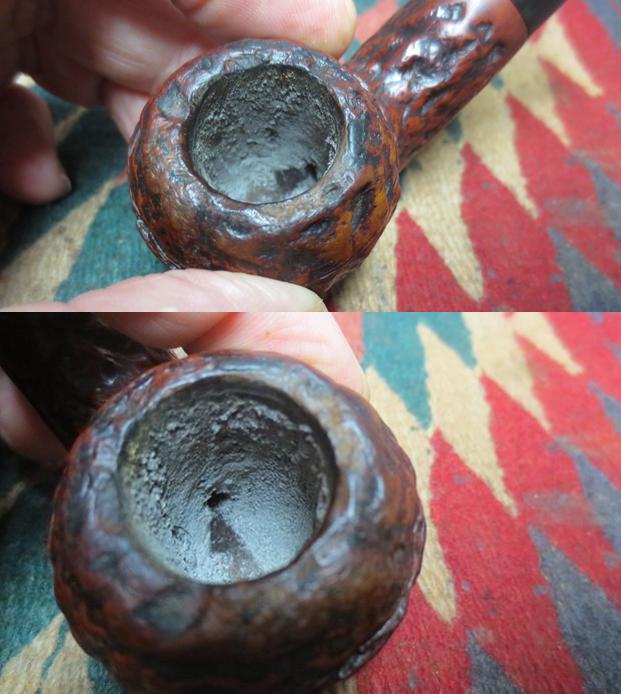
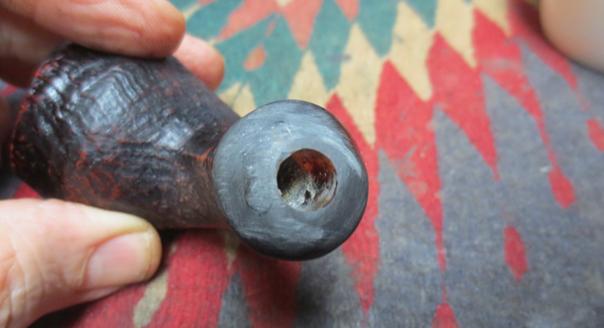
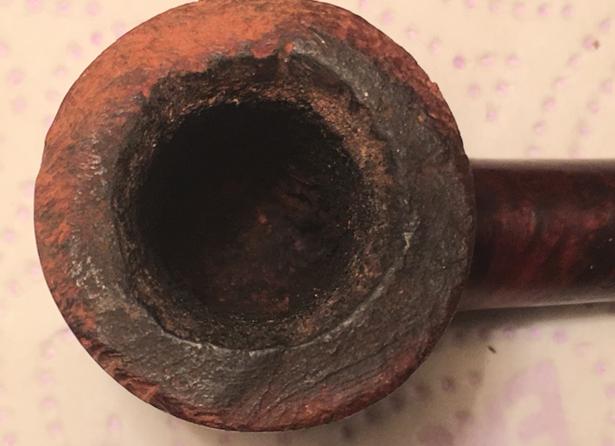
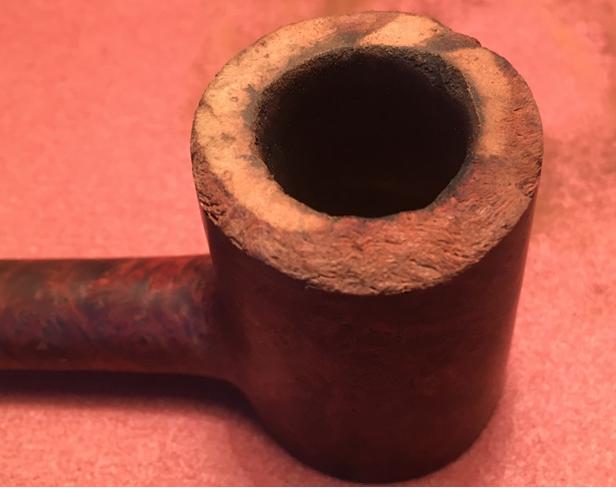
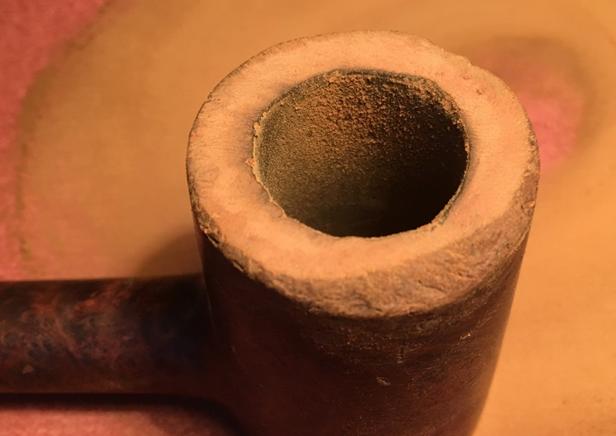
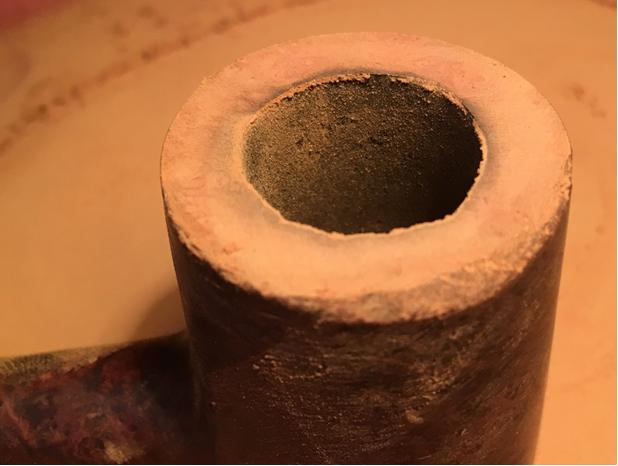
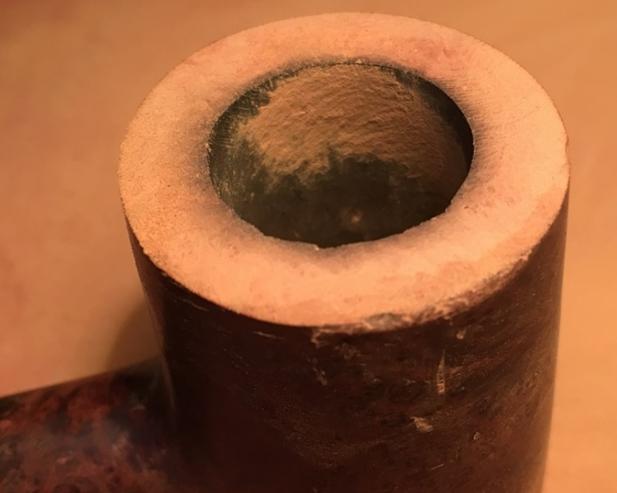
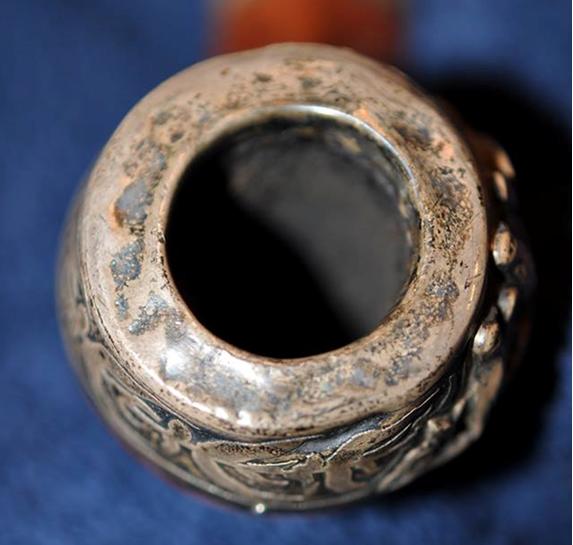
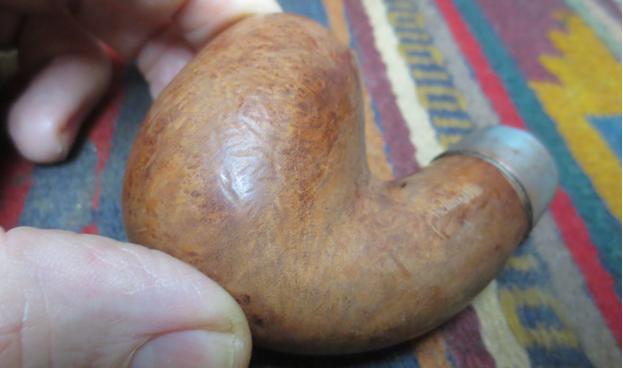 I took photos of the crack in the bowl. It is on the back side as noted above. It extends down the back of the bowl to the shank/bowl junction (photo 2). What was interesting to me was that there were two small holes drilled at the twin ends of the crack in the bend of the junction. They had been filled in with glue and sanded smooth. I have circled them in red in the photo below (photo 1). I don’t why the previous repair had not continued with filling in the crack on at least the outside of the bowl but it did not. Possibly it was because the crack went through the bowl and extended down to a spot just above the entrance of the airway in the bowl (photos 3-4). There appeared to be burn damage on the back wall of the bowl on both sides of the crack. The rest of the interior walls of the pipe were solid with no damage.
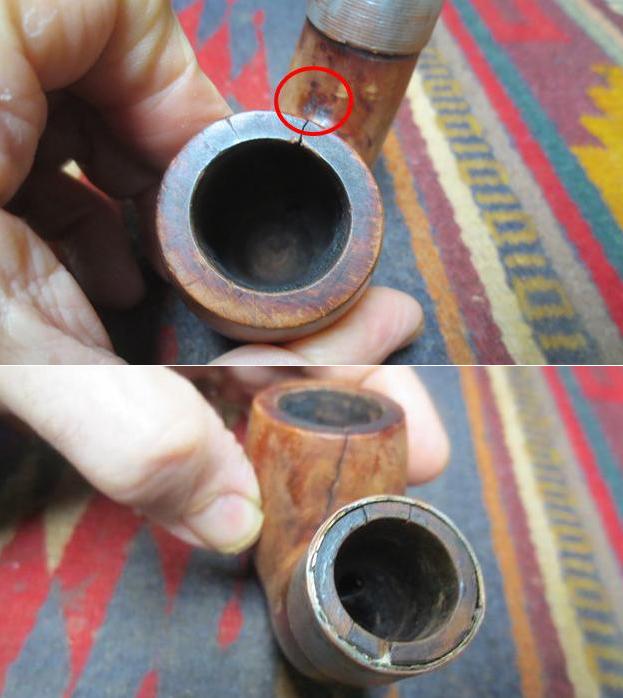
 As I mentioned before the best part of this pipe was the stem. In fact at one point I considered throwing the bowl away and saving the stem for a future repair.
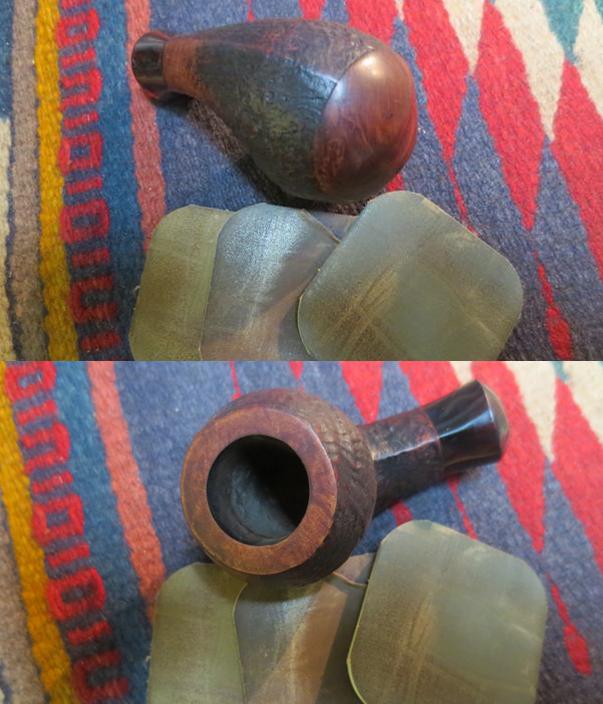
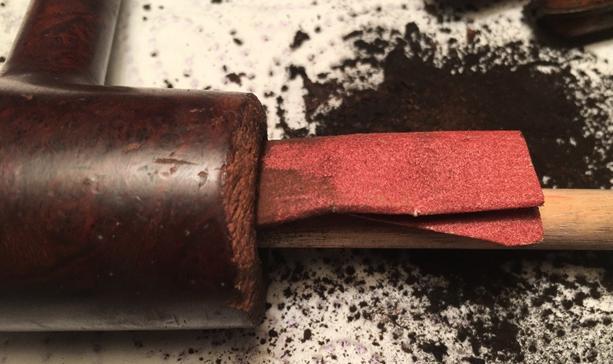
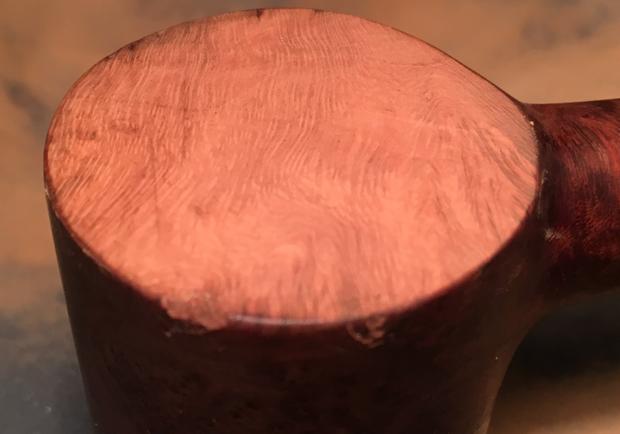
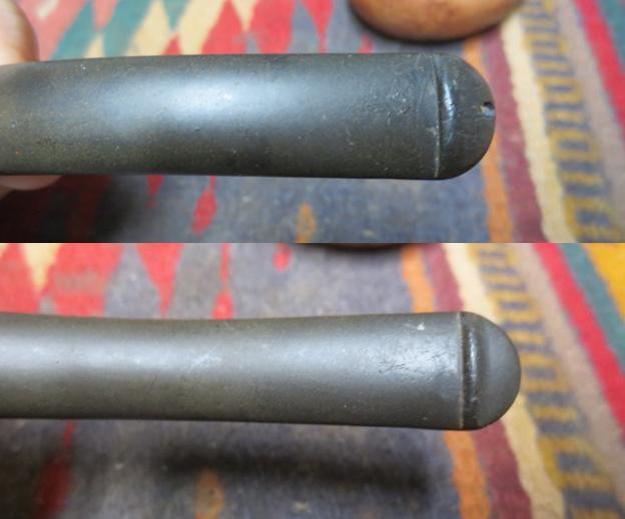 With so much work to do on the bowl it was hard to decide where to begin. I turned it over in my hands for a few moments and decided to start by sanding out the rough side of the bowl. I would try to remove all of the damage that had been done in that area. The next two photos show the damaged area after the first sanding with 180 grit sandpaper. You can see how extensive this rash was on the bowl side.
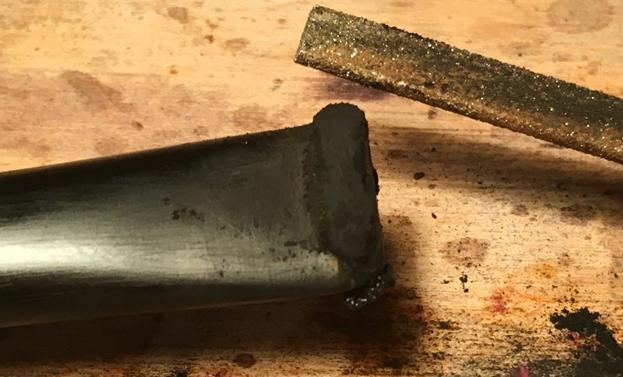
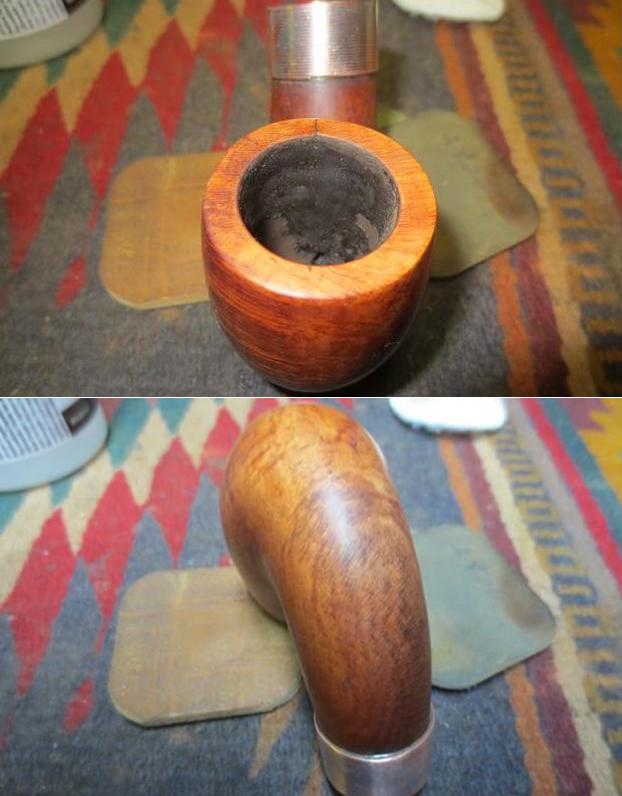
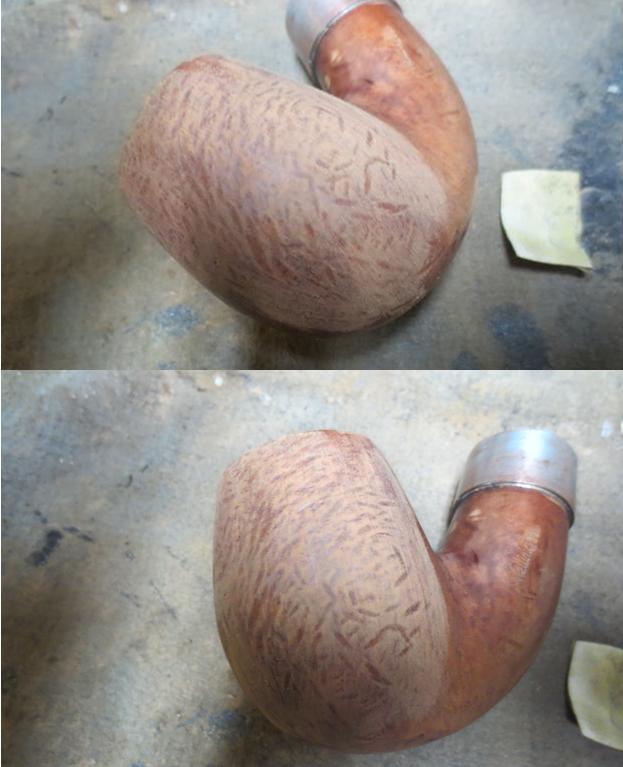 I decided to top the bowl to deal with the damaged portion of the rim. I used the topping board and 220 grit sandpaper to remove the damaged rim surface and clean it in preparation for the crack repair. You can see that I needed to do some more reaming in the bowl to clean it up.
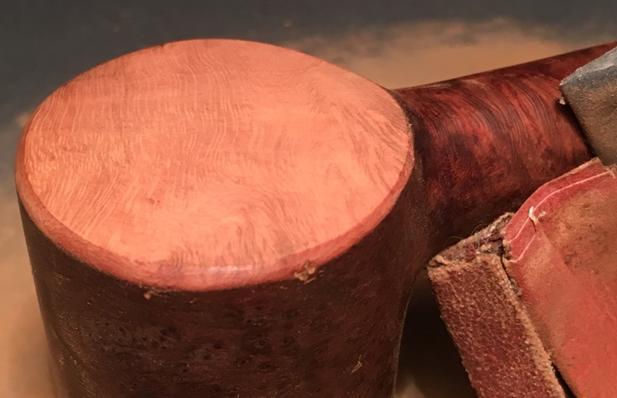
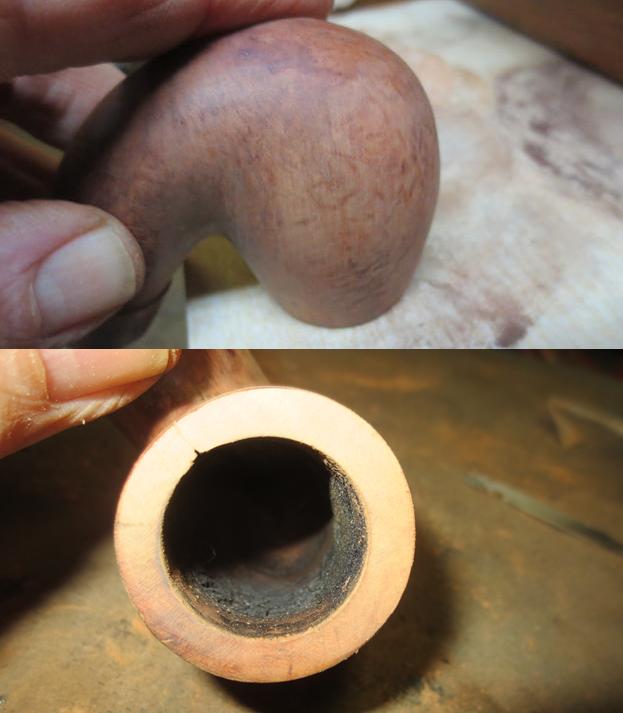 With the rim finished I went back to sanding the bowl side with 220 grit sandpaper. I worked to remove the damage on the side and worked over the curve of the bowl shank junction. When I finished with the 220 grit sandpaper the bowl side was smooth. The roughness and damage had been removed. The briar needed to be sanded with higher grit sandpapers and sanding sponges to remove the scratches.
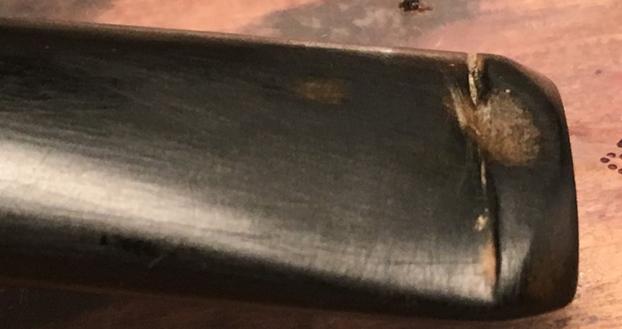
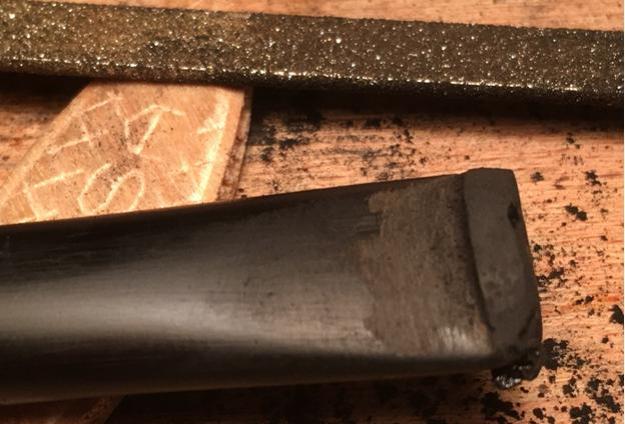
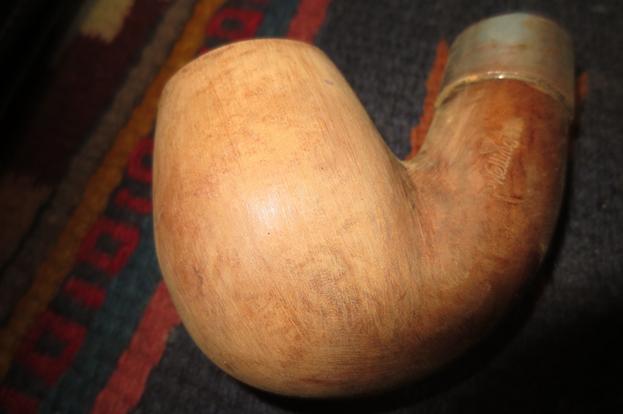 I topped the shank end with 220 grit sandpaper on the topping board to smooth out the sharp edge of the metal band and prepare the shank end for some repairs.
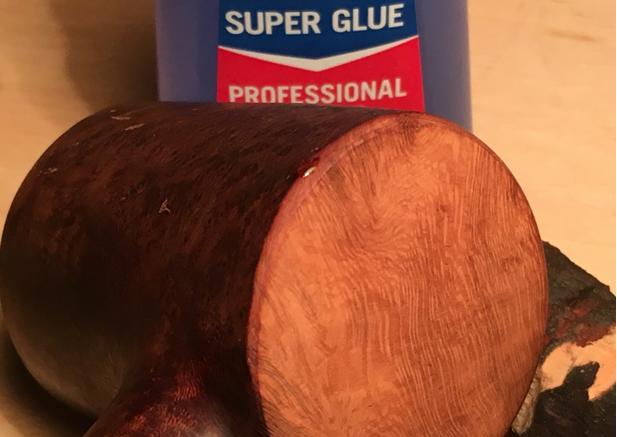
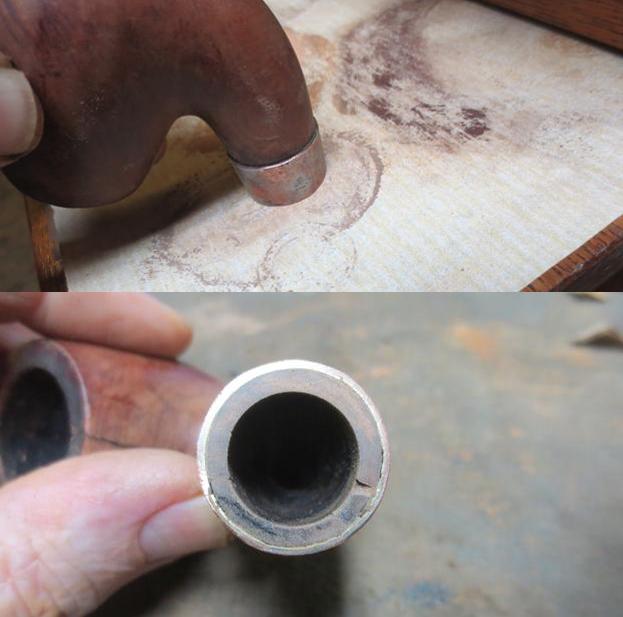 I filled in the chipped areas on the shank end with briar dust and super glue. When the glue dried I topped it further and added a little glue on the long chipped area on the left of the second photo below.
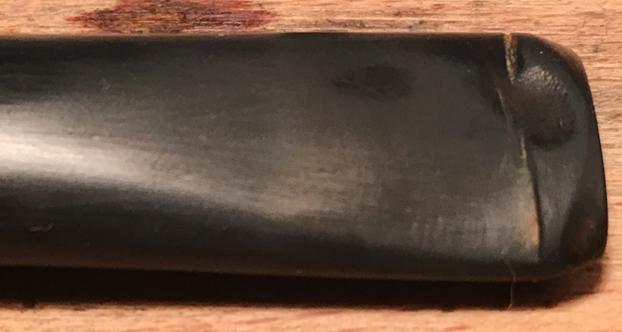
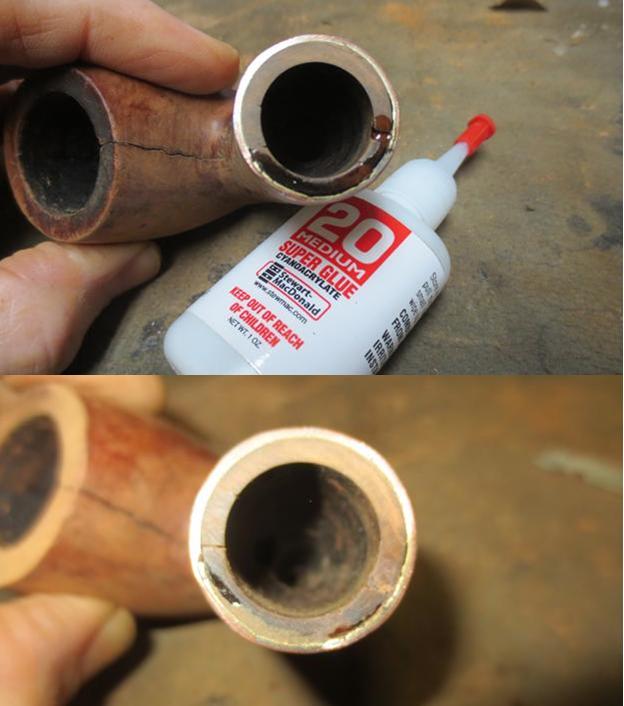 I scraped away the excess glue along the edge of the band on the shank with a sharp knife. Once I finished the transition was smoother. I would sand the area along the band to clean up the scratches but the thick glue was removed.
 There were some deep nicks on the lower front side of the bowl that needed to be filled. I filled them with super glue and briar dust and sanded them smooth to match the surface of the surrounding briar. I sanded around the shank band at the same time to smooth out the scratches and nicks.
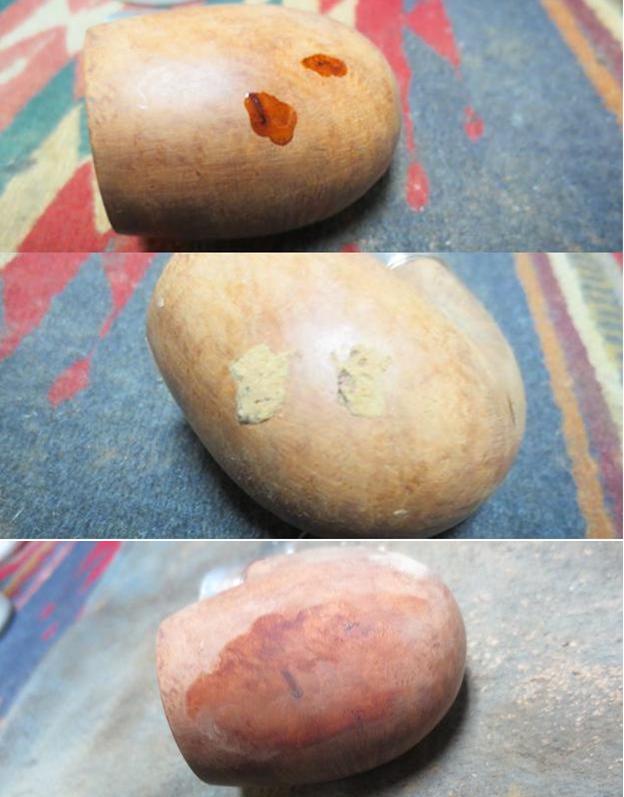 I moved to the back of the bowl and filled in the exterior part of the crack with super glue and briar dust. The twin drilling at the bottom of the crack by the previous owner had done a good job stopping the crack from going further so I did not need to deal with that issue. There was no movement in the crack when I squeezed it together. It was stable so I moved on to do the surface repair. I put super glue in the crack and then pressed briar dust into the glue to seal the surface of the crack.
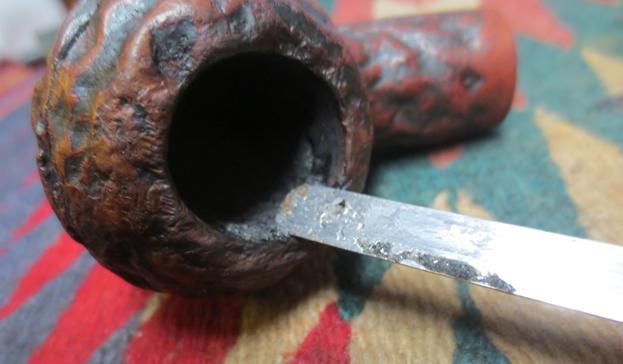
 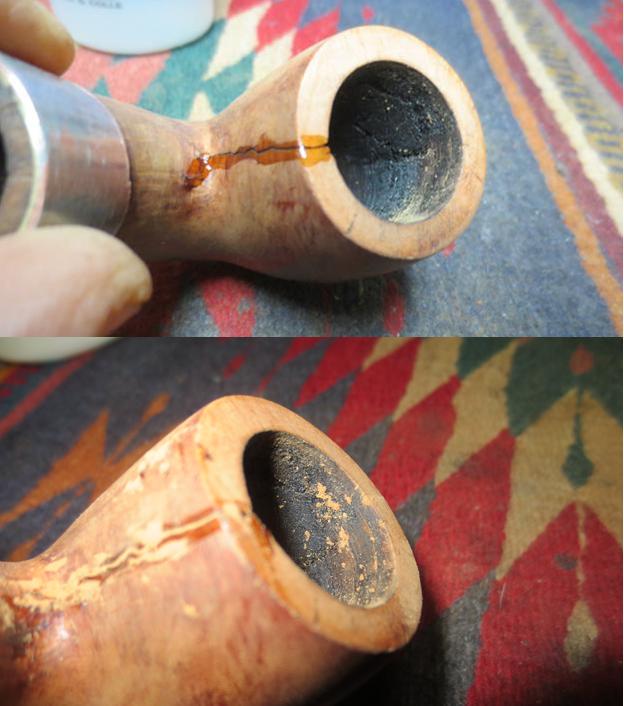 It was time to address the internal crack at this point. I needed to join the two sides of the crack together inside and also address the burned areas around both sides of the crack. I scraped out the inside of the bowl with a Savinelli Fitsall Pipe Knife to remove the remaining excess cake. I made sure to remove all of the cake. I worked on the area around the crack to remove all of the carbon and picked the area with a dental pick to see how badly the area was burned. I sanded the inside of the bowl with a rolled piece of 220 grit sandpaper to smooth out the walls.
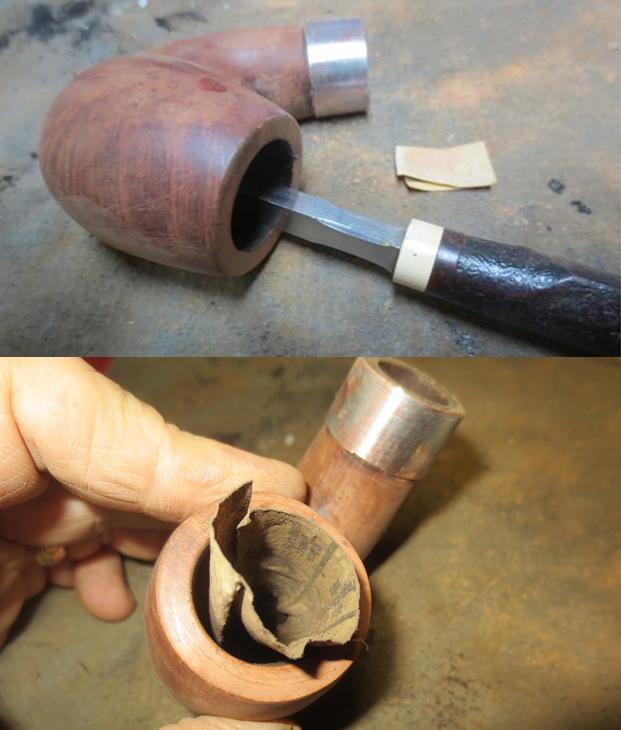 I sanded the repair on the exterior of the bowl with 220 grit sandpaper to remove the excess patch material on the exterior of the crack. I smoothed it out to match the surrounding briar. The repair is looking really good on the exterior and the sanded interior of the bowl (also visible in the photo) was in better shape than I expected.
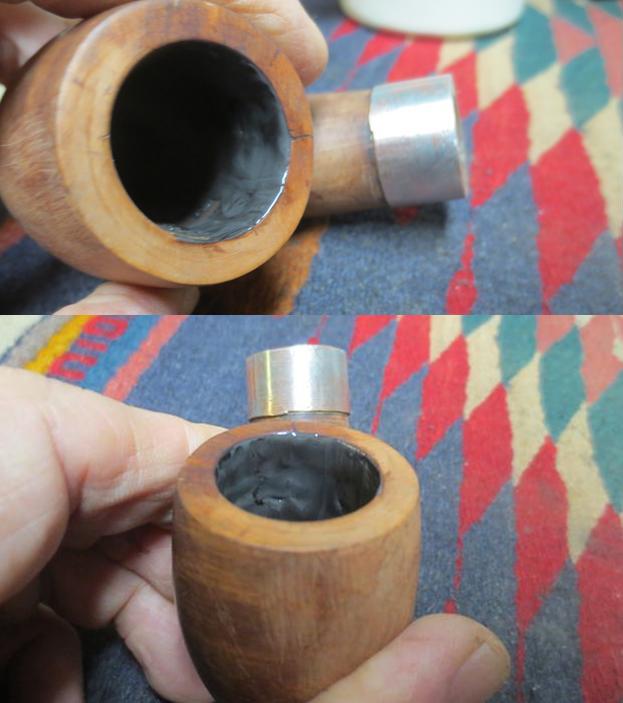
 I wiped down the inside of the bowl with damp cotton swabs to remove the dust and debris from the bowl sides. With all of the preparations finished the inside crack was ready for repair using JB Weld. I have used it before following the directions from Charles Lemon on Dadspipes blog and had good results. I mixed the two parts of the “goop” together and applied the mixture to the inside of the bowl with a dental spatula. I pressed the mix into the crack and then spread it over the surface of the back wall on both sides of the crack. Once I had good coverage on the wall and in the crack I set the bowl aside to let the glue set.
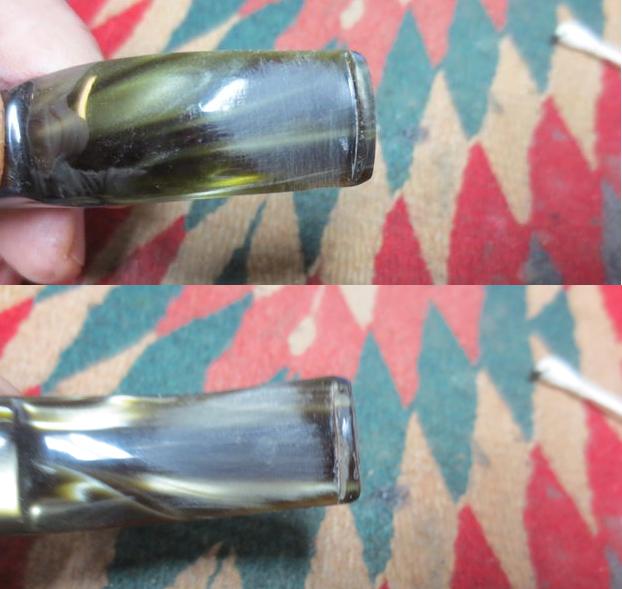
 While the repair in the bowl interior cured I turned to deal with the minimal damage to the stem. I sanded the light tooth chatter and small bite marks on the top and underside of the stem near the button using 220 grit sandpaper. I reshaped the button edge and the straight edge on the underside of the stem at the same time.
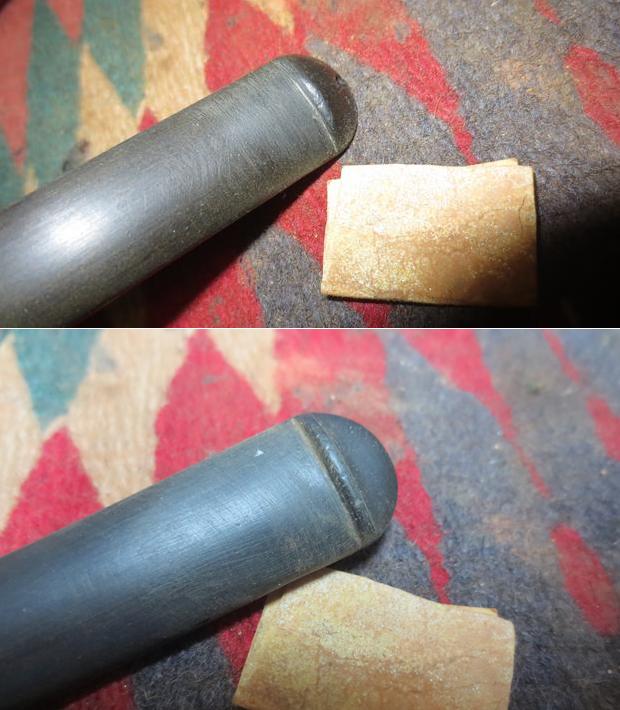 When the internal repair had dried to touch I could turn my attentions to the sanded exterior once again. I wiped the bowl down with a light coat of olive oil to make the scratched areas stand out and show me where I needed to do more sanding.
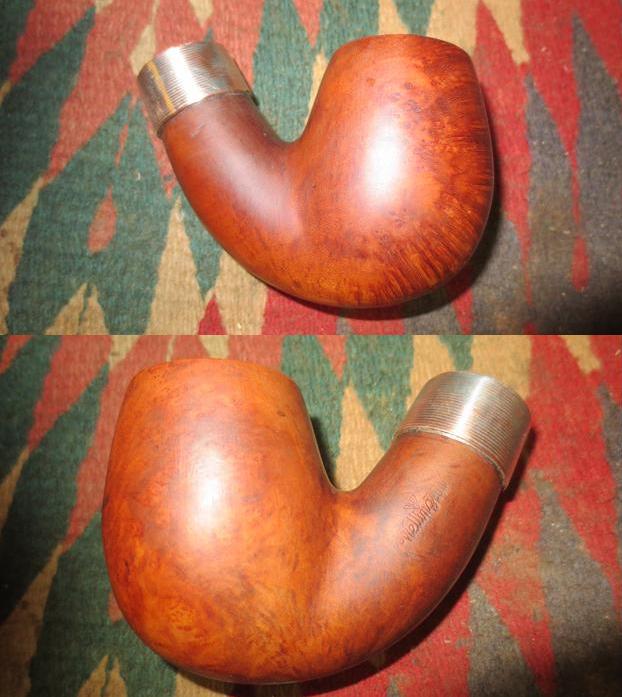
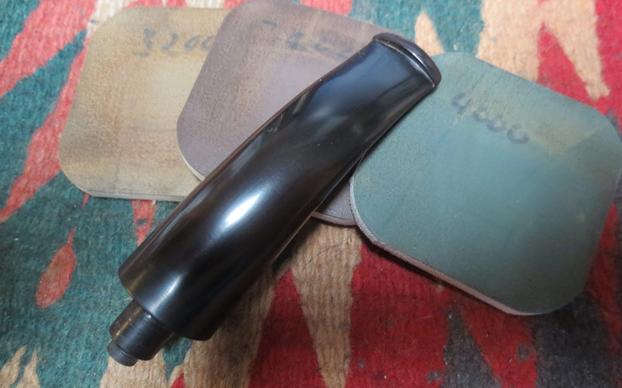
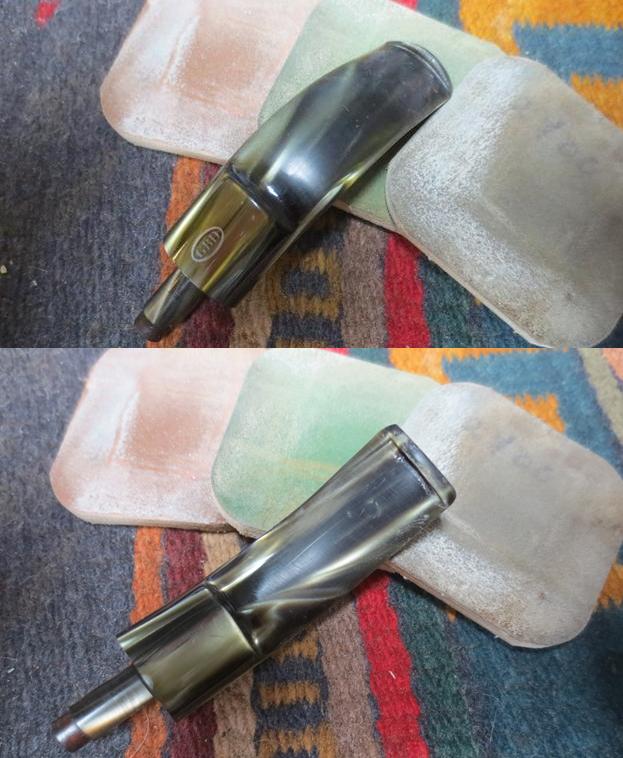
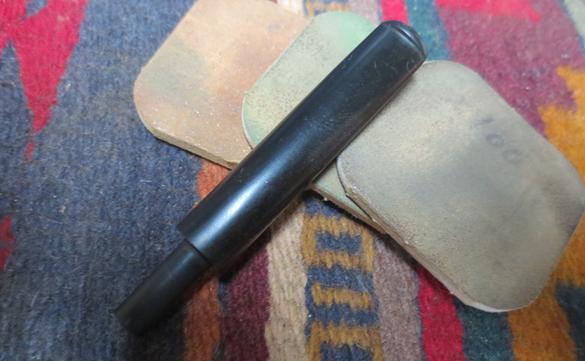
 I polished the briar and the metal band with micromesh sanding pads – wet sanding it with 1500-2400 grit pads to smooth out all of the scratches and areas that showed up with the olive oil rubdown. The more I sanded it the more the grain began to stand out. There was some great birds-eye and cross grain in the briar. The third photo shows the JB Weld repair on the inside of the bowl very clearly. Once it turns black it will have cured enough to sand.
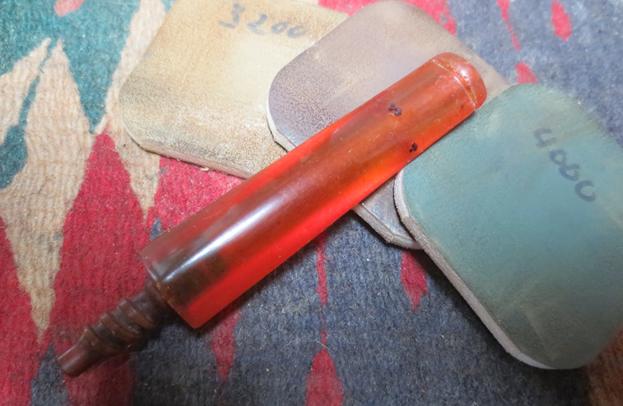
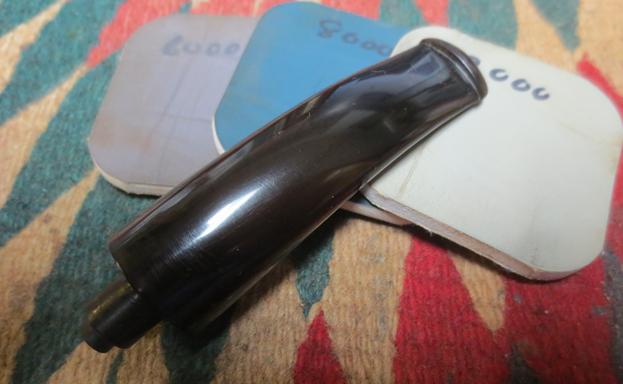
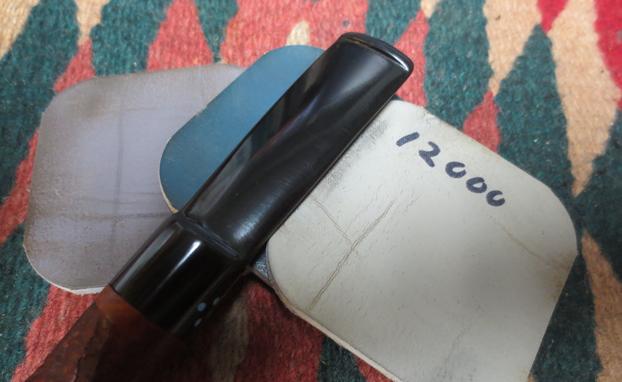
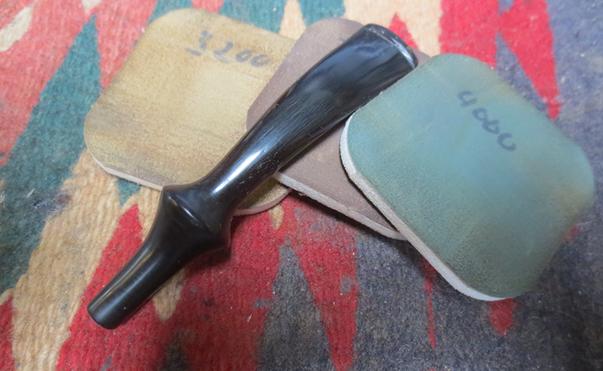
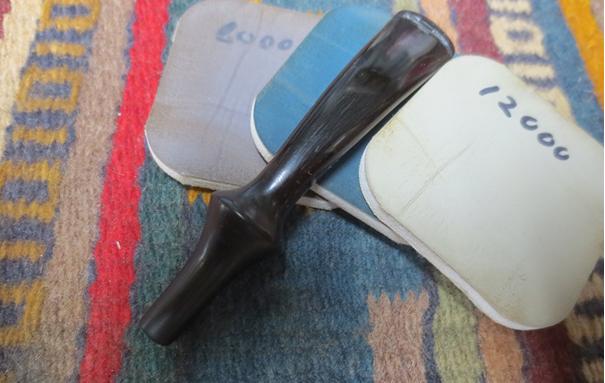
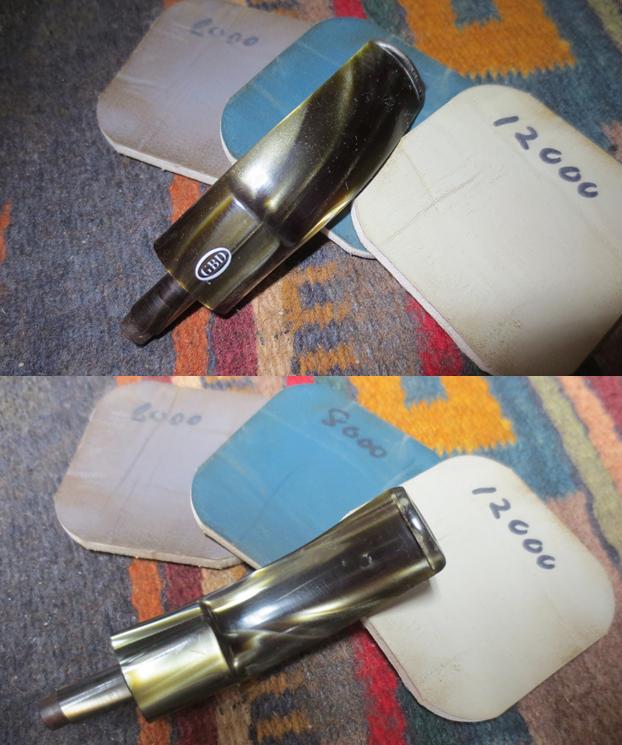
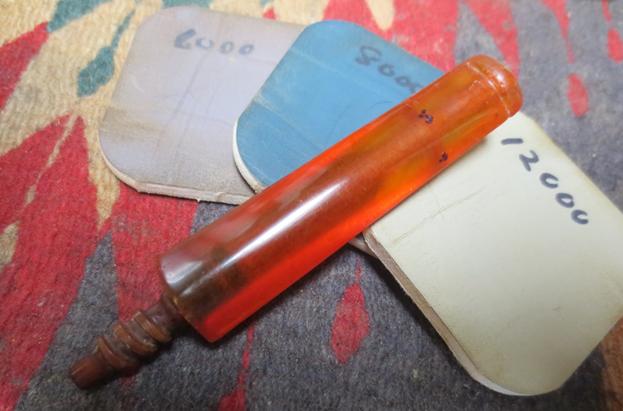
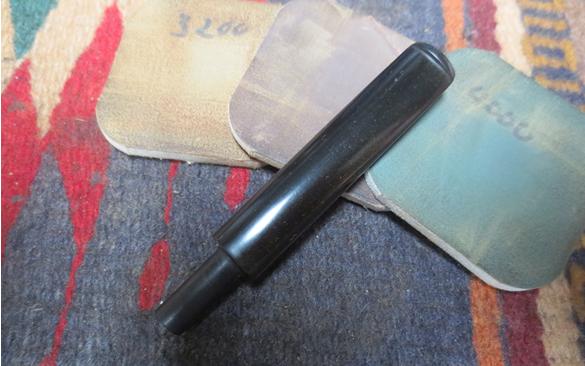
 I continued to polish the briar and band with micromesh sanding pads – dry sanding it with 3200-12000 grit pads until the bowl shone.
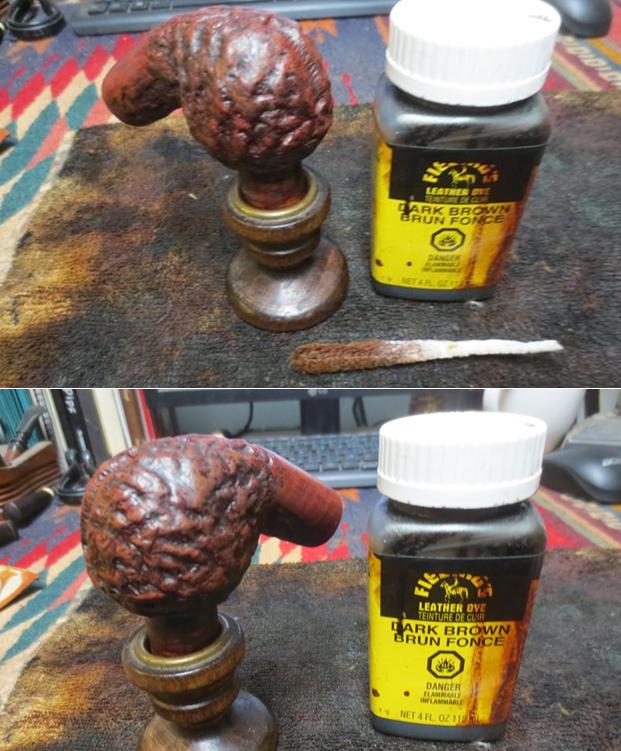
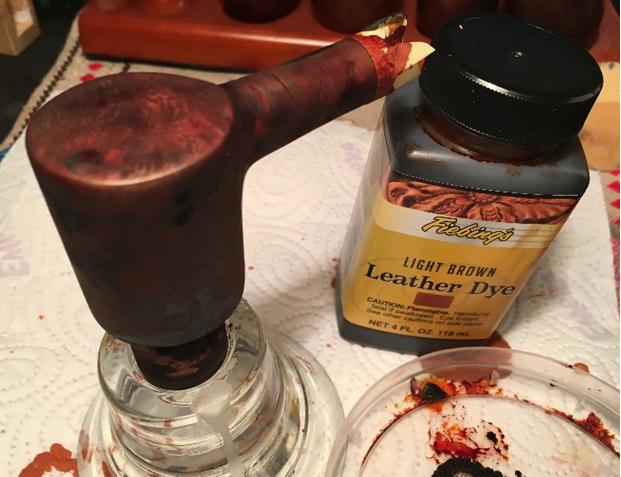
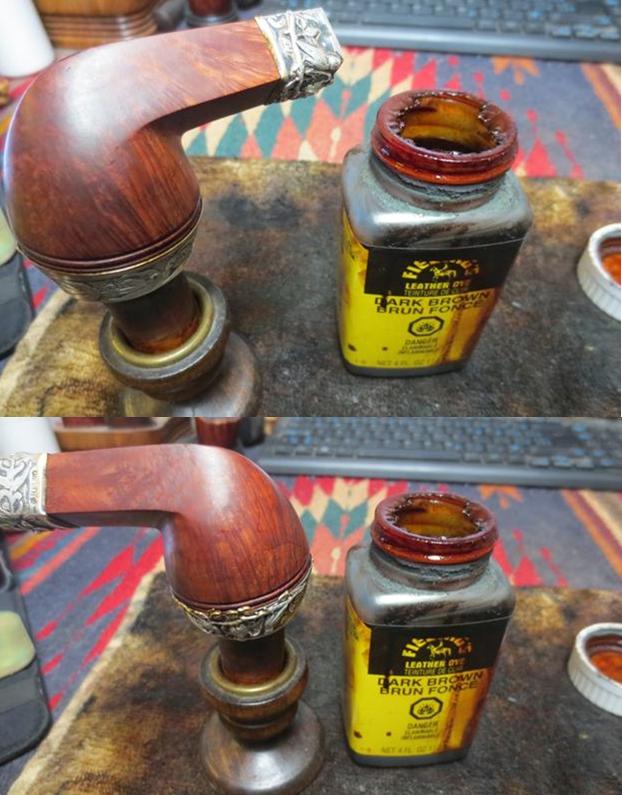
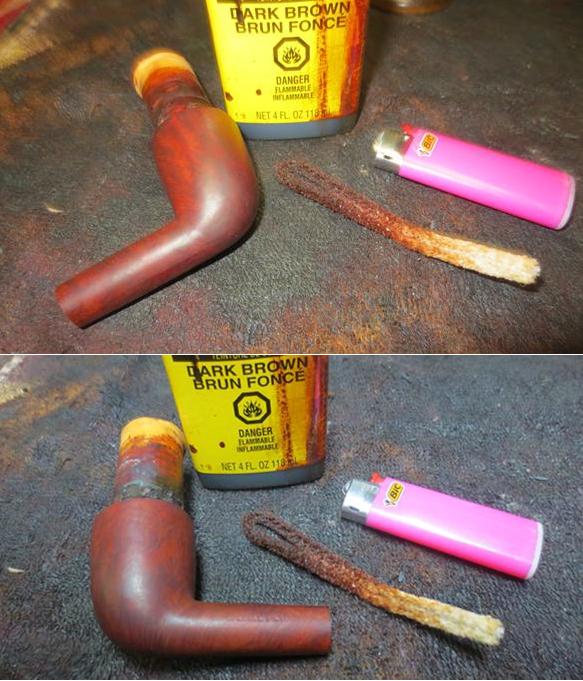
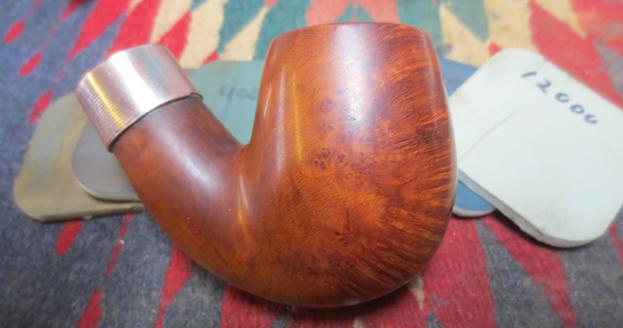 I stained the pipe with a dark brown aniline stain thinned 50/50 with isopropyl alcohol. I applied the stain, flamed the stain to set it and repeated the process until the coverage was even around the bowl and rim.
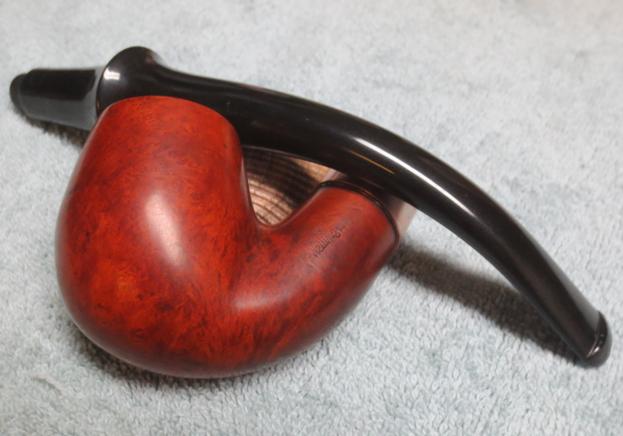
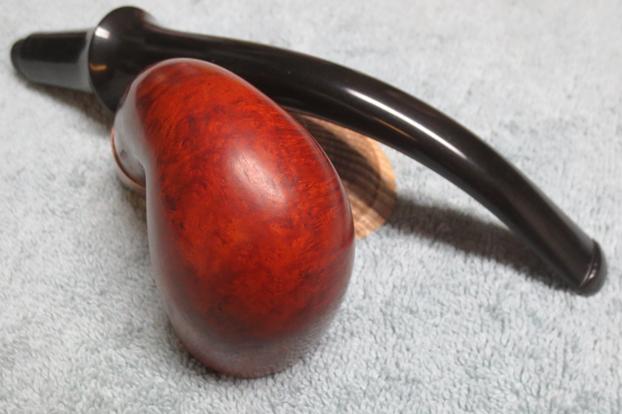
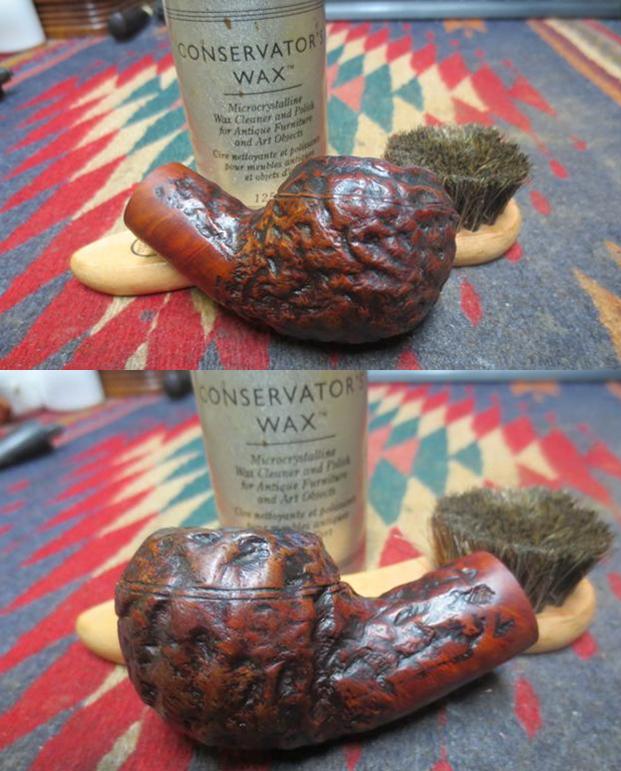
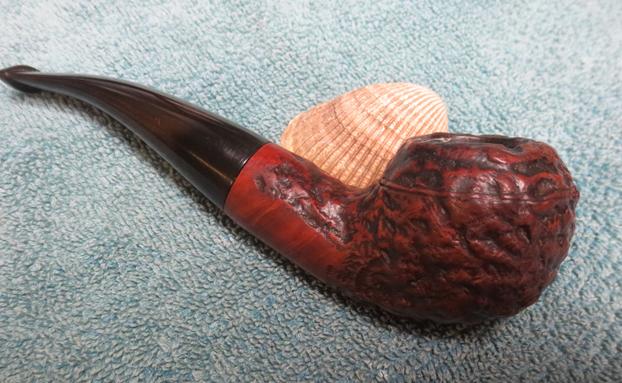
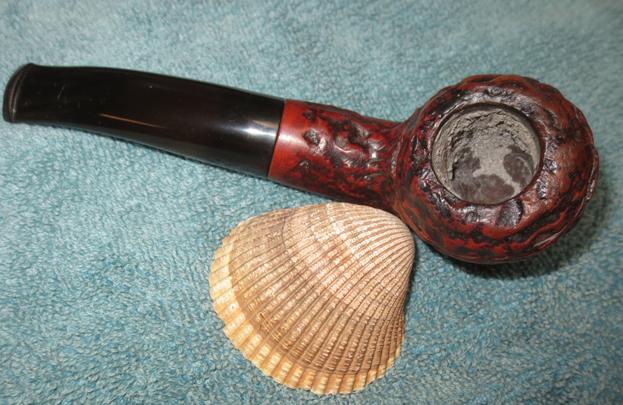
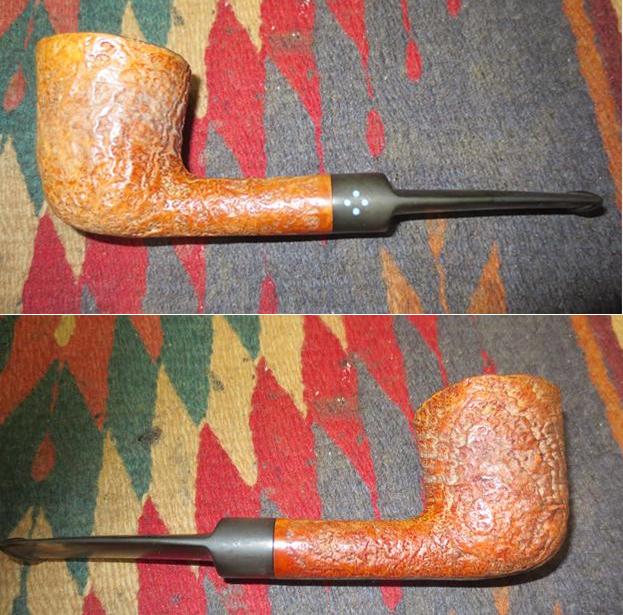
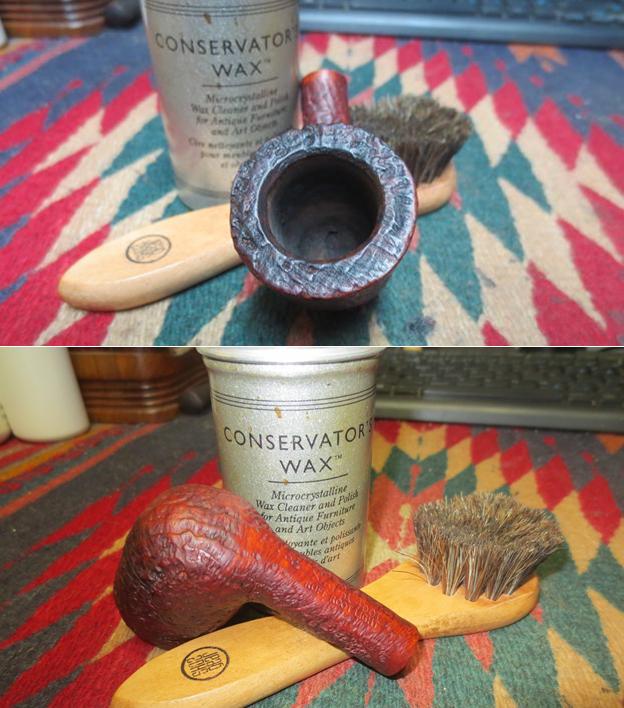
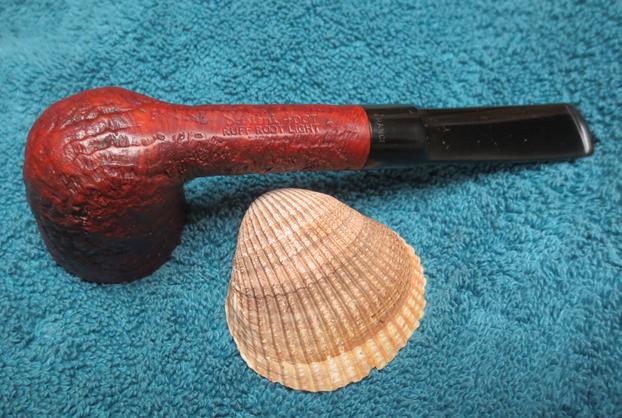
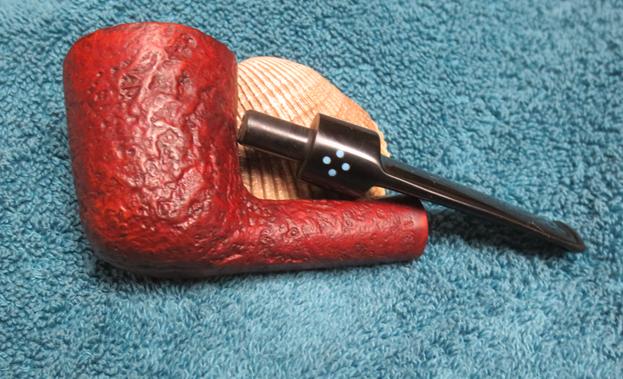
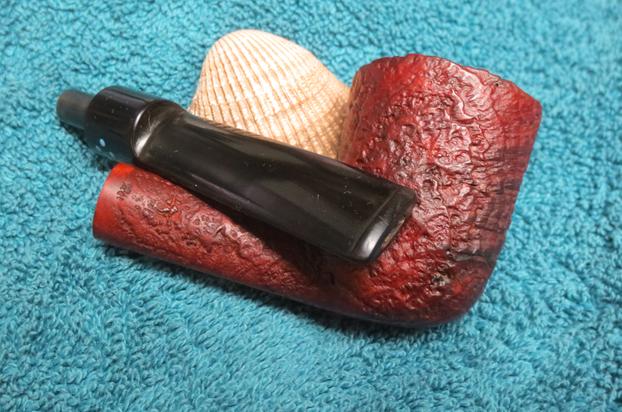
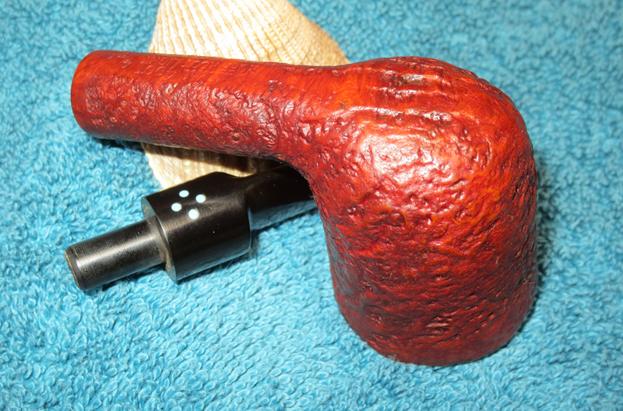
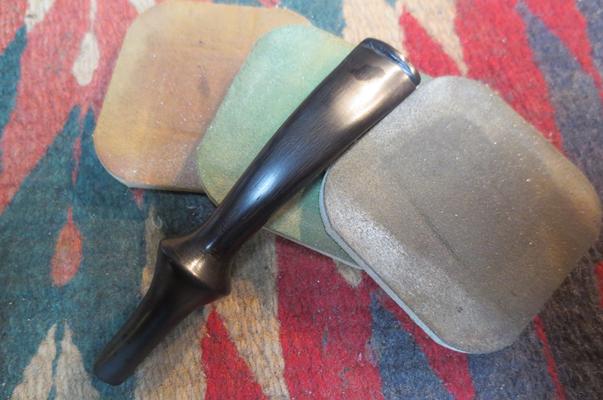
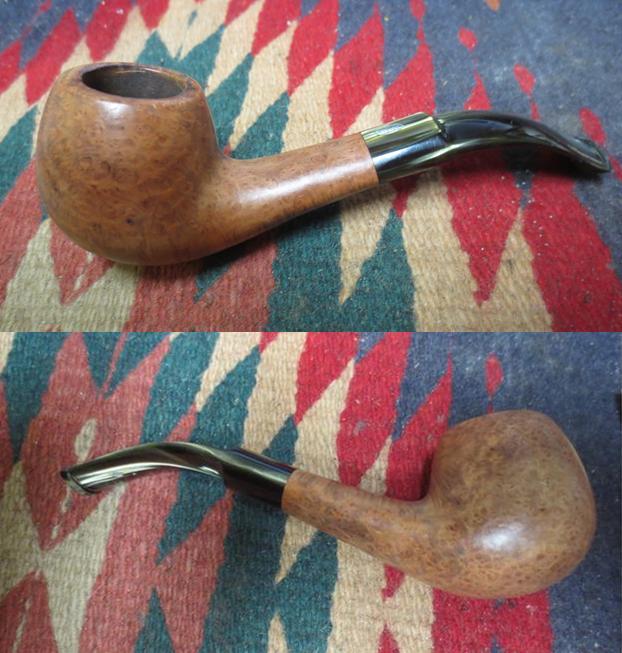
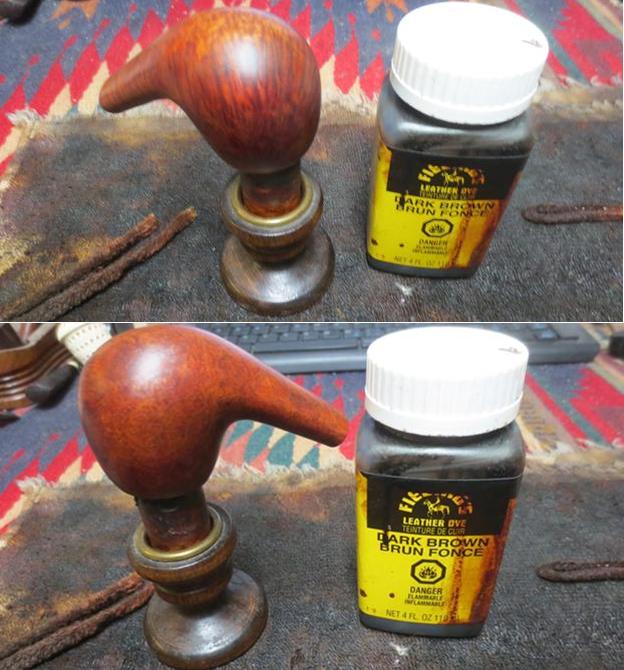
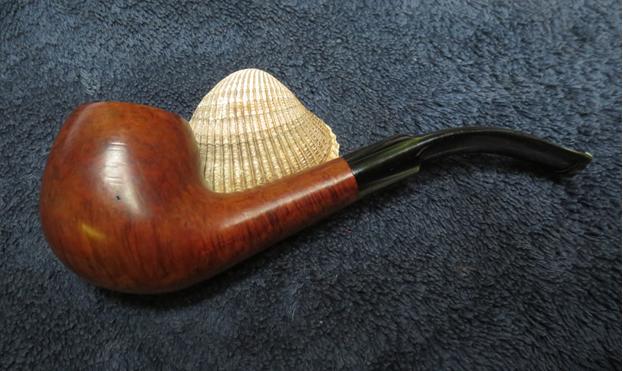
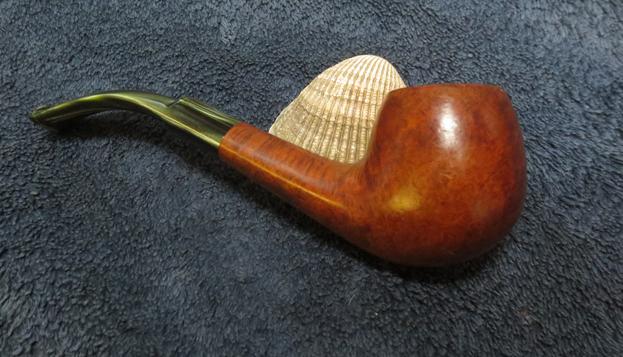
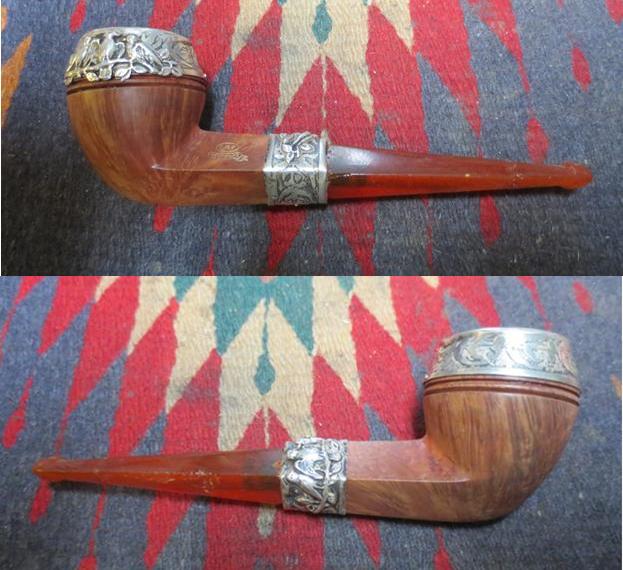
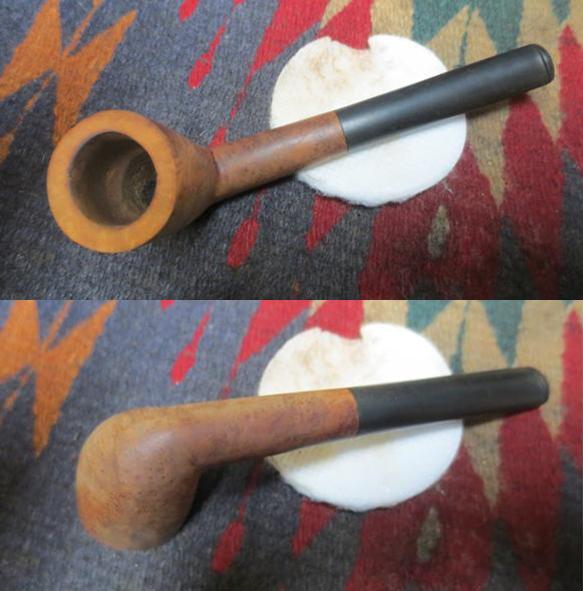
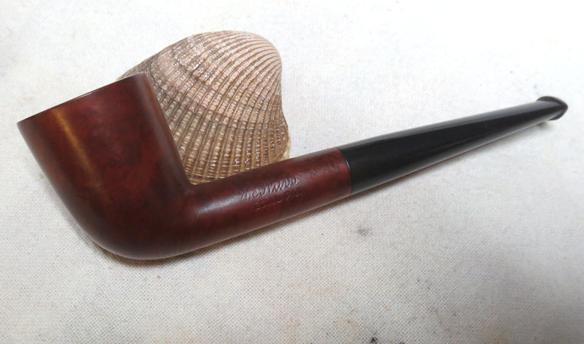
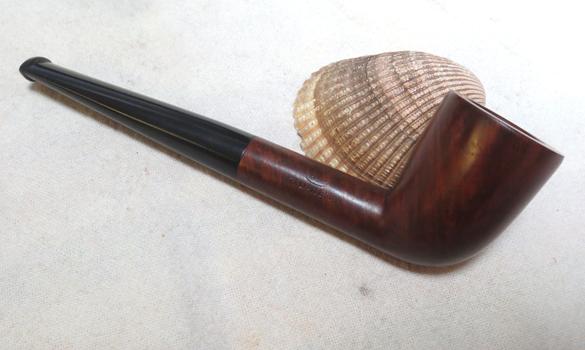
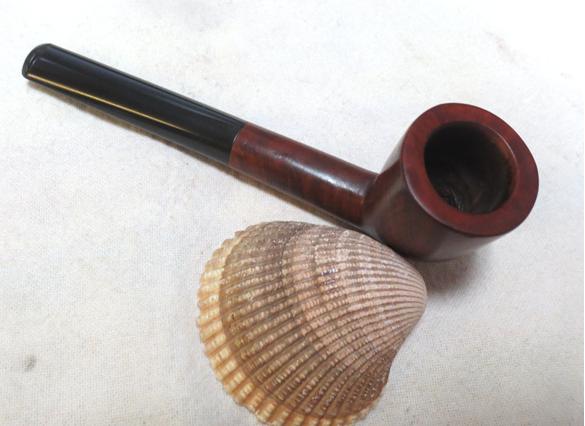
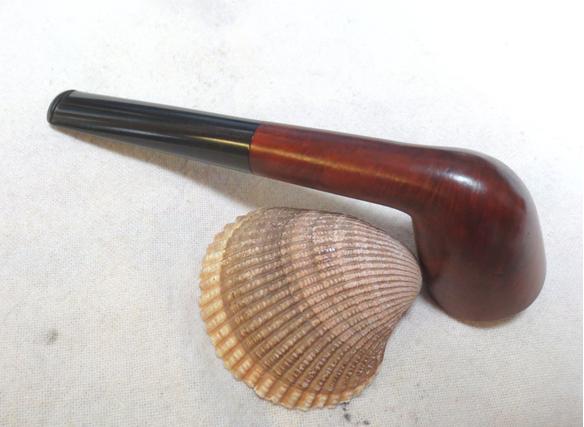
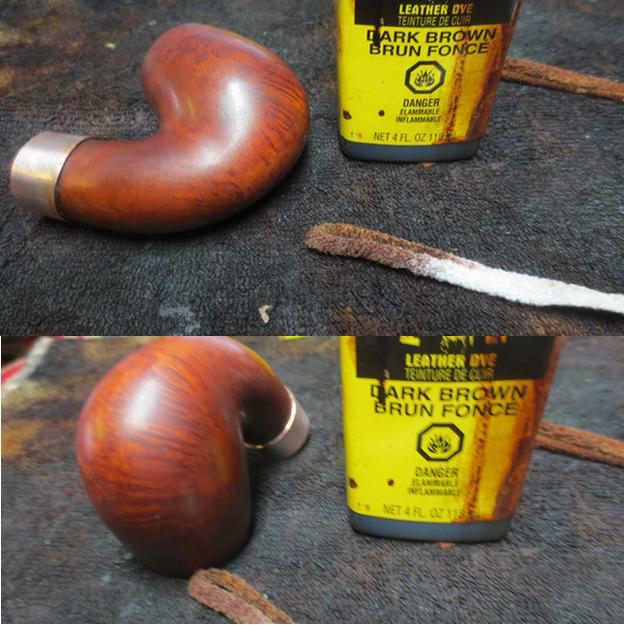 I gave the bowl several coats of carnauba wax and buffed it with a clean buffing pad. I took the following photos to show what the bowl looked like now that it was stained and waxed. It is a pretty piece of briar and a far cry from the mess I started with.
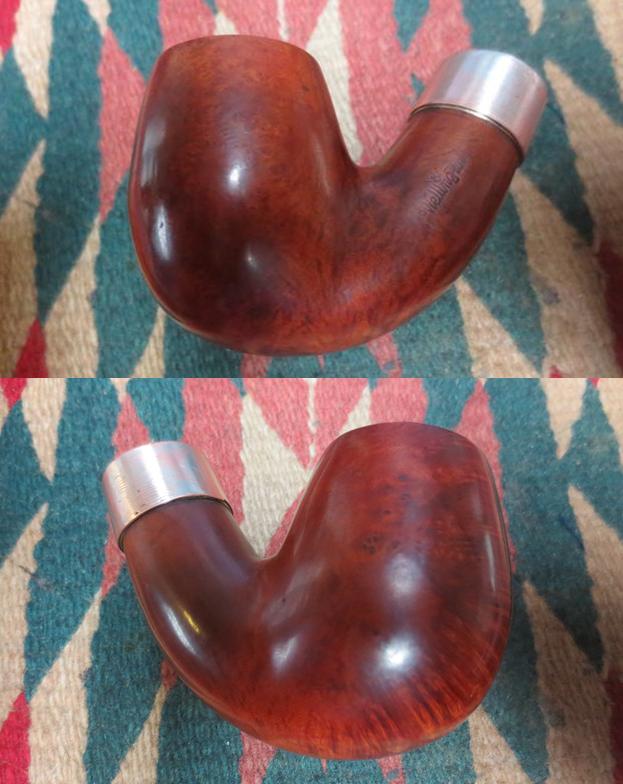
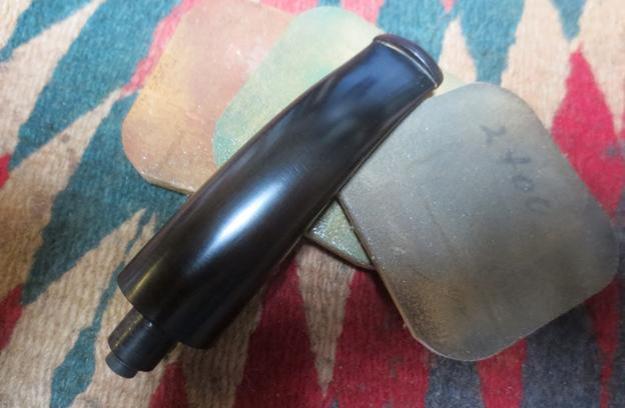
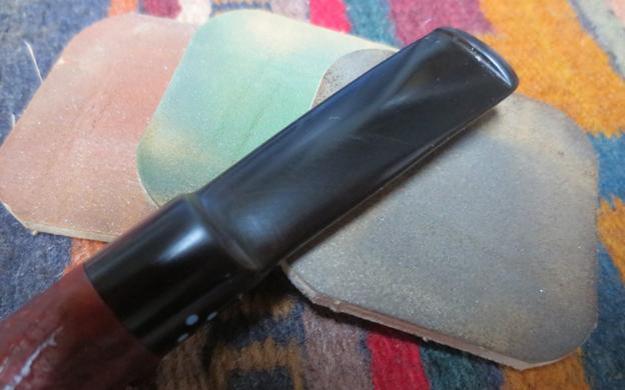
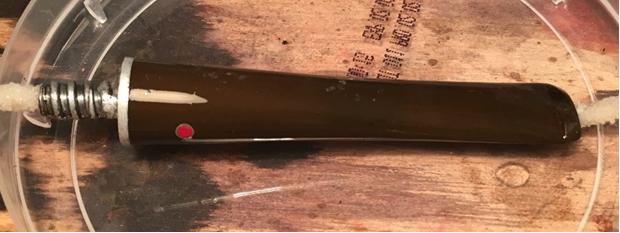
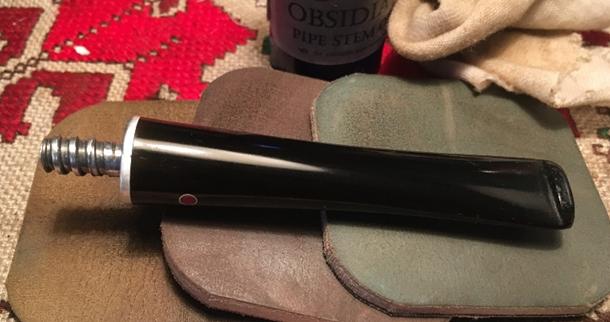
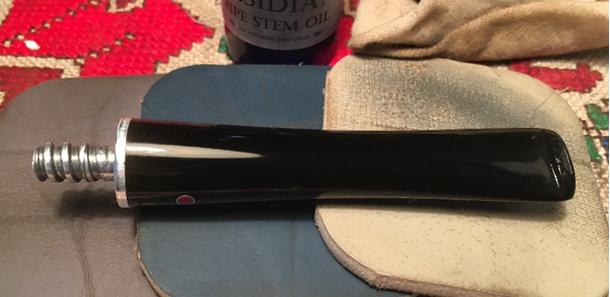
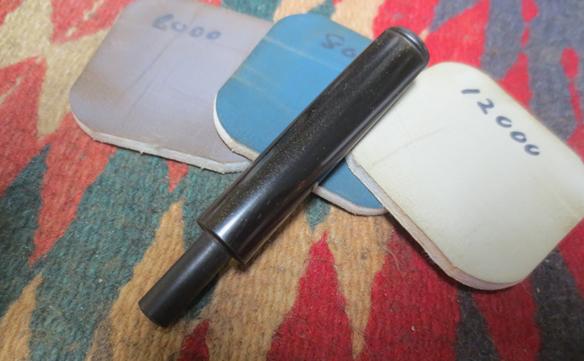
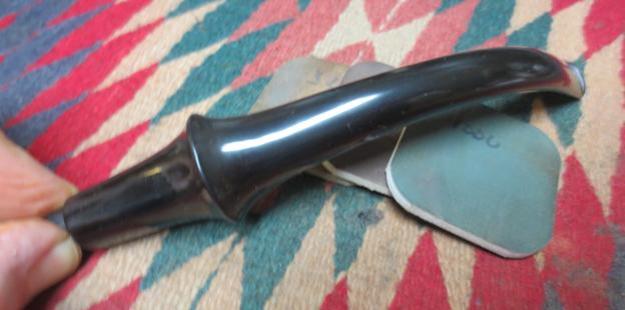
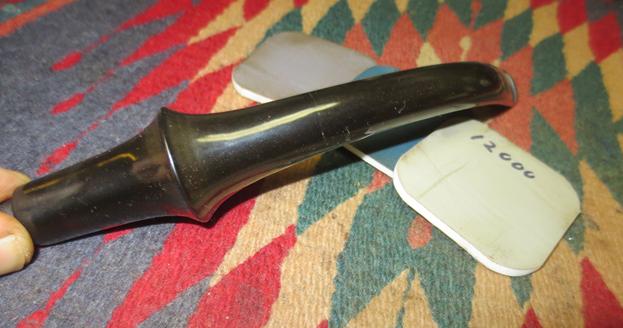
 I set the bowl aside and polished the stem. I buffed it with red Tripoli to remove as much of the light oxidation as possible. I wet sanded the stem with 1500-2400 grit micromesh sanding pads and dry sanded it with 3200-12000 grit pads. (For some reason the last photo of the stem has a yellow tint and makes it look oxidized. It actually shone at this point in the process with no oxidation left. I rubbed it down with Obsidian Oil after each set of three pads. After the final rubdown I set the stem aside to dry.
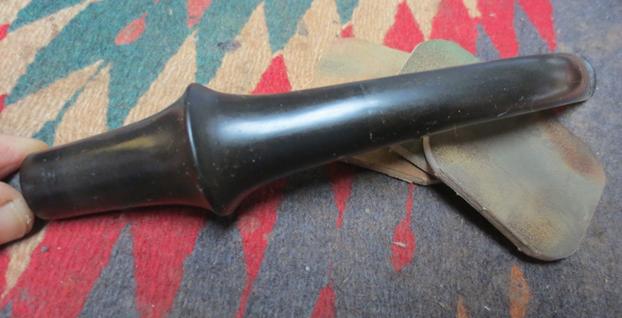
 By this point in the process the JB Weld had hardened. It had been about 4-5 hours. It was time to smooth out the inside of the bowl and remove the excess JB Weld. I used the Dremel with a sanding drum to smooth out the back side of the bowl. You can see the spots on the bowl wall where I left the material to fill in the damaged areas on the wall. I went on to sand the interior wall with 180 and 220 grit sandpaper to further smooth out the repair and minimize the JB Weld. The repairs had stabilized the cracked bowl and it was usable once again.
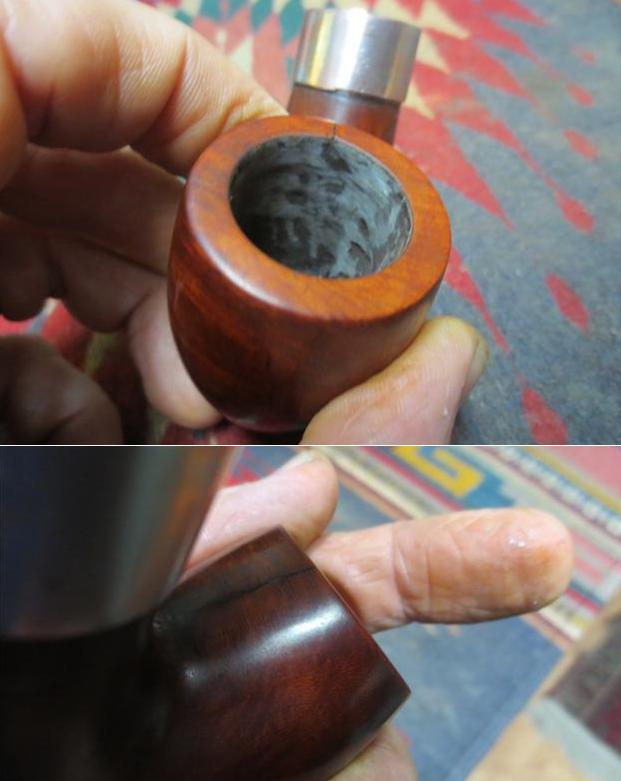 I have one final step to take to before I can close the book on this repair. I need to mix a bowl coating to paint the inside of the bowl with. It is a mixture of sour cream and activated charcoal powder. I had to order some more as I ran out of the charcoal capsules and my local pharmacy was also out of stock. It may take a while to get some so for now the bowl is finished. Once the bowl coating is applied and has cured the pipe will be ready to smoke and carry on a long life.
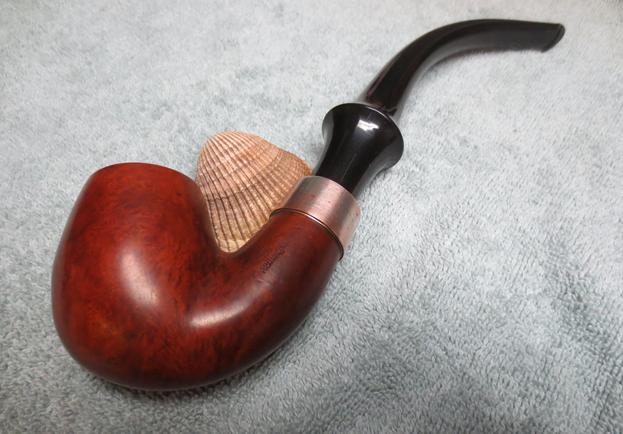
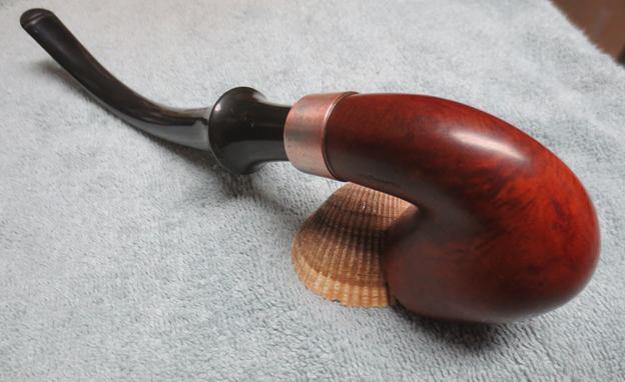
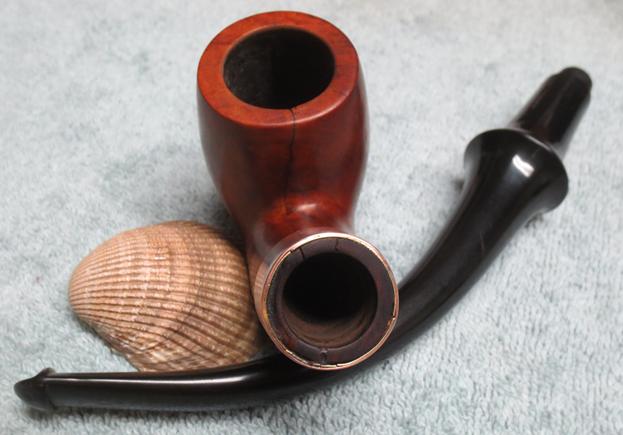
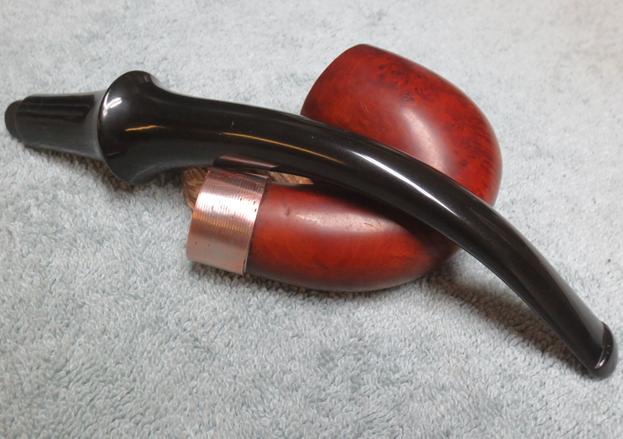
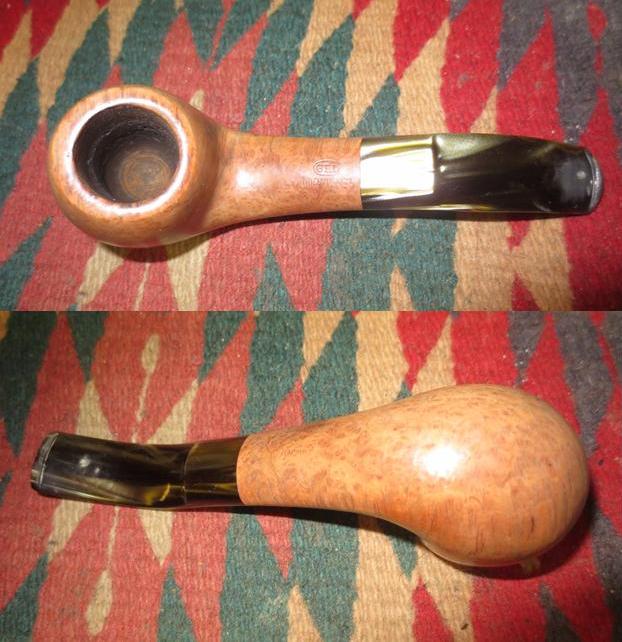
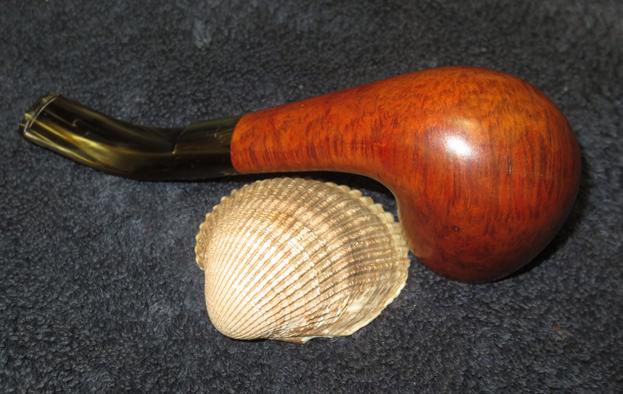
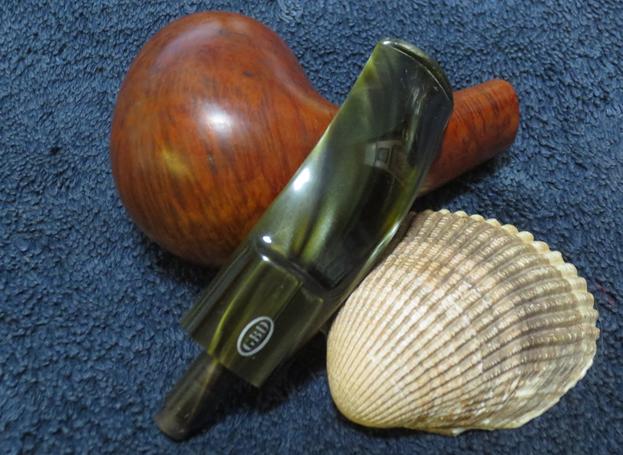
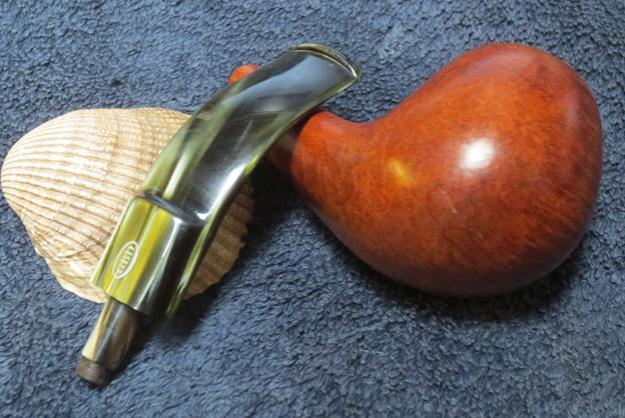
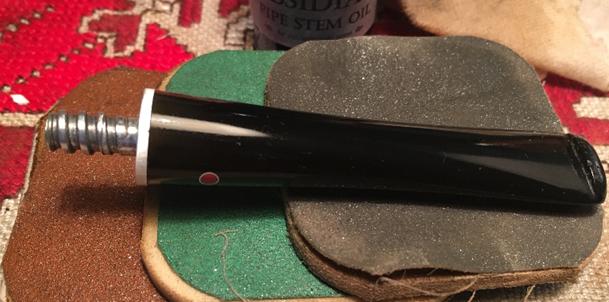
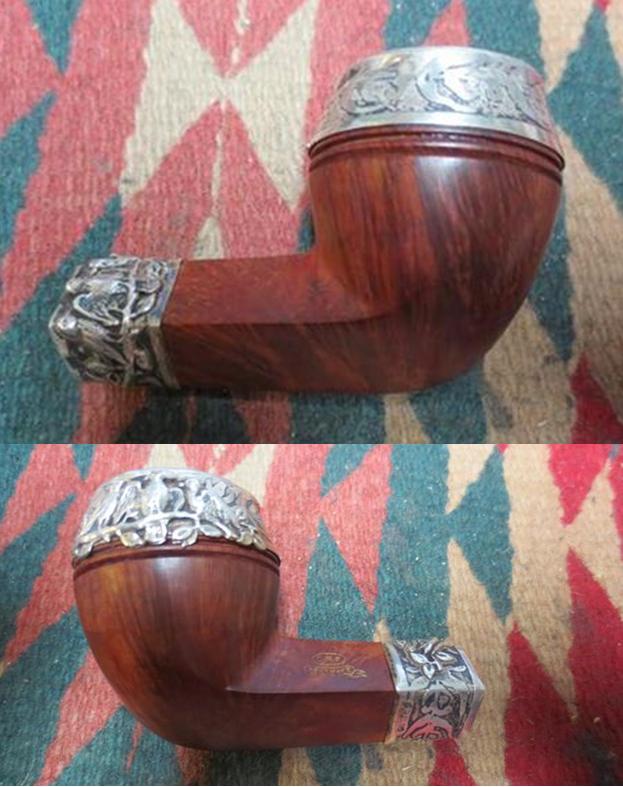
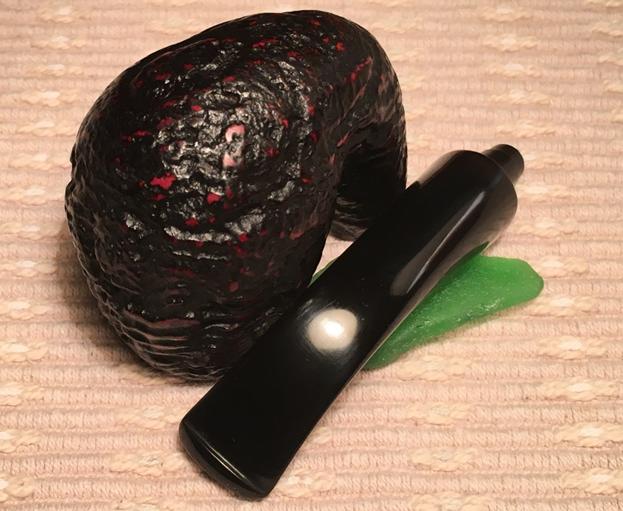
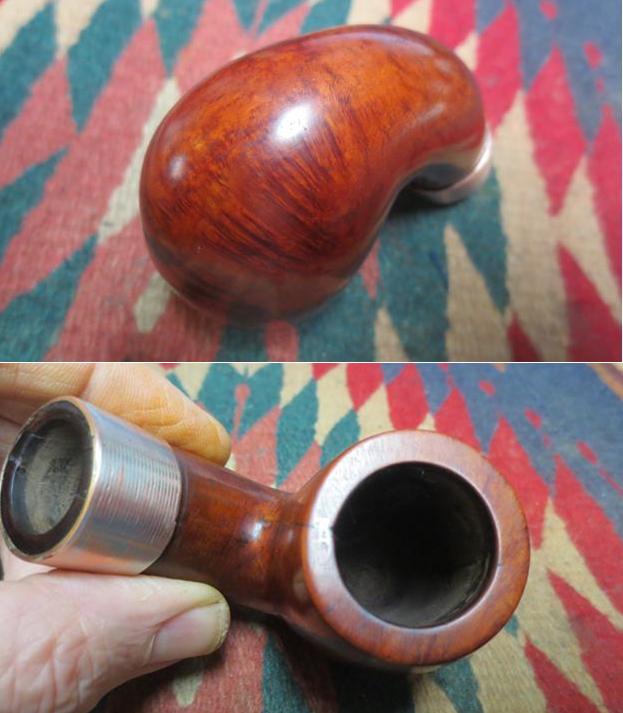
At this point in the process when all is basically finished I can honestly say that I am glad I did not scrap bowl to the junk box. It has some beautiful grain and I think it looks good with the scar on the back side of the bowl where the crack used to be. The metal pipe band polished up nicely with hints of copper and silver mingled together giving it a bit of a sparkle. The finished pipe is shown in the photos below. It has been buffed with Blue Diamond a final time and given multiple coats of carnauba wax. I buffed it with a clean buffing pad and then by hand with a microfibre cloth to deepen the shine. The write up is longer and the photos are many this time around. It was a lot of work to give this old timer another chance but I think it was worth the effort. Thanks for bearing with me.