Blog by Steve Laug
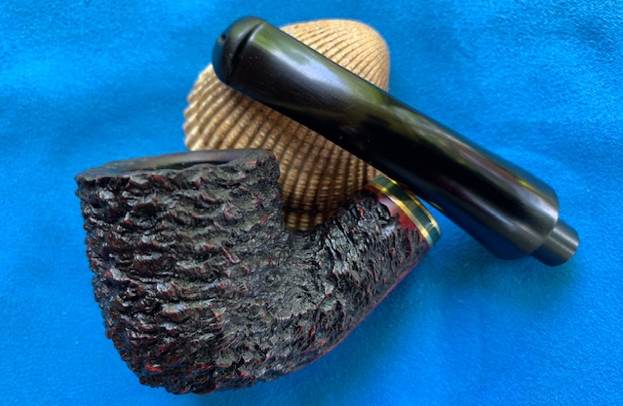
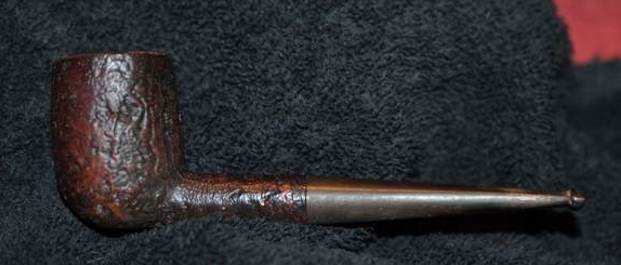
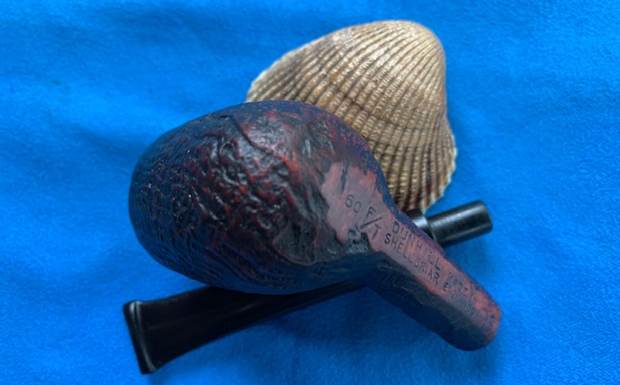
 Jeff and I have been picking up pipes from an older Eastern European Professor who lives in the LA area. Over the past few years we have picked up a large number of pipes from him. Included in the last lot was a Peterson’s System pipe that intrigued us. We had no idea how big the pipe was until it arrived. It is a huge rusticated pipe. To me it is a house pipe but not sure. It is 9 inches long and the bowl is 2 1/2 inches tall. Rim diameter is 1 3/4 inches and chamber is 1 inch diameter. It is stamped on the left side and reads Peterson’s (with a forked tail P) over System. Below that and to the right it is stamped Made in Ireland in a circle. The ferrule is sterling silver and rounded. It is stamped with K&P each in its own cartouche over Sterling Silver. That is followed by Peterson over Dublin. The Professor and his friend included the following photos for us to have a look. You can see why we had no idea of the size of the pipe.
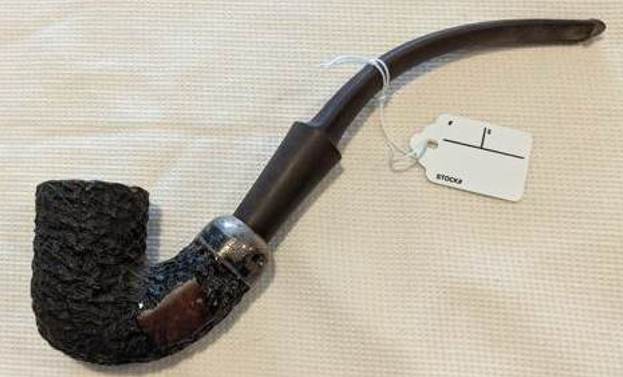
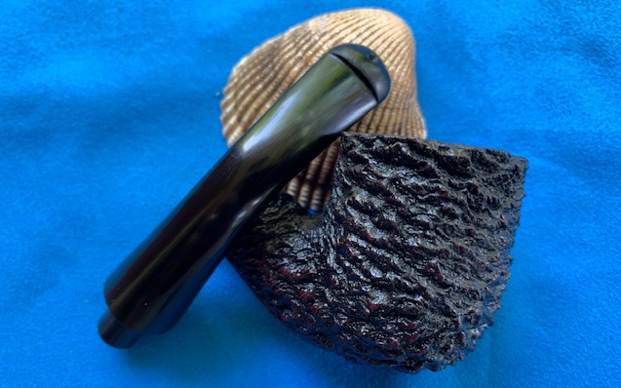
 He also included photos of the bowl and rim top as well as the sides to show the general condition of this pipe. I was well smoked and showed wear and tear of the years of the Professor’s travels and use.
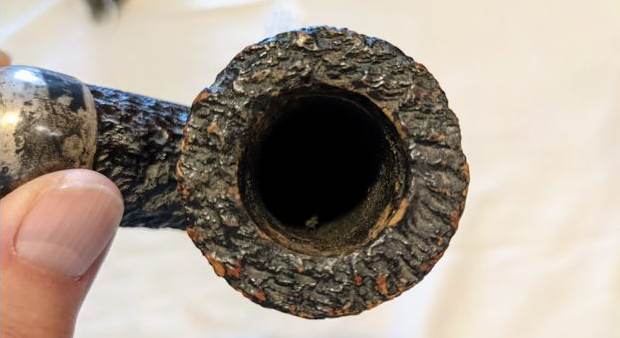
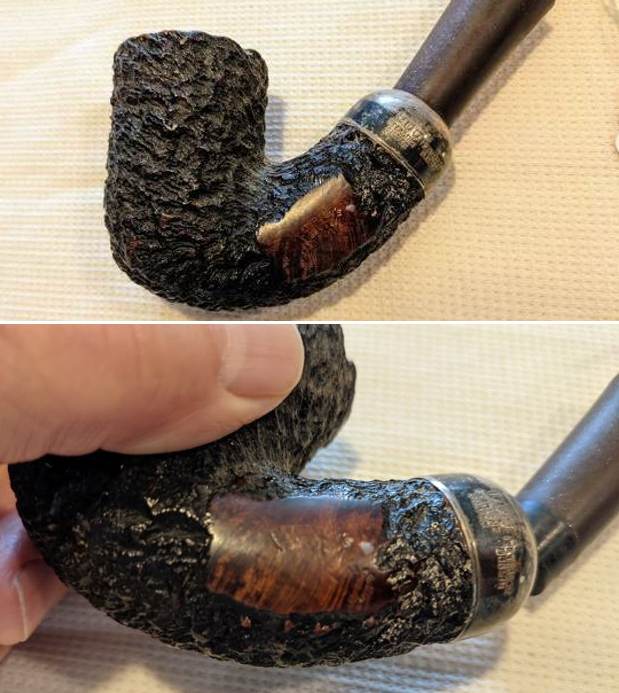
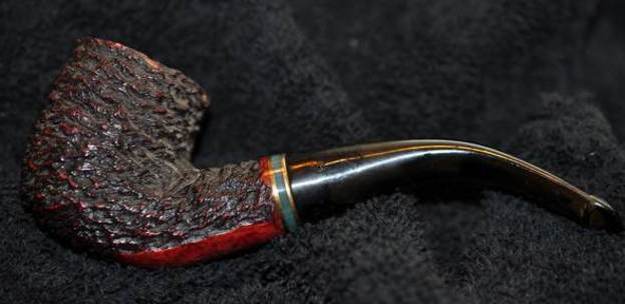
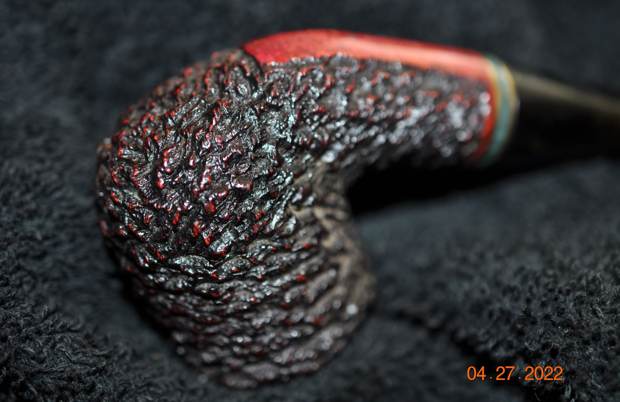
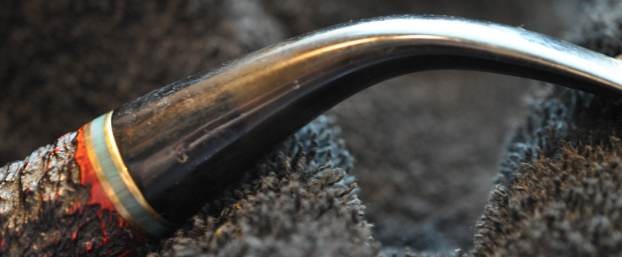
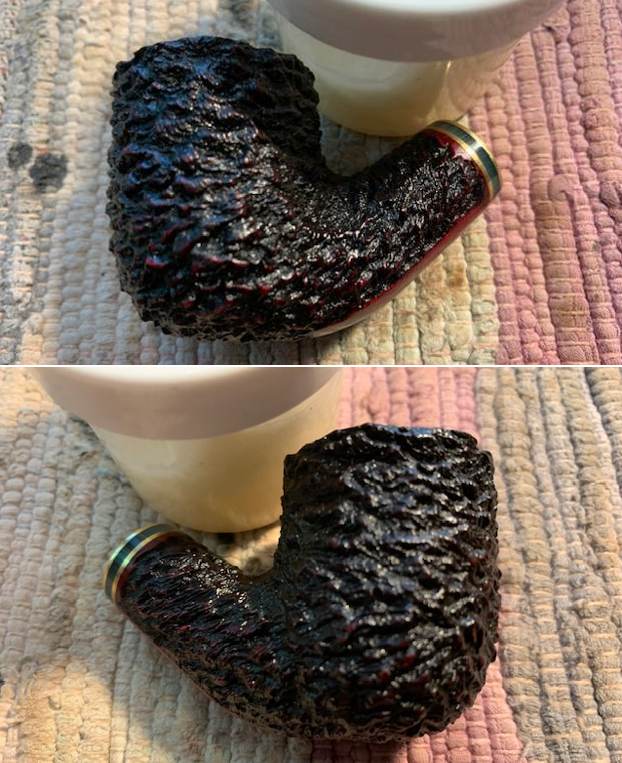
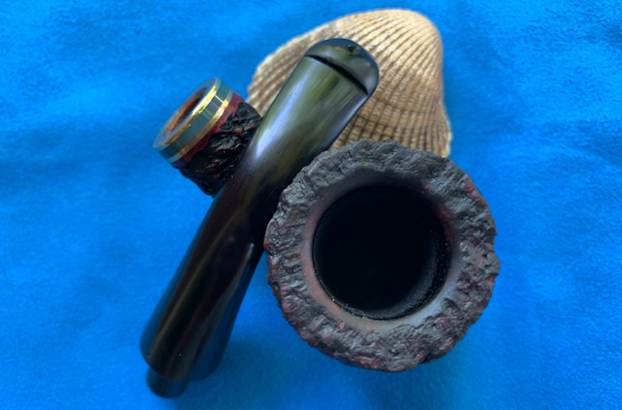
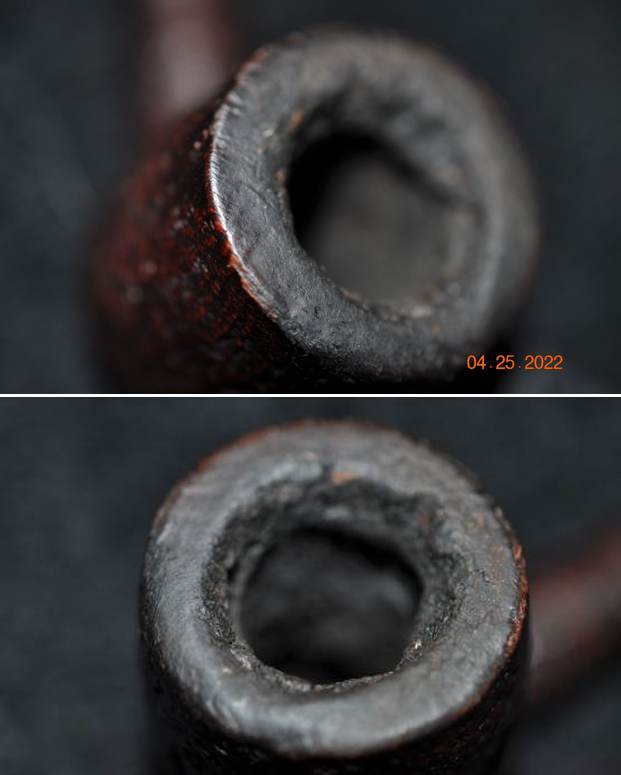
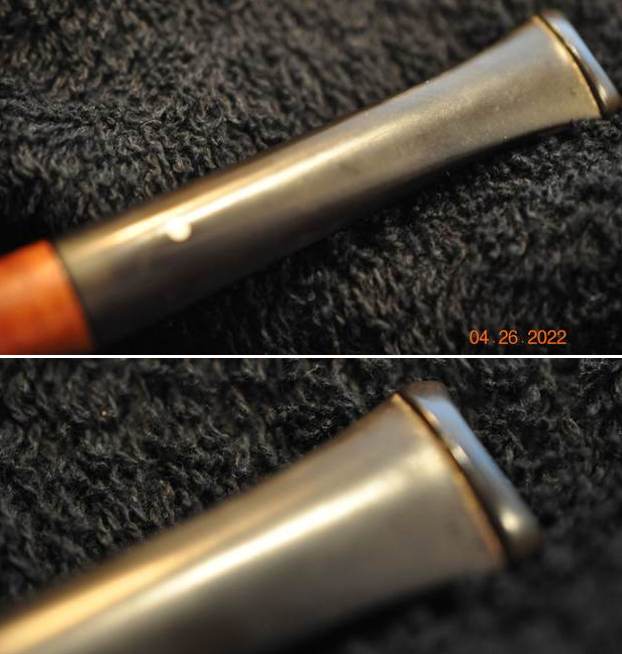
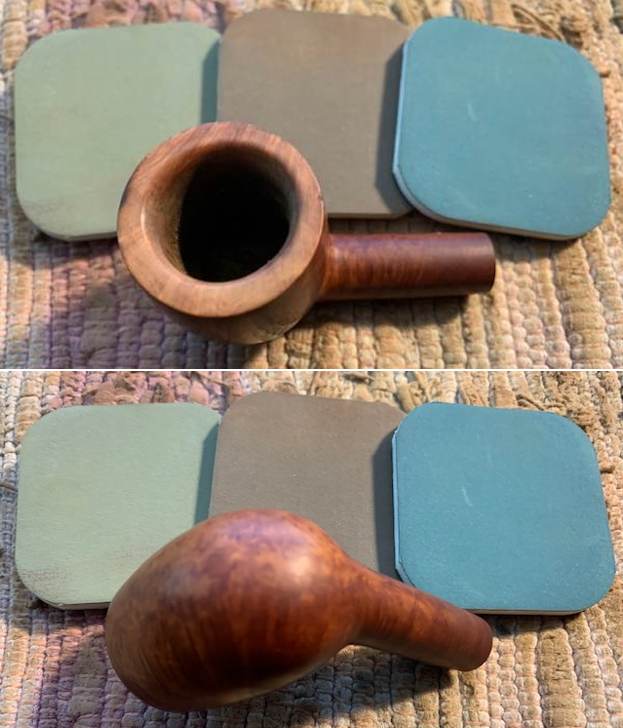
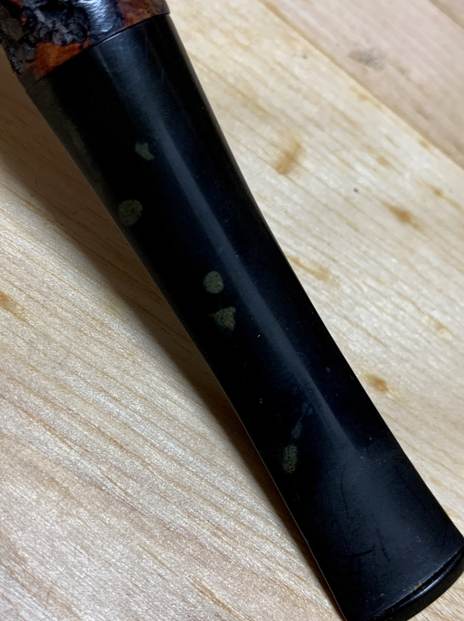
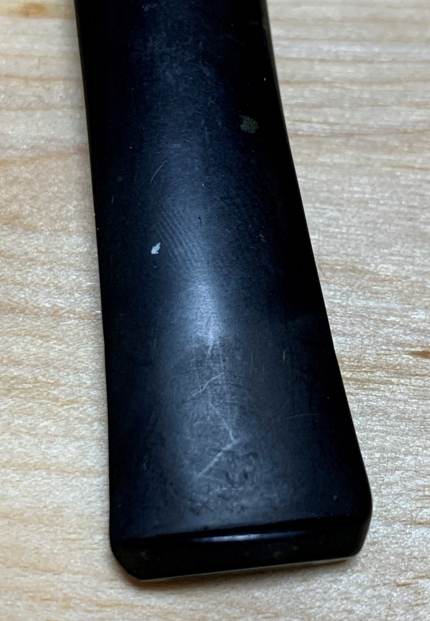
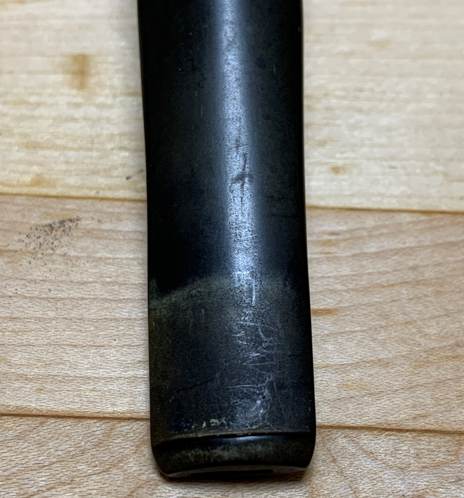
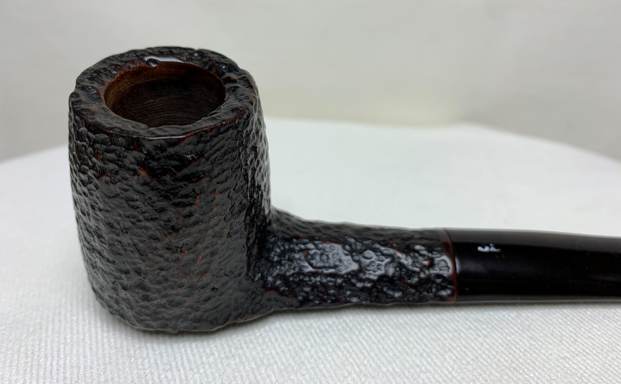
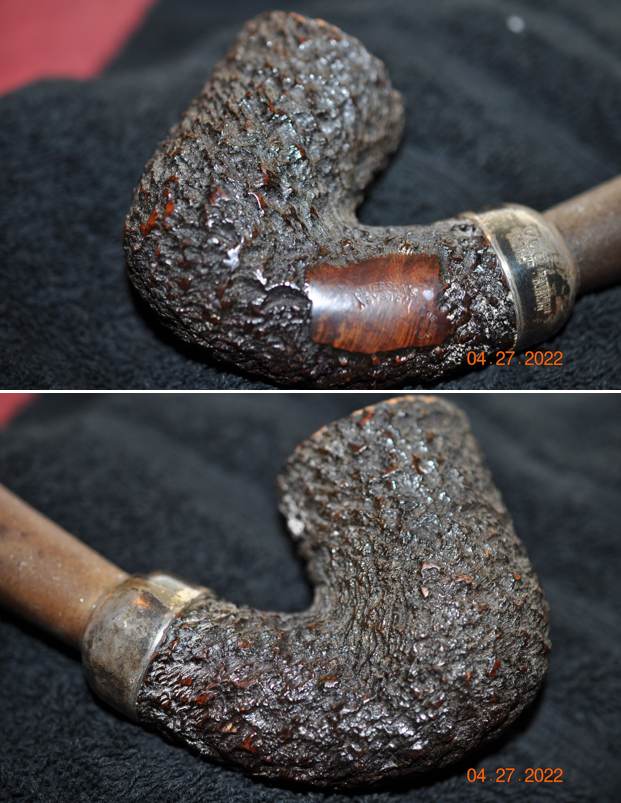
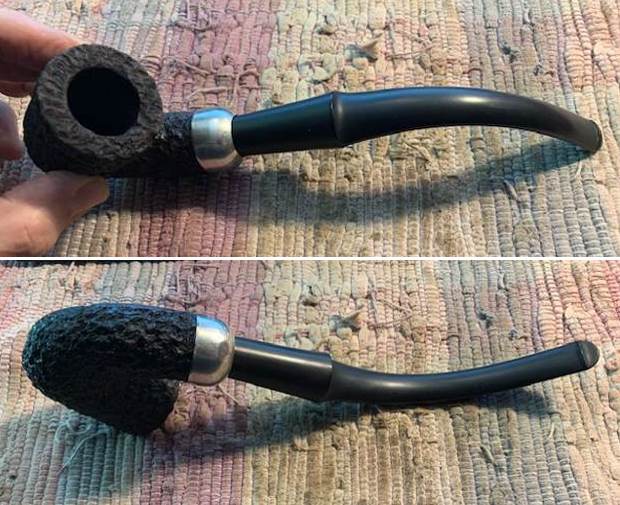
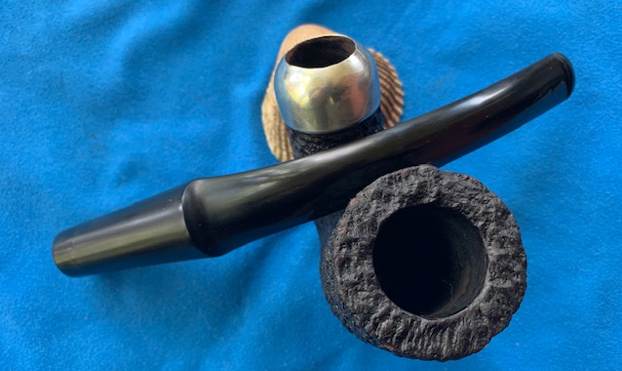
 The pipes arrived in Idaho after some time spent negotiating a price and then waiting for the shipping. When they arrived in April he took photos of the pipe before he cleaned it up. You can see the style of the rustication on the bowl – rugged and really a lot like the finish on a Rocky Donegal. It is dirty with dust and debris deep in the rustication on the rim top, bowl sides and shank. The bowl has a remnant of cake in the bowl and shows signs of being recently reamed. The finish has some worn spots on the sides and rim top. The silver ferrule is oxidized and dark from tarnish. The stamping on the silver and the briar is very readable. The stem is oxidized but does not appear to have any tooth marks or chatter. Jeff sent me photos so I could have a sense of the pipe.
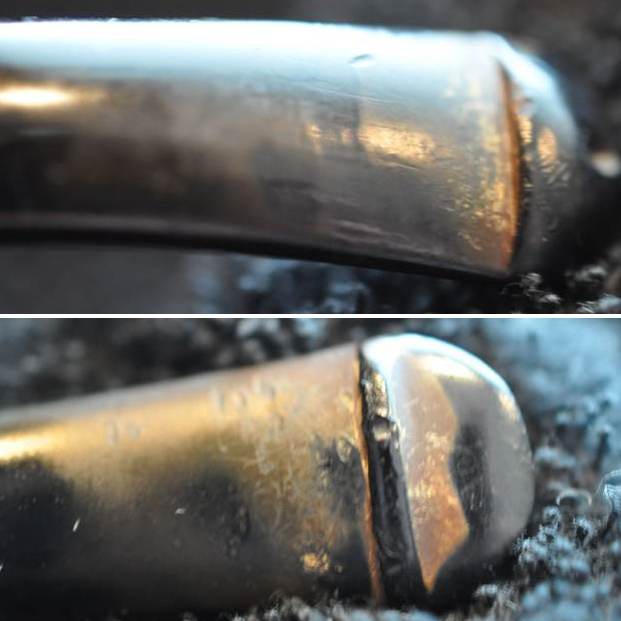
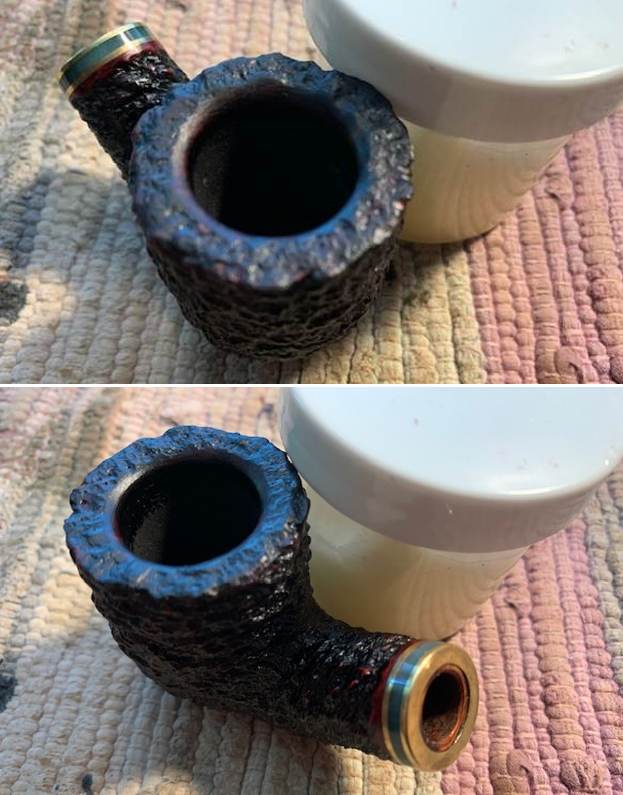
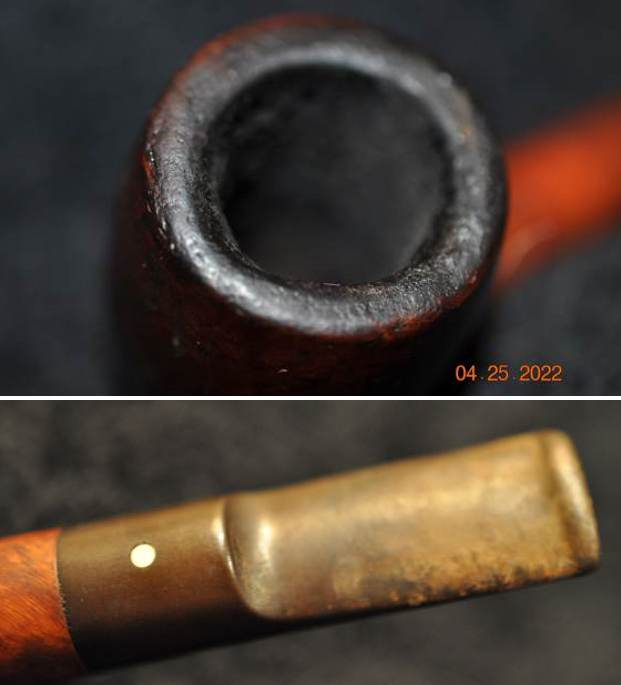
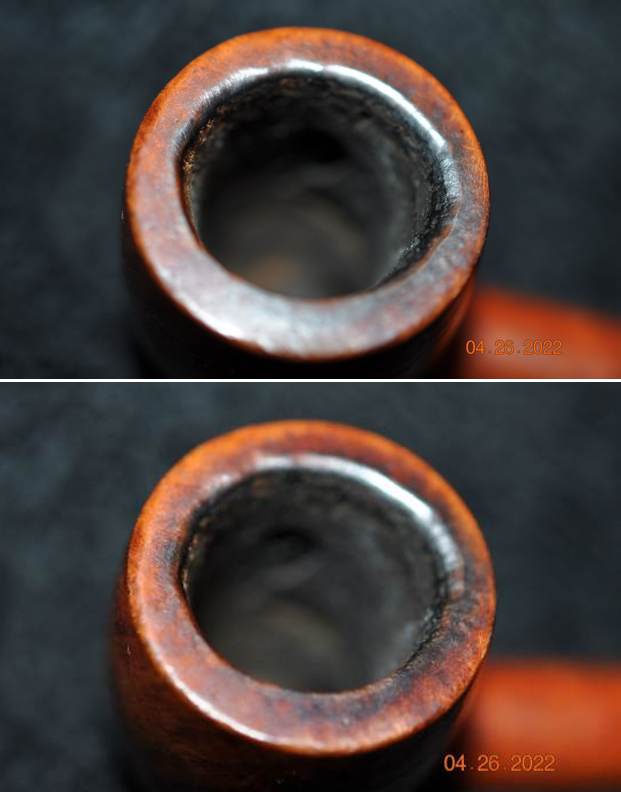
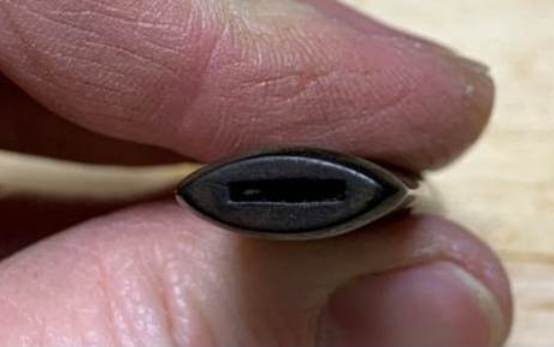
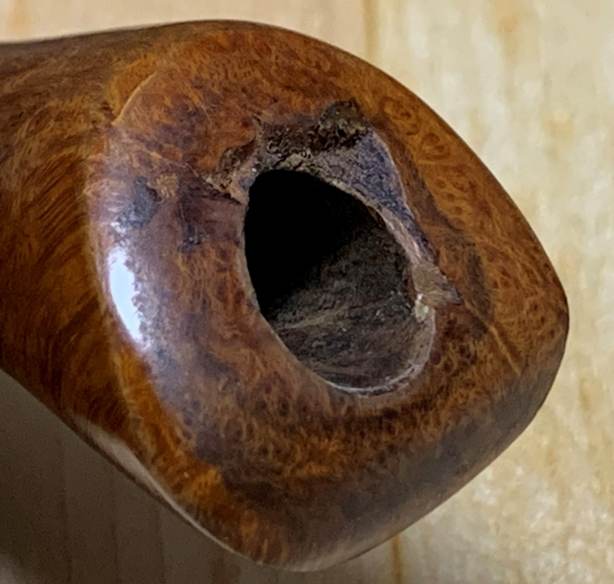
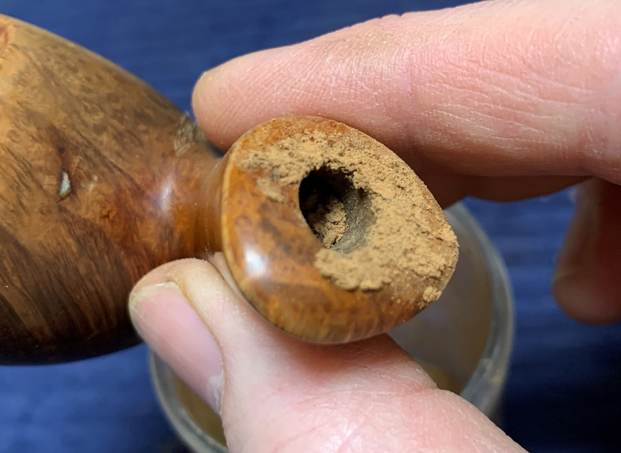
 He took close up photos of the rim top and stem to give a clear idea of the condition of the pipe.
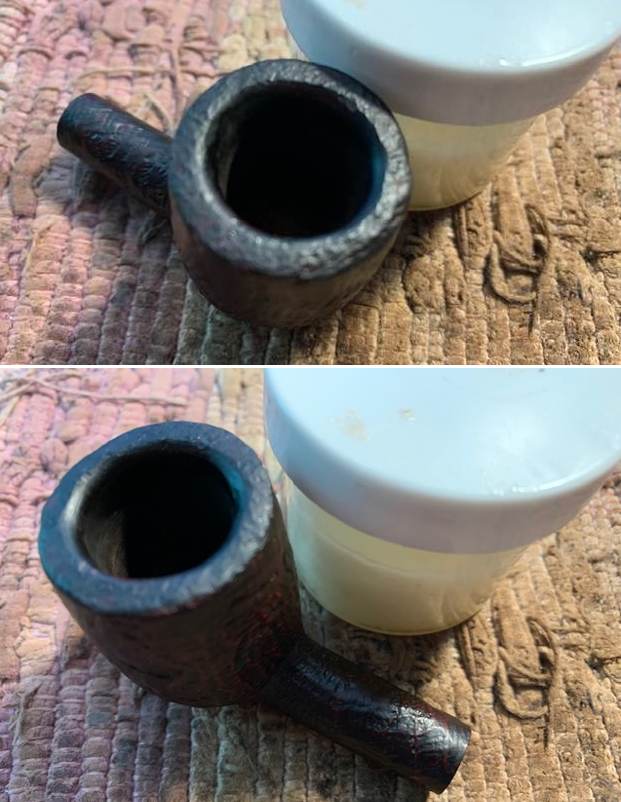
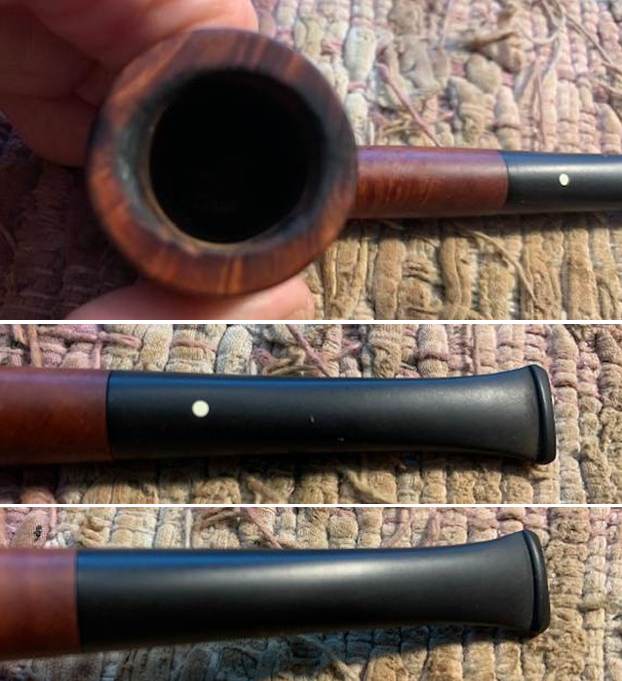
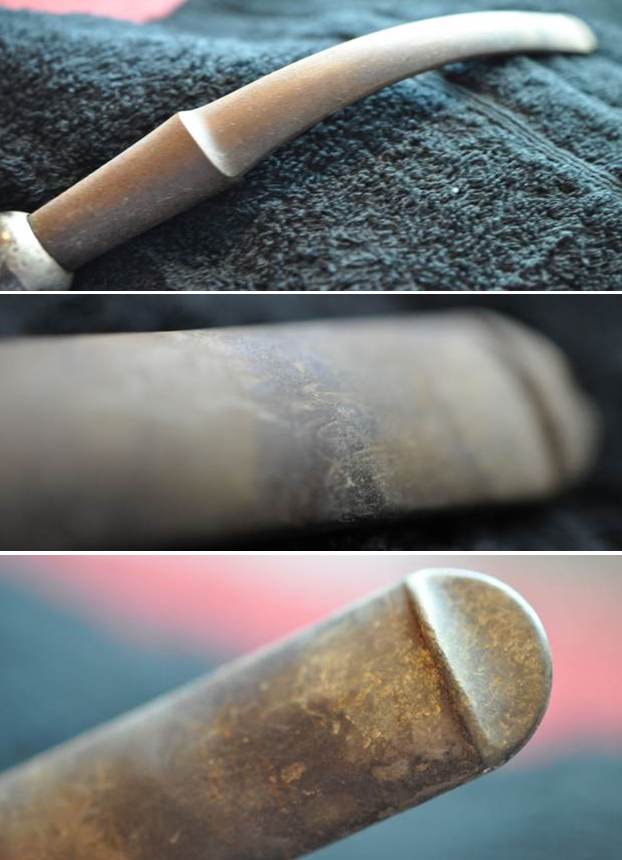
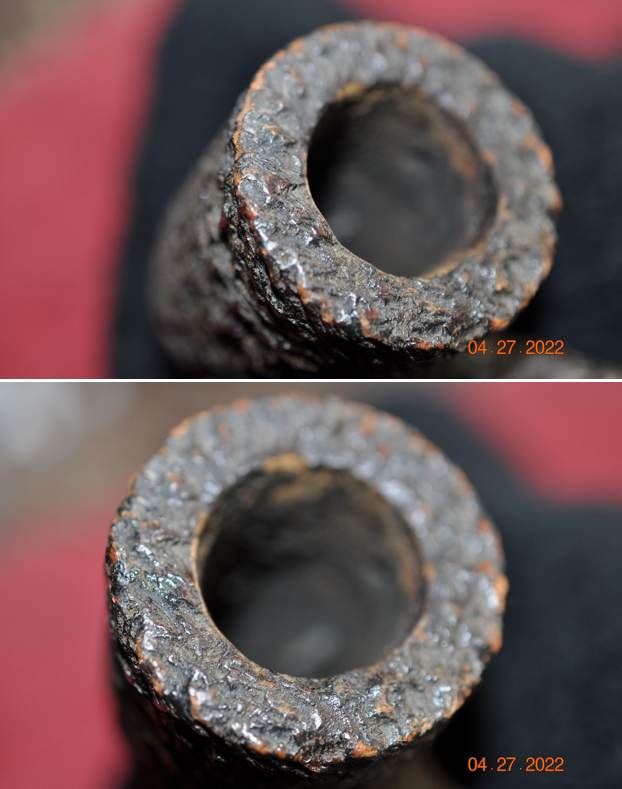
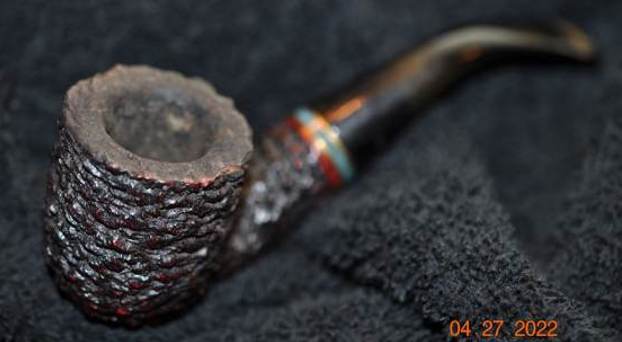
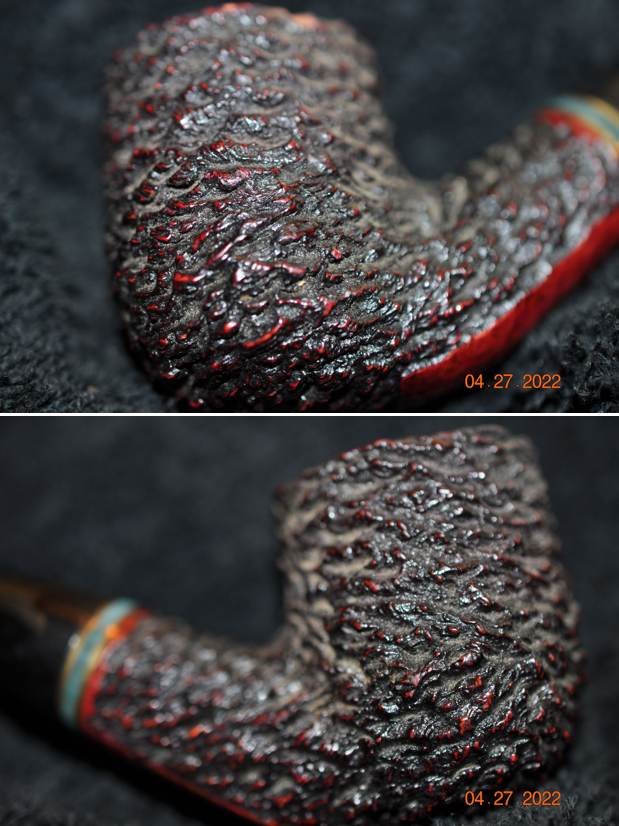
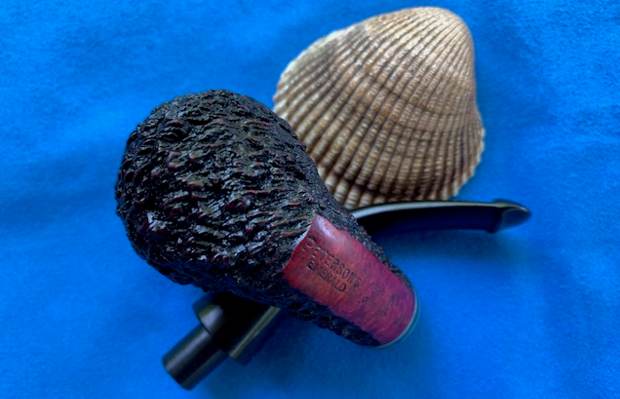
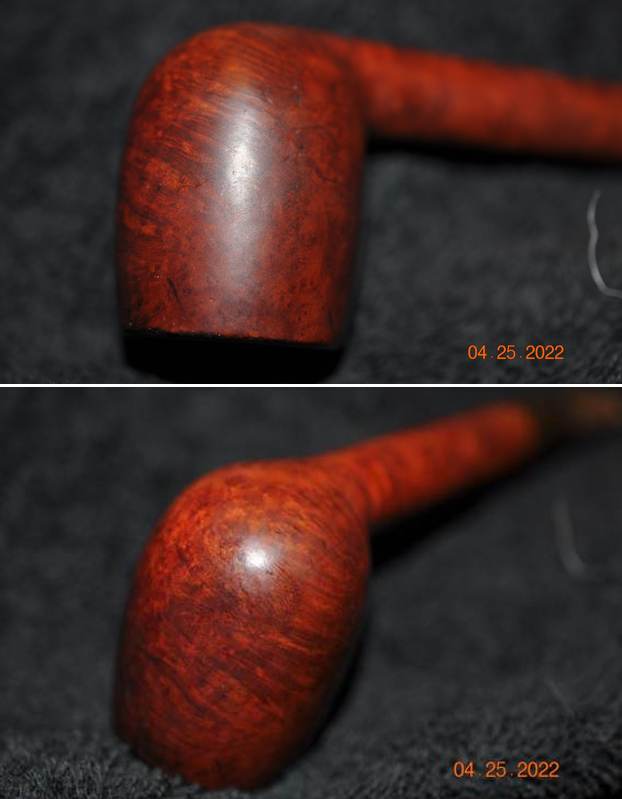
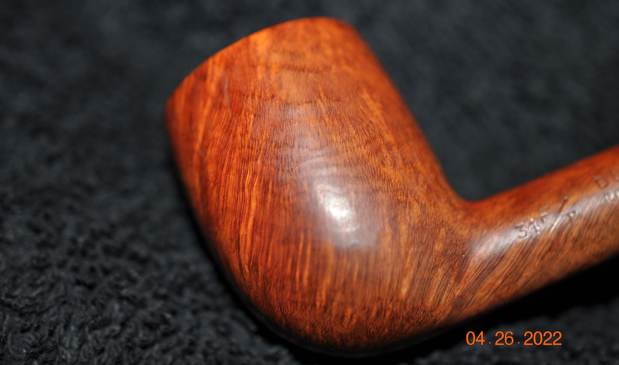
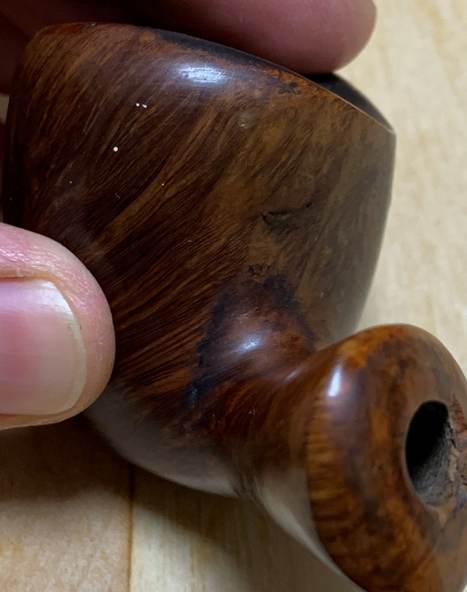
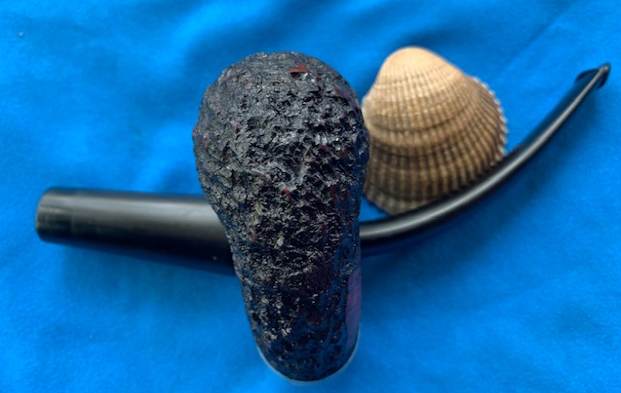
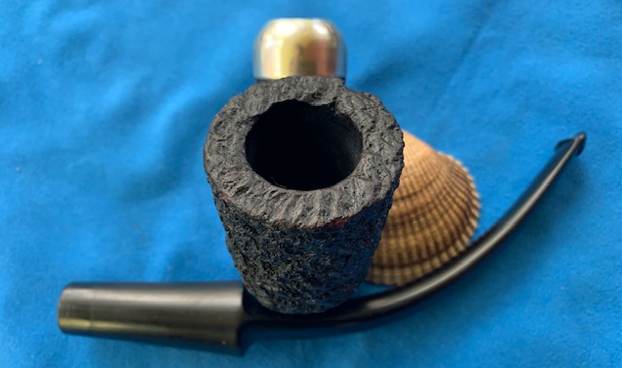
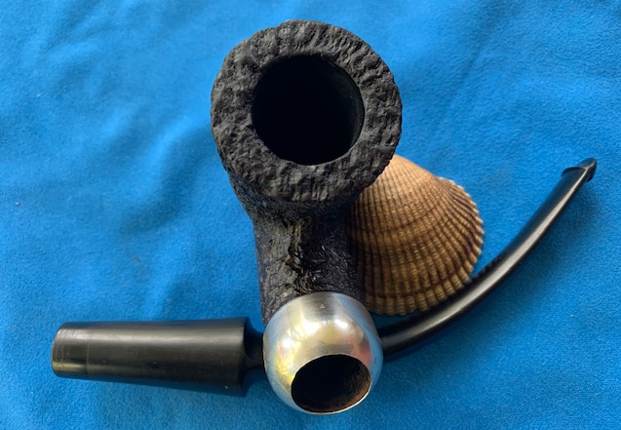
 He took photos of the bowl from various angles to show the condition of the briar and the style of the pipe. It is a beautiful old pipe under the grime and grit of the years.
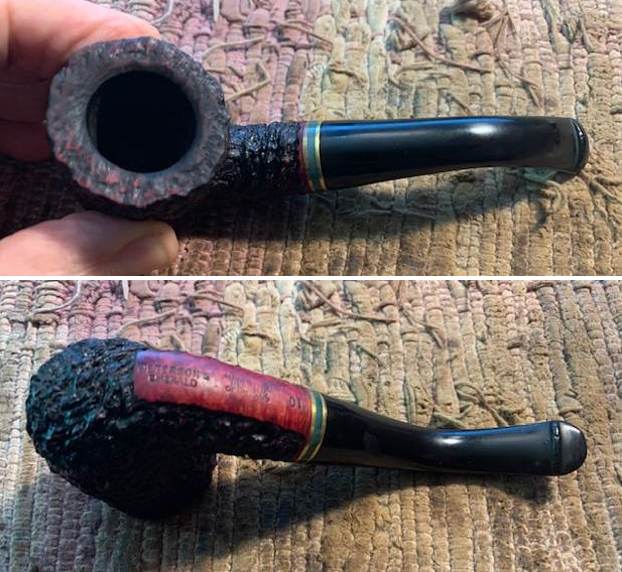
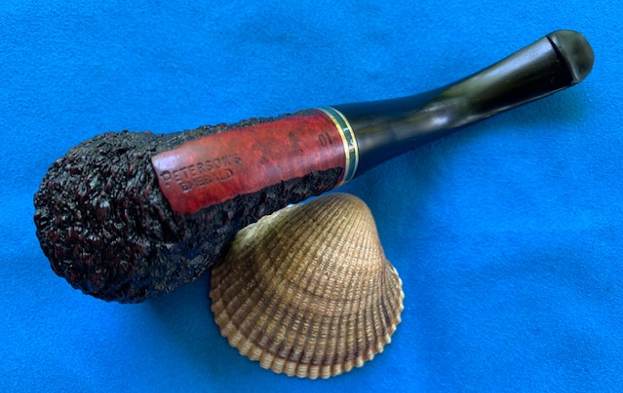
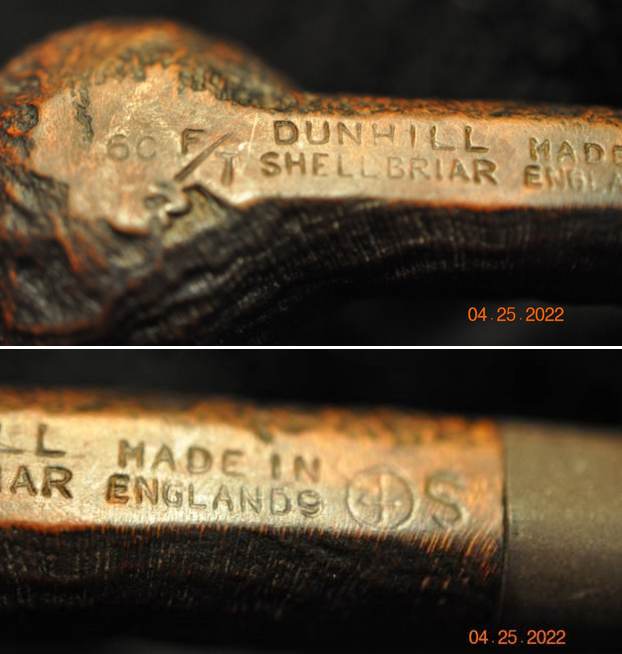
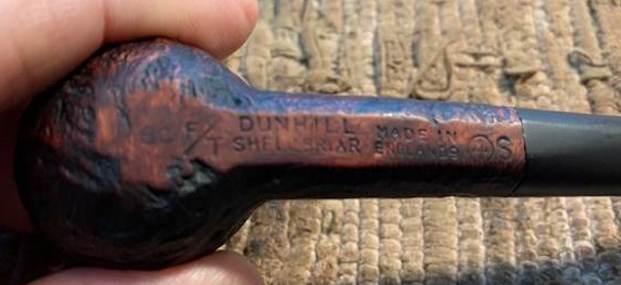
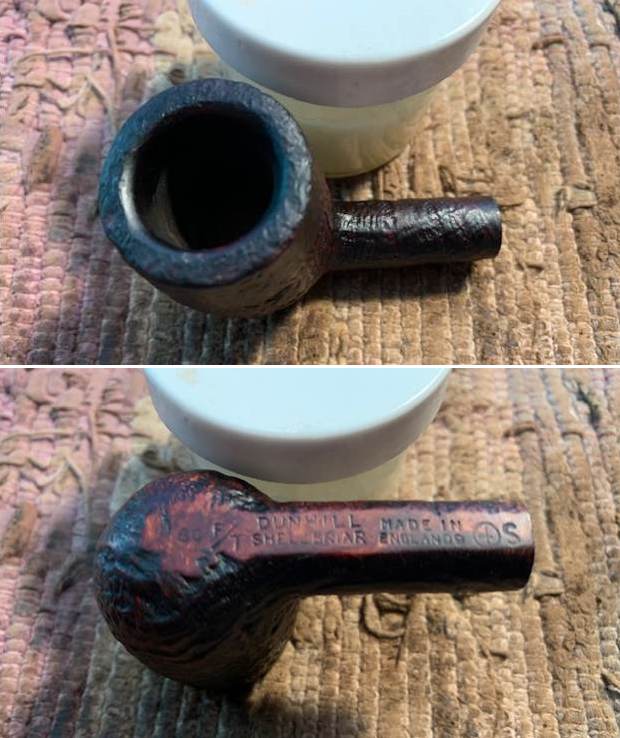
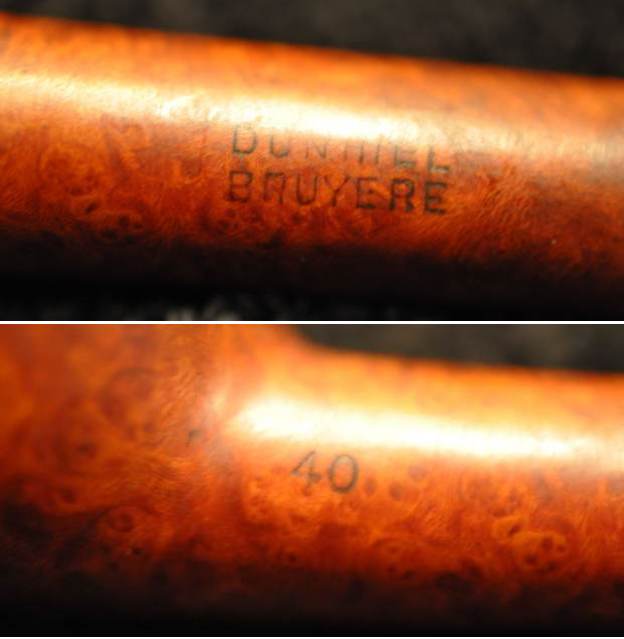
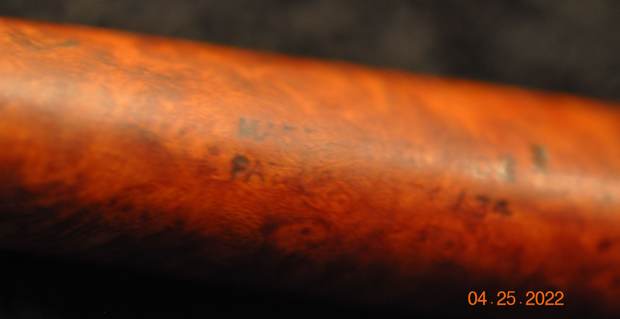
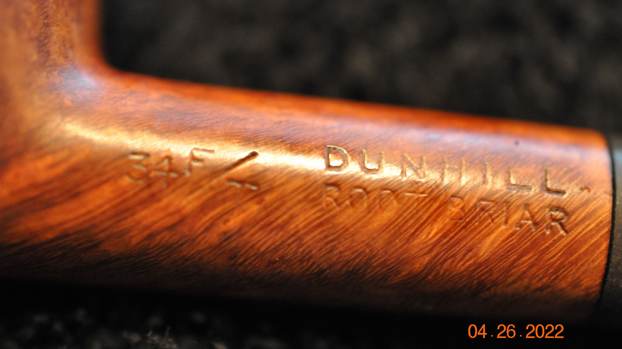
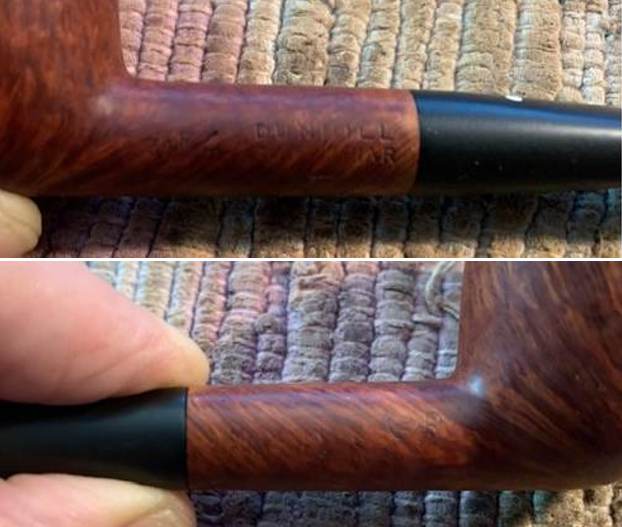
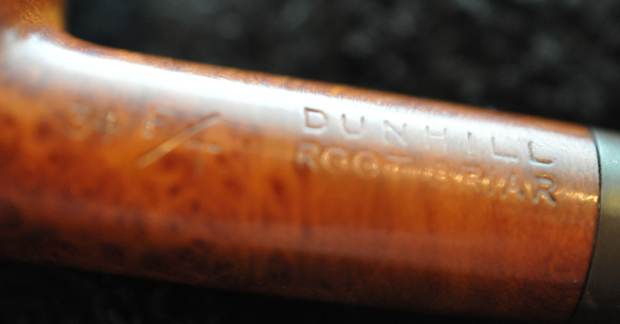
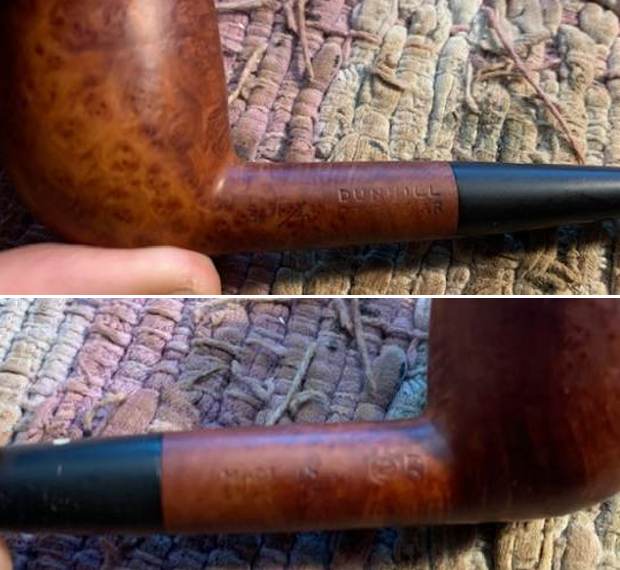
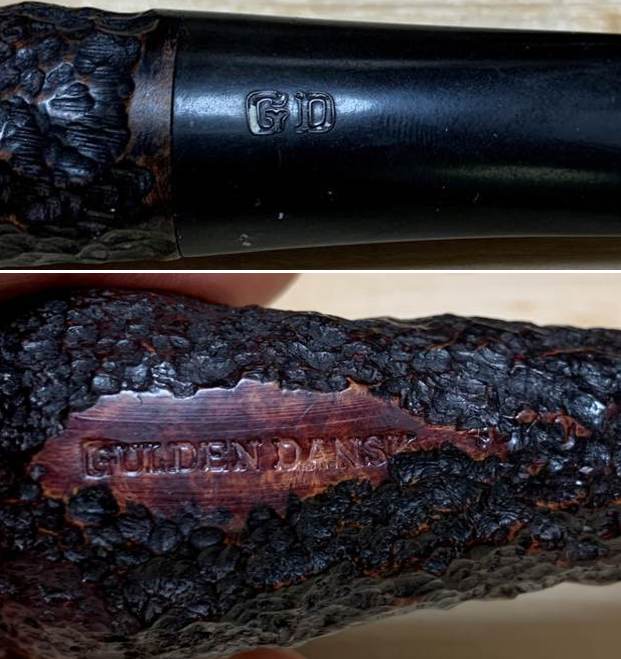
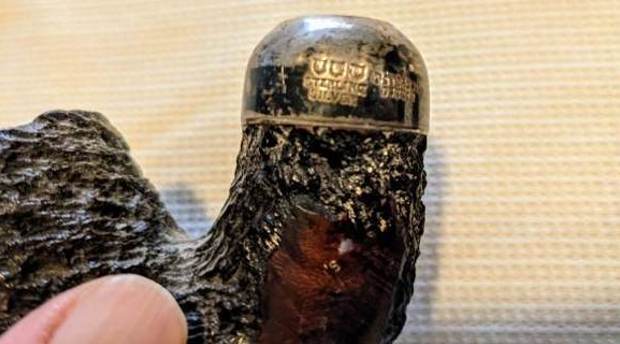
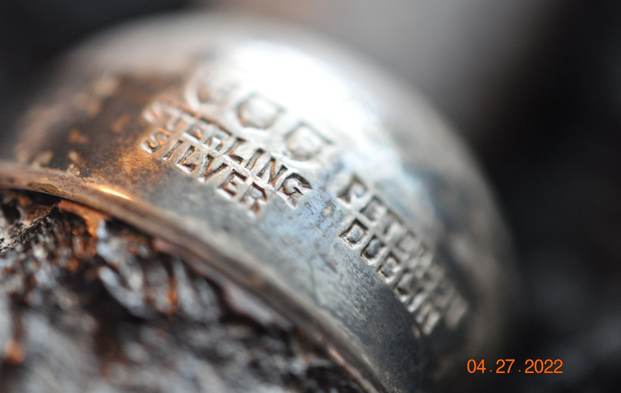
 Jeff captured the stamping on the shank side. It is clear and readable as noted above. There are some spots on the stamp that are more faint than others but it is still clear. The silver stamping is very clear.
 I turned to the Pipedia article for confirmation of my thinking about it being a Pre-Republic Period pipe (https://pipedia.org/wiki/Peterson#1950_-_1989_The_Republic_Era). I quote the section on the Pre-Republic Period that confirms my thoughts. I have highlighted the portion in red regarding the COM stamp on this pipe.
1915 – 1949 The Pre Republic Period — This was a turbulent period for the company with the outbreak of World war 1 and the start of the Easter uprising in 1916. The K&P shop was extensively damaged during the military action at this time ( see attached newspaper report). Following quote by Kapp & Peterson.-
“Kelly’s, the well known Dublin landmark at the corner of Sackville Street and Bachelor’s Walk, one of the most shot at and fully punctured premises in Dublin, was in our possession practically before the smoke ceased over the ashes of our fine shop under the Metropole Hotel. This was one of the most sensational business captures arising out of the Rebellion.”
Around 1916, Peterson began stamping their pipes “Made in Ireland” in what is referred to as a block format. Charles Peterson died shortly after retiring and moving to Hamburg in Germany in 1919 where he is buried.
The original 1890 ‘system’ pipe patent expired at around this time. The Irish free state came into being in December 1922. The Free State Era was from 1922 through to 1937.
Peterson followed with a stamp of “Irish Free State” in either one or two lines, either parallel or perpendicular to the shanks axis and extremely close to the stem. Ireland was a republic in all but name. Eventually the Irish people voted for a new constitution in 1937 and Ireland then formally became Eire (Ireland in Irish). The Made in Eire era stamps were from 1938 through till 1941. Peterson now stamped their pipes with “Made in Eire” in a circle format with “Made” and “Eire” in a circle with the “in” located in the centre of the circle. This was used during the years of 1938 – 41. Later they stamped their pipes with “Made in Ireland” in a circle format 1945-1947 and still later with “Made in Ireland” in a block format 1947-1949. The “Made in Ireland” block format came in either one line or two lines.
The Republic of Ireland was formed on 17 April 1949.
Further down in the article there was some more interesting information on the brand and the time period of this particular pipe.
The pre-republic Peterson’s are often considered to be rather special by Peterson pipe smokers. They hark back to a time when quality briar was in abundance and craftsmanship was of the highest level.
Like all collecting desirables, pre-republic pipes are now relatively hard to come by, with availability declining with each passing year. The amazing thing that I find with pre-Republic’s is the consistently high smoking qualities that they show, regardless of being a high or low grade issue. No it is not that I am looking through rose tinted glasses and being sentimental, they really were very well made. I base my judgement on owning and smoking quite a few of them.
For the purpose of this exercise and bearing in mind the eccentric vagaries of Peterson nomenclature, I am suggesting that an acceptable criteria or starting point for when the Pre- Republic era begins and ends, requires a short historical resume.:-
The Irish Free State came into being in December 1922. The British sovereign, as King of Ireland, was nominal head of state, but Ireland was a republic in all but name.
An entirely new constitution was voted by the Irish people in 1937, with provision for a President Of Ireland as head of state. Therefore, Ireland became a republic in 1937, but was not called that. It was called simply EIRE (Ireland in Irish.)
When, in 1945, the British government inquired of prime minister Eamon de Valera whether he intended to proclaim a republic, his answer was: “we are a republic”, having refused to say so before for eight years. This was news to the British: when George VI ascended the British throne in 1936, he had been crowned King of Ireland, as well, little knowing that there no longer was a Kingdom of Ireland!
As usual when trying to get accurate facts in regard to Peterson history, something will jump up and get in the way. They are missing many of their records. The following is the best that we can do for a guide to the myriad markings during the period 1922 – 1949.
Prior to 1920 it was rare for a country of origin to be stamped on the pipe, just Peterson’s Dublin on the band. After 1921/22,If it is stamped “MADE IN IRELAND” and the “Made in” is stacked over “Ireland” or “MADE IN EIRE” or several other forms, it was made between 1922 and 1938. A considerable number of Peterson pipes were stamped “Irish Free State”. From about 1930 to 1949, most of the pipes (those which were stamped) were stamped “Made in Ireland”.” If the stamp reads “MADE IN IRELAND” in a circle, the pipe was made between 1939 and 1948. These are all “pre republic” pipes. I can tell you that the mark “Irish Free State” was adopted in 1922;and replaced by “Eire” in 1937 and then by “Republic of Ireland” in 1949…
The site also had a photo of the exact stamping that was on the ferrule of this pipe so I am also including that photo below.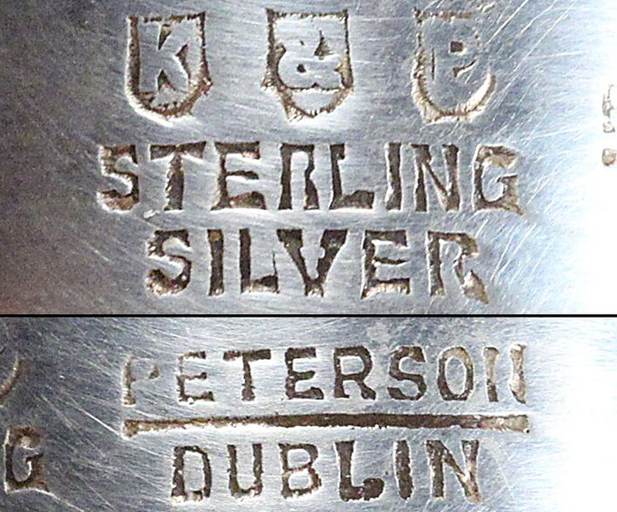 There was also a section in the Pipedia article on House Pipes. I include that below as I am pretty certain that the pipe I have is one of them. I have highlighted a section in red below that gives a sense of finishes and costs of these large pipes.
House pipes: Another popular Peterson system pipe variant, is the huge House Pipe. I believe the term house pipe, has come from the fact that they are just too big to carry around for some and too heavy to hold in one’s mouth. The pipes are so large that you’ll want to smoke them at home, settled into a comfortable chair for a very long session with a good book! I remember seeing them referred to as ‘systems on steroids’!
These large hand made pipes normally retail for around $200 $ 400 depending on shape and finish. Varying from Smooth, Sandblast and Rustic finishes and Straight Billiard and Bent shapes. Extra large bowls. All with sterling silver bands. Finishes include terracotta and oak colours.
Over the years there have been a few large System pipes Produced by Peterson which could be considered to be included as ‘House’ pipes. In the early Peterson catalogues, circa 1900,they were advertising XXL systems which were similar in size to the modern ‘House’ pipes. Around 1990 Peterson were asked by a large UK retailer, i.e. Bonds of Oxford St. London, to commission the making of a special giant classic bent pipe, with dimensions of, length 17cms, bowl height,6.1cm, bowl chamber depth 5.5cms, internal bowl diameter 2.1cm. This is a classic shaped Peterson with hallmarked silver ferrule in smooth and rustic finishes, plus options of tapered and saddle stems. In the early 1990s Kapp & Peterson made this giant, classic full bent, smooth pipe exclusively for Bonds of Oxford Street London. Bonds seem to have an endless source of New Old Stock Peterson pipes. I am always intrigued by these pipes when they arrive by post. Inevitably they come in their original packaging and to my mind, are a window back in time. I enjoy the box and contents as much as the pipe.
I had seen this pipe on many occasions when I had previously visited Bonds E bay site. I have always been attracted to it and admired the classic shape ,size and finish. They were offering the same pipe in various finishes and stem fittings. However I preferred the smooth tapered fishtail. I am a sucker for large bent Pete’s. Just my taste. However it was not cheap at around $355. Having had the opportunity to see the pipe ‘in the flesh’, I am amazed at the quality, feel, looks and the smoking performance. Yes you heard right I smoked it! Normally with the newer unsmoked high grades that come into my collection, they remain unsmoked. However I made an exception with this beauty and boy it was worth it.
I wrote to Mark Irwin and sent some photos of the pipe to see what he could tell me. Unfortunately in my first email the photos did not include any profile shots. I sent him those in subsequent emails and also order a copy of the 1896 K&P Catalog from Smokingpipes. Here is what Mark wrote in the emails.
FIRST
Hey Steve,
Without seeing a perfect flanking shot, I can’t be 100% sure here, but I can tell you it is either the shape 1 or shape 3 straight-sided (“dutch billiard”) from the 1906 and 1896 catalogs. Not seen in K&P catalogs after 1906, like other magnums it remained in the shadows but surfaced from time to time. The rustication is excellent, dating it to the late 1940s or early 1950s when this type of work was routine at the factory. The sterling mount was given to it because of the unusual size as well as the good blast. With a flanking shot, I can determine whether it is the 1 or the 3.
I just thought of something: if you have the restoration of the 1896 K&P catalog I released not long ago through Smokingpipes, you can simply lay your bowl on top of shape 1 and shape 3 and *presto* you’ll know. The original scaled illustrations are quite useful in this way.
Happy Smokes,
Mark
SECOND
It’s the 1. How very cool. Is this pipe going in your collection, is it someone’s your working on or do you intend to sell it? Great piece!
Yes, I think with your enjoyment of the history of pipes you’d love the catalog and the historical commentary.
Mark
Mark’s information confirmed what I had learned from my research and gave me additional information. Mark notes that the rustication dates it to the late 1940s or early 1950s. The COM stamp had helped me date it between 1945-1947 so that fits! He also confirms that it a Shape 1, straight-sided (“Dutch Billiard”).
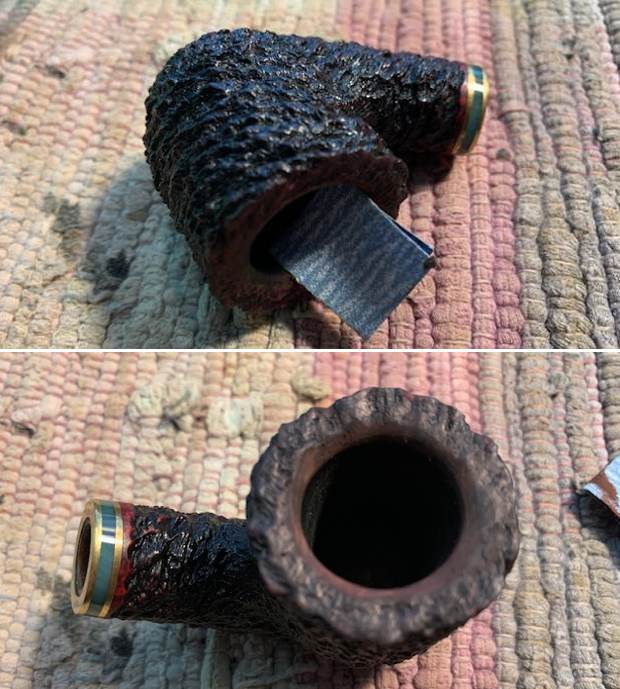
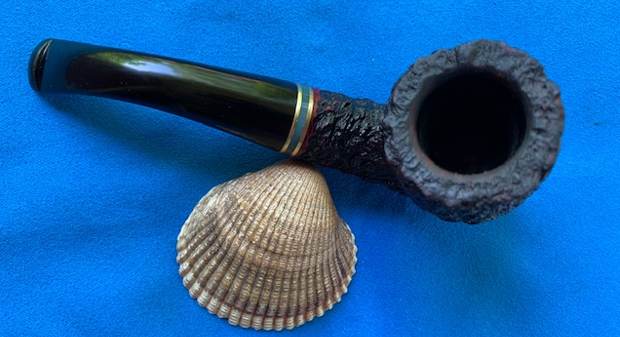
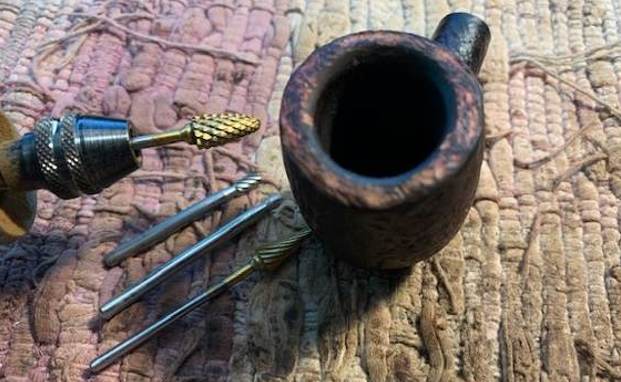
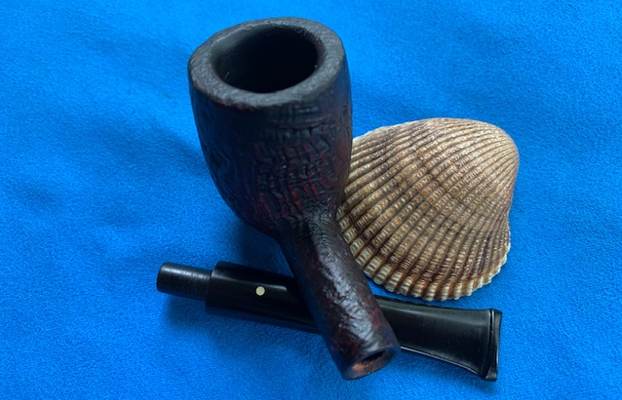
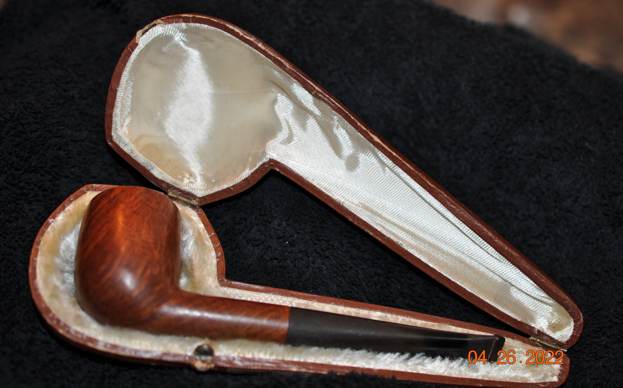
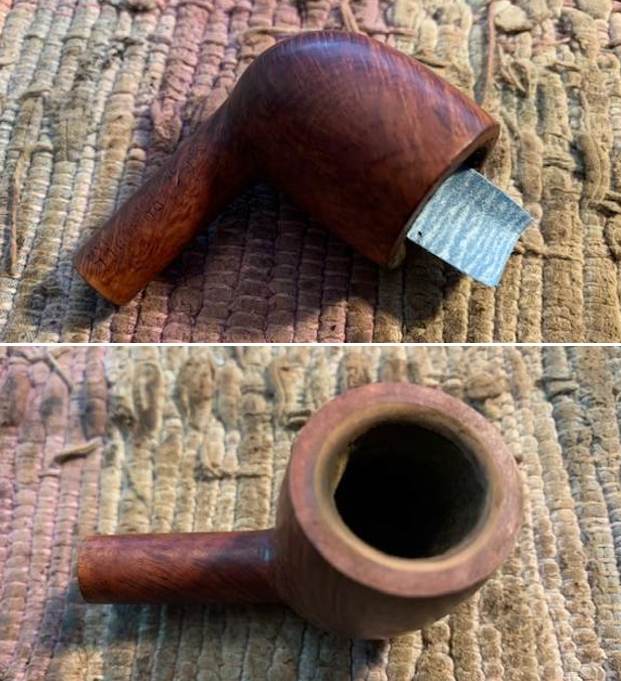
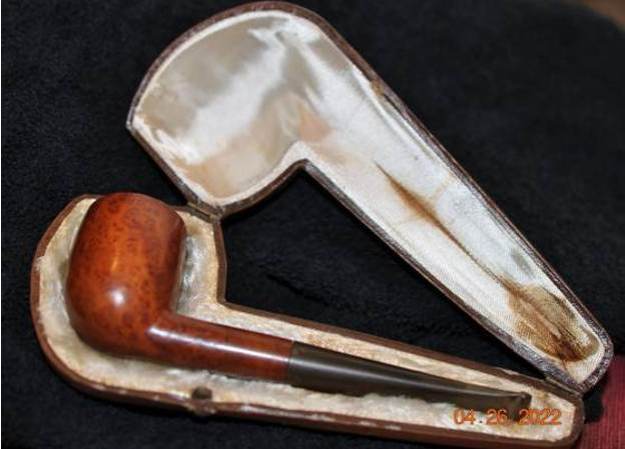
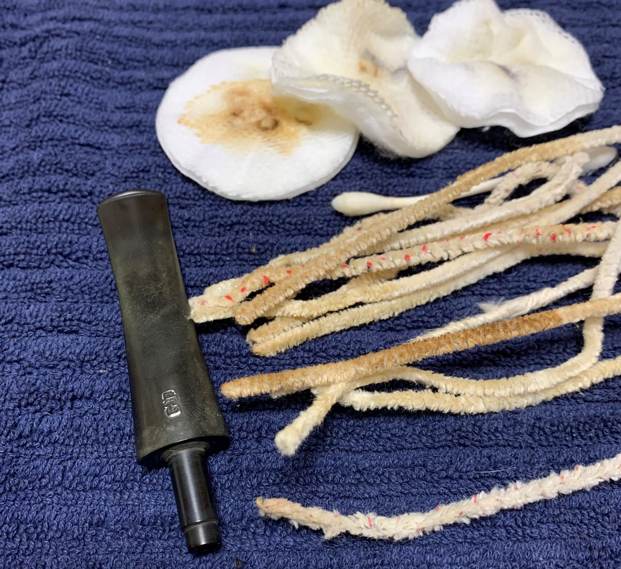
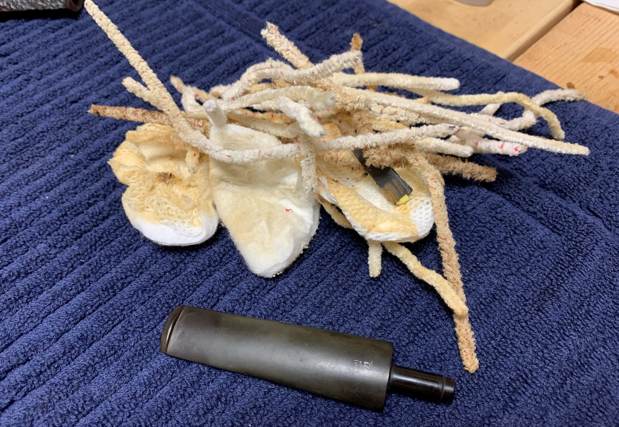
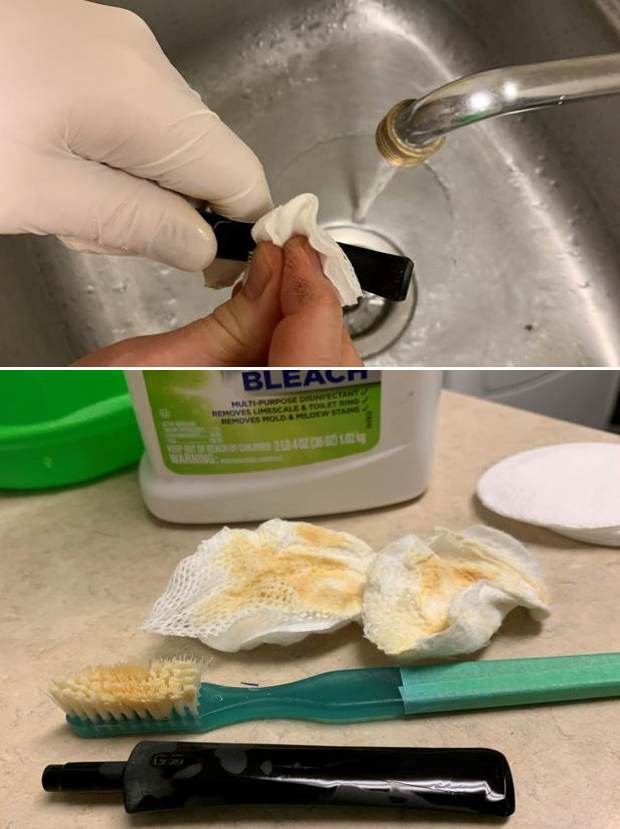
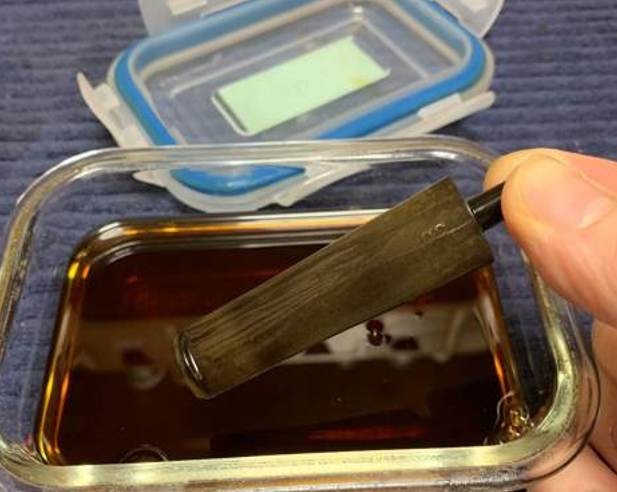
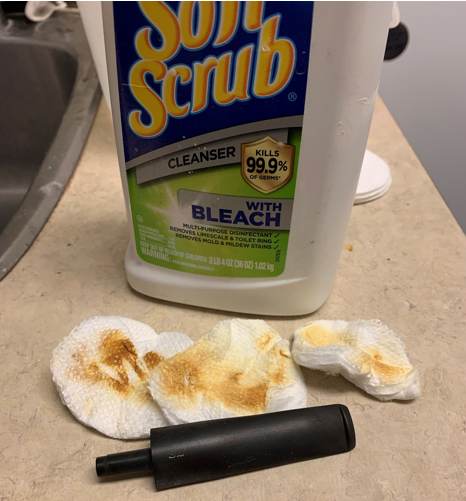
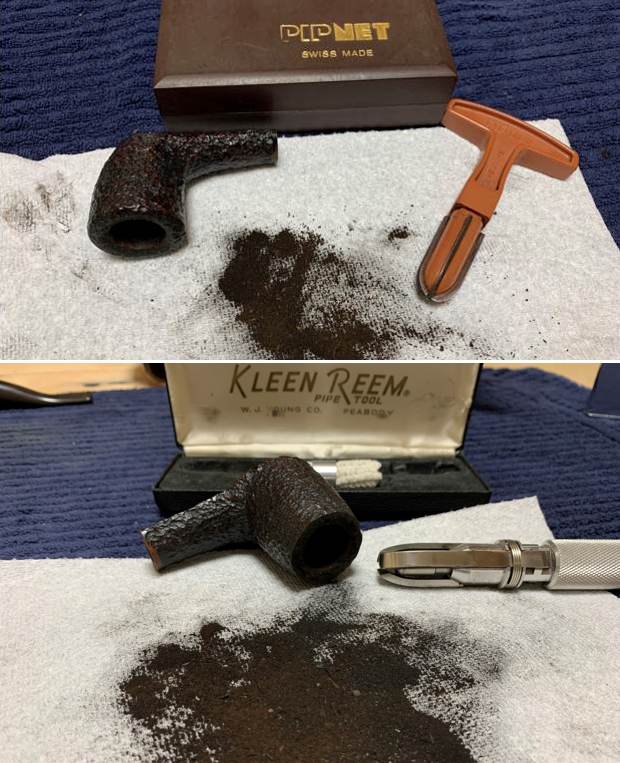
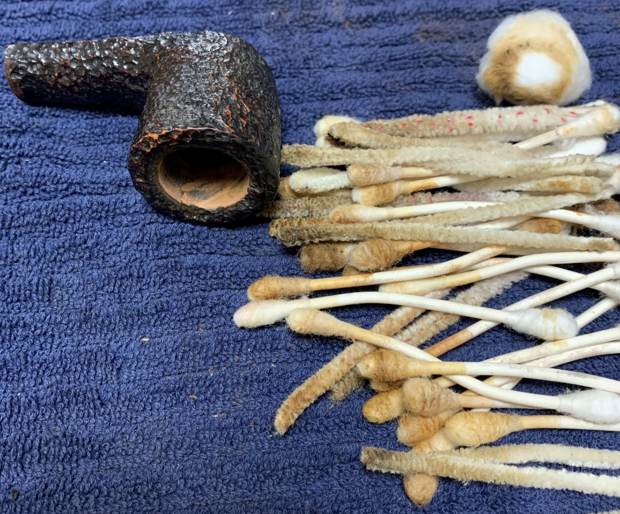
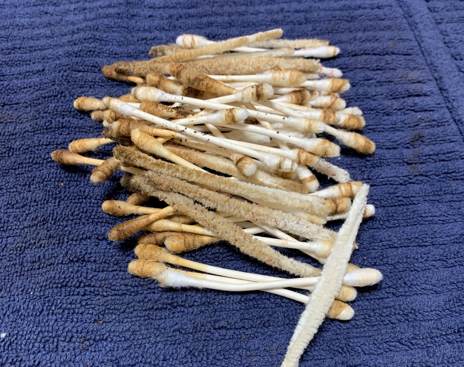
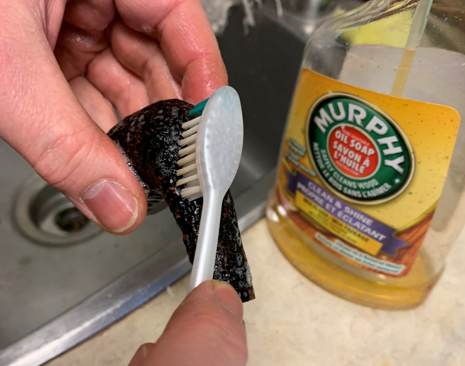
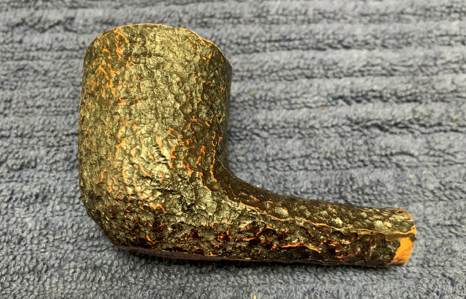
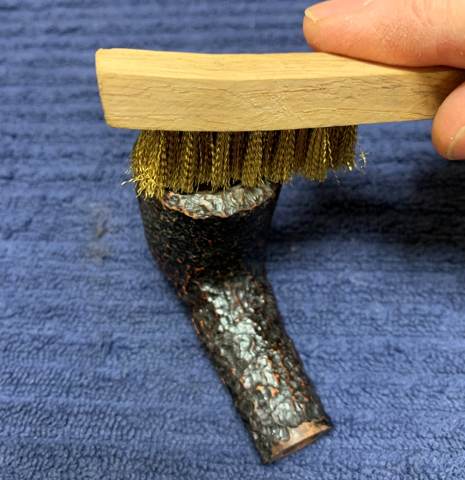
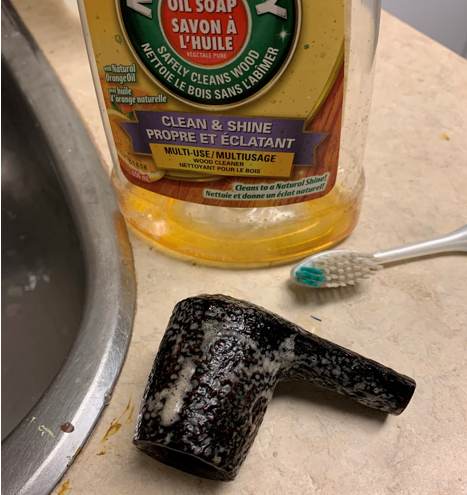
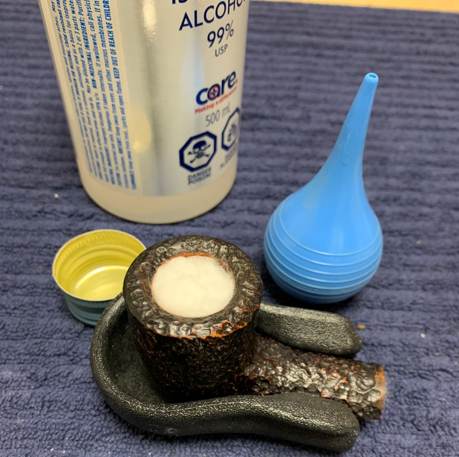
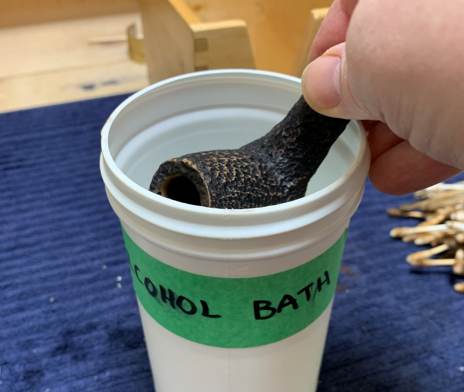
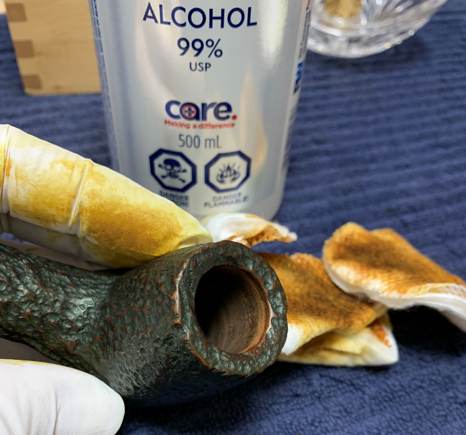
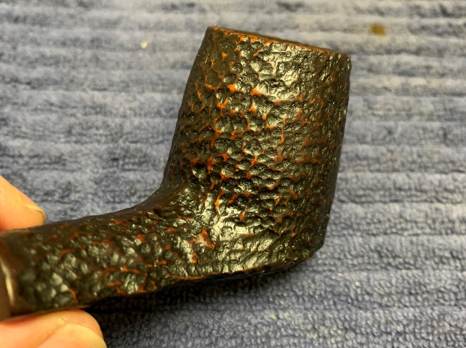
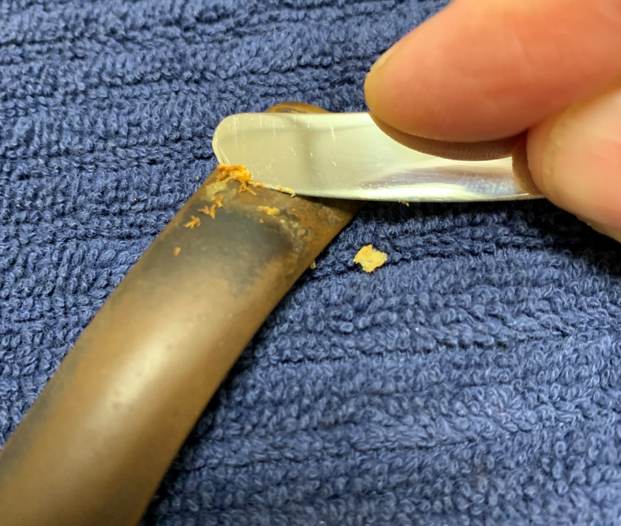
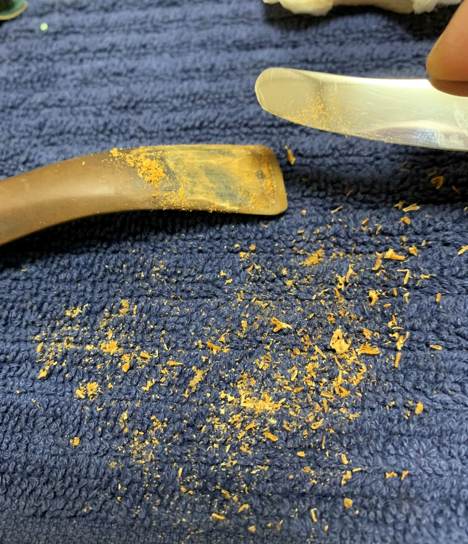
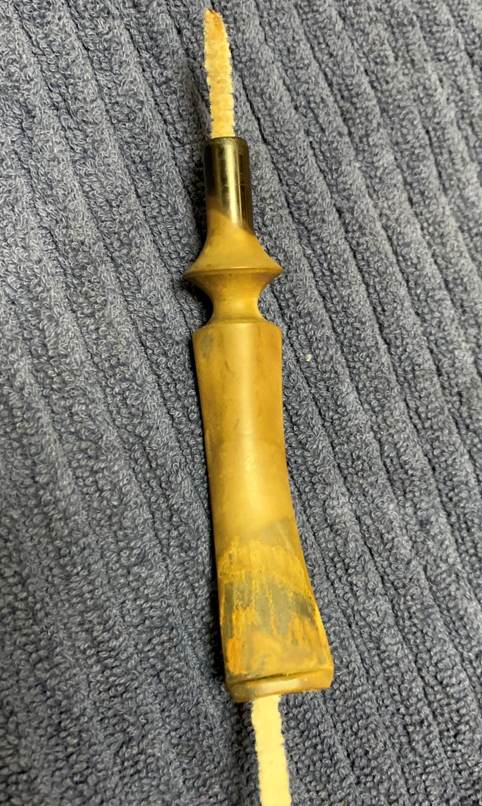
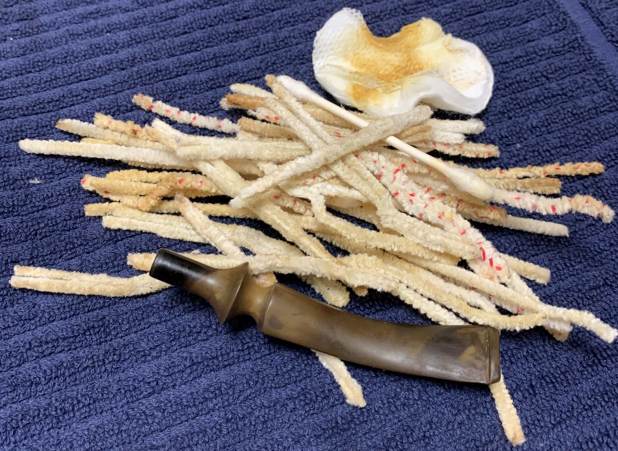
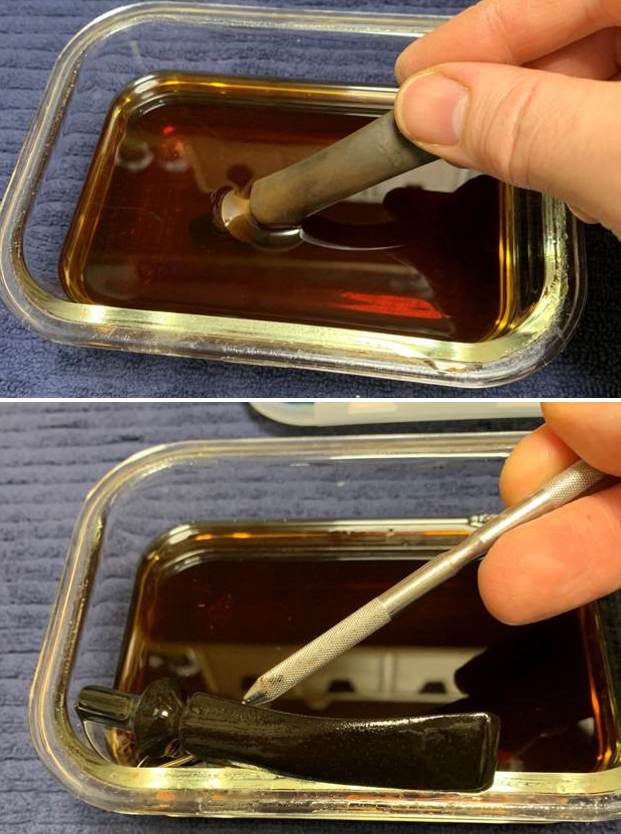
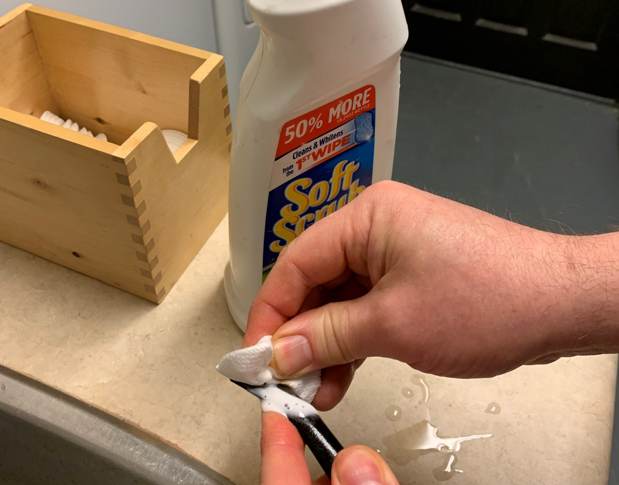
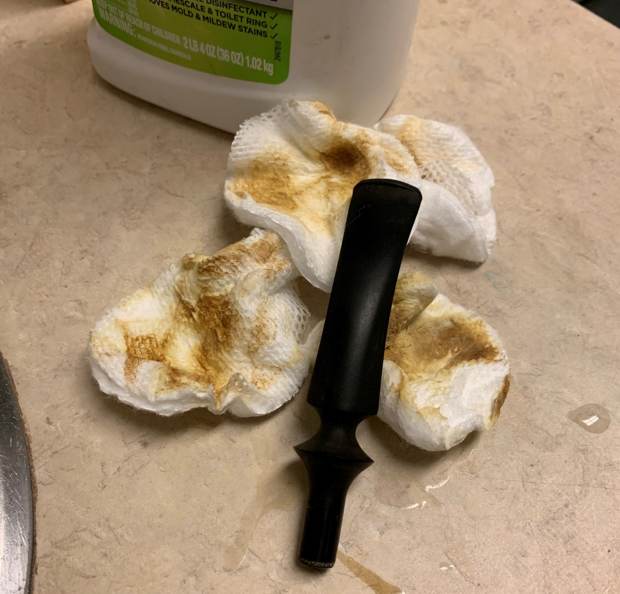
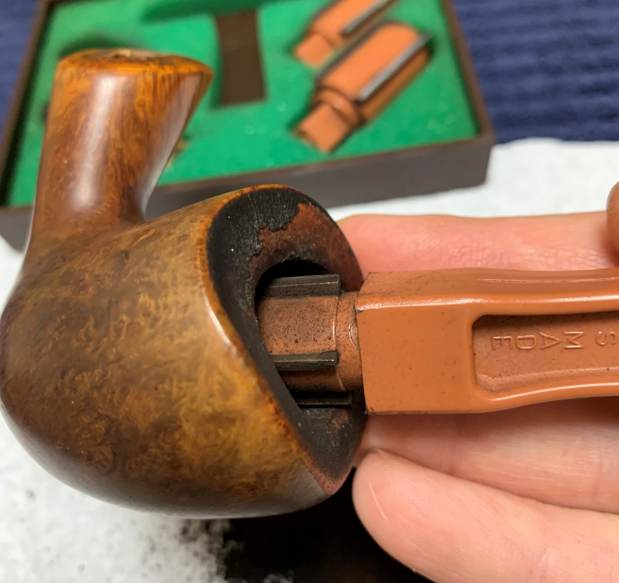
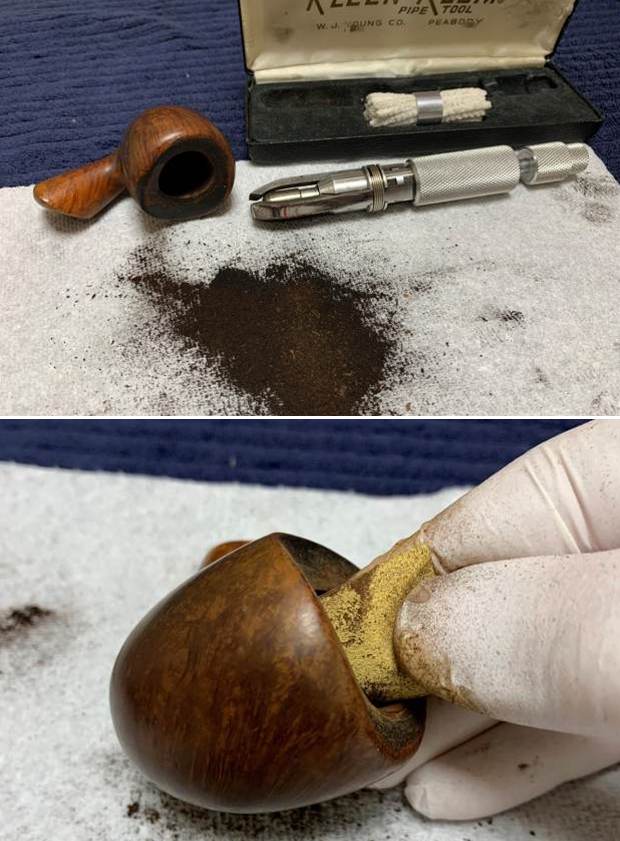
Armed with that information I turned to work on the pipe itself. Before he sent it to me, Jeff had cleaned up the pipe with his usual procedure. He reamed the pipe with a PipNet pipe reamer and removed the rest of it with a Savinelli Fitsall Pipe Knife. He scrubbed the bowl with undiluted Murphy’s Oil Soap with a tooth brush. He rinsed it under running warm water to remove the soap and grime. He cleaned out the inside of the shank and the airway in the stem with isopropyl alcohol, cotton swabs and pipe cleaners. He soaked the stem in Briarville’s Pipe Stem Deoxidizer and then rinsed it off with warm water. He scrubbed the stem with Soft Scrub and a tooth brush and rinsed it off with warm water. It looked amazing when I took it out of the package of pipes he shipped me. So much so that it is the first of those pipes that I chose to work on. I took photos of the pipe before I started my part of the restoration work. 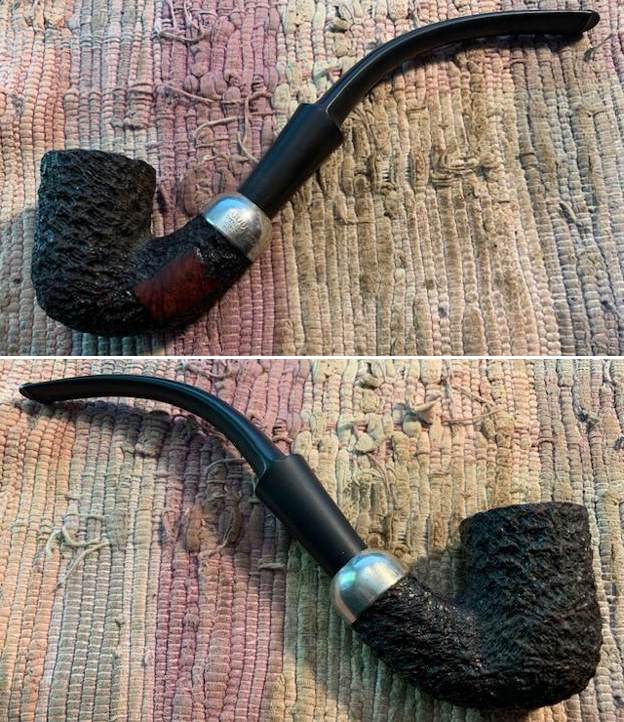
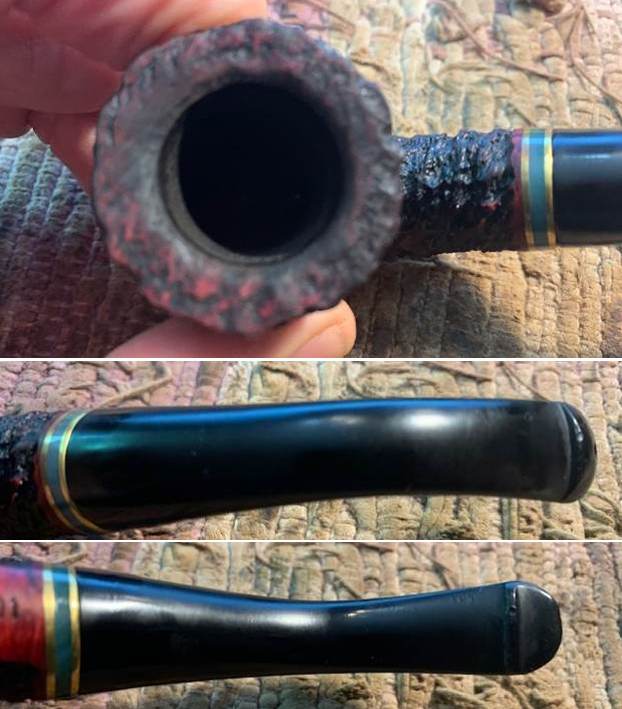
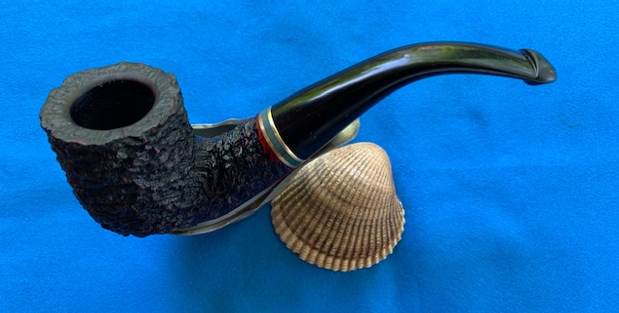
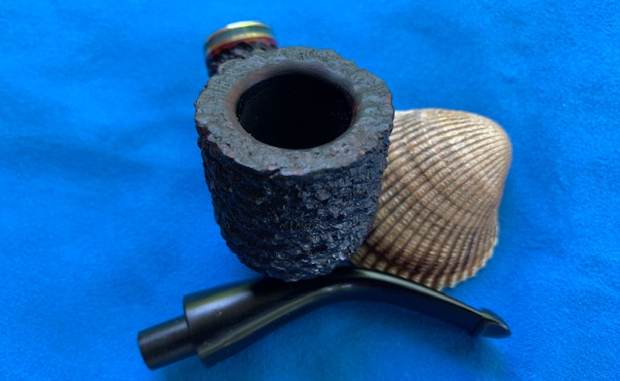
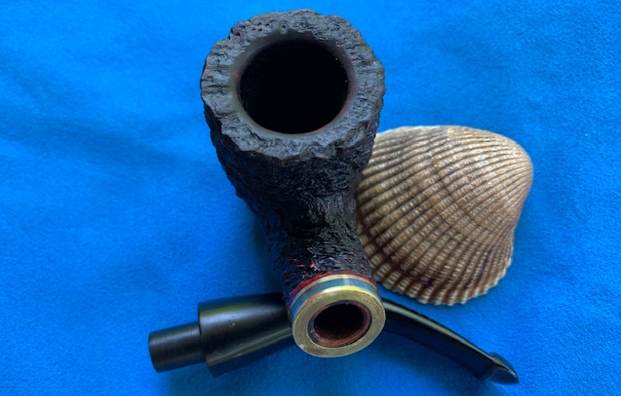
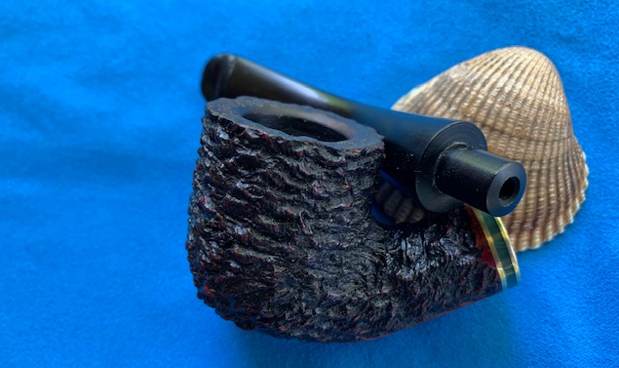
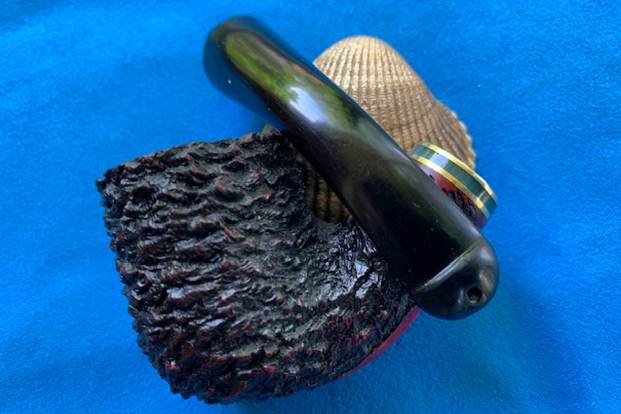
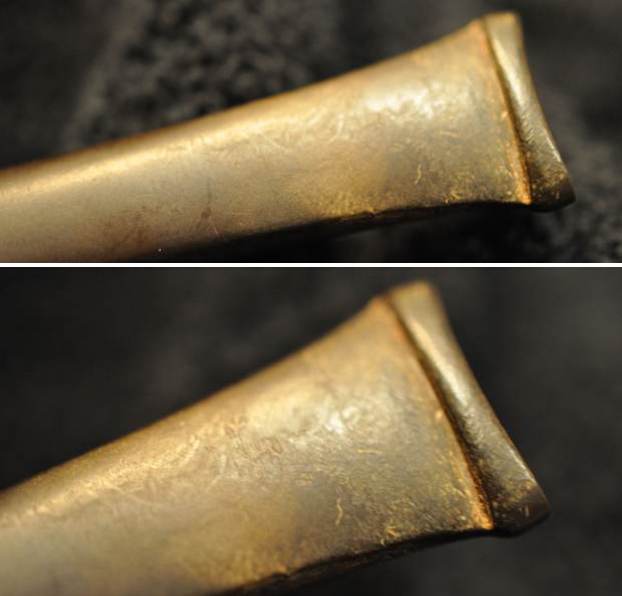
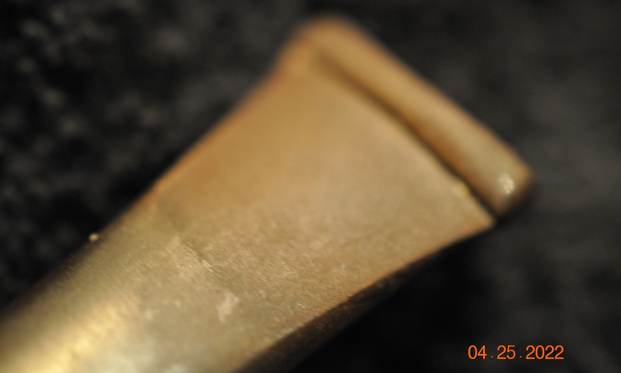
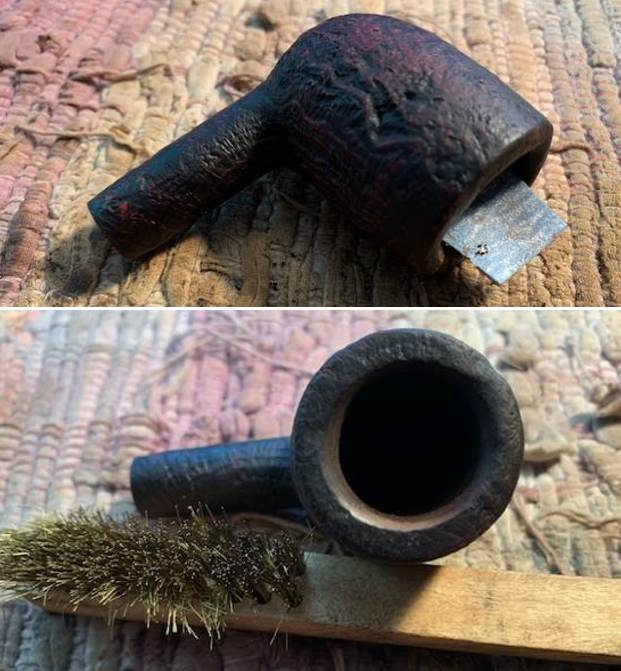
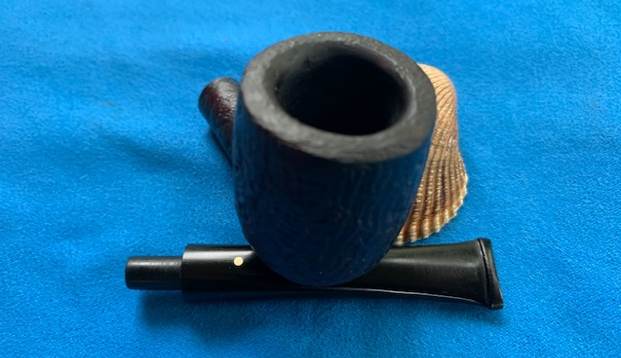
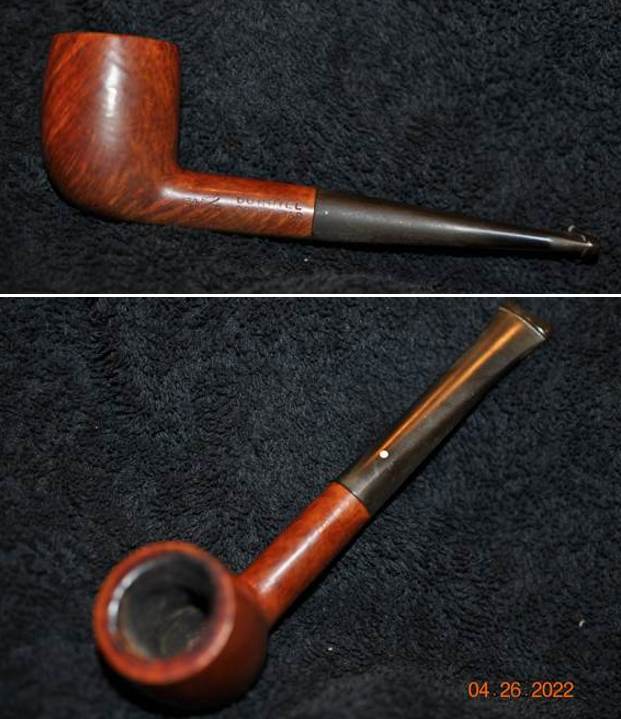
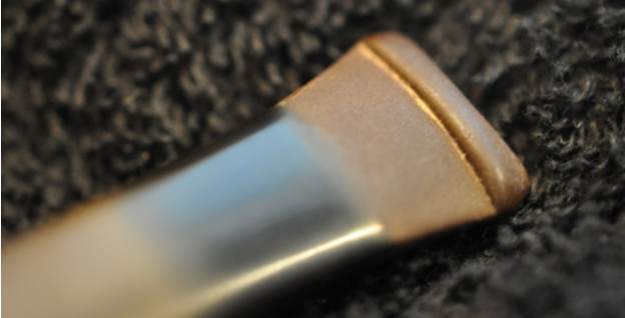
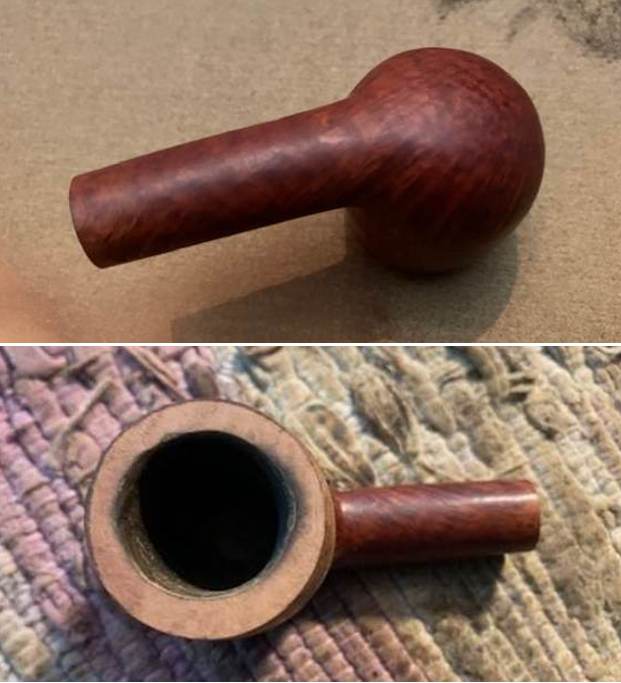
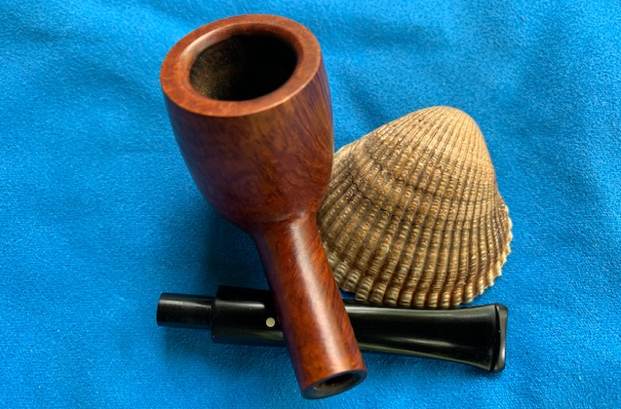
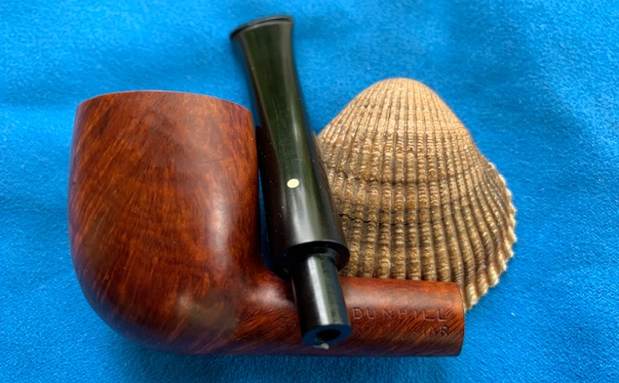
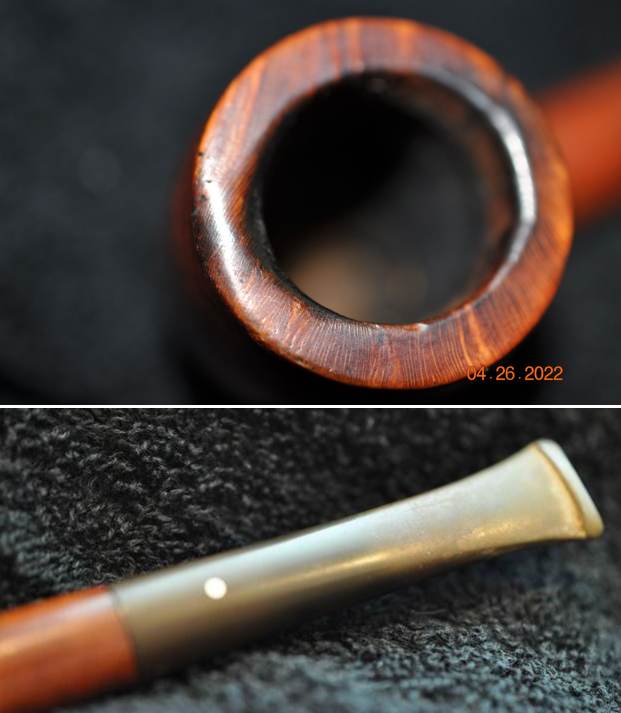
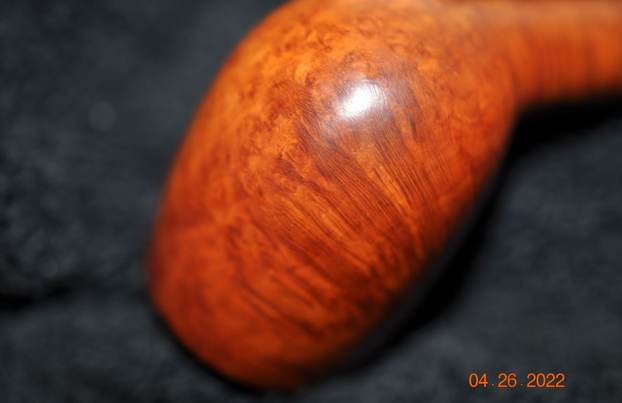
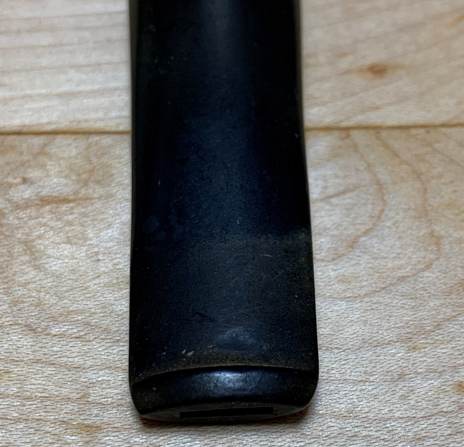
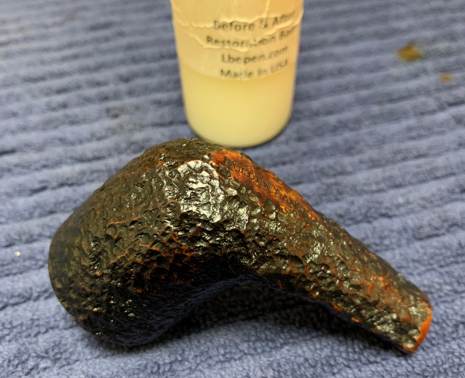
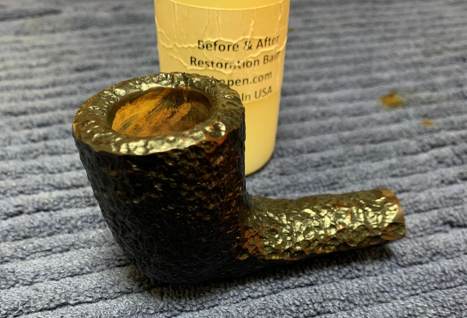
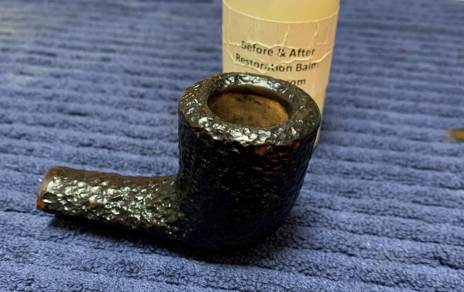
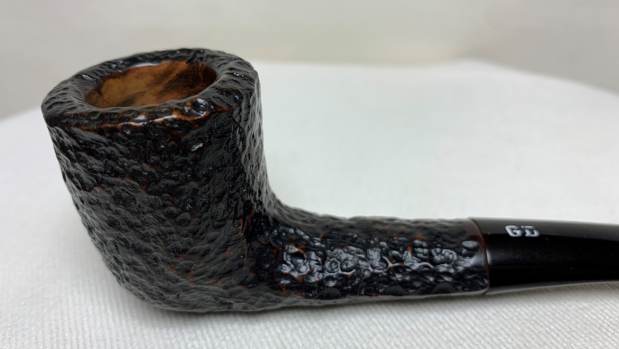
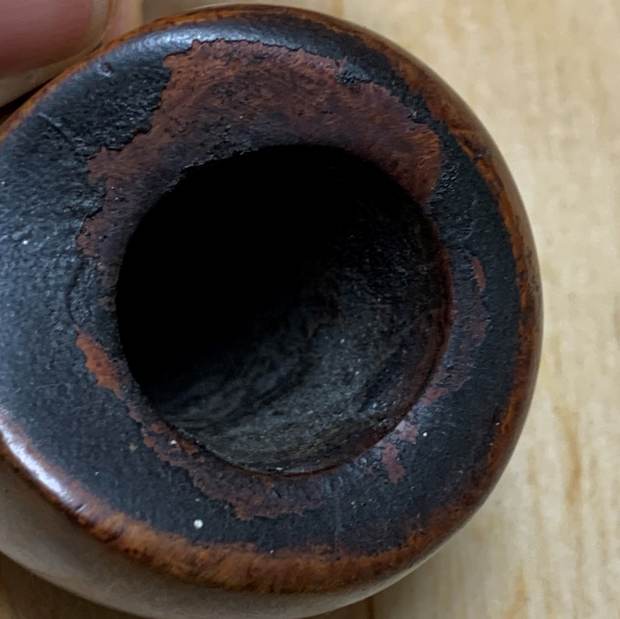
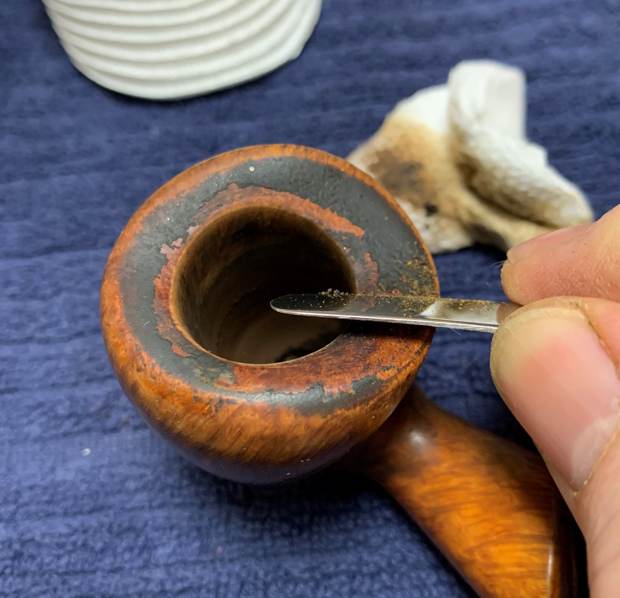
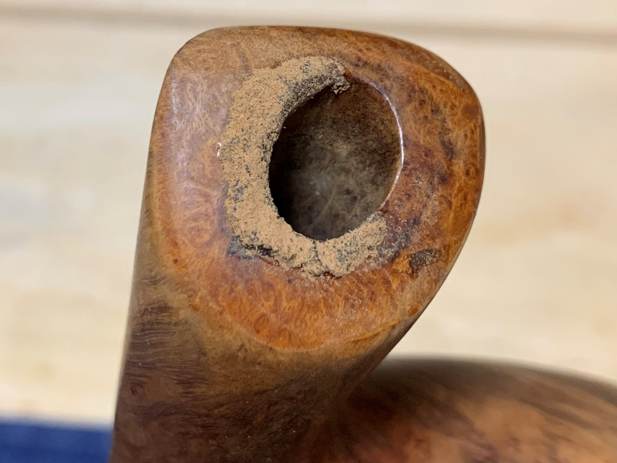
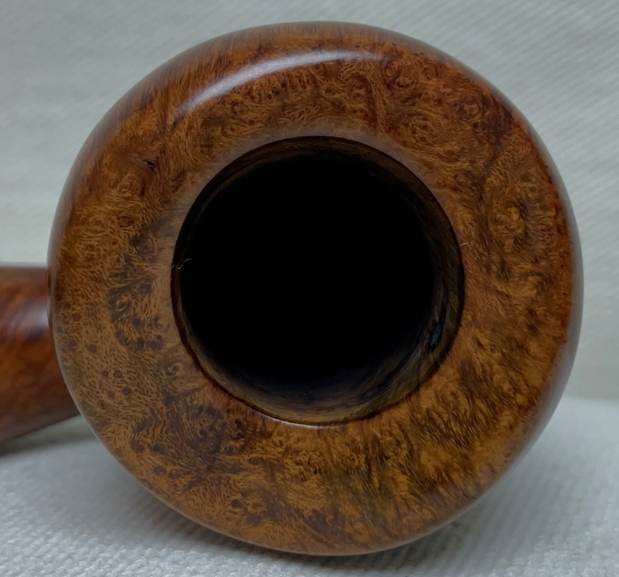
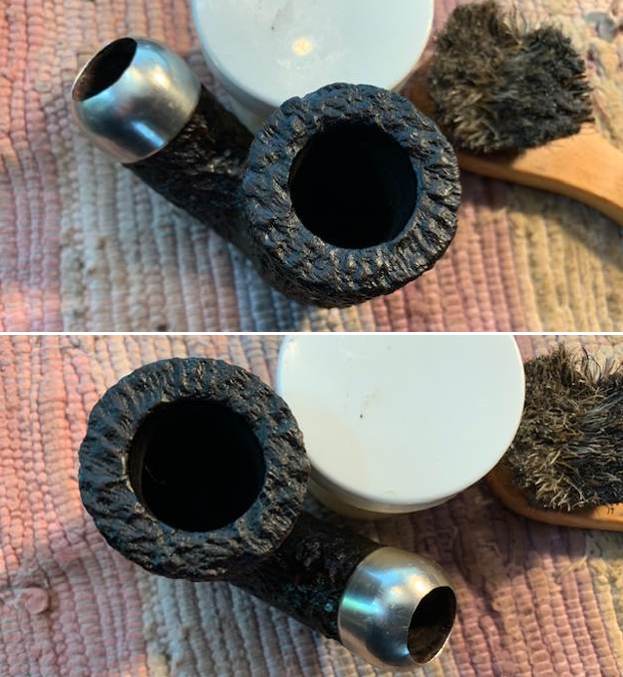
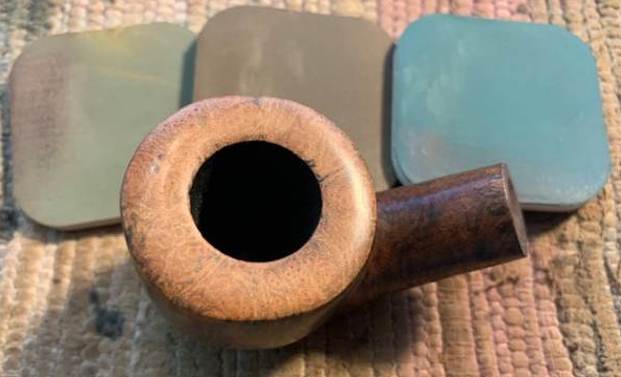
 The rim top and the inner and outer edges of the bowl all look very good. The stem surface looked good with the oxidation gone and no visible tooth marks and chatter on either side of the stem.
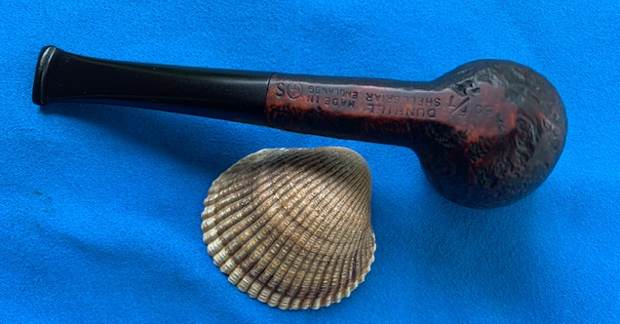
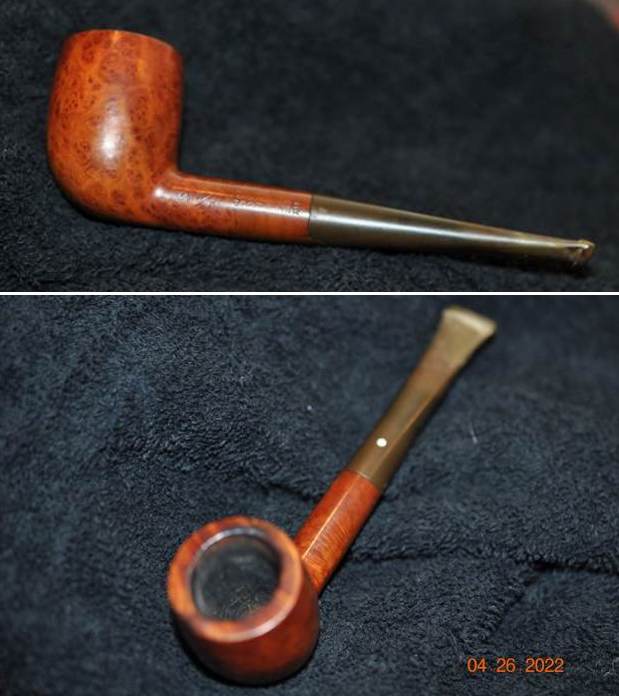
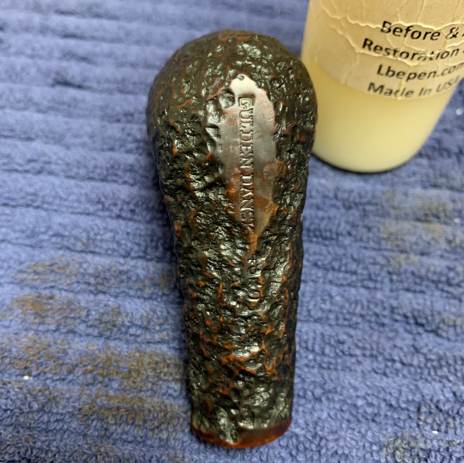
  The stamping on left side of the shank and on the silver ferrule is clear and readable as noted above.
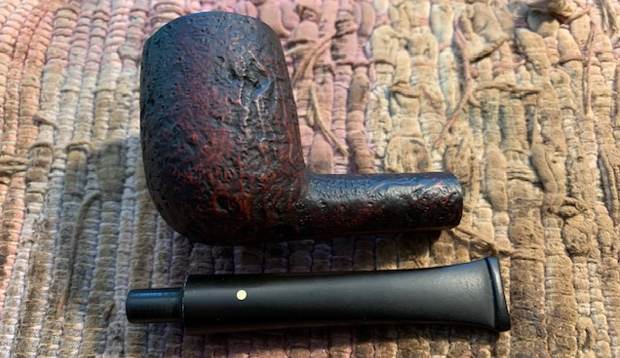
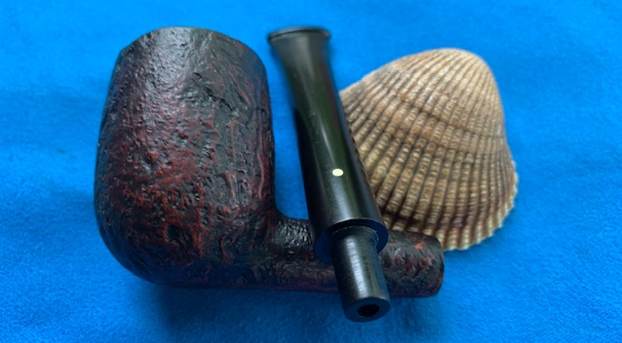
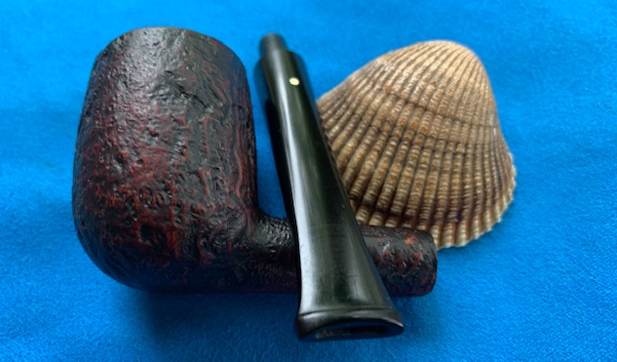
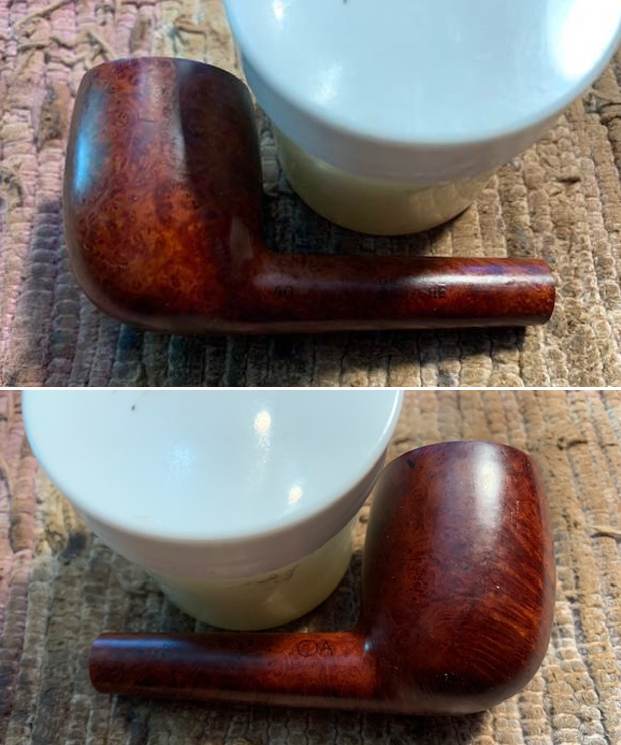
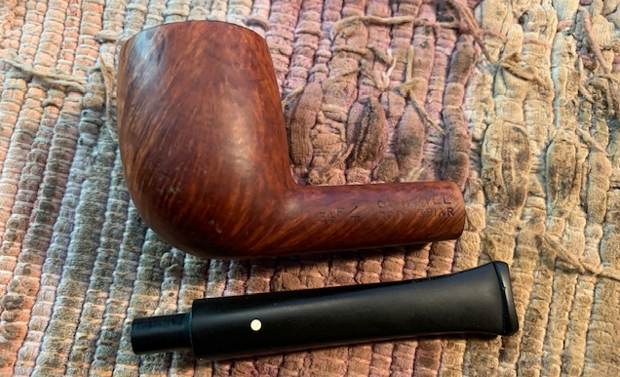
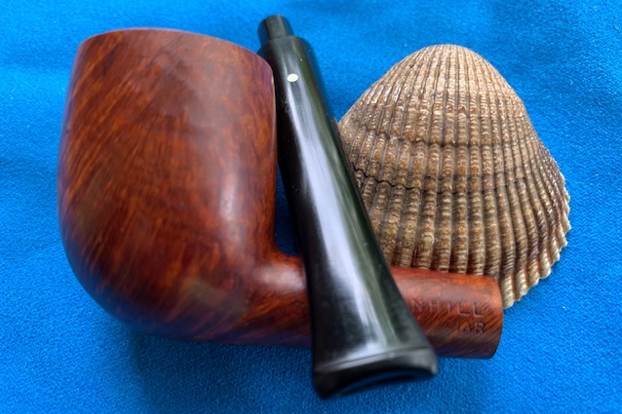
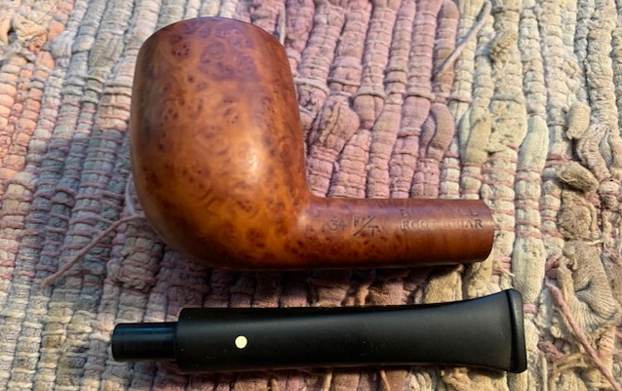
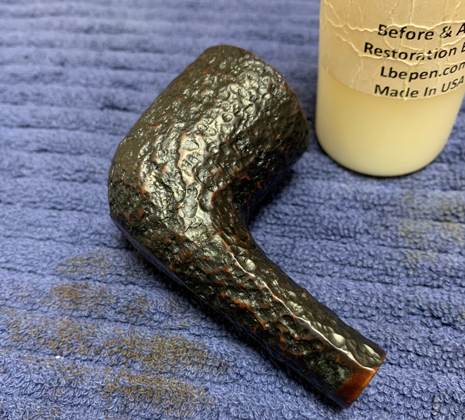
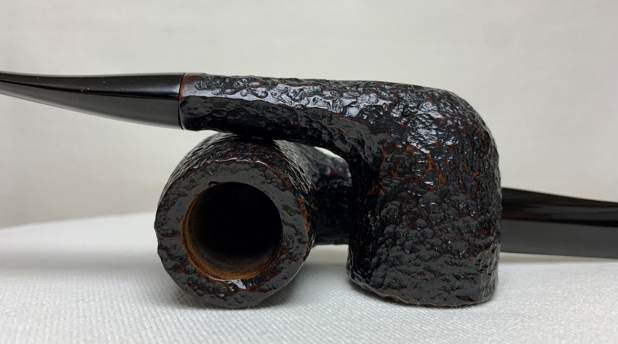
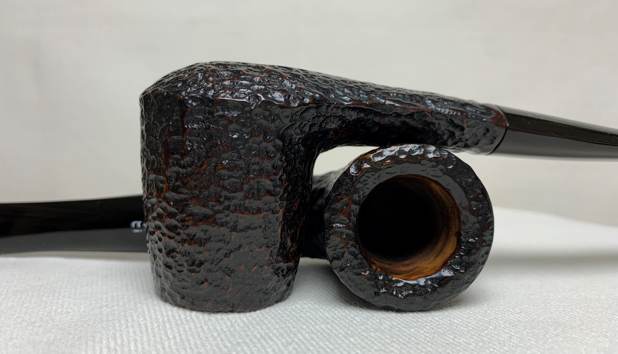
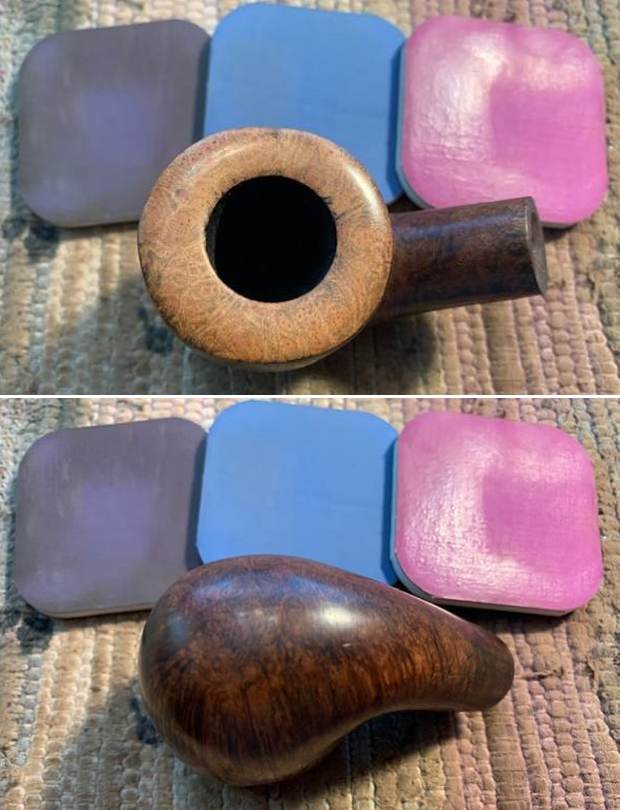
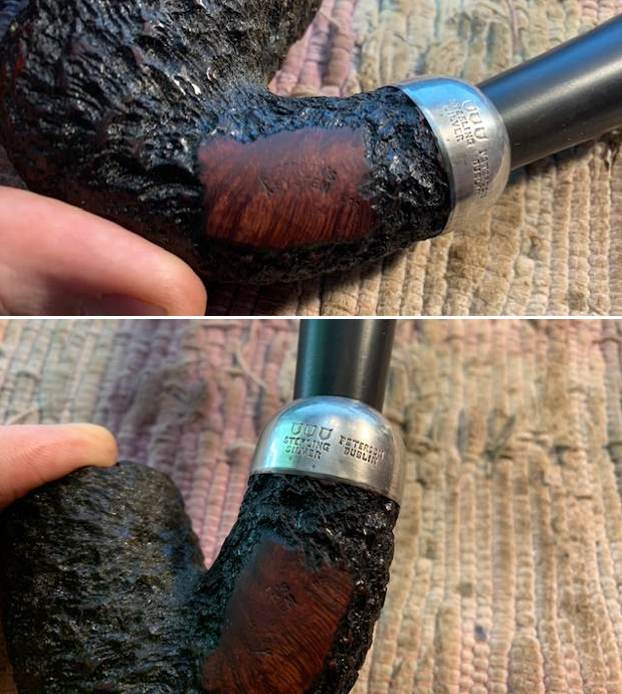 I took a photo of the pipe with a regular sized Peterson System 312 to give a sense of the size of this pipe. It really is a big pipe. I then removed the stem and took a photo of the pipe to give a sense of the whole. It is a proportionally pleasing pipe.
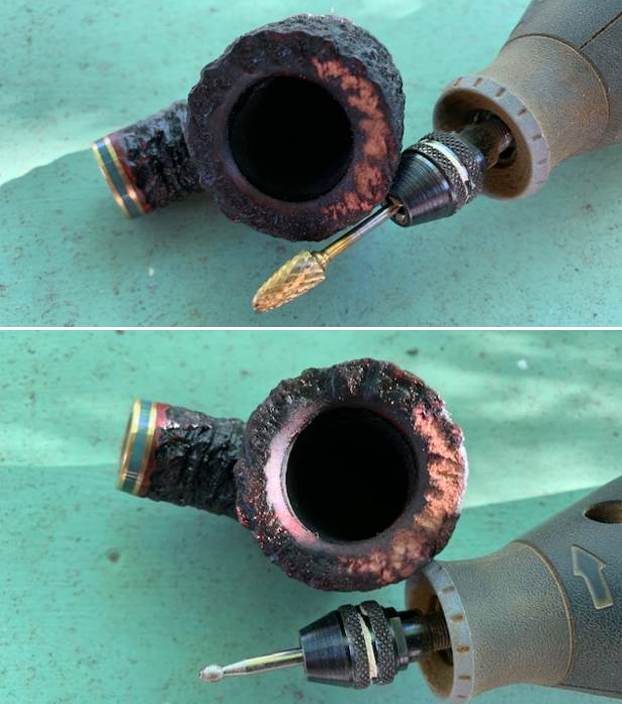
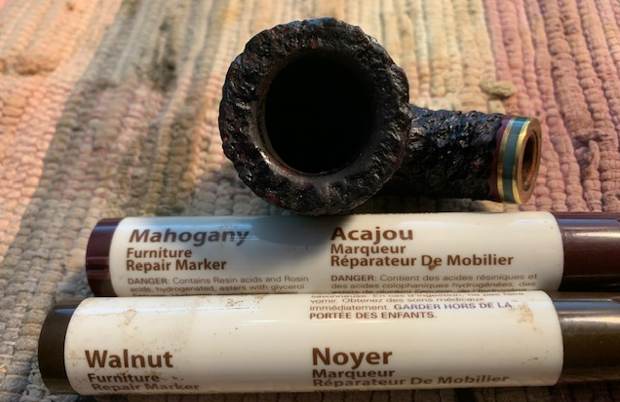
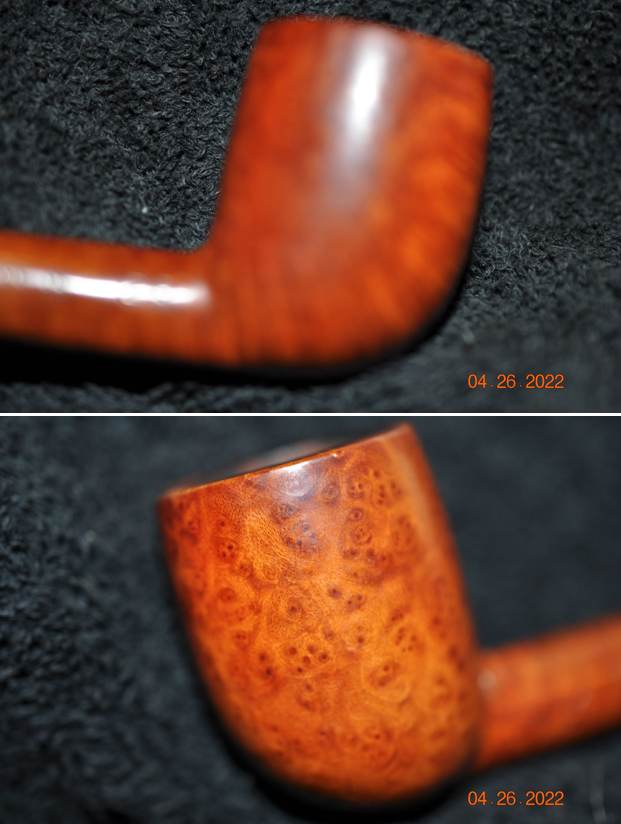
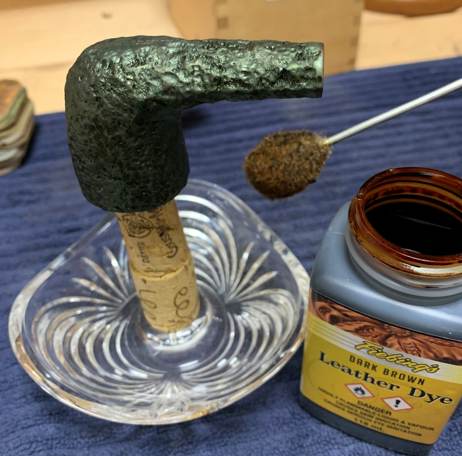
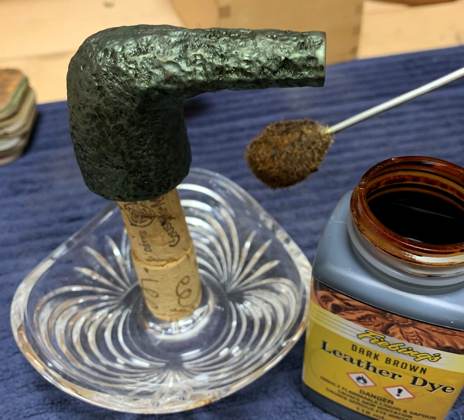
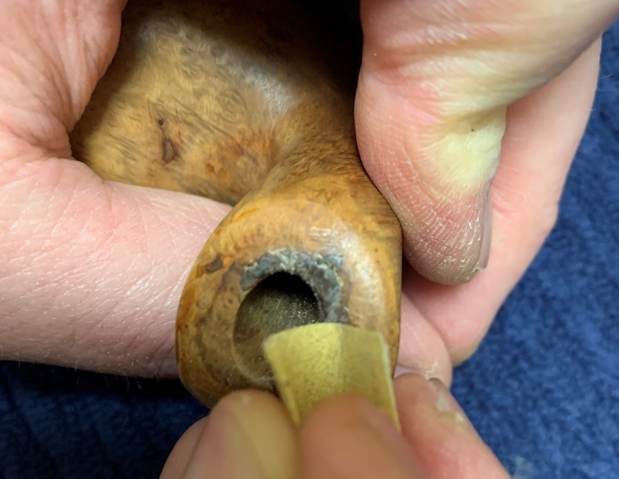
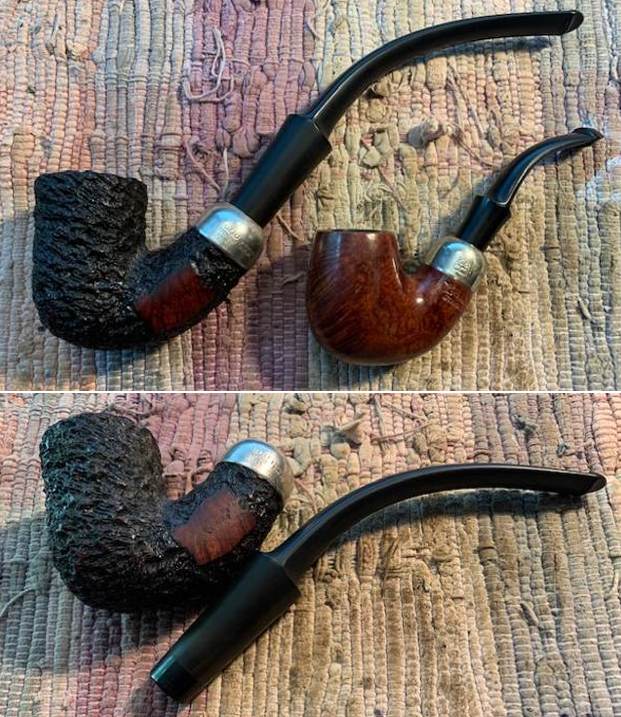 I started my work on the pipe by addressing the fading of the finish on the rim top and edges. I used a Walnut Stain Pen to match the color of the rest of the bowl. The finished rim top and edges look better.
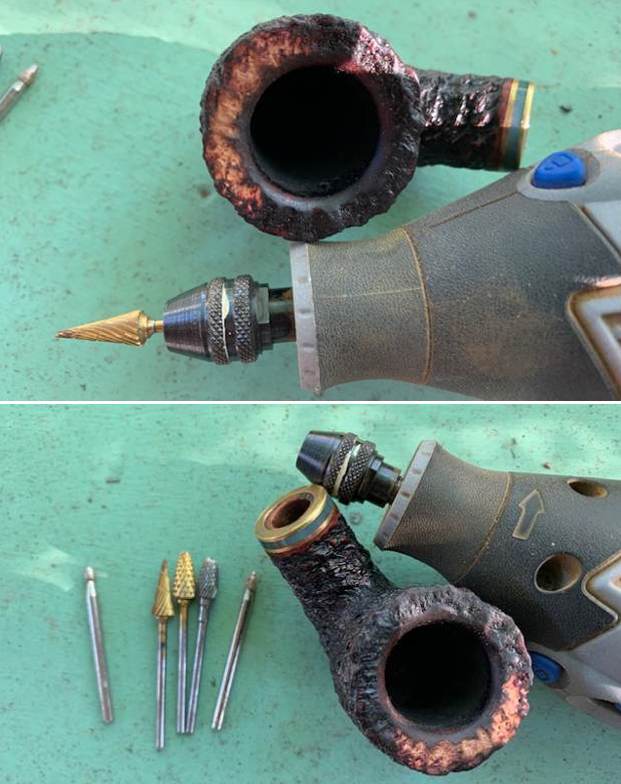
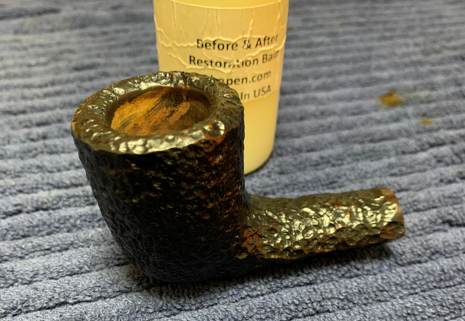
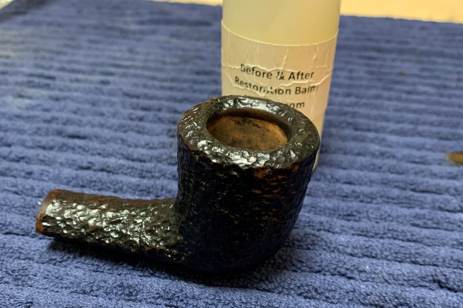
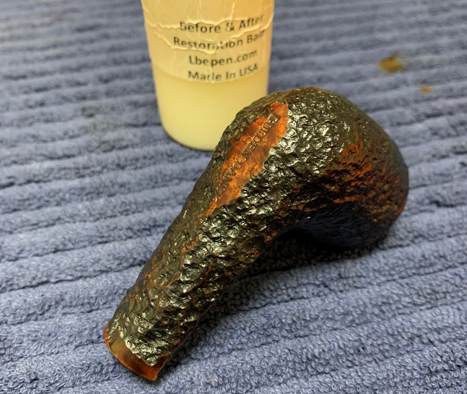
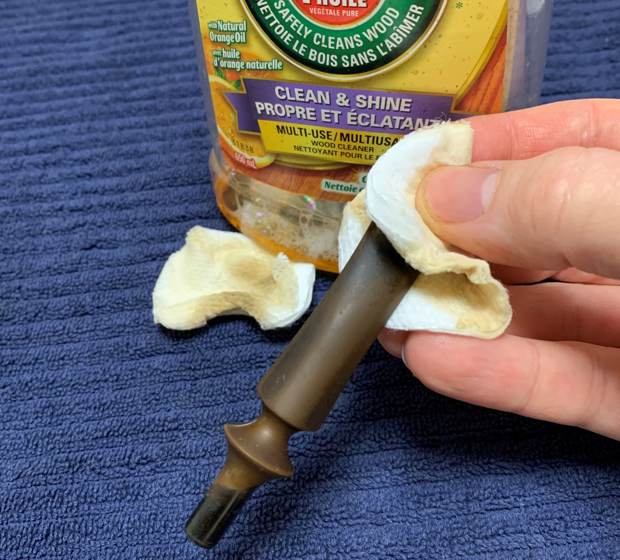
 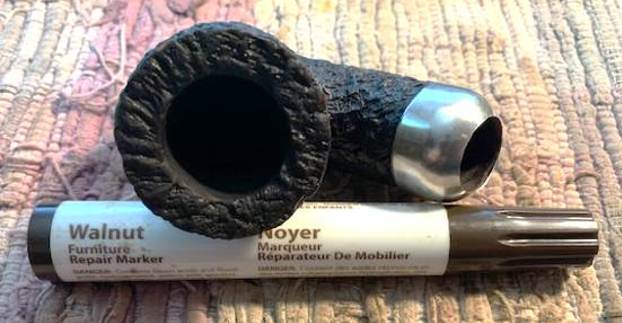 The bowl looked very good at this point so I rubbed it down with Before & After Restoration Balm. I worked it into the surface of the bowl and shank with my fingertips and a horsehair shoe brush to clean, enliven and protect the briar. I let the balm sit for about 10-15 minutes and buffed with a cotton cloth to raise the shine.
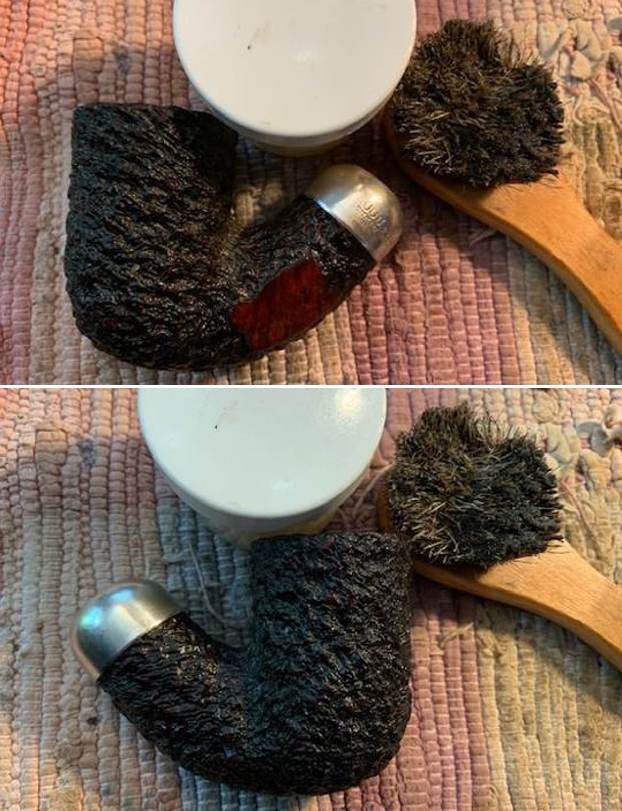

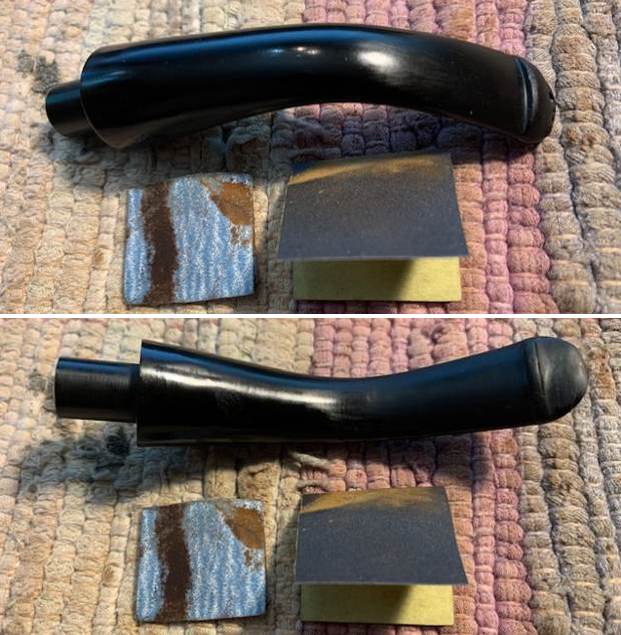
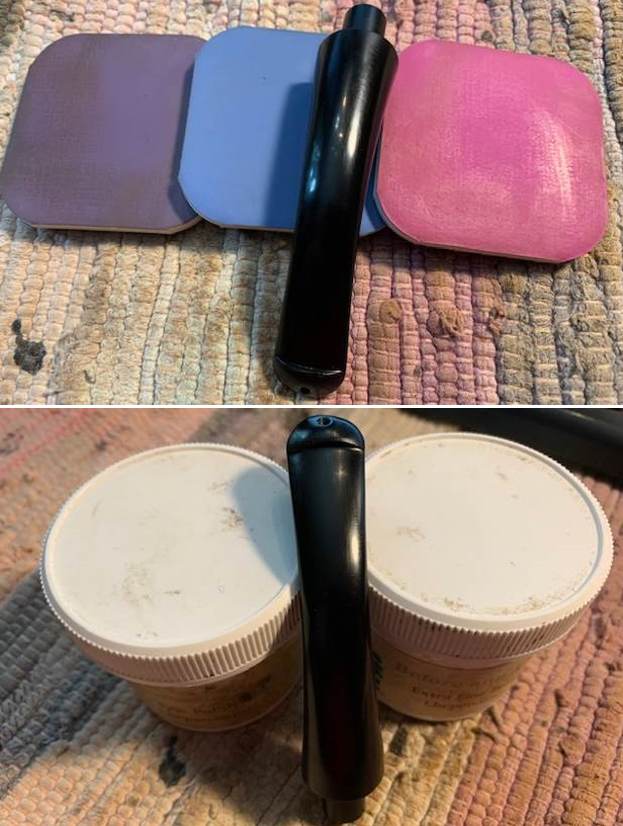
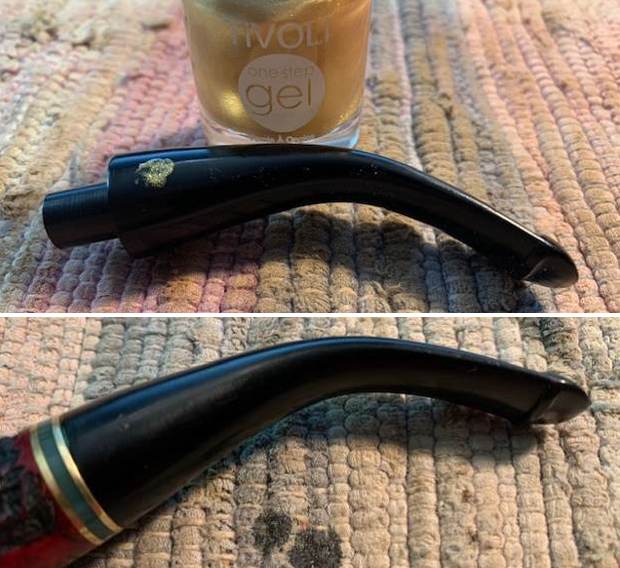
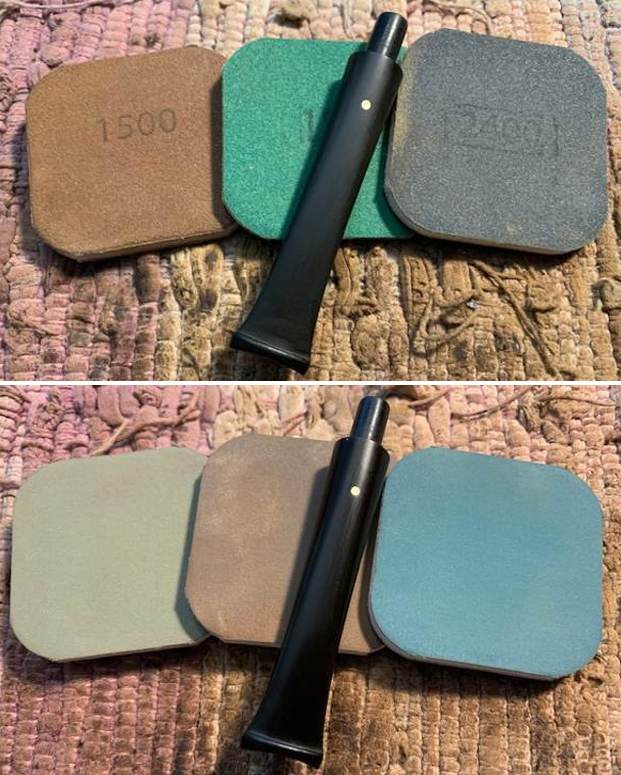
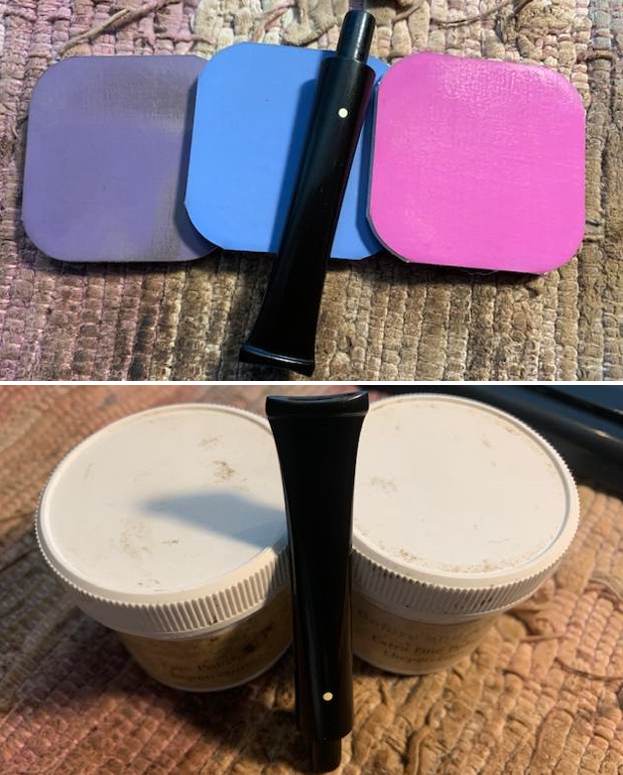
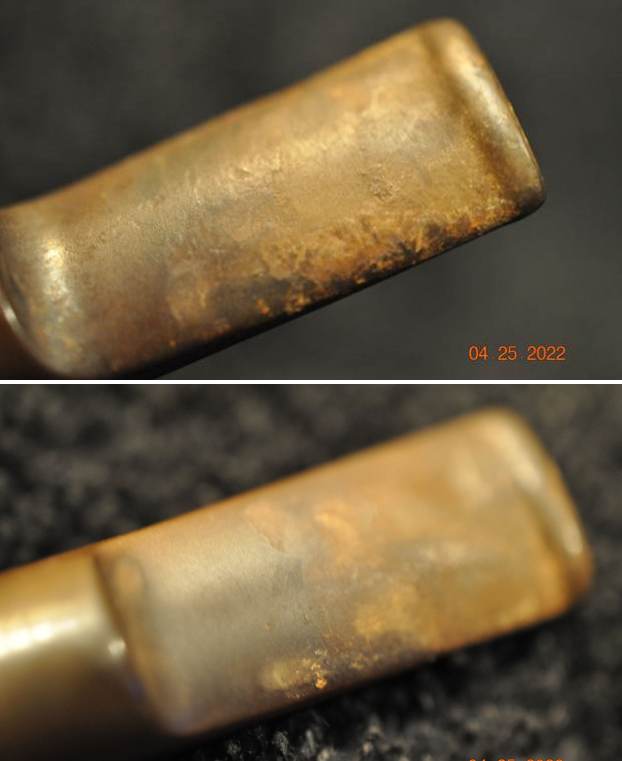
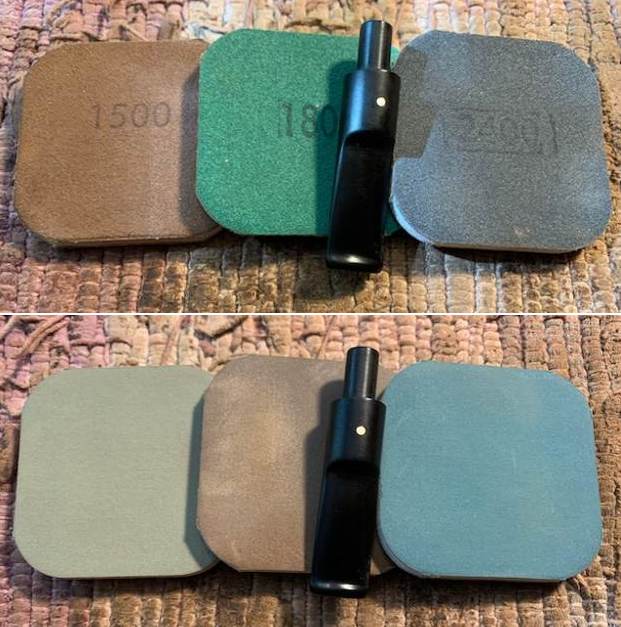
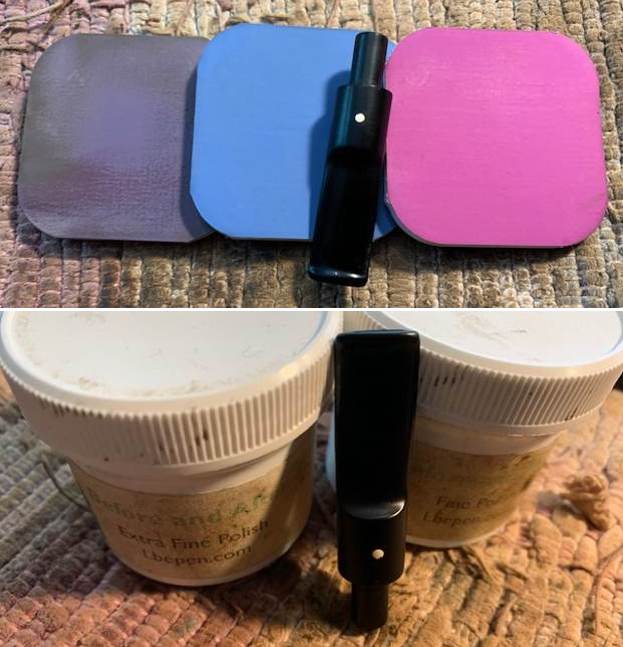
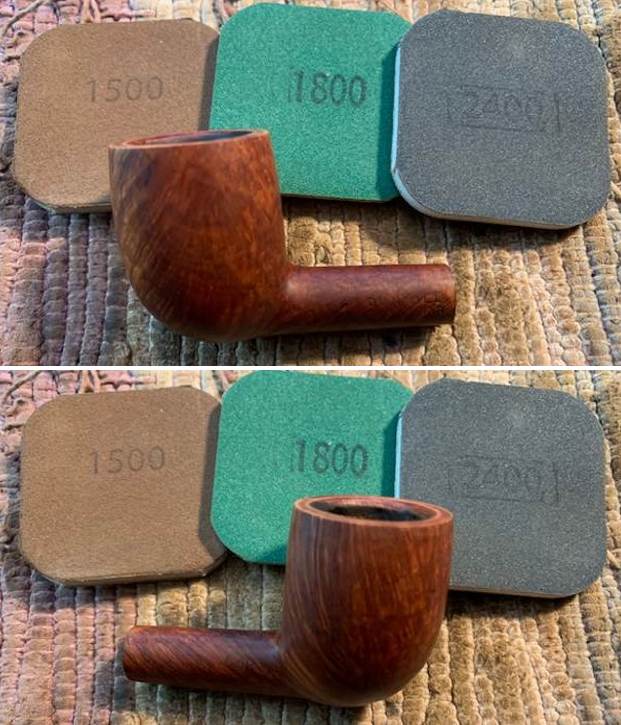
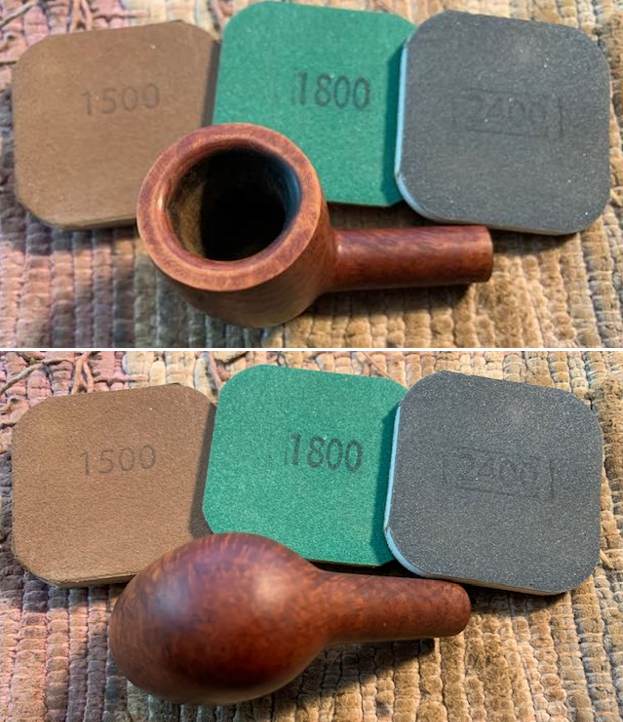
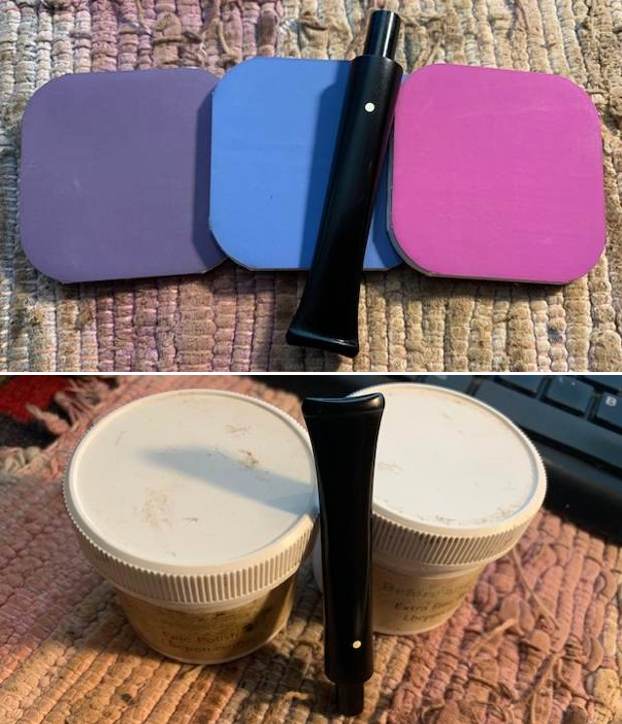
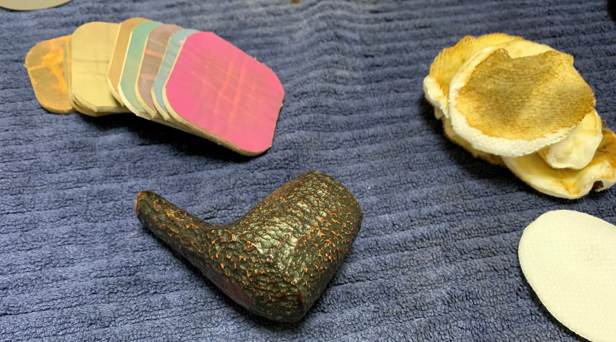
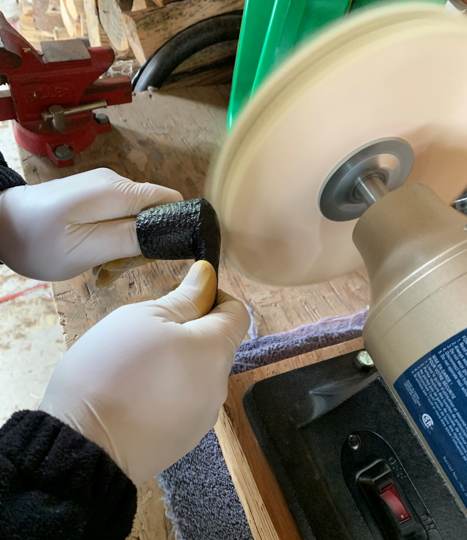
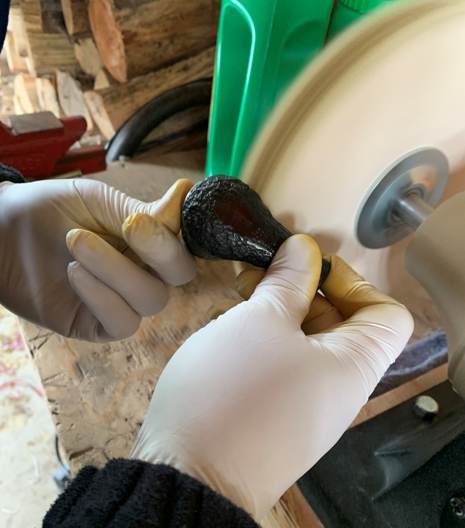
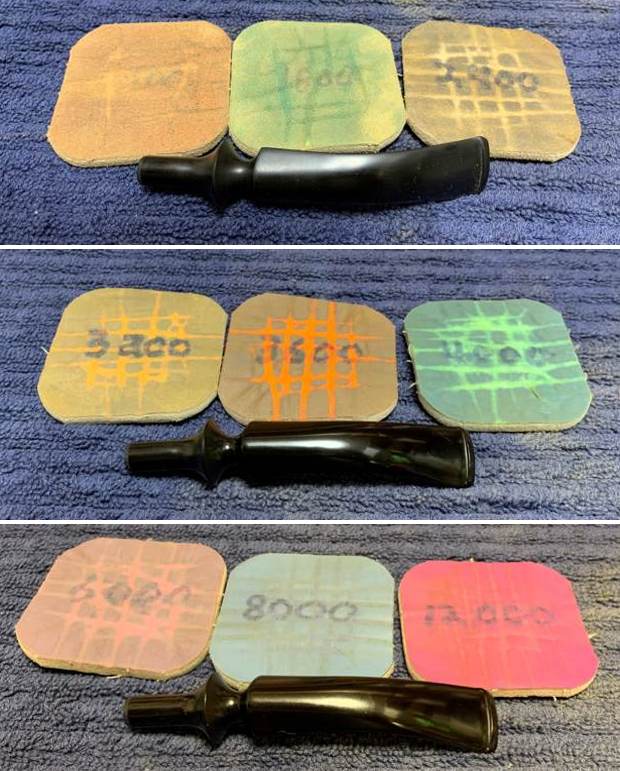
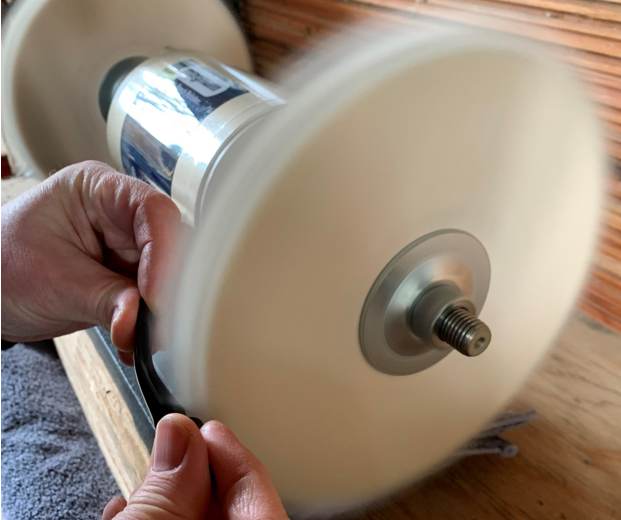
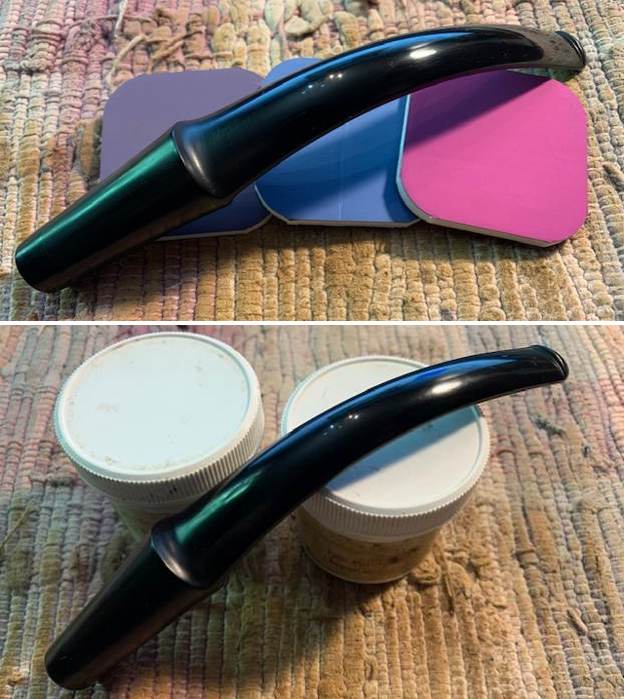
 I set the bowl aside and turned to work on the stem. I polished the vulcanite stem with micromesh sanding pads – 1500-12000 grit pads. I wiped it down with Obsidian Oil after each sanding pad. I used Before & After Pipe Polish – both Fine and Extra Fine to further polish the stem.
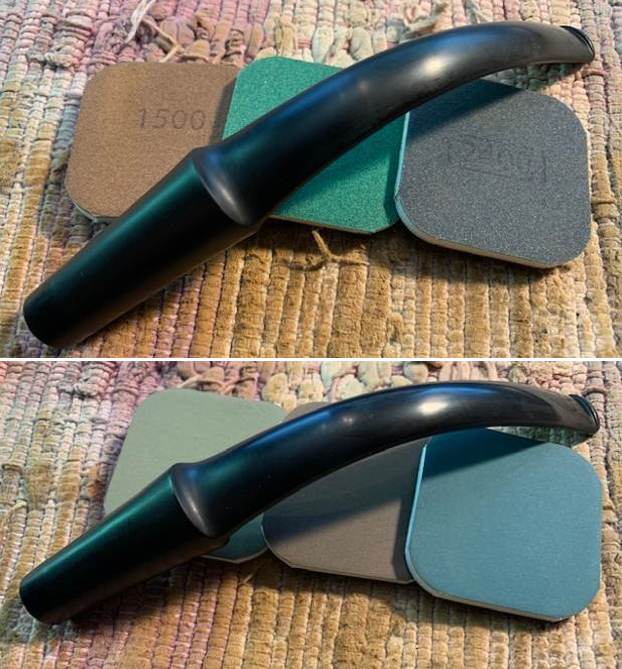
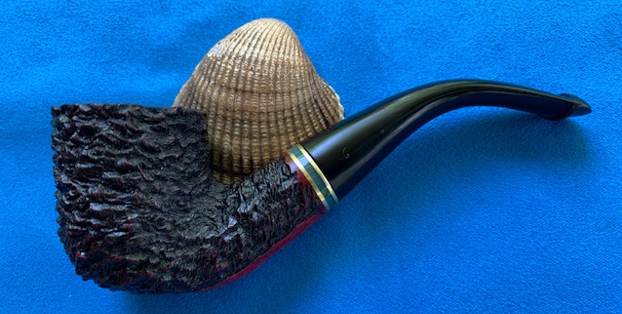
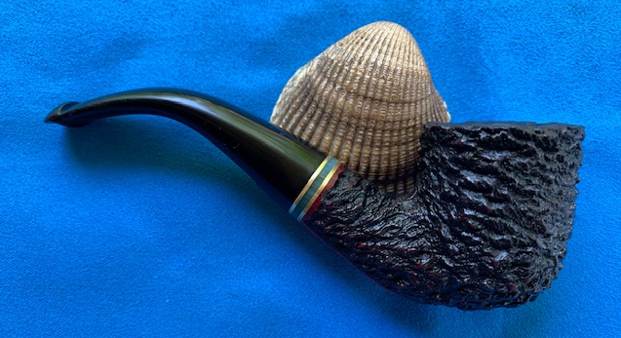
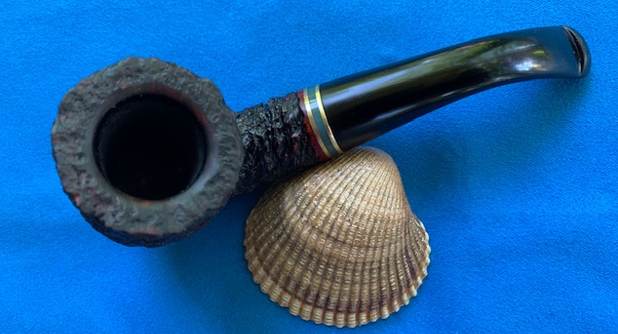
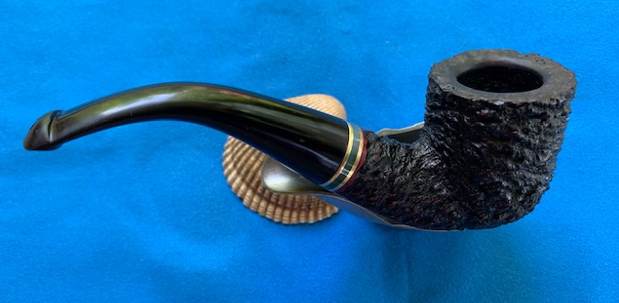
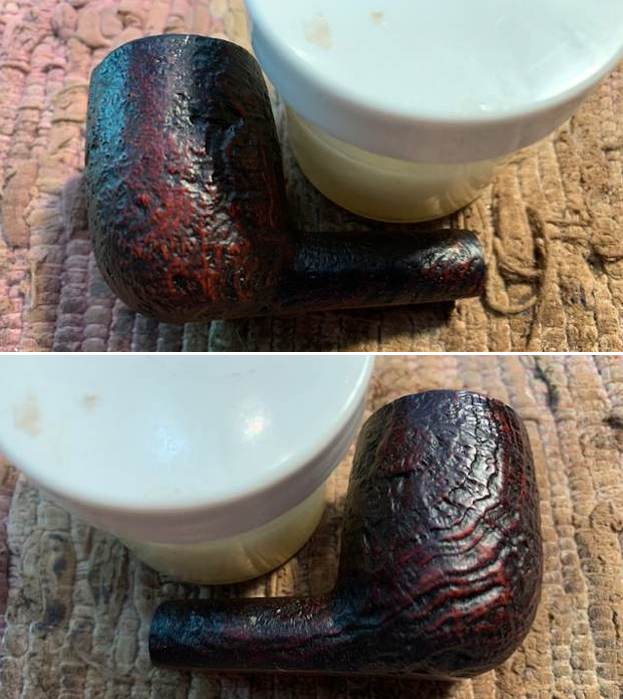
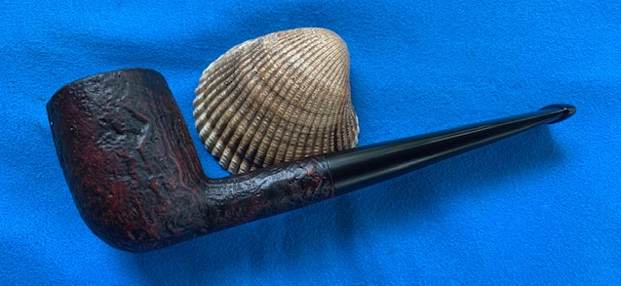
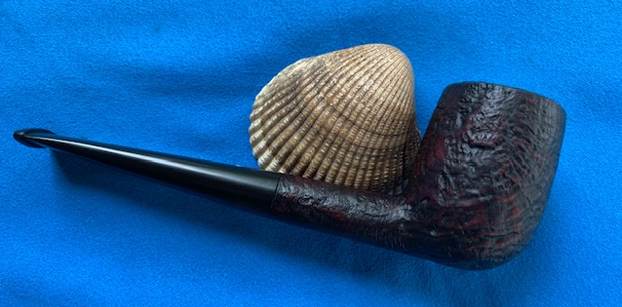
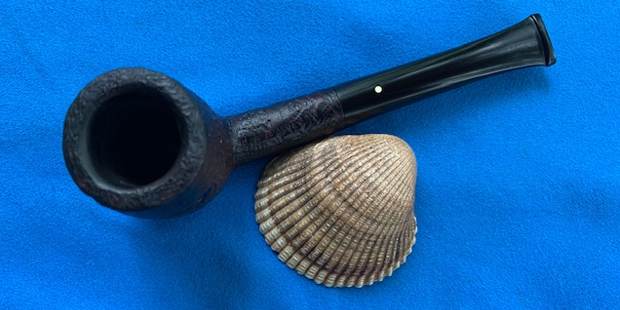
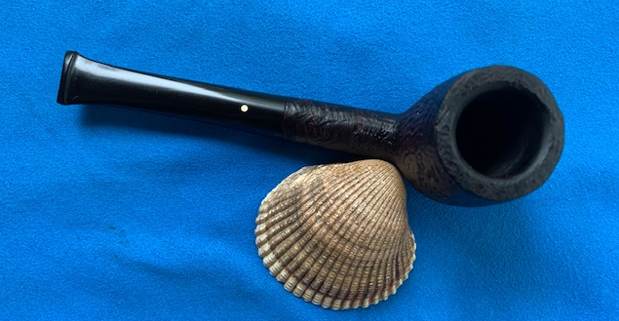
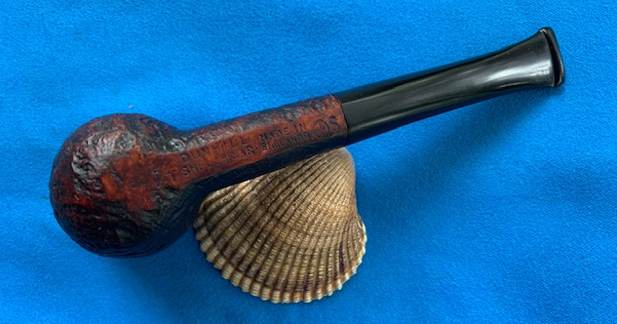
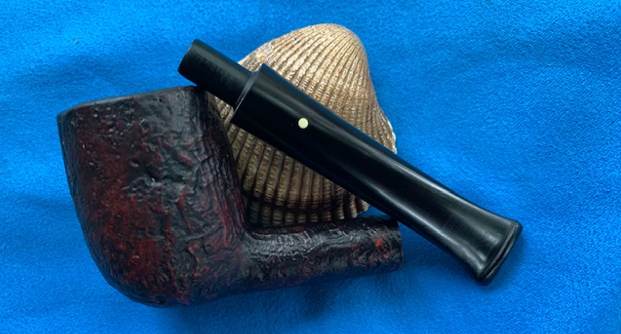
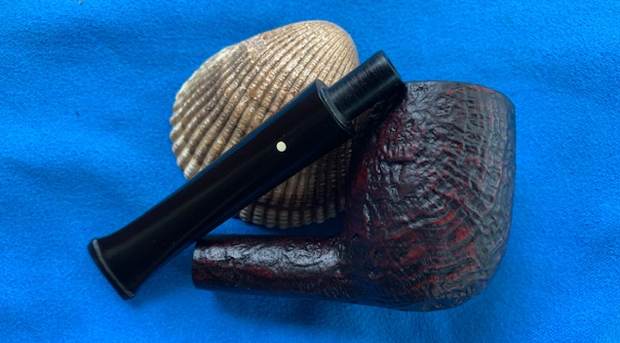
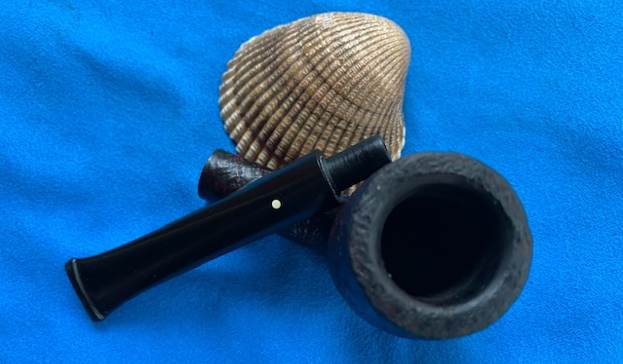
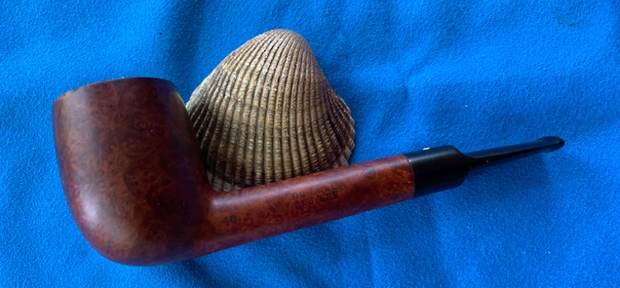
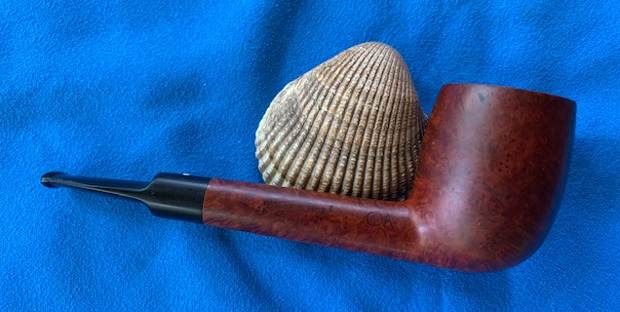
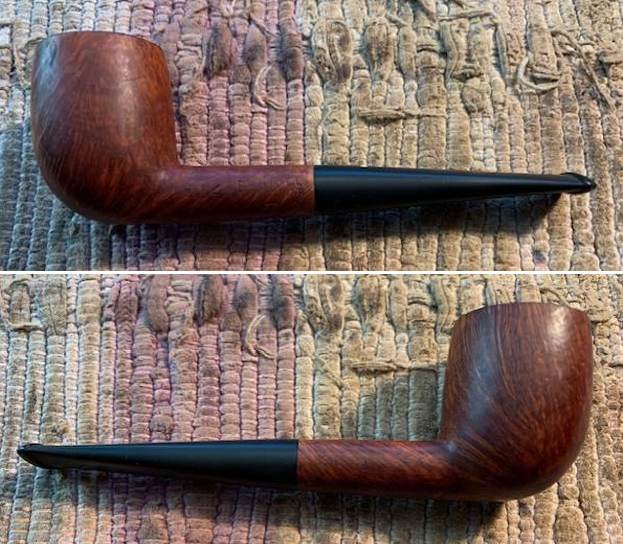
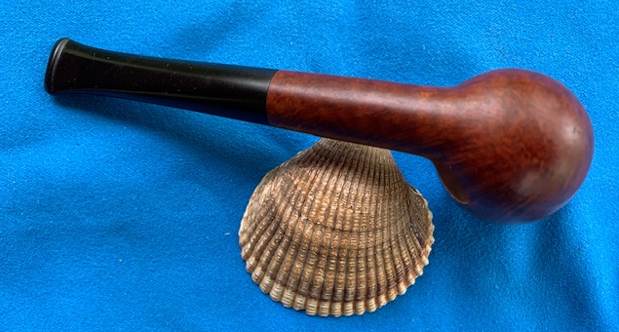
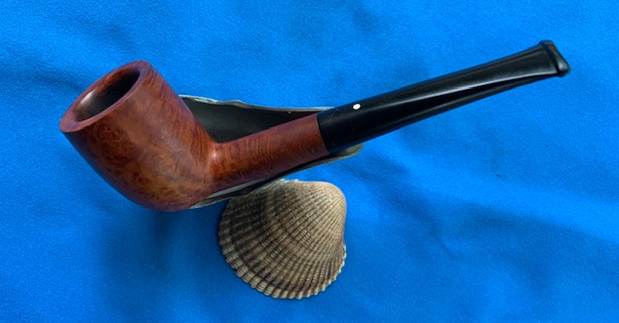
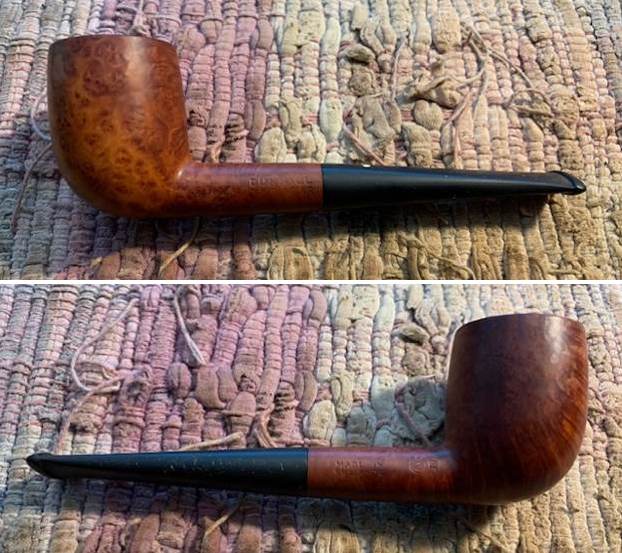
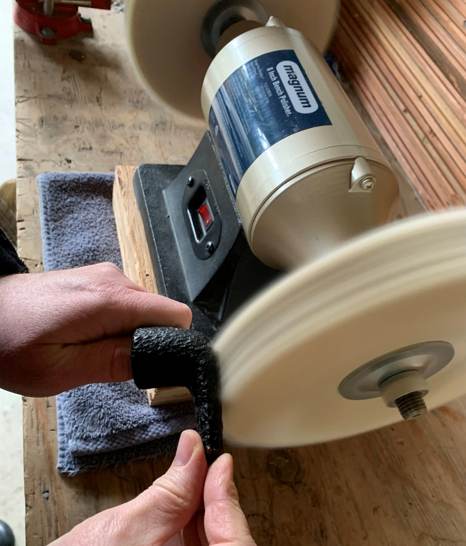
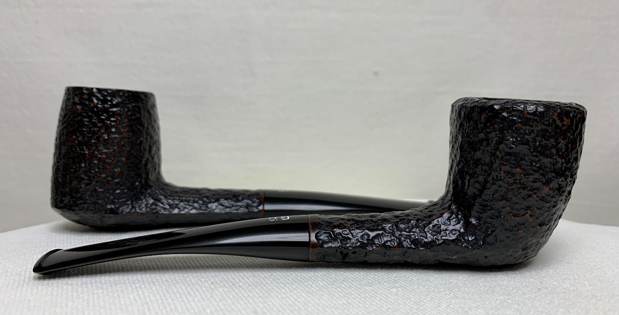
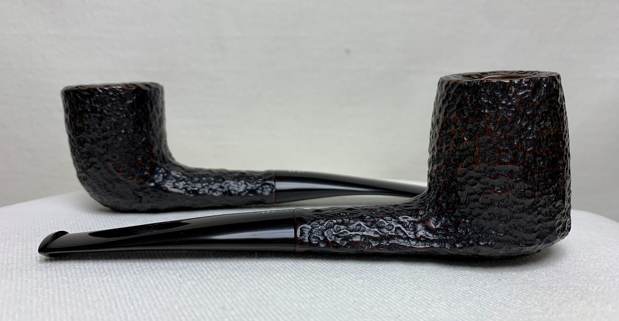
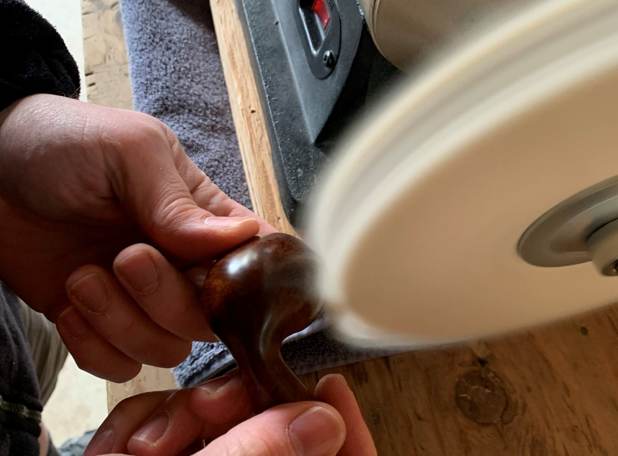
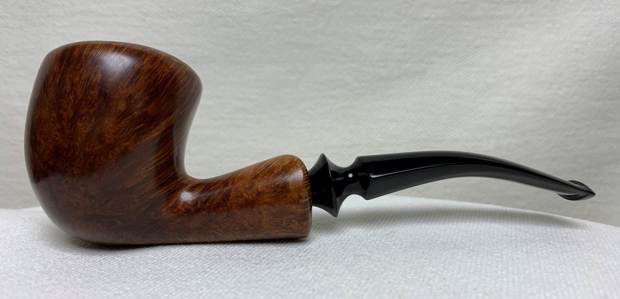
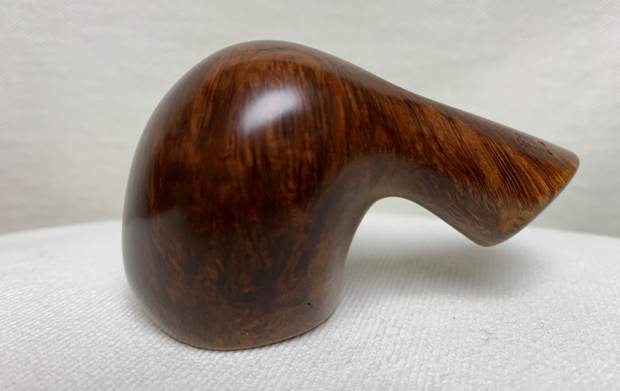
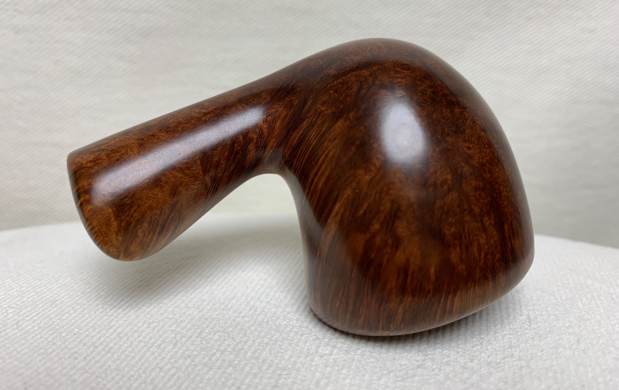
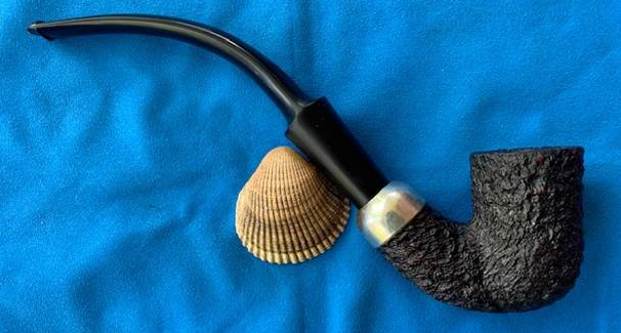
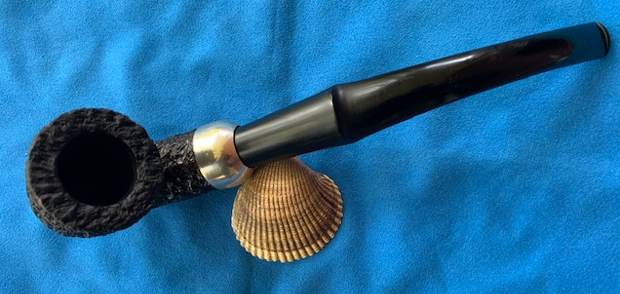
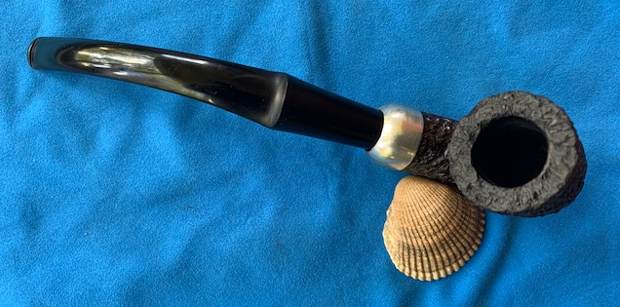
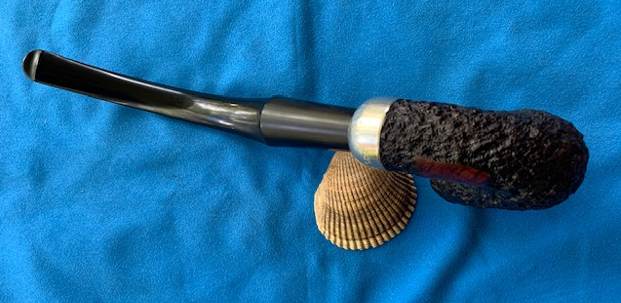
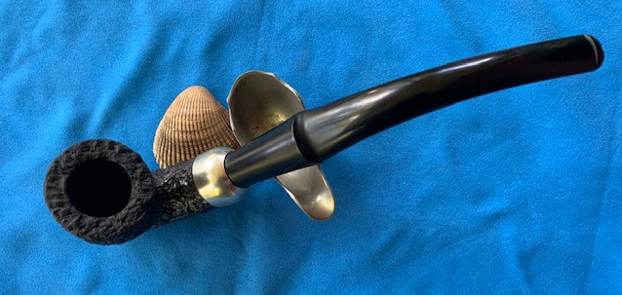
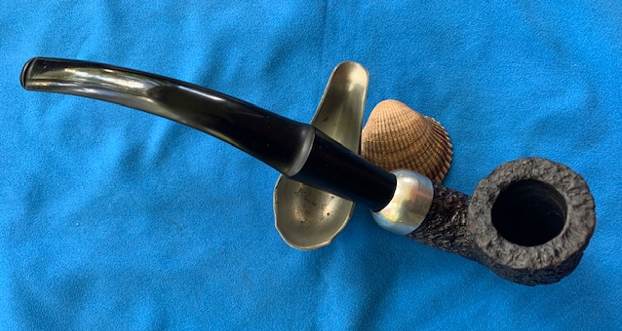
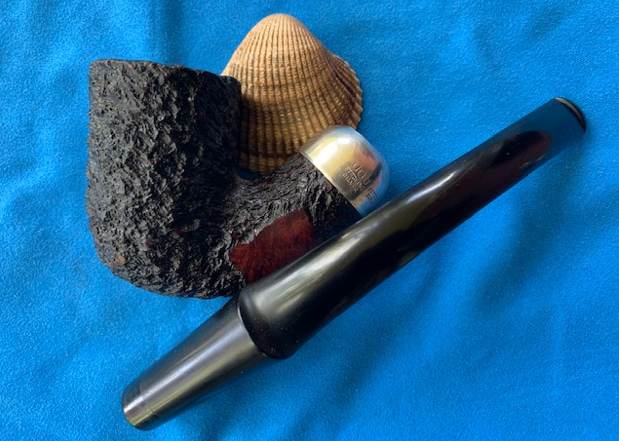
 This Beautiful Rustic Peterson’s Pre-Republic System House Pipe Shape 1 “Dutch Billiard” is a great looking pipe now that it has been restored. The style of rustication that is used around the bowl is highlighted by the dark, rich stain application and works well with both the polished Sterling Silver ferrule and vulcanite stem. I put the stem back on the bowl and carefully buffed the pipe with Blue Diamond on the buffing wheel using a light touch on the briar. I gave the bowl multiple coats of Conservator’s Wax and the stem multiple coats of carnauba wax on the buffing wheel and followed that by buffing the entire pipe with a clean buffing pad. I hand buffed the pipe with a microfiber cloth to deepen the shine. The finished Rustic Peterson’s System House Pipe is a large pipe that will be great for sitting and reading on the porch. Give the finished pipe a look in the photos below. The dimensions of the pipe are Length: 9 inches, Height: 2 ½ inches, Outside diameter of the bowl: 1 ¾ inches, Chamber diameter: 1 inch. The weight of the pipe is 101 grams/3.56 ounces. This is a pipe that I am adding to my own collection for now. I hope to enjoy it many times on the front porch over the summer ahead. I take a moment to remind myself and each of us that we are trustees of pipes that will outlive us and the lives of many other pipe men and women who carry on the trust of their care and use. Thanks for reading this blog and my reflections on the pipe while I worked on it.
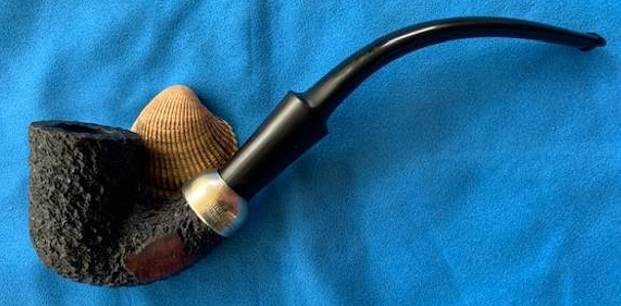


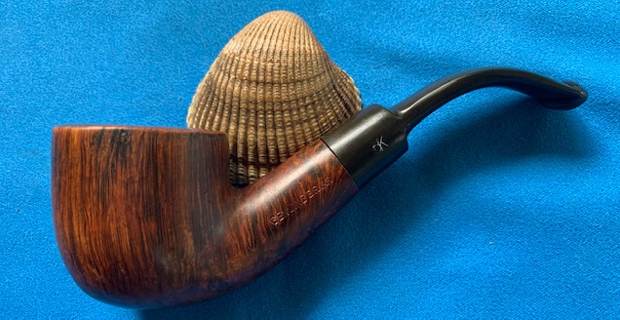
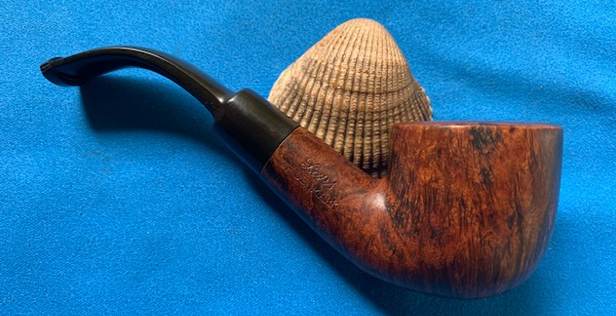
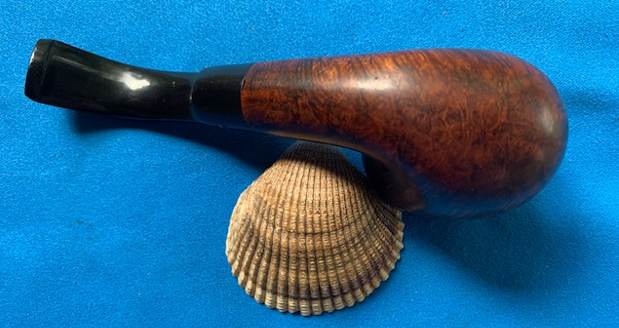
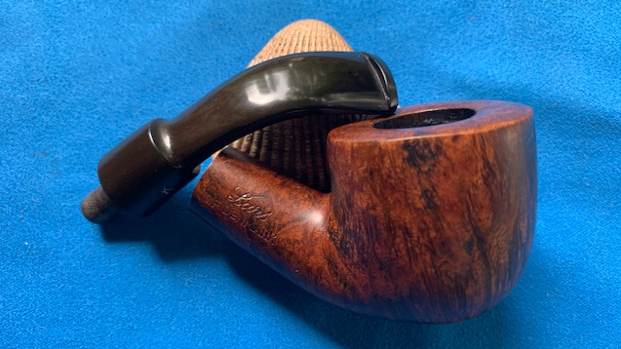
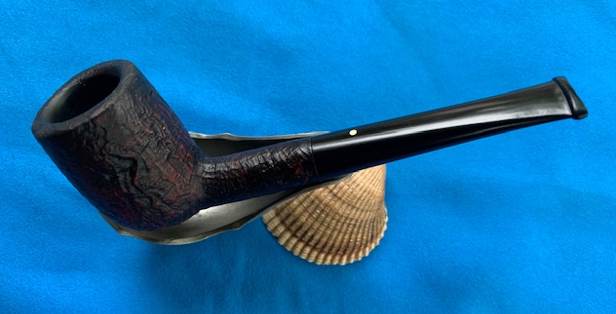
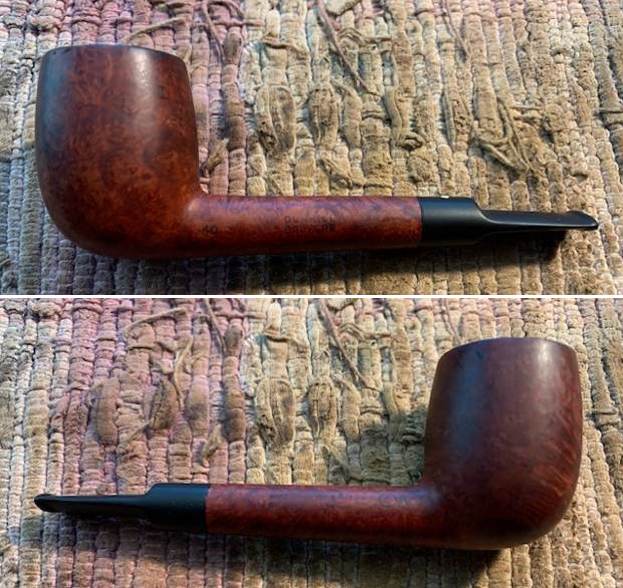
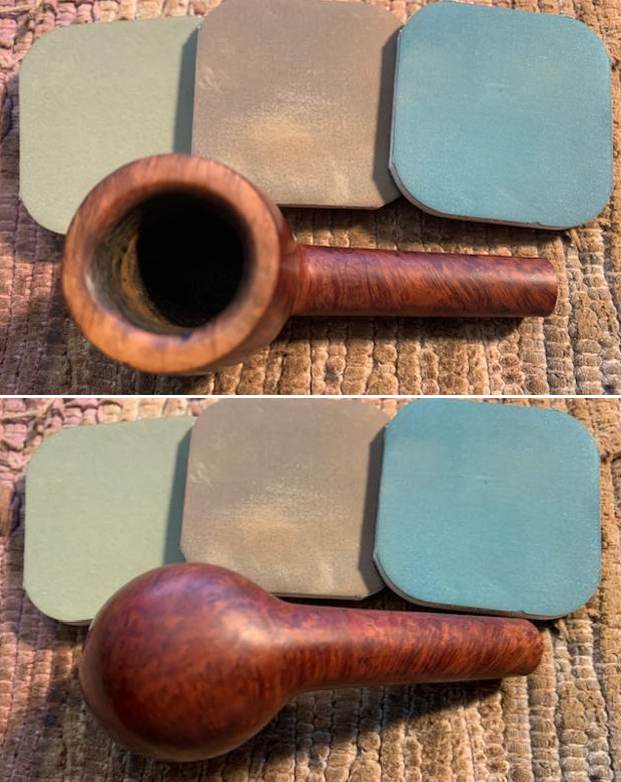
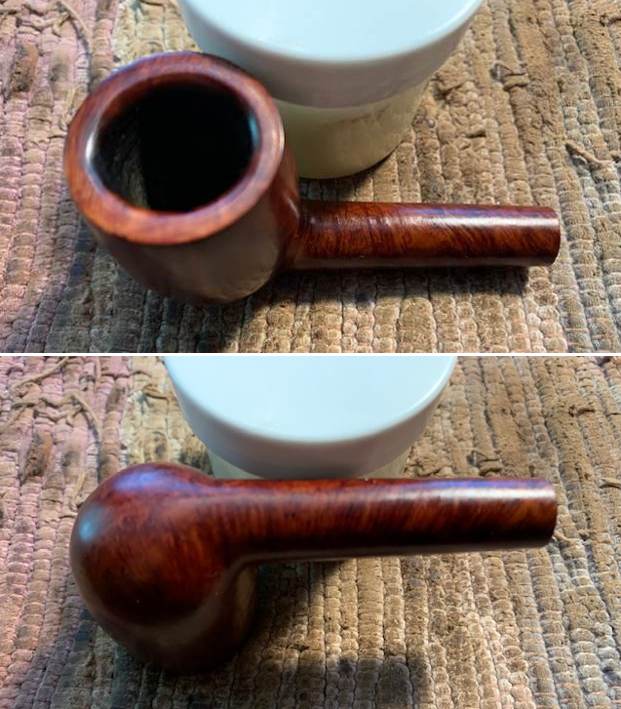
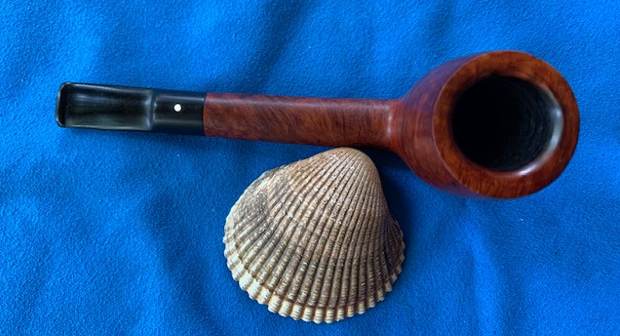
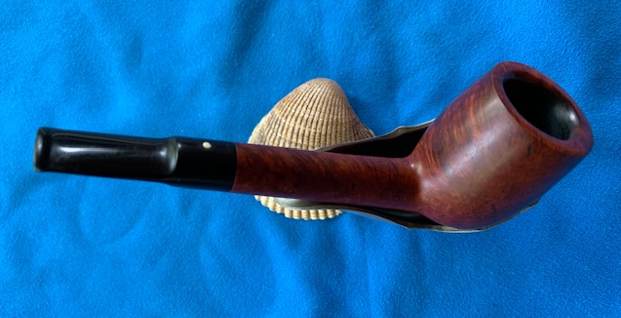
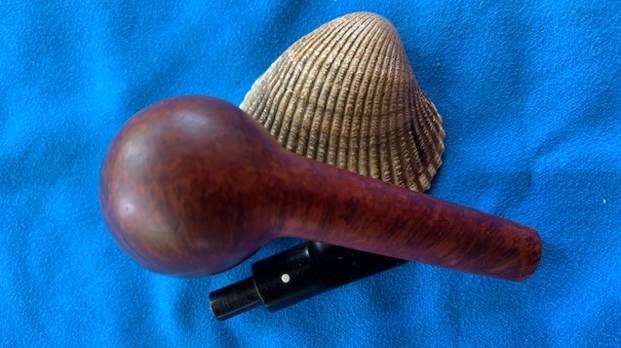
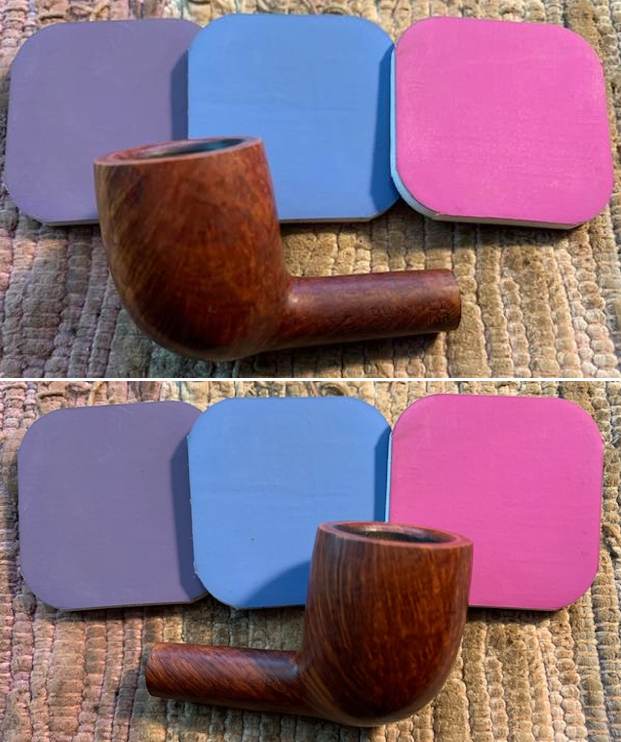
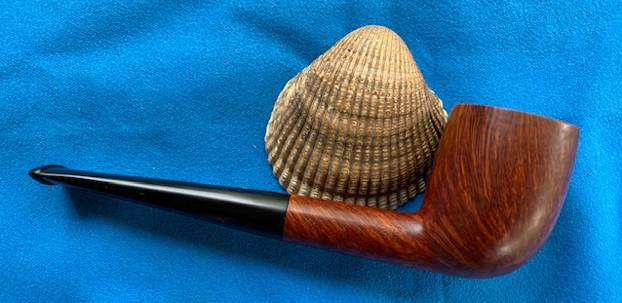
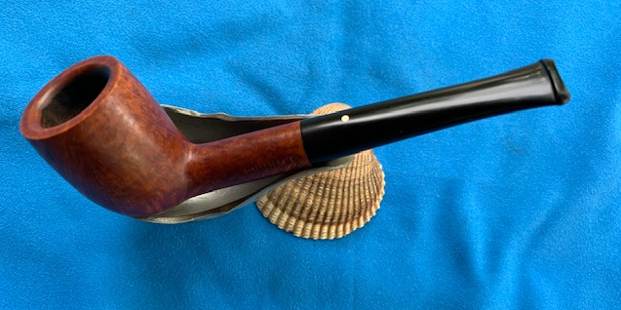
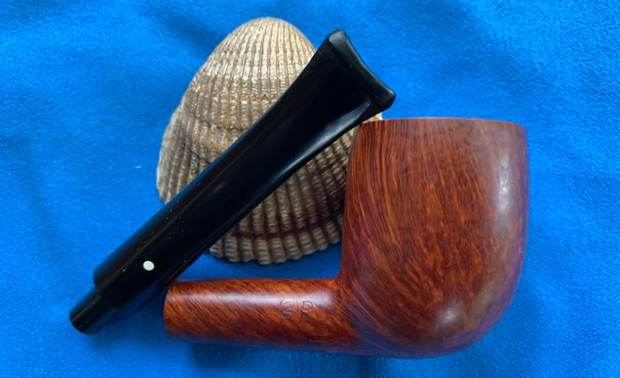
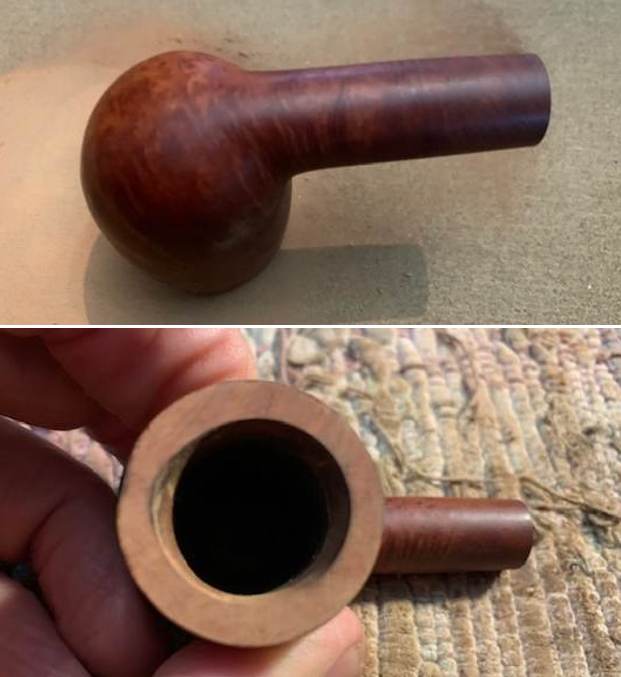
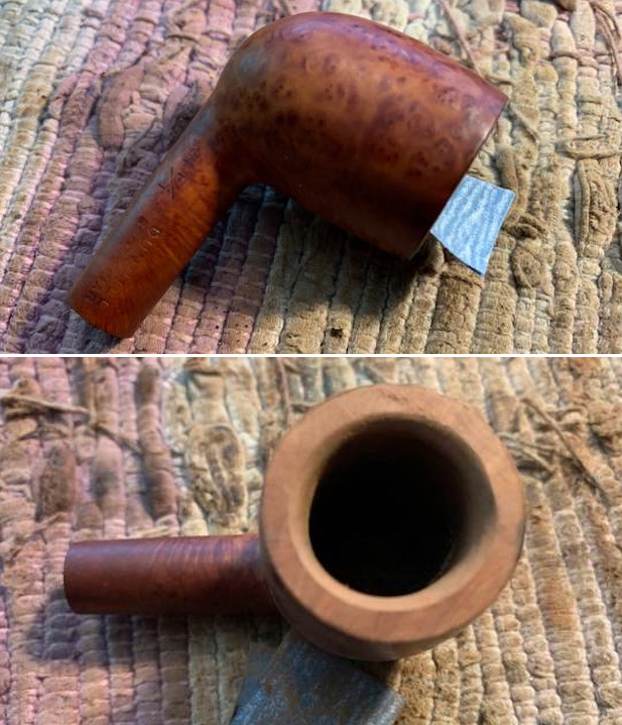
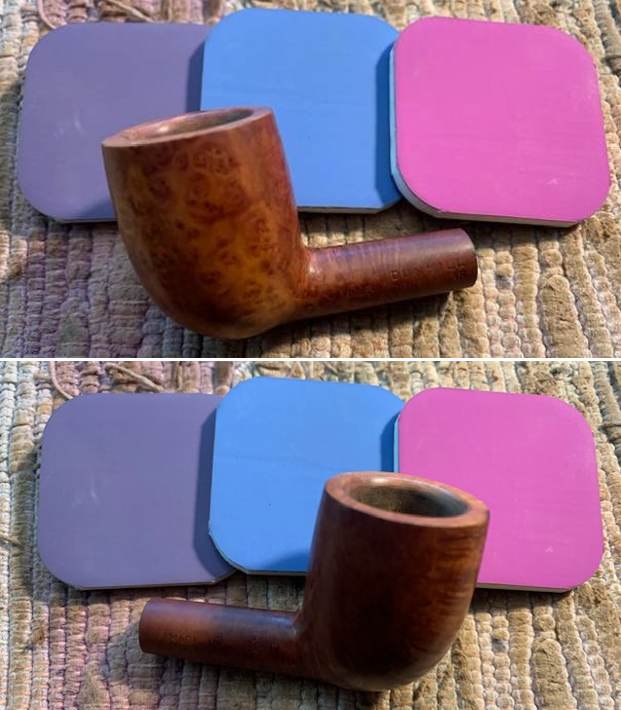
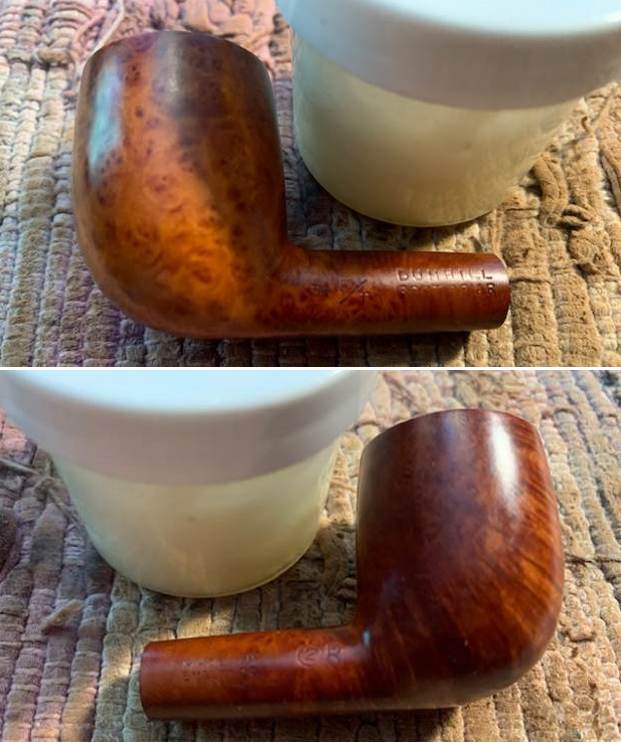
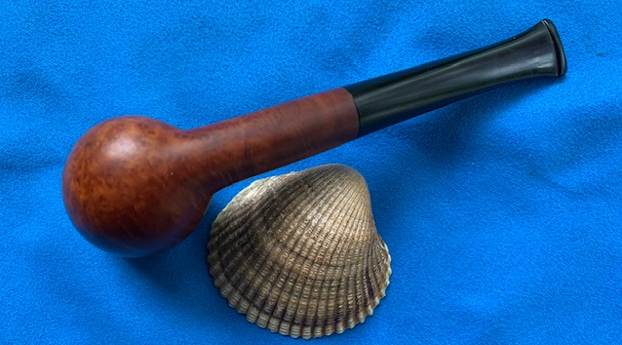
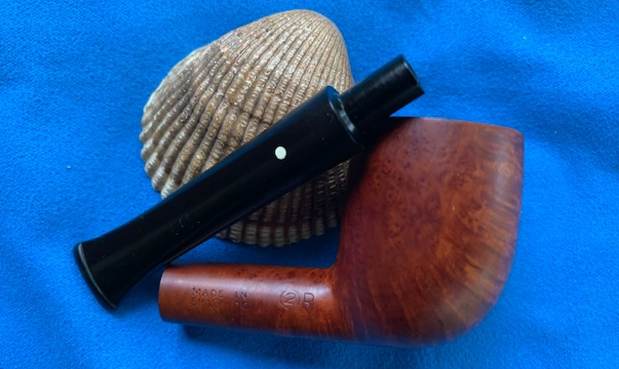
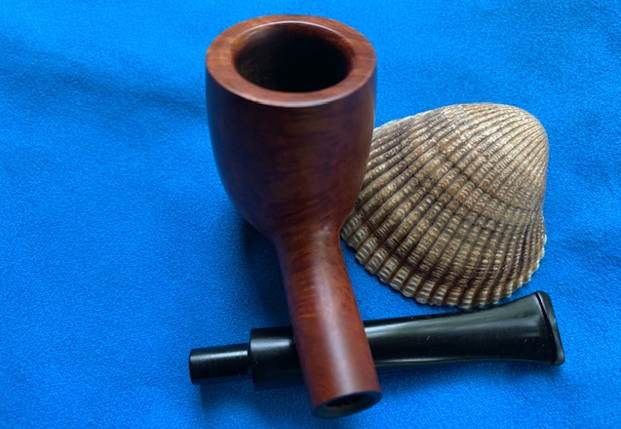
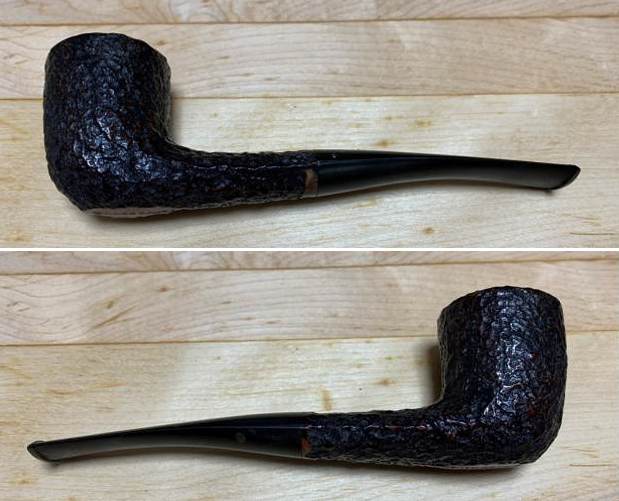
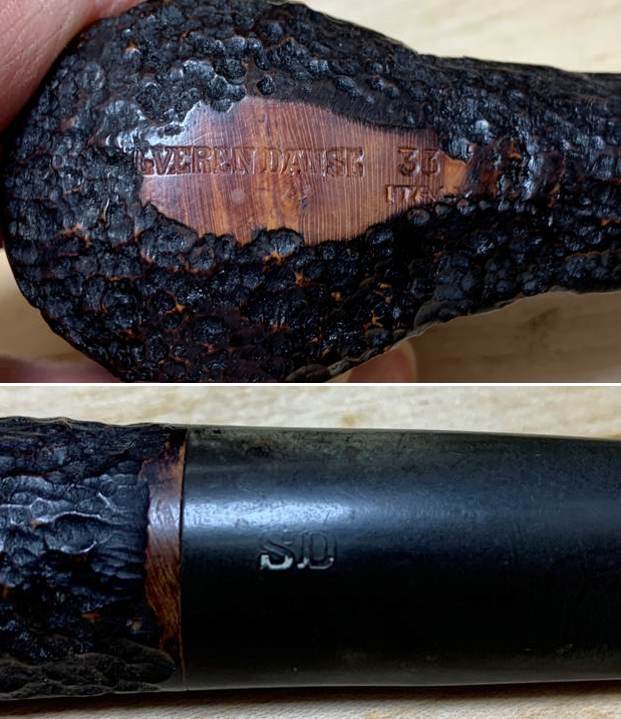
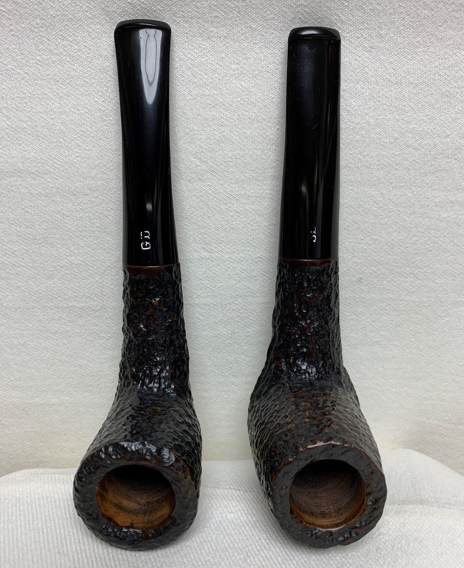
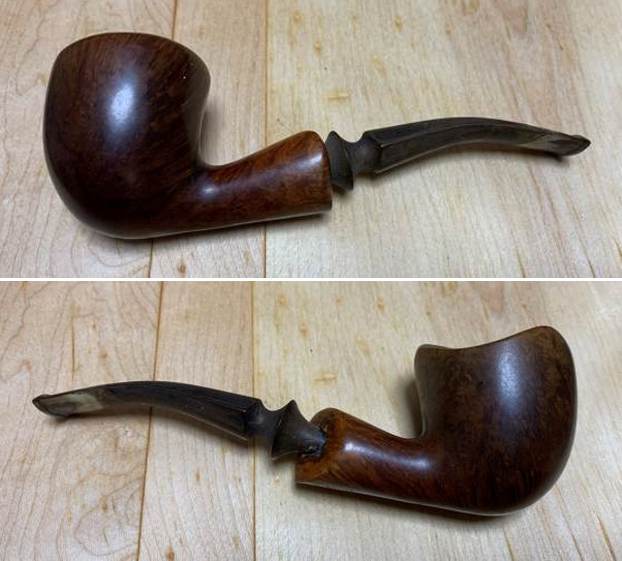
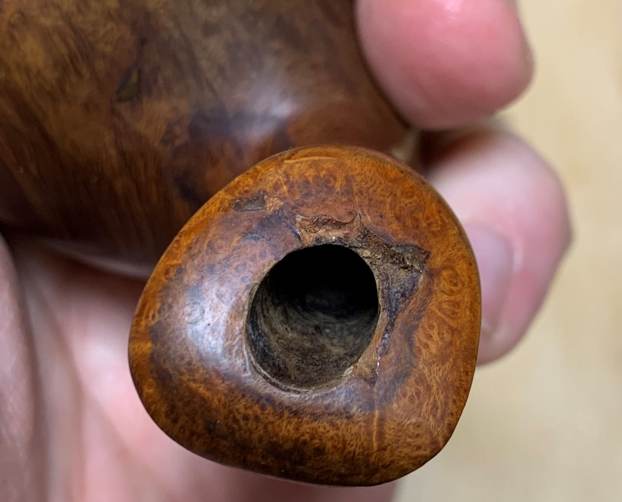
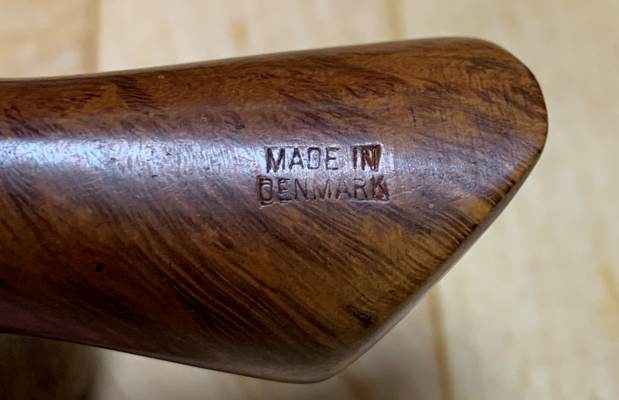
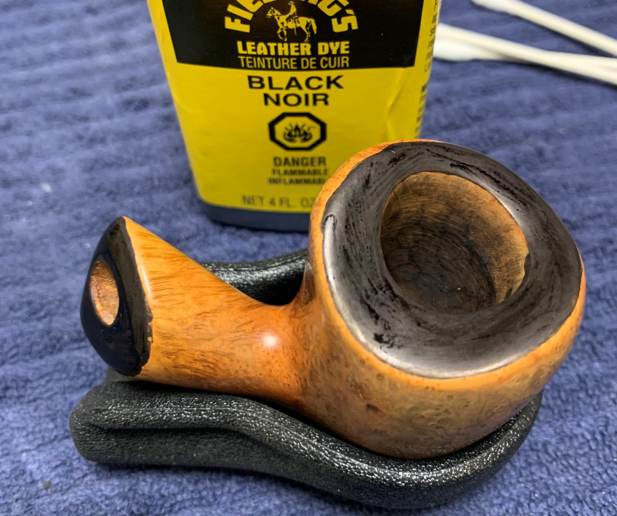
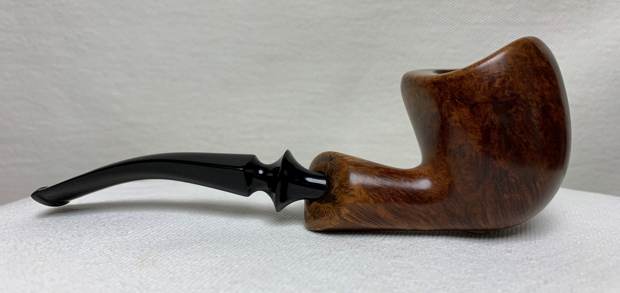
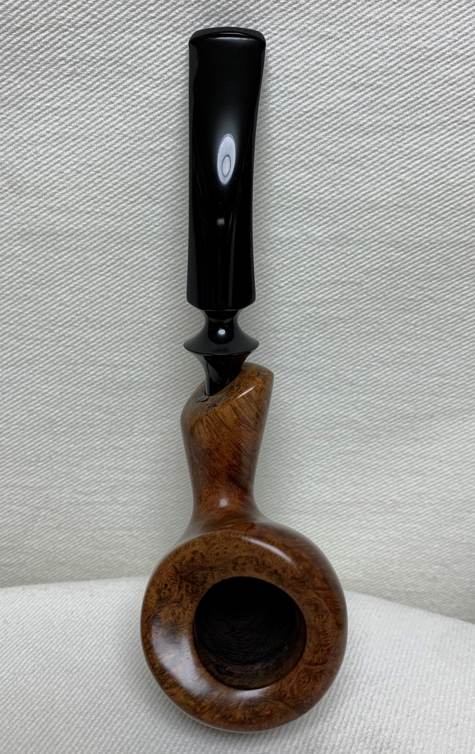
 The fourth and final one I am working on is another bent Pot. I have circled it in red in the photo above. The stem has a logo on the left side of the saddle that is a “dk” (Denmark I believe). The bowl was clean but had a bowl coating on the bowl walls. The rim top and bowl are clean but the finish is a little muddy with marks on the finish. The rim top had some dark stain that was spotty and needed to be removed. The inside of the shank and mortise had some stain inside that was like the walnut stain on the bowl. The vulcanite stem is lightly oxidized and has casting marks on the side of the stem ahead of the saddle portion. It is clean on the inside. The “dk” stamp on the left side is clear and readable. I took photos of the pipe before I started my work on it.
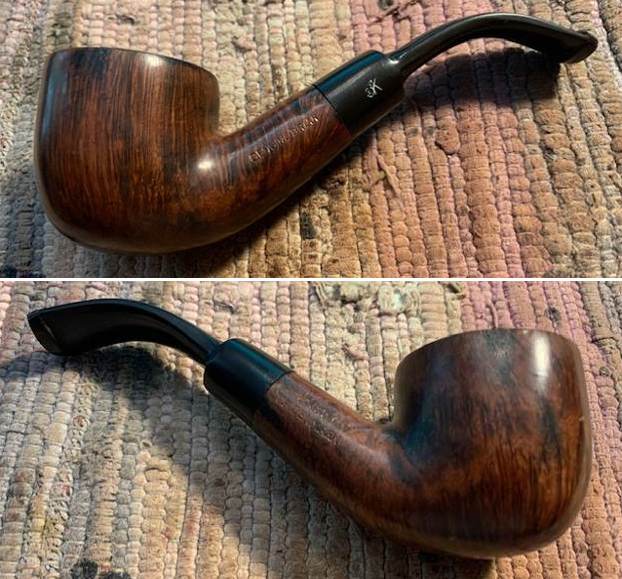
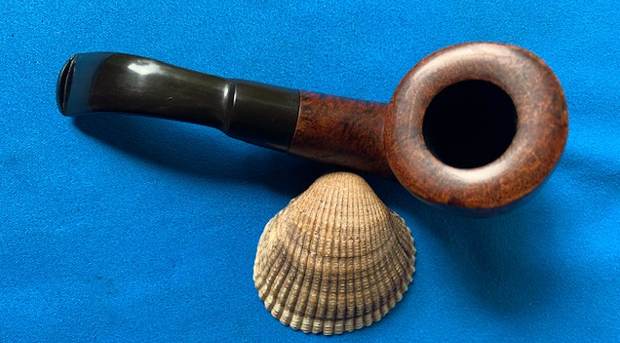
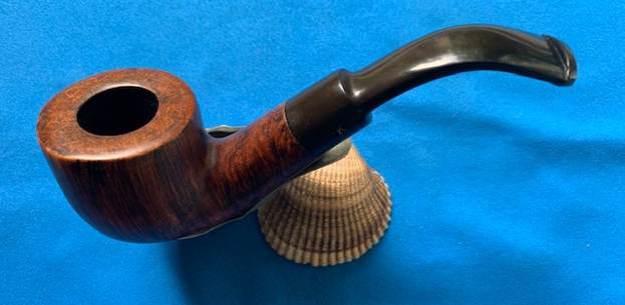
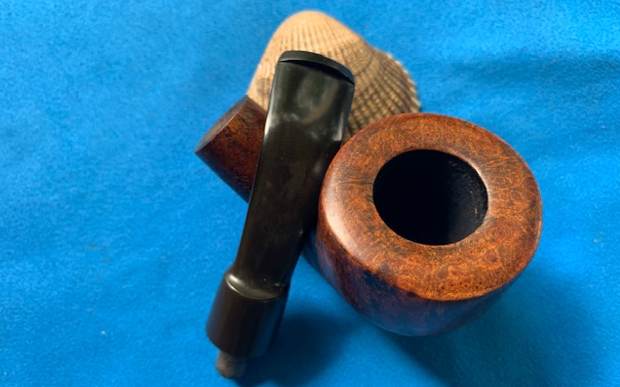
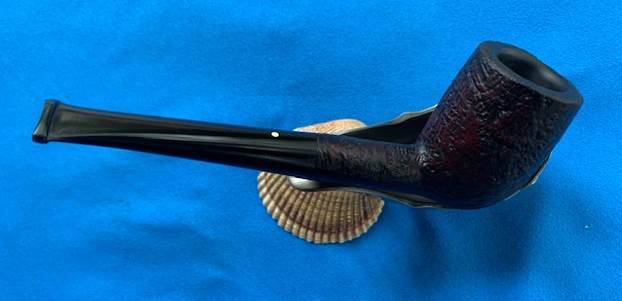
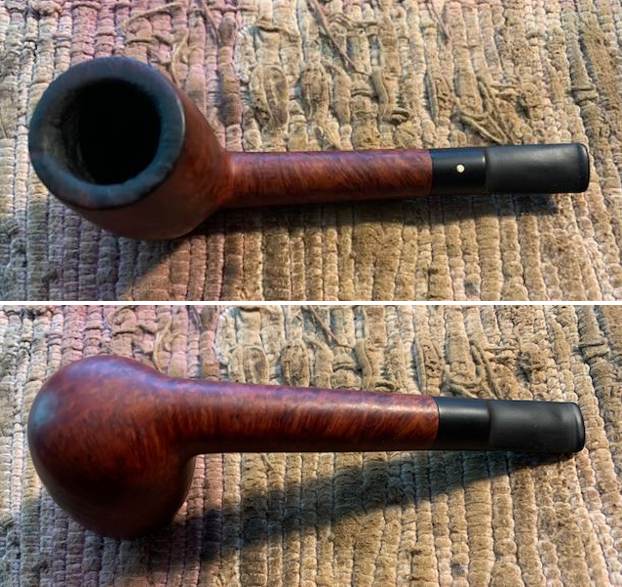
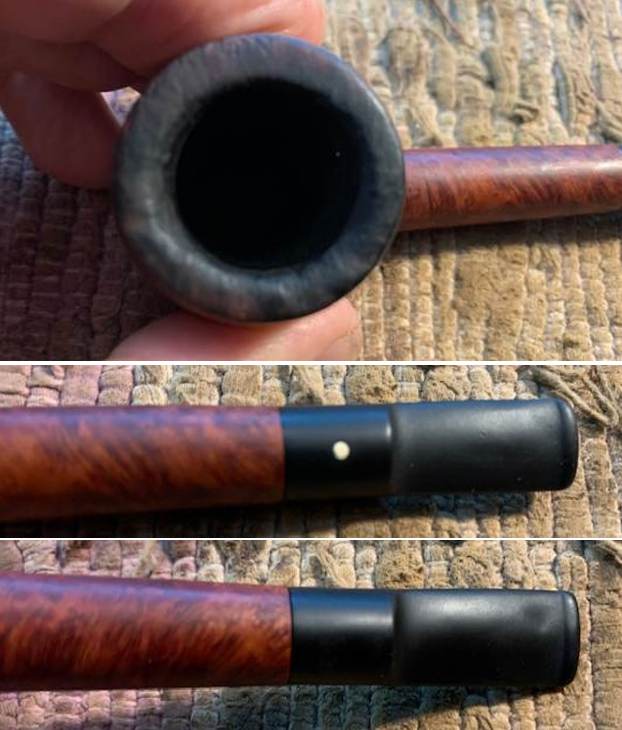
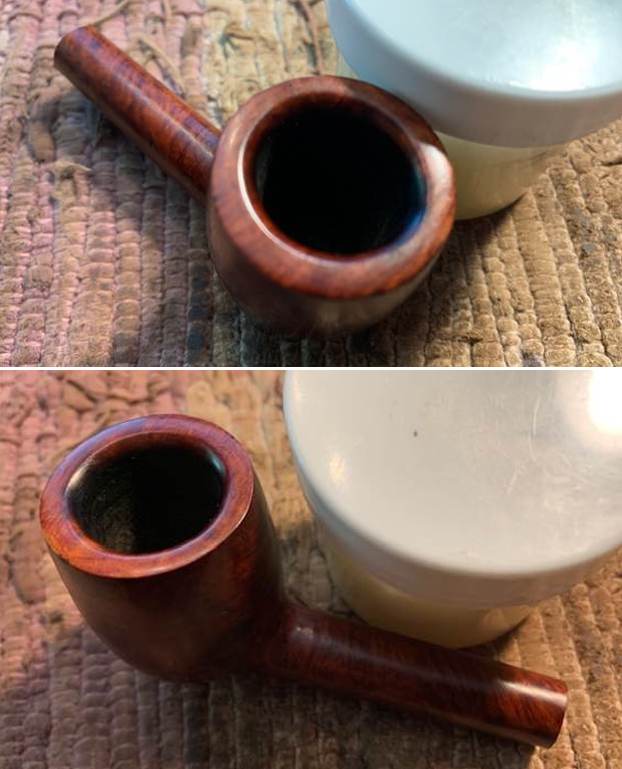
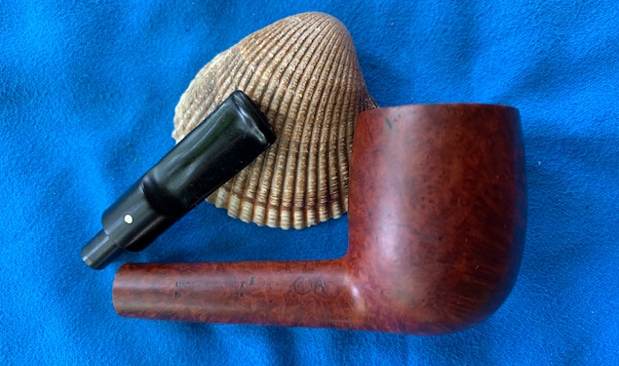
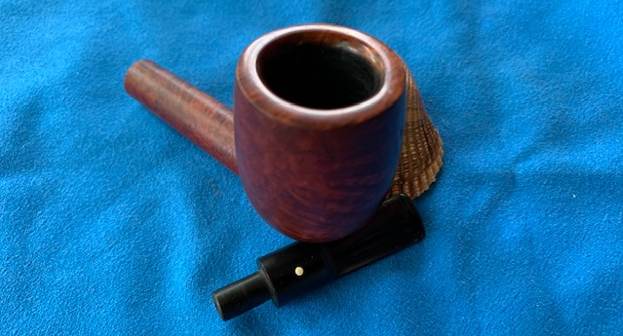
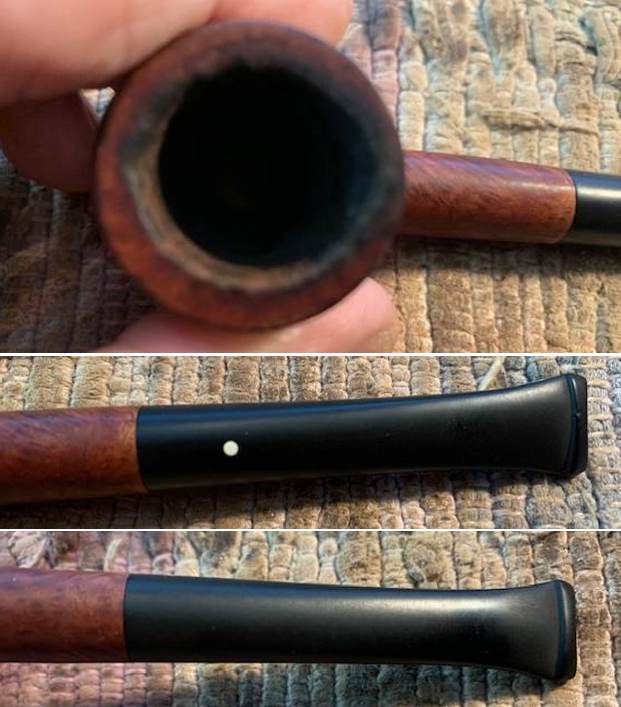
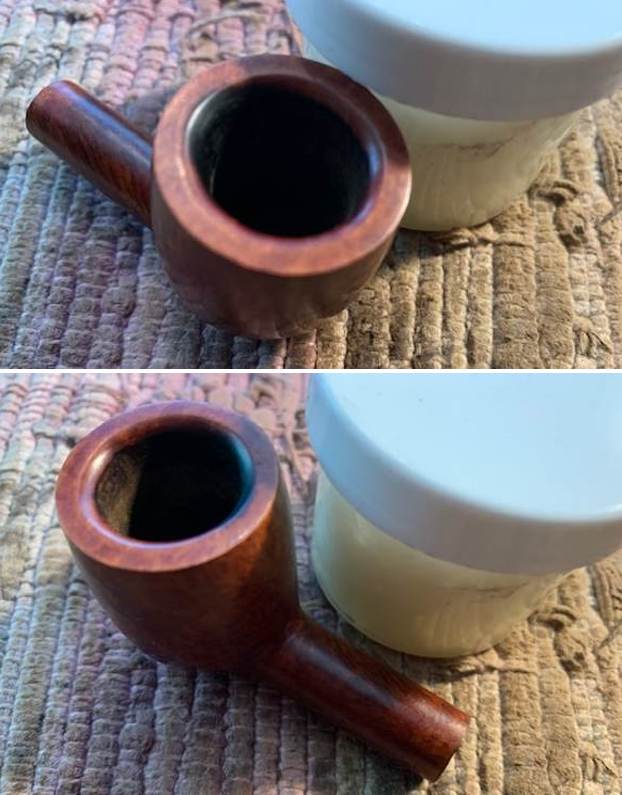
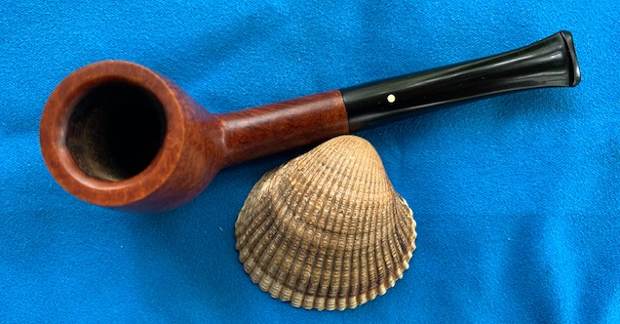
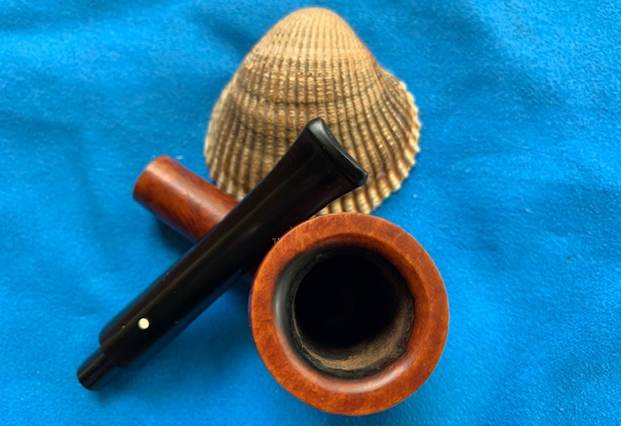
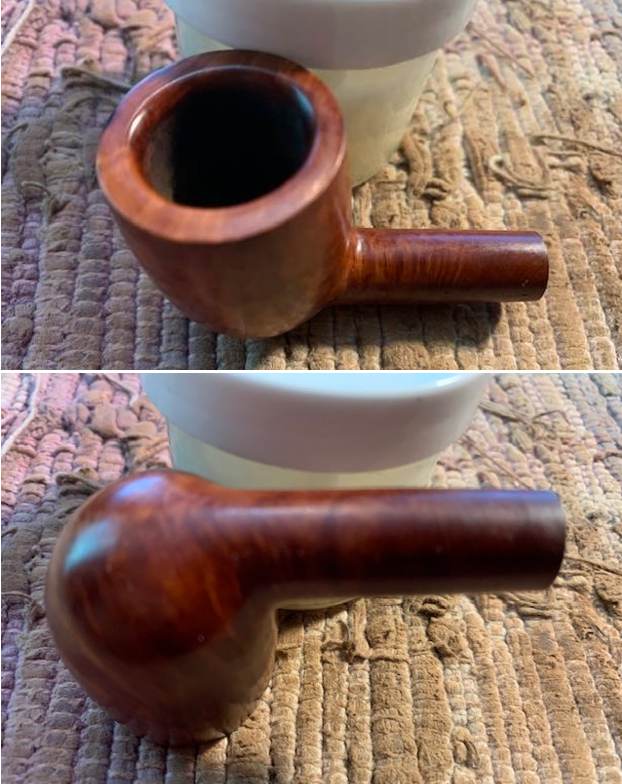
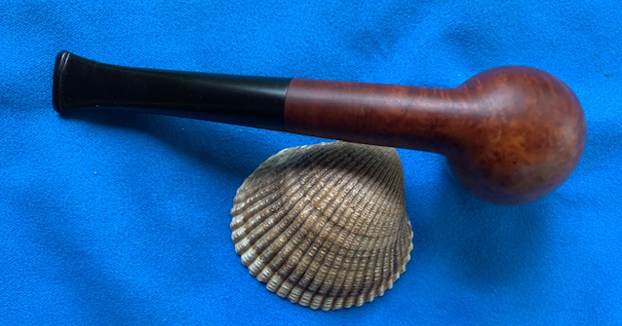
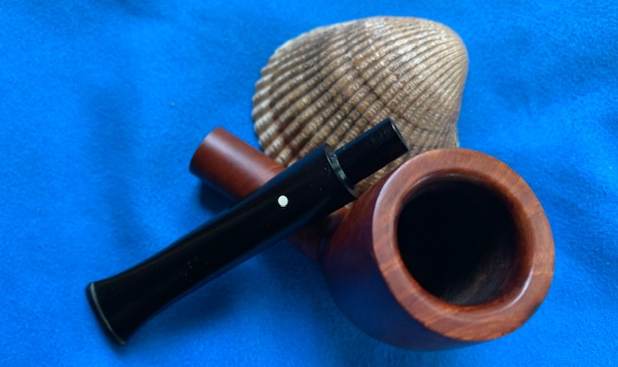
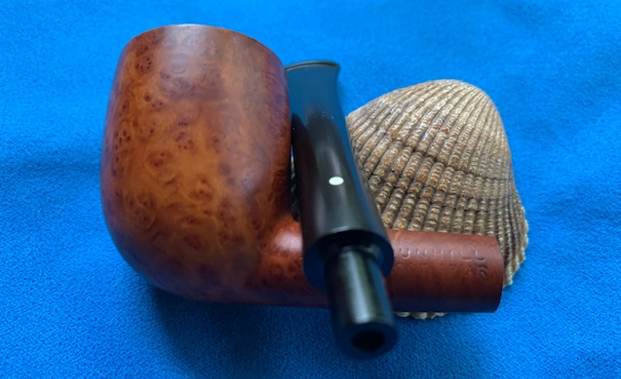
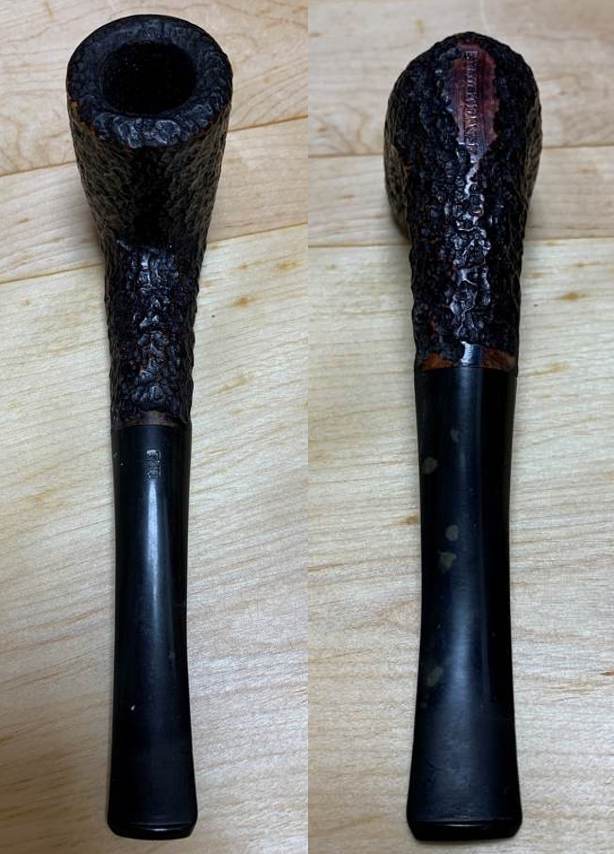
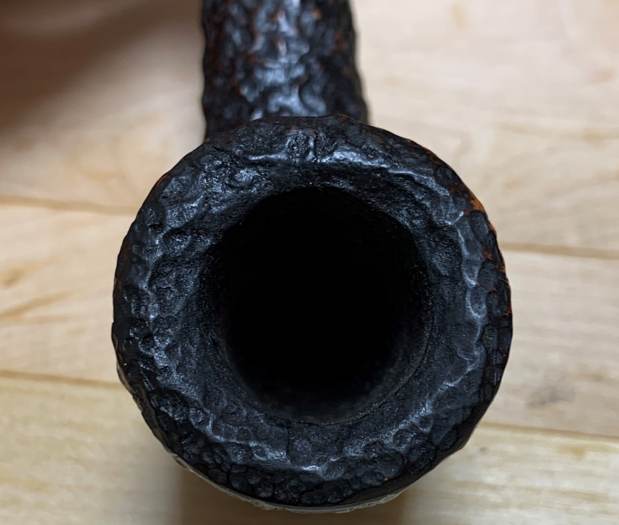
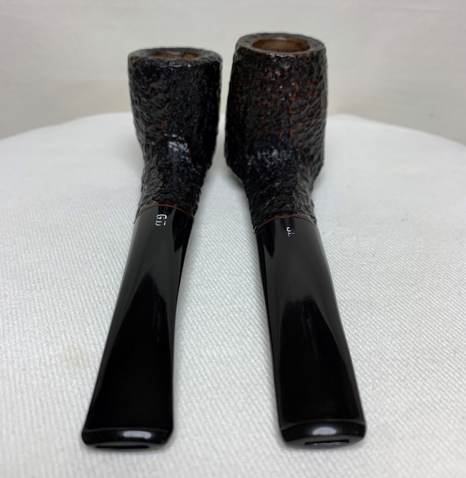
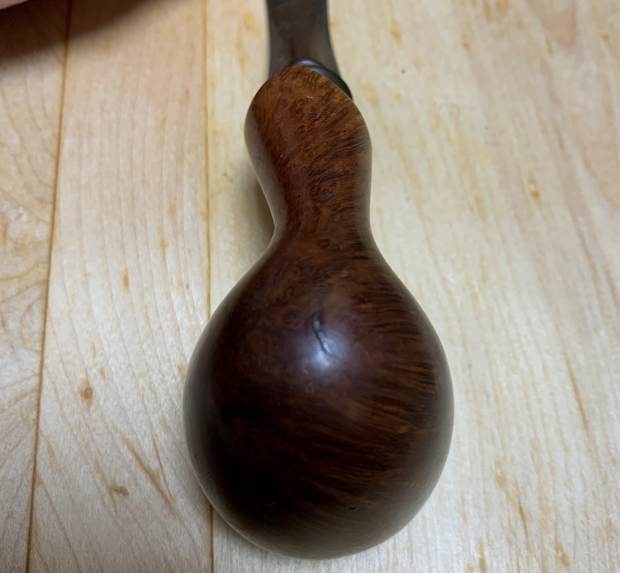
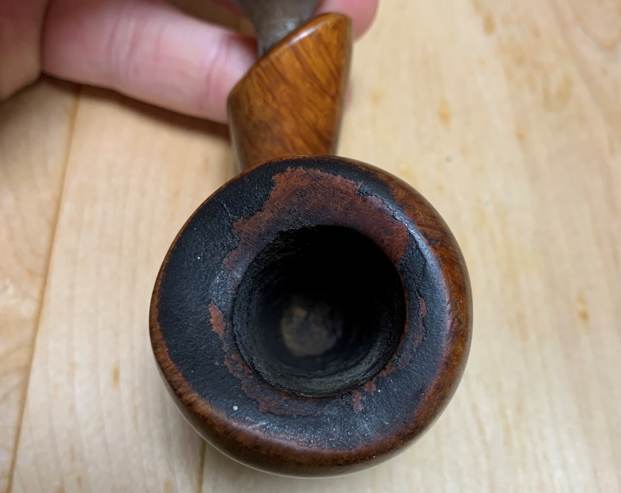
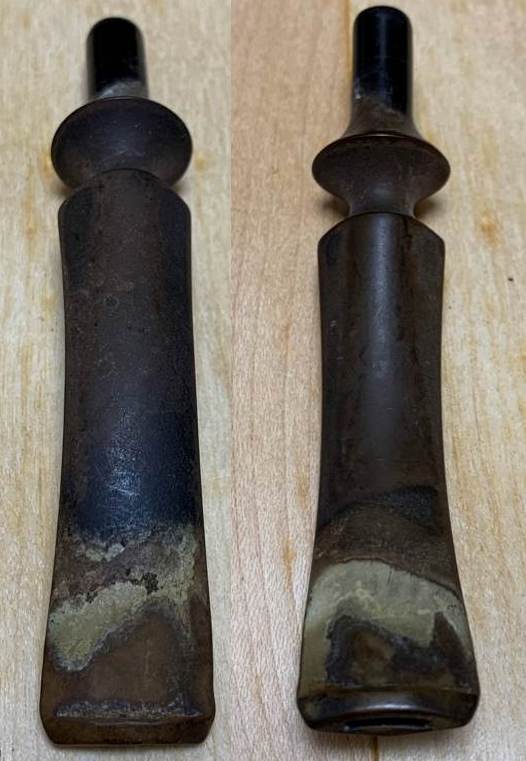
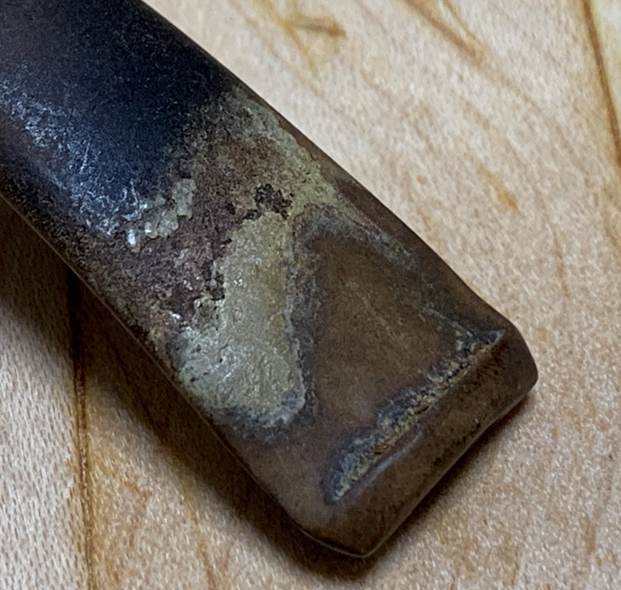
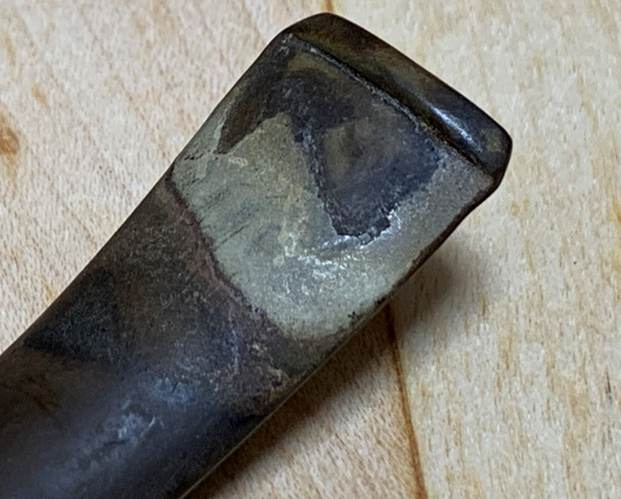
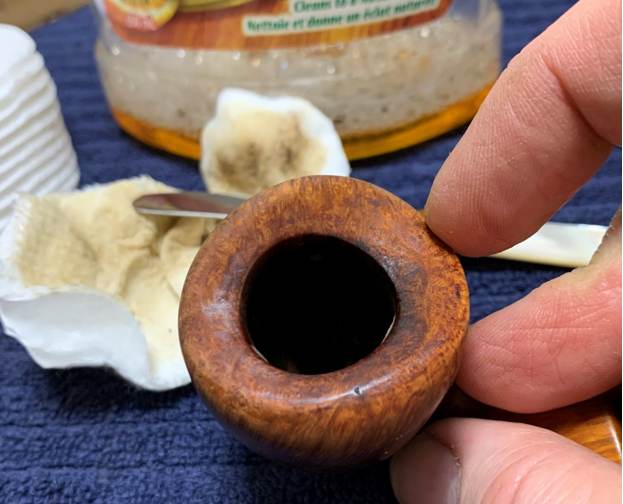
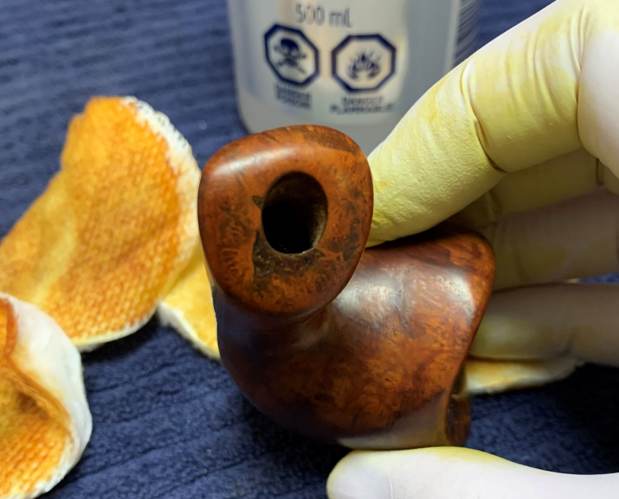
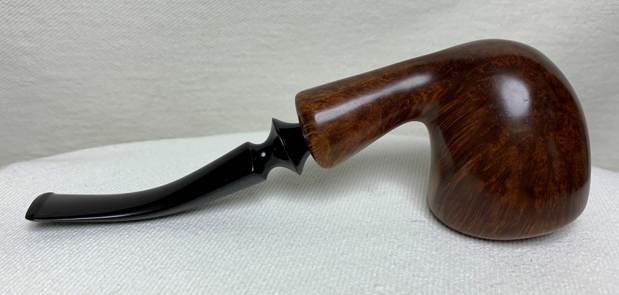
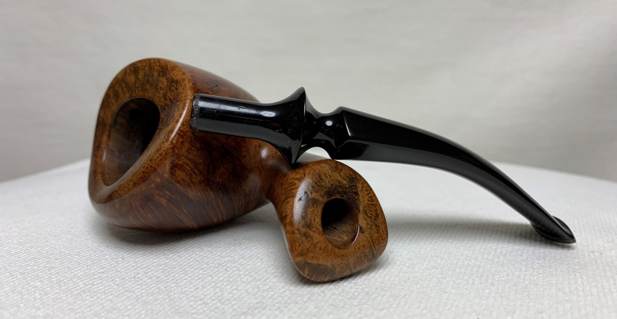
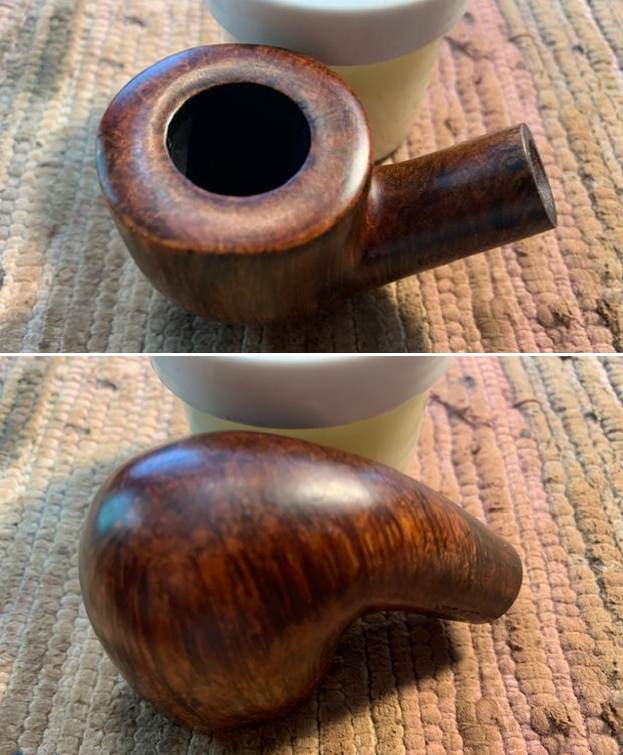
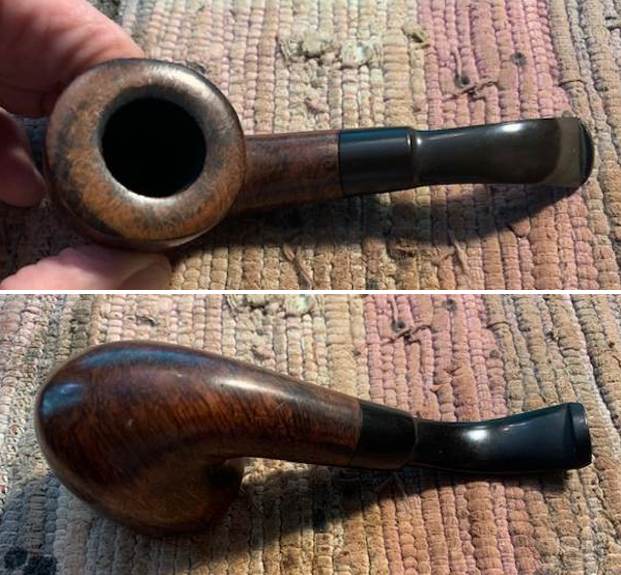 I took a close up photo of the rim top to show some the scuff marks that were on it. The edges of the bowl looked very good. The stem was lightly oxidized and rough with casting marks on the sides of the blade but it was free of tooth marks and chatter.
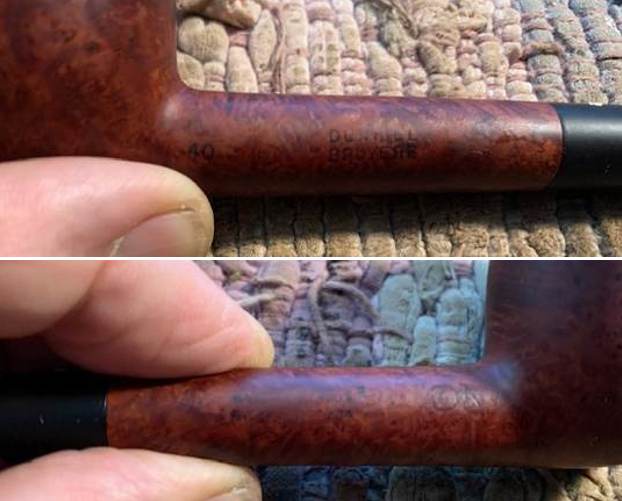
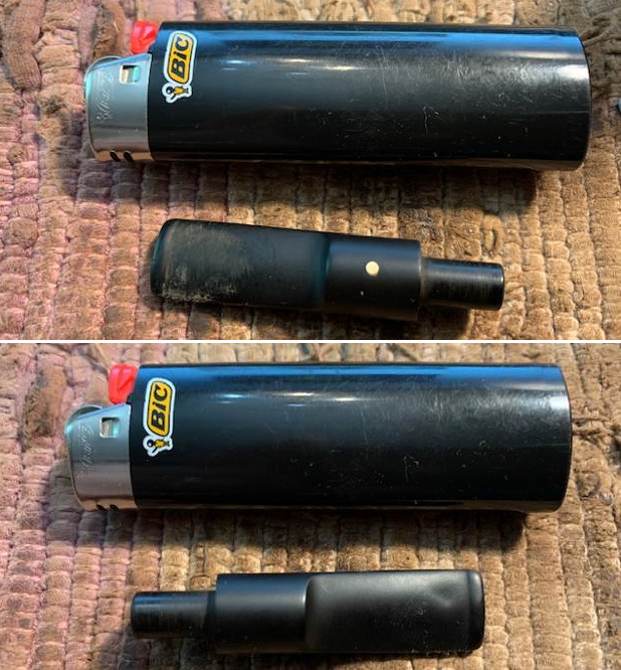
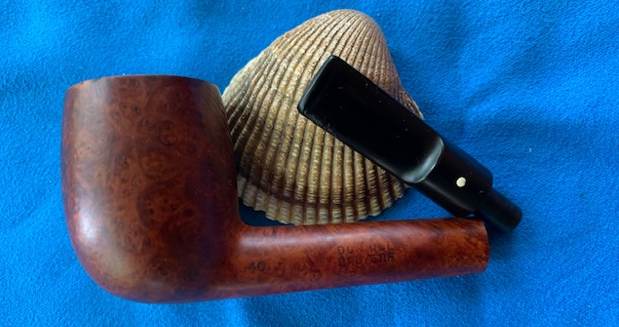
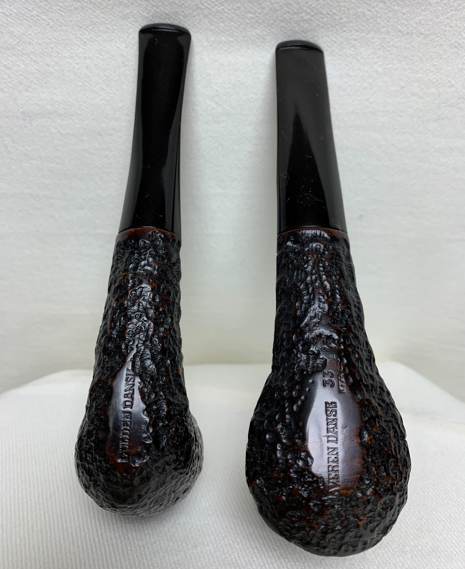
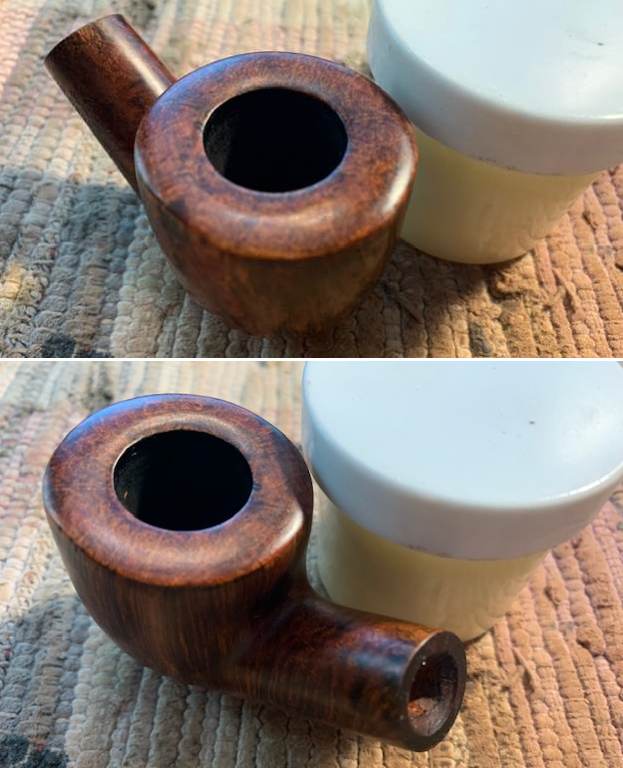
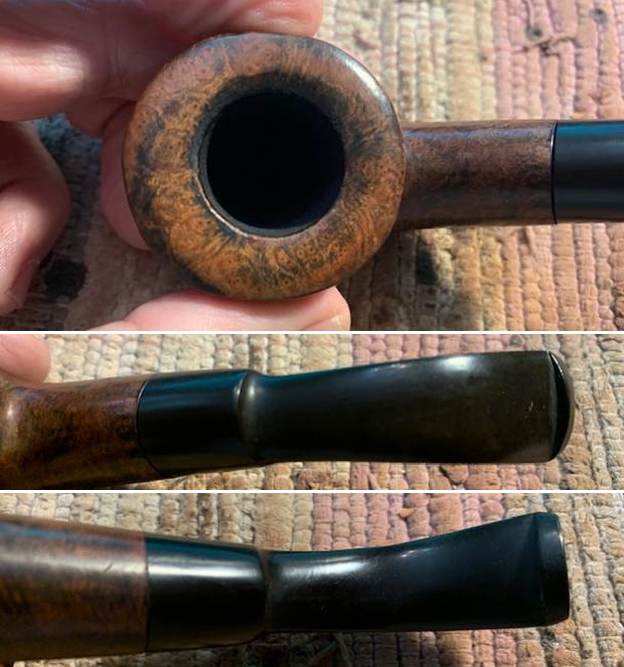 I took photos of the stamping on the sides of the shank. They are clear and readable as noted above. The logo stamp on the left side of the saddle bit is also clear.
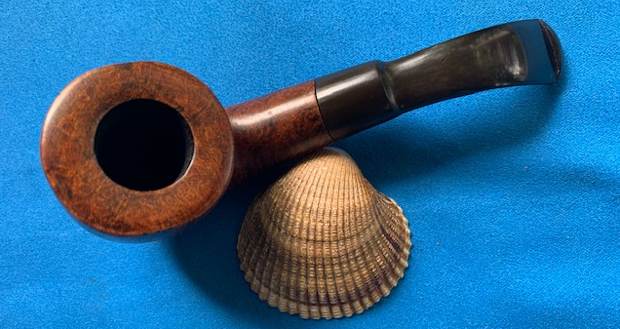
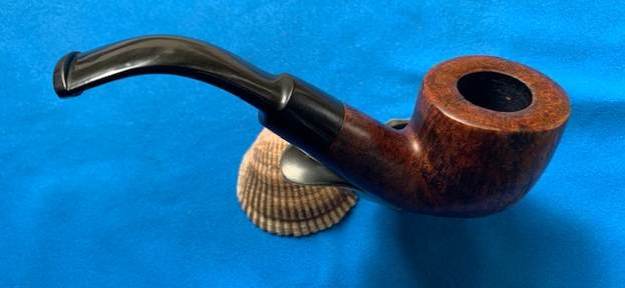
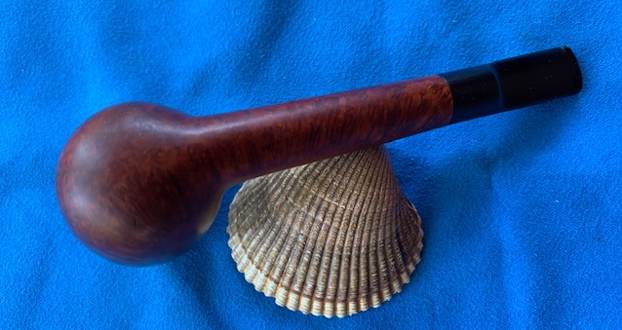
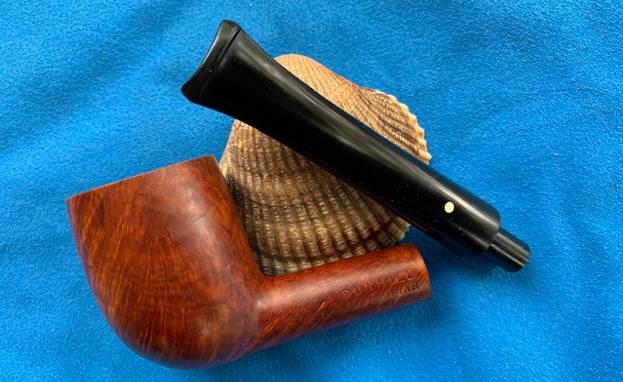
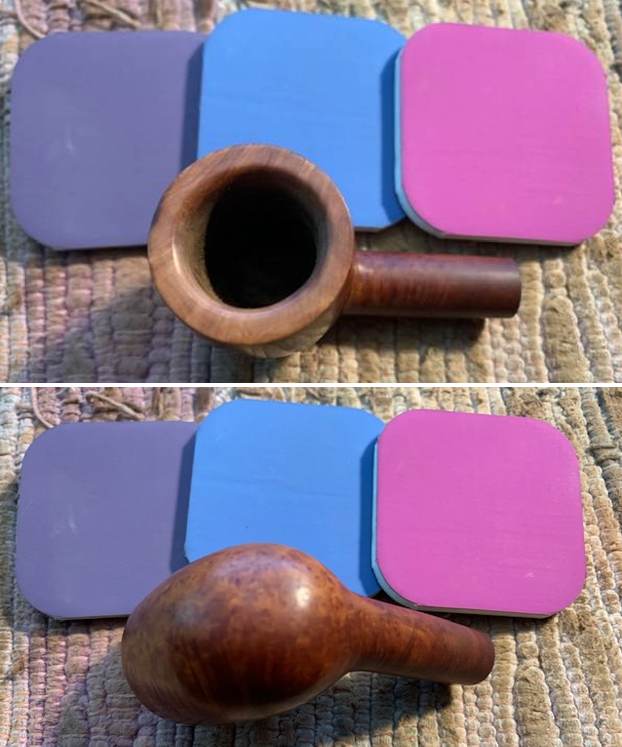
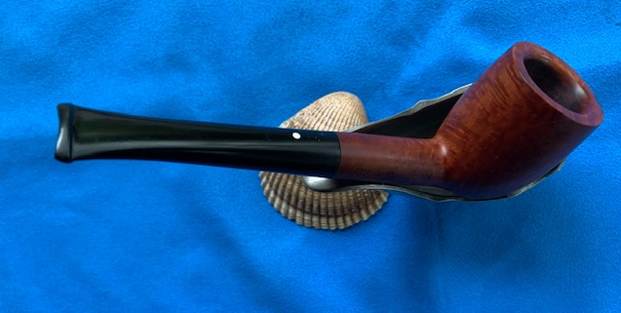
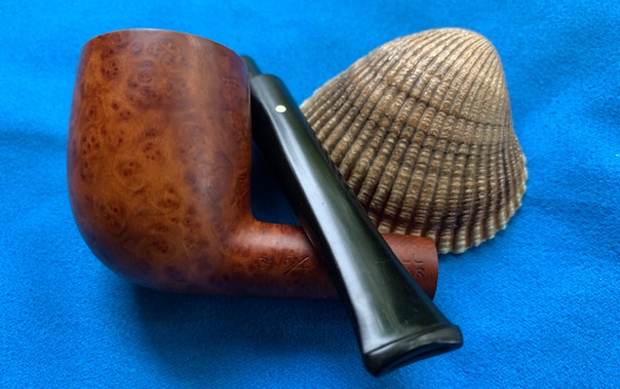
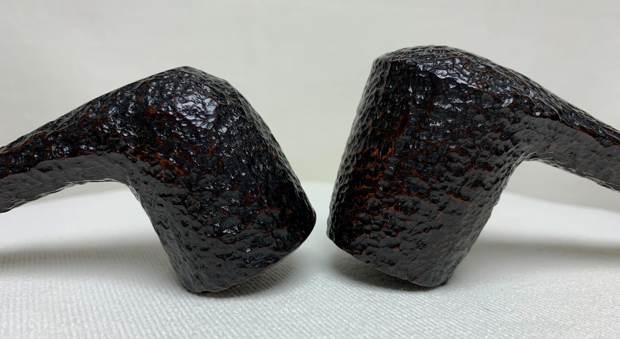
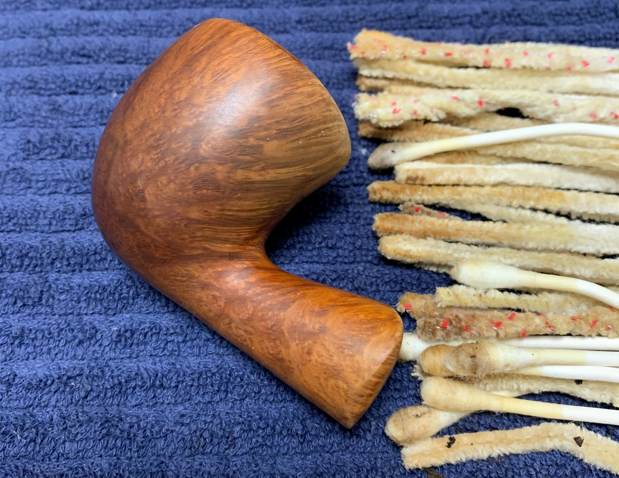
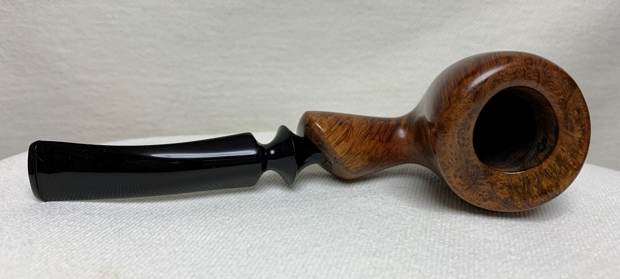
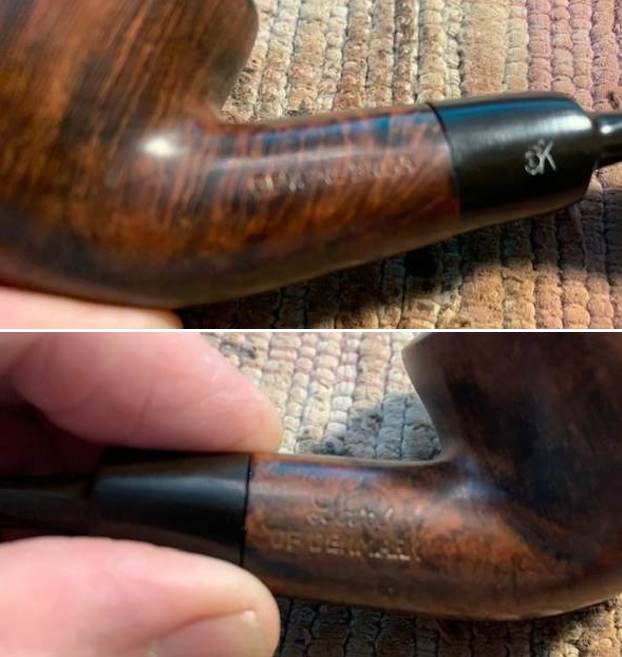 I removed the stem from the shank and took a photo of the pipe from the side. It is a proportionally well made pipe. The tenon is tight and will need to be cleaned as will the dusty shank.
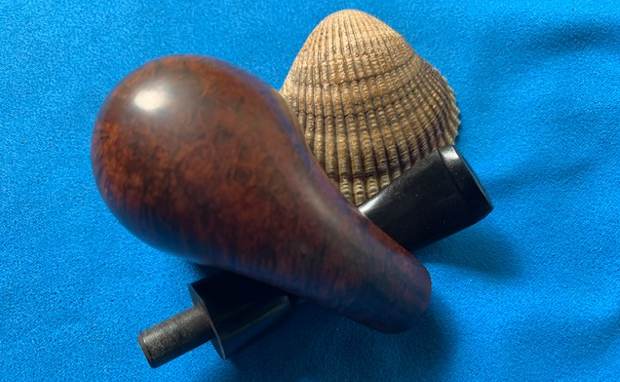
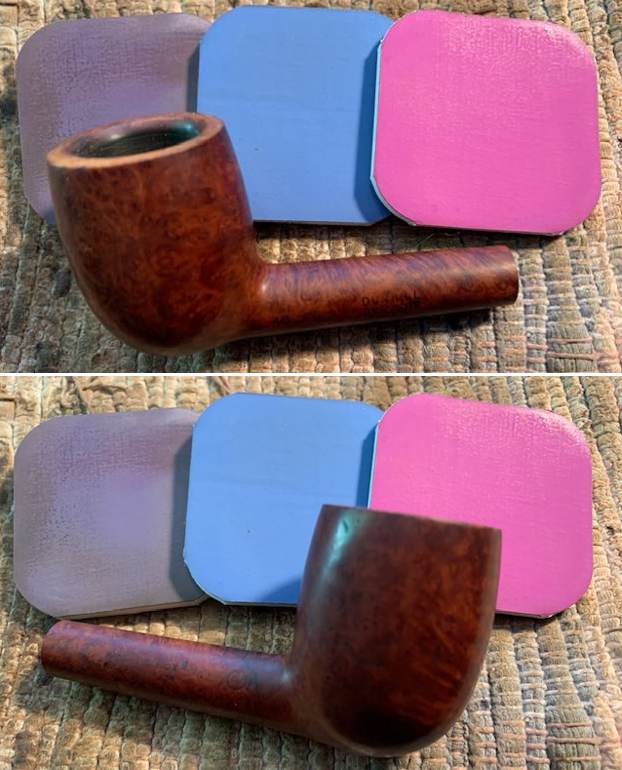
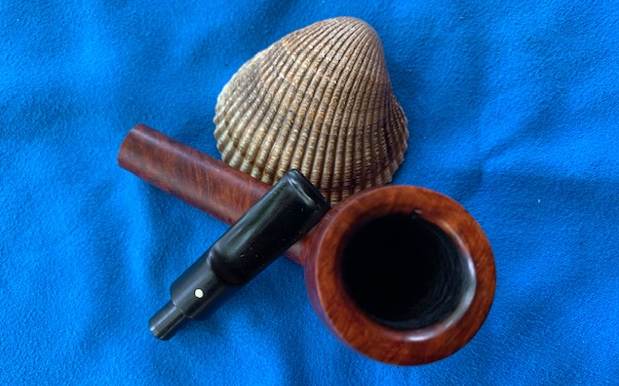
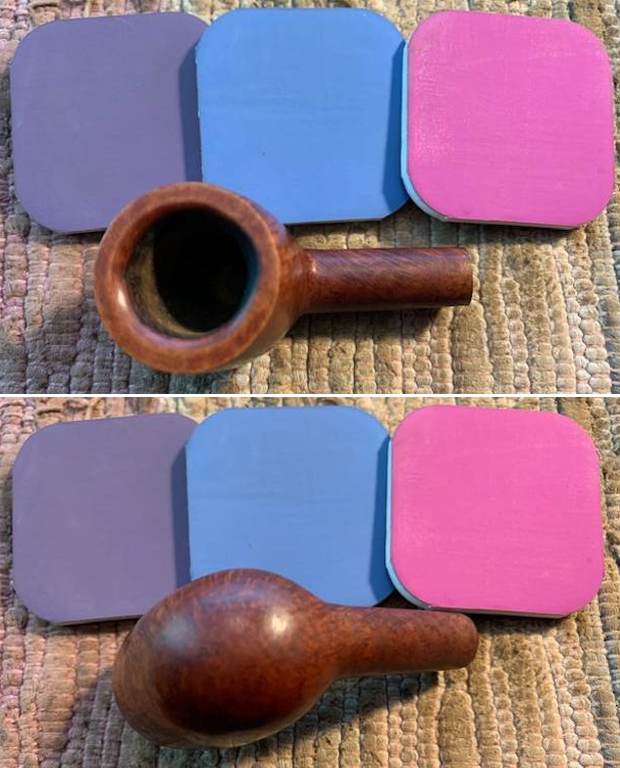
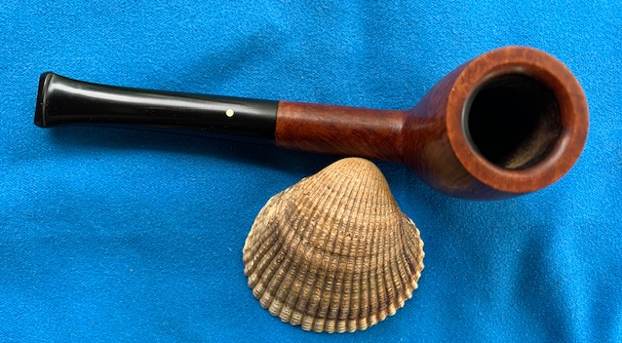
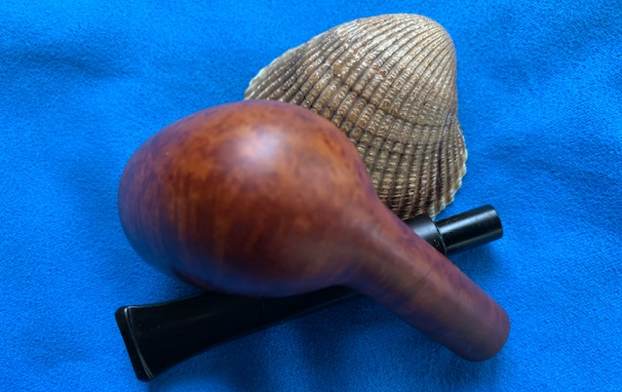
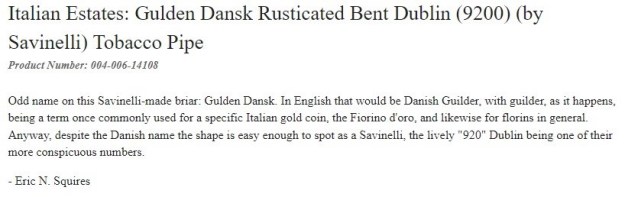
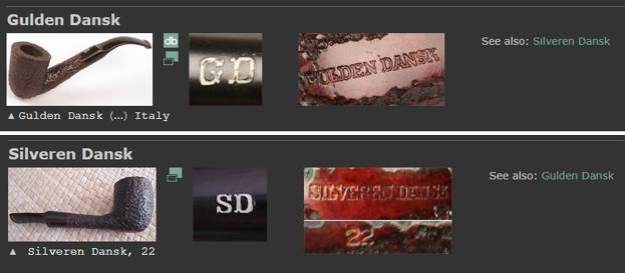
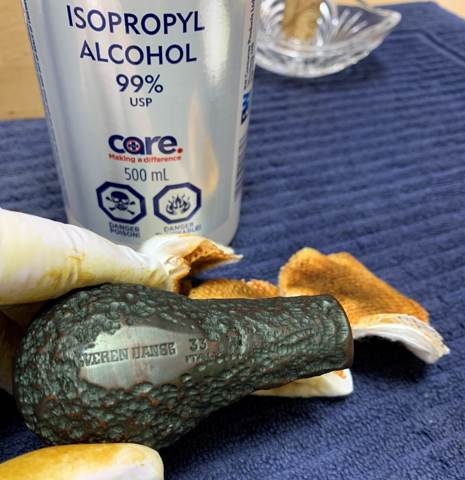
 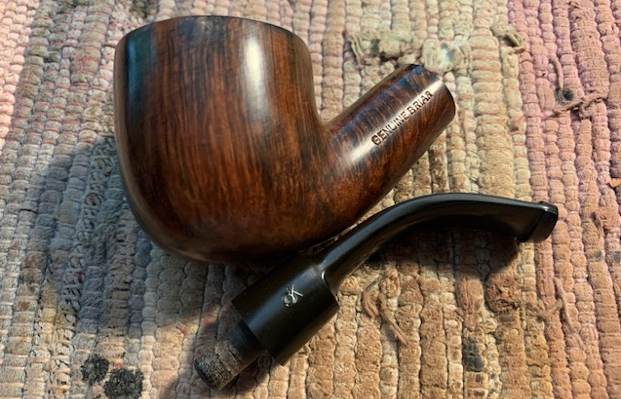 I knew next to nothing about the brand. I turned to Pipephil’s site and found some basic information and a photo of a pipe (http://pipephil.eu/logos/en/logo-l2.html). The only detail in the side bar was a note saying that this is not a pipe from Lars Mikael Ivarsson son of Sixten Ivarsson. Ah well, There was nothing else there and there was nothing on Pipedia either. It remains a mystery. I have included a screen capture of the pipe on Pipedia. It is stamped identically to the one on my table.
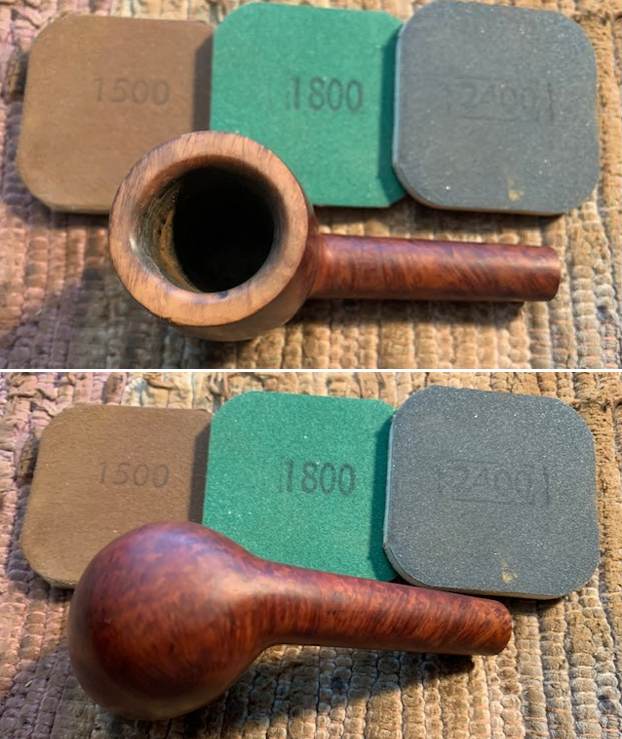
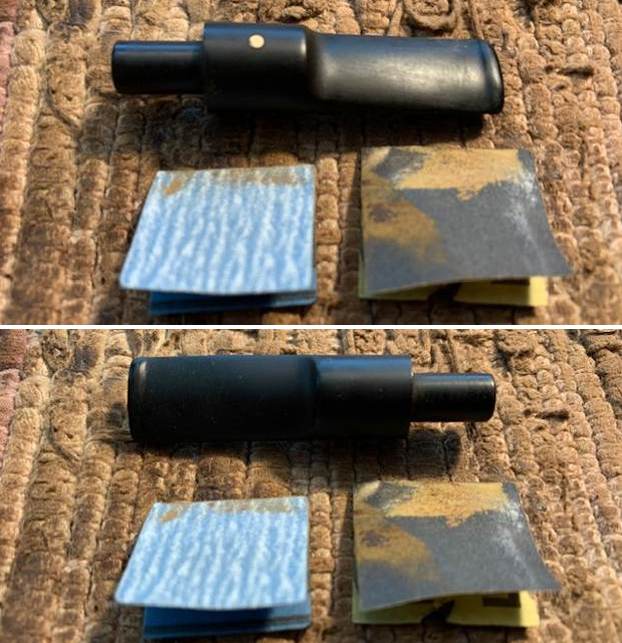
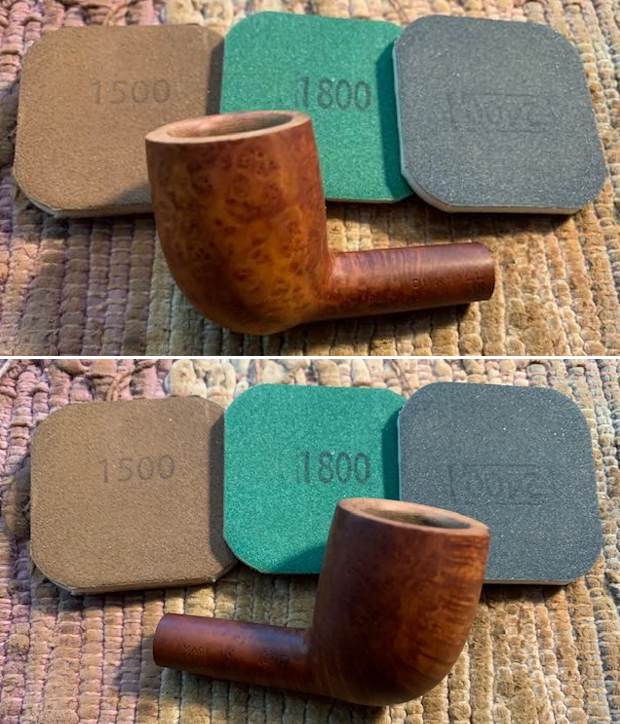
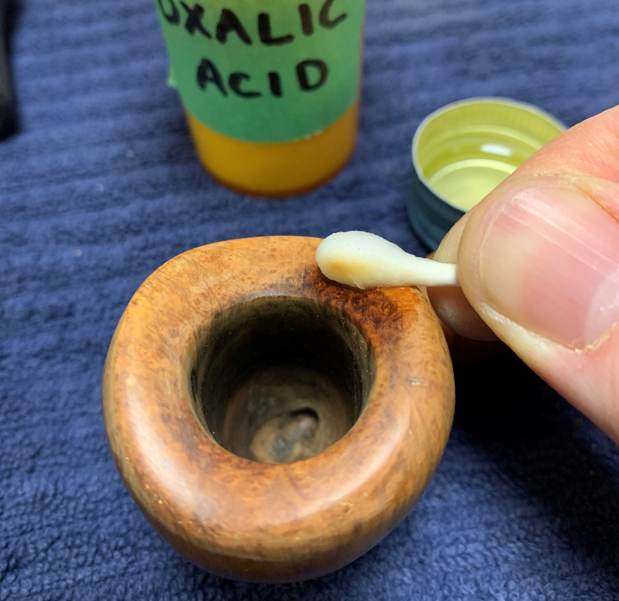
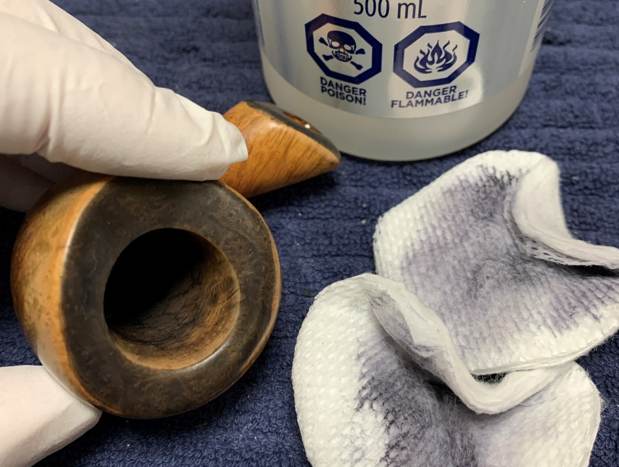
 I started the work on this pipe by removing as much of the dark spotty stain on the rim top and sides of the bowl. I used 220 grit sandpaper to remove them. I started polishing the briar with 400 grit wet dry sandpaper.
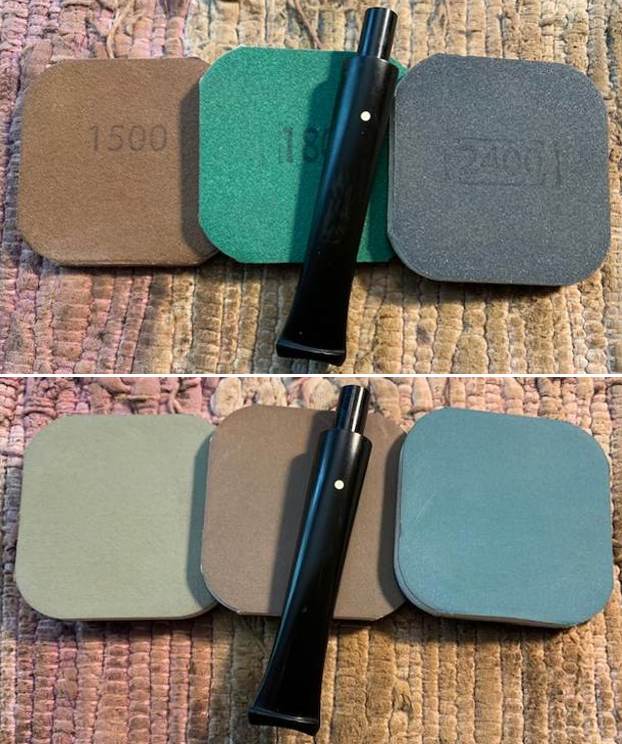
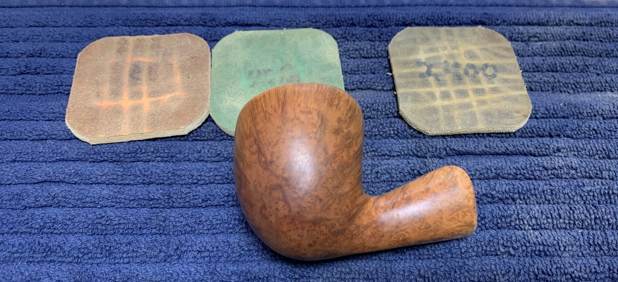
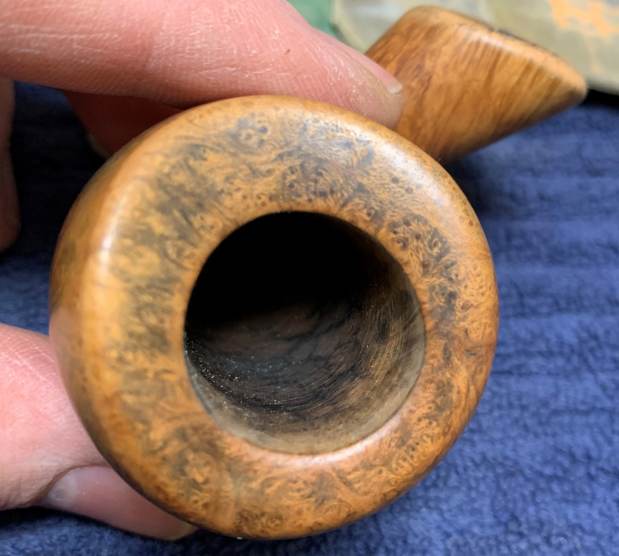
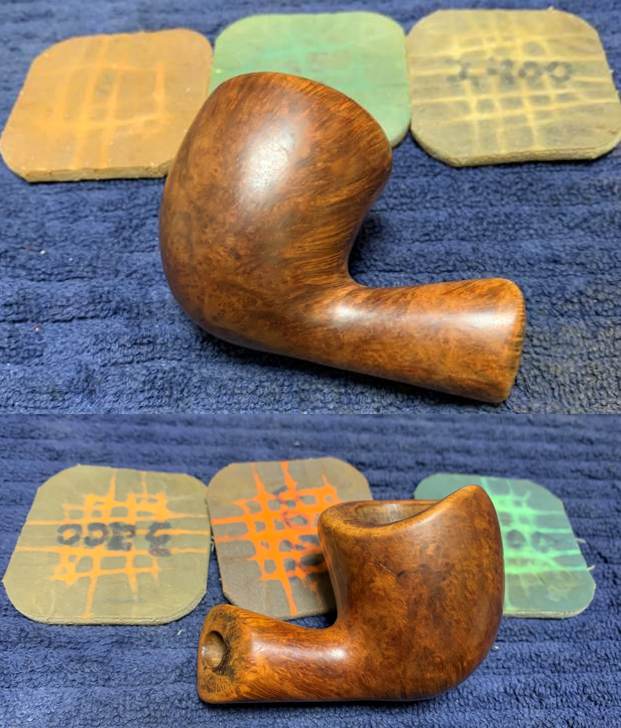
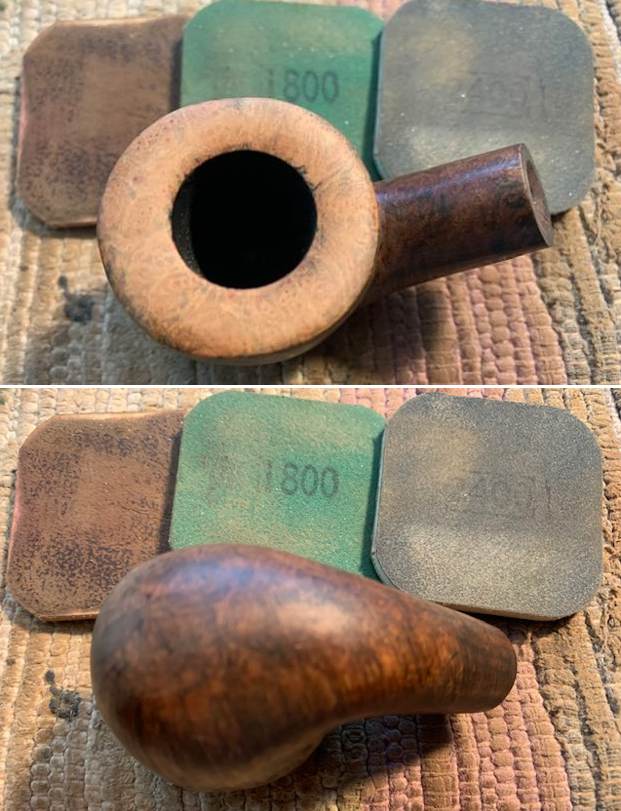
 I polished the briar with micromesh sanding pads – dry sanding with 1500-12000 grit pads. I wiped the bowl down after each pad with a damp cloth. It was looking better by the final three pads.


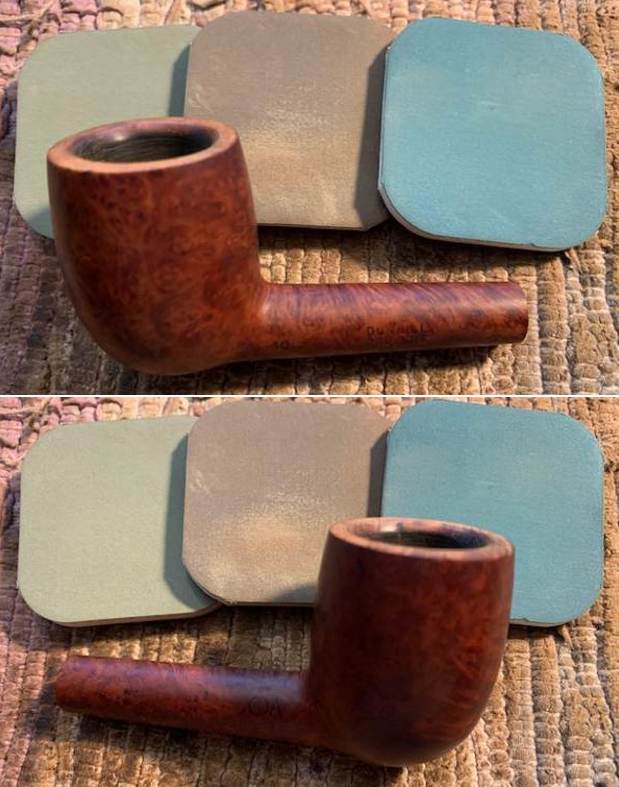
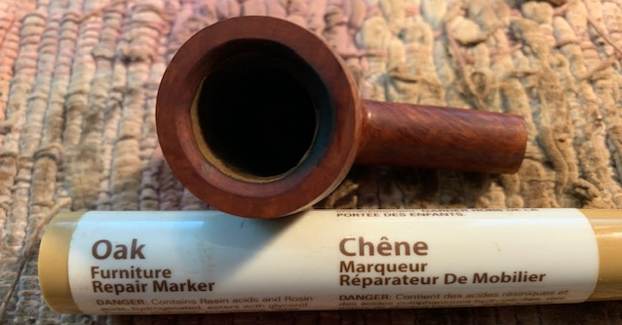
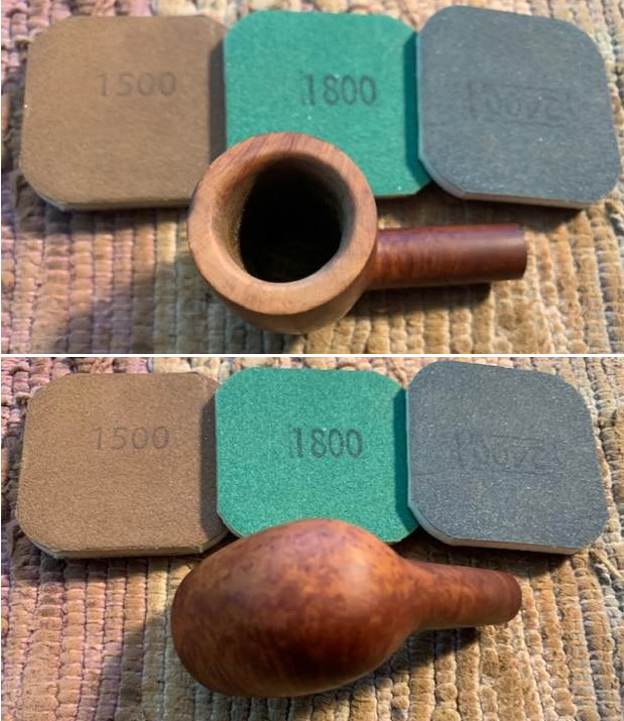
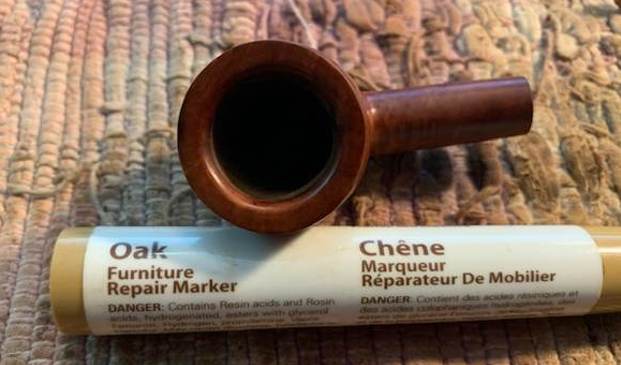
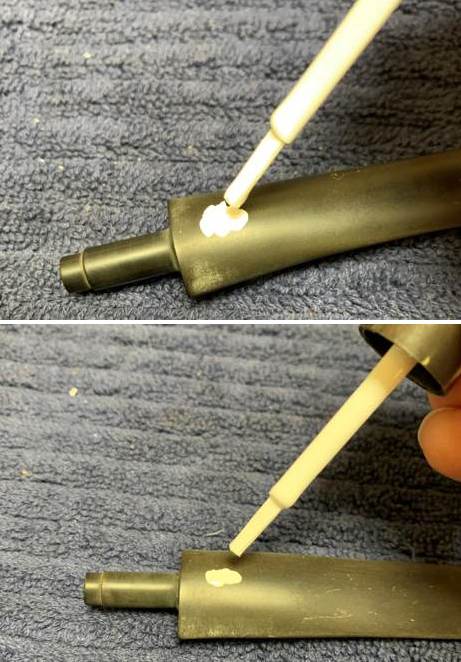
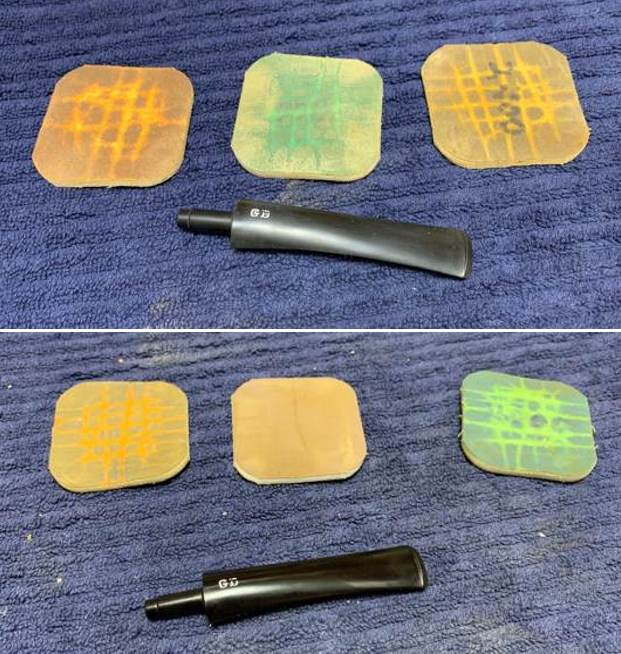
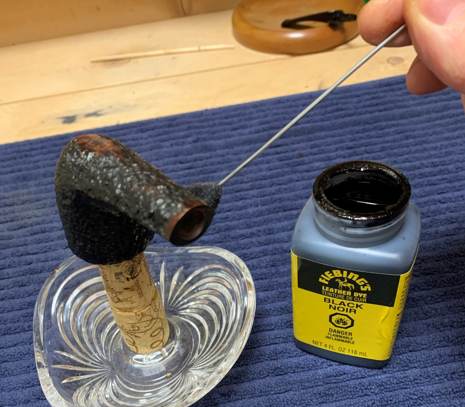
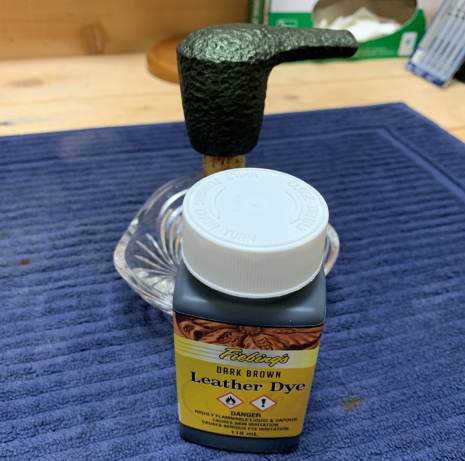
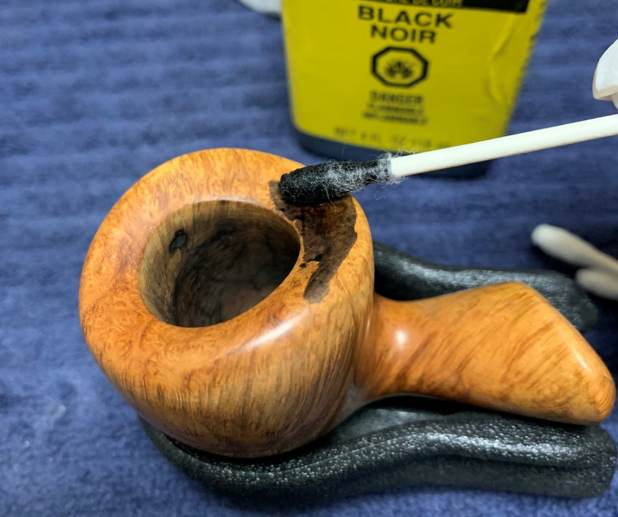
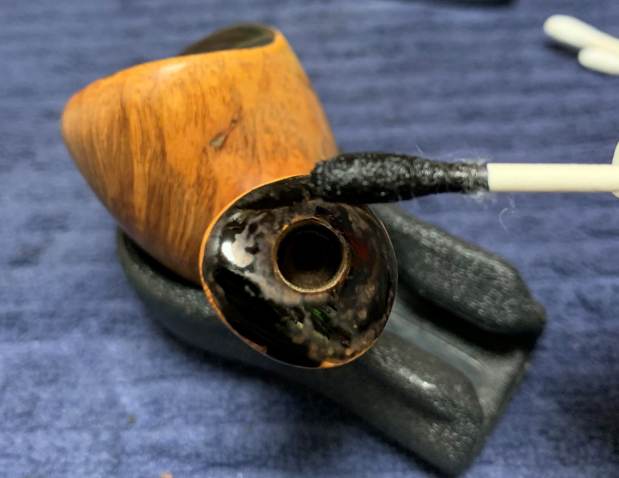
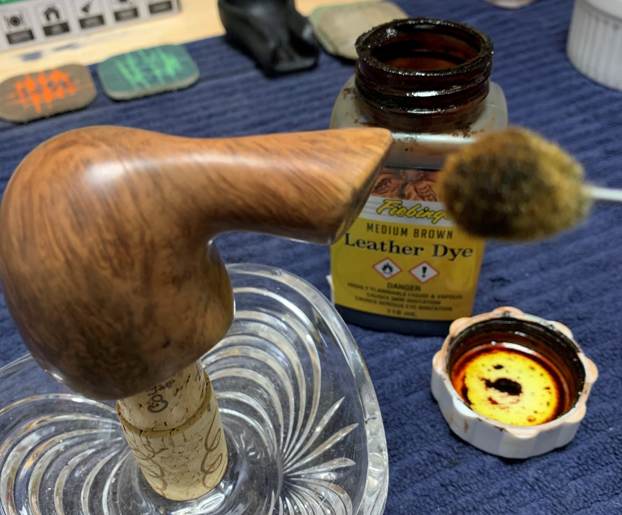
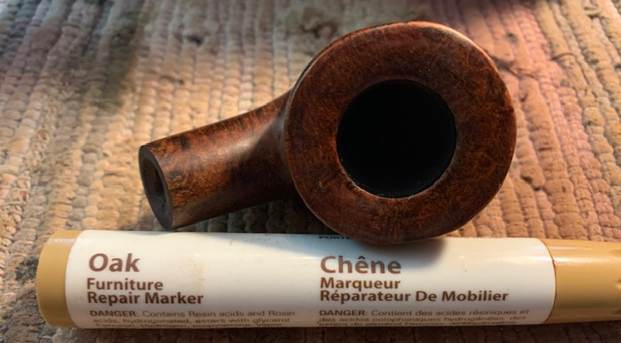
 I needed to do an understain on the rim top with black so I used a black stain pen and stained the top “spottily”. In essence I scribbled with it as my plan was to sand it after it dried to get a similar effect to what was on the bowl sides. Once it dried I sanded it with 1500 and 1800 grit micromesh sanding pads. I wiped it off with a damp cloth. I stained it with an Oak stain pen and it was a good match. Polishing would blend it further.
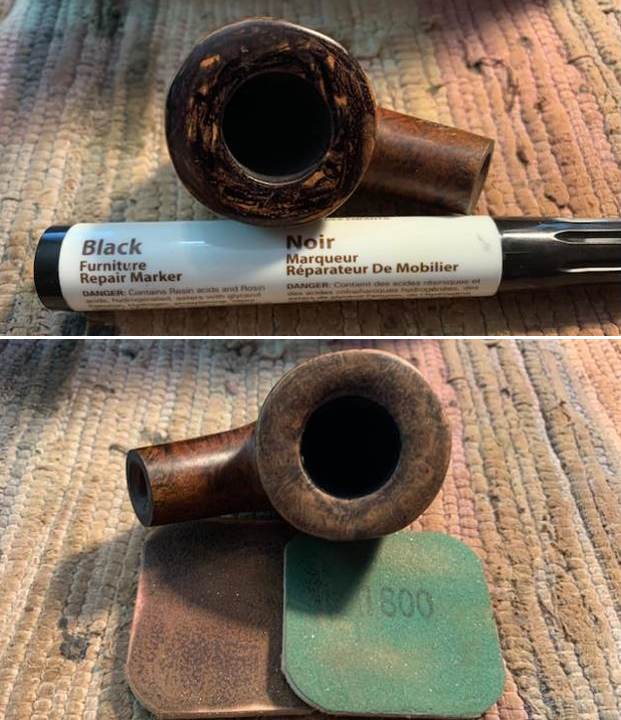
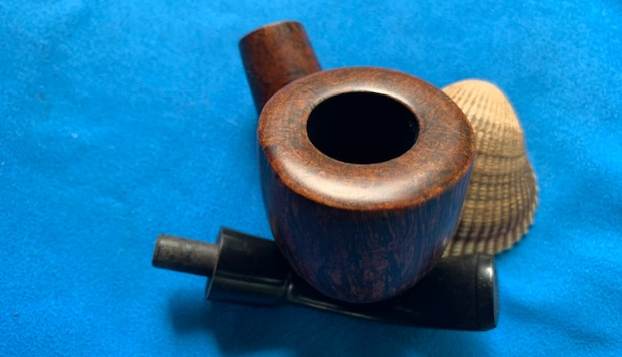
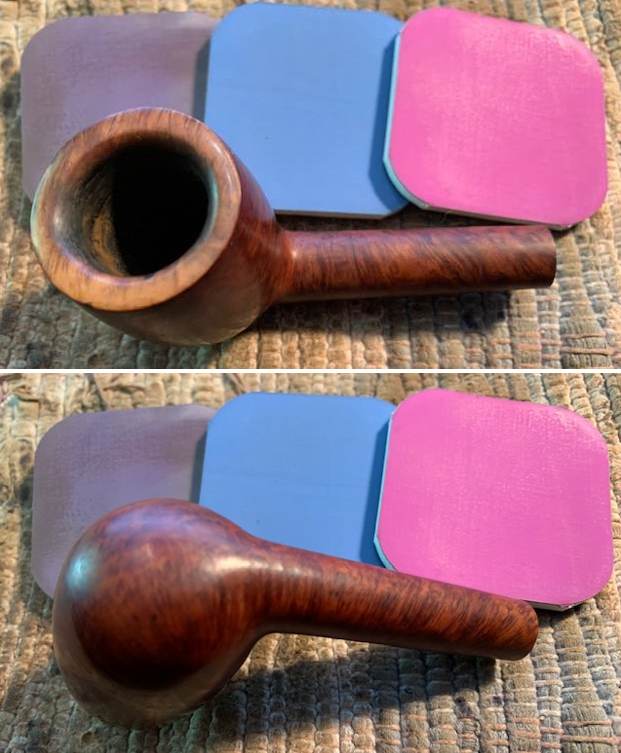
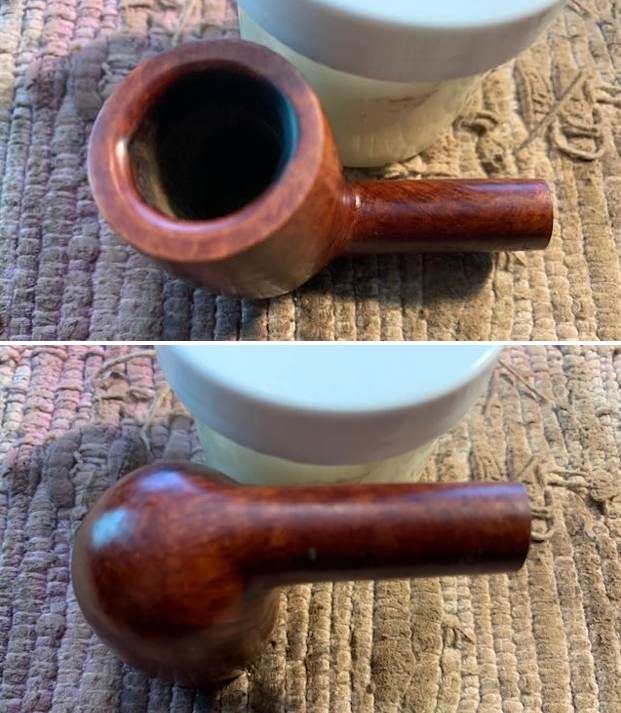
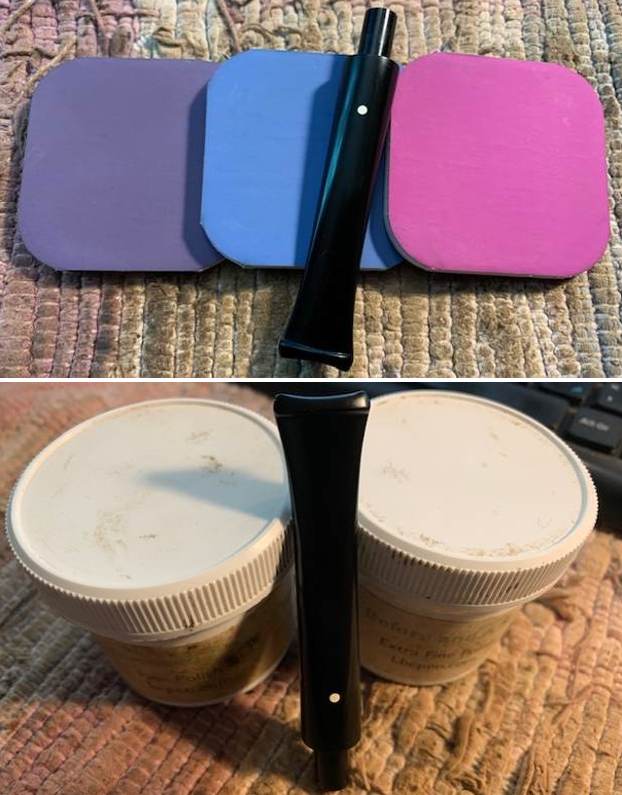
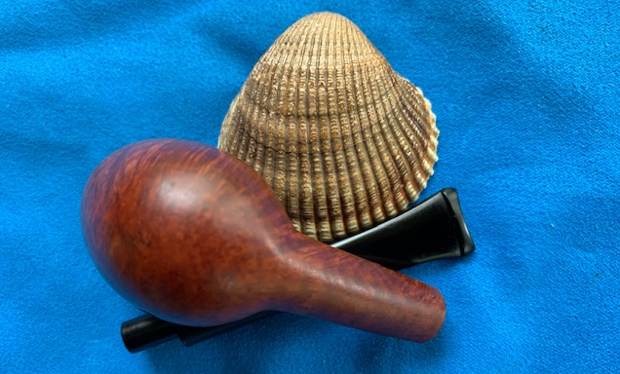
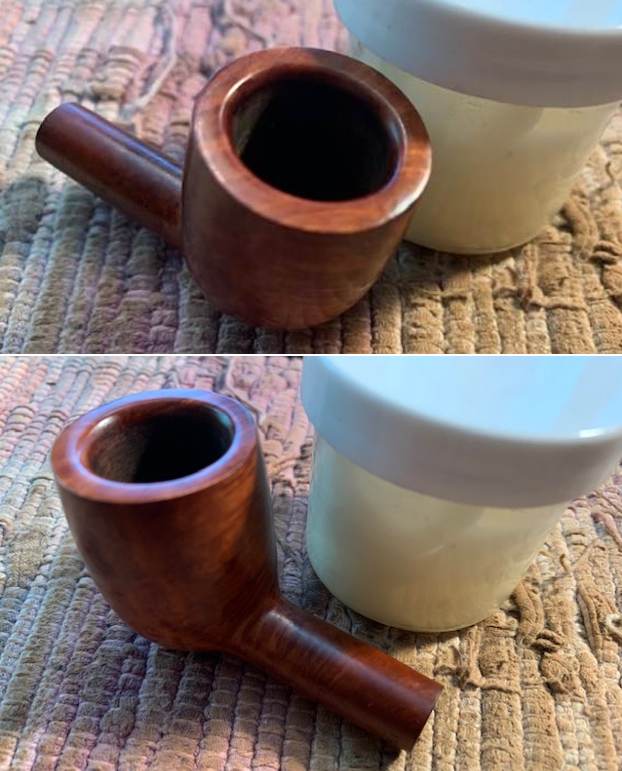
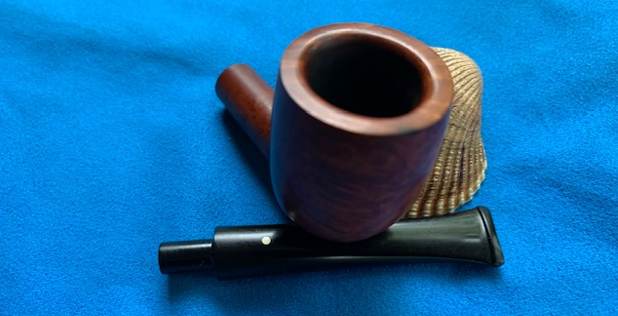
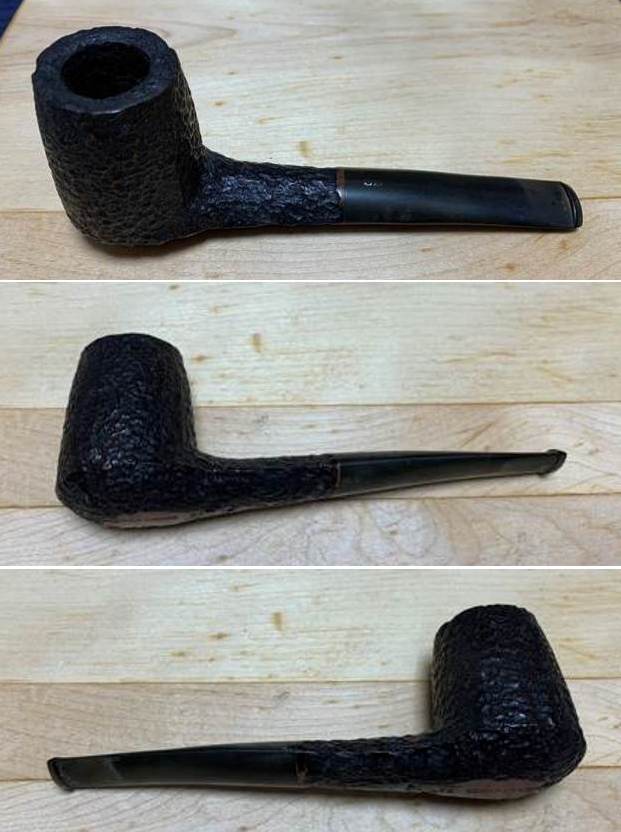
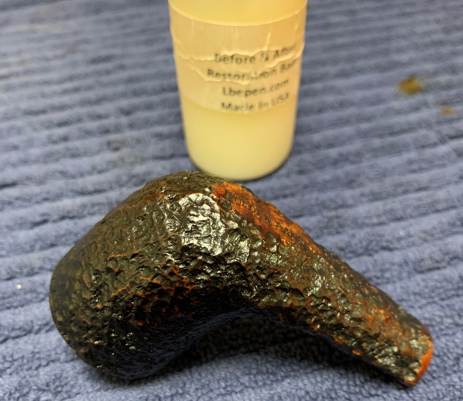
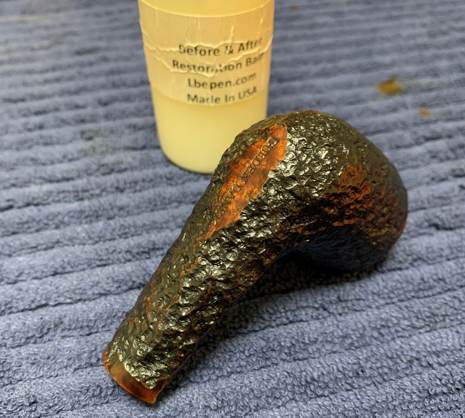
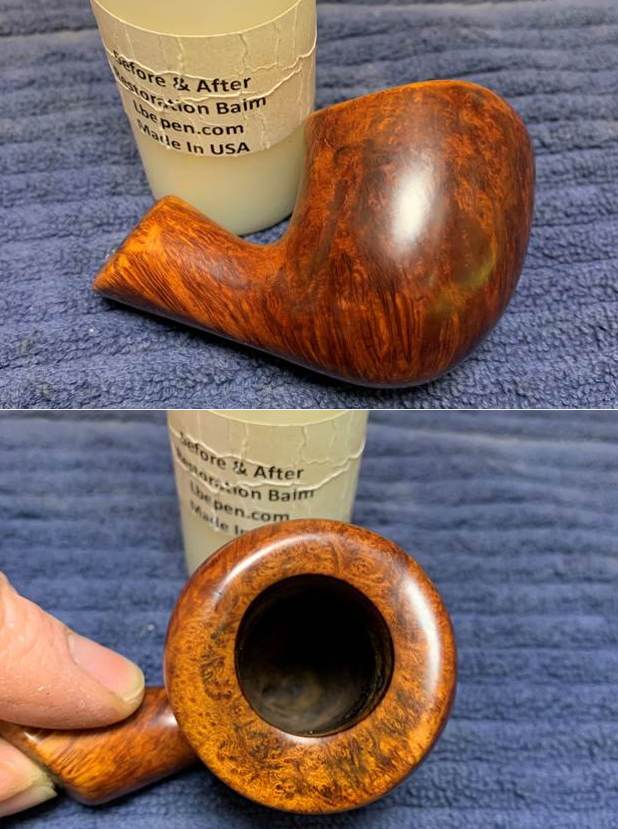
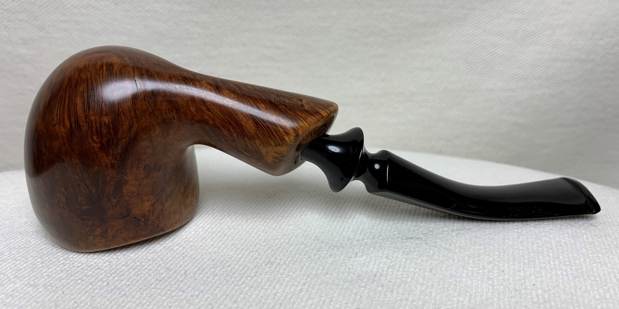
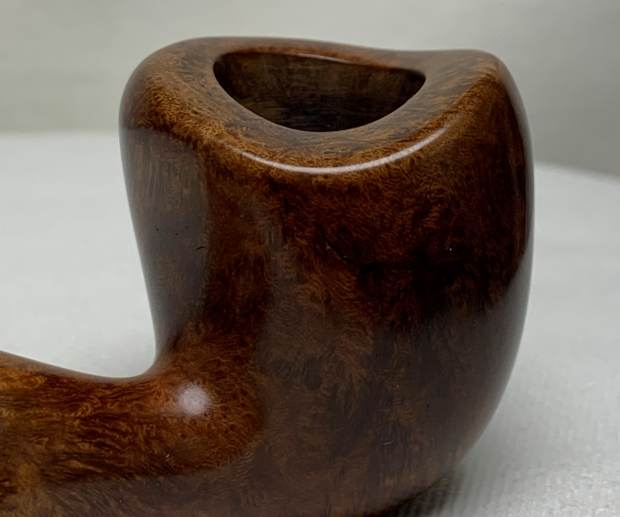
 With the polishing finished I worked some Before & After Restoration Balm into the surface of the briar with my fingertips to clean, enliven and protect the briar. I let the balm sit for 15 minutes and then buffed with a cotton cloth to raise the shine. The photos show the bowl at this point in the restoration process.
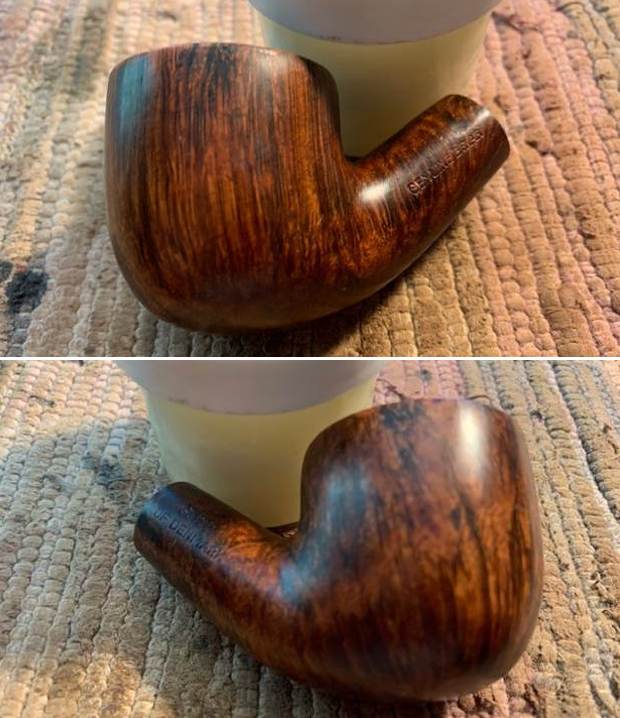
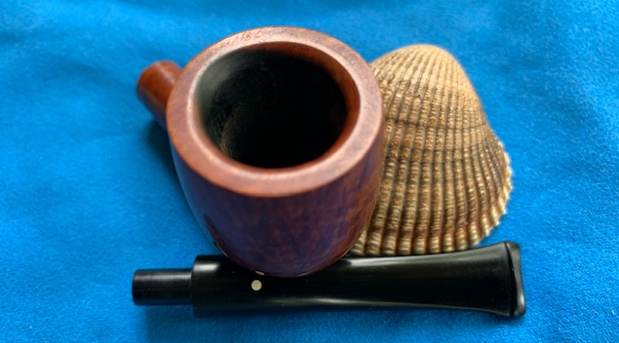
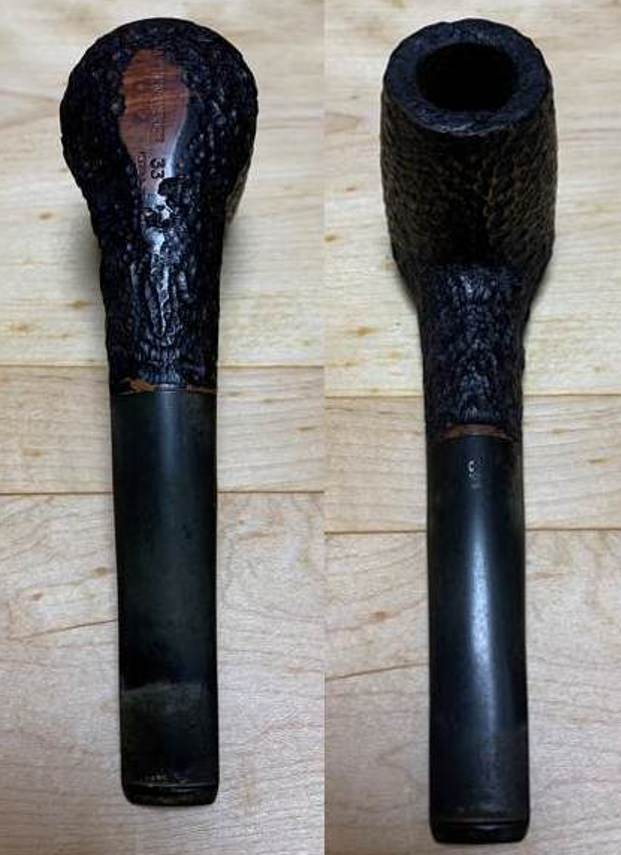
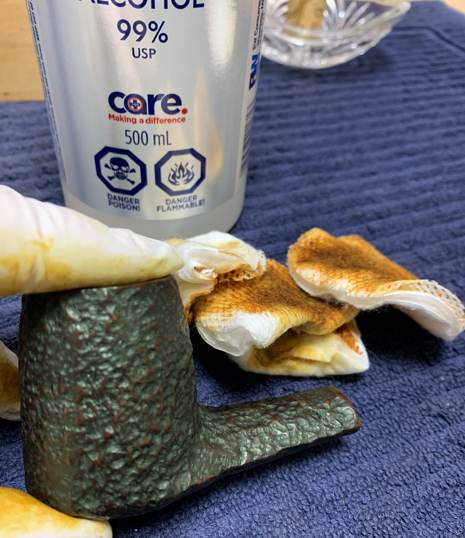
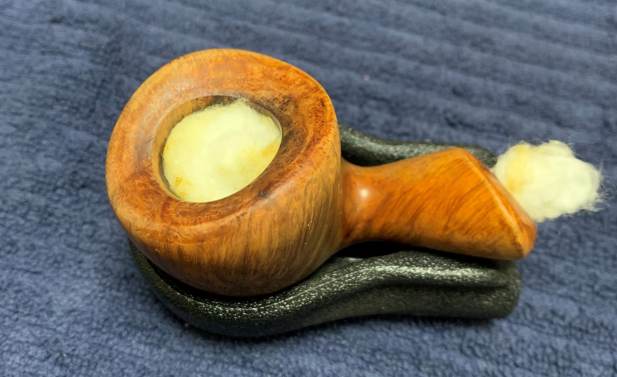
 The inside of the shank and mortise some brown/walnut stain in it. I cleaned it out with alcohol, pipe cleaners and cotton swabs until the came out clean. I cleaned the airway in the stem at the same time in the same way.
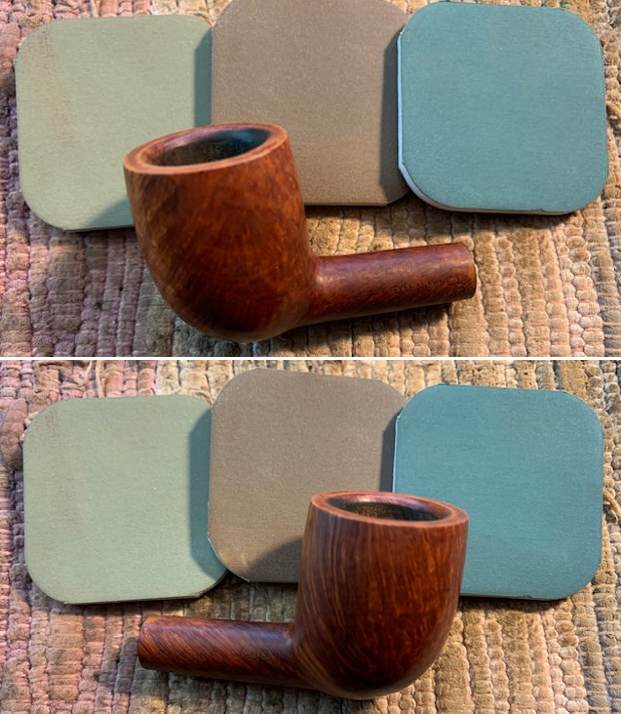
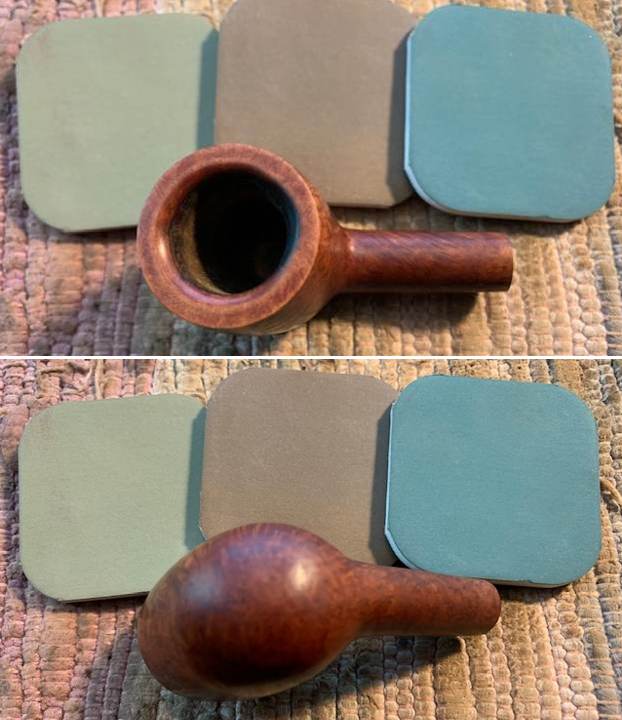
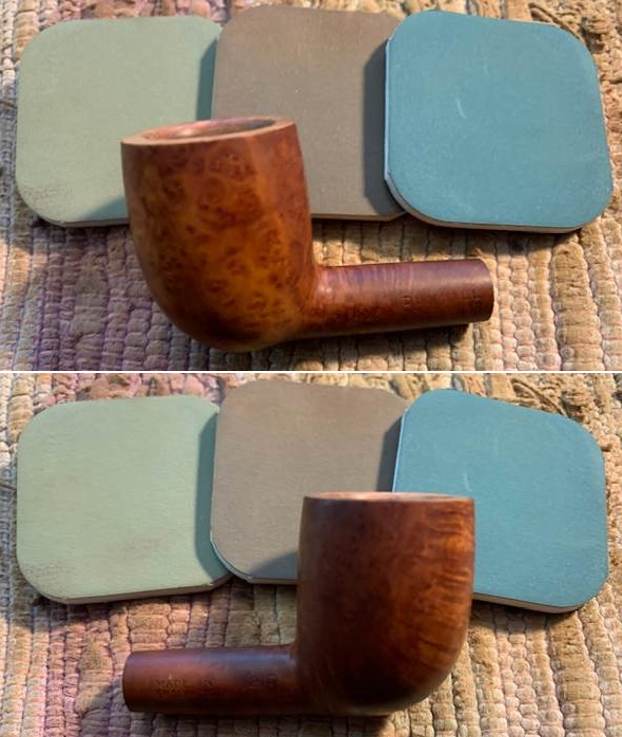
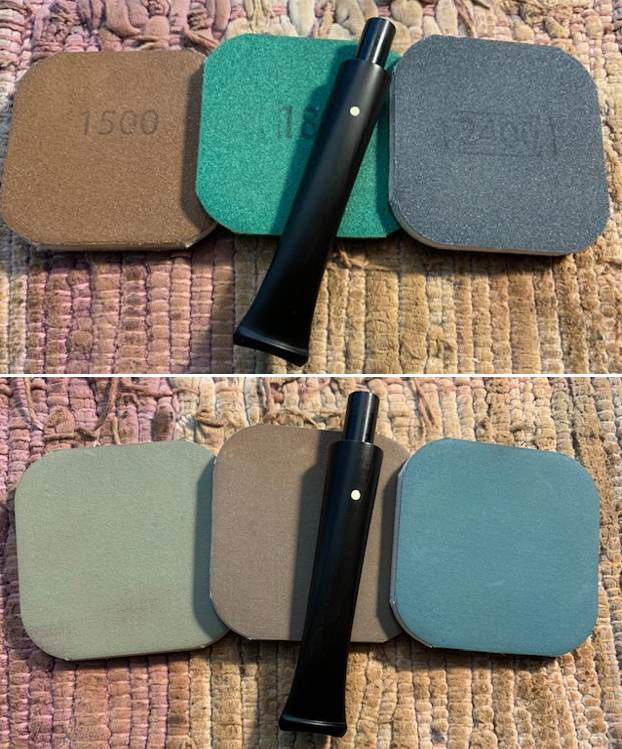
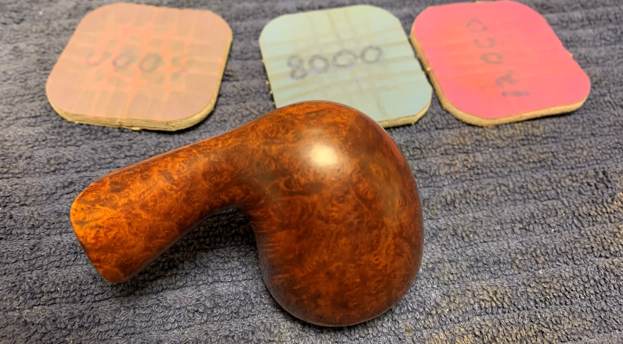
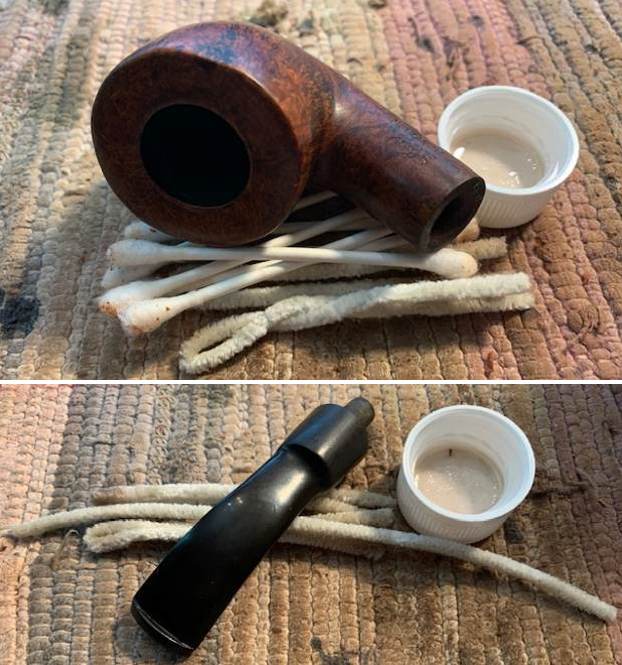 I polished the vulcanite stem with micromesh sanding pads – dry sanding with 1500-12000 grit pads. I wiped it down with Obsidian Oil after each sanding pad. I used Before & After Pipe Polish – both Fine and Extra Fine to further polish the stem and gave it a final coat of Obsidian Oil to finish it.
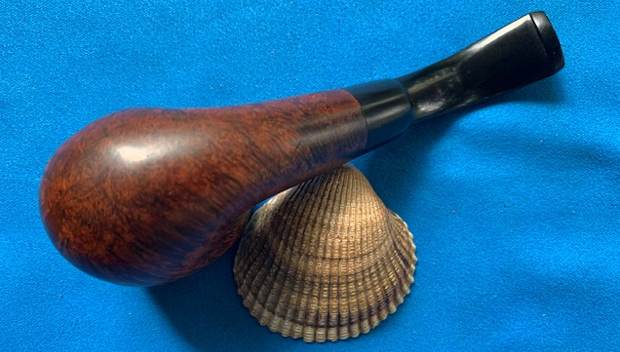
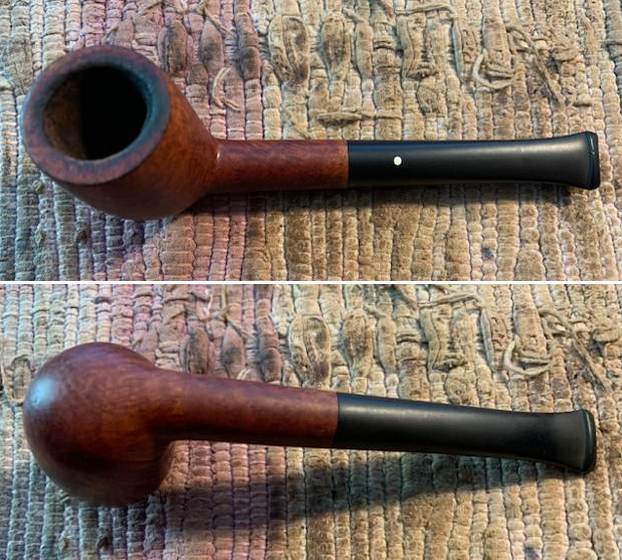
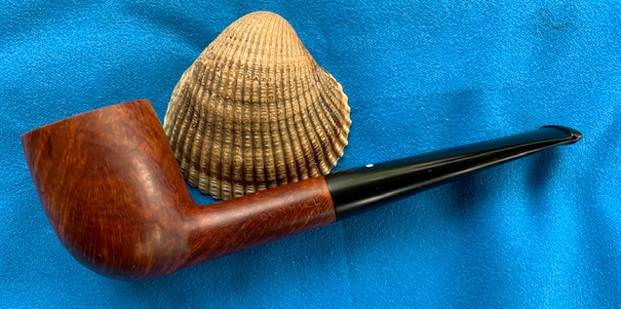
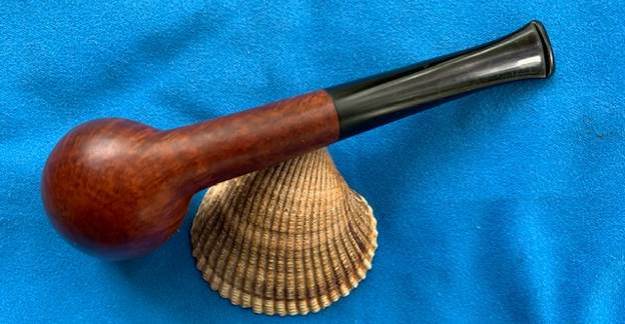
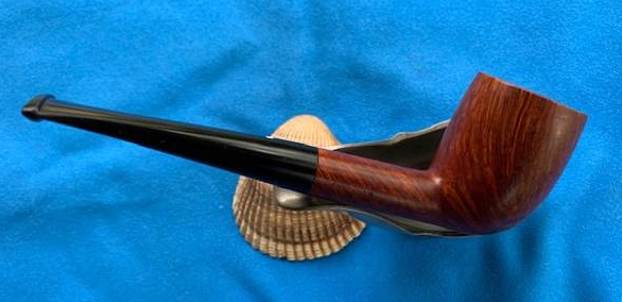
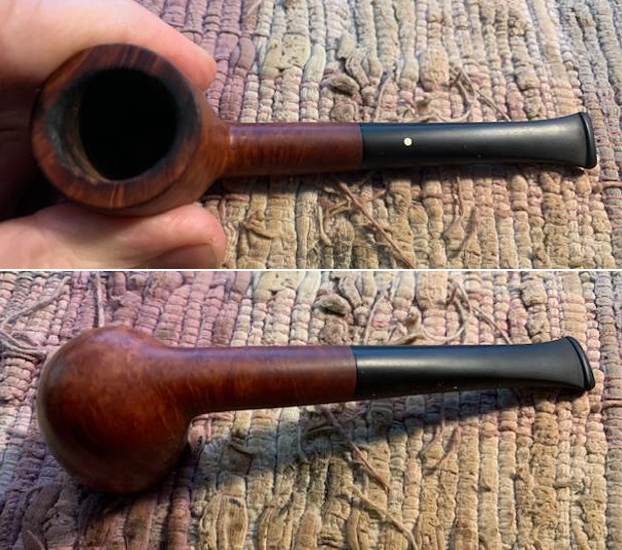
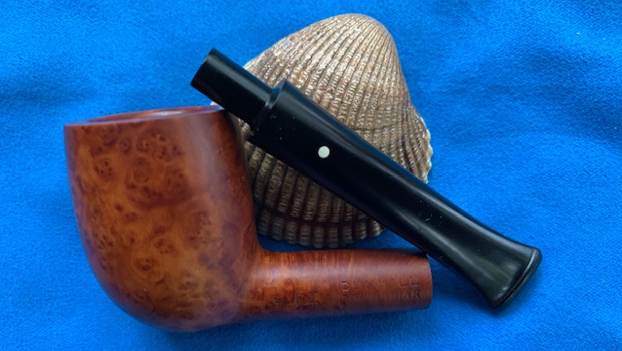
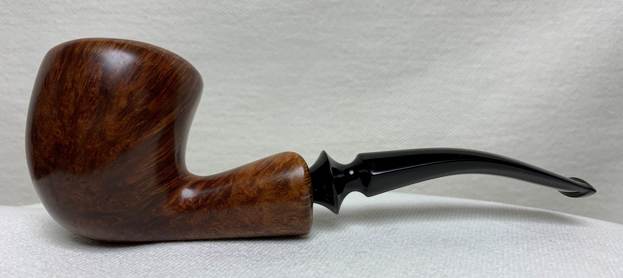
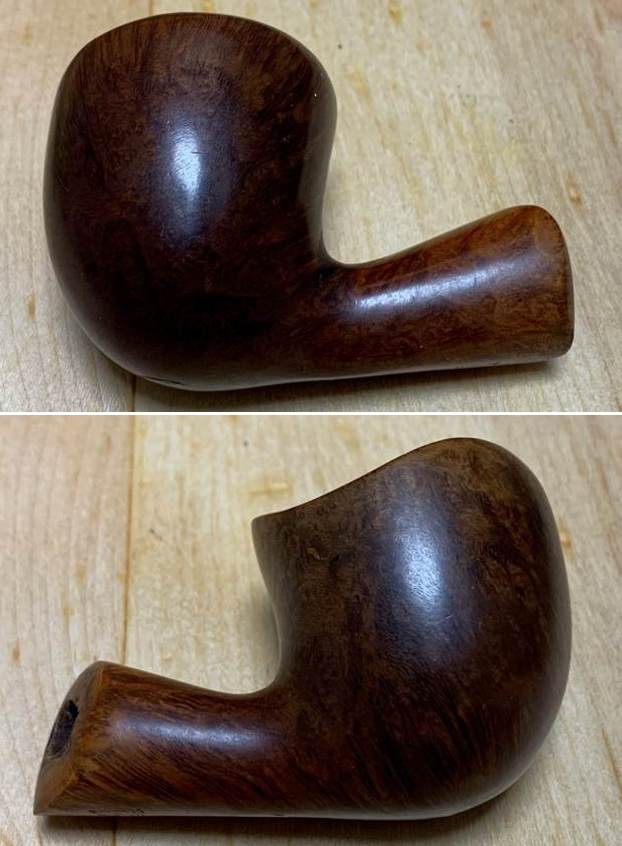
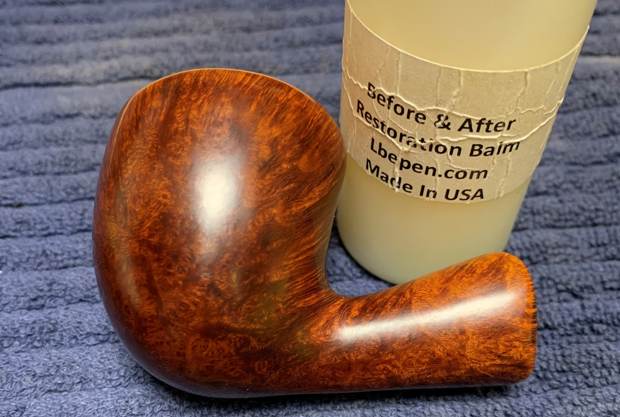
 This interesting Lars of Denmark Genuine Briar Bent Pot turned out to be another nice looking pipe with the little extra TLC I put in once I received it. The rich walnut finish with black under tones highlights the swirls of the grain and works well with the polished vulcanite stem. I put the stem back on the bowl and carefully buffed the pipe with Blue Diamond on the buffing wheel using a light touch on the briar. I gave the bowl and the stem multiple coats of carnauba wax on the buffing wheel and followed that by buffing the entire pipe with a clean buffing pad. I hand buffed the pipe with a microfiber cloth to deepen the shine. The finished Lars of Denmark Bent Pot is a nice size pipe that I think will be a great smoker. Give the finished pipe a look in the photos below. The dimensions of the pipe are Length: 5 ¼ inches, Height: 1 ¾ inches, Outside diameter of the bowl: 1 ½ inches, Chamber diameter: ¾ of an inch. The weight of the pipe is 54 grams/ 1.94 ounces. Since it is unsmoked it is one you can break in with your tobacco of choice. I will be adding it to the Danish Pipe Makers Section of the rebornpipes store shortly. Let me know if you are interested in adding it to your collection. Thanks for reading this blog and my reflections on the pipe while I worked on it.