Blog by Steve Laug
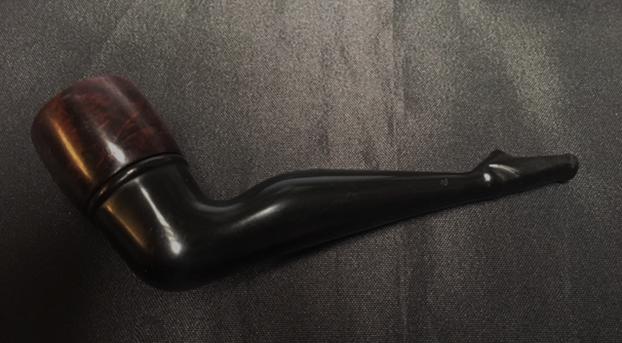
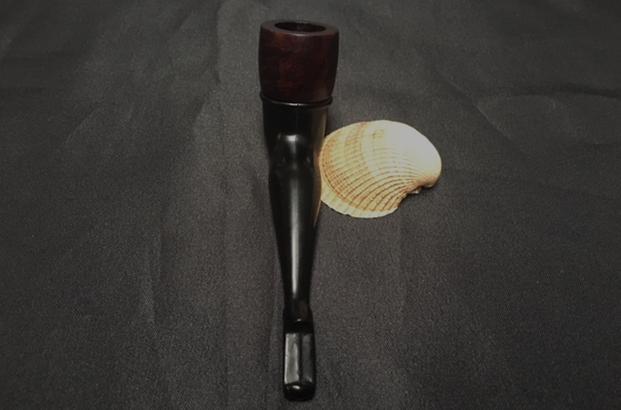
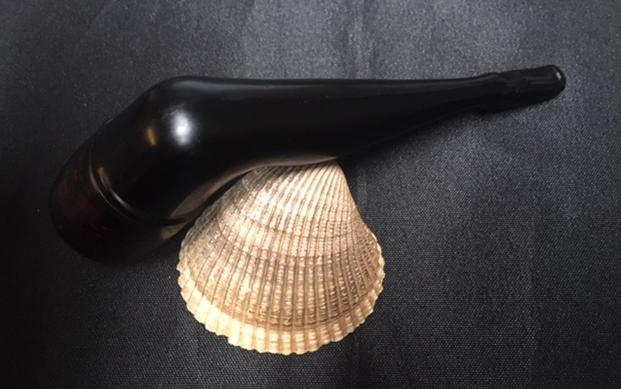
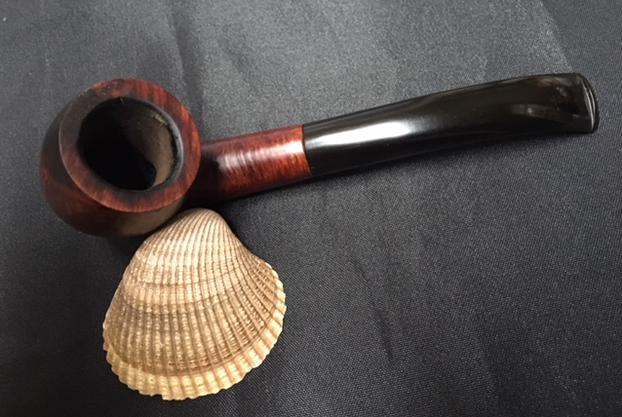
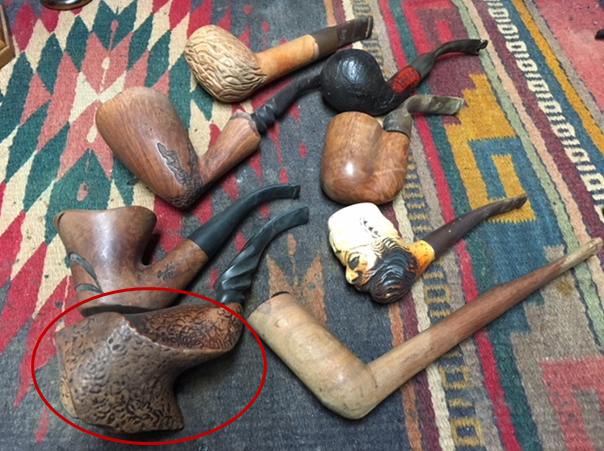
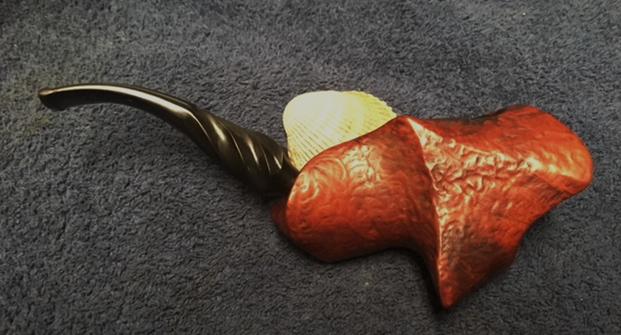
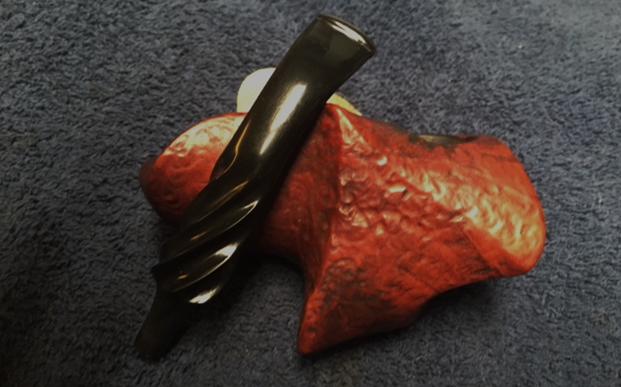
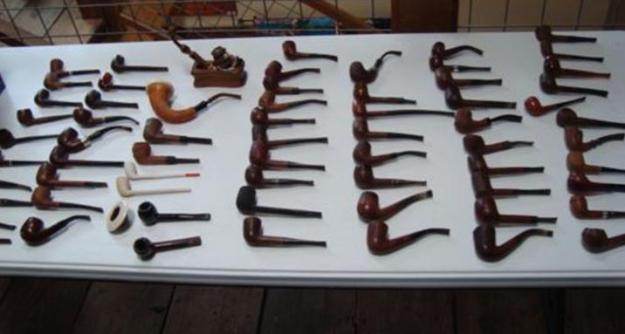
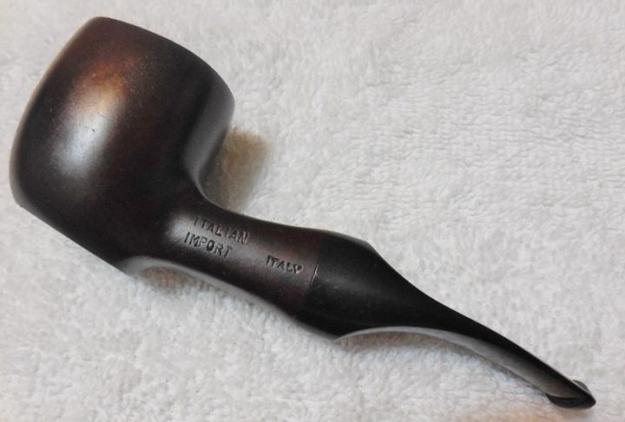
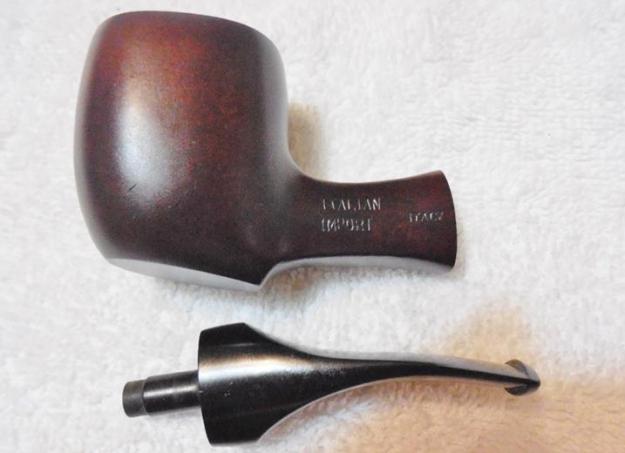
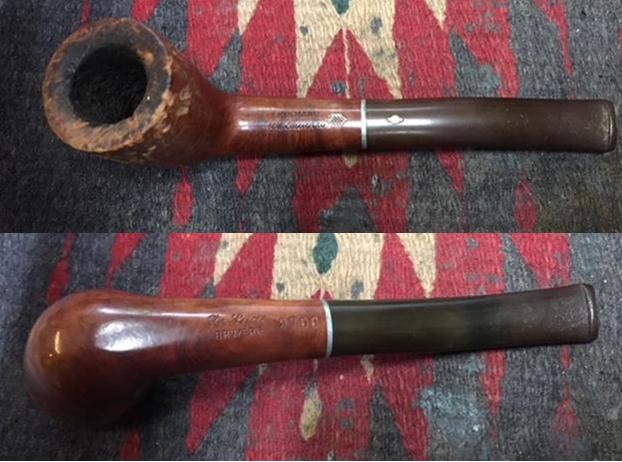
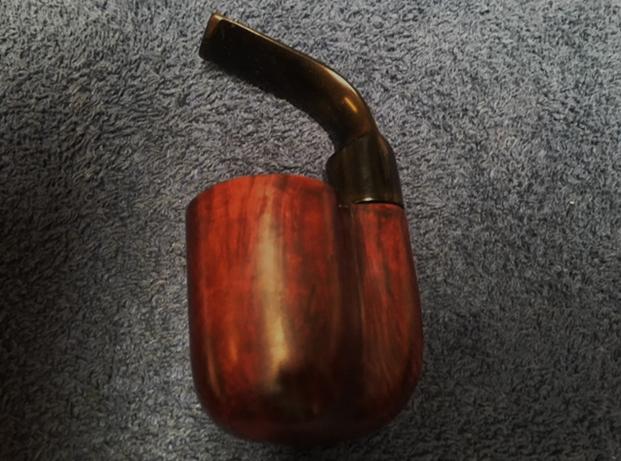
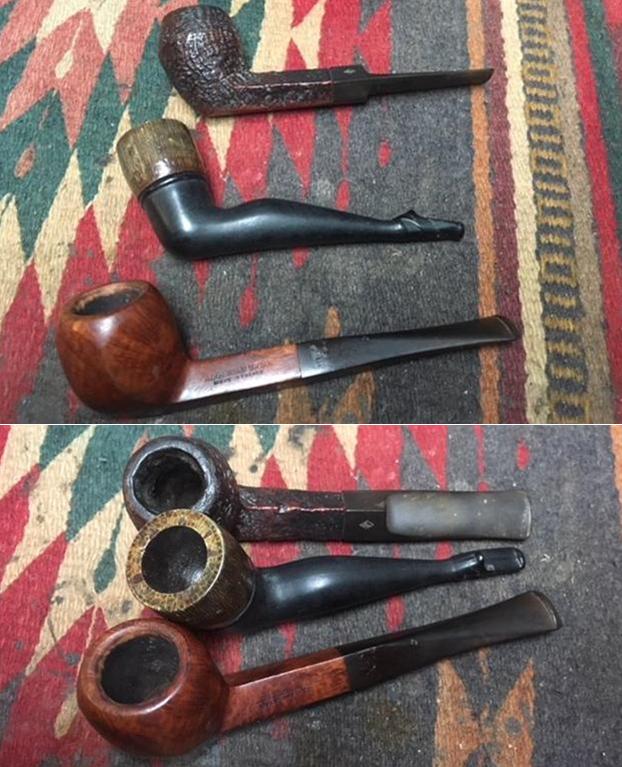
This is a continuation of the work that began with an email from Anthony, a reader of rebornpipes asking if I would be willing to help him clean up his Dad’s pipes. He wrote; “I have a few pipes (8 or so) that haven’t been smoked in 15 years. They were my dad’s. I would like to get someone to restore them”. We chatted back and forth via email and the long and short of the story is that I have eight of his Dad’s pipes in my shop now to work on. The photo below shows the mixture of pipes that he sent me. There are some interesting shapes and most are very dirty and have very little if any of the original finish left on the briar. All have an overflow of carbon on the rim top and all have damaged stems and buttons. Anthony remembers his Dad smoking them throughout the years he was growing up so they went from regular use to being boxed and stored. They will need a lot of TLC to bring life back to them but it should be fun to give it a go. I went through the pipes and assessed their condition and contacted him and got the go ahead to proceed on the lot. I have completed the restoration of three of the pipes. I put red X’s through the pipes in the above photo to show the ones that I have completed. The next pipe I chose to work on was the full bent briar with a stem that turned over the bowl to make it a pocket pipe – it is the second pipe down on the right hand column in the above photo. I have circled it in red. It is an interestingly shaped full bent pipe with the shank and the bowl being side by side with no gap between them. The only stamping on the pipe is on the underside of the shank at the stem/shank junction and reads ITALY. The bowl was very dirty and the finish was worn to the point that it was lifeless looking. Once again, not only did it have a thick cake in the bowl and some darkening and lava overflowing onto the rim top it also appeared that Anthony’s Dad had laid the pipe aside mid smoke. The bowl was about 1/3 full of partially burned tobacco that had hardened and dried with age. The bent, vulcanite stem was the least chewed of the collection and had some tooth chatter and light marks on both sides around the button. It was also oxidized and would need to be cleaned. I took photos of the pipe to show its overall condition when it arrived at my work table.
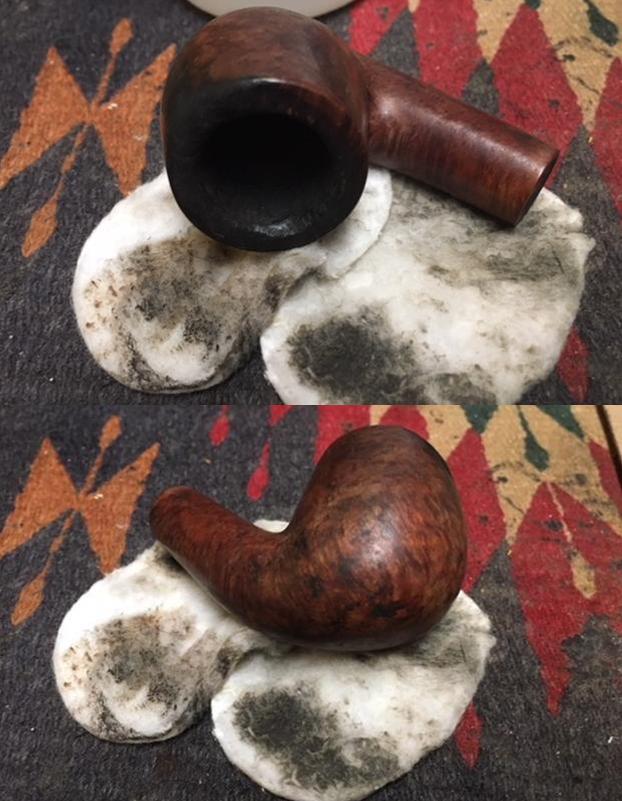
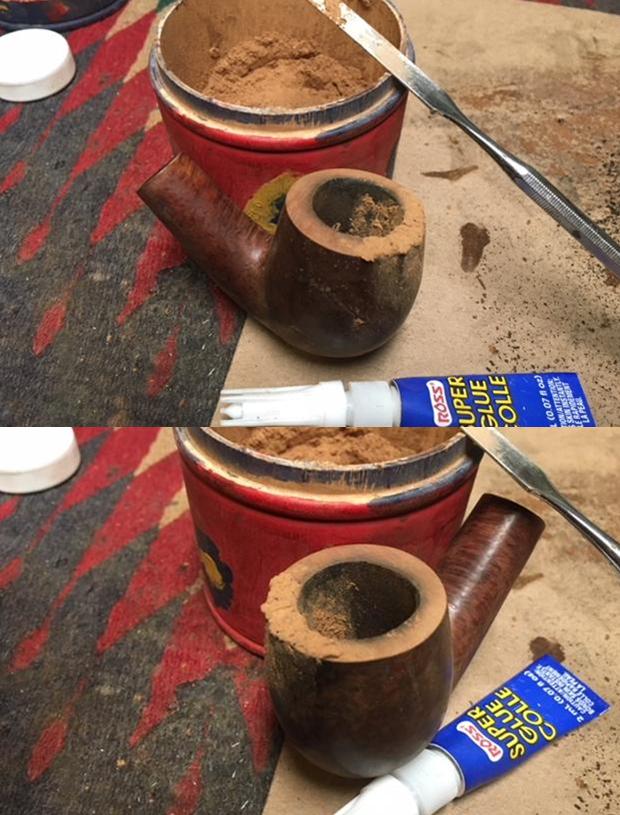
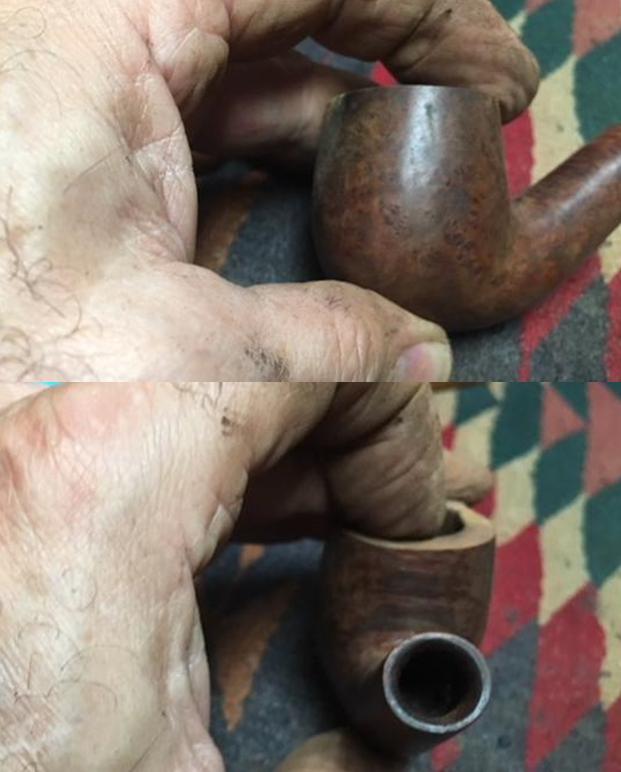
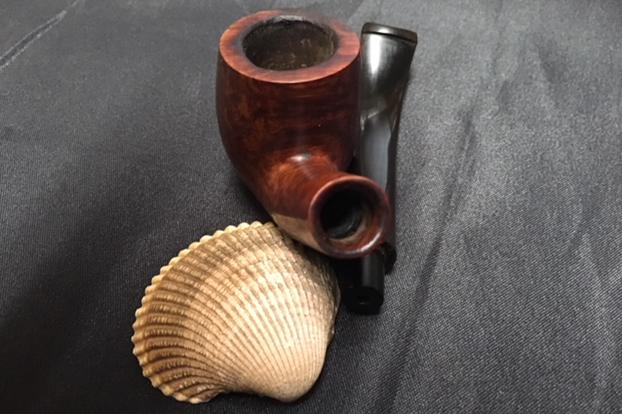
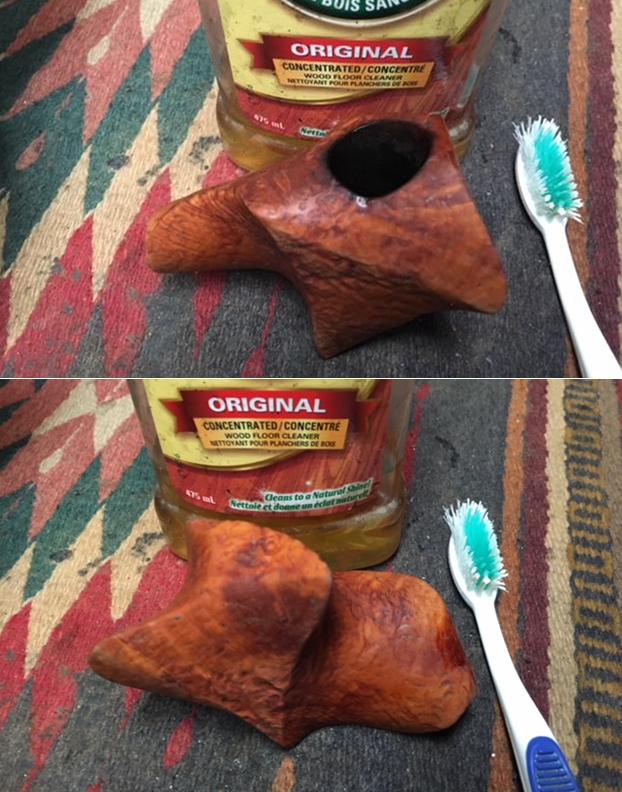
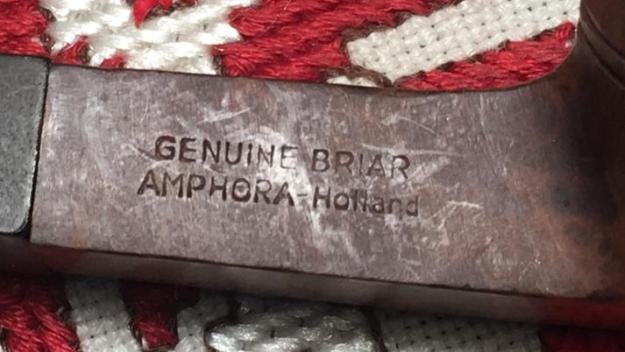
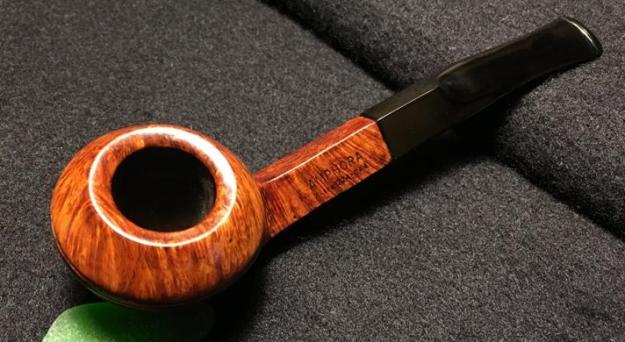
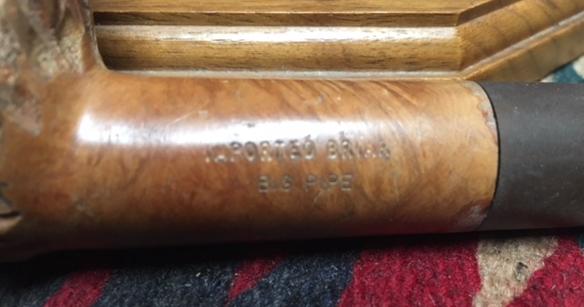
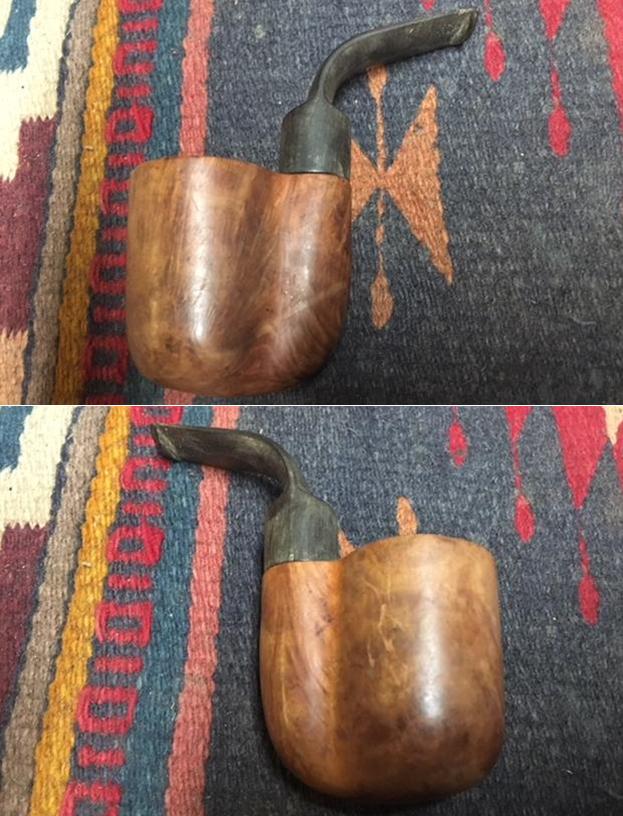
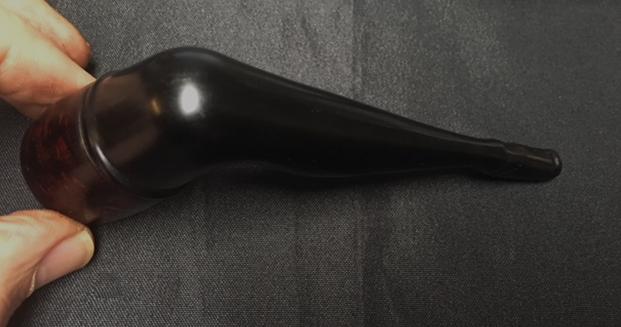
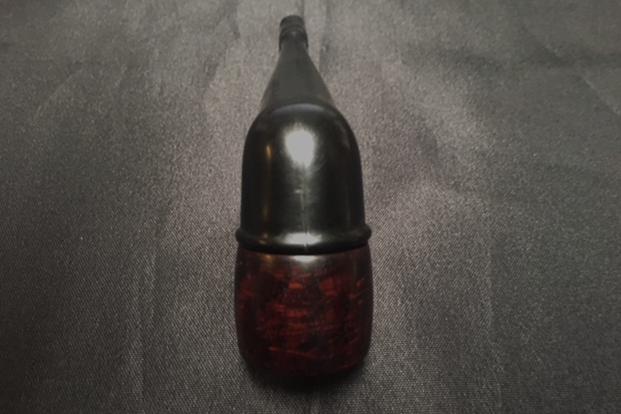
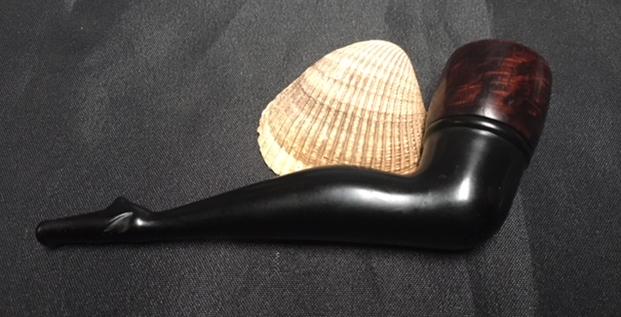
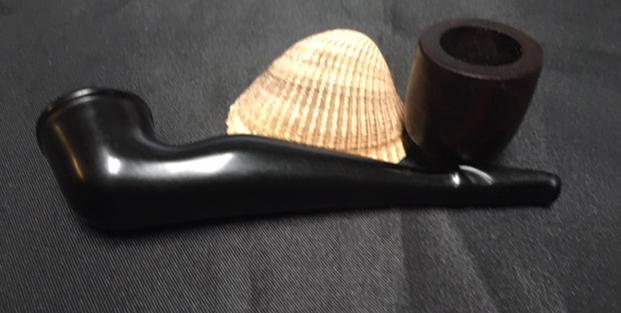
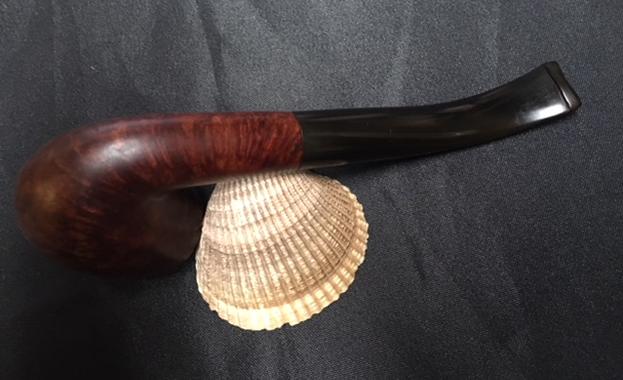
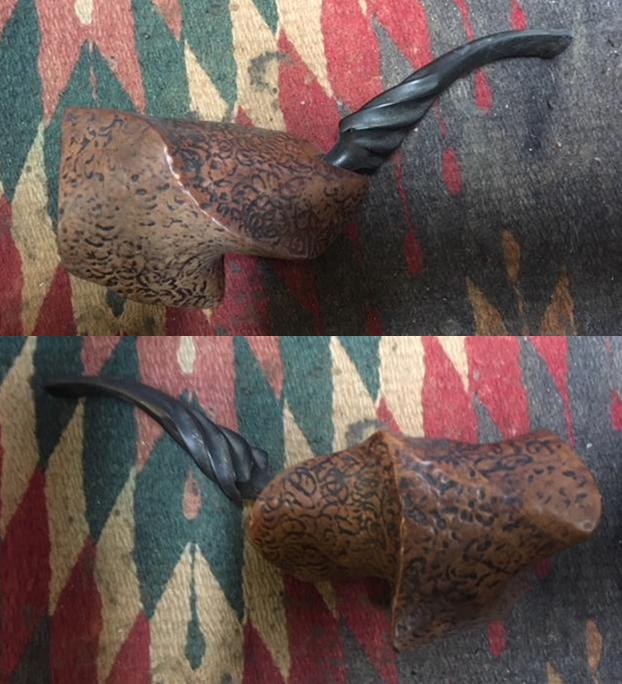
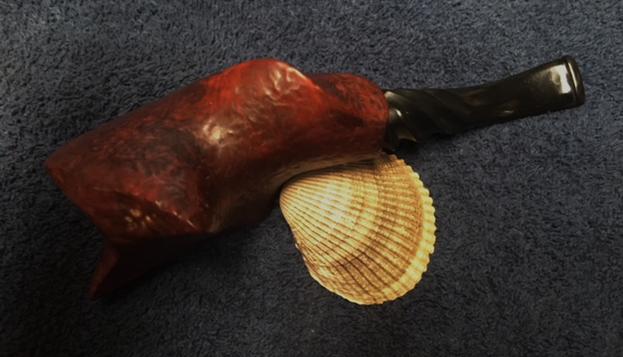
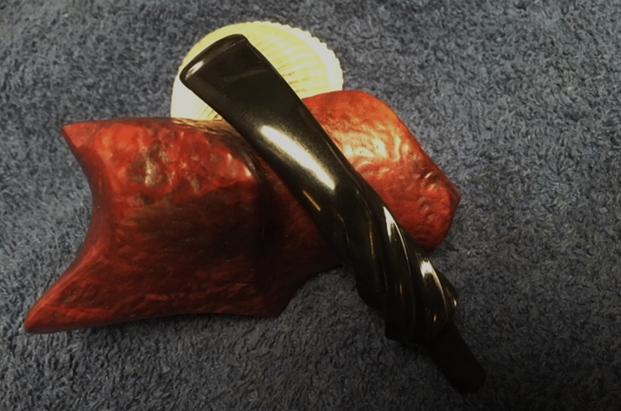
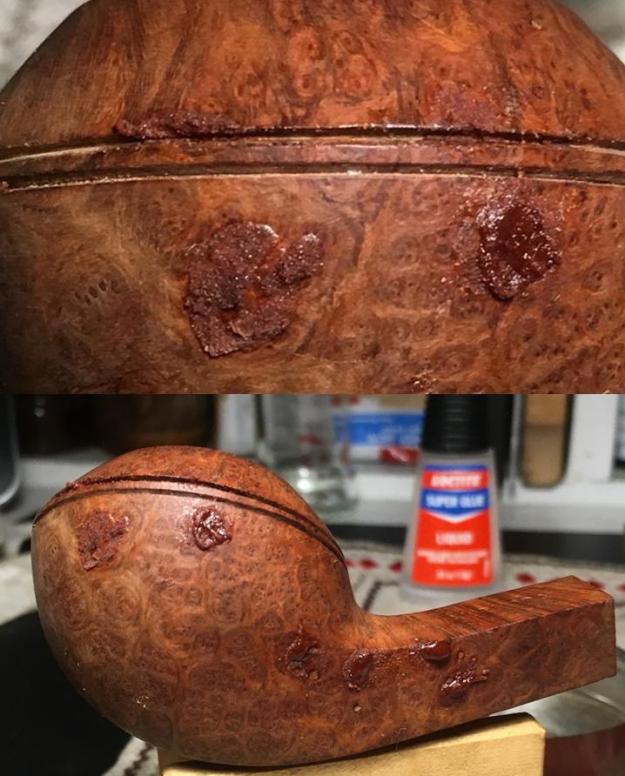
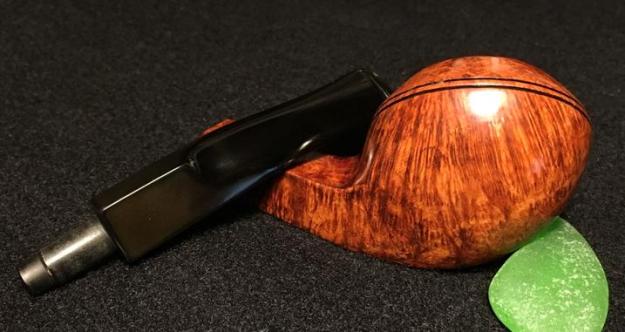
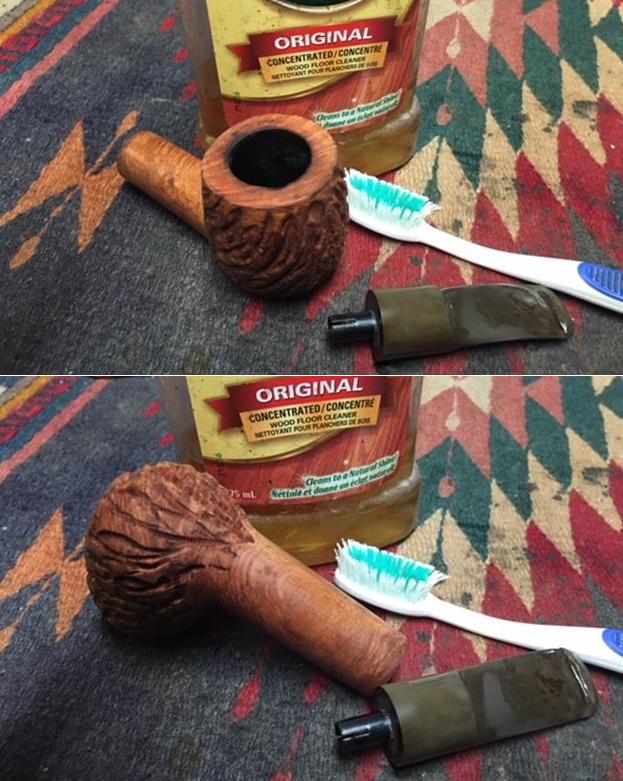
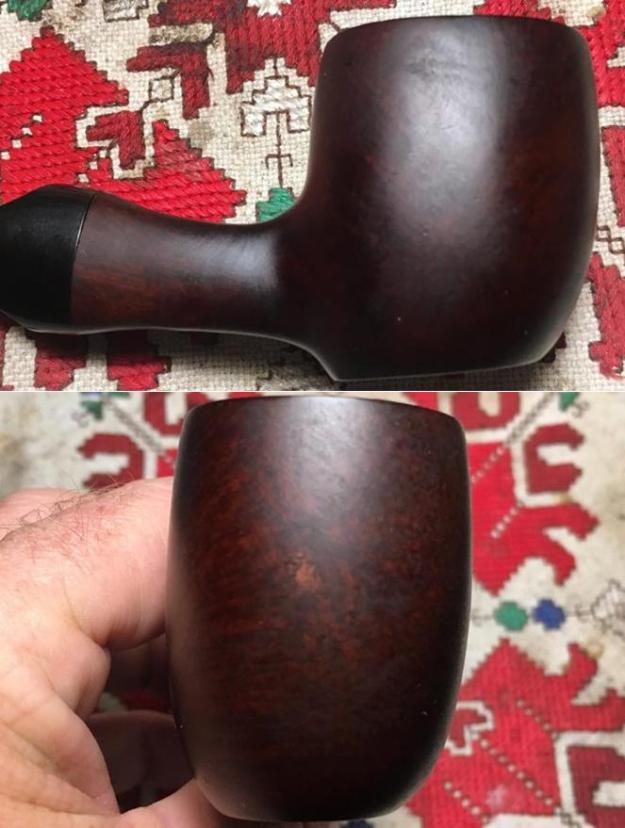
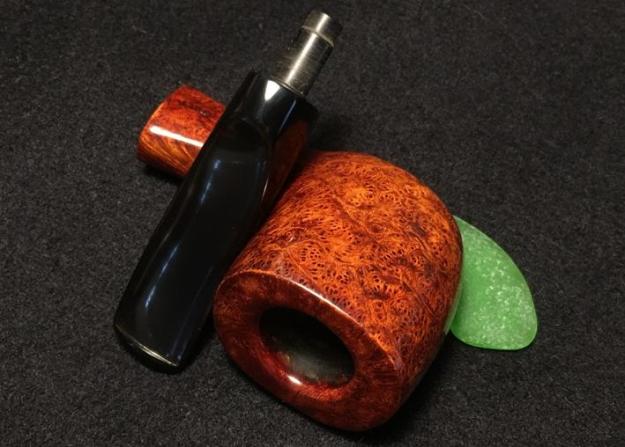
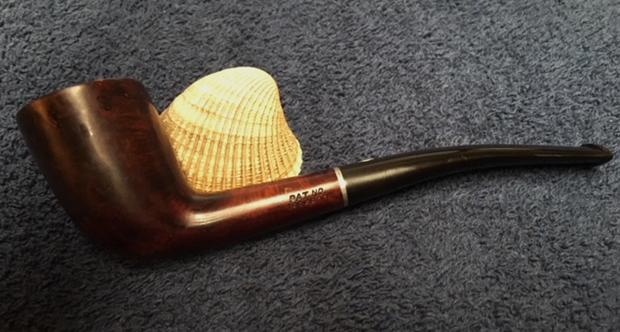
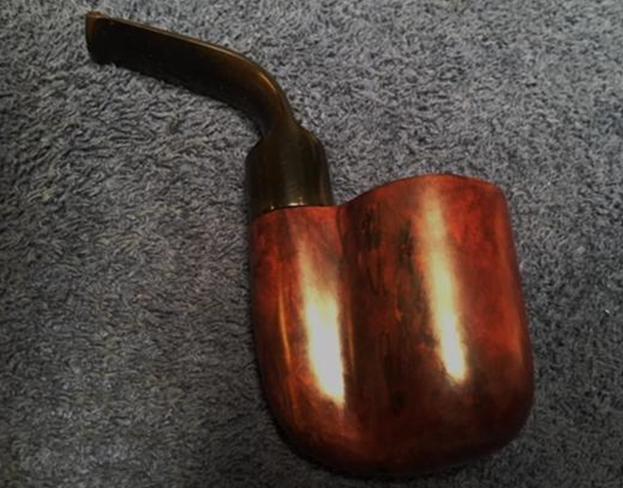
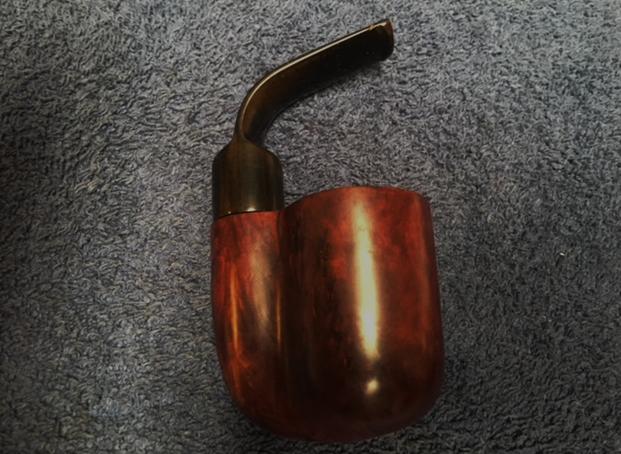
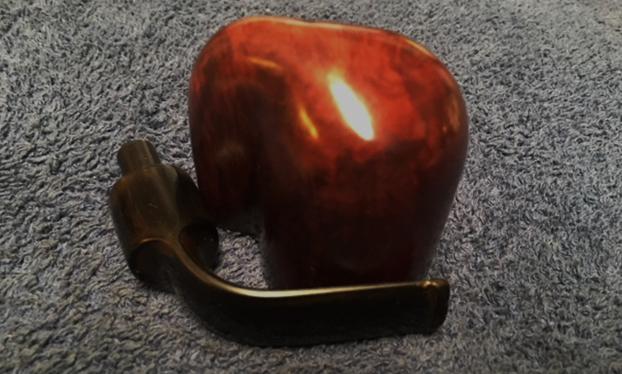
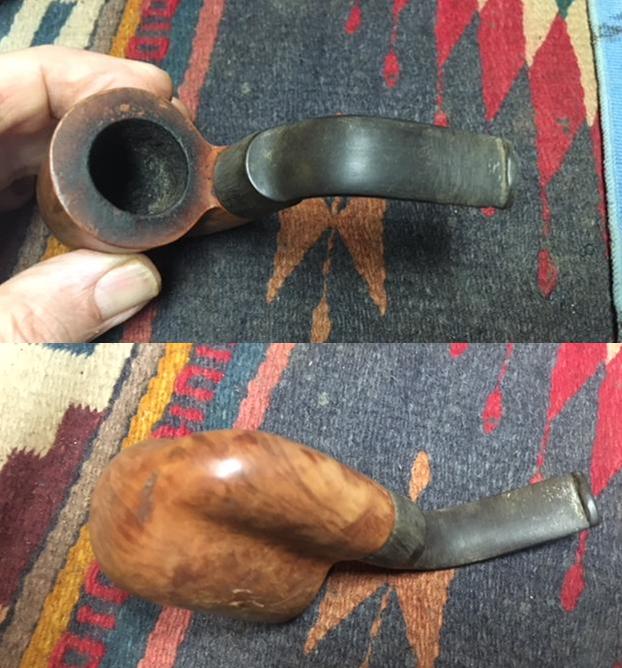 I turned the stem over the bowl to show how it was used as a pocket pipe and took a photo. The stem turned gave the pipe a better profile and it could easily be stuffed in a coat or vest pocket for use and reuse.
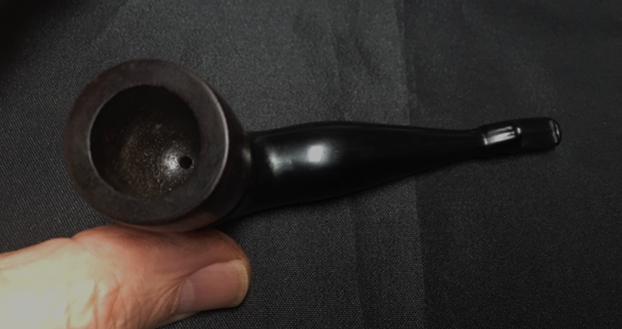
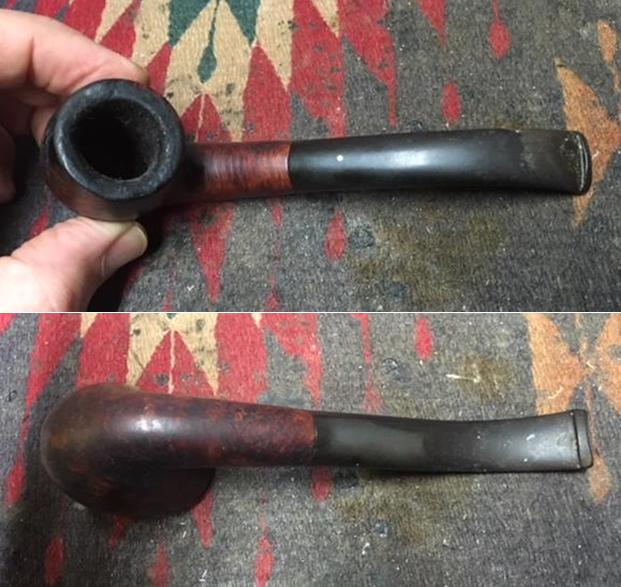
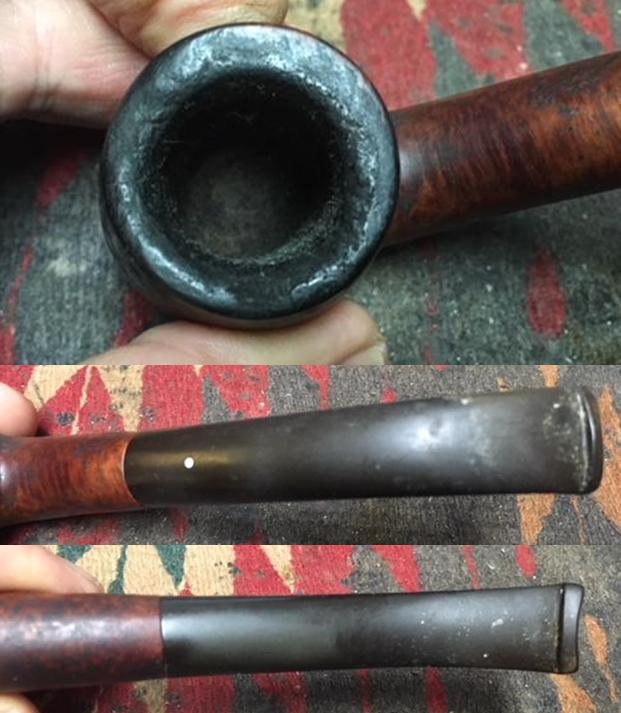
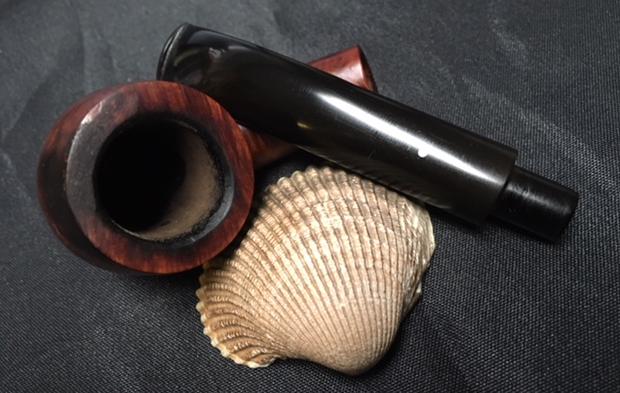
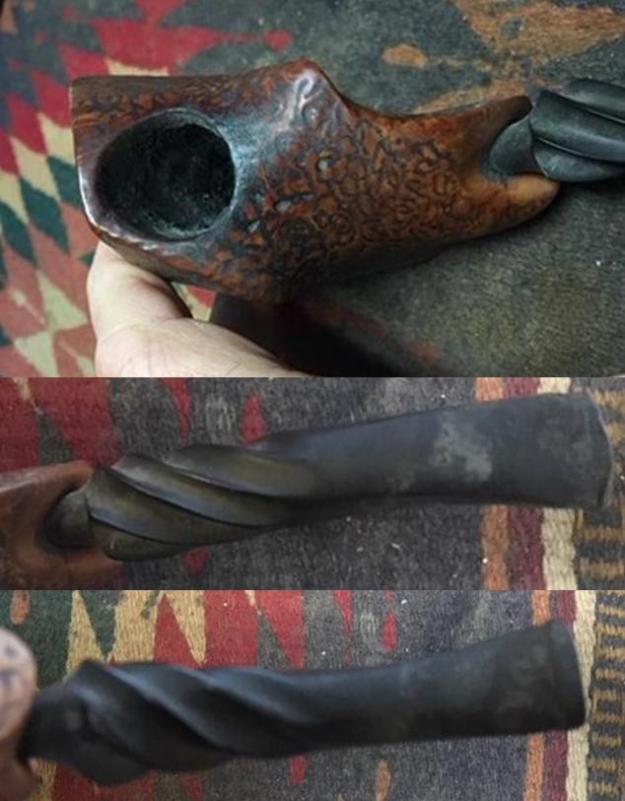
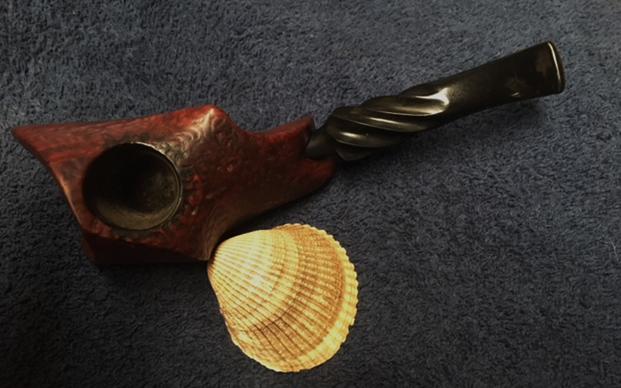
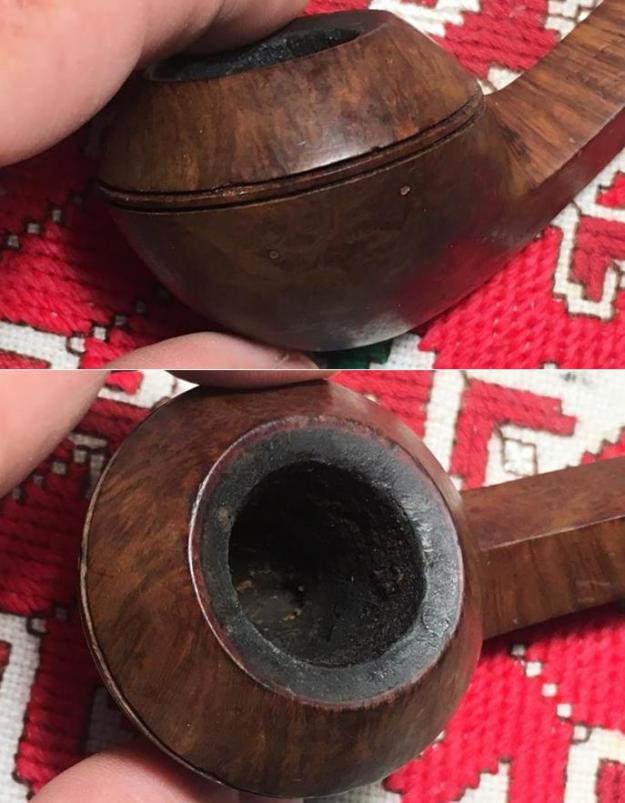
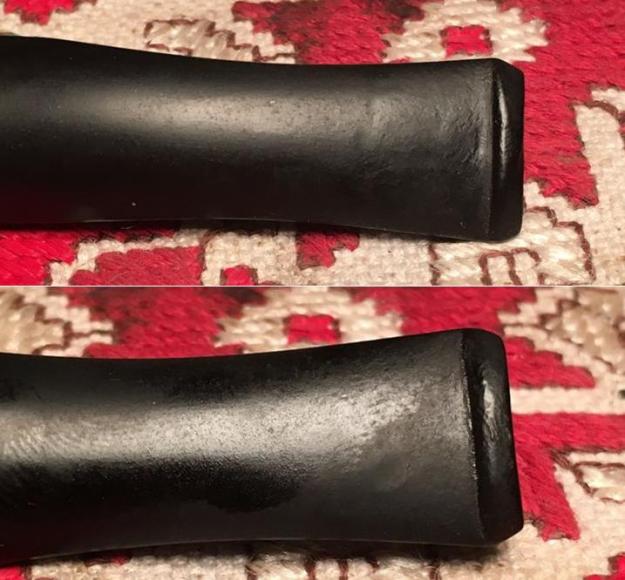
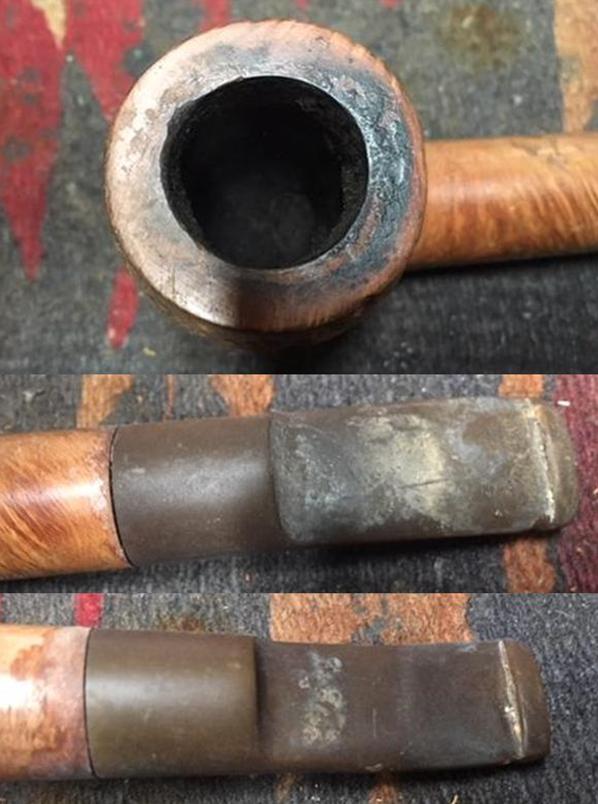
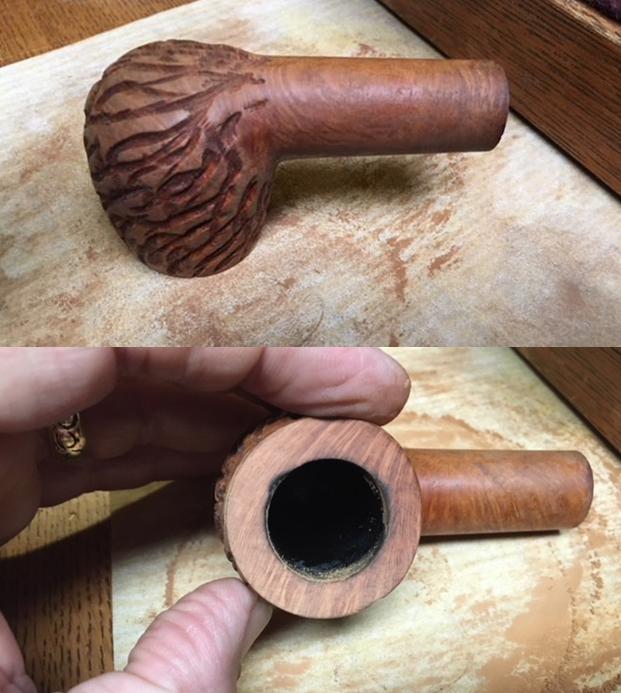
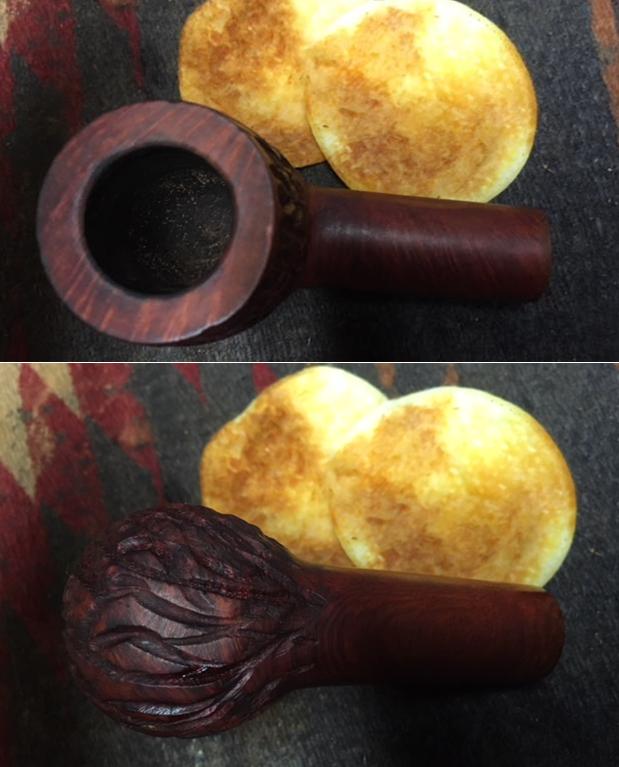
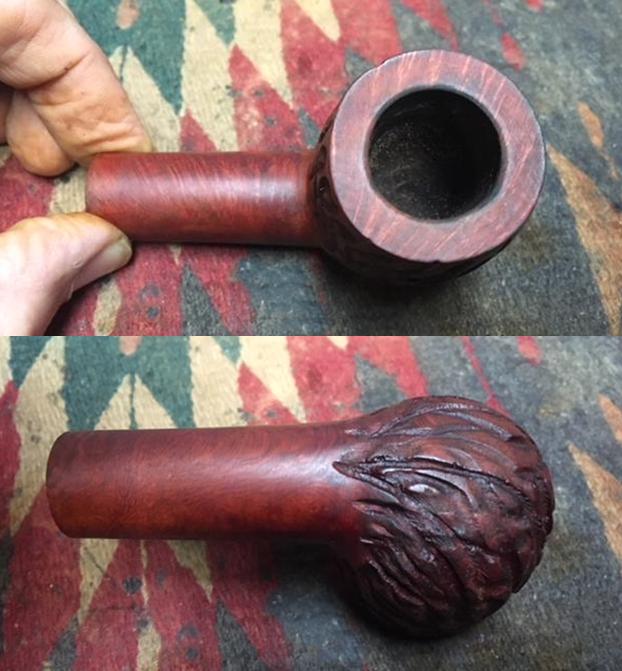
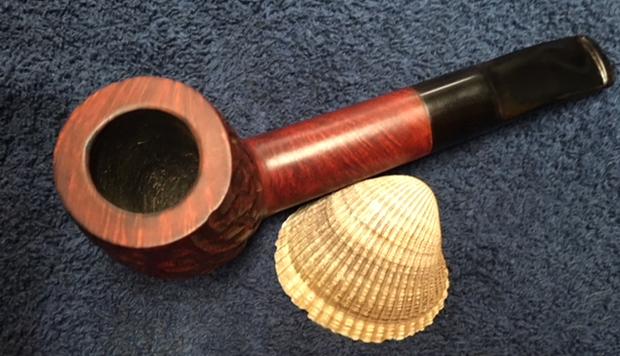
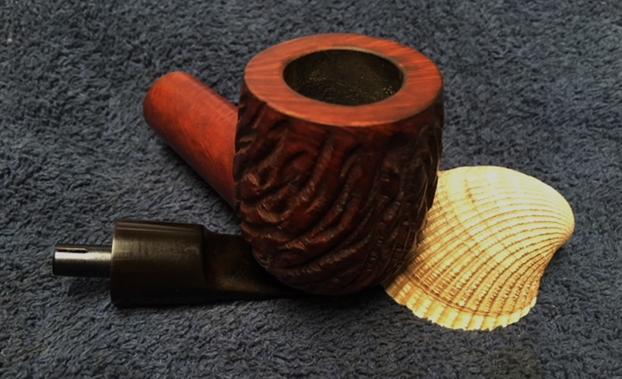
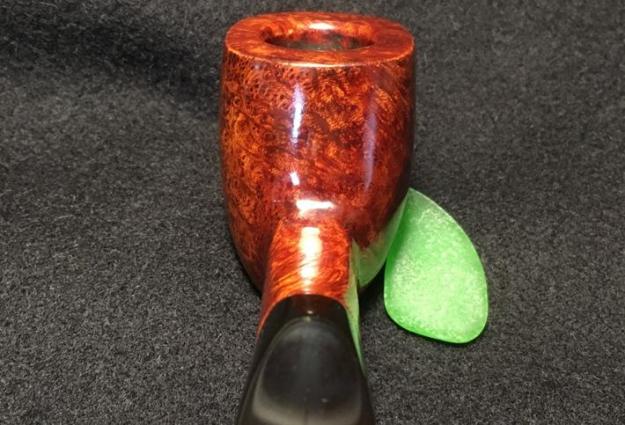
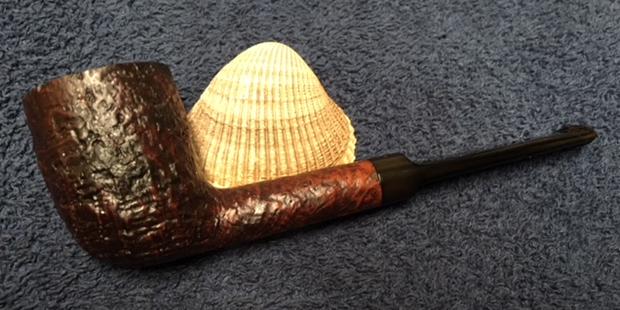
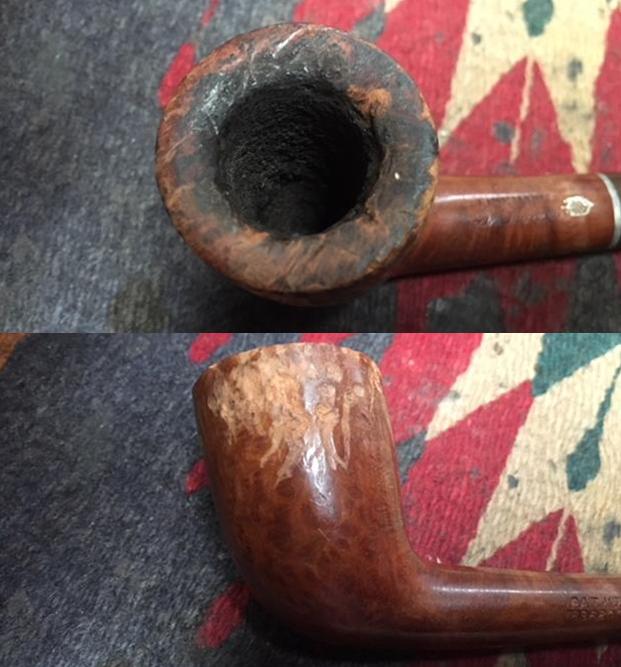
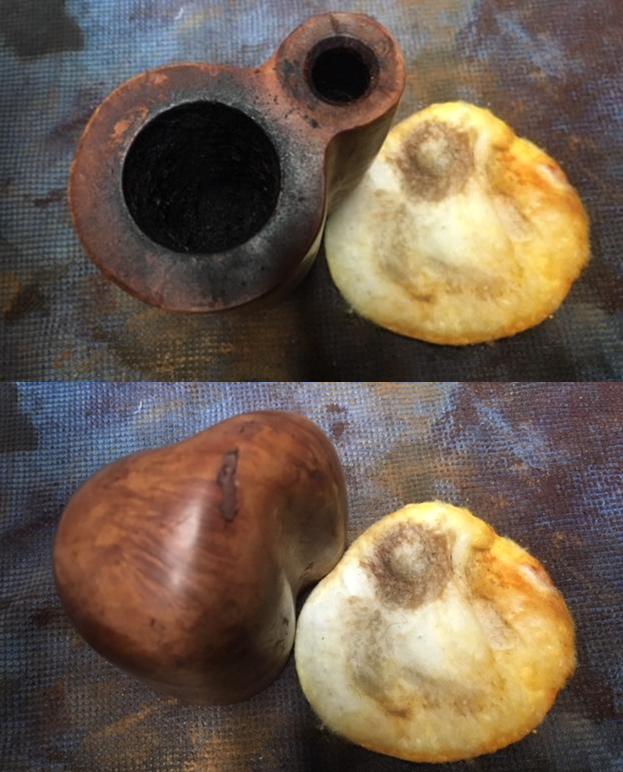
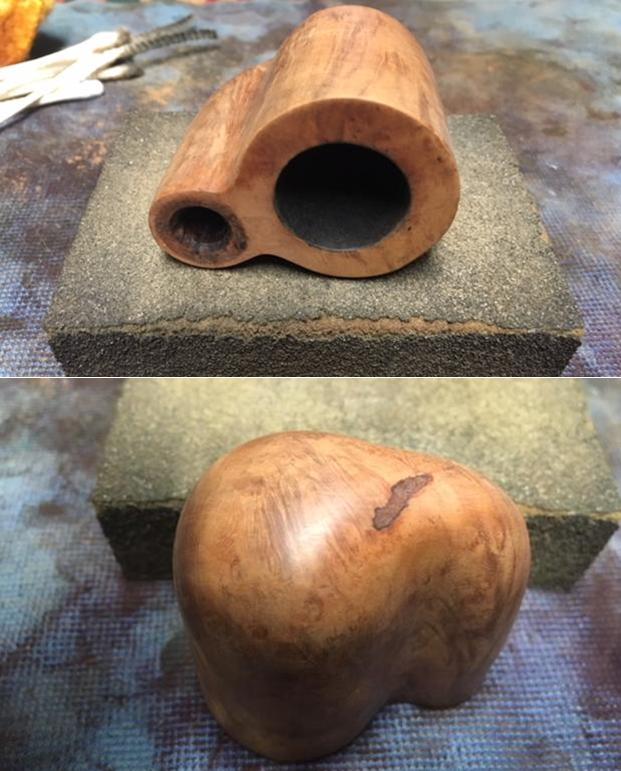
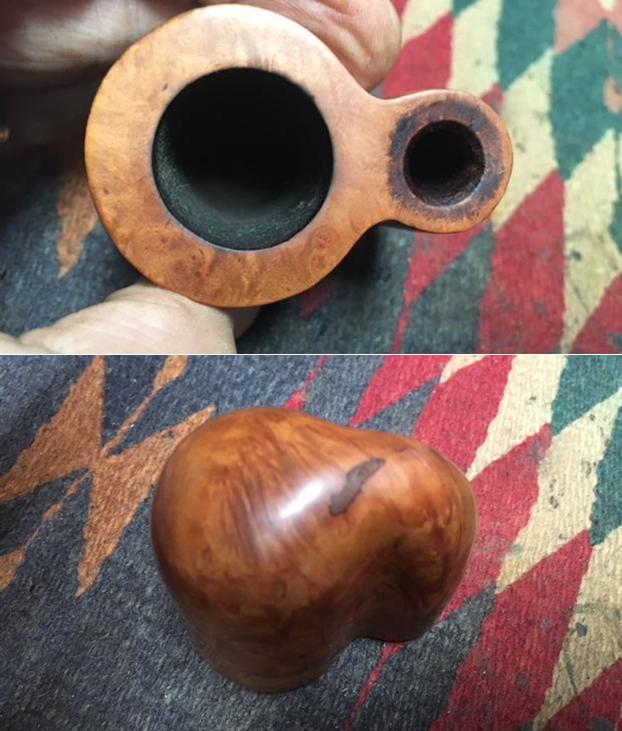
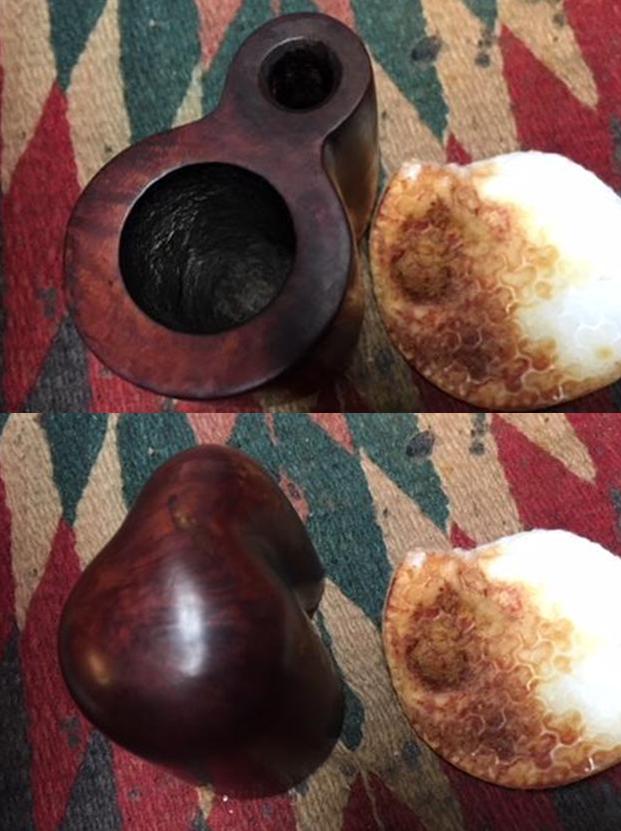
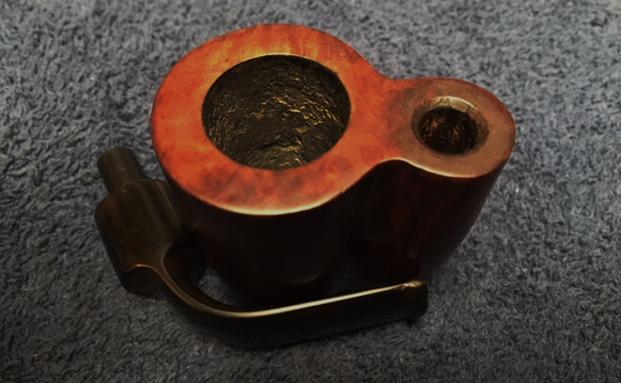
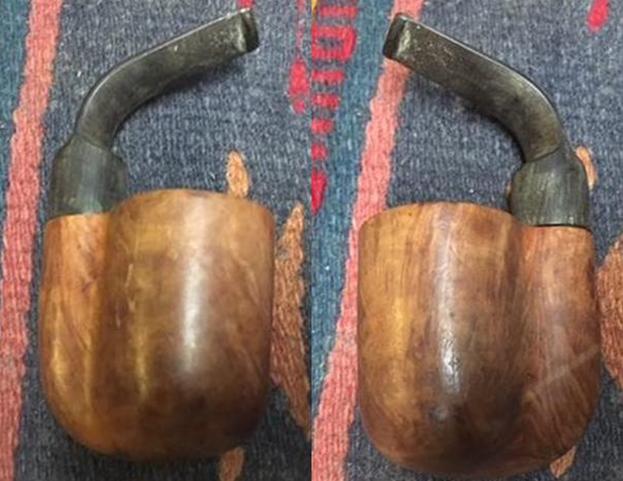 I took some close up photos of the bowl, rim top and the stem to show what I was going to be dealing with on this pipe. The rim top was dirty and lava covered but the inner edge appeared to be in decent condition. The stem was lightly oxidized and it had the least chewing damage of any of these pipes. There were light marks and tooth chatter on both sides of the stem and button.
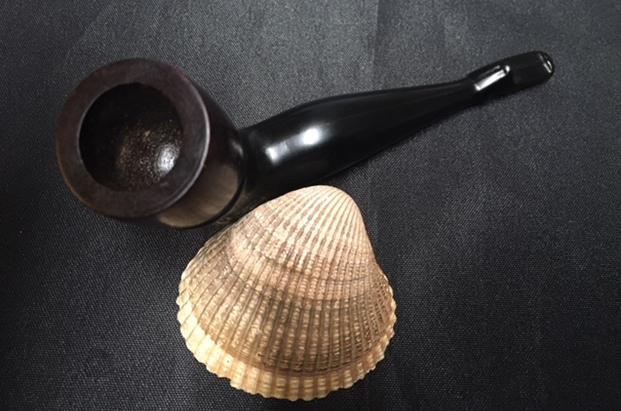
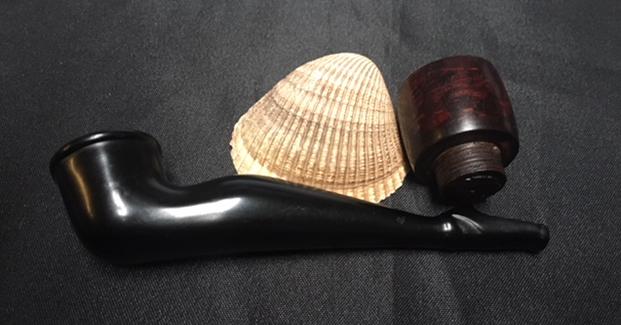
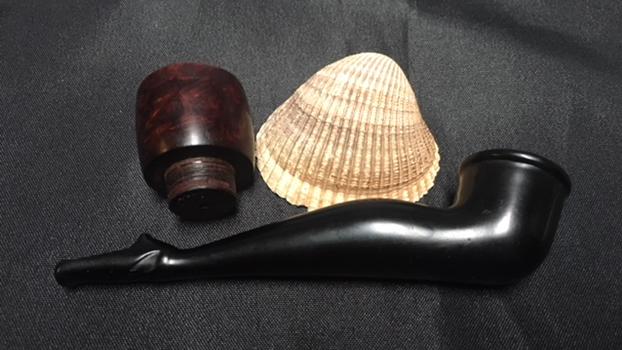
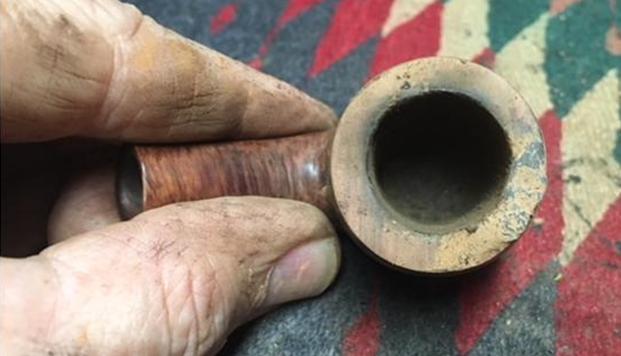
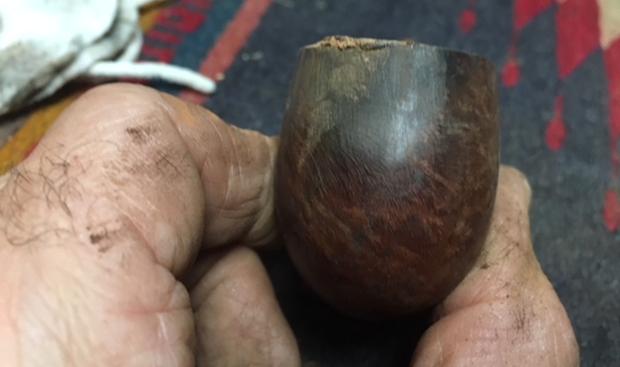
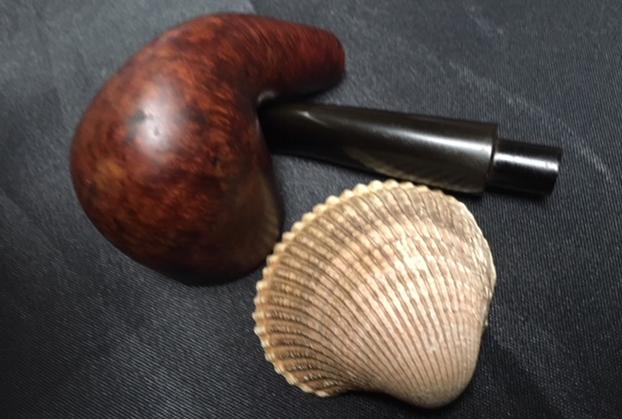
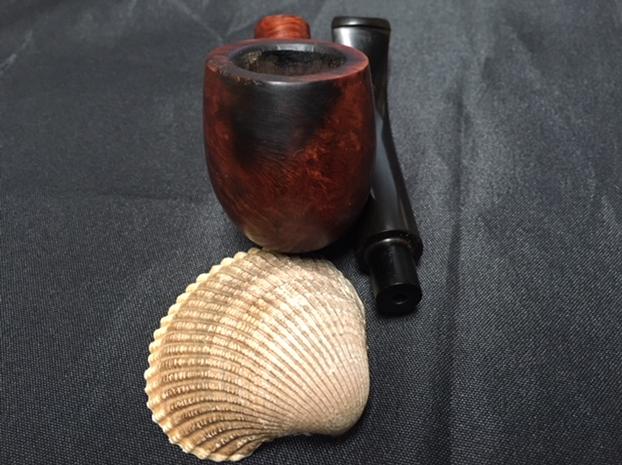
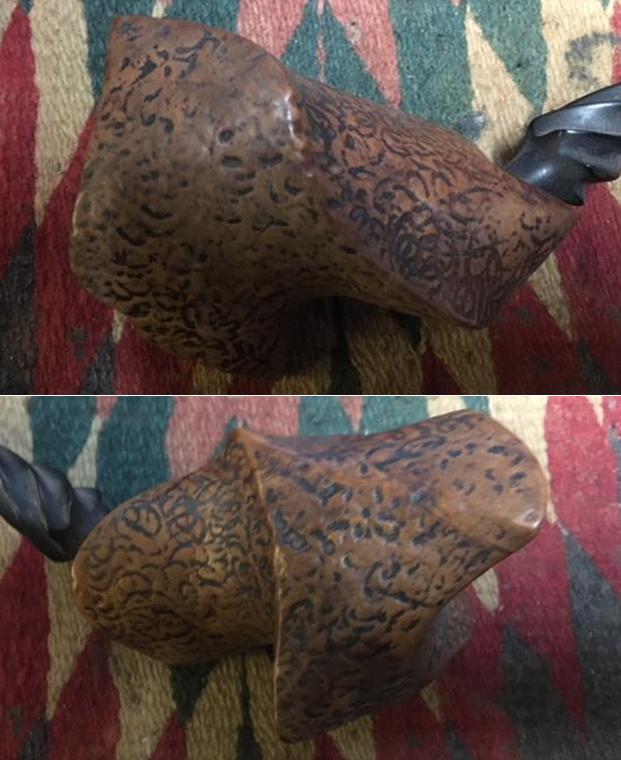
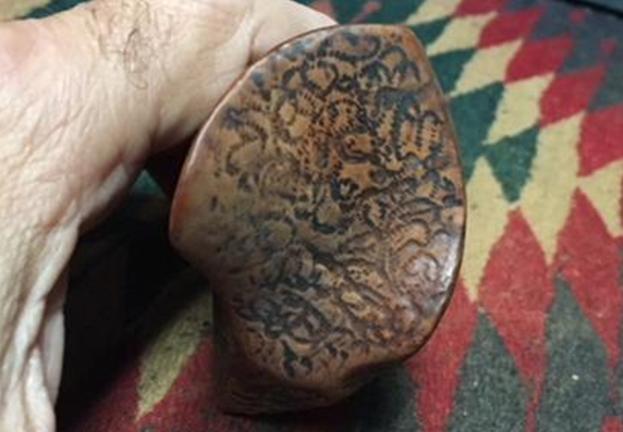
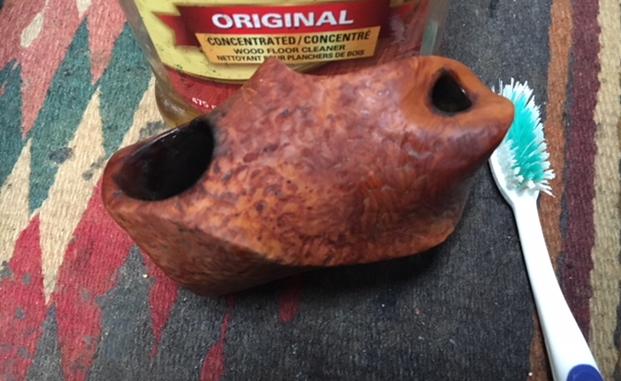
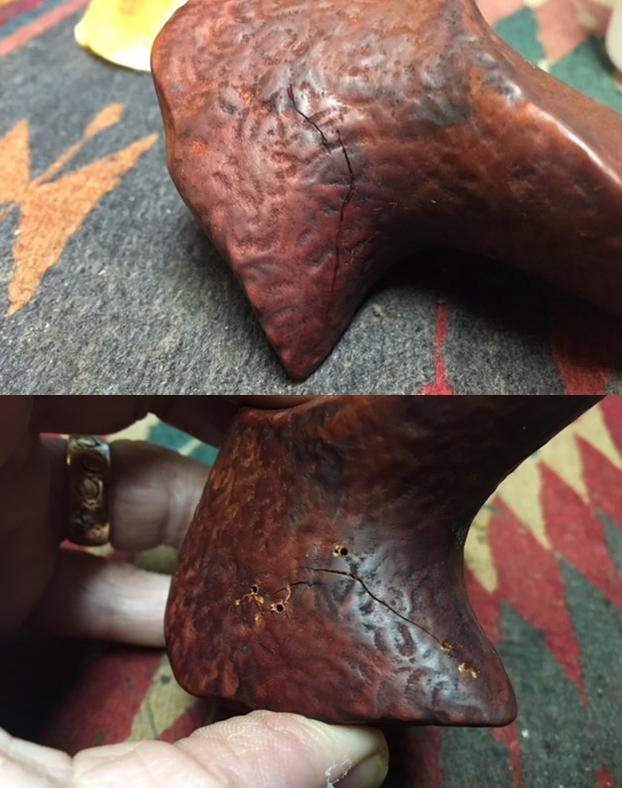
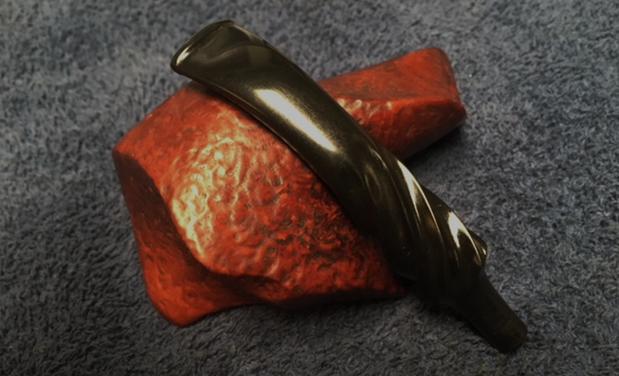
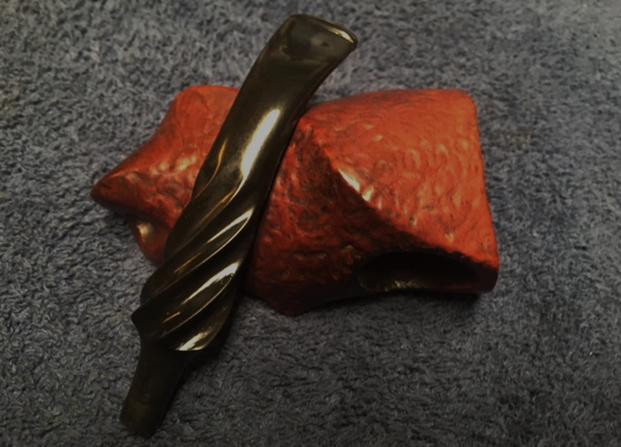
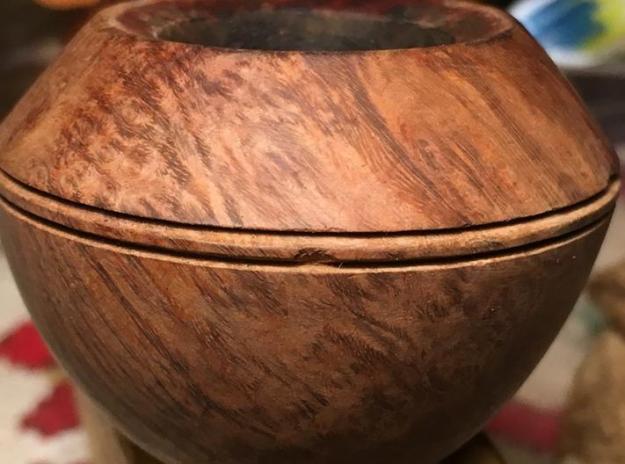
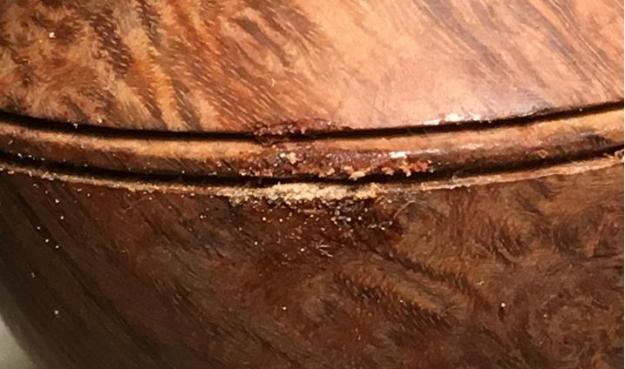
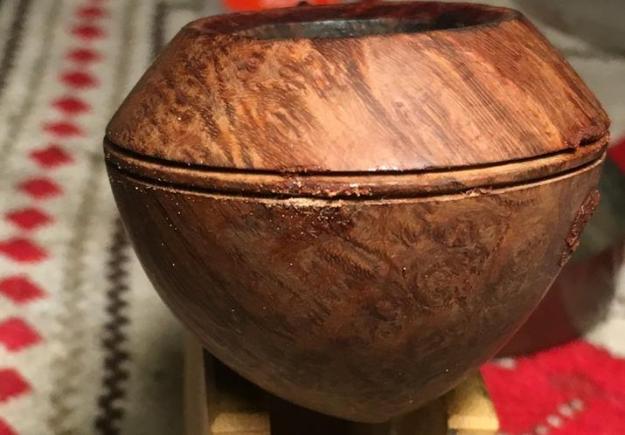
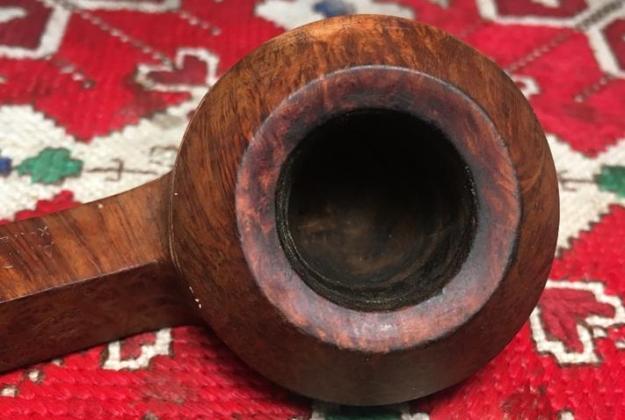
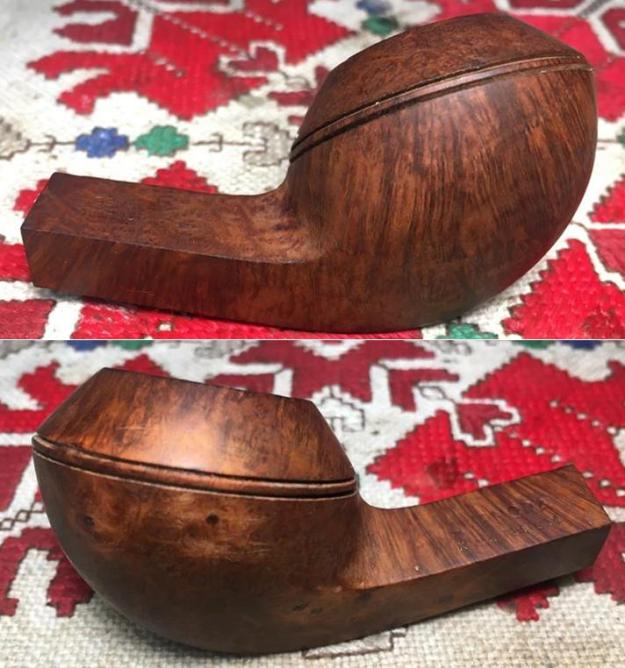
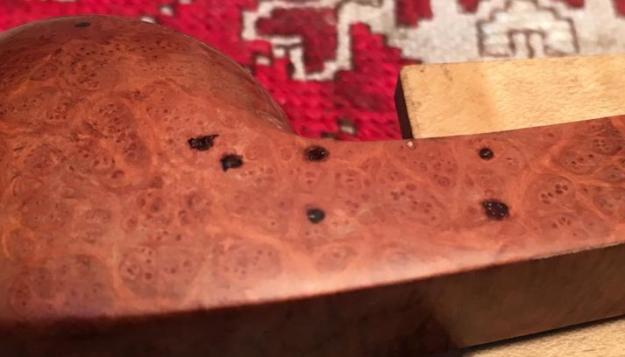
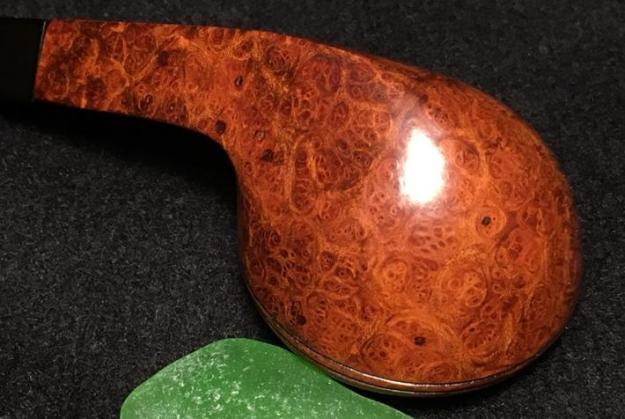
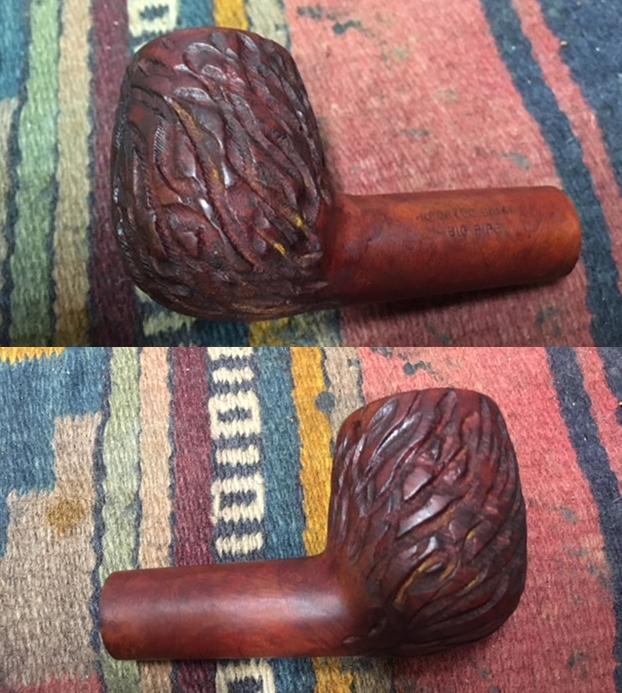
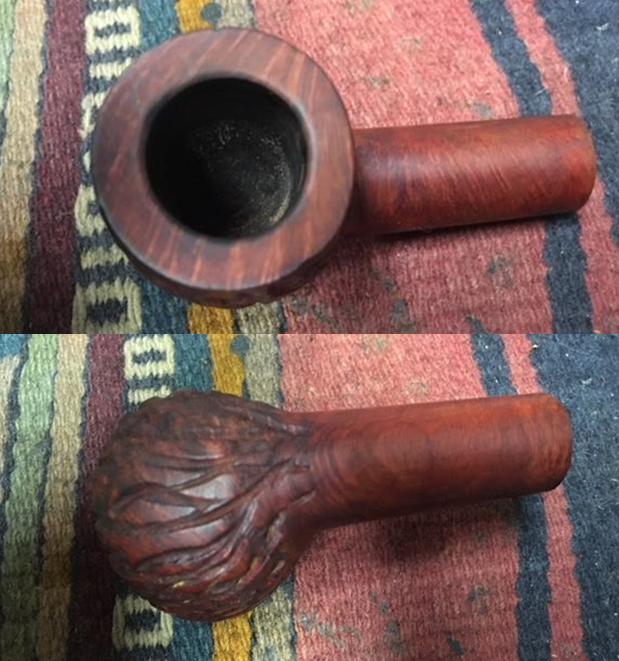
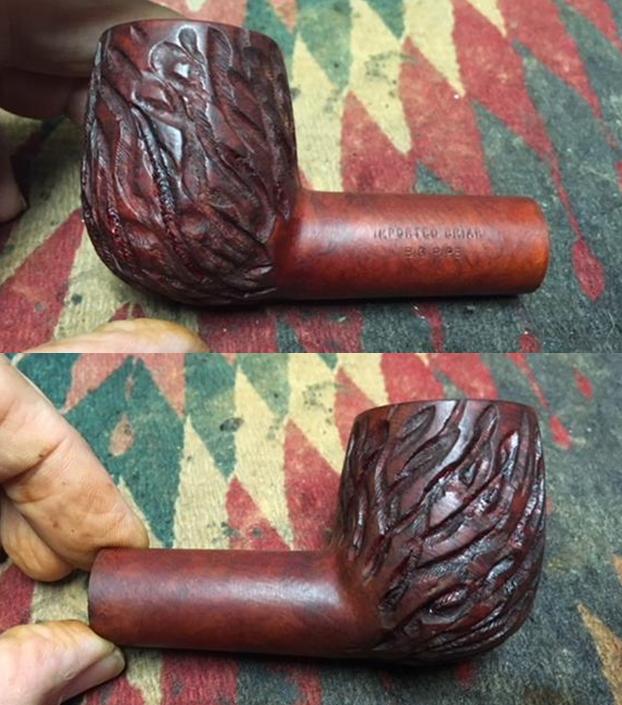
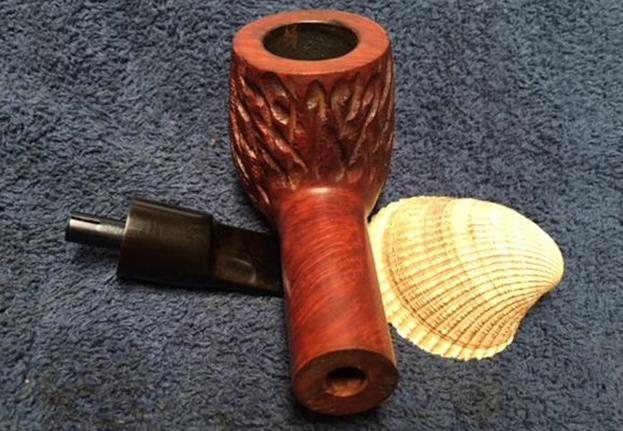
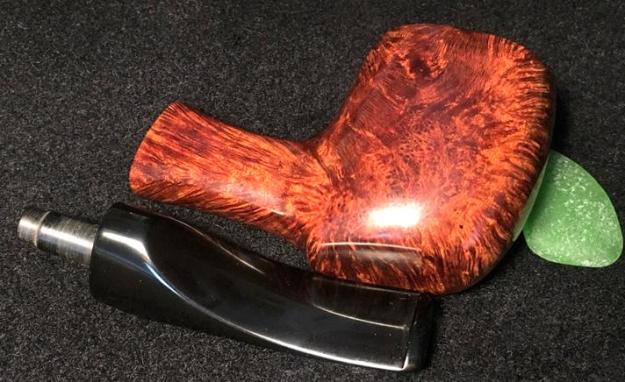
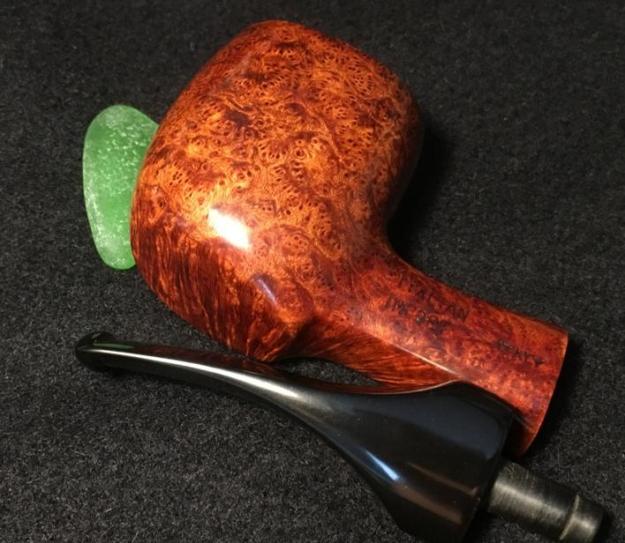
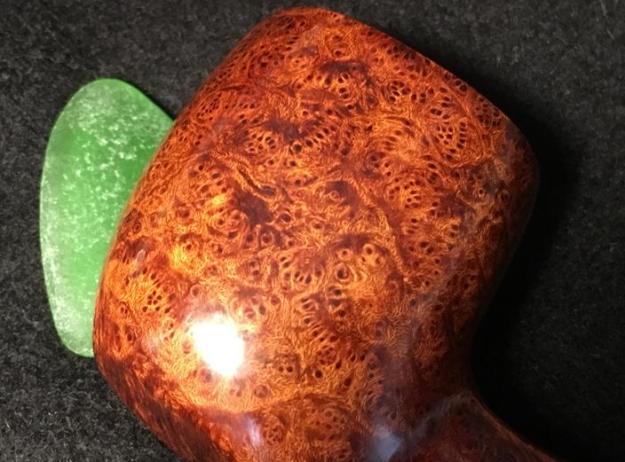
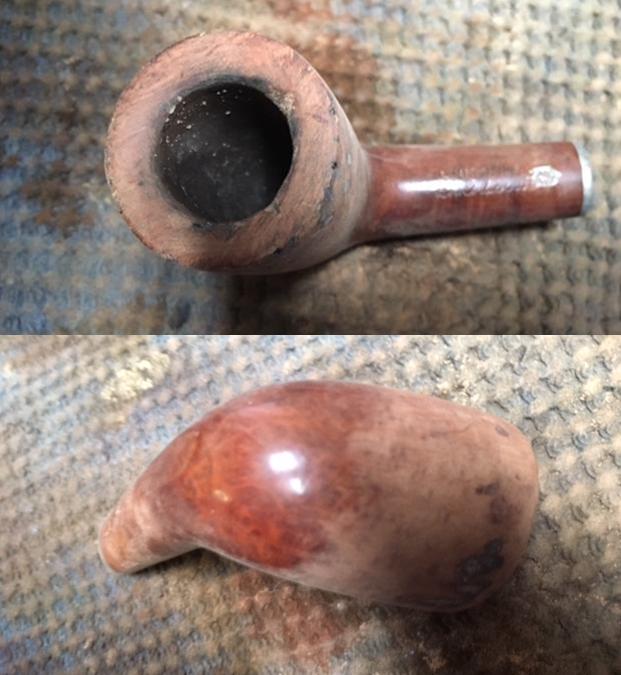
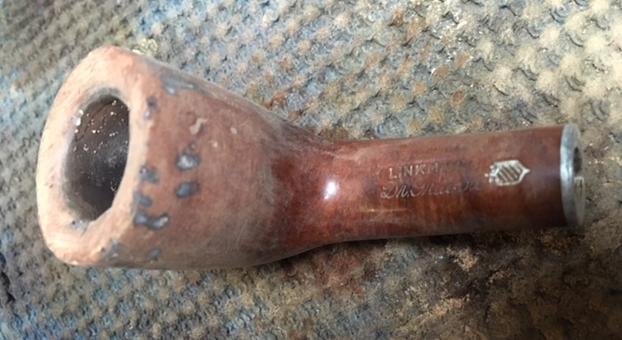
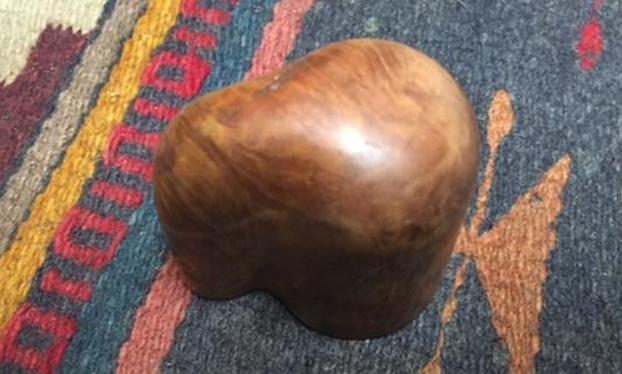
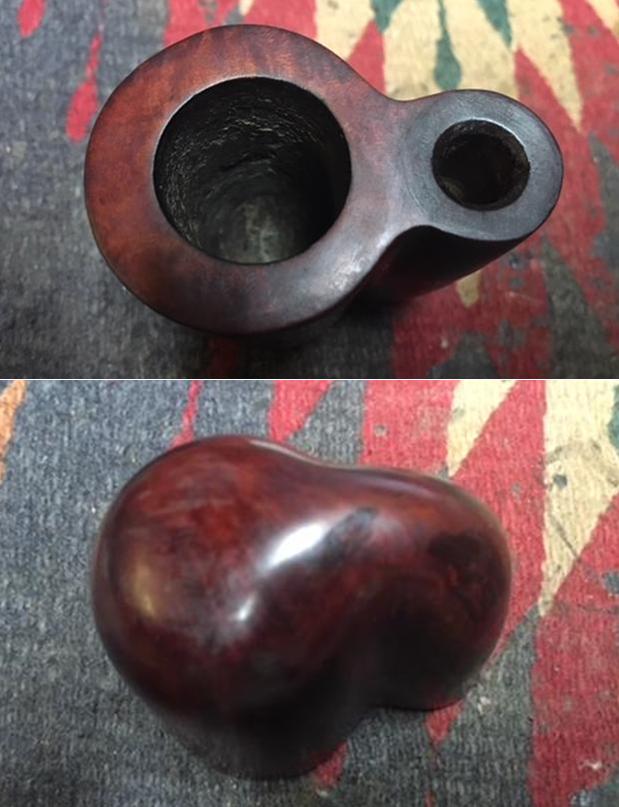
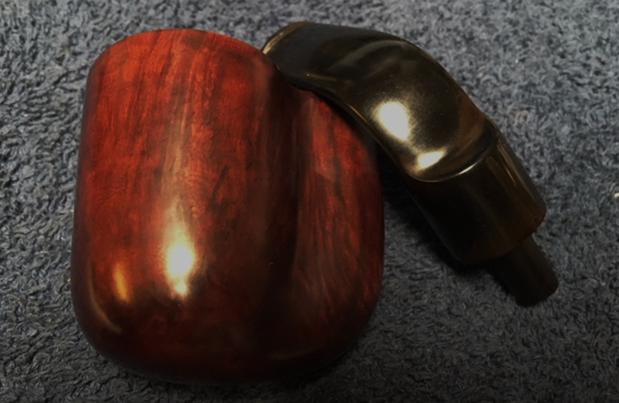
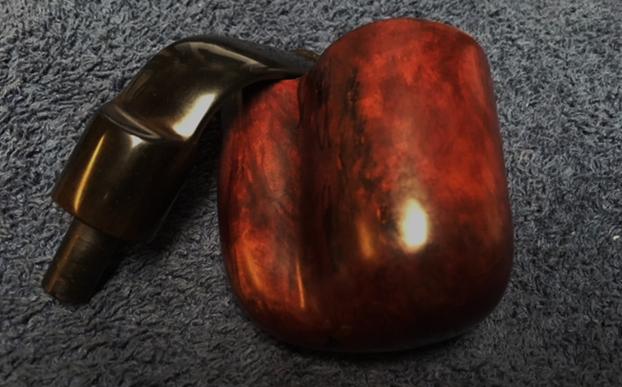
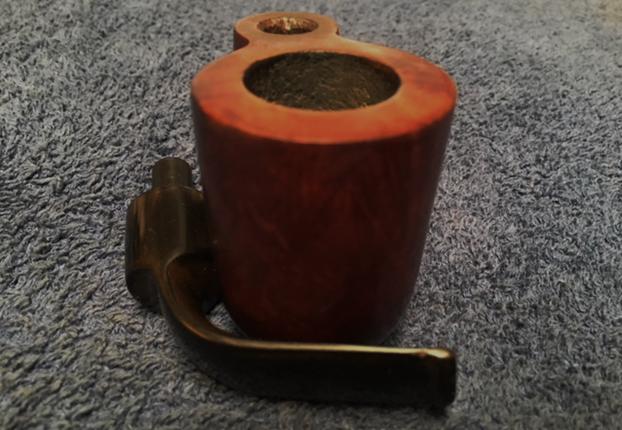
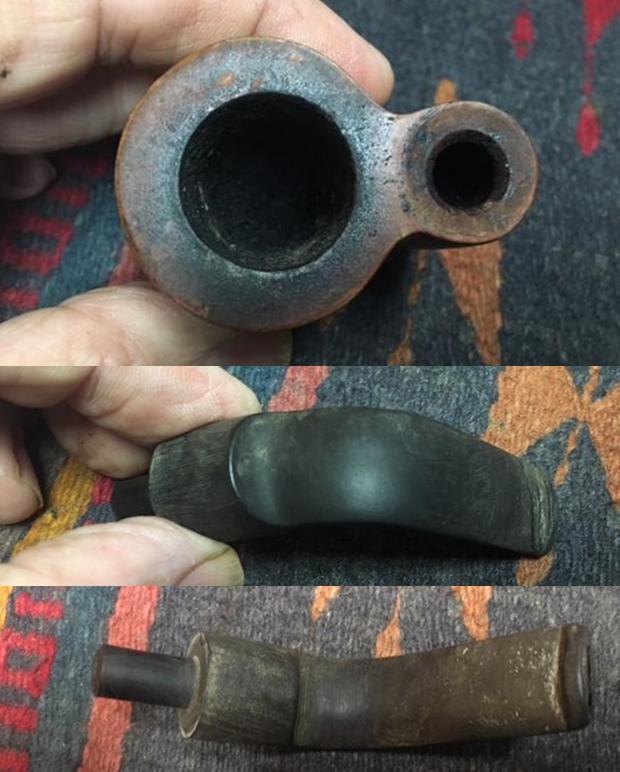 I took photos of the bowl from various angles to try to capture the condition of the pipe for you. The briar appears to have some interesting grain around the sides. There is one fill in the bottom of the bowl that is chipped and damaged.
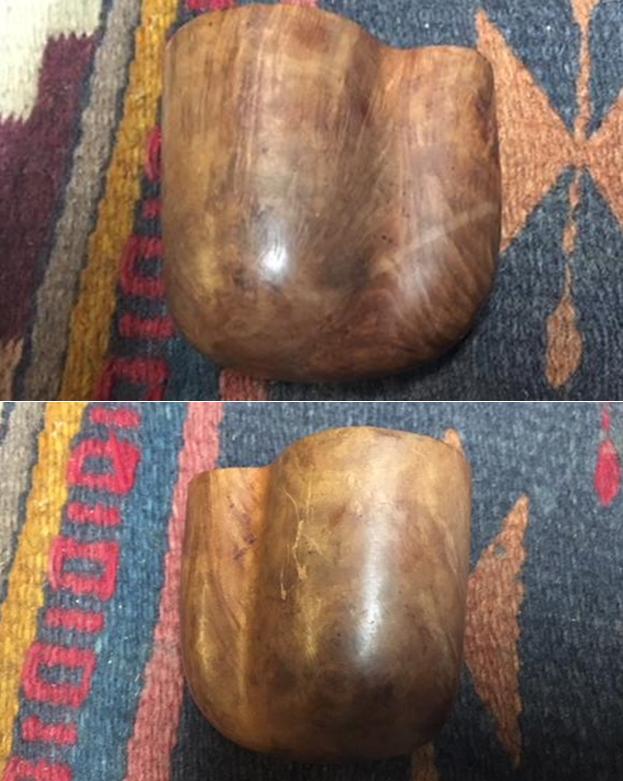
 I shared the tribute that I asked Anthony to write about his Dad and his pipe smoking in the last blog post and will share it again now. I always find that it gives me a sense of the previous pipeman when I work on a pipe from an estate. Anthony sent me a great tribute. Here it is in his words:
When my dad died 6 years ago, my mom asked if I wanted my dad’s old pipes. He was a long time pipe smoker, ever since I was a kid I can remember him sitting on the couch smoking his pipe inside. He worked at IBM and used to smoke his pipe in his office before they changed the laws in California. So you can imagine he had quite the collection over the years.
I took his pipes and put them in storage for a few years, I myself recently quit smoking cigarettes and decided to take up pipe smoking as it was easier on the wallet. I asked in /r/pipetobacco if anyone could recommend a pipe restoration service and someone told me about rebornpipes.com. I was hesitant but after looking at the blog I knew it would be a good place to send my dad’s pipes.
My dad loved smoking his pipes, sitting out by the pool in the sun taking a nap or in the garage wood working. The house was my mom’s area and the garage was my dad’s area. I spent hours sitting out in the garage as a kid watching the niners or a’s and giants on tv while doing woodworking projects. I hope to do the same with my kids these days.
I’m not sure if my dad smoked other tobacco but I remember Captain Black was the kind he smoked regularly. He had tins of it in the garage, full and empty and would turn the old tin jars into storage for odds and ends, like screws or washers or miscellaneous stuff.
I remember when I played little league my dad would sit in the stands and smoke his pipes. One of my teammates asked “What is that smell?” and I ashamedly said “Oh that’s my dad’s pipe…I’ll go tell him to put it out” and my teammate said “No man, it smells good!”. It’s funny how the little conversations over the years you remember.
Another time when I was in 3rd grade or so we learned how smoking was bad for you (this was back in the 80s). I remember I asked my teacher if smoking a pipe was bad for you too….and she hesitated and said “Not as bad as cigarettes, since you don’t inhale it”. After that I was no longer worried about my dad smoking.
Knowing my mom I have no idea how my dad pulled this off but he managed to smoke his pipe in the house. I guess she liked the smell of it. Recently when I was waiting for my girls to get out of school I was sitting on a side street smoking my pipe and someone walked by and thanked me for bringing the pipe back. He said his dad used to smoke a pipe and he loved the smell. As did mine. The only difference is my daughters complain constantly about the smell of my car, but that is mostly because I smoke cigars too.
Anyway, grab some fine tobacco, light up a bowl and sit back and relax. I don’t have a pool like my dad did but you can catch me working on my laptop sitting in my driveway smoking a nice pipe, especially one of these restored pipes from reborn pipes….I can’t wait to smoke them.
Today after publishing the blog on the twisted freehand pipe I received an email from Anthony. He copied me an email that he had received from his Mom after she read the blog. It gives more insight into his Dad so he gave me permission to post it here.
Dear Anthony,I really enjoyed your email attachment about Steve Laug’s restoration of your dad’s pipes (“#1 and #3”)! Your father would be so thrilled to see this master craftsman bringing back to life his old favorites — especially as he so loved wood-working himself — and to know that you treasure them. (I wonder if the one I “rescued” from his workshop and now display in plastic case — the meerschaum lion’s head — is ruined. After vacuuming and blowing out all the dust and rat-turds, I soaked it in vinegar till white again. It looks good, anyway!)
I also loved reading your comments about Dad’s enjoyment of them. I don’t think he was ever addicted to tobacco; he just enjoyed it casually (and mostly chewing on them!).
I remember when he acquired the large, twisted one (“#3”) at a pipe shop called “Andre’s,” around 1969 or ’70. It was a unique shop, originally in Los Gatos or Campbell (I think) which later moved — maybe to The Alameda area in San Jose. I’m not sure if Andre made any that he sold, but as a woodworker Dad was fascinated by this one especially. He also bought his favorite tobacco blends there. (Maybe there’s something on the Internet about Andre’s, if he became more well known.)
While expecting our first child in early April 1971, I went down there to get Dad a surprise gift pipe for his April 25 birthday and picked out a plump, short one labeled “The Little Chub.” Not knowing in those days whether Baby would be a boy or girl, I wrapped it with a card saying it was “To My New Daddy from your Little Chub.” Lo and behold, Baby arrived on Dad’s very own birthday, when I tucked the pipe into my suitcase for the hospital and presented it to him there (along with The Little Chub herself — his best birthday gift ever)! I don’t see it among these photos, so I guess it got chewed down worse than the others!
Re. your notes on changes over the years in smoking habits and rules:I think it was IBM that banned smoking at work before state or local governments did. Also, as tobacco was made stronger (and more addictive), odors grew stronger and more permeating, and its terrible health effects became more obvious, more bystanders were impacted and objected.
As for my allowing pipes in the house in “the old days,” I had grown up with both parents heavy smokers, when that was common practice. (I didn’t take it up myself, as I couldn’t afford it — in the break room at work in my teens, machines sold candy bars for a nickel, but a pack of cigarettes cost 35 cents! And I liked chocolate better anyway.) But a man with a pipe was more attractive (especially if he dressed well), it seemed a sophisticated image, and the smoke smelled better. Many of my professors at Berkeley had pipes on their desks! But after we had kids and knew smoke was a hazard for them, we didn’t want them near it inside. And of course, we watched both my parents suffer terribly (Daddy’s heart attacks and emphysema, and Mom’s lung cancer) from near-lifelong smoking.
Anyway, these are beautiful, vintage, collectors’ items when restored and they’d look great in a closed case on the wall!
Love,Mom
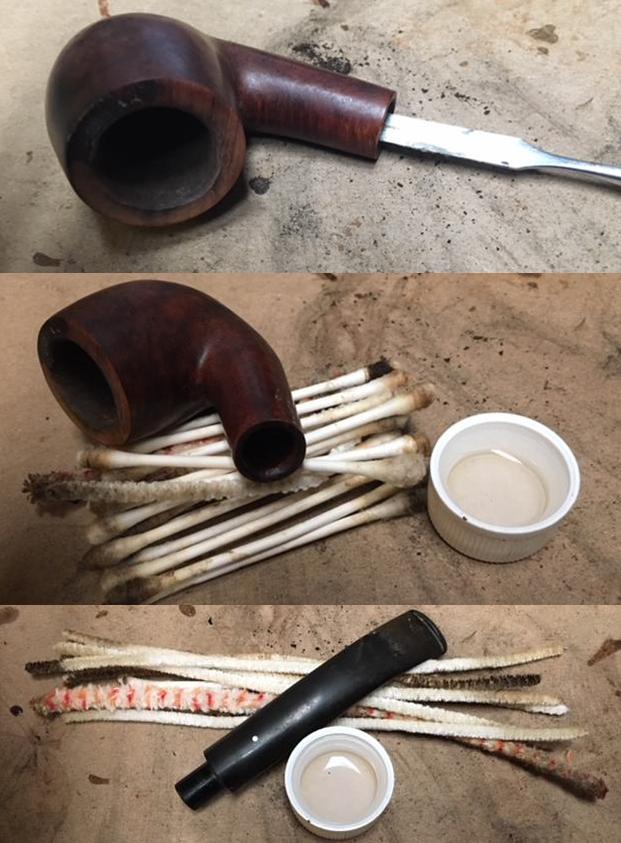
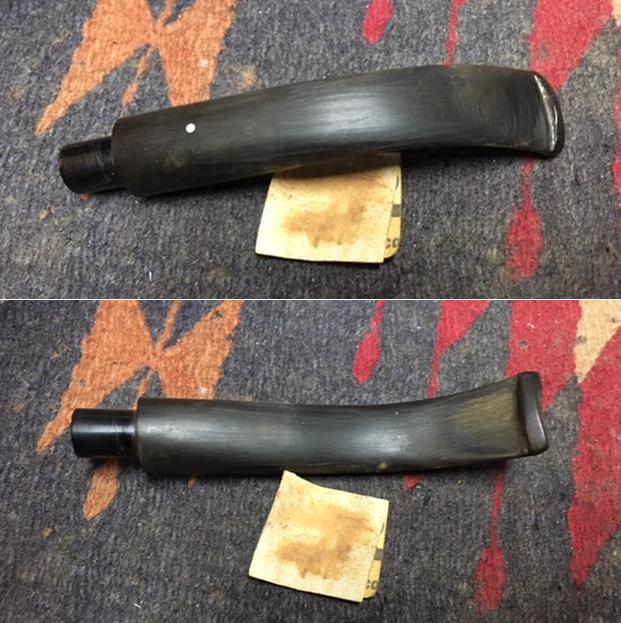
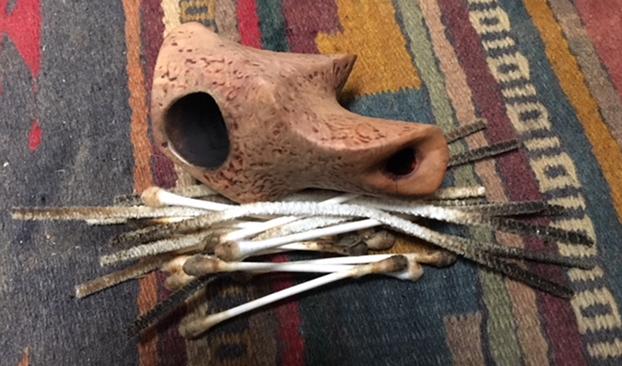
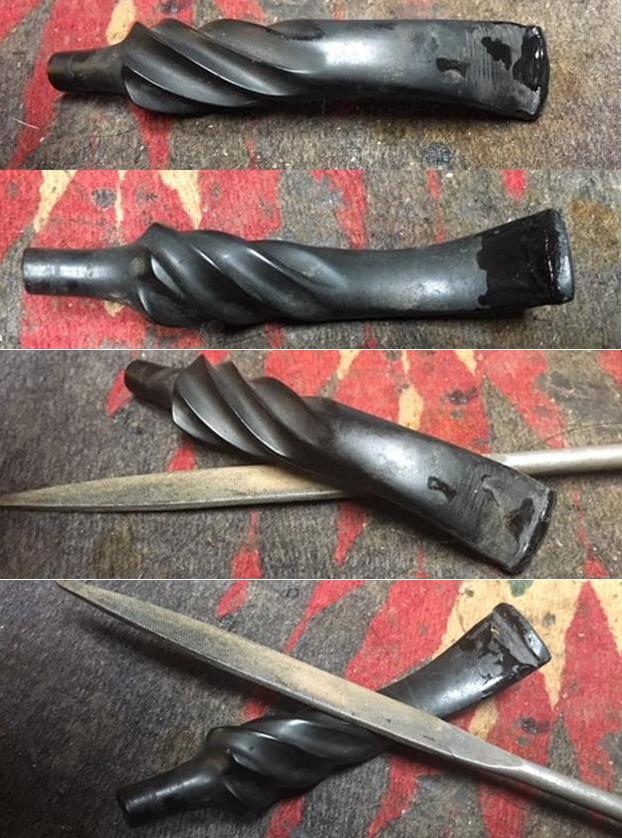
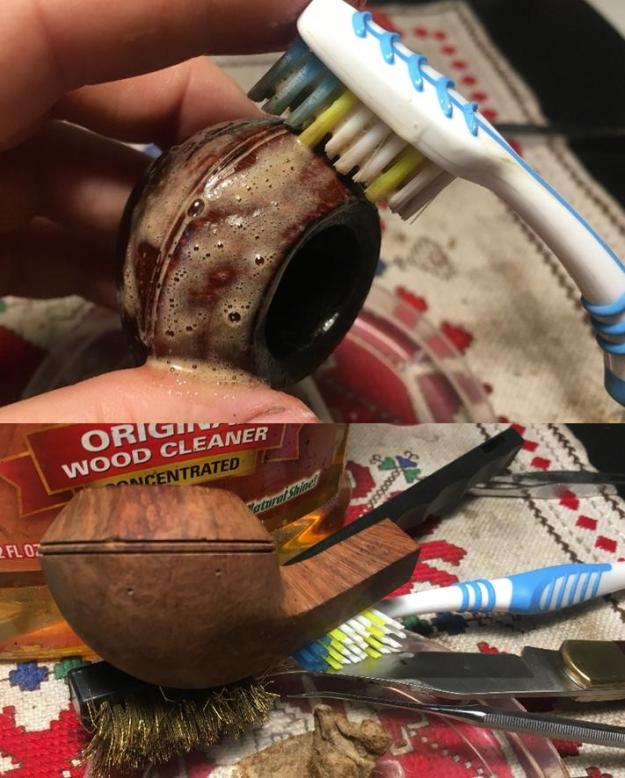
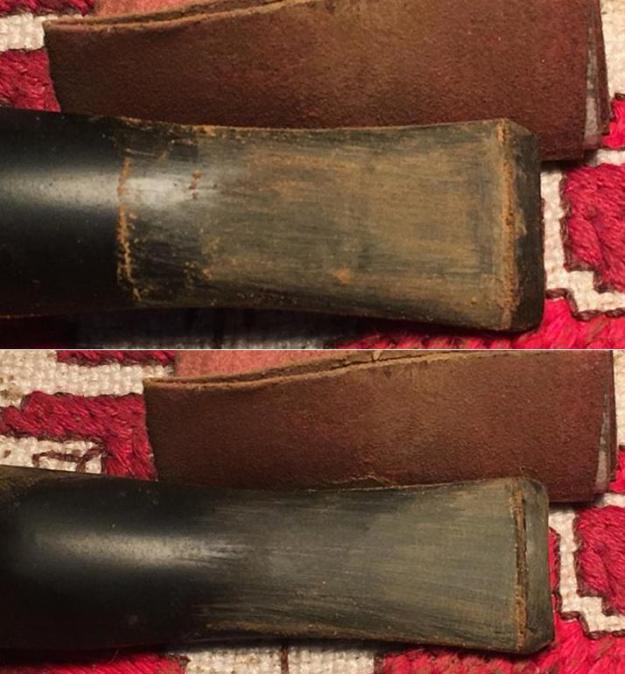
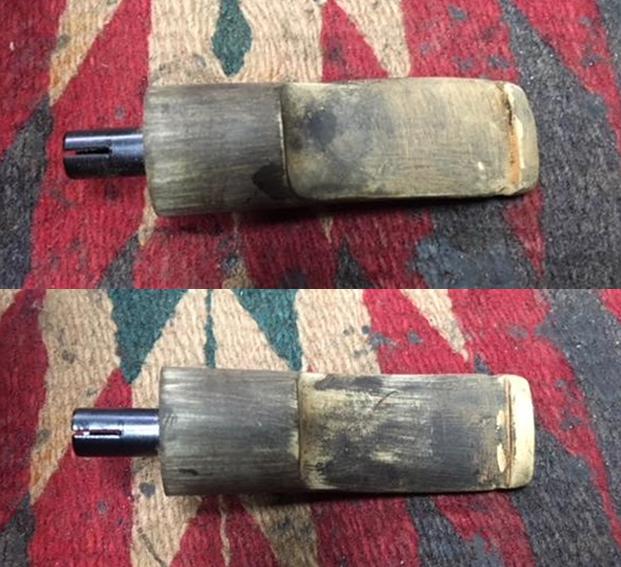
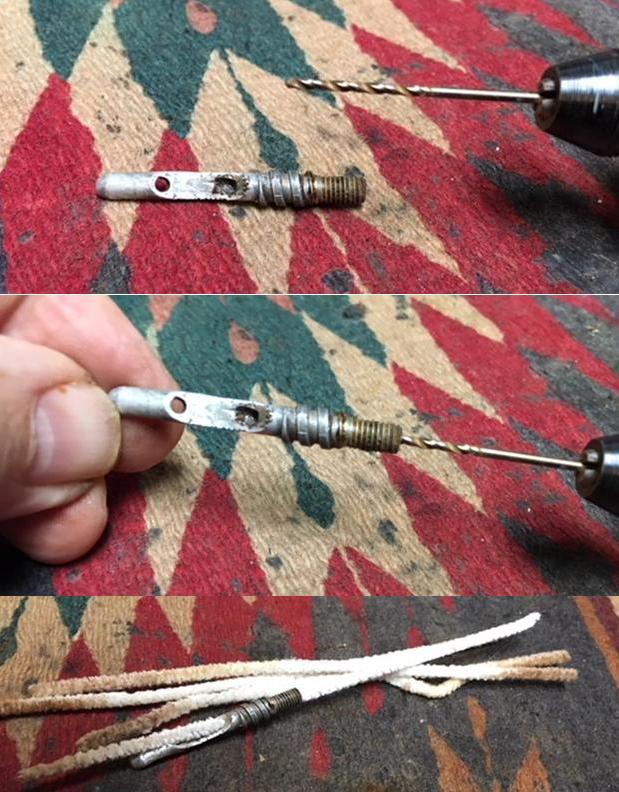
Thanks Anthony, that gives me a sense of who your Dad was and how he used and enjoyed his pipes. I was ready to turn my attention to this third pipe. On this pipe I decided to work with the stem as it seemed a pretty straightforward cleanup (unlike the others). I cleaned out the inside with pipe cleaners and alcohol and worked on the funneled end of the tenon with a cotton swab and alcohol. It was quite dirty but it did not take too long to change that. 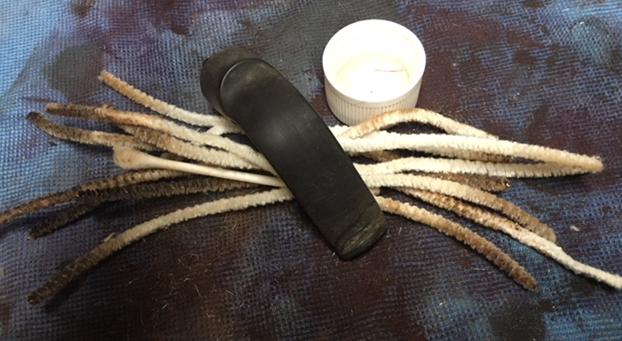 I used some 000 steel wool to clean off the light oxidation and then sanded the tooth chatter and marks out with 220 grit sandpaper.
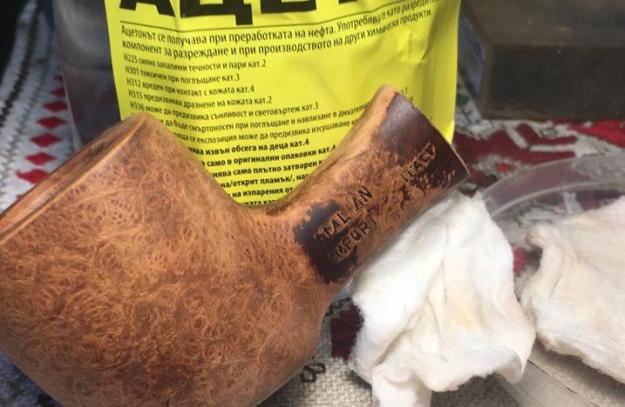
  I wiped down the bowl with acetone on a cotton pad to remove the grime and remnants of the finish on the bowl. I scrubbed the rim top but that would take a bit more work to clean it off.
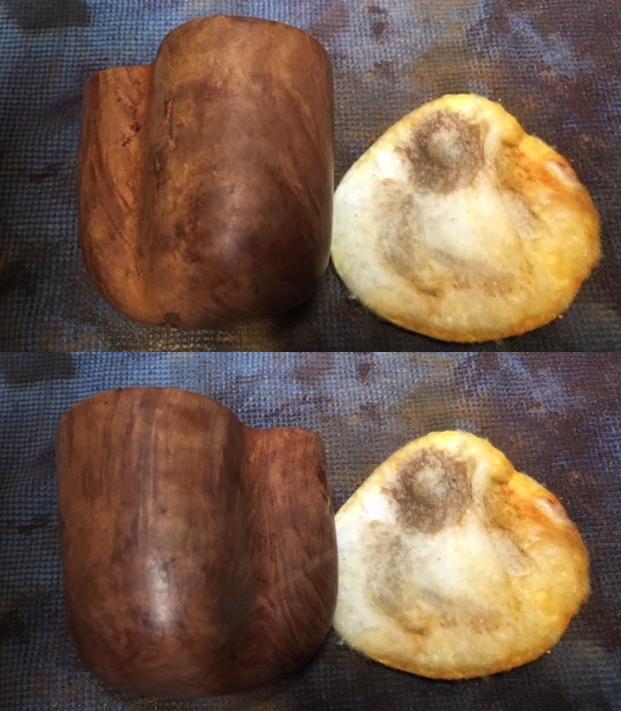
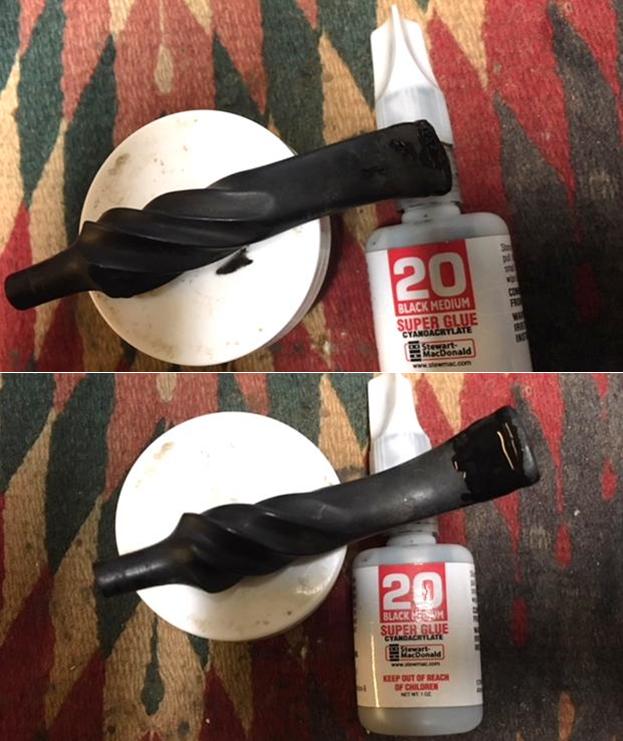
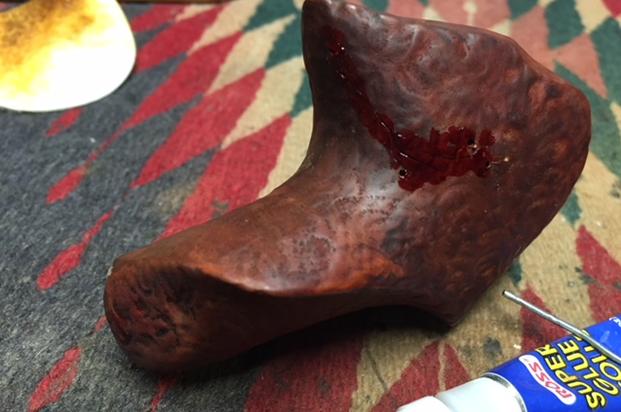
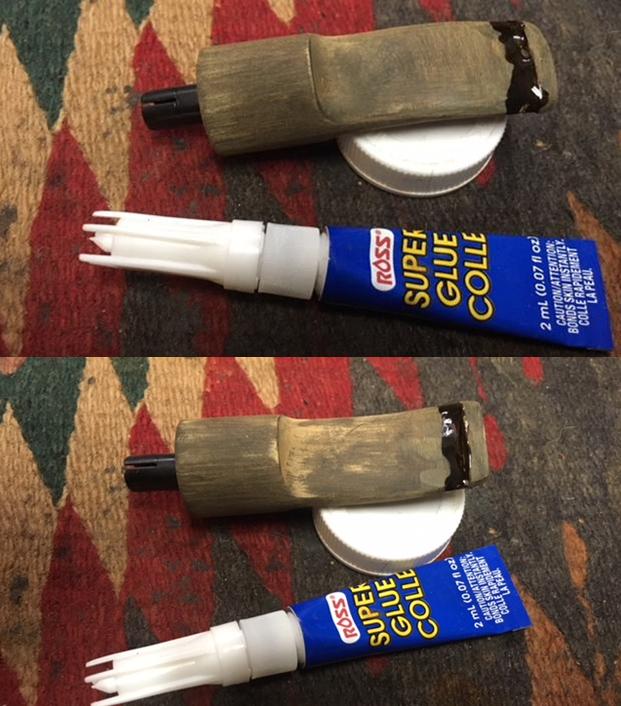
 I cleaned up the fill on the bottom of the bowl and refilled it with super glue. I did not pick it out as it was merely pitted and not loose. The super glue would take care of the damage.
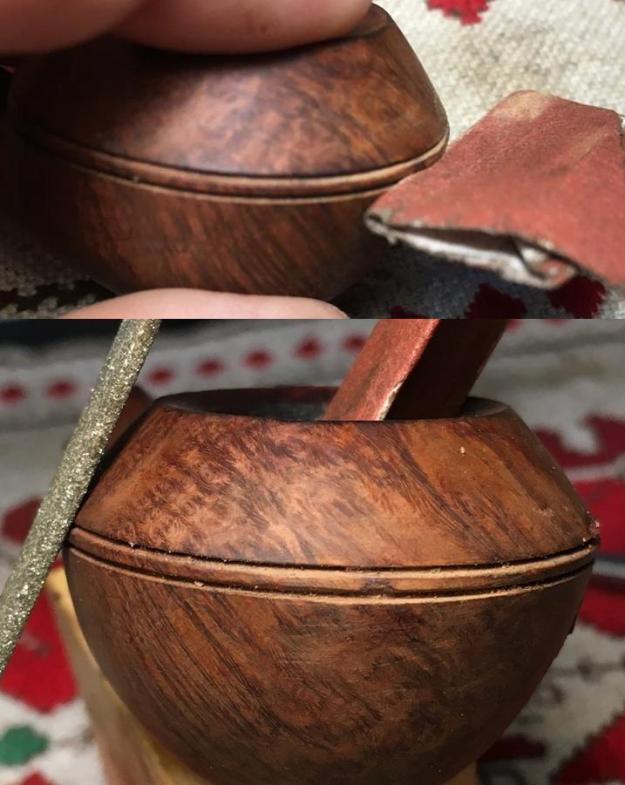
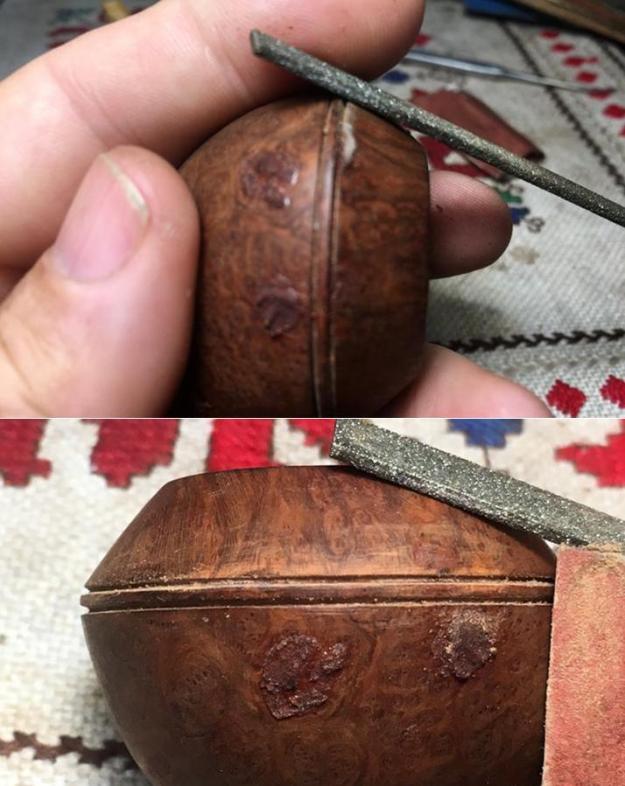
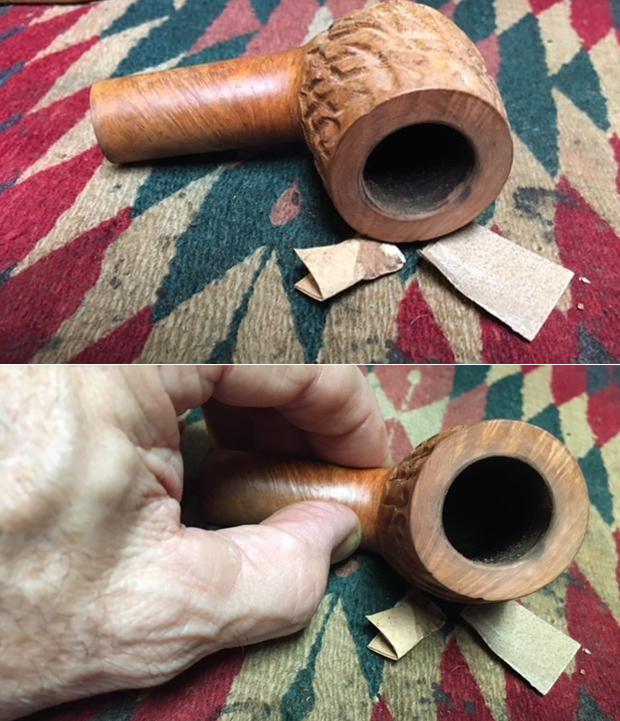
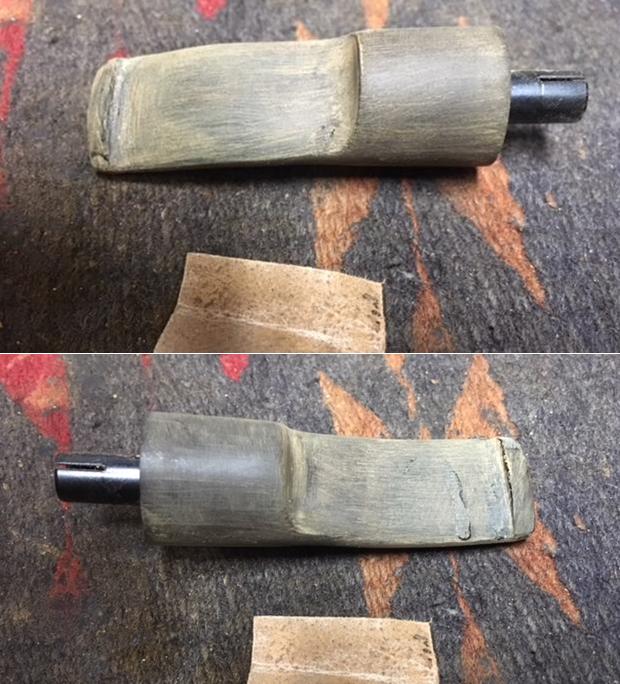
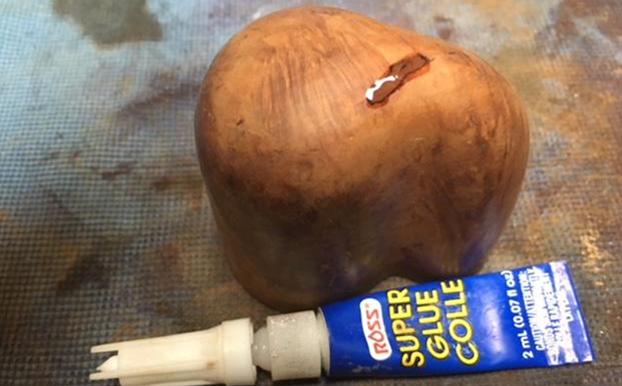 With the exterior of the bowl cleaned and repaired it was time to address the rim top. I used a folded piece of 220 grit sandpaper to clean off the lava and remove the damage that was present on the surface. I worked over the surface of the shank end as well and cleaned off the grime there. There was still some darkening on the briar but it was clean.
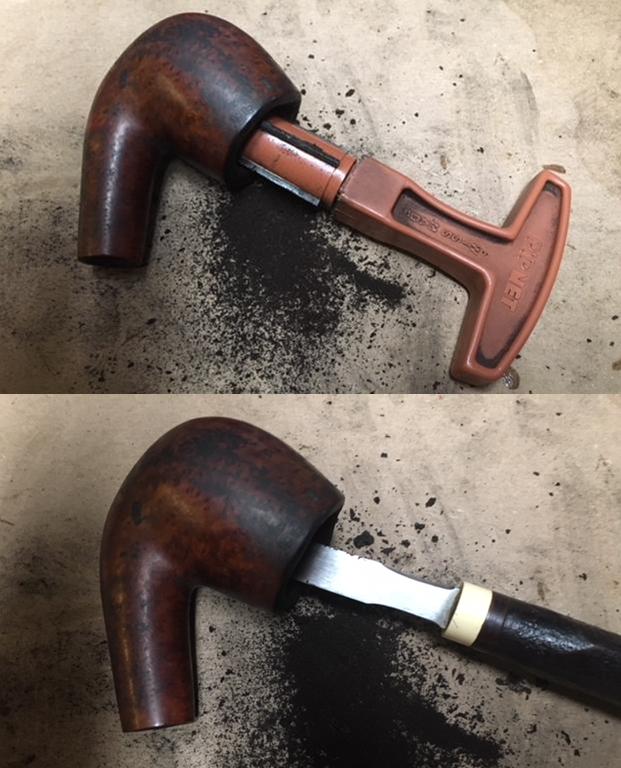
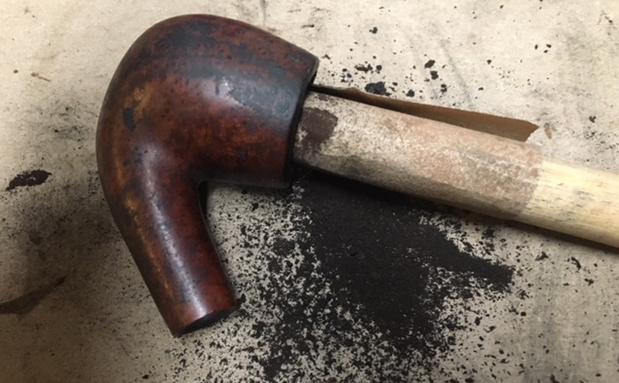
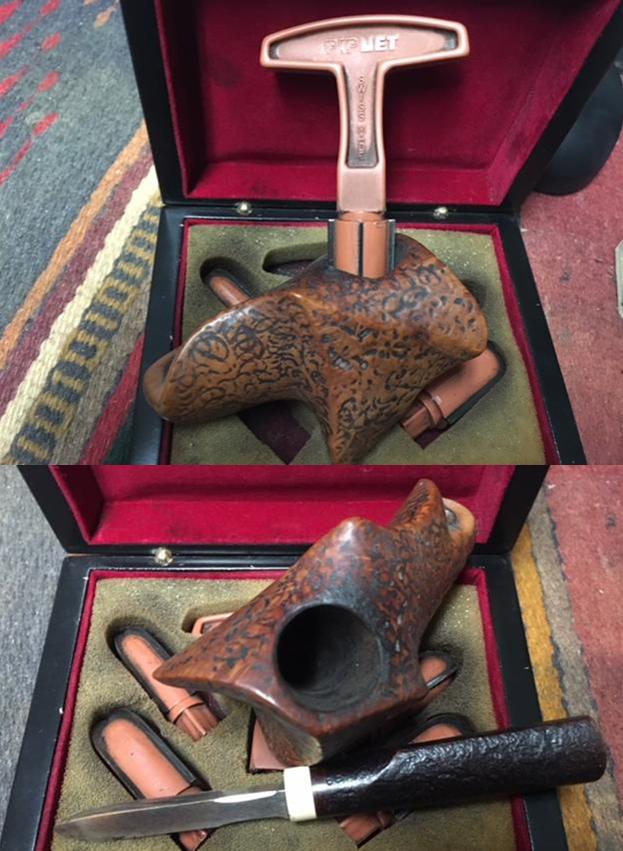
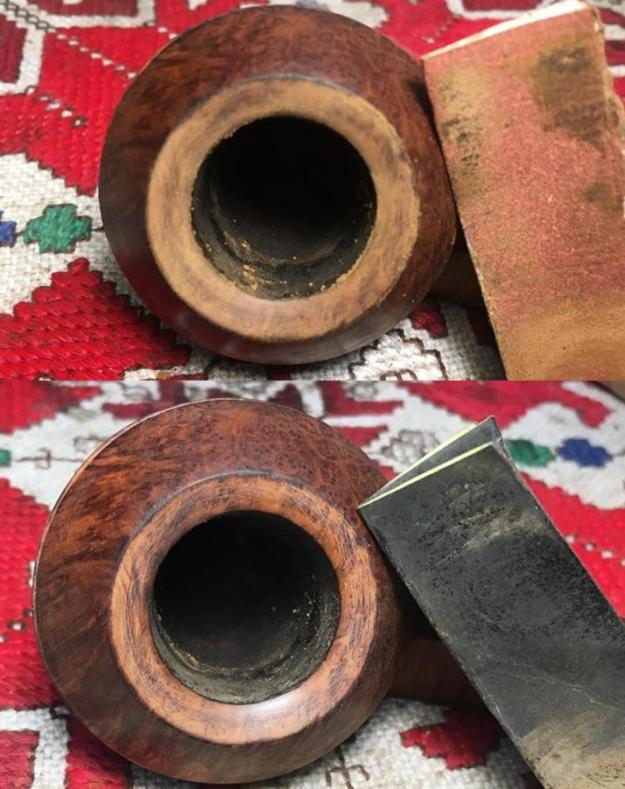
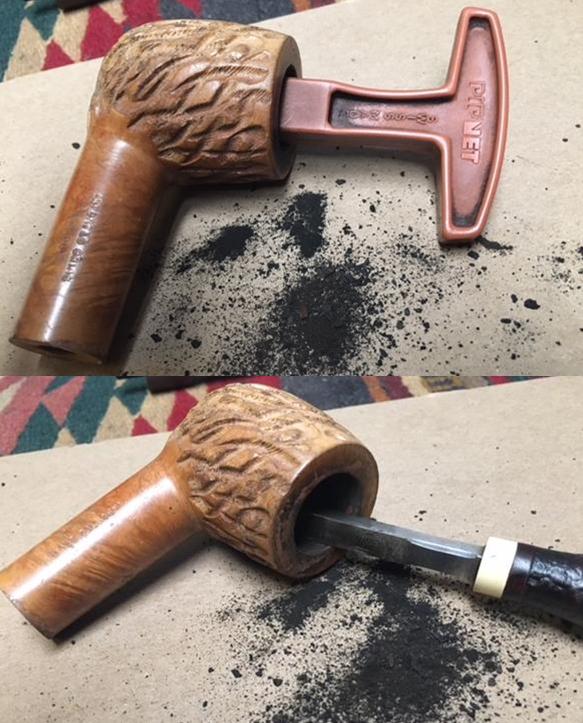
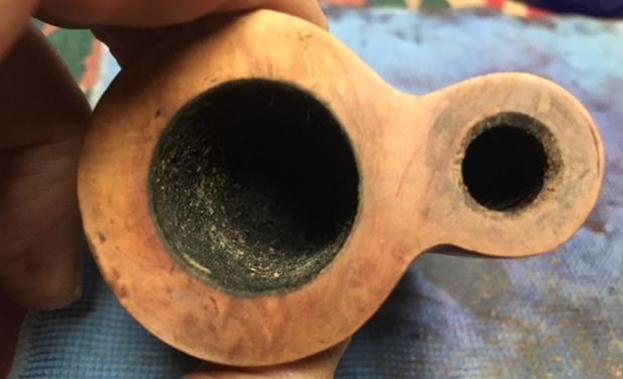 Now it was time to ream the bowl. I used a PipNet pipe reamer and took the cake back to bare briar. The pipe had been sitting for so long I wanted to do a maximum cleanup and also check out the walls of the bowl for damage. I cleaned up the bowl with a Savninelli Fitsall pipe knife and then sanded it with 220 grit sandpaper wrapped around a dowel.
 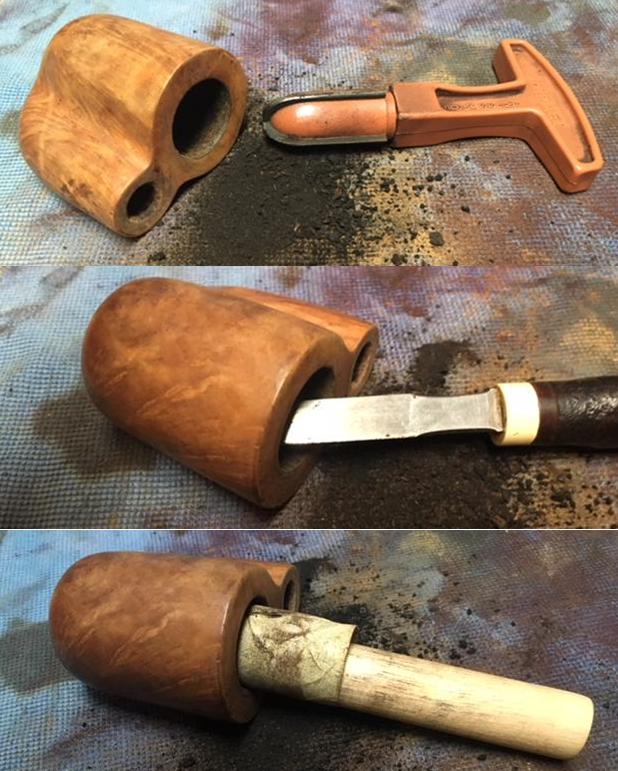 I cleaned out the sump in the shank and mortise and the airway into the bowl with pipe cleaners, cotton swabs and alcohol.
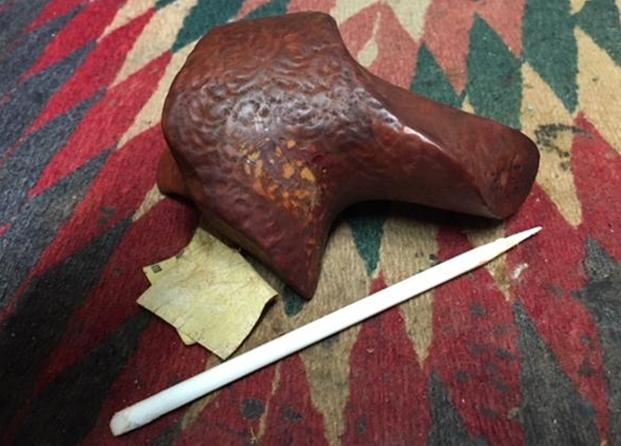
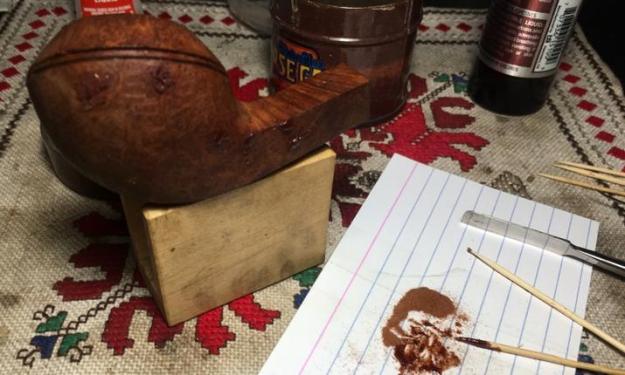
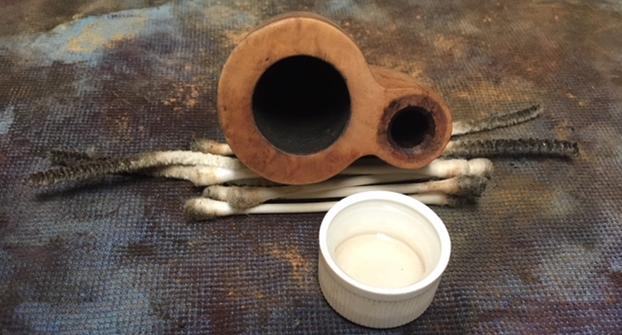 I repaired some deep gouges on the right side of the bowl with clear super glue. When it was dry I sanded it smooth with 220 grit sandpaper to blend it into the surface of the bowl.
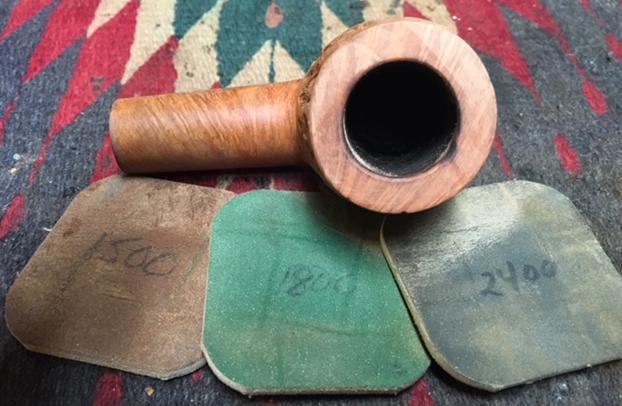
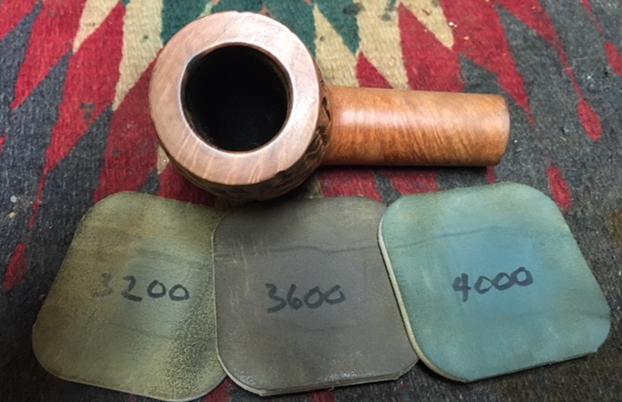
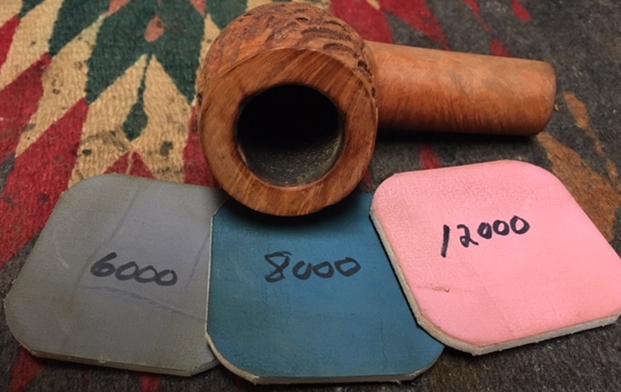
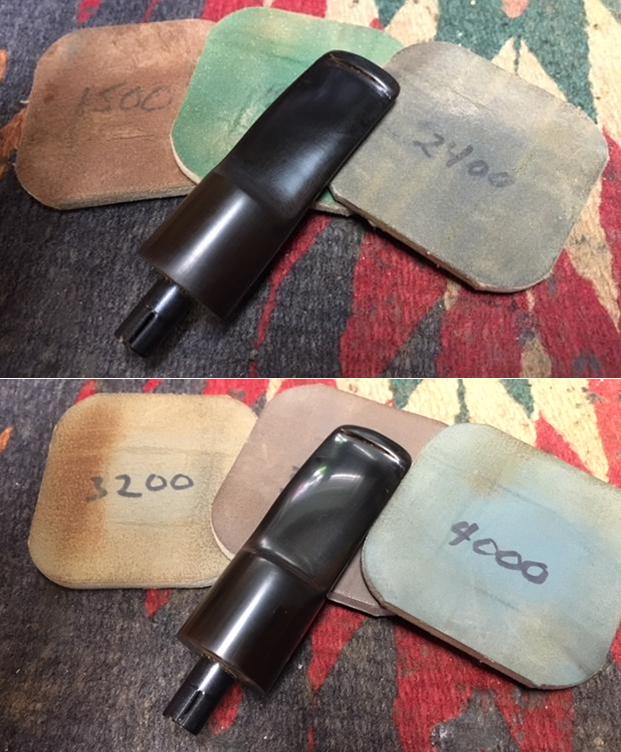
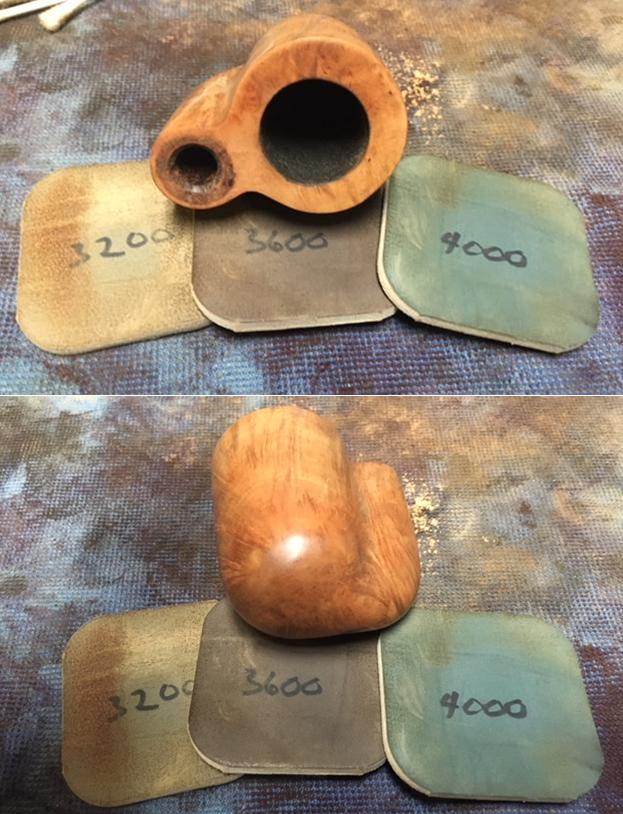
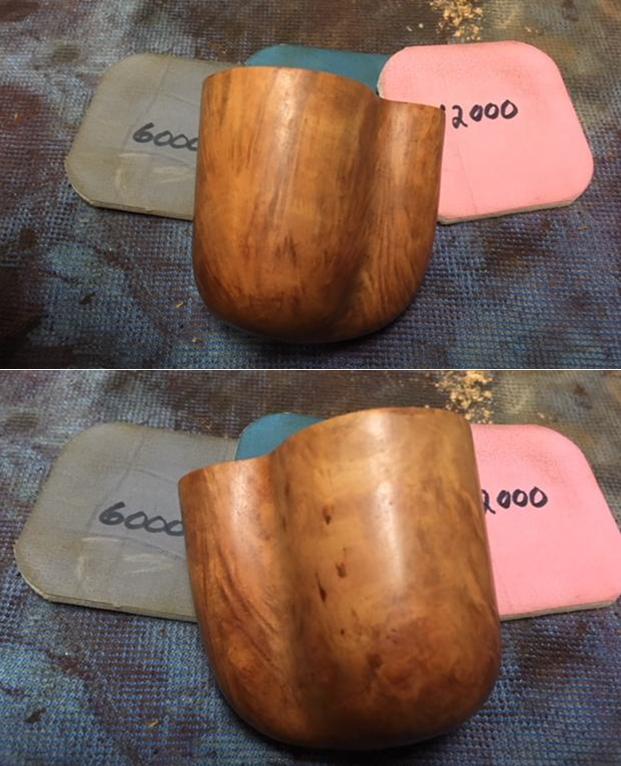
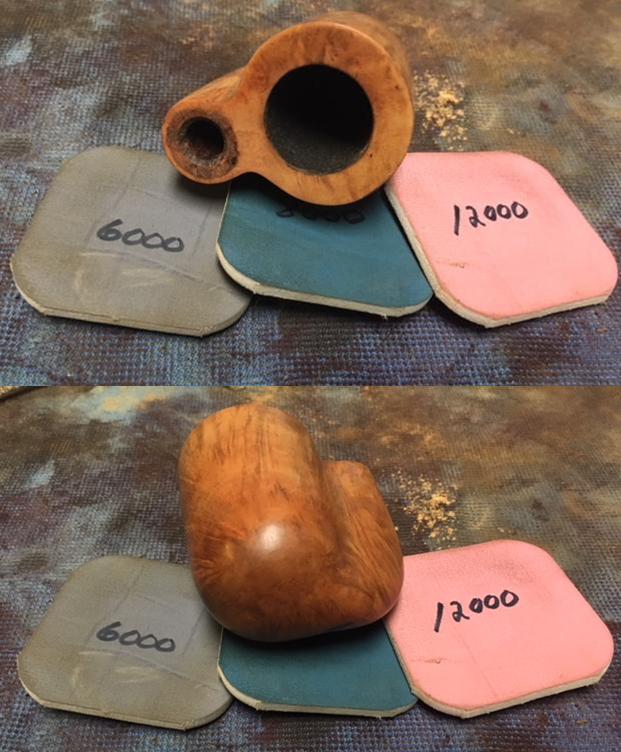
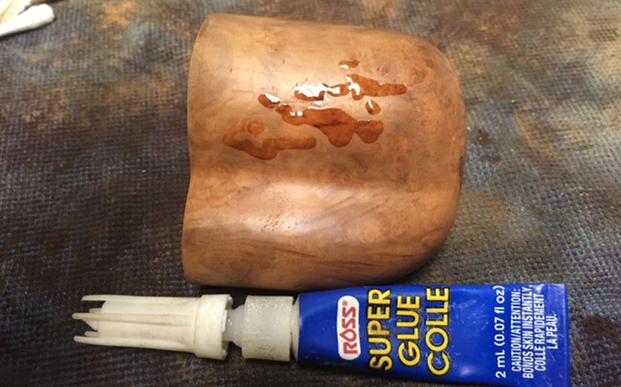 I began the polishing of the briar with a medium and a fine grit combination sanding sponge. I polished out the scratches and the repairs until the surface began to shine. I followed that by polishing it further with micromesh sanding pads – wet sanding with 1500-2400 grit pads and dry sanding with 3200-12000 grit pads. I wiped the bowl down after each pad with a damp cloth to remove the debris from the previous pad. Once I had finished I wiped it down with an alcohol dampened pad and let it dry.
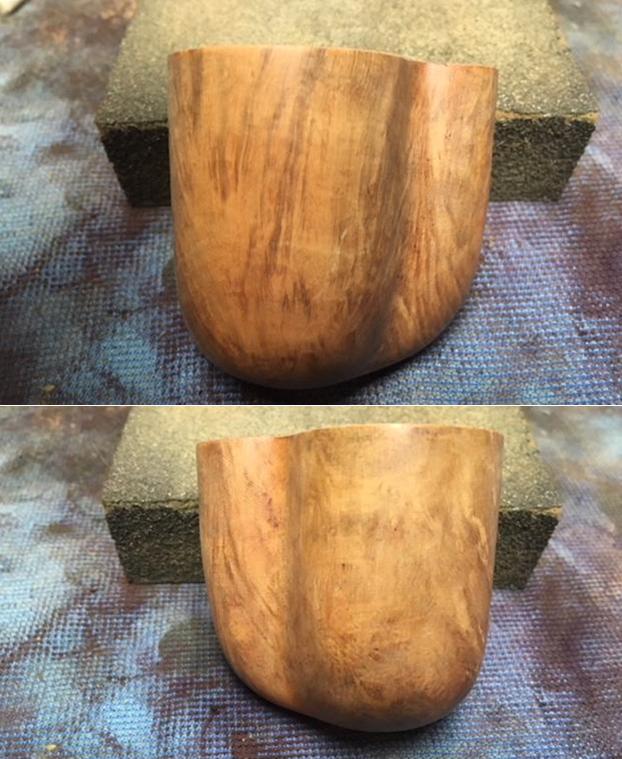
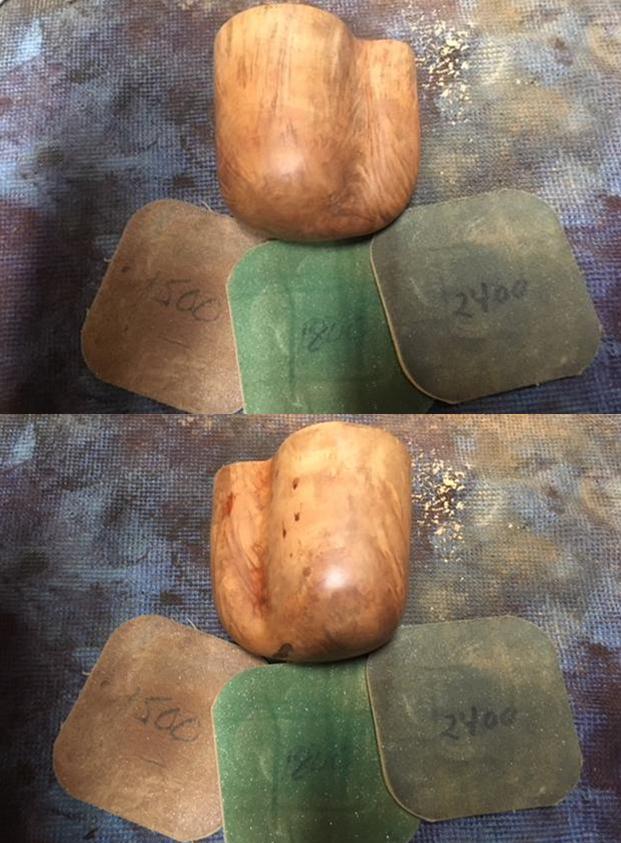
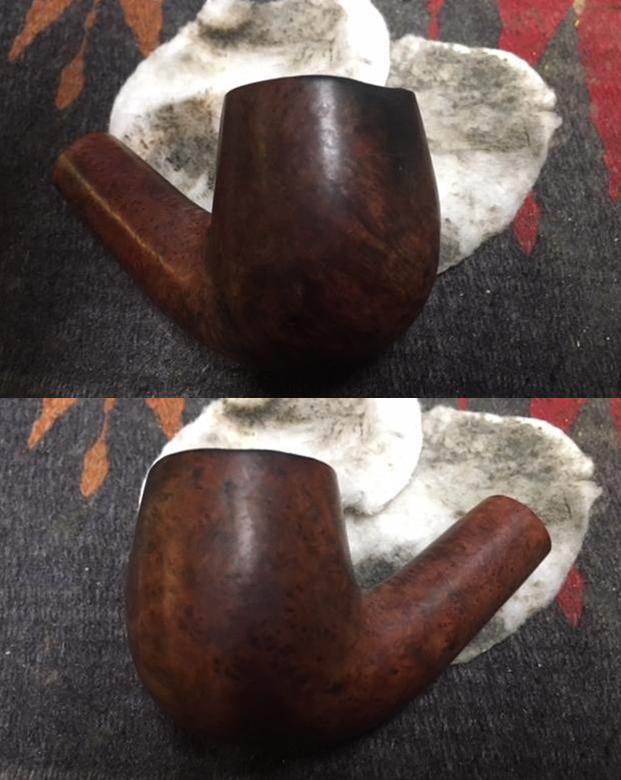
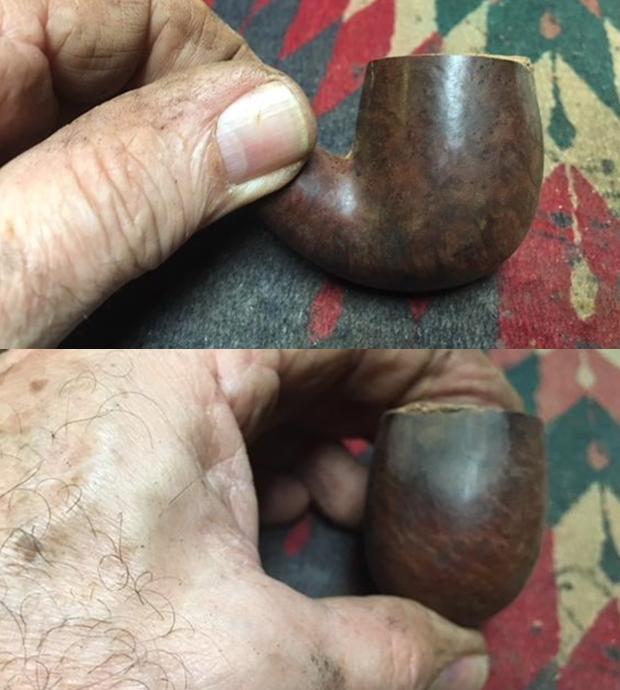
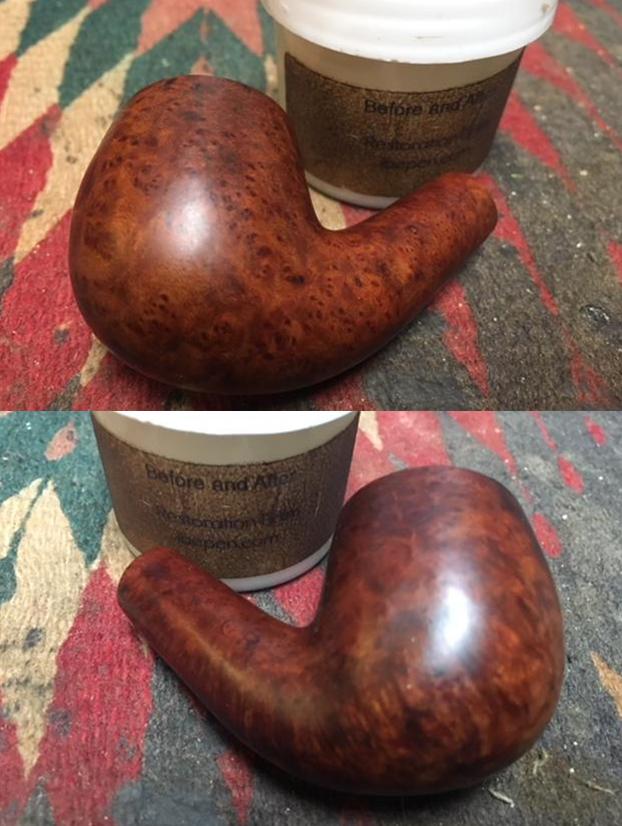
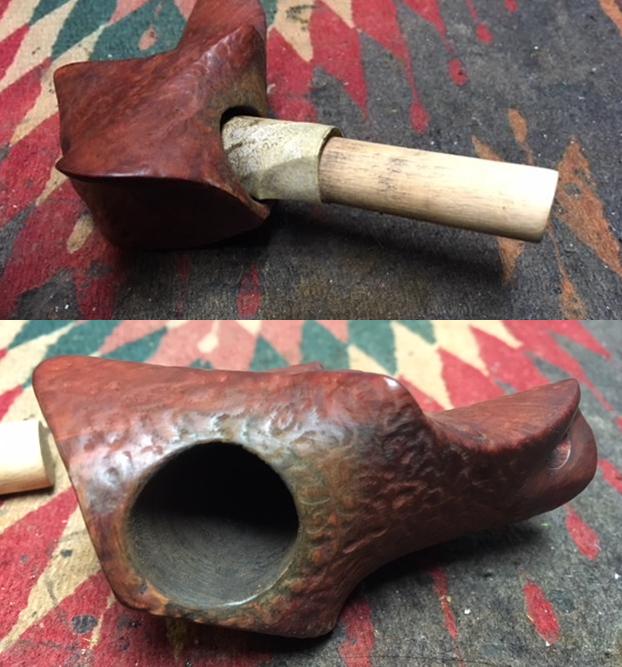
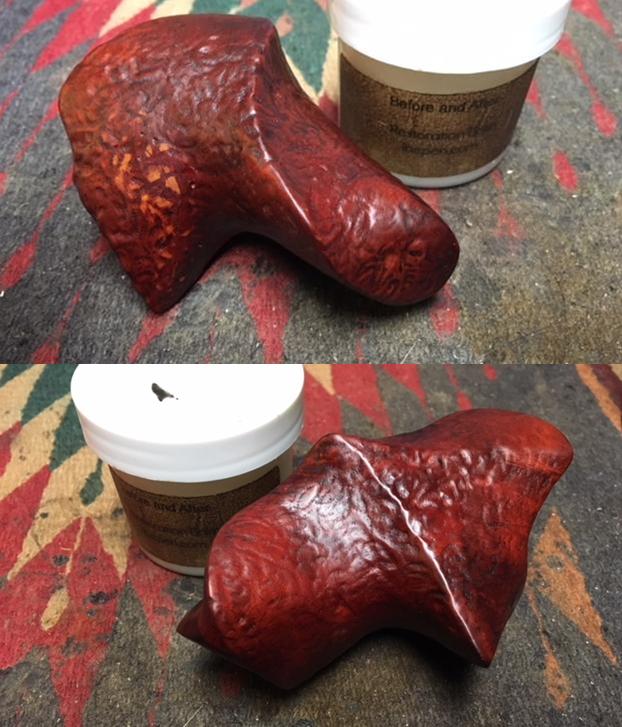
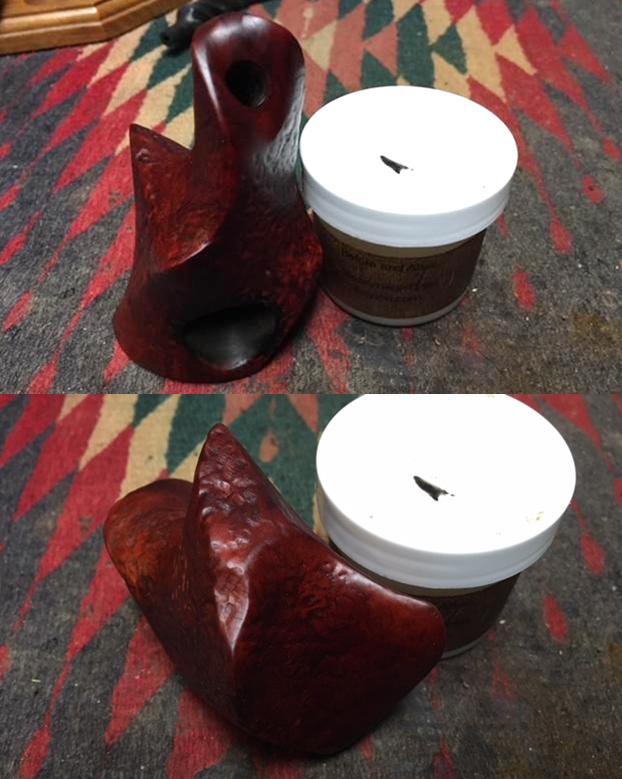
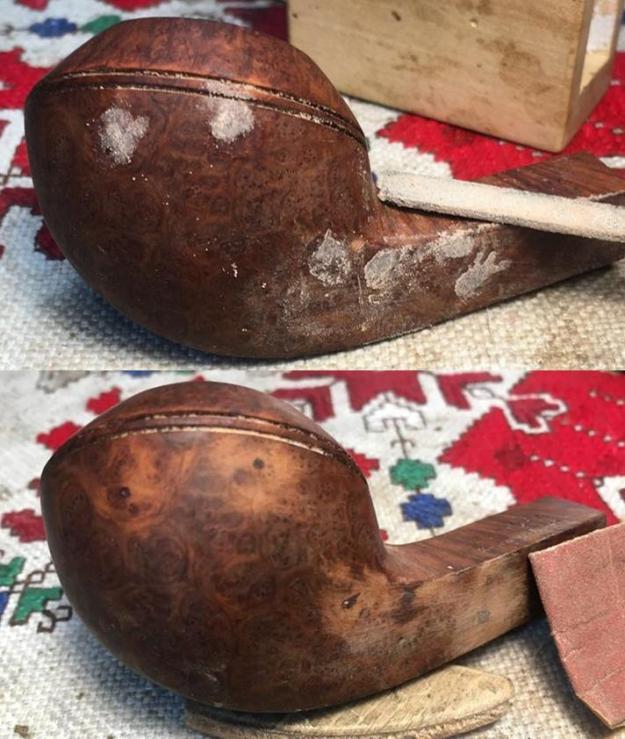
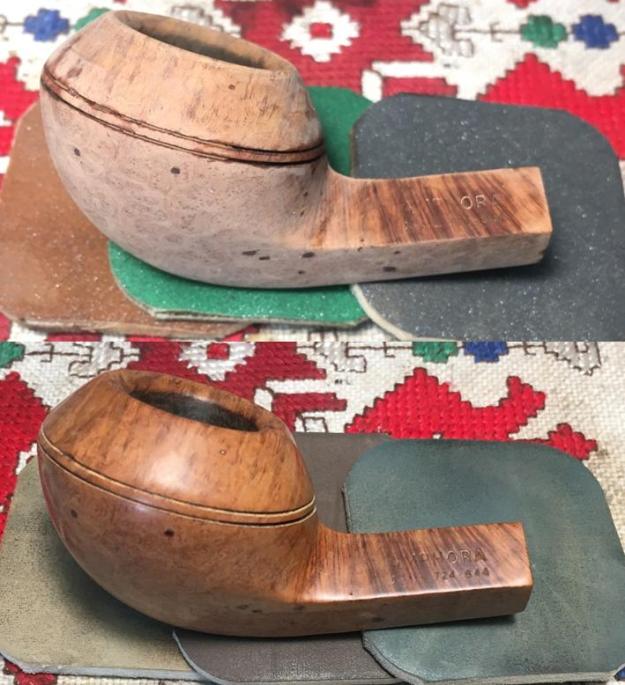
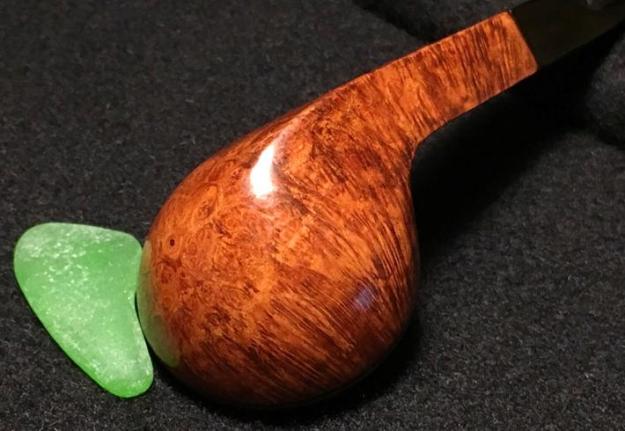
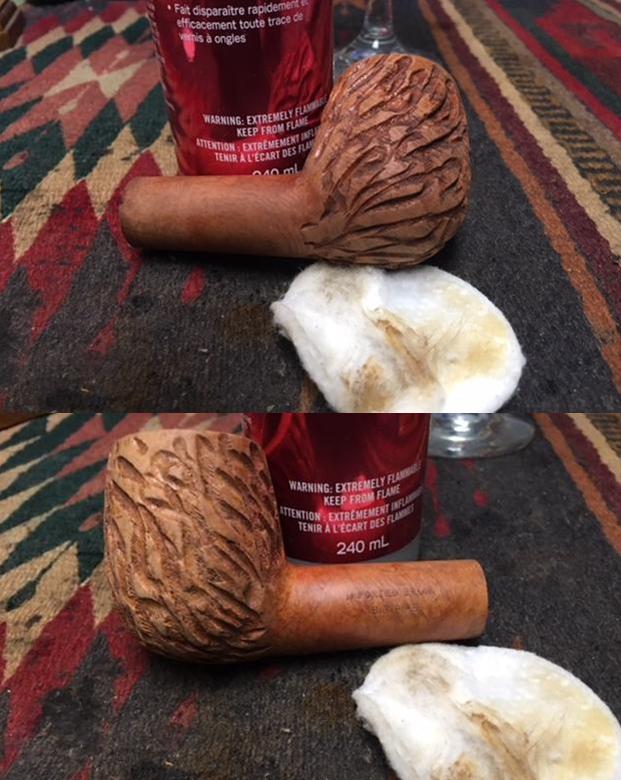
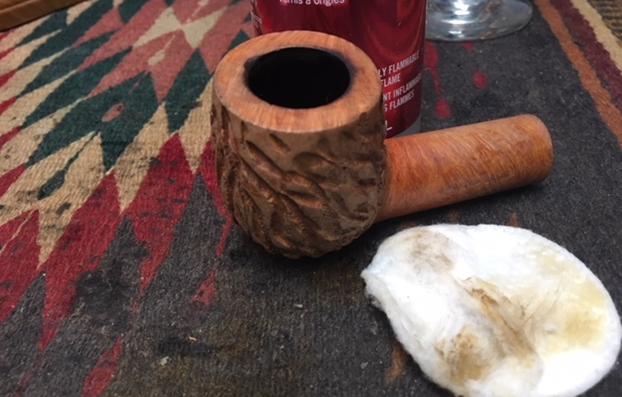
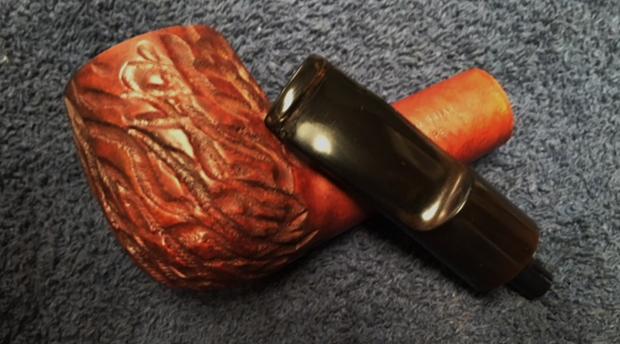
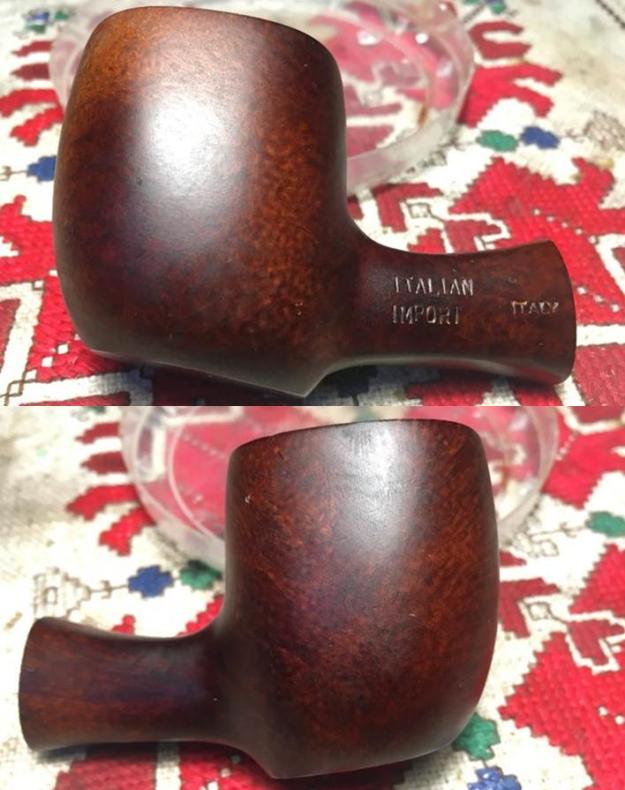
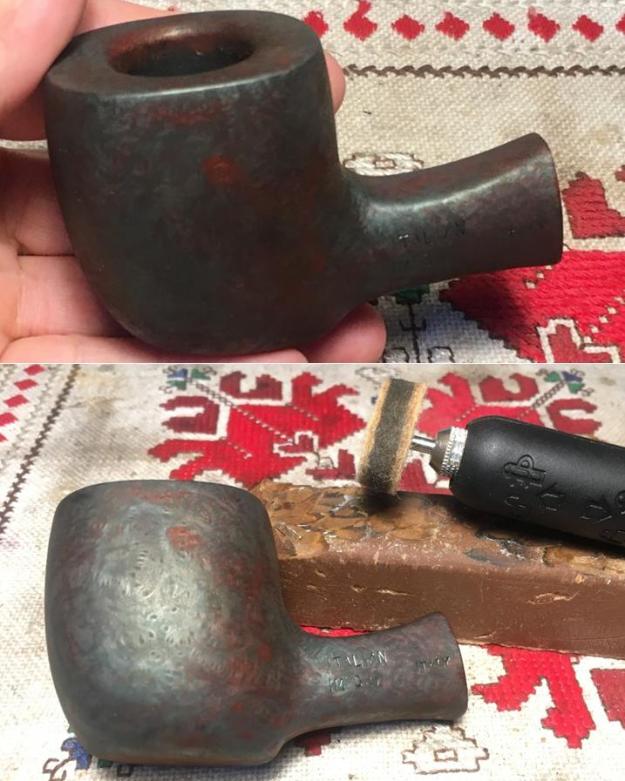
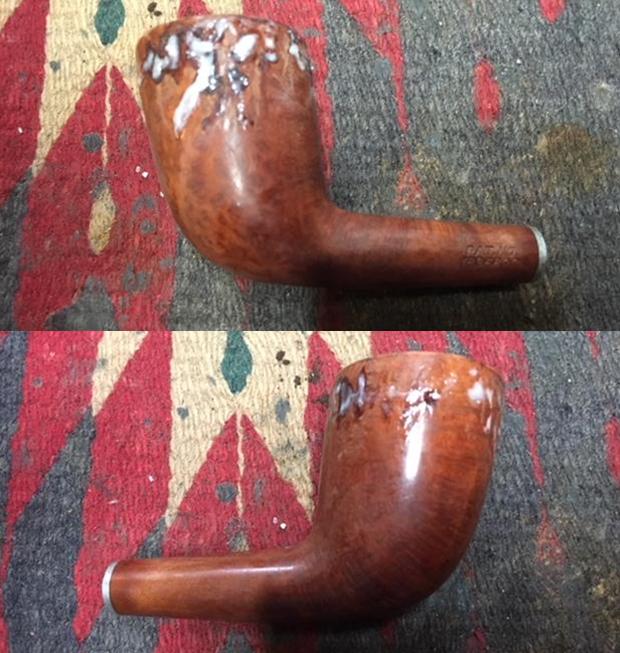
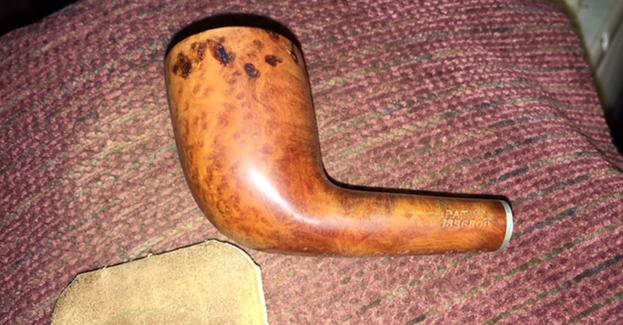
 I rubbed Before & After Pipe Balm into the surface of the wood with my finger tips and worked it into the grain. The product did its magic and enlivened, cleaned and gave the wood a rich glow. It cleaned up the repaired areas so I could see where I needed to work in the stain to blend it into the briar. The photos show what it looked like at this point.
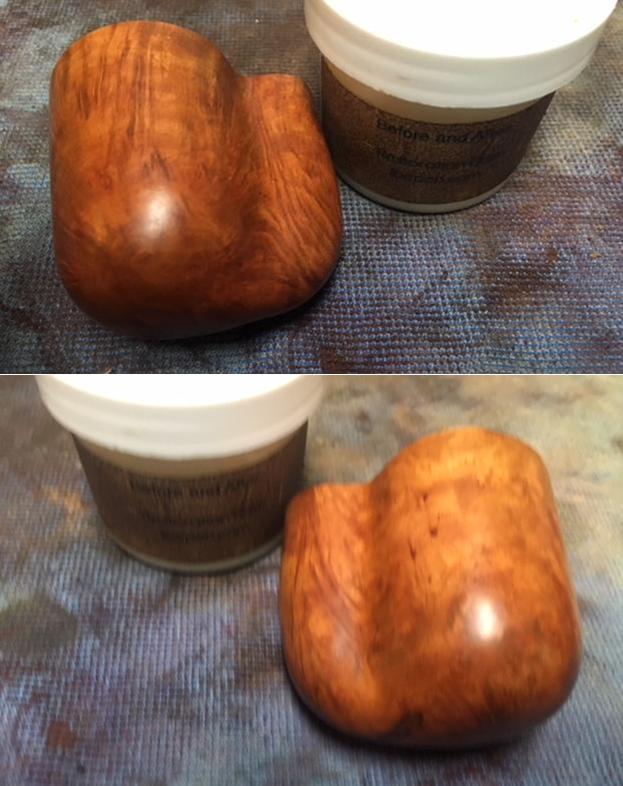
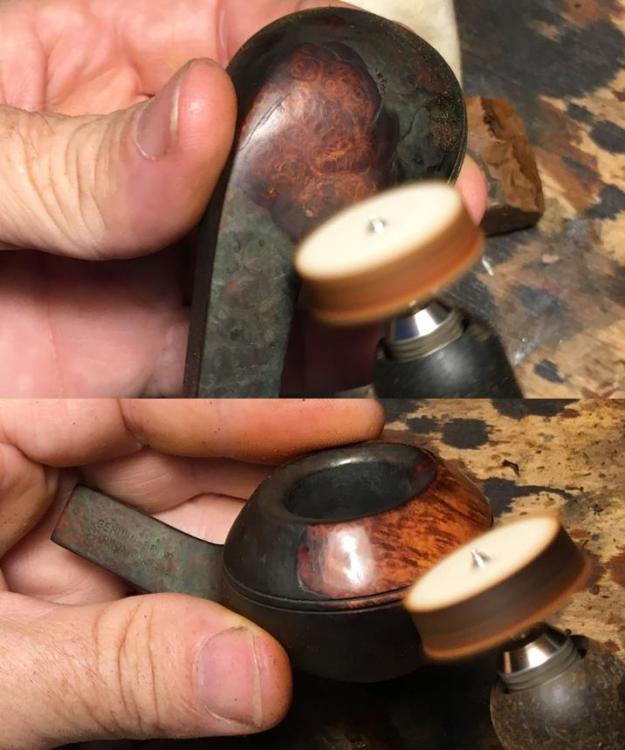
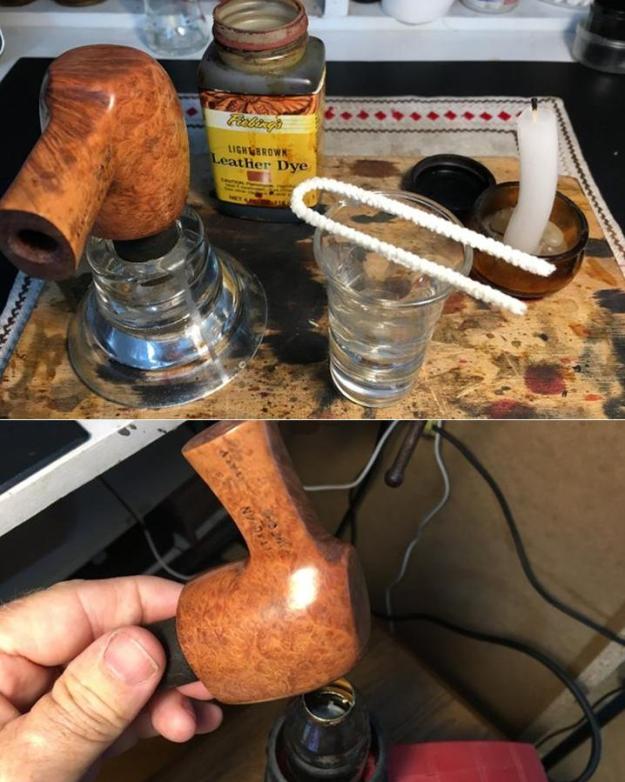
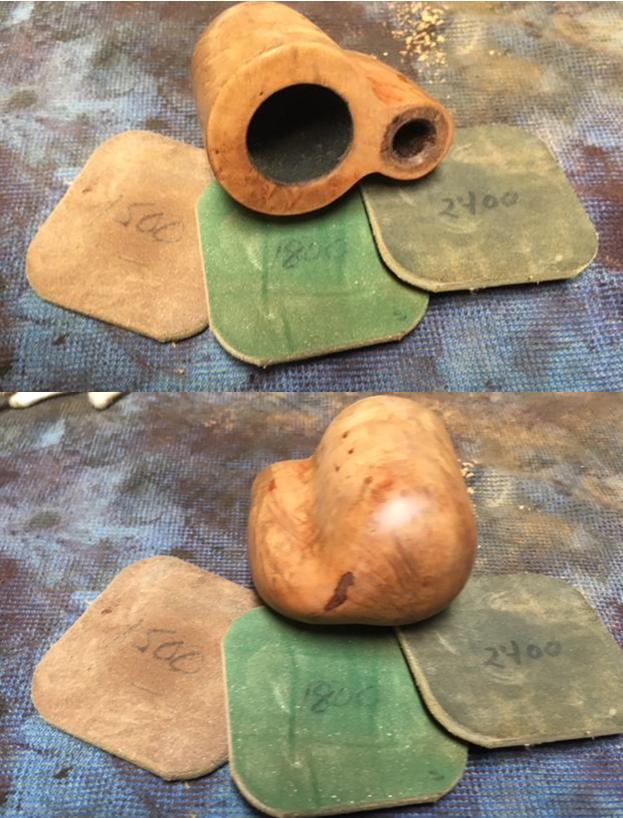
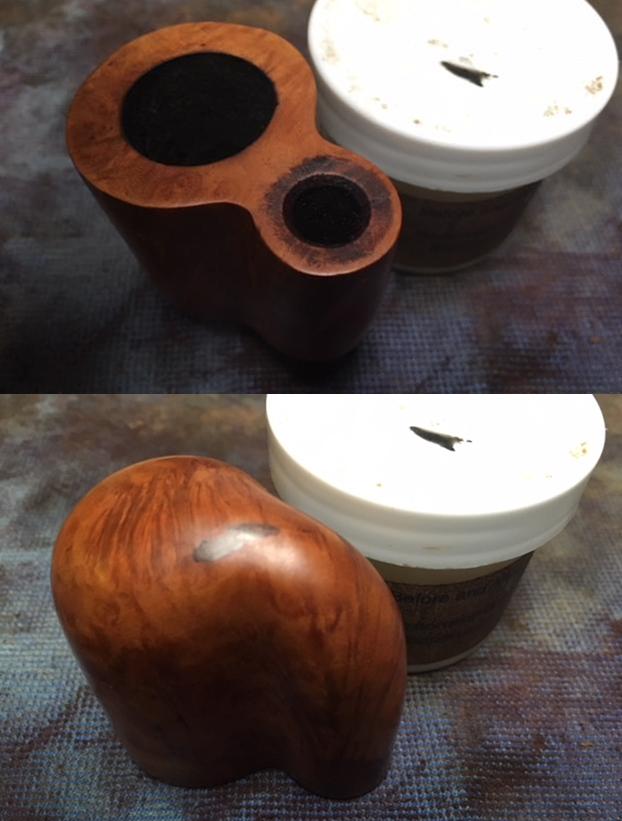 I buffed the bowl on the buffing wheel with Blue Diamond to further polish it. The photos below show the condition of the bowl at this point. It is almost ready to restain.
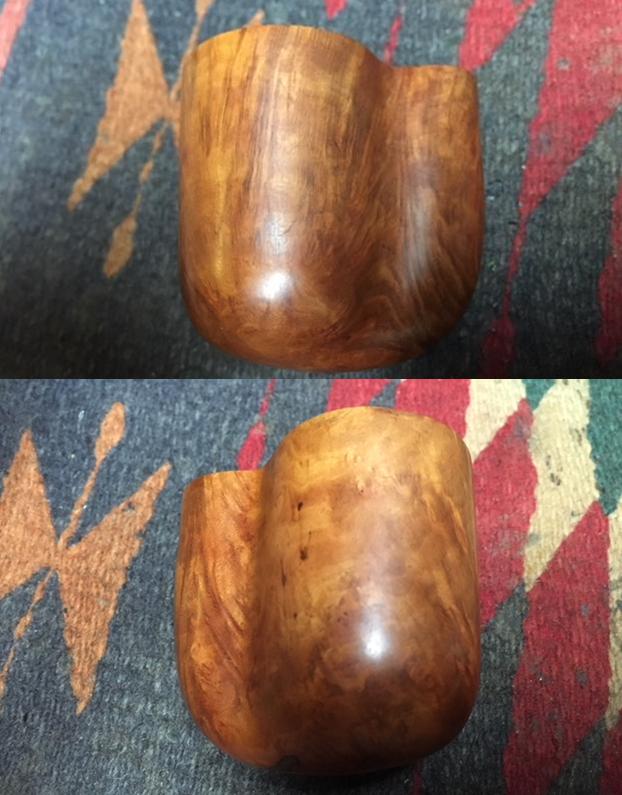
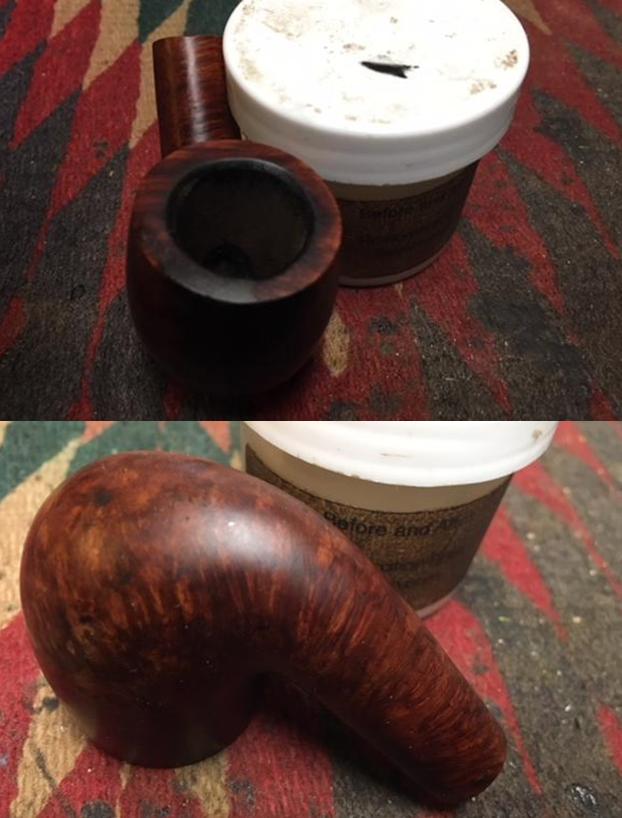
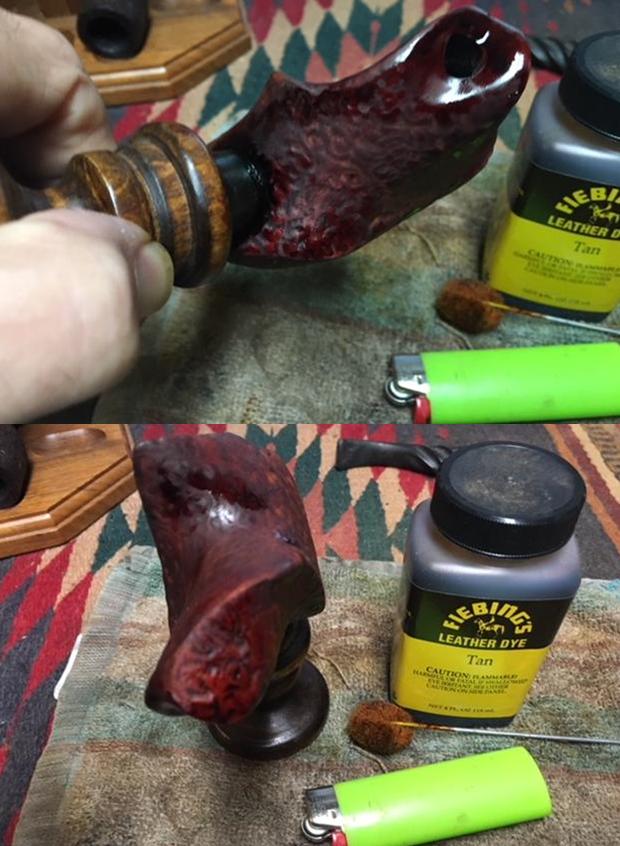
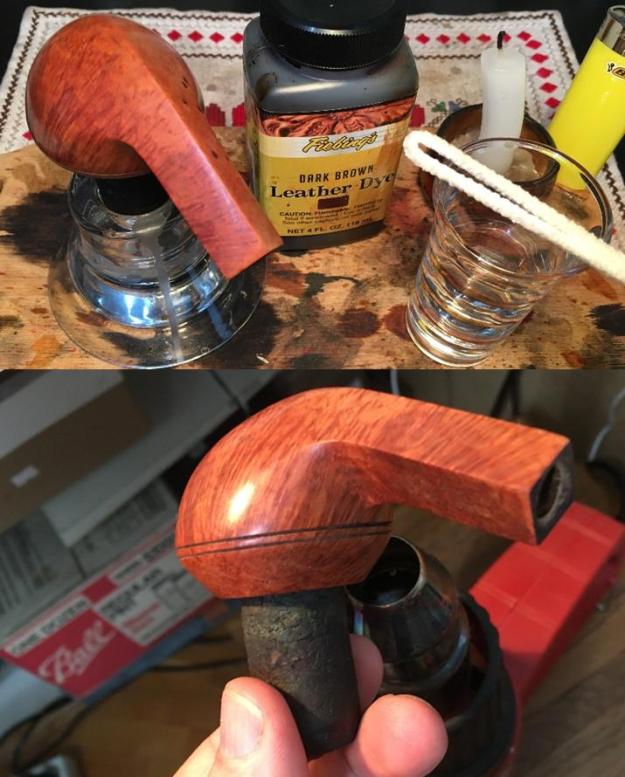
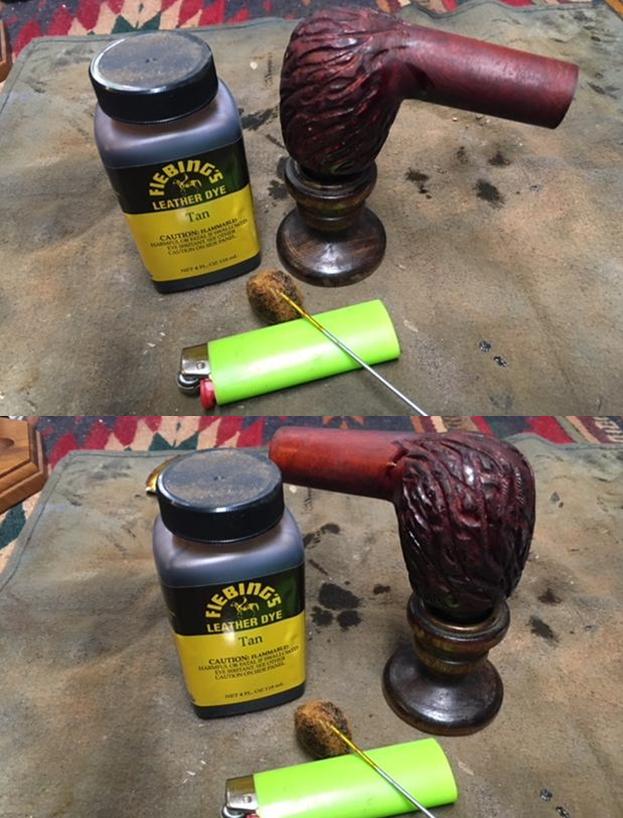
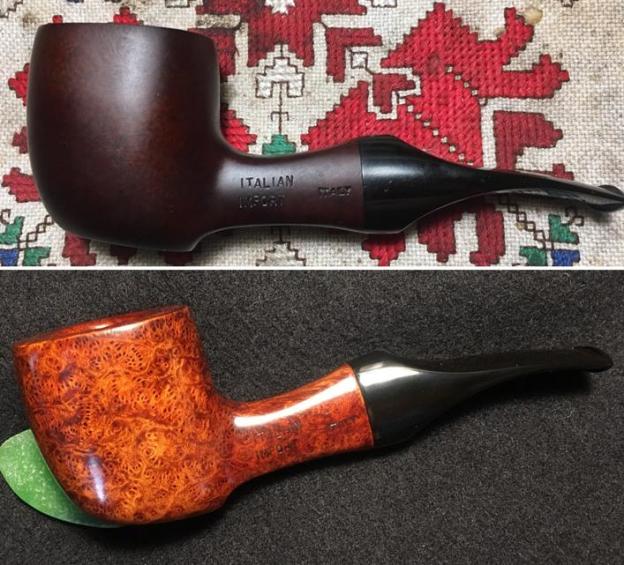
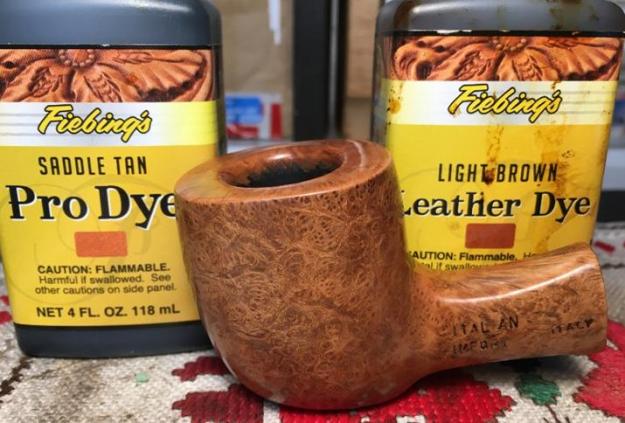
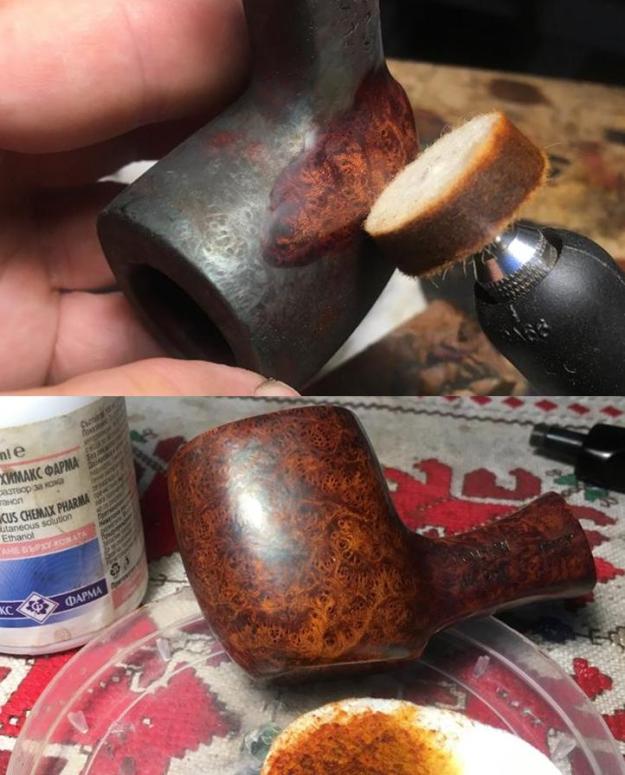
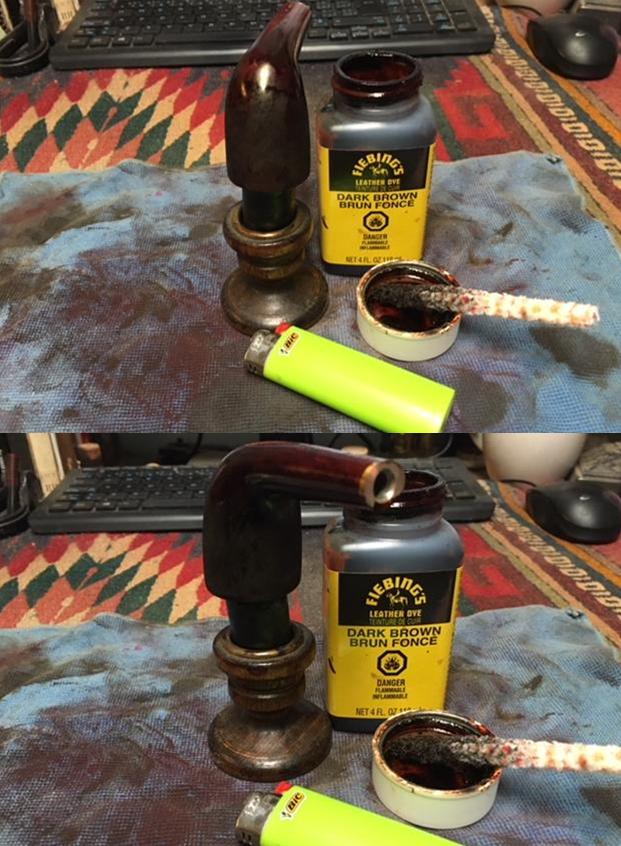
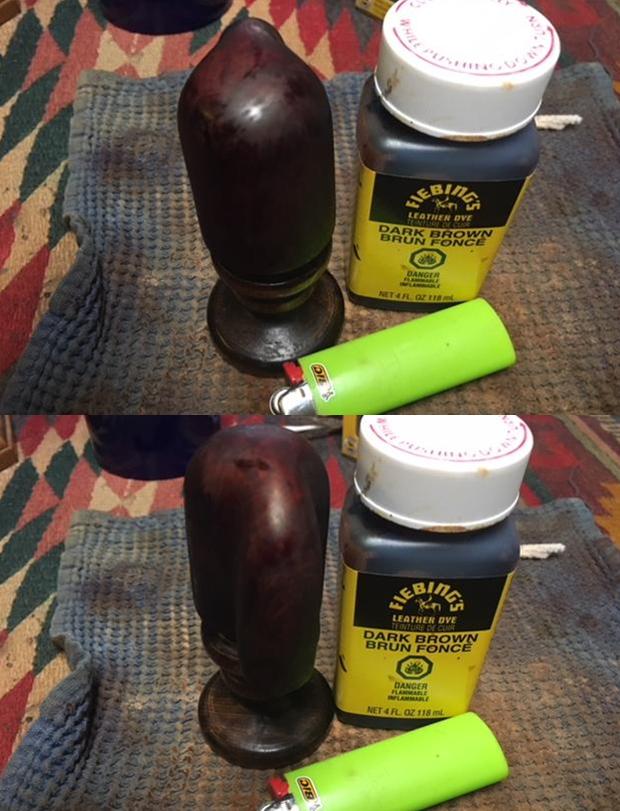
 With the bowl cleaned, it was time to restain the pipe. I chose to use a Fiebing’s Dark Brown stain to give some life back to the pipe. It is dark enough that I figured it would hide the repairs a bit and blend the fill in on the bottom of the bowl. I heated the briar and then applied the stain with a dauber. I flamed the stain to set it in the grain and repeated the process until I was happy with the coverage.
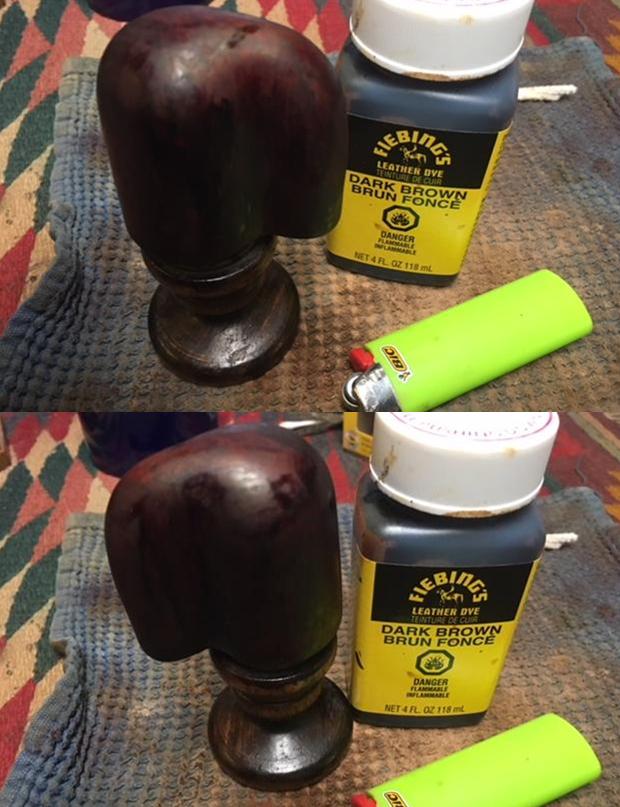
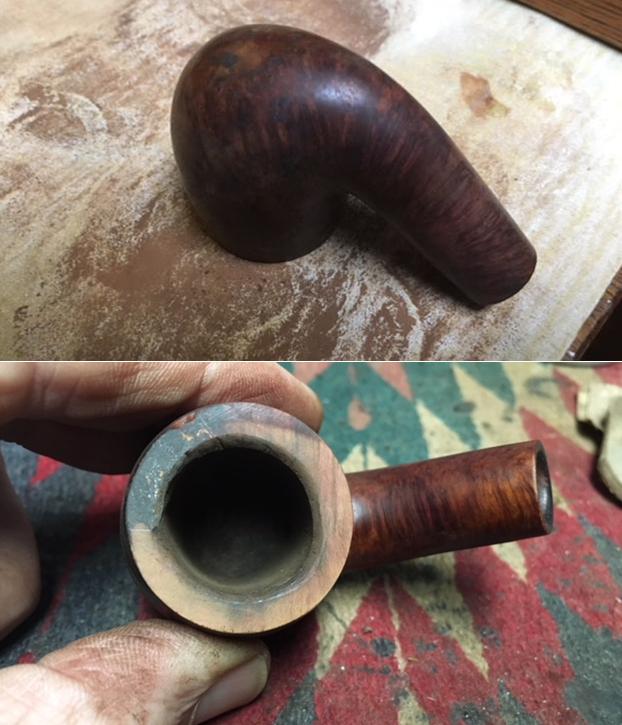
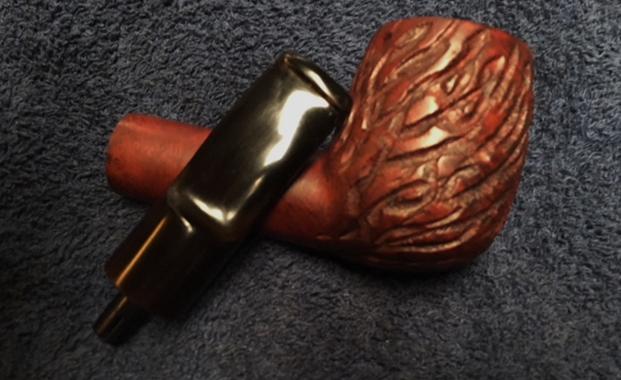
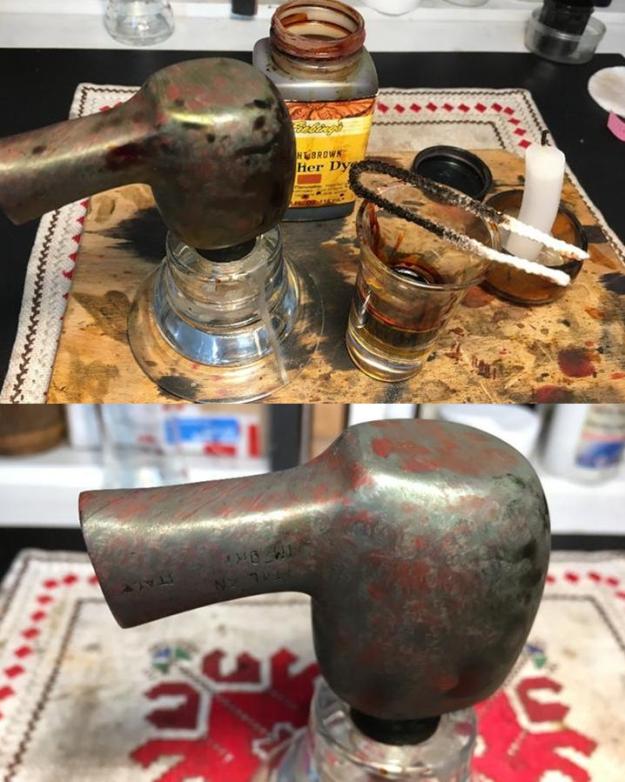
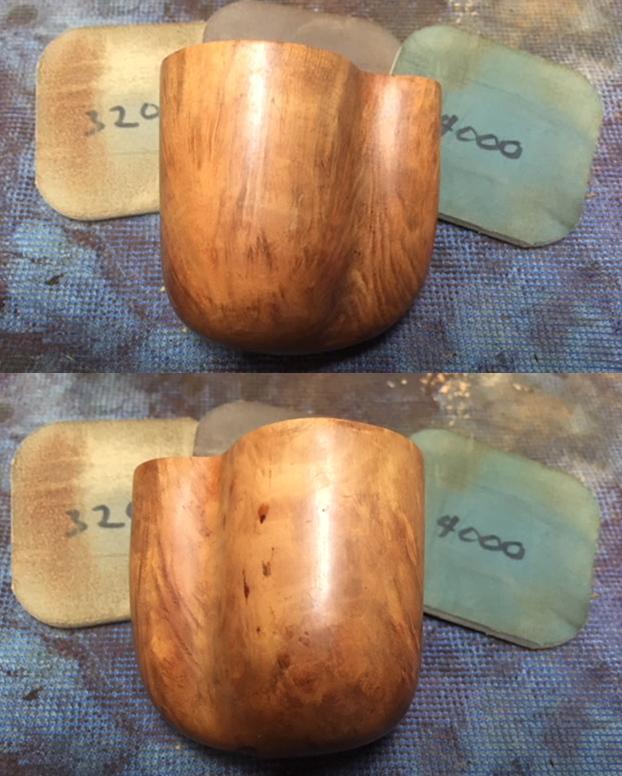
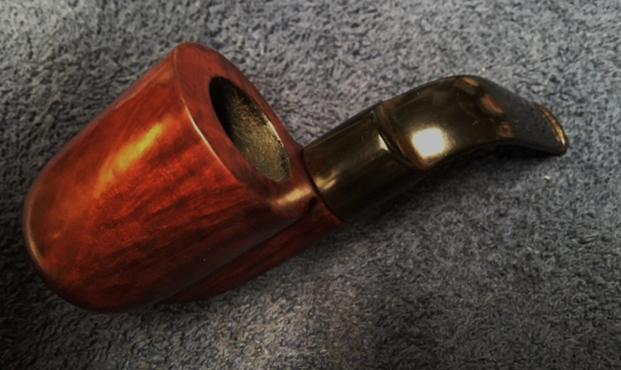
 I set the bowl aside to let the stain cure overnight and called it a day. I took pictures of it once I had buffed it with Blue Diamond to remove the topcoat of crust. It needed some more work in my opinion.
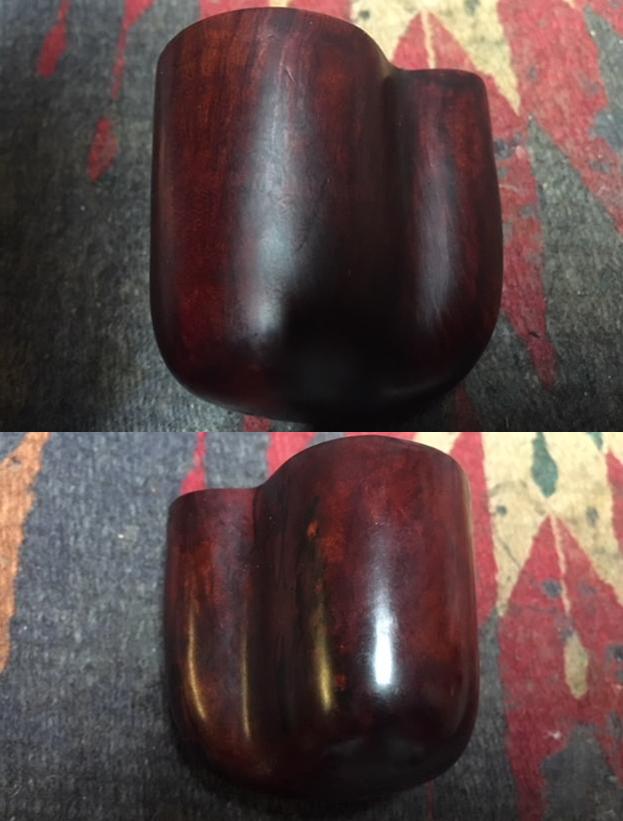
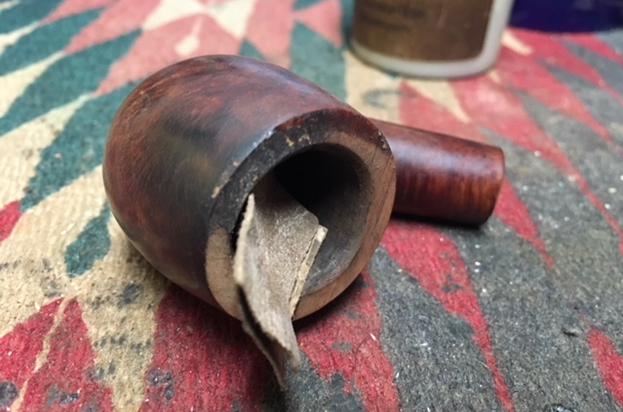
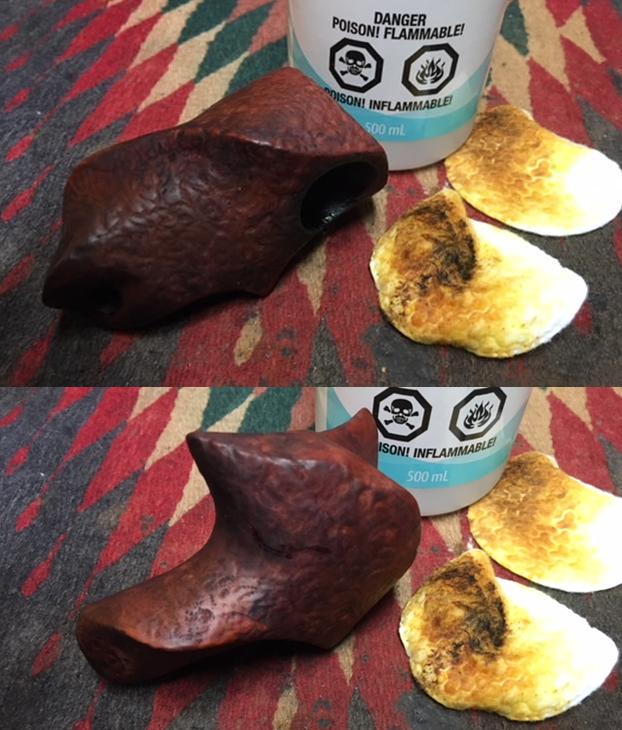
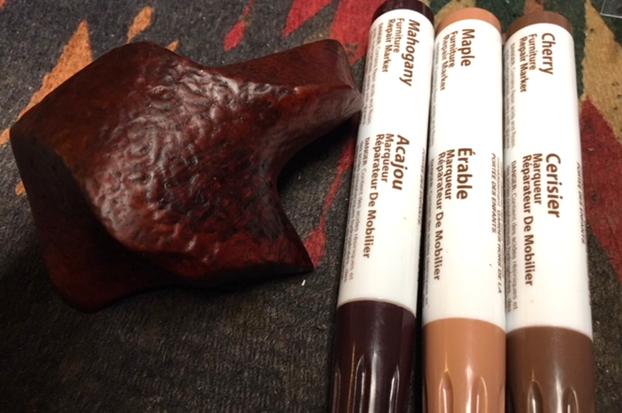
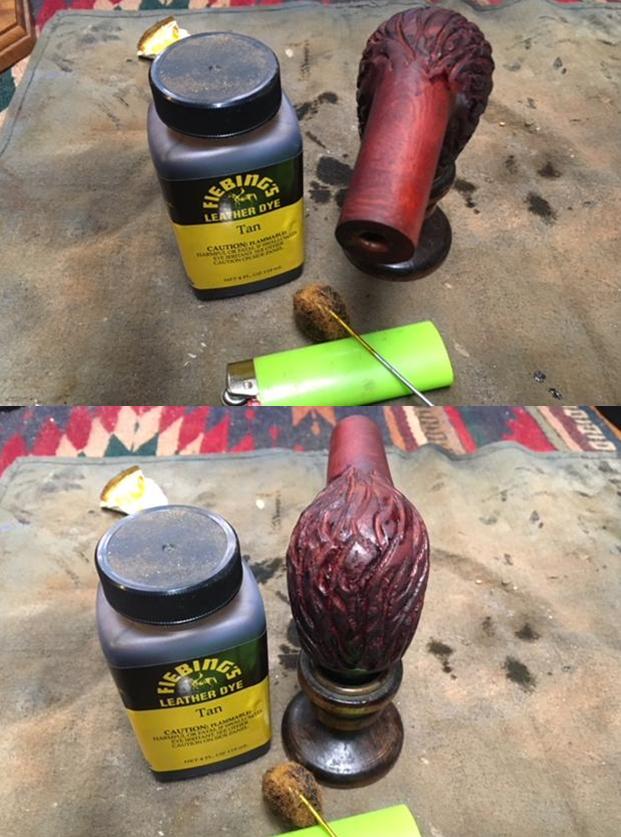
 The stain was a bit too opaque for me as I wanted the interesting grain to stand out. I would need to sacrifice some of the coverage on the files to get the grain to stand out. I decided to go for it and wiped the bowl down with alcohol on a cotton pad to make the stain a bit more transparent.
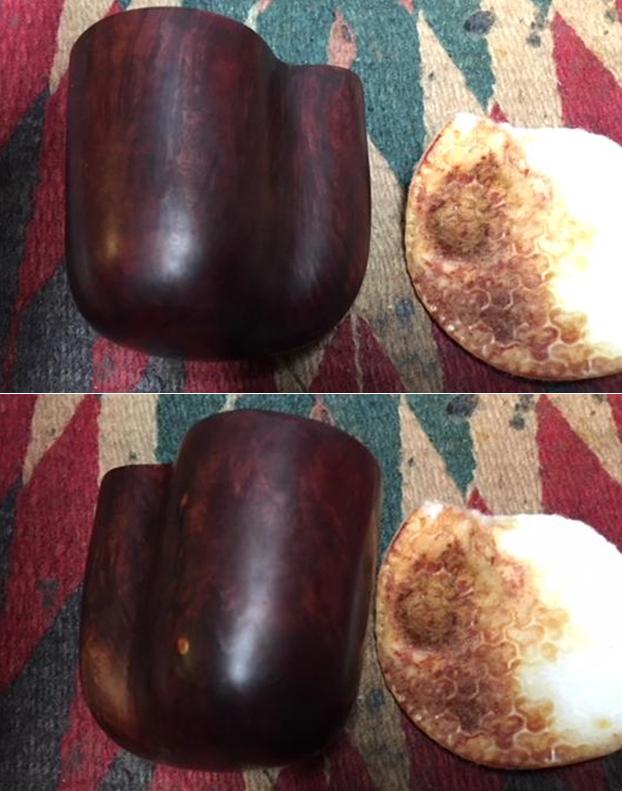
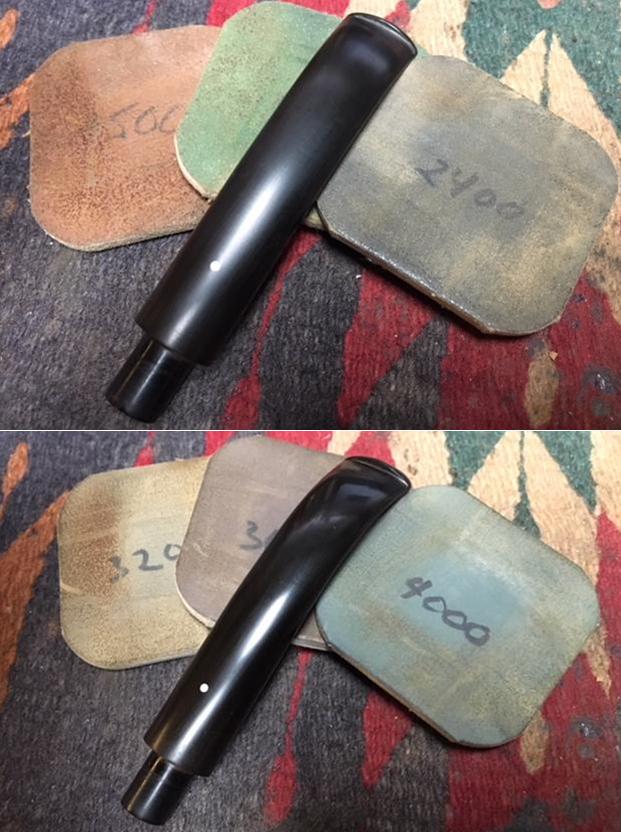
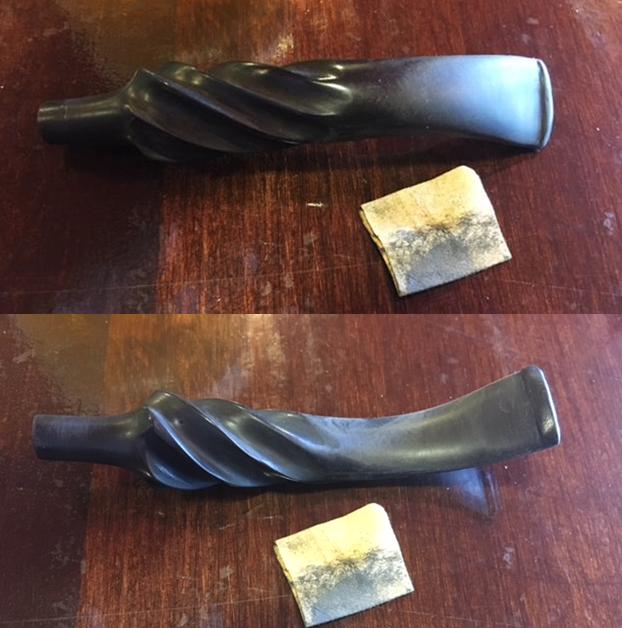
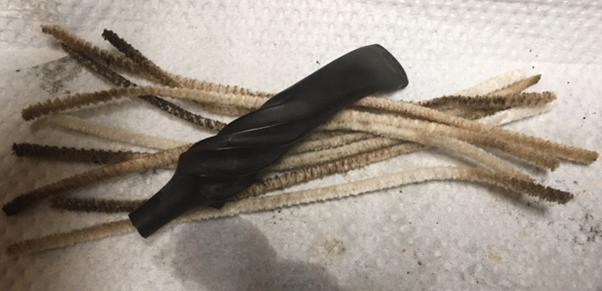
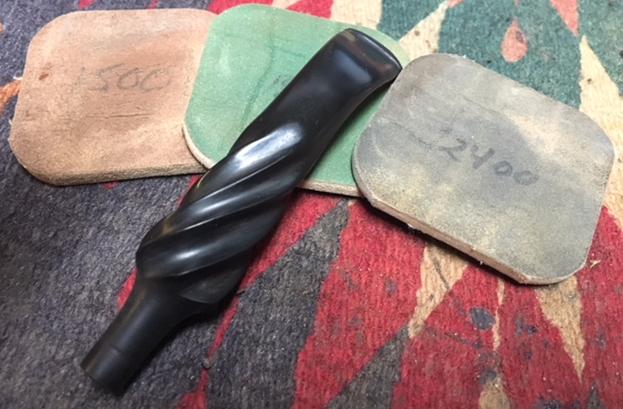
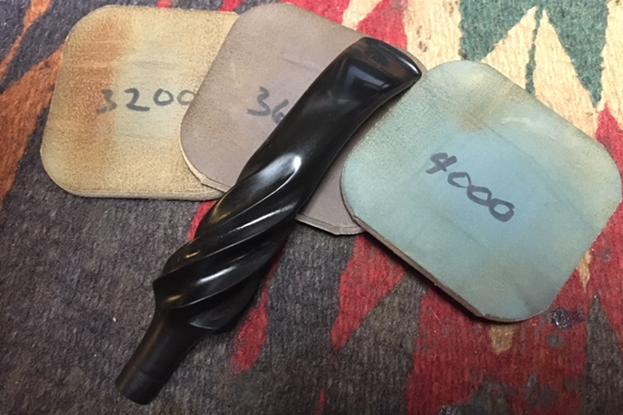
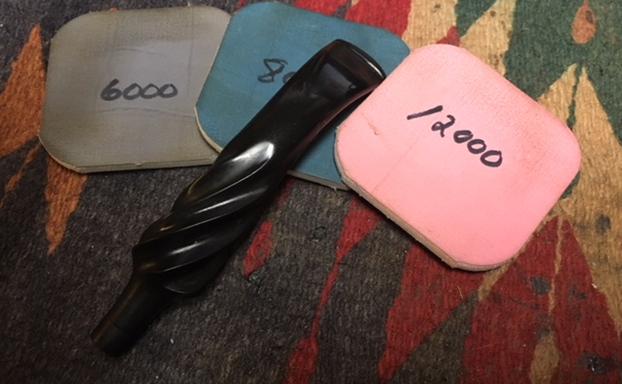
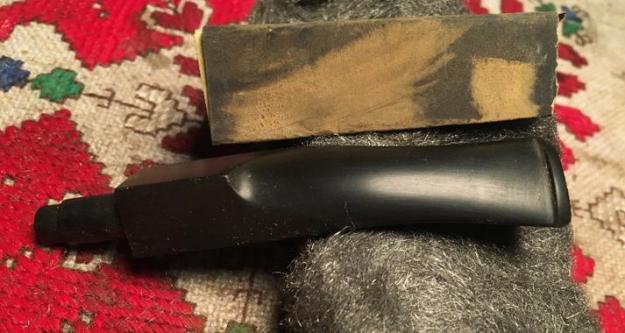
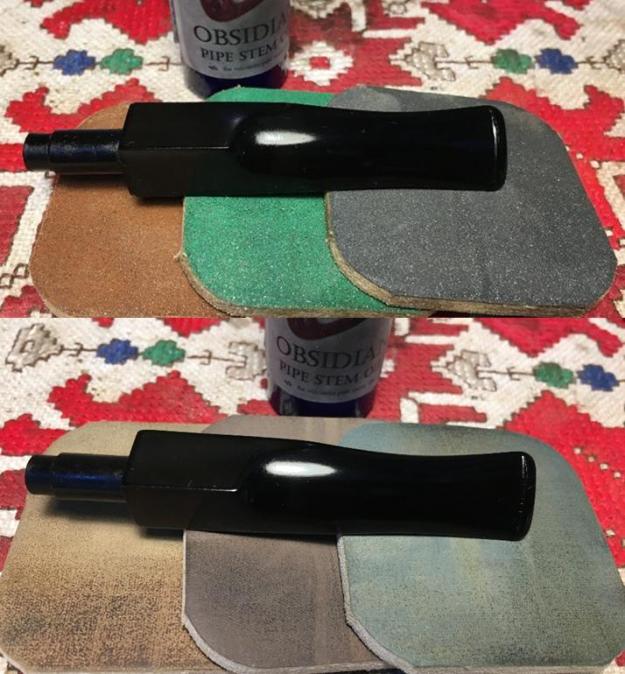
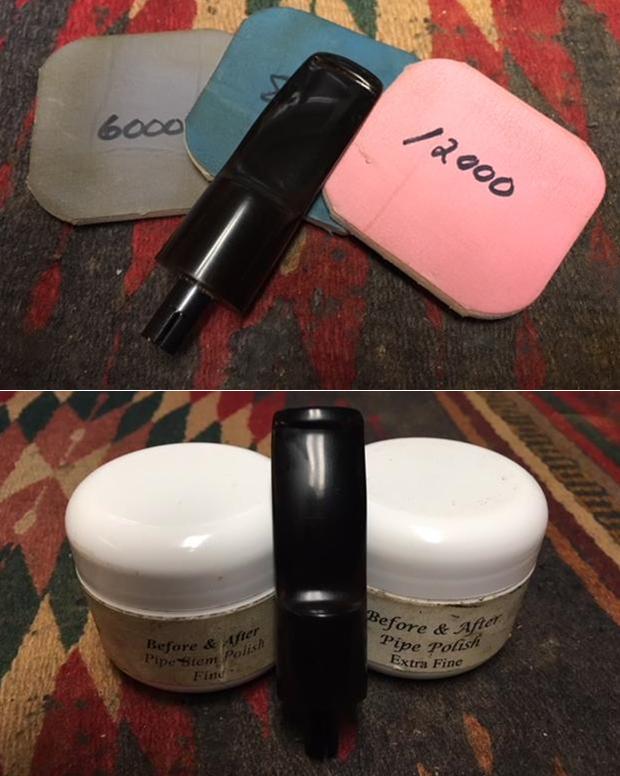
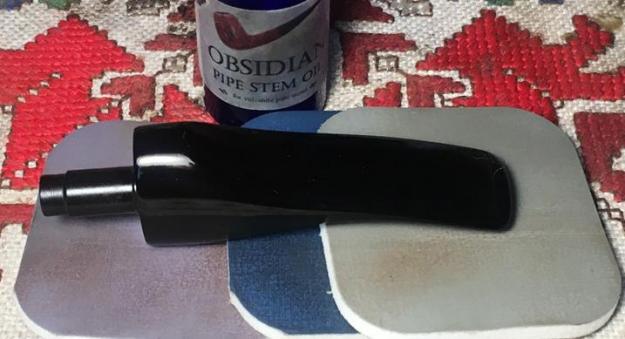
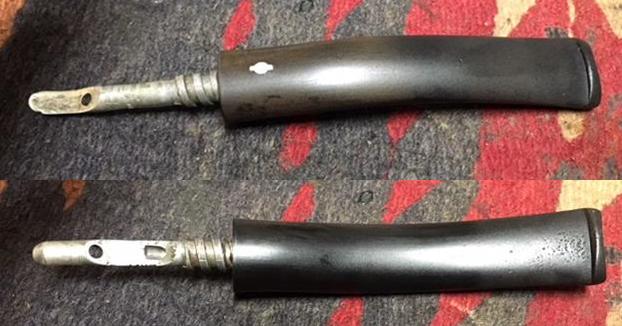
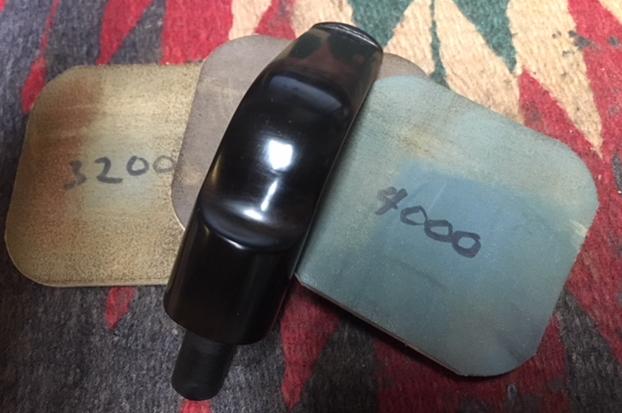
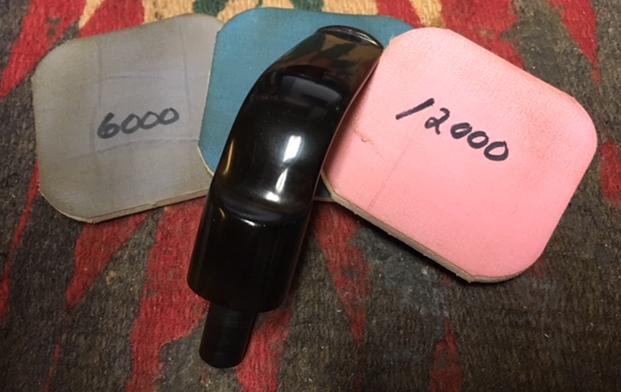
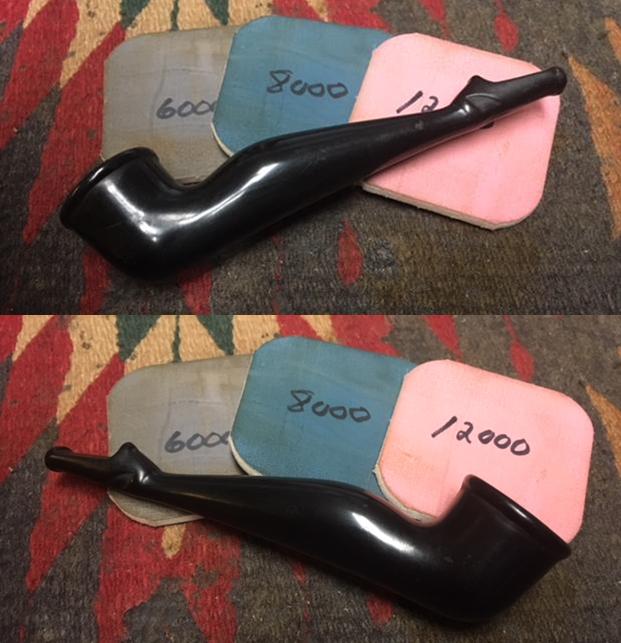
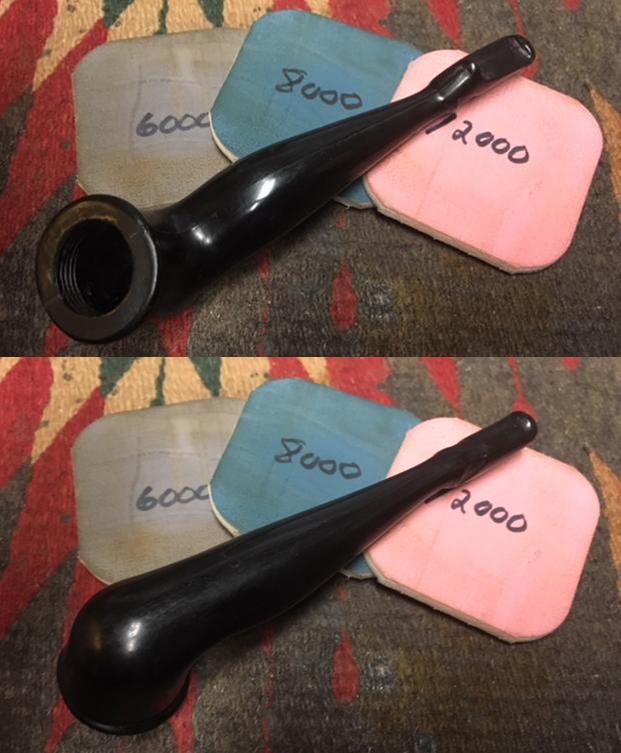
 I set the bowl aside and polished the stem with micromesh sanding pads – wet sanding it with 1500-2400 grit micromesh sanding pads and wiped it down with Obsidian Oil after each pad. I dry sanded it with 3200-12000 grit micromesh pads and again wiped it down after each pad with oil. I gave it a final coat of oil after the final pad and set it aside to dry.
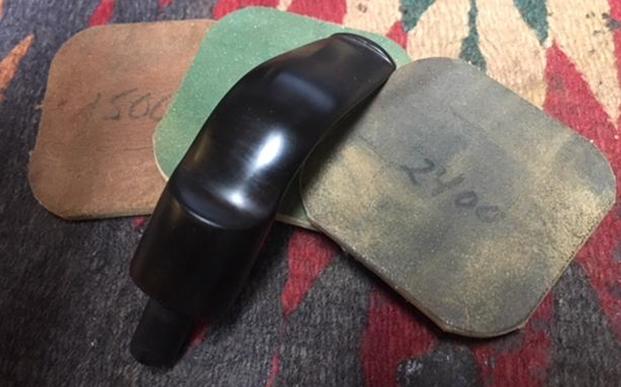
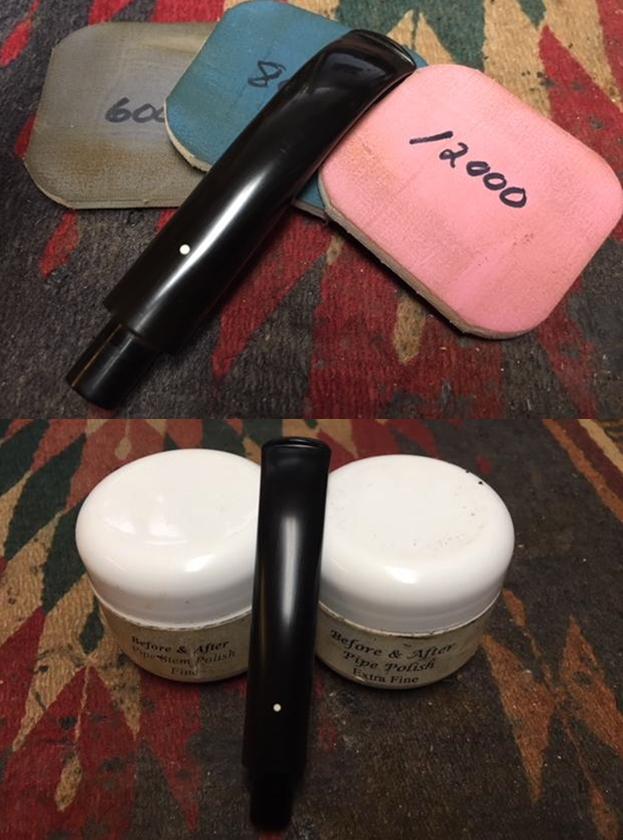
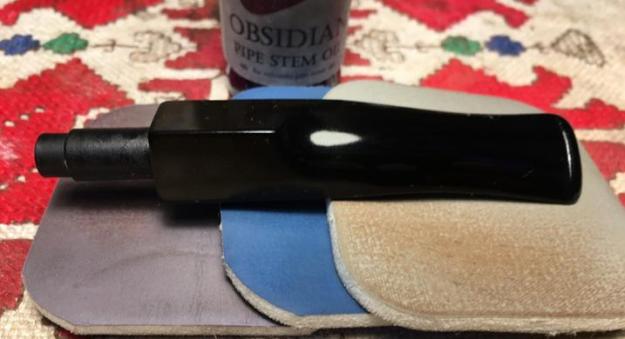
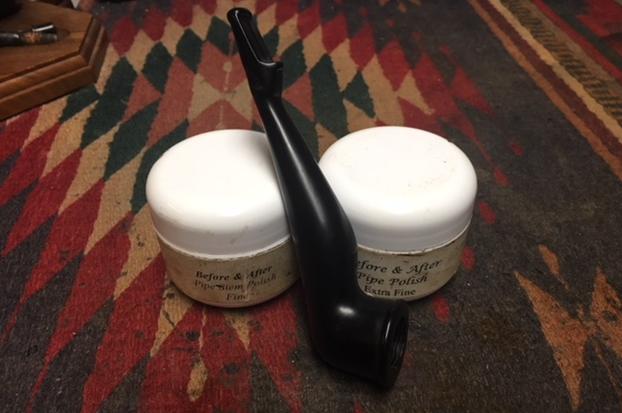
 There were still some stubborn spots of oxidation in hard to sand spots so I polished the stem with Before & After Pipe Polish – Fine and Extra Fine polishes and I am happier with the end result.
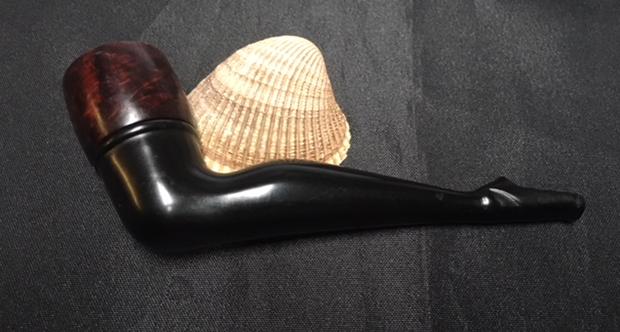
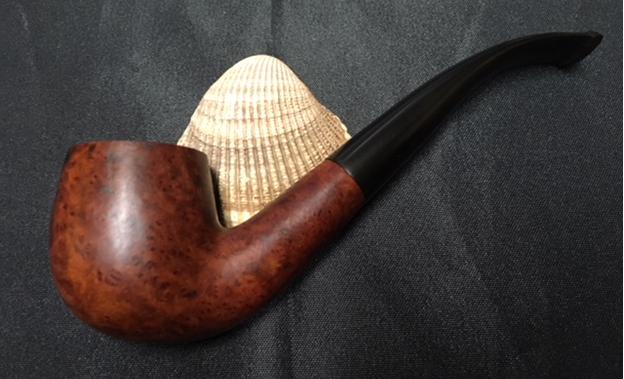
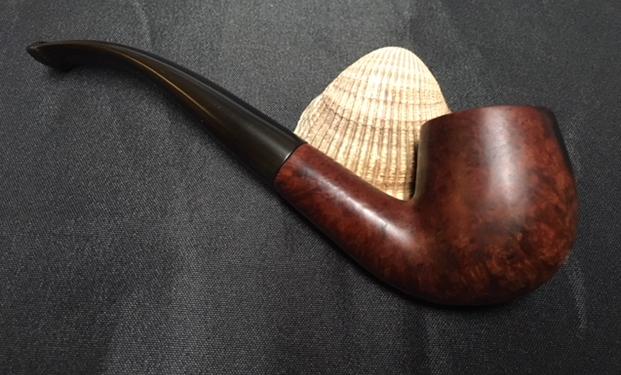
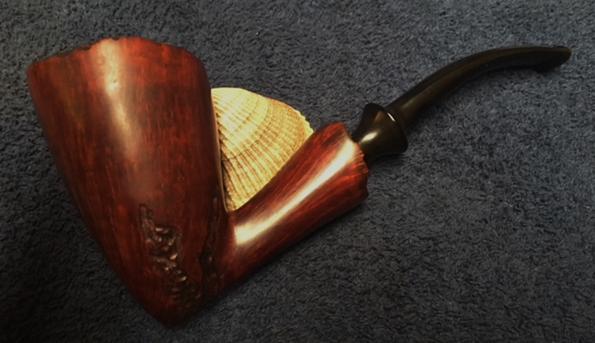
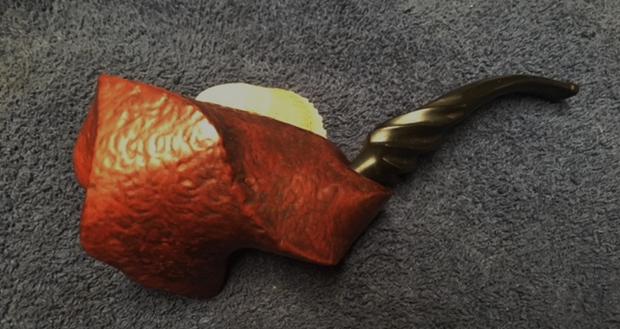
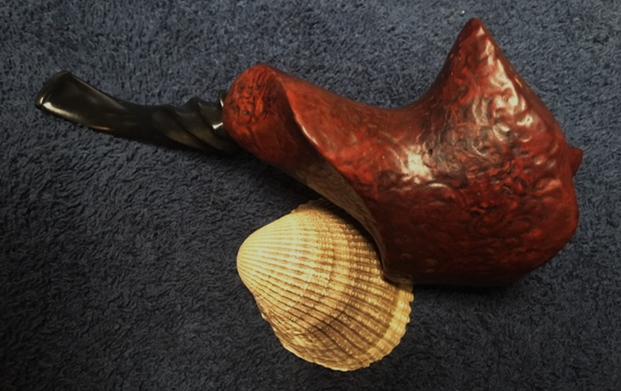
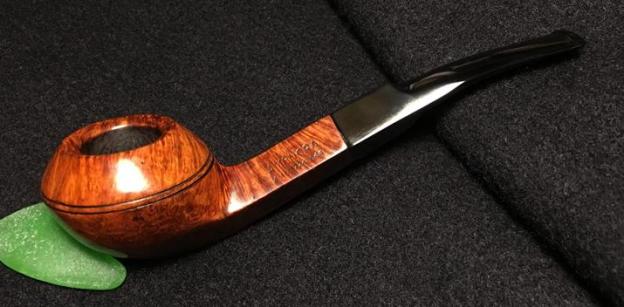
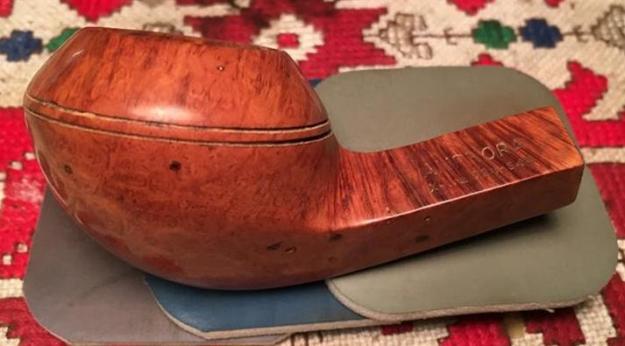
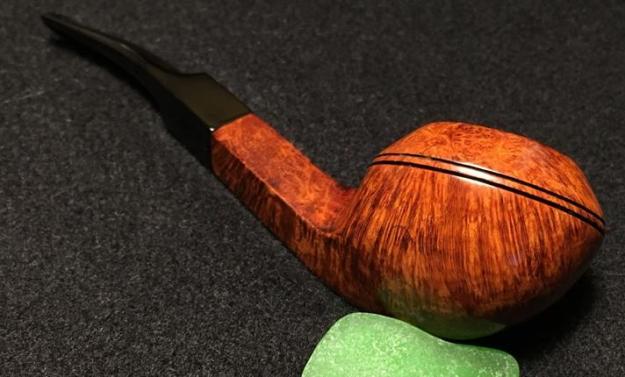
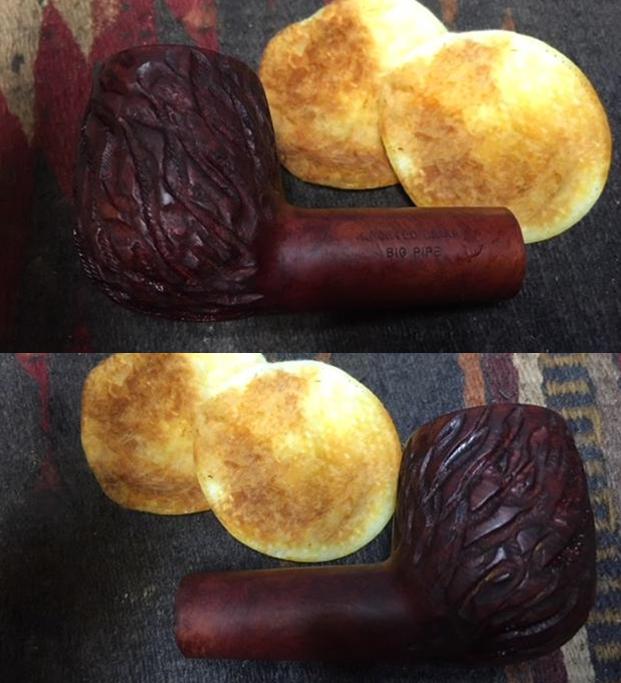
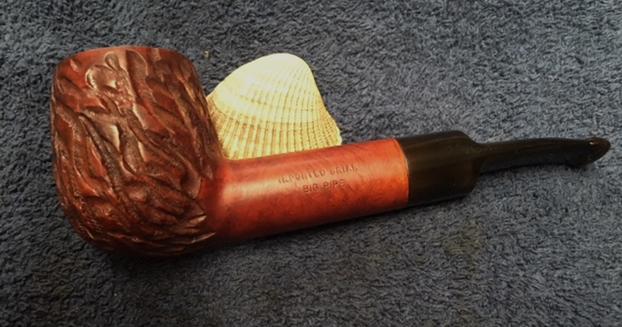
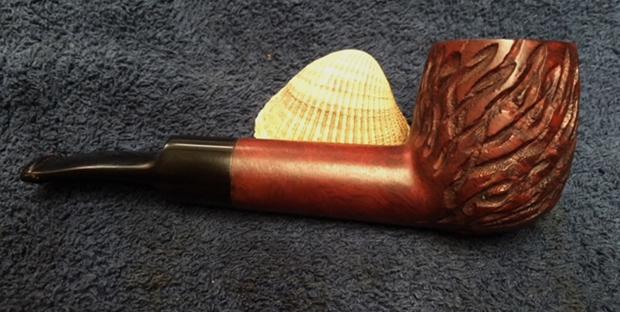
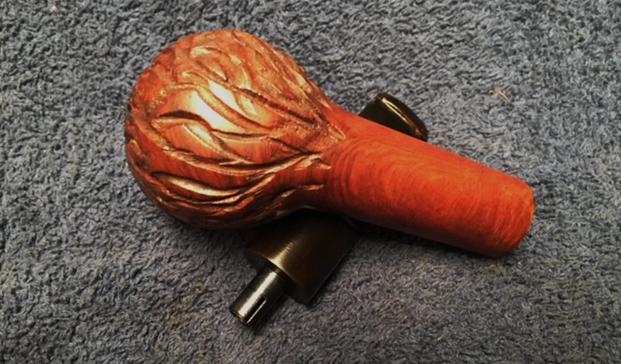
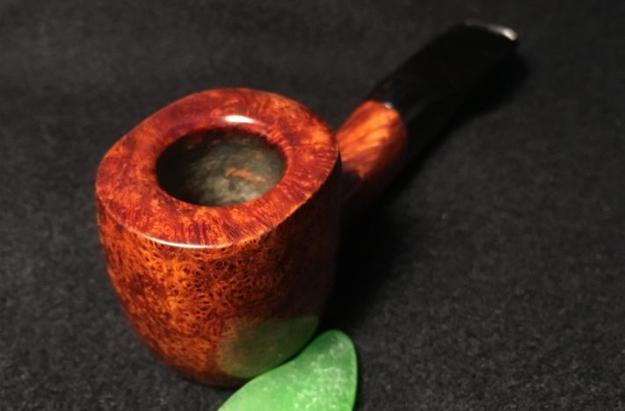
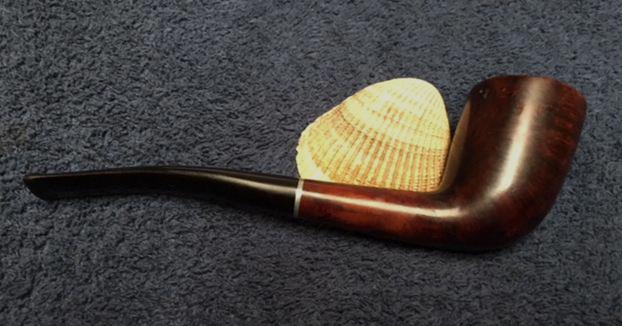
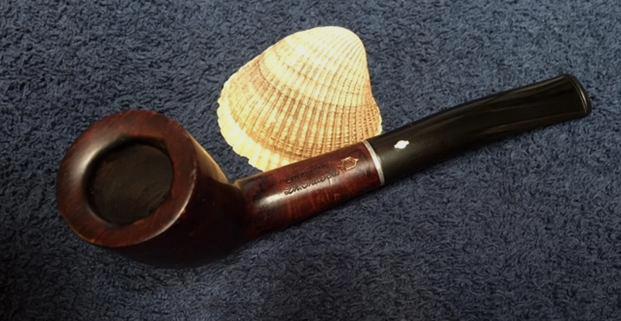
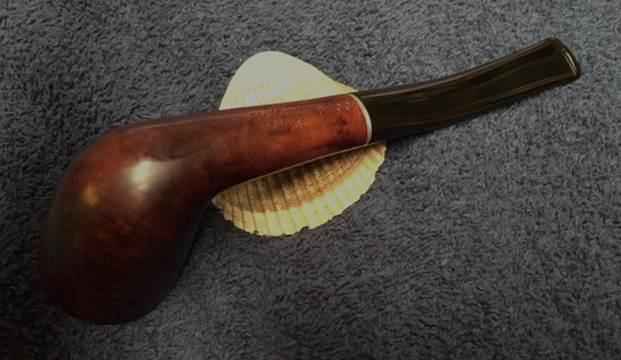
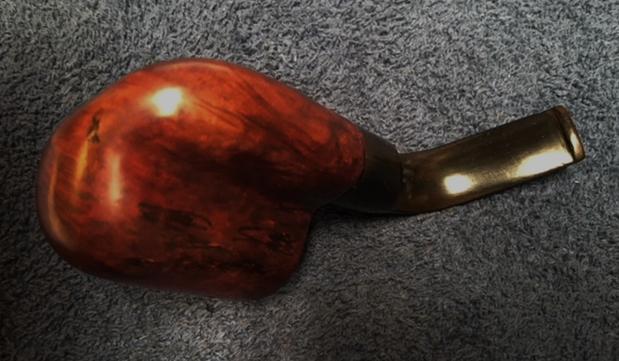
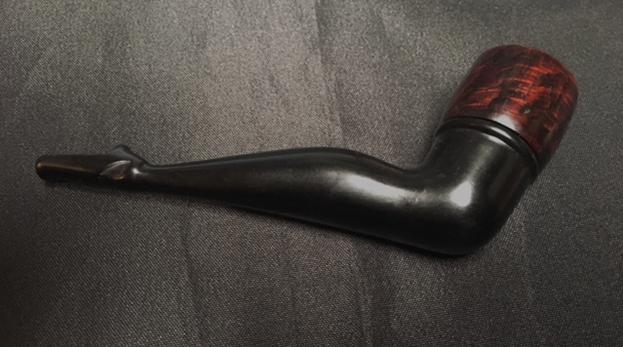
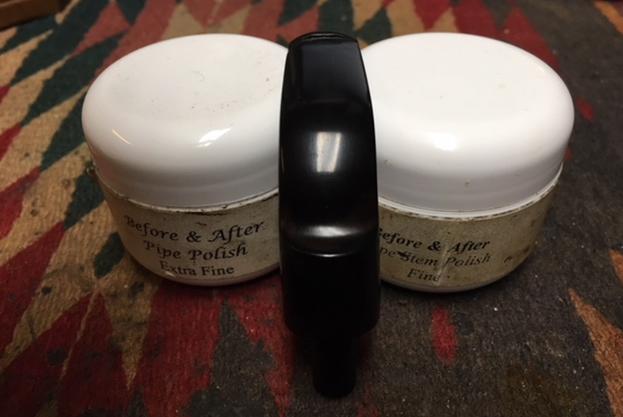 I polished the pipe with Blue Diamond to polish out the remaining small scratches. I gave the bowl and the stem multiple coats of carnauba wax. I buffed the pipe with a clean buffing pad to raise the shine. I hand buffed it with a microfiber cloth to deepen the shine. The pipe polished up pretty nicely. The finished pipe is shown in the photos below. This is fourth of eight pipes that I am restoring from Anthony’s Dad’s collection. I am looking forward to hearing what Anthony thinks once he sees the finished pipe on the blog. Once I have the remaining four pipes finished I will pack them up and send them back to him. It will give him opportunity to carrying on the trust from his Dad. The dimensions are Length: 3 1/2 inches, Height: 2 1/8 inches, Outside diameter of the bowl: 1 5/8 inches, Chamber diameter: 7/8 inches. Thanks for walking through the restoration with me as I worked over this pipe from Anthony’s Dad’s collection. Four more will soon follow in the days ahead. Keep an eye out for them because there are still some unique pipes in the lot.
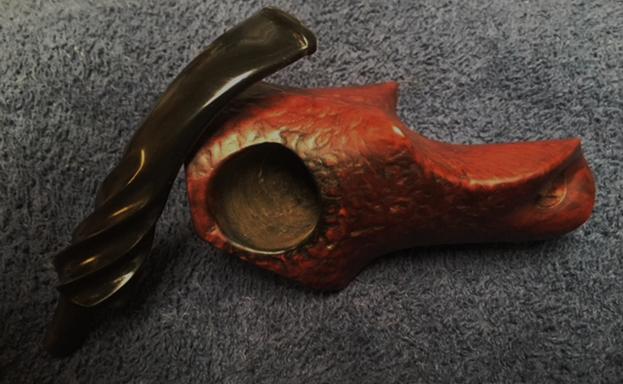
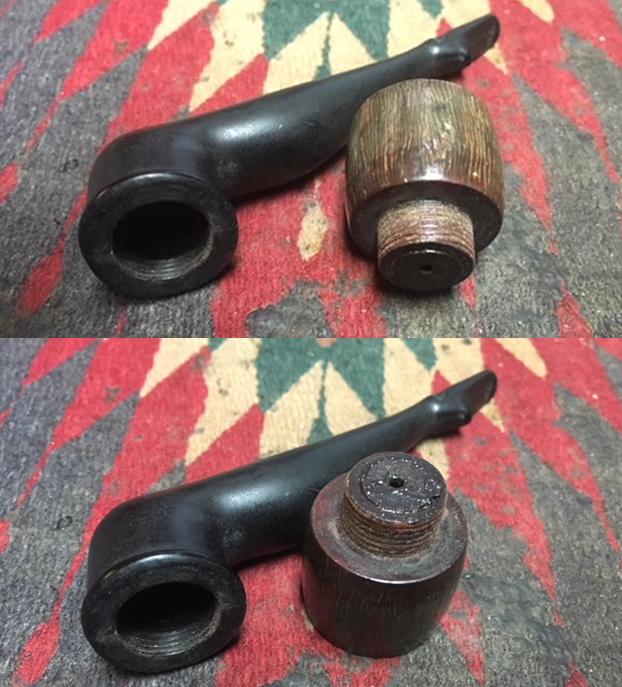
 The black cast/molded Gutta-Percha base was shaped like a female leg and even had a ballet slipper on the extended foot. The airway came out at the end of the toe. The base was nicked and dull looking with none of the rich glow that I know comes when the material is polished. But by far the worst part of the pipe was that some had dipped the briar bowl in a gold metallic paint rubbed it into the grain and then covered it with multiple layers of Varathane plastic coat. They had even dipped the threads on the nipple that screwed into the base in the plastic coat and painted the inside of the bowl as well. I say that was the worst part because otherwise the pipe was unsmoked. It would have been NOS (New Old Stock) before whoever did this abomination to the pipe. The bowl is normally a rich reddish brown colour in all the variations that I have seen on the internet so the gold and plastic finish would need to go.
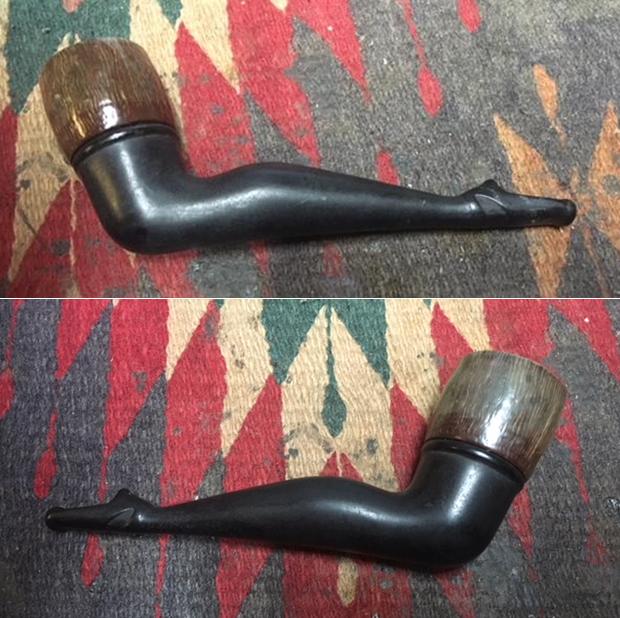
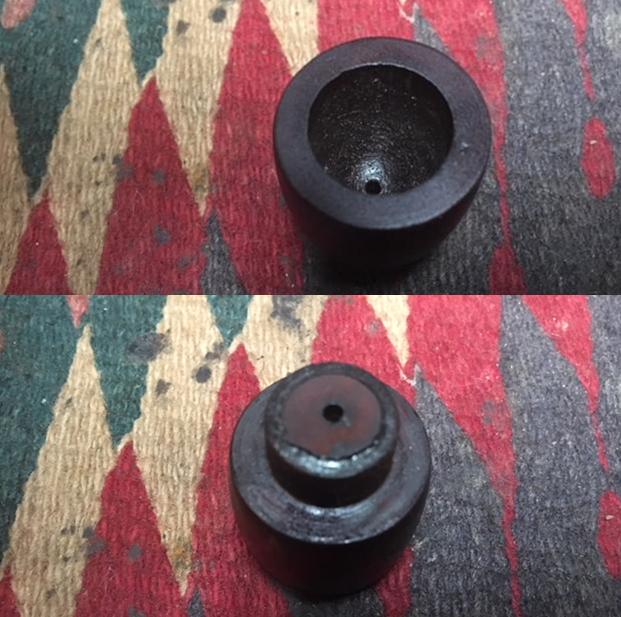
 I took a close up photo of the rim top to show you the way it looked when I got it – I don’t know if some of you like the look – but I don’t. It is like painting an antique wooden piece with crackly gold paint to give it the look of hammered metal. It just does not work for me. I also took some photos of the base to show the condition of the mouthpiece end of the pipe. There were some nicks in the material but no tooth marks or chatter and the orific airway in the end of the toes was undamaged.
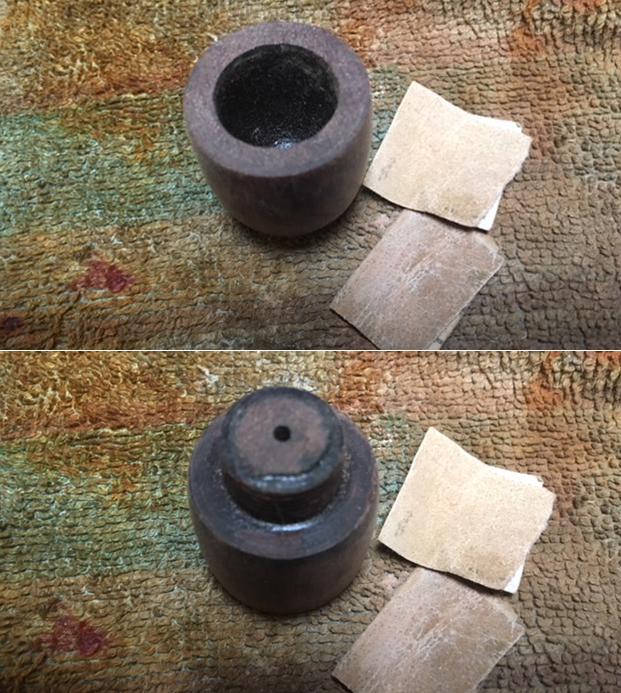
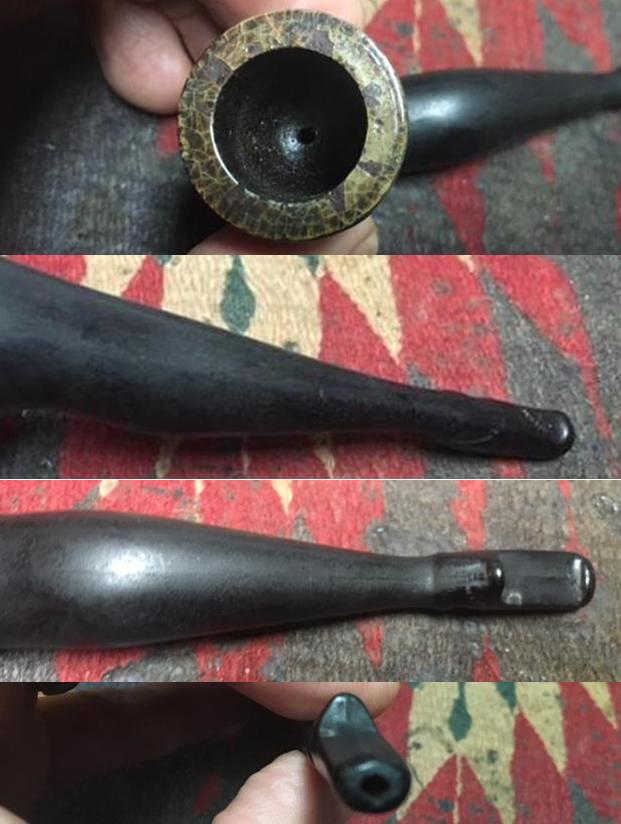 I took photos of the bowl with it removed from the base to show how it had been painted with streaks to make it look like vertical grain – it was not as the wood was smooth and bits of it peaked through the gaudy gold finish. You can also see the thick plastic coat on the nipple that is threaded into the bowl almost filling in all of the threads.
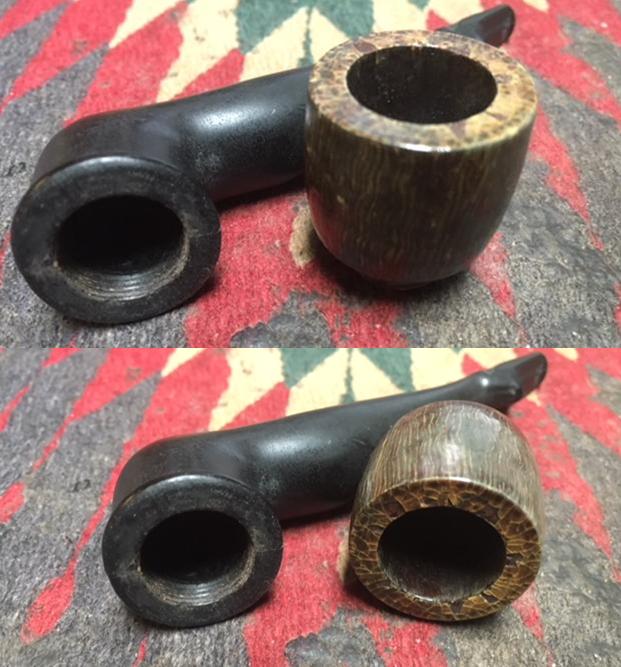
 I topped the end of the nipple with 220 grit sandpaper on the topping board to remove the thick plastic coat that was not even smooth on that portion of the bowl. I did the same with the bowl to remove the plastic and metallic gold paint. Those areas definitely looked better to me but the bowl was a long way from looking normal.
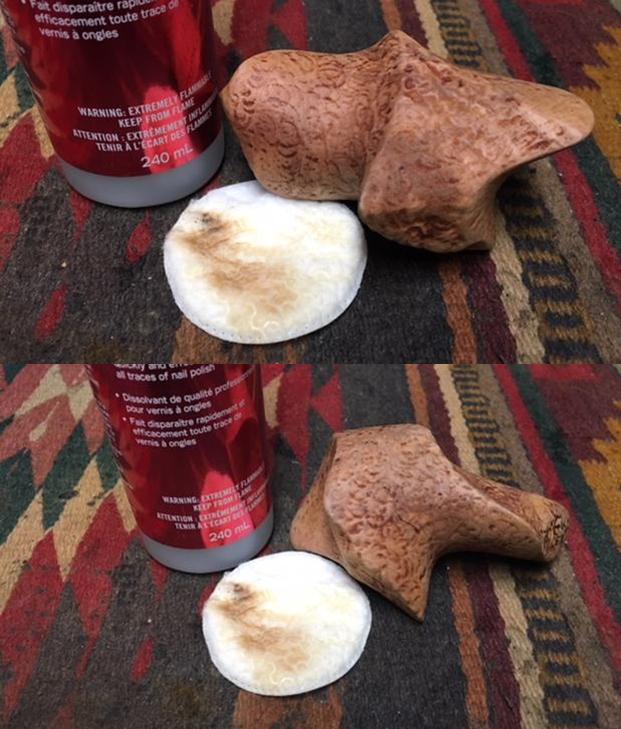
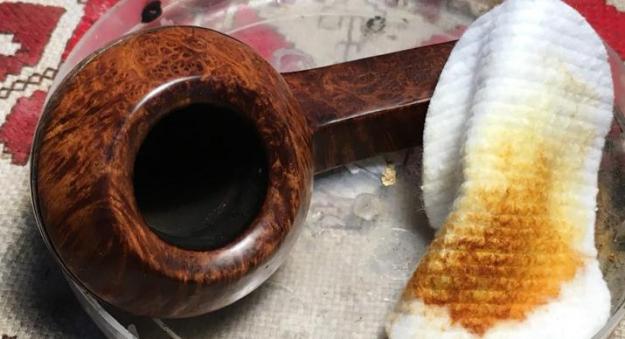
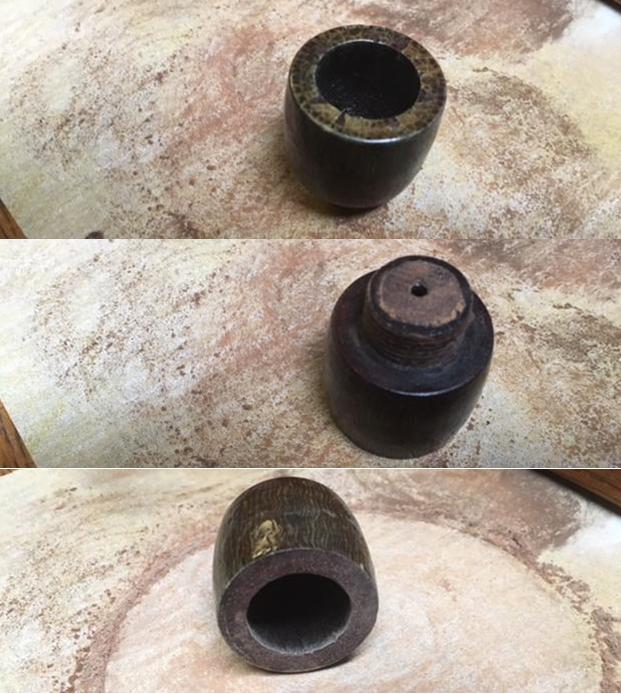 I tried wiping the bowl down with acetone to break through the plastic coat – no luck. The brown stains on the cotton pad come from the nipple end and the rim top where I had broken through the finish. There was only one way to remove this abominable coat of plastic and that was to sand it until it was gone… not my favourite thing. Think twice before any of you put that stuff on a pipe. It is truly awful and stops the wood from breathing.
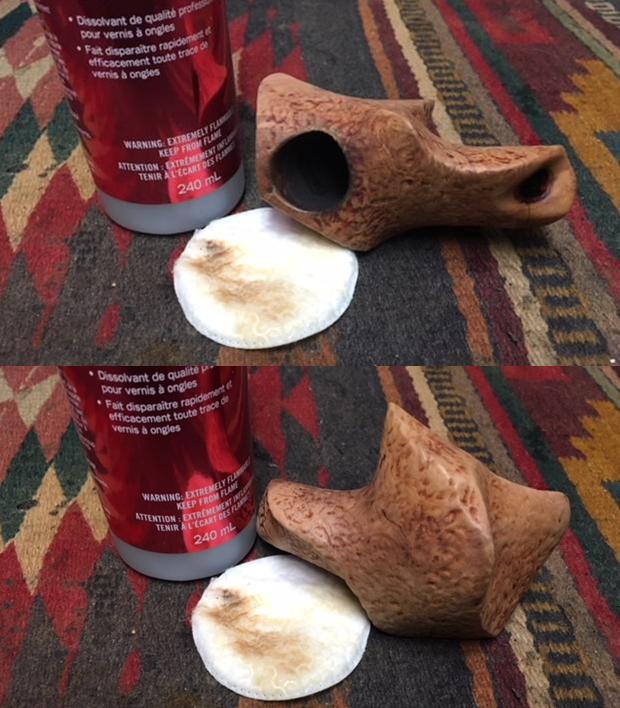
 I sanded the bowl with 180 grit sandpaper and was able to break through the plastic coat and the gold coat. Underneath the bowl was nicked and damaged. The majority of the damaged spots were merely built up plastic coat and sanding them smoothed things out. But some of them were deep gouges in the wood. I sanded, cleaned with alcohol and filled those in with clear super glue and briar dust. When the repairs had cured I sanded them smooth with 180 and 220 grit sandpaper to blend them into the surface of the bowl.
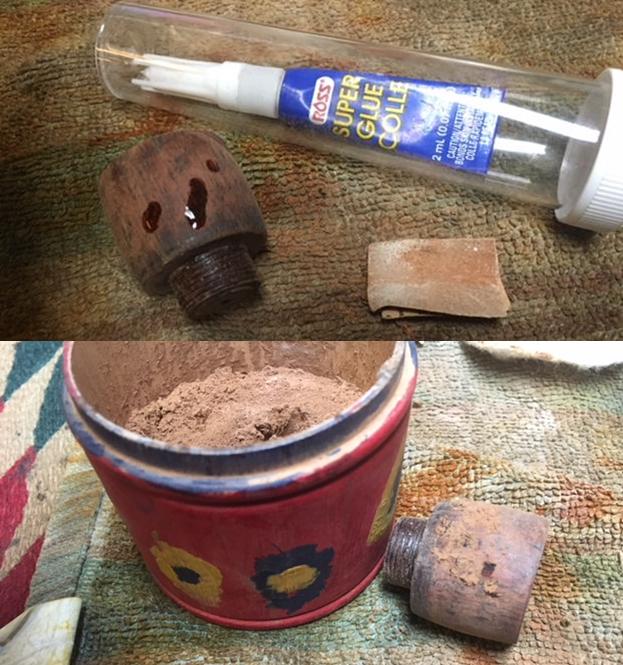
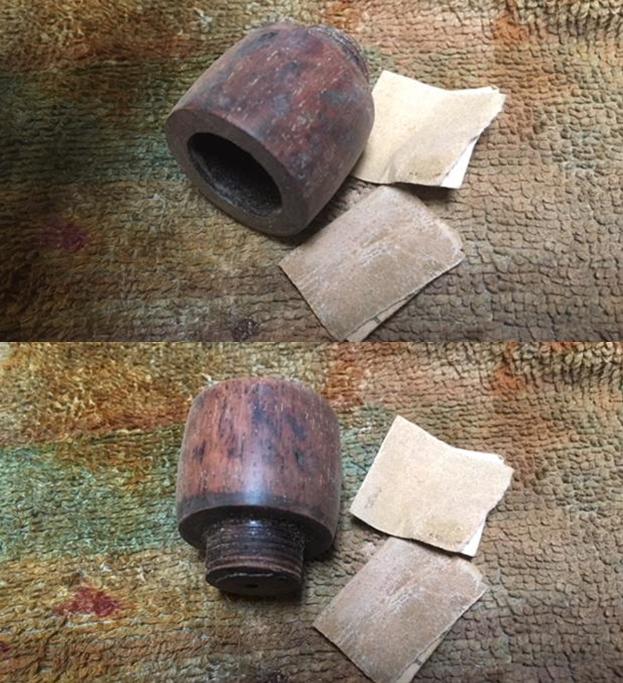
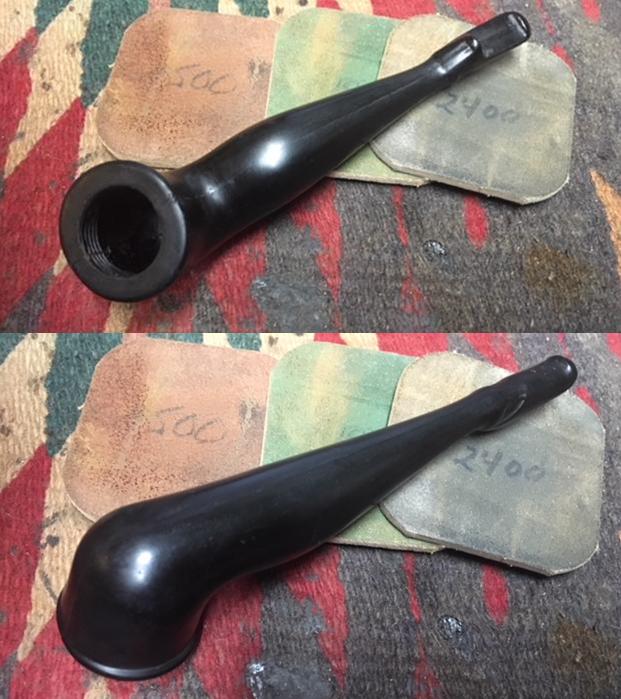
 I sanded the bowl with a medium and a fine grit sanding sponge to remove the remnants of the repair and the plastic coat. It took a bit of sanding but the finish was finally smooth to touch. I sanded the bowl with micromesh sanding pads – wet sanding with 1500-2400 grit pads to smooth things out more.
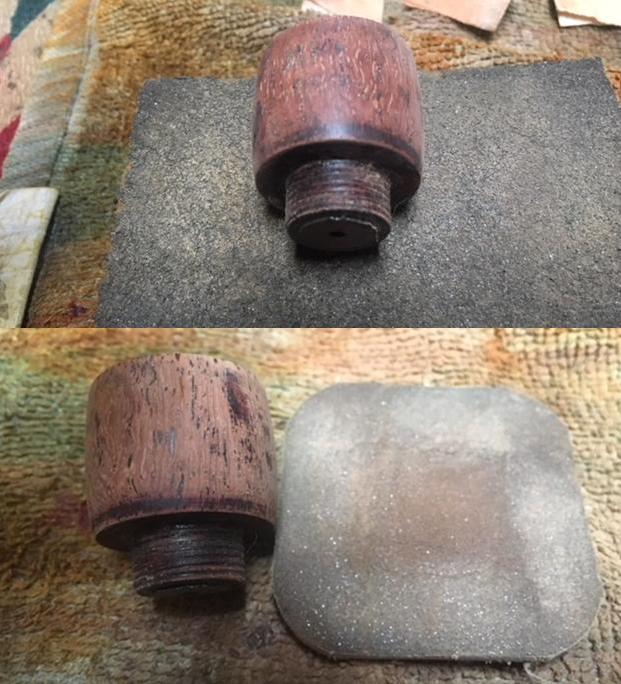 With the bowl smooth and clean I decided to stain it with the tan aniline stain I have. I am sure that it is mislabeled as it is far too red to be tan. I figured it would work well with this bowl.
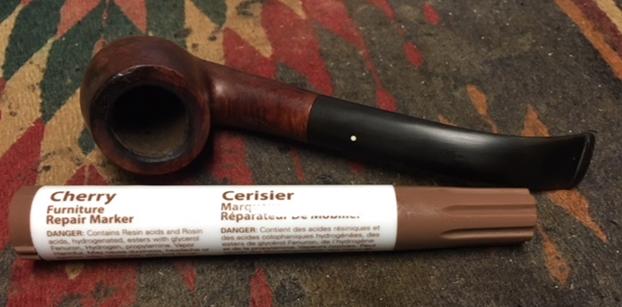
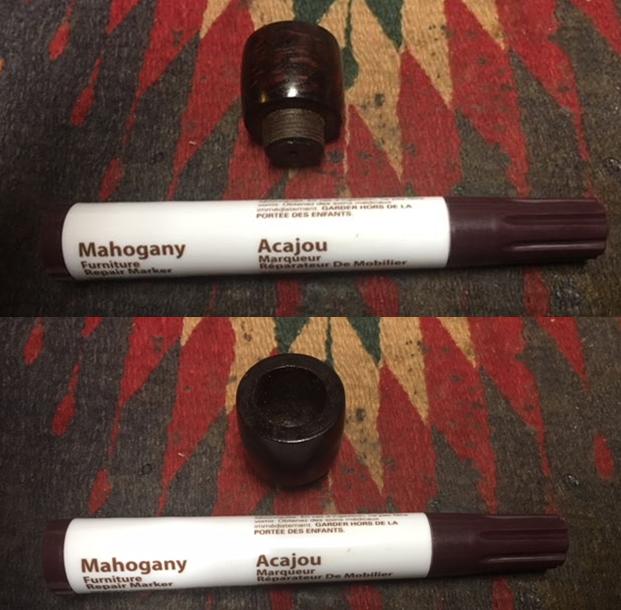
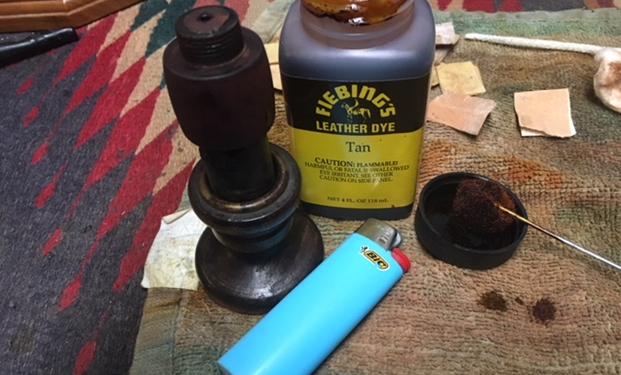 I wiped the bowl down with alcohol on cotton pads to even the stain coat and make it a bit more transparent. The trouble was that all of the flaws and nicks in the wood showed up then. I gave it a second coat of stain using a Mahogany stain pen to darken the overall surface of the bowl and still leave it transparent enough to see the grain in the wood.
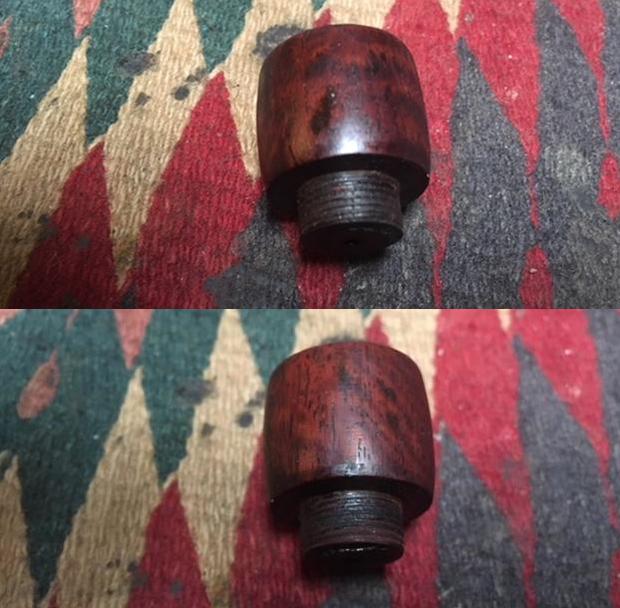
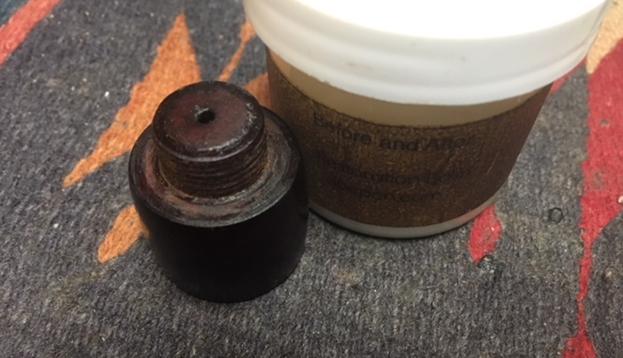
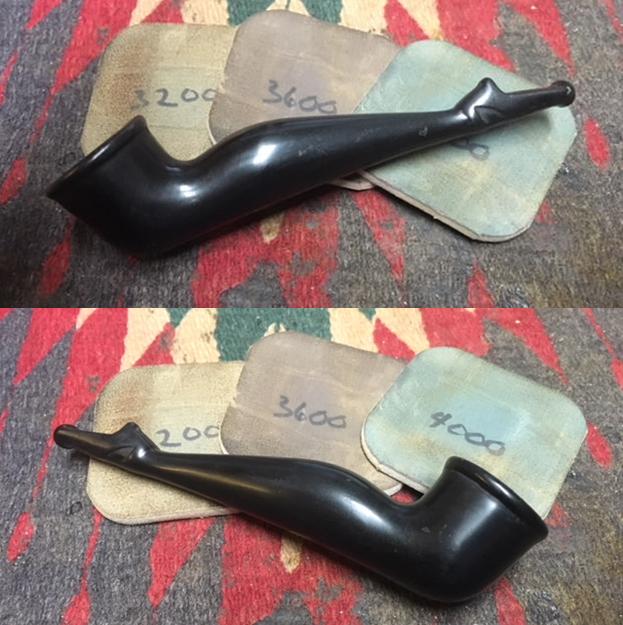
 I rubbed some Before & After Restoration Balm into the surface of the bowl to enliven, clean and protect the newly stained bowl. I let it sit for a few moments then buffed it off with a cotton cloth. I took photos of the bowl at this point to show how things were developing.
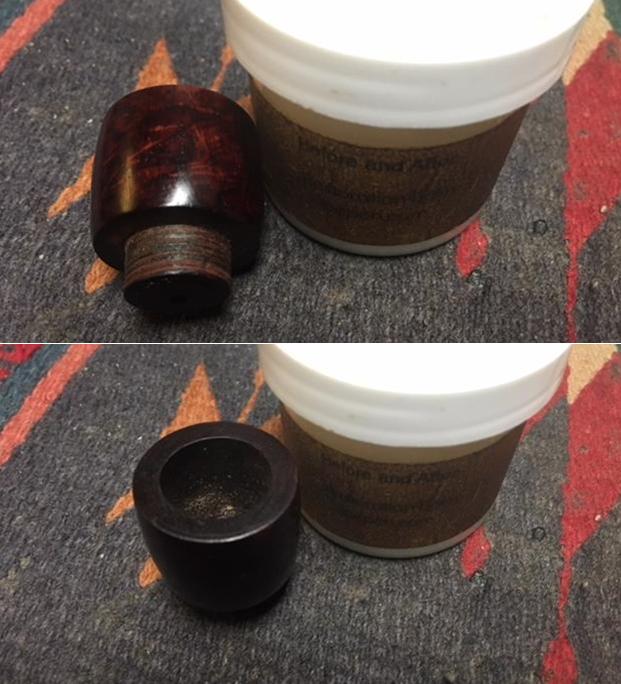
 I set the bowl aside and worked on the base. I cleaned out the debris of time on the inside of the base with cotton swabs and alcohol. There were not a lot of tars as the pipe was unsmoked. But there was dust from sitting all these years since it was made.
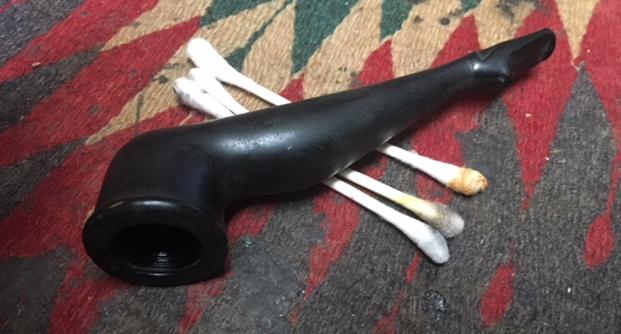 I polished the base with micromesh sanding pads – wet sanding with 1500-2400 grit pads and dry sanding with 3200-12000 grit pads. I wiped the base down after each pad with Obsidian Oil and rubbed it into the material. The pictures tell the story as the base begins to develop a shine.
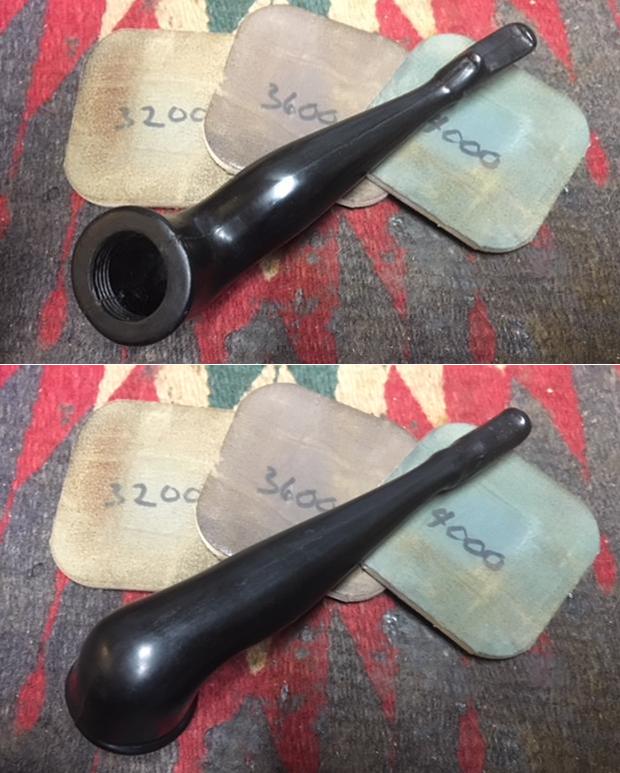
 I further polished it with Before & After Pipe Polish – both Fine and Extra Fine to remove more of the scratches from the Gutta-Percha base. I rub the polish on with my fingertips and polish it with a cotton pad to raise the shine.
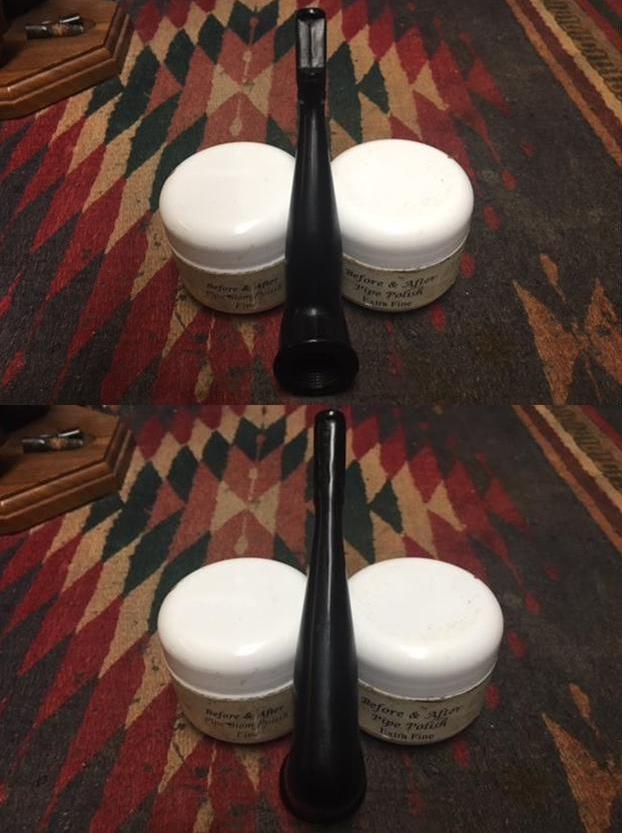
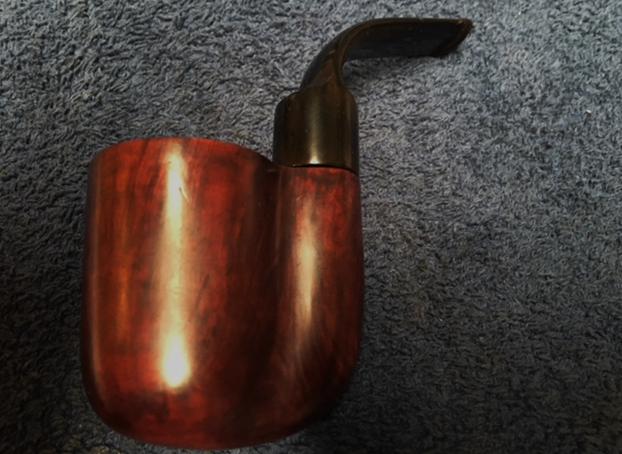
 I buffed the bowl and the base independently of each other with Blue Diamond on the buffing wheel to remove minute scratches and give the materials a shine. I gave both parts multiple coats of carnauba wax and buffed them with a clean buffing pad to raise the shine. I put the parts back together and hand buffed it with a microfiber cloth to deepen the shine. The photos below show the finished and restored pipe. I personally like the rich brown over the metallic gold on the bowl when I got the pipe. The dimensions of the pipe are petite – the length from thigh to tip of the toe is 5 ½ inches, the height from the knee to the thigh is 2 inches, the outer diameter of the thigh is 1 1/8 inches and the chamber diameter is 1 inch. It is a unique piece of pipe history and joins the rest of the Gutta-Percha pipes in my collection. Thanks for walking through the restoration of this leg pipe with me.