By Steve Laug
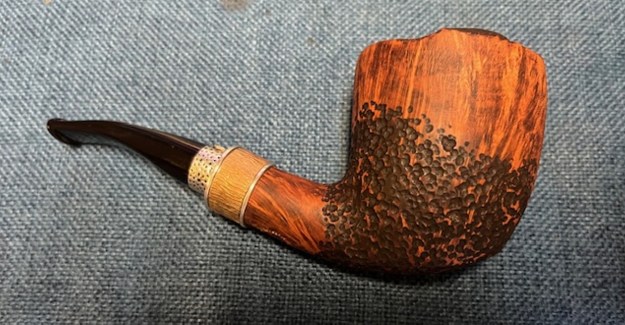
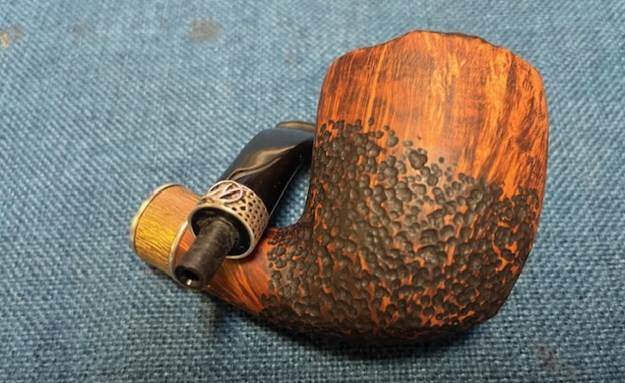
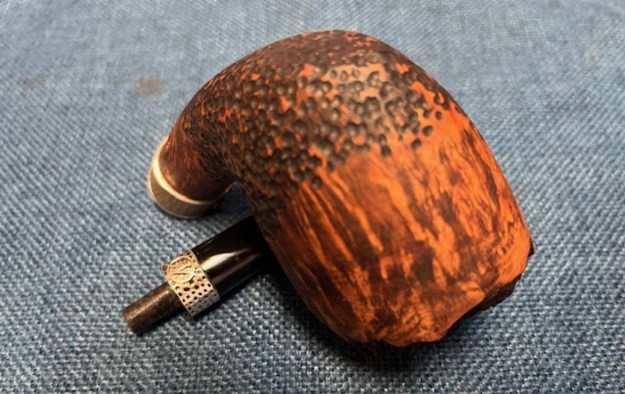
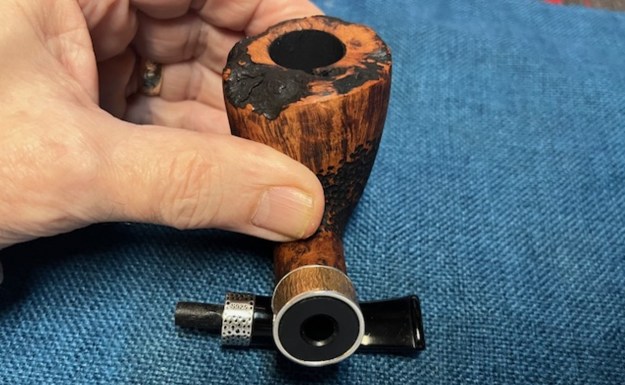
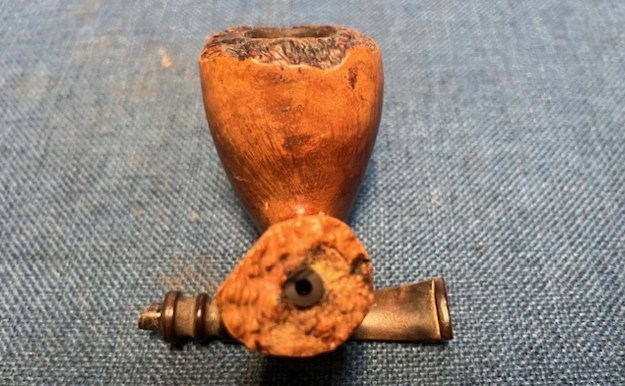
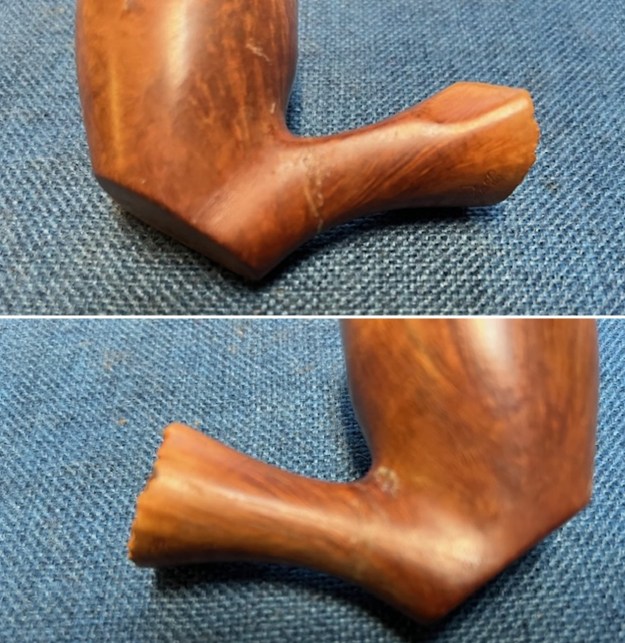
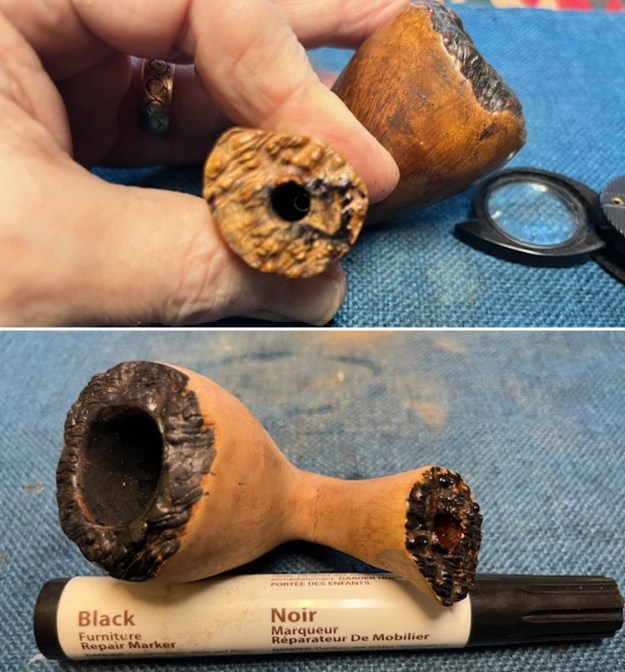
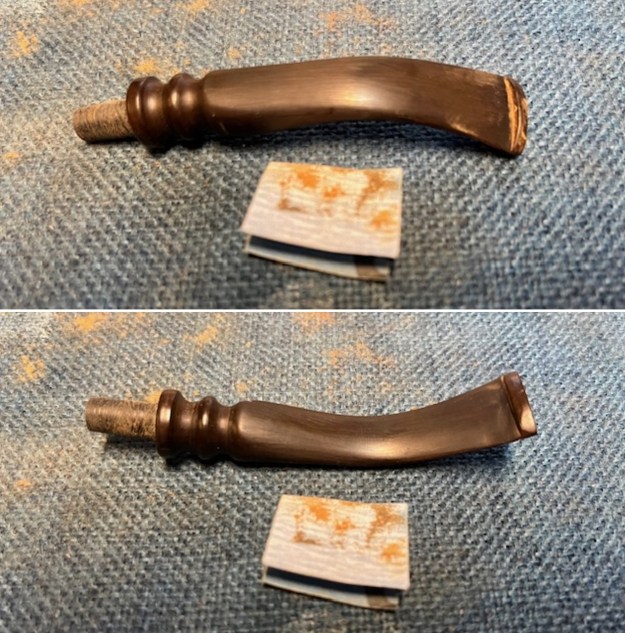
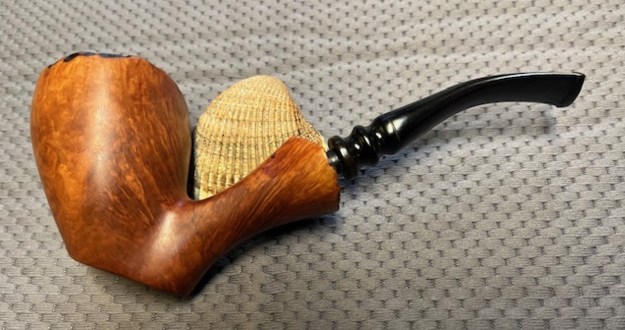
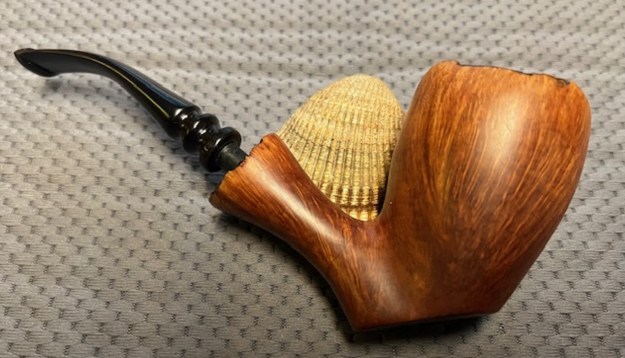
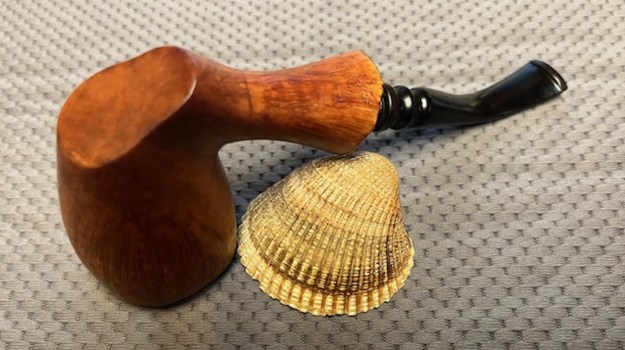
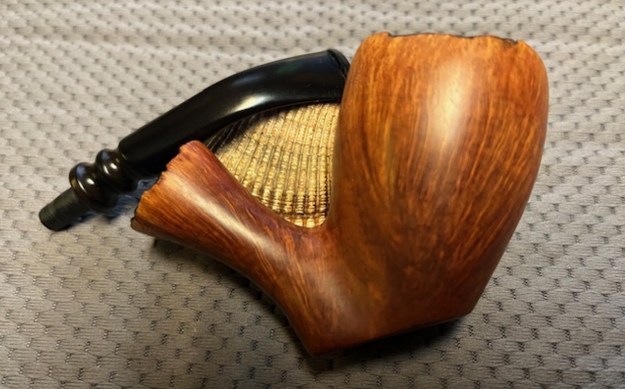
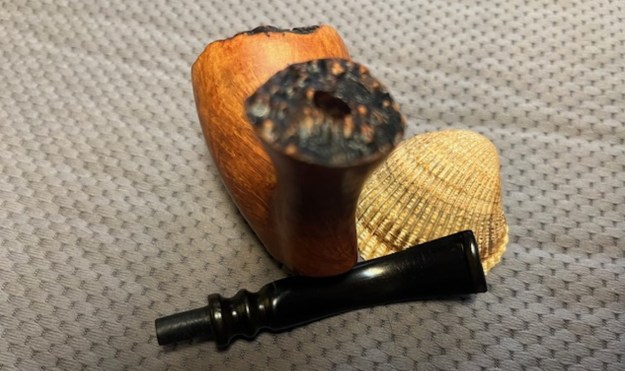
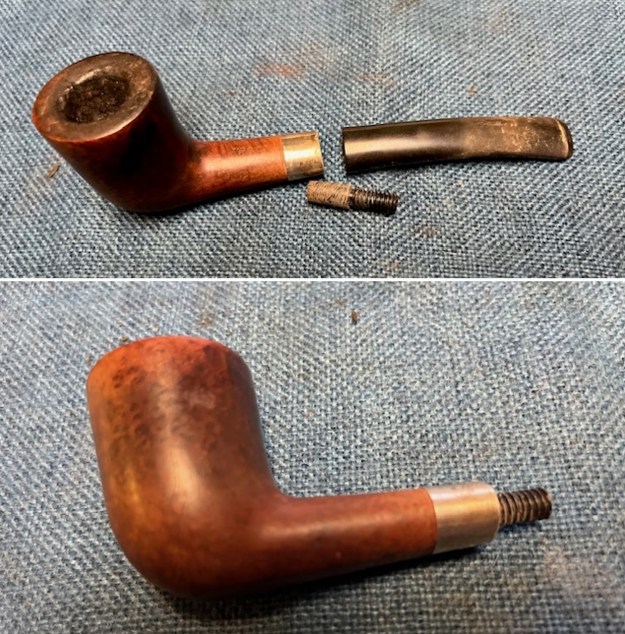
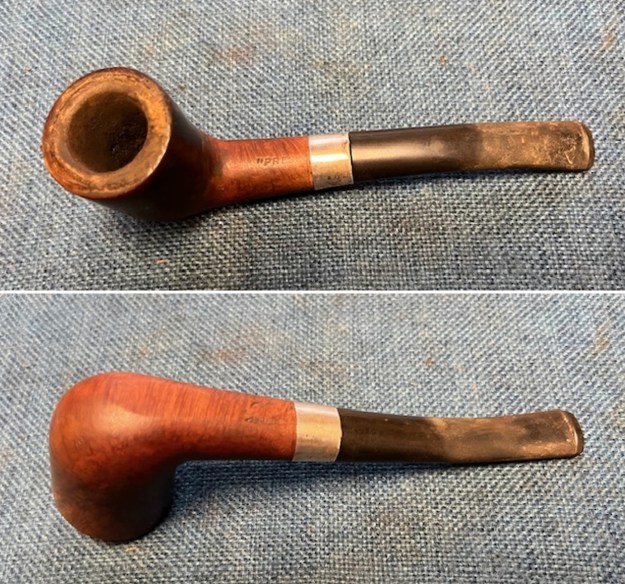
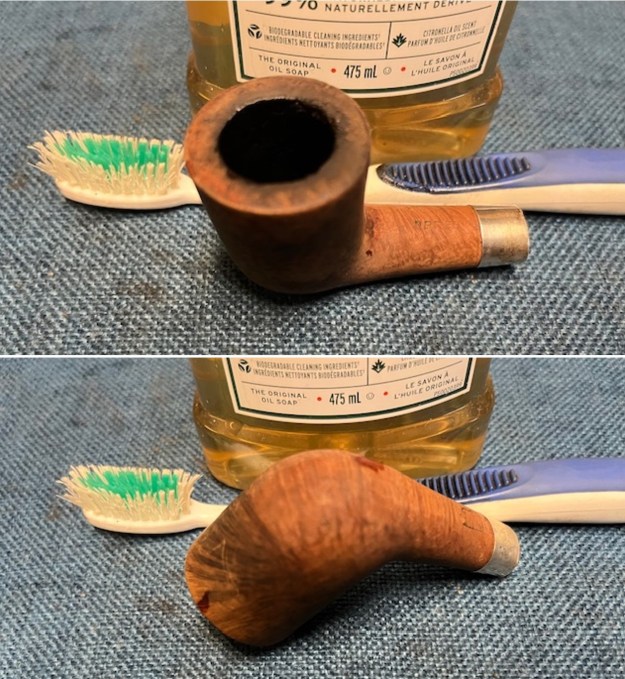
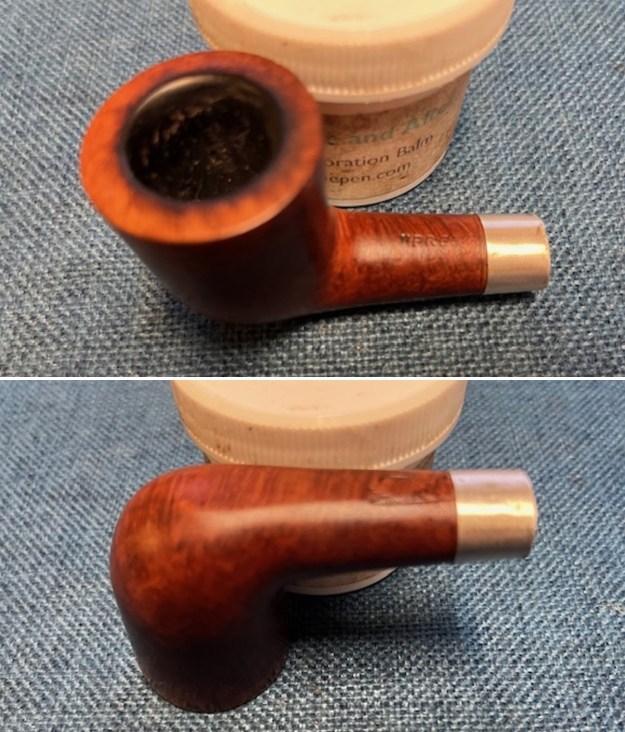
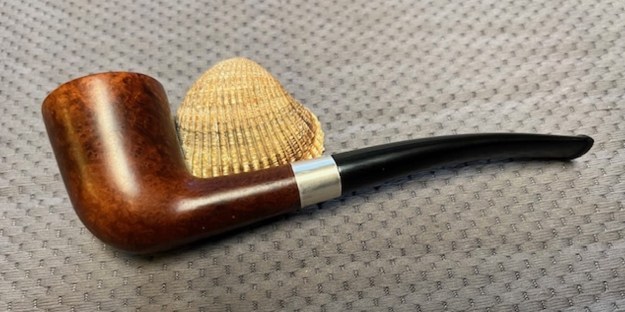
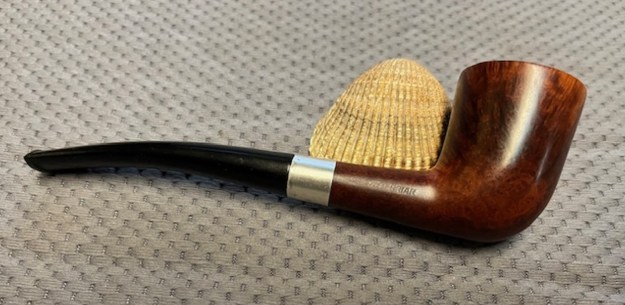
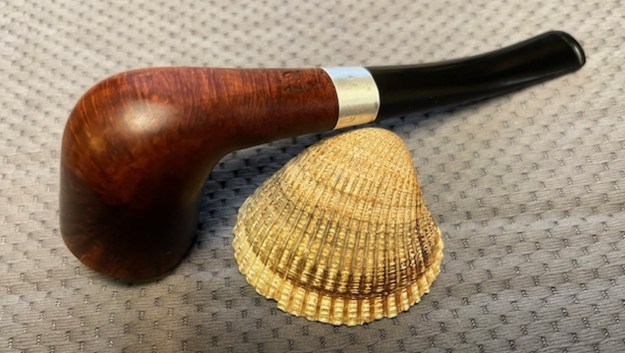
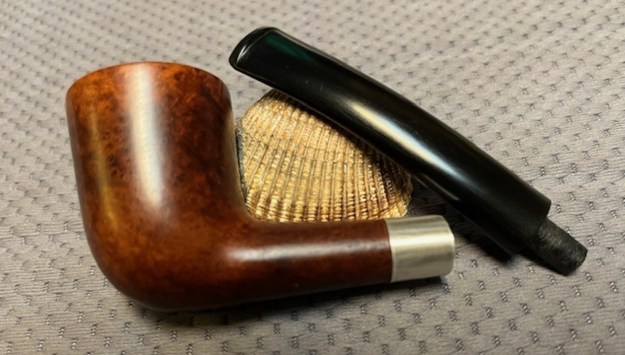
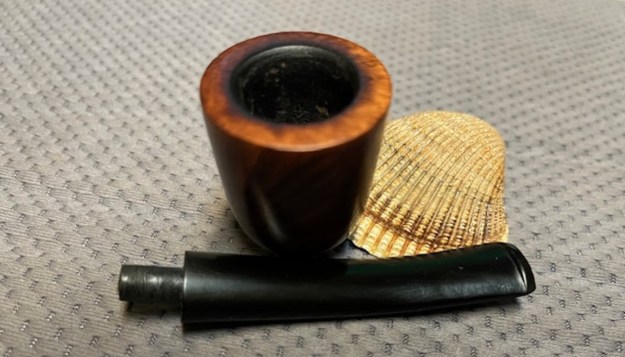
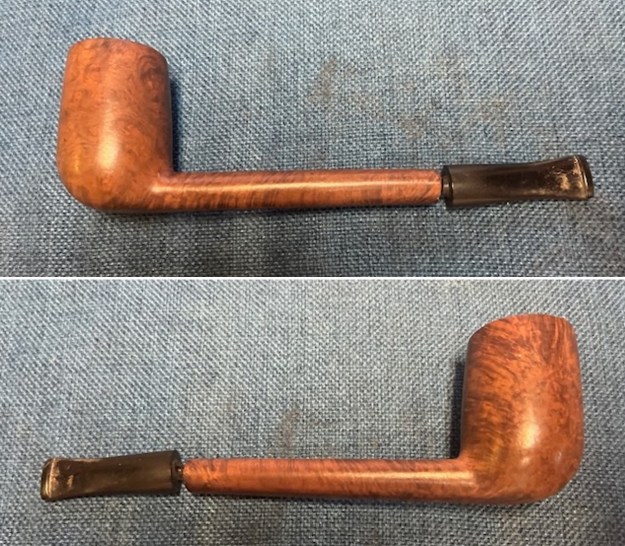
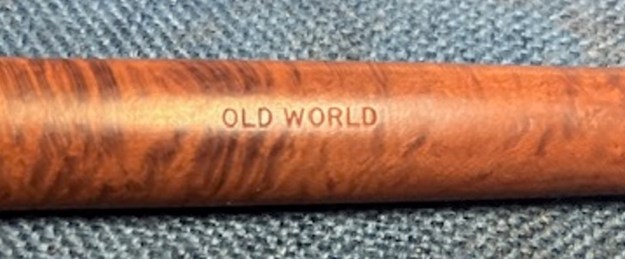
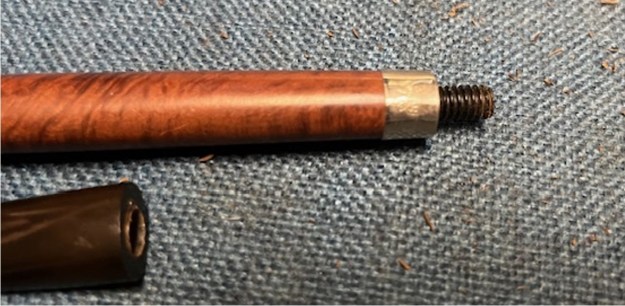
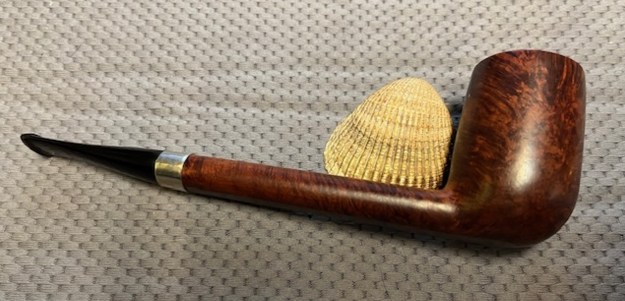
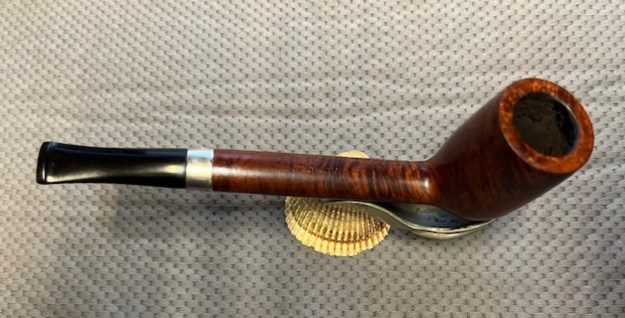
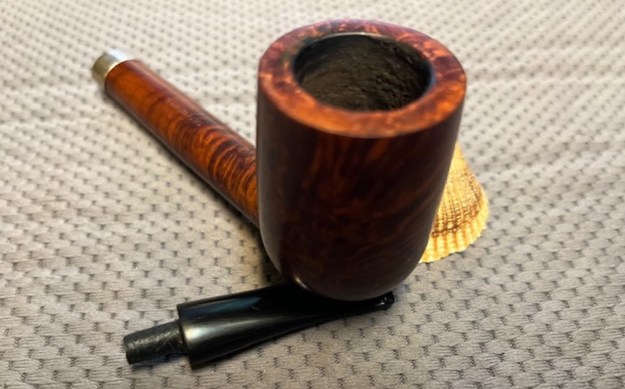
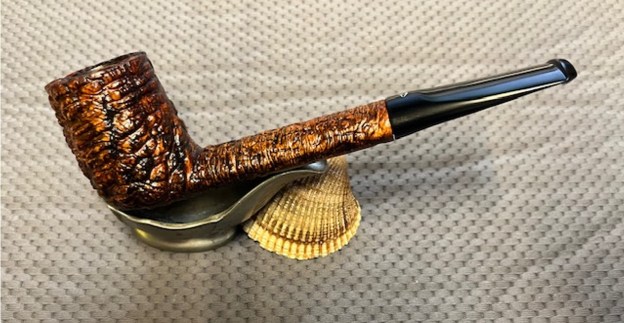
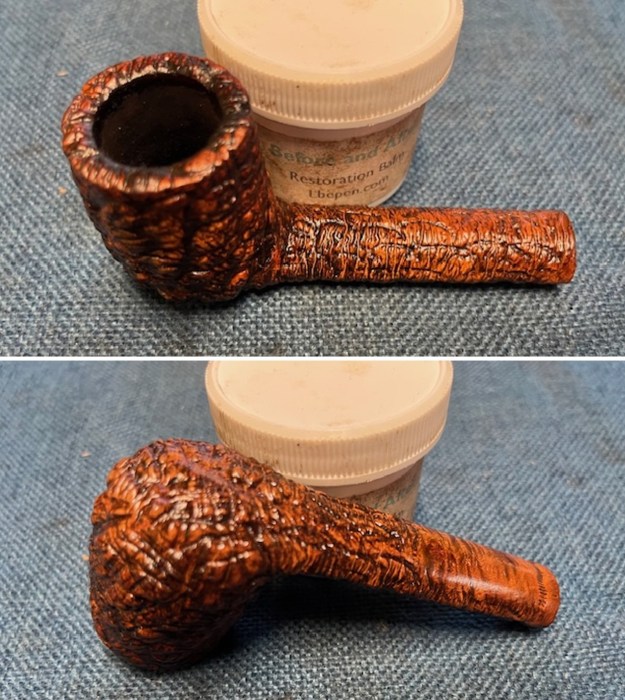
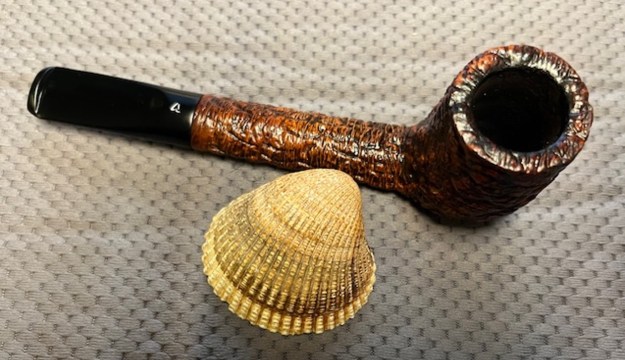
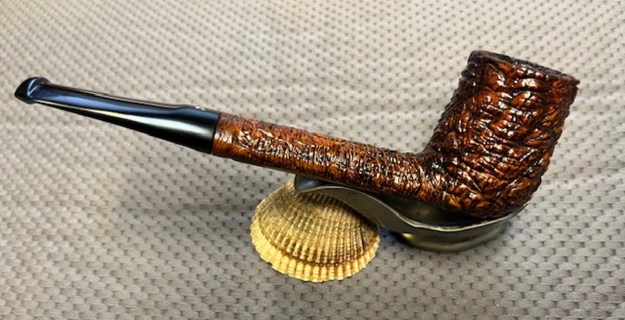
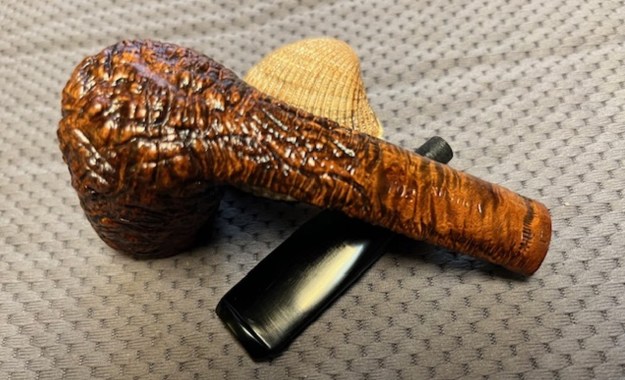
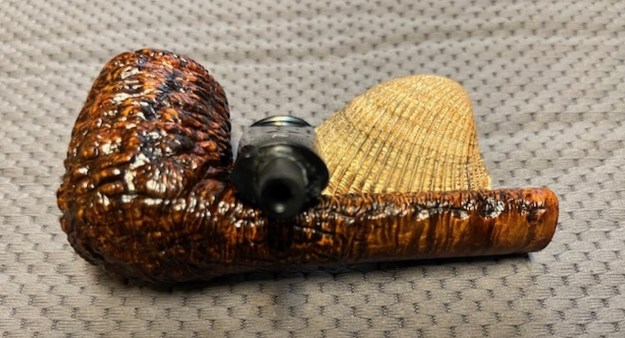
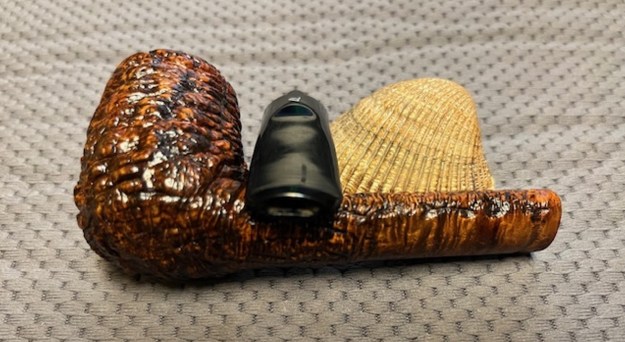
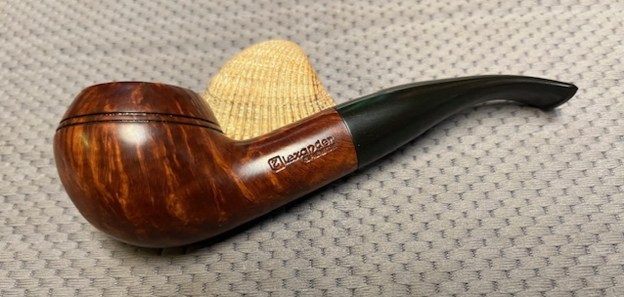
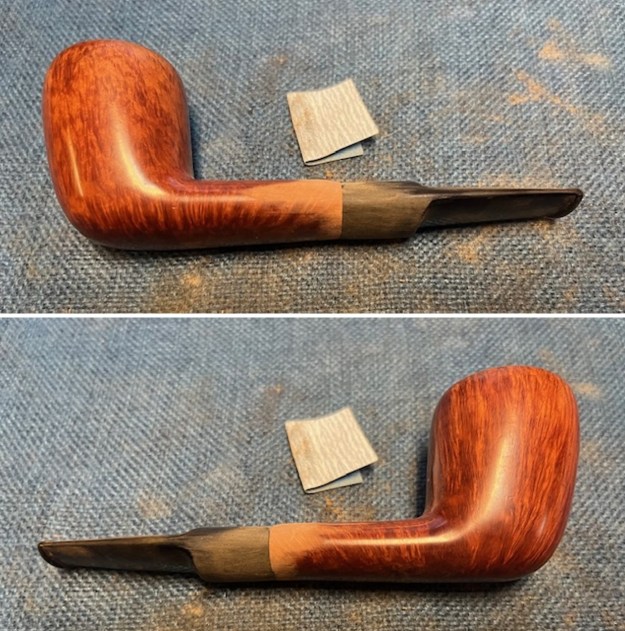
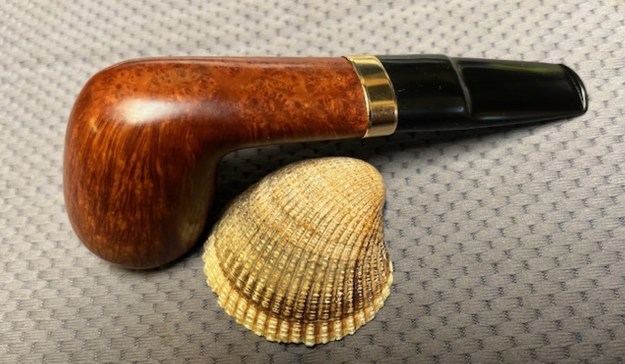
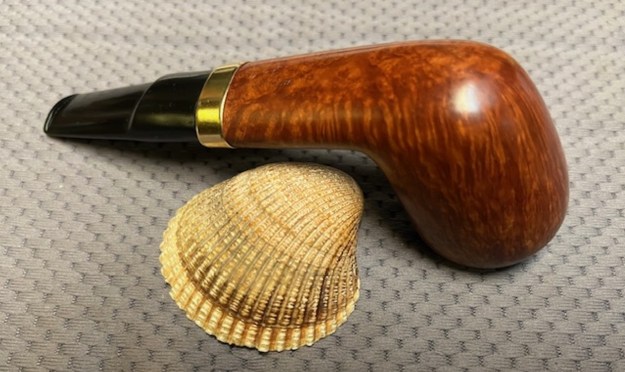
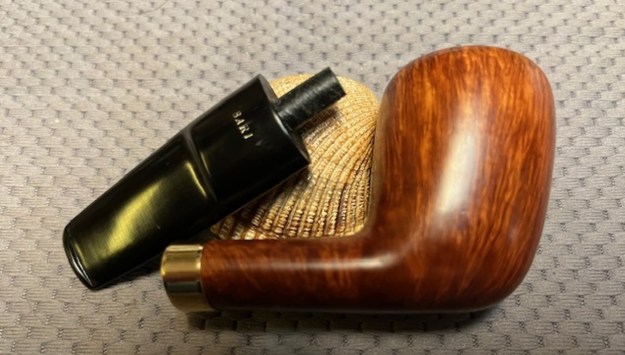
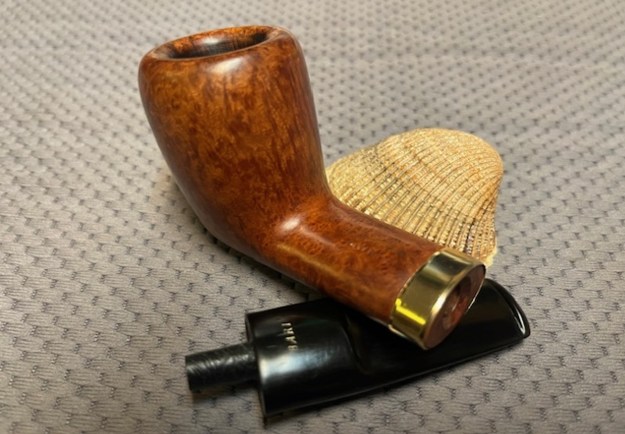
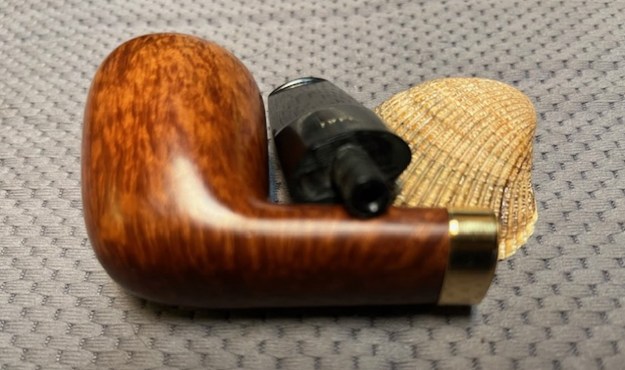
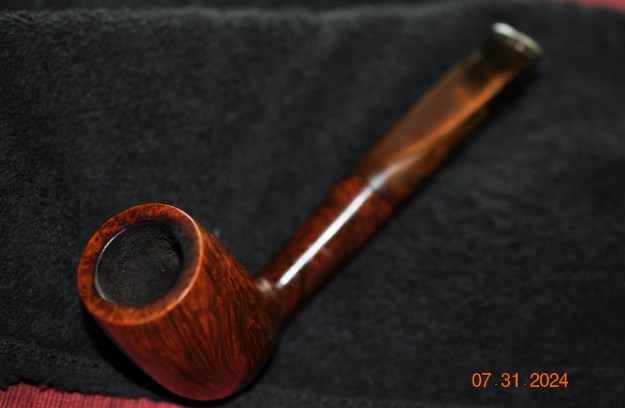
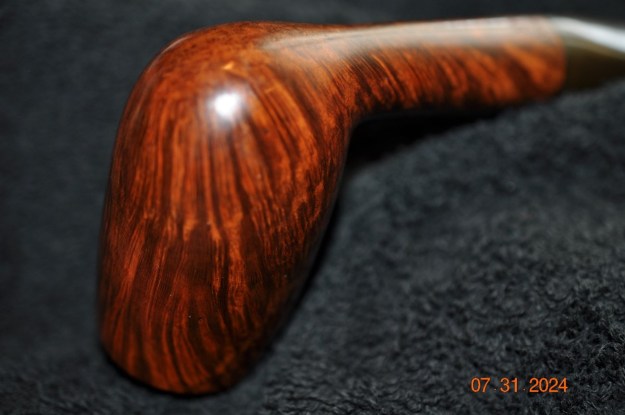
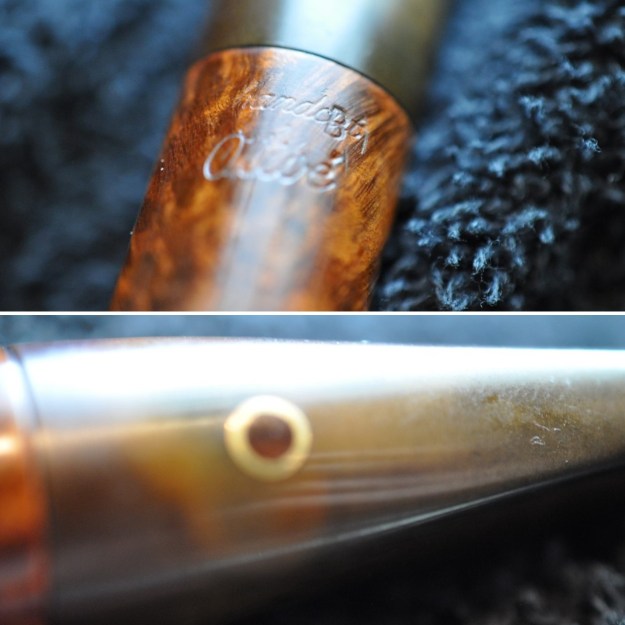
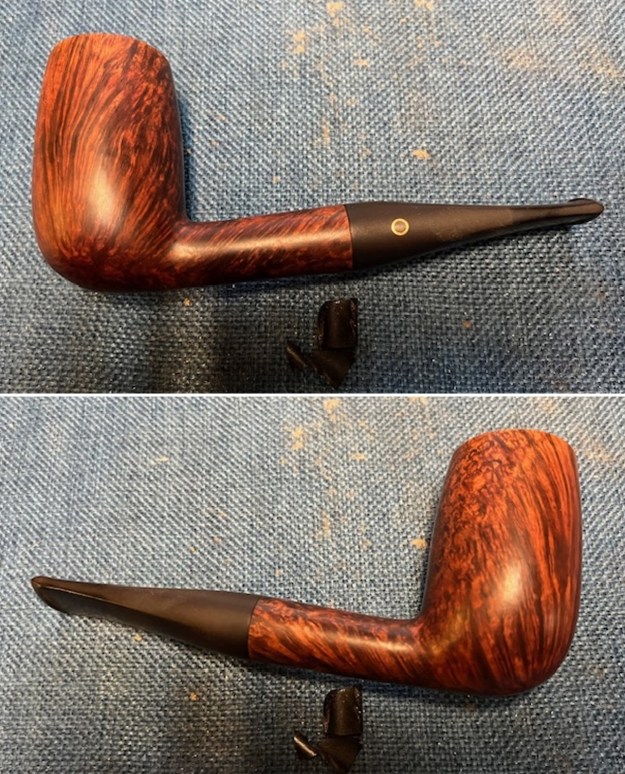
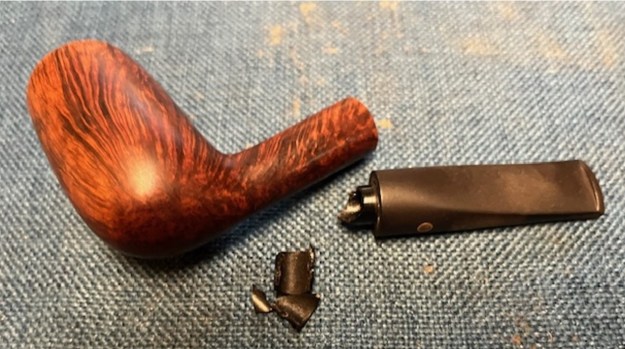
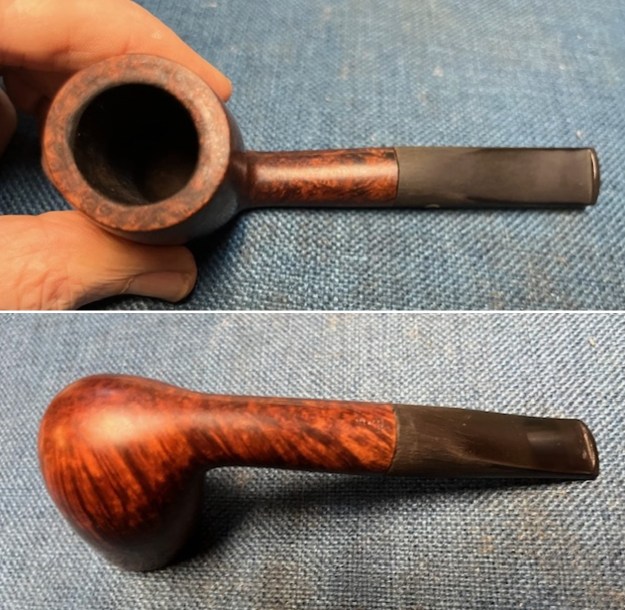
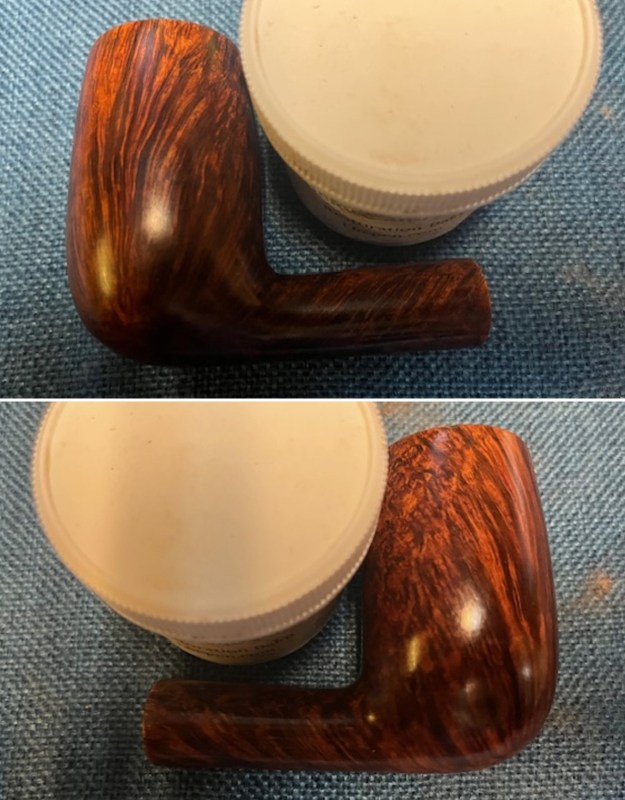
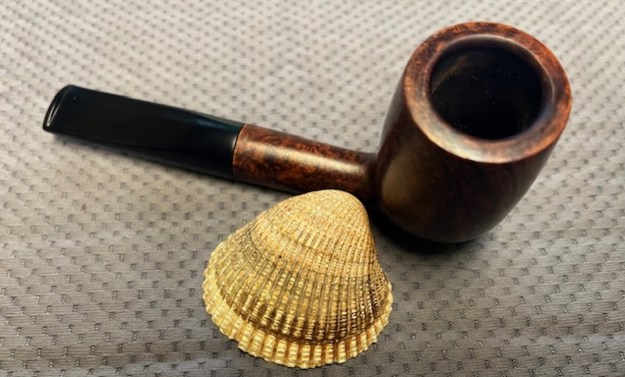
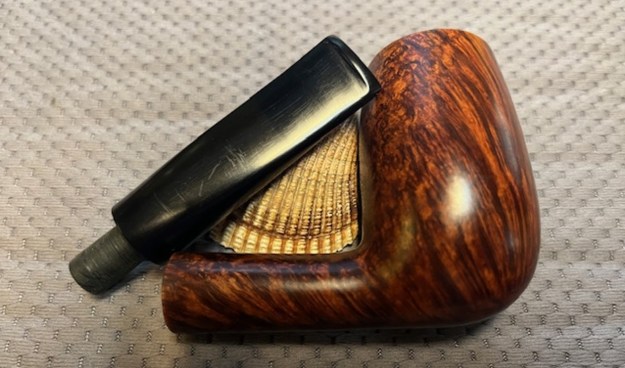
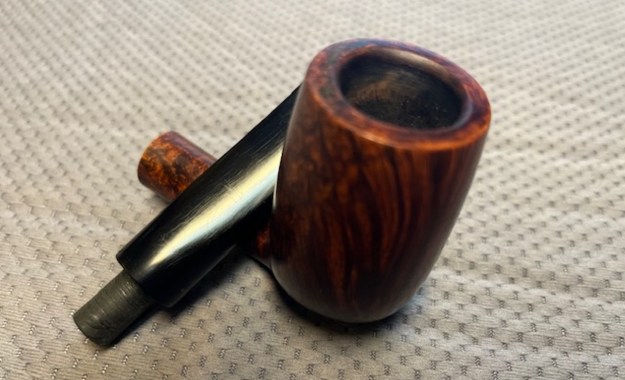
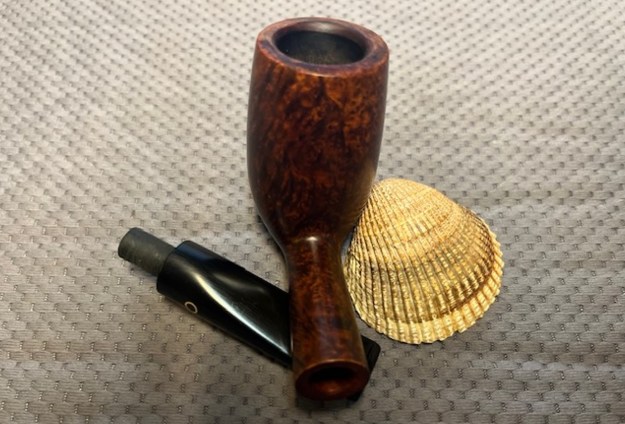
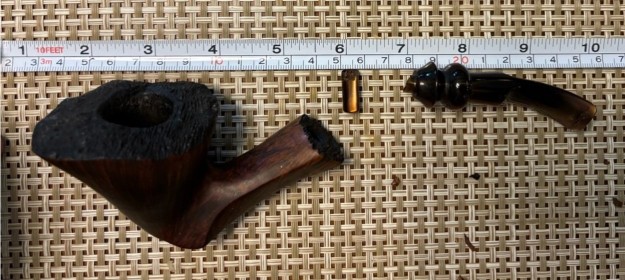
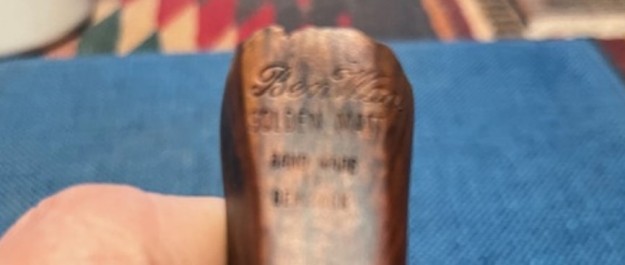
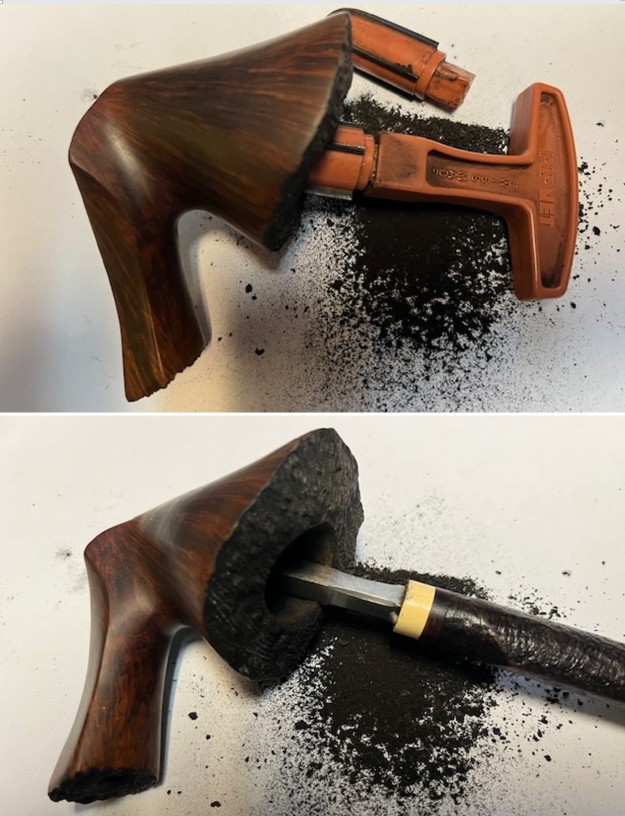
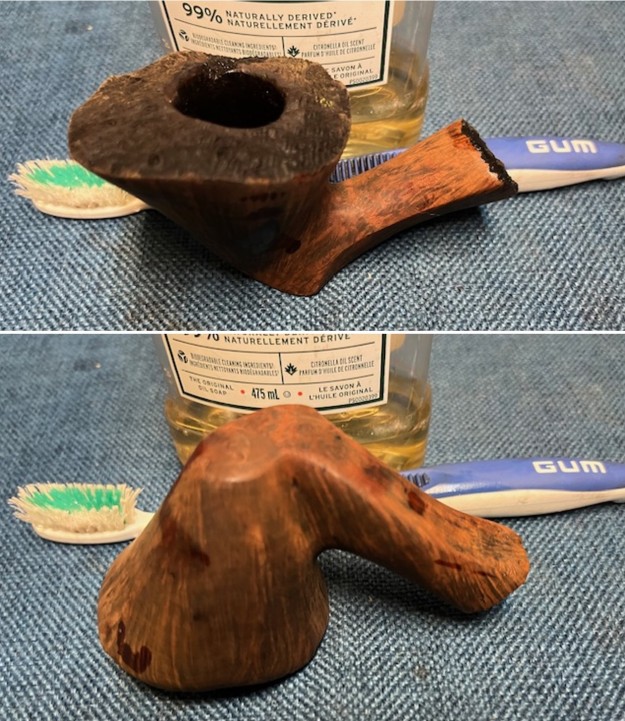
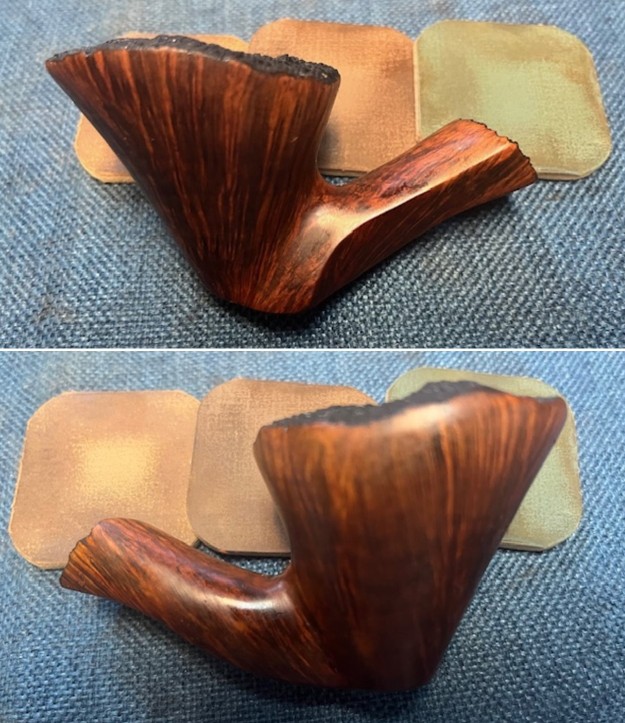
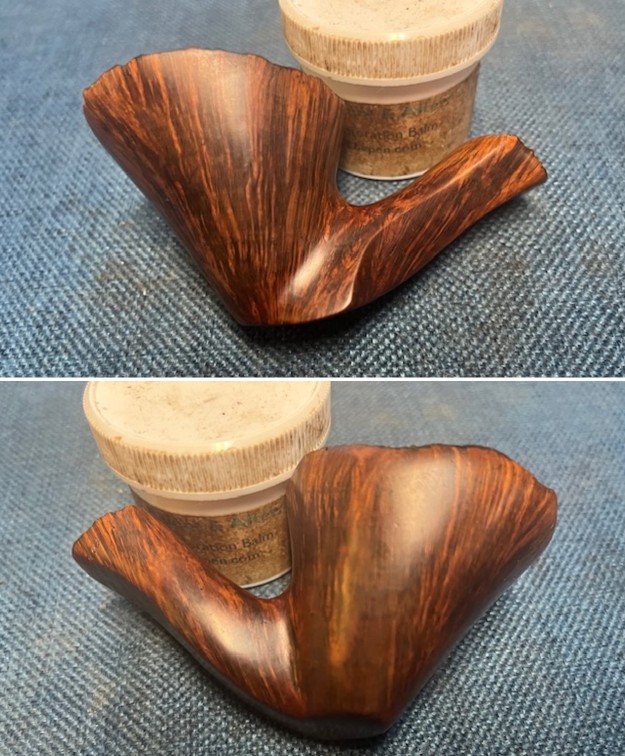
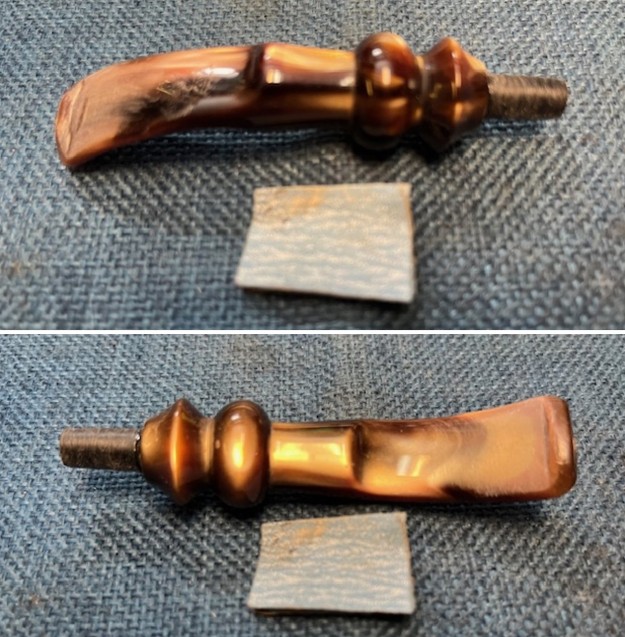
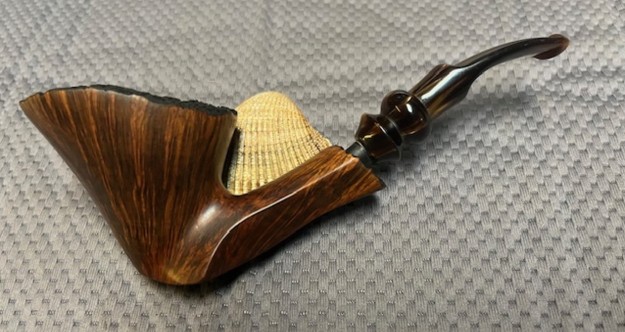
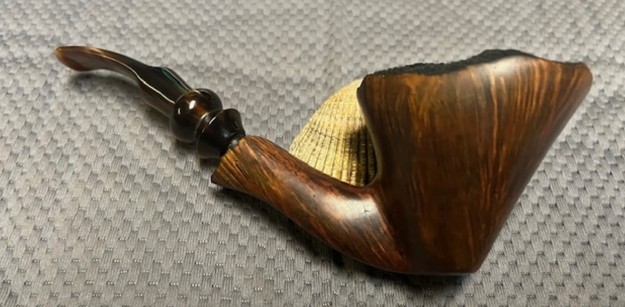
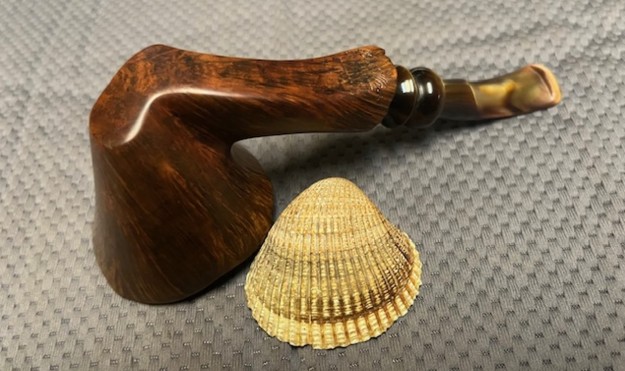
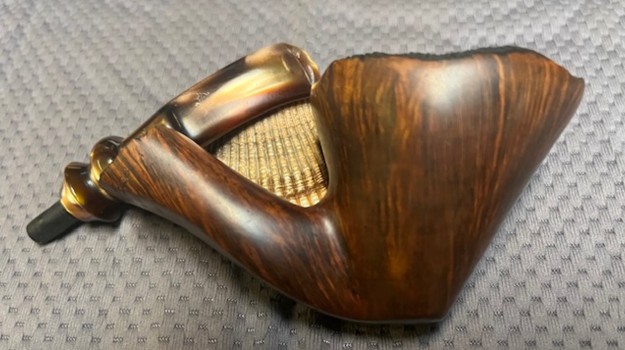
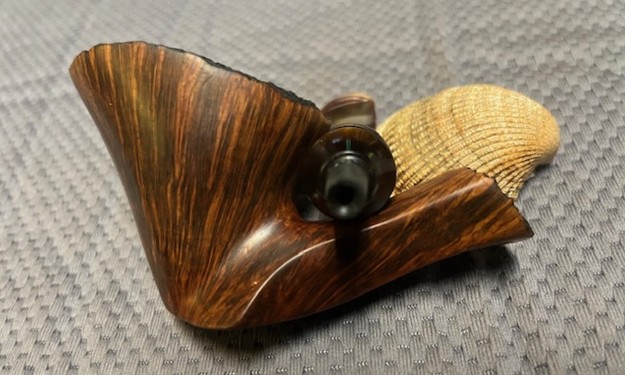
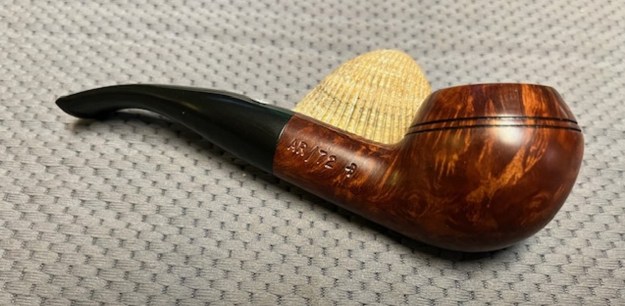
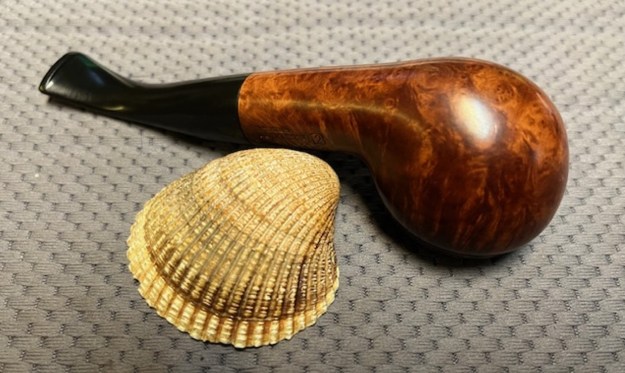
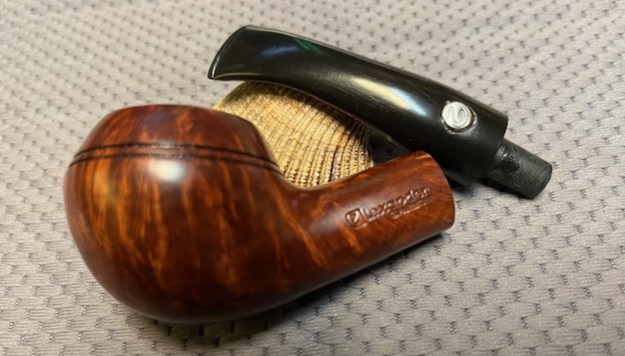
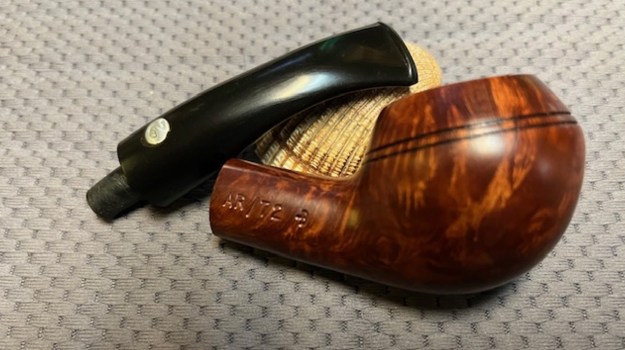
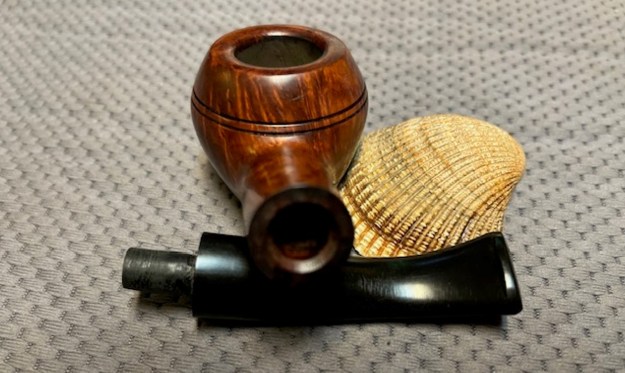
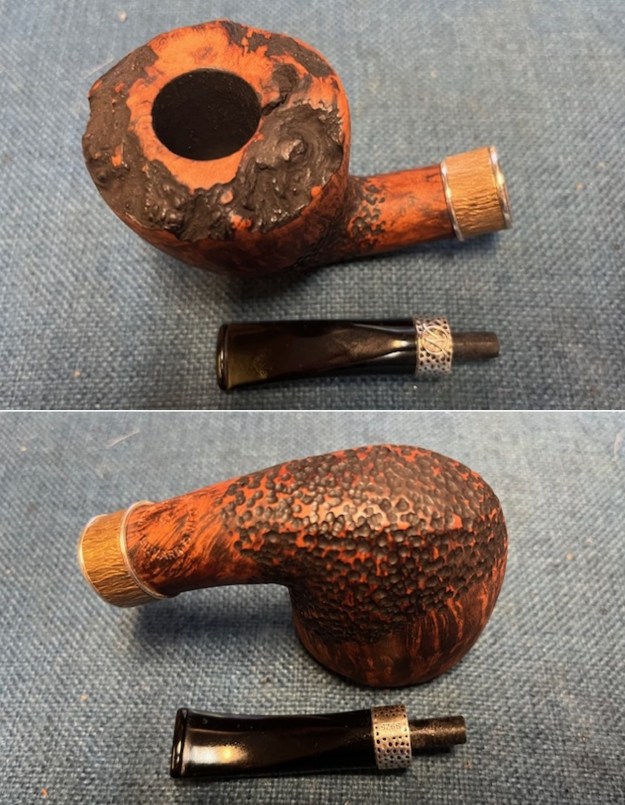
The next pipe on the work table is a beautifully grained Alexander Greece Rhodesian. It is stamped on the left side of the shank and reads Alexander [over] Greece. The A at the beginning of Alexander is a letter Z in the centre of the A. On the right side it reads AR / 72 B. It is another one that came from a box of pipes with broken tenons that I set aside to work on someday. Today is that day I guess! It is very classic shaped Rhodesian shaped bowl with an ebonite taper stem. I really like the look of a Rhodesian and this one has a little twist that makes it a bit different. The bowl was very clean and had no cake. The finish was in excellent condition and had a great wax/shellac coat. I would run some pipe cleaners through it but it appeared to be very clean. The ebonite taper stem had a fancy Z logo in a silver circle inlaid on the topside. It is not oxidized but has tooth chatter and tooth marks on both sides ahead of the button. The tenon had snapped off cleanly in the shank. I took photos of the pipe before I started working on it. 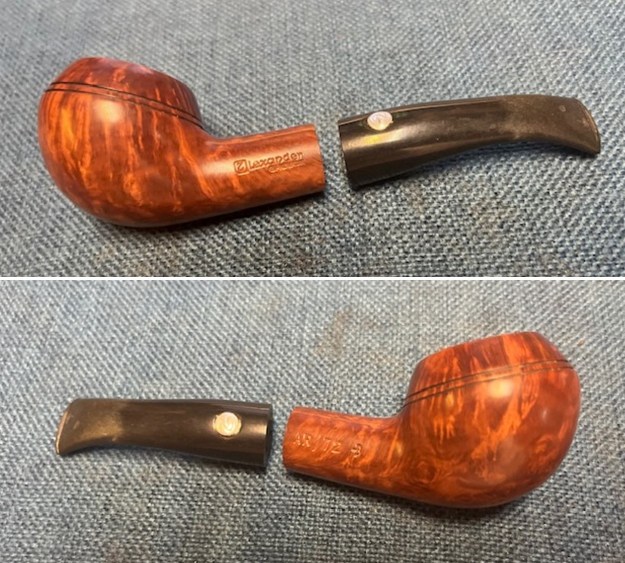
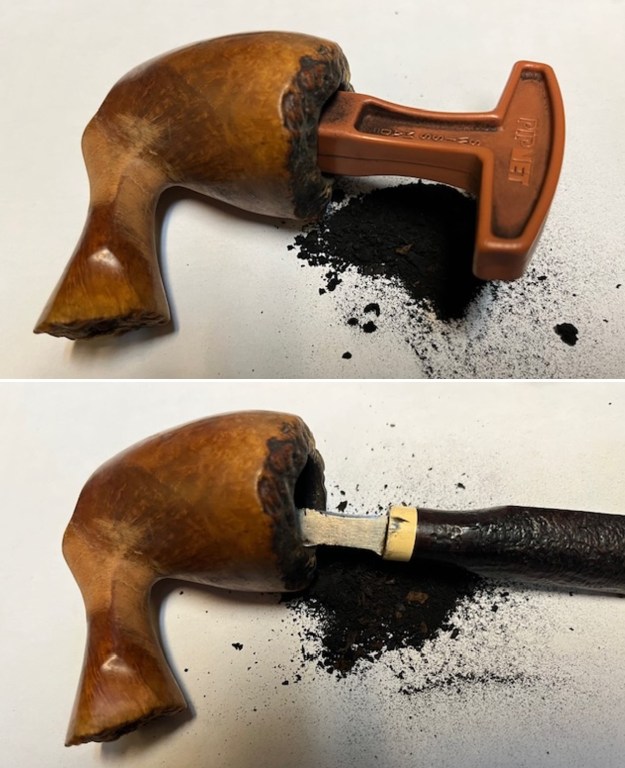
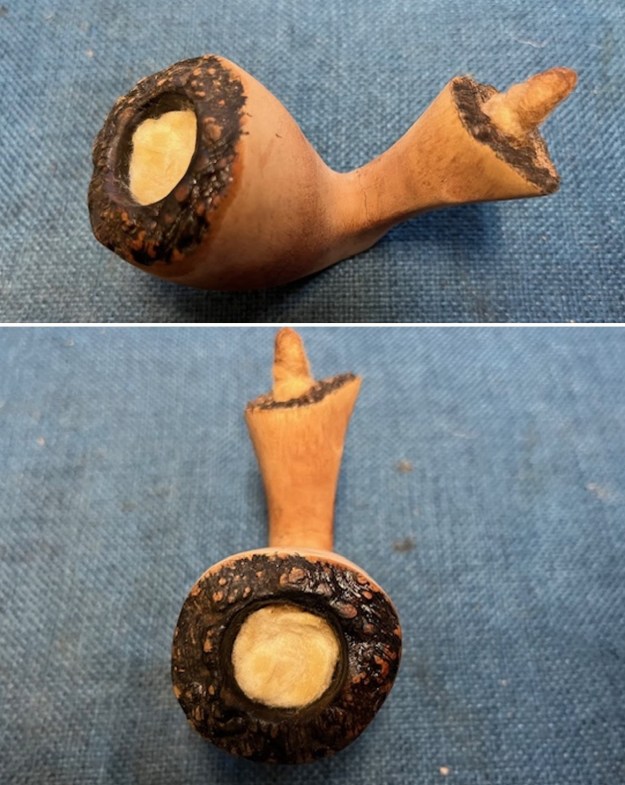
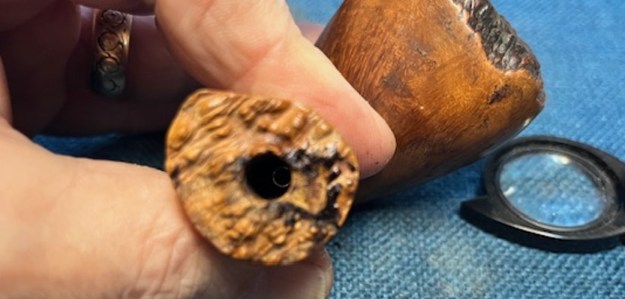
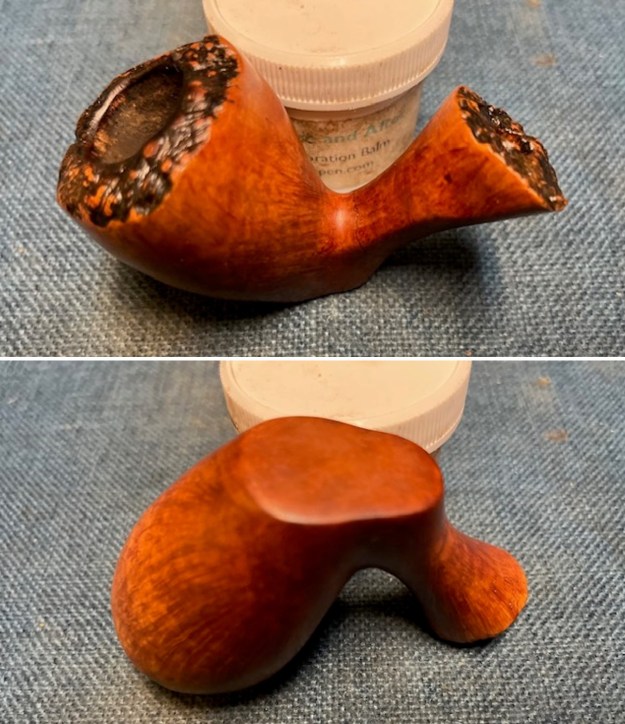
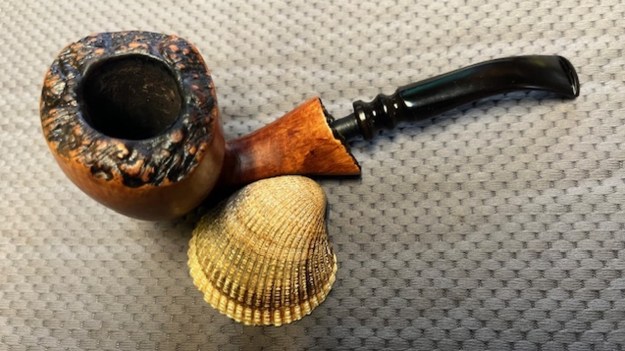
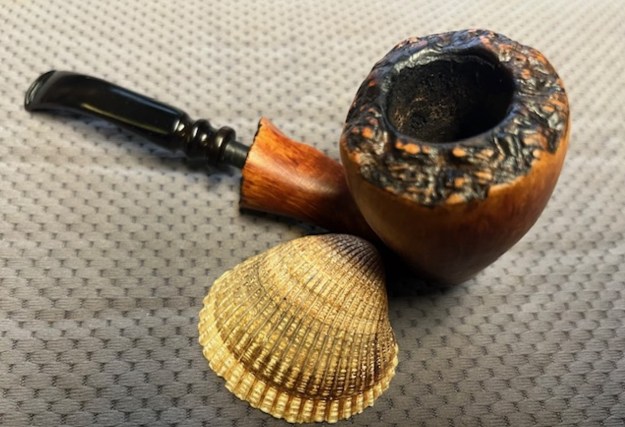
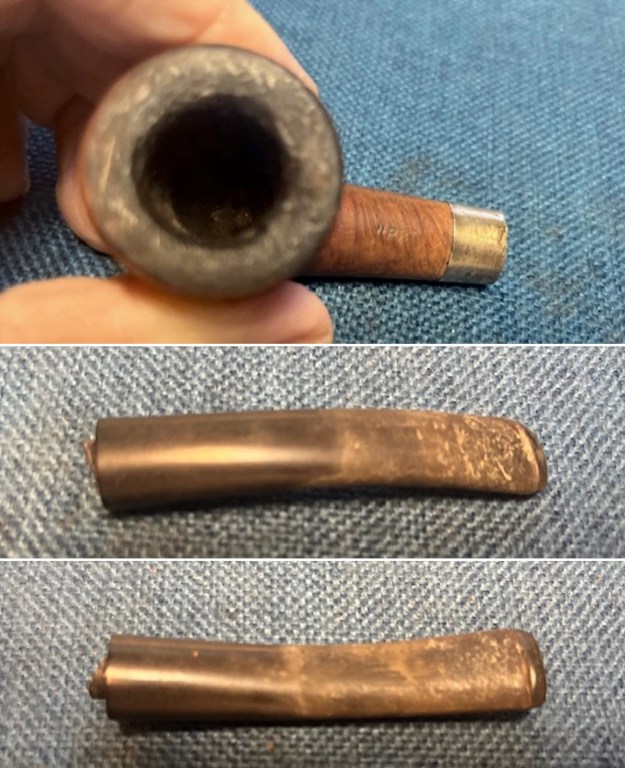
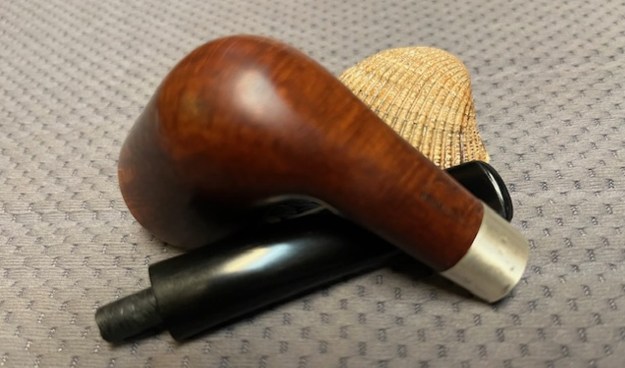
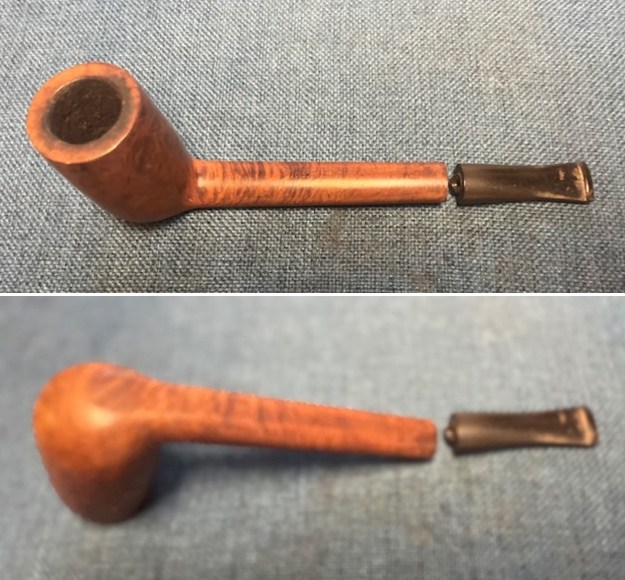
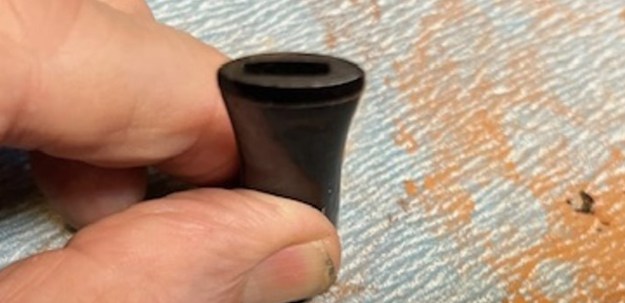
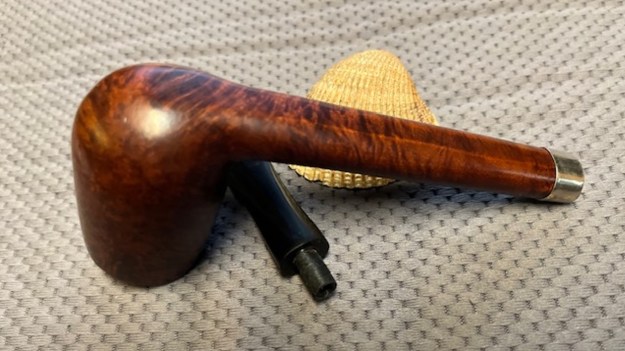
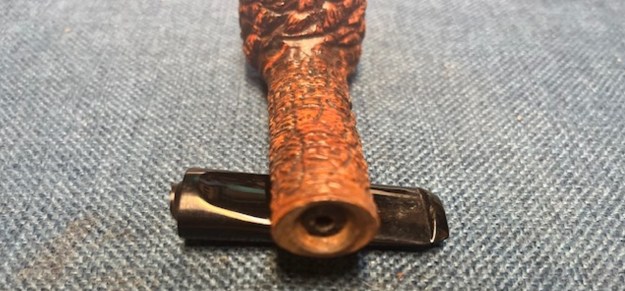
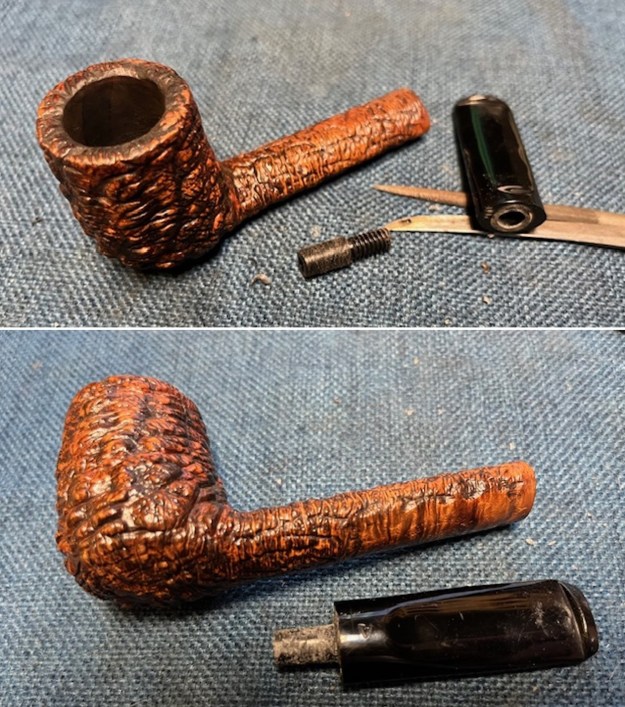
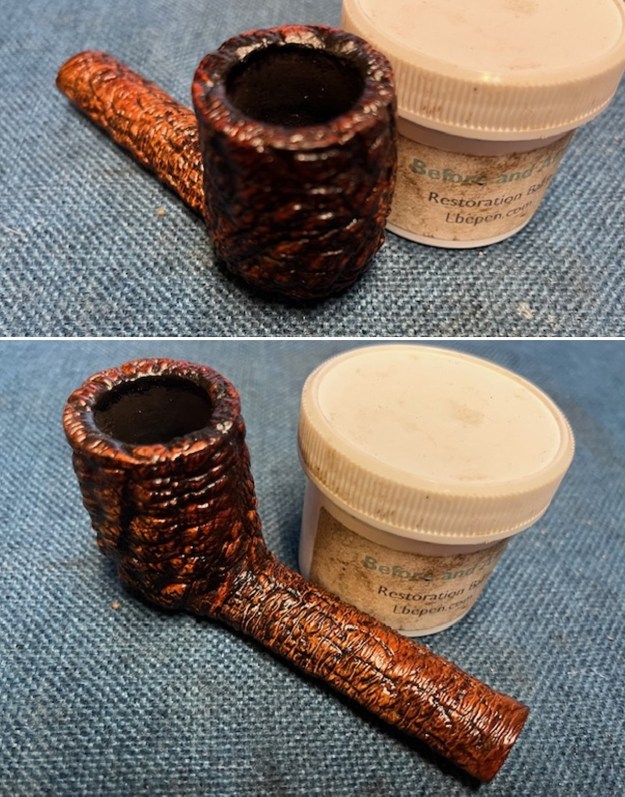
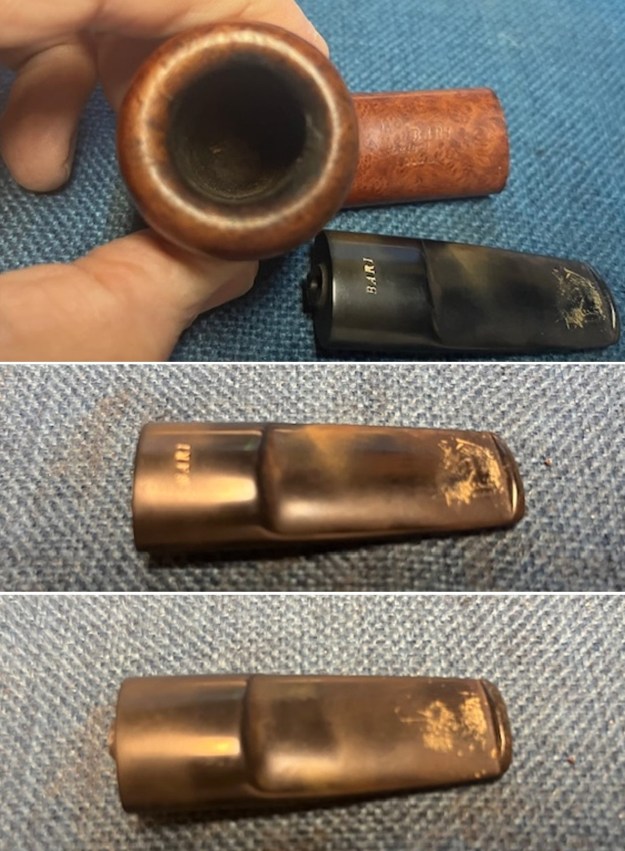
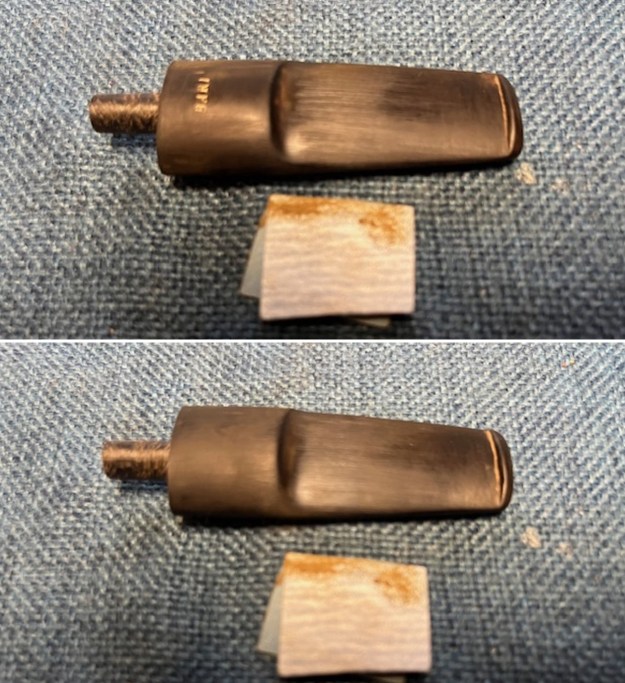
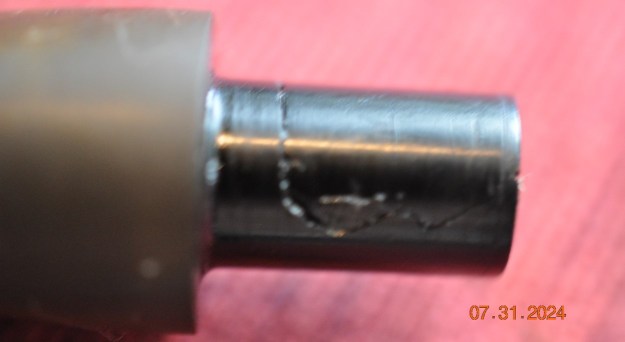
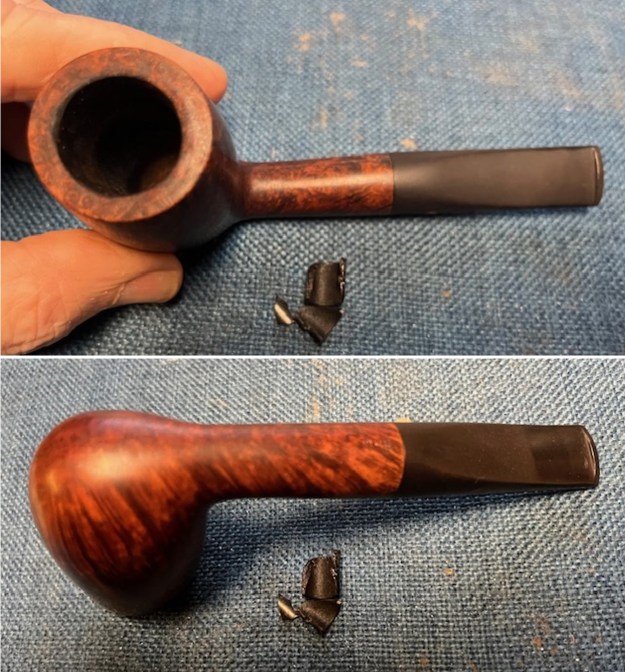
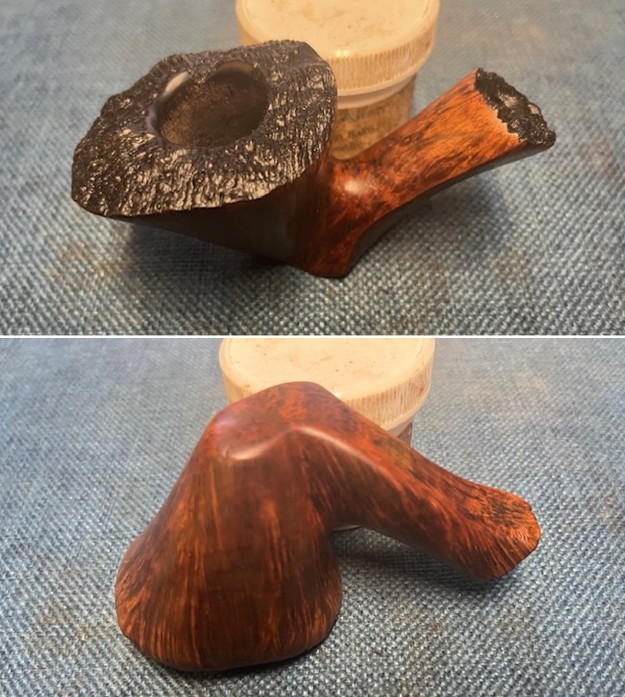
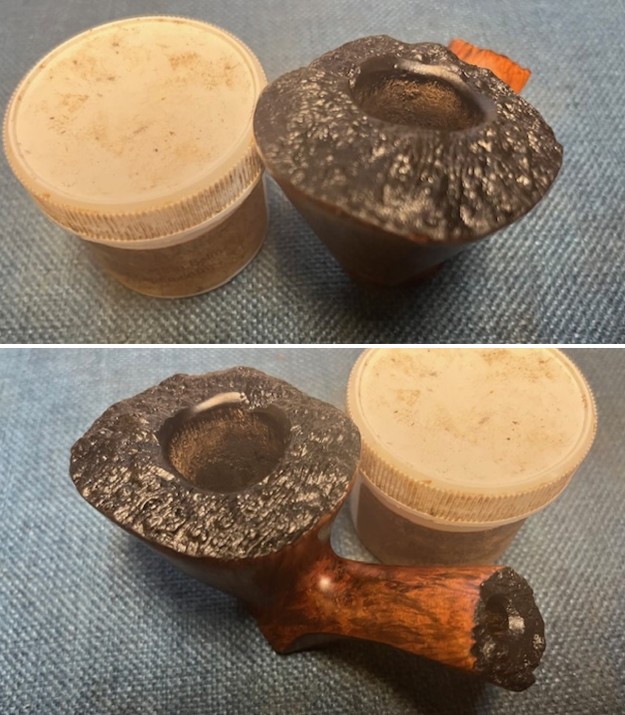
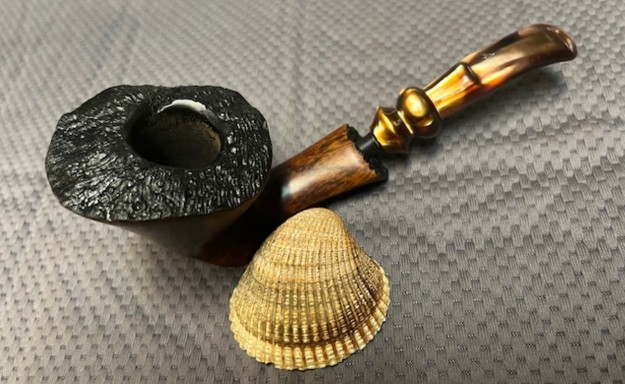
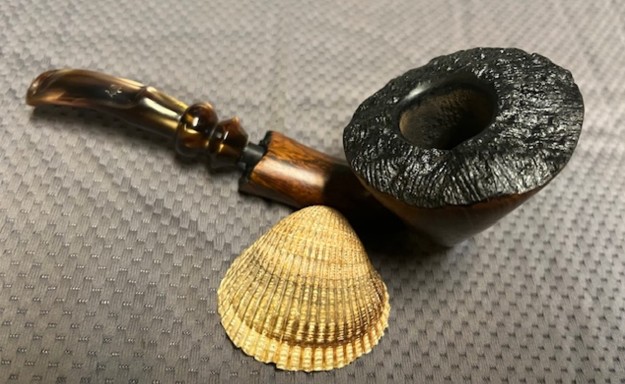
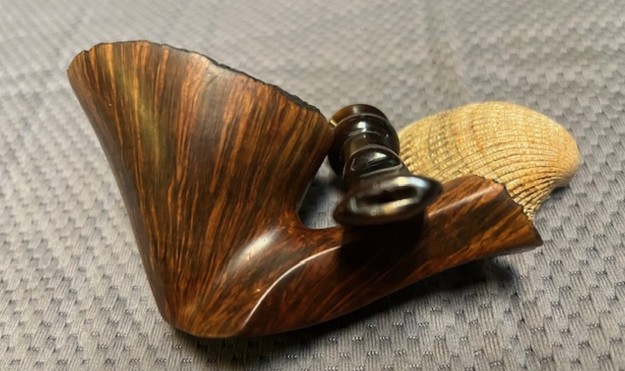
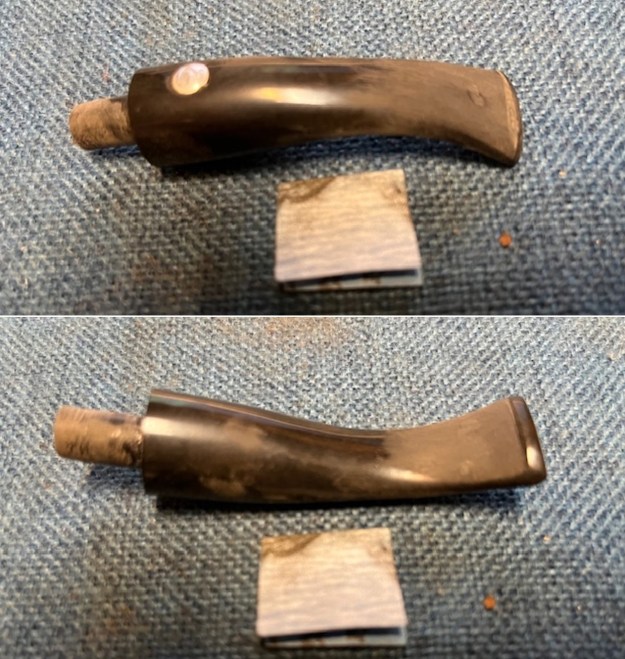
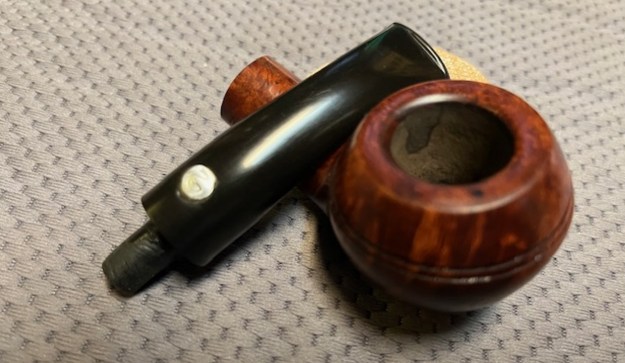
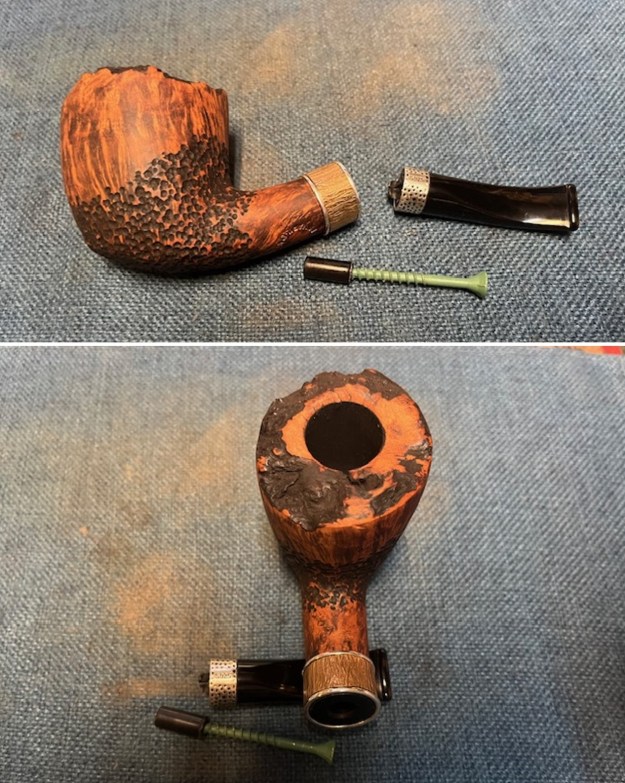
 I took a photo of the shank end to show the snapped off tenon in the shank. The break is quite clean so it should clean up very well.
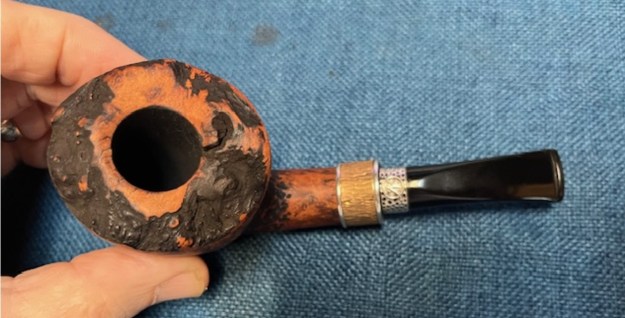
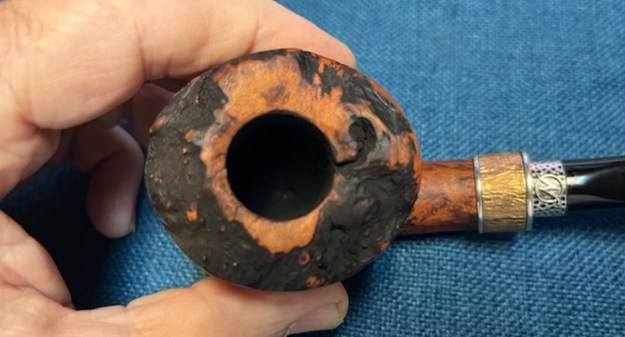
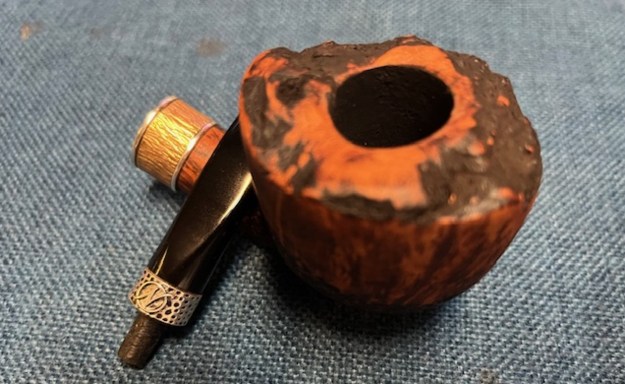
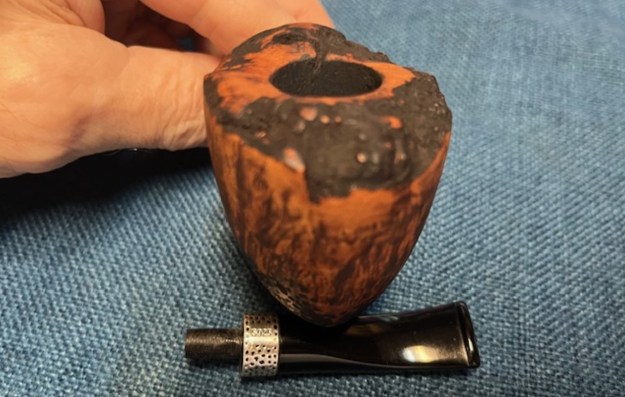
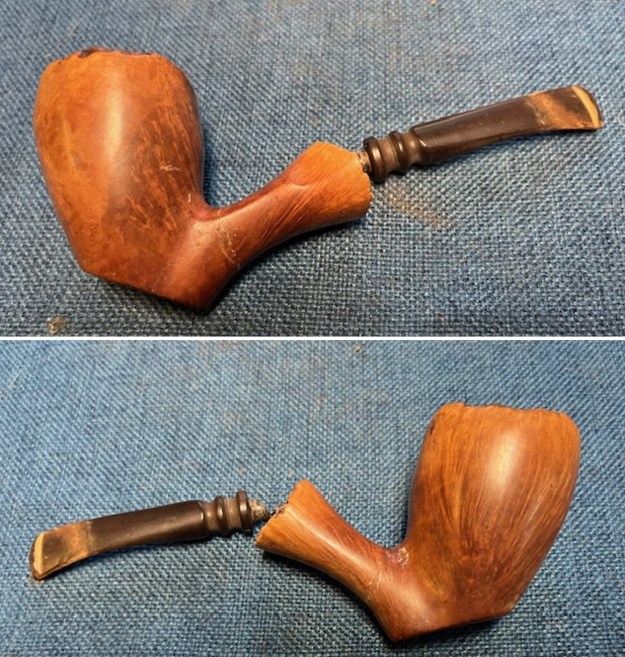
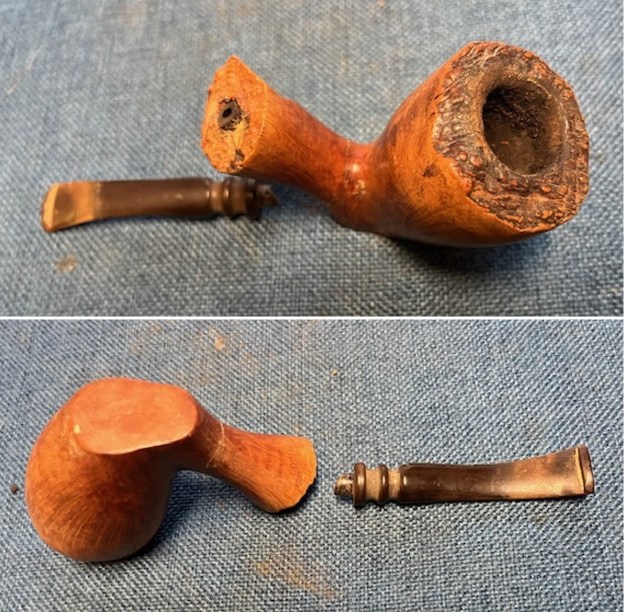
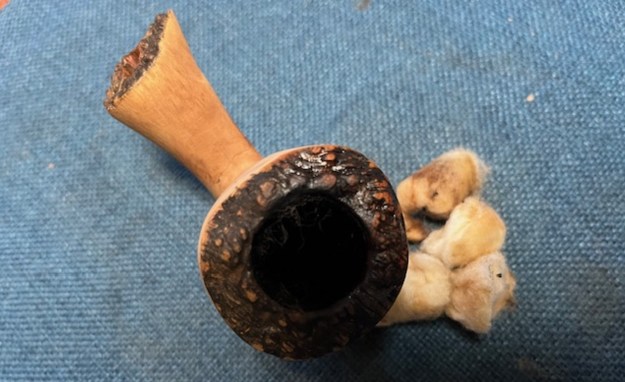
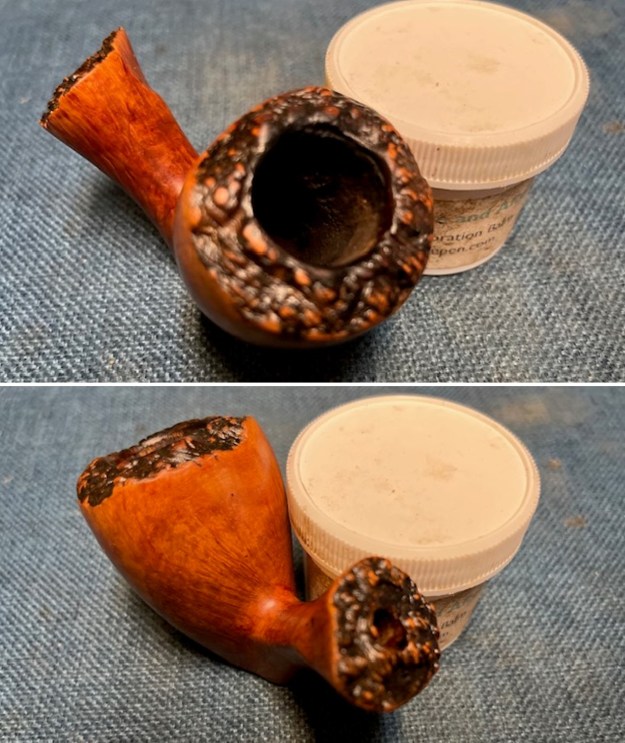
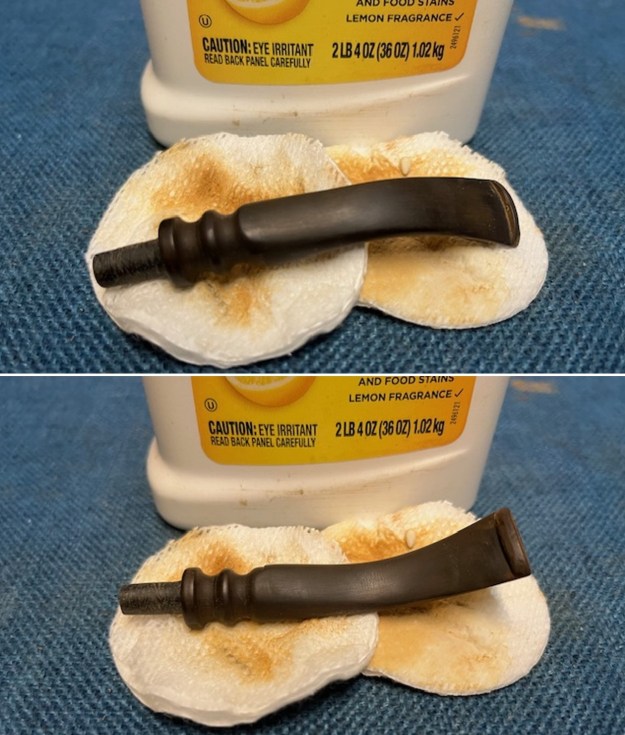
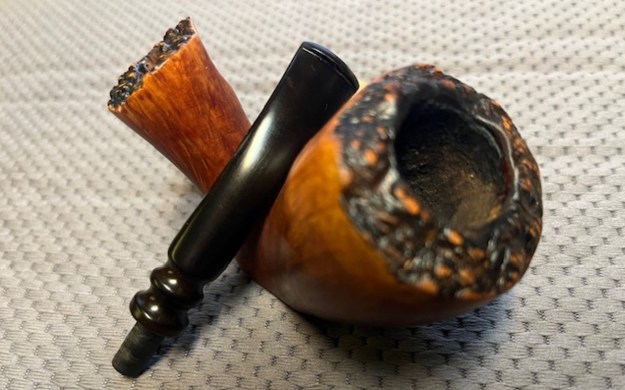
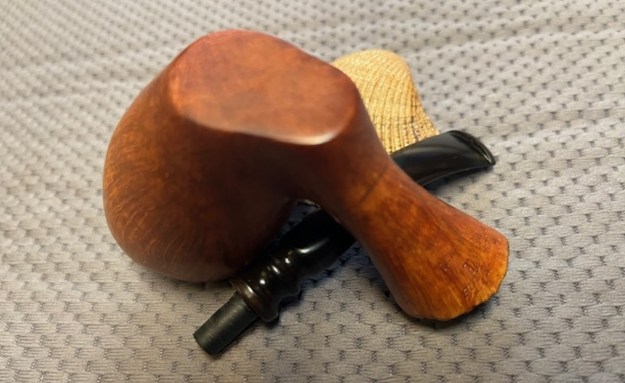
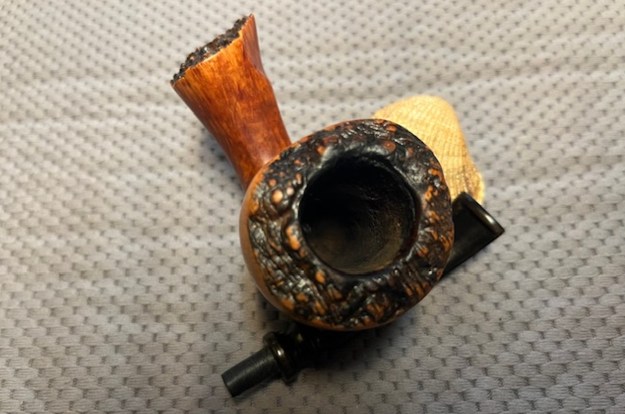
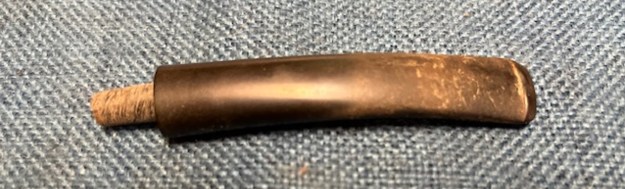
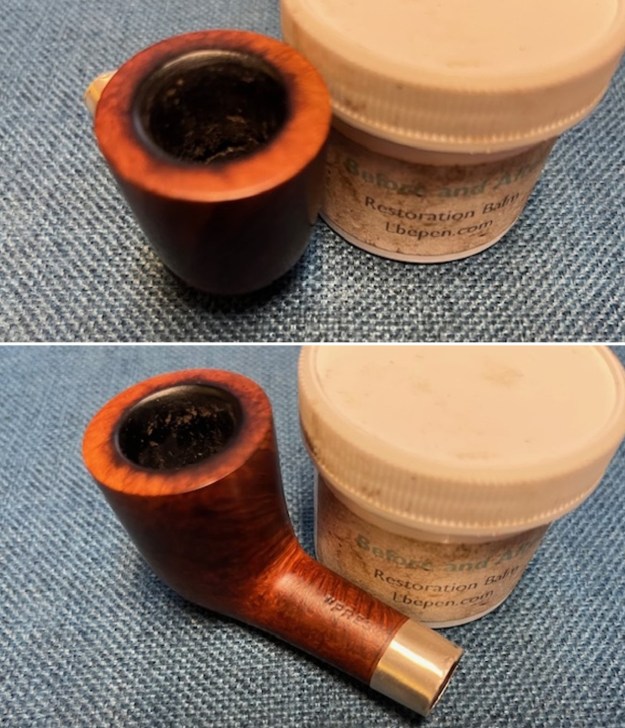
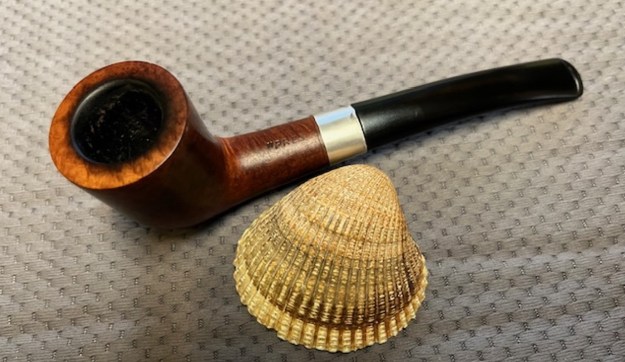
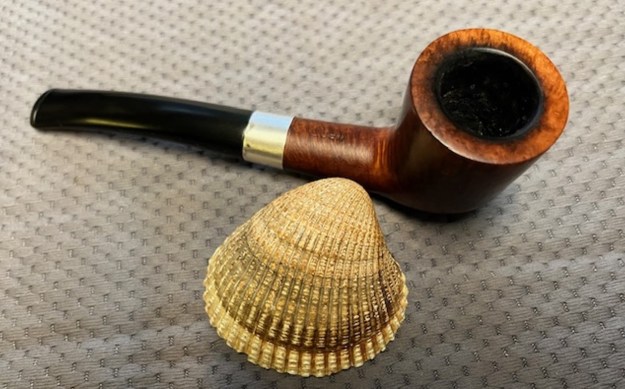
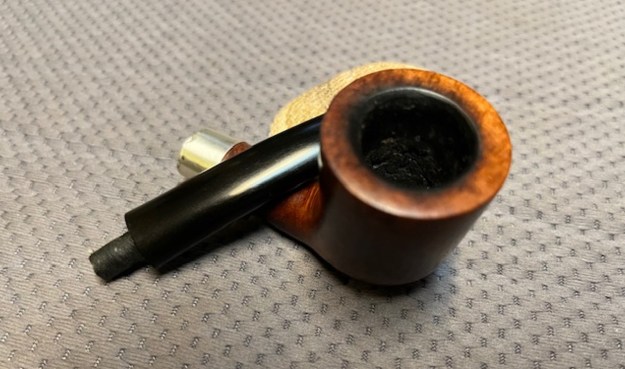
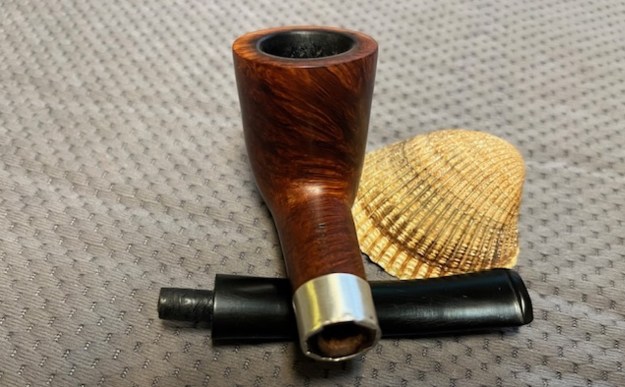
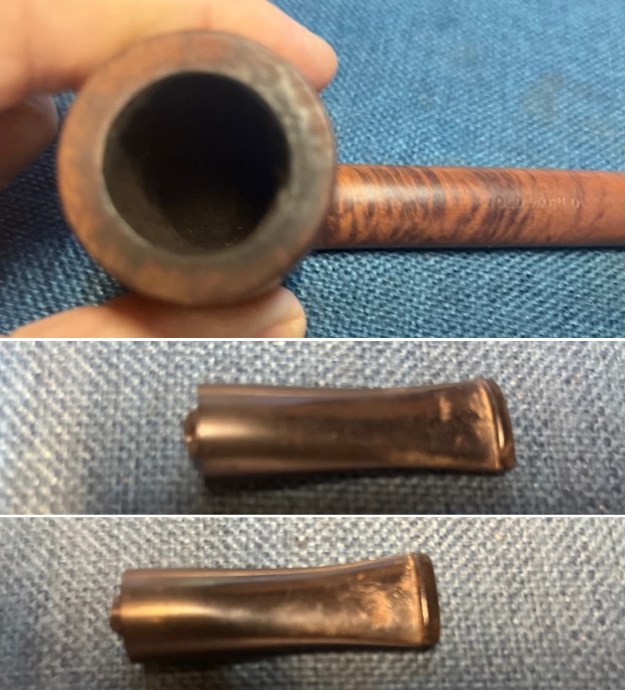
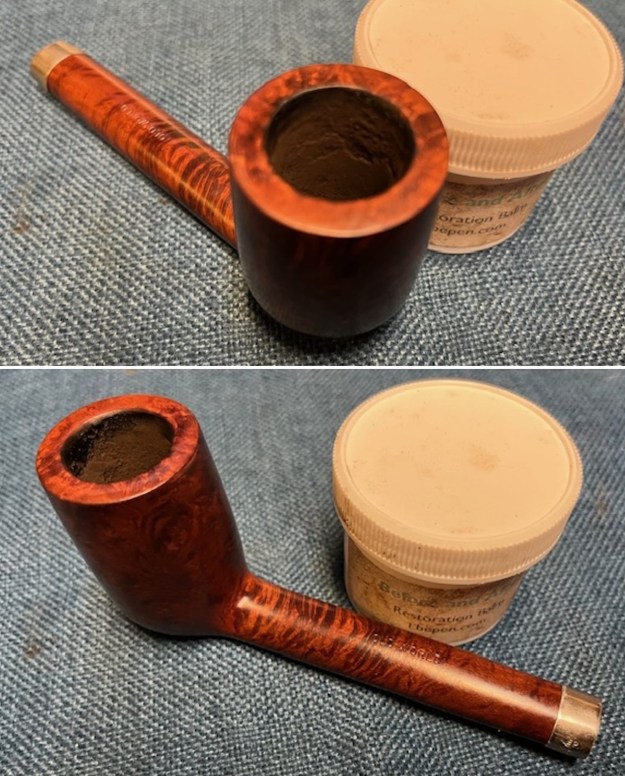
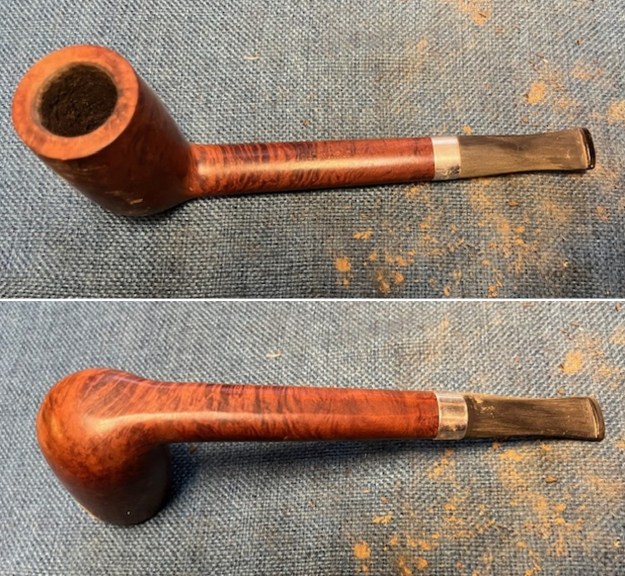
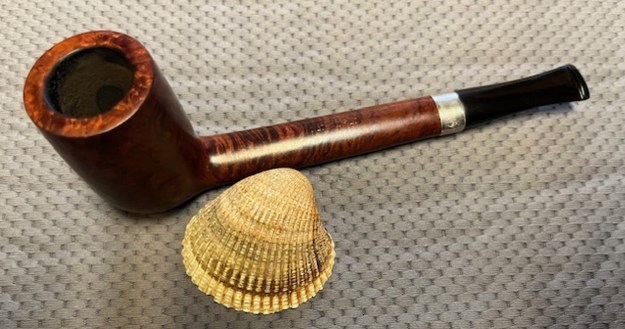
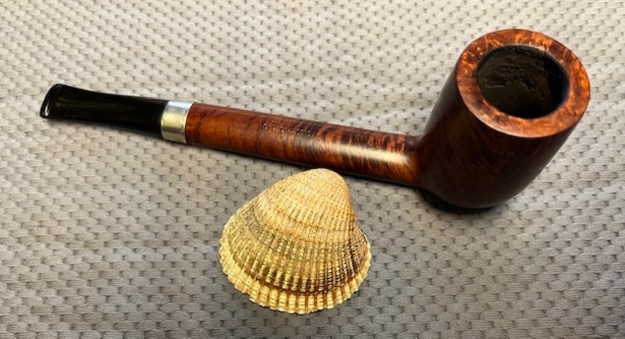
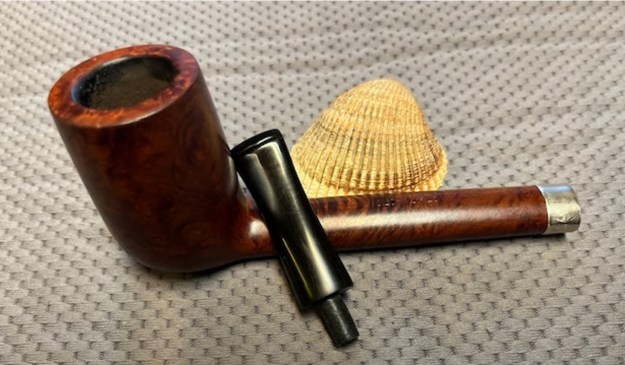
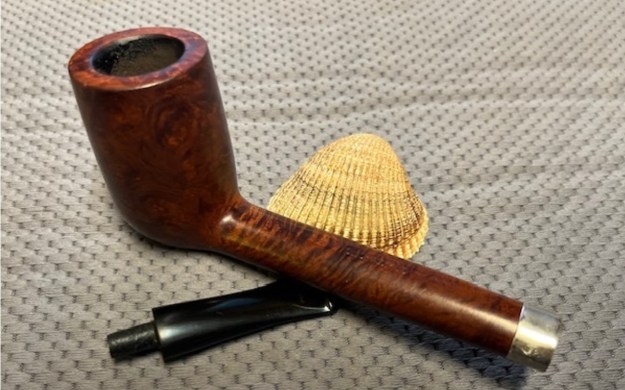
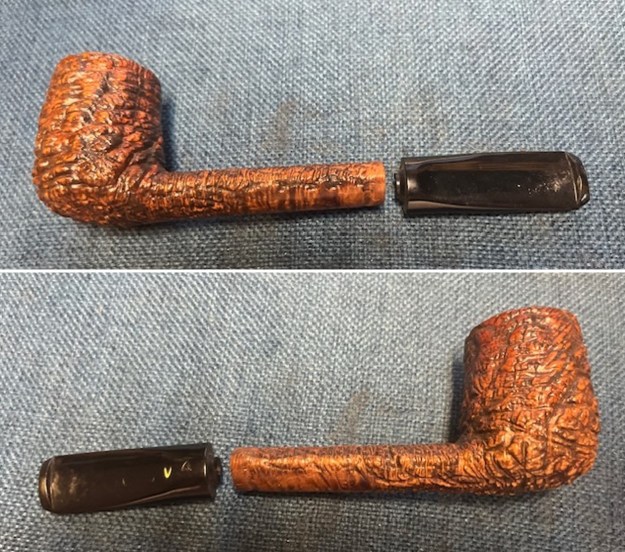
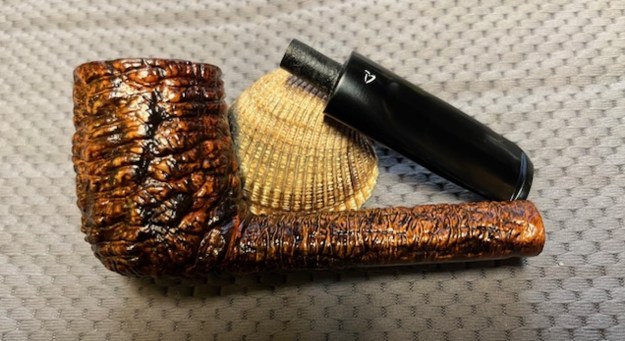
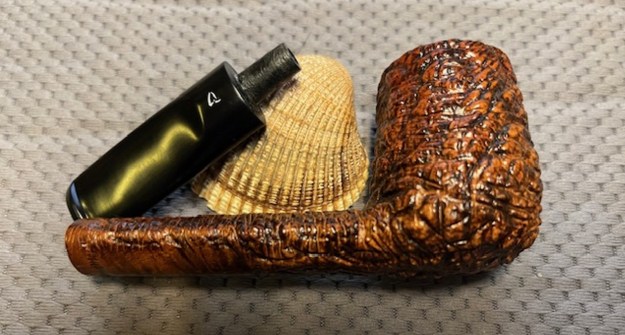
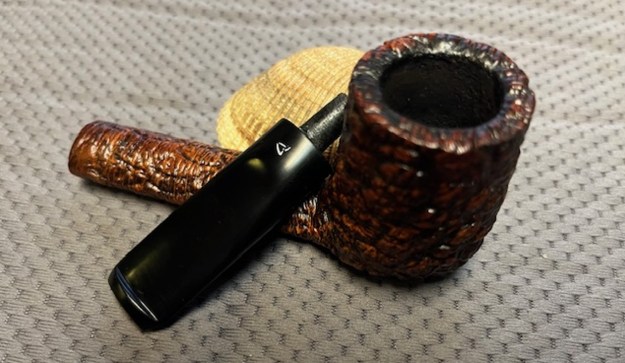
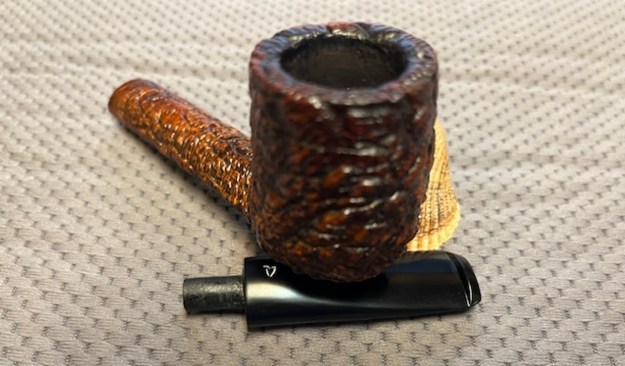
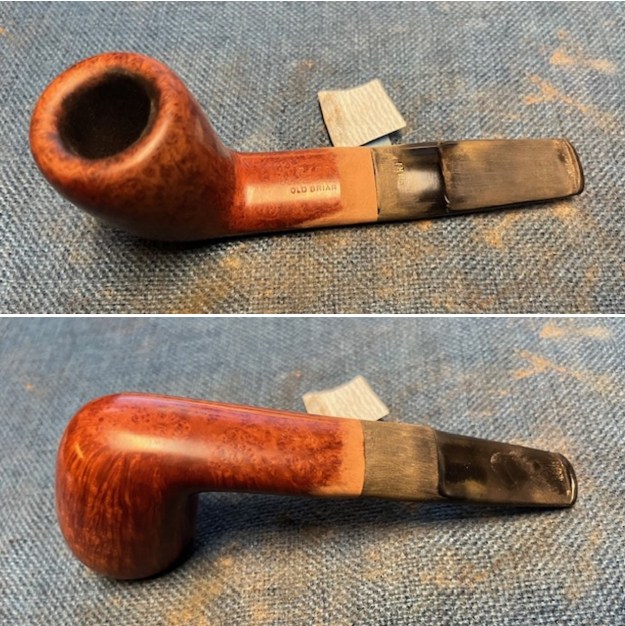
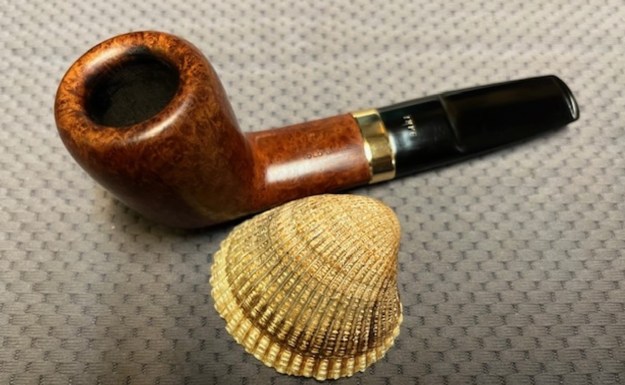
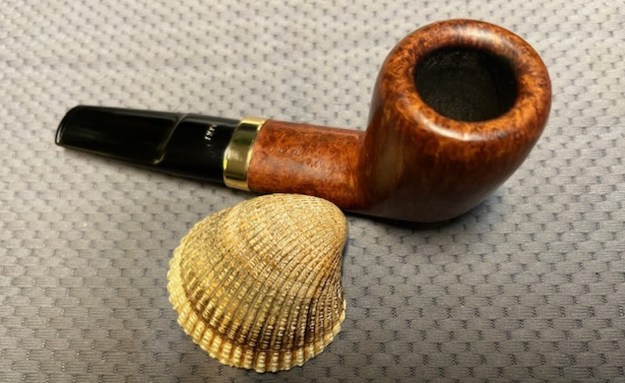
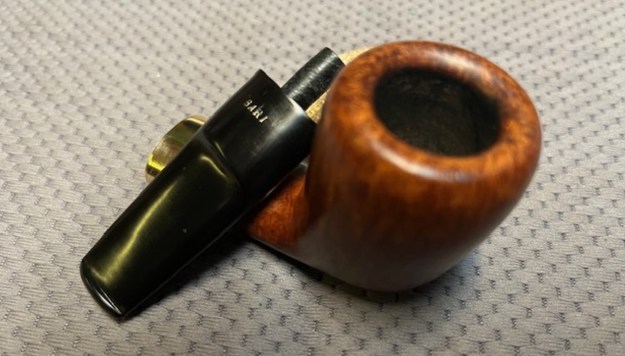
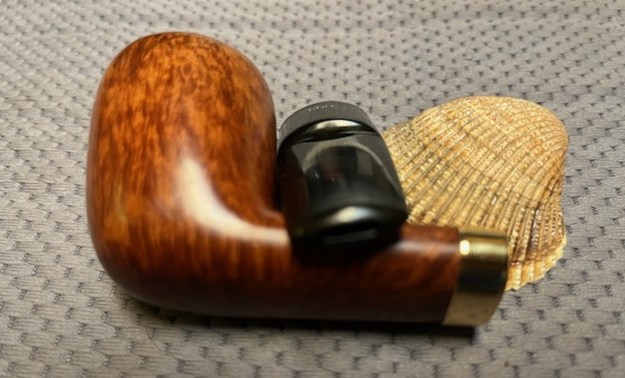
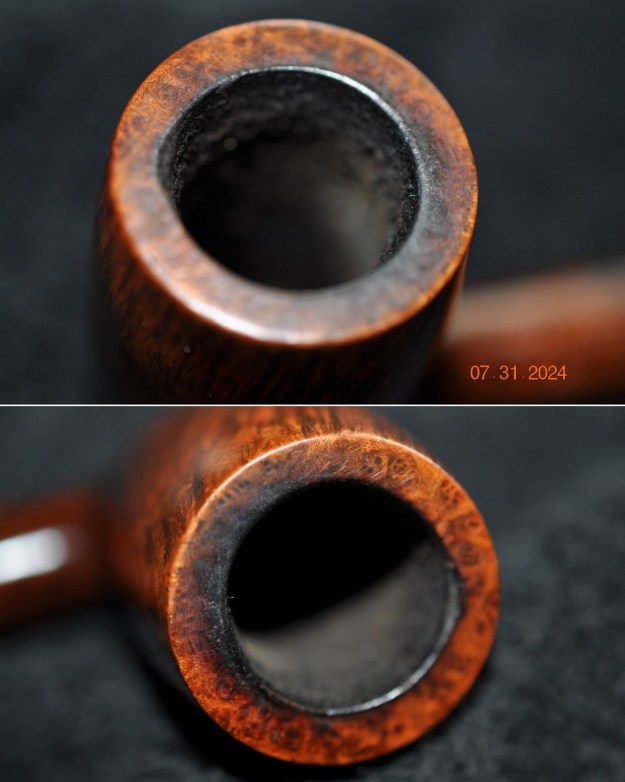
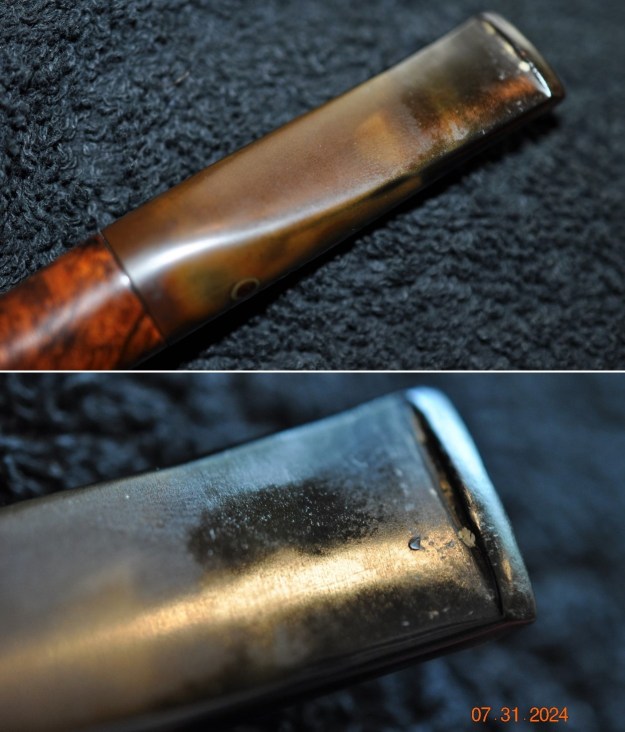
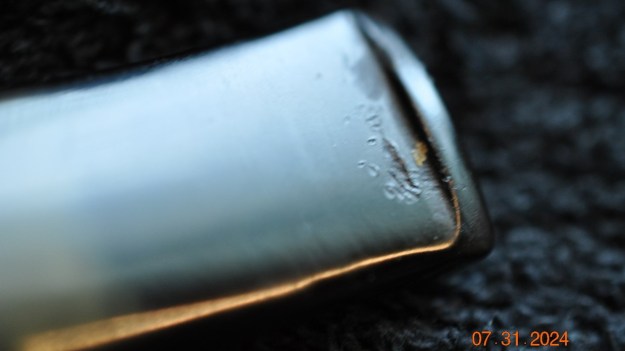
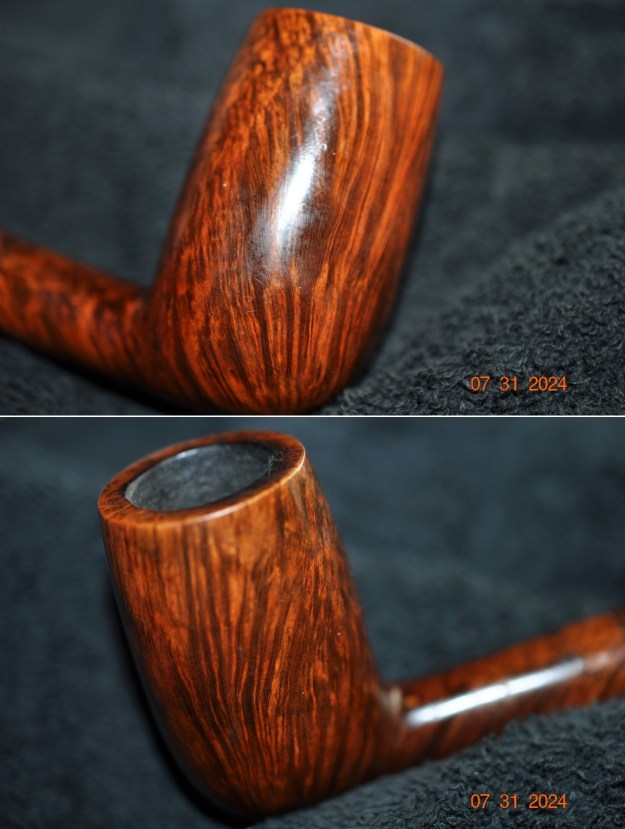
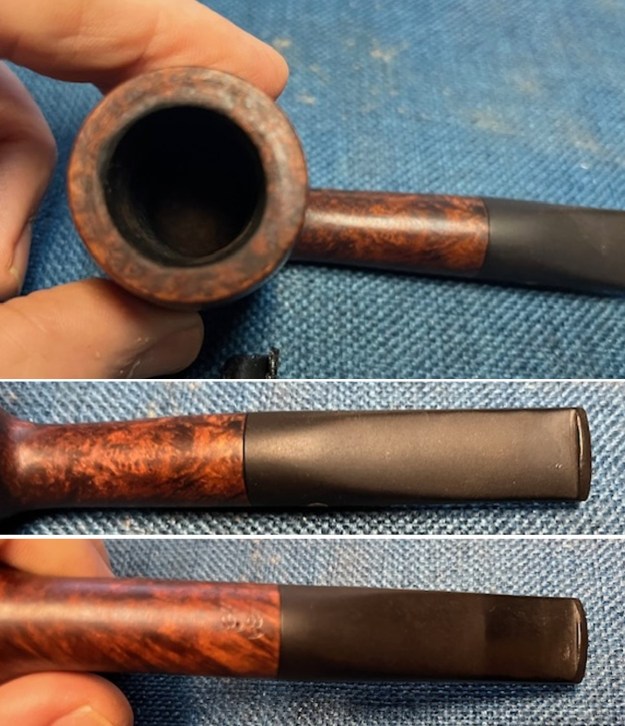
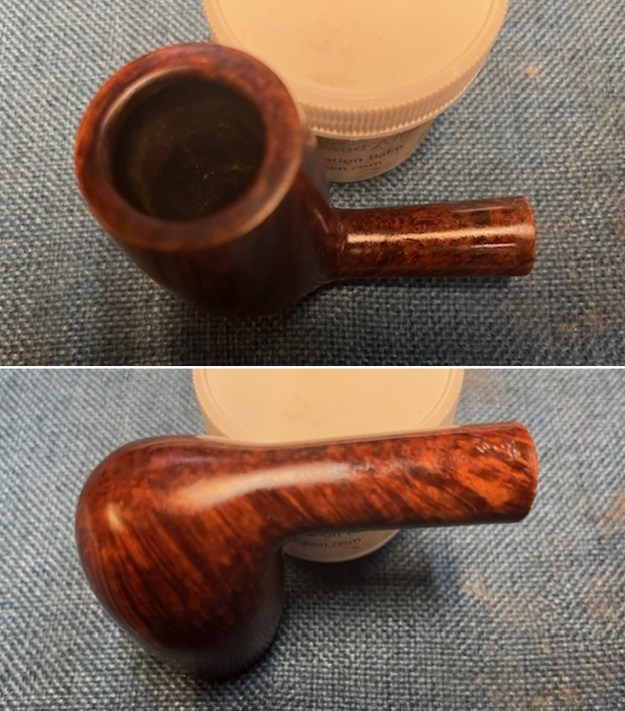
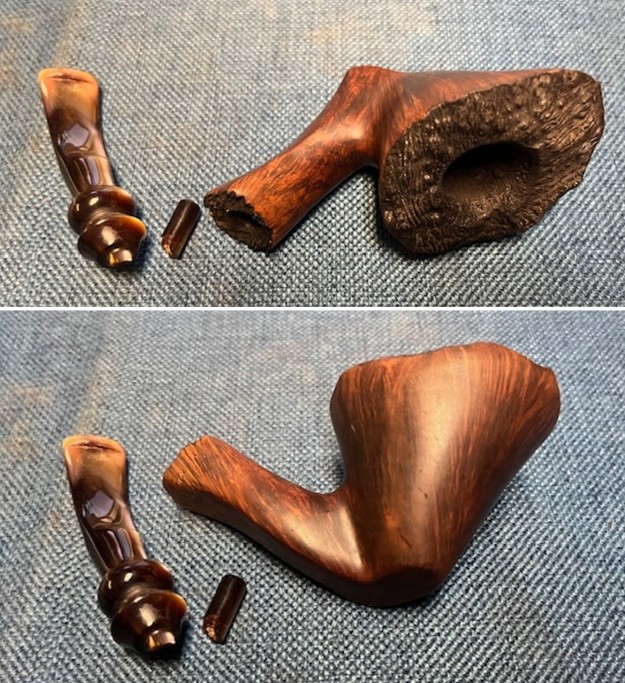
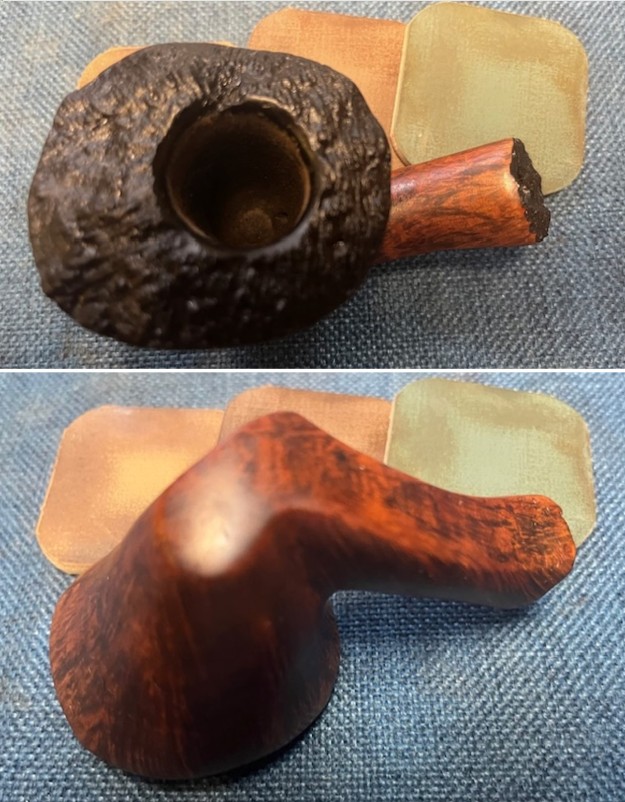
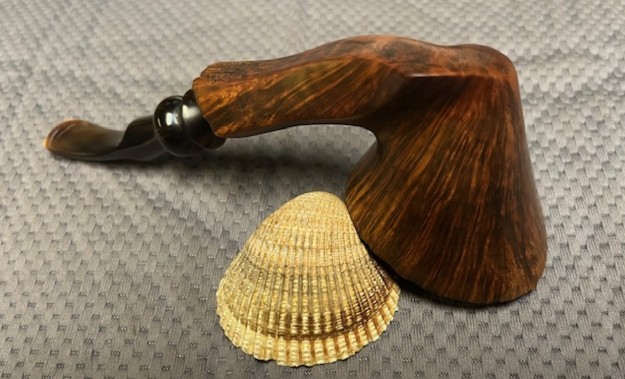
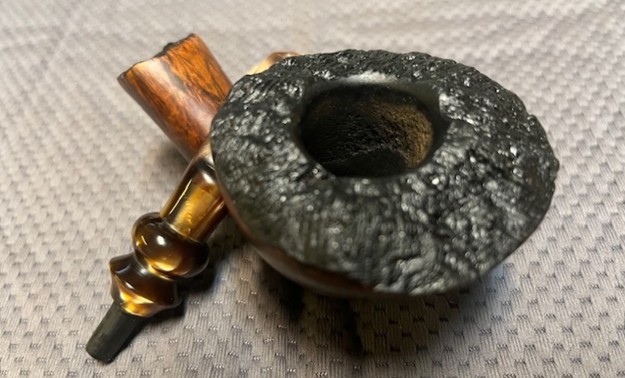
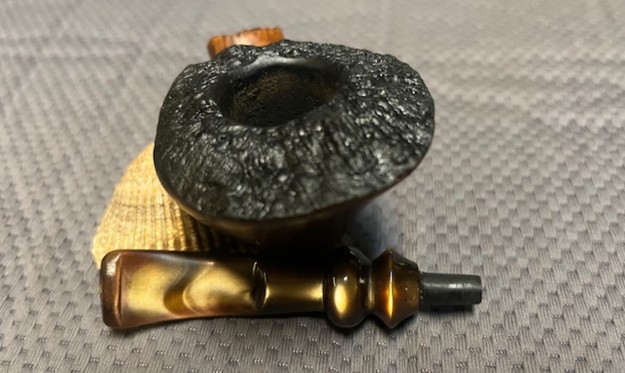
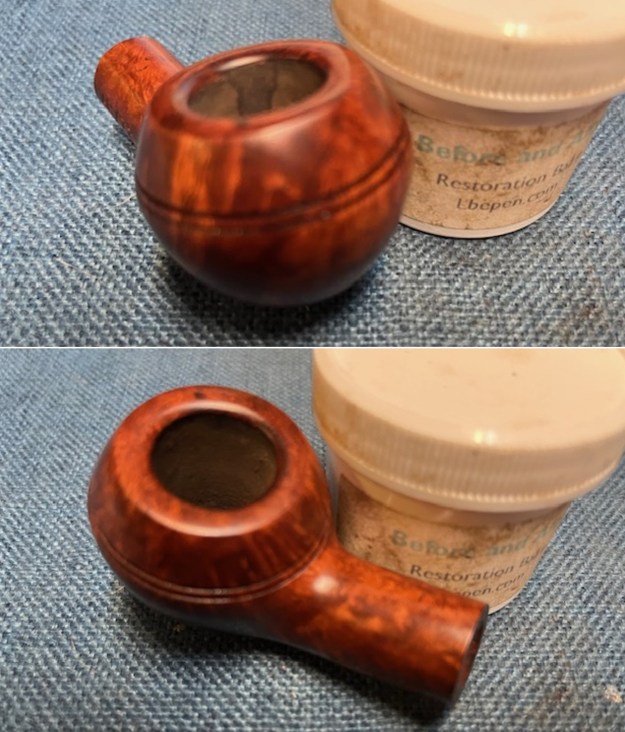
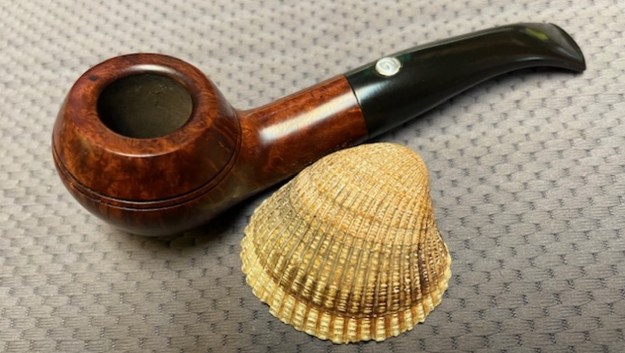
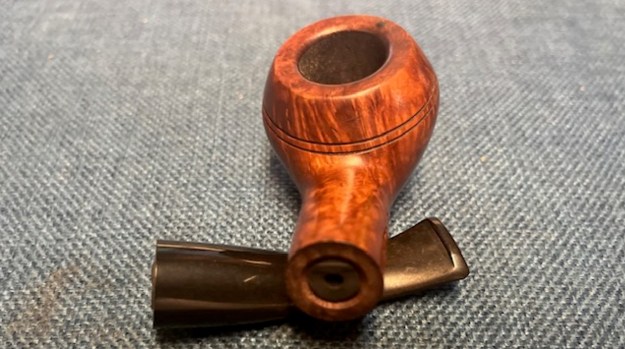 I took photos of the bowl and rim top to show the cleanness of the bowl and the condition of both. It was clean bowl that had been reamed. The inner and outer edges otherwise look very good. I took photos of the top and underside of the stem showing wear and tooth marks on the top and underside of the stem surface and button.
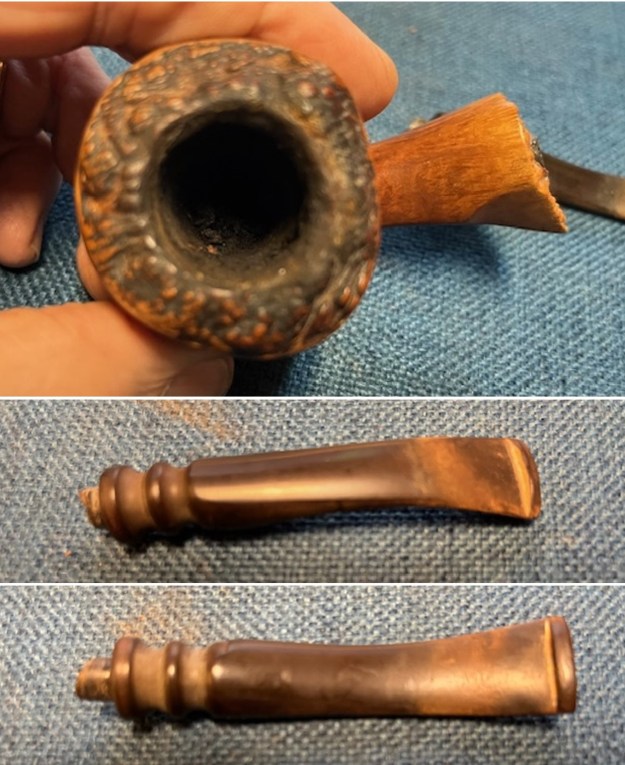
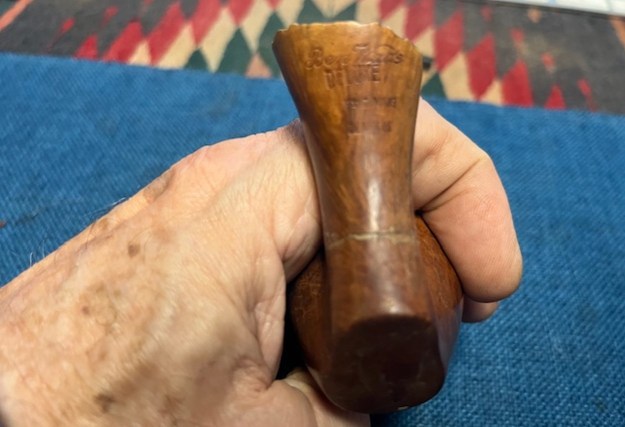
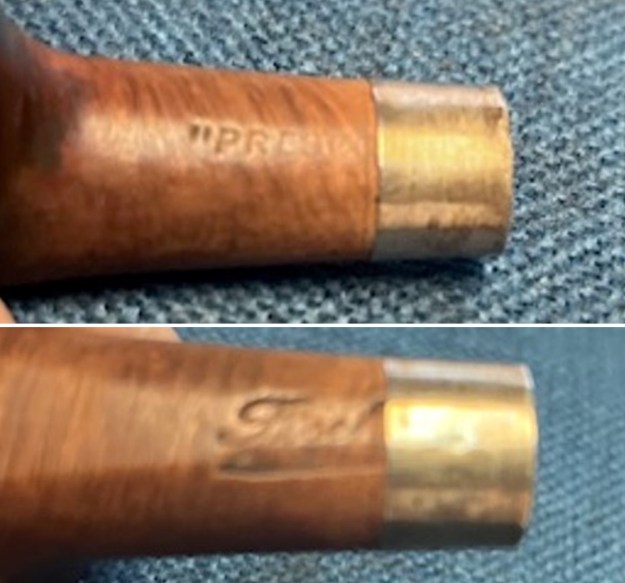
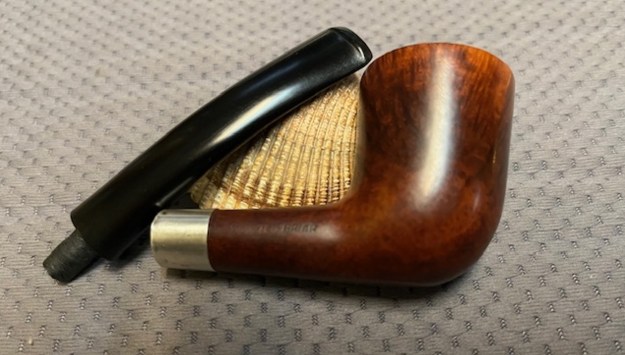
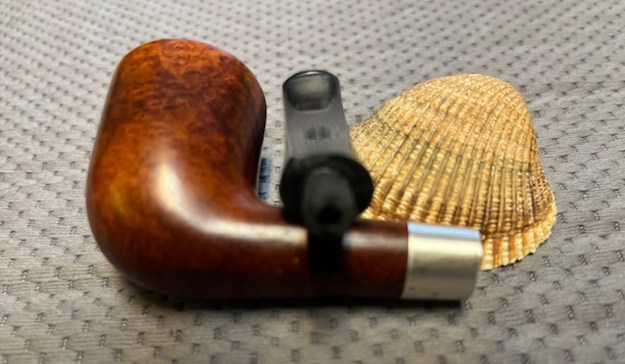
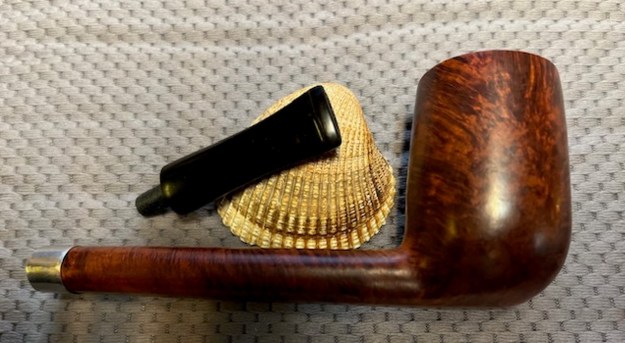
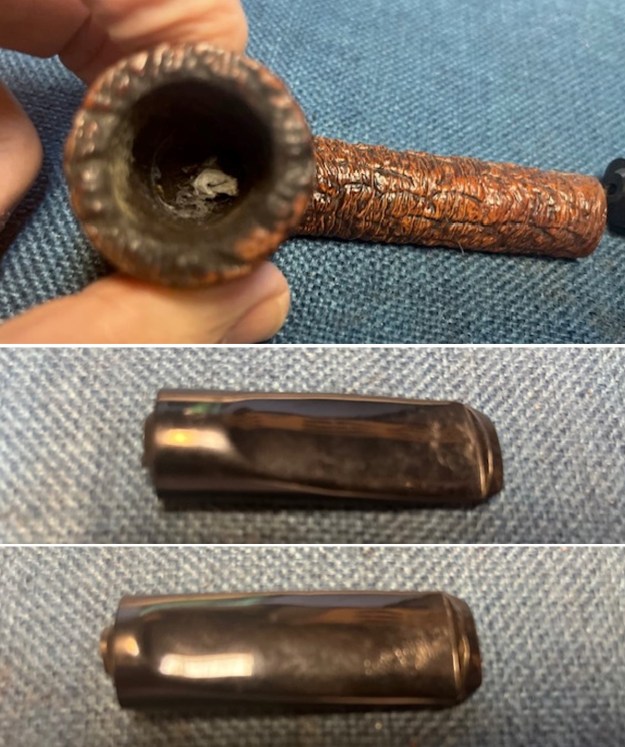
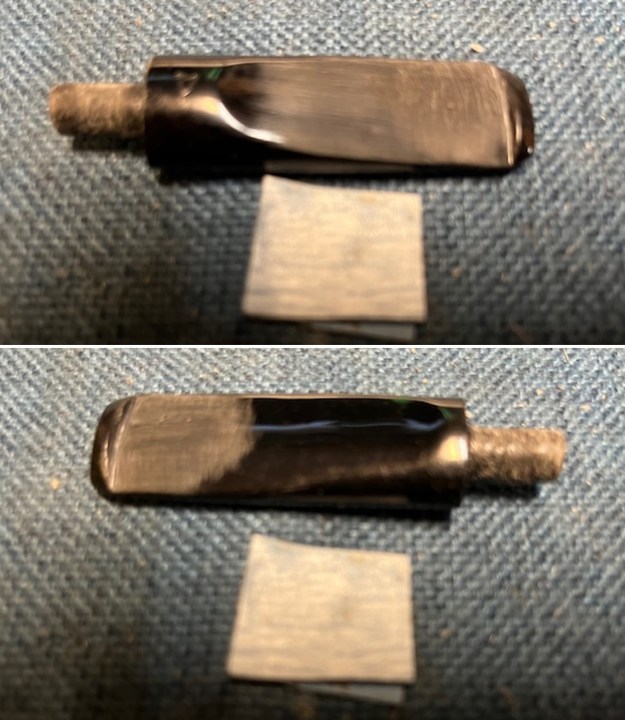
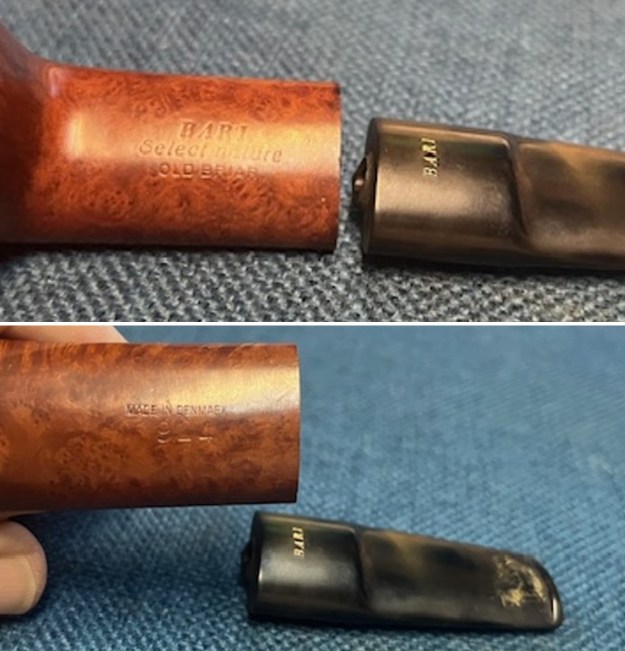
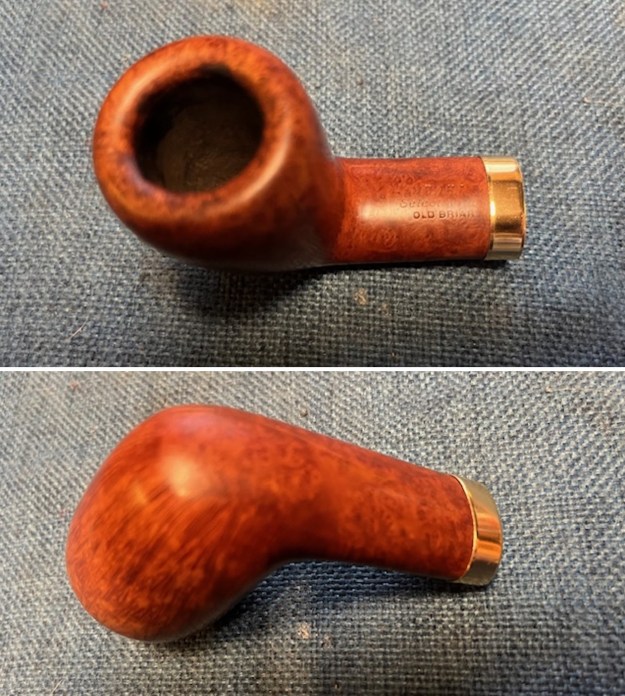
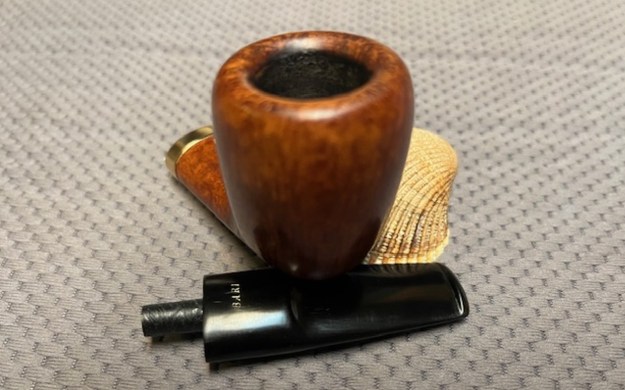
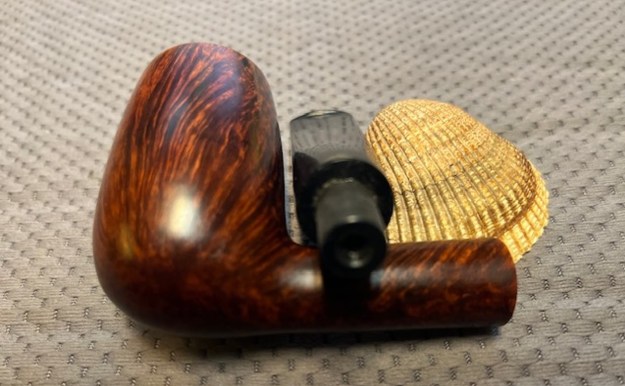
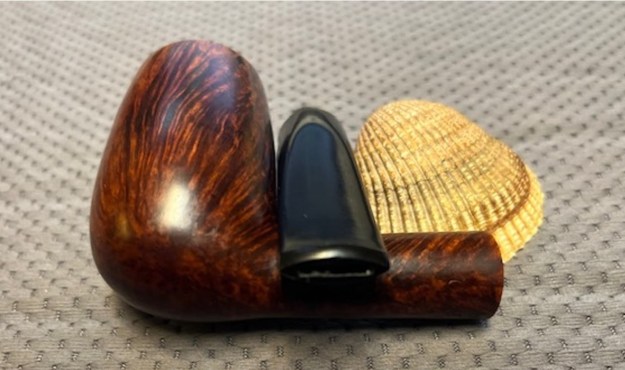
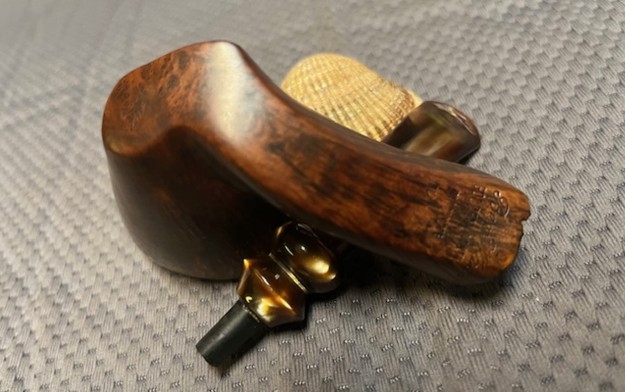
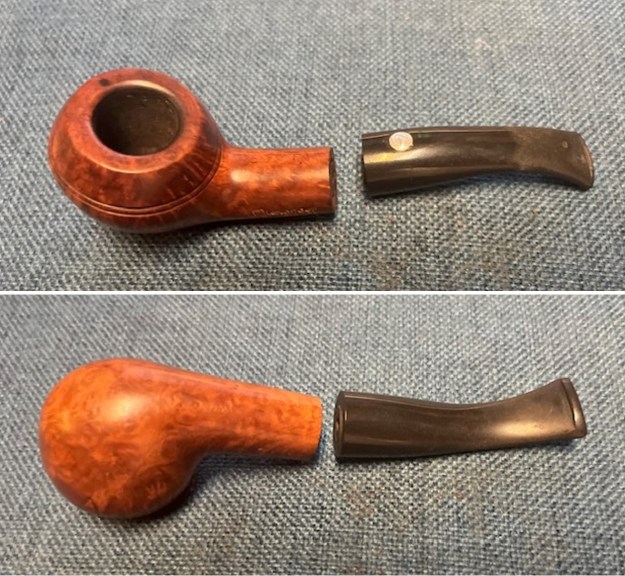
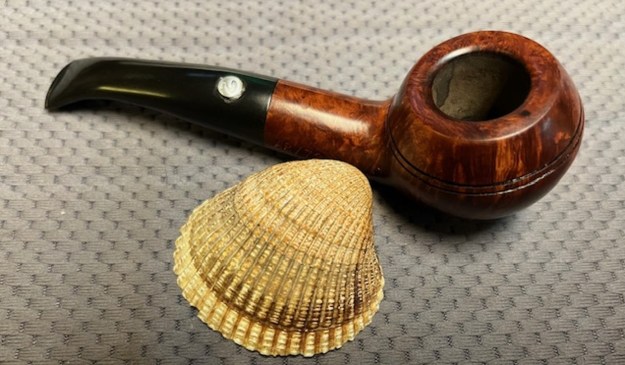
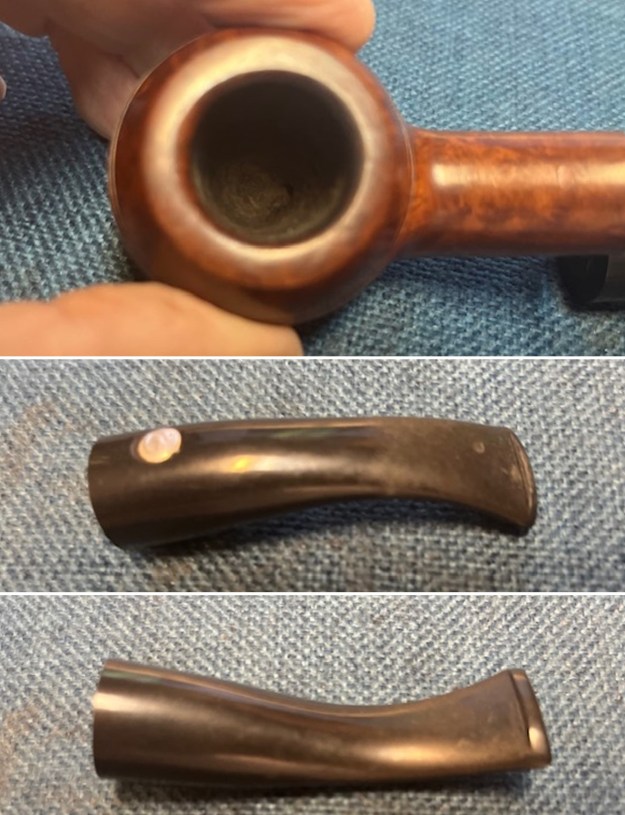 I took photos to capture the stamping on the sides of the shank. It is clear and readable as noted above. I also took a photo of the inlaid Alexander logo on the left side of the stem.
 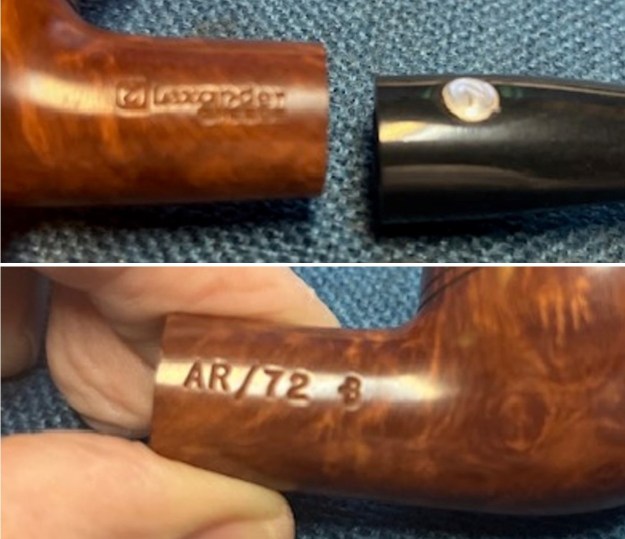 Before I started working on the pipe I turned to Pipedia to remind myself of the Alexander Greece brand and gather the background that makes working on pipes a pleasure (https://pipedia.org/wiki/Alexander_Pipes). I quote from the article below. Of note it starts with an update regarding the death of Alexander.
Update: Today I am saddened by the news that Alexander passed away on February 10th, 2015. Our thoughts and prayers are with his family and friends. We are very thankful for his contributions to the World of pipes. –sethile (talk) 21:00, 12 February 2015 (UTC)
“I am Alexandros Zavvos, born in Molos, Thermopylae, near Lamia. Since I was a child I had an inclination for art, starting with painting. I studied Radio-electronics, and at age 23 I got involved with commerce with a capital of 150.000 drs. in 1962.
I entered the pipe business where I met, by total chance, with Mr. Libero G. Albanese, first technician and producer of briar-wood models in Kalabria, Italy. When I told him that I am Greek, he almost prayed, saying that we Greeks have the best briar in the world for pipe-making! From that moment on I understood that this fellow is in love with his work – and he transmitted that to me instantly!
From mid-1962 to 1963 I searched all over the world for a college or a school in order to be taught the art of pipe-making, but in vain – there were none. Moreover, I wasn’t able to make it through the big European pipe-makers of that time (British, Italian, Danish). I was convinced that only through experience there was a chance of me becoming what I wanted.
In 1964 I started the commercial briar-wood model production, in 1965 I constructed empirically my first pipe and in 1967 I started the vertical production (this is from the briar Greek woods to the consumer) – maybe there is no other factory in the world producing smoking pipes vertically.
In 1970 I started the research, which was accomplished in 1984, on the 1st generation hygrostatic system. In that same period we founded, my brother and I, our factory in Lamia for the production of ebony epistomes.
Today, 40 years later, I have successfully arrived at the production of the 5th generation hygrostatic pipe. I will finish by saying that this pipe, to what concerns the pleasure it provides, has nothing to do with that pipe for peace, offered by American Indians.”
The Alexander Briar Pipes website still sells briar pipes of several styles, including “Hygrocool”, “Hygrocool NT”, regular pipes, cigarette pipes and pocket pipes, along with briar blocks, acrylic and ebonite stems and accessories.
At the mention of the Hygrostatic System above I remembered a pipe that Paresh had restored for me and gifted me when I went to India. I have included the link below.
https://rebornpipes.com/2019/08/02/gifting-my-mentor-and-dear-friend-steve-an-alexander-zavvos-hygrosystem-pipe/
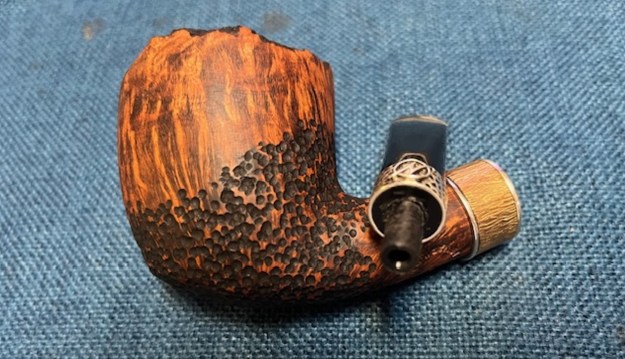
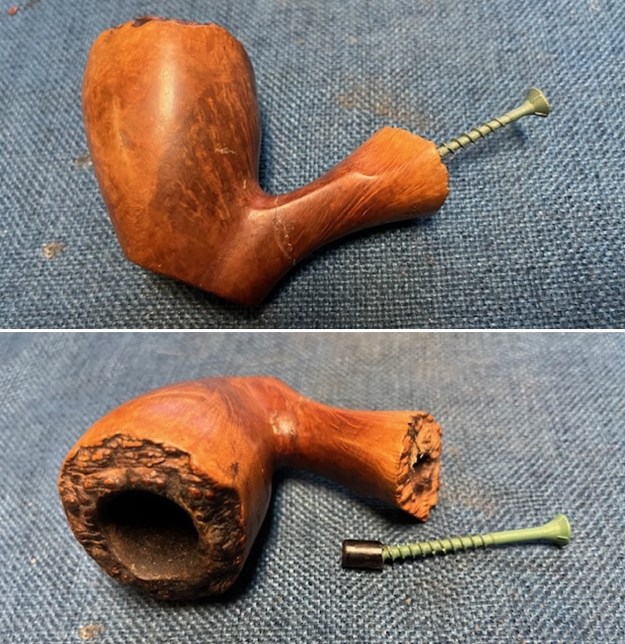
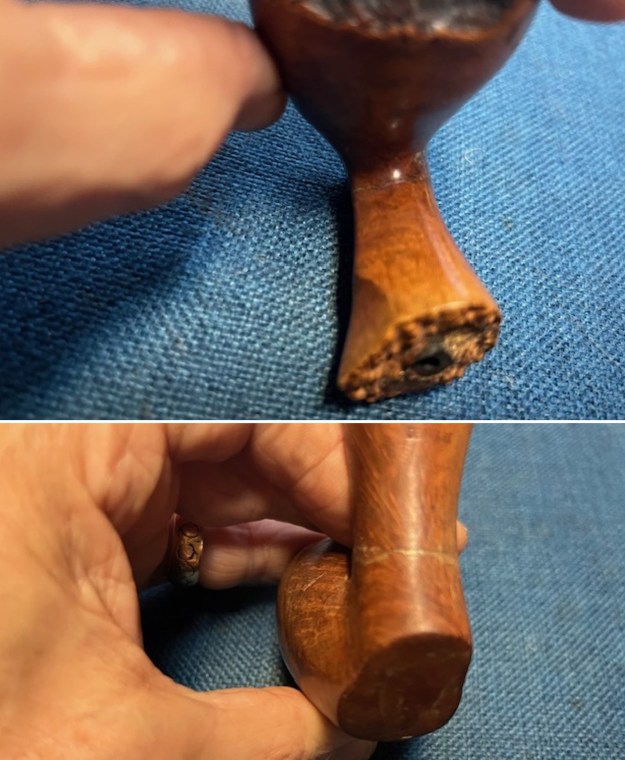
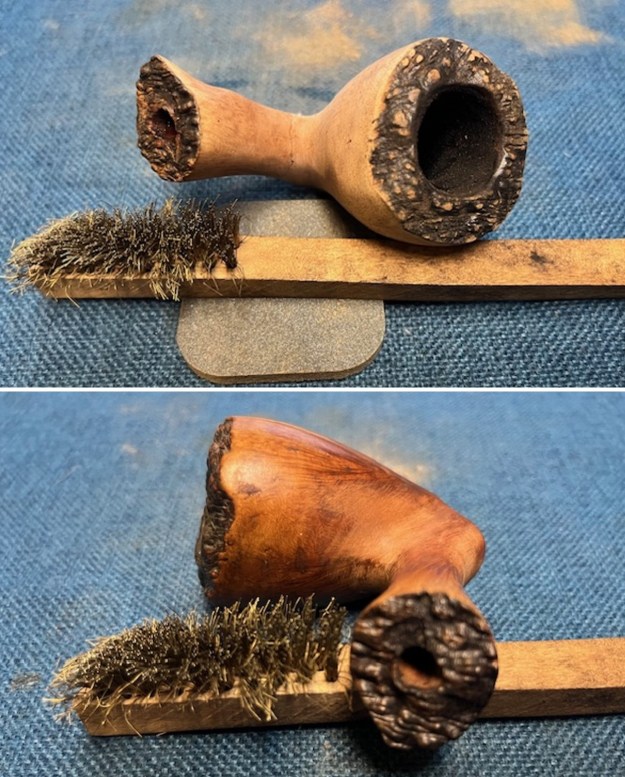
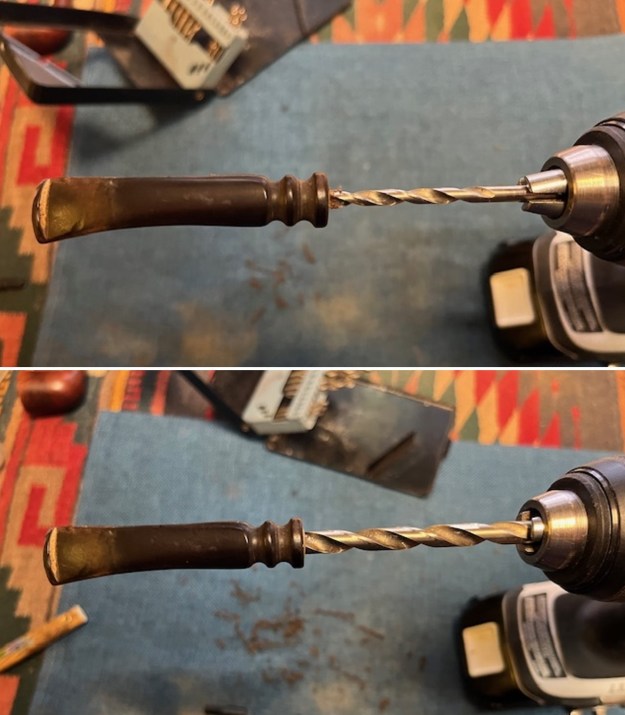
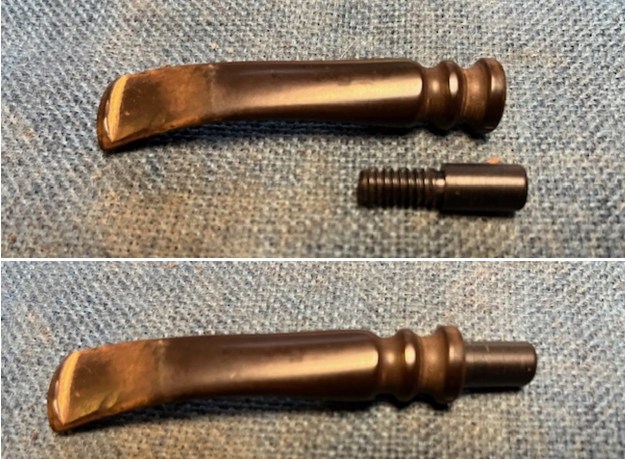
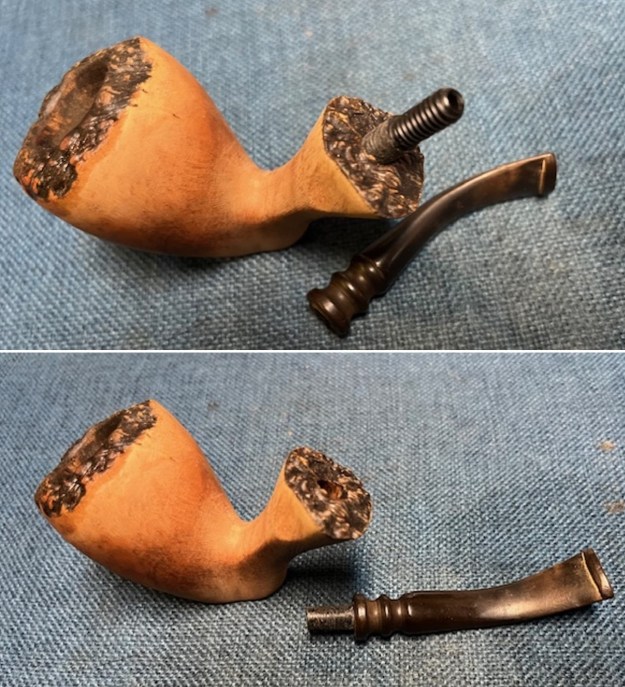
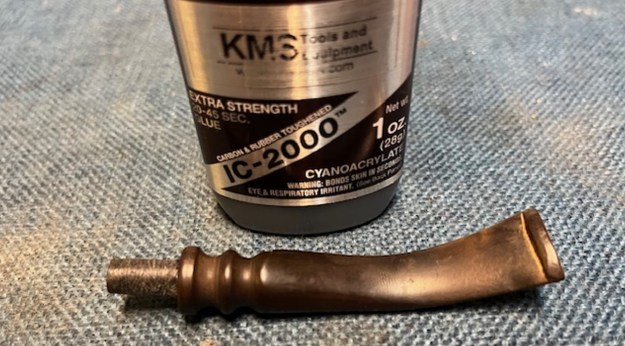
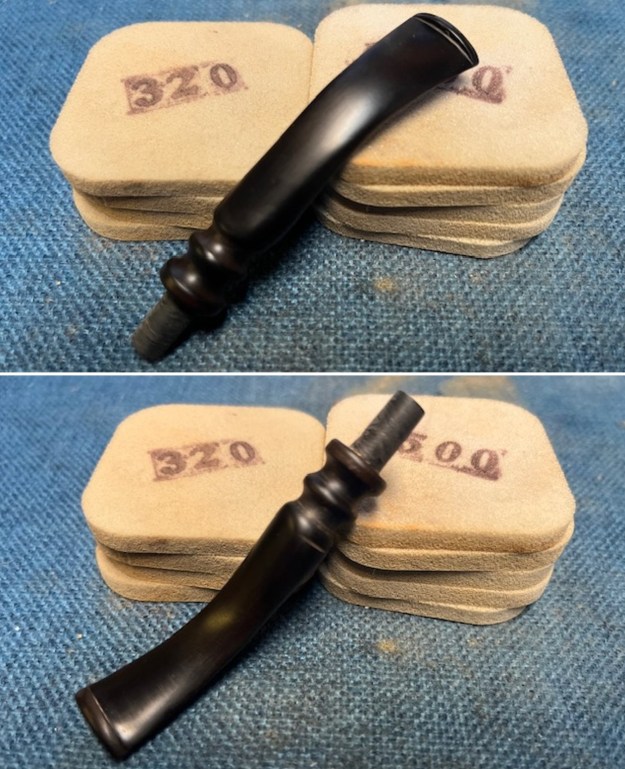
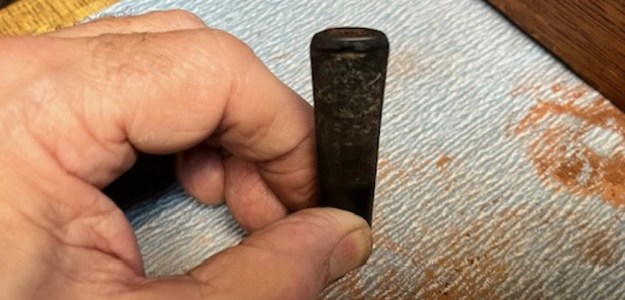
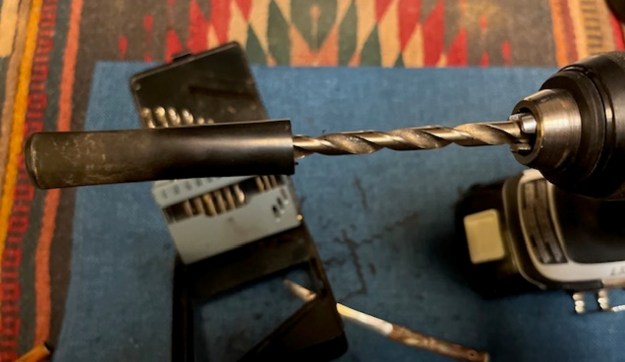
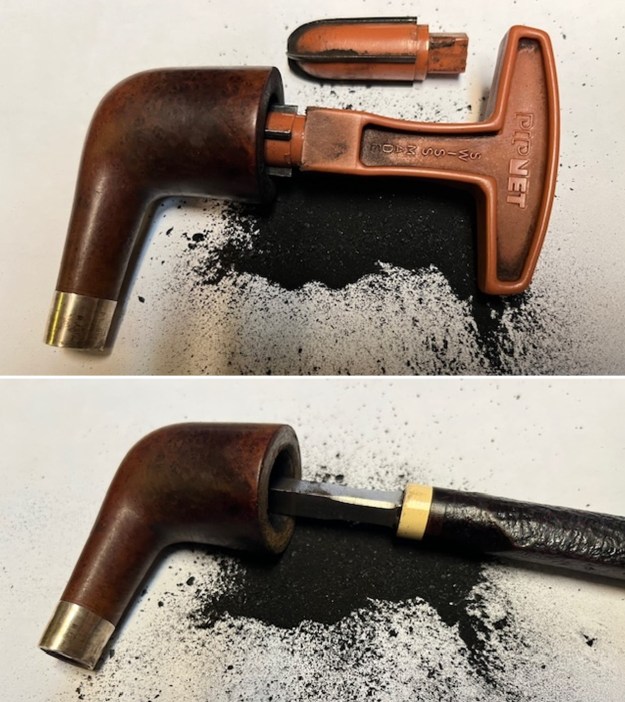
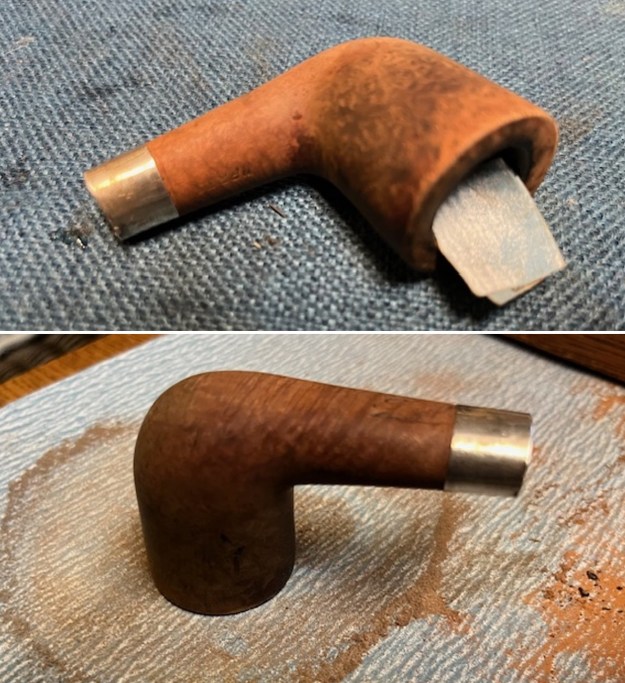
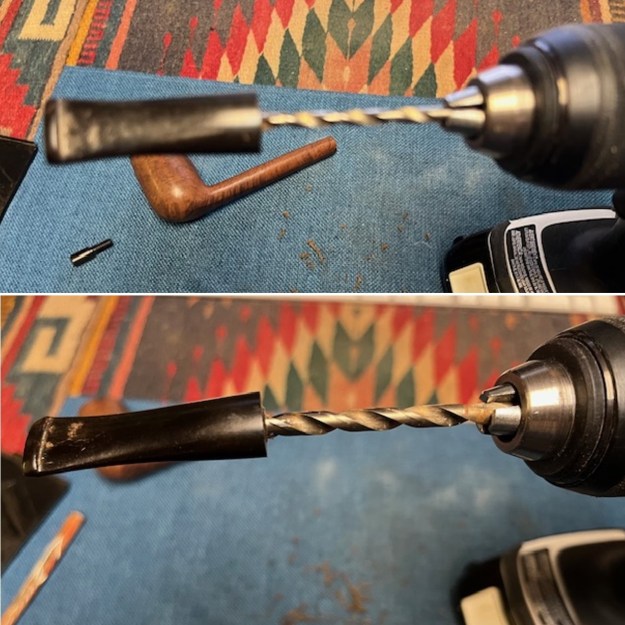
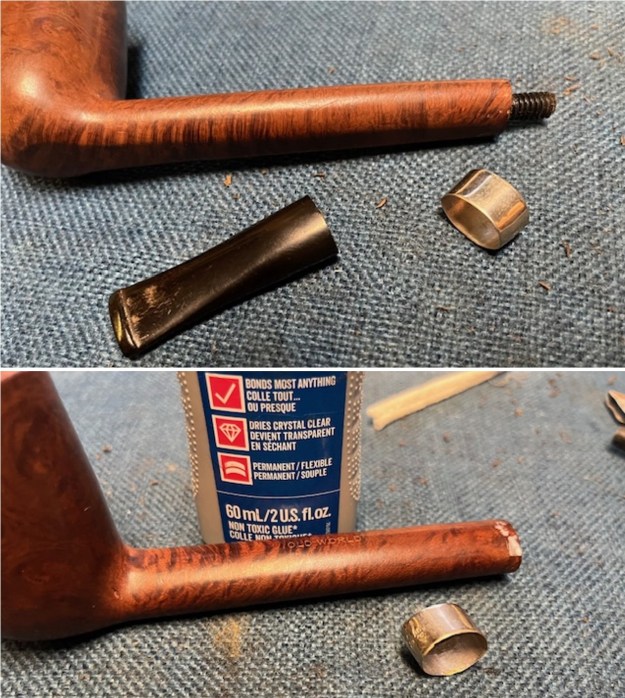
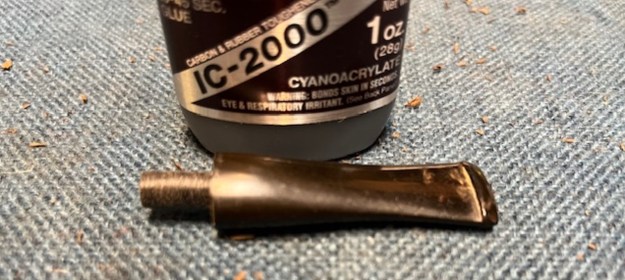
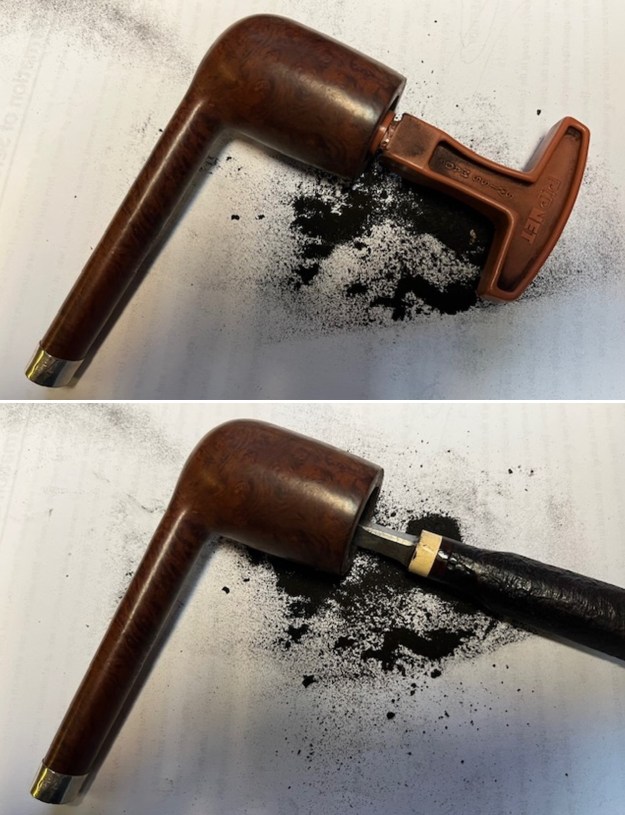
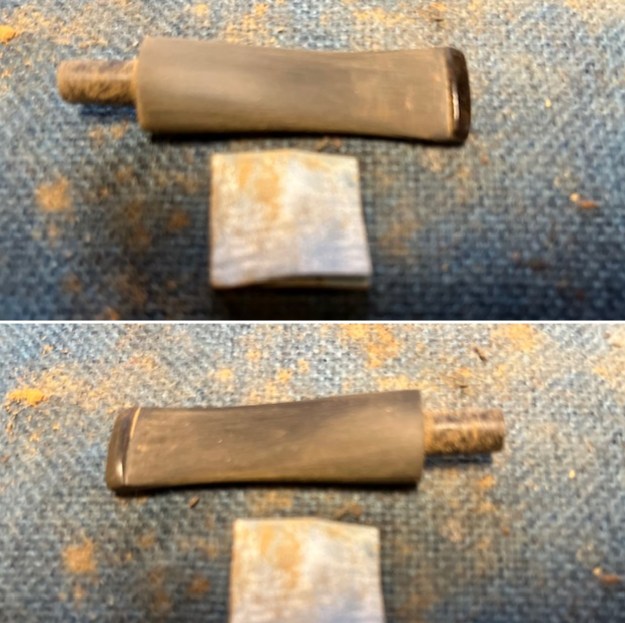
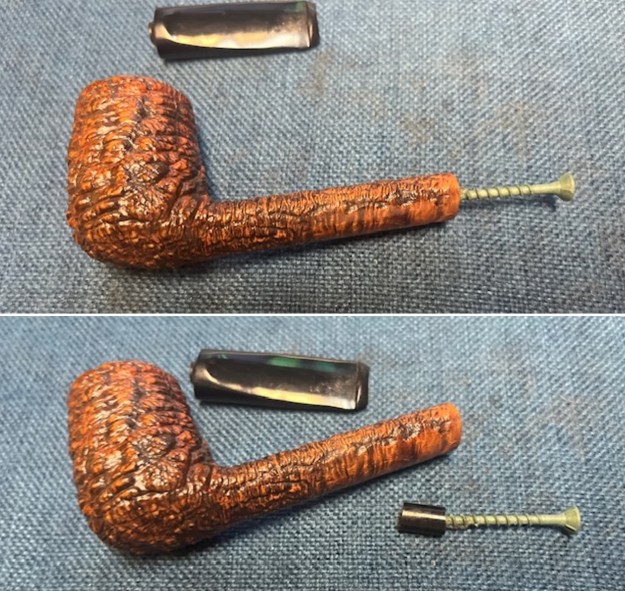
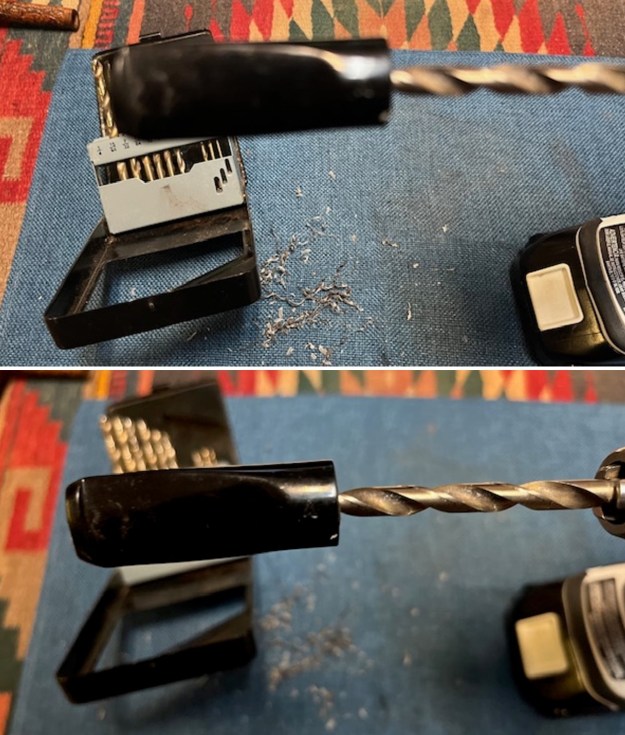
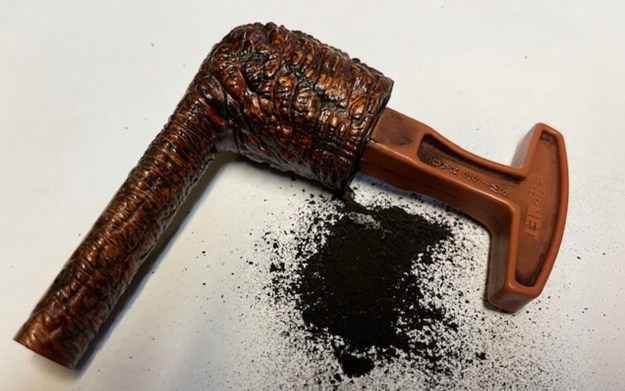
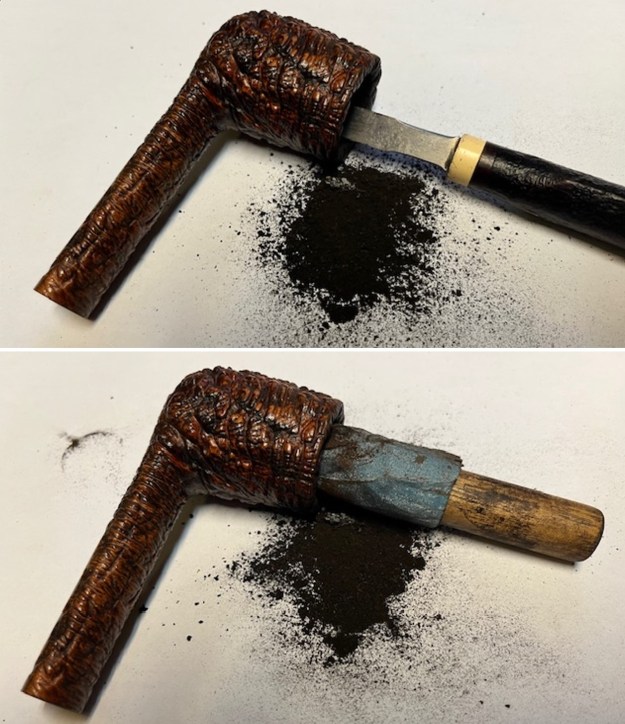
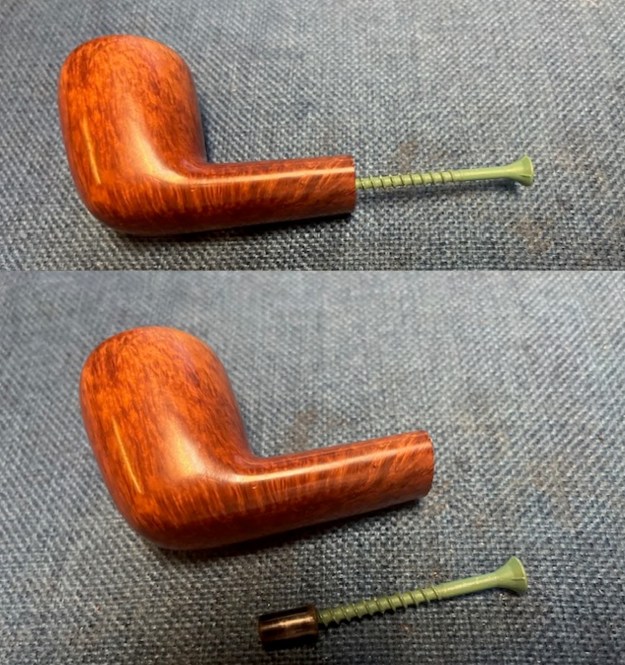
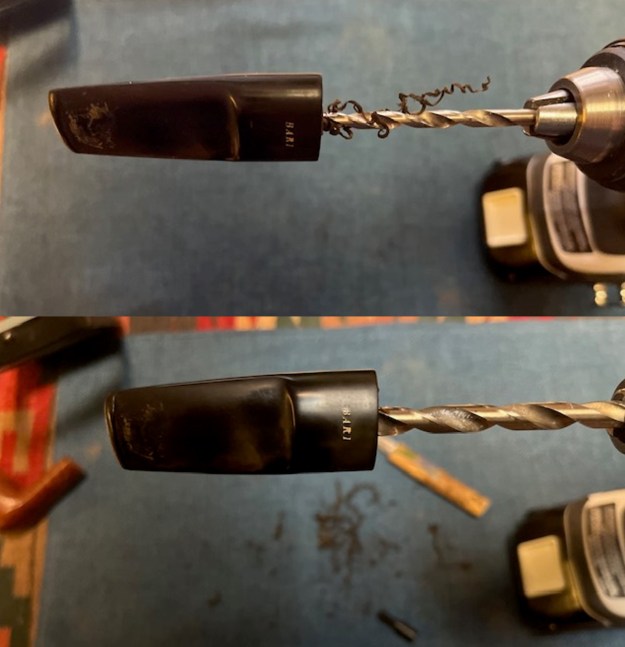
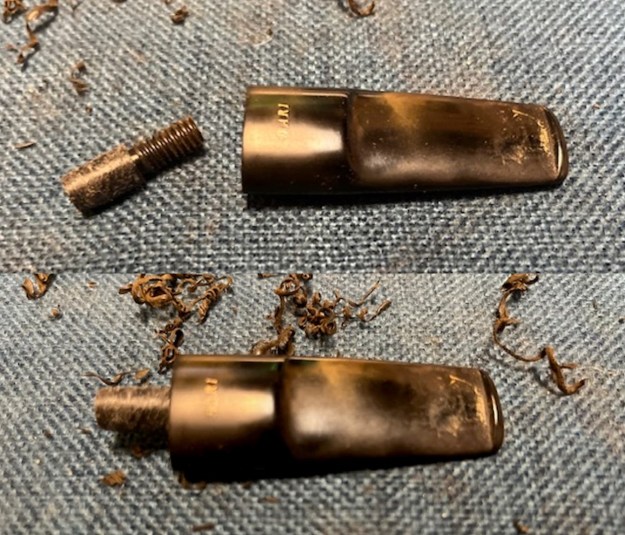
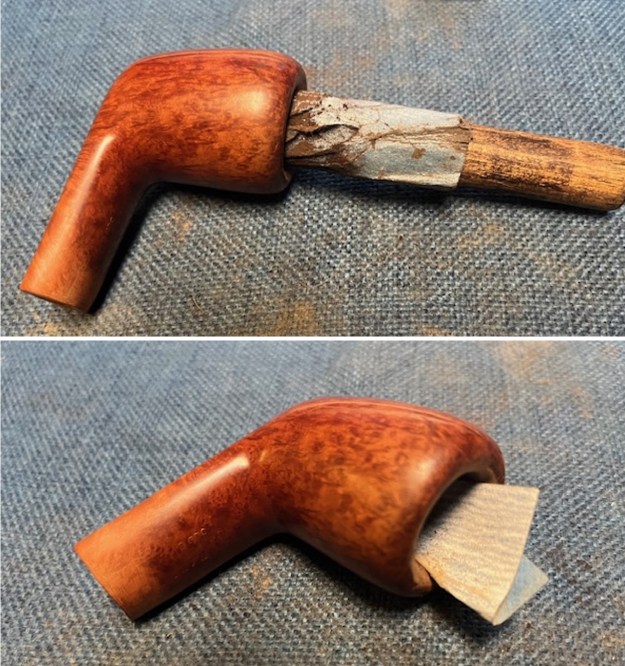
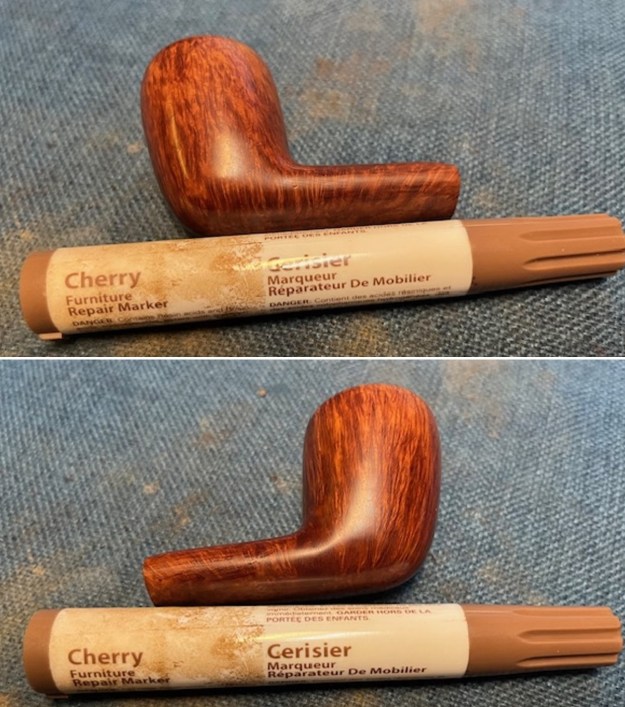
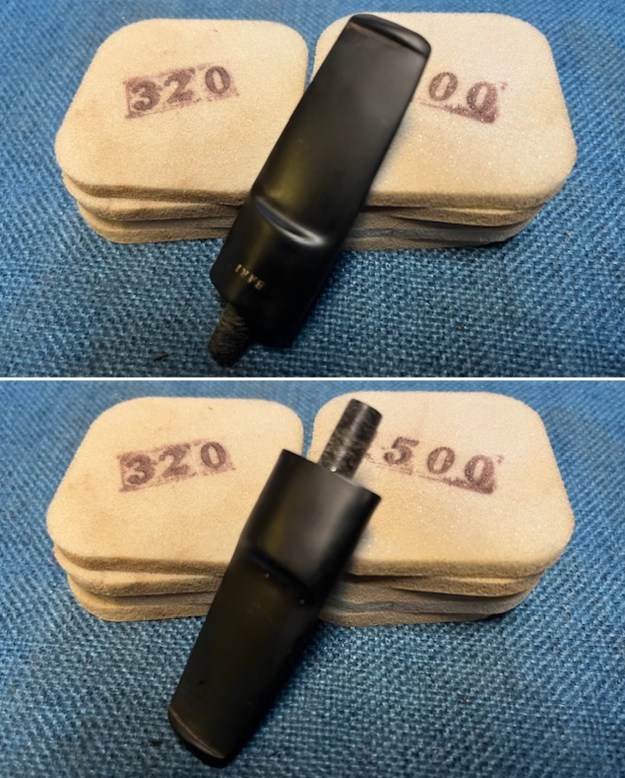
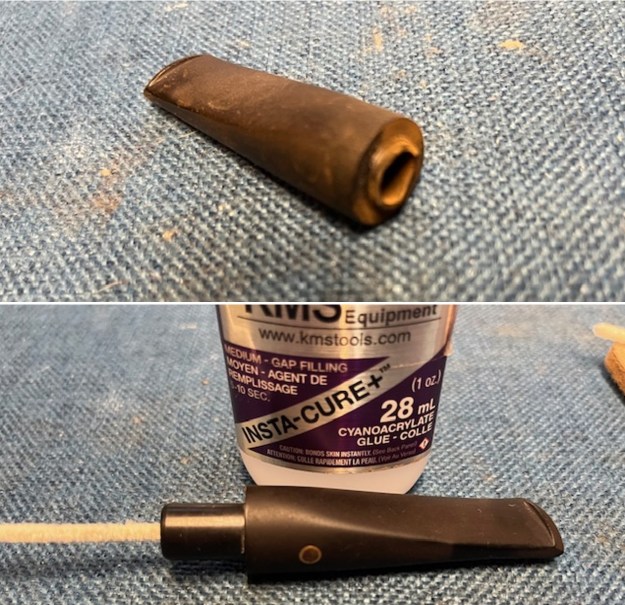
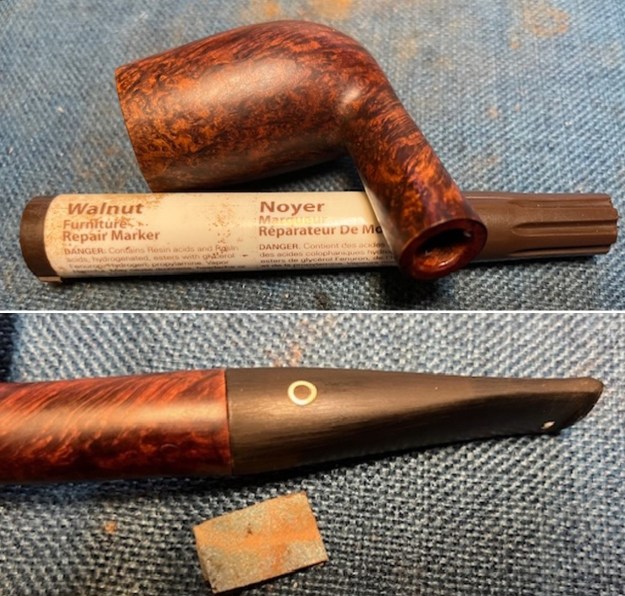
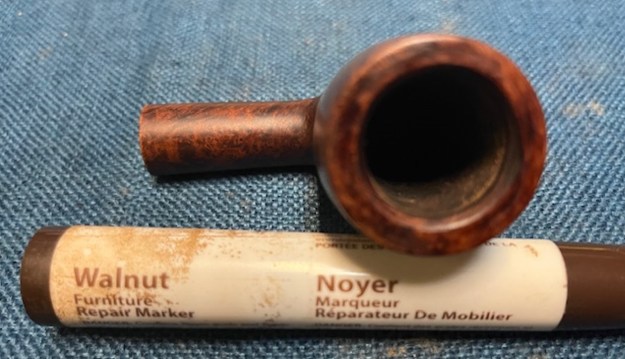
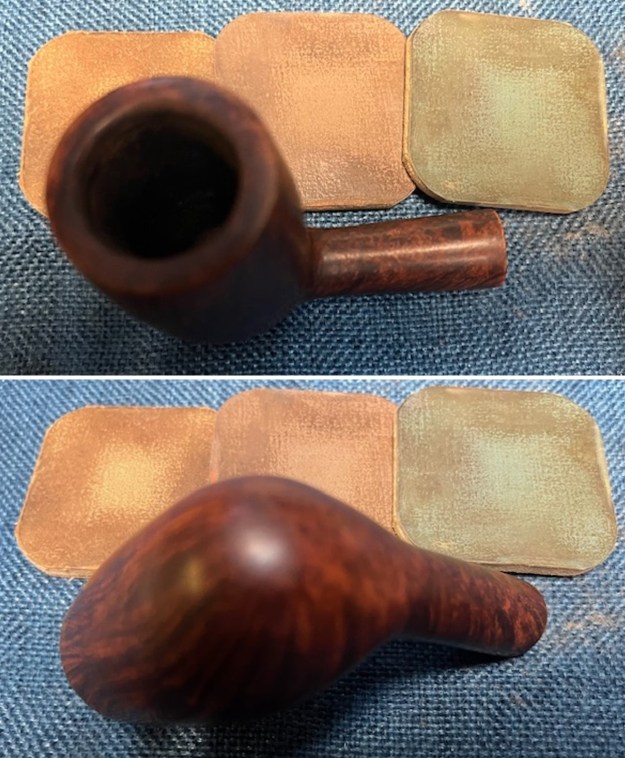
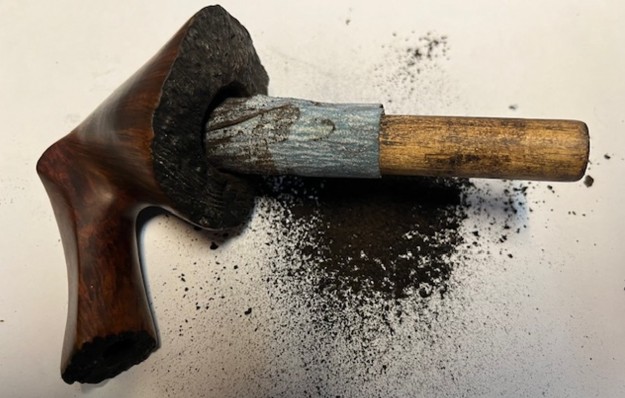
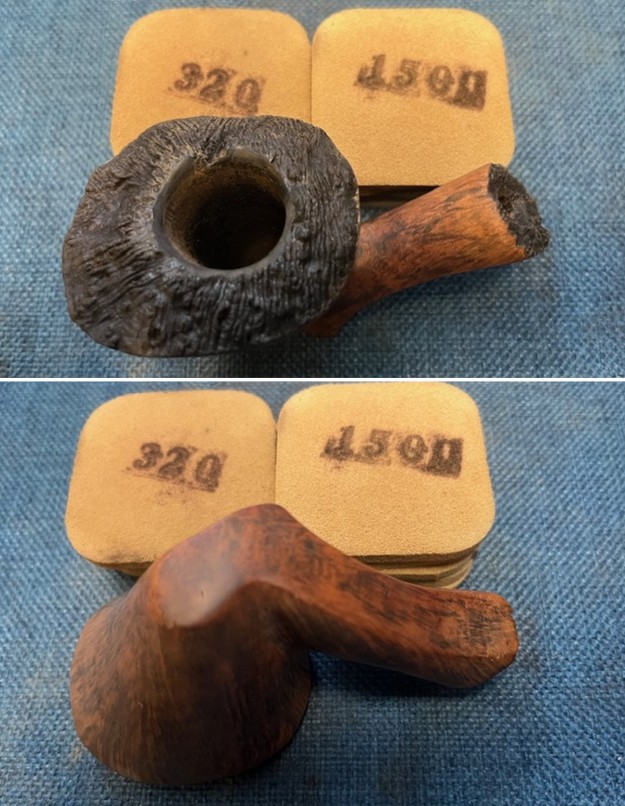
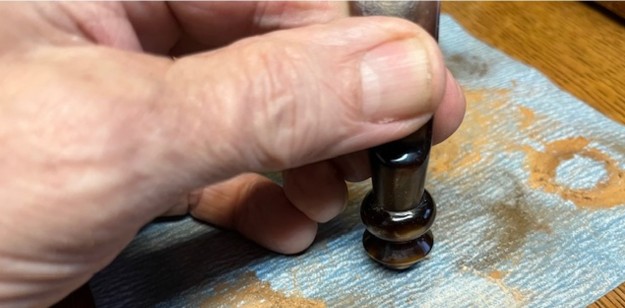
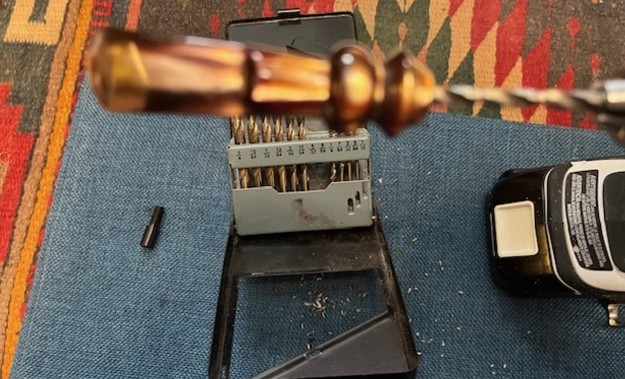
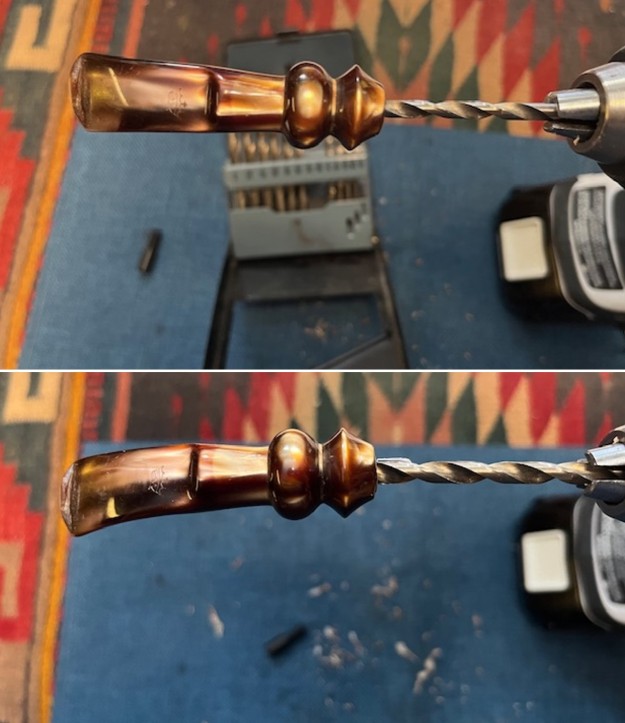
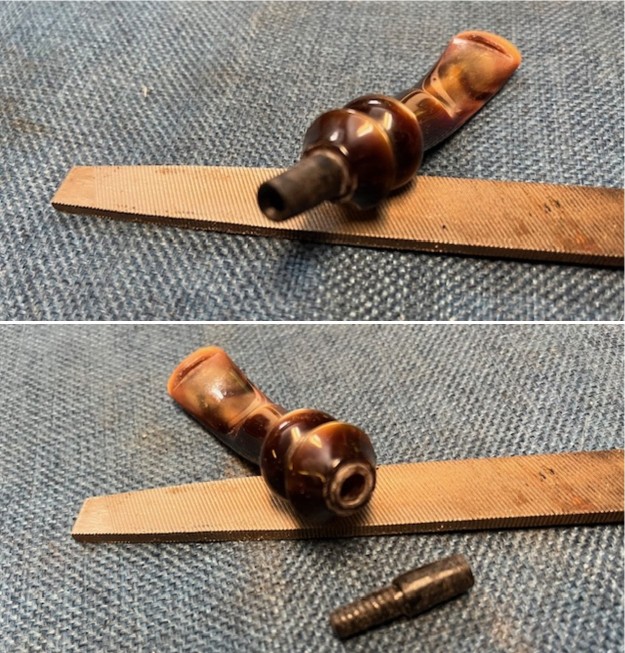
It is an interesting brand and a great looking classic pipe rather than his hygrosystem pipe. Given the information and background on the pipe I started my work on the pipe. I decided to start by pulling the broken tenon and beginning the process of the replacement. I used a drywall screw to pull the tenon. I screwed it into the airway and wiggled the broken piece out of the shank. The second photo of the bowl below shows the pulled tenon.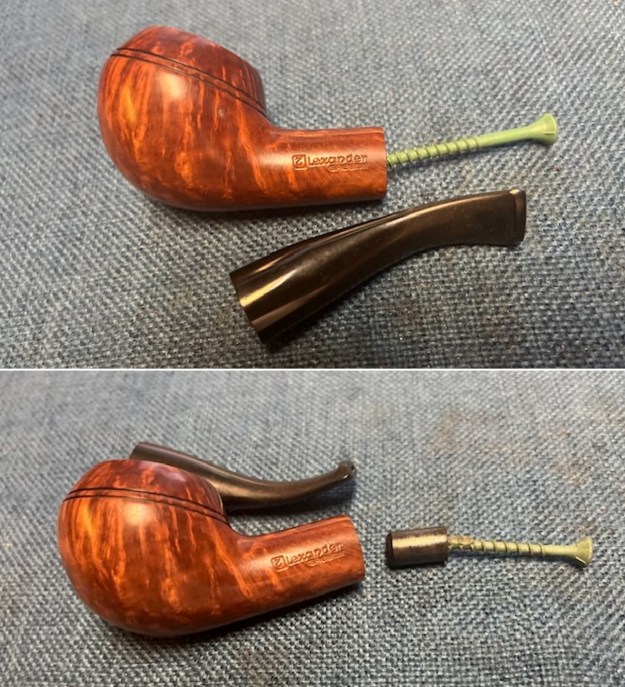 In preparation for fitting a new tenon I flattened out the broken edges on the snapped tenon using a topping board and 220 grit sandpaper. I drilled the airway in the stem with increasingly larger drill bits until I had the bit that was the same size as the threaded portion of the new tenon.
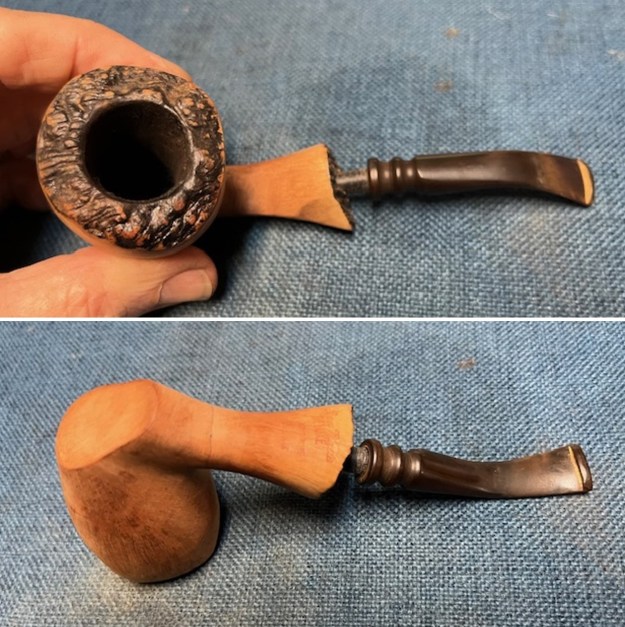
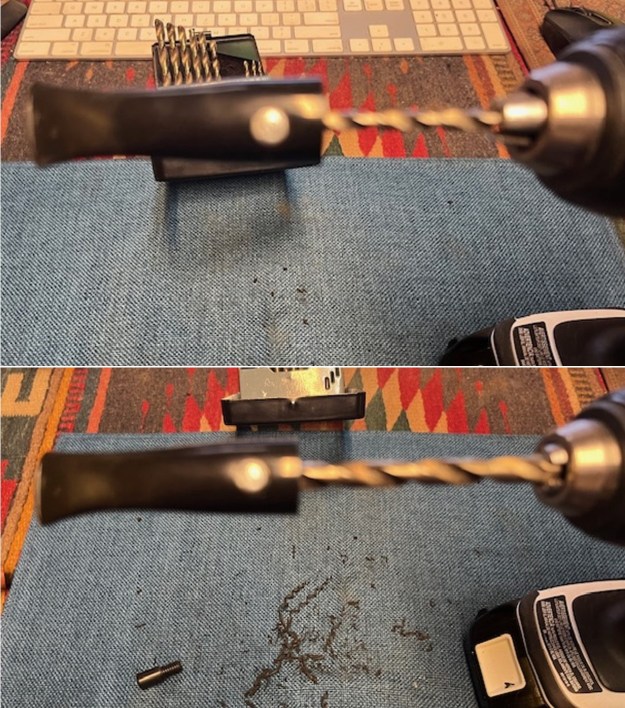 I fit the tenon in the stem to make sure the fit and alignment was correct and repeated the process in the mortise. I fit the stem on the tenon in the mortise to check the alignment.
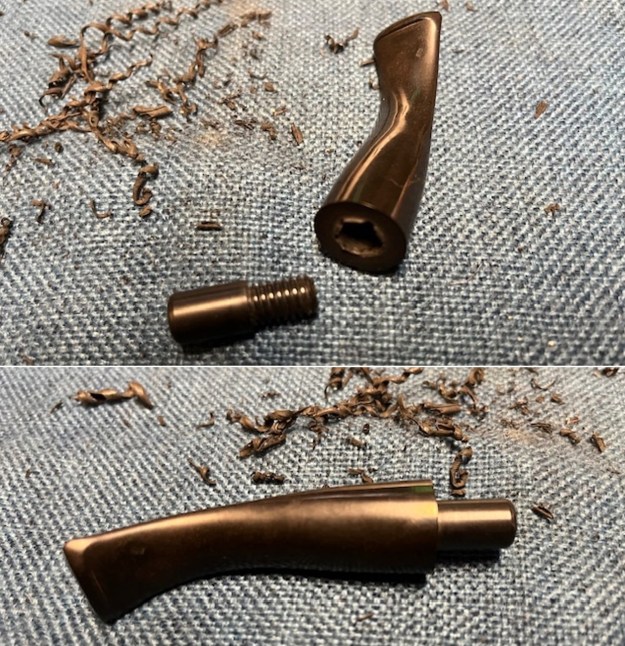
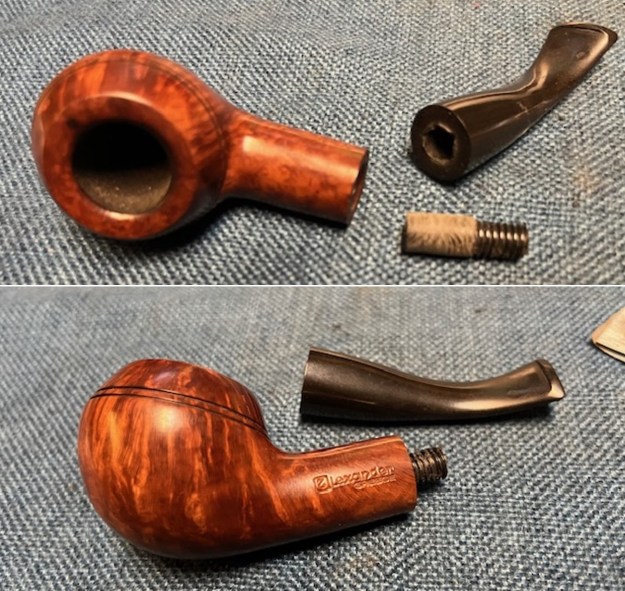
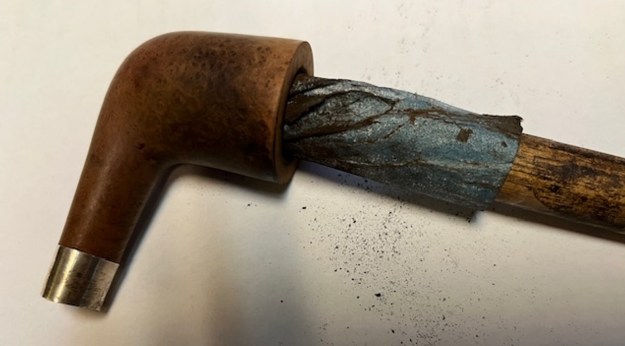
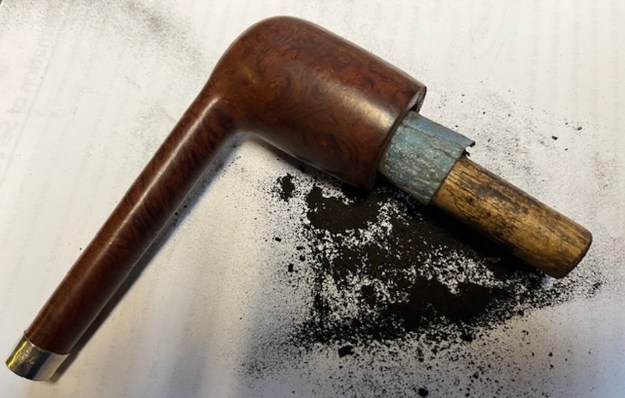
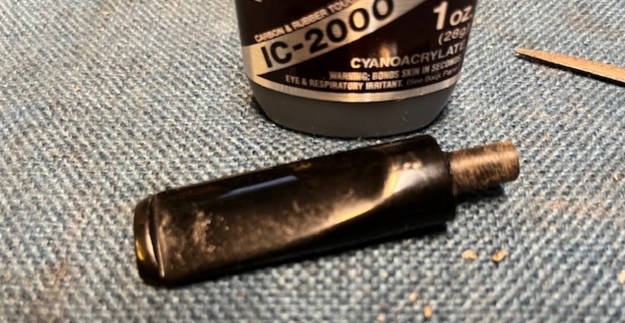
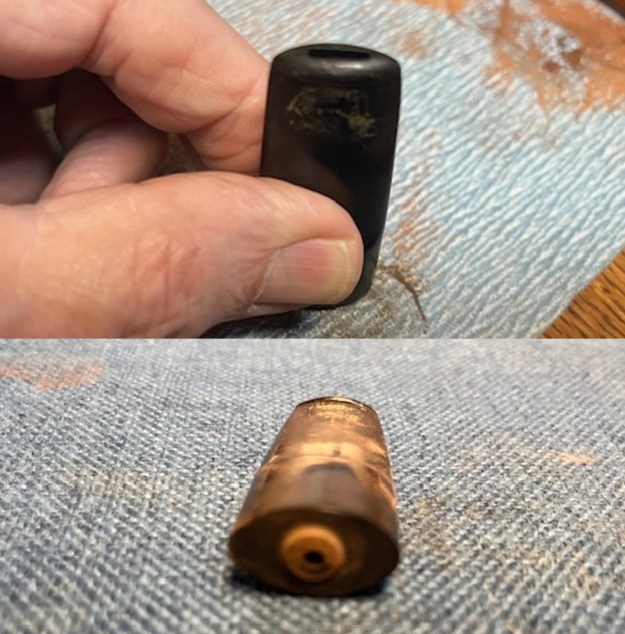
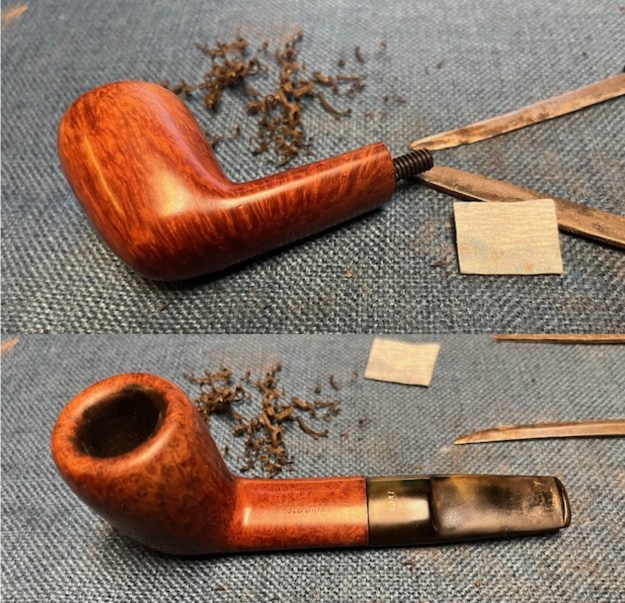
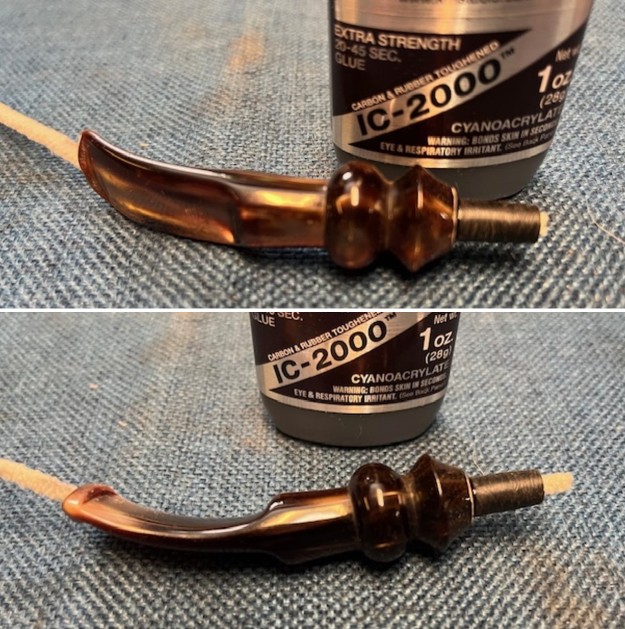
 With the fit as good as it was going to get on this one I slid a pipe cleaner in the stem and tenon and painted the threads with black CA glue. I pressed it into place in the stem and set it aside to cure.
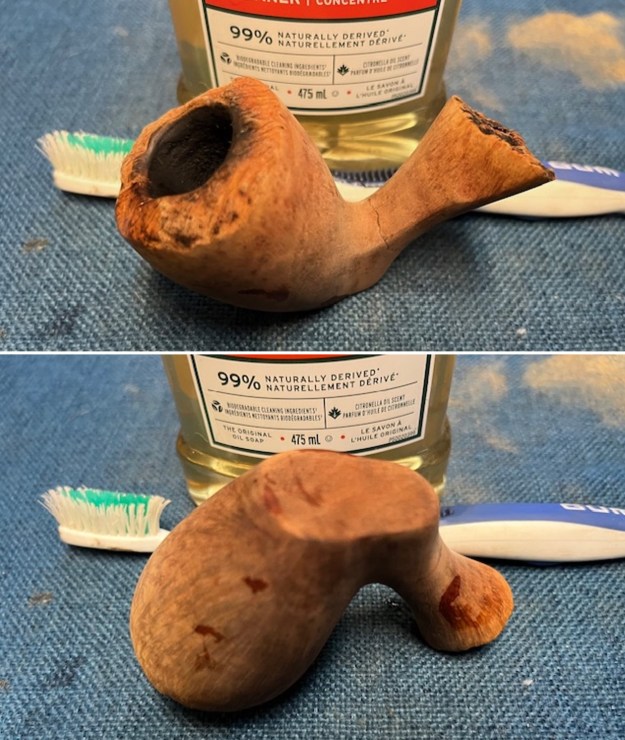
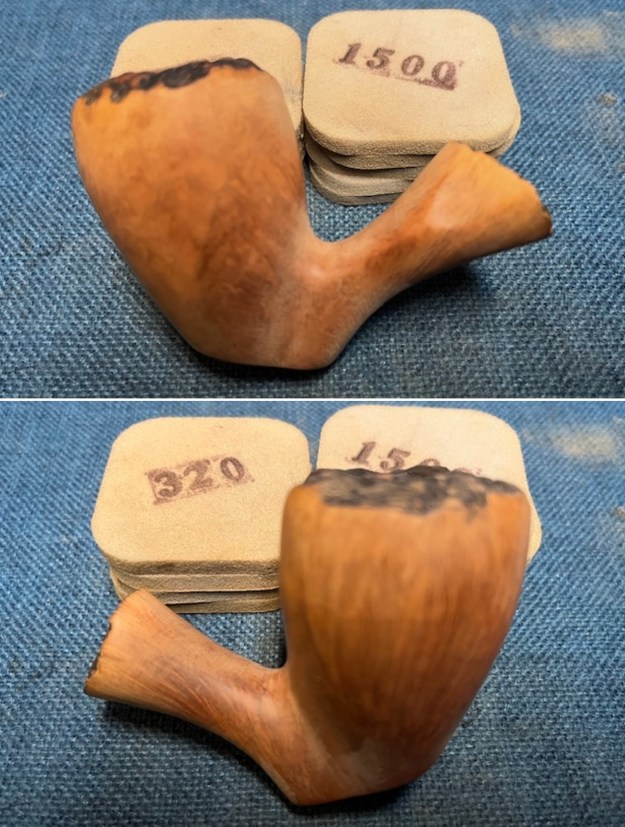
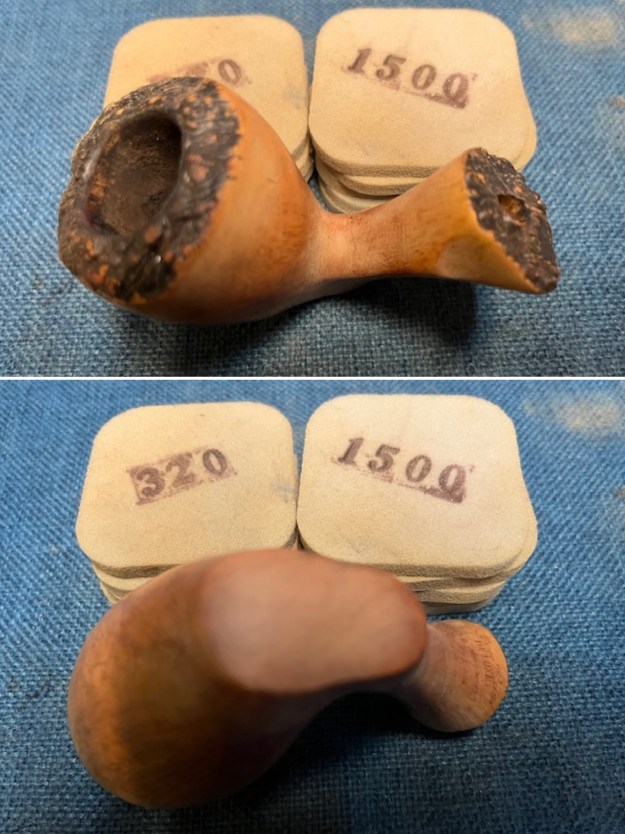
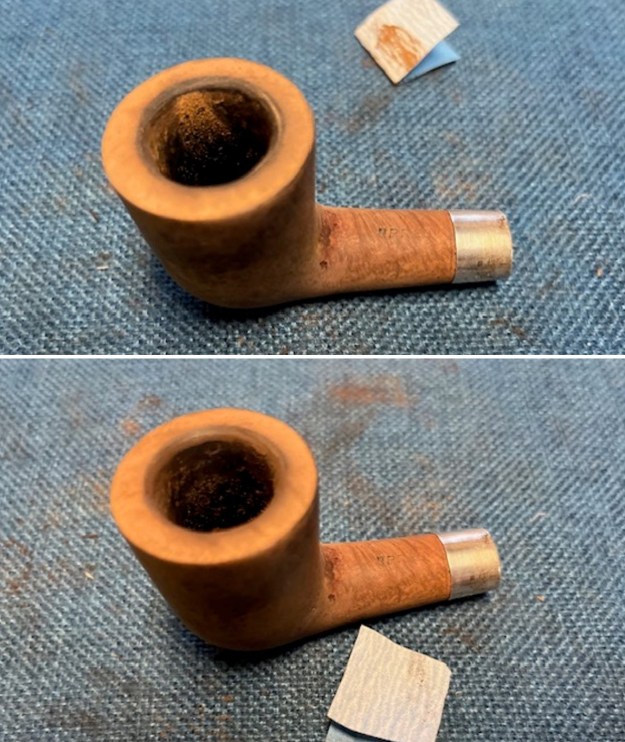
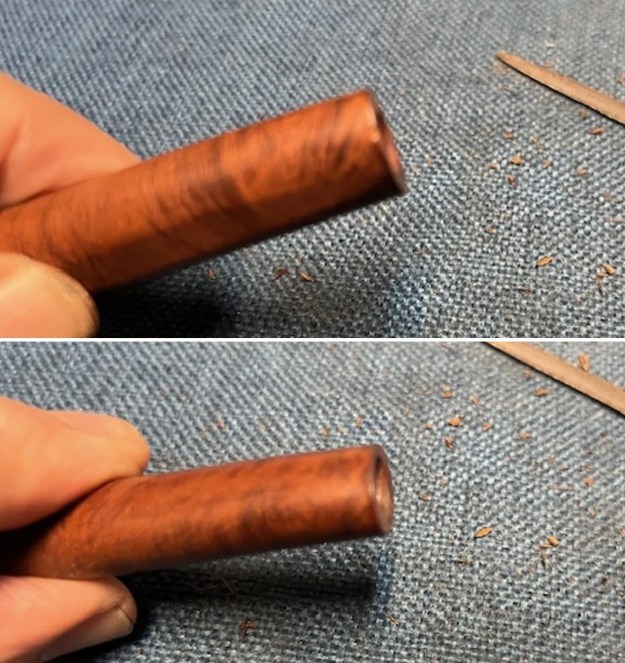
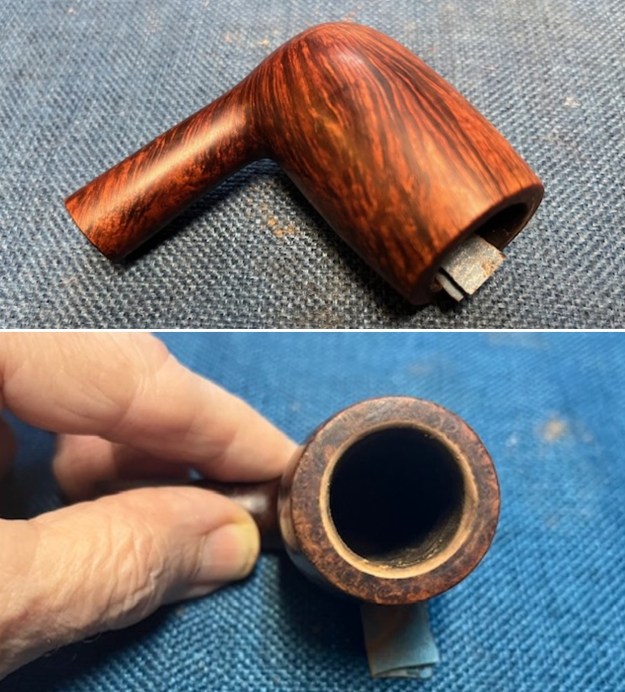
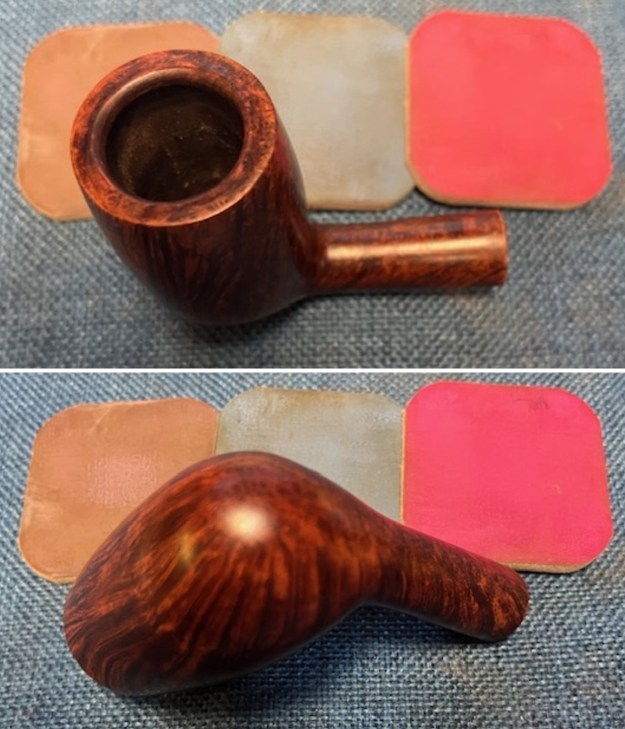
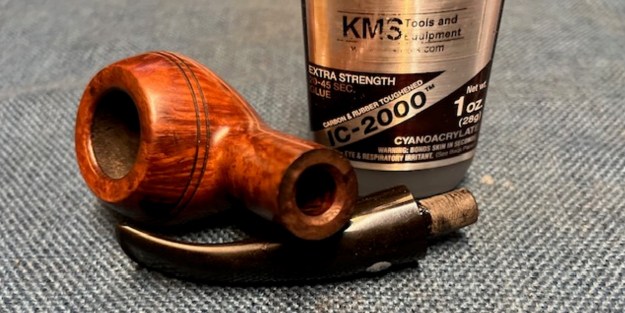 I set the stem aside overnight to let it cure. I turned out the lights and called it a night. In the morning I sanded the bowl with 220 grit sandpaper on a piece of dowel to clean up the walls of the bowl. It had been reamed but needed to be sanded smooth. It was in great condition.
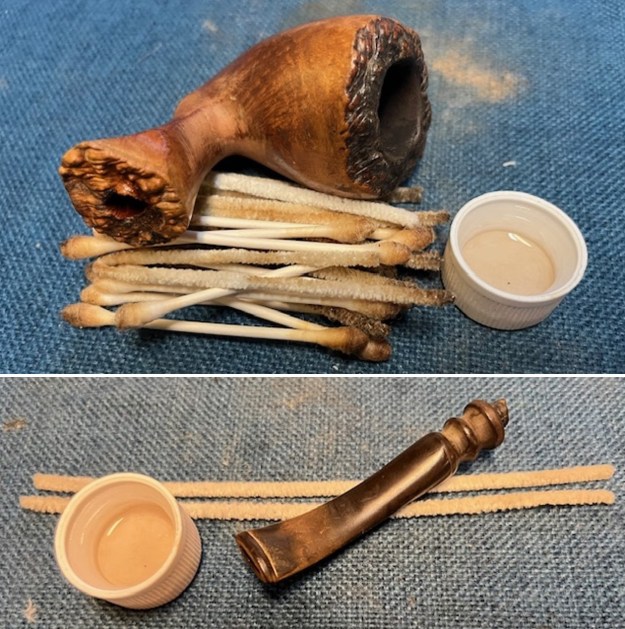
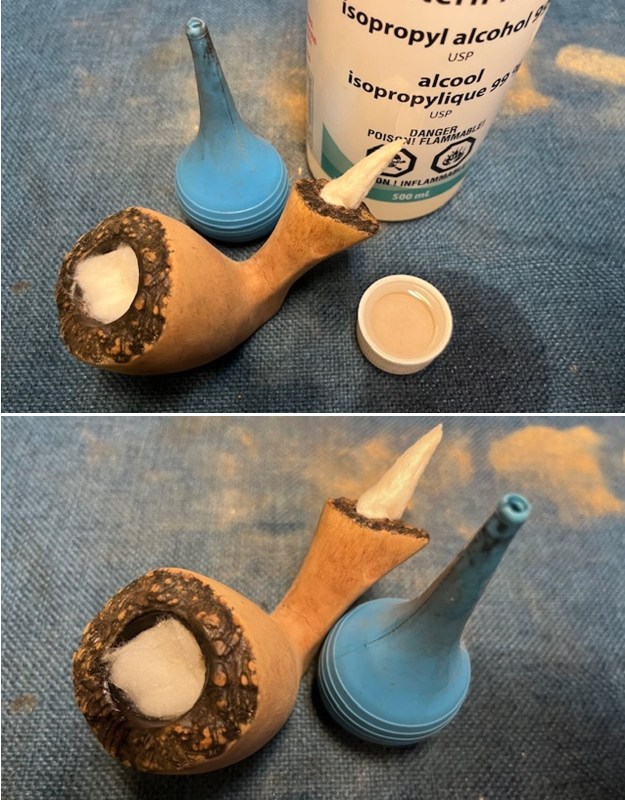
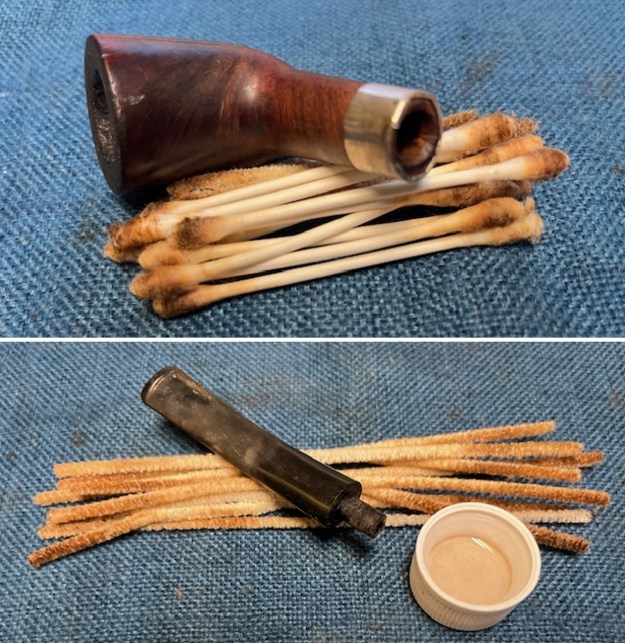
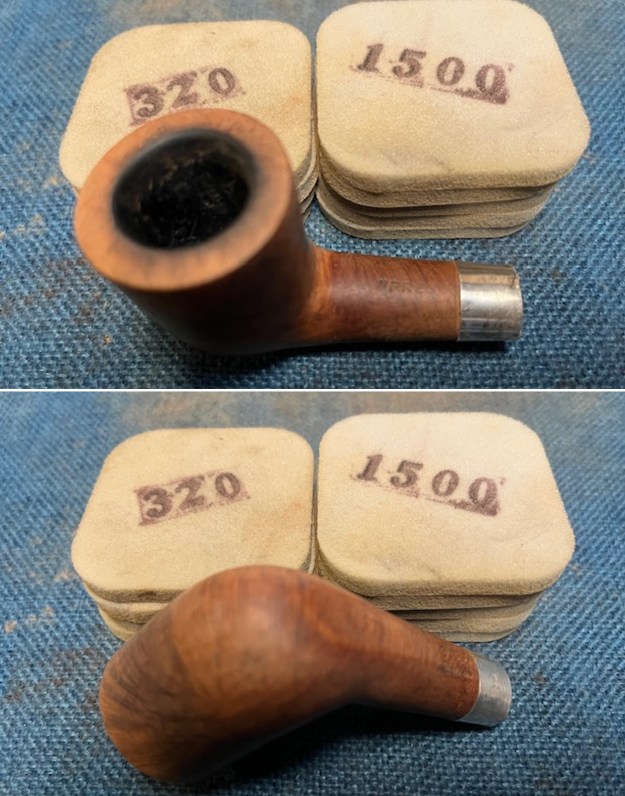
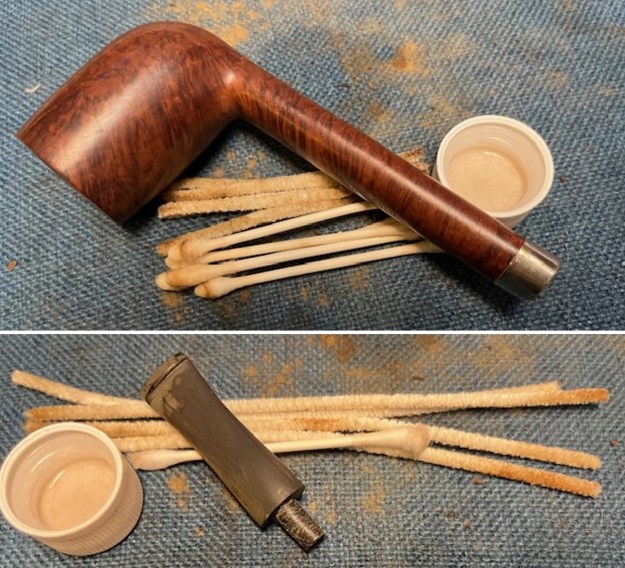
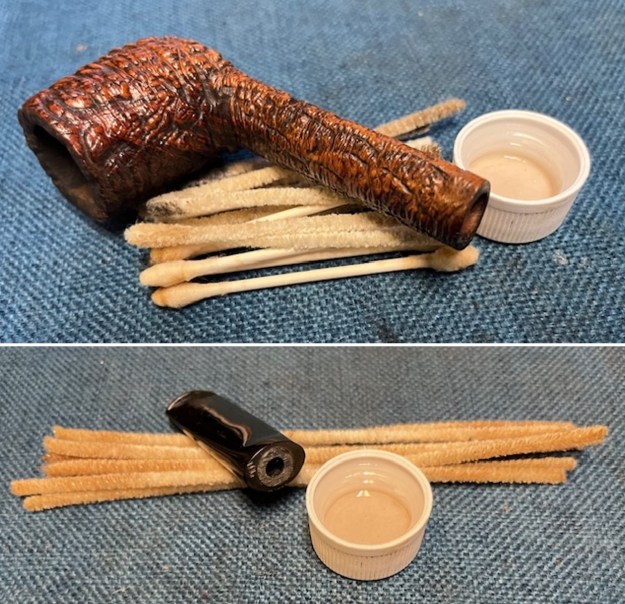
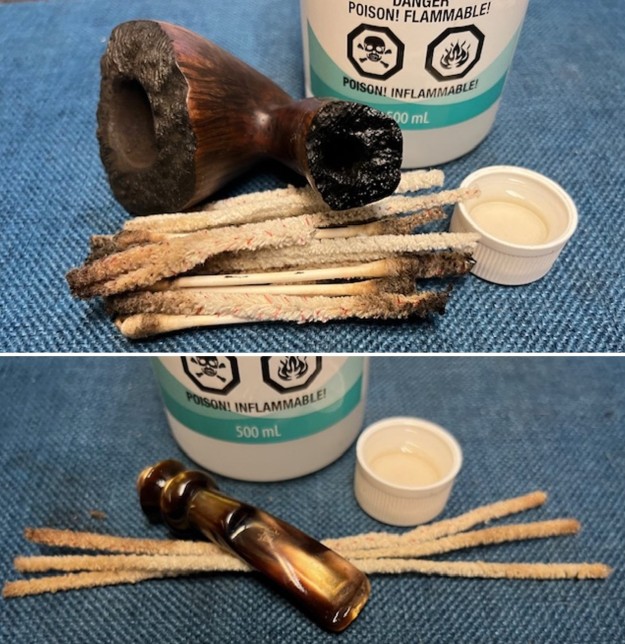
 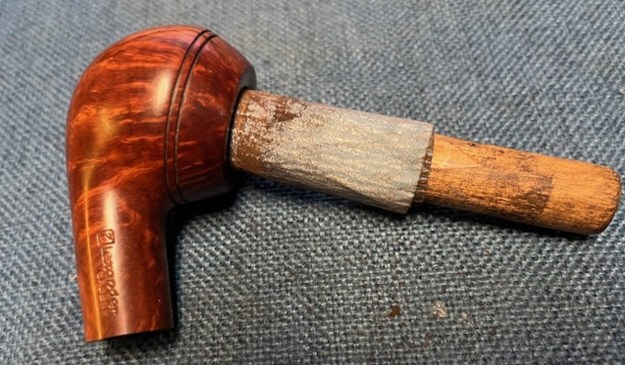 I cleaned out the shank and airway into the bowl with pipe cleaners, cotton swabs and alcohol to remove the tars and oils. I cleaned out the airway in the stem at the same time.
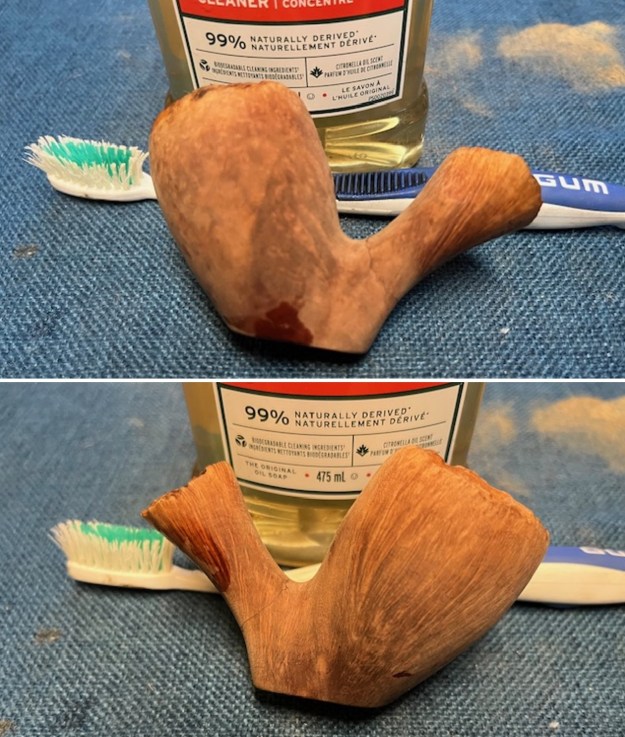
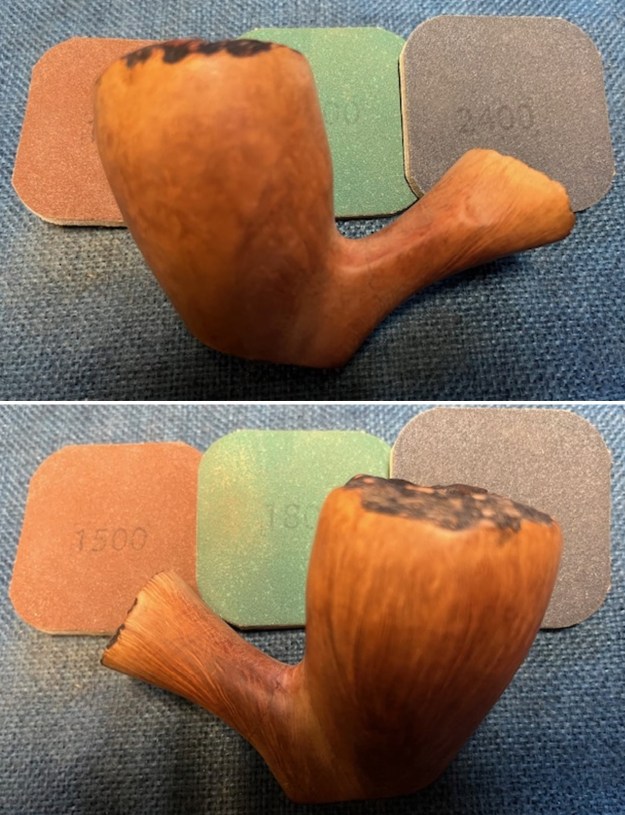
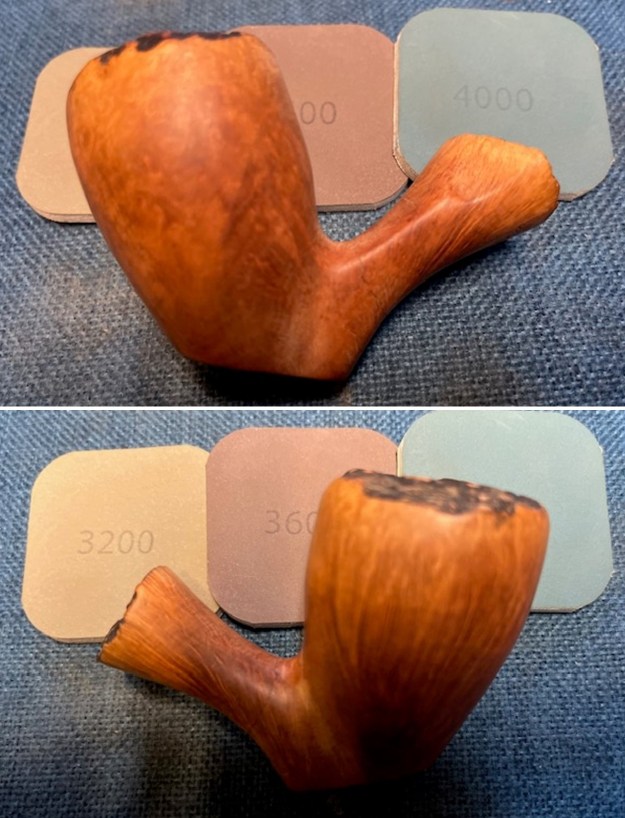
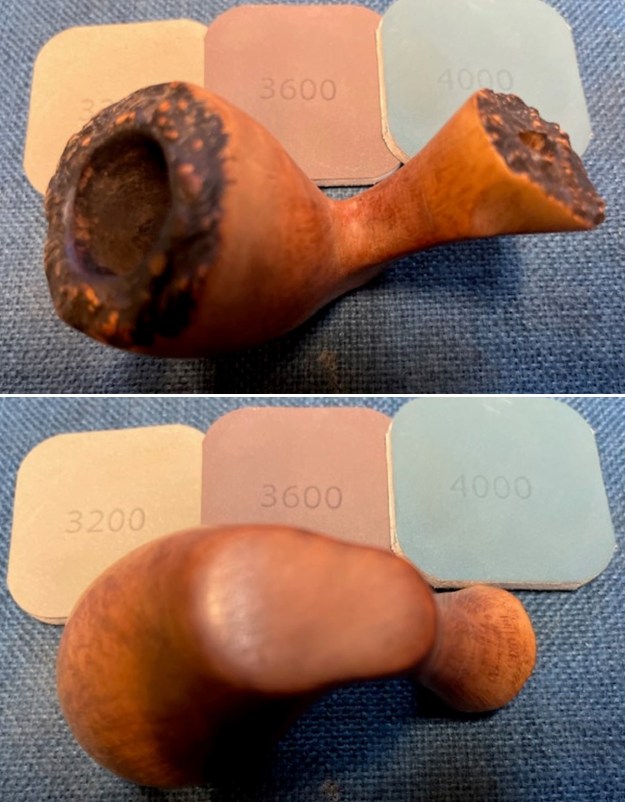
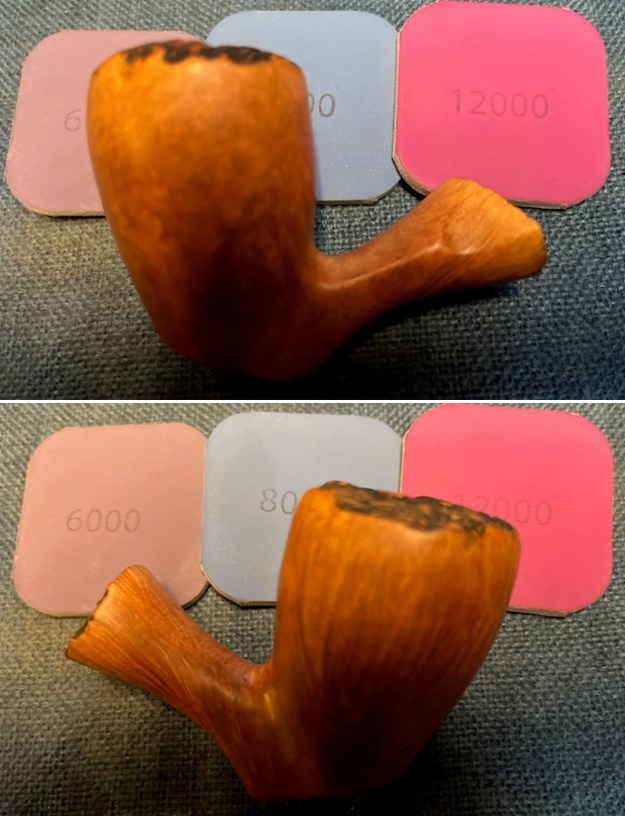
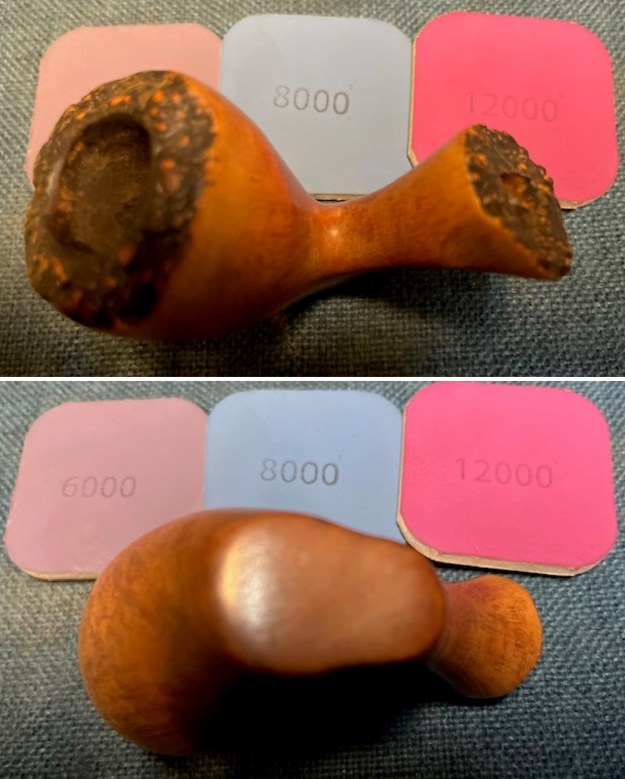
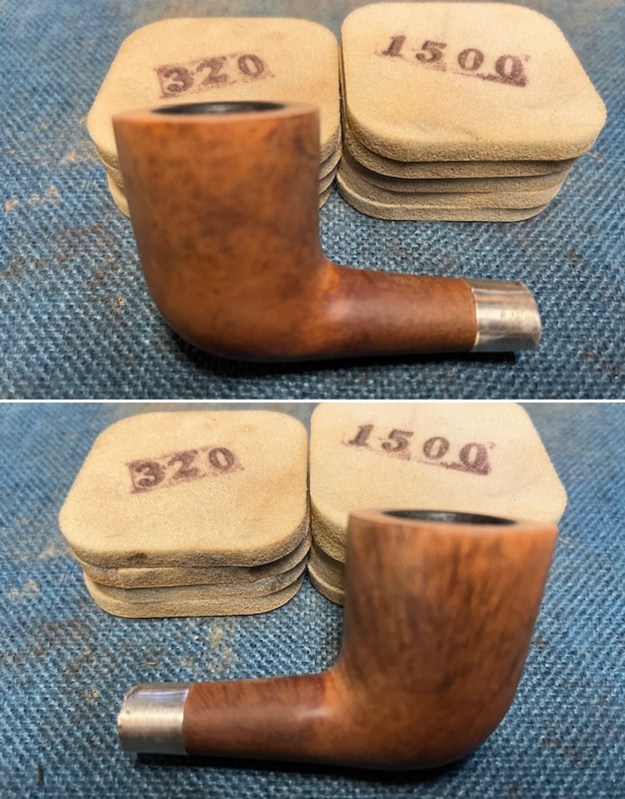
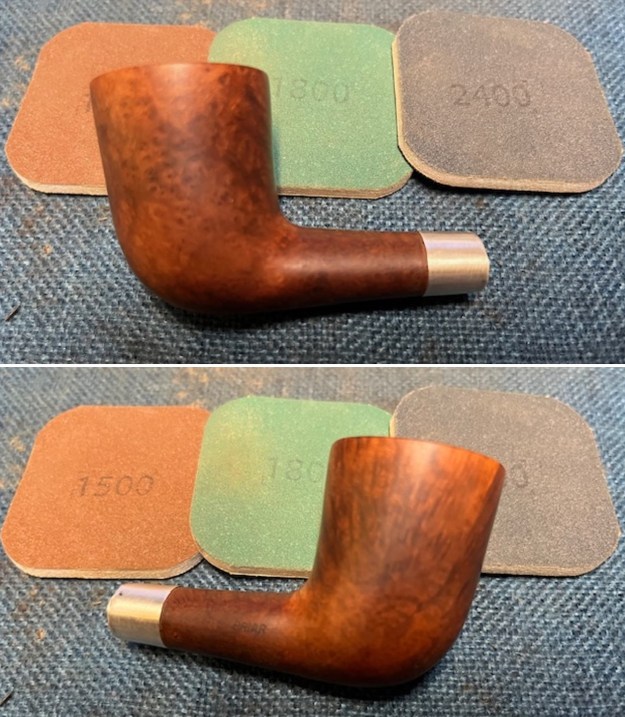
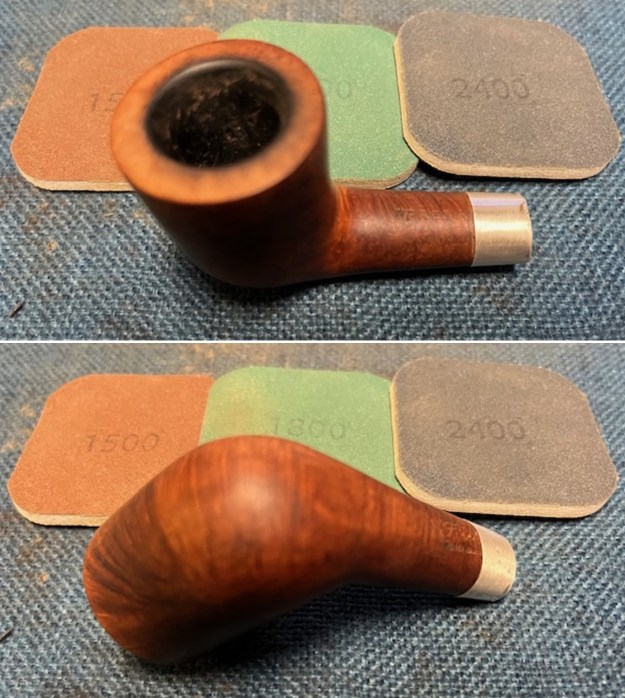
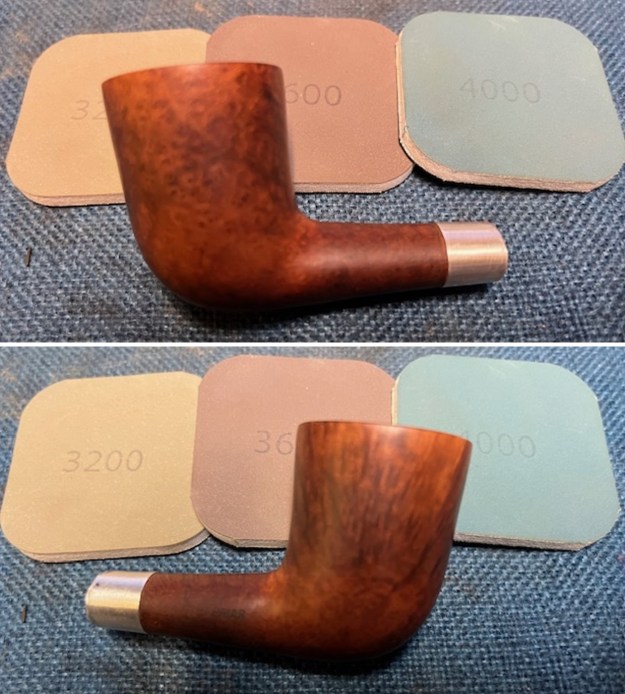
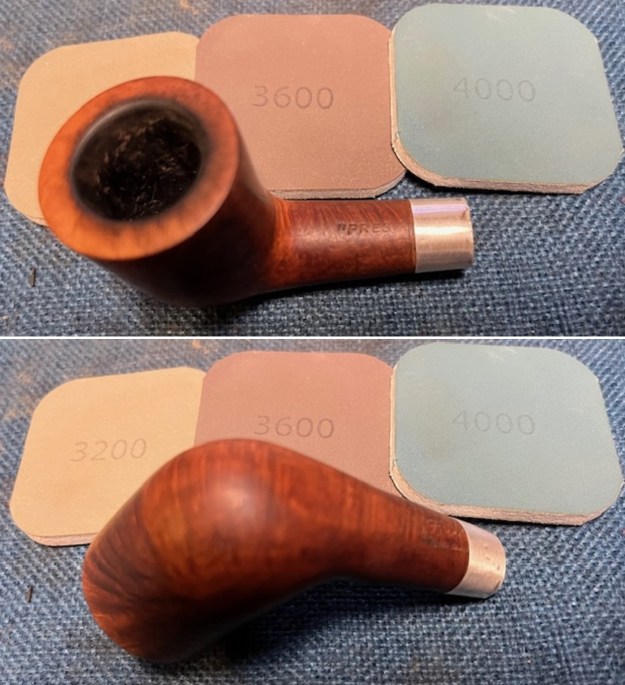
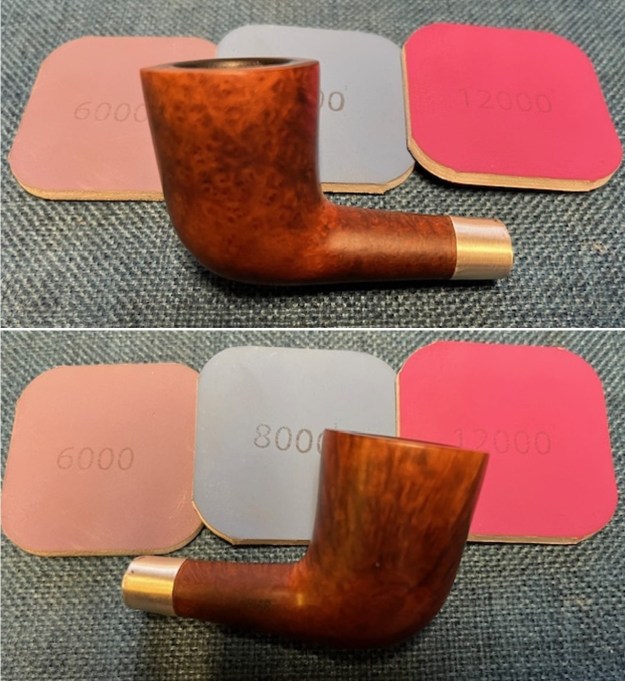
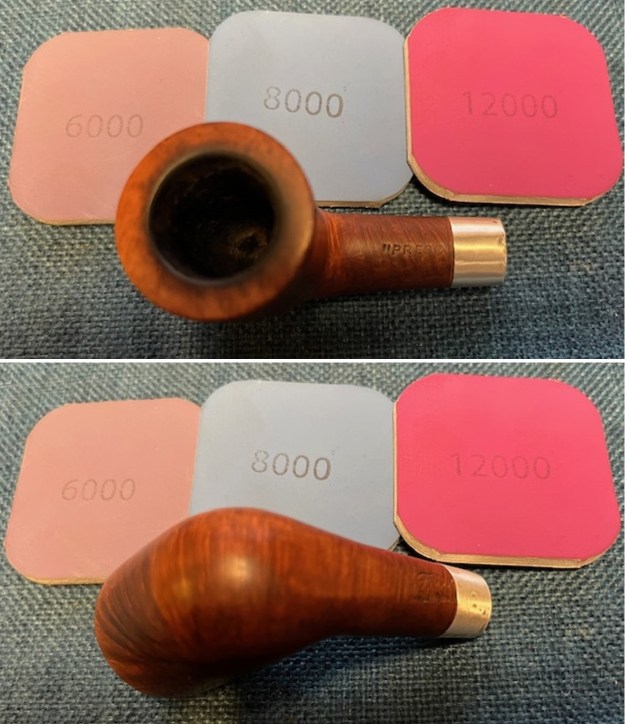
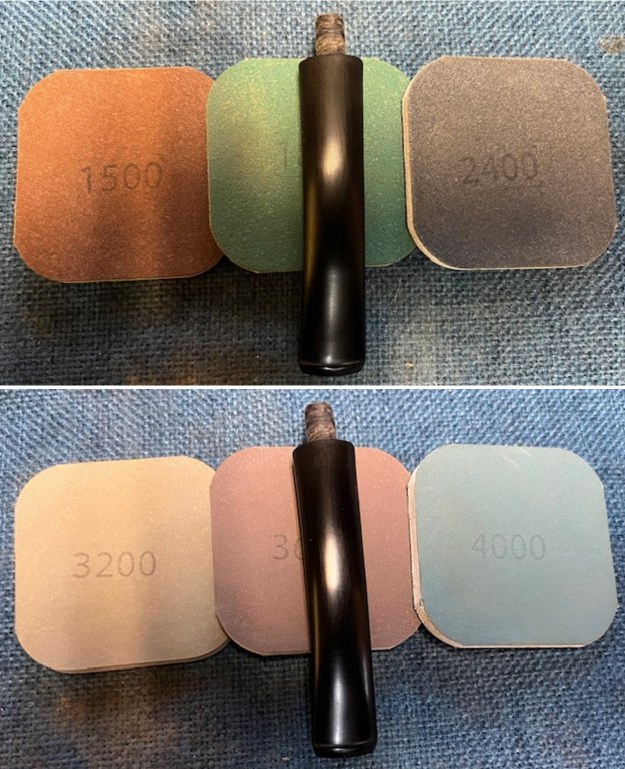
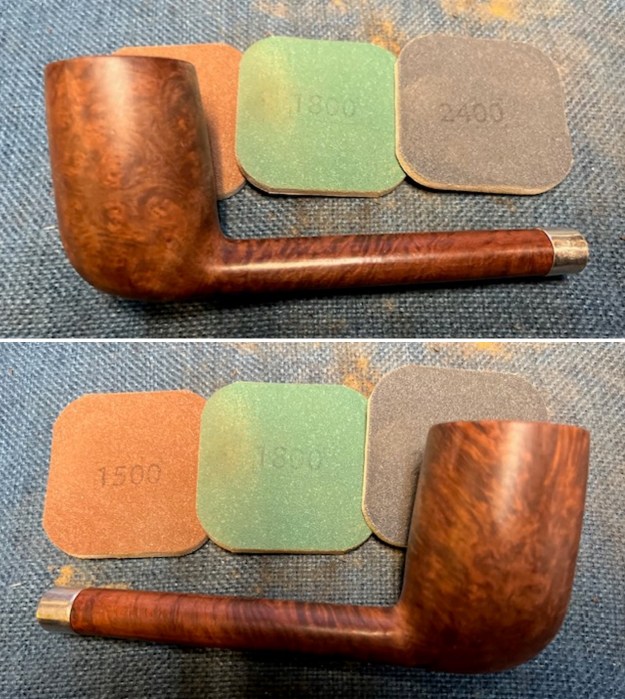
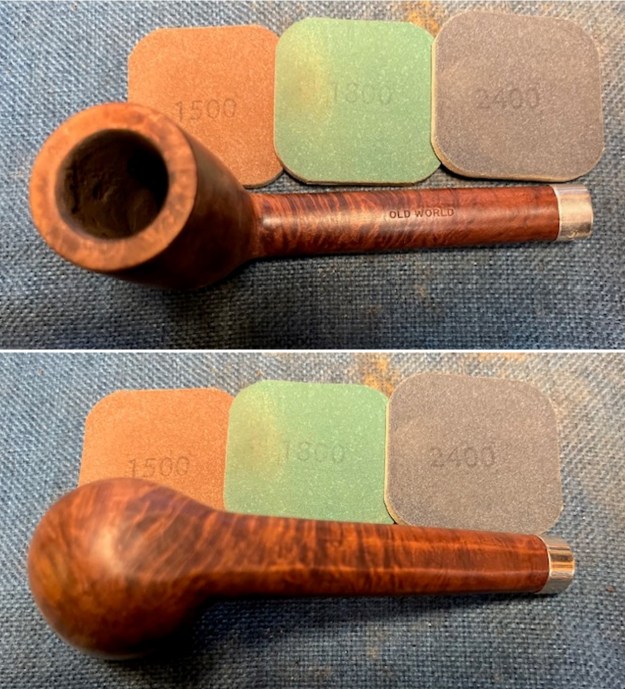
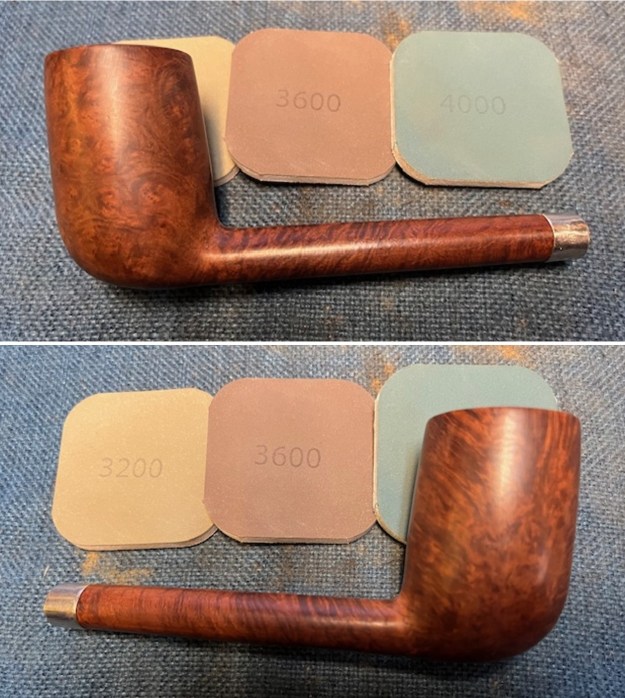
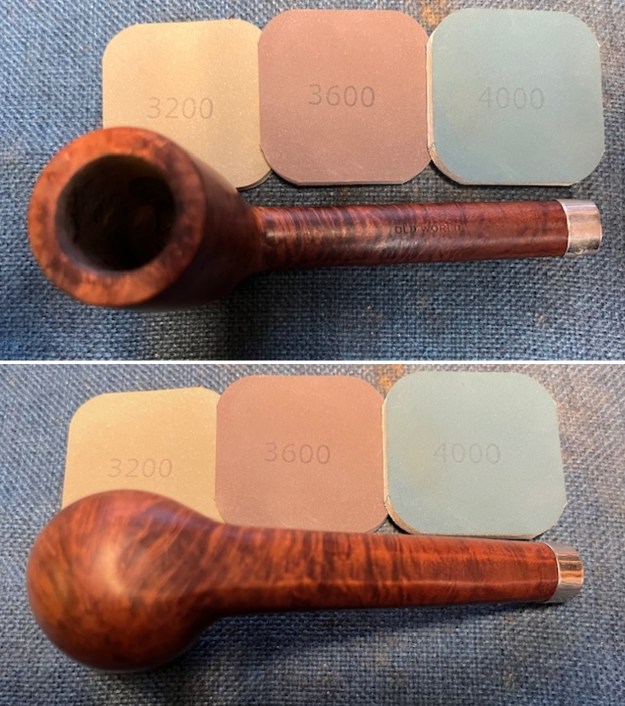
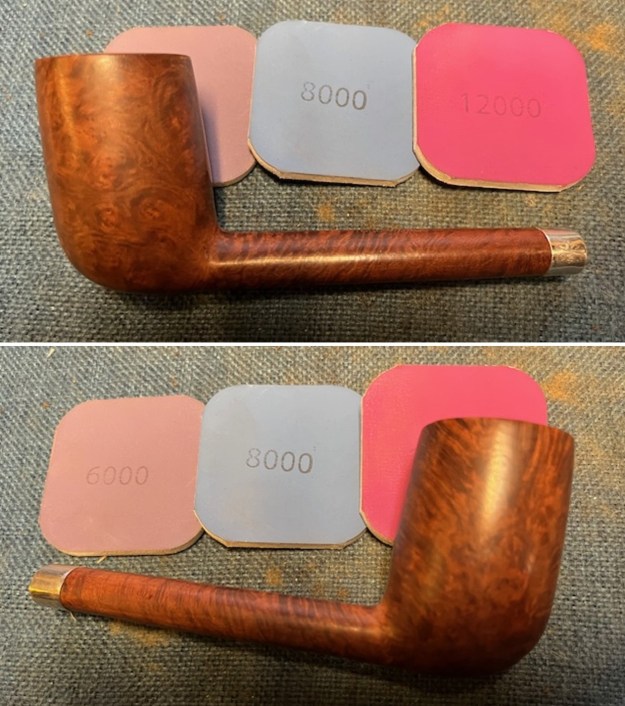
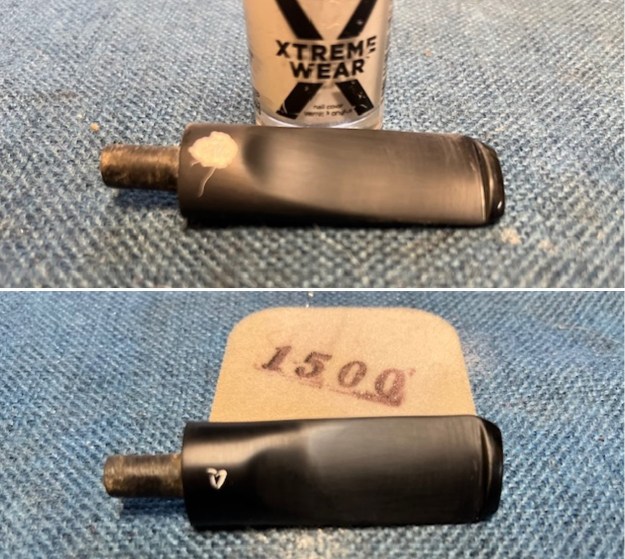
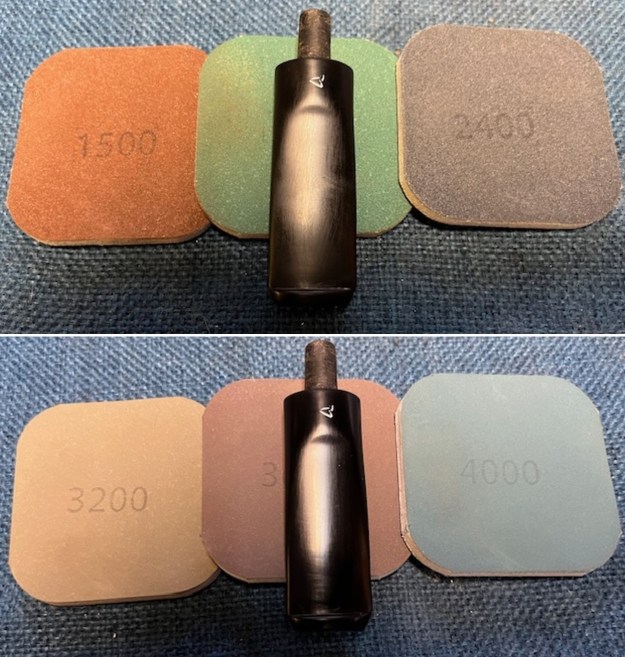
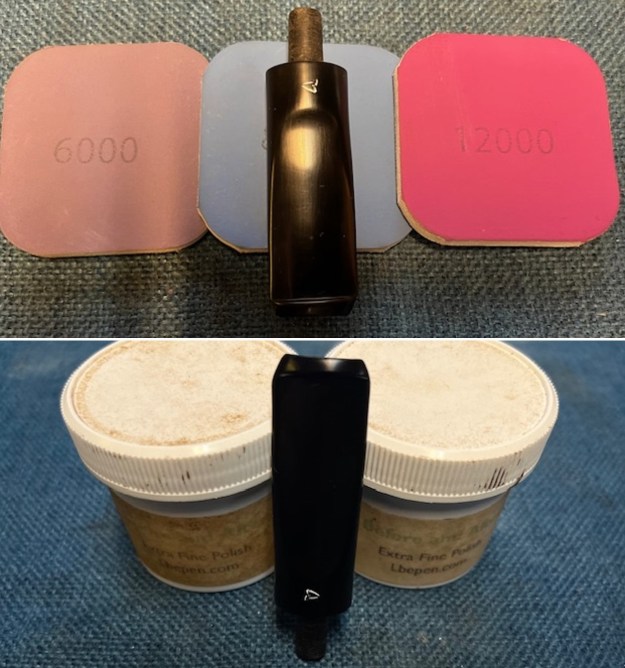
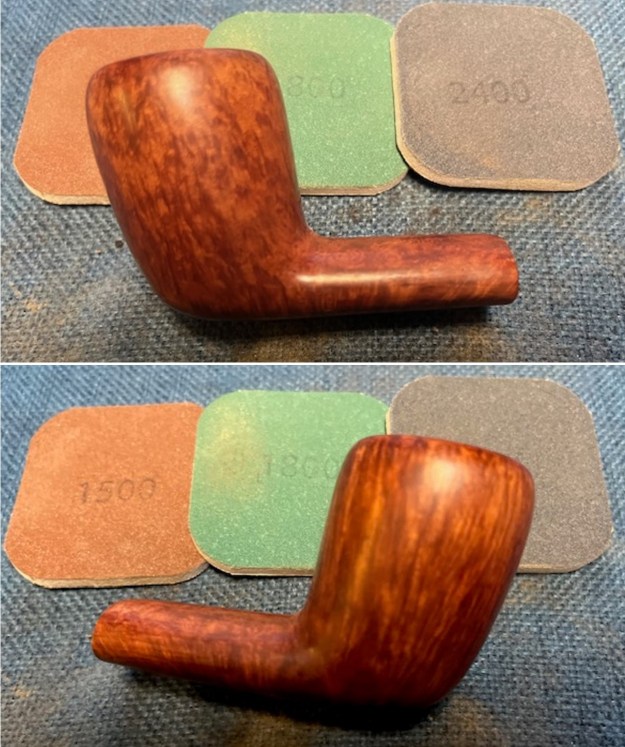
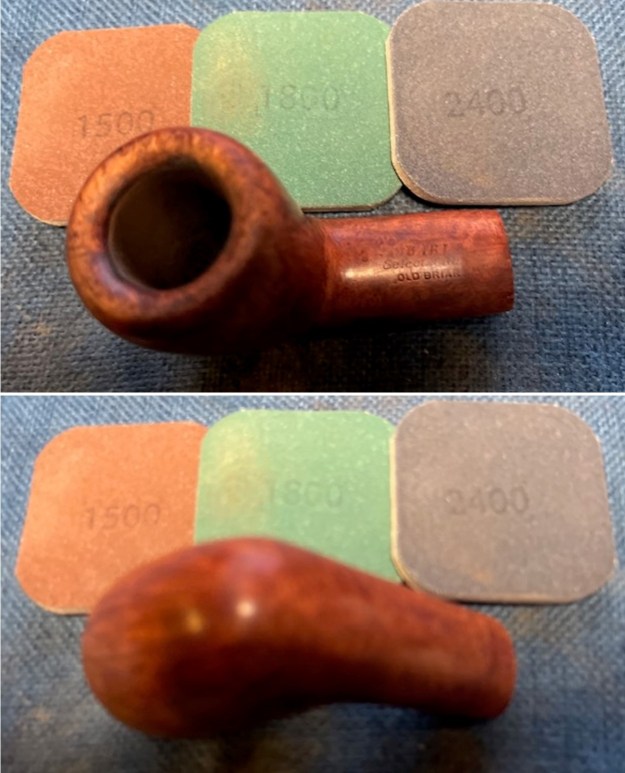
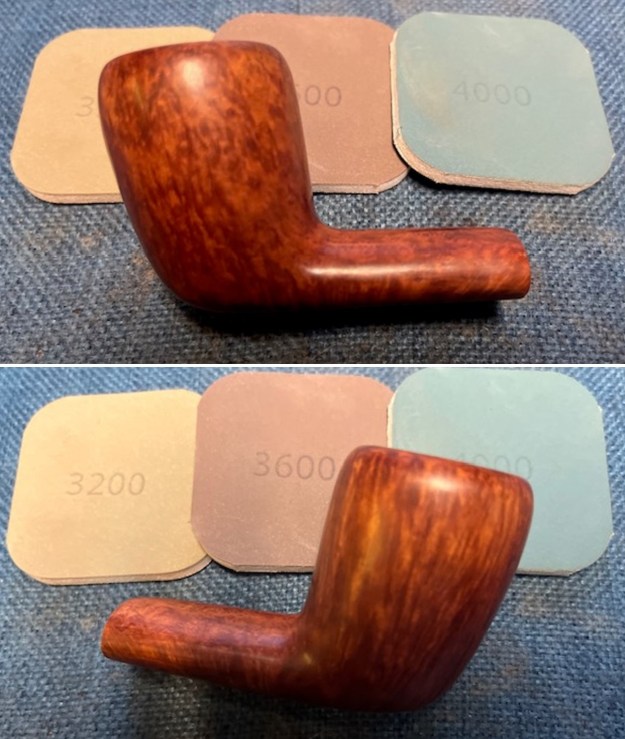
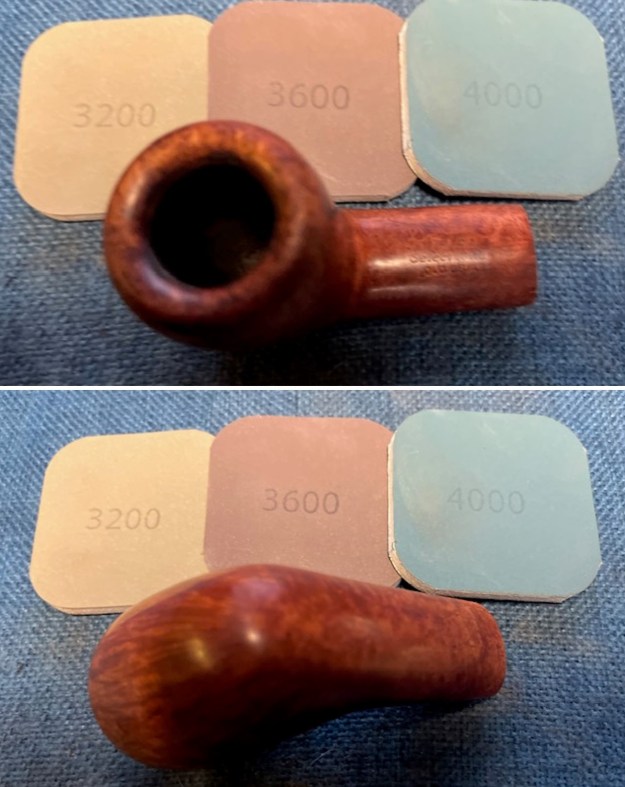
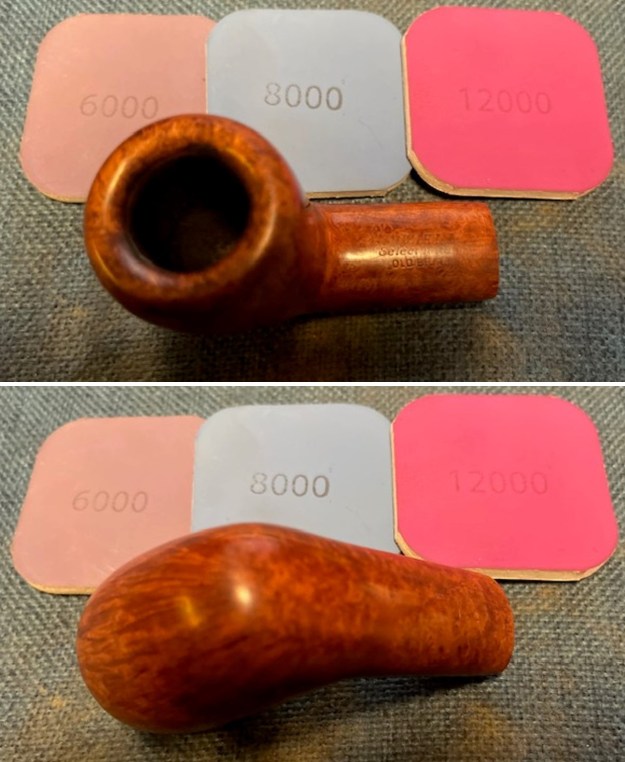
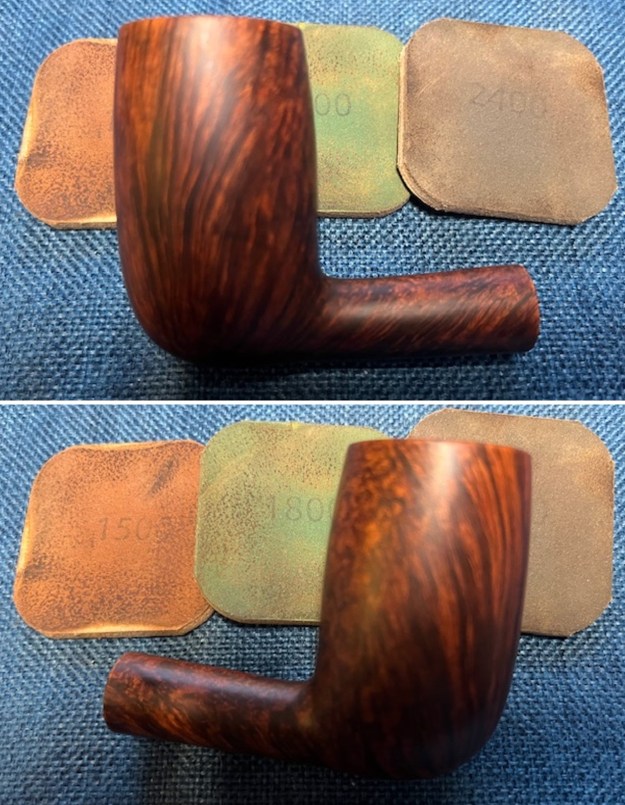
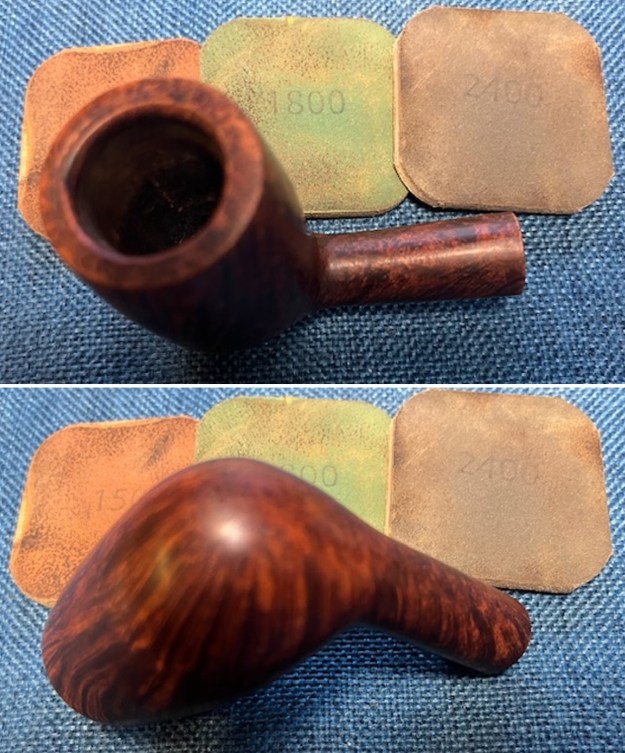
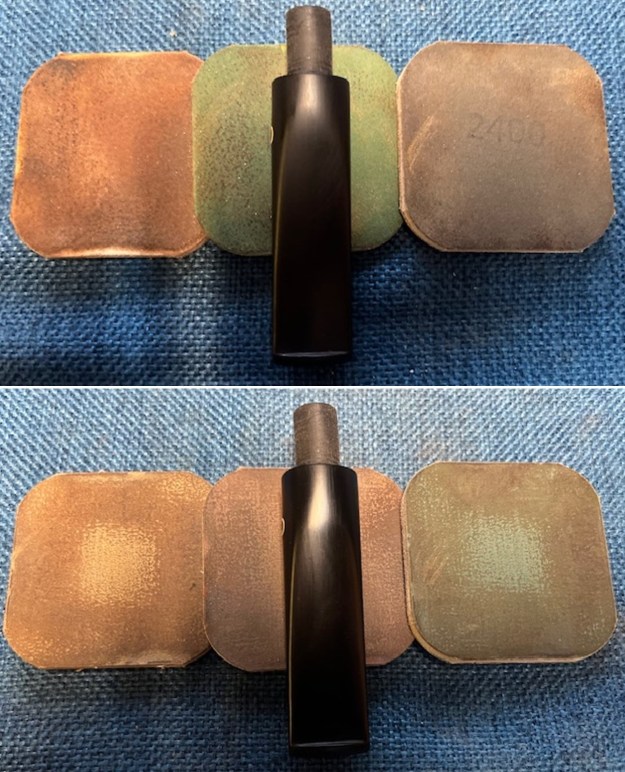
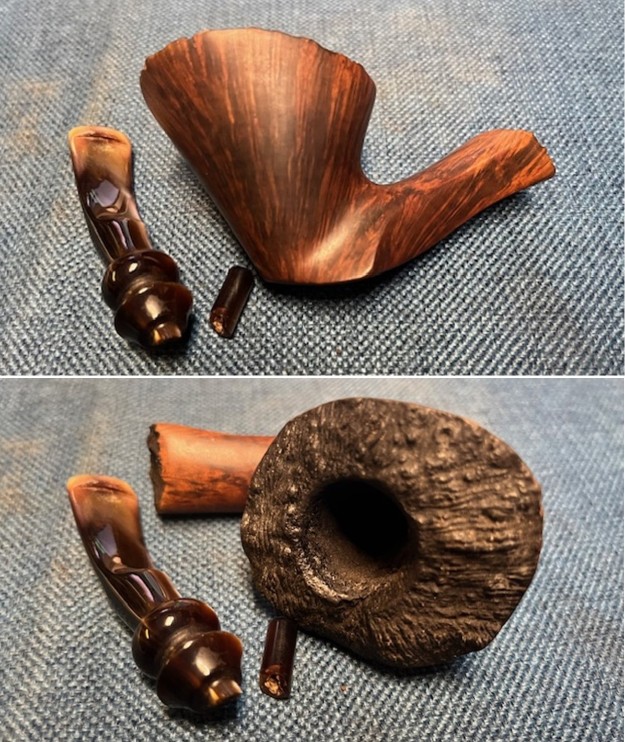
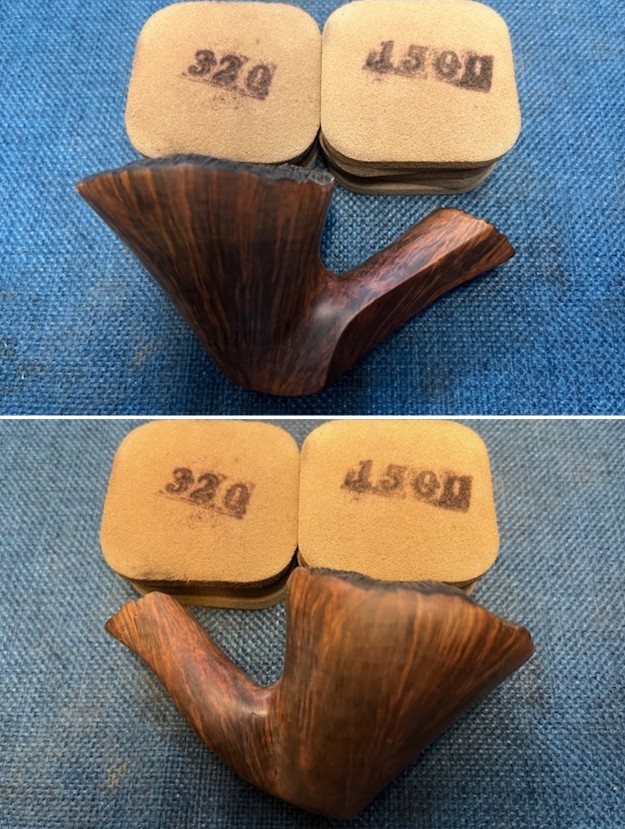
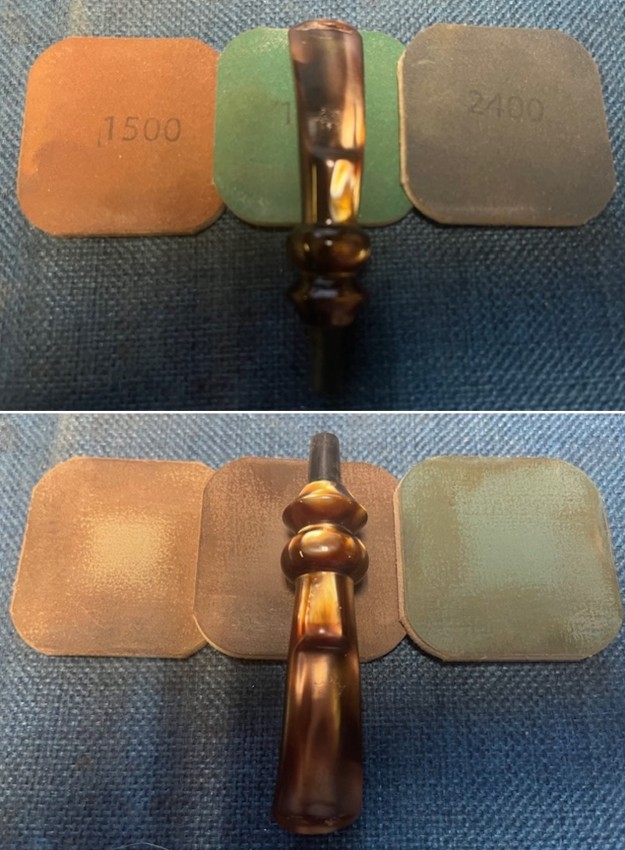
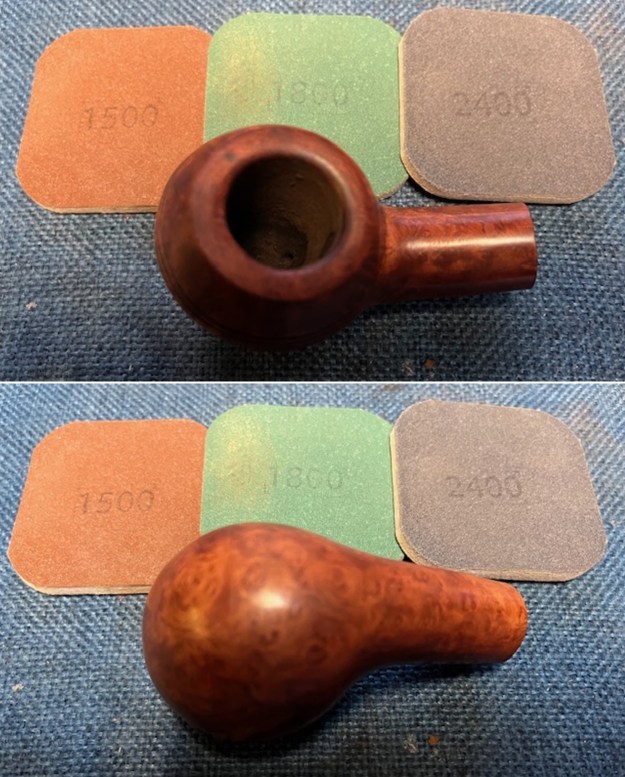
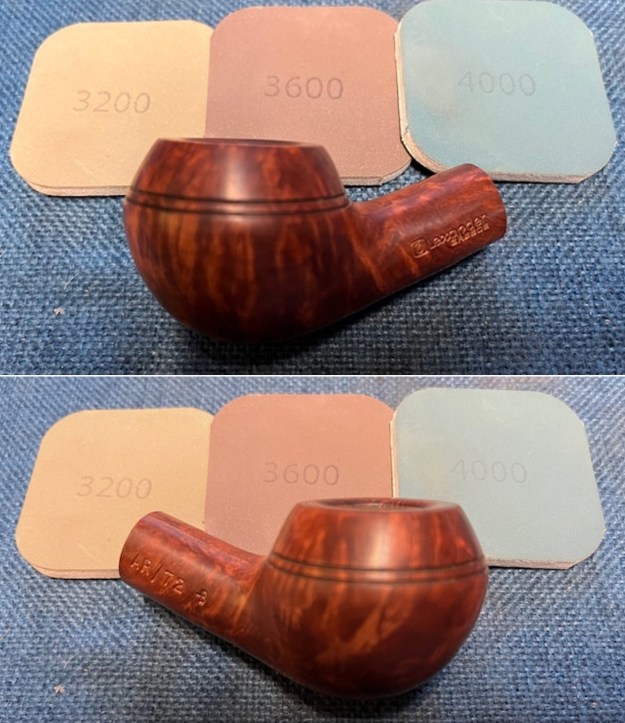
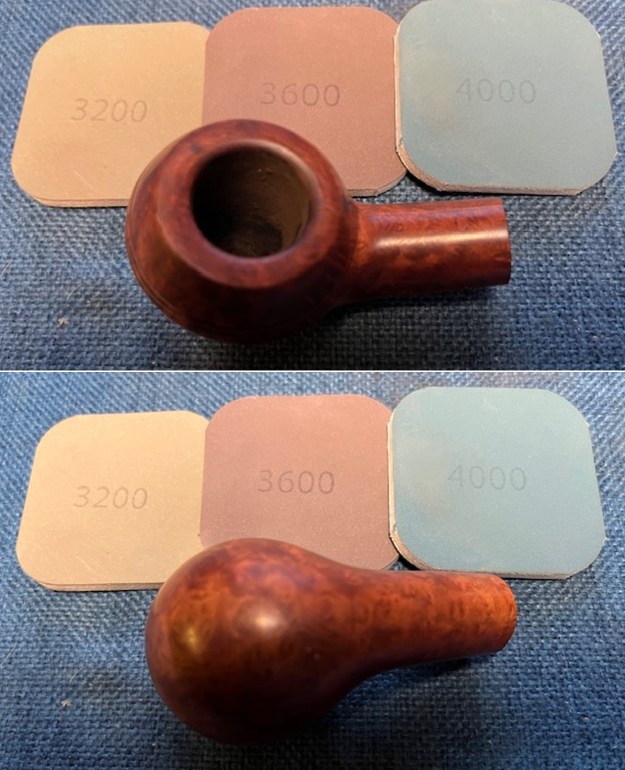
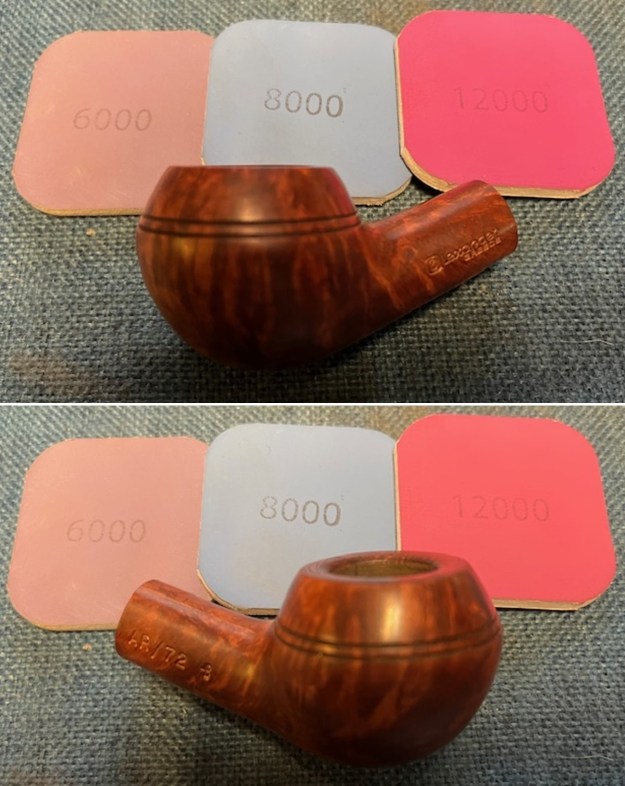
 I polished the briar with micromesh sanding pads – dry sanding with 1500-12000 grit pads. I wiped the bowl down after each pad with a damp cloth to remove the sanding dust.
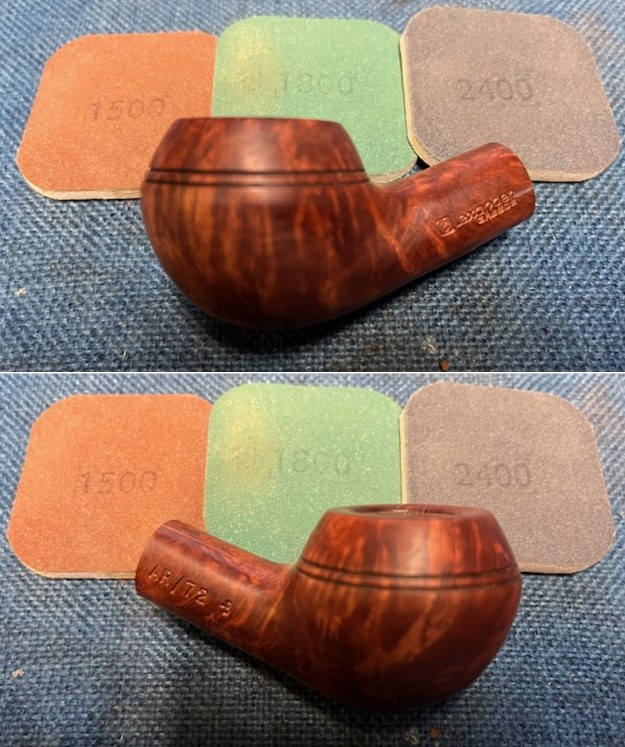
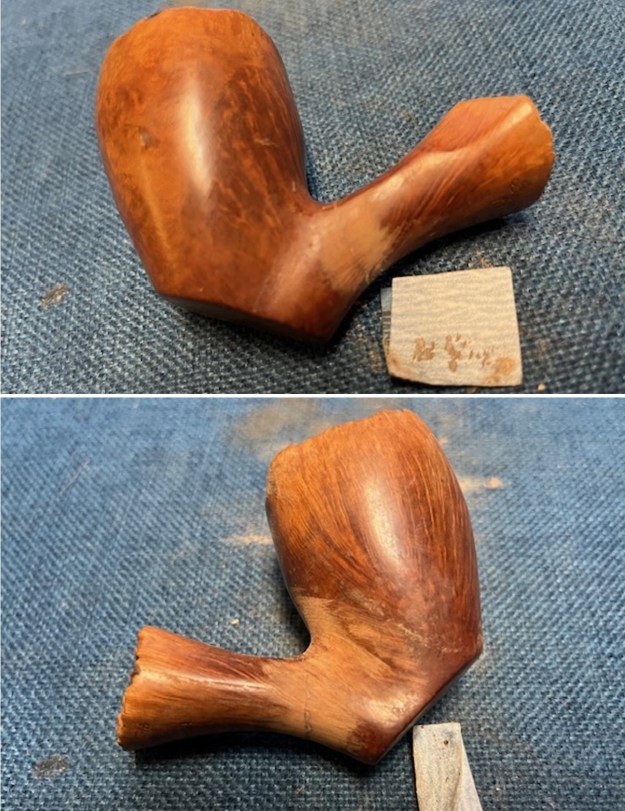
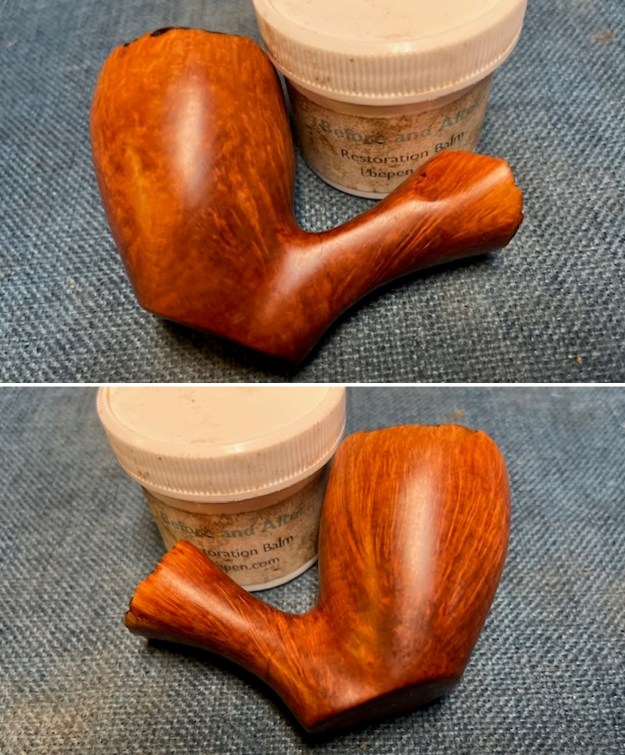
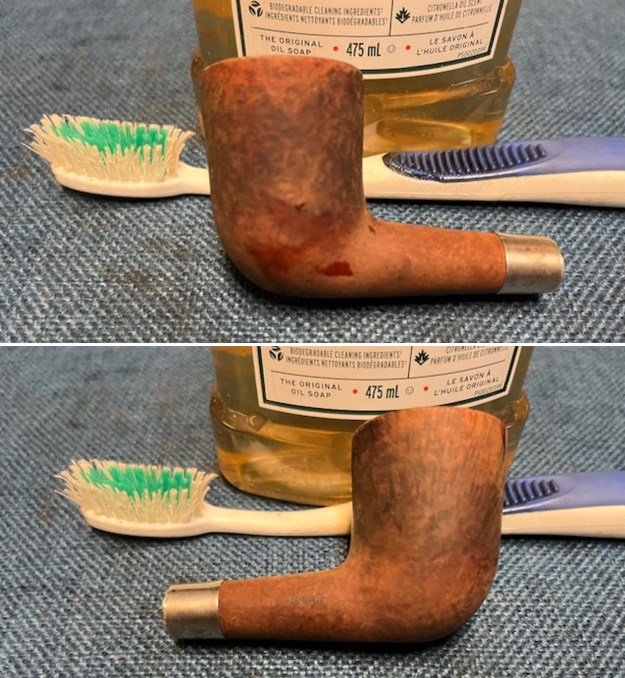
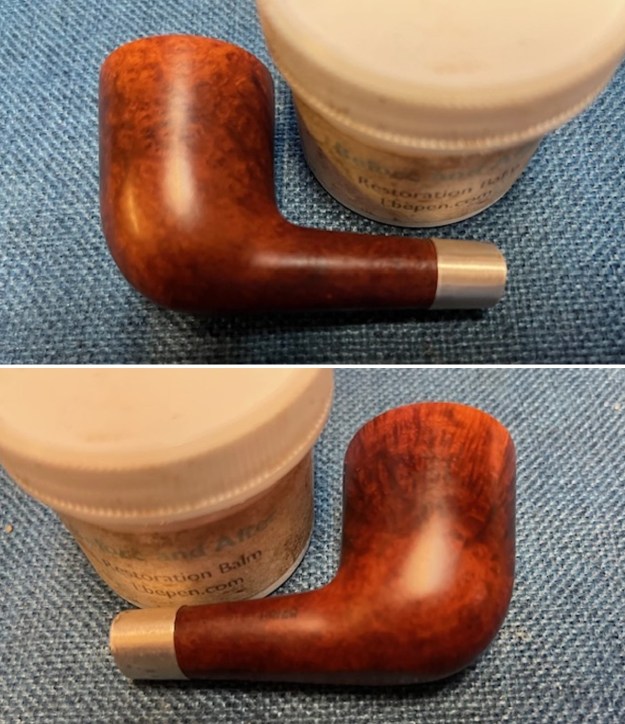
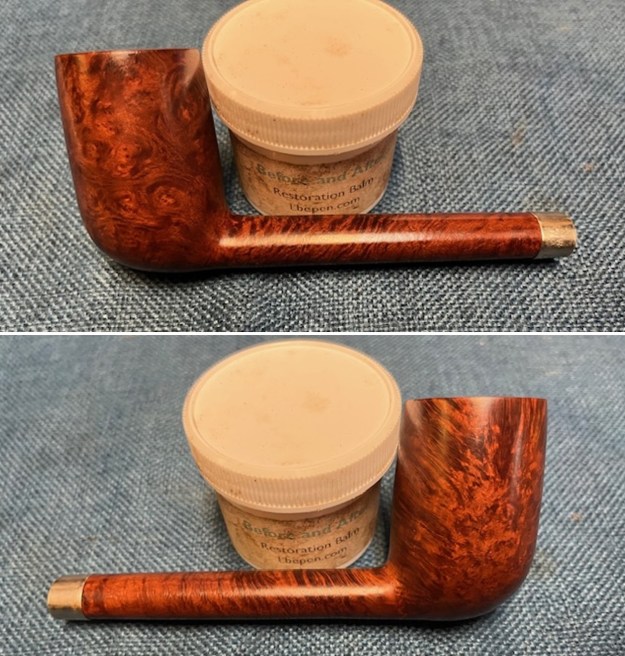
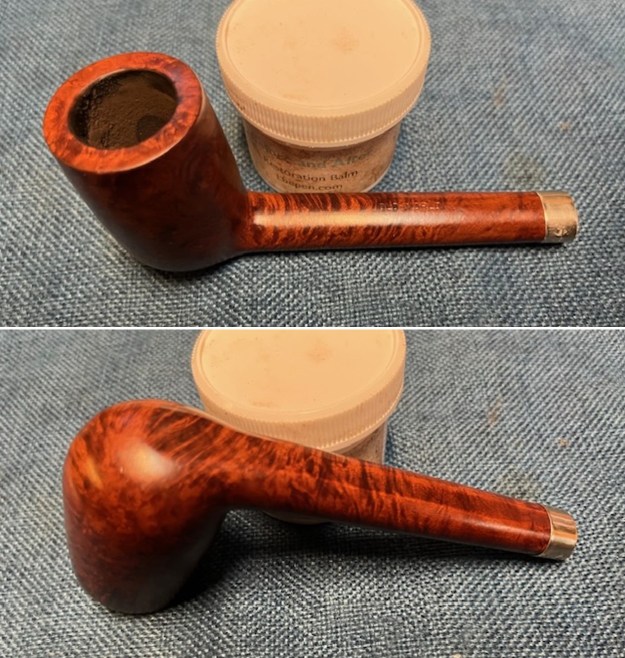
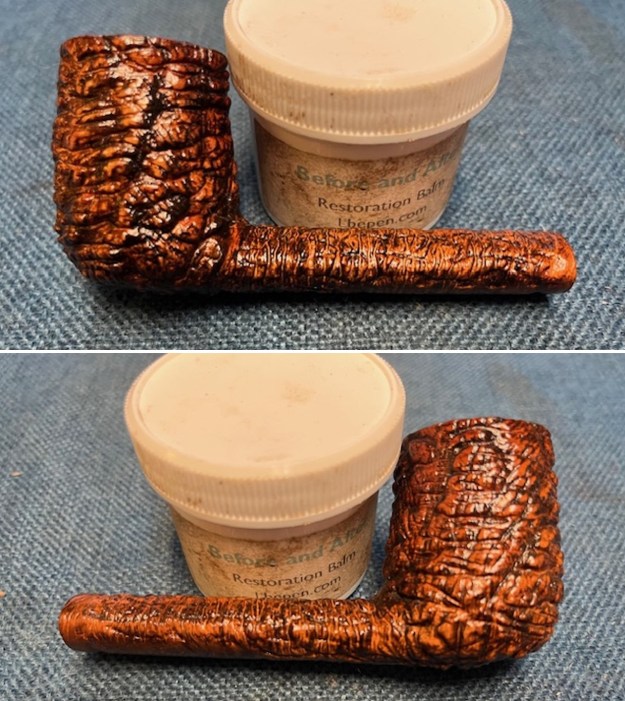
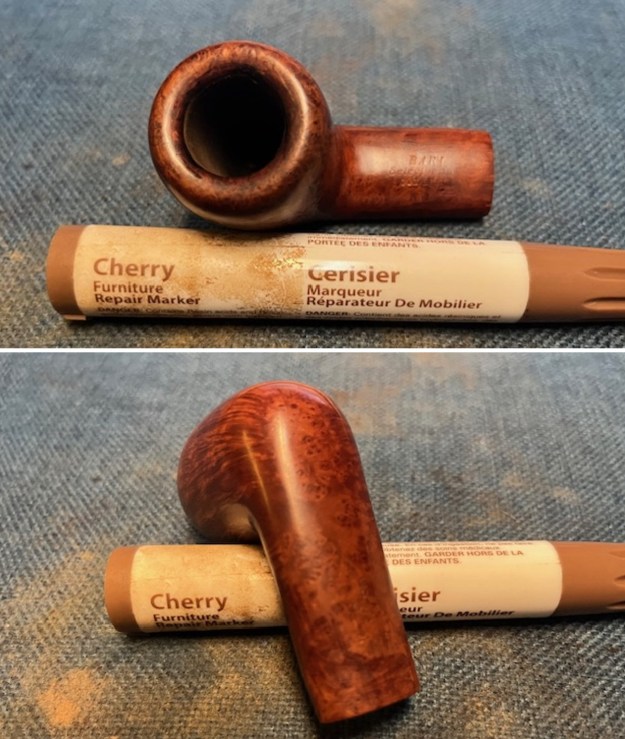
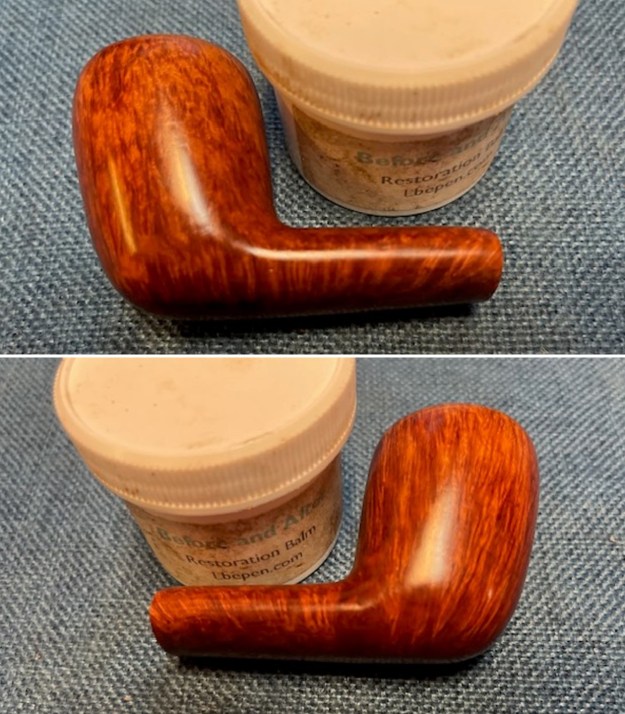
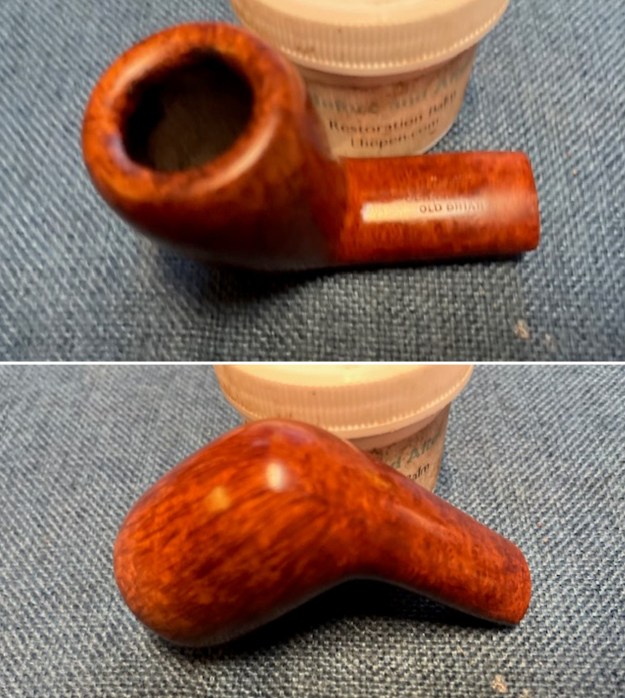
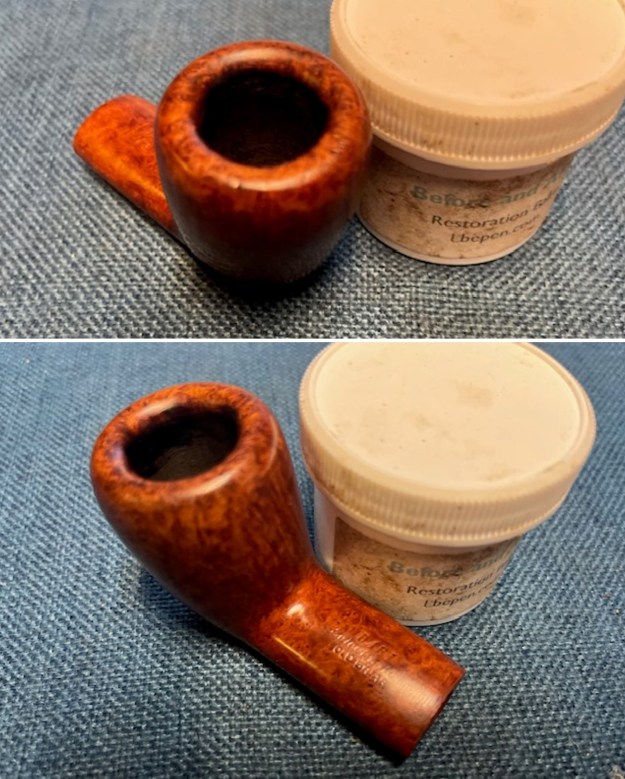
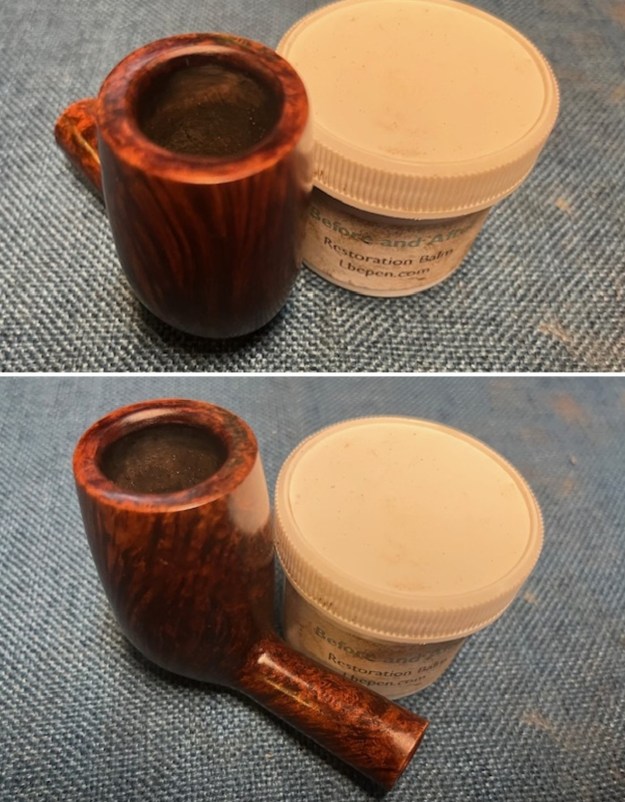
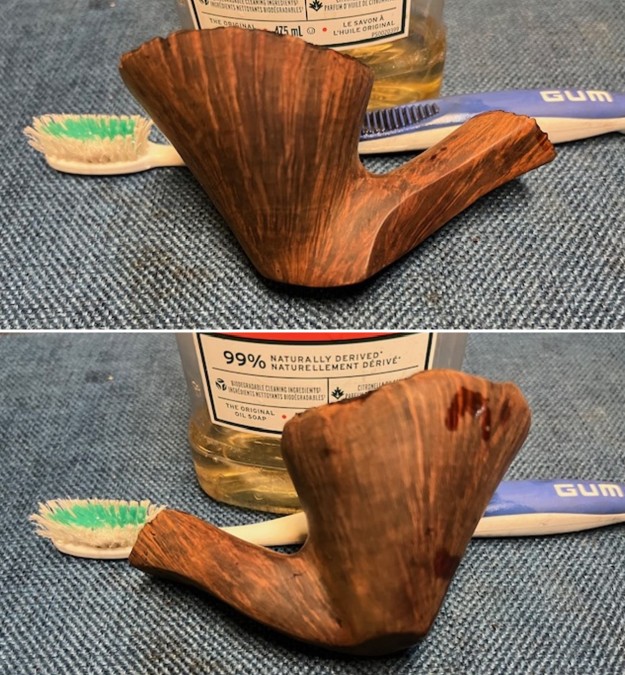
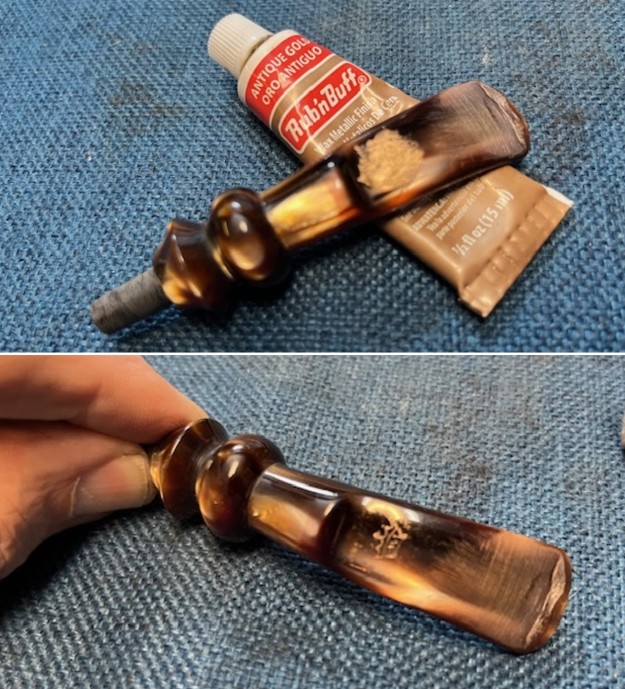
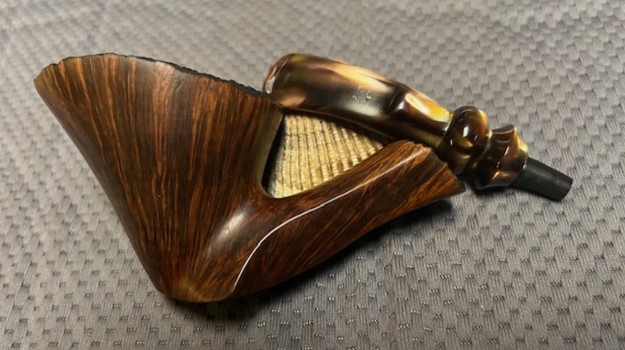
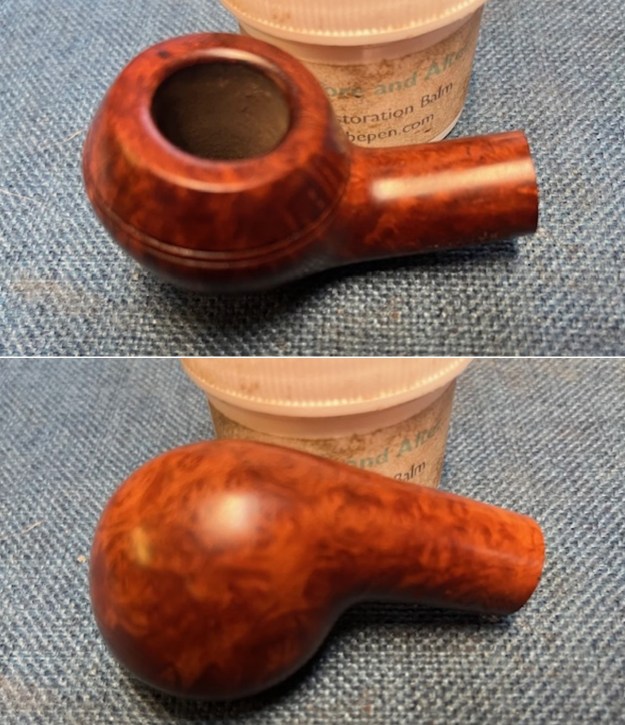
 I worked some Before & After Restoration Balm into the finish of the bowl, rim top and shank with my fingertips to clean, enliven and protect it. I find that the balm really makes the briar come alive again. The contrasts in the layers of stain really made the grain stand out. I let the balm sit for 15 minutes and then buffed with a cotton cloth to raise the shine. The bowl really looks good at this point.
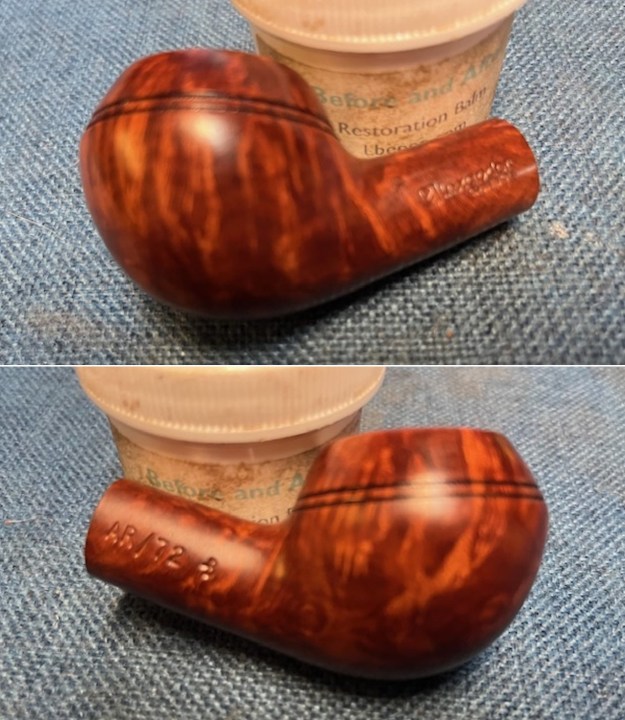
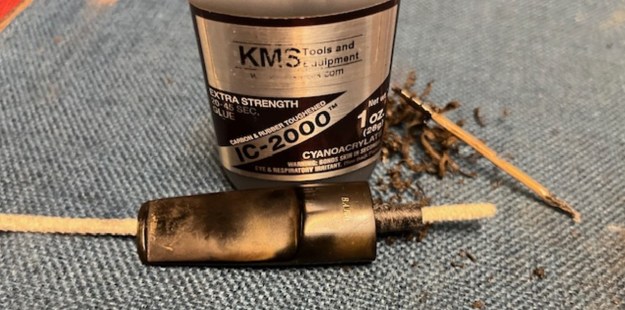
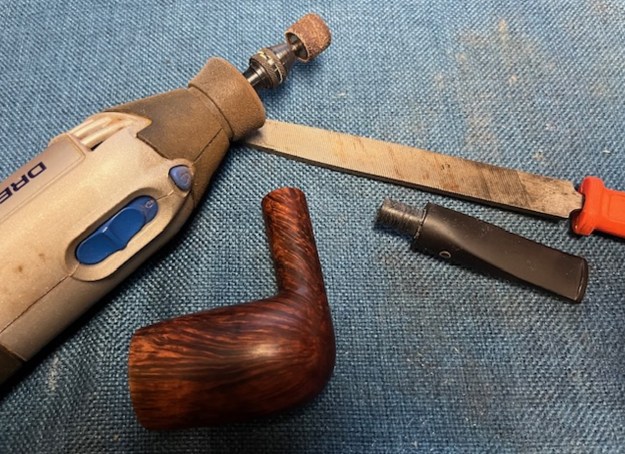
 I set aside the bowl and turned my attention to the stem. I “painted” the surface of the stem with the flame of a Bic lighter to lift the deep tooth marks. I filled in what remained with black CA glue and set it aside to let the glue cure.
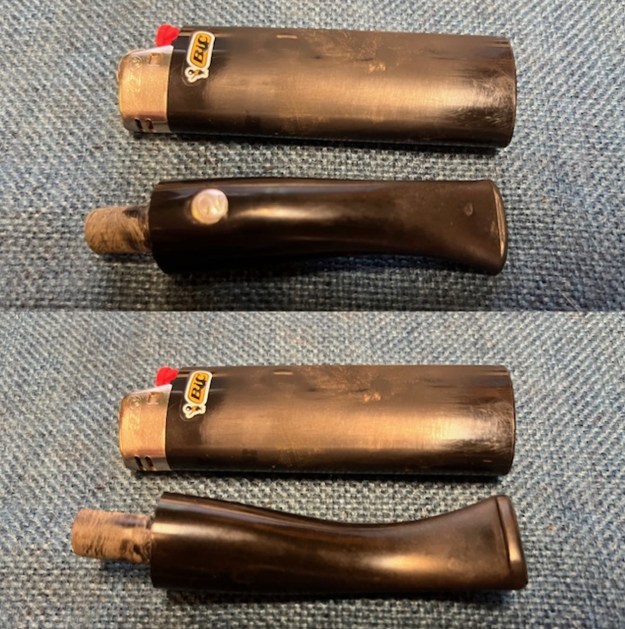
 I flattened the repairs with a small file to start the process of blending them into the surrounding ebonite. I sanded the stem surface with 220 sandpaper to further blend in the repairs and flatten them out. It was looking much better at this point.
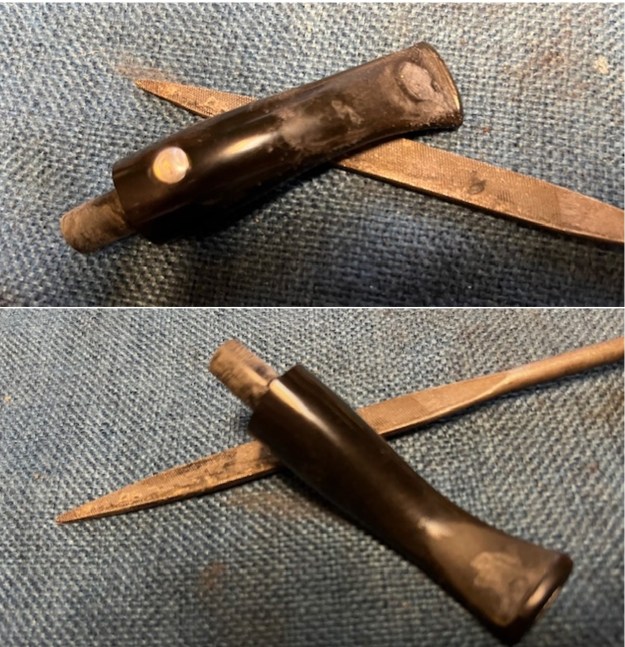
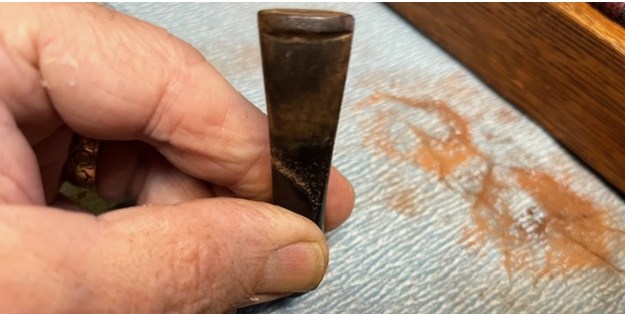
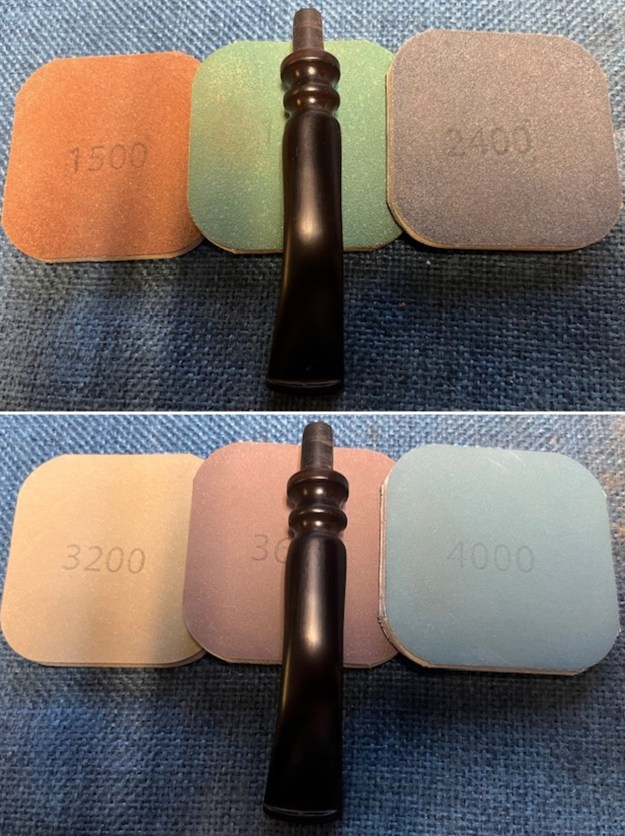
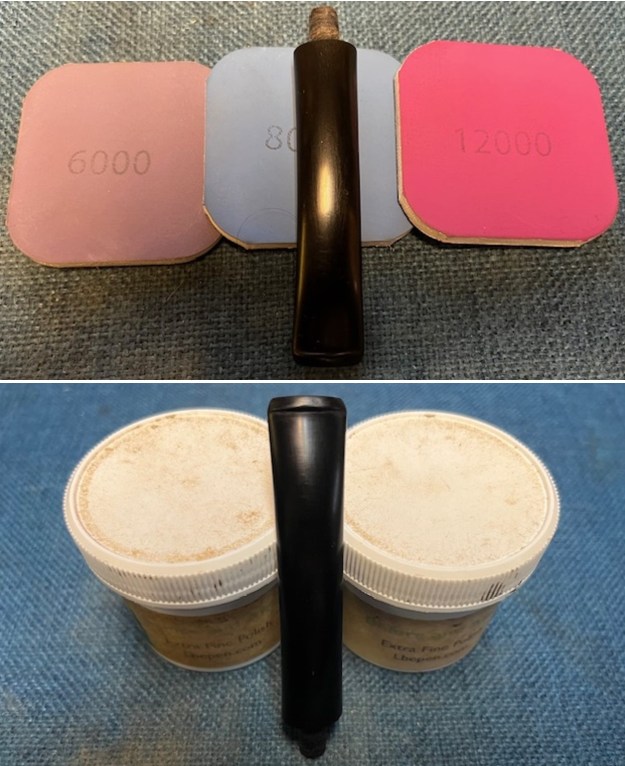
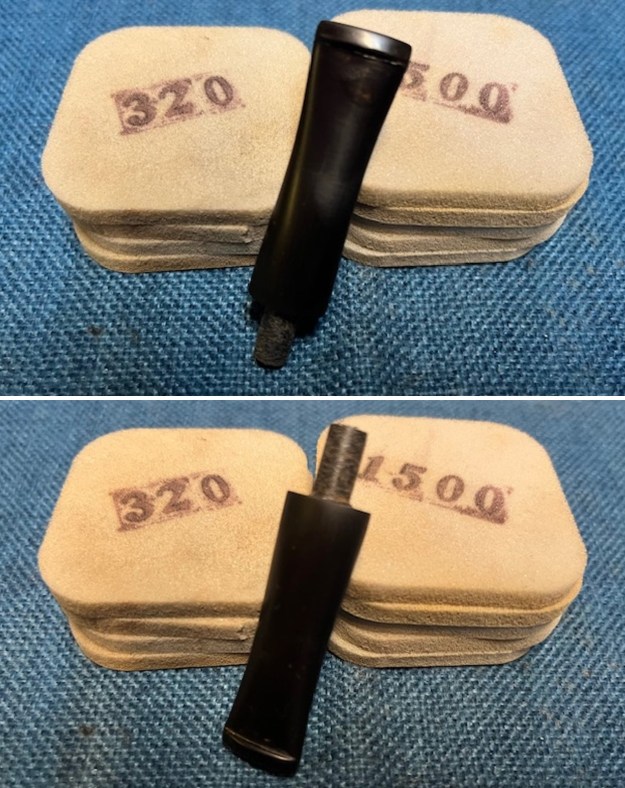
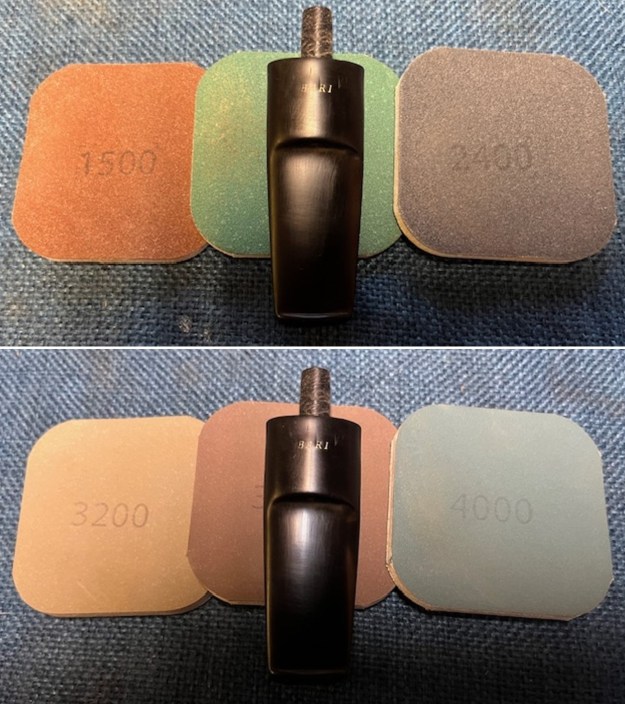
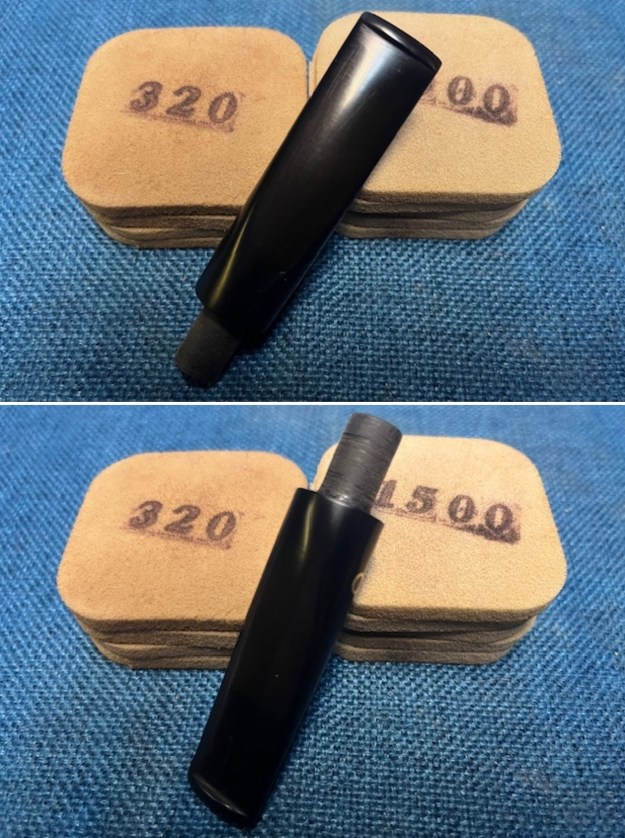
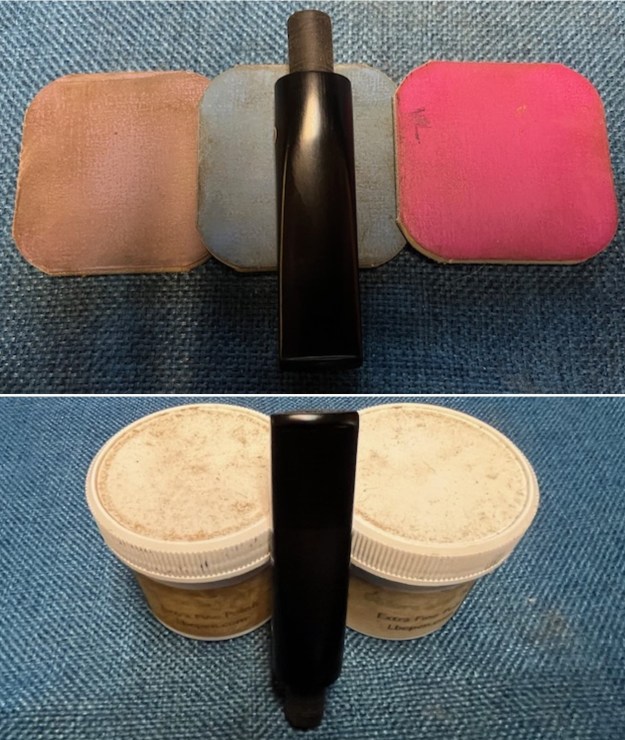
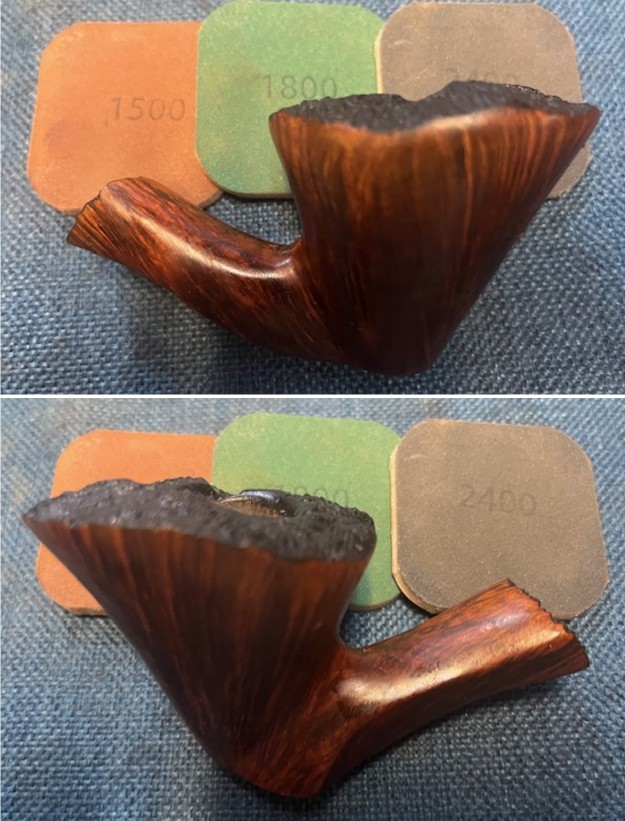
 I sanded the stem with 320-3500 grit sanding pads and wiped the stem down after each pad with an Obsidian Oil saturated cloth to remove the grime and protect the stem.
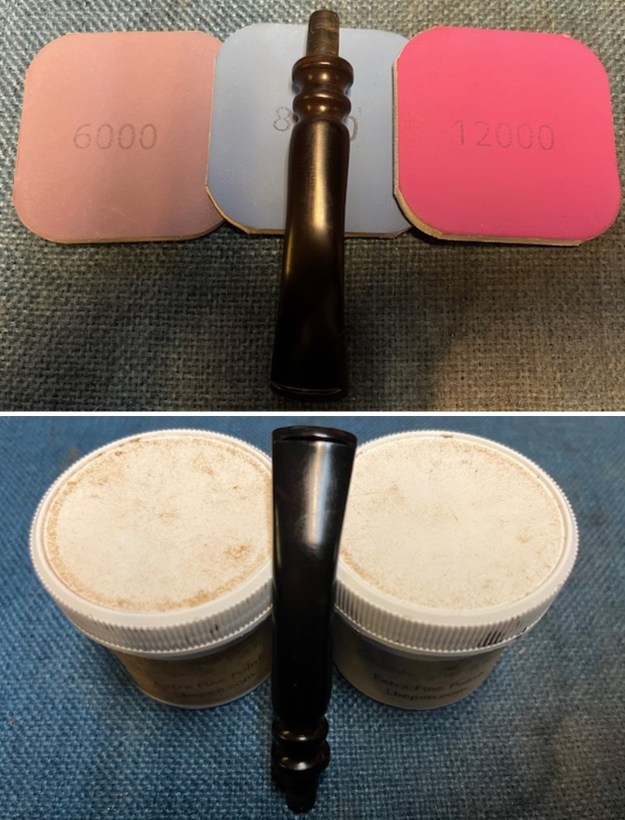
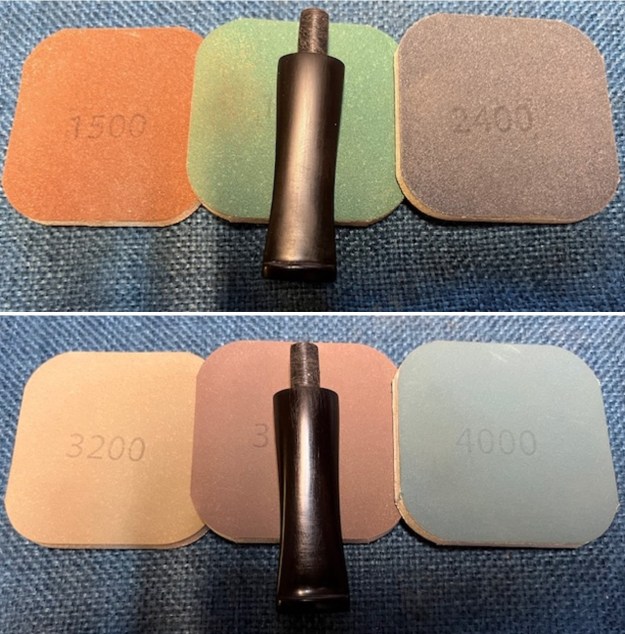
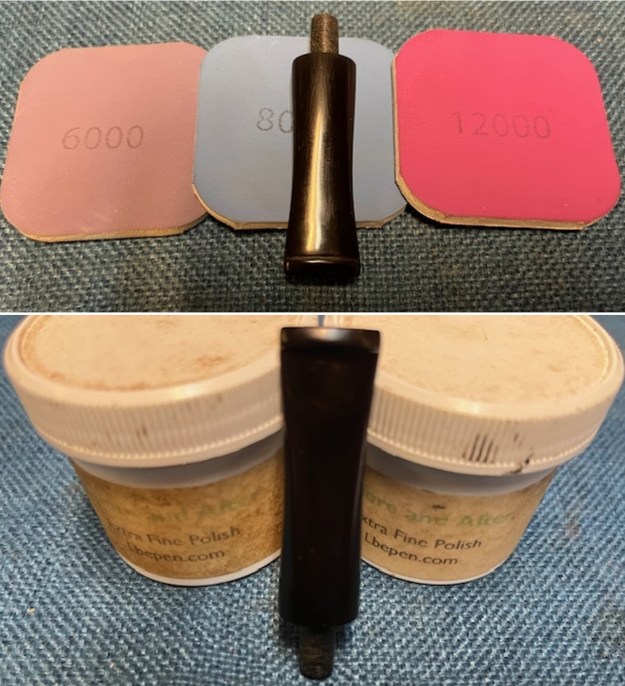
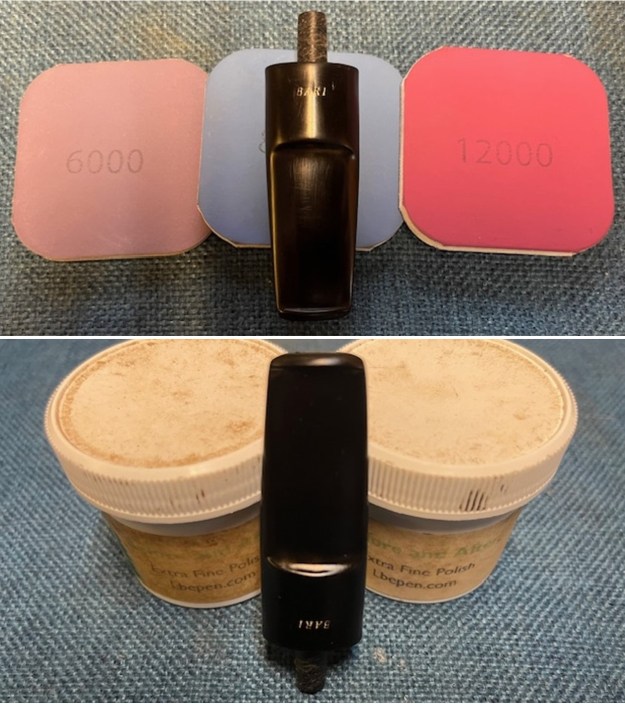
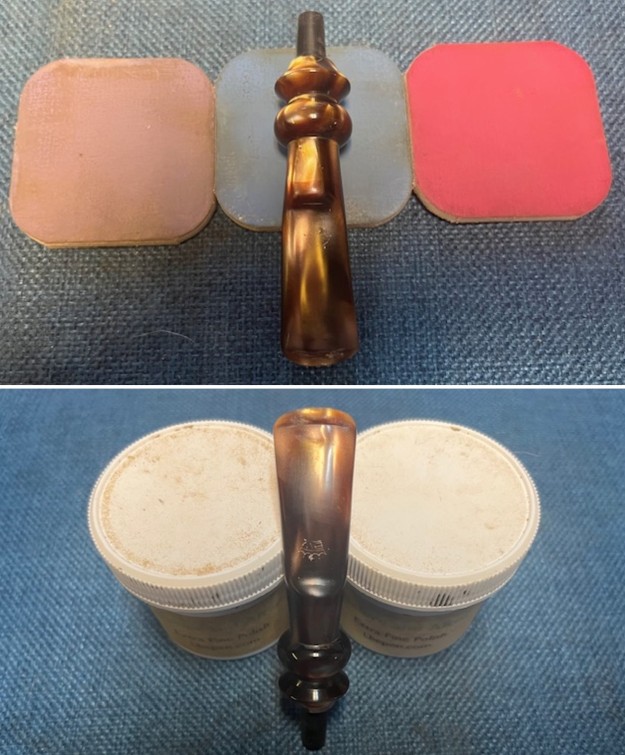
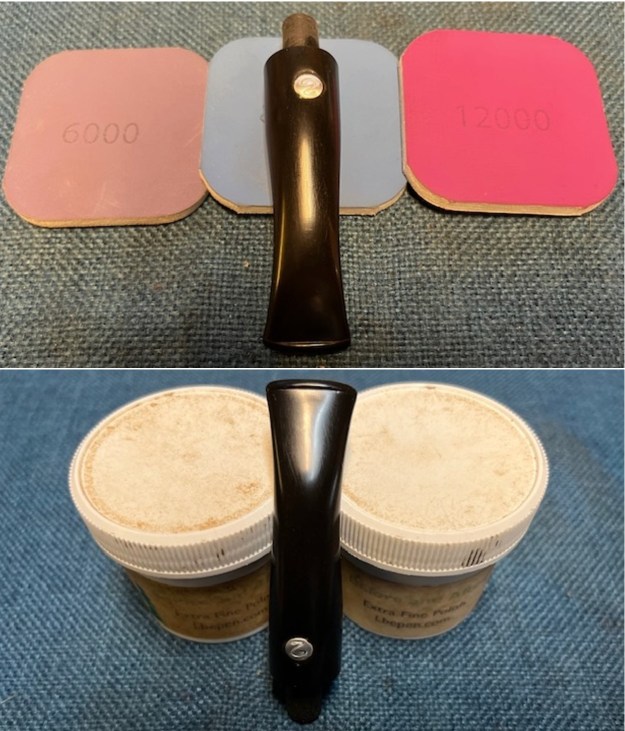
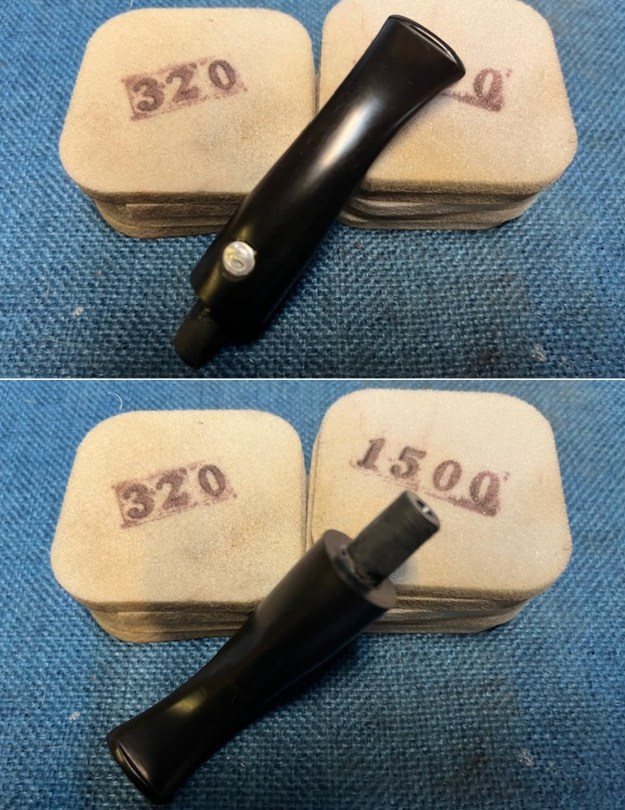 I polished the stem with micromesh sanding pads – wet sanding it with 1500-12000 grit pads. I polished it further with Before & After Pipe Stem Polish – both fine and extra fine.
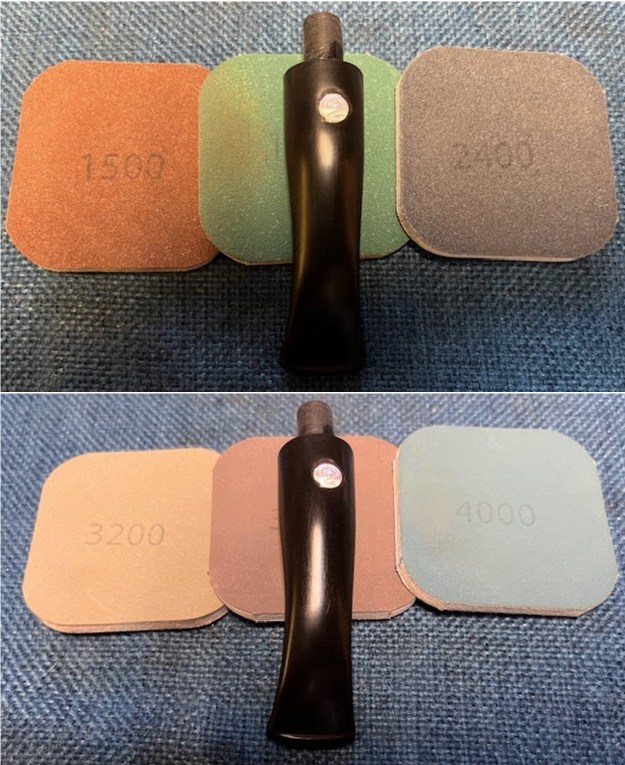
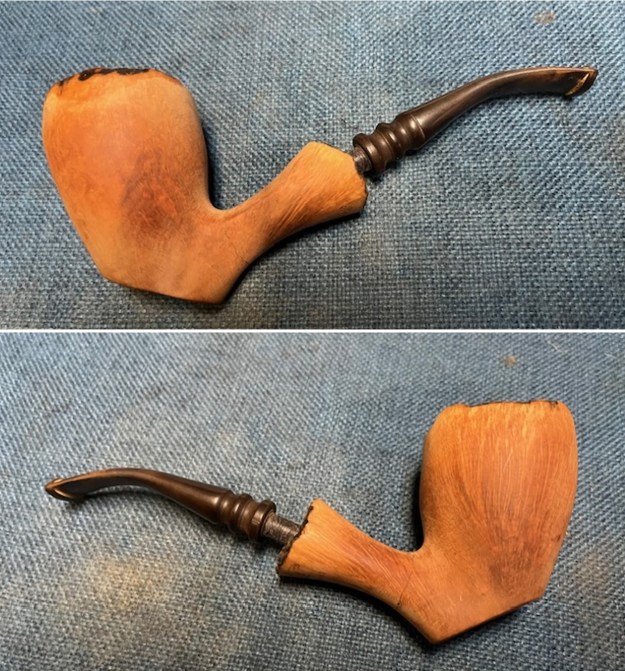
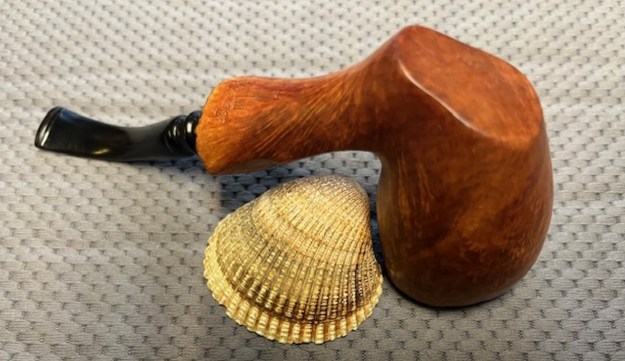
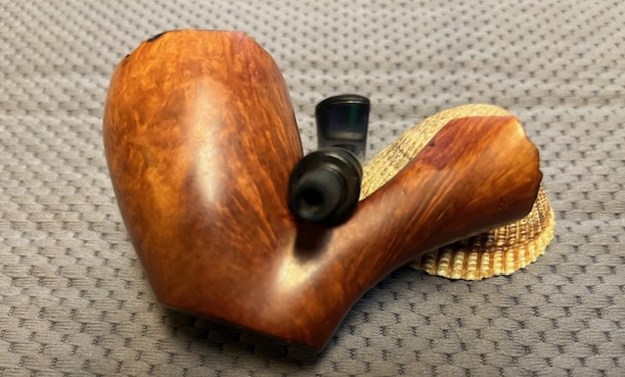
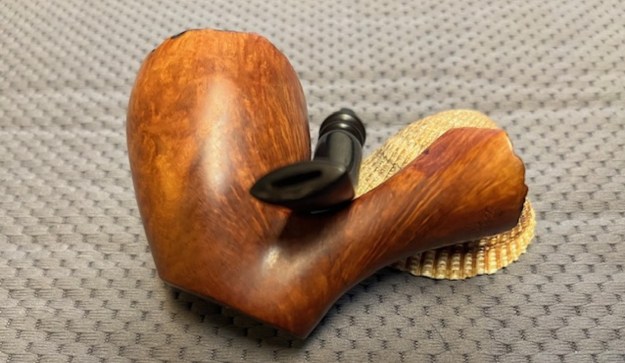
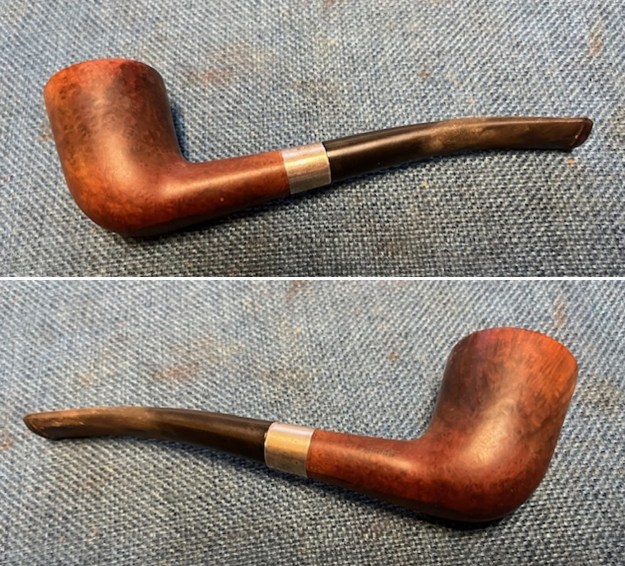
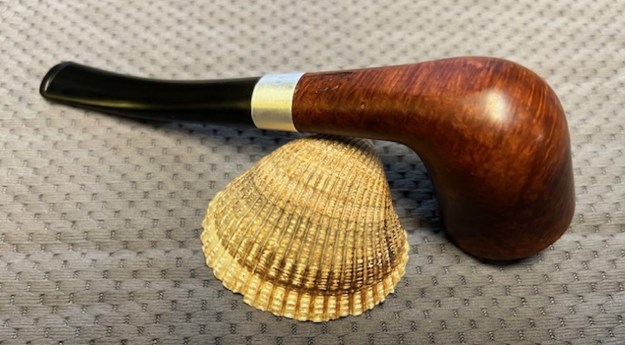
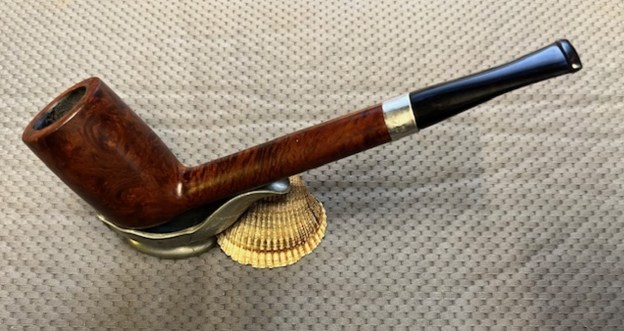
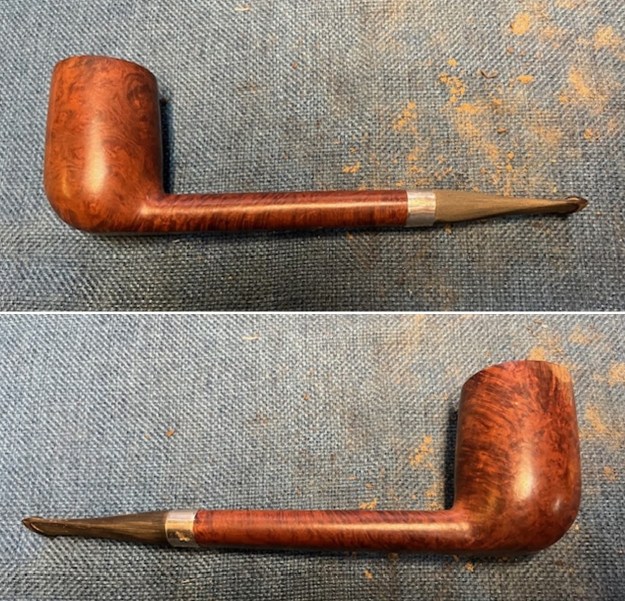
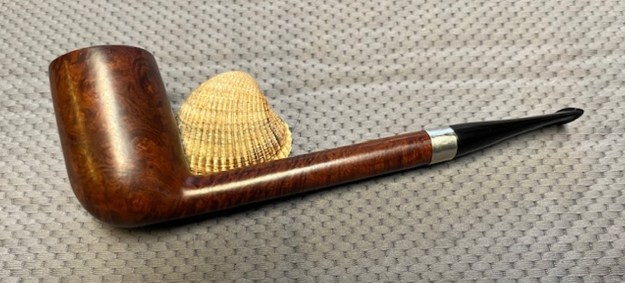
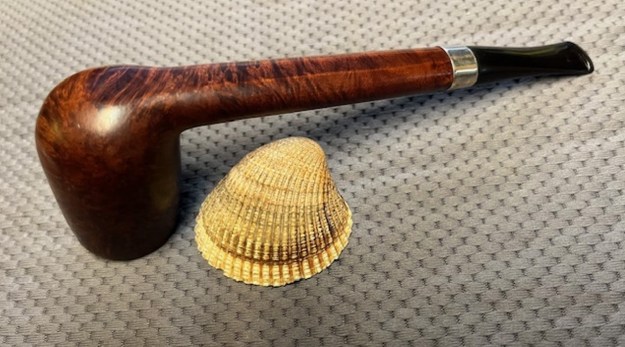
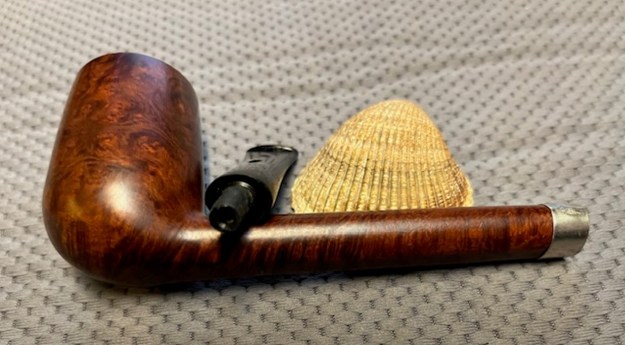
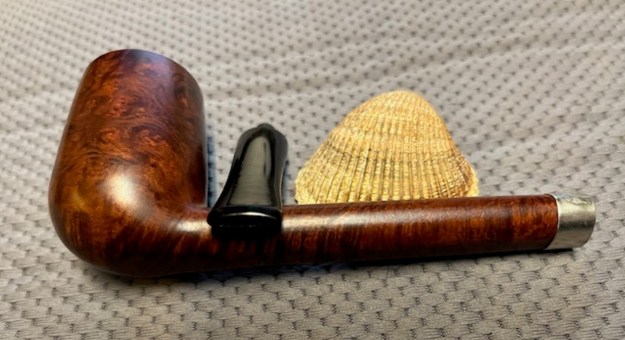
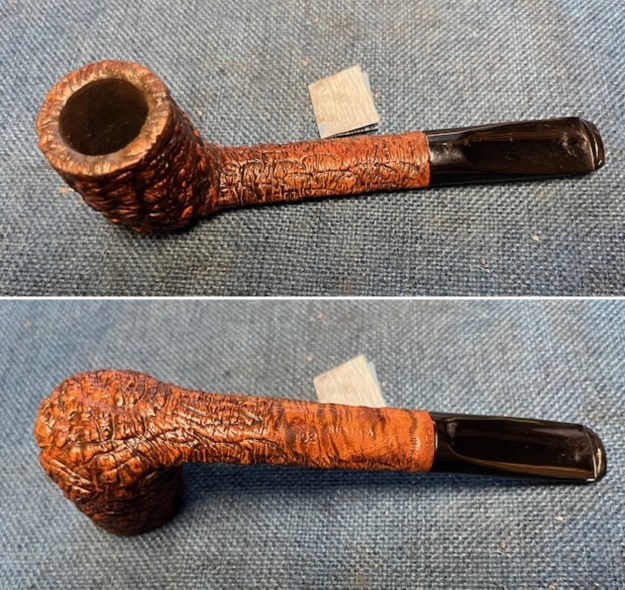
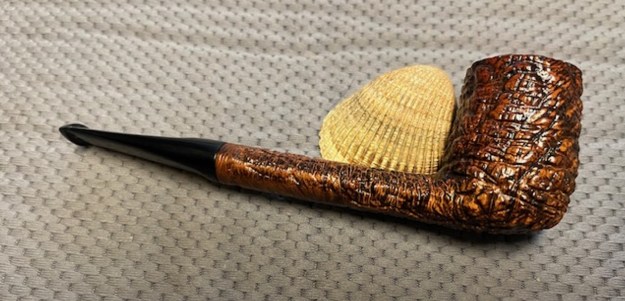
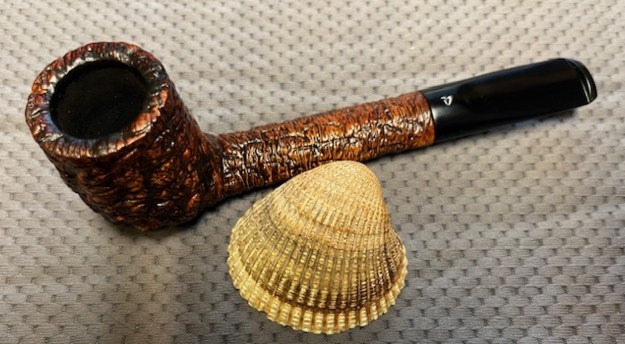
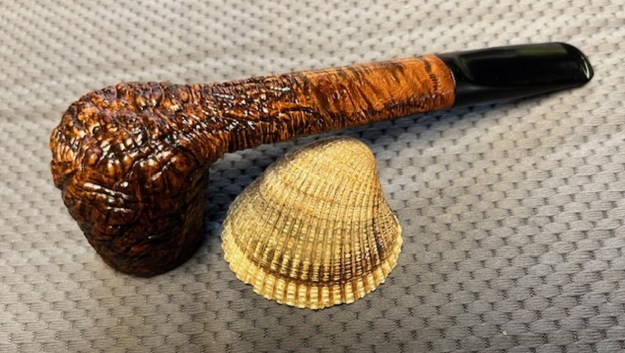
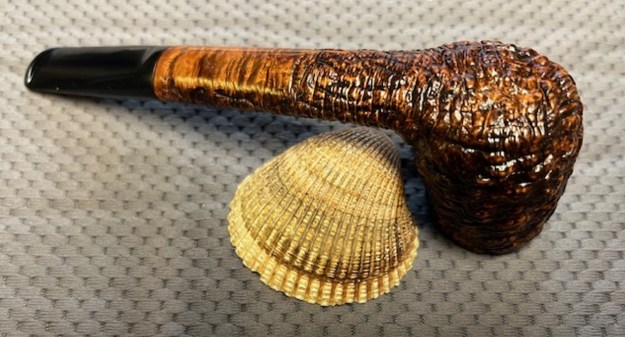
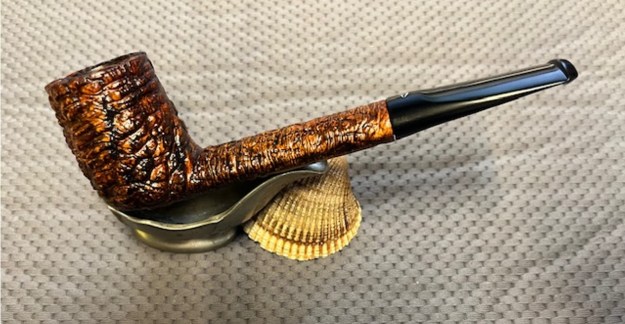
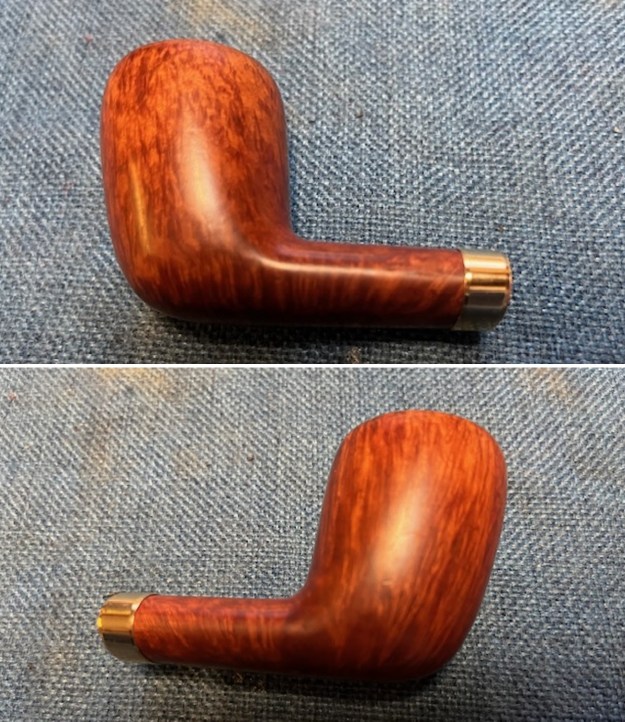
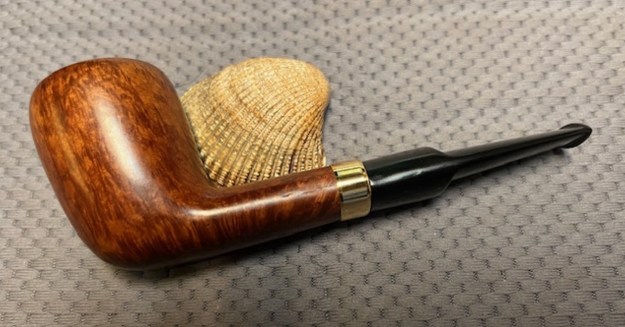
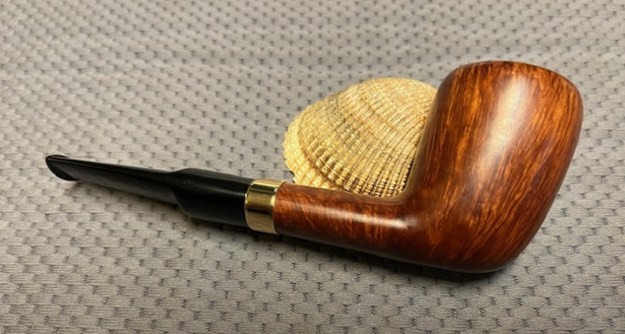
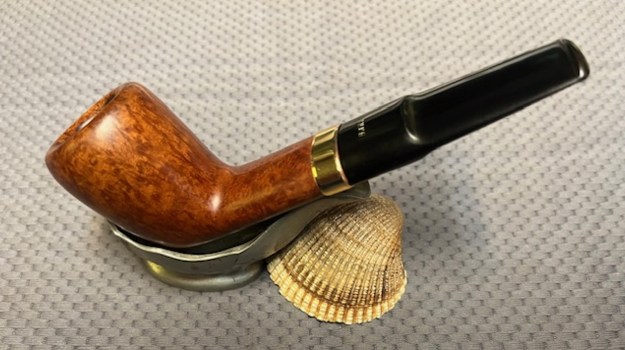
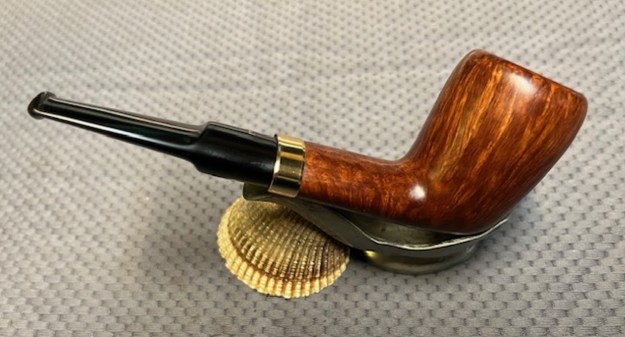
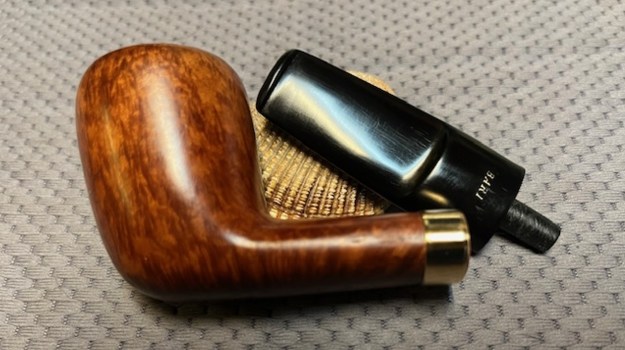
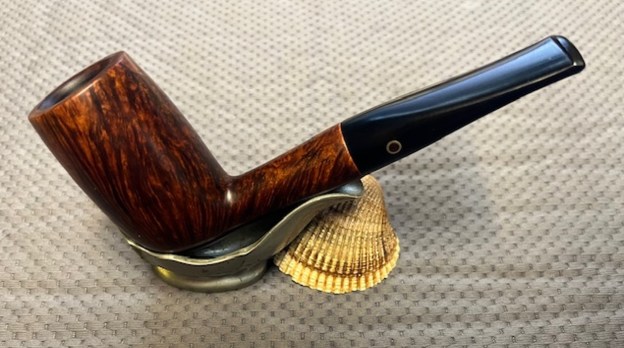
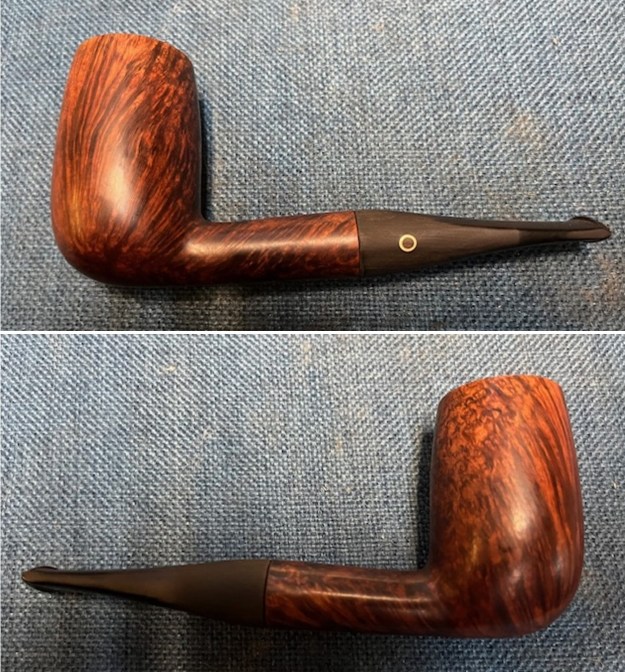
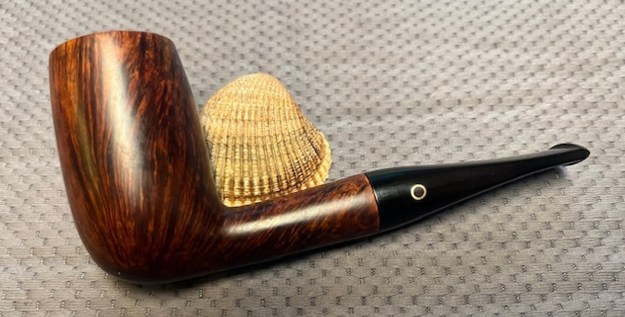
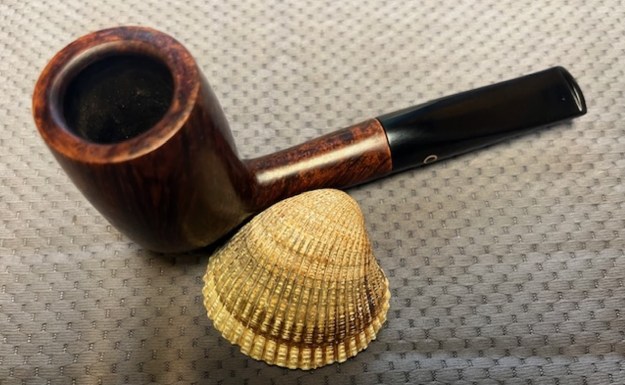
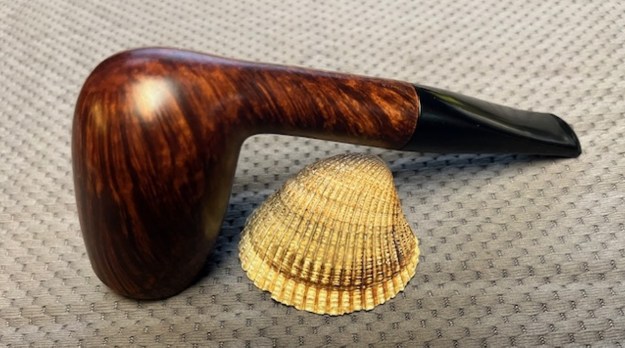
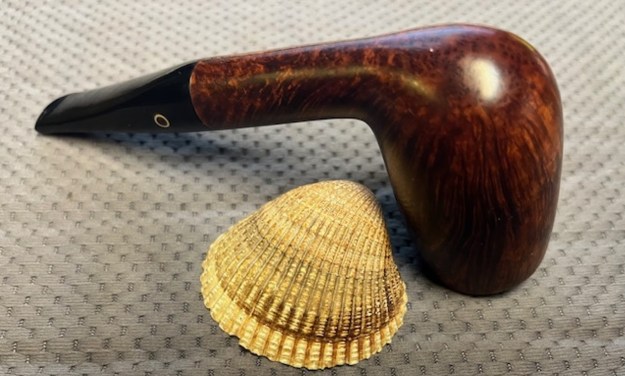
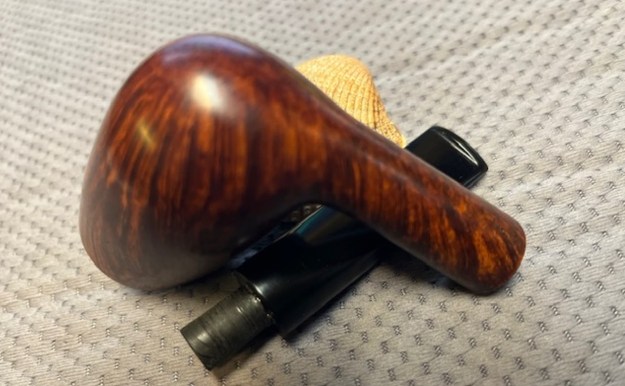
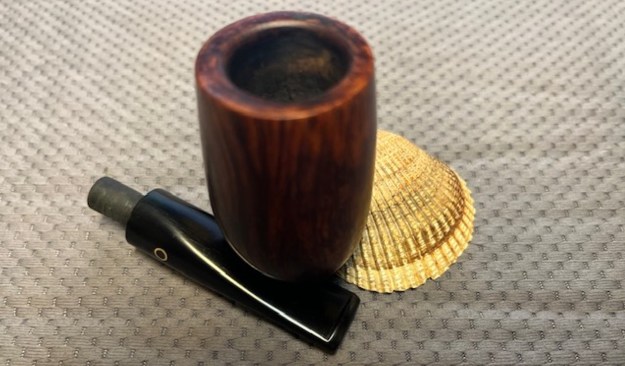
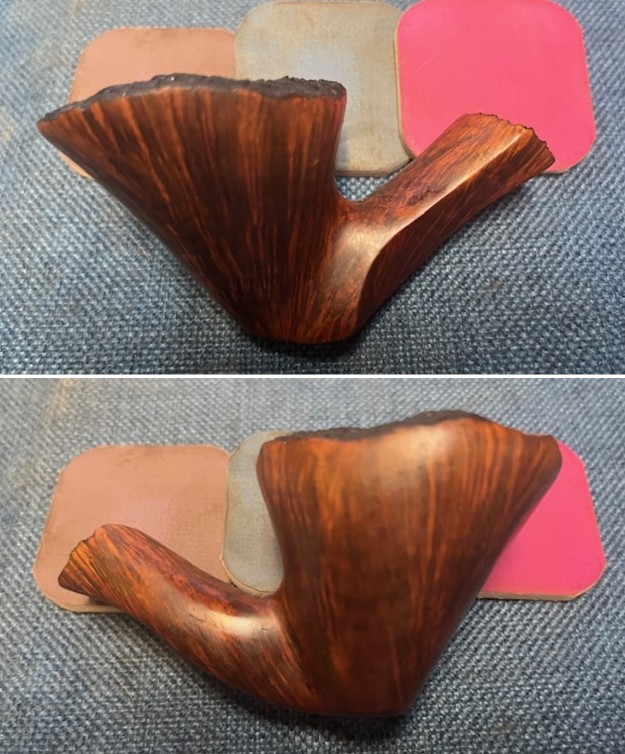
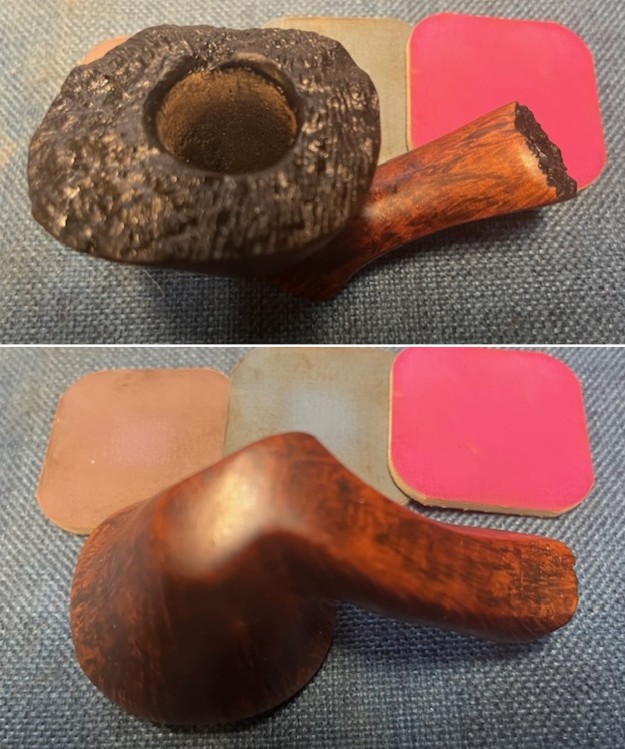
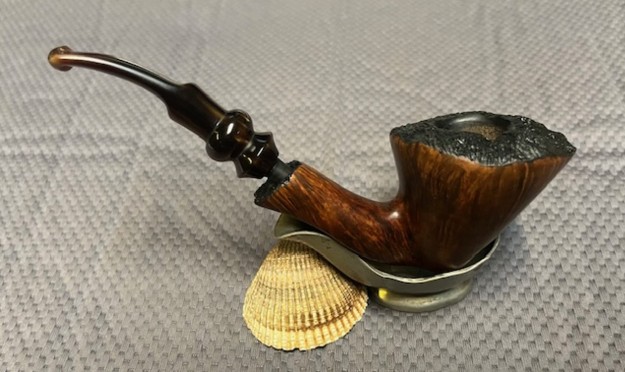
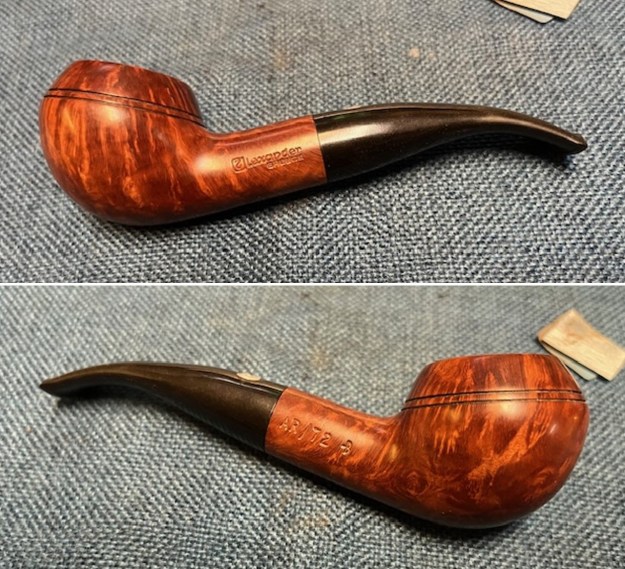
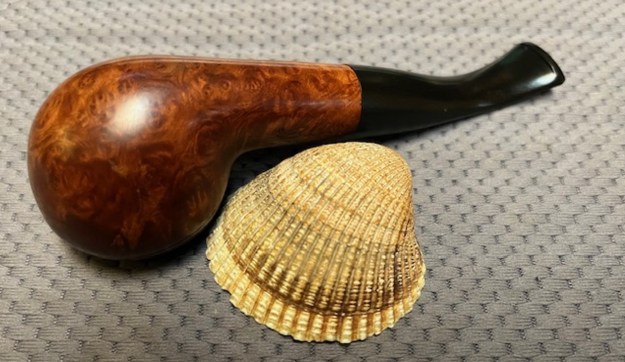
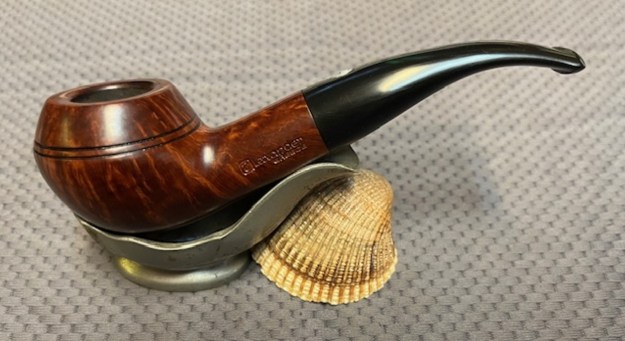
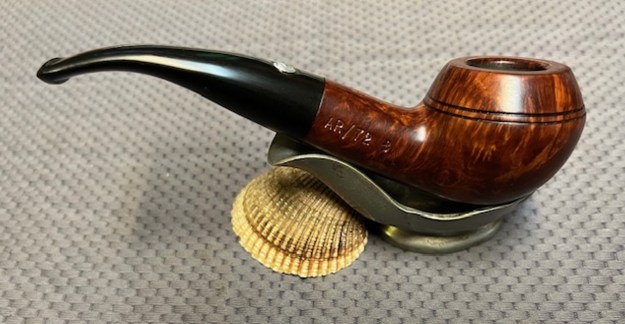
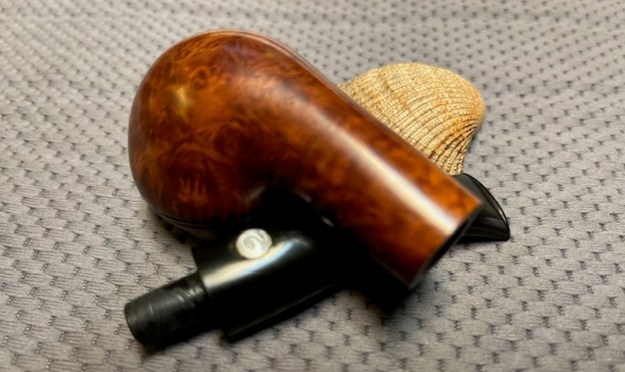
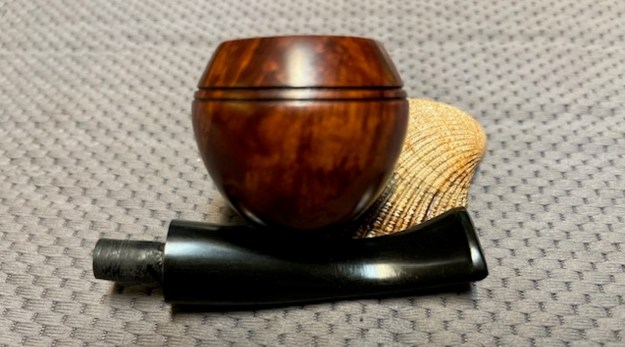
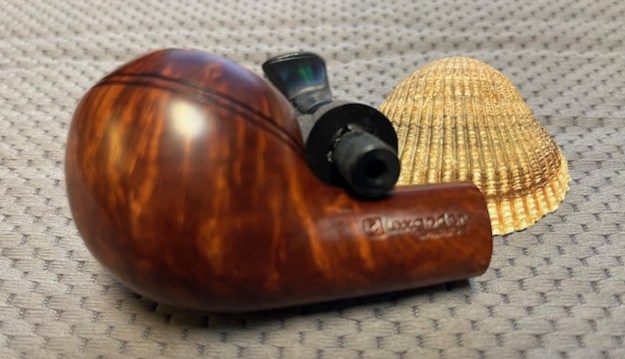
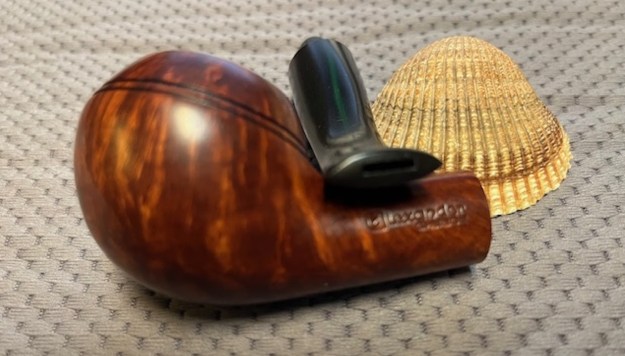
 Once again, I am the part of the restoration that I always look forward to – the moment when all the pieces are put back together. I put the pipe back together and buffed the bowl and the stem with Blue Diamond on the buffing wheel. I gave the bowl and the stem multiple coats of carnauba wax. I buffed the pipe with a clean buffing pad to raise the shine. I hand buffed it with a microfiber cloth to deepen the shine. It is fun to see what the polished bowl looks like with the smooth finish and the black ebonite stem. This richly stained Alexander Greece AR/72 -B Rhodesian is light weight and ready for you to load up a tobacco of preference and enjoy a fresh smoke. Have a look at it in the photos below. The dimensions are Length: 5 ½ inches, Height: 1 ½ inches, Outside diameter of the bowl: 1 ¼ inches, Chamber diameter: ¾ of an inch. The weight of the pipe is 46 grams/1.66 ounces. This is one that will go on the Pipe from Various Makers Section of the rebornpipes online store shortly. Let me know if you are interested in adding it to your rack. Thanks to each of you who are reading this blog. Remember we are not pipe owners; we are pipemen and women who hold our pipes in trust until they pass on into the trust of the next generation.

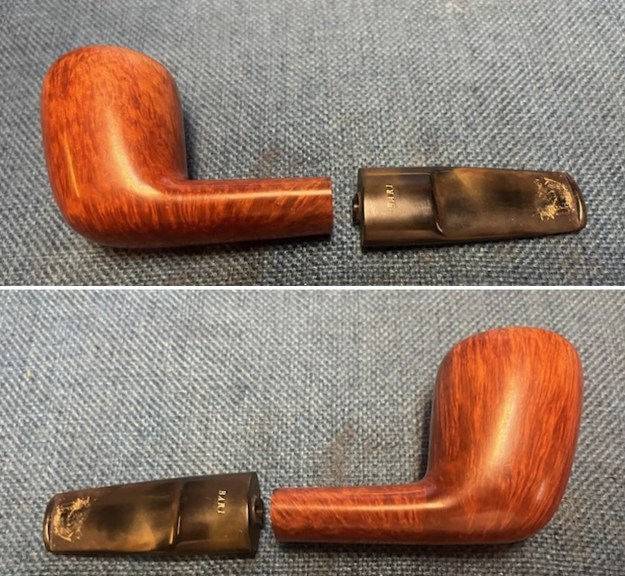
 He shipped the pipe to me and it arrived at my place on Monday afternoon. I used my normal methods to pull the broken tenon from the shank. I threaded a drywall screw in the shank and tried to pull it from the shank with no luck. It would not come out. I put it in the freezer to see if the old freezer trick would cause it to loosen. I took it out of the freezer after 30 minutes and with some cajoling and wiggling on my part the tenon came free.
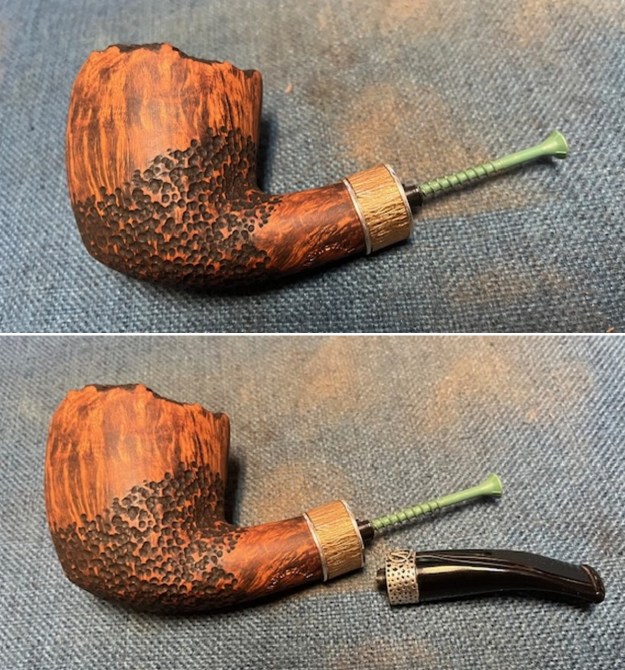
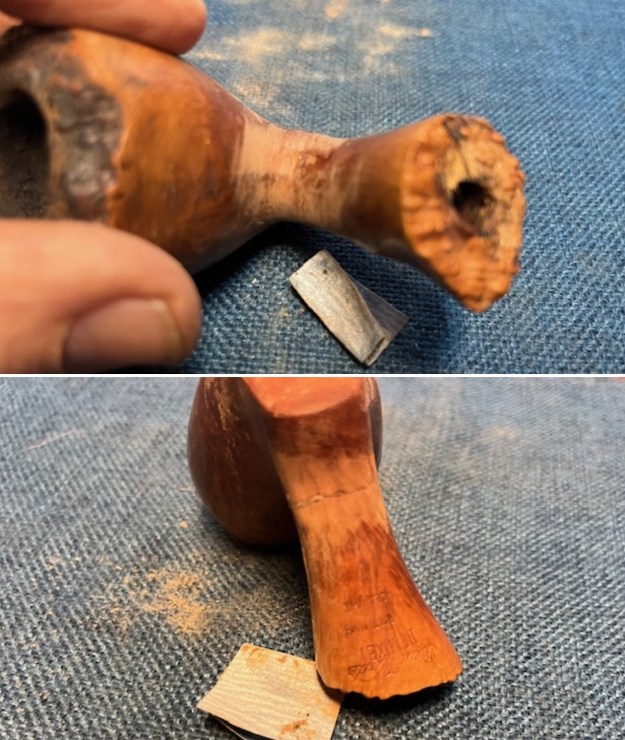
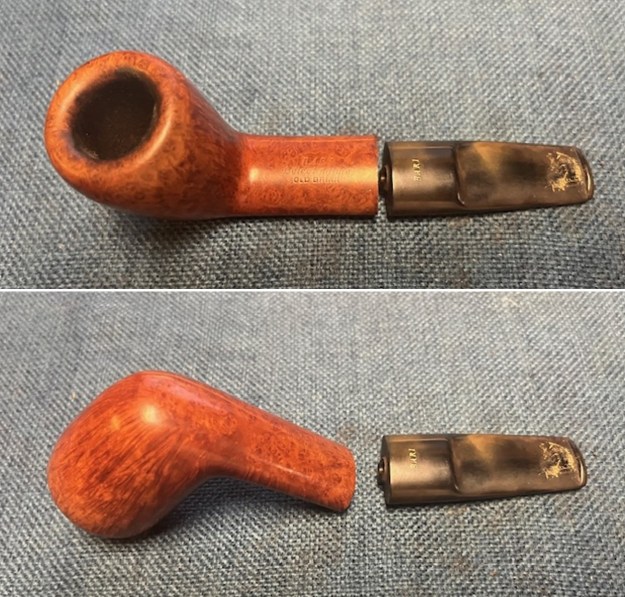
 I carefully flattened out the broken tenon piece remaining on the stem with a small sanding drum on my Dremel. I ran it at a very slow speed and flattened it carefully avoiding the silver band on the stem end. Did I say carefully? Once that was done I used various drill bits to open the airway in the stem to receive a new tenon. I used the Dremel to also reduce the diameter on the new tenon to match the diameter of the mortise. It fit very well. I roughened the end of the new tenon with a rasp so that it would have some bite for the glue when I fit it into the drilled out airway in the stem.
 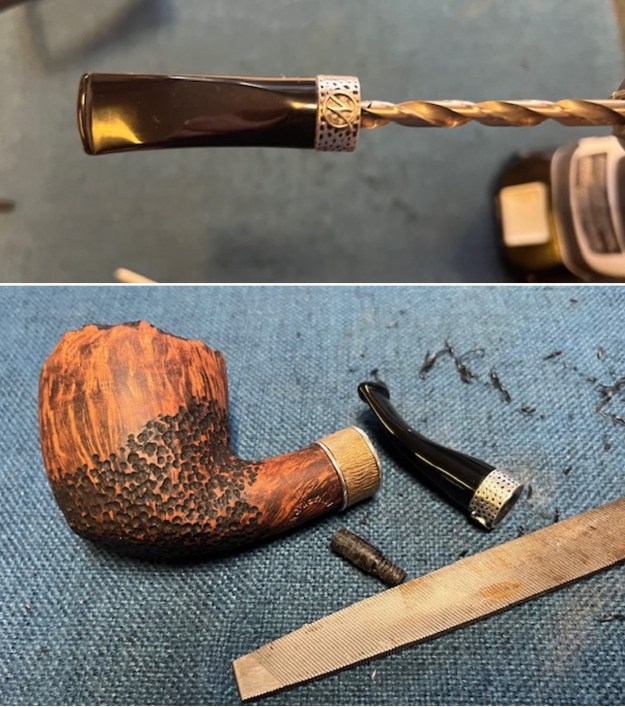 I glued the new tenon in place in the mortise with Black rubberized CA Glue. I set it aside for the repair to cure.
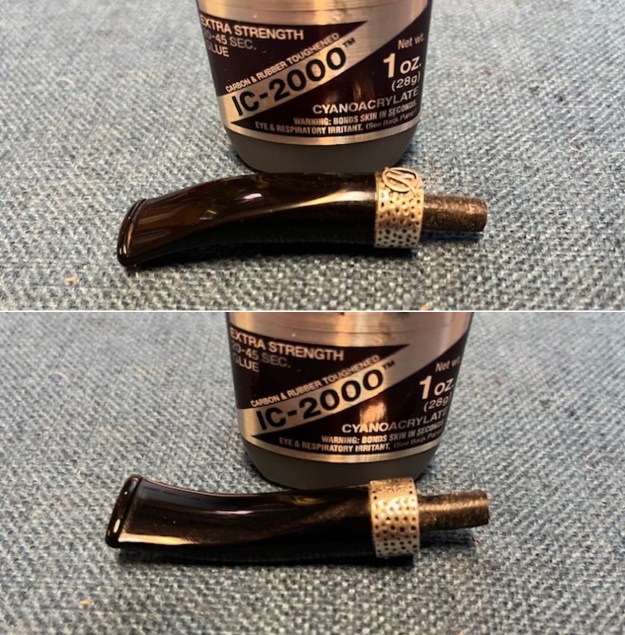 I set the stem and bowl aside and took photos of the way it looked and let it cure over night. It is a great looking pipe at this point. I still need to polish the new tenon and get a shine on it but it fits very well and all aligns with the shank. I look forward to putting the stem on the pipe in the morning.
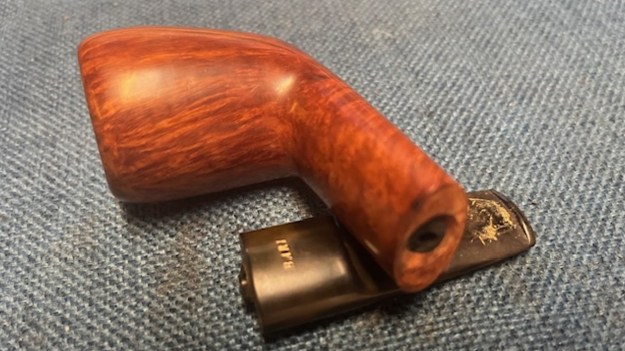
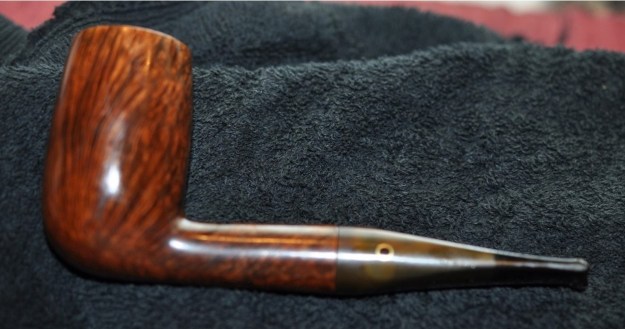
 This morning I fit the stem to the shank and I was very happy with the fit. I polished the new Delrin tenon with micromesh pads and it looks good. Have a look at the pipe.