Blog by Paresh Deshpande
It’s been a while since I have sent Steve any write ups for posting on rebornpipes and it’s not because I have not been working on any. As a matter of fact, I had completed re-stemming and refurbishing of 4 un-smoked vintage bowls. These were c.1897 BBB OWN MAKE Billiard with long pencil shank that came with its original shop stickers on it, the second was a c.1901 A.D.P (Adolph Posener), the third was a c.1904 Imperial ITC bent billiard and the fourth was c.1911 A.O KEYSTONE (Adolphe Oppenheimer & Co). Unfortunately, I lost the photographs that I had taken of all the pipes during their refurbishing process and as such there was nothing for me to base my write ups on (yeah…I know even Steve has been suggesting that I do the write up simultaneously as I work!!).
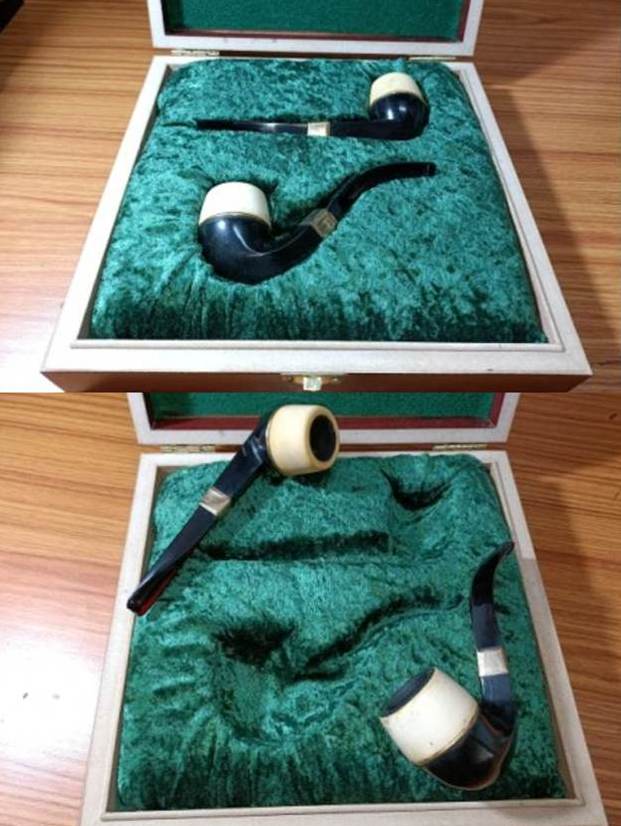
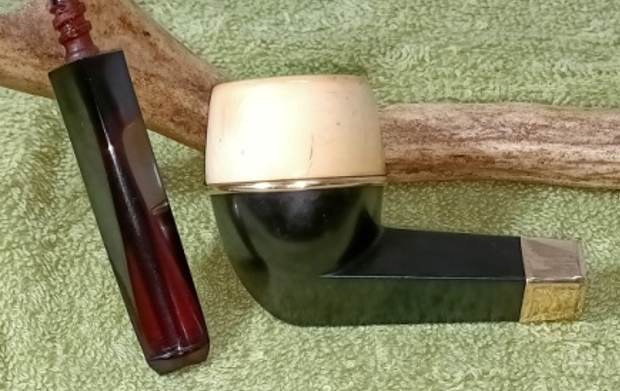
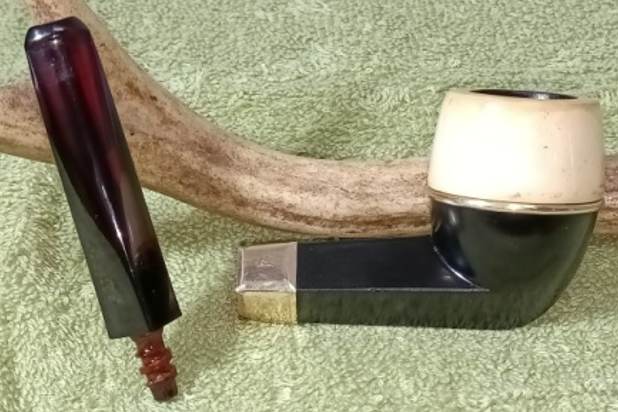
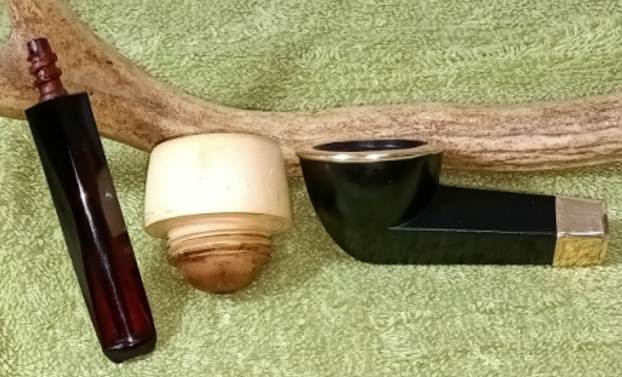
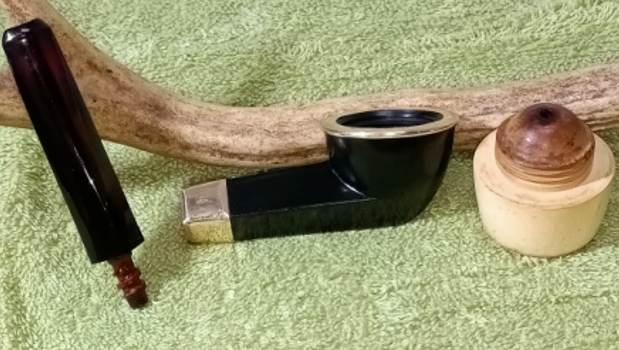
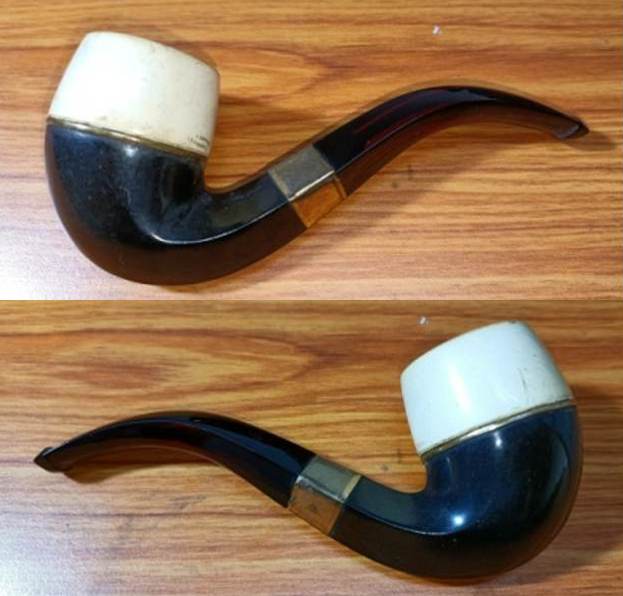
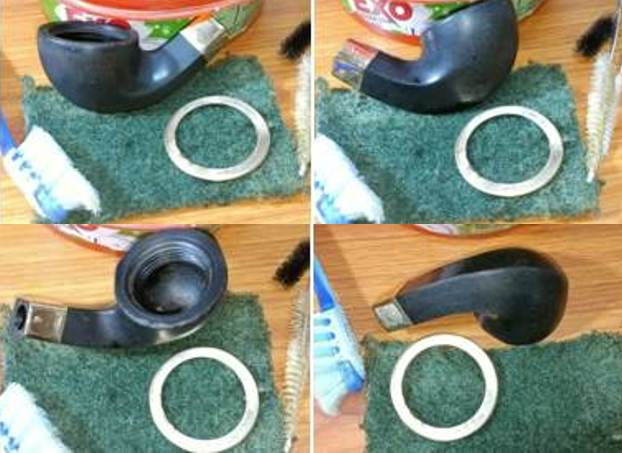
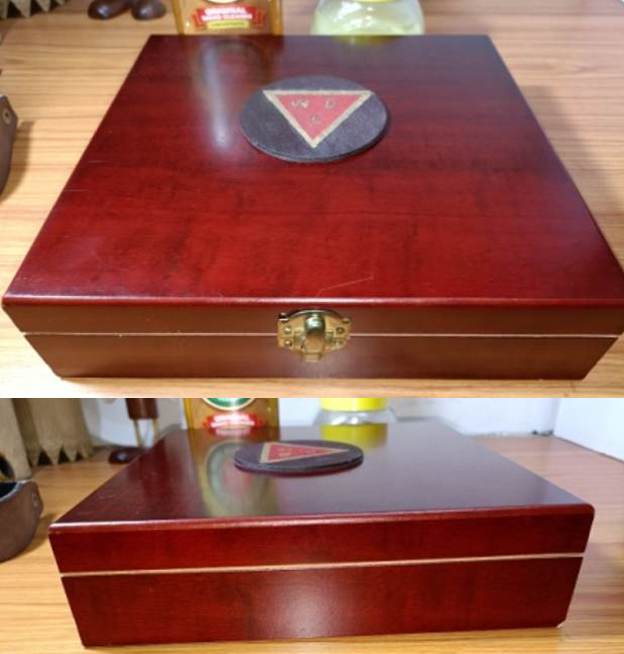
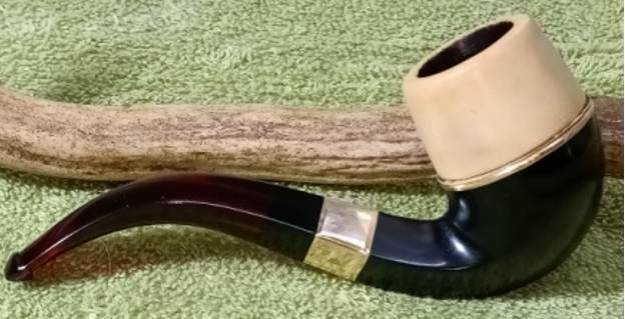
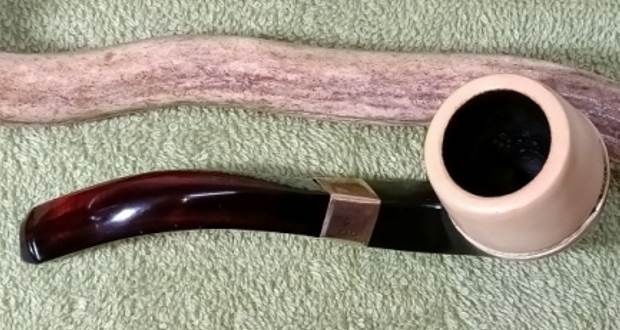
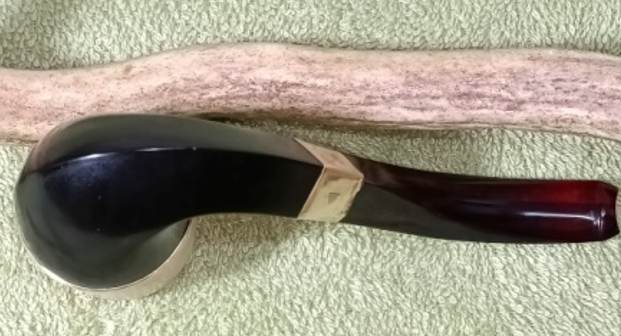
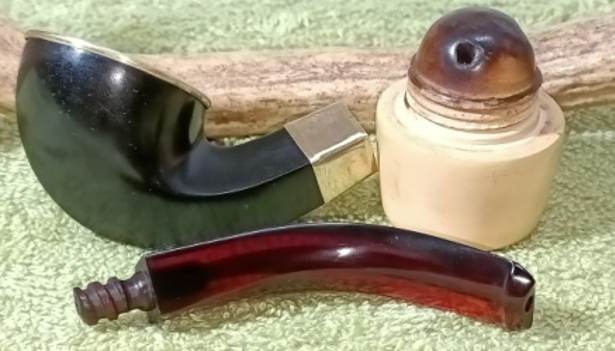
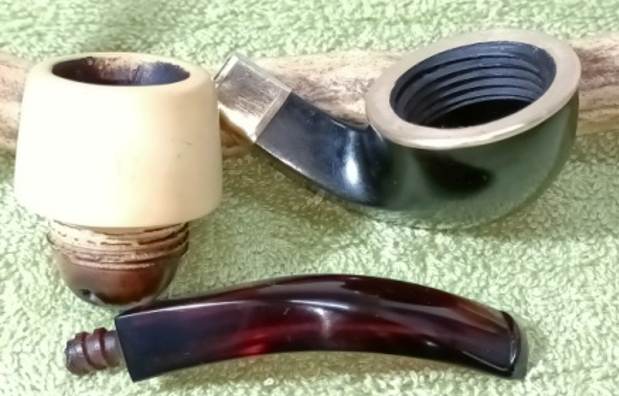
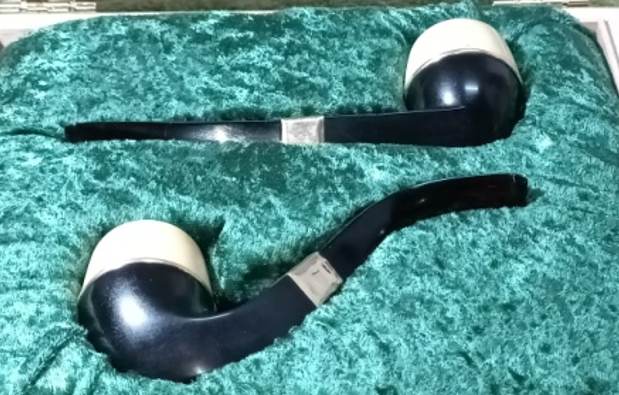
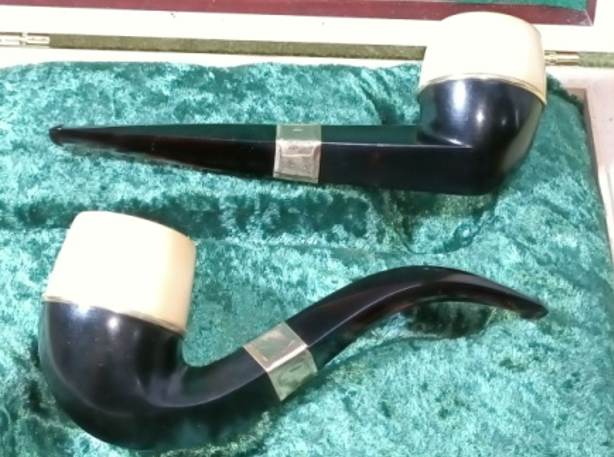
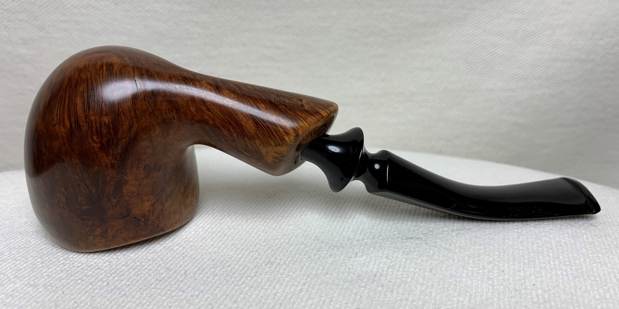
Moving ahead, the next project that I selected to lift up my spirits was a pair of WDC Meerschaum bowled Bulldog pipes that came in its beautiful Presentation case. Both pipes appeared to be in a very good condition and should clean up well. Here are a few pictures of the pair and its case as it sat on my work table. This pair of pipes has three different materials used in its manufacture and that is what makes it unique and interesting. The chamber/bowl are made from Meerschaum which threads in to a Bakelite shank that has a brass (?) band at its end and bears its trademark inverted triangle stamped with as “WDC”. The stems are made of Redmanol, a beautiful translucent material that was widely used in the early part of the 20th century.
 I have worked on a few WDCs earlier and am pretty familiar with the brand’s history. I revisited rebornpipes where I had posted my previous WDC projects. Here is the link to the write up which will give readers a fairly detailed idea about the brand and a rough estimate as to the vintage of the pair of pipes on my work table.
https://rebornpipes.com/2019/04/05/sprucing-up-another-wdc-a-cased-bakelite-briar-dublin/
I visited rebornpipes.com and came across an interesting article on materials used in pipe making (https://rebornpipes.com/2014/08/09/hard-rubber-and-other-early-plastic-used-in-pipes-ronald-j-de-haan/)
It is here that I found the following information on “BAKELITE”:
These qualities made Bakelite the most successful synthetic material in the first half of the 20th century. From 1928 it was also produced as molded resin. Both the pressed and the molded forms were suitable for the pipe making industry. Pipes were made from Bakelite and molded phenol-resin. Complete pipes of Bakelite are very rare because of its lack of heat resistance. Phenol-resin however was frequently used for pipe mouthpieces and cigarette holders because it imitated amber.
Further search on rebornpipes got me to a write up that Steve had done on a Redmanol WDC pipe. Given below is the link to the referenced article.
https://rebornpipes.com/2020/05/26/life-for-a-wdc-redmanol-dublin-with-a-removable-redmanol-bowl/
I quote from the article…..
“I turned to Wikipedia for an article on Bakelite and Redmanol to remind myself of the connection between the companies (https://en.wikipedia.org/wiki/Bakelite).
As the sales figures also show, the Bakelite Company produced “transparent” cast resin (which did not include filler) “artificial amber”, were machined and carved to create items such as pipe stems, cigarette holders and jewelry.[11][12] However, the demand for molded plastics led the Bakelite company to concentrate on molding, rather than concentrating on cast solid resins.[11]:172–174…
…The Bakelite Corporation was formed in 1922 after patent litigation favorable to Baekeland, from a merger of three companies: Baekeland’s General Bakelite Company; the Condensite Company, founded by J.W. Aylesworth; and the Redmanol Chemical Products Company, founded by Lawrence V. Redman.[13] Under director of advertising and public relations Allan Brown, who came to Bakelite from Condensite, Bakelite was aggressively marketed as “the material of a thousand uses”.[7]:58–59[14] A filing for a trademark featuring the letter B above the mathematical symbol for infinity was made August 25, 1925, and claimed the mark was in use as of December 1, 1924. A wide variety of uses were listed in their trademark applications.[15]
I also read a brief article on Redmanol on Wikipedia and the link was clear as the companies joined in 1922 (https://en.wikipedia.org/wiki/Redmanol_Chemical_Products_Company).
Redmanol Chemical Products Company was an early plastics manufacturer formed in 1913. Lawrence V. Redman was its president. In 1922, the Redmanol Company, the Condensite Company of America, and General Bakelite were consolidated into the Bakelite Corporation.[1]” ….unquote.
From the above gleaned information, it is safe to conclude that the pipe now on my worktable is of 1920s and early 1930s vintage.
Though I had simultaneously worked on this pair, I have divided the write up in two parts where I have dealt with each pipe separately. In PART I, I shall deal with the straight Bulldog of the pair and in PART II, I shall describe the process on the bent Bulldog.
PART I:- STRAIGHT BULLDOG
Initial Visual Inspection
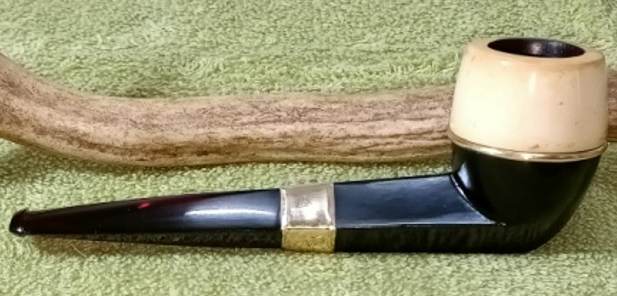
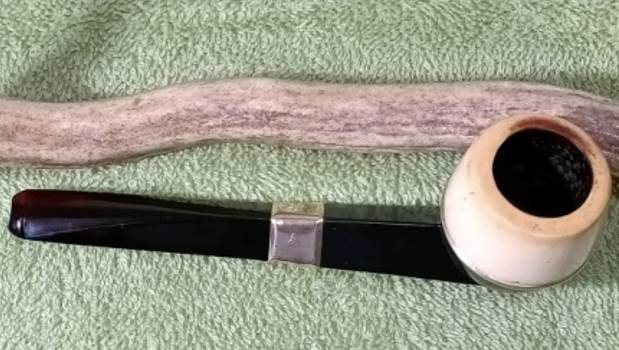
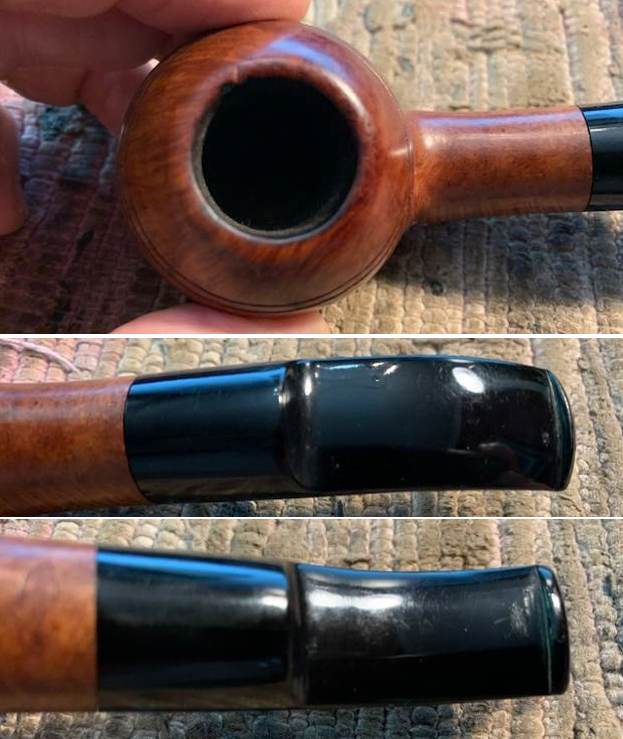
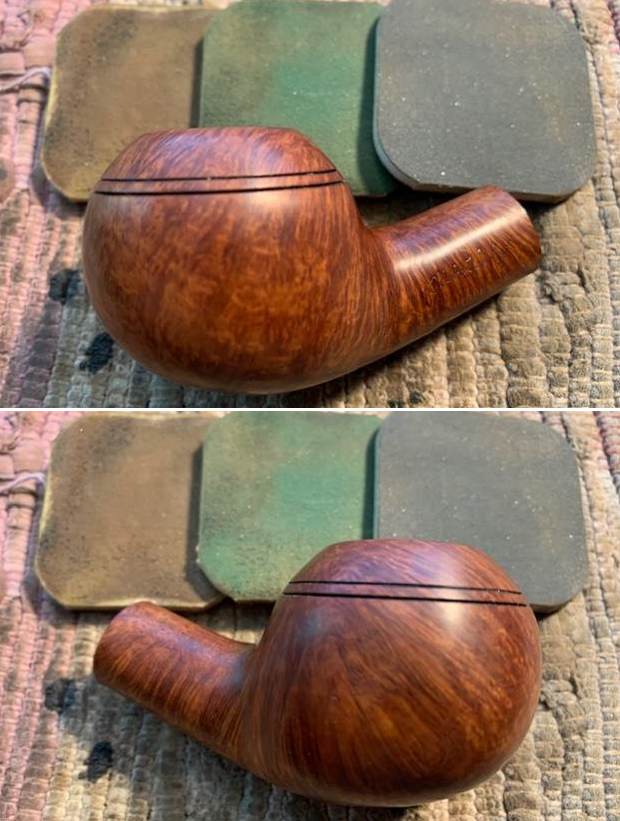
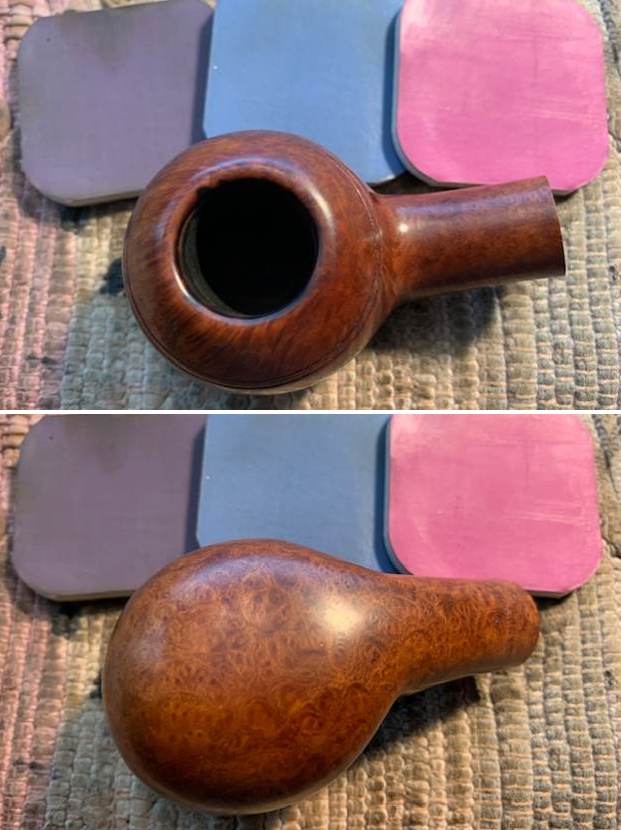
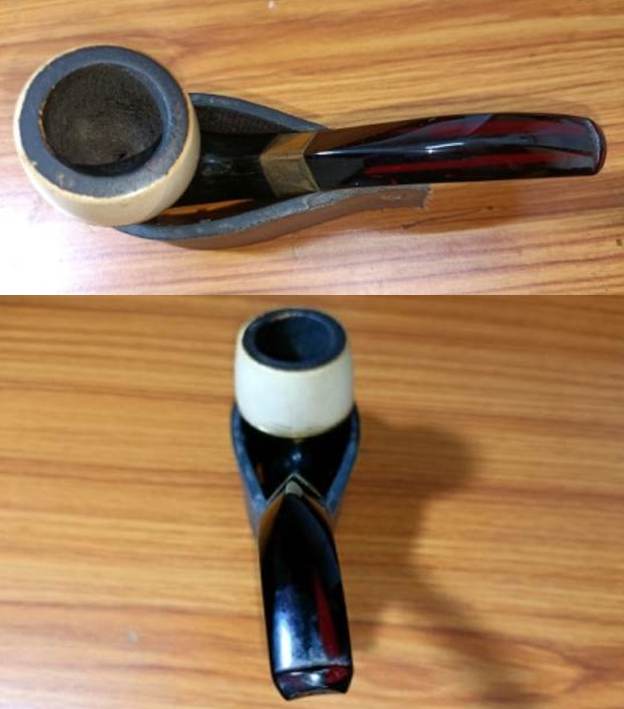
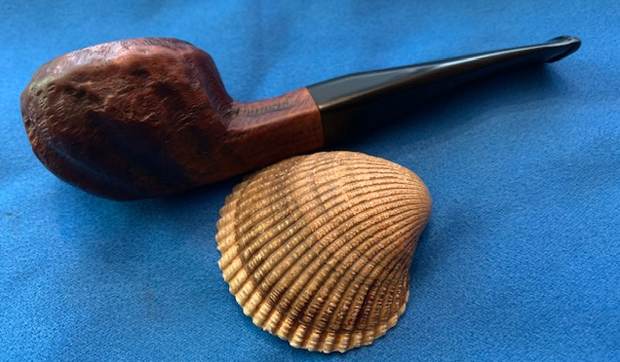
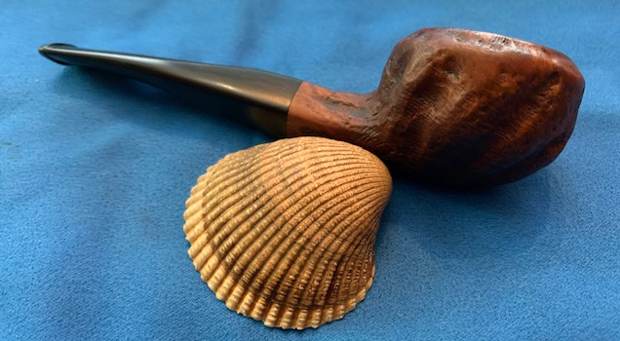
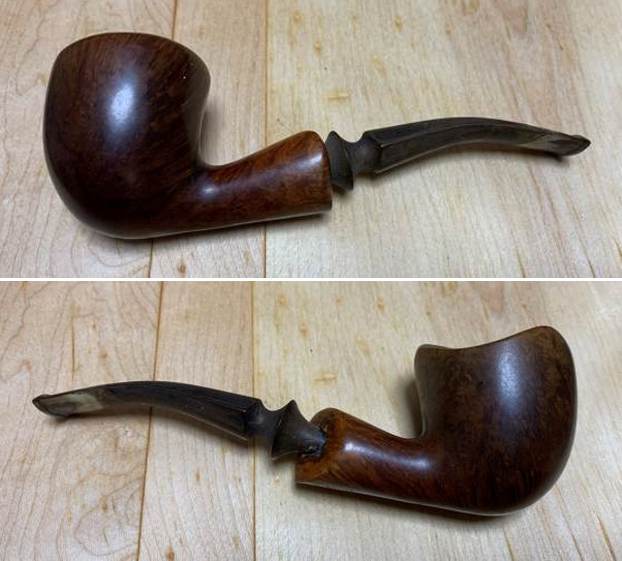
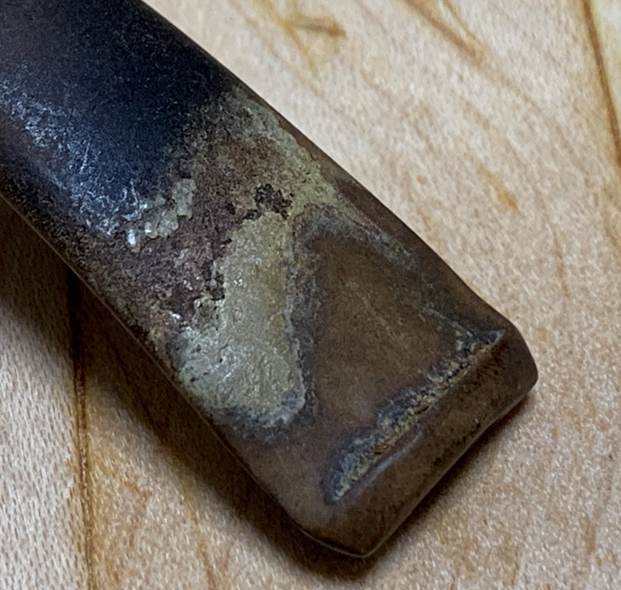
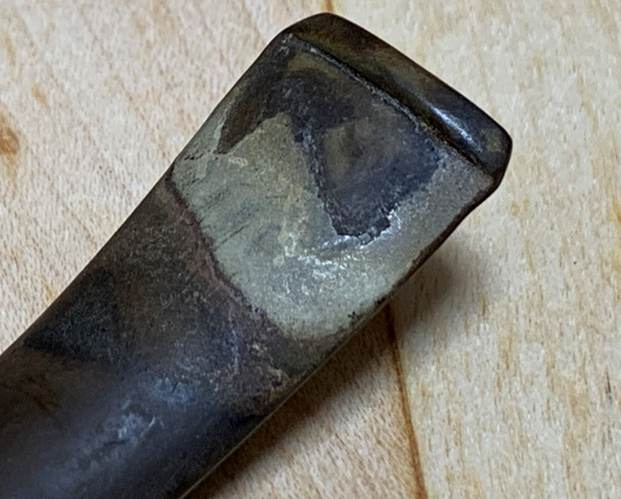
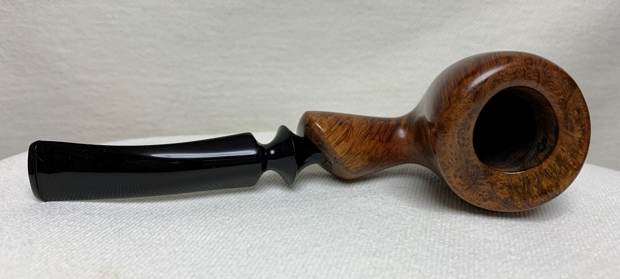
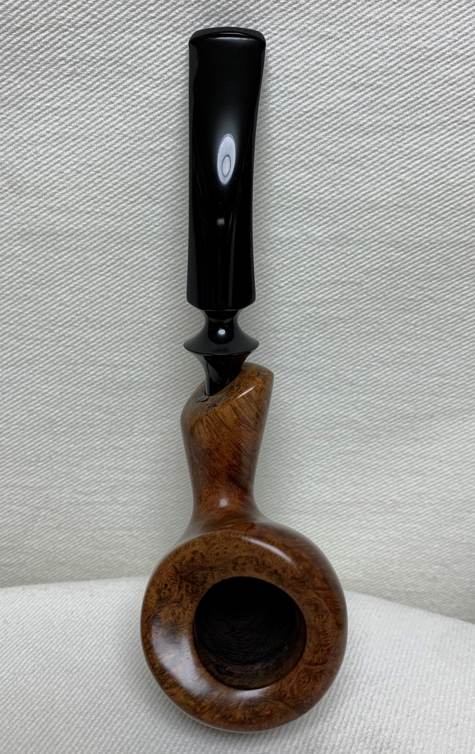
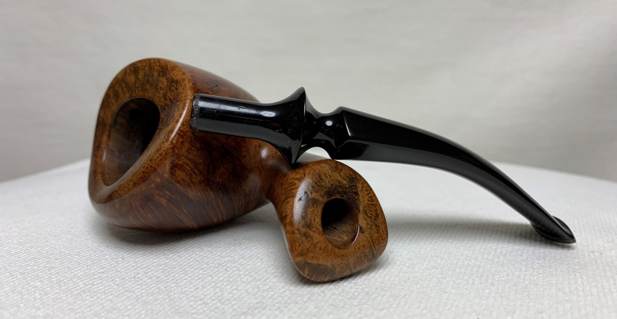
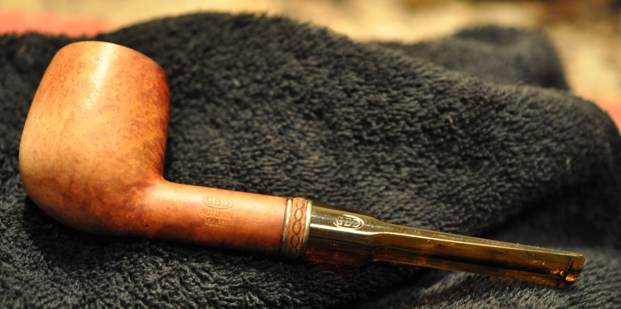
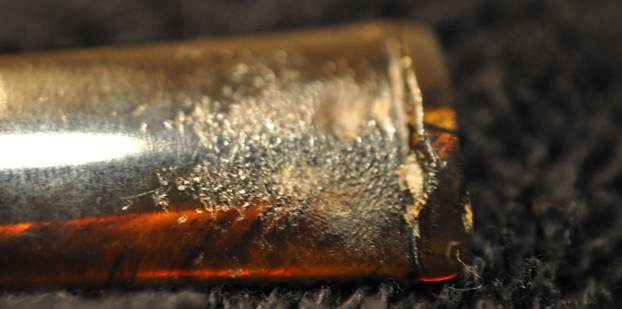
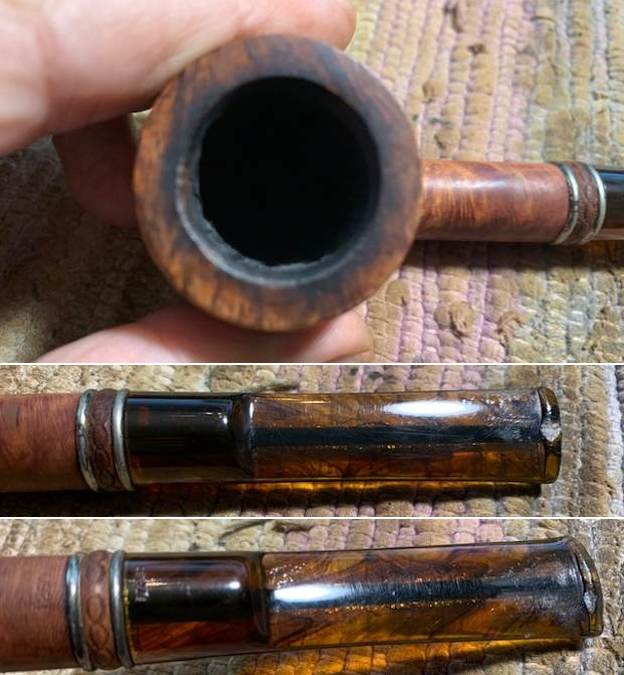
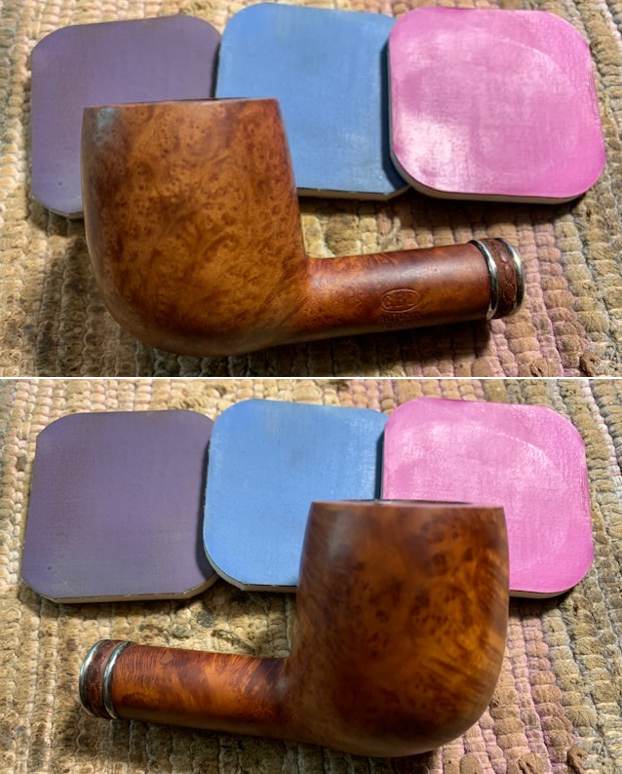
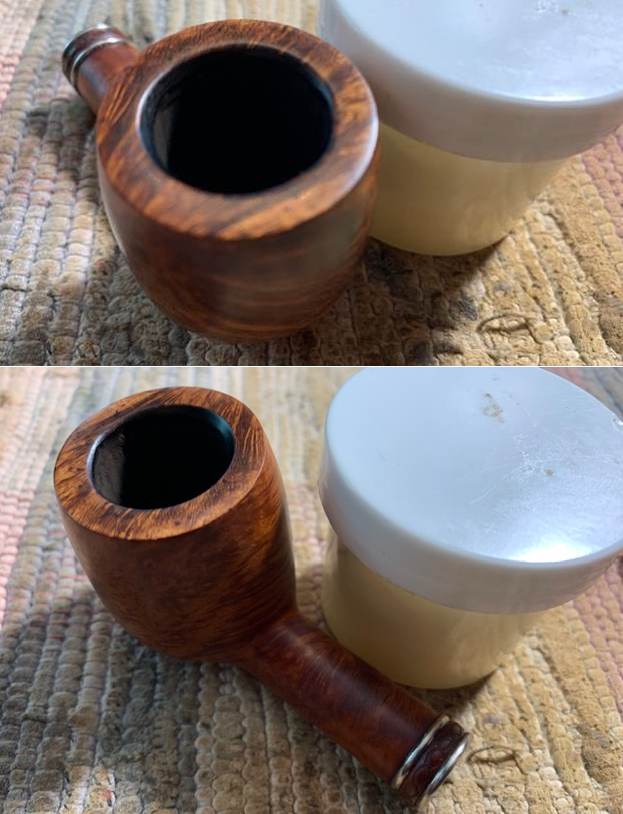
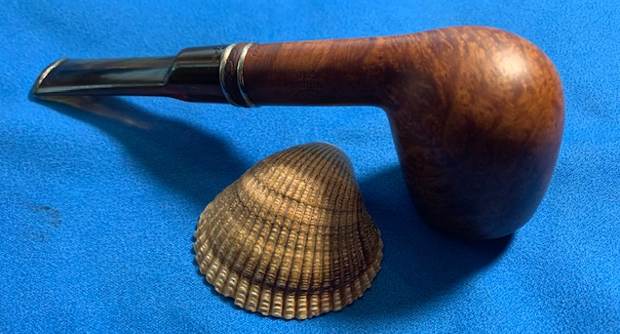
The straight bulldog pipe is in great condition given its 90 odd year age. It appears to have been well smoked given the decent layer of cake in the chamber. The rim top is clean without any lava overflow. The meerschaum bowl has a few superficial scratches from being used. The Bakelite diamond base and shank is dull in appearance, but intact. The translucent Redmanol stem is slightly oxidized and appears dull and lackluster. There is a deep tooth indentation over the upper surface and a chipped surface near the round orifice. The pictures below give a fair idea of the condition of the pipe in its present state.

 Detailed Inspection
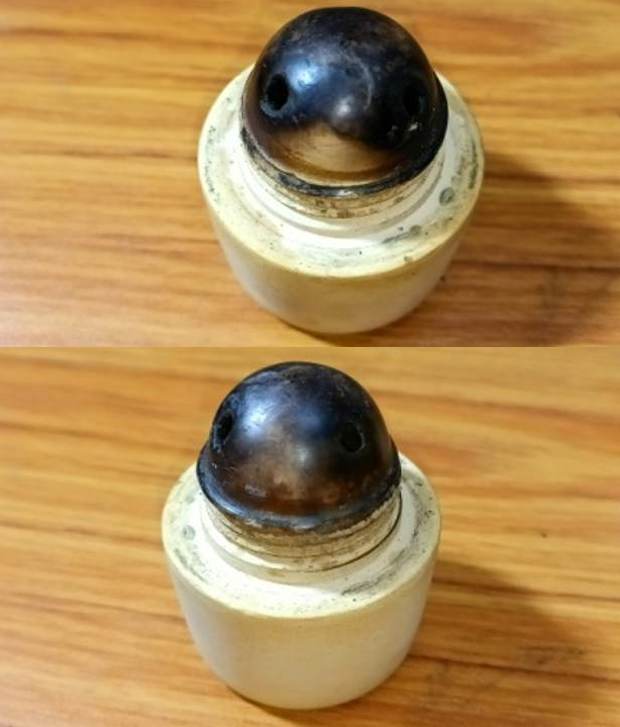
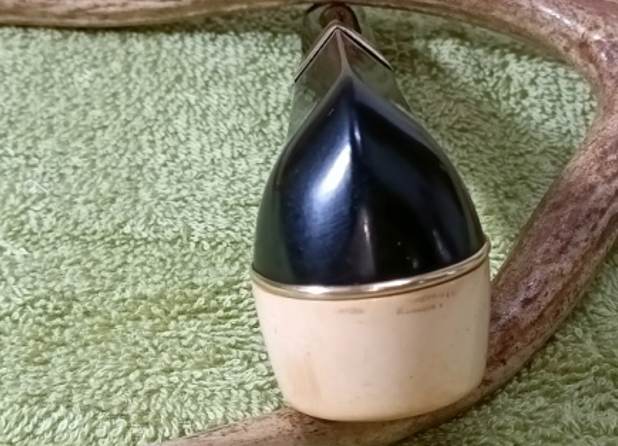
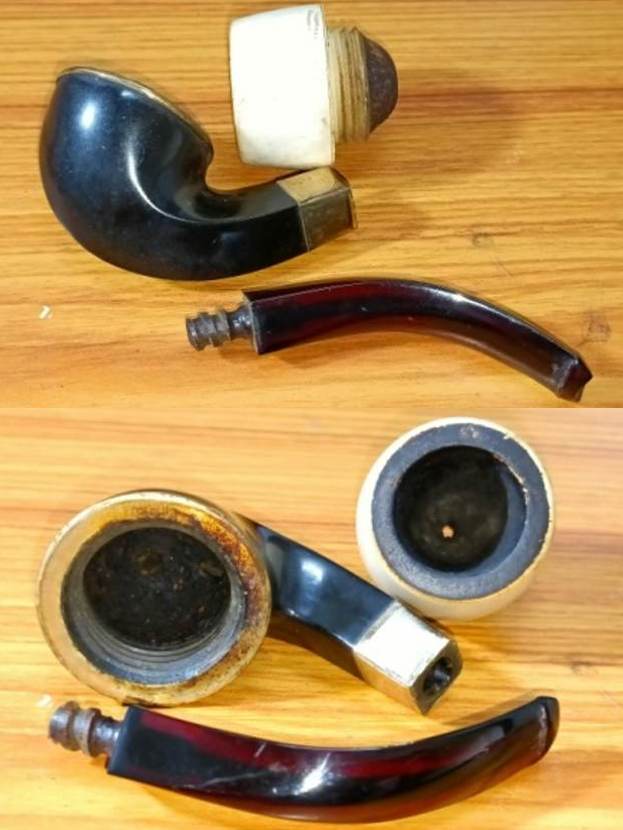
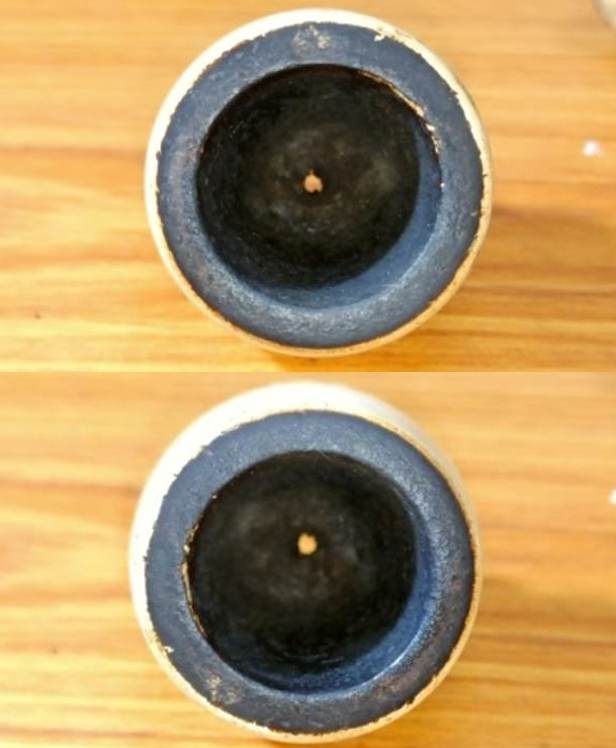
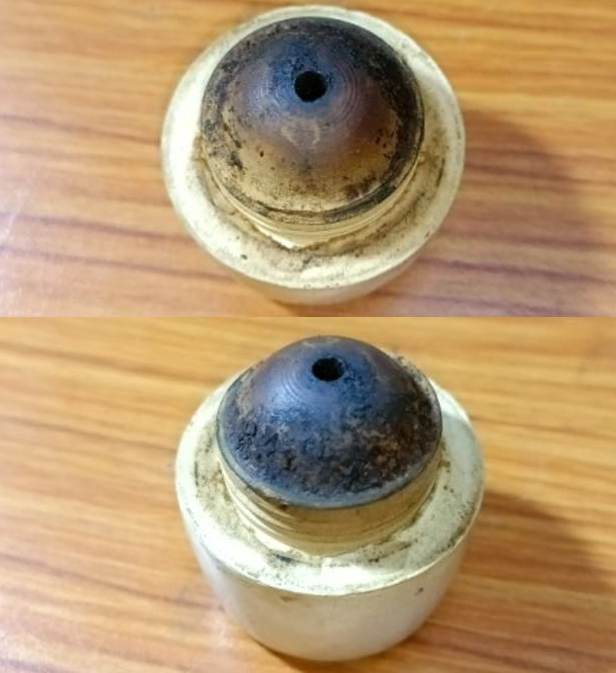
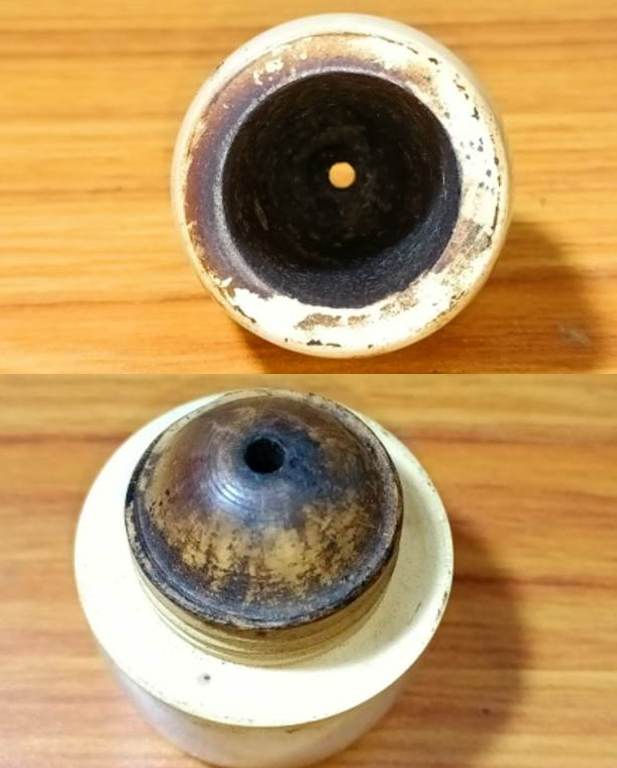
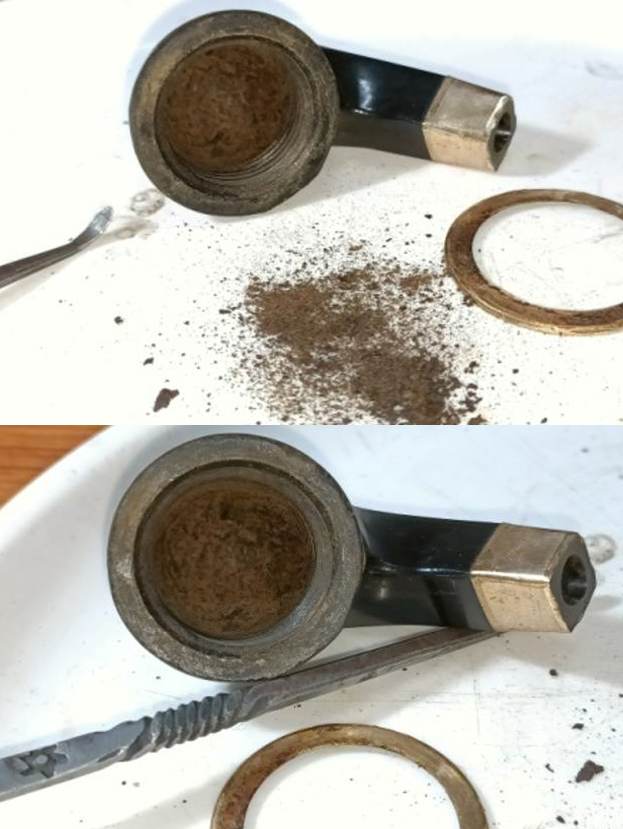
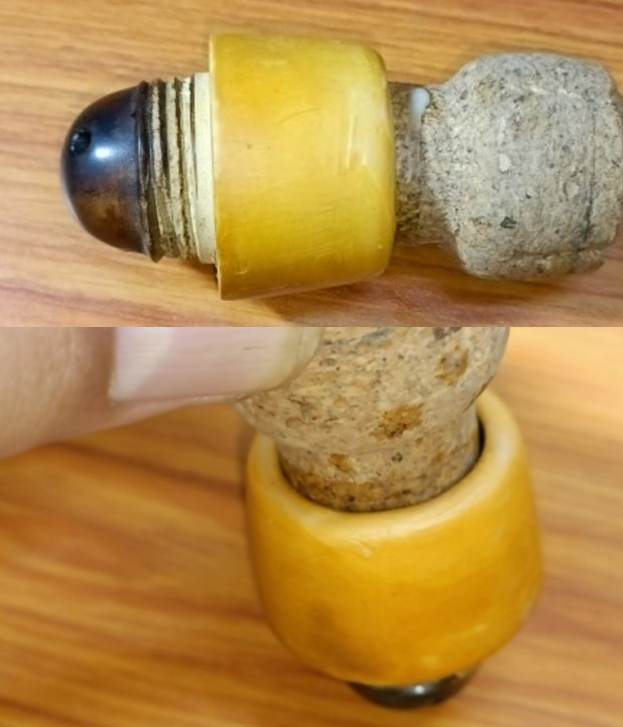
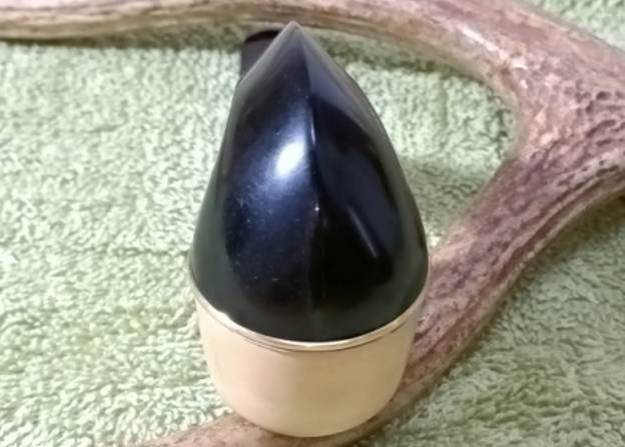
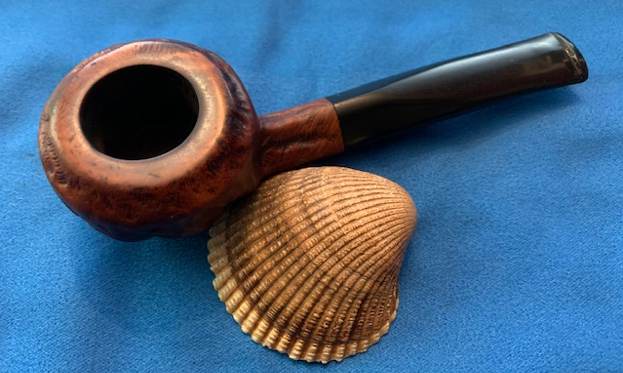
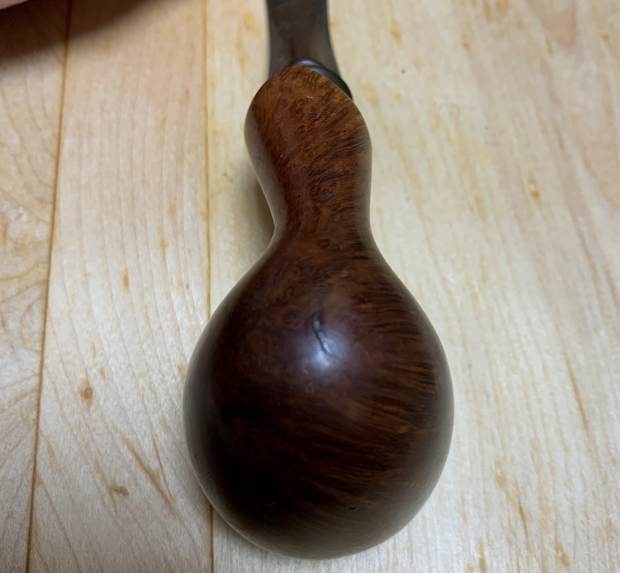
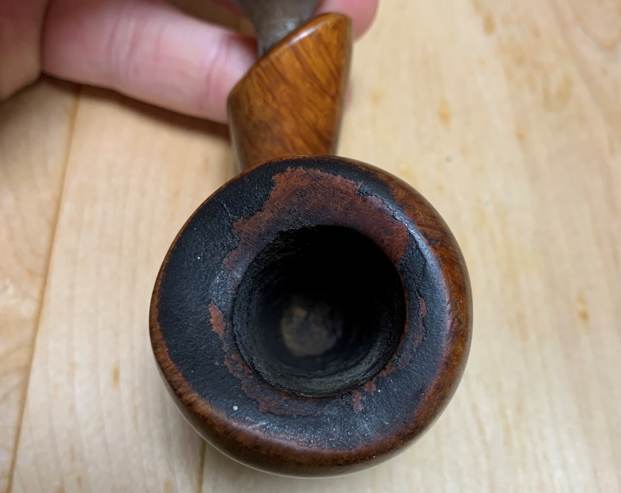
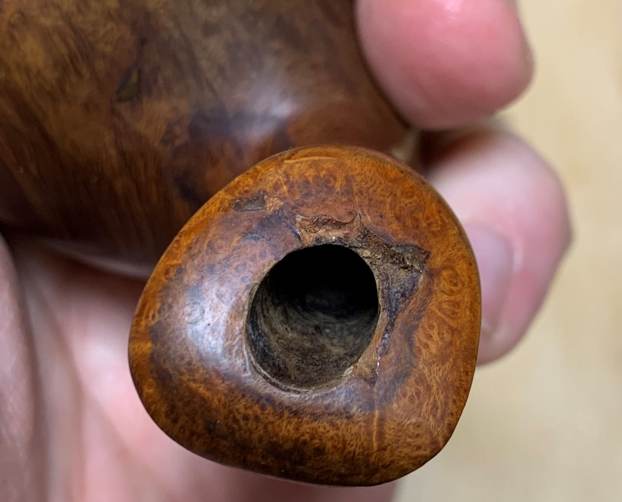
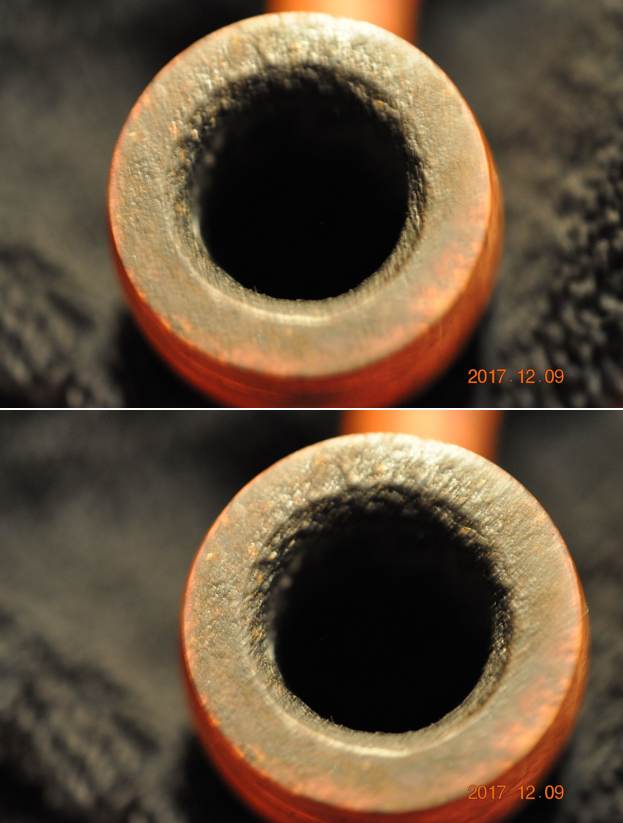
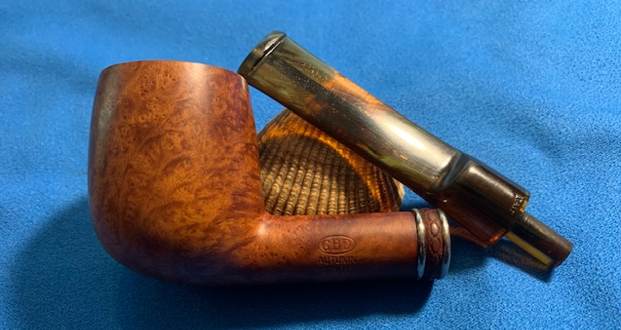
The pipe consists of three parts, a Meerschaum bowl, Bakelite base and shank and the Redmanol straight stem with a round orifice. These three parts come together as an instrument of smoking by means of threads at the bowl and stem ends.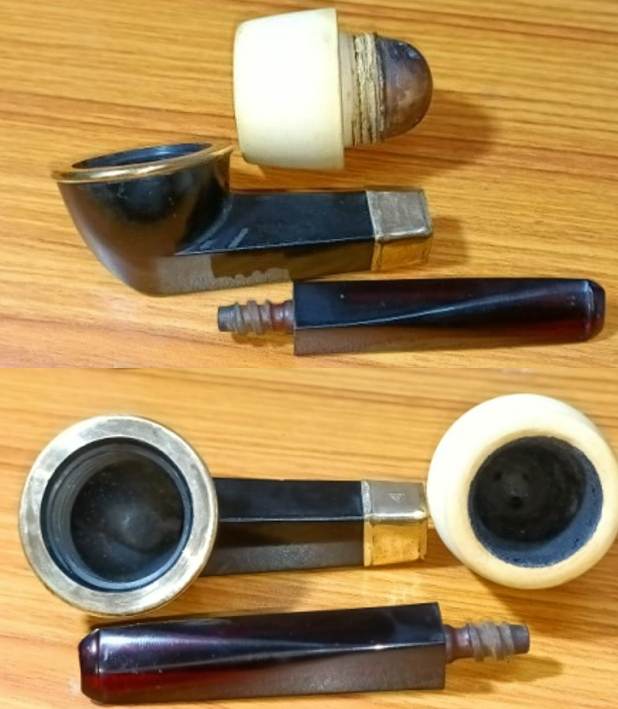 The meerschaum bowl is in very good condition with just a few scratches over the sides. The chamber has a thick layer of dried and crumbling cake. The rim top is in pristine condition and does not have any overflow of carbon deposits. The thread on the cup is slightly worn only at a small section and the attaches securely with the Bakelite shank. The bottom of the meerschaum cup has three draught holes and shows a couple of dents/ dings. The draw on the pipe was not very smooth and open. Close observation of the depth of the meerschaum cup made me realize that it touched the heel of the Bakelite base and constricted the air flow. I shall deal with this issue subsequently.
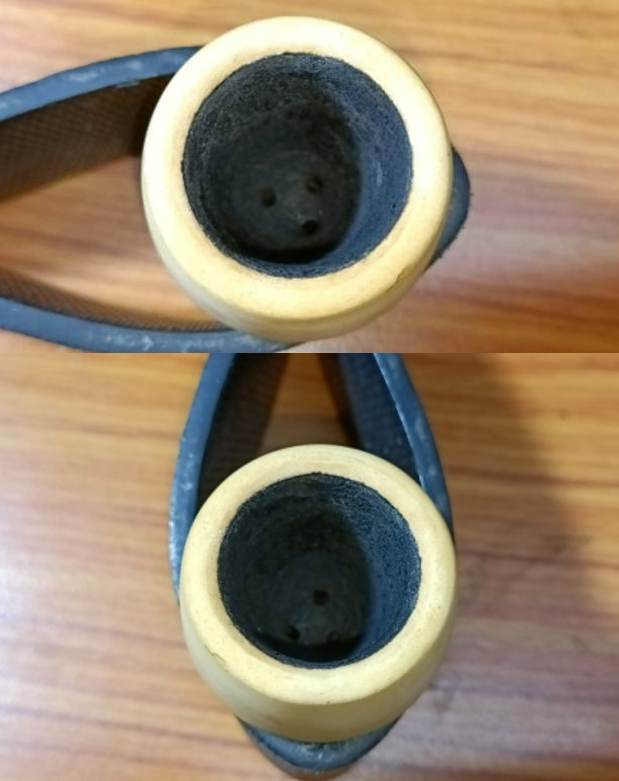
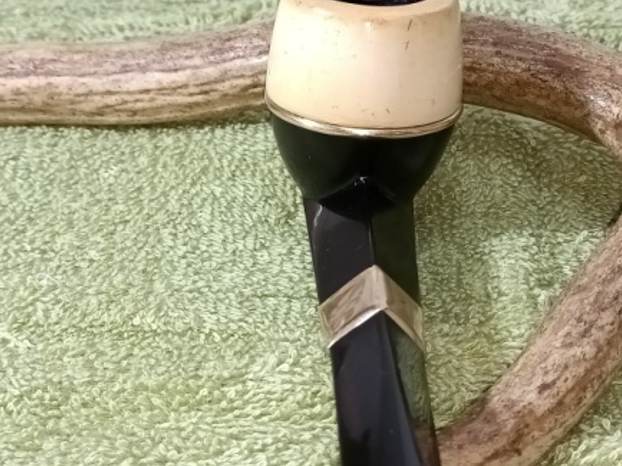
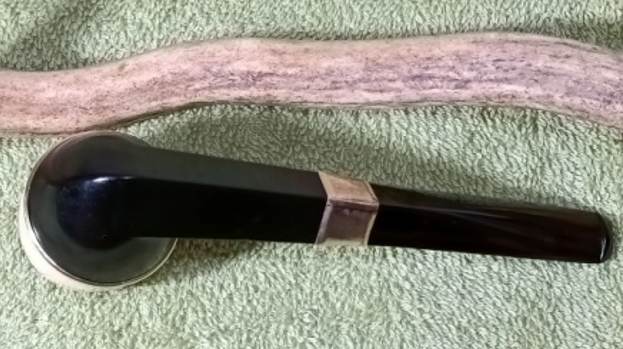
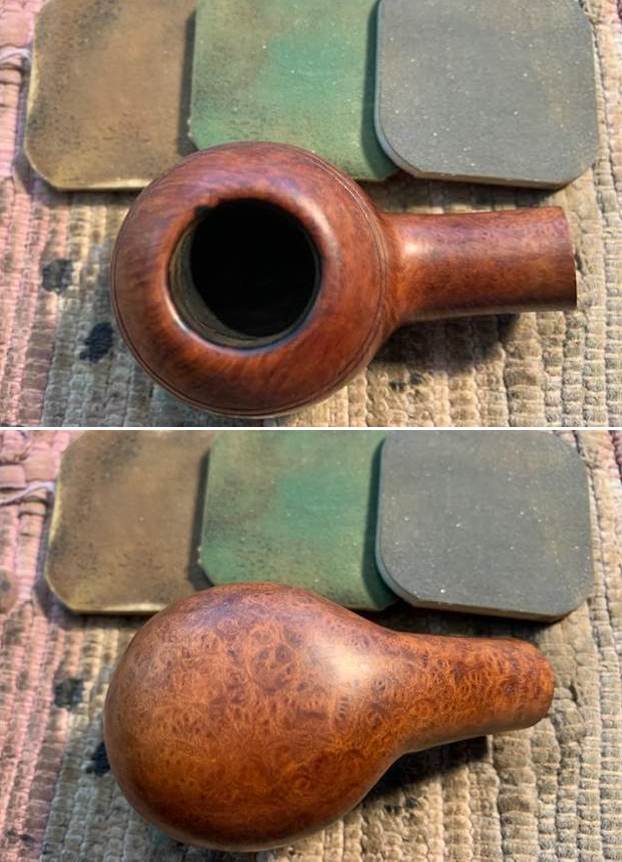
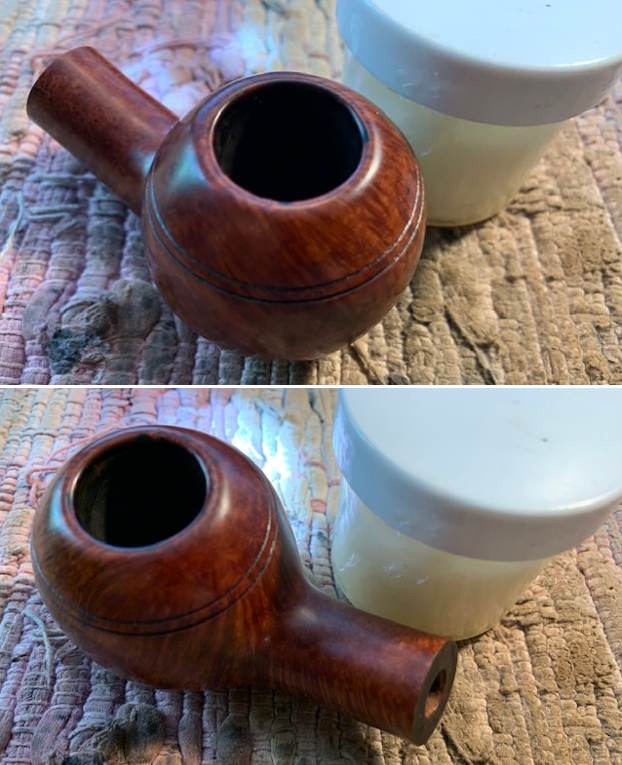
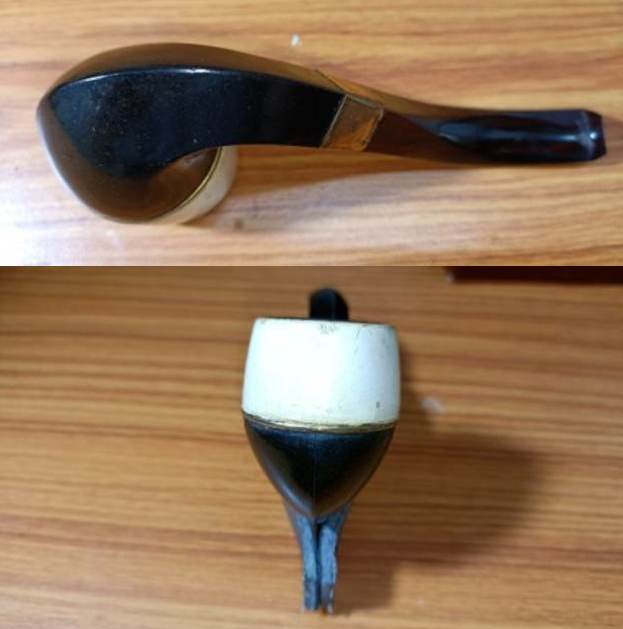
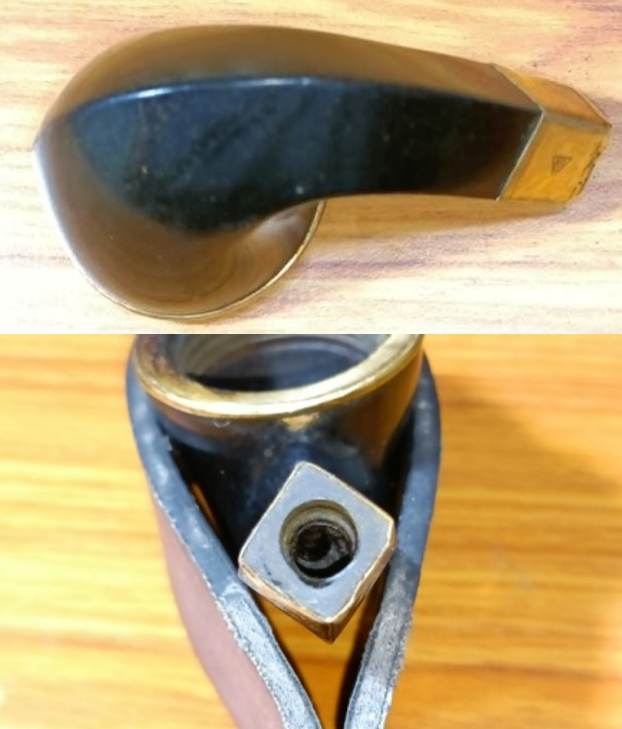
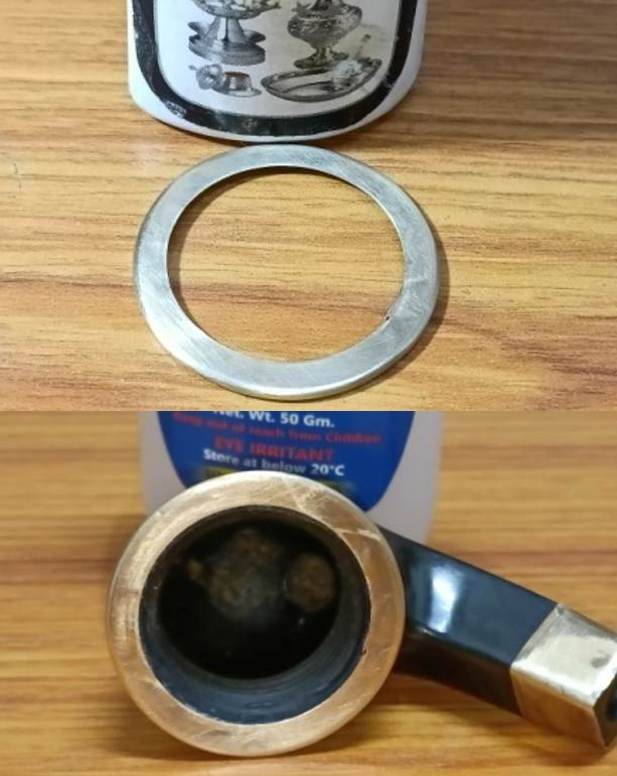
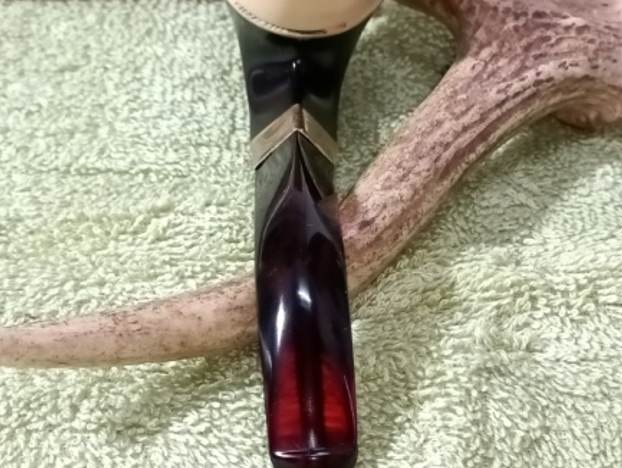
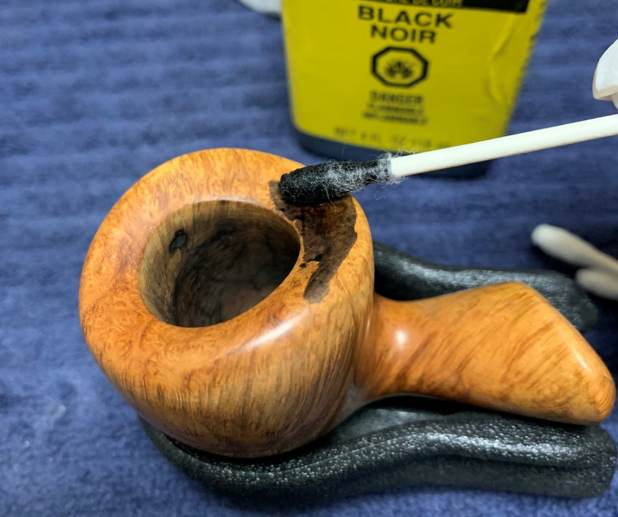
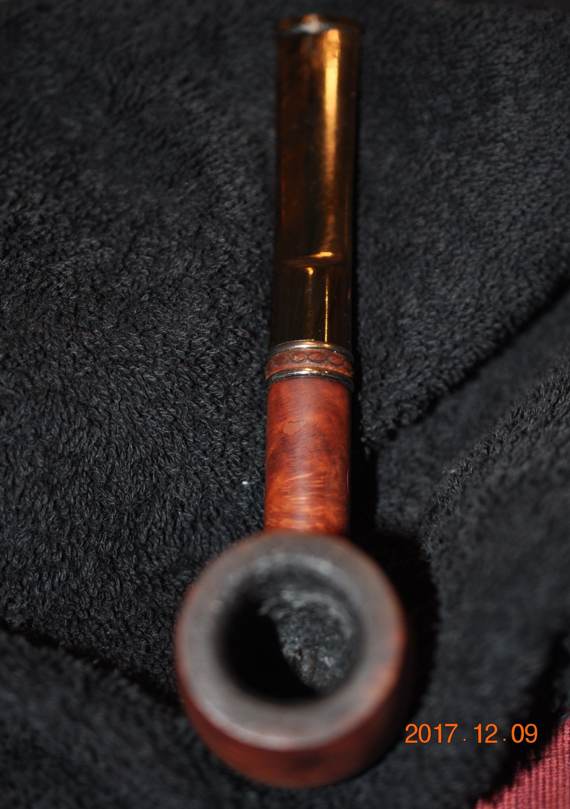
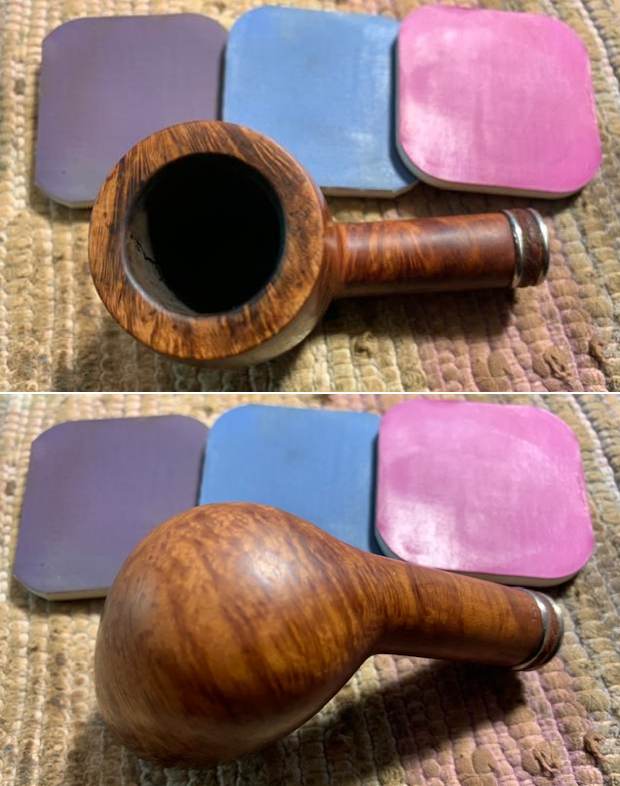
 The Bakelite base is clean with no traces of old oils and tars in the trough that houses the meerschaum cup. The brass rim cap at the top of the Bakelite base is firmly fixed and is nicely clean and shining. The mortise shows some traces of gunk but should clean up nicely. There are a couple of minute chipped spots over the right side of the diamond shank edge (encircled in yellow). The brass band at the shank end shows some signs of brassing and should polish up to nice shine. The brass rim cap and the shank band coupled with the translucent Redmanol stem add a nice bling to the appearance of the pipes.
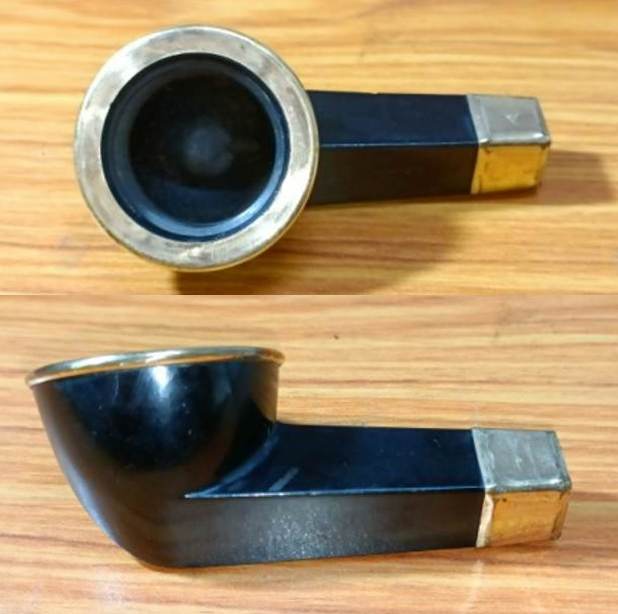
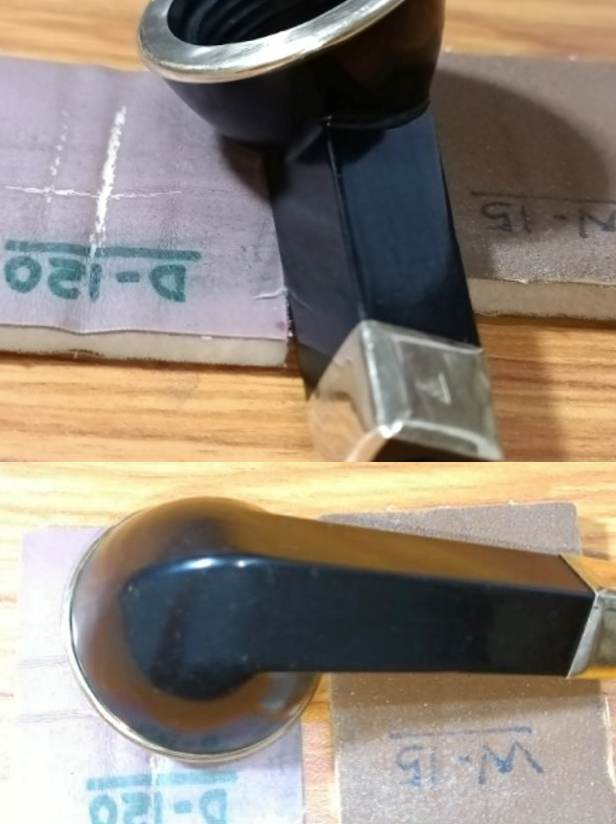
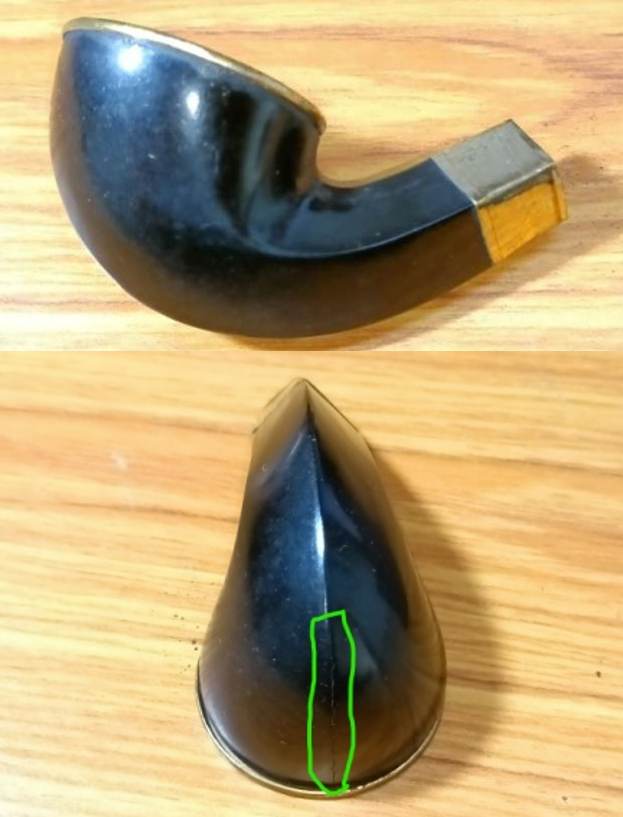
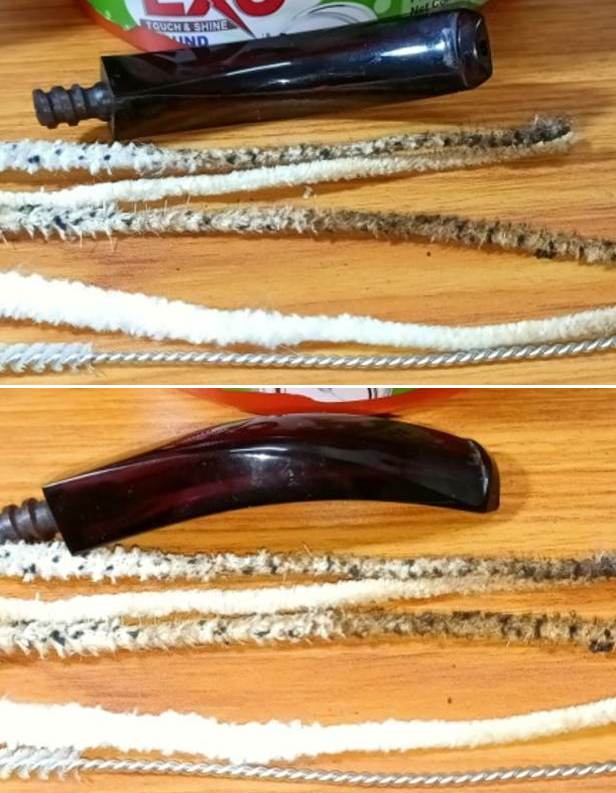
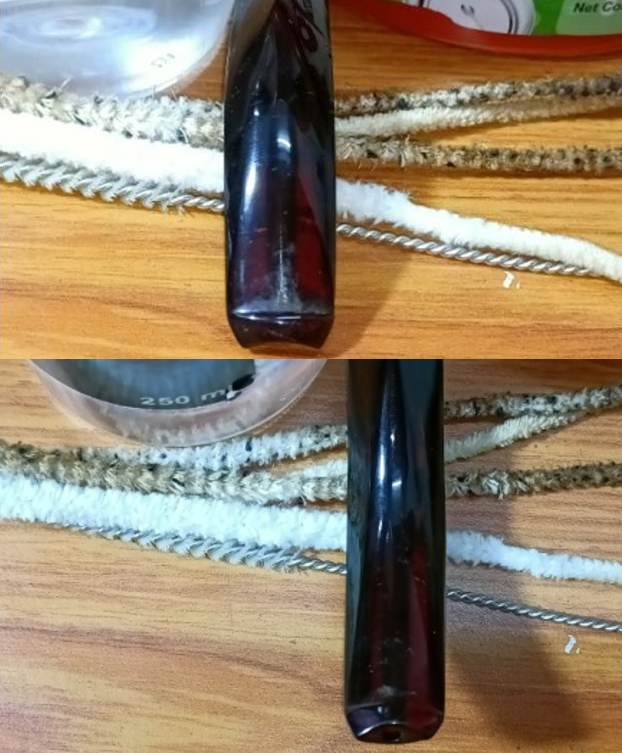
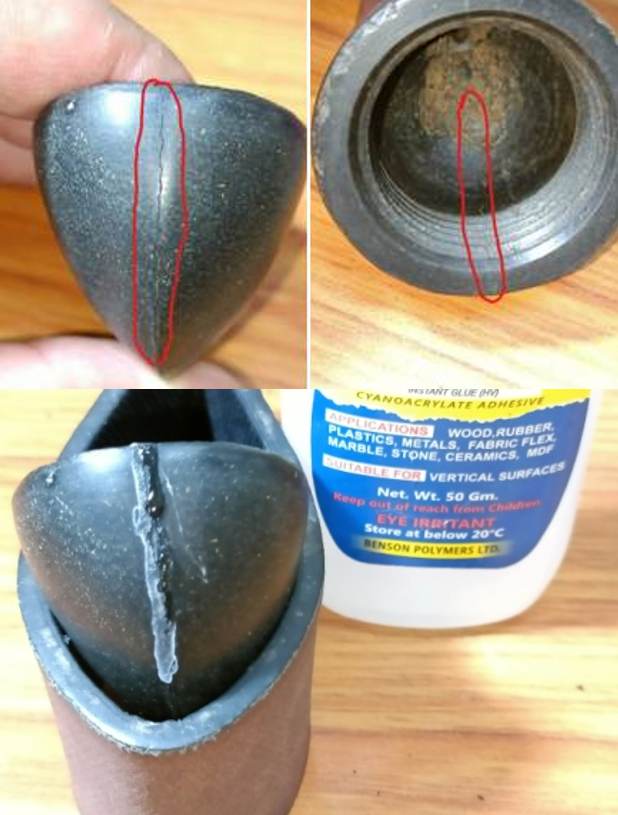
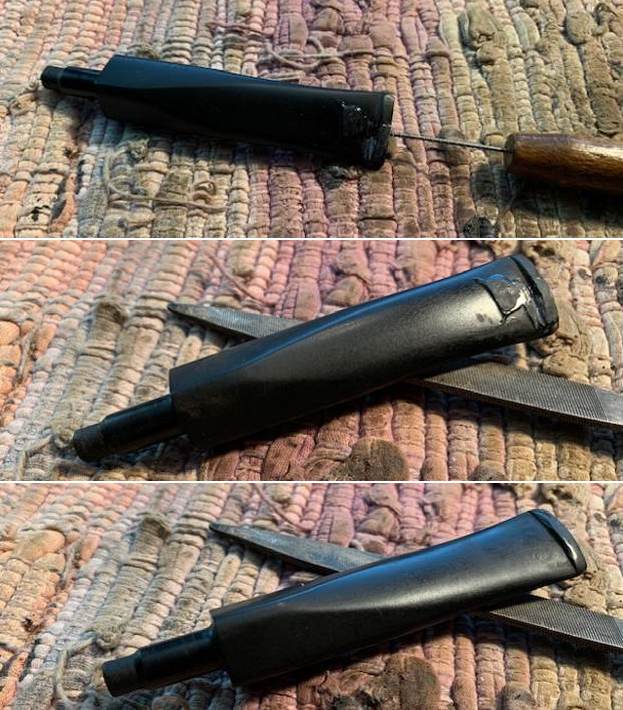
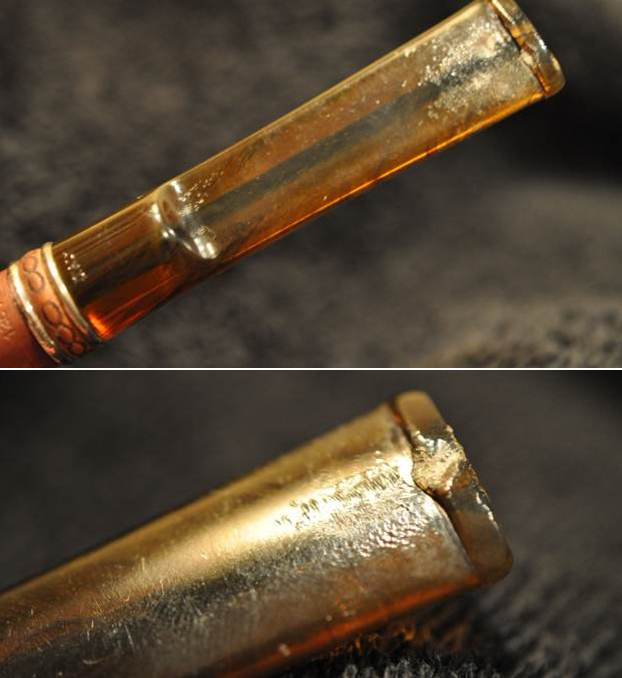
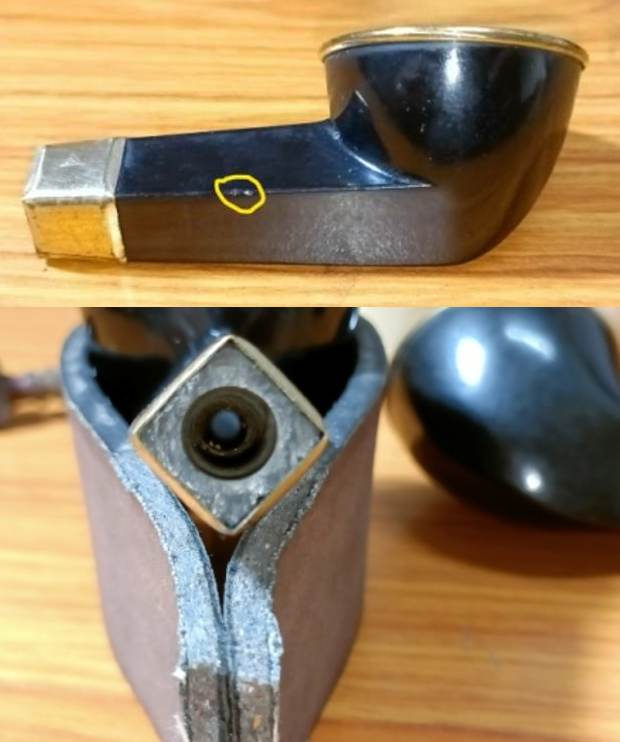 The diamond Redmanol stem has a rounded orifice which also points to its vintage. It has a rich translucent red color and the light really plays through. I cannot wait to see the stem clean up. Minor tooth chatter is seen on the upper and lower surface. The pointed corner edge of the lip on the left is broken (encircled in green) and will either have to be reconstructed or filed away to a straight profile. The stem airway has darkened due to accumulation of saliva, oils and tars and would need to be thoroughly cleaned. The screw-in tenon is of the same Redmanol material and is covered with dried oils and tars.
  The Process
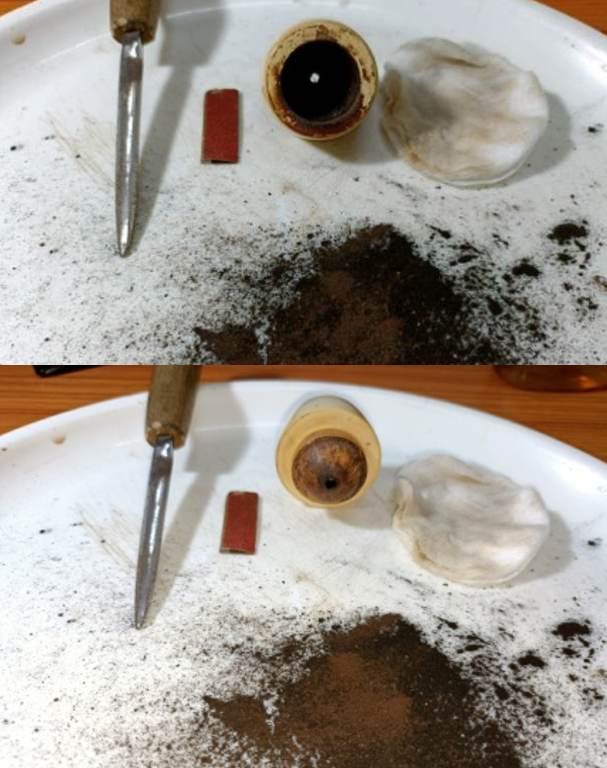
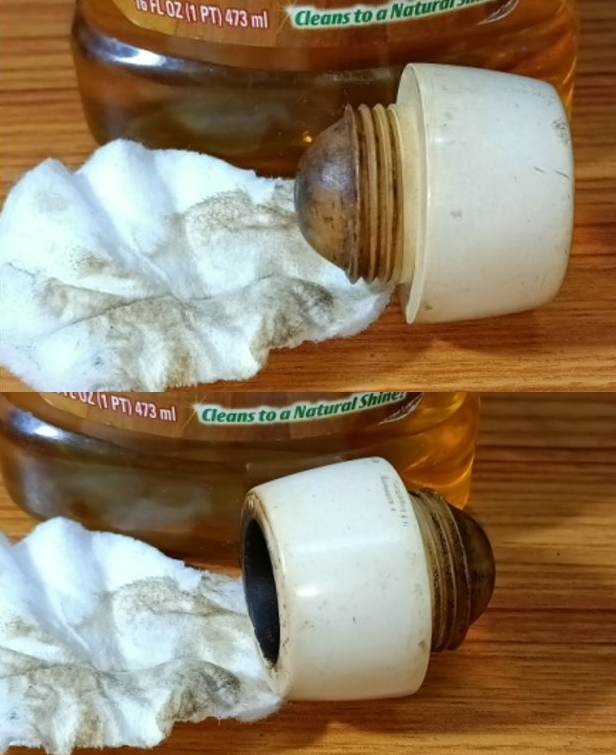
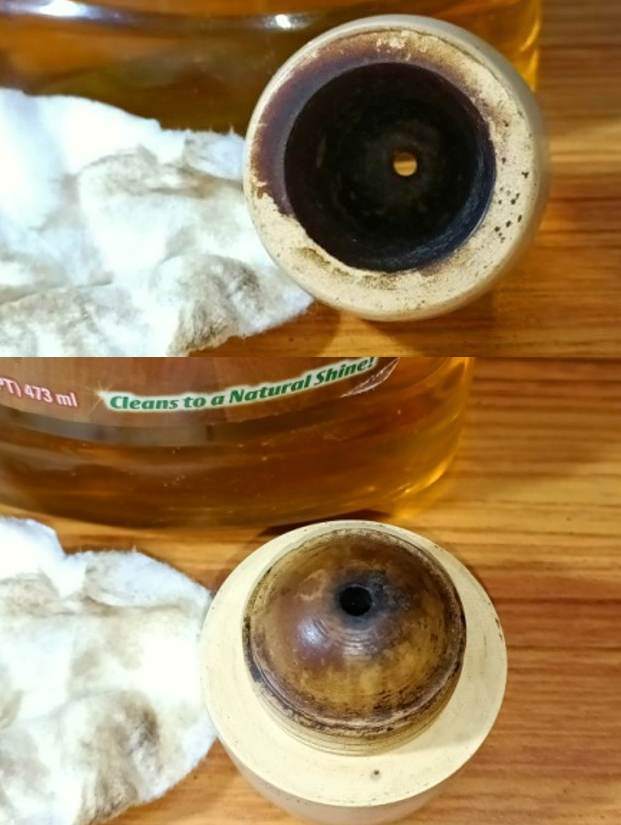
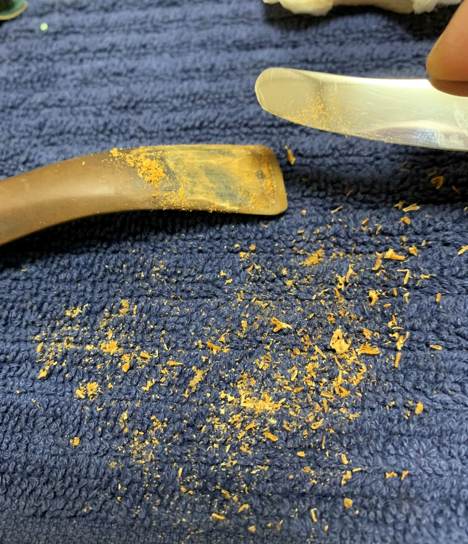
I started this project by reaming the chamber with my smaller fabricated knife and scraped out all the carbon from chamber. I used a 220 grit sand paper, pinched between my thumb and forefinger, to sand the inner walls of the chamber of the pipe. Once I had reached the bare walls, I wiped the chamber with a cotton pad dipped in isopropyl alcohol. This removed all the residual carbon dust and also rid the chamber of all ghost smells. The walls of the chamber are nice and solid with no signs of cracks.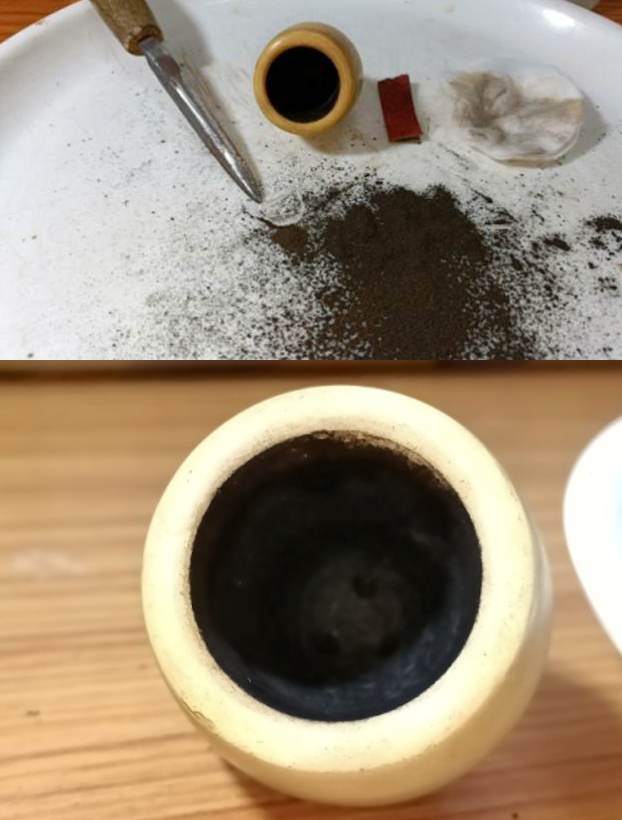 I cleaned the external surface of the Meerschaum cup with Murphy’s Oil soap and cotton swabs. I also cleaned the threads at the foot of the cup with tooth brush and oil soap. I wiped the bowl surface with a moist cloth to remove the soap and grime that remained on the surface. The stummel surface cleaned up nicely. The scratches and dents and dings over the stummel surface are now clearly visible.
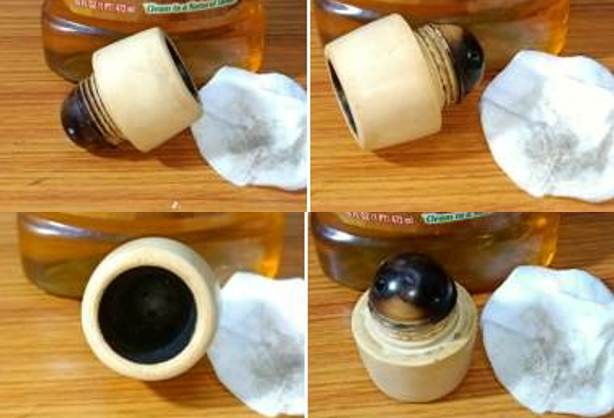 Once I was done with cleaning the external surface of the meerschaum cup, I handed over the cup to Abha, my wife, to work her magic in polishing the cup. She polished the rim top surface and rim edges with micromesh pads. She then went on to dry sand the entire stummel with 1500-12000 grit pads and wiped the bowl down with a damp cloth to remove the dust that was left behind by the sanding. I had requested her to minimize the scratches but not necessarily remove them. These lacerations and dings must have had a history and I wanted to preserve it. She did a fantastic job of polishing the meerschaum cup to a nice deep shine.
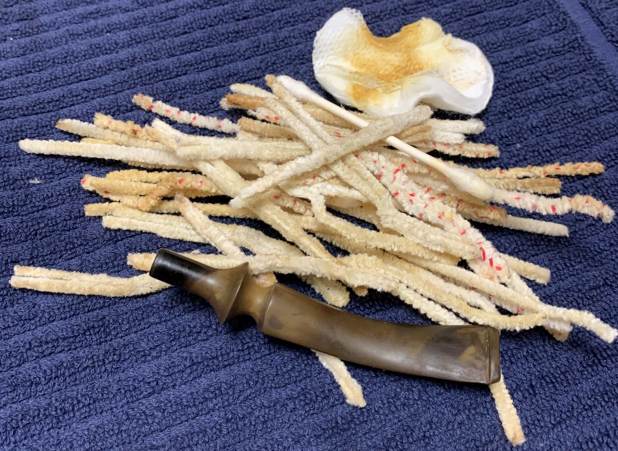
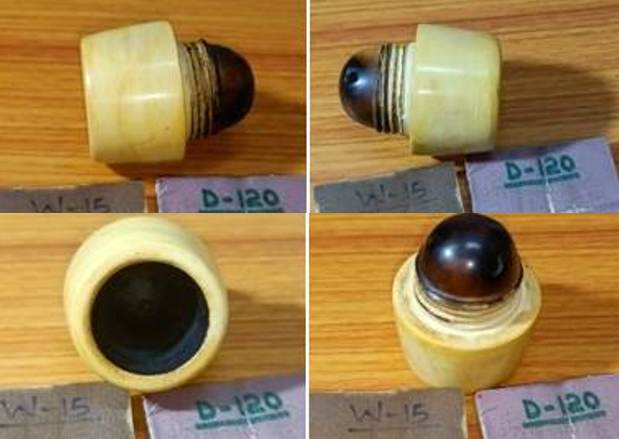 While Abha was busy with polishing the meerschaum bowl, I addressed the stem repairs. I first cleaned the stem surface and the stem airway using anti-oil dish cleaning soap and thin shank brush and rinsed it under warm running water to remove the entire gunk from the airway. I also cleaned up the threaded tenon with a tooth brush and soap. To finish the cleaning, I ran a few bristled and regular pipe cleaners dipped in alcohol to remove the residual gunk from the airway and dry it out.
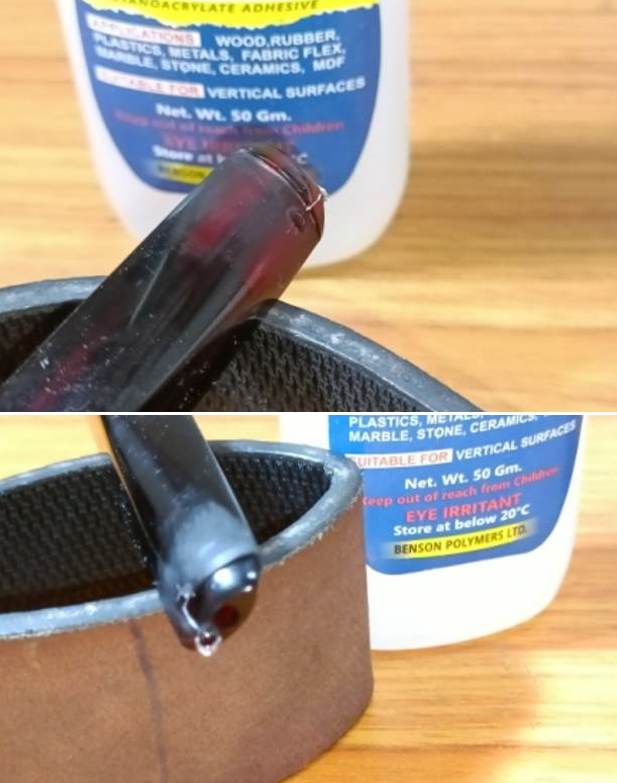
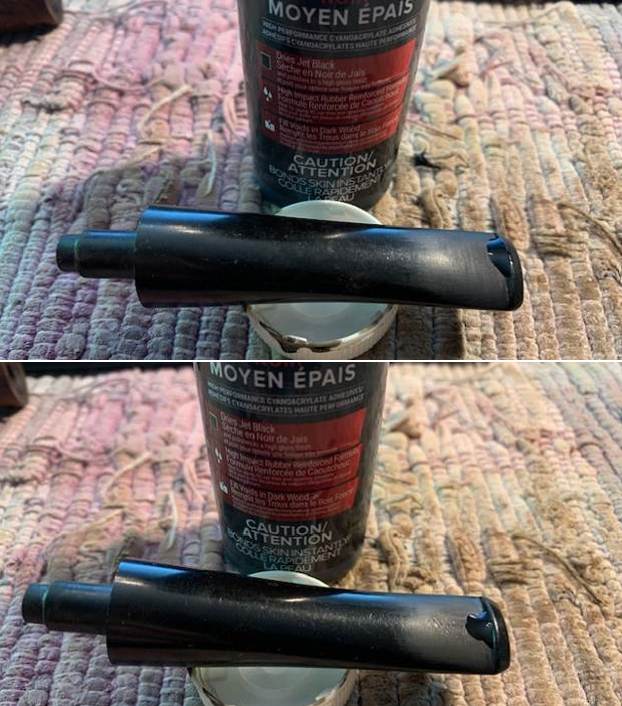
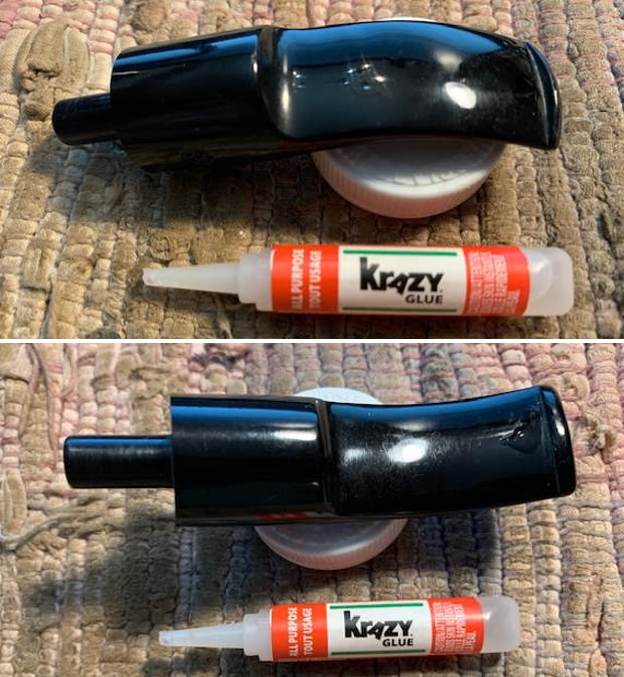
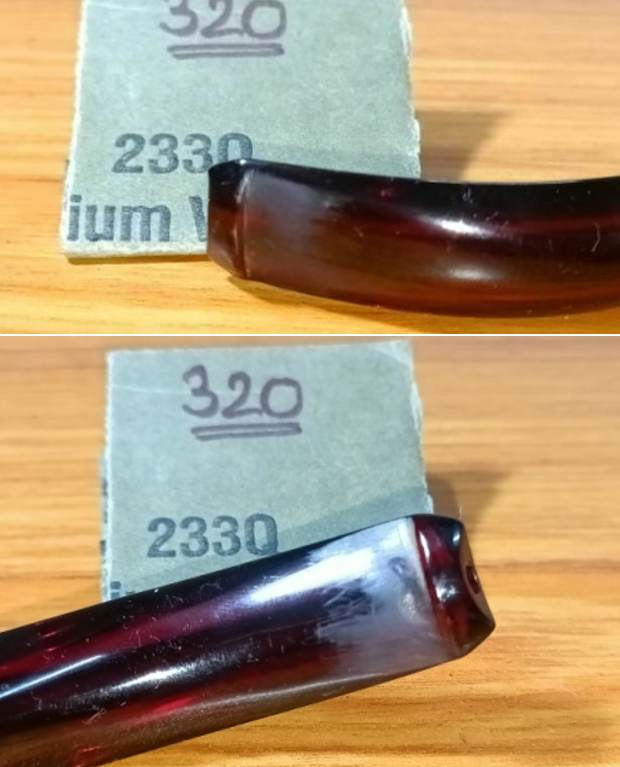
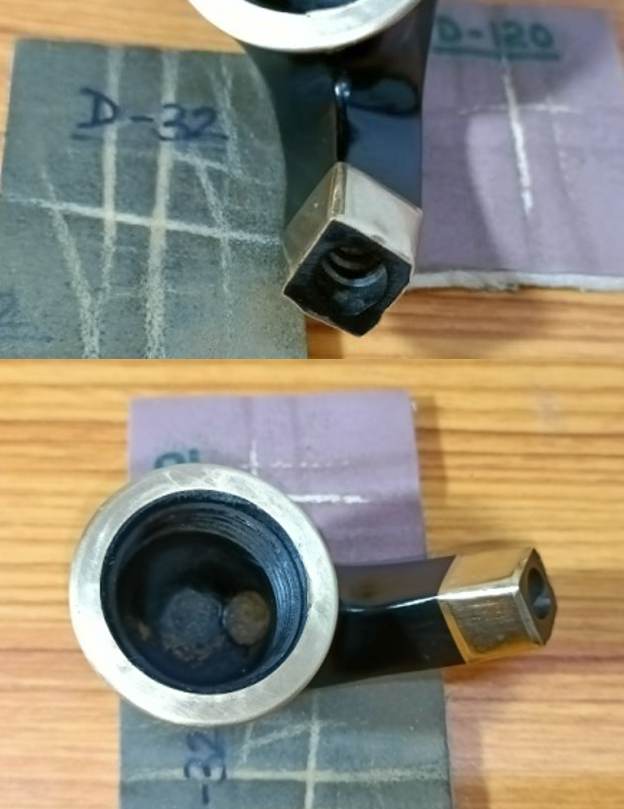
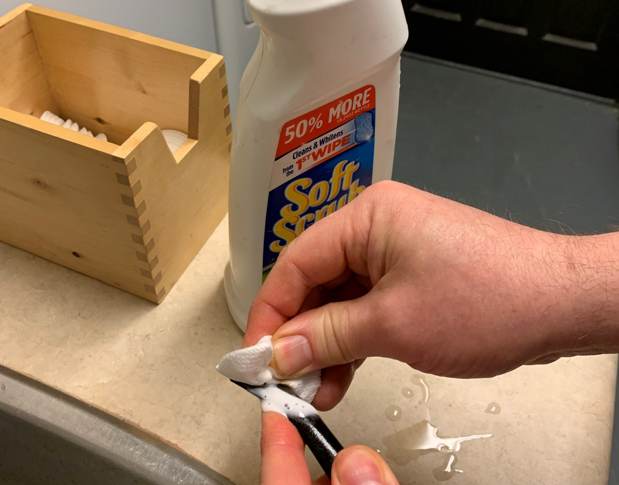
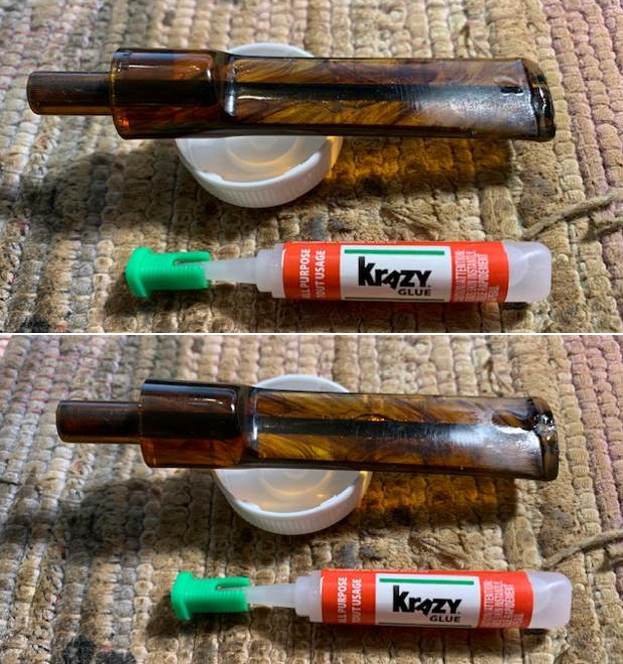
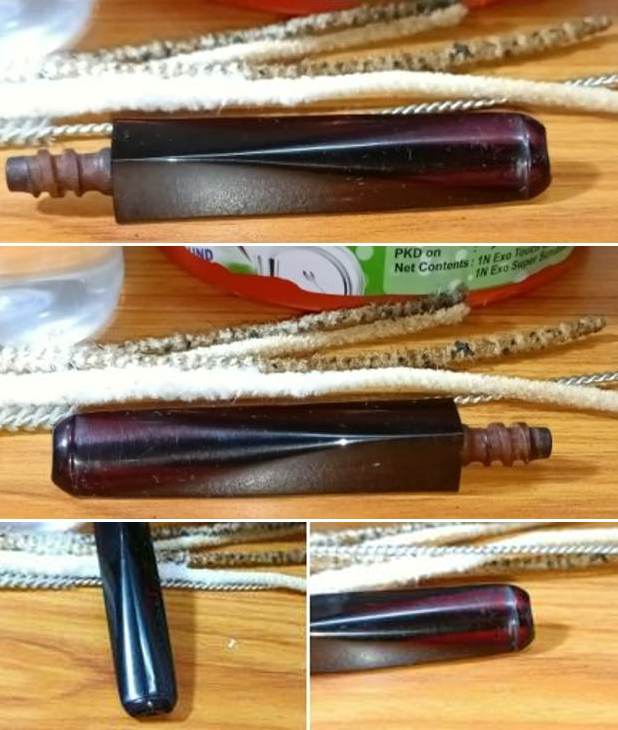 To address the minor tooth chatter on both upper and lower surfaces, I sand the bite zone with a folded piece of 320 grit sandpaper. However, there was one tooth indentation in the bite zone and the chipped corner of the lip still remained an eyesore. I spot filled these with clear CA superglue and set the stem aside for the glue to cure.
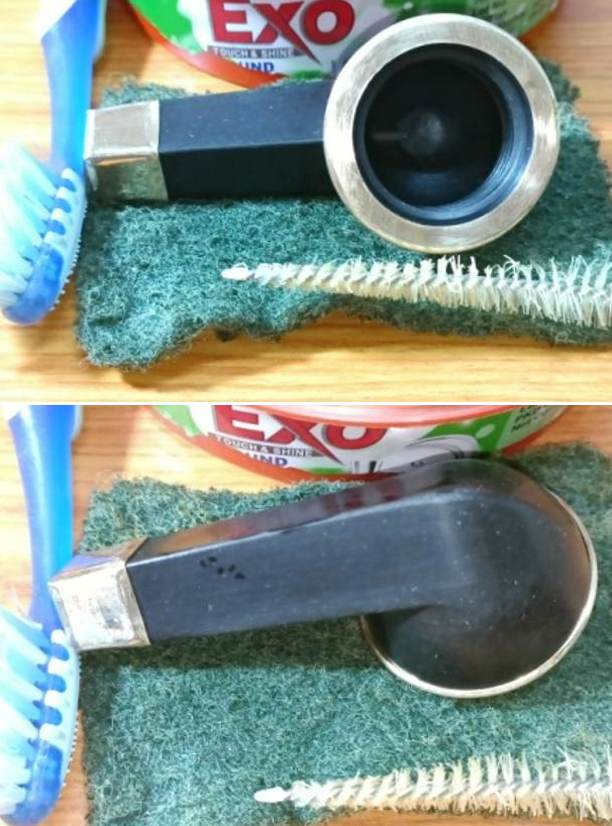
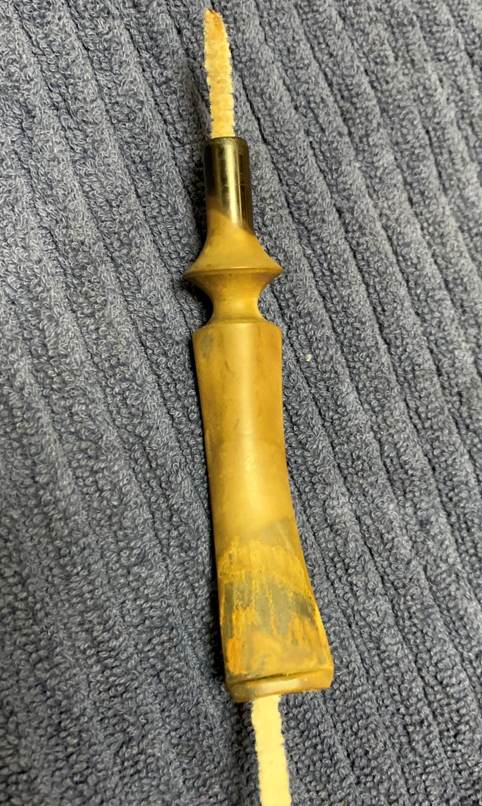
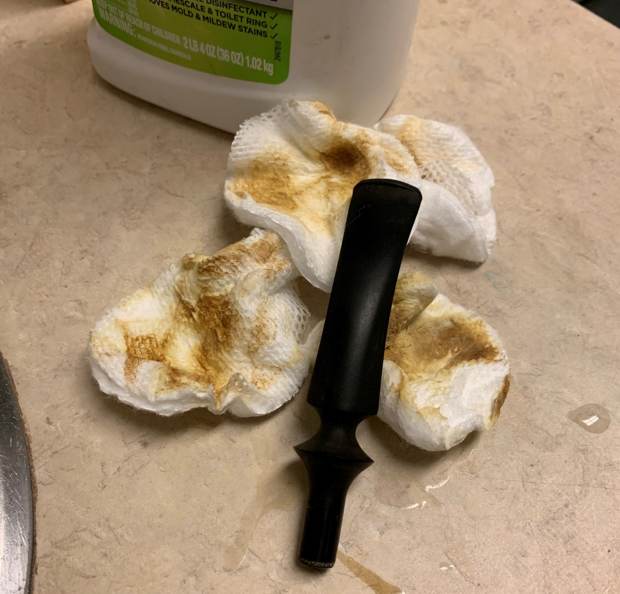
 I cleaned the mortise by scraping out the dried gunk using my fabricated tool. Next, I cleaned the Bakelite shank with anti oil dish soap and tooth brush. I cleaned the shank internals and mortise with shank brush and anti oil soap and rinsed it under warm water. The shank is now clean both from the inside and the outside.
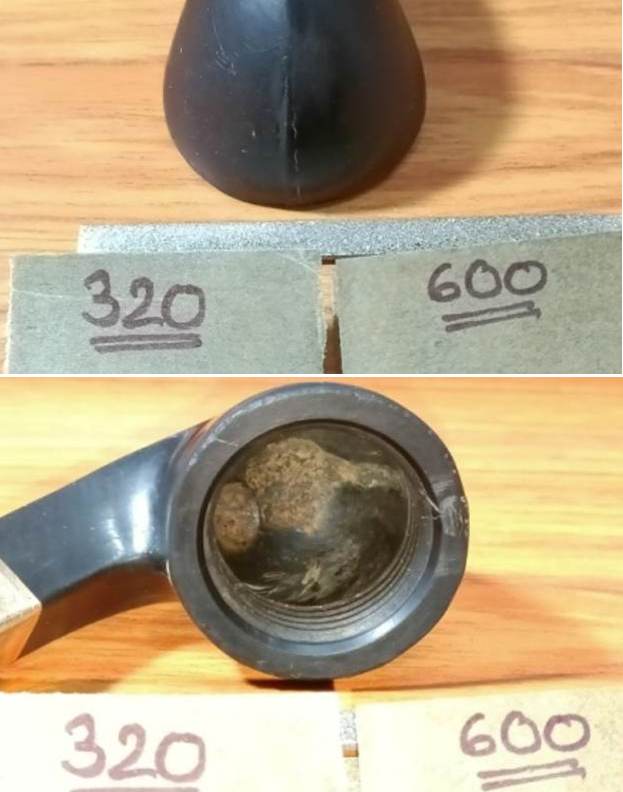
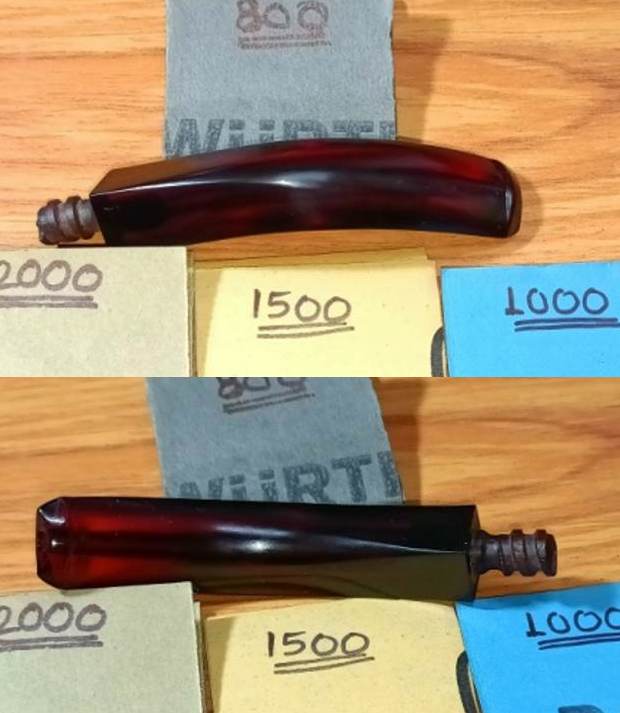
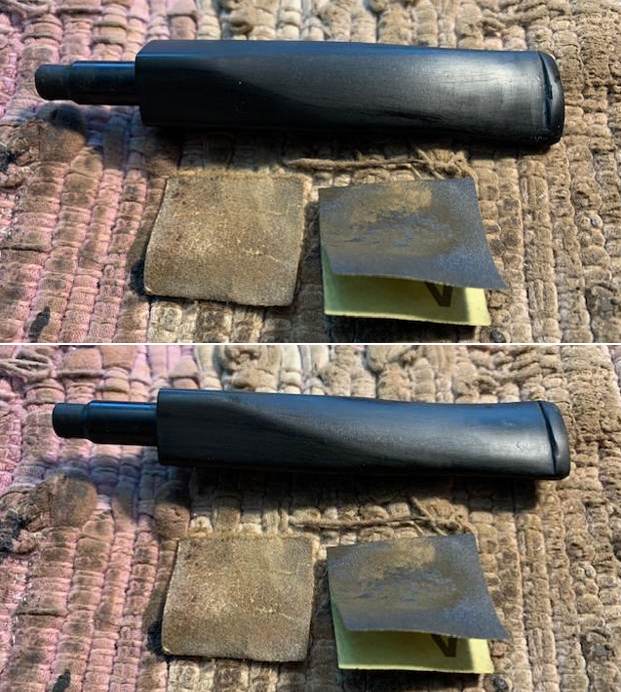
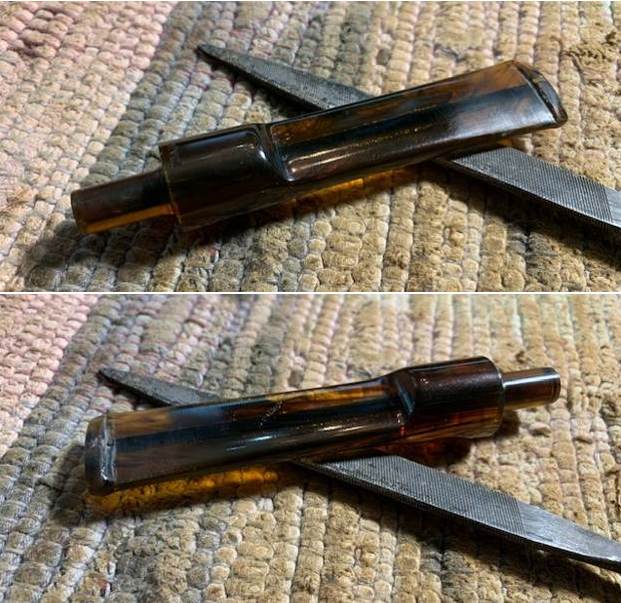
 Once the stem fills had cured, I sand the fills with a flat head needle file to roughly match the fill with the rest of the stem surface. I further fine tune the match by sanding the bite zone with 320 grit sandpaper followed by 600 grit sandpaper.
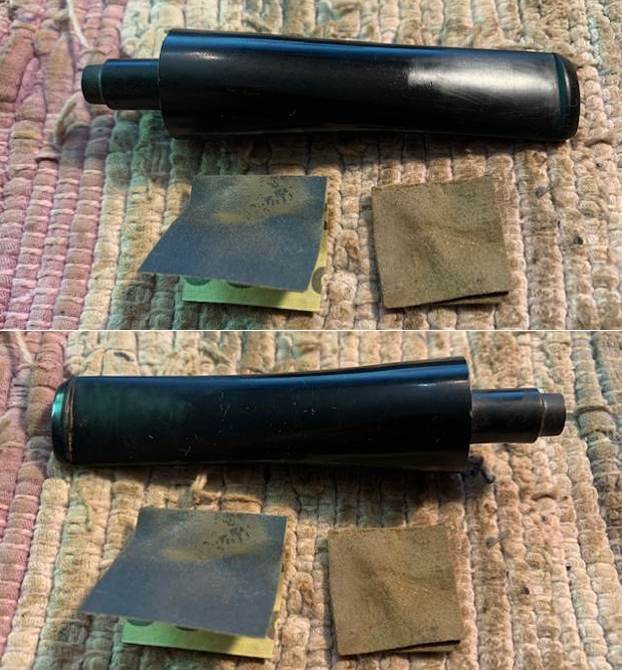
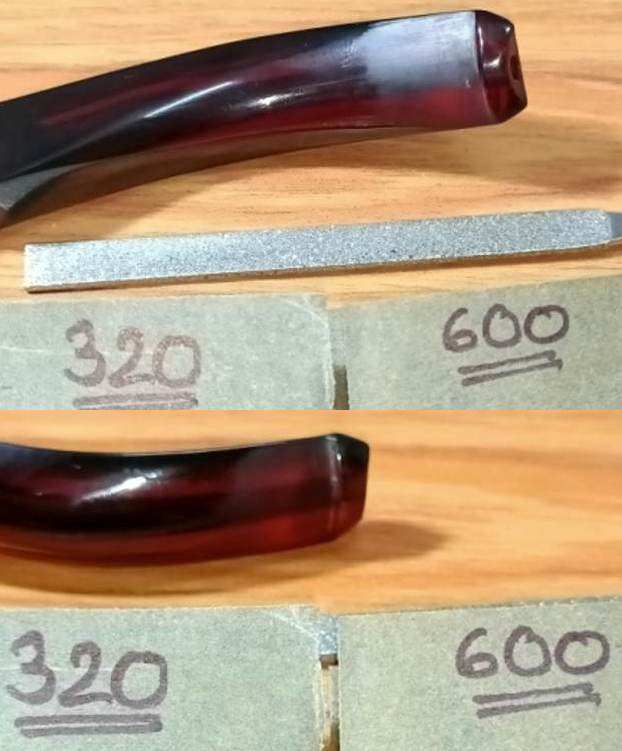
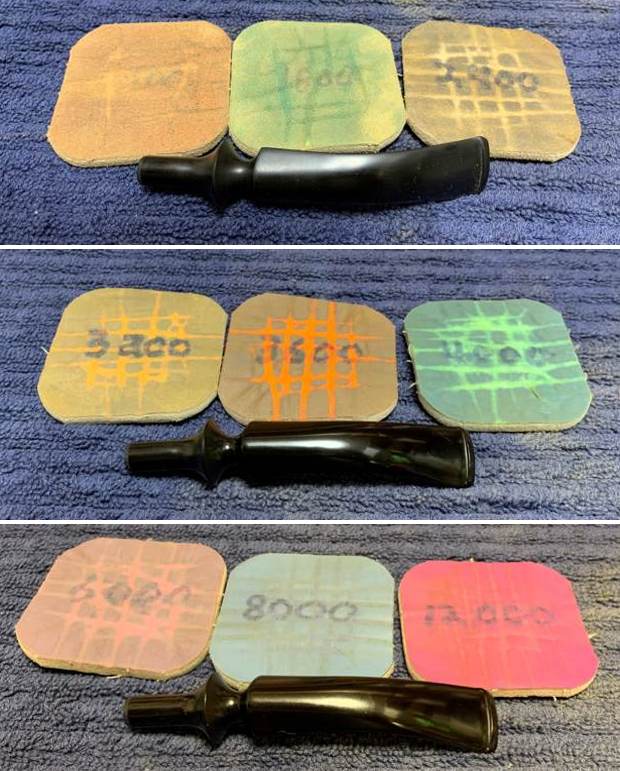
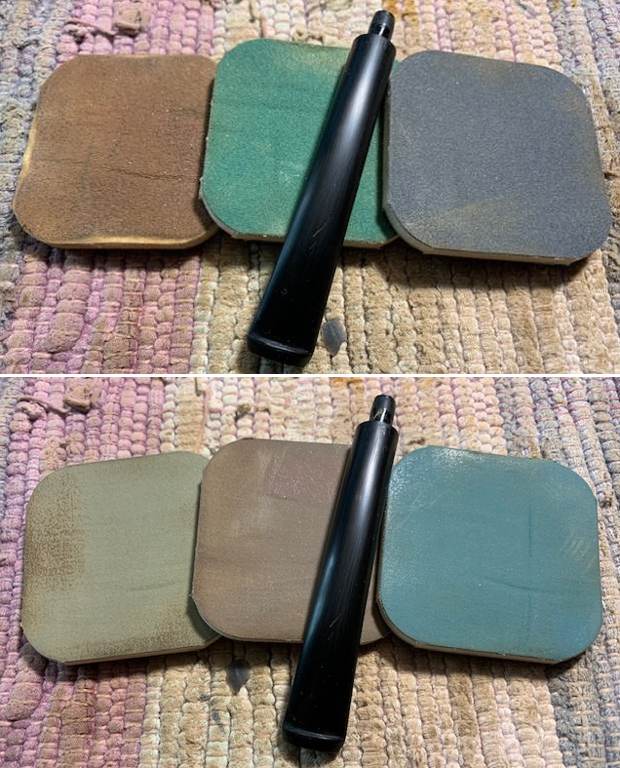
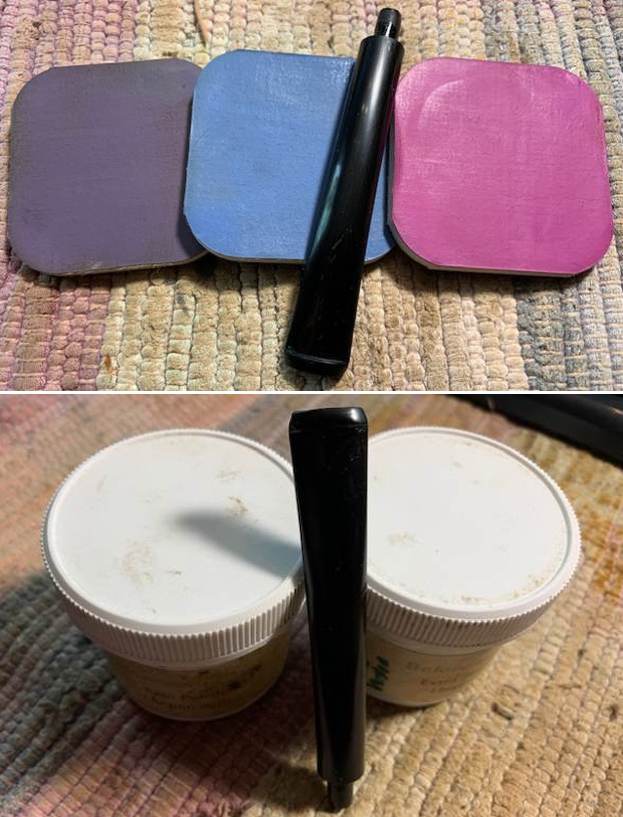
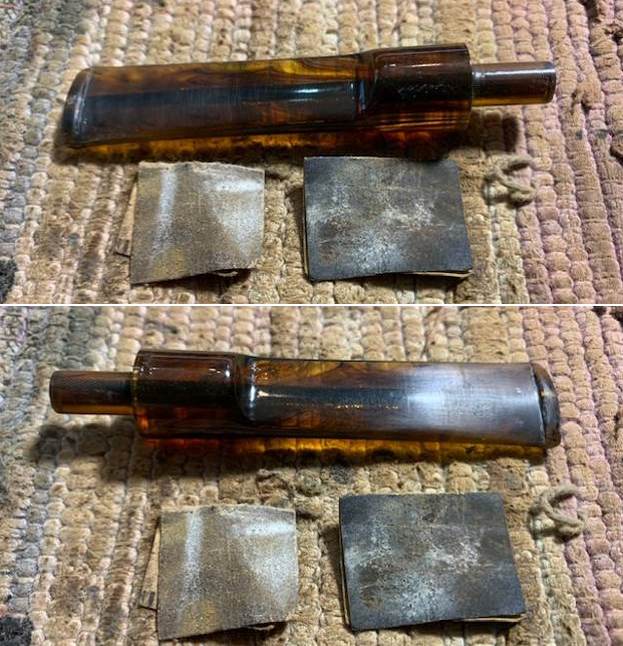
 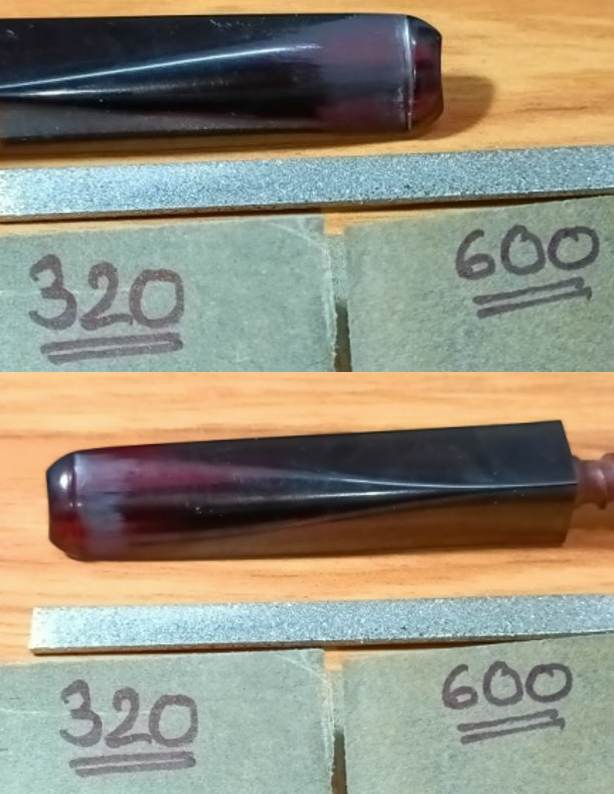 Following the sanding with a piece of 600 grit sandpaper, I began the process of polishing by wet sanding the entire stem with 800, 1000, 1500 and 2000 grit sandpapers. I completed the polishing of the stem by dry sanding the stem with 3200 to 12000 grit micromesh pads. The translucent red of the Redmanol stem just shines through.
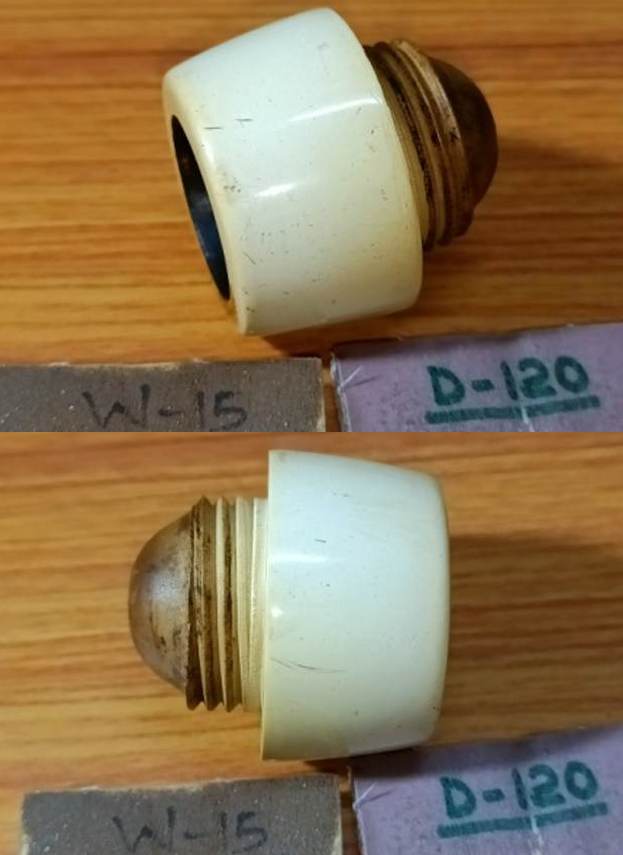
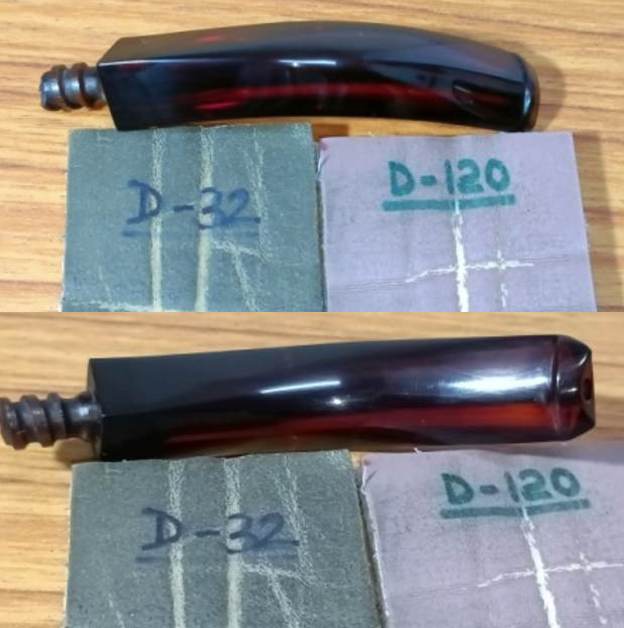
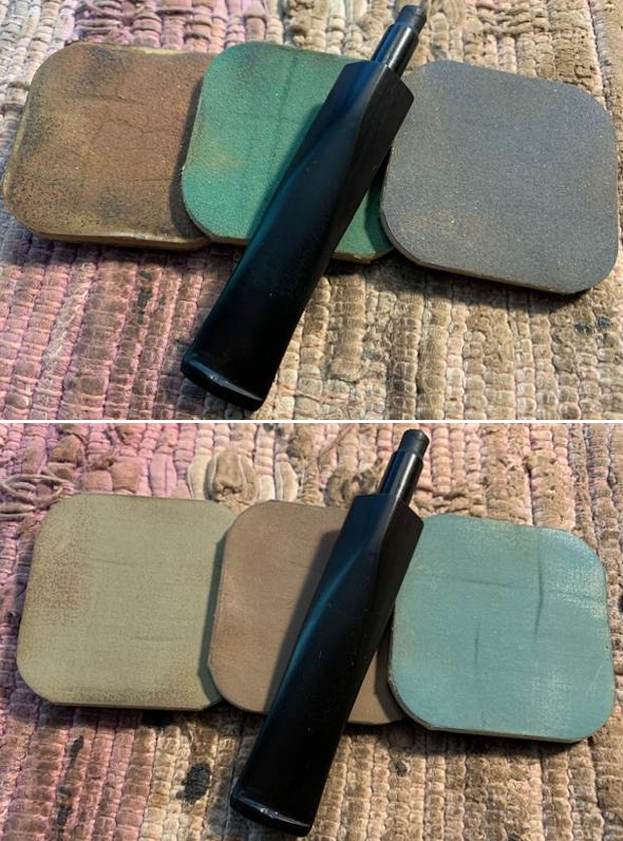
 With the Meerschaum bowl and the Redmanol stem polished, I turned my attention to the Bakelite shank. I polished the shank by wet sanding with 1500 to 2400 followed by dry sanding with 3200 to 12000 grit micromesh pads.
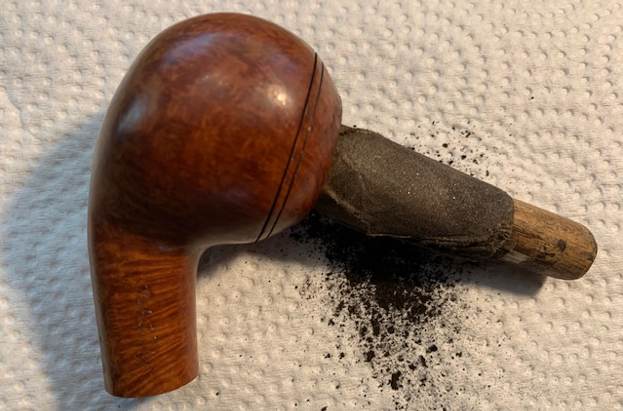
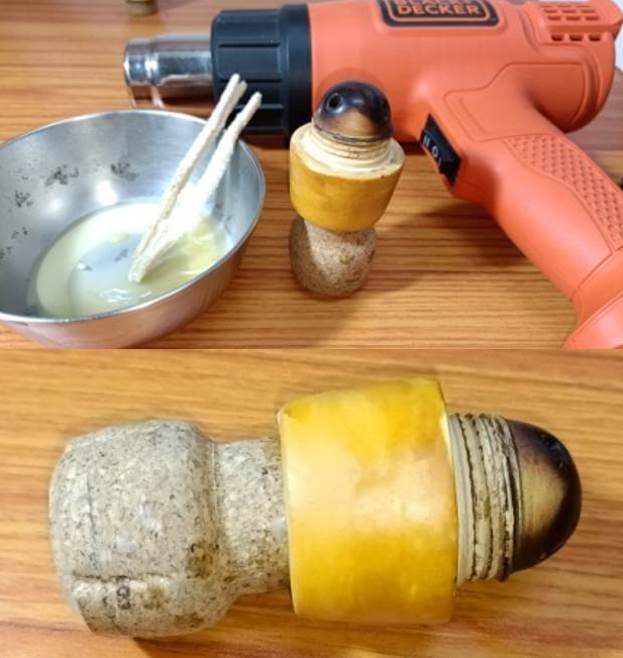
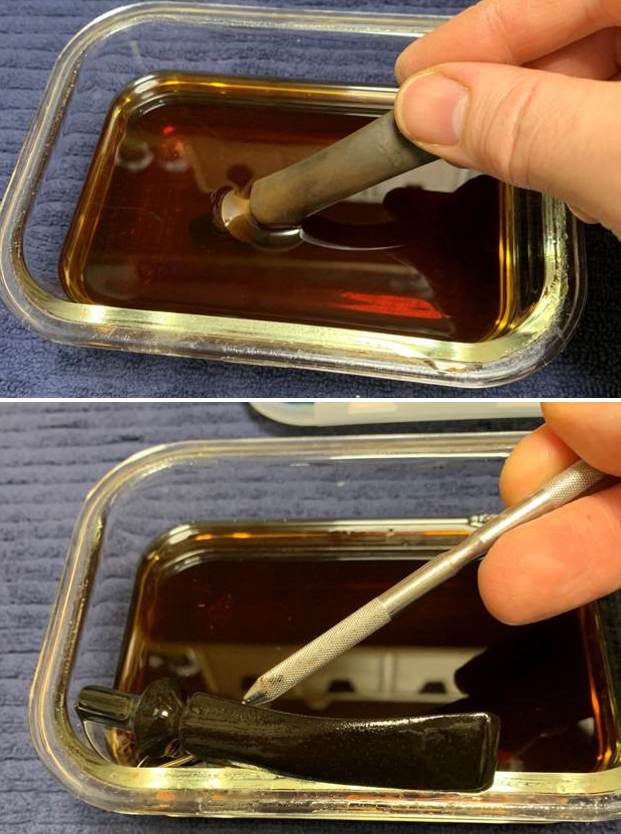
 Next I gave a beeswax polish to the meerschaum bowl. I assembled the equipment and materials that would be needed during the process viz heat gun, paper towels, q-tips and a Katori, a steel container graciously lent by Abha from the kitchen and of course, beeswax. I stuffed the chamber with cork to prevent inadvertent seepage of the melted beeswax into either. Next, I melted a sufficient quantity of beeswax in the katori using my heat gun and thereafter heated the stummel. Using the a folded pipe cleaner, I completely coated the stummel with the wax and continued the application till the surface was saturated and set the stummel aside to absorb the wax. I reheated the stummel with the heat gun about 20 minutes later and let the excess wax either be absorbed or drip off from the stummel surface. I rubbed off the excess wax with a soft cotton cloth and brought a deep shine to the surface with a microfiber cloth.
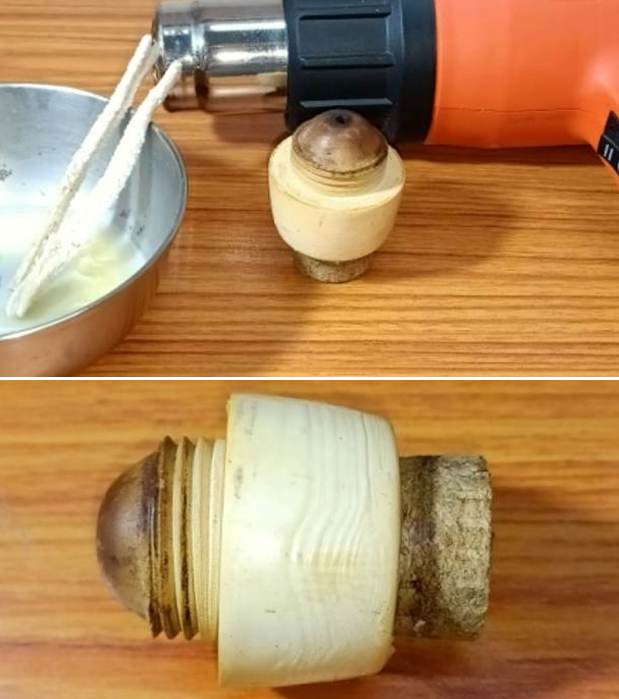
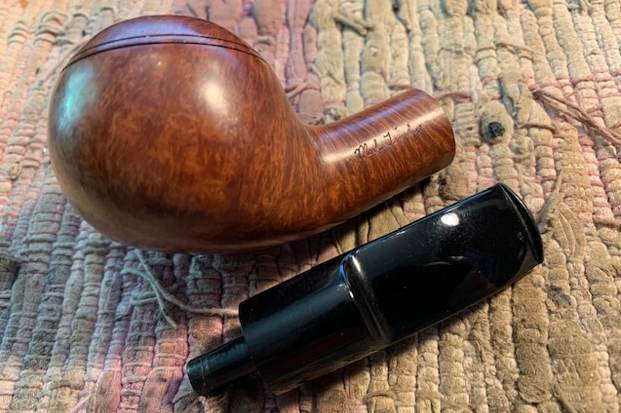
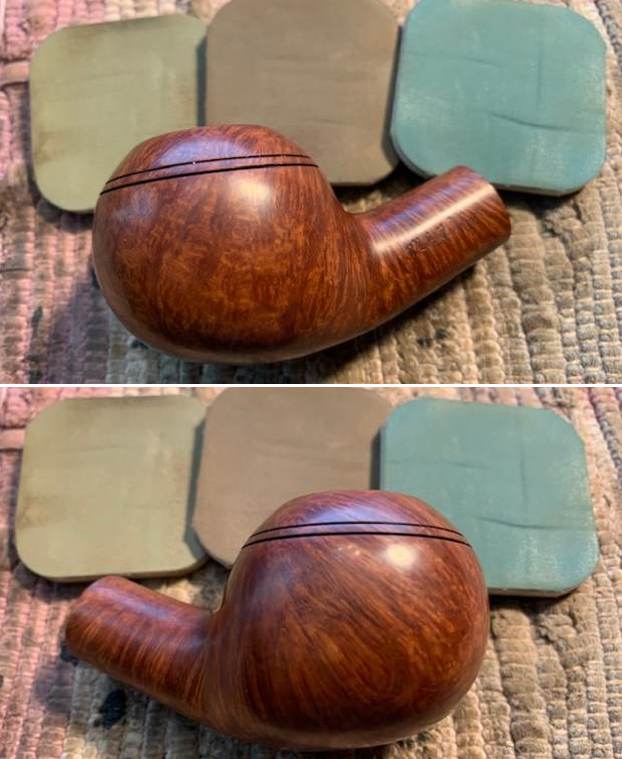
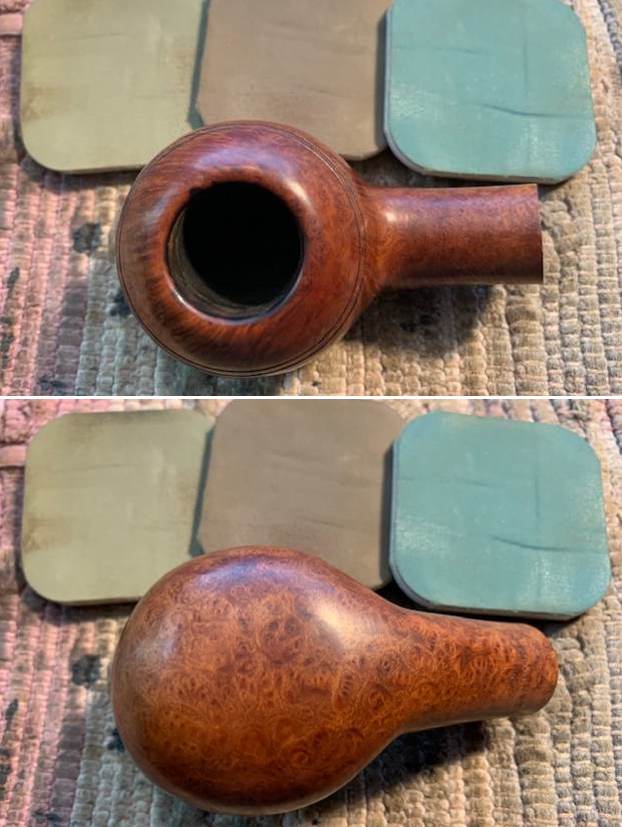
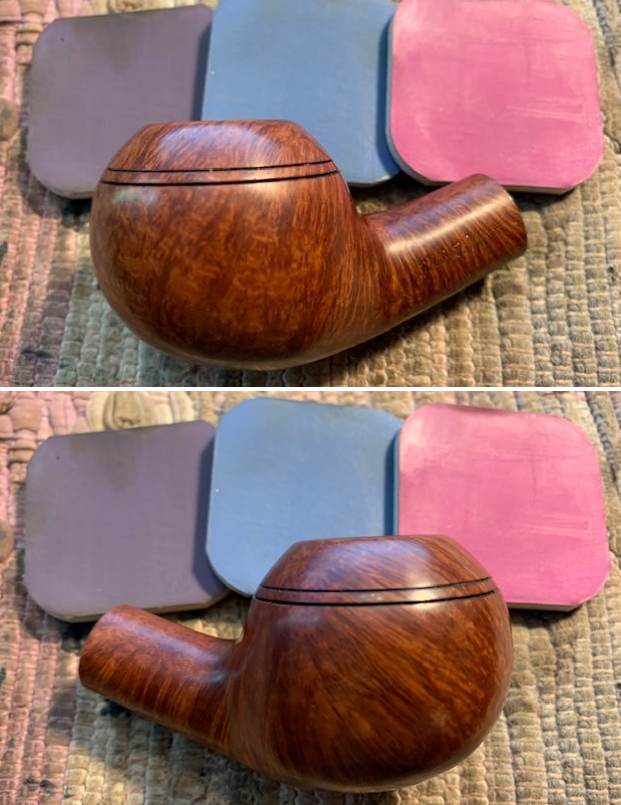
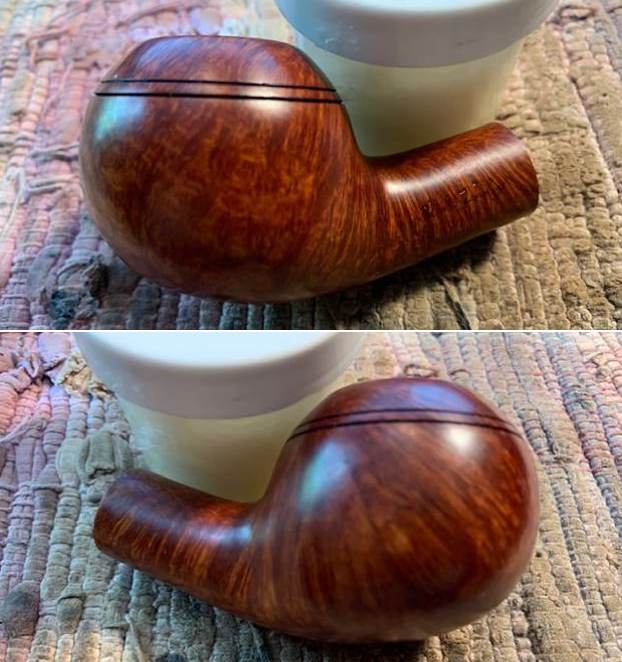
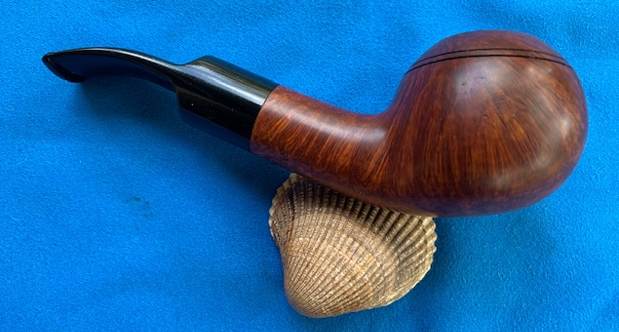
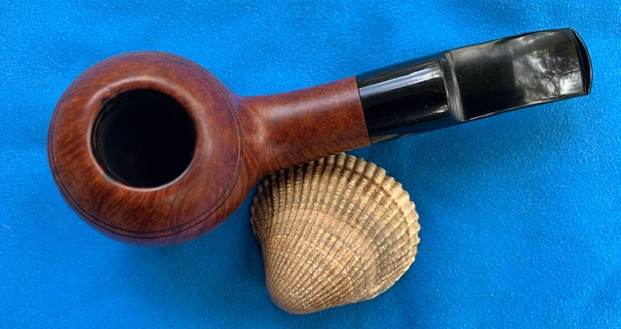
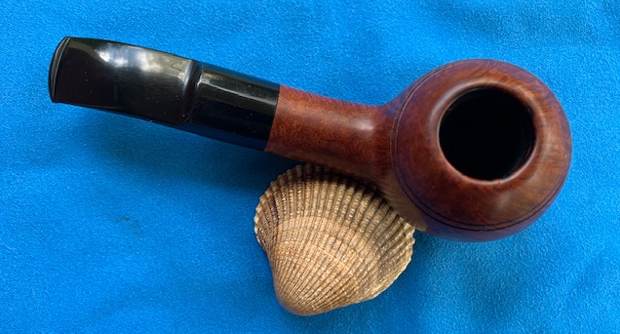
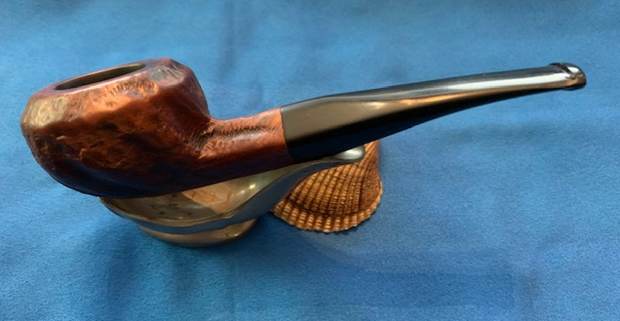
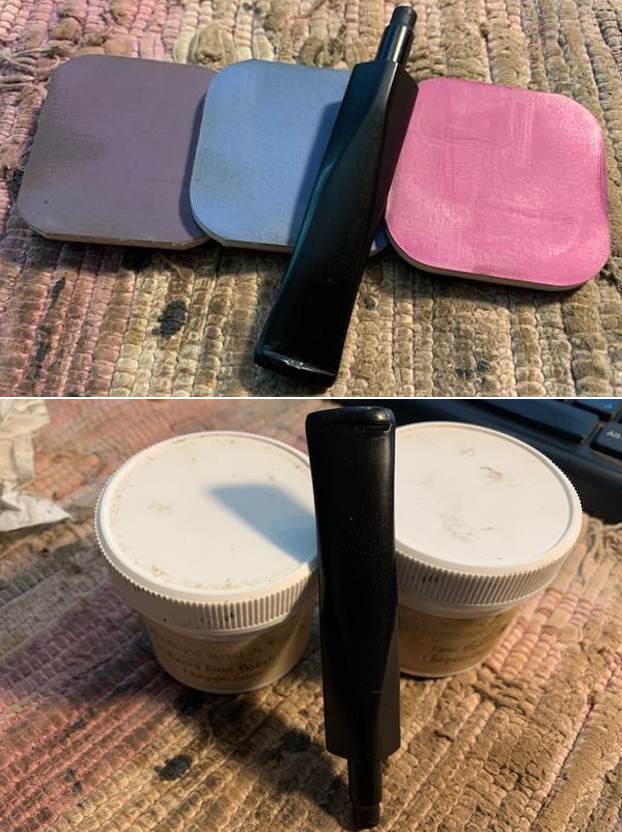
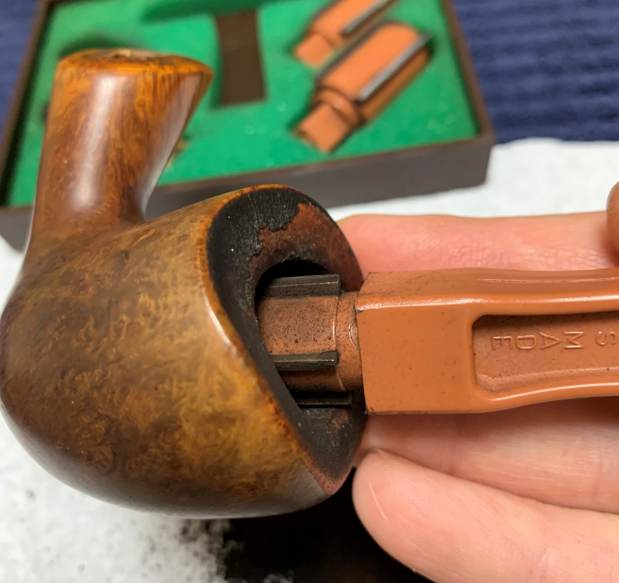
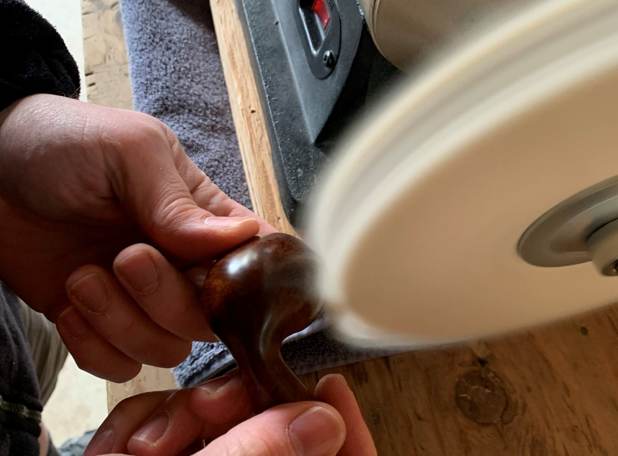
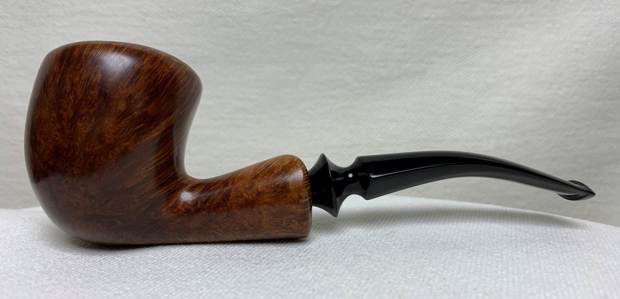
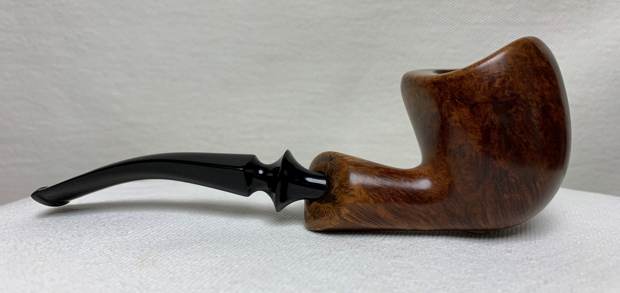
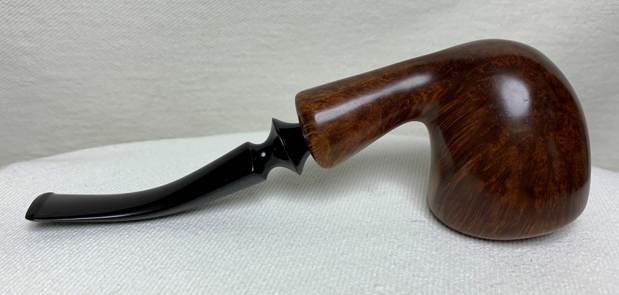
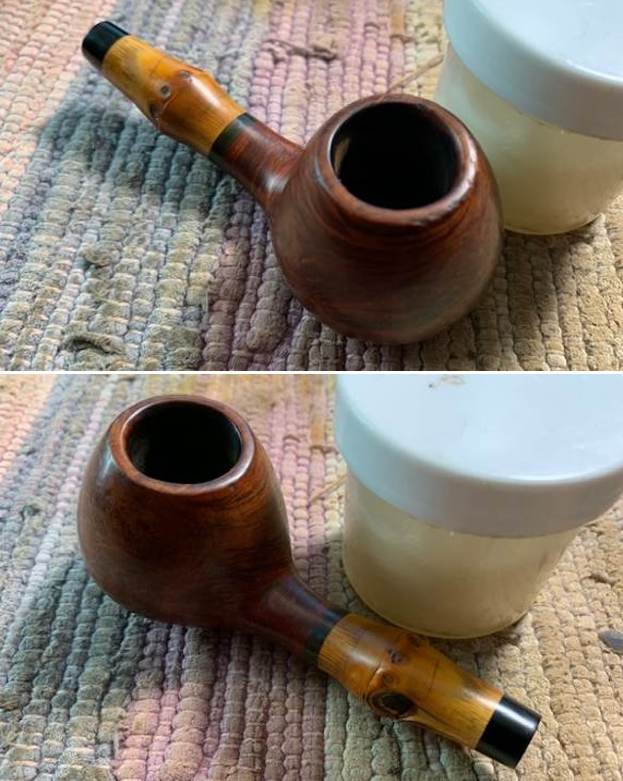
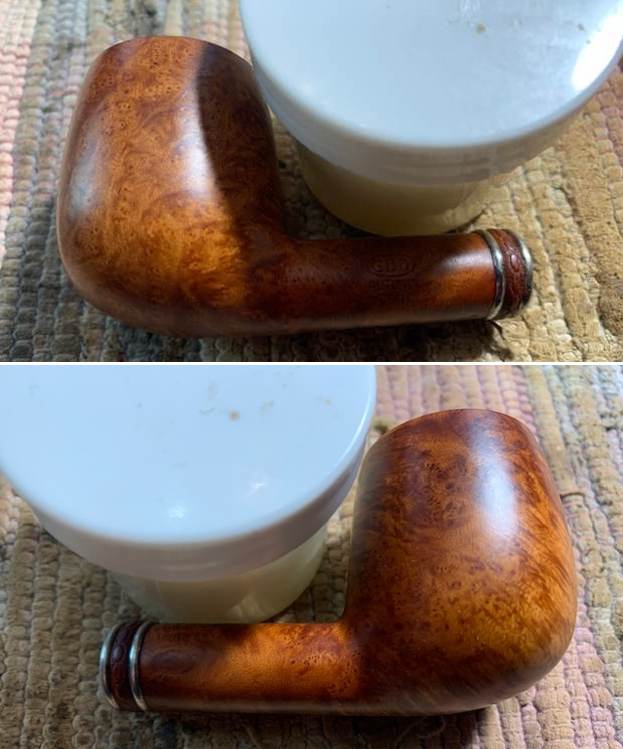
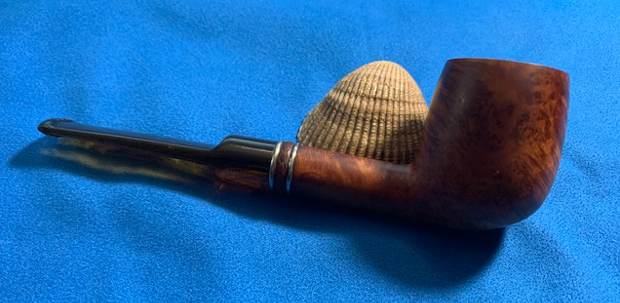
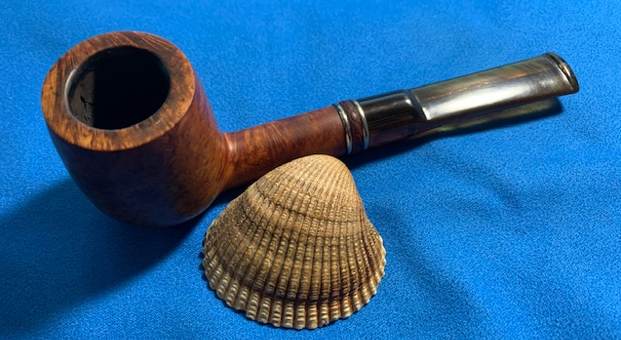
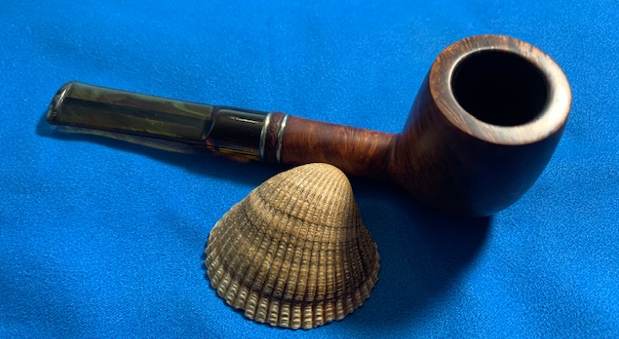
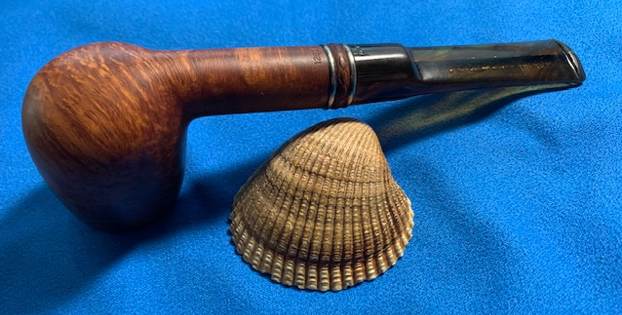
 To finish, I re-attach the Redmanol stem with the Bakelite shank. I mount a cotton cloth buffing wheel on to my hand held rotary tool and setting the speed at 50% RPM, applied Blue Diamond compound over the shank and the stem surface. I wiped/ buffed the parts with a soft cotton cloth to clear it of any leftover compound dust. I then mounted another cotton cloth wheel on to the polishing machine and applied several coats of carnauba wax over the shank and the stem of the pipe. I finished the restoration by giving the pipe a rigorous hand buffing using a microfiber cloth to raise the shine further. Have a look at the completed pipe below.
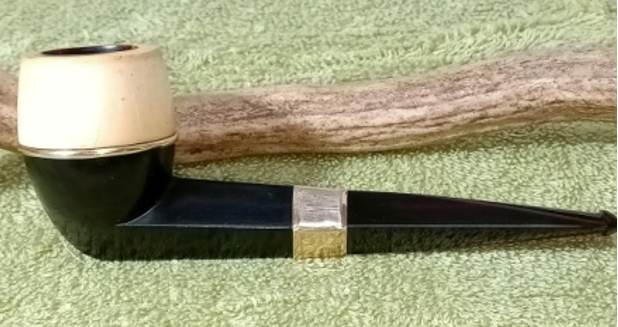
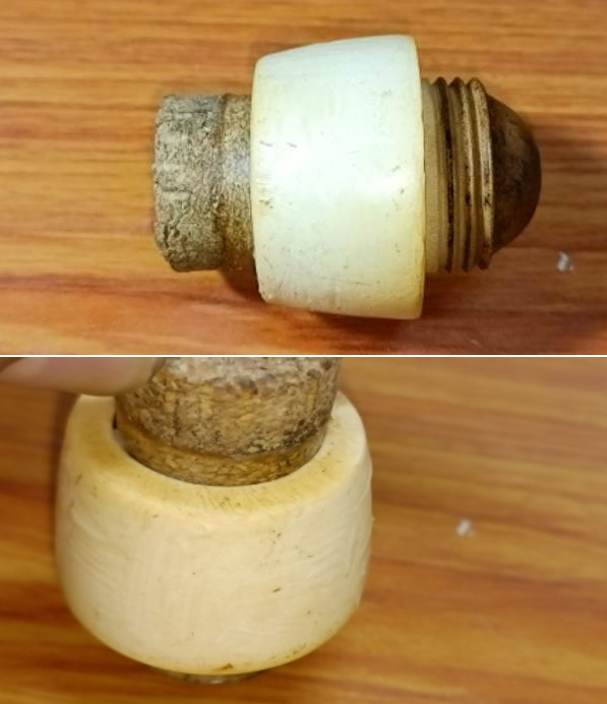
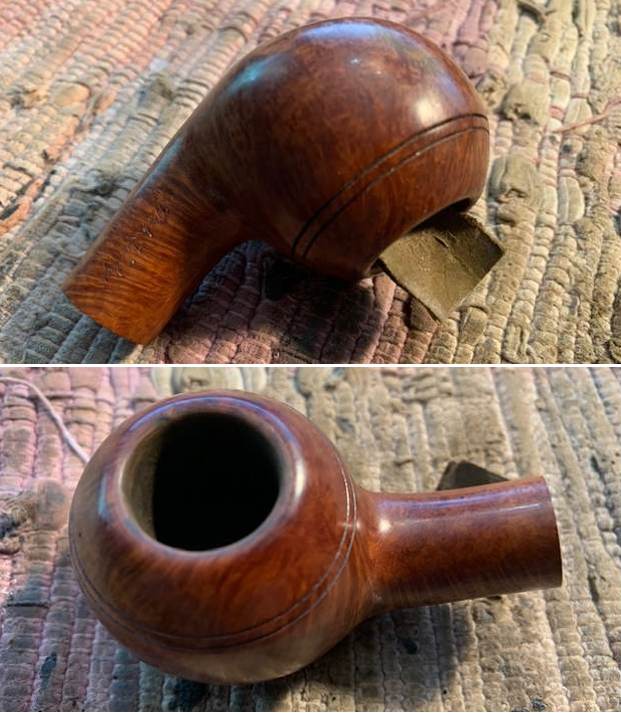
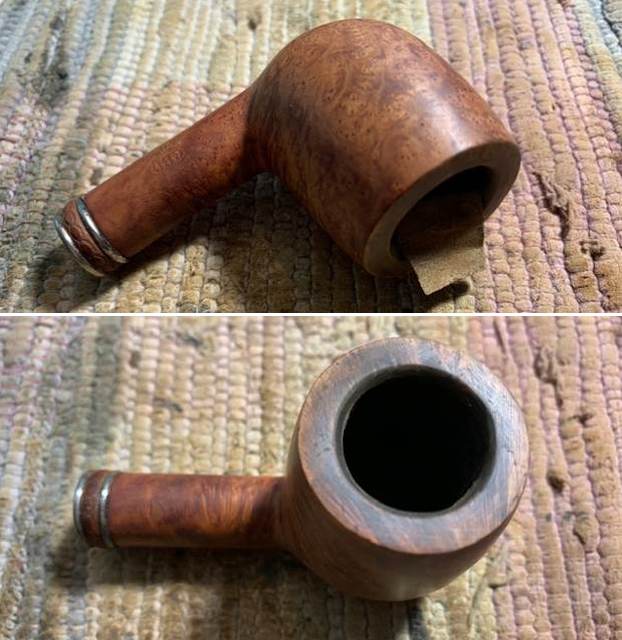
 P.S. – Readers must have noticed that the meerschaum bowl has been changed from three holed one to one hole. Well, if you recollect I had made a mention of draw on this pipe being constricted. It turns out that the meerschaum bowl on this pipe was a long neck one and the one on the bent bulldog had a shorter neck. The Bakelite base of the straight pipe is shallow as compared to the bent bulldog and accommodated the short neck meerschaum bowl better than the long neck bowl. Once the switch was made, the draw on both the pipes was open, full and smooth as silk.
Now, why the bowls were switched in the first place? The answer to this intriguing question will be given in the next part…
Thank you all for being with me as I walk the path of learning nuances of pipe restoration.

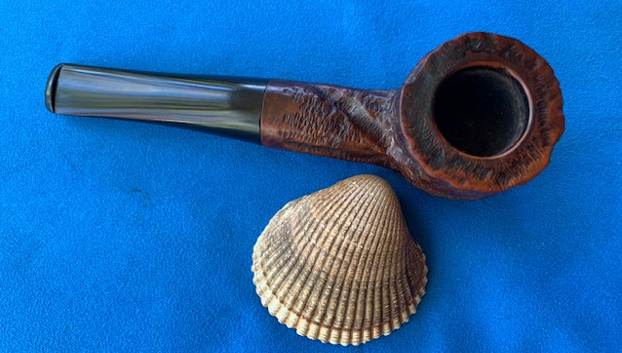
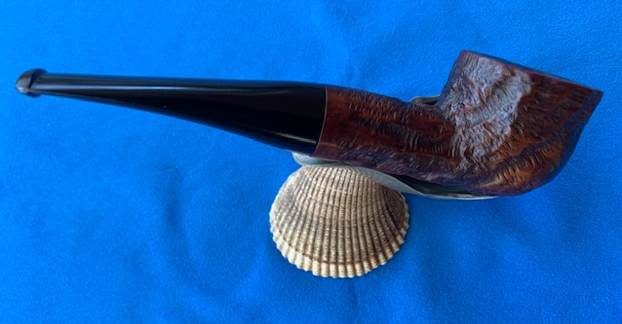
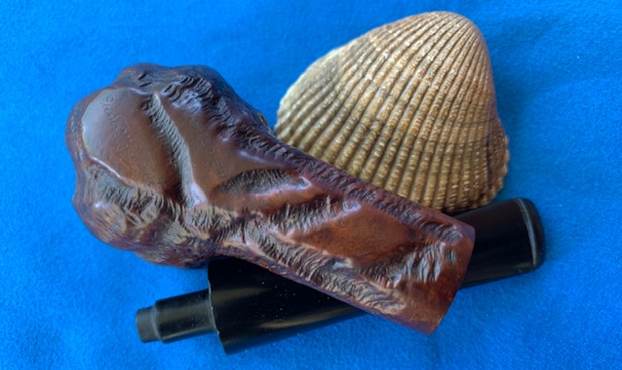
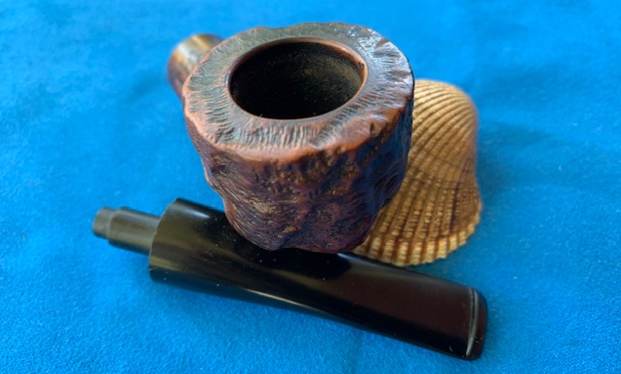
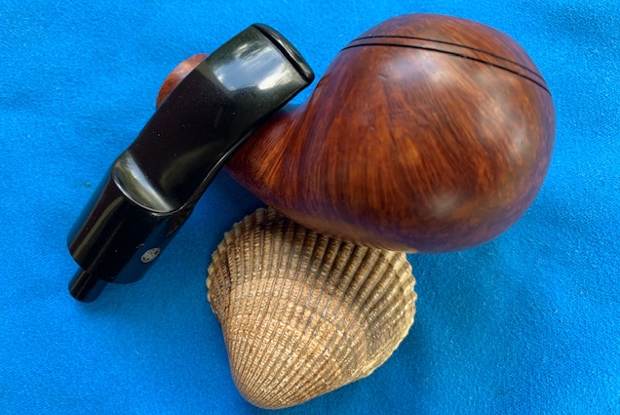
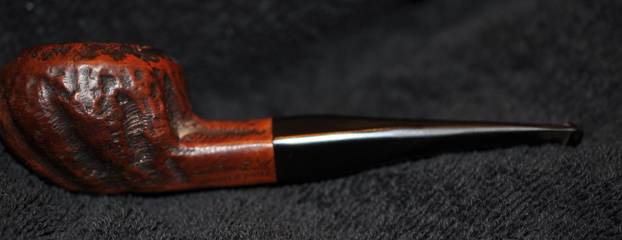
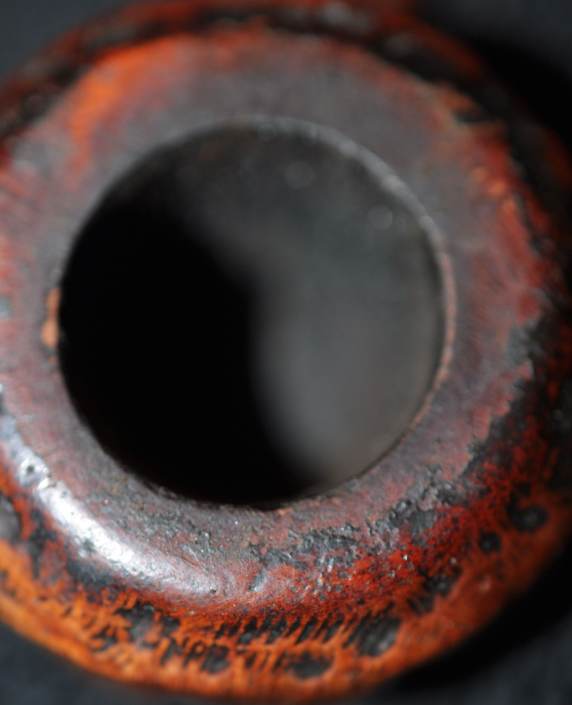
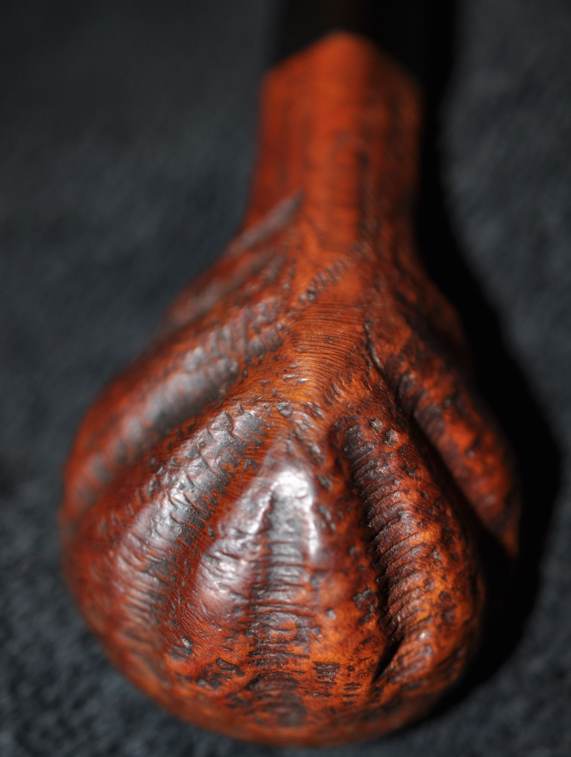
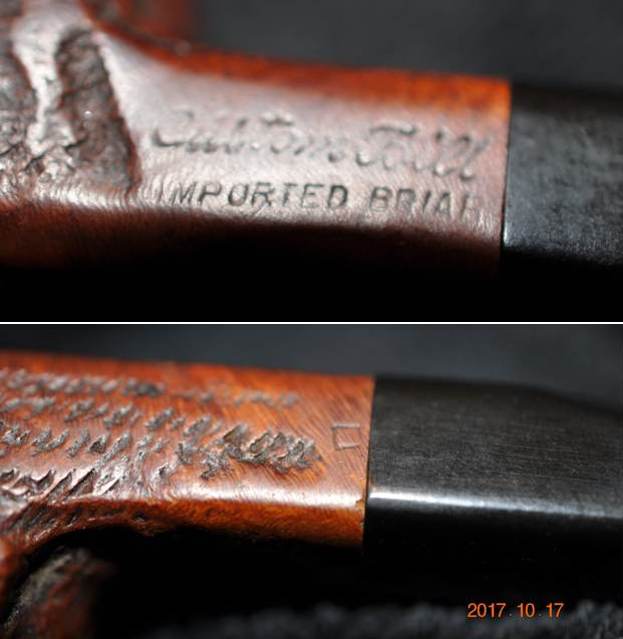
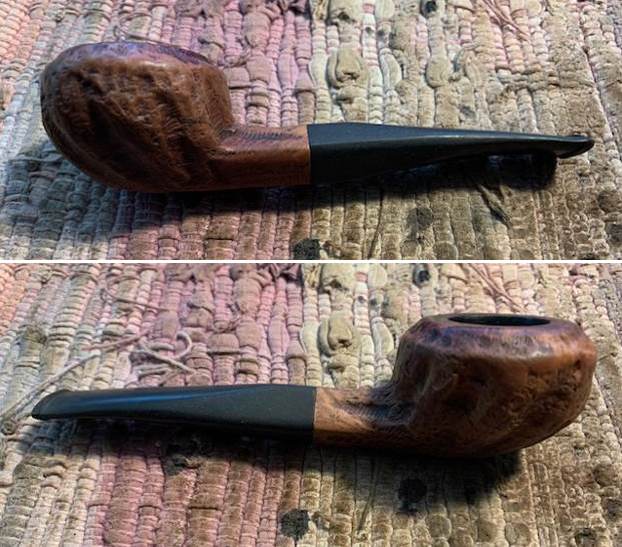
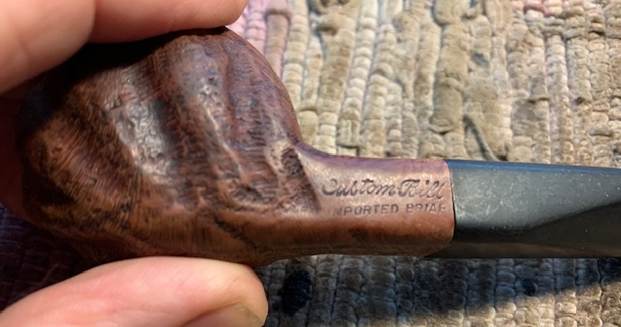
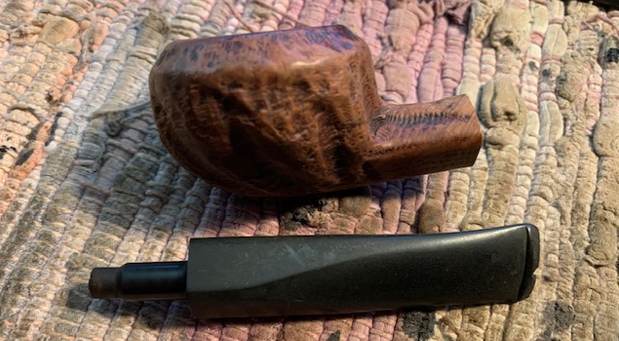
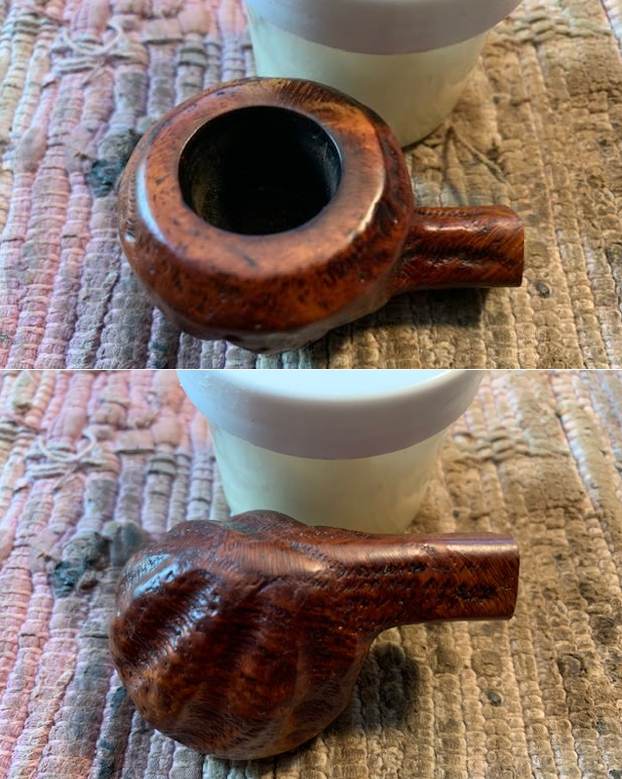
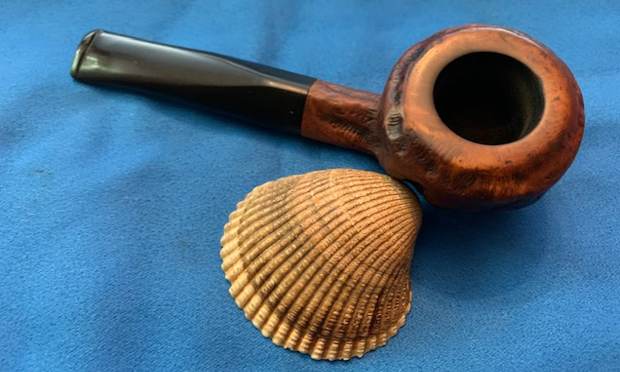
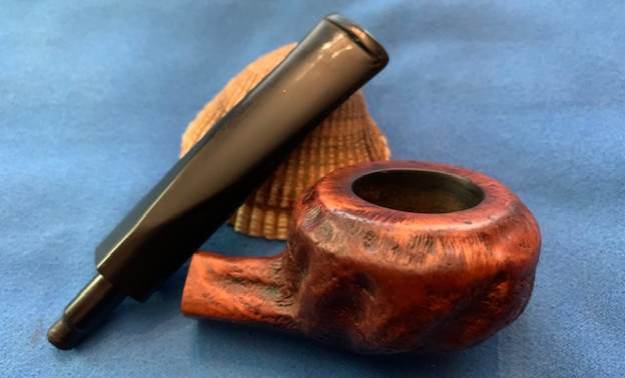
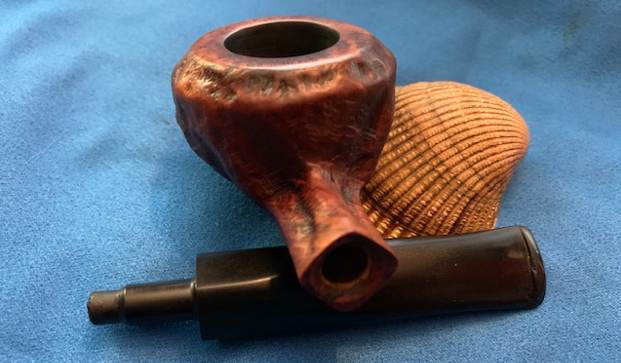
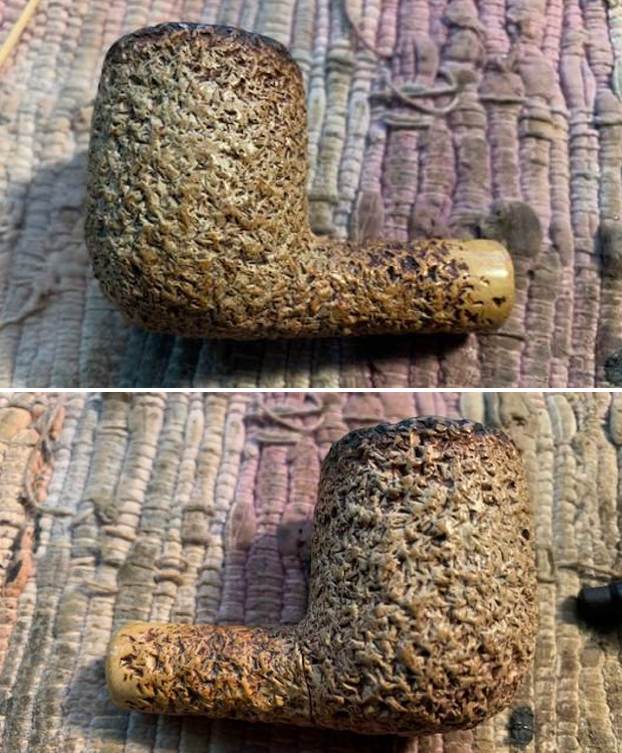
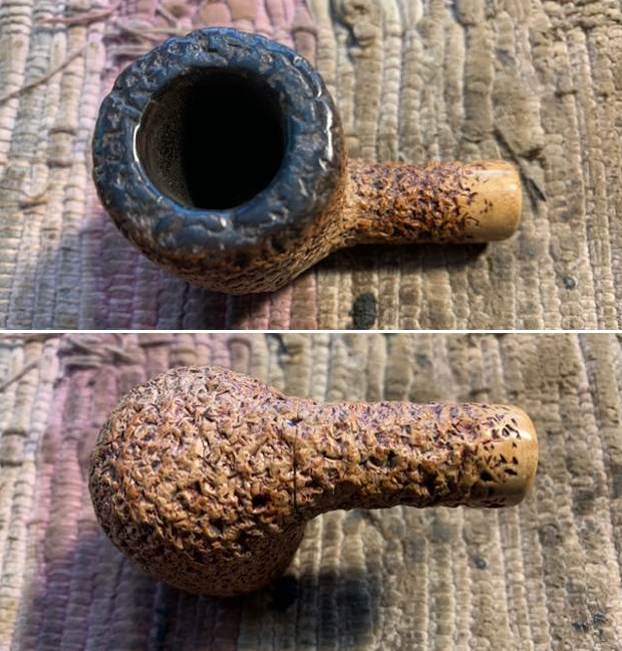
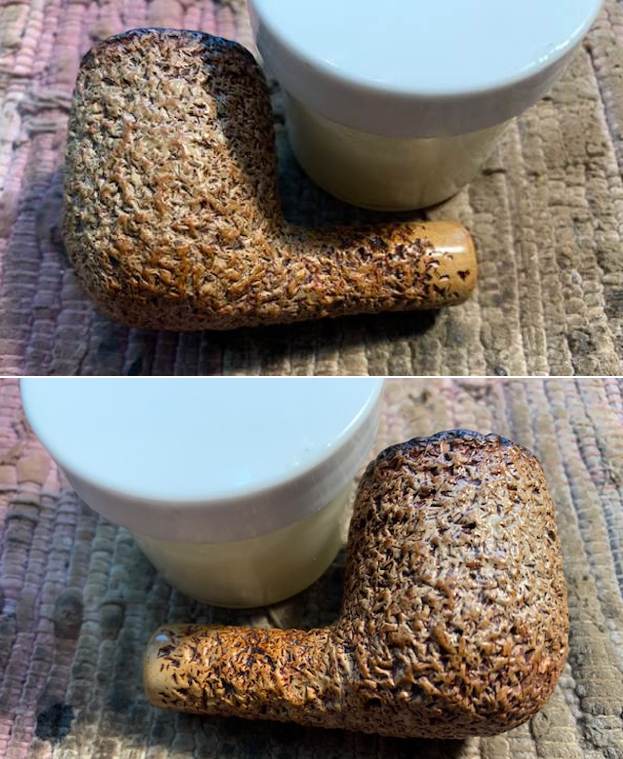
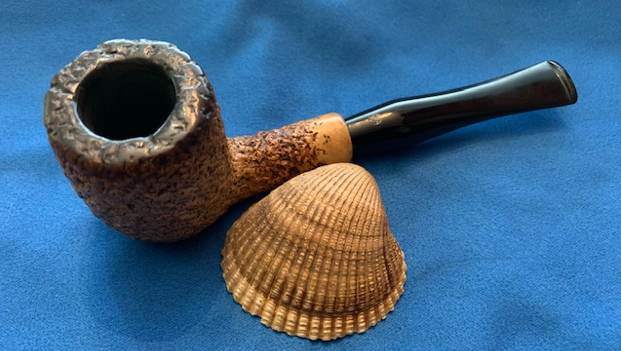
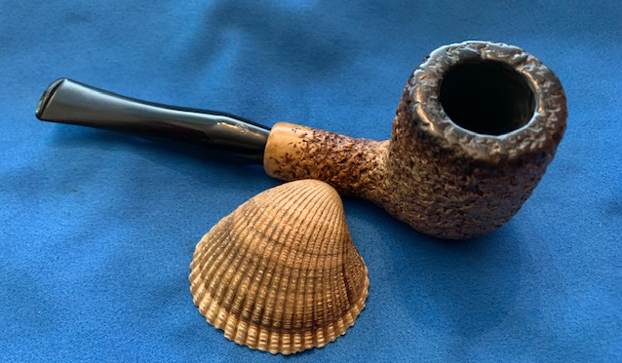
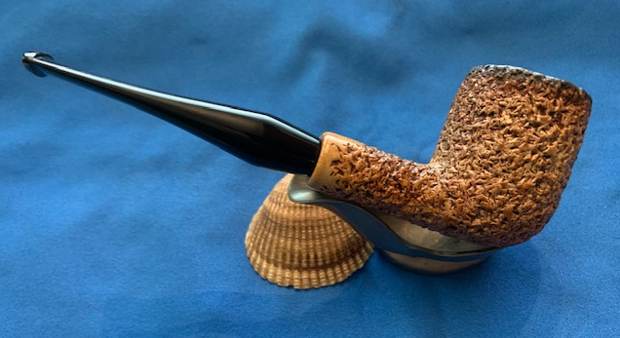
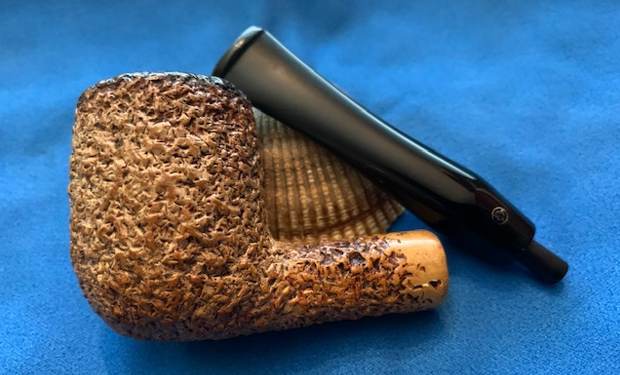
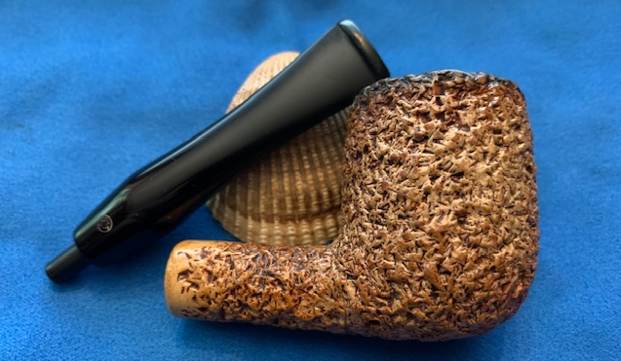
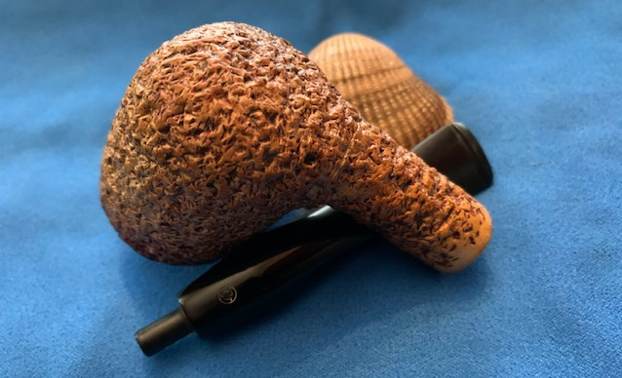
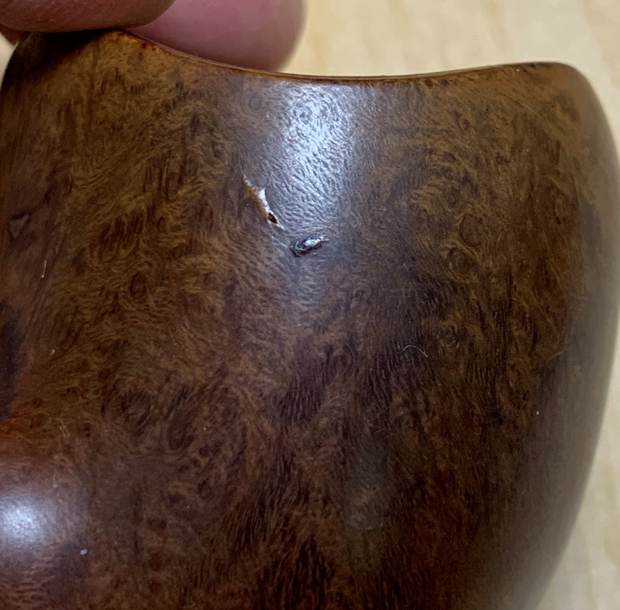
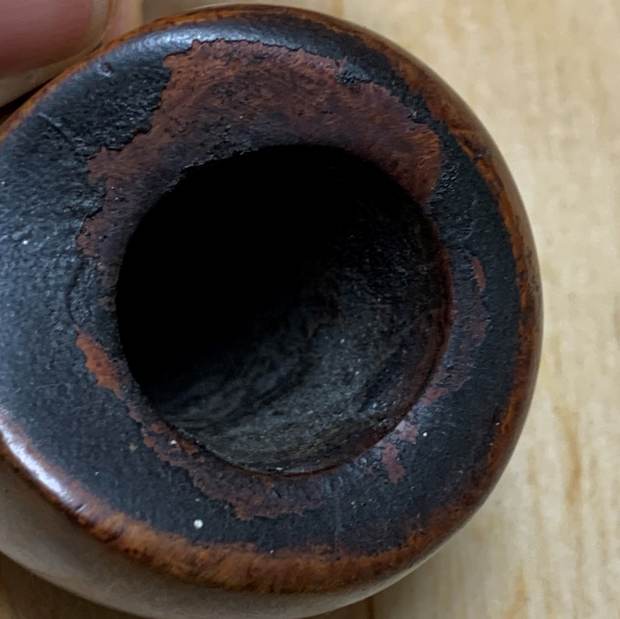
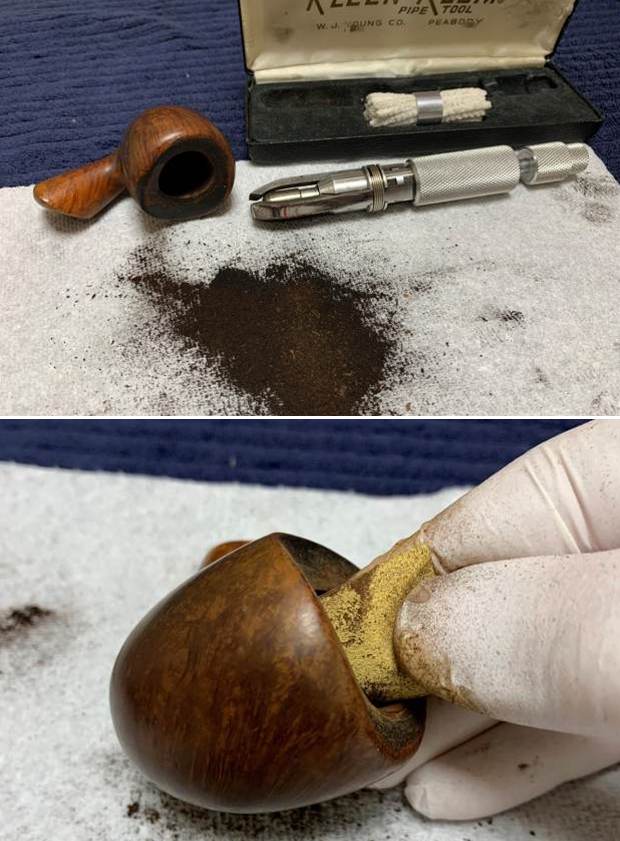
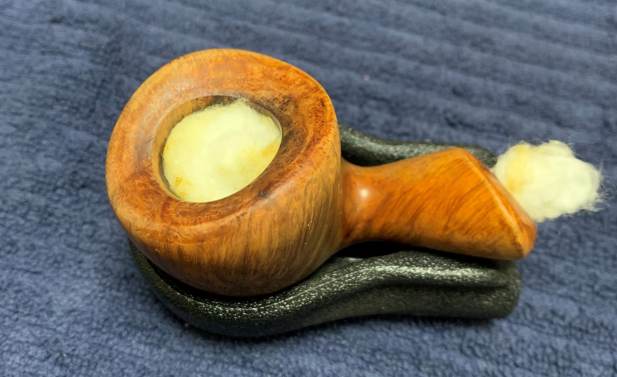
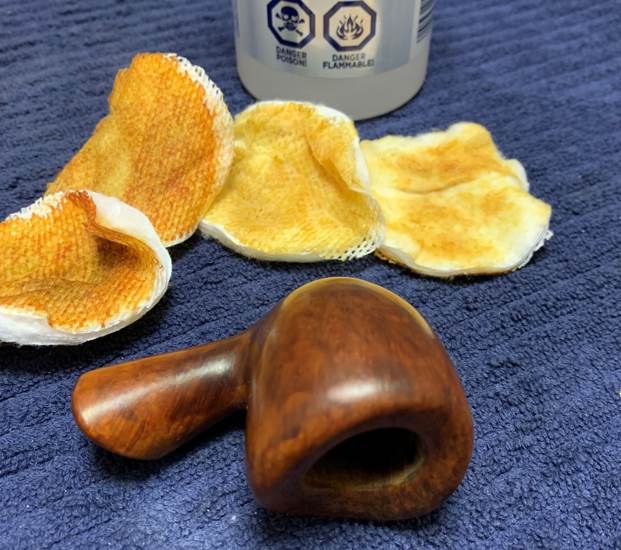
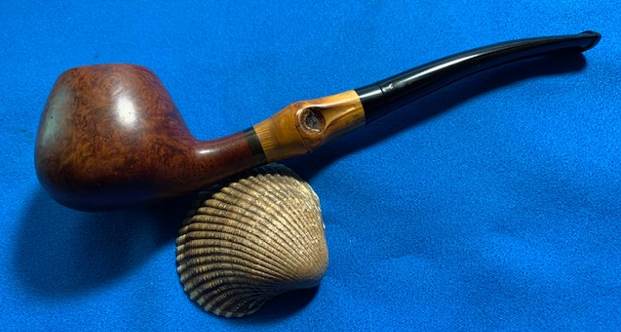
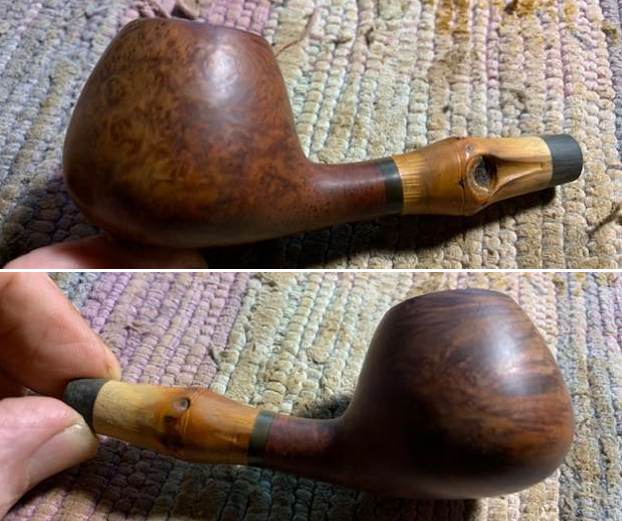
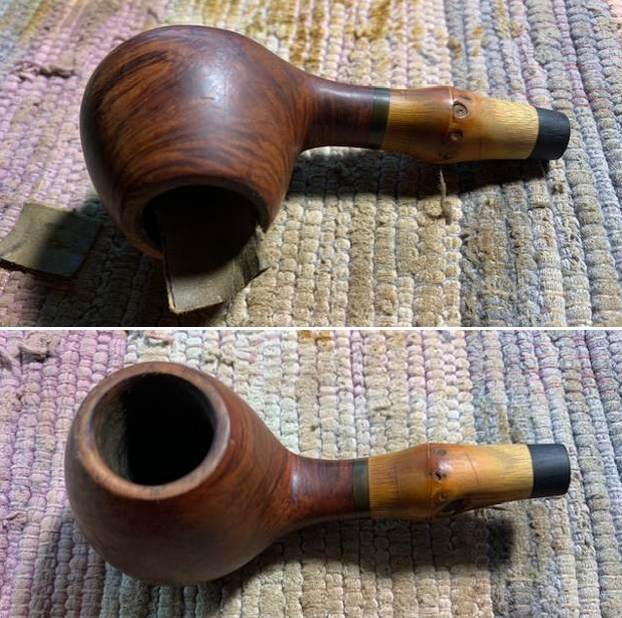
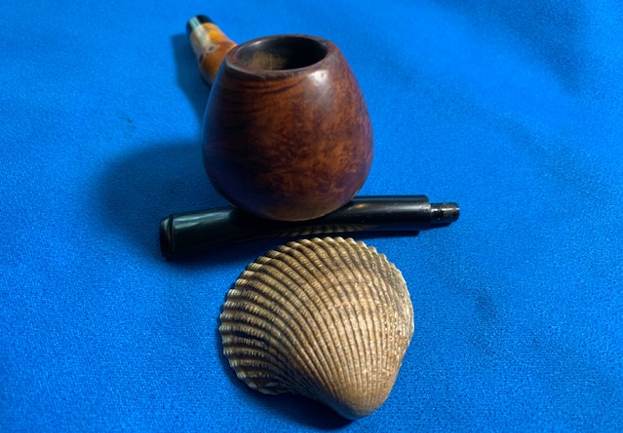
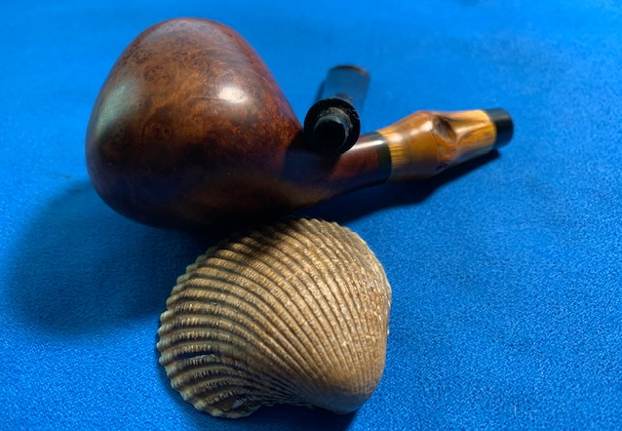
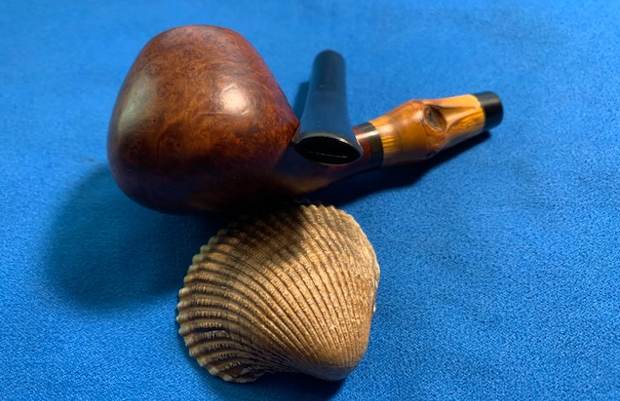
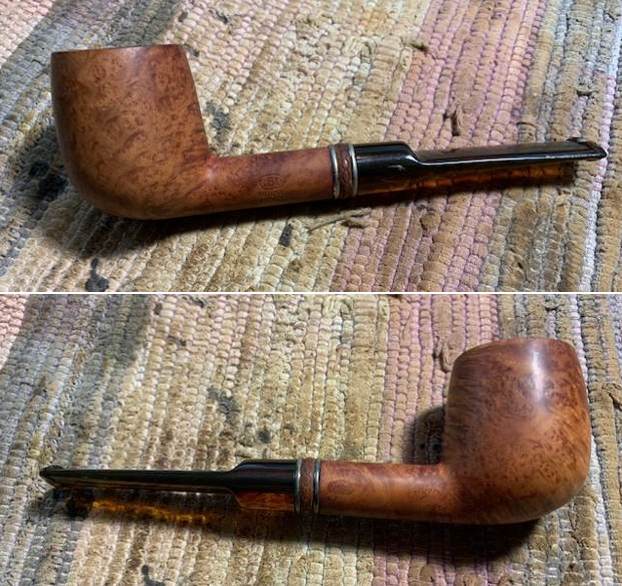
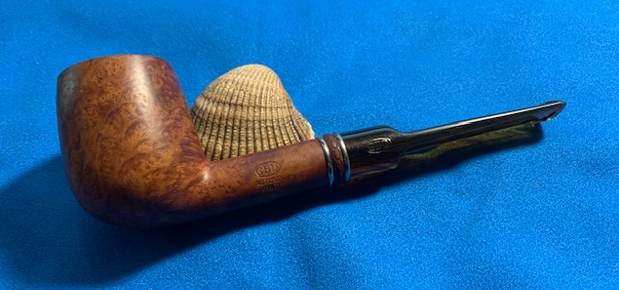
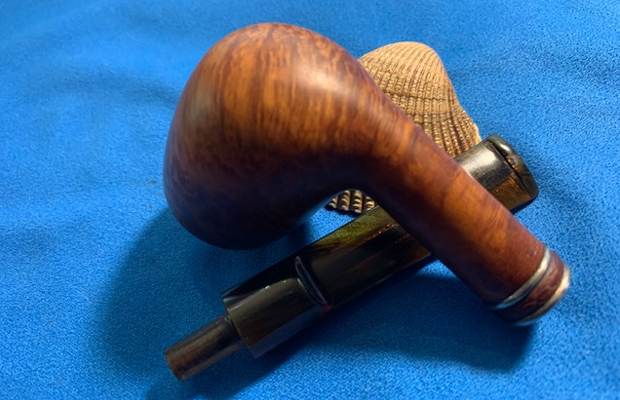
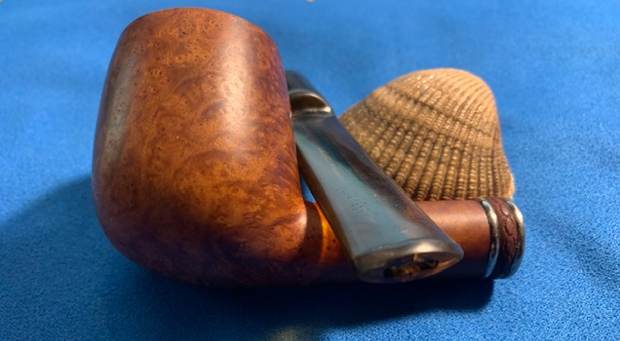
 The next pipe I chose to work on is one that has been here in my box to work on since around 2016. It is a well made, interesting looking Custom-Bilt chunky Pot. The more I looked at it the more I thought that it had not gone through Jeff’s cleaning before it came here. I actually have no idea where it was from and when it came us. The bowl had moderate cake and the inner edge had damage and the rim top was darkened. The pipe is a classic Custom-Bilt piece – a rusticated Chubby shank Pot shaped pipe with some deep carving around the bowl. The pipe is stamped on the heel of the bowl and reads Imported Briar [over] Custom-Bilt. On the right side of the shank it bears a carved circle near the stem/shank junction. Looking at the pipe you can see signs that the bowl had been heavily caked with an overflow of lava on the rim top and the inner edge. The bowl and shank smelled dirty and seemed to be oily. The stem looked good and had tooth chatter and marks on the top and underside near the button. There were no markings or a logo on the taper stem. It looked pretty good when I brought it to the worktable.
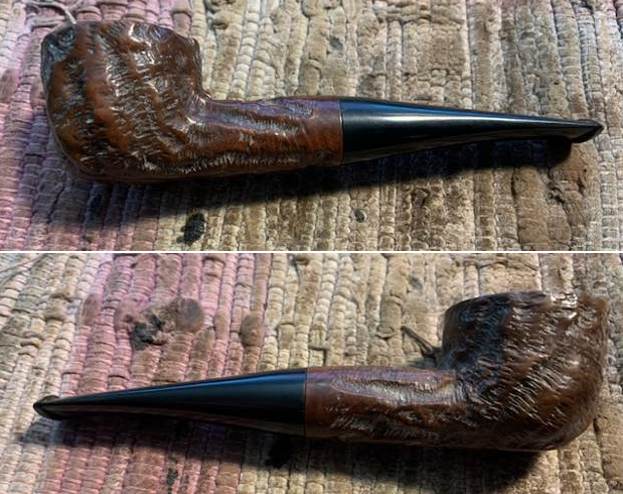
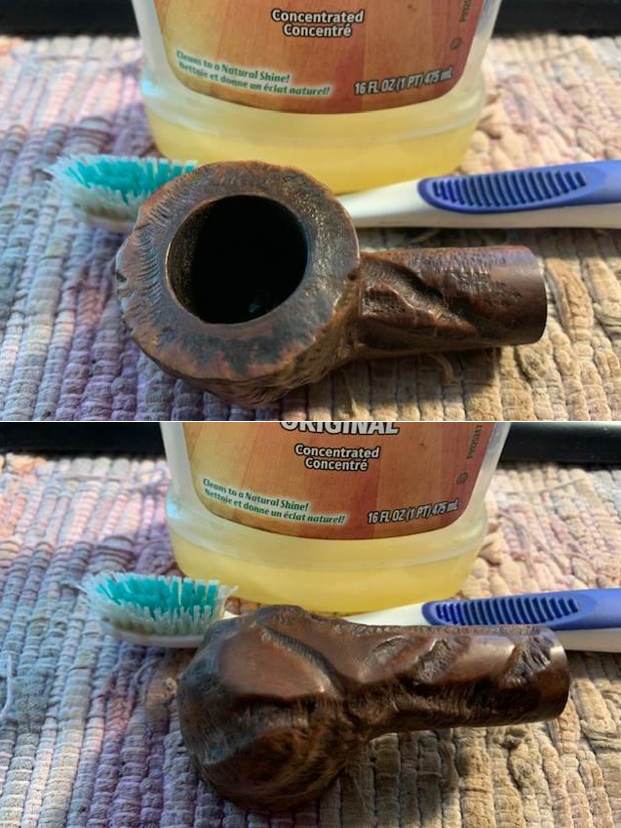
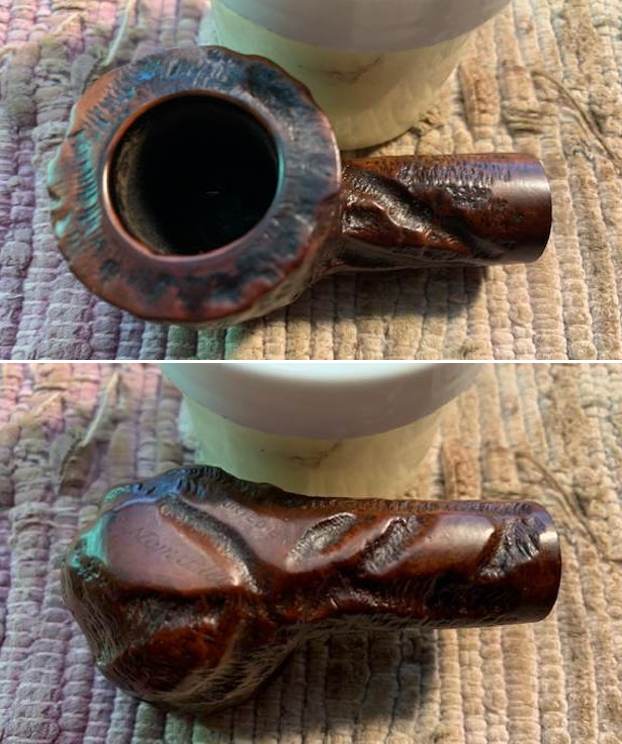
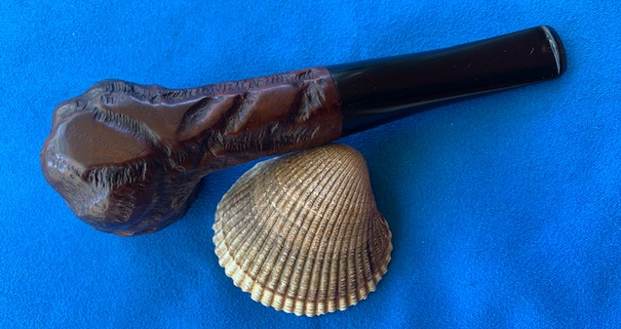
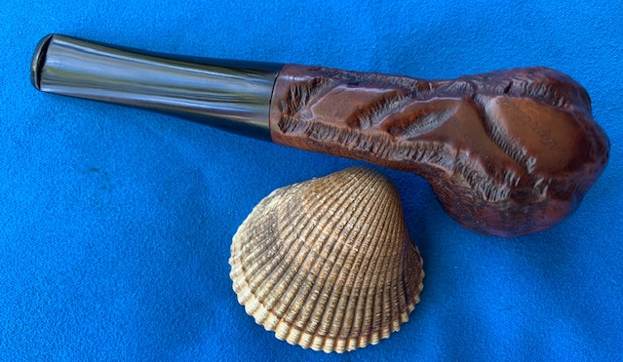
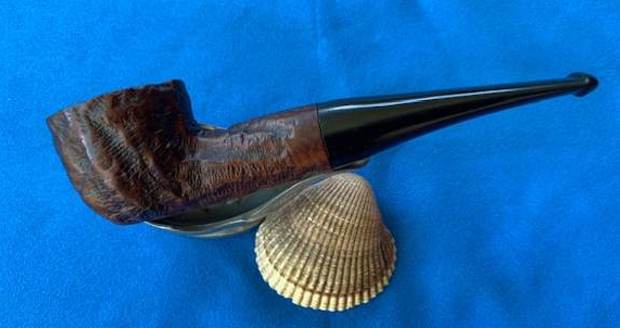
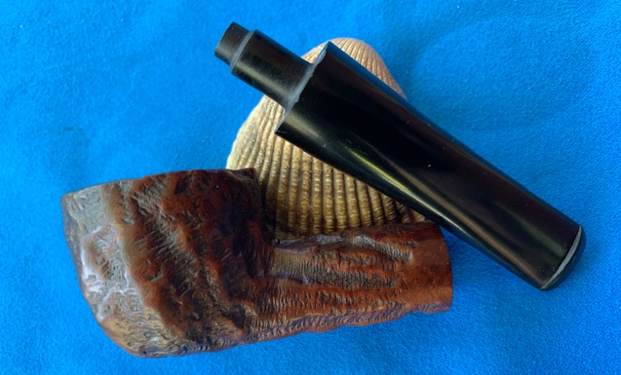
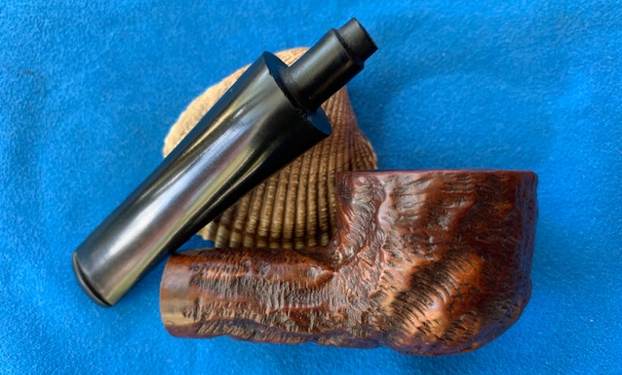
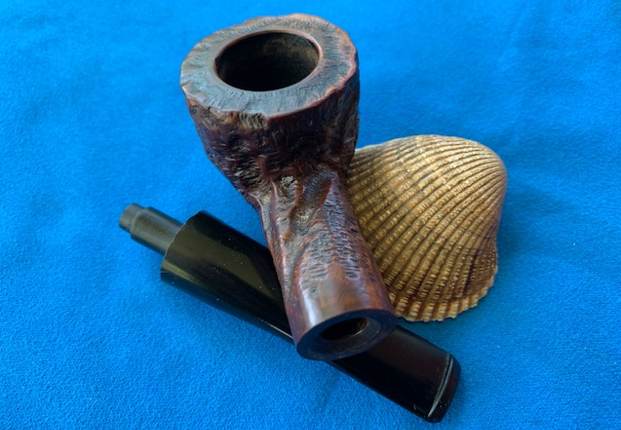
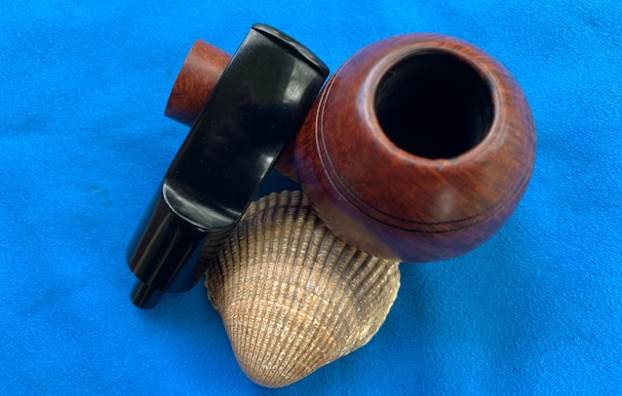
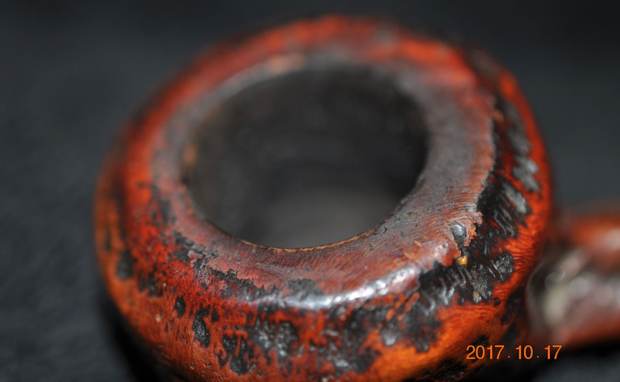
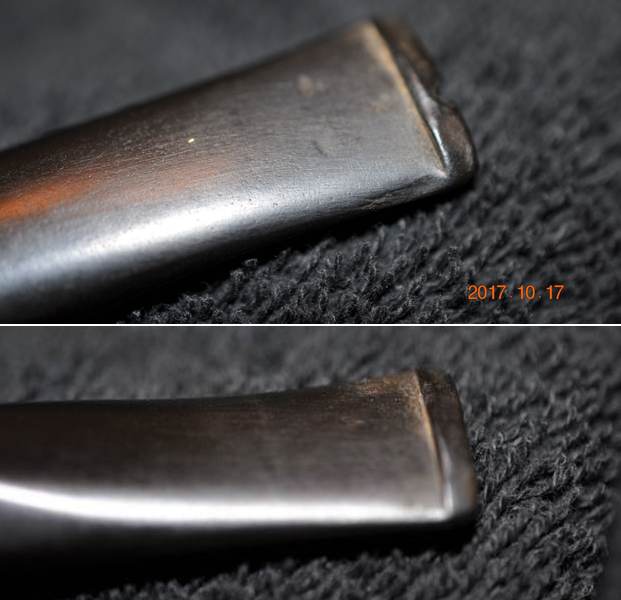
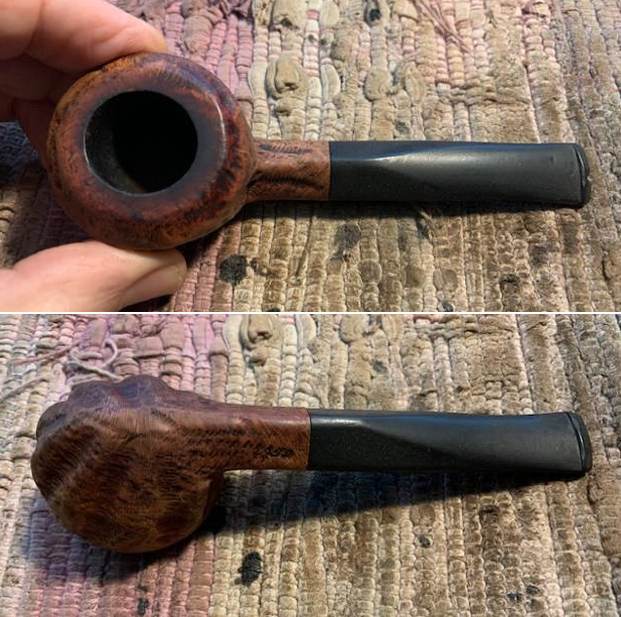
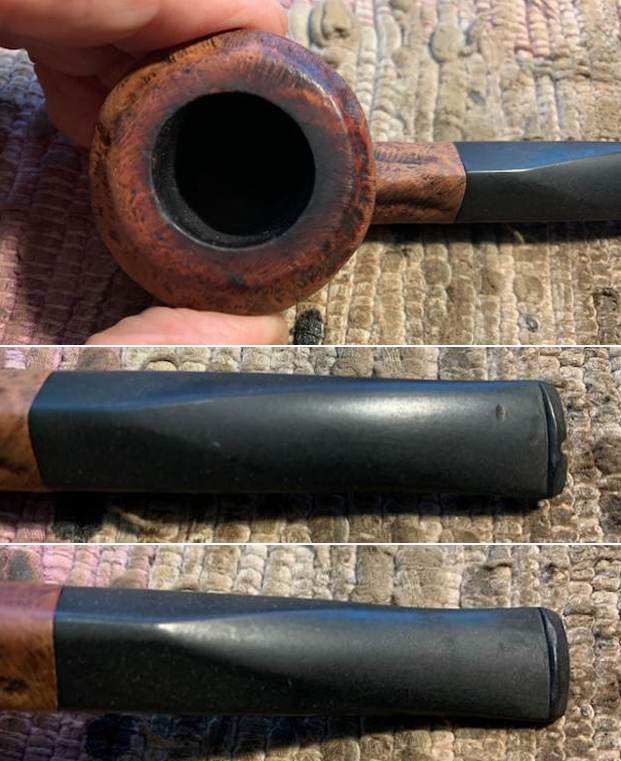
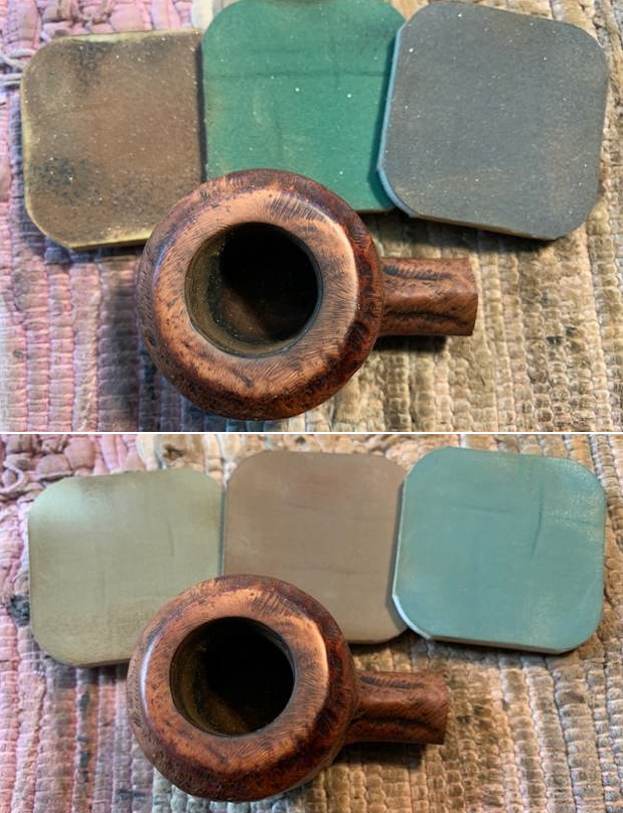
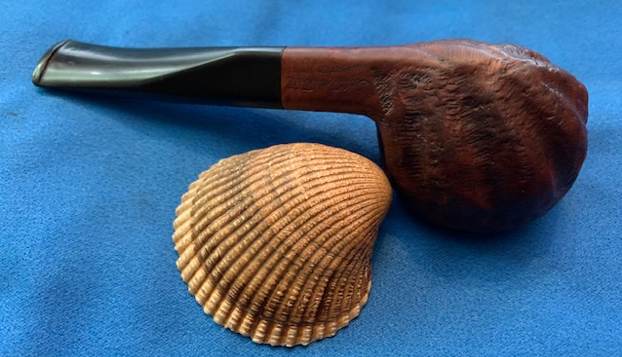
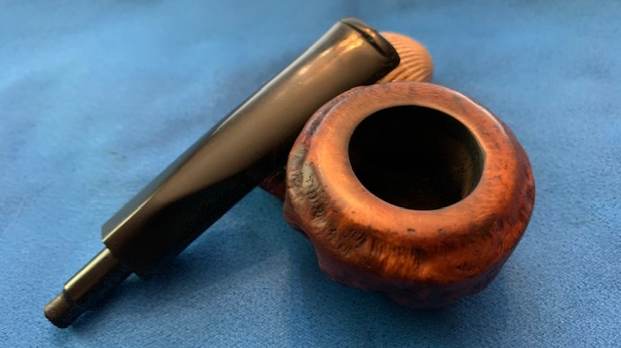
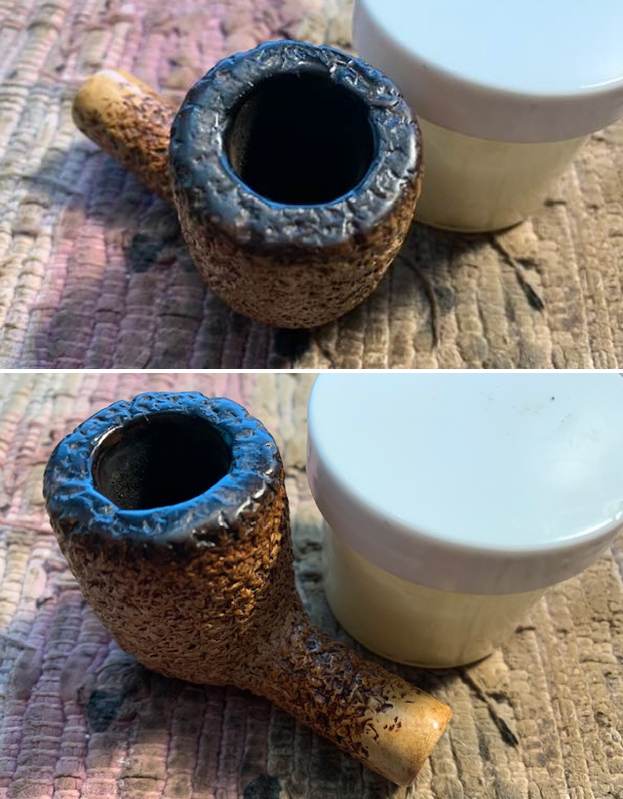
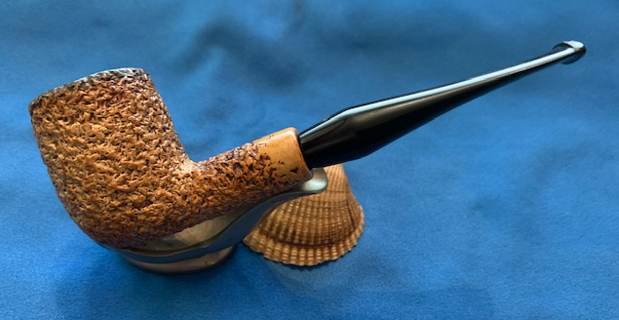
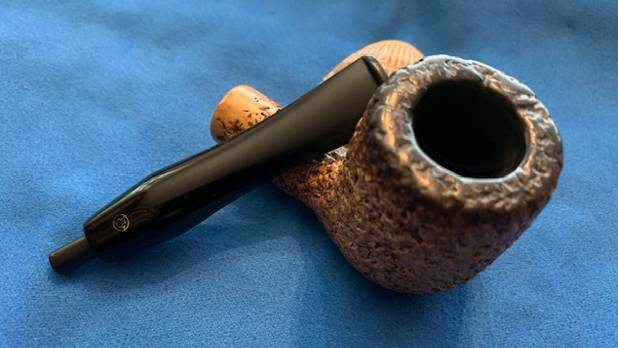
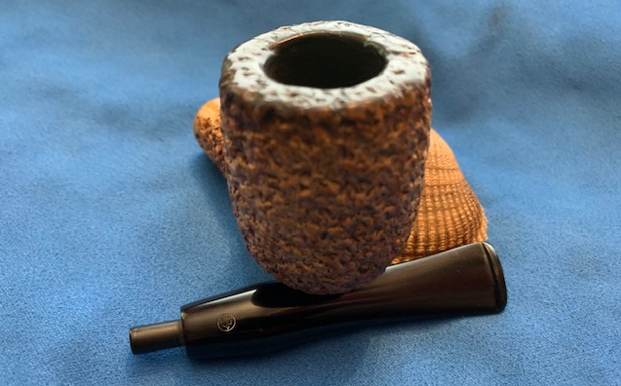
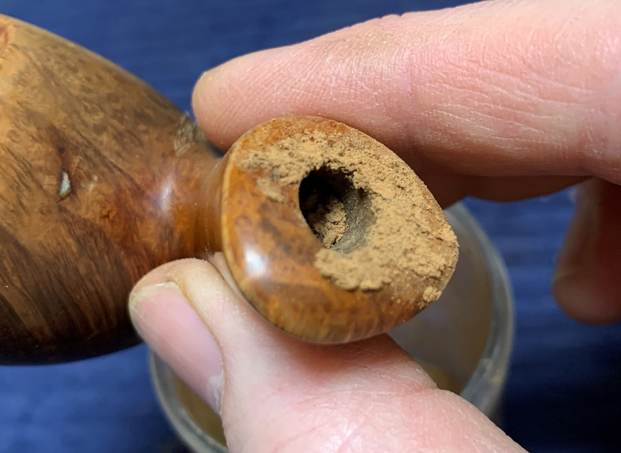
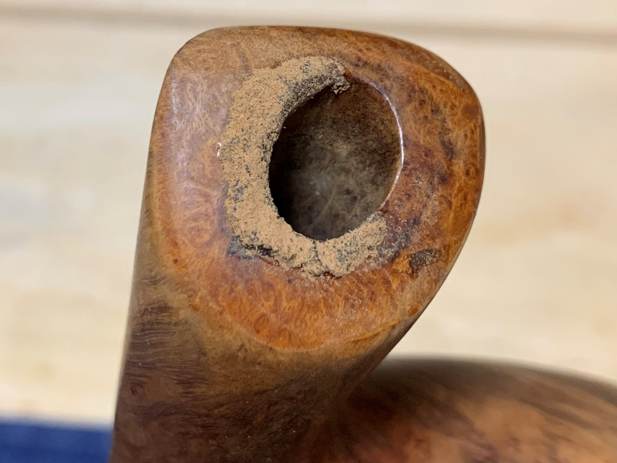
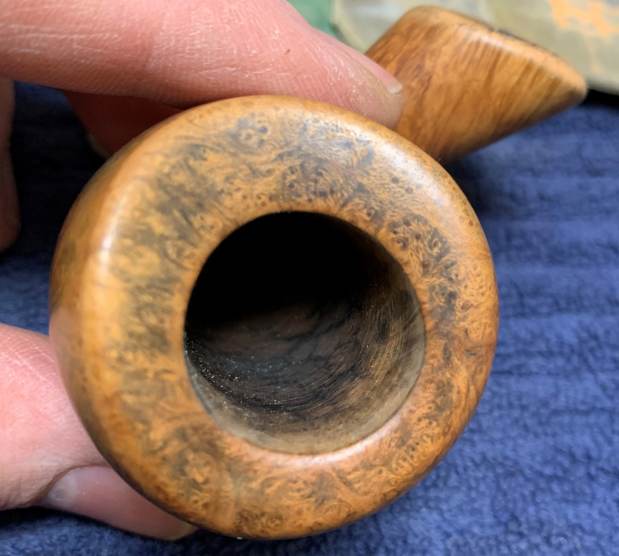
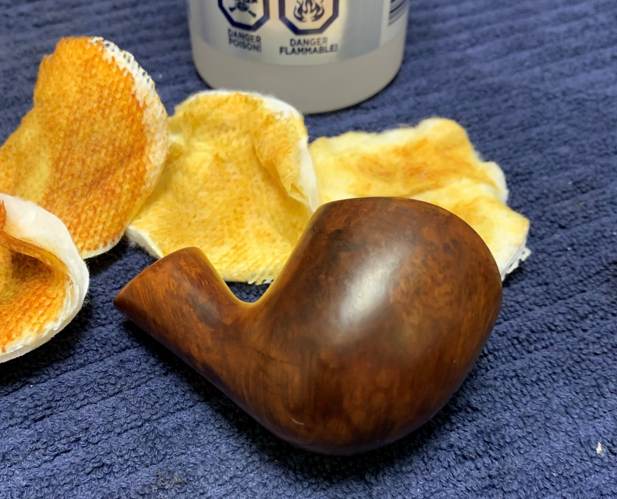
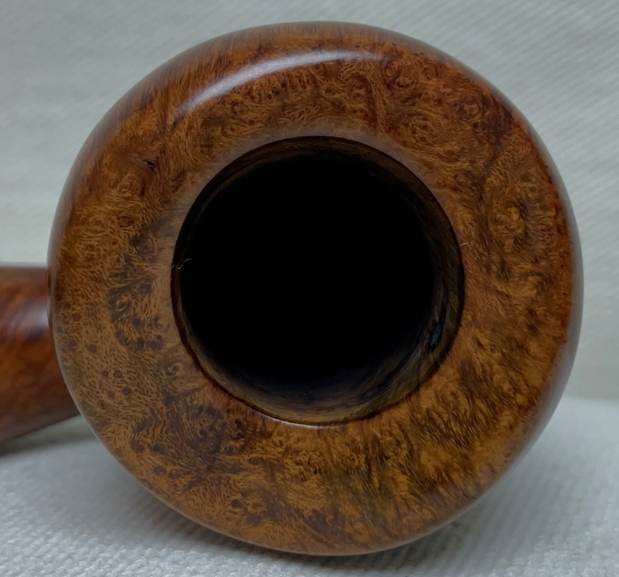
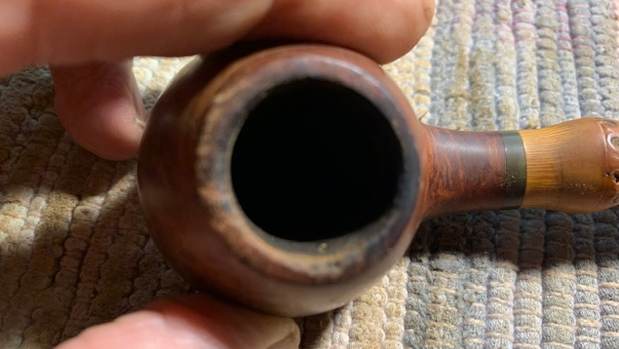
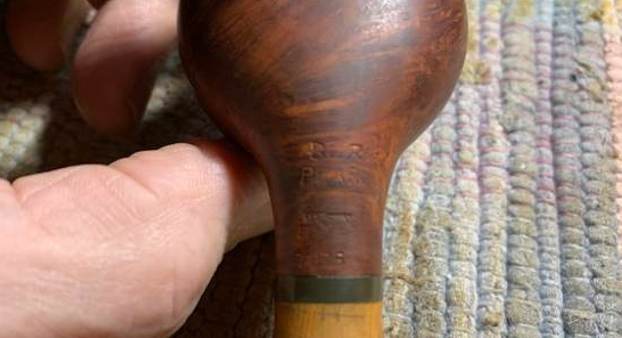
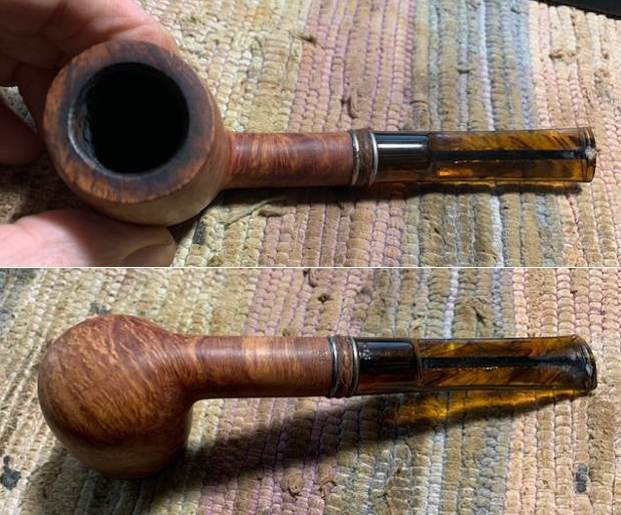
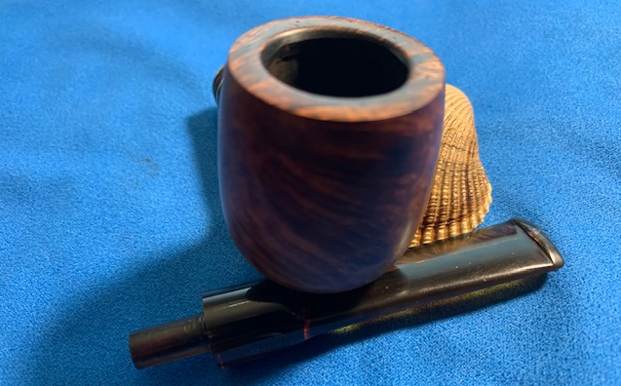
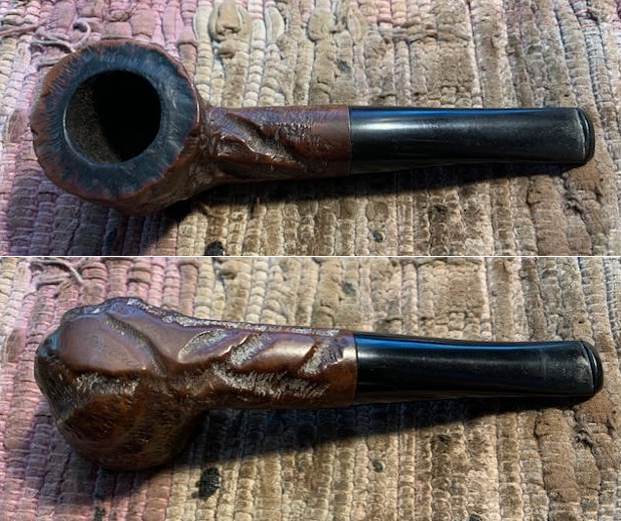 I took photos of the rim top and bowl to give a clear picture of the appearance of the rim top and edges of the bowl. There was some darkening on the rustication on the top and some lava in the grooves. There was also some damage to the inner edge of the bowl. I took photos of the top and underside of the stem to show the chatter and tooth marks.
 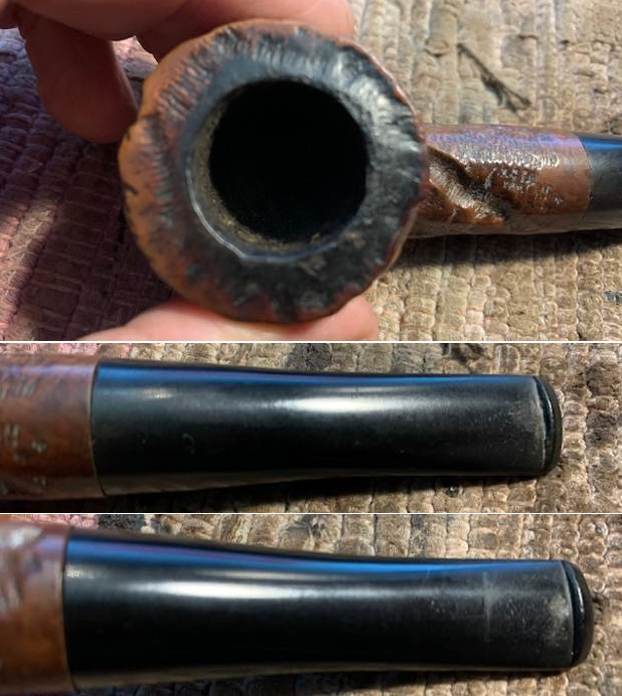 The stamping on the heel of the bowl is faint but still readable and read as noted above.
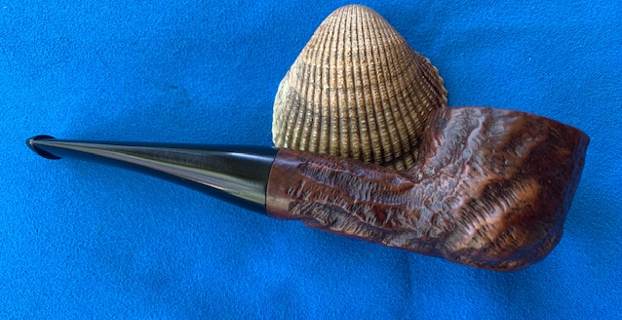
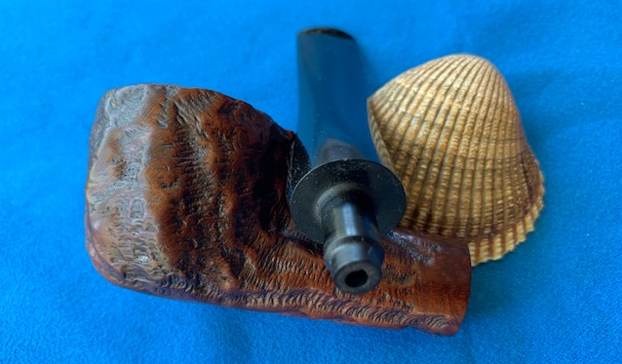
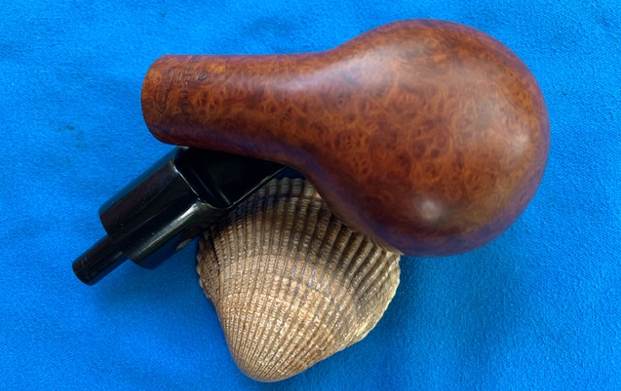
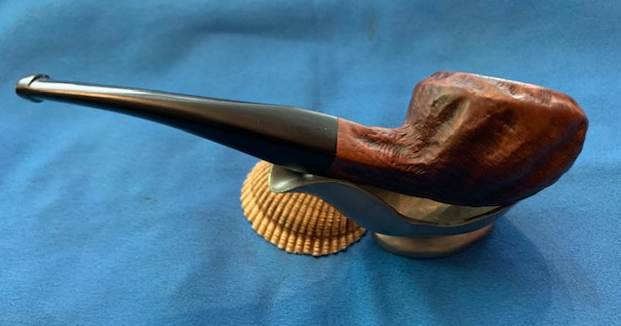
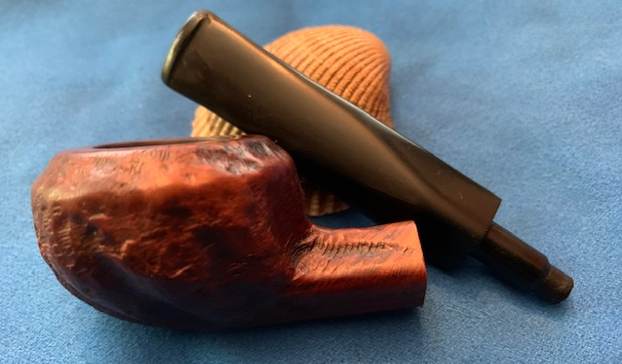
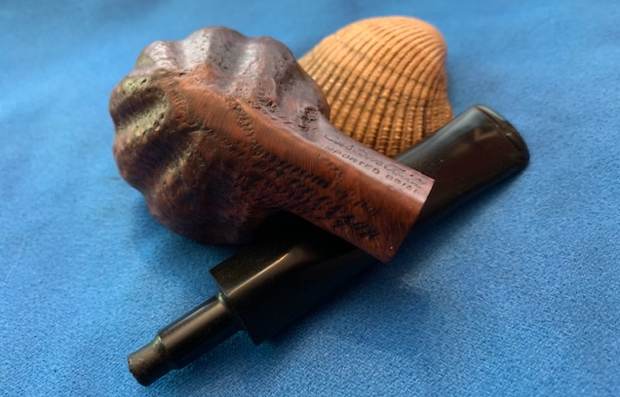
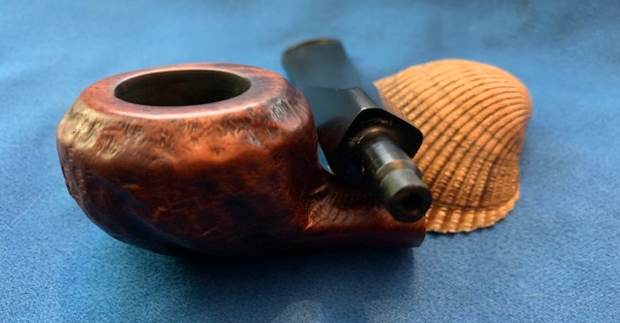
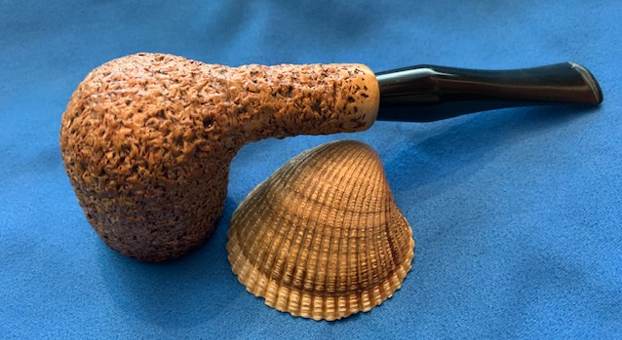
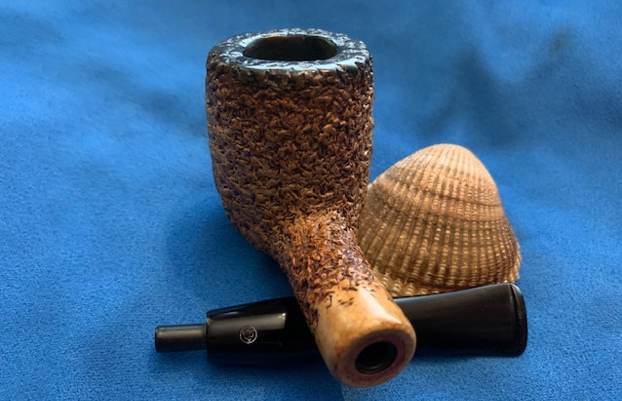
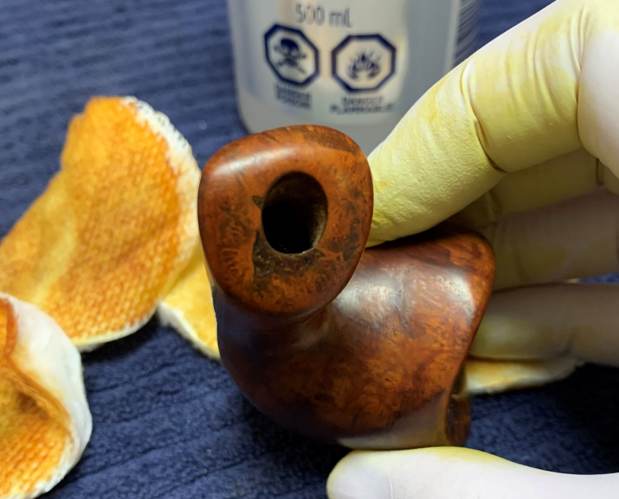
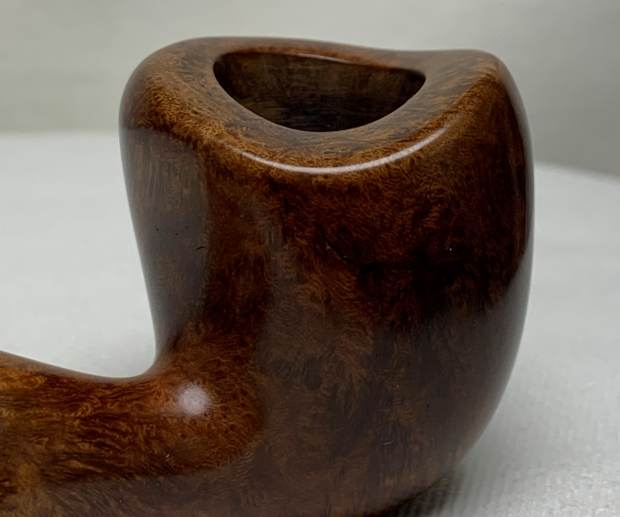
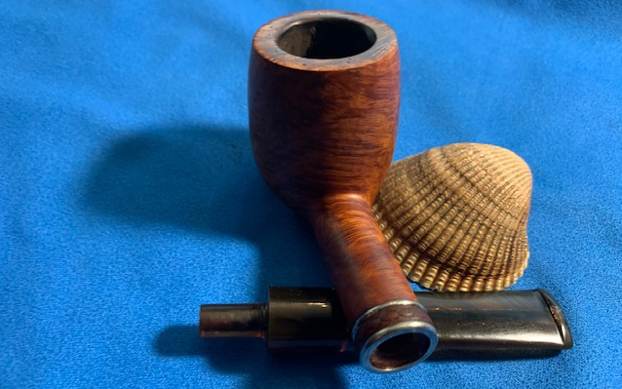
 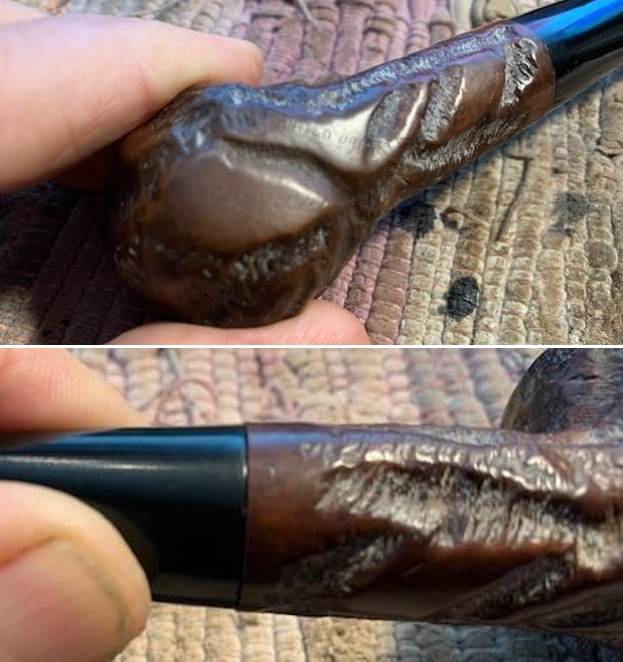 I removed the stem and took a photo of the pipe to give a sense of the whole. It is a stubby pipe.
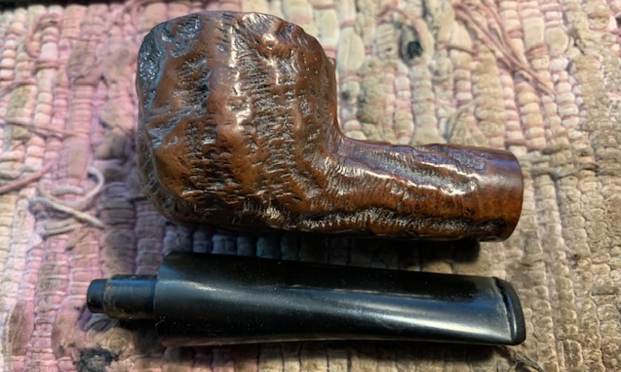 I turned to Pipephil (http://www.pipephil.eu/logos/en/logo-c8.html) to get a quick view of the brand once again. I knew that I was working with one of the older pipes and probably made by Tracy Mincer himself. He stopped making the Custom-Bilt pipes in the early 1950s. The screen capture I included below shows a brief history of the brand. It also has a comment on the symbols stamped on the shank near the stem including the square that is stamped on this one.
 I turned to Pipedia (https://pipedia.org/wiki/File:CustomBilt_Stamp1.jpg) for a quick read. The majority of the information there included two book reviews of the “Custom-Bilt Story” by Bill Unger.
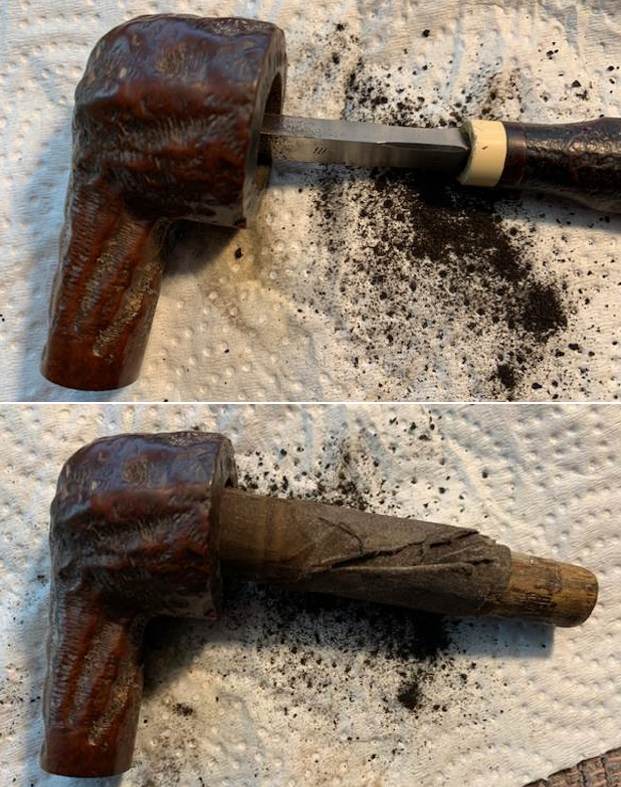
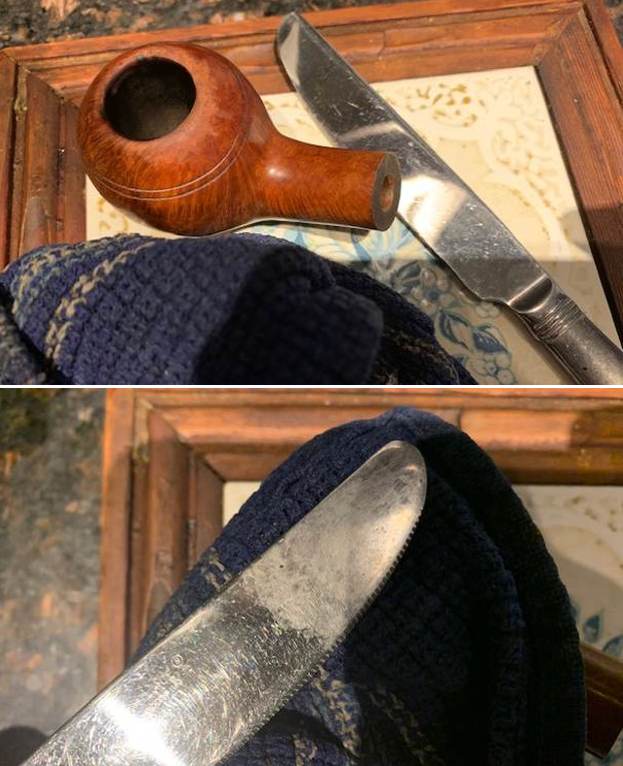
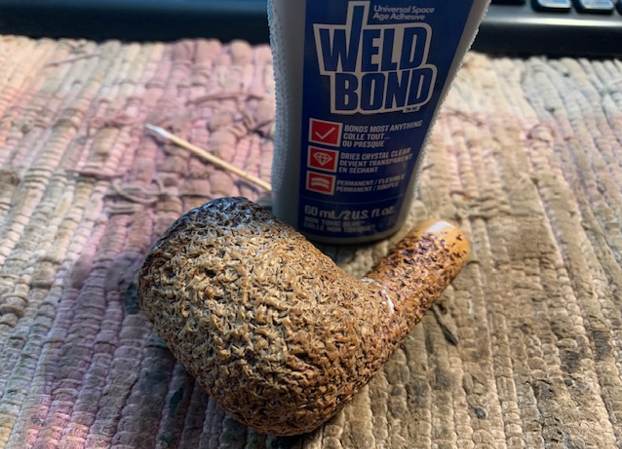
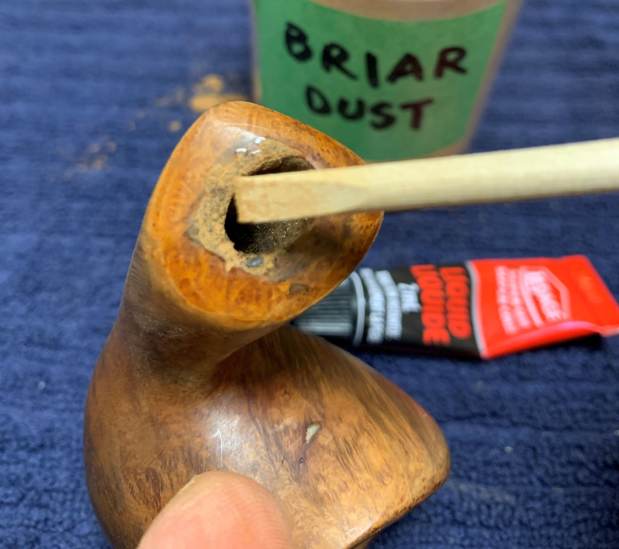
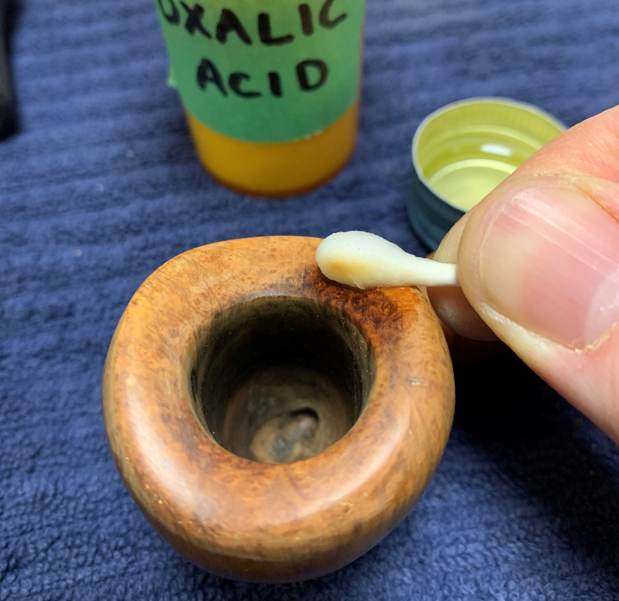
 Armed with that information I turned to work on the pipe itself. I started my work on the pipe by cleaning up the reaming in the bowl with a PipNet pipe reamer. I used a Savinelli Fitsall Pipe Knife to remove the remainder and then sanded the bowl walls with 220 grit sandpaper wrapped around a piece of dowel. The bowl walls looked very good.
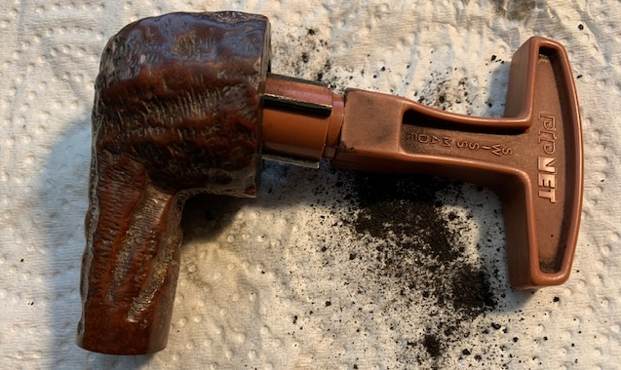
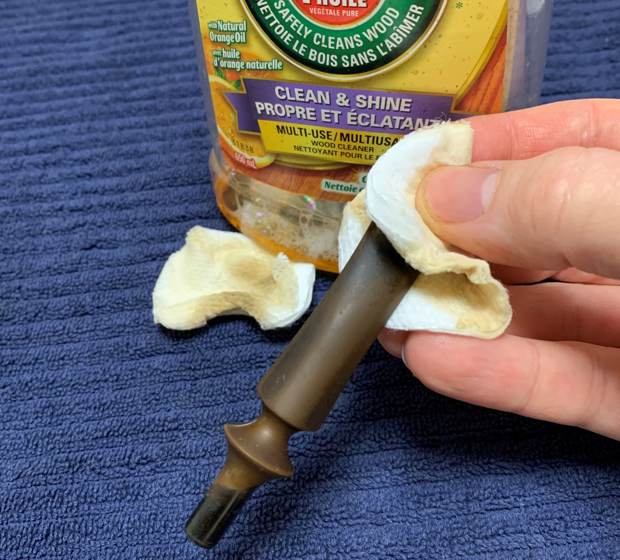
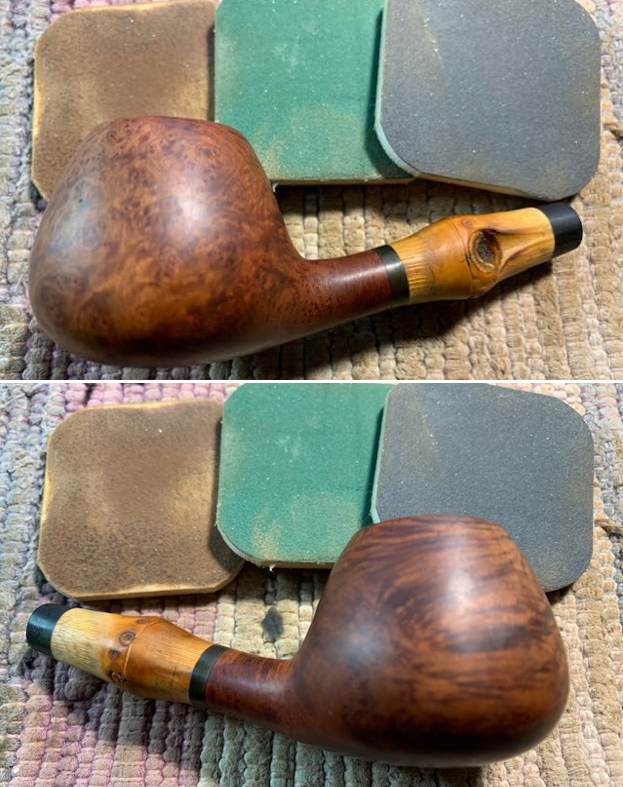
 I scrubbed the externals with undiluted Murphy’s Oil Soap and a tooth brush. I worked over the rim top and the rest of the bowl and rinsed it off with warm water. I dried off the briar with a cotton towel.
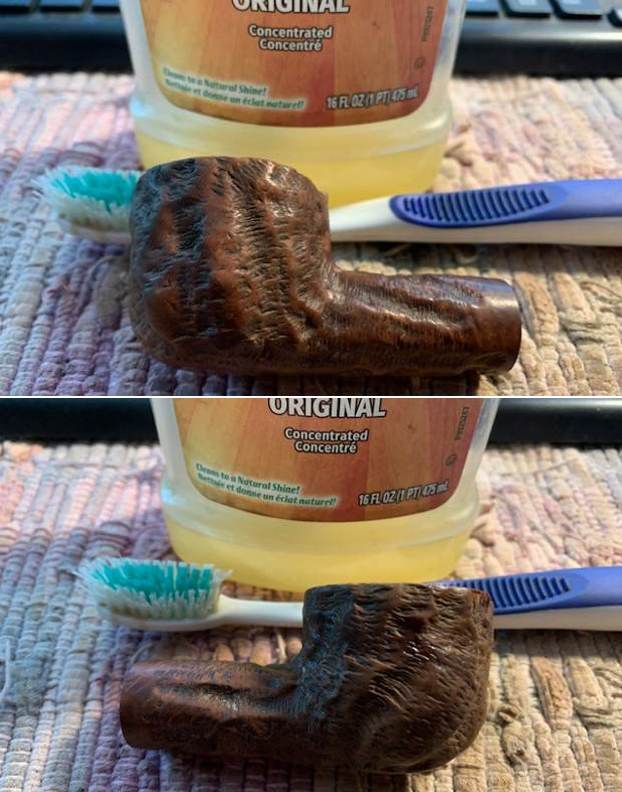
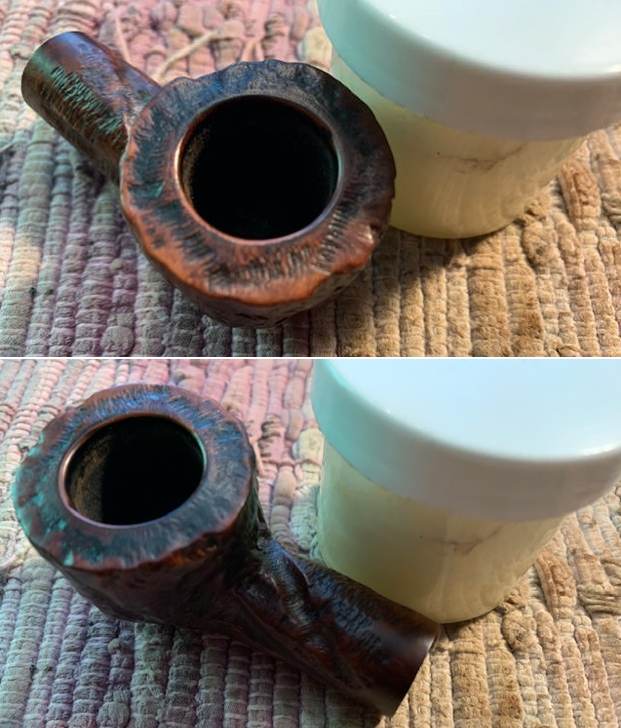
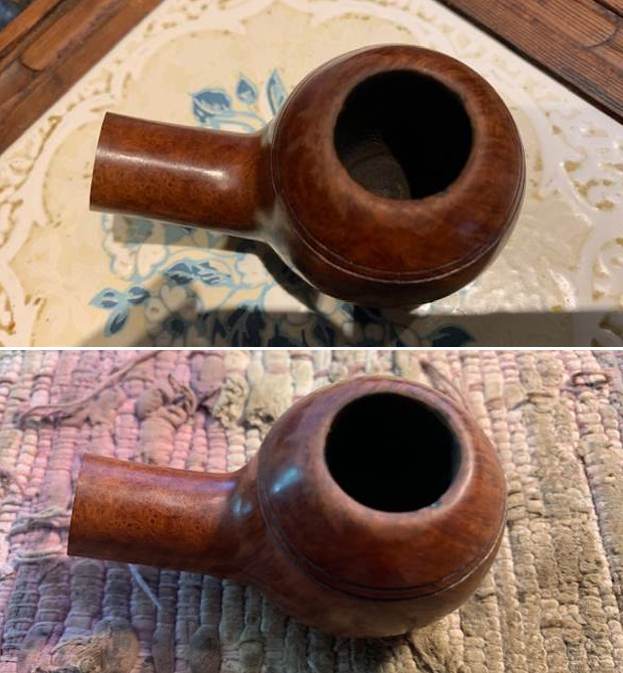
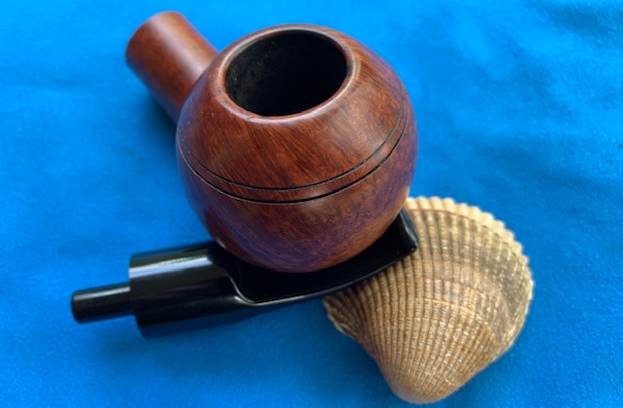
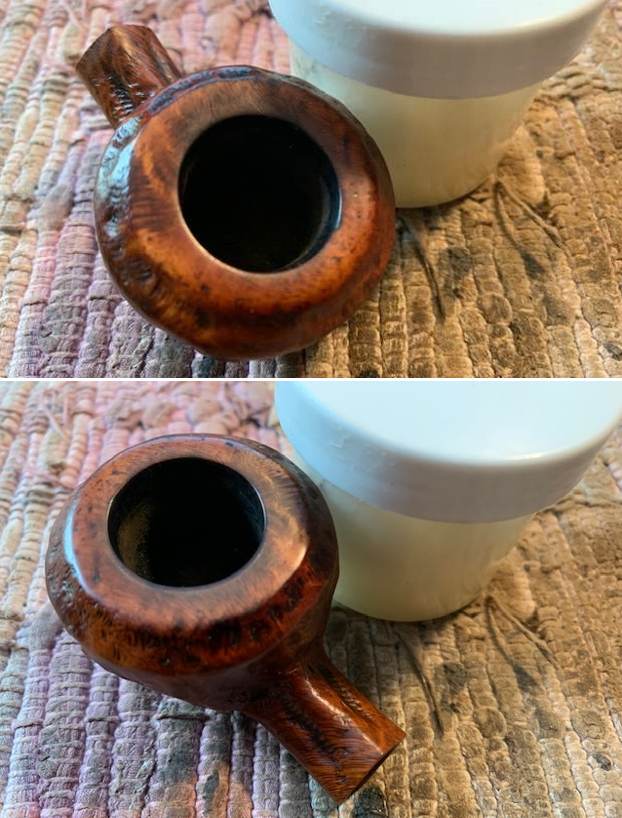
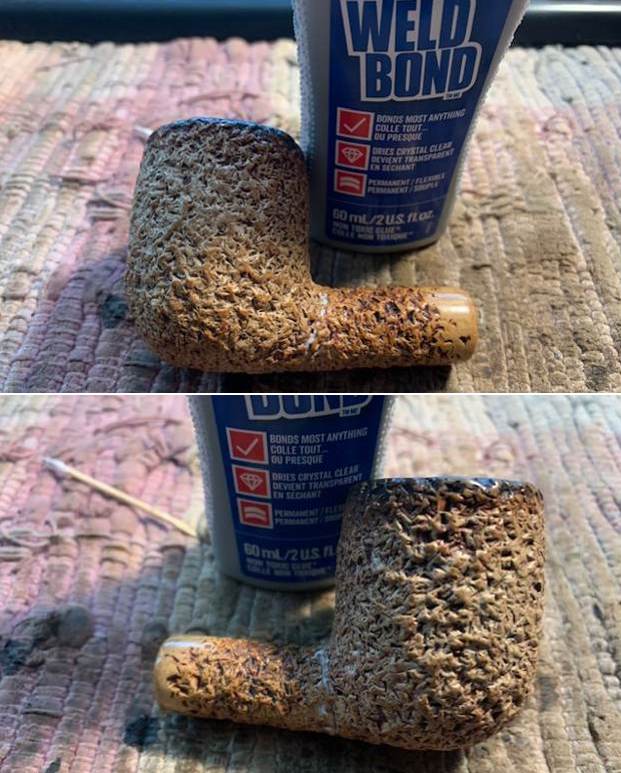
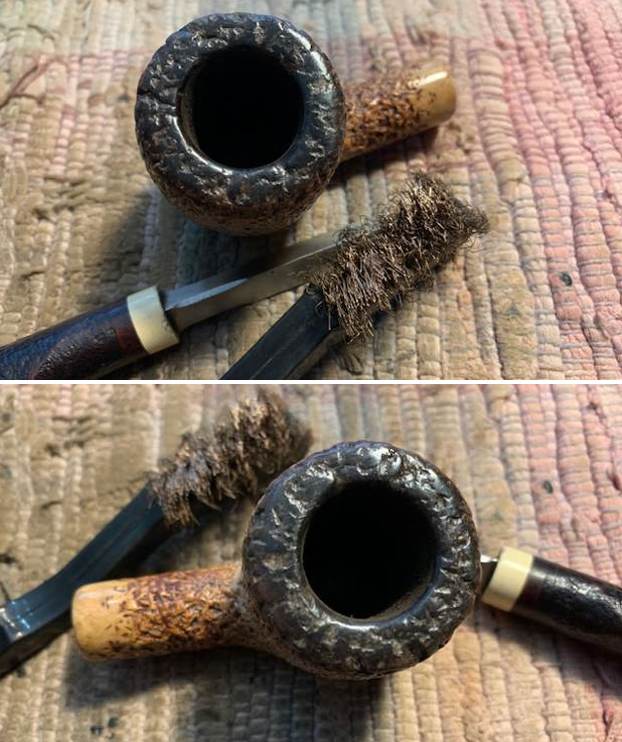
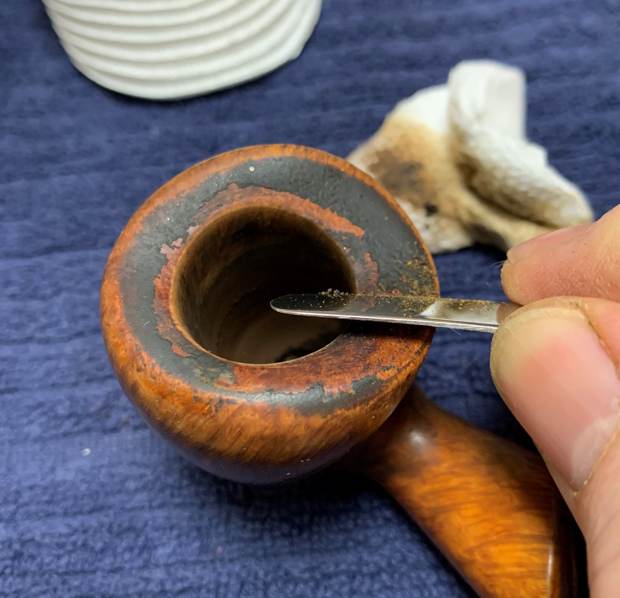
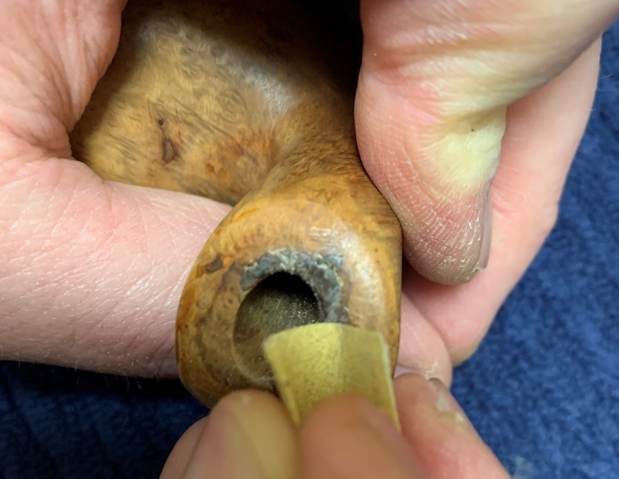
 I turned next to the remaining darkening on the rim top and used a brass bristle brush and worked it over to remove the grime and debris that was still present there. It looked better when I finished.
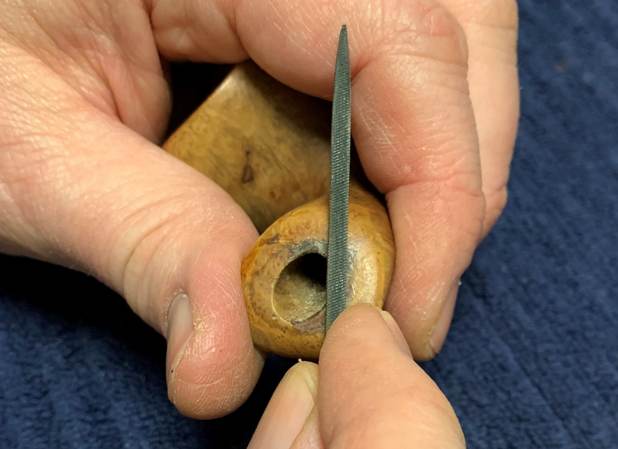
 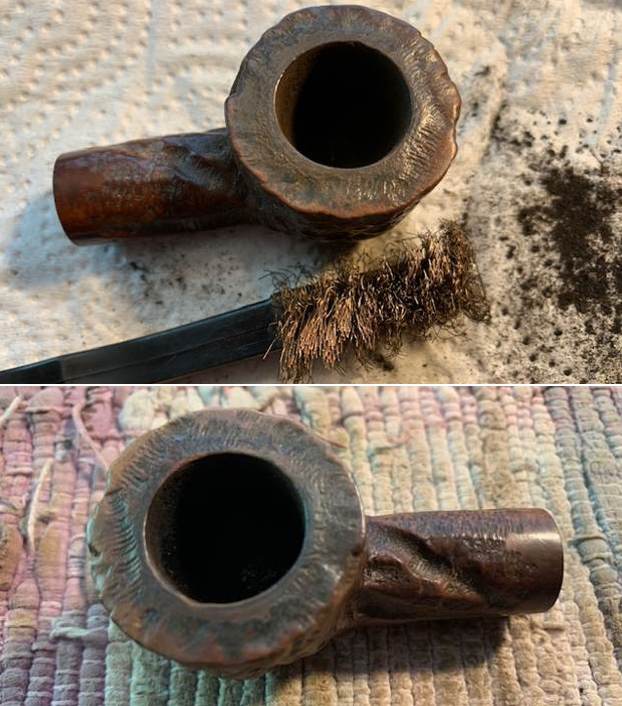 I cleaned up the damage to the inner edge of the rim. I used a folded piece of 220 grit sandpaper to reshape the edge. The finished rim top and edge looks better.
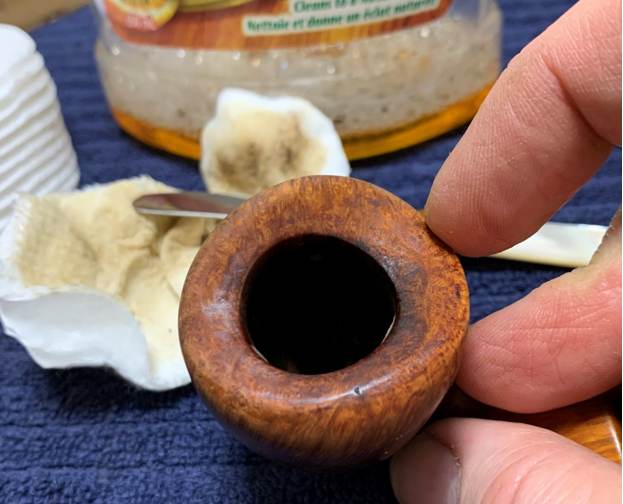
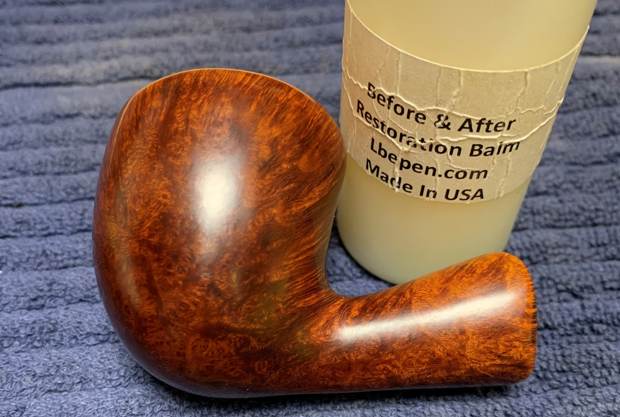
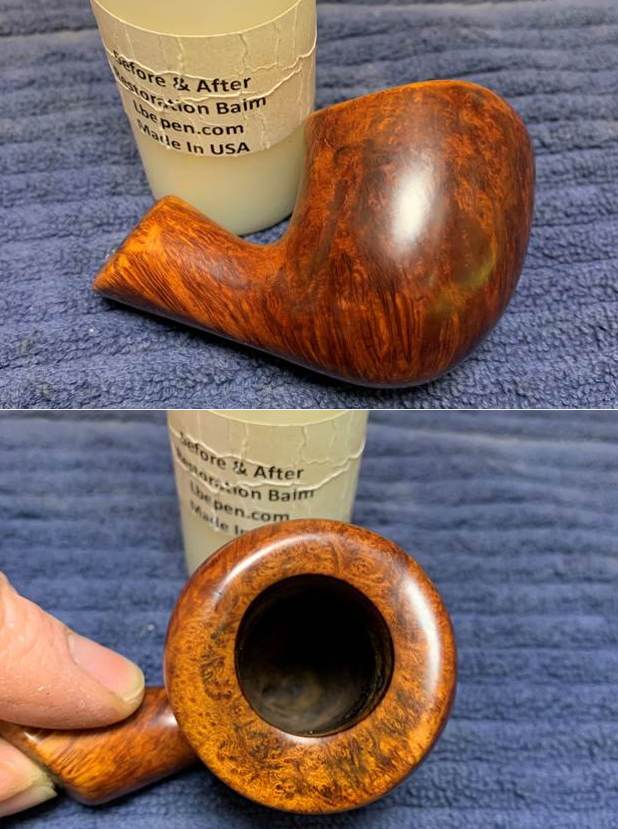
 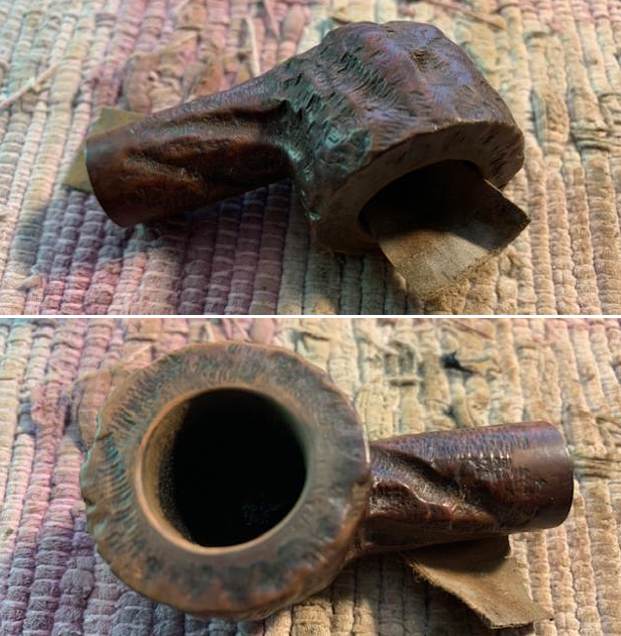 I wiped the rim top down with alcohol to remove the sanding dust. Once I had dried it off I rubbed it down with Before & After Restoration Balm. I worked it into the surface of the bowl sides and shank with my fingertips and a horsehair shoe brush to clean, enliven and protect the briar. I let the balm sit for about 10-15 minutes and buffed with a cotton cloth to raise the shine.
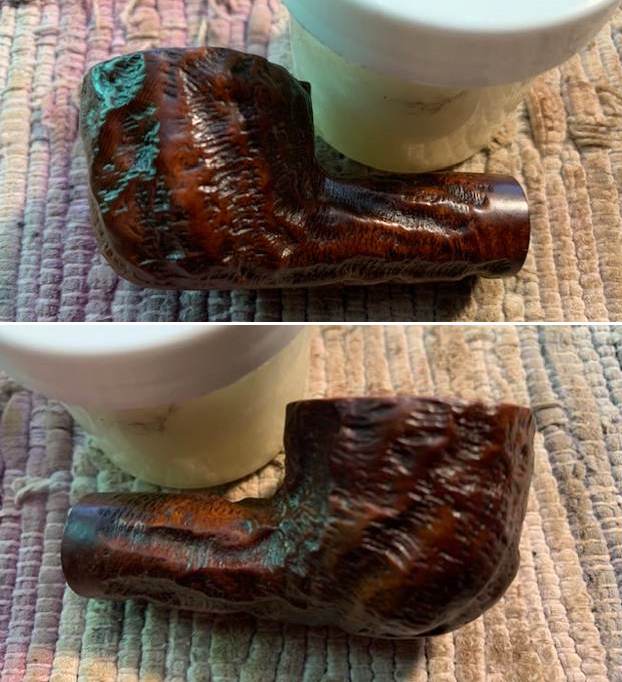
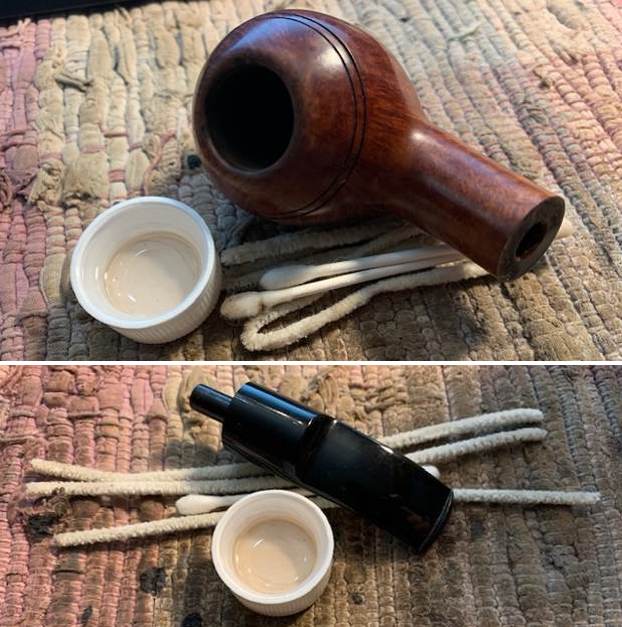
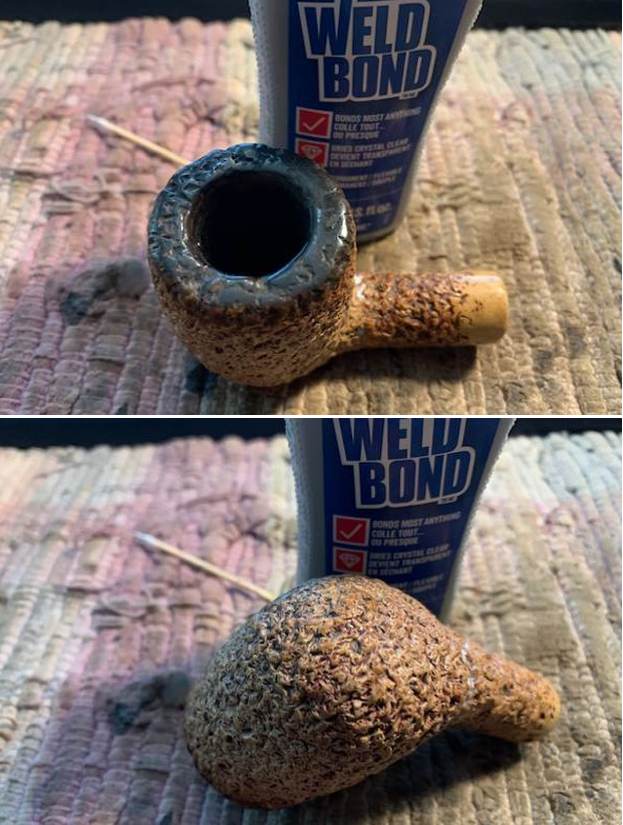
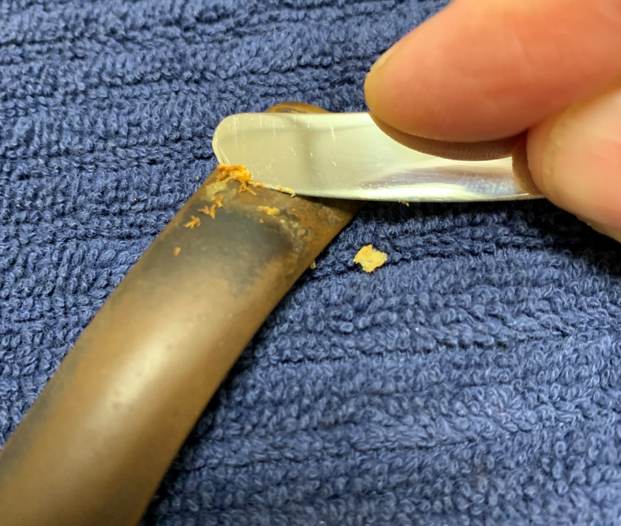
 While I was buffing it I found that I had forgotten to clean the insides of the shank and stem. I cleaned it with isopropyl alcohol, pipe cleaners and cotton swabs. It smelled much better.
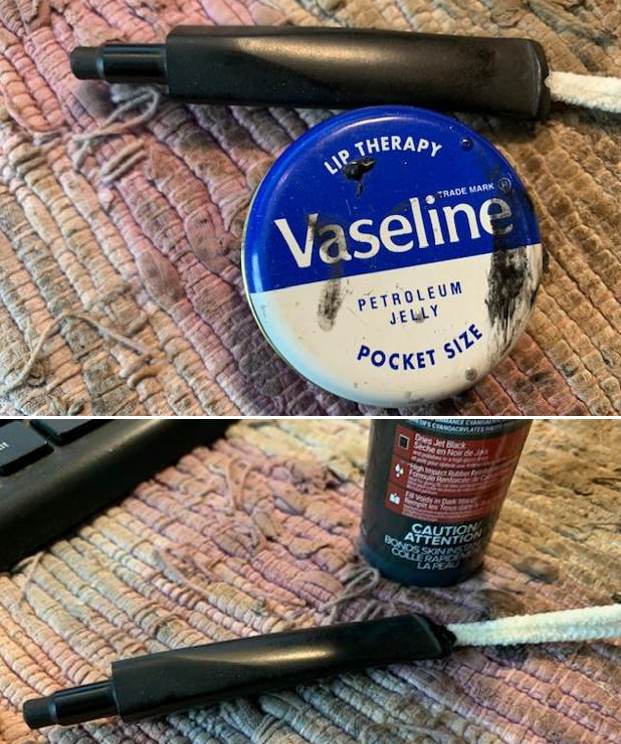
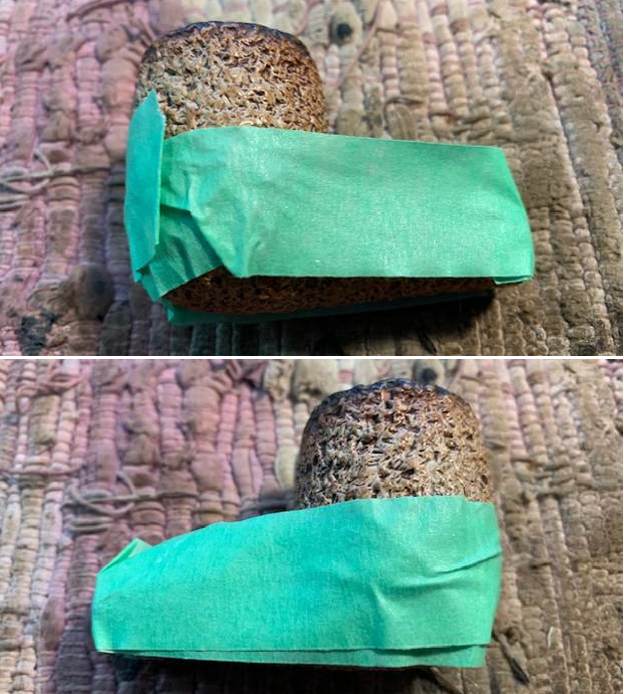
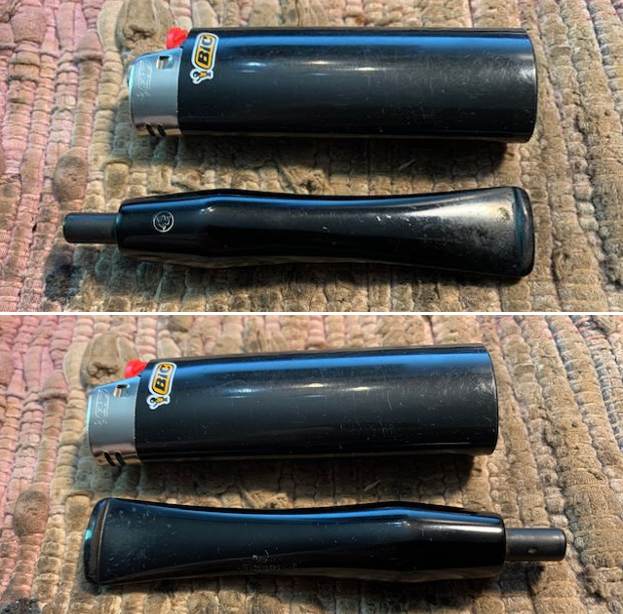
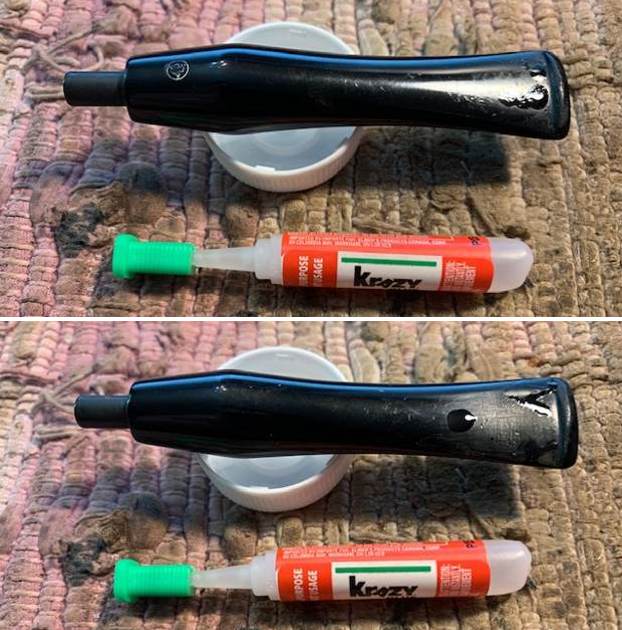
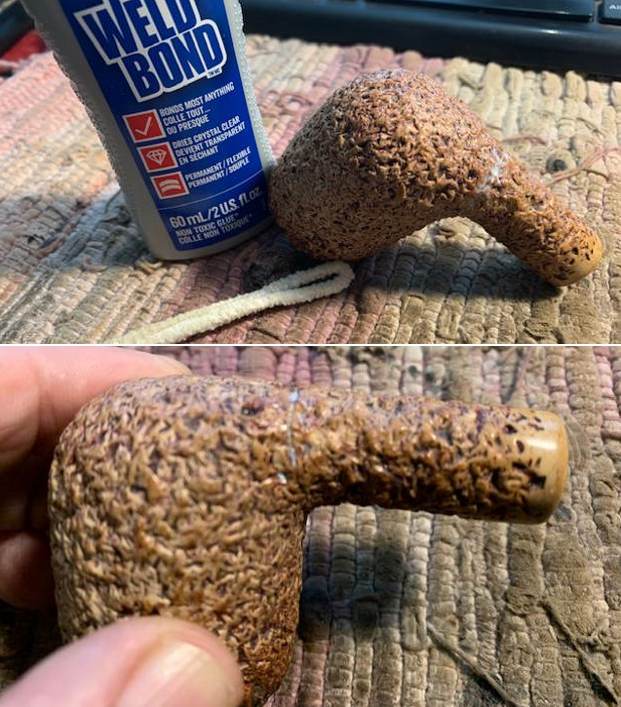
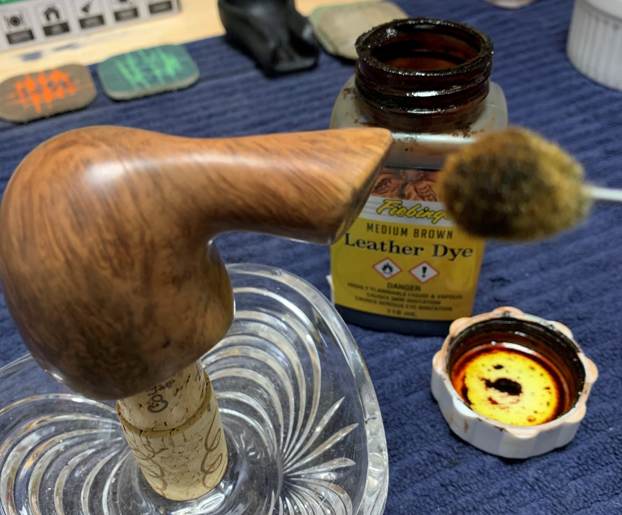
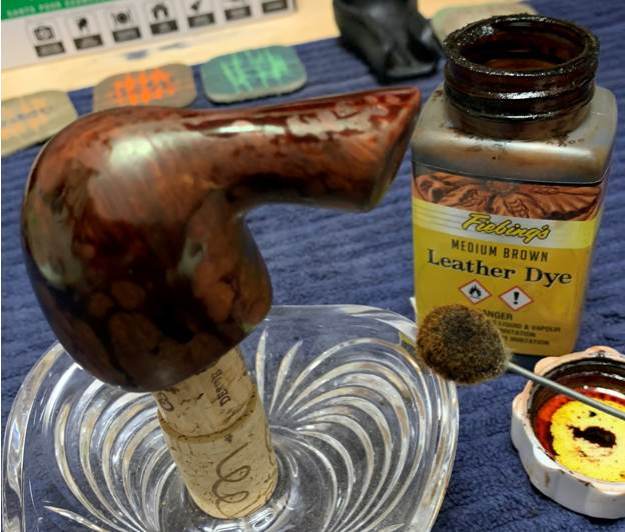
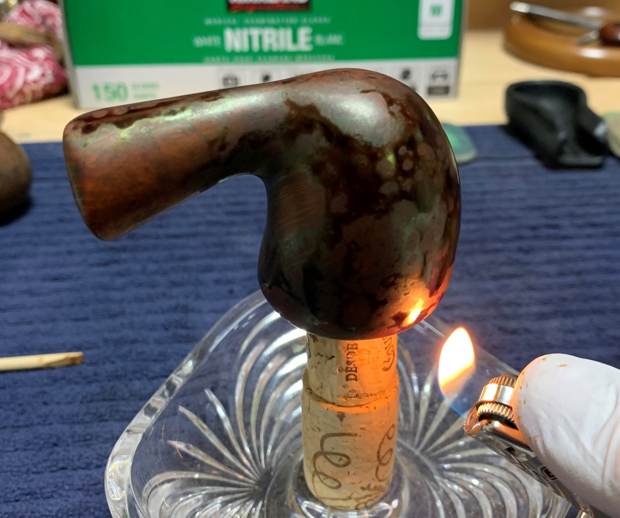
 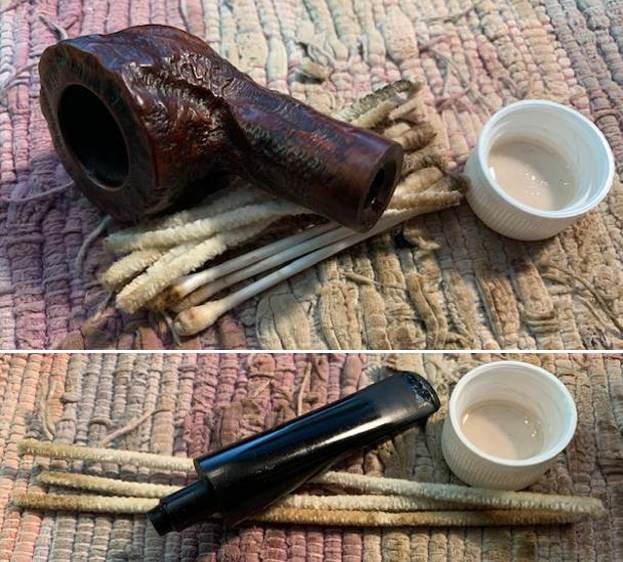 I set the bowl aside and turned to work on the stem. I “painted” the stem with the flames of a lighter to lift them as much as possible. I filled in the remaining tooth marks with black super glue.
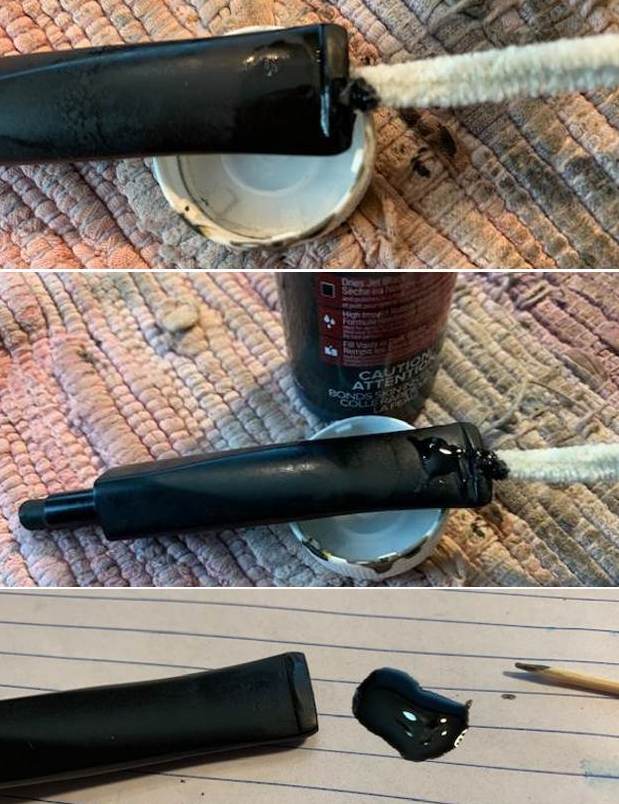
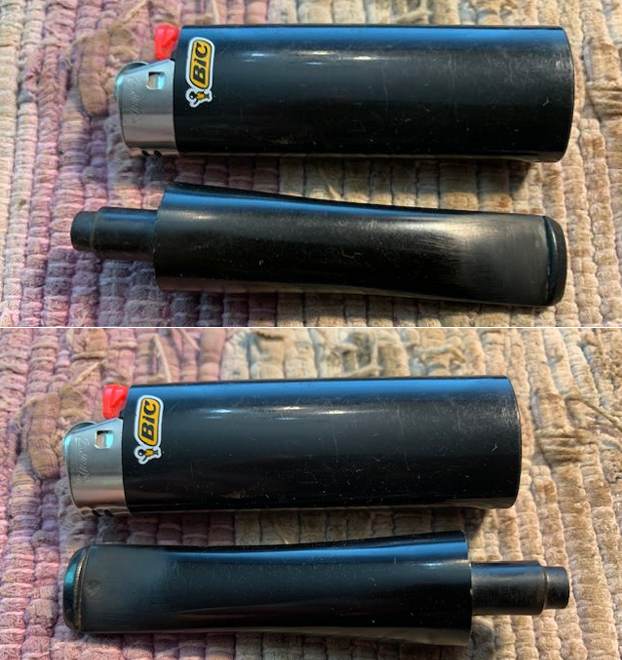
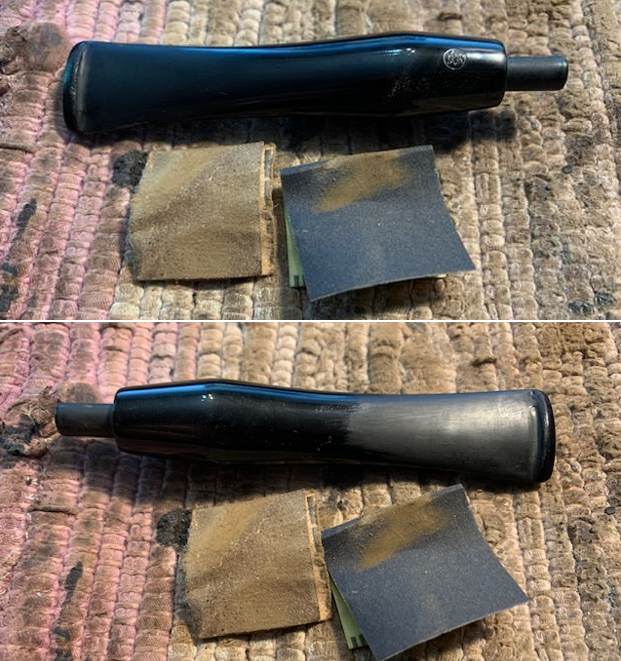
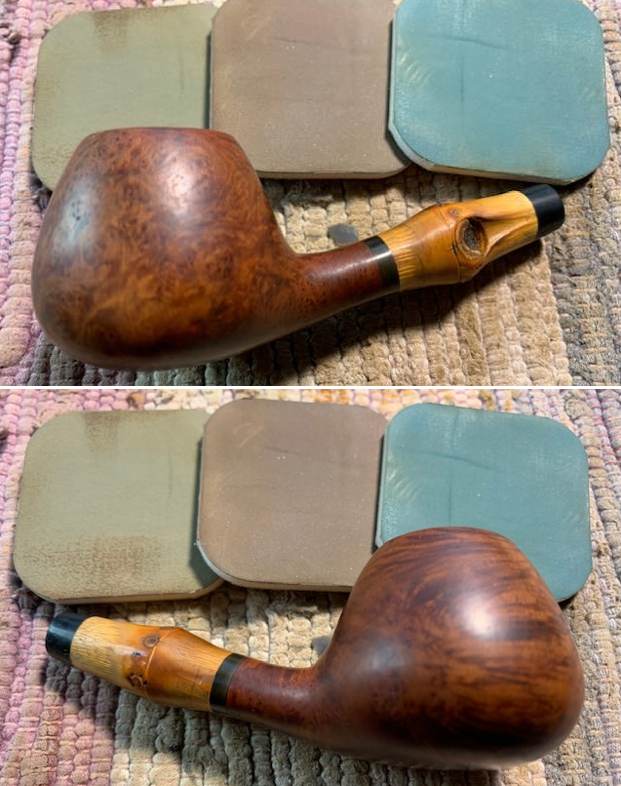
 Once the repair cured I flattened the repair on the topside and shaped the button edge on both sides with a small flat file. I sanded the button edges and the repairs on the stem with 220 grit sandpaper to blend them into the surface of the vulcanite. I started polishing it with 400 grit wet dry sandpaper. It is starting to look very good.
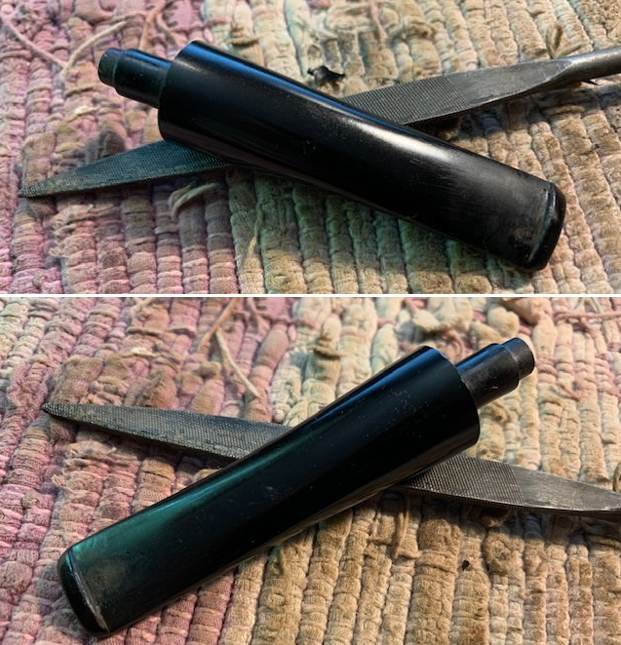
 I polished the vulcanite stem with micromesh sanding pads – 1500-12000 grit pads. I wiped it down with Obsidian Oil after each sanding pad. I used Before & After Pipe Polish – both Fine and Extra Fine to further polish the stem.
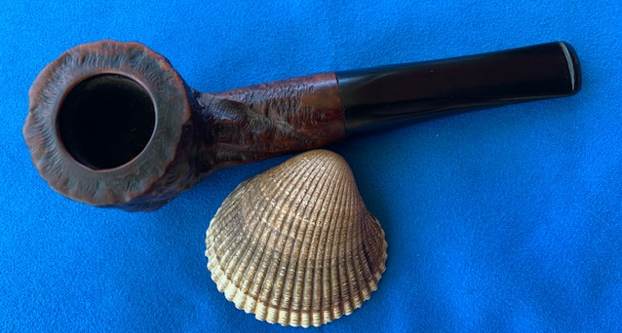
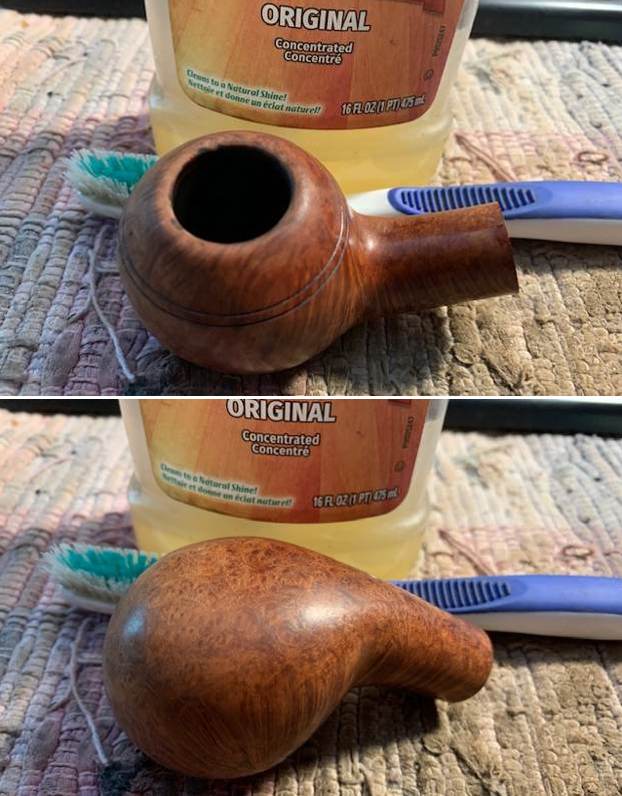
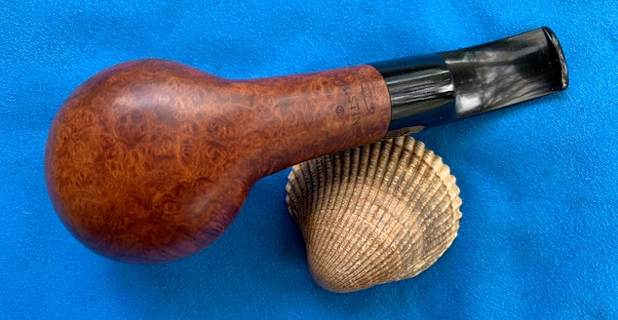
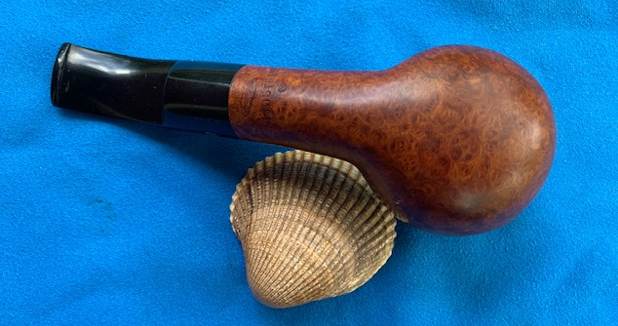
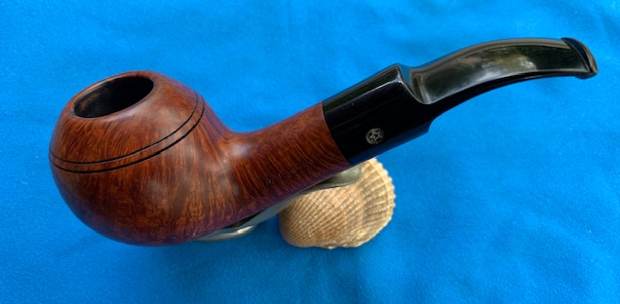
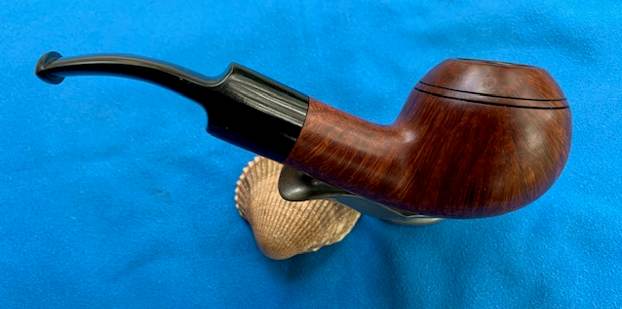
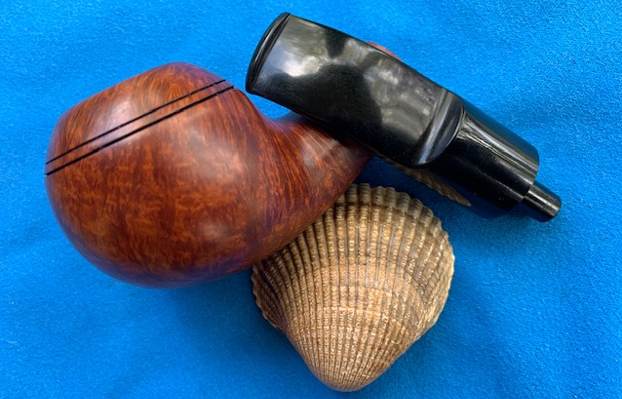
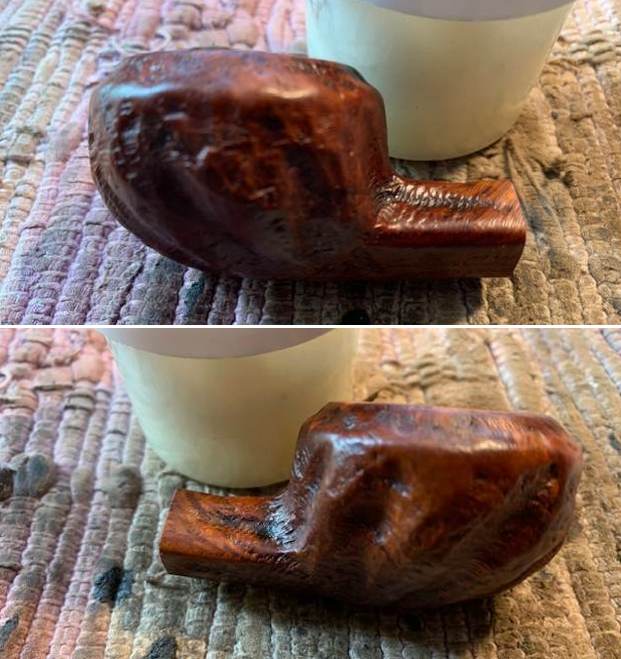
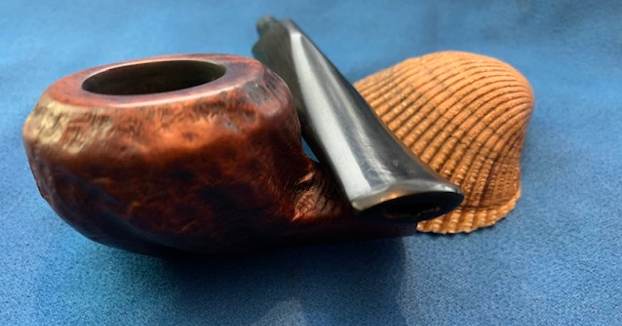
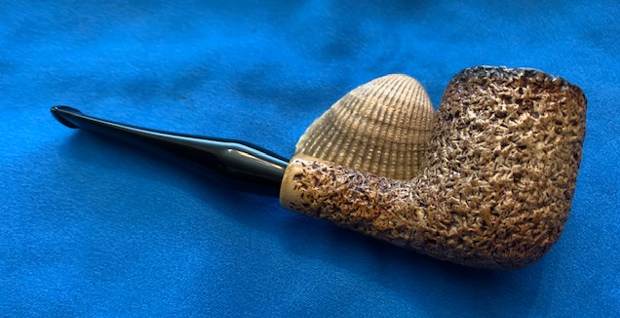
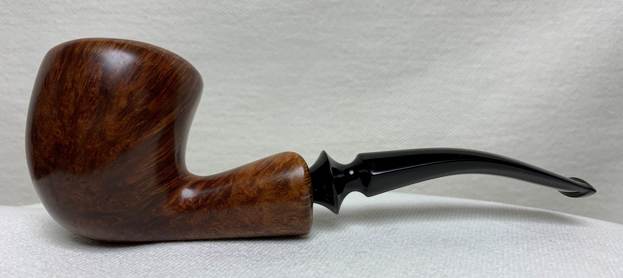
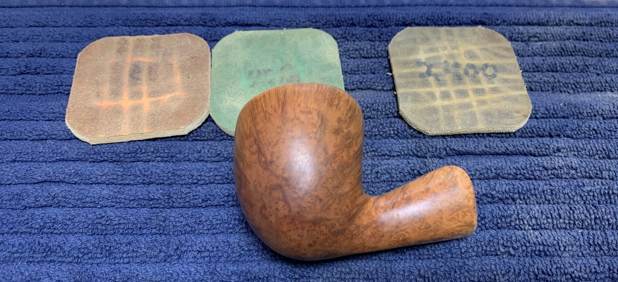
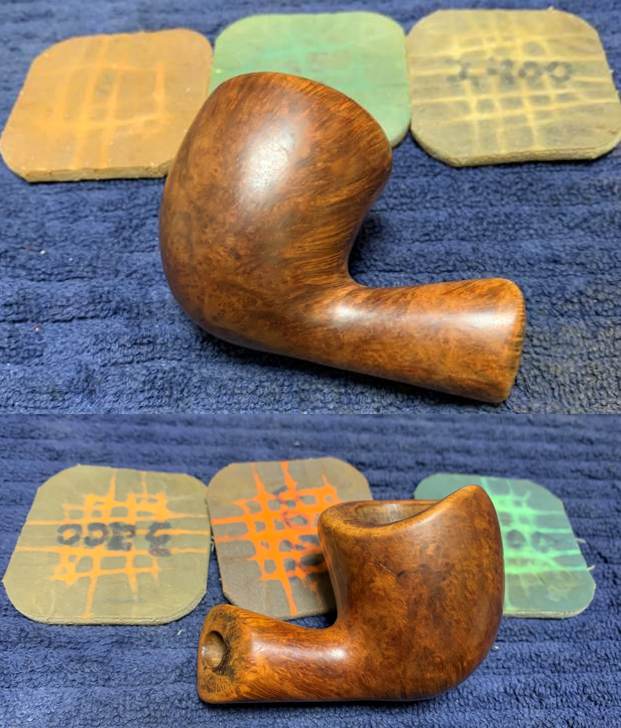
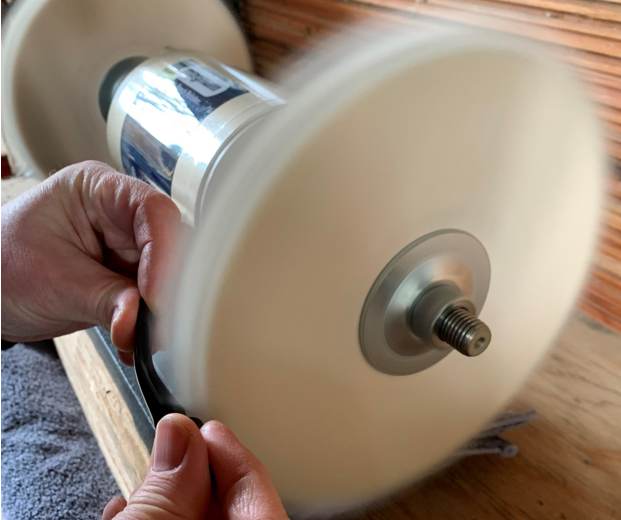
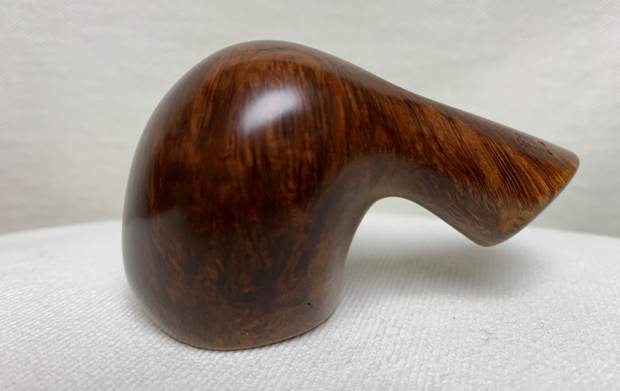
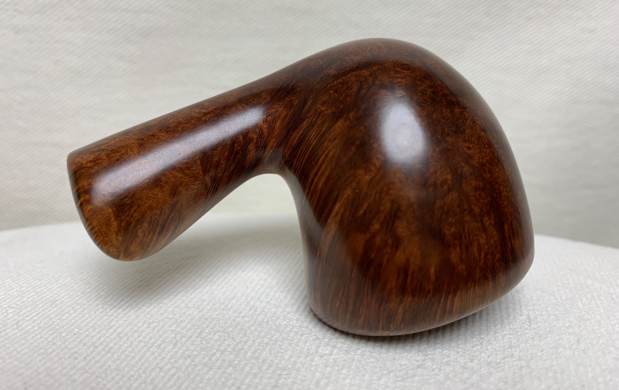
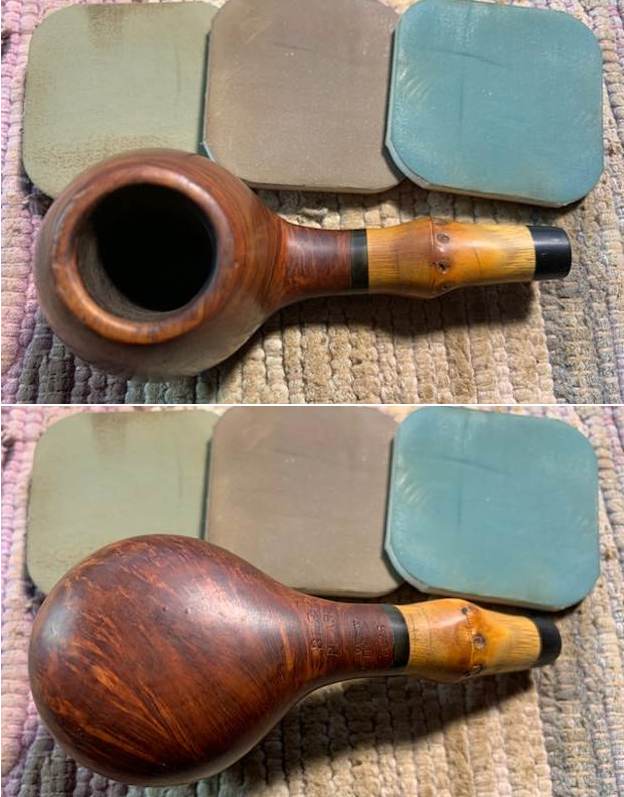
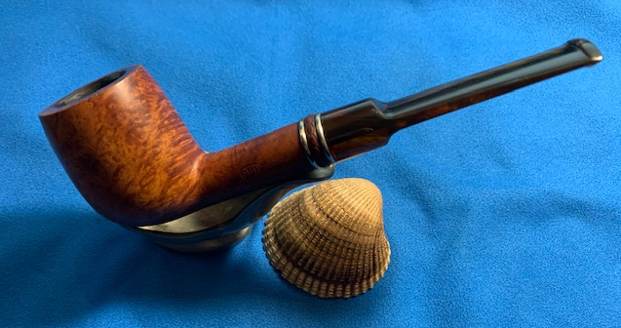
 This Custom-Bilt Pot is a great looking pipe now that it has been restored. The style of rustication that is used around the bowl is highlighted by the stain application and works well with both the shape and the polished vulcanite stem. I put the stem back on the bowl and carefully buffed the pipe with Blue Diamond on the buffing wheel using a light touch on the briar. I gave the bowl multiple coats of Conservator’s Wax and the stem multiple coats of carnauba wax on the buffing wheel and followed that by buffing the entire pipe with a clean buffing pad. I hand buffed the pipe with a microfiber cloth to deepen the shine. The finished Custom-Bilt is another pipe that fits nicely in the hand and feels great. Give the finished pipe a look in the photos below. The dimensions of the pipe are Length: 5 ½ inches, Height: 1 ½ inches, Outside diameter of the bowl: 1 ½ inches, Chamber diameter: 7/8 of an inch. The weight of the pipe is 42 grams/1.48 ounces. I will be putting it on the rebornpipes store in the American Pipemakers Section shortly. If you are interested in adding this pipe to your collection send me a message or an email. Thanks for reading this blog and my reflections on the pipe while I worked on it. There are many more to come!
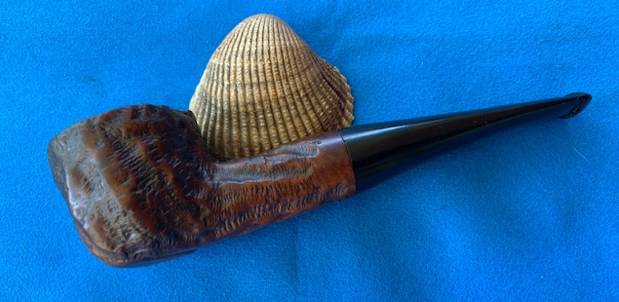


