Blog by Steve Laug
Over the years I had heard and read about the Portobello Road Market – the world’s largest antique market with over 1,000 dealers selling every kind of antique and collectible. On past trips to England I had not been able to take the time to go have a look. On the current trip it looked like I would have time and to top it off we had rented an Air BNB apartment within walking distance of the market. I looked up information about the market so I could be prepared. I want to know what to expect when I went walked to it on the weekend. But I have to tell you, all the preparation I did was not enough to prepare me for what the reality would be like once I turned the corner in the Nottinghill neighbourhood and came out on Portabello Road. The next two photos give you a bit of a feel for what I saw on that Saturday morning. The streets were crowded with people of every size, shape and ethnicity. There were booths lining both sides of the street. There were shops with a variety of wares to sell. 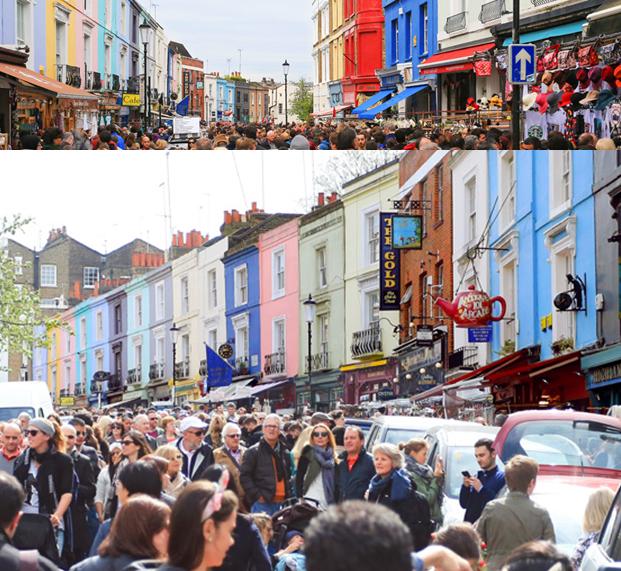
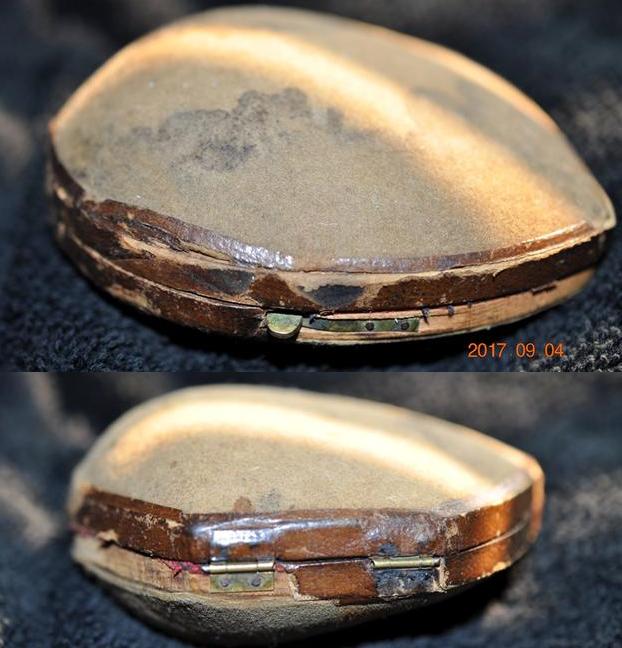
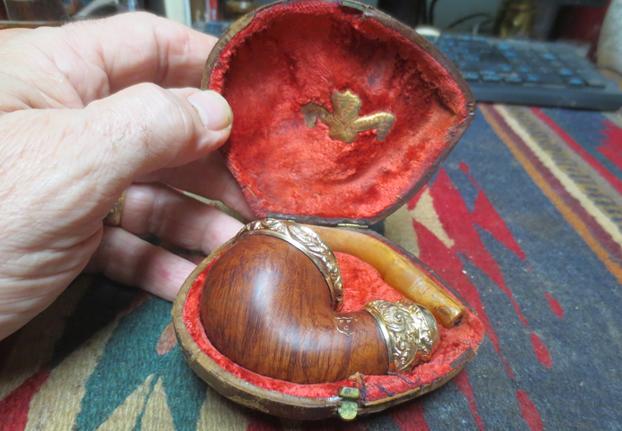
 I wandered up and down the street of the market looking at the booths and shops along sidewalks and street. As mentioned above, the market is known for its antique sellers and shops so I was hoping to find a few pipes in the windows and shop cases. I walked through several of the antique shops (really like our Canadian antique malls) looking quickly at the cases to identify the ones I would come back to and spend more time at. In one particular shop there was a small corner booth by the door that had display cases around the front and side of the spot. The cases were full or pipes and cheroot holders carved out of meerschaum. There were many old carved meerschaum pipes with shapes of animals and faces. There were some briar pipes as well with different stems – varying from amber to horn to rubber. This was a booth where I needed to take some time to go through the pipes.
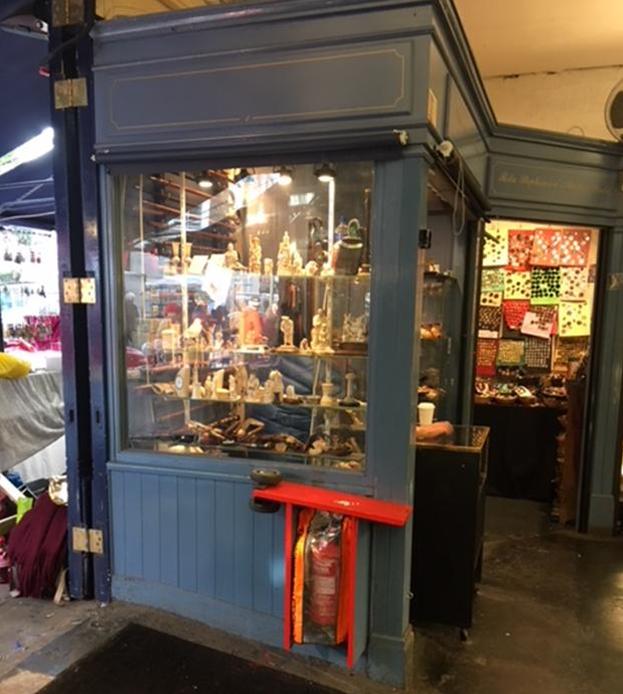 In the next two photos you can get a bit of an idea of how the pipes were displayed in the cases. They were really a jumble and it would take time to go through them. You can see meerschaum pipes with and without cases and stems. You can see oddly shaped bog oak pipes with amber stems and old pipes with metal shank and bowl caps. There were long pipes and shot pipes and many in between. The prices were surprisingly high so it would be a matter of narrowing the field down to one or two that I would add to my bag.
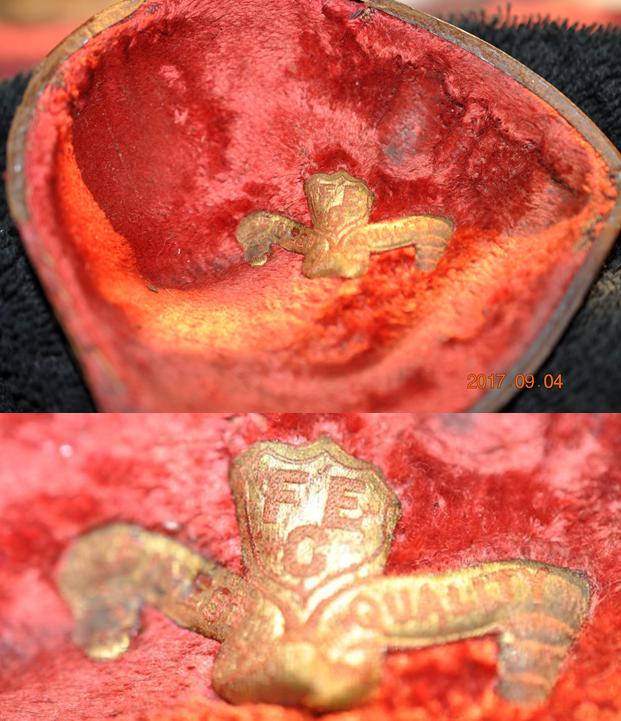
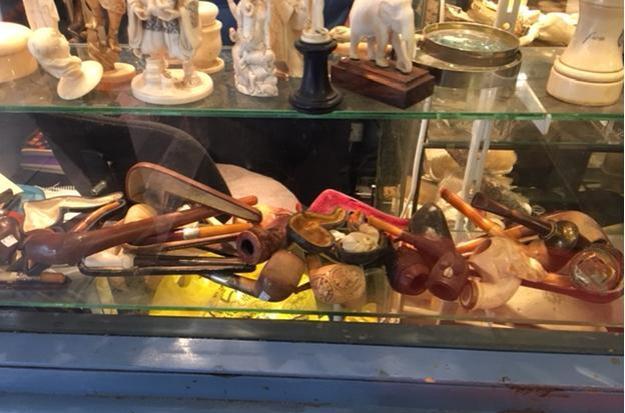 I moved from the side case to the front of the booth to look through some of the pipes displayed there. These too were a jumble and mixed through displays of figurines, crucifixes and antique cutlery. There were even books on collectible meerschaums on display on top of the cases.
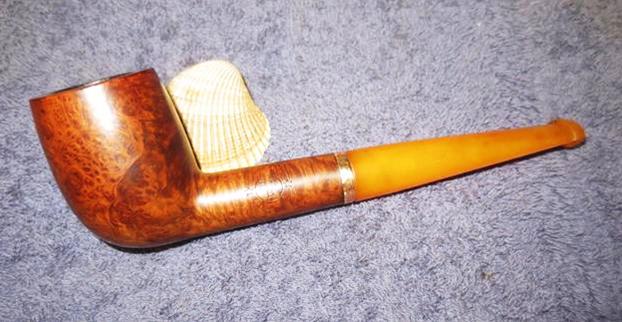
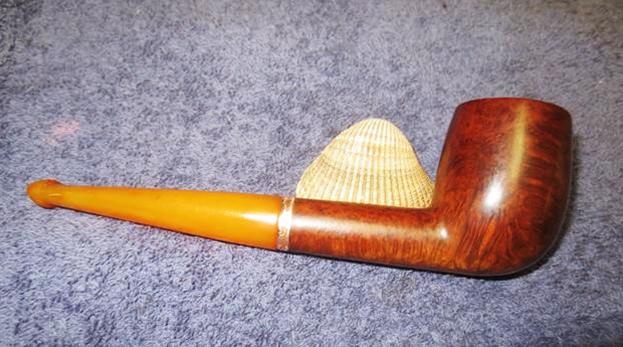
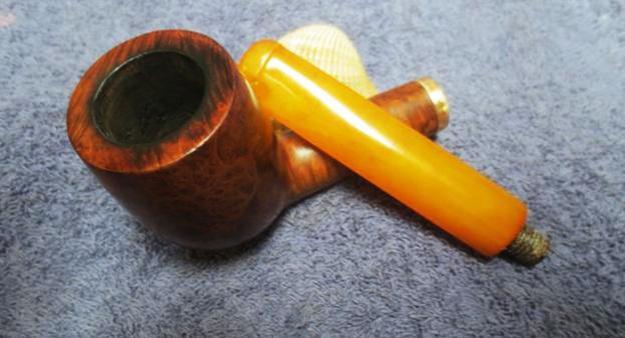
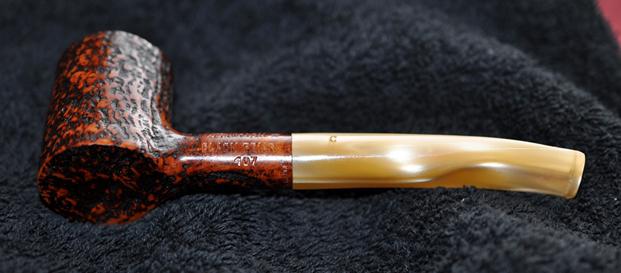
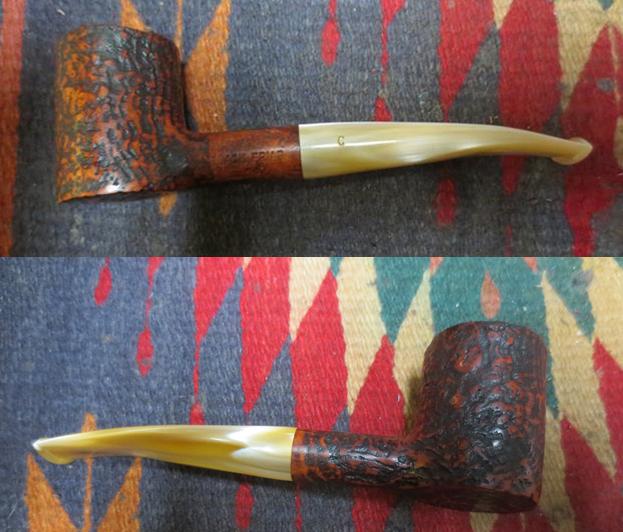
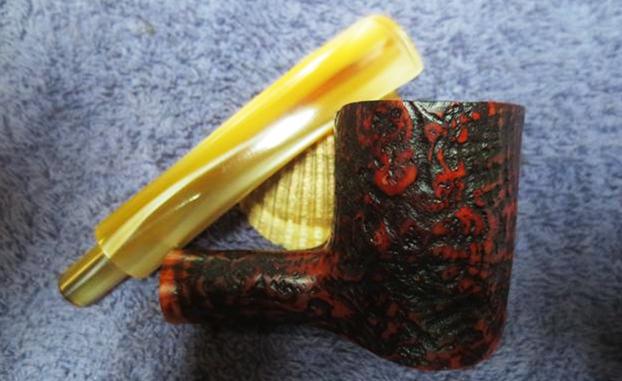
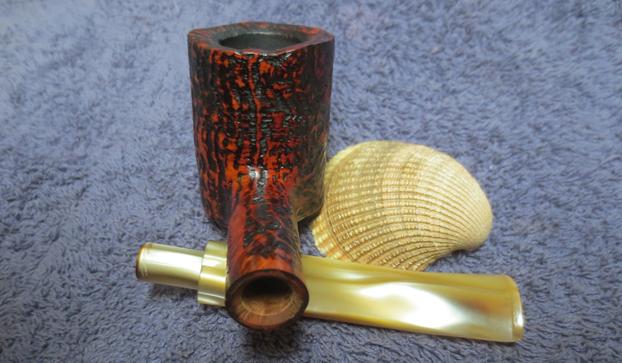
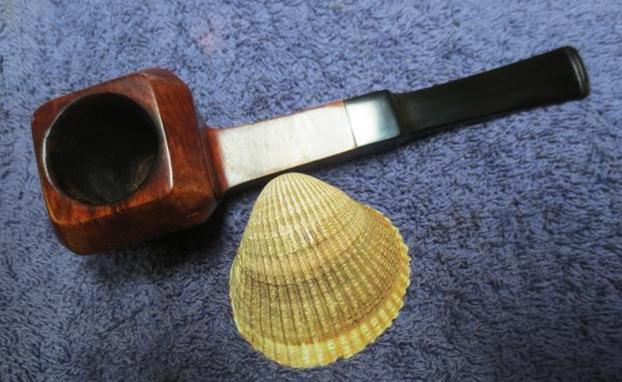
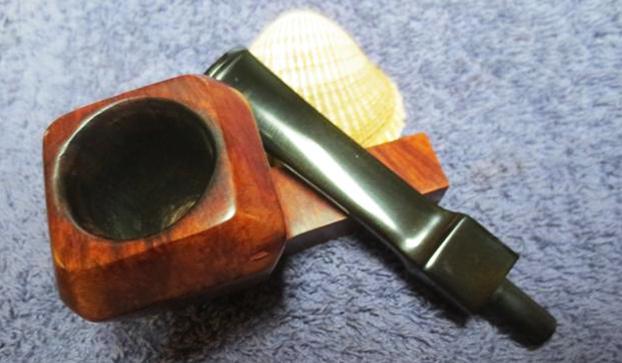
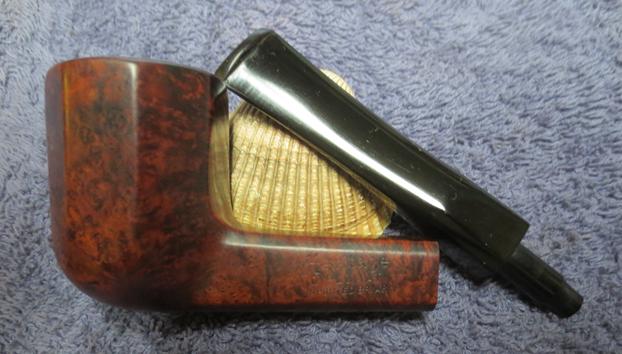
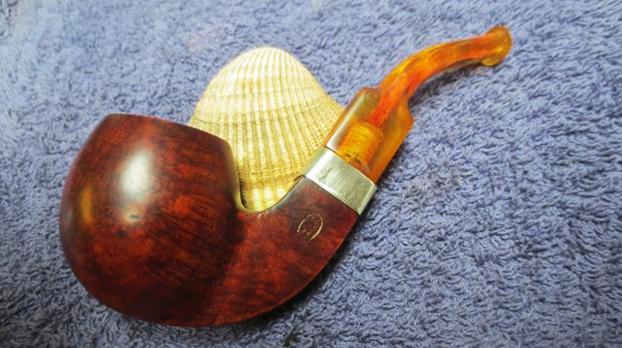
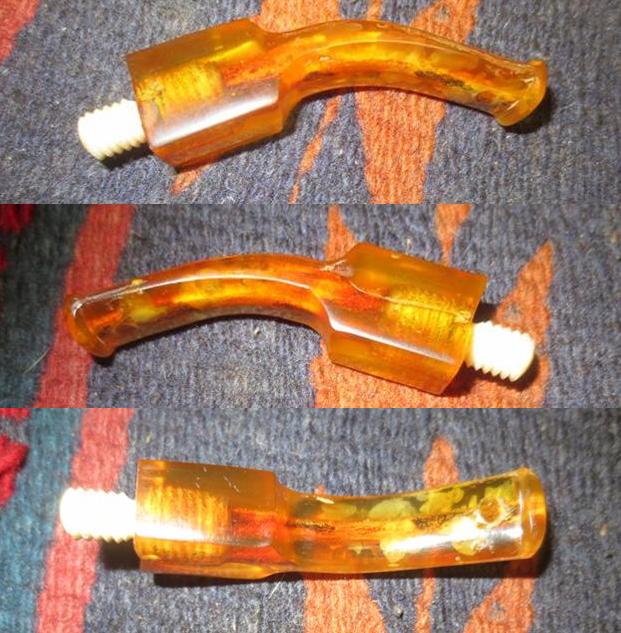
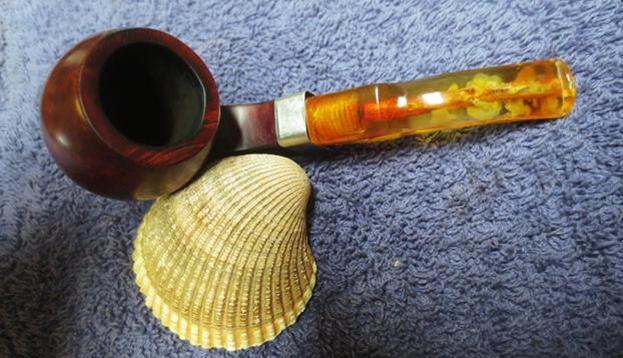
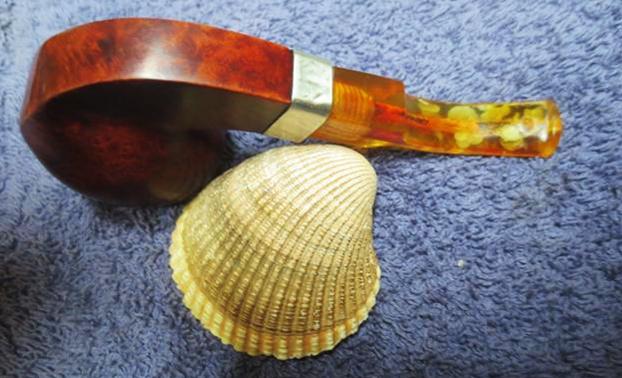
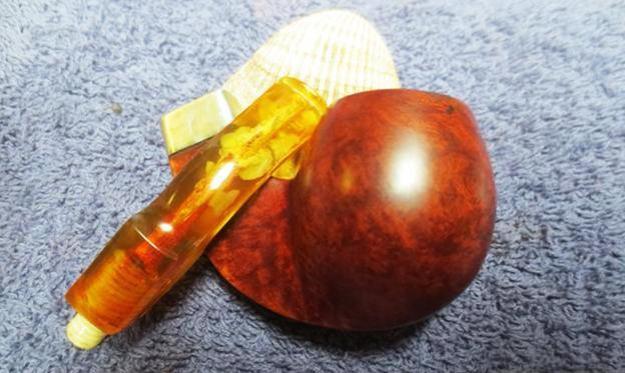
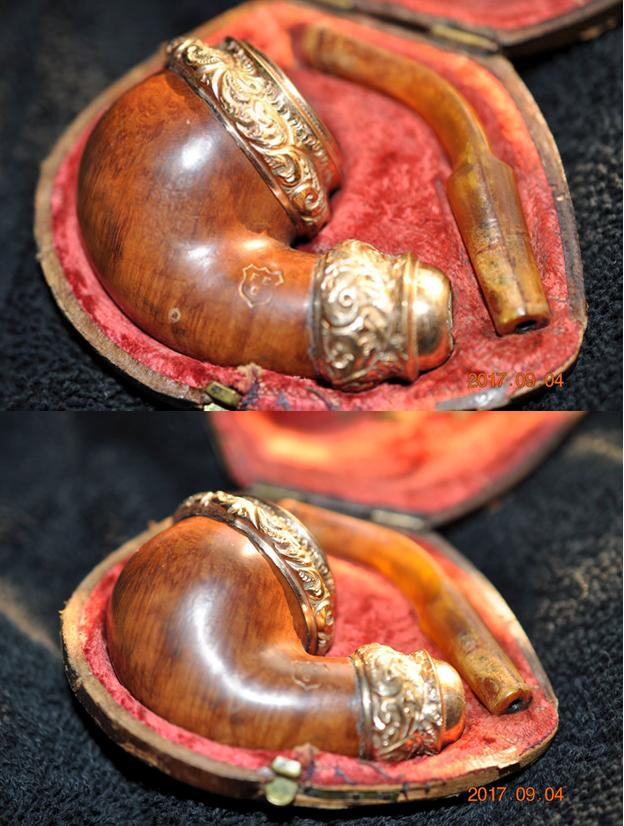
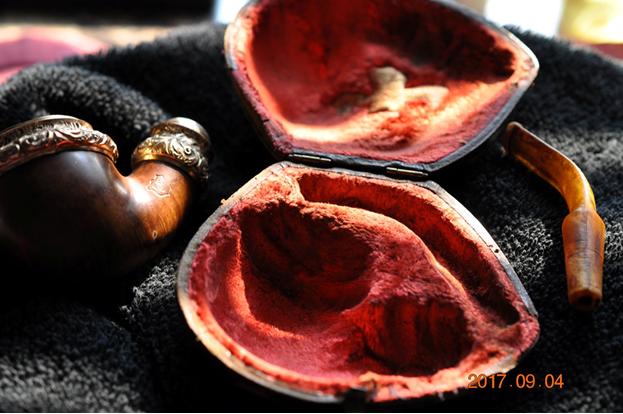
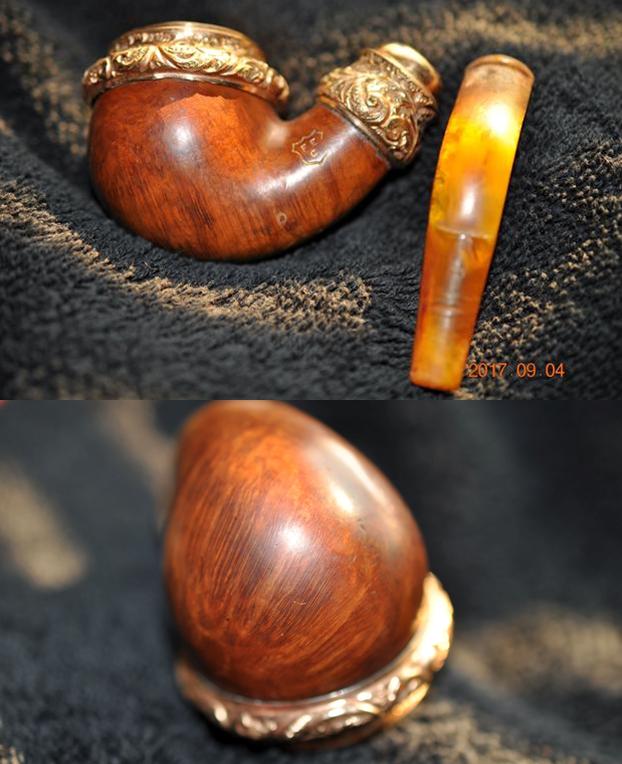
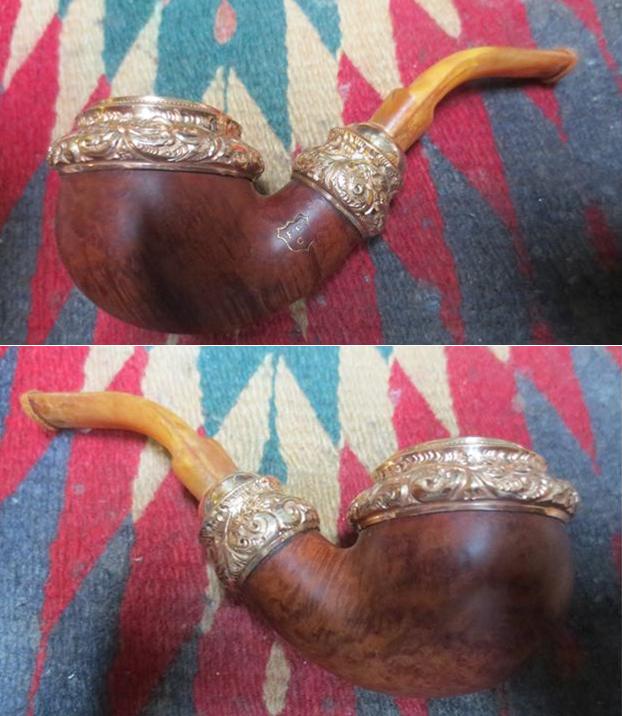
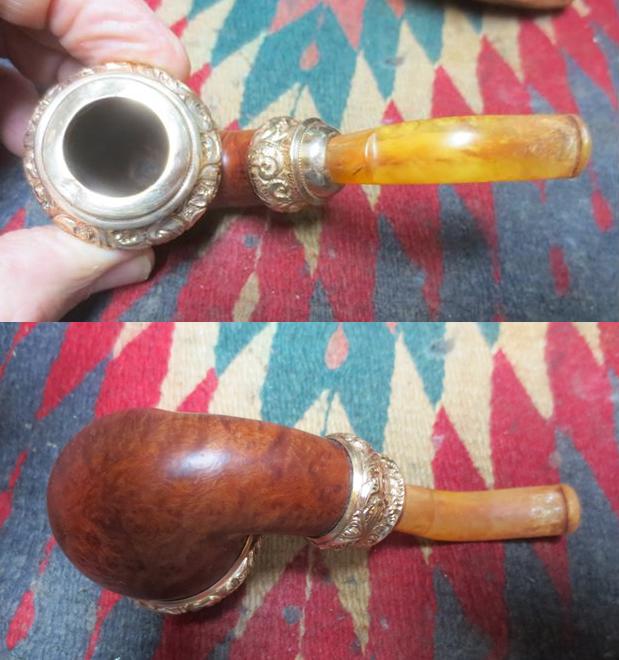
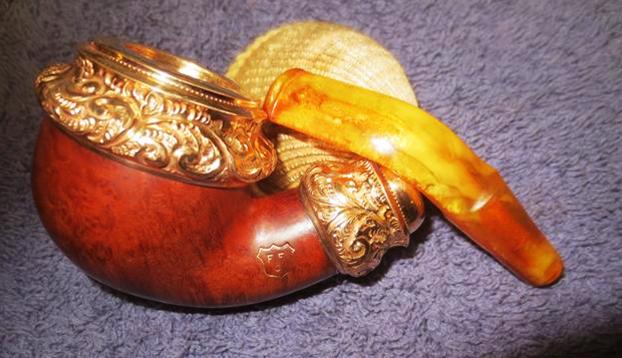
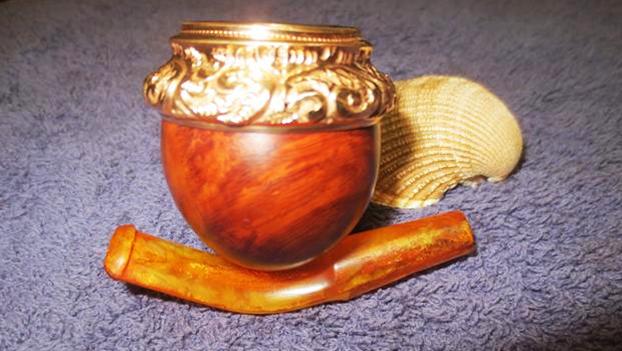
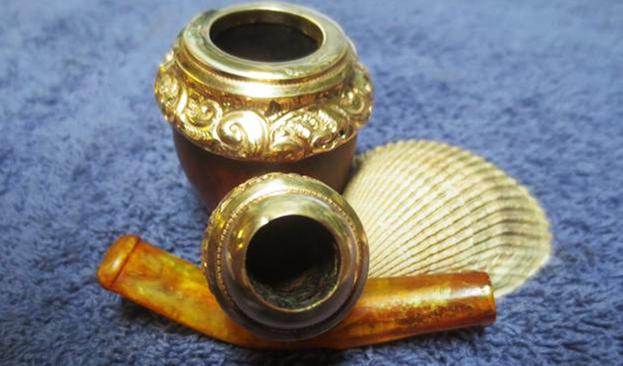
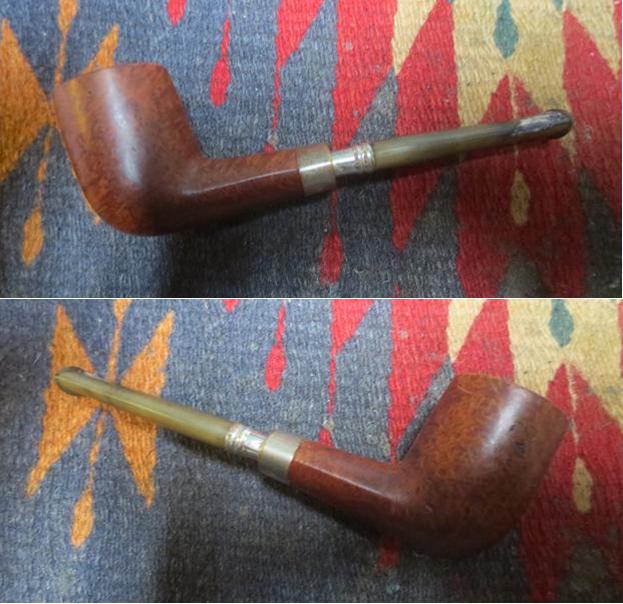
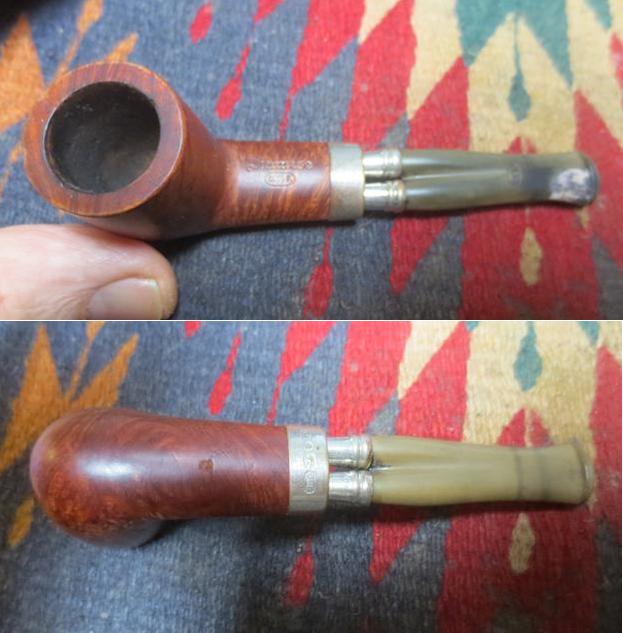
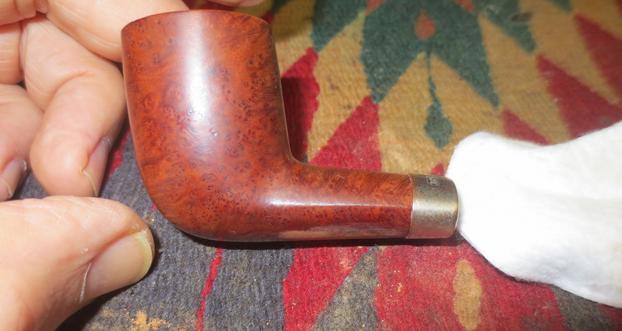
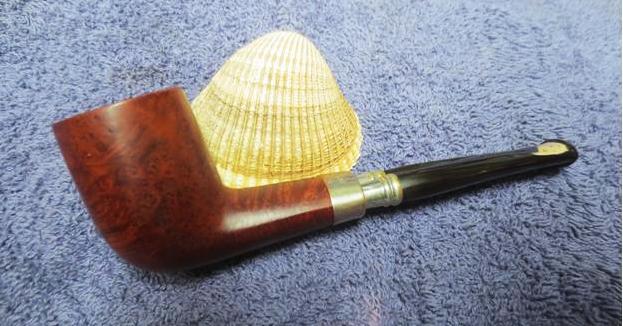
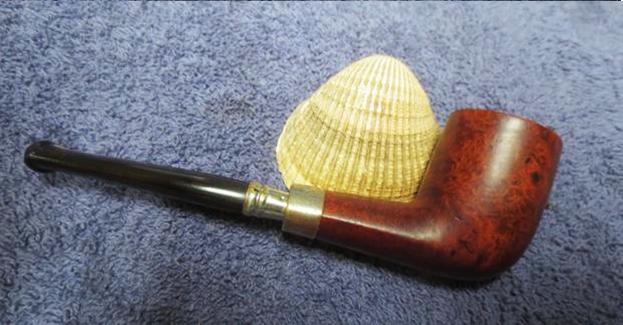
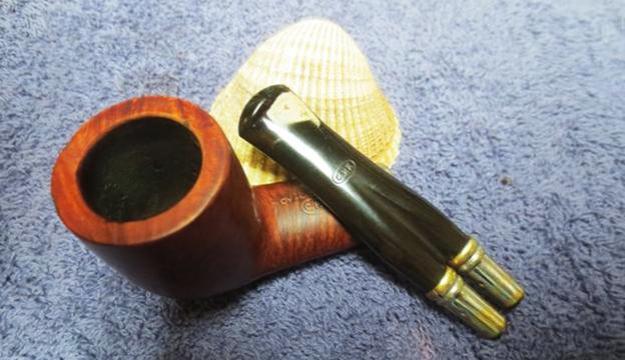
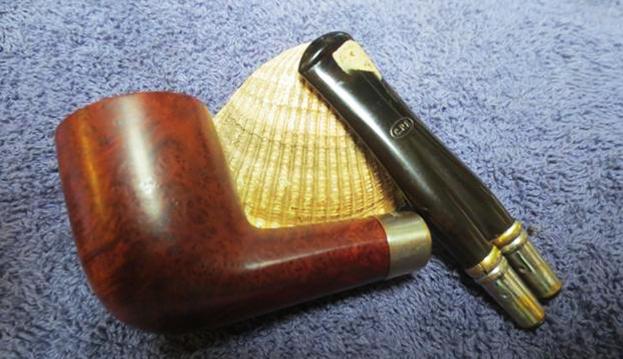
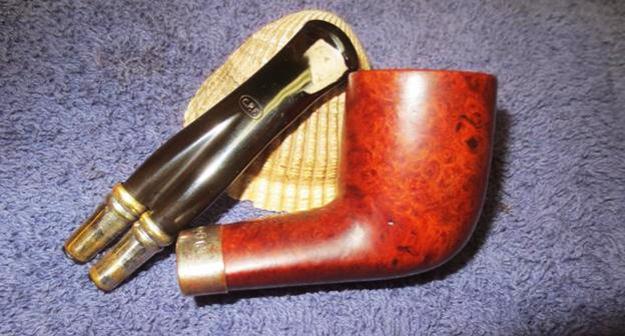
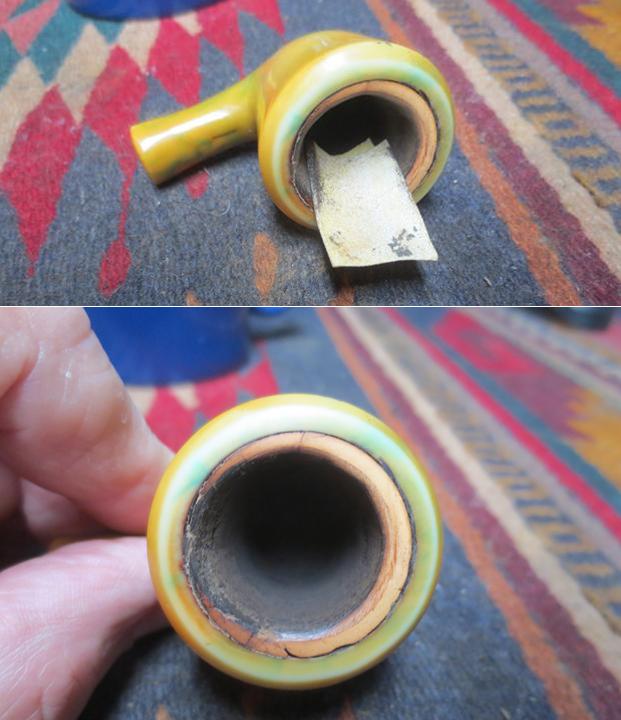
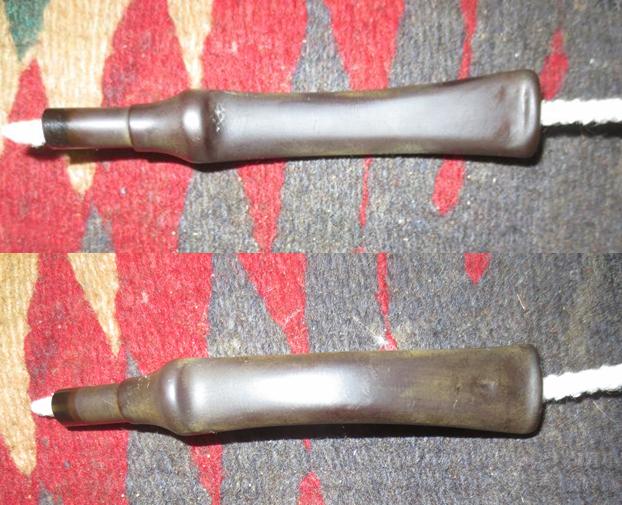
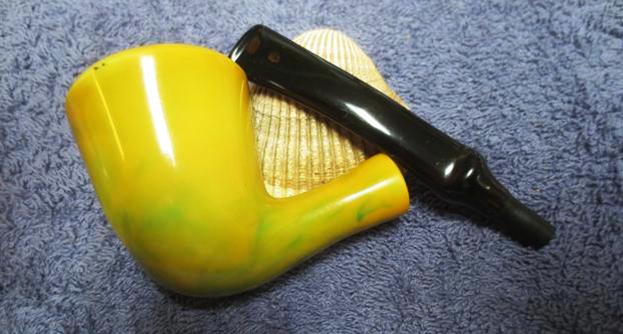
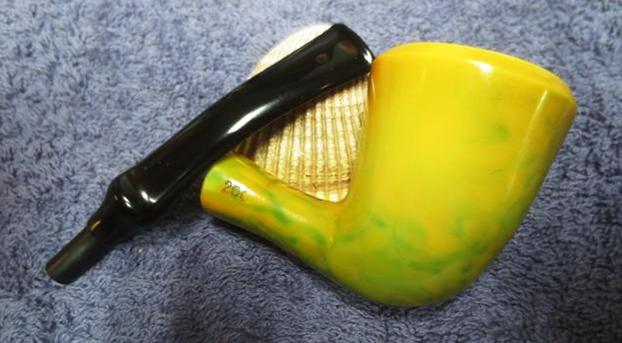
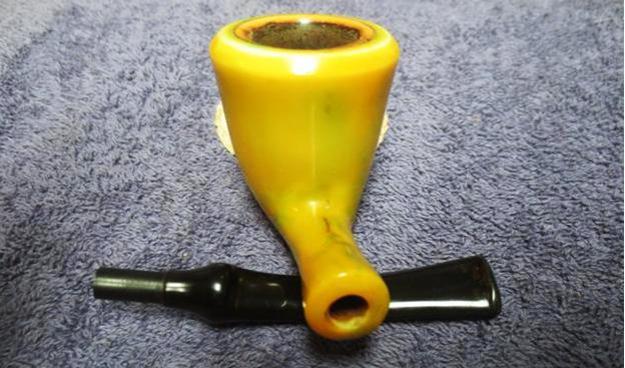
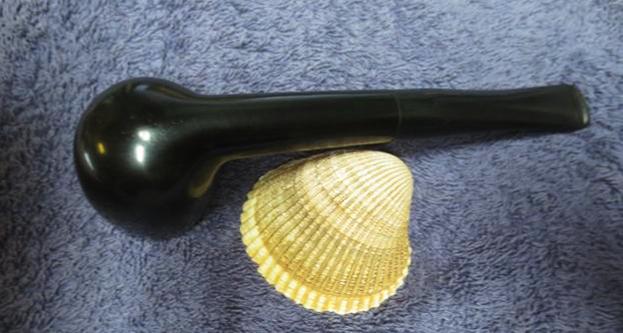
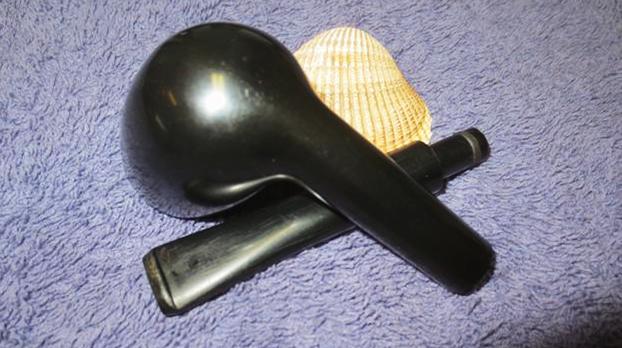
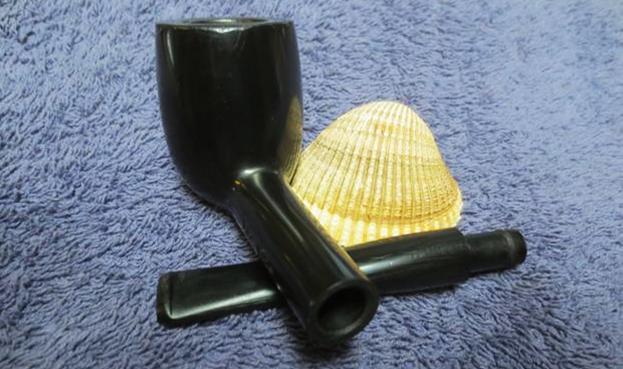
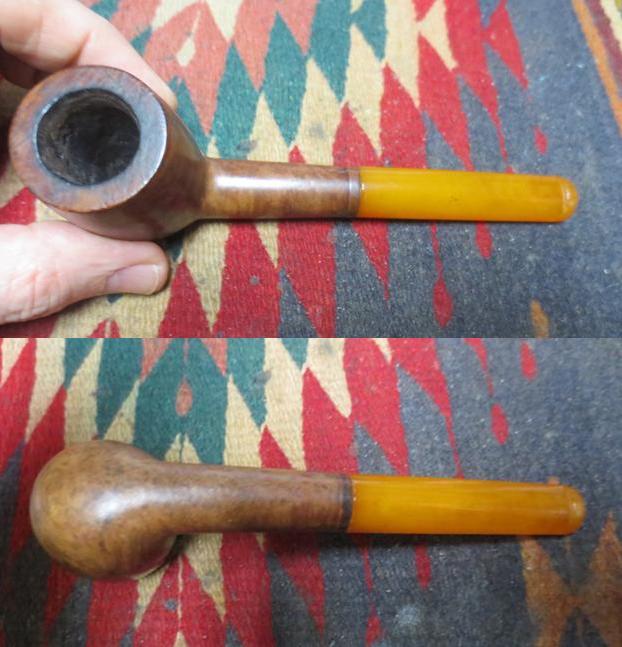
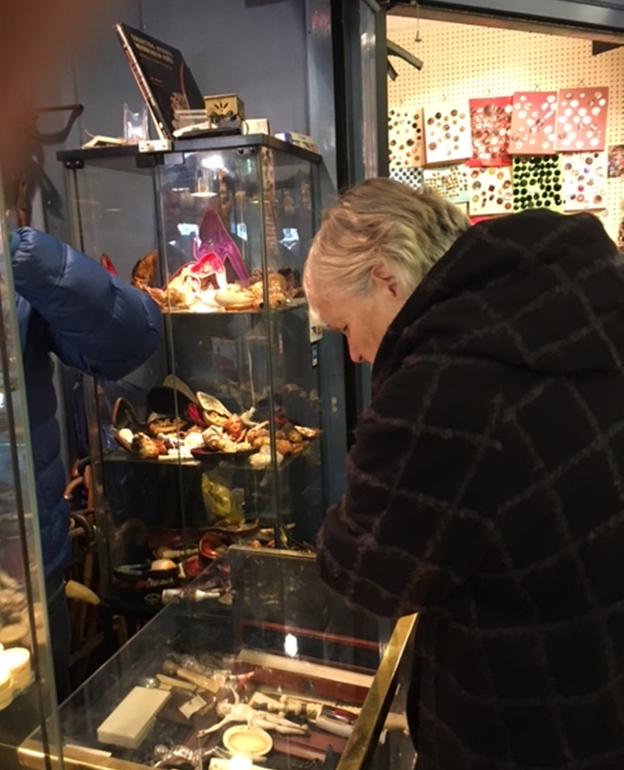 I finally narrowed down the pipes I was interested in to the one below. It was a large billiard that was in fairly good condition. There was a light cake in the bowl, the rim top had some lava and the stem had tooth marks. The stem had a piece of paper wrapped around the threaded bone tenon to give it enough bite to hold onto the threads in the mortise. The pipe was stamped on the left side of the shank with the letters PNB or PBN in a circle with a star on the right and left, outside of the circle. It also had a thin oxidized brass/gold band on the shank end that would clean up nicely. The stem looked to be Bakelite or Amberoid and had some light tooth marks on the top and underside near the button. I took the photos below when I returned to the apartment after the shopping adventure.
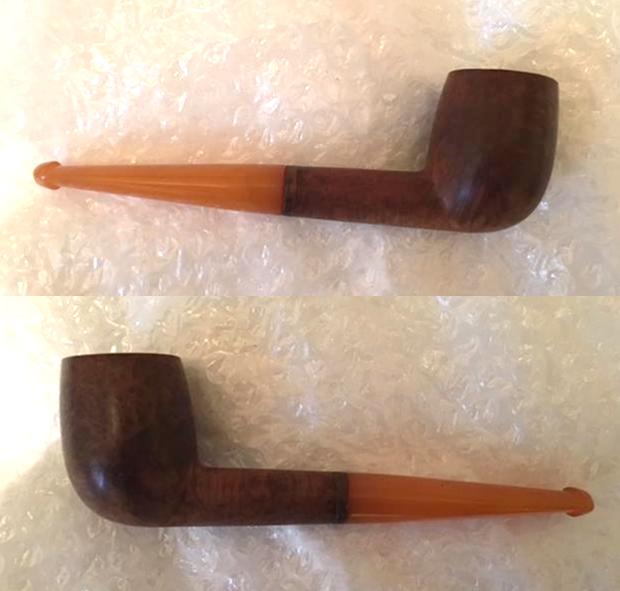
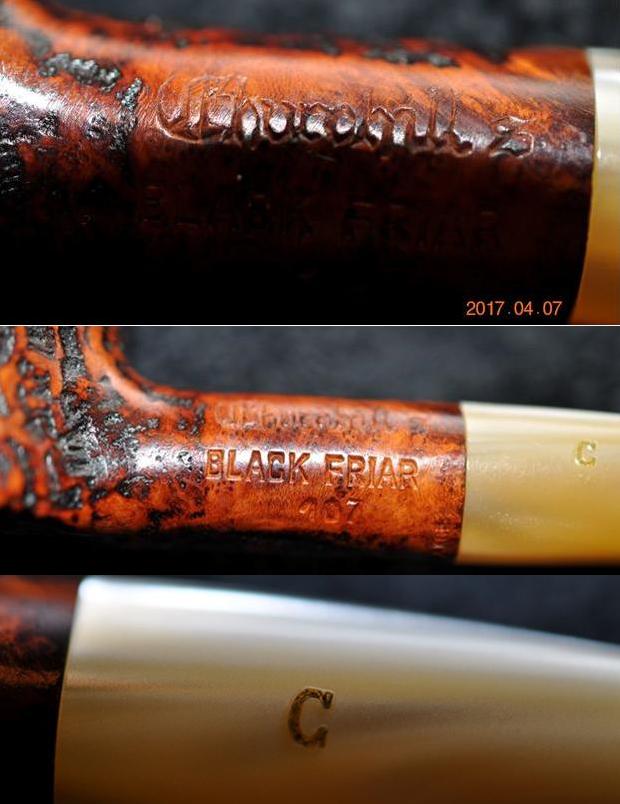
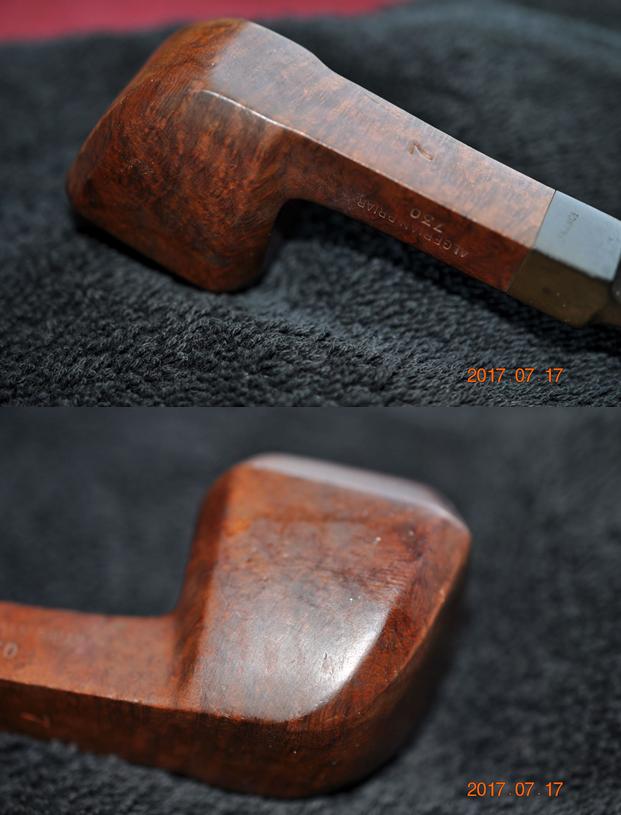
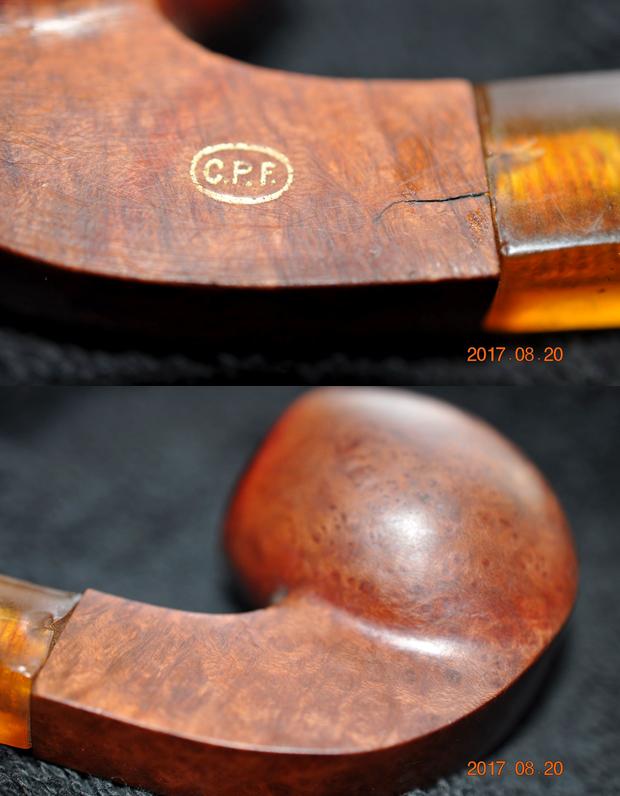
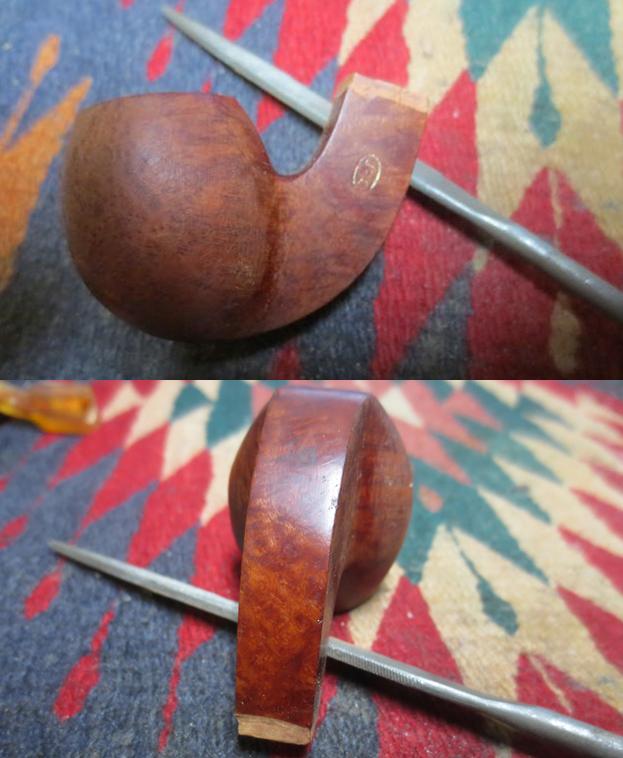
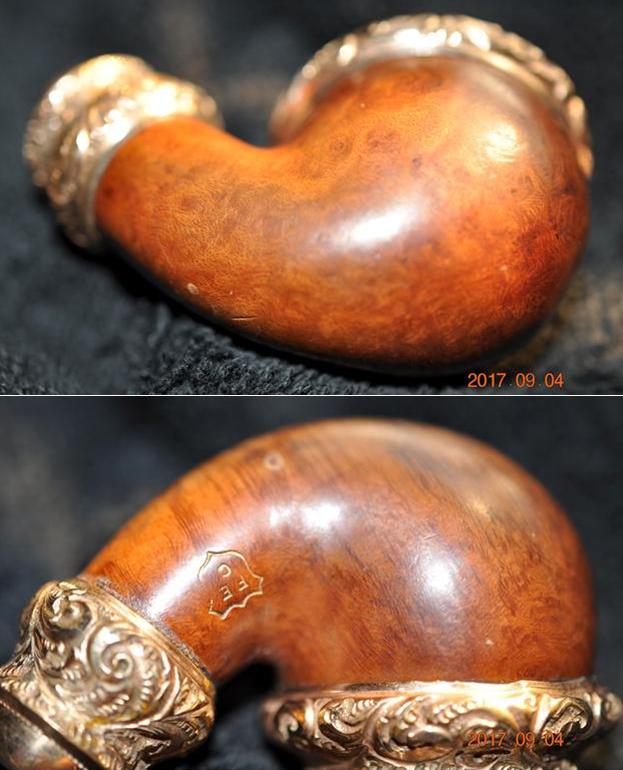
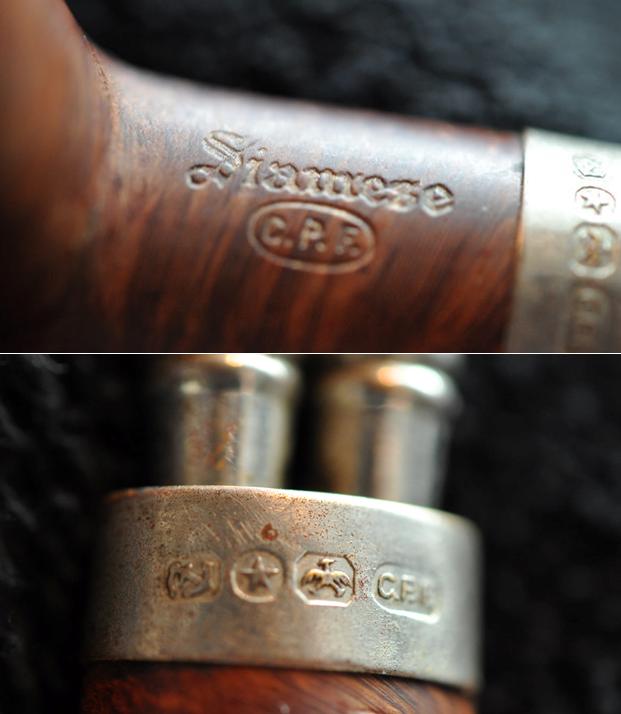
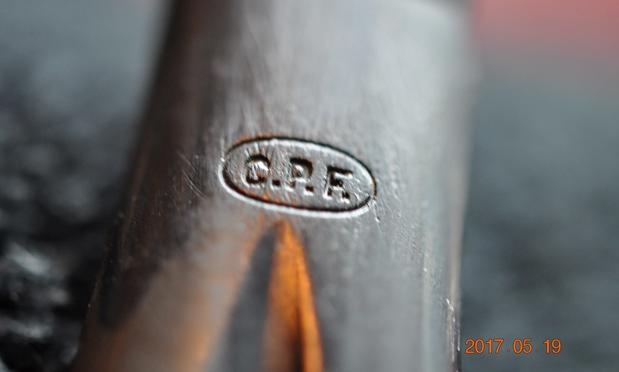
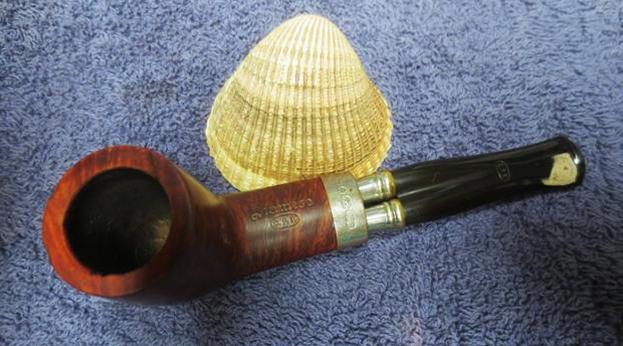
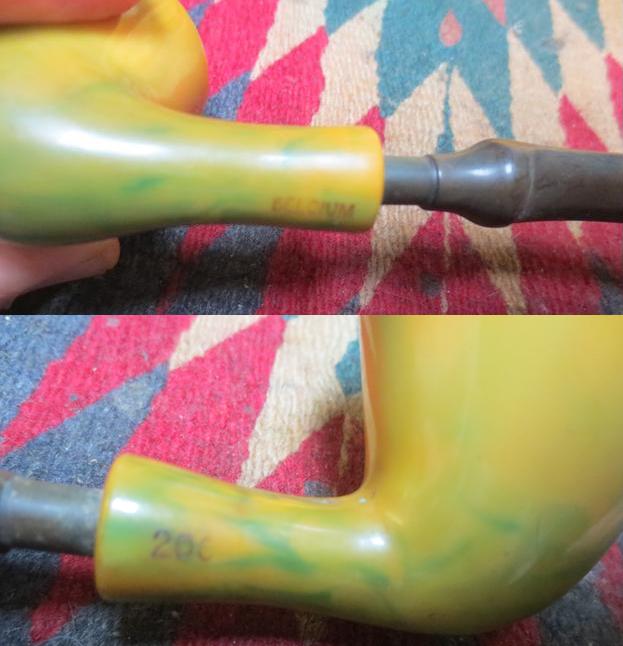
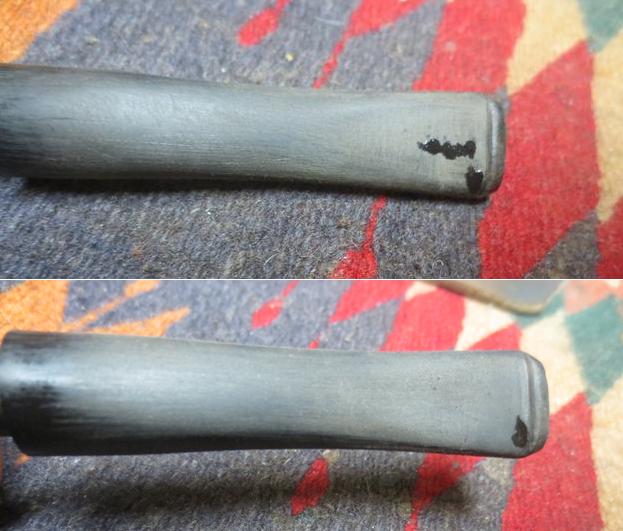
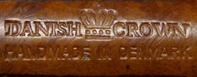
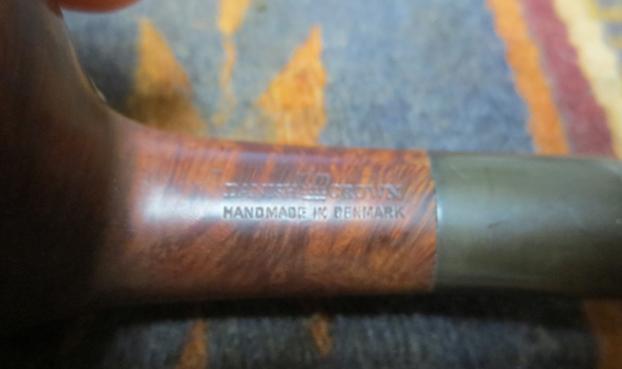
 The next photo shows the stamping on the left side of the shank. I cannot find any information on the brand either as PNB or PBN. I posted the logo on the Gentlemen’s Pipe Smoking Society on Facebook and Mike Hagley had a suggestion that was a possibility. He said the pipe looks like a Belgian made pipe, so he suggested that PNB stands for Pipier Nationale Belgique. Another friend on the same GPSS group Neville van Niekerk from Germany wrote that the pipe was a Bernstein pipe from Vienna, Austria. He went on to say that they were originally Meerschaum pipe makers until the Turks decided that Meerschaum could not be exported in blocks any more. Thank you both for your suggestions.
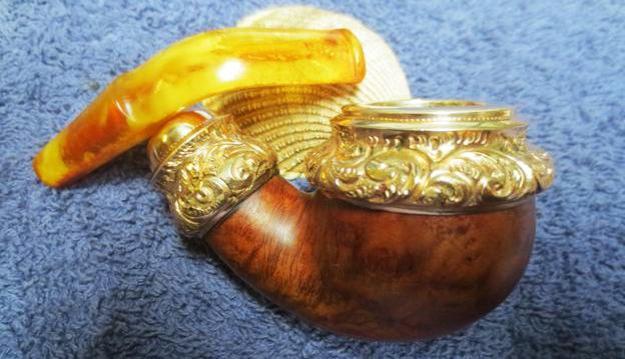
 I wrapped the pipe in bubble wrap and put it in my suitcase until I returned to Vancouver three weeks later. I was looking forward to working on the pipe. When I got home I unwrapped the pipe and brought it to my work table. I took some photos of it to chronicle what it looked like before I started. The photos below show the pipe when I started.
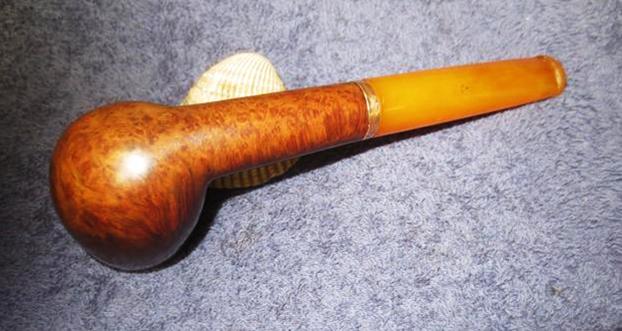
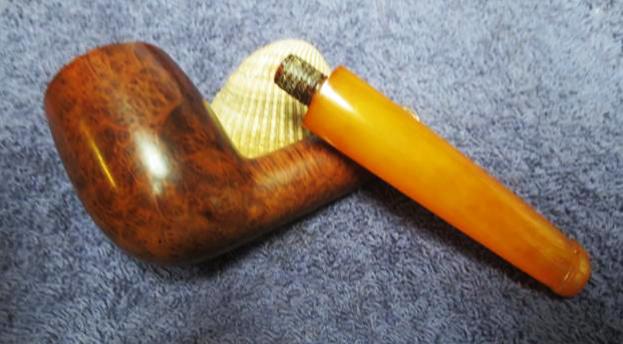
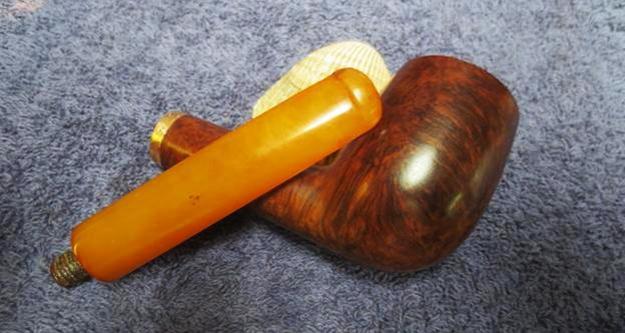
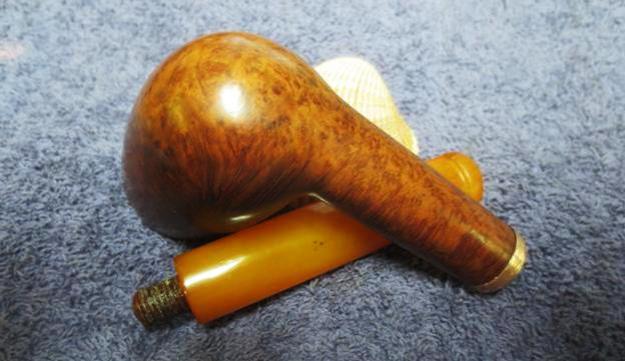
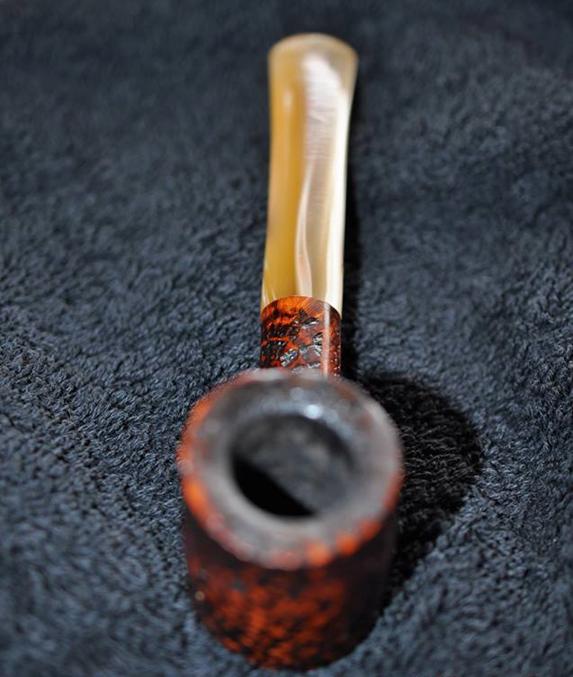
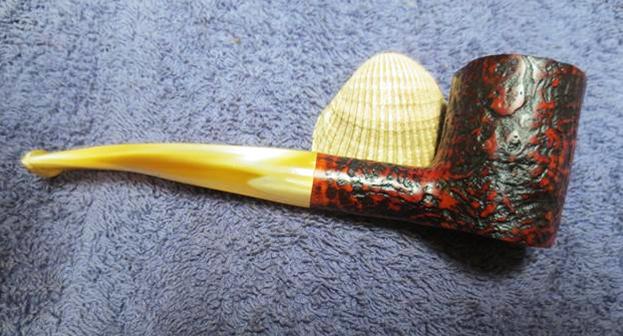
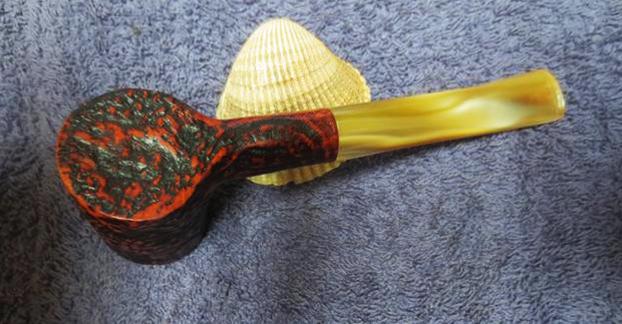
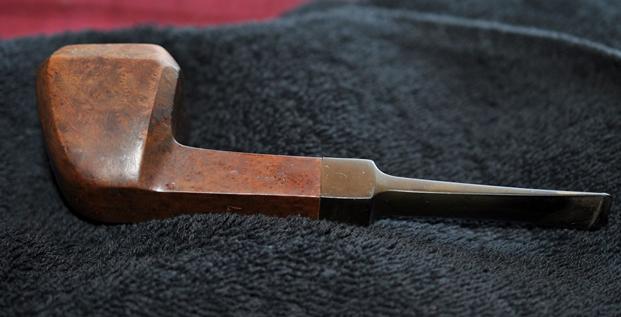
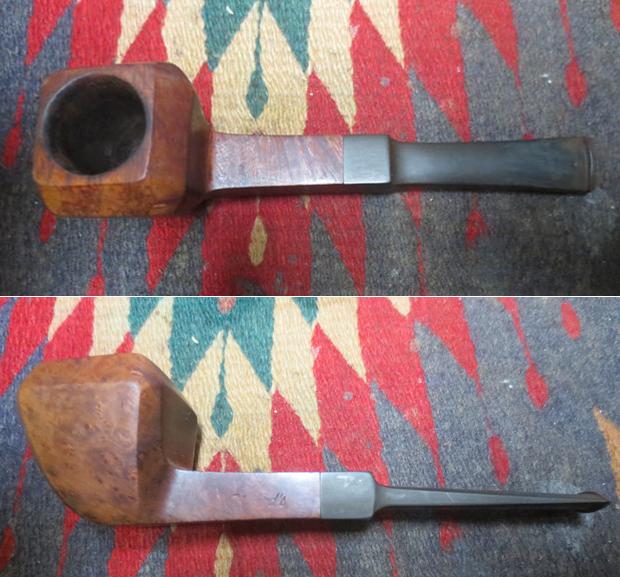
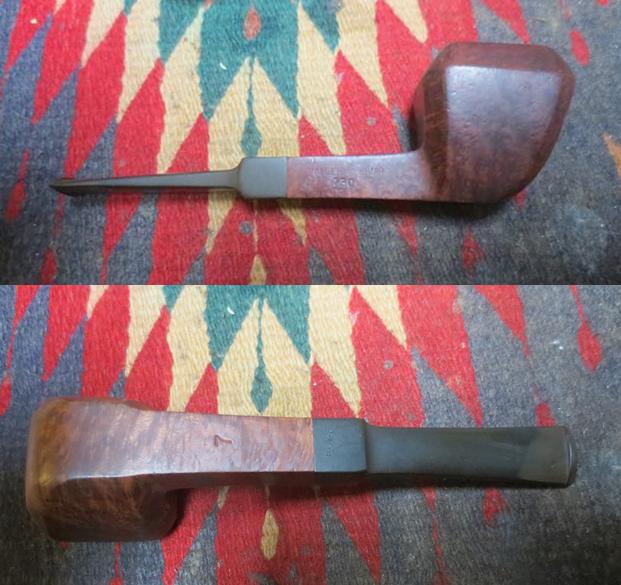
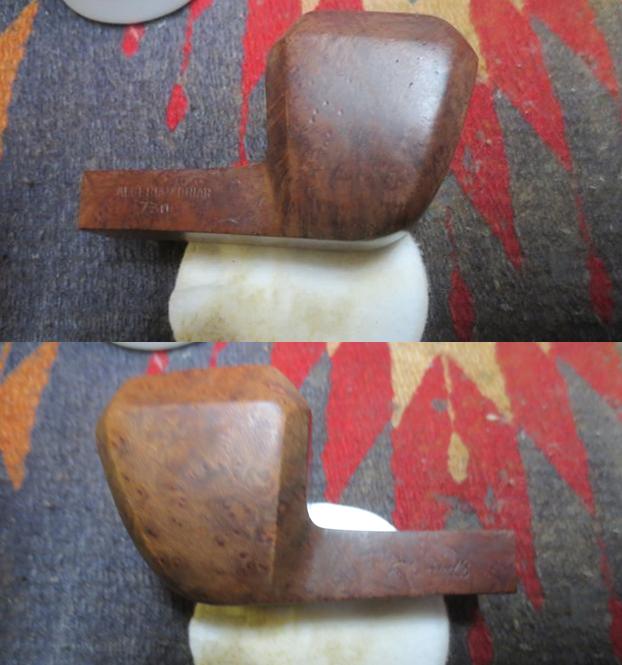
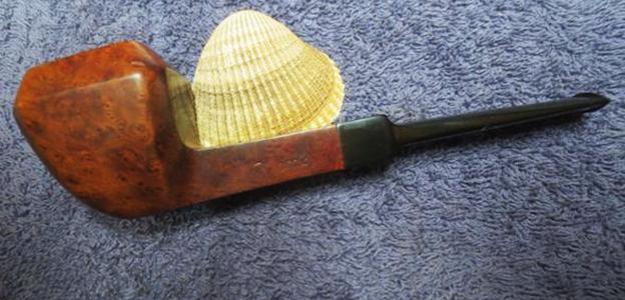
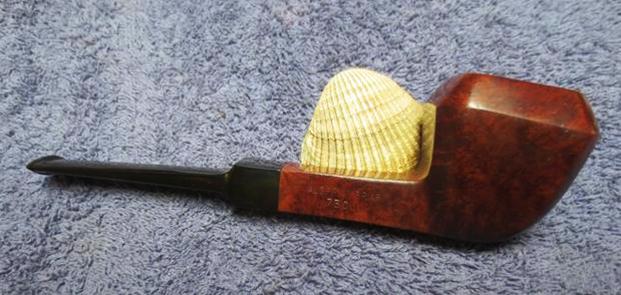
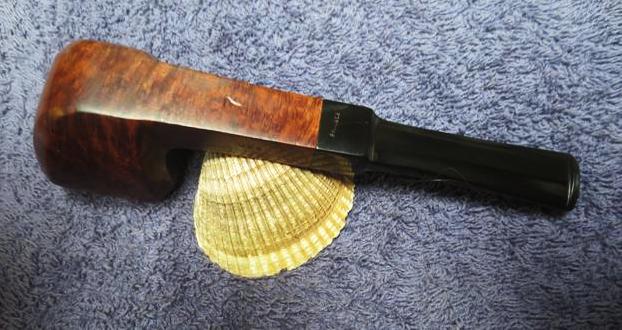
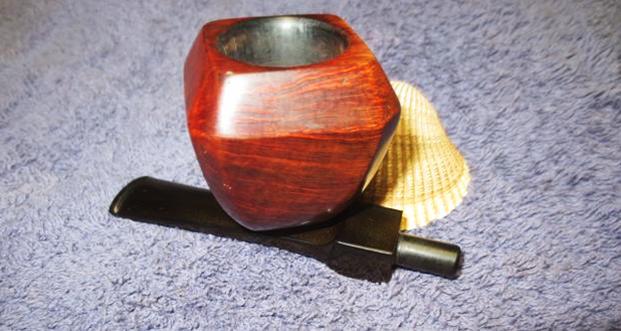
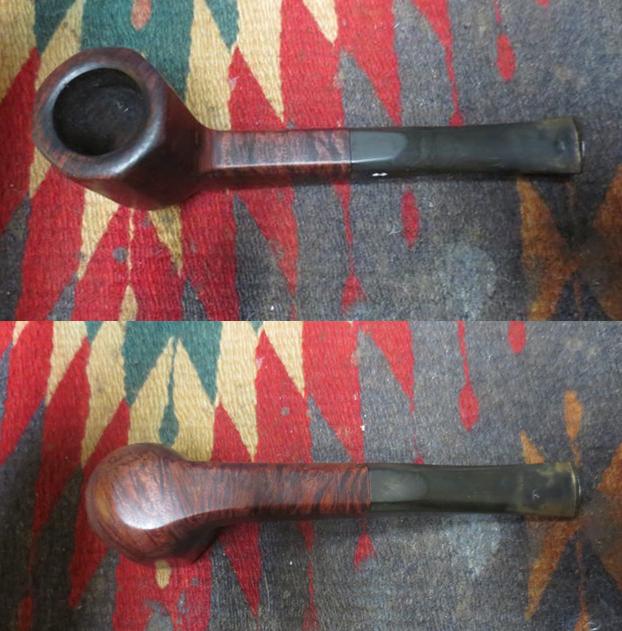
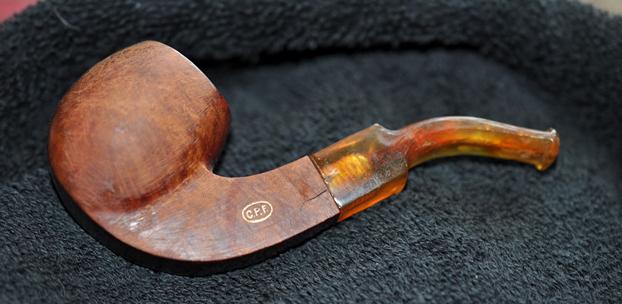
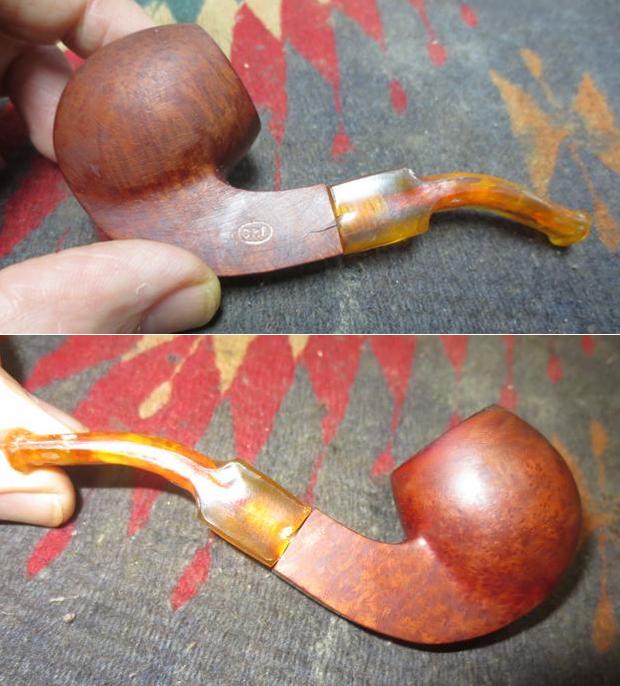
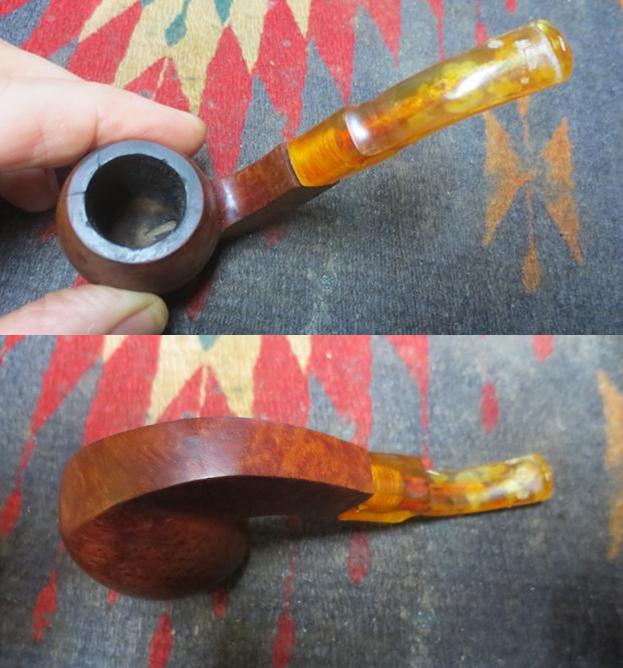
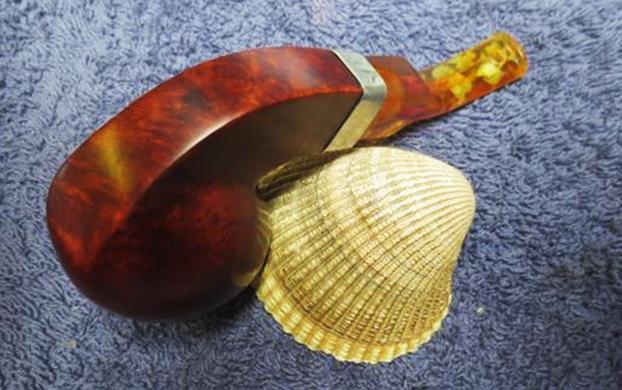
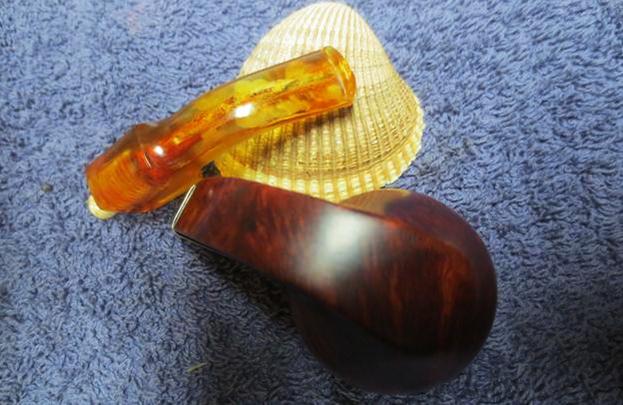
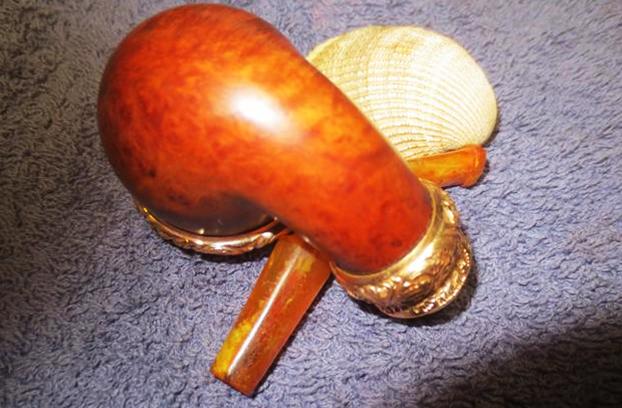
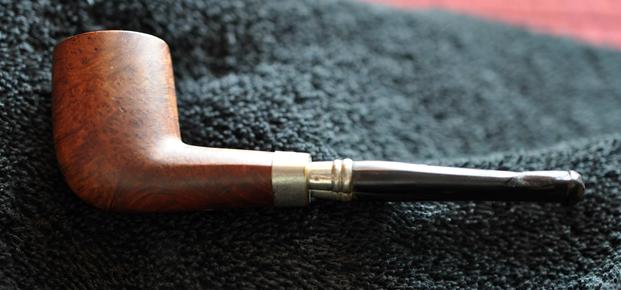
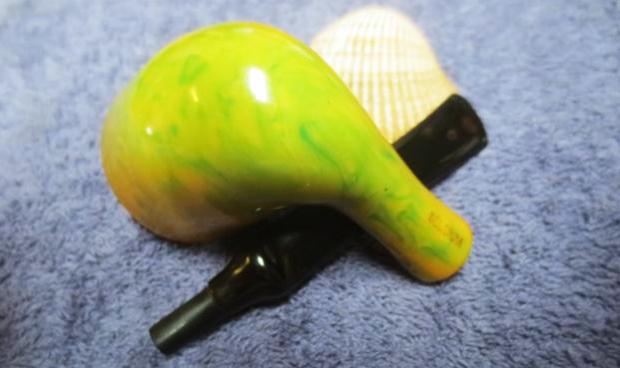
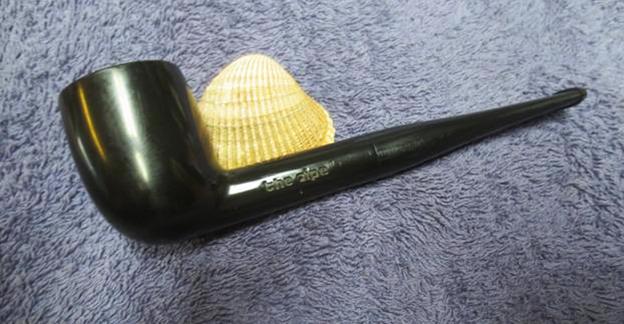
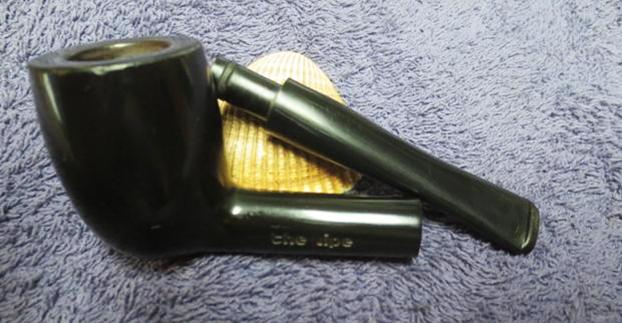
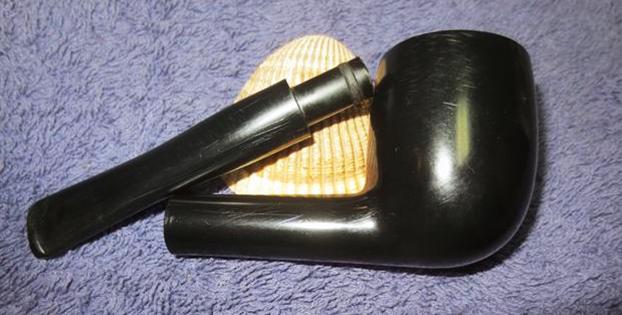
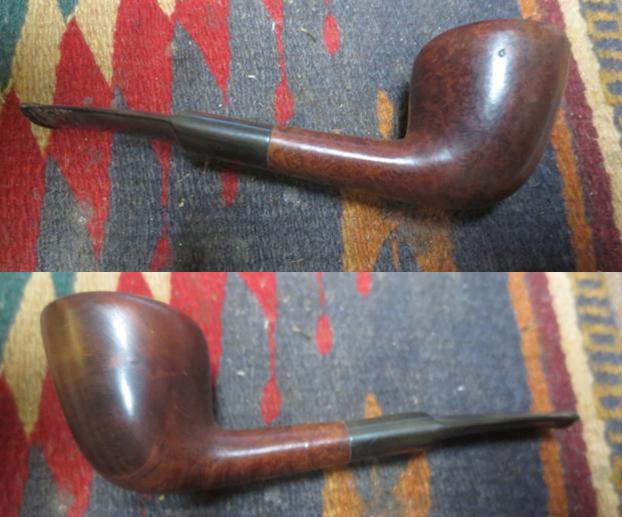
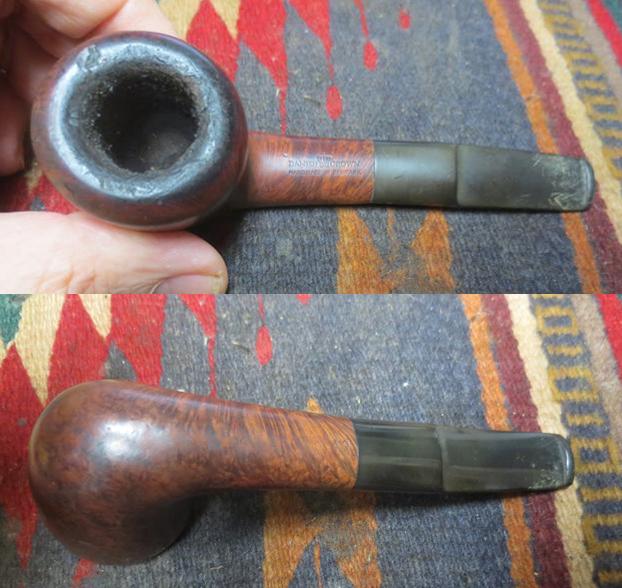
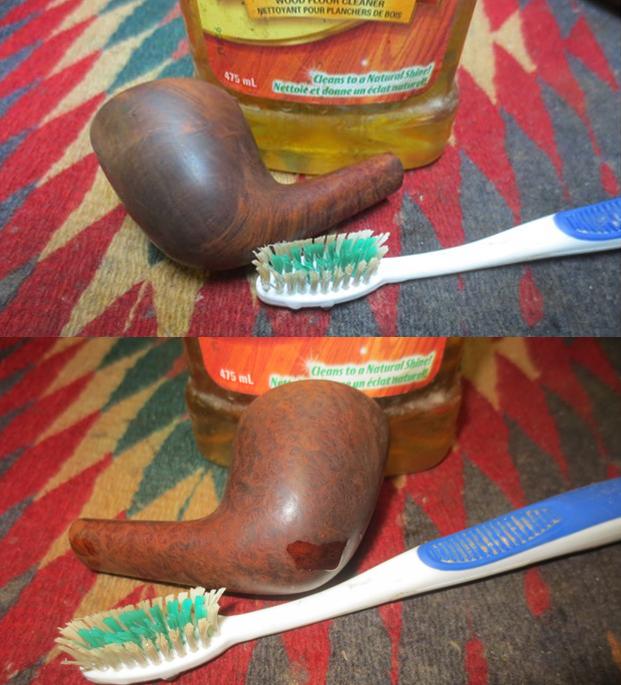
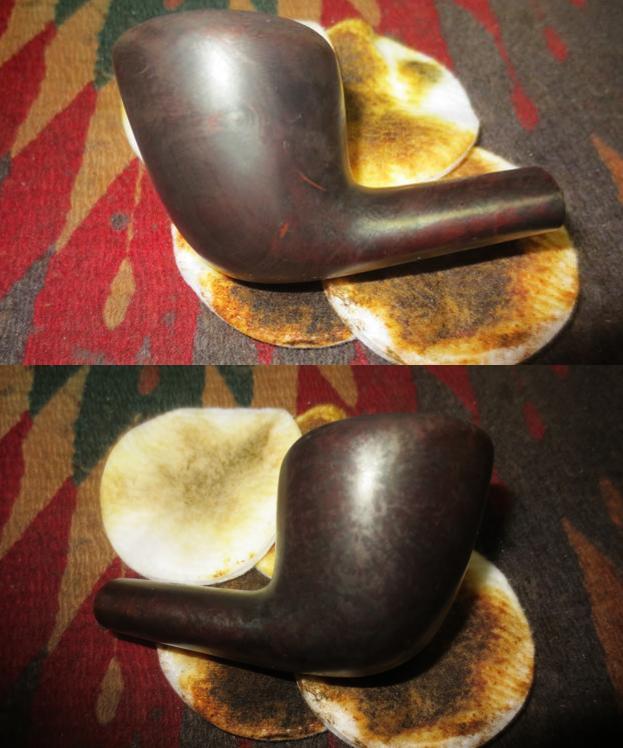
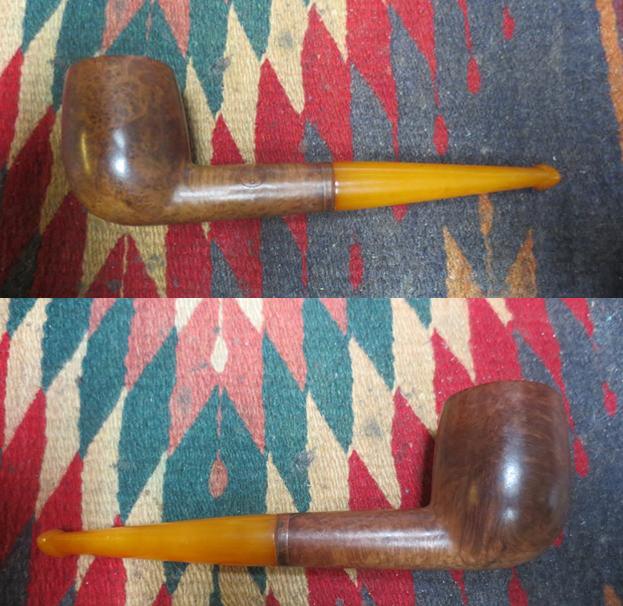
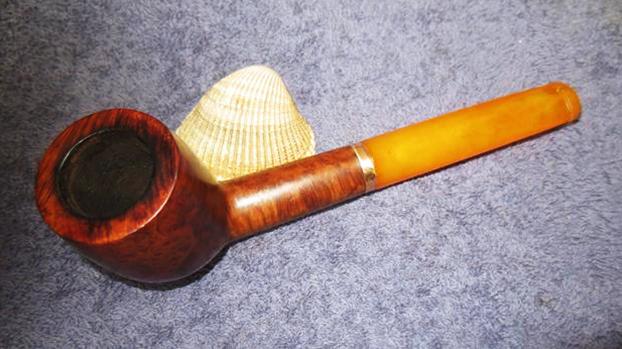
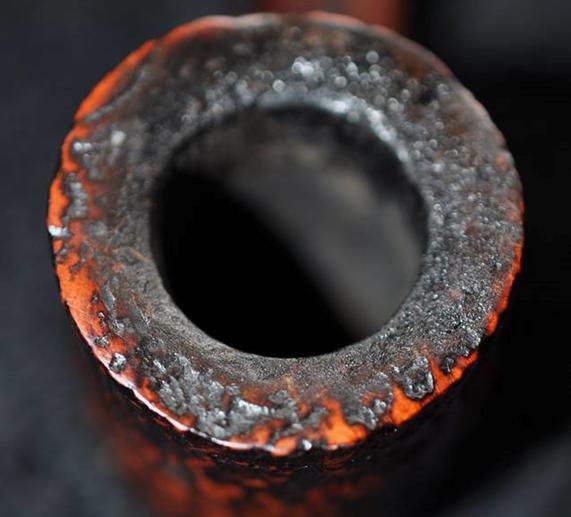
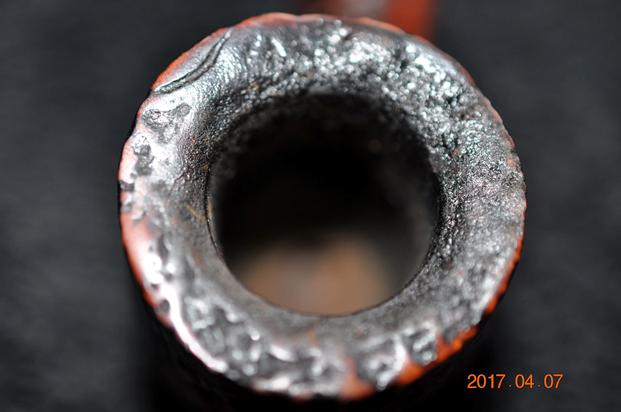
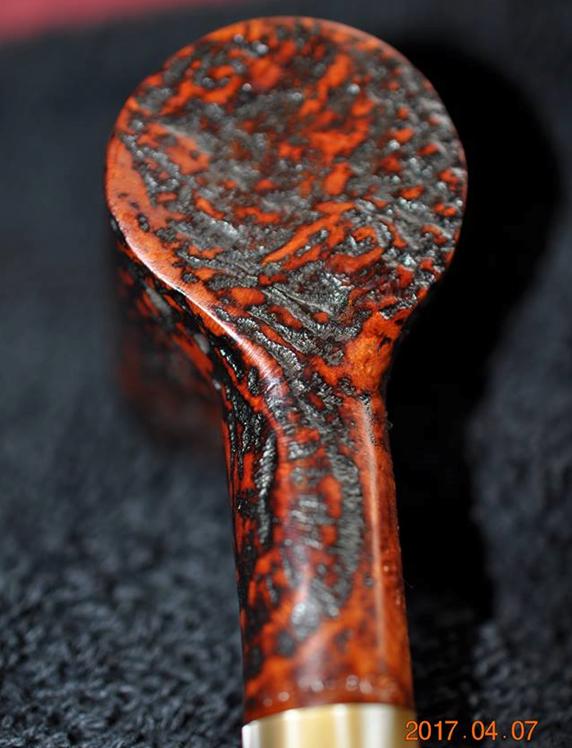
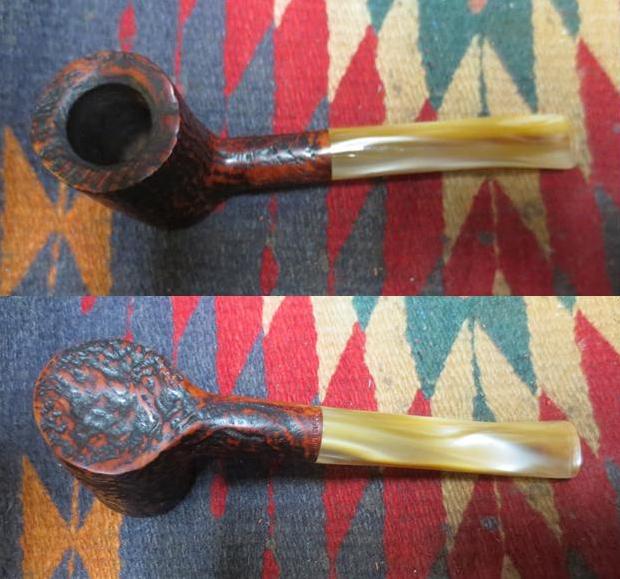
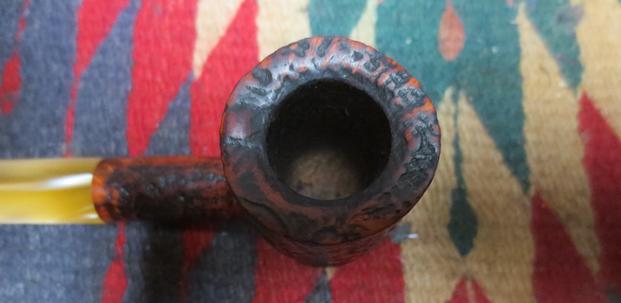
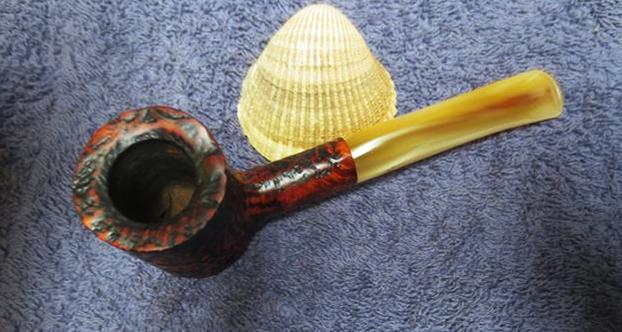
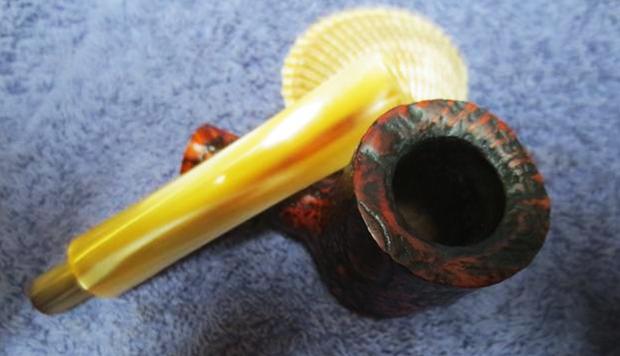
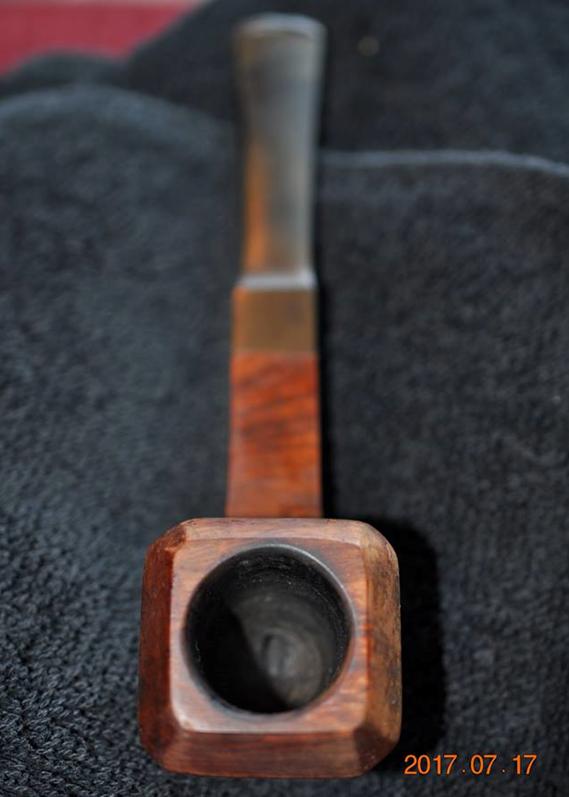
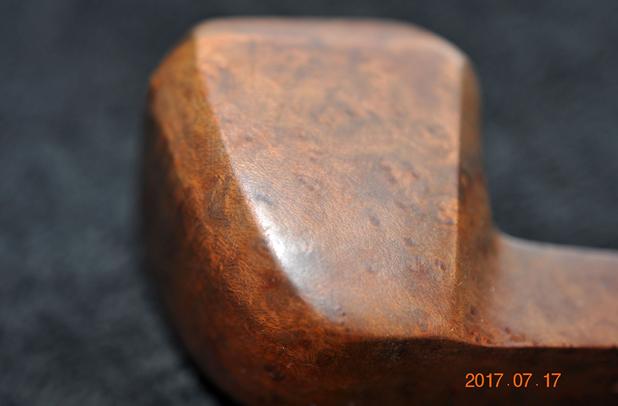
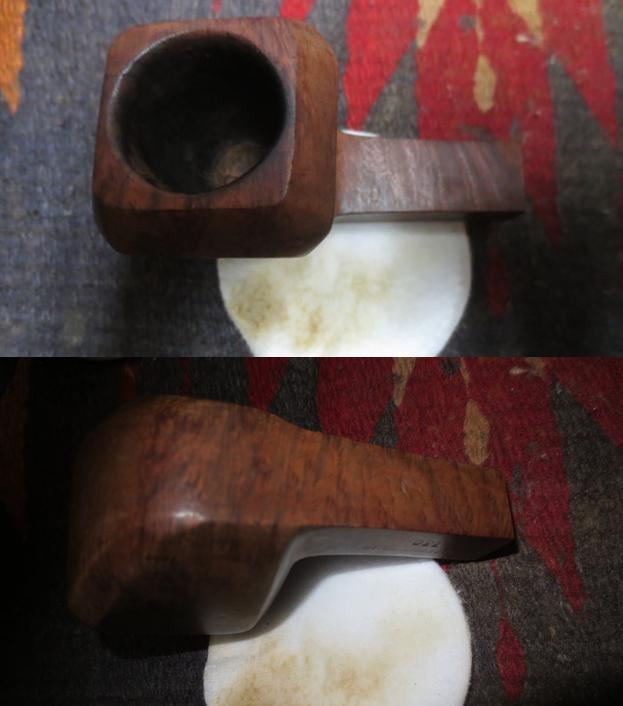
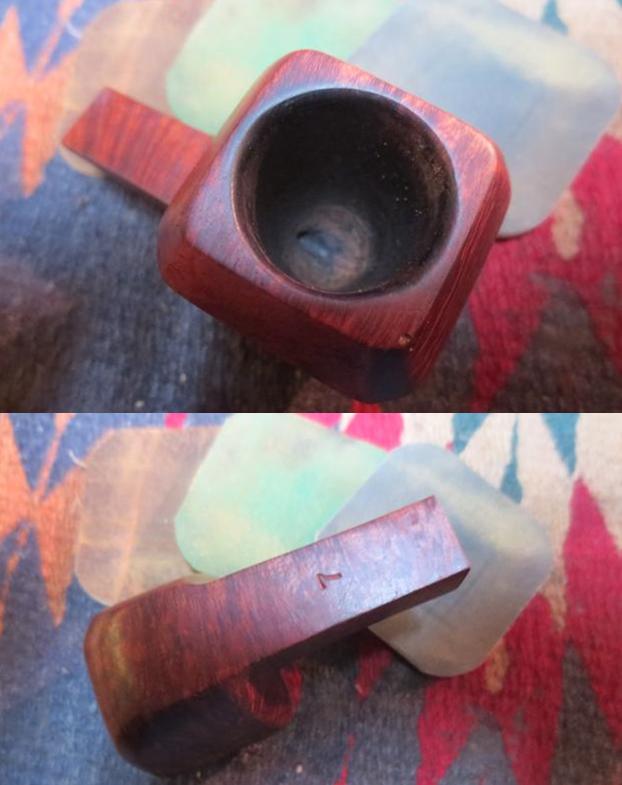
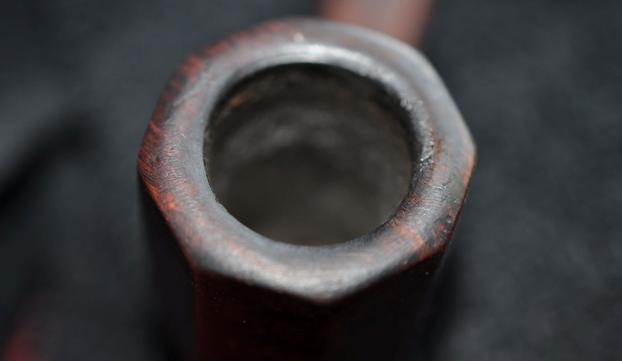
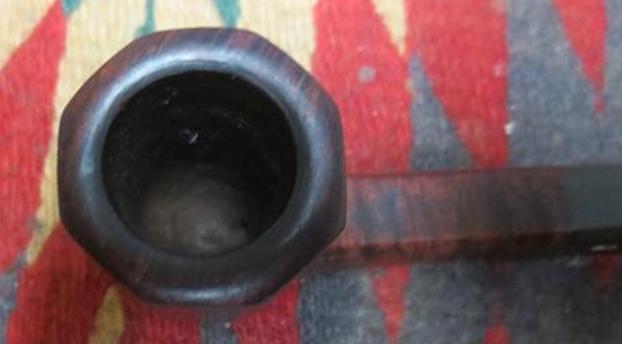
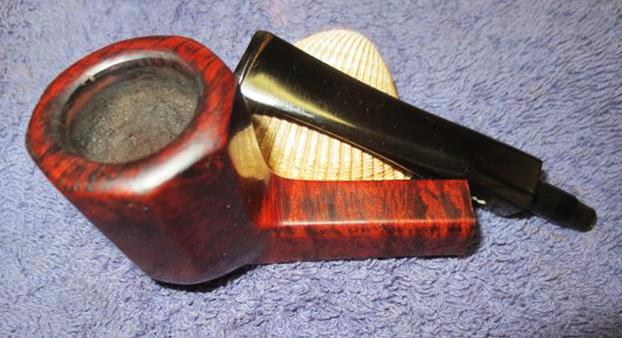
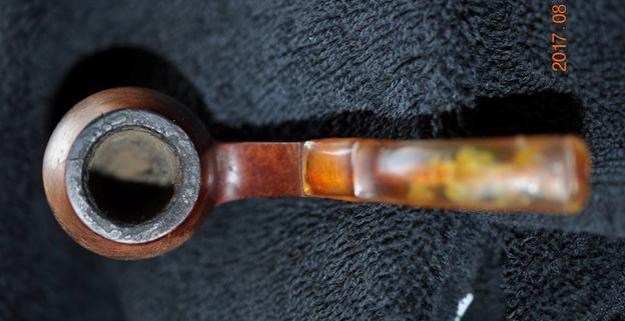
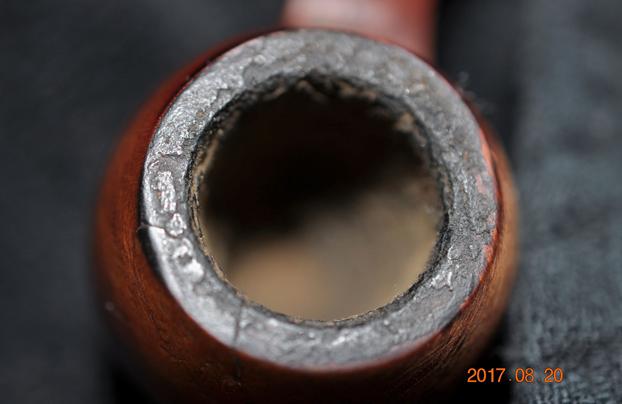
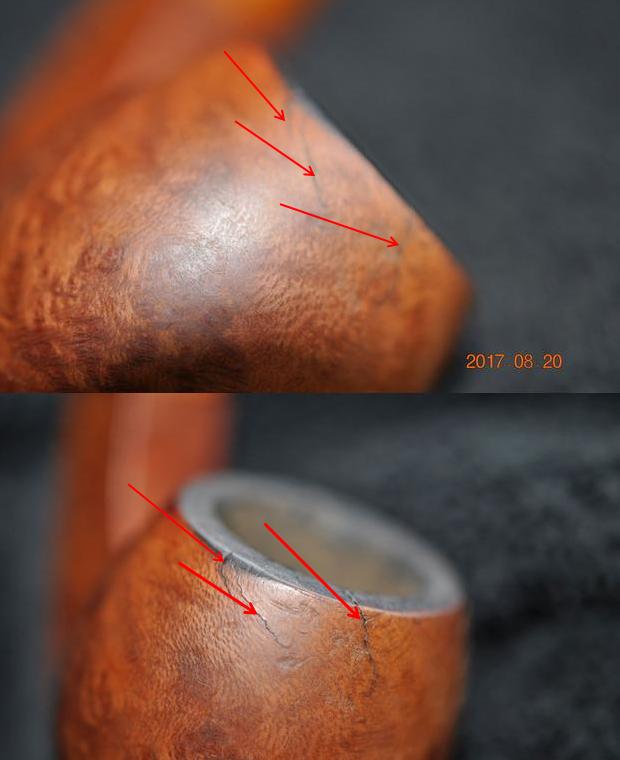
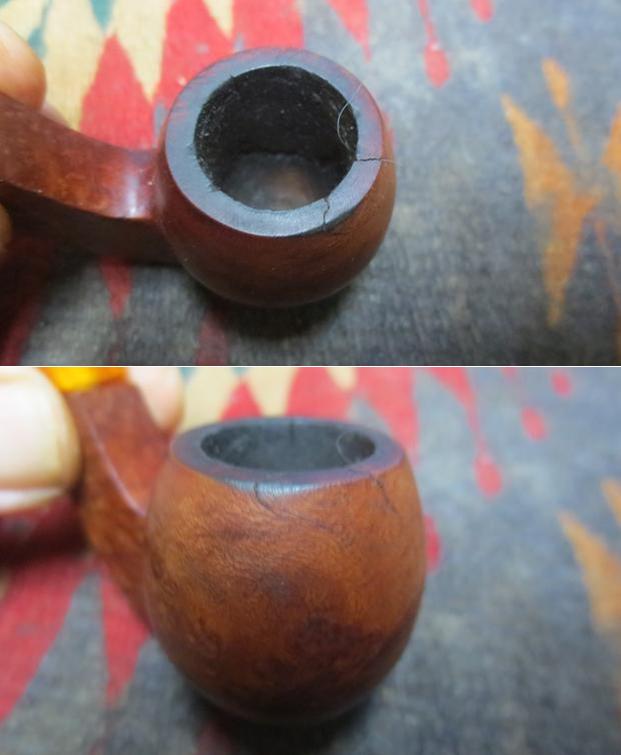
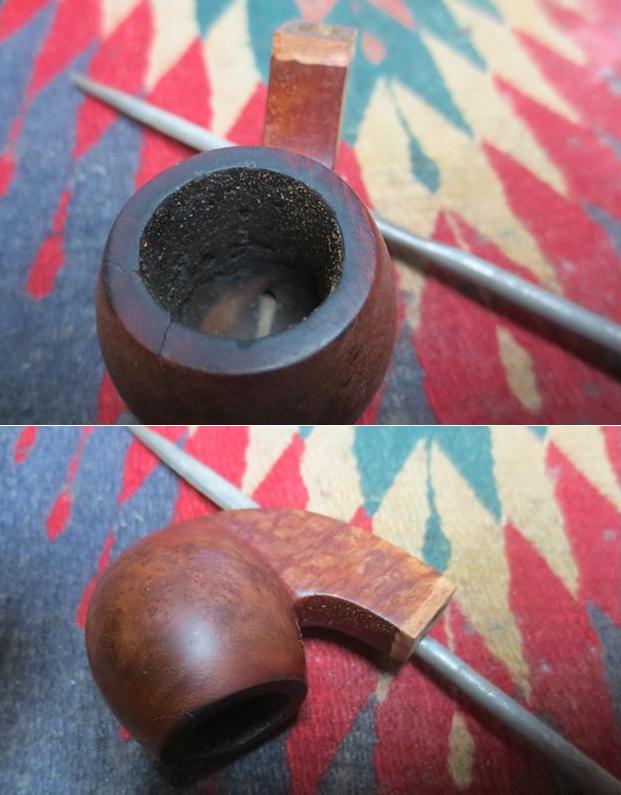
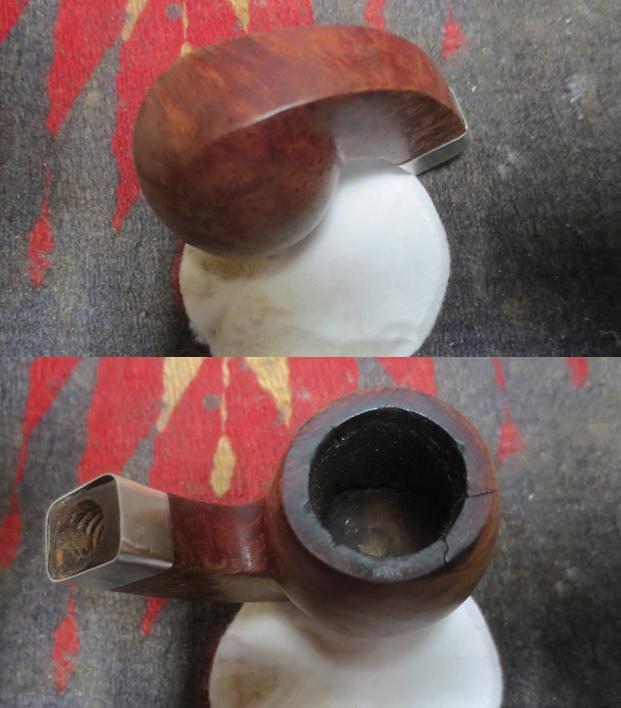
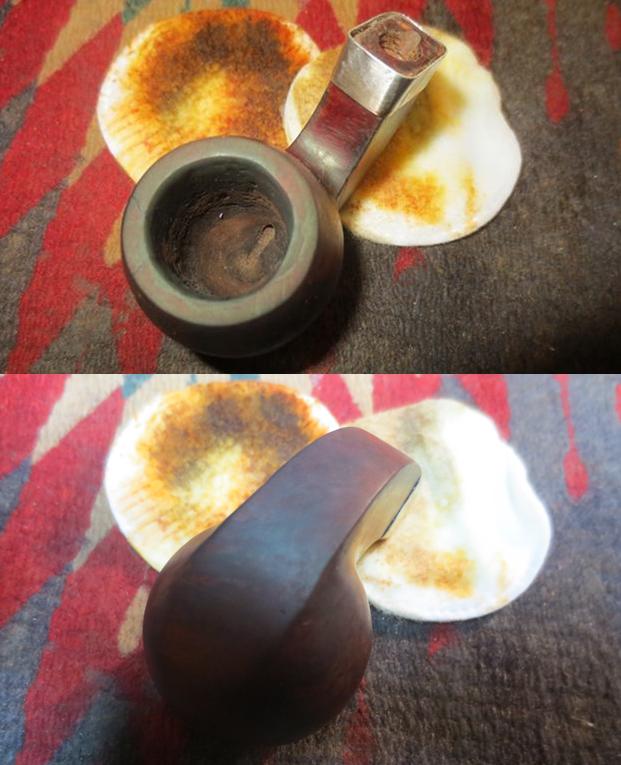
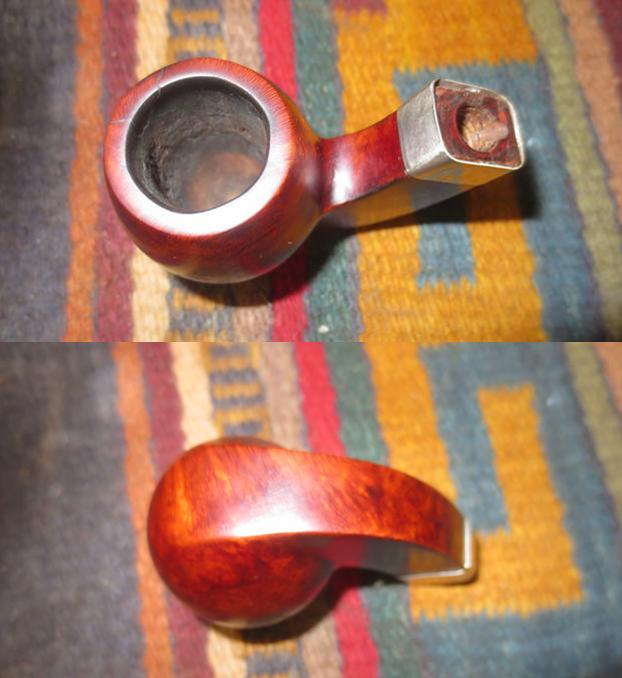
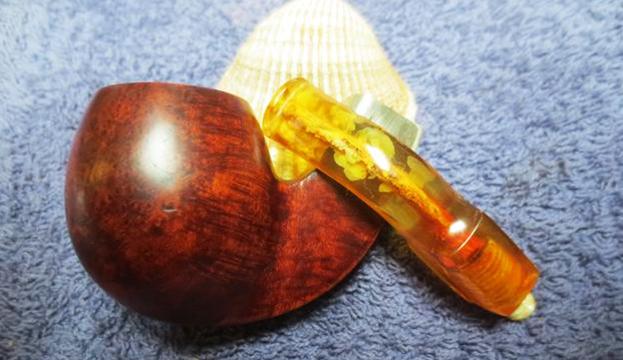
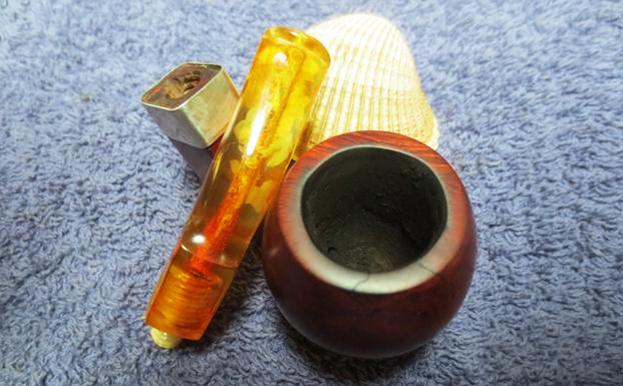
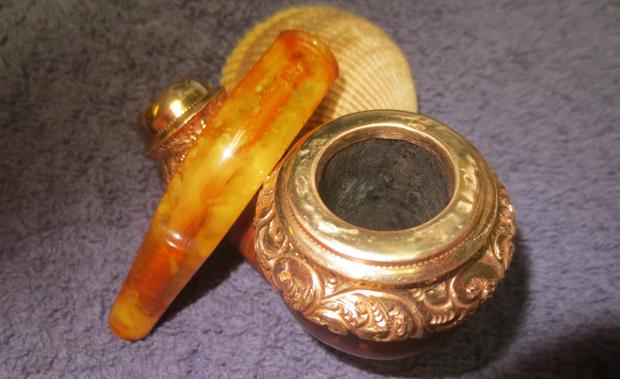
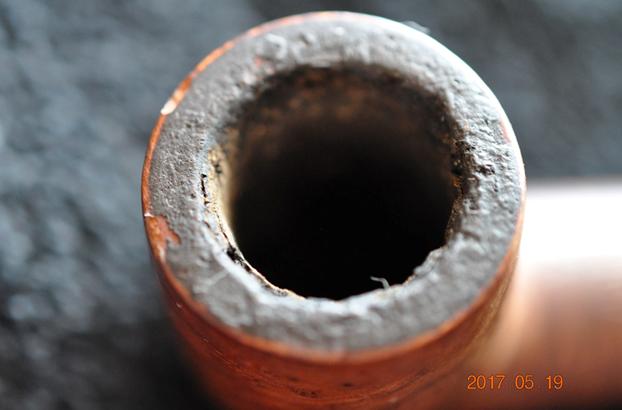
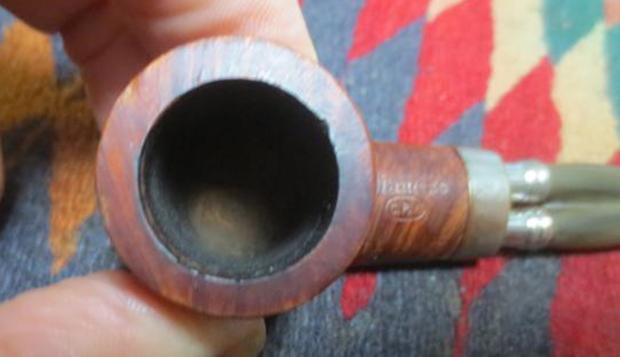
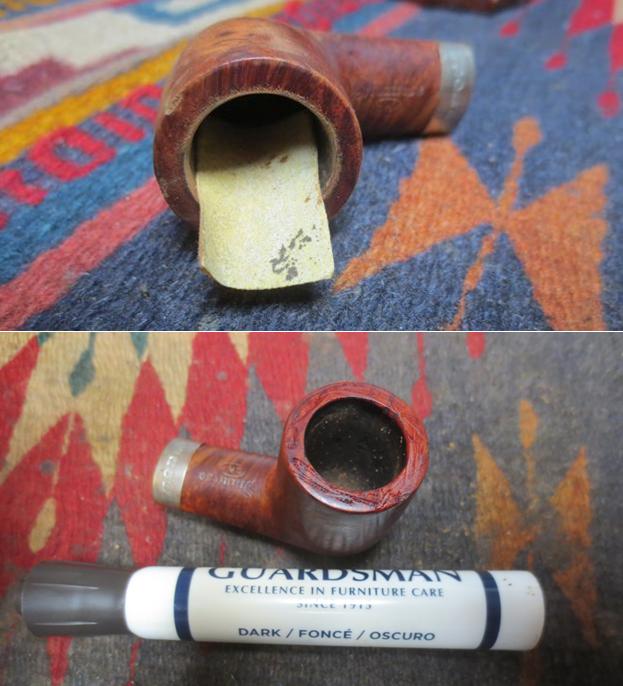
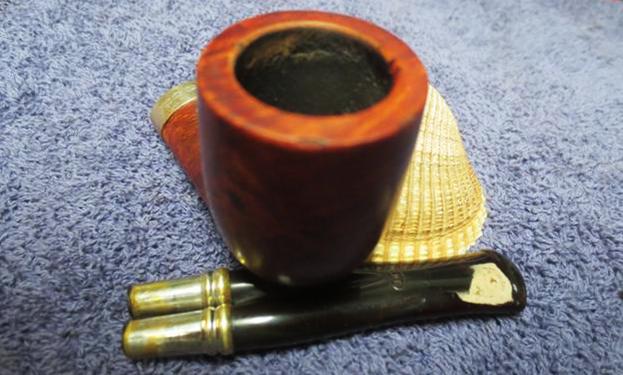
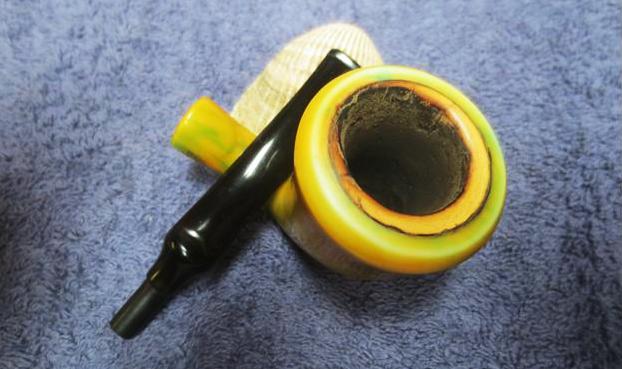
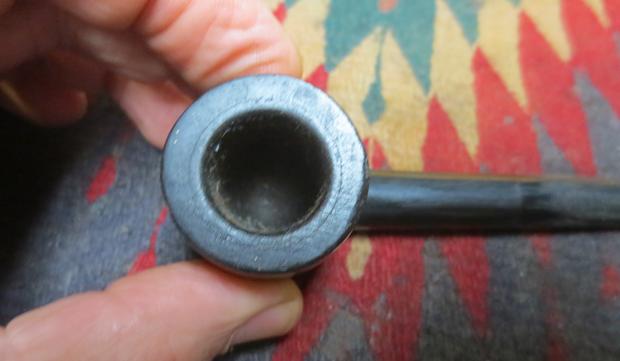
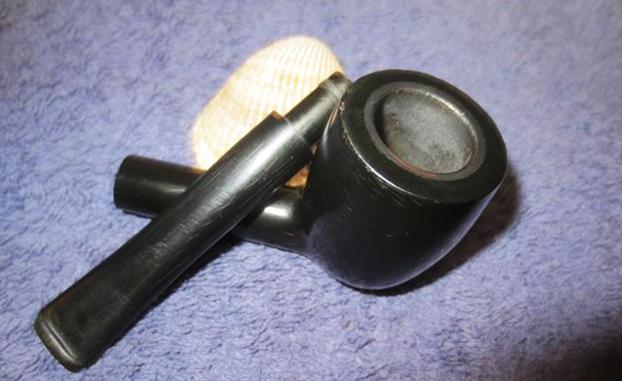
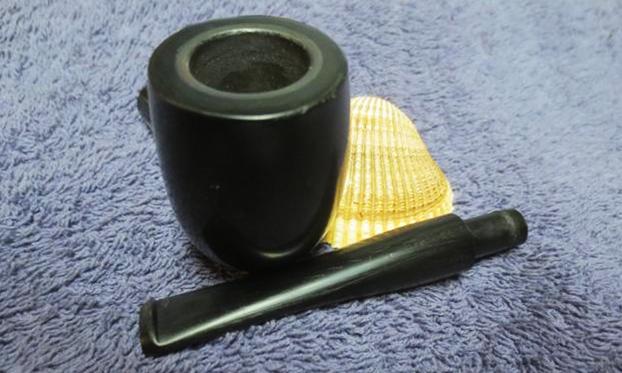
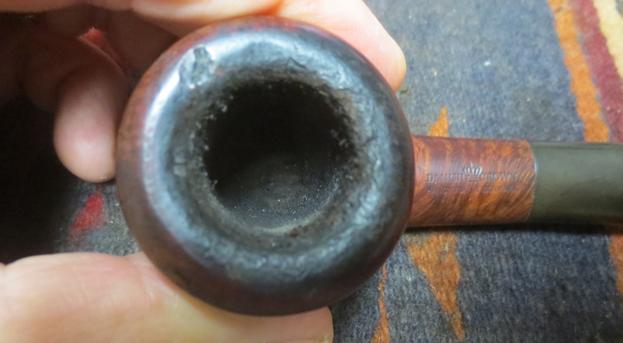
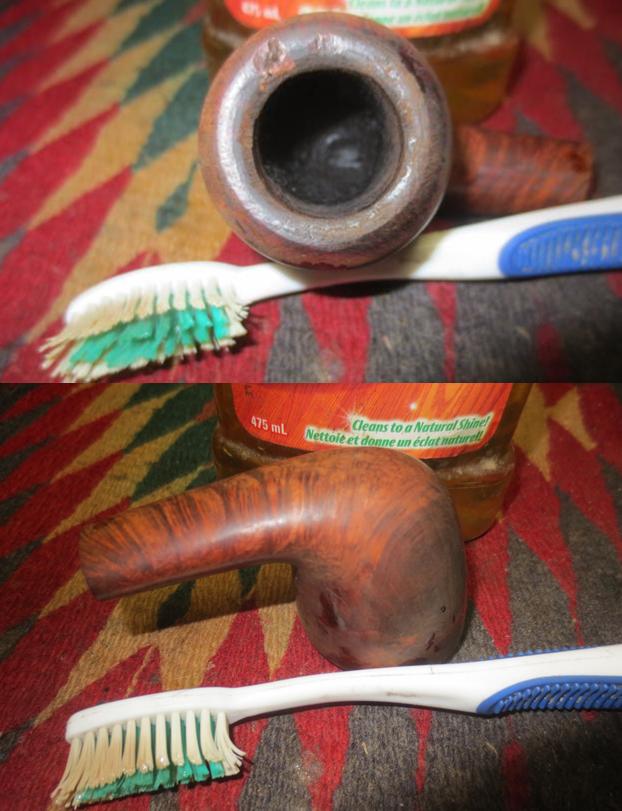
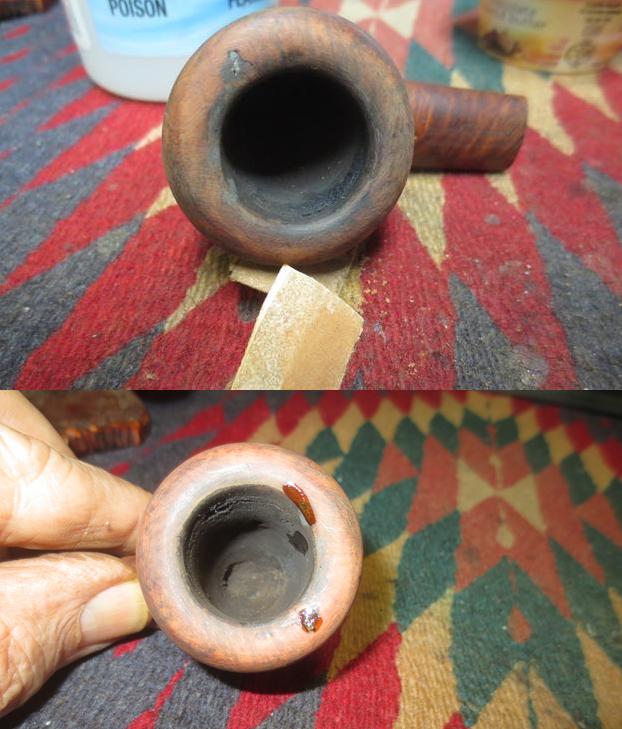
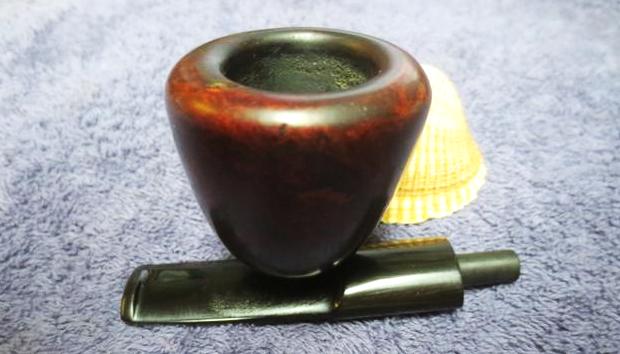
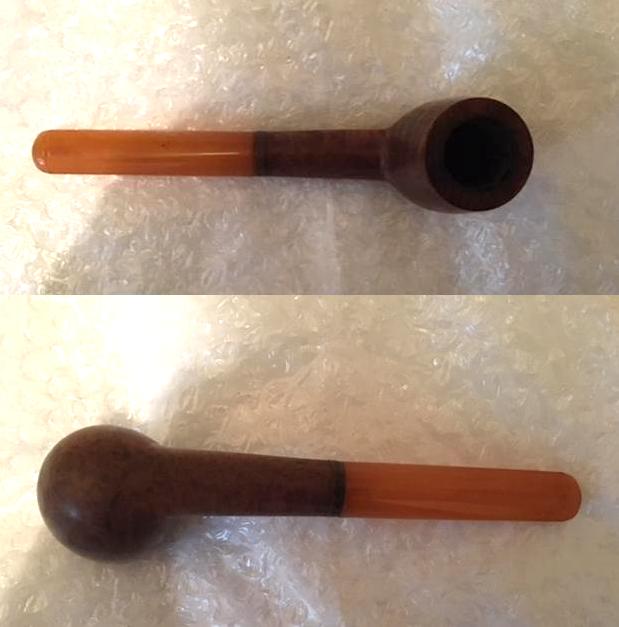
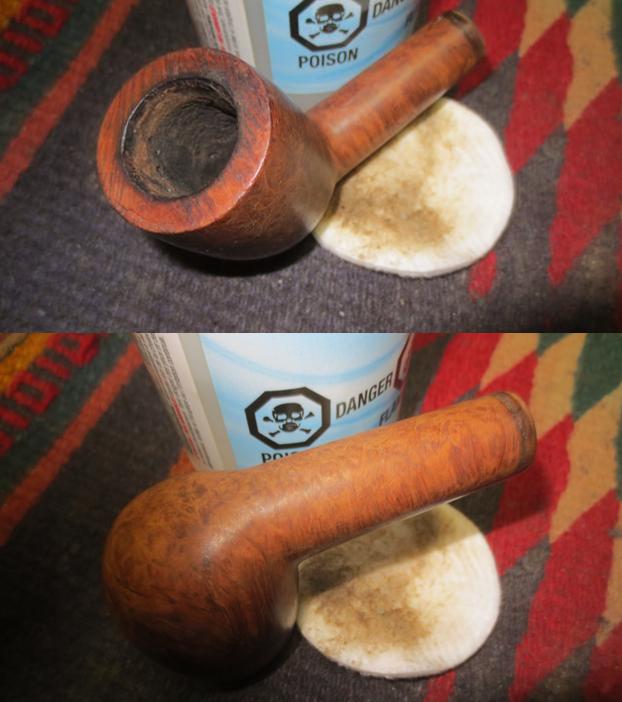
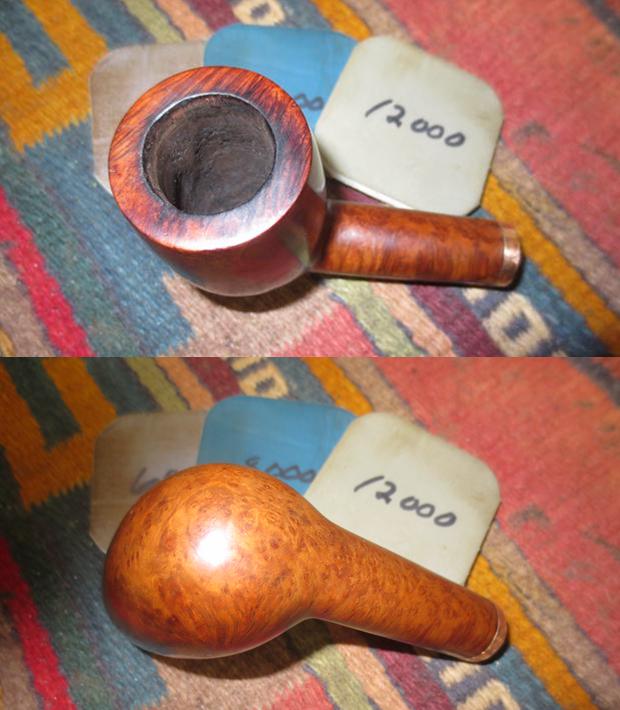
 I took a close up photo of the bowl and the rim to show the cake and the rim darkening. The inner and outer edge of the rim was in good condition. There was some light scratching on the rim top and some darkening all around the inner edge but it would clean up nicely.
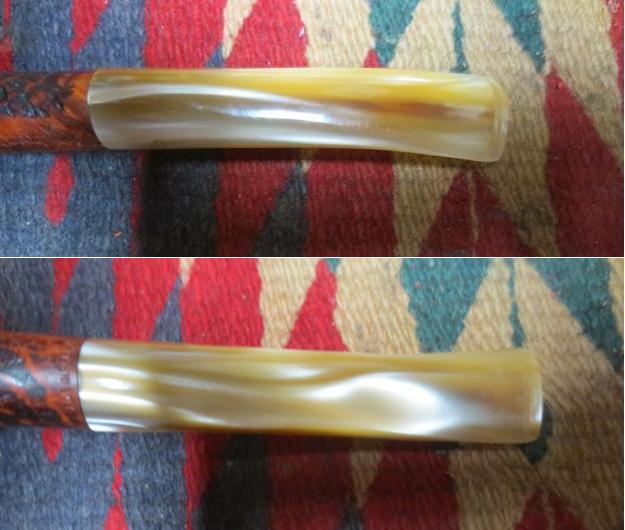
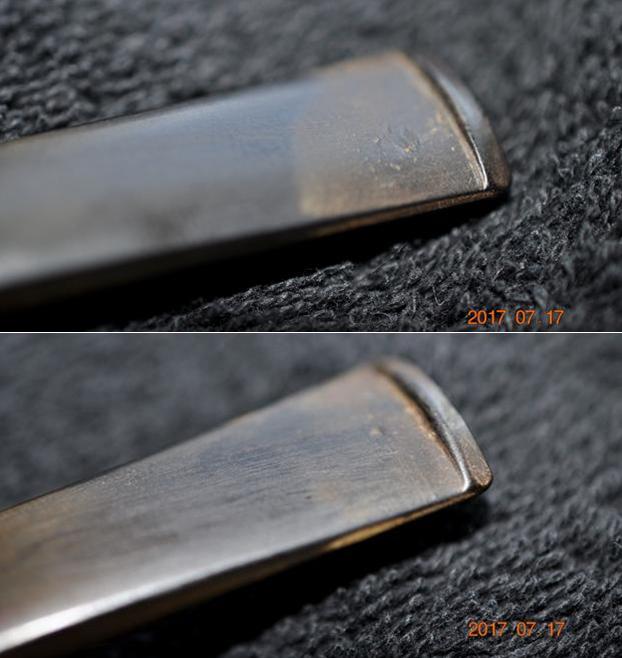
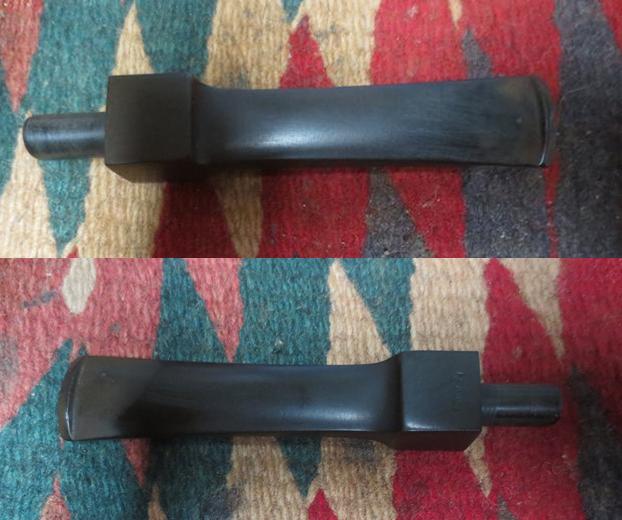
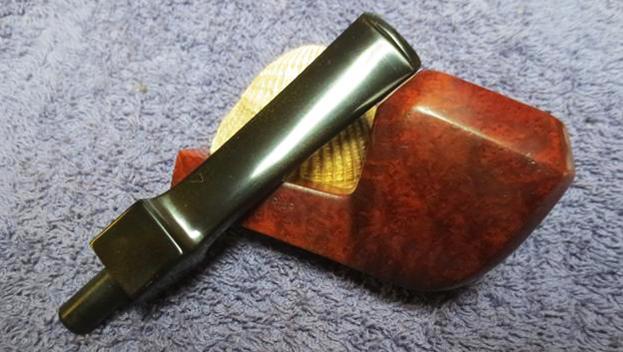
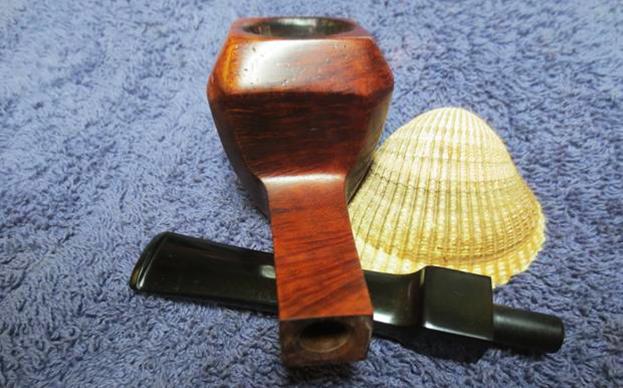
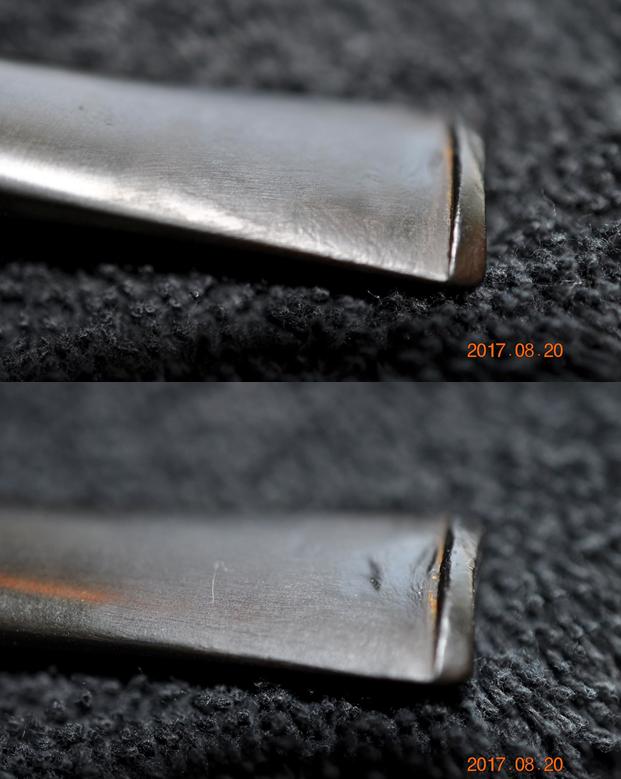
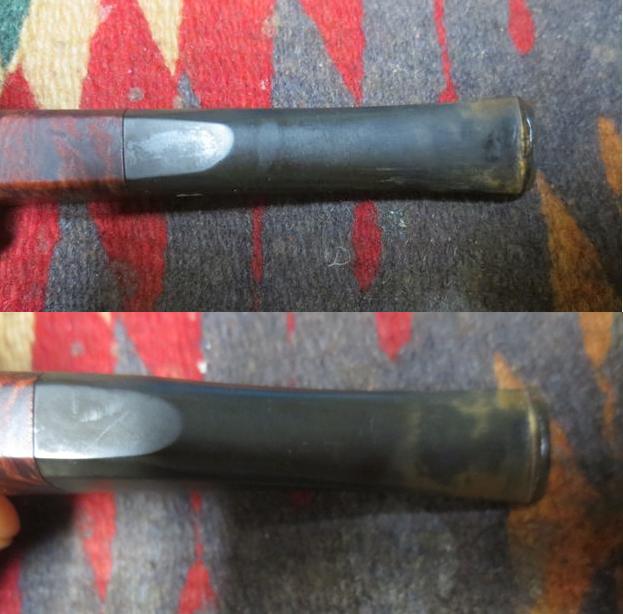
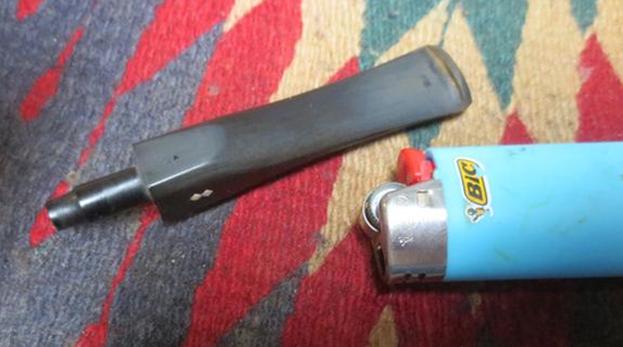
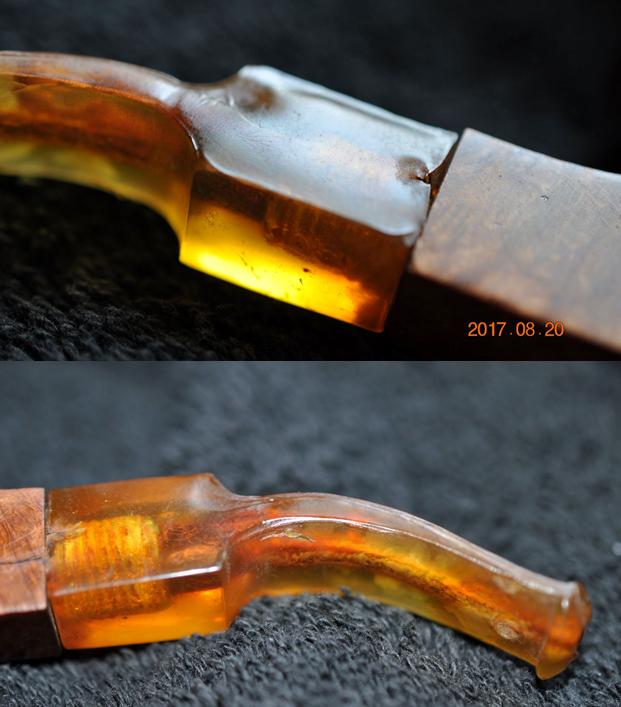
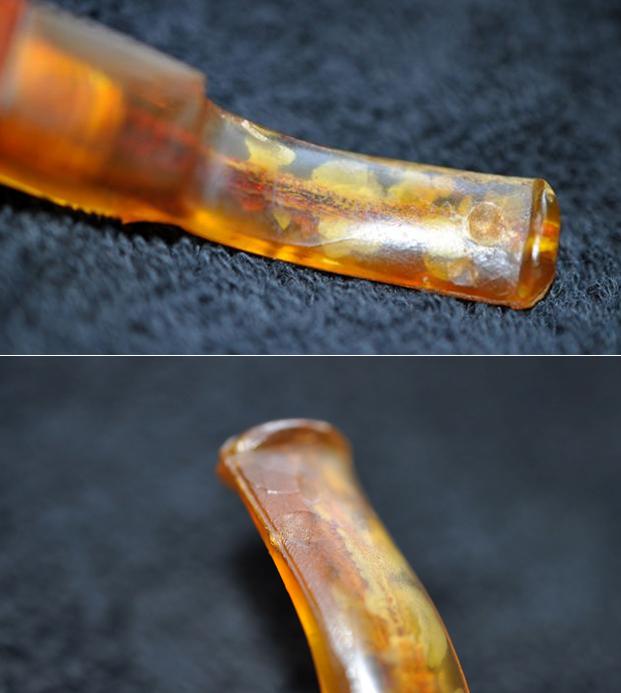
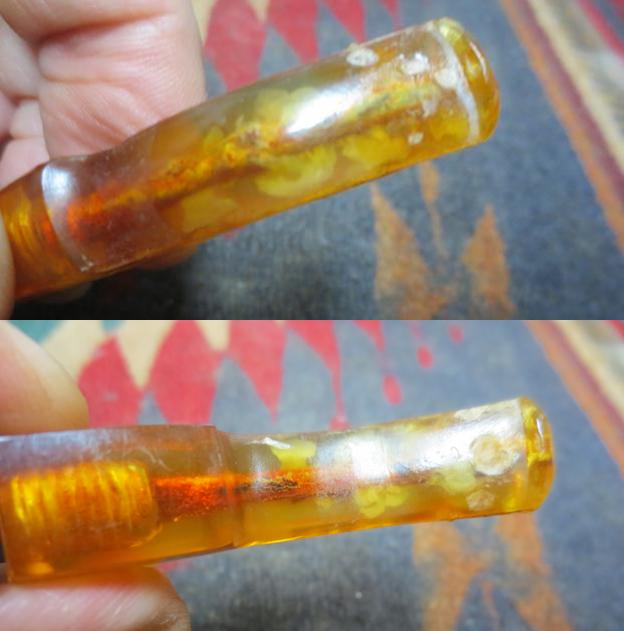
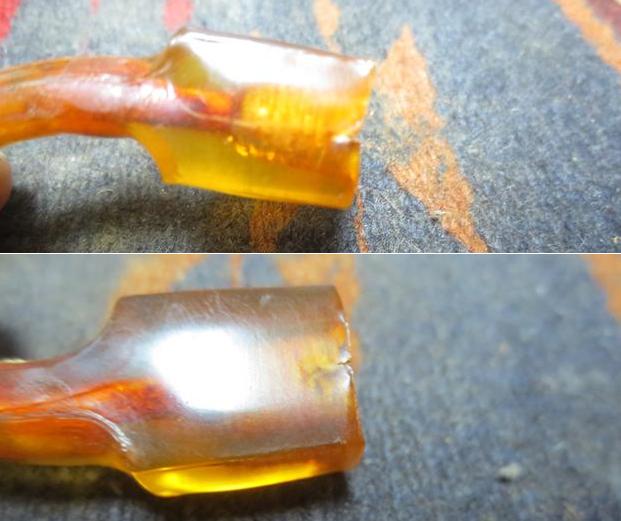
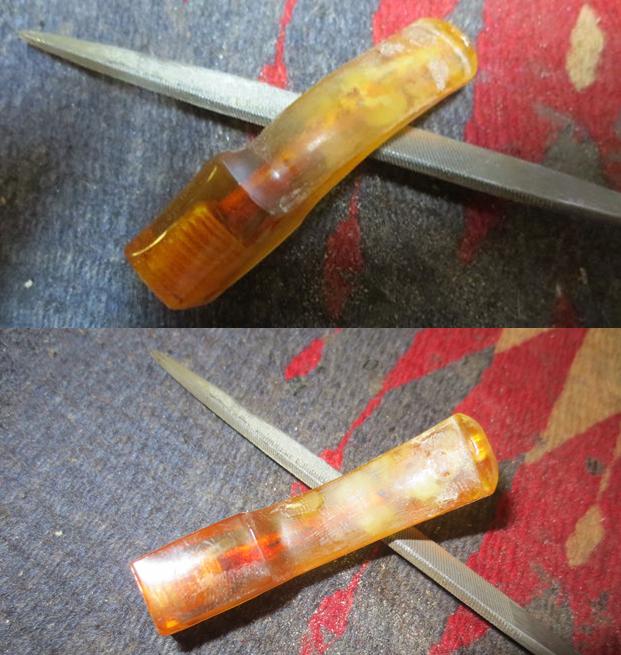
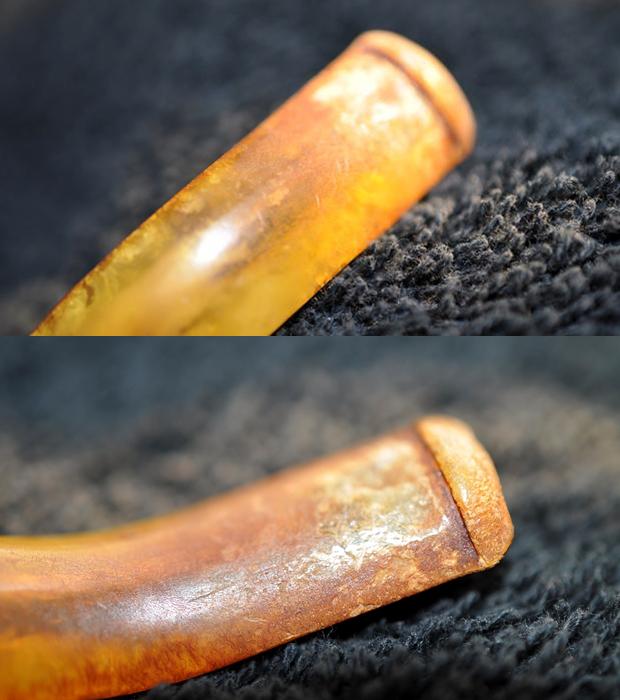
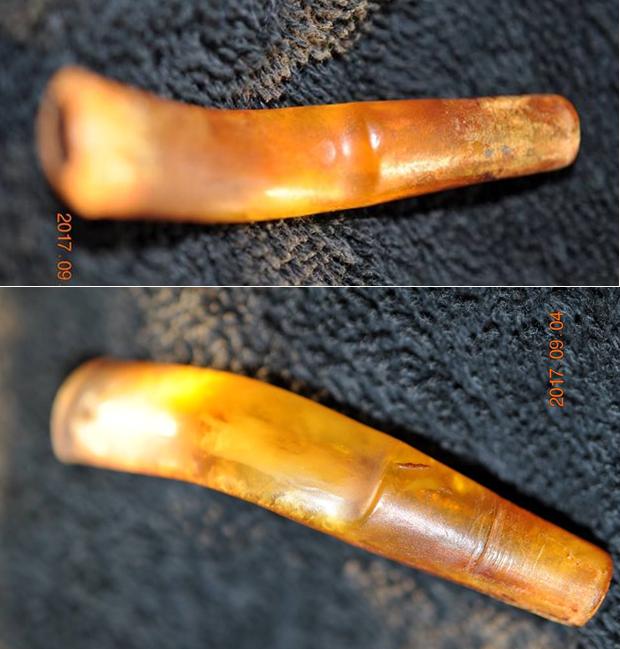
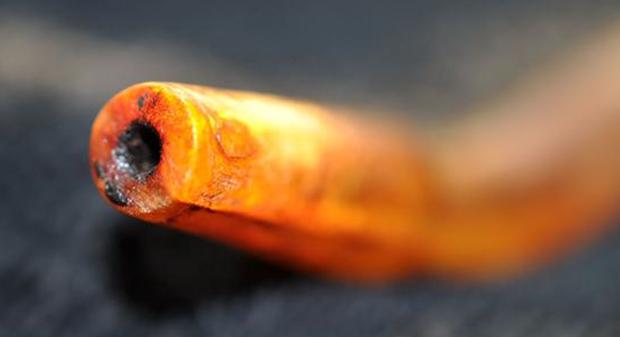
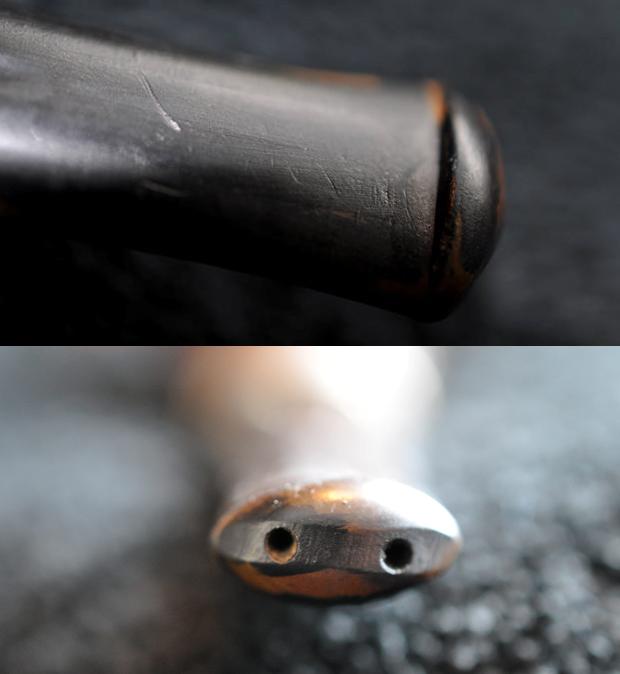
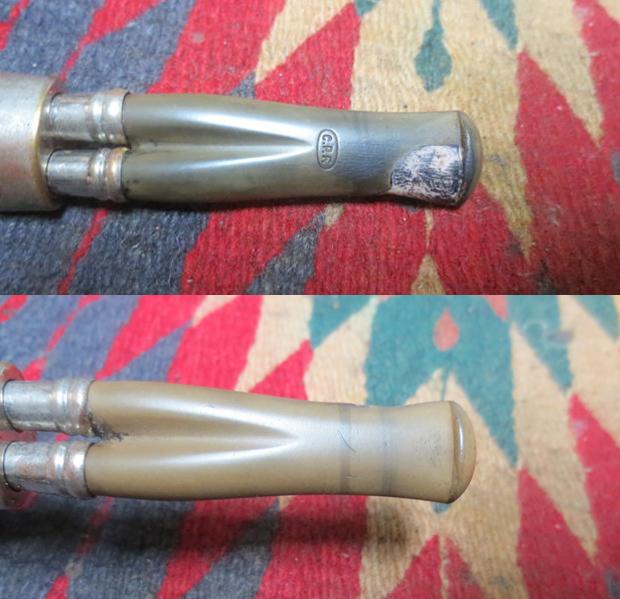
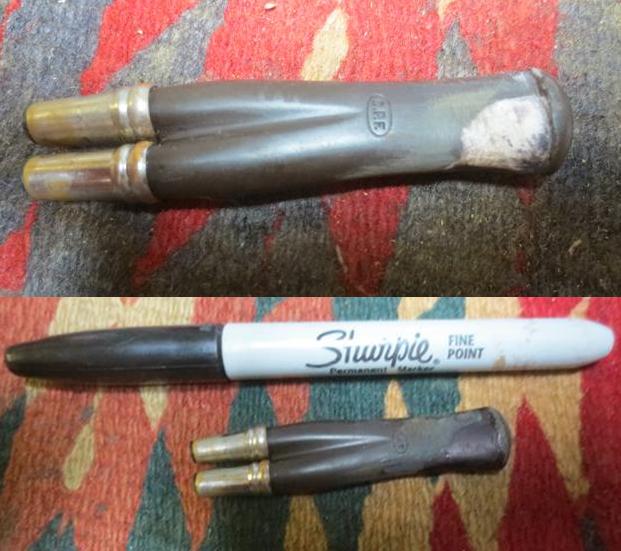
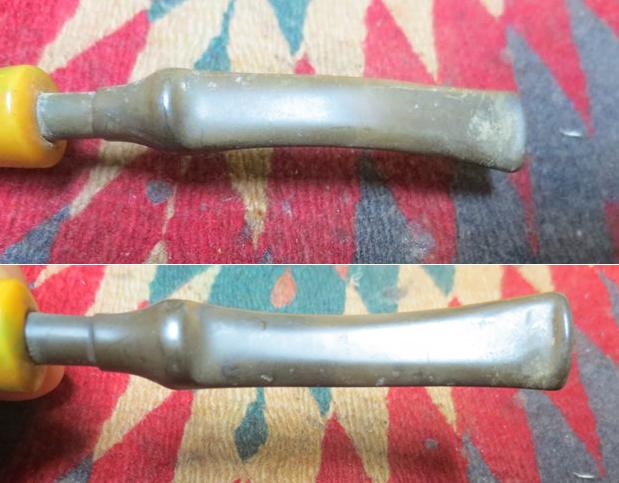
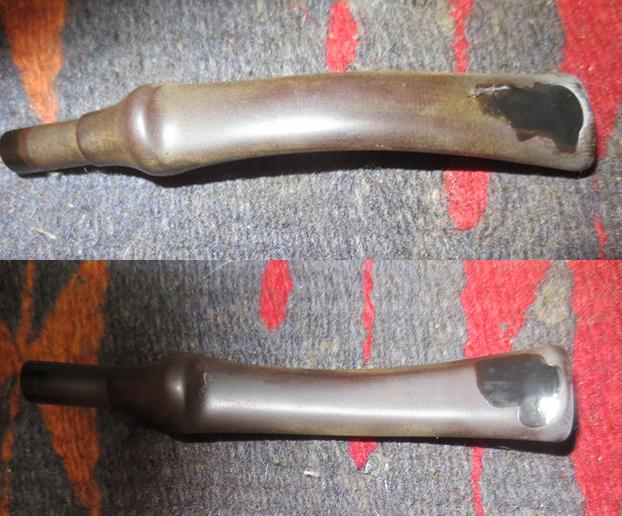
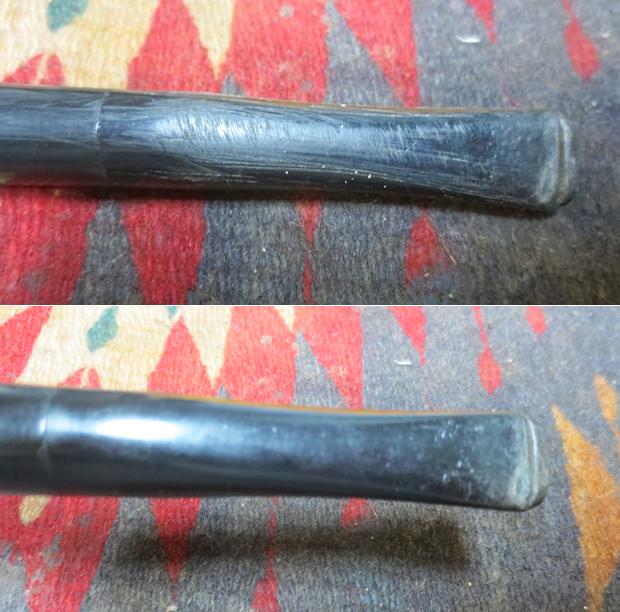
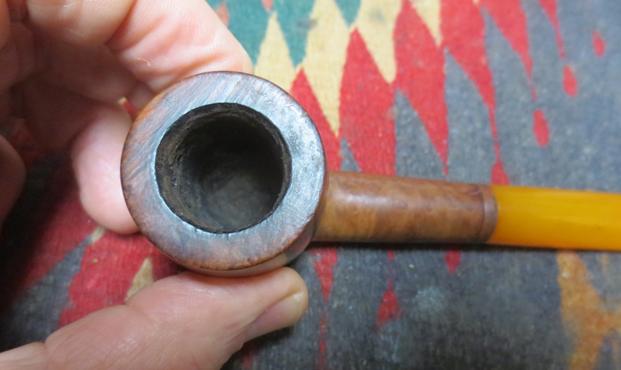 The stem was in pretty good condition. There was some light tooth chatter on the button surface and a tooth mark on the right side of the top of the button. There was a deep tooth mark on the underside of the stem near the button as well.
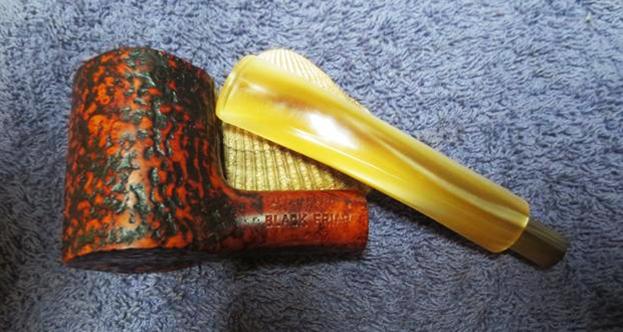
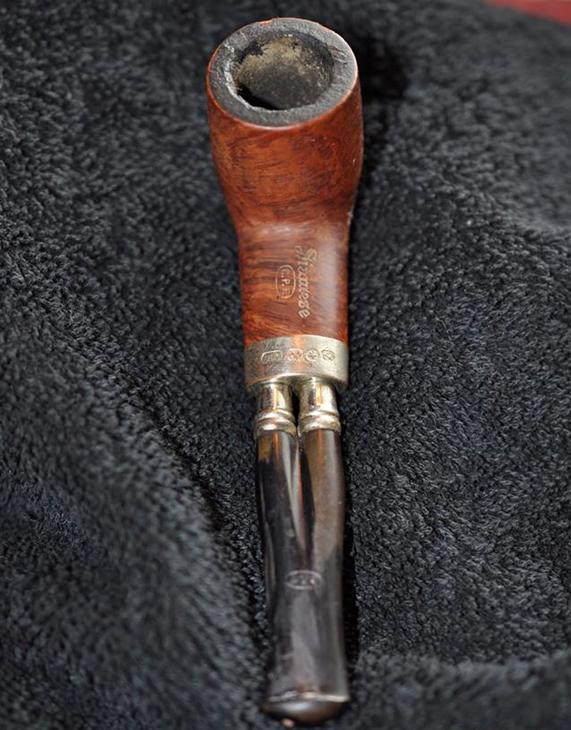
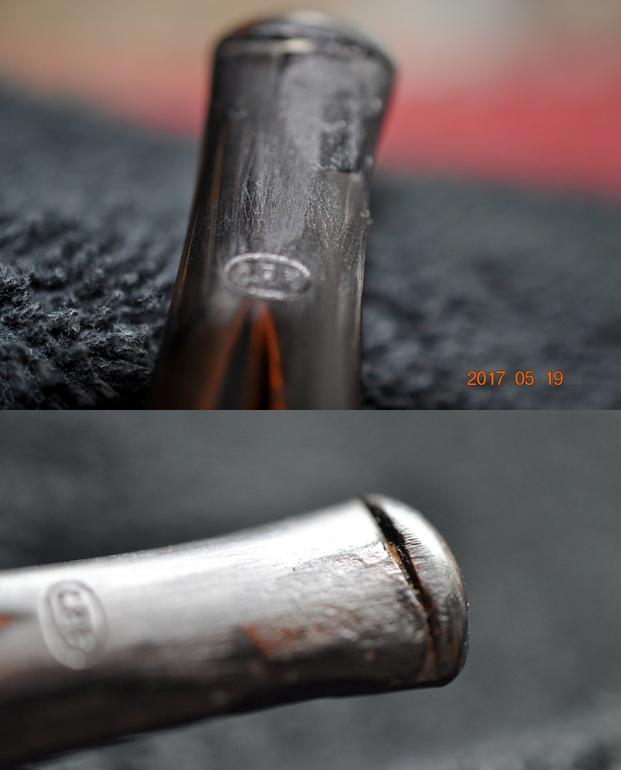
 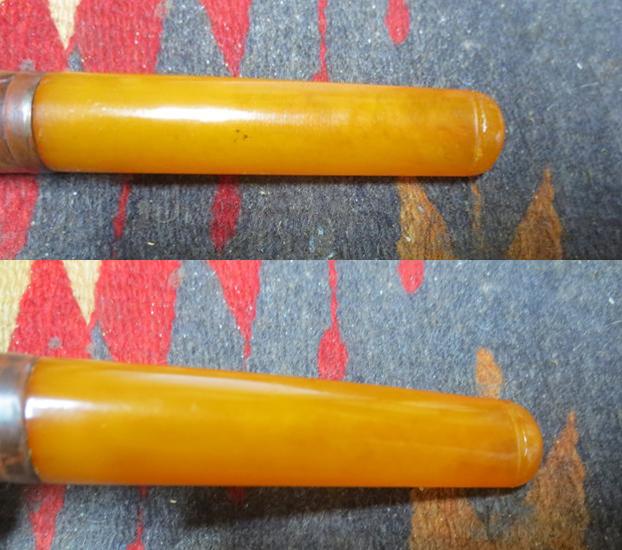 I took another photo of the stamping on the shank and was able to get a clearer photo.
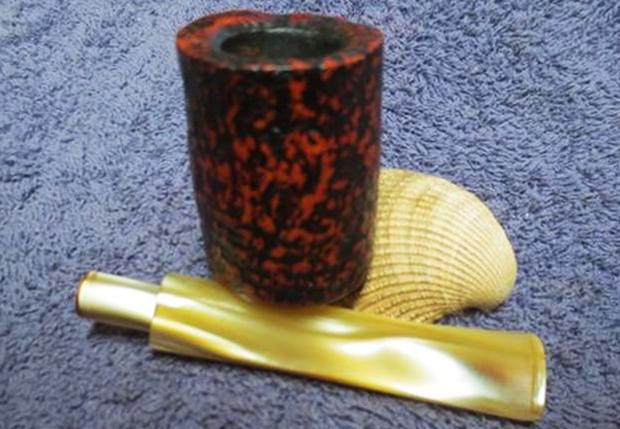
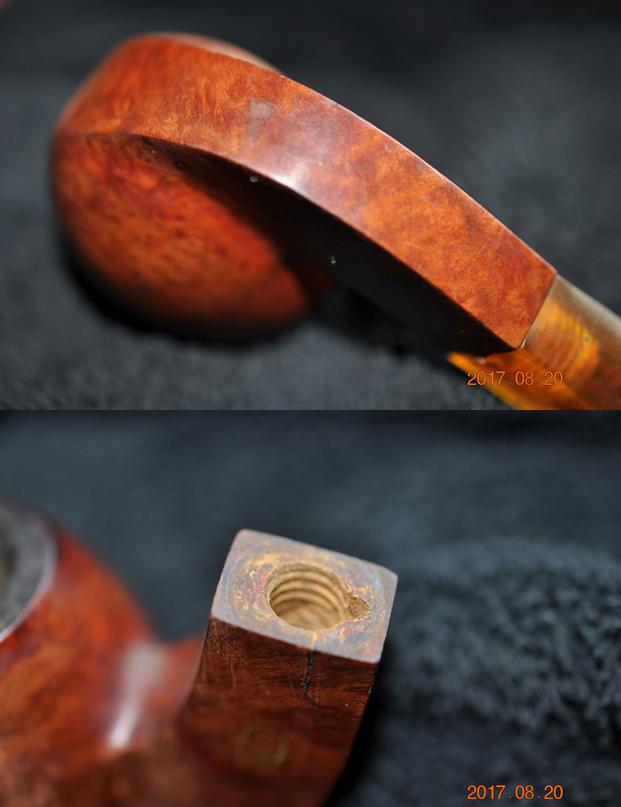
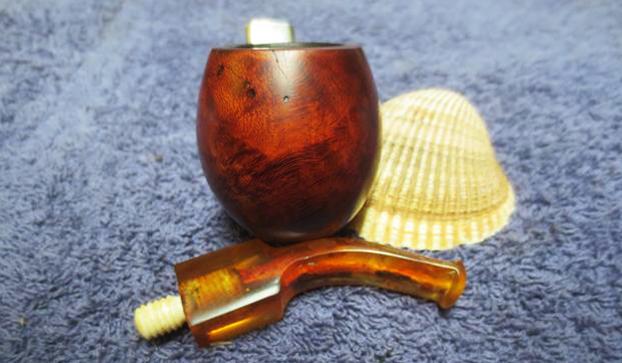
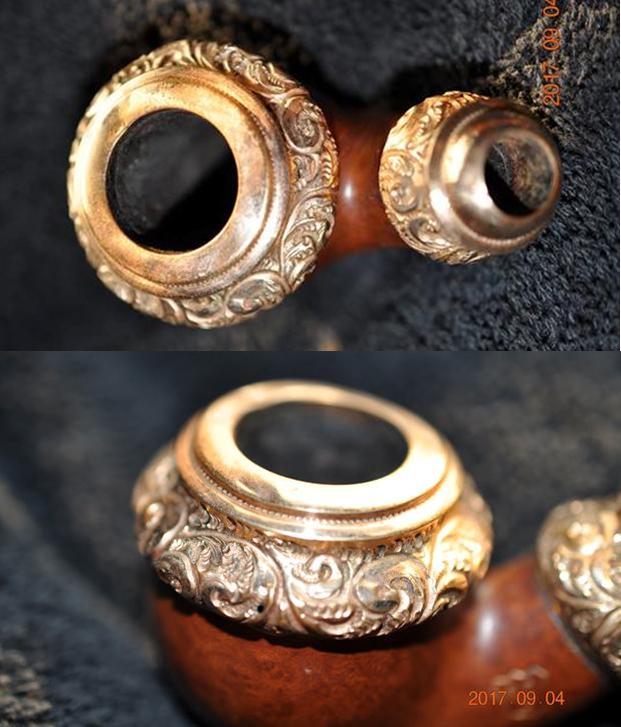
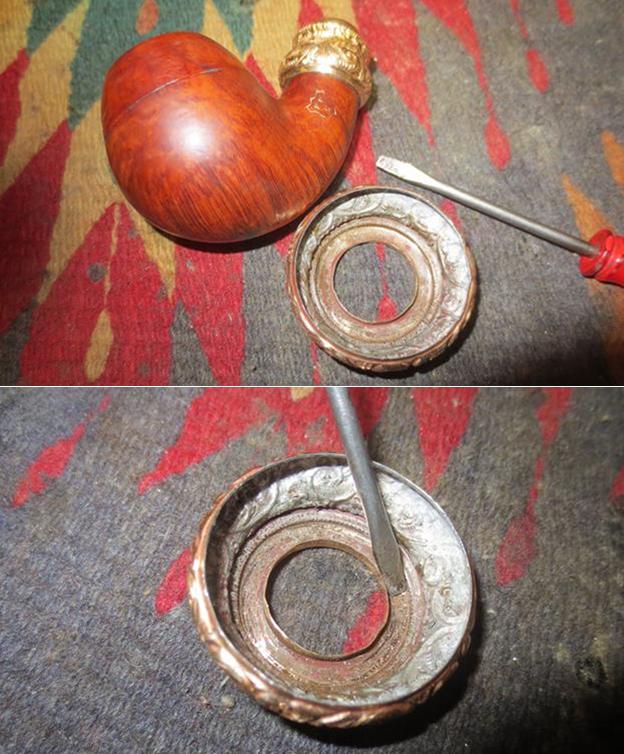
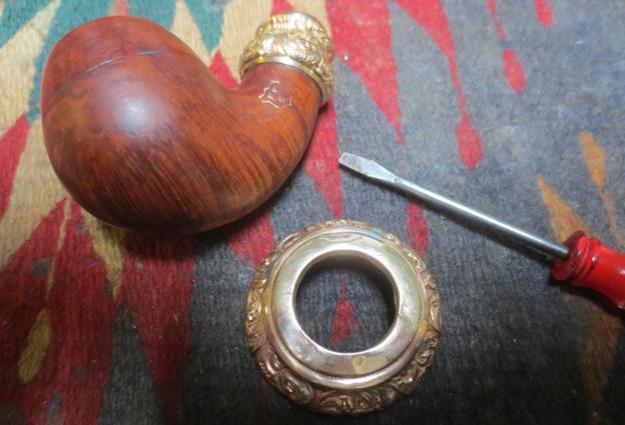
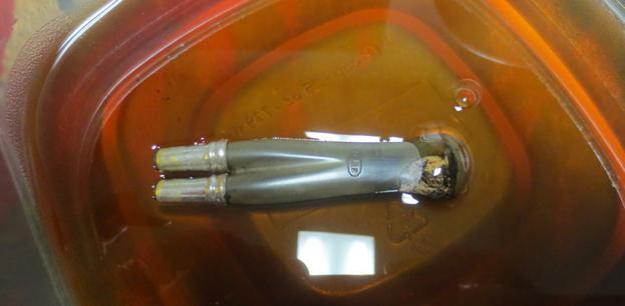
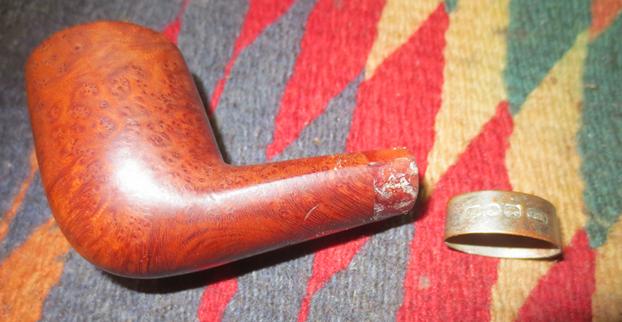
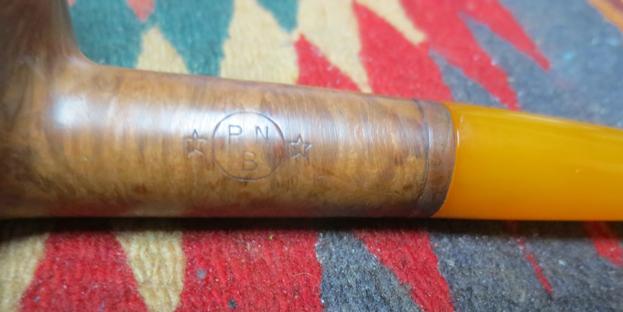 I unscrewed the stem from the shank and the paper wrapping on the tenon came off easily. The band on the shank was also loose so it fell off as well.
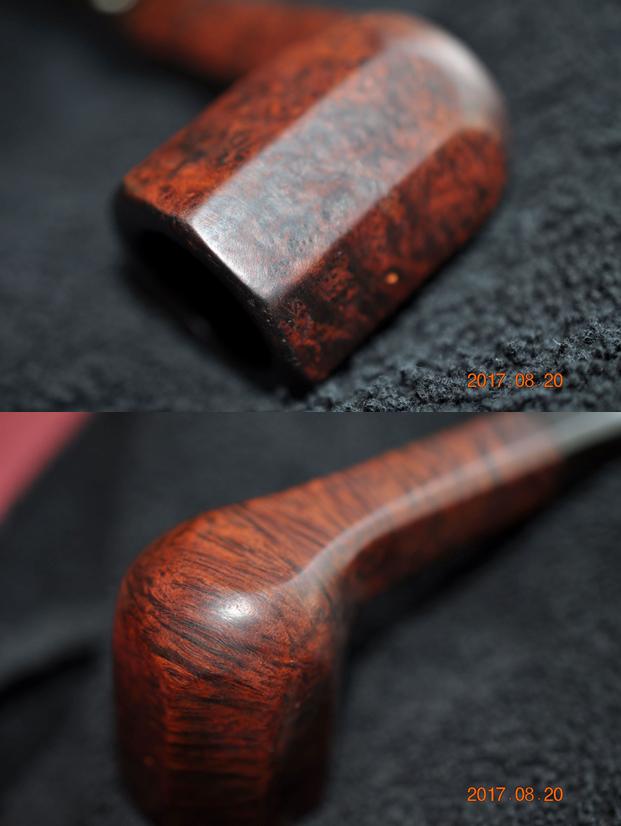
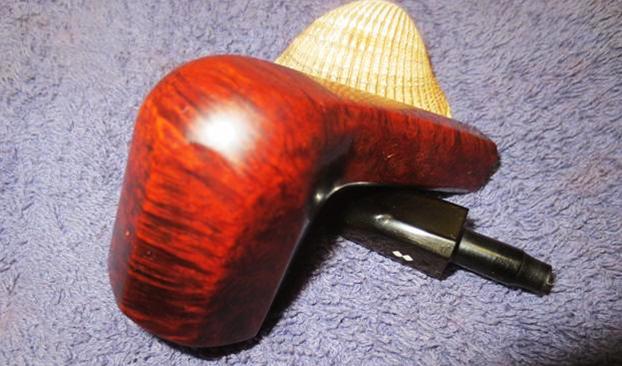
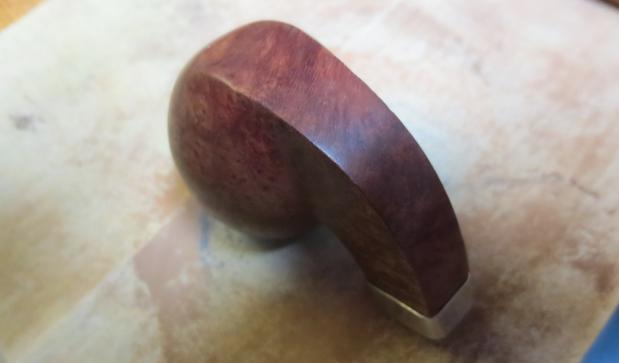
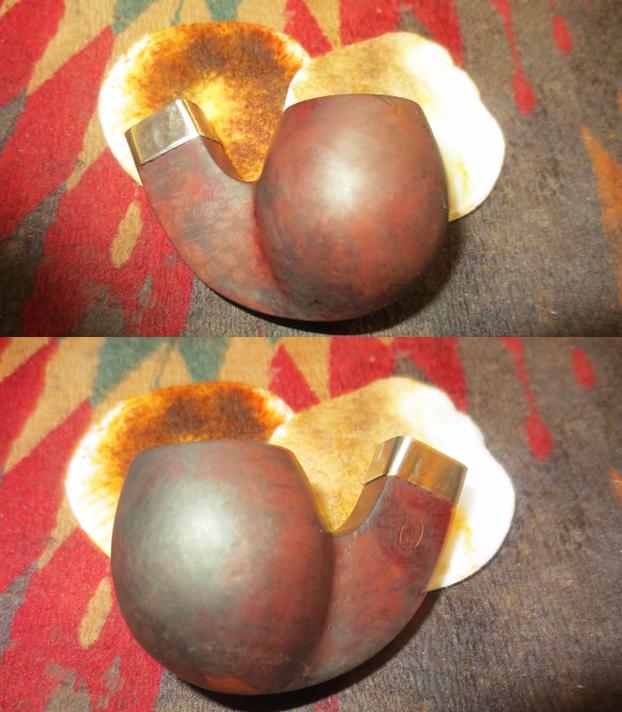
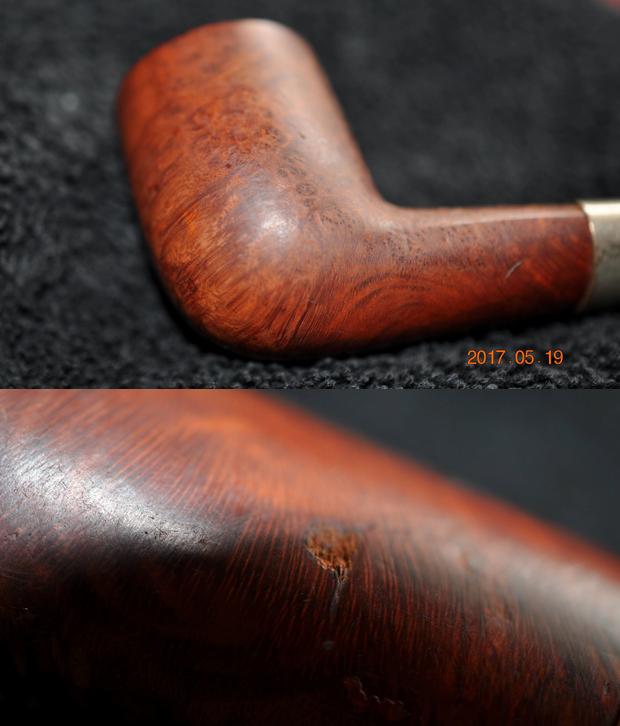
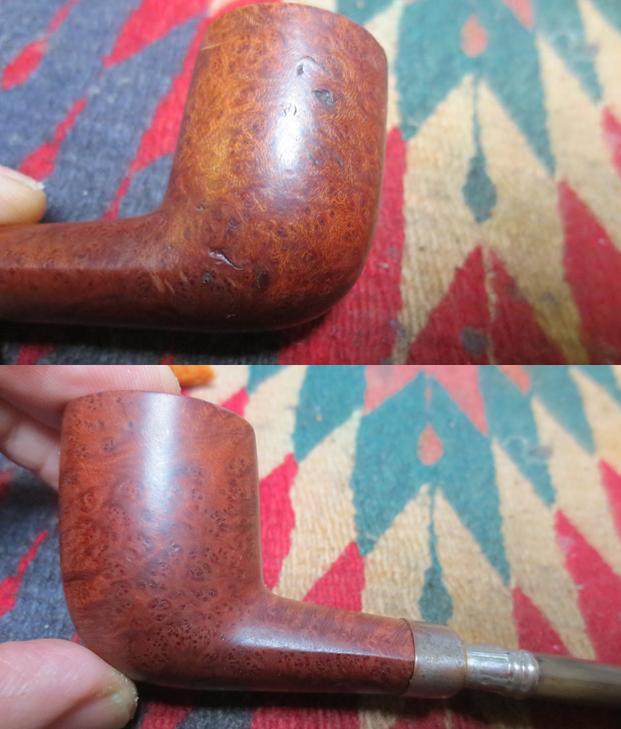
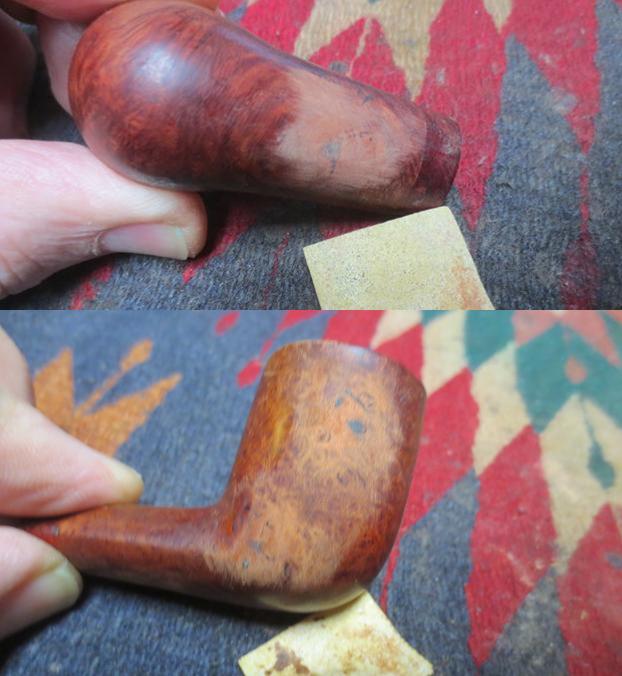
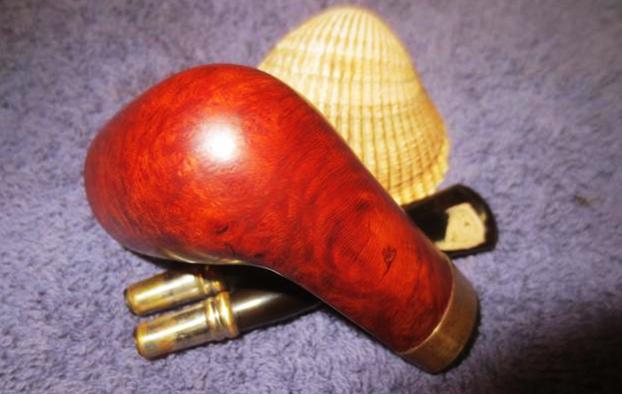
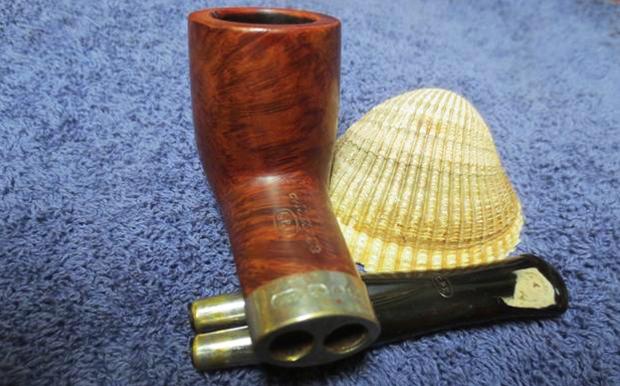
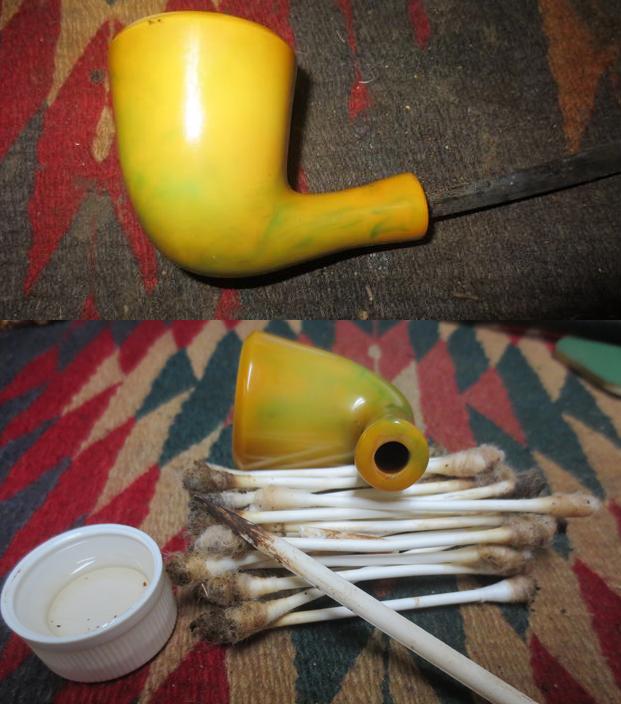
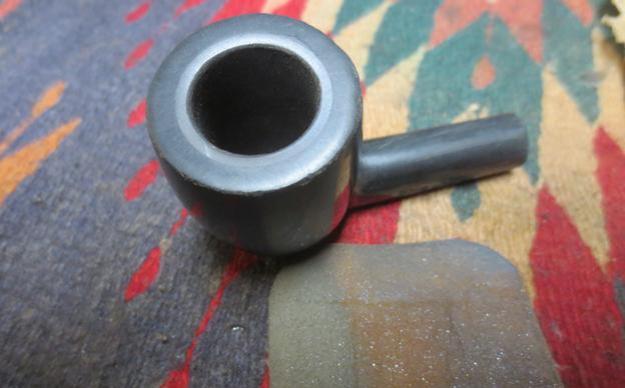
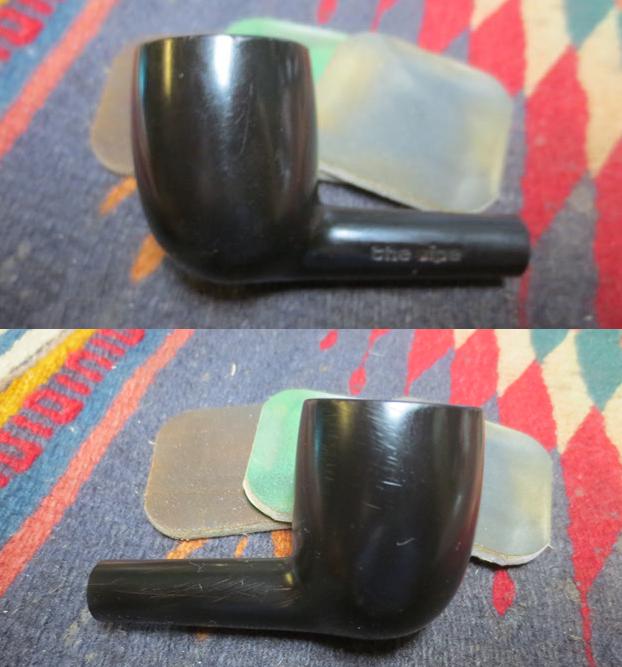
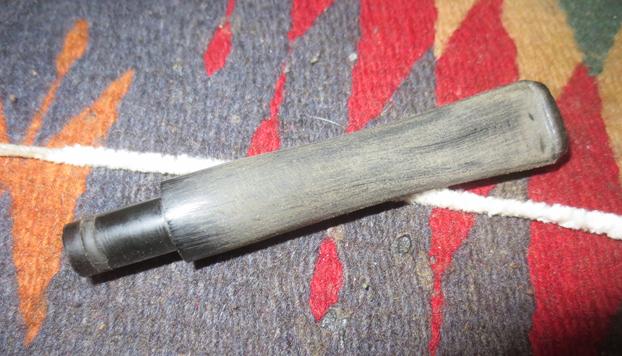
 I wiped the outside of the bowl and shank down with 99% isopropyl alcohol on cotton pads. I wanted to remove any remnants of the finish and also the grime that was ground into the briar on the sides of the bowl and rim. The pipe has some beautiful grain – a mix of birdseye, cross and flame grain.
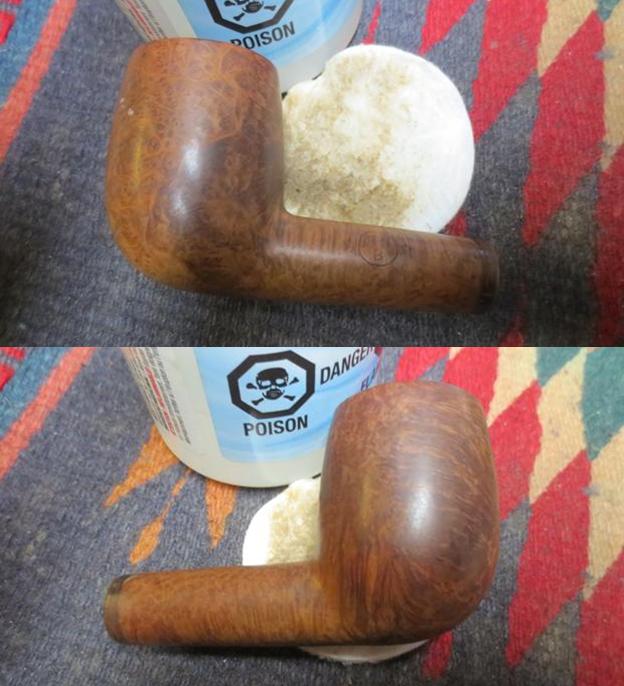
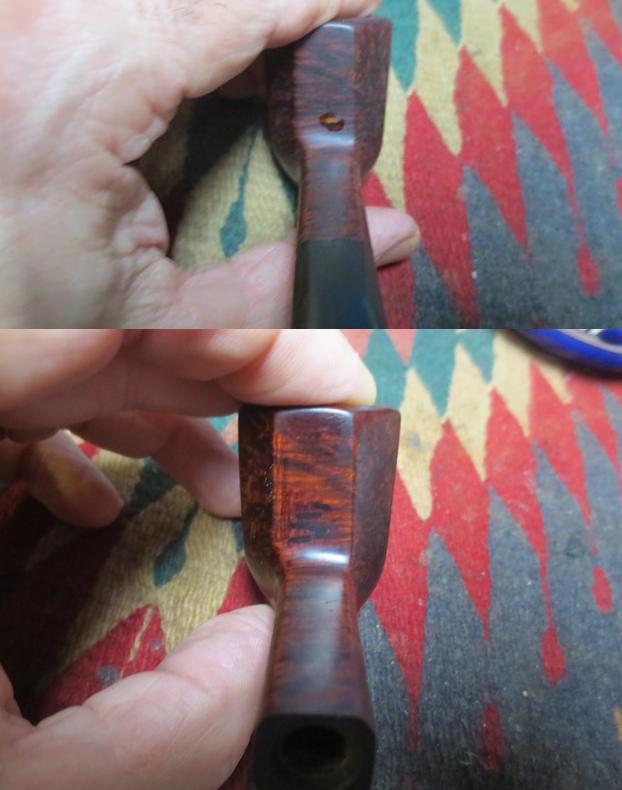
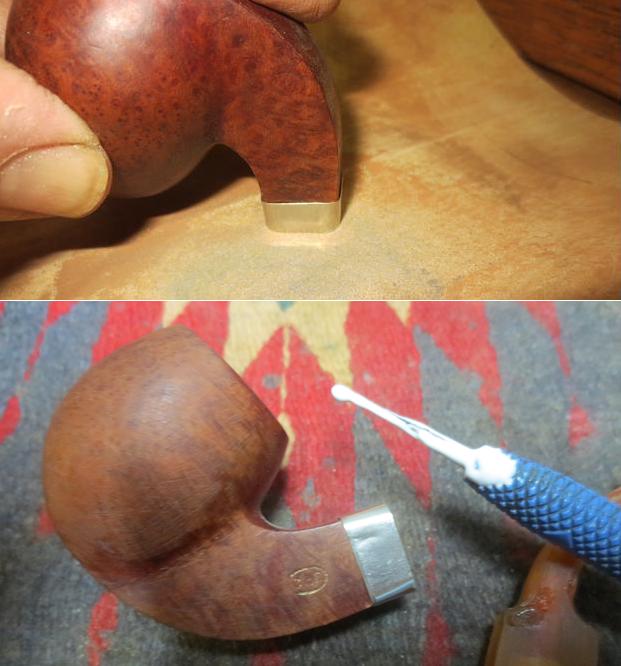
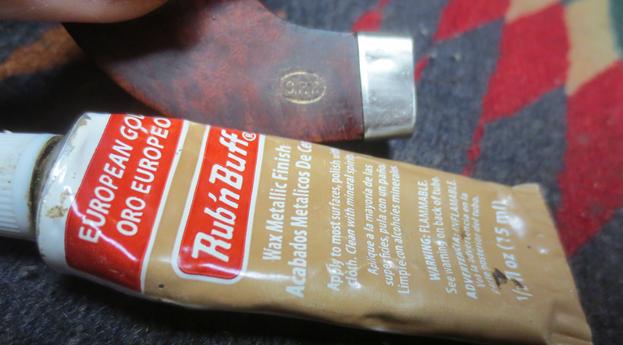
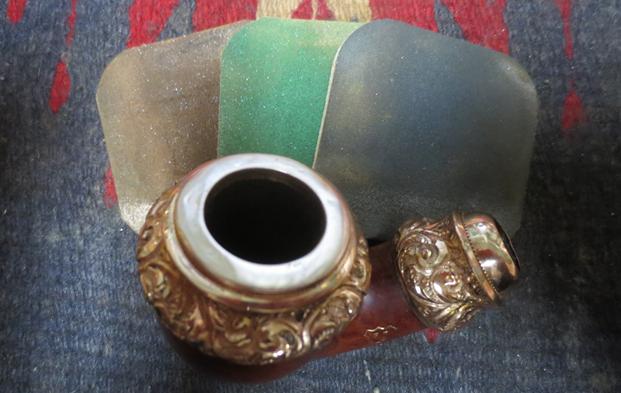
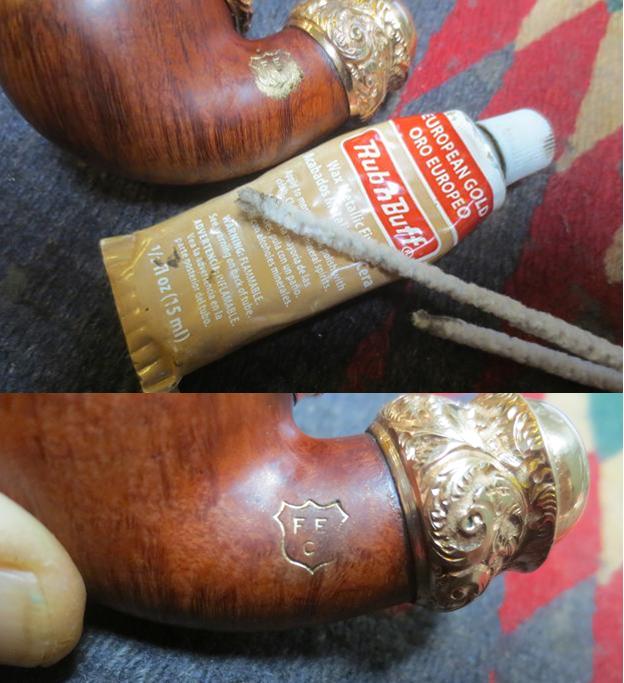
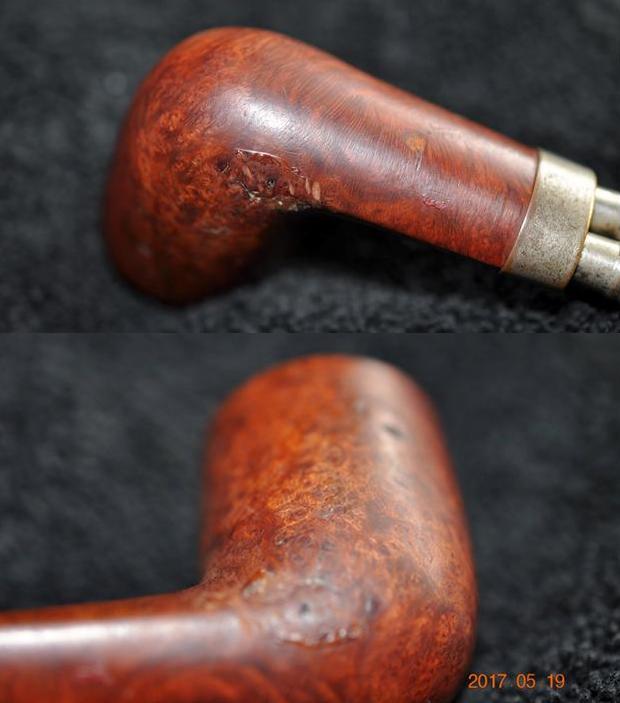
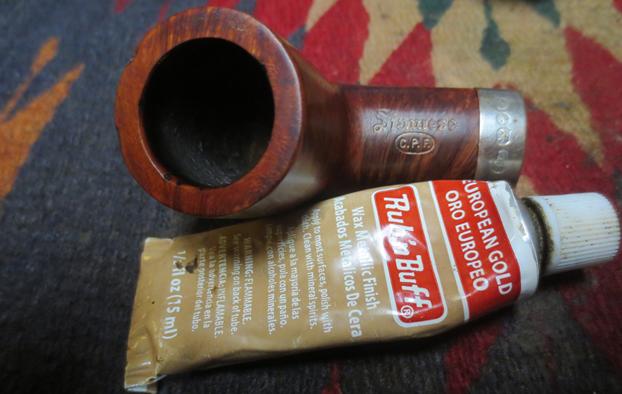
 I polished the brass band with micromesh sanding pads to remove the oxidation that had darkened it. The shine returned and it was a nice golden colour that would work really well with the amber coloured stem and virgin briar.
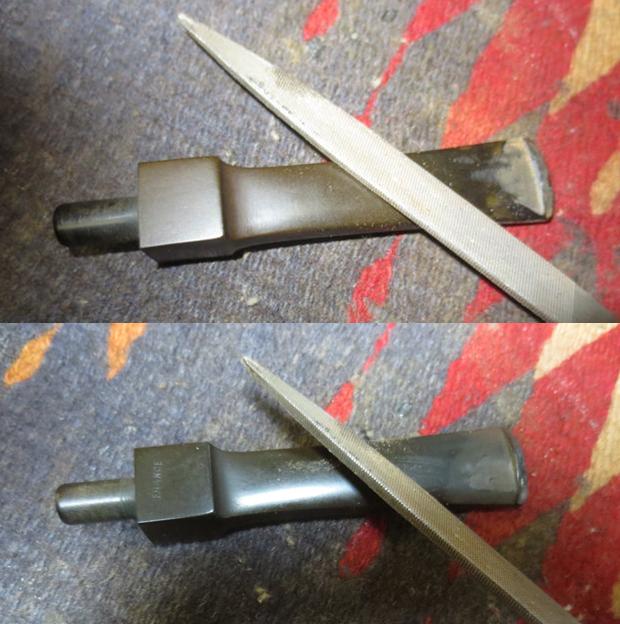
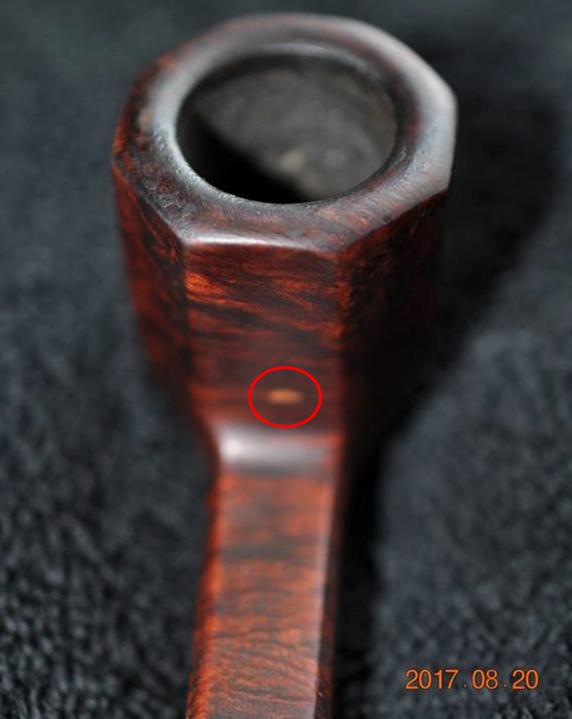
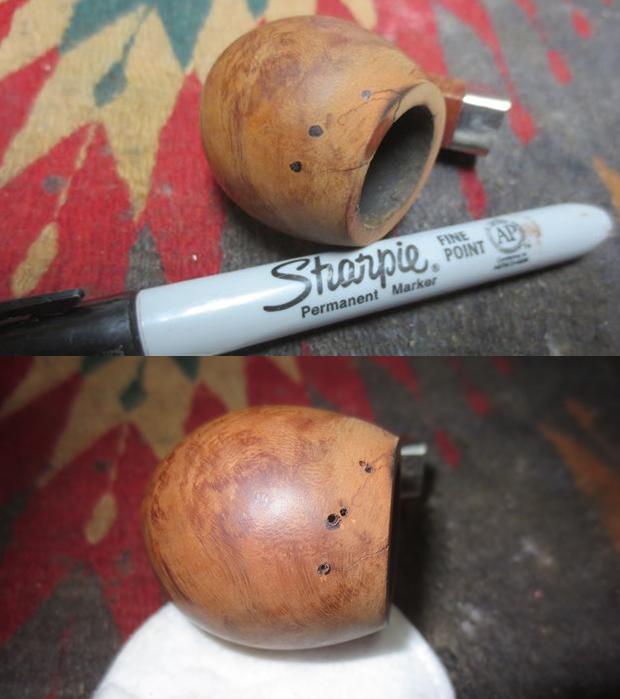
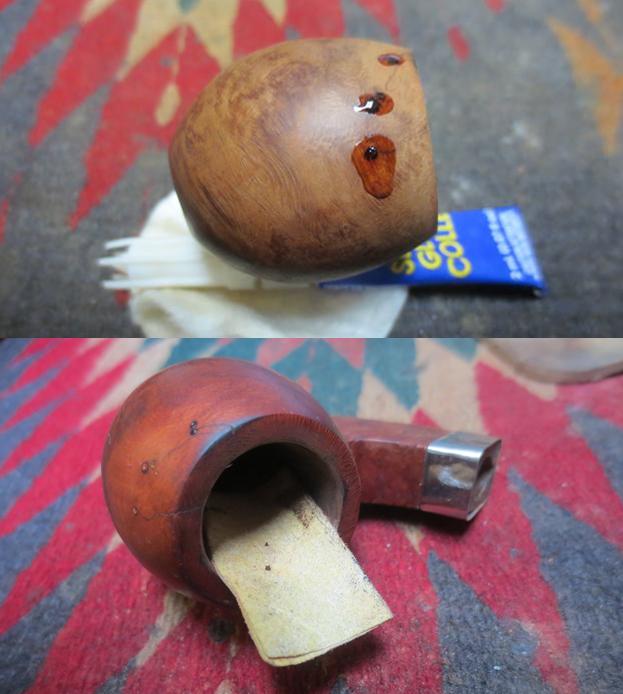
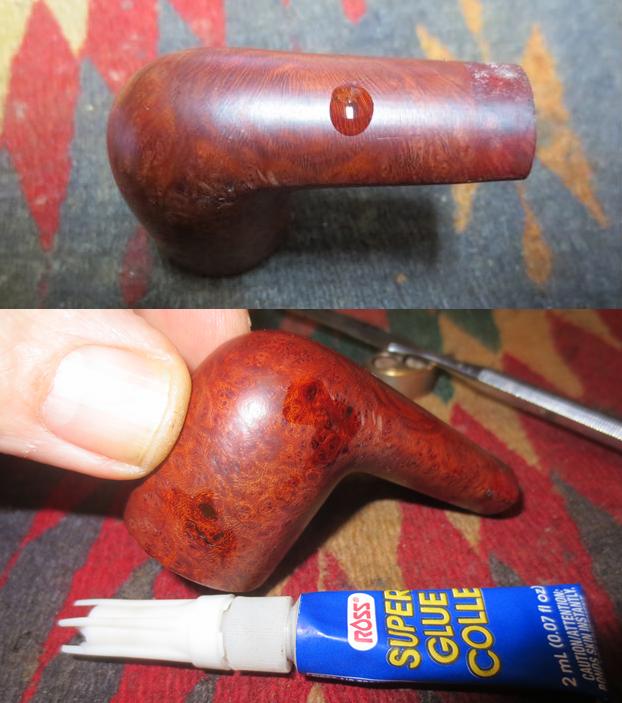
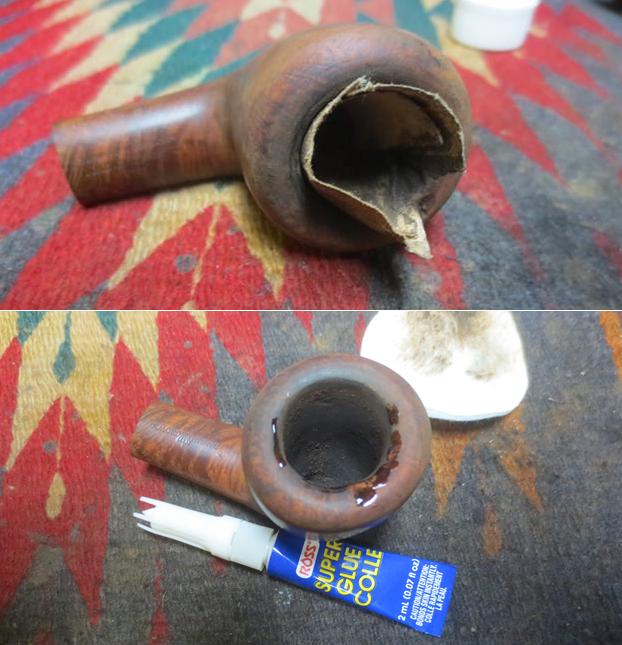
 With the band removed from the shank a flaw in the briar was revealed on the right side of shank near the shank end. I filled it in with clear super glue and when it dried sanded it smooth with 220 grit sandpaper and would later polish it with micromesh sanding pads to blend it in with the rest of the briar.
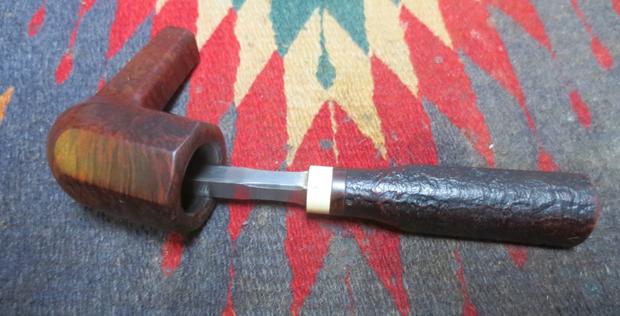
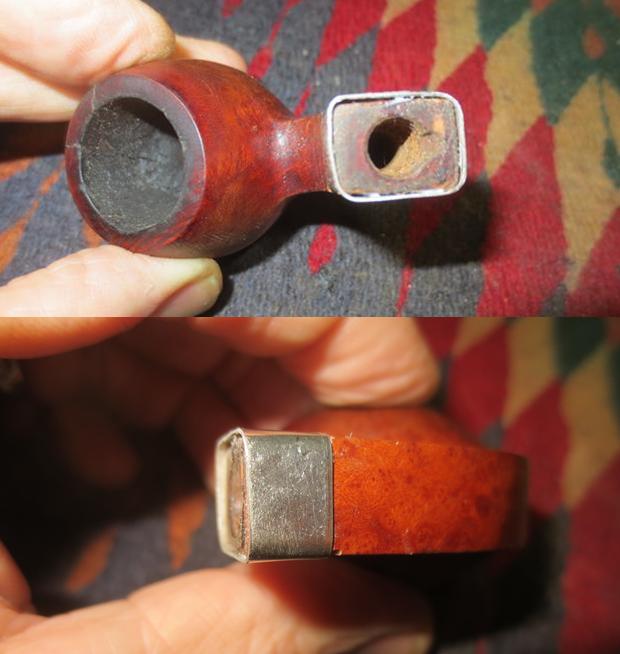
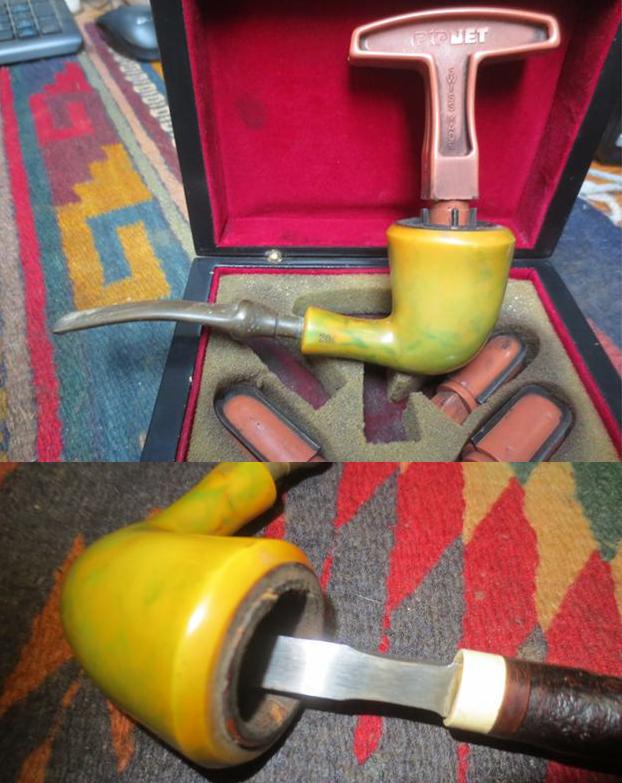
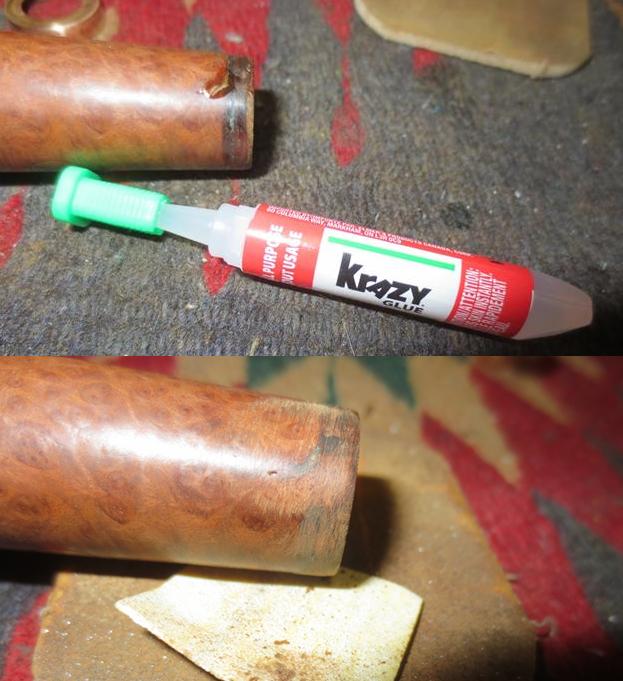 I reamed the bowl back to bare briar with a PipNet pipe reamer and finished cleaning it up with a Savinelli Fitsall pipe knife.
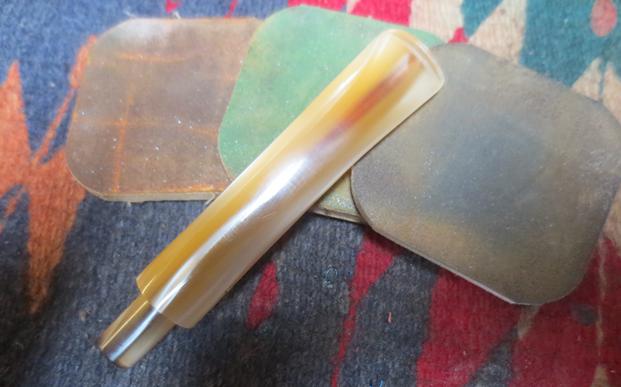
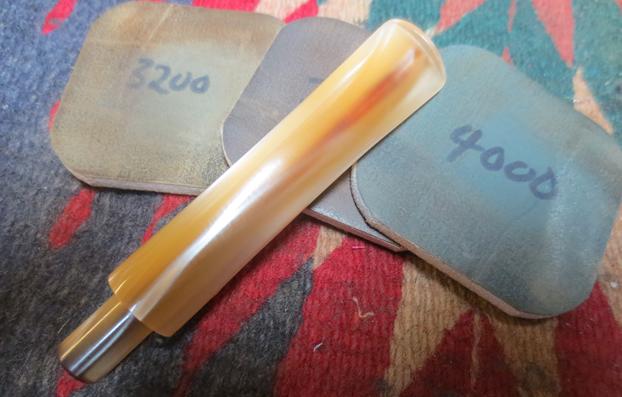
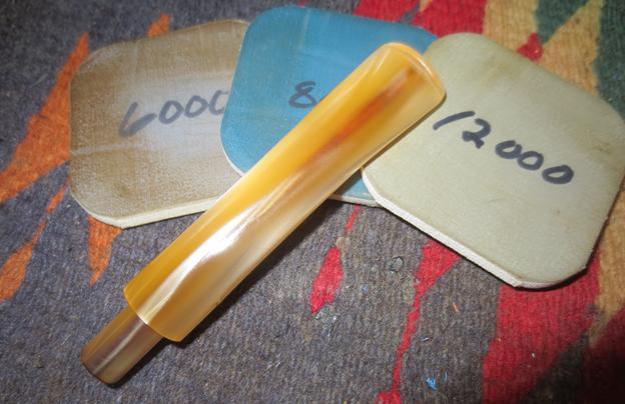
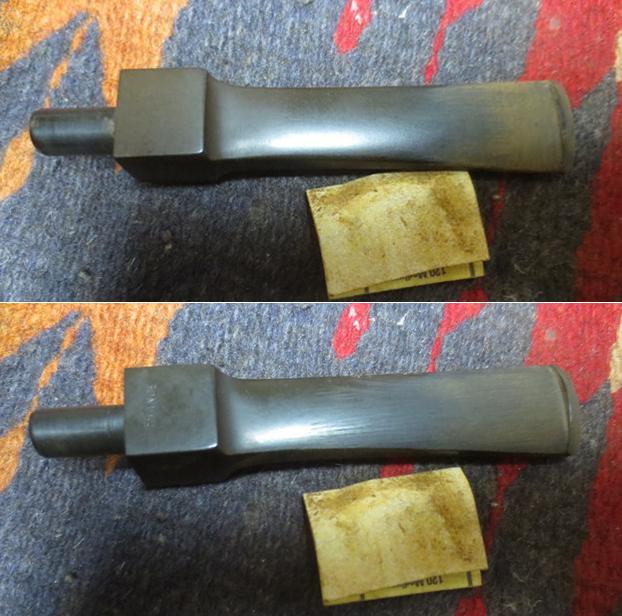
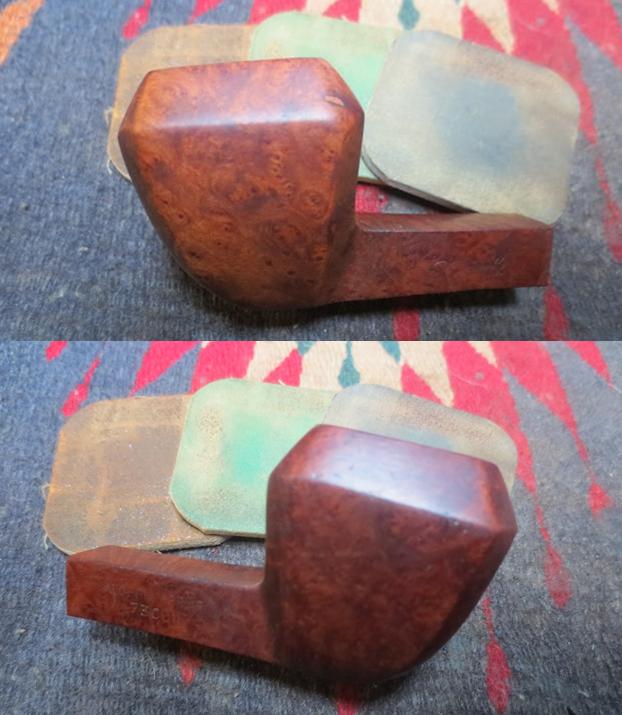
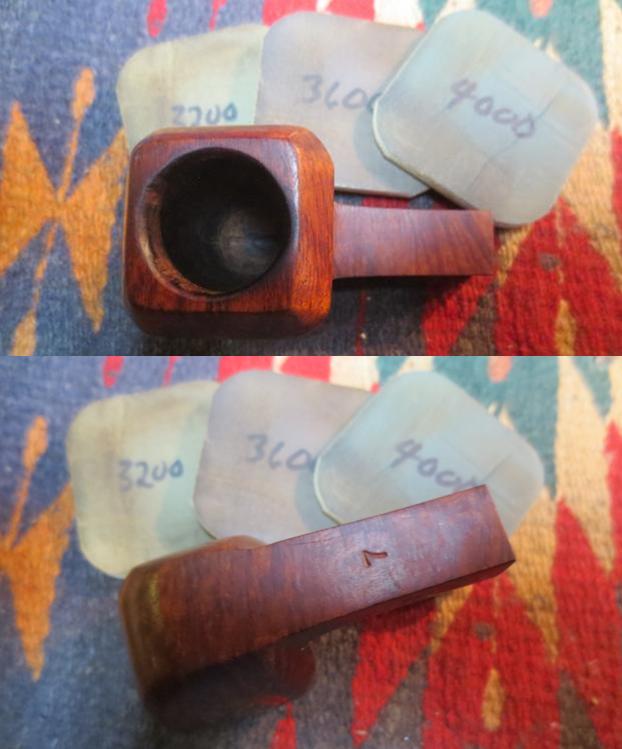
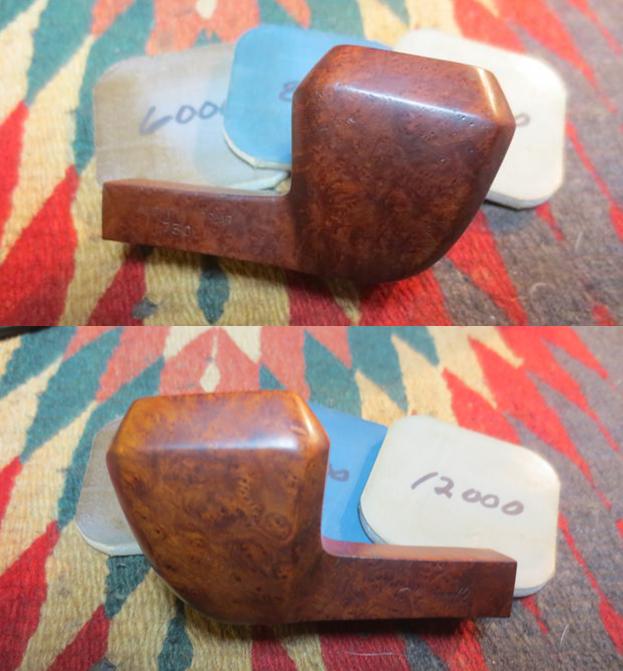
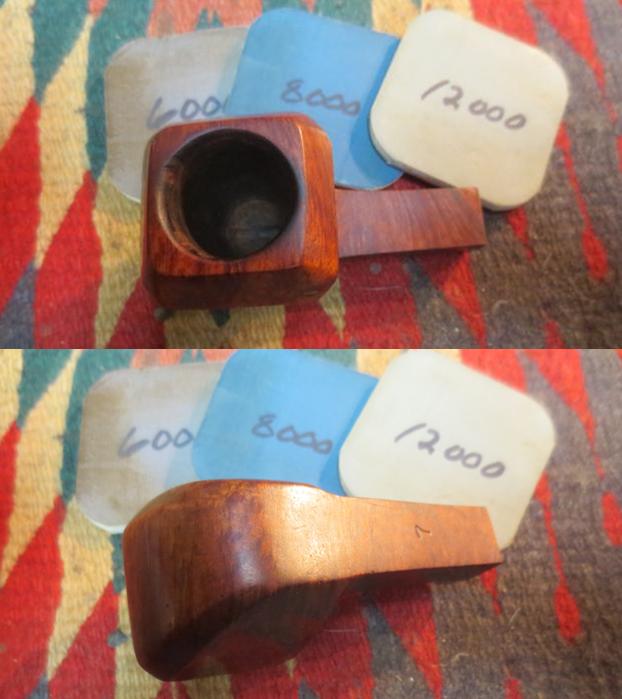
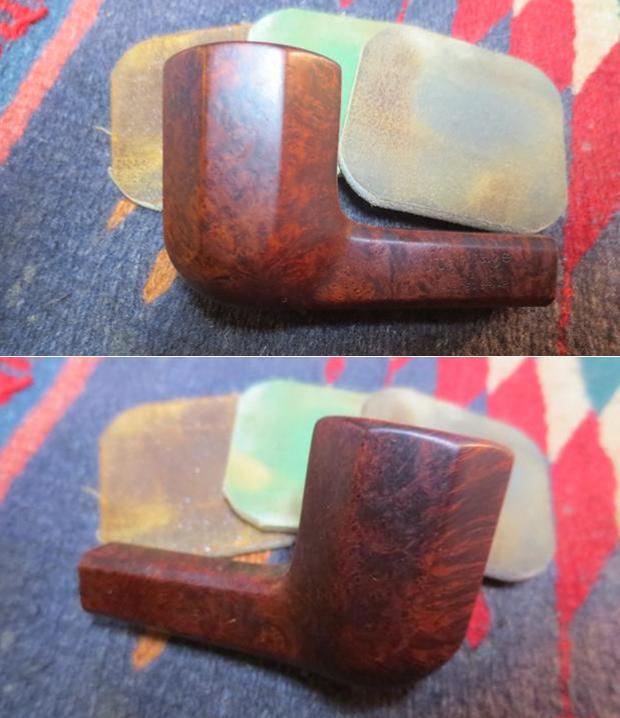
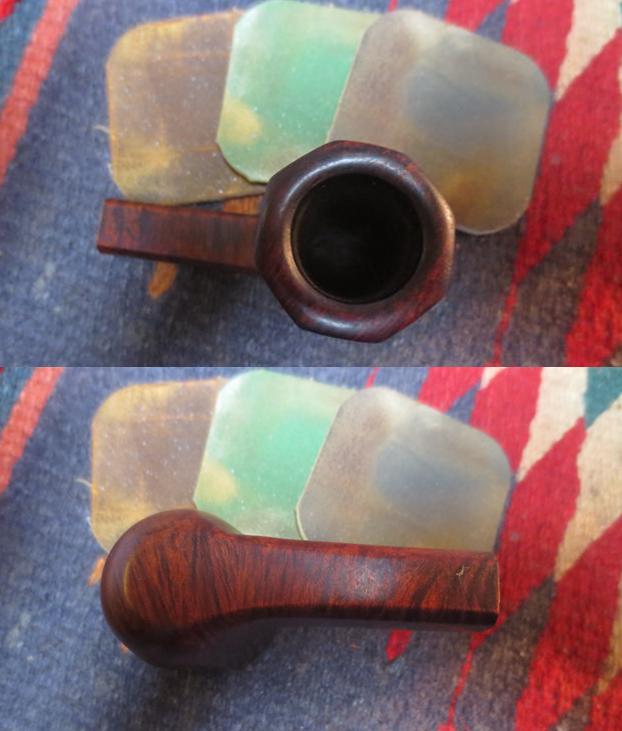
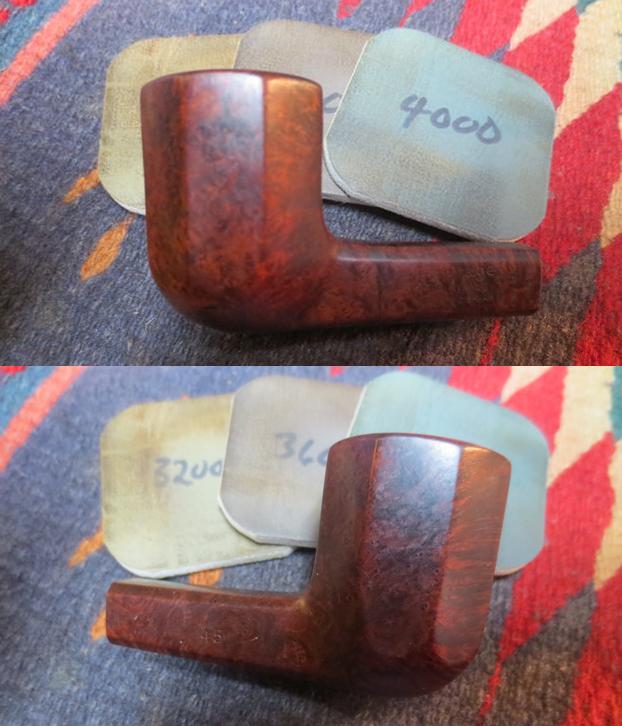
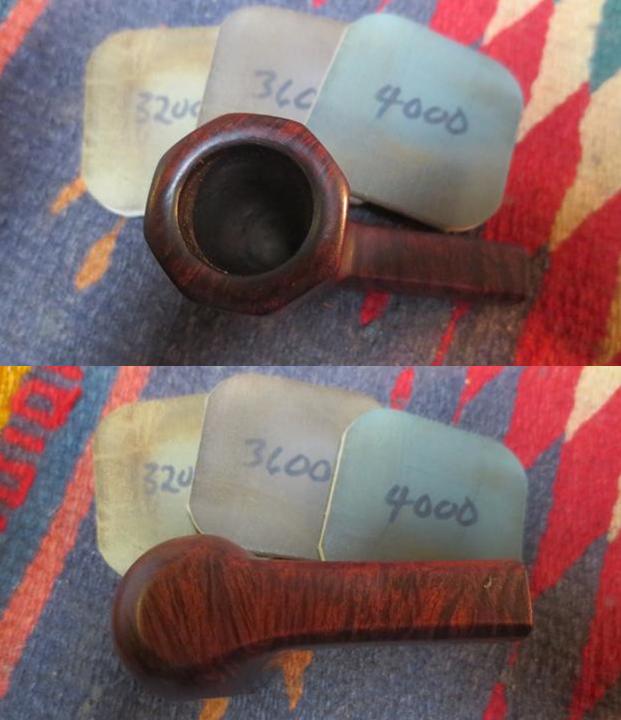
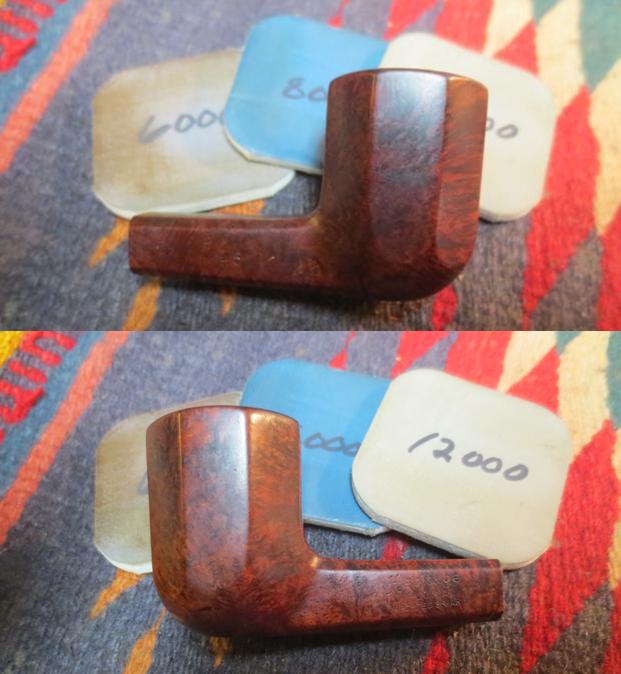
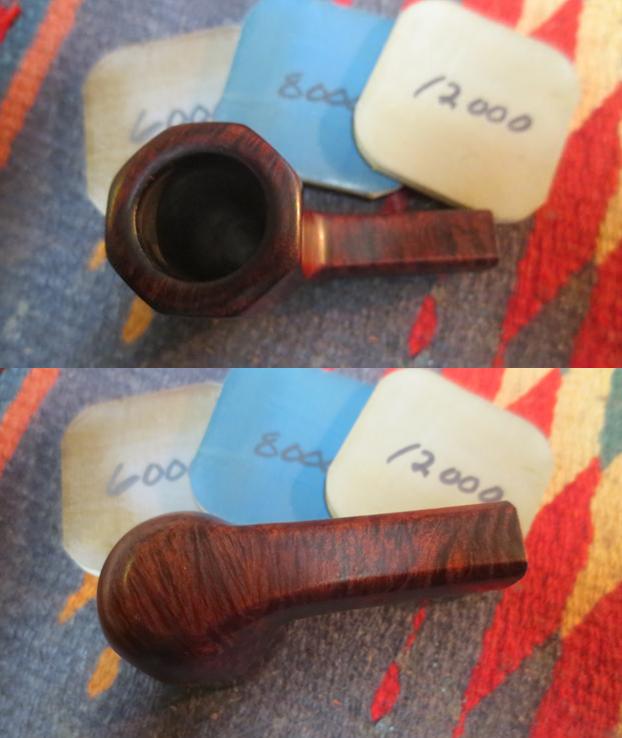
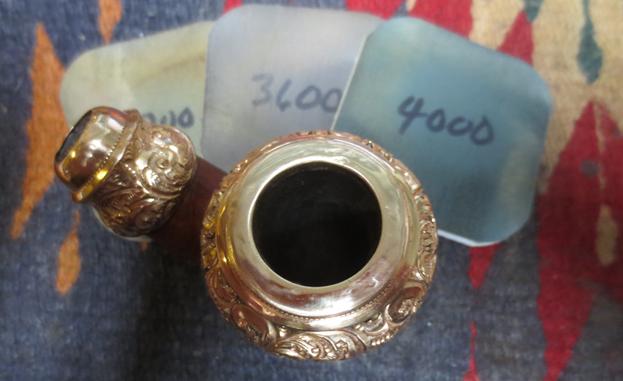
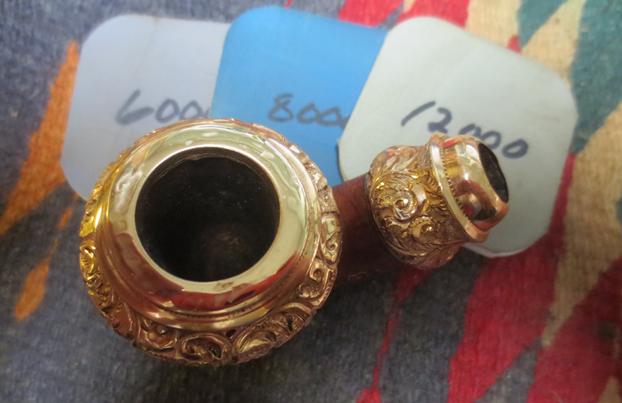
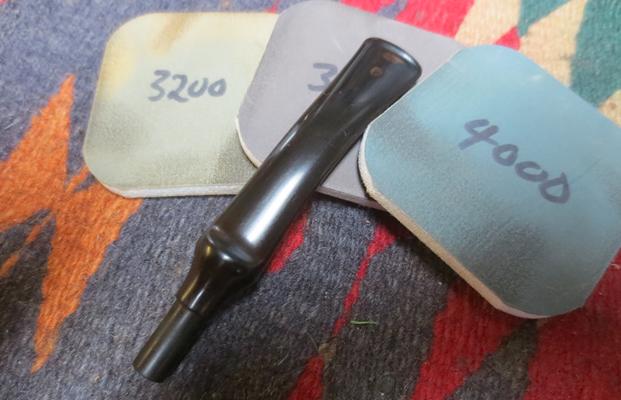
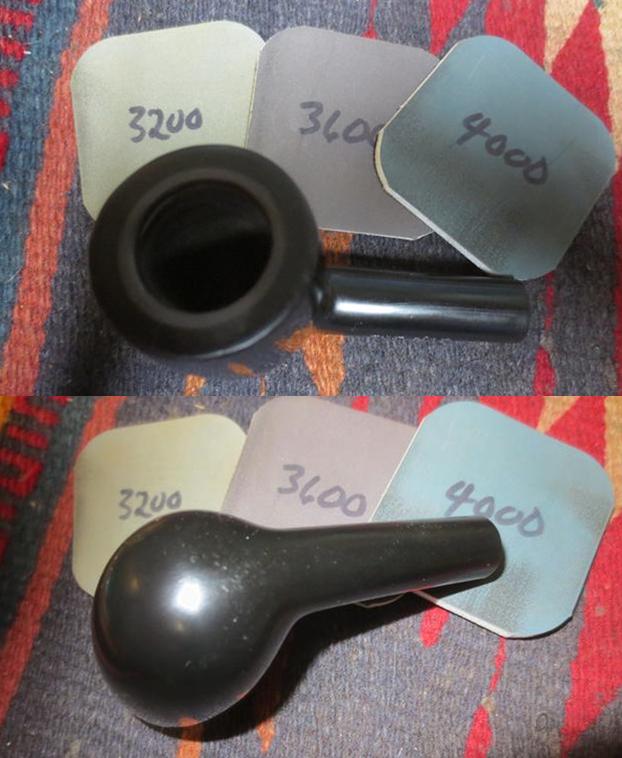
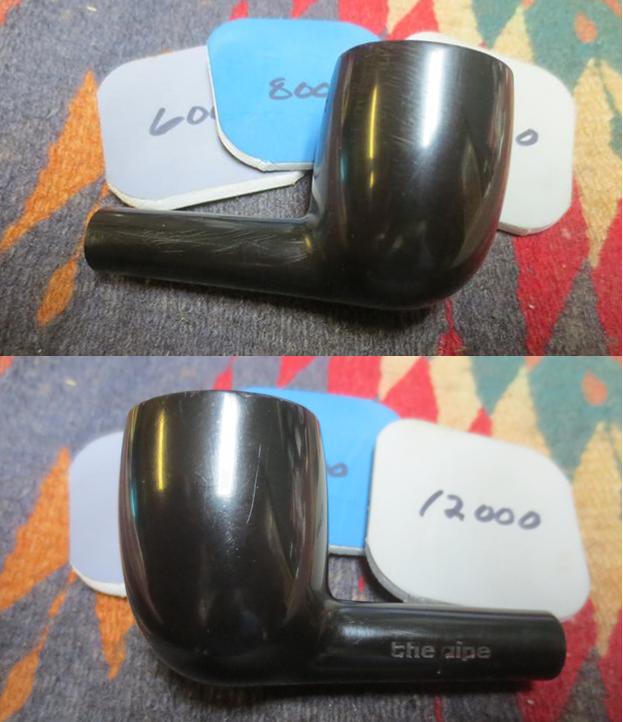
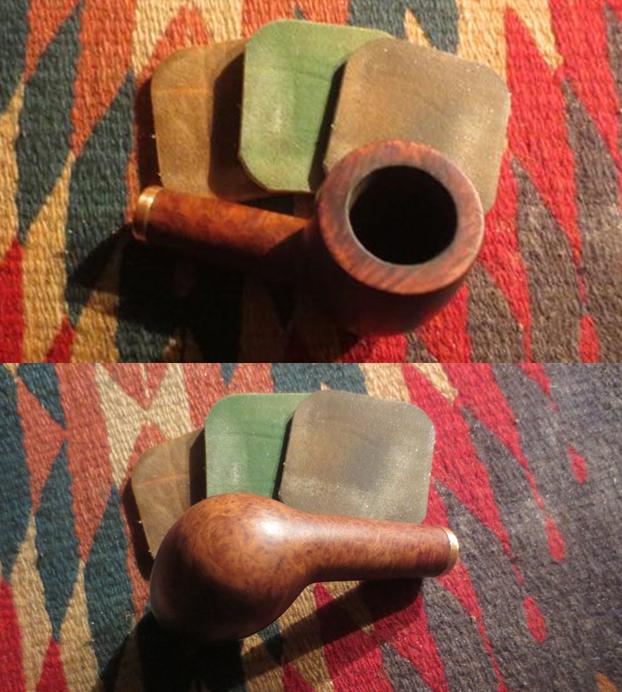
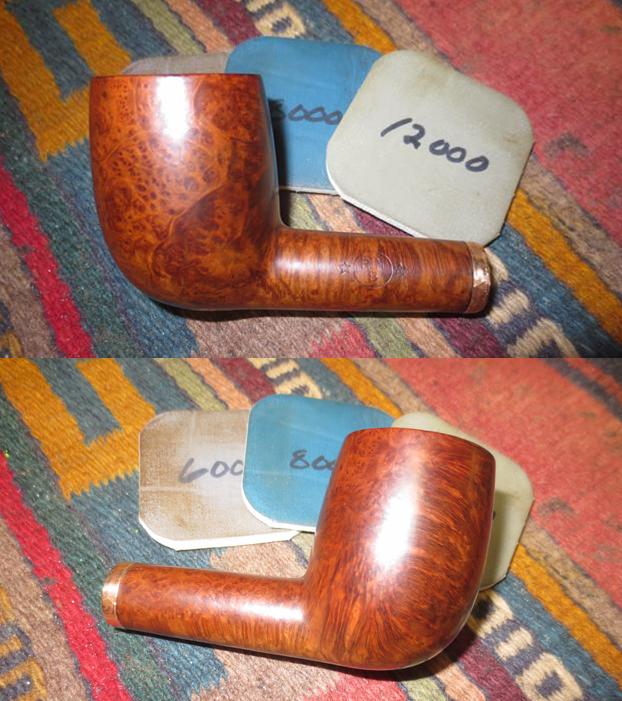
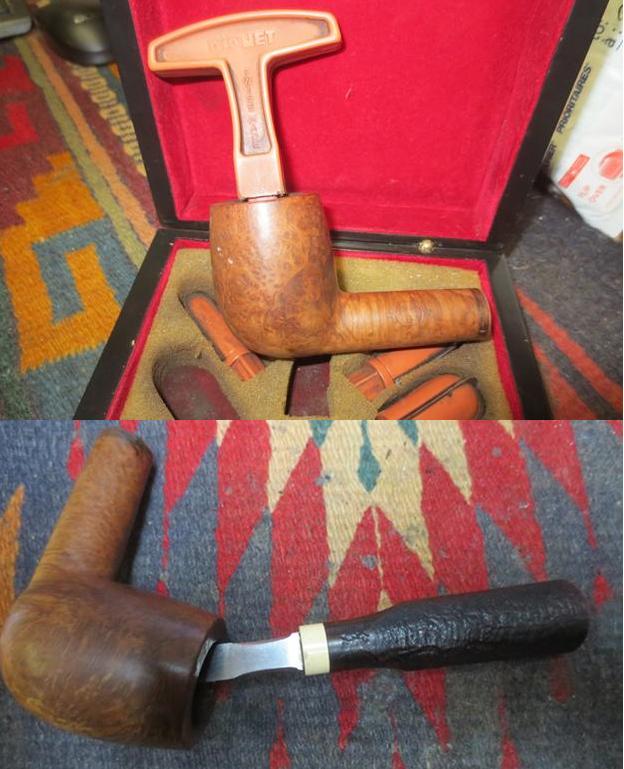 I pressed the band on temporarily so that I could polish it in place while polishing the briar. I wet sanded the briar and band with 1500-2400 grit micromesh sanding pads and dry sanded it with 3200-12000 grit pads. I wiped it down with a damp cotton pad after each pad. Each micromesh pad brought a deeper shine to briar and band.
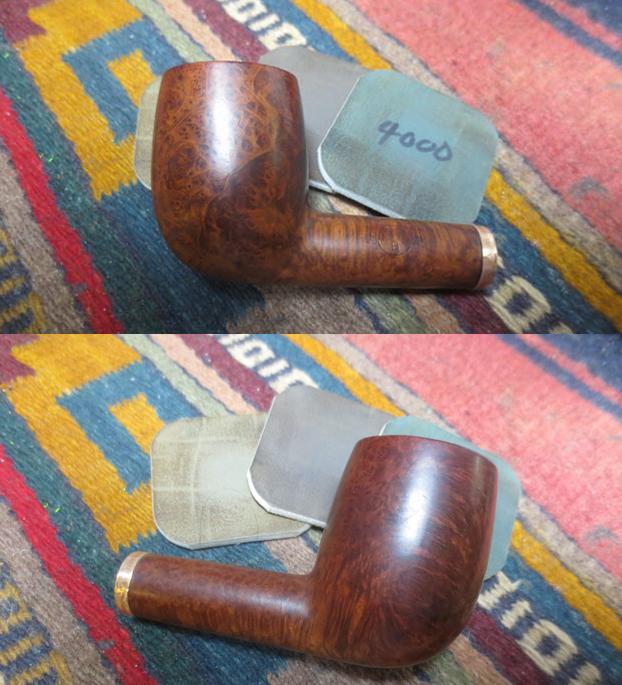
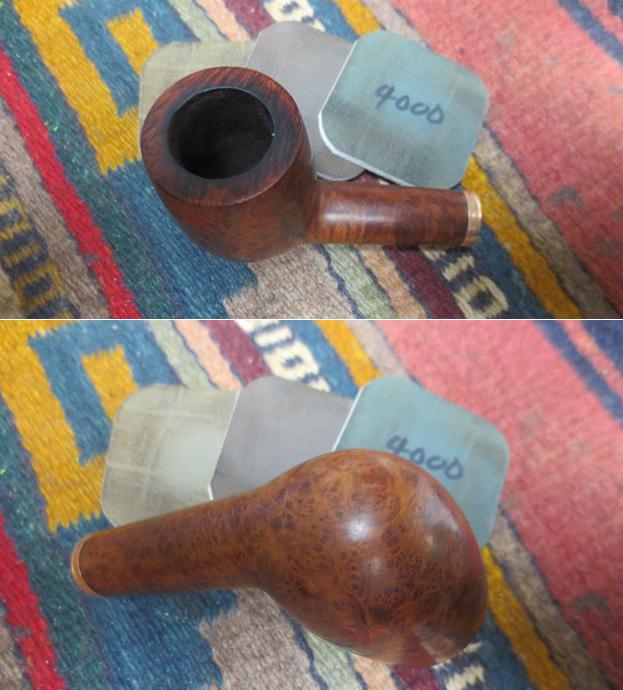
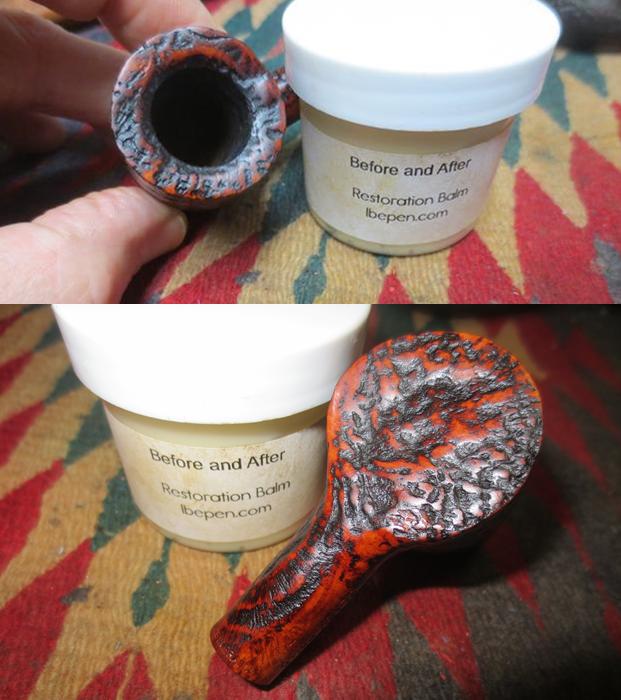
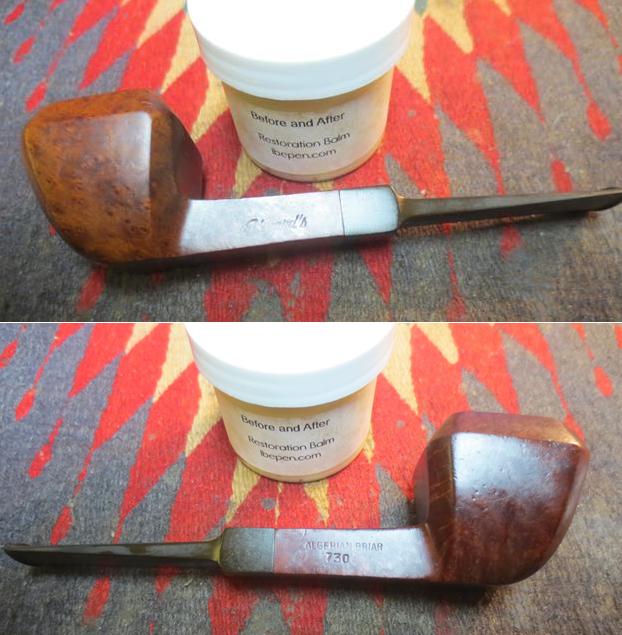
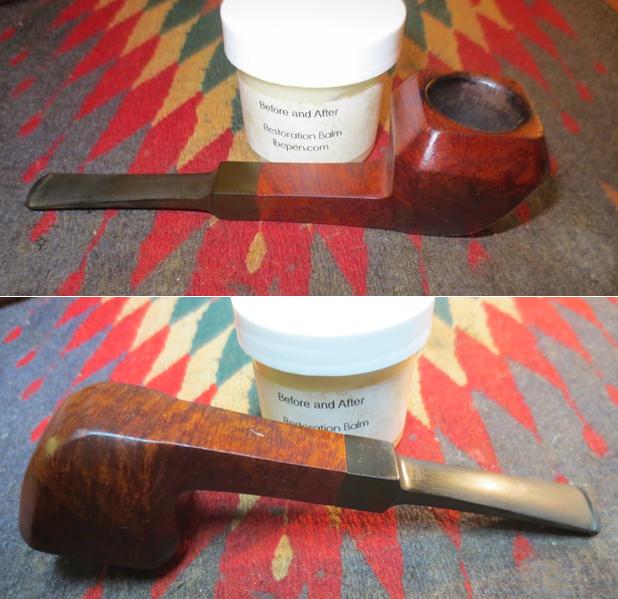
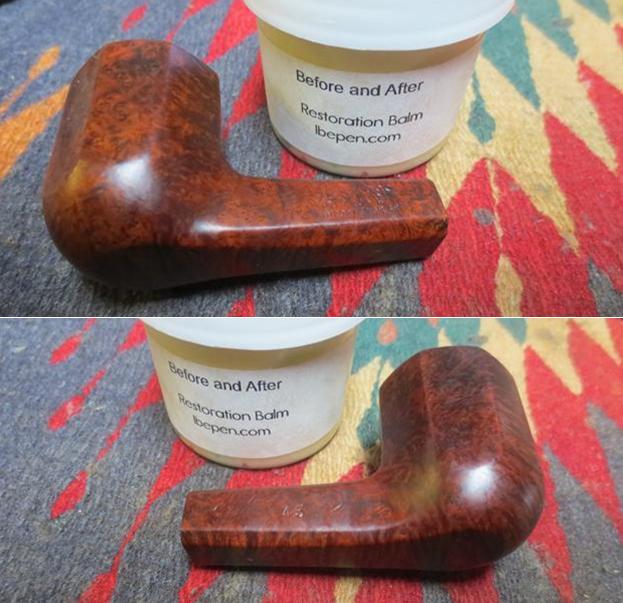
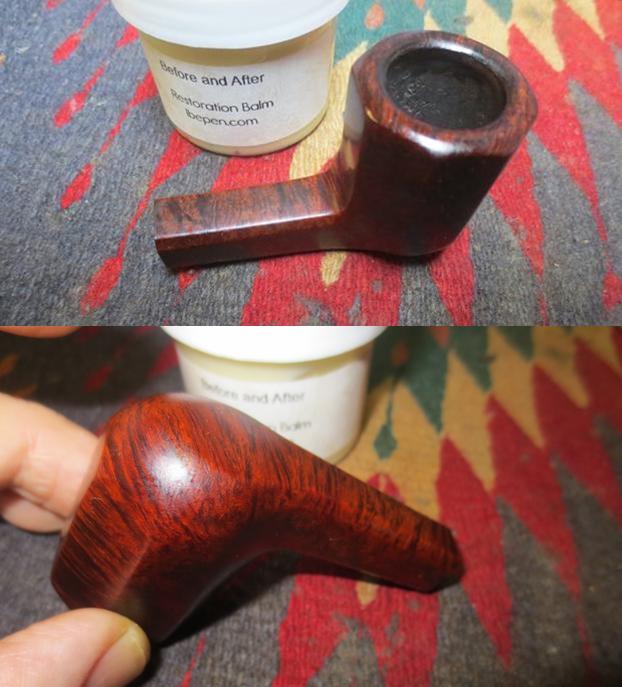
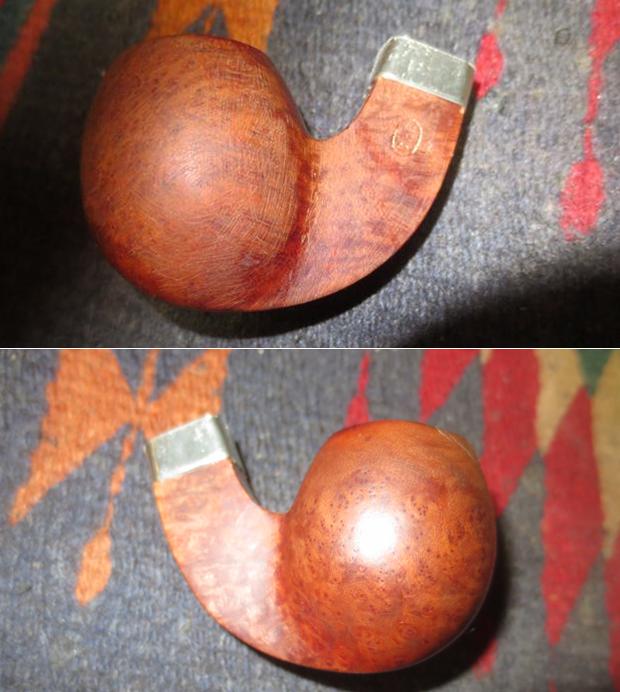
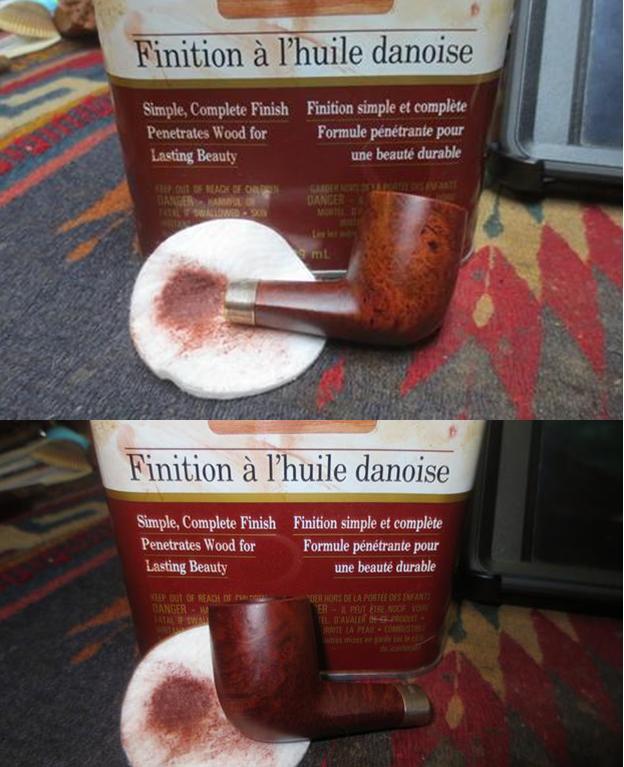
 I removed the band and wiped the briar down with Before & After Restoration Balm. I rubbed it into the briar with my fingers, let it sit for about 10 minutes and then buffed it off with a soft cloth. It really brought the grain to life.
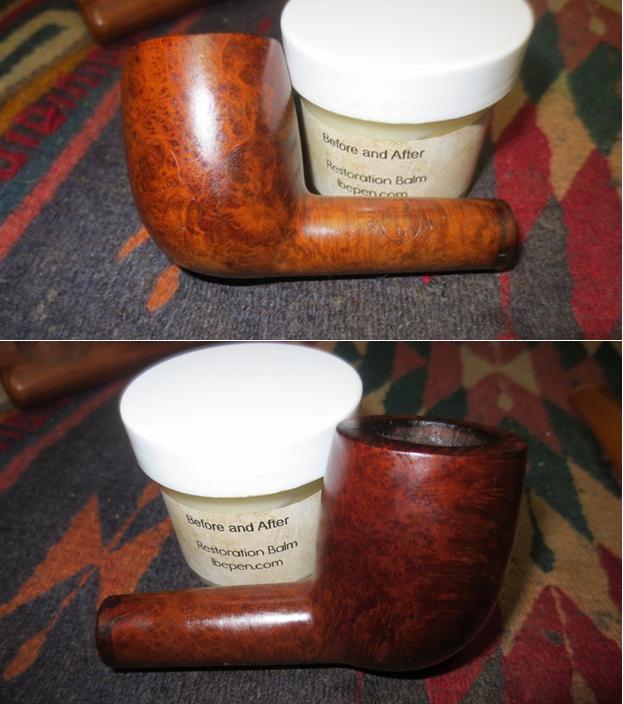
 I buffed it lightly with a shoe brush and a soft cloth. I wiped down the shank end with some alcohol on a cotton pad to clean it off so that I could reglue the band. I used a dental pick to put glue on the shank end and the inside of the band. I pressed it in place and lined it up. I held it until the glue set.
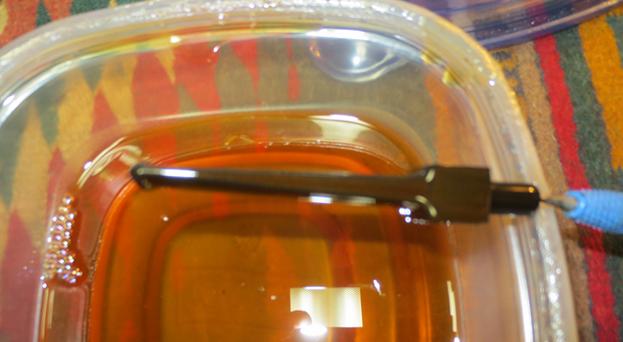
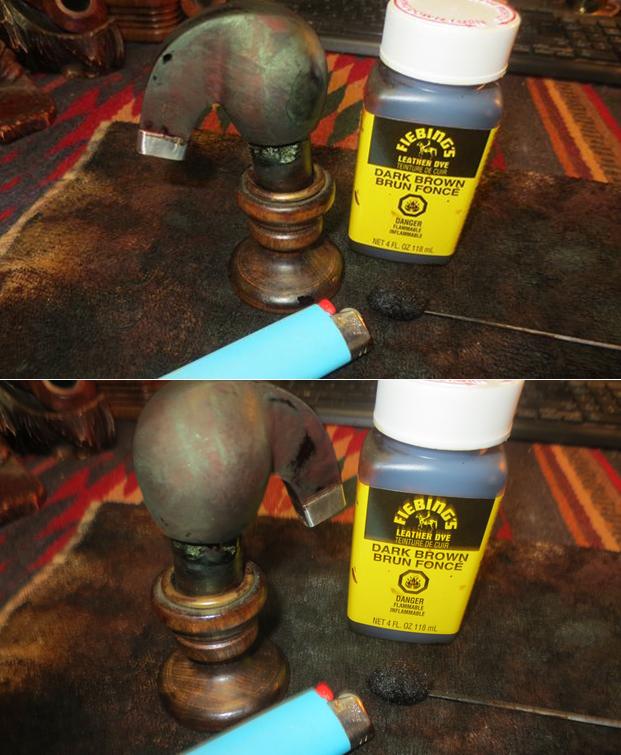
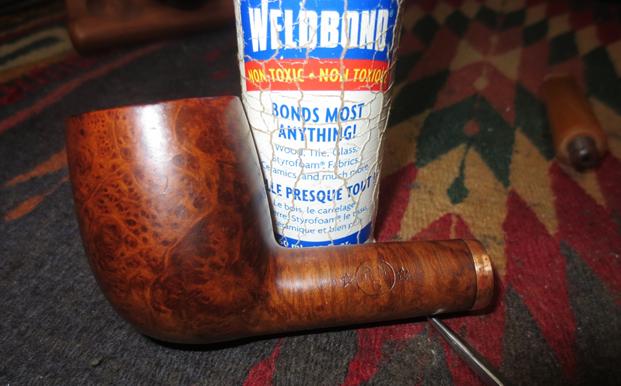 Once the glue dried I decided to address the worn threads in the mortise. The threads on the old bone tenon would not hold onto the threads in the mortise. I painted the threads in both with clear fingernail polish and let them dry.Once the glue dried I decided to address the worn threads in the mortise. The threads on the old bone tenon would not hold onto the threads in the mortise. I painted the threads in both with clear fingernail polish and let them dry.
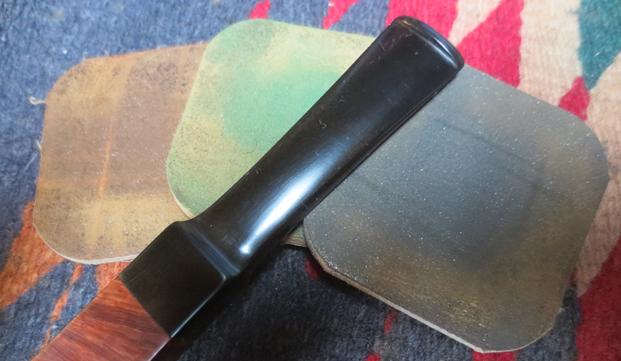
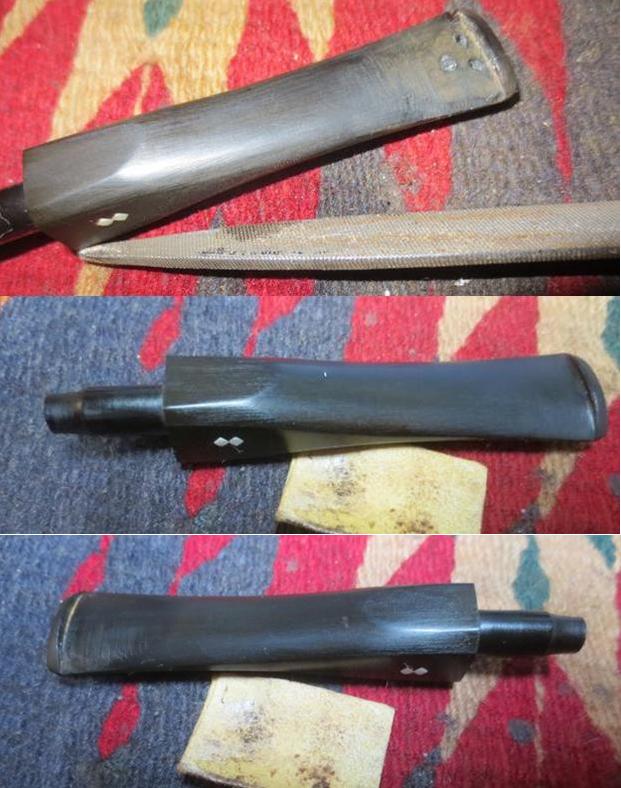
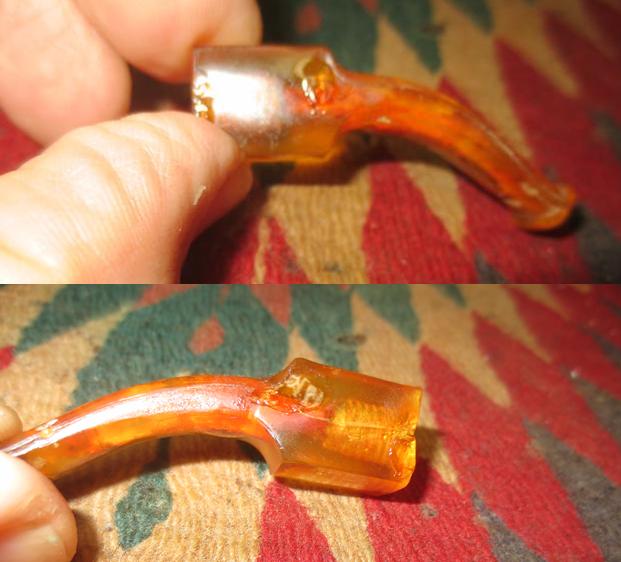
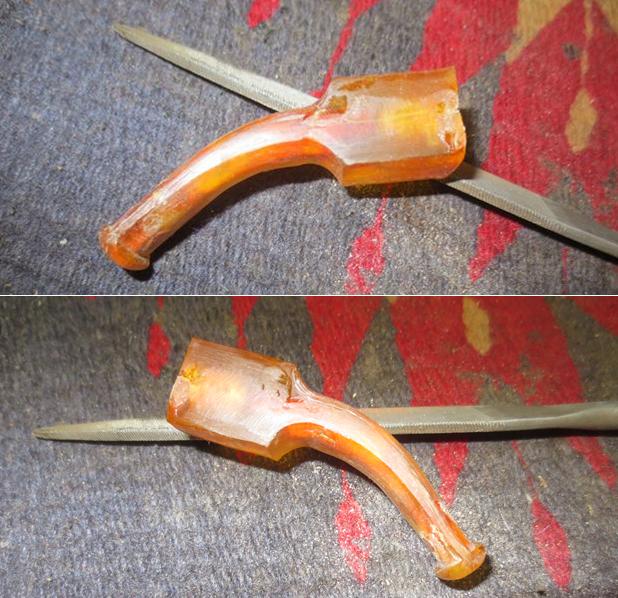
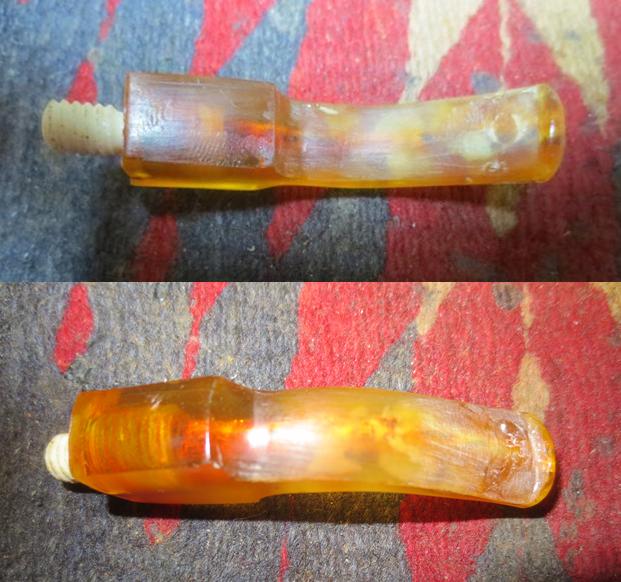
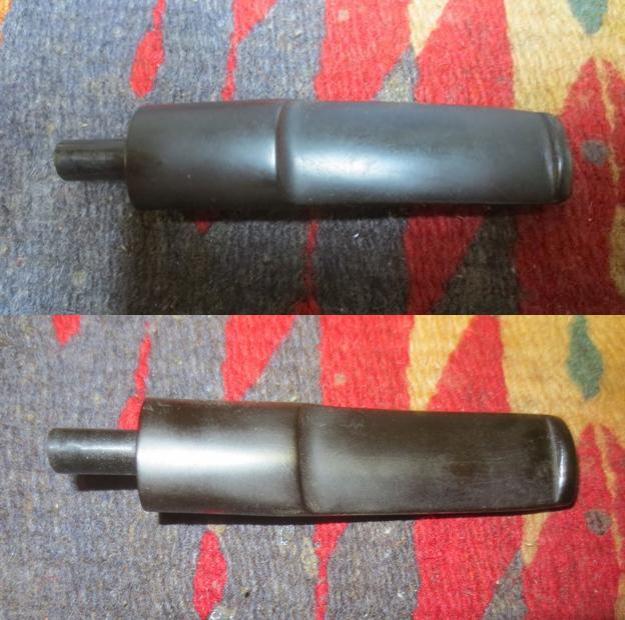
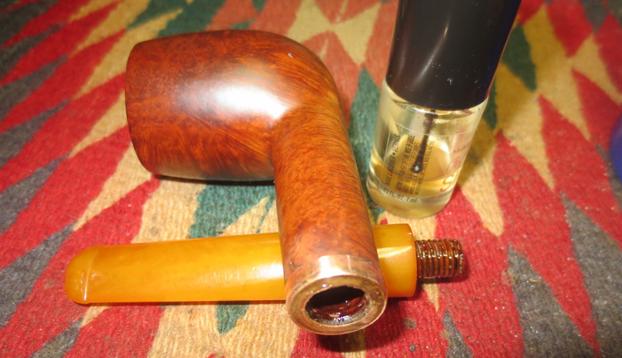 When the fingernail polish had dried I worked on the tooth marks on the stem. I sanded the tooth chatter with 220 grit sandpaper and reshaped the button to remove the tooth marks.
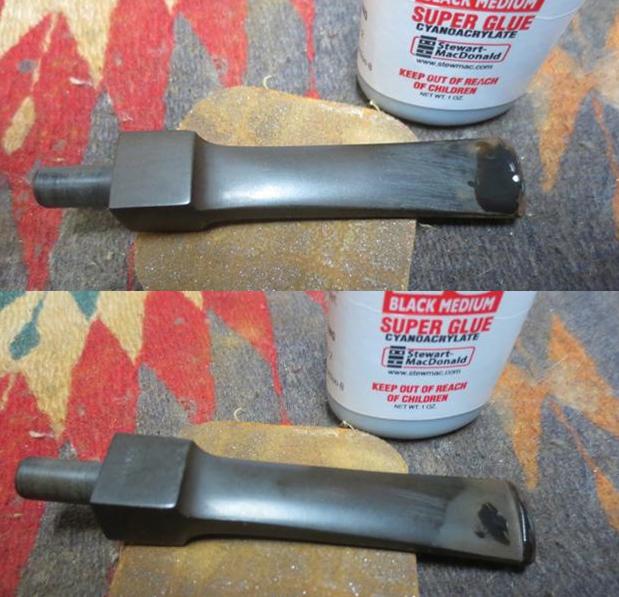
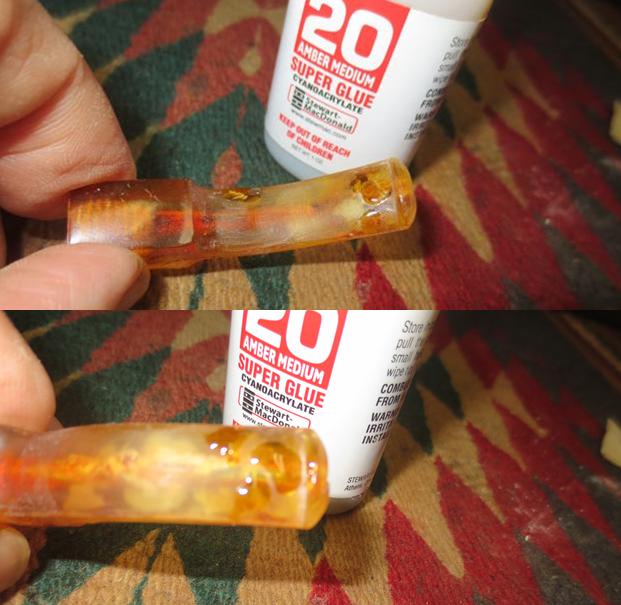
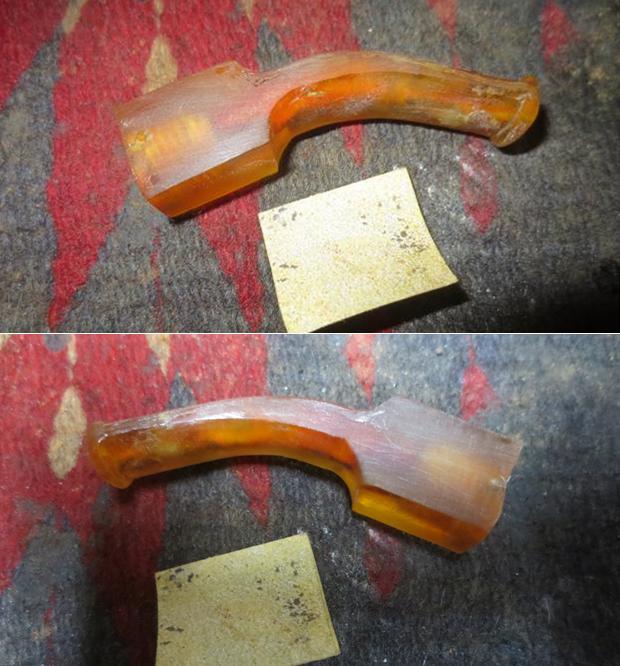
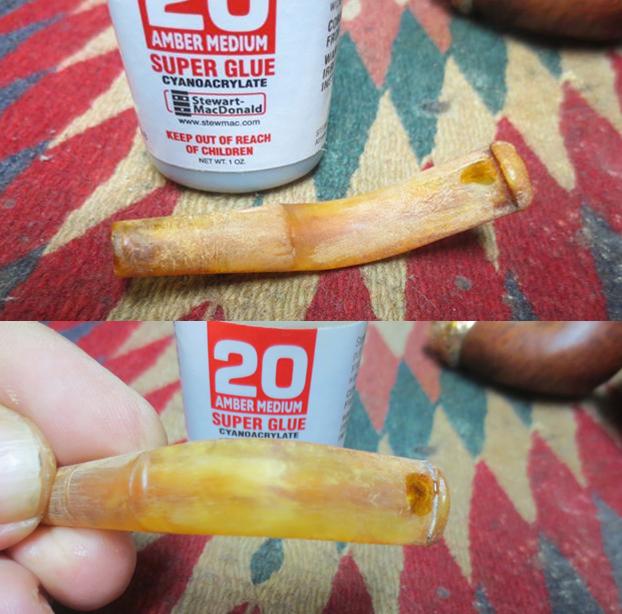
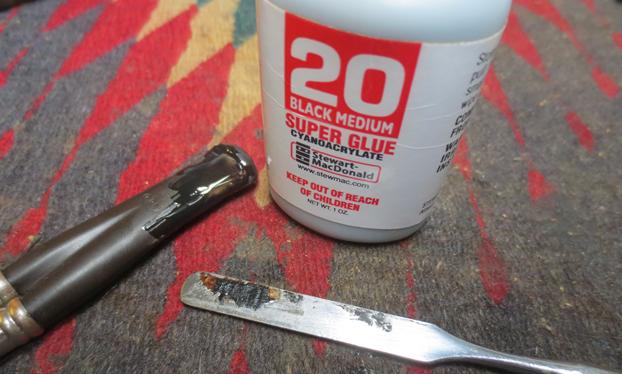
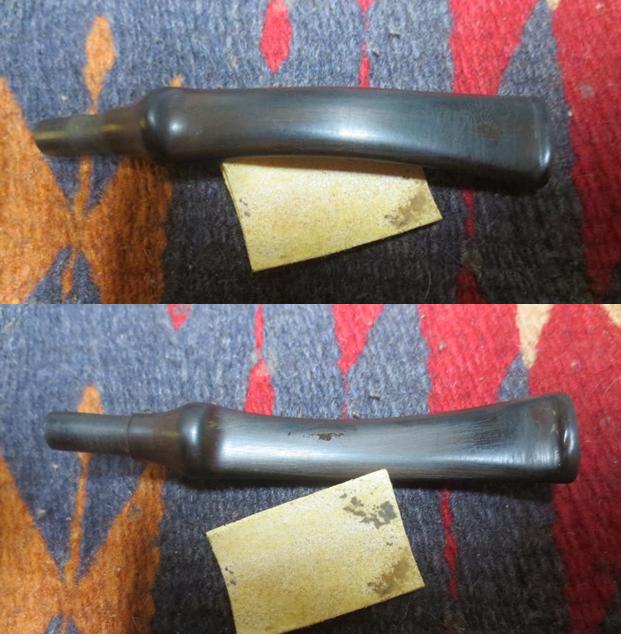
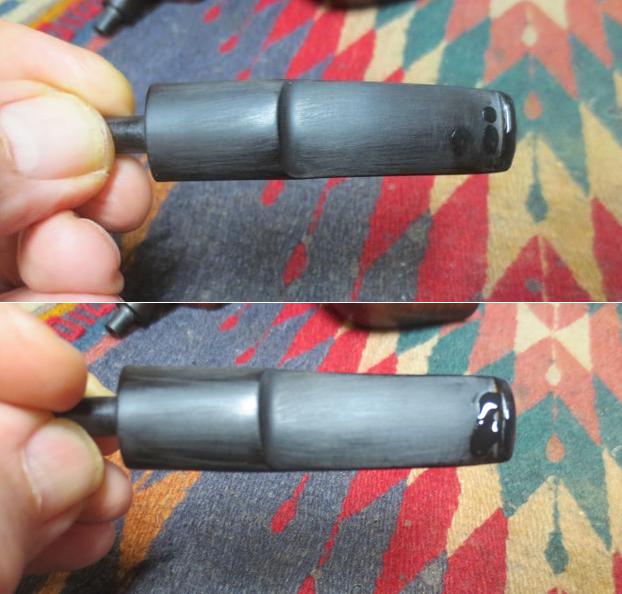
 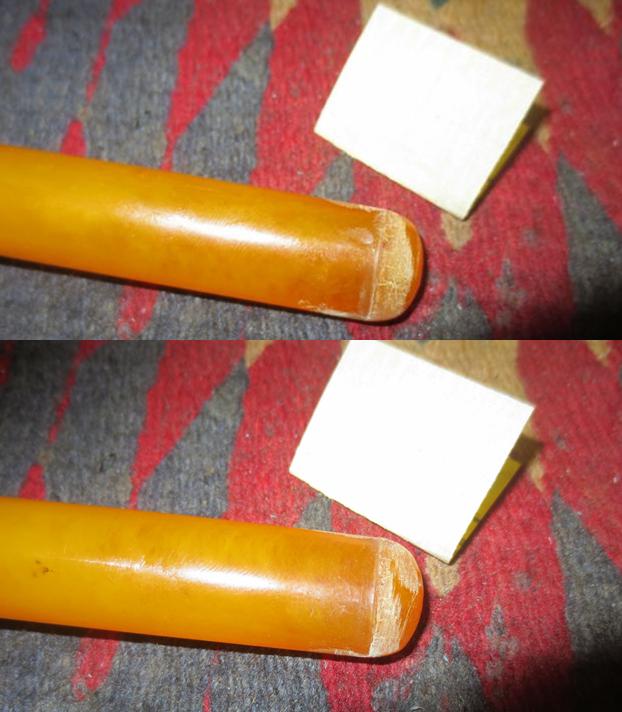 I filled in the tooth marks with amber super glue. I purposely overfill the areas so that as the glue dries and shrinks it still fills in the dent. I set the stem aside to let the glue cure.
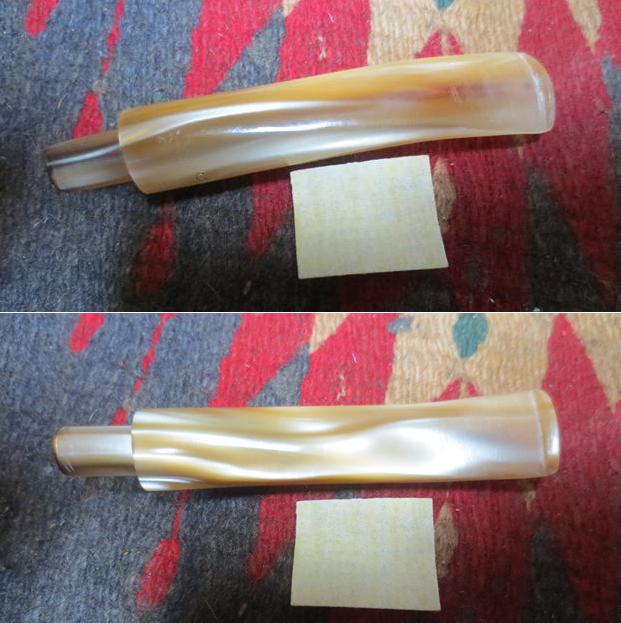
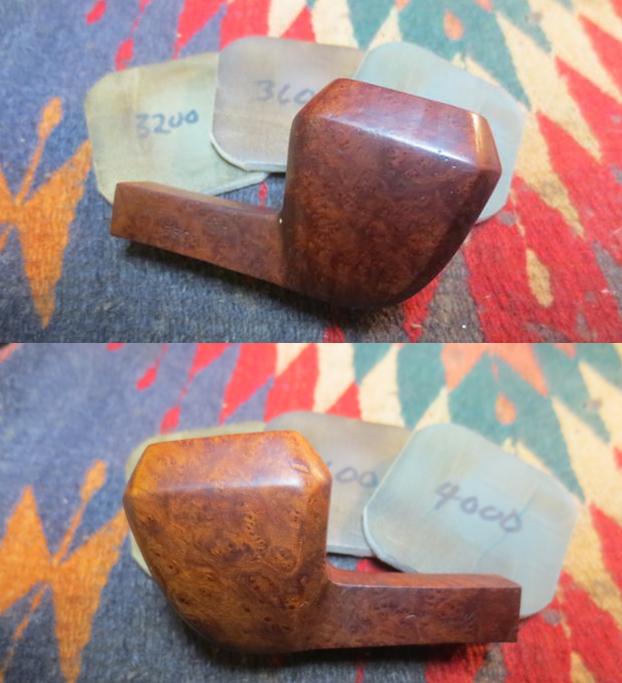
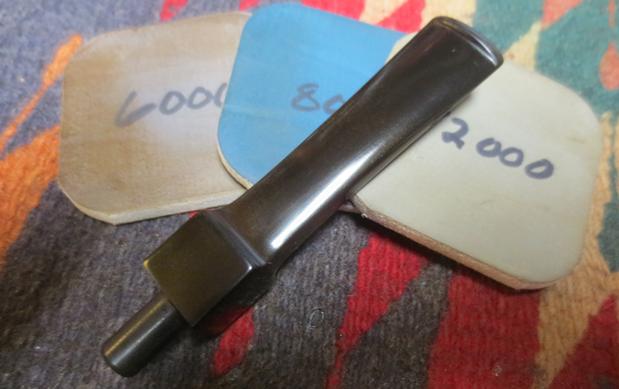
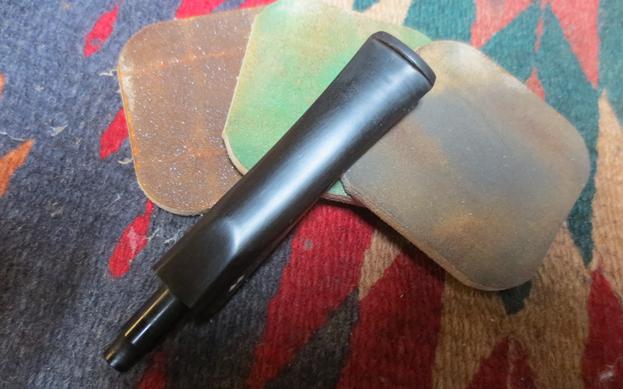
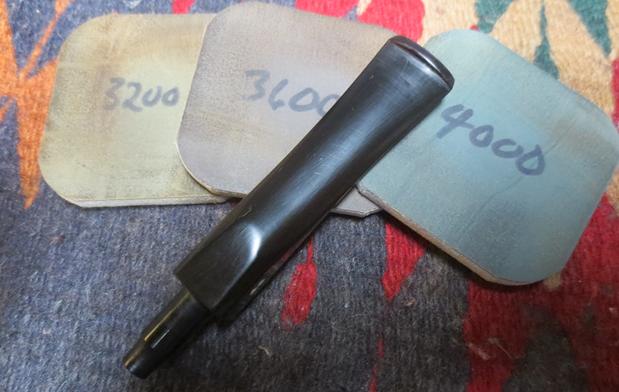
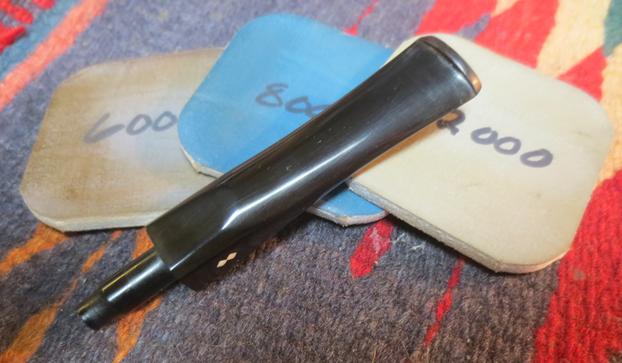
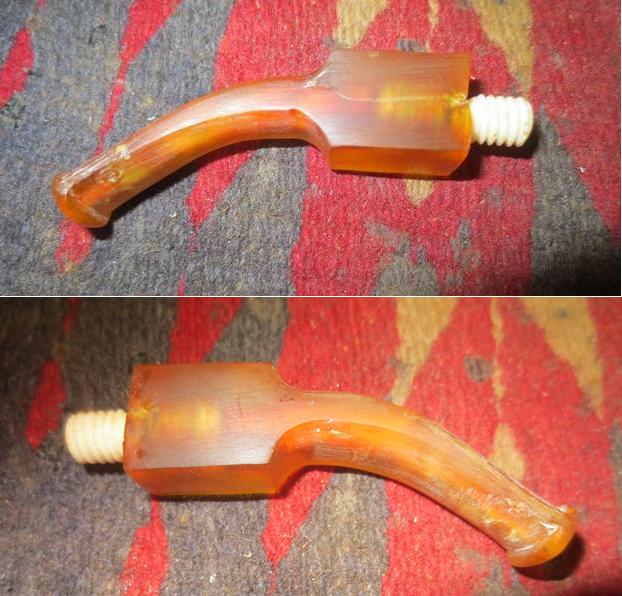
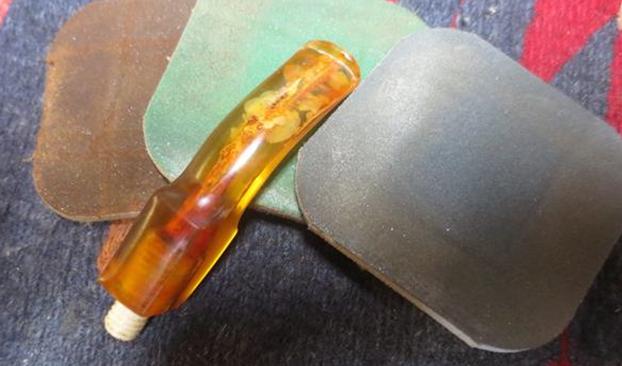
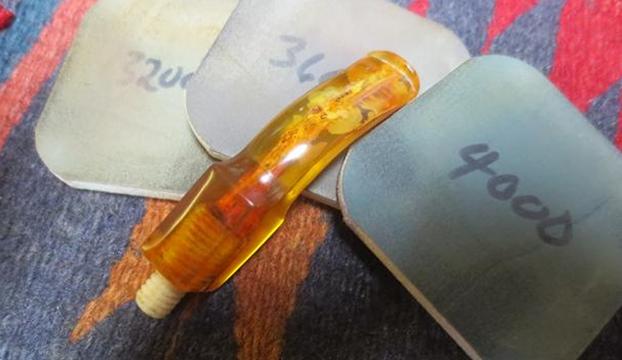
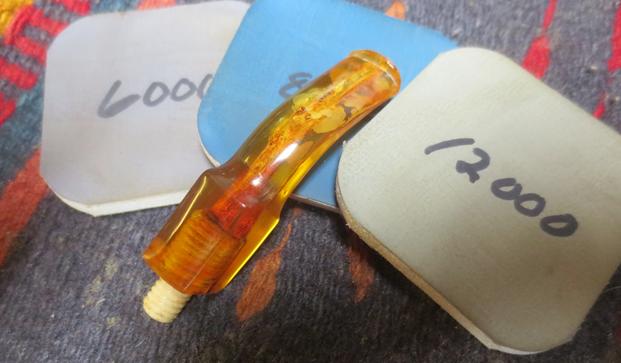
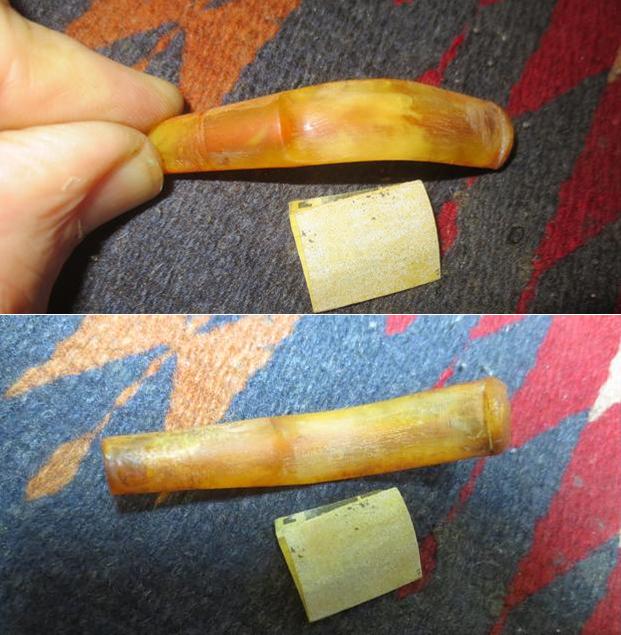
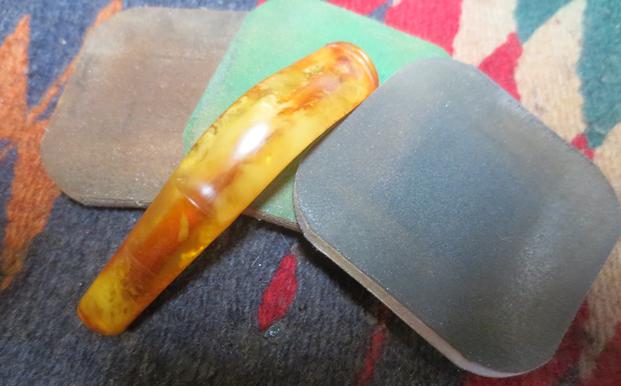
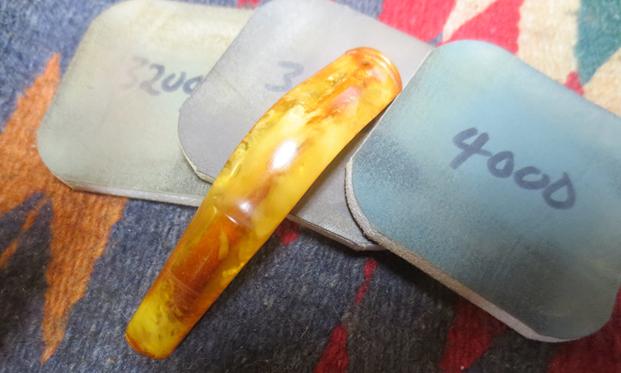
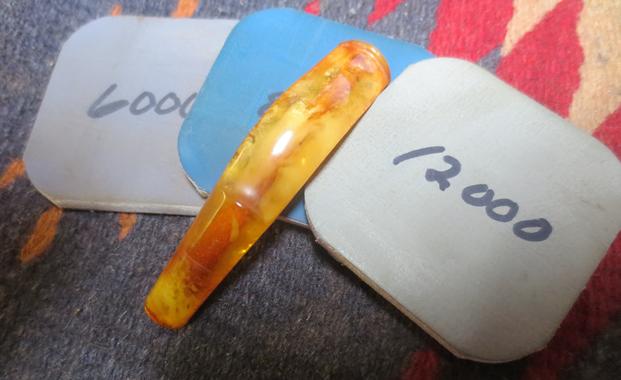
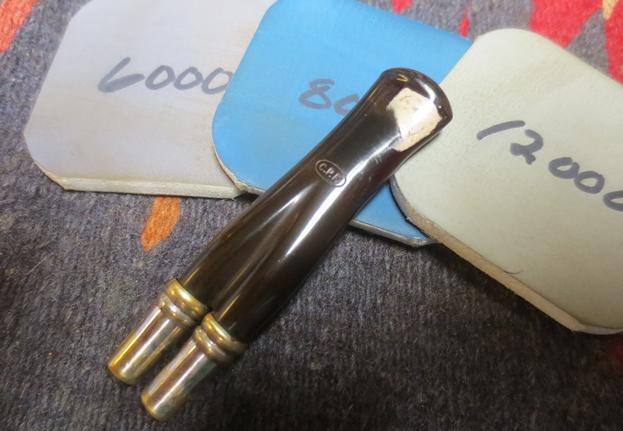
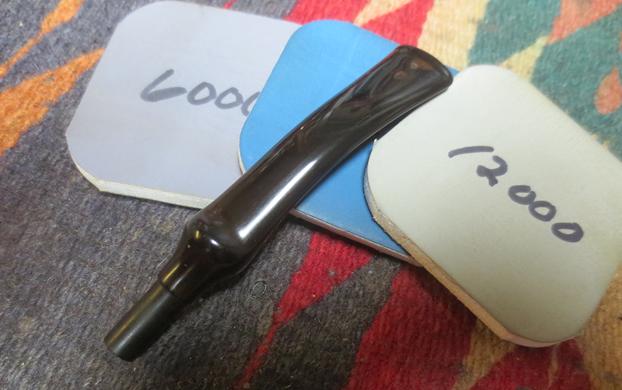
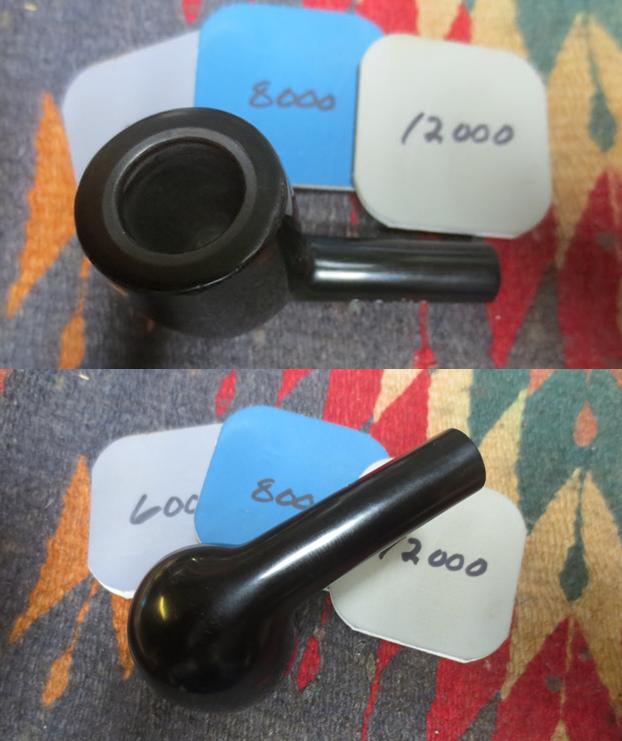
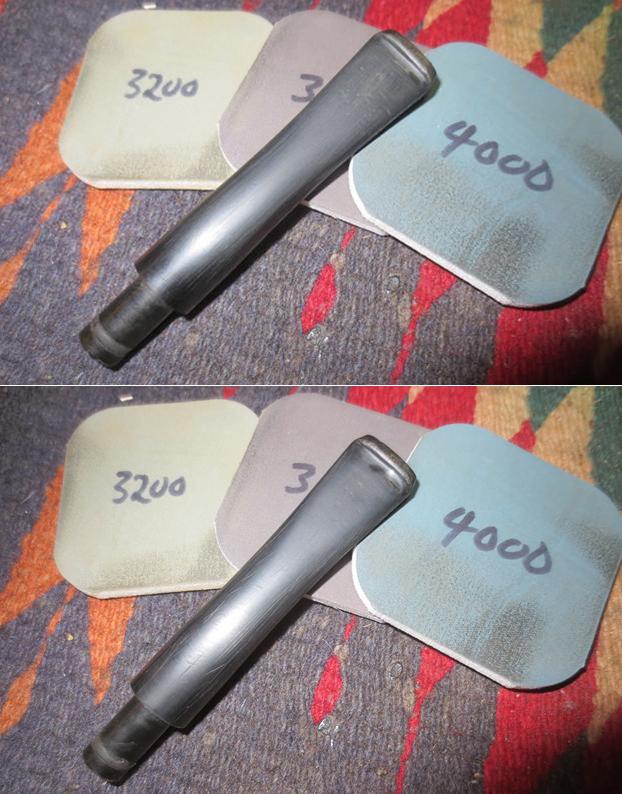
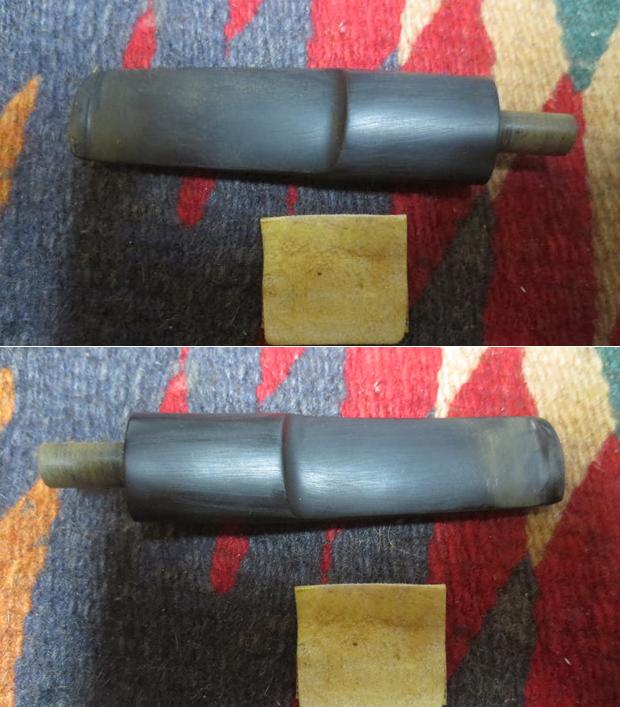
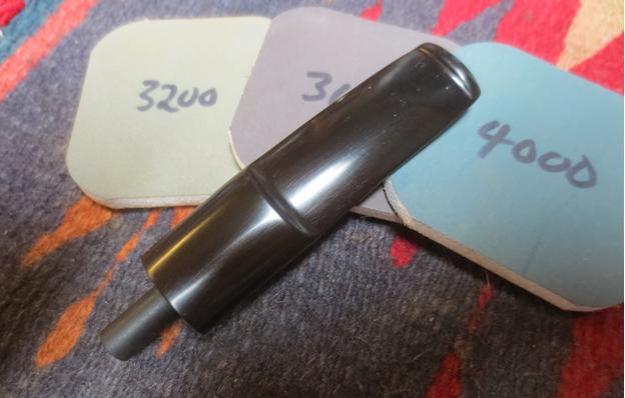
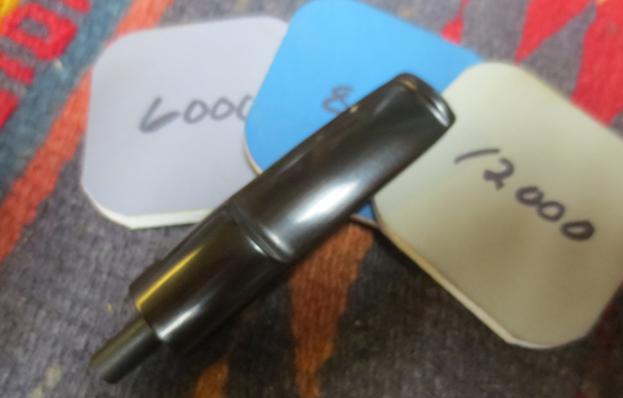
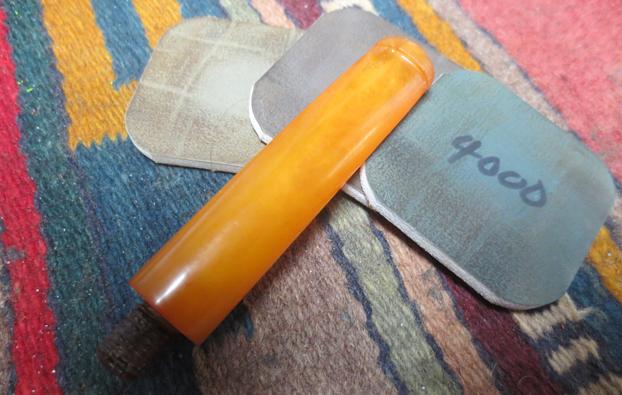
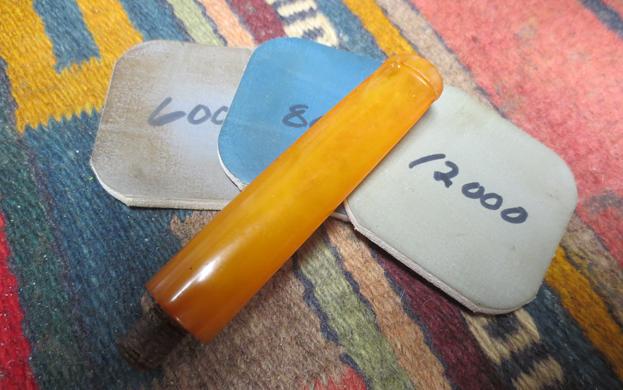
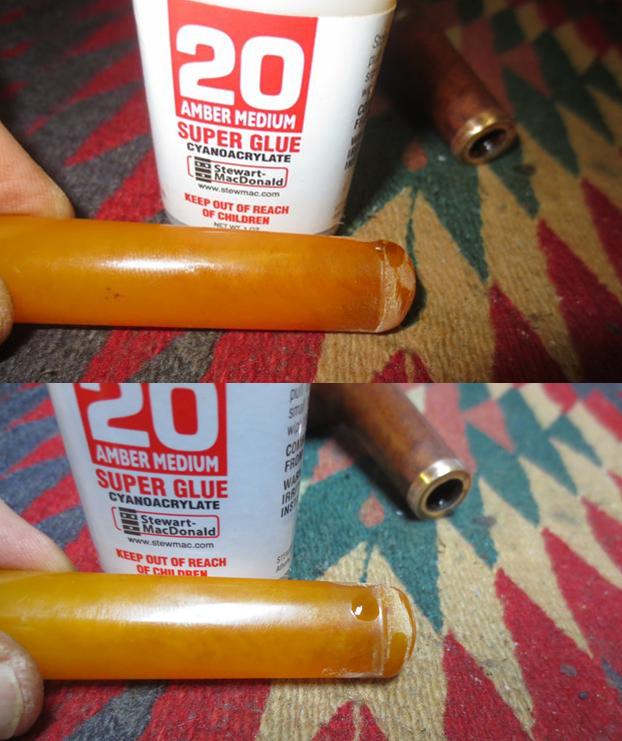 Once the repairs had dried I sanded them smooth with 220 grit sandpaper. I polished the stem with micromesh sanding pads – wet sanding with 1500-2400 grit pads and dry sanding with 3200-12000 grit pads. I rubbed the stem down with Obsidian Oil after each sanding pad.
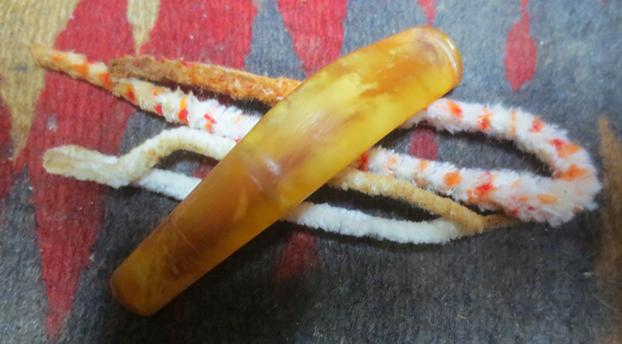
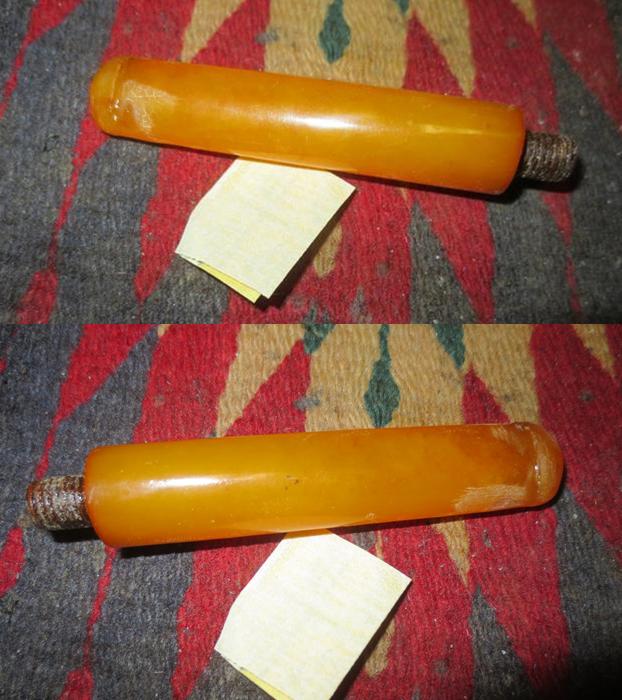
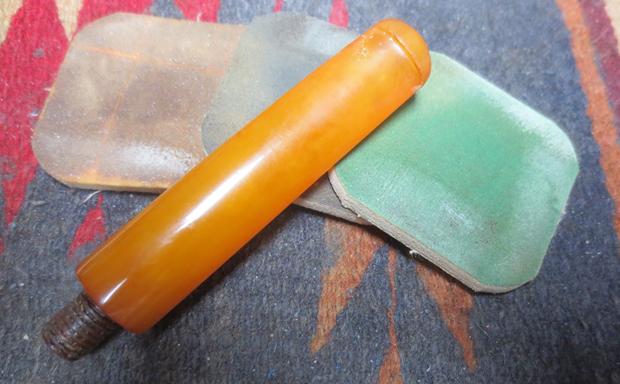
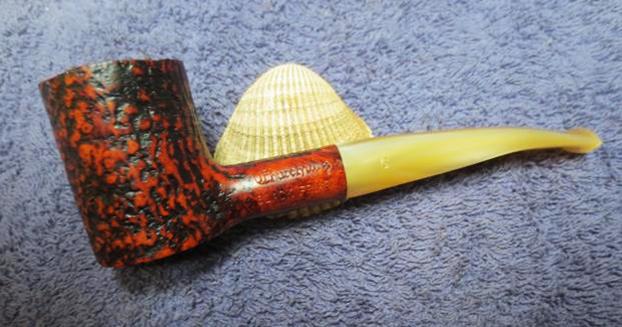
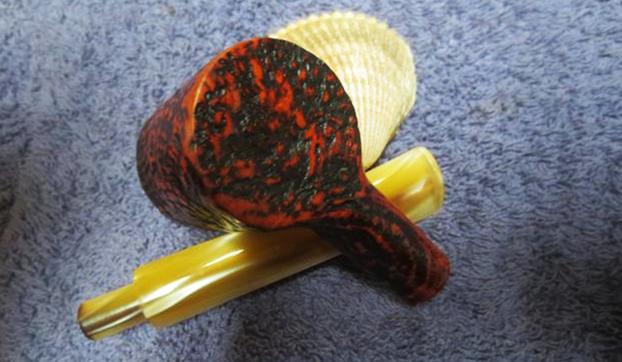
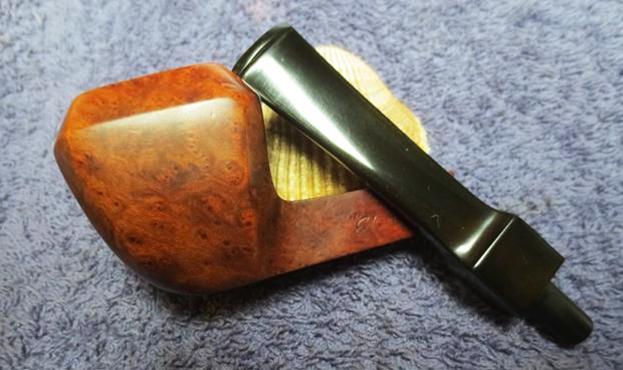
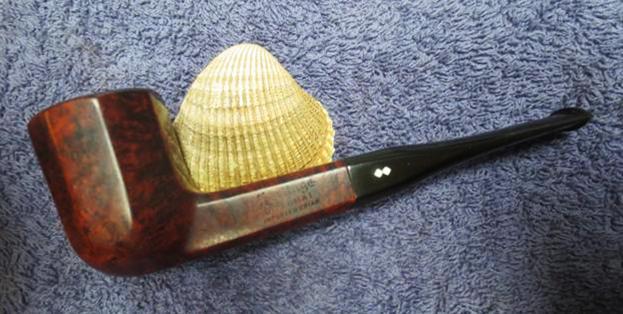
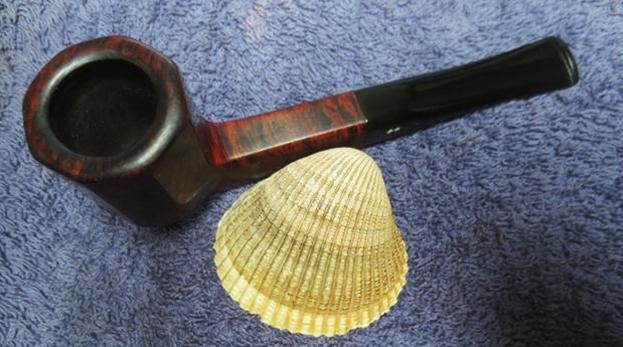
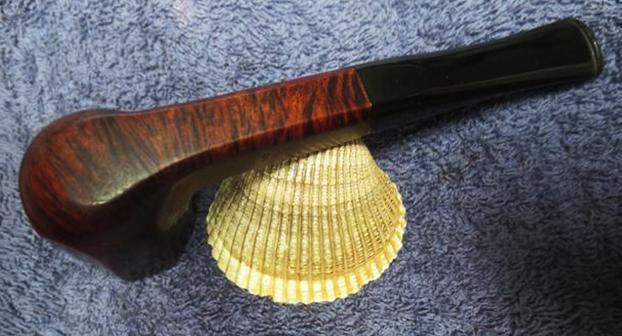
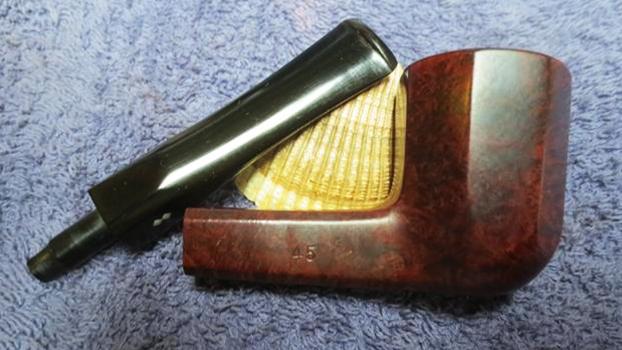
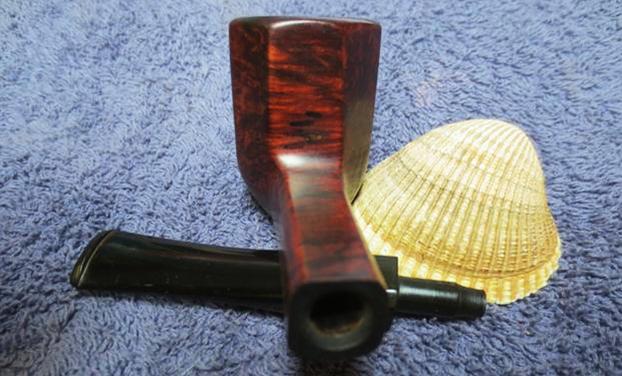
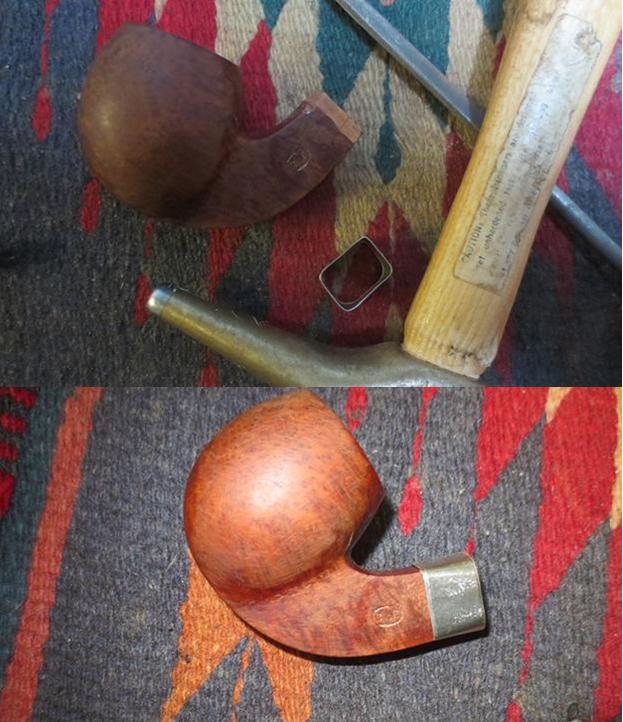
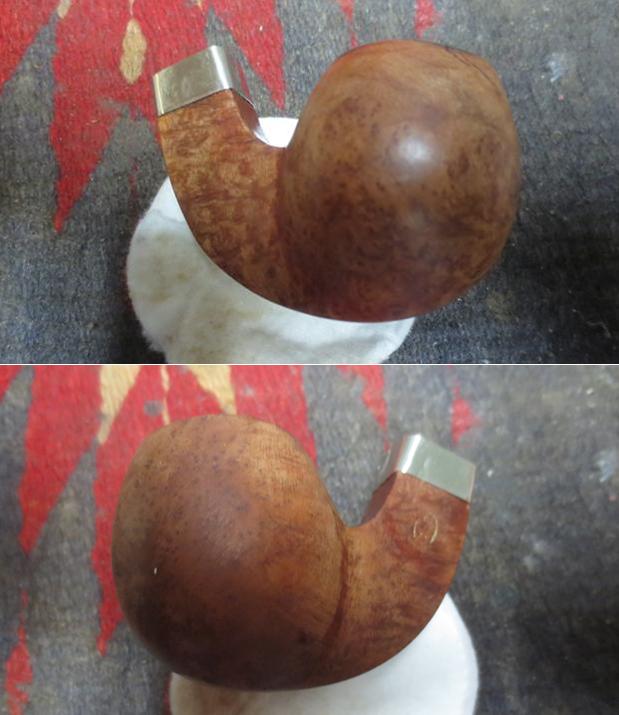
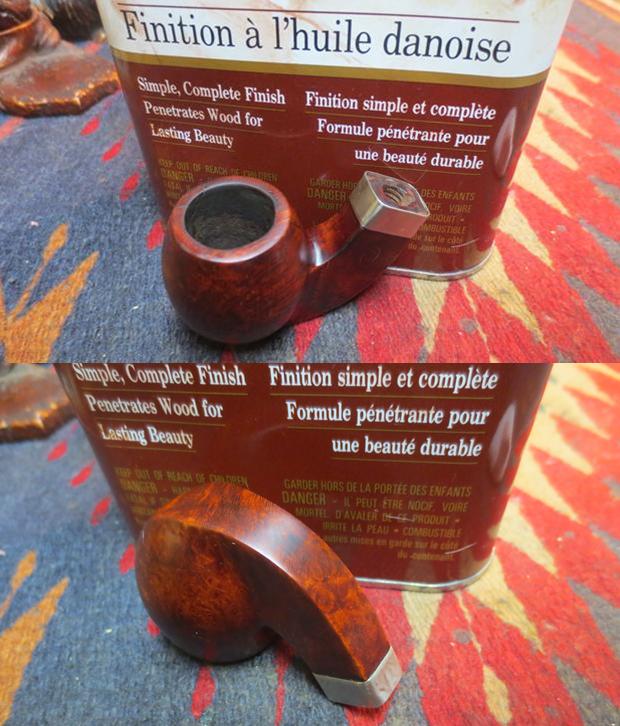
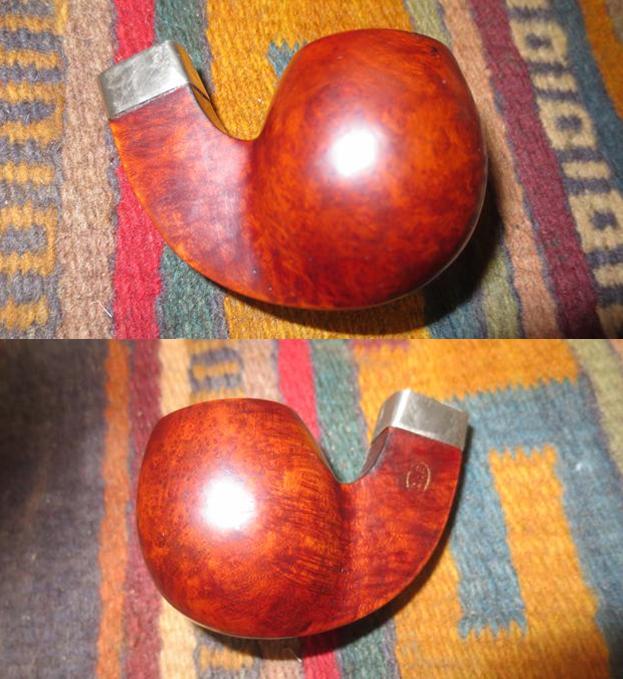
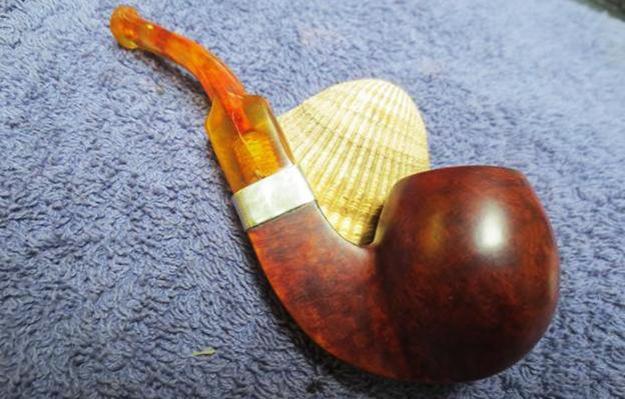
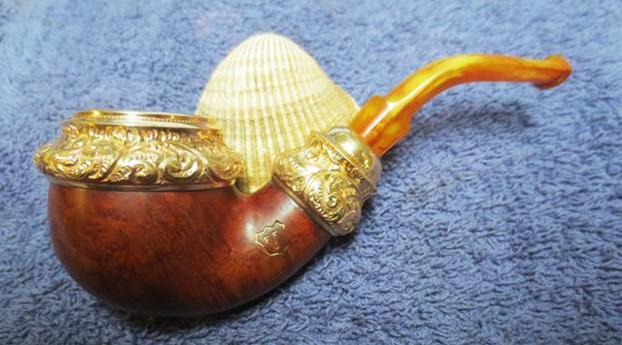
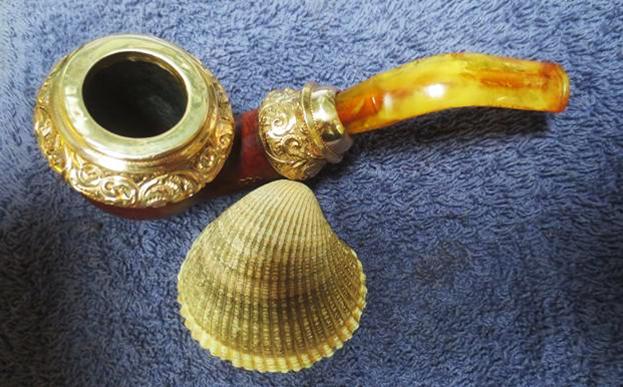
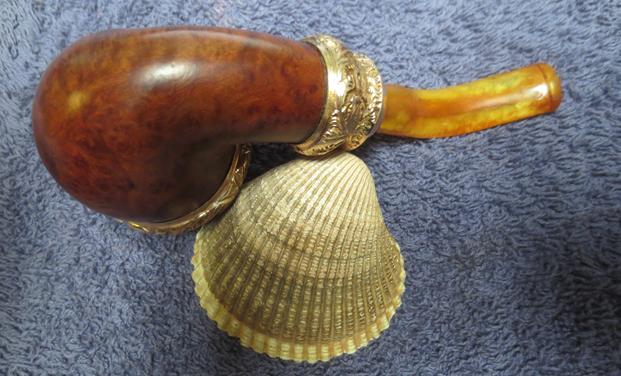
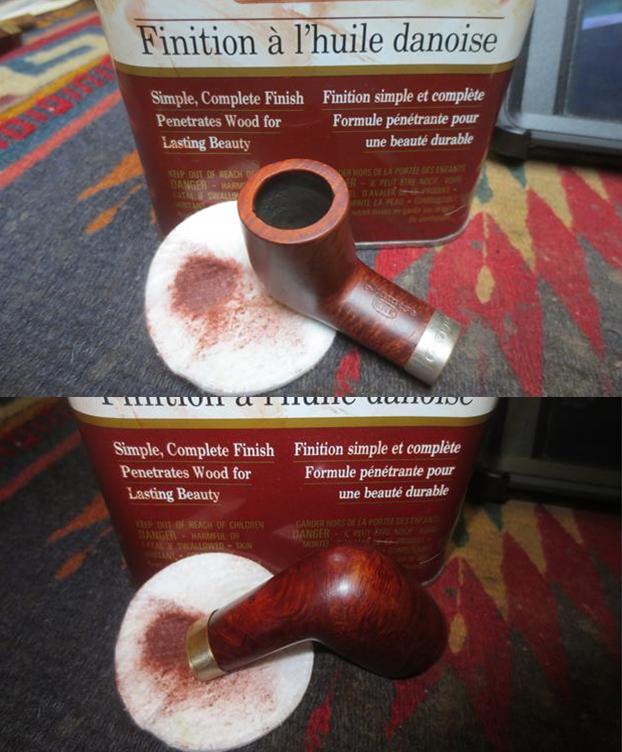
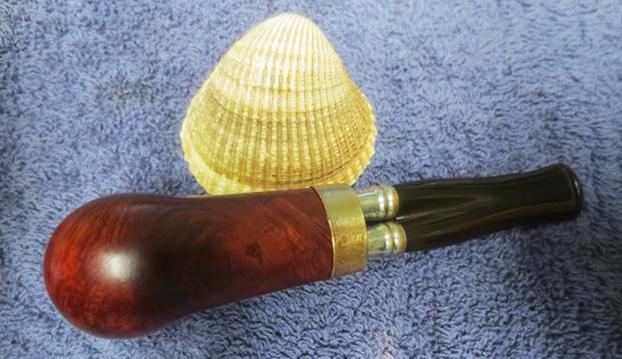
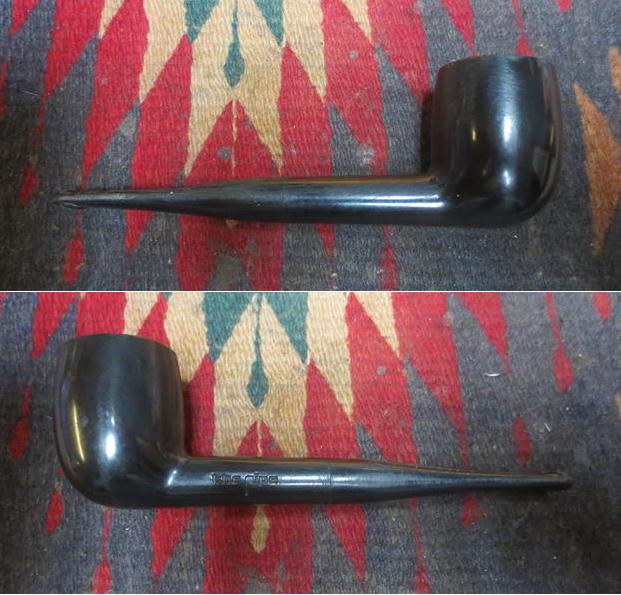
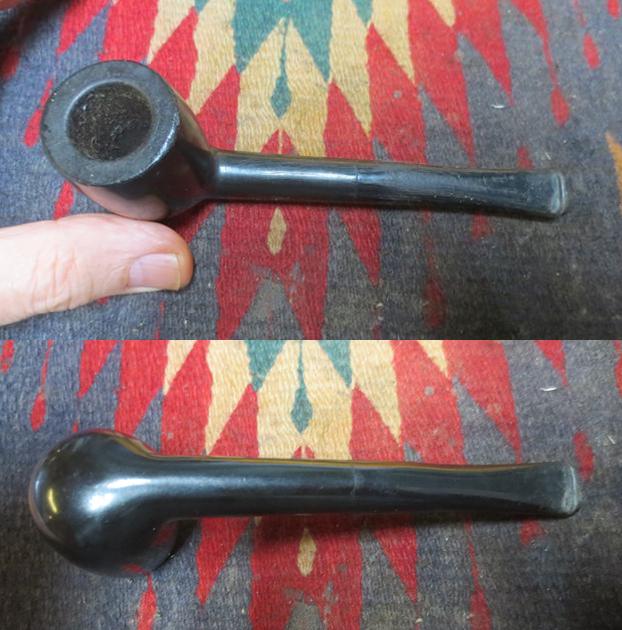
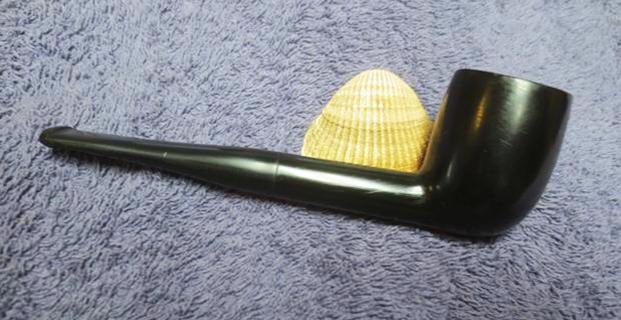
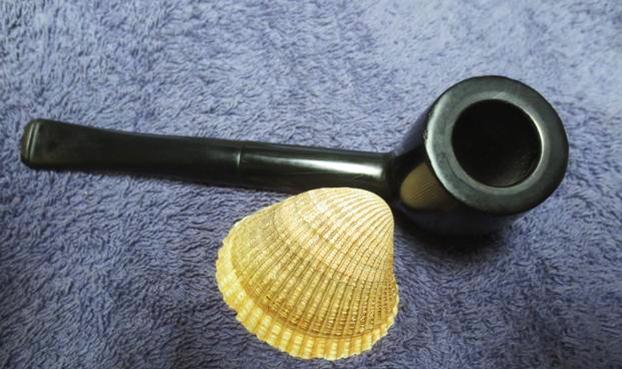
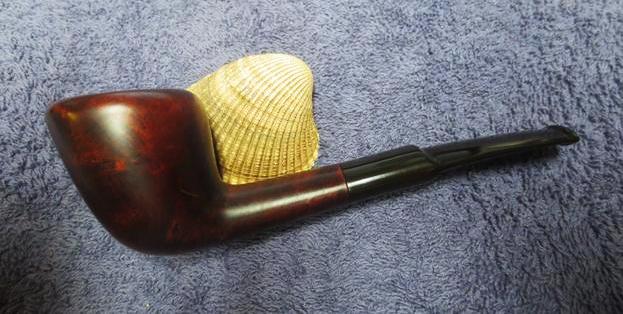
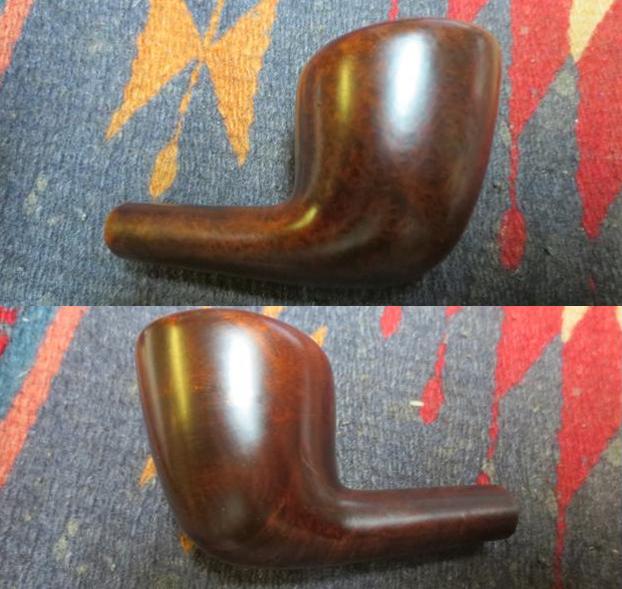
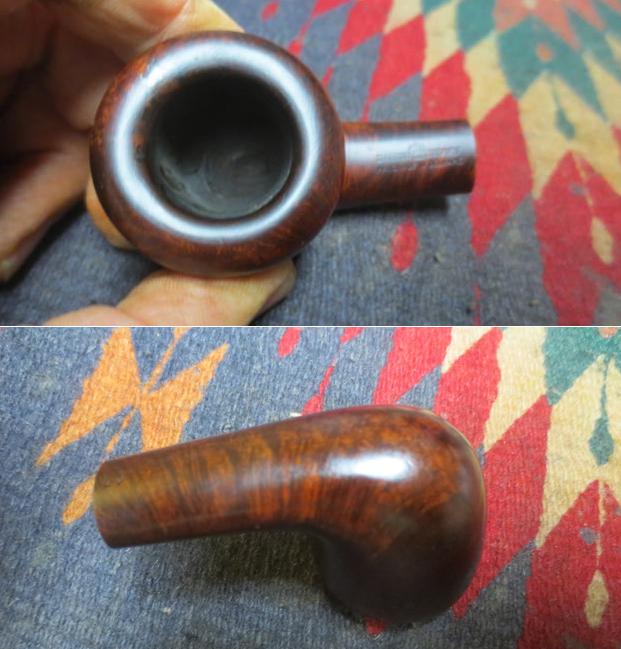
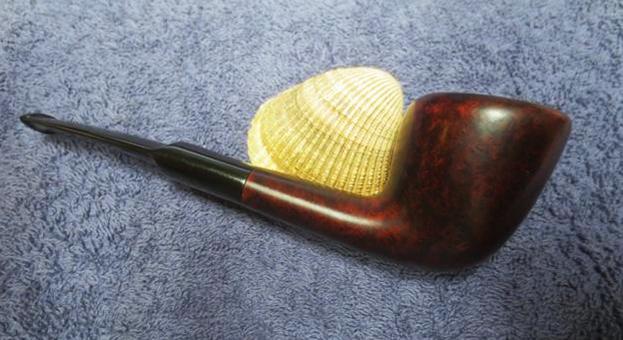
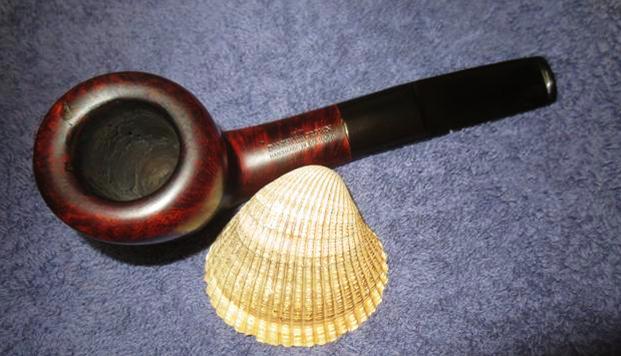
 I cleaned up the threads a bit on the old bone tenon and turned it in place into the mortise. It fit snuggly and held tightly in the shank. I buffed the pipe and stem with Blue Diamond on the buffing wheel and then gave the bowl and stem multiple coats of carnauba wax to shine and protect. I buffed the pipe with a clean buffing pad to raise the shine and hand buffed it with a microfiber cloth to deepen the shine. The finished pipe is shown in the photos below. It is quite a large pipe. The dimensions are, Length: 6 ½ inches, Height: 2 inches, Diameter of the bowl: 1 3/8 inches, Chamber diameter: 7/8 inches. I am pleased with the way the pipe turned out. Thanks for looking.