Blog by Steve Laug
My brother Jeff sent me a link to a pipe he thought might interest me on eBay. He was right; we bid on it and won. The shape of the clamshell case (even though it is worn and tired looking) caught my attention. At its widest point it is 4 inches long, it is 3 ¼ inches wide and 2 inches tall. It is the perfect size case to put in a coat pocket with not too much of a bulge. The brass catch/latch was visible and was attached with nails to the front of the bottom half of the case. The wooden case is visible under the worn leather. On the back side of the case you can see the hinges, also attached with nails. (He took photos of the case and the pipe before he cleaned it up.)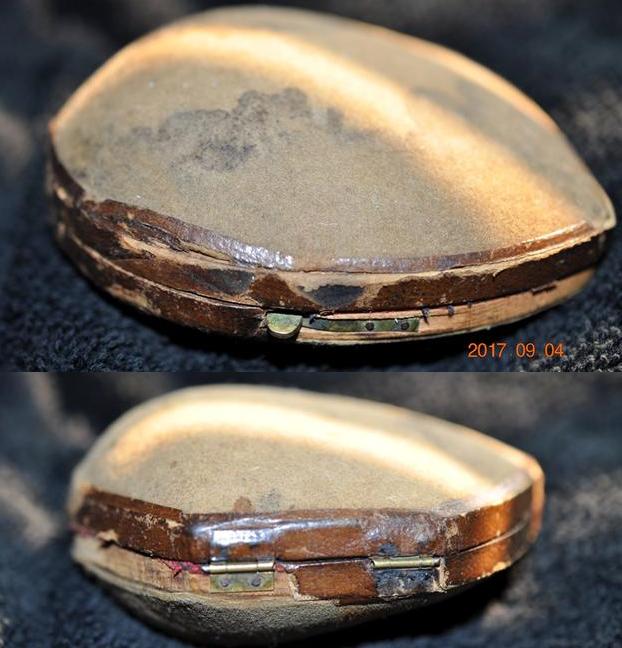 The plush red lining covered entire inside of the case. While it was worn and a little soiled it still showed some of its original glory. The top half of the case had a gold banner with FEC in a shield and two ribbons unfurled below the shield that read “FINEST QUALITY”.
 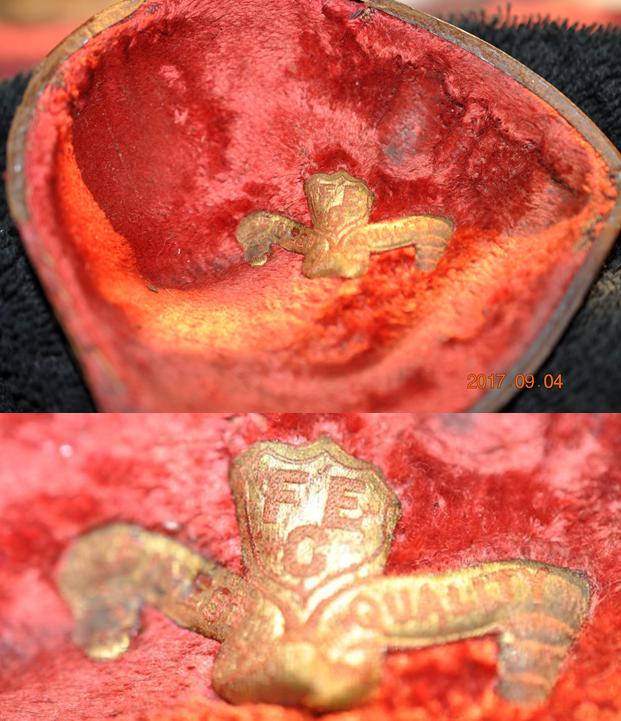 The bottom half the plush lined case had been form fitted to hold the bowl and stem separated but safely held in place. Then the pipe itself was intriguing. It looked to be in decent condition and was a brand with which I was unfamiliar. It looked very old and clean for a pipe of this age.
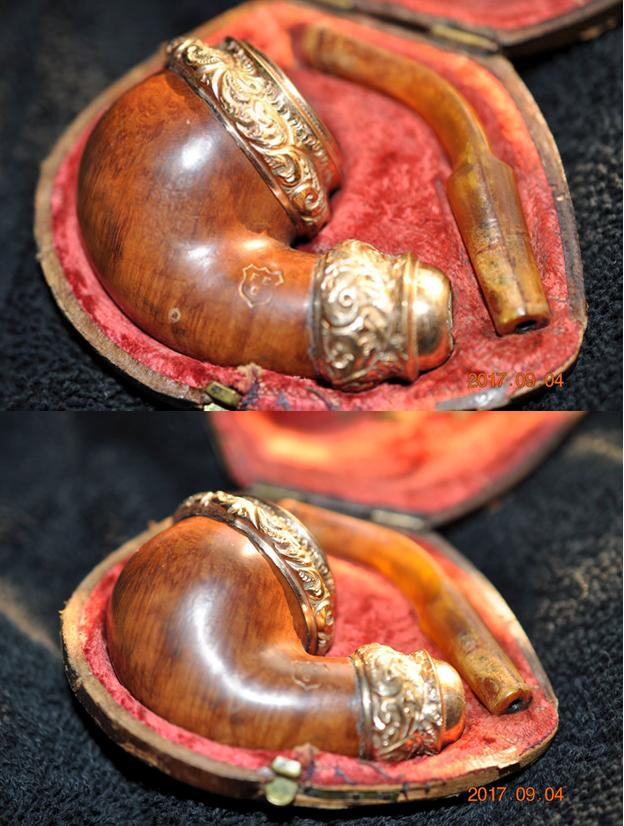 Jeff took a photo of the inside of the case to show the form of the underside without the pipe and stem in place. It is obvious the case was made especially for this pipe and stem. The fit is perfect and the forms match the shape of the bowl with its bling and the saddle stem.
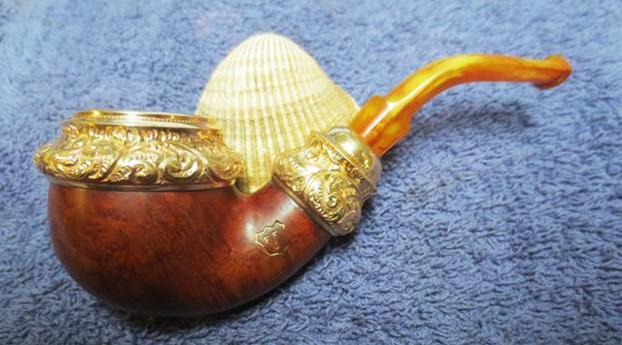
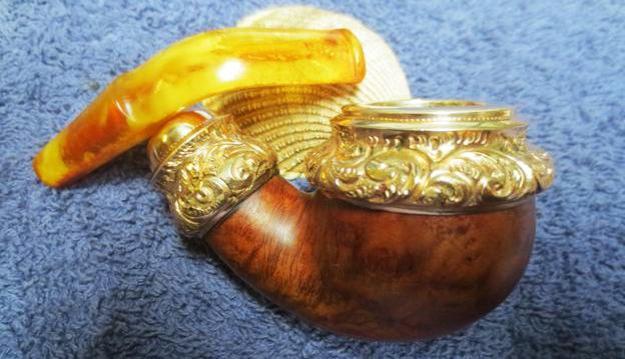
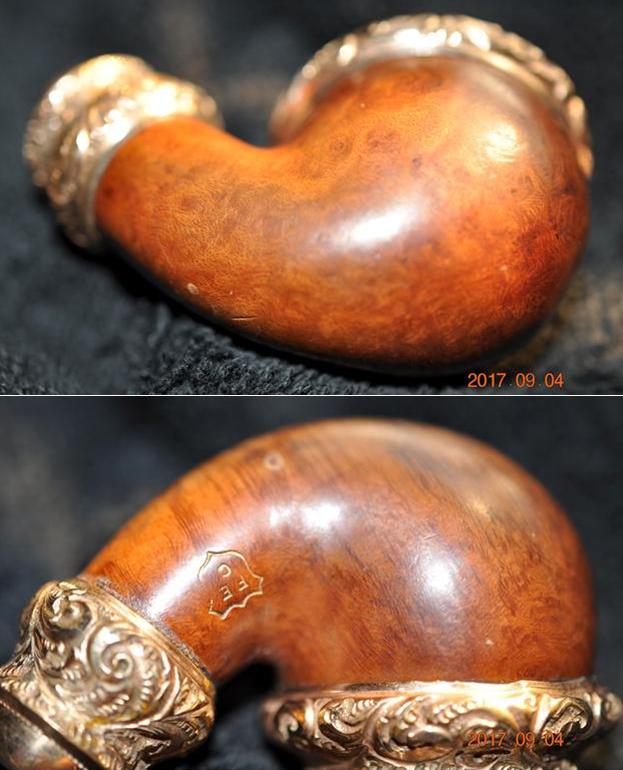
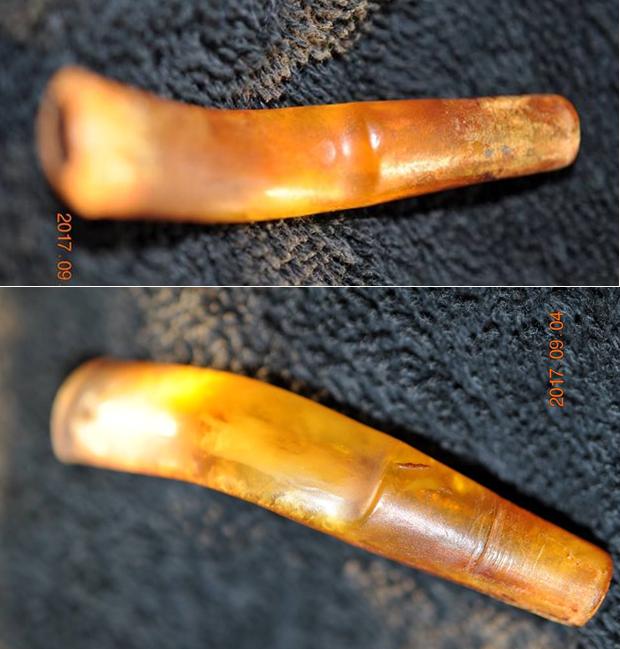
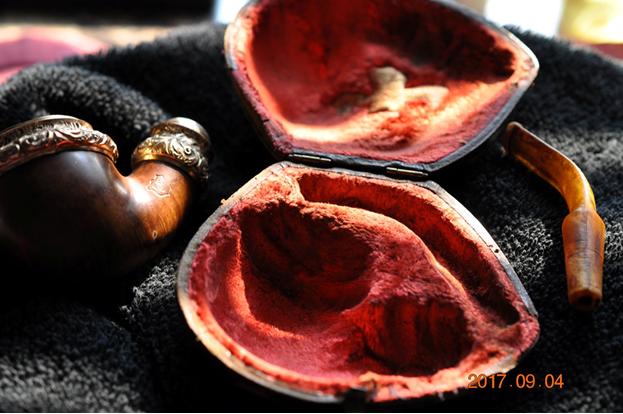 Jeff took photos of the pipe and stem from various angles to capture the condition of the pipe. Other than some grime and dirt from sitting and the normal cake and tars in the bowl and shank the pipe was in really good shape. There were some scratches and dings in the briar and in the Bakelite stem but nothing too serious. The first and last photos below show the FEC shield on the left side of the shank. It was worn on the right side of the shield but it was very clear.
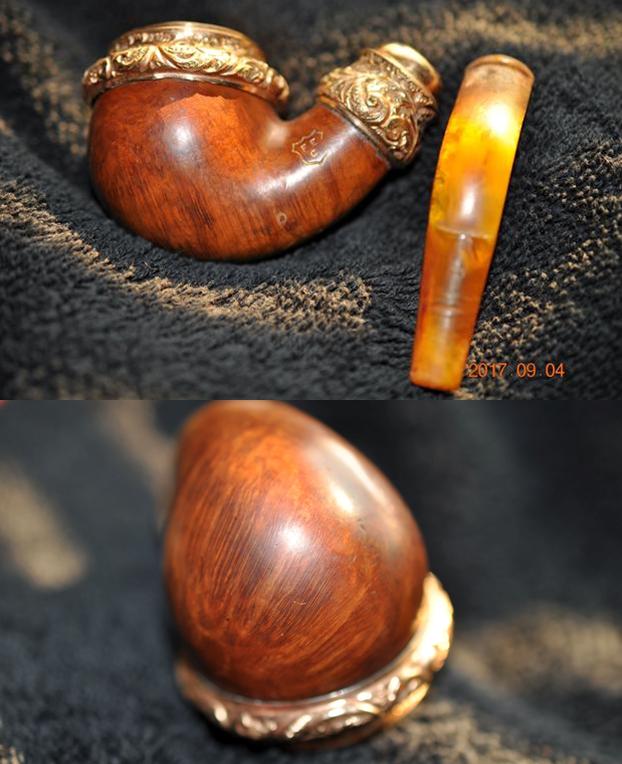
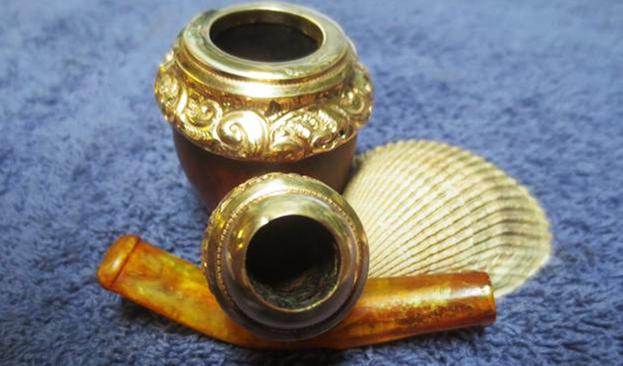
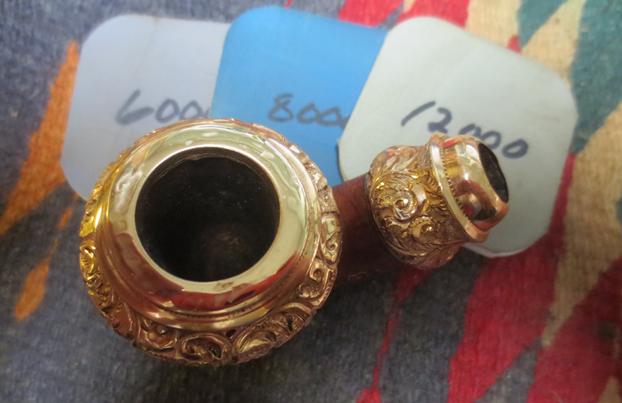
 The filigree shank and rim adornments were in really good condition with no chipping or scratching. There were also no nail caps showing that held both in place on the rim and the shank. The flat portion of the gold rim top was dented and there was some darkening. The next photos show the rim top and sides of both the rim cap and shank cap. There was grime and grit in the swirls of the gold but other than being dirty it was in good condition.
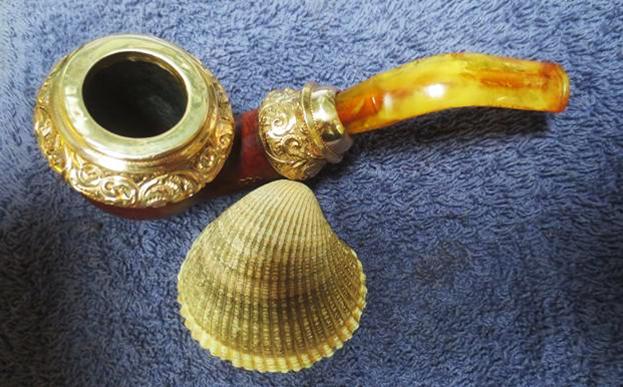
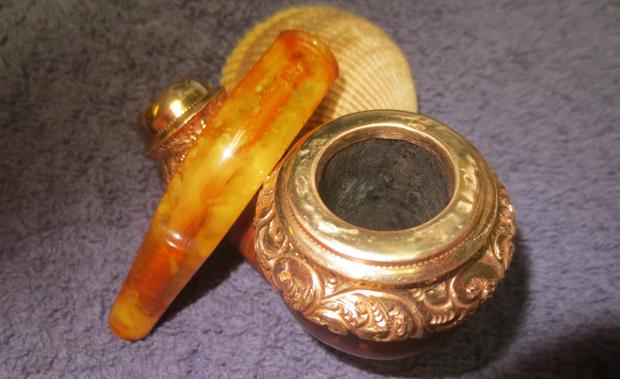
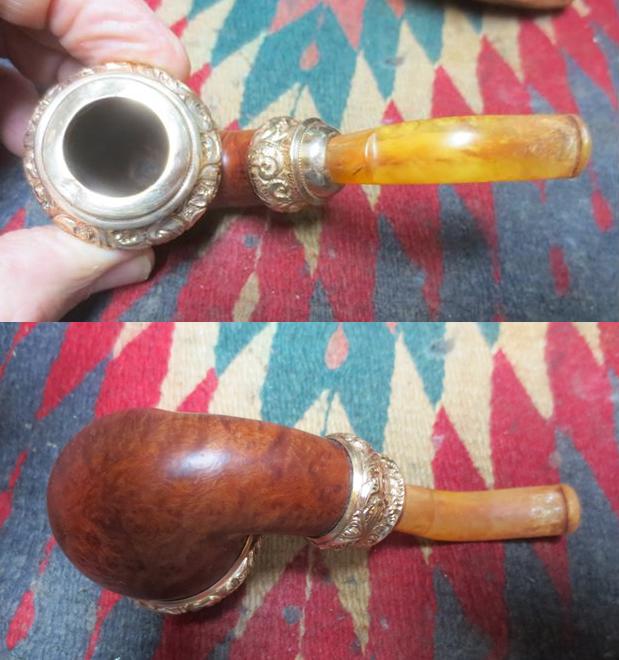
 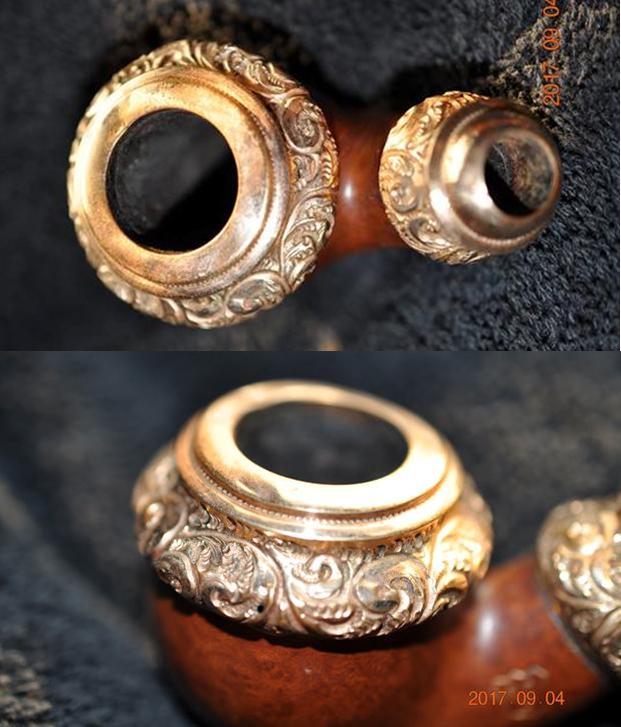 The next photo is a view of the pipe looking down the end of the shank. The build up of tars and oils on the walls of the mortise are very clear. The debris flowing out of the end of the tenon is also visible in this photo.
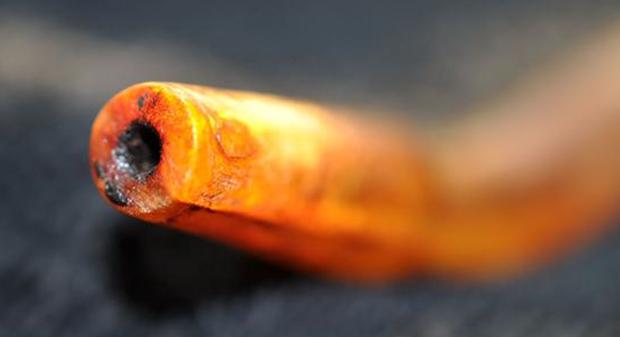
 The stem was a bit of a wreck with tooth chatter, tooth marks and nicks all around the top and underside. The airway in the stem is black with tars and oils. The third and fourth photos below show the nicks and scratches in the tenon of the Bakelite stem. The fifth photo below shows the airway at the end of the tenon – note how dirty the airway is.
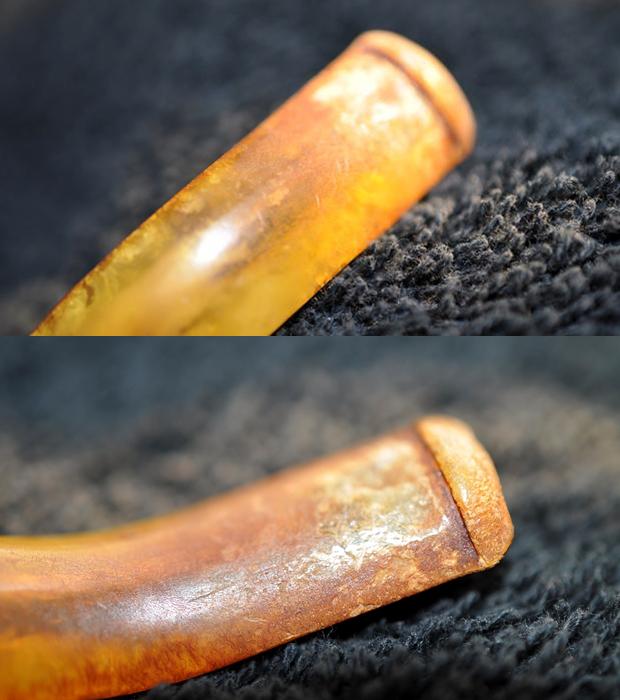
 As I mentioned above I had no idea of who made the FEC brand or even what country it came from. In many ways it looked like an older American pipe of the same ilk as CPF or WDC. The gold filigree on the cap and shank made me think of both of those but hunting for an American brand with those initials turned up absolutely nothing. I looked in the index of my copy of “Pipes, Artisans and Trademarks” by Jose Manuel Lopés’ and found a listing. It was short and to the point but now I had my information.
FEC is the old English brand of Friedrick Edwards & Co., established in London around 1884, and which mainly produced meerschaum and calabash pipes. The company was bought in 1904 by S. Weingott & Sons, but continued separately until 1916.
Armed with the company name behind FEC I went back to the web and did some more searching. I found the same information as quote above on Pipedia. I also found a Briar Pipe Makers in London Directory on Pipedia. There was a listing for FEC. https://pipedia.org/wiki/Briar_Pipe_Makers_in_London_Directories. It read as follows:
Edwards, Friedrich & Co. – 25 Gingshouse St., W [at this point in time, John Solomon Weingott was a full partner of F. Edwards & Co. who were primarily meerschaum pipe makers]
Now I had some idea of the age and provenance of the pipe in my hands. It was made in the FEC factory at 25 Gingshouse St., W in London, England. Since Friedrich Edwards & Co. made primarily meerschaum and calabash pipes before joining with S. Weingott & Sons in 1904 I was pretty confident that this pipe came out after that merger. I knew that the brand continued separately until it was subsumed by S. Weingott & Sons in 1916. That gave me the dating parameters for the pipe. It was made between 1904-1916 which certainly fit the style of the pipe and its ornamentation.
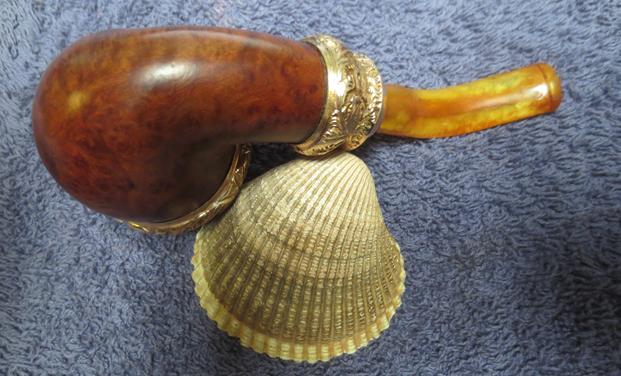
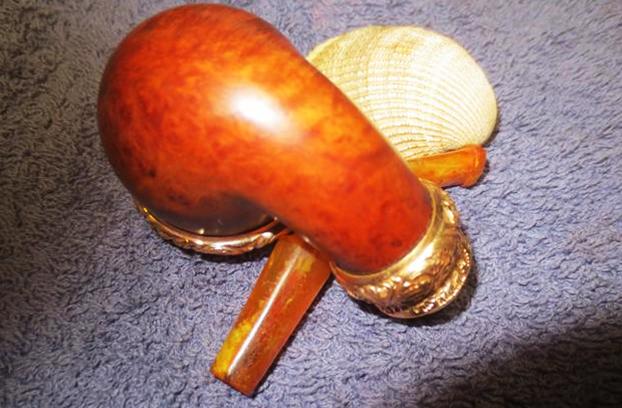
When the pipe arrived in Vancouver, I could see that Jeff had done a lot of cleaning and scrubbing on before he sent it to me. The scrubbing of the gold filigree would have been a labour of love in that it was so intricate and detailed that the grit and grime would have fought hard to remain in all of the crevices. He had reamed the bowl with a PipNet pipe reamer and a Savinelli Fitsall Pipe Knife. He cleaned up the rim and the exterior of the bowl with Murphy’s Oil Soap to remove the grime and debris on the briar itself. He exercised care around the gold stamping on the left side of the shank. He had cleaned out the mortise and the airway in the shank and the stem with alcohol, cotton swabs and pipe cleaners. The stem damage was clearly visible and the nicks and marks stood out in clarity. There were some deep tooth marks on both sides of the stem at the button and the slot in the button still had some tars and dark spots in the corner of the slot. When I brought the pipe to my work table I took some photos of it as I opened the case. It really was a beautiful old pipe. 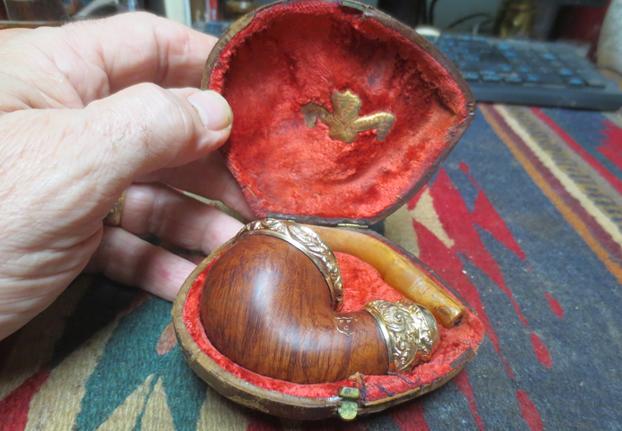 I took it out of the case and put it together to get a feel for its size and appearance. While it was petite it still have a full sized bowl. The briar had some great grain patterns around the bowl and shank.
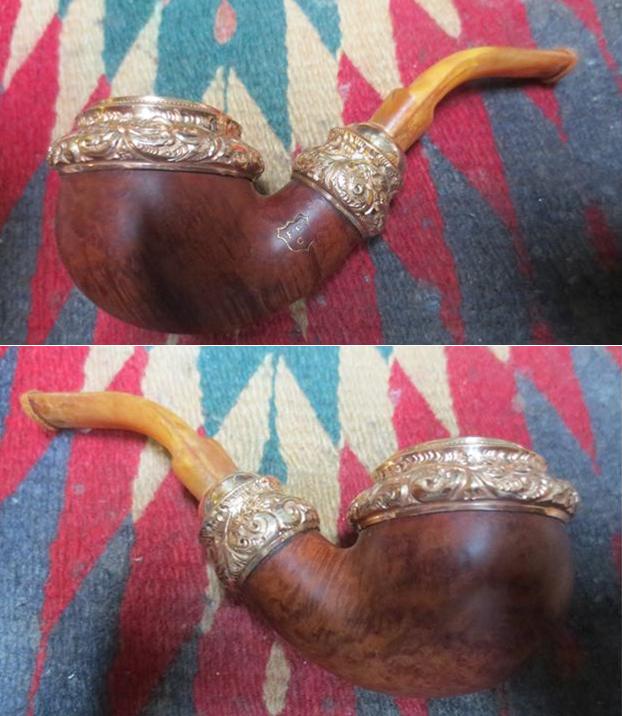
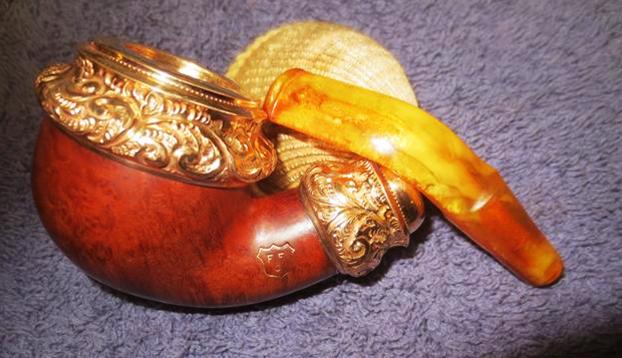
 Jeff had done a great job cleaning up the gold filigree on the rim cap and shank cap. It looked amazing and had a rich shine to those spots on the pipe. The dents on the top of the rim can be seen in the photo below as can the clean bowl. I took a picture of the FEC Shield on the left side of the shank to show the condition of the stamping.
 When it arrived I could see that he had really worked over the stem and the airway from the top and bottom looked clean. The tooth chatter and marks on the top and underside are shown in the photos below.
 I decided to start working on the stem as it was the part of this pipe that needed the most work. I sanded down the tooth chatter with 220 grit sandpaper and was able to remove all of the chatter and some of the lighter tooth marks. I sanded the scratches and nicks on the rest of the stem and the tenon end and was able to smooth most of them out.
 I wiped off the stem with a cotton pad to remove the sanding dust and filled in the deep tooth marks on both sides near the button with amber super glue.
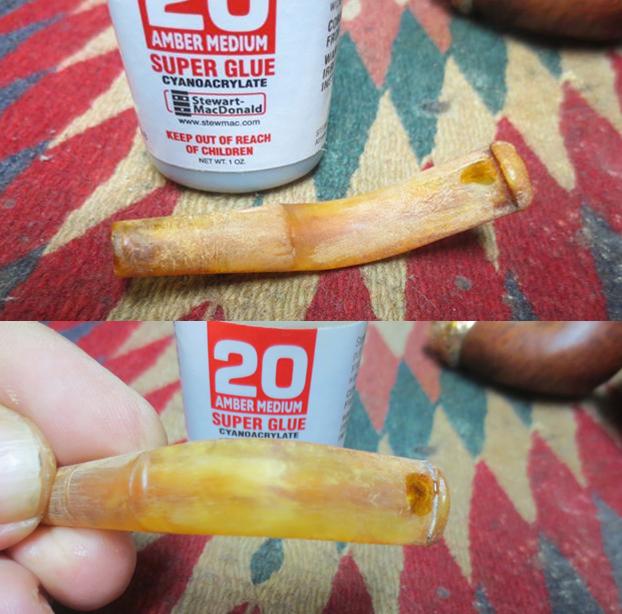 When the glue repairs had cured I sanded them flat with 220 grit sandpaper to blend them into the rest of the surface of the stem. I was really happy with the blend achieved by the amber super glue and the Bakelite stem.
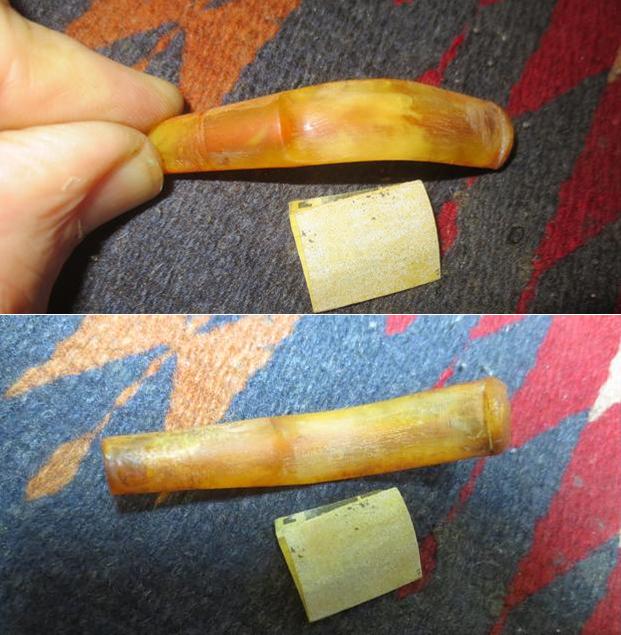 I cleaned out the remaining dark spots in the slot in the button and the tenon area of the stem with pipe cleaners and warm water. I was able to remove all of the left over darkening and the stem looked better.
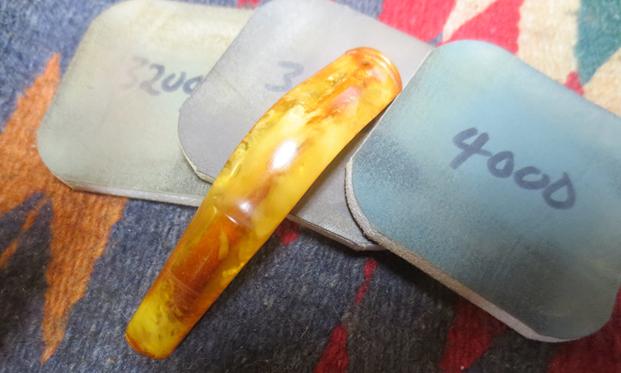
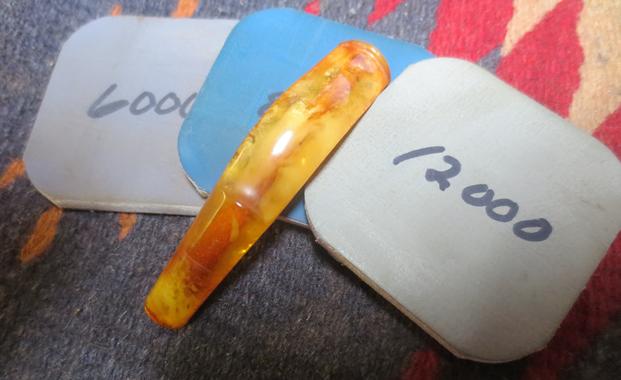
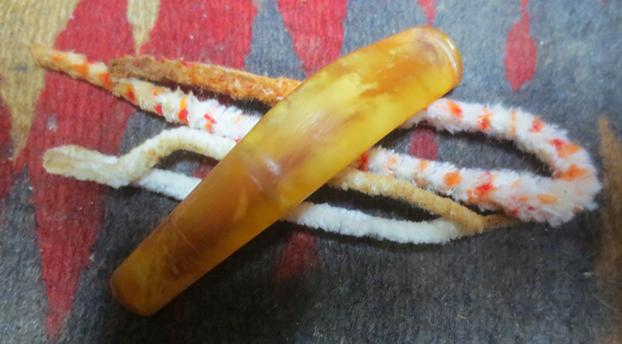 I polished the stem with micromesh sanding pads – wet sanding with 1500-2400 grit pads and dry sanding with 3200-12000 grit pads. I rubbed the stem down with Obsidian Oil after each pad and then proceeded through the pads. After the 12000 grit pad I gave it a final coat and let it dry.
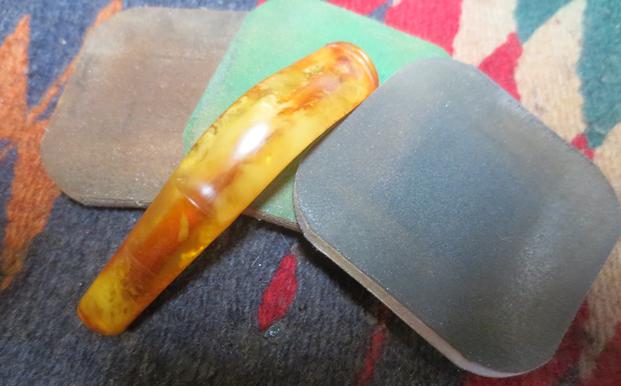
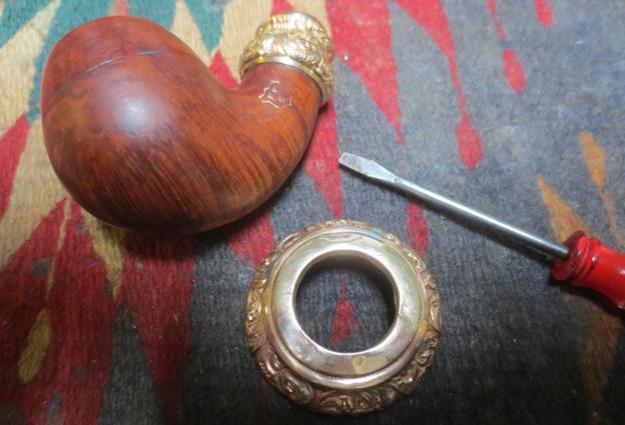
 I spoke with Jeff this morning and he told me that the top cap was not glued or pinned to the top of the bowl and could easily be removed. I wiggled it free without doing and damage to the edges. I used a small flat blade screw driver that fit perfectly in the last ring before the opening. It worked to smooth out much of the dents and damage to the top of the rim. While I was not able to remove all of it I was able to minimize it in this manner.
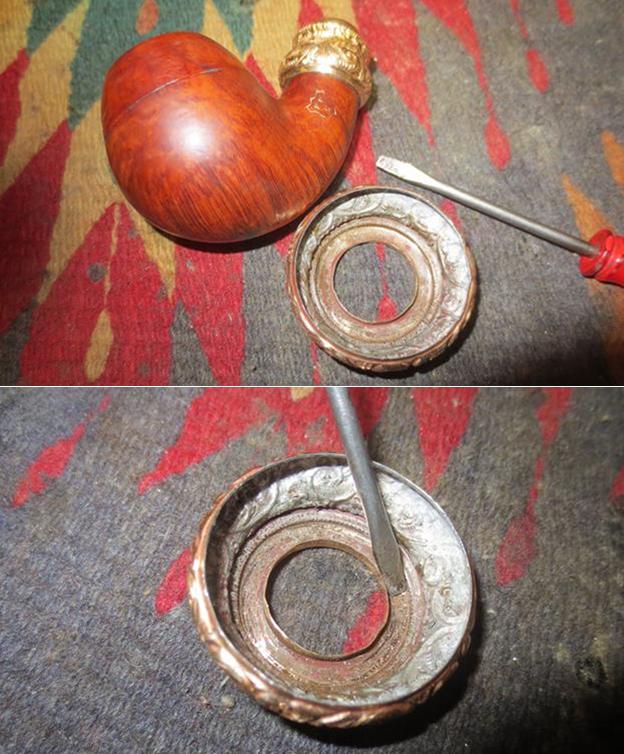
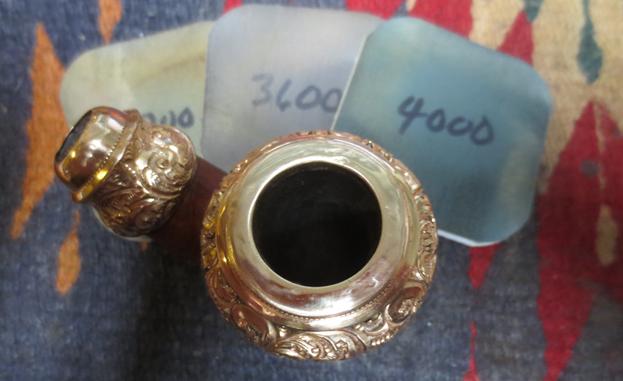
 I decided to pressure fit the rim cap back on the top of the bowl rather than glue it or pin it. I figured that way if I wanted to try smoothing out the rim cap some more I could do so in the future. I polished the top of the rim cap with micromesh sanding pads to further minimise the scratching on the top. I wet sanded with 1500-2400 grit pads and dry sanded with 3200-12000 grit pads. I wiped it down afterwards with a soft cotton pad to raise the shine.
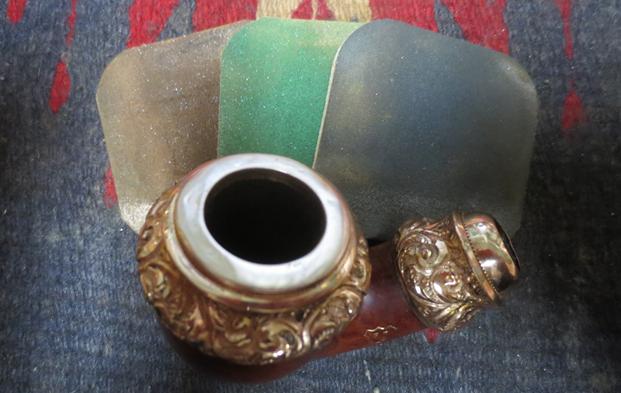
 I touched up the FEC Shield stamp on the left side of the shank with Rub’n Buff European Gold. I applied it with the tip of a pipe cleaner and worked it into the grooves of the stamp. I removed the excess with a damp cotton swab and polished the finished shank with a soft cotton pad. I was able to fill some of the grooves toward the top right of the shield and a bit of the letters. The stamping on the bottom right side of the shield was too shallow to hold the gold.
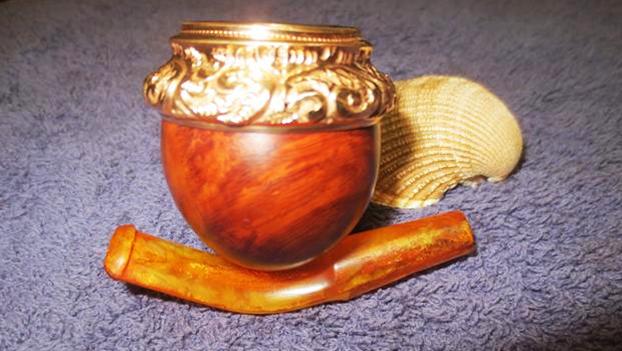
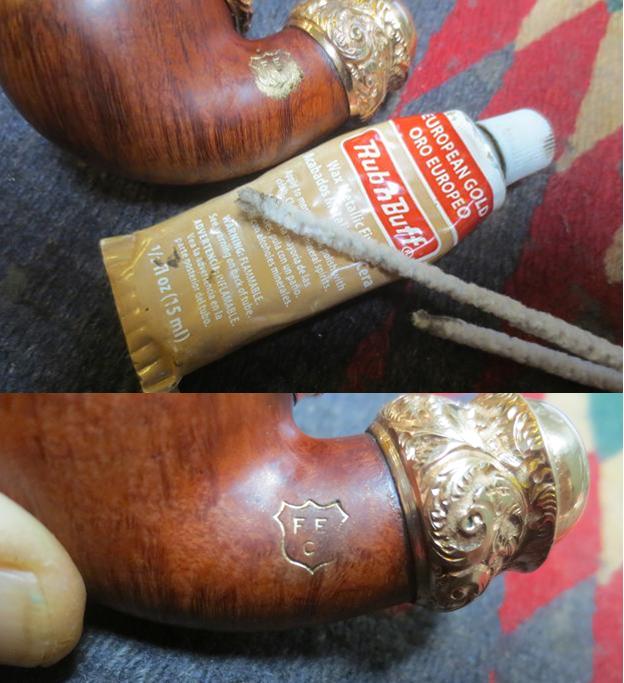 I buffed the pipe bowl and stem independently with Blue Diamond on the buffing wheel to polish them both. I worked over the briar around the bowl with the Blue Diamond and lightly buffed the gold rim and shank cap. I carefully gave the briar several coats of carnauba wax and then Conservator’s Wax in the hard to reach spots. I buffed the briar and caps with a clean buffing pad to a raise a shine. I gently buffed the stem with Blue Diamond so as not to melt it or cause damage. I gave the stem multiple coats of carnauba wax and buffed it with a clean buffing pad to raise the shine. I hand buffed bowl and stem with a microfibre cloth to deepen the shine. I put the stem in the shank and hand buffed it once more. I am quite happy with the finished pipe. It is a beautiful piece of briar and the stem picked up a nice shine that brought it back to life. The dents in the rim cap while still present look much better. The finished pipe is shown in the photos that follow. Thanks for looking and enduring my obsession with these pipes from another time.