Tag Archives: repairing tooth marks

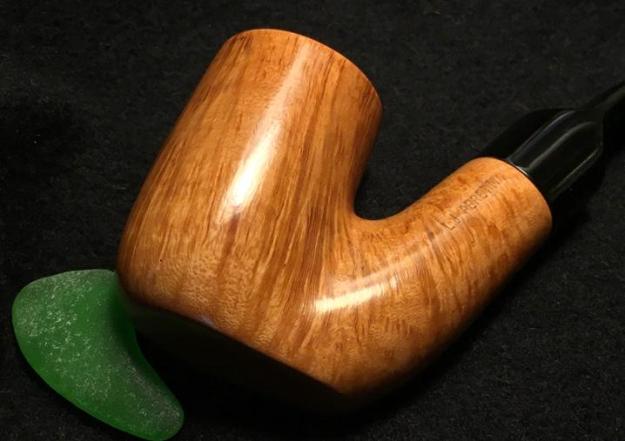
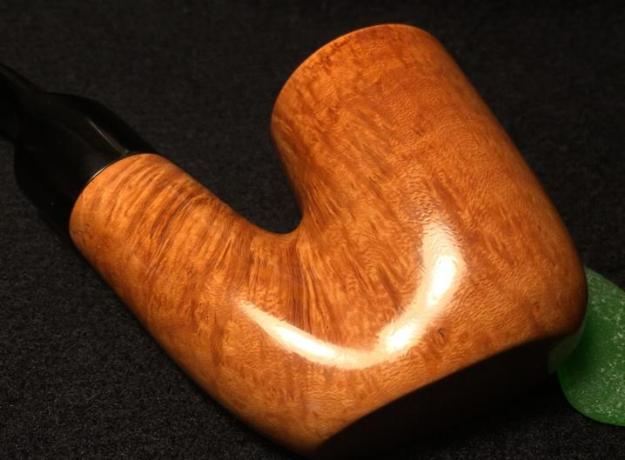
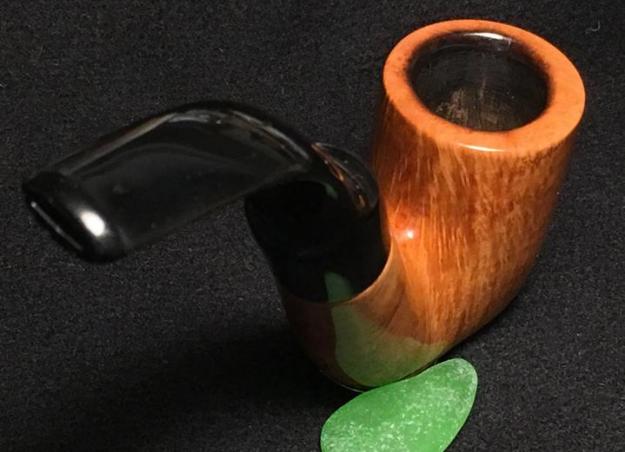
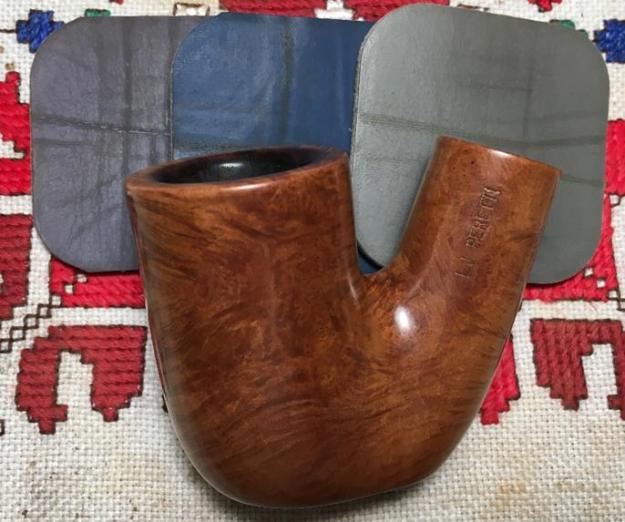
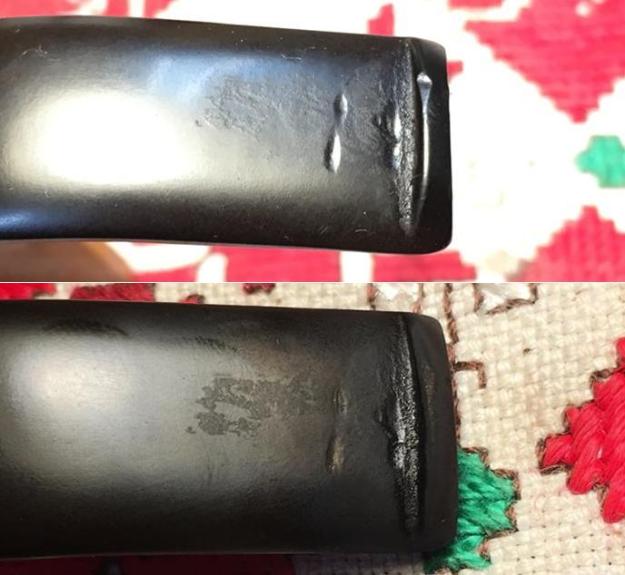
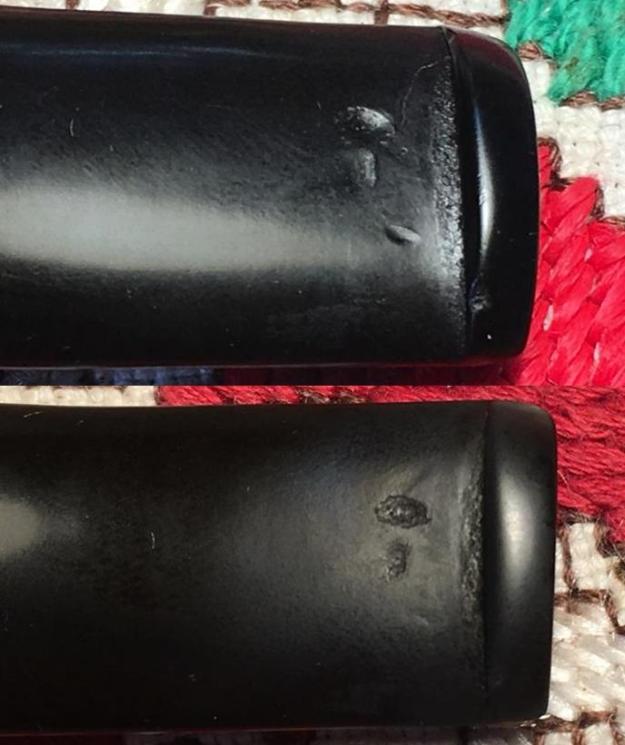
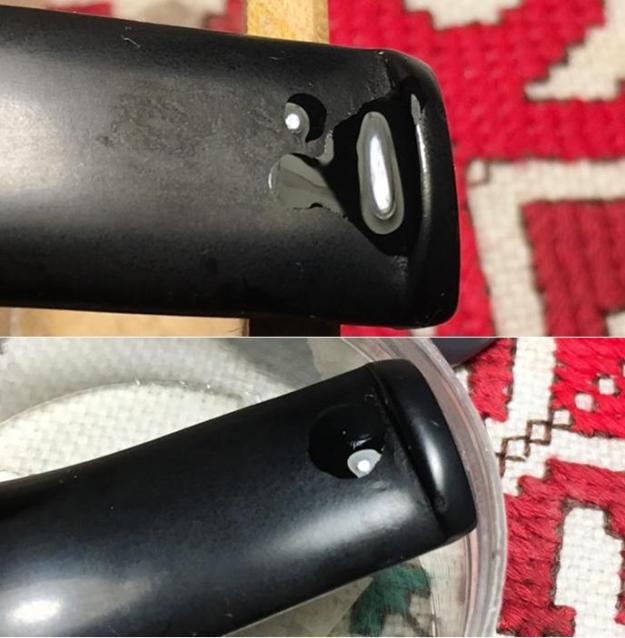
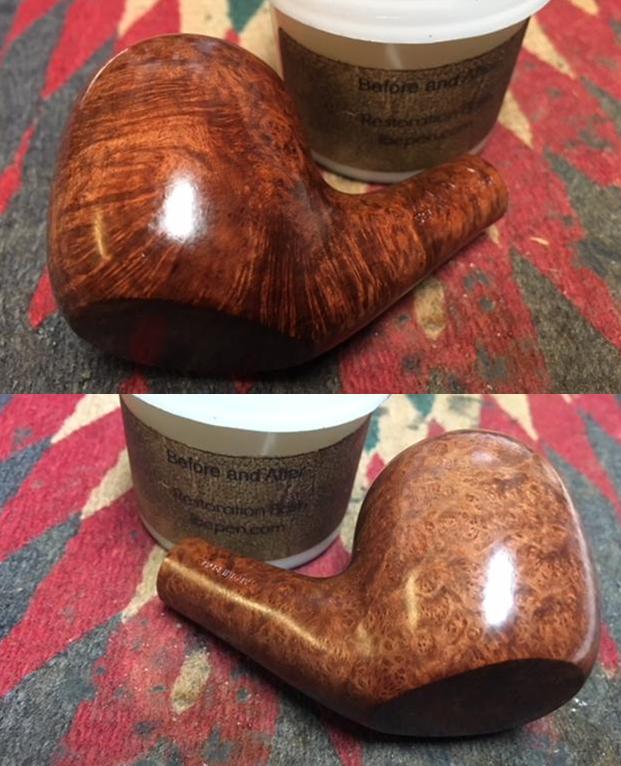
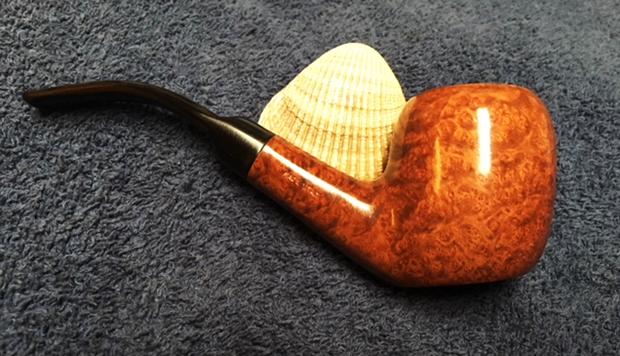
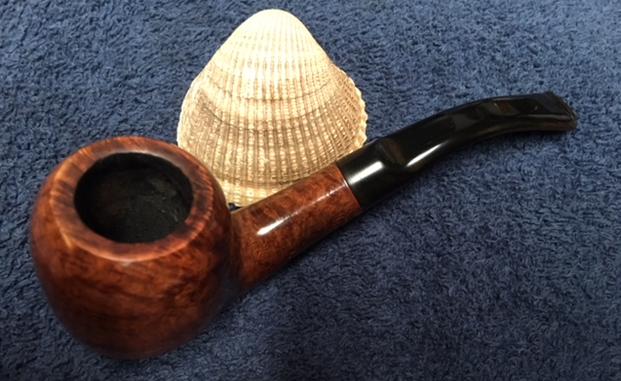
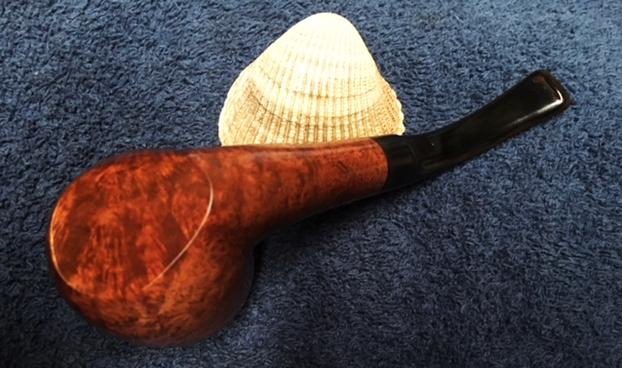
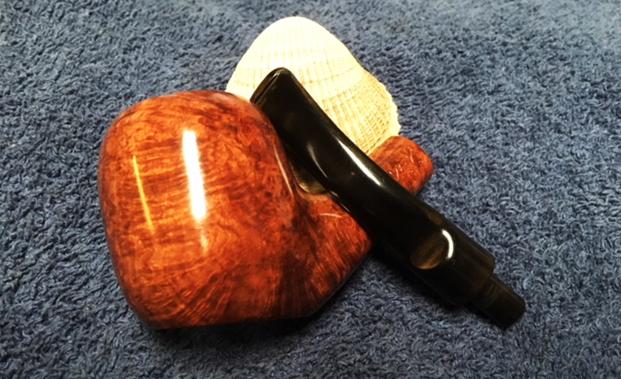
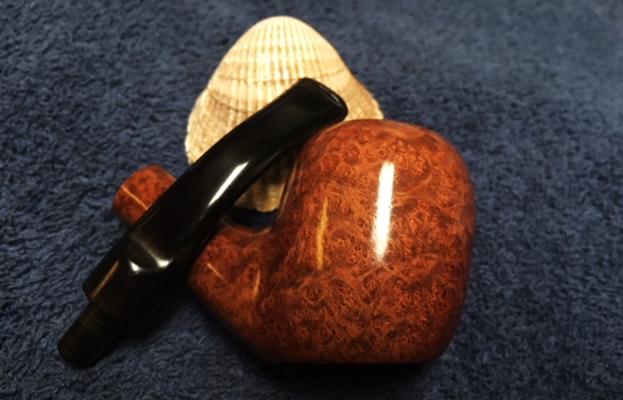
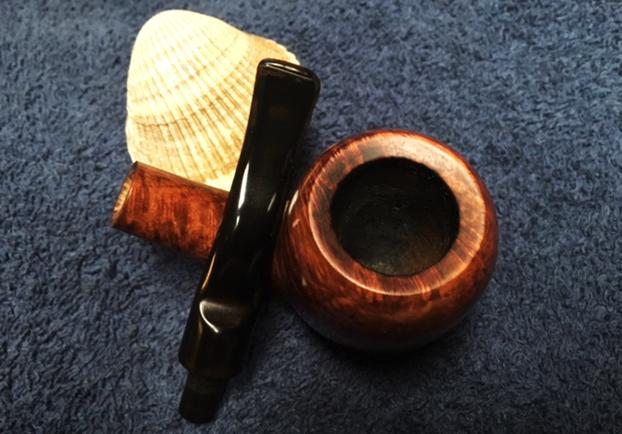
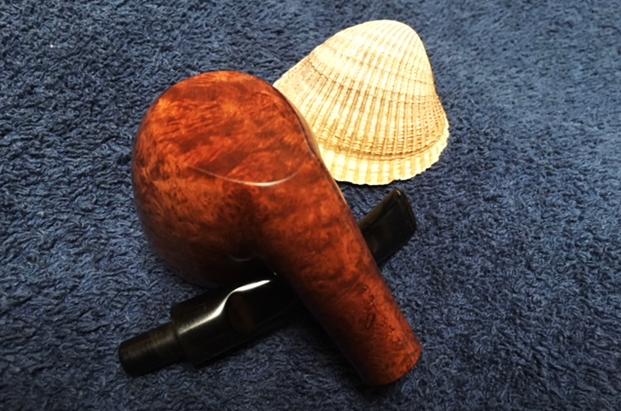
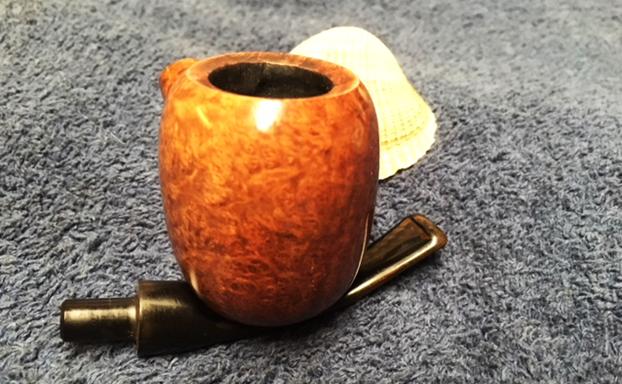
Another L. J. Peretti Oom Paul Sitter Recommissioned


Blog by Dal Stanton

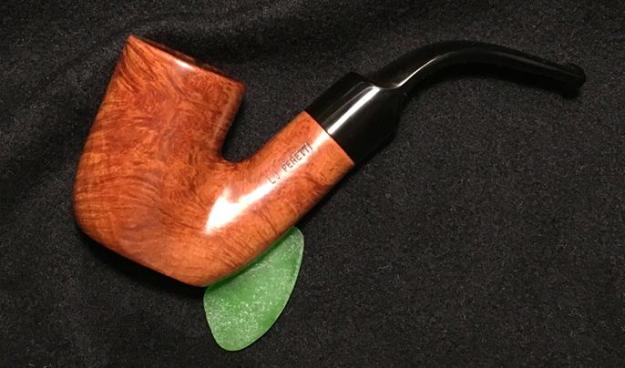
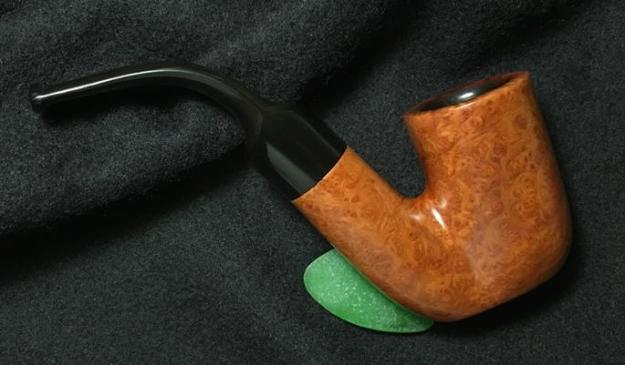
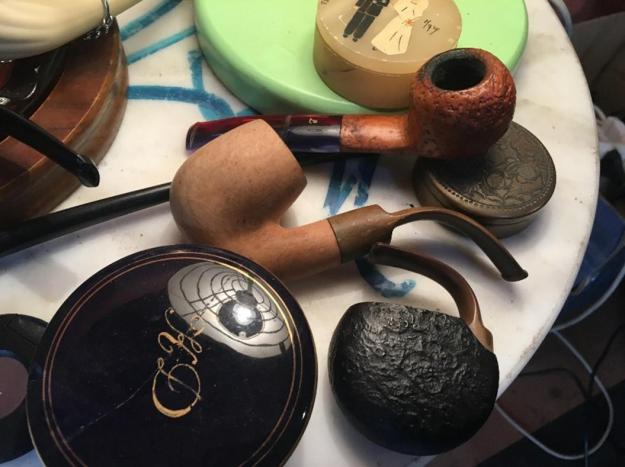
I’m almost finished working through the Peretti Lot of 10 I acquired off the eBay auction block.  I’m amazed at the interest in these pipes since I posted a picture of the Peretti Lot on several of my favorite Facebook pipe groups.  I also enjoy posting on Instagram and Facebook giving updates of the restorations on my worktable here in Sofia, Bulgaria.  One of the best things I enjoy about ‘Pipedom’ and social media are the relationships developed around the world with pipe men and women whose love of pipes – their names and their histories, trust people like me who restore these friends enabling them to be passed on to the next generation of pipe men and women.  That’s why I named my pipe space, The Pipe Steward.  We are stewards when we understand that we don’t own, but we merely take care of something special for a time, add our histories then pass it on.  I met Tim via social media when I posted the picture below.  He was drawn to the Oom Pauls and commissioned one of the Sitters potentially to add to his already large collection – I see the plethora of posts and pipes he has on Instagram!  So, adding this Peretti Oom Paul Sitter to his collection is special and appreciated.  When one of my pipes is commissioned, the final decision to keep it is made after its restored and I publish the write up and a price is set.  So, Tim has first dibs on this Oom Paul Sitter when it goes to The Pipe Steward Store.  As with the other Perettis, this Sitter will benefit the Daughters of Bulgaria – our work here in Bulgaria helping women and girls who have been trafficked and sexually exploited.
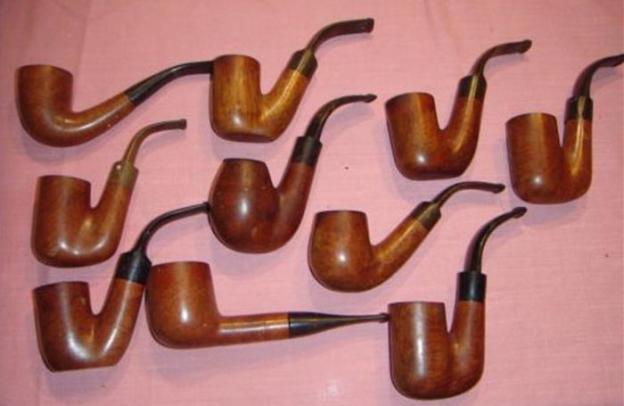
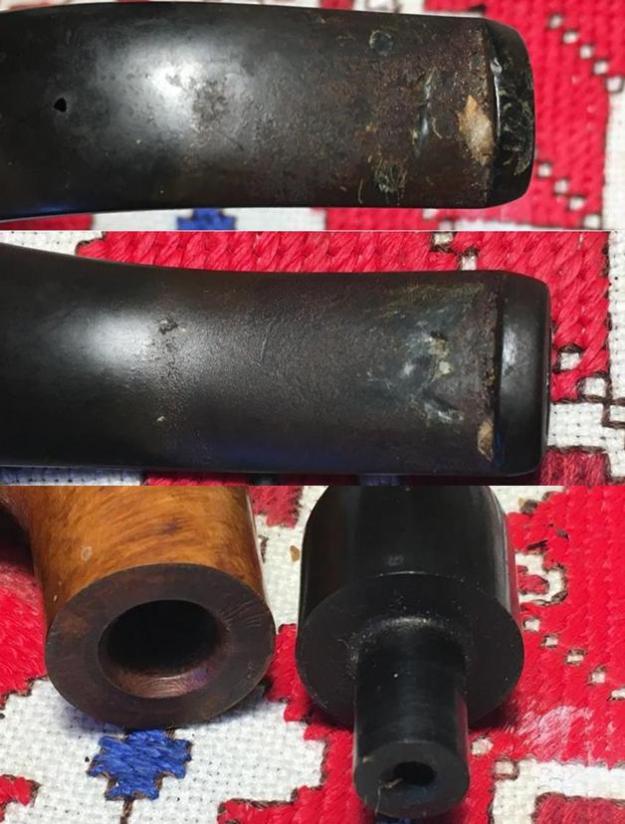
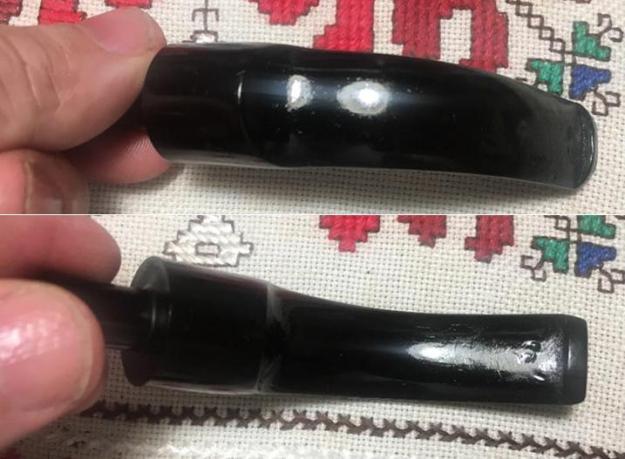
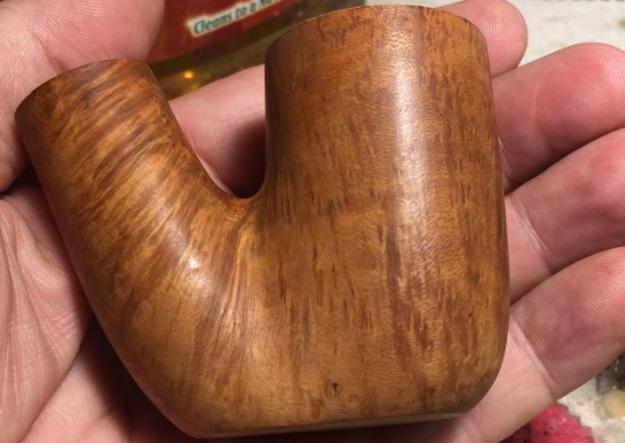
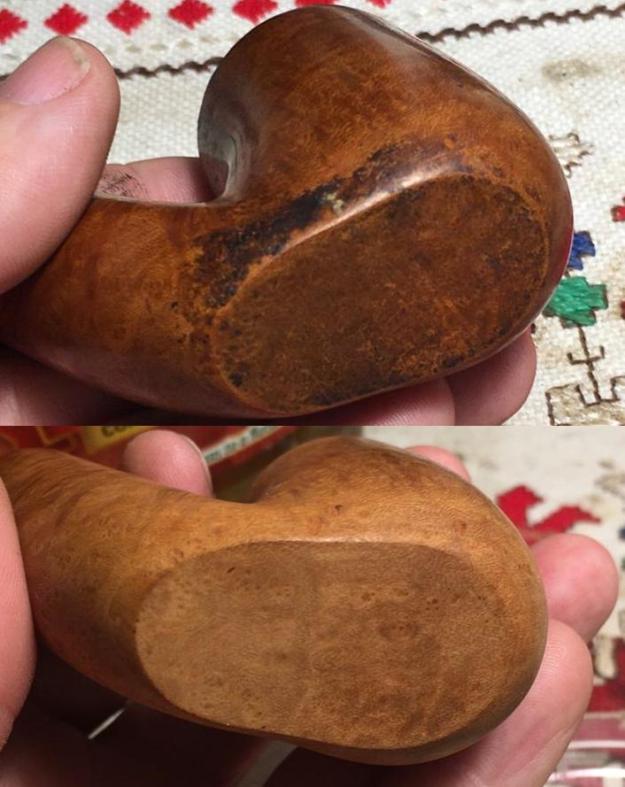
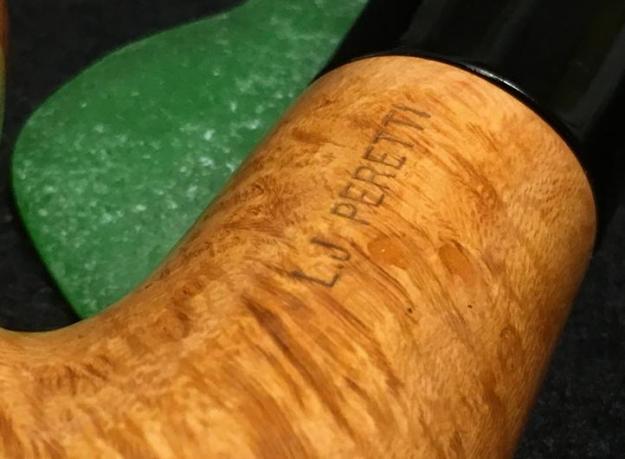
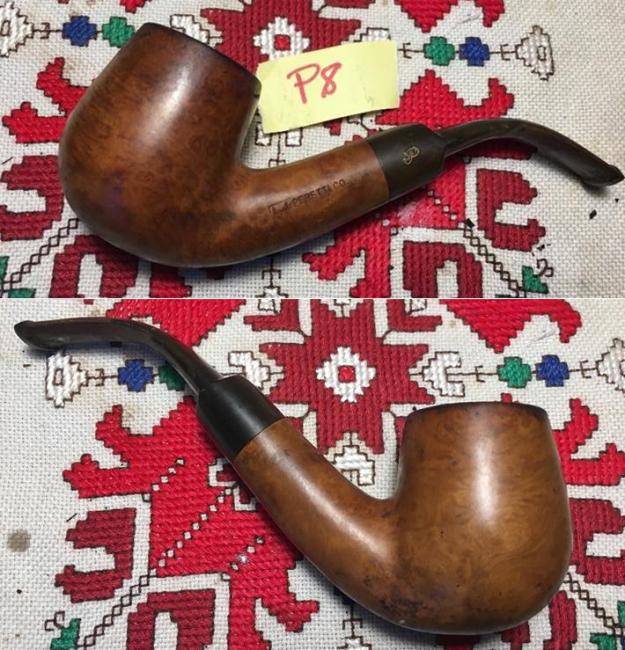
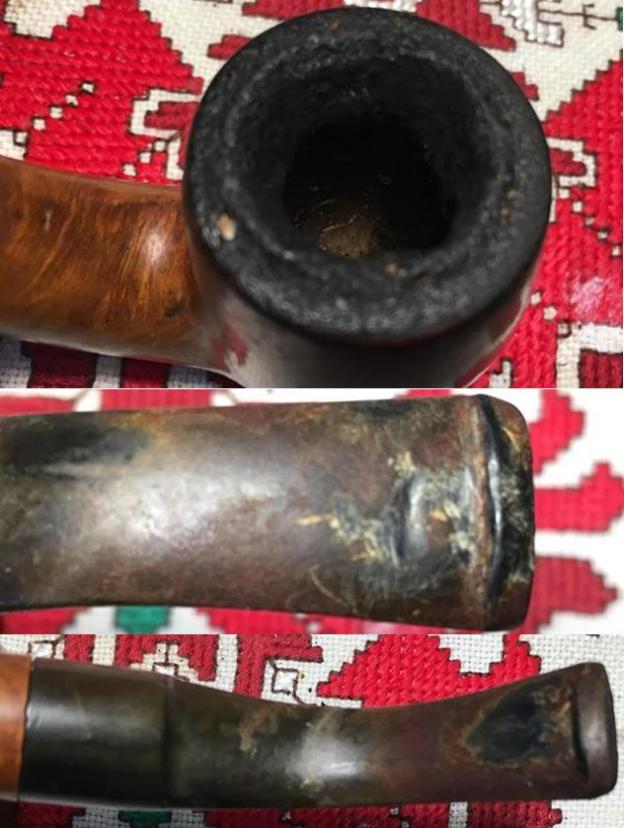
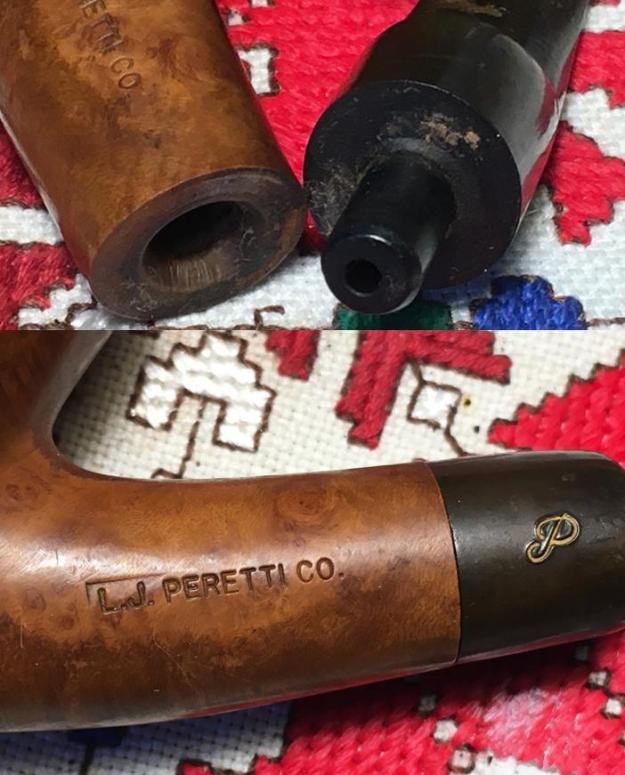
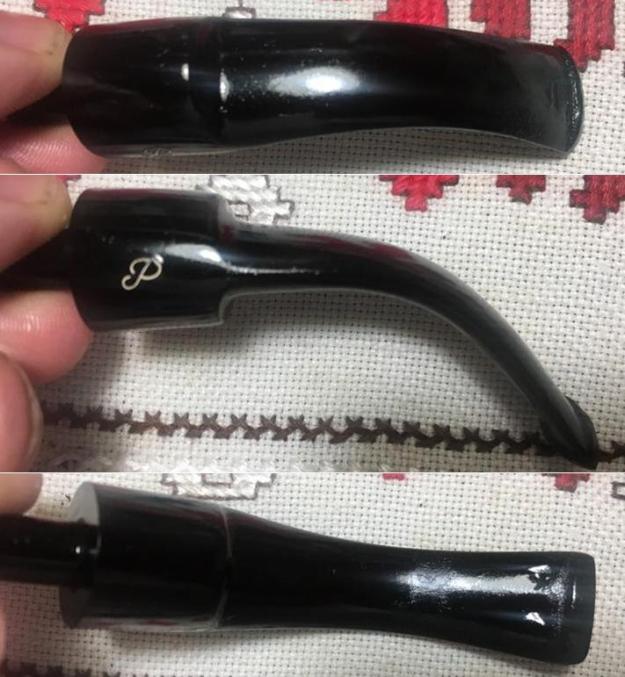
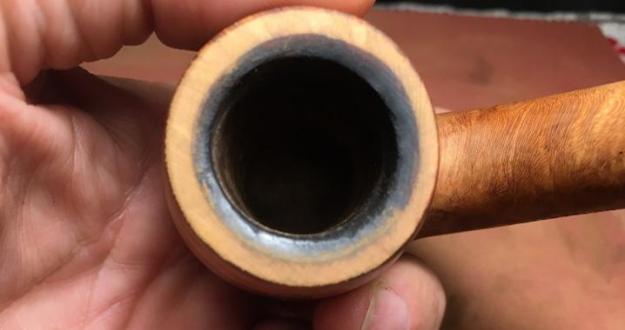
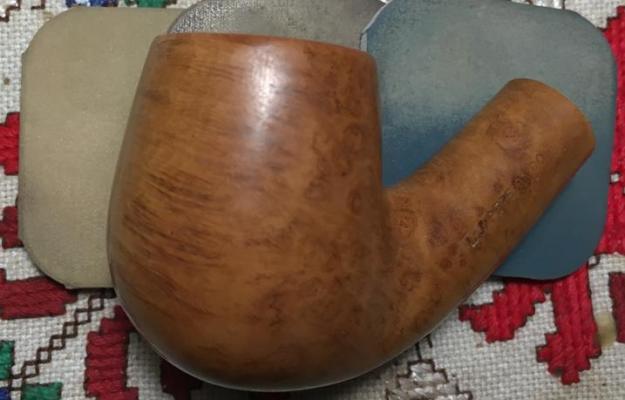
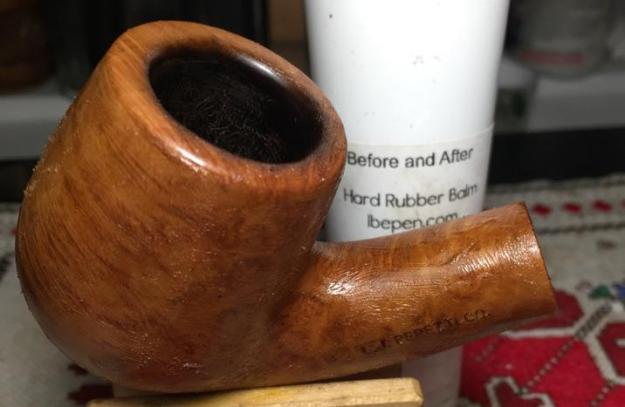
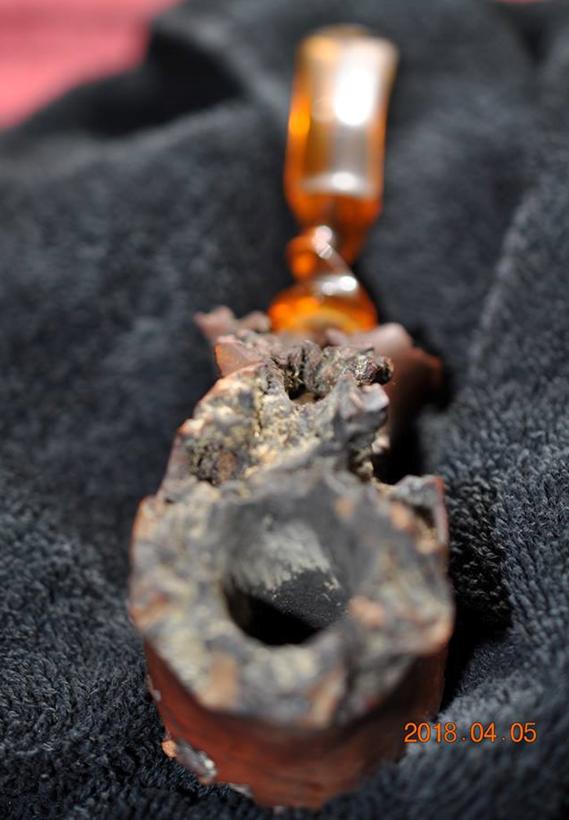
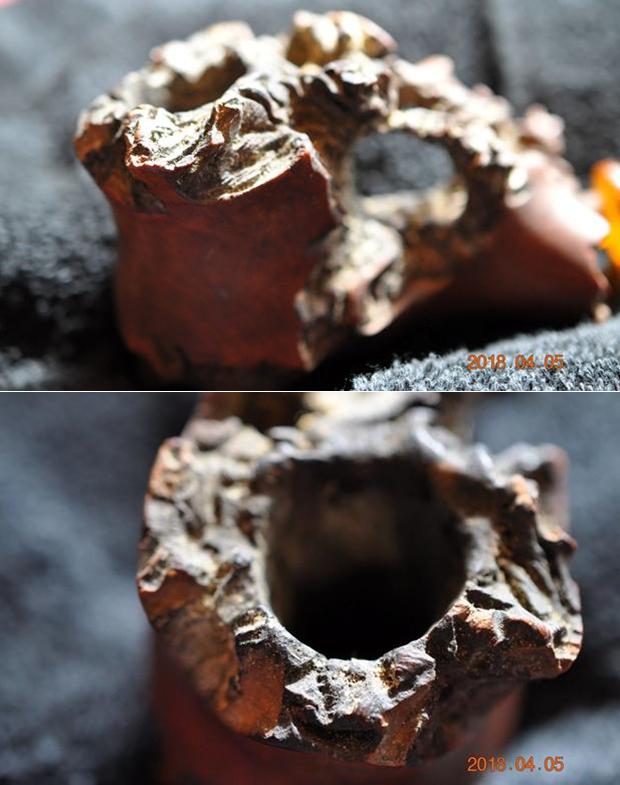
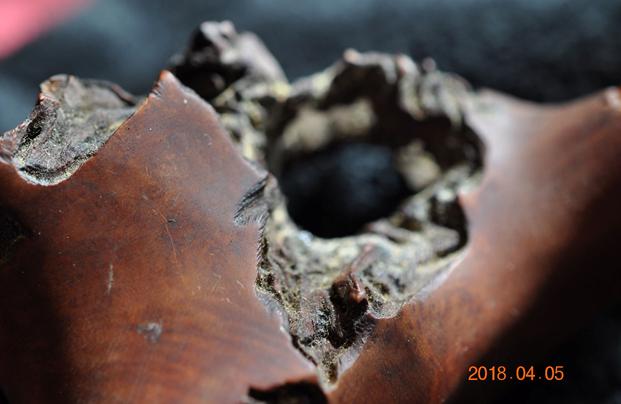
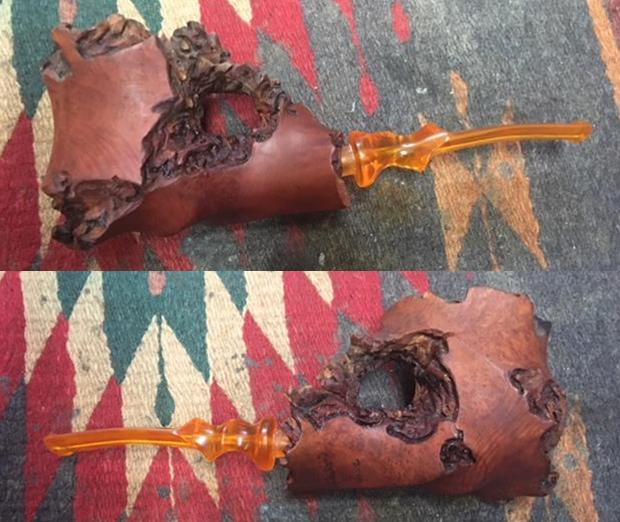
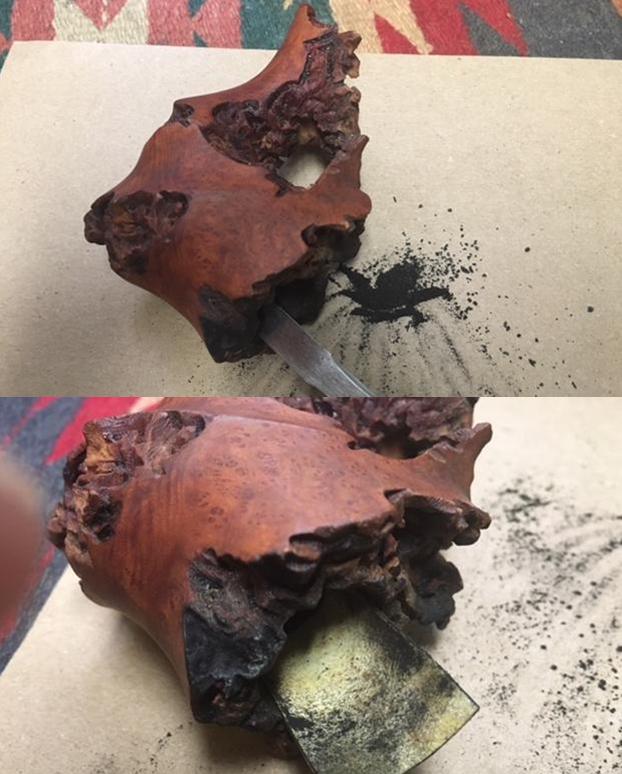
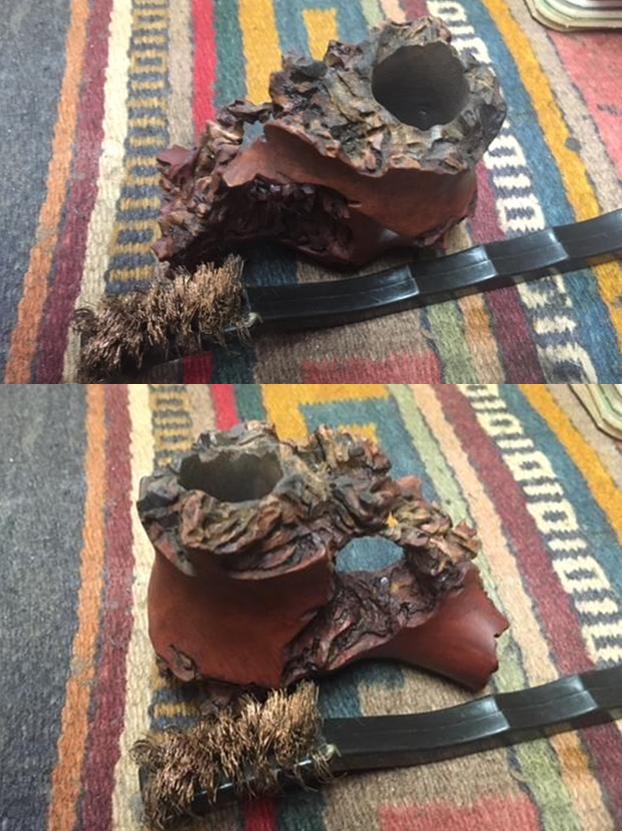
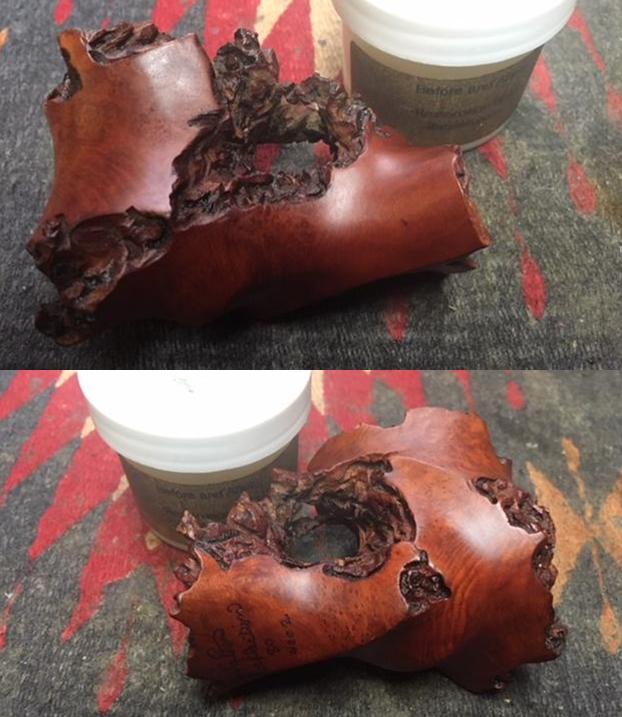
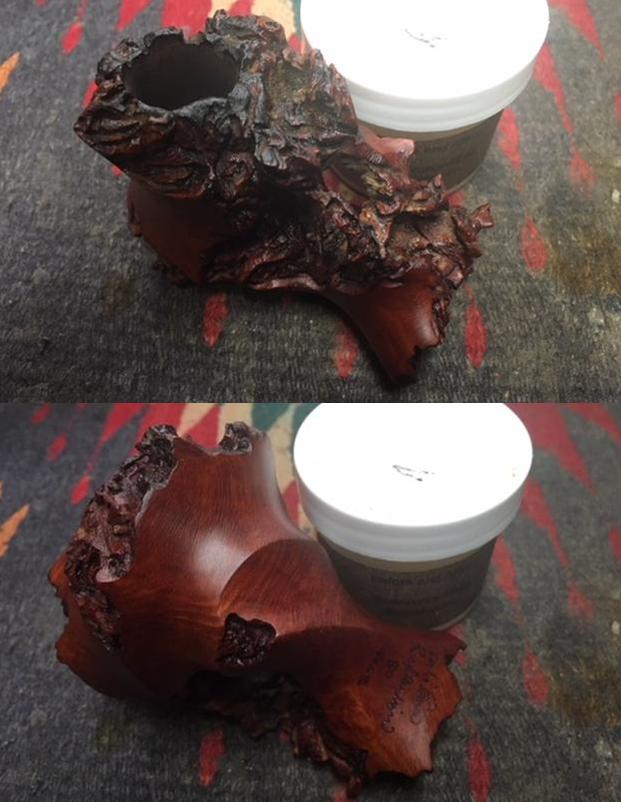
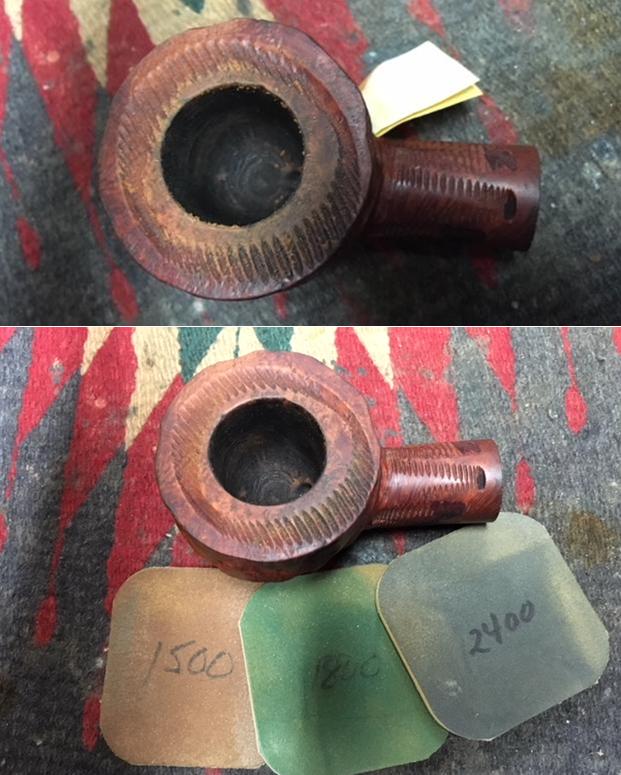
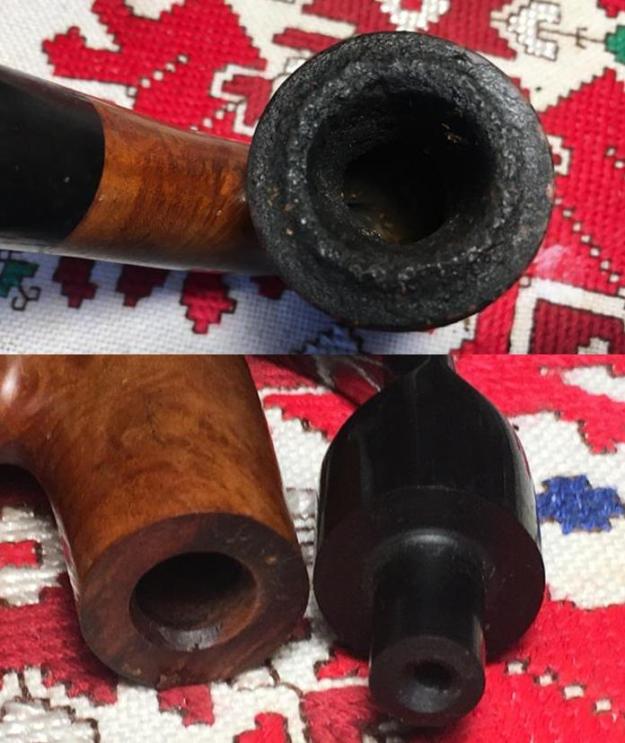
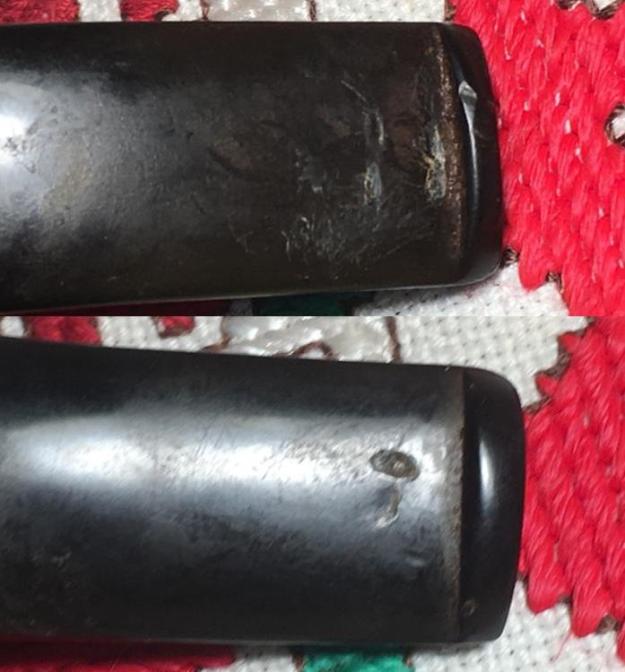
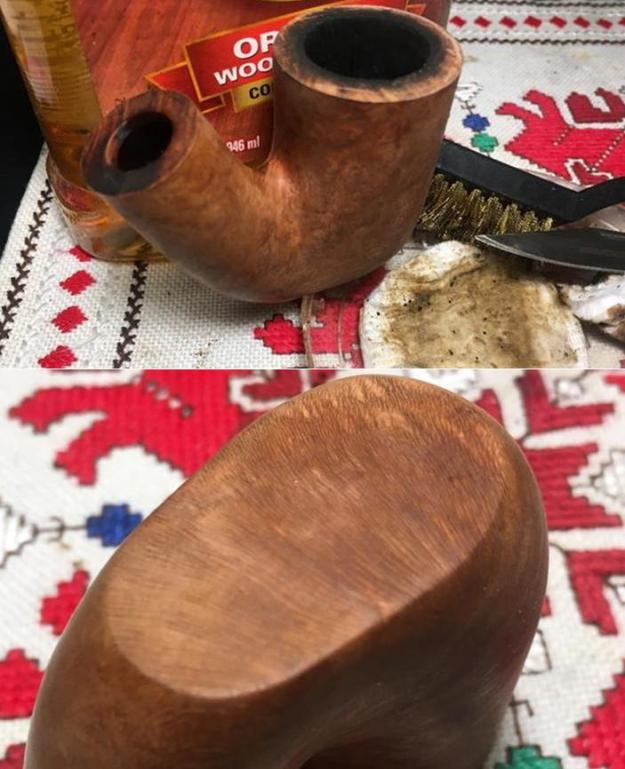
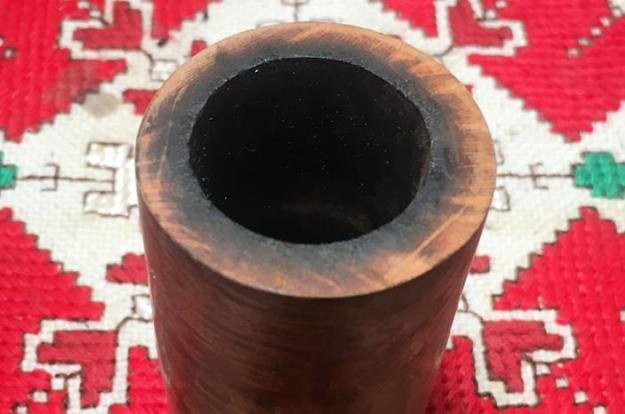
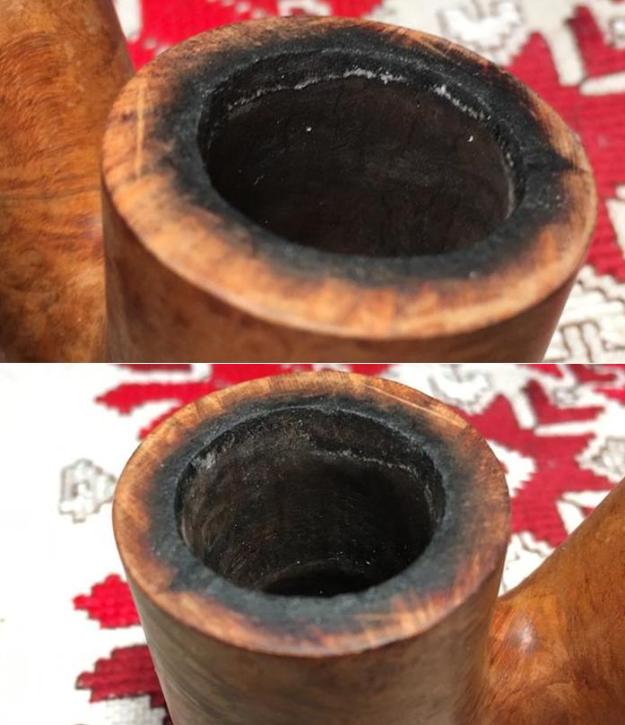
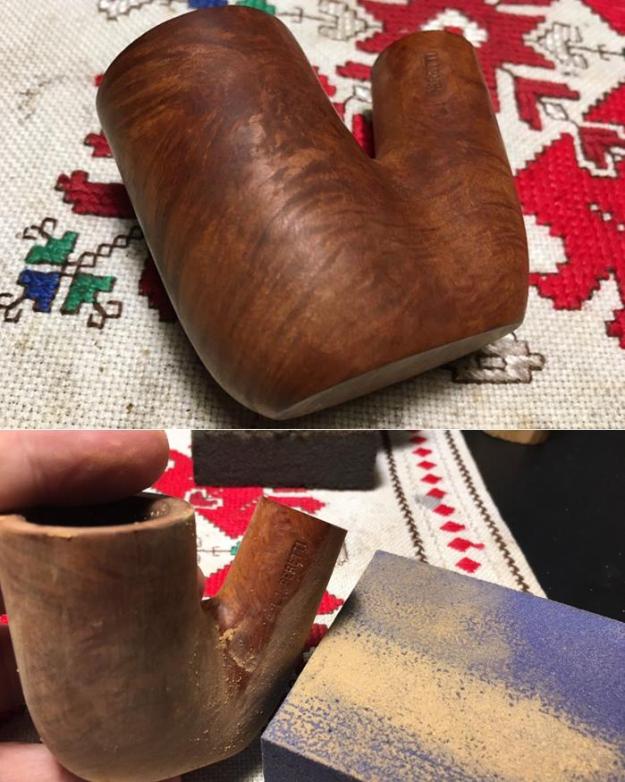
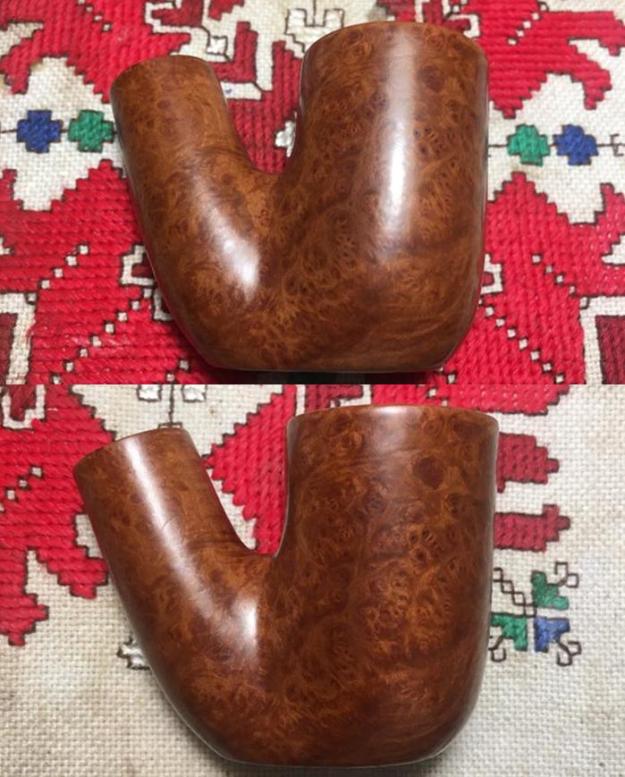
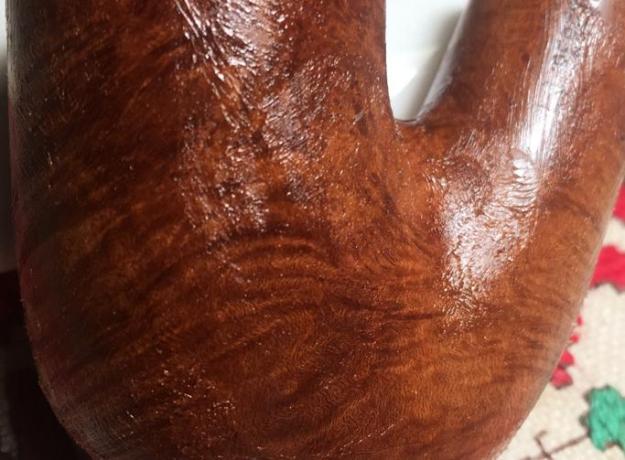
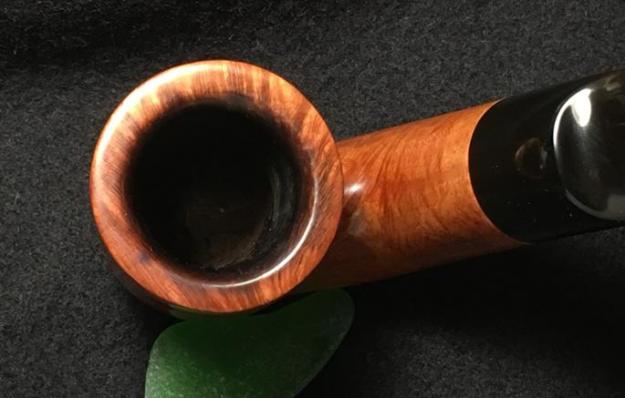
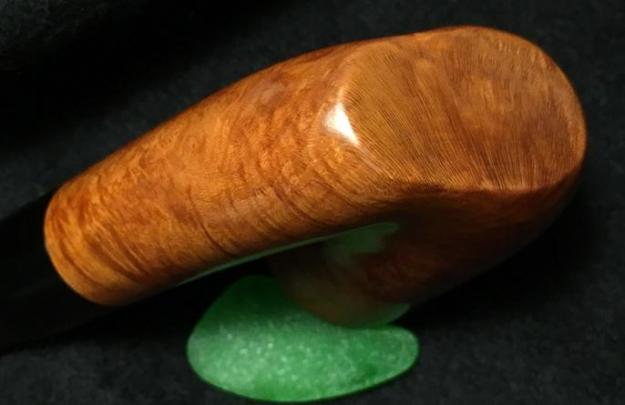
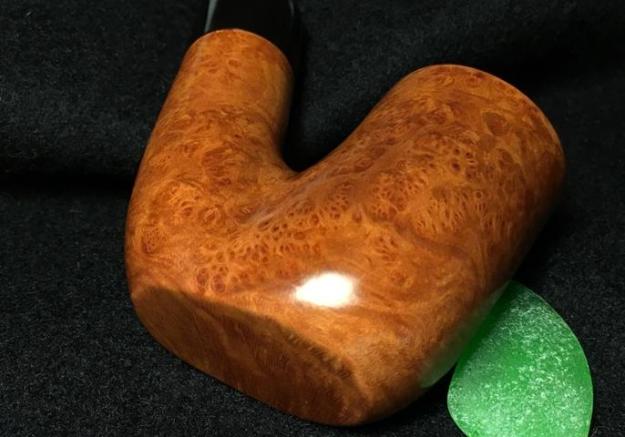
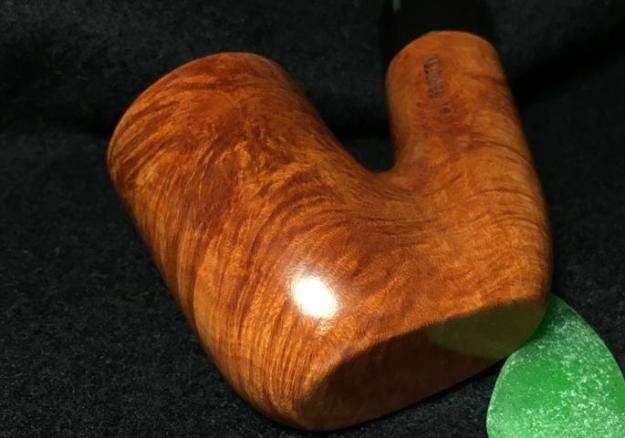
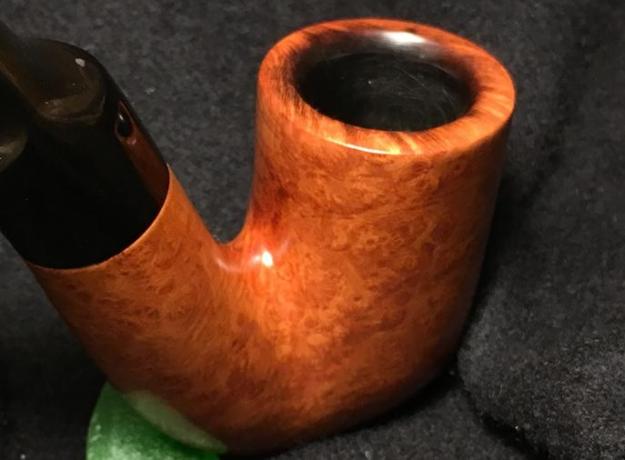
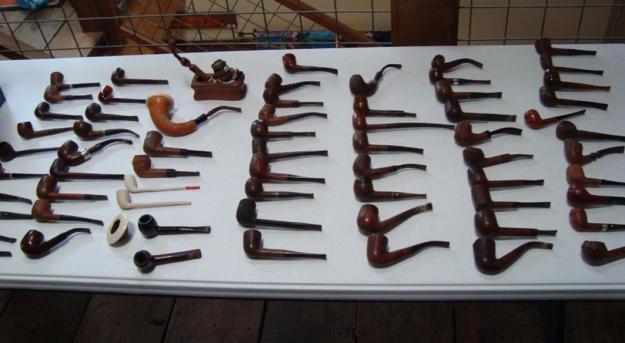
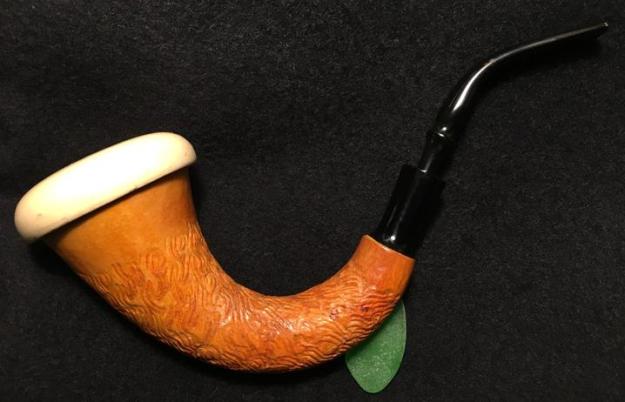
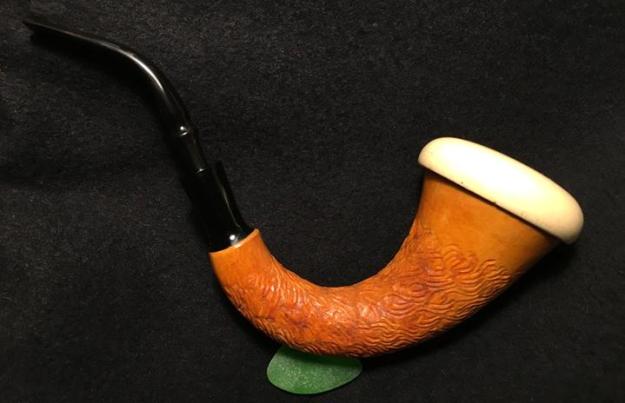
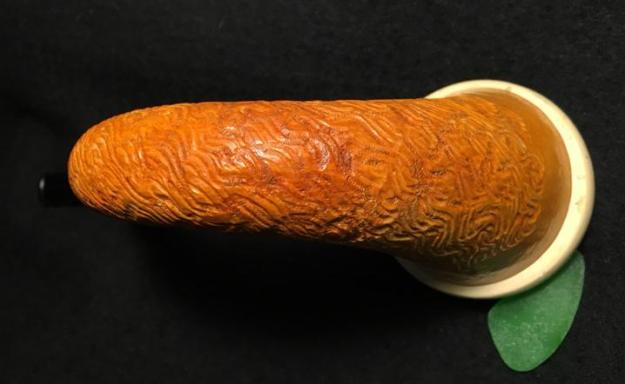
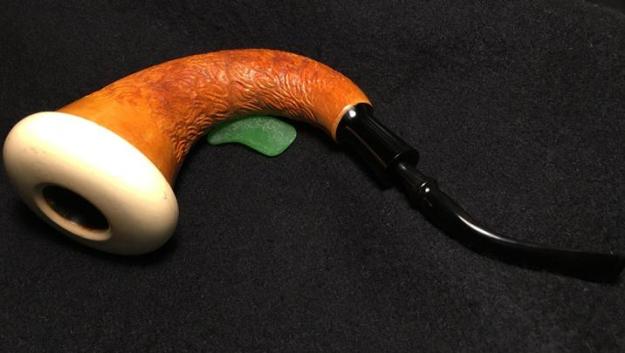
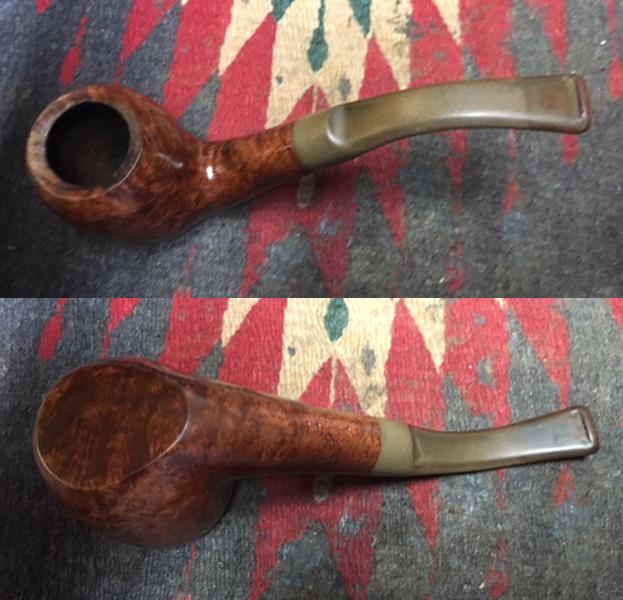
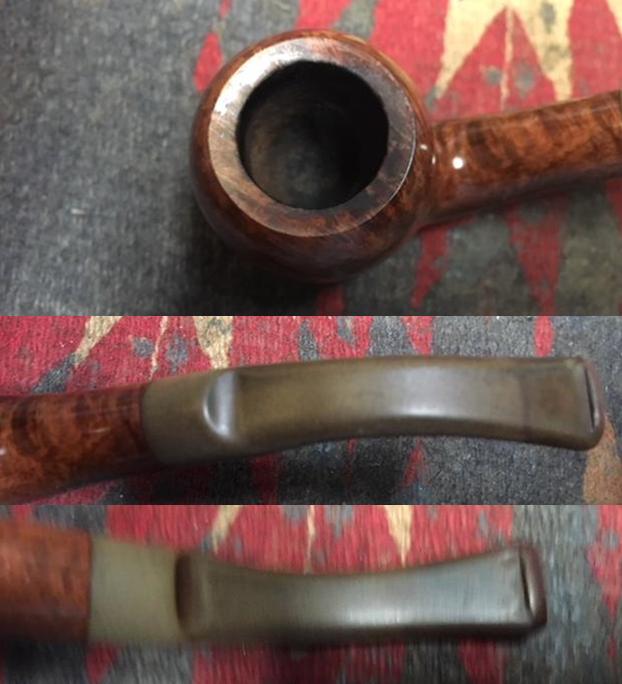
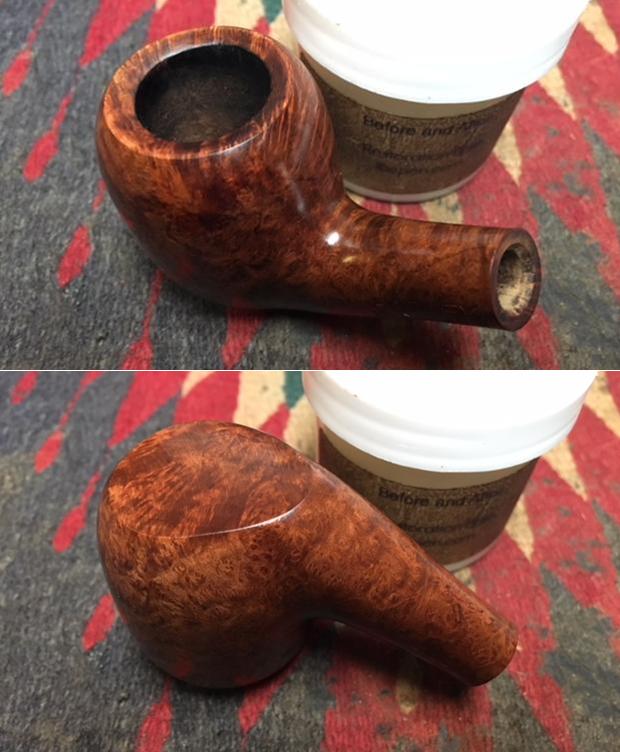
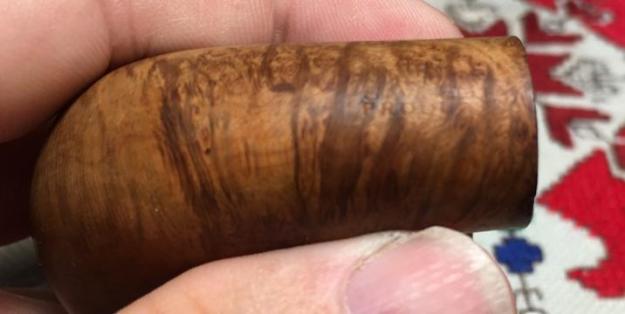
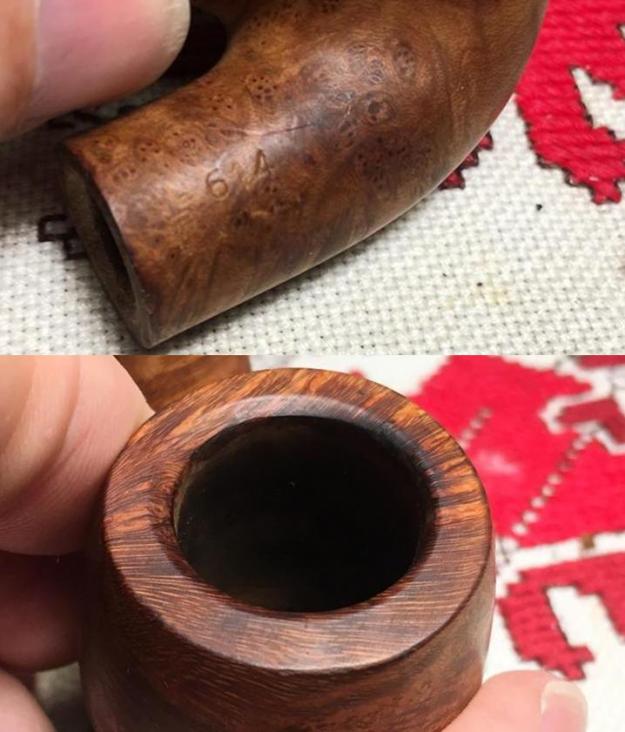
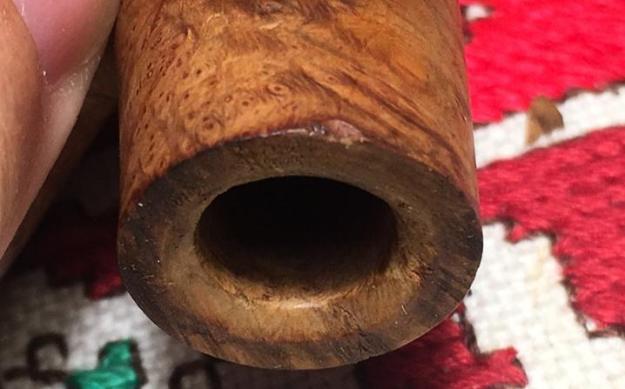
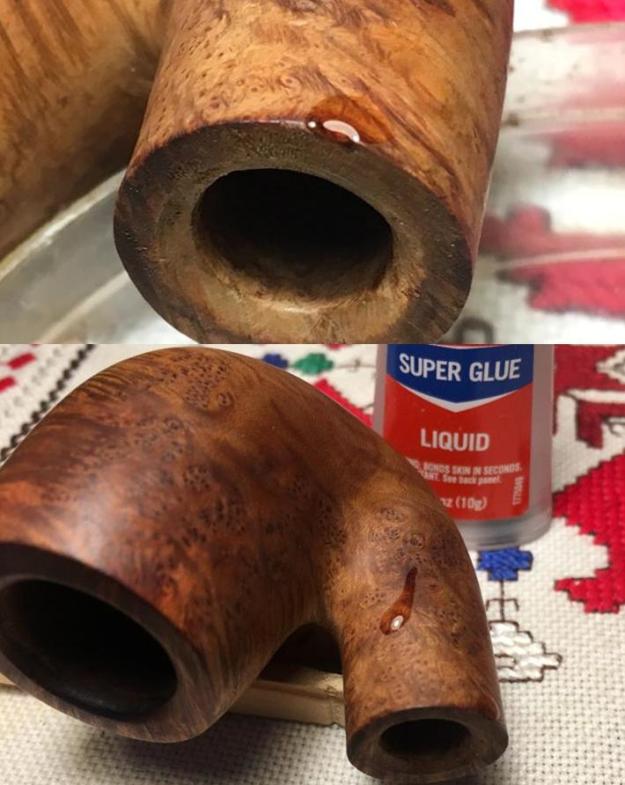
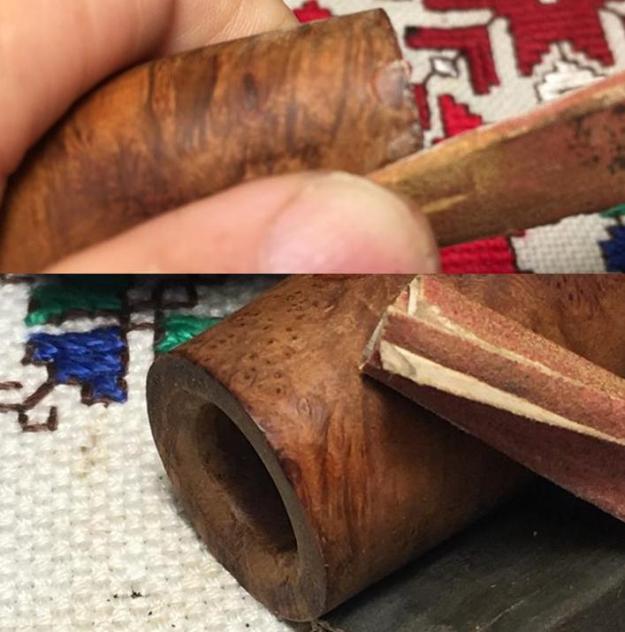
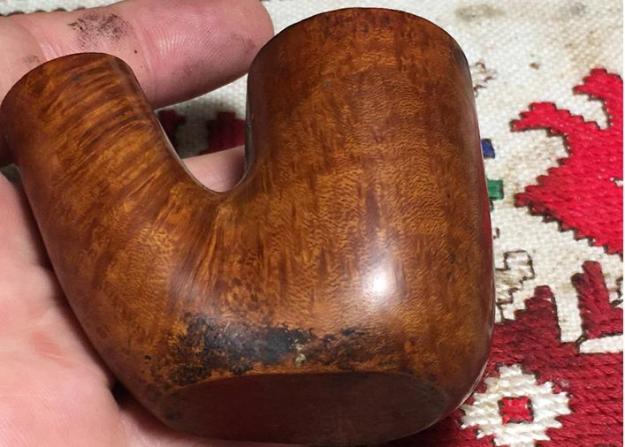
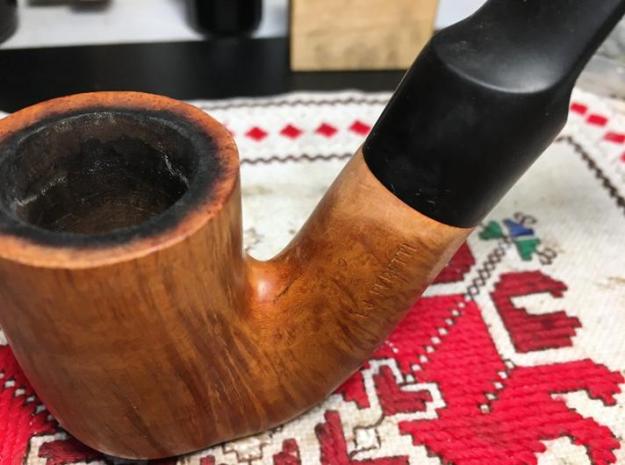
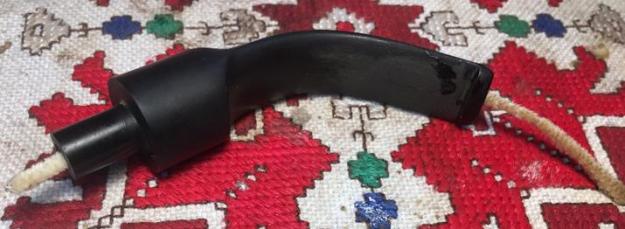
Of the Peretti Lot of 10, there are two Oom Pauls yet to be restored that have been commissioned.  Two other pipes above are joining my collection of Perettis when I finally get to restoring them!  The Calabash on the top, left, and the COLOSSUS Billiard on the bottom.  The Oom Paul Sitter before me now is distinctive and stands out even in the picture above – bottom right.  The vertical straight flame grain is distinctive even in its present state.  Here are pictures chronicling the Oom Paul Sitter’s condition and challenges. The condition of this Sitter resembles all his brother Oom Pauls and the cousins.  The former steward of these Perettis seemed to have a scorched earth policy.  All of them, this one included, have thick cake in the chamber and thick, crusty lava flowing over the rim. As with the others, the left side of the rim has taken the brunt of the tobacco lighting and the briar is charcoal where the flame was pulled over the side, burning the rim.  The unfortunate result of this is that when the charred wood is cleaned away, the rim/bowl is thinner on that edge and therefore out of round.  The stummel surface is dirty but will clean up well showing the beautiful vertical grain.  I see no fills in this briar.  The stem carries with it the bites and dents that all the other Perettis received as well.  The stem is moderately oxidized and has a little calcification on the bit.  The one critical observation I have made about the Peretti Oom Pauls is that the drilling of the mortises for the tenon/stem fit hasn’t been the best.  This Sitter’s stem does not sit evenly with the shank.  The shank has a lip over the upper part of the saddle stem and the stem has a lip over the lower shank.  The drilling has left something to be desired!  The tenon fit is also loose. I have plenty of hurdles to address as this Oom Paul Sitter is recommissioned!
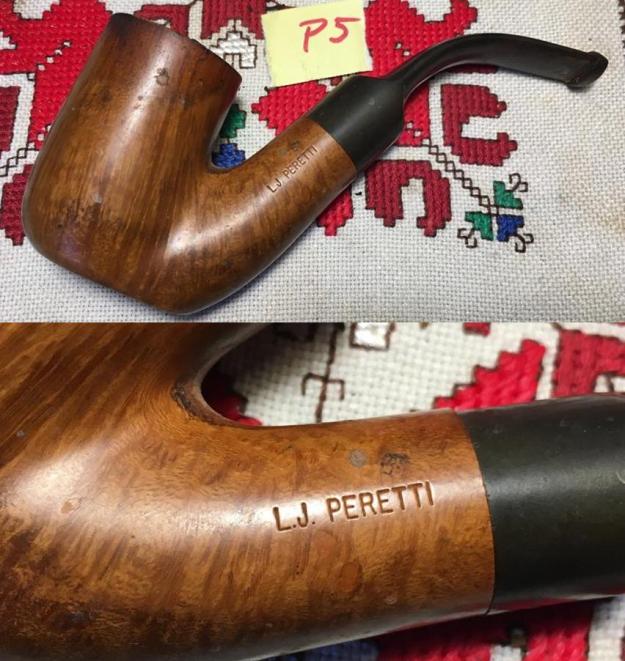
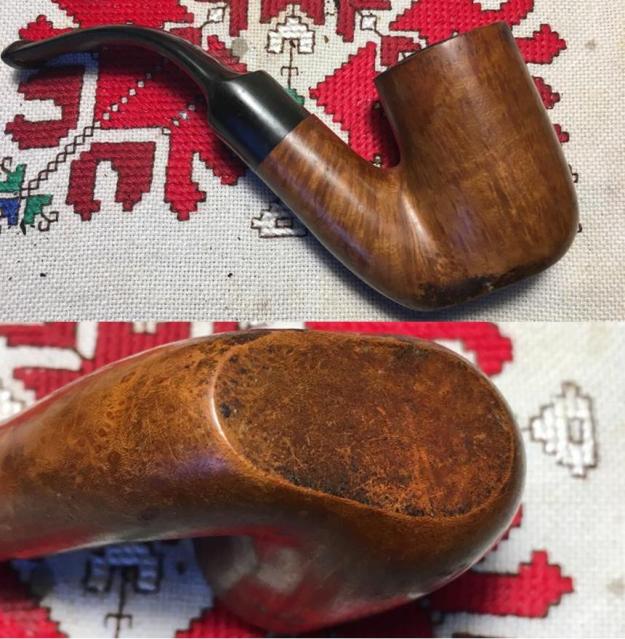
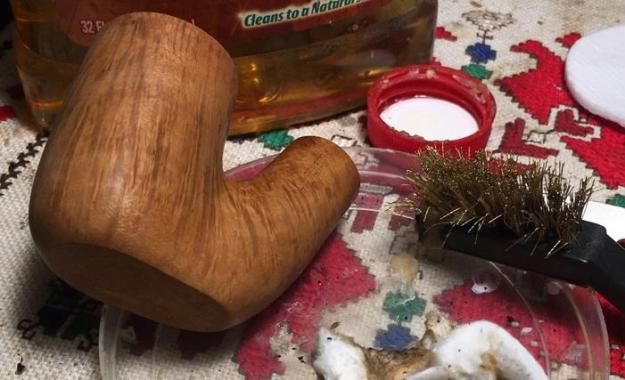
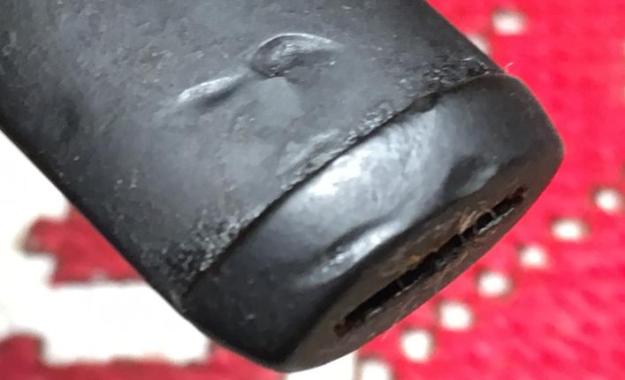
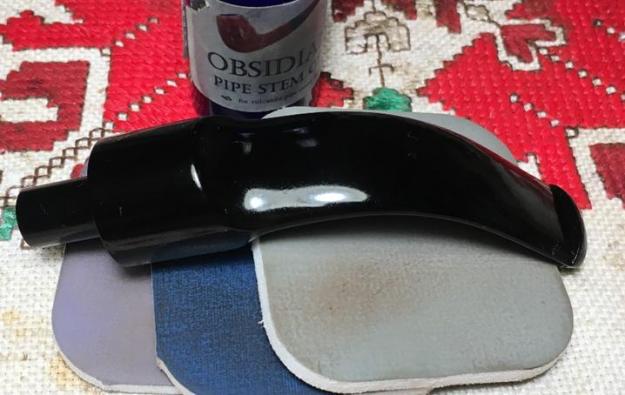
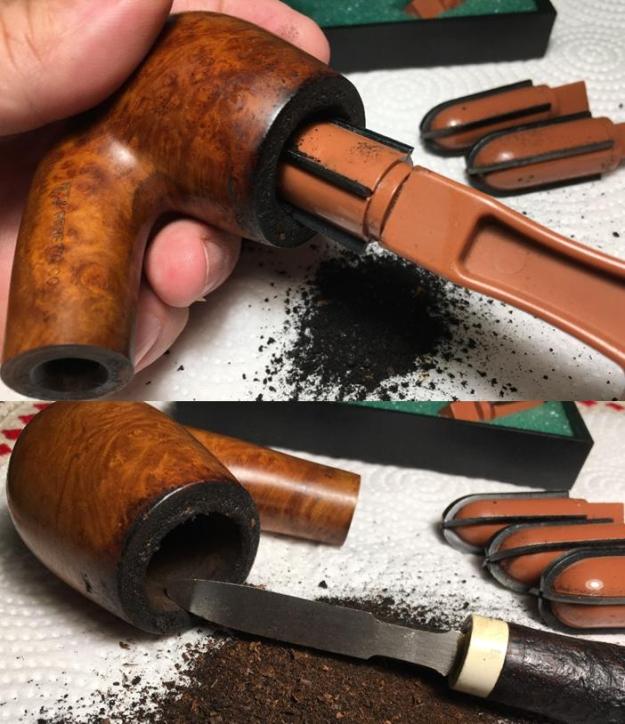
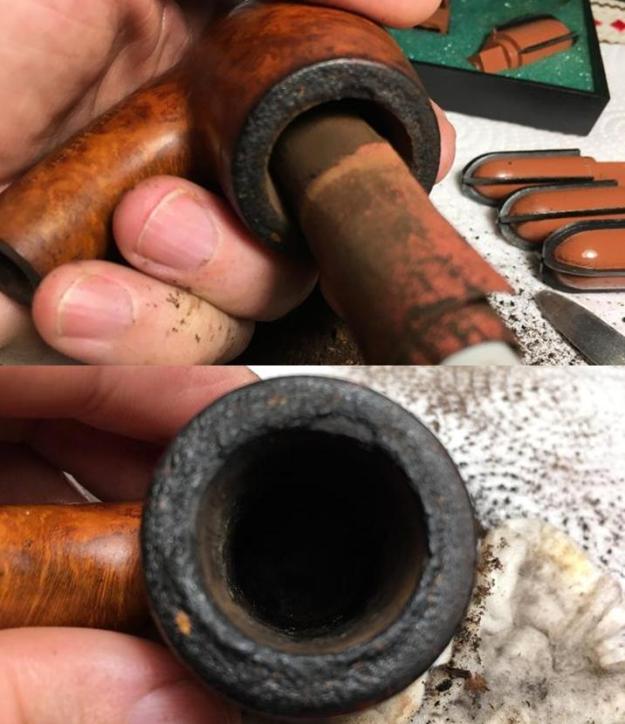
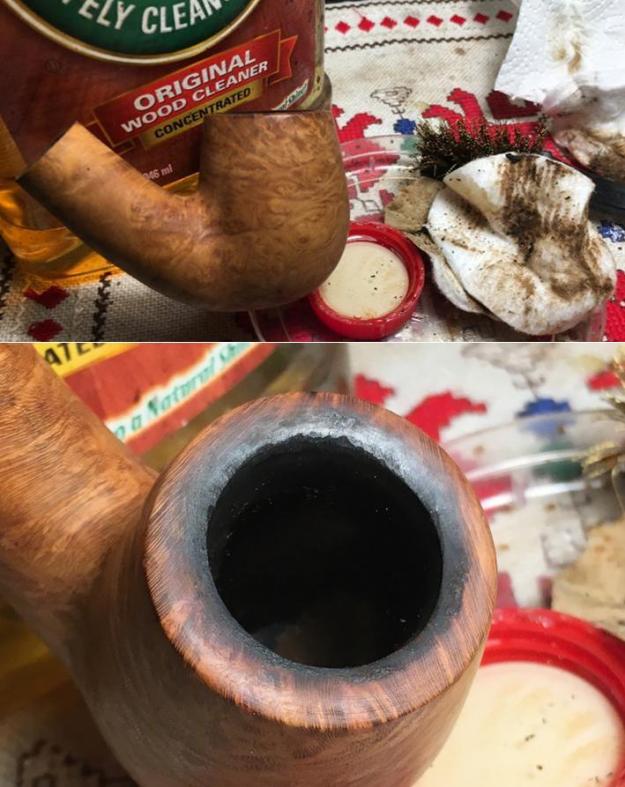
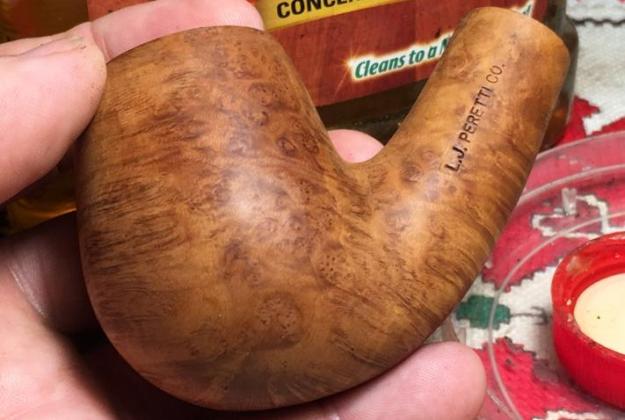
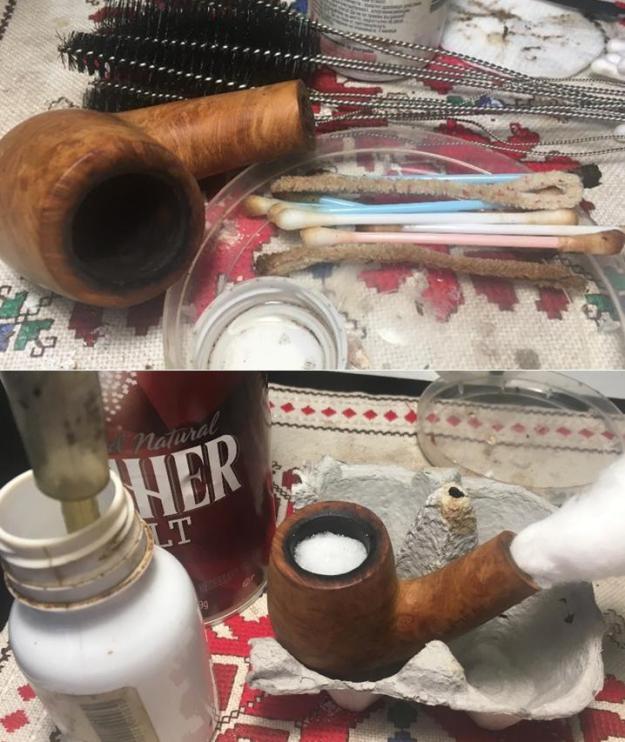
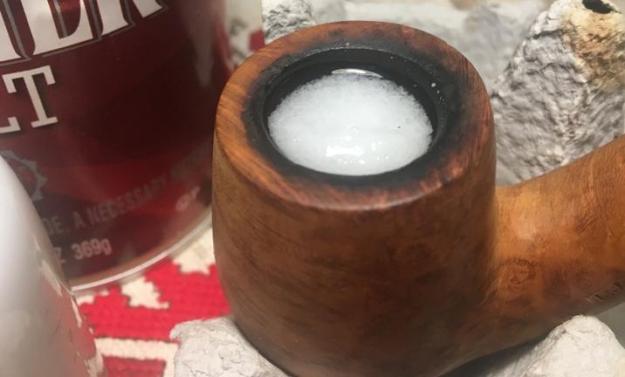
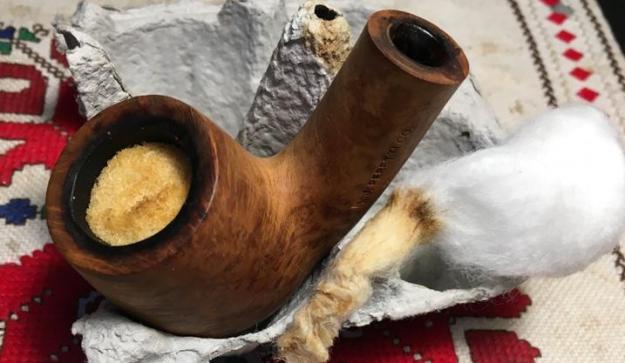
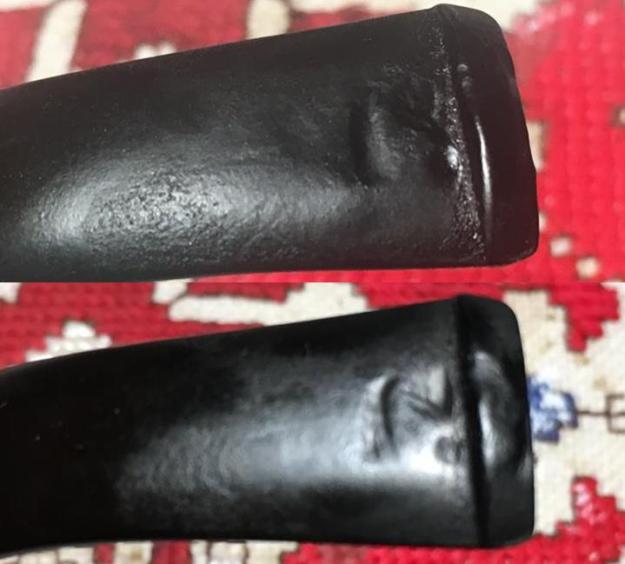
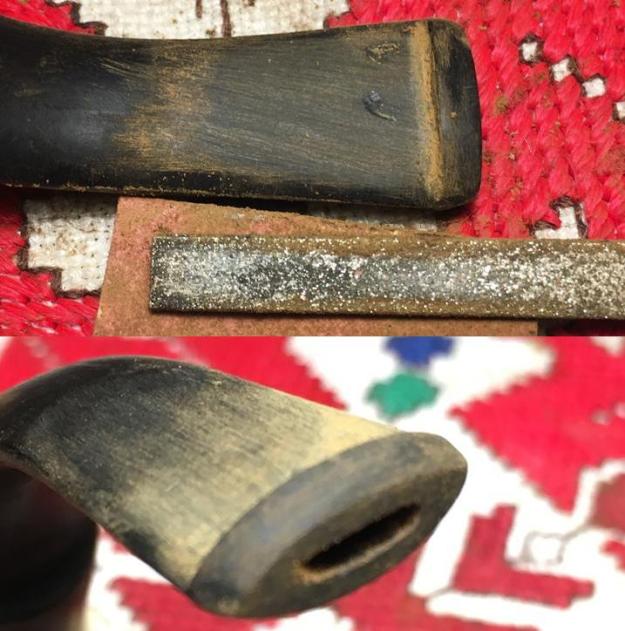
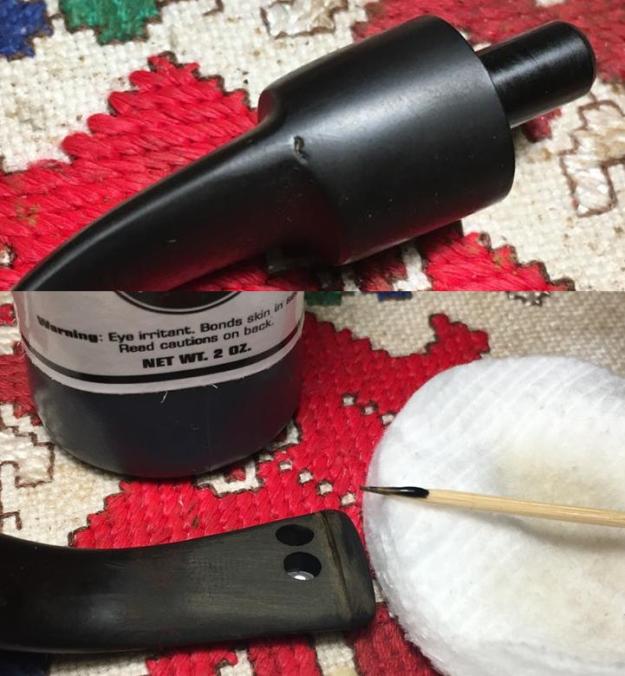
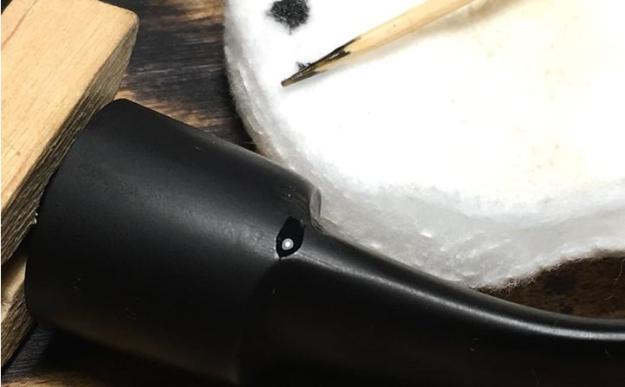
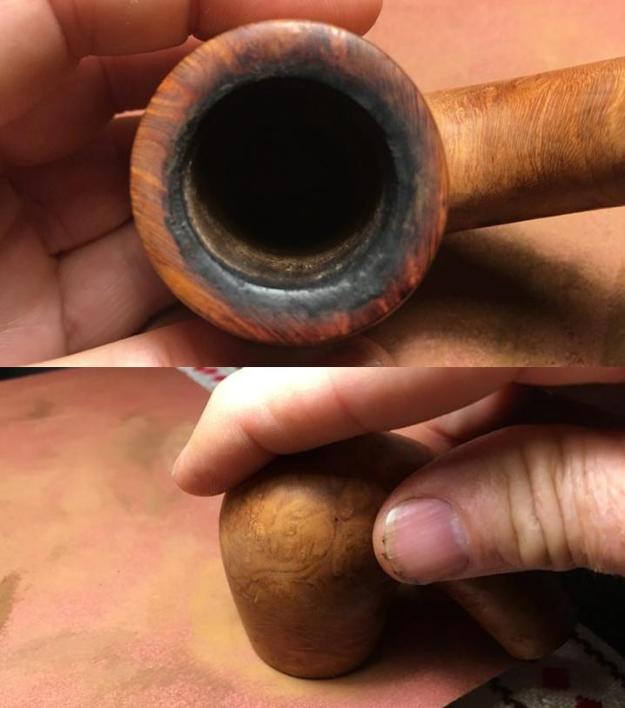
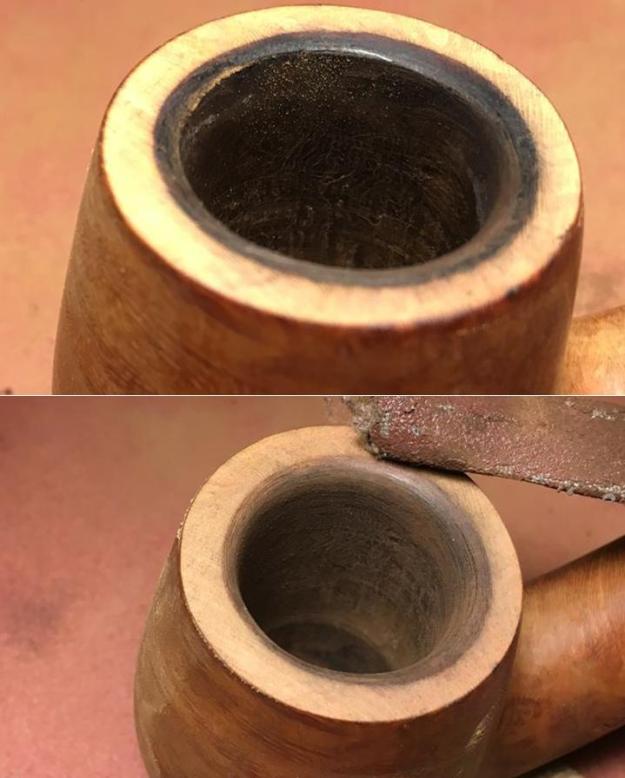
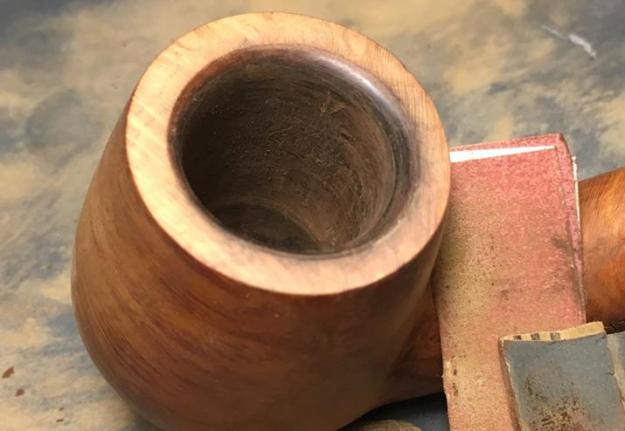
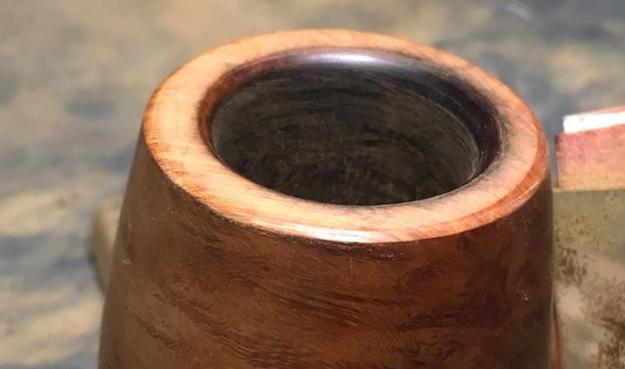
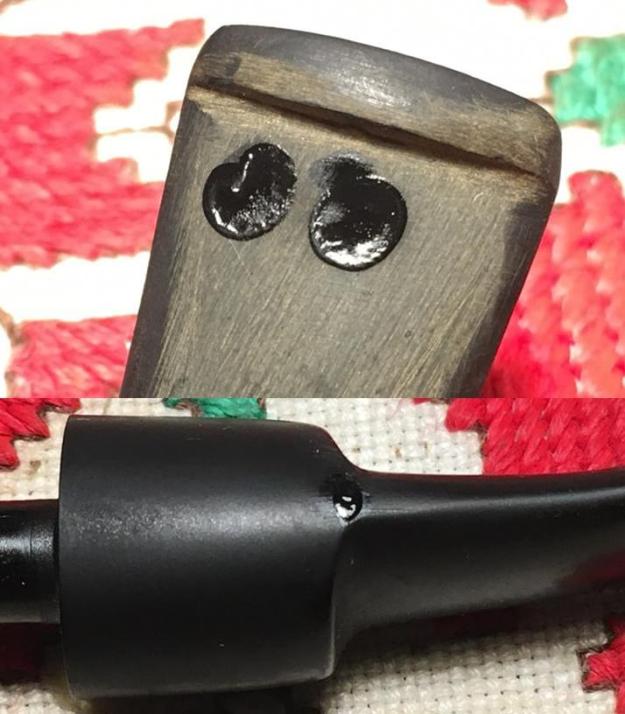
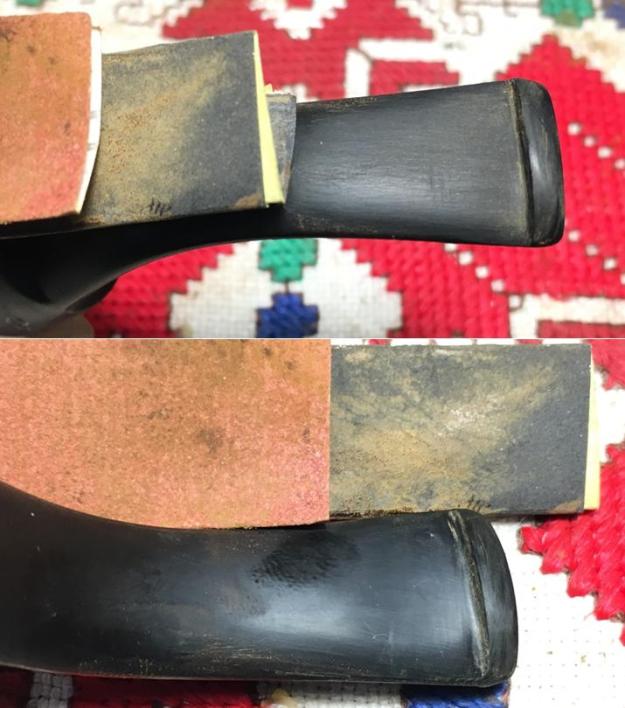
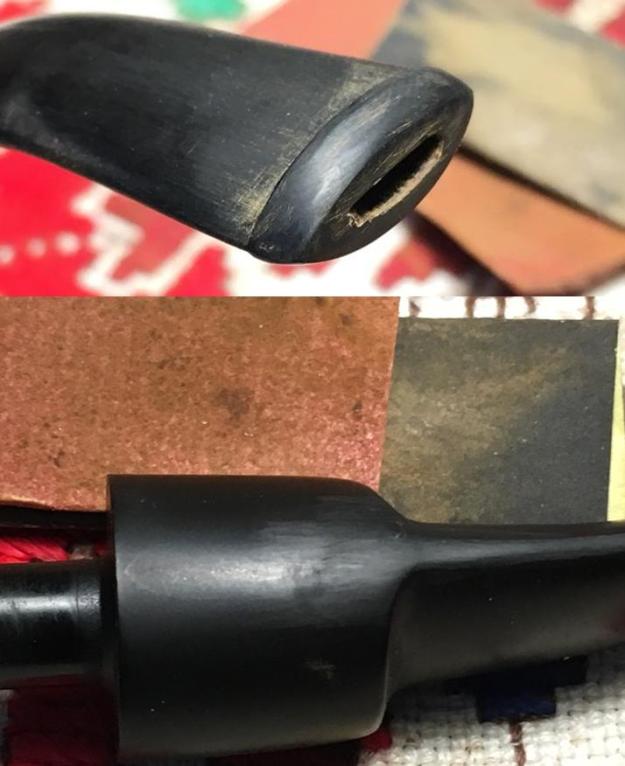
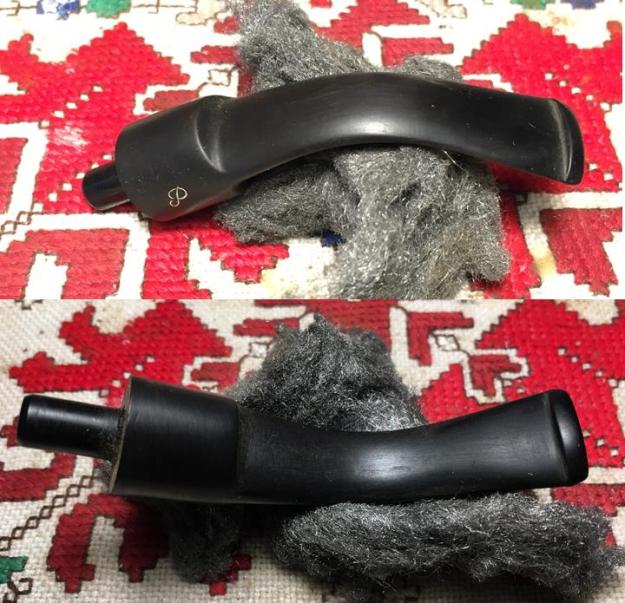
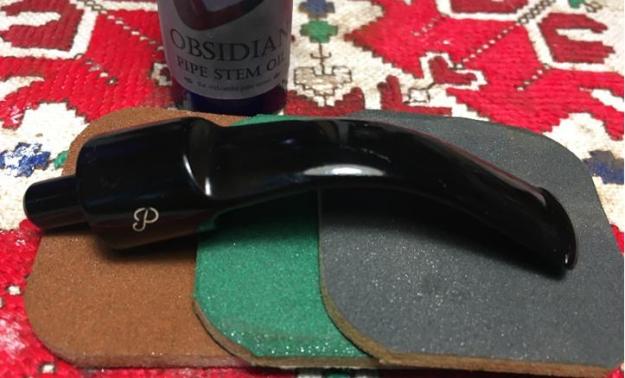
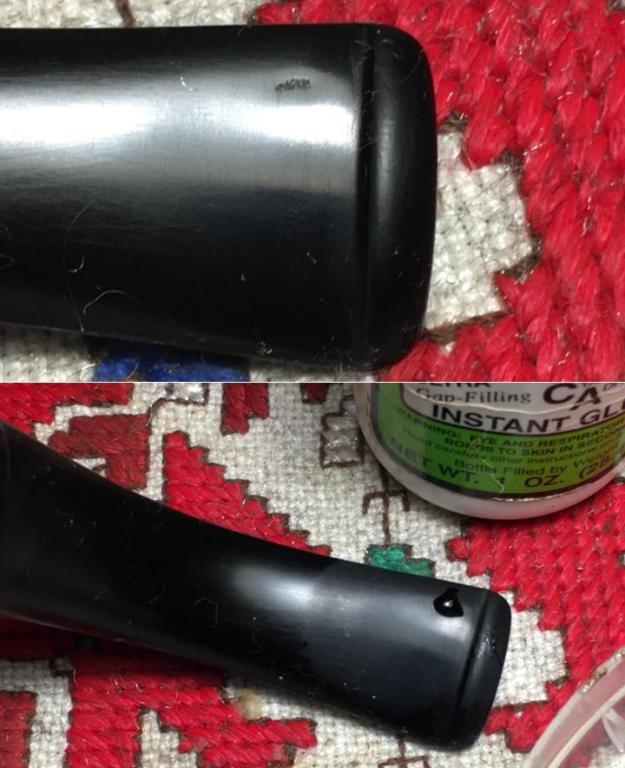
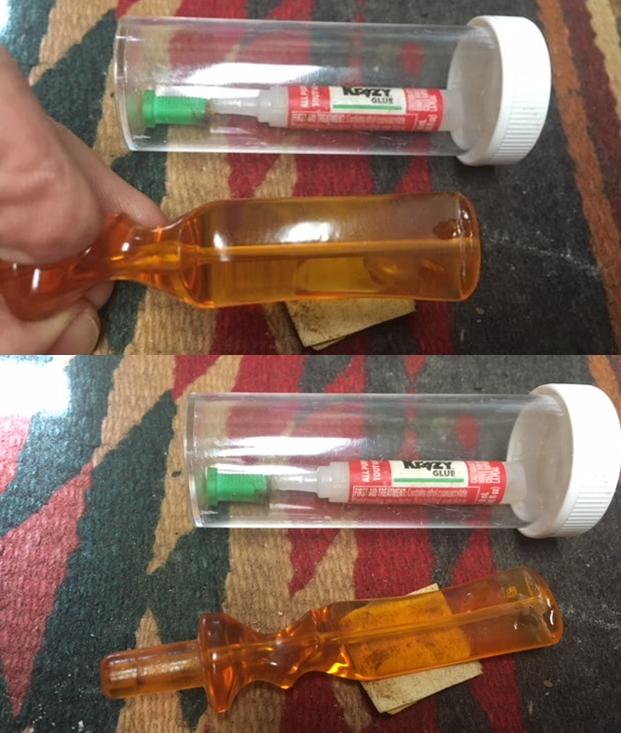
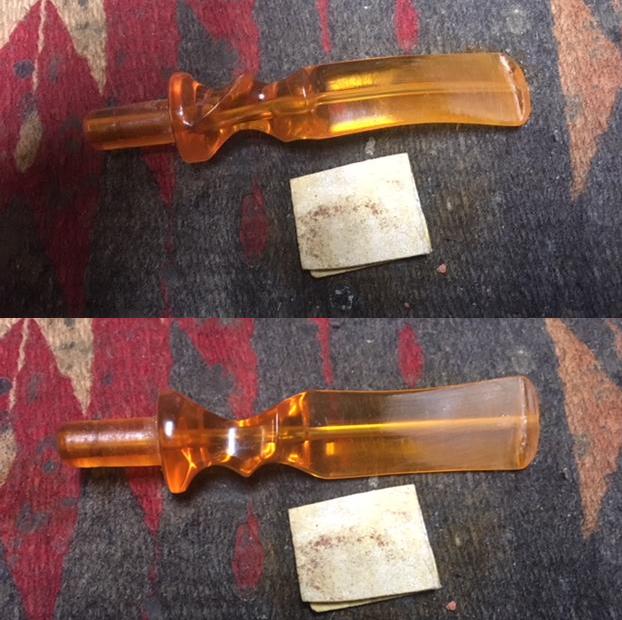
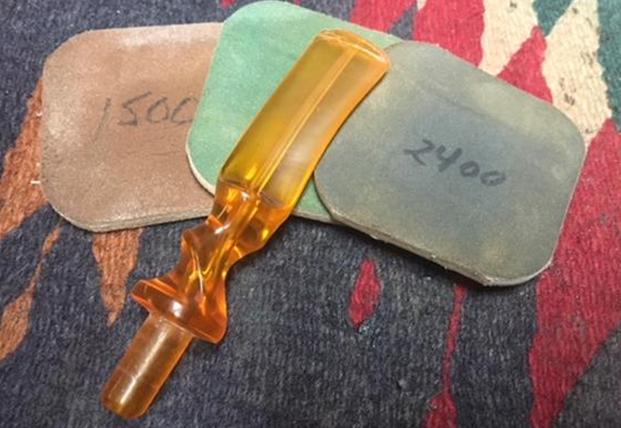
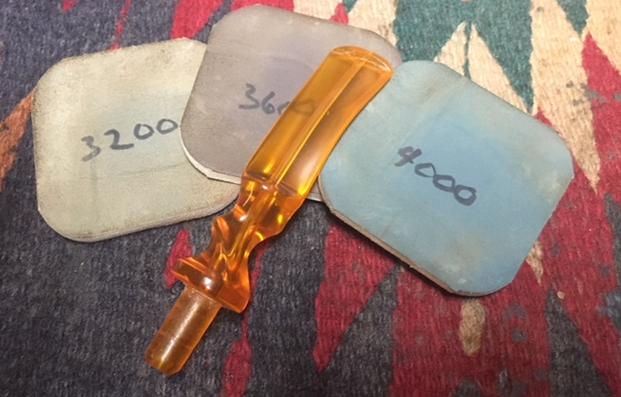
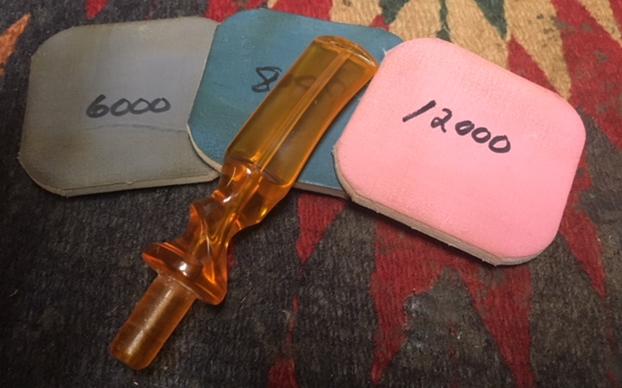
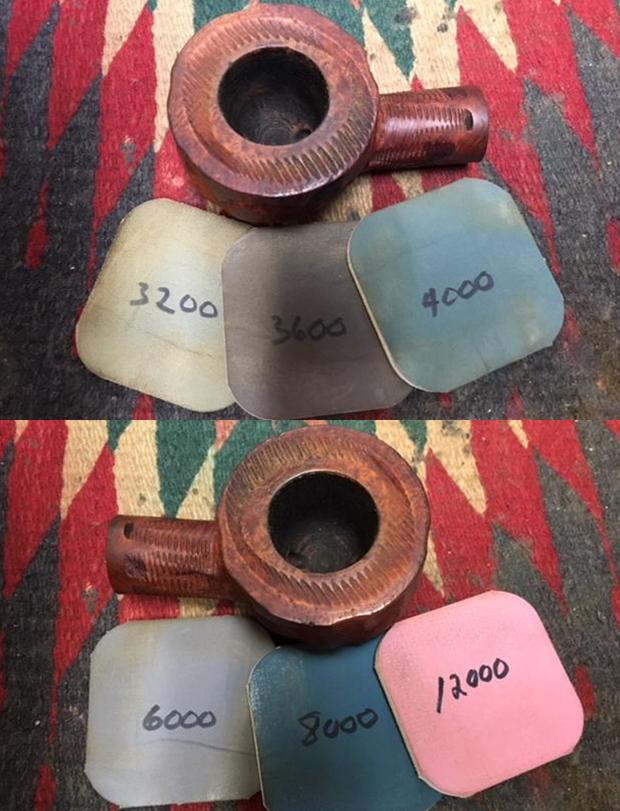
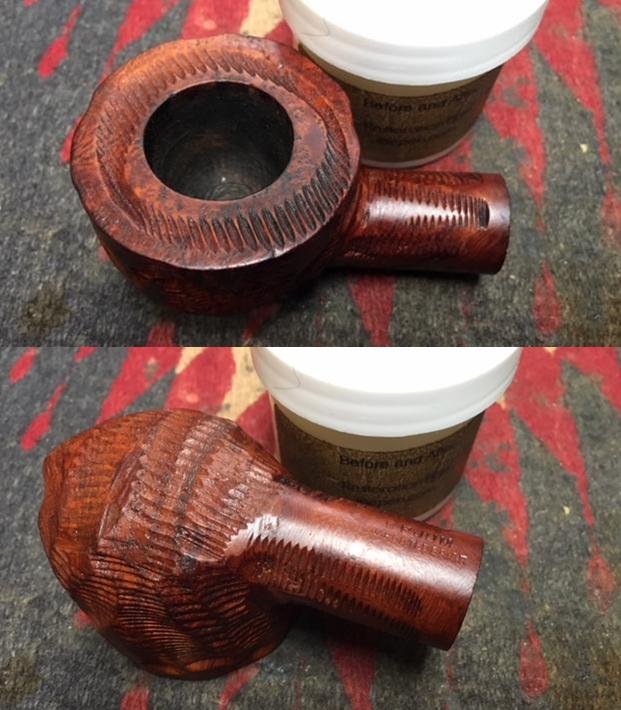
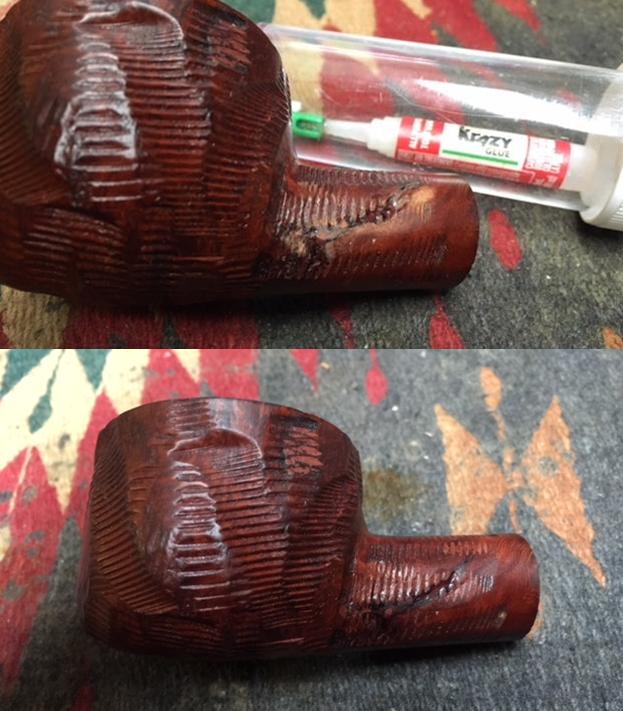
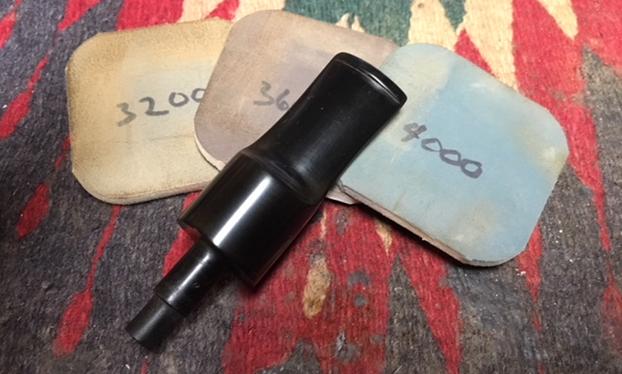
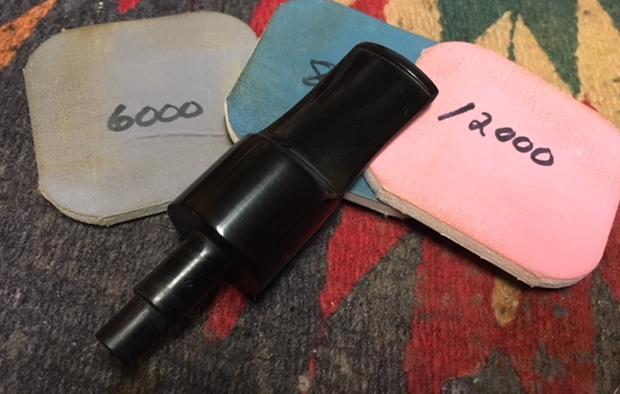
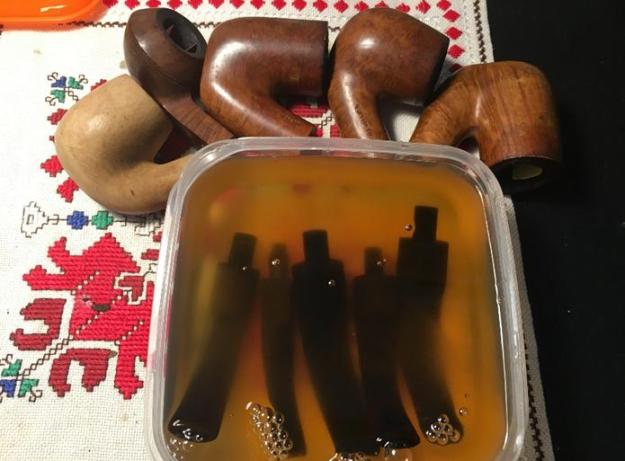
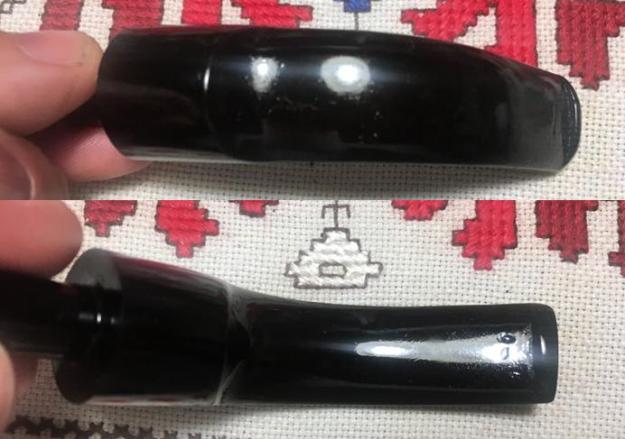
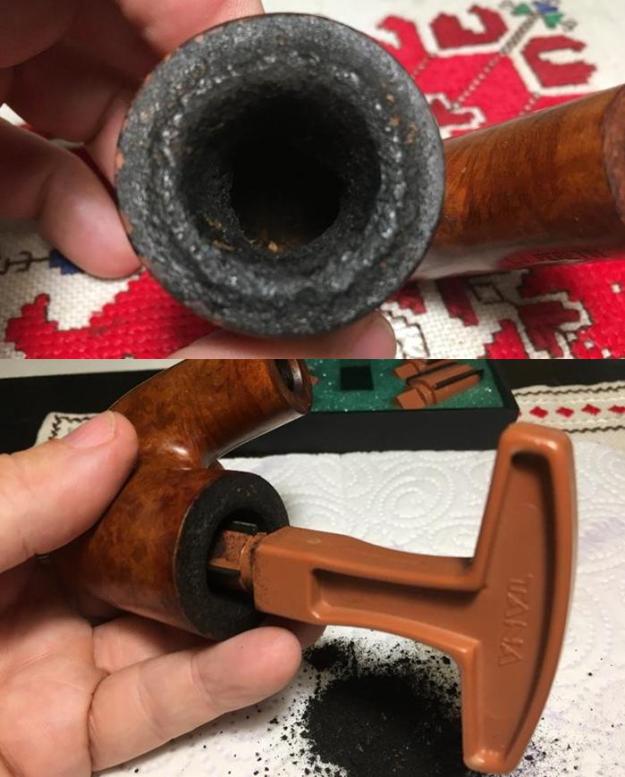
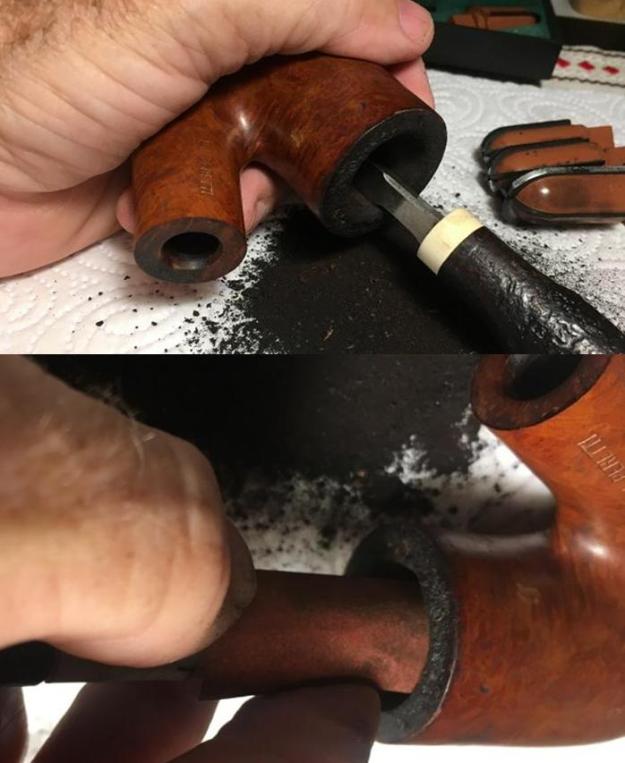
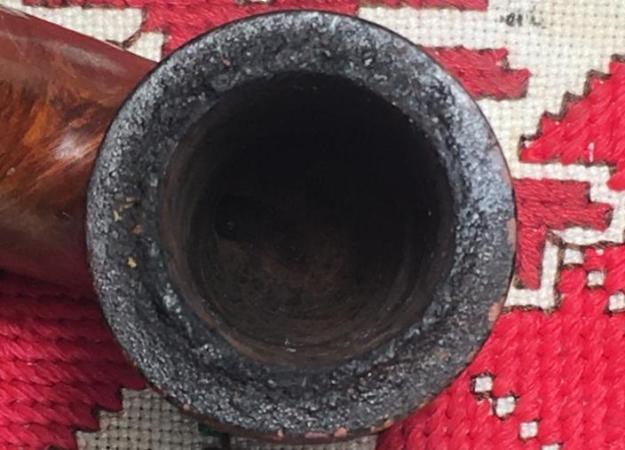
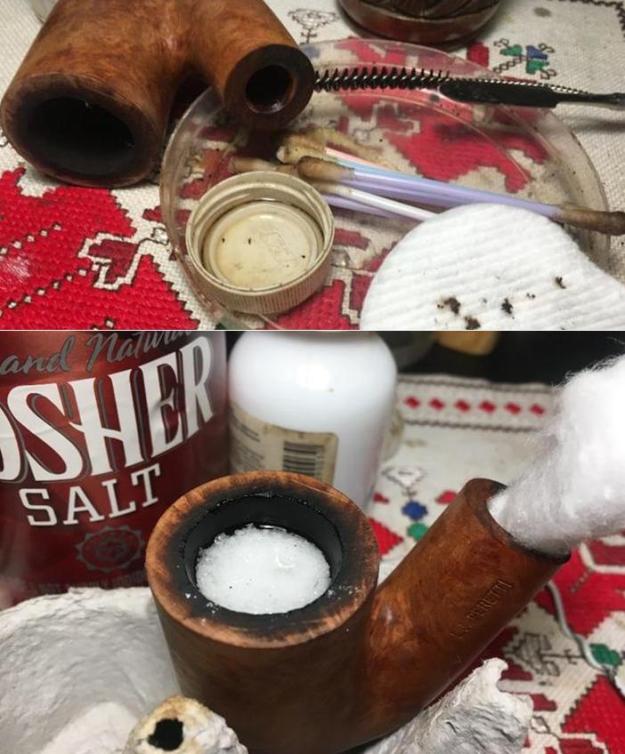
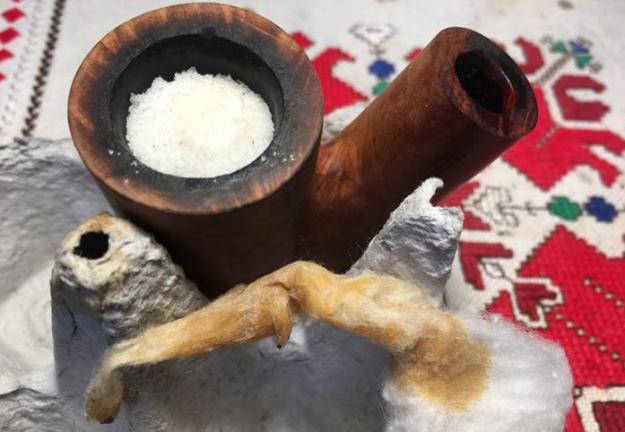
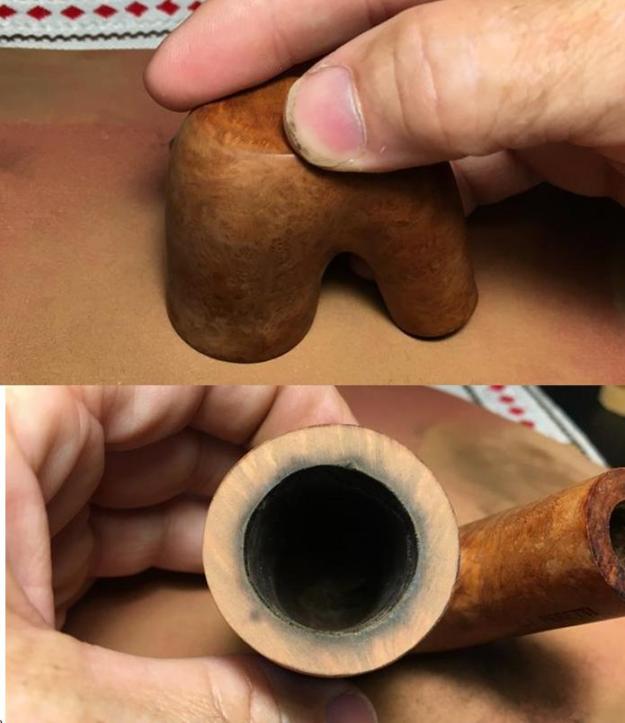
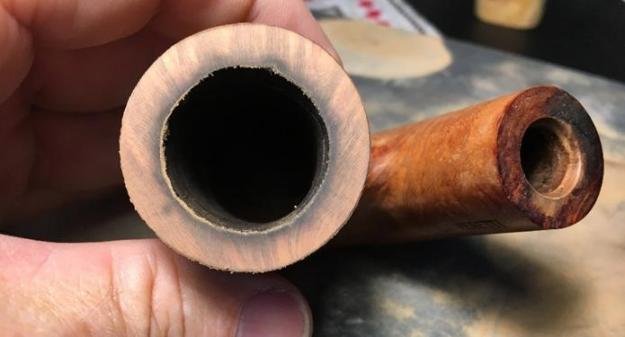
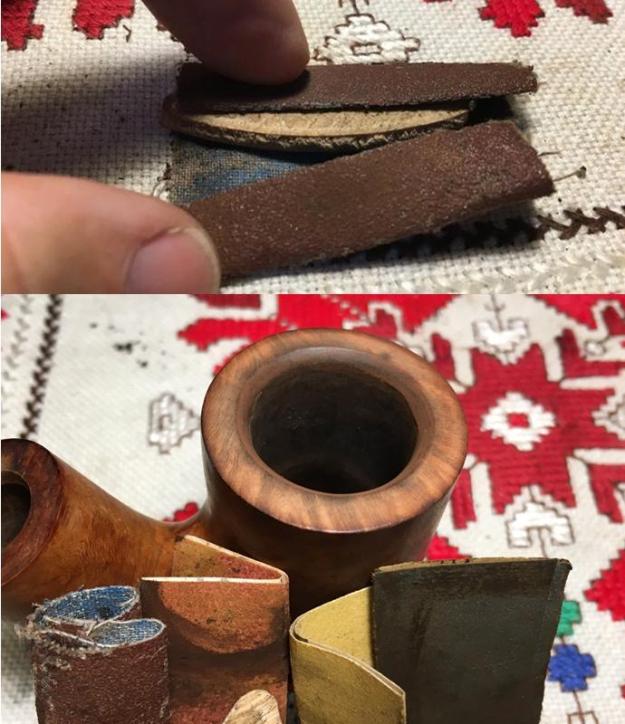
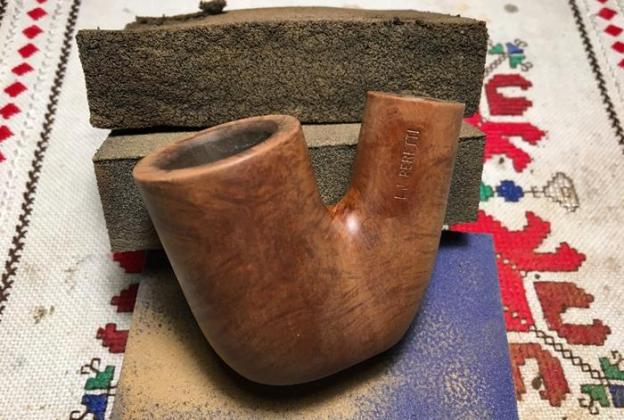
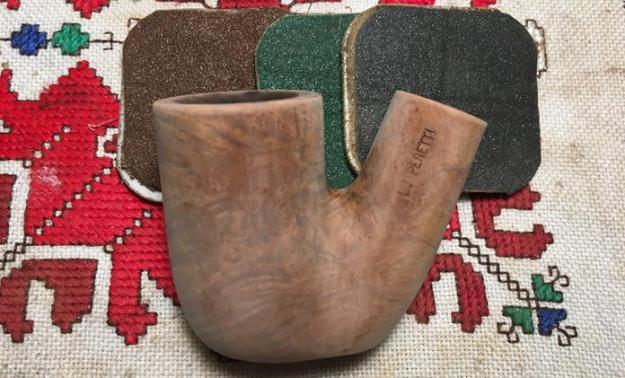
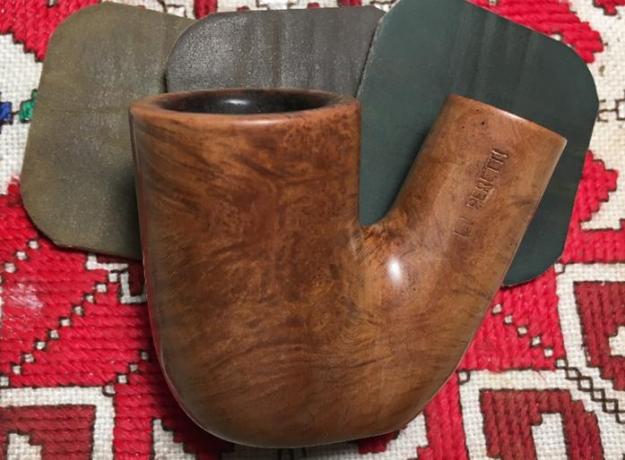
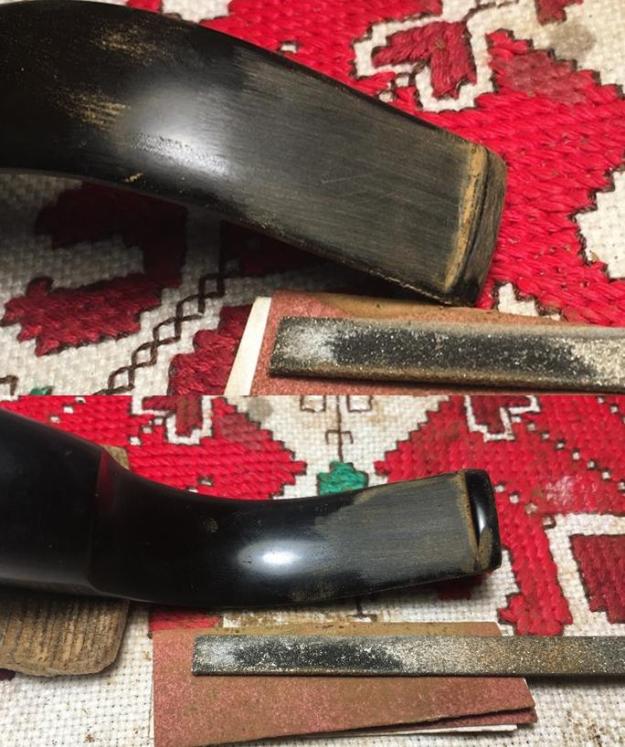
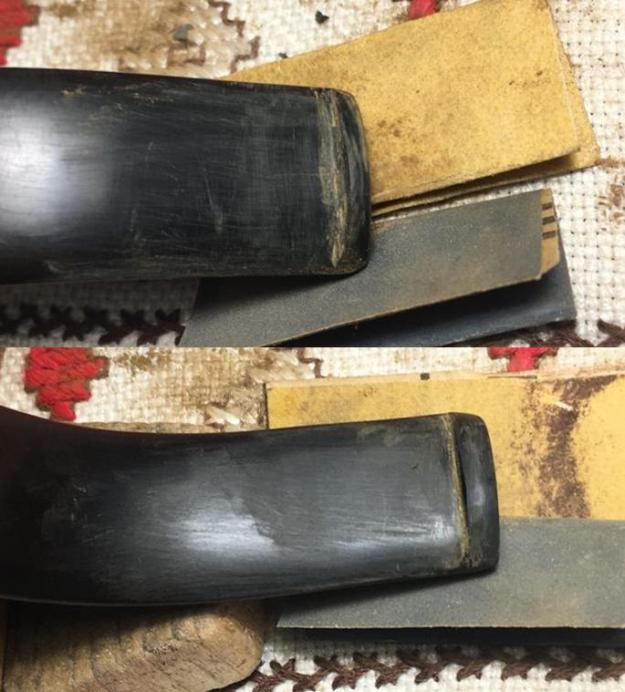
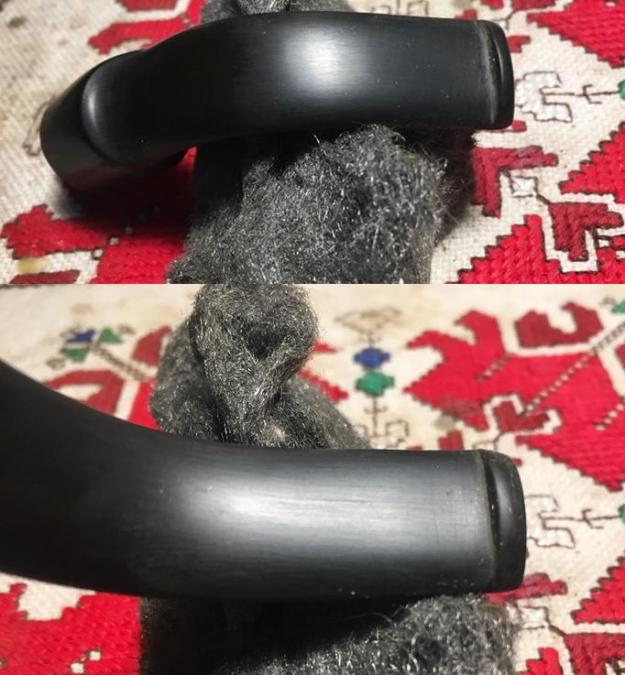
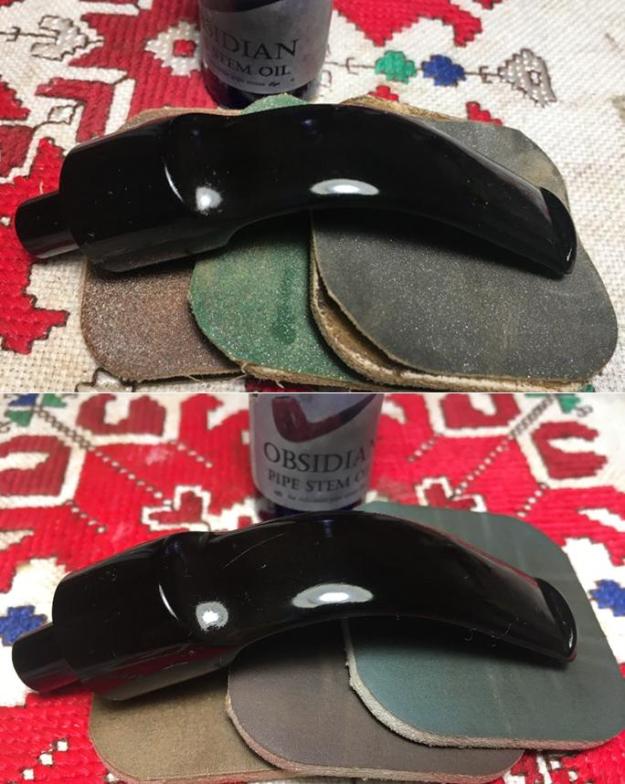
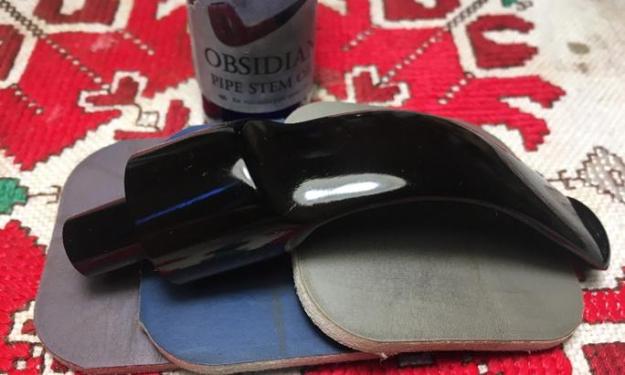
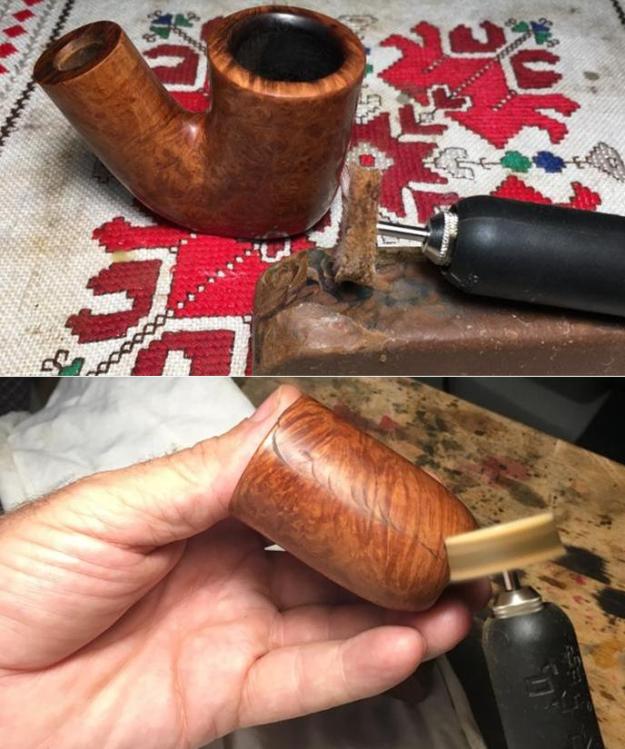
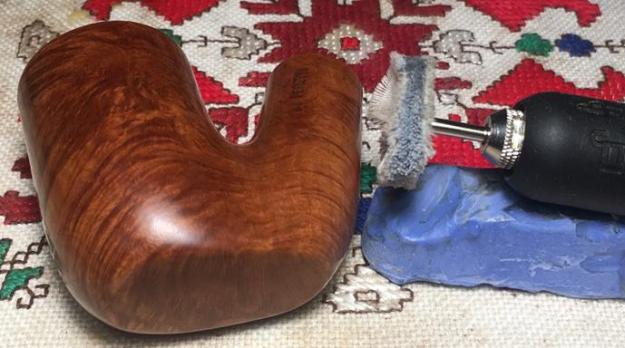
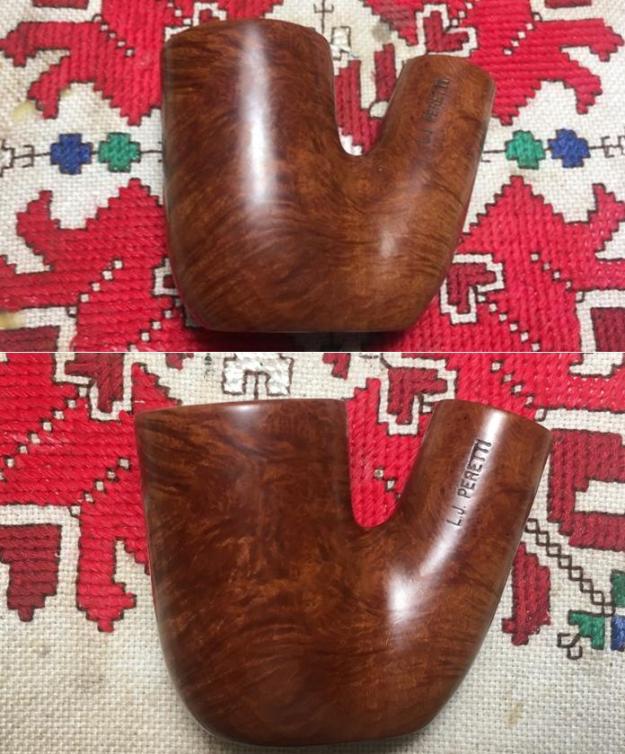
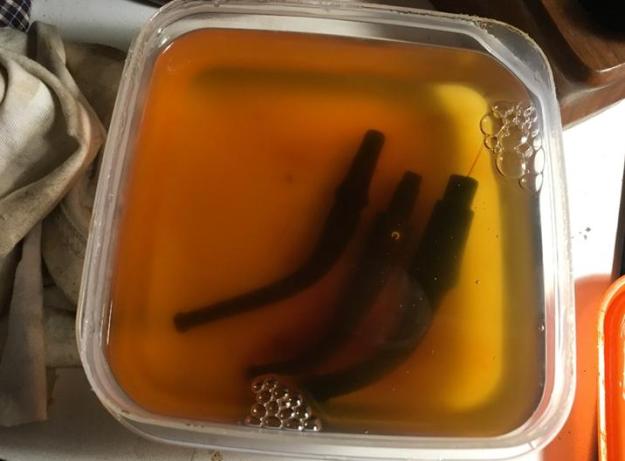
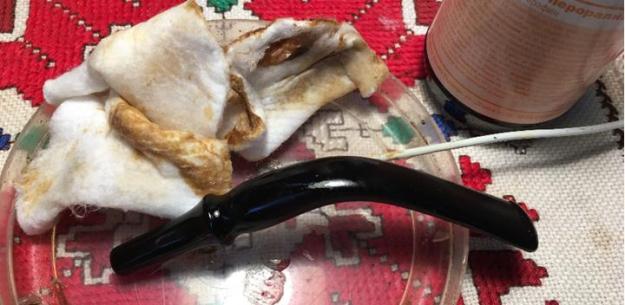
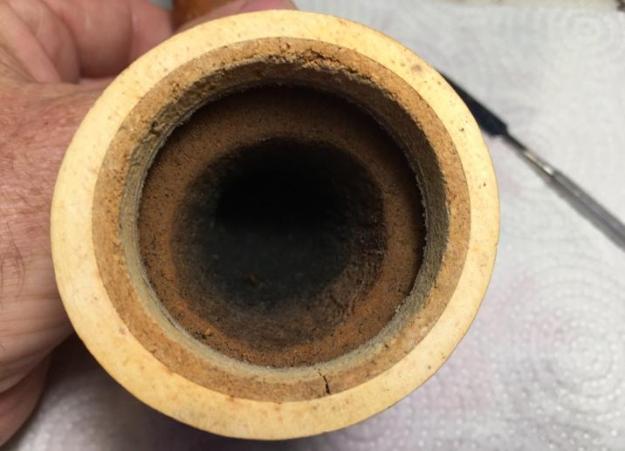
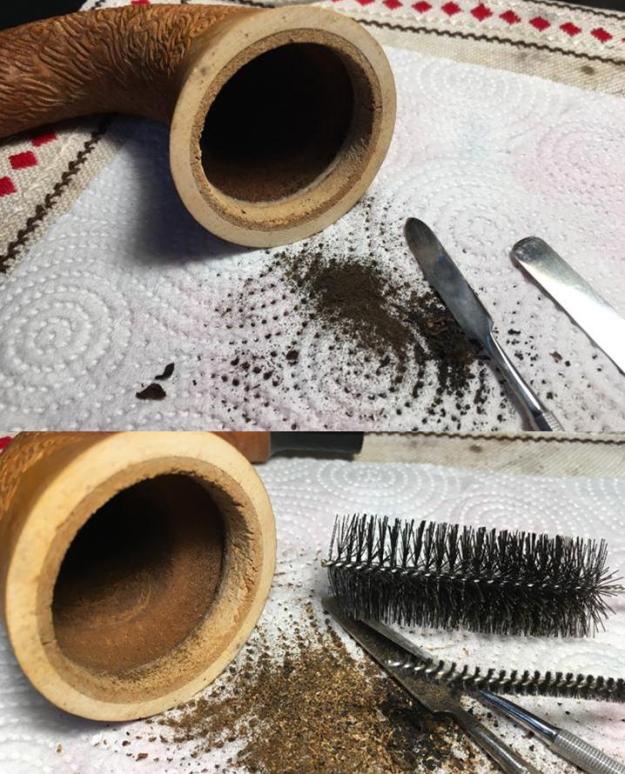
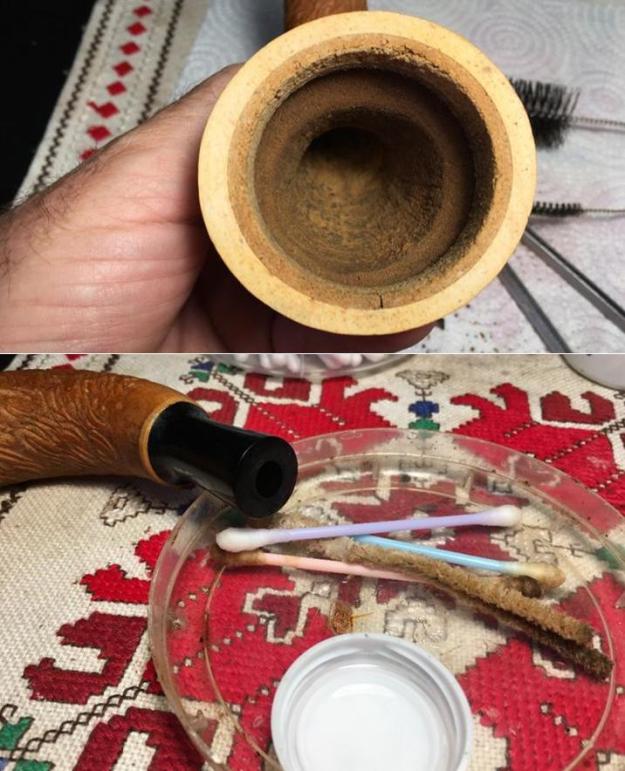
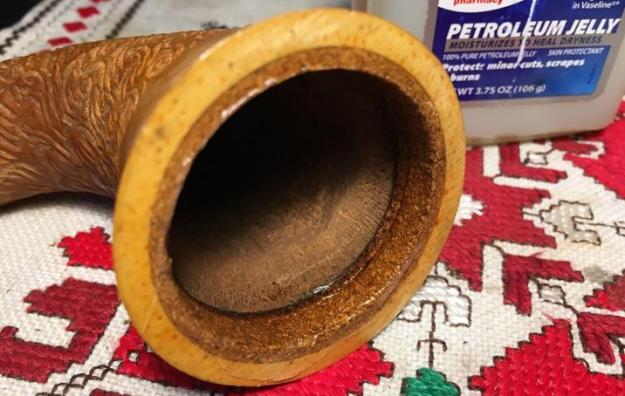
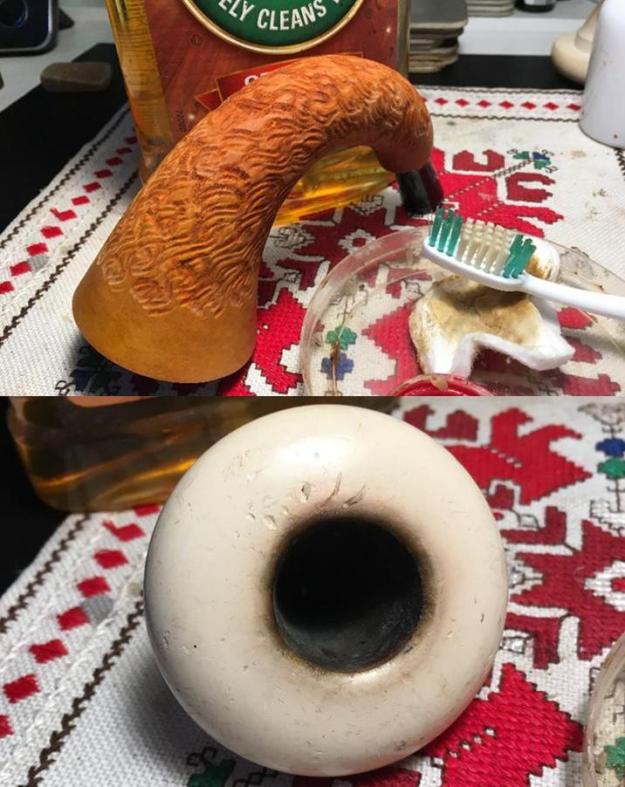
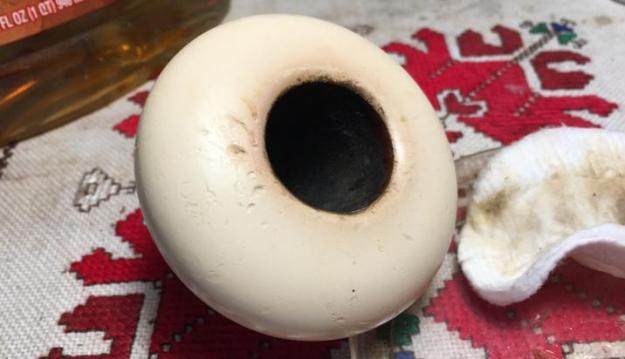
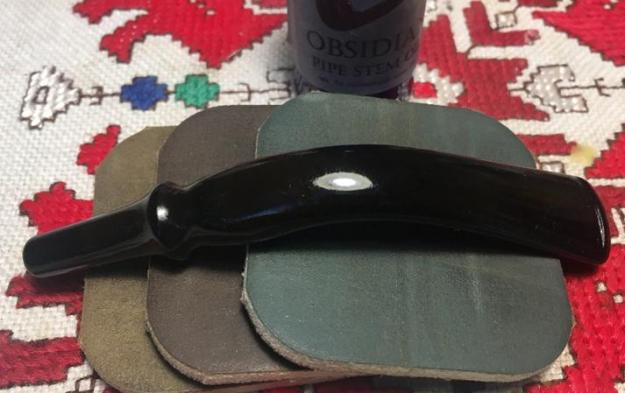
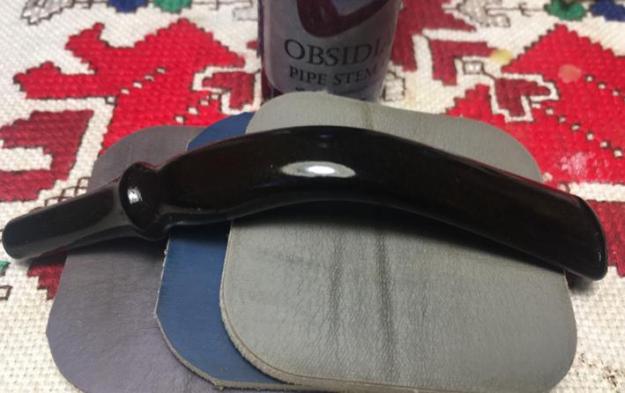
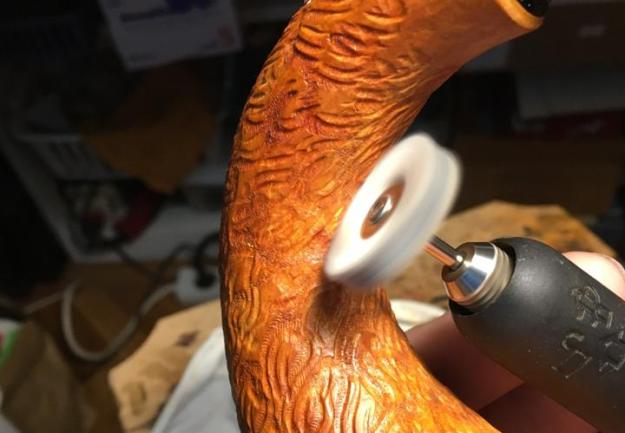
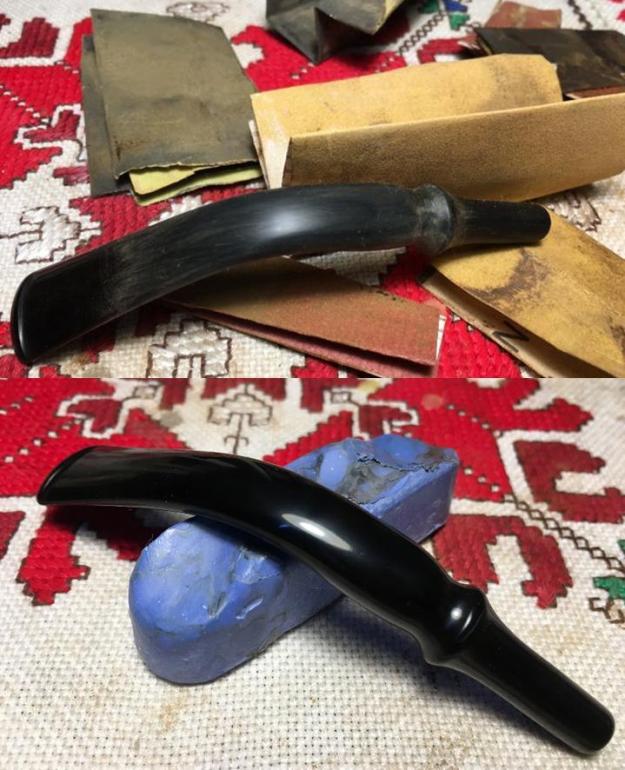
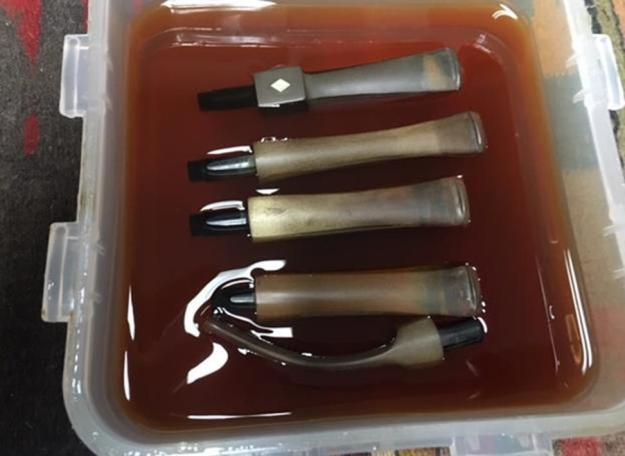
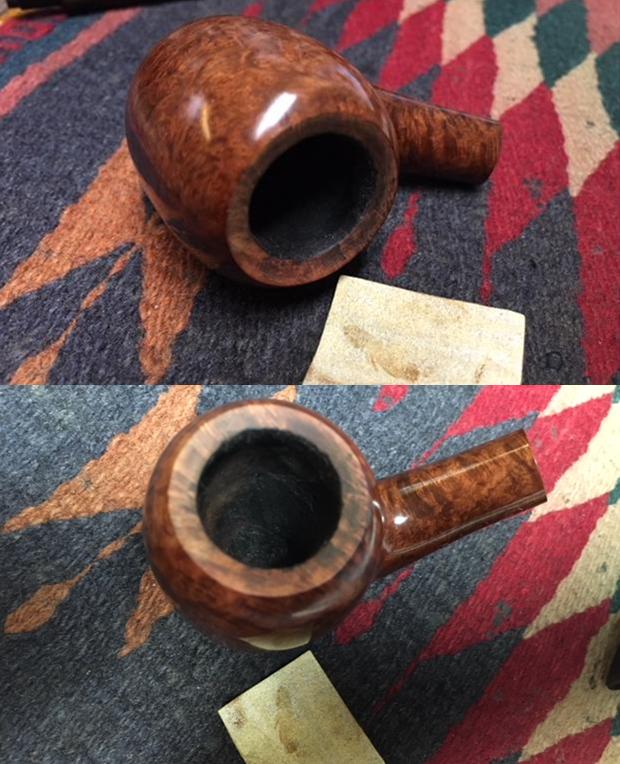
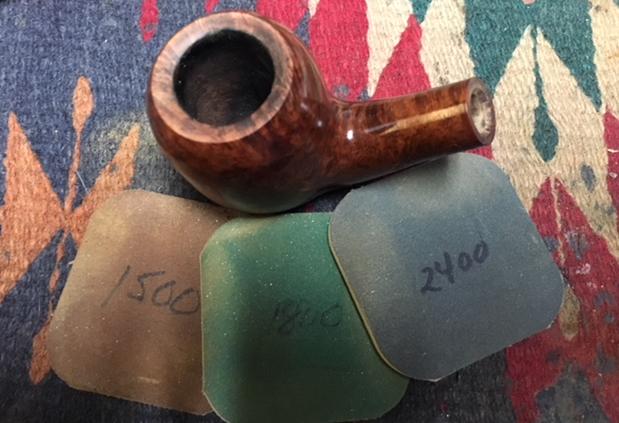
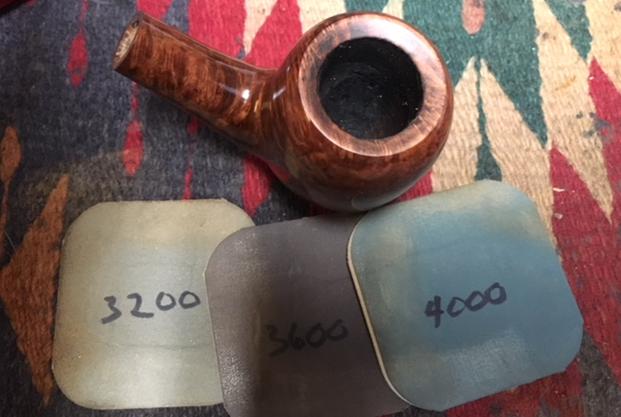
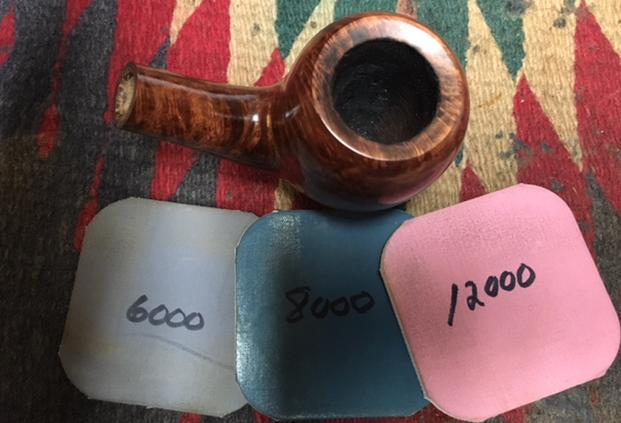
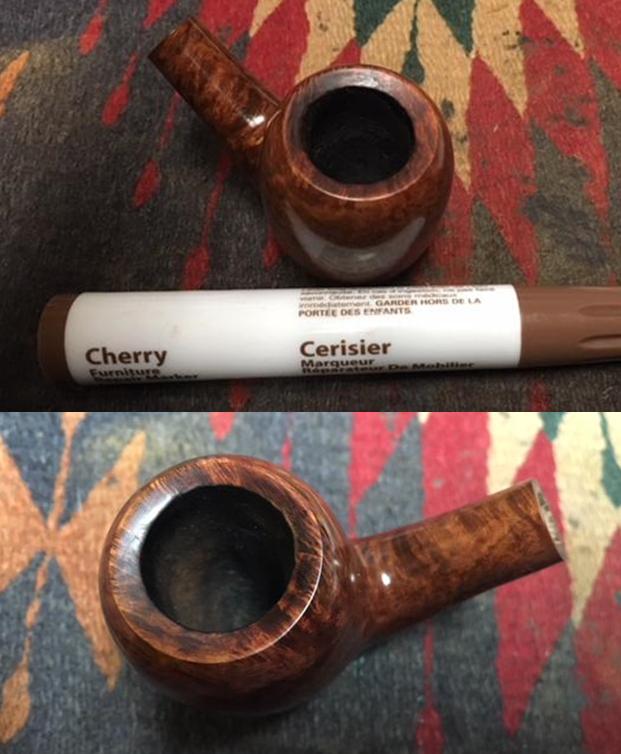
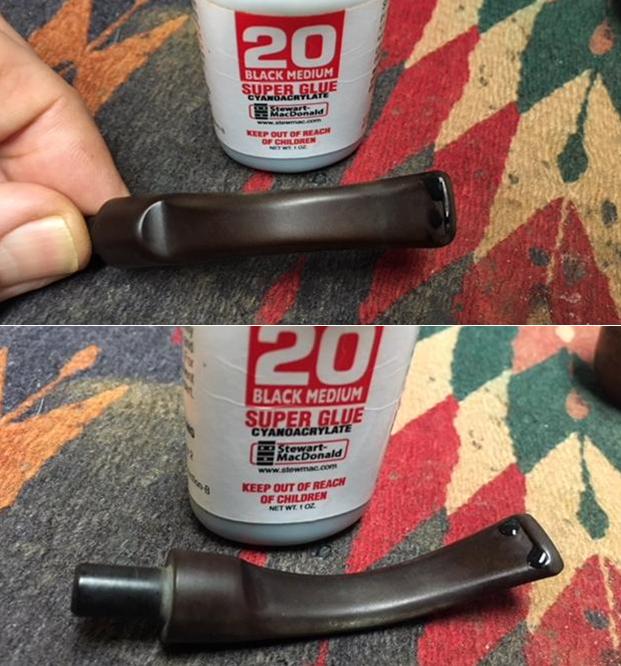
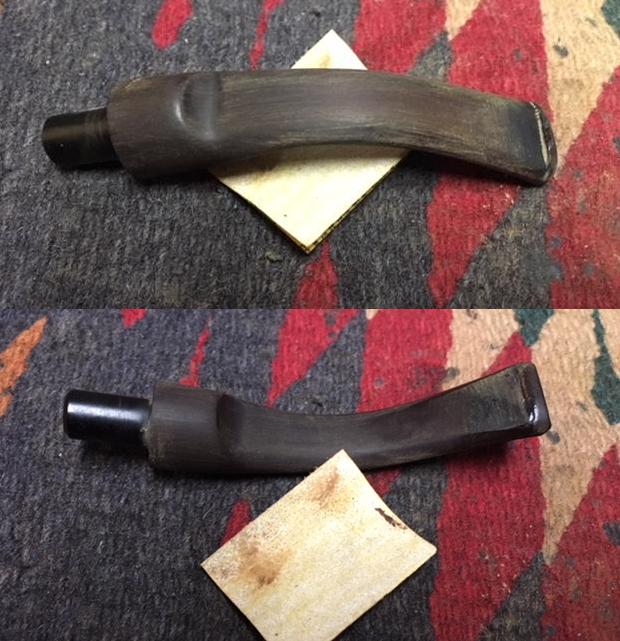
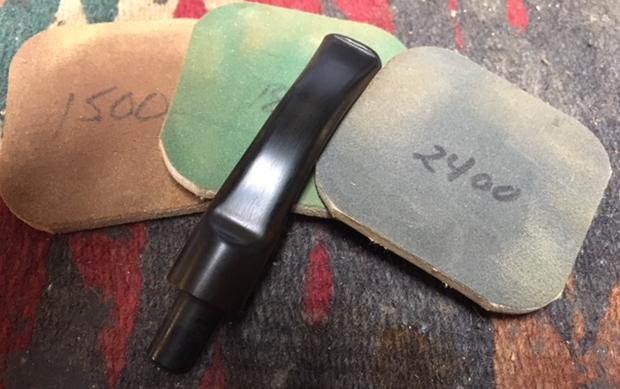
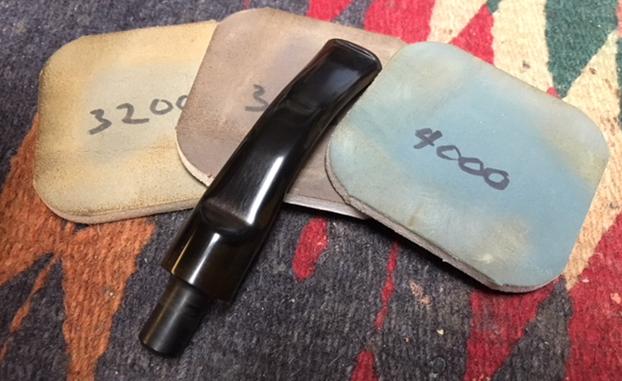
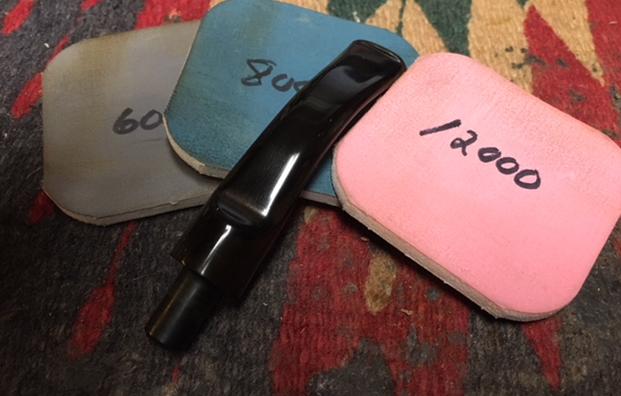
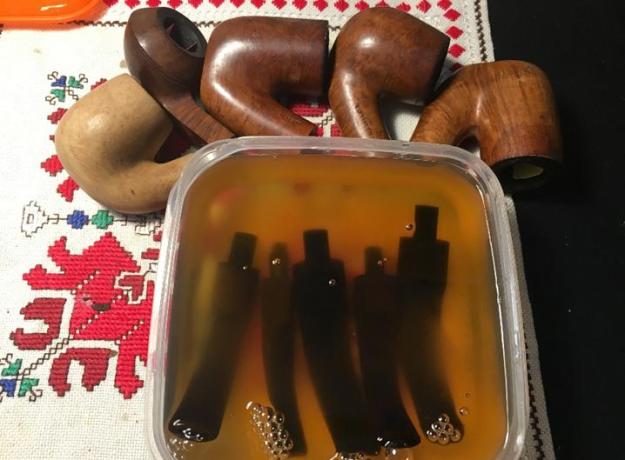
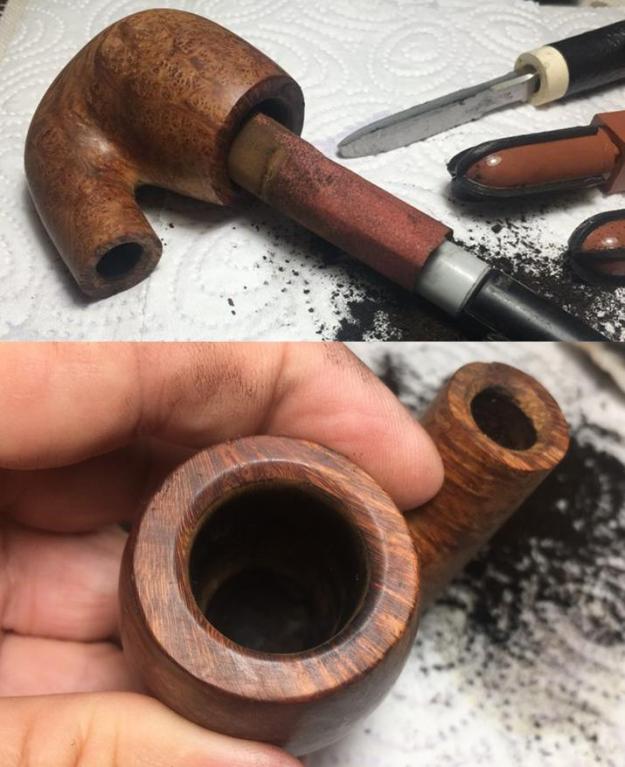
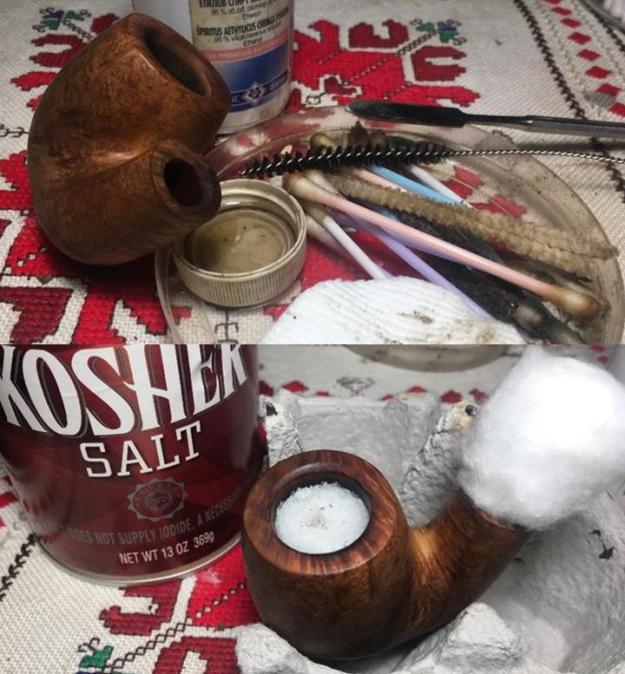
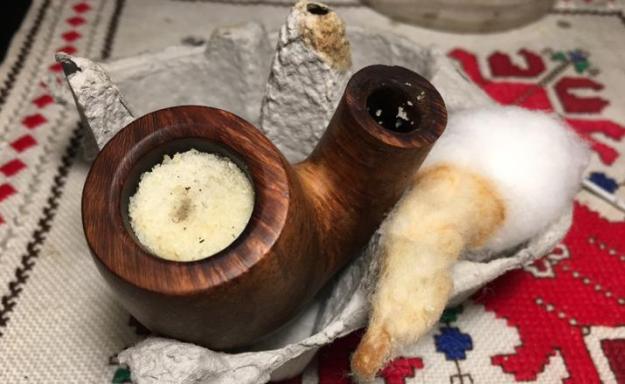
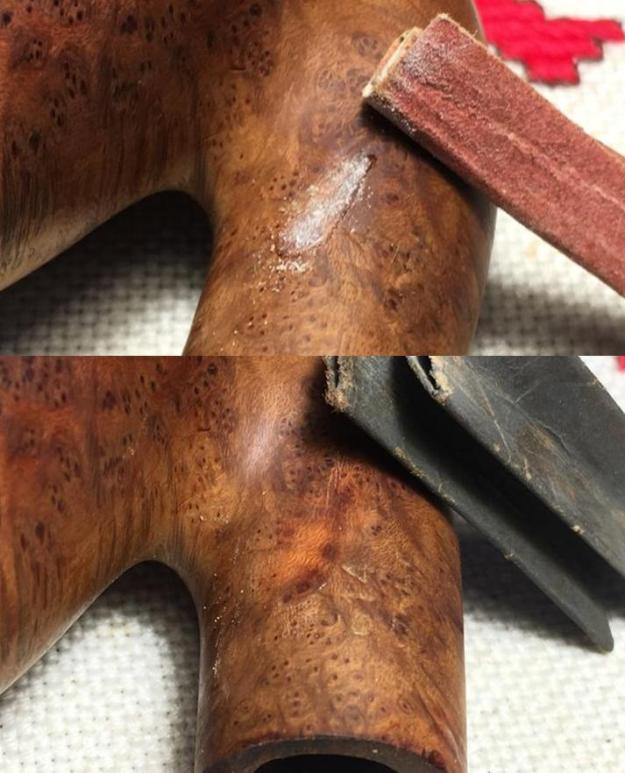
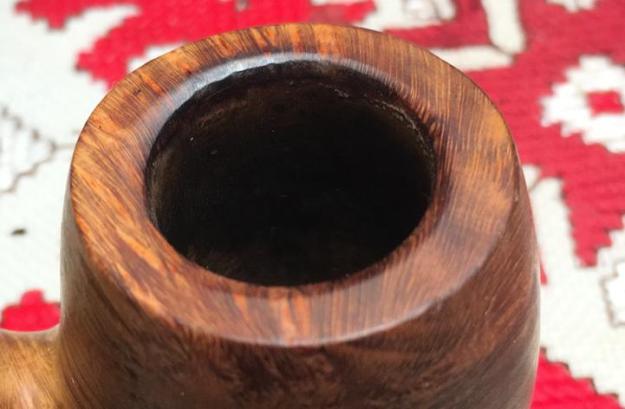
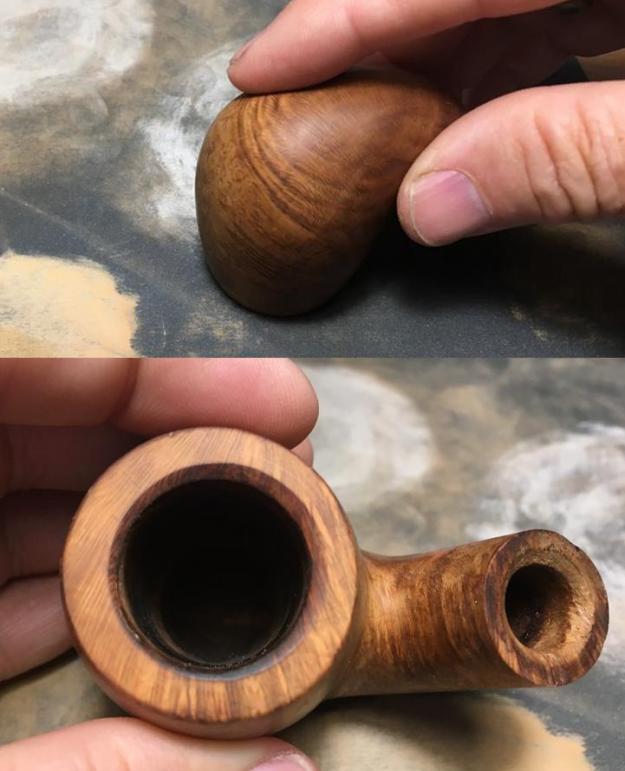
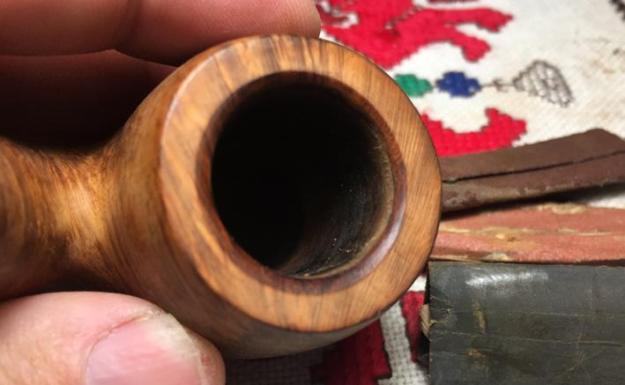
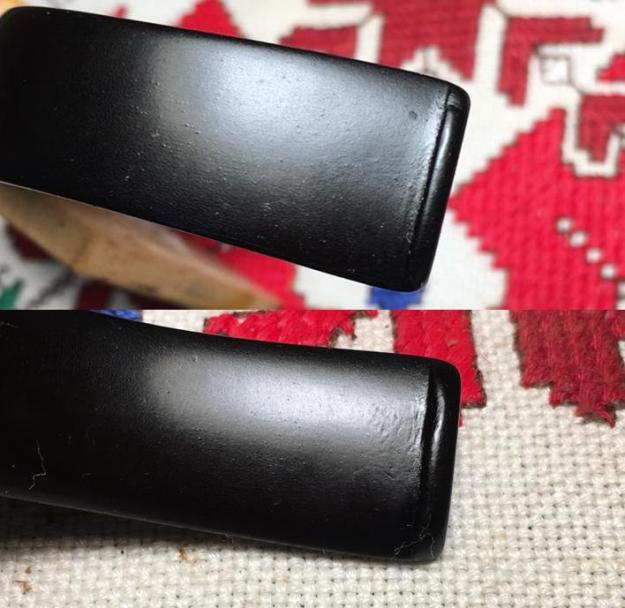
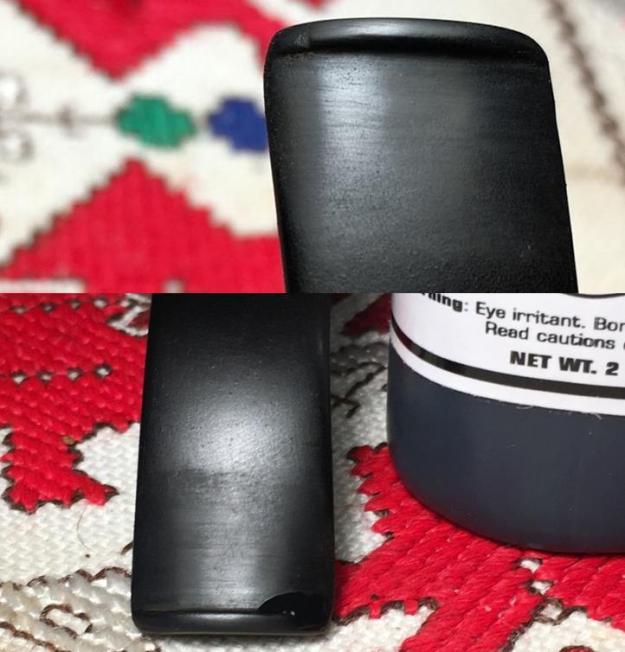
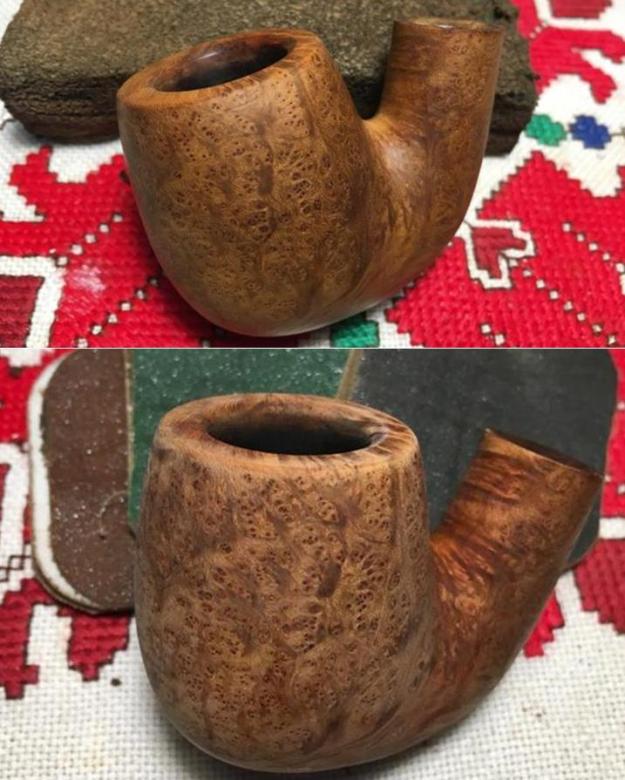
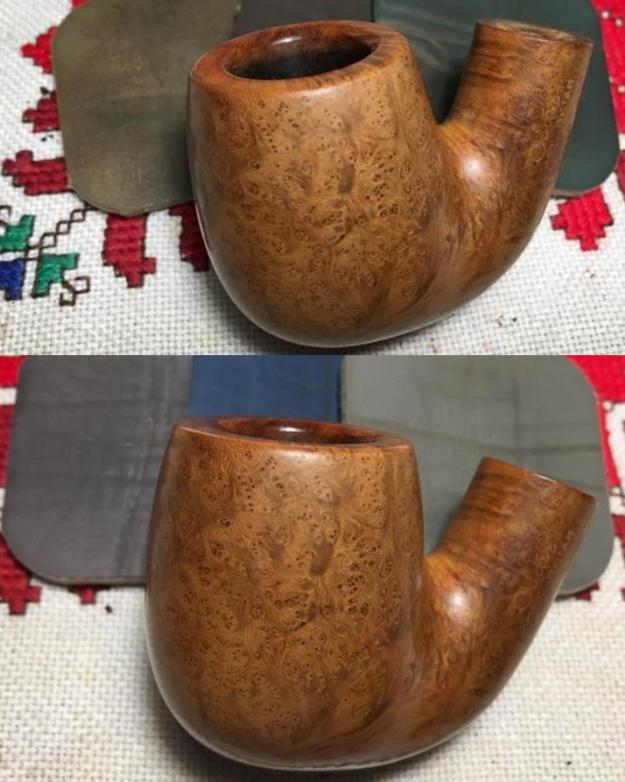
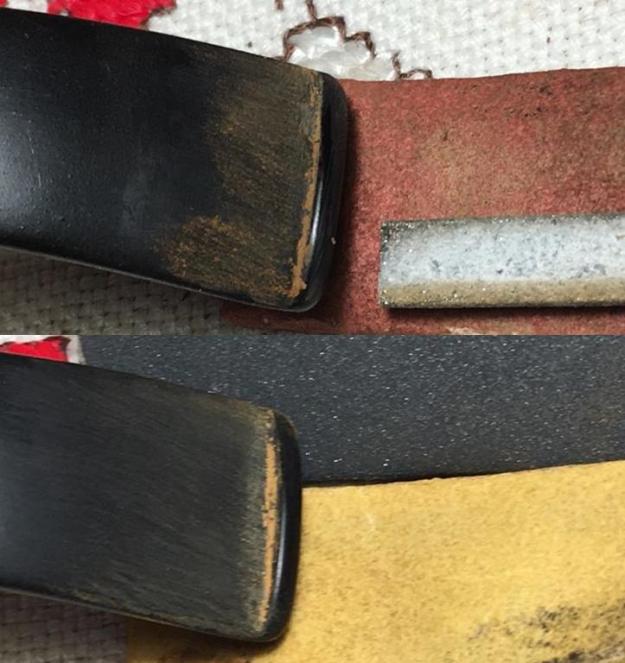
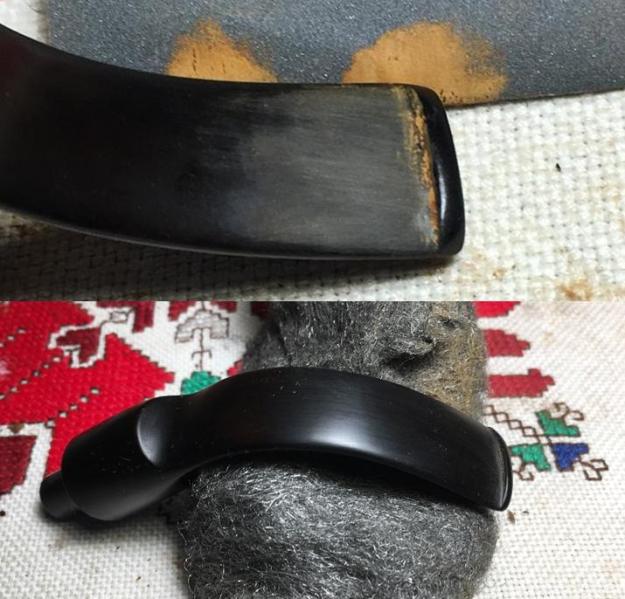
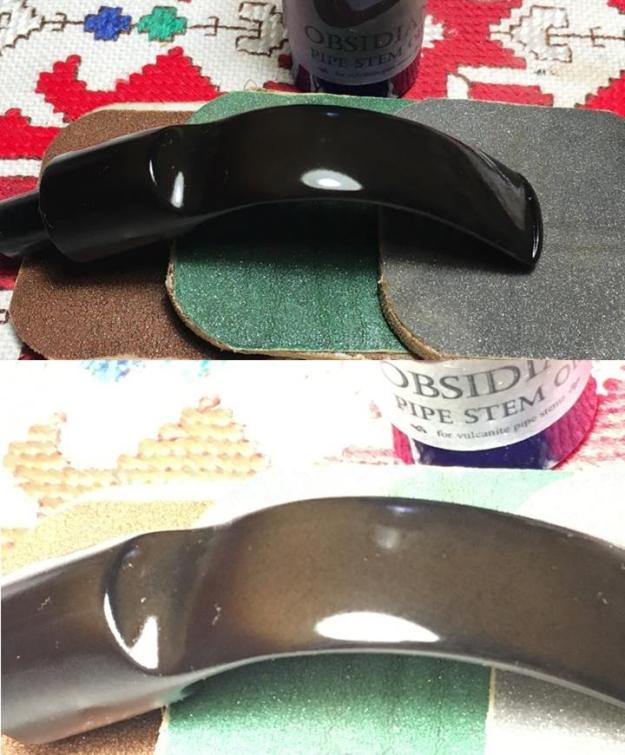
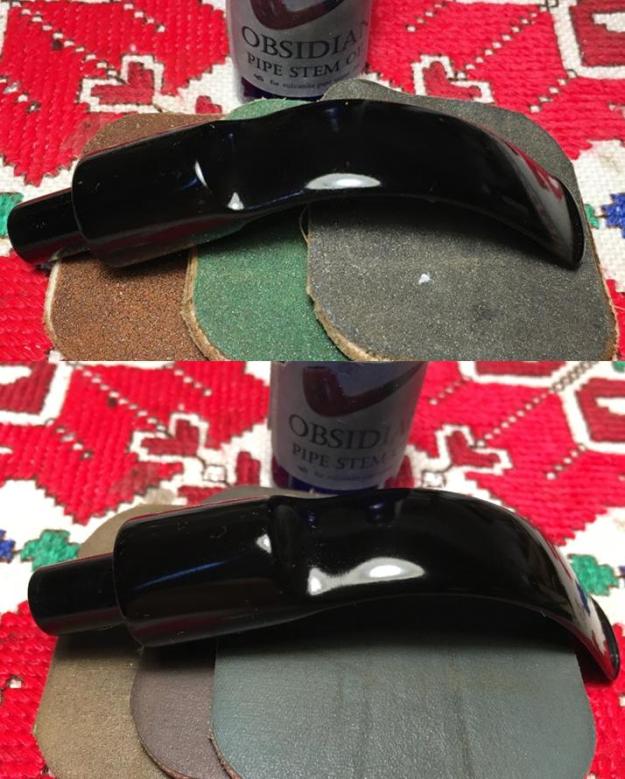
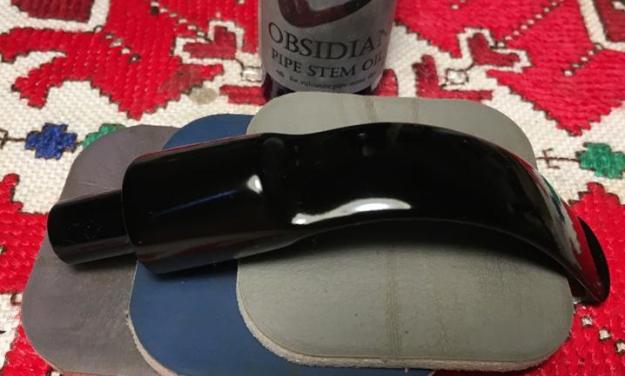
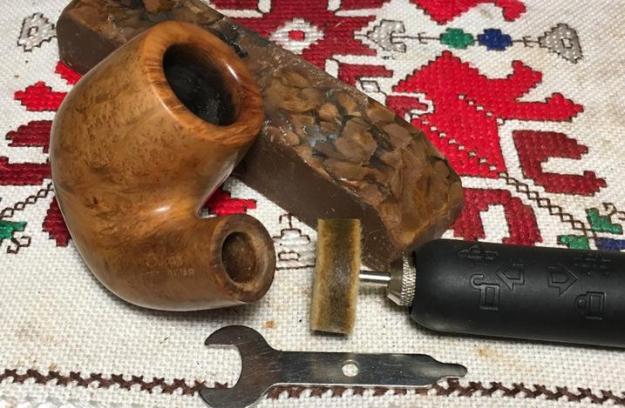
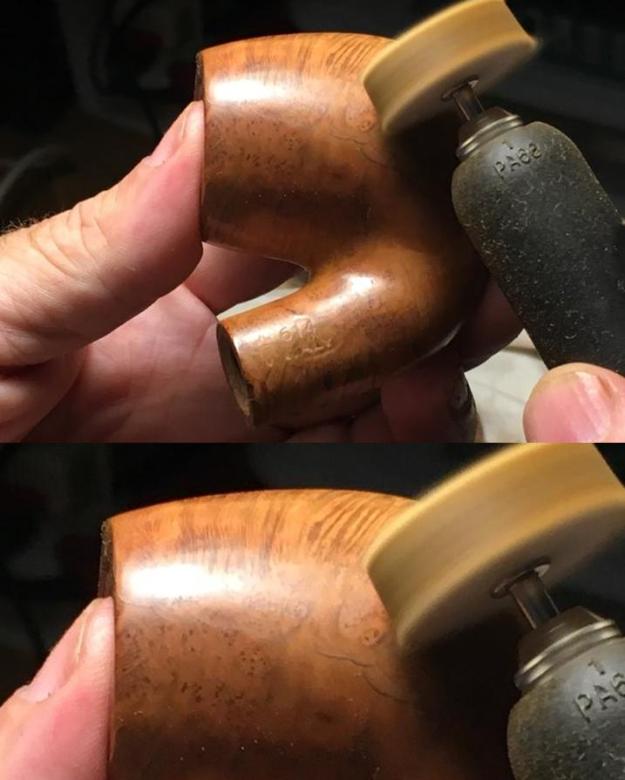
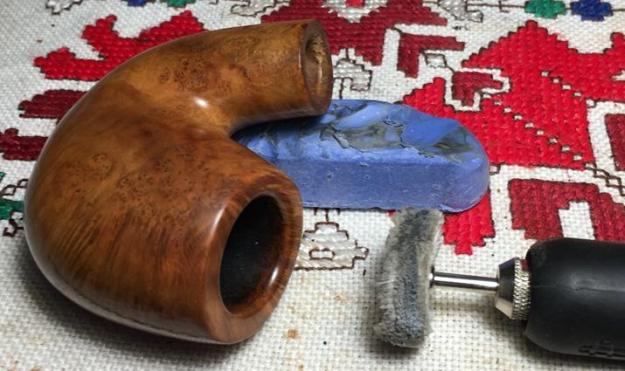
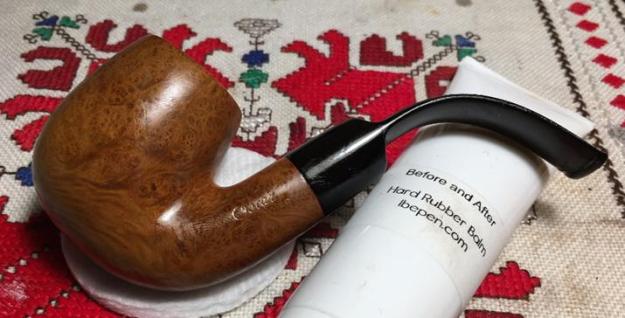
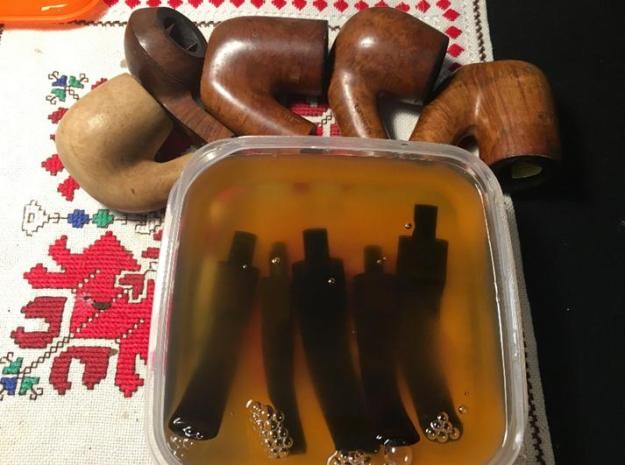
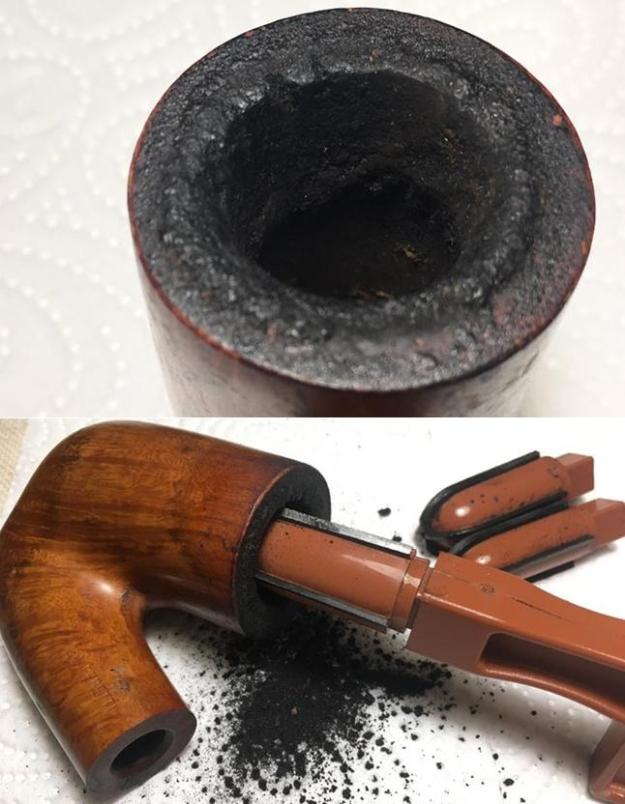
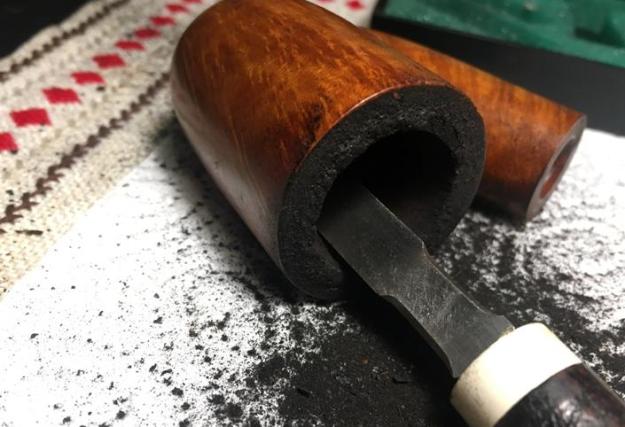
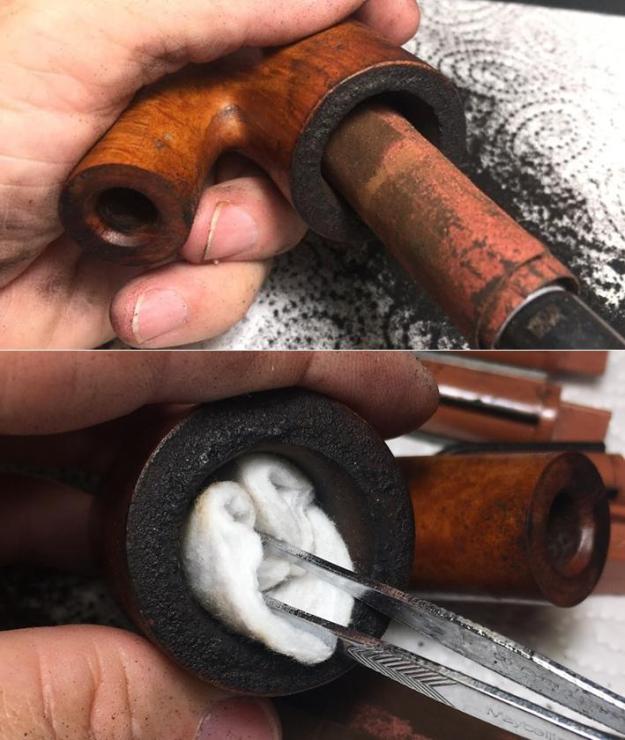
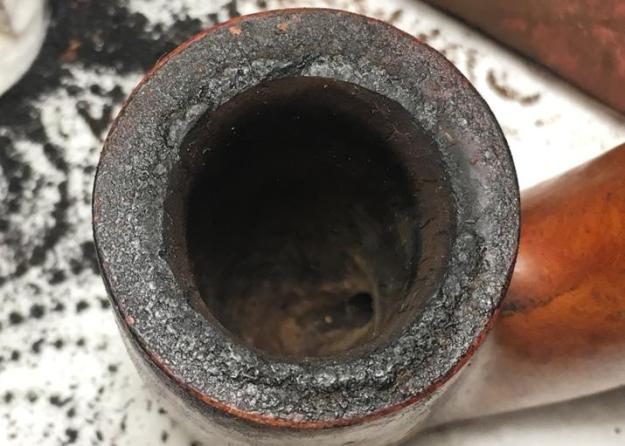
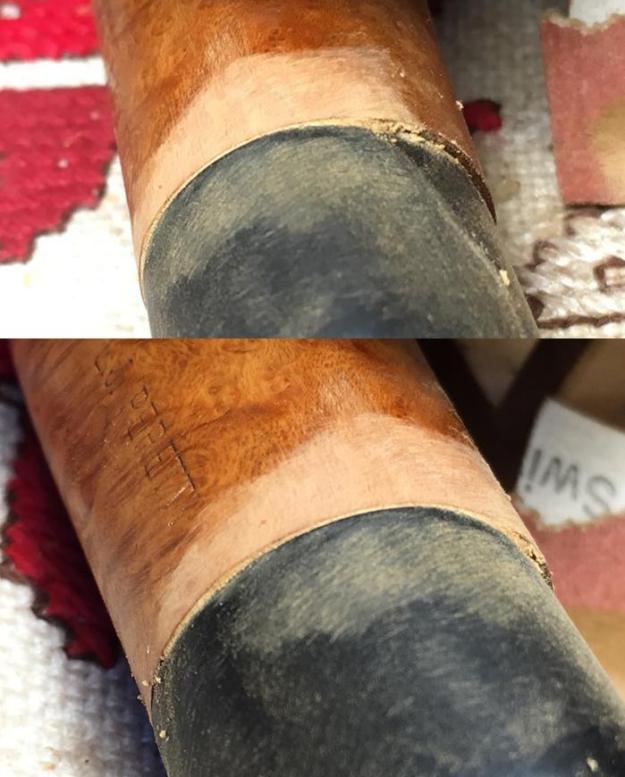
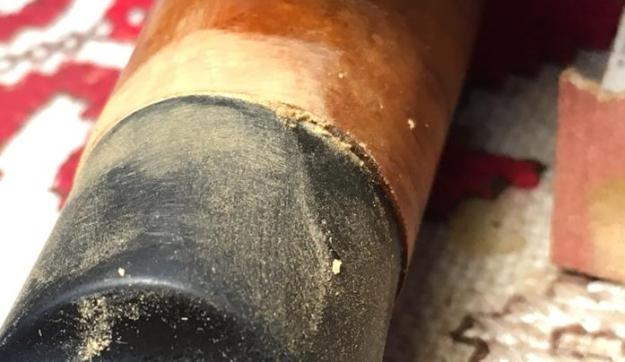
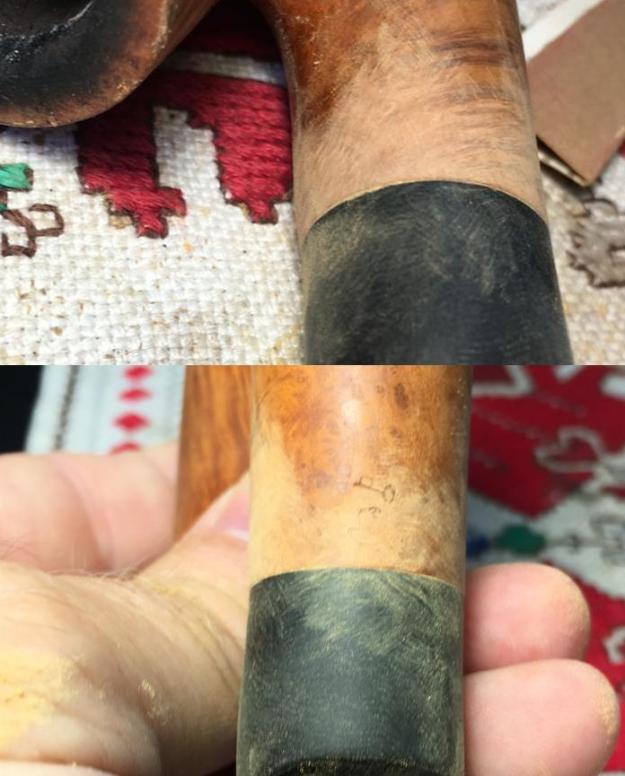
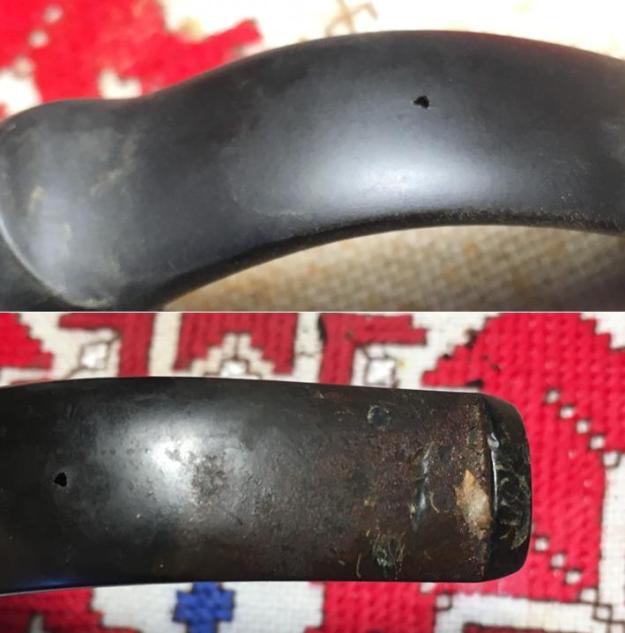
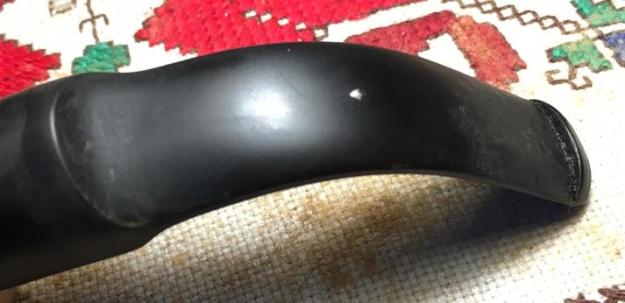
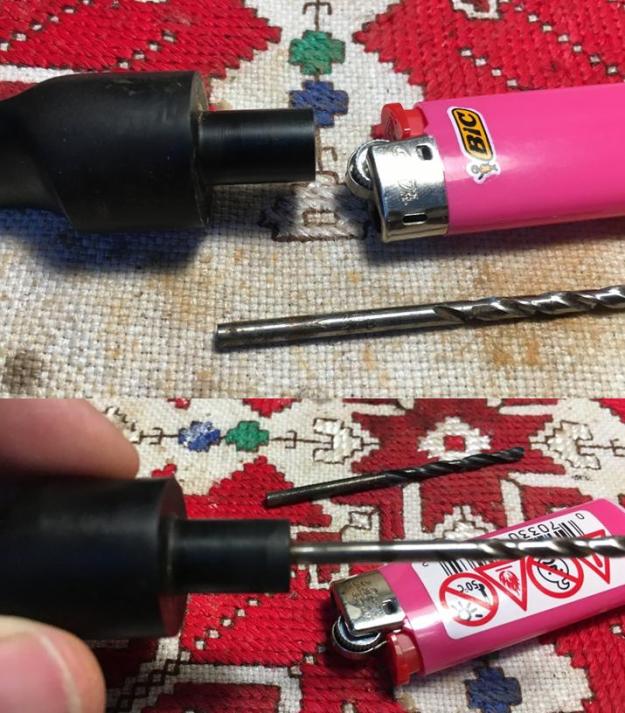
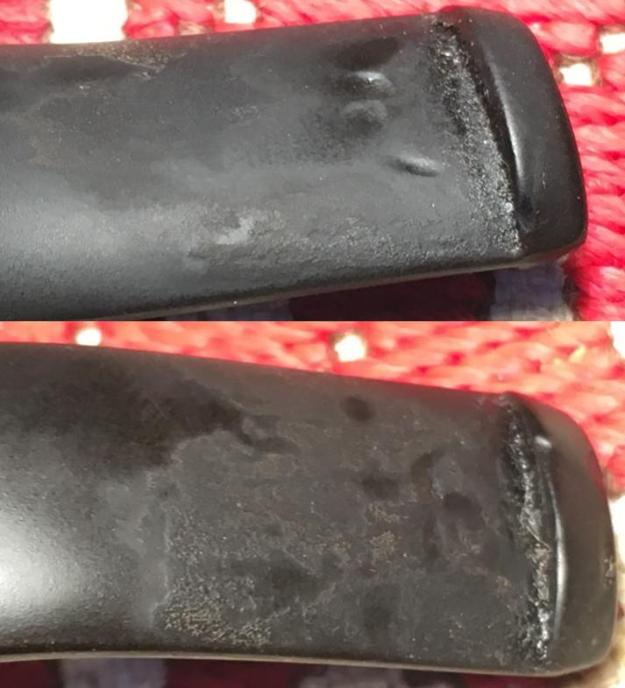
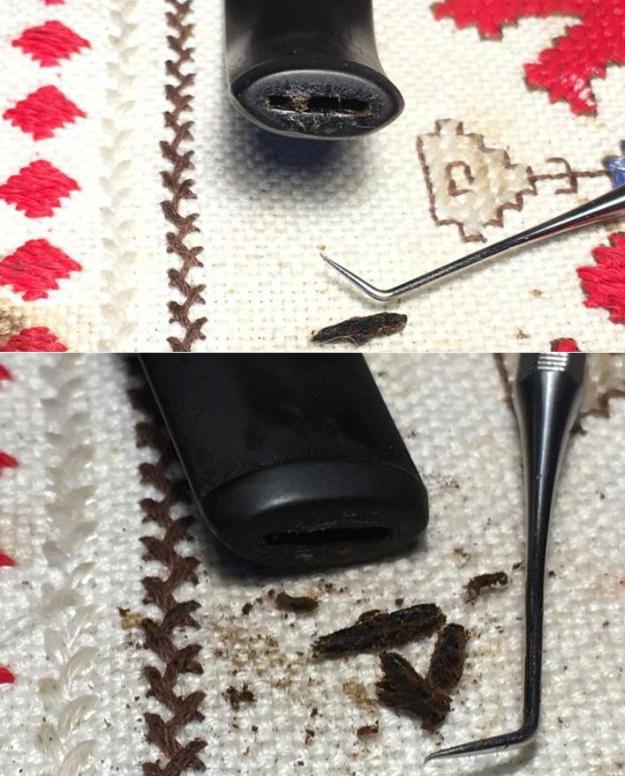
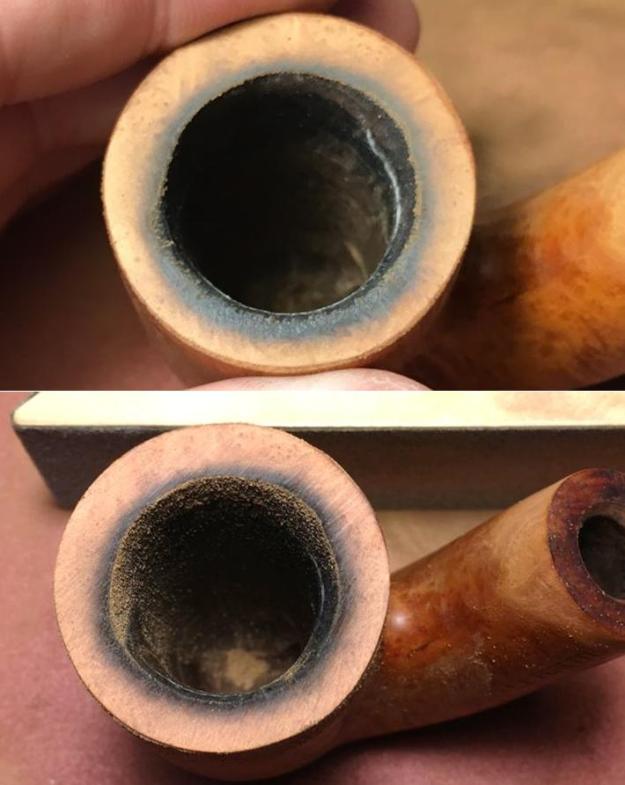
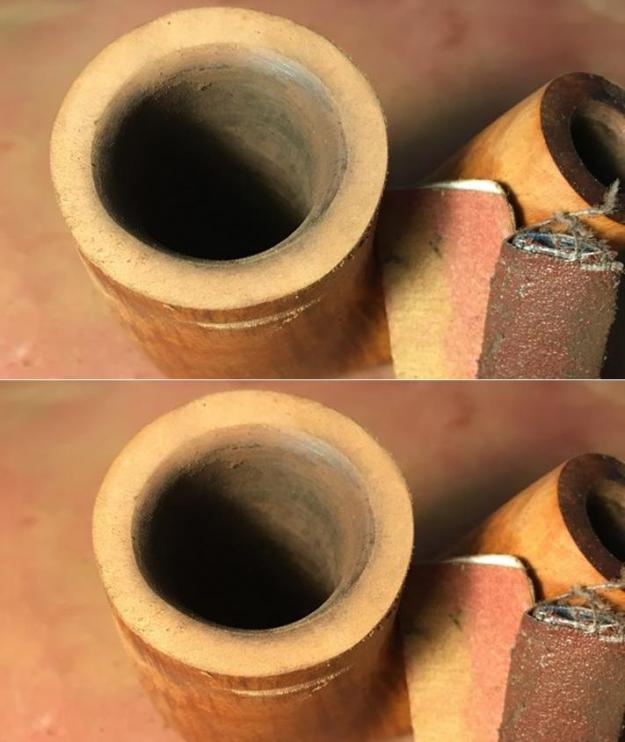
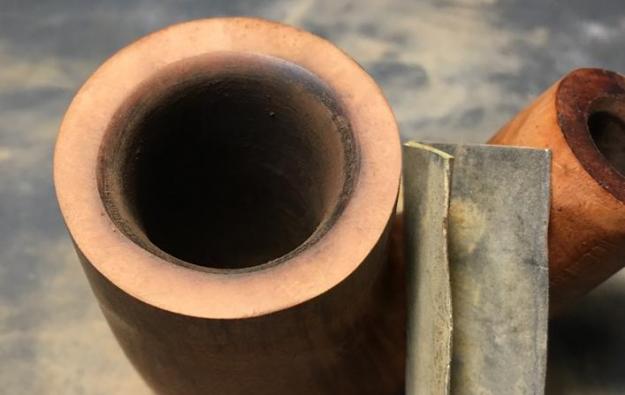
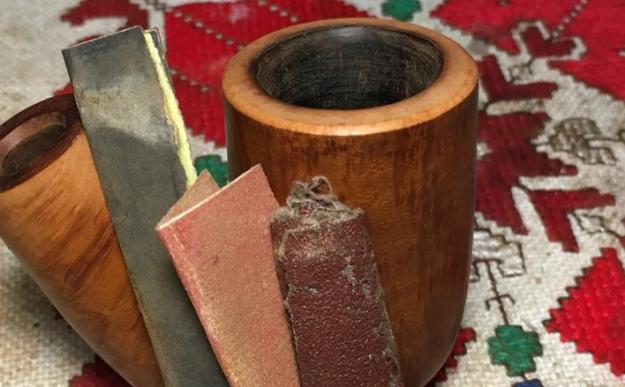
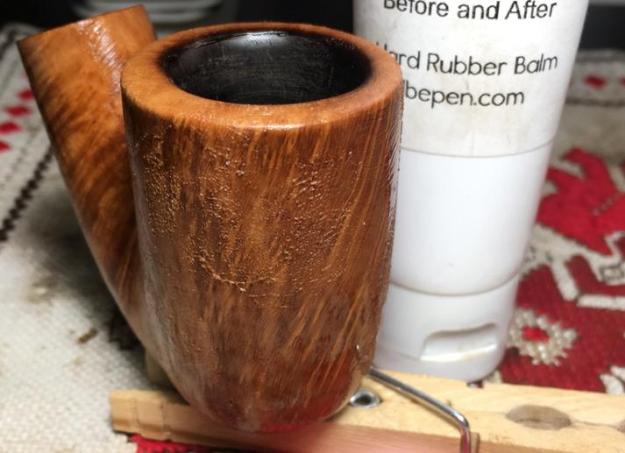
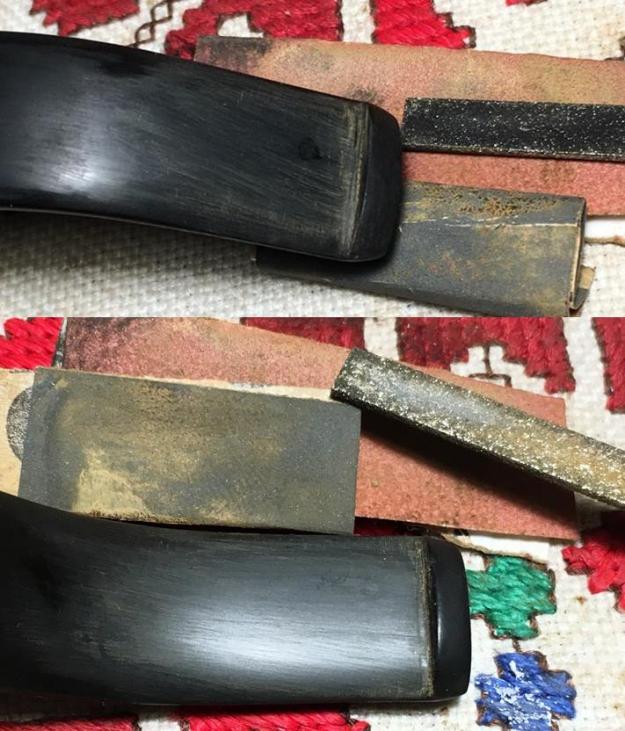
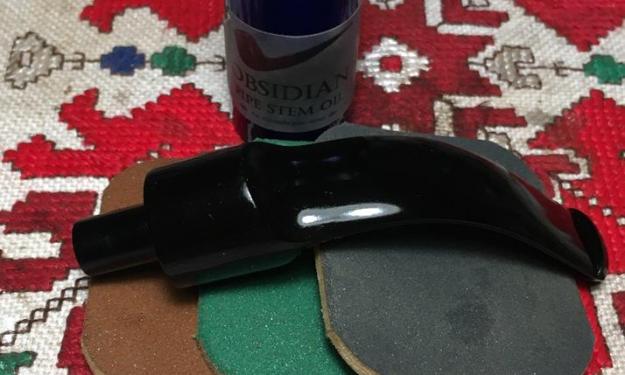
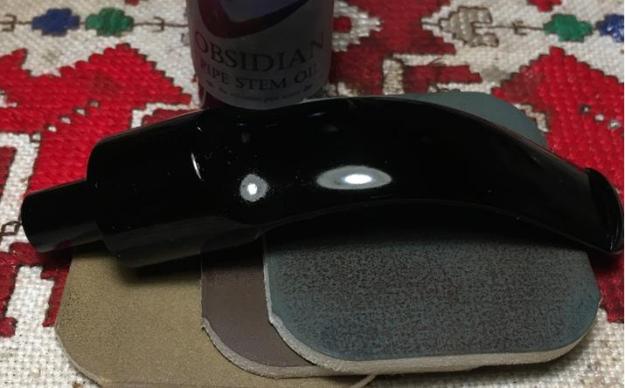
Beginning with the stem, it joins 4 other stems in a bath of Before and After Deoxidizer.  The stem soaks for several hours and when I fish it out, I let it drain and then wipe it down with cotton pads and light paraffin oil – this removes the Deoxidizer and the raised oxidation which wipes off as a very nasty brown.  The Deoxidizer has done a good job.Before proceeding further with the stem, I turn to the stummel cleanup.  I start by reaming the thick, crusted cake in the chamber.  Using my Pipnet Reaming Kit, I start with the smallest blade – first laying paper towel down to minimize cleanup!  I use 3 of the 4 blades available in the Pipnet Kit. The cake is hard causing the reaming tool to seize at times and I’m careful not bear down through stops in the turning of the blades but draw out the blades and go at it again.  I follow the Pipnet blades by employing the Savinelli Fitsall Tool which scrapes the walls more closely giving me more control.  I remove more cake on the top rim charring.  The goal is to find solid, healthy briar – which I do, but I can see the narrowing of the rim a bit due to the removal of the damaged wood. I then sand the chamber with 240 paper wrapped around a Sharpie Pen to give leverage.  This process clears the remnants of carbon cake and brings out a freshened briar to allow the new steward to restart a proper cake development – the thickness of an American dime is sufficient and helpful to protect the briar.  Thicker than that and the carbon cake can damage the bowl as the cake heats and expands. Finally, I wipe the chamber with cotton pads wetted with isopropyl 95% – ridding the chamber of the carbon dust.The bottom of the picture below represents the left side of the stummel where the rim damage is greatest.  You can see the narrowing of the rim on the bottom (left) compared to the opposite side.Now to attack the lava flow on the rim and to clean the stummel surface.  I take a few pictures of the stummel grime to show the progress.  I’m looking forward to seeing what Murphy’s will do!  Using undiluted Murphy’s Oil Soap, I go to work using cotton pads.  I also use a brass brush on the rim – brass brushes do not scratch the wood.  The hard crust is not easily moved.  I use the Savinelli Fitsall tool’s flat straight edge and carefully scrape the crust off the rim.  After getting the rim and stummel as clean as I can, I rinse the stummel with cool tap water and wow!  I’m not disappointed.  The beauty of this block of briar is shouting from the housetop!  I’m liking this a lot.  The downside is the rim.  As with all the other brothers and cousins, this stummel will be topped to restore fresh briar to the rim.  I love doing ‘before & after’ comparisons.  Who says that a good cleaning doesn’t help!? Now, to clean the internals of the stummel I use pipe cleaners and cotton buds dipped in isopropyl 95%.  I’m amazed that the internals, mortise and draft hole, are not terribly dirty.  With only a few pipe cleaners and cotton buds expended, I turn to the stealth approach.  To freshen the internals even more, I use the kosher salt and alcohol soak.  I fashion a wick using a cotton ball by pulling and twisting it.  I then push it down into the mortise into the draft hole using a straight hard wire.  I fill the bowl with kosher salt which will not leave an aftertaste as iodized salt and I cover the bowl and give the stummel a shake to displace the salt.  I then fill the bowl with isopropyl 95% until it surfaces over the salt.  In a few minutes the alcohol has been absorbed so I top if off again.  I put the stummel aside for the night, I turn out the light and my day is finished.The sun has risen on a new day in Bulgaria and the kosher salt and alcohol soak has done the job.  The salt and wick are discolored showing that the oils and tars were absorbed through the night.  I thump the stummel on my palm to dislodge the salt into the waste and I wipe the chamber out with paper towel as well as blowing through the mortise.  I dislodge any leftover salt crystals.  To make sure all is clean I run a pipe cleaner through the draft hole and a cotton bud in the mortise and all is clean and fresh.  I wonderful thing to behold!Before proceeding any further with stummel or stem restoration, I work on the issue of the junction between the two.  The upper half of the shank is extending over the stem so that when I run my fingers over the area there is an obvious ridge.  I take a close-up to show this.  Also, on the bottom of the shank, the stem extends over the shank – not as much, but I still detect a ridge in the opposite direction with the touch.  The mortise drilling was too low creating the offset.Leaving stem and stummel joined, I carefully sand the higher areas on both shank and stem to form a smooth transition from shank to saddle stem.  Of course, much care is given in the sanding so that I don’t inadvertently erase the ‘TI’ at the end of the L. J. Peretti nomenclature on the shank!  In the immediate picture below, you can see the sanded alignment transitioning into what has yet to be sanded on the top of the shank. The hope is to remove the ridge, but also to taper the sanding down the shank a bit to avoid the ‘stuffed pants’ look – a bulge of briar paralleling the ridge sanding.  The goal is a smooth, tapered transition. I like the results.  The ridges are removed and tapered.  Now, switching to 600 grade paper I erase the scratches left by the 240 sanding. After the 600 grade sanding is completed, I take a look at the junction.  Through the cleaning process, I have noticed that the stem has loosened in the mortise.  I’ll need to address the tenon/mortise junction. …AND IT WAS GOING SO WELL, until it wasn’t.  As I was surveying the stem, my eye caught sight of what looked like a hole on the upper side of the stem, mid-way through the bend.  Oh my!  Well, I first thought my eyes were not seeing what they were obviously seeing.  My initial reaction was, “How did I do that?”  Then, my next inclination was to look at earlier pictures of the stem to see if it was there and if so, how is it possible to have missed something so obvious?!?!  I’m glad you couldn’t hear the conversation floating through my mind at that point!  I found a picture before the restoration began, and yes, it was there.  The pictures reveal the source my current frustrations which is part and parcel of pipe restorations – and life….  I put a dental probe in the hole, and yes, it did go through. I then ran a pipe cleaner through to see how thin the vulcanite was at the stem’s bend where the hole broke through.  It appears thin, but salvageable.  To test the integrity of the surrounding vulcanite I pinch it hard to see if it would break.  It didn’t and that is good. I decide to patch it like a typical hole in a bit scenario but perhaps leave the patch a little ‘fat’ to add some reinforcement to the area.So, the projects are mounting for this stem.  First, to address the stem’s looseness – the tenon/mortise junction. Second, repair to the hole in the bend.  Third, repair the chewed bit and button – upper and lower.  Then, the sanding and preparations for the finishing phase.  I begin with the tenon expansion to tighten the stem’s fit.  I do this first because it’s the easiest and least time consuming.  I find a drill bit just a little larger than the existing tenon draft hole to act as the ‘expander’.  I use a Bic lighter and heat the vulcanite tenon by painting it with the lighter’s flame.  As the vulcanite heats, as a rubber composite, it softens and becomes pliable.  When heated sufficiently, gently I push the smooth end of the bit into the hole and the tenon expands as a result.  It works like a charm.  After heating the tenon, inserting the bit by twisting it, and retracting it, I test the fit.  It is good and snug, but not too tight that one is afraid of cracking the shank – which I’ve had experience in! I decide to do the prep work on the bit next so that at the conclusion, I can apply patch material to the bit area as needed as well as to the bend hole.  Looking at the bit and button first, I take a few more pictures to get a closer look.  I notice that there was something on the side of the draft hole and I began digging with a dental probe.  One hunk of something dislodged like it was hanging on for dear life.  I stuck the probe in deeper…there’s more….  I was incredulous!  How could so much stuff hide in the button draft hole!  I took pictures – it is an event!Addressing the dents first, I paint the dents with the flame of a Bic lighter to expand the vulcanite as it heats.  As it expands, the dents tend to dissipate in their severity.  Often, after flaming dents one is able simply to sand out the remaining damage – or much of it.  I also flame the button hoping to minimize the dents on the lip.  It did help, but sanding is still necessary. With a flat needle file and 240 grade sanding paper, I go to work on the upper and lower bit.  I use the file to refine the button and remove the dents where possible. The sanding removes much except for one dimple on the top and one on the lower bit. The button sanded out nicely.  I also employ a round sharp needle file to sharpen the edges of the draft hole. For the upper and lower dimples, I spot drop Special ‘T’ CA glue which is thicker. First, I clean off the areas with alcohol and cotton pads to clean it. I start with applying glue on the lower dimple and wait for an hour or so for the glue to set, and I flip the stem over and apply glue to the upper bit dimple. Now to the bend hole.  I use 240 grit paper and lightly rough up the area around the hole.  I then wipe it with isopropyl 95% to clean the area.  Instead of applying CA glue, I’ll use a putty created out of mixing CA glue and activated charcoal dust. I believe this will give me more texture for blending if I leave a larger area of patch to reinforce the area.  I don’t know if this will work in the end, but I can start with this intention and if it doesn’t work, I can always sand the excess.  First, I put petroleum jelly on the end of a pipe cleaner and I insert it to where I see it has reached the hole.  The pipe cleaner will hopefully keep the glue/charcoal in place and the petroleum jelly will keep the putty from sticking to the pipe cleaner, so I can pull it out!  Next, I place some charcoal dust on an index card.  I then place a bit of regular super glue next to the charcoal.  I use a tooth pick to draw the charcoal into the glue so that it’s gradually added.  In this way I can judge what the thickness should be – not too thin so it runs – not so thick that it doesn’t penetrate the hole. I mix the activated charcoal and superglue and when it seems to be the right consistency, I apply it to the hole using the toothpick as a trowel.  I tamp the putty down so that it fills the hole and I spread the patch around the surface.  I give a few movement tugs on the pipe cleaner and it is not stuck.  I put the stem aside to allow all the patches to cure. Turning again to the stummel, I focus on the rim repair.  I start by topping the Oom Paul Sitter.  Using 240 grade paper on a chopping board I rotate the inverted stummel on the paper in a circular motion.  I will remove enough on the rim trying to minimize the internal bevel which will remove the remainder of the charred wood.  I’ll have to be careful.  When placing the inverted stummel on the chopping block before putting the 240 paper down, I test how level the top is – the stummel rocks a bit.  This tells me that the rim is not level and most likely the left side, where most of the damaged wood is, has deteriorated.  Charred wood is softer and therefore probably dipped. I start topping and check often to see where things are going.  I also use a sanding block to help direct the topping to areas to try to bring about an evenly rounded rim – a challenge with the charring damage on the left side of the stummel – depicted on the bottom in the pictures below.  The pictures show the process. I’ve removed enough top briar real estate at this point and I will try to bring more balance to the rim as I remove the internal charring as I introduce a bevel.  Using a coarser 120 grade paper, I cut the initial bevel removing the charring.  I follow the 120 beveling using a rolled piece of 240 grade paper which smooths and continues to clean the char.  I then take the stummel back to the topping board again to reestablish the lines of the rim.  I do this a few more times, as I try to create a more balanced looking rim. I then top the stummel again with 600 grade paper and beveling as well.  The pictures show the rim cleaning and balancing process. One last step.  To soften the entire look of the rim, I introduce a gentle bevel on the external rim edge by cutting it with 120, following with 240 then 600 rolled pieces of sanding paper.  Considering from where we’ve come, I’m satisfied with the appearance of the rim!  It’s not perfect and this Peretti will carry the rim imbalance with it the ‘limp’ but he’s moving!Next, to prepare the stummel surface for the finishing phase, I use micromesh pads 1500 to 2400 to wet sand the stummel.  Then I follow this by dry sanding with pads 3200 to 4000, then 6000 to 12000. The grain on this Peretti Oom Paul Sitter is exceptional.  I watch it emerge through each micromesh cycle. This is going to be a beautiful pipe. With most of the Peretti Oom Paul restorations I have done (and the Peretti Half Bent Billiard) I was very pleased with the results of applying Before and After Restoration Balm on the stummels.  Keeping the light, natural original motifs of these Perettis has been my goal and the use of the Balm has helped maintain this desire.  I do the same with this Peretti.  I put some Balm on my finger and I work the Balm into the briar surface.  As I work it in, it starts as more liquid – with the consistency of light oil, but then gradually firms up until it is wax-like.  After I work it in thoroughly with my fingers, I set the stummel on the clothespin stand to allow the Balm to do what it does for a while. I take a picture of the Balm on the stummel.  After several minutes, I wipe the Balm off by buffing it out with a clean microfiber cloth.  It looks great – as I was expecting.With the Sitter’s stummel waiting in the wings for the stem to catch up, I pick up the stem.  Having had a night to thoroughly cure, the patches are ready to be filed and sanded down.  Before I forget it, since I had a pipe cleaner with petroleum jelly on it in the stem’s airway, I want to clean the airway so I run a pipe cleaner through the stem dipped with isopropyl 95%. Also, the thought in the back of my mind is the putty in the hole patch, did it push through and harden in the airway and form an obstruction.  Unfortunately, this was the case.  With the pipe cleaner coming from the tenon side, there seems to be a ridge at the patch site just entering the bend.  The pipe cleaner hung up there.  Coming from the button end, there is no problem with an obstruction.  As I test repeatedly, I discover that coming in from the tenon side, if I put a slight downward bend to the end of the pipe cleaner, the pipe cleaner would successfully navigate past the patch down to the button draft hole.  This is not a perfect situation, but it could be much worse with no passage through the airway.  Yet, the bright side of the scenario is that the patch is a bit stronger as a result, though the new steward will need to be aware of this bump in the road.  So, we move on. I begin the filing on the bend hole patch using a flat needle file.  I focus on keeping the file on the patch mound to not impact the vulcanite around the patch.To help me see what the patch would look like if I left it a bit ‘fat’ on the surface, I take a little detour.  My thinking is that it might help strengthen the area to leave the patch fatter on the surface.  To get a preview of the patch area, I ran the patch through the entire sanding process to get a better idea how visible it would be.  It didn’t take long to go from the filing to 240, 600 then 0000 steel wool focusing only on the patch area. Then I ran the patch spot through all the micromesh pads 1500 to 12000, applied Obsidian Oil and I look at the patch area. I take two pictures to show the future.  I decide I didn’t like the future!  Actually, the patch isn’t that bad, but I know it’s there and it seems unfinished….  I decide to continue to blend the patch by sanding.This is the bend patch after continuing with 240 and 600 grade papers.  That’s much better.I move on to the upper and then lower bit.  I use the flat needle file, 240 then 600 on both upper and lower sanding the patches and blending them.I follow by sanding/buffing the entire stem with 0000 steel wool before starting the micromesh pad process.Now to the fine-tuning sanding process.  I wet sand the stem using micromesh pads 1500 to 2400.  I then follow this by dry sanding with pads 3200 to 4000 then 6000 to 12000.  After each set of three pads, I apply Obsidian Oil to revitalize the vulcanite.  The Peretti’s stem is looking good even with all the repairs that were done.  I love the glassy pop of the vulcanite!  The patch work blended well. Now the home stretch.  I reunite the Peretti Oom Paul Sitters stem and stummel and mount the felt buffing wheel to the Dremel, set it at the slowest speed and apply Tripoli compound to the stummel.  Tripoli is a coarser compound I apply using a circular pattern over the stummel in a methodical way to cover the entire stummel.  I do not put too much pressure on the wheel, but allow the speed, compound and the felt to do the work.  When the Tripoli is complete, I mount a cotton cloth wheel to the Dremel, remaining at the same speed and I apply Blue Diamond compound to both stummel and stem.  I do it in the same way as the Tripoli. Finally, I change cotton cloth buffing wheels and apply White Diamond compound to the stem alone.  When the compounds are completed, I buff the pipe with a felt cloth to remove the compound dust from the surface of the briar.  I mount yet another cotton cloth buffing wheel to the Dremel, increase the speed to about 40% of full power and I apply a few coats of carnauba wax to stem and stummel.  Finally, I complete the restoration of this Peretti Oom Paul Sitter by giving it a brisk hand buffing using a microfiber cloth.
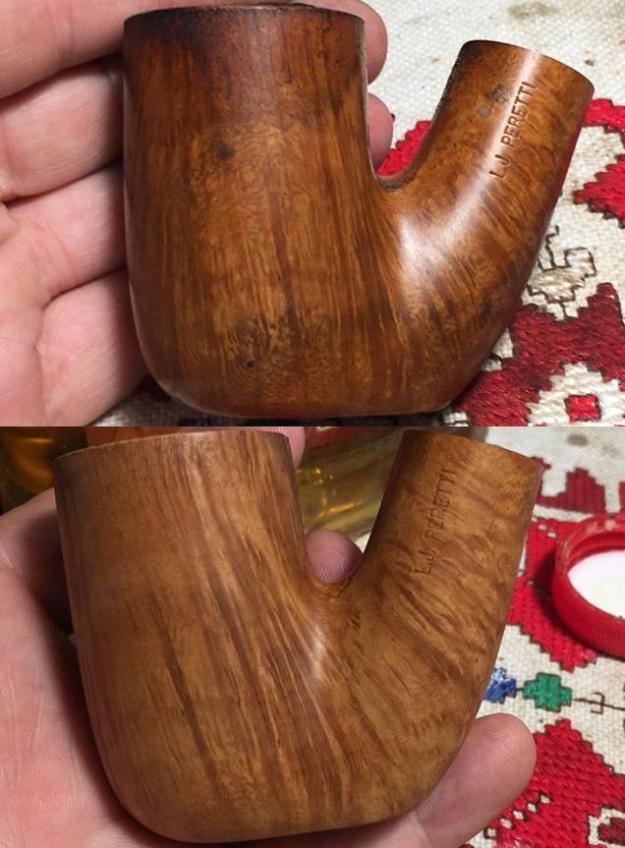
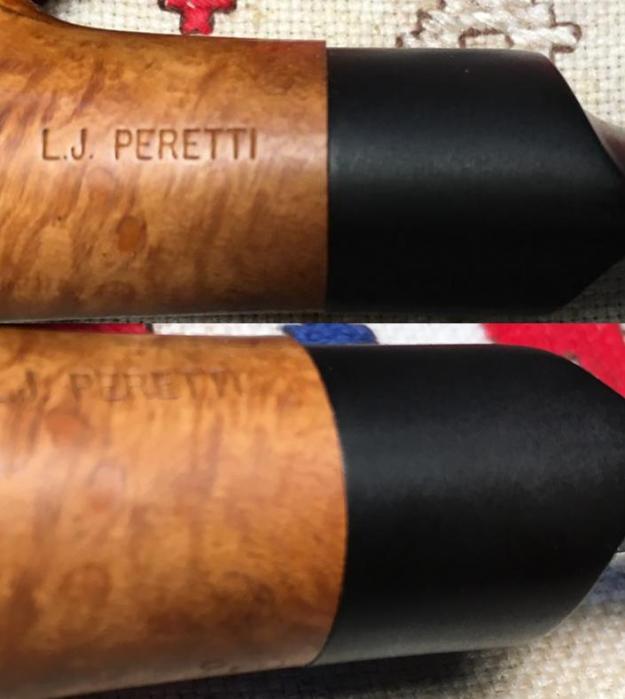
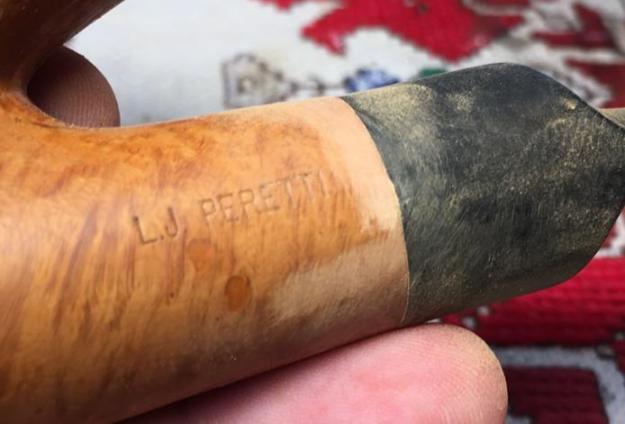
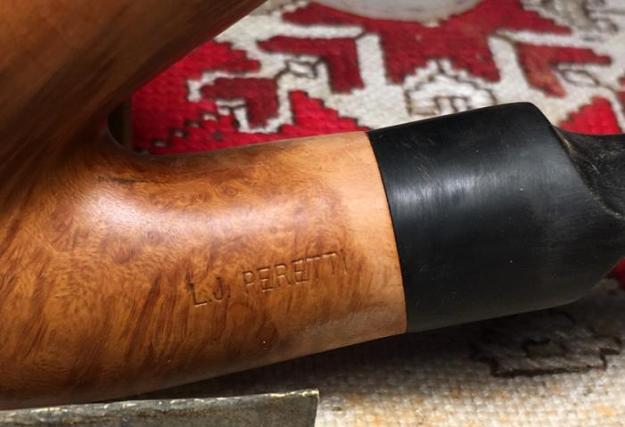
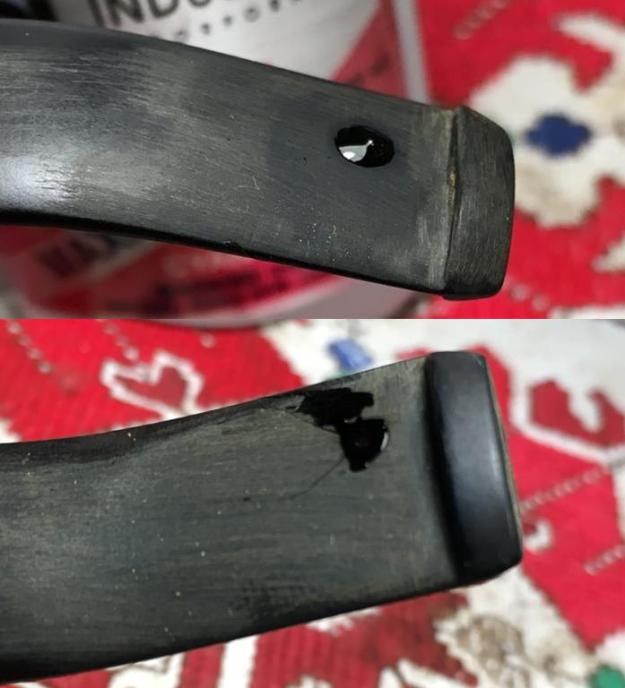
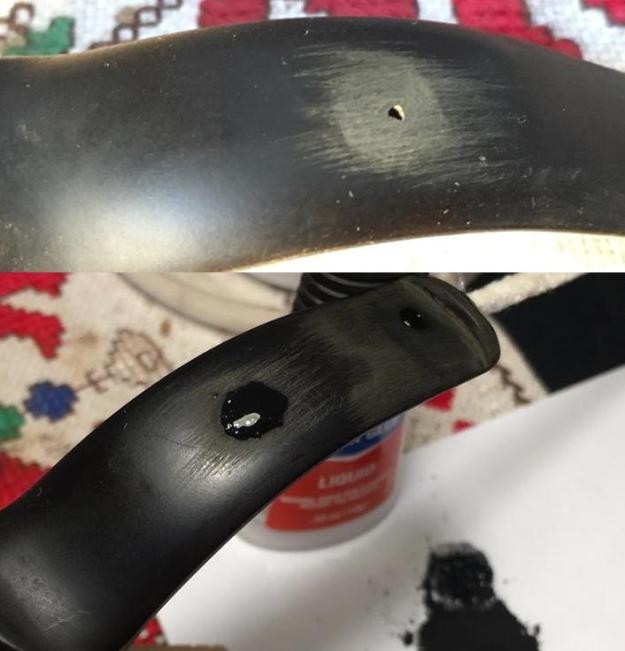
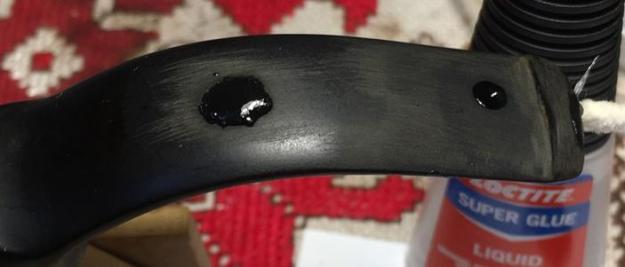
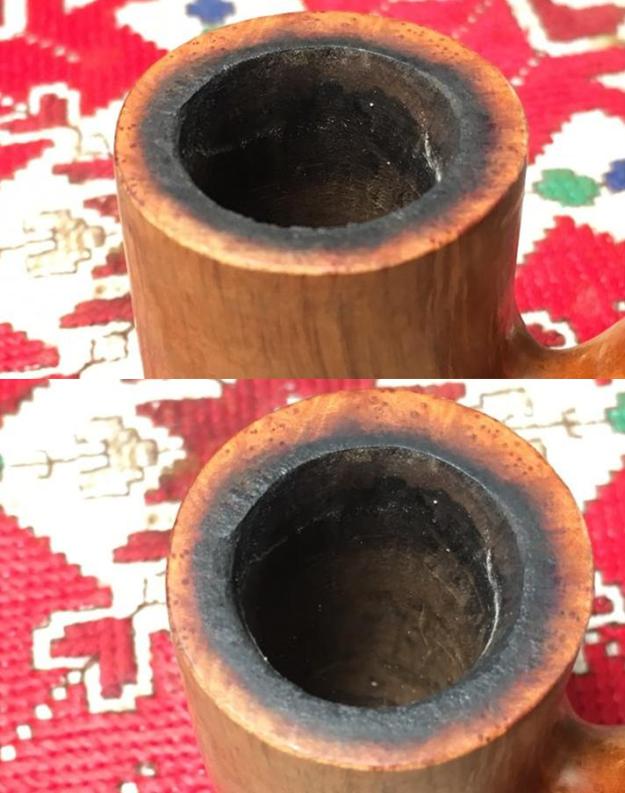
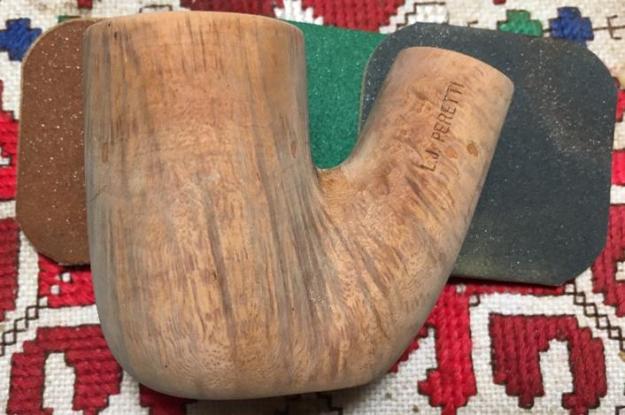
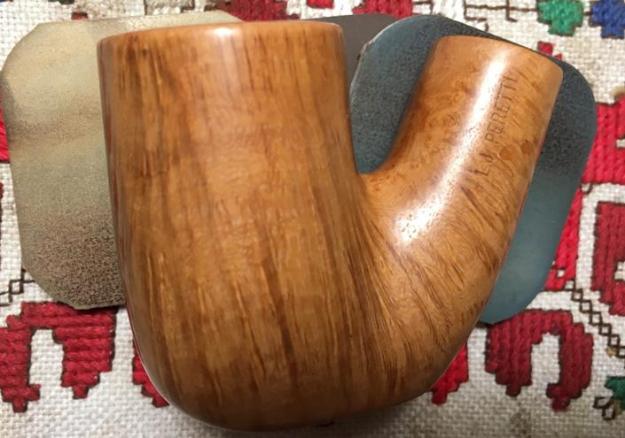
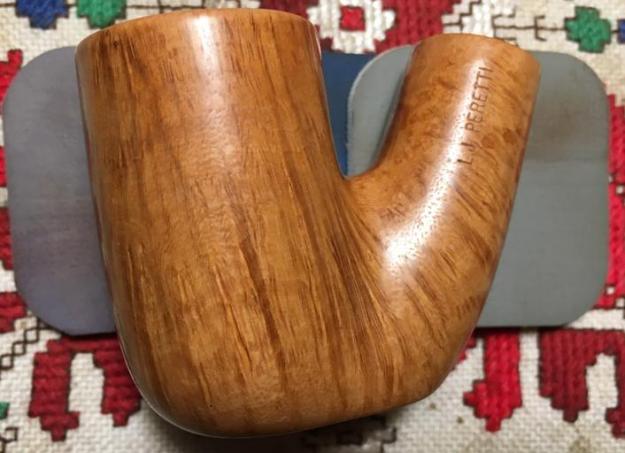
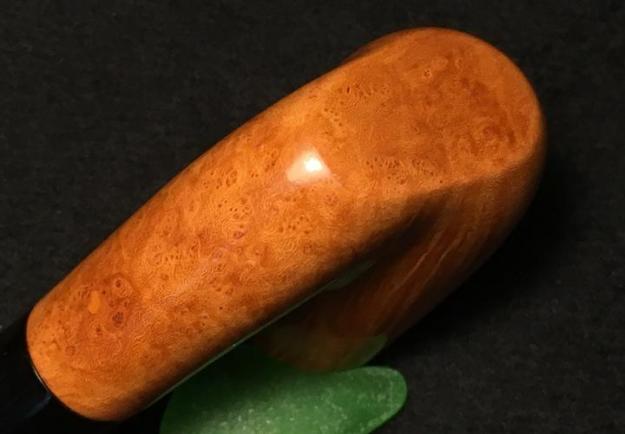
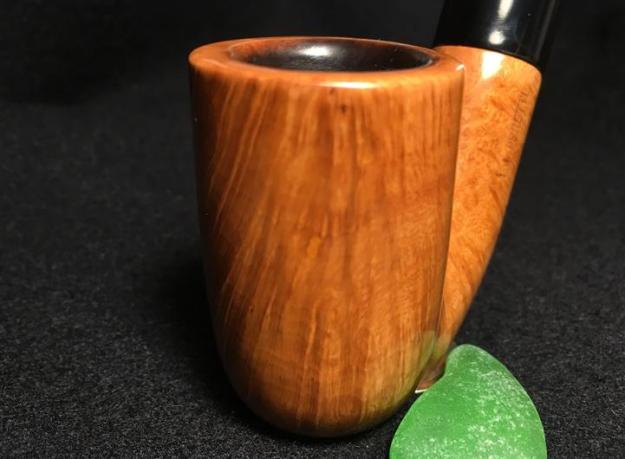
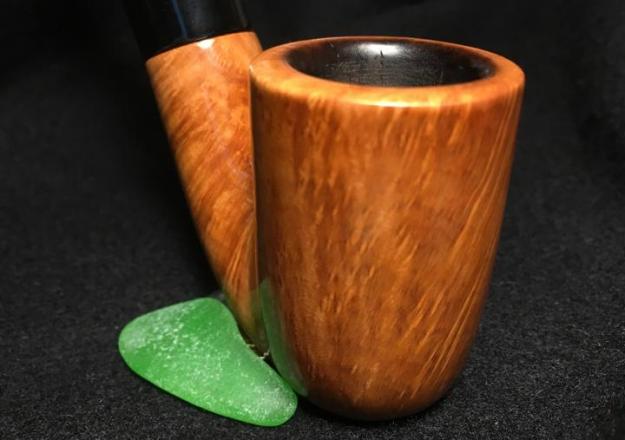
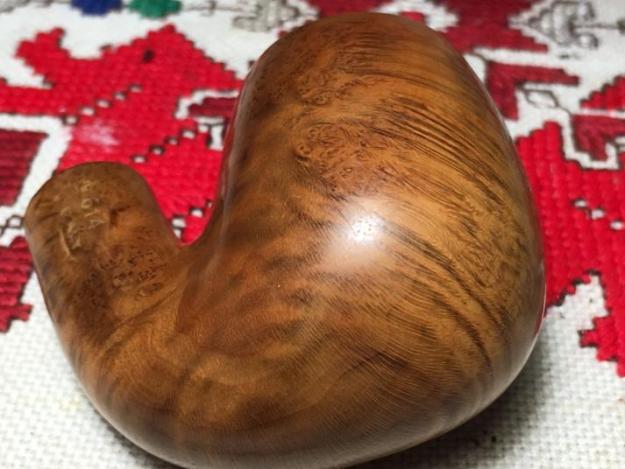
The vertical flame grain on this large Oom Paul Sitter stummel is striking and it is complemented by bird’s eye on the heel as well as the shank. It is unique in the Peretti Lot of 10 where the pipes showcased mainly horizontal and bird’s eye grain.  This Peretti will provide much visual pleasure to his new steward and with the size of the bowl, he will pack enough favorite blend for a nice long reflective time.  The stem and rim gave some challenges which I think have worked out well.  He carries with him some marks from his former life – as we all do!  Tim lives in Missouri and is the pipe man who commissioned this Oom Paul Sitter and has first dibs on the pipe when I put it in The Pipe Steward Store.  This pipe will benefit the Daughters of Bulgaria – women and girls who have been trafficked and sexually exploited.  Thanks for joining me!
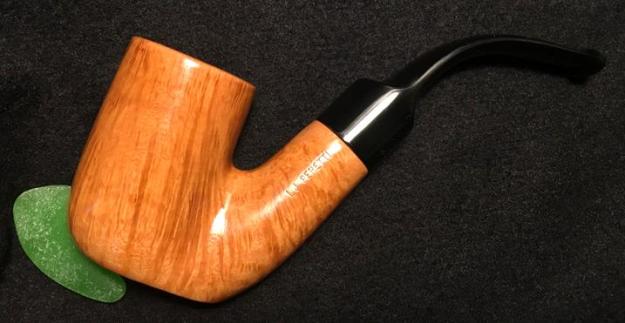
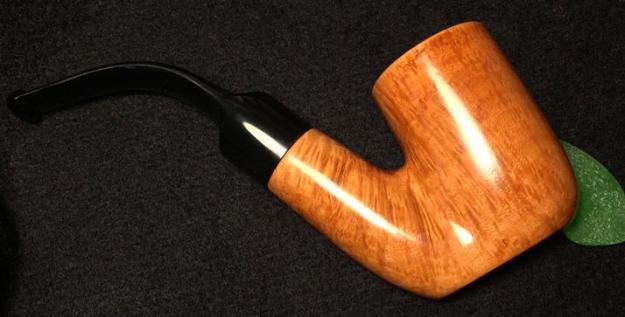
 

Another L.J. Peretti of Boston: A Hefty Half Bent Billiard with a Saddle Stem


Blog by Dal Stanton

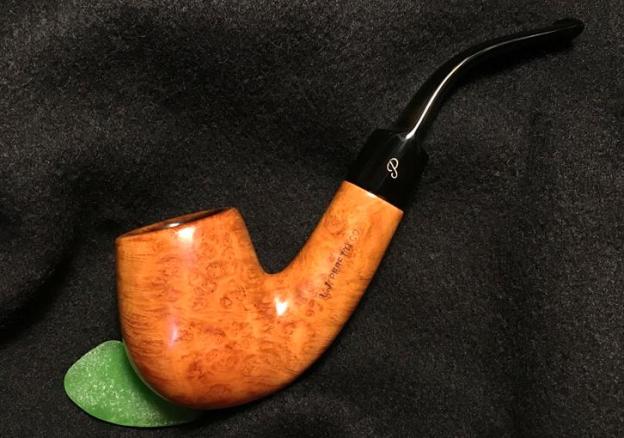
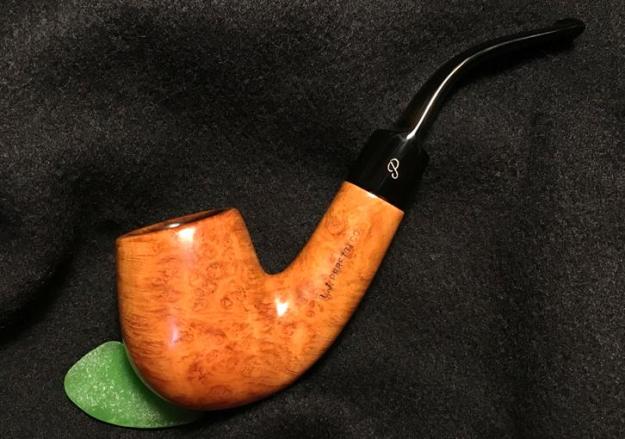
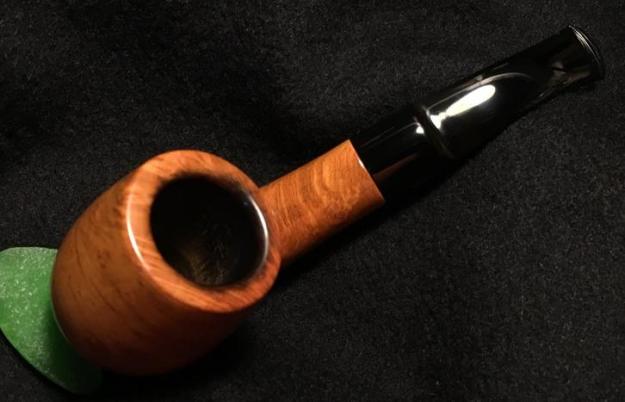
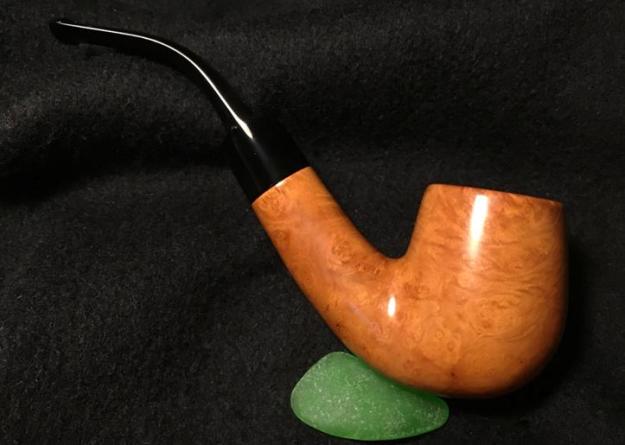
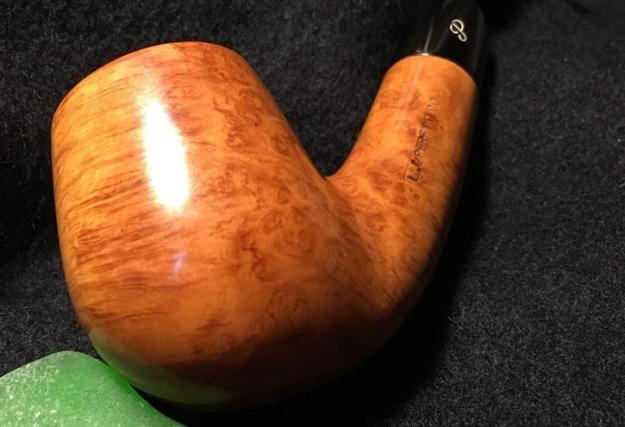
I have been placing several L. J. Peretti pipes in the hands of new stewards which brings me much satisfaction!  The others were all Oom Pauls – classic Oom Paul’s and some slightly modified by Peretti to serve as Oom Paul sitters.  After I was introduced to L. J. Peretti pipes and restored some that I added to my own collection, I started keeping my eyes open for these pipes because I discovered they were pretty good smokers and that the briar used to make them was not bad – actually, was quite good.  When I saw the Peretti Lot of 10 on the eBay auction block with the seller’s location nearby Peretti’s home of Boston, I figured (correctly) that these all came from a Peretti collector who lived in Boston or near enough to know the Peretti story.  The L. J. Peretti Co. is the 2nd oldest Tobacconist shop in the US – where custom blends are still created by hand.  Here is the picture I saw on eBay. The Peretti on my worktable now is the Billiard Half Bent Saddle on the right, center in the picture above.  Two things stood out when I cradled this Billiard in my palm for the first time.  First, the stem has the classy cursive Peretti ‘P’ stamped on it.  Only a few in the Lot of 10 had this stamp.  Only hazarding a guess, but this may indicate a higher-grade line in the Peretti offerings – though I haven’t laid my eyes on anything that could confirm this, catalogues, etc.  It is a classy touch to have the ‘P’ embedded on the stem.  Secondly, this Billiard is a big boy!  Just comparing him to the hefty Oom Pauls in the photograph above shows that this Billiard is not shrinking away in embarrassment! The bowl is full and the shank is long and broad.  His dimensions are Length: 5 7/8 inches, Height: 2 inches, Rim Diameter: 1 5/16 inches, Chamber Diameter: 1 7/8 inches, Bowl depth: 1 3/4 inches.  I also put him on the scale and he weighs 57 grams.

Our cousin, Stephen, who my wife and I visited while we were in the US some months ago, saw the Peretti Lot of 10 when I posted a picture of the 10 offering the Oom Pauls to new stewards to be commissioned.  He responded but he wasn’t interested in an Oom Paul.  He was drawn to the Half Bent Billiard because it reminded him of a pipe he had earlier in life.  I was glad to restore the Billiard for Stephen because I remembered that during our visit to his home in Alabama, he saw my restored L. J. Peretti HUGE Bent Egg in my pipe pouch – also from the Lot of 10 pictured above – center, left and pictured below after being restored (See LINK for restoration), and Stephen tried to barter him away from me!  Who could blame him?!  I held firm and my Peretti Egg and I continue to have regular fellowship here in Bulgaria!  Thank you, Stephen! Since Stephen commissioned this Peretti, he will have first dibs on it when I put it in The Pipe Steward Store.  This pipe benefits our work here in Bulgaria helping trafficked and sexually exploited women and girls (and their children!) – the Daughters of Bulgaria.Bringing the Half Bent Billiard on my worktable here in Sofia, Bulgaria, I take some pictures to take a closer look as well as to assess what this Billiard’s challenges are. As with all his Peretti cousins in the Lot of 10, the L. P. Peretti Co. is stamped on the left side of the shank.  Some of the other Perettis are without the ‘Co.’  As noted above, this Peretti also has the cursive ‘P’ stamped nicely on the stem.  Only a few of the Perettis had this stamp in the Lot.  This Billiard shares with all his cousins the thick cake in the chamber.  It also has very thick lava flow on the rim.  It is also most likely, as with the other Perettis, that there will be scorching damage underneath the lava.  The briar surface is dirty – lots of grime, but this should clean up nicely, as with the other Perettis, this large patch of Billiard briar shows great promise.  The stem is also showing deep oxidation and calcification on the stem – especially on the bit.  As with all his cousins, the bit and button show a good bit of biting, clenching and the subsequent dents, chatter and button damage.

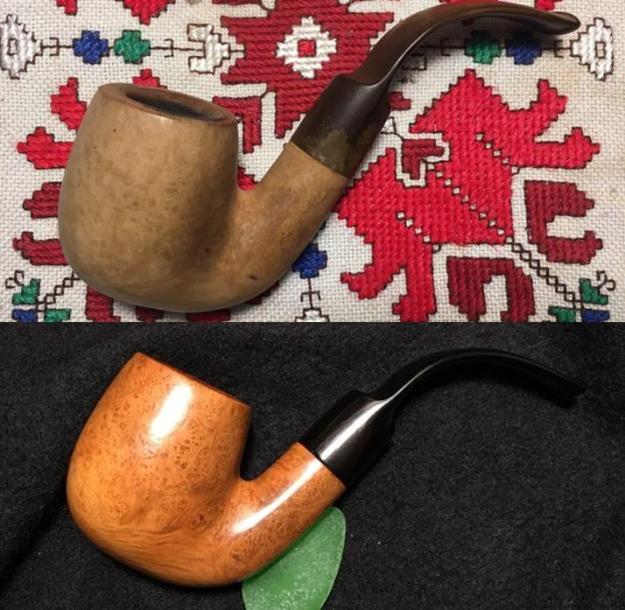
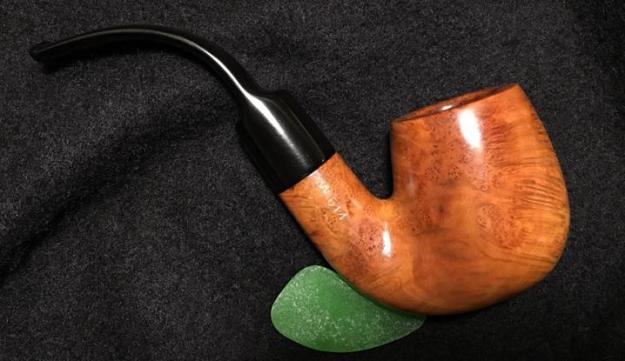
To start the restoration of this hefty Peretti Billiard Half Bent Saddle, I add the stem to a bath of Before and After Deoxidizer.  This was the first time I used the Before and After product and I was testing it to see how it worked.  The Peretti Billiard joined several pipes and their stems in the queue.  After soaking for several hours, I fished out the Billiard’s stem and allowed the Deoxidizer to drain.  I then wiped off the oxidation with a cotton pad wetted with light paraffin oil, Bulgaria’s mineral oil.  One of the attributes of Before and After Deoxidizer is that it is stamp friendly, which proves to be the case with the Peretti ‘P’.   With the stummel now in hand, I use the Pipnet Reaming Kit to remove the very thick cake resident in the chamber.  By removing the cake down to the briar gives it a fresh start and enables me to examine the chamber wall for damage.  After putting down paper towel for easier cleanup, I start with the smallest blade.  I use 3 of the 4 blades available in the Pipnet Kit.  I then fine tune the reaming by using the Savinelli Fitsall Tool to scrape the chamber walls removing more carbon cake left behind.  Wrapping a piece of 240 grit paper around a Sharpie Pen, I sand the chamber.  Finally, I clean the chamber of the carbon dust using cotton pads with isopropyl 95%.  The chamber walls look great – no problems.  The pictures show the steps in the process. Now to the external surface.  I use undiluted Murphy’s Oil Soap and cotton pads to scrub the grime – and there’s plenty of it.  I also work on the crusty rim surface utilizing a brass brush and scraping with my thumb nail.  I also employ a pin knife to help scrape the crust.  What emerges is beautiful grain on the stummel – large swirling bird’s eye catches my eye. Surprisingly, a nice looking, slightly rounded rim emerges from underneath all the crust!  The briar on the rim reveals that this was a nice-looking pipe at one time – I’m thinking it was on Peretti’s upper scale shelf.  The scorching on the inside of the rim is significant and will need to be addressed. Next, the dirty job.  Using pipe cleaners and cotton buds dipped in isopropyl 95% I attack the internals of the stummel.  I also utilize a dental spatula to scrape the mortise walls.  With a little effort the buds and pipe cleaners started coming clean.  As I usually do with all my restorations, I follow this cleaning with a kosher salt/alcohol soak.  I find that this additionally cleans the internal briar and freshens the internals.  After putting the stummel in an egg carton to keep it upright and stable, I fill the bowl with kosher salt which leaves no aftertaste (as iodized salt does).  I then fashion a ‘wick’ by stretching and twisting a cotton ball which is inserted down into the draft hole and mortise – as far down as I can manage.  I then fill the bowl with isopropyl 95% alcohol until it surfaces over the salt.  After a few minutes, after the alcohol has been absorbed, I will top the alcohol off again.  I put the stummel aside and let it soak through the work day until I return home this evening. Later, when I arrive home from work, I’m always pleased to see the nasty results of the salt/alcohol bath.  The salt has discolored, and the wick has absorbed the grunge.  I thump the old salt into the waste, wipe the bowl with paper towel and blow through the mortise to dislodge any remnants of salt from the soak.  To make sure all was clean, I ran a pipe cleaner through the draft hole and plunged a cotton bud in the mortise – both dipped in isopropyl 95%, and both came out clean.  Done – always a nice place to be.I turn now to the chewed up and dented stem – oh my.  The entire Peretti Lot of 10 I determined came from one steward.  One of the ways I determined this was that all the stems were clenched the same way and therefore reveal the same forensics!  I take a few pictures to show the problems with upper and lower bit and button.  The first step I use is using flame to heat the vulcanite which expands it making the dents less severe and more easily sanded.  I use a Bic lighter and paint the upper and lower bit areas.  I concentrate on the button as well.  After several cycles of ‘painting’ I have come to the point where the vulcanite is no longer expanding.  It has helped but there remains some denting and bite marks.  I pair the before and after ‘flame painting`’ pictures to let you compare. I think the button benefited most. Using 240 sanding paper, I sand both upper and lower bit and the button to see how much of the damage can be sanded out.  The heating technique helped more than I realized – good news.  The upper bit sanded out completely.  The lower bit still shows two dents.  Using the flat needle file, I worked on the button and refreshed the upper and lower button lips.  The draft hole was dented too.  I pull out the topping board with 240 paper on it and ‘top’ the button to flatten it out.  I smooth out the draft hole using a rounded needle file.  I take a picture to show the progress of the 240 paper and file work.  When I look at the stem I see something I didn’t see before.  A hole in the stem on the right at the base of the saddle.  I’ve never seen this before.  I’ll need to patch it as well.  I wipe the stem with alcohol to clean the area where I will apply black CA glue to fill the dents.  After clean, using a toothpick, I spot drop black CA glue on both dents on the lower bit.  The toothpick allows me to control where and how much glue I apply.  I wait an hour or so for the glue to set and then turn over the stem and spot drop glue on the ‘saddle’ hole.  I set the stem aside for the patches to cure for several hours.  With the stem patch curing, I turn again to the stummel and the rim.  The scorched briar needs to be removed and topping the stummel will move in that direction. Like all the Peretti Billiard’s cousins in the Lot of 10, the left side seems to have borne the brunt. I’m hoping I only need to top a small amount and remove the remaining scorched wood on the internal rim edge by introducing a bevel.  That’s the plan.   Placing 240 grit paper on the chopping block, I top by moving the inverted stummel in a circular motion and evenly as possible.I stop to check a number of times how much progress has been made on removing the scorched briar.At this point, I’ve removed enough damaged surface via topping leaving a manageable internal ring of charred material that can be removed without taking more healthy briar.  I use a rolled piece of 120 coarse sanding paper to cut an internal bevel and remove the scorched area.  I also aim at balancing the round of the rim – it is slightly out of round because of the greater damage on the left side of the bowl where the former steward lit his tobacco.  After cutting the bevel with 120, I give another very light topping with 240 grit paper to restate the rim line after the bevel.I follow the 240 topping board and 120 paper beveling by using 240 grade paper to erase the scratches of the 120 beveling.  Then, I use 600 grade both to erase the scratches of the 240 on the bevel, but to top again lightly the stummel with the 600 grade paper to erase 240 scratches and to smooth.Finally, I introduce a very gentle external bevel around the rim using 240 then 600.  I do this to soften the look of the rim and to give it more of a rounded appearance.  I’m pleased with the rim repair.  This Peretti Big Boy Billiard has already come a long way from the caked, scorched condition he arrived in!  He’s looking good.Now to the briar surface – and there’s a lot of briar real estate on this stummel!  I begin by wet sanding with micromesh pads 1500 to 2400.  Then dry sanding, I use 3200 to 4000 and 6000 to 12000.  I take a picture after each set of three. I enjoy watching the grain emerge on the Peretti Billiard through the micromesh pad cycles – it’s an amazing transformation.  Along with most of his Peretti cousins, the briar seems to be a higher grade – no fills and the grain is beautiful. To maintain the rich natural briar look consistent with the Peretti hue template, yet to deepen and make the briar grain richer, I use Before and After Restoration Balm. I apply the Balm to my finger and then spread it over the stummel and work it in to the briar.  The Balm begins as an oily liquid and then gradually grows firmer until it takes on the characteristics of a thick wax.  After I work the Balm in well, I put the stummel on the stand to absorb the Balm for several minutes and take a picture.  I then wipe the stummel with a clean cotton cloth to remove the Balm residue and buff up the surface.  I put the stummel to the side and turn my focus again to the stem.After the black CA glue patches have thoroughly cured, I first use 240 sanding paper to do the initial removal of excess patch and blending. I continue to shape and fine tune the button lips with the 240 as well as remove the patch excess and smooth the saddle hole on the side.  Then, to erase the tracks of the 240, I use 600 grade paper. To erase the scratches of the 600, I buff the entire stem with 0000 grade steel wool which leaves a good evenly prepared surface to begin the micromesh pad cycles.  I like the way the chewed bit came out.Now, using micromesh pads 1500 to 2400 grade, I wet sand the stem.  It was going so well until it wasn’t! After starting the second cycle dry sanding with pads 3200 to 4000, I see what I didn’t see before.  As the lower bit was glossing up because of the micromesh sanding, a small dimple remnant of the lower bit dent became visible to me – ugh.  When it comes to restoring pipes (and with many things in life 😊) I’m a stickler for detail and even though I’m well advanced in the stem finishing process, this dimple will not stand!  I wipe the spot with alcohol to assure that it is clean and I spot-drop Special T CA glue on the dent. This glue is extra thick because I want the drop to stop on the spot and not run over the stem as thinner CA glue tends to do.  I’ll spare you all the pictures of starting over filing, sanding, steel wooling and micromeshing pads catching this dimple patch up, so let it suffice to show the before and after, and then we move on.  Starting with the completion of pads 1500 to 2400:The discovery.  Before….And after….Now moving on to dry sanding with pads 3200 to 4000 and 6000 to 12000.  To revitalize the vulcanite, after each cycle of three I apply Obsidian Oil.  The stem looks great even though I encountered a significant detour along the way.  I love the pop of vulcanite that has been fine-tuned with micromesh pads!The home stretch!  As I reunite the half-bent saddle with the stummel to begin the compound buffing cycle I discover that the union between stem and stummel has loosened.  As sometimes can happen during the cleaning process, the mortise can be opened, and the result is that the tenon is not as snug. To remedy this and to tighten the mortise/tenon union a bit, I use the flat end of a drill bit just a little larger than the diameter of the tenon draft hole.  I heat the vulcanite tenon with a small flame and as it warms the vulcanite it becomes pliable and gradually I insert the drill bit into the airway.  This expands the mortise a bit and hopefully, creates a better fit. The approach works perfectly even though it required two enlarging drill bits to provide a snug union. With stem and stummel reunited with a good fit, I mount a cotton cloth buffing wheel to the Dremel and set the speed to the slowest.  Using Blue Diamond compound, I apply it to the stummel and stem using a slow, methodical, circular approach, not applying too much pressure to the buffing wheel, but allowing the speed of the Dremel and compound to do the work.  With my wife’s assistance, I include a picture showing this below.  After completing the Blue Diamond application, I mount another cotton cloth buffing wheel dedicated to the application of wax.  After increasing the speed to about 40% of full power, I apply the carnauba wax in the same way as the compound.  Afterwards, I use a microfiber cloth and give the pipe a brisk hand buffing to raise the shine.None of the Peretti pipes that I’ve restored thus far have disappointed.  They arrived on my worktable in rough shape with scorching and chewed bits.  This L. J. Peretti Co. Billiard Half Bent Saddle was no exception.  The briar grain showcased in the large bowl reveals swirls of large bird’s eye pattern and horizontal straight grain in a whimsical contrast.  The grain flow reminds me of pictures of Jupiter’s atmosphere intermingling!  The distinctive Peretti “P” stamping stands out nicely imbedded in the glassy shine of the half bent saddle stem.  Cousin Stephen commissioned this hefty Peretti Billiard and will have first dibs on it in The Pipe Steward Store.  This pipe benefits women and girls (and their children) that we work with here in Bulgaria, who have been trafficked and sexually exploited – the Daughters of Bulgaria.  Thank you for joining me!

An Amazing Craggy Briar Freehand Stamped Wathen Reflection


Blog by Steve Laug

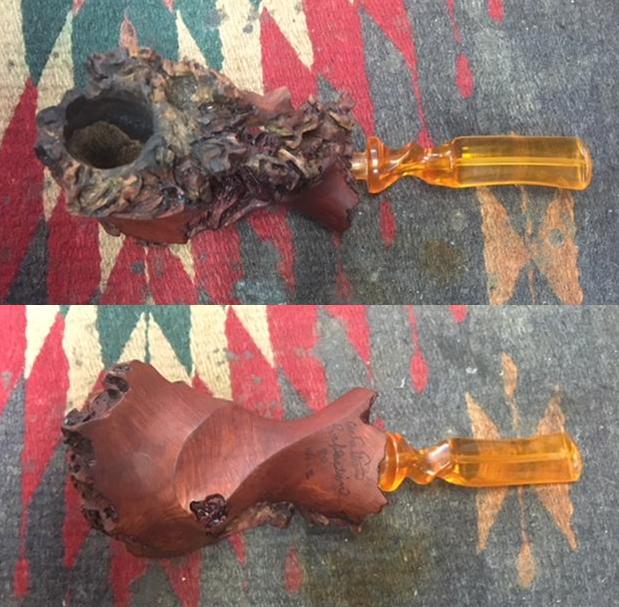
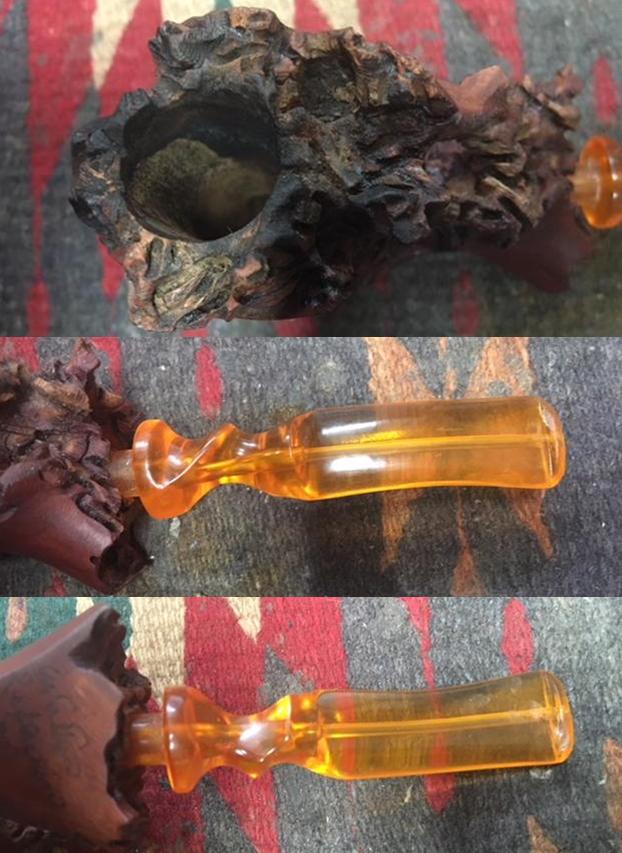
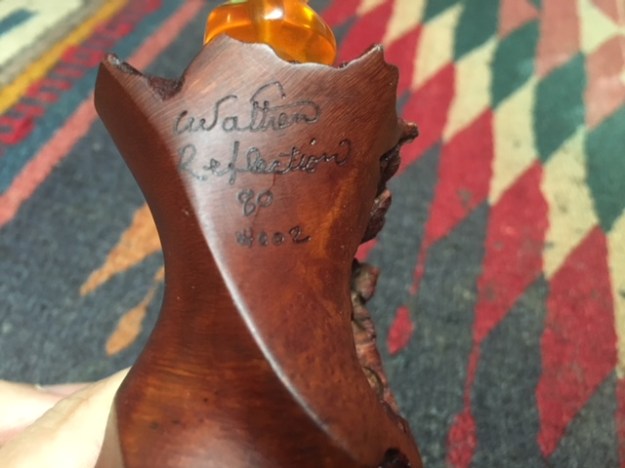
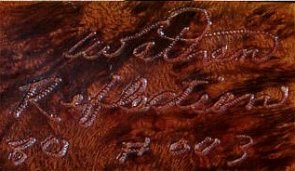
Jeff picked up this beautiful craggy rustic briar freehand pipe guy in Maryland. It was very rusticated and craggy. There were rustications on the rim, around the rim, around various parts of the bowl and on the shank top. There was a rusticated bridge from the rim on the back of the bowl all the way to the end of the rusticated and craggy looking shank. The rustication on the exterior was filthy with lots of dust and debris deep in the crevices. There was a thick cake in the bowl and the airway in the twisted saddle, amber coloured stem was filthy with tars and oils. The inside of the shank must have been very dirty as well. Jeff took photos of the pipe before he cleaned it. I have included them here to give an idea of the rough condition of this pipe when it arrived in Idaho and Jeff started his magic. It is really quite unique with a rustic carving around the rim top and down the bowl part way. It is also rustic around the bottom edge of the bowl. There is a rustic bridge from the bowl to the end of the shank. The back of the bowl and the top of the shank is also rustic. The end of the shank slightly flared and rustic with the mortise drilled in the center. The underside of the shank is stamped Wathen over Reflection over the numbers 80 over #002. I am sure these numbers will help me date the pipe once I figure out who the carver is and where he lived and worked. It is a uniquely carved pipe that has smooth portions on the bowl front, sides and shank. The stem was an amber acrylic saddle with a twist in the saddle. The overall look of the pipe reminds me of a Micoli. Jeff had outdone himself in the cleanup of this worn and weary old pipe. It looked really good when you see where it was when he started. I took some photos to show the condition of the pipe when I brought to the worktable today. Jeff scrubbed the exterior with Murphy’s Oil Soap and a tooth brush to clean up the rustication around the bowl and rim. He reamed the bowl with a PipNet pipe reamer and cleaned up the reaming with a Savinelli Fitsall Knife. He cleaned the interior of the mortise and the airway in the shank and the stem with alcohol, cotton swabs and pipe cleaners. The pipe came to me clean and ready to do some light restoration on it. The briar appeared to be very dry. The stem had a twist in the saddle that spiraled around the top and underside the length of the saddle. The surface was clean but had tooth chatter on the top and underside near the button and on the surface of the button itself. I took close up photos of the rim top and the bridge to the shank end to show the condition of the rustication. There was some darkening on the rim top that would need to be addressed but it was clean. I also took photos of the stem to give a clear picture of what I had when I started.I took a photo of the underside of the shank to show the stamping there. It read Wathen in script over Reflection also in script. Under that was stamped the number 80 over #002. It was etched in script into the briar and had been darkened with a black stain to make it legible. Not sure what the numbering means and the brand is unfamiliar to me. I decided to do some research on the brand. It appears that today is my day for digging up information on the freehand pipes that I am restoring. I searched for the brand, Wathen to see if I could figure out any connections. The first link I found took me to Pipedia and the following link, https://pipedia.org/wiki/Wathen. I found a sample of the stamping on the shank similar to the one I am working on and some of the history of the brand. I quote it in full.

Kerry S. Wathen was a pipemaker who worked for a small pipe shop in south Kansas City called “The Briar Patch” in the 1970’s. Tending to larger sized pipes his centerpiece was a huge briar calabash shape. When the Briar Patch closed he probably moved to Iowa where his pipes were available at David’s Briar Shop in Des Moines (ca. 1977 – 1980/81).

Wathen was having some problems with his hands at that time and was finally forced to give up his talented carving. He usually inscribed his pipes with his name and two digits for the year of production like “Wathen ’75”. The best pieces were named “Reflection”. Kerry S. Wathen, Sr. passed away on April 1, 1985 in his hometown of Topeka, Kansas.

The article on Pipedia gave me some interesting information on the pipe and the maker. The maker appears to have been Kerry S. Wathen. He carved pipes for a shop called The Briar Patch in Kansas City in the 1970s. It also said that he move to Iowa and sold his pipes through David’s Briar Shop from 1977-1981. It also helped me understand the stamping. The number 80 was the year in which the pipe was made. The #002 evidently was the second pipe made in that year. The stamping Reflection was how he marked his best pieces. According to the article he died in 1985.

I found another link for the sale of three Wathen Reflections through Cigar and Tabac shop. Here is the link, https://www.cigarandtabacltd.com/kerry-wathen-reflections-pipes-on-sale/. I quote the information from there that confirms the other information and adds some more. The first part of the quote said that the pipe were on sale for $250 each. Then it pretty much quoted the information from Pipedia. The second part of the article gave the following new information.

Wathen was having some problems with his hands at that time and was finally forced to give up his talented carving. He usually inscribed his pipes with his name and two digits for the year of production like “Wathen ’75”. The best pieces were named “Reflection”.

The last piece I found was from pipes.org and confirmed the Des Moines, Iowa connection that is noted in both of the above articles. Here is the link to the pertinent part of the discussion on the forums, http://pipes.org/forums/messages/23/5570.html?1099700064.

I have ten Wathen pipes that were purchased between 1977 and 1980 from a shop in Des Moines, Iowa. The shop name was David’s Briar Shop and the Wathens were pretty popular there.

Armed with that information I was pretty certain that the pipe I was working on was made by Kerry Wathen and with the 1980 date stamp it pretty well placed as one of the Des Moines, Iowa pipes made just five years before Kerry Wathen died. I turned my attention to restoring the pipe. I started with cleaning up the remnants of cake on the inside of the bowl with a Savinelli Fitsall pipe knife. I sanded out the inside of the bowl with a rolled piece of 220 grit sandpaper until the inside of the bowl was smooth and clean. I scrubbed the rim top rustication with a brass bristle tire brush to remove the carbon and debris in the rustication. I scrubbed it until the surface was clean. The photos below show the progress.I rubbed the bowl down with Before & After Restoration Balm to deep clean the smooth briar bowl and worked it into the rusticated portions around the bowl, rim and shank including the bridge. The product works to clean, enliven and protect the briar. I hand rubbed it with my fingers, working it into the exterior of the rustication with a horsehair shoe brush. I wiped it off and buffed it with a soft cloth to polish it. The pipe really began to have a rich shine. I took some photos of the bowl at this point to mark the progress in the restoration. I set the bowl aside and turned my attention to the stem. I sanded the surface to remove the tooth chatter and filled in the deeper tooth marks on both sides of the stem near the button with clear super glue.When the repairs had dried I sanded them with 220 grit sandpaper to smooth and blend it into the rest of the acrylic stem. Once it was sanded smooth the stem looked really good.I polished the stem with micromesh sanding pads – wet sanding with 1500-2400 grit pads and dry sanding with 3200-12000 grit pads. I wiped the stem down after each pad with a damp cloth to remove the sanding dust on the acrylic. I polished the stem and the smooth parts of the bowl with Blue Diamond to polish out the remaining small scratches. I gave the bowl multiple coats of Conservator’s Wax and buffed it with a shoe brush. I gave the stem multiple coats of carnauba wax and buffed it with a clean buffing pad to raise the shine. I hand buffed the bowl and the stem with a microfiber cloth to deepen the shine. The pipe polished up pretty nicely. The rustication around the bowl, the rim, the bridge to the shank end, the shank and shank end and the smooth brown finish all work very well with the amber coloured acrylic stem. The finished pipe is shown in the photos below. I have never worked on a Wathen pipe before and the unique shape and rustication pattern made it a challenge that was fun to tackle. The shape, finish and flow of the pipe and stem are very well done. The dimensions are Length: 6 1/2 inches, Height: 2 1/2 inches, Outside diameter of the bowl: 2 inches wide and 2 inches long, Chamber diameter: 3/4 inches. This one will be added to the rebornpipes store soon. If you are interested in adding it to your collection send me an email to slaug@uniserve.com or send me a message on Facebook. Thanks for walking through the restoration with me as I worked over this unique, interesting and challenging Wathen freehand. I still have other freehands that I will be working on in a variety of shapes and sizes in upcoming blogs. 

Refreshing a Lattice Work Meerschaum Bent Billiard


Blog by Steve Laug

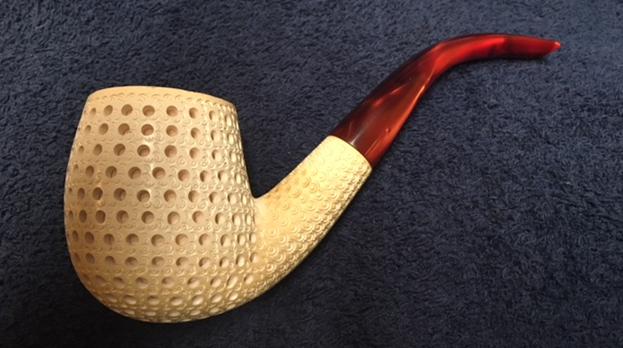
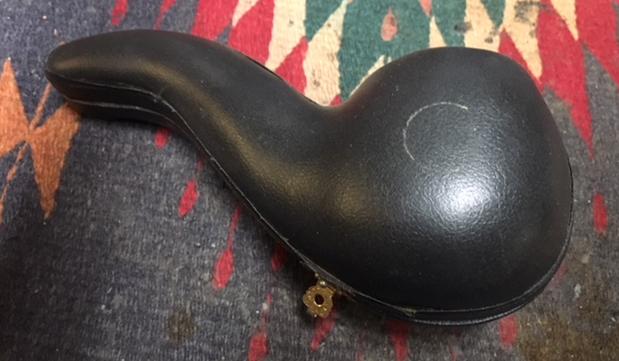
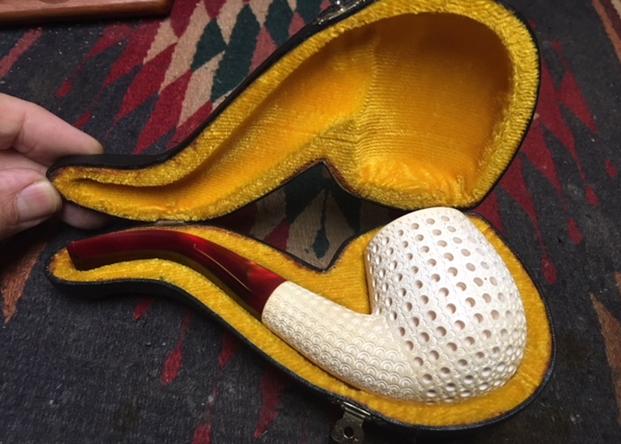
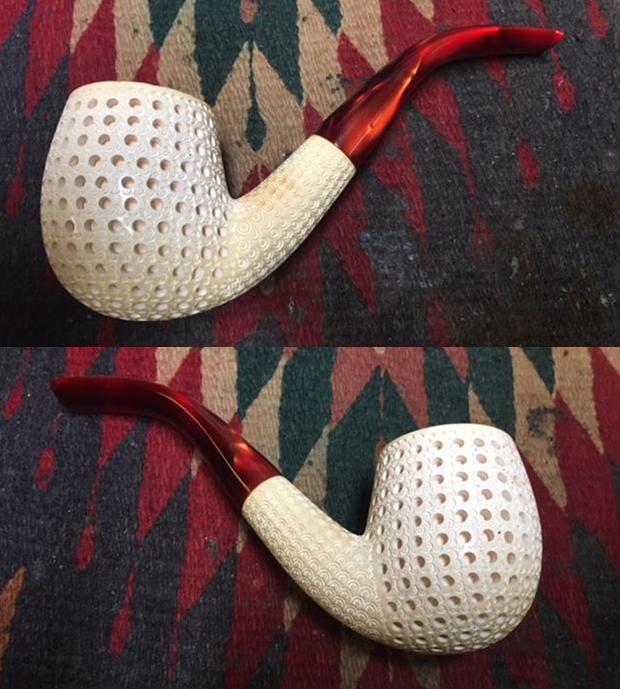
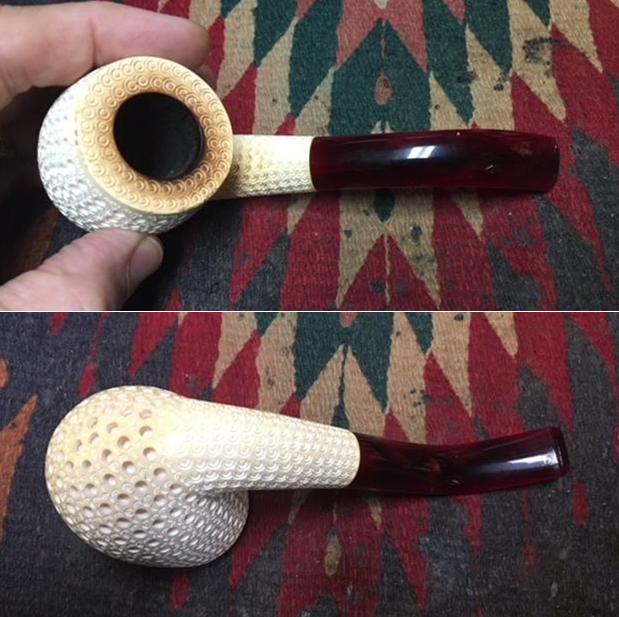
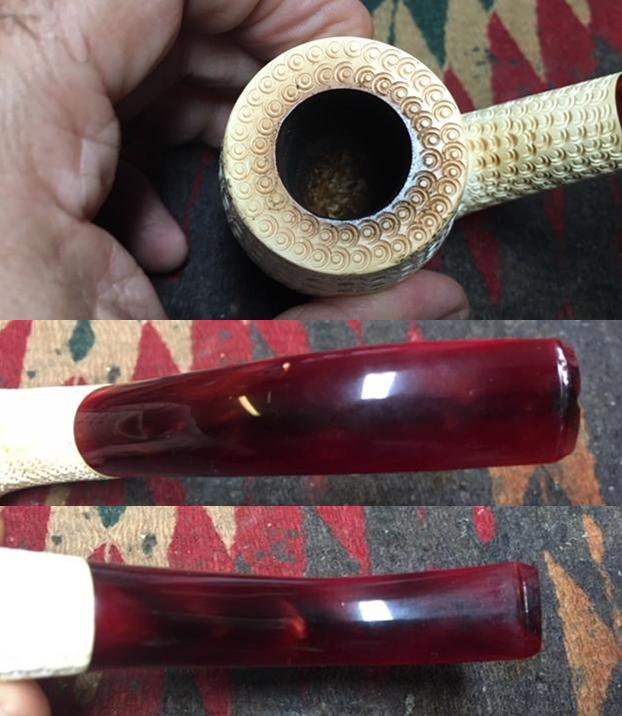
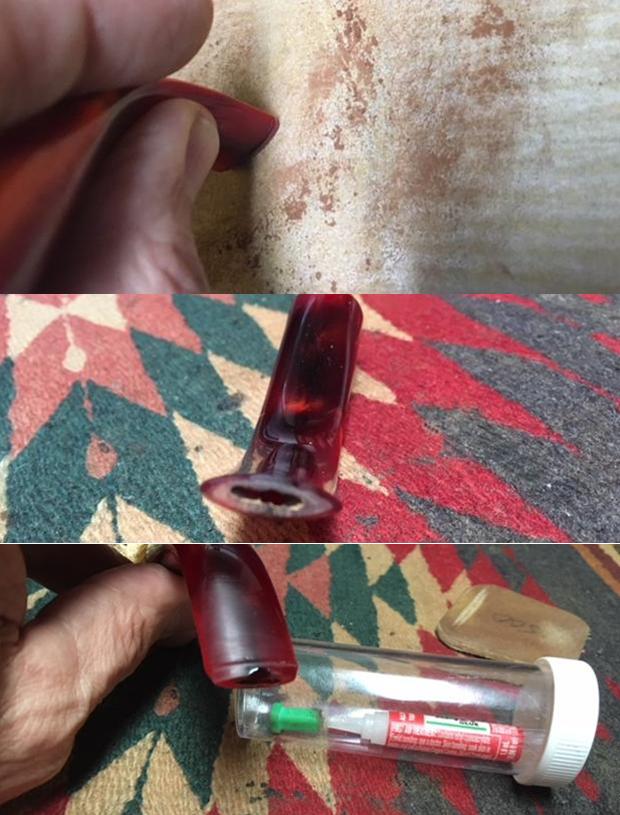
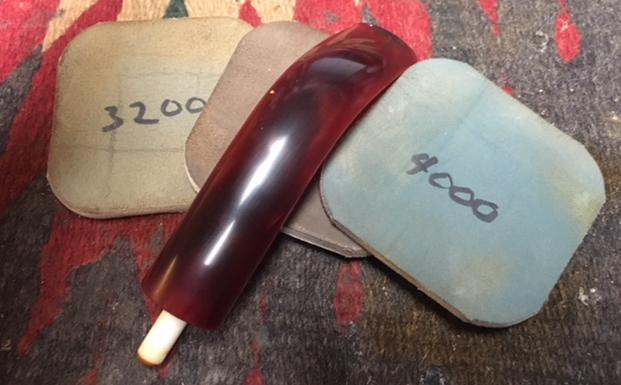
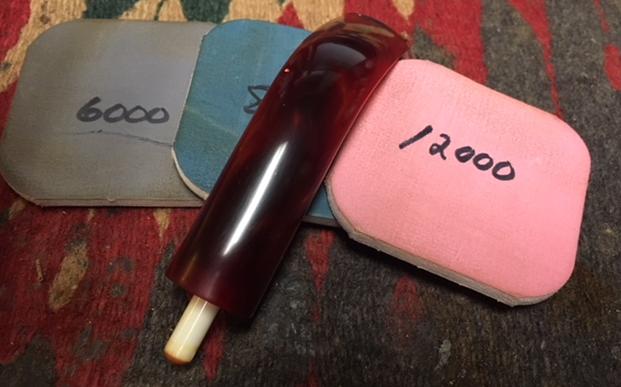
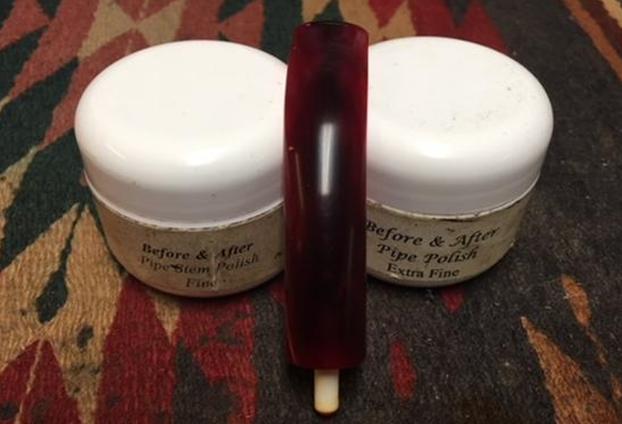
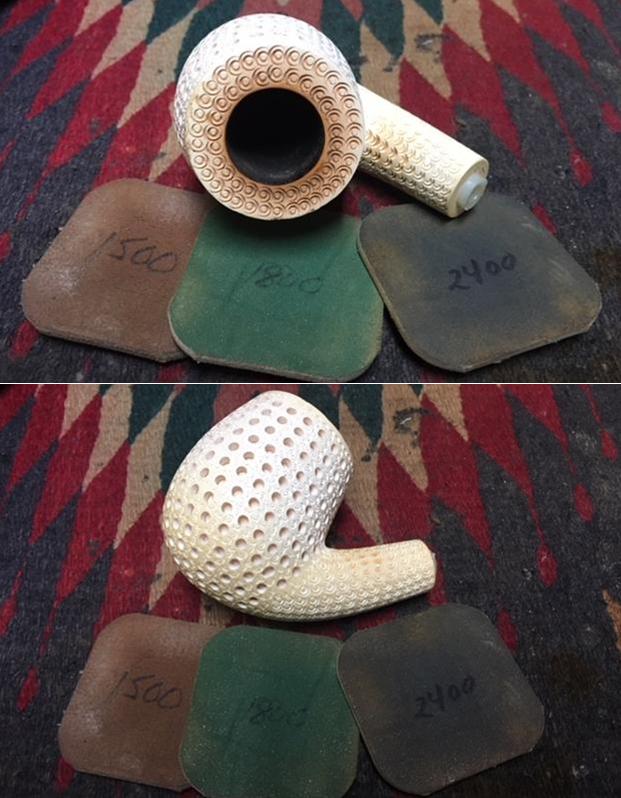
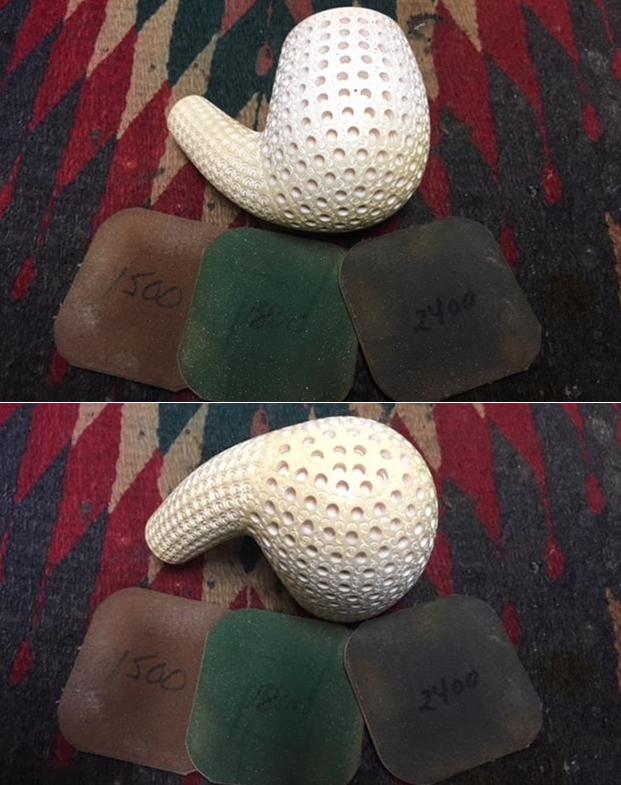
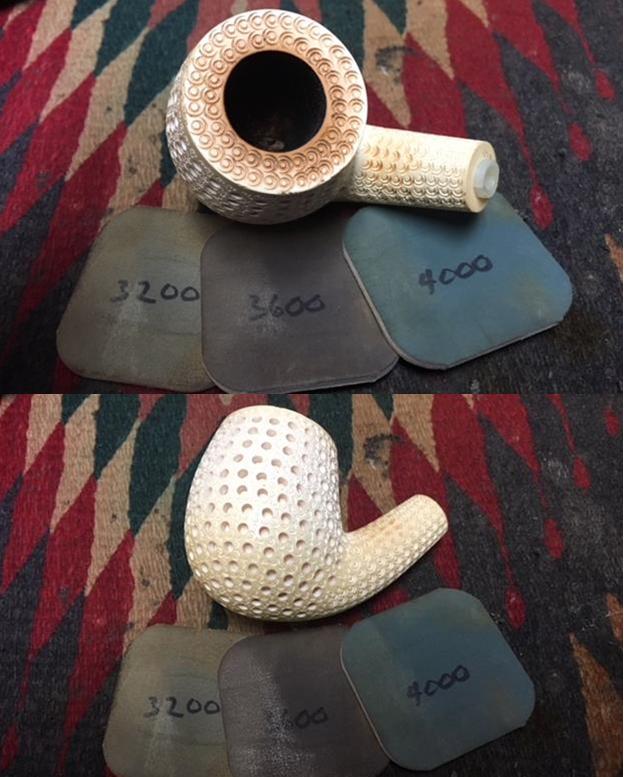
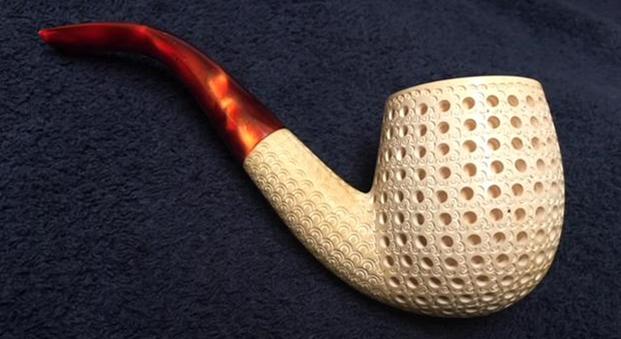
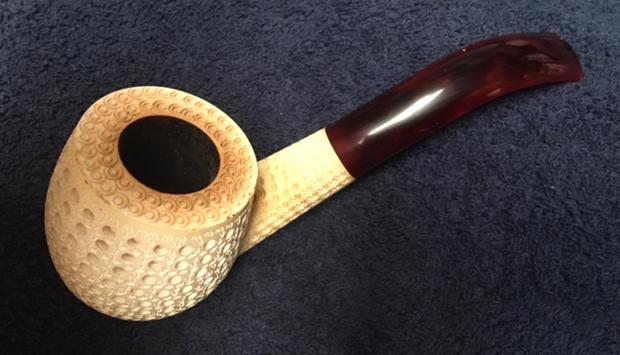
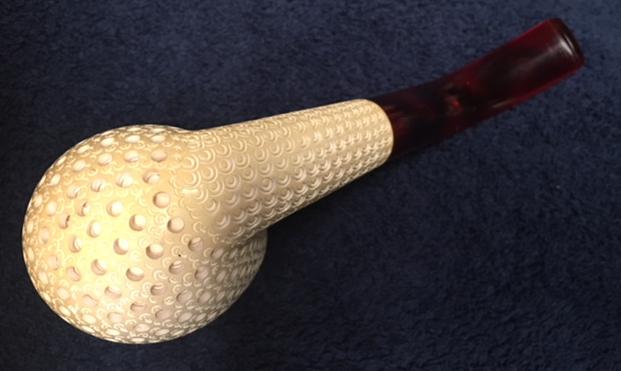
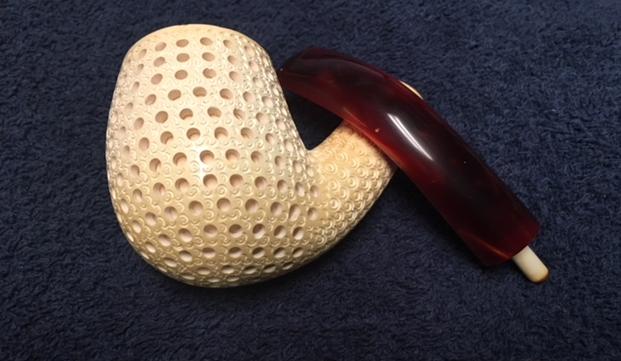
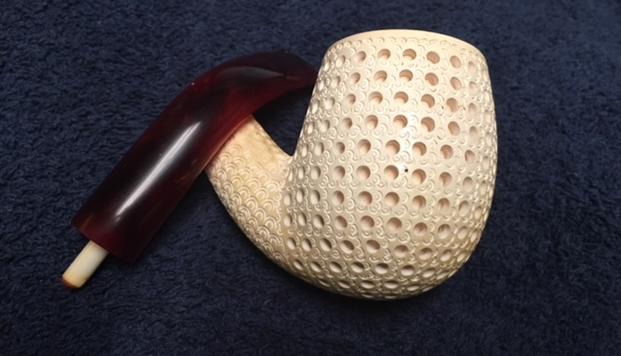
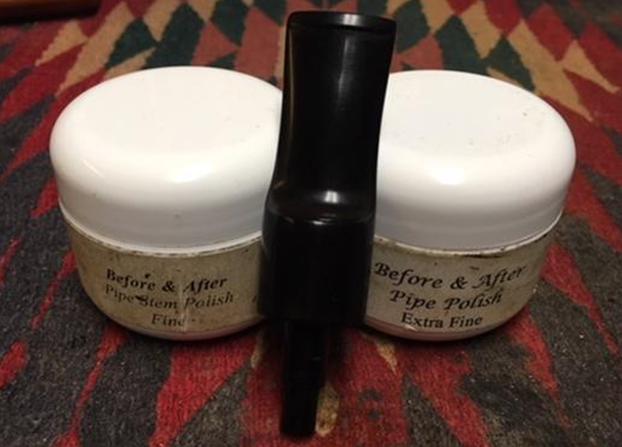
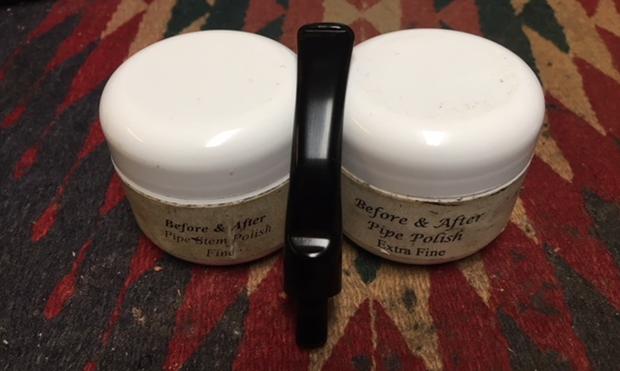
I really am enjoying working on the last batch of pipes that my brother sent me. He does such a great job reaming and cleaning them that I have a fun job of bringing life back to a clean pipe. The next one up on my work table came in its own black vinyl (leather-covered??) case. From the outside the case looked like it contained a large apple shaped or round shaped pipe. The brass latch on the front edge and the hinges on the back were in great shape. There was a circle on the top outside of the case that looked like it had originally had a sticker logo on the outside of the case. It had long since disappeared and left its imprint on the surface of the case. The black case looked promising and made me wonder what was going to be inside. Jeff said he had picked this one up at an auction and it was in great shape.I opened the case and inside it was lined with golden yellow coloured velour. Nestled in the base of the case was a nice looking lattice meerschaum pipe that I think some would call and egg but to me was a bent billiard. The stem was a red acrylic with a Teflon/nylon push tenon and a nylon mortise insert. There was some light tooth chatter on the top and underside of the stem near the button on both sides and a small chip mid button edge on the outside.I took the pipe out of the case and took pictures of it before I did my polishing and clean up on it. It really looks good. Other than the chatter on the stem and the chip in the top of the button the rim top had some darkening and light build up. Jeff had reamed the bowl and scrubbed the exterior of the pipe with a soft soap. He had also cleaned out the mortise and airway in the shank and the stem. It was very clean. I took some close up photos of the rim top and the stem. You can see from the rim top that there was some darkening along the back edge of the bowl. There is some colouration happening on the top and underside of the shank and on the bottom and sides of the bowl. The rim is also taking on colour. It should not take too much work to clean off the darkening. The stem had some chatter than is visible around the button on both sides as well as a small chip that is visible in the photo of the top side of the stem.The thickness of the button lent itself to topping it slightly. I used the topping board and put the surface of the button face against the sanding board. I worked it against the sanding board and remove the chip that was on the face of the button. I filled in the remaining portion of the chip with clear super glue and set it aside to cure.I sanded nicks and the tooth chatter on both sides of the stem. I reshaped the button and blended the repair into the rest of the button surface with 220 grit sandpaper. With the sanding and reshaping there was sanding dust in the airway on the stem so I cleaned it with alcohol and pipe cleaners. I also cleaned off the white nylon push tenon. I polished the stem with micromesh sanding pads – wet sanding it with 1500-2400 grit sanding pads and dry sanding it with 3200-12000 grit pads. I rubbed it down with Obsidian Oil after each sanding pad. I finished polishing it with Before & After Pipe Polish using both the fine and extra fine versions. I gave it a final coat of Obsidian Oil and set it aside to dry. I polished the rim top with micromesh sanding pads – wet sanding with 1500-2400 grit pads and dry sanding with 3200-12000 grit pads. I polished the sides of the bowl and shank at the same time with the pads. I the polished stem with Blue Diamond to polish out the remaining small scratches. I buffed the bowl with a soft microfiber cloth. I gave the bowl multiple coats of Clapham’s Soft Beeswax and the stem several coats of carnauba wax and buffed the pipe with a clean buffing pad to raise the shine. I hand buffed the entire pipe with a microfiber cloth to deepen the shine. The pipe polished up pretty nicely. The finished pipe is shown in the photos below. The dimensions are Length: 6 ½ inches, Height: 2 1/4 inches, Outside diameter of the bowl: 1 3/4 inches, Chamber diameter: 3/4 inches. I will be adding it to the rebornpipes store shortly. If you are interested in adding it to your collection send me a message or an email to slaug@uniserve.com. Thanks for walking through the restoration with me as I worked over beautiful lattice meerschaum.

Breathing New Life into a B.P. Jum War Club


Blog by Steve Laug

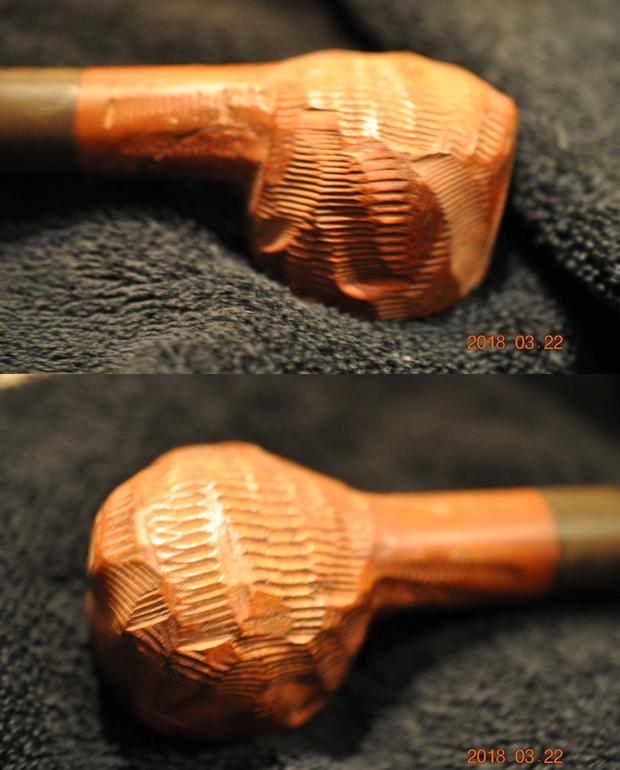
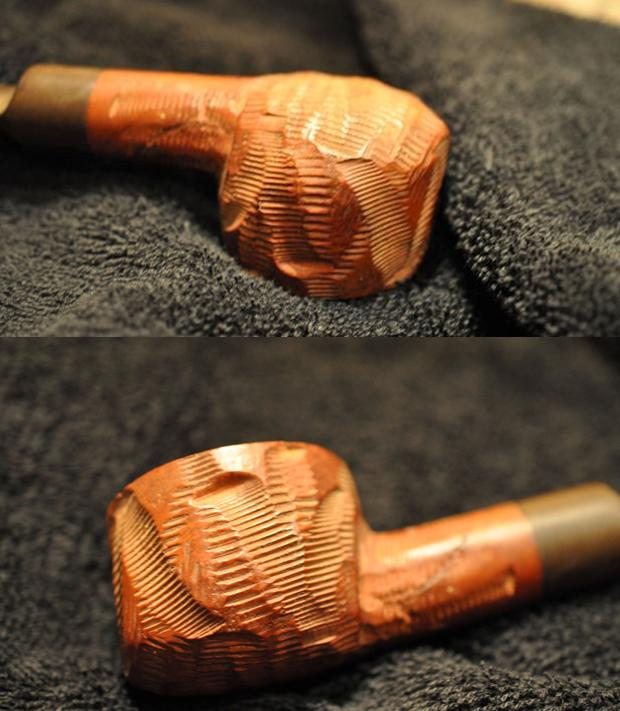
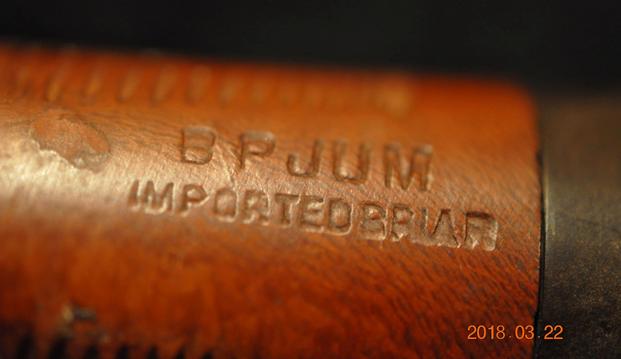
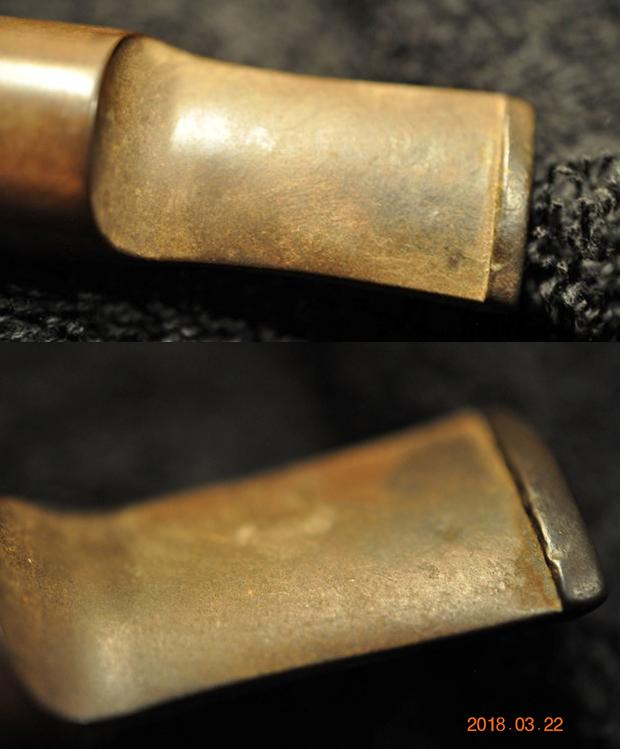
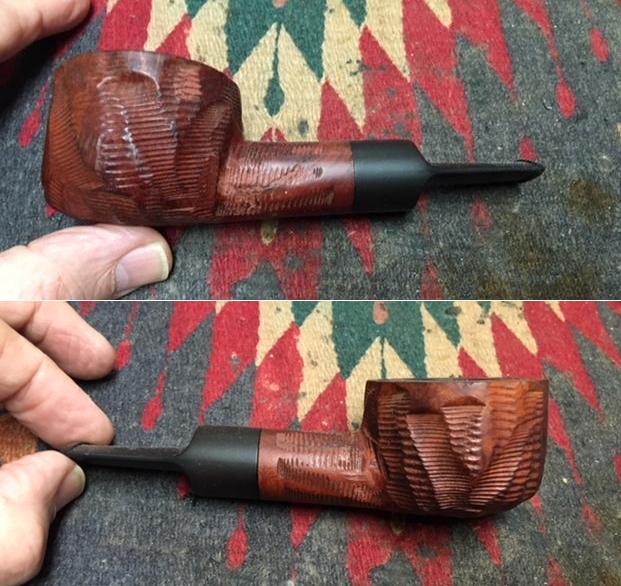
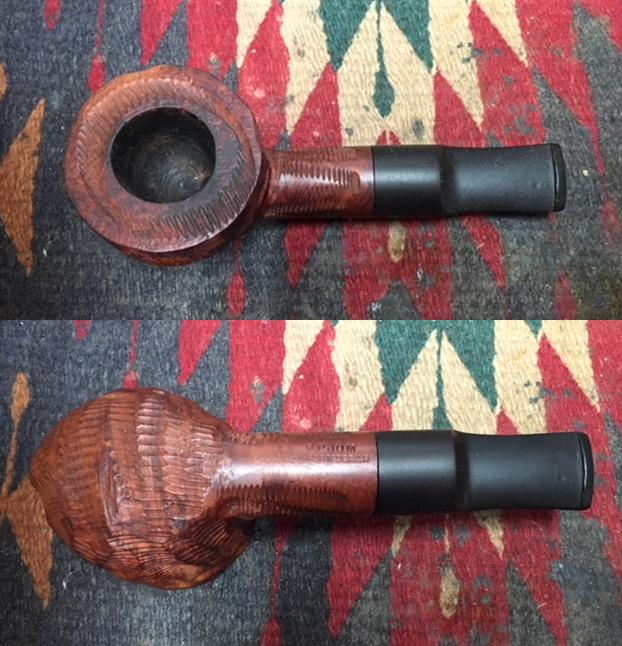
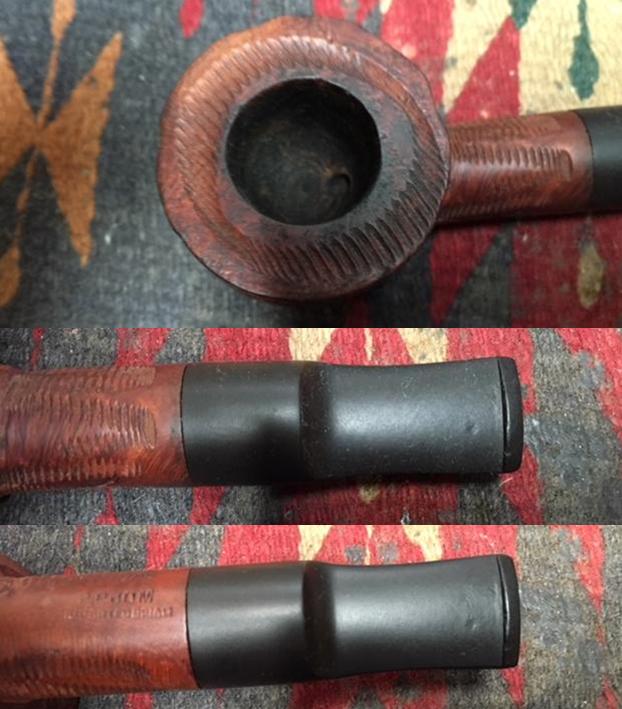
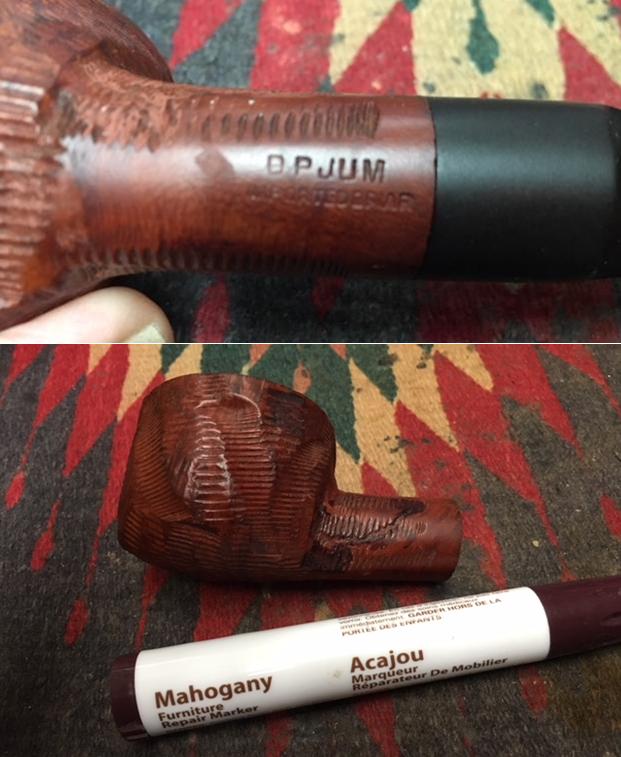
In one of the boxes of pipes that my brother Jeff sent me was a large, hefty carved pipe that was stamped BP Jum. It had a carved finish very similar to the carving on Custombilt pipes made by Tracy Mincer. The shape is also similar to the CB pipes. It is a large pipe – 5 ½ inches long, 1 ½ inches tall, outside wall diameter 2 inches and the chamber diameter 1 inch. The shank diameter is 7/8 inches. The stem is 2 ¼ inches long. The briar was very dirty with grit and grime in the depths of the carvings. The rim top was also dirty with lava and tars in the carving of the rim. There was cake built up on the walls of the bowl. The briar has a log of putty fills underneath the rustication with a large one on the left side of the shank. The stem was oxidized and dirty and there were tooth marks and chatter on both the top and underside of the stem near the button. The internals of the both the airway in the stem and shank and the mortise were very dirty with tars and oils. Jeff took photos of the pipe before he started his cleanup work on it. Jeff took photos of the rim top and inside of the bowl to show the condition. You can see the cake – not terribly thick but still visible and flaking nonetheless. It was not hard but was flaky and soft. He also took photos of the sides and underside of the bowl and shank. I have included those here. There was a smooth portion of briar on the underside of the shank that was stamped BP JUM over IMPORTED BRIAR. There were fills in the shank that are visible in the photo below.He took photos of the stem to show the tooth marks and the oxidation on the stem.I did some research to try to find out information on the BP Jum brand. There was a lot of conjecture as to whether the brand was made by Tracy Mincer of Custombilt fame. There is no definitive proof other than the common shapes, sizes and look of the pipes. Bill Unger, of Custombilt fame and author of a history of the brand, mentions BP Jum but cannot definitively connect the two. So the maker remains a mystery that is still unsolved. Do any of you reading this have information on the brand? Send me a message or an email if you can help. Thanks ahead of time.

Jeff had reamed the bowl with a PipNet pipe reamer and followed up with a Savinelli Fitsall pipe knife to remove the cake. He scrubbed out the mortise and the airway in the shank and the stem with alcohol, cotton swabs and pipe cleaners. He scrubbed the exterior of the bowl, rim, shank and stem with a tooth brush and Murphy’s Oil Soap to remove the oils and tars on the bowl, rim and shank. He rinsed it under running water. He dried it off with a soft cloth. The lava mess on the rim was thoroughly removed without harming the finish underneath it. Without the grime the finish looked good. The stem would need to be worked on. I took photos of the pipe to show its condition before I started my work on it.   I took close up photos of the rim top that shows the clean bowl and the small nicks and dents in the smooth portion of the finish. The stem was clean and Jeff had used Before & After Deoxidizer to soak and remove much of the oxidation. He rinsed out the inside of the stem and rinsed off the exterior as well. The photos of the stem show the tooth marks and chatter on both sides.The BP JUM stamp is very clean. You can see the putty fills on the left side of the photo as well as on the shank sides and the bowl itself. I used a Mahogany stain pen to touch up all of the fill areas on the pipe and blend them into the texture of the briar.I used a folded piece of 220 grit sandpaper to sand out the nicks and damage on the smooth parts of the rim. I polished them with micromesh sanding pads – wet sanding with 1500-2400 grit pads and dry sanding with 3200-12000 grit pads. I wiped the rim down after each sanding pad to remove the sanding dust. I rubbed the bowl down with Before & After Restoration Balm to deep clean the briar and particularly the sanded areas. The product works to clean, enliven and protect the briar. I hand rubbed it with my fingers and wiped it off with a soft cloth. I buffed the bowl with a horsehair shoe brush to polish it. The briar really began to have a rich shine. I took some photos of the bowl at this point to mark the progress in the restoration. I used clear super glue to fill in the large fill on the left side of the shank. I scored it with a knife to match the marks in the rustication. I stained the fill with a mahogany stain pen to match the briar and rubbed the area down with the balm to blend it.I waxed the cleaned and polished bowl with Conservator’s Wax and worked it into the rusticated finish. I buffed it with a shoe brush and a soft cloth. The bowl is finished other than the final buffing that I will do once the stem is finished. I set the bowl aside and turned my attention to the stem. I used a Bic lighter to paint the tooth marks with the flame and try to lift them. I was able to remove the lighter tooth chatter and lift the deep tooth marks partially. I sanded the stem and the surface of the button with 220 grit sand paper to remove the remaining tooth marks and reshape the surface and edges of the button. There were two tooth marks that were too deep and did not lift when heated. I filled them in with clear super glue. Once it had cured I sanded it down with 220 grit sandpaper to blend it into the surface of the vulcanite. I polished the stem with micromesh sanding pads – wet sanding with 1500-2400 grit pads and dry sanding with 3200-12000 grit pads. I wiped the stem down after each pad with a damp cloth to remove the sanding dust. I used the Before & After Pipe Polish to remove the small minute scratches left in the vulcanite. I finished by wiping the stem down with a final coat of Obsidian Oil and set it aside to dry. I polished the stem and bowl with Blue Diamond to polish out the remaining small scratches. I gave the bowl multiple coats of Conservator’s Wax and the stem several coats of carnauba wax and buffed the pipe with a clean buffing pad to raise the shine. I hand buffed it with a microfiber cloth to deepen the shine. The pipe polished up pretty nicely. The finished pipe is shown in the photos below. It is an interesting looking pipe that may have been carved by Tracy Mincer. It certainly bears a lot of resemblance to Custombilt/Custom-Bilt pipes.The dimensions are Length: 5 ½ inches, Height: 1 1/2 inches, Outside diameter of the bowl: 2 inches, Chamber diameter: 1 inch. I will be adding it to the rebornpipes store shortly. If you are interested in adding it to your collection email me at slaug@uniserve.com or send me a message on Facebook. Thanks for walking through the restoration with me as I worked over this BP Jum.


Recommissioning Another L. J. Peretti of Boston: An Oom Paul Sitter


Blog by Dal Stanton

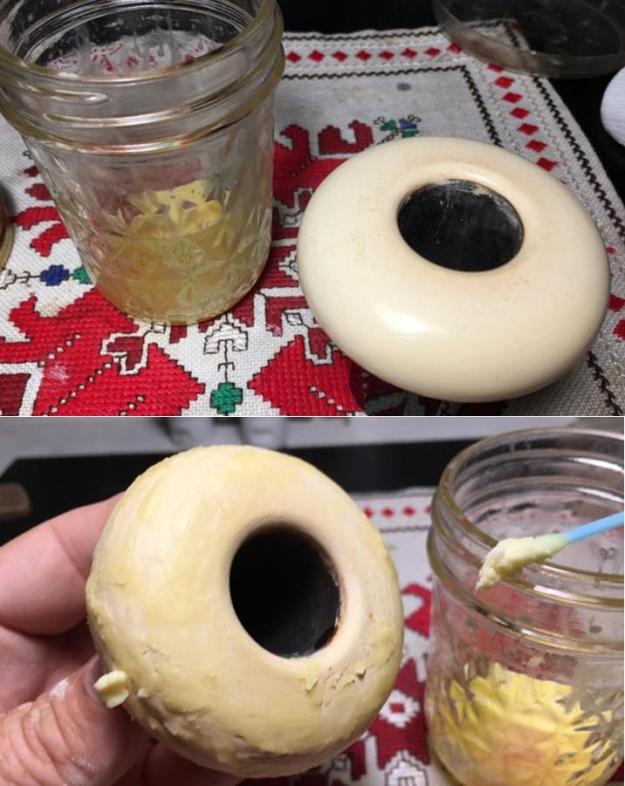
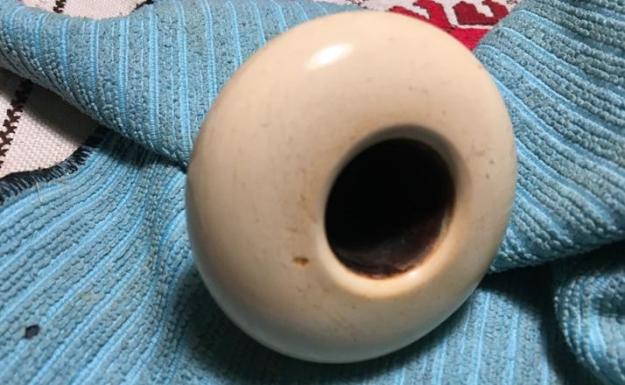
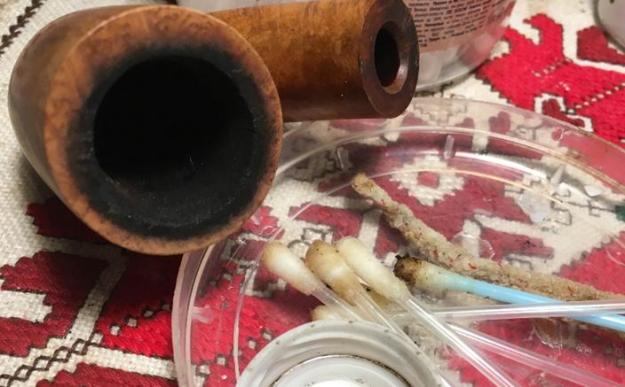
After restoring my first two Oom Pauls (see: LINK) from the L. J. Peretti Co., Tobacconist of Boston, this is the next Oom Paul that came to Bulgaria in the Peretti Lot of 10 I acquired off the eBay auction block.  I posted the picture of the 10 (below) on my favorite Facebook pipe groups (The Gentlemen’s Pipe Smoking Society, Old Codgers Smoking Pipe, Pipe Smokers of America, and Tobacco Pipe Restorers) letting interested pipe men and women know that except for one, the Oom Pauls would be available for personal collections.  All the Perettis restored and placed with new stewards benefit the Daughters of Bulgaria, an effort to help women and girls (and their children!) who have been trafficked and sexually exploited.  This L. J. Peretti Oom Paul Sitter from the Lot of 10 has been commissioned by a pipe man in neighboring Romania, just to the north of Bulgaria.  After restored, he will have first dibs on this Peretti now on my worktable!Along with the large stummel, what makes this Peretti stand out is the fact that it is a Sitter – a very nice feature when one is at the table enjoying friends and board games or a hand of cards!  I wish that the L. J. Peretti Co., had put out a shape chart in the past – if they had, I haven’t been able to find it!  This pipe, with another Sitter in the Lot of 10, might be just a bit shy of full bent status which is the technical norm for Oom Pauls according to Bill Burney’s description of the Oom Paul in Pipedia, but it is clear that Peretti used the same tall, long, full stummel with the Sitters, but widened the bend a bit, perhaps to allow the better balance as the Sitter is seated.  My call is that it is very close and either way, will serve his new steward well!  Here are pictures I took of the Peretti Oom Paul Sitter on my worktable here in Bulgaria. The left side of the shank is stamped with L. J. Peretti with no other markings on the stummel or stem.  Along with his brothers and cousins in the Peretti Lot of 10, this Oom Paul Sitter shares the thick carbon cake in the chamber and the rim abuse of incessant lighting over the side of the rim.  The extent of the erosion to the briar around the rim due to this scorching I’ll know after the reaming and cleaning of the stummel/rim.   The bowl shows normal nicks, scratches and grime that has darkened and obscured the briar.  I detect no fills on the surface, but the Sitter’s heel has a large, lightened blotch/fill to be addressed along the way. The stem has moderate oxidation, but the bit is chewed up like all his Peretti brothers and cousins.  The former steward liked to chew on his Perettis!  The upper/lower bit and button lip have sustained compression dents.

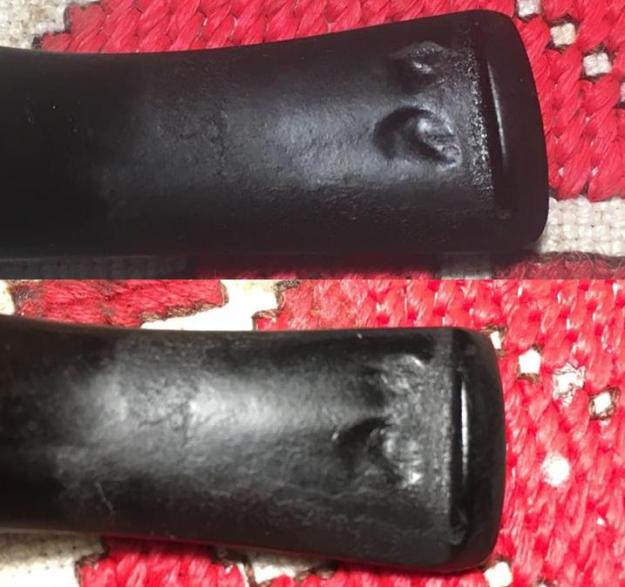
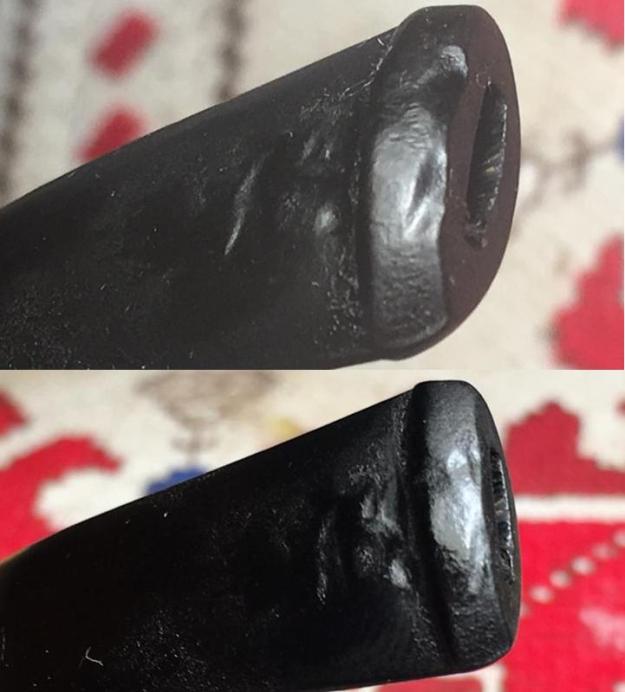
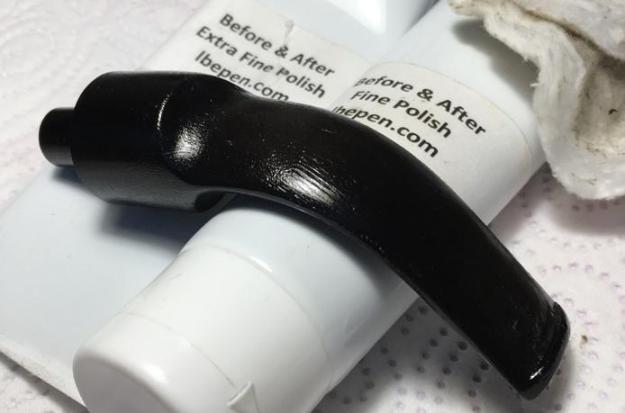
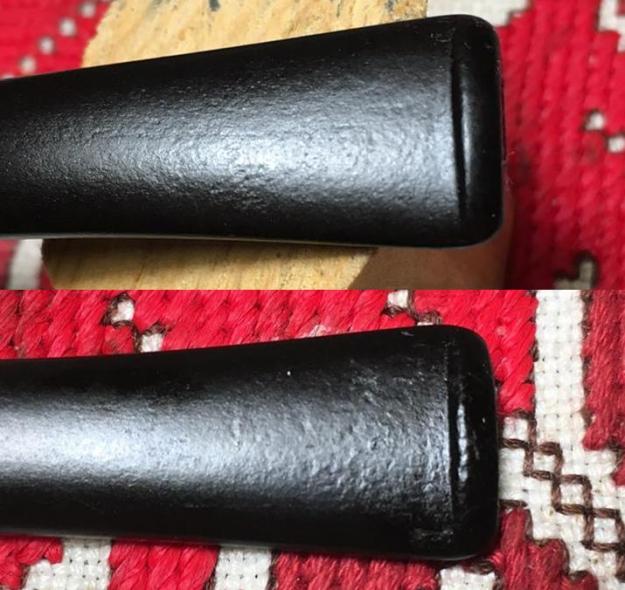
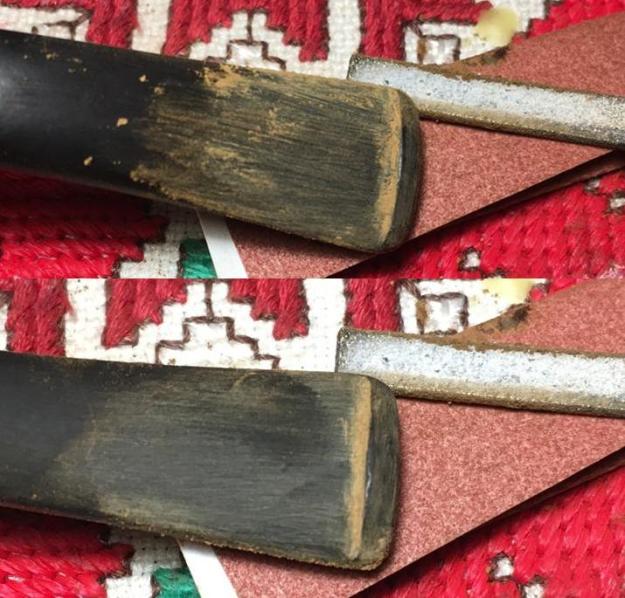
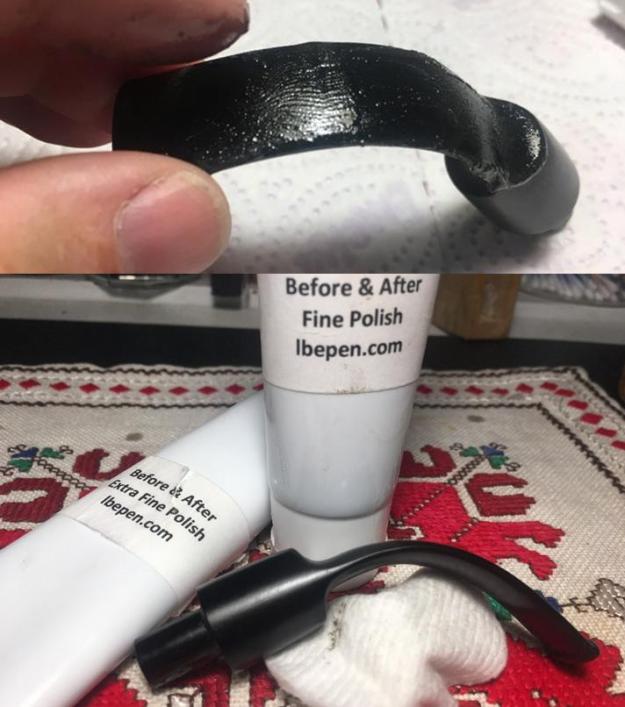
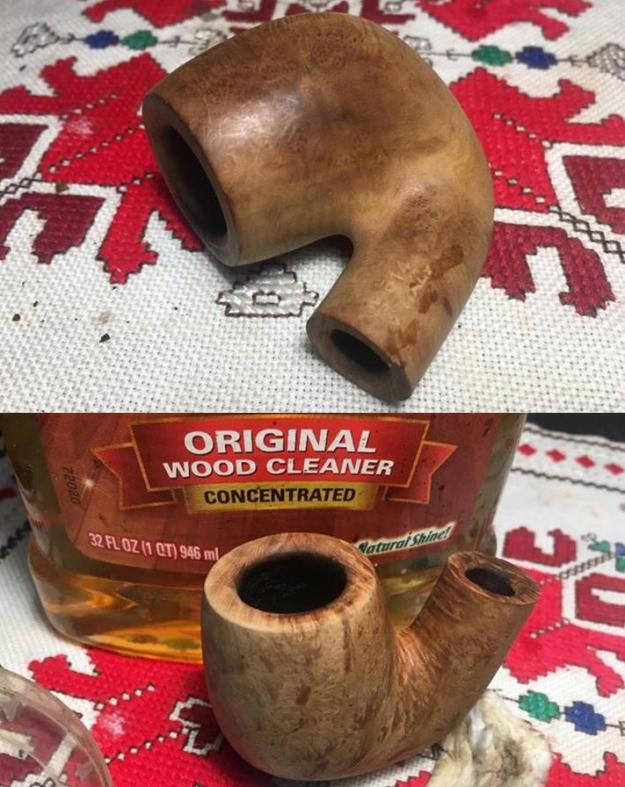
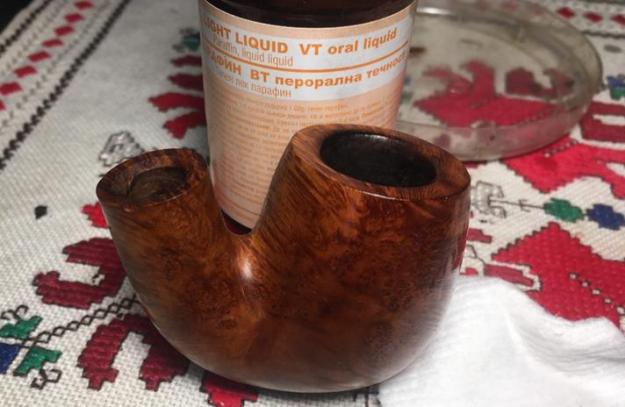
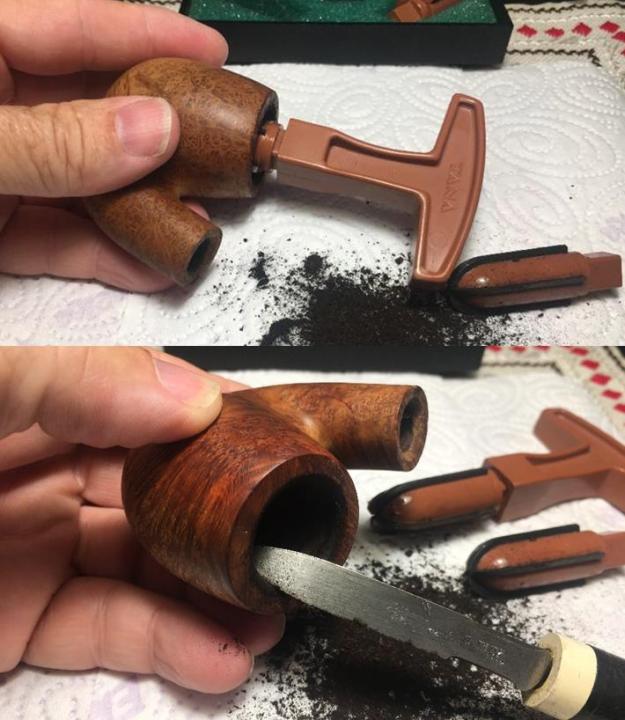
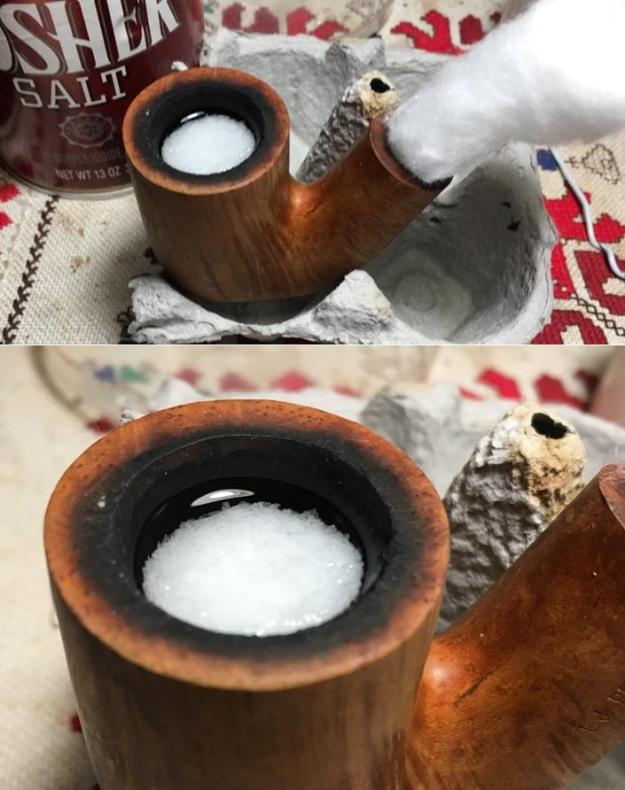
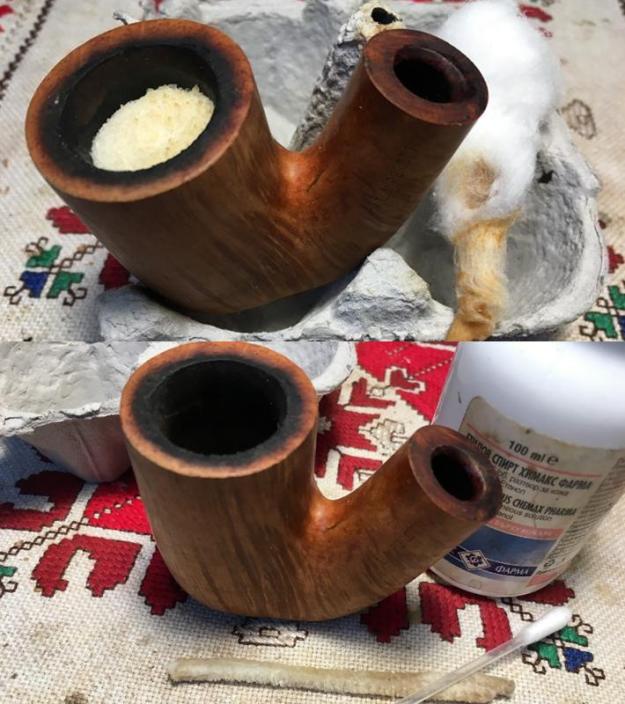
I start the restoration process by addressing the oxidation of the stem.  Previously, along with several other stems of pipes in the queue, the Sitter’s stem went into a soak using ‘Before and After Deoxidizer’ to remove the oxidation from the vulcanite stem.  I first had cleaned the internals of the stem with isopropyl 95% and pipe cleaners.  The stem stayed in the soak for several hours and after removing it from the Deoxidizer, I wiped it down with cotton pads and mineral spirits (in Bulgaria, light paraffin oil).  The oxidation wipes off as a nasty brown on the cotton pads.  I continue to wipe with cotton pads and paraffin oil until it cleans and is buffing up.  The Before and After Deoxidizer does a good job. To continue the Before and After process, I now apply first the Fine Polish by putting some on my finger tips and working it into the vulcanite.  The polish starts off thick and gritty, but liquifies as I work it around and absorbs into the vulcanite.  After a while, I buff off the polish with a cotton pad and then, in the same manner, apply the Extra Fine Polish.  I take a picture of the stem after I worked this polish in but before buffing it off.  You can make out the texture of the polish on the surface.  I then buff it off with a cotton pad.  The stem looks clear of oxidation and has a deep black hue.I look now to the stummel.  I begin by reaming the heavily caked Oom Paul chamber.  I also work on the rim surface with very thick, crusted lava flow.  There is no way to determine the condition of the chamber wall or the rim until the cake is removed.  This is a consistent characteristic of all the L. J. Peretti Lot of 10.  I use the Pipnet Reaming kit to begin the job starting with the smallest blade over a paper towel to minimize clean up!  I use 3 of the 4 blades available.  I then use the Savinelli Fitsall Tool to continue to remove carbon from the chamber walls by scraping the chamber wall and reaching the difficult areas.  When I detect the walls are scraped smoothly – no more crunching of carbon, I sand the chamber using 240 grit paper wrapped around a Sharpie Pen.  Finally, after sanding I wipe the chamber with cotton pads wetted with isopropyl 95% to remove the carbon dust.  Looking into the chamber, I see no cracks or crevices. It looks good! I take pictures along the way.  Now, to attack the thick gunk on the rim, I use undiluted Murphy’s Oil also to clean the entire stummel which is darkened by the grime.  I use a cotton pad and Murphy’s and the grime is coming off.  I’m pleasantly surprised to see what I thought was a fill on the heel of the stummel disappear!  It too was simply gunk on the briar surface.  The rim put up some resistance!  I first use the cotton pad but quickly utilized a brass brush to scrub the lava over the rim.  I also used my pen knife to scrape gently the rim surface.  To complete the cleanup, I rinse the stummel and rim with cool tap water.  The stummel surface looks good – it cleaned up well and I can see some impressive grain patterns lurking underneath.  As with the other Peretti Oom Pauls I’ve restored, the plane of the rim is dropping a bit to the left of perpendicular with the shank, but I’ll leave it as is.  I also note that the left side of the rim has eroded somewhat because of the practice of lighting the tobacco over the edge.  The result is that there is an inconsistent rim width around the circumference.  I’ll seek to correct this, or at least help it along by creating an internal rim bevel. Since I like working on clean pipes, I turn to the internal cleaning of the stummel using a shank brush, pipe cleaners and cotton buds dipped in isopropyl 95%.  I also utilize a dental spatula to scrape the sides of the mortise to remove old tars and oils.  After the frontal assault on the gunk, I decide to employ the stealthier approach – a kosher salt and alcohol soak.  This approach helps to freshen the internals as well as remove more latent tars and oils.  I fill the stummel with kosher salt, cup the chamber with my palm and give the stummel a shake to displace the salt.  I then create a wick with a cotton ball by pulling and twisting it.  I stuff the wick down the mortise and through the draft way.  Then I place the stummel in an egg carton to stabilize it and fill the bowl with isopropyl 95% until it surfaces over the salt.  I wait a few minutes and top it off again.  The day is late, and I set the stummel aside to let it soak through the night.The next morning, I discover that the salt had not discolored much but the wick had been successful drawing out the oils.  I clean out the stummel getting rid of the expended salt and wiping the chamber with a paper towel. I run a long shank brush through the mortise and draft hole to clear the remnants of salt.  Now, a clean stummel!Now, to the rim.  I take a closer look and take a couple close ups to mark the starting point.  The damage is not as extensive as I’ve seen on some of his Peretti brothers.  Cleaning the scorched briar on the rim and creating an internal bevel in order to remove the damaged wood is the goal – fresh, healthier briar to form the rim.  Starting, I gently top the stummel with 240 sanding paper on a chopping board only removing what is necessary. Rotating the inverted stummel on the board I discover that I don’t need to take off much.  I then switch to 600 grade paper and smooth the rim – lightly topping it more.  The pictures show the progress. The topping went well.  Now, to cut the internal bevel, I roll a piece of 120 grade paper tightly around a hard wood disk to provide a flat, firm backing to help with a crisper b.  I then work the paper around the internal rim circumference edge to cut the initial bevel.  In the same way, I sand with 240 grade paper and finish it off with 320 and 600 grade papers.  I think the rim looks great. I’m enjoying how this Peretti in cooperating.  The stummel surface has normal nicks and minor dents which this Peretti has received over the years.  To remove these, using sanding sponges on the surface is my usual approach.  I start by employing a rougher grade sponge, middle grade and then finish going over the surface with a light grade sanding sponge.  I am careful to protect the L. J. Peretti nomenclature on the shank as I sand. After the sanding sponges I transition to using micromesh pads to sand out the briar surface more using finer sanding surfaces. I begin by wet sanding with pads 1500 to 2400 then dry sanding from 32000 to 4000 and then 6000 to 12000.  I enjoy watching the grain start to show through the micromesh pad cycles. The L. J. Peretti is looking good as I look at it now.  The pictures show the progress. Turning now to the stem, I take another look at the bit showing tooth chatter and dents. I first use a flame from a Bic lighter to paint the area expanding the vulcanite.  As the vulcanite expands as the natural result of heating it, I’m hopeful that the dents and chatter might rise and make for less sanding.  I believe the process helped but did not fully remove the dents.  I took before and after pictures first with the upper bit comparison, then the lower bit. To address the dents, after wiping the area with alcohol to clean the surface, I apply drops of Black Medium KE-150 CA glue to the dents.  I start on the upper bit.  I put CA glue on the 2 main dents and run more glue along the button to fill in the chatter there.  I then wait for an hour or so for the CA glue to set, so that I can flip the stem and apply glue on the lower bit. After the Black CA glue has cured, I start the process of filing and sanding the patch down to the vulcanite surface and sanding out the chatter.  Starting with the flat needle file and 240 sanding paper I do the initial sanding and refreshing the buttons of both the upper and lower bit with the file.  I follow by sanding with finer grades, 470 then 600.  I finish this phase by buffing the entire stem with 0000 grade steel wool.  The pictures show the progress finishing out the bit repairs. With this initial stem repair and sanding completed, I now use micromesh pads to continue sanding the stem with even finer sanding grades.  I begin wet sanding with pads 1500 to 2400, then dry sanding with pads 3200 to 4000 followed by pads 6000 to 12000.  After each set of 3 pads I apply Obsidian oil to revitalize the vulcanite.  I love to see the vulcanite’s glassy pop!  The pictures show the progression. Now, I take another look at the Peretti Oom Paul Sitter seated on my worktable!  I like that characteristic of this large stummel.  I study the attractive grain patterns that have started to emerge through the sanding process.  To enhance the grain further, I mount a felt buffing wheel on the Dremel and I apply the coarser Tripoli compound with the lowest speed setting. Before I start the sanding process, I purge the wheel with the Dremel’s metal tightening wrench.  I apply the compounds by rotating the wheel over the surface of the briar.  I don’t apply too much lateral pressure on the buffing wheel, but I allow the speed, wheel and compound to do the work. After asking nicely, my wife takes a picture of me applying the Tripoli compound with the Dremel.  After the Tripoli compound, I apply the less coarse compound Blue Diamond.  I apply it in the same manner as Tripoli but with a cotton cloth buffing wheel instead of a felt wheel.  When completed, I wipe the stummel with a cotton cloth to remove residue compound dust. The next step is to apply Before and After Restoration Balm to the Peretti’s briar surface.  With the other restorations I’ve done with the Peretti Lot of 10, I have been very pleased with the results of applying the Restoration Balm.  I very much like the natural briar look and the original Peretti motif has the lighter, natural patina.  The Balm seems to take the natural briar grain and deepen and enrich it.  I take a before and after picture of the stummel to show the difference.  I’m afraid the lighting of the pictures does not show the subtle deepening that I perceive with the naked eye.  To apply the Balm, I squeeze a little Balm on my fingers and work it into the briar surface.  As I do this, the Balm progressively thickens to almost a wax-like consistency.  I take a picture of the Balm on the stummel as I allow it to sit for a few minutes to give an idea of its consistency.  I then use a cotton cloth rag to wiping it off at first, and then buffing it as the surface is exposed.  I then use a micromesh cloth to give the stummel a hand buffing.  The pictures show to process comparing each side in succession. I remember that I forgot to apply Blue Diamond compound to the stem. So, I attach the stem to the stummel and apply Blue Diamond compound to the stem and then wipe the entire pipe with a felt cloth to remove excess compound dust.  Now, applying the carnauba wax, I mount a cotton cloth wheel to the Dremel, increase the speed to about 40% full power and apply the carnauba to the stem and stummel.  After applying a few coats, I use a micromesh cloth to give the pipe a rigorous hand buffing to raise the shine even more.

This Peretti Oom Paul Sitter cleaned up very well – I’m pleased with the results.  After restoring several Peretti pipes and I’ve concluded that not only have I found them to be good smokers, but the briar used for the production of these pipes seems to be of a higher quality and very pleasing to the eye on the whole.  The grain on this Peretti has not disappointed.  The large stummel showcases well the lateral grain on the lower regions and then bird’s eye grain dominates the opposite side of the bowl.  Codruț, a pipe man in neighboring Romania, saw this Peretti when I posted several Peretti Oom Pauls that were to be restored and made available.  He commissioned this Peretti and he will have first dibs on it when it goes into The Pipe Steward Pipe Store.  This Peretti Oom Paul Sitter benefits the Daughters of Bulgaria, our work here in Bulgaria helping women and girls (and their children) who have been trafficked and sexually exploited to find a new life.  Thanks Codruț(!), and thank you for joining me in this restoration!

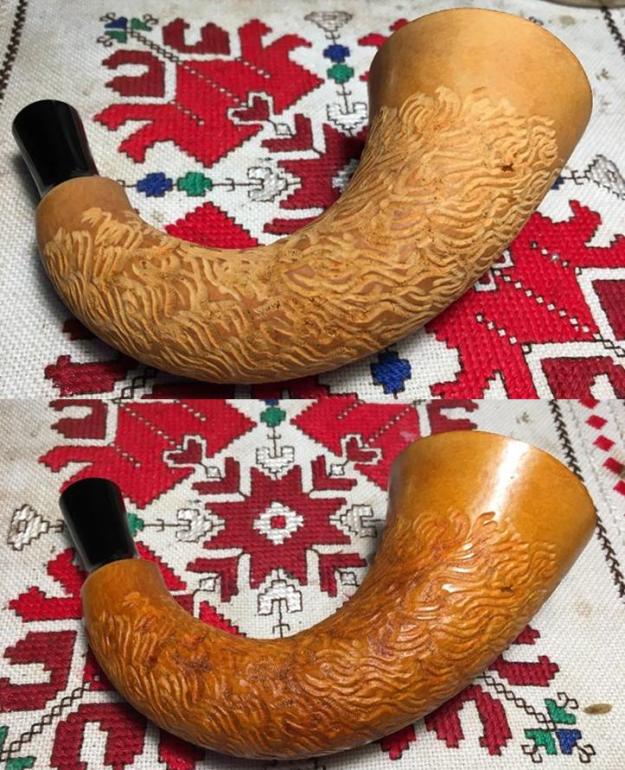
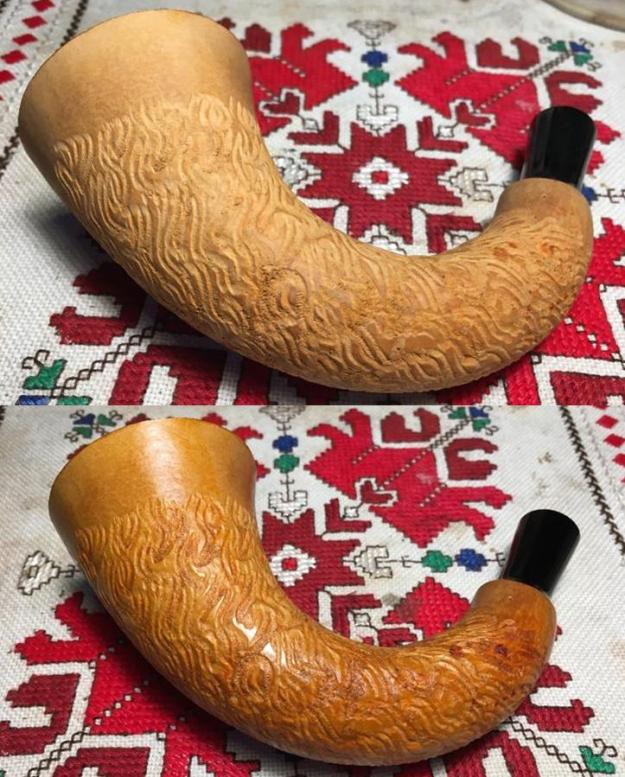
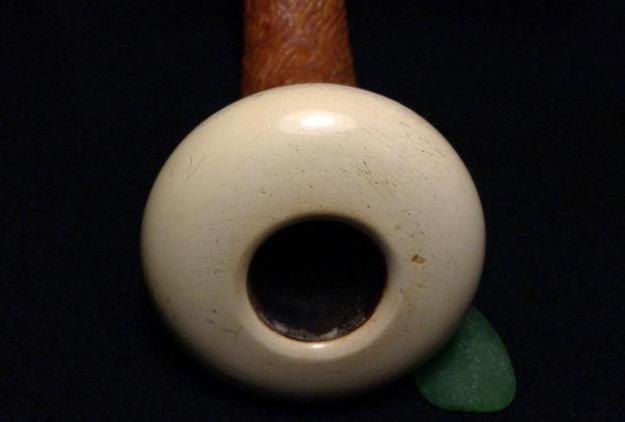
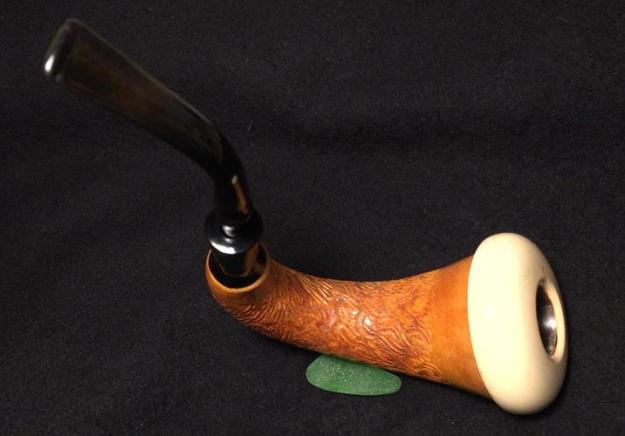
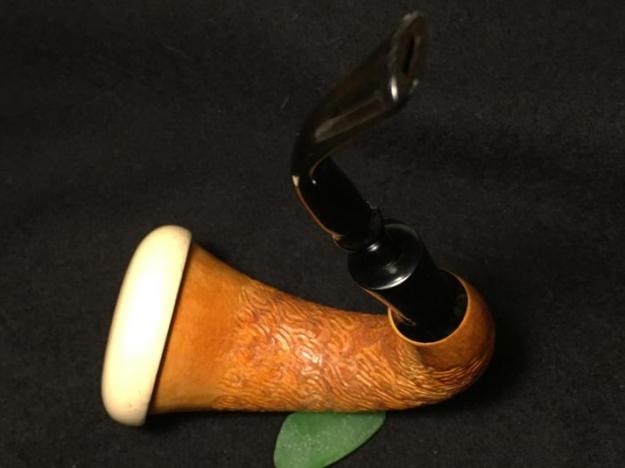
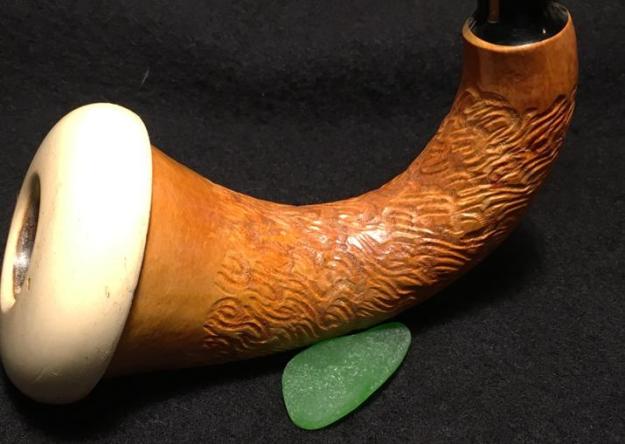
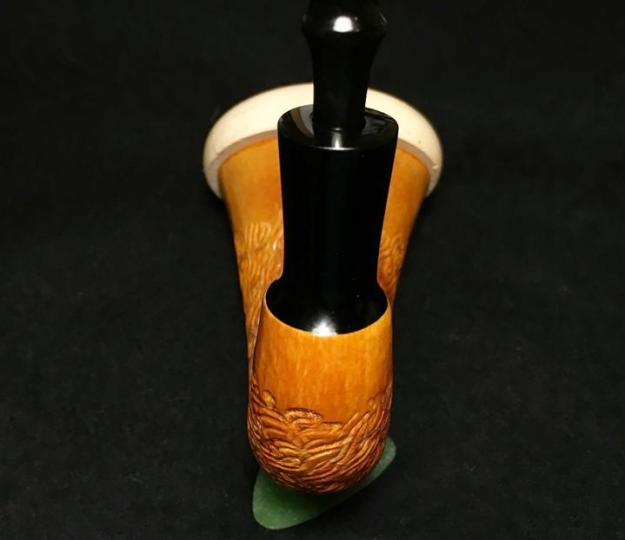
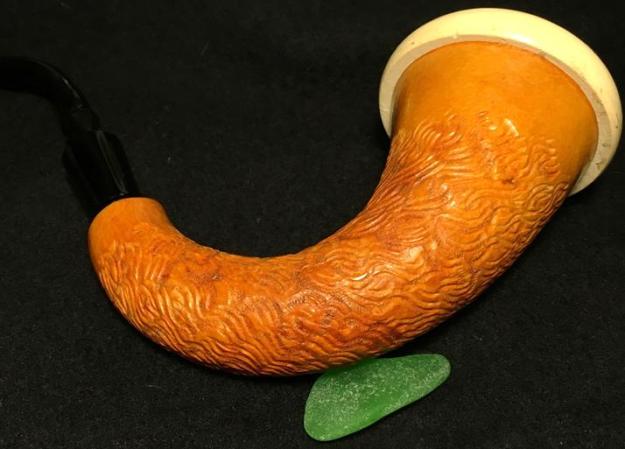
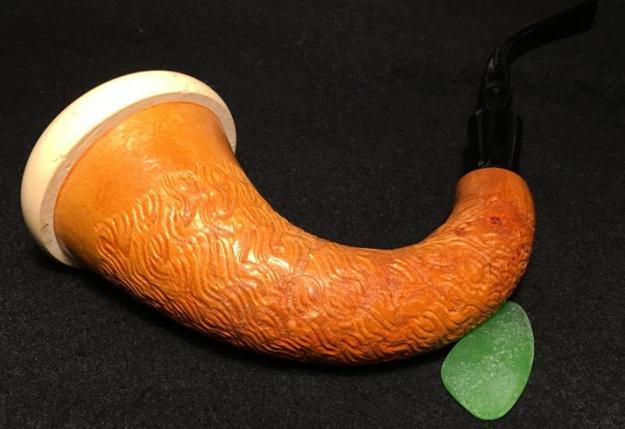
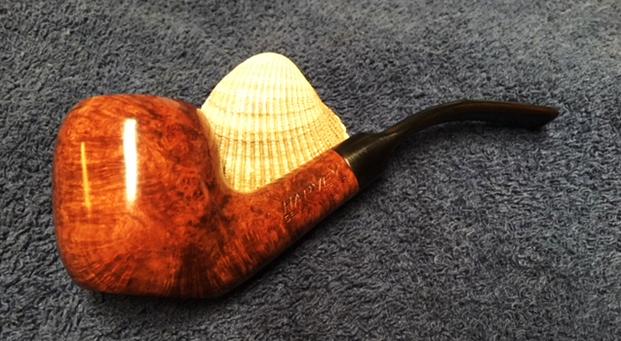
Recommissioning a Sculpted Gourd Calabash for a Man Serving His Country


Blog by Dal Stanton

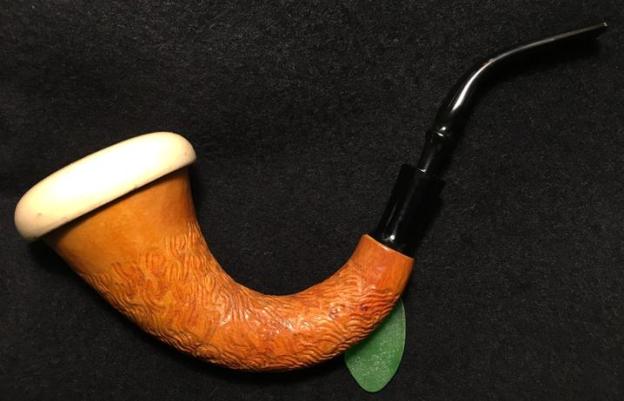
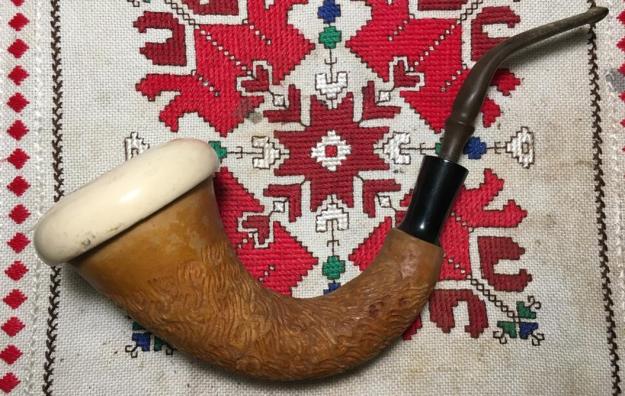
Last year, when my wife and I were in the US for some months for our periodic furlough reconnecting with friends, family, and sponsors of our work in Bulgaria, I was also trying to connect with pipes –  I love the search!  As I’ve done many times before, I was trolling through the eBay offerings.  I came across a listing for a lot of pipes, which the seller described as:  Huge Lot Of 66 Smoking Pipes Pre-Owned Pre-Smoked and Deeply Loved.  The further description was that the Lot of 66 was a donated item, that the collection belonged to one owner, and they repeated that the collection had been “Loved”.  There were several other pictures providing break downs of the overview below.  As you might expect, I started going through the pictures to see what I could see – the seller said that they were not pipe people, they did not know the brands nor the specific histories.  This is always a good sign – treasures could be lurking in the mass of 66 pipes!  I could see very easily one OBVIOUS treasure – a Gourd Calabash.  Well, I did the math, determined a budget, and with my wife’s blessing, went to the auction block and I won – which surprised me.   There turned out to be several treasures in the Lot of 66 which will gradually make their way to The Pipe Steward worktable to be restored and recommissioned to benefit the Daughters of Bulgaria, helping women and girls, and their children, who have been trafficked and sexually exploited.  I toted the Lot of 66 back to Bulgaria with me (thanks to a very patient wife!) and now the Sculpted Gourd Calabash is now on the worktable.  What prompted the Calabash’s retrieval from the ‘Help Me!’ basket was a text message I received from a man who said he was looking for a Meerschaum pipe and a Calabash.  Brian had met one of my colleagues in Plovdiv, Bulgaria, and through their conversation, he discovered that I restored pipes and that he had a bucket list of sorts, of pipes he was trying to acquire while in Europe for a short work stay.  Brian and I began to text back and forth, and I told him I did have a Calabash and a few Meerschaums.  He was able to look at the Sculpted Gourd Calabash on The Pipe Steward site in the ‘For Pipe Dreamers Only’ section – unrestored pipes that folks may commission. We agreed on the Calabash and since he was leaving Bulgaria soon, I went to work straight away on his ‘Bucket List’ Calabash along with the other projects on my worktable.  Only later, as we continued to text each other, did I discover that Brian was an Airforce serviceman from Washington State and lives on a farm where he and his wife provide foster care for children.  He said he was on a short military training exercise in Bulgaria.  My sense of appreciation grew – not only for the service to his country, but their care and concern for children.  I also discovered that Brian has become very interested in pipe restoration and may give it a go!  So, to work on the Calabash.

One of the discoveries I made when I looked at the Calabash for the first time in hand – what I could not see in the pictures, was that the gourd was sculpted – a very interesting and attractive design that both adds an unexpected ‘fresco’ of sorts on the gourd, and also a different, tactile feel.  On my worktable here in Sofia, Bulgaria, I take pictures of the Sculpted Gourd Calabash to chronicle his condition. The first thing that draws the attention to this Gourd Calabash after the sculpted design is taken in, is the sheer size of the pipe.  From the end of the Meerschaum cup to the end of the fancy push tenon stem is just at 9 inches!  The cup is 2 ¾ inches wide and the cup chamber is 1 3/8 inches deep. The pipe has no markings to reveal its origins.  The gourd is generally in good shape and carries with it the normal signs of age – nicks and scrapes on the gourd surface.  The surface shows the latent shininess of former finishes which look like blotches in the pictures above – these need to be removed.  When I investigate the inside of the gourd I see dust and loose particles that need to be cleaned.  The cork gasket which forms the connection between the Meerschaum cup and the gourd is in good shape but is dry. On rebornpipes, one of Steve’s best practices is to apply a little petroleum jelly to the gasket to condition it and to create a renewed seal.  I’ll try this out as well.  The cup itself is solid but sports some small chips on the top, near the chamber opening.  There are also nicks and scratches revealing the bumps and bruises he’s collected along the way.  I’ll work on sanding these out.  The push tenon stem has significant oxidation and tooth chatter.  The shank extension is made of plastic and is scraped up a bit on the end, but it should clean up nicely.

I begin the restoration of this treasure of the Lot of 66 for Brian’s bucket list by first cleaning the internals of the stem with pipe cleaners and isopropyl 95%.  After this, I add the stem to the Before and After Deoxidizer bath, along with a couple other stems in process. I let the stem soak in the Deoxidizer overnight.  The next morning, I fish out the stem from the Deoxidizer, let it drain off, and wipe liquid and oxidation off with cotton cloth pads wetted with light paraffin oil.  This removes the raised oxidation.  I wipe and buff the vulcanite and put it aside to dry.  The Before and After Deoxidizer has grown in my appreciation for the job it does.  The stem looks great. Turning now to the gourd, I look again inside the gourd and the walls are dark, with some dried tars.  I won’t be able to get it all cleaned, but I take a dental spatula to scrape what I can off.  I put down some paper towel to help in cleanup. I also employ a long-wired shank brush to reach into the gourd and travel the curve.  I do the same thing with a brush through the mortise into the gourd.  This loosens more hardened tars.  After I finish with the scraping and the brushing, I clean the mortise with pipe cleaner and cotton bud dipped in isopropyl 95%.  The internals are as clean as I can manage! Before I turn to the external surface of the gourd, I finish the internal by applying petroleum jelly with my finger to the cork gasket to rejuvenate it.To clean the grime from the gourd surface and in the sculpting crevices as well as to remove the old shiny finish, I use undiluted Murphy’s Oil Soap with cotton pads and a bristled tooth brush.  I then gently rinse the gourd using the toothbrush and a very light flow of water – avoiding water getting inside the gourd. I hand dry the gourd with paper towel and let it set to dry thoroughly.  While I had the Murphy’s out, I did a quick clean over of the Meerschaum cup using a cotton pad. After the gourd thoroughly dries, I want to rejuvenate the surface.  Using Before and After Restoration Balm I work the balm into the sculpted gourd with my fingers.  I take two pictures to mark the beginning for comparison. I’m looking forward to seeing what the Balm does with the thirsty, dry gourd!  I was not disappointed – oh my!  The richness of color that exemplifies a classic Gourd Calabash is evident.  Every pipe man and woman hopes to have at least one Gourd Calabash in their collections!  I put the gourd aside to rest and pick up the Meerschaum cup.  I take another close look at the chamber and at the chipping on the cup dome.  I think that the chips are too deep to sand out totally, but I take a piece of 470 grade paper and lightly sand the surface of the Meer cup.  I strategically and lightly sand out nicks on the surface and the bevel of the cup.  I’m not able to remove the deepest divots next to the chamber lip but it looks better. As I sand, I use a dampened cotton cloth to wipe off the Meer dust. Before going further with the Meer cup surface, I take the Savinelli Fitsall Tool and gently scrape the chamber.  The cake is very light, and it doesn’t take much.  I follow by sanding the chamber with a piece of 240 grade paper around a Sharpie pen and then wipe the chamber with a cotton pad and alcohol.  Now I bring the Meerschaum cup through a micromesh pad cycle by wet sanding with pads 1500 to 2400 then dry sanding with pads 3200 to 12000.  As I sand, I do not get carried away!  Sanding Meerschaum is a much gentler activity than briar!  As I progress to the latter, more polishing pads, the Meerschaum begins to reflect like glass.  Nice!The next step with the restoration of the cup is to apply bee’s wax to the Meer surface.  Bee’s wax is excellent in protecting the Meer surface as well as encouraging a rich patina.  I have Bulgarian bee’s wax available and I melt it with a hot gun.  When it liquifies, I apply it to the surface with a cotton bud. I also warm the Meer cup with the hot air so that it allows for the more even application of the melted wax.  I prop the cup in a small plastic cup.  As I apply the melted bee’s wax with a cotton bud, the wax congeals very quickly as it cools on the Meer surface.  At the end of the application, the wax is caked on the surface.  It takes some work as I begin removing the excess, congealed wax, using a cotton cloth.  As the excess comes off, it reveals the surface and it buffs more easily.  Finally, with all the excess removed, I use a micromesh cloth to give the cup a hearty hand buffing.  The Calabash’s Meer cup is now ready for a gourd.  It looks good. Now, to the fancy push tenon stem.  The bit is rough with chatter.  I will remove it by using a piece of 240 grade paper.  I also take a flat needle file to redefine the button.  I follow the 240 paper with 470 grade paper removing the scratches left by the 240 paper.  Then, I use 600 grade paper and sand the entire stem to remove rough spots in the vulcanite as well as removing the tracks of the 470 paper.  Finally, I buff the entire stem with 0000 grade steel wool. Following the steel wool buff, I want to rejuvenate the vulcanite.  First, I apply Before and After Fine Polish then Extra Fine Polish to the stem. I work each in with my fingers throughout the stem.  After each application, I wipe/buff the polish with a cotton cloth.  The vulcanite responds well with a deeper black – it looks good.Now to the micromesh pads.  With pads 1500 to 2400 I wet sand followed by 3200 to 4000 and 6000 to 12000 are dry sanded.  After each set of three I apply a coating of Obsidian Oil.  The polished vulcanite pop is nice to behold! Now to the Calabash’s sculpted gourd.  Using the Dremel, I mount a cotton cloth buffing wheel dedicated to Blue Diamond compound.  Using the fine abrasive compound, I sand the smooth gourd areas to bring out more gloss.  I also want to test carefully the application of the compound to the sculpted area which has peeks and valleys.  I’m interested to see if Blue Diamond will also enhance this area.  Using the slowest speed on the Dremel, I work the buffing wheel around the gourd – both smooth and sculpted.  The sculpting is very intricate and the more I look at it the more amazing it is – very nice touch on an already classic shape.  I can work the compound into the sculpting and the results are good.  The surface is shining up well.  I take a picture applying the compound – no small feat with only two hands!  I also run the buffing wheel with Blue Diamond on the shank extension as well as on the unattached fancy stem.No – this next picture is not repeated from above, unfortunately.  In the interest of full disclosure, as I was working the Blue Diamond compound on the stem, I noticed oxidation that I did not see before – or wasn’t as obvious until I started buffing up the vulcanite with the compound.  Well, I’ll spare you all the pictures of starting from the beginning by re-sanding the stem starting with 240, 470, 600, steel wool and the full run of 9 micromesh pads…  Let this picture represent the whole…. Thankfully, back to ‘now’ with the second picture.I give the gourd and stem a quick hand buff with a felt cloth to remove compound dust in preparation for the application of wax.  I mount another cotton cloth buffing wheel dedicated to carnauba wax onto the Dremel.  I increase the speed up to about 40% and apply the wax to both gourd, stem and shank extension – the cup and stem are not assembled.  I find that the compact Dremel buffing wheel allows me to work in a much more directed way.  To spread the carnauba wax over the sculpted, rougher area, I steer the buffing wheel in the same direction as the sculpted valleys.  In this way, the wax does not gum up but continues to spread evenly over the surface and crevices.  As I watch the waxing unfold, oh my!  Gourd skin loves carnauba wax!  After some coats of wax, I use a micromesh cloth to buff up the gourd and stem surface.  I also buff the Meerschaum cup with the cloth.

I am very, very pleased with the results of this Sculpted Gourd Calabash.  The design created on the gourd surface attracts the eye and holds it.  The smooth gourd ‘bands’ below the Meerschaum cup and over the gourd shank, connecting to the shank extension, create a symmetry that works well.  The Meer cup looks good.  It carries some of the former scars and cuts – a sign of the Calabash’s history.  I’m glad that Brian will take good care of this Calabash as he returns to the US after his tour of service in Bulgaria.  I appreciate his service to his country and that his bucket list Sculpted Gourd Calabash benefits the Daughters of Bulgaria, women and girls (and their children) who have been trafficked and sexually exploited.  Thanks Brian and thanks for joining me through this restoration! 

New Life for an Italian Made Harvey Futura Bent Sitter


Blog by Steve Laug

The next pipe on the work table is another pipe that came to me from the estate of a Vancouver pipe smoker whose widow left them with a local Pipe Shop after he died. I was asked to clean them up and sell them for the shop as it has since closed. The photos below show the pipe as it was when I brought it to my work table. It is a nicely shaped bent sitter – with birdseye and cross grain all around the bowl and shank. The unusual patterns of the grain on the briar is unique and a bit captivating. The bowl was heavily caked with a lava coat on the top of the rim. It was hard to tell how the inner and outer edge of the rim actually looked until the bowl was reamed. The bowl was dirty but the finish was still shiny as if it had a top coat of varnish or shellac over the stain coat. The stem had some tooth chatter and marks on the top and underside near the button. The pipe had promise it was very dirty. Since it was an Italian Made Pipe I did a bit of research to see if I could find it on the web. I checked on the PipePhil website and it was not listed there. I also check on Pipedia and found a listing under Italian made pipes that read Harvey pipes but gave absolutely no information on the brand. I have a theory that the brand was made by Rossi because I knew that the factory made many pipes for various sellers around the world. I have no proof of it of course but it is a good possibility. I have no idea of the connection between Rossi and Harvey pipes but I sense that there is one.

I took photos of the stamping on the shank to show the stamping around the sides and bottom of the shank. The top photo shows the left side of the shank which is stamped HARVEY over Selected Grain over FUTURA. The second photo shows the Made In Italy stamp on the right side of the shank. The third photo shows a number stamped on the underside of the shank. It reads 29-827. When I went back to the States after Christmas to visit my parents and brothers I took a box of these pipes to Jeff to clean up for me. He reamed this Harvey Italian Made Bent Sitter with a PipNet pipe reamer and cleaned it up with a Savinelli Fitsall Pipe Knife. He scrubbed the exterior with Murphy’s Oil Soap and a tooth brush to clean off the grime on the finish and the heavy overflow of lava on the rim top. He cleaned up the internals of the shank, mortise and stem with pipe cleaners, cotton swabs and alcohol to remove all of the oils and tars in the pipe. When it came back to Vancouver it was a quite different pipe. I took photos of it before I started the restoration. I took photos of the rim top and the stem to show their condition. Jeff was able to clean out the bowl completely and the rim top. He removed the tars and lava to reveal some peeling of the varnish coat on the rim and some very obvious fills that can be seen in the first photo. The stem was oxidized and pitted. There were scratches, tooth chatter and marks on both sides near the button. I worked on five of the pipes from that estate at the same time. I put all of the stems in a bath of Before & After Pipe Stem Deoxidizer to soak. I submerged them all of the stems in the bath and let them soak overnight to break down the oxidation.While the stem soaked I worked on the rim top with 220 grit sandpaper to remove the darkening and light remnant of lava. I wiped it down with a damp cloth and dried it off.I polished the rim with micromesh sanding pads – wet sanding with 1500-2400 grit pads and dry sanding with 3200-12000 grit pads.  I used a cherry stain touch up pen to blend the sanded and polished rim top with the colour of the rest of the bowl. Once the stain dried I wax it with carnauba wax and buffed it with a buffing wheel to polish and make it shine.I rubbed the bowl down with Before & After Restoration Balm to deep clean the briar. The product works to clean, enliven and protect the briar. I hand rubbed it with my fingers and worked it into the finish. I wiped it off with a soft cloth. I buffed the bowl with a micromesh cloth to polish it. The briar really began to have a rich shine. I took some photos of the bowl at this point to mark the progress in the restoration. I set the bowl aside and worked on the stem. I took it out of the deoxidizer and rinsed it under warm water to rinse off the mixture. I blew air through the stem and ran water through it as well to rinse out the mixture there as well. The stem still had some oxidation spots but it was all on the surface as seen in the first two photos below. I painted the surface of the stem with the flame of a Bic lighter to lift the tooth marks. One of the benefits of the lighter is that it burned off the sulfur on the surface of the stem. I sanded out the tooth chatter with 220 grit sandpaper until the tooth chatter was gone. I filled in the tooth marks with black super glue and set the stem aside to let the repairs cure.  When the repairs had dried, I sanded the repaired spots with 220 grit sandpaper to smooth them out and blend them into the surface of the stem.I polished the stem with micromesh sanding pads – wet sanding with 1500-2400 grit pads and dry sanding with 3200-12000 grit pads. I wiped the stem down after each pad with a damp cloth to remove the sanding dust. I used the Before & After Pipe Polish to remove the small minute scratches left in the vulcanite. I finished by wiping the stem down with a final coat of Obsidian Oil and set it aside to dry. I put the stem back on the pipe and carefully worked the stem over with Blue Diamond to polish out the remaining small scratches. I gave the bowl several coats of Conservator’s Wax and the stem several coats of carnauba wax and buffed the pipe with a clean buffing pad to raise the shine. I hand buffed it with a microfiber cloth to deepen the shine. The pipe polished up pretty nicely. The finished pipe is shown in the photos below. This interesting Italian made Harvey Futura pipe came back to life nicely with the restoration. This one will be going on the rebornpipes store shortly. It will be a great yard pipe or working pipe. The dimensions of the pipe are Length: 5 1/2 inches, Height: 1 3/4 inches, Outside diameter of the bowl: 1 1/4 inches, Chamber diameter: 3/4 inch. Thanks for walking through the restoration with me.

An Unexpected Find in Athens – A Savinelli Oscar Aged Briar 614


Blog by Dal Stanton

When I first laid my eyes on this Savinelli, I didn’t realize it was a Savinelli.  I was in Athens, Greece, tooling through the Monastiraki market area at the foot of the Acropolis, next door to the Forum.  As I explored I found one shop nestled on a tree-covered side street with a table set on the front sidewalk with all kinds of paraphernalia. It drew me like a bee to pollen!  Two congenial men were sitting behind the table conversing in Greek. I assumed they chatted about all manner of life, family, politics…, and what is usually the case, as I drew near, their conversation stopped, and the English began.  As I perused the table with strategic disinterest, I saw one pipe on the table that did not grab me too much.  The shop owner asked me if I was interested in pipes?  I said yes, and he said that he had many more that he didn’t know what to do with…. “Oh, my…” – my heart skipped a beat!  In his wonderfully, friendly, thick Greek accent and manner of hospitality, he said, ‘Come with me.”  As he pulled a chain out of this pocket a full ring of keys followed. He led me down a narrow, alley walkway along the side of the shop.  We stopped and he unlocked a side door that led immediately up the stairs to an ‘upper room’ where, as he explained with a subdued, secretive flourish, he seldom brought customers.  When we entered the room, I saw why.  It was his special place – family pictures were arrayed everywhere, icons of the Greek Orthodox Church were given special deference as they hung from places of honor. Many shelves full of his collections.  He pulled my attention away from the array to a slew of pipes displayed in a case hanging on the wall and arranged beneath on a cluttered table. I took it all in.  He explained that his good friend, from Armenia, asked him to sell off his collection of pipes and he gave me a price for everything, including the wall-hanging display case.  With gratitude to him for his generous offer, I had to decline as I was flying back to Sofia and would have no room in my luggage for all of it.  I suggested to him that his friend could possibly make more money if he sold the pipes and case separately and he confided that he knew little about pricing pipes individually.  As we talked, I discovered that he was a board member of a foundation that assisted orphaned children Armenia – the home of his friend.  That opened the door for me to share that I too, was a board member of the Daughters of Bulgaria Foundation and I shared with him why I collected pipes – to restore and sell them to benefit the Daughters and their children.  He encouraged me to go through the collection and pull out pipes that interested me and make him an offer.  In Mediterranean culture, very much like Bulgarian culture – relationship is supreme, and we had talked of things near and dear to our hearts.  Pipes became the doorway to a deeper fellowship that we both understood and appreciated.   I left the shop owner with a firm handshake, a parting picture, and an appreciation for him and his journey. I also left his shop with some special pipes and friendly prices 😊: Lorenzo Carnevale Sanremo of Italy (on top in picture below), a Savinelli Roley Pocket Pipe (bottom, below), and a sorry looking ¾ Bent Billiard (center below) that appeared to have no name – at least in the dim light of the upper room, I could not see any.  It appeared the pipe had been left out in a sun-drenched field through a few seasons – showcasing a terribly oxidized stem and a bleached-out bowl, but the old boy had nice form and I liked him.  It struck me that this pipe reminded me of a Southern US epithet, ‘Bless his heart, he can’t help how ugly he is!’  The ‘Bless his/her heart’ is the softener or honey before the hard news! The pipes were unwrapped when I returned home to Sofia.  I was anxious to look at them, take some pictures, and to do my normal ‘information intake’ for each pipe I collect so that I can remember later when they emerge from the ‘Help Me! Basket’ heading to The Pipe Steward worktable.  With a magnifying glass in hand, I discovered that the ‘Bless his heart’ charity pipe was a hidden prince with great potential – a Savinelli Oscar Aged Briar 614 of Italy.  The Oscar is a popular line of the well-known Italian pipe family, Savinelli.  I was surprised and happy to see what I could do to help him out!  On the left side of the shank was stamped in cursive script, ‘Oscar’ over ‘AGED BRIAR’.  The right side of the shank was stamped the Savinelli ‘S’ logo on the left, and to its right was shape number ‘614’ over ‘ITALY’. I took some other pictures of the Savinelli Oscar on my worktable to catalog his condition when he arrived from Athens. Fast forward now nearly a year. Many of my restoration projects start because a pipe is commissioned, and it is plucked from the ‘Help Me!’ Basket.  This often happens when a pipe  listed in the “For Pipe Dreamers Only!” on The Pipe Steward site attracts someone.  Or, here in Bulgaria, when folks are in our home and know about my pipe restoration work, they often will pour through the many pipes in the ‘Help Me!’ Basket (and boxes 😊) in search of just the right one!  That was the case with the Savinelli Oscar. Taylor, a colleague and blooming pipe man, wanted a couple of pipes for himself and one for a friend in the US. The favorite he chose, or did the pipe choose him 😊(?), was the Savinelli Oscar which is now on my worktable.

To learn more about the Savinelli Oscar Aged Briar, I look at the Savinelli Pipe Shape guide to identify shape 614.  I locate it in the chart and it looks to be a 3/4 Bent Billiard. I circle the 314 in the chart and it’s interesting to see the other Bent Billiards nearby to compare.  I’m thinking that the Oscar is a 3/4 Bent but I am surprised to see, that comparing it to all the other Savinelli bent shapes, it seems to be the most fully bent shape that Savinelli offers – at least from this chart.Then, with a simple search on Google using the name and the shape number, 614, I’m hoping for an Oscar 614 in pristine condition to guide the restoration of this sad boy.  I find this example of an Oscar Aged Briar 614 formerly on the AntiqueAuctionsNow website – a nice looking classic bent stem Billiard.Ah ha! As I look closely at the picture above, it cues me into the possibility of the Savinelli Shooting Star stem stamp on the Oscar – impossible now to see with the heavy oxidation.  I look to another regular place, PipePhil.eu, which gives me more information and understanding.  The Savinelli Oscar line, along with three others, is marked with the Shooting Star stamp.Looking at the overall condition of the pipe, I have already noted the oxidation and a hope that the Shooting Star stamping can be salvaged.  The bit also has very minor tooth chatter with a single dent on the upper button. The bowl almost appears like it has been bleached by the sun and the nomenclature stampings on the sides of the shank are thin and will take some care not to diminish more.  The rim has some scorching over the left quadrant and has minor cake build up in the chamber.  The internal rim has a smart bevel that I will refresh.  I’ll ream the chamber to get down to the briar for a fresh start. A few small fills are detected on the lower shank and a significant divot is evident on the shank end, just below to the left of the Savinelli ‘S’ logo.

The first thing to address is the stem’s oxidation.  I add the Oscar’s deeply oxidized stem with a batch of other stems into a bath of Before and After Deoxidizer to remove the oxidation on the stem.  Aligned with each stummel, the stems are put into the solution for a few hours.  The Savinelli Oscar is on the left.  I’m hopeful that the Before and After Deoxidizer might uncover the Shooting Star stem stamp – hopeful, but doubtful.After a few hours, using a toothpick, I fish out the Oscar’s stem and allow it to drip-drain the Before and After Deoxidizer.  I then wipe the stem with cotton pads and mineral spirits (light paraffin oil here in Bulgaria) which removes layers of raised oxidation off the surface.  Miraculously, the Savinelli shooting star stamp appears out from underneath the oxidation!  It is very thin and I’m not sure there’s enough depth left of the stamp for acrylic paint to find purchase. Continuing with the stem, I use Before and After Fine Polish then Extra Fine Polish to further condition the stem.  With both, I place some polish on my finger and work it in on the vulcanite surface until it is absorbed.  After each, I buff it further with cotton pads.  The stem looks great – though the Shooting Star stamp doesn’t look like there’s much I can do with it but save what’s left of it!Turning to the stummel, I use undiluted Murphy’s Oil Soap to scrub the surface and rim with a cotton pad.  Whoops!  Usually, I do the reaming before this – I’ll need to back track.  I rinse the stummel with cool tap water and it cleaned up very well – the rim gunk is gone.  I decide to apply a coat of light paraffin oil (mineral oil) to the surface to rehydrate the briar.  I set it aside for a while for the paraffin oil to absorb fully.  The grain looks good. Now, back to the chamber cleaning that I missed.  I use the Pipnet Reaming Kit to ream the light cake out of the chamber. I use only the two smaller blades.  I then fine tune the reaming with the Savinelli Fitsall Tool.  Finally, I wrap 240 grade paper around a Sharpie Pen and sand the chamber down to the fresh briar.  I finish the chamber cleaning by wiping it with a cotton pad wetted with isopropyl 95%.  The pictures show the progress. To the internal cleaning – using cotton buds, pipe cleaners and a shank brush I clean the mortise.  I also use a dental spatula to scrape the mortise walls to remove gunk.  With my day ending, to give a more thorough cleaning, I use a kosher salt and alcohol soak to penetrate the tars and oils left in the bowl and mortise overnight.  I fill the bowl with kosher salt – not iodized that leaves a taste.  I give the bowl a shake with my hand covering the top to disperse the salt.  I then form a wick to stuff down the mortise to draw out the oils and tars.  I stretch and twist a cotton ball to do this.  With the cotton wick in place, I place the stummel in an egg crate to keep it steady.  I then use a large eyedropper to fill the chamber with isopropyl 95%.  I wait a few minutes and top it again.  Time to call it a day. The next morning, the soak has done the job of pulling even more oils and tar out of the internals.  I dump the used salt in the waste and use a paper towel and shank brush to wipe out the expended salt left in the bowl and mortise.  I also blow through the stummel to make sure there’s no old salt left.While I’m inspecting the stummel after removing the salt, looking at the scratch by the nomenclature and small chip on the shank end, I notice what I didn’t see before.  A stamp on the lower side of the shank that is nearly invisible.  I can make out only some of the stamping with a magnifying glass – Sav… over Produ….  I look again at the examples of the Oscar from Pipephil.eu (above) and sure enough, it shows a lower stamp as well – Savinelli over Product.  I take a picture to show what I found.I take a few shots of some problem areas – a cut or possibly a hairline crack, just above the shape number, the internal bevel of the rim is worn from lighting practices.  I want to refresh the bevel and rim, which is already in good shape.  I begin with the divot on the shank.  I decide to apply a drop of regular, clear super at the divot to build it out.  I’ll let it cure a few hours before sanding and blending it.  After a couple of hours, the shank end divot has set up enough for me to work on the cut/crack.  I’m not convinced it is a crack – a cut is more likely I think.  I decide to lay a very small line of regular super glue over the cut using a toothpick to guide the glue.  It will be close quarters with the shape number when I sand it down, but I think it will look better.After the glue cures, I first use 240 grit paper to sand both the divot and the cut down to the briar.  I stay on top of the glue mound as much as possible to not impact the briar surface.  I then use 600 grit paper to smooth and blend.  These were small issues, but I feel better for addressing them – the Savinelli Oscar will look good.  Now, I turn to the rim.  It’s in good condition but there are some nicks and dents on the edge of the rim.  There is also a darkened area from minor scorching from lighting the tobacco. (11 o’clock in the first picture).  In this area, the internal bevel has also eroded.  I decide to give the stummel a very light topping using 600 grade paper to reestablish the lines of the rim and bevel. After this, I wrap first a 120 grade paper around a tapered wooden disk to provide a hard surface behind the paper to cut a more distinct bevel.  I work the 120 paper around the damaged bevel area to shape the bevel.  I then follow in the same manner with the wooden disk, 240 then 600 paper to finish the rim and bevel repair.  The rim now looks fresher – I like it. I put the stummel aside for a time to address the stem.  After deoxidizing the stem, discovering the Shooting Star stamp hanging on by threads, I look closely at the stem and the bit is in good shape.  There are only shadows of tooth chatter and one small dent on the upper button lip.  To bring up the button dent, I try painting it with a flame from a Bic lighter to expand the vulcanite enabling me to sand out the dent.  After several attempts, I was still left with a dent.  I decide to apply a drop of Black Medium KE-150 CA glue to the dent.  I put the stem aside to let the patch cure. While I wait for the stem patch to cure, I pick up the stummel and start the external finishing process by first using a light grade sanding sponge to work the surface – addressing minor nicks.  I then wet sand the stummel using micromesh pads 1500 to 2400.  I follow this by dry sanding using pads 3200 to 4000, then 6000 to 12000.  I take pictures after each set of 3 to show the progress. I enjoy this part of the restoration process!  With each cycle of micromesh pads, the beauty of the grain emerges.  This Oscar has attractive grain.  I am drawn to the knot pattern on the heel as it gravitates outwardly and up the stummel with lateral grain having a feathered texture – bird’s eye grain as well on the upper bowl.  Very nice! With the black CA glue cured, I now return to the stem.  Using a flat, needle file, I remove the patch area above the vulcanite and redefine the button.  I follow with 240 grade paper to erase the tracks left by the file.  I then use 320 grade paper followed by 600 grade to smooth the area further.  I flip the stem and sand the lower bit with 600 grade paper to remove the light tooth chatter.  Finally, I buff the entire stem, watchful of the Shooting Star stamp, using 0000 steel wool.  The pictures show the progress. Following the steel wool buff, I now wet sand the stem with micromesh pads 1500 to 2400. After finishing with this first wet sand cycle, I was bushwhacked by oxidation resurfacing on the Oscar’s stem!  Ugh!!  After all the sanding and roughing up the surface, sometimes it’s difficult to see the oxidation left behind until the fine tuning with the micromesh pads. The first picture below doesn’t show what I can see with the eye – a deep shadow of oxidation.  I take another picture adjusting the aperture, so you can see the source of my frustrations!  I send a note to Steve with questions and his response was good news and bad.  The good news was that it wasn’t my process but that Savinelli stems are notoriously difficult to exorcise oxidation.  The bad news is that I simply will go back to work, sanding with 240 grit, 320, 600, then again steel wool buff and application of Before and After polishes….  I did all these, including a few times going through the first set of 1500 to 2400 micromesh pads, so that I am finally satisfied with the Savinelli Oscar’s stem.  Yet, I haven’t rid the oxidation 100%, but time to move on!Again, at the end of the first cycle of 3, wet sanding with micromesh pads, 1500 to 2400, I then dry sand with pads 3200 to 4000, then 6000 to 12000.  After each cycle I apply Obsidian Oil to the (almost!) exorcised vulcanite.  When I look at the stem now, it looks pretty good! With the Savinelli Oscar’s bowl back in front of me, I begin the final sanding and waxing process.  I first mount the felt buffing wheel on the Dremel and apply Tripoli compound to the briar’s surface.  I first set the speed at the slowest speed, purge the wheel with the Dremel’s tightening wrench’s sharp edge, and I apply the compound.  I apply compounds, which are abrasives, not waxes, in a methodical, circular motion, not applying too much downward pressure on the wheel but allowing the compound, speed and the wheel to do the work.  Following the Tripoli, I apply Blue Diamond compound in the same manner, with a cotton cloth buffing wheel mounted on the Dremel, set at about 40% speed.  During the application of the compounds, I love to watch the natural shine of the briar start reflecting like glass.  The beauty of this Savinelli’s grain is popping. With the help of my wife, the picture below shows the application of Tripoli compound.  You can see how I use the sheen of the lamp to ‘steer’ the compound around the briar surface allowing the action to buff out the microscopic lines and nicks.  With the compounds finished, I buff the stummel with a clean felt cloth to remove the compound dust left behind.  The last restoration I did of the L. J. Peretti Oom Paul (see LINK) which I added to my own collection, I utilized for the first time the Before and After Restoration Balm.  I liked the results a lot.  The Restoration Balm maintains the lighter hues of the natural grain but enriches the patina.  I use the Balm with the Savinelli Oscar as well.  I reunite the stem and stummel and I put some Balm on my fingertips and I work it into the briar surface as well as the stem.  As I rub, the Balm thickens until it has almost a stickiness.  After application, I lay it aside for a while to allow the Balm to do its thing – while it’s doing its thing, I take a picture.  I then wipe it down and buff it with a cotton cloth pad.  I like the rich luster that the balm brings up from the briar. The vulcanite stem also responds very well.I follow the Restoration Balm by applying carnauba wax to the stem and stubble.  I mount the Dremel with a cotton cloth buffing wheel dedicated to applying wax.  With the Dremel speed still at 40% I apply several coats to the pipe and follow the wax with a hearty hand buffing using a micromesh cloth that bring up the shine even more.

This surprising Savinelli Oscar find in Athens turned out better than I expected.  The grain is eye-catching, with plentiful bird’s eye captured around the bowl.  The knot on the heel though, grabs my attention.  The deep briar that I see now is a far cry from the sun-bleached conditioned that I found it in.  This Savinelli Oscar will go into the Pipe Steward Store and since Taylor commissioned this pipe as his first pipe, he will have first dibs.  The restoration of this Italian Savinelli Oscar Aged Grain 614 will benefit the Daughters of Bulgaria – helping women, girls, and their children, who have been trafficked and sexually exploited.  The first picture is a reminder of before and after.  Thanks for joining me!
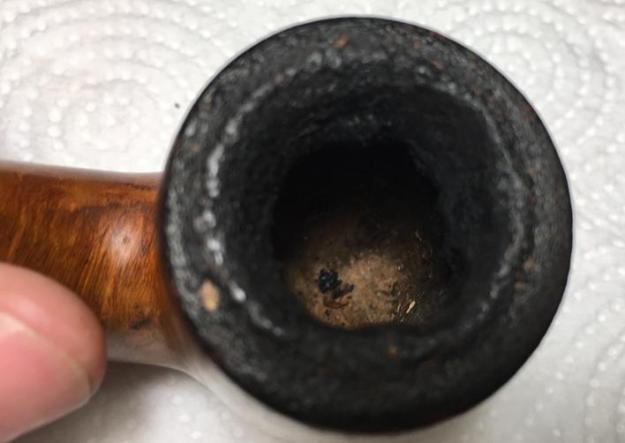
Paresh’s Grandfather’s Pipe #7 – Charatan’s Make De Luxe 140 Billiard


Blog by Steve Laug

I have repaired 6 of the 7 older pipes (1937-1950s) left to Paresh by his Grandfather. I have enjoyed working on and researching them. His Grandfather was a pipeman who worked for the Indian Railroad. Paresh recently learned that his Grandfather smoked a pipe. This 7th pipe is a Charatan’s Make De Luxe 140 Billiard with a taper stem. I took photos of the pipe before I stated to work on it. The bowl was in rough shape with a series of cracks running down two spots on the bowl – one on the left side at the centre of the top and running down the bowl and connecting with another crack just right of the centre of the bowl at the back. It was a U shaped crack that went all the way through the bowl. The finish was dirty and the rim top had damage and lava on the rim top. The bowl was out of round. The outer edge of the bowl was damaged from knocking out against hard surfaces. The stem had tooth marks on the top and underside near the button. The stem had the CP stamped on the left side. The rim top had been cleaned and the bowl reamed. There was still some cake in the bowl. Abha (Paresh’s wife) had once again done a great job cleaning the finish. She had scrubbed it with Murphy’s Oil Soap and removed all of the debris and dust from the smooth finish. The cracks showed up on the outside of the bowl and also on the inside of the bowl. The inner edge of the bowl was damaged and slightly out of round. I also took a close up photos of both sides of the stem. You can see the tooth marks on both the top and underside of the stem just in front of the button. The surface of the stem is lightly oxidized.The stamping is readable. On the left side of the shank reads Charatan’ Make over London, England over De Luxe. Next to that is the shape number 140 next to the stem shank junction. There was no stamping on the right side of the shank. I looked up an article on determining dates of manufacture of Charatan Make pipes (https://pipedia.org/wiki/Dating_of_Charatans). That article helped me date this pipe with some level of certainty to the Rueben Era Charatan made between the years 1910-1960. I quote from the portion of the article that gave the identifying characteristics of that era. I quote in full.

Identification of a second era pipe (Rueben’s era, 1910-1960)

Pipes belonging to this period are rare, however is it possible to come across one. They can be distinguished from a pipe of the first era mainly because their larger size. Their characteristics are similar to the ones of the previous era.

1) Pipes can be larger, up to the dimension of a Dunhill group 5

2) The mouthpiece is tapered or saddle.

3) No double comfort

4) the CP logo is engraved so that the C enters the P

5) Absence of £ on the pipe shank (note that from 1955 all the pipe imported in the USA by Lane has it, however that stamping is not synonymous of the Lane era).

6) Absence of the letter X on the shape code engraved on the shank (for ex. 2502 and not 2502X)

7) Absence of letters DC after the shape number (for ex. 2502 and not 2505DC)

8) Absence of the engraving “MADE BY HAND” on the shank (introduced for the first time in 1958)

9) Presence of the writing “CHARATAN’S MAKE LONDON ENGLAND” on 2 lines

10) The CP logo is finer than in following eras

All ten of the items in the above list apply to the pipe in hand. From the stamping on the stem where the C enters the P to the missing L which places it as pre-1955 to the lack of a double comfort bit all help to place this pipe in this time period.

With that I reread Paresh’s biographical write up on his Grandfather once again. There Paresh stated that his Grandfather had visited England in 1946 and that later after 1947 the British left India for good. Many of the Superior Officers gave his Grandfather pipes as parting gifts. I am fairly confident that this was one of those gift pipes given to him around 1947. I am including his bio now as part of the background information on this pipe. Here is Paresh’s tribute.

Respected Sir,

Now that the first batch of my Grandfather’s pipes has reached you, I would like to share my memories of him with you, the aim being to provide you with an insight to his personality, the era in which he lived, and a brief history associated with the pipes that I have inherited from him.

My Grandfather, Ananta (named after an exotic seasonal white flower having lovely fragrance), was born in a small coastal town of Konkan region of Maharashtra, India, in 1918. These were very turbulent times when India’s freedom struggle against British rule was gathering momentum and the atmosphere was charged with “Quit India Movement”. Having completed his graduation from Bombay, he joined Railways in 1937. This also marked the beginning of his journey into the world of pipe smoking!!!!!

Having seen his potential, in 1945, he was sponsored by the Government to visit England, for gaining further experience and expertise in his profession. This was a period when India’s Independence was round the corner and efforts were being made to train Indians for various administrative appointments in future Independent India. He returned back to India after a year, in 1946 and with him came some pipes that he had purchased in England. I believe a few of his Petes, Barlings, Charatans and GBDs are from this visit.

In 1947, when the British finally left India for good, my Grandfather was gifted pipes by his British peers, subordinates and Superior Officers as a parting gift. He stayed in touch with a few of them over all these years, even visiting them in 1959-60. Some of his later era Charatans and Barlings and Petes are from this trip. He quit smoking in early 1970s (before I was even born!!!!) and his pipes were packed up. There were a number of pipes which were used as TINDER for lighting fires (CAN’T BELIEVE IT…… I have not overcome my grief of this loss till date!!!!!) due to ignorance!!!!!!

My Grandfather was a very strict disciplinarian and temperamental (I did not know this as he was neither when dealing with me as I am the youngest of all his grandchildren!!!!!! He was always the most understanding and loving person in my life). I later learned that in his office, he was not to be disturbed when his pipe was lit, as he would be in his thinking/ contemplating mode while it was just the opposite as he lit his pipe in the evening while at home, when he would be at his relaxed best!!!!.

The interesting part is that neither of us knew that we each smoked a pipe until after his demise in Jan 2018!!!! In our culture, to this day, smoking or alcohol consumption is socially never talked about (mute acceptance!!!). It was during his last rites that absent mindedly I lighted my pipe and looking into the flickering flames of his funeral pyre, remembered and recollected all the wonderful memories and talks that we had shared. No one said a word to me about my lighting up a pipe!!!!!! Immediately thereafter, I rejoined my duty station. A few days later, my wife, Abha, received a box from my Uncle with a note that said “Grandfather would have loved Paresh to have these”. This box contained a collection of his fountain pens and 8-10 of his pipes (since then as my folks are winding up his belongings, I have received 2-3 packets and a large number of pipes, some in decent condition and some in unspeakable state). Abha immediately messaged me with pictures of these pipes and pens. I had been collecting and restoring (no major repairs, though) fountain pens since long and immediately recognized some of them as highly collectibles, however, pipes were a totally different ball game! I was inexperienced with no knowledge/ information regarding various brands/ pipe makers, shapes and materials. I knew nothing about the value of these pipes, nothing about pipe restorations, nothing about caring for them; I mean zero knowledge about collecting pipes. I smoked some real cheap Chinese pipes which were readily and unfortunately, the only ones, available in India and some inexpensive pipes from eBay India!!!!! Also regular pipe cleaning, pipe rotation, pipe cleaners and such things were unknown to me.
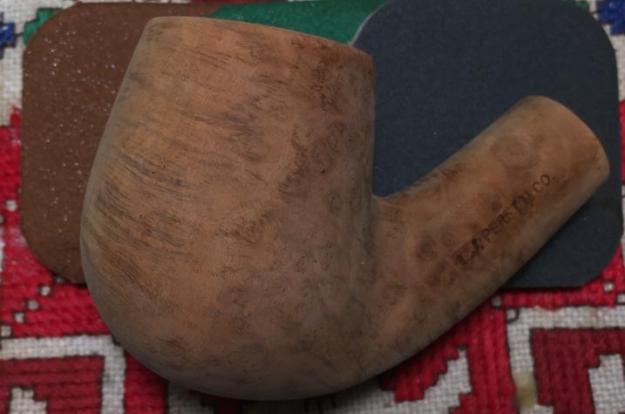
Thus, to know more about the REAL pipes, I embarked upon the journey of exploring finer nuances of pipe brands/ makers, their history and watching “How to videos” on packing a pipe, cleaning, repairing and caring for ones pipes. I found it extremely interesting and satisfying. It was while meandering through this confusing quagmire of pipe world that I came across rebornpipes.com website and eventually established contact with you, Mr Steve, who has since been my mentor, guide and GURU, making this journey a wonderful and satisfying experience.

Sir, there is one more thing that I need to thank you for and that is when you asked me to write a brief about my grandfather and his pipes, I realized how little I knew about him, in fact, knew nothing, as I was not even aware that he was a “pipeman” as no one in my family ever spoke about it being taboo subject and since he had quit a long time before I was even born!!!! This led me to ask the elders in my family, questions on the subject and came to know the above details. I cannot thank you enough for prodding me to get to know my grandfather and his pipes a lot better. Sir, these pipes of his, with your help and guidance, will remain with me forever in mint condition…
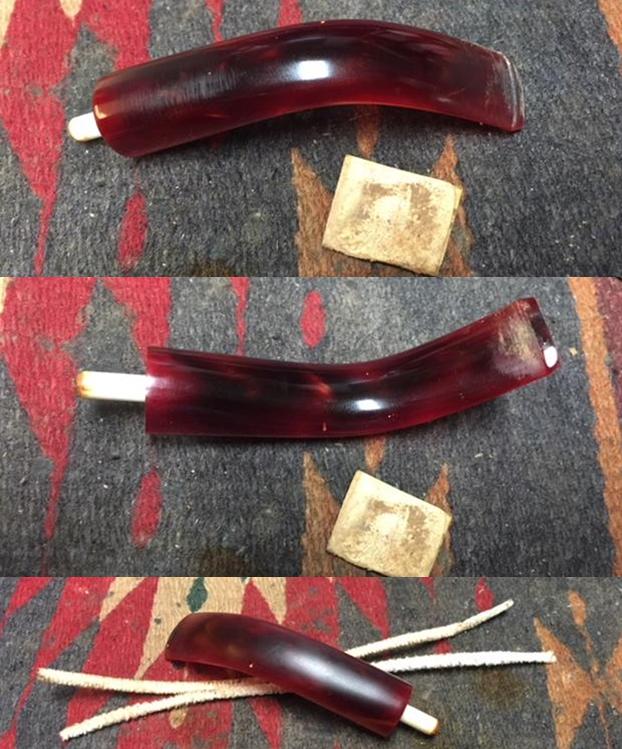
I began work on the pipe by cleaning up the reaming of the bowl first with a PipNet pipe reamer. I began with the smallest cutting head and worked on cleaning up the inside of the bowl. While I cleaned it up the cracked section of the bowl came loose. I cleaned up the unbroken portion of the bowl and the broken chunk with a Savinelli Fitsall Pipe Knife to remove the remnants of cake left behind. I cleaned off the edges of the broken chunk of bowl and the remaining bowl with alcohol on cotton swabs. I used a slow curing clear super glue to repair the cracked chunk of briar. I painted the edges of the bowl and the chunk with the super glue and pressed the chunk in place in the bowl side. I held it in place until the glue had set and the chunk was firmly in place. I wiped the bowl down with alcohol on a cotton pad to wipe off the excess glue. I sanded the repaired cracks with 220 grit sandpaper and smoothed out the finish to blend in the repairs with the rest of the bowl. Once I had cleaned up the repairs I touched them up with clear super glue to fill in the divots in the repair. I sanded the bowl with 220 grit sandpaper to smooth out the repair further after the touch ups. I took pictures of the repair at this point to show the progress.I topped the bowl with 220 grit sandpaper and a topping board to smooth out the finish on the top. I removed the damaged areas, removed the glue that had squeezed out from the repairs and cleaned up the rough areas on the outer edge of the rim.I polished the bowl with micromesh sanding pads to blend the repairs into the finish of the bowl. I wet sanded with 1500-2400 grit pads and dry sanded it with 3200-12000 grit pads. I wiped it down with a damp cotton pad after each grit sanding pad. I mixed up a batch of JB Weld and applied it to the inside of the bowl with a paper clip and a folded pipe cleaner. I worked it into the inside of the cracks and lined the bowl walls all around the cracks until it was smooth. I set it aside to let it cure.Abha had done a great job cleaning out the internals of the mortise and shank with pipe cleaners, cotton swabs and alcohol. I ran a pipe cleaner through the shank to remove any of the debris that I had loosened when reaming the bowl. It was pretty clean so it did not take much as the interior was clean.I worked Before & After Restoration Balm deep into the briar of the bowl and shank to clean, enliven and protect it. I worked it in with my fingertips and set it aside for a few minutes to let the balm work. I wiped it off and buffed it with a soft cloth to polish it. The briar really began to have a deep shine and the grain began to shine through. I took photos of the bowl at this point to mark the progress in the restoration.   I worked on the inside edge of the rim with a folded piece of 220 grit sandpaper to smooth out the damage to the edge of the bowl.I stained the briar with a Dark Brown aniline stain and flamed it with a Bic lighter to set the stain. I repeated the process until I had even coverage on the bowl. I wanted to leave the stain pretty opaque to blend the repaired crack into the rest of the briar. I let the Dark Brown stain dry. Once it was dried I gave the bowl a coat of Conservator’s Wax, let it dry and then buffed the bowl by hand. I repeated the wax until the pipe looked good to my eye. I set the bowl aside and began the work on the stem. There were some deep tooth marks in the surface of the stem near button. I cleaned the areas with alcohol and filled in the marks with black super glue.  When the super glue cured I sanded it with 220 grit sandpaper to blend it into the surface of the stem. I used a needle file to sharpen the inside edge of the button.I sanded the repaired areas with 220 grit sandpaper to smooth out the repairs and blend them into the surface of the surrounding vulcanite.I cleaned out the airway on the stem with pipe cleaners and alcohol to clean out the tar and oils. It did not take much work to remove all of the remaining tars because Abha had done a really good job cleaning out the stem.I polished the stem with micromesh sanding pads – wet sanding with 1500-2400 grit sanding pads and dry sanding with 3200-12000 grit pads. I wiped the stem down with Obsidian Oil after each sanding pad and set it aside to dry. I polished it with Before & After Pipe Polish – both Fine and Extra Fine polishes. I wiped it down with some Obsidian Oil to fine the polishing process. With the stem polished I put it back on the pipe and lightly buffed the bowl and stem with Blue Diamond. I gave the bowl multiple coats of Conservator’s Wax and the stem multiple coats of carnauba wax. I buffed the pipe with a clean buffing pad to raise the shine and hand buffed it with a microfiber cloth to deepen the shine. The pipe polished up pretty nicely. I left a little oxidation around the CP stamp on the stem so as not to damage it. The finished pipe is shown in the photos below. It is the final pipe from Paresh’s Grandfather’s pipes that I finished and I will get them packed up and sent across the sea to India where he can carry on the legacy. I know that he is looking forward to having them in hand and enjoying a bowl of his favourite tobacco in memory of his Grandfather. Thanks for walking through the restoration with me as I worked this pipe over.