Blog by Dal Stanton
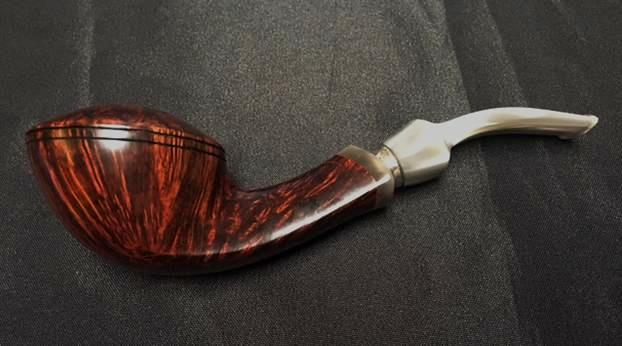
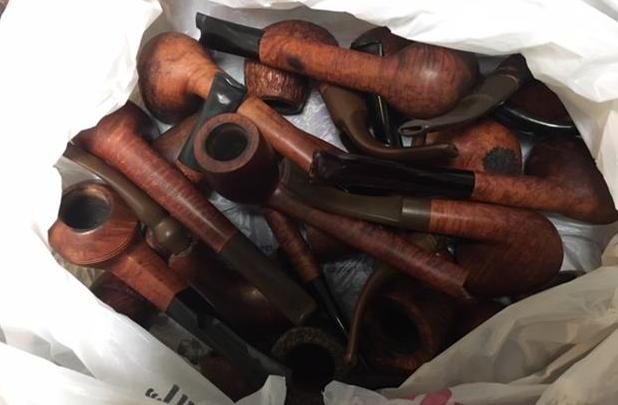
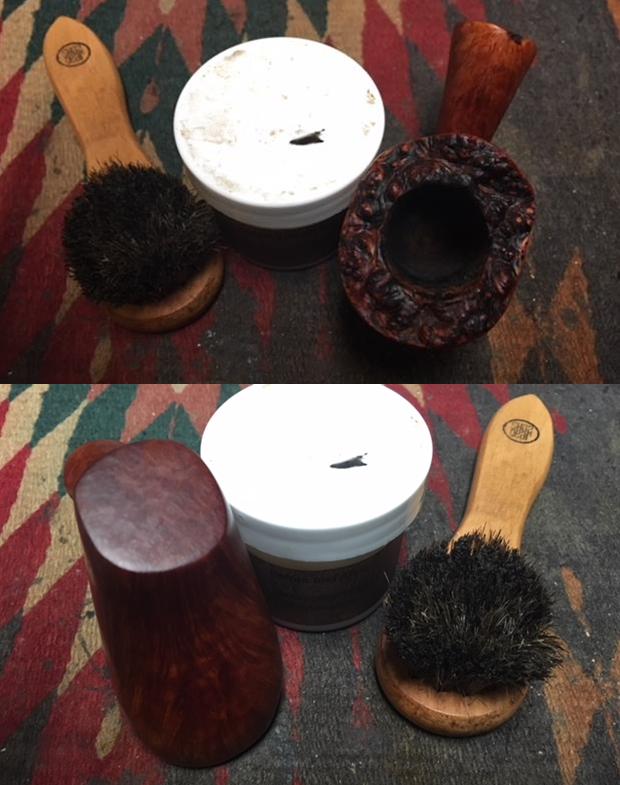
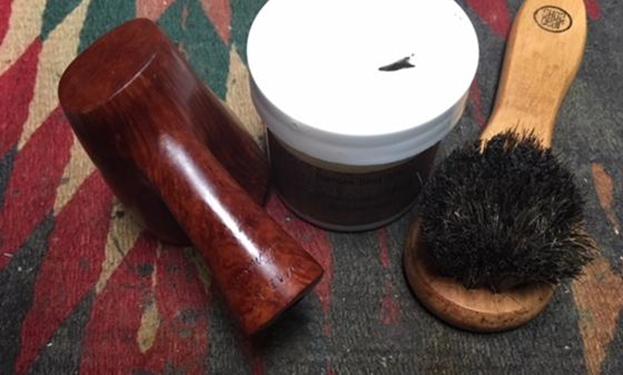
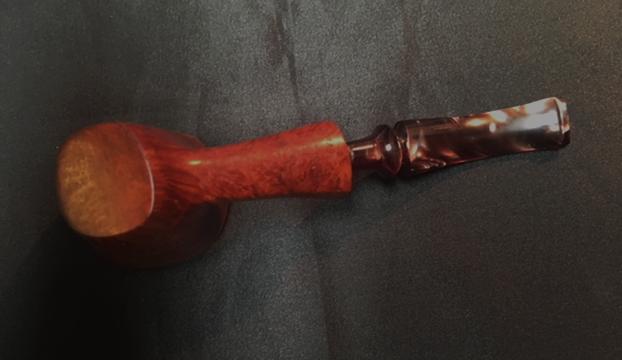
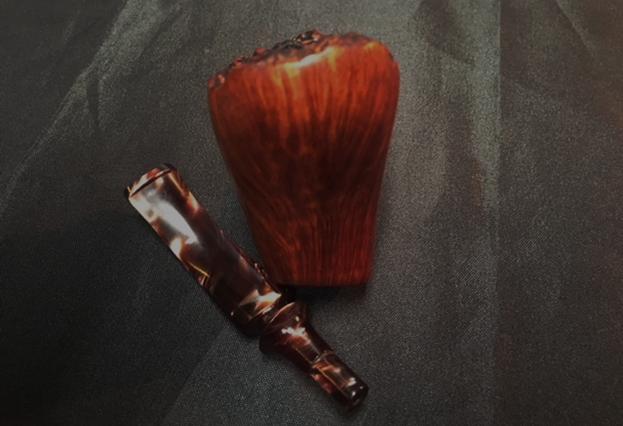
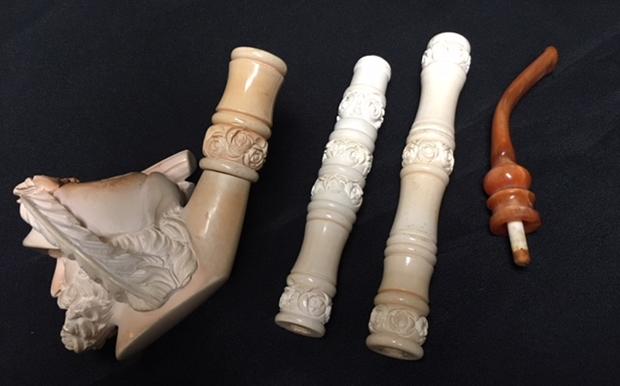
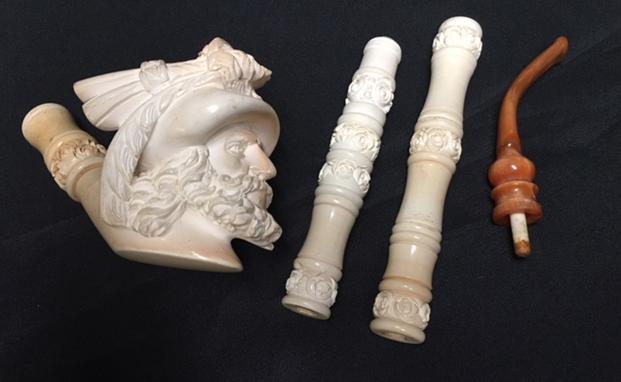
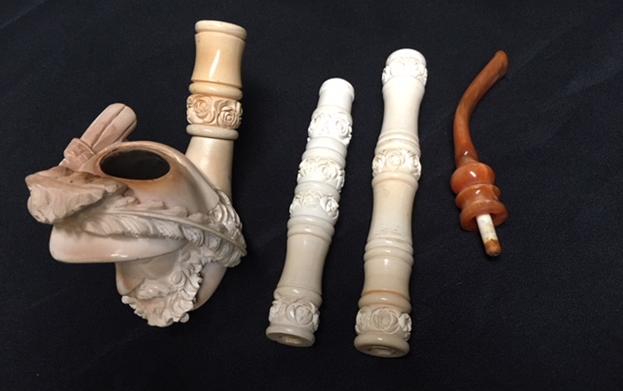
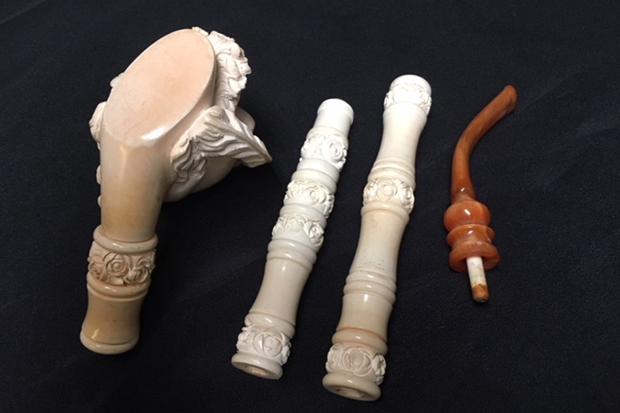
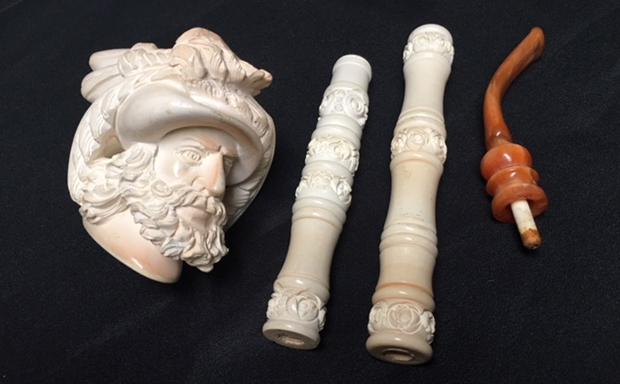
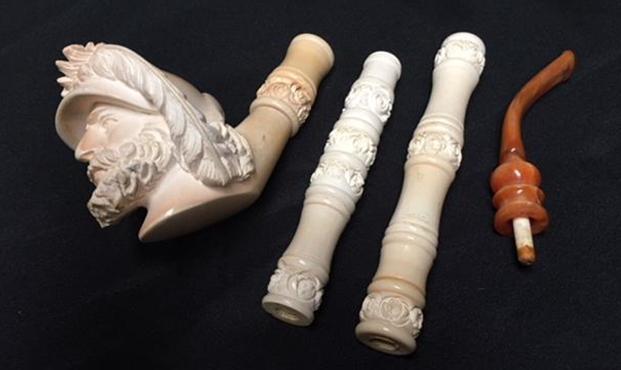
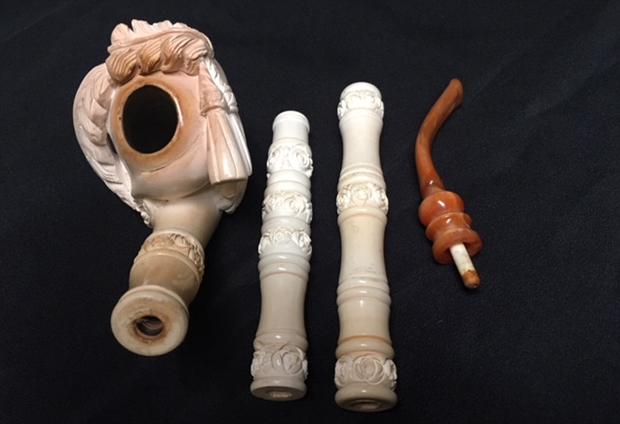
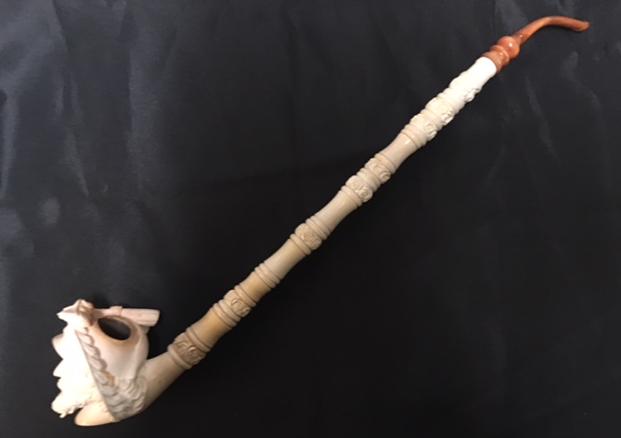
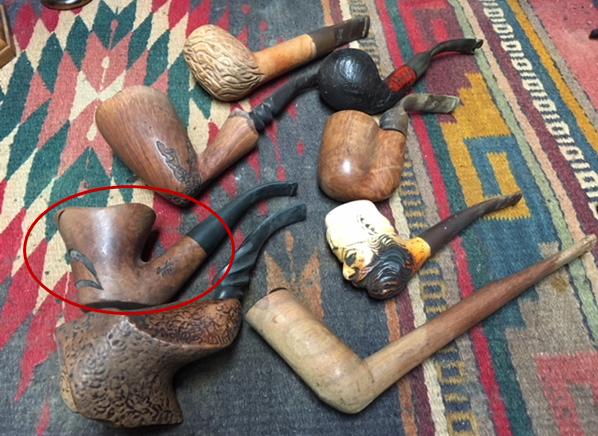
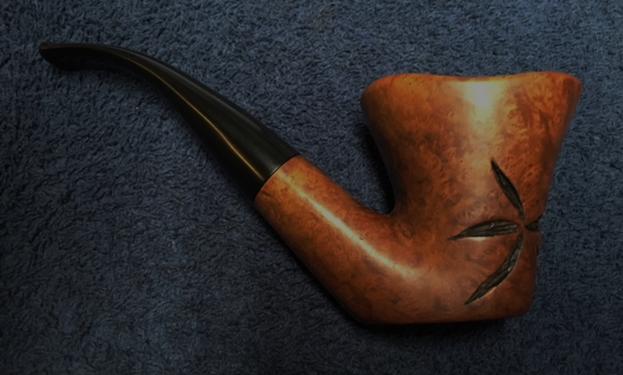
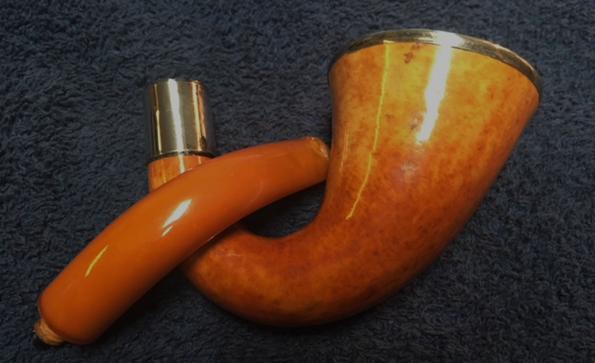
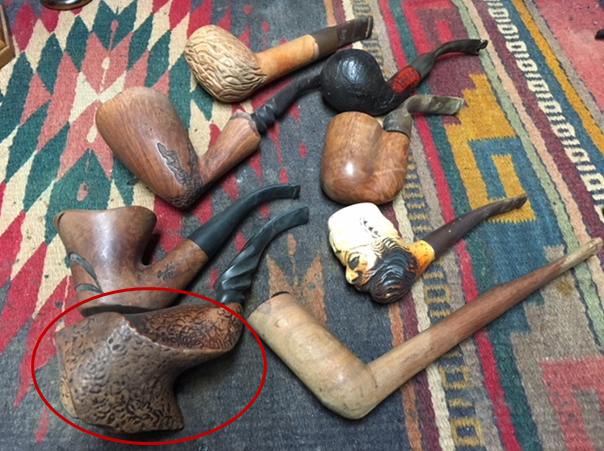
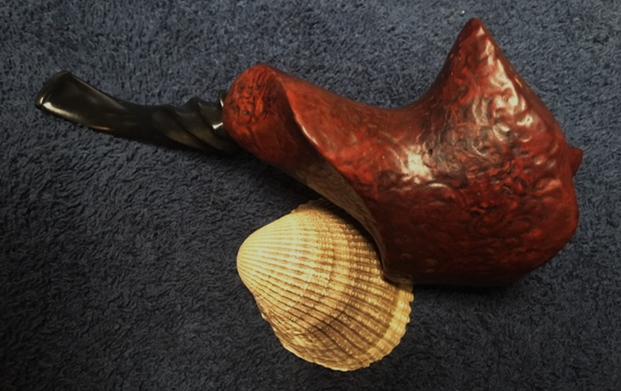
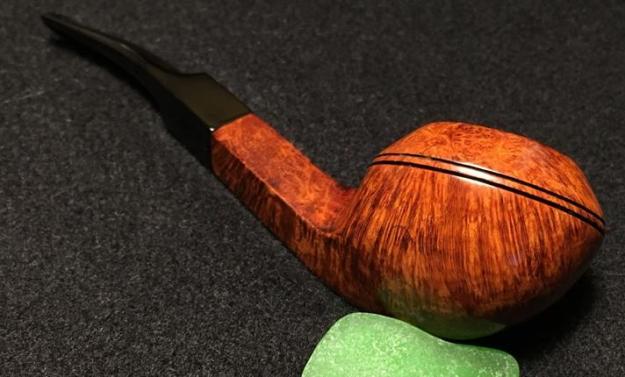
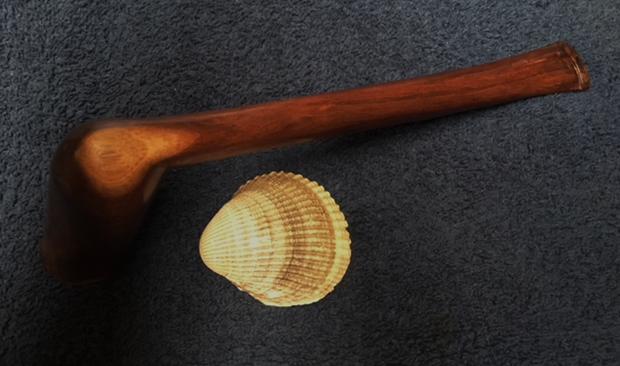
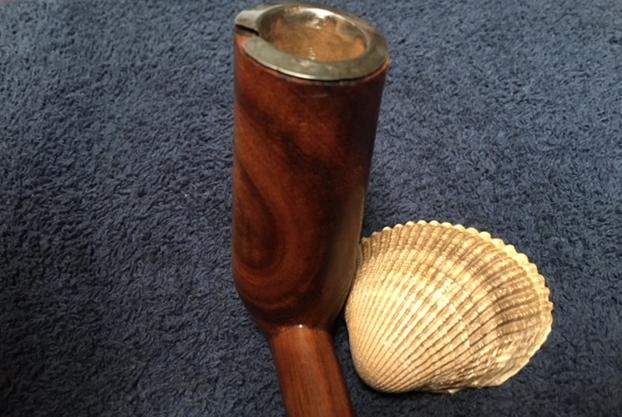
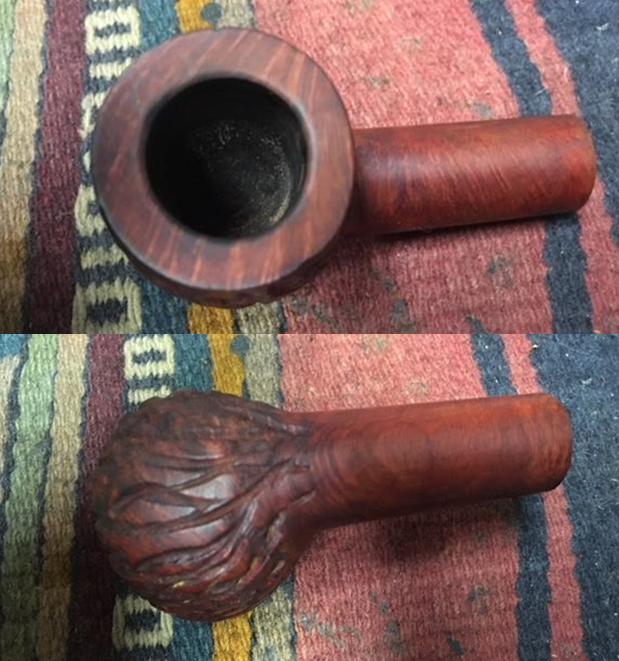
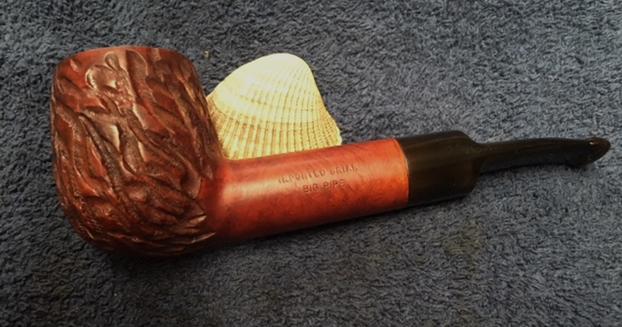
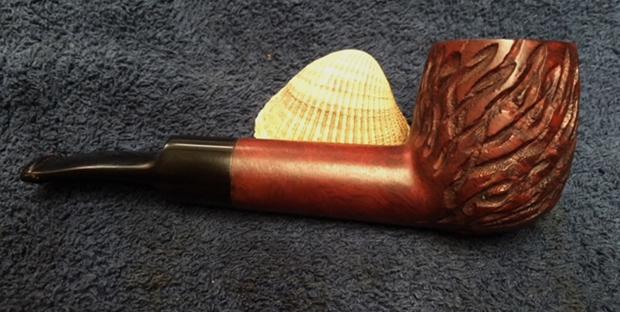
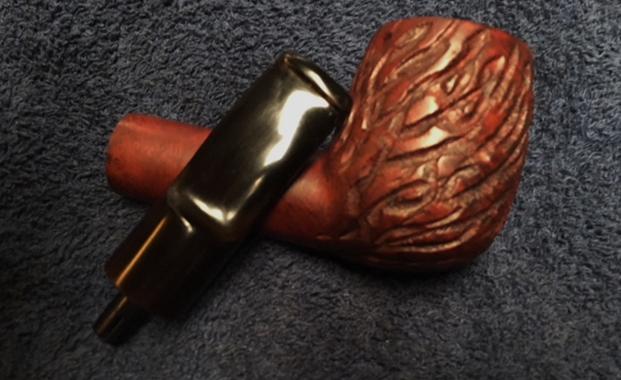
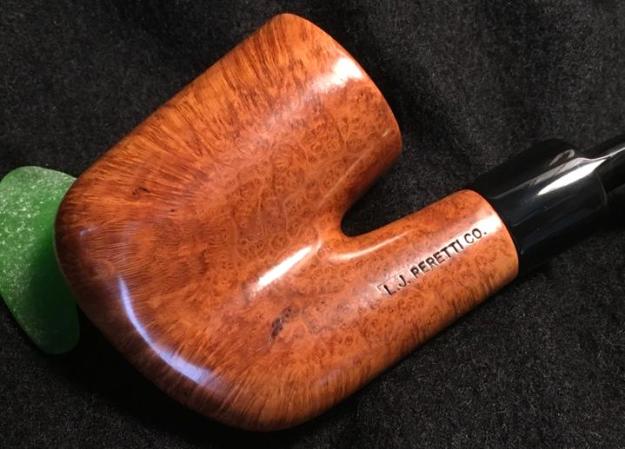
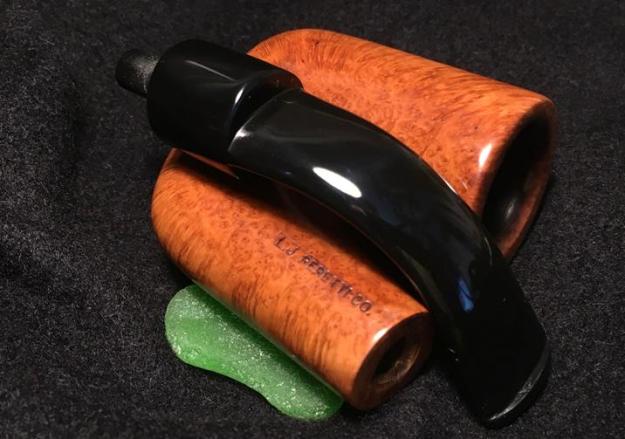
As with people, when you look at pipes, the way you look at them can be cursory – like walking down the sidewalk in the city center of Sofia. You see colors, fashions, groupings of people, a quick intake of information and not much of the information reaches longer term memory in our brains. I’ve been looking at the Peretti Lot of 10 that has been my focus over the past weeks as I’ve recommissioned each, one by one. Interestingly though, not until a pipe reaches the status as “the one” on the worktable do you really start seeing it. 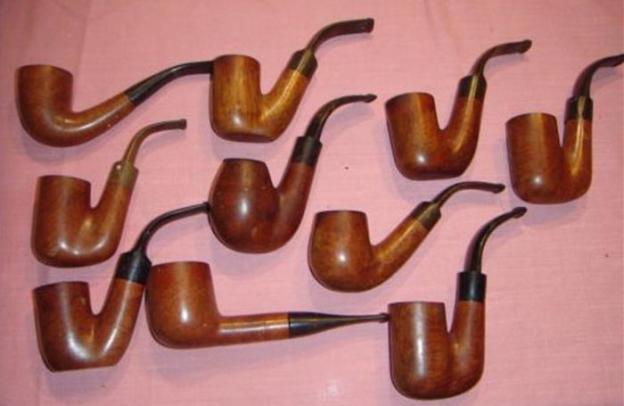 The difference might be like walking the city sidewalk as I described above and then comparing this to looking at your new granddaughters for the first time just after their births – which I’ve had the pleasure of in the past several months! Oh my, you look at toes, each one, fingers, how the ears hang and curl…. There is no end to the enjoyment of taking in the fulness of the detail! When looking at the ‘the one’ close-up – the detail of an estate pipe in need of restoration, the detail will not be tented with the rose-colored glasses affixed when looking at grandchildren! Here are the pictures I took from the city ‘side walk’ of the next Peretti Oom Paul now on my worktable when I was cataloging the Peretti Lot of 10 when they arrived here in Bulgaria together.
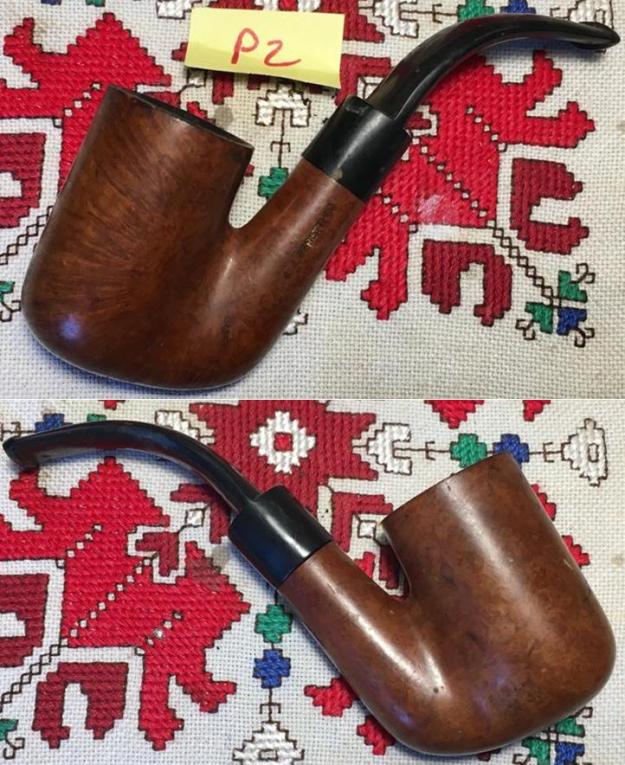
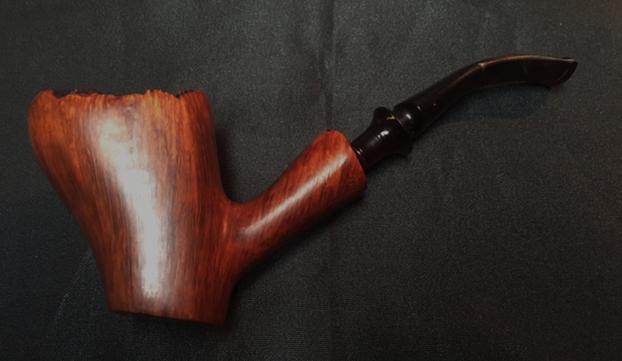
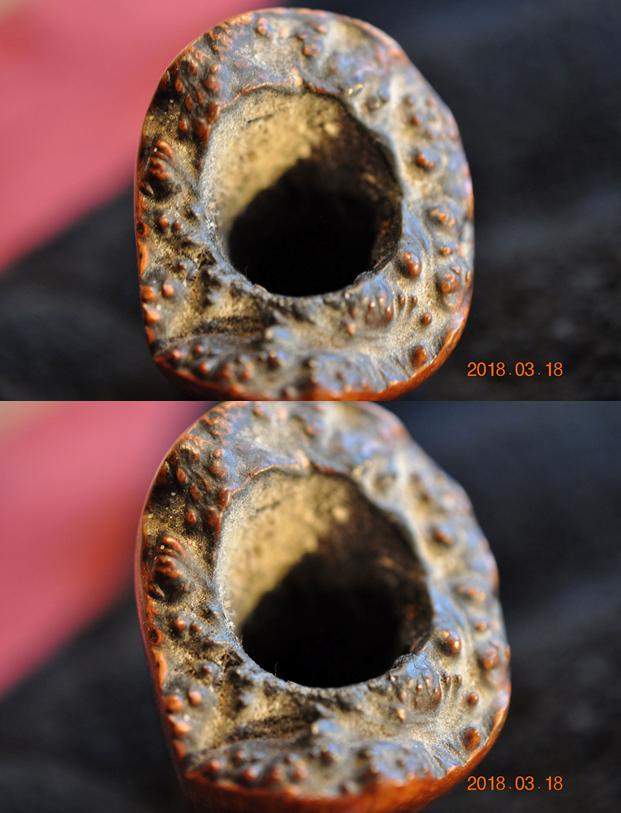
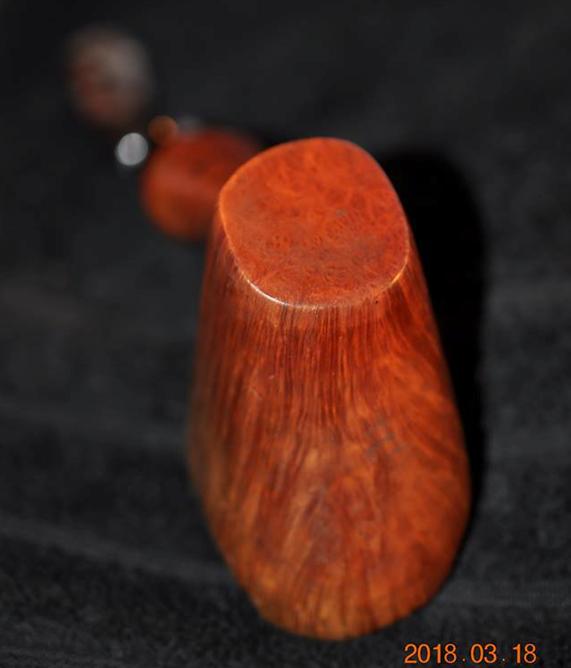
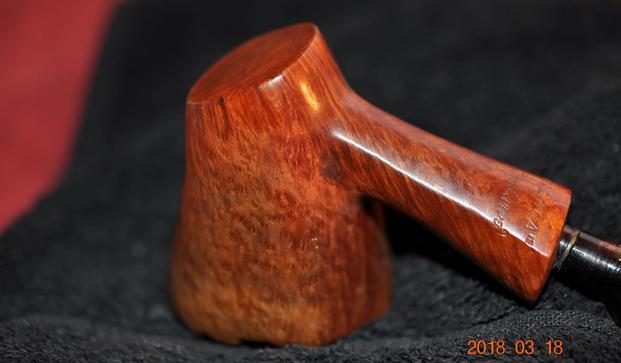
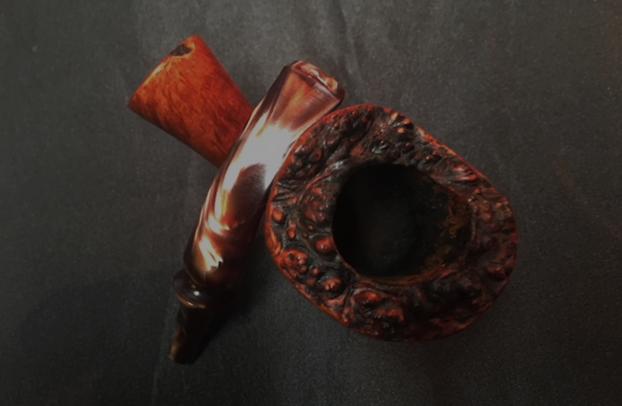
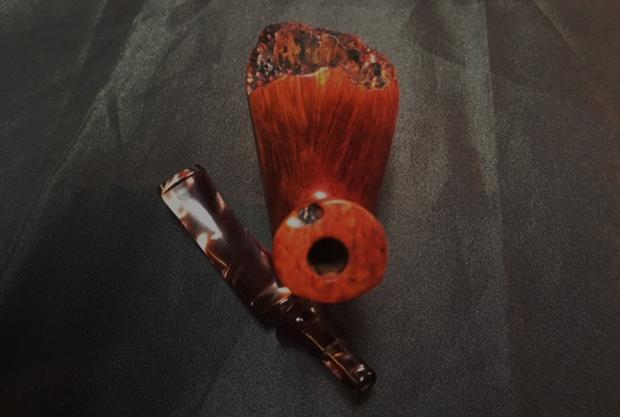
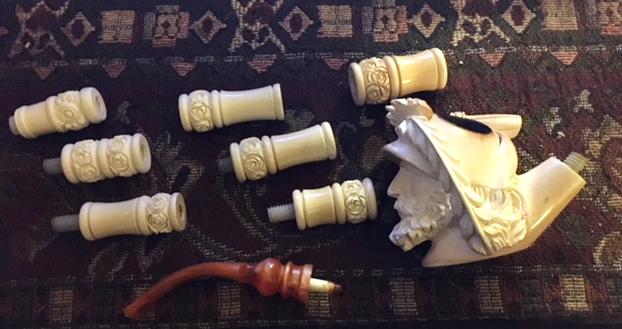
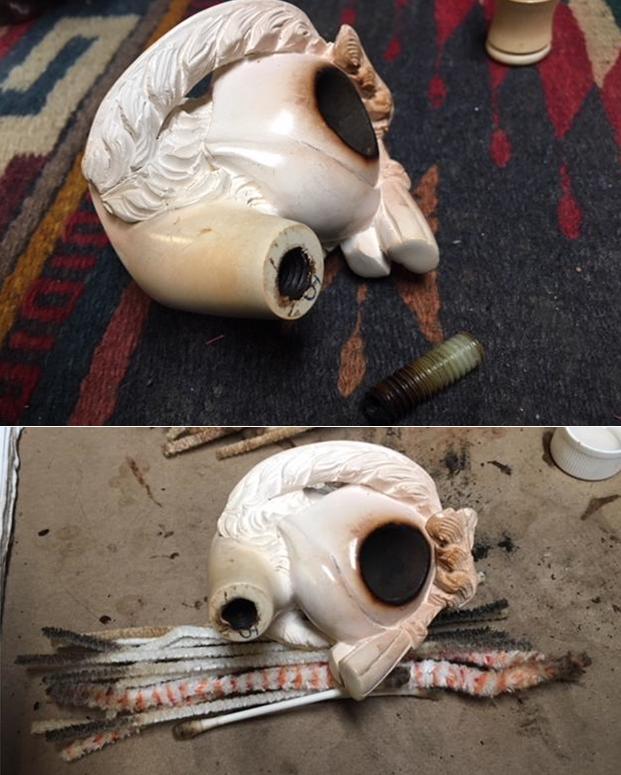
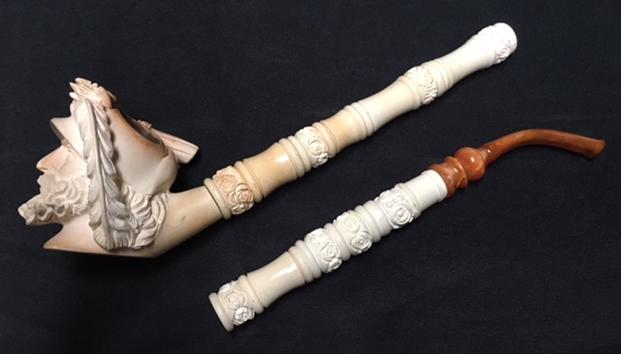
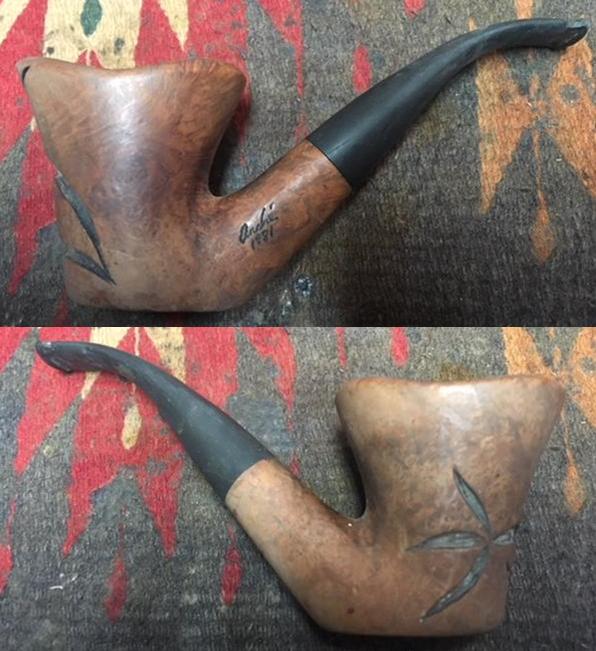
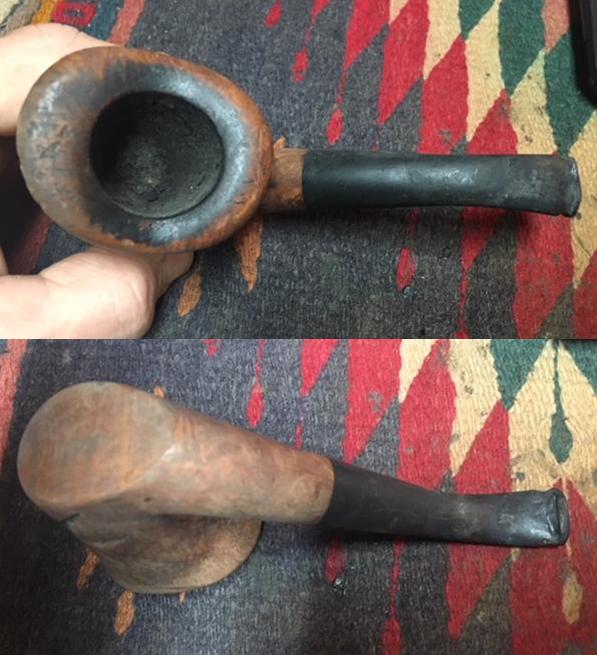
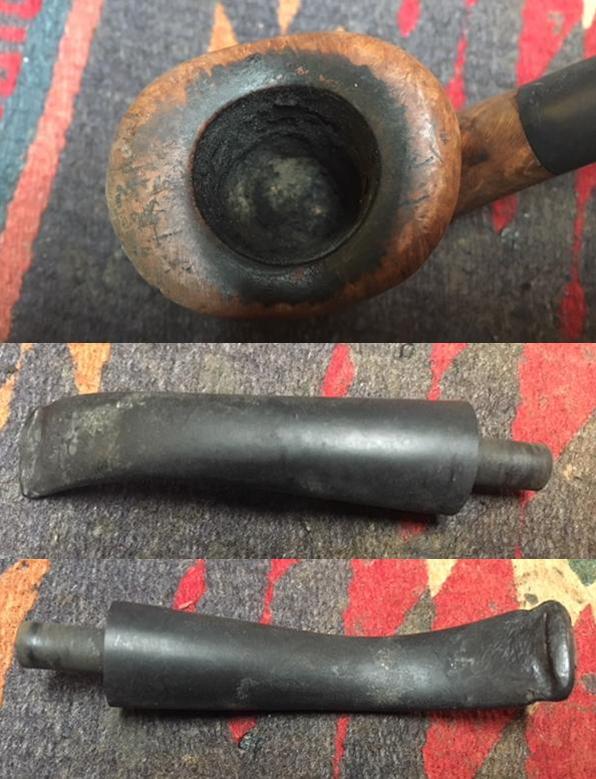
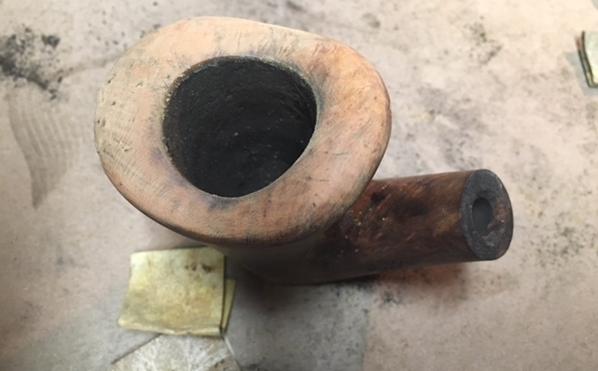
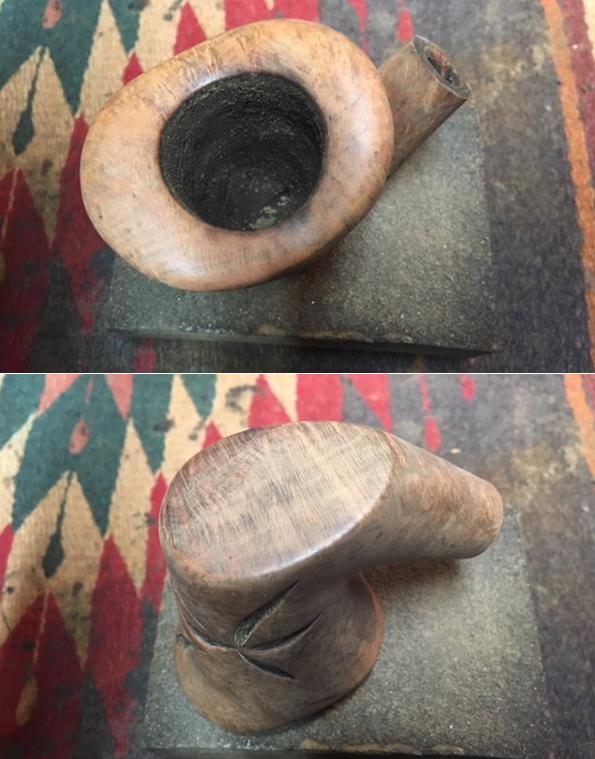
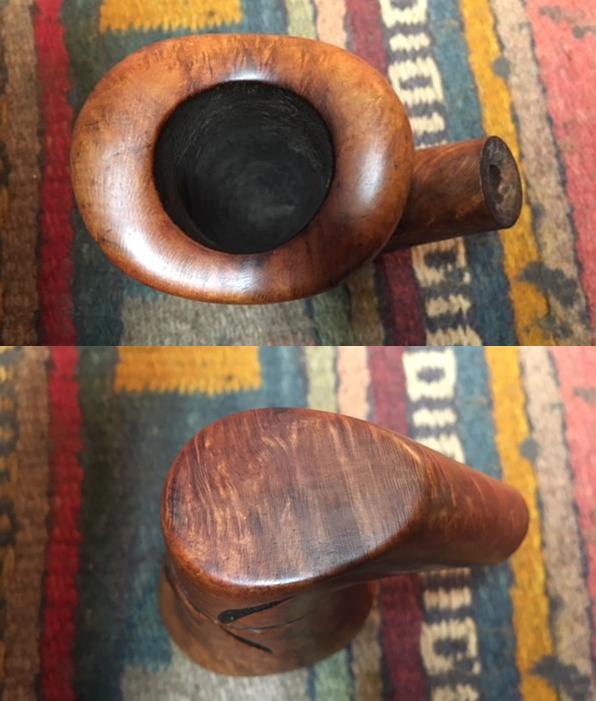
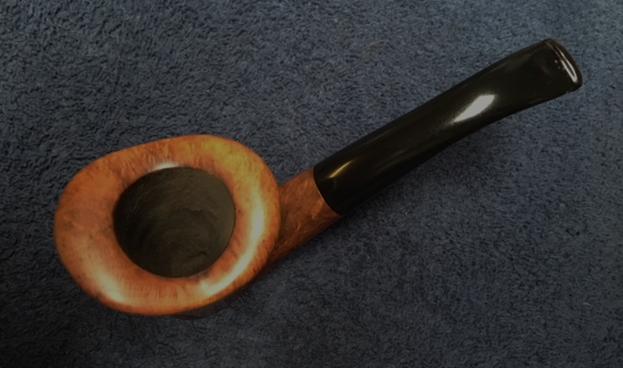
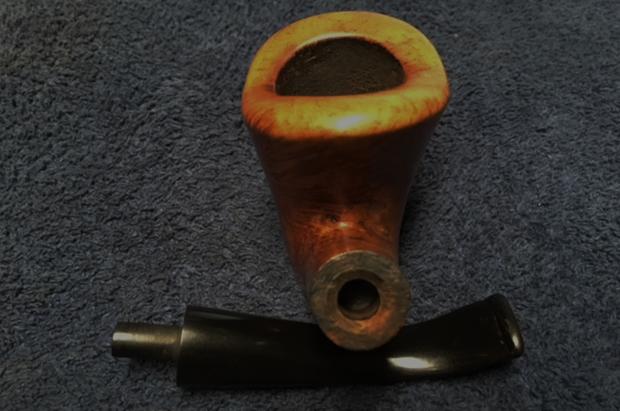
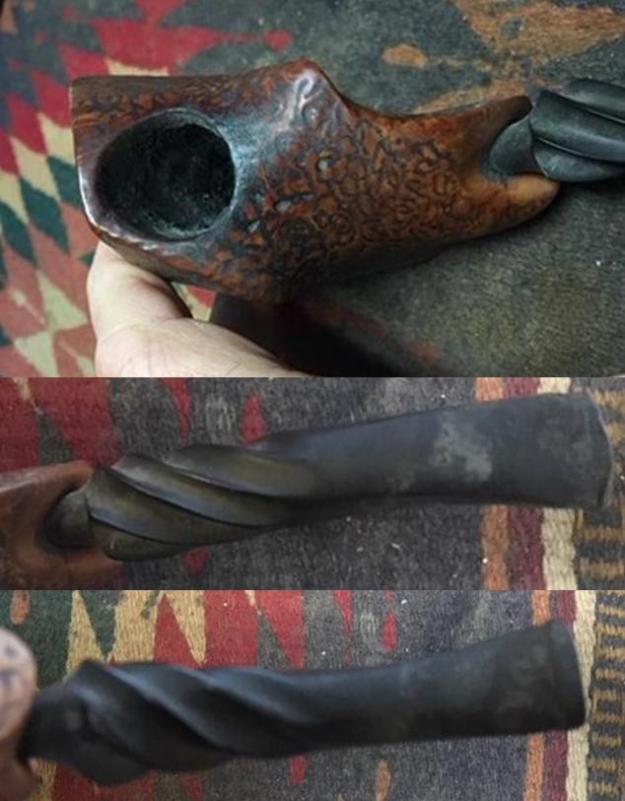
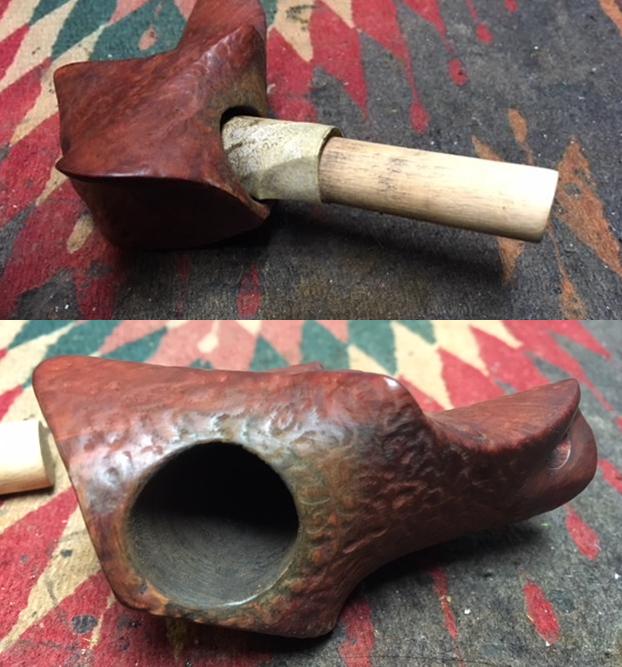
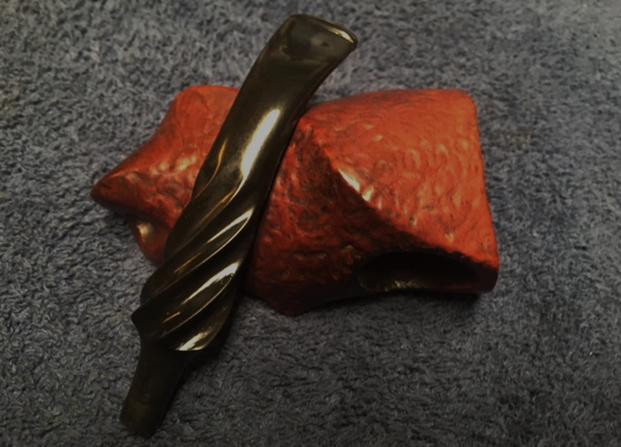
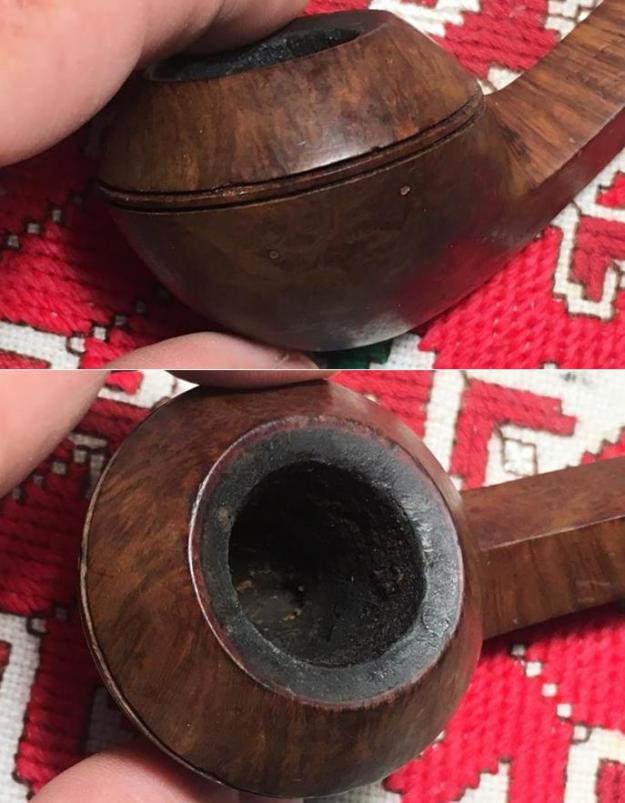
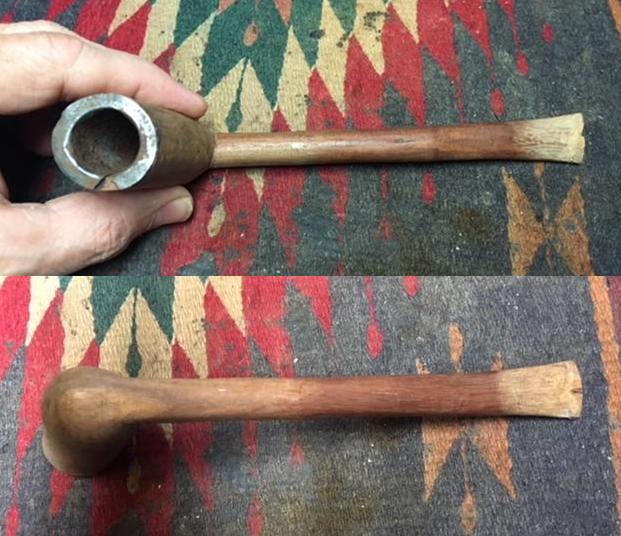
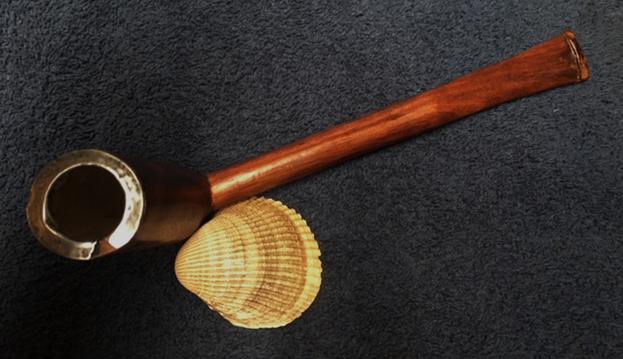
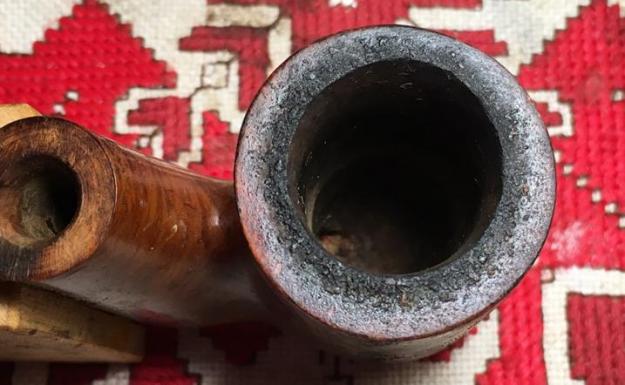
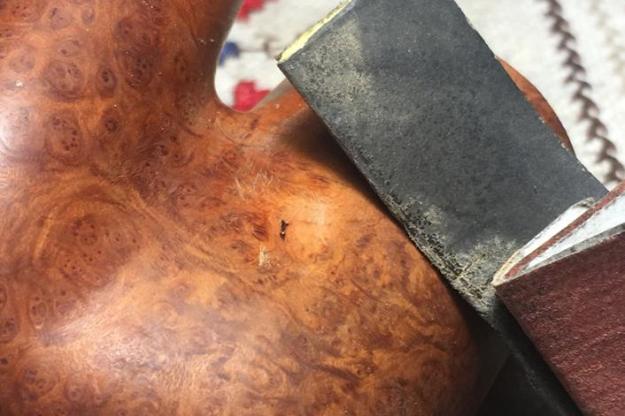
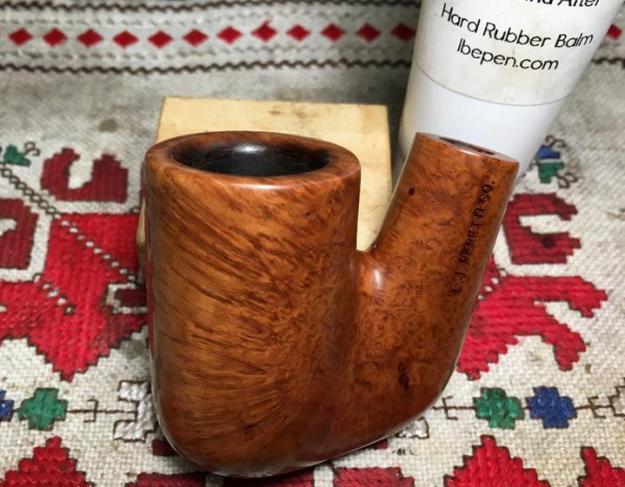
 After restoring several of these Perettis, all having the same steward, I’ve become familiar with what to expect. Each Peretti has the former steward’s ‘MO’. This Peretti falls in line. It has thick cake in the chamber and thick, crusty lava covering the rim. The left side of the chamber/rim is scorched and charred from the tobacco lighting habit of excessively pulling the fire over the side and damaging the briar. Even as I do what I can to correct it, this Peretti will also leave the worktable with the same limp as his 9 brothers and cousins did in different degrees – an imbalanced and out of round rim/chamber. Additionally, this Peretti Oom Paul’s stem is dented and chewed with almost the same ‘finger prints’ as the others. These are the issues stemming from the former steward’s pipe smoking practices. And yet, the stummel shows great potential – like the others, the grain on this large Oom Paul stummel is quite eye catching under the dirt and grime. I see normal nicks and bumps of being a faithful servant in the rotation – the briar will clean up well, I’m sure of this.
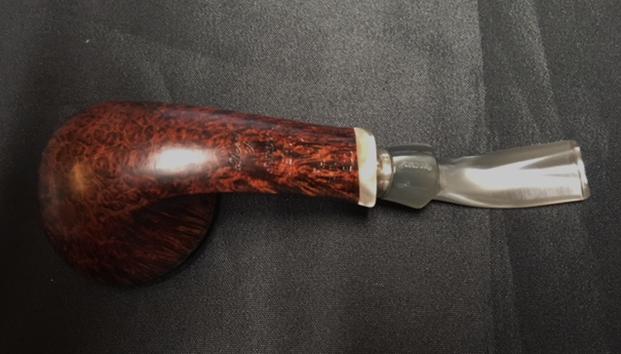
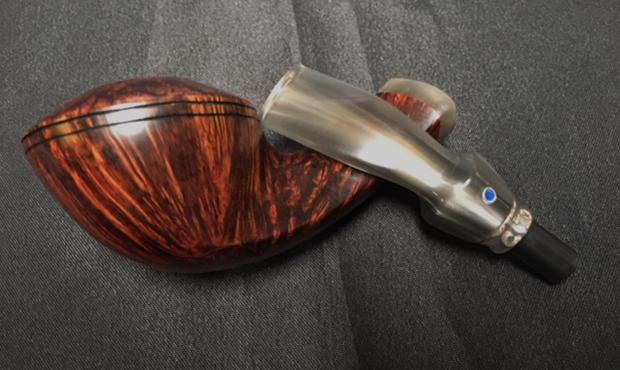
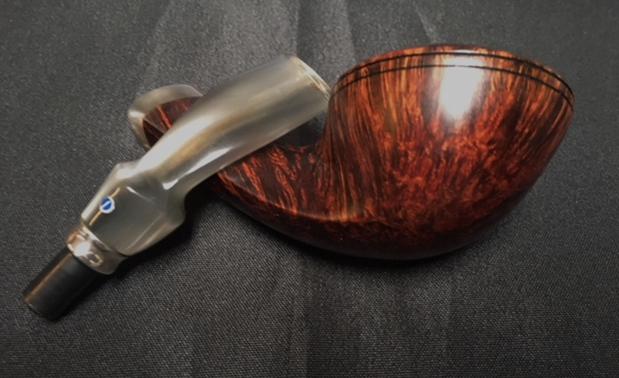
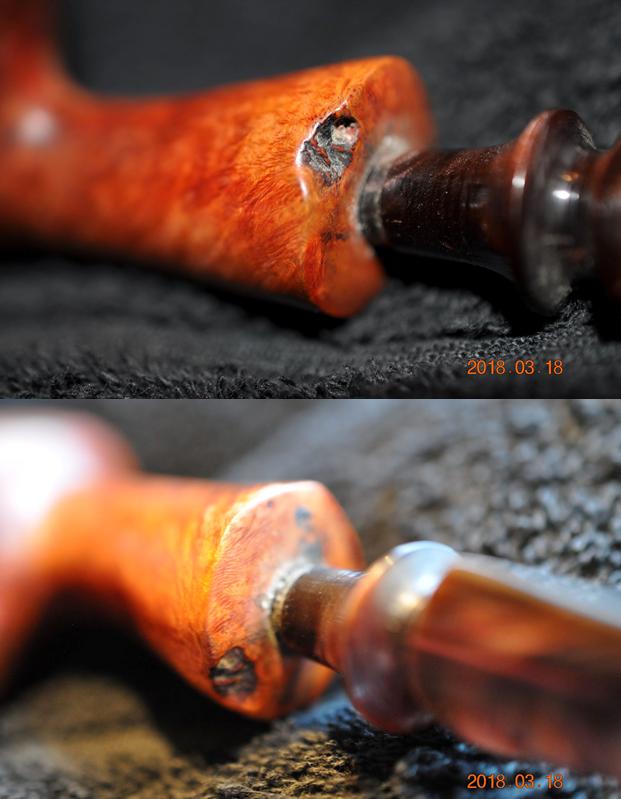
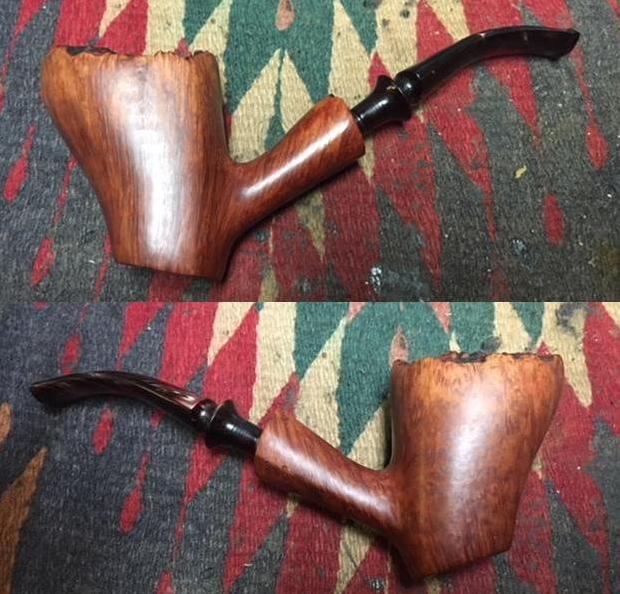
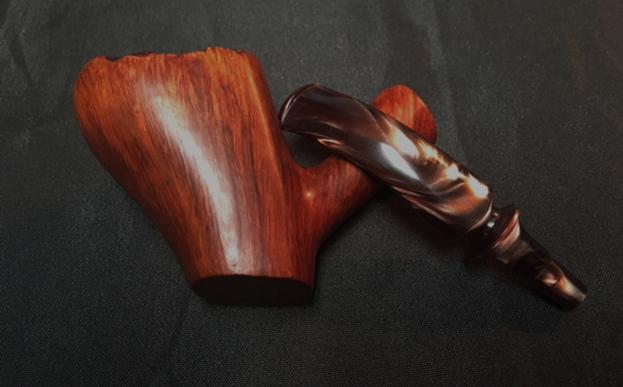
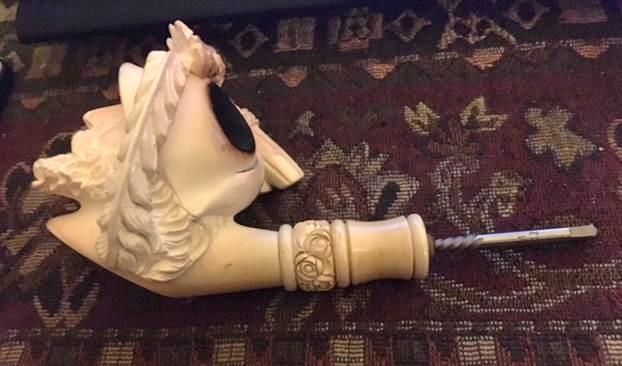
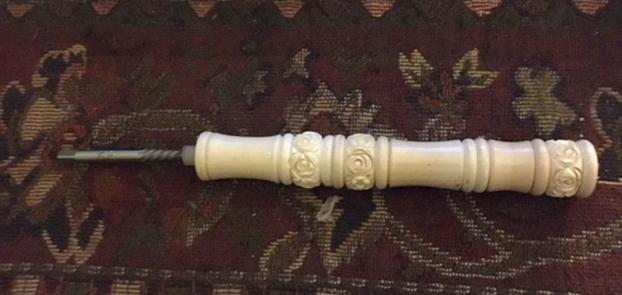
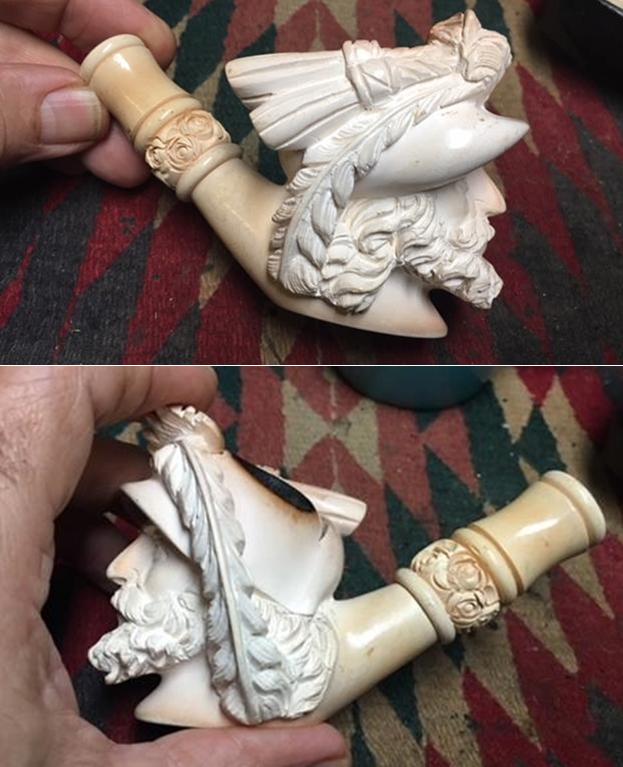
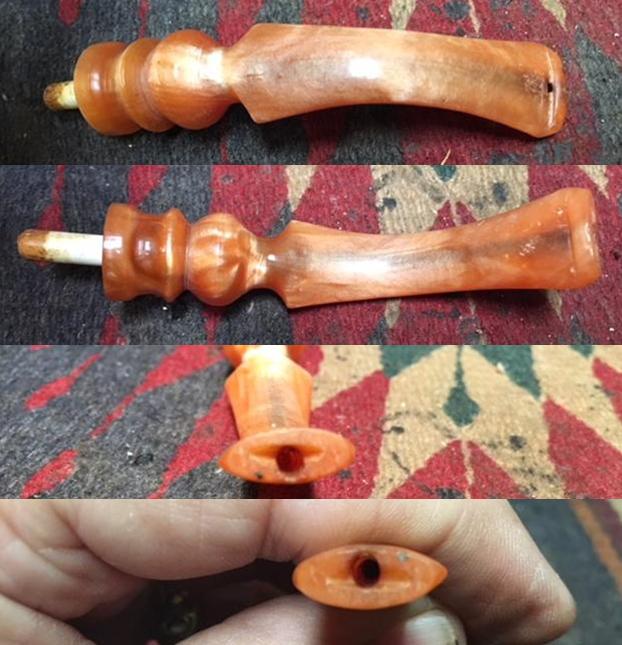
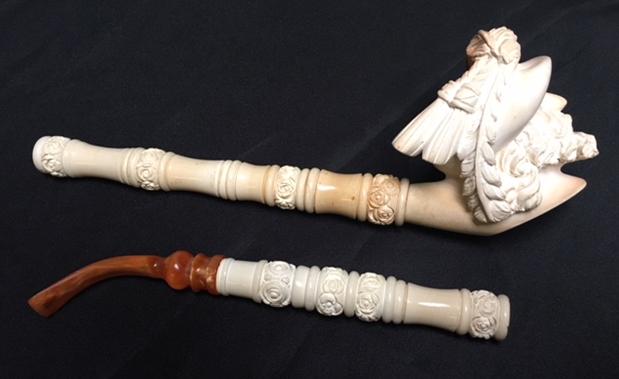
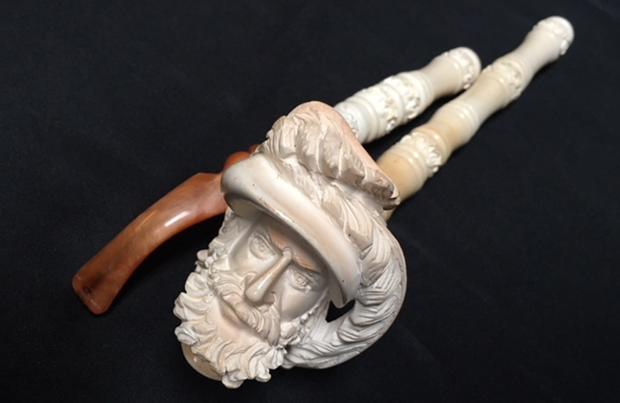
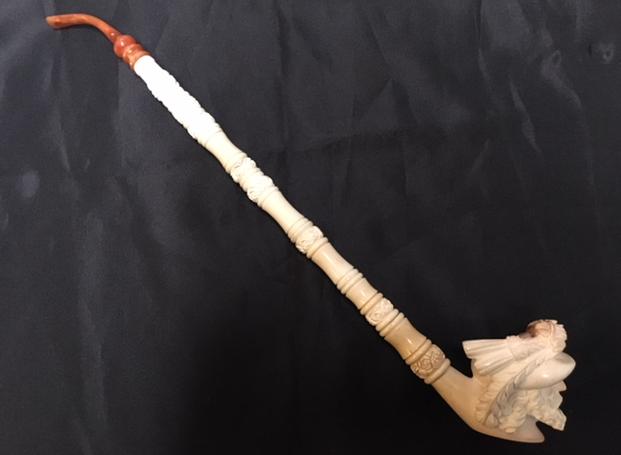
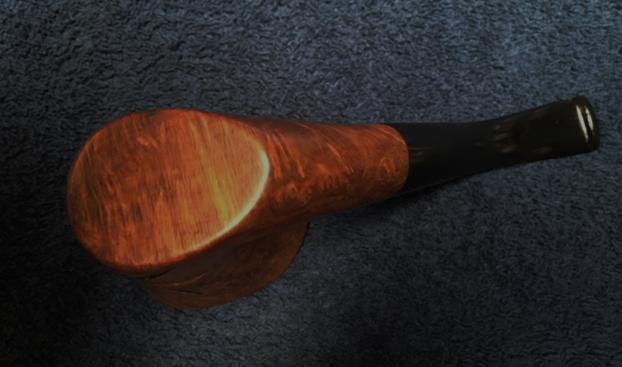
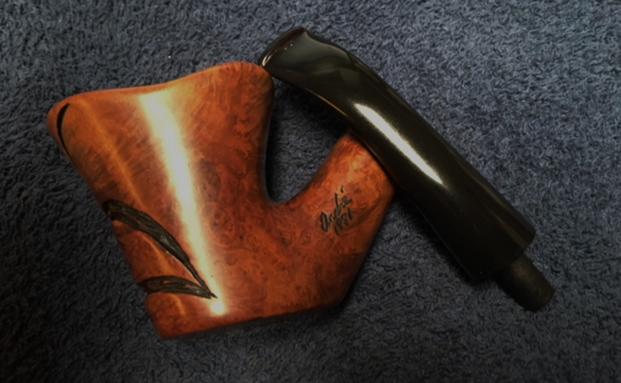
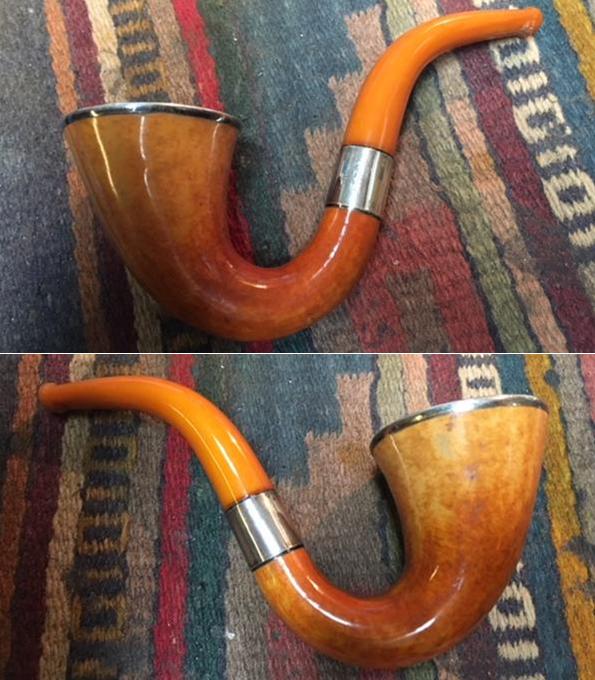
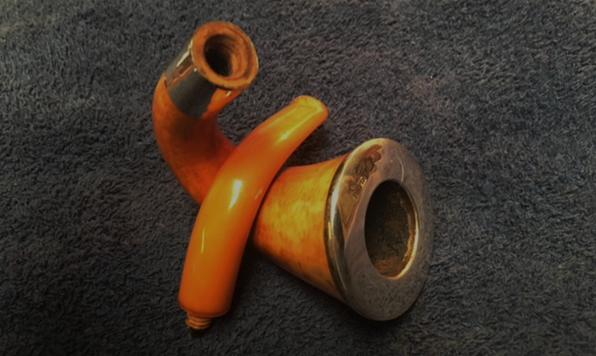
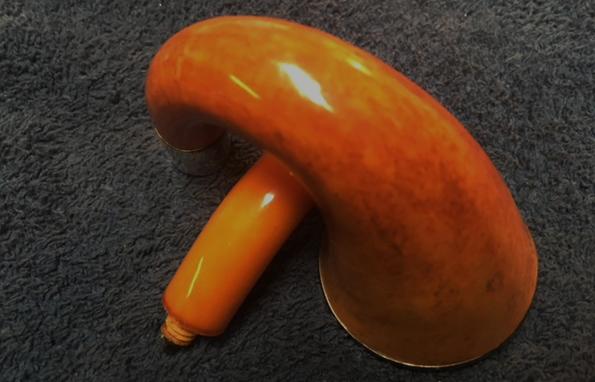
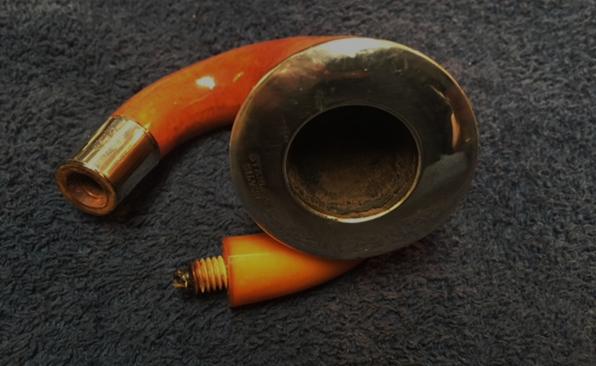
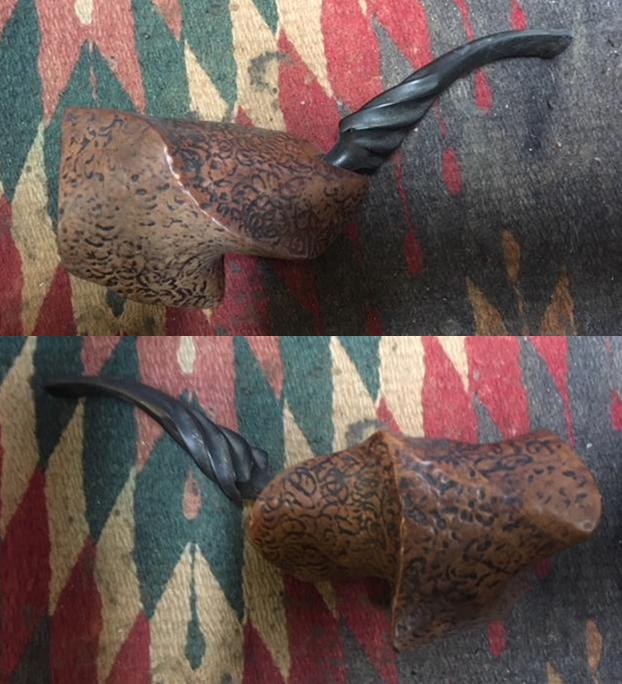
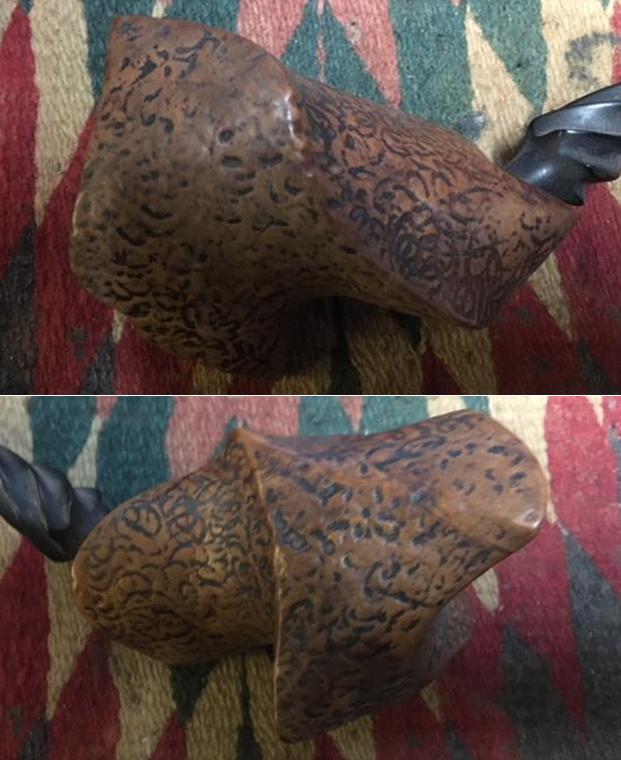
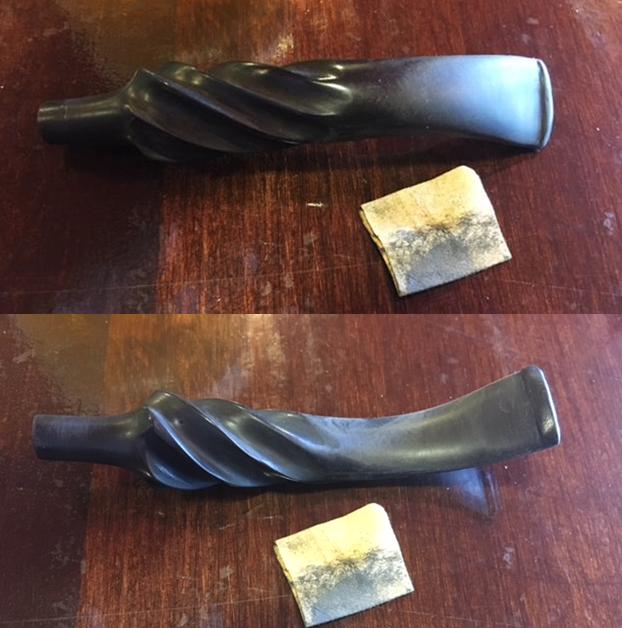
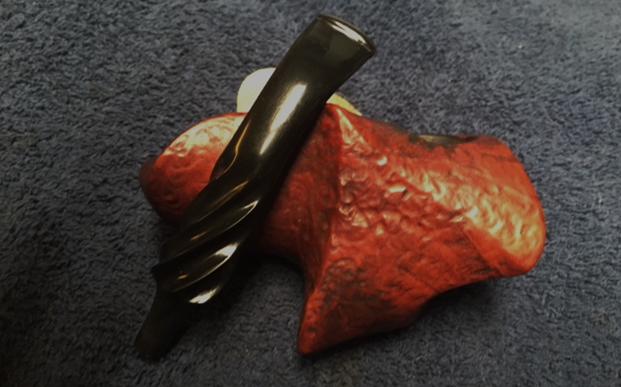
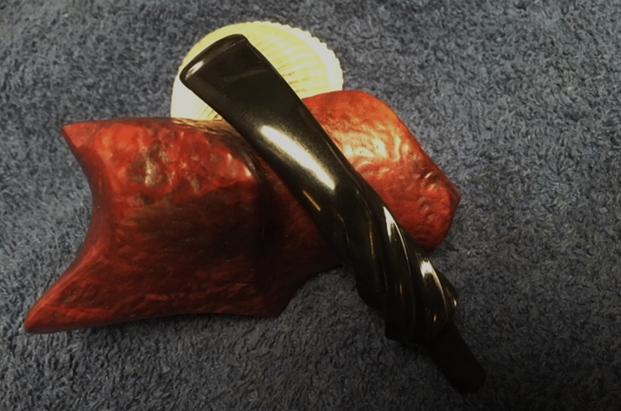
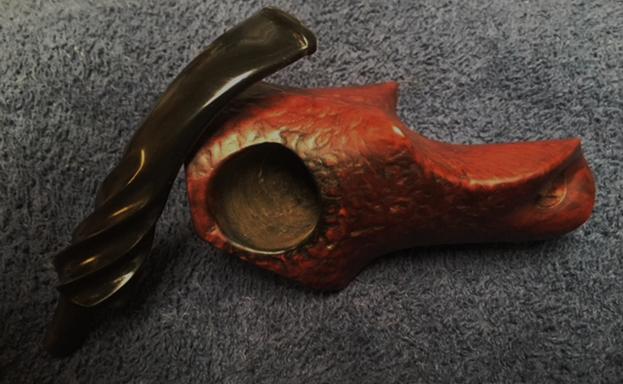
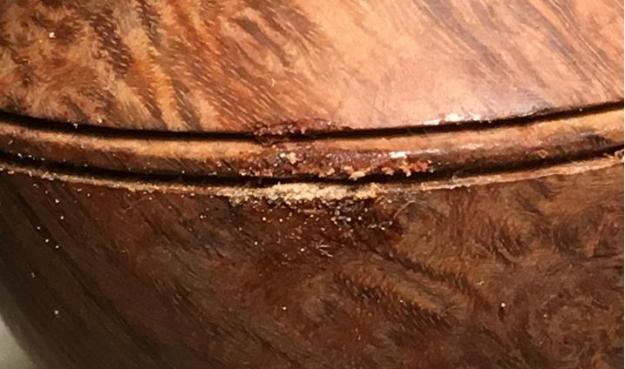
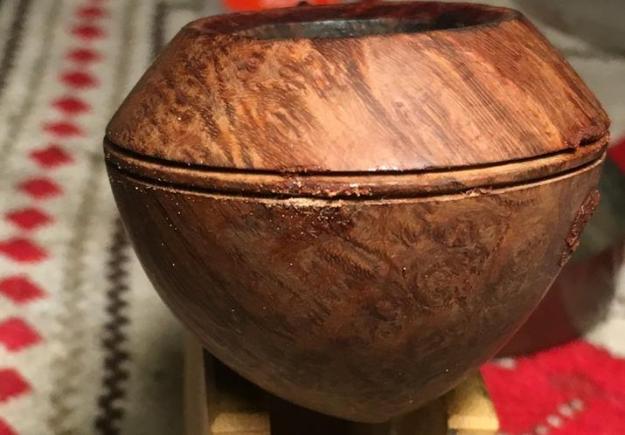
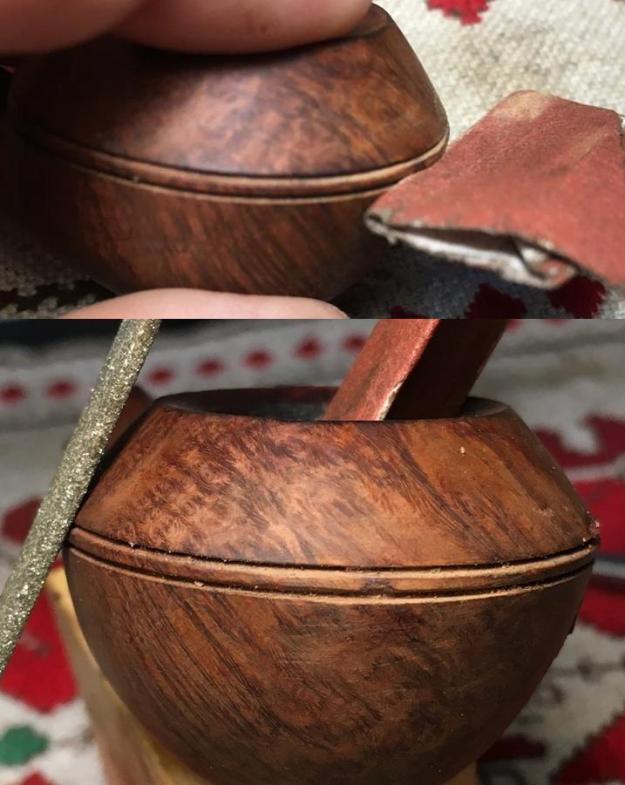
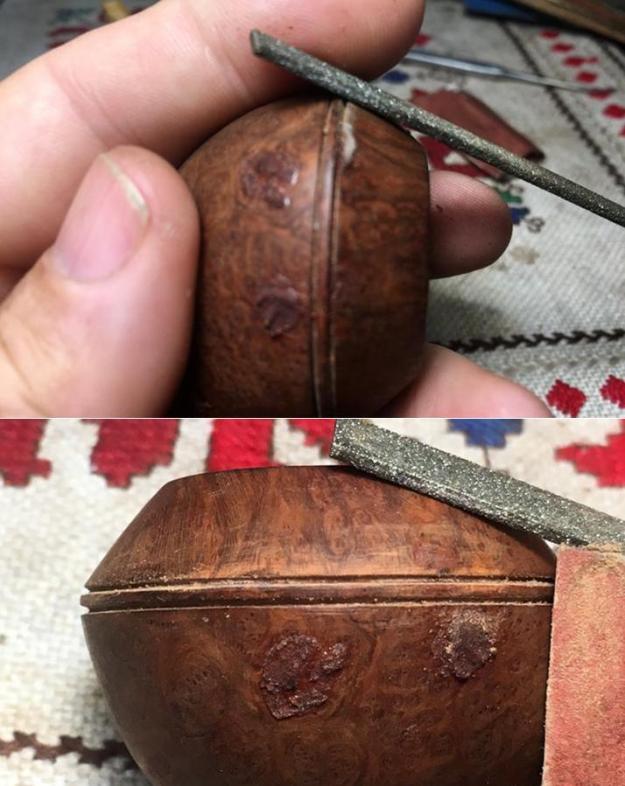
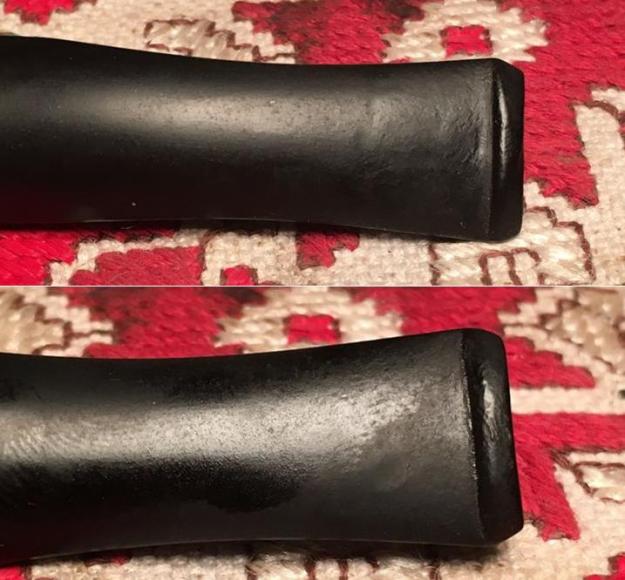
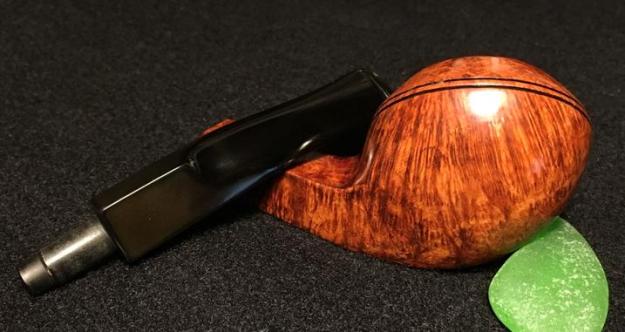
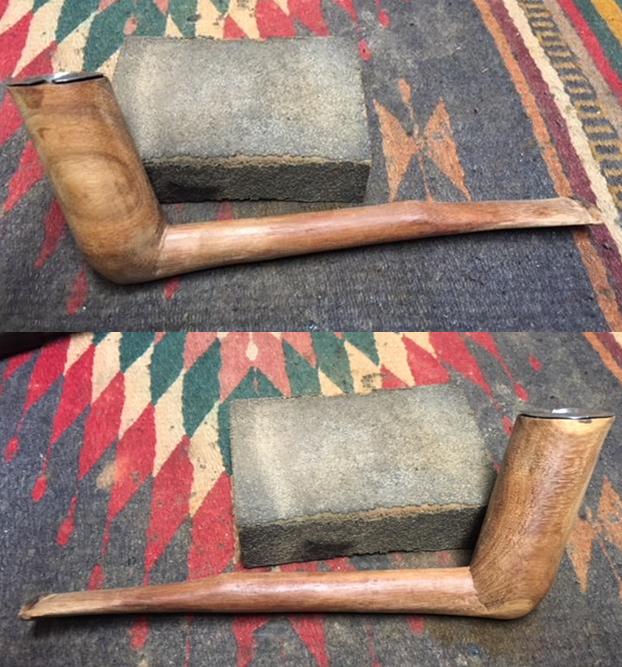
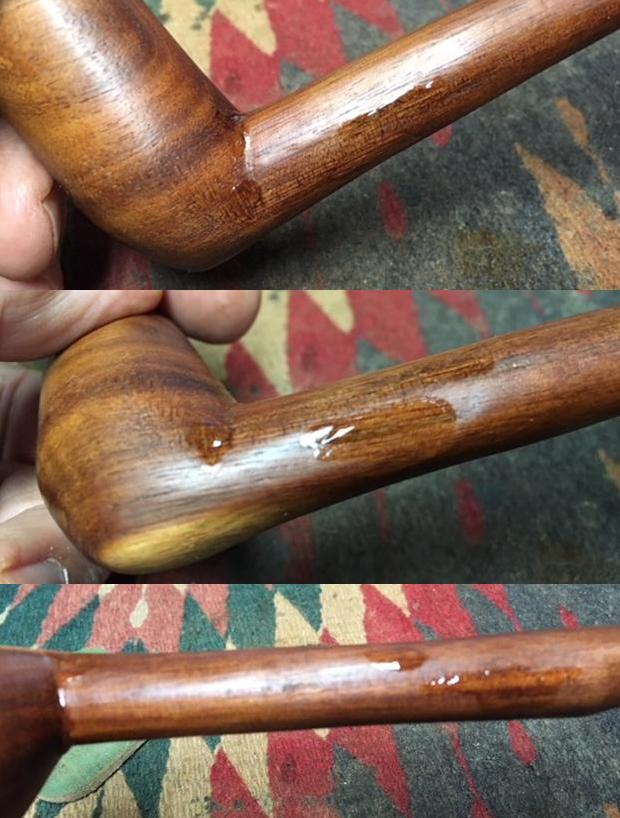
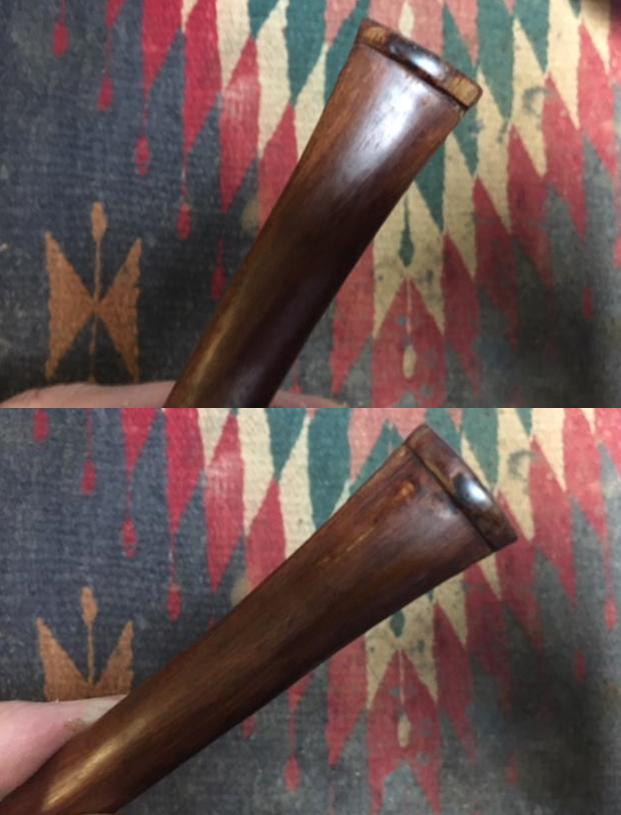
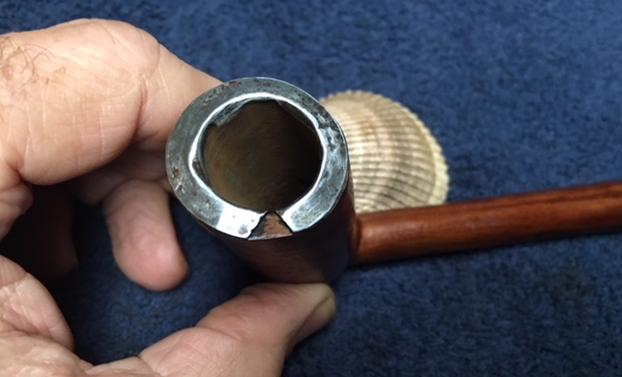
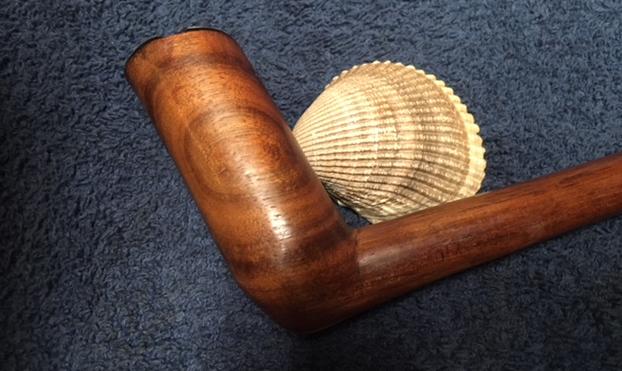
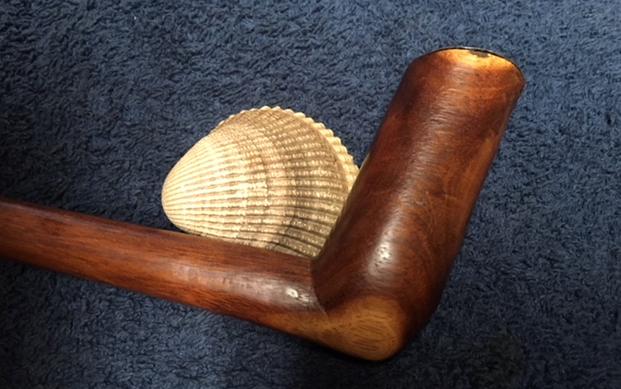
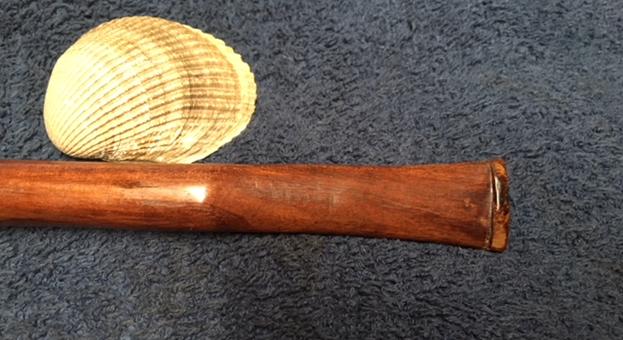
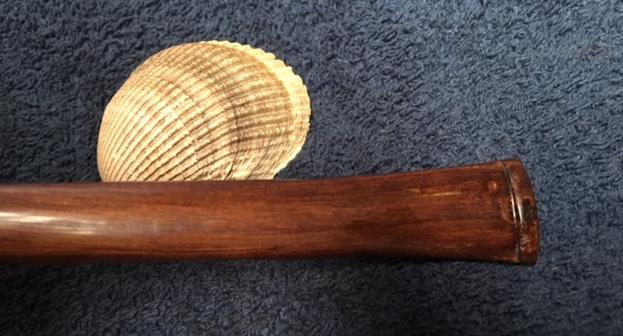
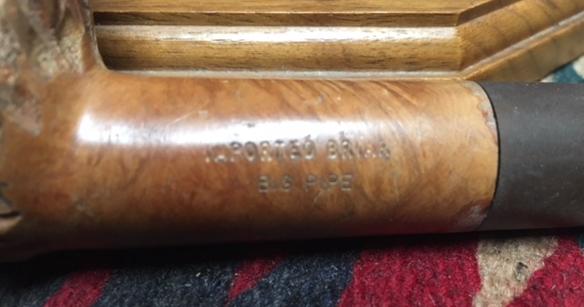
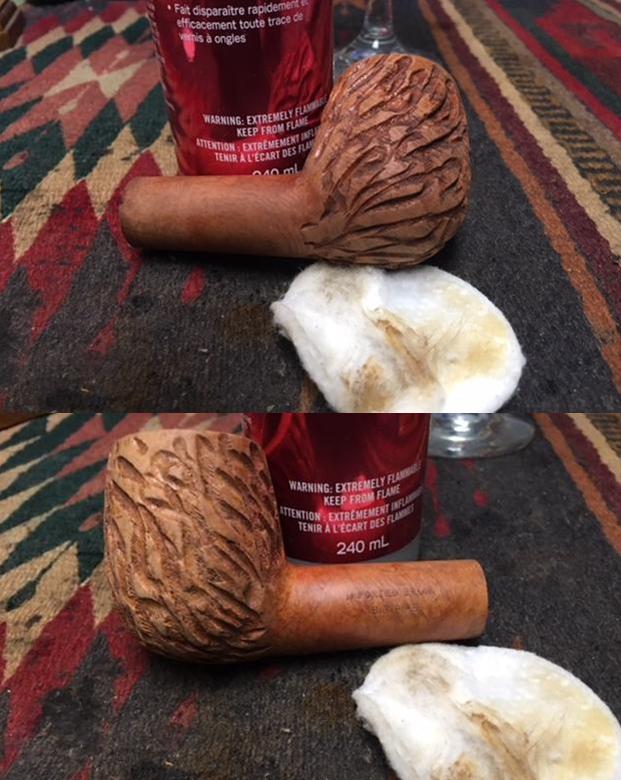
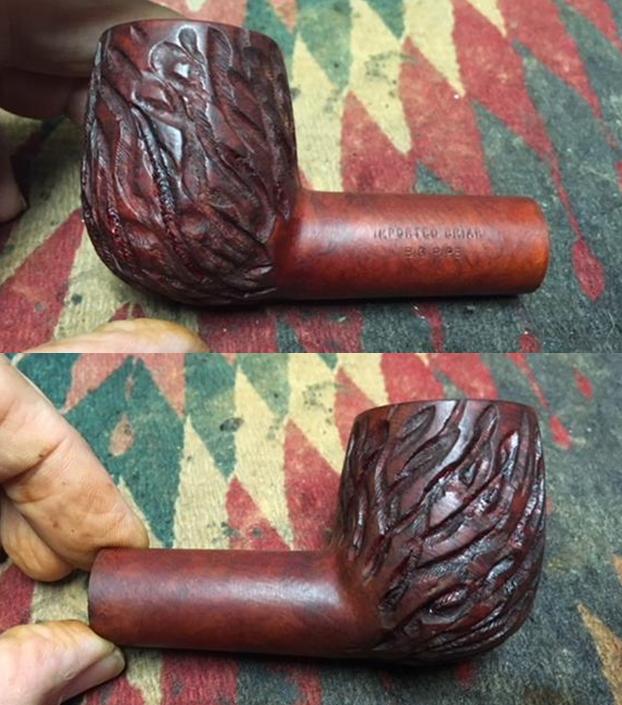
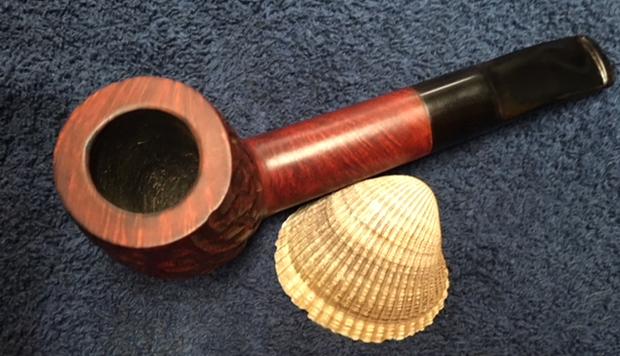
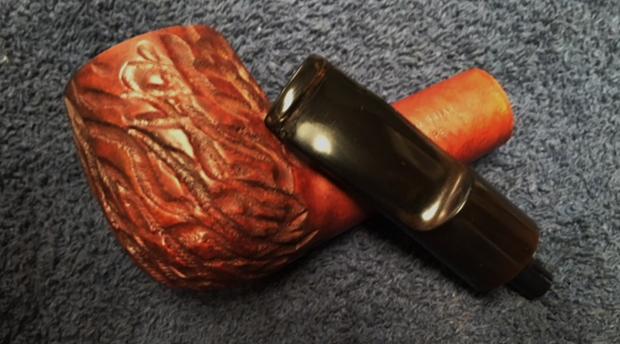
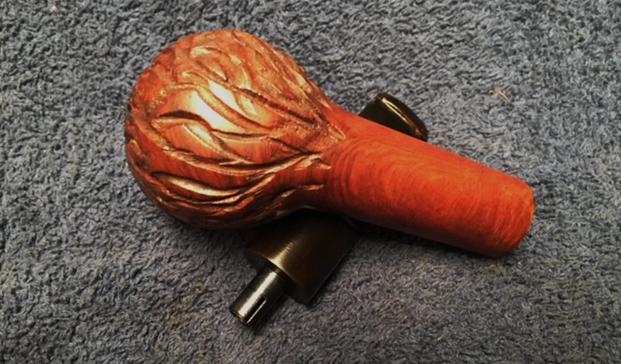
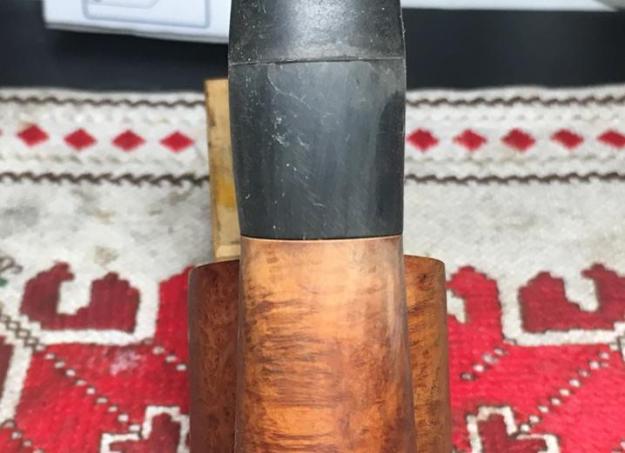
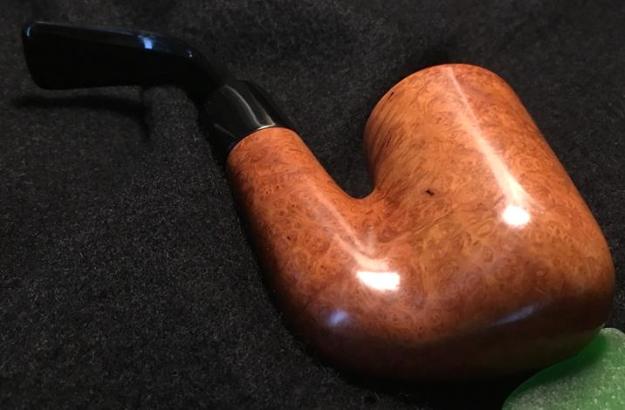
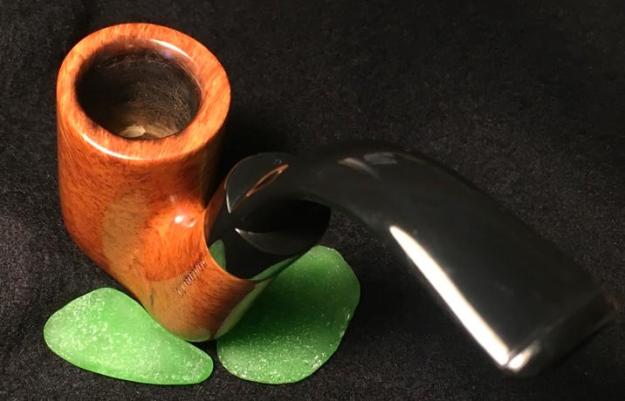
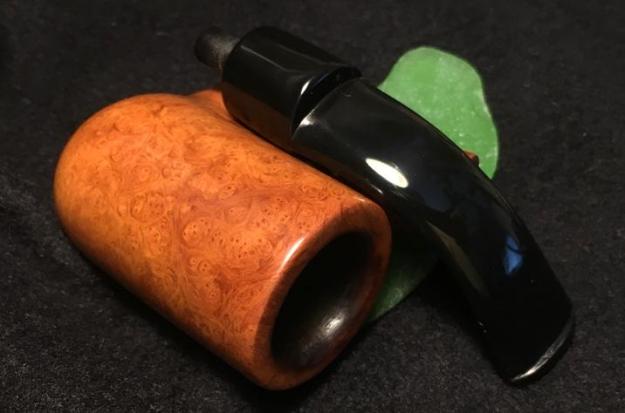
Unfortunately, there’s more to the story. In my previous write ups of the other Perettis, I had commented that some of the Oom Pauls’ stems were not aligned well with the shanks due to less than ideal drilling precision. I have never made a pipe and my hat is off to those whose interests and creativity take them in this direction – there are many beautifully done Free Style pipes I see all the time posted by fellow pipe men and women. I understand that the drilling of a stummel is one of the more complex parts of making pipes – especially when sharp angles require multiple drillings. When I took a closer look at the pipe my eyes focused on the fact that there was a huge ridge overhanging the shank. As I turned the pipe over looking at it from different angles, it appeared that somehow the wrong stem was mistakenly joined with this shank! I looked at the other Oom Paul I have left in the basket to restore, in the queue for a new steward, and it was obvious that the other stem was not matching this stummel. I came to the sad conclusion that this drilling job simply was shoddy. Here’s what I see of ‘the one’ on my work table:


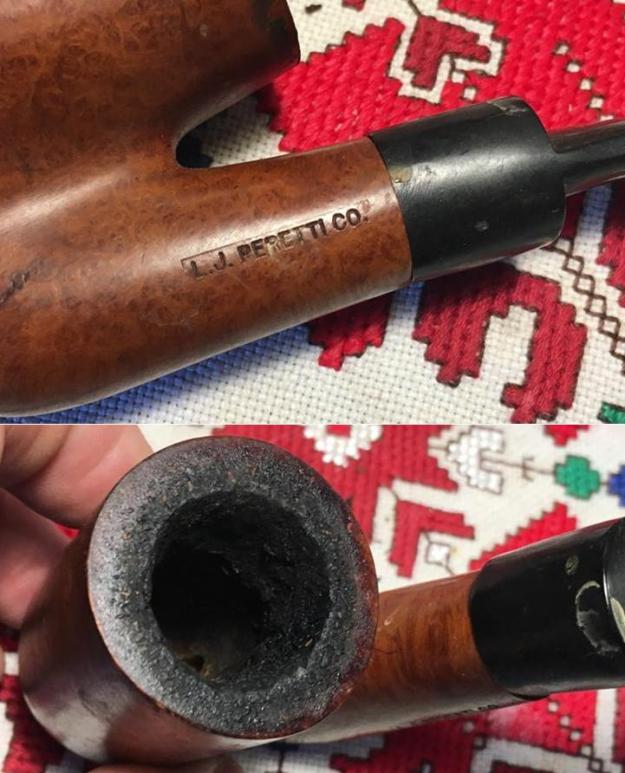
 No matter which angle I chose or how I squinted my eyes it didn’t make what I was looking at any better! Oh my. The next thought I had was of Abraham, a Californian and fellow pipe man and member of the Facebook group, ‘The Gentlemen’s Pipe Smoking Society’. What would he think when he reads this blog after having commissioned this pipe, waiting patiently over the weeks as it slowly moved up in the queue! Fortunate for him, I AM a man of prayer and this pipe WILL benefit the Daughters of Bulgaria! I’m already wondering what I will do to rescue this ailing Oom Paul! I remembered my research on Peretti for my first Peretti restoration a few years ago. I wondered where the Boston-based L. J. Peretti Co., manufactured their pipes. I sent an email to the Peretti Tobacconist in Boston and was amazed that I received a response. Here is what I learned:
 Hello Dal,
We have been sourcing our proprietary pipes from a number of different manufacturers. That said, it is most likely that Arlington Briars made the pipe you have in your possession. Photos would help us identify the pipe further. I will have to look through some of our old content and see what I can find.
Hope this helps, Tom LJP
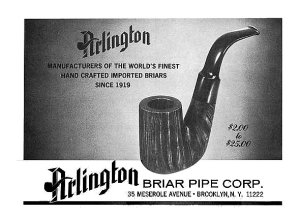
Per Pipedia: Arlington Briar Pipes Corporation was founded in 1919 in Brooklyn, New York, and produced the Arlington, Briarlee, Firethorn, Krona and Olde London brands among dozens of others, primarily acting as a subcontractor making pipes to be sold under other brand names. Among others, in the 1950’s, Arlington turned pipes for the famed Wilke Pipe Shop in New York City. The corporation was dissolved by the State of New York as inactive on December 6, 1978.
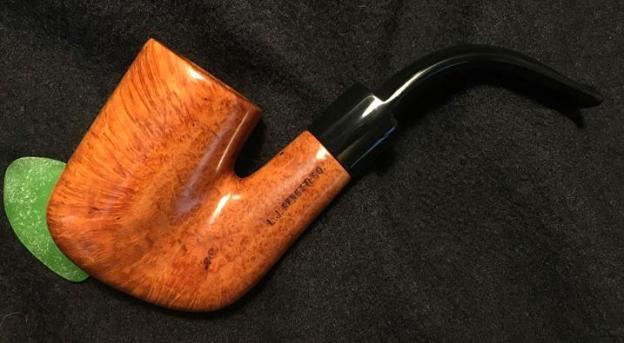
I don’t know for certain that Arlington Briar Pipes produced the Peretti Lot of 10, but when I looked at the Pipedia page, this picture of Arlington’s own brand, this Oom Paul was staring at me. He looks very familiar! Well, we won’t know for sure, but the history of L. J. Peretti and the drilling of this Oom Paul interests me! In the back of my mind as I begin restoring this pipe, is the huge misalignment of the stem and stummel.
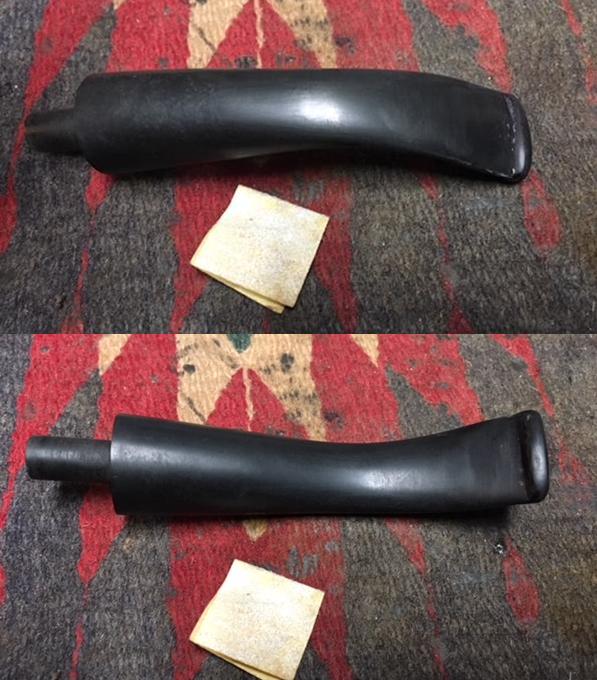
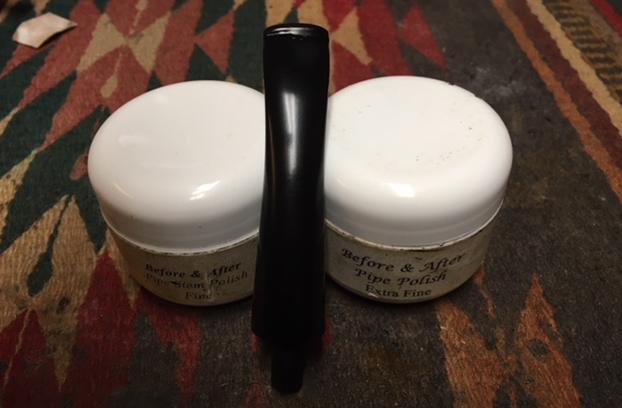
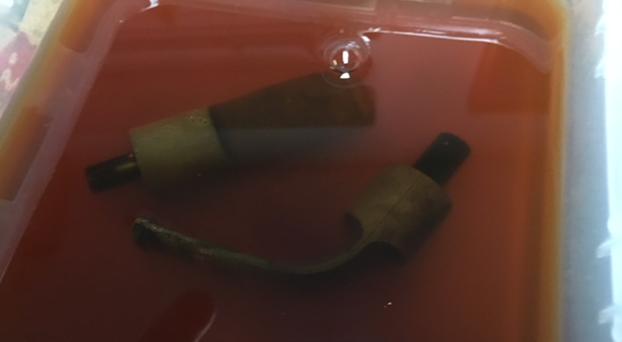
The first step in the restoration of this L. J. Peretti Oom Paul is to add the stem to a bath of Before and After Deoxidizer. After several hours in the bath with other stems, I take out the stem and drain it of Deoxidizer and wipe it down with a cotton pad wetted with light paraffin oil (mineral oil) to remove the oxidation that was raised during the soak. 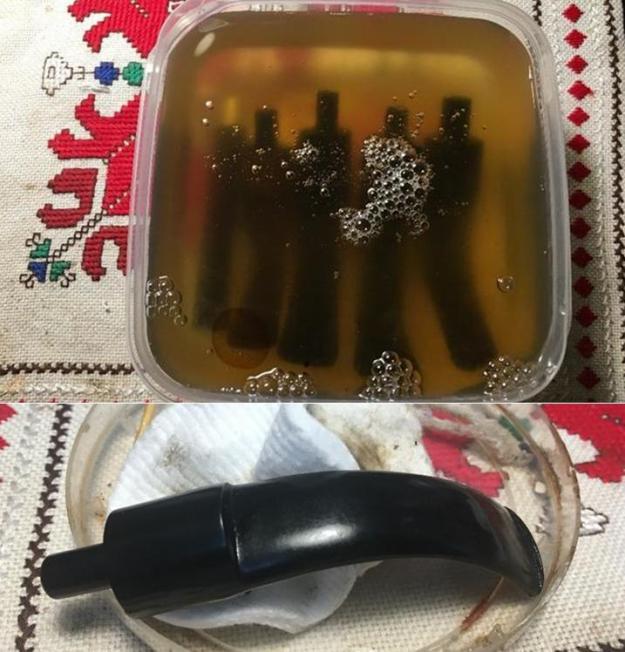 I then use Before and After Fine Polish followed by Extra Fine Polish to further condition the vulcanite and remove oxidation. I work the polishes in with my fingers and after a time, wipe them with a cotton cloth.
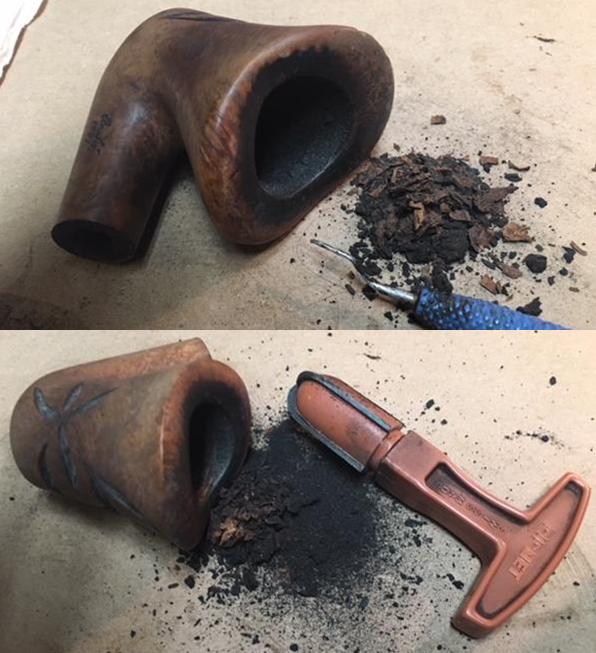
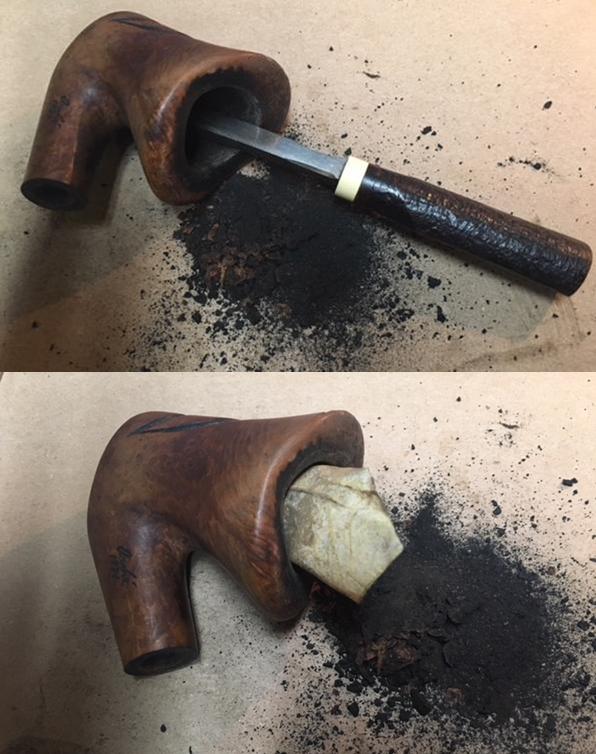
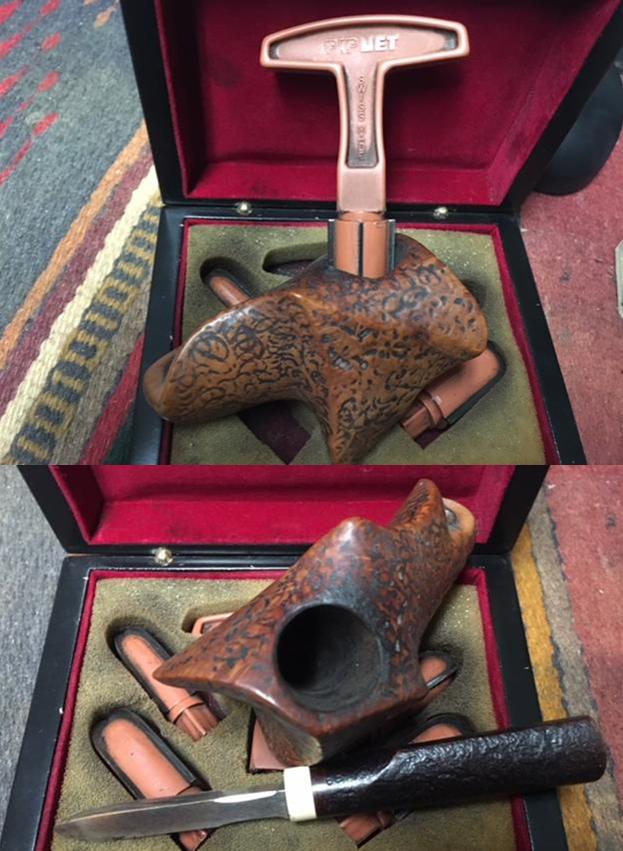
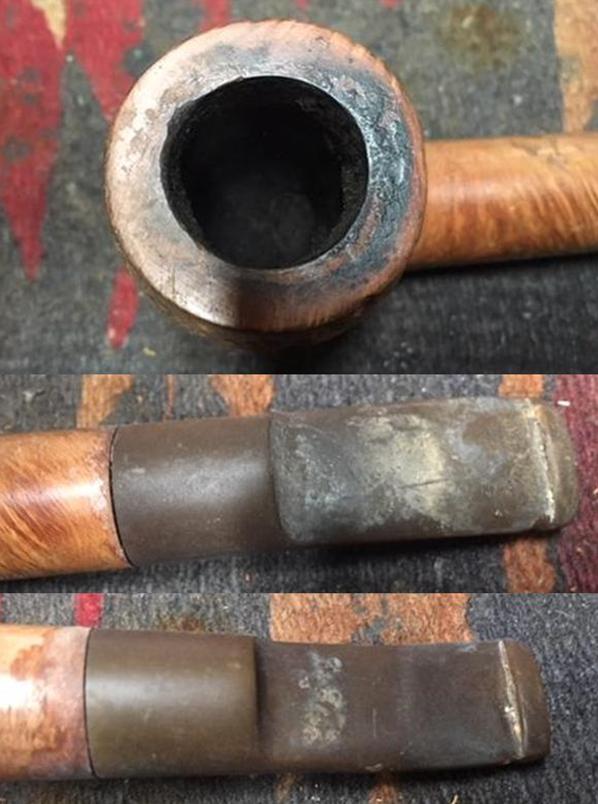
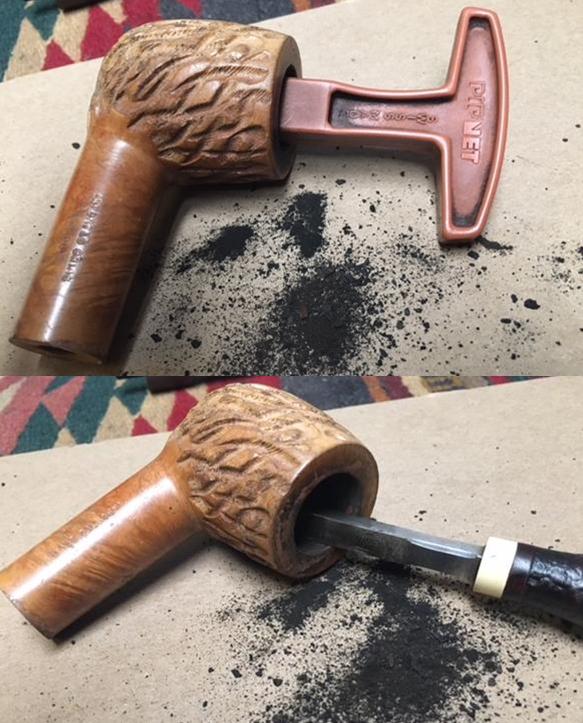
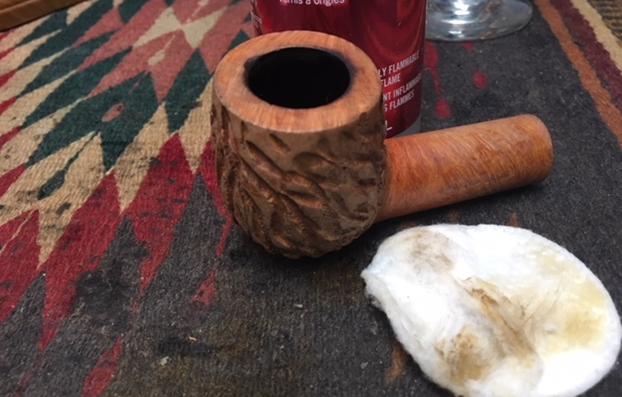
 Turning to the Oom Paul stummel, I see that there is still tobacco at the floor of the chamber. I clear that, and I ream the thick cake using the Pipnet Reaming Kit. I start with the smallest blade and working to the larger blades as the cake is incrementally removed. I use three of the four blades in the Pipnet Kit.
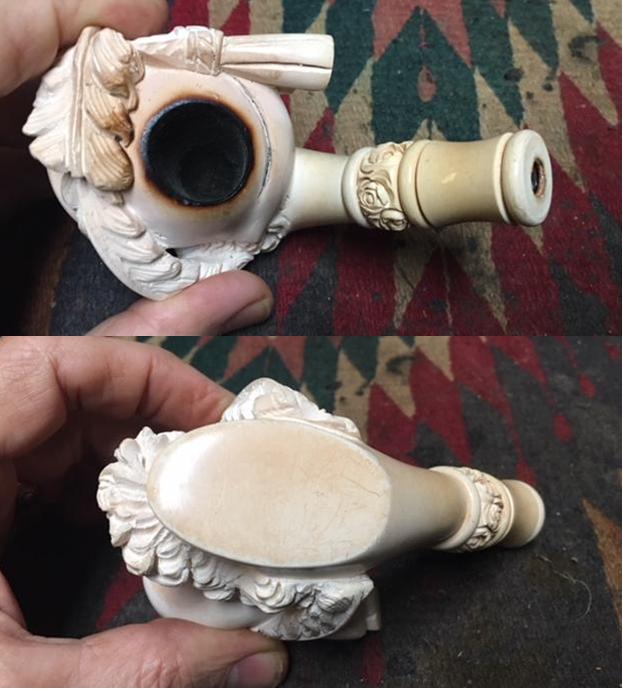
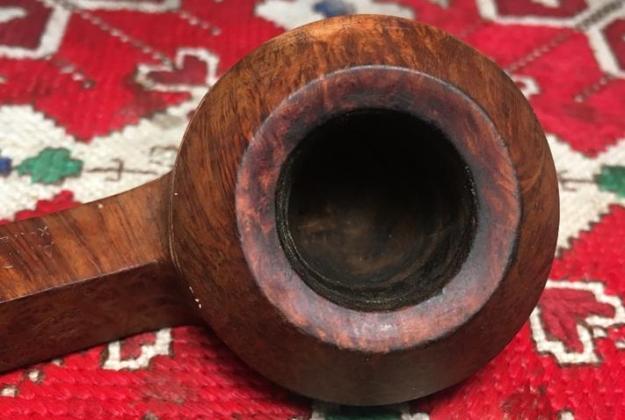
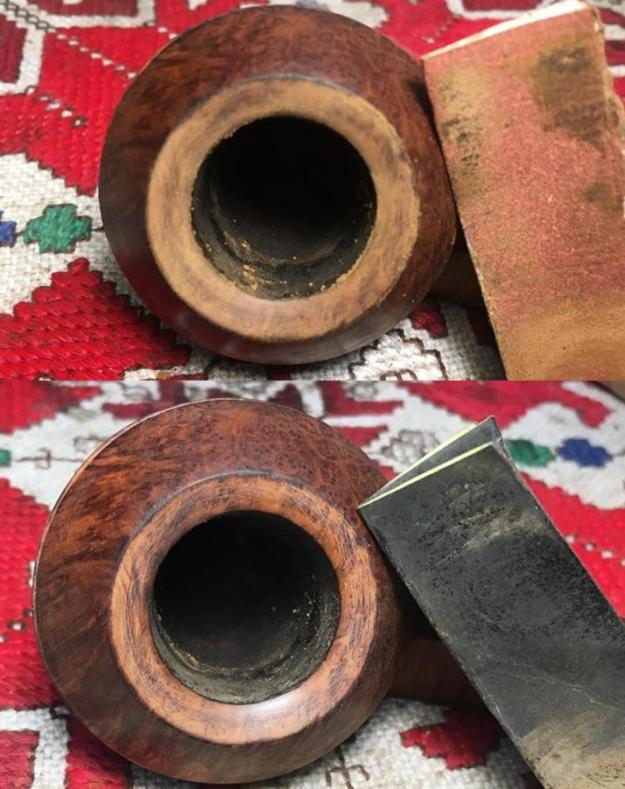
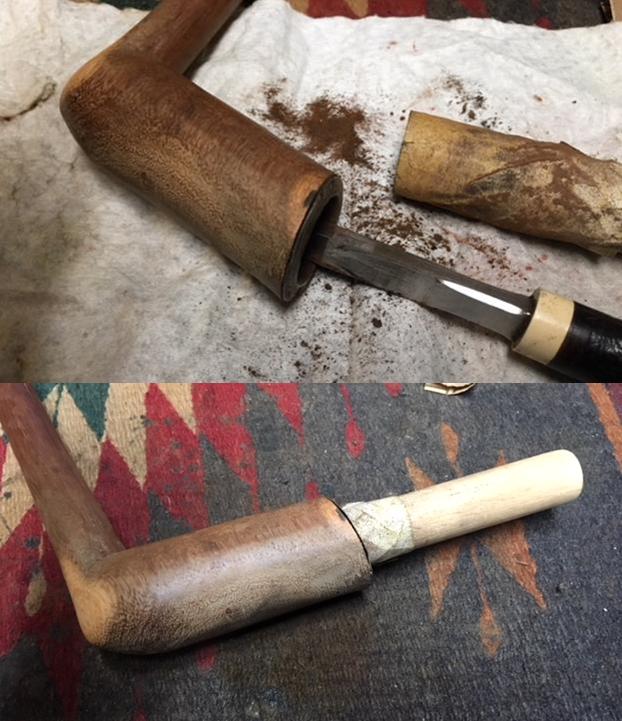
 I then turn to the Savinelli Fitsall Tool to fine tune the reaming job. This is the most painful part for me – carefully removing the charred briar on the rim and watching the rim grow thinner on the damaged side and out of round! The good news is that the chamber itself looks stellar.
 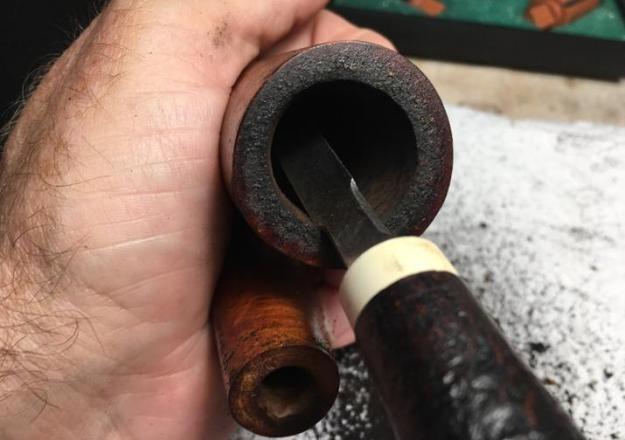 To clean the chamber further I use 240 grit paper wrapped around a Sharpie Pen and sand the chamber. Finally, I wipe the chamber out with a cotton pad wetted with alcohol to remove the carbon dust for all the reaming. The pictures show the process.
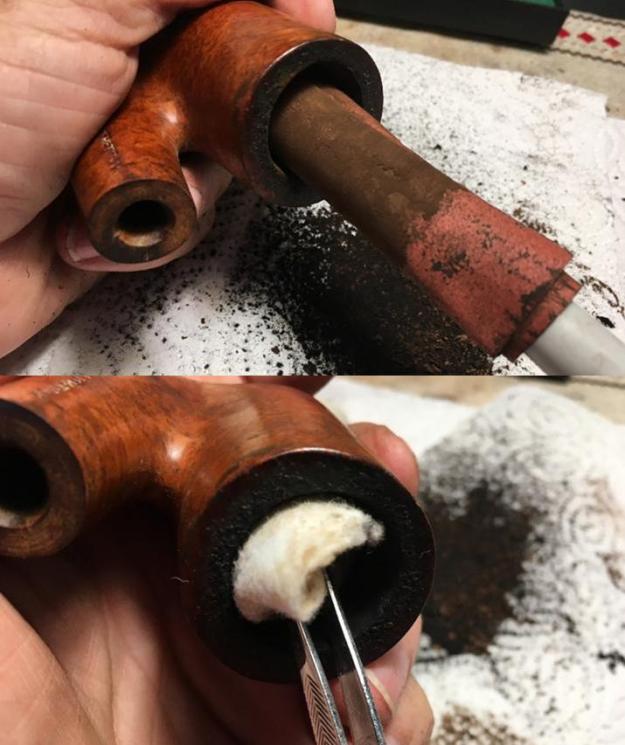
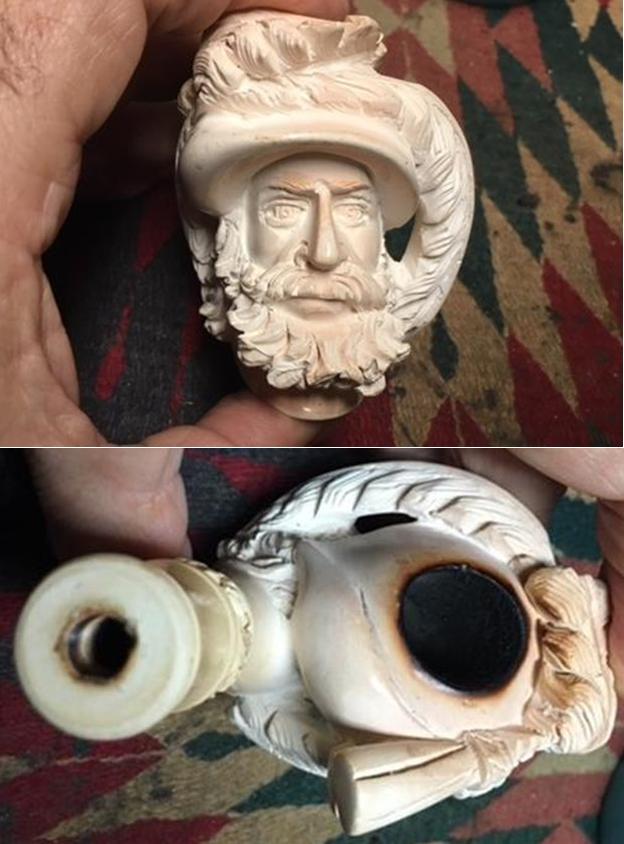
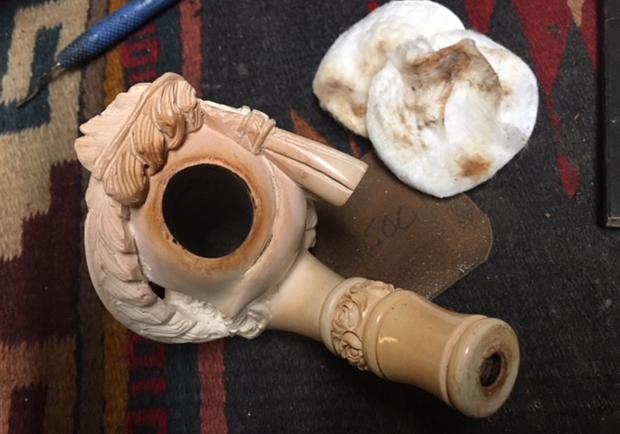
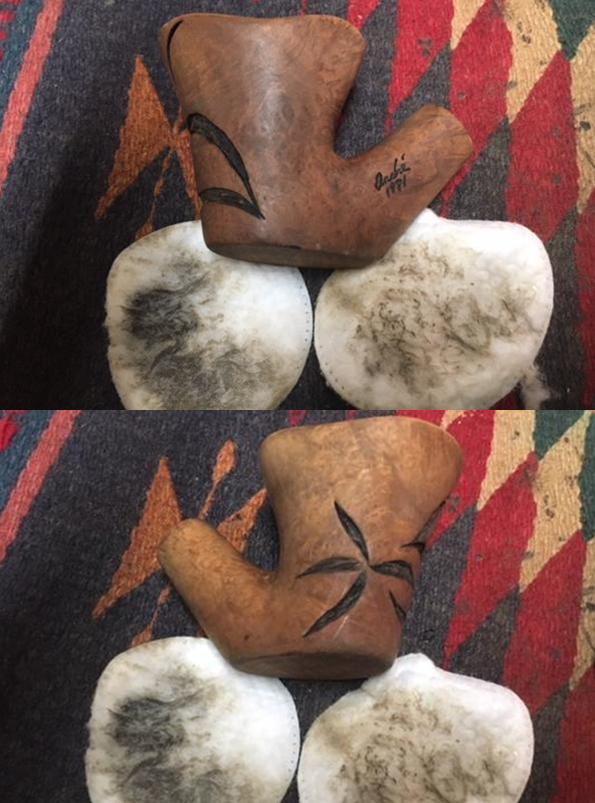
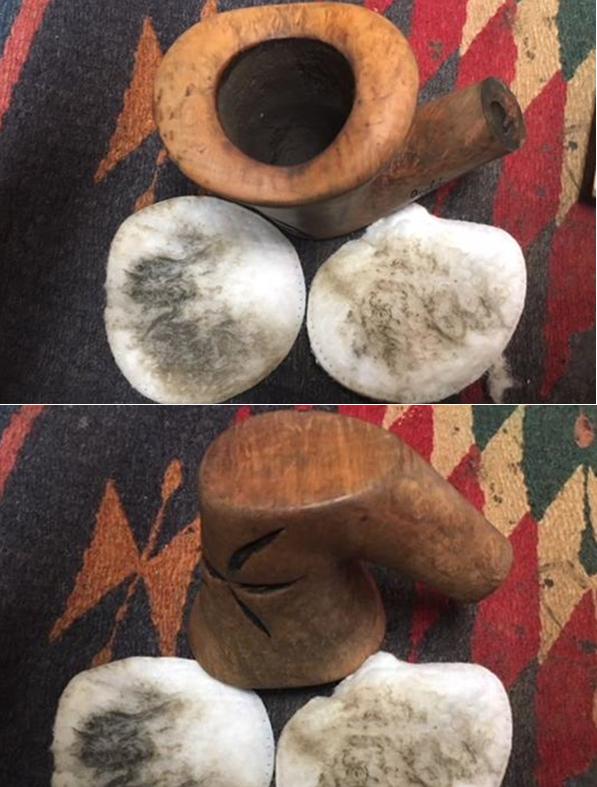
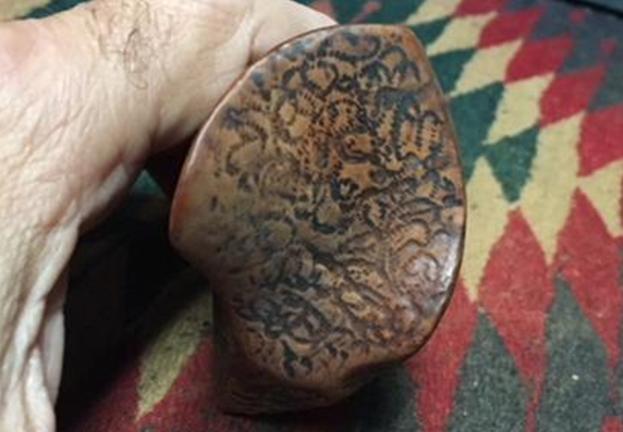
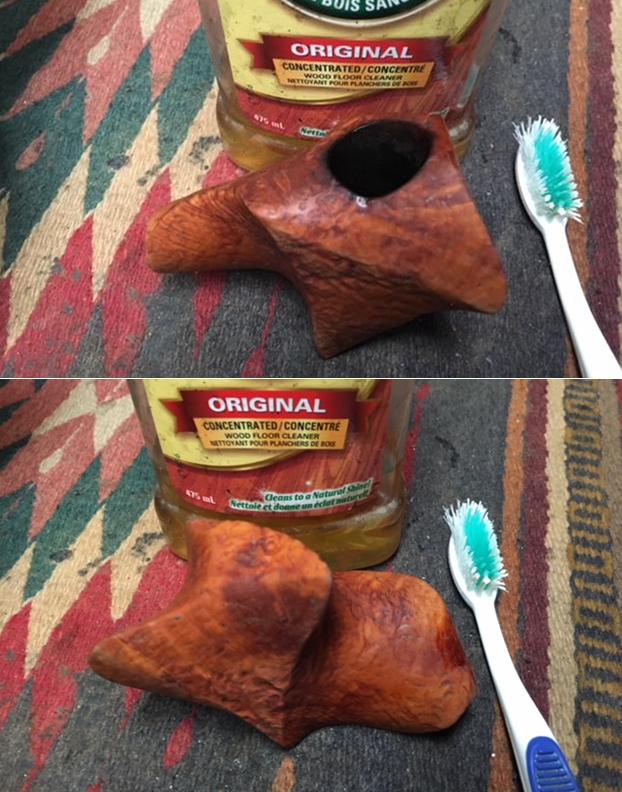
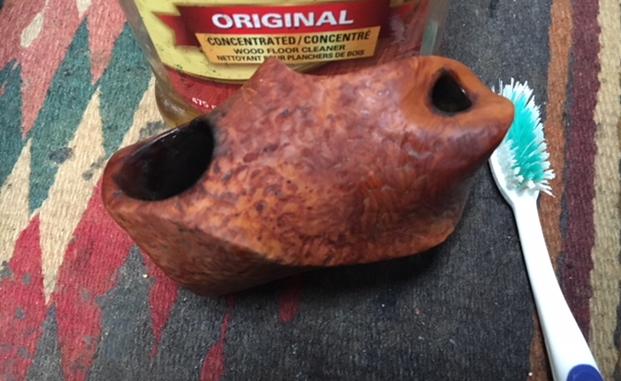
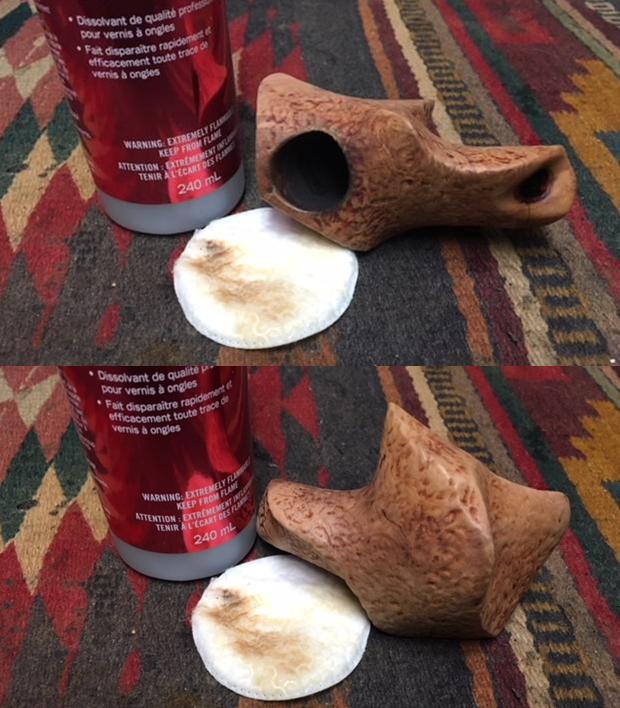
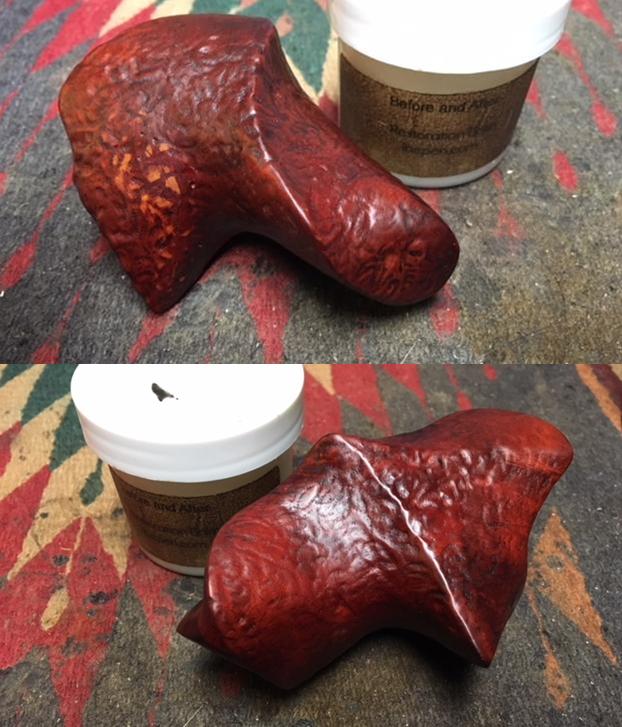
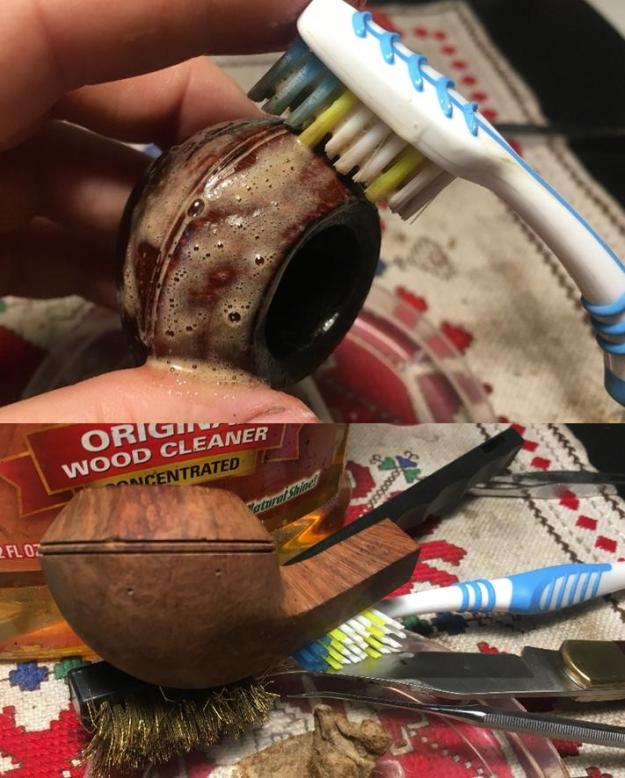
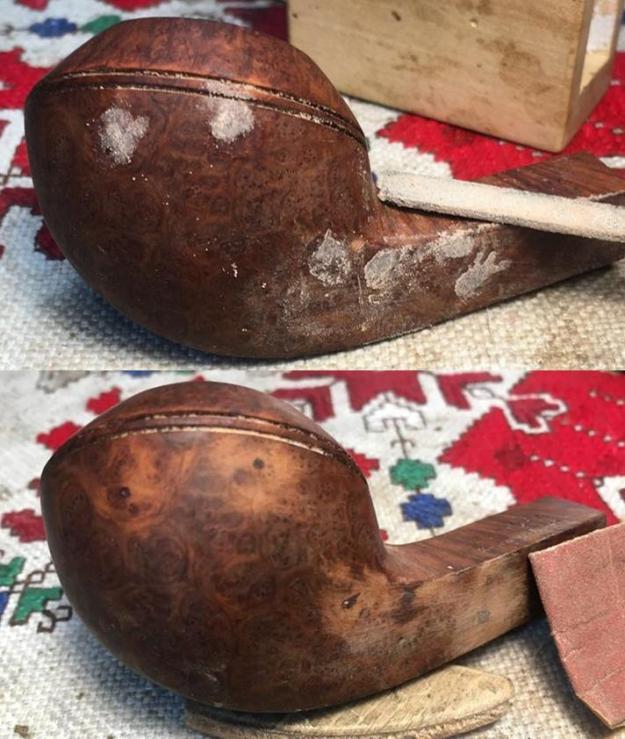
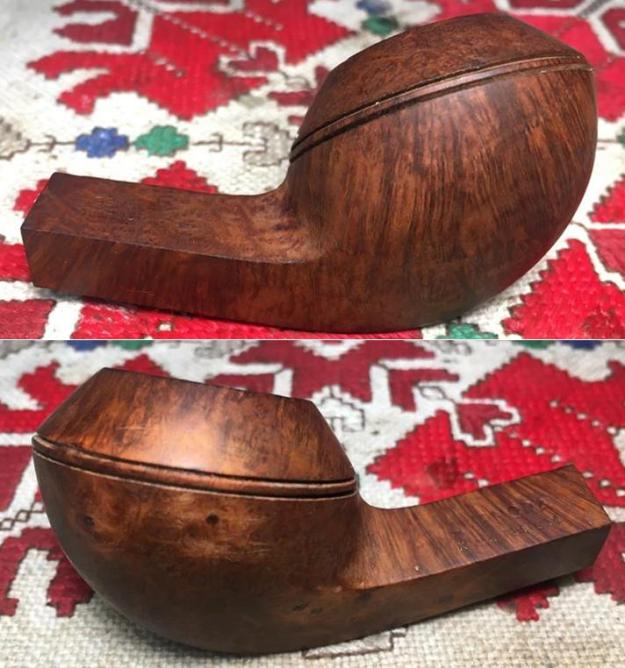
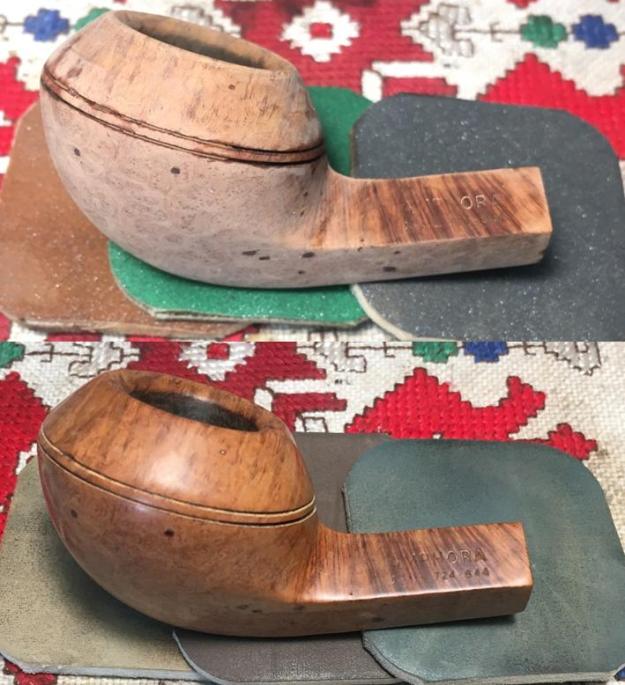
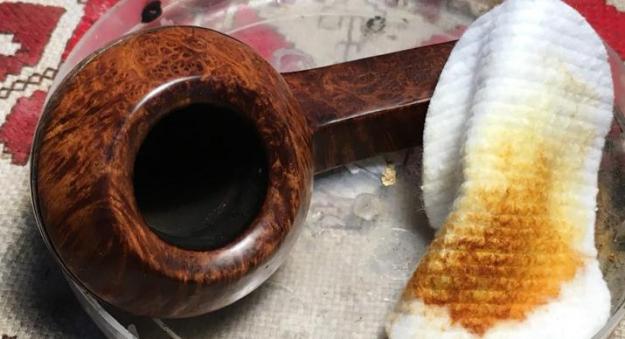
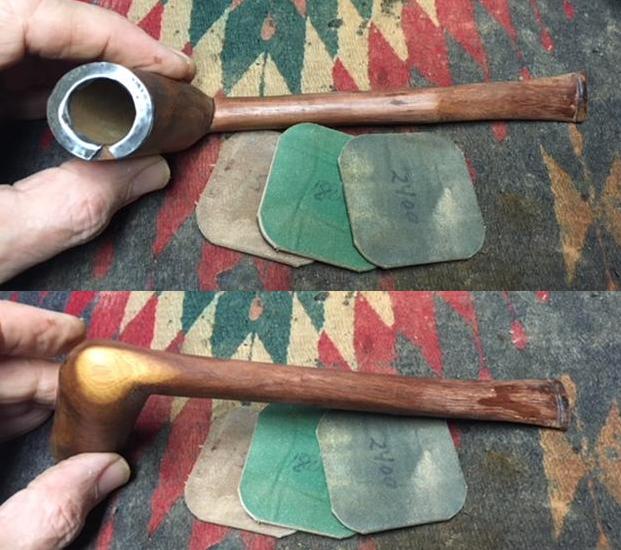
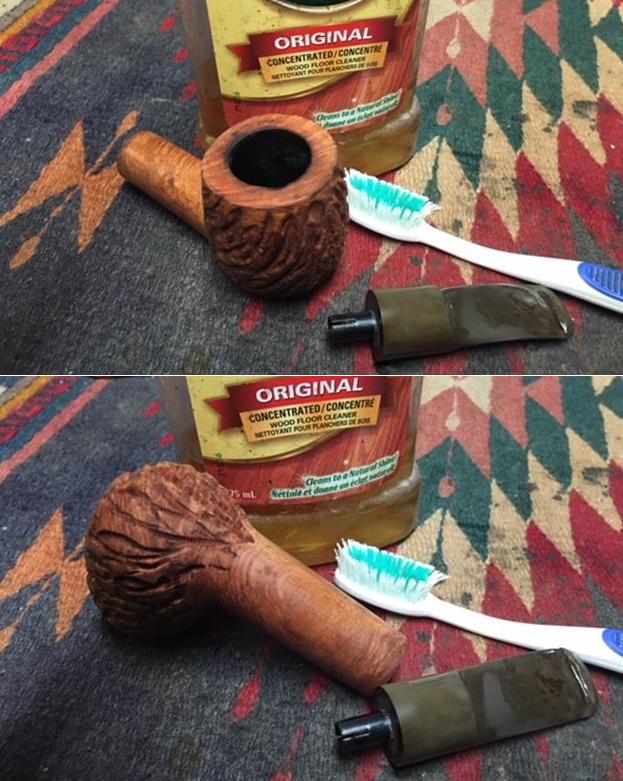
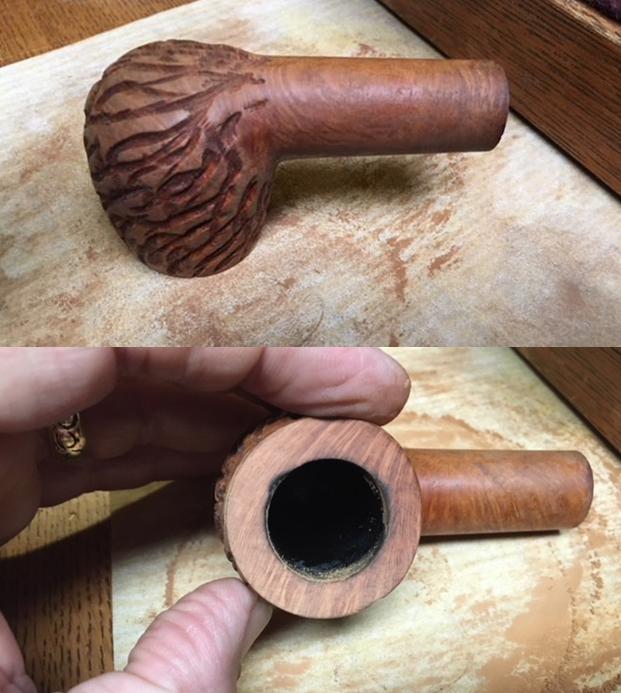
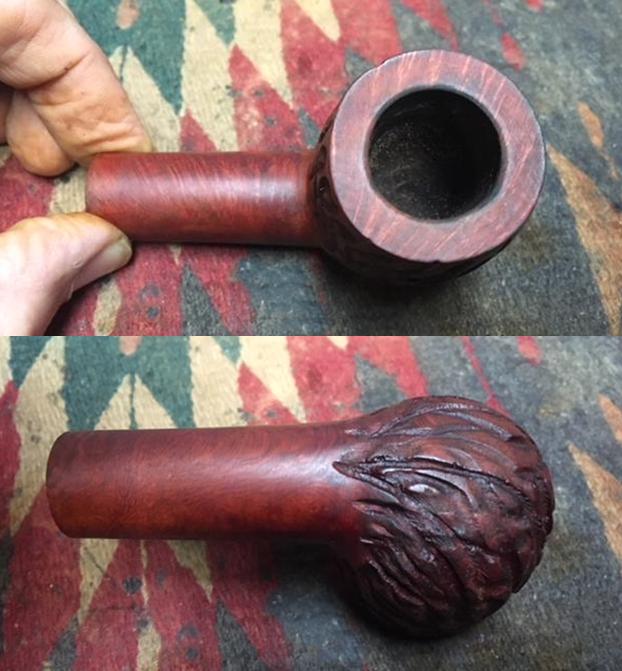
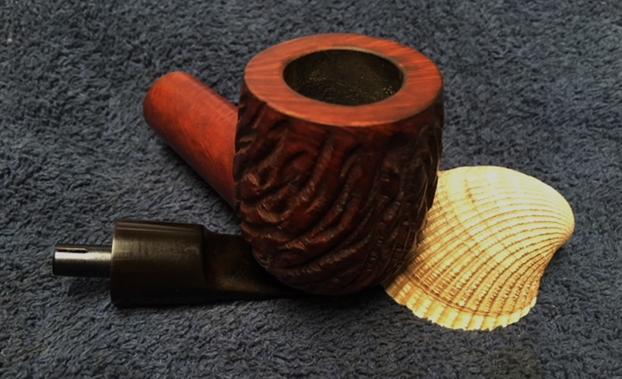
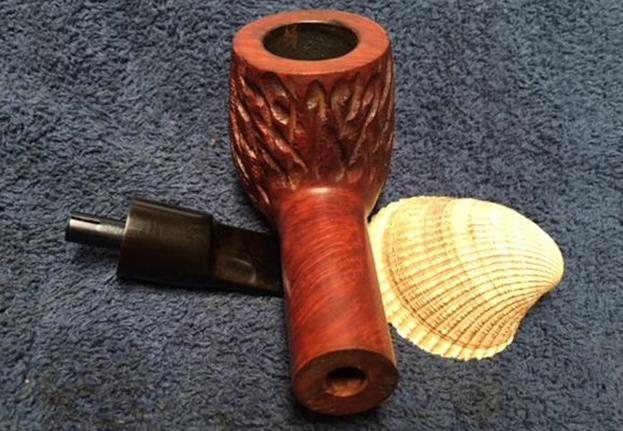
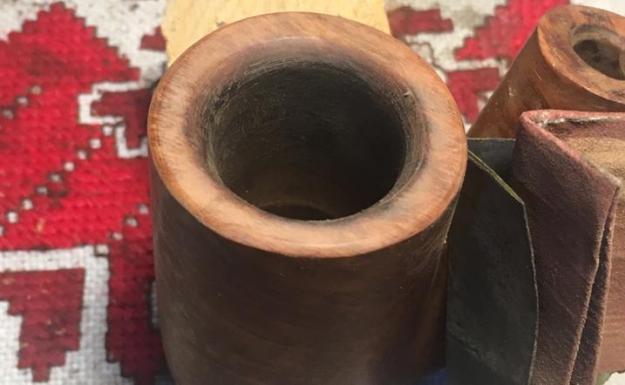
 With all the other Perettis, the basic cleaning of the external surface and the rim revealed beautiful grain underneath the grime. I have the same expectations for this Oom Paul stummel. Using undiluted Murphy’s Oil Soap and a cotton pad I go to work on the briar surface and the lava on the rim. I also use a brass brush to work at removing the lava on the rim. To carefully scrape the rim, I utilize the flat sharp edge of the Savinelli Fitsall Tool. I rinse the stummel with tap water. The pictures show the progress, before and after. Quite a difference! My eye is drawn to a spider web grain pattern on the stummel’s left side – shown in the first two pictures – very nice!
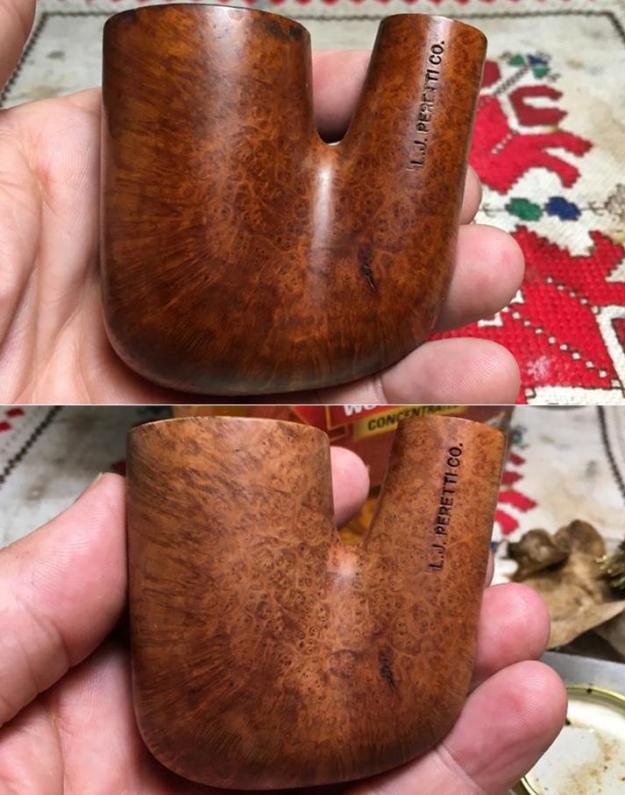


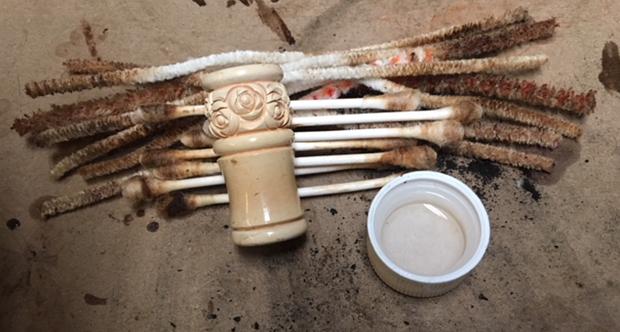
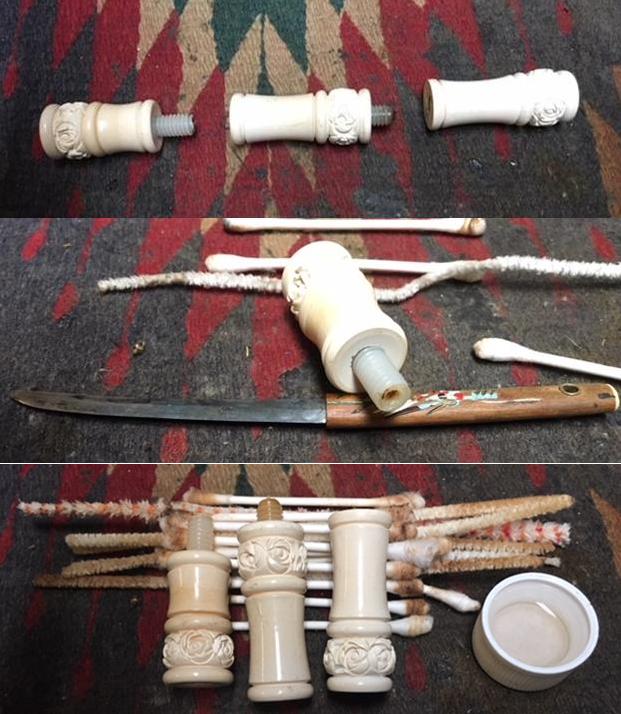
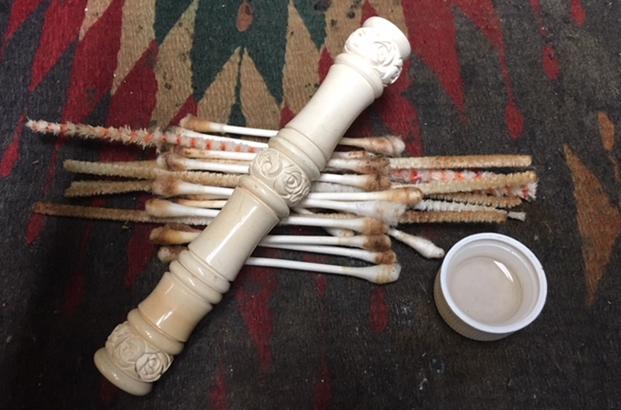
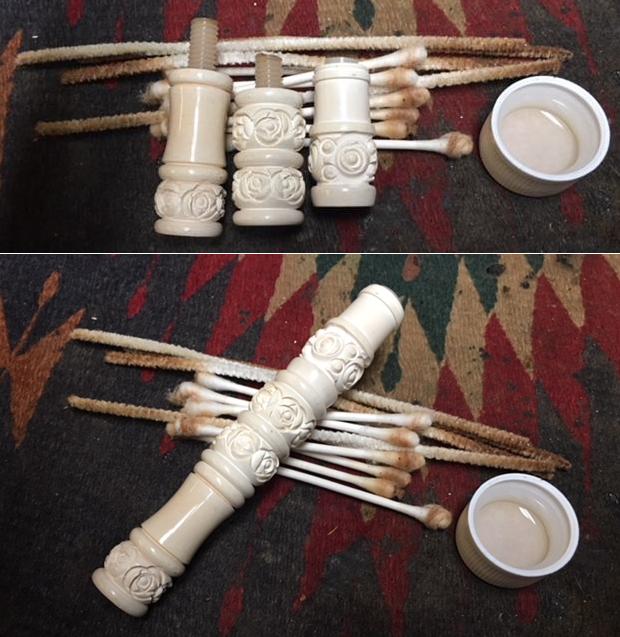
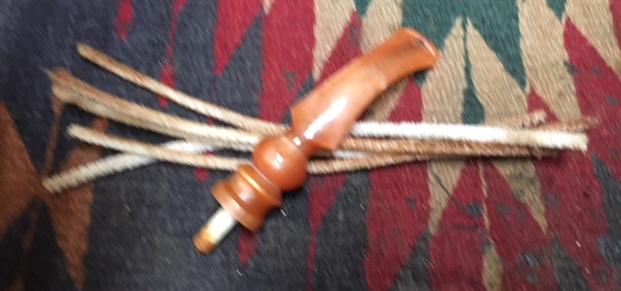
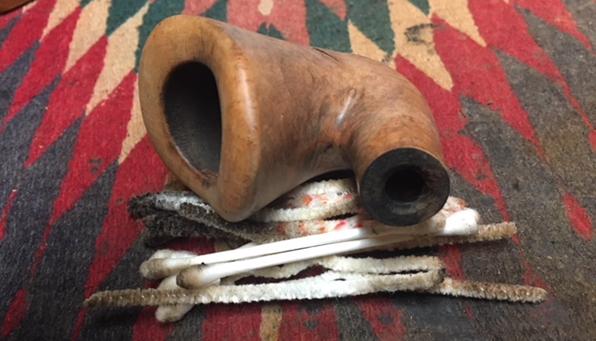
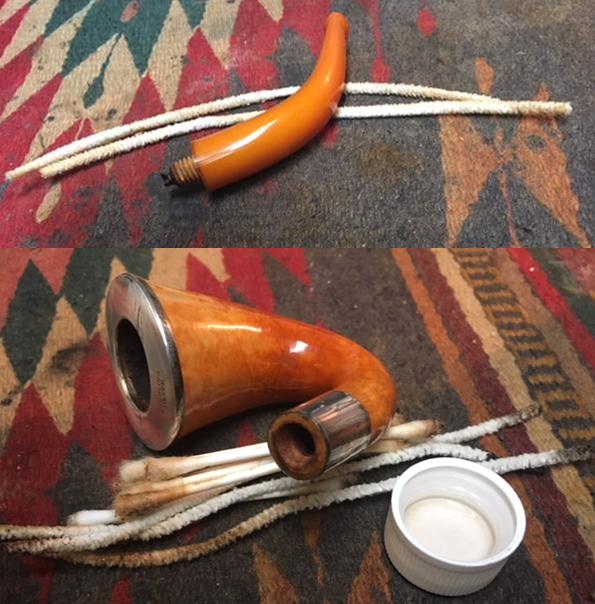
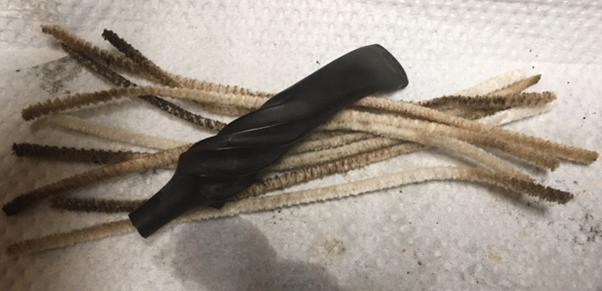
 I turn now to clean the internals and it doesn’t take too much. I use pipe cleaners, cotton buds and a shank brush to work on the draft hole and mortise. Even though the internals are cleaning up nicely, I like to utilize a kosher salt and alcohol soak to freshen and clean even more thoroughly preparing the pipe for a new steward.
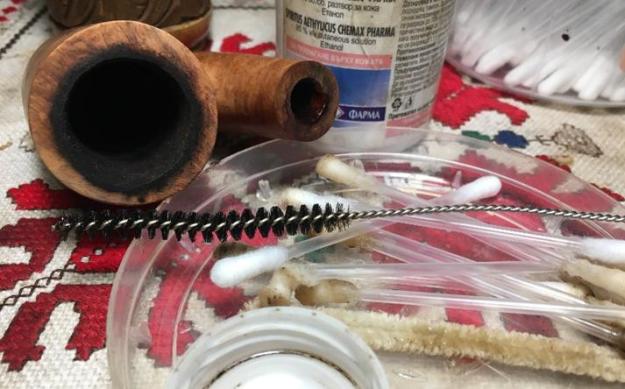 To prepare the soak, I form a wick using a cotton ball. I stretch and twist it and then push it down the mortise and draft hole. I use a straight piece of an old wire clothes hanger to push and guide the wick. This wick acts to draw out the residual tars and oils as the salt and isopropyl 95% do their job. I then position the stummel in an egg carton for stability and fill the chamber with kosher salt. I asked the question when I first saw this method used, why kosher? The answer I received was that it didn’t leave an aftertaste as does iodized salt. Sounded reasonable to me. I then give the stummel a shake with the chamber cupped to displace the salt. Then, using a large eye dropper I fill the chamber with isopropyl 95% till it surfaces over the salt. After a few minutes I top it off with a bit more alcohol because it has absorbed into the fresh cotton wick and salt. I put the stummel aside and let the soak do its thing.
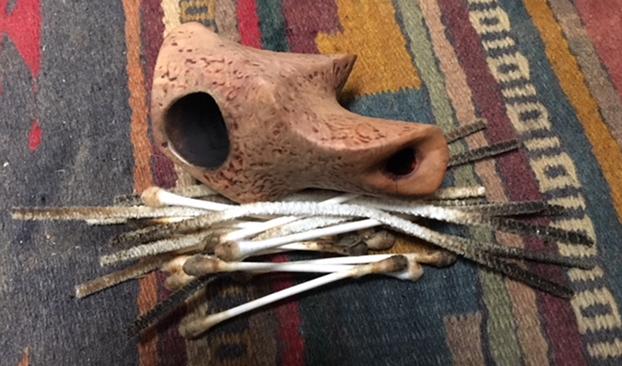
 The next morning as expected, the darkening of the salt and wick indicate that more tars and oils were pulled out of the internals. I thump the stummel on my palm releasing the expended salt in the waste. I wipe the bowl with paper towel, blowing through the mortise to dislodge remaining salt. I also use a multi-sized shank brush to do this. Finally, I run another pipe cleaner and cotton bud dipped in isopropyl 95% in the mortise and draft hole to finalize the cleaning.
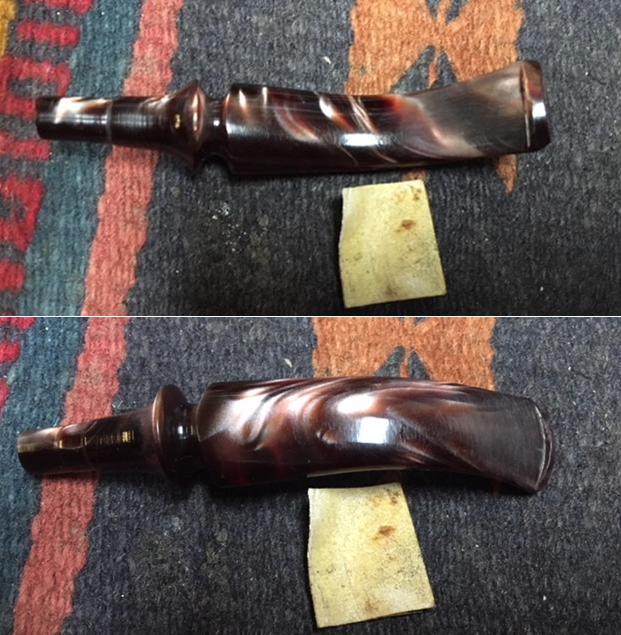
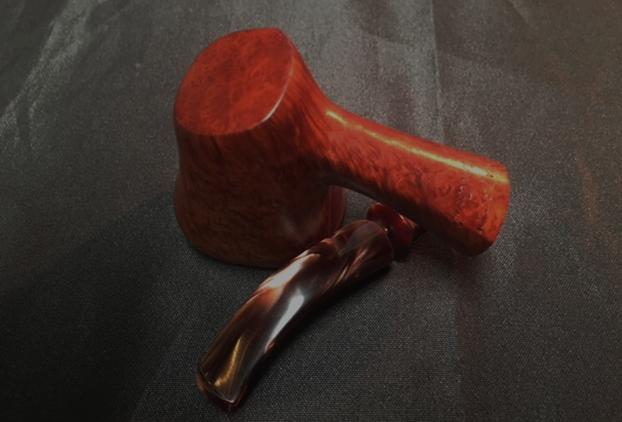
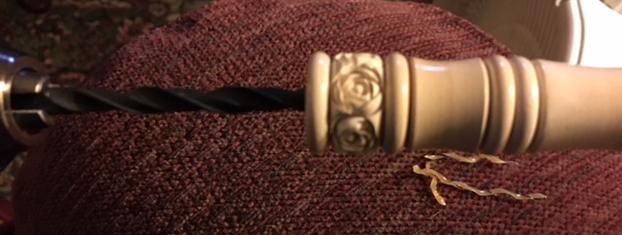
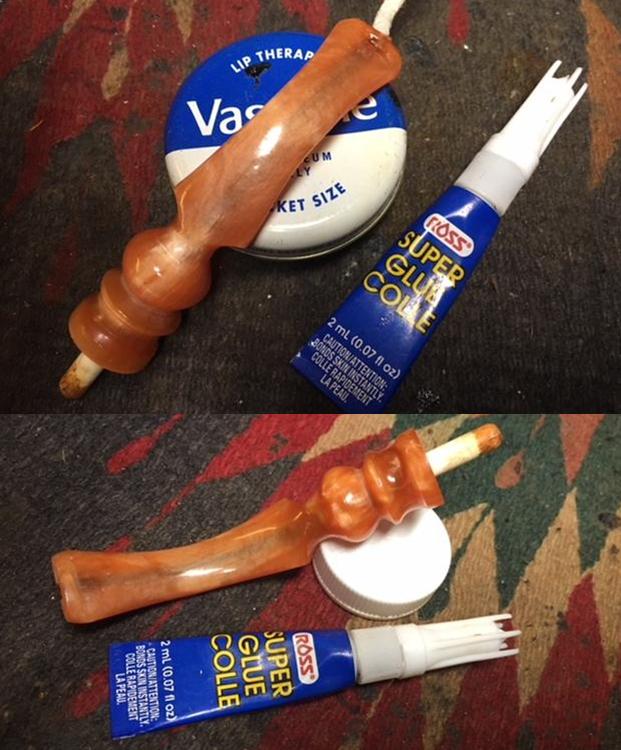
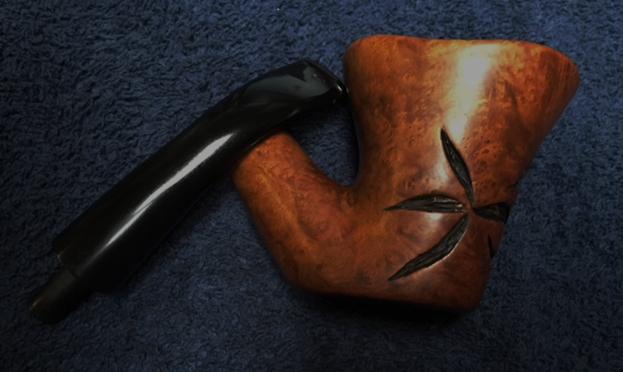
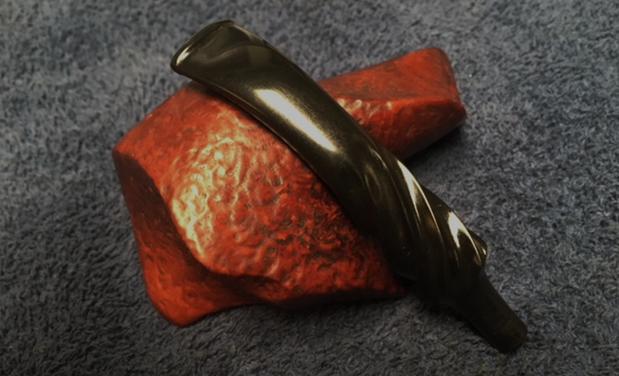
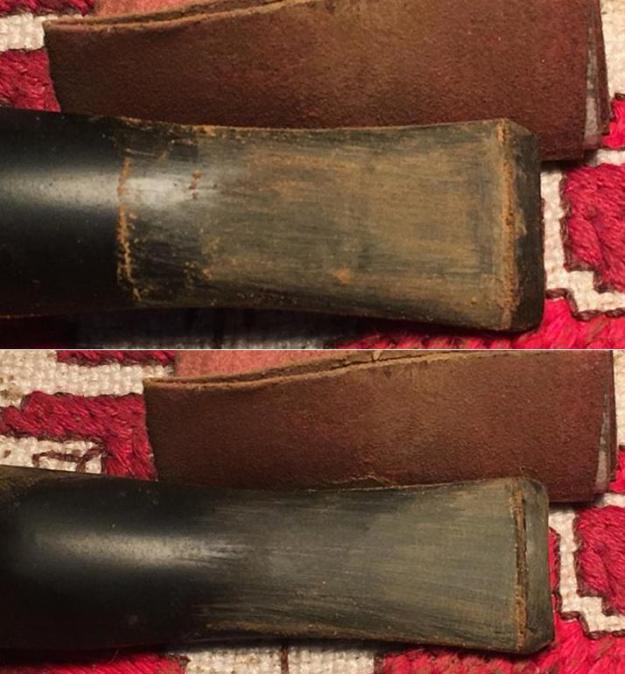
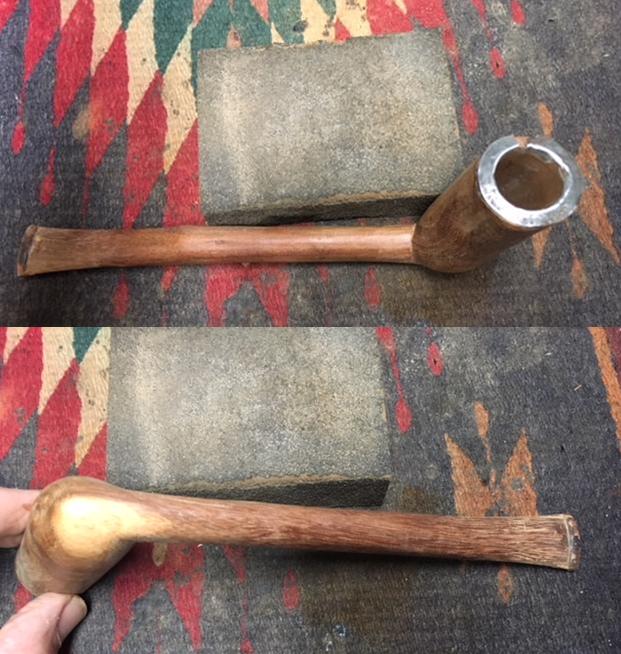
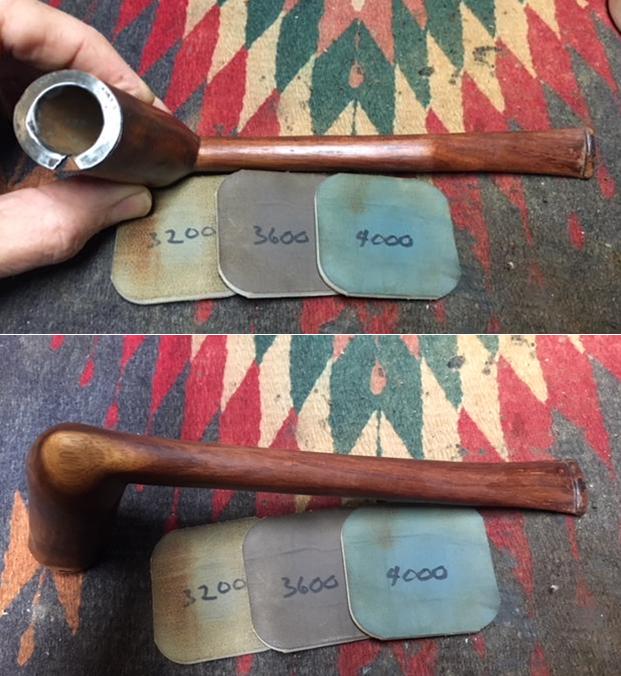
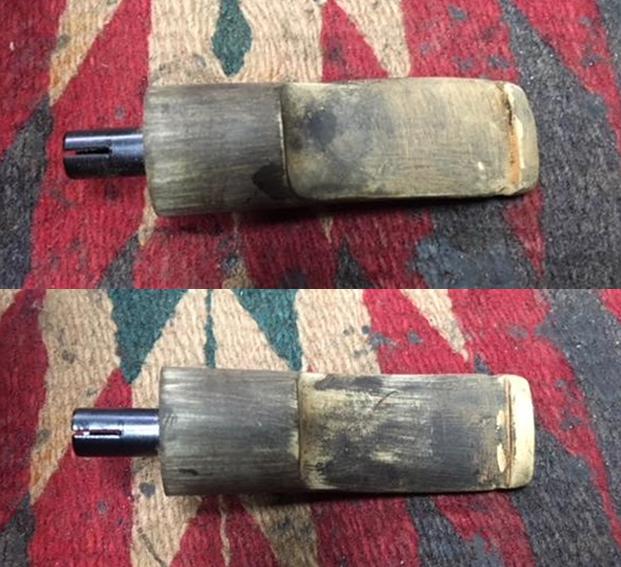
  After reuniting the stem and stummel again, I take another long, hard look at the goblin stem that was lurking in my subconscious! I have been mulling over the stem/shank junction and what it would take to repair – counting the cost in sanding and lost briar. As I fiddled with the stem, twisting it around checking the looseness of the fit, I stumbled onto the solution to the alignment conundrum! When I reversed the stem, so that it was upside down, the saddle of the stem and the shank lined up almost perfectly! The old 70s song came to mind, “Oh happy day!” I have absolutely no idea what was going on in the production line of the Arlington Briar Pipes factory that day, if indeed it was there, but there was a breakdown in communication between the drill man and the stem bending man (or women!). My mind wonders whether they had a few beers over lunch…. I’m scratching my head, but this restoration was just made a little less difficult! The junction between the end of the shank and saddle stem shows a bit of gap (daylight) but that can be addressed. My plan: re-bend the upside-down stem, thereby turning the upside-down stem to right-side up! Did you follow that? The pictures show the discovery!
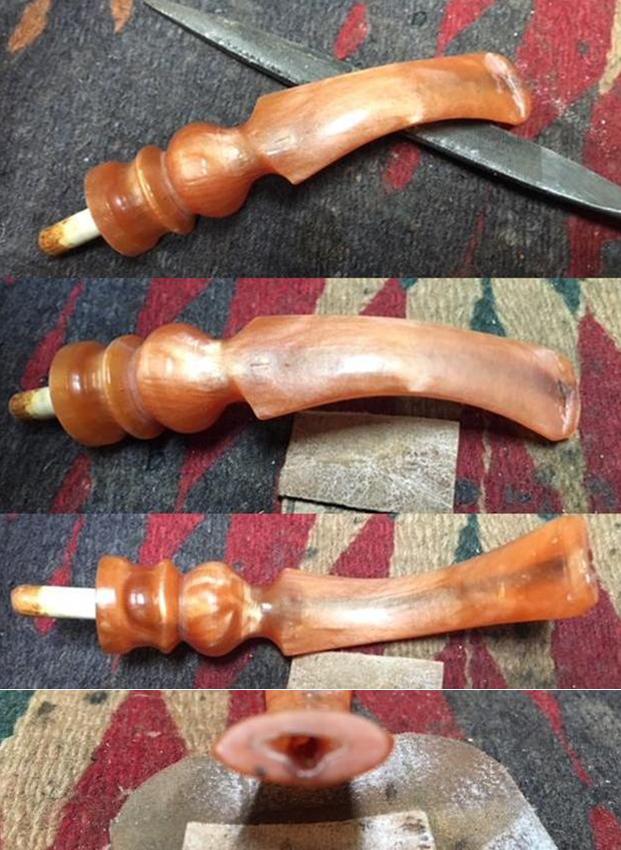
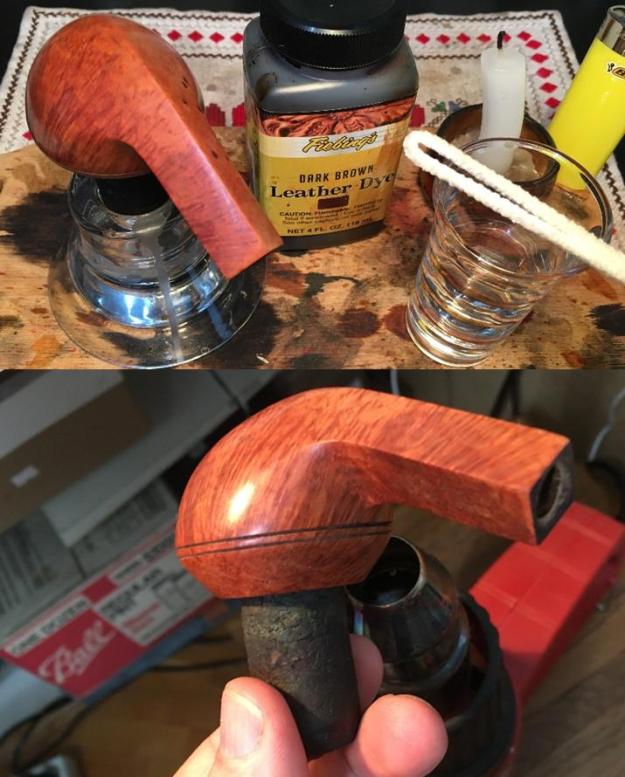
 To make sure I retain the same angle of bend, which seems to be on the money, I trace the stem’s angle on a piece of paper which I’ll use as a template for the reversing bend. I use a narrow-rounded glass bottle to provide the back-board for the bending. I then insert a pipe cleaner through the draft hole to help to maintain the stem’s integrity during the heating and bending. Using a heat gun, I gradually heat the stem in the bend area and when the vulcanite becomes pliable I bend it over the glass and size it up on the template. When I think I have it right, I place the stem under cool tap water to cool the vulcanite and set the bend. The first time through, I’m not satisfied that I create enough bend. I repeat the process again. The second time was the charm. I like the bend – the fit is now much, much better in the shank.
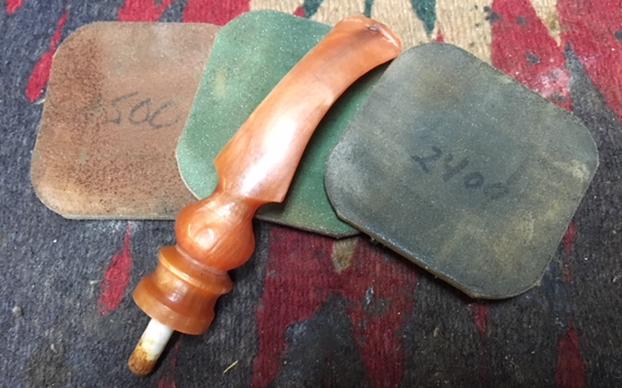
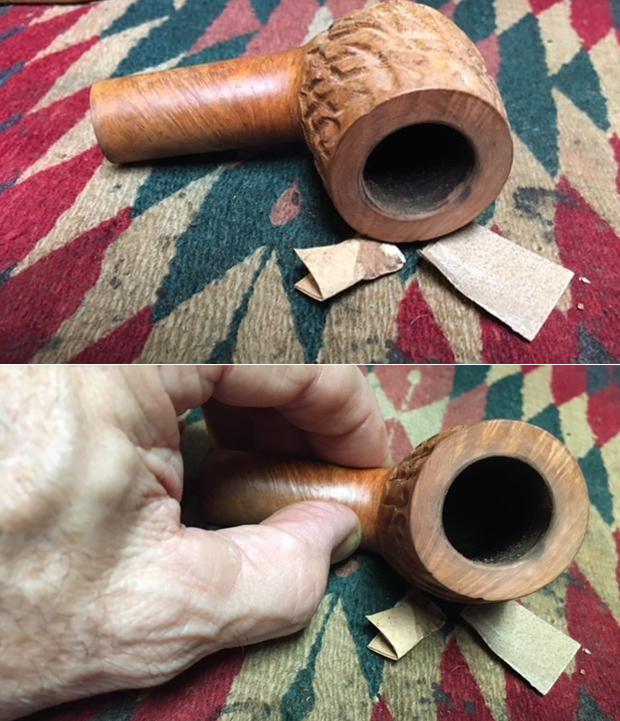
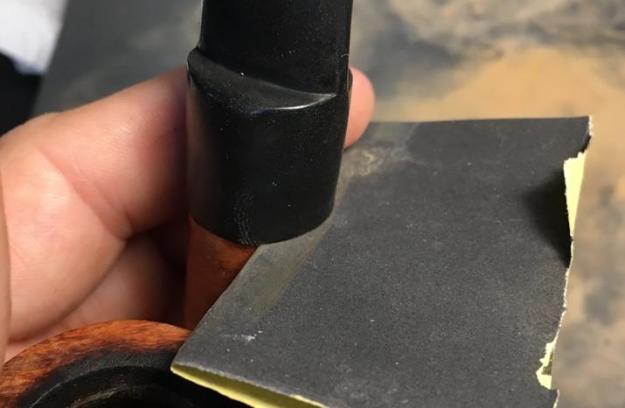
 While I’m on the stem adjustment, I now address the gaps or ‘daylight’ I can see between the shank base and the stem saddle. I start using by 600 grade paper on the topping board and I VERY gently top the shank base primarily to clean and start with a flat surface. I then use a piece of 600 grade paper, folded over once, inserting it between the shank base and saddle of the stem as a two-side sanding pad. I work on sanding down the high spots so that the gaps close. After a while, I’m not making progress too quickly, so I switch to 470 grade paper – a little coarser, and it does the trick. It takes quite a while sanding and testing repeatedly and making sure the stem stays in proper straight alignment during the sanding. I’m able to sand the high spots and achieve a much better, not perfect(!) union between the stem and shank.
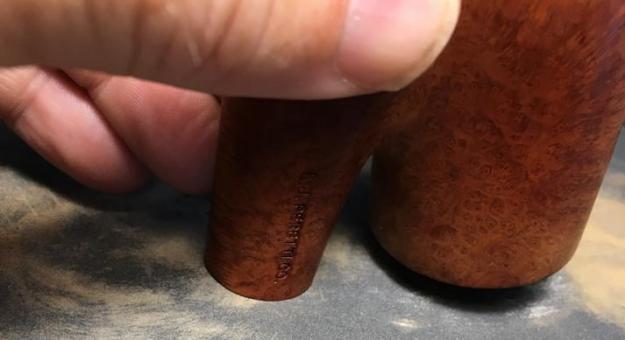

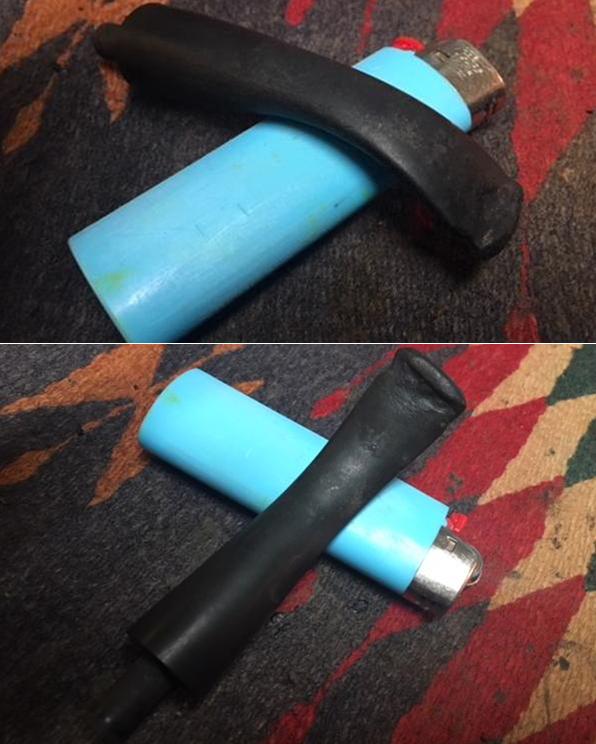
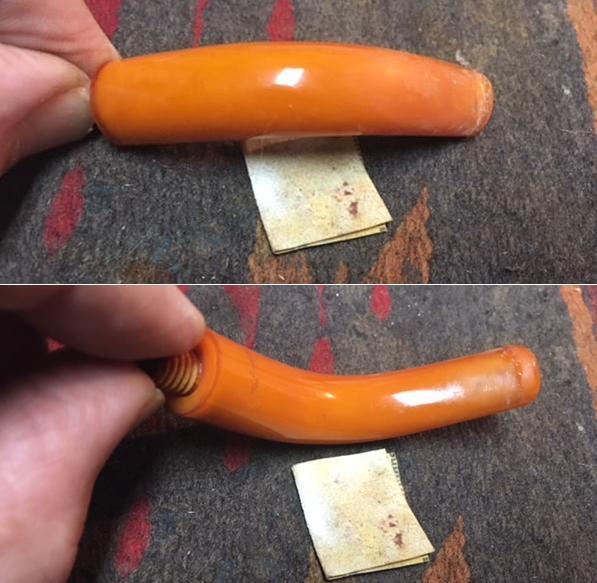
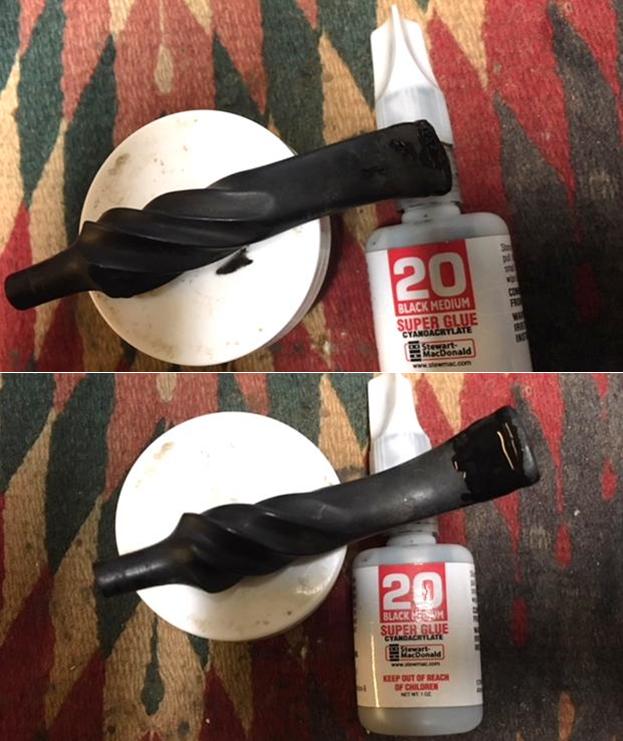
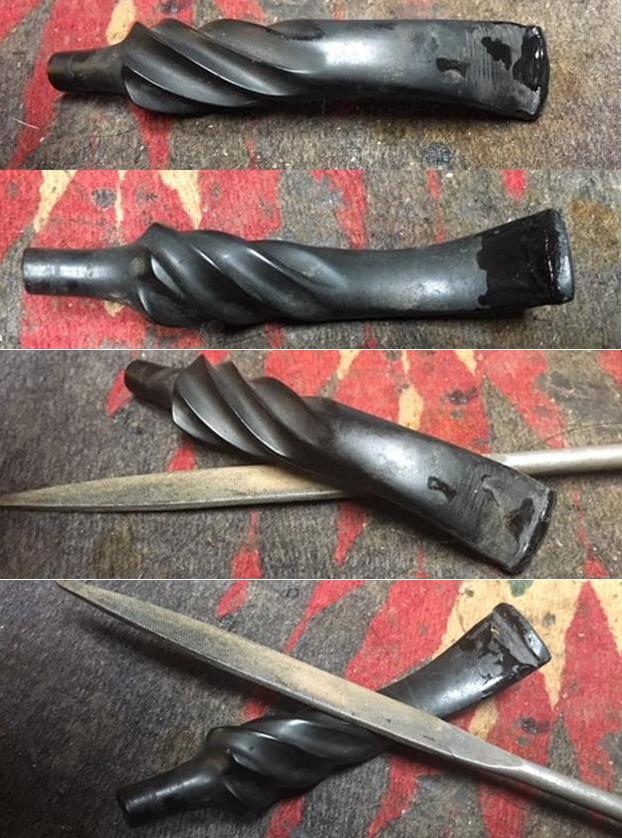
 Another adjustment is needed with the fit of the tenon and mortise. The fit now is looser than I prefer. I will tighten the fit hopefully by heating the tenon while inserting a slight larger drill bit into the tenon’s airway and expanding it. I heat the tenon with a Bic lighter and gradually work the smooth end of the drill bit down the airway. I cool the vulcanite with tap water to hold the expansion and withdraw the bit and test in the mortise. The fit is now snugger and that is good. That completes the mechanical adjustments to the stem – its working well!
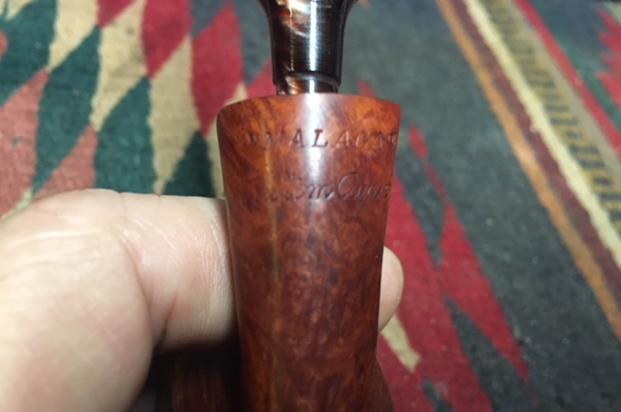
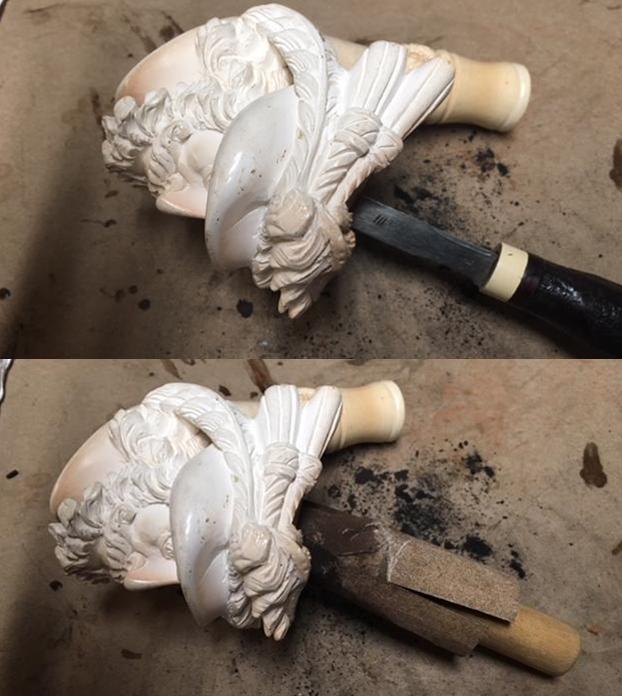
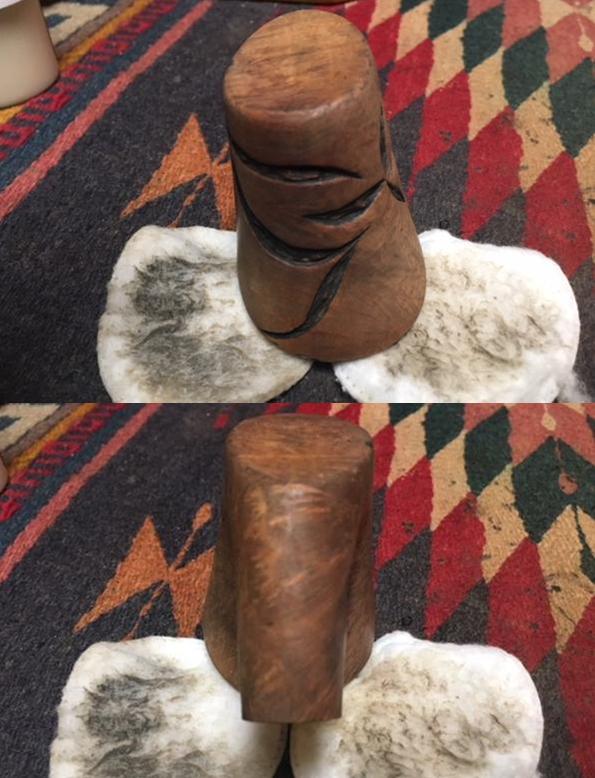
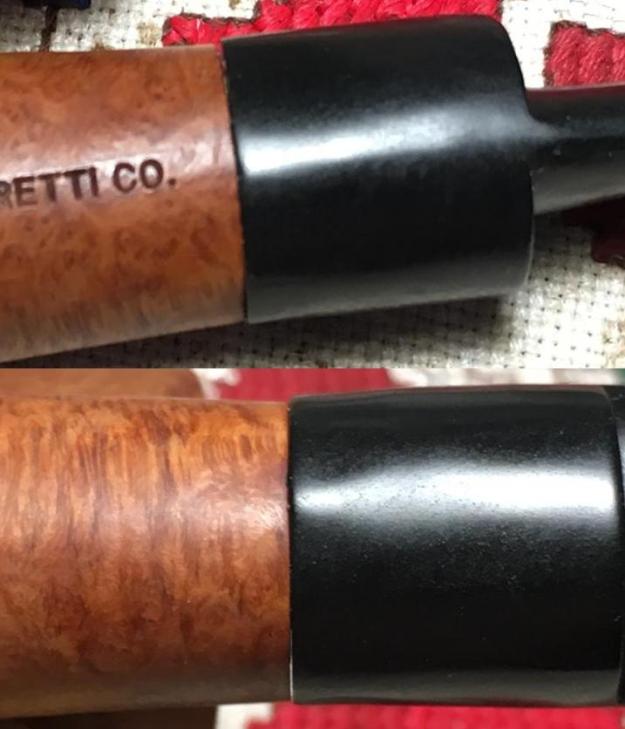
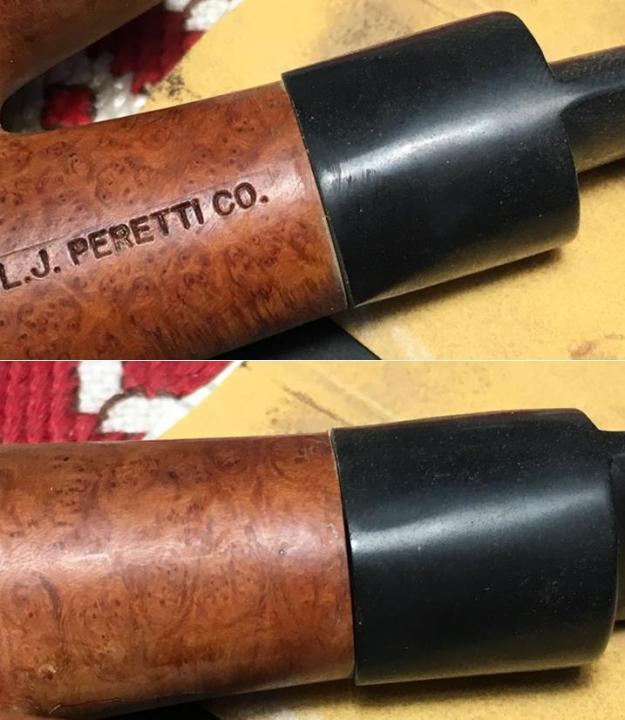
 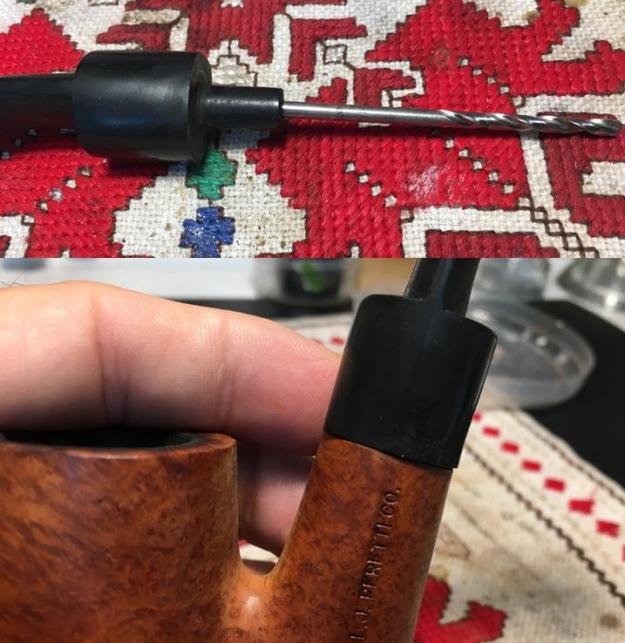 Even after the stem was turned ‘upside down’ to achieve better alignment, the saddle of the stem is enlarged over the shank at different places creating a ridge as I move my finger toward the stem over the junction. To correct this, I use 240 sanding paper to work on these ridges of vulcanite. I keep the stem inserted into the shank to do this. As I sand at the edge, dealing with the ridge, I’m also sanding up the saddle to taper the angle. I don’t want a mound of vulcanite to circle the saddle, so I blend the angle through the entire saddle – rounding it as well. The first picture shows the evidence of a ridge with the vulcanite dust collecting. The rest of the pictures show the stem flush with the shank and the tapering work on the saddle. Of course, the ‘L. J. Peretti Co.’, stamping on the shank is carefully safe-guarded during the sanding.
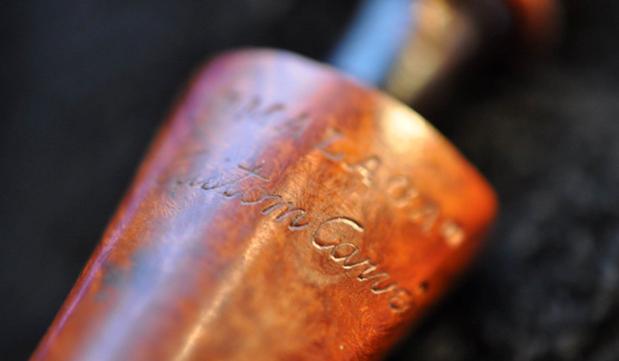
 After the 240 grade paper, I go over the same area with 470 grit paper followed by 600 which goes much faster because the purpose is to erase the scratches of the previous sanding paper. I am truly amazed at the recovery of this Oom Paul’s shank/stem alignment issues. The entire structure of the pipe is now tighter and sharper. The pictures show the completion of this part of the restoration for which I am thankful!
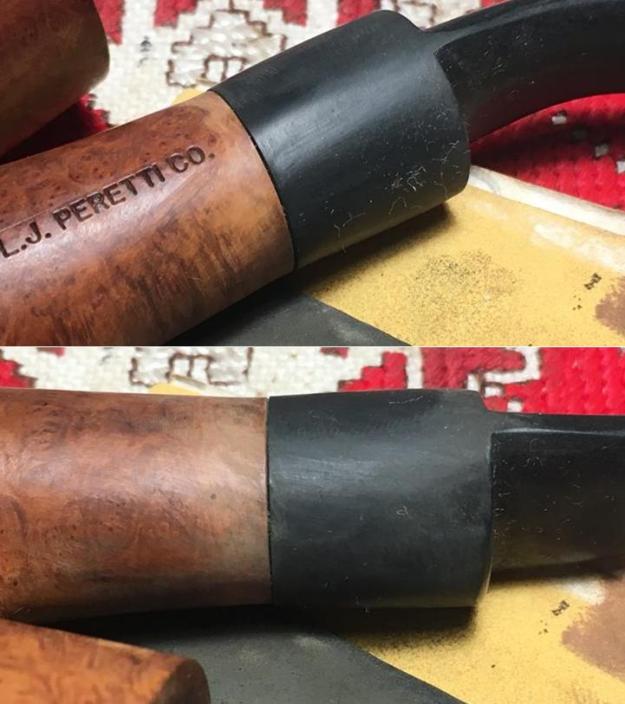
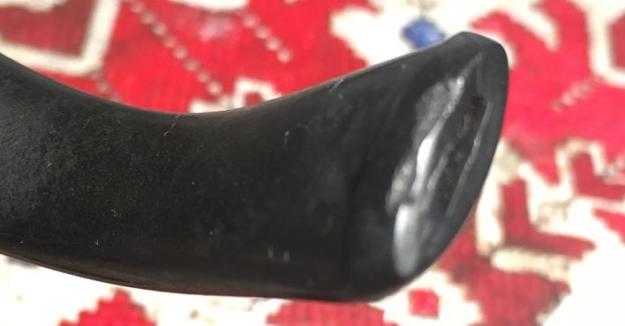
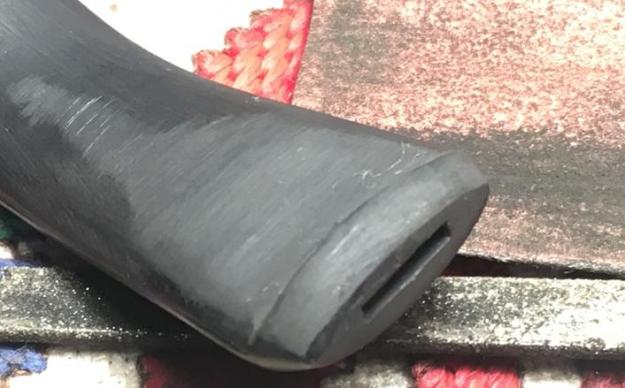
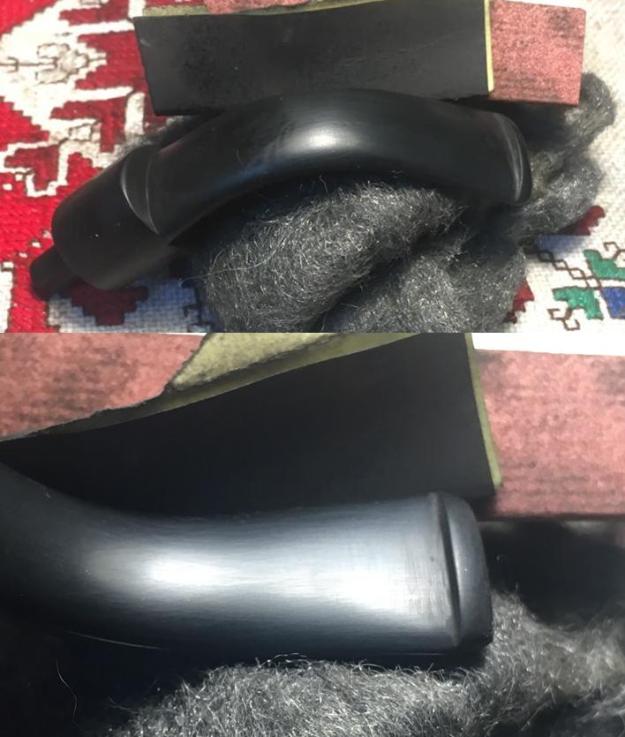
 Now I remove the stem from the stummel and flip the stem over to the bit area to repair the tooth chatter and dents. I take pictures of the upper and lower bit as well as a severe dent on the lower button lip to mark the starting point.
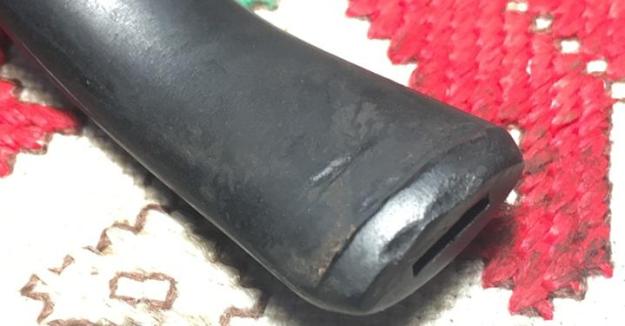 The first step is to employ the heating method. I use a Bic lighter and paint the vulcanite with the flame. As a rubber composite, the vulcanite expands with the heating and so the dents will rise reclaiming their original place in the whole – or almost. The dents have been lessened but not removed. The lower bit’s dents have almost vanished and will probably only need sanding. The upper bit and the button lip still have quite a bit of damage.
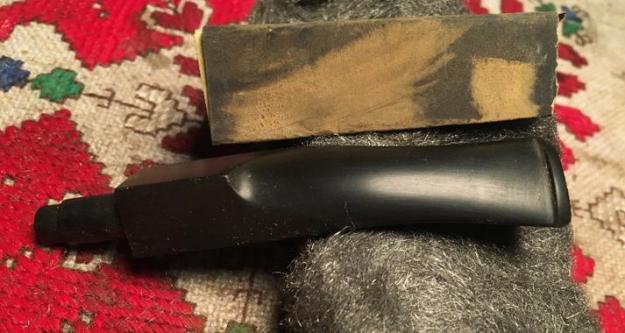
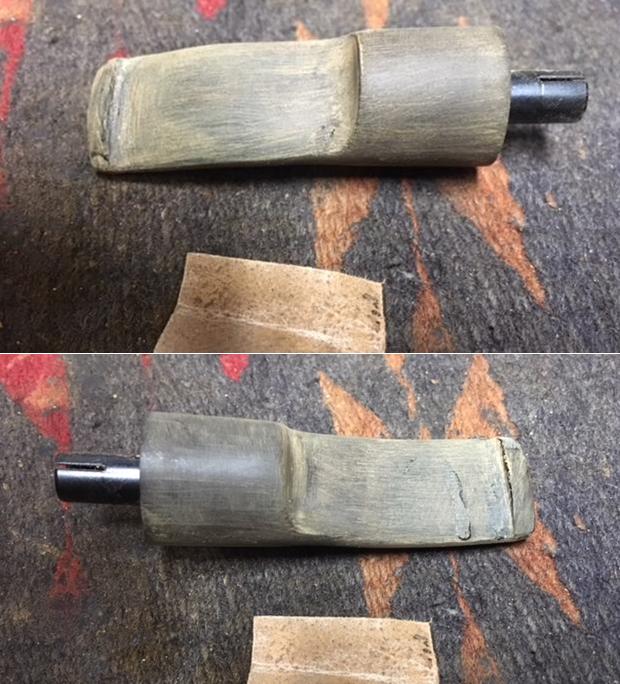
 I then take 240 grit paper and sand the bit and button to see what is left to patch. While I’m at it I sand the entire stem since it was re-bent in the extreme opposite, I want to remove any residual ripples in the vulcanite. The lower bit dents sanded out completely. The upper bit and button need to be patched. Pictures show the progress – first, upper then lower bit and button after sanding with 240 grit paper.
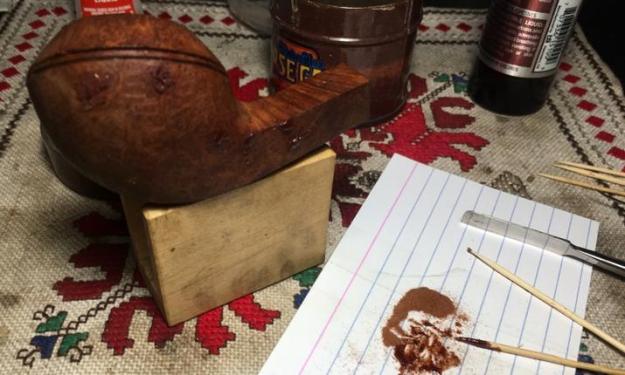
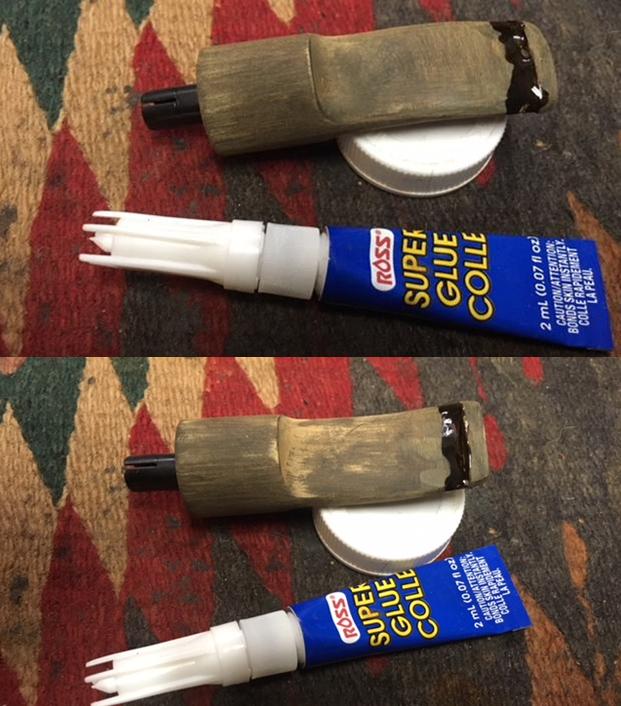
 Now I will patch the upper bit using BSI Maxi-Cure Extra Thick CA glue mixed with activated charcoal dust. I will patch the two dents as well as the left side of the button lip. It needs to be rebuilt. After I put a small amount of charcoal dust on an index card, I drop a little CA glue next to the activated charcoal dust. Then, using a tooth pick, I draw charcoal dust into the dollop of glue mixing it as I go. Gradually, as I draw more charcoal dust into the CA glue it begins to form a thicker putty. When it reaches the right consistency – like molasses, I use the tooth pick as a trowel and apply the patch putty to both dents and to the left side of the lower button lip to rebuild it. I put the stem aside to allow the patches to cure.
 With the stem patches curing, I now look to the rim damage. I take another close-up to get another look…. It’s amazing how things jump out – when I took the picture of the rim to begin working on cleaning it up, in the picture I notice what I hadn’t seen before – look beyond the rim to the shank….
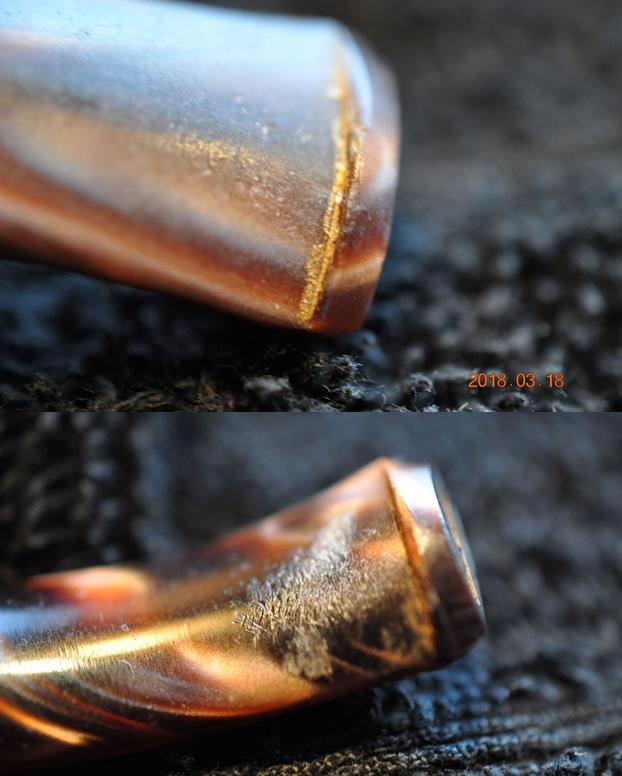
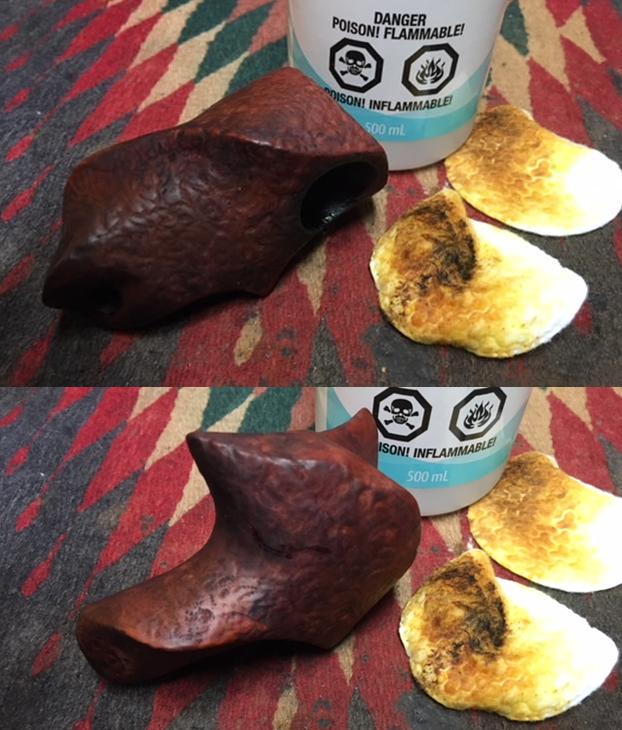
 When I first saw it, I thought it might simply be a wet line left over from cleaning the stummel. But after closer examination with a magnifying glass it confirmed what I was hoping against! A crack in the shank emanating from the ‘crook’ or where the shank and bowl join. I had almost the same thing in a previous Peretti Oom Paul restoration (See: Two of Boston’s L. J. Peretti Oom Pauls Recommissioned) – a shank crack that came from the crook and worked up toward the stem but did not reach the shank end. I closely inspect the mortise for evidence of an internal crack and I see none. I really don’t know how this crack started – it appears to be trauma created from the inserted tenon pushing forcefully toward the top of the mortise because of a drop which forced the stem down – my guess. I would think if this were the case, you would expect more trauma on the back of the shank – as a reaction force. But I see no indication of this. I take a few close-ups of the crack to see it more clearly.
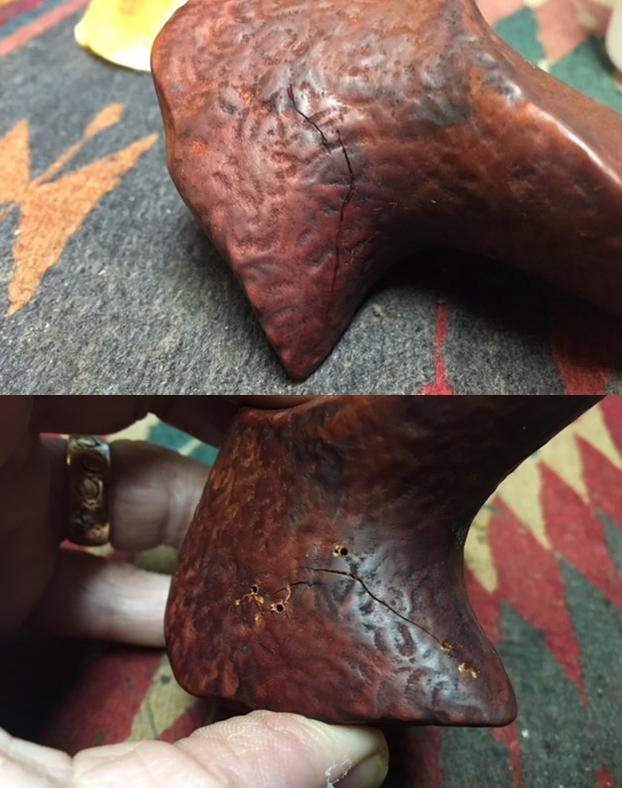
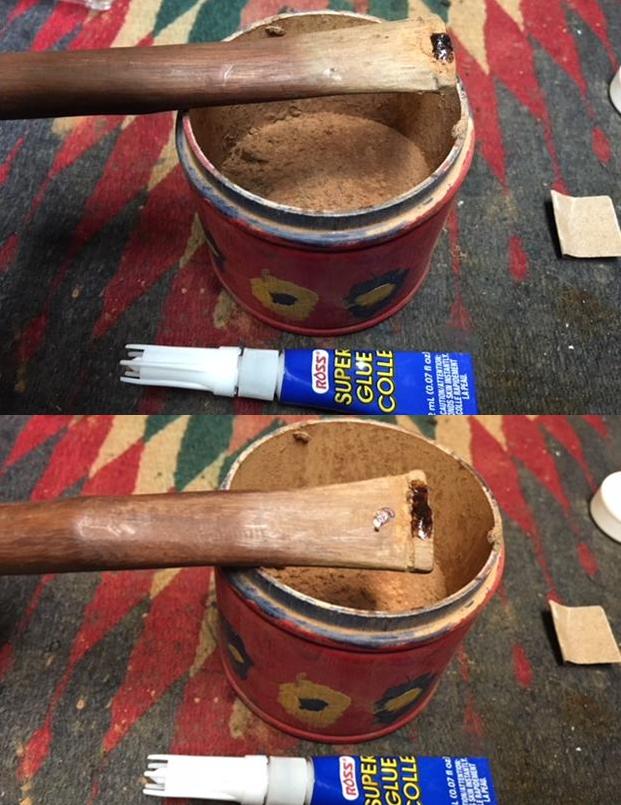
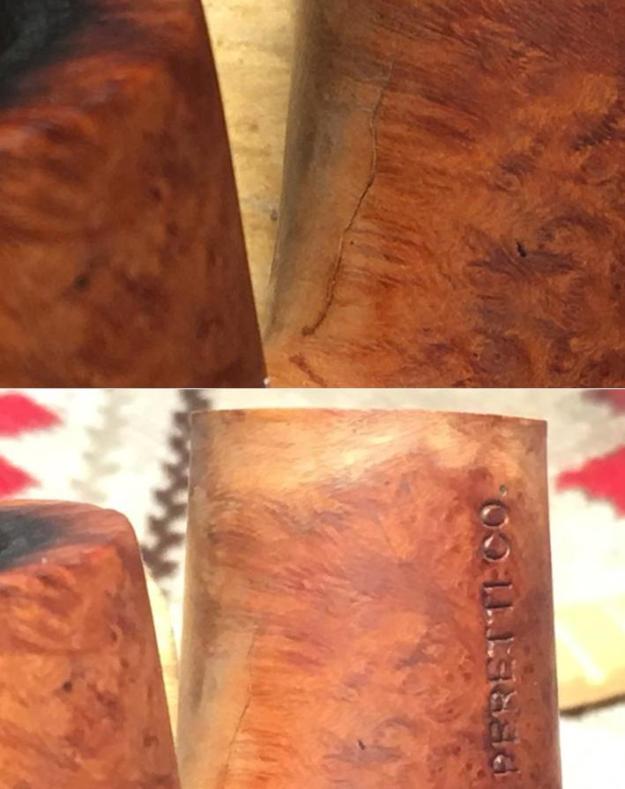 The good news is that the crack is localized in the briar and has not crept all the way to the end of the shank. As I did before, to block the ‘crack creep’ I drill small holes at both ends of the crack which will arrest its growth. Drilling in the crook is not easy! With the aid of a magnifying glass, I mark the ends of the crack with the sharp point of a dental probe. I use these as a drill guide (first picture below). I then mount a 1mm drill bit into the Dremel and I VERY carefully drill the holes – not an easy feat holding the Dremel free hand! I wipe off the area with a cotton pad this apply thin CA glue to both holes as well as along the line of the crack. The thin CA glue will seep more deeply into the crack helping to seal it. I then sprinkle briar dust on the entire repair area to help blending later when I sand. I set the stummel aside to let the crack repair cure.
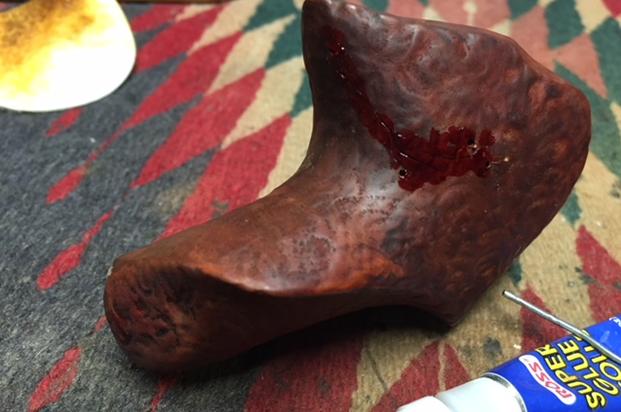
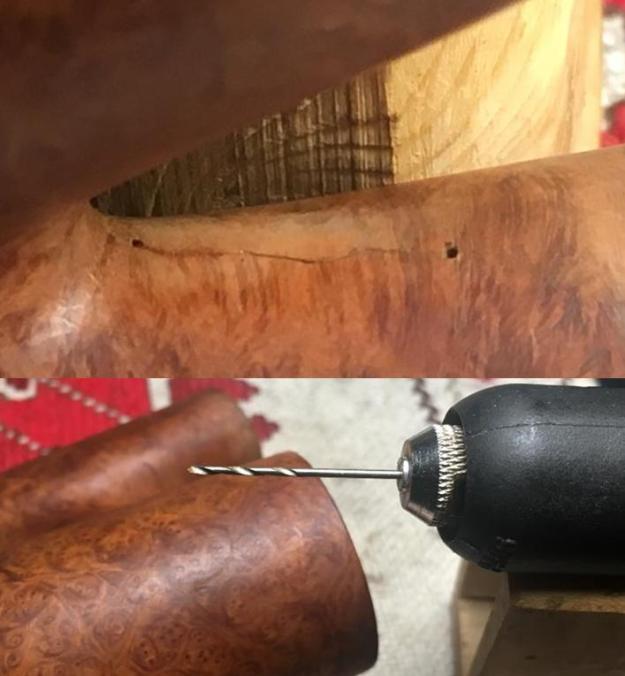
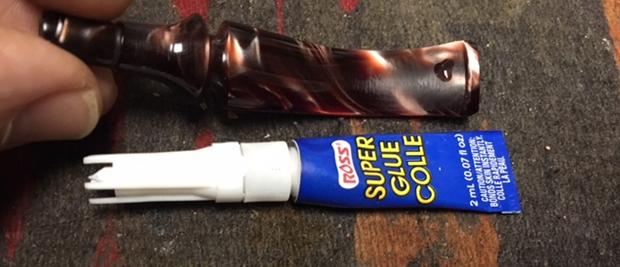
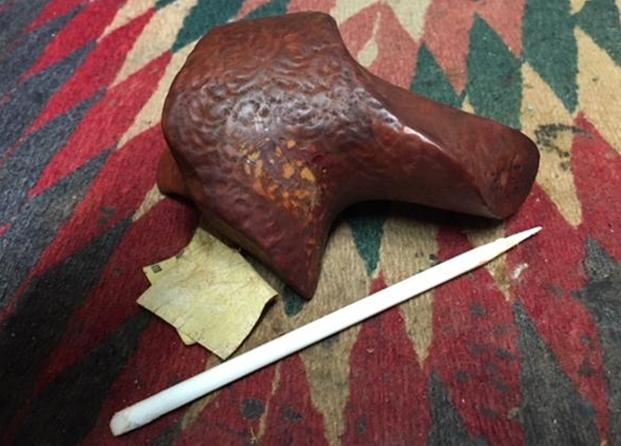
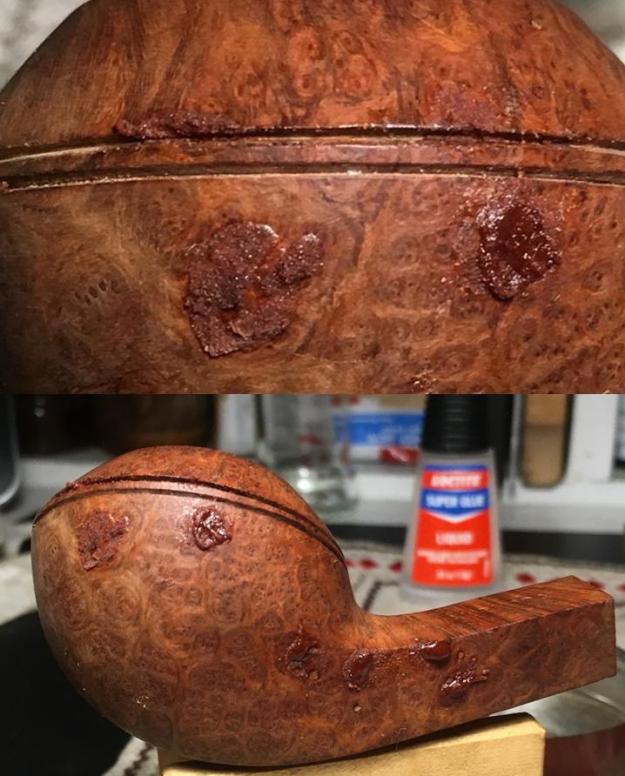
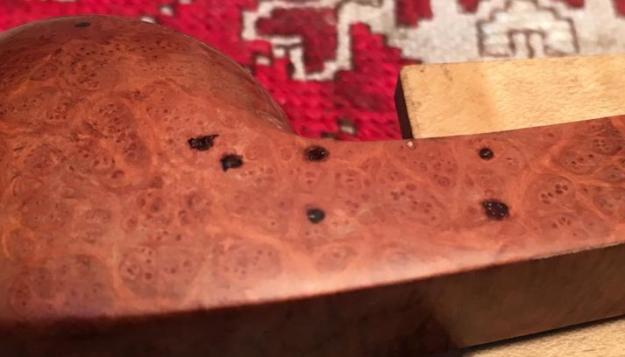
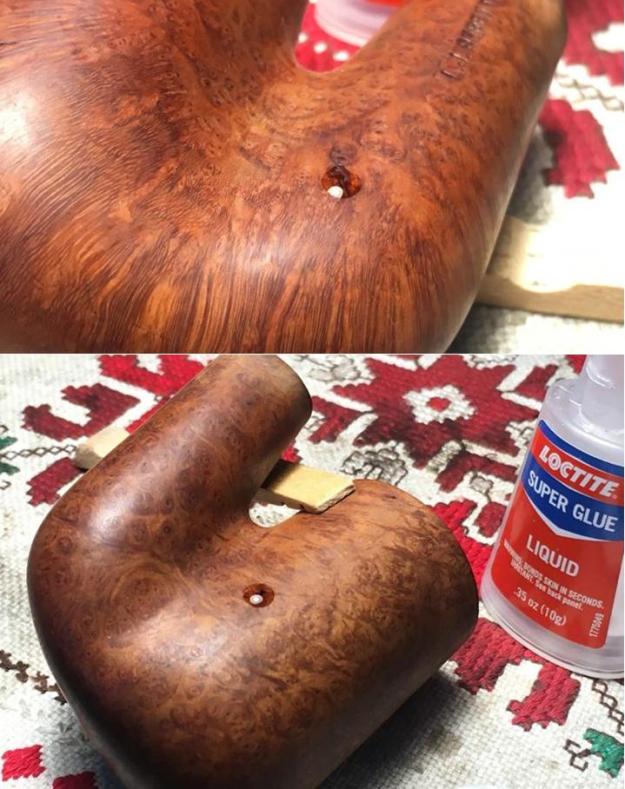
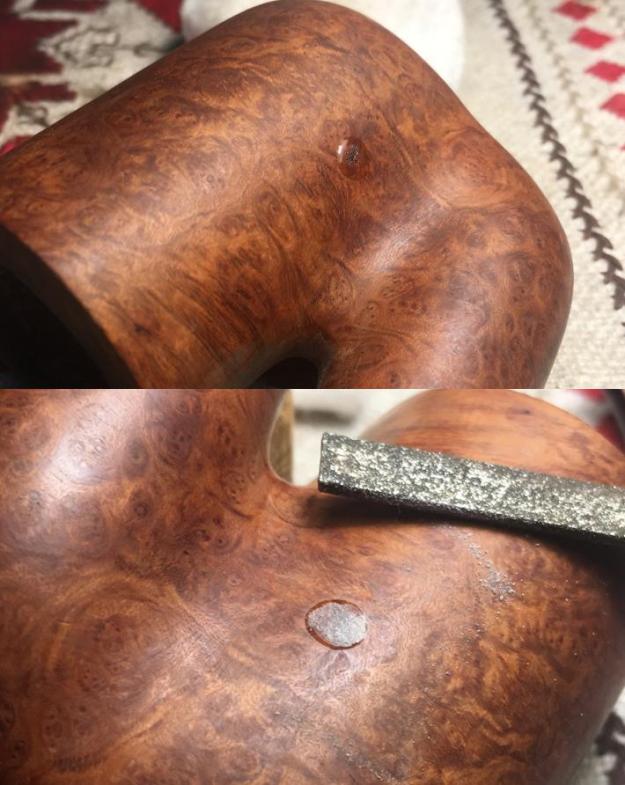
 While I’m working on the stummel, I also detect two places that have very small gaps in the briar that I want to fill. I apply a drop of regular CA glue to each gap. After applying the first drop, I wait an hour or so for the glue to set so that I can flip the stummel and apply the other patch. After the first patch sets, I apply the drop of glue on the other side and set the stummel aside to allow the CA glue patches to cure.
 With stummel patches curing I turn again to the stem and the charcoal dust and CA glue patches are ready to be filed and sanded on the bit and to reshape the button. I start by using a flat needle file to bring the patch mounds down to the vulcanite surface level. I also shape the new button with the file. The pictures show the filing progress.
 Switching to sanding paper, I first use 240 grit to bring the patch mounds down to the vulcanite surface and to blend, erasing the file scratches. I continue to shape and blend the button profile. Then I switch to 600 grade paper and sand the entire stem to erase the scratches left by the 240 grade paper. Finally, I use 0000 grade steel wool to sand/buff the entire stem to smooth out the scratches left by the 600 grade paper. I like the results. The reformed button looks good. With a closer look at one of the patches, I detect very small air pocket cavities in the patch which is common. To rectify this, using a tooth pick, I paint both patches, to be on the safe side, with a thin layer of thin CA glue to fill the cavities. I wait a few hours for the CA glue to cure and I sand the patch again with 600 grade paper and then again with the 0000 steel wool.
 I have sanding patch projects on the stummel to address. I start first with the crack repair on the shank. Using 240 grit paper I sand down the patch over both holes on each side of the crack as well as the crack itself. I then follow with 600 grit paper over the entire area. The repair looks good and will blend well as I finish the pipe. The main thing was to protect the pipe from a creeping crack – this is done.
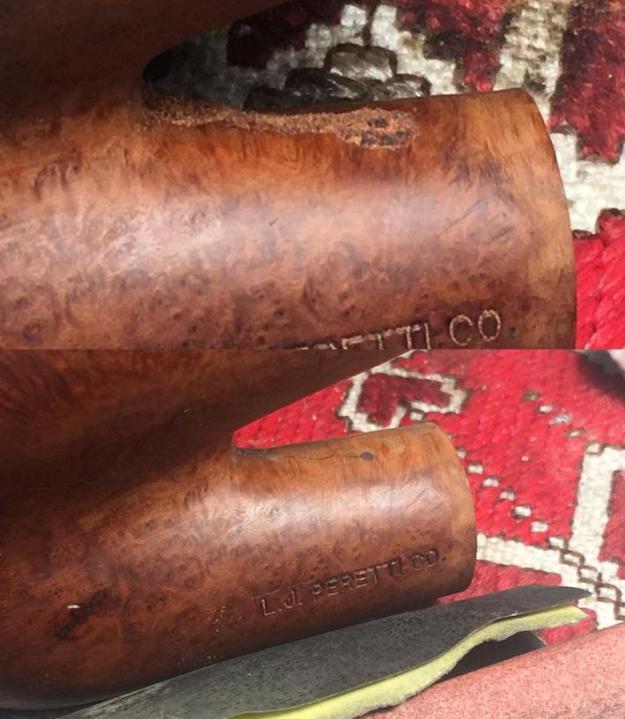 Turning to the patches on both sides of the stummel, I use a flat needle file, then 240 grit paper followed by 600 on both sides. As I file/sand, I try to stay on top of the patch mound to minimize impact on surrounding briar. Patches on the stummel are finished. Now I turn to the rim repair.
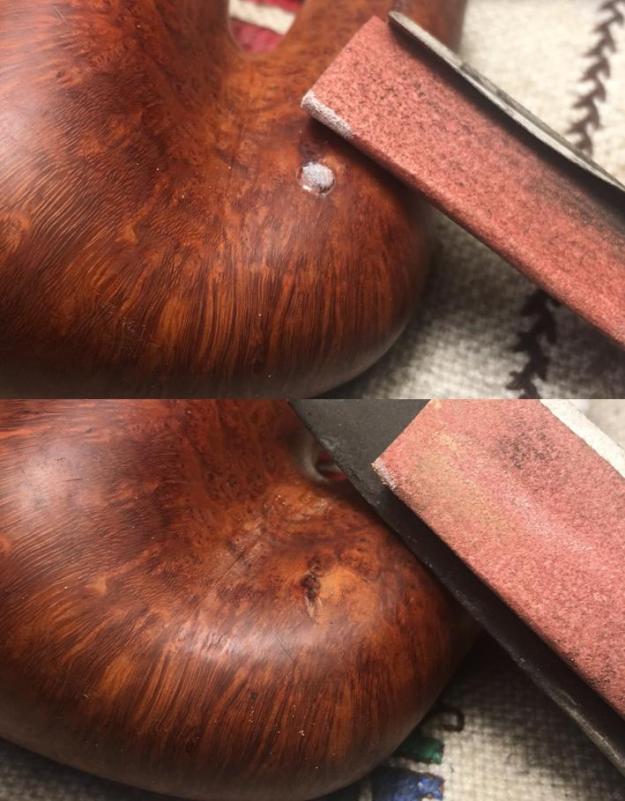
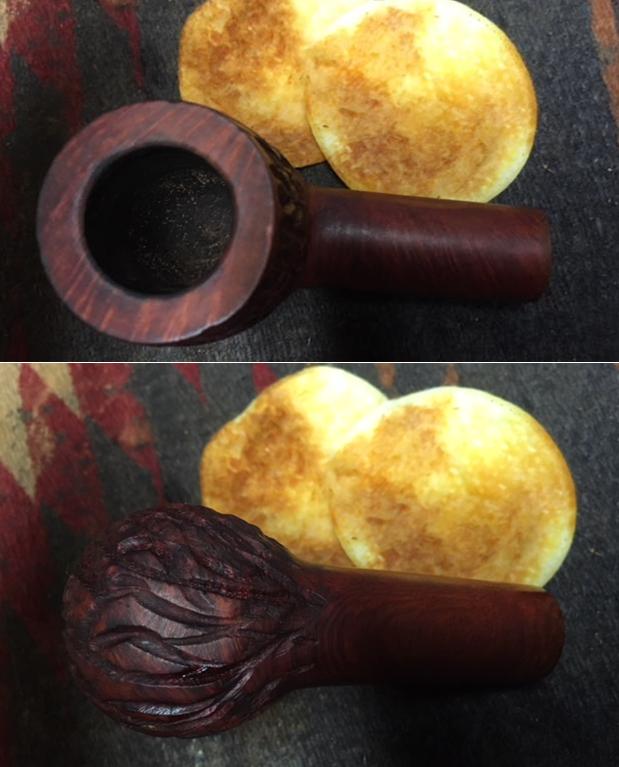
 I feel like I’ve been around the block a few times with the repairs to the stummel and now I’m finally looking at the rim repair. I take another picture to get a closer look and mark the starting point. In the picture below, the bottom of the picture is the left side of the rim that has sustained the most damage from burned briar because of the former stewards practice of lighting his tobacco over the side of the rim instead of over the tobacco. I cannot replace the lost briar but what I try to do as I remove the damaged briar is to restore the balance to the rim as much as possible. I do this through beveling.
  First, I take the stummel to the topping board which for me is a chopping board covered with 240 grit paper. After inverting the stummel, I rotate it over the board in an even, circular motion. I check the progress often to make sure I’m not leaning in the direction of the damaged area. It is especially a challenge topping an Oom Paul because his shank is extended beyond the plane of the rim. So, I hang the shank off the side of the board as I top.
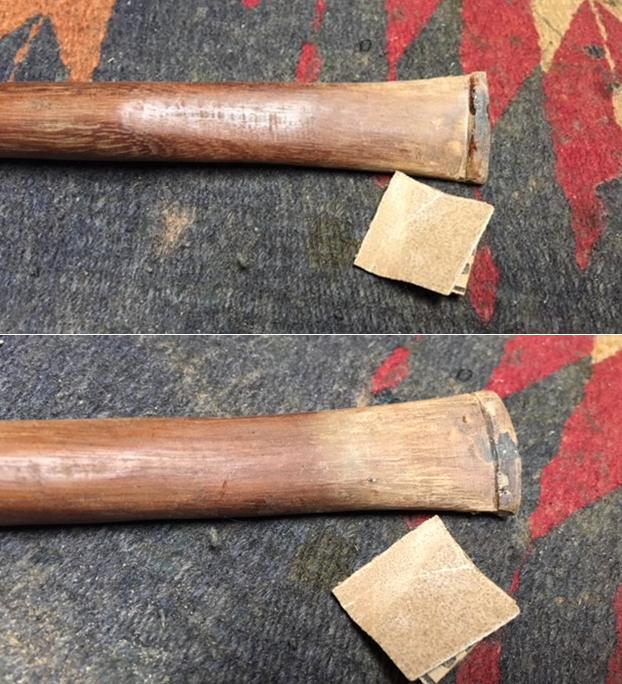
  I utilize a flat sanding block as well to direct the topping in specific areas. When I’ve taken enough off in topping, I switch the paper to 600 grit on the topping board to give the rim a quick smoothing by removing the 240 scratches. You can see in the pictures below how I unintentionally nicked the shank in the process….
 Next, to remove the internal ring of scorched briar I use a tightly folded piece of coarse 120 grade paper to cut a bevel around the internal edge. I increase the bevel on the ‘fat’ areas of the rim seeking to balance the roundness a bit – even though nothing will solve it completely! The goal is to give the appearance of more balance. After completing the main shaping of the bevel with the coarser 120 paper, I continue using a rolled piece of 240 grit paper. I take a picture at this point to mark the progress.
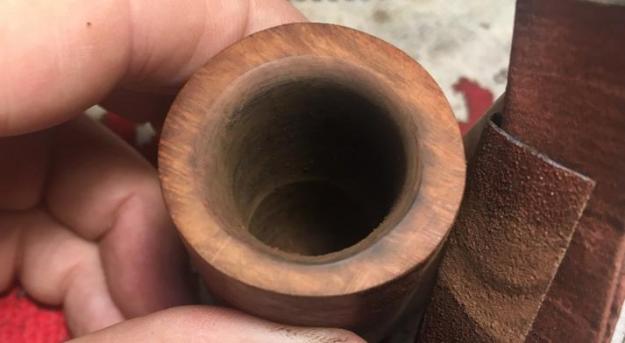 I take the stummel back to the topping board with 600 grit paper to define the rim lines again.
 One last step in the rim repair. The external edge of the rim is sharp because of the topping. To soften the appearance of the rim and to enhance the overall presentation of the rim, I cut a small, gentle bevel on the external edge. I do this with 240 grit paper rolled, then follow with 600 grit paper. I pinch the paper on the edge of the rim with my thumb and move methodically and evenly around the circumference. We live in a broken world and many people live their lives with a limp – it reminds us of our frailty. This Peretti Oom Paul will always have a limp of a bowl that is out of round because of the damage he sustained in the past. Despite this, the rim looks pretty good considering from where we’ve come!
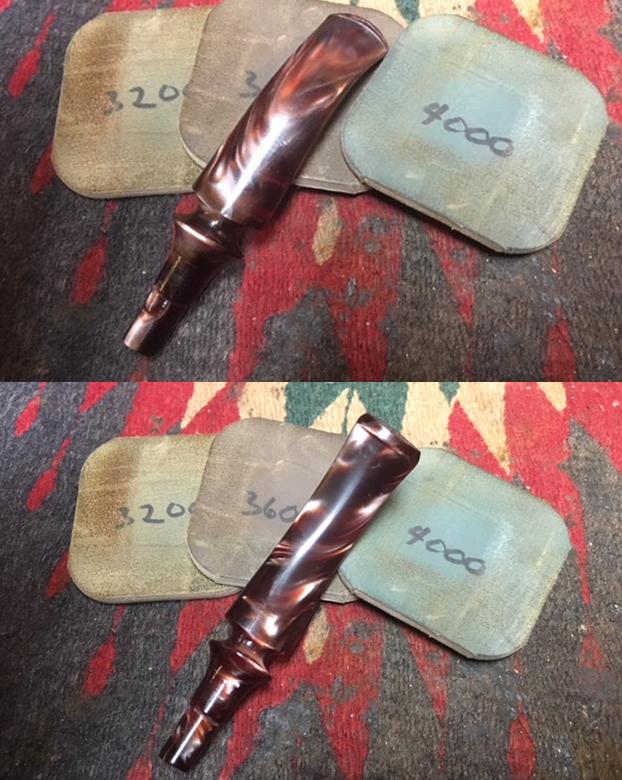
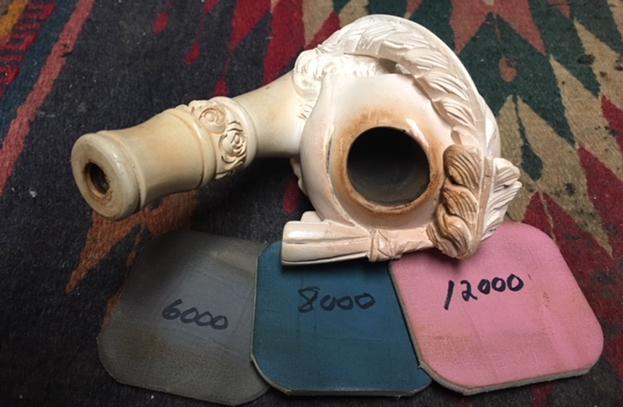
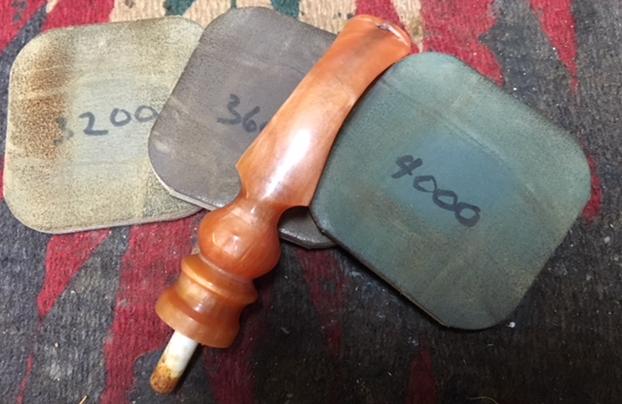
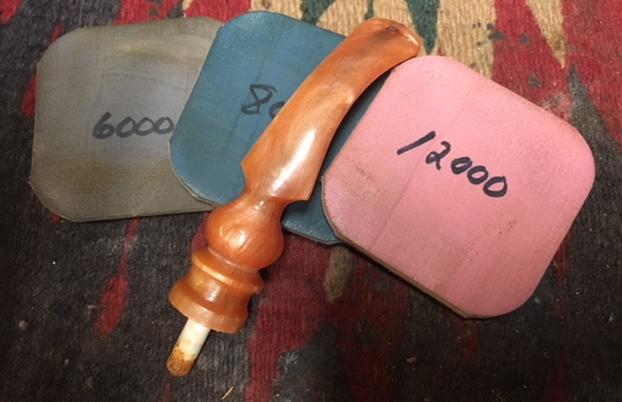
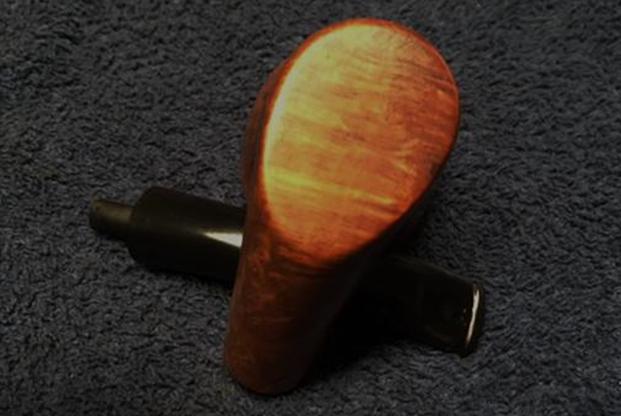
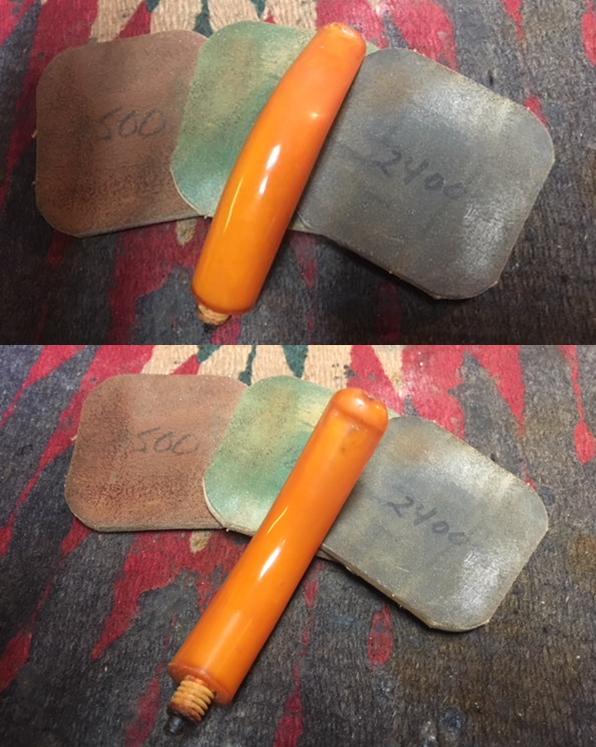
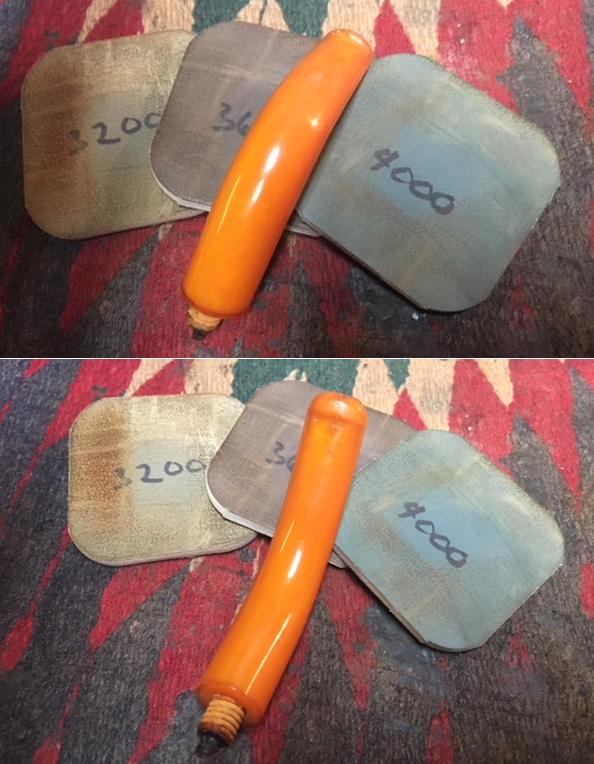
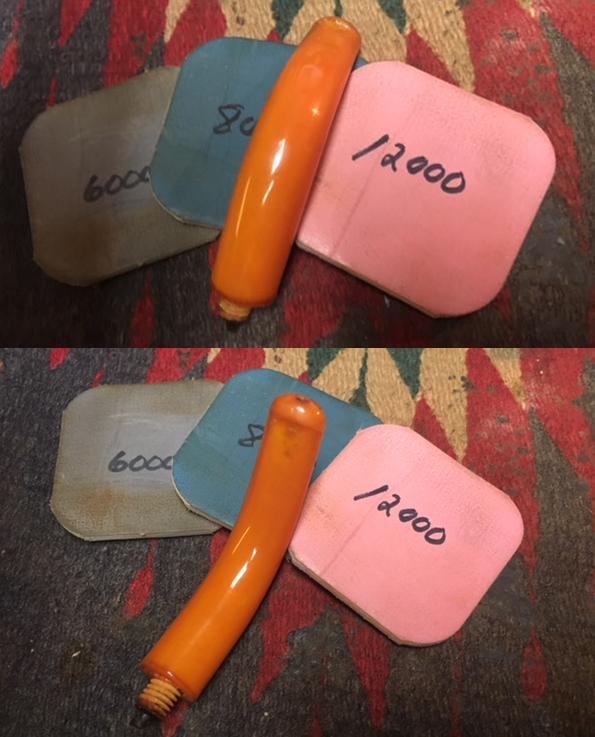
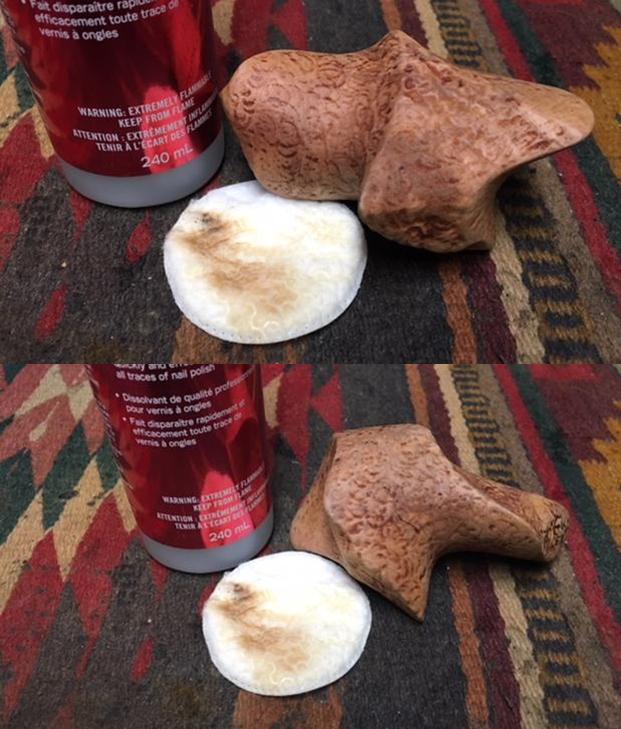
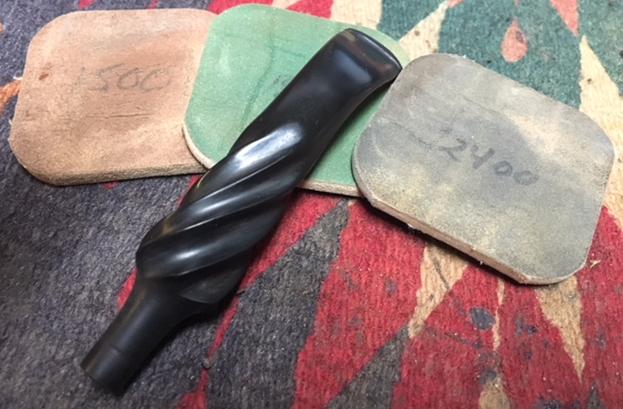
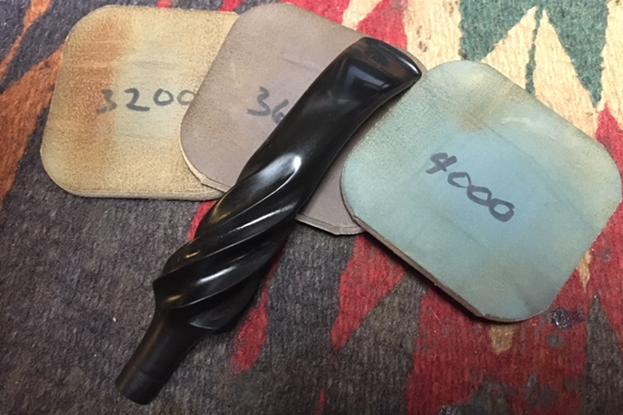
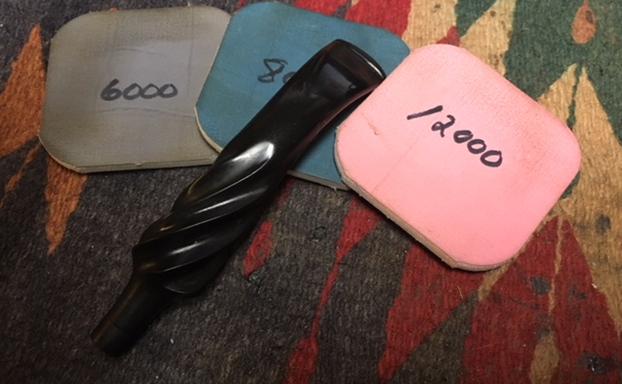
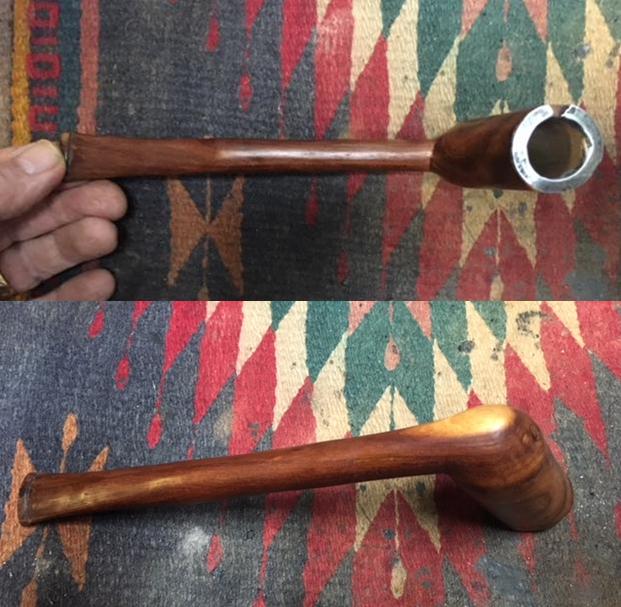
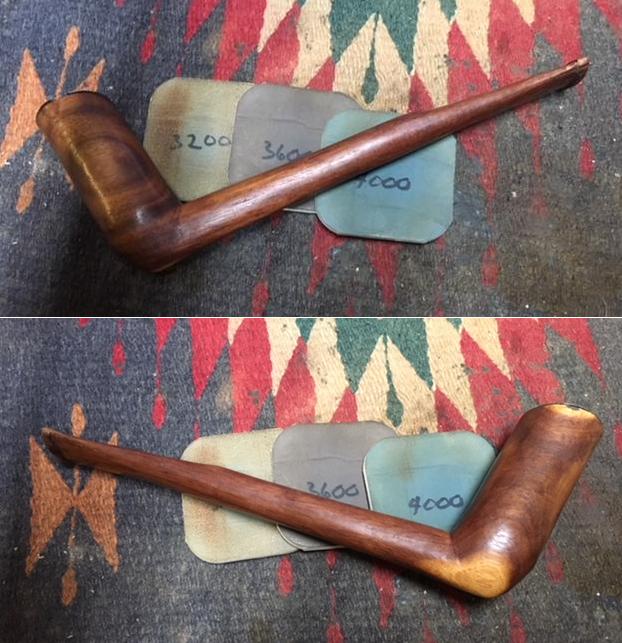
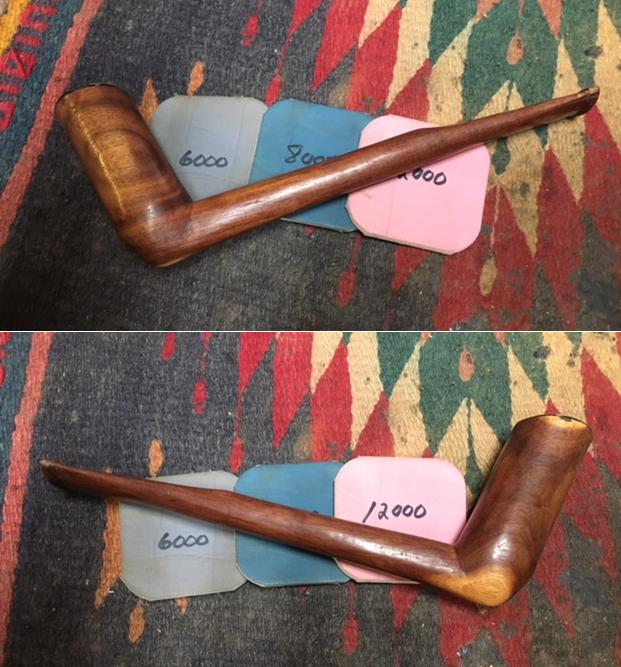
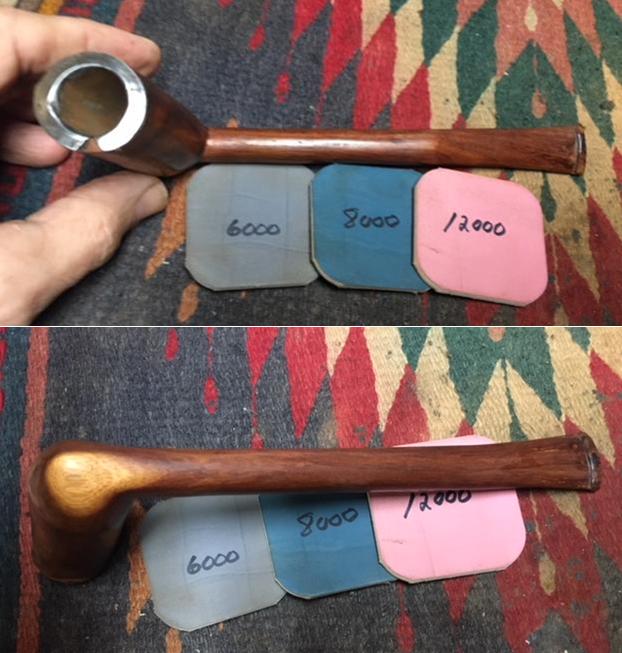
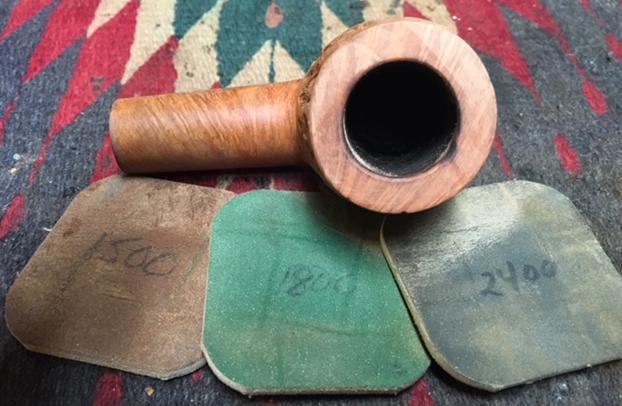
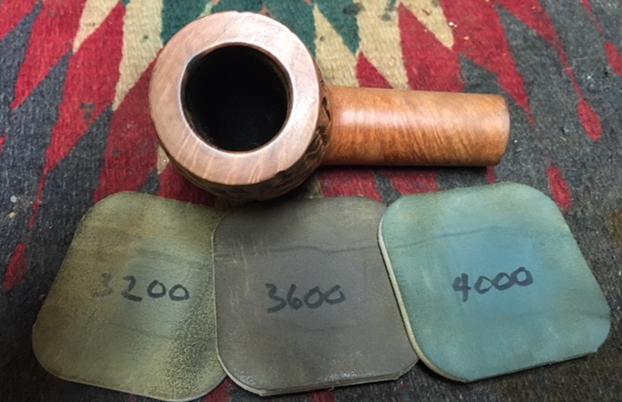
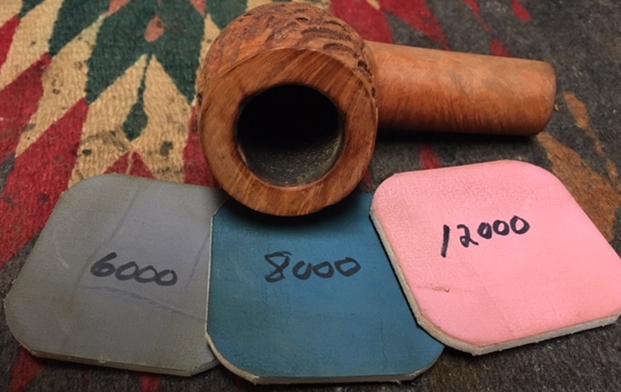
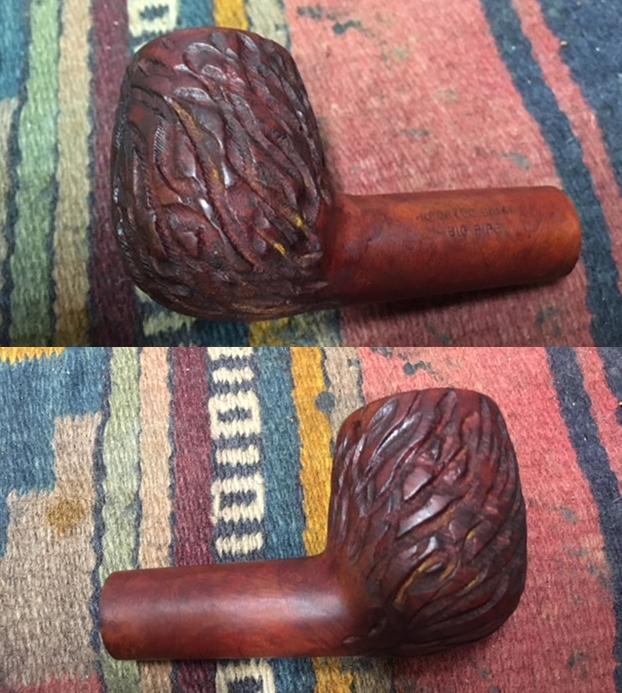
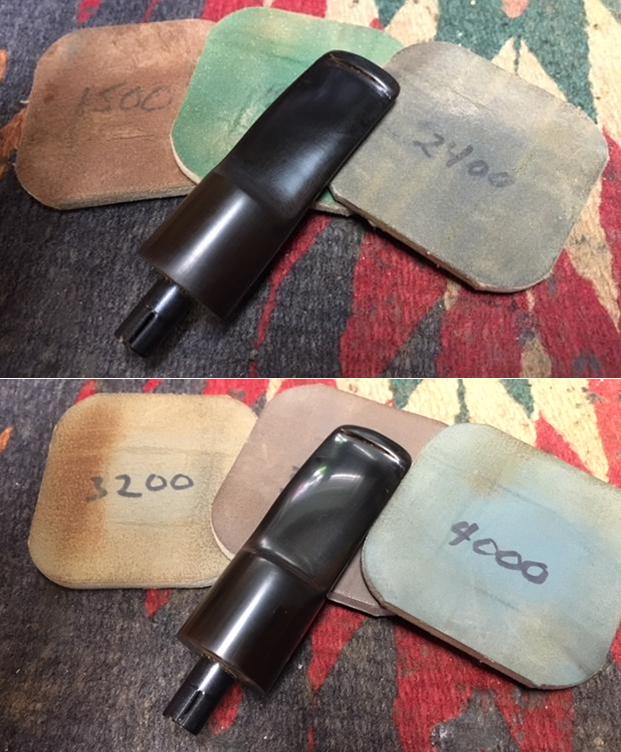
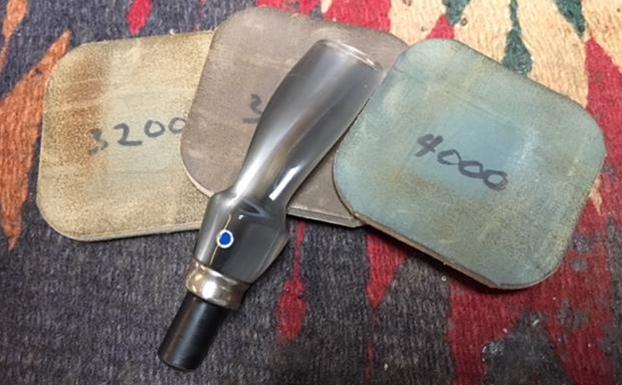
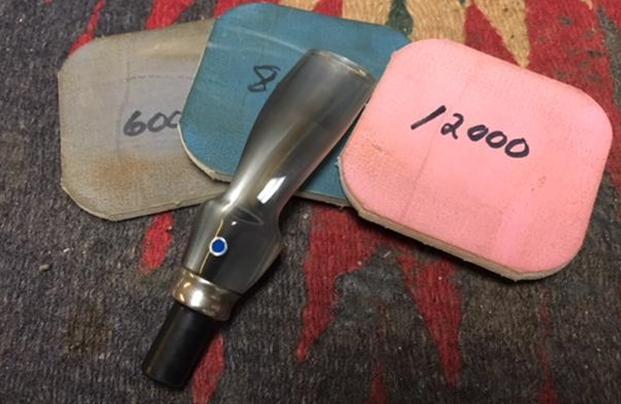
 Anxious to move the stummel along, I now address the briar surface. Using micromesh pads 1500 to 2400 I wet sand the stummel. I follow this with dry sanding with pads 3200 to 4000 then 6000 to 12000. I enjoy watching the briar grain emerge through this process!

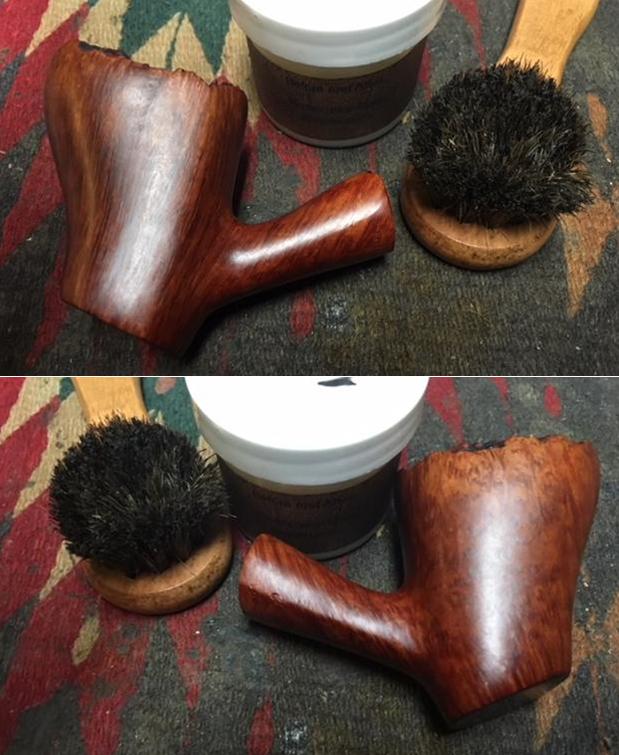
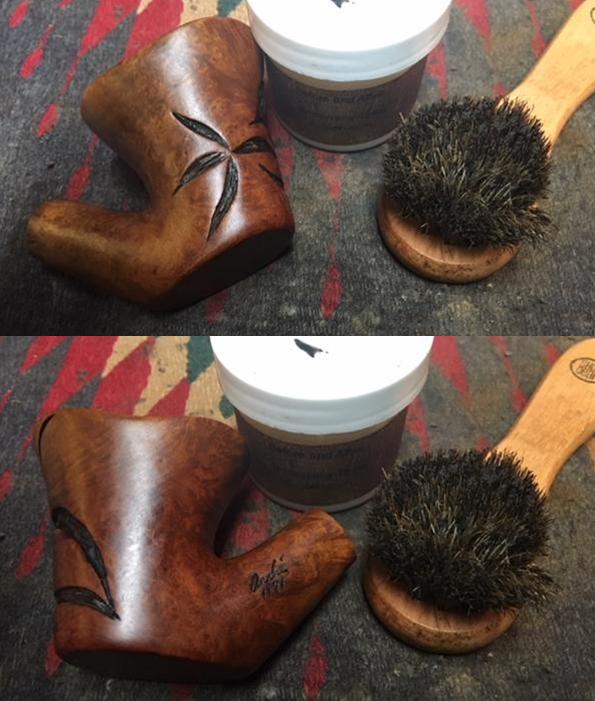
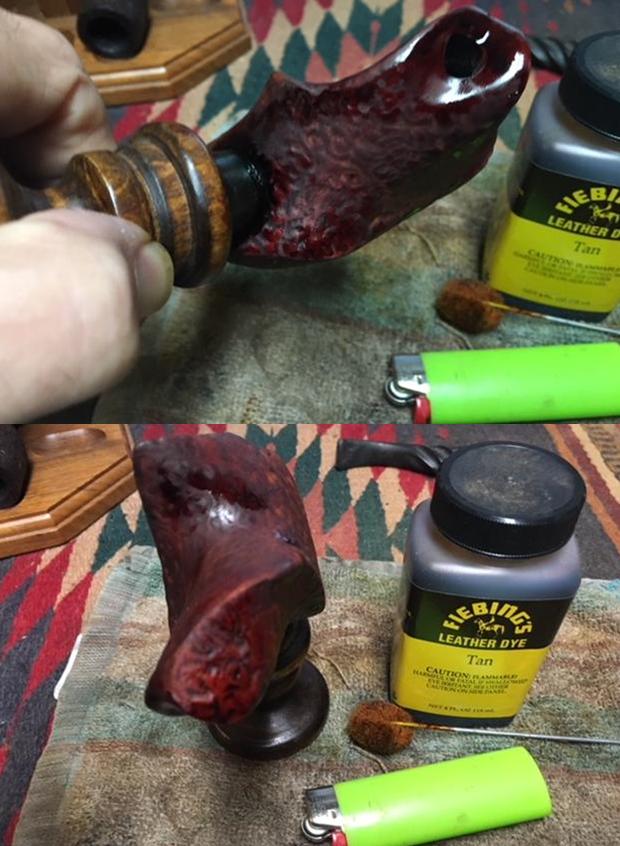
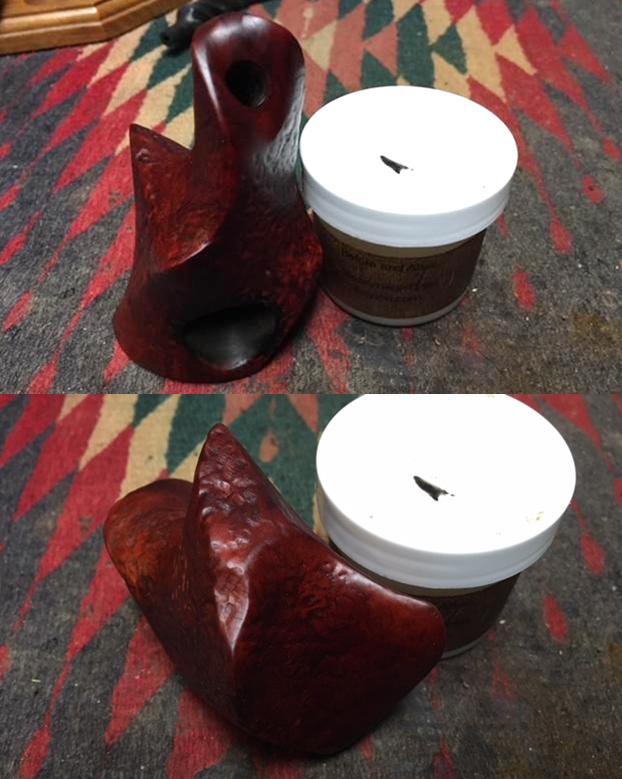
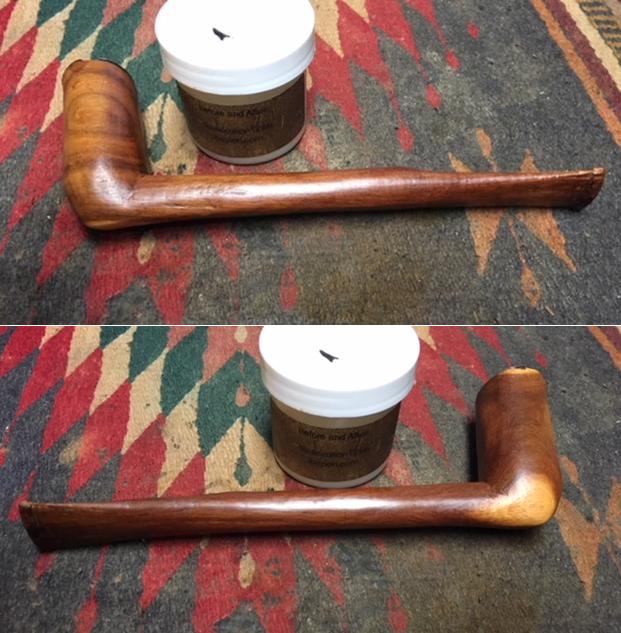
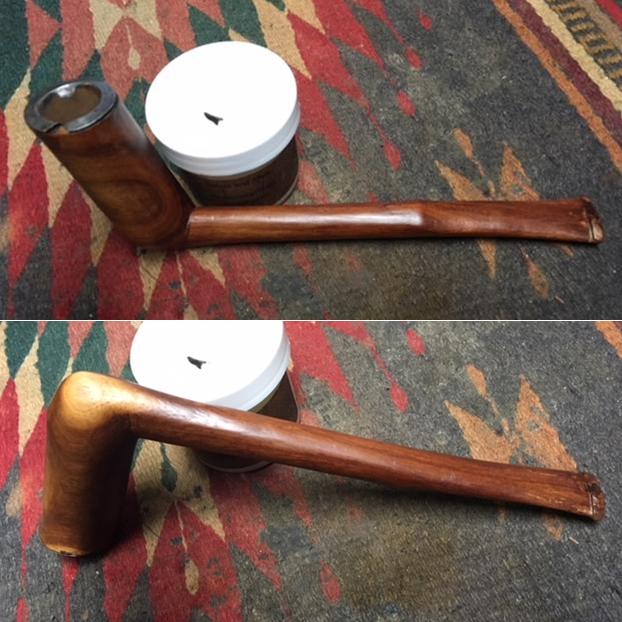
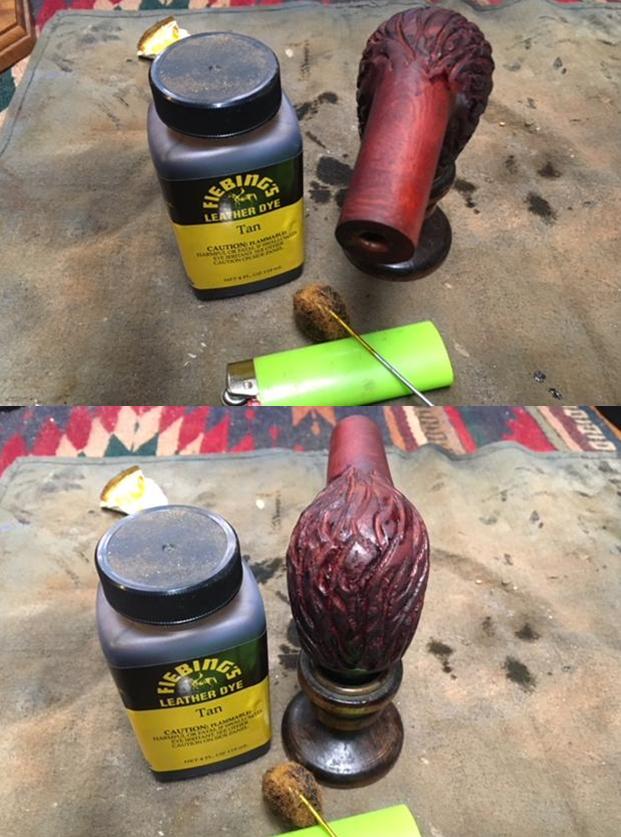
 With the previous Peretti restorations, and with this one, I strive to maintain the original Peretti light, natural grain motif. I have used Before and After Restoration Balm to deepen and enrichen the natural grain color. I’ve been more than satisfied with the previous restorations and will apply the Balm to this Peretti Oom Paul as well. I apply Balm to my finger and then I work it into the briar surface with the ends of my fingers. The Balm starts with an oily feel then it gradually transforms into a thicker wax-like substance. After I work it in, I set it on the stand to allow the Balm to work. I take a picture of this and then after several minutes I wipe/buff the Balm off with a microfiber cloth. The results look great.
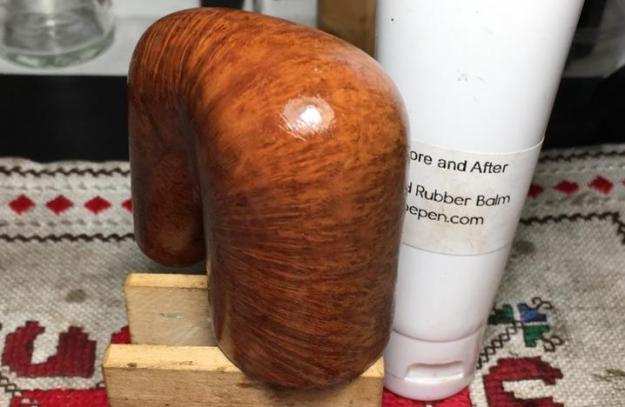
 With the stummel awaiting a stem to catch up, I turn to the stem. The CA glue painting of the air pocket cavities in the bit patch is ready for sanding and I use 240 grade paper to sand down to the stem surface. I then use 600 grade paper followed by 0000 grade steel wool to finish it out. The bit repair is done, and it looks good. All the air pockets have been removed.
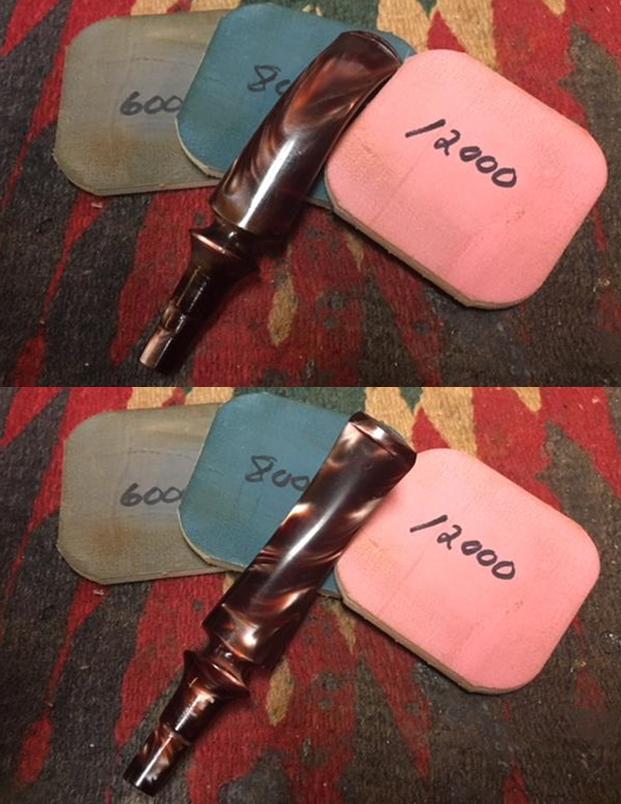
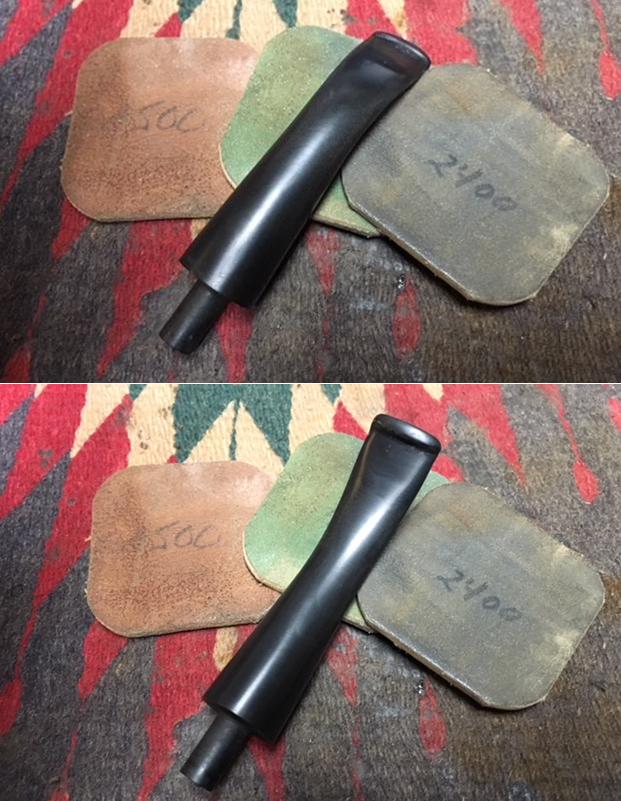
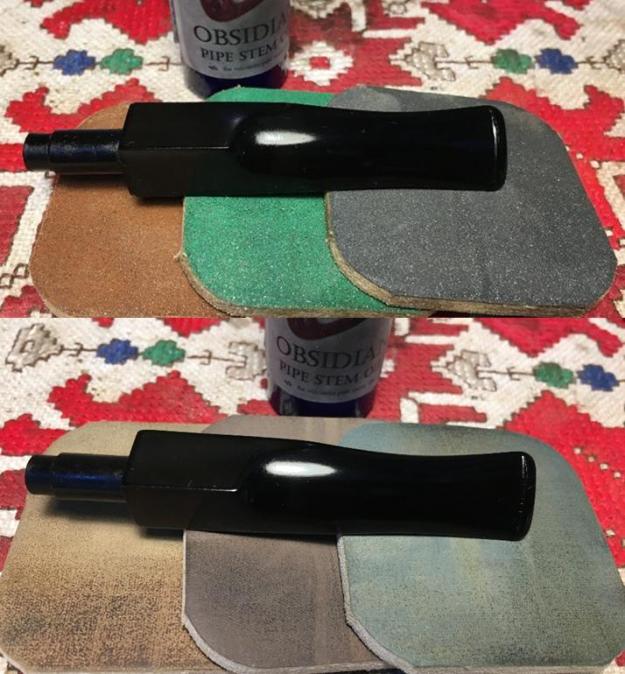
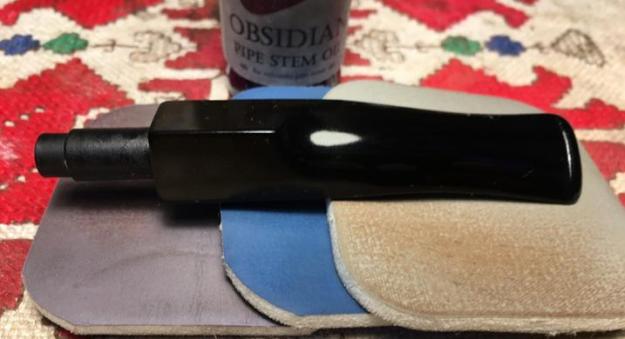
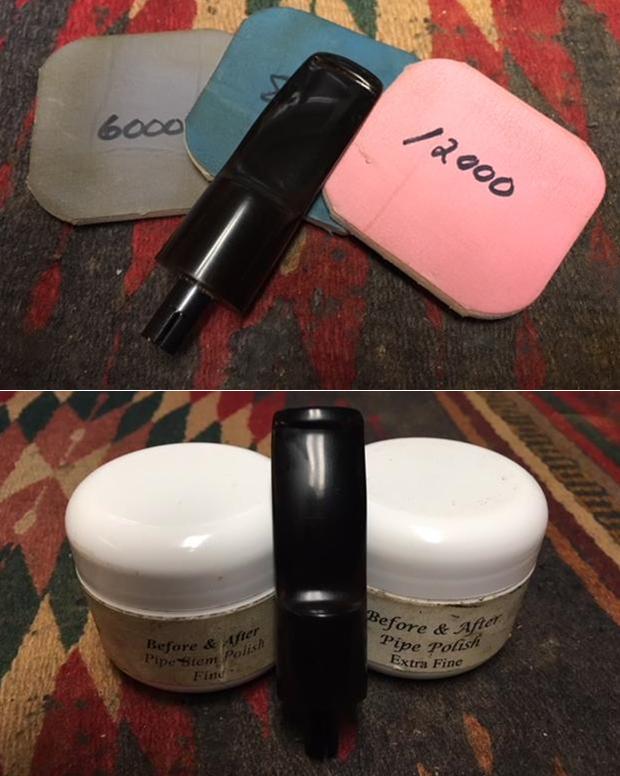
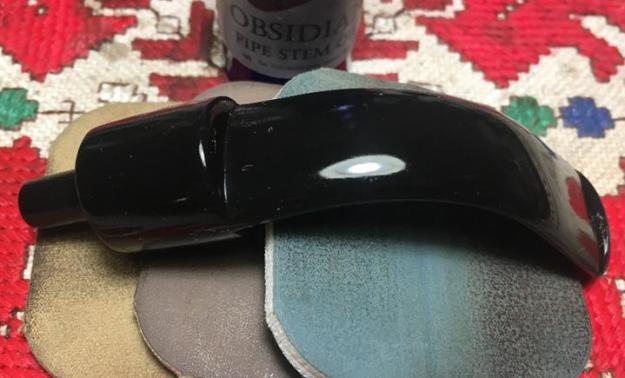
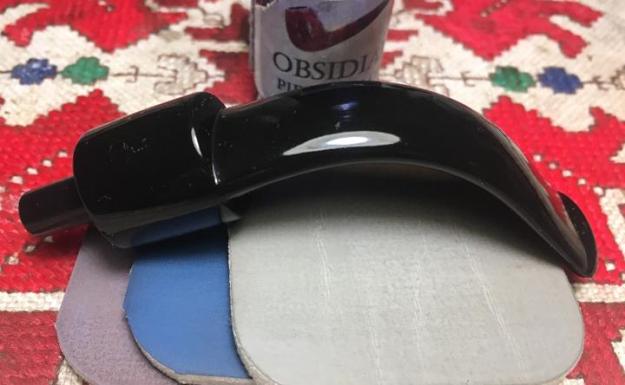
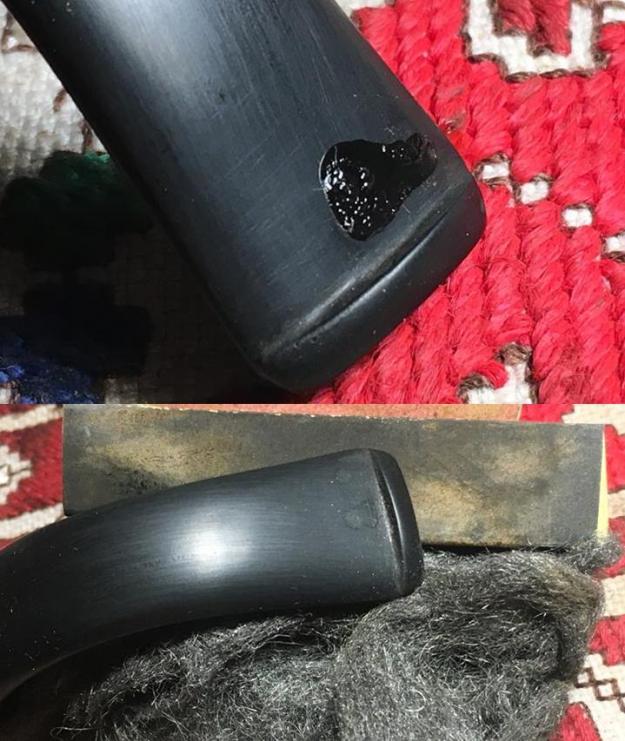 I move on to the micromesh pad cycles. First, I wet sand using pads 1500 to 2400. I follow by dry sanding with pads 3200 to 4000 then 6000 to 12000. After each set of 3 pads I apply Obsidian Oil to the stem which rejuvenates the vulcanite. I love the glassy shine of polished vulcanite!
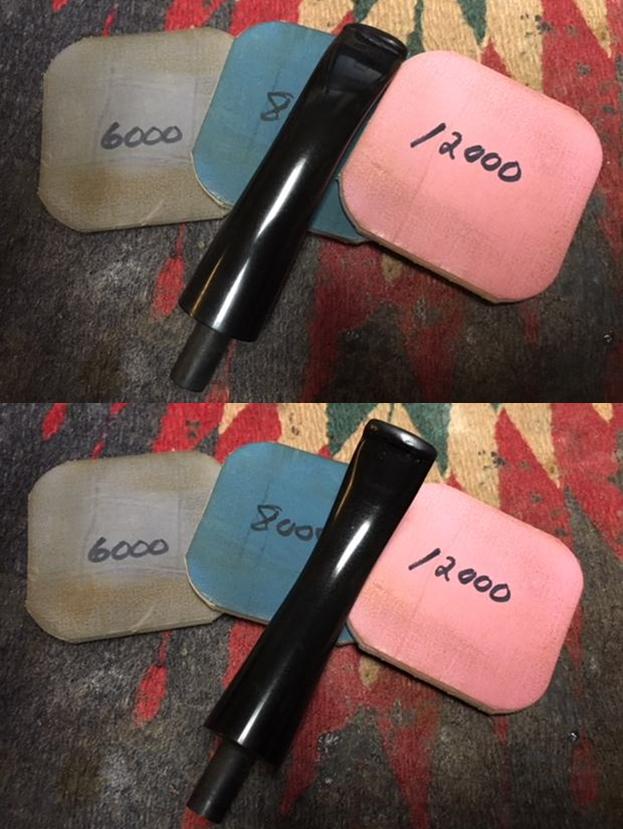
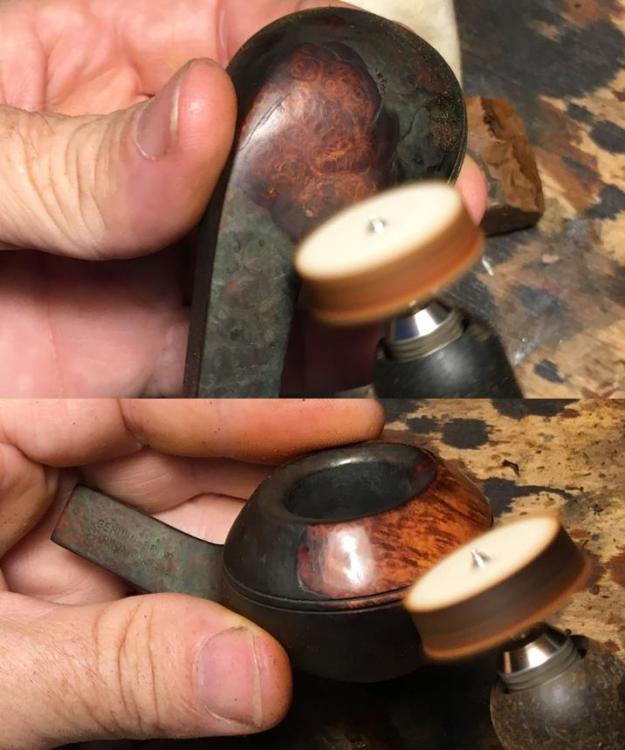
 After reuniting stem and stummel, I mount the Dremel with a cotton cloth buffing wheel and apply Blue Diamond compound to the pipe. I set the Dremel to its slowest speed and apply the compound in a methodical way – not applying too much pressure to the wheel but allowing the speed of the Dremel and abrasiveness of the compound to do the work. I then wipe the pipe with a felt cloth to remove compound dust. Then, mounting another cotton cloth buffing wheel to the Dremel, and increasing the speed to about 40% full power, I apply a few coats of carnauba wax to the stem and stummel. I finish the process by giving the pipe a good hand buffing with a microfiber cloth to raise the shine.
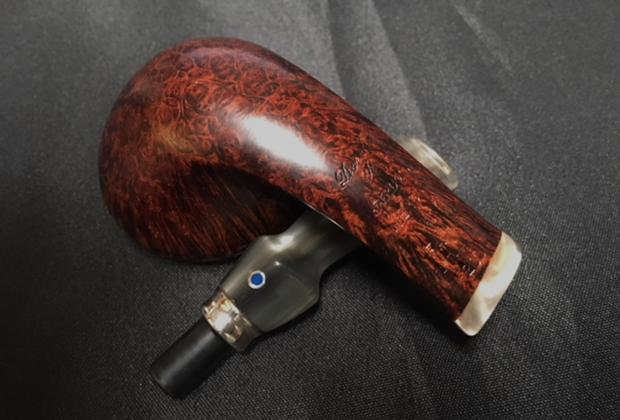
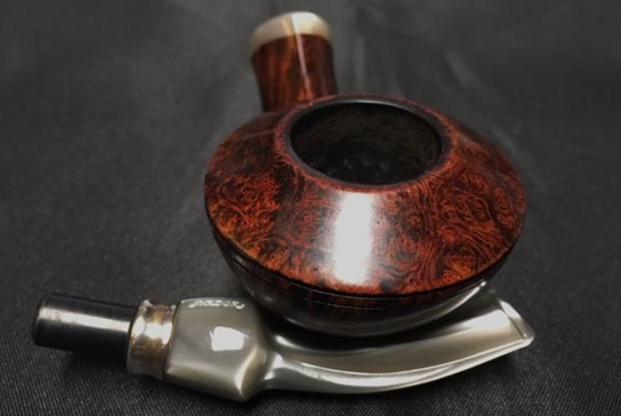
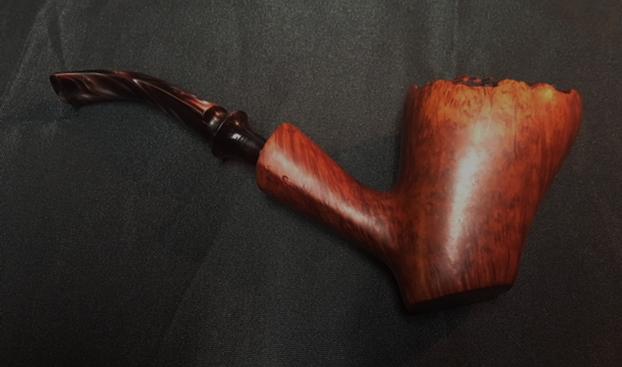
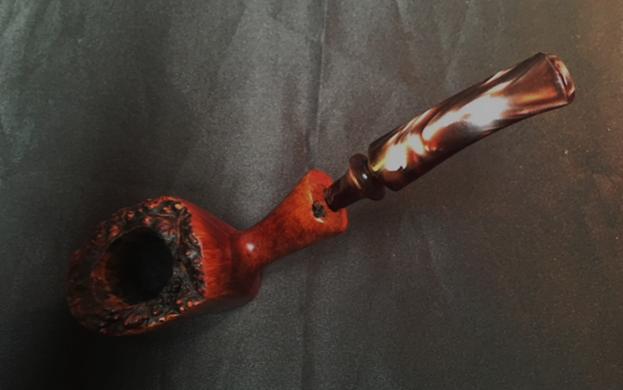
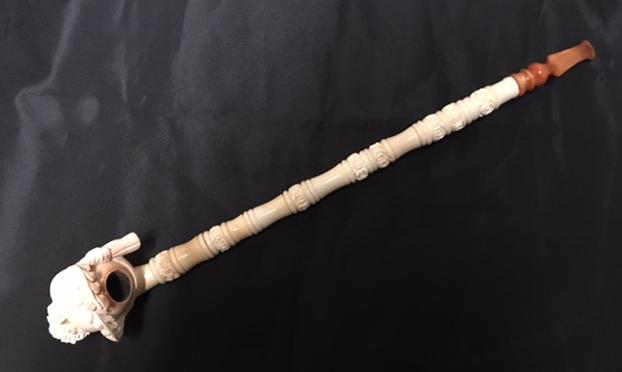
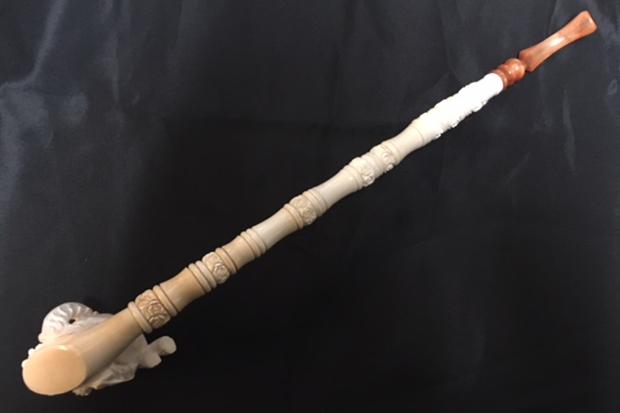
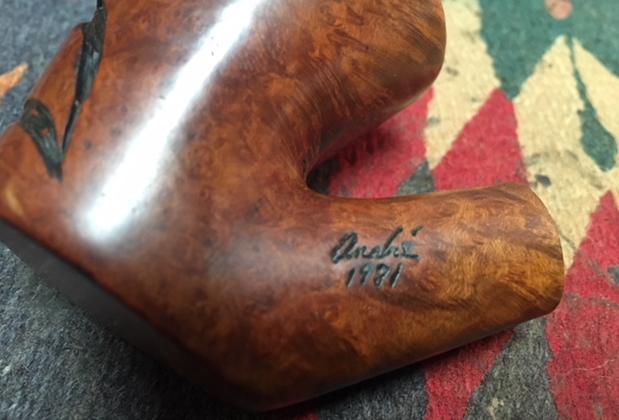
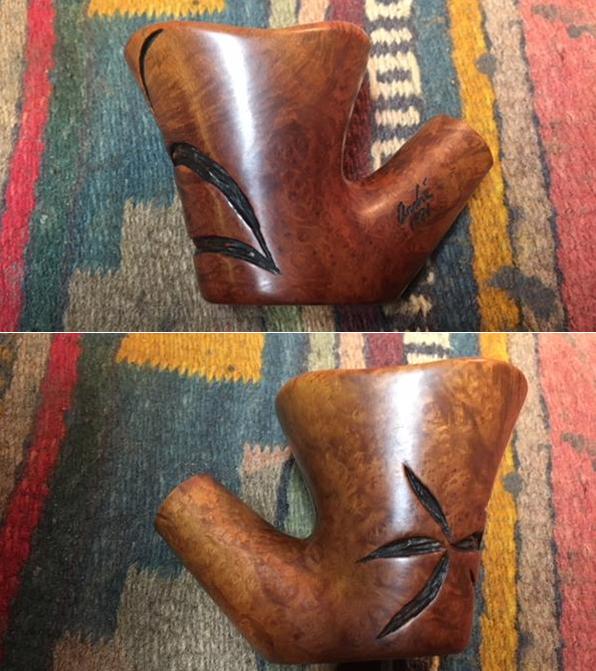
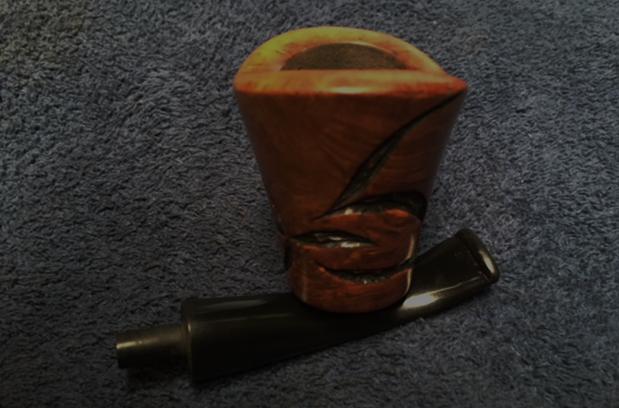
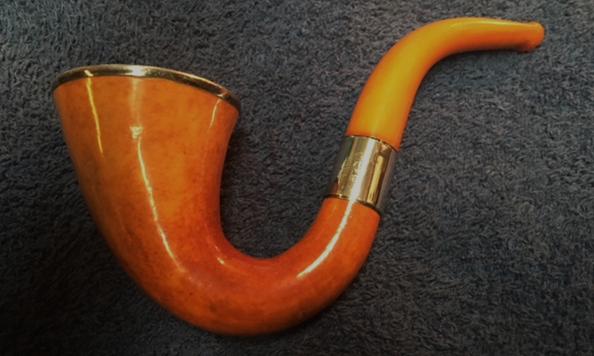
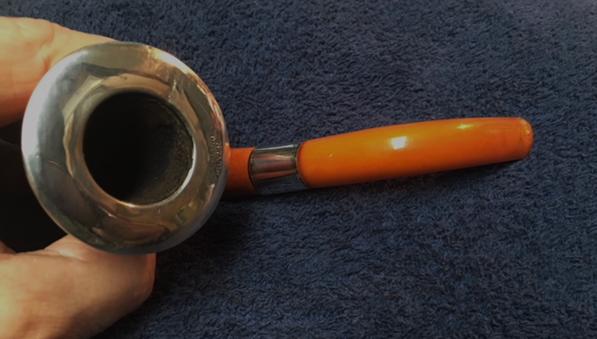
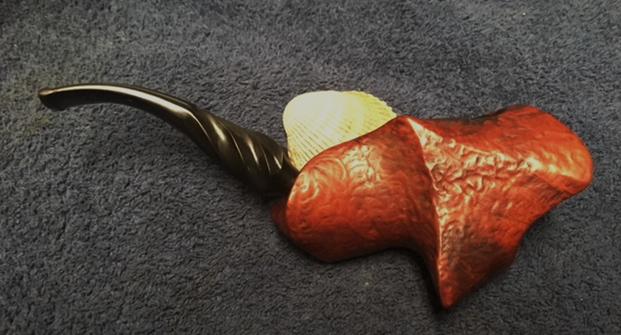
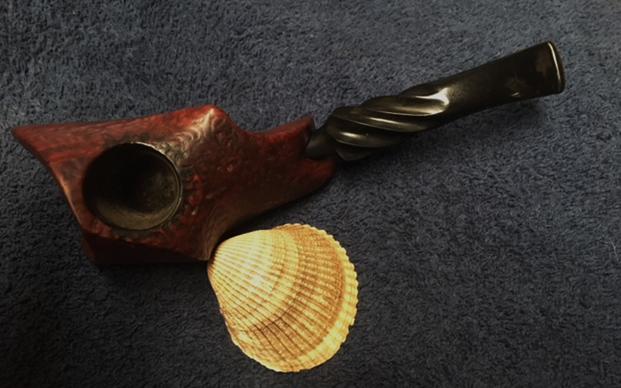
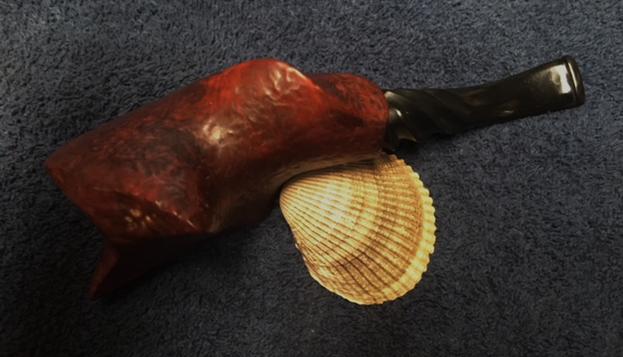
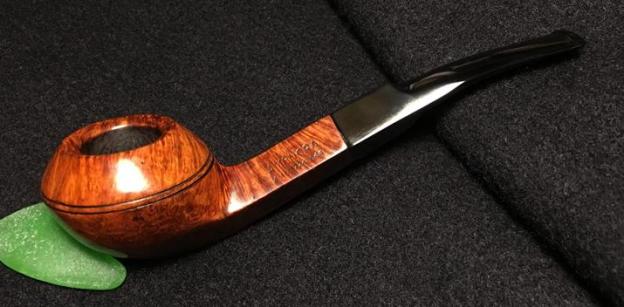
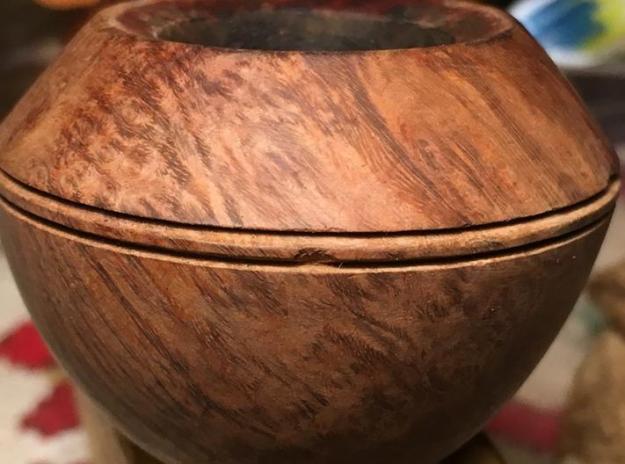
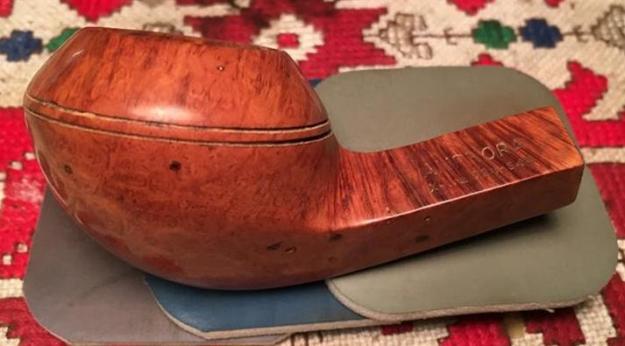
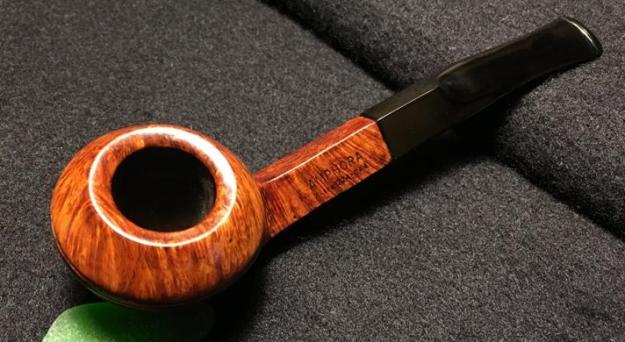
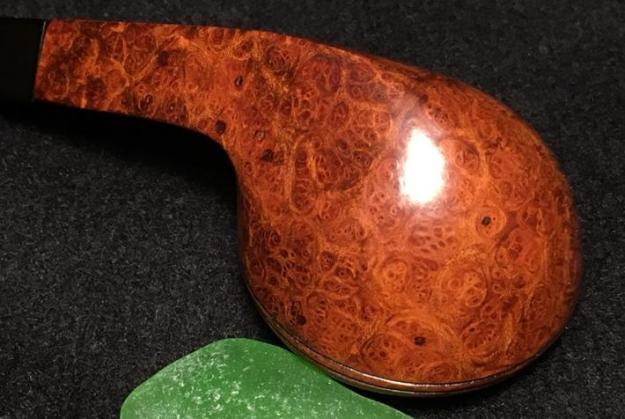
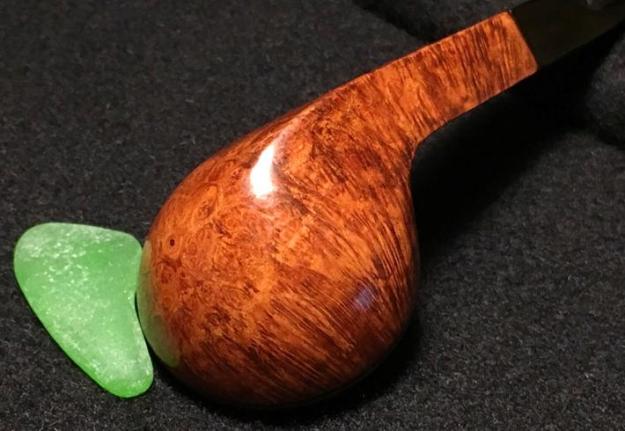
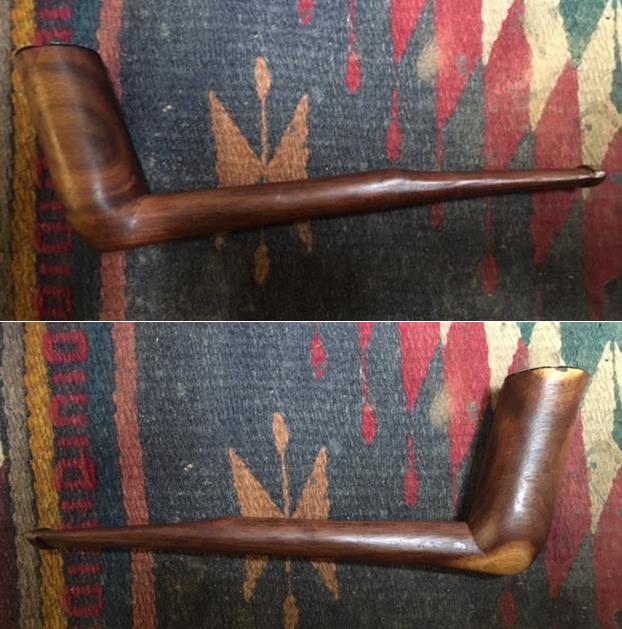
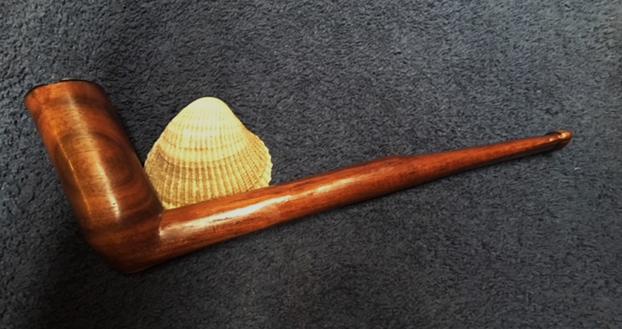
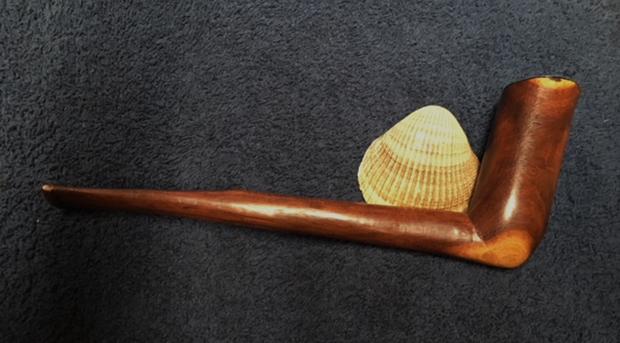
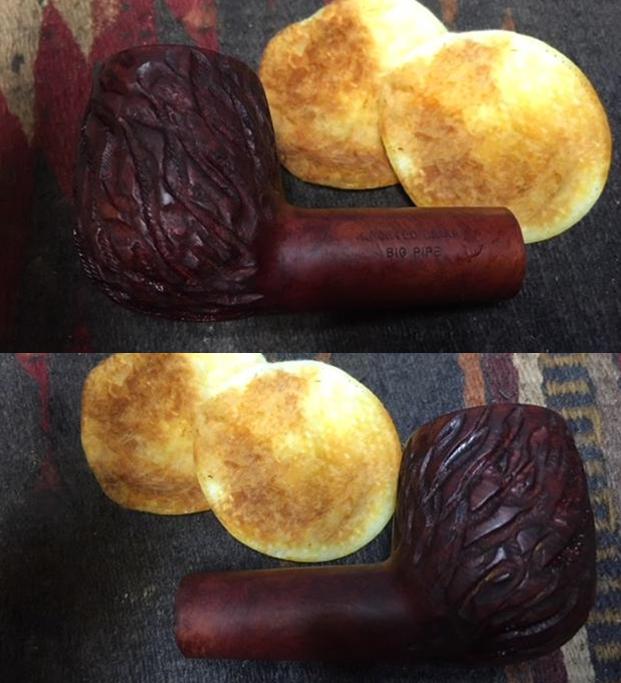
I must admit, I was so occupied with the technical aspects of this restoration that I didn’t fully appreciate the beauty of this pipes color and grain until now. I especially like the ‘burst’ on the left side of the large Oom Paul stummel. Earlier I called it a spider web effect – now it looks more like a center of clustered circles, the bird’s eye grain, and sunburst expanding out from it. Very striking grain showcased on this classic Oom Paul shape. He’s overcome an upside-down stem, a crack in the crook of the shank, a chewed up bit and a burned up rim – I would say he’s looking good now for what he’s been through! This Peretti was commissioned by Abraham in California and he will have first dips on this L. J. Peretti Oom Paul when he goes into The Pipe Steward Store. This pipe benefits the work of the Daughters of Bulgaria – helping women and girls (and their children!) who have been trafficked and sexually exploited. Thank you for joining me!


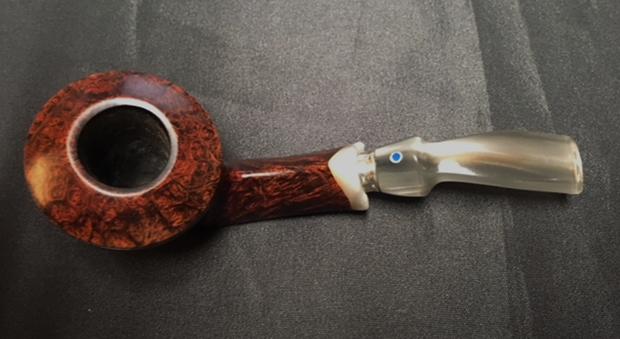
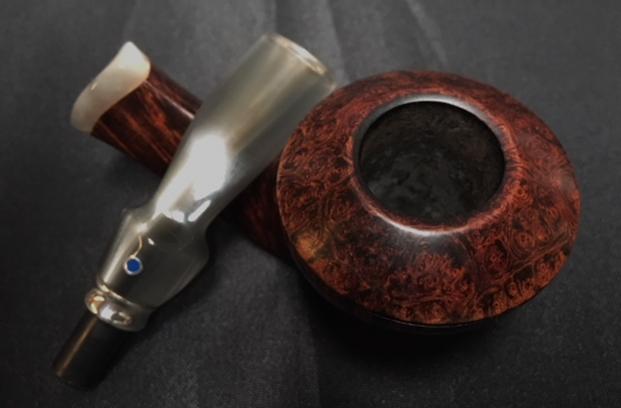
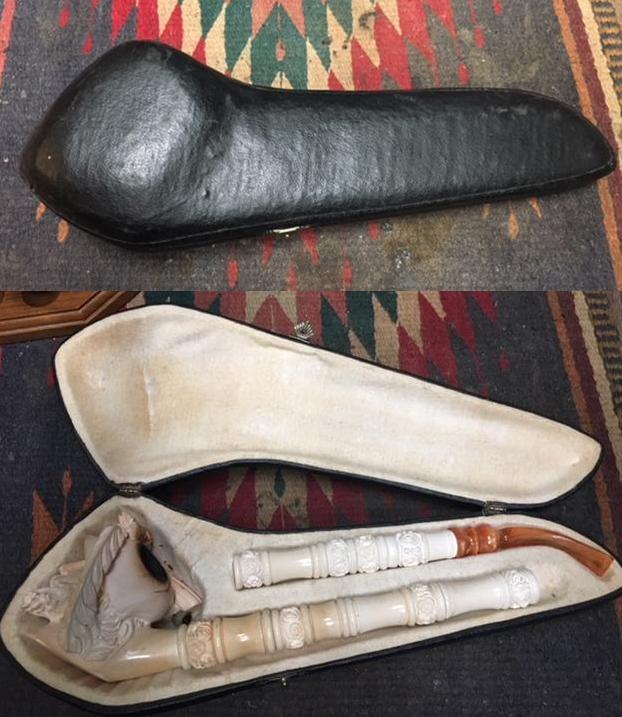
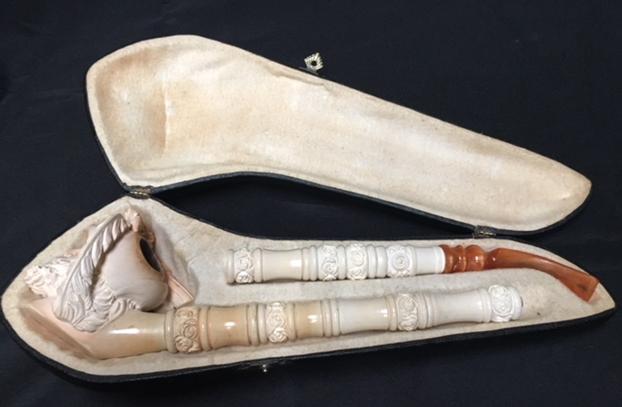
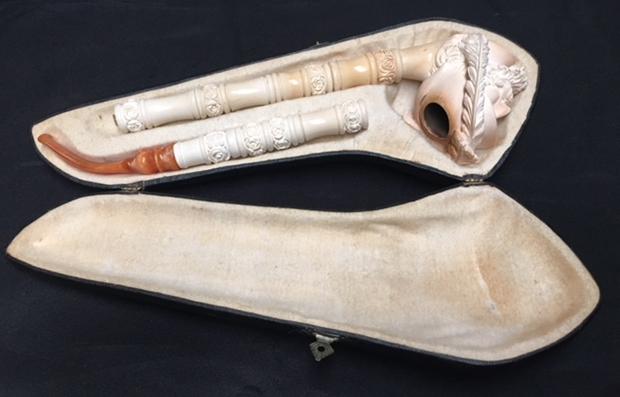
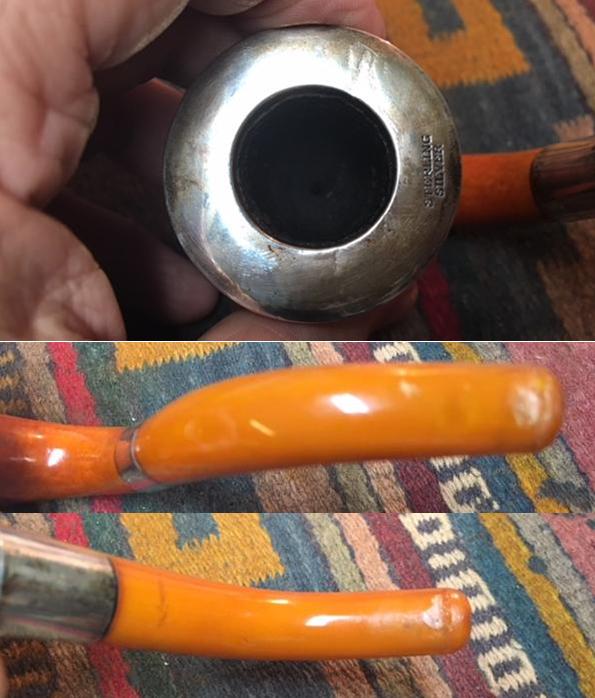
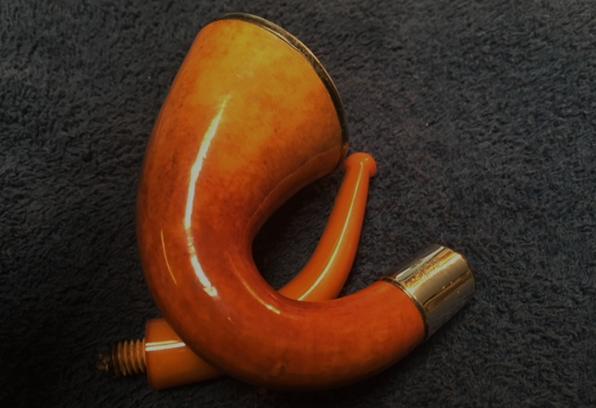
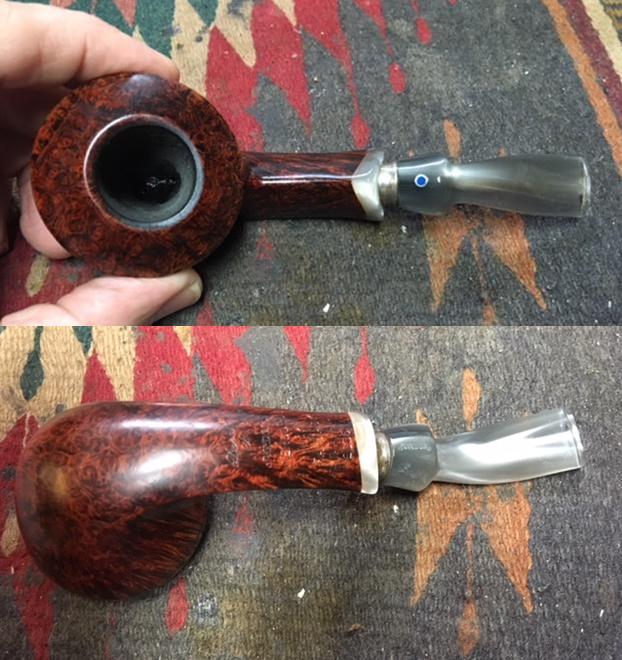 The bowl had an uneven cake and there was some darkening on the rim top. The inside of the shank was dirty and needed to be cleaned. The silver on the stem was tarnished and dull looking. The Lucite stem had tooth marks and chatter on the top and underside of the stem near the button. There was also a tooth mark in the top of the button on the left side. I took photos of the bowl and stem to give a clear picture of the condition of the pipe before I started to work on it.
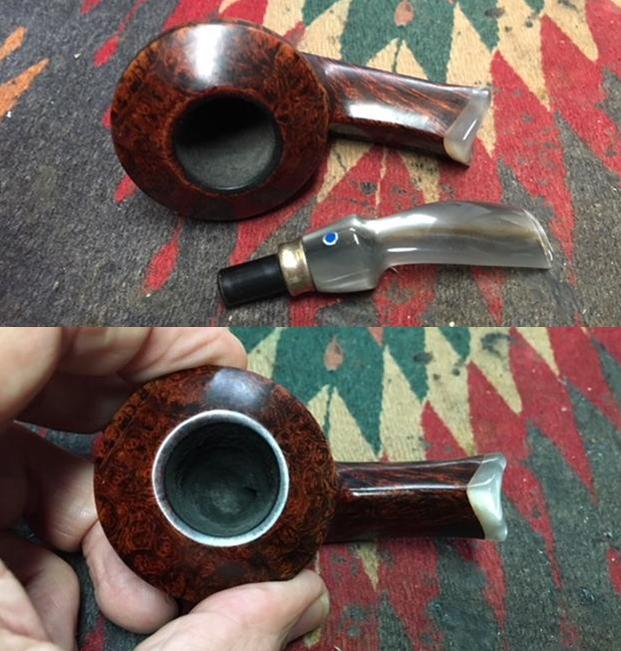
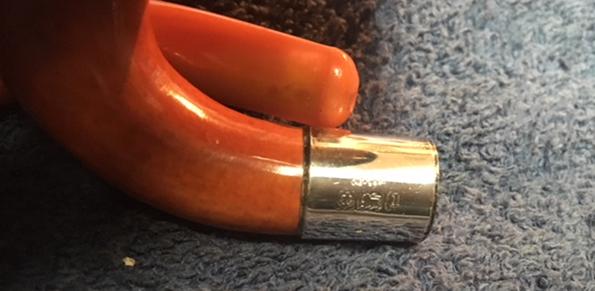
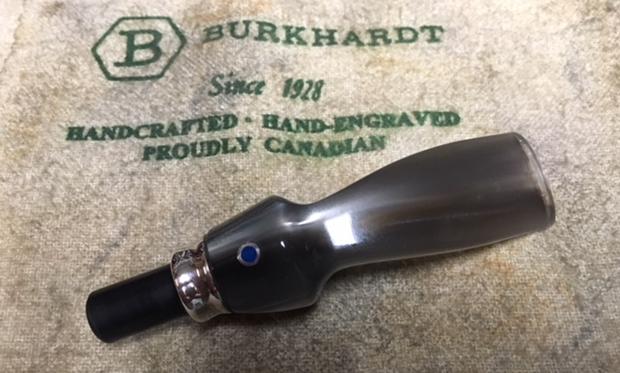
 I took a photo of the stamping to show what it looked like. The underside of the stem is stamped as follows – Dorelio over Rovera. Under that it is stamped Ardor over Mercurio. Under that it is stamped Italy then Fantasy. Under that is stamped Fatta A Mano and the year 2006.
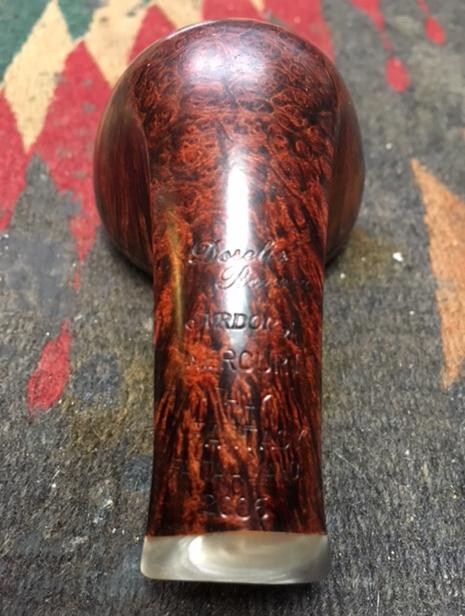 I did a quick review of the history of the brand by turning to Pipedia. The link there was an article that came from Italian Pipemakers.com. Here is the link – https://pipedia.org/wiki/Ardor. I quote part of the article that gives a quick view of the brands
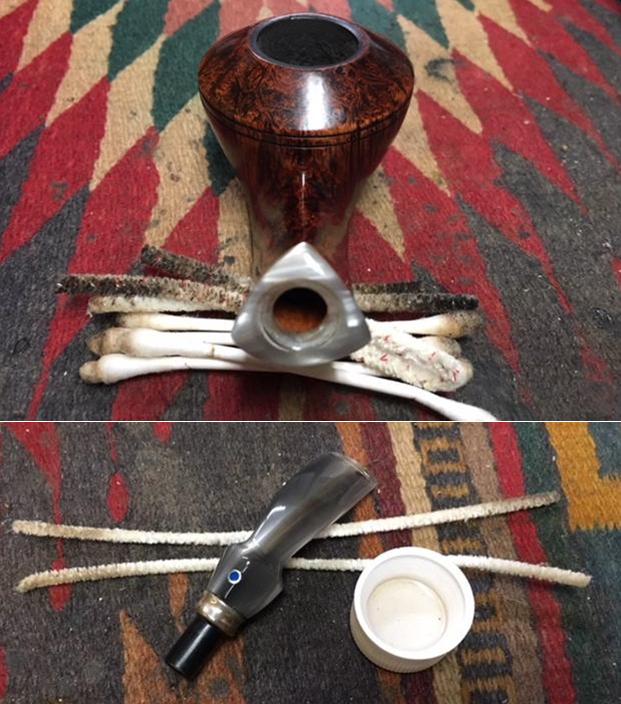 I evened up the cake on the walls of the bowl with a Savinelli Fitsall Pipe Knife. I took the cake back to where there was a thin layer all around the bowl.
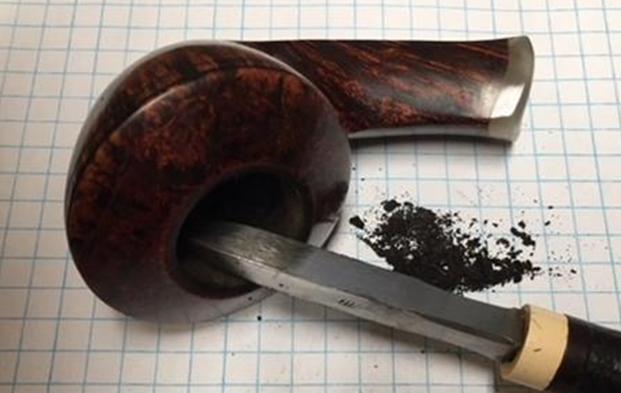 I rubbed Before & After Restoration Balm into the smooth finish on the bowl and shank. The balm cleans the surface and enlivens and protects the briar. I worked it into the lines and the finish. I let it sit for a while and then buffed it off with a soft cloth and polished it. I took photos of the bowl at this point to give an idea of what it looked like at this point.
 I set the bowl aside and turned to address the stem. Once the repair on the top side of the stem button had cured I shaped it with some folded 220 grit sandpaper and sanded out the tooth chatter and marks on both sides.
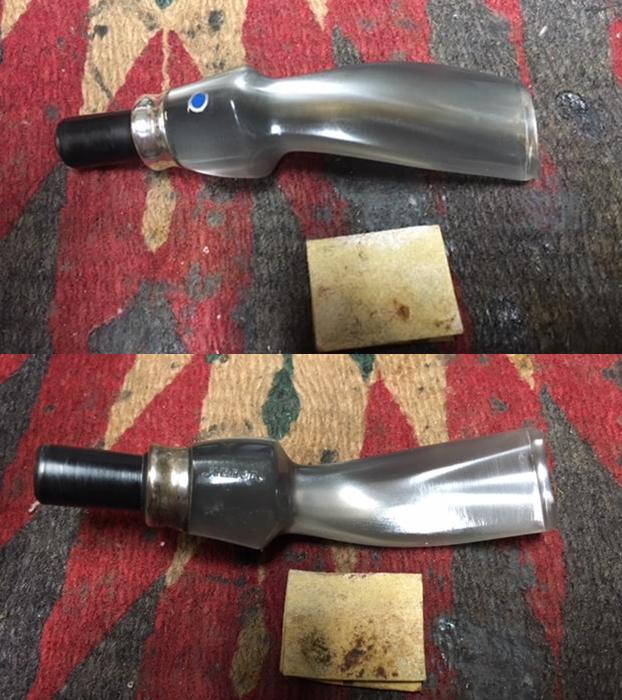 I polished the stem with micromesh sanding pads to remove the scratches in the acrylic. I wet sanded it with 1500-2400 grit pads and dry sanded it with 3200-12000 grit pads. I wiped the stem down with a damp cloth after each sanding pad. I polished the silver band with a jeweler’s cloth.
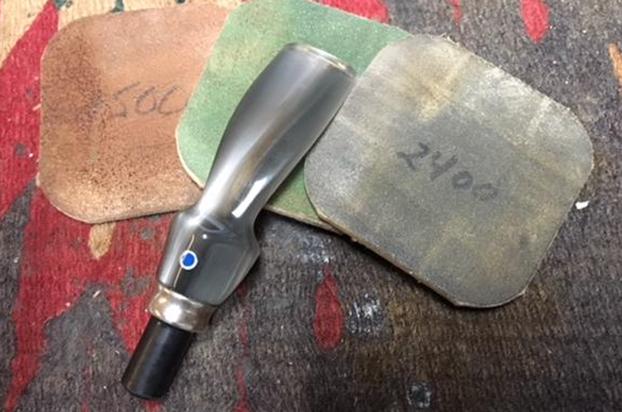
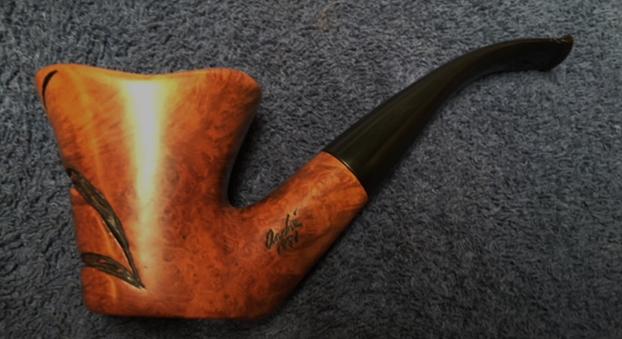
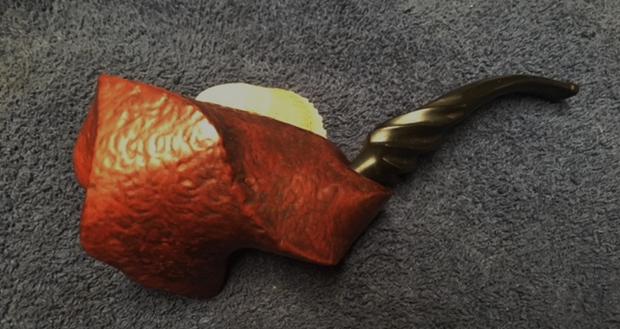
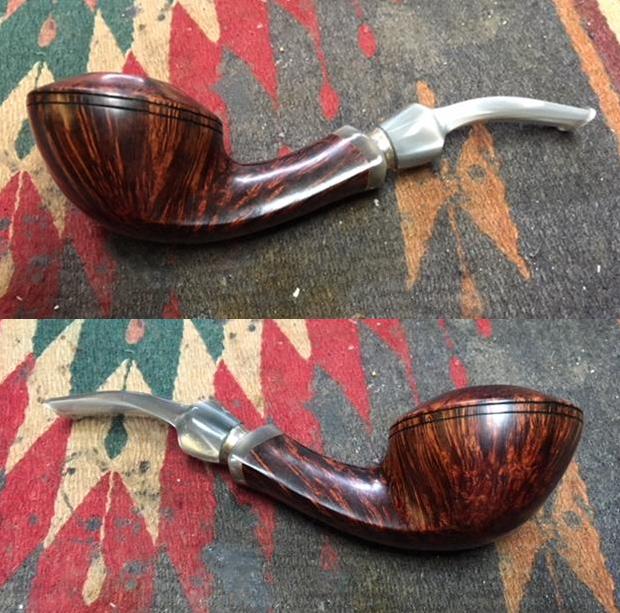
 I put the stem back on the bowl and buffed the pipe with Blue Diamond polish on the buffing wheel. I gave both the bowl and stem multiple coats of carnauba wax and buffed the pipe with a clean buffing pad. I hand buffed it with a microfiber cloth to deepen the shine. The finished pipe is shown in the photos below. I have seven more pipes to finish for him – three come from his personal rotation while four of them are some finds he made while pipe hunting. This is going to be a fun bunch of pipes to work on. I look forward to moving through the rest of them. Thanks for looking.