Blog by Steve Laug
This morning I decided to work on the “little brother” of the G.F.B. unsmoked cased bent billiard I posted yesterday (https://rebornpipes.com/2021/12/18/look-at-this-a-beautiful-unsmoked-pipe-in-my-bag-of-older-pipes-yet-to-be-restored/). We bought this pipe on Ebay back on October 25, 2017 from Minneapolis, Minnesota, USA. The pipe was also a G.F.B. with a diamond shank, rolled gold rim cap and ferrule and amber stem. However this one was heavily smoked and in nowhere near the condition of its “big brother”. The leather cover on the case was in was worn but still in decent condition. There was some wear on the edges of the case but the hinges and lock worked very well.  Don’t you want to know what is inside of this case? Do you want to compare it with the other unsmoked on I called its “Big Brother”? Well… I will get there. Jeff opened the case to show us what the pipe looked like inside. The lining of the case was far more worn and had a orange colour to it. It also had the G.F.B. stamp on the inside of the cover. The rolled gold cap and ferrule were not ornate or filigreed like the previous one. It was definitely a lower grade model.
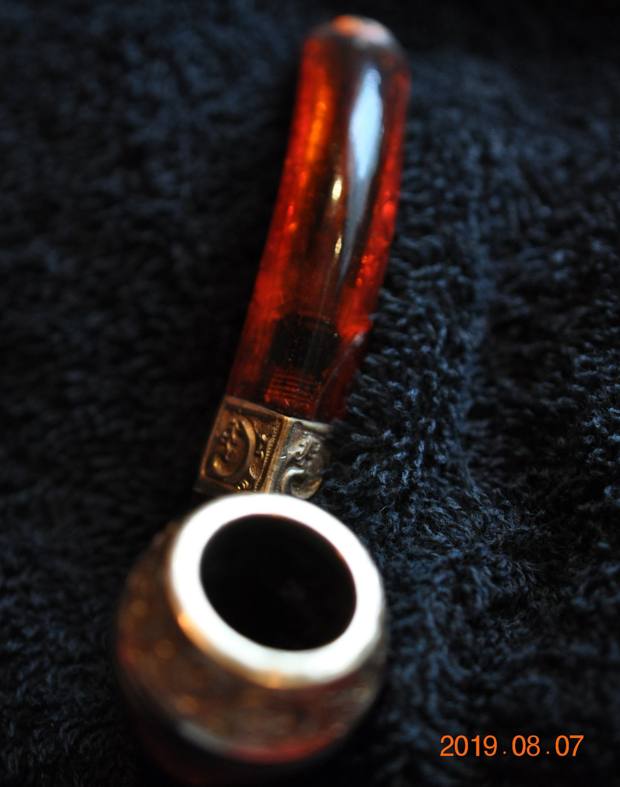
  It was another beautiful looking older pipe. The briar was worn and tired looking with nicks in the finish and a dull, lifeless look to it. The gold coloured rim cap and shank ferrule were also worn. The cap looked like it had been knocked around on hard surfaces to remove the dottle from the bowl. The stem was amber and was chipped and dirty as well. It still looked good but definitely had the tooth marks and chatter of a previous set of chompers! Once again this was an old timer – a pipe from the late 1890 or early 1900s. The case has a gold stamped Three Stars [over] G.F.B. in a logo on the inside of the orange fabric lid. The shank of the pipe is stamped with Three Stars [over] G.F.B. in and oval in gold. Have a look at the photo of the case lid and pipe below.
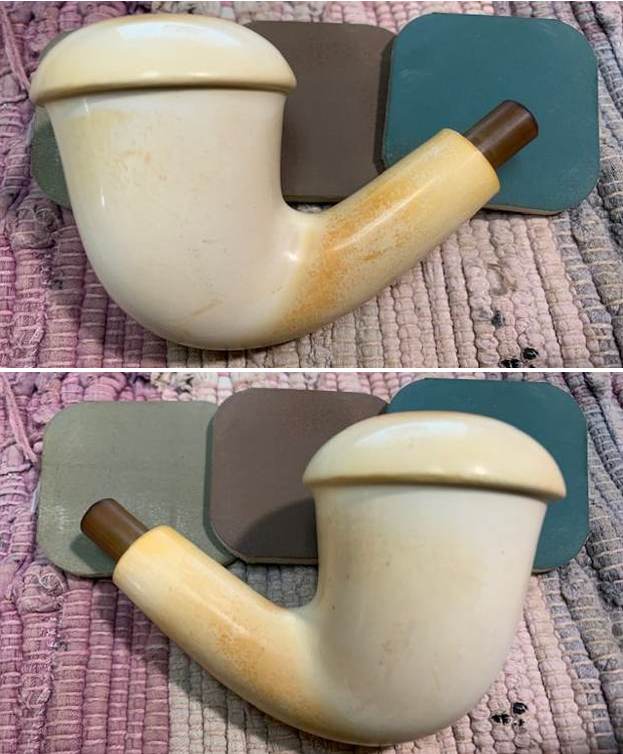
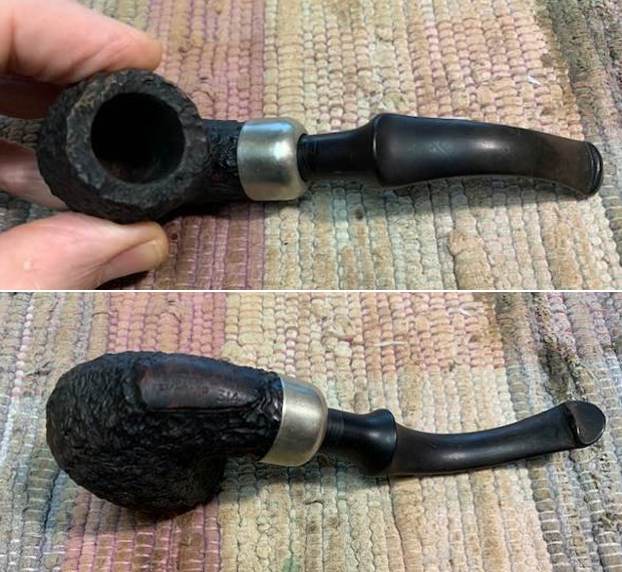
 Jeff took the pipe out of the case and took photos of the pipe to show the look and the condition it was in when we received it. It was nowhere near the pristine beauty of its “Big Brother”. It was well used and tired looking.
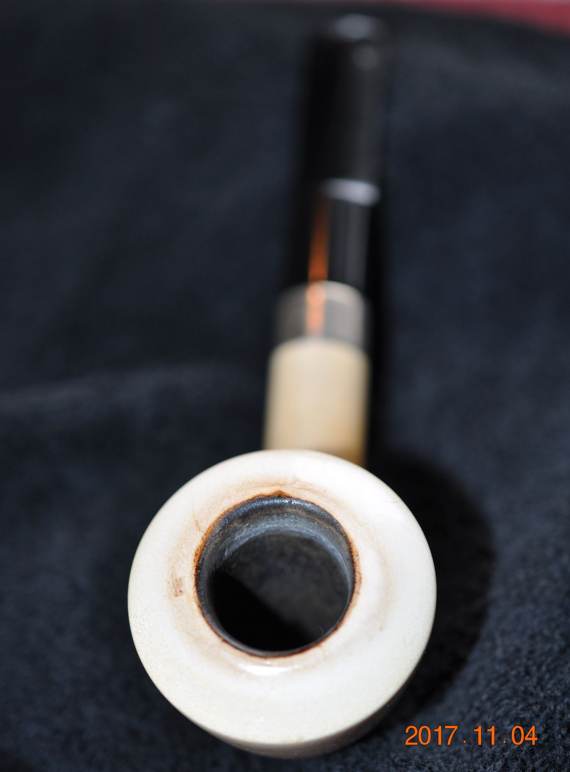
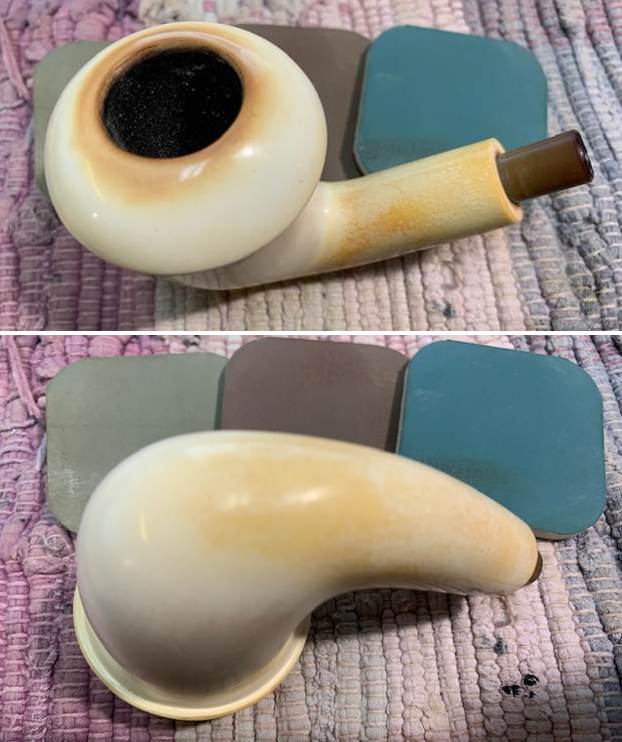
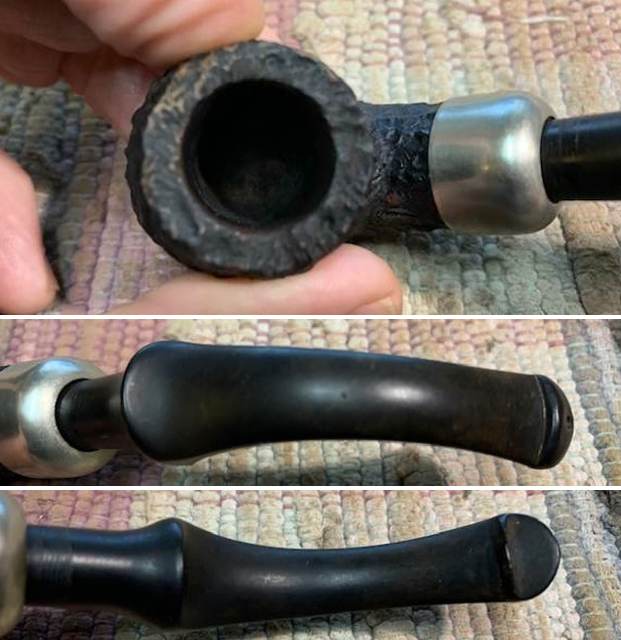
 He took close up photos of the bowl, rim and stem surfaces to show their condition. You can see the thick cake in the bowl and the many dents in the rim top that tell the story of how the pipe was used by its previous caretaker. The stem was worn as well. It had chips out of it at the shank connection and bite marks and chatter on both sides near the button. The button itself was also worn and chipped.
 He took photos of the bone tenon to show the tars and debris that had collected on the screws of the tenon. It was well used and filthy.
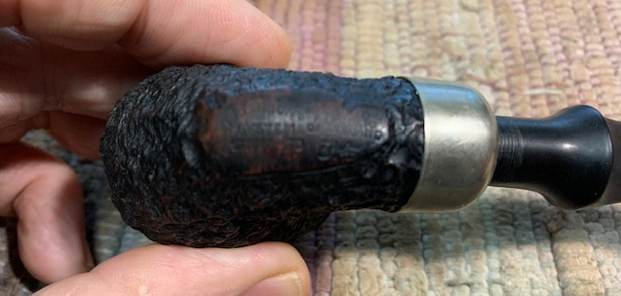
 He also captured the look of the tired briar. You can see the water damage on the bowl base and heel. There is a large chip on the lower right side of the bowl. It is worn looking but still shows some amazing rain around the bowls ides and shank.
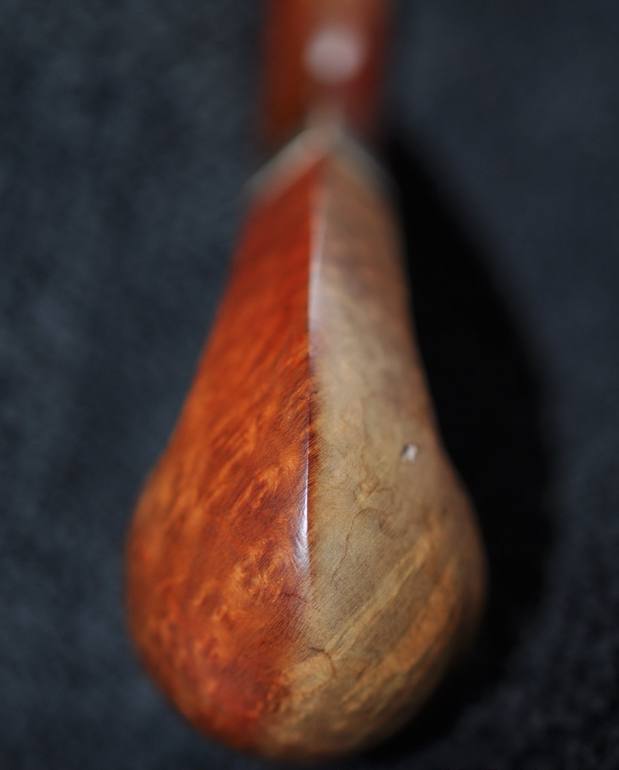
 I am including the material on the brand and the tie to Manhattan Pipe Company that I dug up on the previous pipe. I am including it in full so you can either read it or skip it if you already read it. It is interesting and pertinent to this pipe as well so that is why it is here for ease of reference.
I turned to first to a couple of the blogs that I have written on the restoration of G.F.B. pipes in the past. I reread them and have included a link to one of them below. I was able to identify that the G.F.B. stamp stood for Genuine French Briar (https://rebornpipes.com/2013/11/21/restoring-an-older-gfb-three-star-horn-stem-bent-bulldog/). I have included a catalogue page on the brand below for you to see. The description fits the rim cap and ferrule of mine. It says “Beautiful Rolled Gold Plate Mountings and Real Amber Bits.” So far I had found and read several blogs on the G.F.B. stamp that was on the inside of the case. Now it was time to do a bit of reading on the Manhattan stamping on the pipe. I again turned to a blog I have written on the brand below (https://rebornpipes.com/2017/07/24/another-interesting-piece-of-pipe-history-manhattan-canted-dublin-with-a-horn-stem/). I quote from that blog what I found on the brand.
I thought it would be interesting to see if there was any new information online regarding the brand. Of course, I checked on the Pipes, Logos and Stampings – PipePhil’s site. There was a listing for Manhattan pipes but there was not any new information and what was there was inconclusive. I turned to Pipedia to see if there was a new article. I was surprised to find that there was one, I do not know if it was new or not, but I do not recall seeing it before. The article was called The Manhattan Briar Pipe Company. It is an interesting read so I have included the article in its entirety as well as the advertisement from 1913 that showed a Manhattan pipe…
 The Manhattan Briar Pipe Co. was organized in October, 1902 by the American Tobacco Company, under an agreement with the owners of the Brunswick Briar Pipe Company, as a New York corporation. Its initial address was 111 5th Avenue, New York City, and the value of its stock in 1902 was $350,000.00. American Tobacco Company had itself been founded in 1890 by J. B. Duke through a merger between a number of U.S. tobacco companies, and was one of the original twelve members of the Dow Jones Industrial Average in 1896. It was commonly called the “Tobacco Trust”.
The majority of the stock in Manhattan Briar Pipe Company was immediately acquired by the American Tobacco Company after the company was organized, but the prior owners retained a controlling minority interest for some years. In October, 1906, however, the American Tobacco Company acquired the remaining shares of stock, and from that point on Manhattan Briar was the pipe making branch of American Tobacco. By 1911, however, American Tobacco had been dissolved in anti-trust litigation, and Manhattan Briar Pipe Co. became a separate concern.
Manhattan Briar Pipe Co. had started operations in 1905 in Jersey City, New Jersey, having taken on a lease for a ten year period in 1905, and maintained a factory at Marion, New Jersey, where the pipes were made. By 1913, former American Tobacco pipe department chair John Glossinger was the president of Manhattan Briar Pipe Company, and began a significant advertising push for high grade pipes, using the slogan “Don’t spoil good tobacco by using a poor pipe”. It appears from cases having appeared on the estate market that Manhattan also sold meerschaum pipes, most likely rebranded articles originally made by European craftsmen.
After the expiration of the Jersey City lease the Manhattan Briar Pipe Company maintained offices and a factory at 415-425 Greenpoint Avenue, Brooklyn, New York beginning in 1915, evidently under the direction of W. C. Bastian, who had been granted a patent for a chambered pipe stem otherwise seemingly identical to a Peterson P-Lip in 1910. An employee of the company, one J. Gianninoto, was granted a patent for a device meant to permit the emptying of a cuspidor without the mess in early 1918, and the company continues to be listed in local directories through 1921. In 1922 Manhattan Briar was purchased by S.M. Frank and merged into that company. https://pipedia.org/wiki/Manhattan_Briar_Pipe_Co.
Further digging led me to a link on the S.M. Frank Co. & Inc. history page. Reading through the history of the company I found that S.M. Frank not only purchased the Manhattan Briar Pipe Company but also purchased WDC or William DeMuth & Company – two of the older brands that I enjoy working on. Here is the relevant section from the link: In the year 1900 Sam Frank Sr. started his own business, selling pipes and other tobacco items. His original office was located at 20 W. 17th Street, NYC. He was also closely associated with the sales staff of Wm. DeMuth & Co., selling their line of pipes. It was at this time that Mr. Frank first met Ferdinand Feuerbach and formed what would be a lifelong friendship. Mr. Feuerbach started working for the DeMuth Company in 1897 and by 1903 had become the production manager. In 1919, when Mr. Frank needed an experienced pipe man to run his pipe factory, located at 168 Southern Blvd., in the Bronx, he persuaded his old friend Ferdinand to join him. Mr. Feuerbach is credited with developing DeMuth’s popular Royal DeMuth and Hesson Guard Milano pipelines. In 1922, when S. M. Frank purchased the Manhattan Briar Pipe Co. the company incorporated. http://www.smfrankcoinc.com/home/?page_id=2
That link led me to me to some further information including an advertisement and a shape chart on Chris Keene’s Pipe Pages http://pipepages.com/mbpc2.htm. I have included them here with acknowledgement to Chris Keene. I always enjoy reading the old copy of these advertisements as they take me back to place where the pipe was an acceptable part of the life.

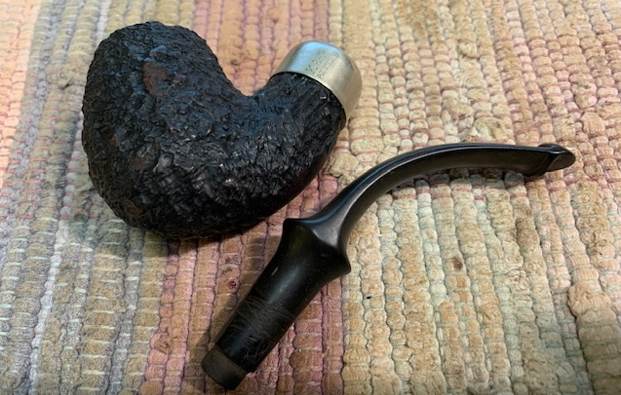
This pipe enjoyed the same link as the previous one between the G.F.B. Brand (Genuine French Briar) with the Manhattan Pipe Company. I took the pipe out of the case and turned it over in my hands. It was now time to work on it.
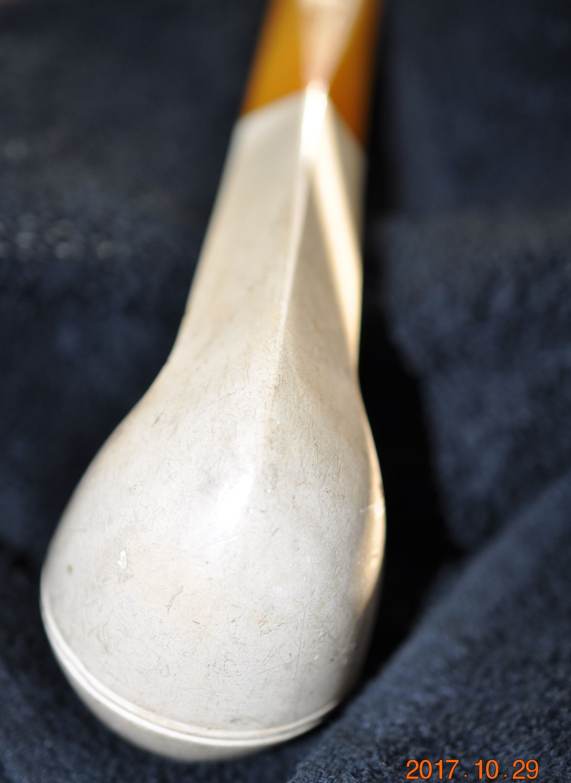
Jeff had cleaned it thoroughly. He had reamed it with a PipNet reamer and cleaned that up with a Savinelli Fitsall Pipe Knife. He had scrubbed the exterior of the briar with undiluted Murphy’s Oil Soap. He cleaned out the interior of the shank and airway with alcohol, pipe cleaners and cotton swabs. He carefully cleaned out the amber stem with clean water and pipe cleaners to remove the debris and oils in the airway and the threads of the bone tenon. I took photos of the pipe when it arrived here. The first two photos show the pipe in the fitted case and the G.F.B. logo stamped on the shank and the lid of the case. While worn it is clear and readable.
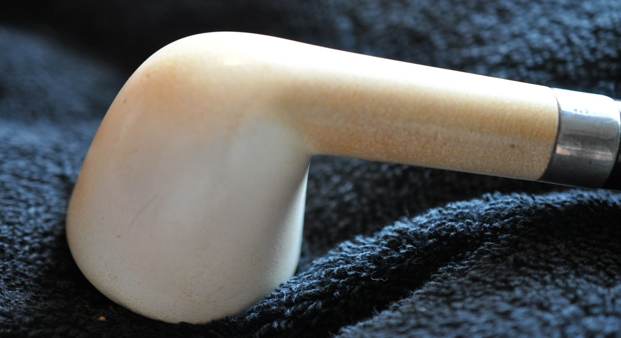
 The overall look of the pipe after cleaning shows the tiredness and worn look of the briar and the stem. It is a beauty in the rough and definitely needs some TLC.
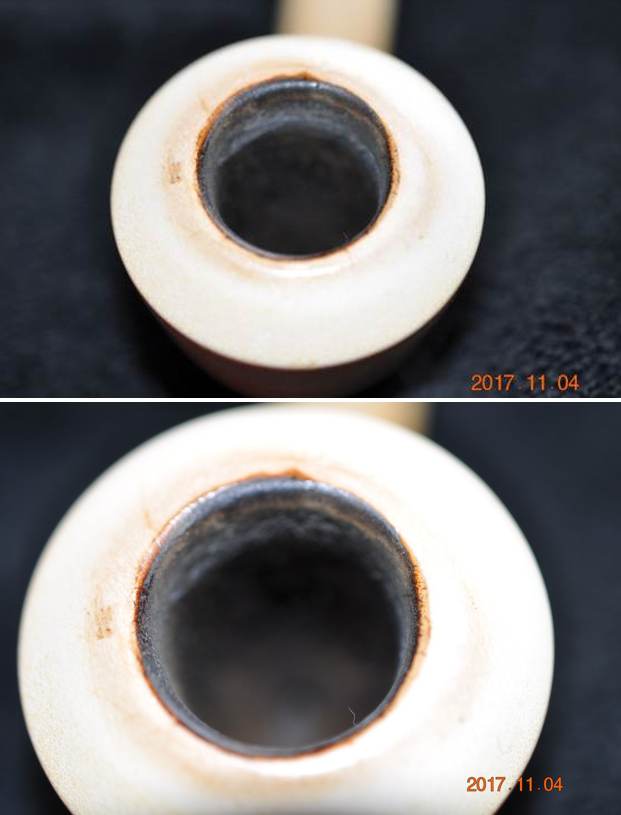
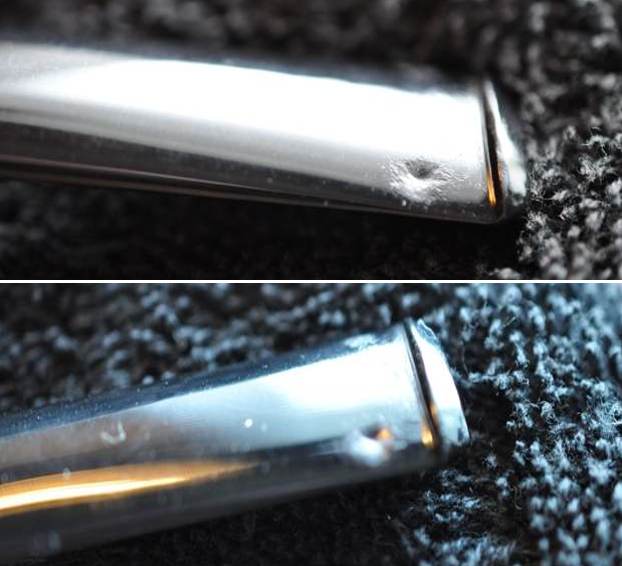
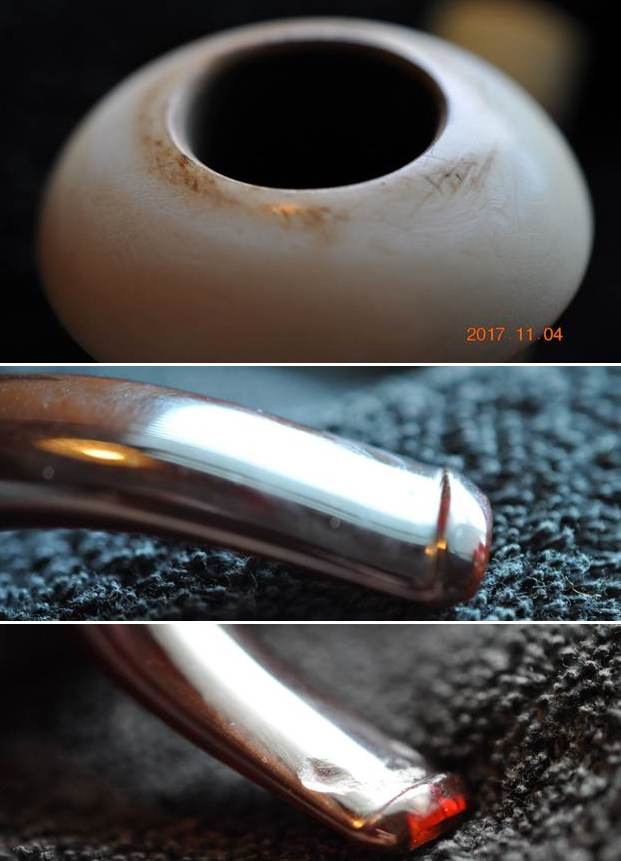
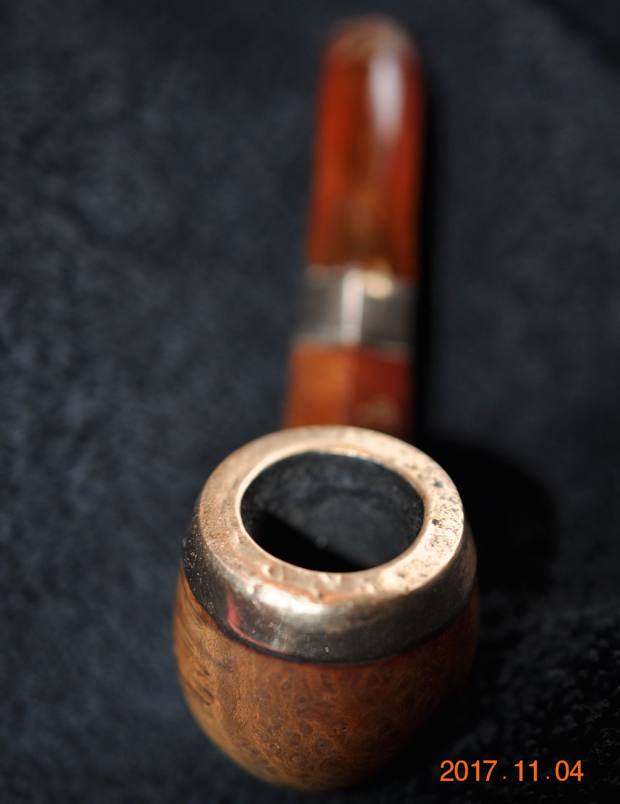
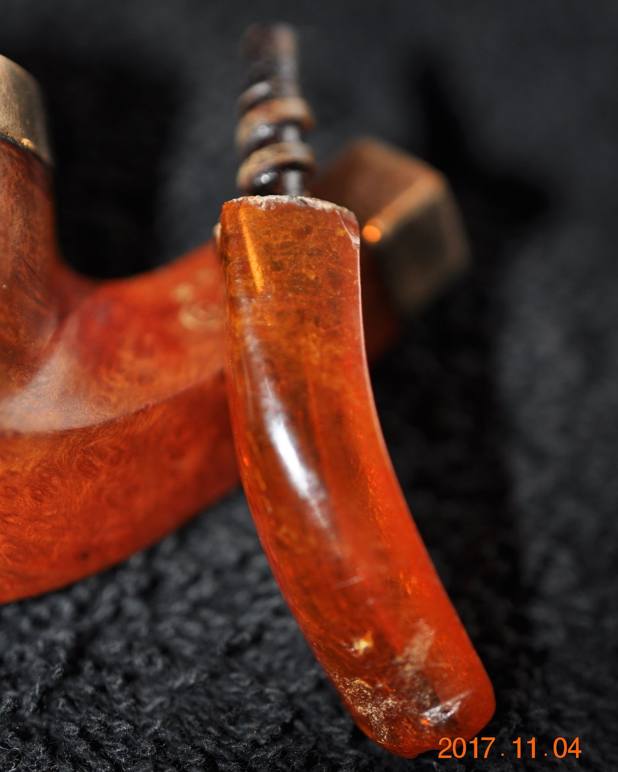
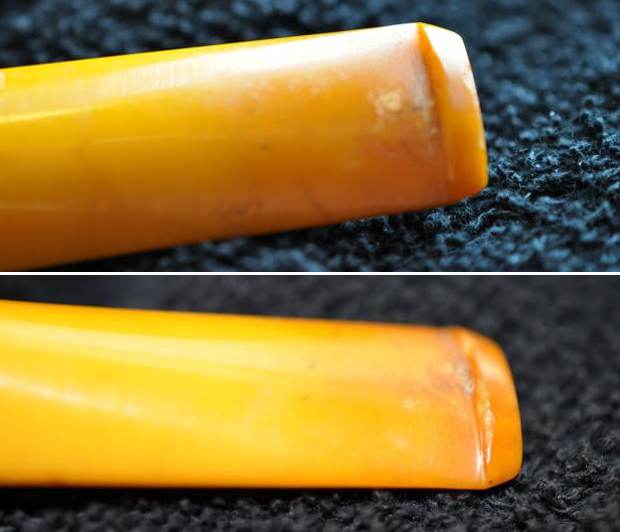
 I took a close up photo of the bowl and rim top to show the condition of the cleaned bowl and rim cap. You can see the clean bowl and the many dents in the top of the rim cap. I also took some photos of the amber stem to show how it looked. There were a lot of nicks, chips and tooth damage to be seen on the surfaces of the stem.
 I took a photo of the Three Stars stamped over the G.F.B. oval logo on the left side of the shank. You can also see the rolled Gold Plated Ferrule on the shank end in the photo. Even in its worn condition it still is a beautiful looking piece of pipe history.
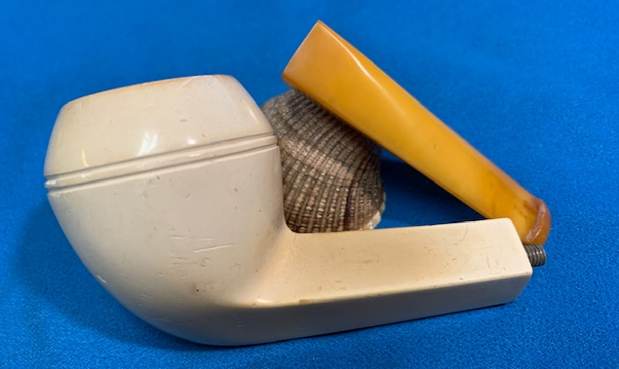
 I unscrewed the stem from the shank to see an tar and oil darkened well used, threaded bone tenon. Amazingly it was free of damage and had not been over or under-turned in the shank.
 I decided to try out something I read somewhere about lifting the dents in the rolled gold rim cap. I “painted” the surface of the cap with the flame of a lighter. I was careful to keep the flame moving. While it is not perfect the heat lifted some of the dents in the surface leaving an improvement.
 I repaired the chip out of the right underside of the bowl with briar dust and clear CA glue. I filled in the chip with the clear glue and pressed briar dust into it. Once it cured I sanded it smooth to blend it into the surface.
 I polished the briar with micromesh sanding pads – dry sanding with 1500-12000 grit pads and wiping the bowl down with a damp cloth after each pad. The briar is beginning to look very good.


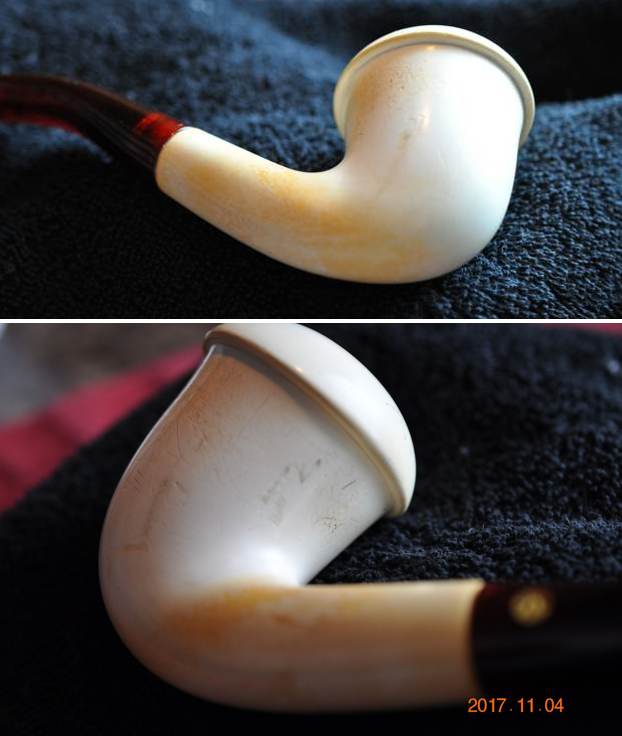
 I touched up the G.F.B. Oval and three stars with Rub’n Buff Antique Gold – working it into the stamp with a toothpick. I buffed it off with a soft cloth. It looks better.
 I worked some Before & After Restoration Balm into the surface of the bowl and amber stem with my fingertips to clean, enliven and protect the briar and amber. I let the balm sit for 15 minutes and then buffed with a cotton cloth to raise the shine. The photos show the bowl at this point in the restoration process. It is definitely looking much better and more full of life.

 I put the bowl in the case for awhile and turned my attention to the stem. I started the process by filling in the chipped areas and tooth marks on the stem surface with clear CA glue. Once the repairs cured I smoothed them out with a small file. I sanded the surface with 220 grit sandpaper to blend it in. I started the polishing with 400 grit wet dry sandpaper.

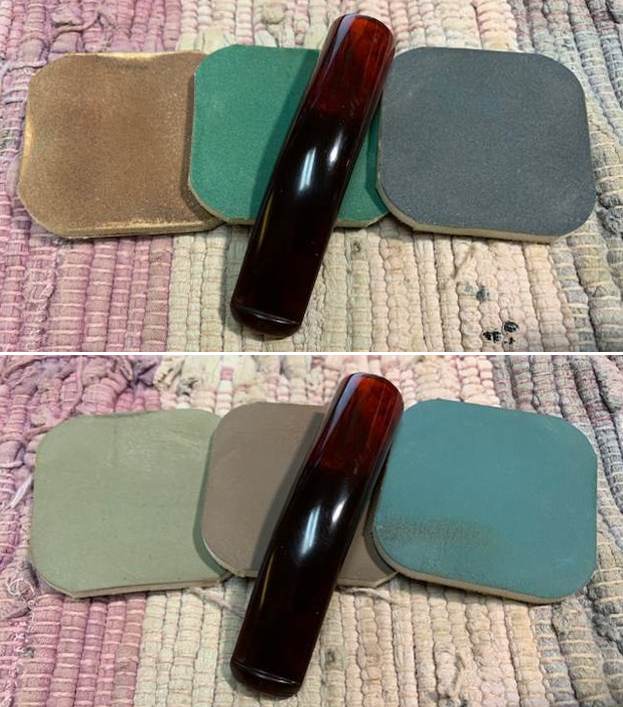
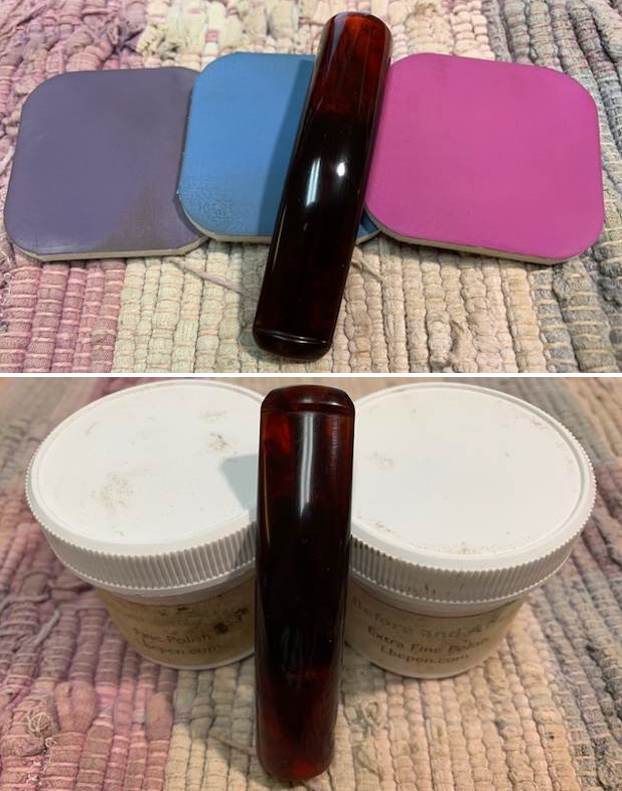
 I polished the stem with micromesh sanding pads – dry sanding with 1500-12000 grit pads. I wiped the stem down after each pad with a cloth impregnated with Obsidian Oil. I finished polishing it with Before & After Pipe Stem Polish – both Fine and Extra Fine and gave it a final coat of Obsidian Oil.
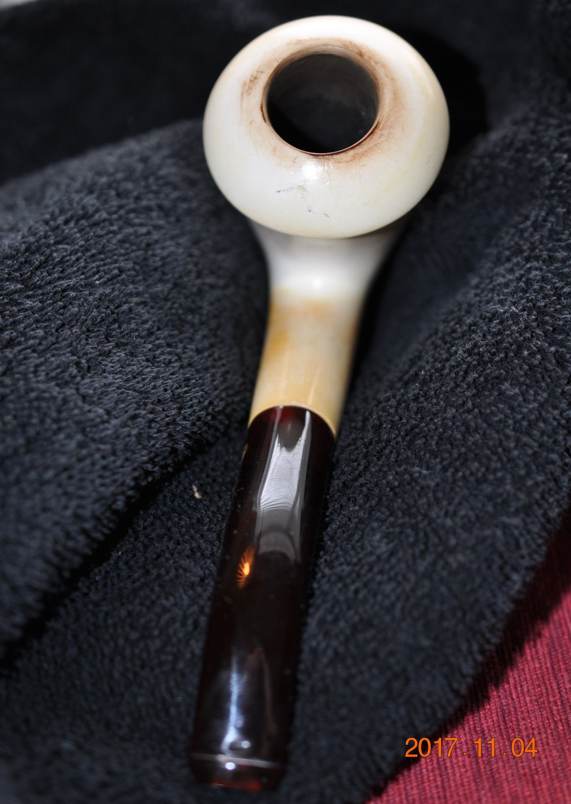
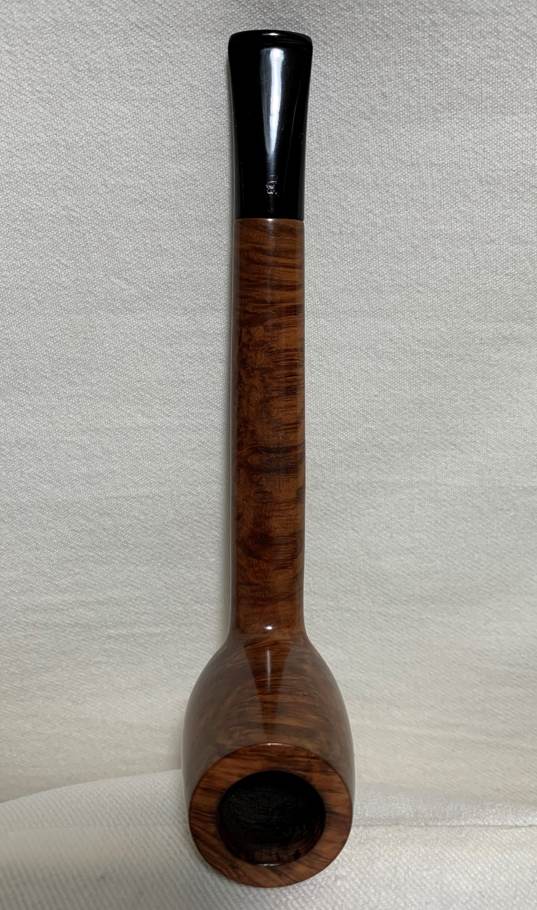
 When the bowl and the stem were finished this G.F.B. Bent Diamond Shank Billiard looked much better. I carefully hand buffed it with a microfiber cloth to raise and deepen the shine. It another beautiful pipe that is over 100 years old. The dimensions of the pipe are – Length: 3 ½ inches, Height: 1 ½ inches, Outside diameter of the bowl: 1 inches, Chamber diameter: 5/8 of an inch. The weight of this large pipe is .71 ounces/20 grams. This G.F.B. Bent Billiard was another great find that goes with the pipes from both brands that I have restored in the past. This is a pipe that will hold another special place in my collection. It is also one that will likely be smoked before its “Big Brother”. It is another pipe that has the capability of transporting the pipe man or woman back to a slower paced time in history where you can enjoy a respite. Thanks for walking through my restoration of this great find.


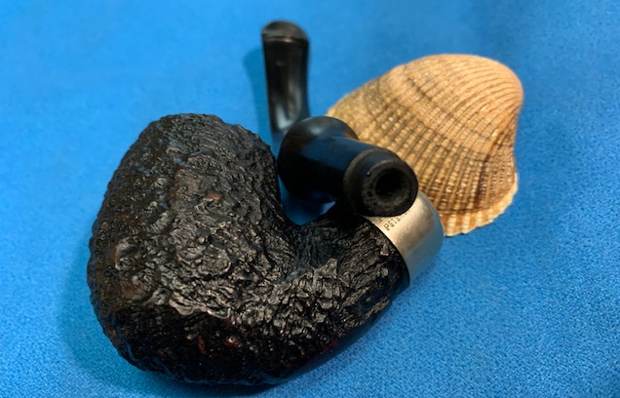
 He took photos of the rim top and the stem to show the condition. You can see the issues on the rim top and stem as I noted above. There are also some scratches on the rim top itself that I am hoping will polish out and look much better. You can see the tooth damage on the stem surfaces on both sides ahead of the button.
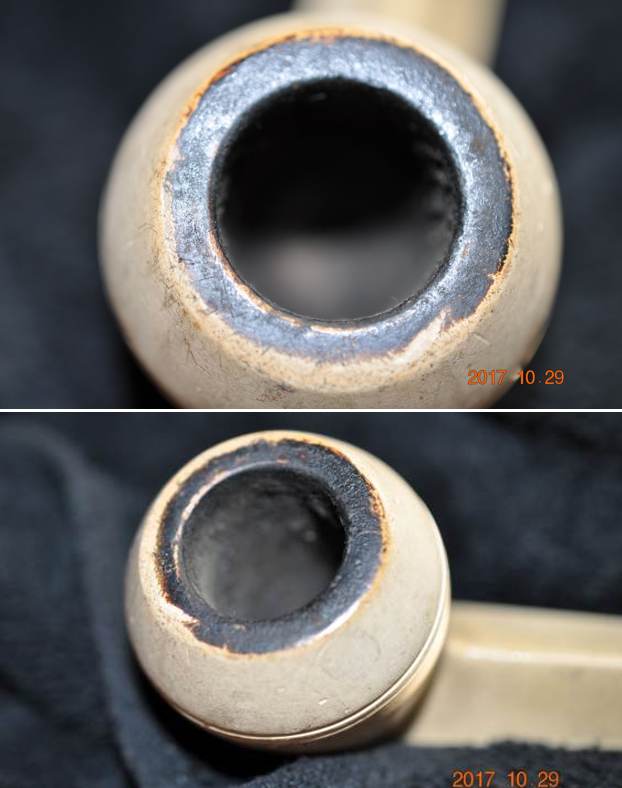
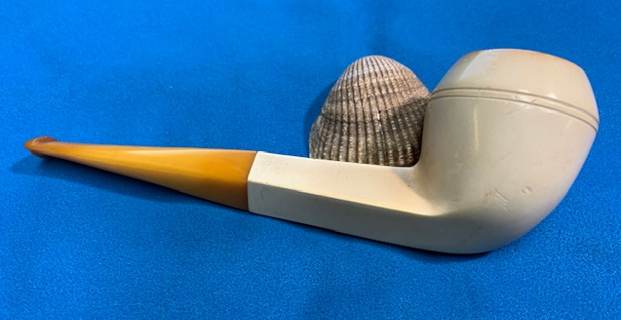
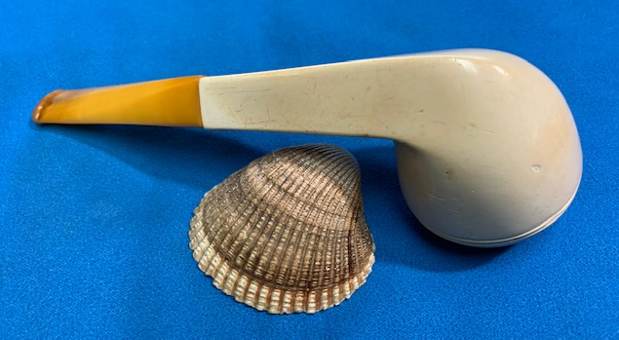
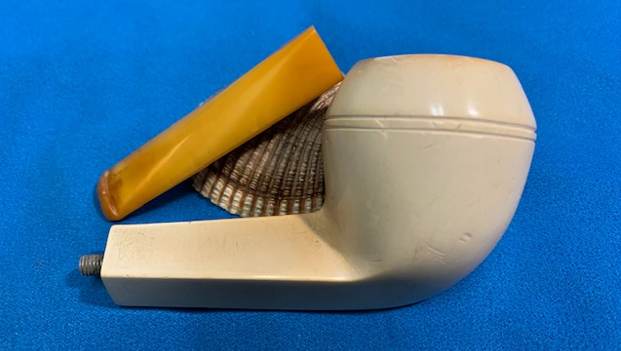
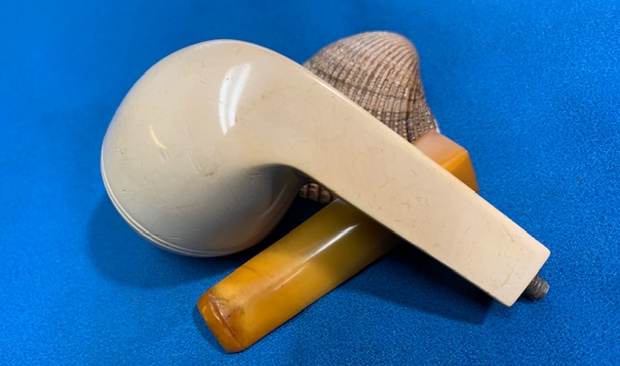
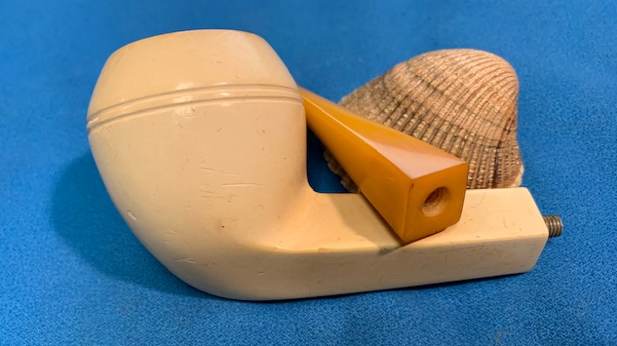
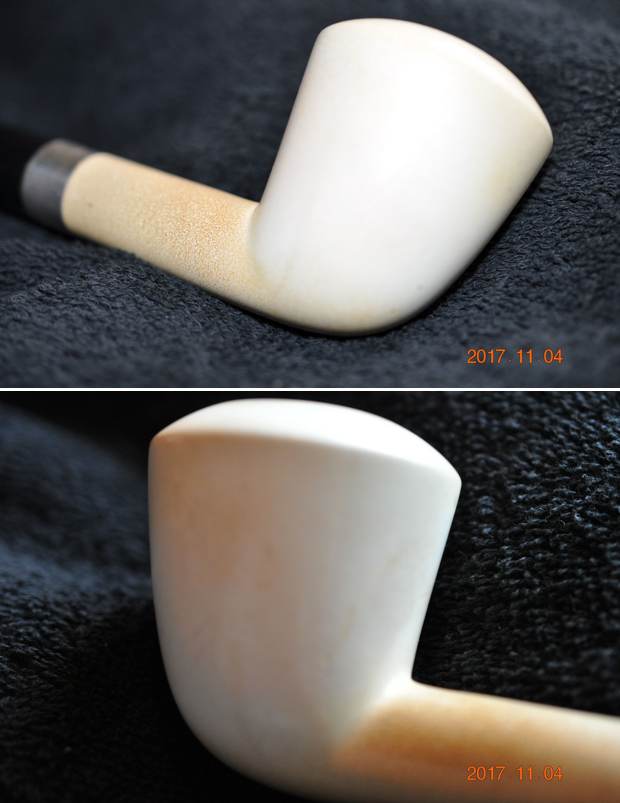
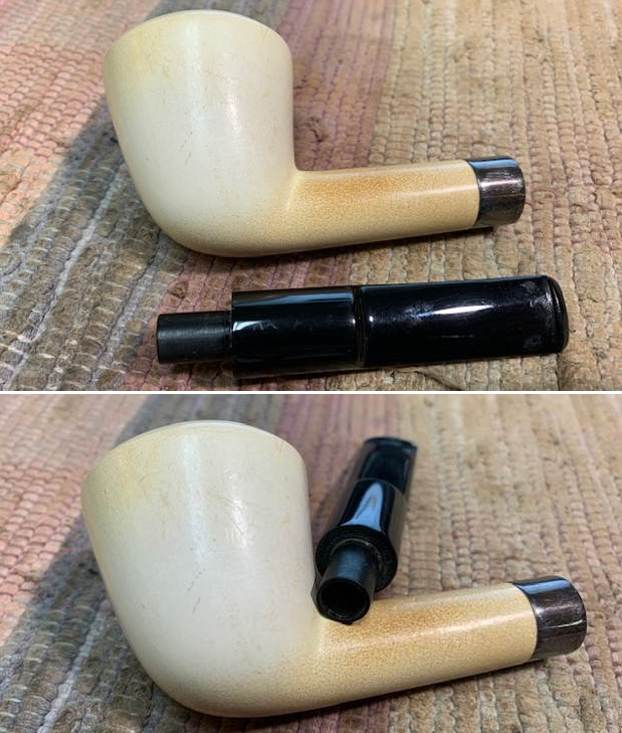
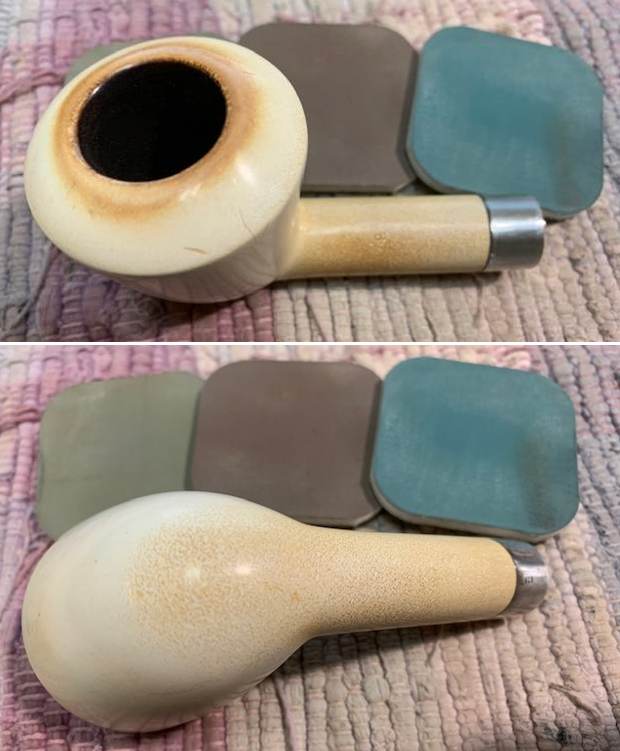
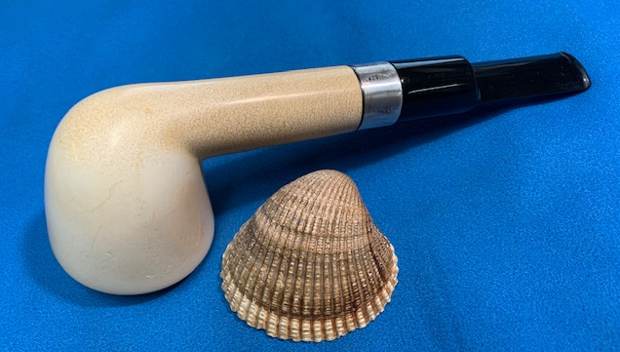
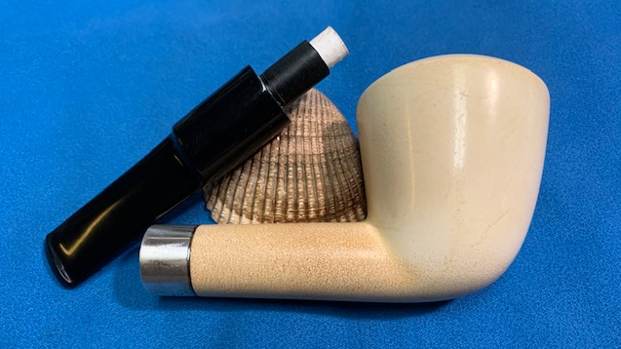
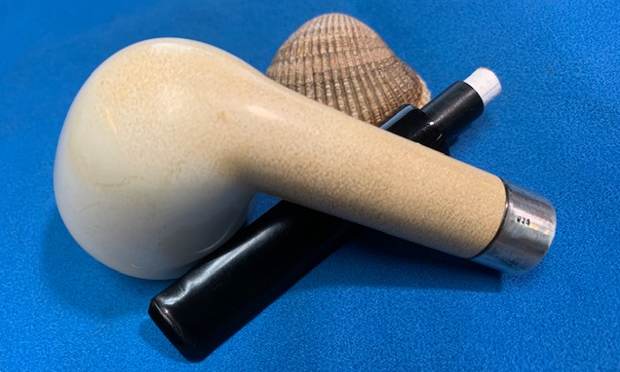
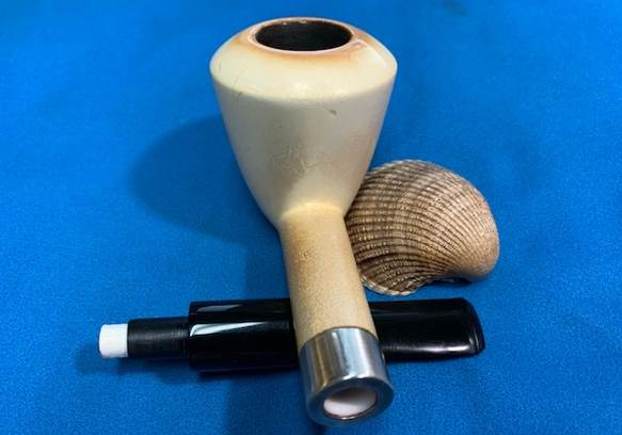
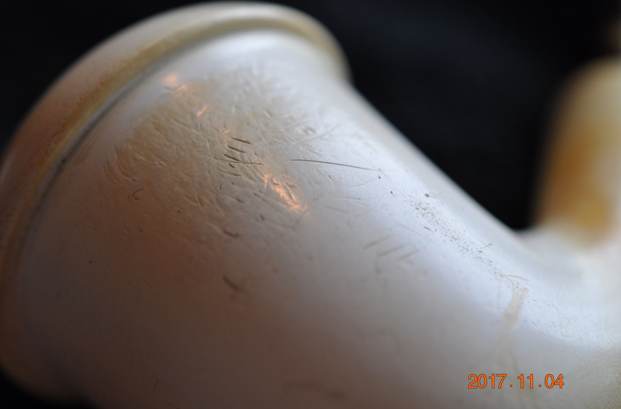
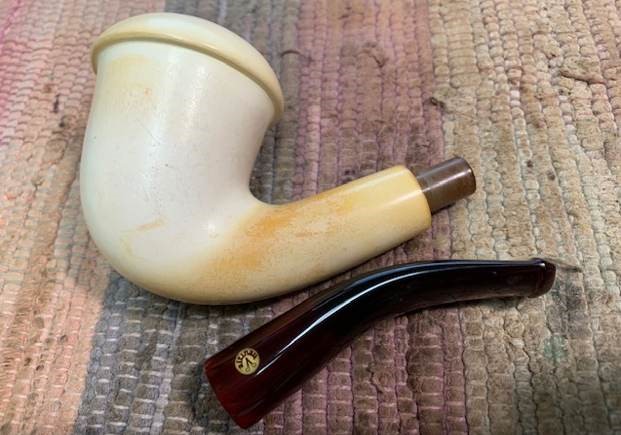
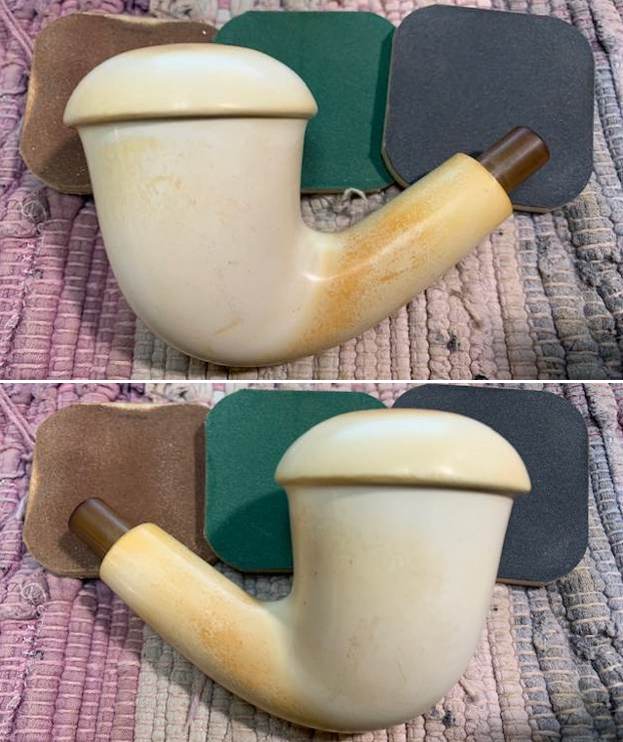
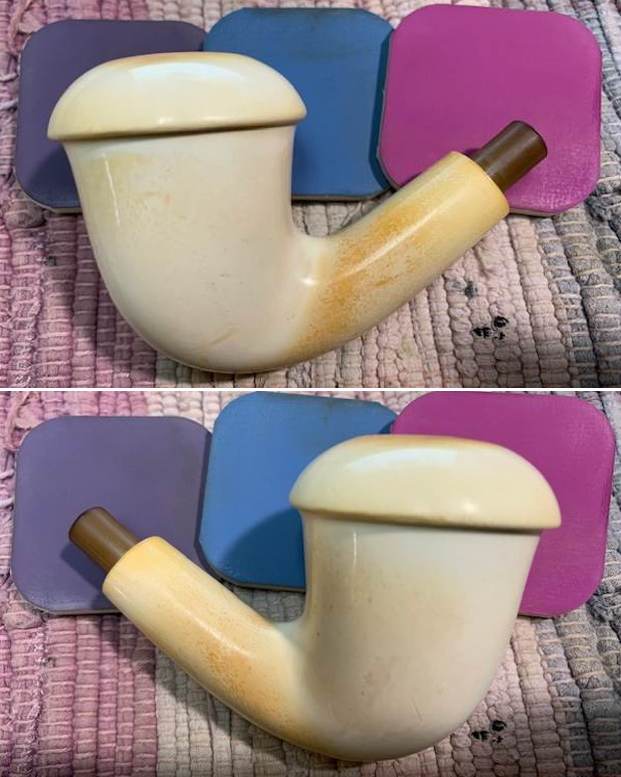
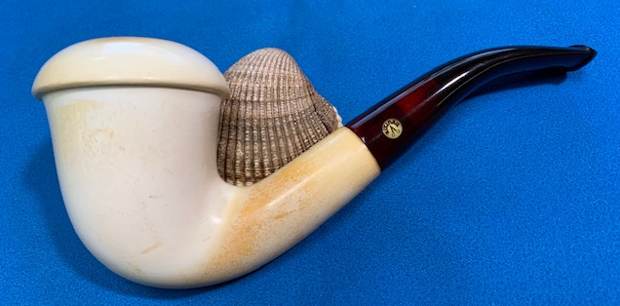
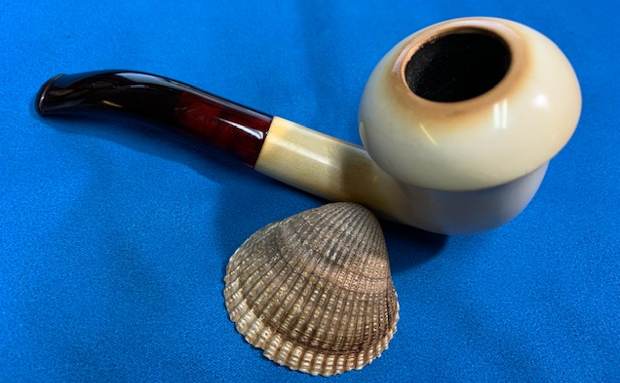
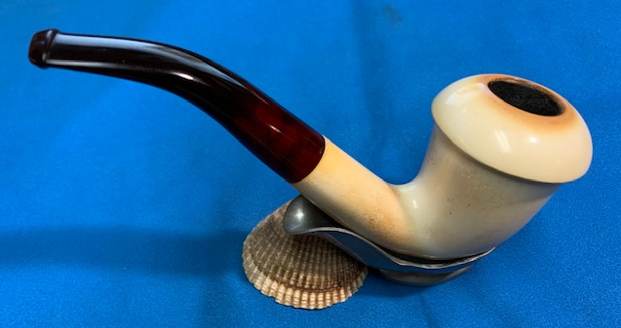
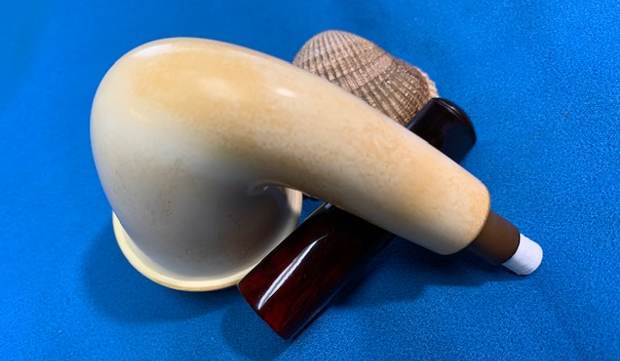
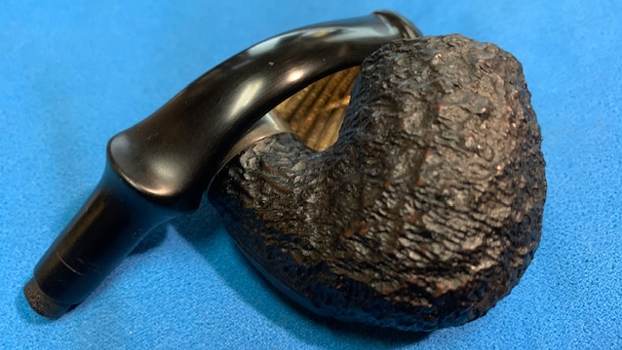
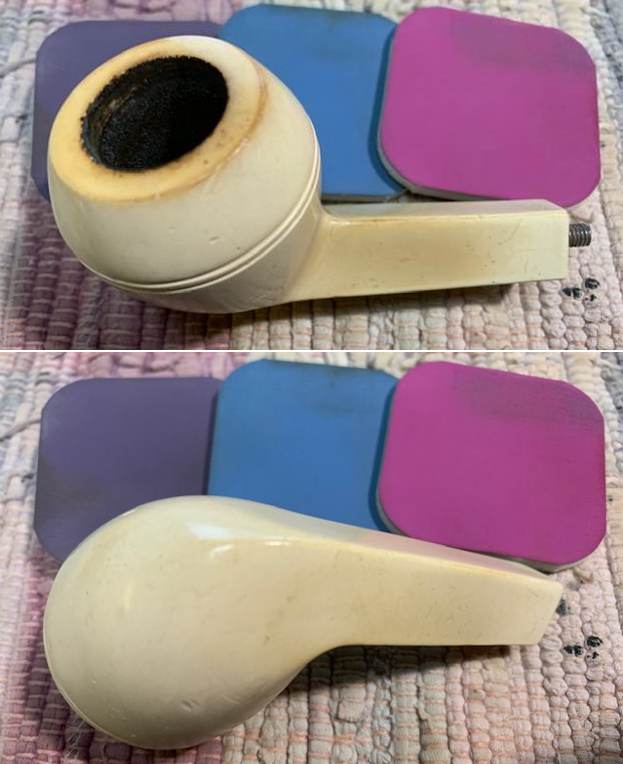
 Jeff took photos of the side and heel of the bowl. You can see the classic lines and nicely carved bowl of the pipe. It is a great looking Bulldog carved from block meerschaum and is well made. There are a lot of scratches and nicks in the meerschaum around the sides, top and shank of the pipe.
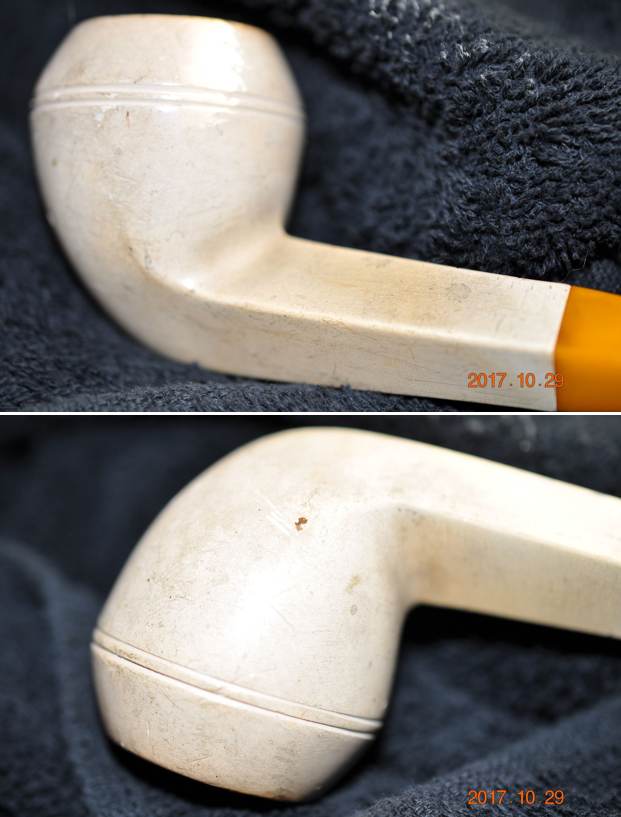
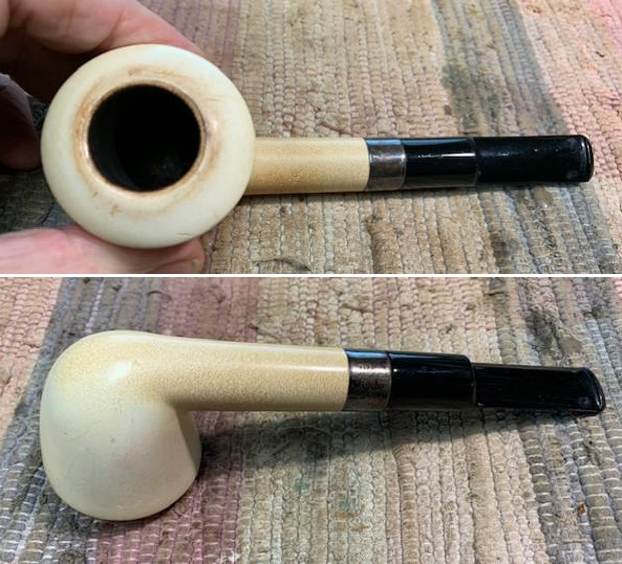
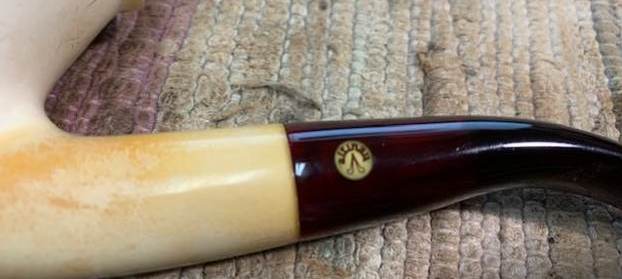
 There was no stamping on the shank or pipe that identified the maker. It was clearly a no name pipe but it was quite nice. Jeff had cleaned up the pipe with his usual thoroughness. He carefully reamed the pipe with a Savinelli Fitsall Pipe Knife. He scrubbed the bowl with undiluted Murphy’s Oil Soap with a tooth brush. He rinsed it under running warm water to remove the soap and grime. He cleaned out the inside of the shank and the airway in the stem with alcohol, cotton swabs and pipe cleaners. He cleaned the stem Soft Scrub cleanser and rinsed it off with warm water. I took photos of the pipe 3 years later when I finally got around to working on it.
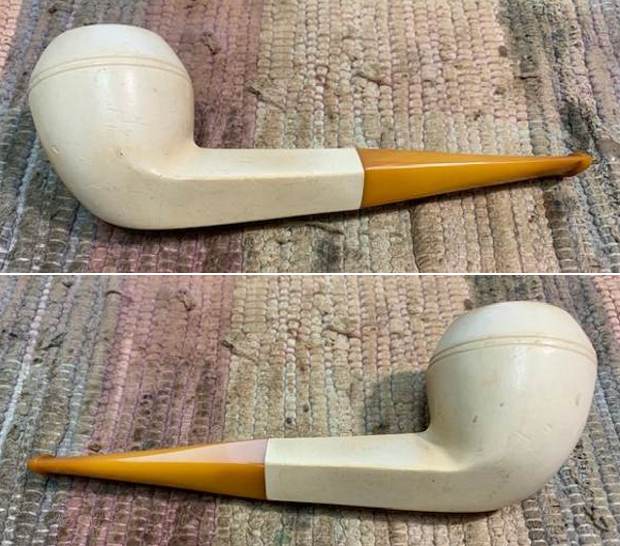
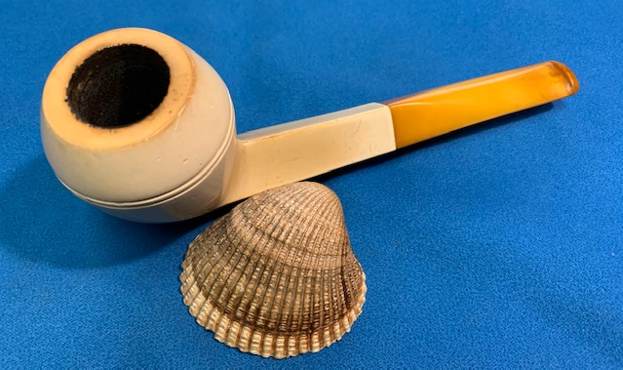
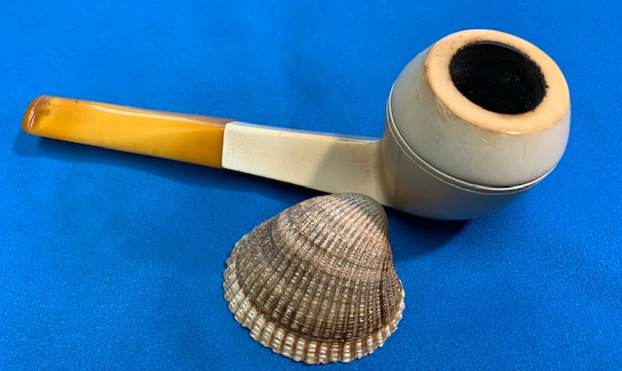
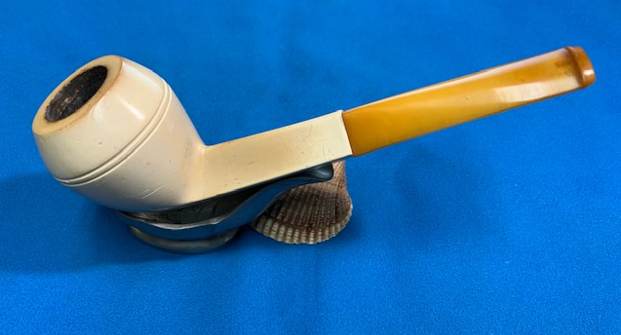
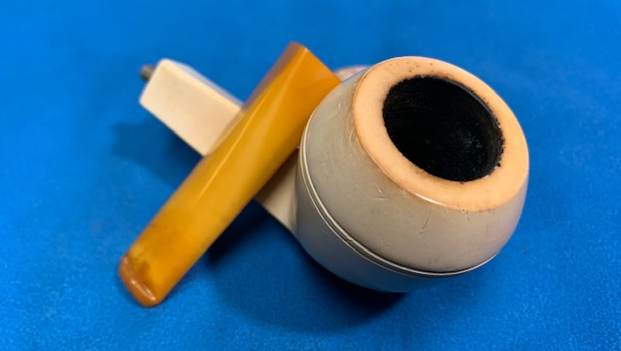
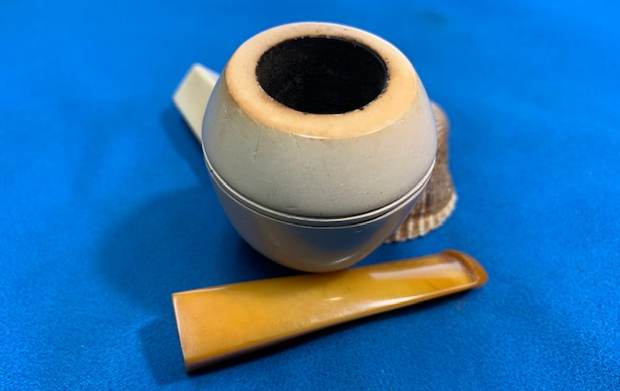
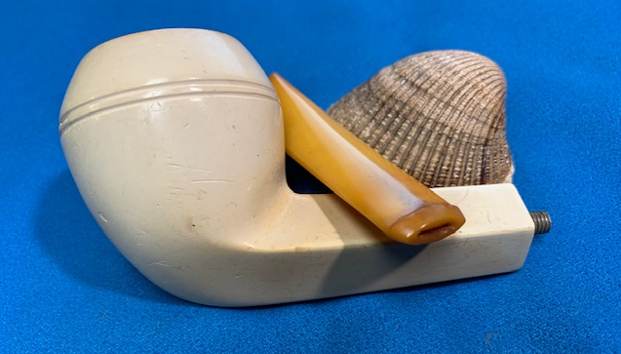
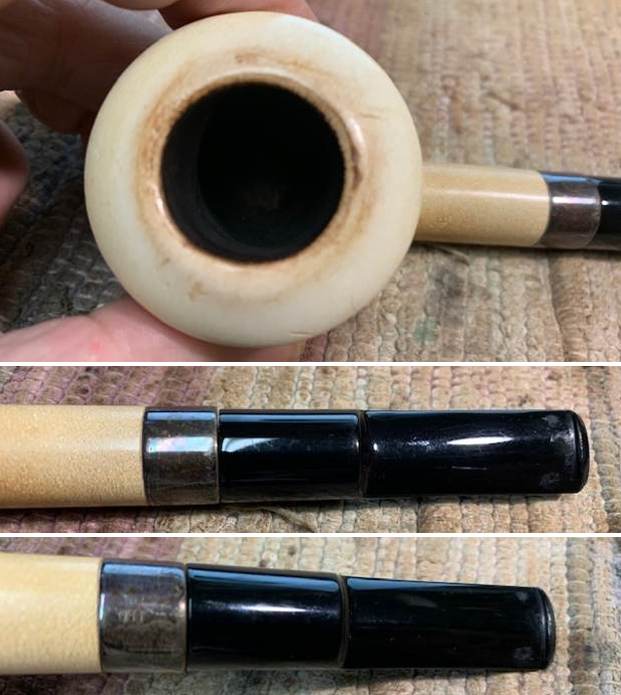
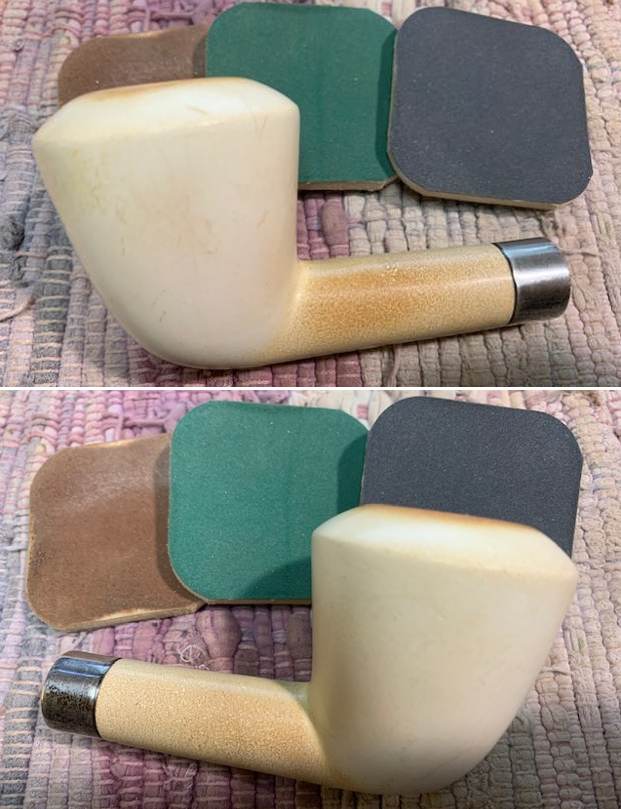
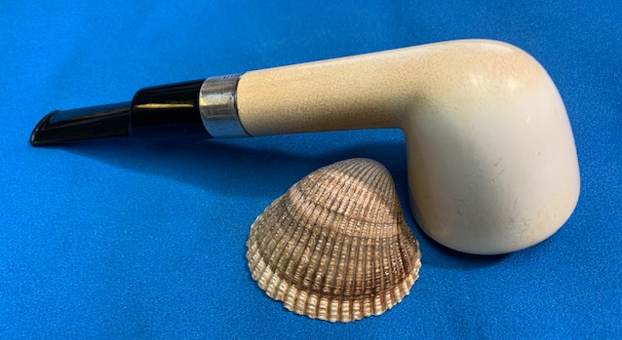
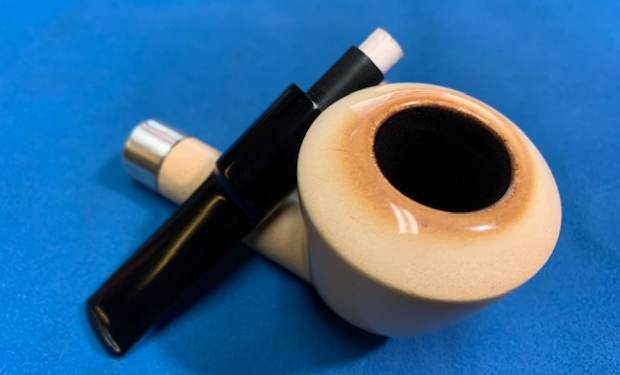
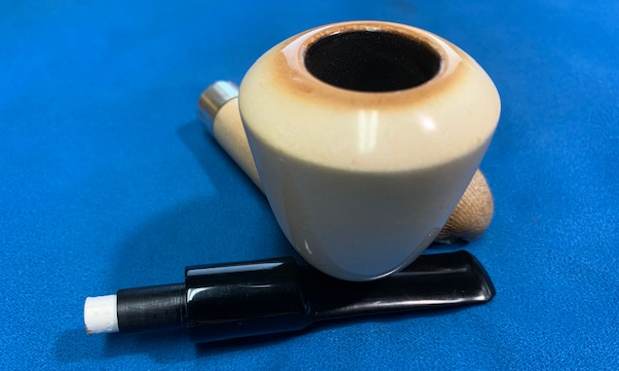
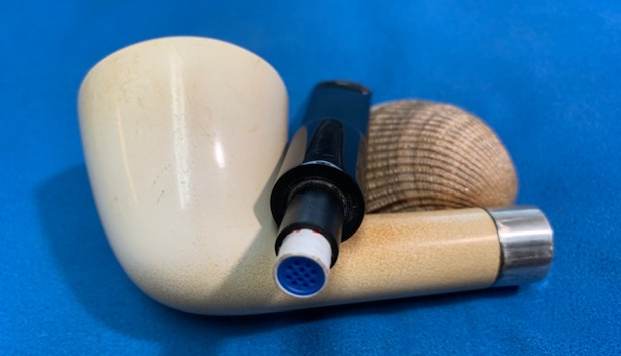
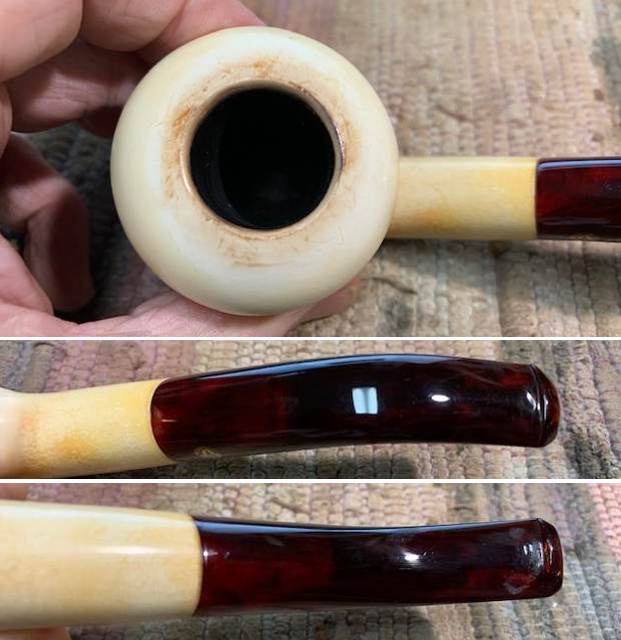
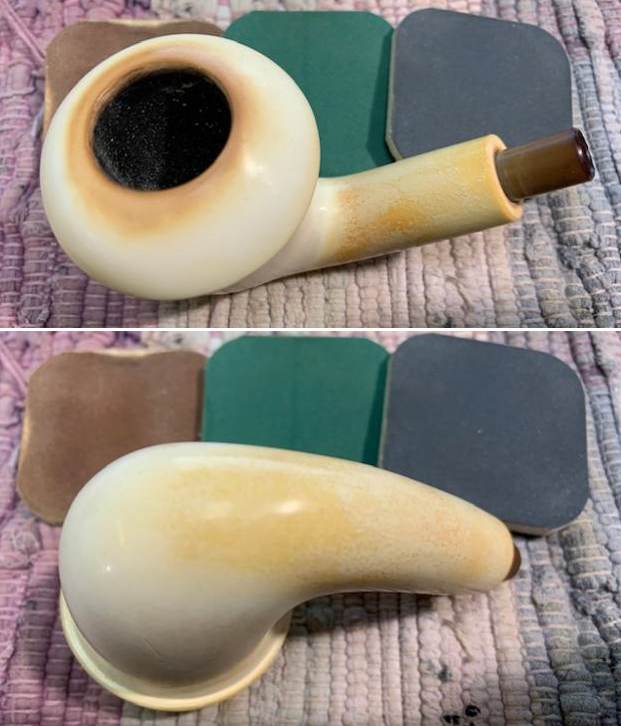
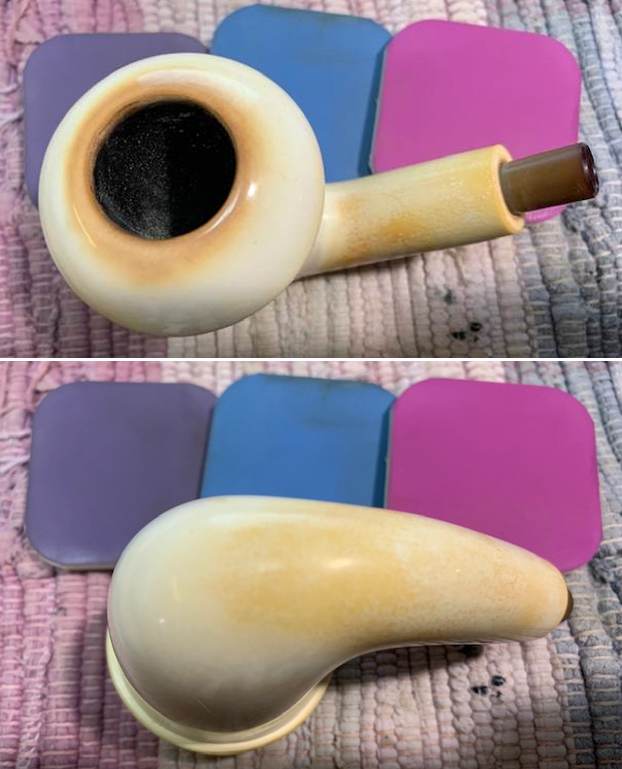
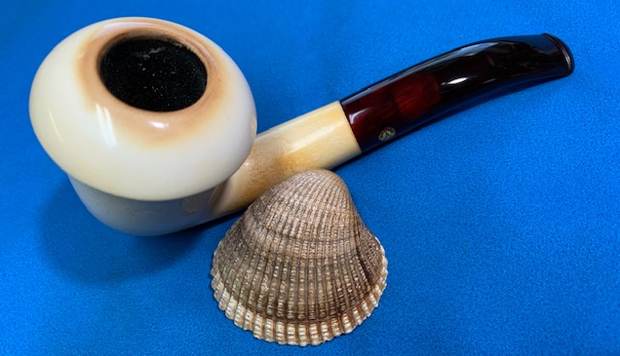
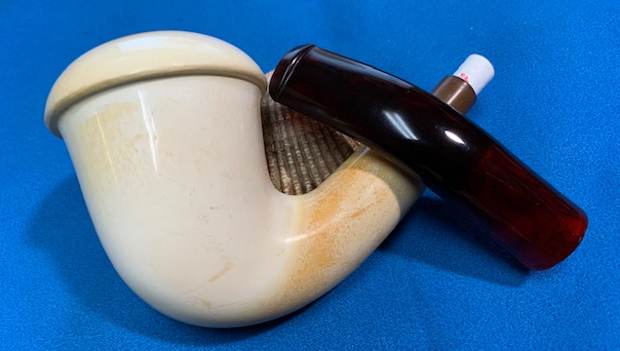
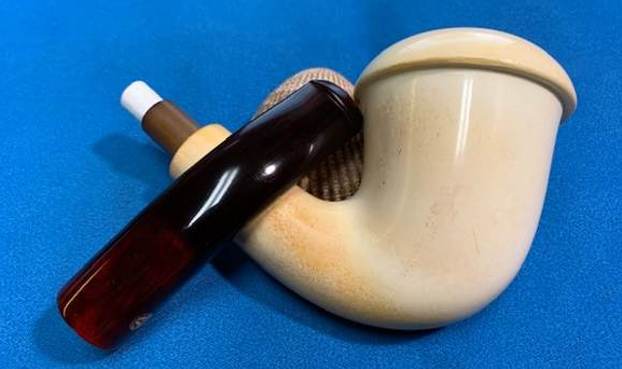
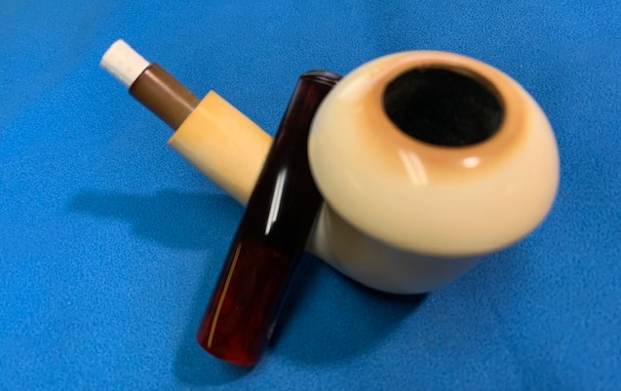
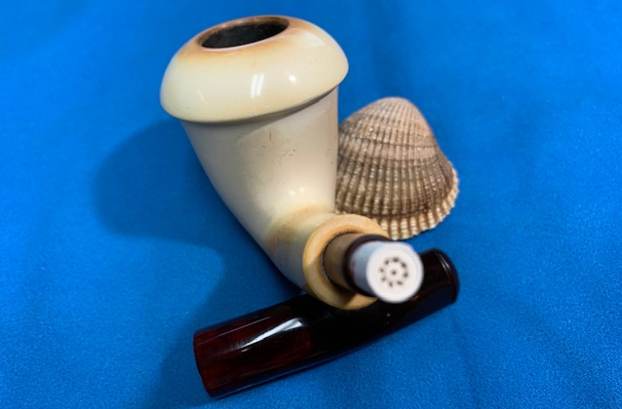
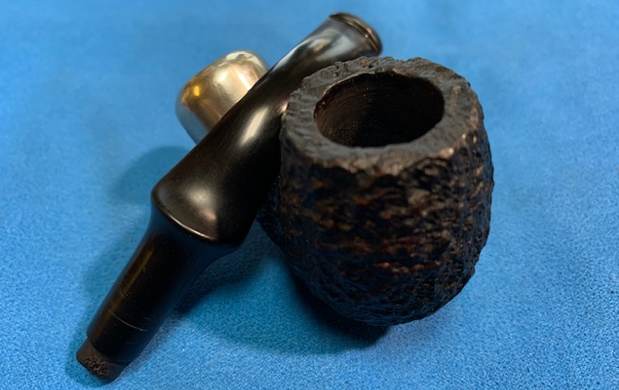
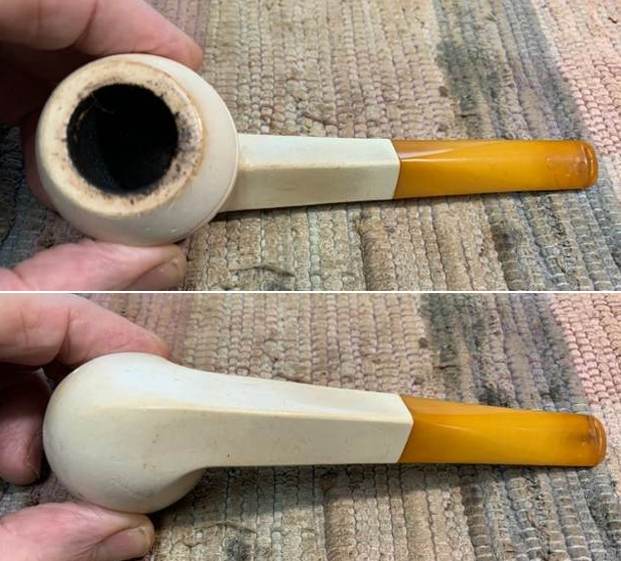 The rim top and inner edge of the rim were in rough condition. The rim top was chipped and nicked. There was darkening on the top and both the inner and outer edges of the bowl along with some dark chips in the surface of the meerschaum.The stem surface looked very good with some tooth marks and chatter on both sides near the button.
 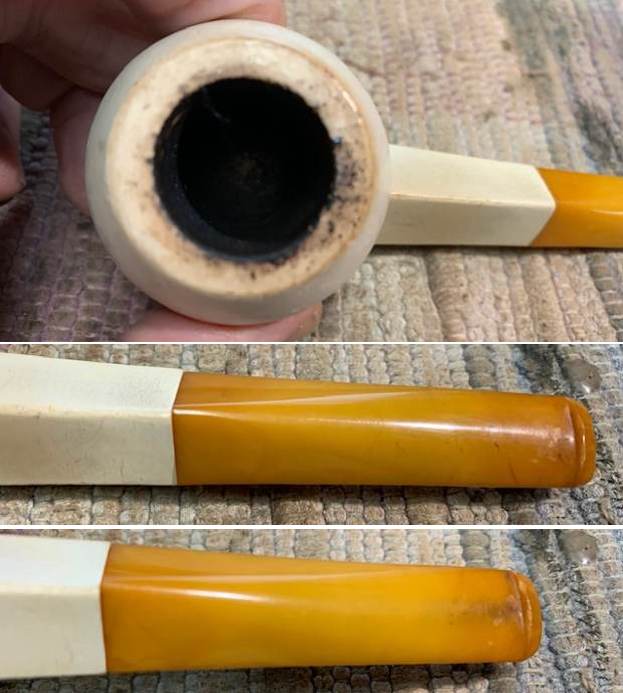 I removed the stem and took several photos of the pipe to give a sense of the whole. The tenon is anchored in the shank and is threaded metal. The golden Bakelite diamond shaped taper stem is also threaded and screws onto the tenon.
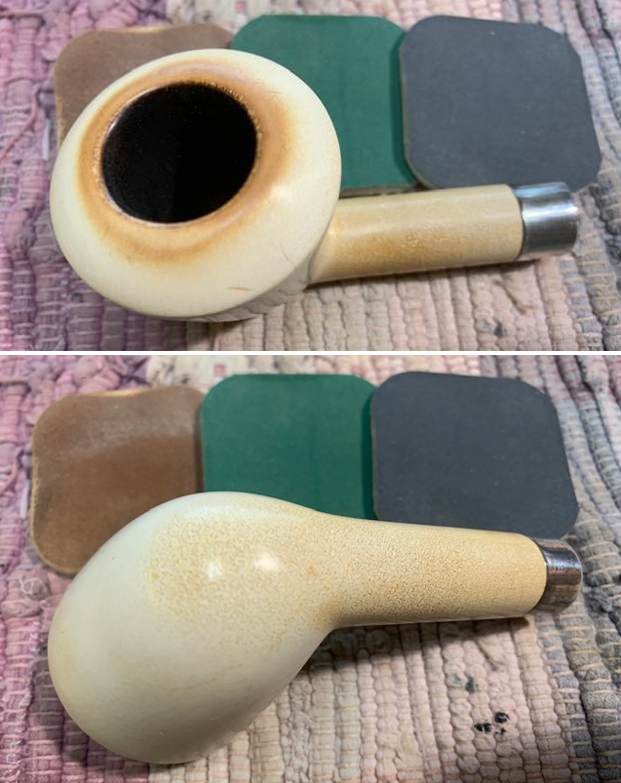
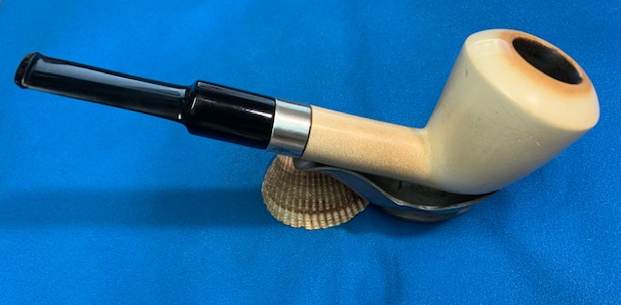
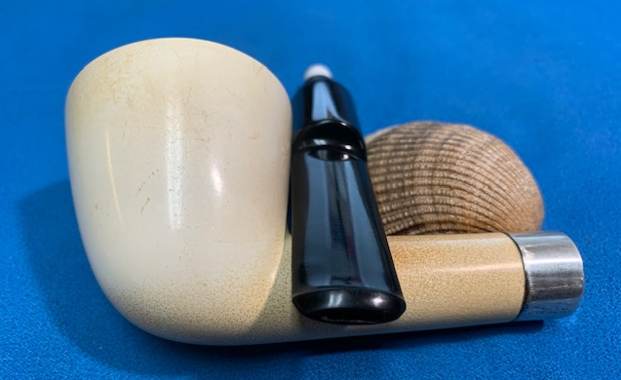
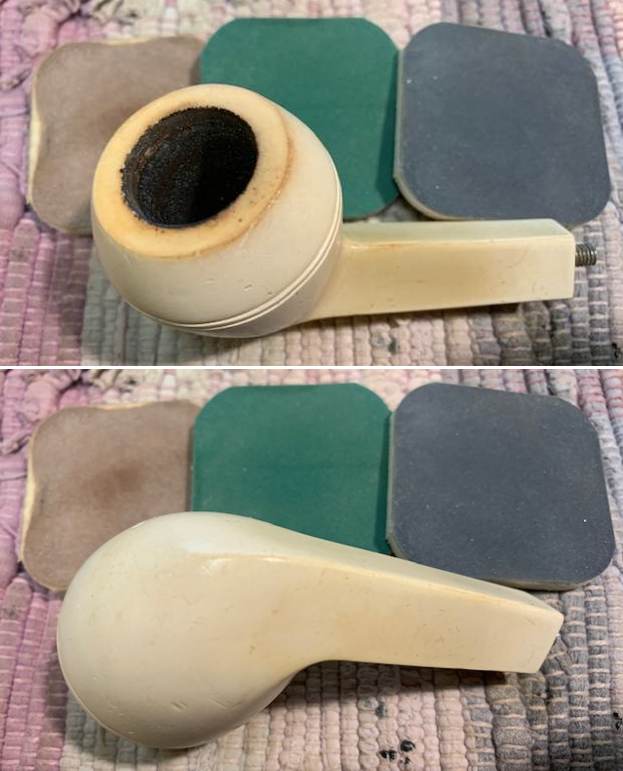
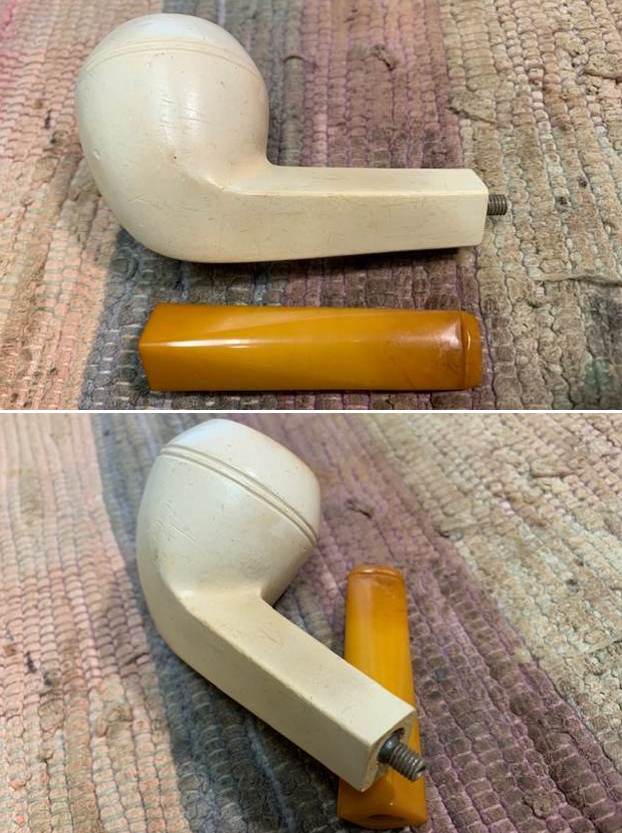 I worked on the rim top and inner edge of the bowl with a folded piece of 220 grit sandpaper to remove the damage and as many of the pits and nicks as possible. It looked much better at this point in the process.
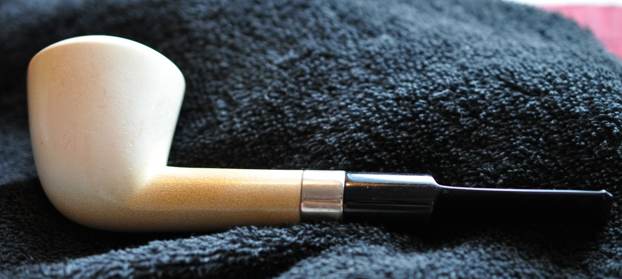
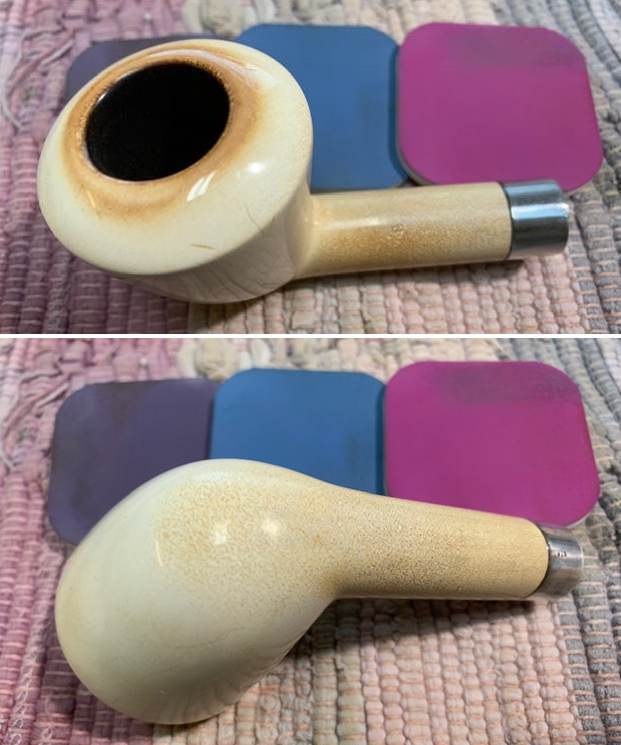
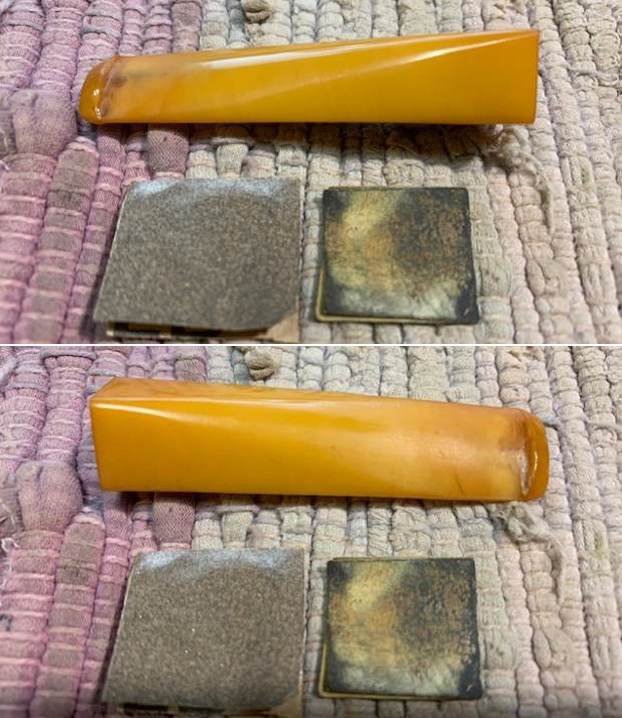
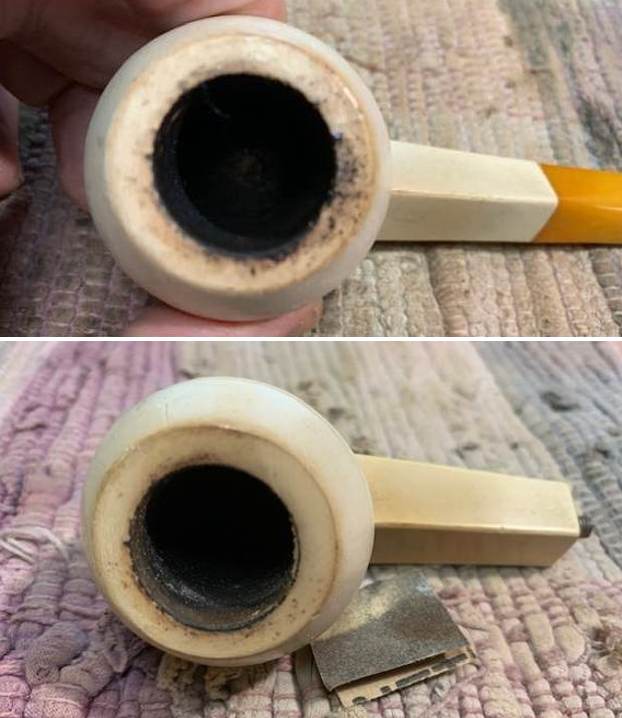 I polished the smooth meerschaum with micromesh sanding pads – dry sanding with 1500-12000 grit pads. I worked on the darkening of the rim top at the same time. I wiped the bowl down after each pad with a damp cloth. The longer I polished it the more the patina came to the surface. The pipe became more beautiful with each grit of polishing pad. While I was not able to remove all of the scratching around the rim top and bowl I was able to minimize them a bit. The remainder are a part of the story of the pipe’s journey and will remain.
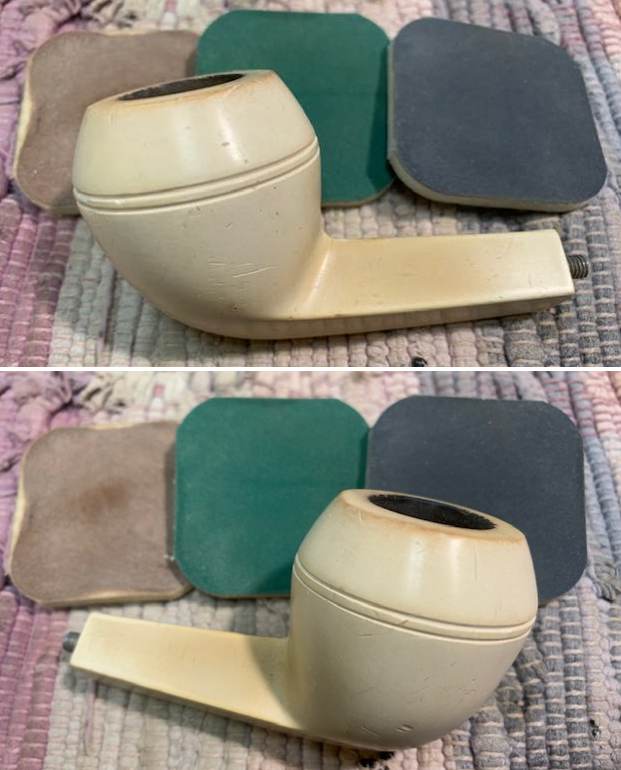


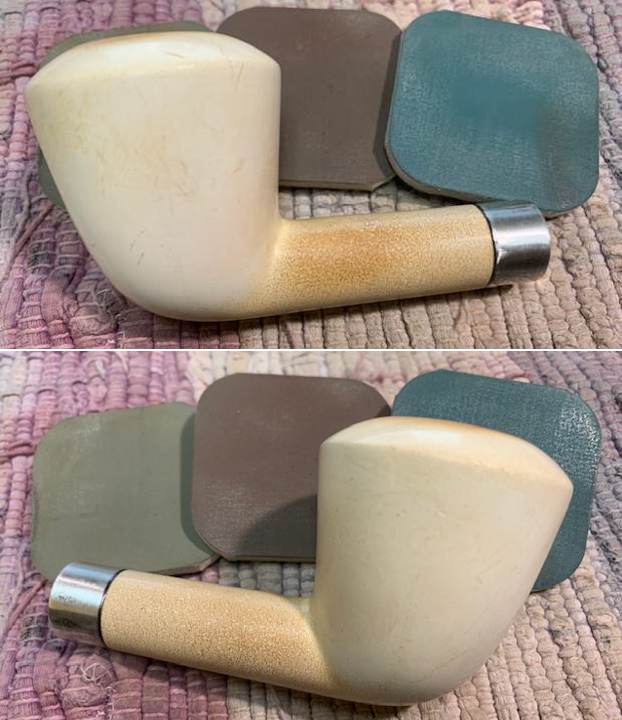
 I set the bowl aside and turned my attention to the stem. I filled in the deep tooth marks on the stem surface on both sides with clear CA glue. Once the repairs cured I sanded them smooth with 220 grit sandpaper. I started polishing the stem with 400 grit wet dry sandpaper.
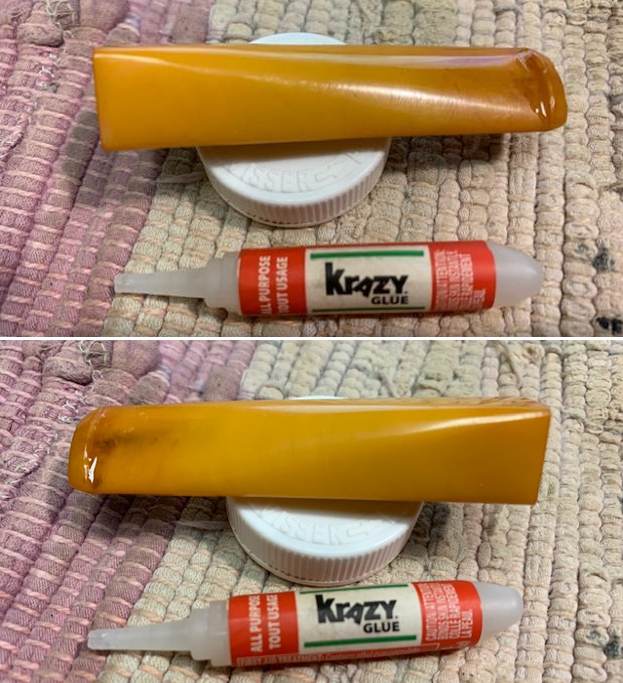
 I polished the stem with micromesh sanding pads. I dry sanded it with 1500-12000 pads and wiped the bowl down after each pad with a cloth and Obsidian Oil. I finished polished it with Before & After Fine and Extra Fine stem polish. I wiped it down with the cloth and Obsidian Oil one final time and set aside to dry.
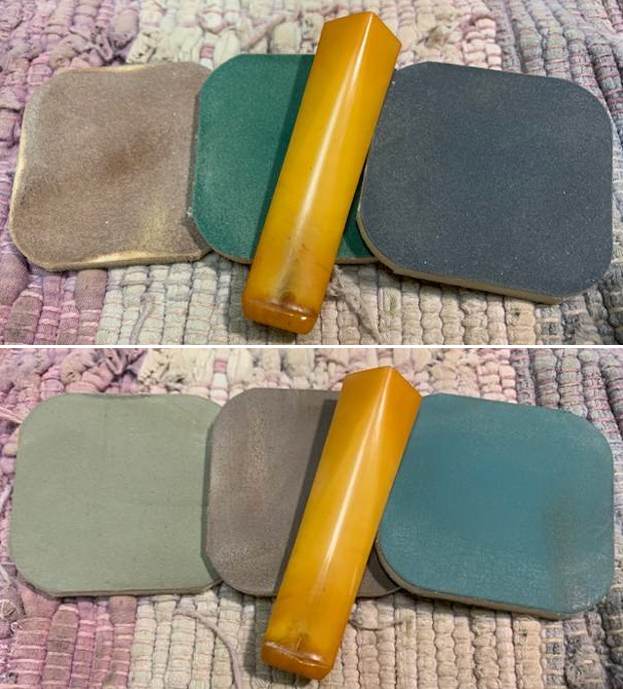
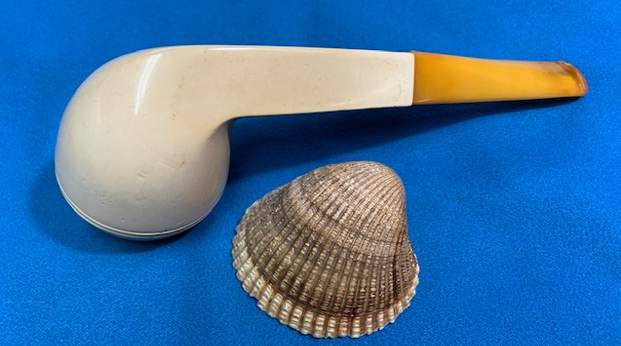
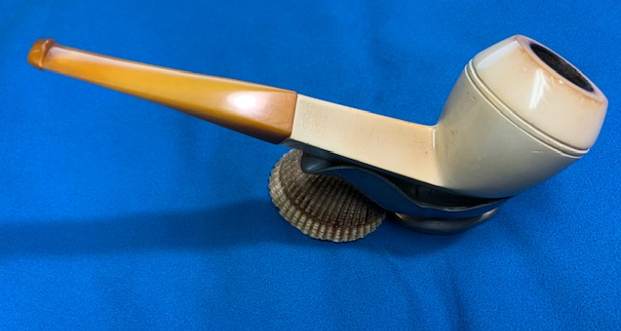
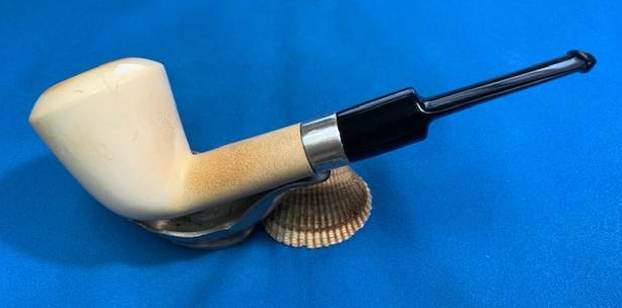
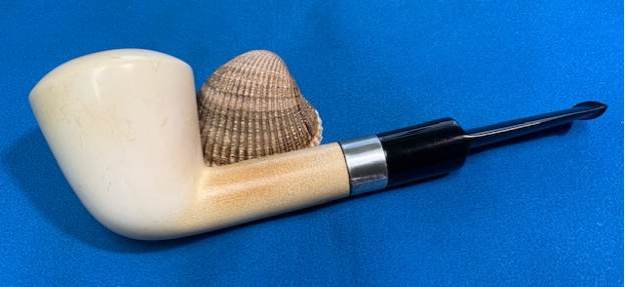
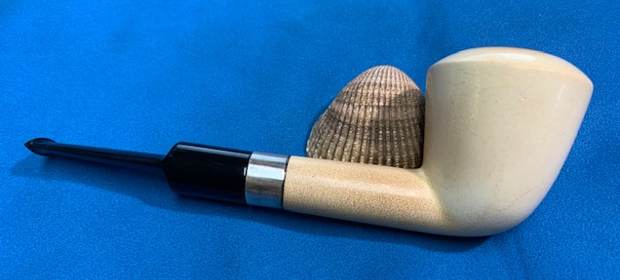
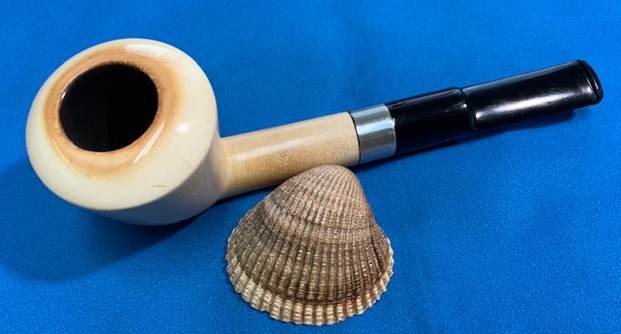
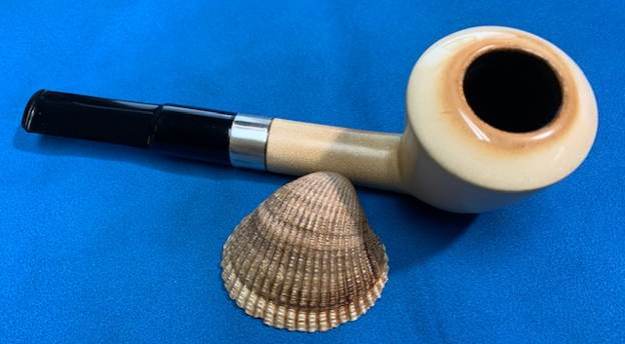
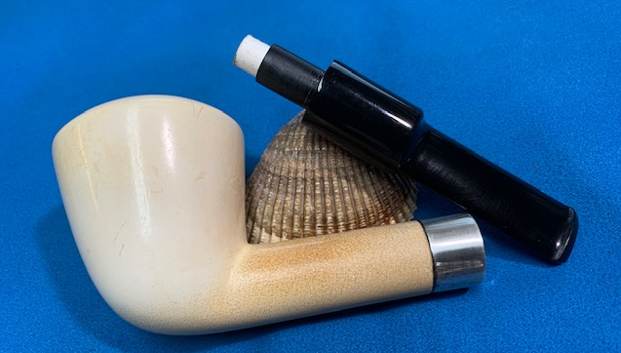
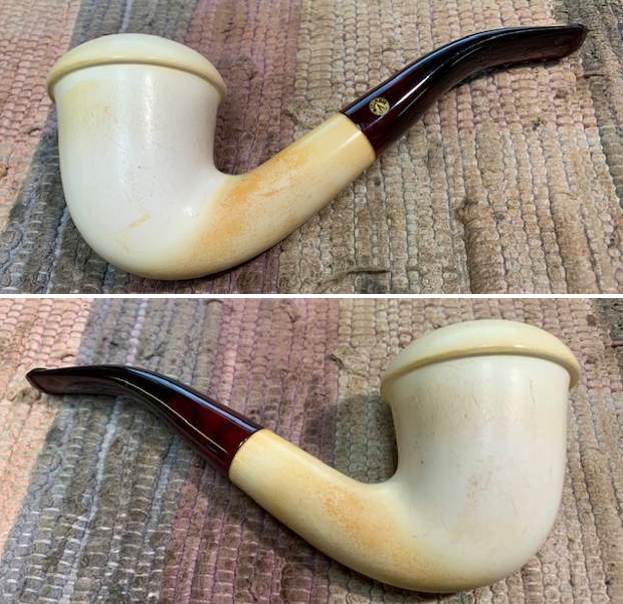
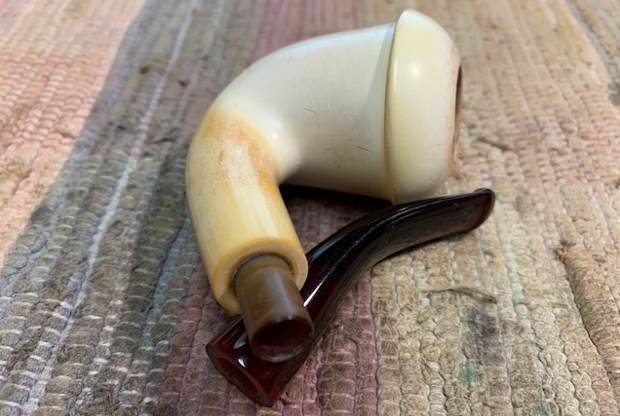
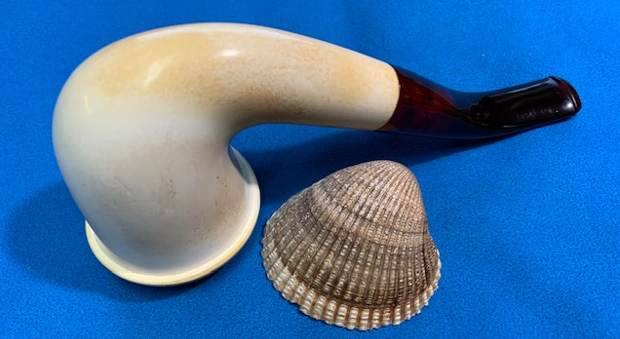
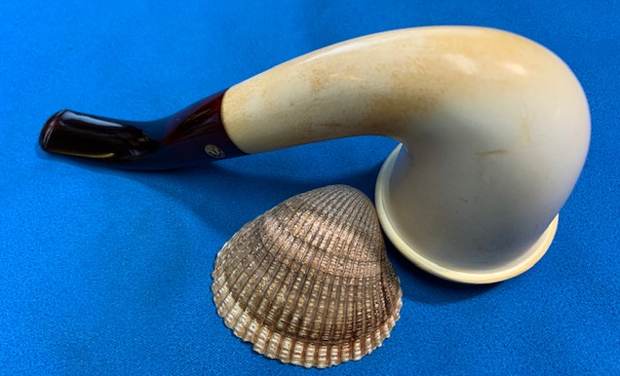
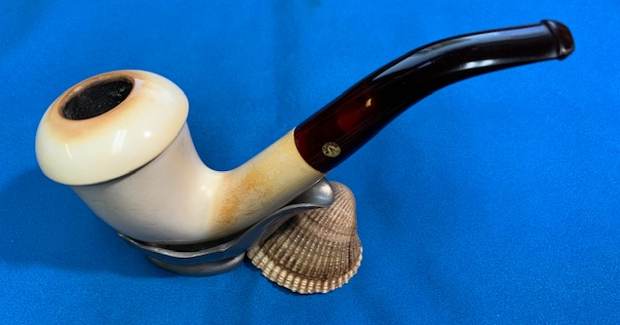
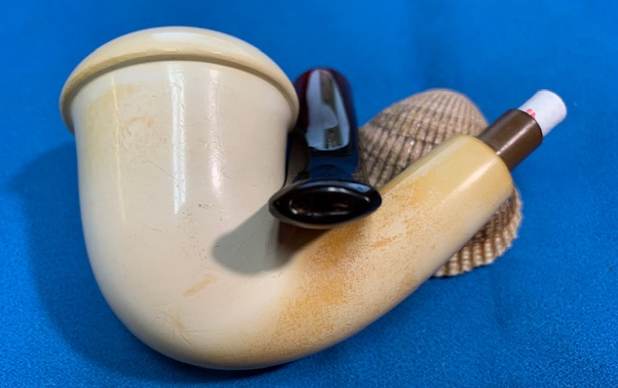
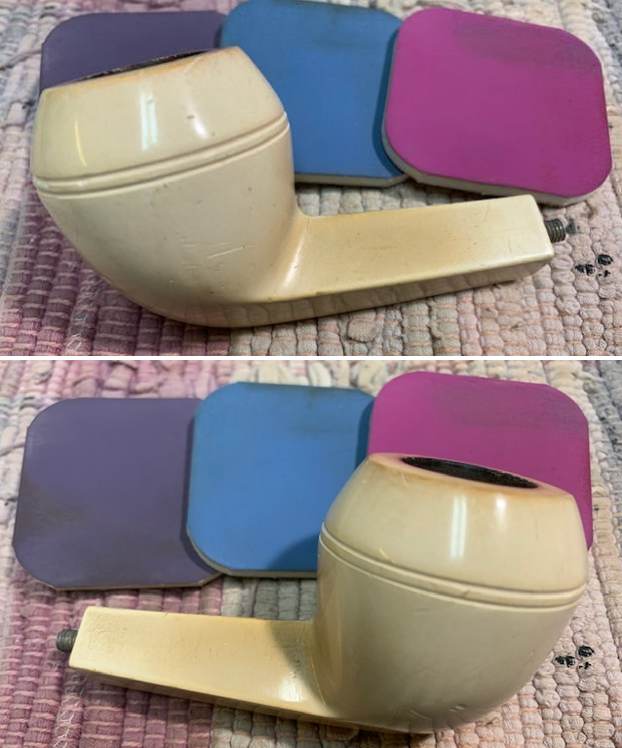
 This Classic No Name Meerschaum Straight Bulldog with a golden Bakelite stem really is a beautiful pipe. The polished meerschaum has a stunning shape. I put the stem back on the bowl and carefully buffed the pipe with a clean buffing pad. I hand buffed the pipe with a microfiber cloth to deepen the shine. The finished Meerschaum Bulldog is another pipe that fits nicely in the hand and feels great. Give the finished pipe a look in the photos below. The dimensions of the pipe are Length: 6 inches, Height: 2 inches, Outside diameter of the bowl: 1 ½ inches, Chamber diameter: 7/8 of an inch. The weight of the pipe is 59 grams/ 2.08 oz. This Meerschaum Bulldog is a real beauty and the rich amber coloured Bakelite stem just highlights the beauty. Jeff made another great find when he picked this up in Bozeman. I will be putting on the rebornpipes store in the Ceramic and Meerschaum Pipe Section. Thanks for reading this blog and my reflections on the pipe while I worked on it. There are many more to come!