Tag Archives: repairing bite marks

Refurbishing an Old Zulu Bowl


I was gifted a few pipe bowls that needed to be restemmed and refurbished by a friend. The first of these that I decided to clean up and restem was an old Zulu bowl. It is stamped Algerian Briar over Made in France on the left side of the shank and no other identifying marks. Thus the maker remains a bit of a mystery that I am not sure can be solved. The bowl itself was in fair shape. The cake in the bowl was not thick but it was particularly crumbly and soft. The finish on the pipe was also shot. The varnish coat was gone and the stain was streaked and damaged. There were a cut groove next to the left side of the stamping and a smaller one on the right side of the stamping. The shank was filthy and caked with oils and tars. The rim was in great shape with no damage to either the inside or outside rim. The grain under the stain coat looked promising with cross grain on the front and back of the bowl and the top and bottom of the shank and mixed birdseye on the sides of the both.
IMG_4862

I had a stem in my can of stems that fit almost perfectly. It was damaged and would need some work but the fit and bend was perfect for the Zulu shape.
IMG_4863

IMG_4864

I fit the stem in place and wiped down the bowl with acetone on cotton pads to remove the remaining finish on the pipe. I reamed the bowl with a PipNet reamer and took the cake back to bare wood. I cleaned out the shank and the bowl with cotton swabs and Everclear.
IMG_4866

IMG_4867

IMG_4868

IMG_4869

I sanded the stem until the transition between the shank and the stem was smooth. I used both 220 grit sandpaper and medium and fine grit sanding sponges to smooth it out. The end of the stem was badly damaged and the button was ruined. I decided to trim off the damaged end of the stem and rework the button. Once it was cut back I cleaned out the stem with Everclear and pipe cleaners. The stem was badly plugged with tars so I had to use a bent paper clip to push through the airway. I used shank brushes and pipe cleaners to remove the tarry build up and open up the stem once again.
IMG_4870

IMG_4872

The airway was still wide and open so I did not need to reshape it. The top and bottom of the button were thin so I could not remove any further material. I reshaped the externals as best as possible by rounding the ends of the stem and making the button more oval in external shape.
IMG_4873

The slight dents in the stem that remained would not lift with heat so I filled them with superglue until they were level with the surface of the stem.
IMG_4874

IMG_4875

I cut the new button with needle files and shaped the end of the stem to have a better flow and taper to the new button. This involved removing some of the thickness of the stem and making the taper more angled. I used files and sandpaper to reshape the stem.
IMG_4876

IMG_4877

With the new button cut I sanded the stem and the entire pipe with 220 grit sandpaper to remove the remaining finish and make sure the flow of the stem was correct to the angles of the pipe. I also sanded it with a medium and fine grit sanding sponge to remove scratches in the briar and vulcanite.
IMG_4879

IMG_4880

IMG_4881

IMG_4882

IMG_4883

IMG_4884

The stain around the stamping on the left side of the shank was very set and stubborn. I lightly sanded it to break through the top coat and then scrubbed it with acetone on cotton pads to match it as much as possible to the unstained briar. I stained the bowl with an oxblood aniline stain, flamed it and restained and reflamed until I had an even coverage on the bowl. I hand buffed it with a soft cloth. I took the pipe to the buffer and buffed the stem and bowl with red Tripoli and White Diamond. The photos below show the pipe after the buffing.
IMG_4885

IMG_4886

IMG_4888

IMG_4889

I sanded the stem with my usual array of micromesh sanding pads – wet sanding with 1500-2400 grit pads and dry sanding with 3200-12,000 grit pads. I rubbed the stem down with Obsidian Oil and when it dried hand buffed the stem.
IMG_4890

IMG_4891

IMG_4892

I buffed the pipe with White Diamond and then gave it multiple coats of carnauba wax. I finished by buffing it with a clean soft flannel buffing pad. The finished pipe is pictured below. It is ready to go into service again. I like the flow of the lines on this pipe. The shape and matte like finish work well together.
IMG_4893

IMG_4894

IMG_4896

IMG_4897

Topping a Badly Damaged Georg Jensen Bent Billiard


Blog by Steve Laug

In the process of going through the box of pipes for the Vancouver Pipe Club to put back the ones I had worked on, I found another that really needed attention. I just could not leave it in the box as the damage looked awful and I knew it could look so much better. It is an oddly shaped bent billiard to me but it had a quaint quality about it that I liked. It is stamped Georg Jensen over Made in Denmark Pipes on the left side and Zenta on the right side. On the underside of the shank it is stamped 525. I am assuming that is a shape number. The stem was oxidized around the shank. The bowl had been coated with varnish – even over the grit on the surface. There were also finger prints in the varnish. The worst part of the pipe was the rim. It was worn down on the front side and the varnish had covered the rough surface of the beat up briar. It was also burned on the back inner edge of the rim and onto the rim surface. The inner edge of the rim was also damaged and nicked and gouged out of round. The stem had one tooth mark on the topside near the button.
IMG_4431

IMG_4433

IMG_4434

IMG_4435

I have included the next two close-up photos to show the rim damage. The front edge is very worn, the back inner edge is burned and the inner edge of the rim is clearly gouged and marked. Fortunately the damage did not extend deeply into the bowl was limited to the top 1/8th inch of the bowl top. The bowl had also been coated with a black rubbery bowl coating. I chose to leave it as the bowl also had some gouges in the bottom from the knife that someone used to ream the bowl.
IMG_4436

IMG_4437

I set up my board and sandpaper that I use for topping pipe bowls and sanded the top of the rim. This one was a little tricky in that the front slope was lower than the rest of the rim. I worked the back half of the rim first to bring the height down to the same place as the highest portion of the front slope. Once I had that done it was an easy matter to proceed with topping the rest of the rim. I worked until I had removed the burn damage and the rough front edge and had a flat, smooth and rim with an even circumference.
IMG_4438

I wiped the bowl down with acetone on cotton pads to remove the varnish coat and the rest of the finish so that I could blend in the stain on the freshly topped rim with the rest of the pipe.
IMG_4439

IMG_4440

IMG_4441

IMG_4443

I used MinWax Red Mahogany stain to restain the pipe. I rubbed it on and then wiped it off several times until I had the even coverage I wanted on the bowl. I had buffed it with a cotton cloth to give it a slight shine and get a feel for the overall look of the stain on the bowl. I retouched the stain on the rim to darken it slightly. I lightly buffed the bowl with White Diamond and gave it an initial coat of carnauba wax.
IMG_4444

IMG_4445

IMG_4446

IMG_4447

The tooth mark on the top of the stem needed to be heated to lift it as much as possible and then I used some superglue to finish the repair. I sanded it with 220 grit sandpaper to feather it into the surface of the stem. I followed that with a medium and fine grit sanding sponge. I finished the stem with my usual array of micromesh sanding pads – wetsanding with 1500-2400 grit pads and dry sanding with 3200-12,000 grit pads. I rubbed the stem down with Obsidian Oil and then buffed the pipe with White Diamond. I gave it multiple coats of carnauba wax to finish. The completed pipe is shown in the photos below. I also included a photo of the top of the rim to show the repair. The pipe is now ready to join the rest of the ones heading to the Vancouver Pipe Club. It should provide years of service to the pipeman who takes it home.
IMG_4450

IMG_4451

IMG_4452

IMG_4453

IMG_4454

Cleaning up a Partner Deluxe Fine Briar Lumberman 129


Blog by Steve Laug

The next little pipe that I reworked for Vancouver Pipe Club donation of pipes is a nice lumberman. It is stamped on the left side of the shank Partner over De Luxe and on the right side it is stamped Fine Briar over 129. Further research has led me to information that this pipe was made by Savinelli. The shape number matches the number for a pipe shaped like this one. The finish was spotty with light and dark areas around the bowl and shank. The top of the rim had damage on the flat surface and burn marks all the way around the outer and inner edge of the bowl. The outer edge was rough to the touch. The grain was a nice combination of birdseye and cross grain. There were two repaired fills on the top of the shank. The stem had one tooth mark on the underside of the stem and there was tooth chatter on the top side of the stem.
IMG_4070

IMG_4074

IMG_4076

IMG_4077

The first photo below is a close up of the rim to show the damage to the surface of the rim and the inner and outer edges. The second photo below shows the burn marks around the outer edge of the bowl.
IMG_4078

IMG_4079

I topped the bowl using the method I have written about previously to remove the damage to the rim surface and edges. I used a folded piece of sandpaper to bevel the inner edge of the bowl and smooth out the damage and minimize it in the bowl.
IMG_4080

IMG_4082

IMG_4084

I wiped the bowl down with acetone on cotton pads until I had removed the varnish coat and the stain as much as possible. It always makes matching the freshly topped rim with the rest of the pipe if the briar is as neutral as possible.
IMG_4086

IMG_4087

IMG_4088

IMG_4090

IMG_4092

The tooth mark on the bottom of the stem and the tooth chatter on the top of the stem needed to be sanded. The first photo below shows the damage on the bottom of the stem next to the button. I sanded both surfaces with 220 grit sandpaper and then with a medium grit sanding sponge until the tooth chatter was gone and the tooth mark was minimized.
IMG_4081

IMG_4091

I continued to sand the stem with my usual array of micromesh sanding pads – wet sanding with 1500-2400 grit pads and dry sanding with 3200-12,000 grit pads.
IMG_4093

IMG_4094

IMG_4095

IMG_4096

I rubbed the stem down with Obsidian Oil and then buffed the stem with White Diamond. I took the pipe back to the work table and restained the bowl and shank with MinWax Medium Walnut stain to bring life back to the briar. I stained the light areas on the rim and at the shank stem junction multiple times until they matched the rest of the pipe.
IMG_4097

IMG_4099

IMG_4101

IMG_4102

IMG_4103

I buffed the pipe and stem with White Diamond a final time to remove any remaining scratch marks and then gave the pipe multiple coats of carnauba wax to protect and give it a shine. The finished pipe is shown below. It joins the others I have refurbished for the Vancouver Pipe Club box of donated pipes.
IMG_4104

IMG_4105

IMG_4107

IMG_4109

Reworking a Poorly Done Topping Job on a Bulldog of Unknown Make


This poor old bulldog came in the pipes that were donated to the Vancouver Pipe Club and I decided to work on it and see if I could repair some of the damage that had been done when someone tried to top it in the past. The rim looked as if whoever topped it tried to do it by hand and not on a flat board. Because of that the surface of the rim was wavy with high and low spots and the outer edge was lower than the inner edge in several places. The top was also at a slight angle as the sanding had not been done on a flat surface.

The first two photos below show the damage to the rim from the side profile. Note the wavy surface of the rim. The third photo shows some damage on the underside of the stem next to the button and the fourth photo shows the rim from the top view. In that photo the bowl appears to be seriously out of round and the front edge seems thinner than the rest of the bowl. This is a bit of an illusion due to the poorly executed sanding on the rim. The way the bowl had been sanded left the front of the bowl lower than the back of the bowl thus creating the appearance of a thin wall. The stamping on it had been buffed out on the left side of the shank and on the right side I could still see very faintly London England over 403S. I am uncertain of the maker. I checked the Comoy’s shape number chart, the GBD and the Orlik shape number charts and there is no such number. Perhaps other may have some idea of the maker.
IMG_3999

IMG_4000

IMG_4001

IMG_4002

I took a two close up photos of the top of the rim to show the damage more clearly. There was also significant burn damage to the front inner edge of the rim. Fortunately this damage was only surface and a retopping would take care of most of it.
IMG_4004

IMG_4005

I also took a close up photo of the end of the stem next to the button to show the tooth marks on the underside next to the button.
IMG_4006

I set up my topping board and sandpaper to work on the rim and repair the damage. It took care to keep the high point of the bowl flat against the surface of the paper and sand until the rim flattened out. This took more time than usual as I had to continually check to see if the rounded spots, low dips and angle sanding of the rim surface were being removed. I also wanted to remove the burn damage as much as possible. The next five photos show the process and the results of the sanding. The profile views show the repair of the outer edge to a flat straight surface with a sharp edge. The top view shows the more even distribution of the thickness of the wall and the removed burned area on the front of the bowl.
IMG_4008

IMG_4010

IMG_4011

IMG_4014

I wiped the bowl down with acetone on cotton pads to remove the varnish and the remaining finish on the bowl so that it would be easier to match the colour of the bowl and the newly topped rim.
IMG_4015

IMG_4016

IMG_4017

IMG_4018

I sanded the rim with a fine grit sandpaper and wet sanded with a 1500 grit micromesh sanding pad to remove scratches and prepare the rim for staining. I stained the bowl and rim with MinWax Medium Walnut Stain and rubbed it on to the pipe and rubbed it off until I had achieved the colour and coverage that I wanted.
IMG_4019

IMG_4020

IMG_4021

IMG_4022

I sanded the damaged areas on the topside and the underside of the stem near the button to remove the tooth marks. I started with 220 grit sandpaper and then a medium grit sanding sponge to repair the tooth damage.
IMG_4023

IMG_4024

The mark on the underside was deep and once I had sanded and cleaned it I put a drop of super glue on it to build up the divot. Once it was dry I sanded it again with 220 grit sandpaper and the sanding sponge to blend it into the surface of the stem.
IMG_4027

IMG_4029

IMG_4030

I used my usual array of micromesh sanding pads to polish the stem repair – wet sanding with 1500-2400 grit sanding pads and then dry sanding with 3200-12,000 grit pads. I buffed the stem with red Tripoli and White Diamond and then rubbed it down with Obsidian Oil. When it was dry I rubbed the stem down and reinserted it in the pipe.
IMG_4031

IMG_4033

IMG_4036

I buffed the pipe and stem with White Diamond and then gave it multiple coats of carnauba wax. I finished the buffing with a clean flannel buff to give it a shine. The finished pipe is pictured below. It is ready to go back to the Pipe Club and will make someone a nice pipe.
IMG_4038

IMG_4039

IMG_4040

IMG_4041

A Great Piece of Briar – Restored Square Shanked GBD New Era 9489 Billiard


I am generally not a fan of square shanked pipes. I am not sure why but there is just something about them that has never caught my eye… that is until I saw this GBD New Era Billiard. It has stunning grain – cross grain on the back of the bowl and the top and bottom of the shank and the bowl. There is also some cross grain off centre on the front of the bowl. The left side has stunning birdseye and the same is also true on the right side of the bowl. The rim of the bowl is beveled inward and is also cross grain. The finish on the bowl was in excellent shape other than a heavy build up on the rim of tars and carbon. The stem was long, oxidized and had a huge bite through on the underside of the stem. It is stamped GBD in an oval over an arced New Era on the left side of the shank and London England over 9489 on the right side.
IMG_3455

IMG_3456

IMG_3458

I have included the photo below of the underside of the stem. The size of the hole made it unpatchable with my usual methods.
Hole in stem

I used the Dremel and sanding drum to cut off the end of the stem and remove the damaged portion of the stem. I would then recut a button on the end of the stem and rework the airway opening in the slot.
IMG_3842

IMG_3843

IMG_3844

IMG_3845

I took the pipe back to my work table and used a file to cut the line for the button. For this initial part of shaping the new button I leave the stem on the shank as the bowl provides a good “handle” to hold on to when reworking the stem.
IMG_3847

I used a flat needle file to carve down the slope of the stem toward the button. I find that reworking the slope of the stem gives a smoother transition between the new button and the blade of the stem. I think we have all seen poorly cut buttons where the button looks pinched on the end – almost like someone squeezed the button out of the stem. I want the transition to move gently toward the new button and then have clean angles on the button.
IMG_3848

At this point I usually remove it from the shank as I have much more carving to do on the stem with needle files and I want to be able to turn it at various angles to get things the way I want them. I continued to work on the stem with various needle files and 220 grit sandpaper to shape and contour the stem. I sanded the rest of the stem as well carefully working around the GBD roundel to make sure not to damage it. When I had finished the shaping of the button I sanded the entirety with a medium grit sanding sponge to smooth out the scratches and further remove the oxidation. I probably could have soaked it in Oxyclean but since I was working the button over with sandpaper and files anyway I just sanded the stem.

I set the stem aside for a bit and scrubbed the bowl rim down with saliva on cotton pads scraping and rubbing until I got to the clean surface of the rim. I did not intend to restain this pipe so I was careful not to remove the finish in the process.
IMG_3849

I took it to the buffer after I had it cleaned up as shown above. I buffed the edge with White Diamond to remove the last of the detritus of the carbon on the rim. The first photo below shows the clean bowl rim. The three photos following that one show the bowl after it had been buffed with carnauba wax to polish it and protect it.
IMG_3852

IMG_3853

IMG_3854

IMG_3856

I put the stem back on just to have a look at the work so far. Sometimes I need to get a bit of perspective on the stem work so I will stop and put things back together, take a few photos and study them to see what I need to do. Somehow the photos show things that my eye does not pick up as I work on the pipe.
IMG_3857

IMG_3858

IMG_3859

IMG_3860

The pipe was looking good and the areas that needed work on the oxidation and scratches showed up clearly in the flash. I used micromesh sanding pads to work on the finish. I wet sanded with 1500-2400 grit pads and dry sanded with 3200-12,000 grit pads.
IMG_3861

IMG_3862

IMG_3864

IMG_3866

When I finished sanding I rubbed the stem down with Obsidian Oil and when it as dry buffed it with White Diamond once again. I gave the bowl and stem multiple coats of carnauba wax and buffed it with a clean flannel buffing pad to give it a shine. It is important when buffing to not press to hard around the nomenclature. I generally use a very light touch in those areas and then hand polish them with a soft cotton cloth. The finished pipe is pictured below. The stem came out quite nicely There is a bit of oxidation around the roundel that still remains. I will continue to work on that with the micromesh pads and see what I can do but it is ready to load a bowl and smoke.
IMG_3868

IMG_3869

IMG_3870

IMG_3871

A GBD “Dublinish” Poker Brought Back to Life


Blog by Steve Laug

The fourth pipe I have refurbished from the lot I just picked up is an oval shanked “Dublinish” Poker that has a GBD on the brass stem roundel. It is stamped on top of the shank with GBD in an oval over New Standard in script. On the underside of the shank it is stamped London England over 9558. I looked up the shape number on the GBD shape site and was unable to find a listing for a pipe of this shape. I looked other places on the web and did not find this shape either listed or pictured. It is certainly not a shape that I have seen for the years that I have been working on pipes and collecting GBD pipes.
IMG_3666

IMG_3667

The picture below shows the state of the bowl when I brought it to the work table. It had a thick and crumbly carbon cake and carbon and tar build up on the concave surface of the rim. The front of the outer edge had burn marks from repeated lighting. The GBD roundel on the stem was badly oxidized and looked to be corroded. The stem was badly oxidized and on the bottom had a large hole where the previous owner had bitten through the stem.
IMG_3668

IMG_3669

The picture below shows the size of the bite through and gives a pretty clear picture why I chose not to patch the stem but rather to cut the bite through off and rework the stem and button.
IMG_3670

I cut off the end of the stem with a Dremel and sanding drum attachment. I cut it back to the place behind the bite mark that was solid and undamaged. The next four photos show the pipe with the damaged portion of the stem removed and a straight cut made across the end of the stem.
IMG_3671

IMG_3672

IMG_3674

IMG_3678

I took it back to the work table and reamed the bowl with a PipNet reamer. I used three of the cutting heads from the smallest up to remove the cake and clear out the debris in the bowl. I wanted to remove the cake to assess the soundness of the rim and the bowl of the pipe. I scrubbed the rim down with saliva and cotton pads. It took a lot of elbow grease to finally get the rim clean of the buildup and tars. In the photo below the burn mark on the front of the bowl is visible.
IMG_3679

I used files, a wood rasp and needle files to cut the line on the button across the top and the bottom of the stem. I trimmed the thickness of the stem tapering toward the shank with the needle files. I wanted to thin down the stem and taper is more smoothly into the new button making for an even transition from the saddle to the edge of the button.
IMG_3680

IMG_3681

I used the needle files to open the end of the button and shape it into and oval and a funnel into the airway. I wanted a good open airway that would easily take a pipe cleaner.
IMG_3682

After working with the files I sanded the stem with 220 grit sandpaper to remove the oxidation and to continue to shape the stem into a smooth taper from the saddle to the button.
IMG_3683

IMG_3684

IMG_3686

IMG_3687

I sanded the end of the button to angle it back toward the slot and to smooth it out and shape it. I also used the needle files to clean up the straight edge of the button.
IMG_3688

IMG_3689

Once I had the taper and the angles correct I sanded the stem with a medium grit sanding sponge to remove the scratches from the sandpaper.
IMG_3690

IMG_3691

When the stem was finished in terms of shaping I moved on to work on the bowl. I wanted to stain the rim and the edges of the bowl where the burn marks were. I used a red mahogany Minwax stain and rubbed it into the rim and gave the entire pipe a stain coat. Once I had wiped that off with a clean towel I gave it a second coat of medium walnut stain to blend it in even more with the rest of the bowl. I buffed it with White Diamond to polish it and give it a shine.
IMG_3692

IMG_3693

IMG_3694

IMG_3695

I sanded the stem with my regular regimen of micromesh sanding pads – wet sanding with the 1500-2400 grit pads and dry sanding with the 3200-12,000 grit pads. I rubbed in a coat of Obsidian Oil and when it had dried took the stem to the buffer and buffed it with White Diamond to give it a shine.
IMG_3696

IMG_3698

IMG_3699

I buffed the entire pipe with White Diamond and then multiple coats of carnauba wax. I finished by buffing the bowl and stem with a clean buff with soft flannel to bring out a high shine. The finished pipe is shown below in the pictures. The shortened stem came out looking very good and the reduced length does not detract from the look of the pipe as a whole.
IMG_3700

IMG_3701

IMG_3702

IMG_3703

Refurbishing a Comoy’s Tradition Shape 4 Bulldog


When hunting for estate pipes I always am on the lookout for certain brands that feel like a win when I find them. I have found a few of them over the years. Some of those brands are Dunhill, Comoy’s, GBD and BBB. Added to that are a few older American brands such as CPF and GFB. On a current hunt I did exceptionally well and found four GBD pipes and two Comoy’s pipes. The first one I have been working on is stamped Comoy’s Tradition and is a shape 4 bulldog. In my mind Comoy’s knew how to make the quintessential bulldog so I was glad to find this one. However, the previous owner had modified the shape dramatically and made it almost unrecognizable due to his changes. I bought it anyway and went back to the books to see what the original shape must have looked like. In the brochure photo below it is the third pipe down labeled Tradition.
f0ae64a8d61b130fc0974354f17_prev

Now for the modifications. The next set of four photos show the pipe’s condition when I bought it. The briar is a beautiful piece with no fills or flaws in it. The grain is very nice with a mix of flame, straight and birdseye. The stain is the typical two stage stain that is present on the Tradition pipes that I have seen – a dark understain with a walnut brown stain over that. The bowl when I received it was slightly caked with a small build up of tars and cake that overflowed on the back edge of the top of the rim. There was a slight series of marks on the bevel above the rings where the pipe must have been dropped on concrete or gravel. I don’t believe the stem is an original as the shape is a bit different from the ones I have seen and it is missing the logo. It is also missing the step down tenon that I have come to associate with these pipes. The stamping is weak on the left side though visible. It is not present at all on the right side of the shank. The bottom of the bowl, shank and stem have been sanded flat to make the pipe a sitter. It appeared that the owner merely laid the pipe on a flat sander and never bothered to smooth out the scratches or refinish the bottom of the pipe. He knew what he was doing because he left just enough briar on the bottom of the shank to not go through into the airway and on the bottom of the bowl to leave it still thick enough to protect it from burning out.
IMG_3586

IMG_3587

IMG_3588

IMG_3589

The photo below shows the flattened underside of the pipe and the scratches that are visible in the briar and the vulcanite stem.
IMG_3590

I reamed out the bowl with a PipNet reaming set beginning with the smallest cutting head and progressing to the one that fit the bowl. I cut back the cake to the bare wood so that I could build it up again evenly. It had tended to be thick around the top of the bowl and about half way down the bowl thinned out. I cleaned out the bowl and shank with pipe cleaners, cotton swabs and Everclear
IMG_3591

I heated the surface of the stem with a lighter to lift the bite marks on the stem surface. The ones on the topside of the stem lifted quite well and a little sanding repaired them. The ones on the underside were deeper and required more work. Several of them lifted but one in particular was very deep and the fibers of the vulcanite were broken. This required a patch with black superglue. There was also a small divot out of the button on the top side that I repaired with the black superglue. I set the stem aside to dry while I worked on the bowl.
IMG_3592

IMG_3593

I wiped down the bowl and rim with a cotton pad and saliva. I scrubbed the tars and carbon on the rim with the cotton pad and saliva until it was gone. It took a bit of scraping and a lot of elbow grease to remove the buildup but once it was clean the stain was still in very good shape. I also scrubbed the bevel of the inner edge of the rim to clean it and polish it as well.
IMG_3595

IMG_3597

IMG_3599

Once the superglue was dry I sanded it with 220 grit sandpaper to remove the excess and smooth out the surface of the patch. I sanded it until it was well blended into the surface of the stem. The next two photos show the patch after sanding with 220 grit sandpaper and then with a medium grit sanding pad.
IMG_3600

IMG_3601

I sanded and stained the flattened bottom of the pipe with a medium walnut stain to blend it in with the rest of the pipe. I sanded the stem with my usual regimen of micromesh sanding pads from 1500-12,000 grit pads. I buffed the entire pipe with White Diamond and then rubbed in a coat of Obsidian Oil into the stem.
IMG_3602

IMG_3603

IMG_3605

IMG_3607

I buffed the pipe and stem with multiple coats of carnauba wax and finished with a clean flannel buff to bring out the shine. The next series of four photos show the finished pipe. Though the previous owner’s modification certainly changed the profile of this old pipe, I think the finished product still looks very good and should continue to provide a good smoke.
IMG_3610

IMG_3611

IMG_3608

IMG_3609

After reading Al’s comment below, I did a bit more comparison work with Tradition colours both on line and in my own collection. They tended to be slightly more red than the walnut colour of this bulldog. Armed with that information I decided to give it a coat of Minwax red mahogany stain to bring out the reds a bit more in the briar. Below are the updated pictures of the pipe. In real time the addition of red brings the colour into the same spectrum as the other Traditions in my collection. Thanks Al for the nudge.
IMG_3657

IMG_3658

IMG_3659

IMG_3660

Restoring A Craft Briar Volcano/Poker


Finding this old pipe comes with a tale that is just too good not to tell. I have written it up here for your reading and also to help me remember the tale.

Yesterday I paid a visit to the Vancouver Flea Market to see if I could add any more pipes to my stock of pipes to refurbish. I generally have had some good luck there picking up older pipes at a good price. There is one seller at the market that has some pipes that have always caught my eye but her prices have been unreasonable. She would not negotiate on prices at all so I generally walked away from her and bought from other sellers. However, this time I decided to play a bit of her game. I looked at the various pipes and asked her prices. She walked away so I did as well. I made a loop around the market and then came back to her. She had a twinkle in her eye when I came back and she asked, “Are you serious to buy or do you just look?” I laughed and said, “That my dear lady depends solely upon you!” Again she had that same look and she responded, “Which pipe are you wanting?” I started with the one furthest away from the one I wanted and asked her price. It was a Savinelli Autograph in very nice shape. She took it from the case and waxed eloquent about its beauty. Now I knew her price was based on how beautiful the pipe was to her. She spoke of how her father had smoked a pipe in the old country and she had prepared his tobacco for him. She got a faraway look in her eye.

That did not last long and she was back to business. “You want it?” she asked. I asked her price which was far more than I was willing to pay. So I moved her on to the other pipes in her display case. These she said were less beautiful and were priced accordingly. I carefully went over each pipe talking about how I restore them to their original beauty because I was a pipeman. I loved pipes and everything about them. I enjoyed the process of restoration. She was hooked! I finally got around to the pipe that I had had my eye one for quite a while over the past trips I have made to the market. I asked her the price. She replied that it was $49 but the other one she had shown was way better. She said I should not wait and think too long as opportunities move quickly in our world and who knew if it would be there the next time I came back.

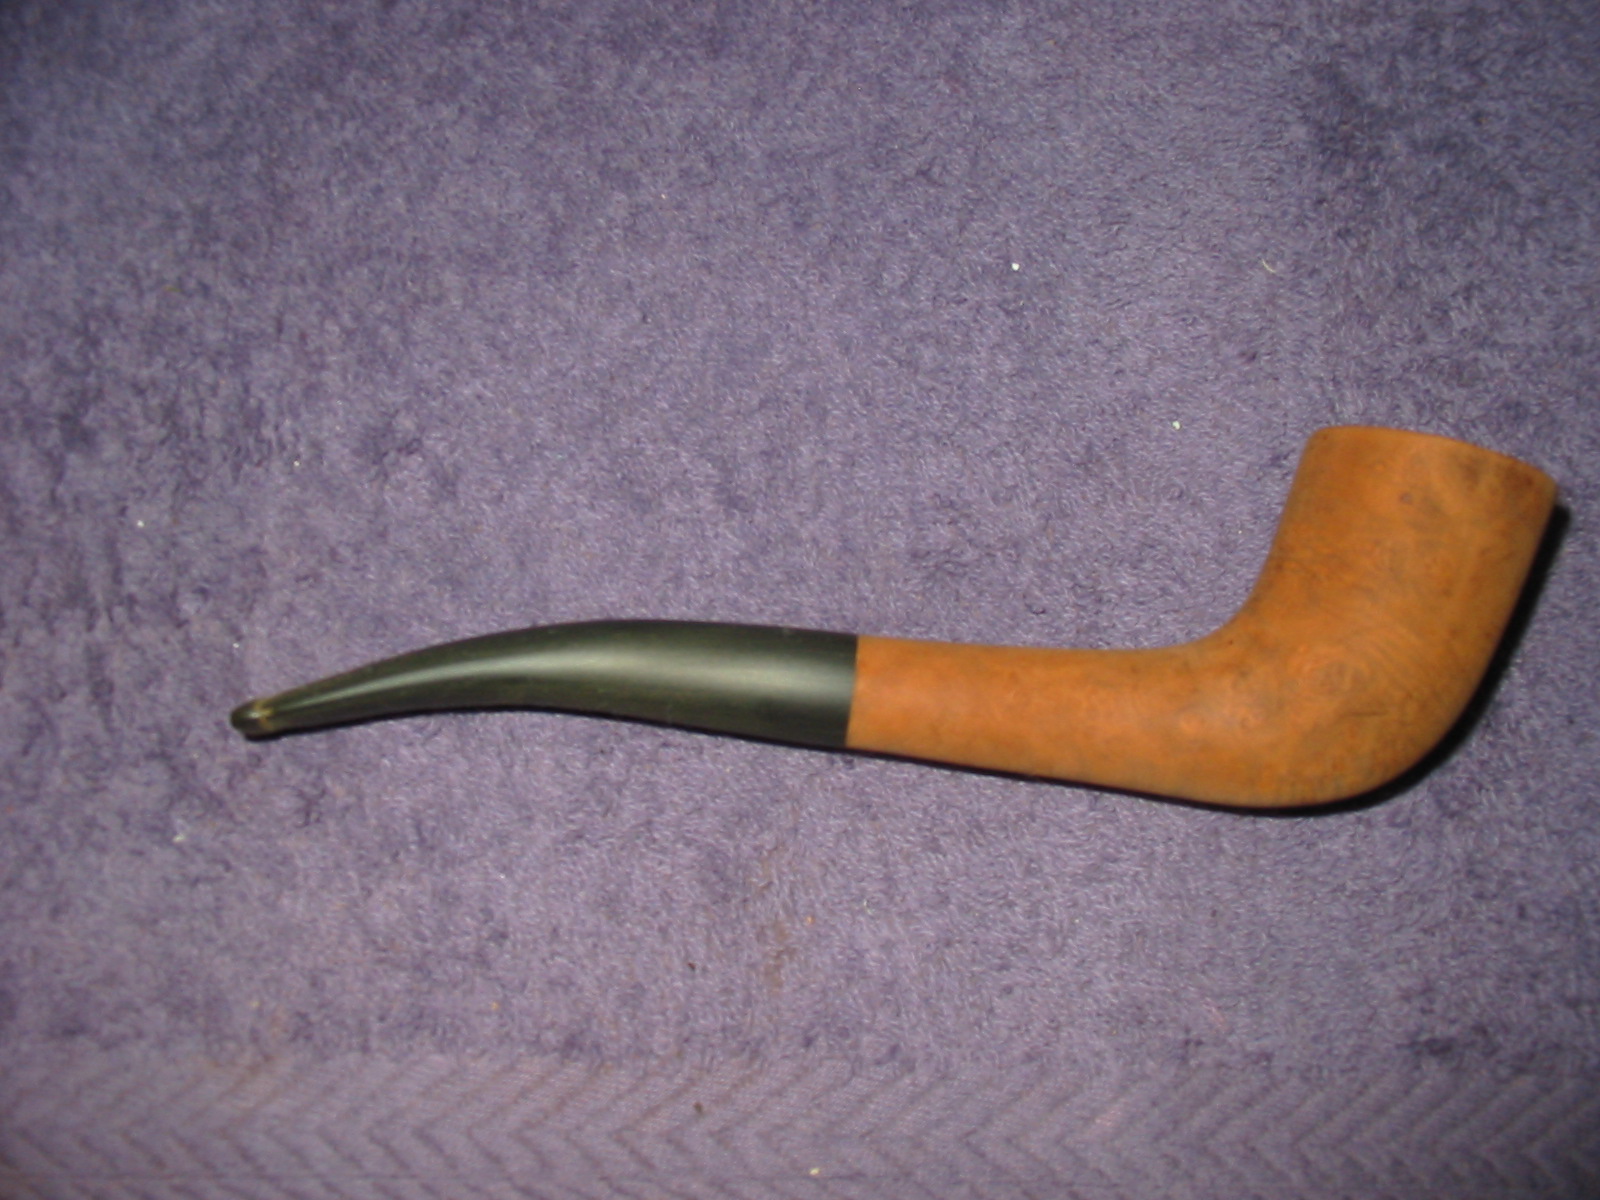
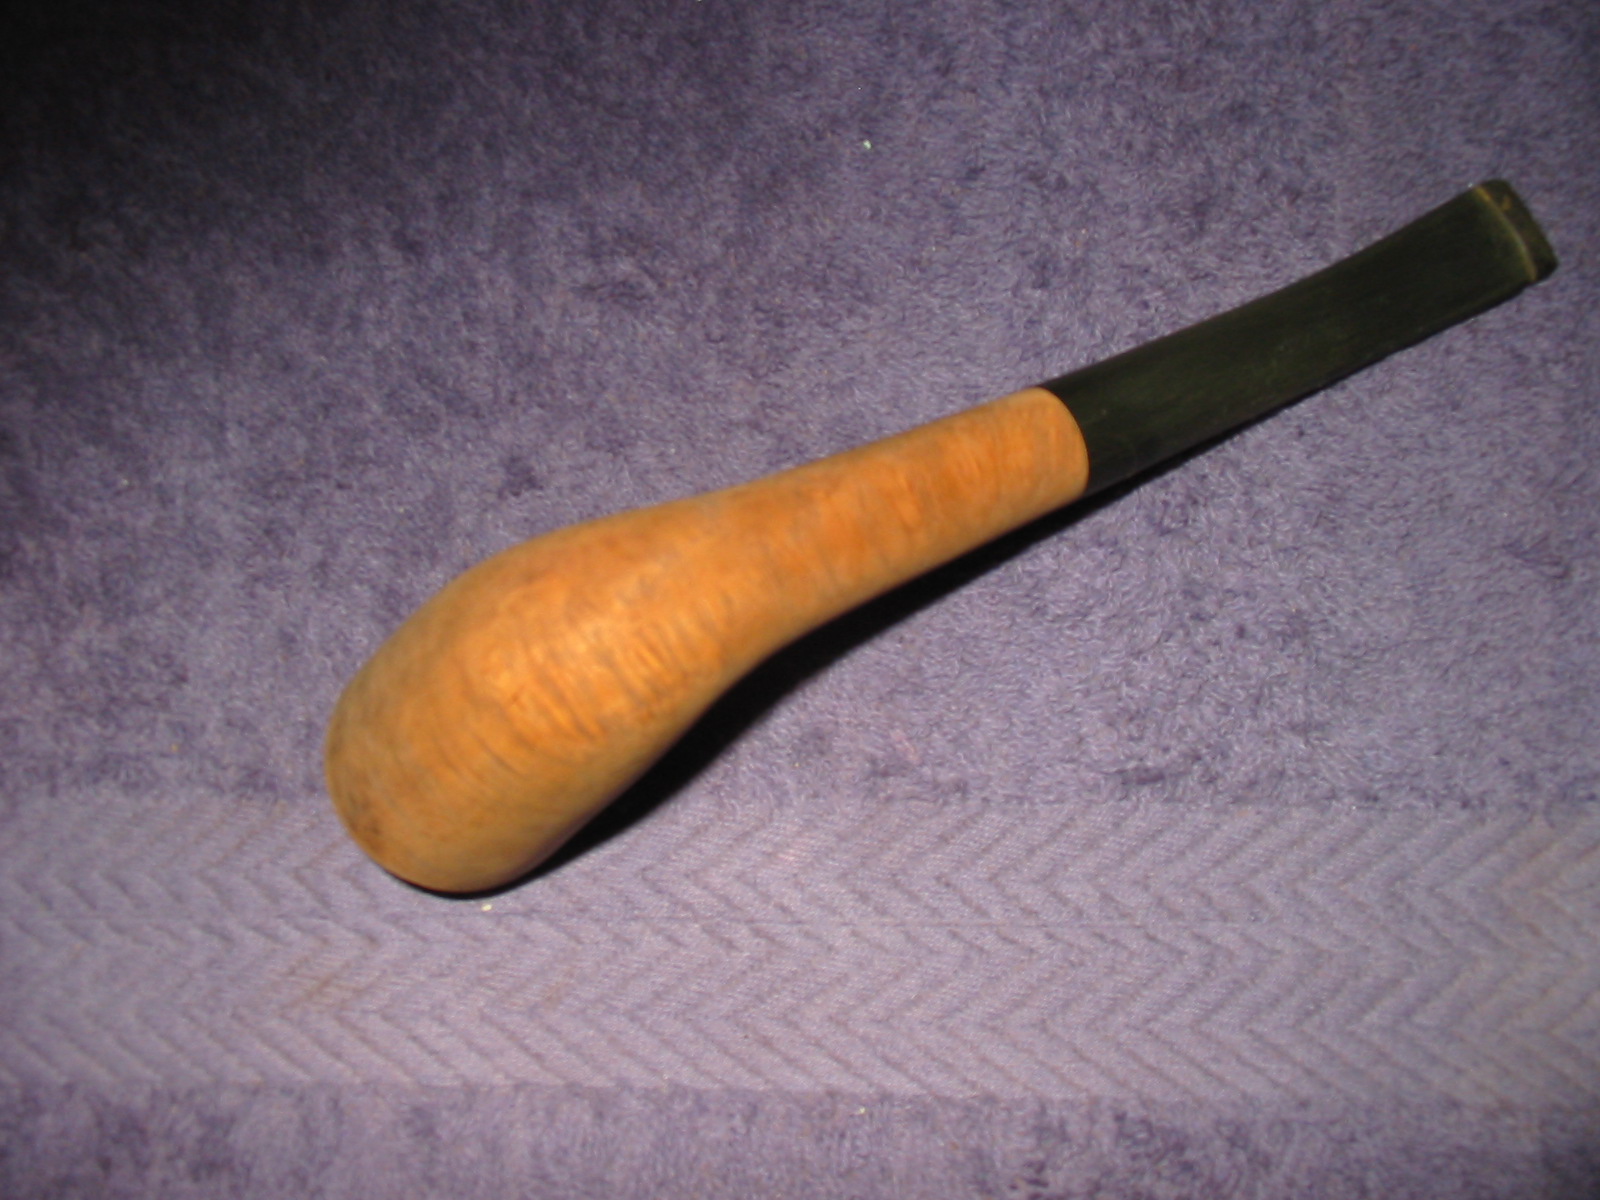
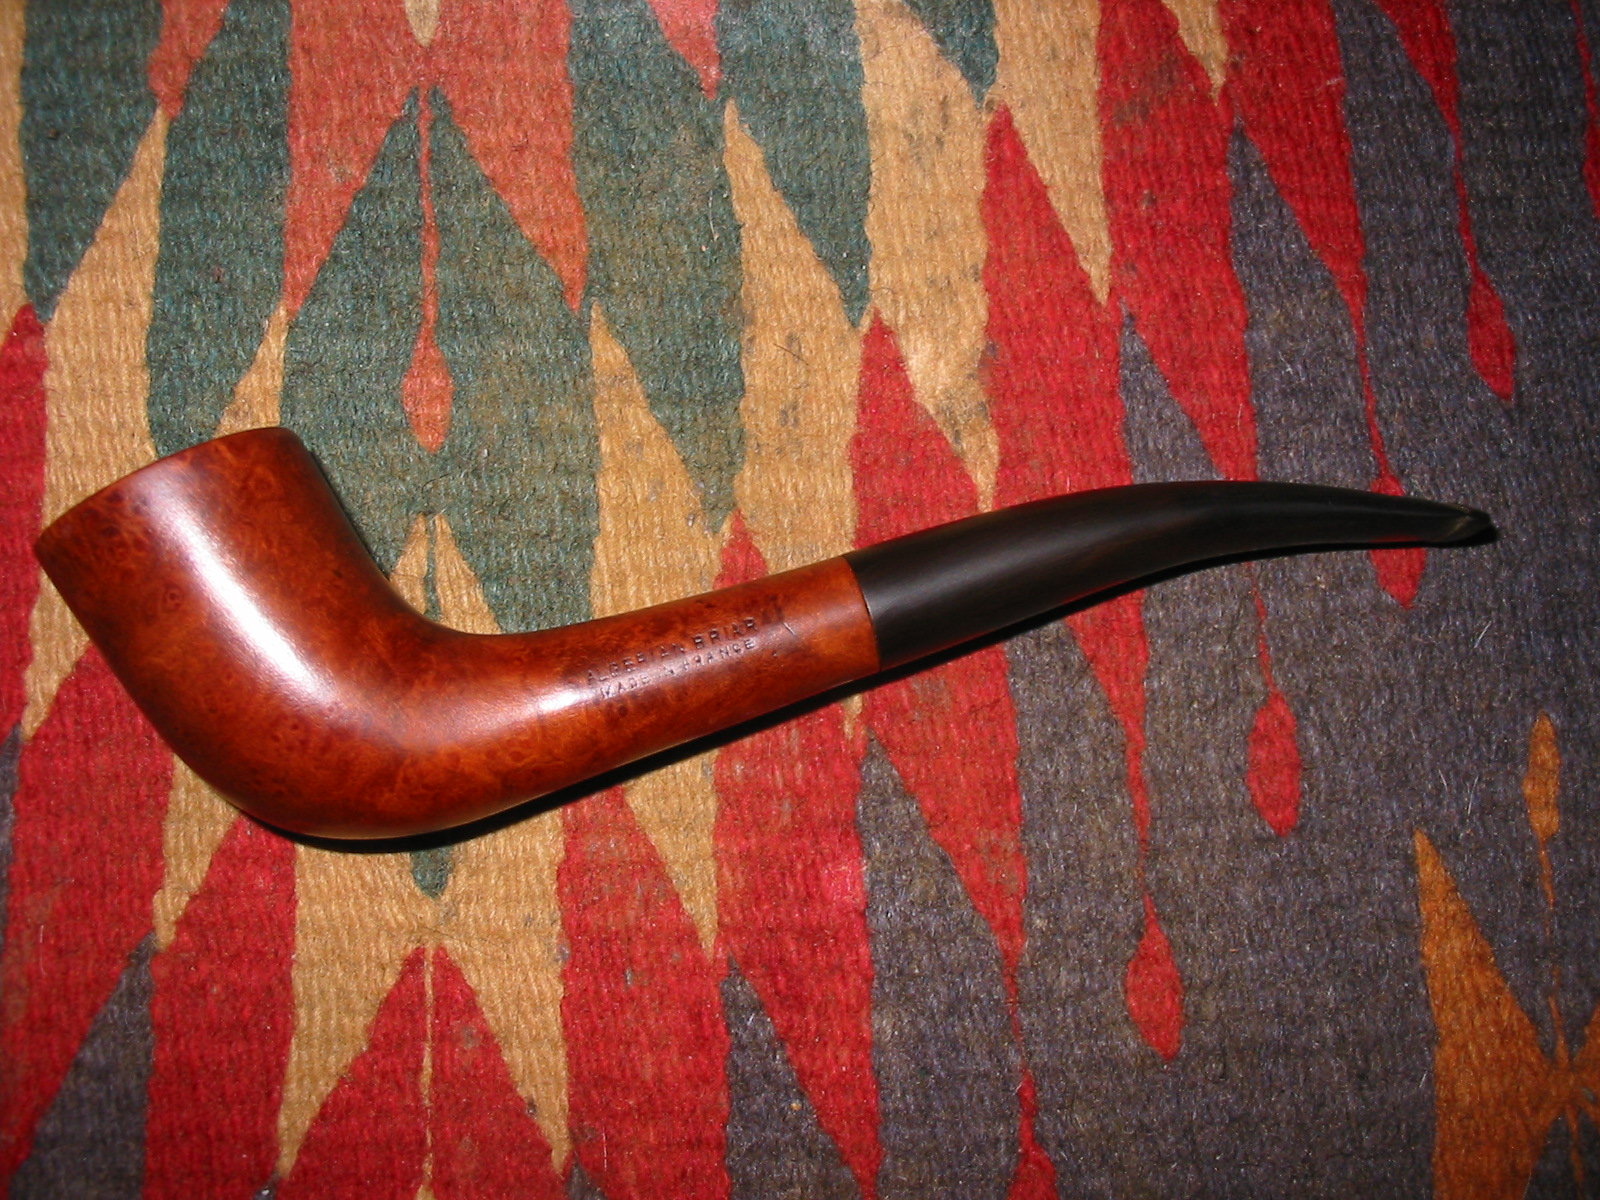
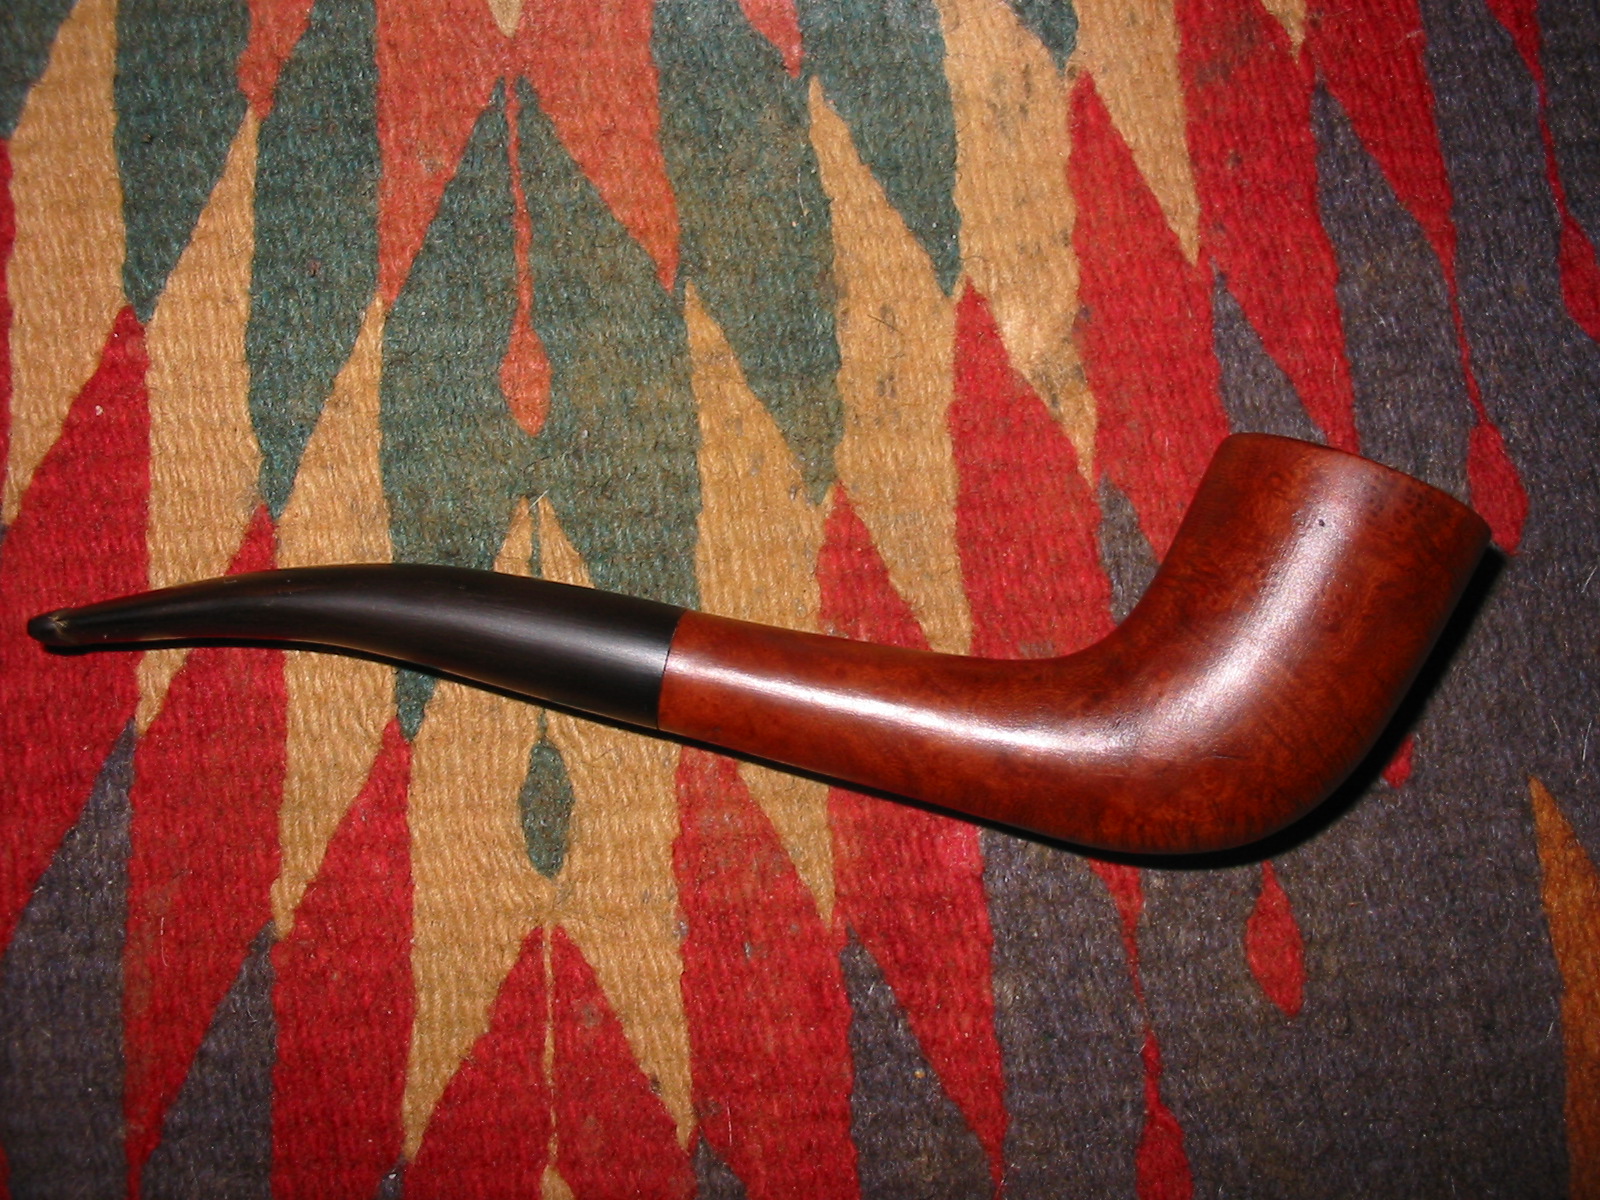
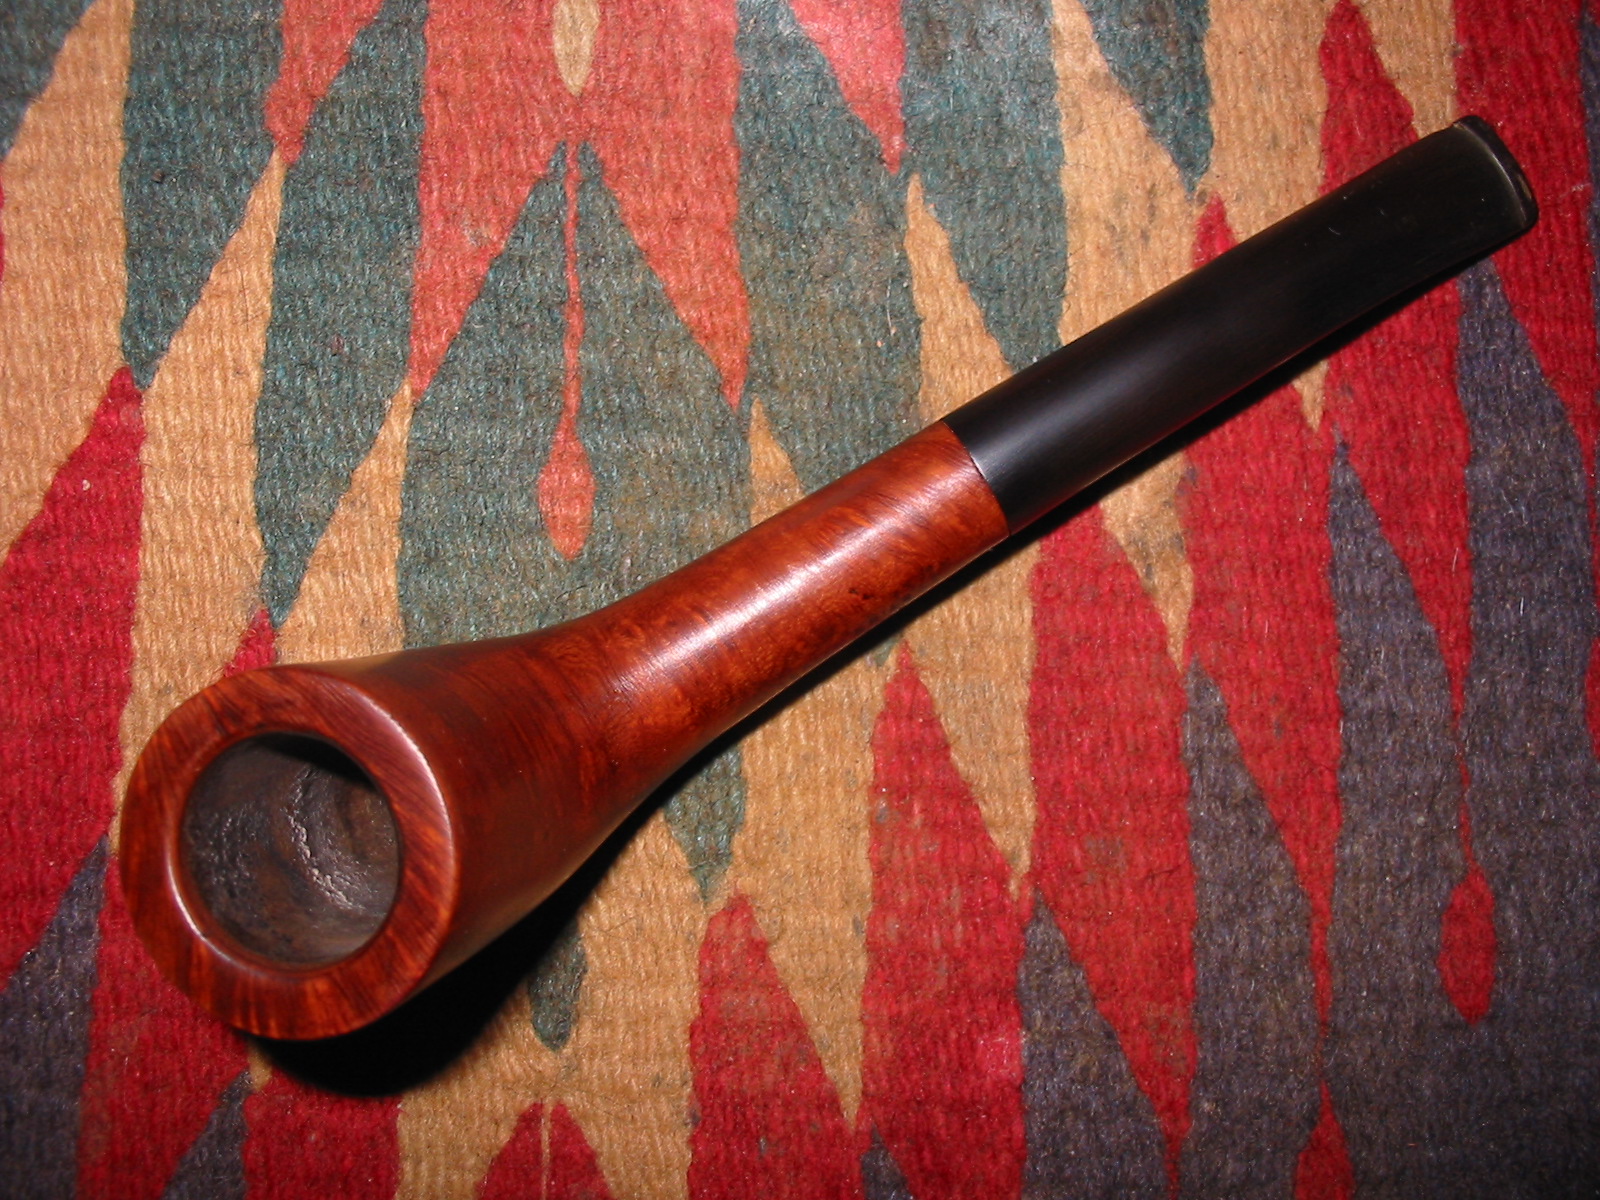
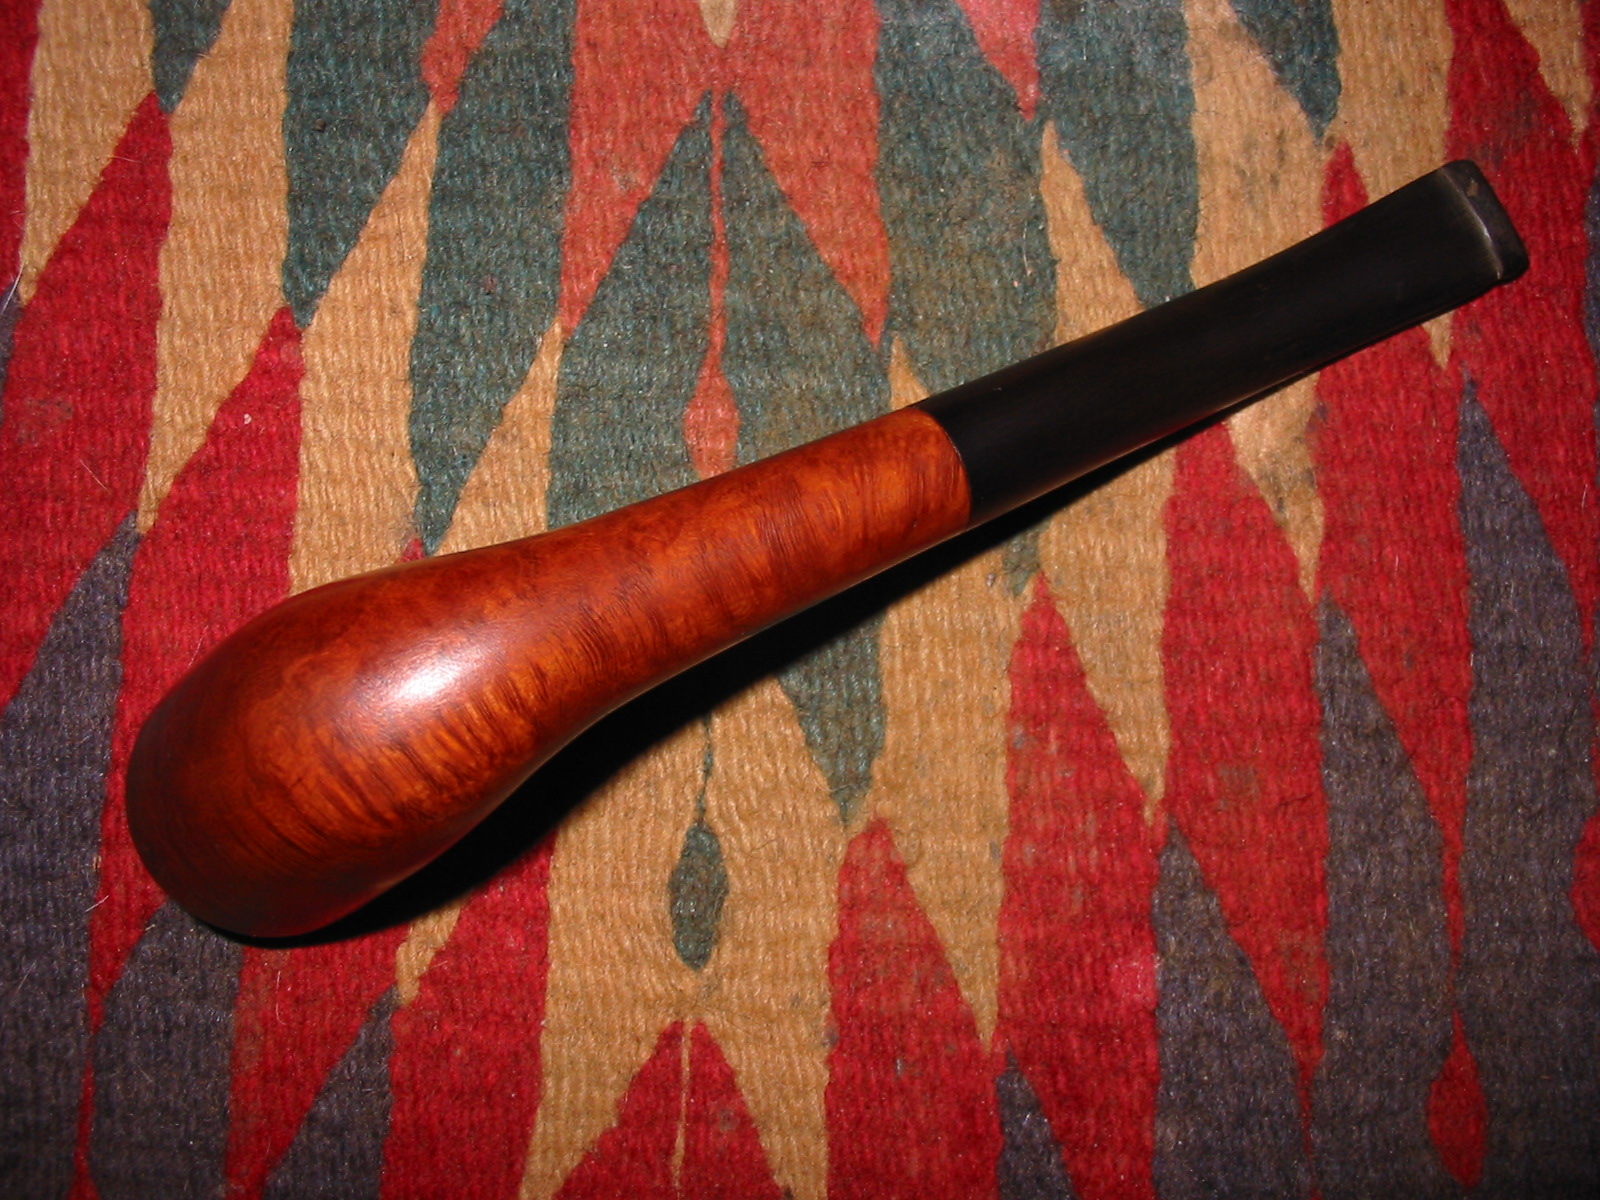
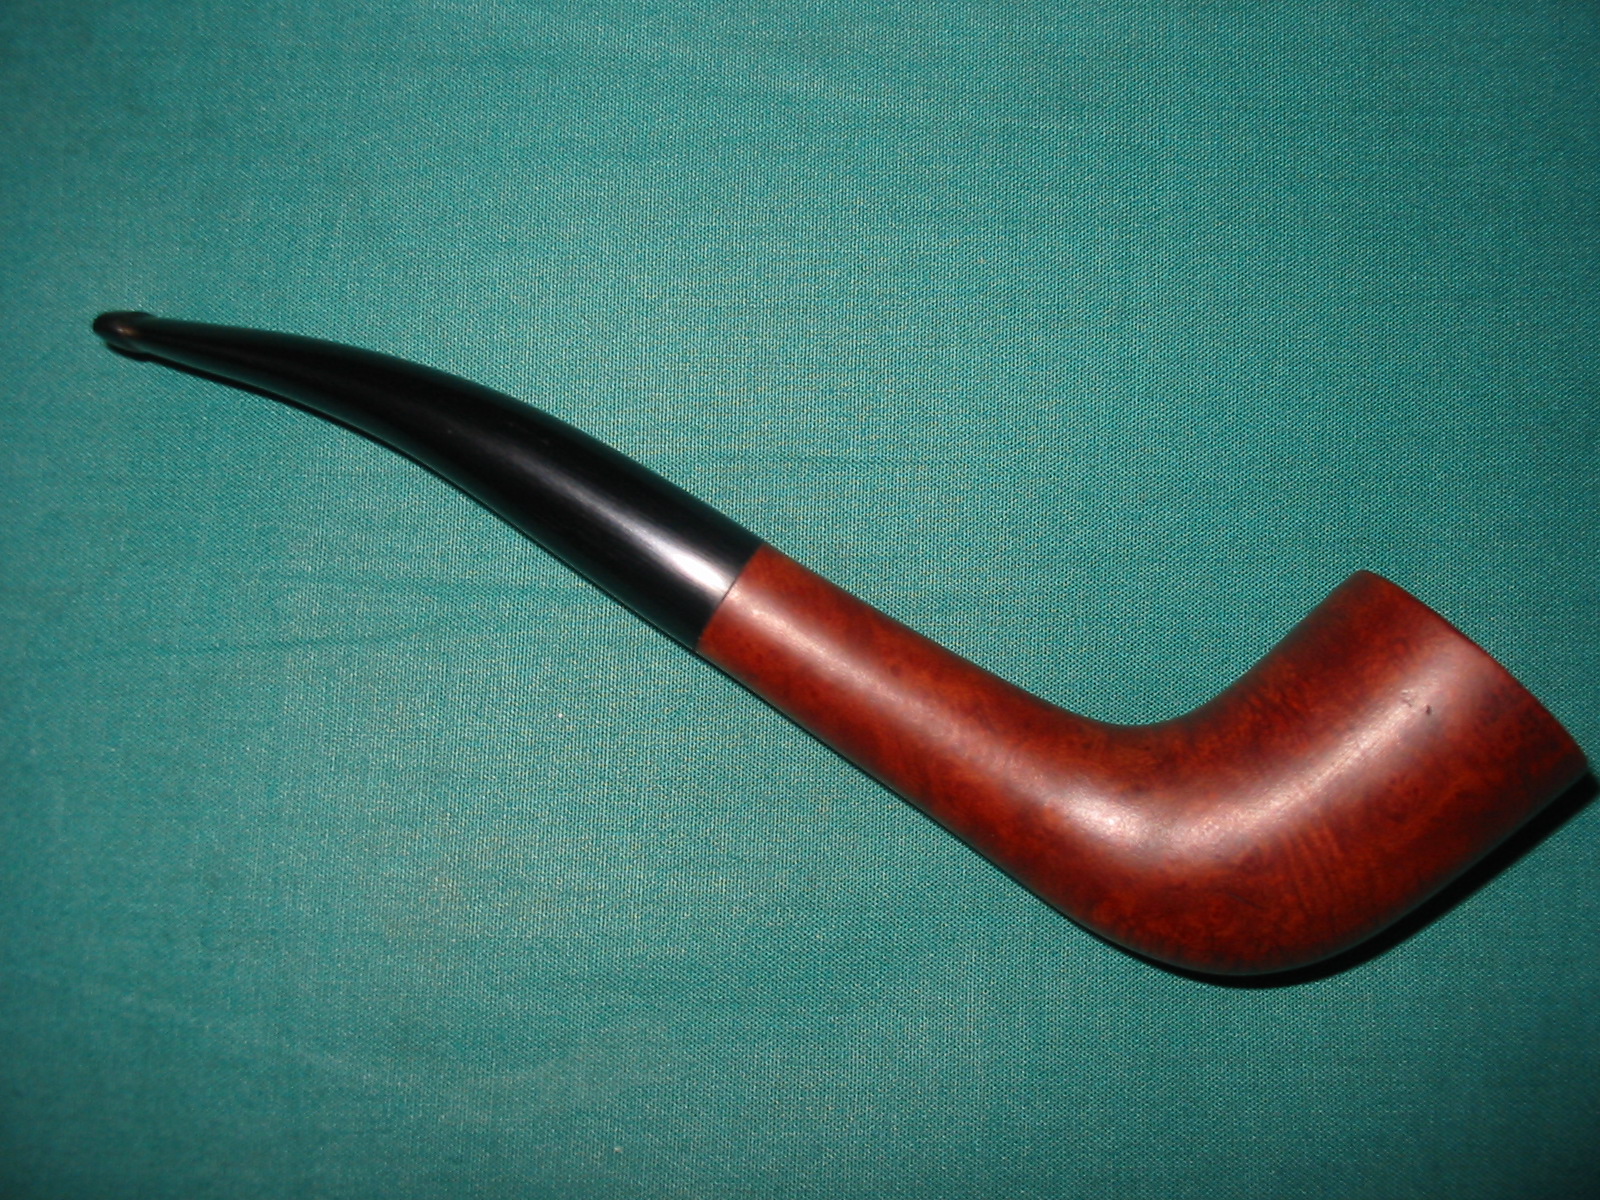
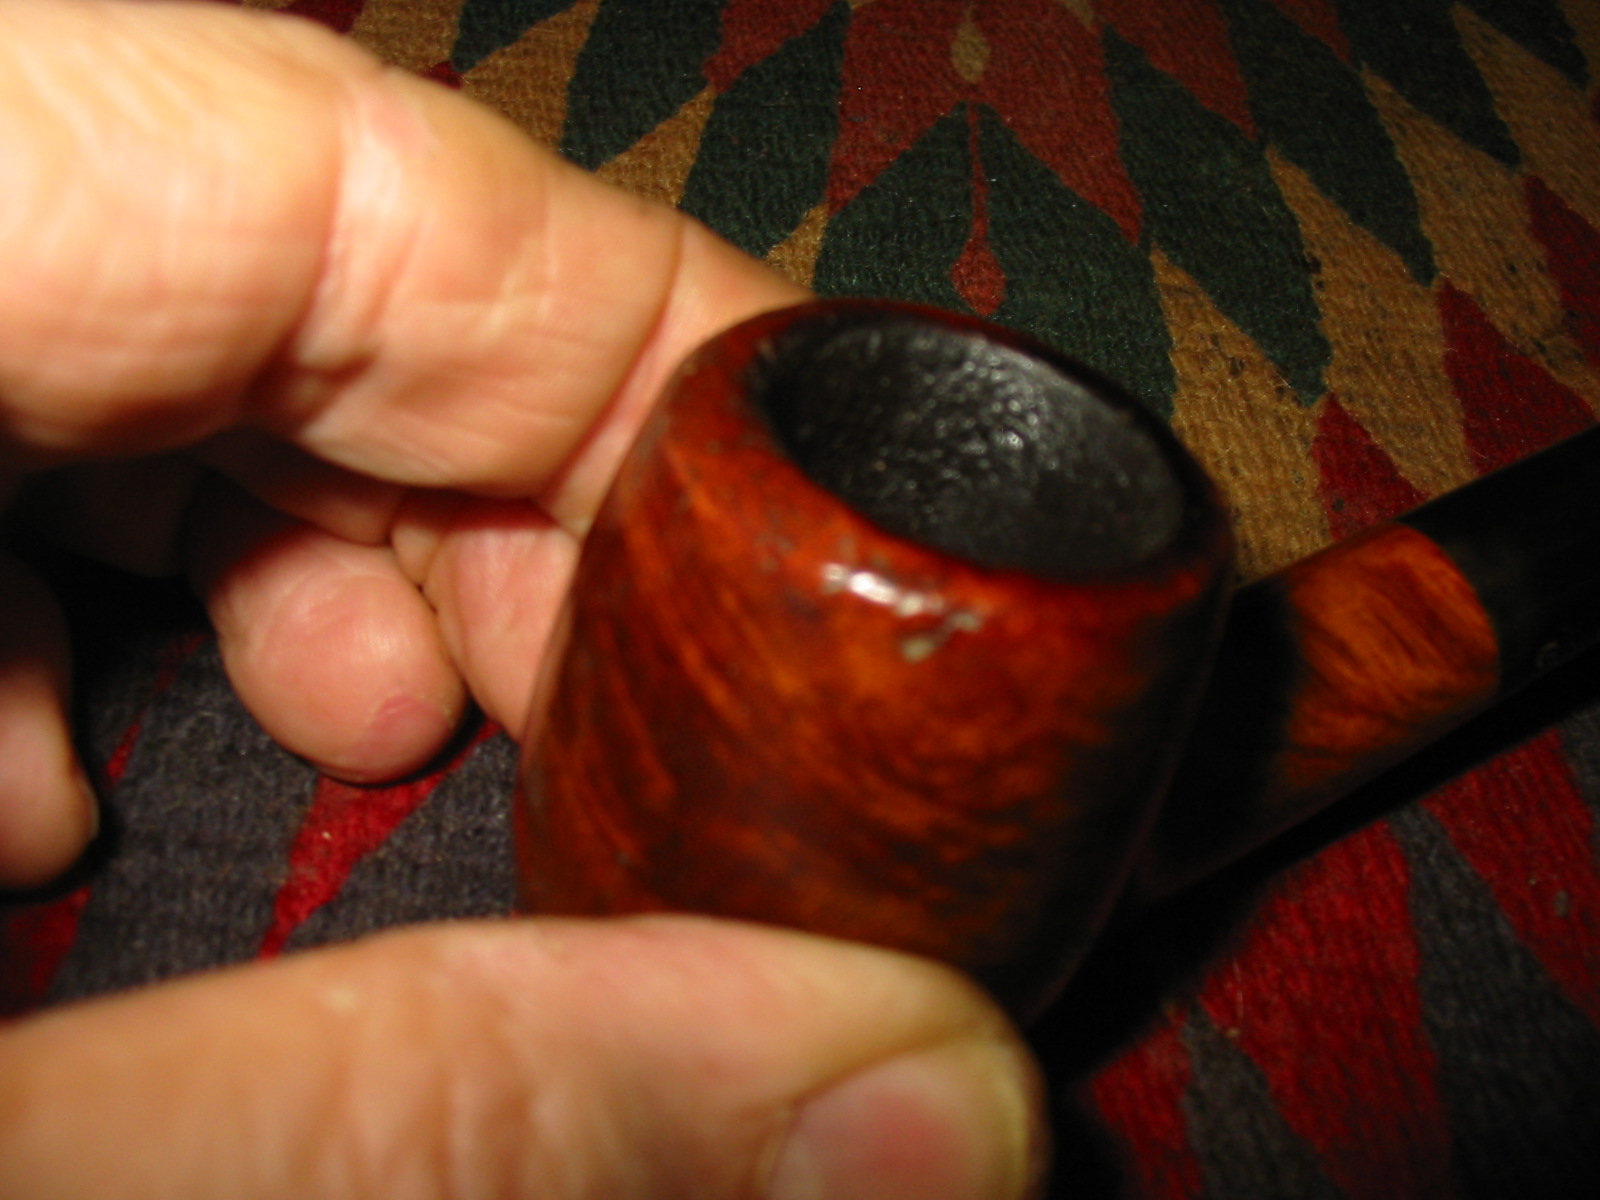
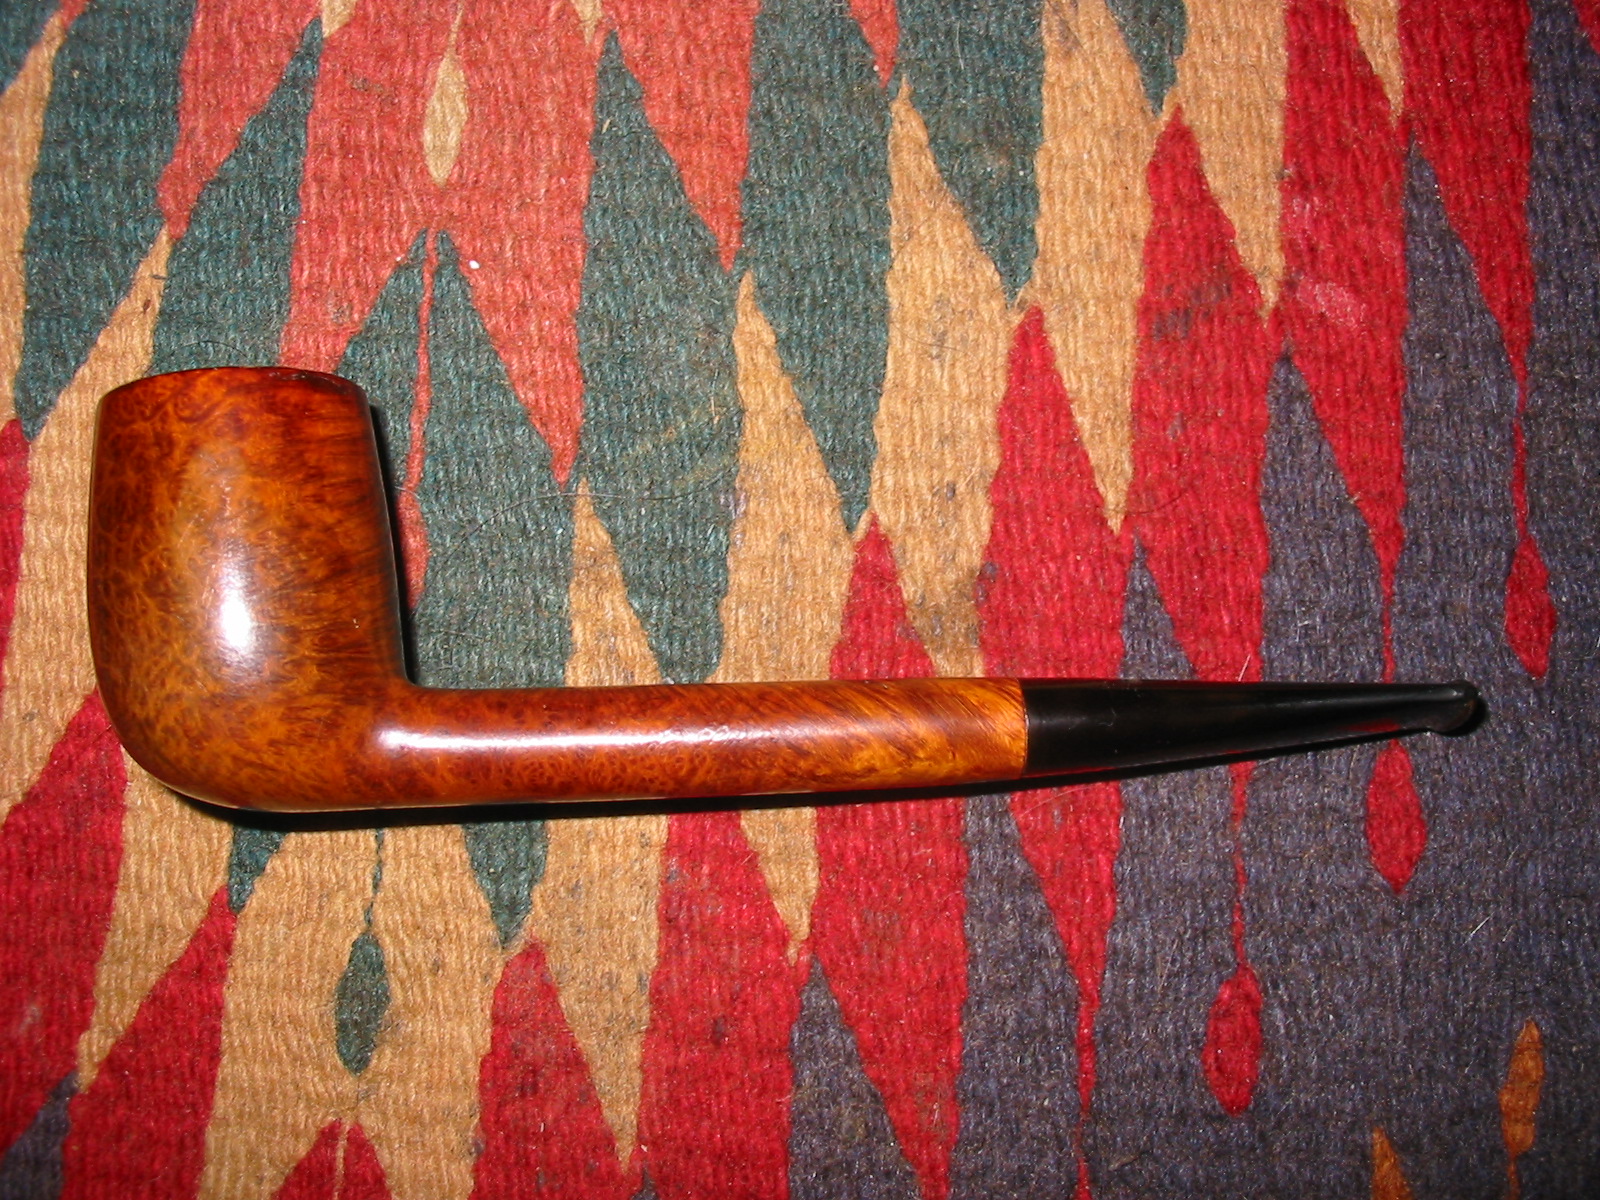
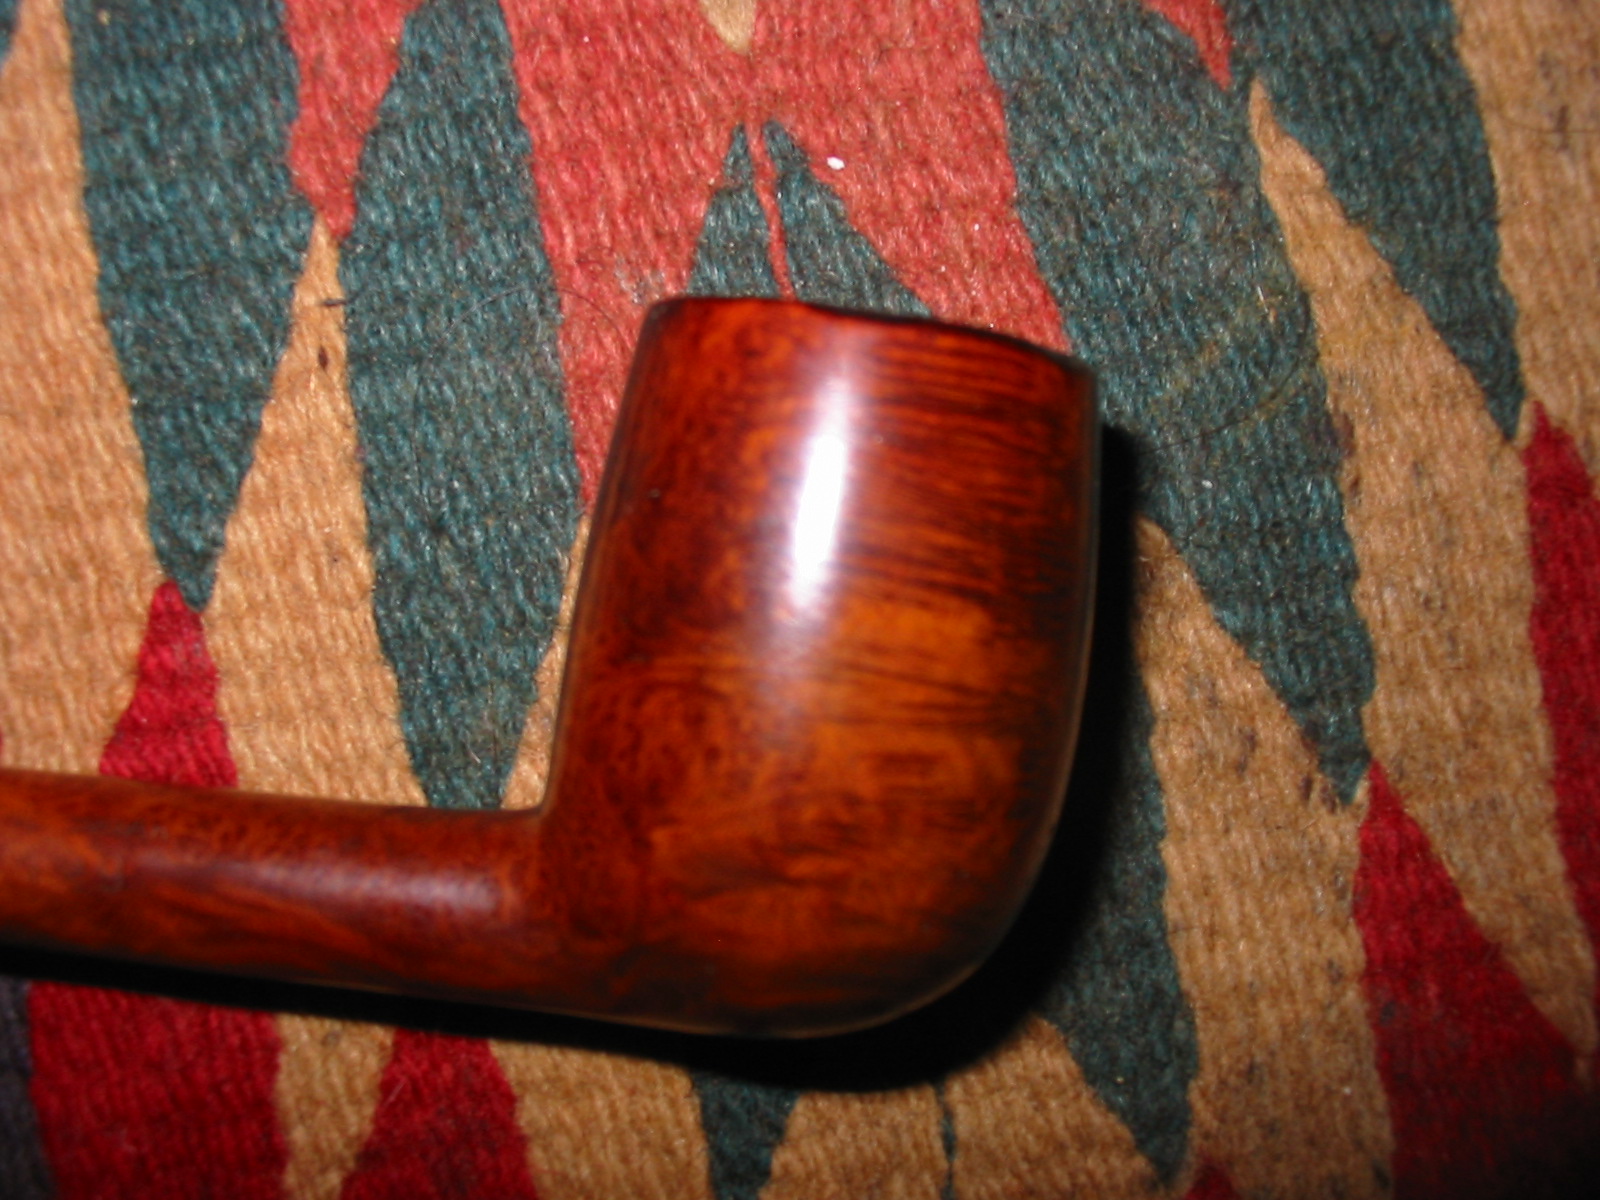
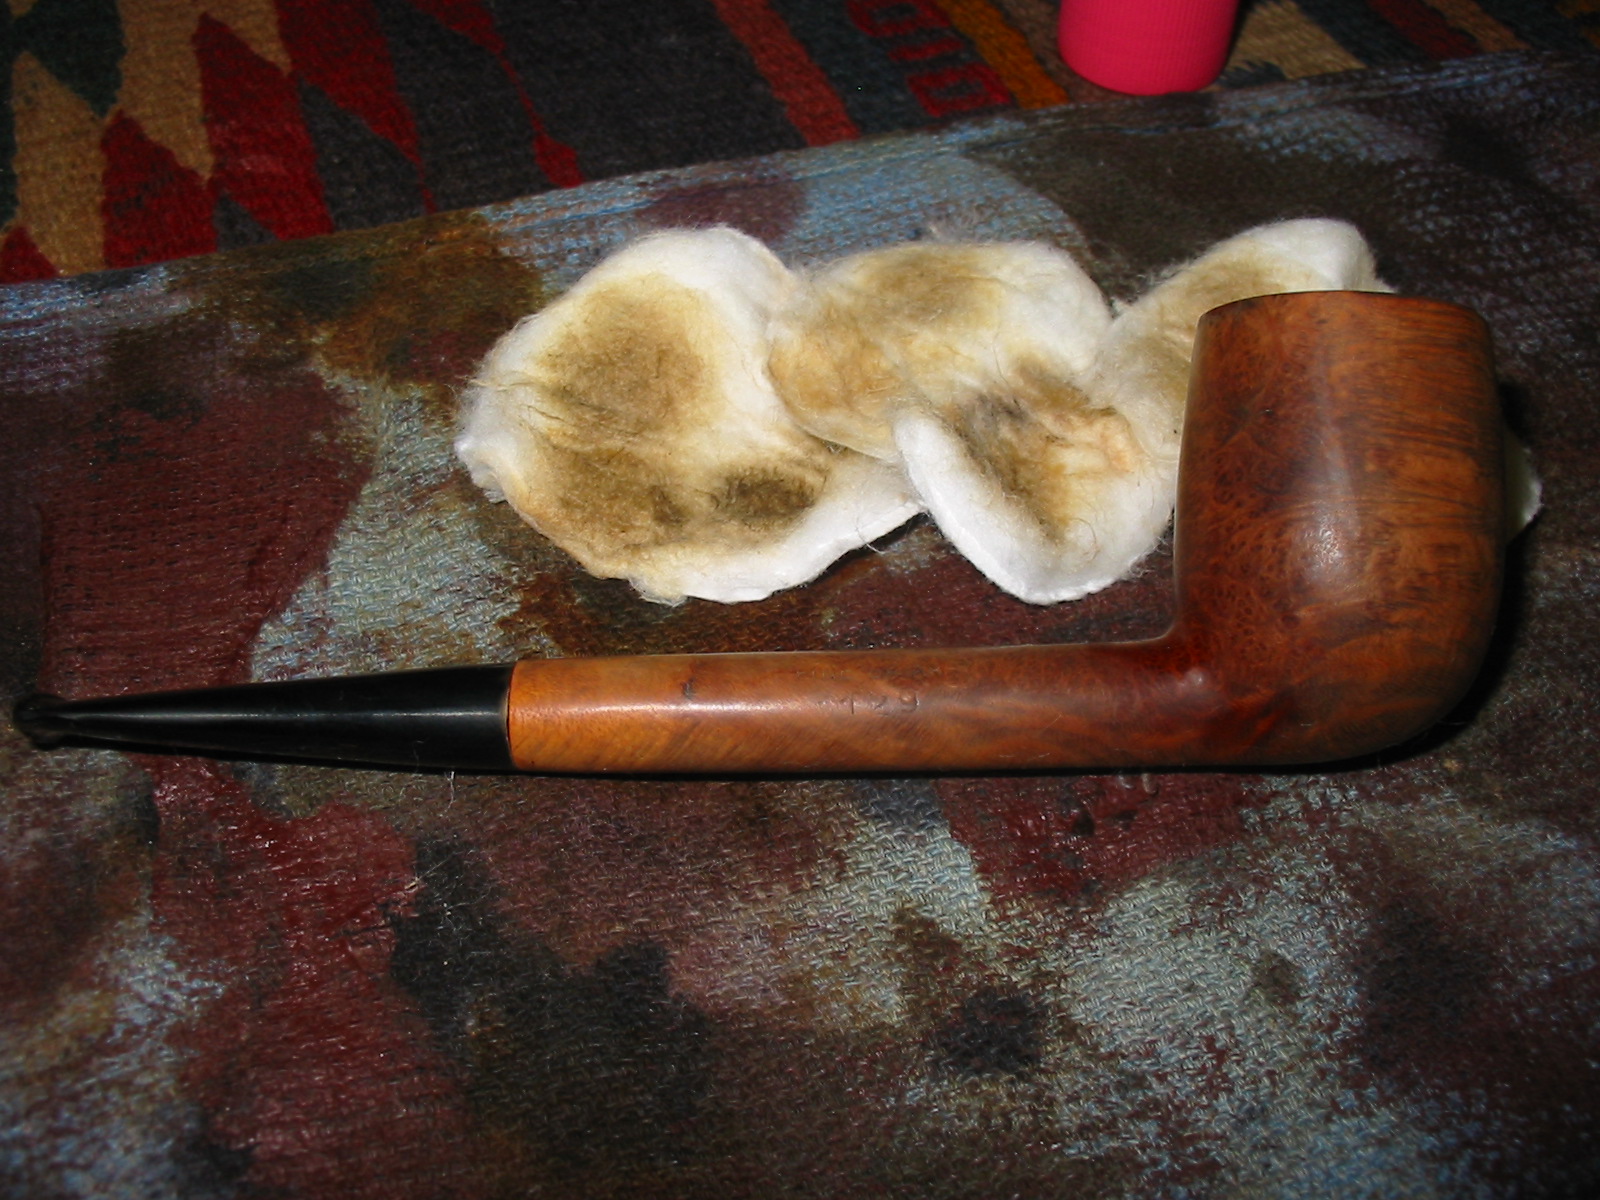
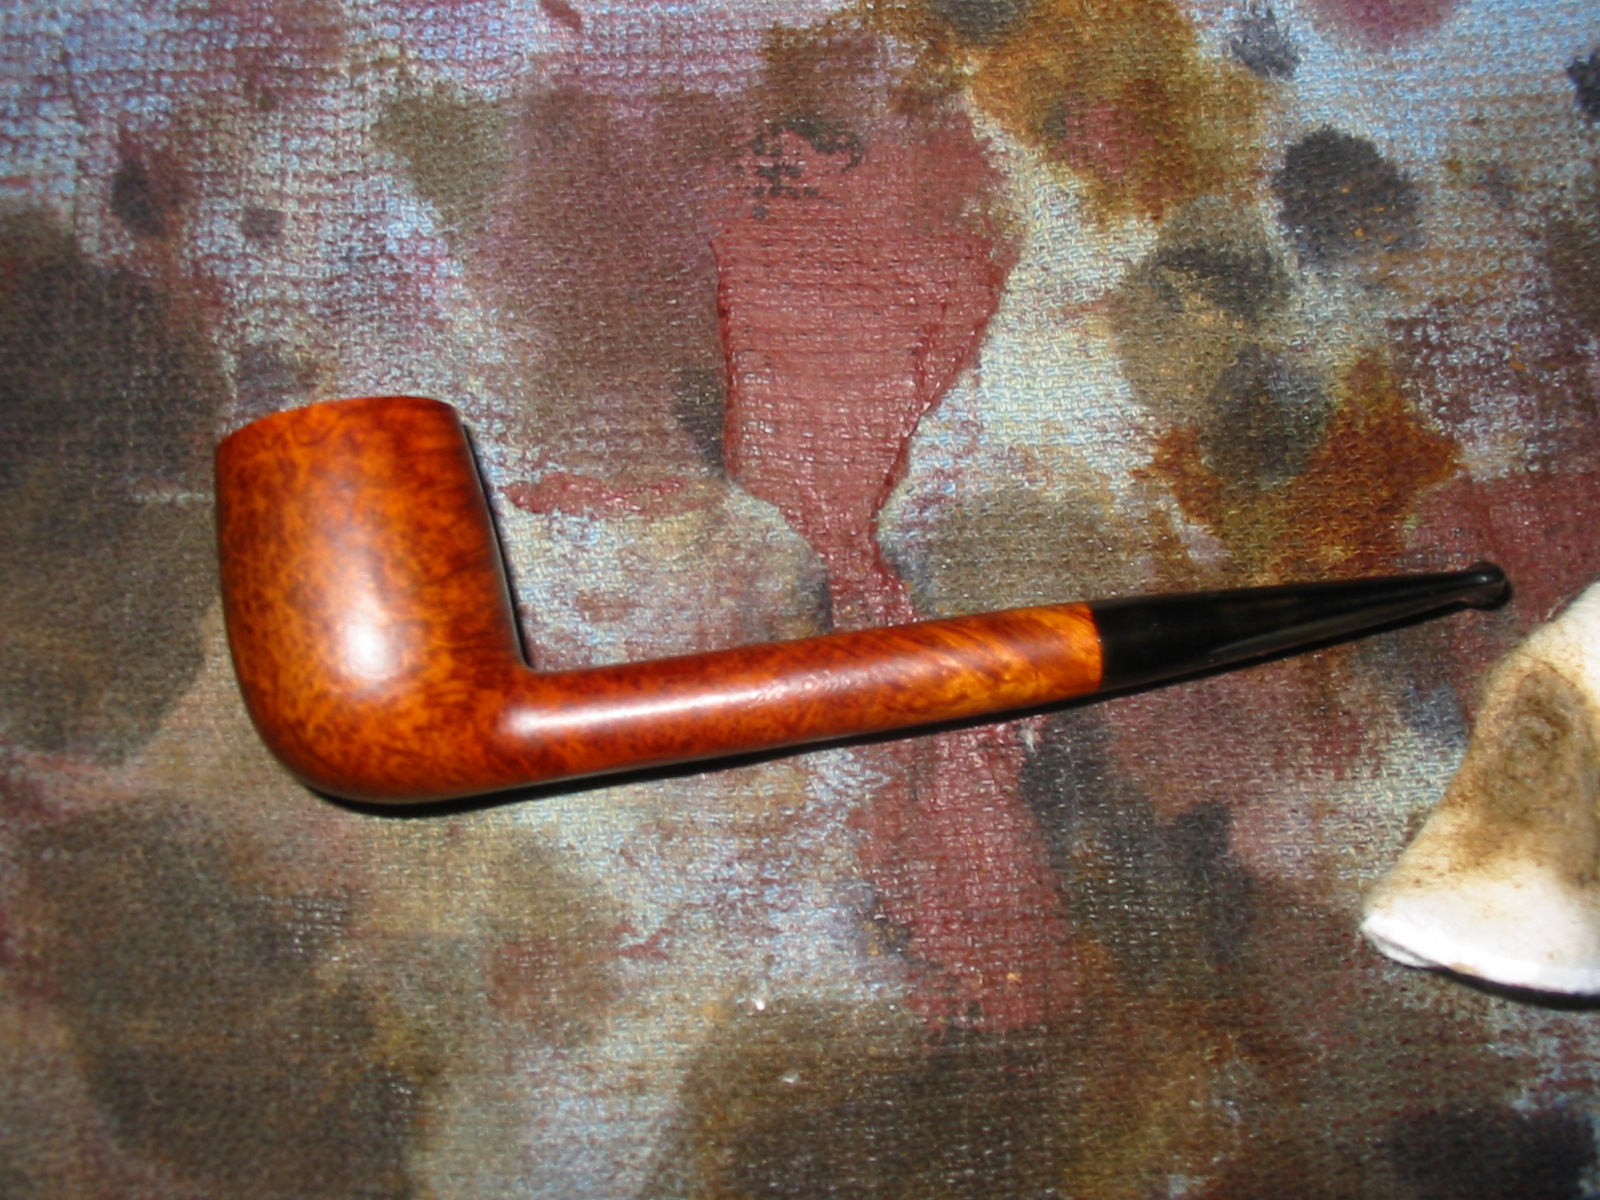
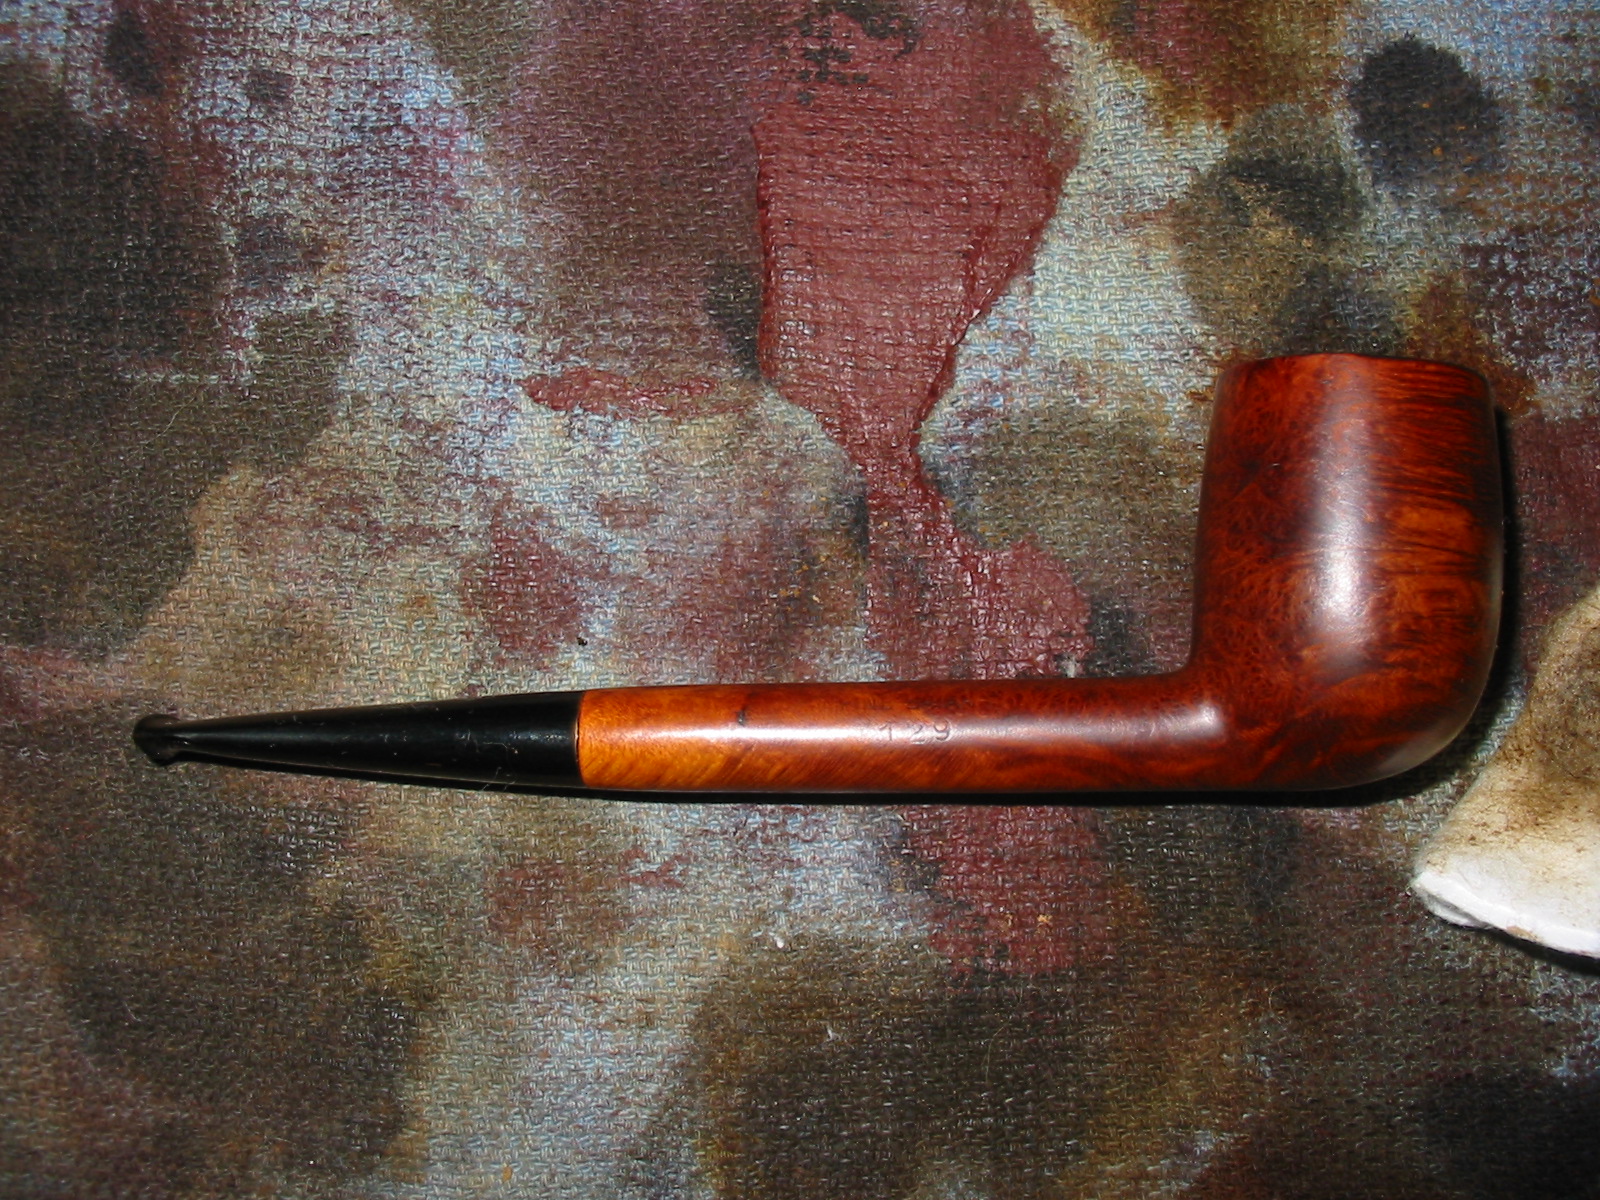
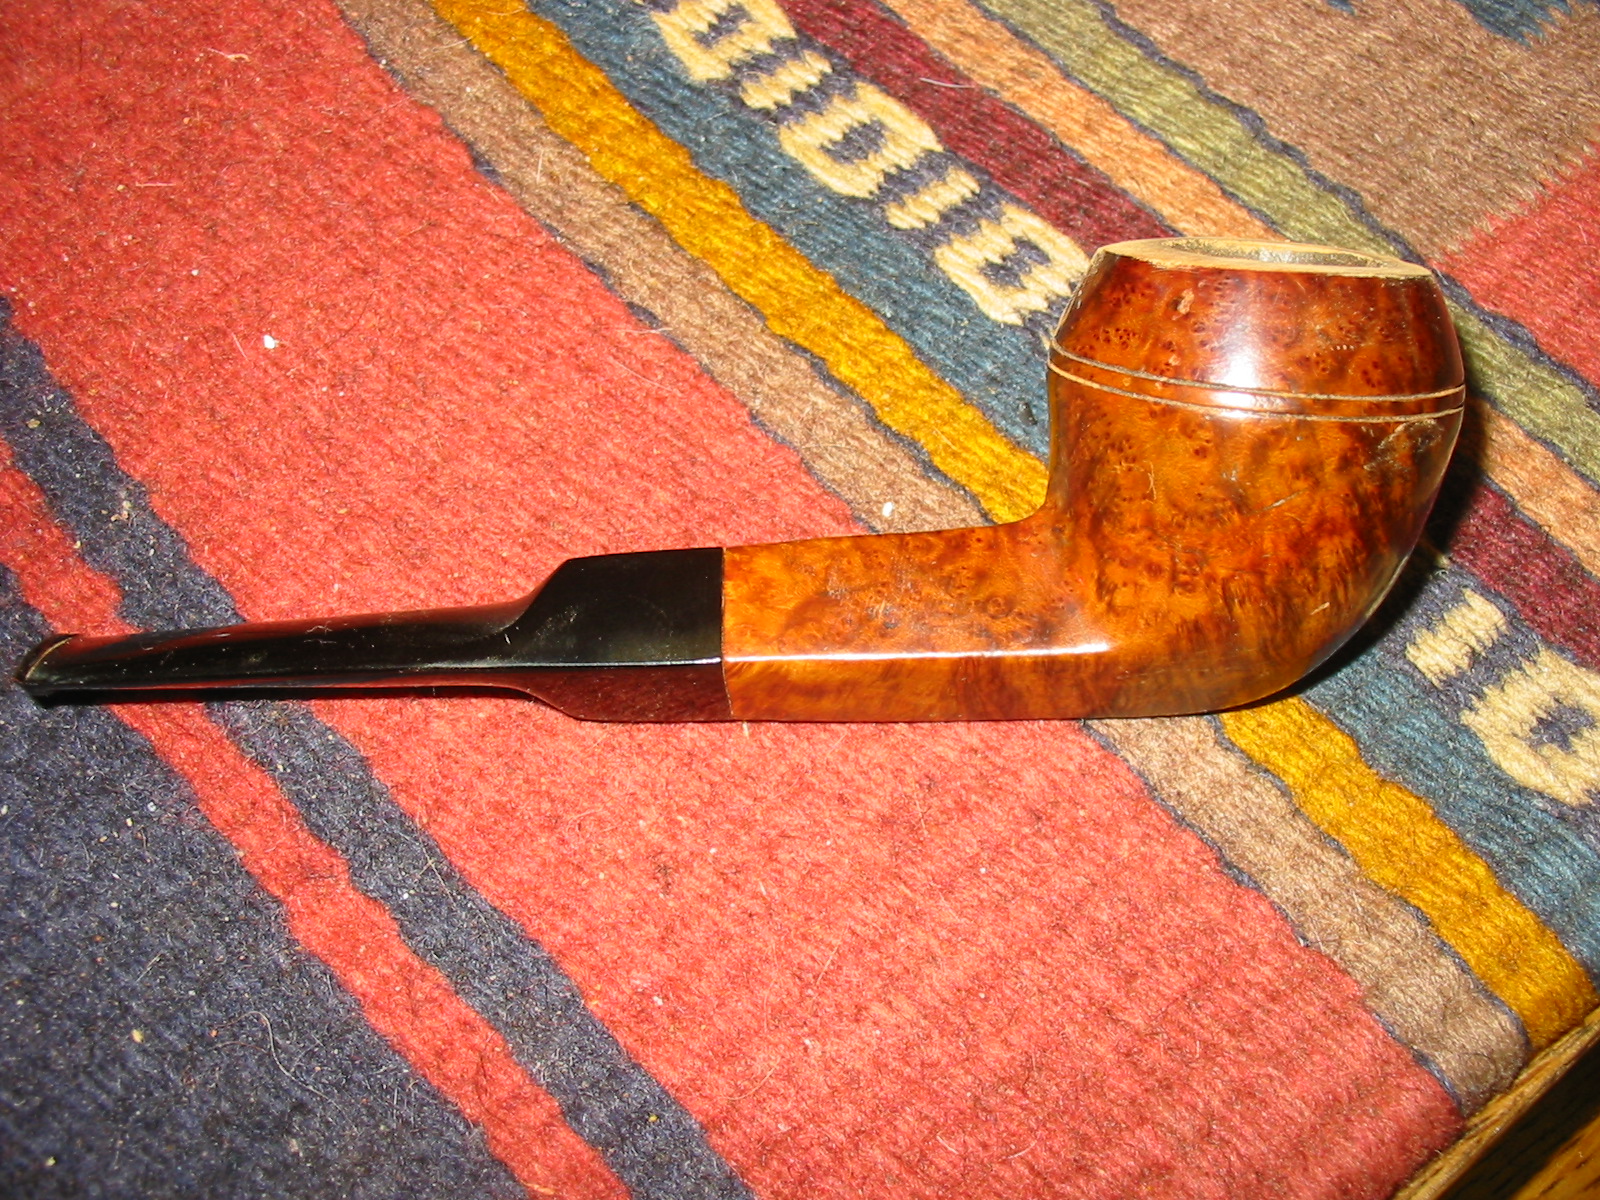
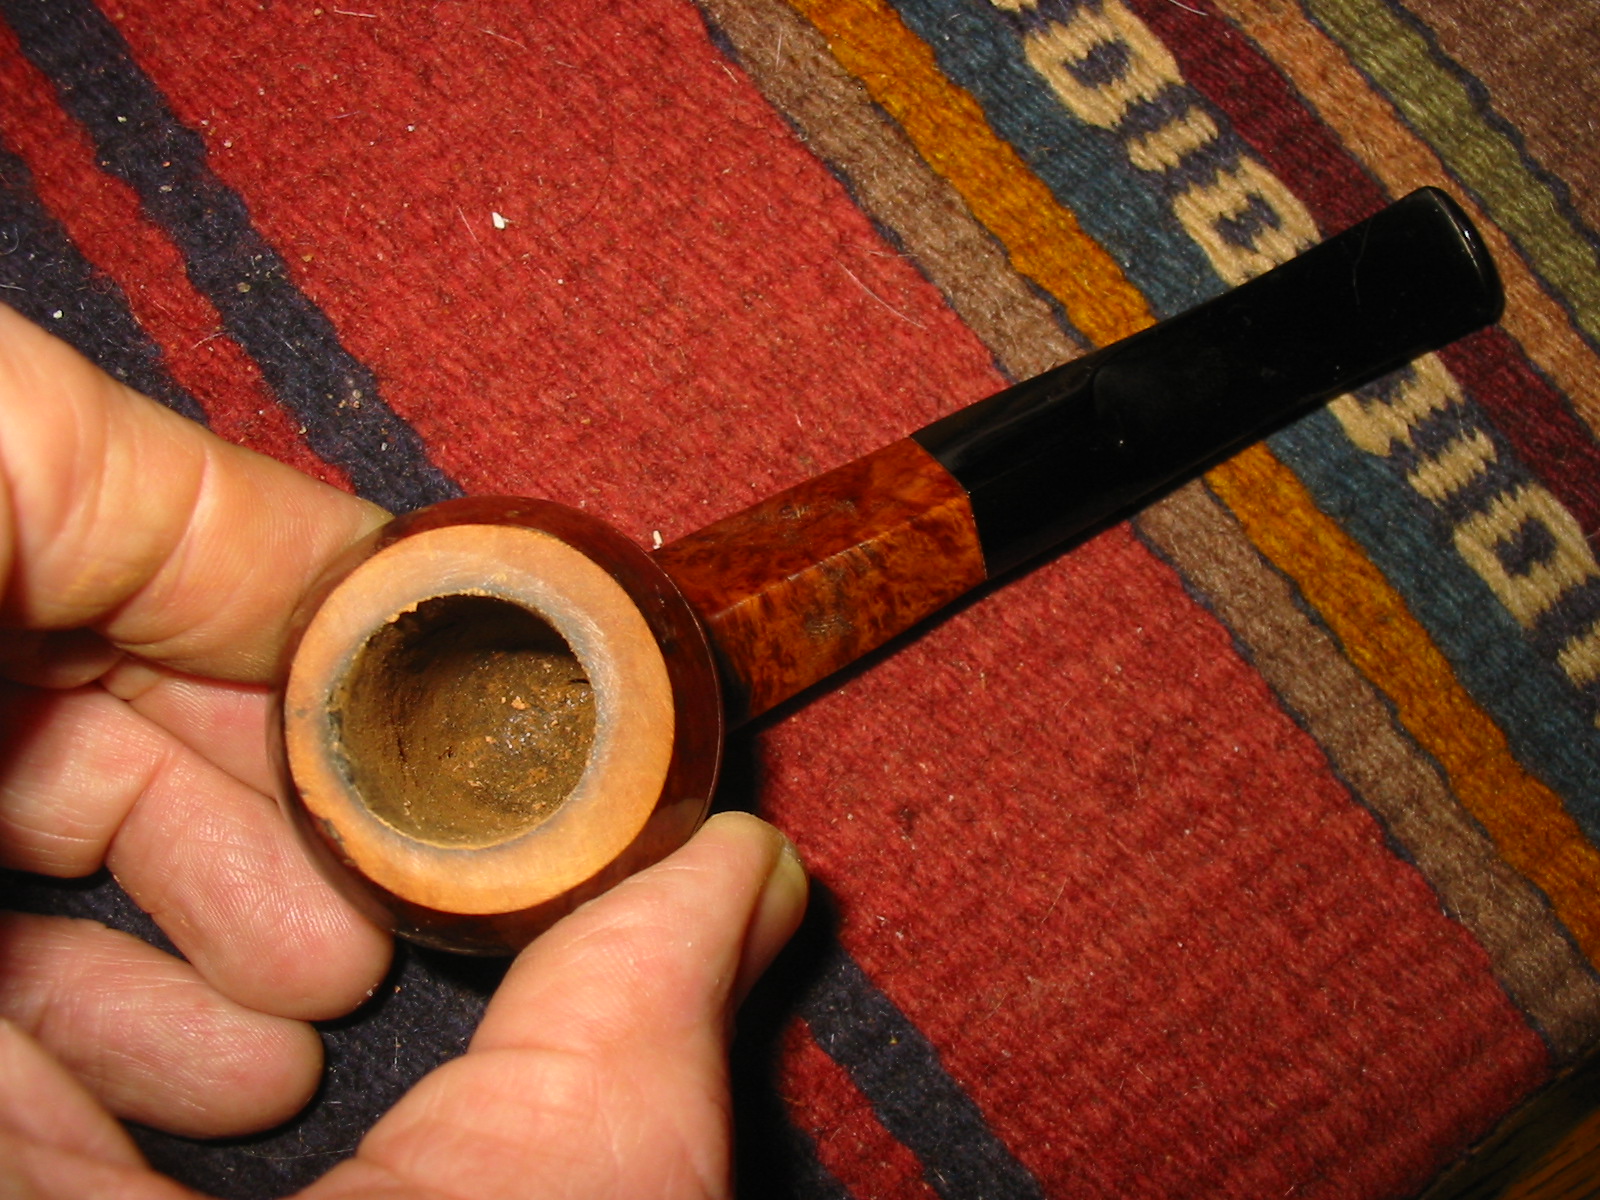
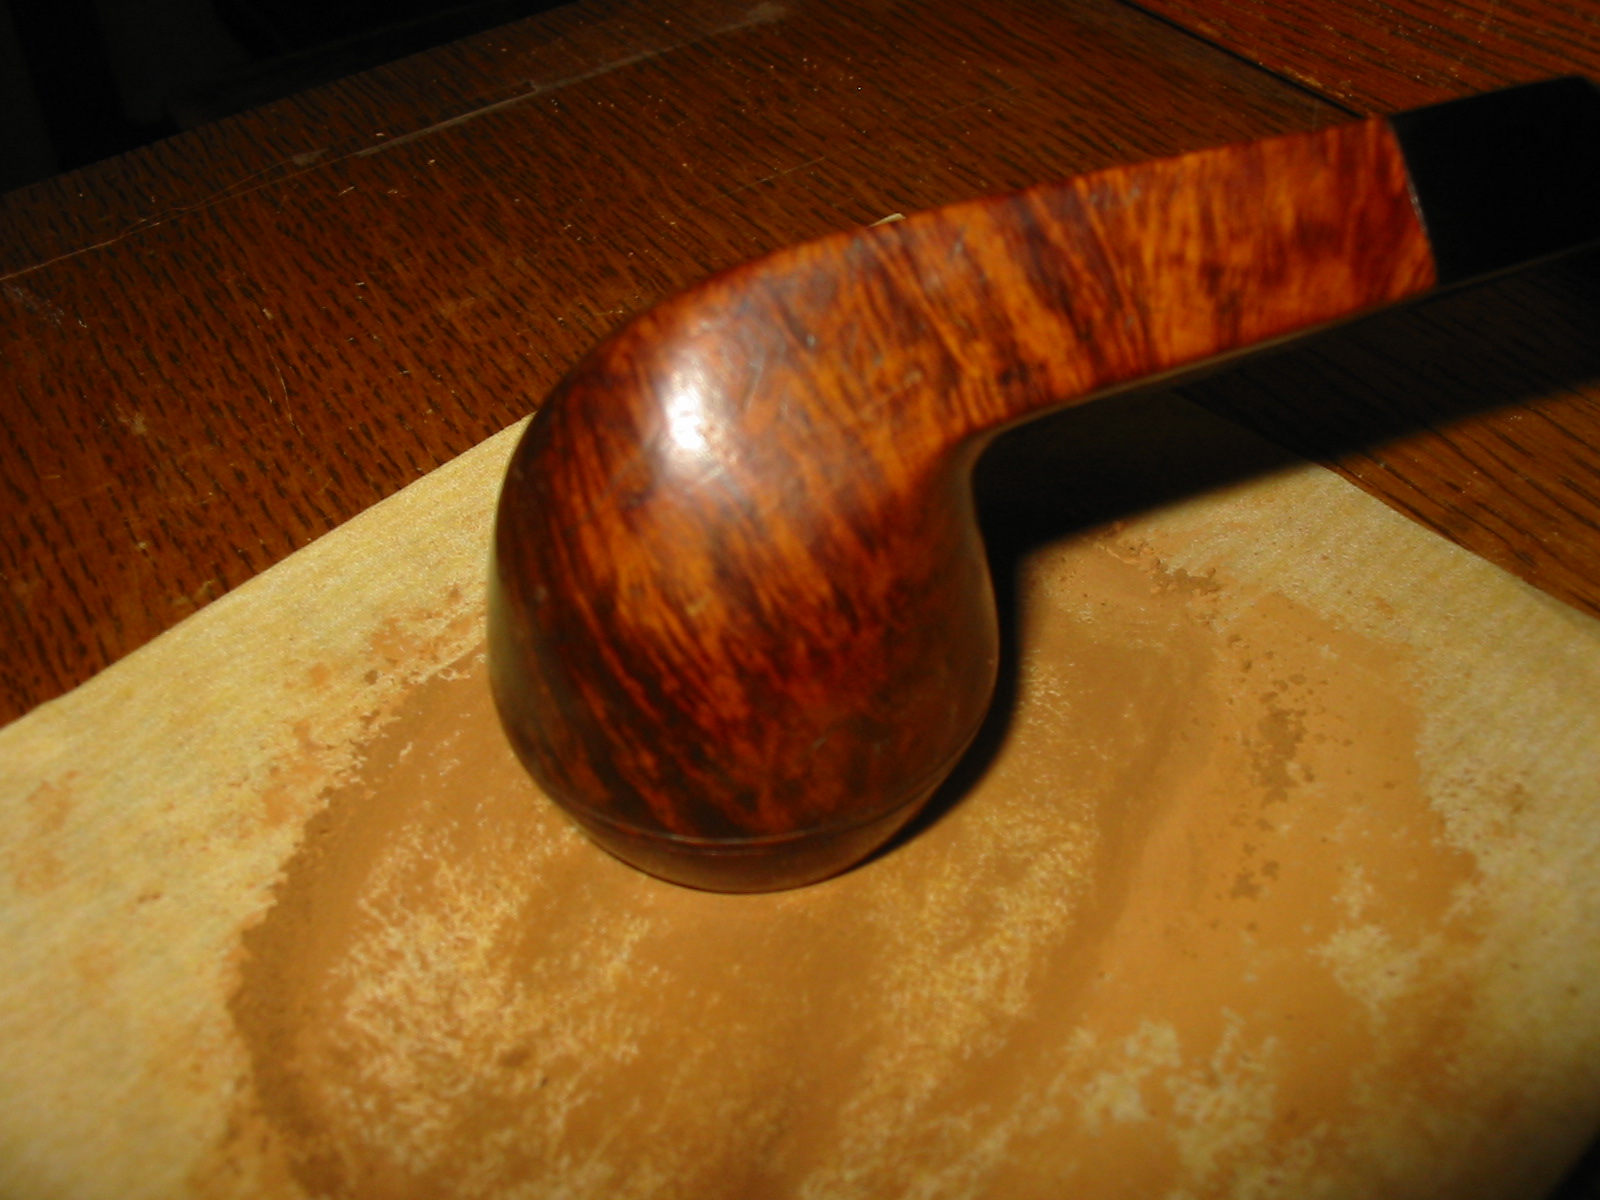
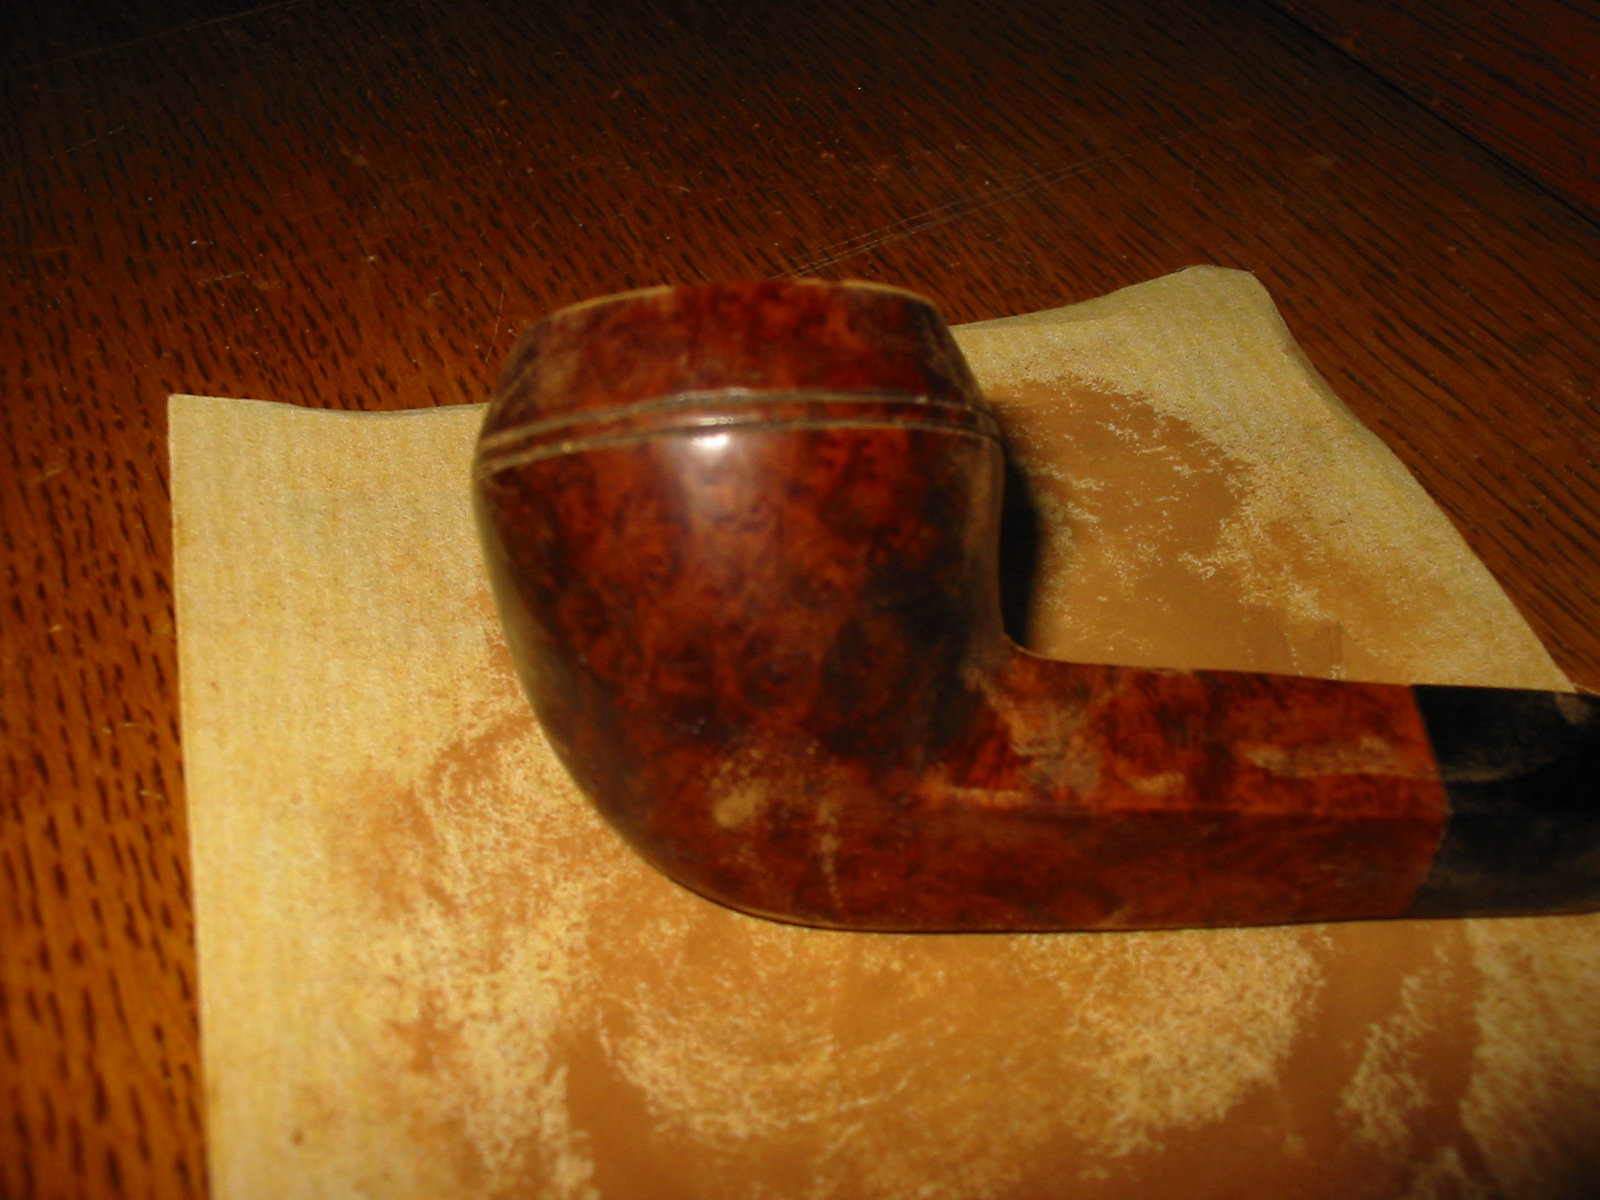
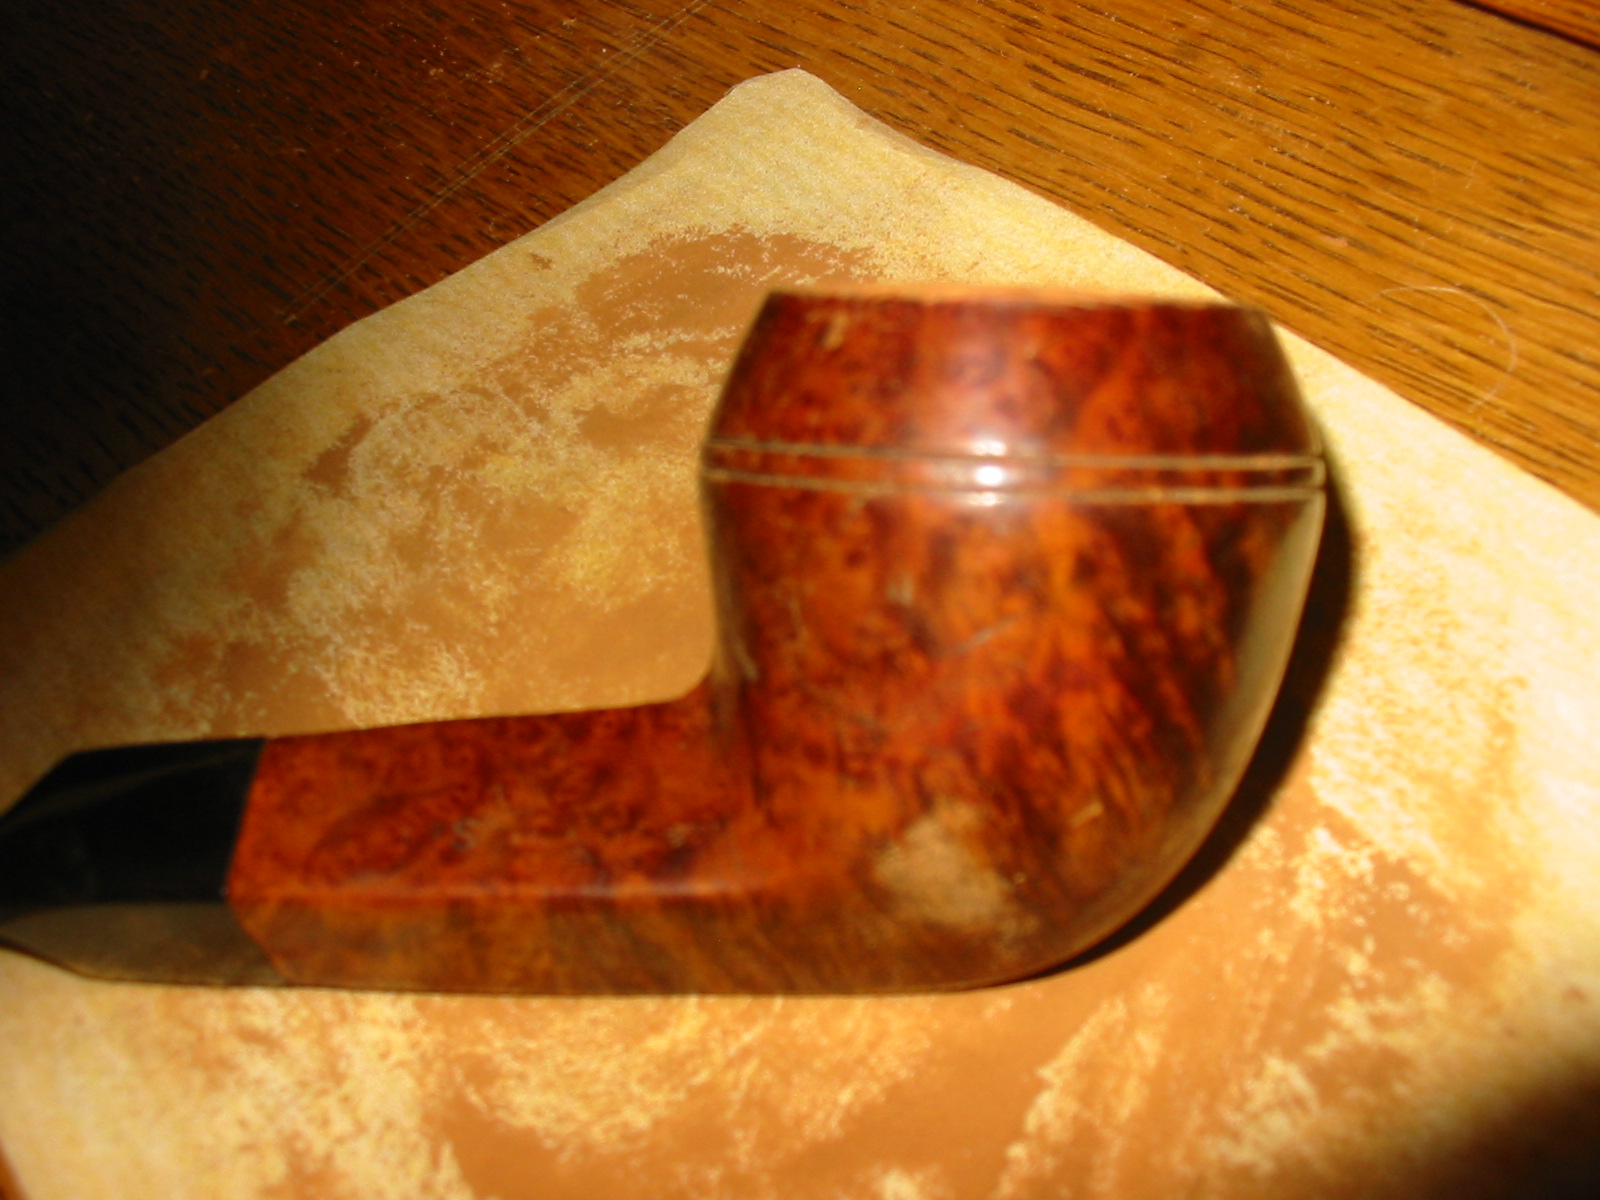
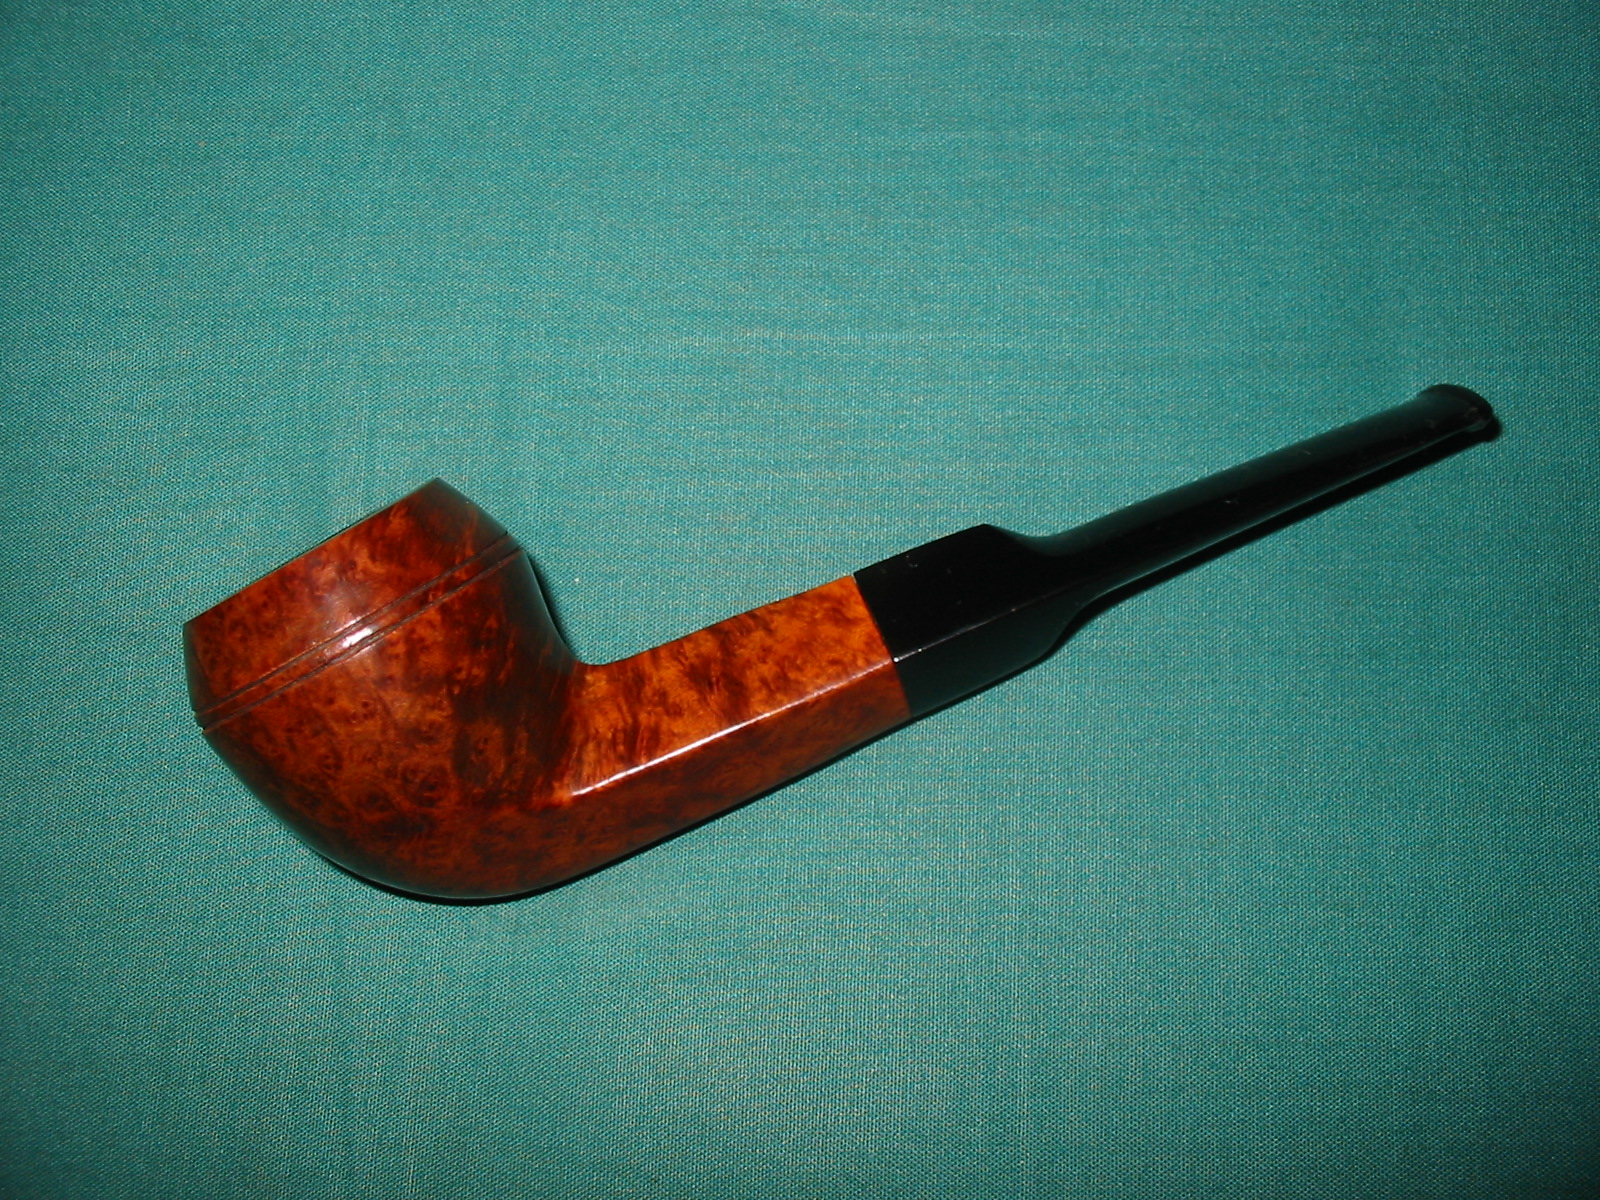
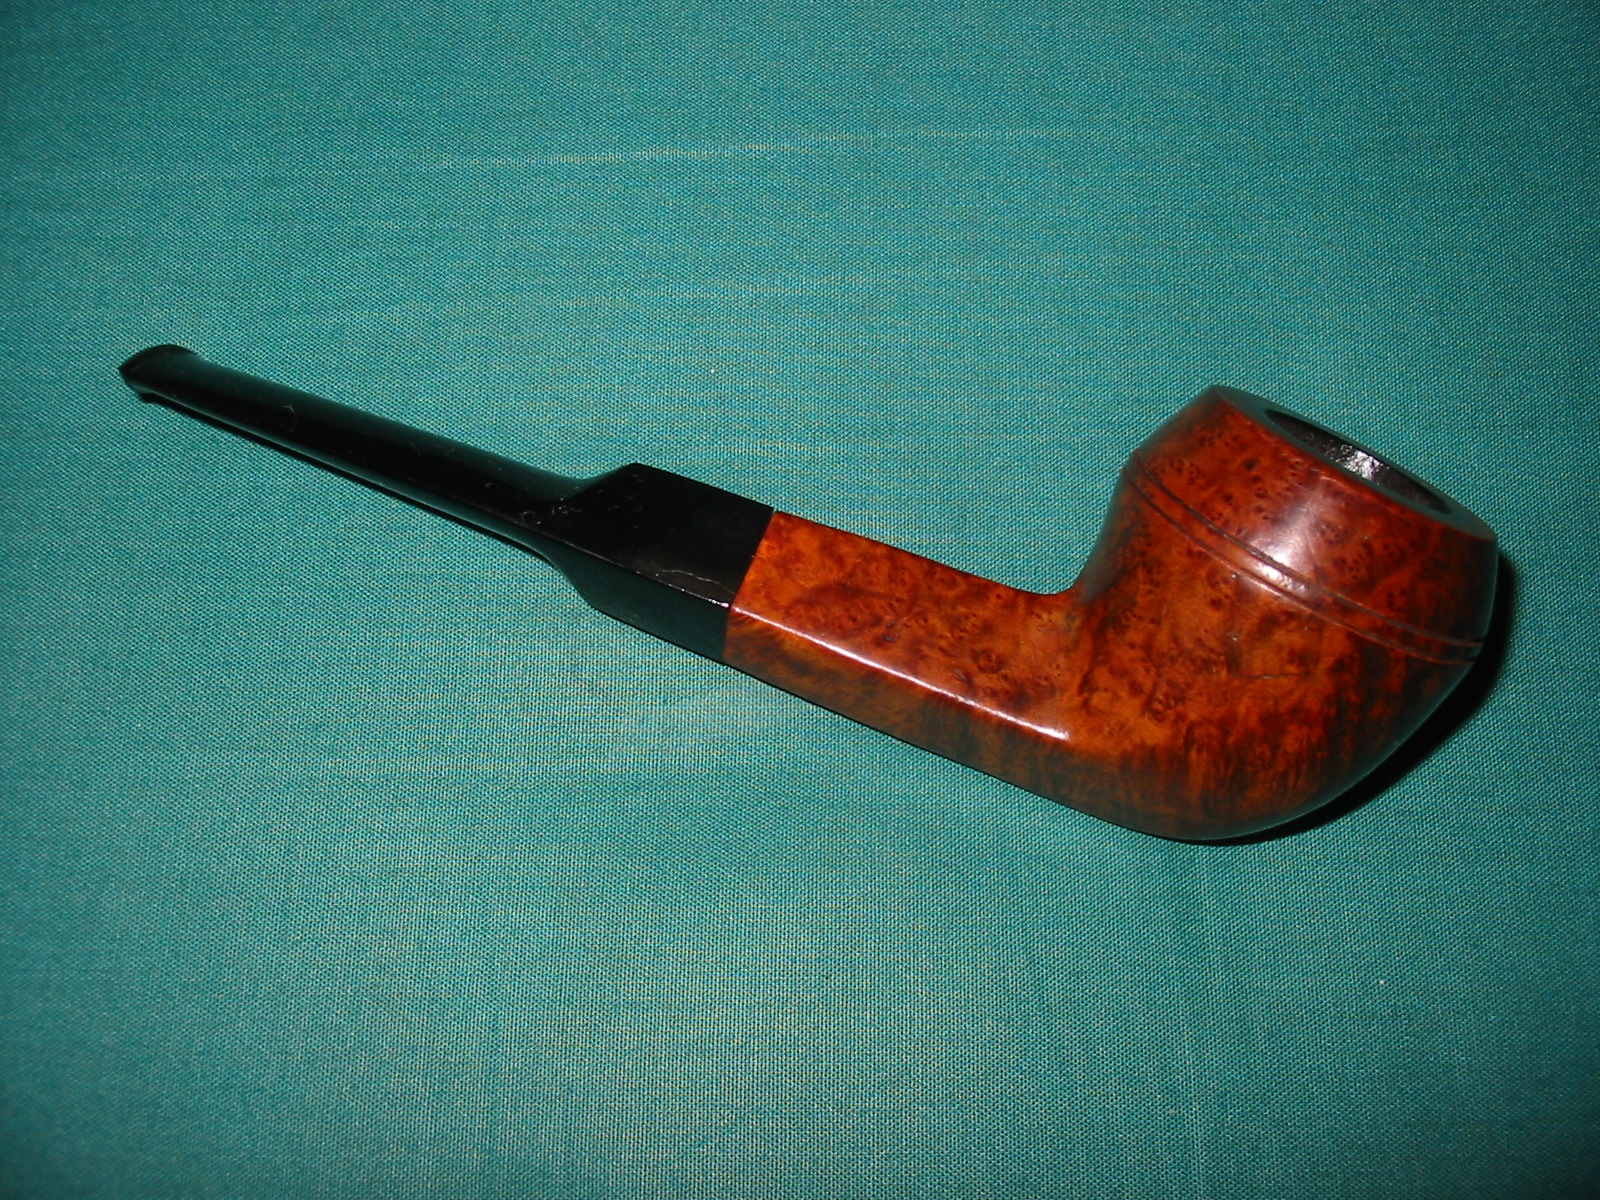
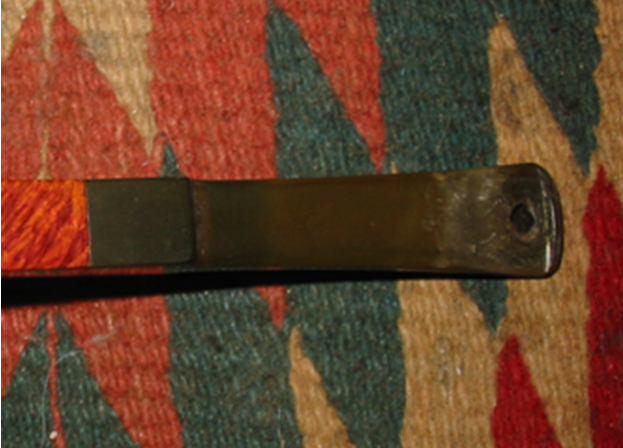
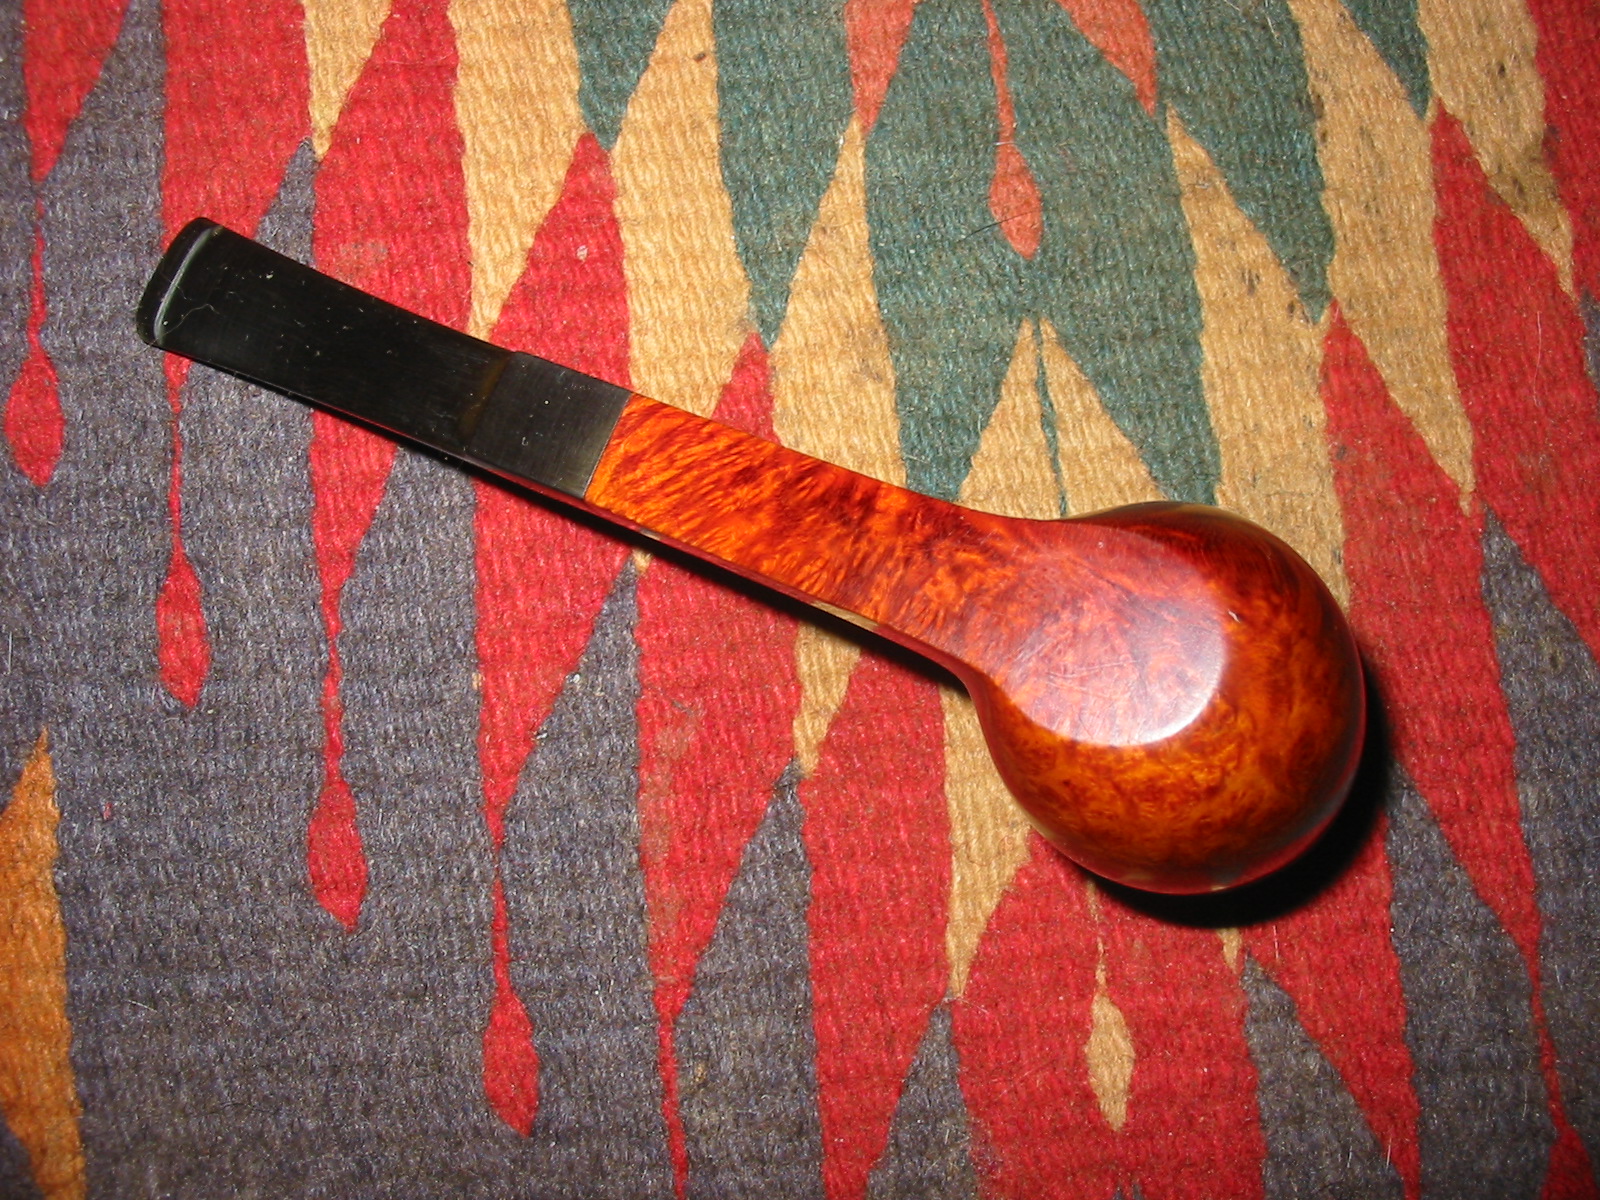
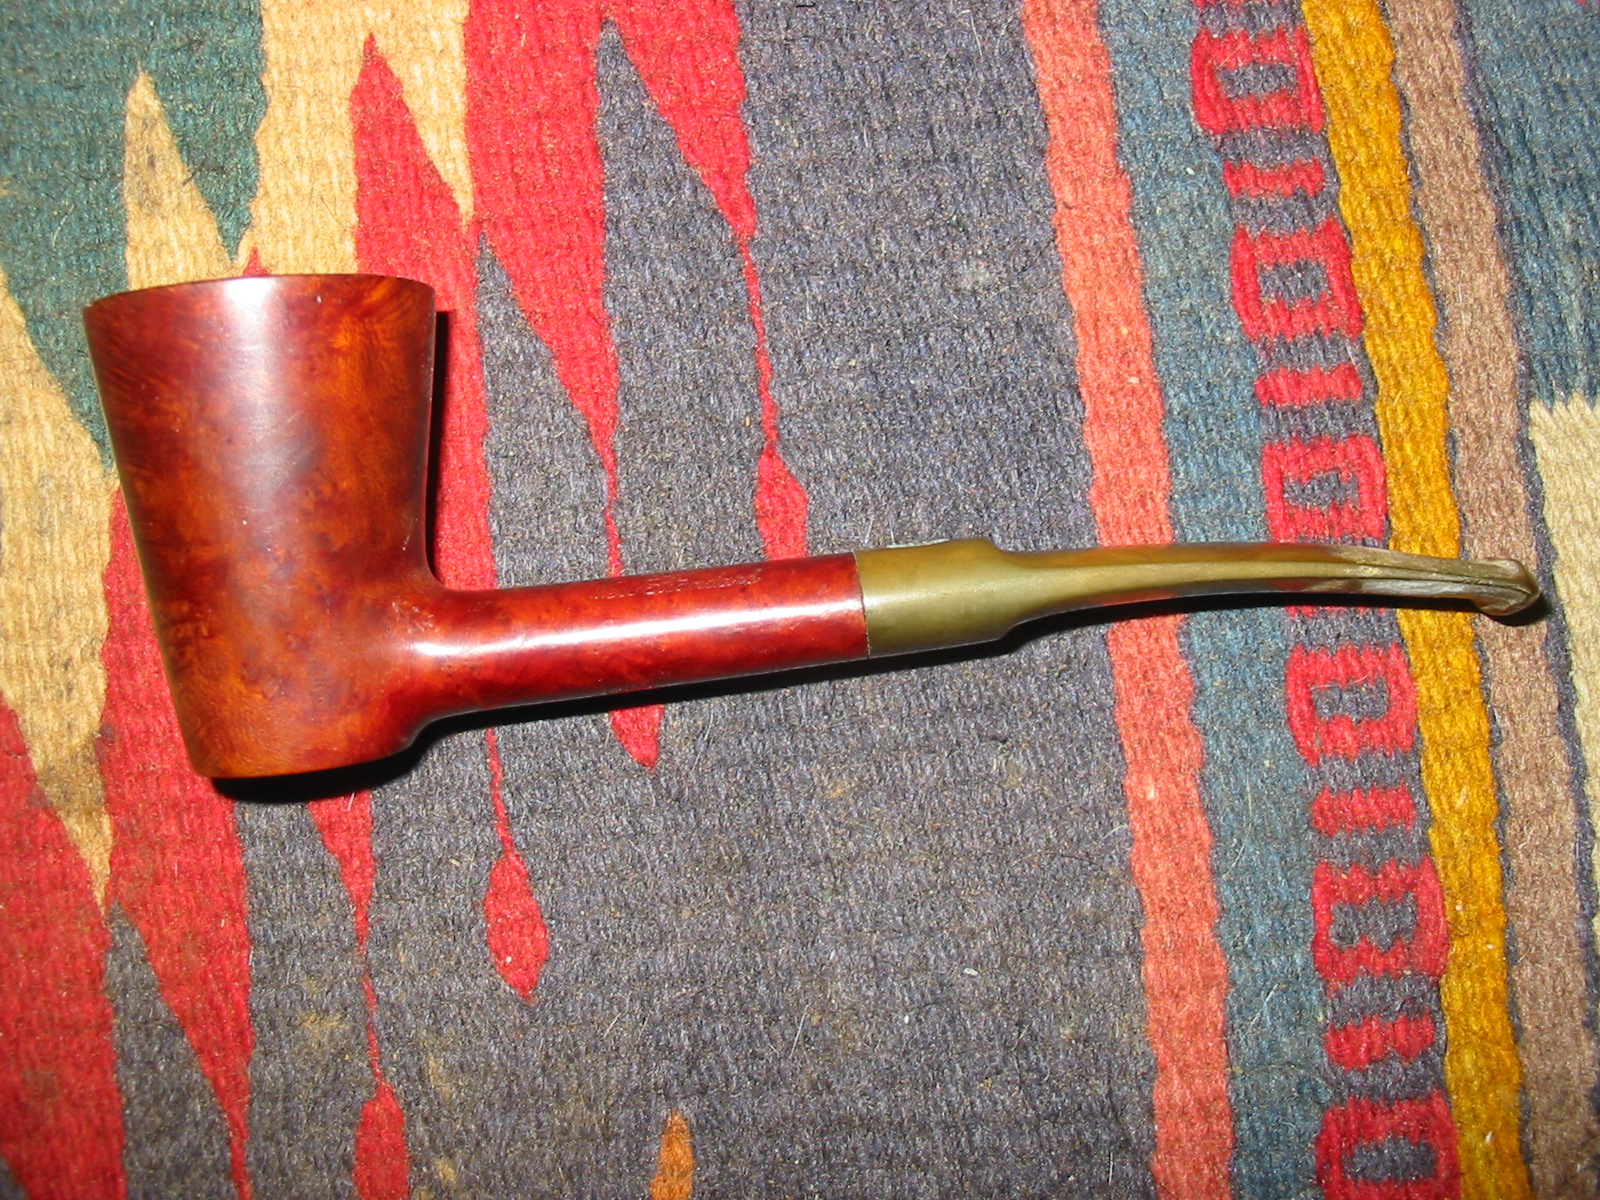
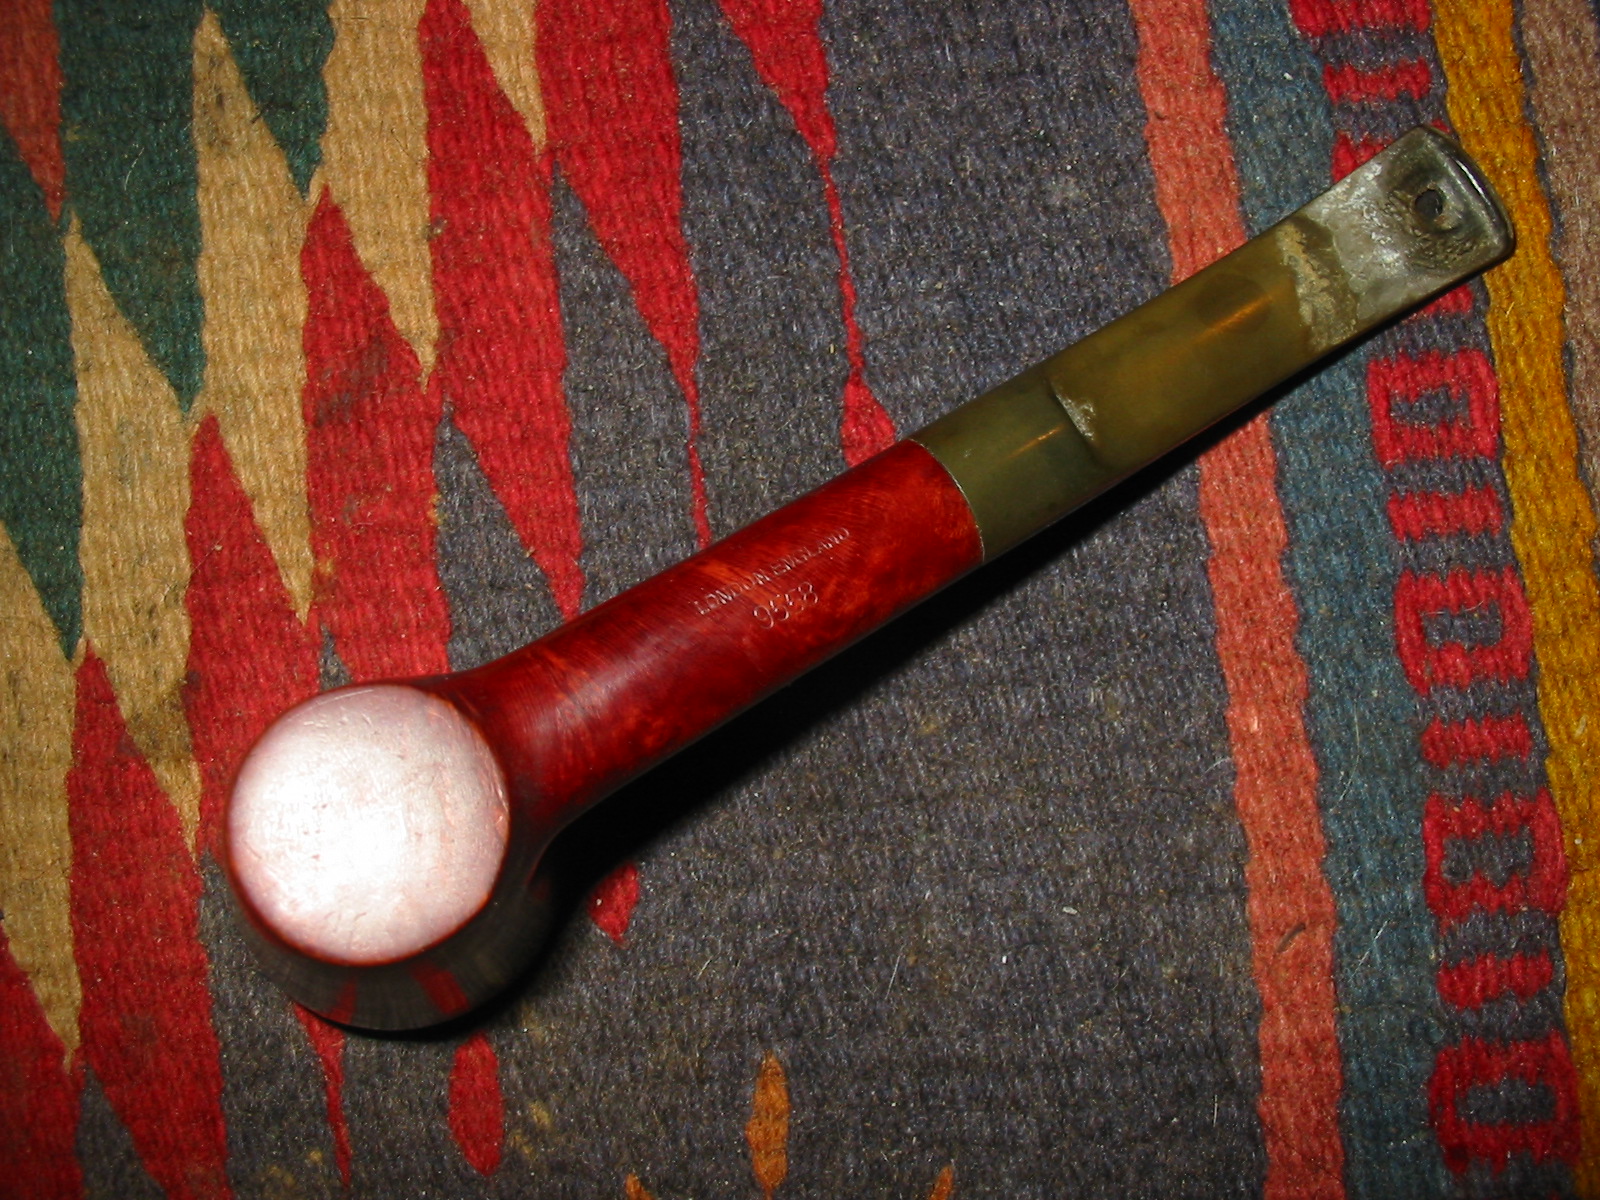
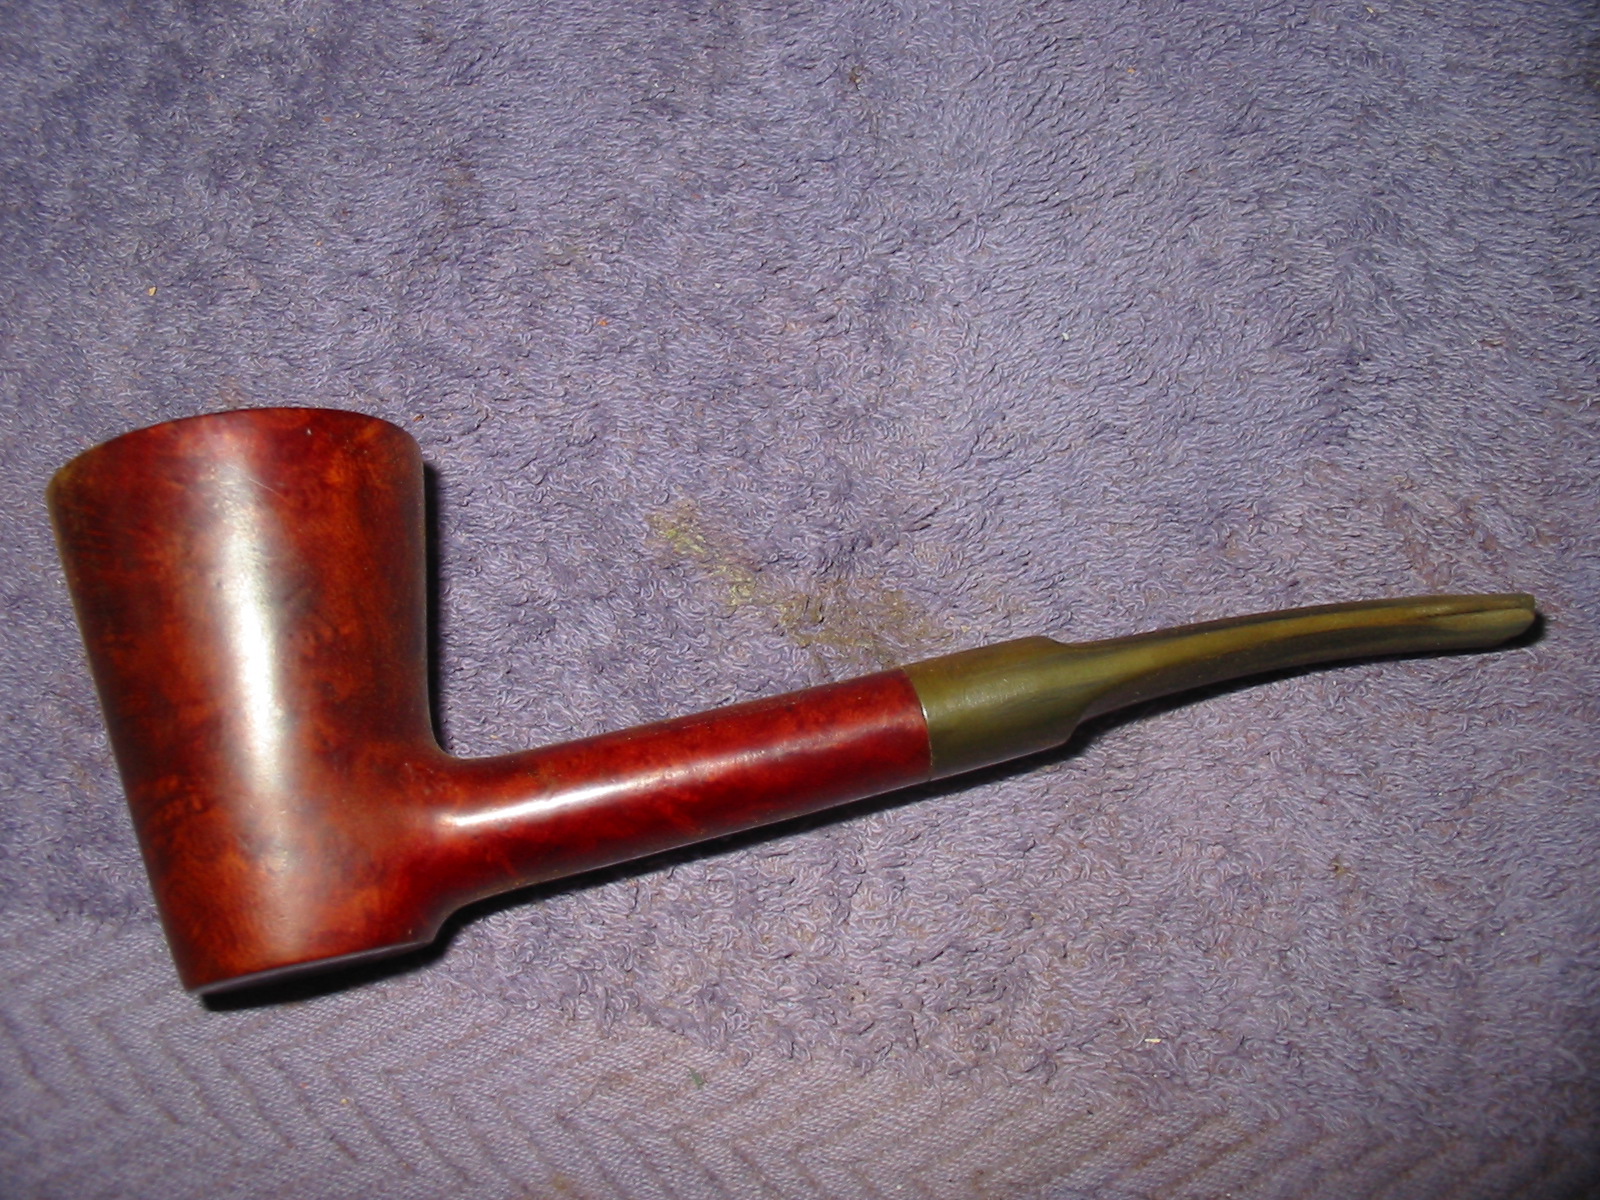
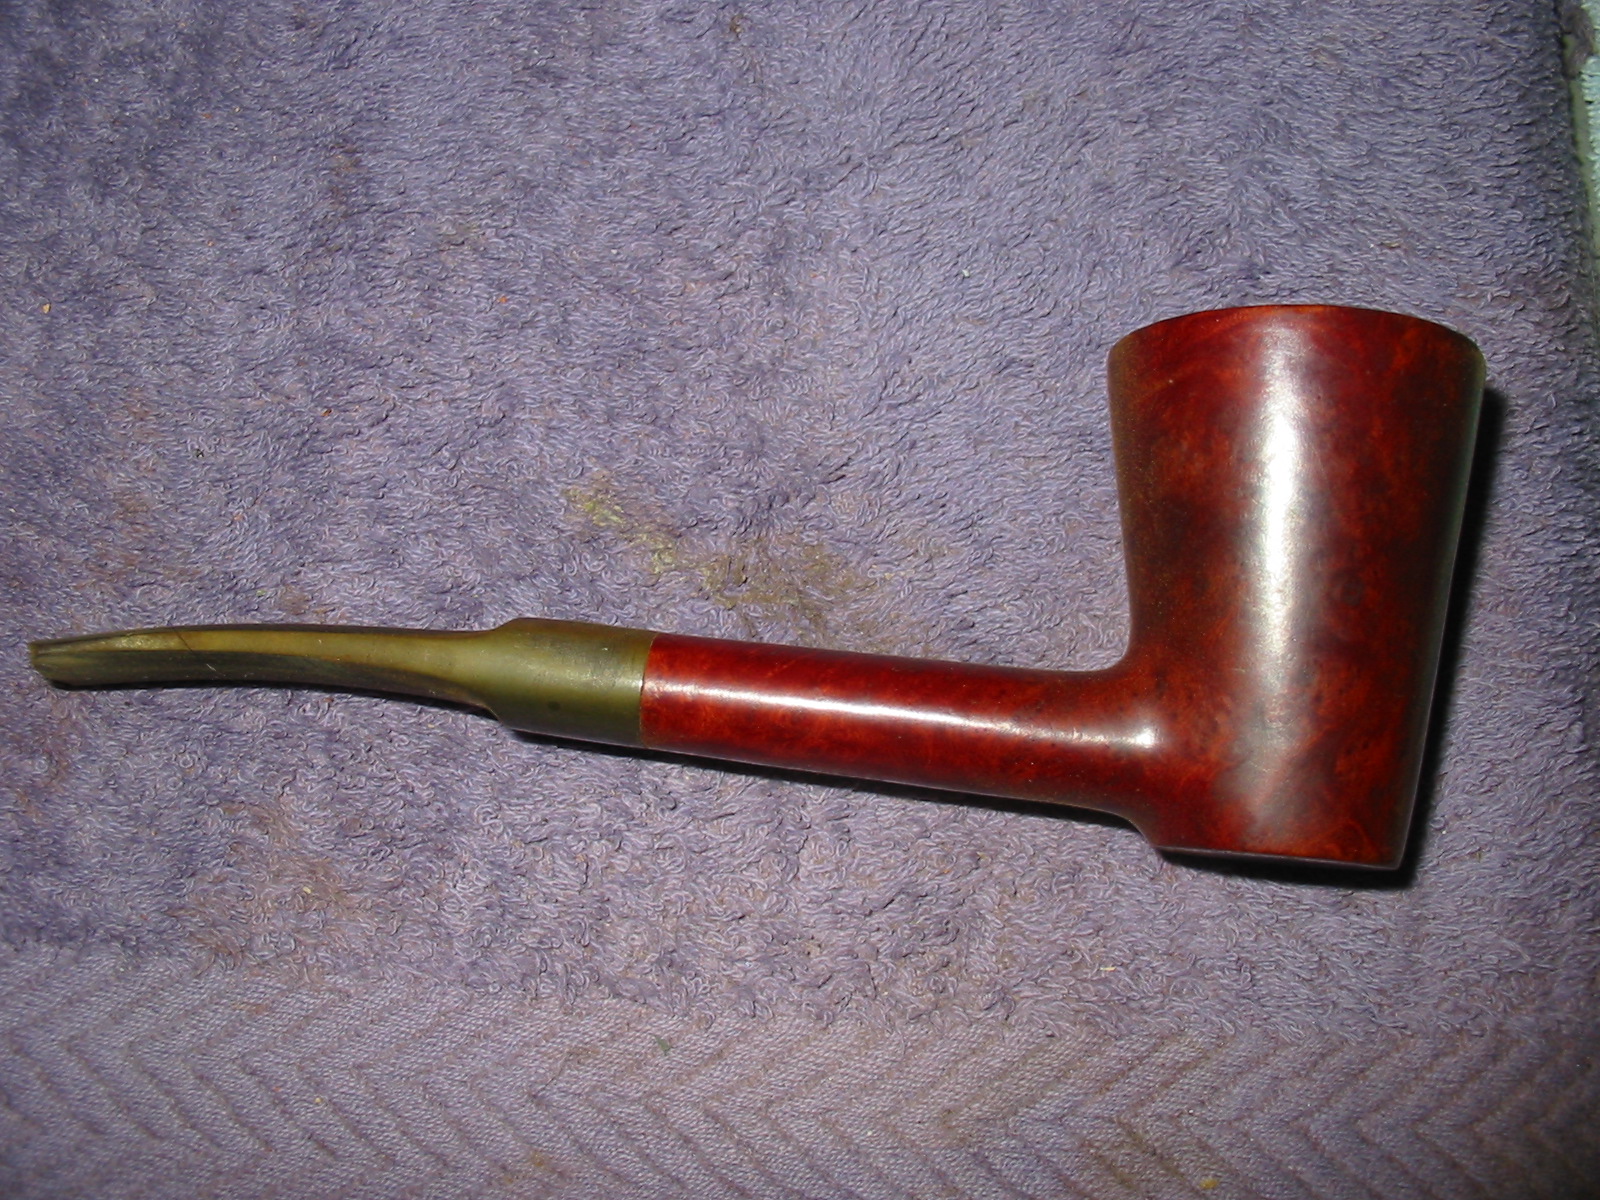
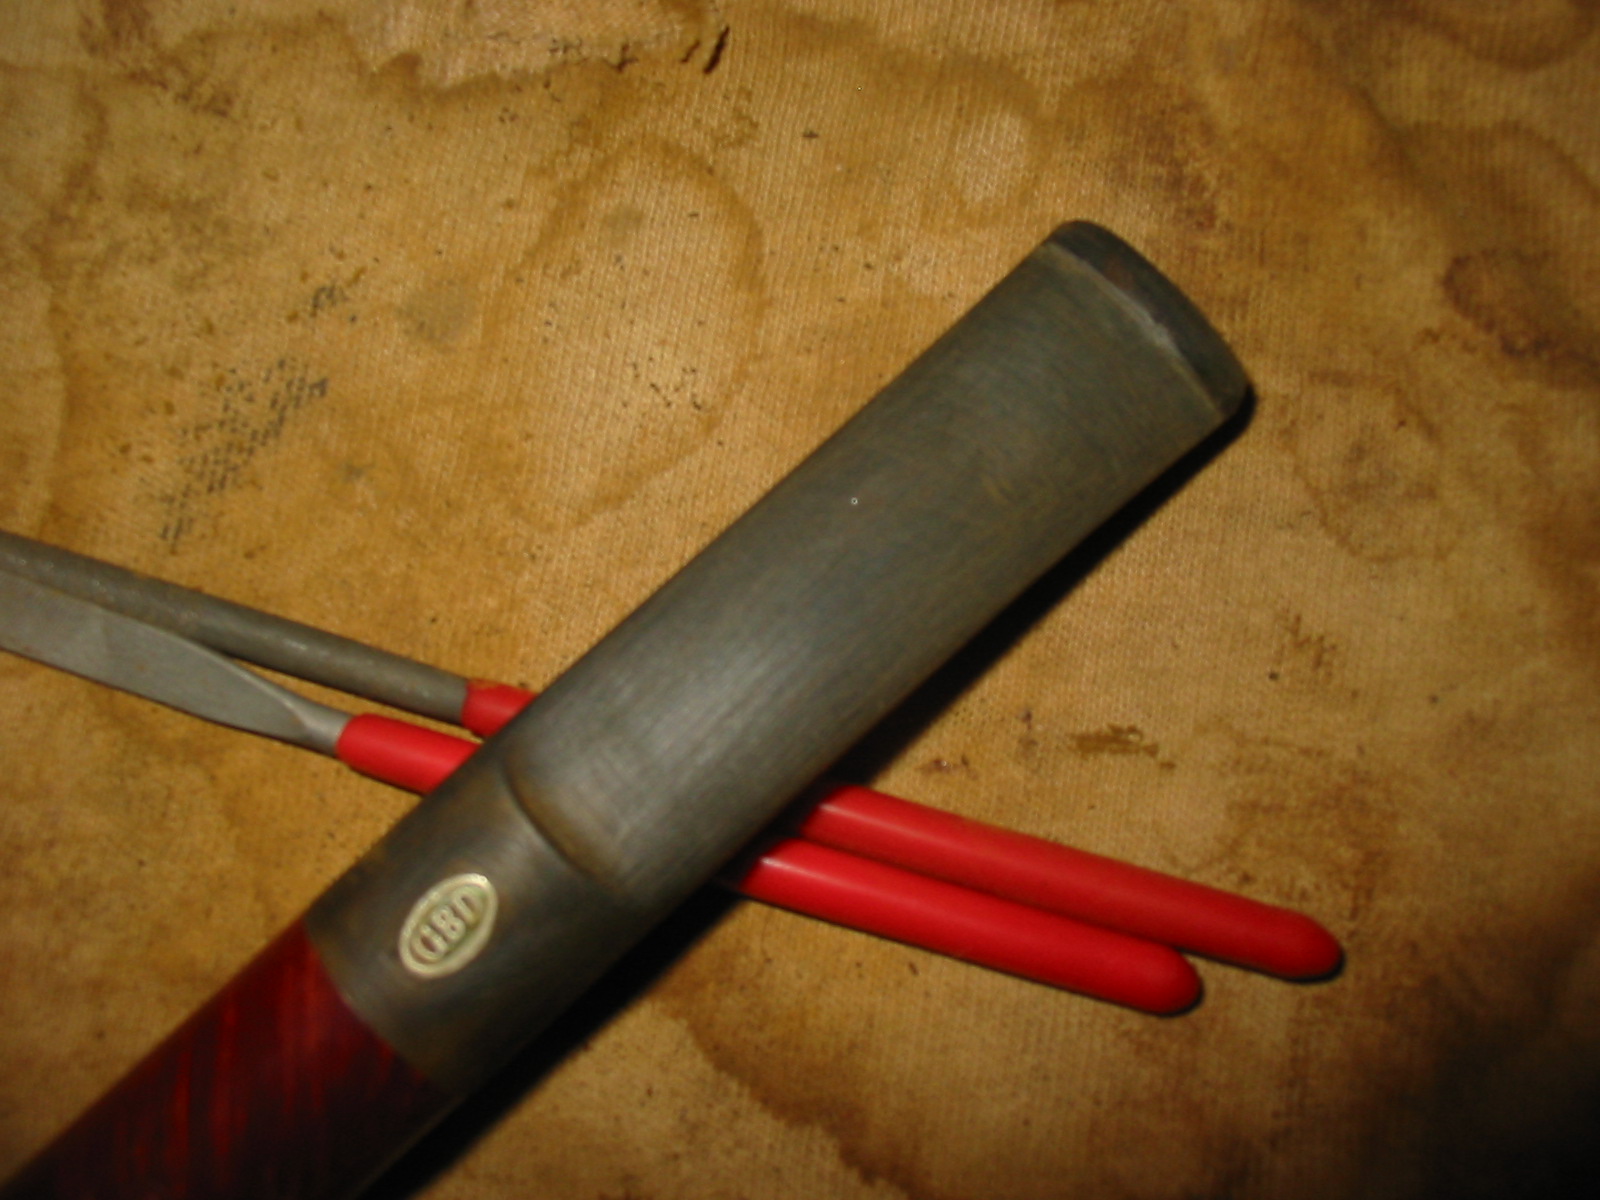
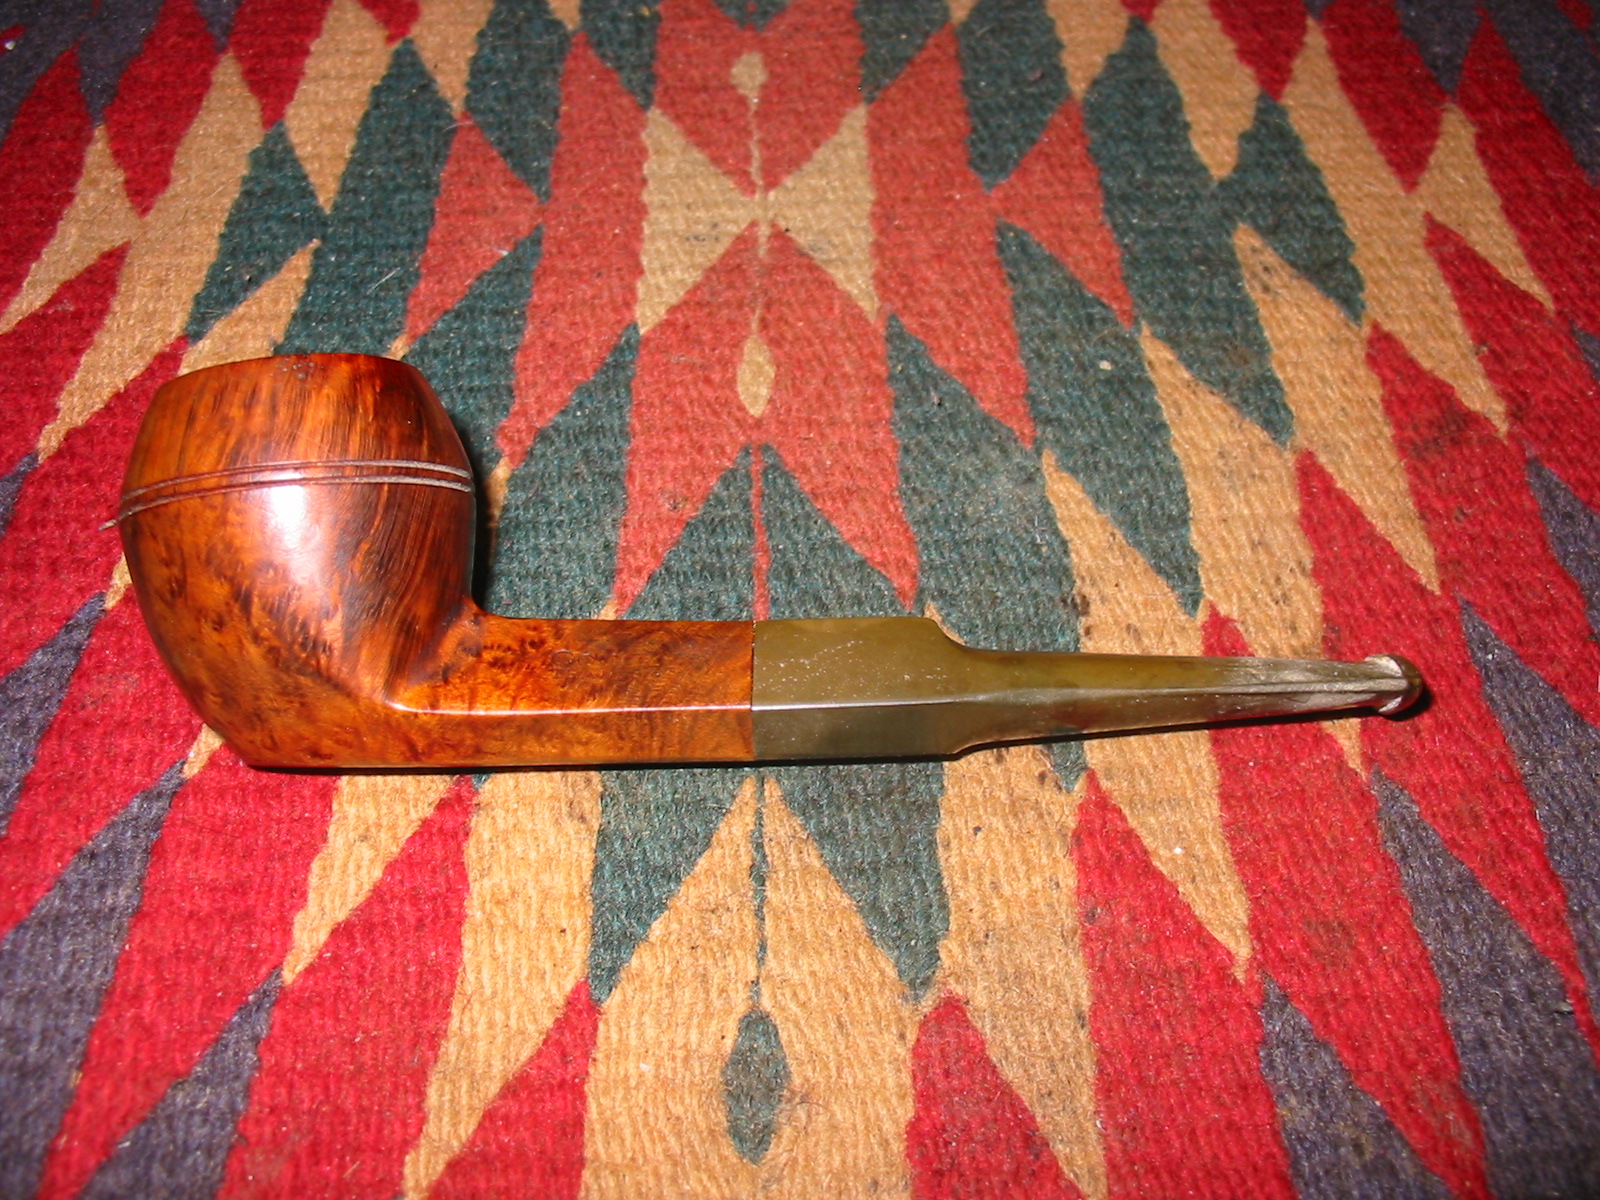
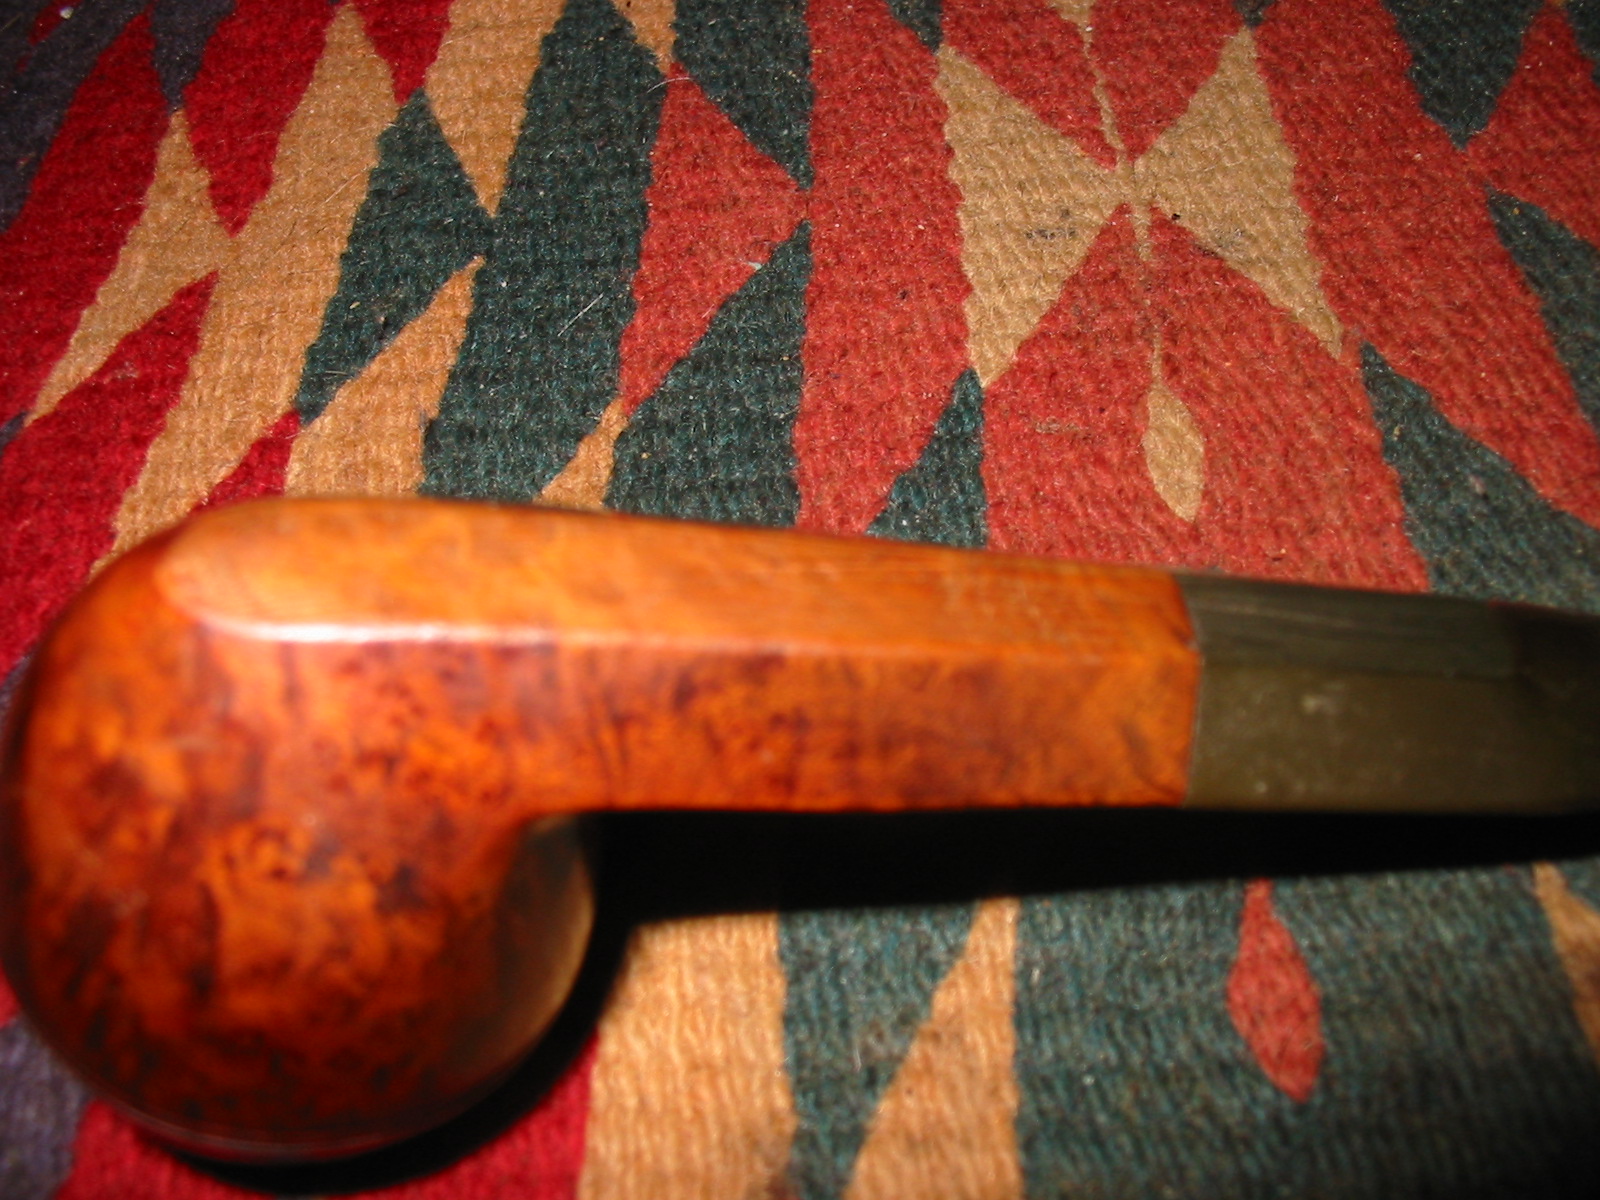
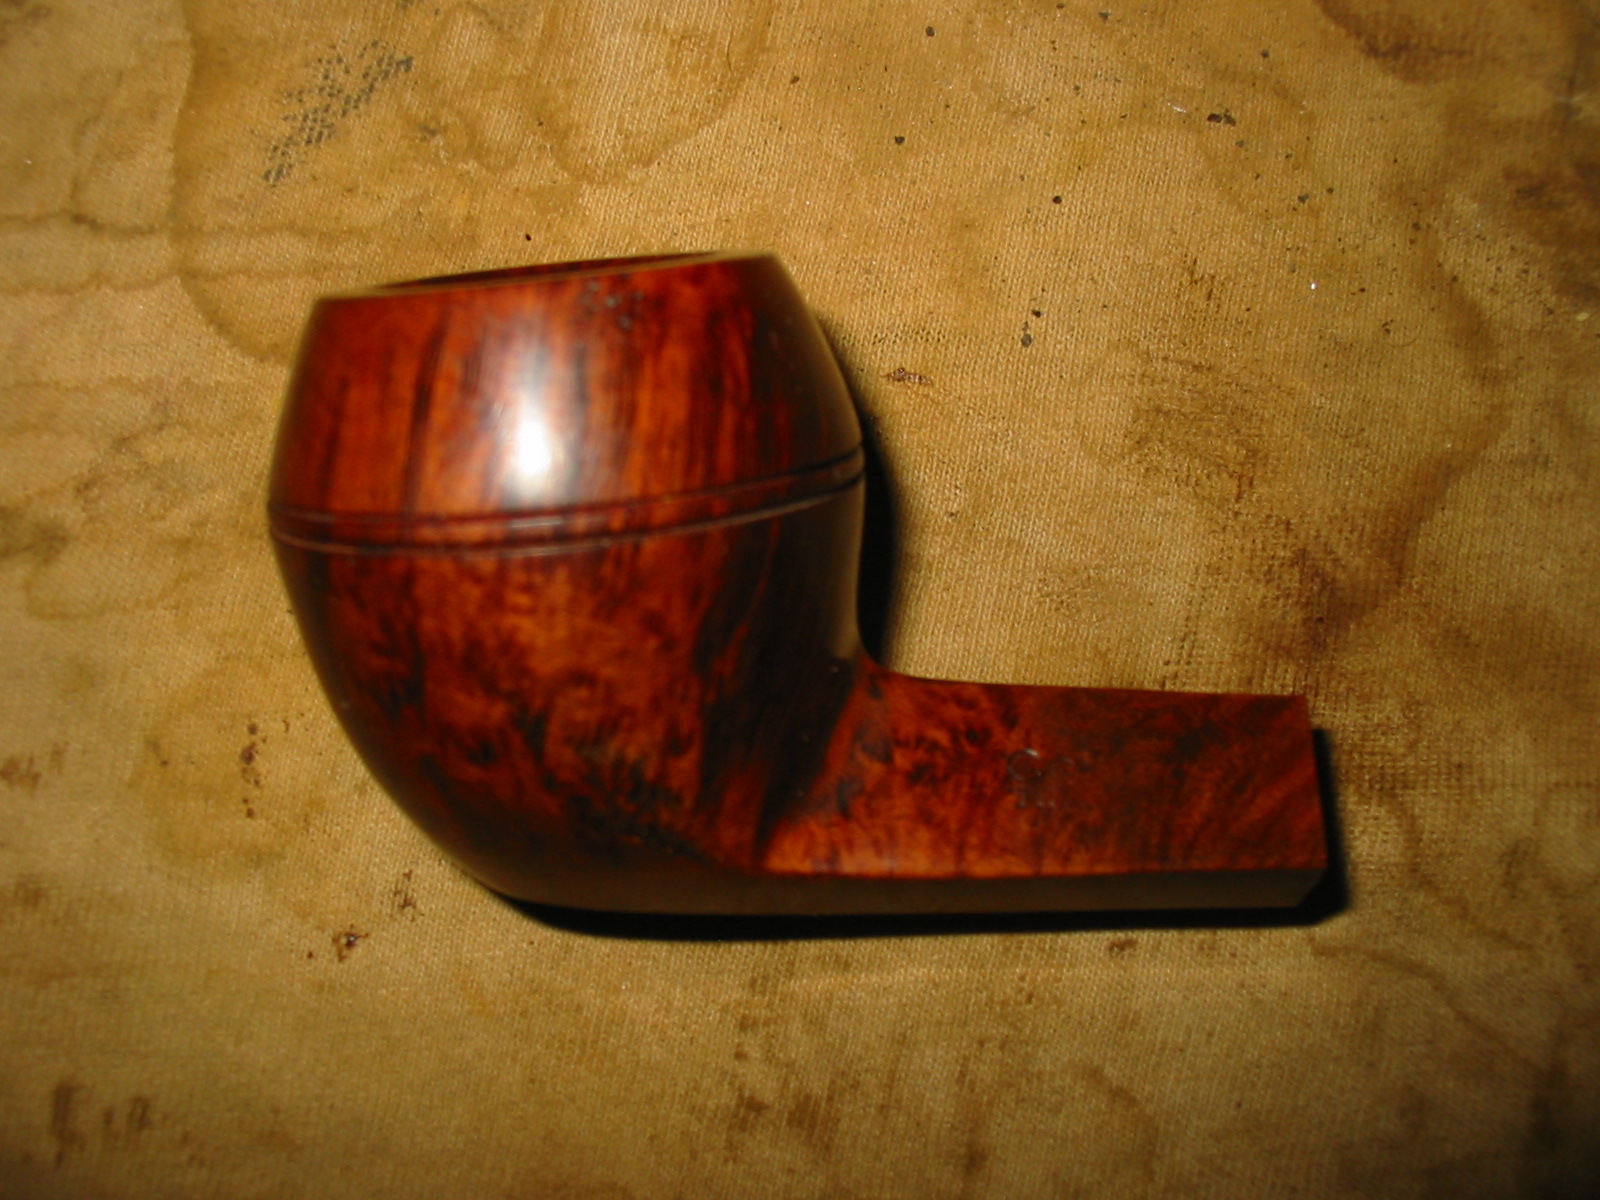
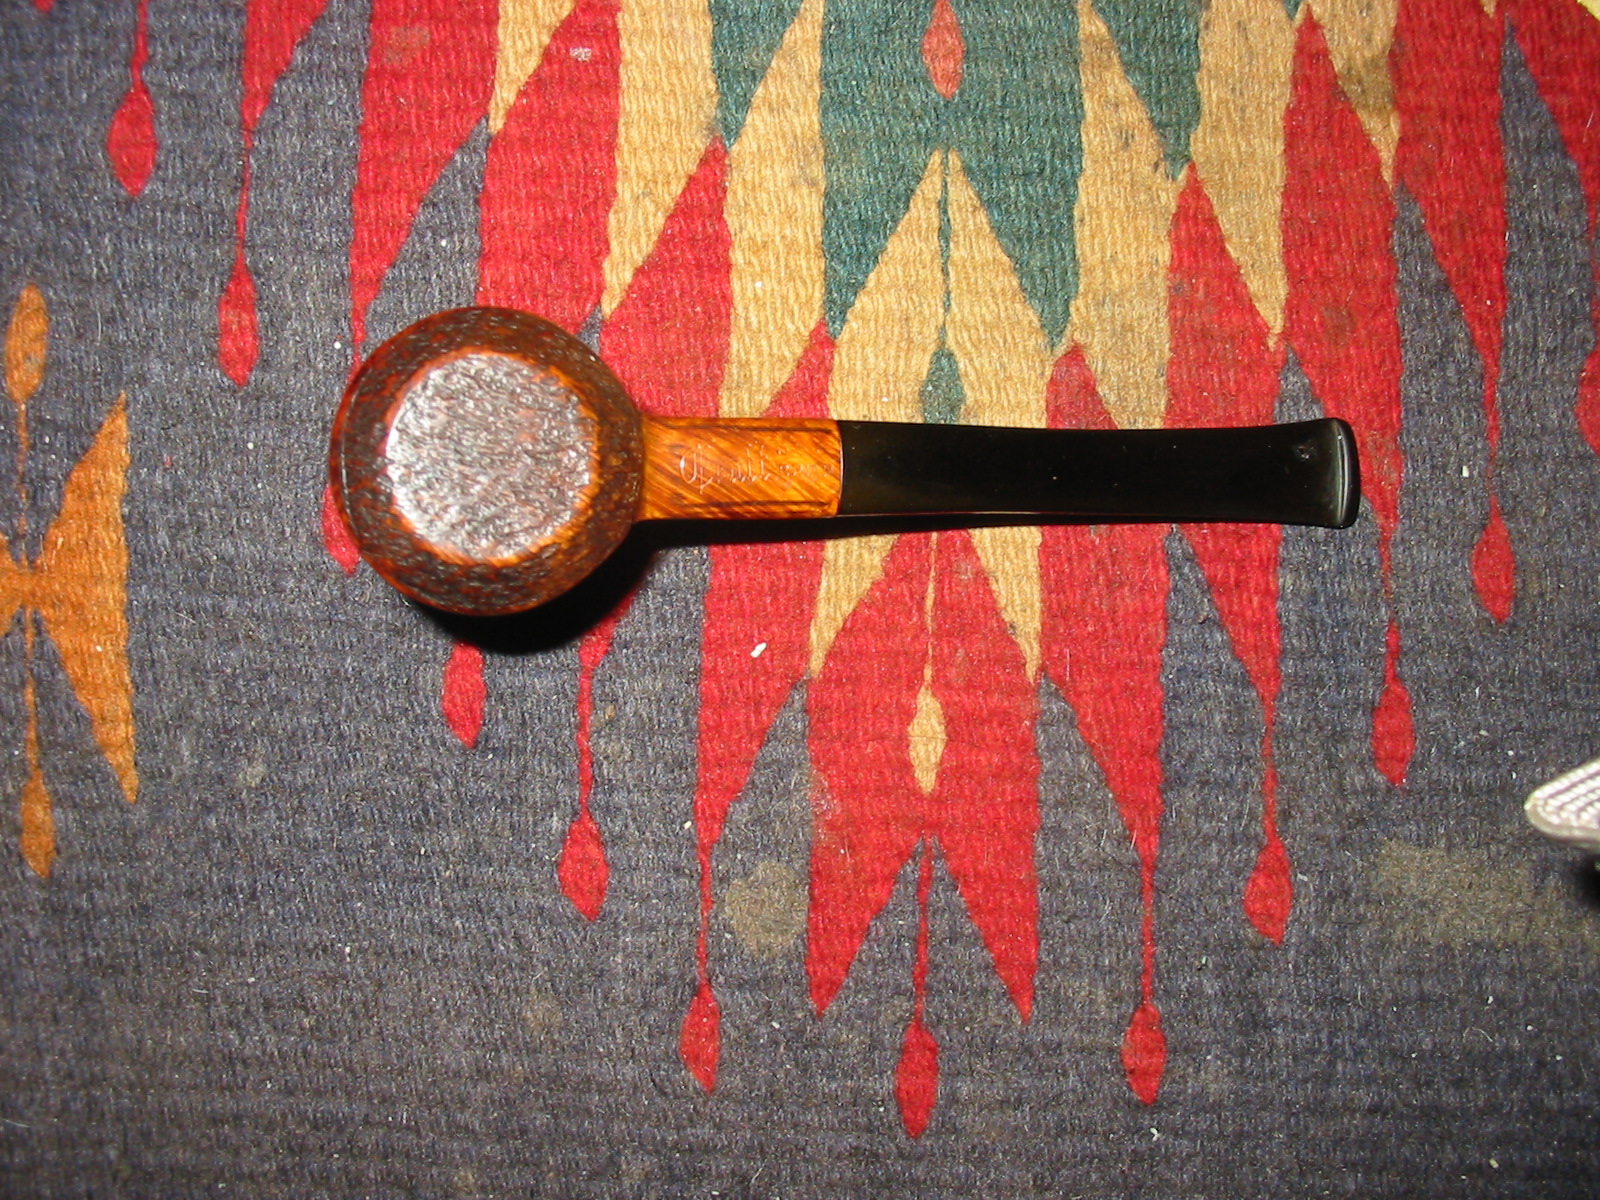
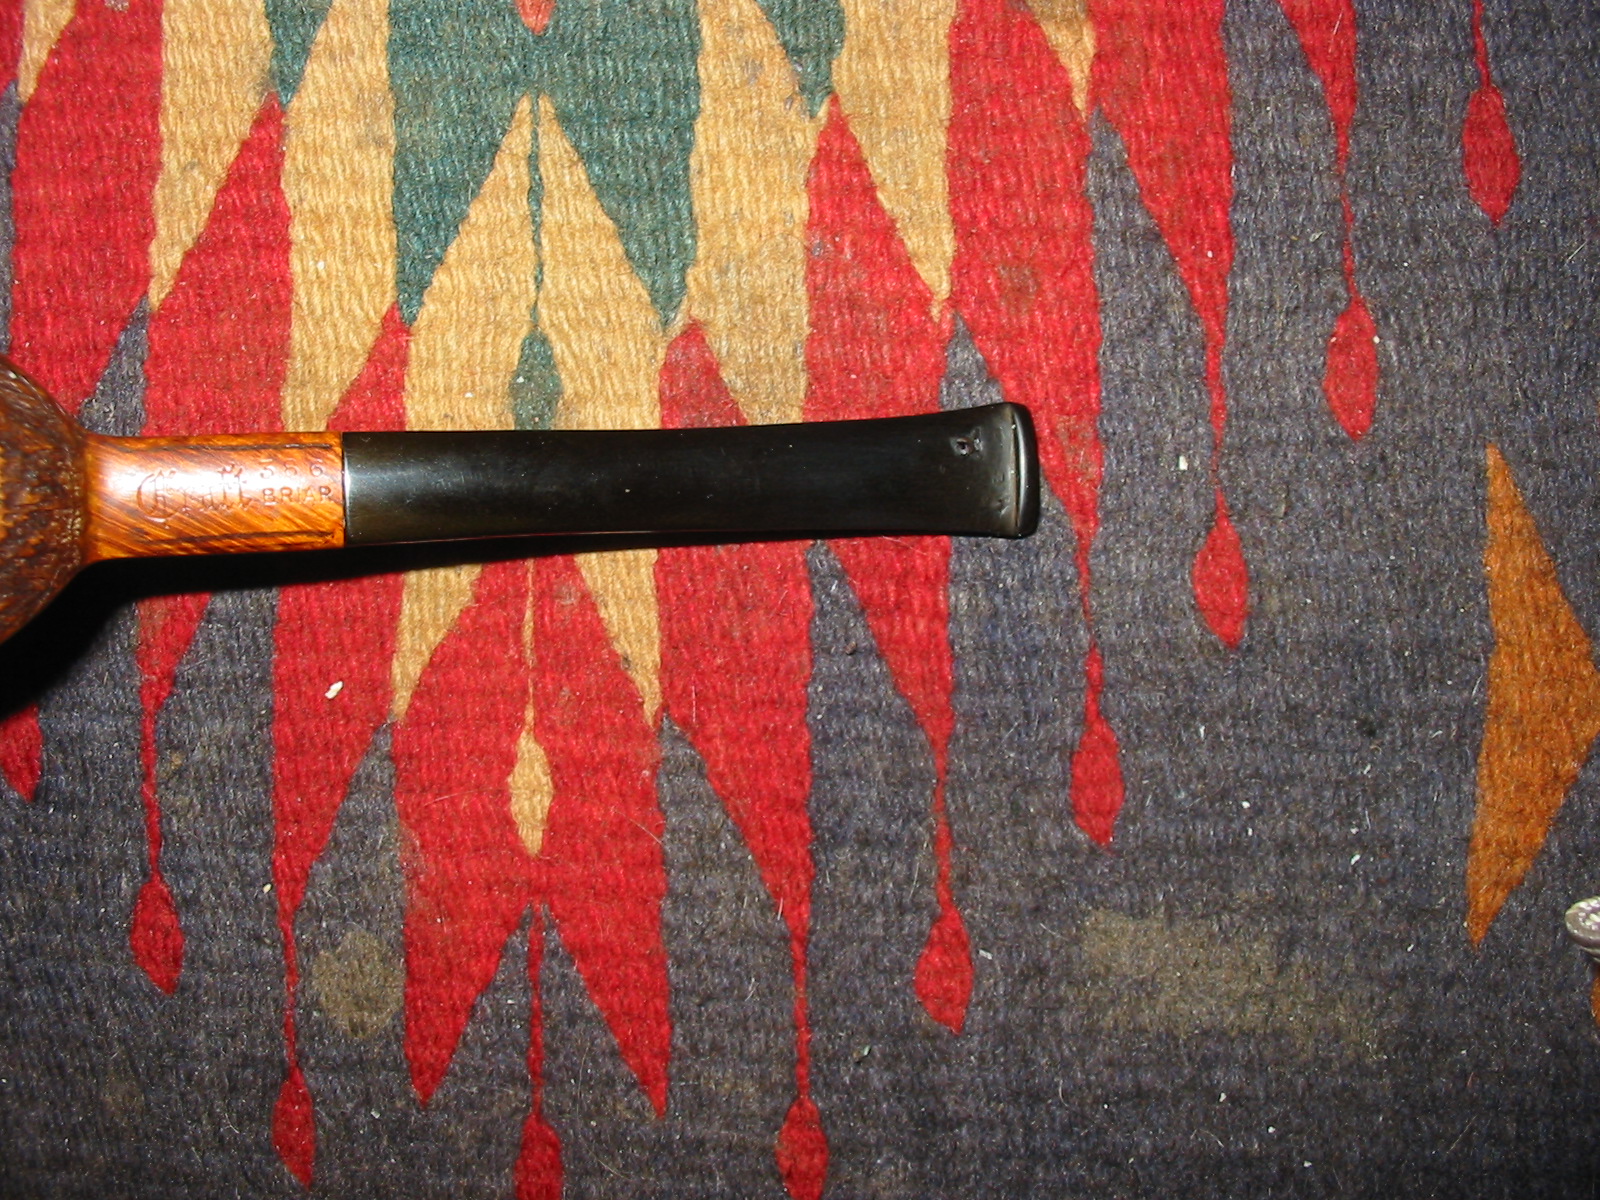
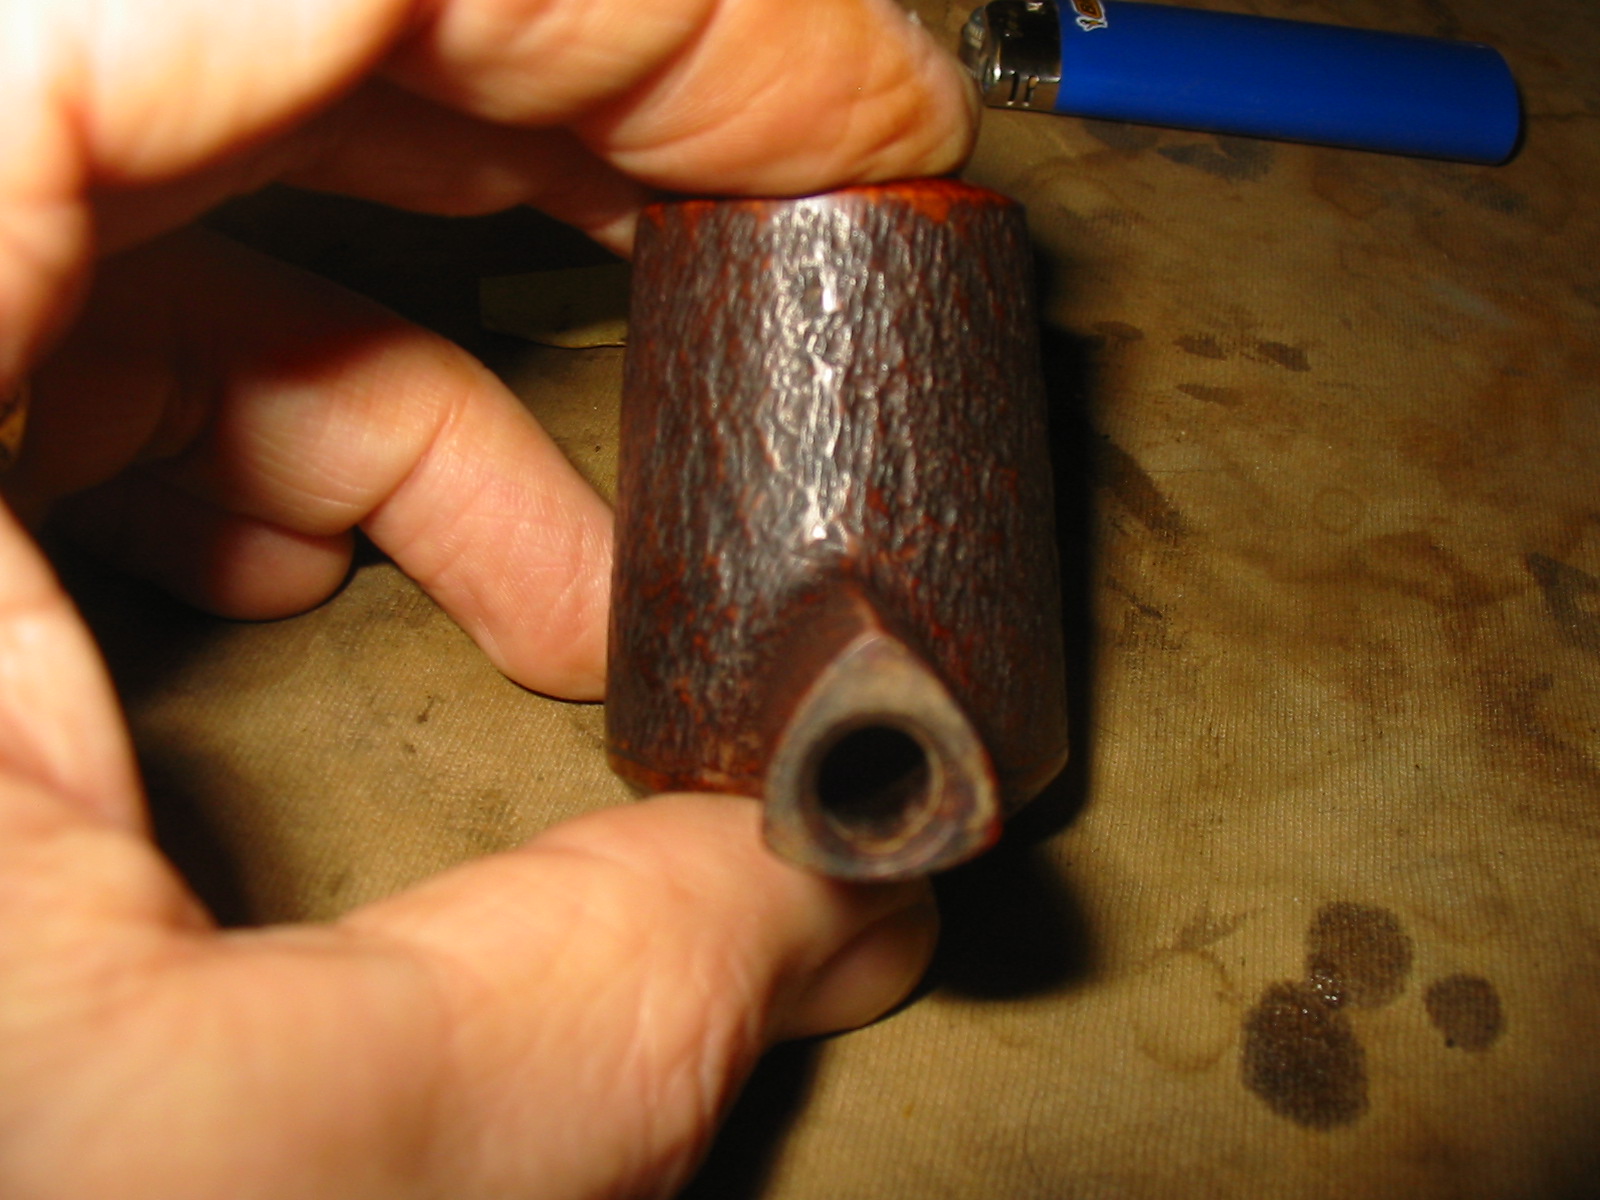
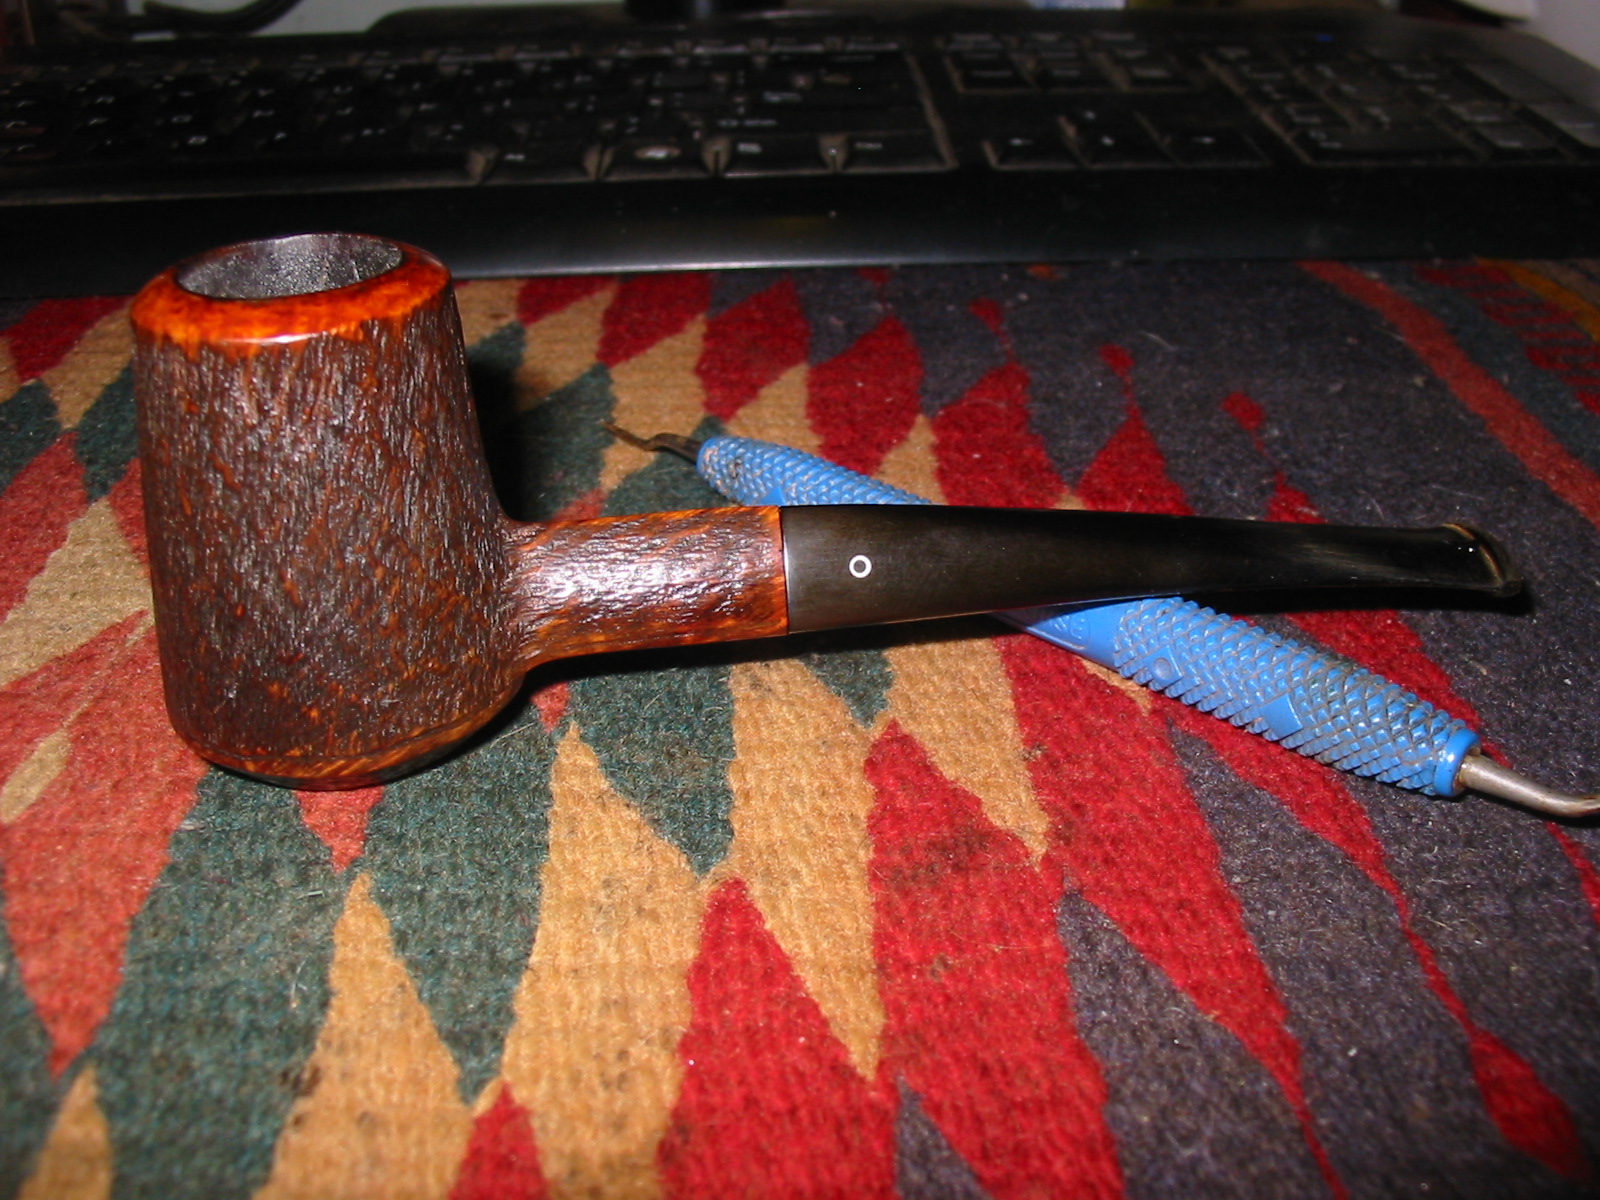
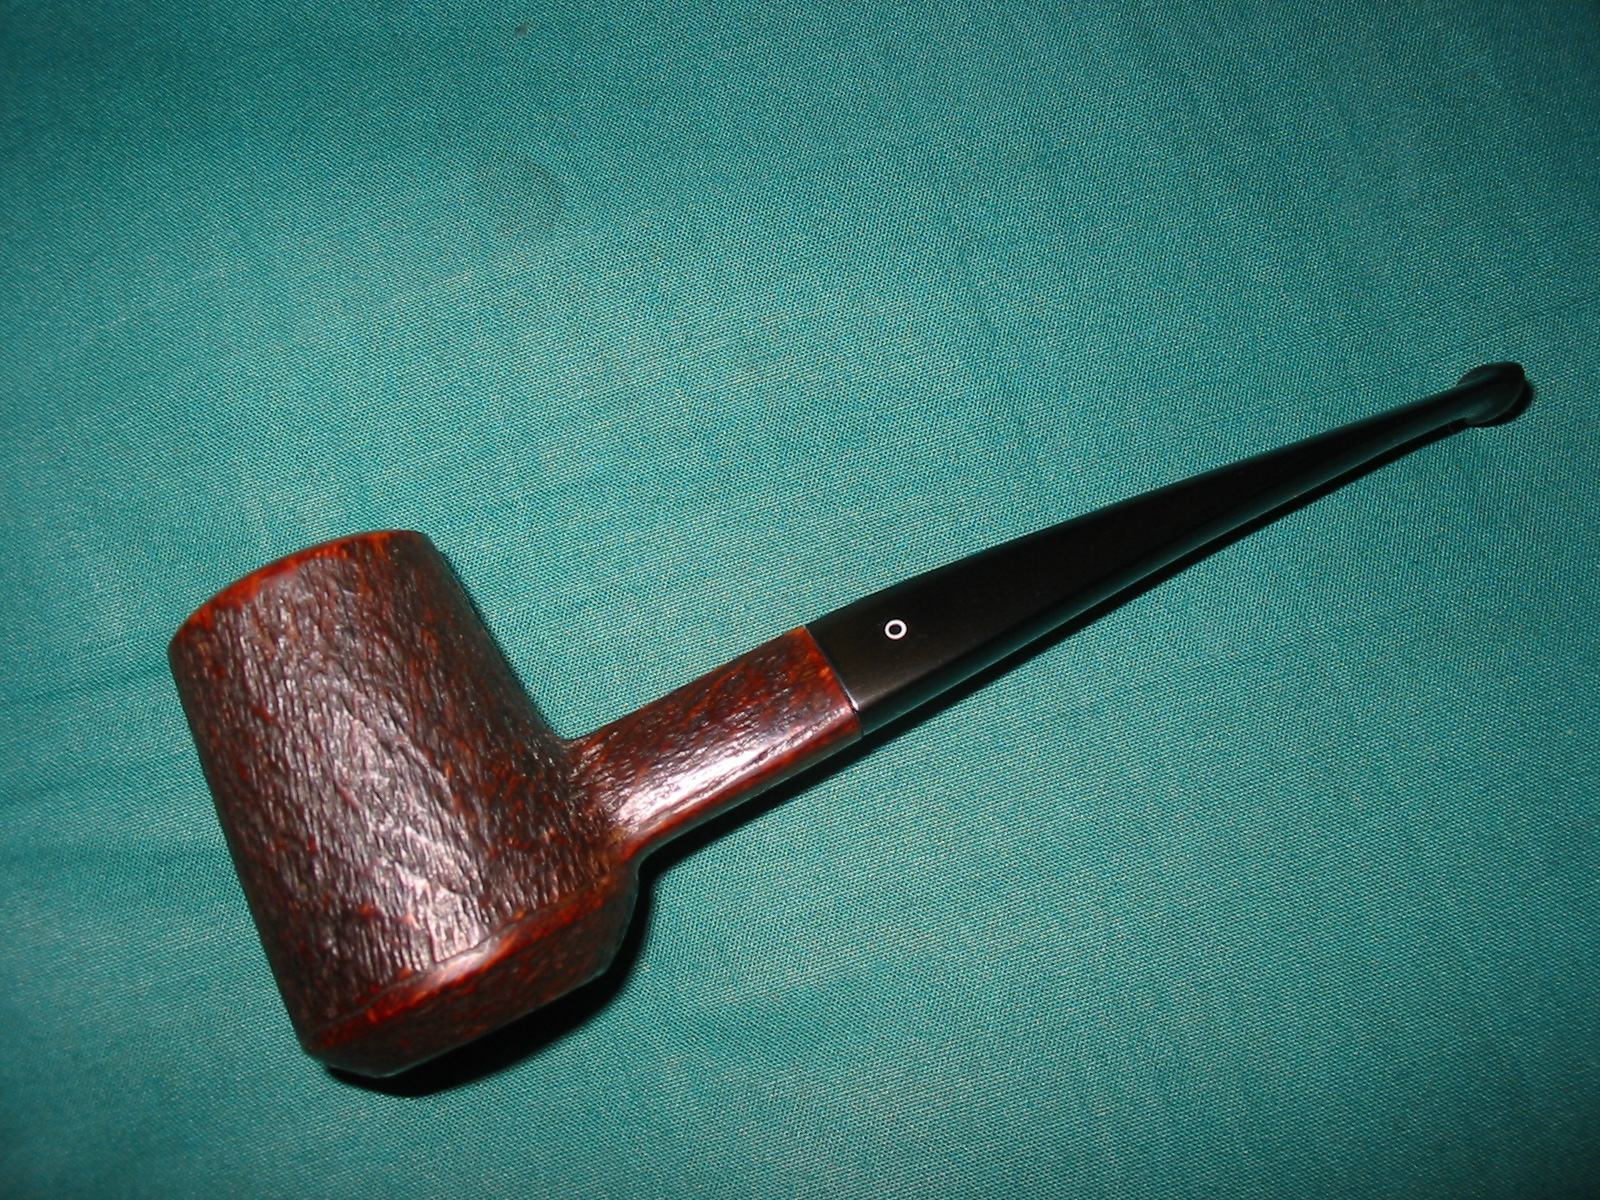
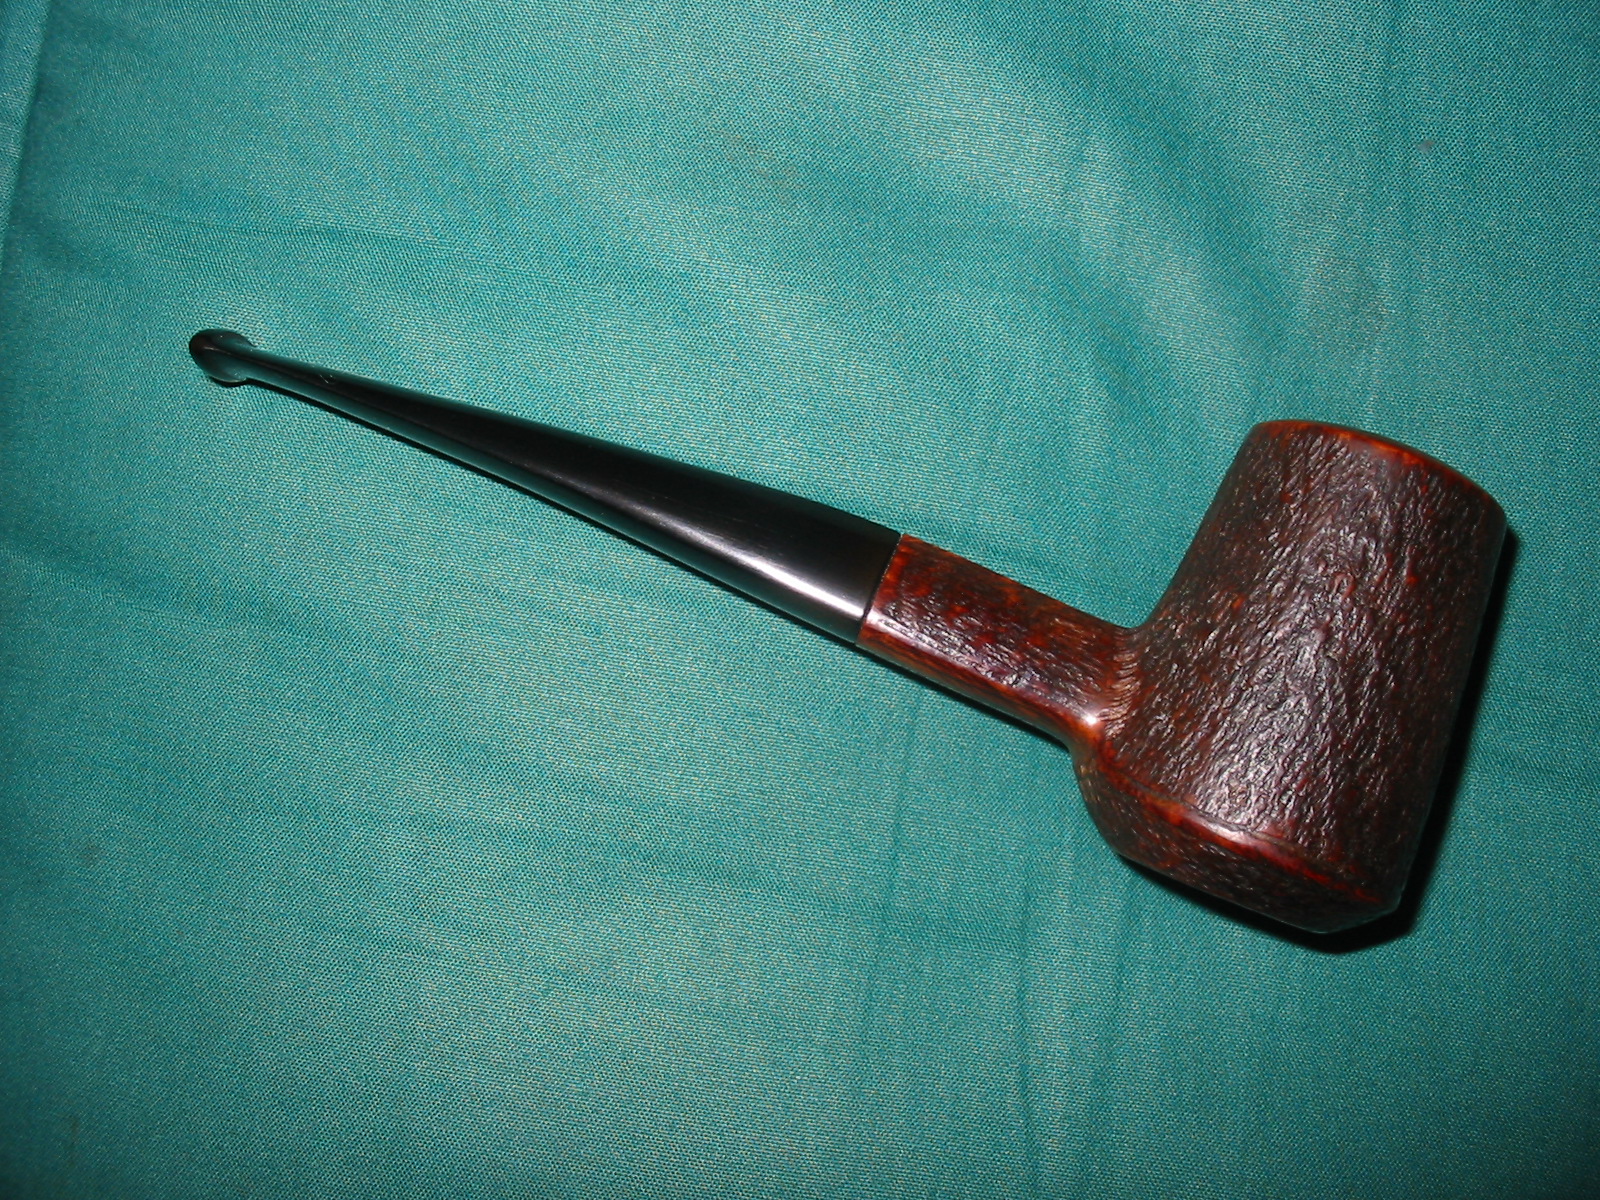
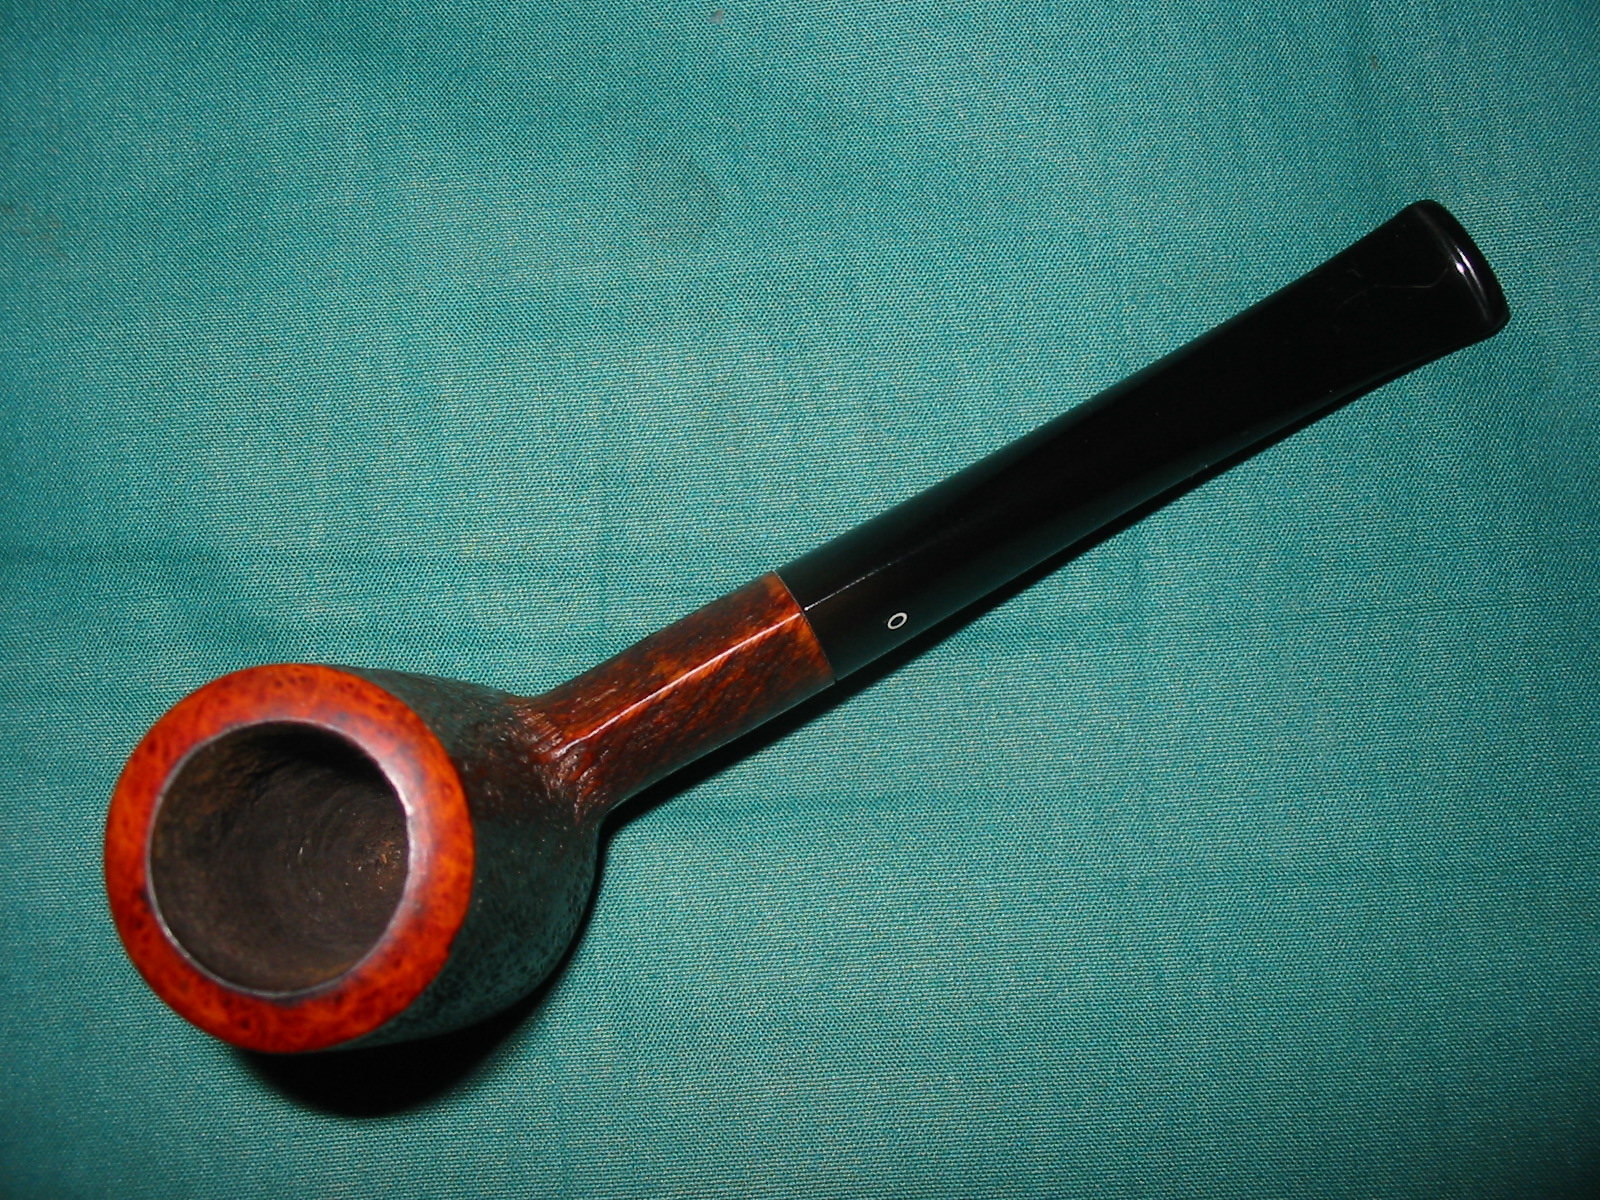
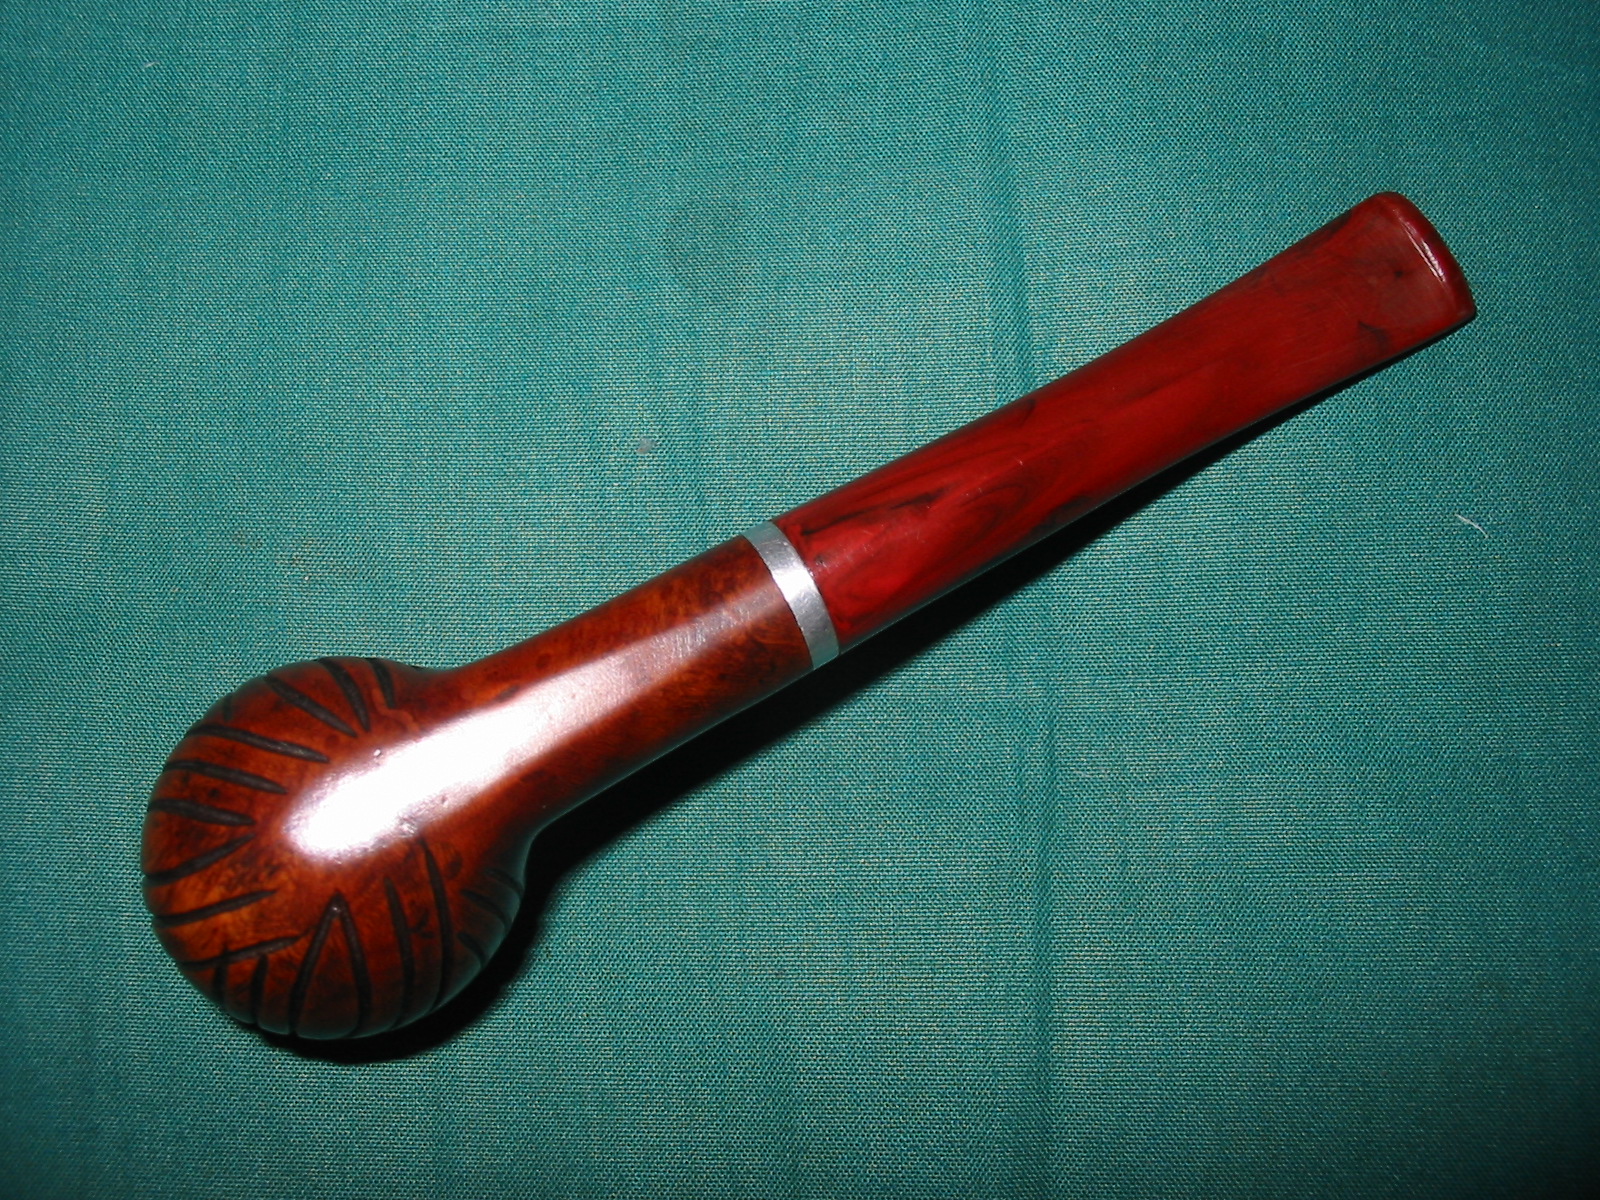
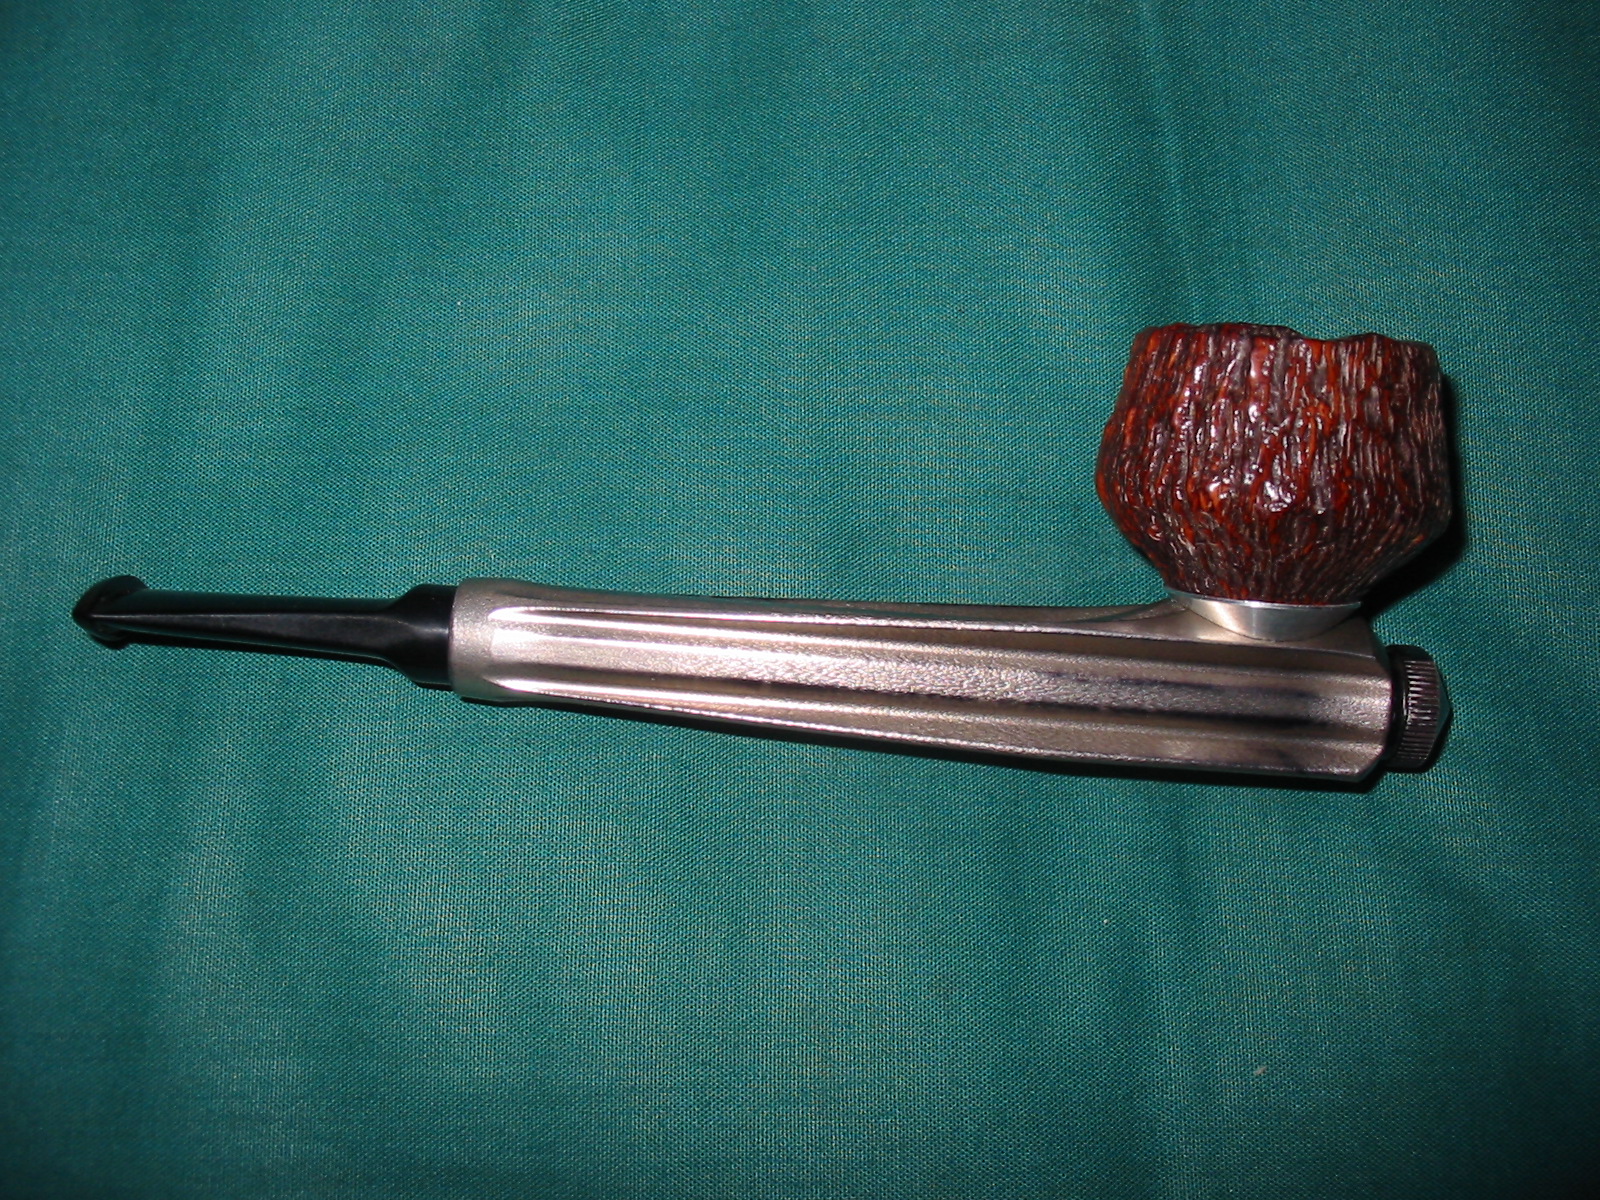
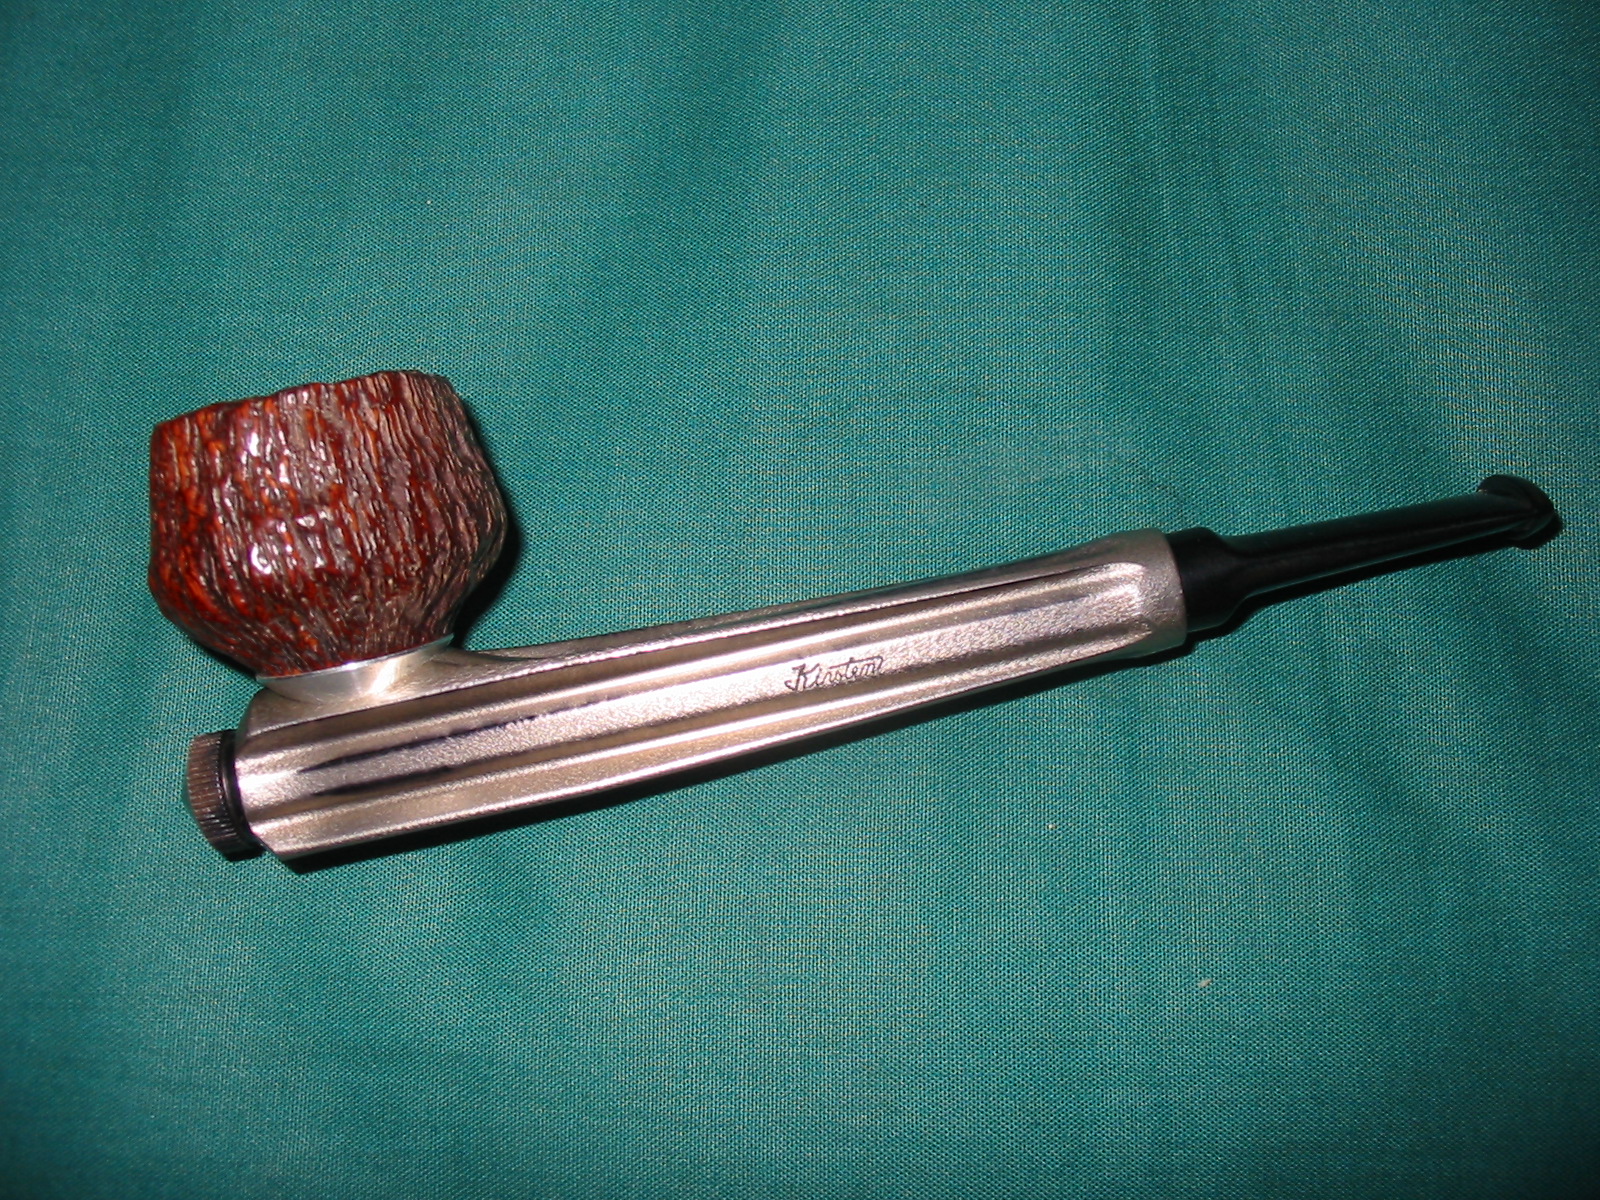
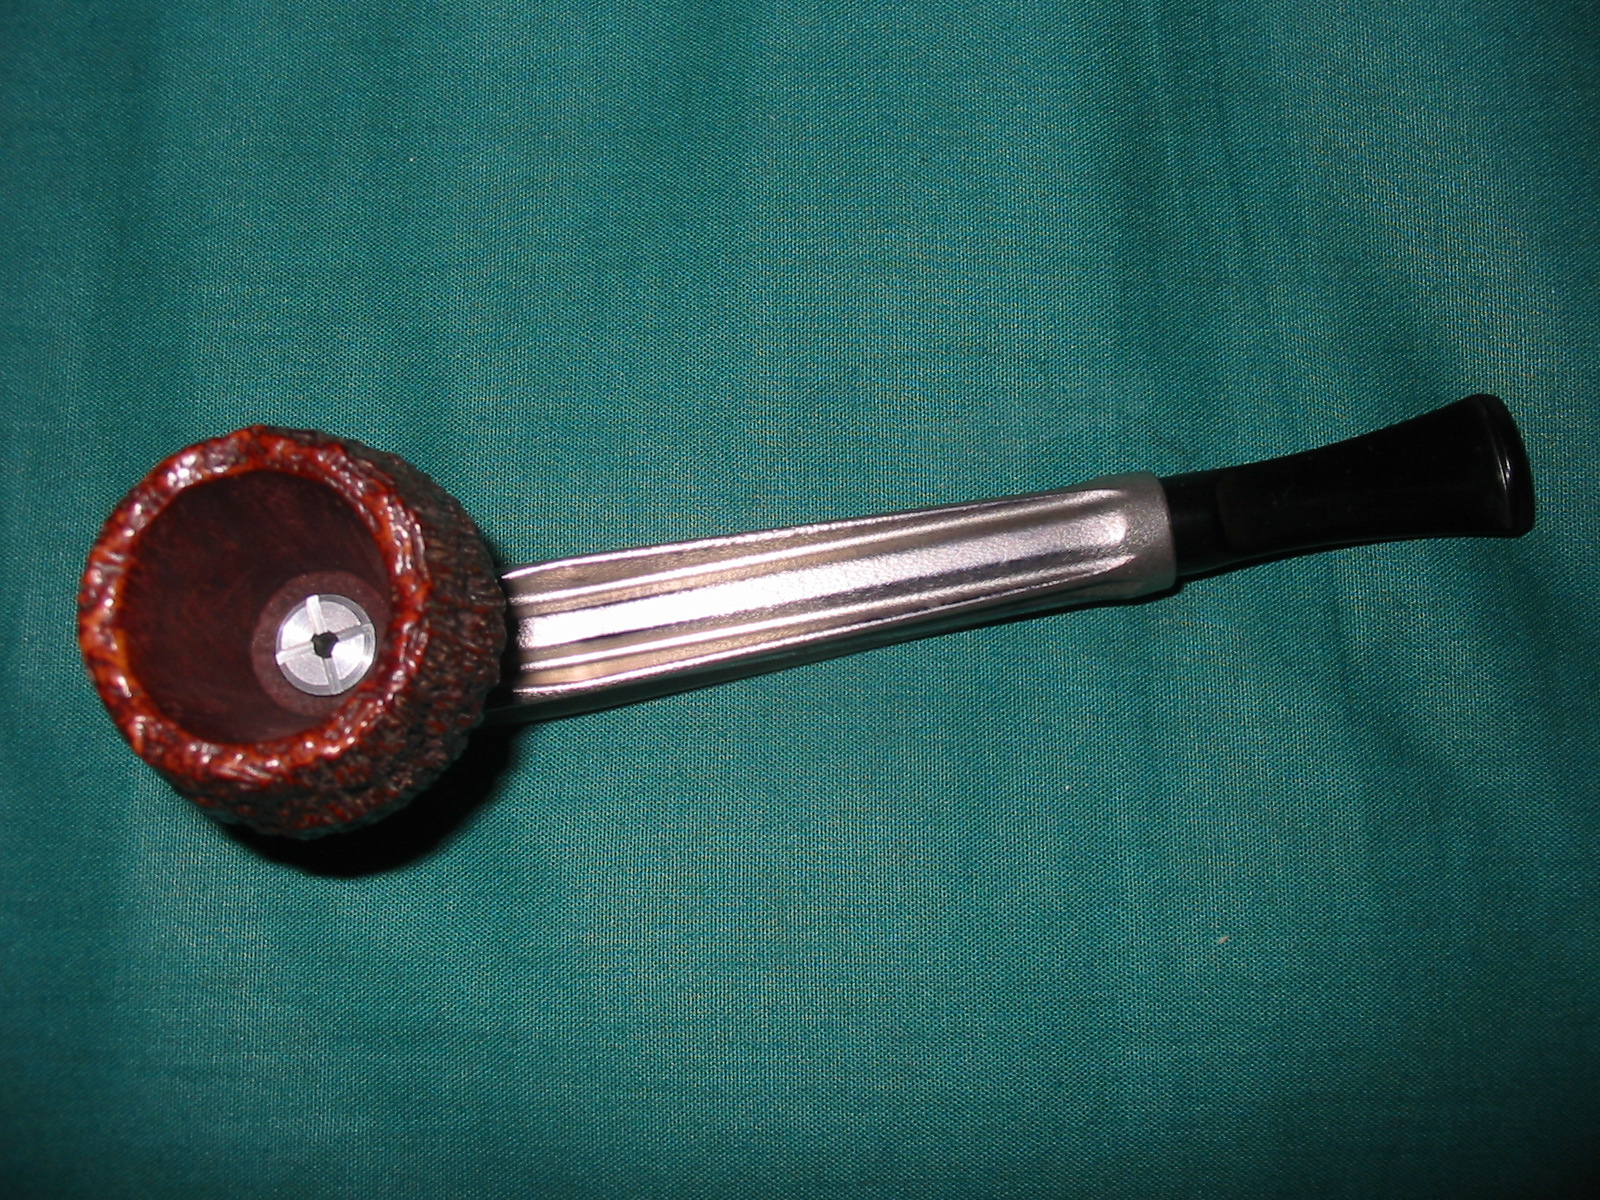
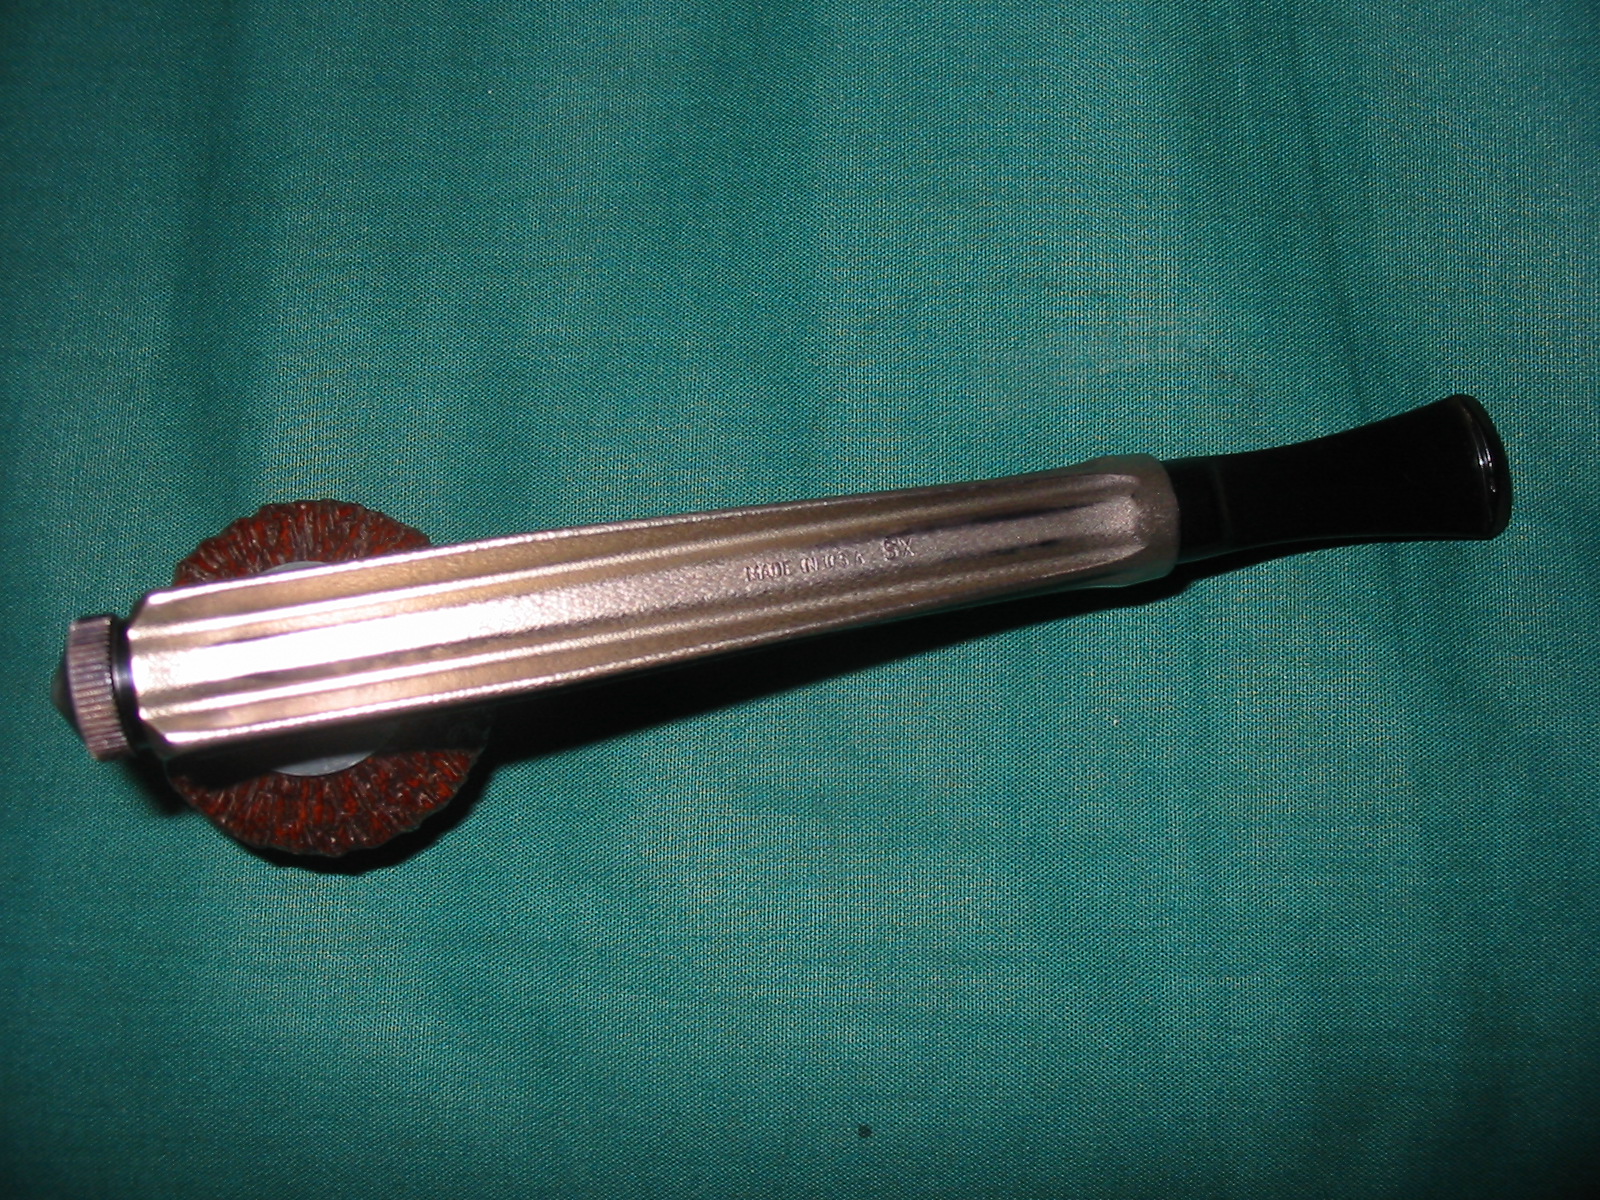
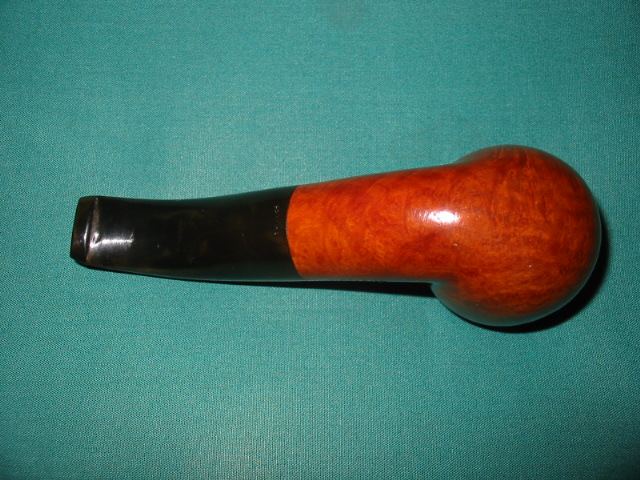
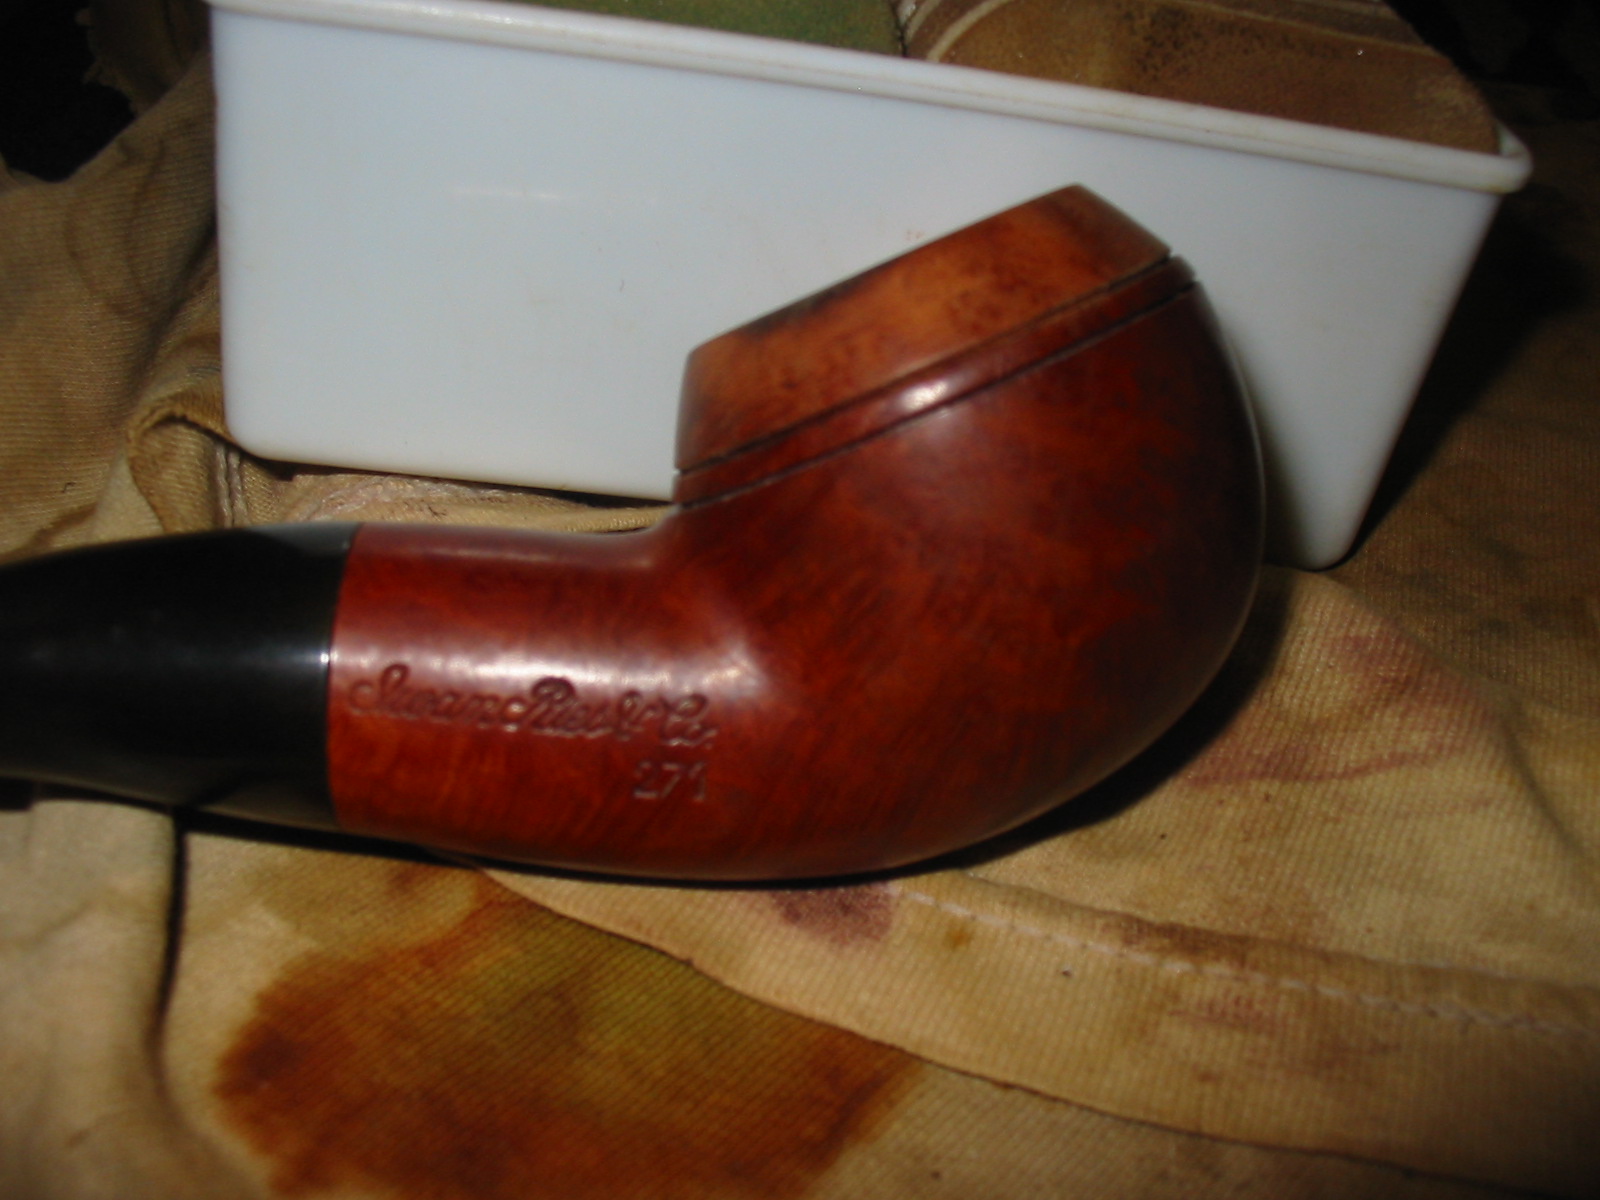
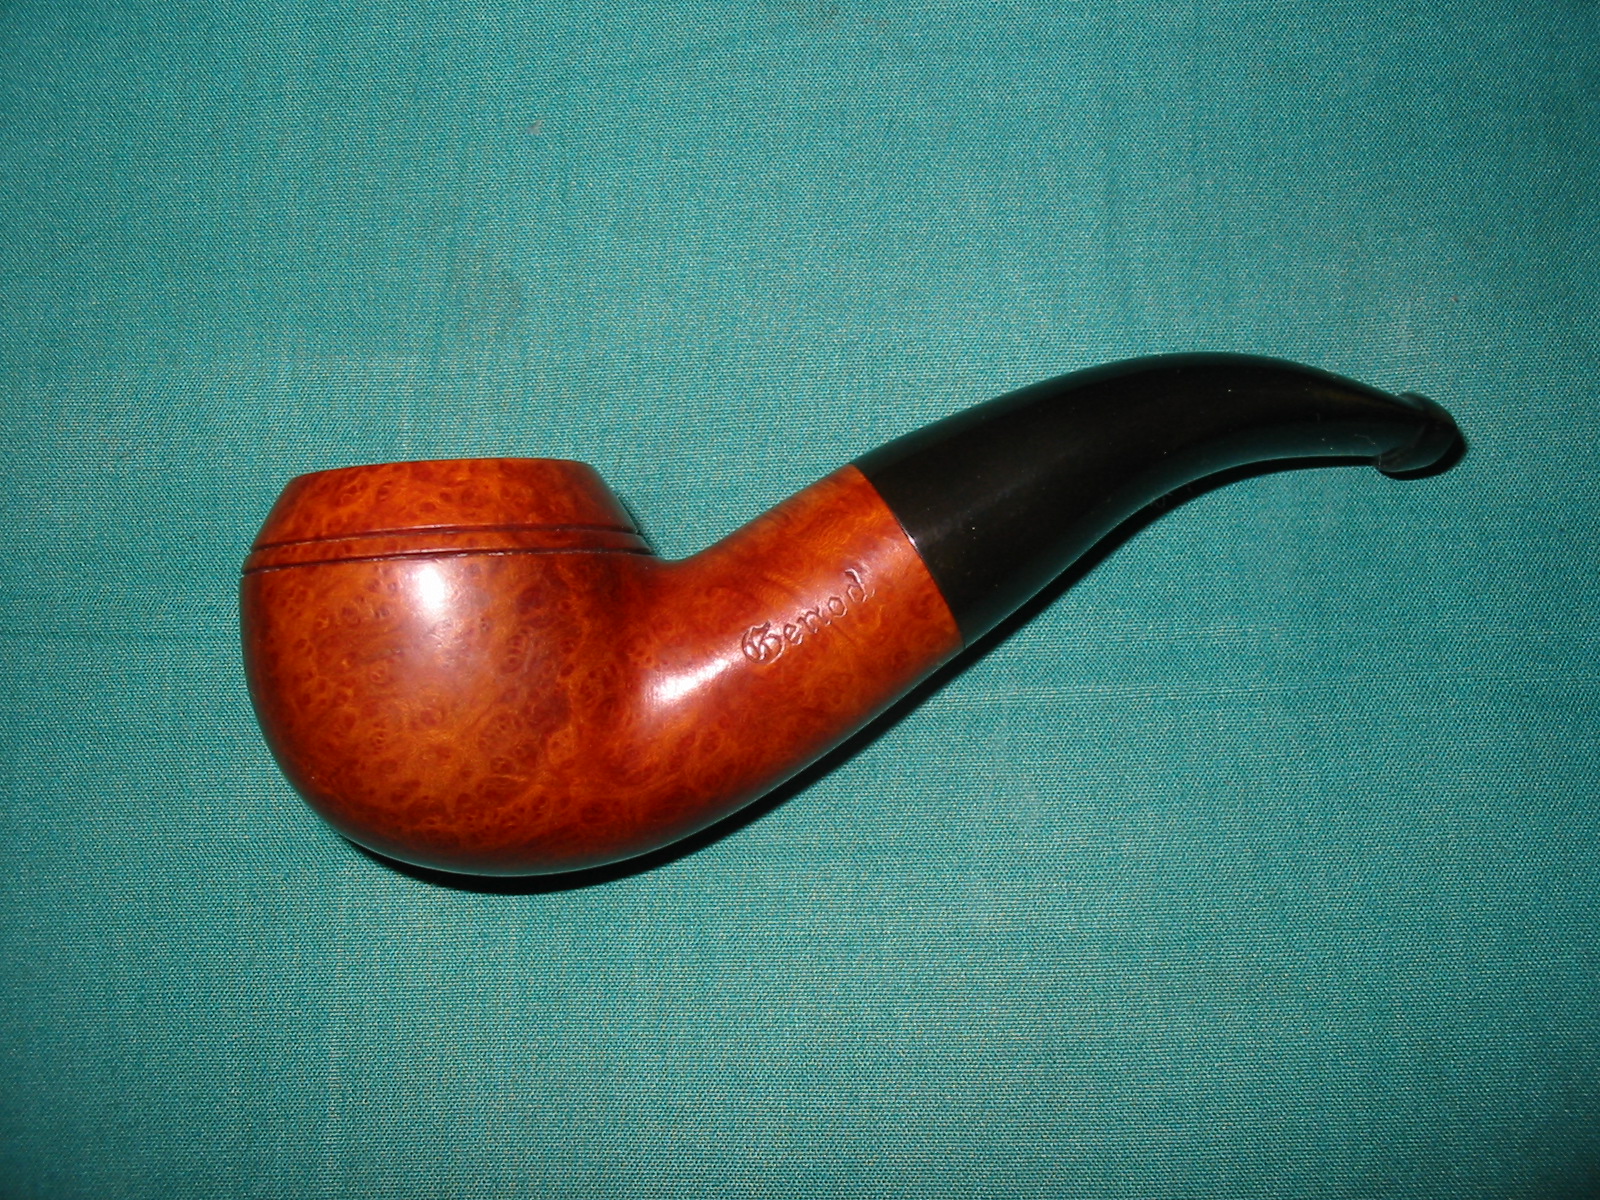
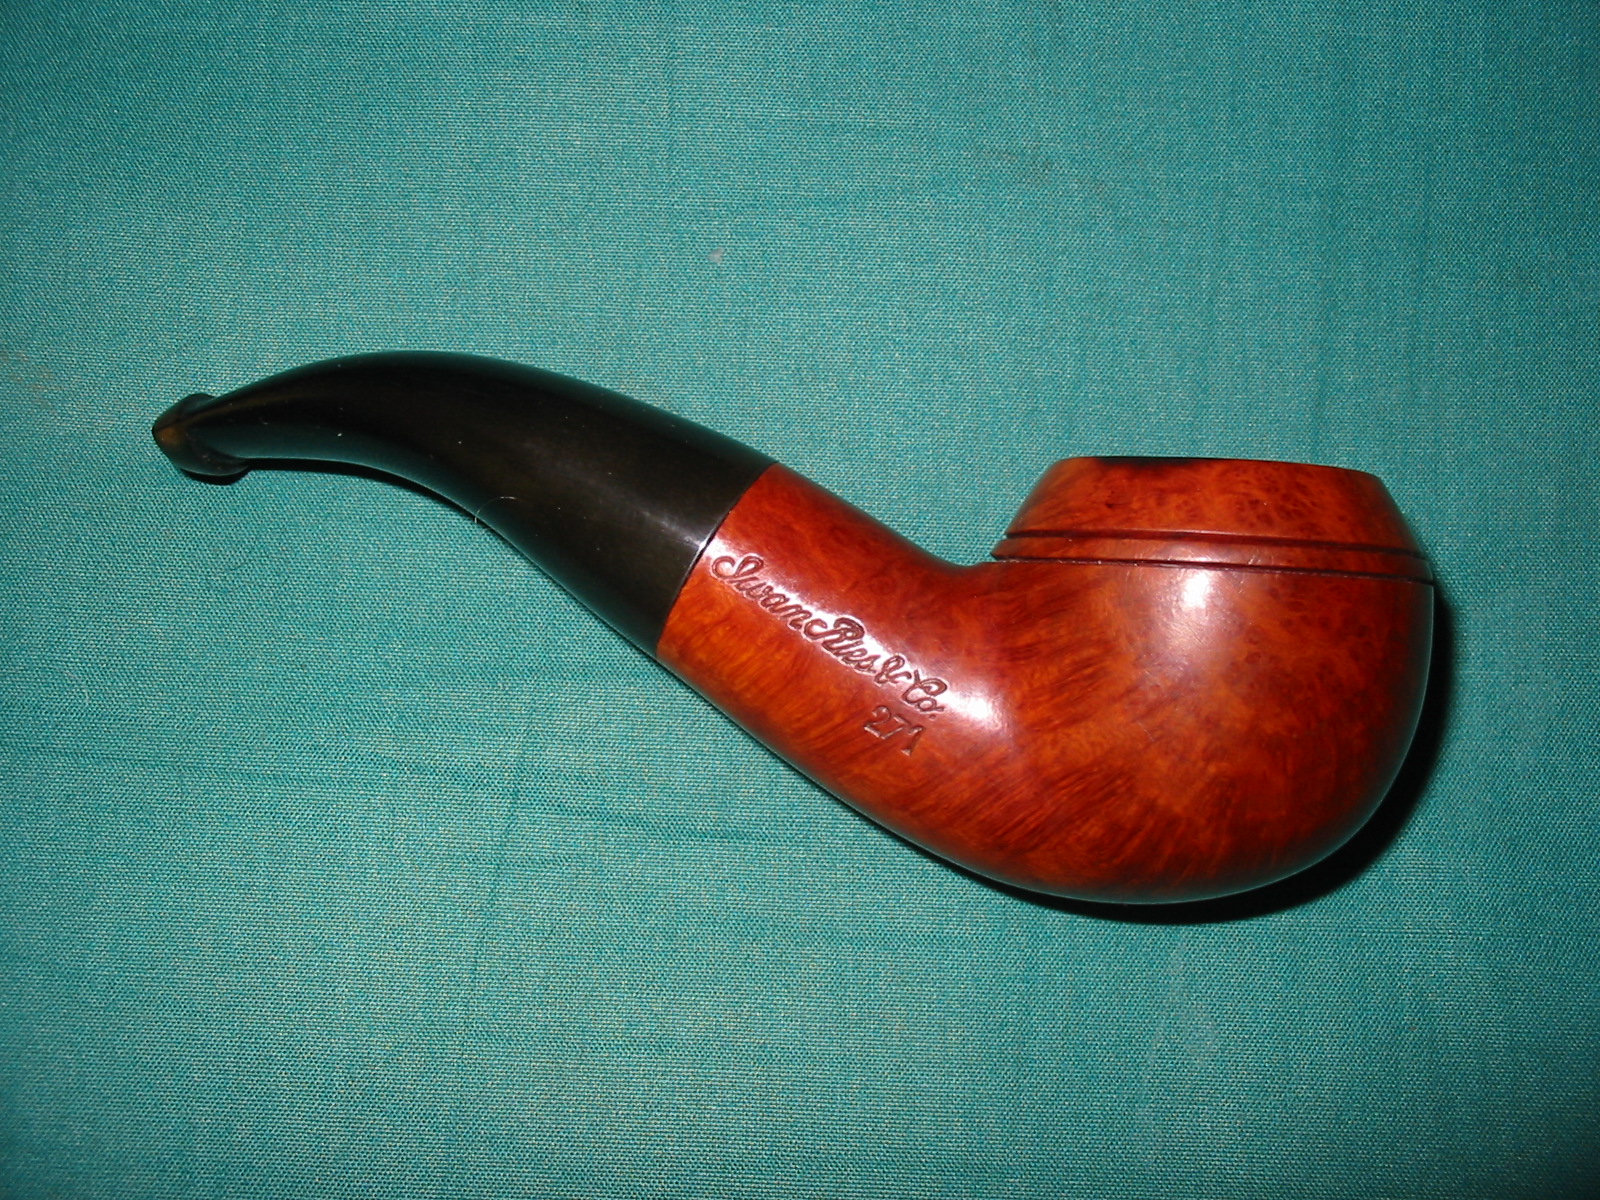
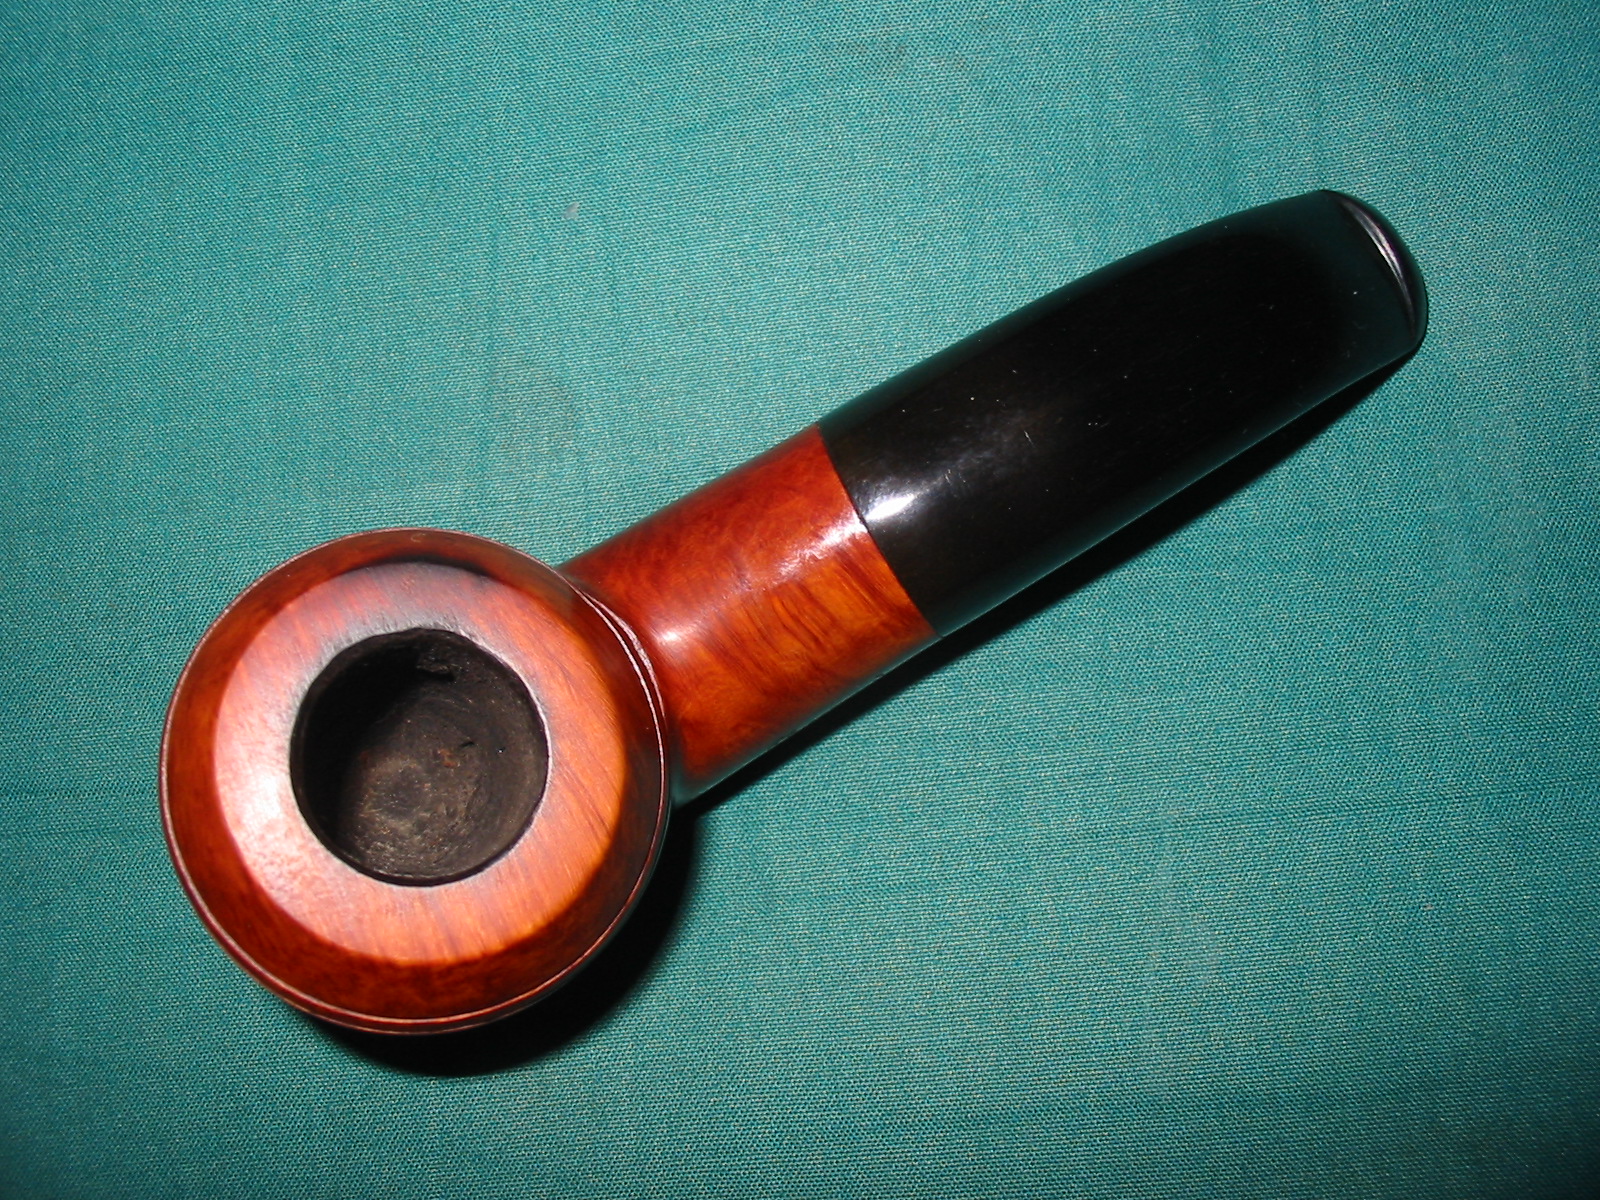
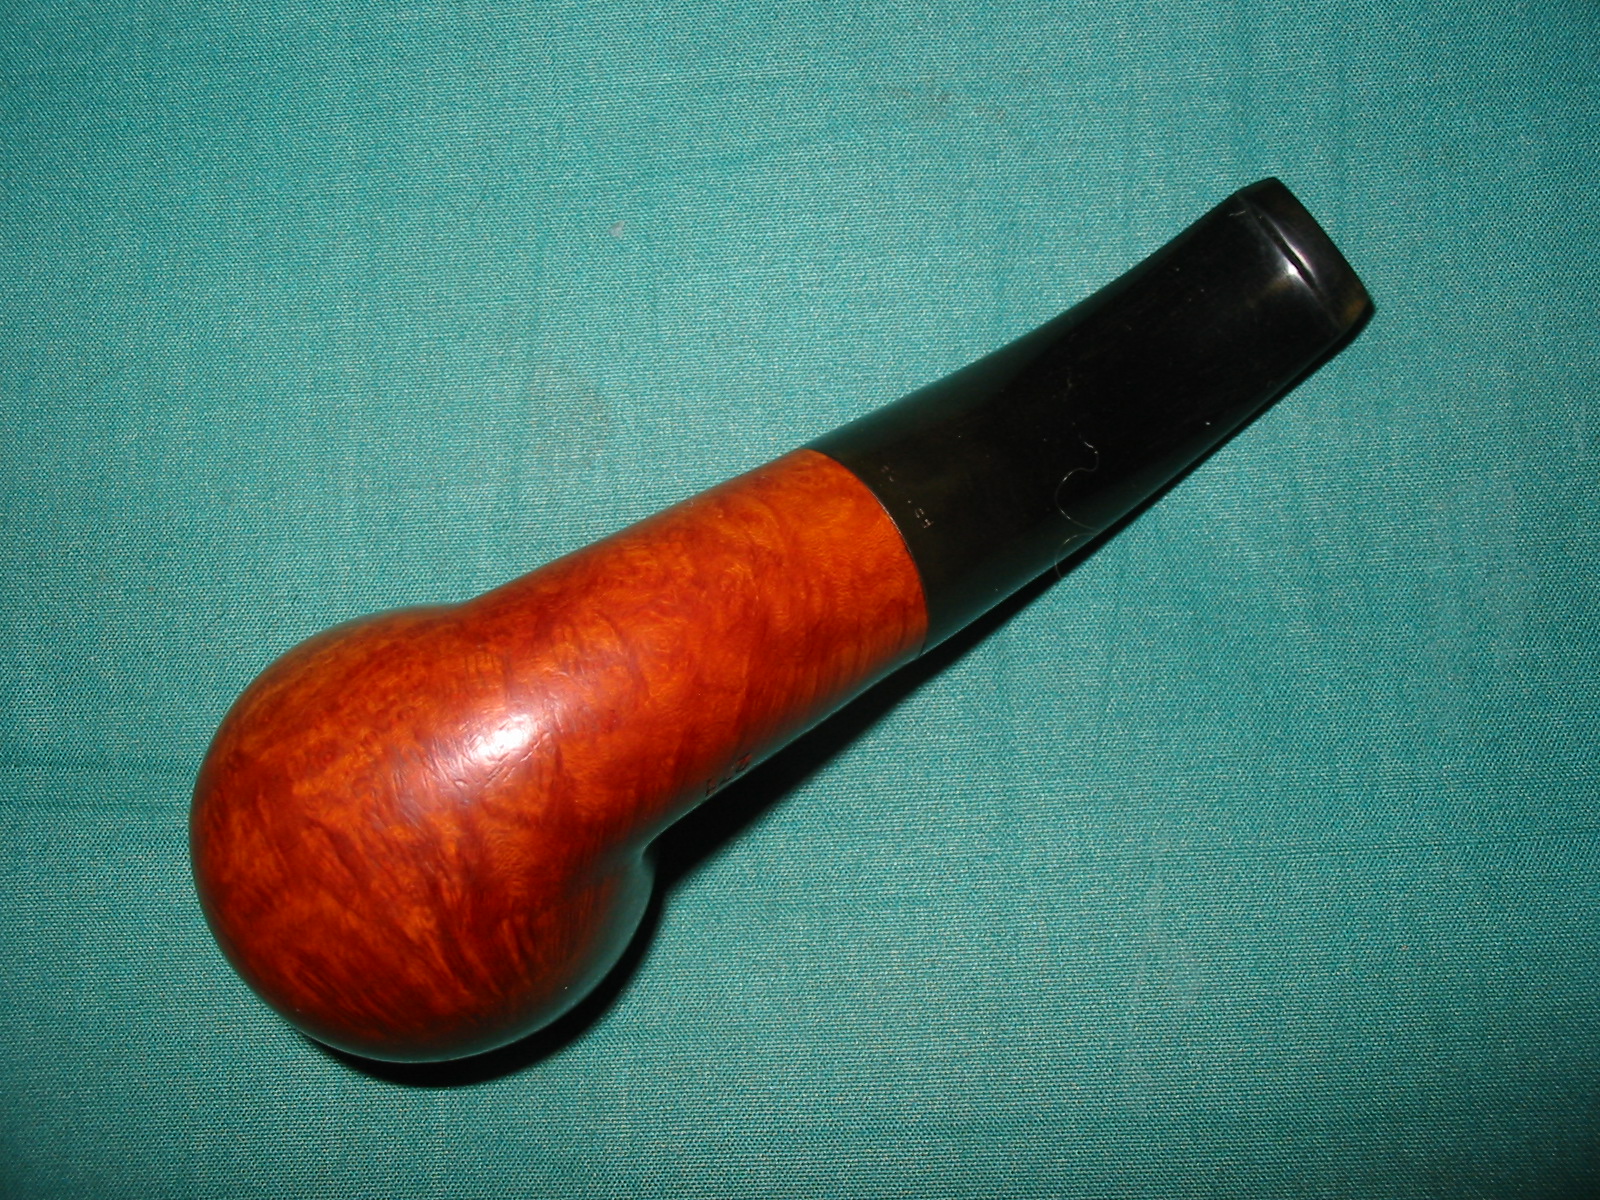
While she spoke I checked out the pipe I wanted. It was stamped on the bottom of its triangular shank, Craft in a Germanic Script and next to that Briar. Stamped above Briar was the number 386. It had an unusual rustication patter on it, a smooth rim and smooth lines on the edges of the triangular shank, the end of the shank and around the rounded bowl bottom. The bottom of the shank was smooth as well. The stem was clean and well fit, with slight oxidation around the shank. There were deep tooth marks on the top and bottom of the stem. The bowl was quite clean with a slight cake and the rim was relatively clean as well – a little tarry buildup at the back of the rim. There was no charring or burning. All of this was taken in while she waxed on about taking every opportunity to by the Savinelli.

When she paused for a breath I asked her the price on the pipe in my hands, knowing full well that there was a price tag on the underside of the stem. Without missing a beat she said, “You want that one? I will make a deal”. Ah, now I knew I could make an offer for the pipe. Too low an offer and she would be insulted but too little a variation from her price would insult her. What to do. I quickly came to a price in my mind and spoke it out, “I will pay you $40 cash right now. No tax and no more for this pipe of less beauty than the one you love so much.” She smiled and nodded her head. “We have a deal,” she said and held out her hand for the cash. I was ready and had two brand new $20’s in hand and laid them on her upturned palm. She smiled and told me to enjoy the new pipe but to not let the beautiful one pass without taking it home too.

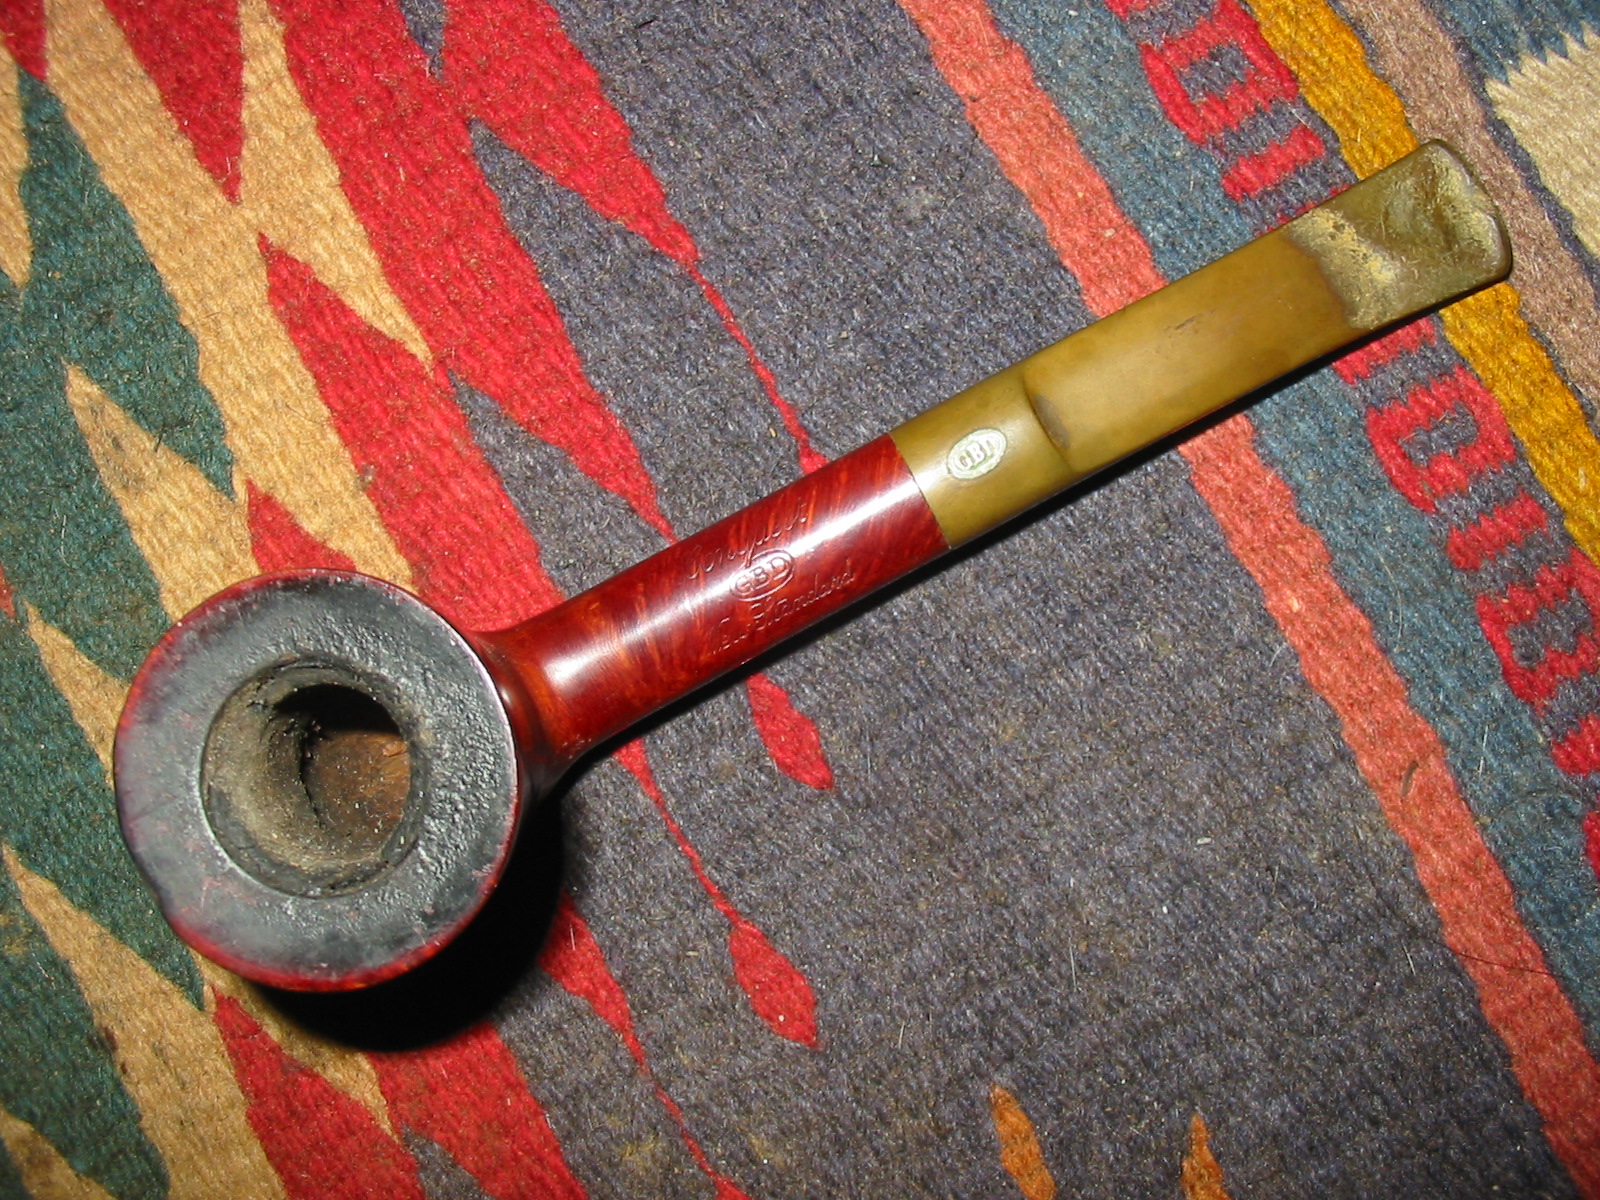
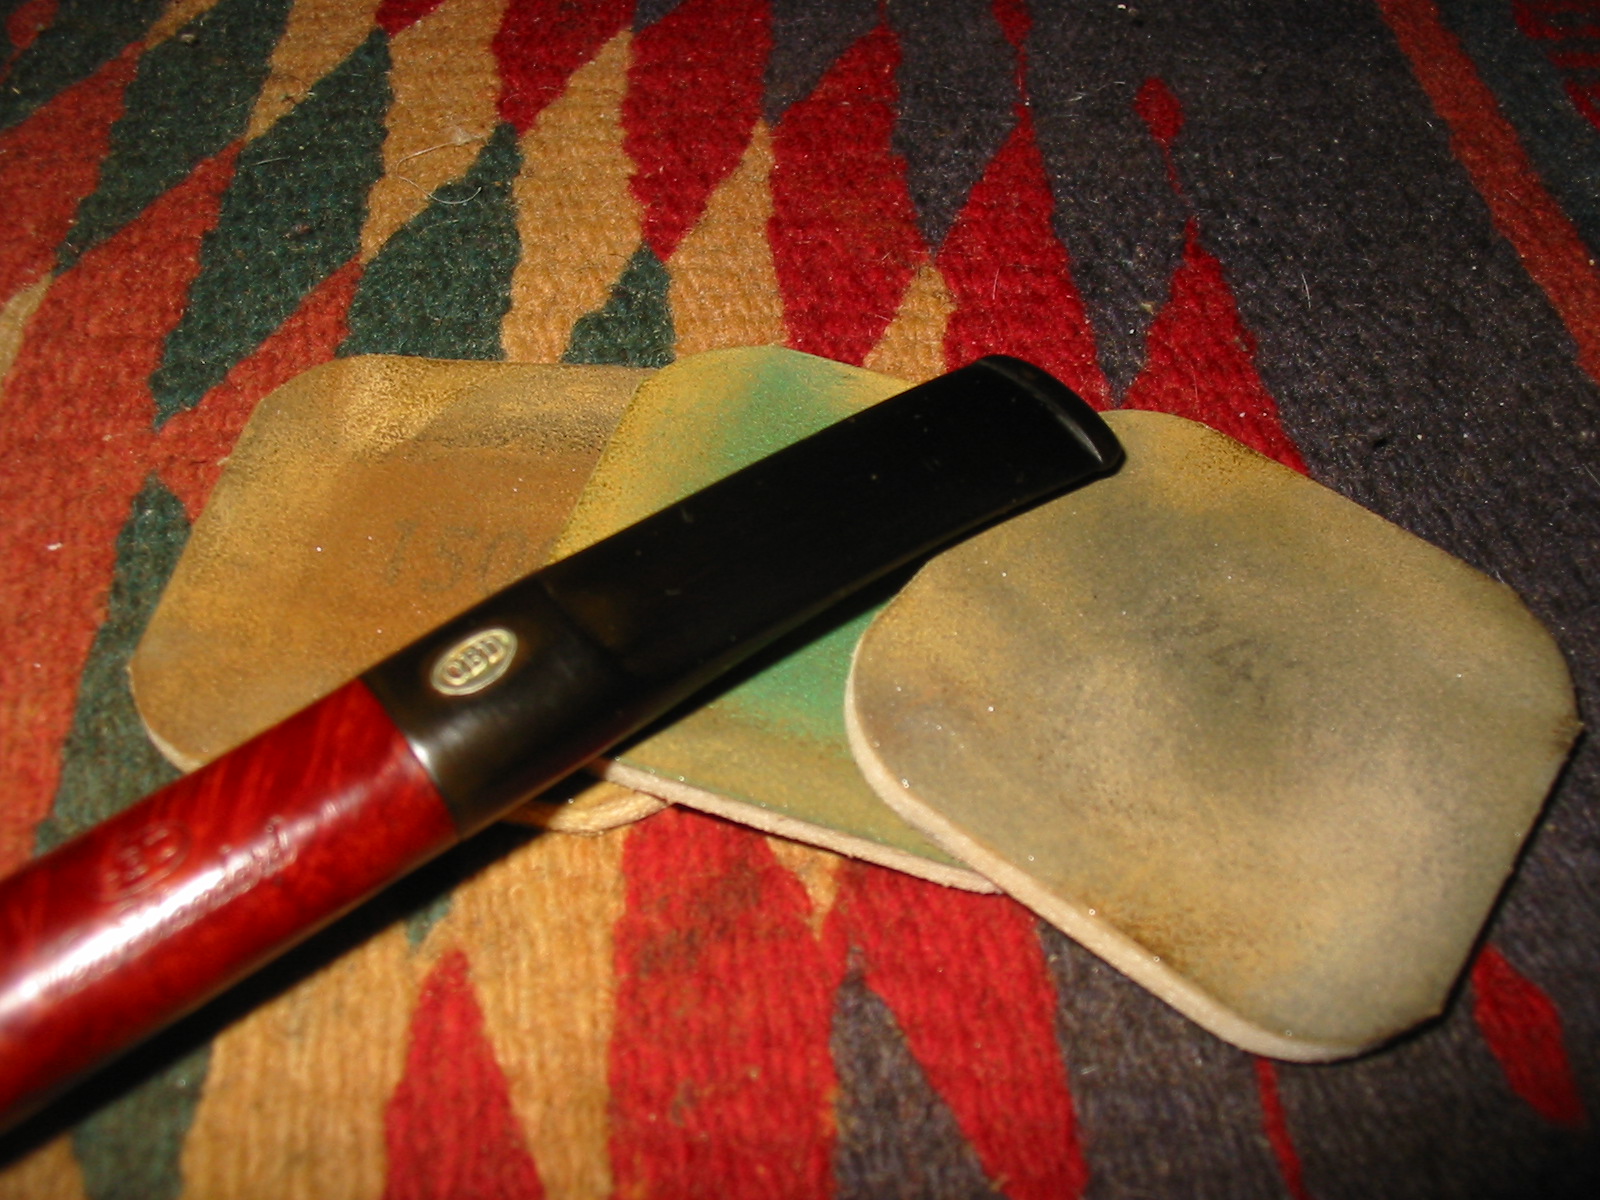
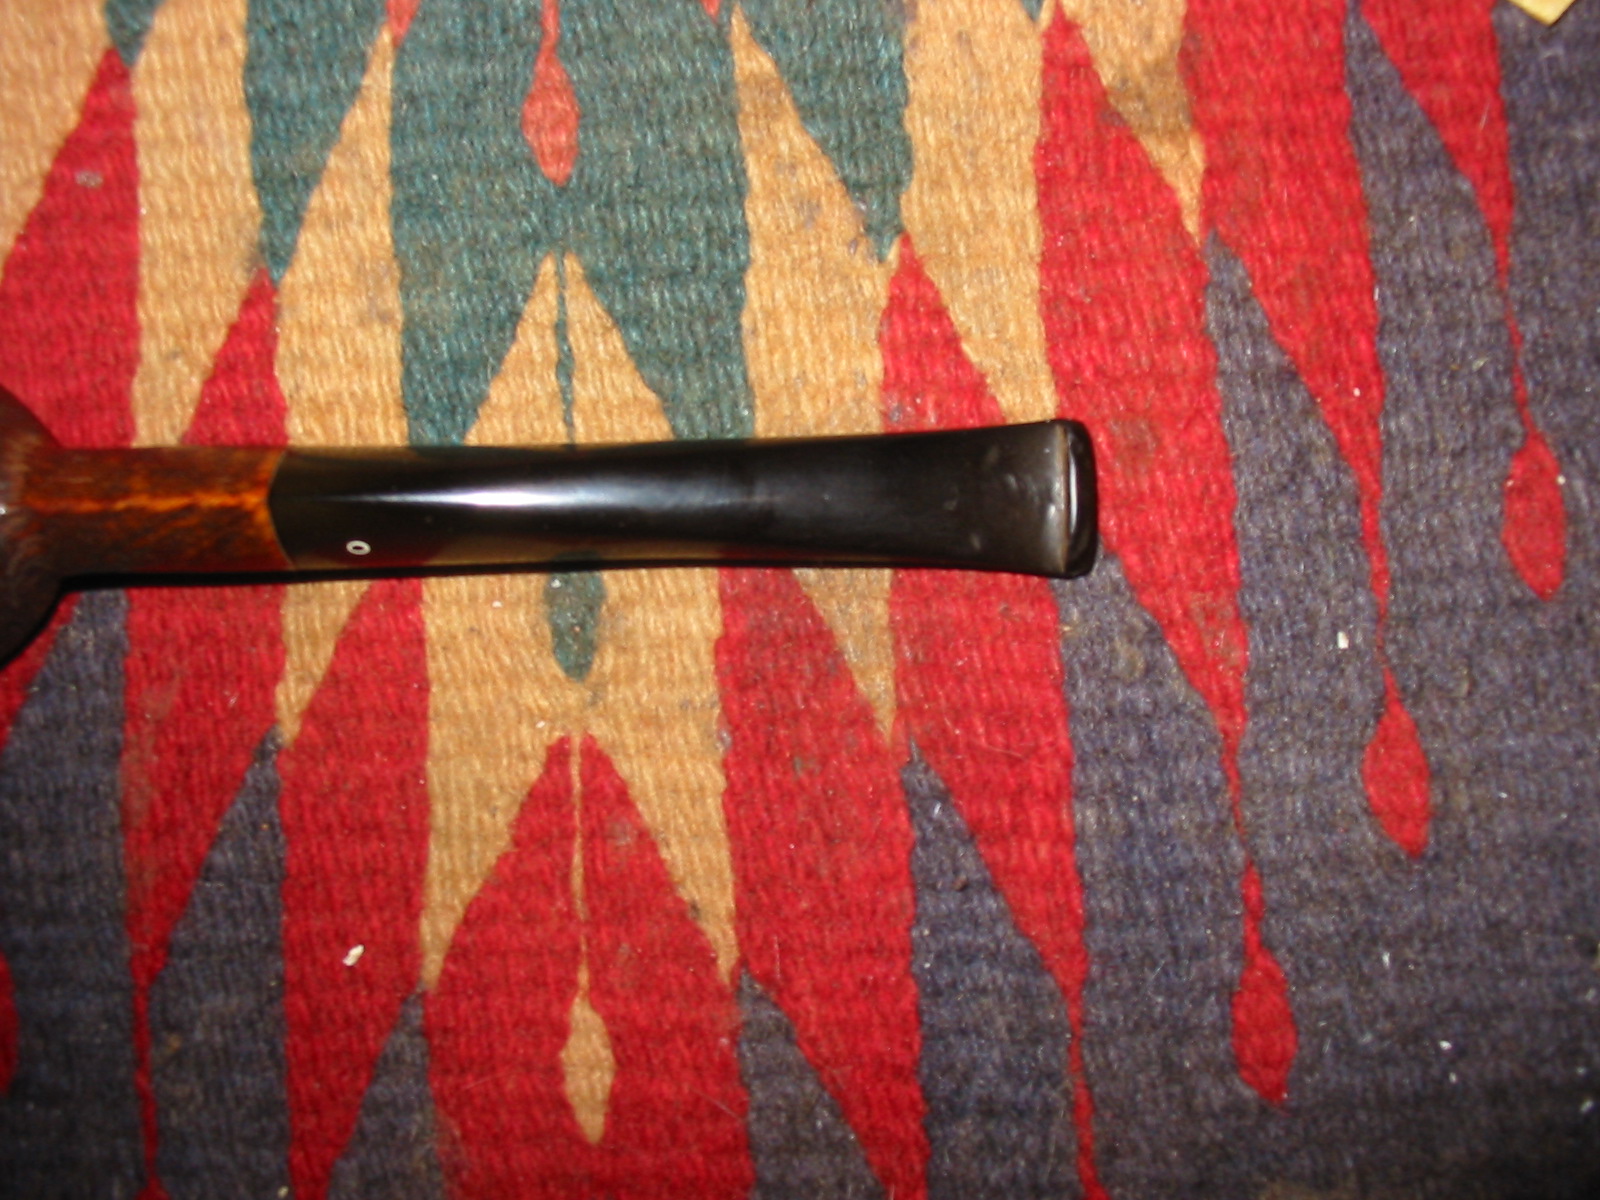
I walked away and went to the coffee shop. I sipped a coffee while I did a bit of searching on the web regarding the Craft brand of pipes. Somewhere in the recesses of my memory it was a familiar name to me. The “o” logo on the stem looked familiar as well. I had a hunch the pipe was made by Julius Vesz, a Toronto pipemaker selling out of the York Hotel. I found a notation on the web that confirmed that the pipe was made in Toronto and sold out of a shop at the York Hotel. The address given on the site matched Vesz’ shop there. I was fairly certain that my hunch was correct. Another site stated that the Craft Briar Pipe Company’s principal was Julius Vesz. The identity of the carver was certified by the web.
IMG_3525

I still wanted to take one further step in confirming that the pipe did indeed come from Julius Vesz. I googled his website and sent an email via the website to the webmaster. I also emailed him directly from the contact information given on the site. Here is the web address should you want to check out some of his pipes: http://www.juliusvesz.ca/
welcome

I have included our correspondence about the pipe in full below.

On Dec 29, 2013, at 6:44 PM, Steve Laug wrote:
aboutpg

Good evening Mr. Vesz
I came across a pipe that I believe came from your shop if my research is correct. It is stamped Craft Briar and 3B6 and has a white o on the triangular stem. I was wondering if you could confirm that it is indeed one of your pipes. I have several of yours and thoroughly enjoy them and was caught by the “o” logo on the stem and the great shape of this one. Thank you for your time.
Kind regards
Steve Laug

On Dec 30, 2013 Rob Vesz wrote:

Hello Steve
This is Rob Vesz, Julius’ son replying. I take care of my father’s email and website. Thanks for your message and kind words.

Yes, Craft is the name Julius stamped on his very early pipes. It is in fact still the name of his company, but he operates under “Julius Vesz”. That pipe would be around 50 years old. My father stopped stamping Craft around the mid 1960’s.

It would be interesting to see a photo if you don’t mind emailing one.

Thanks again.

Rob Vesz

There is was – the web confirmation was confirmed by Rob Vesz that the pipe was indeed crafted by Julius Vesz and gave a date when the stamping on the pipes changed from Craft Briar in the mid 1960’s. I wrote back to Rob and sent the requested photos of the pipe and asked for clarification on the number stamp on the shank of the pipe. I wondered if it was not a date stamp. Below is that correspondence.

On Dec 30, 2013, at 12:37 PM, Steve Laug wrote:

Hi Rob
Thank you for your prompt reply. I appreciate the information. I am in the process of restoring the pipe now. Soon I will write it up for the rebornpipes blog – a blog I run for refurbishing of pipes.

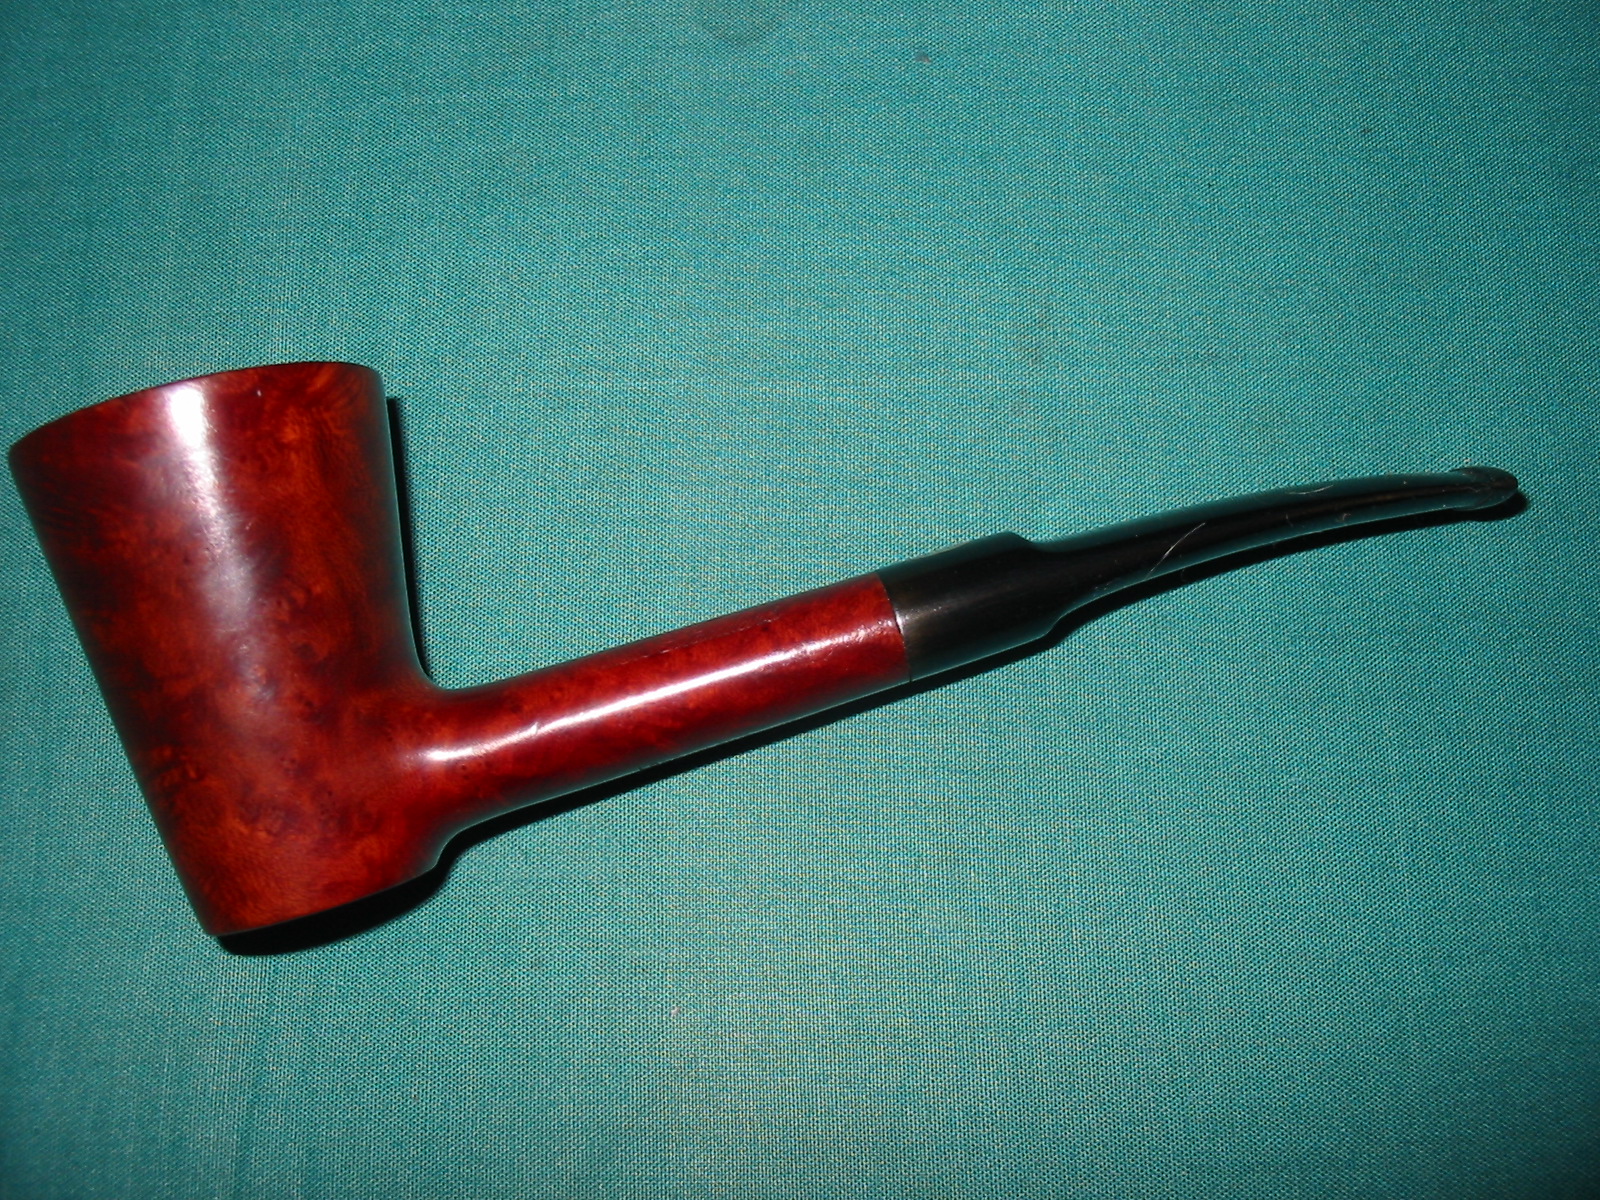
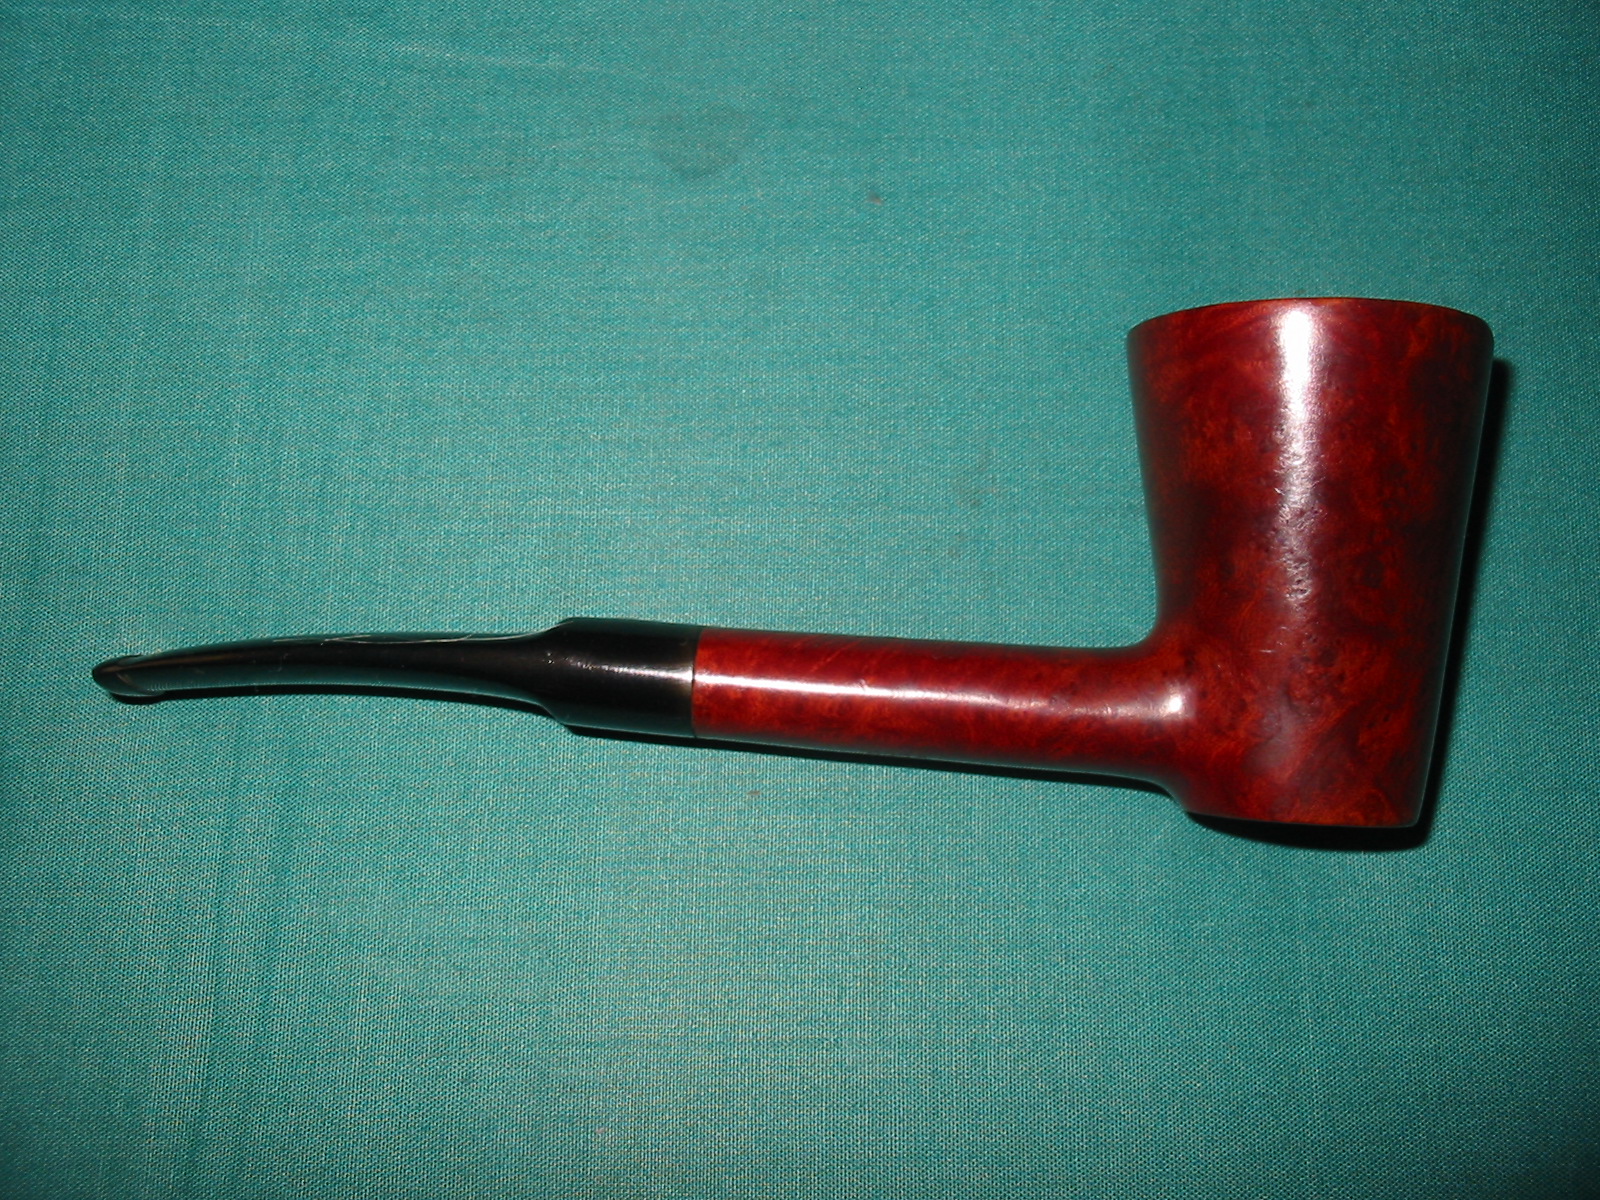
I have attached three photos of the pipe. It is in pretty good shape other than some deep bite marks on the stem, top and bottom near the button.

One more question – can you interpret the stamping for me? The number on it is 386 – does that give me date information?
Thanks
Steve

On Dec 30, 2013 Rob Vesz wrote:

Steve
The 386 should be a style # that my father used. Will speak to him to see if he has any further thoughts on that.

Rob

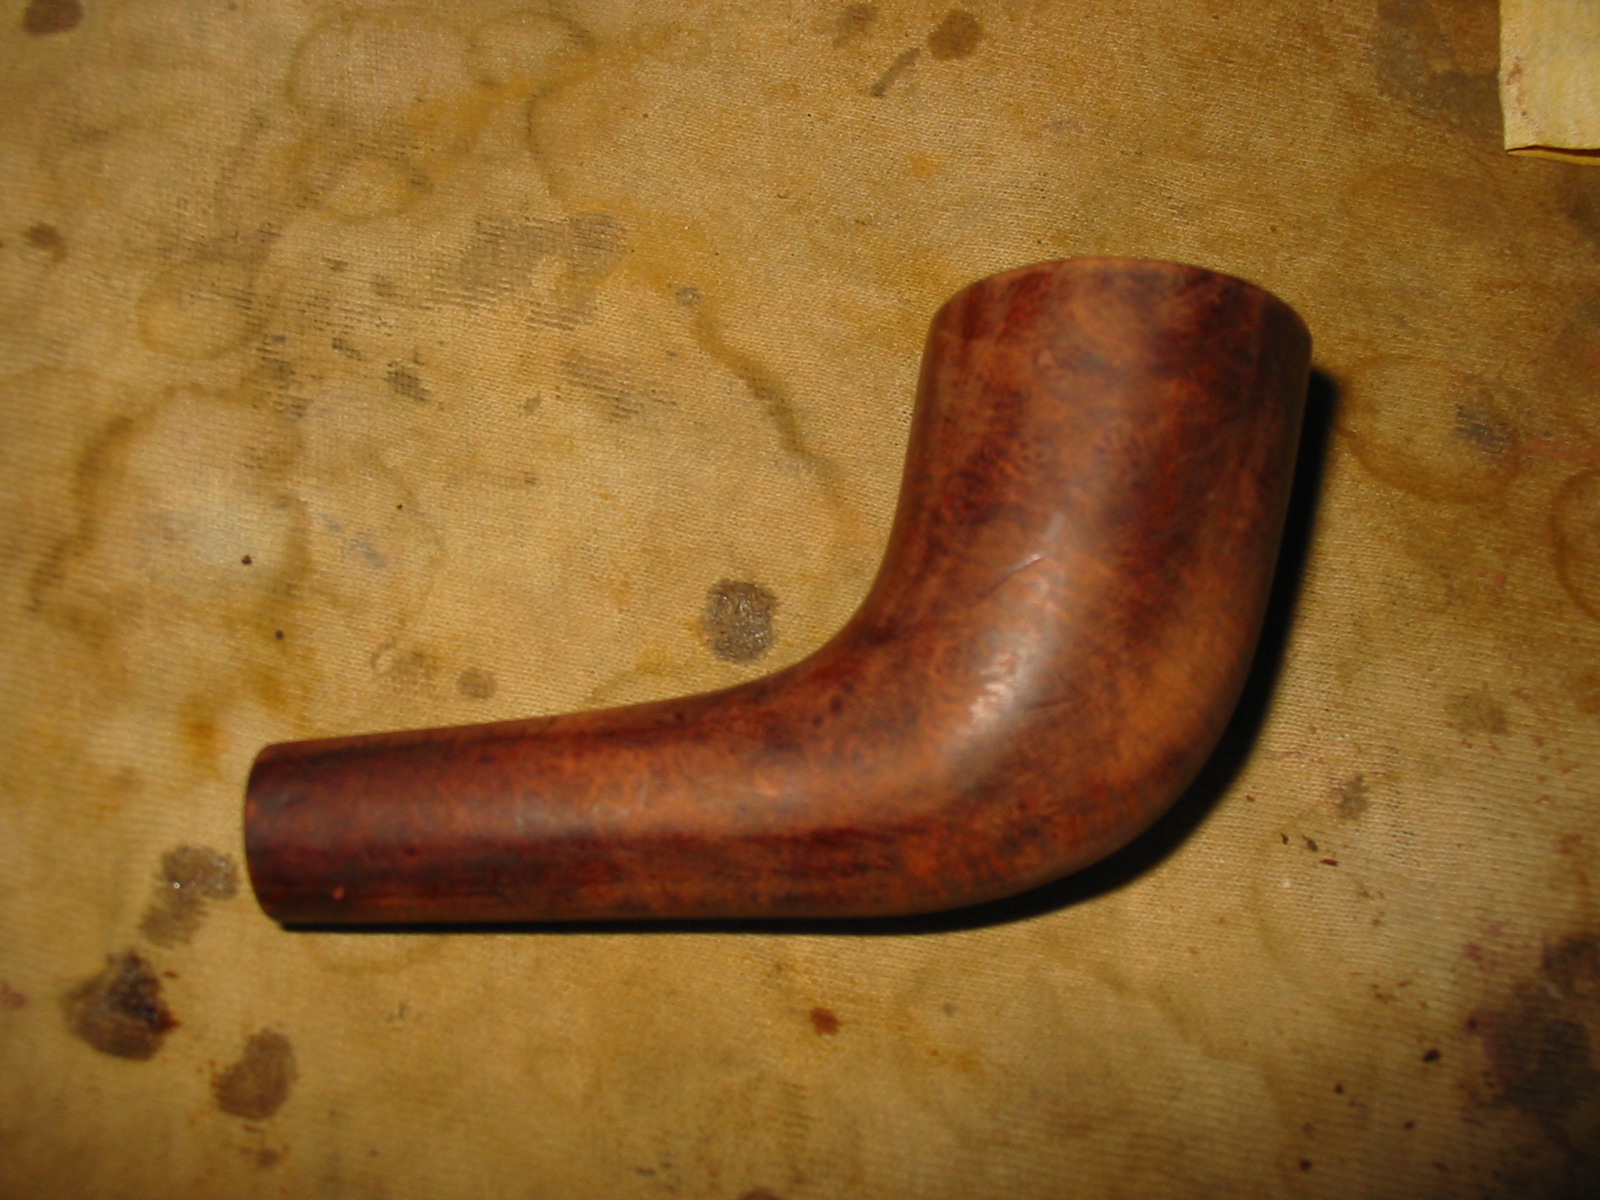
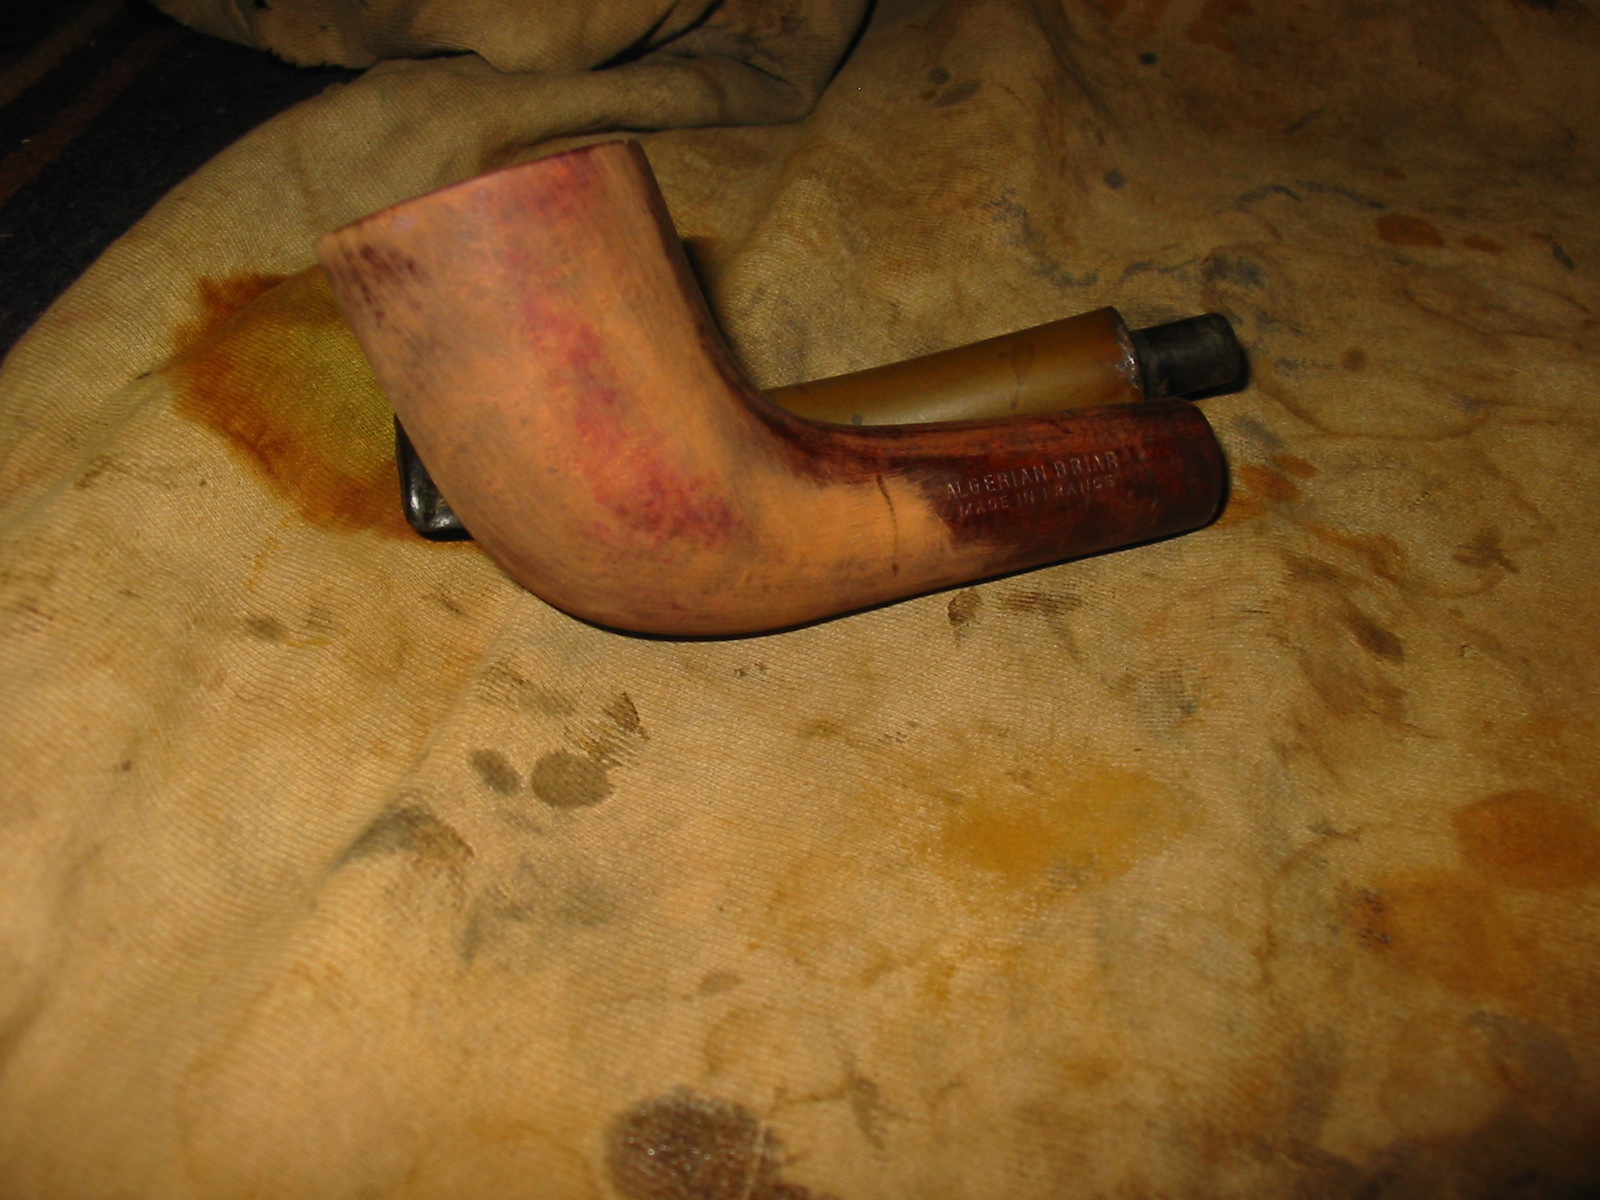
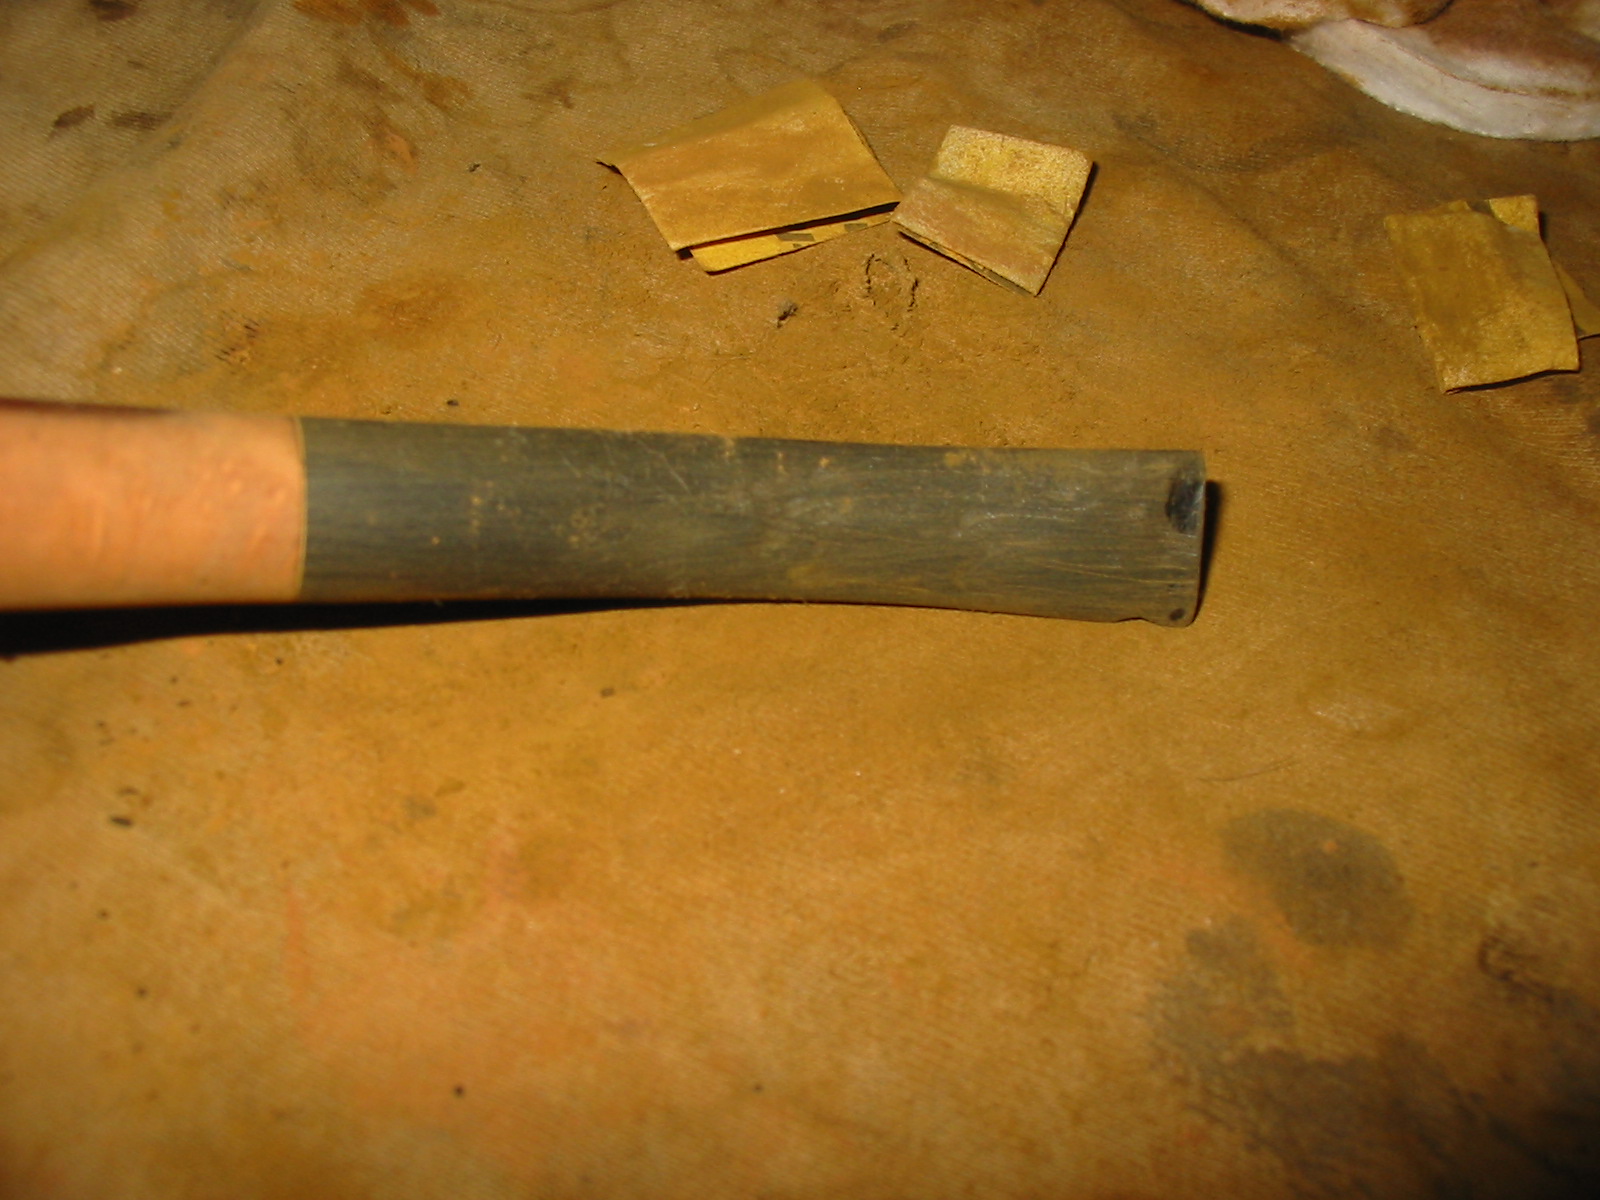
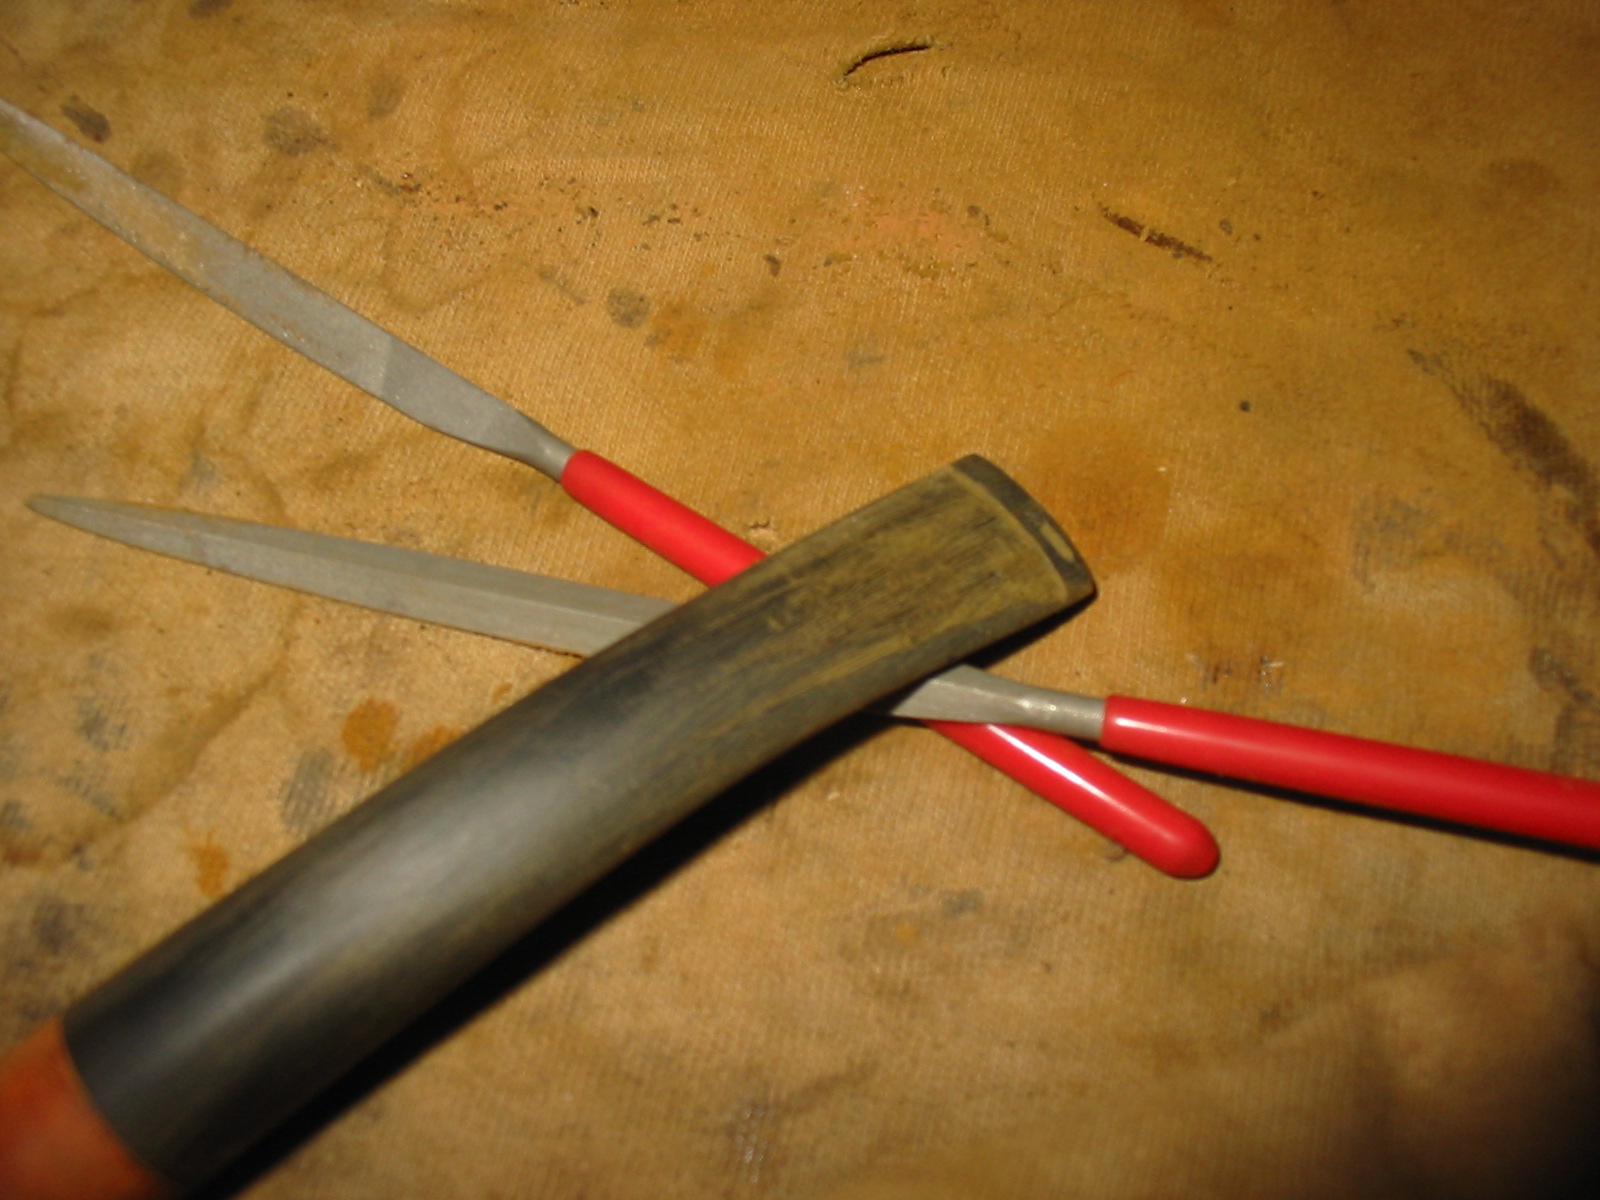
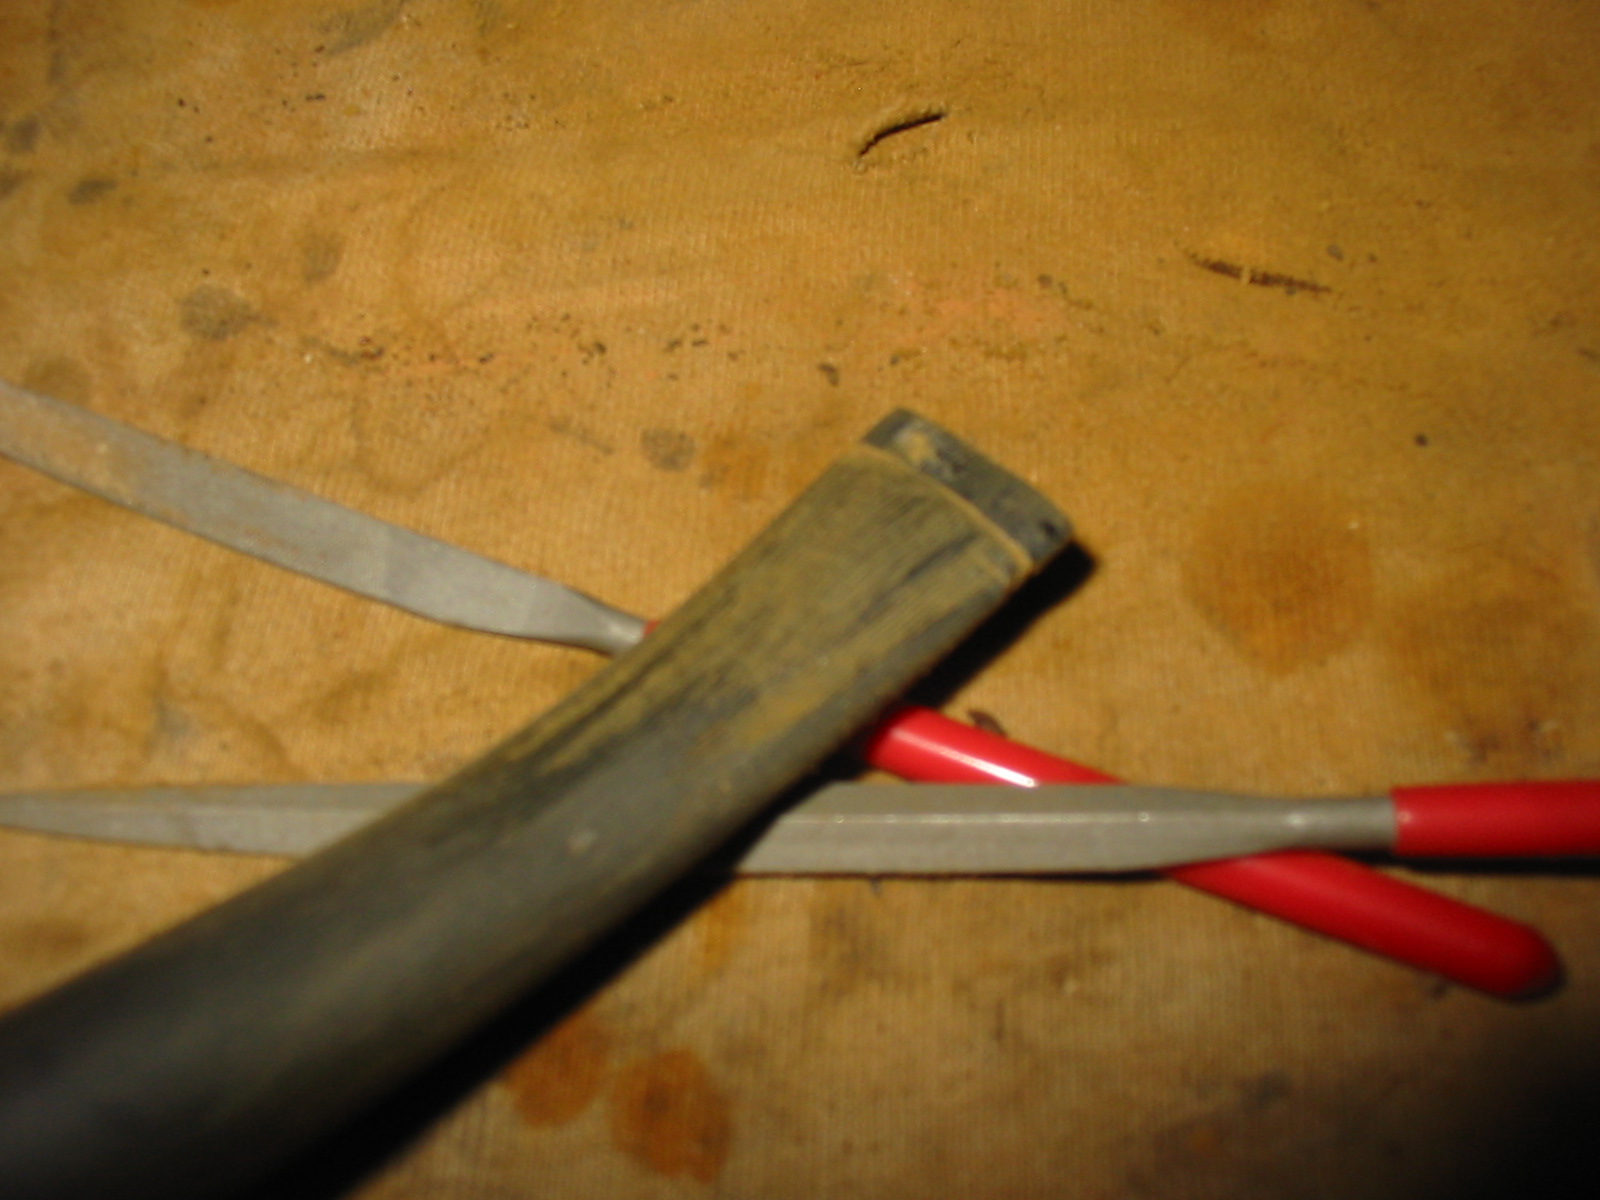
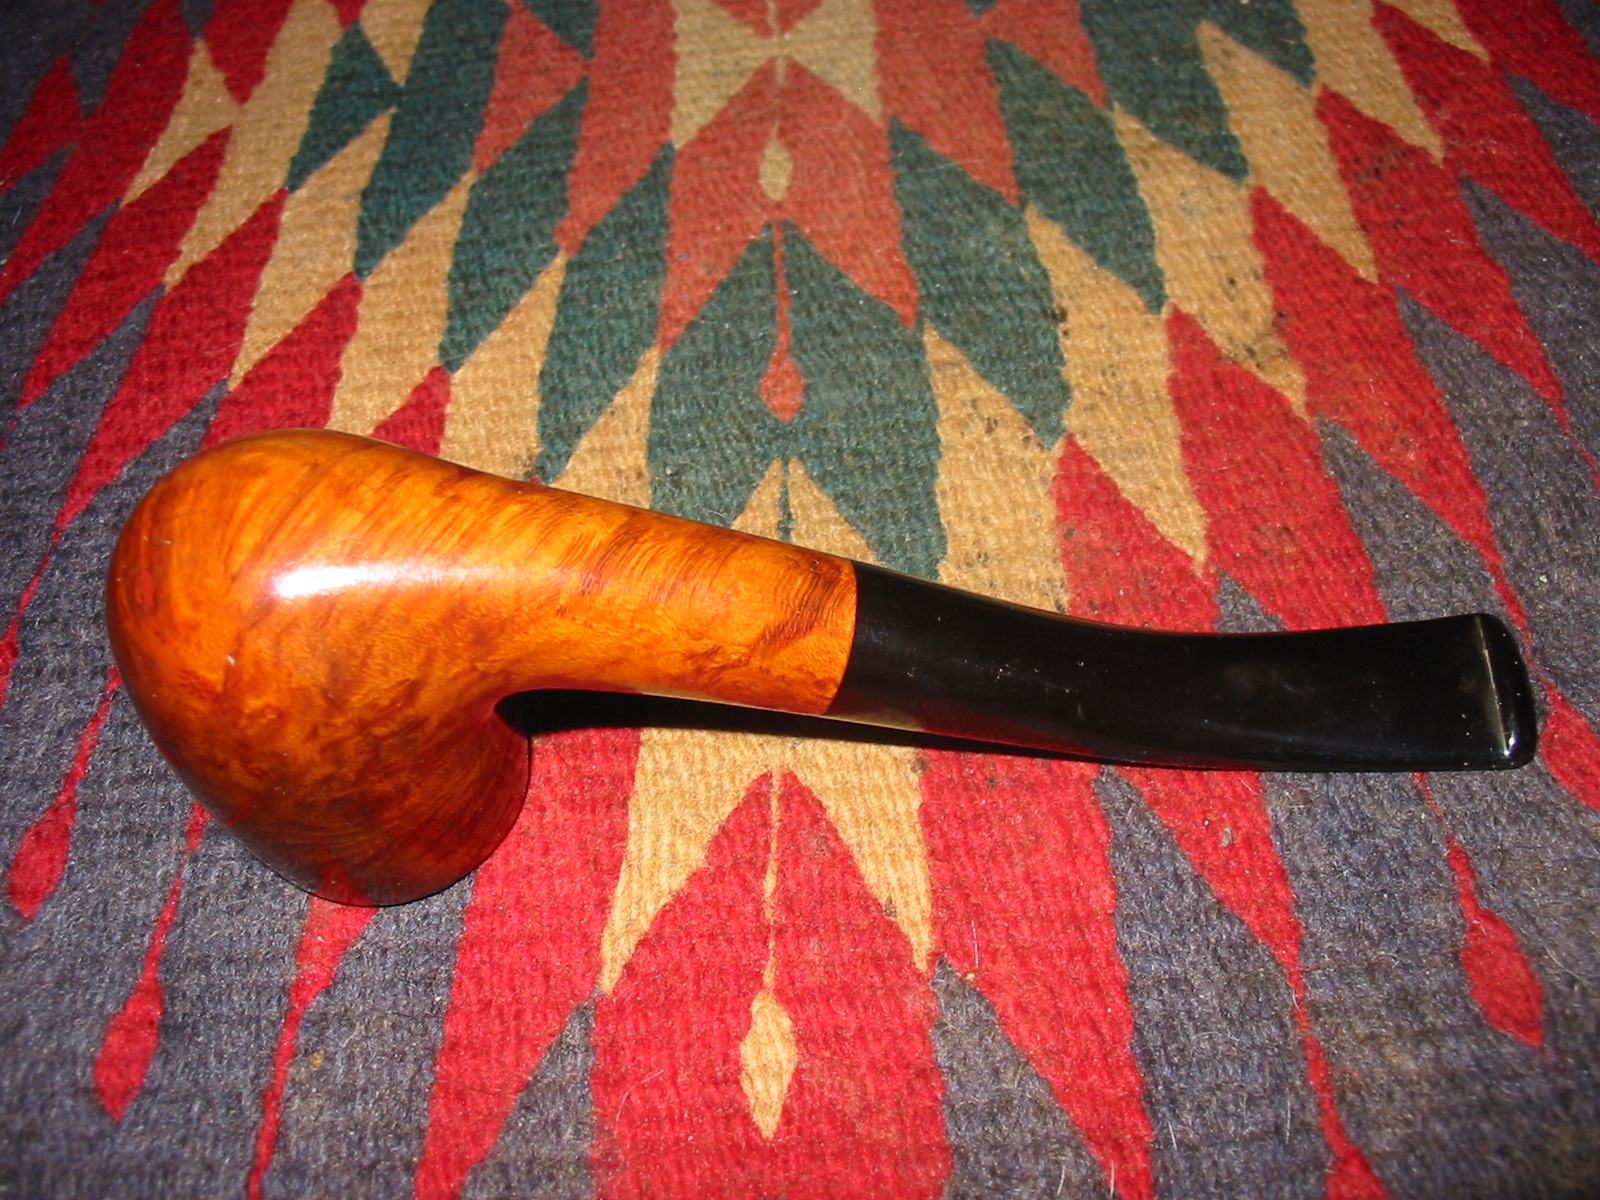
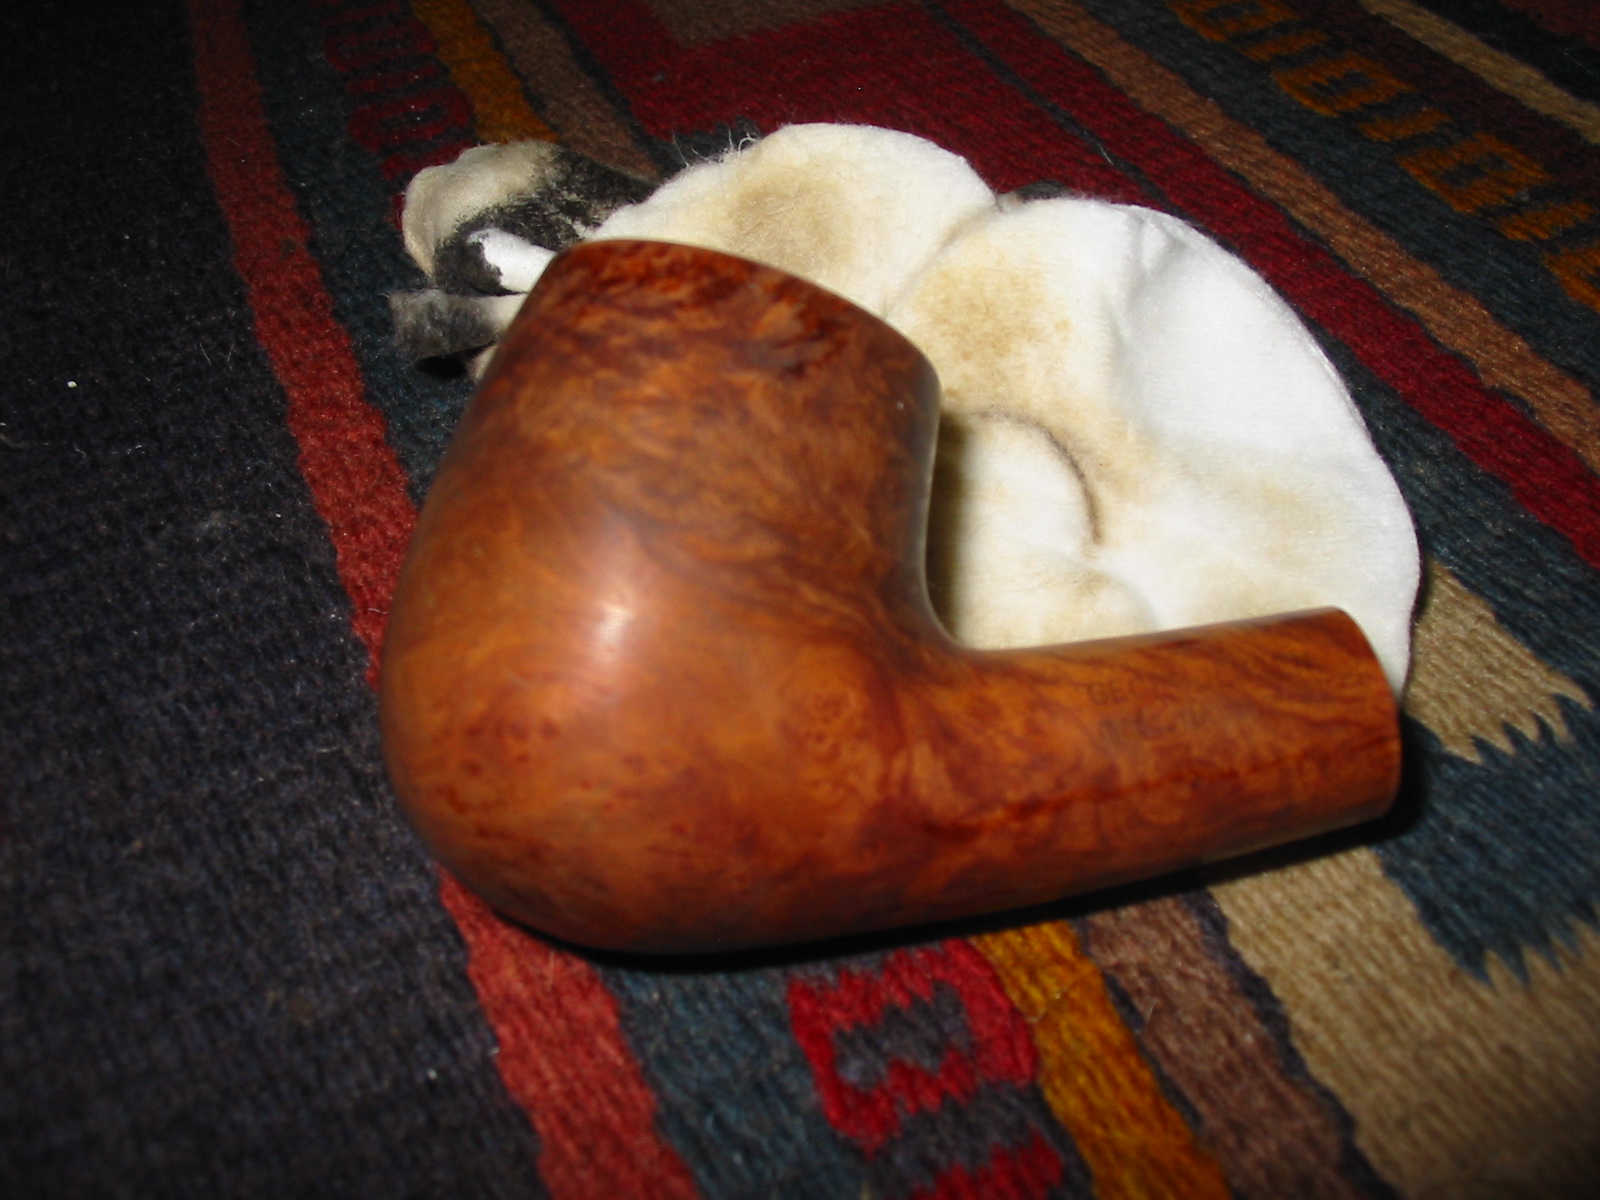
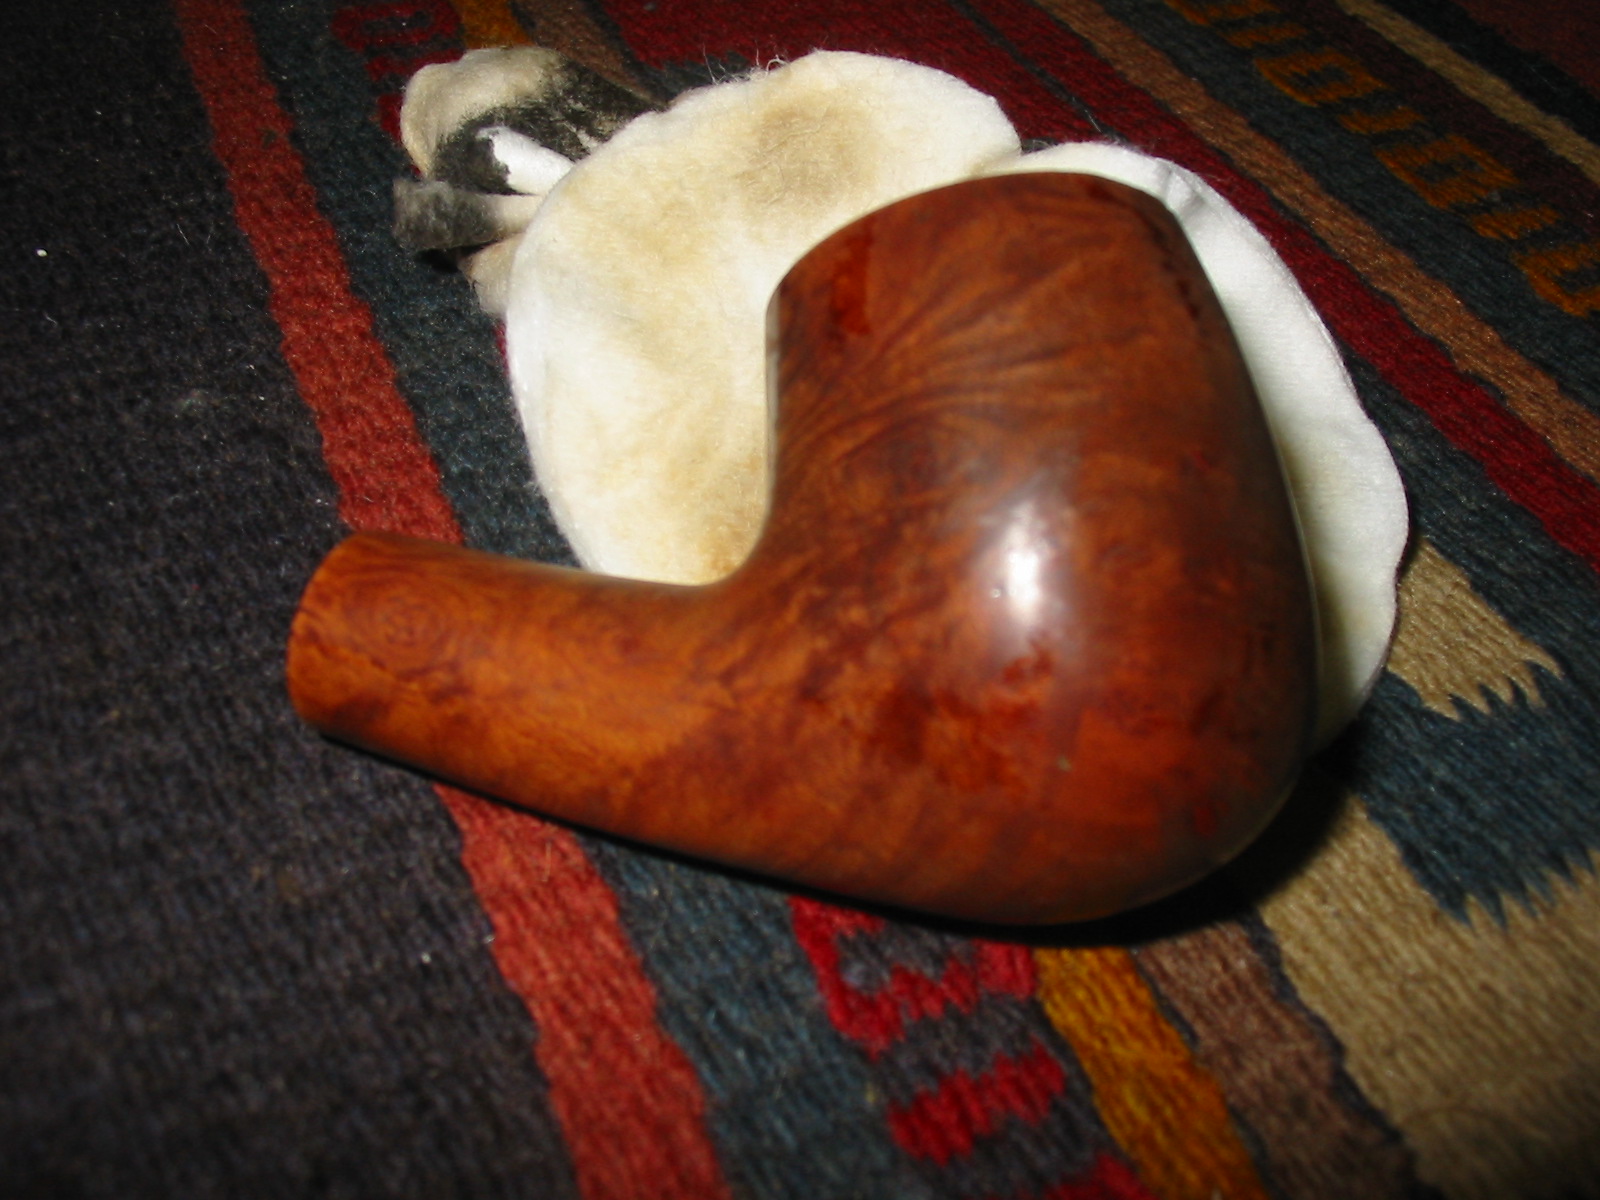
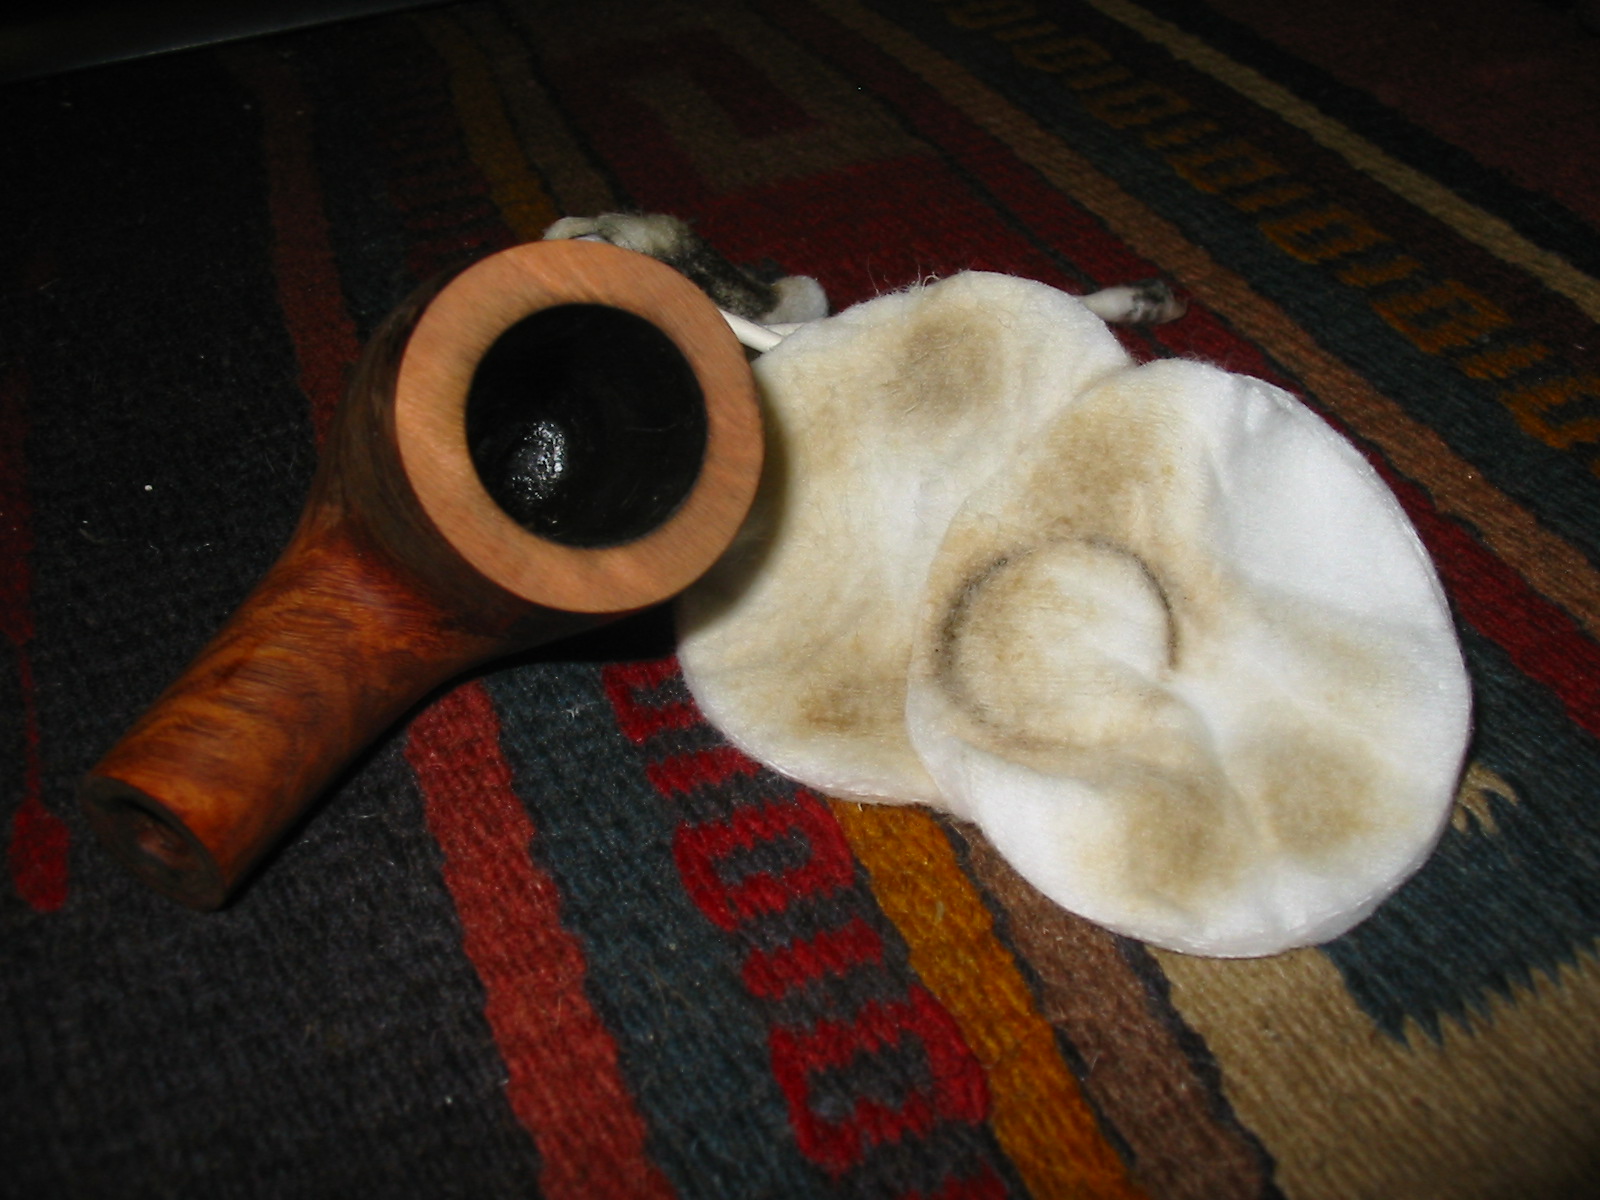
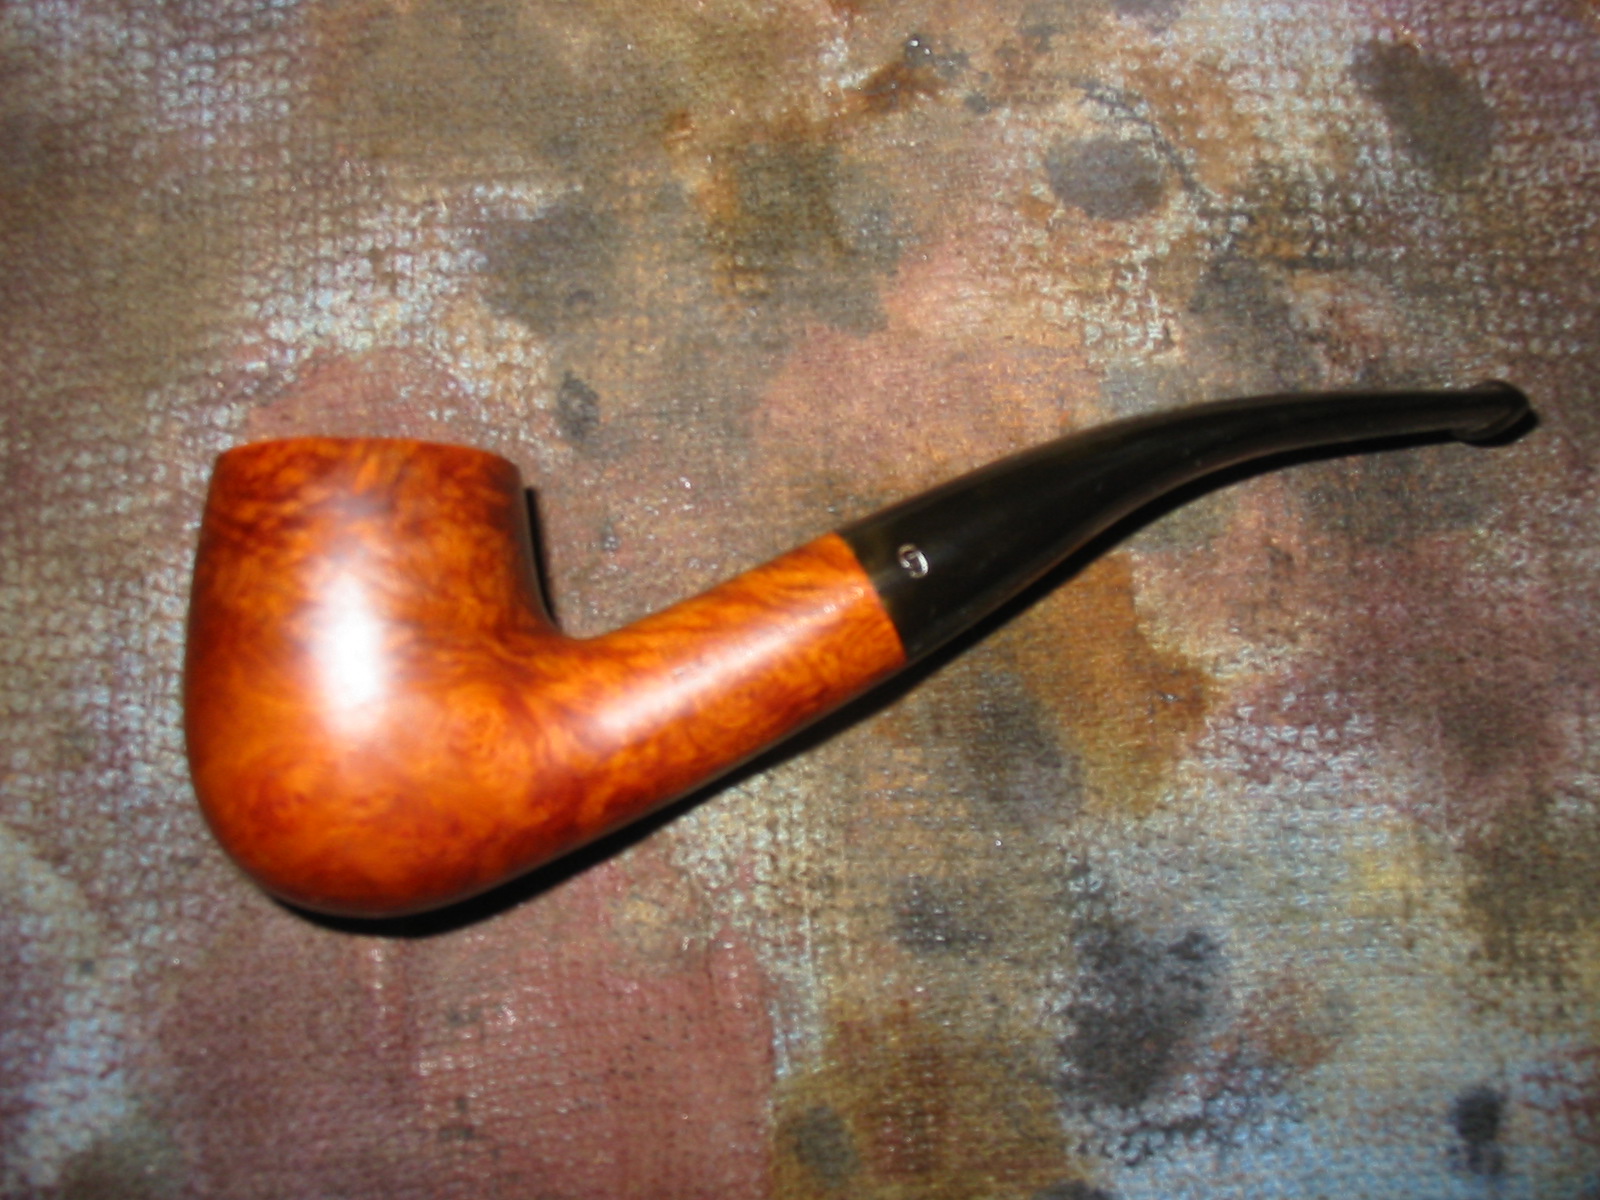
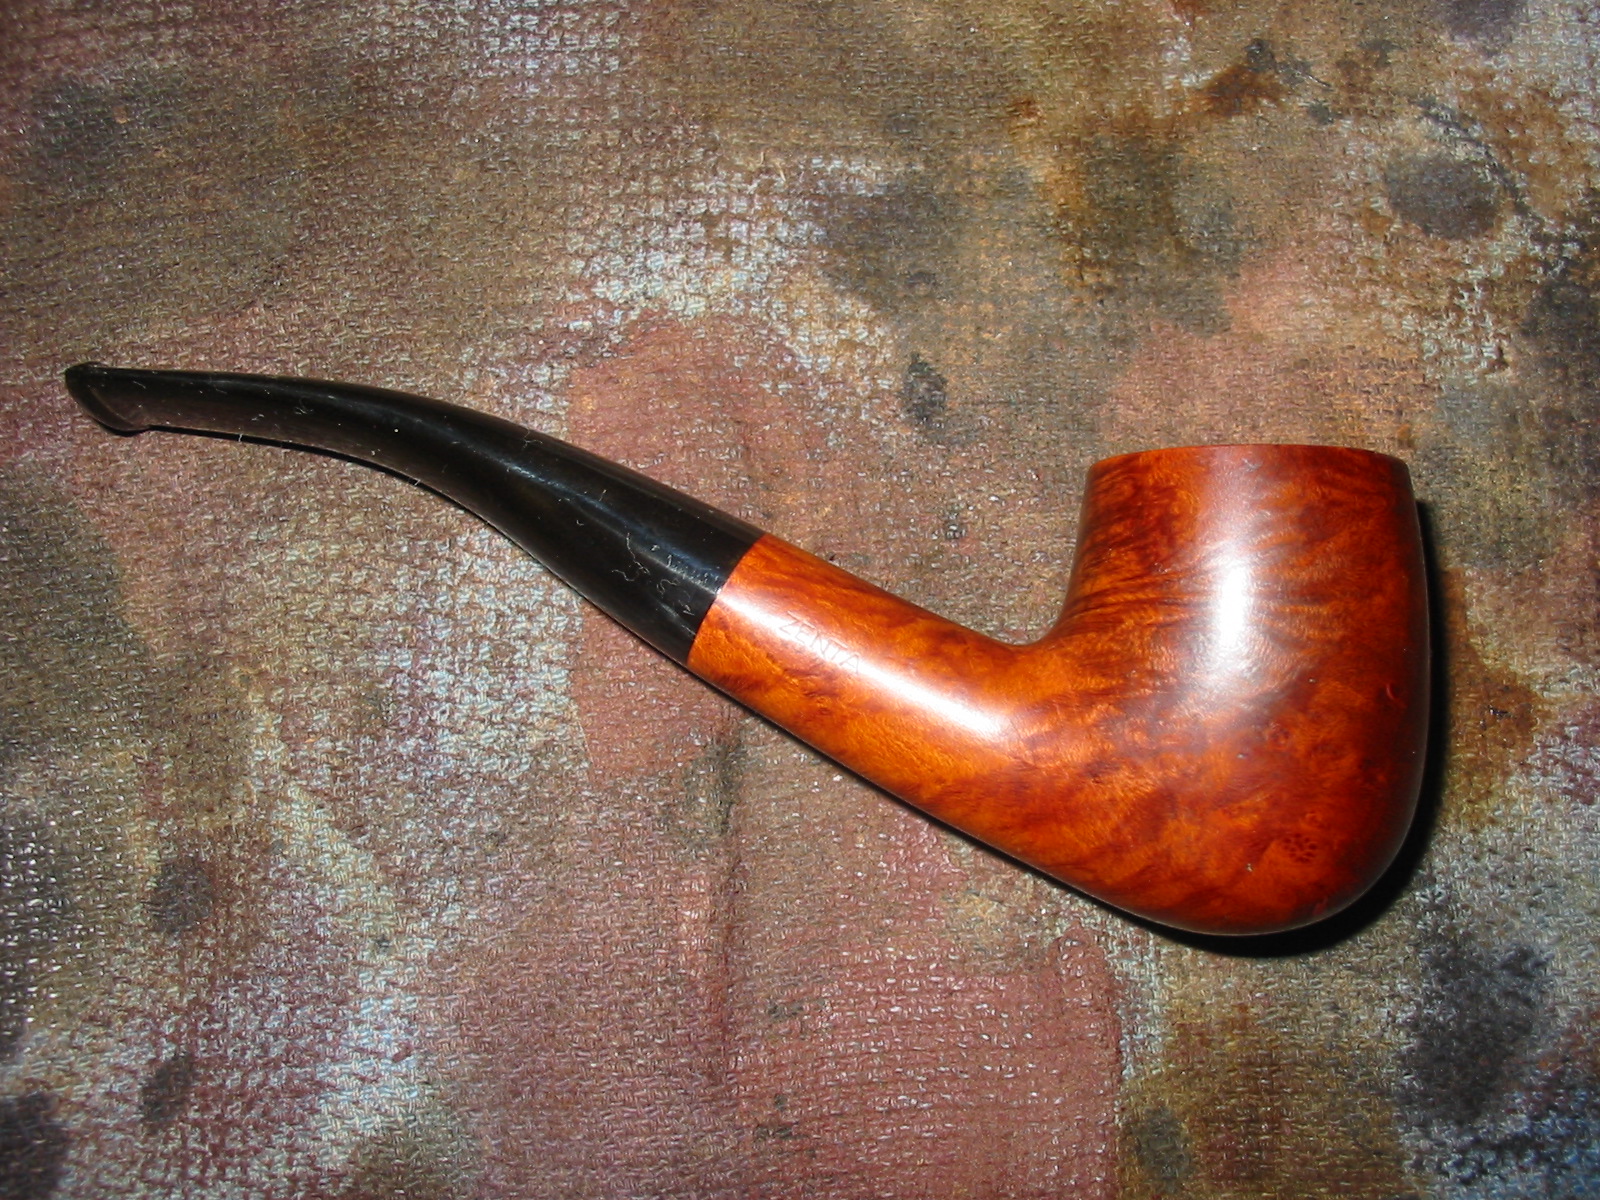
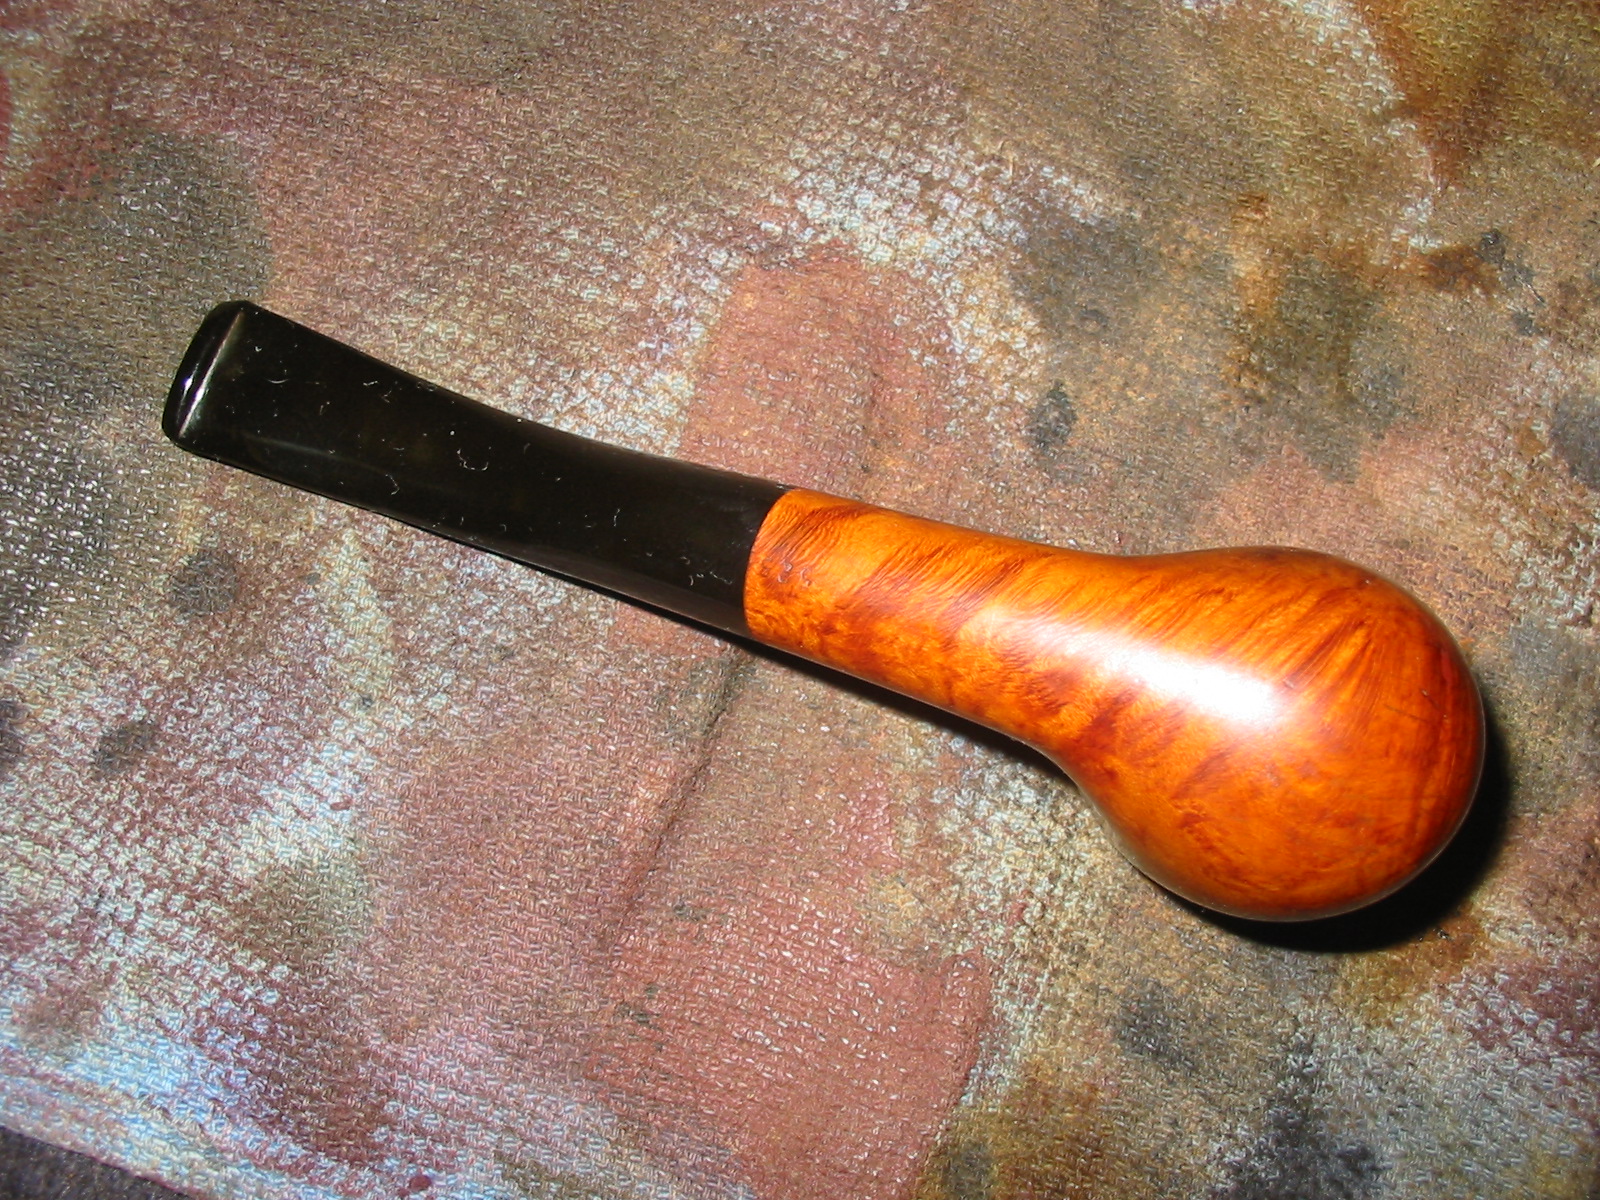
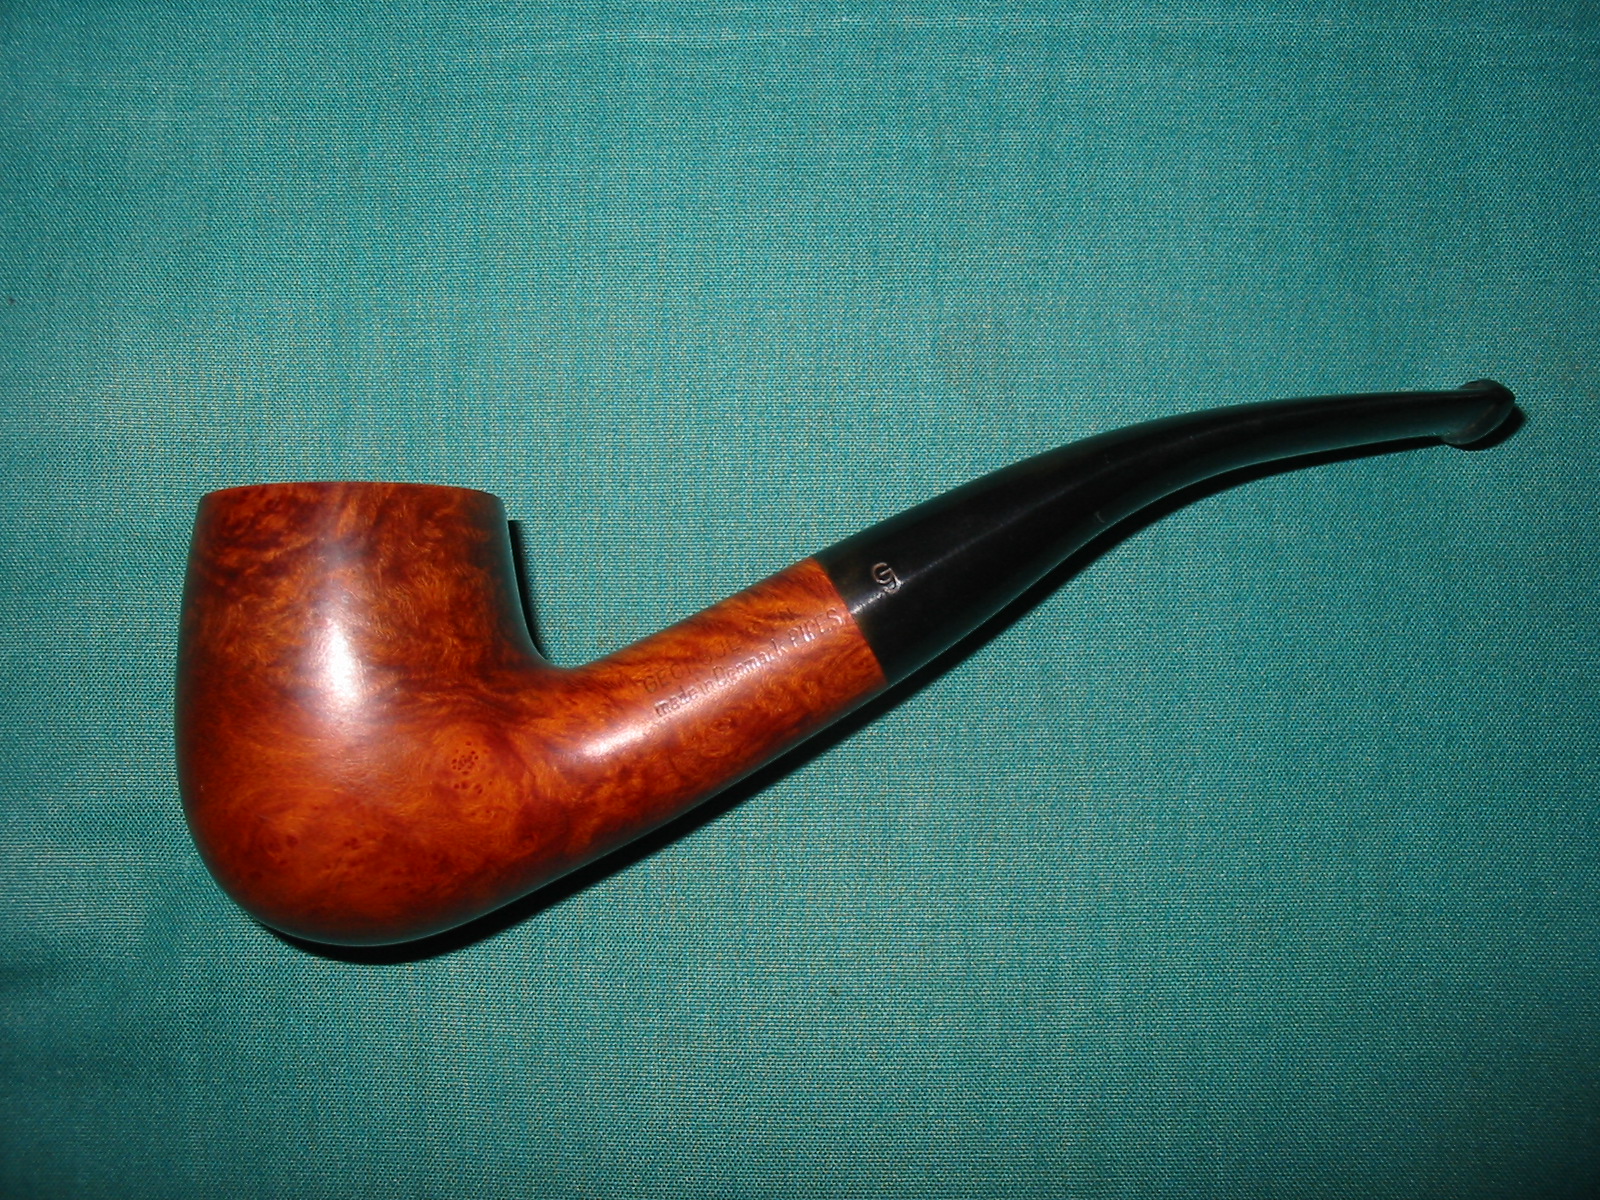
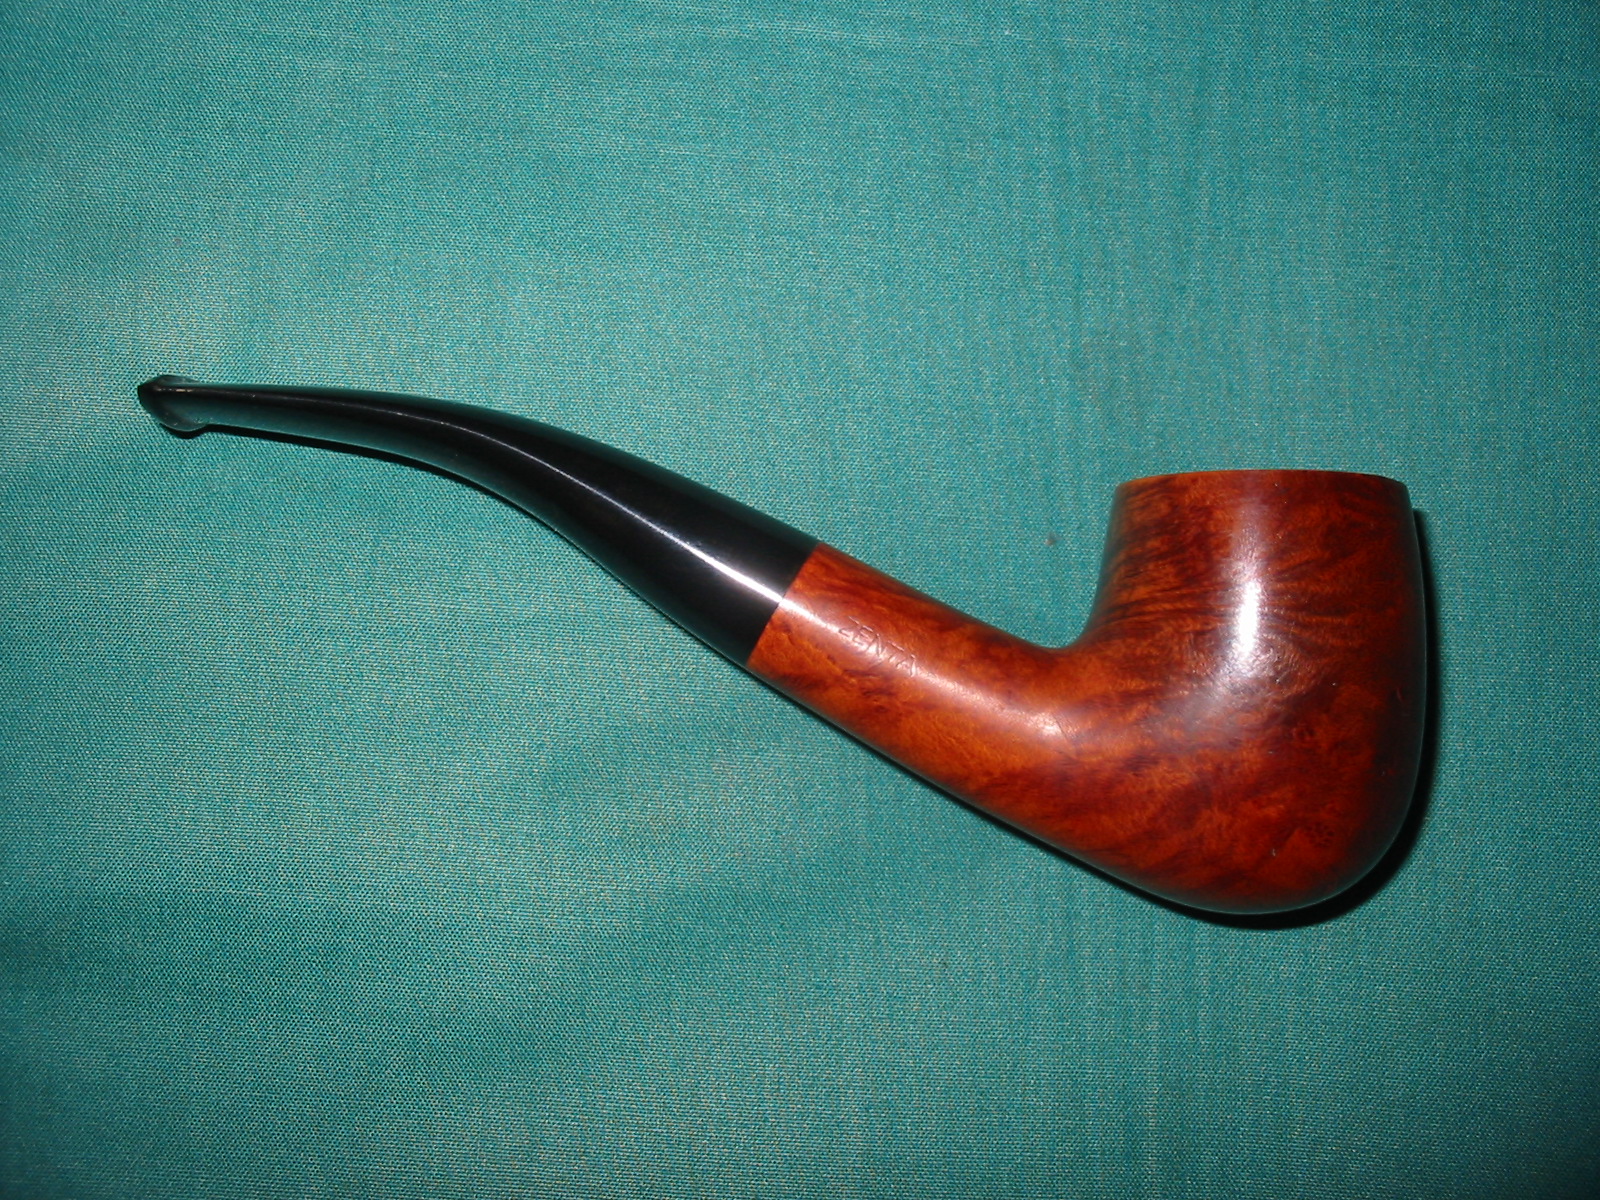
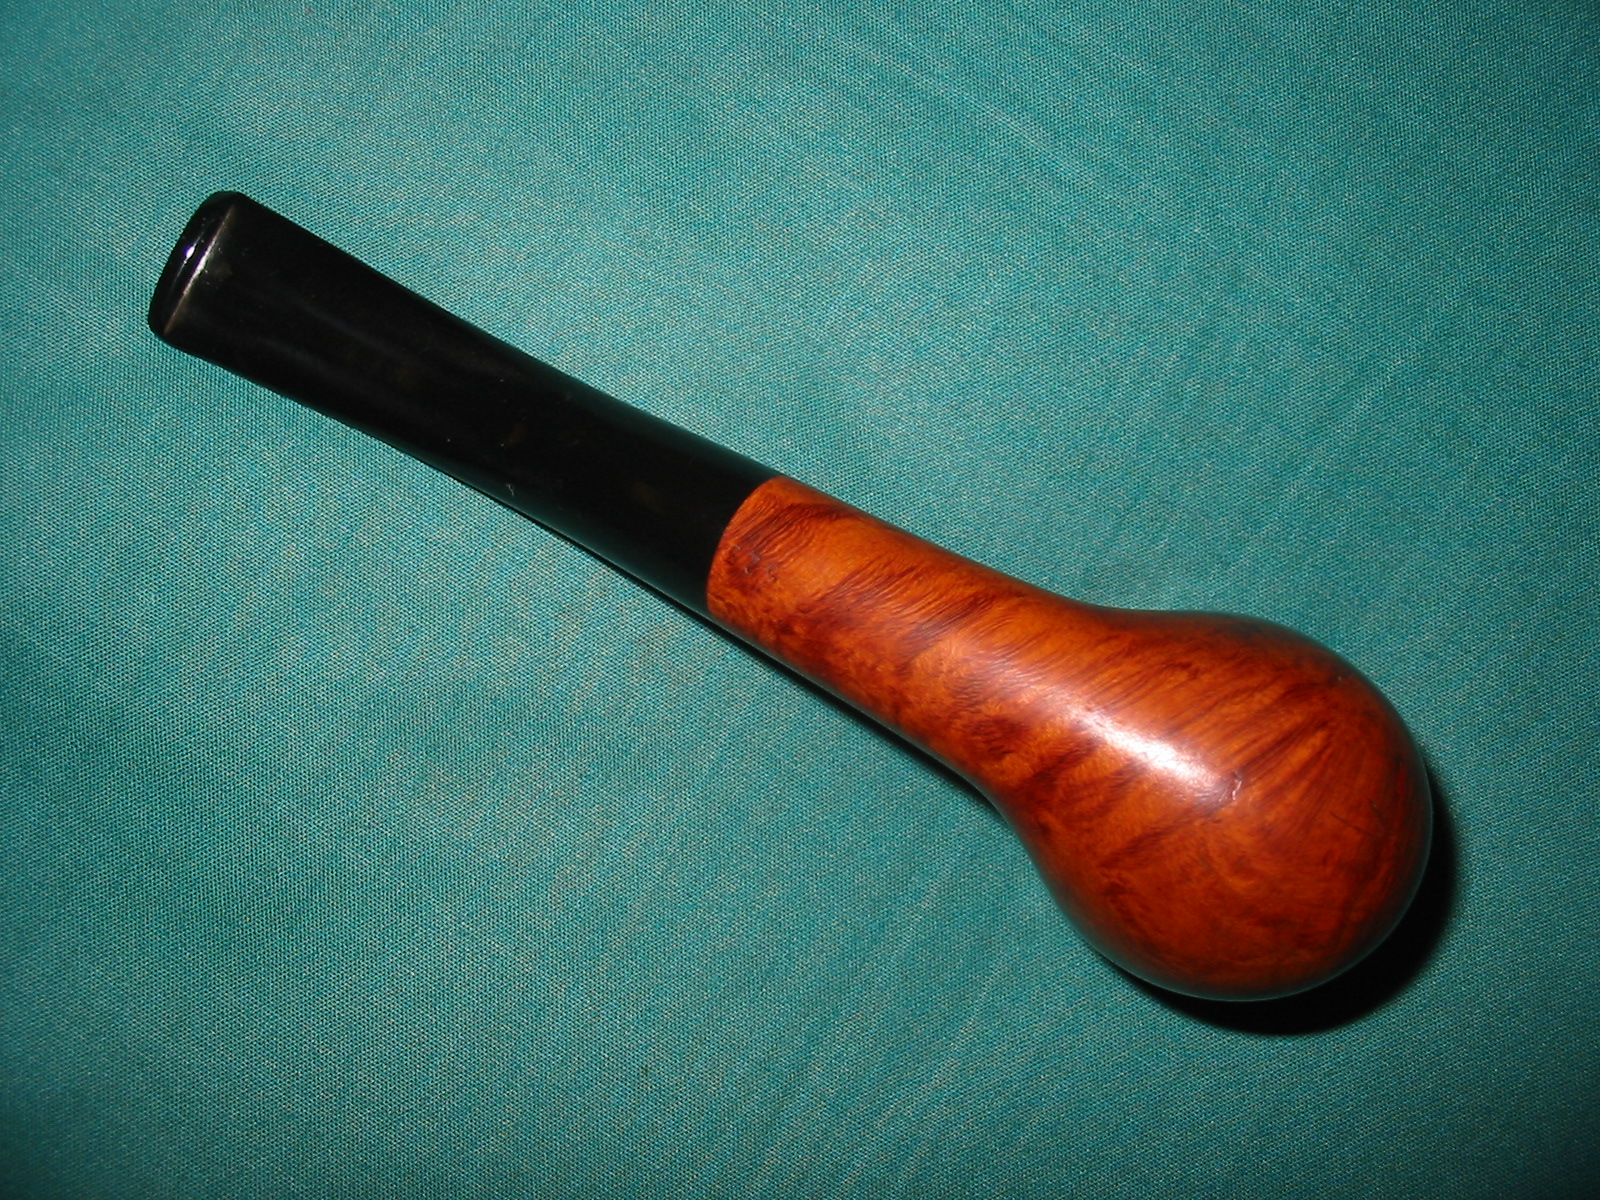
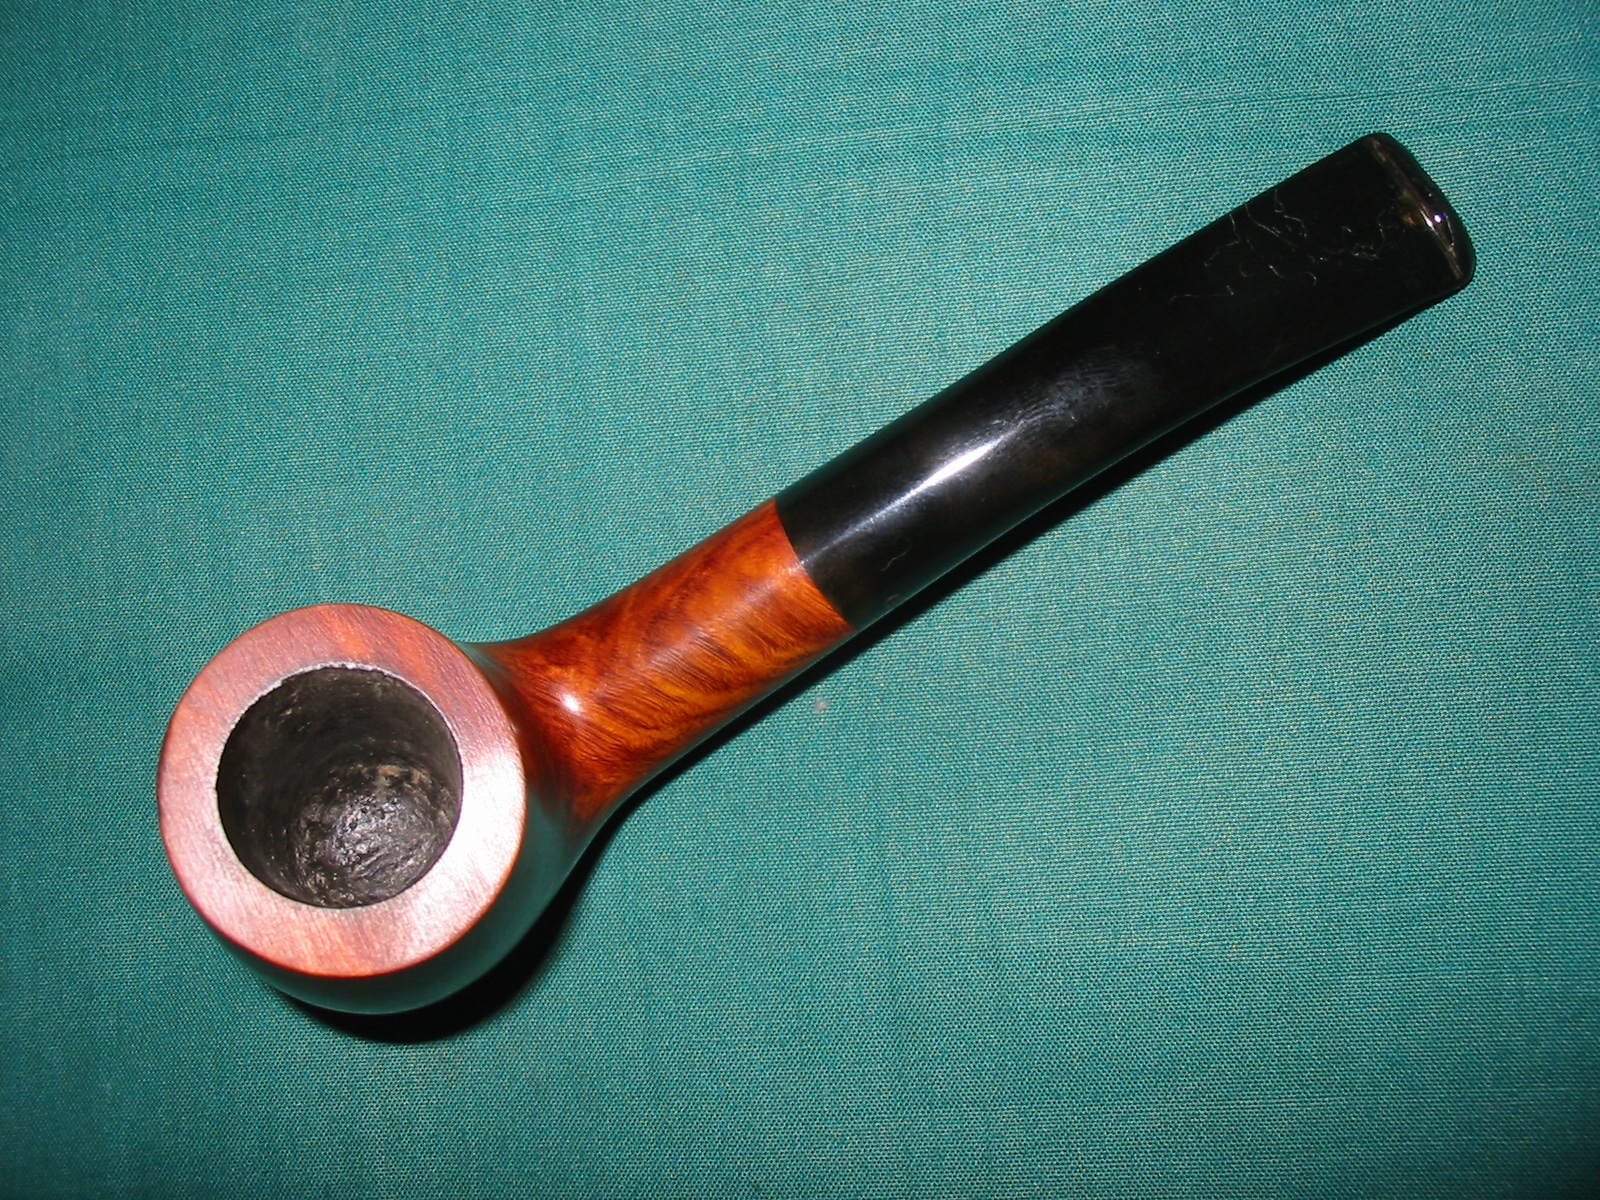
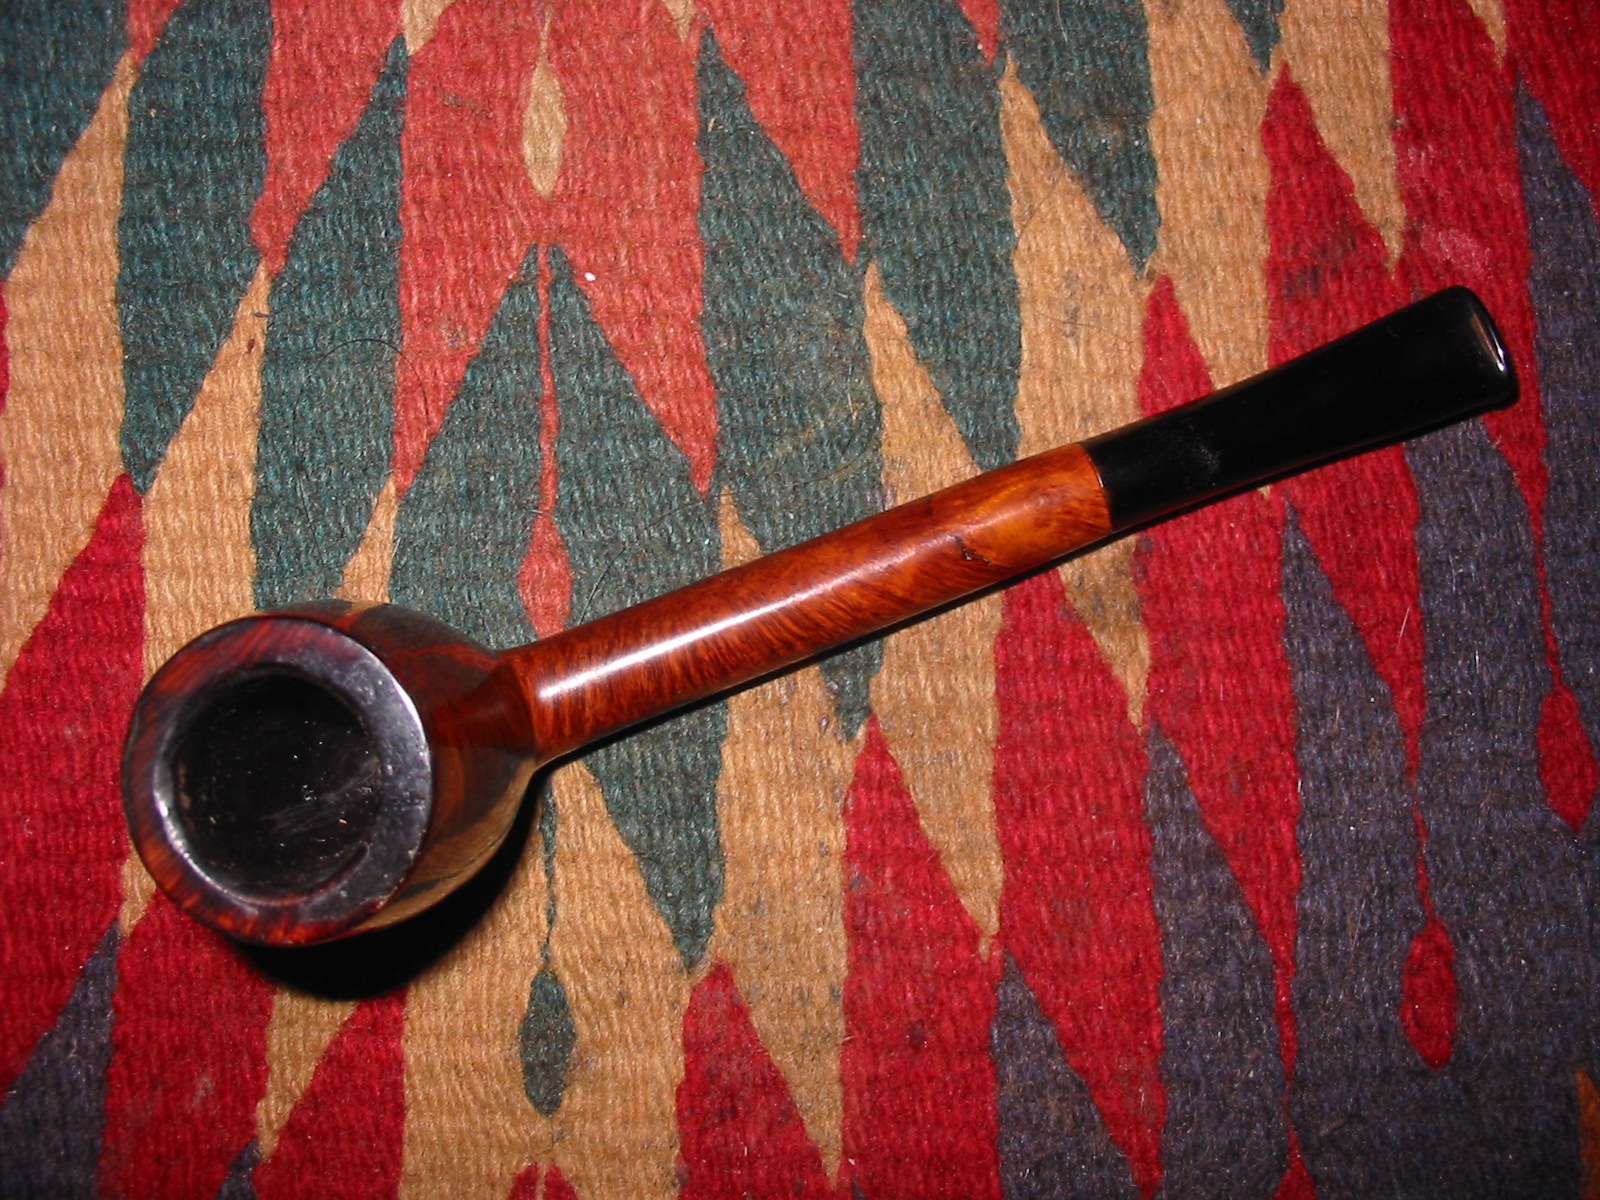
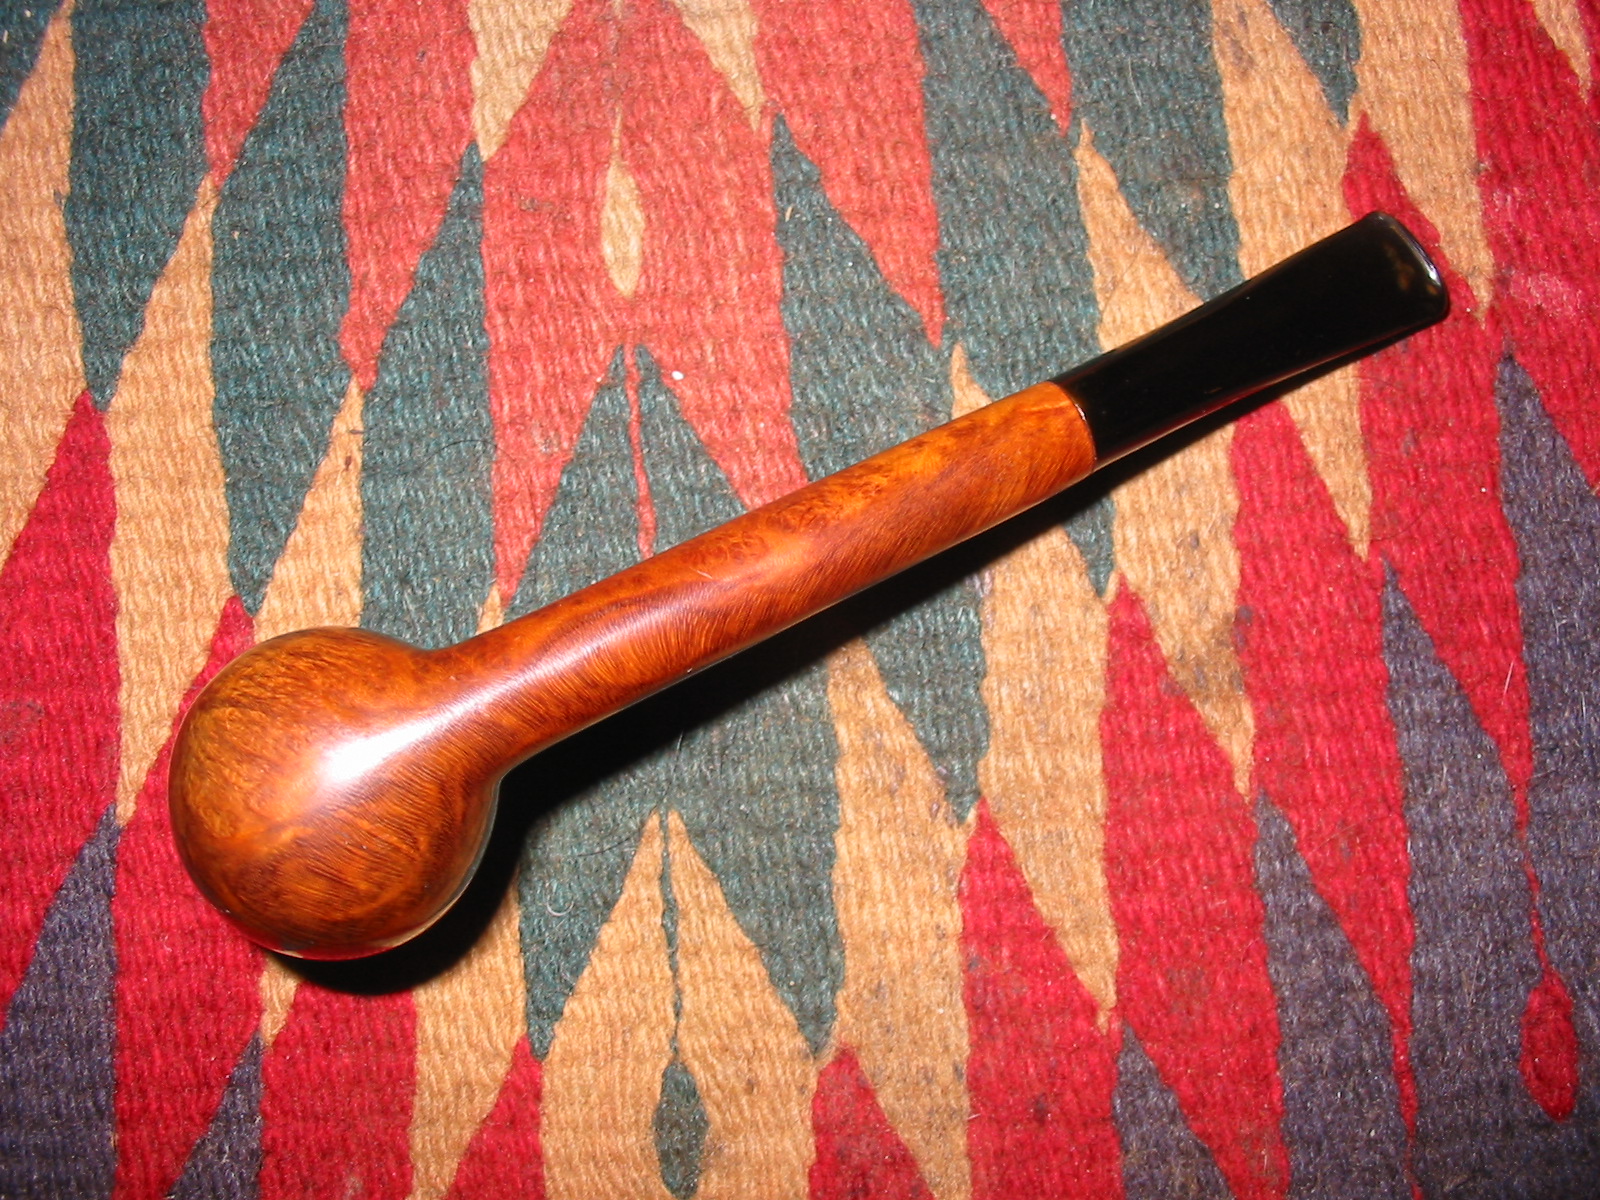
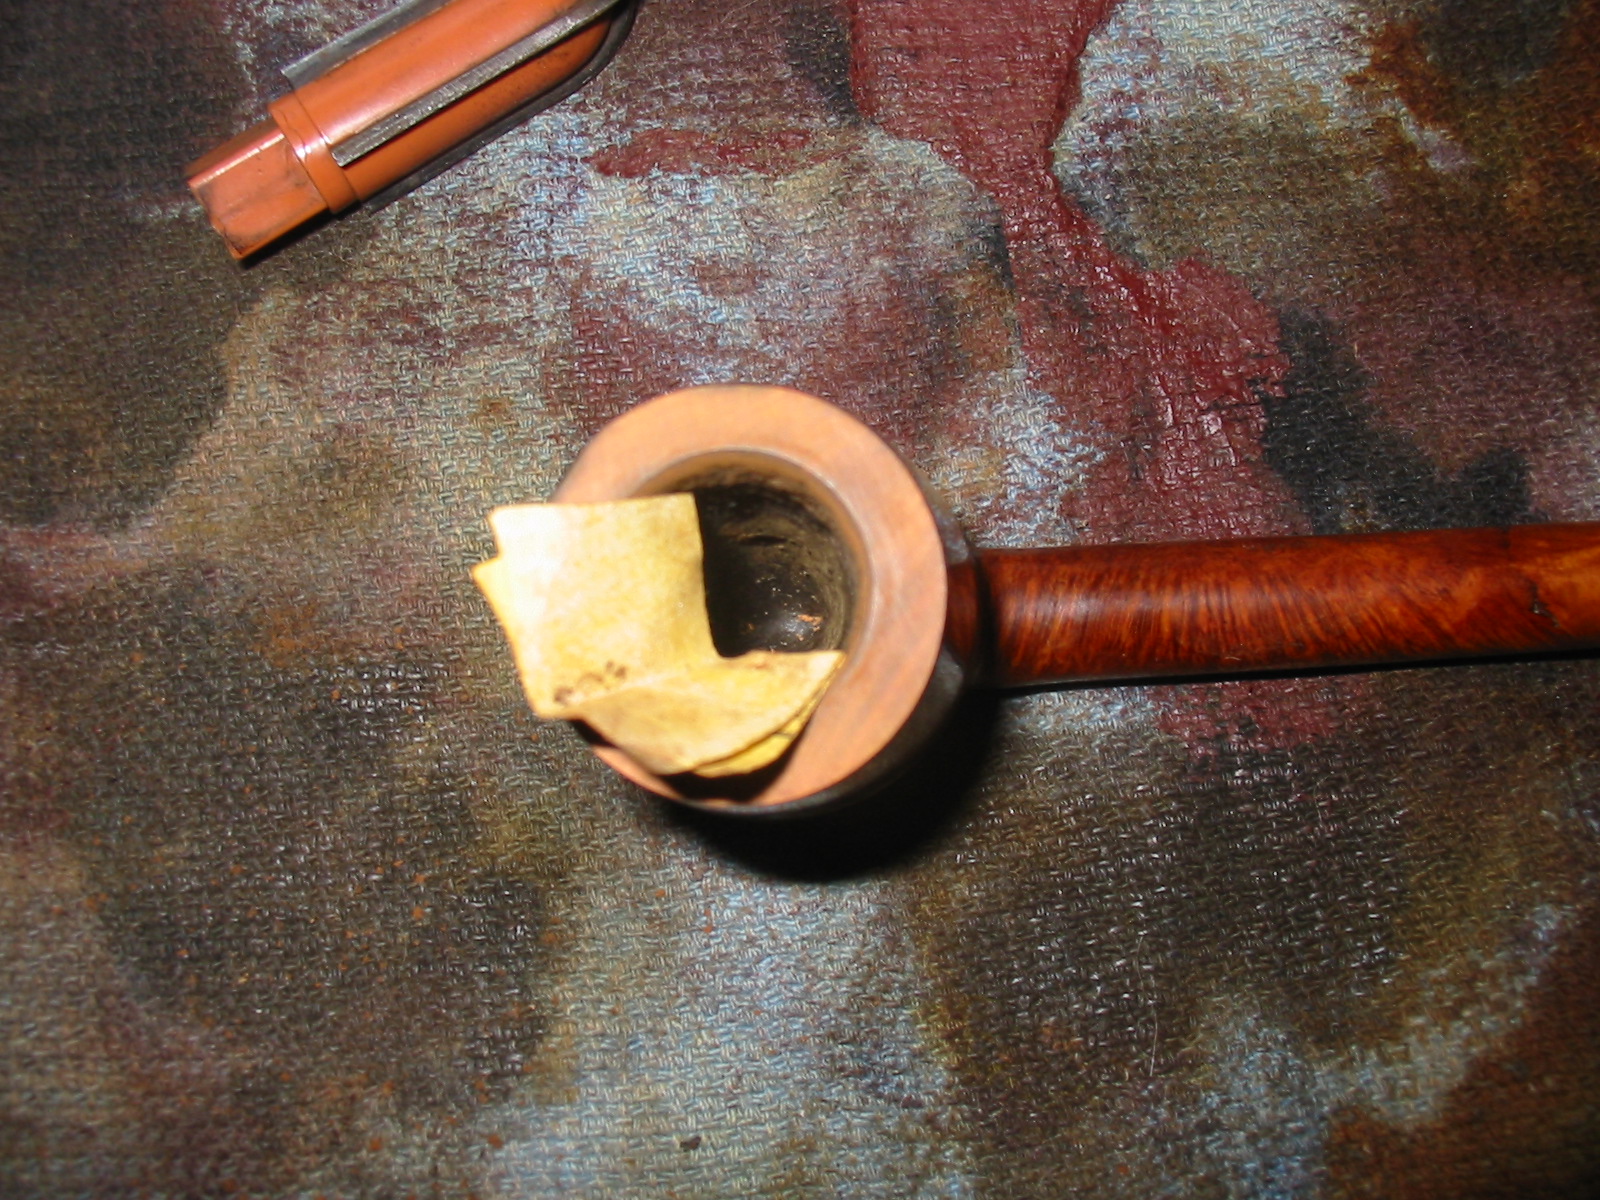
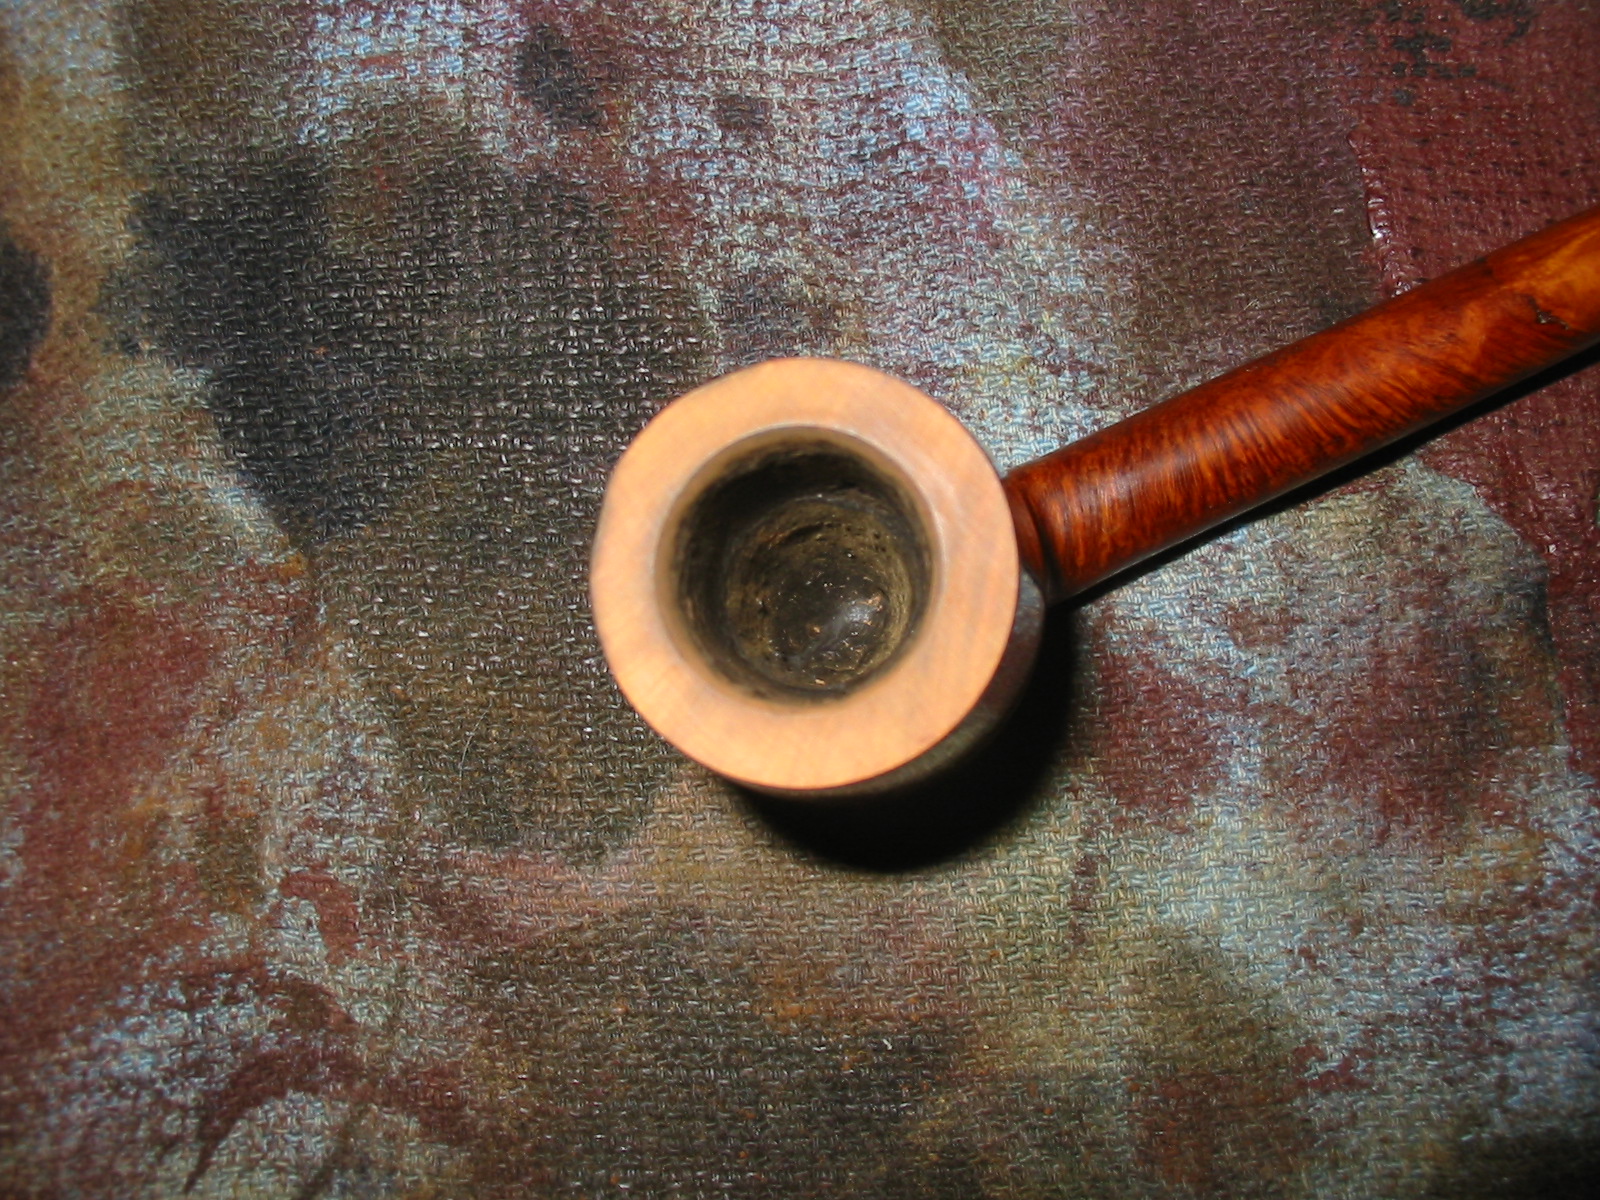
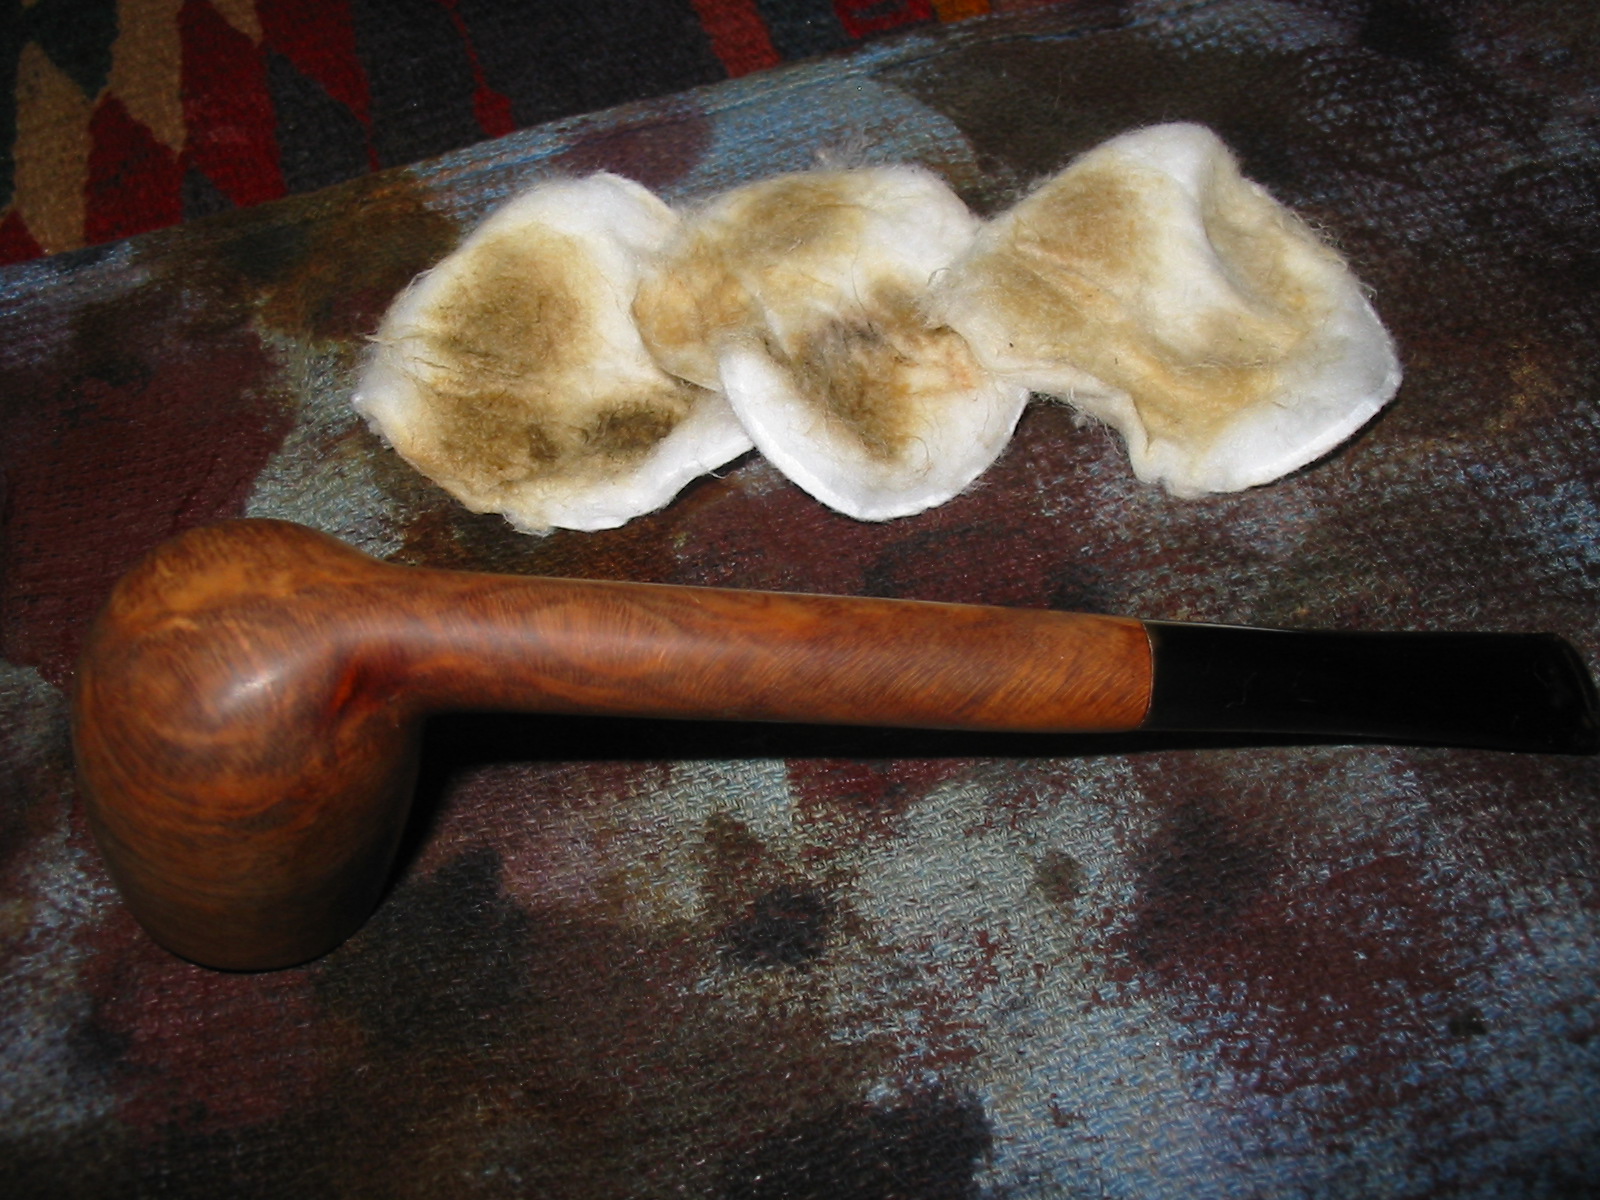
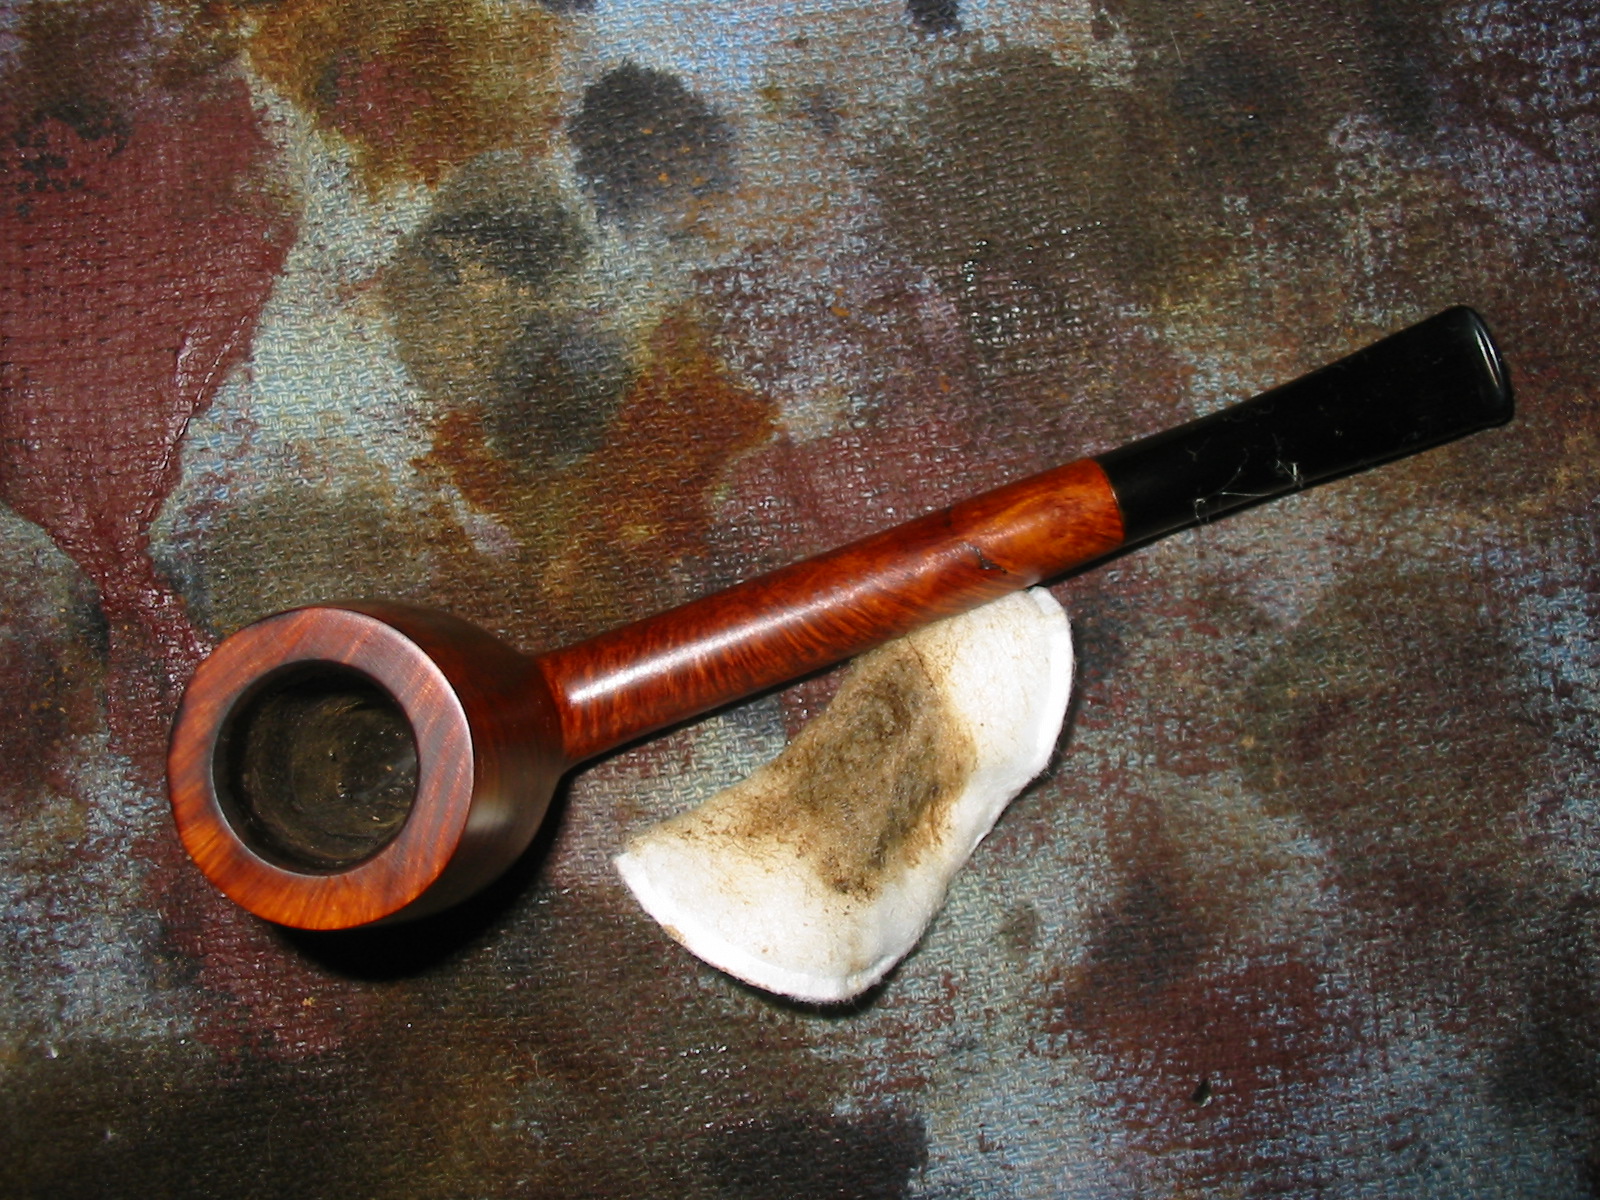
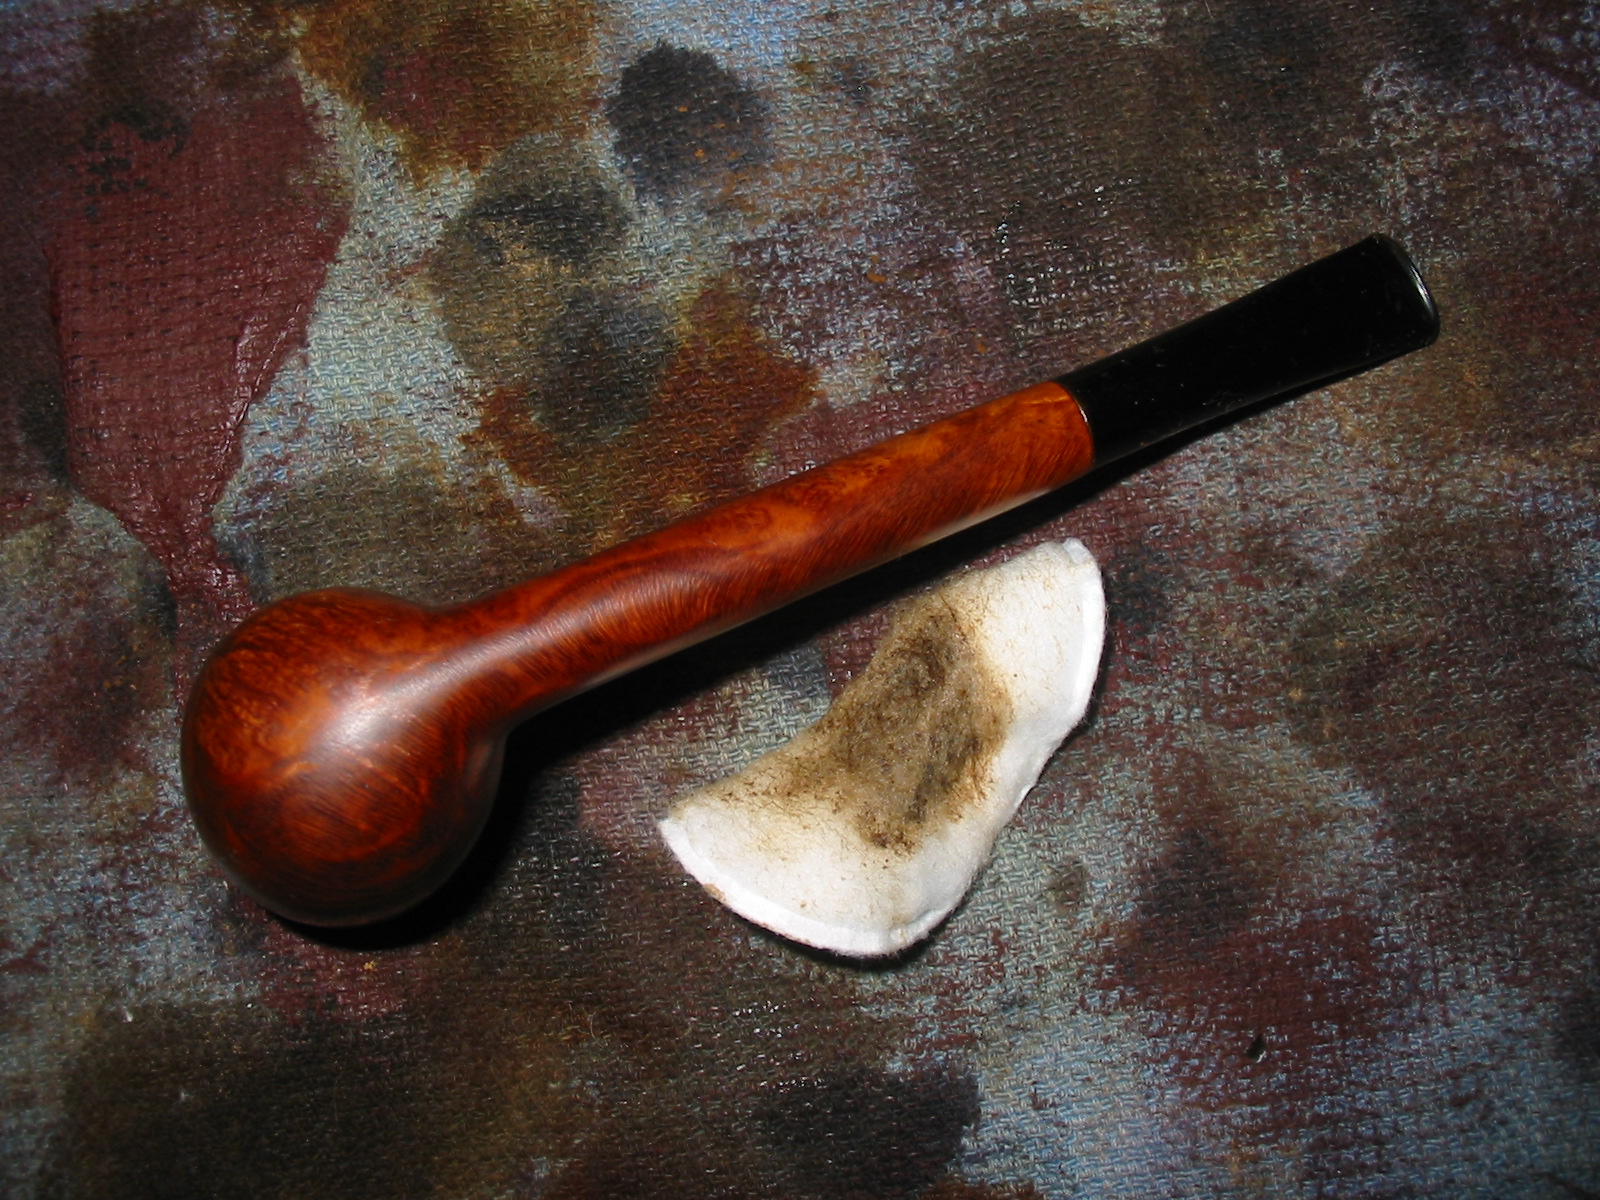
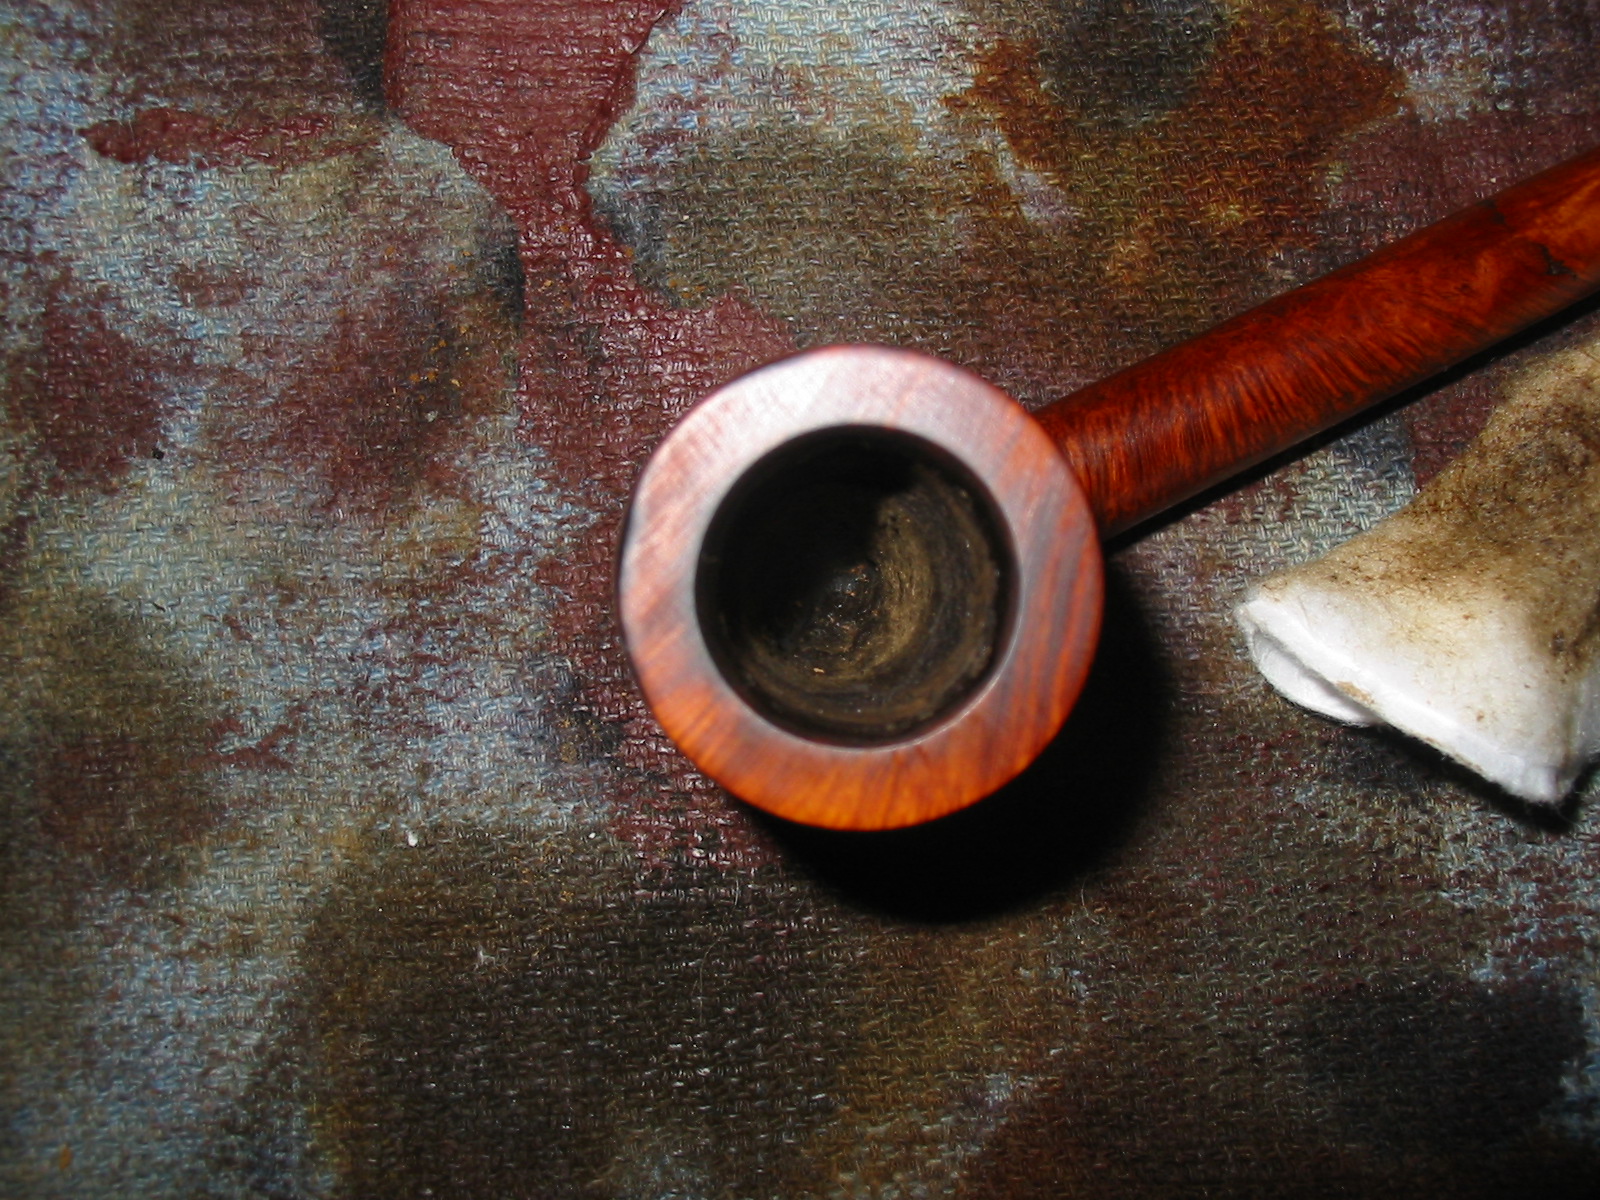
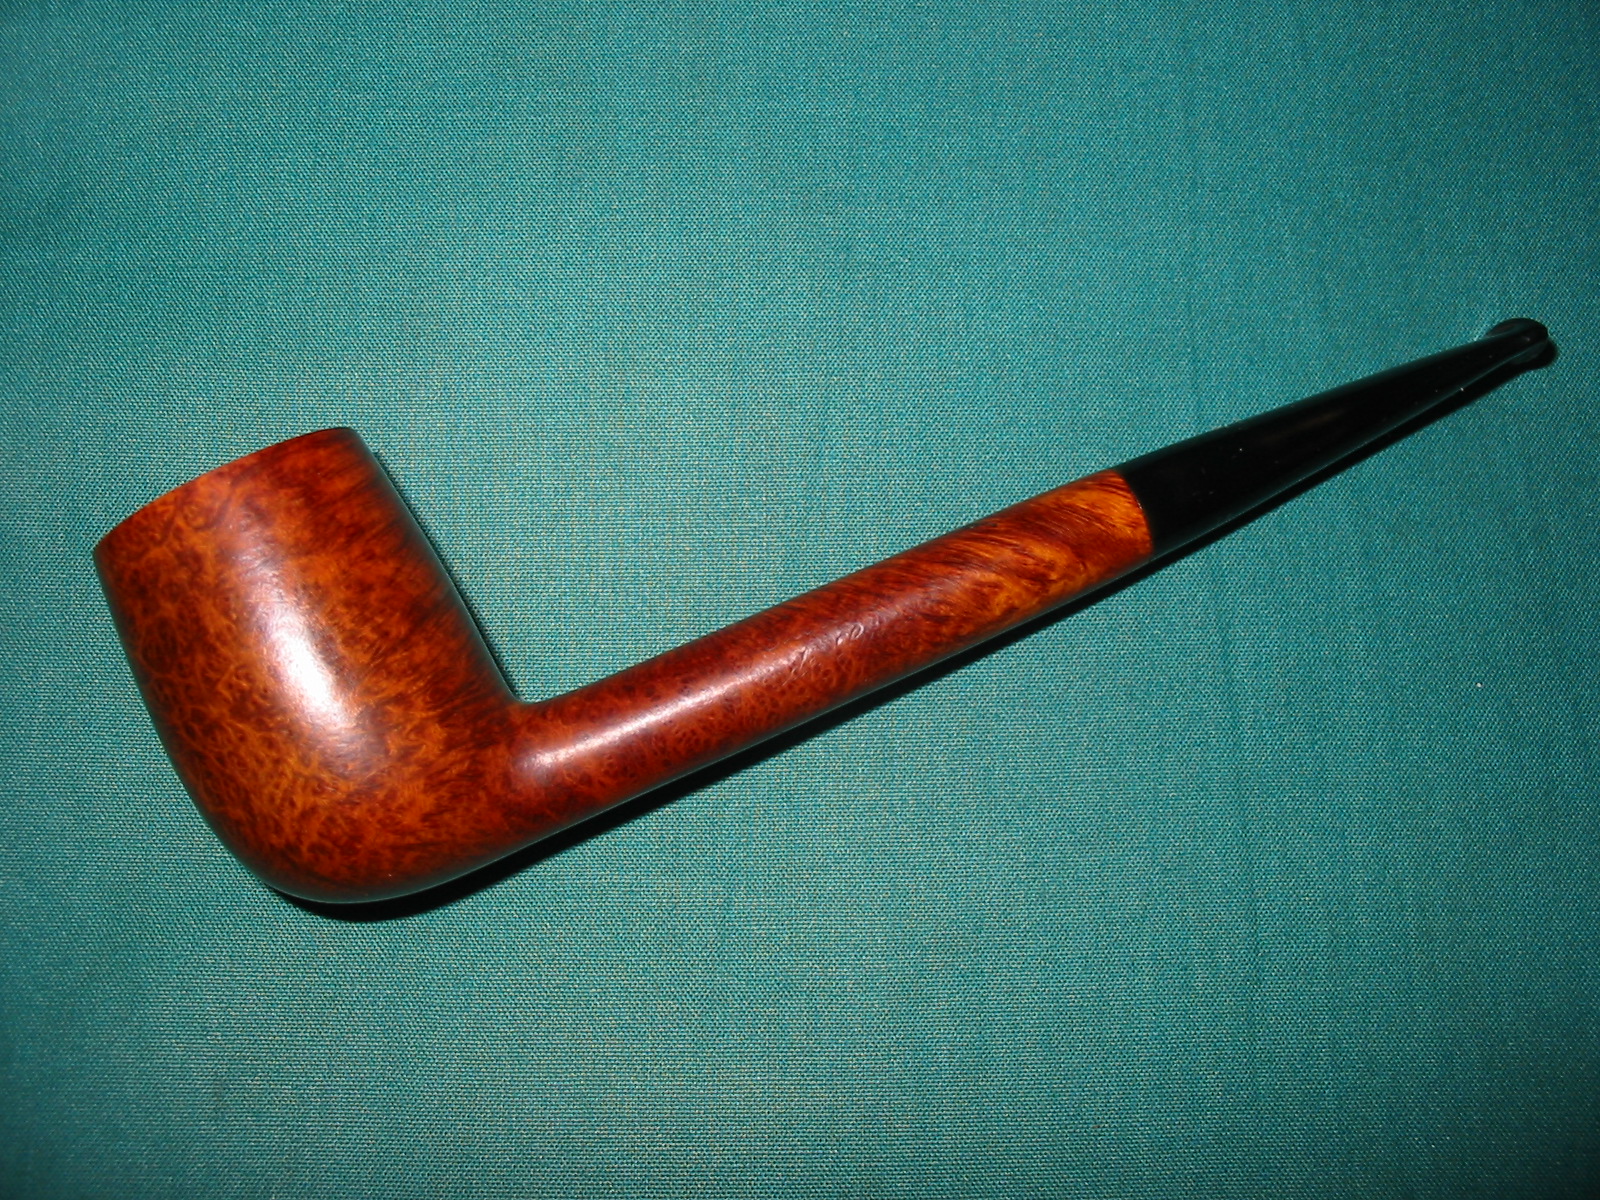
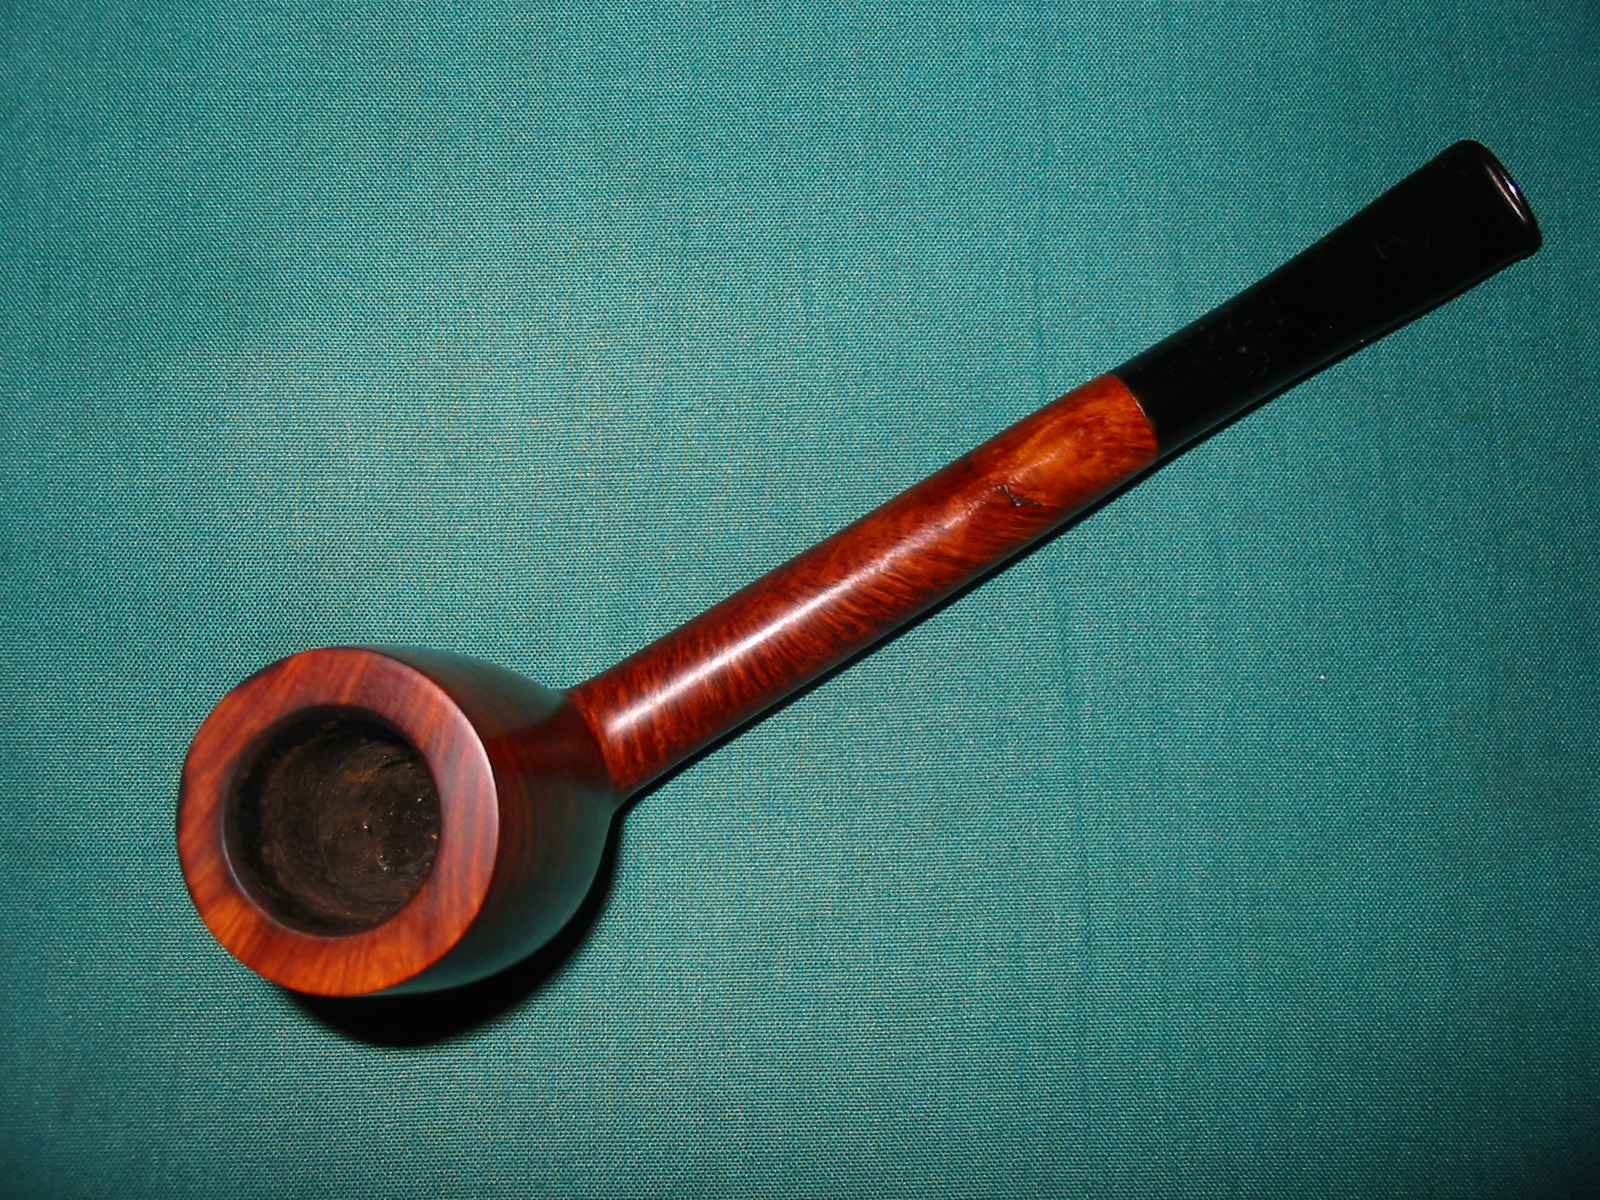
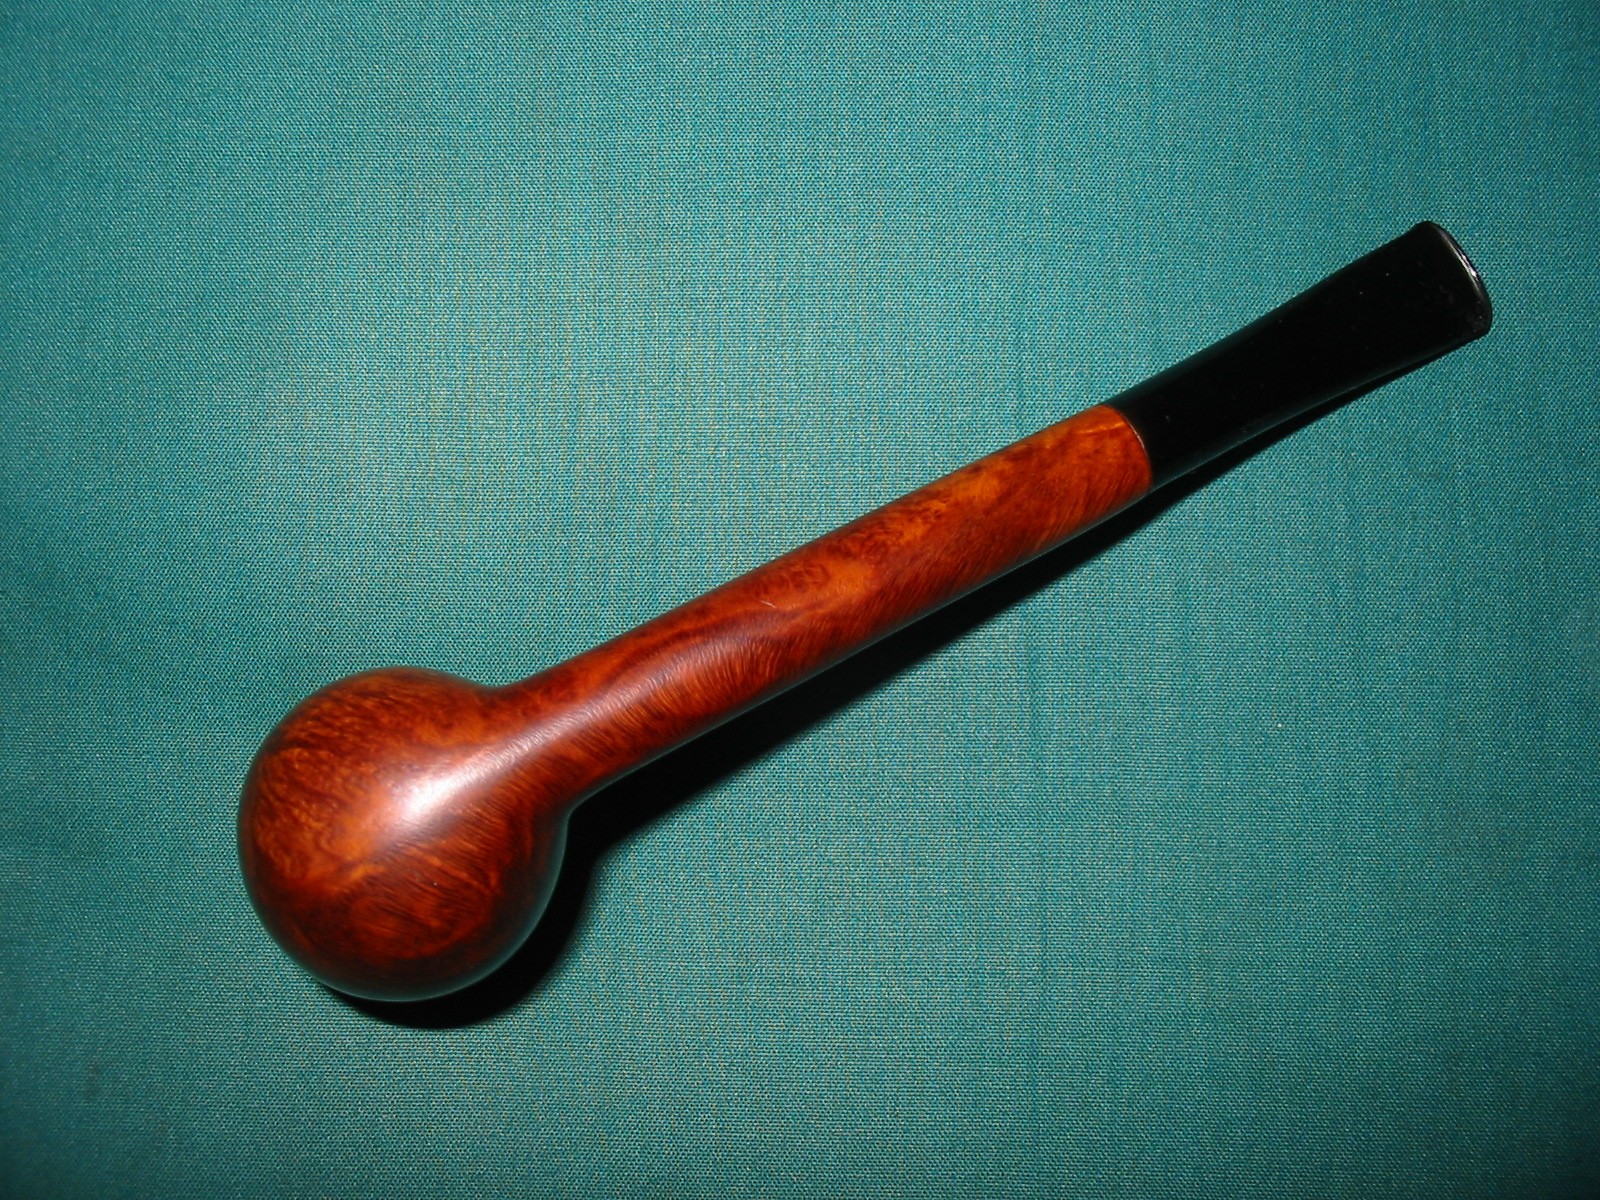
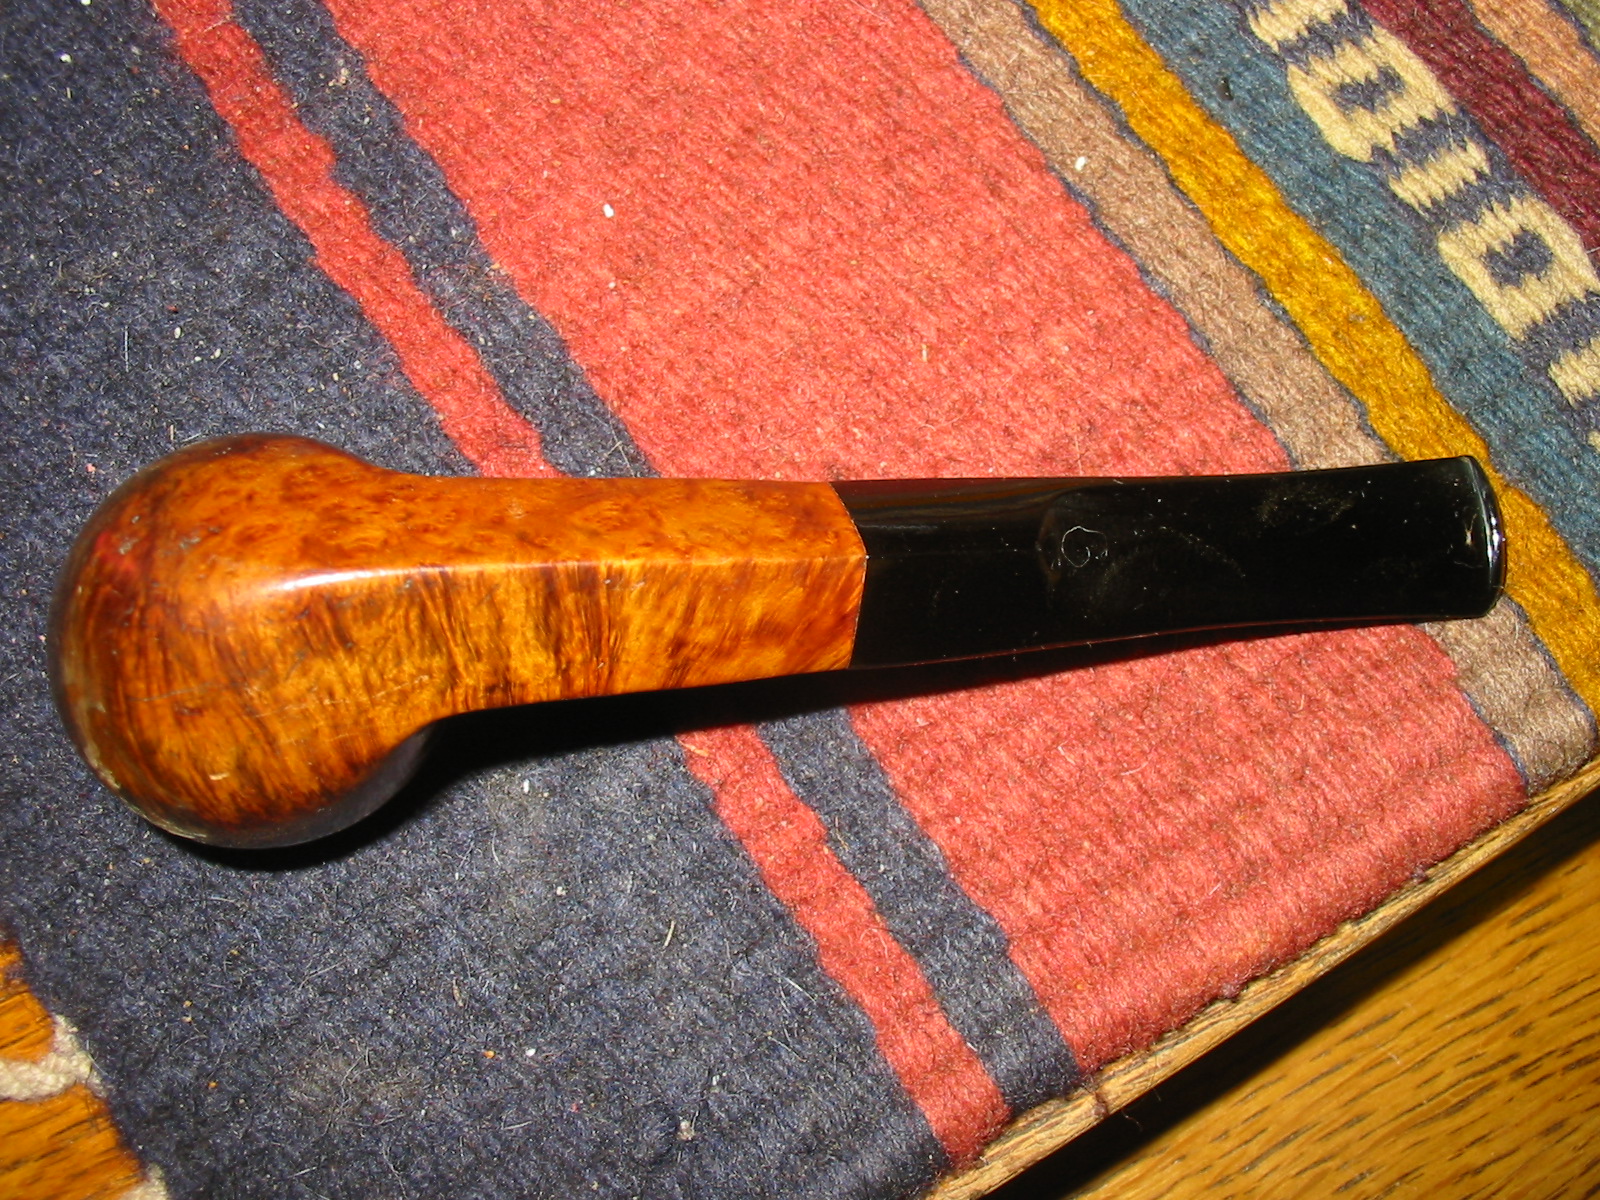
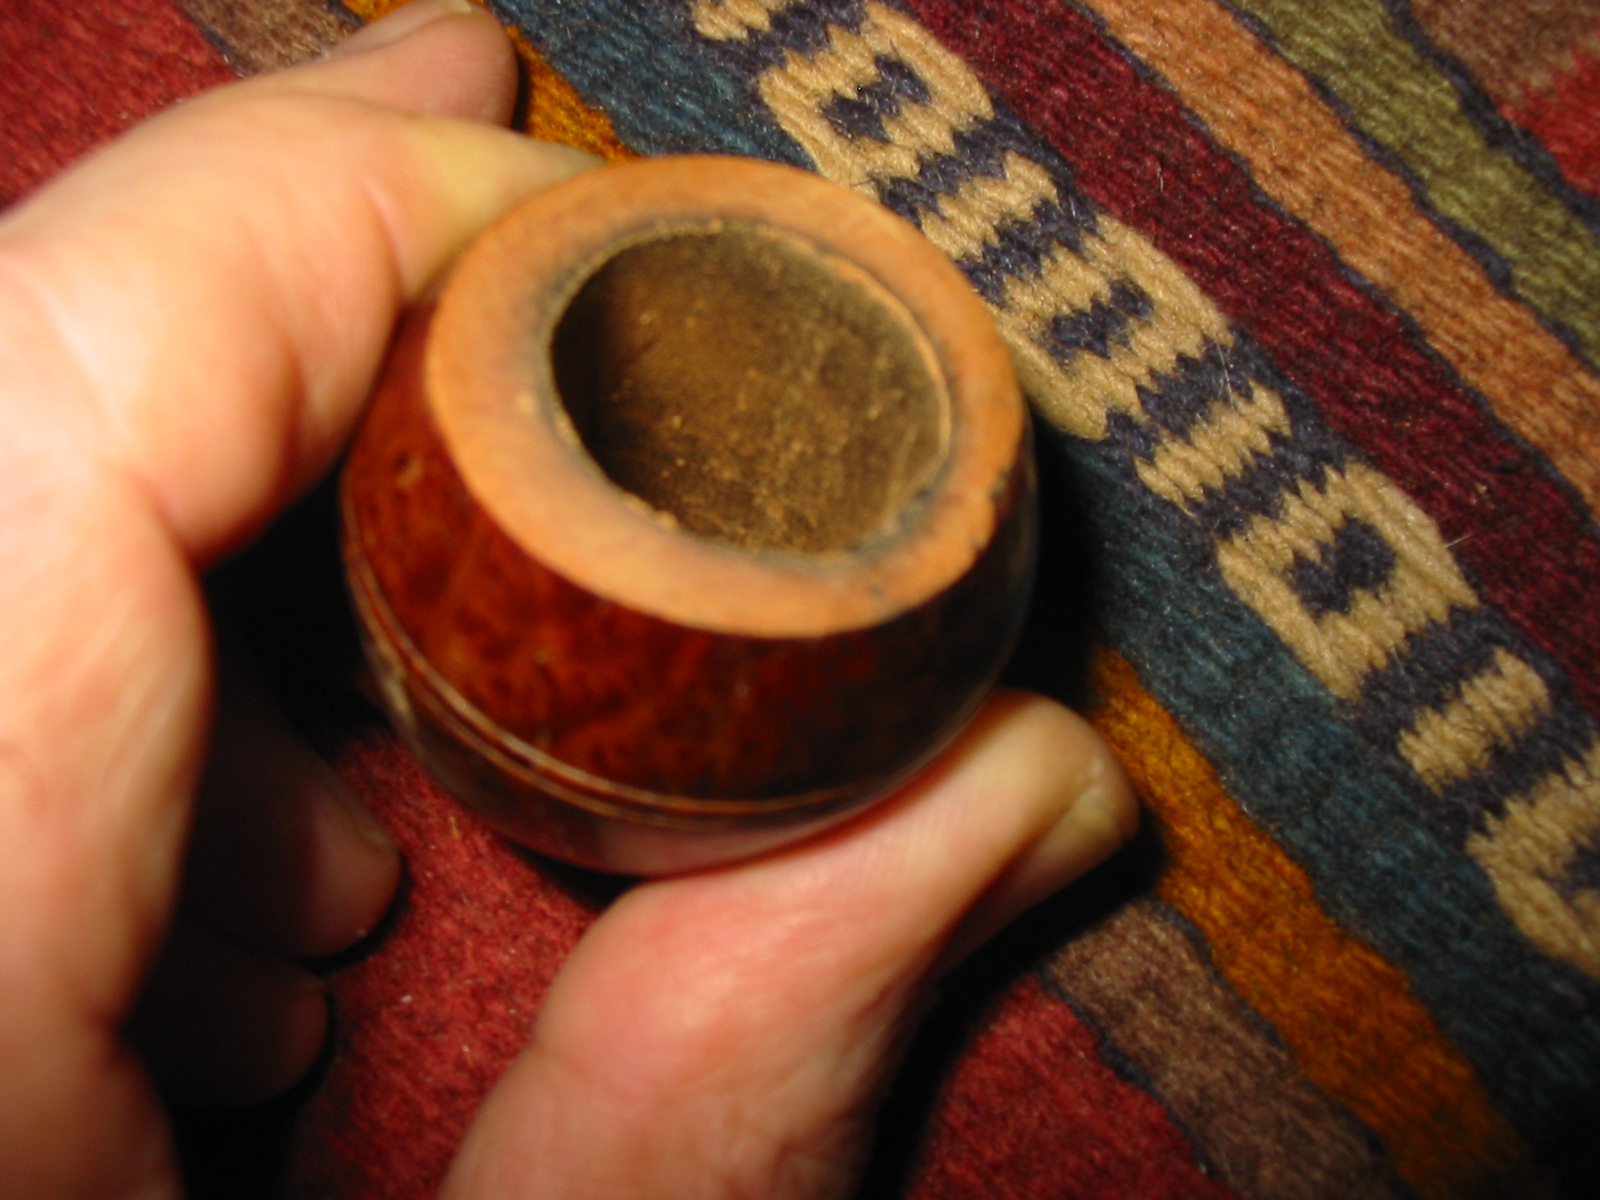
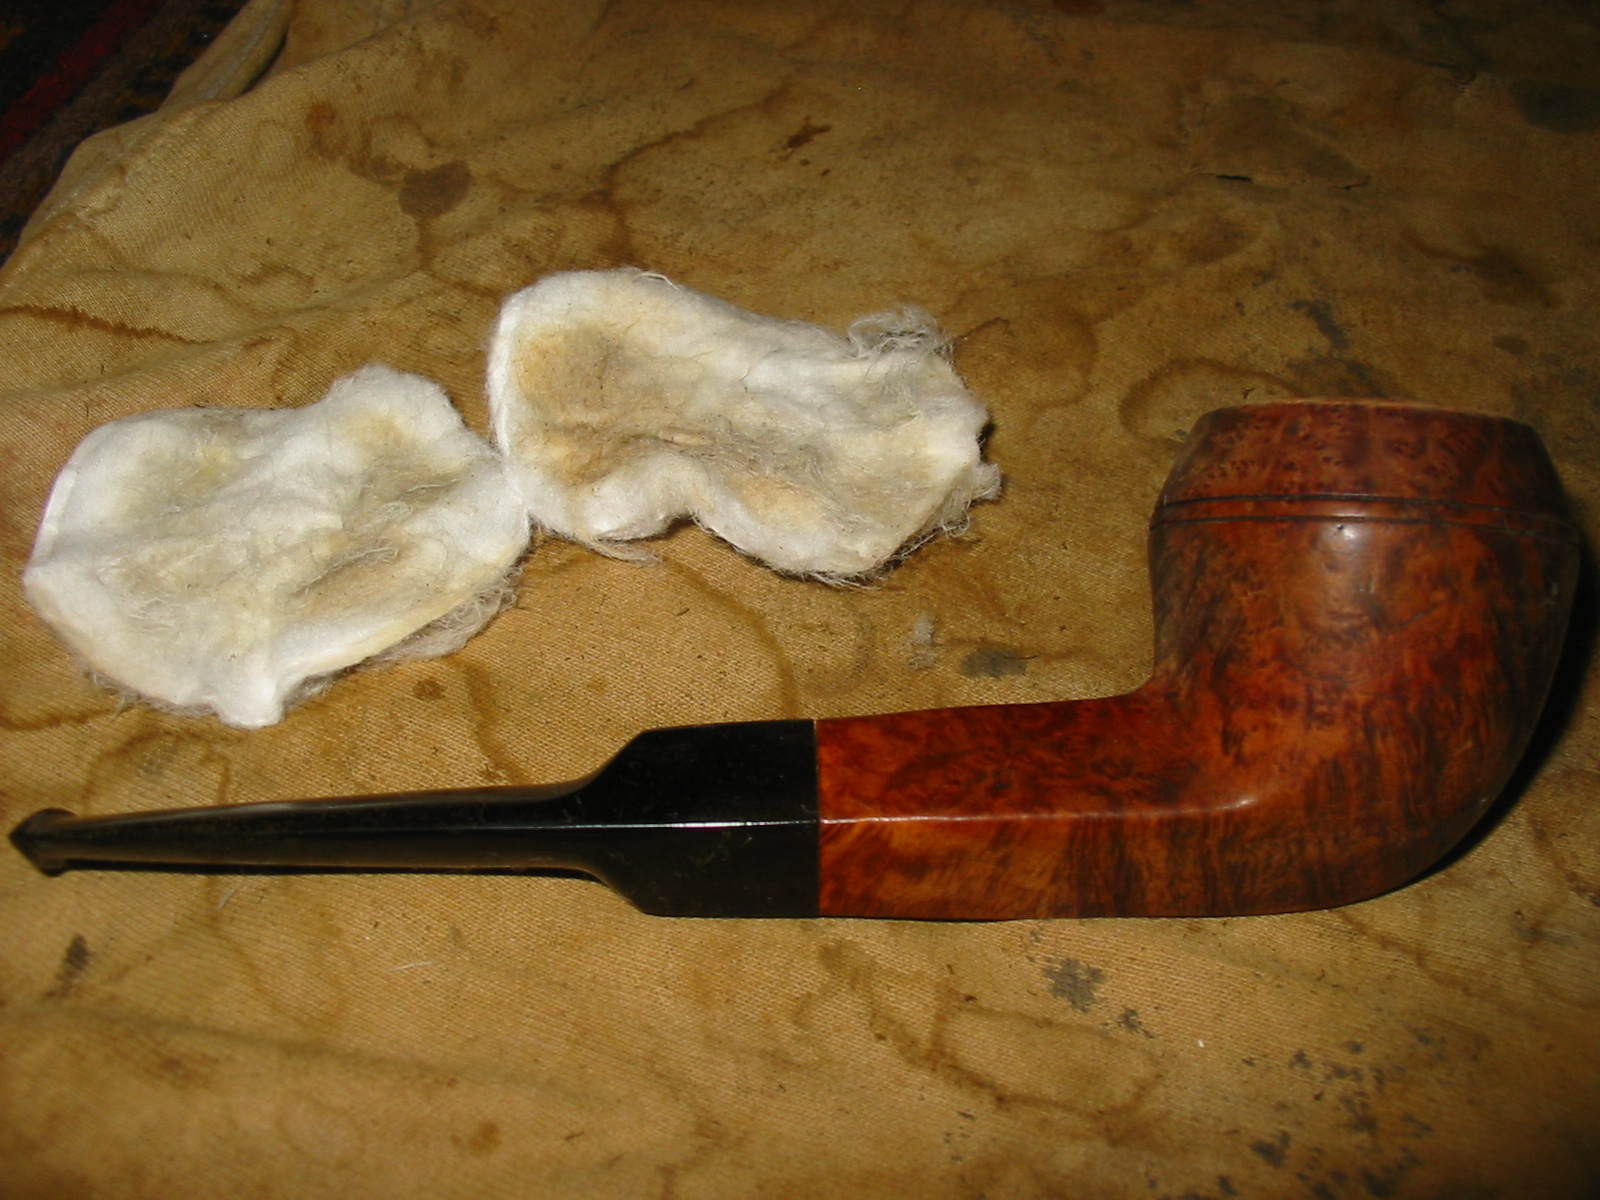
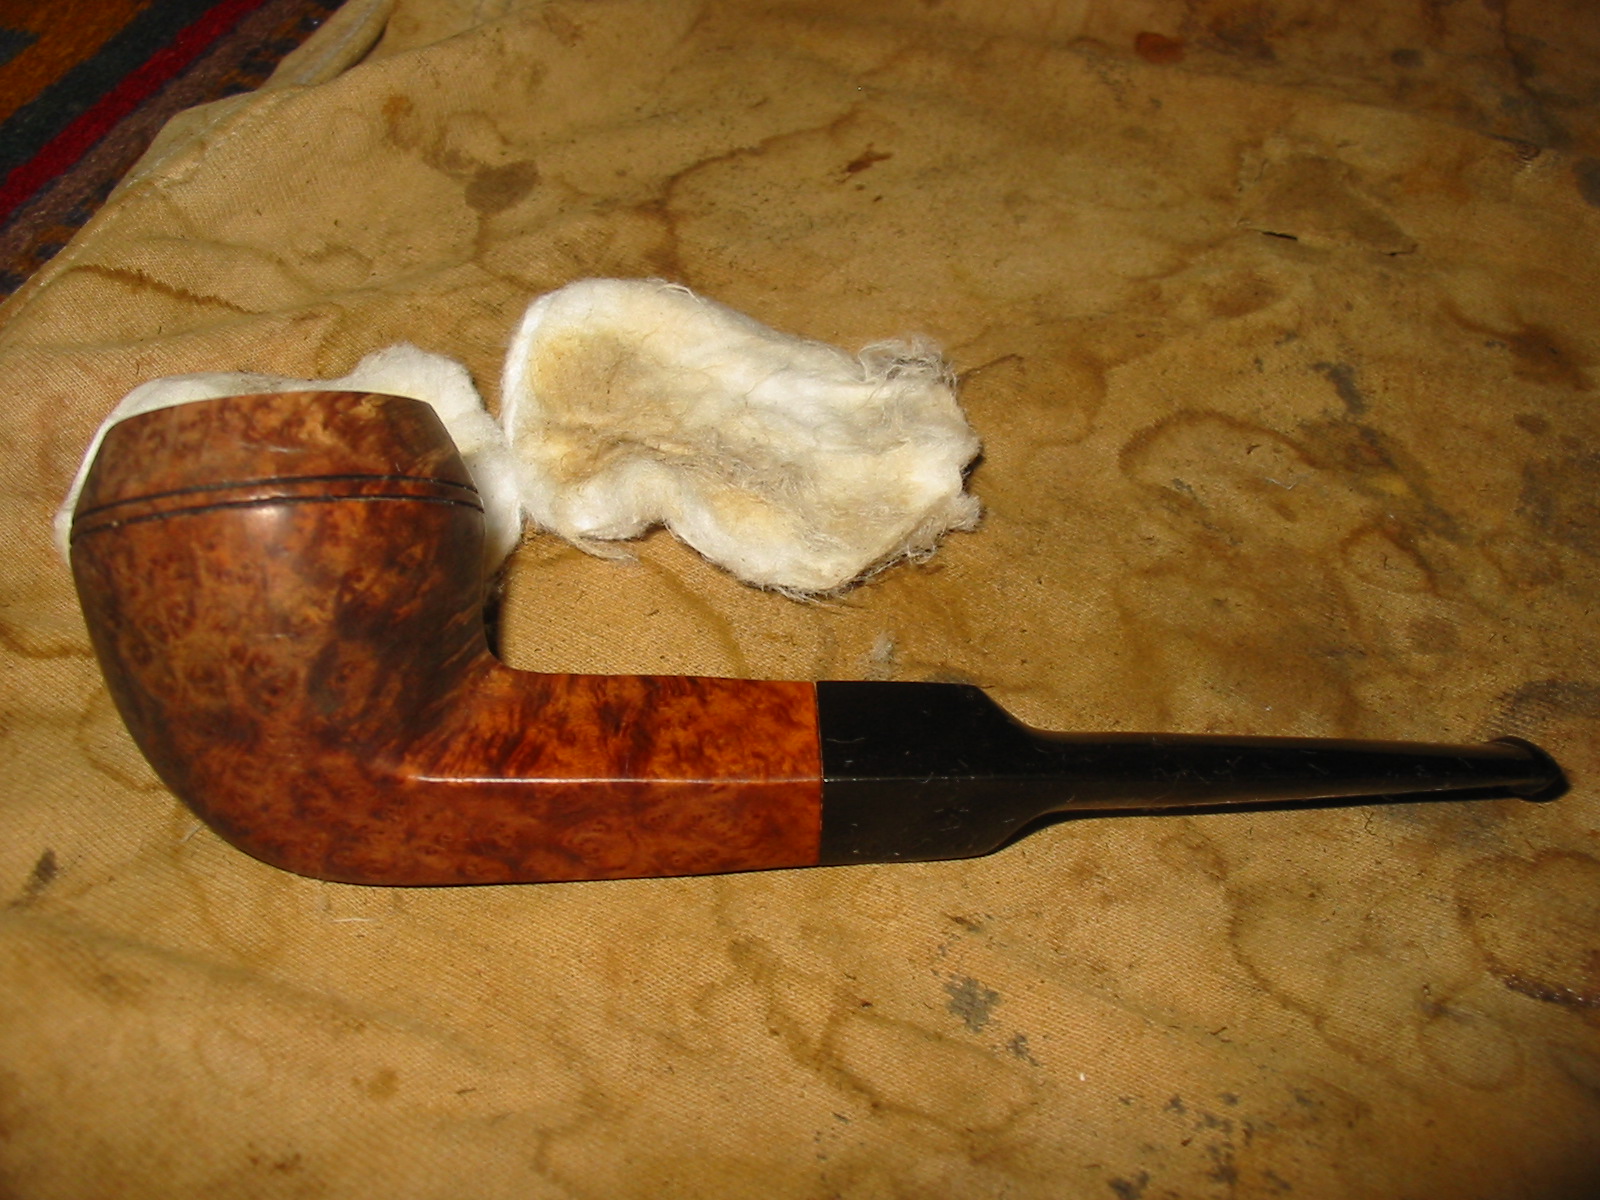
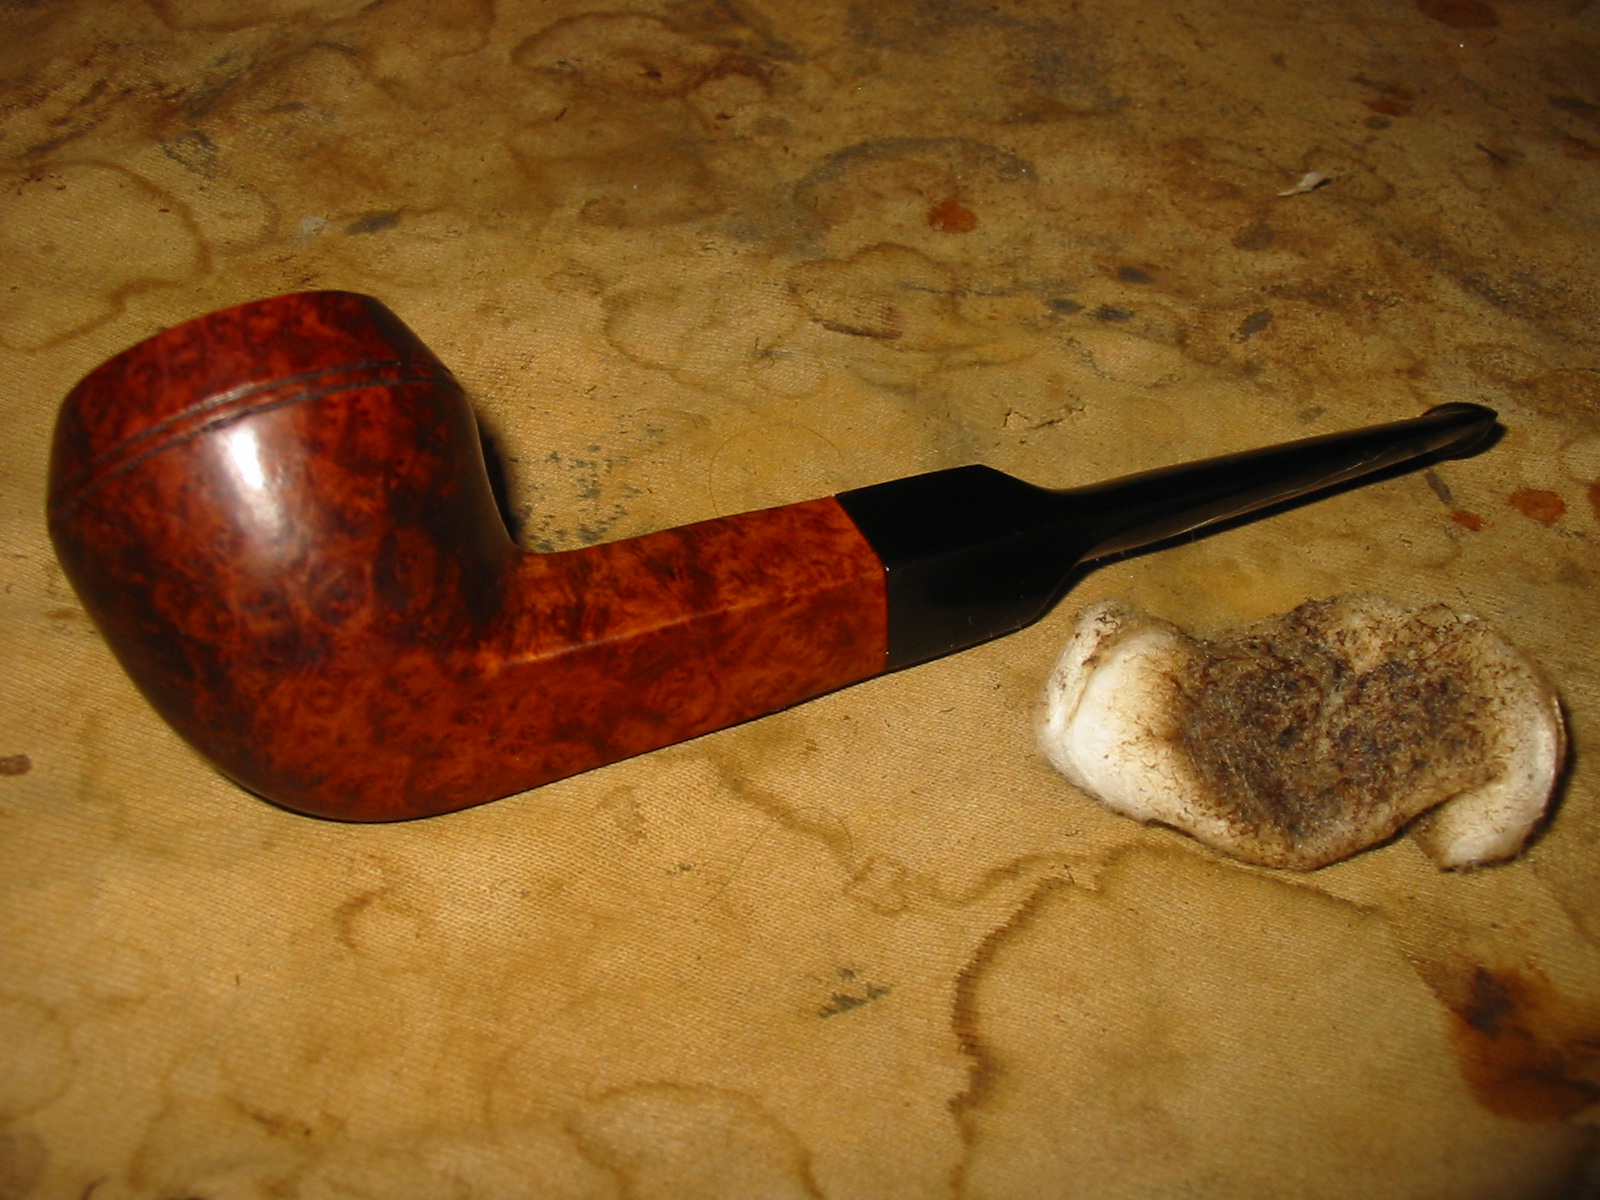
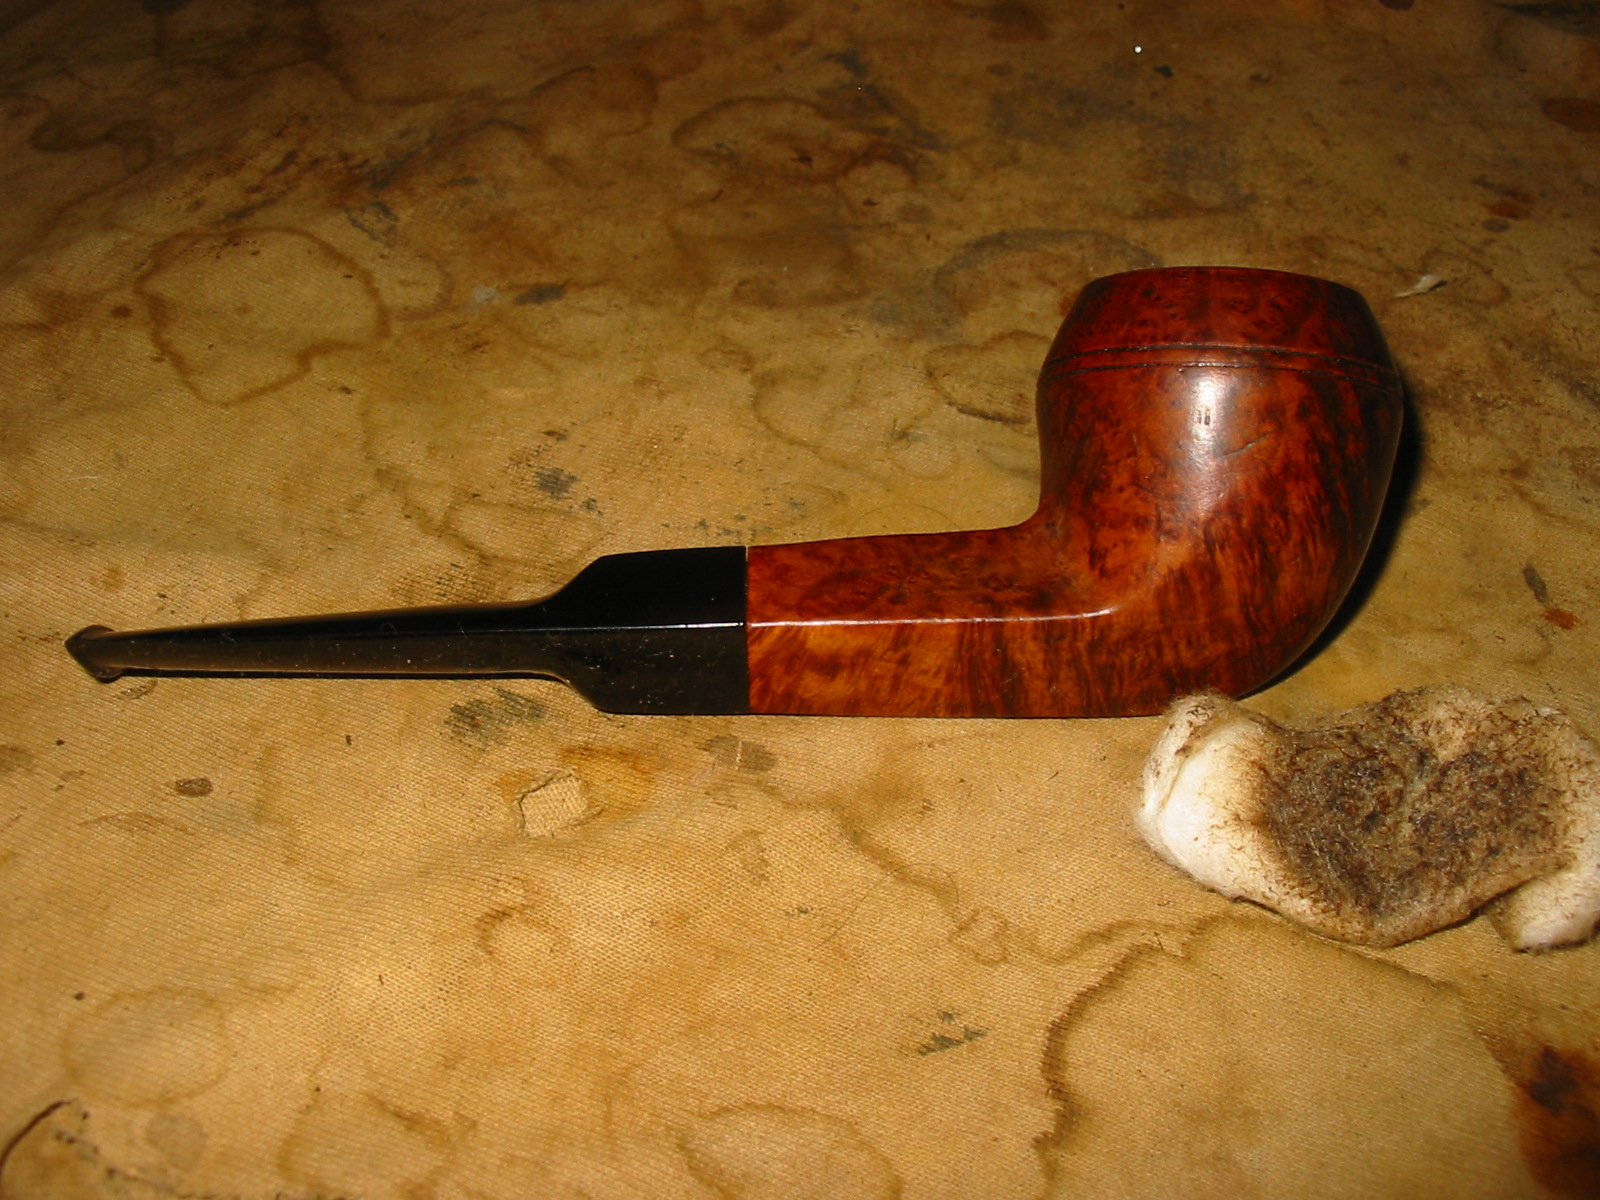
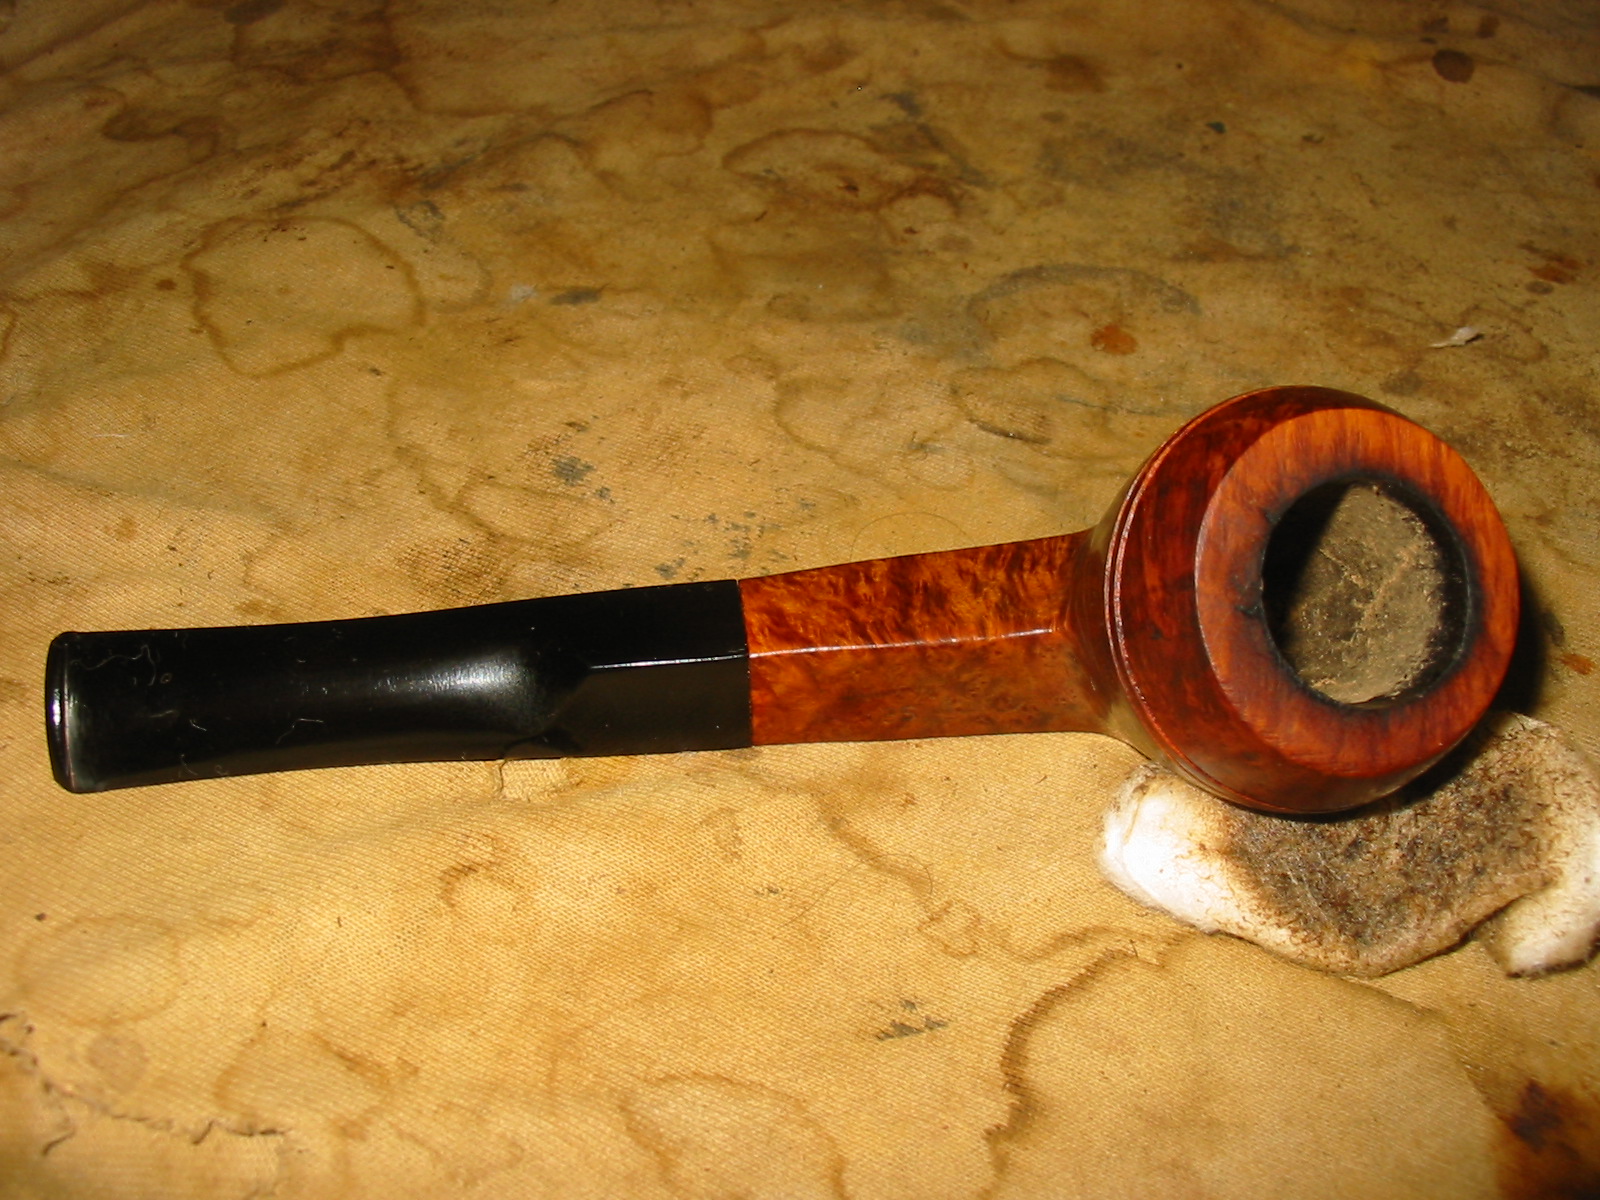
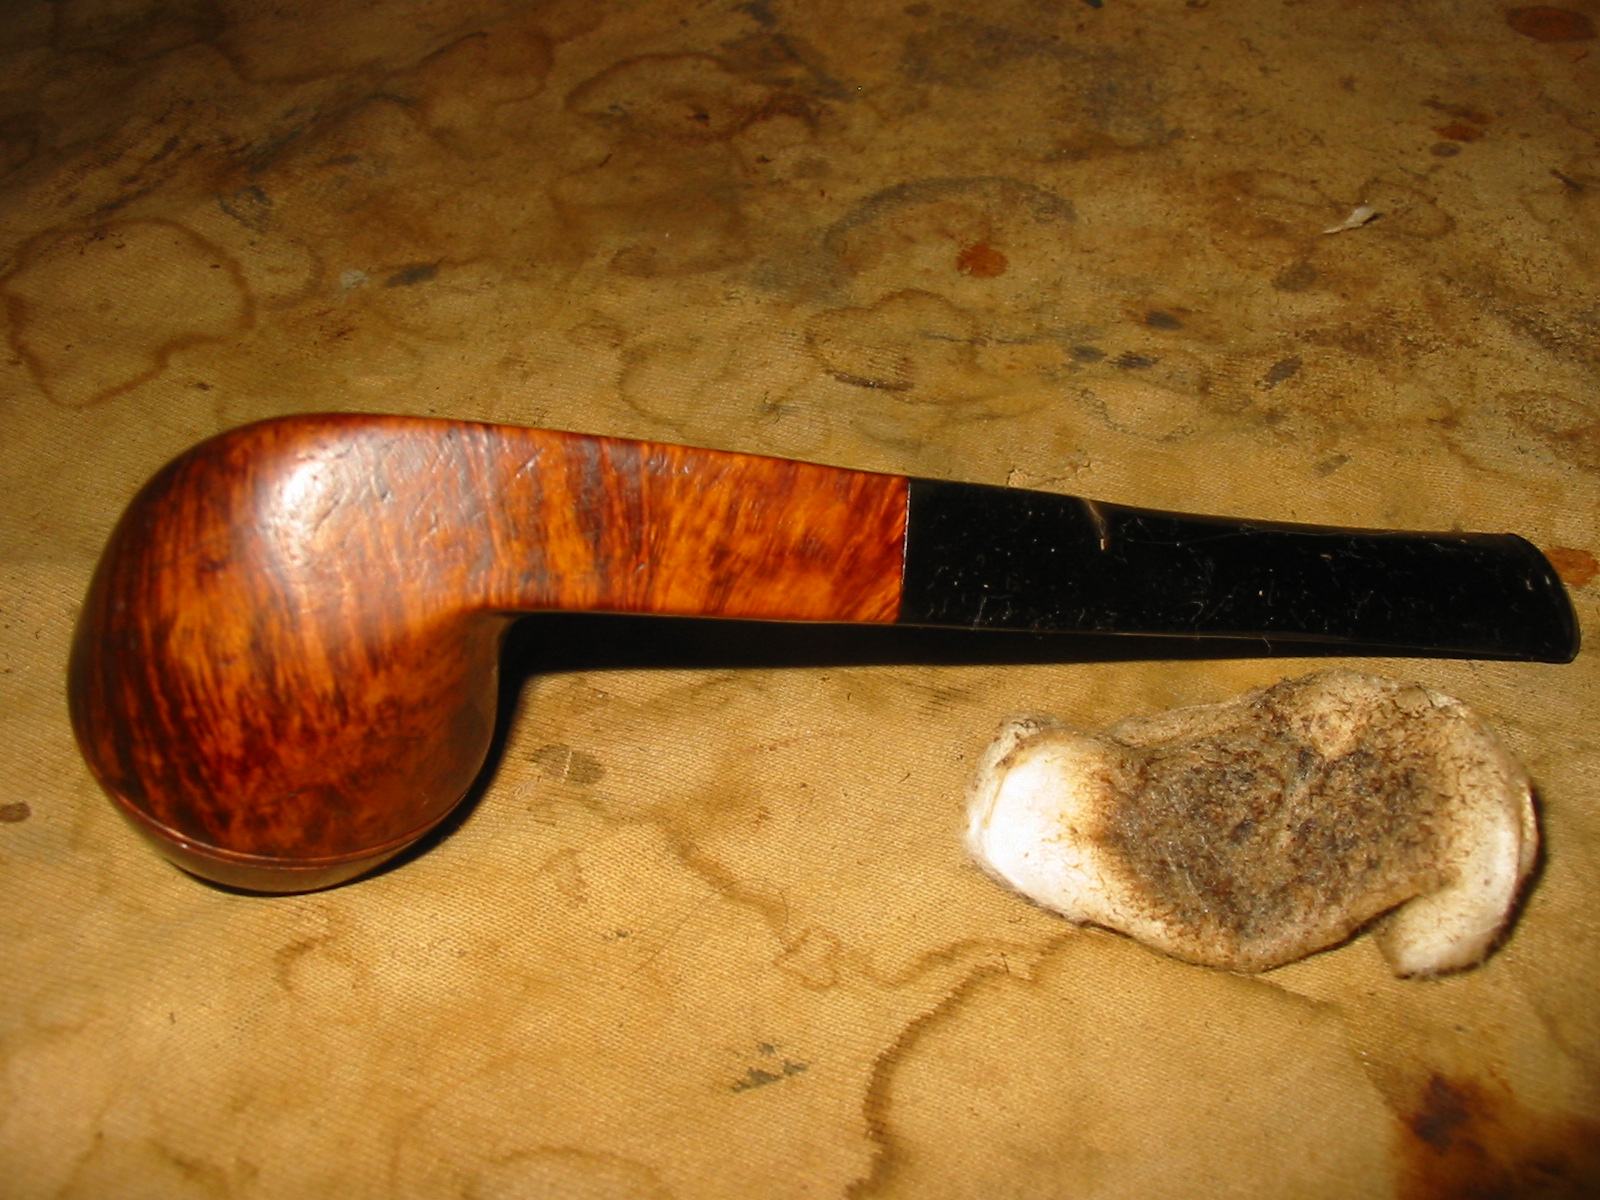
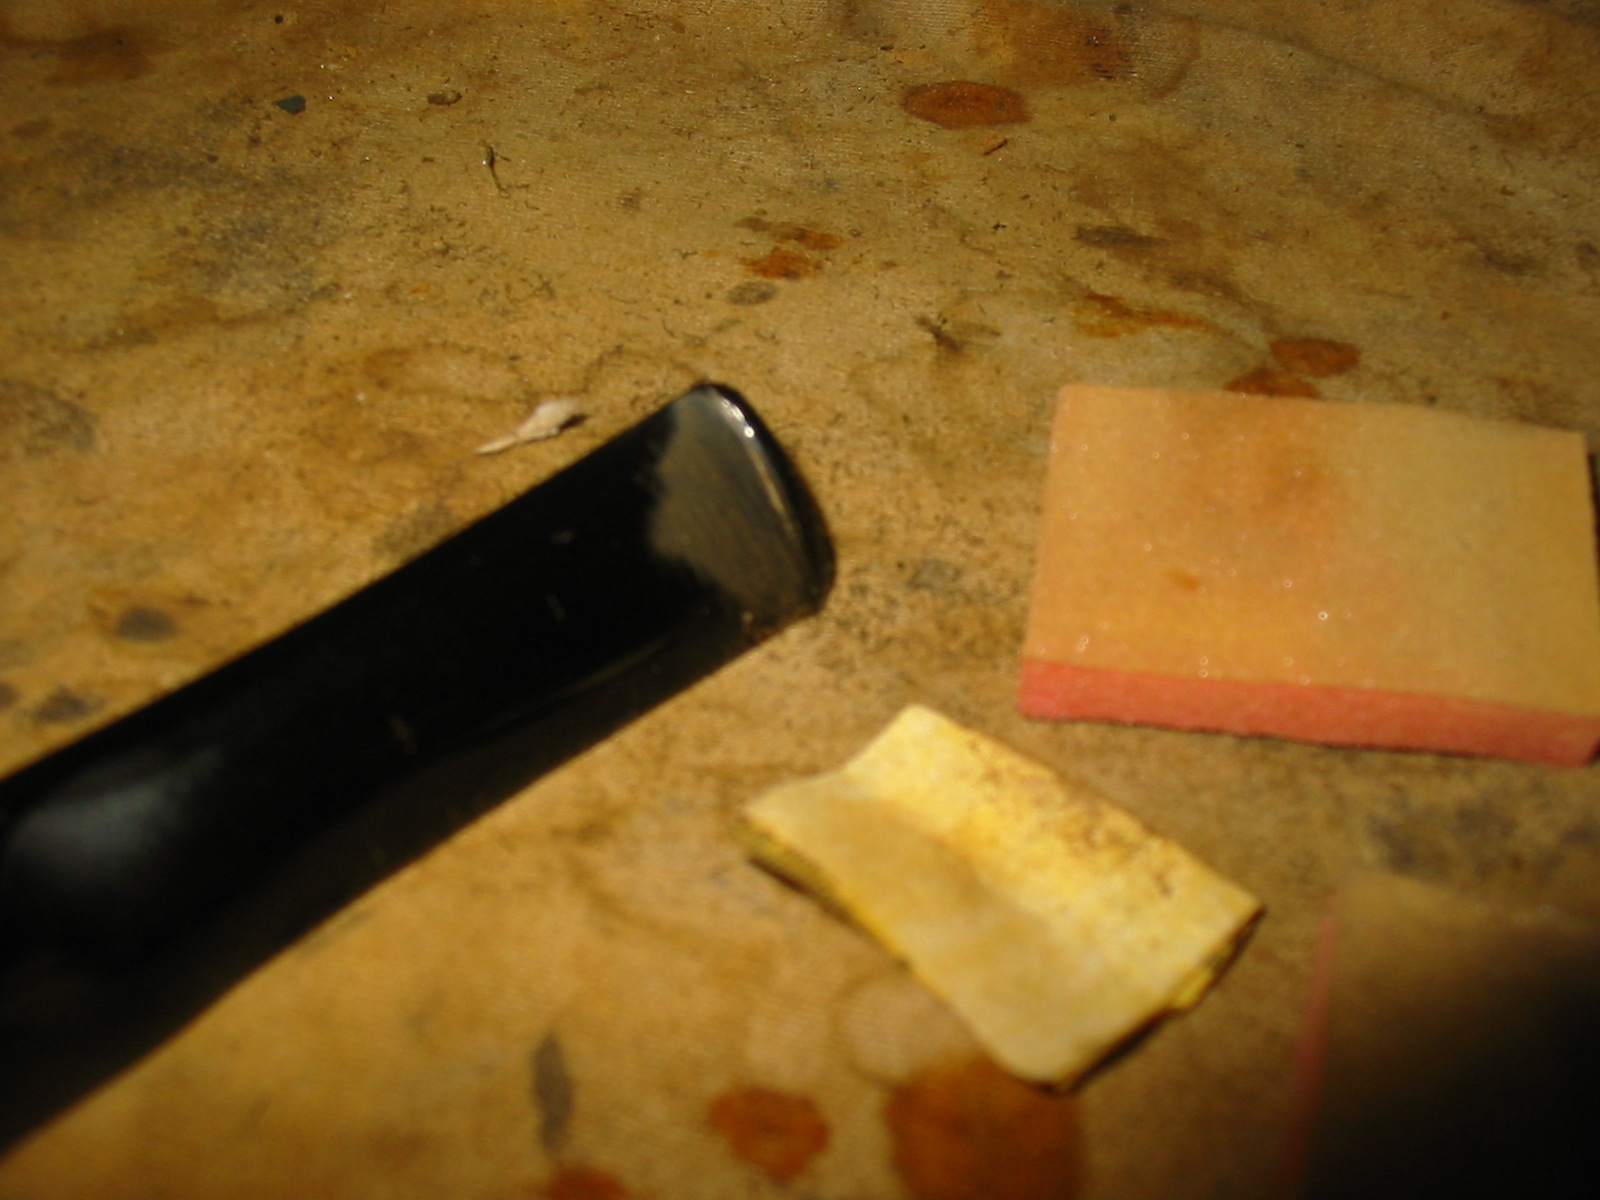
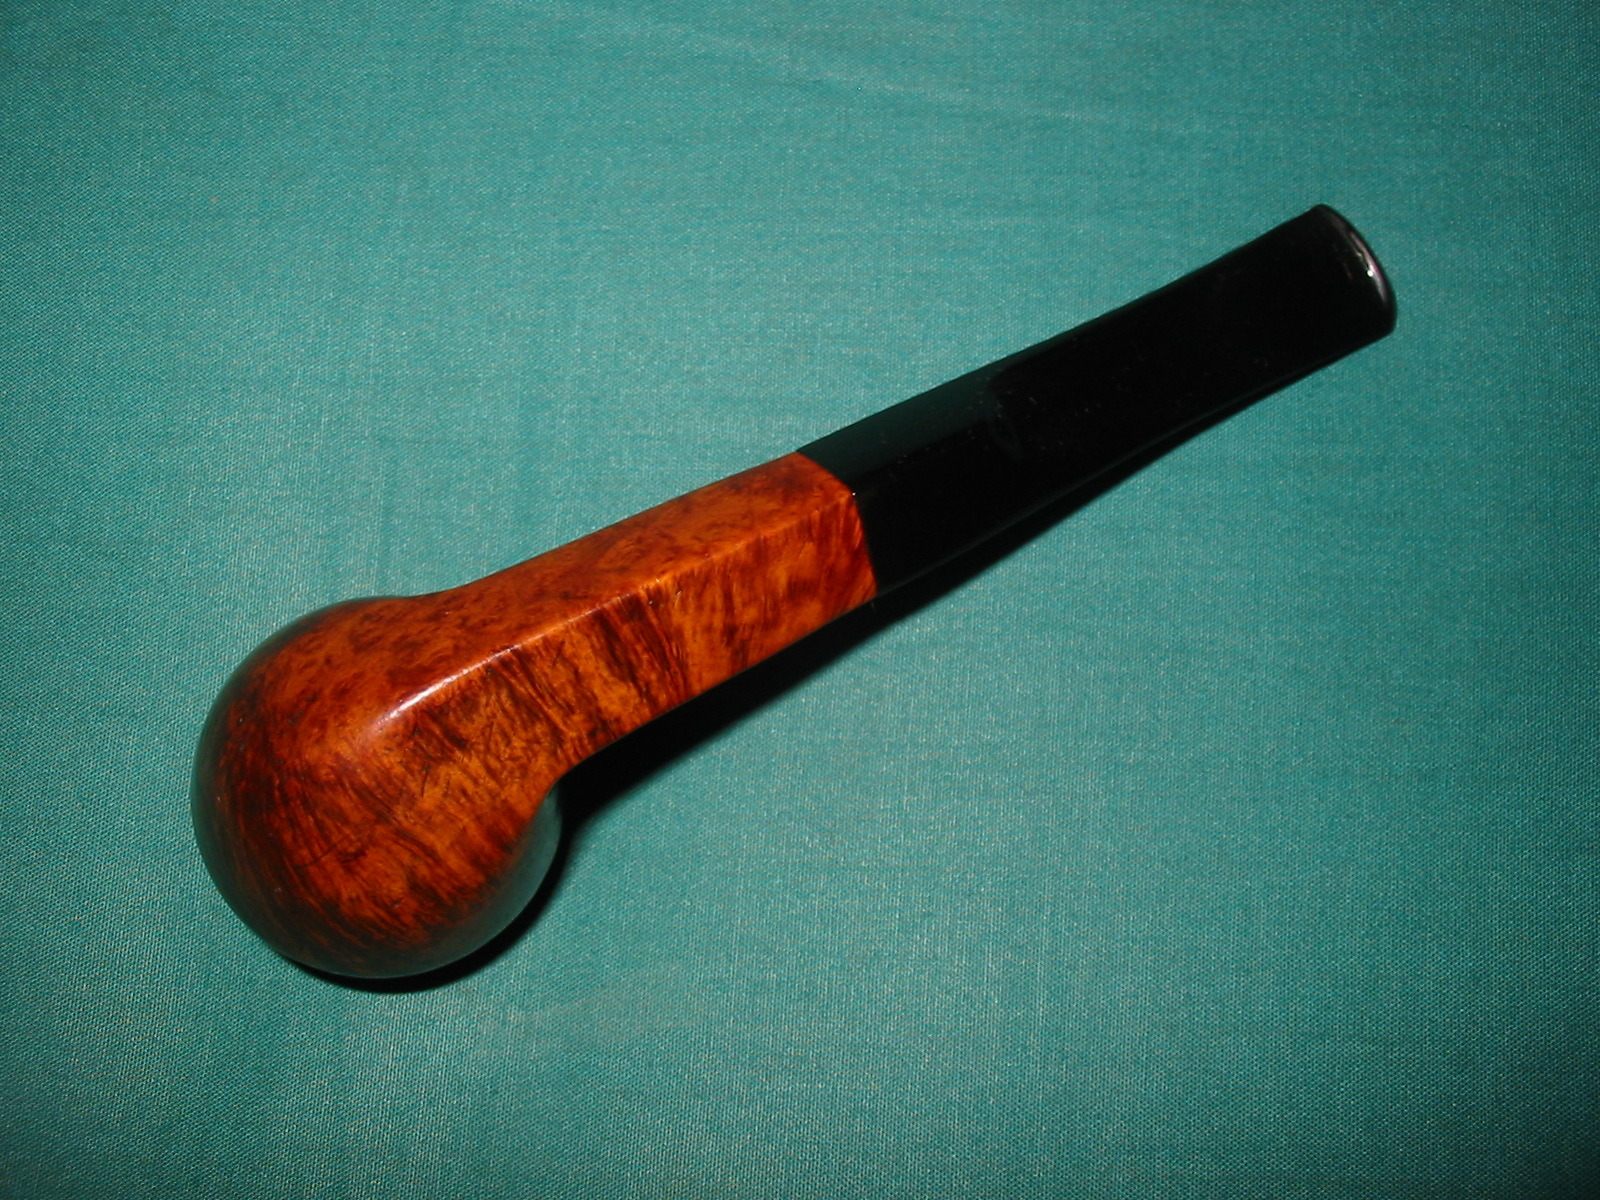
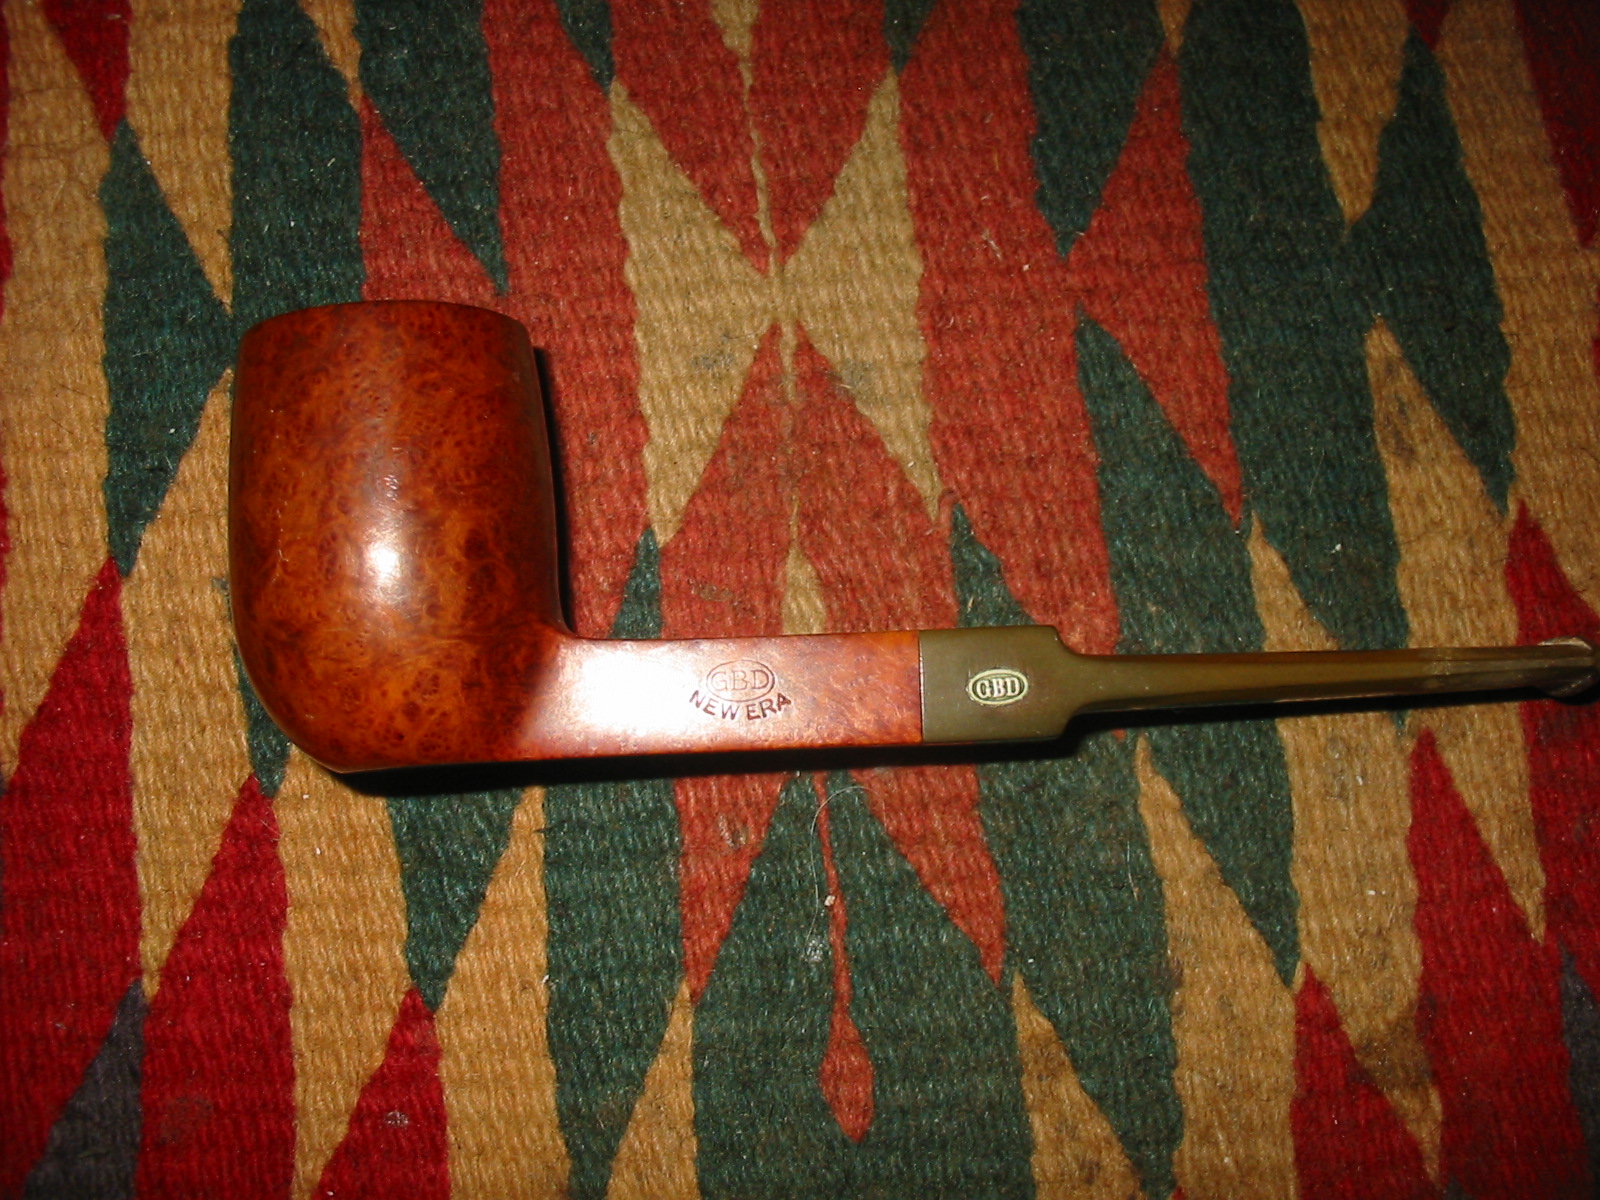
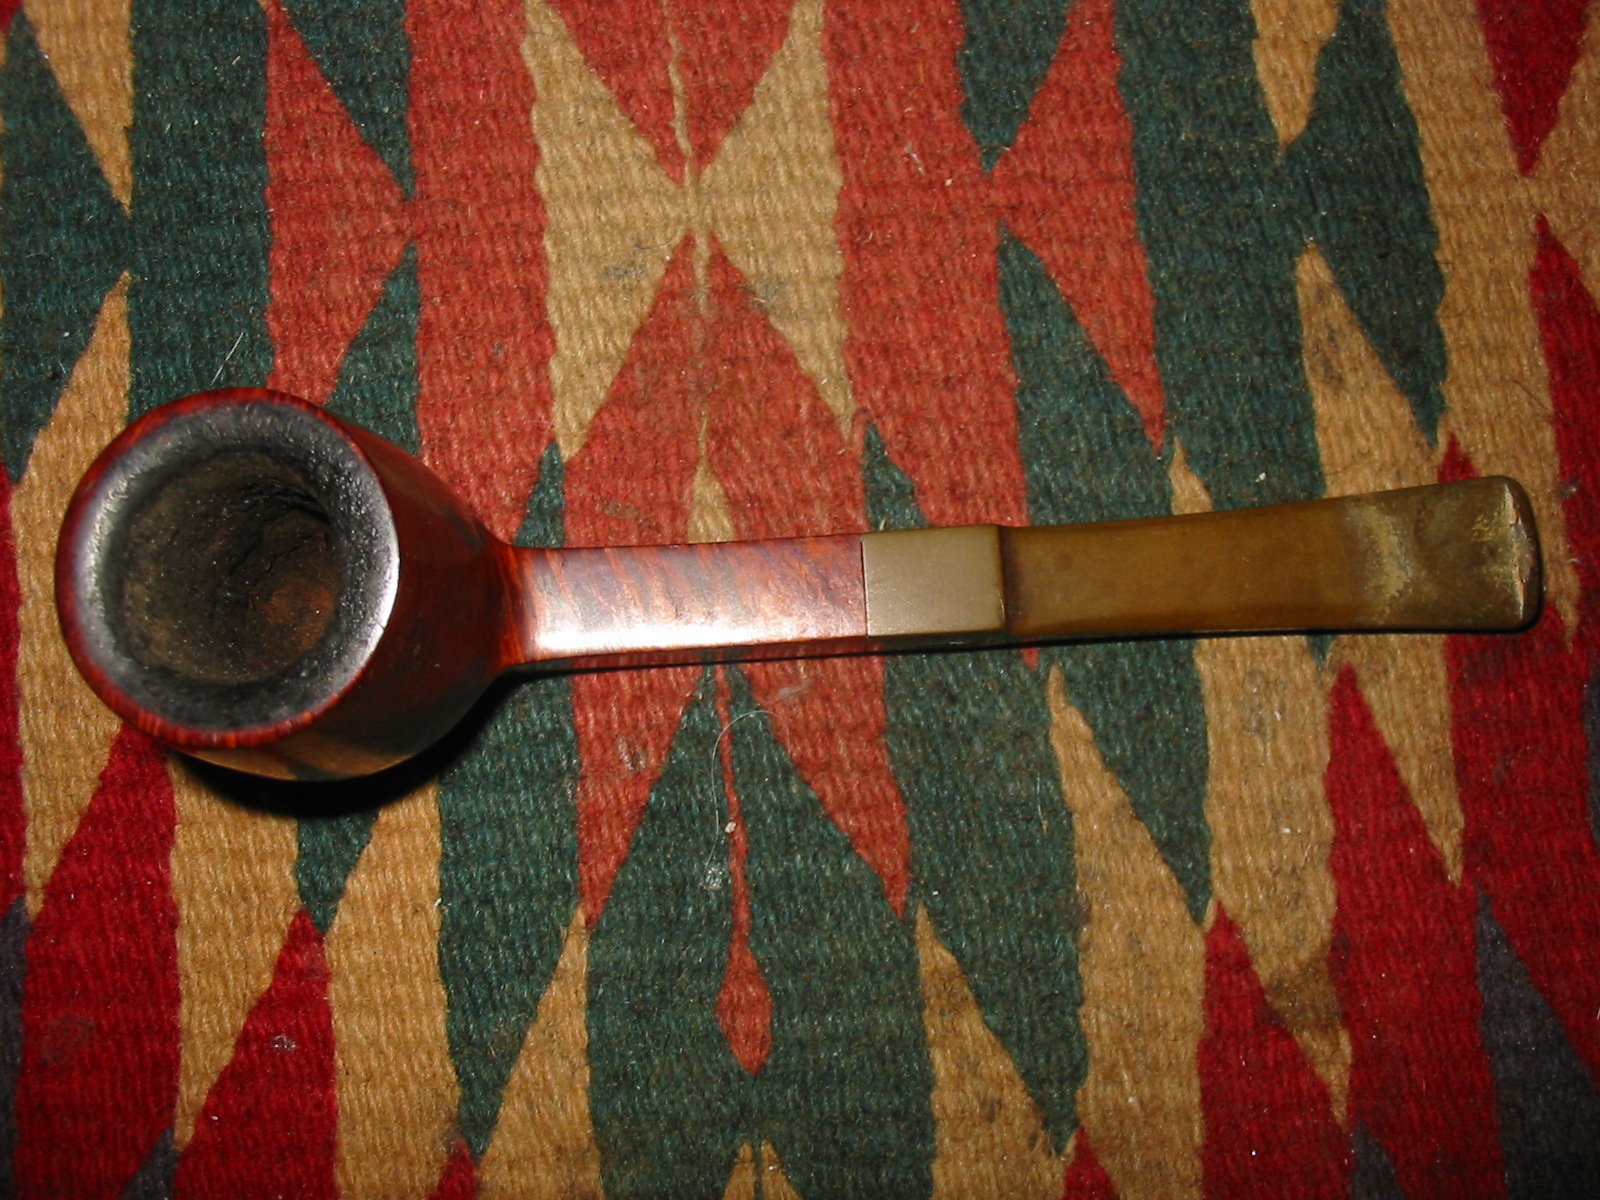
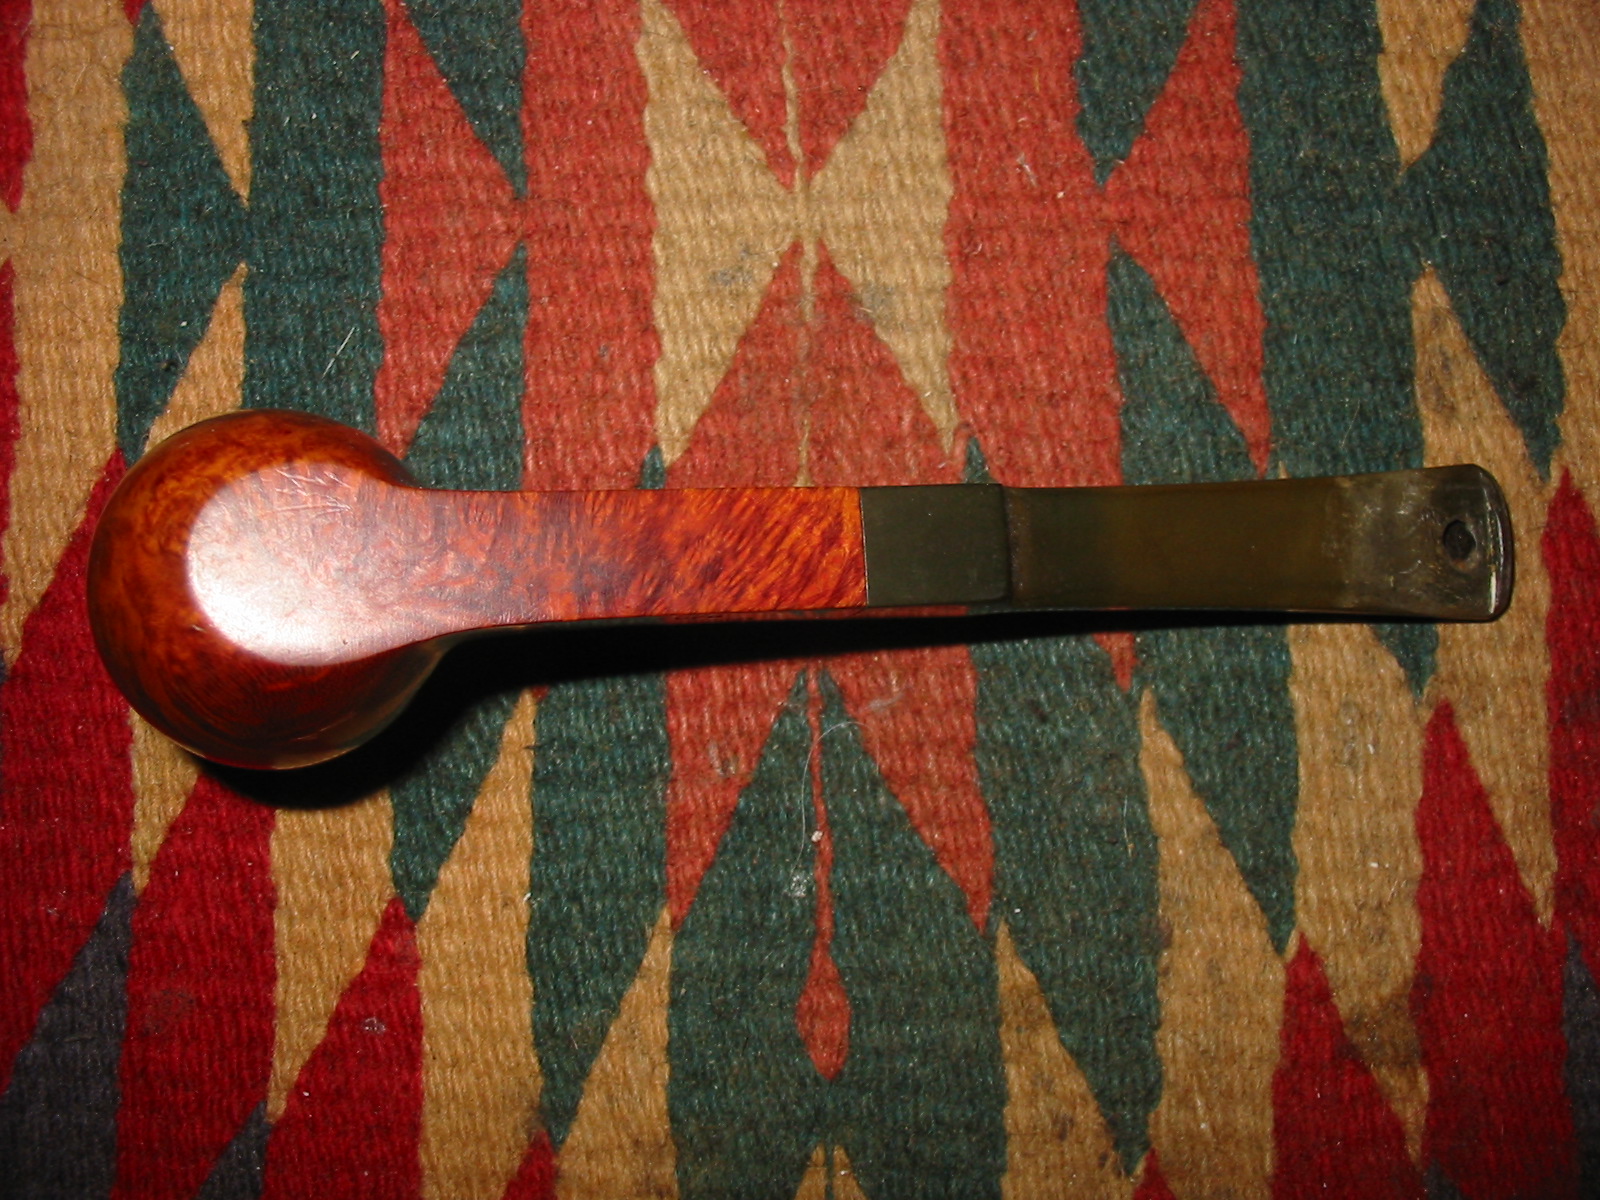
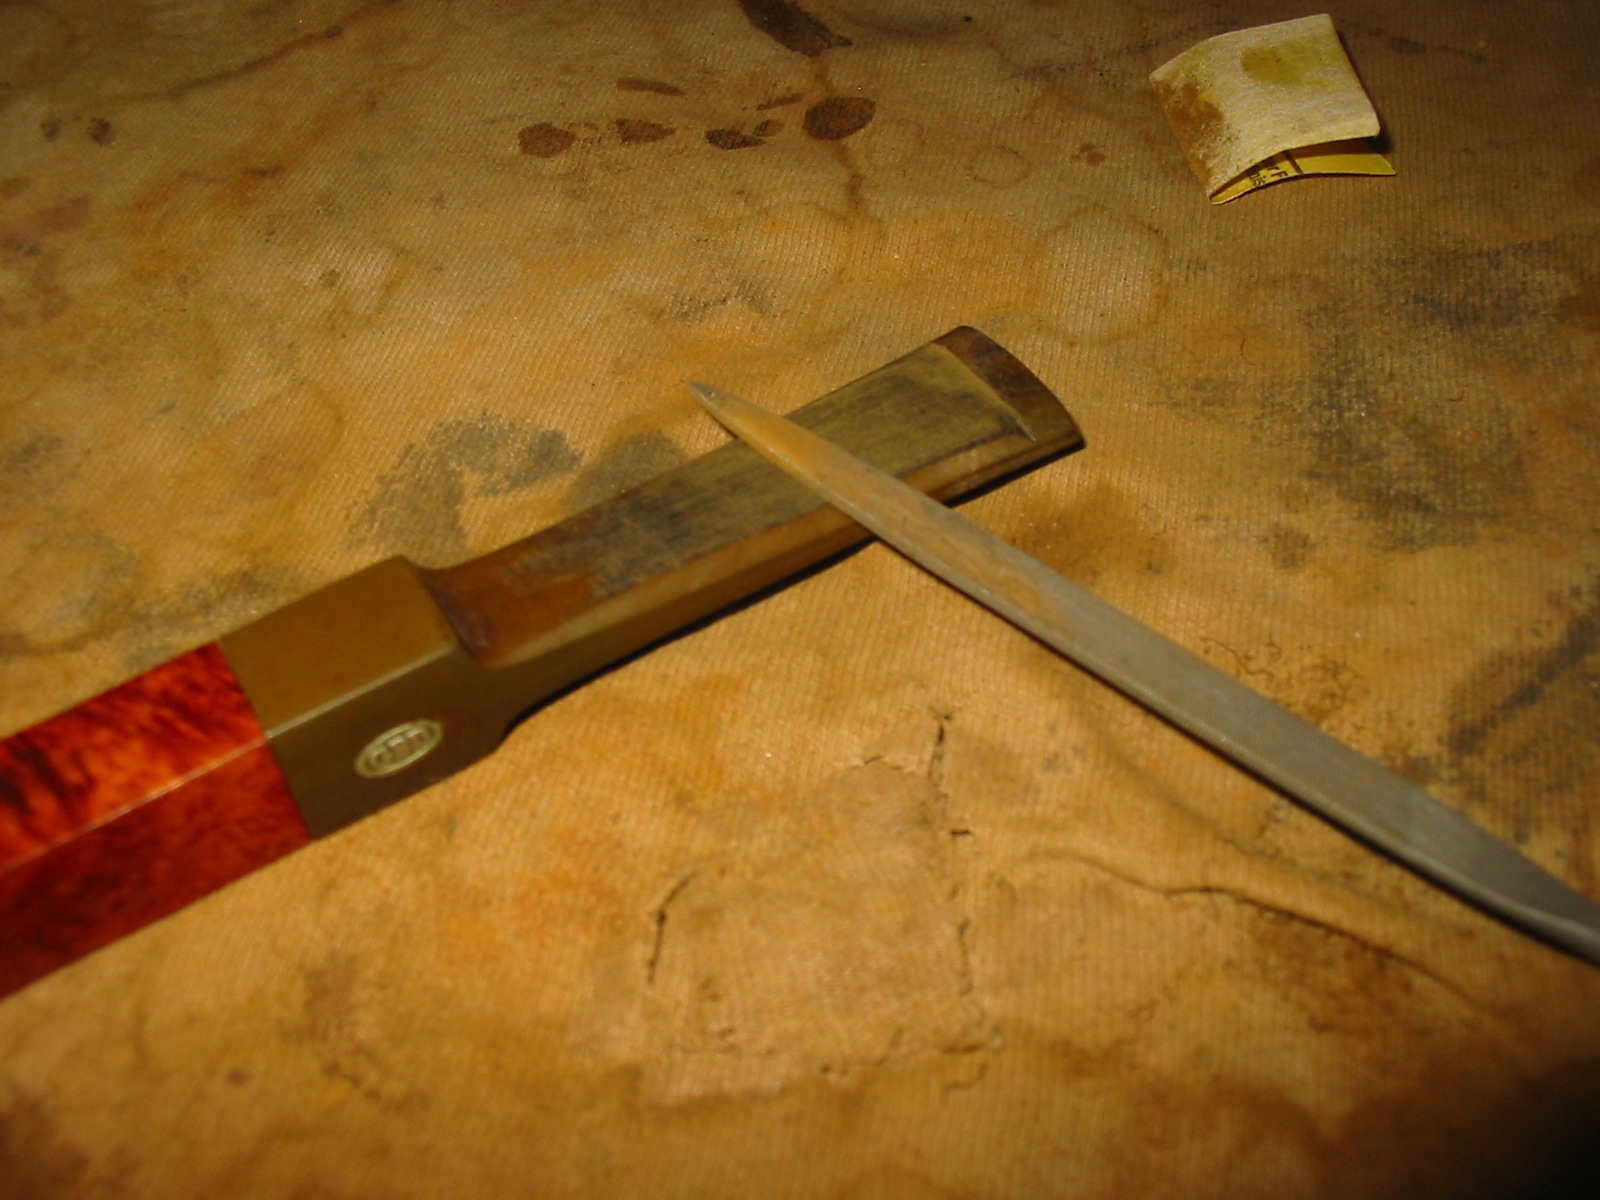
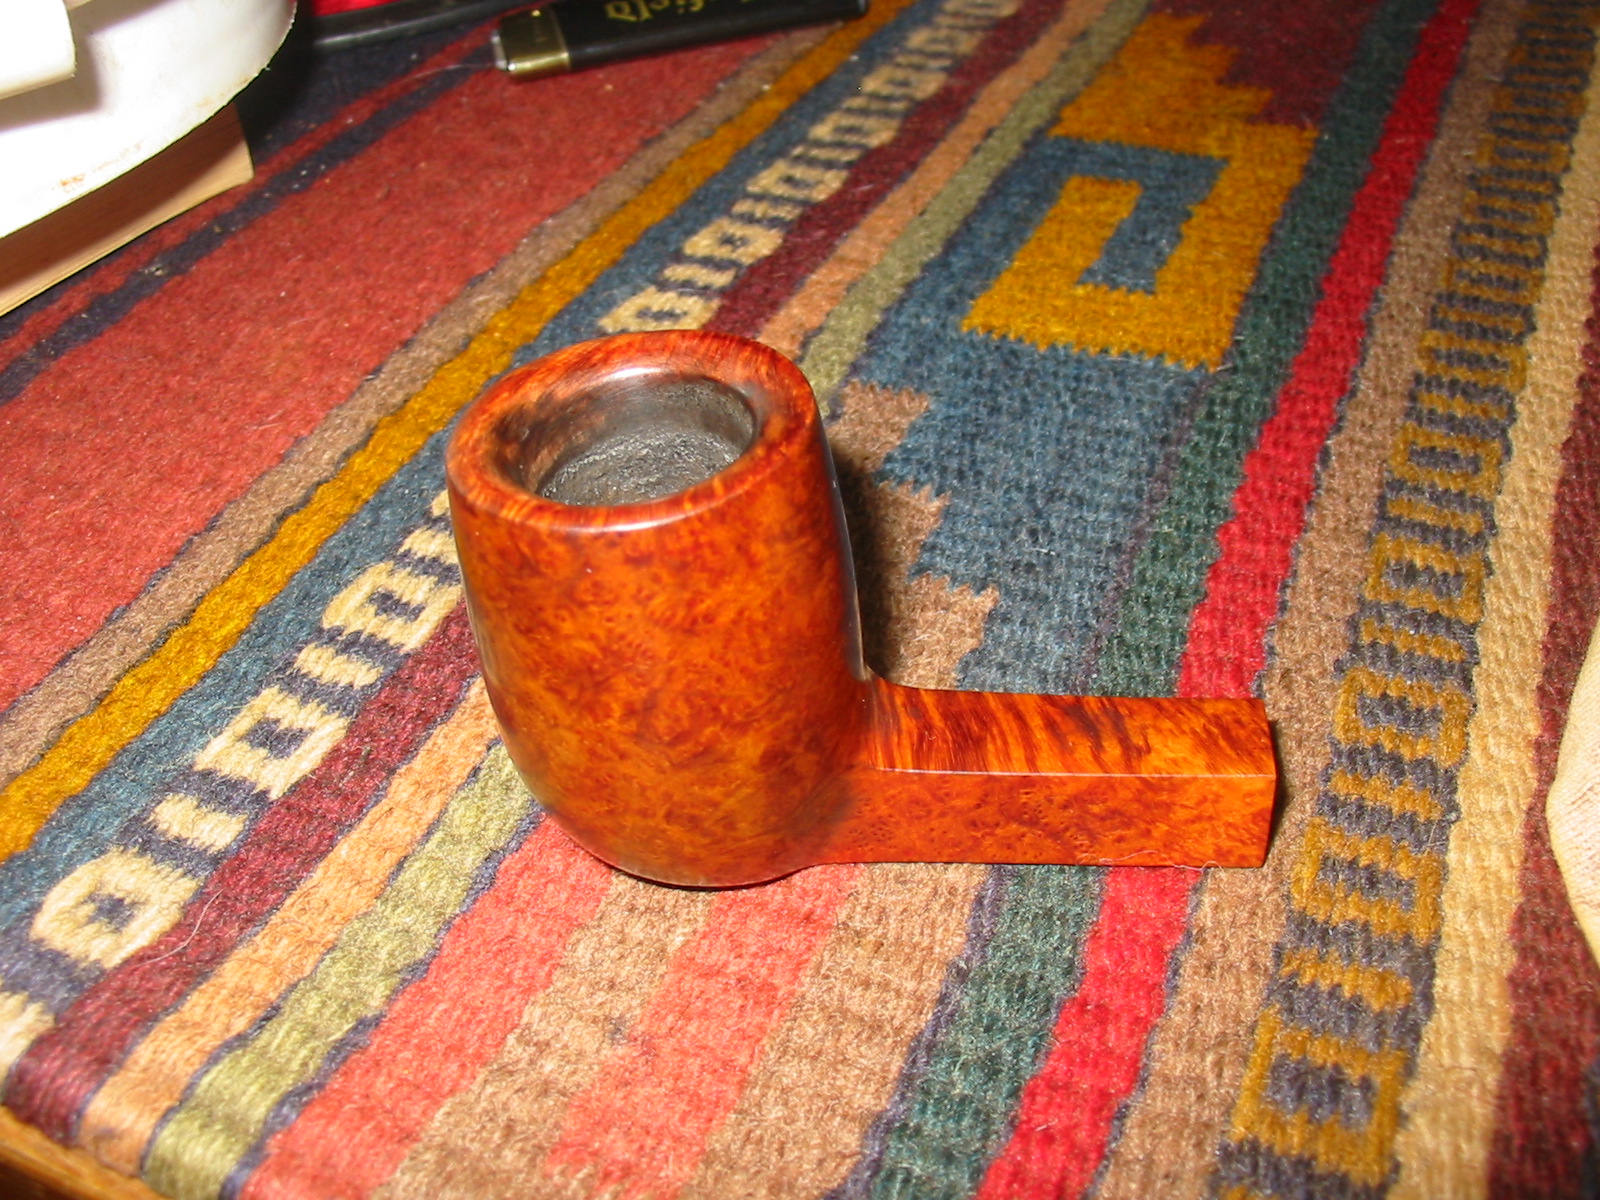
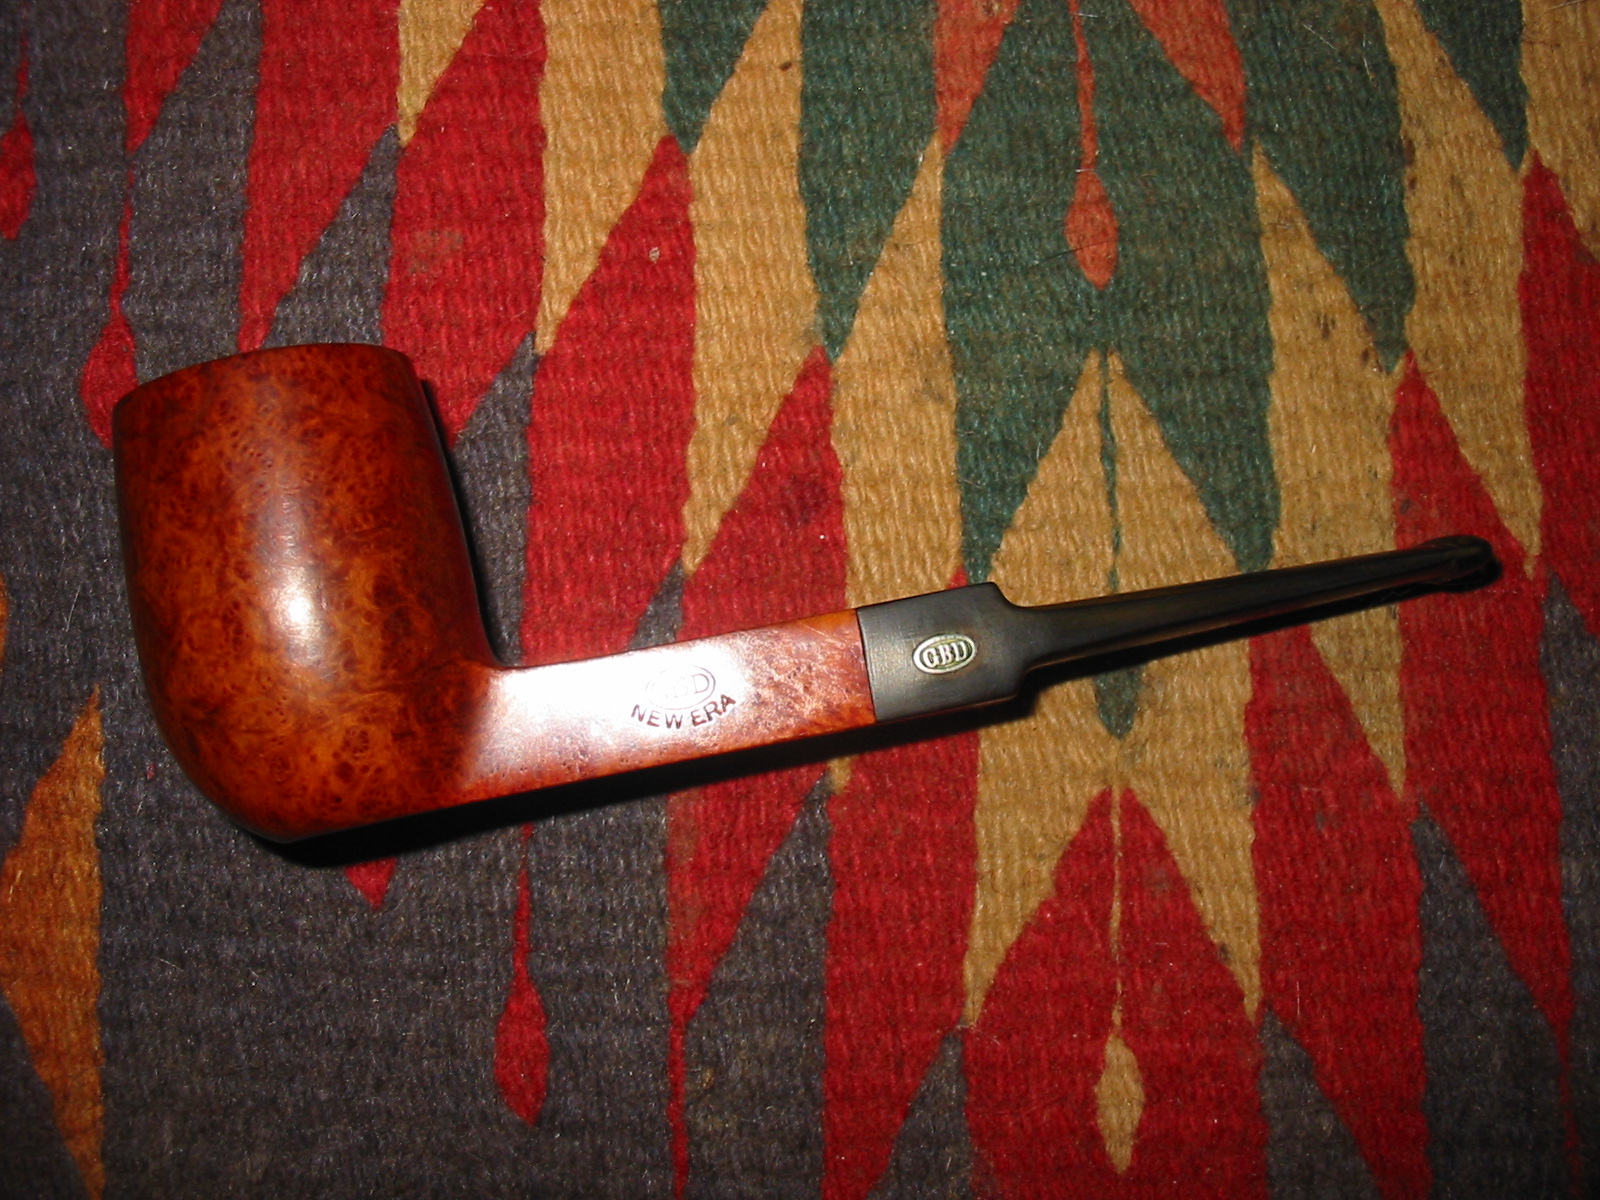
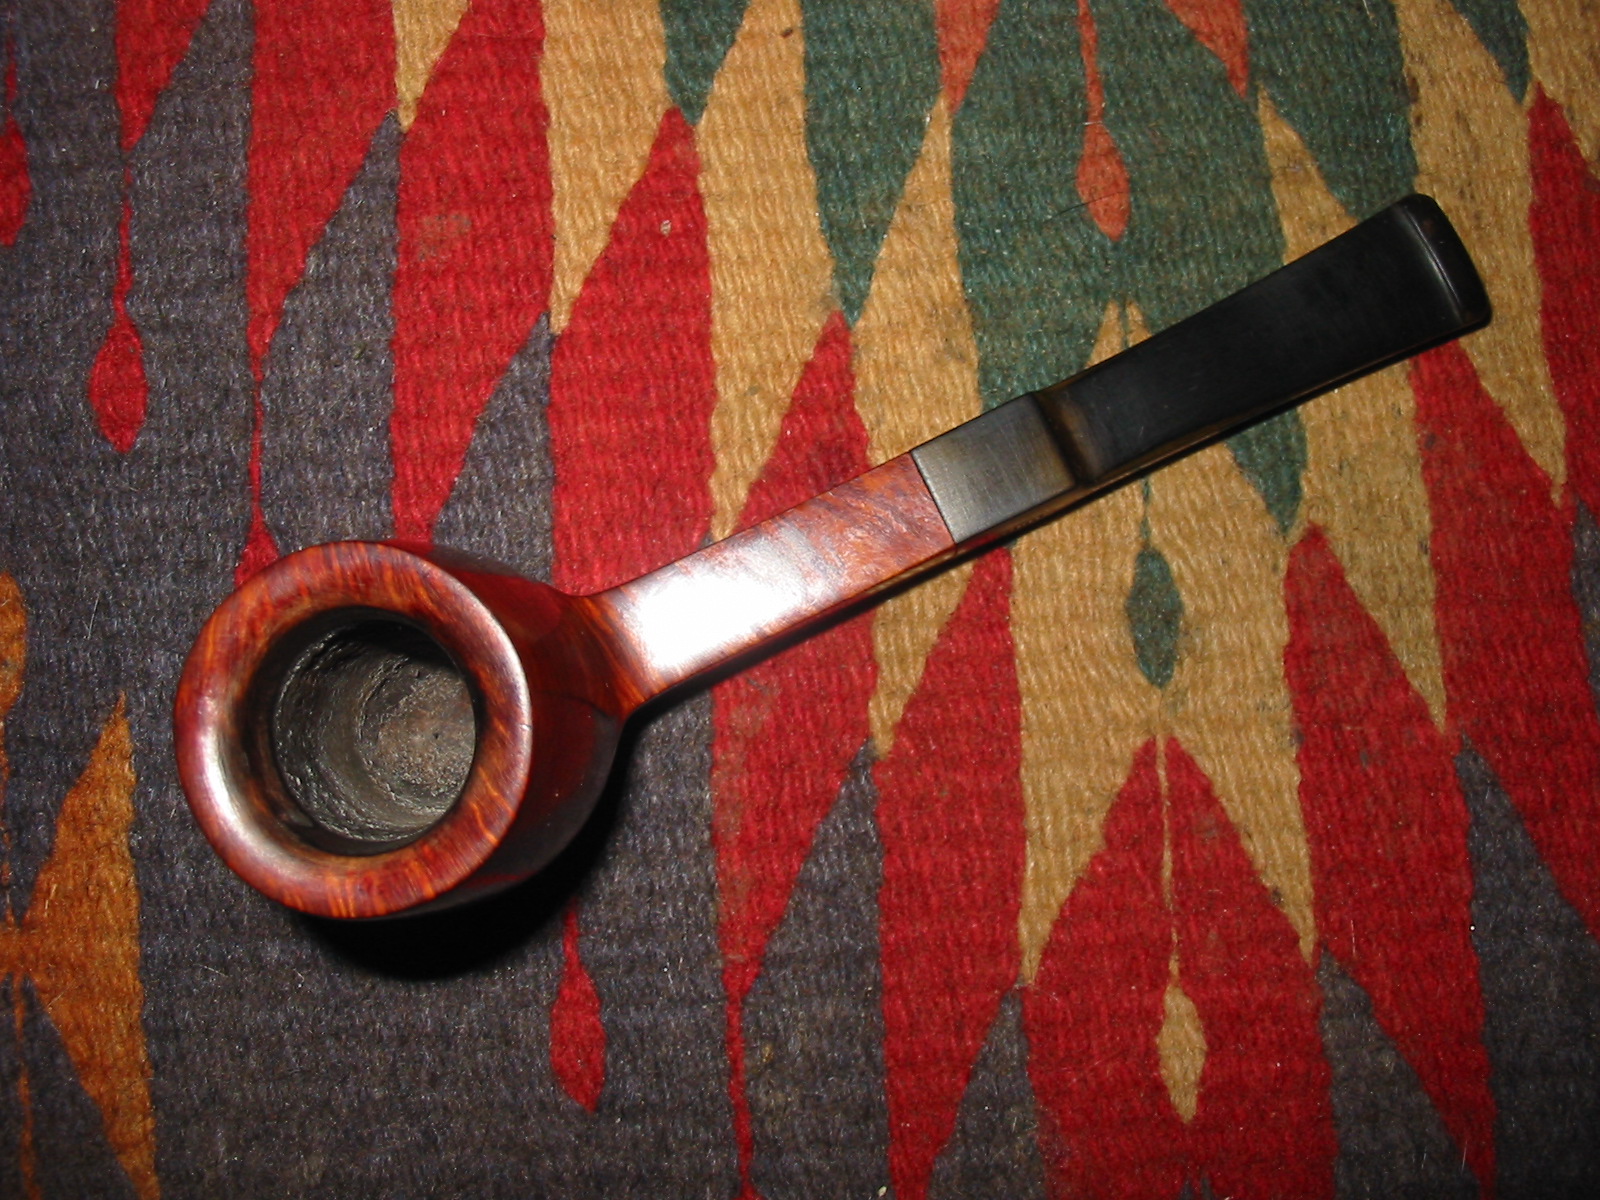
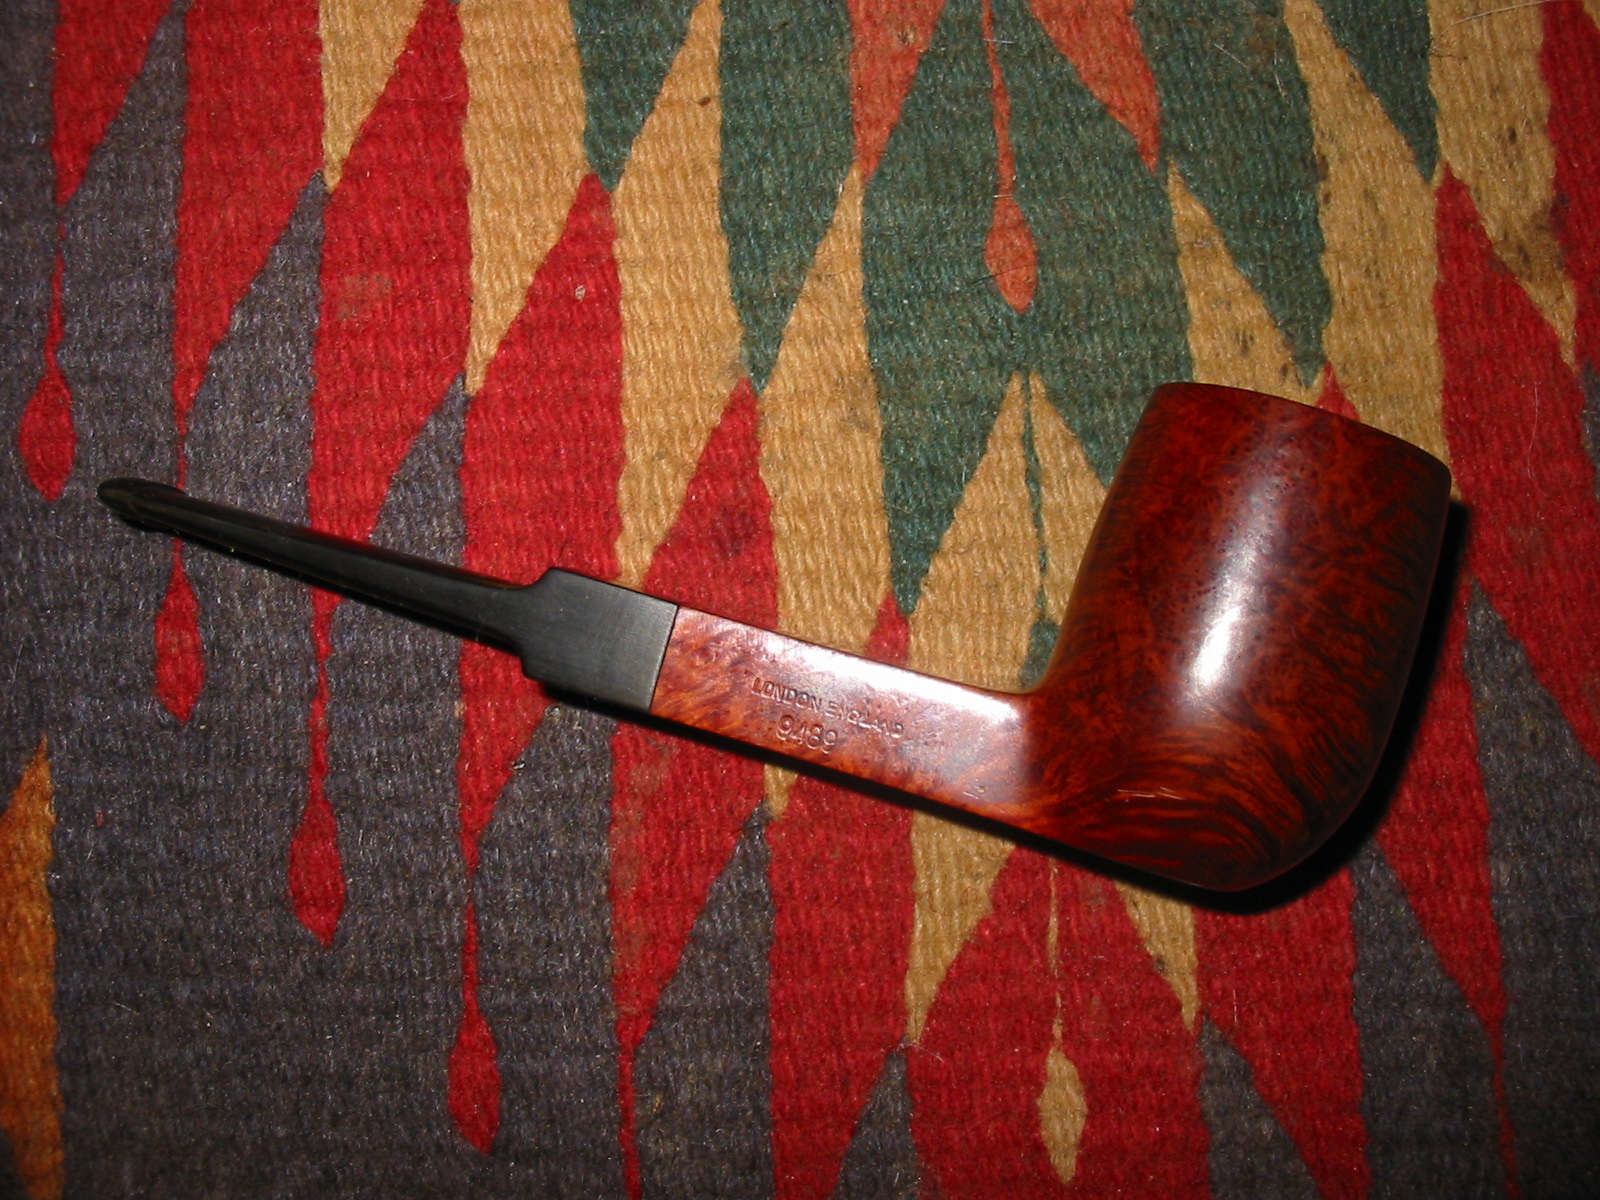
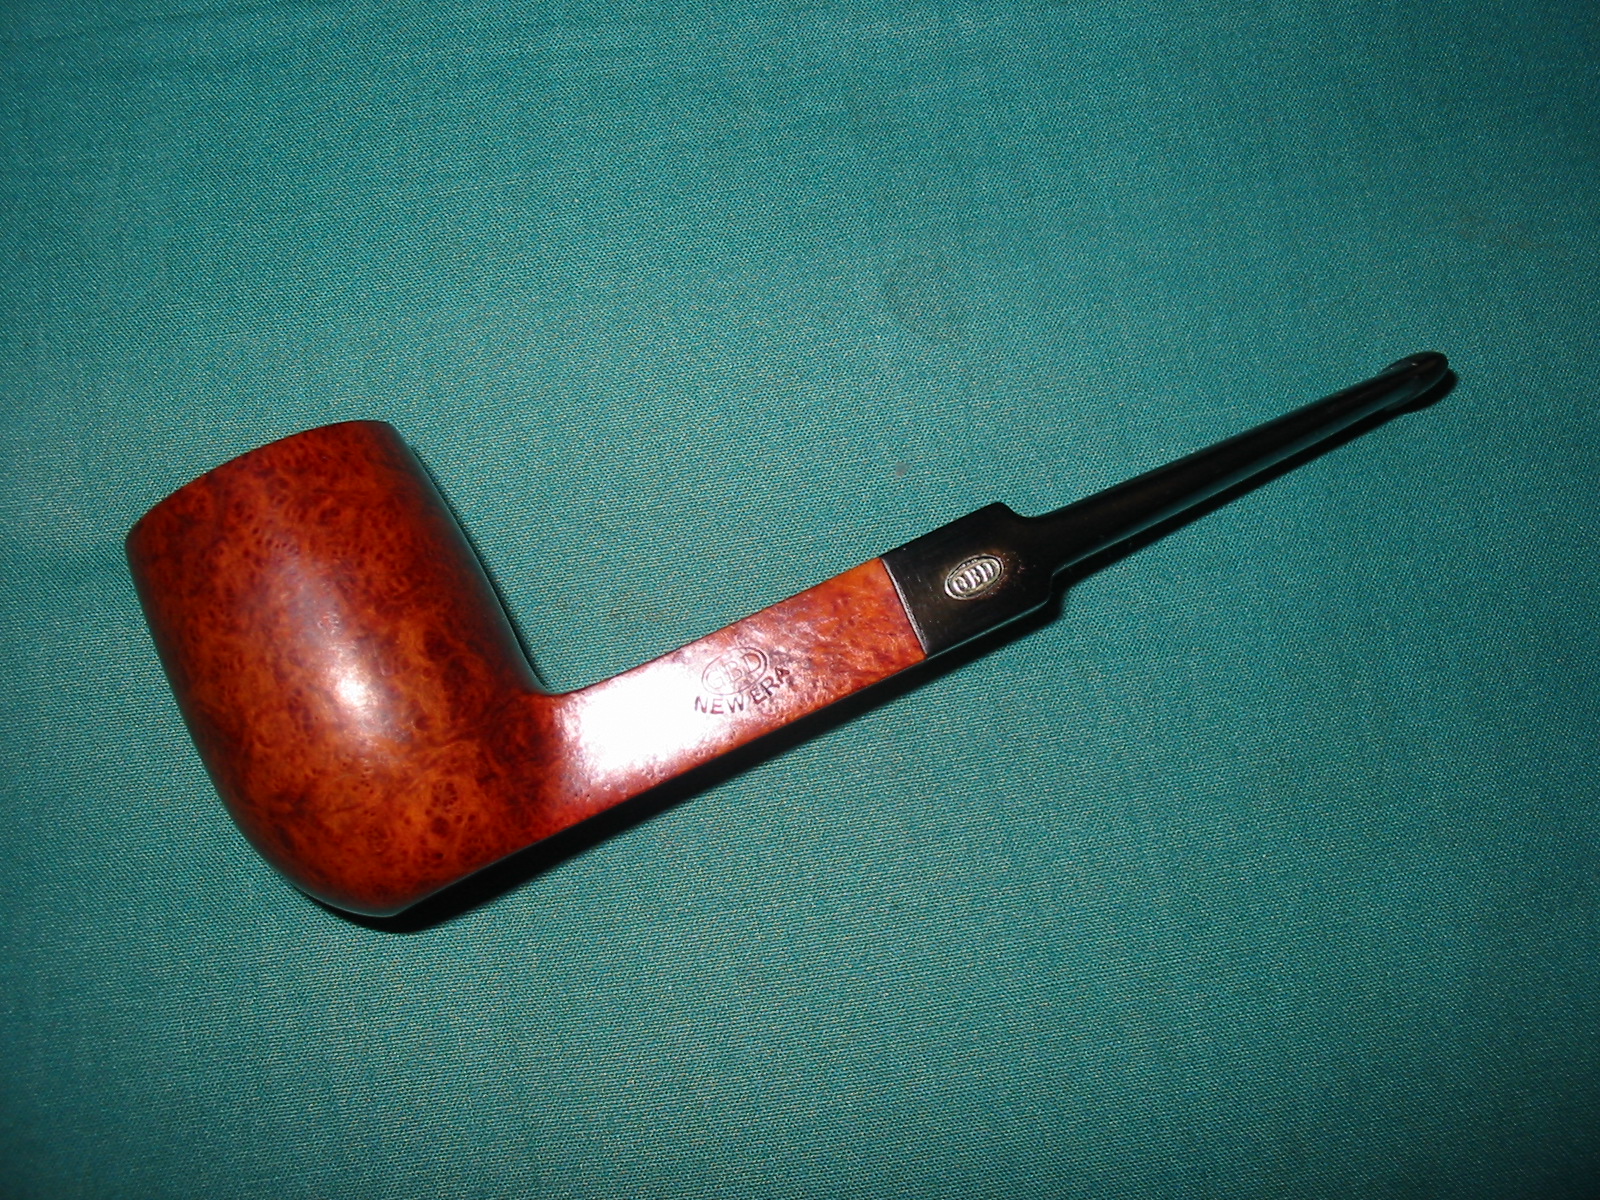
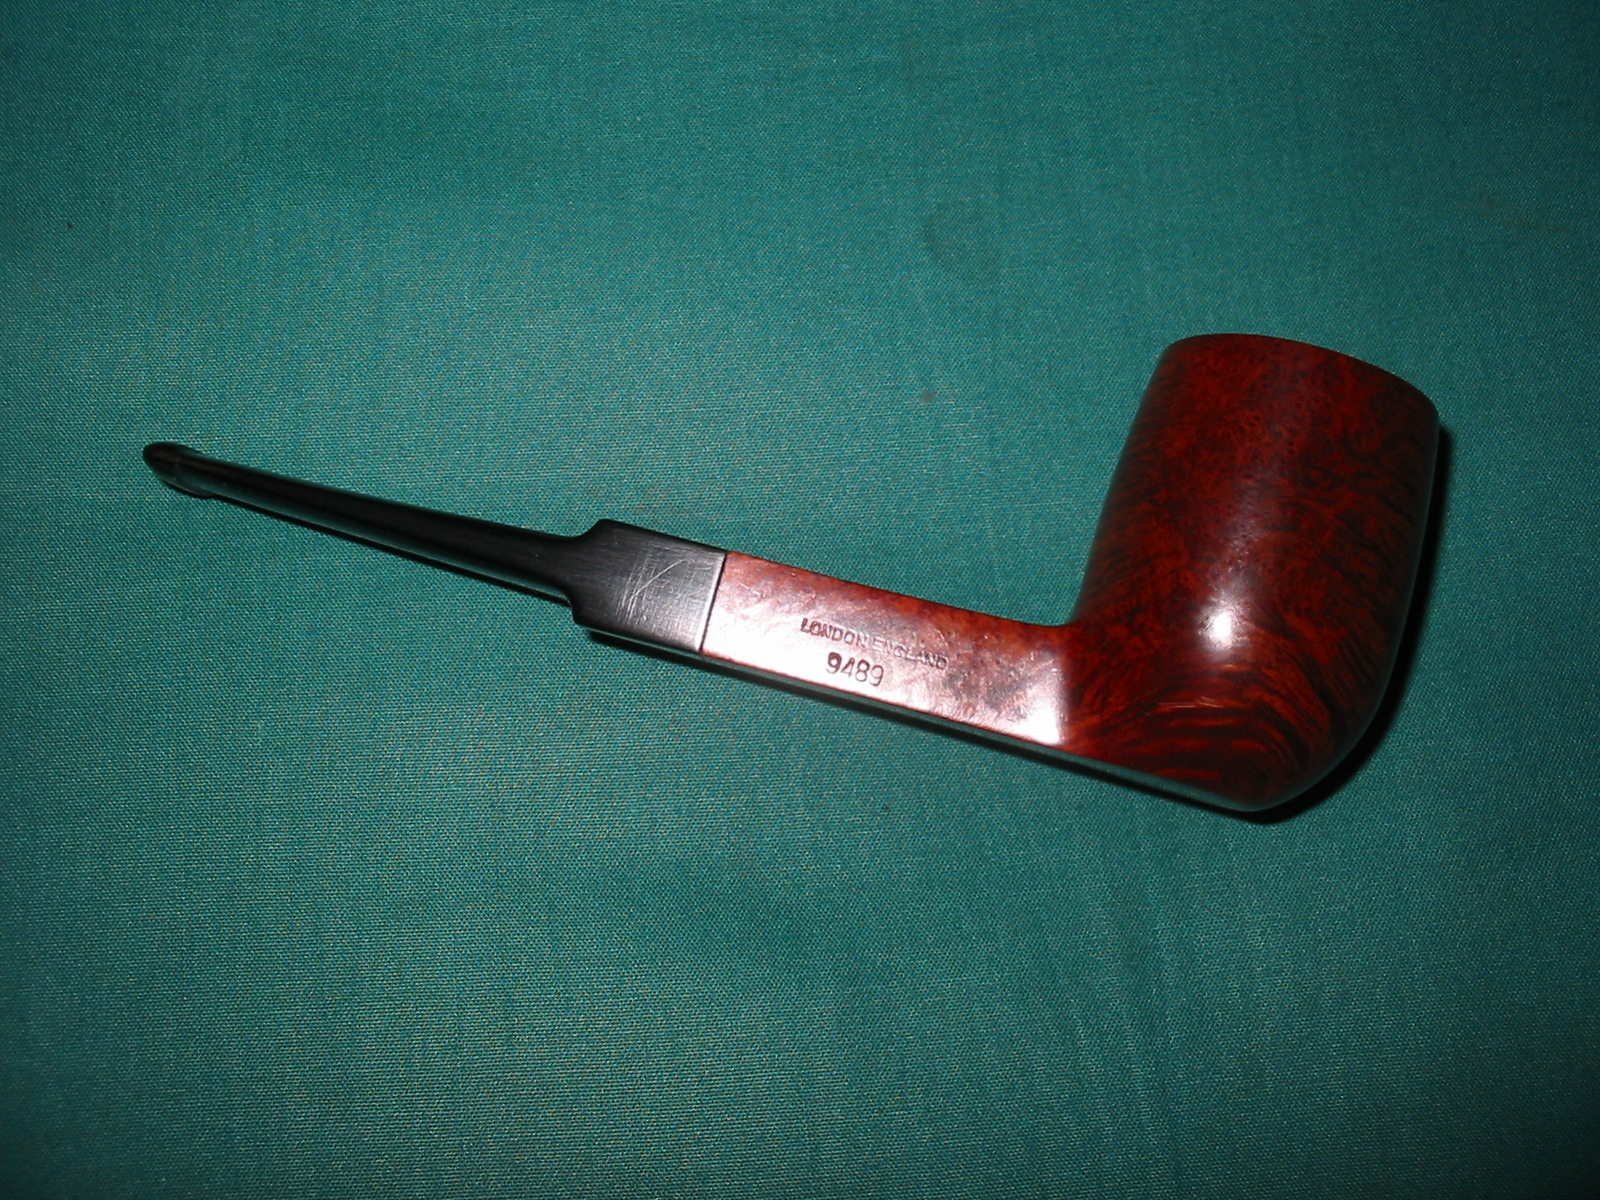
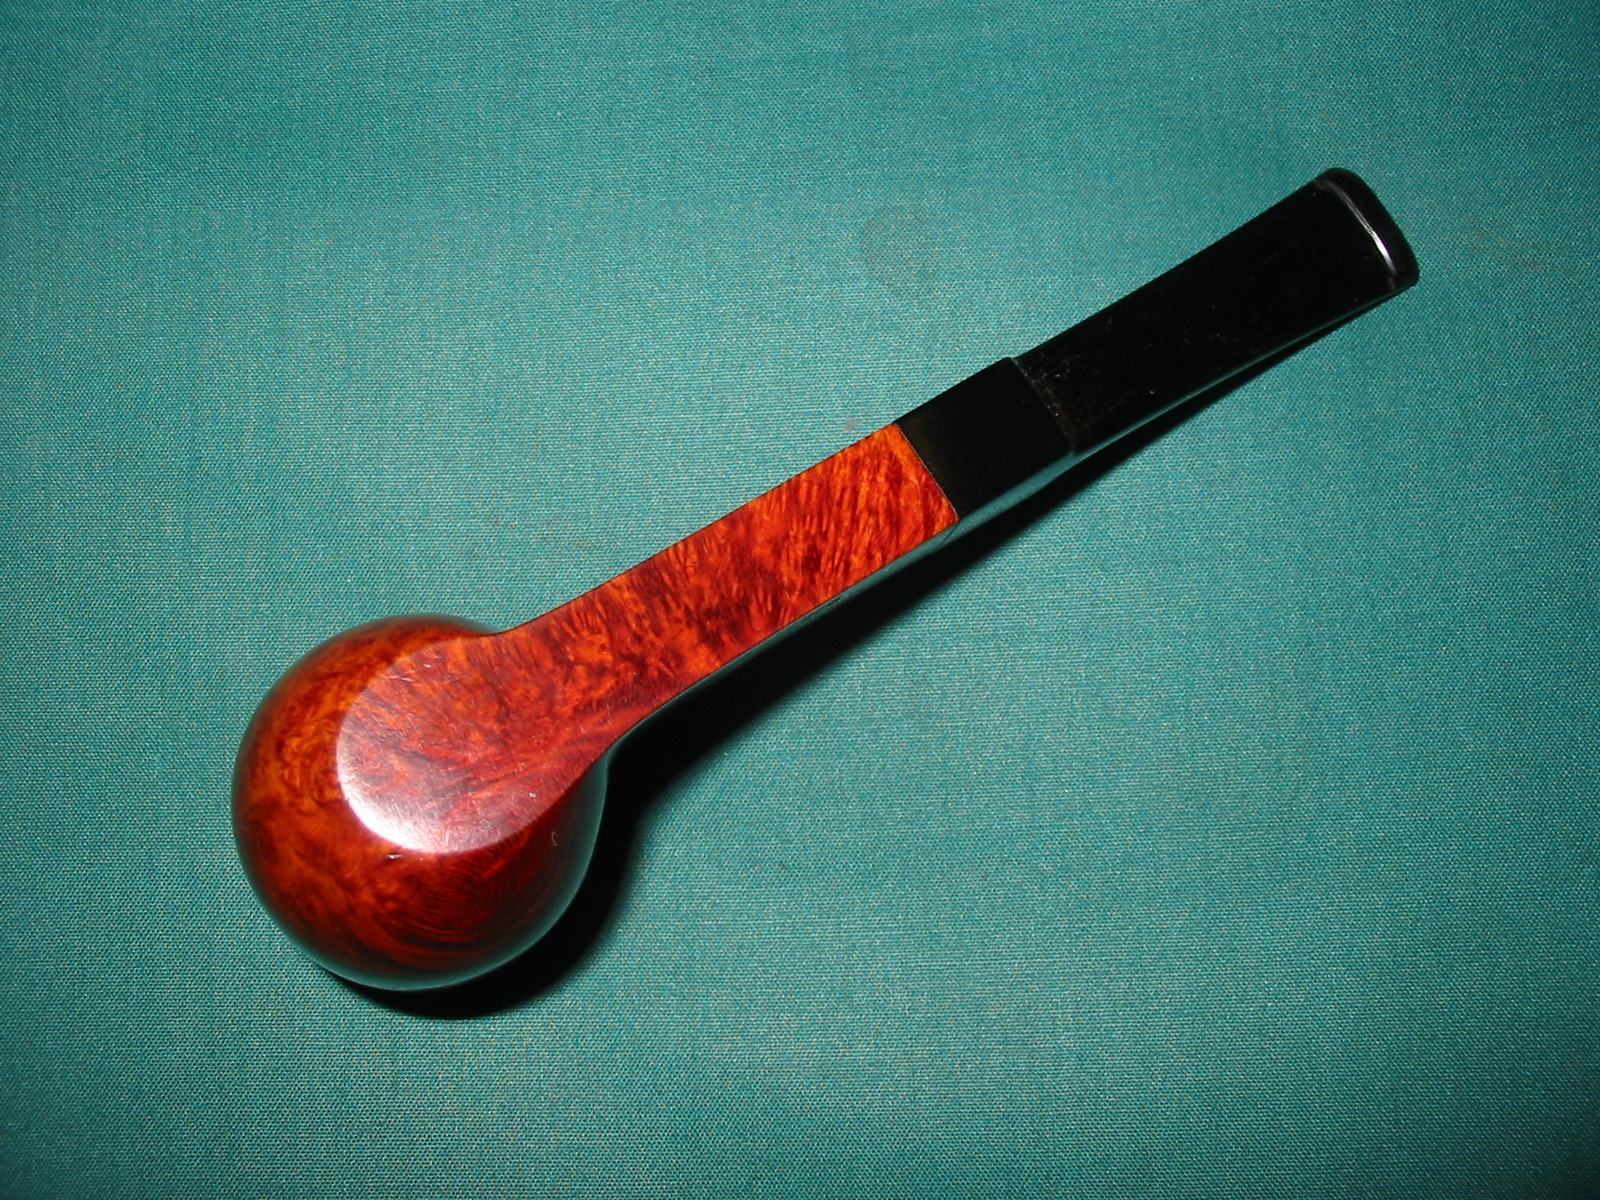
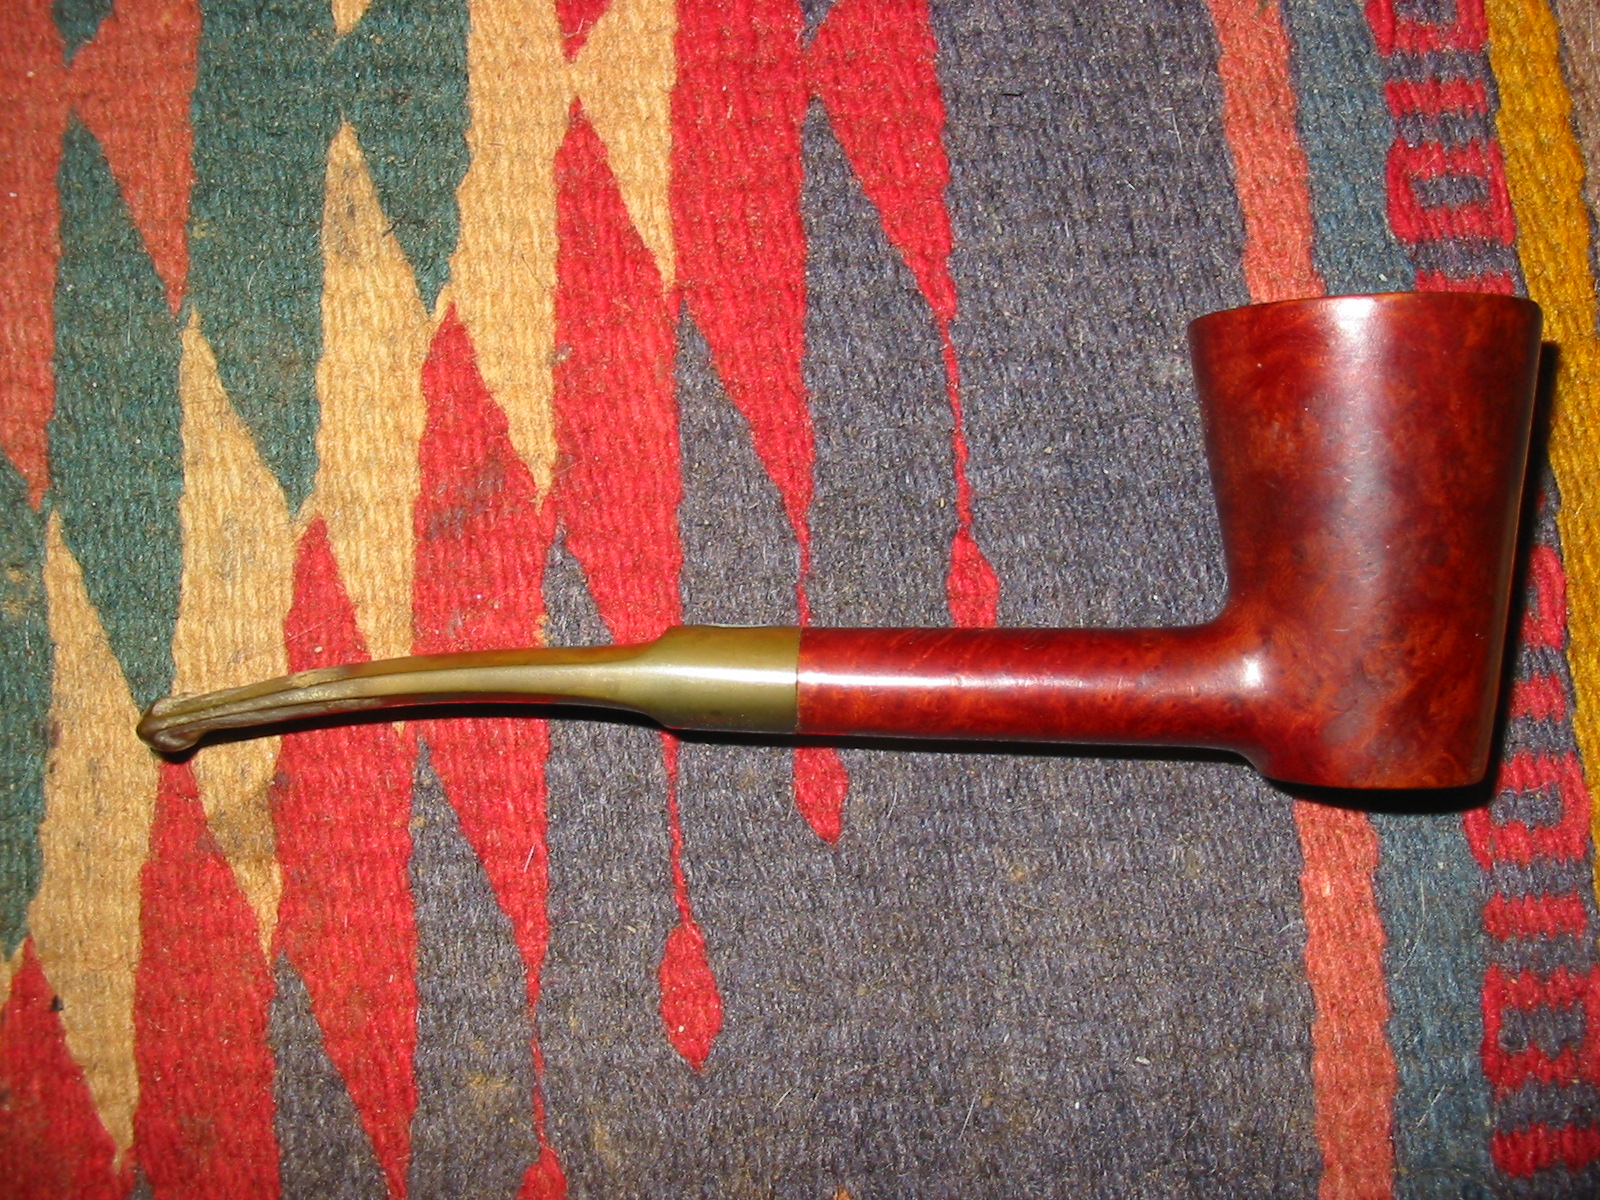
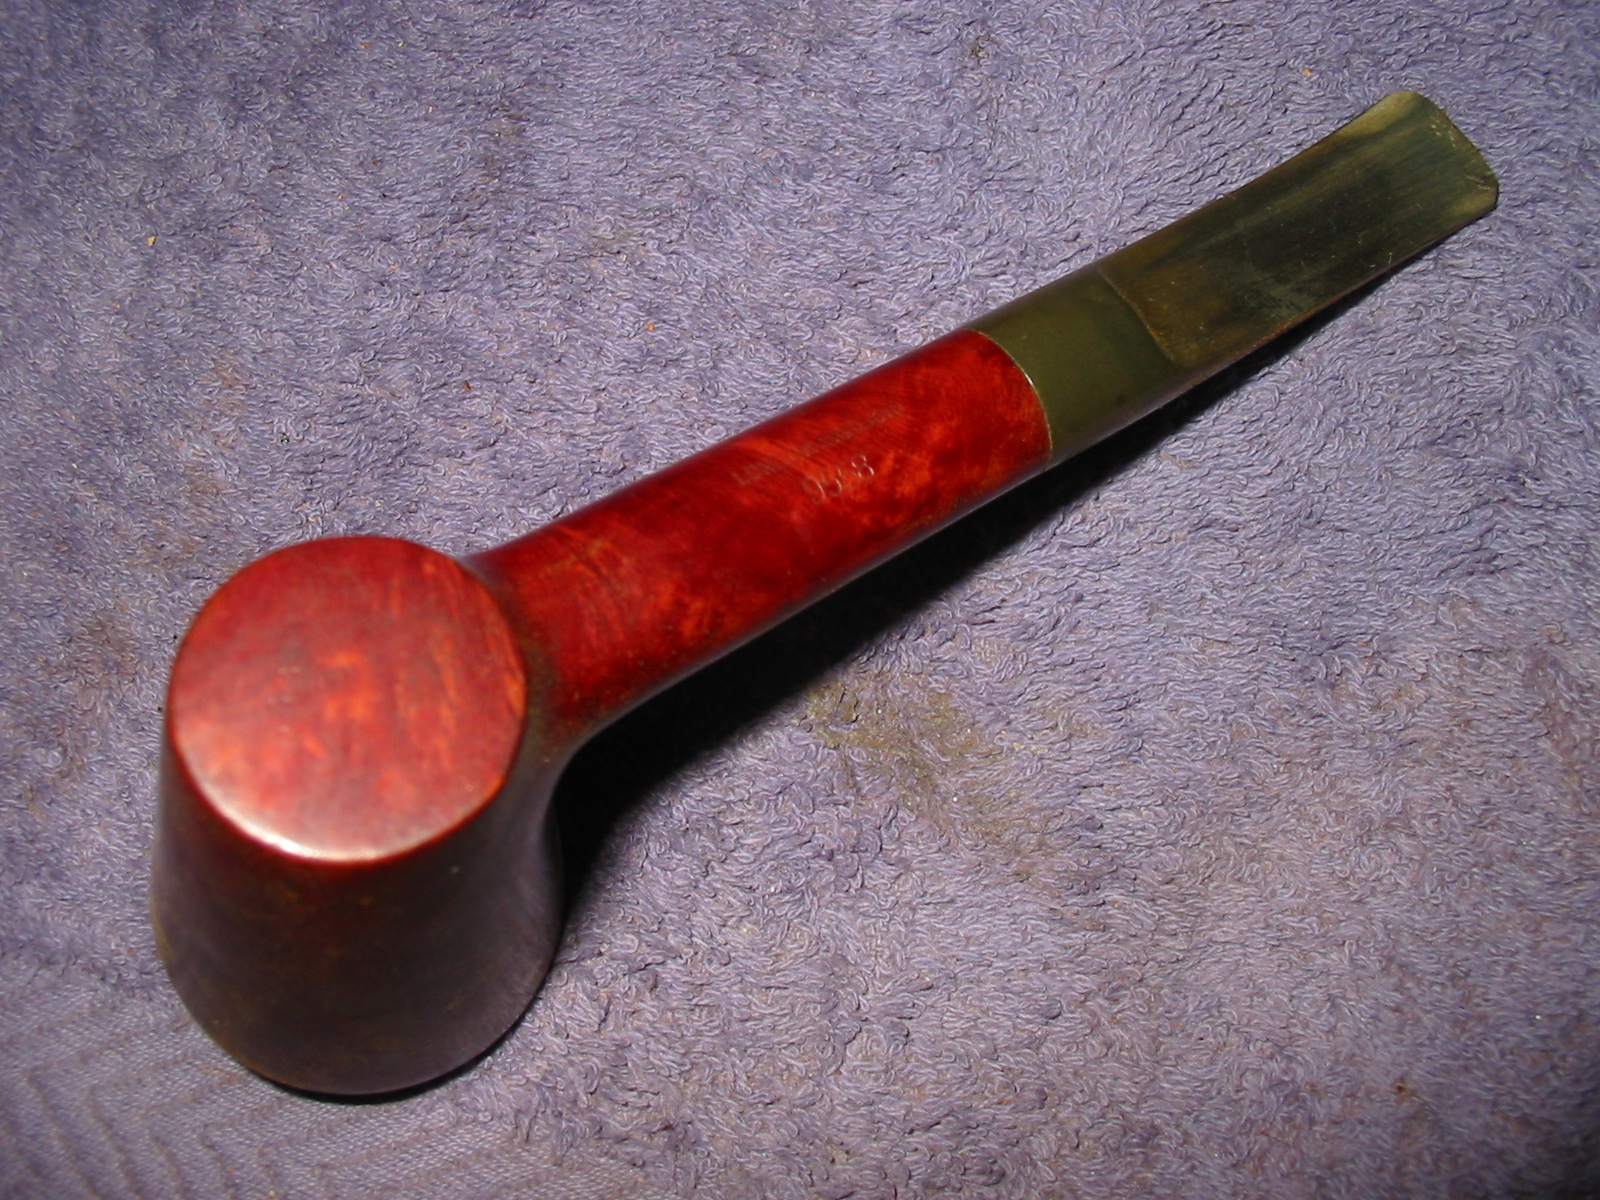
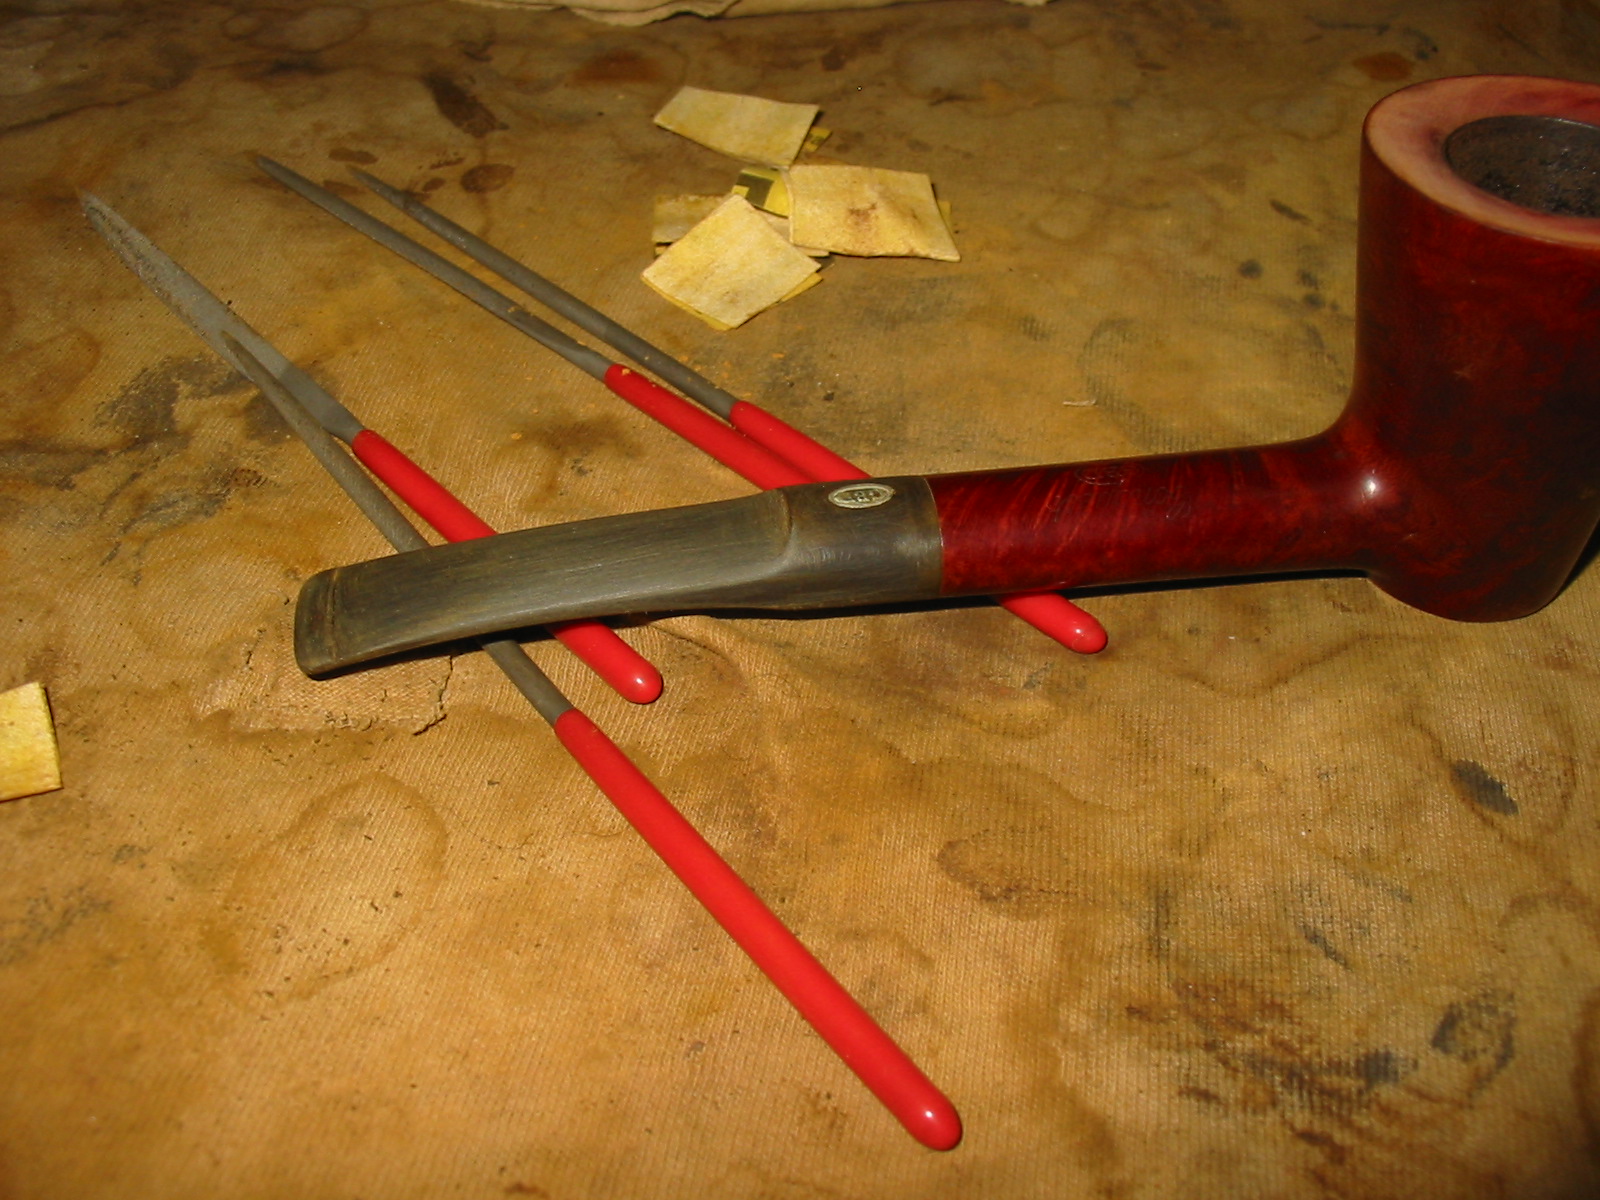
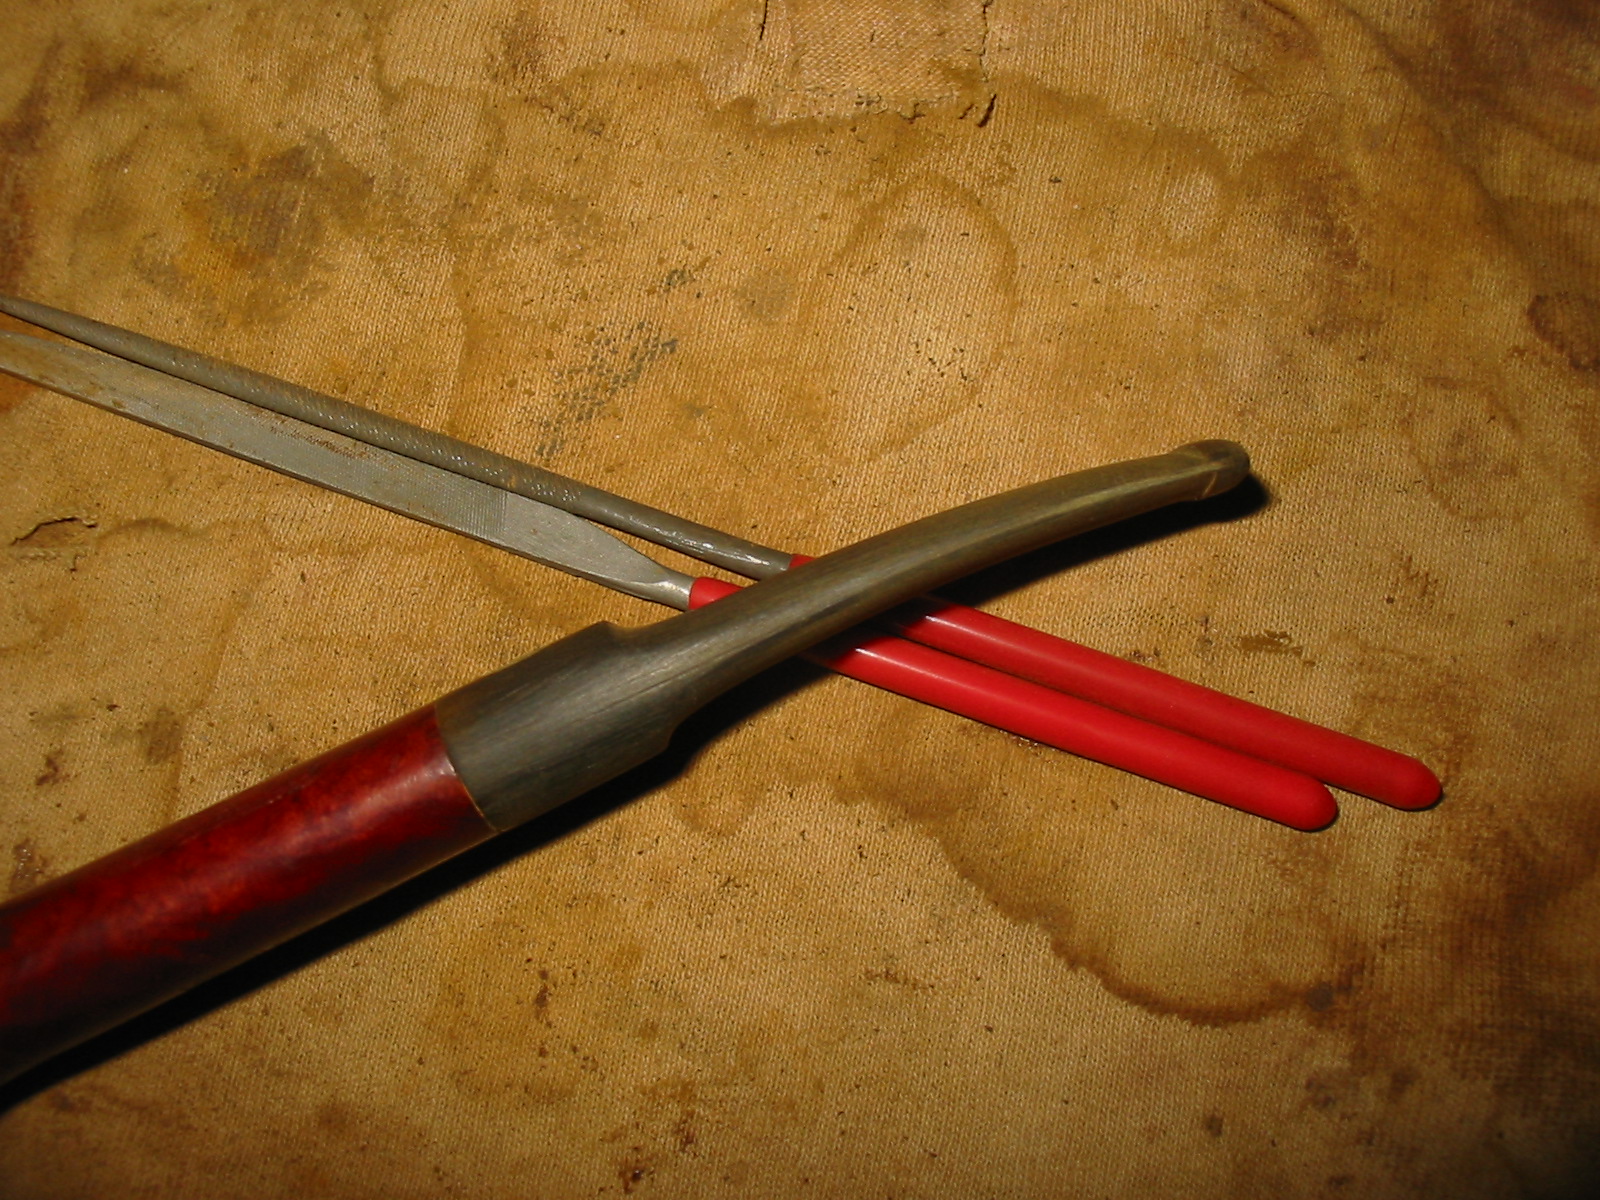
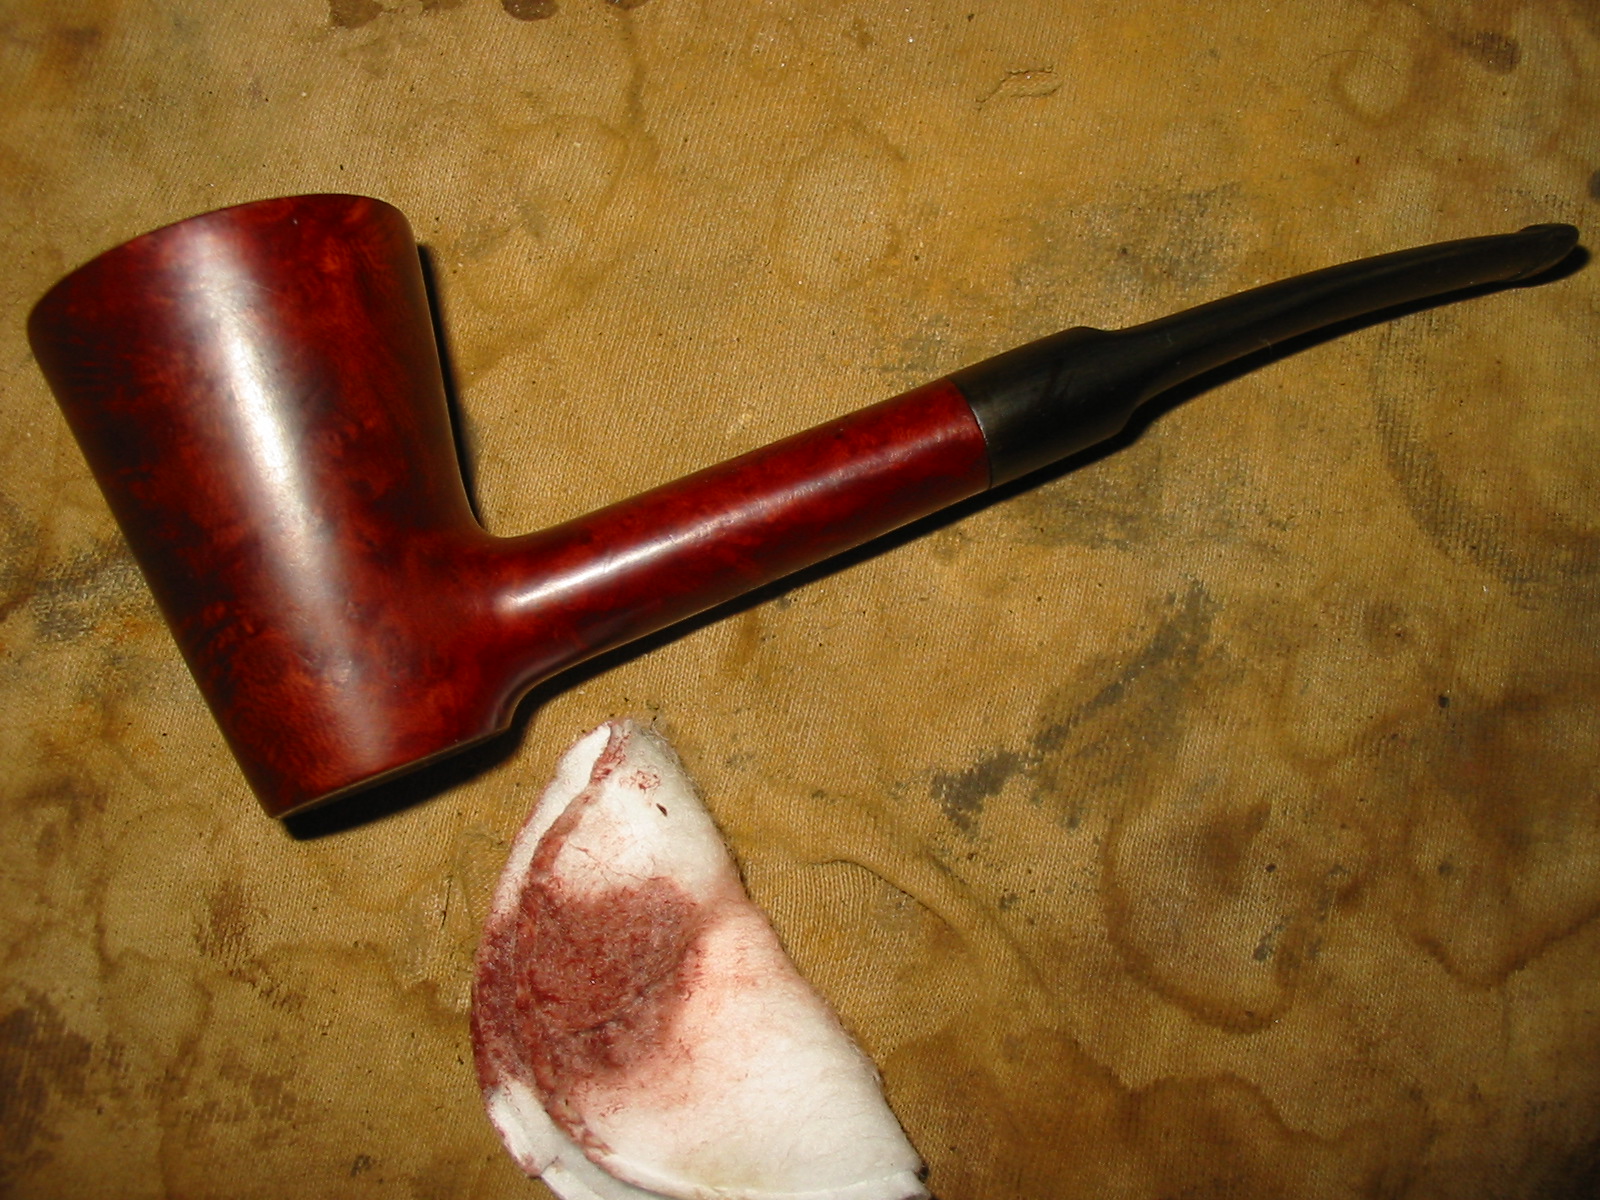
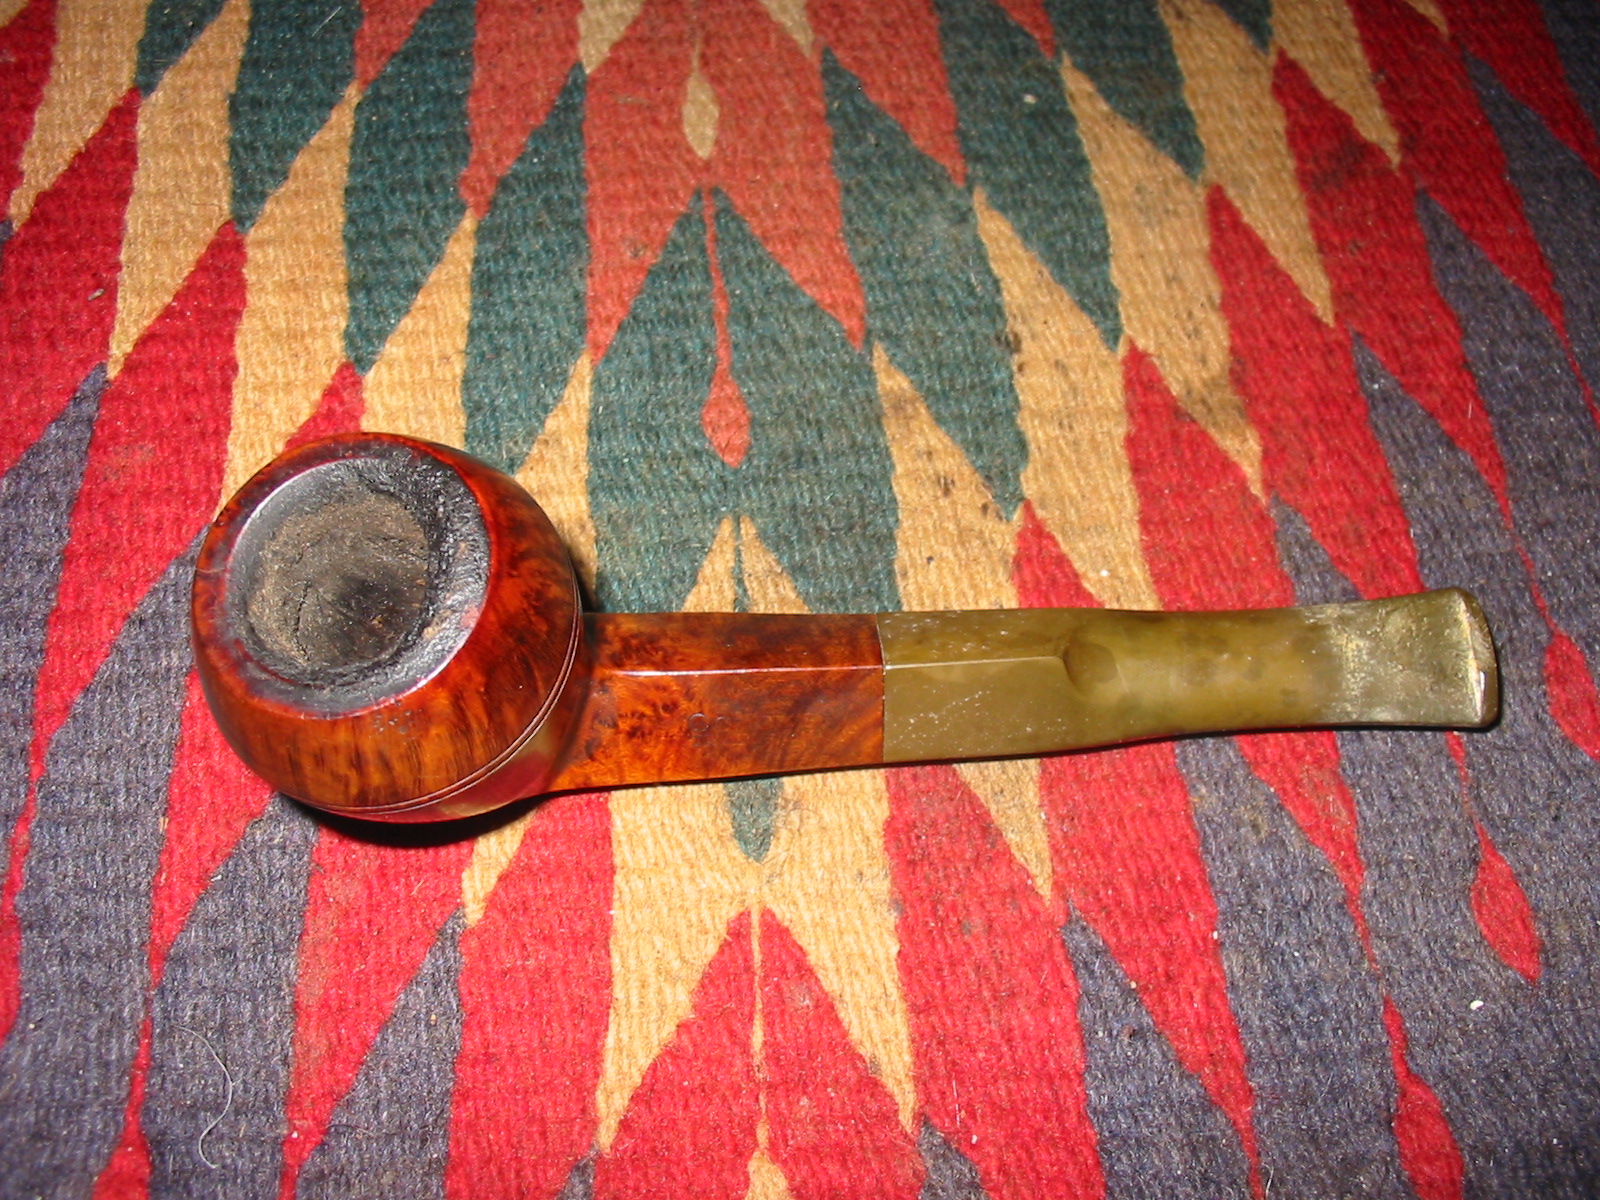
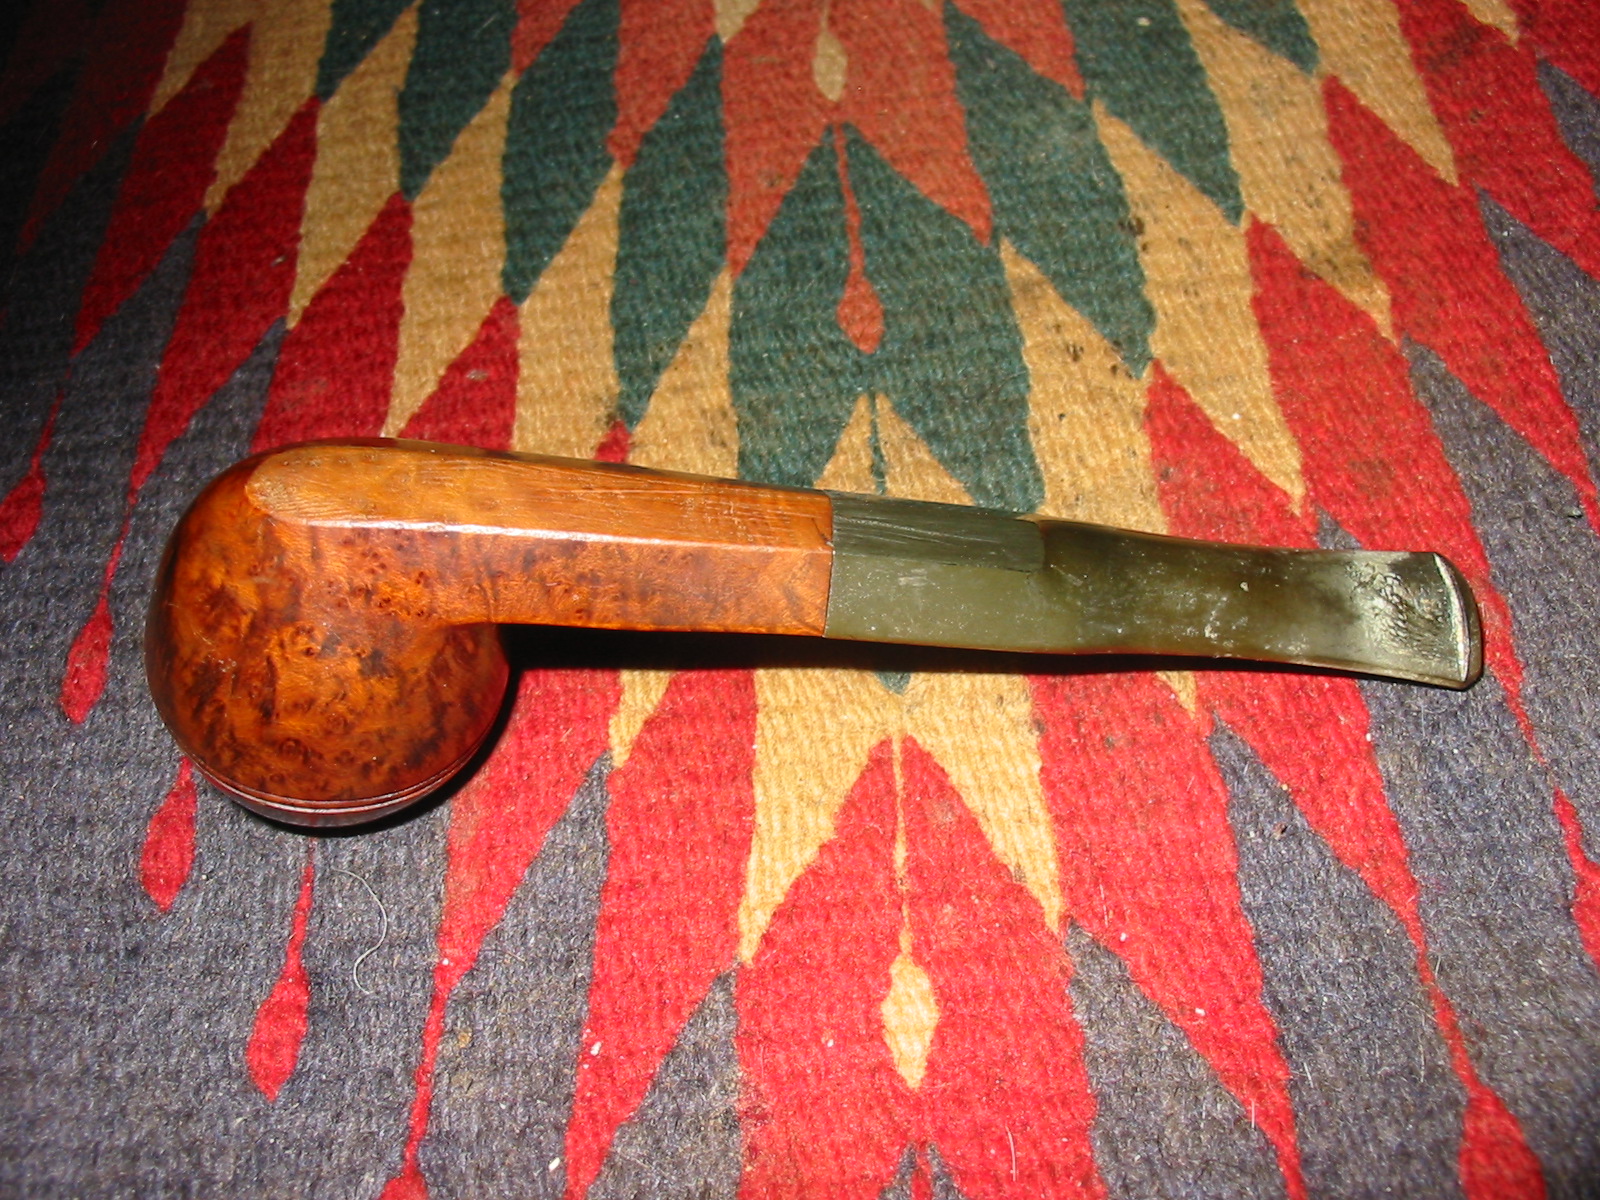
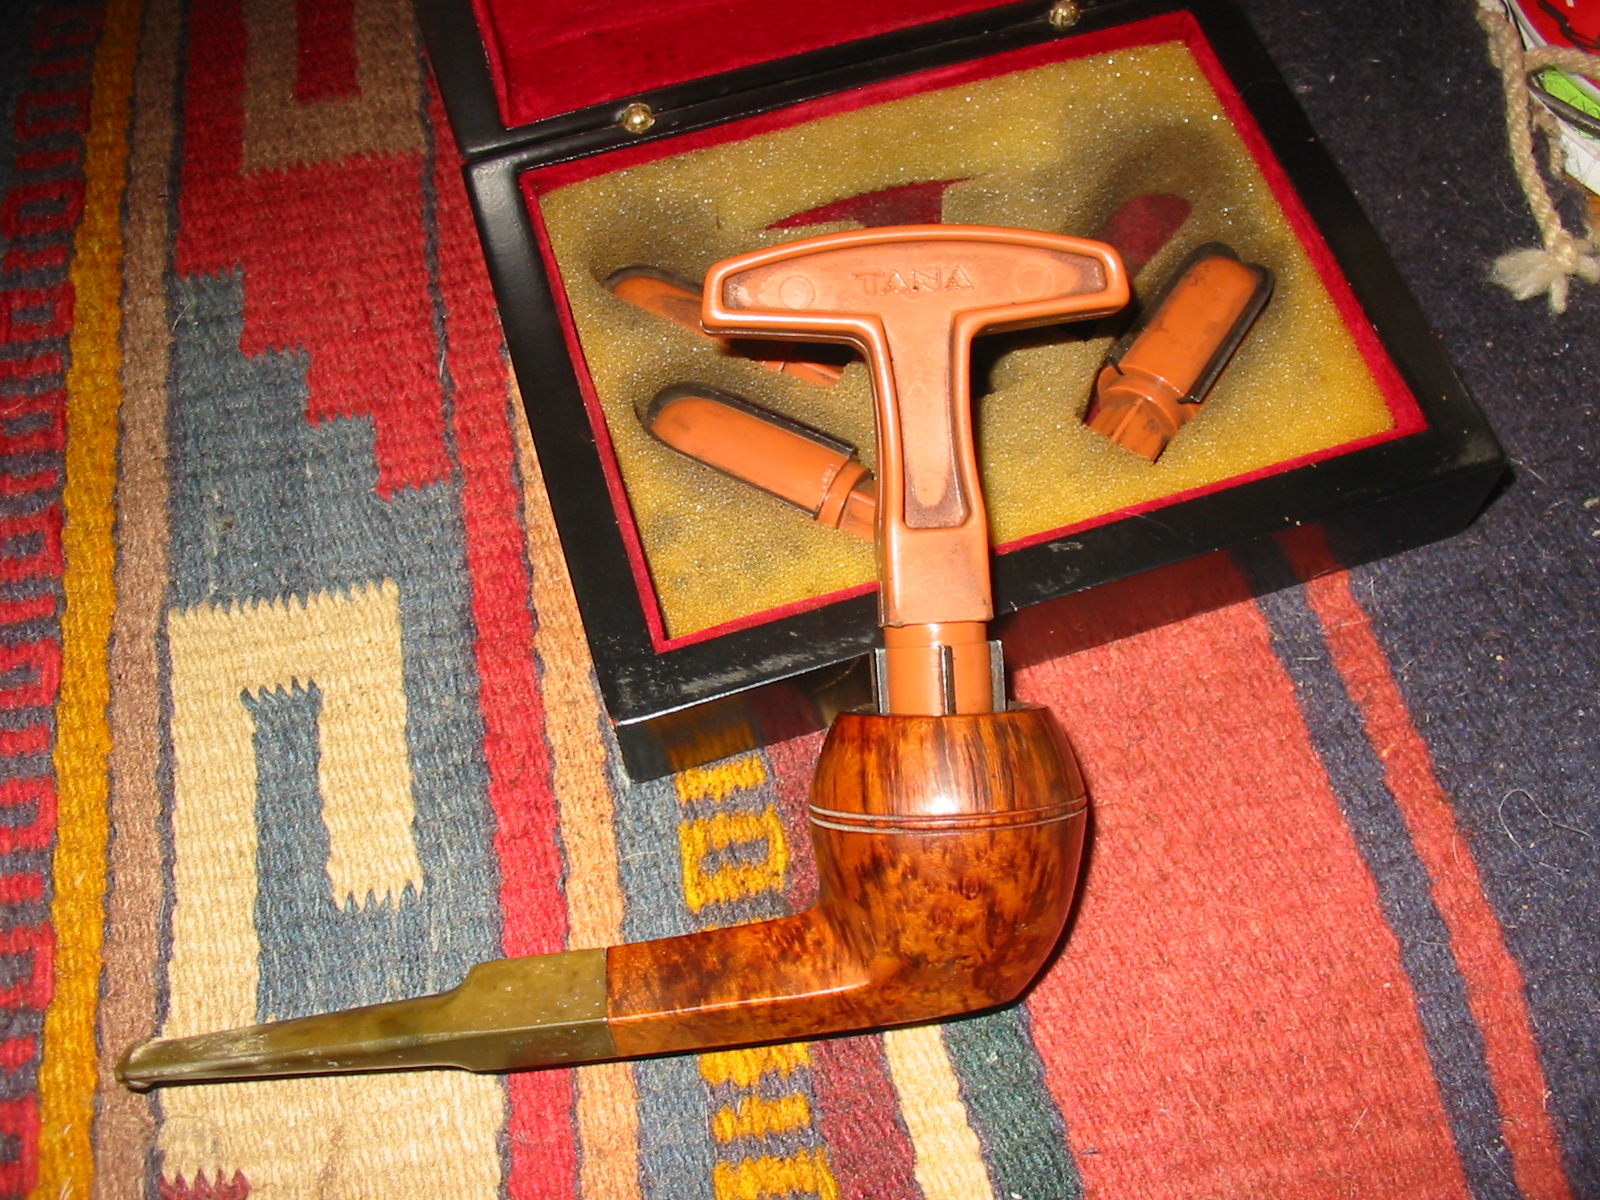
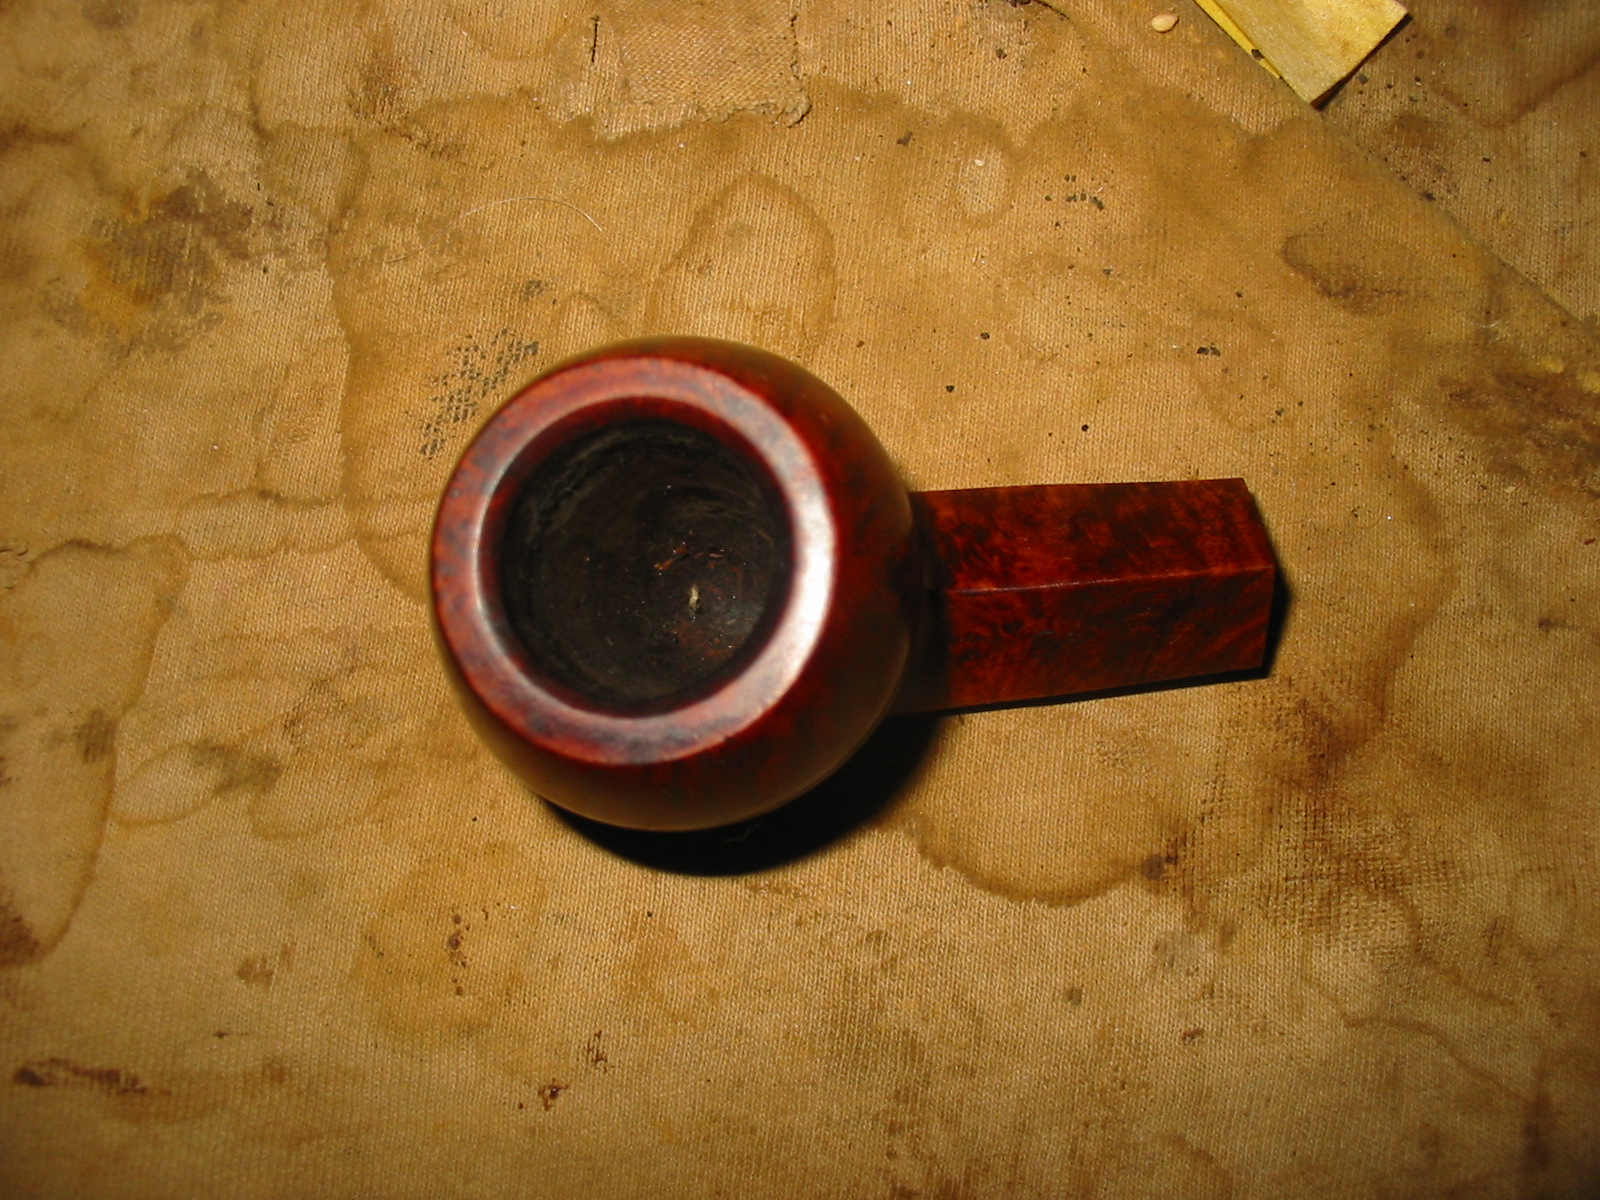
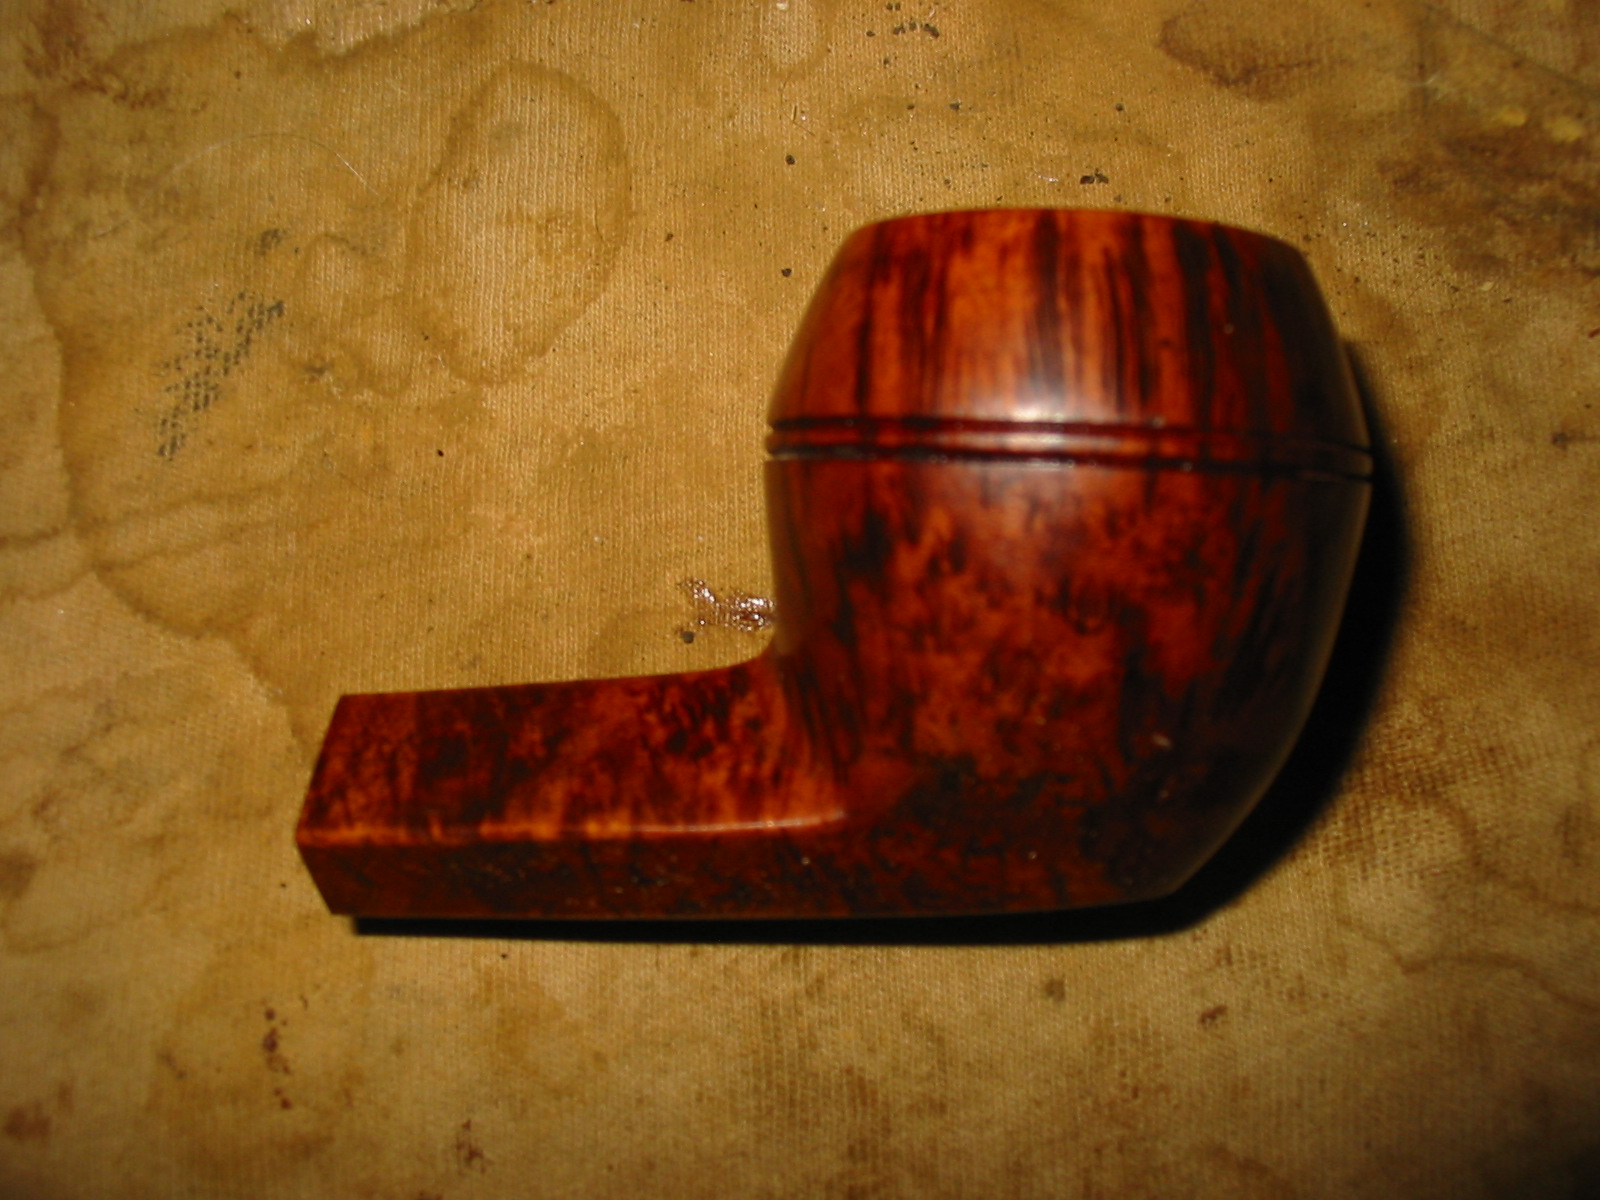
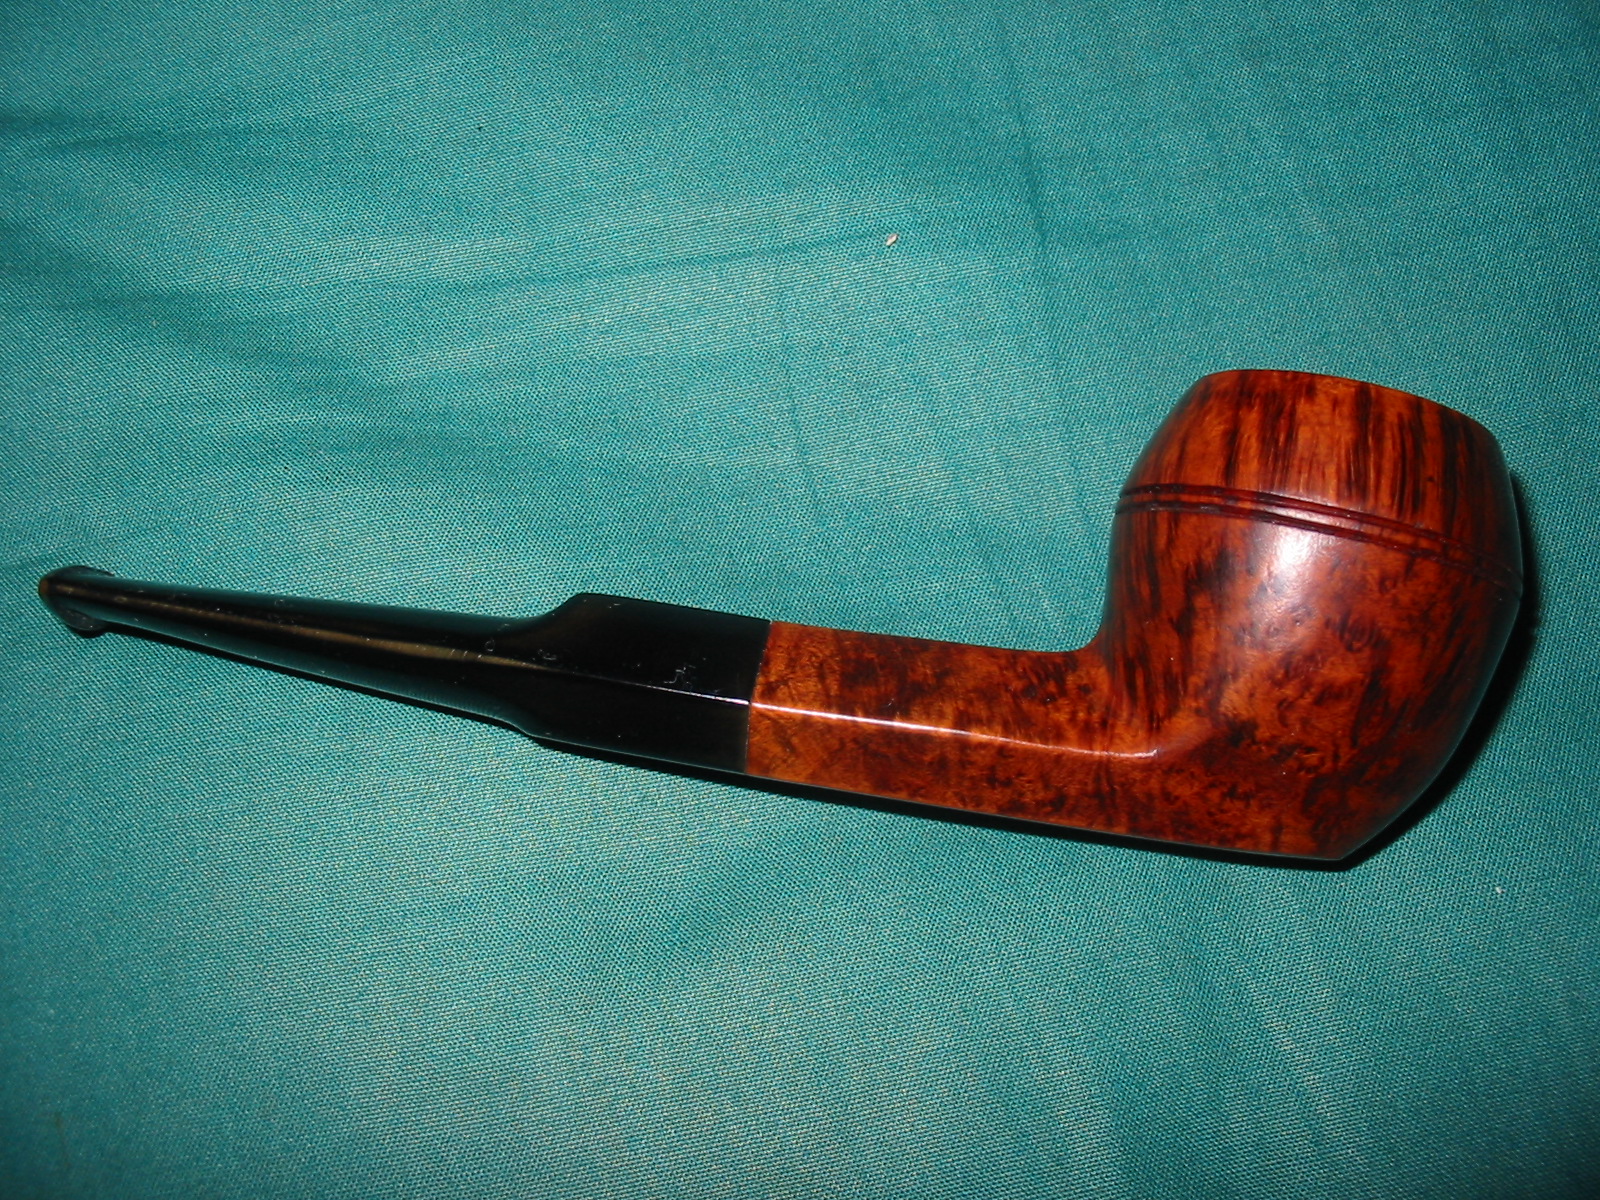
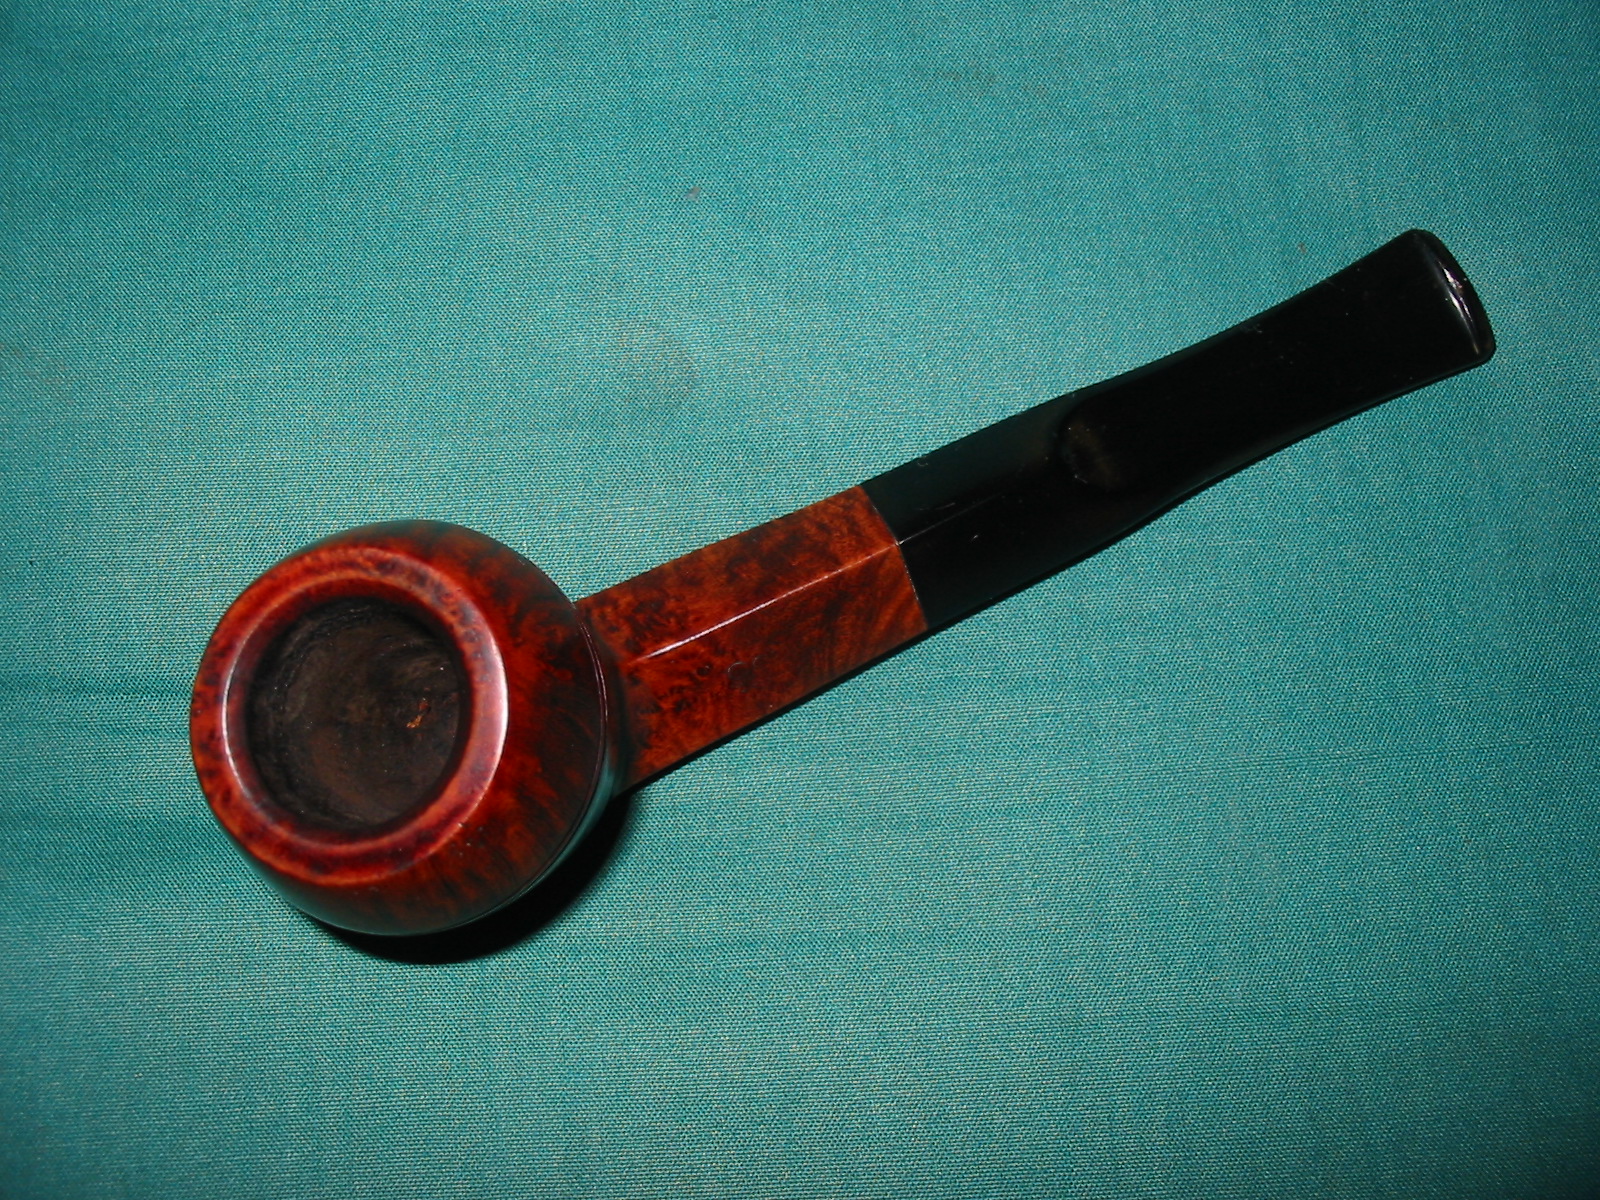
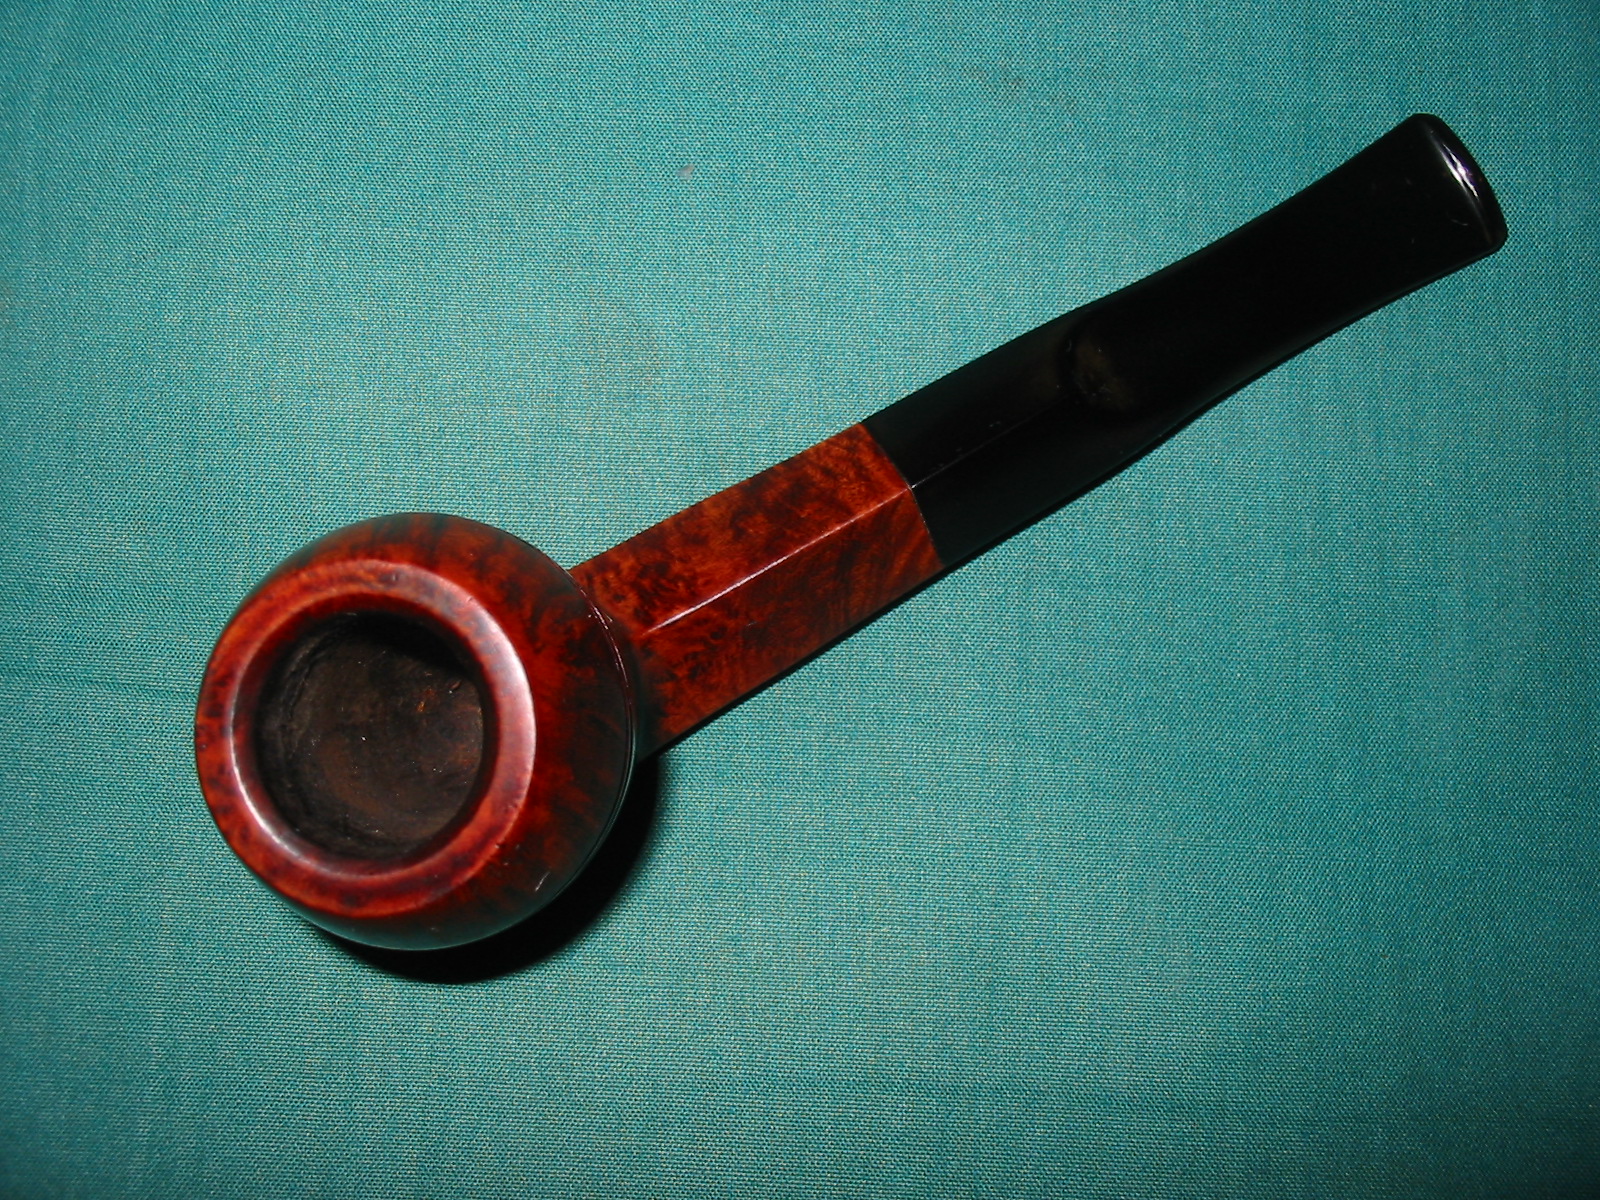
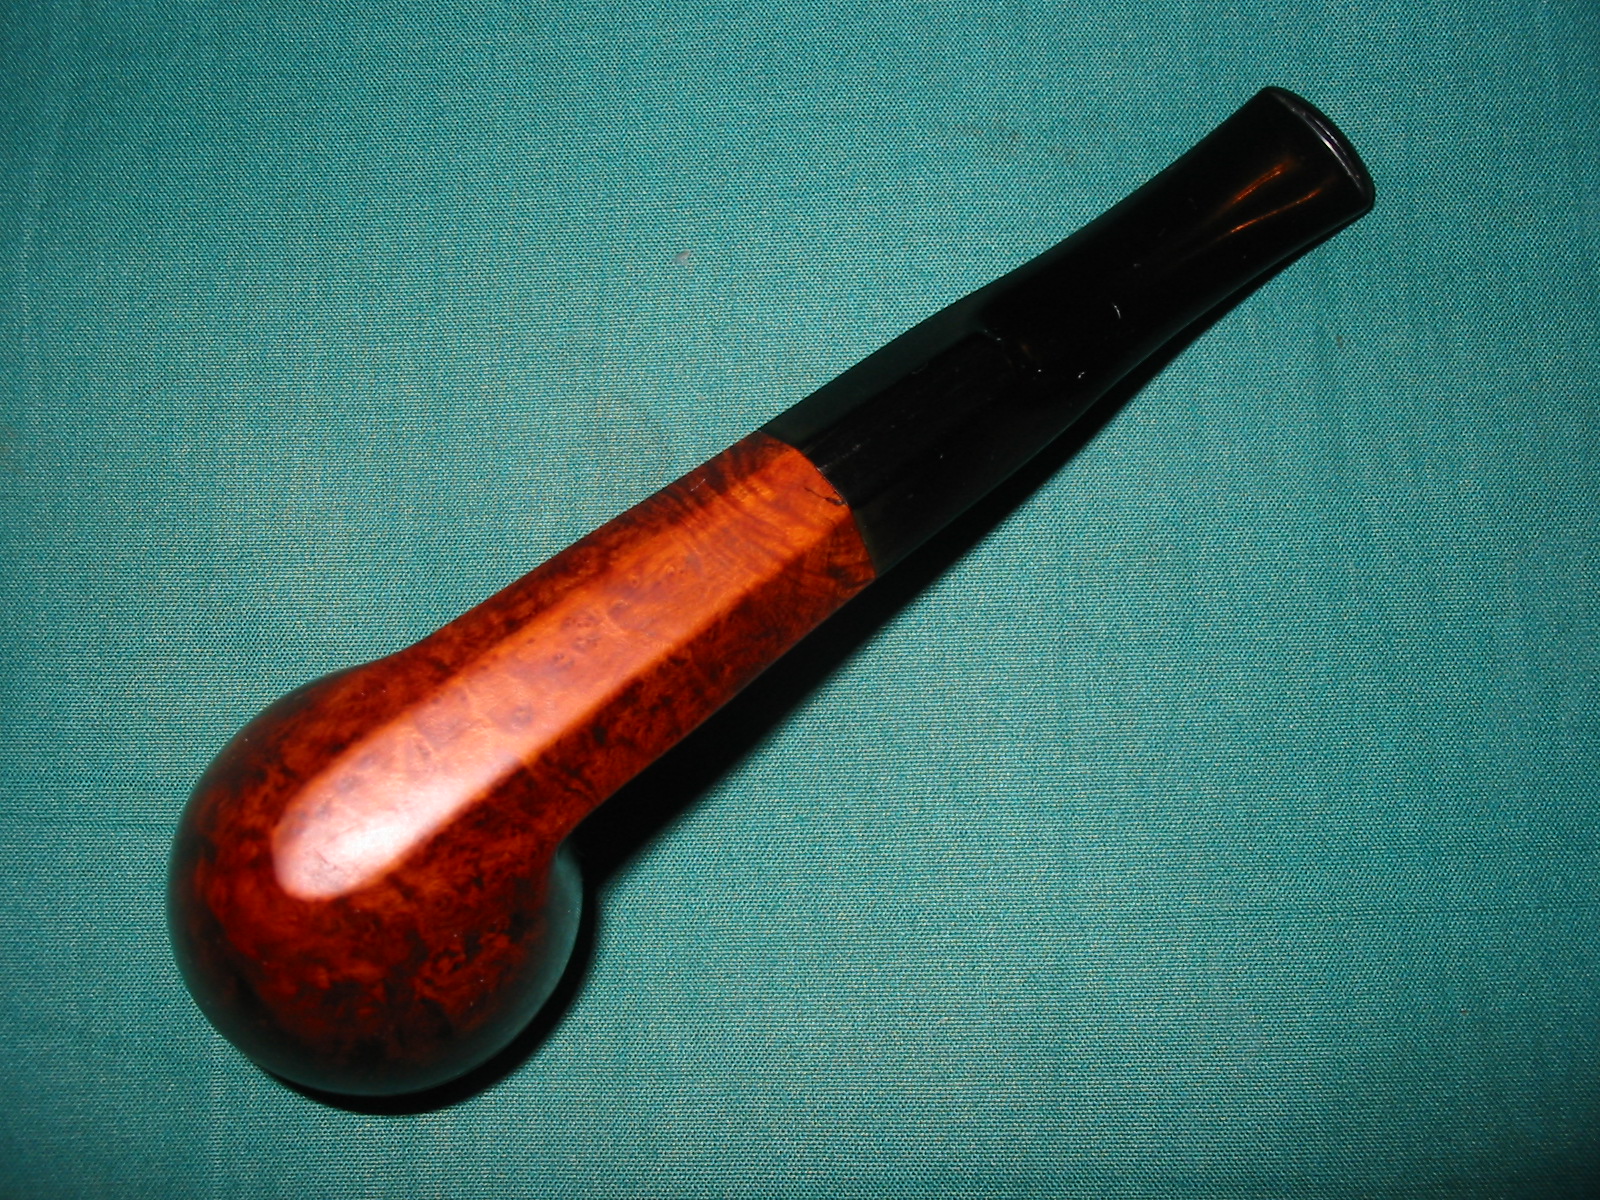
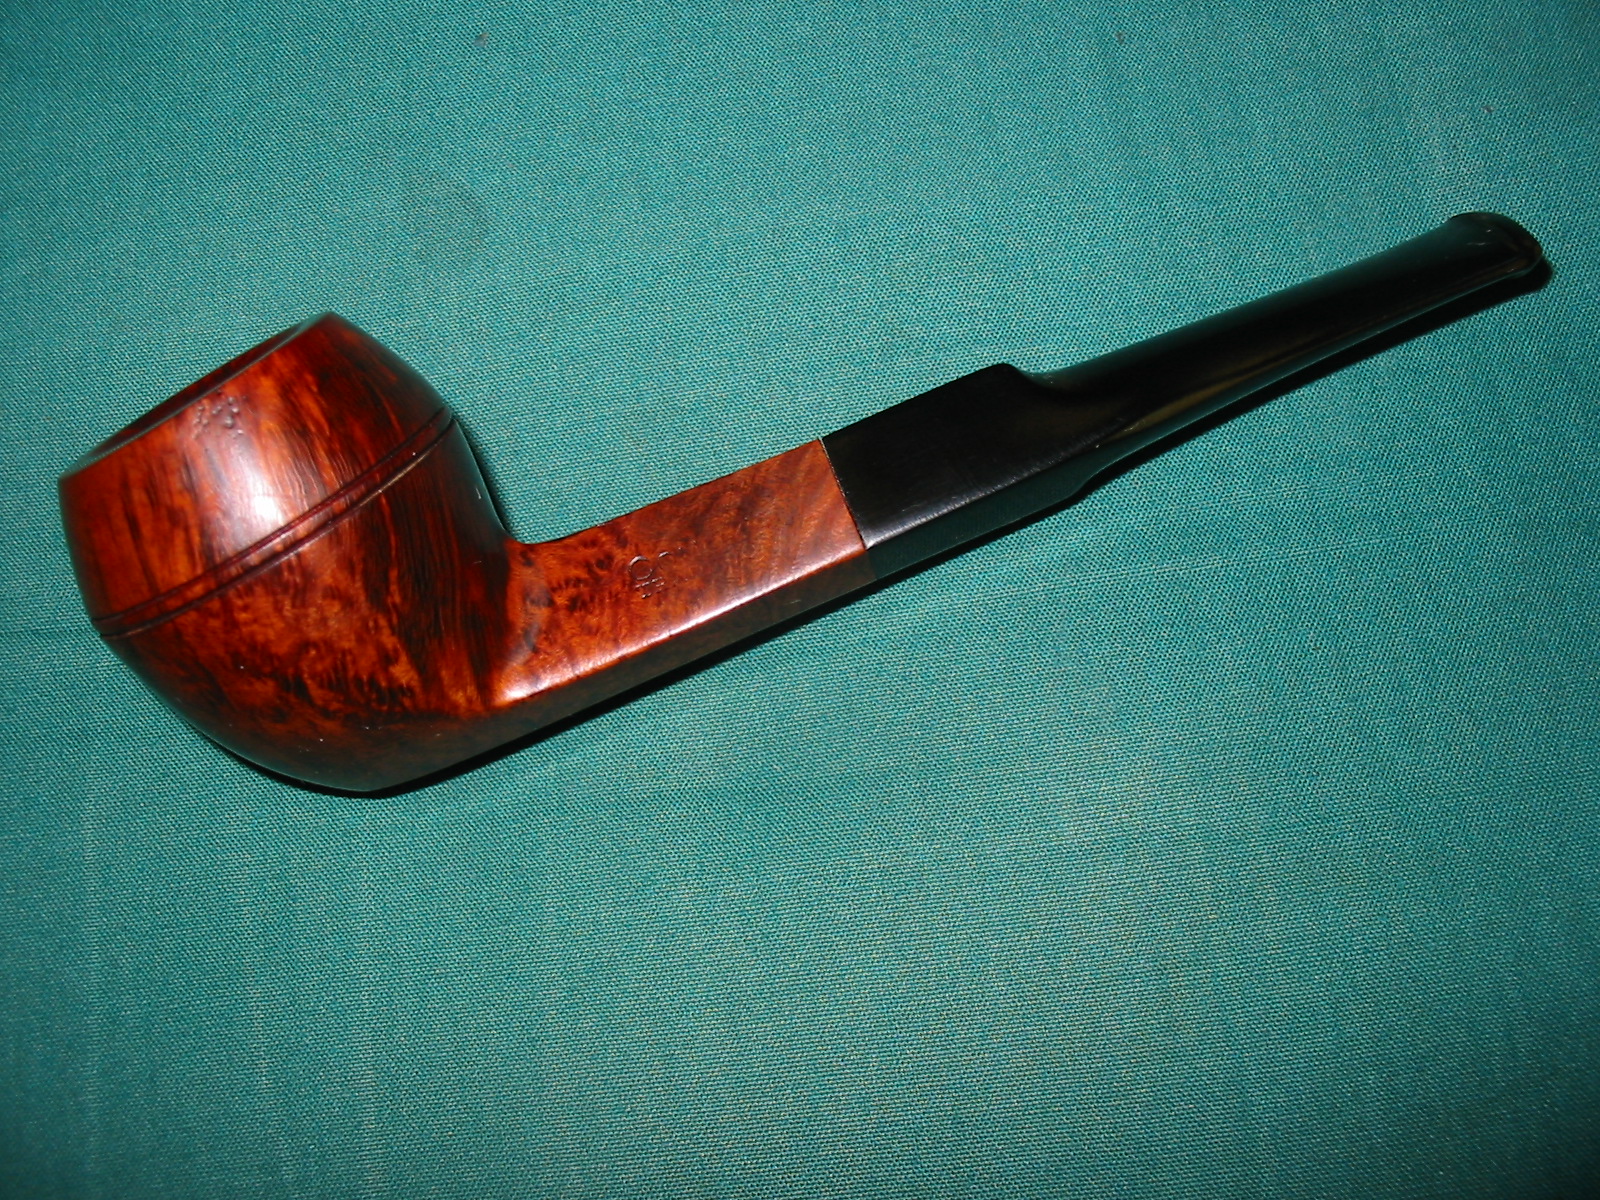
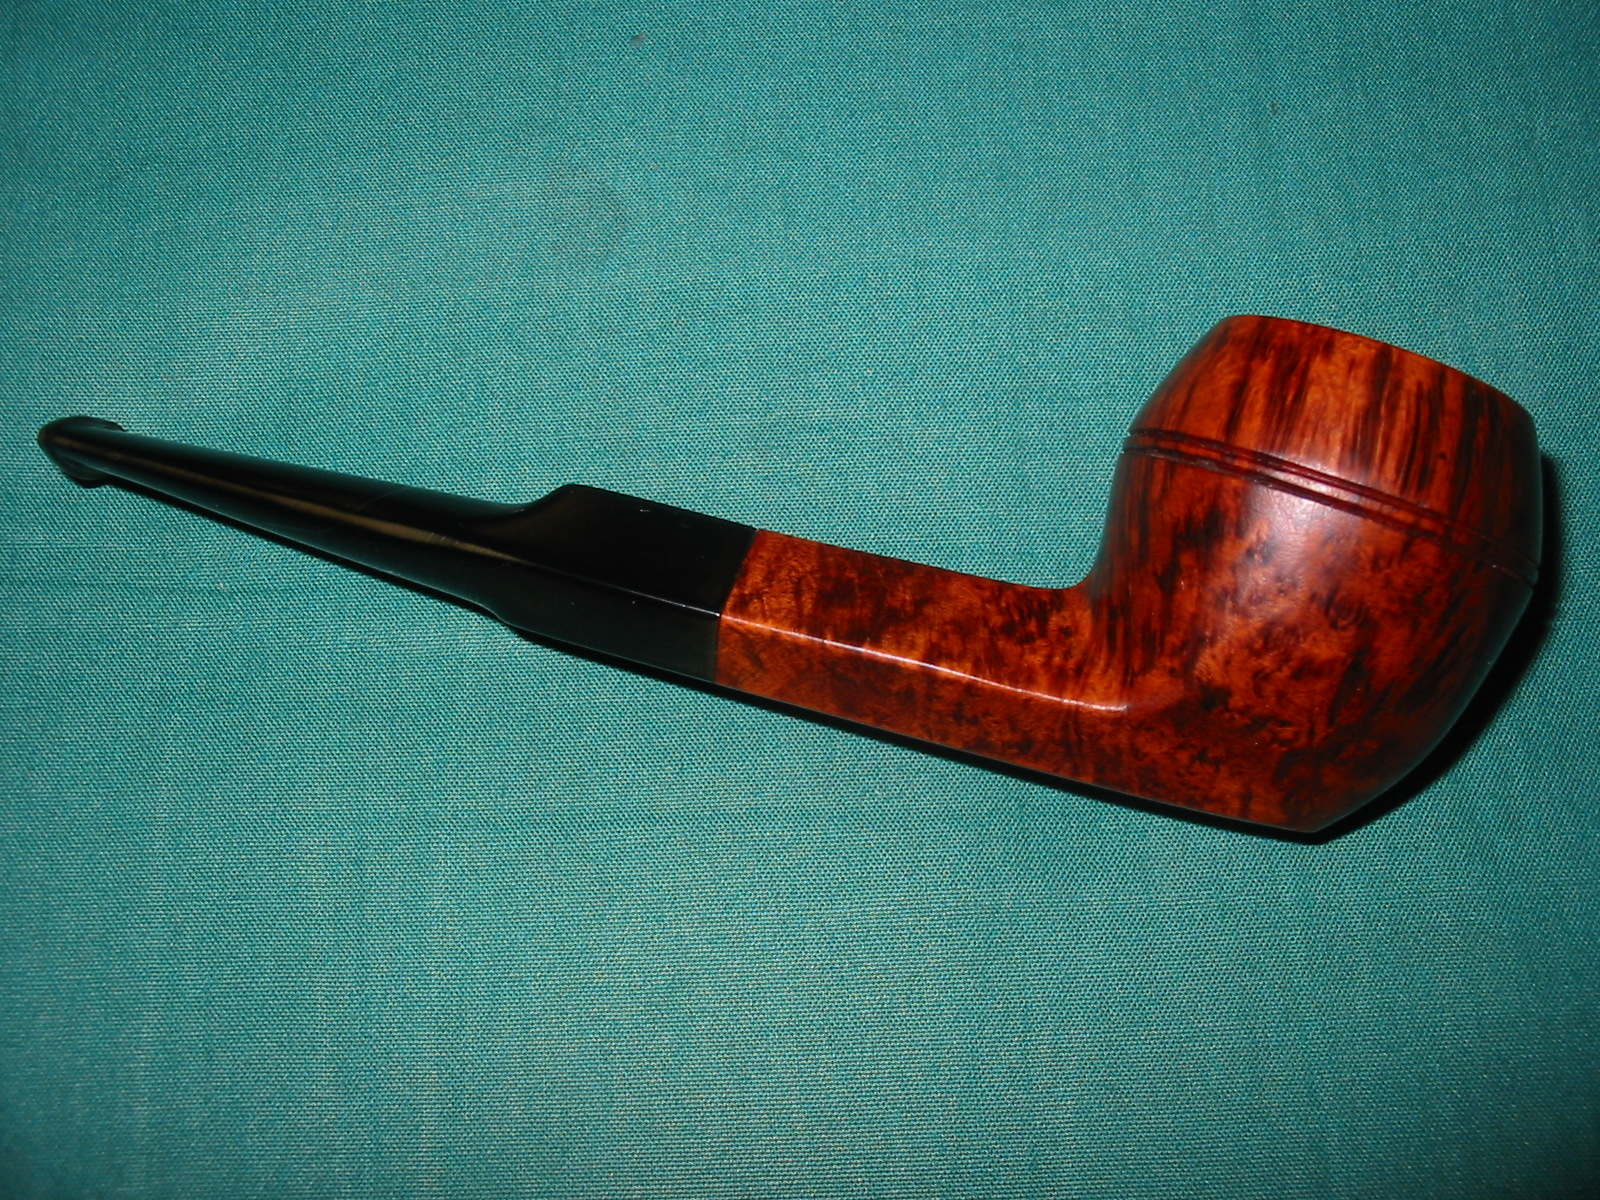
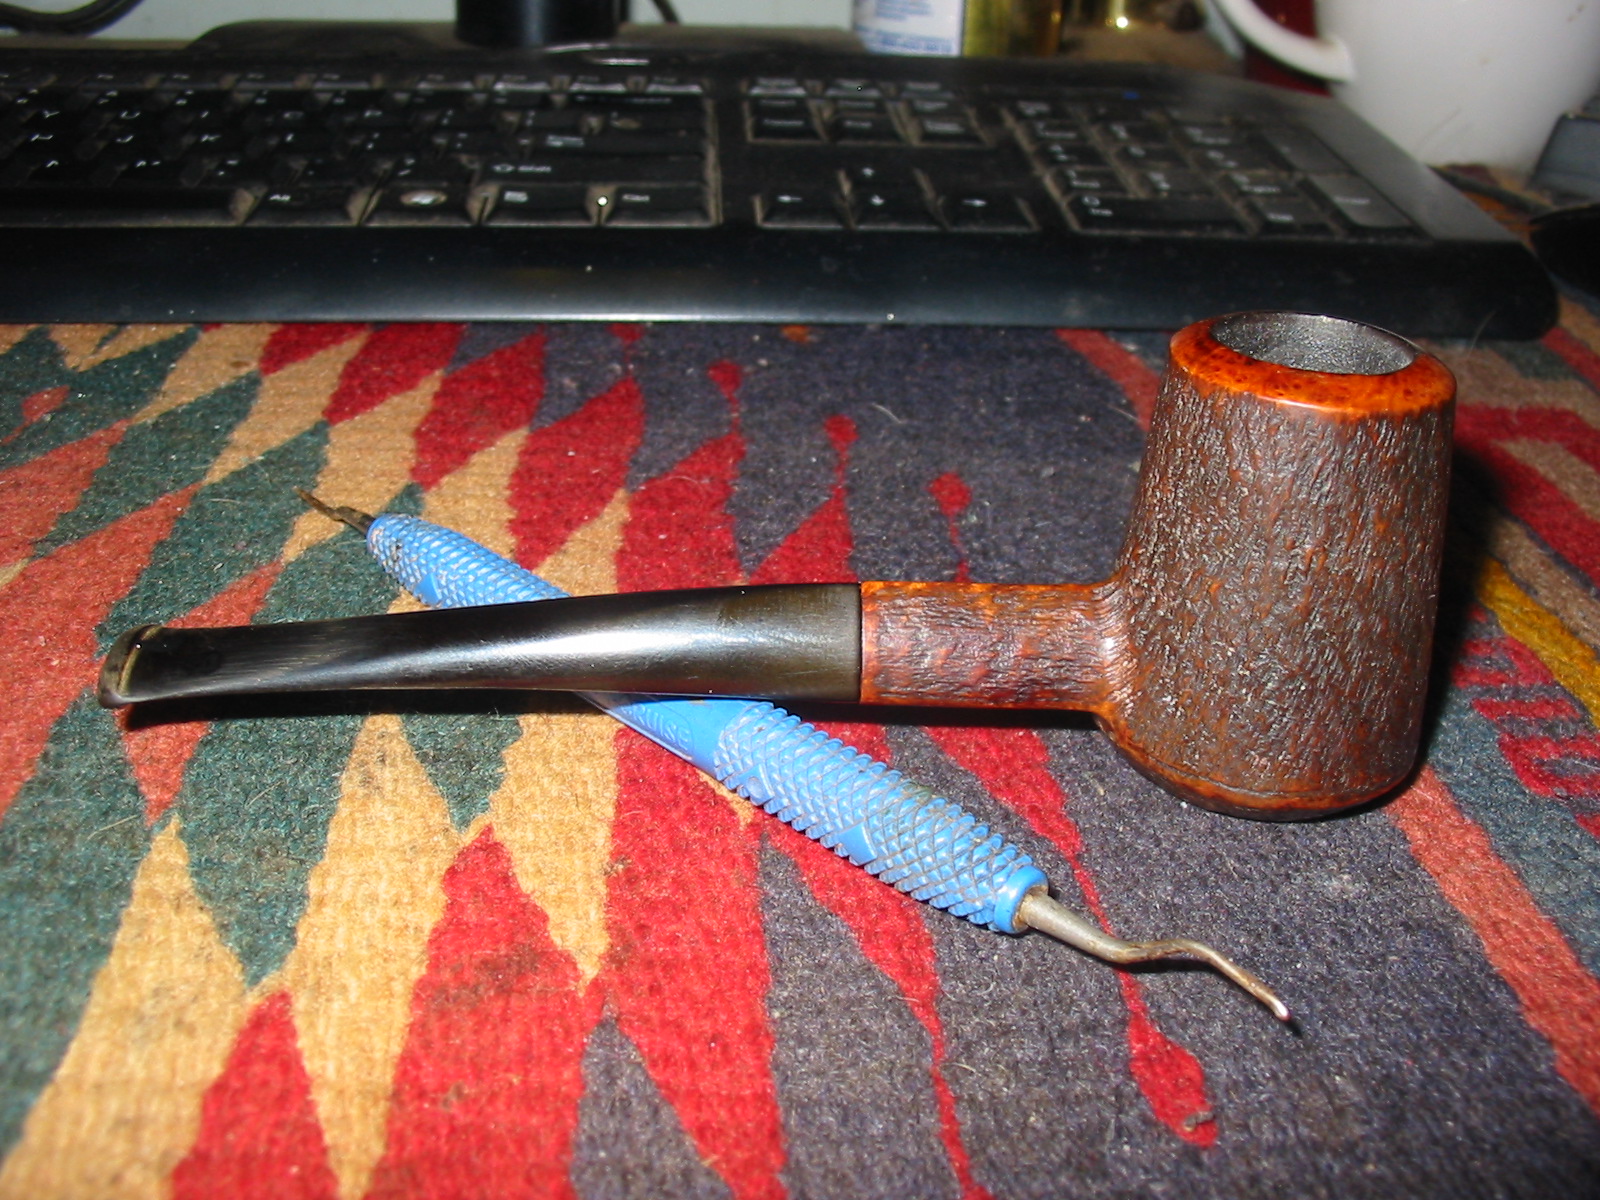
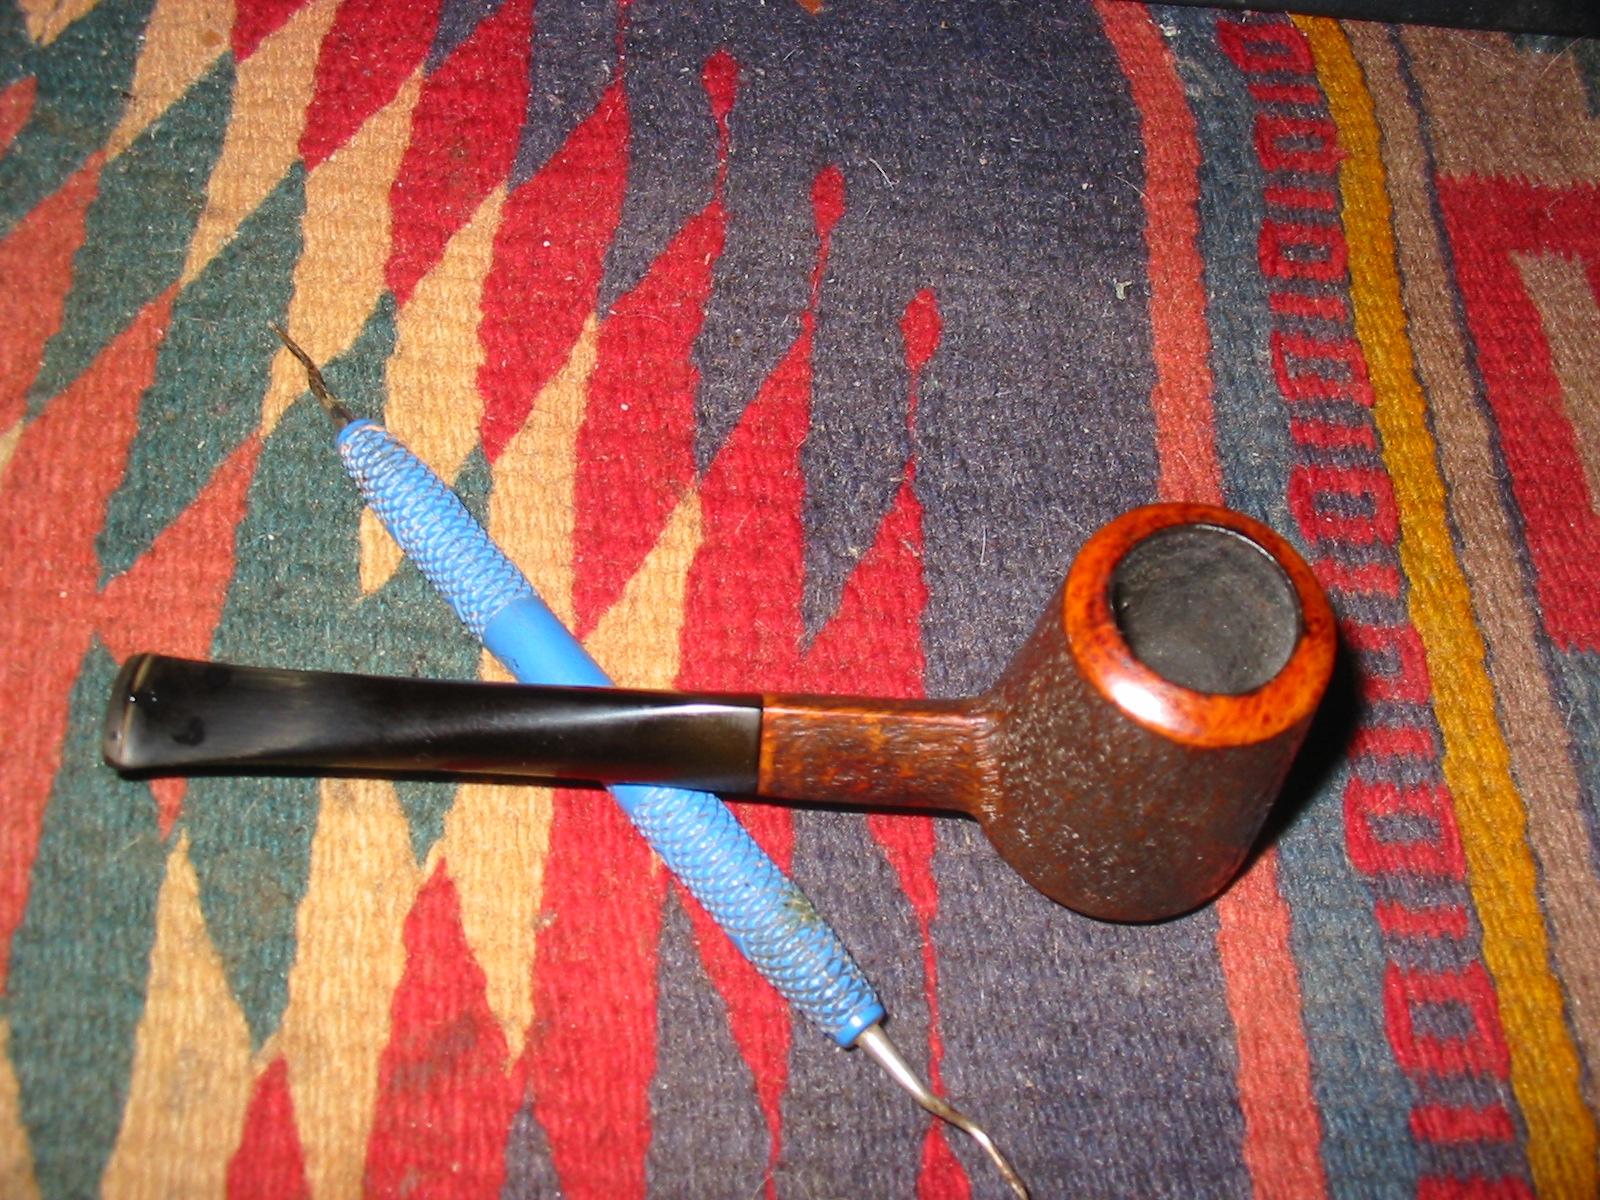
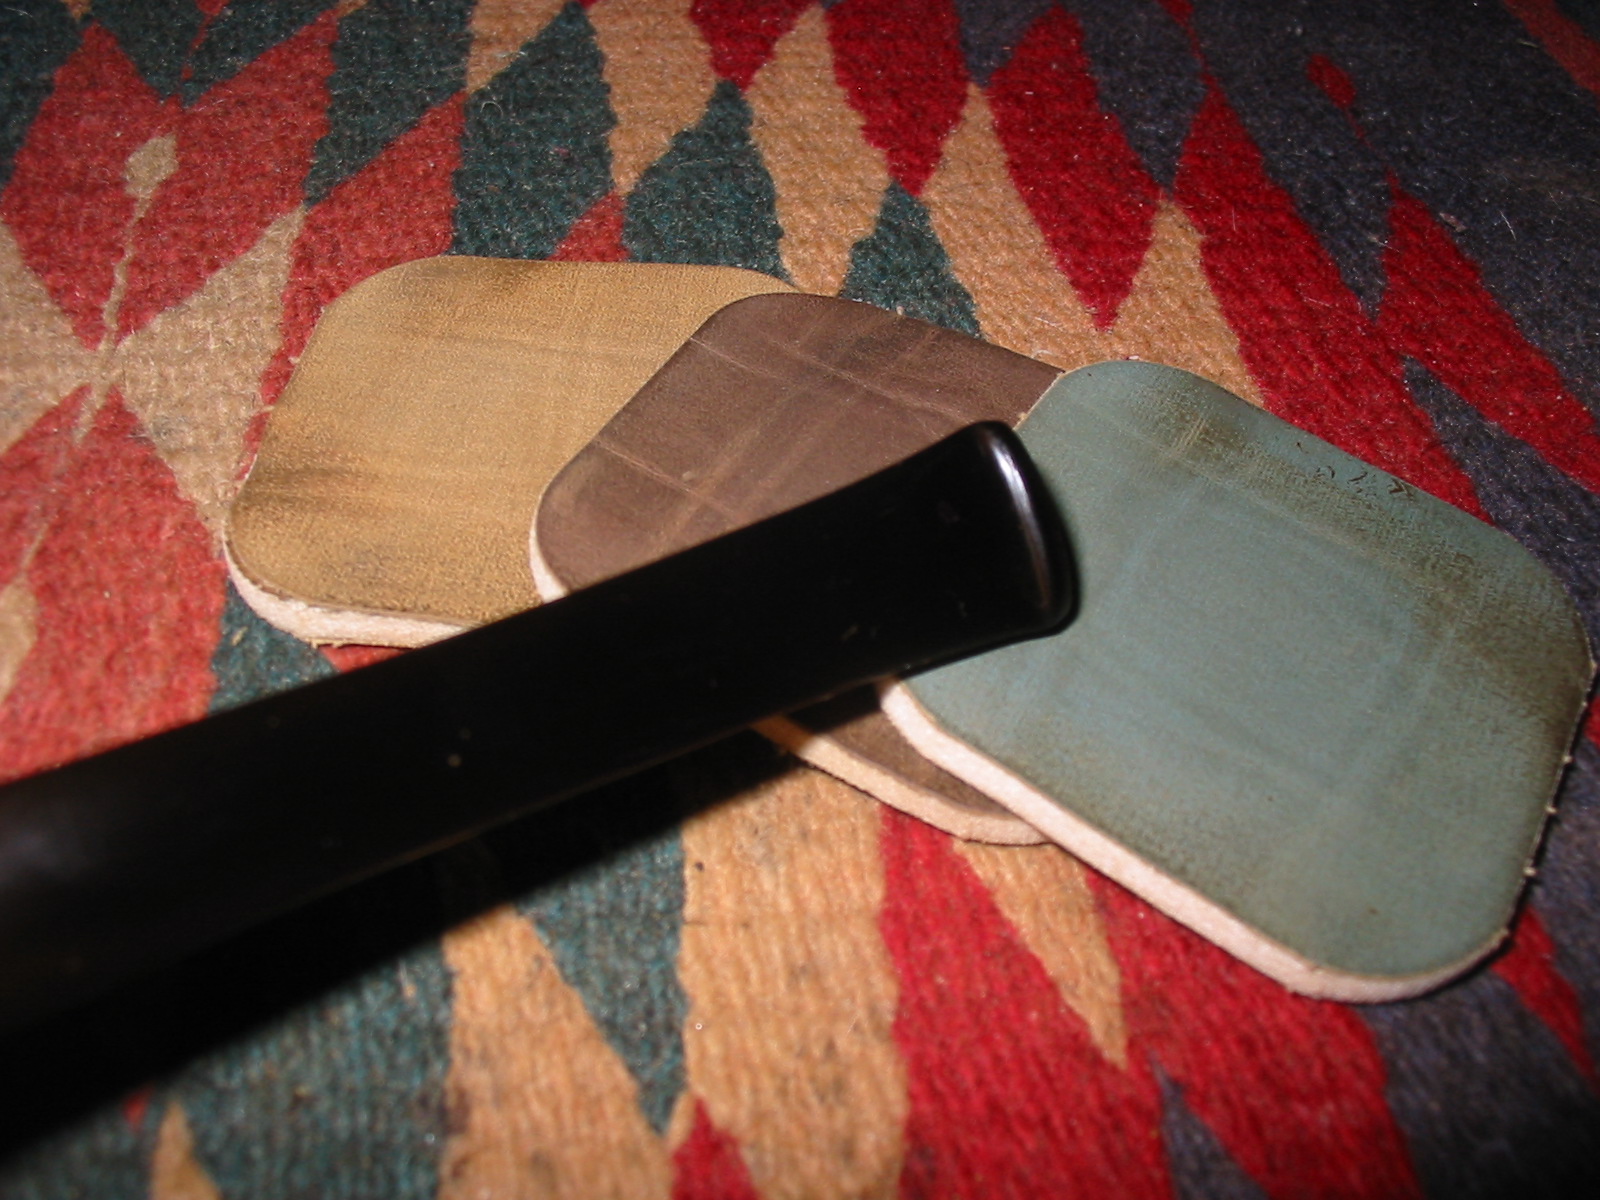
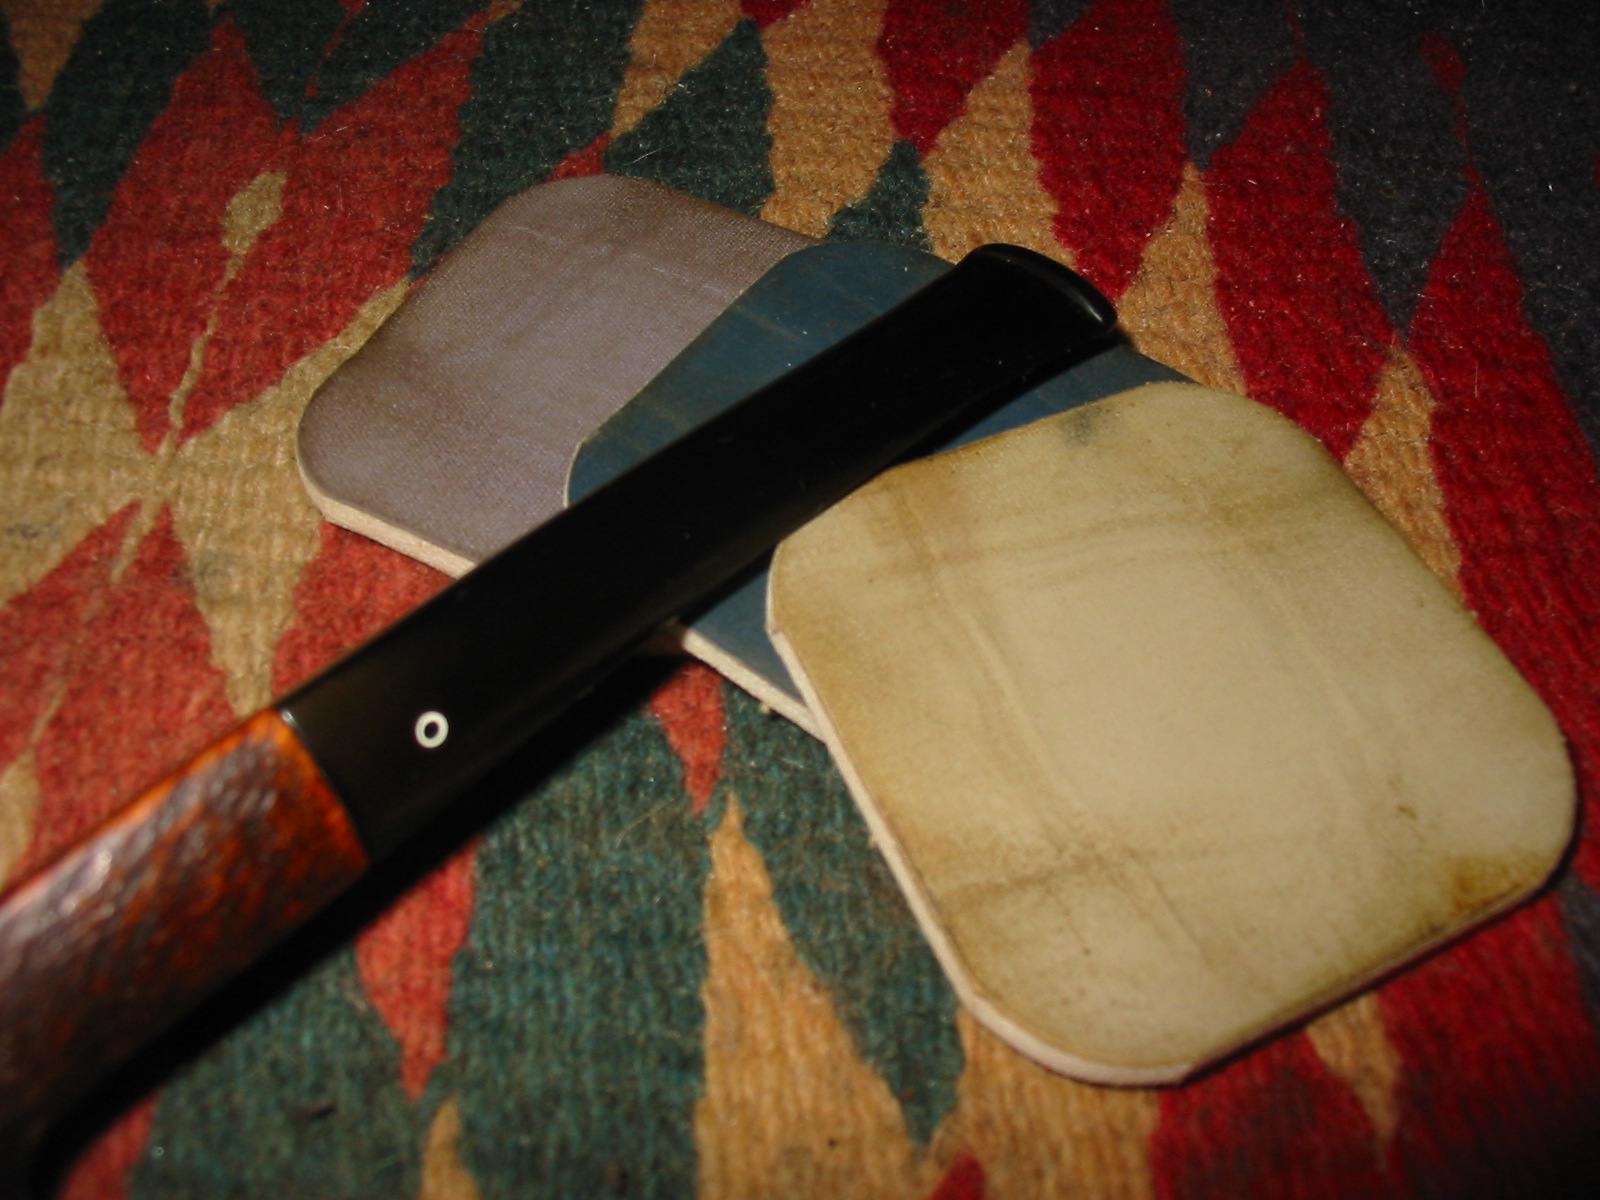
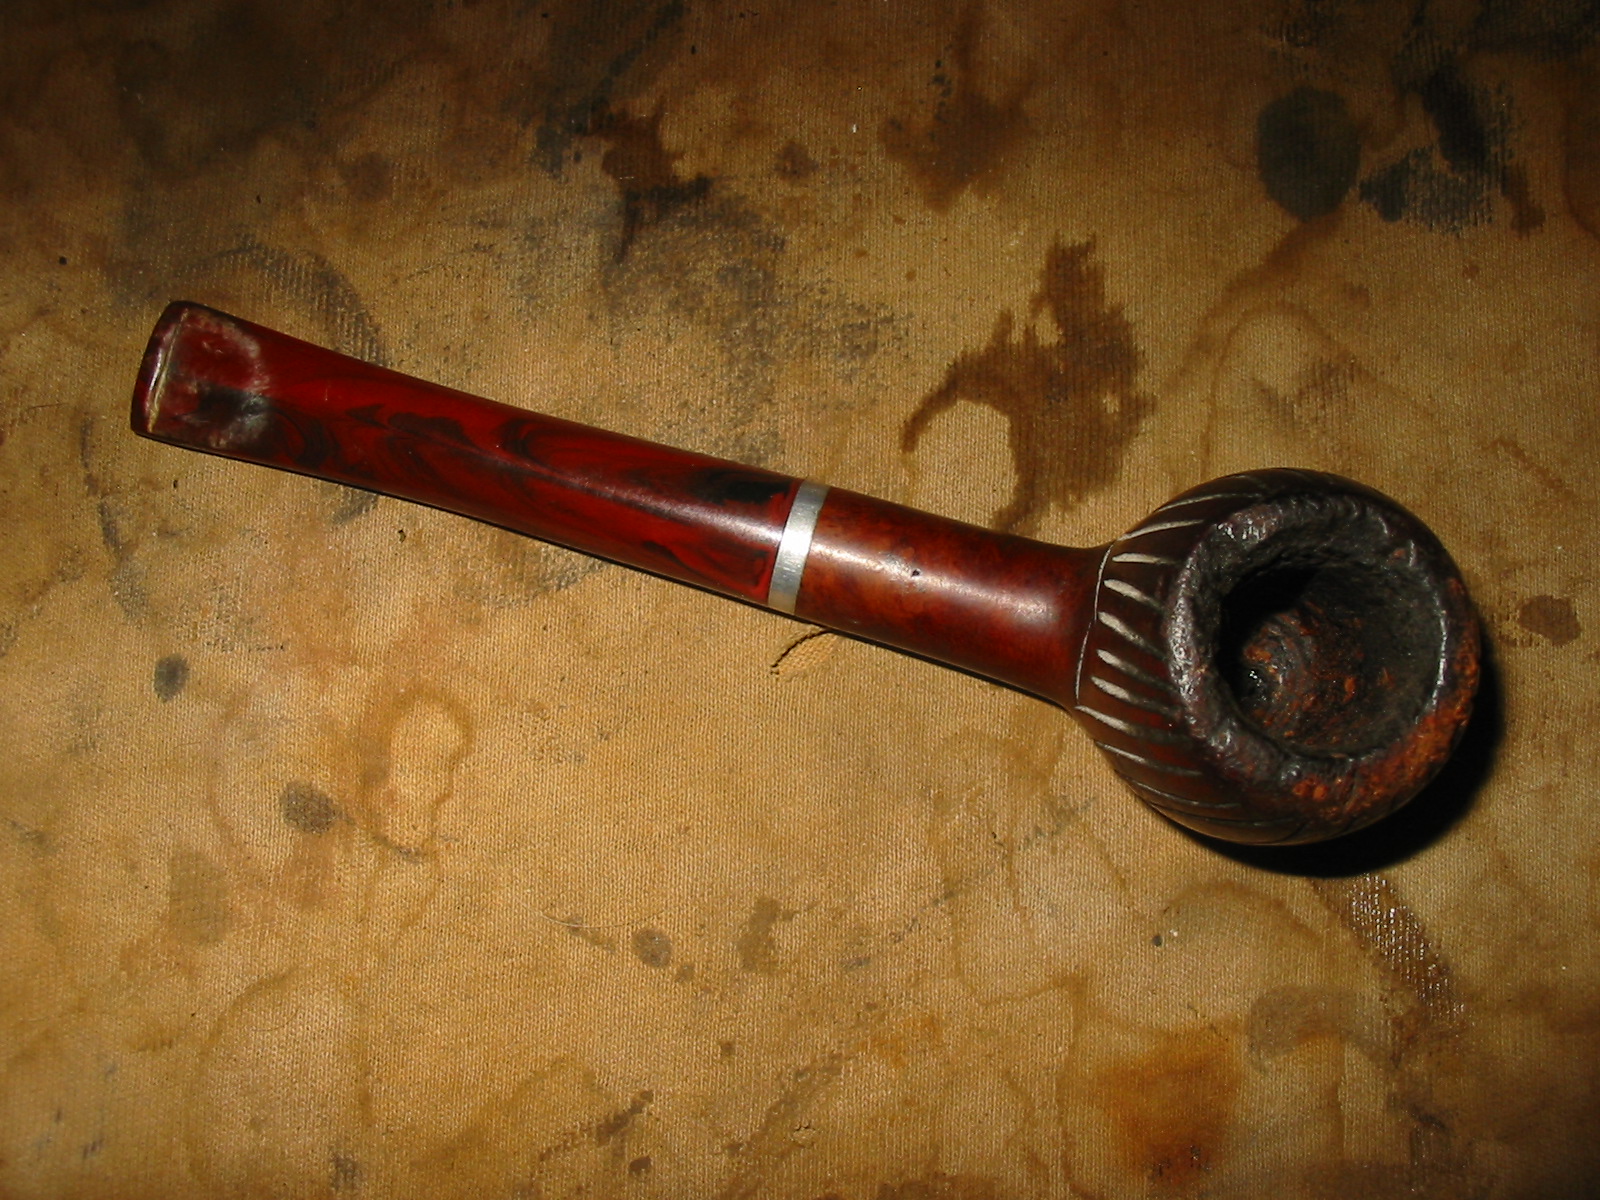
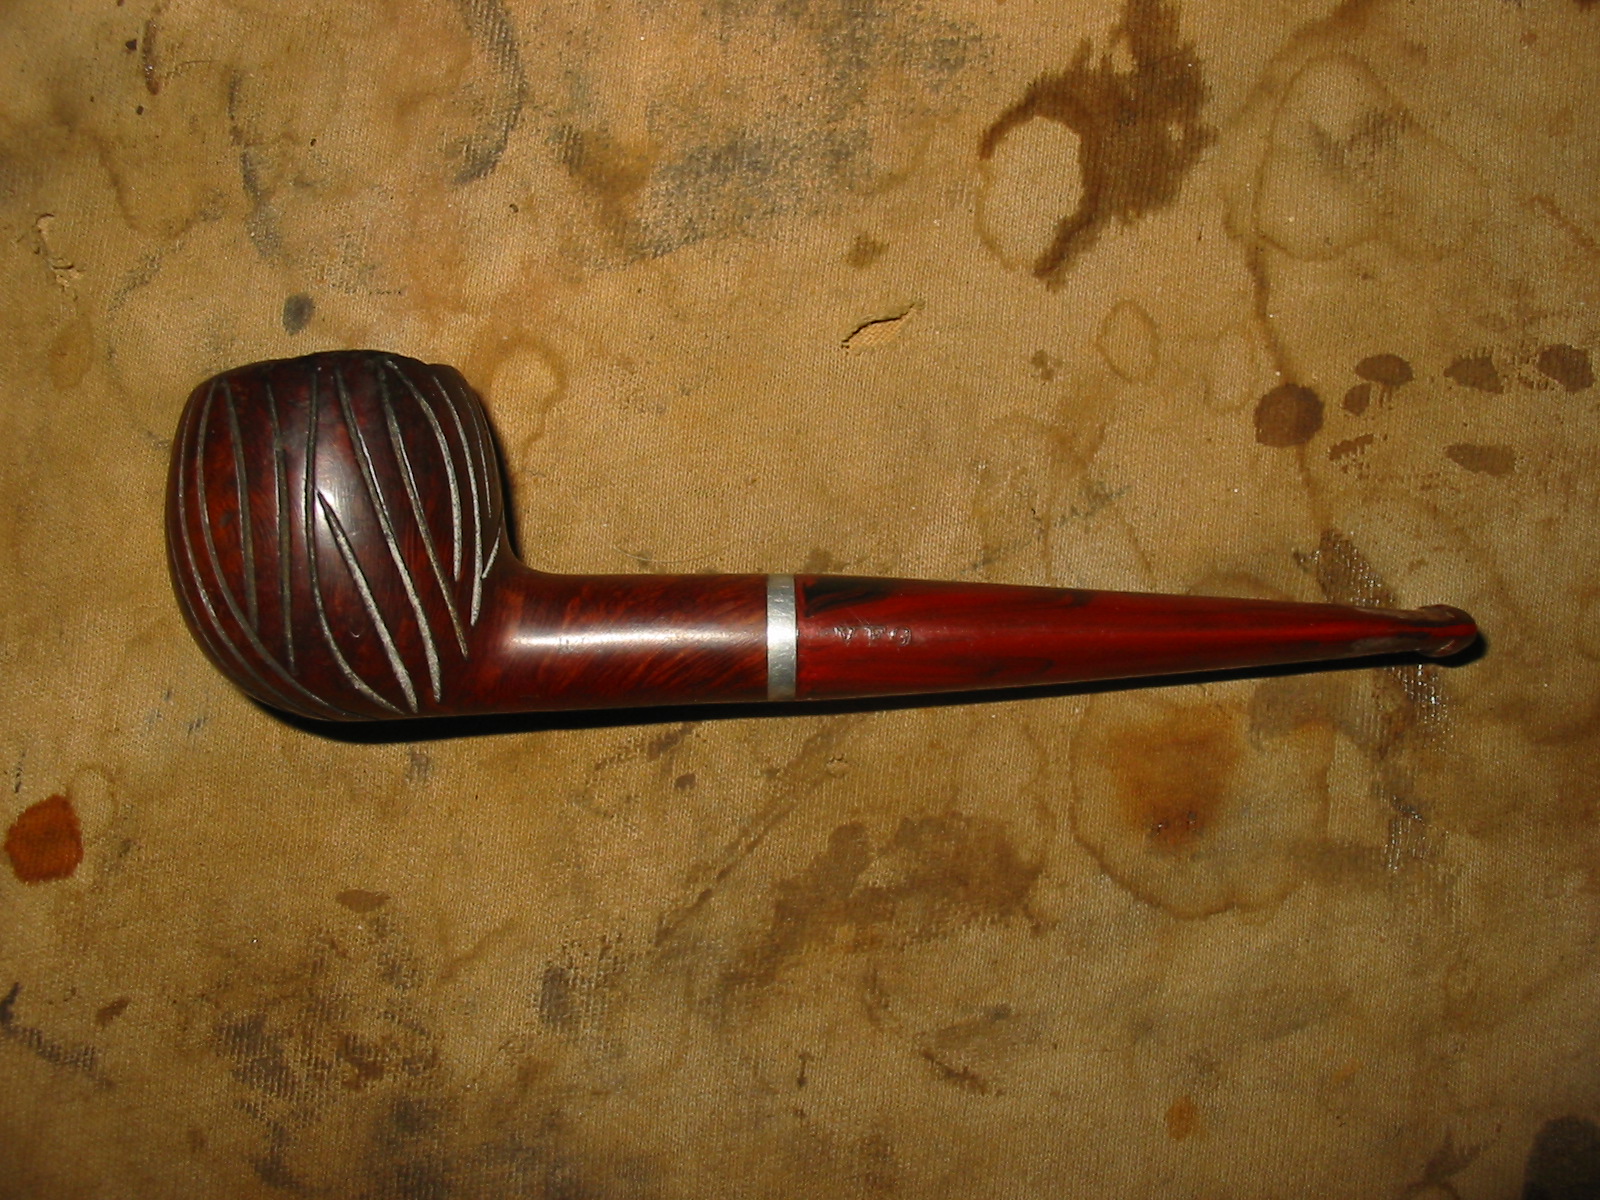
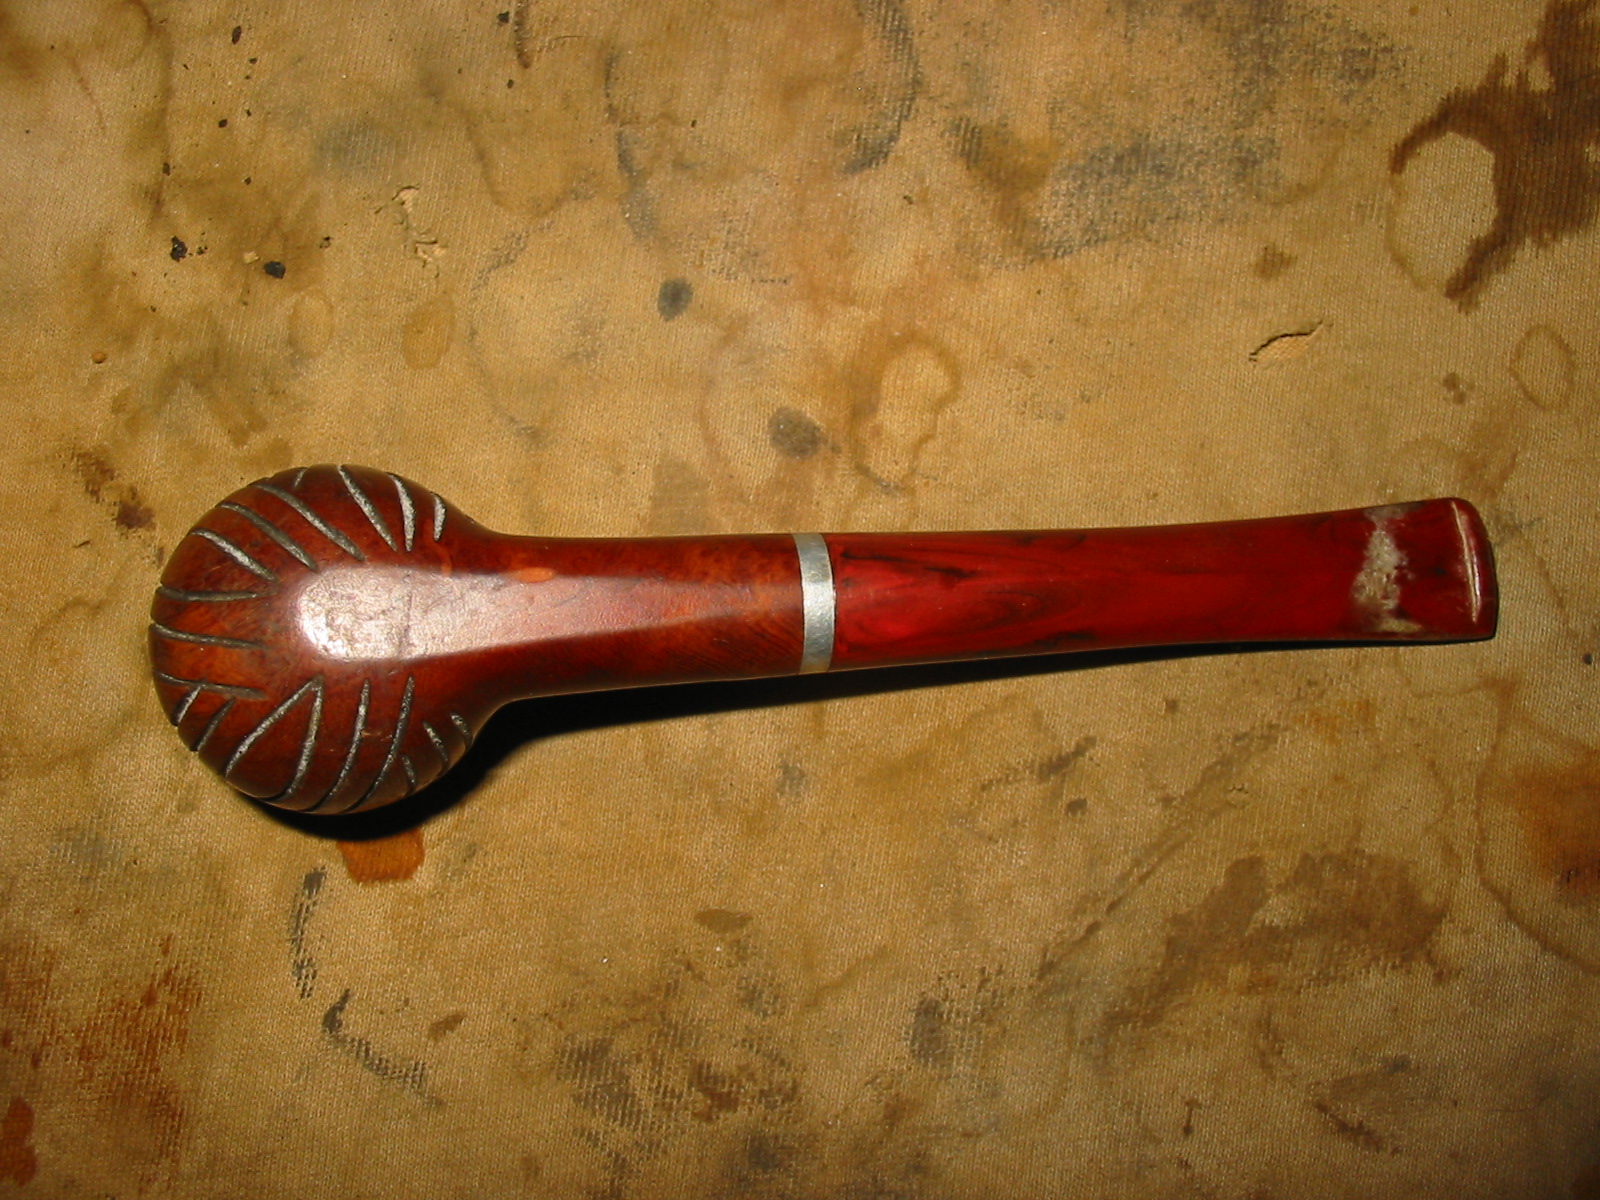
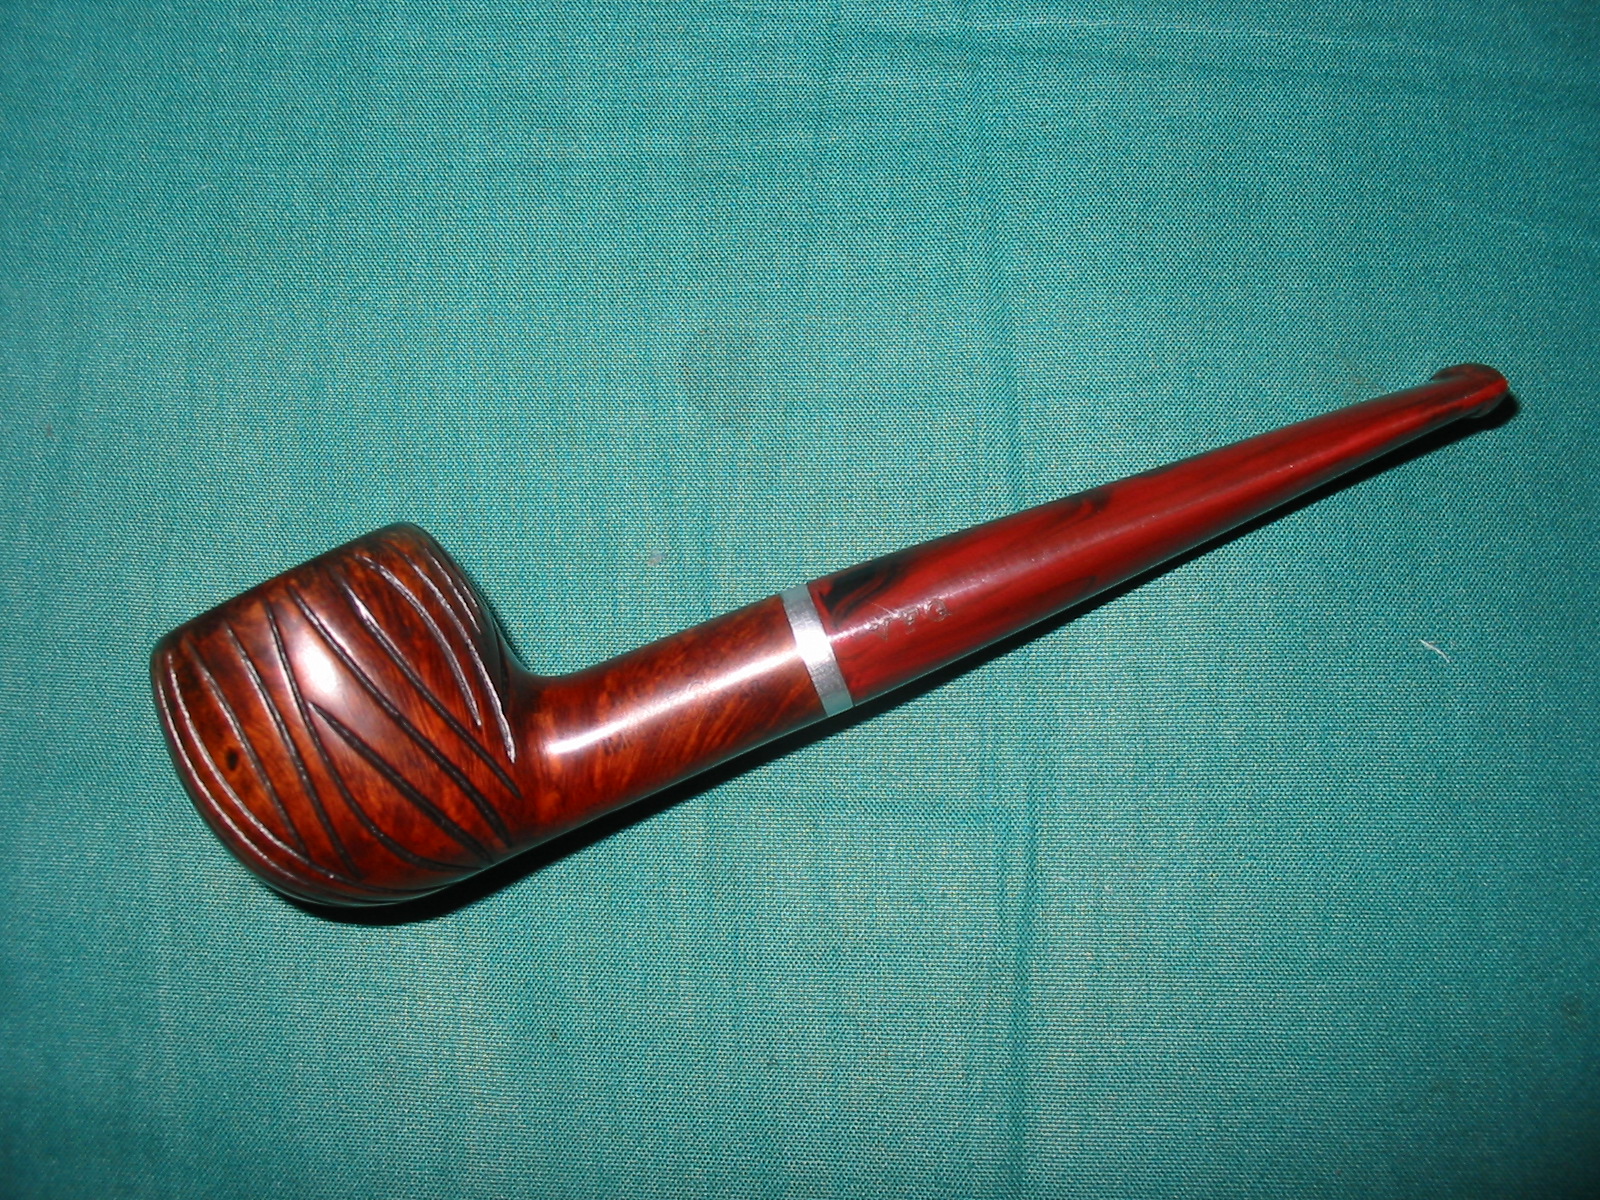
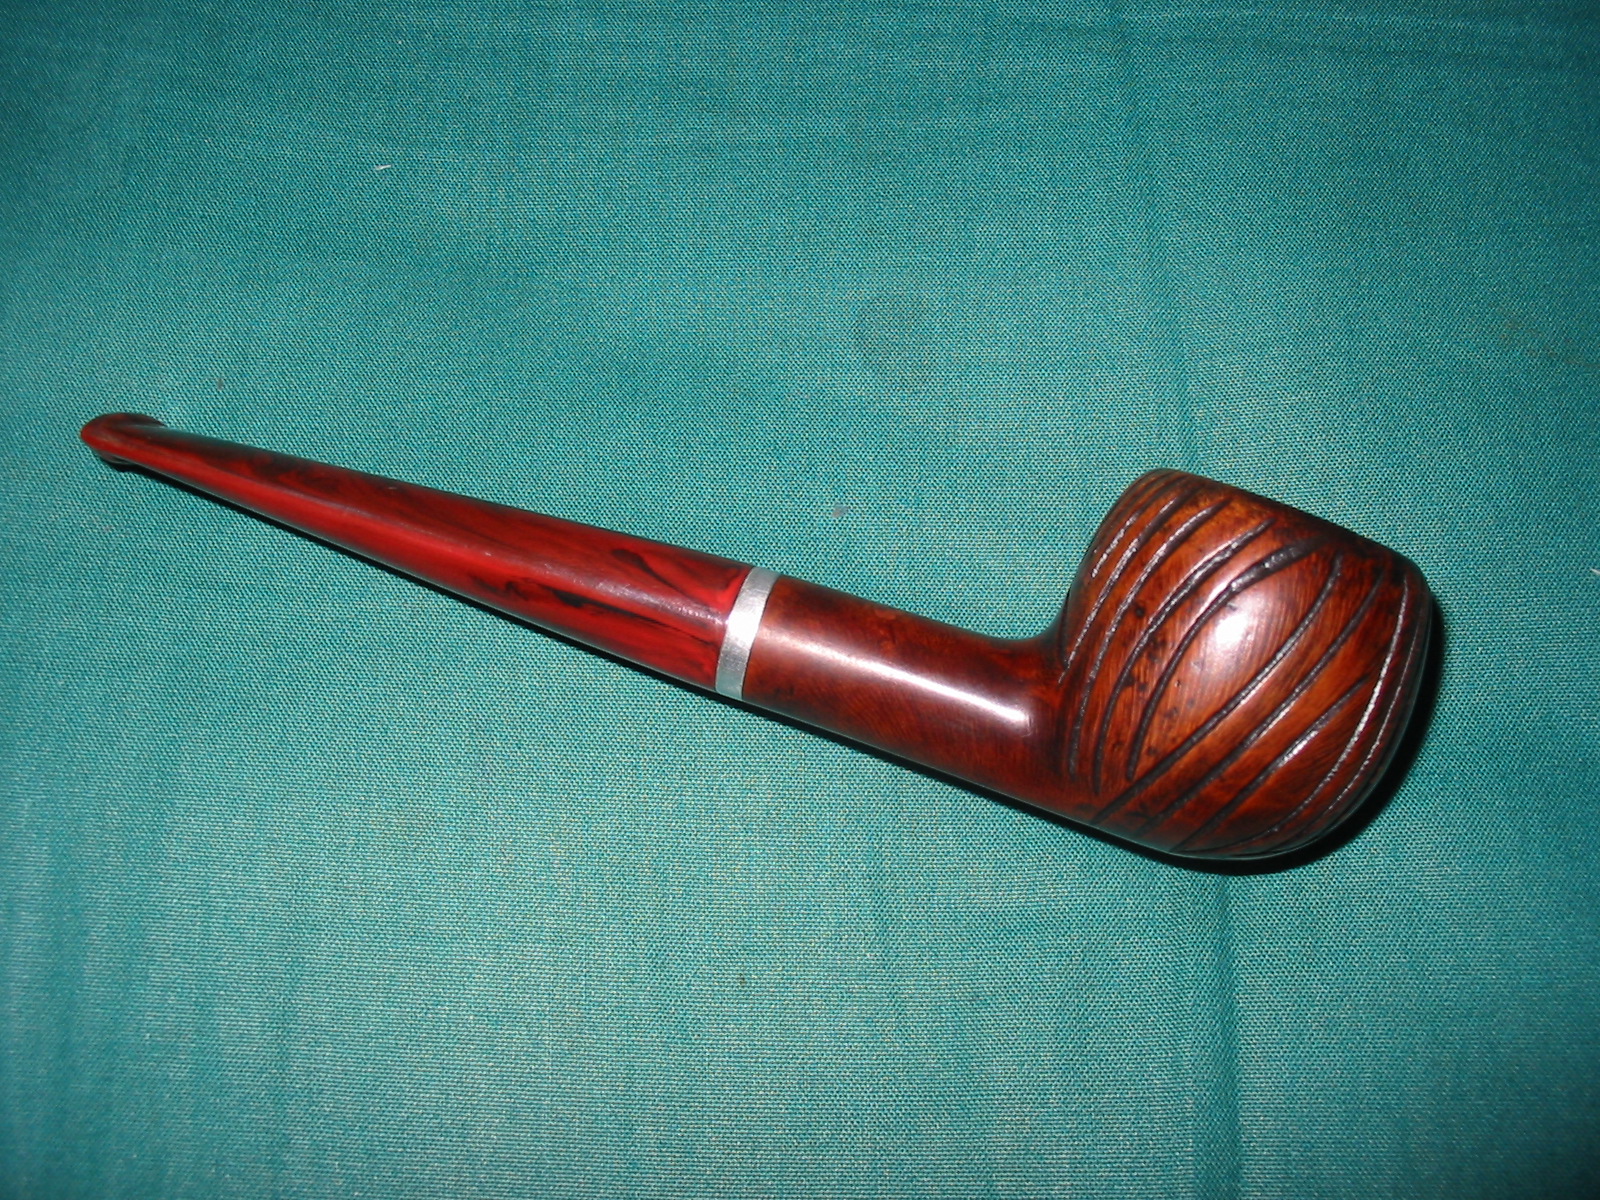
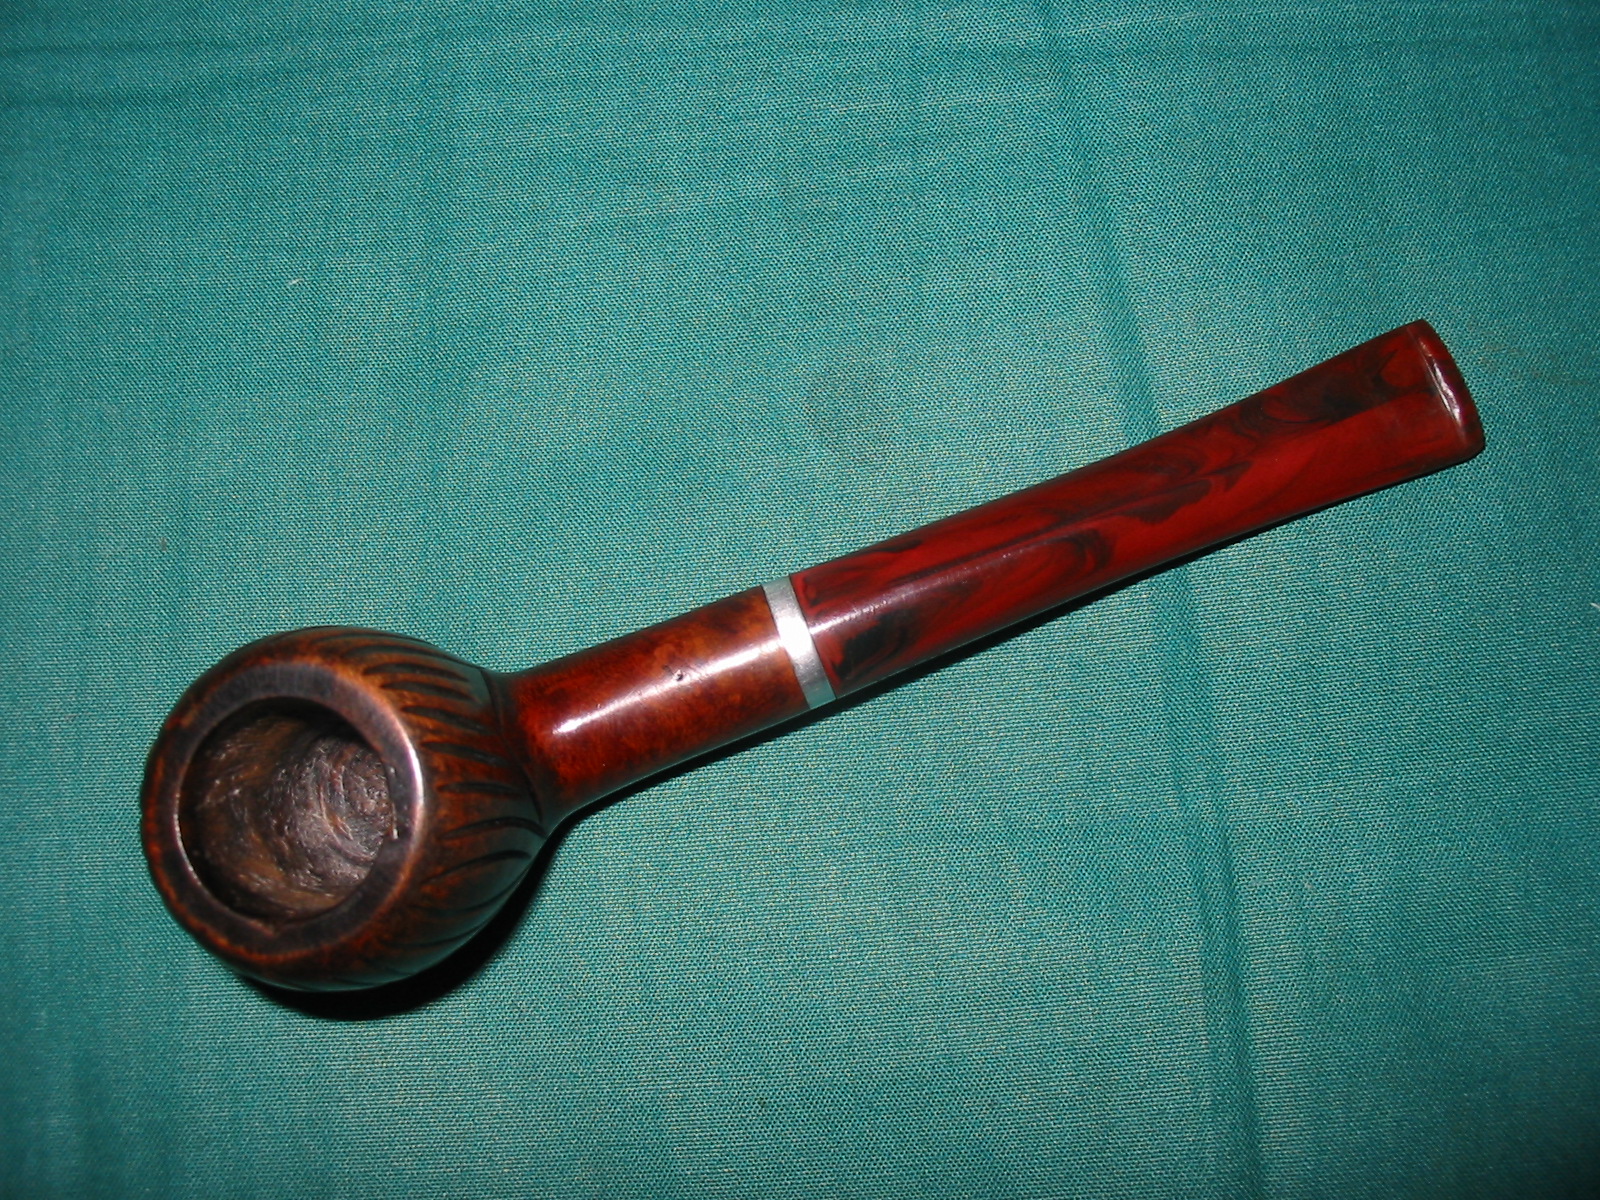
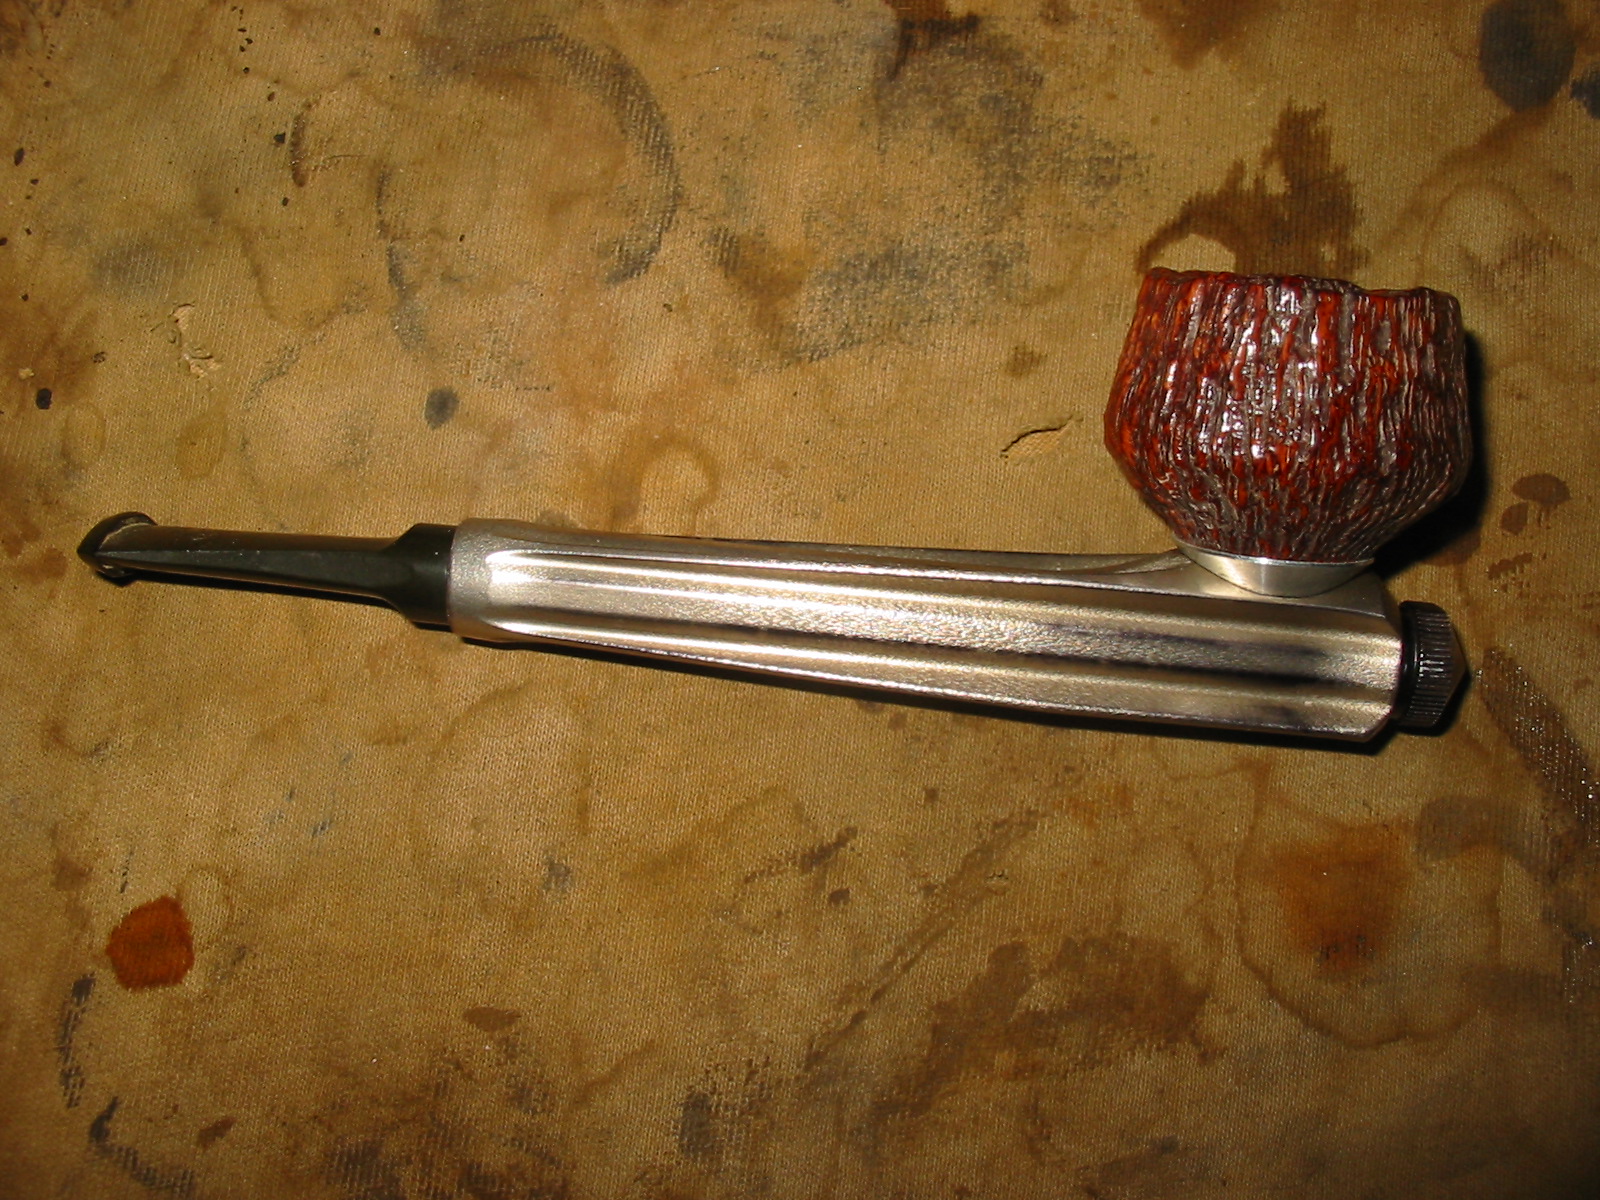
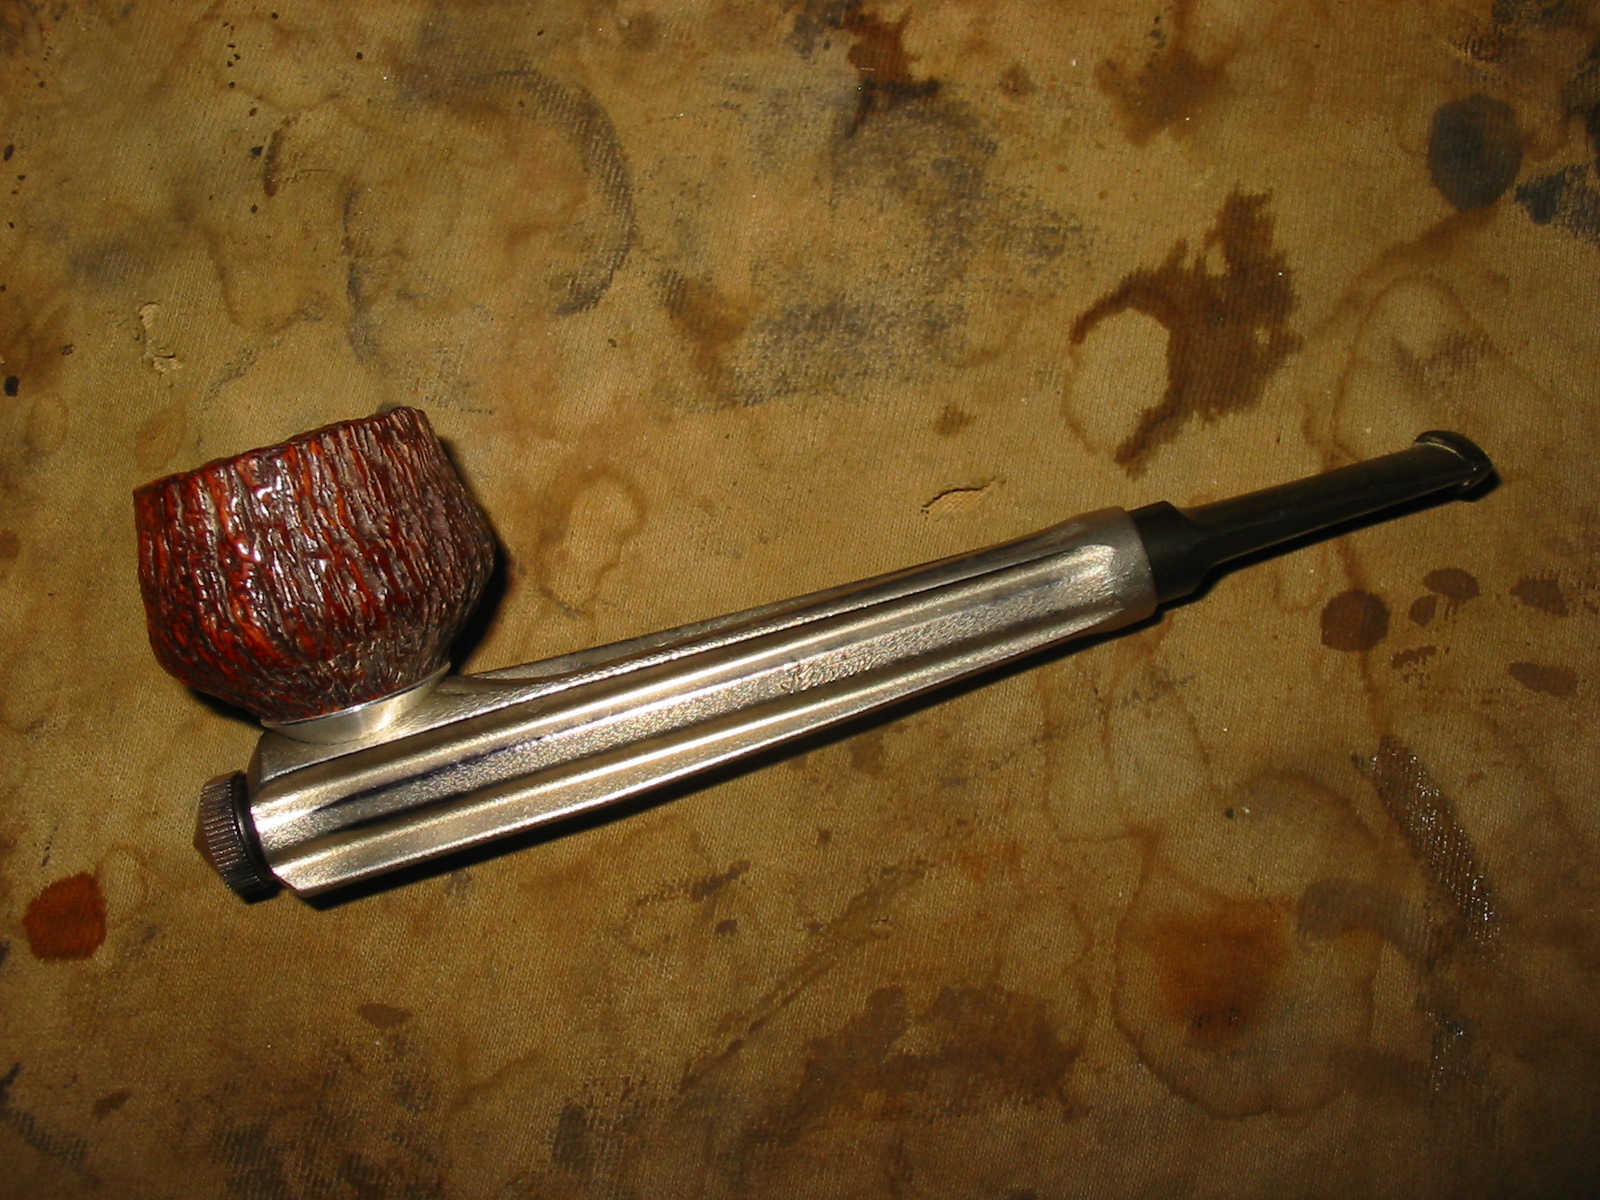
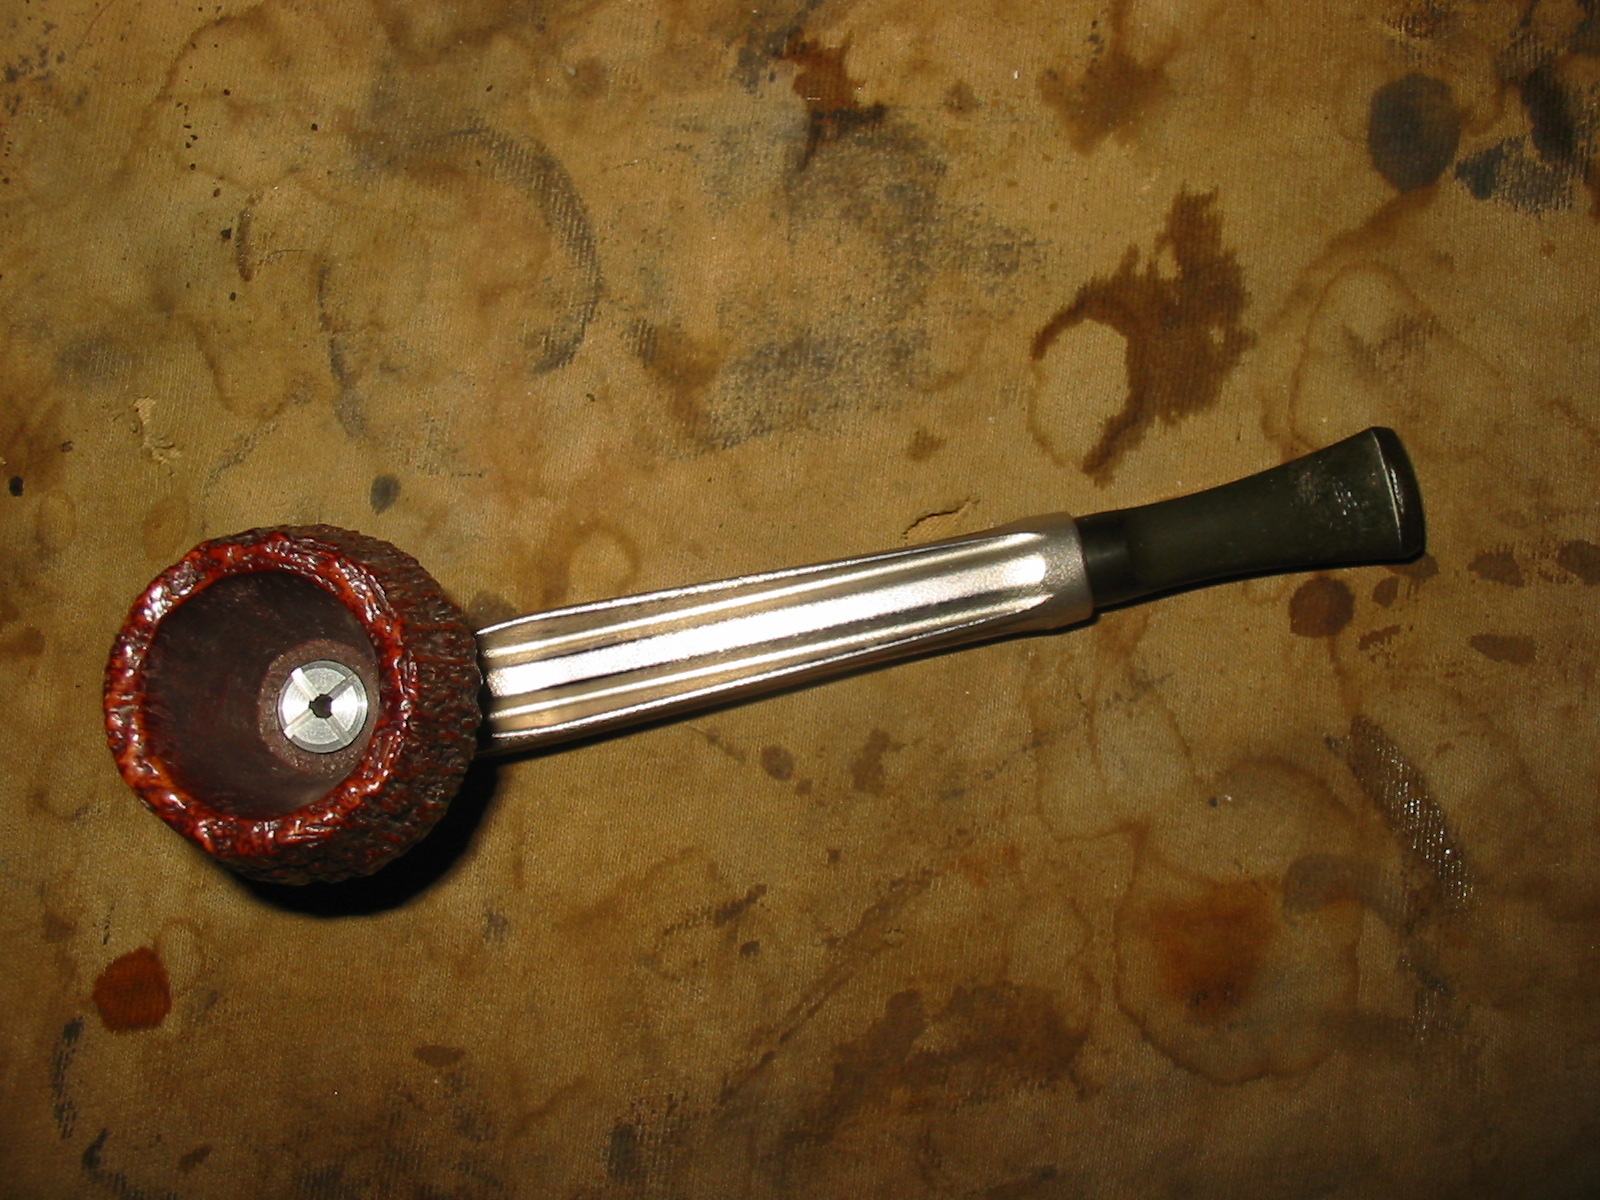
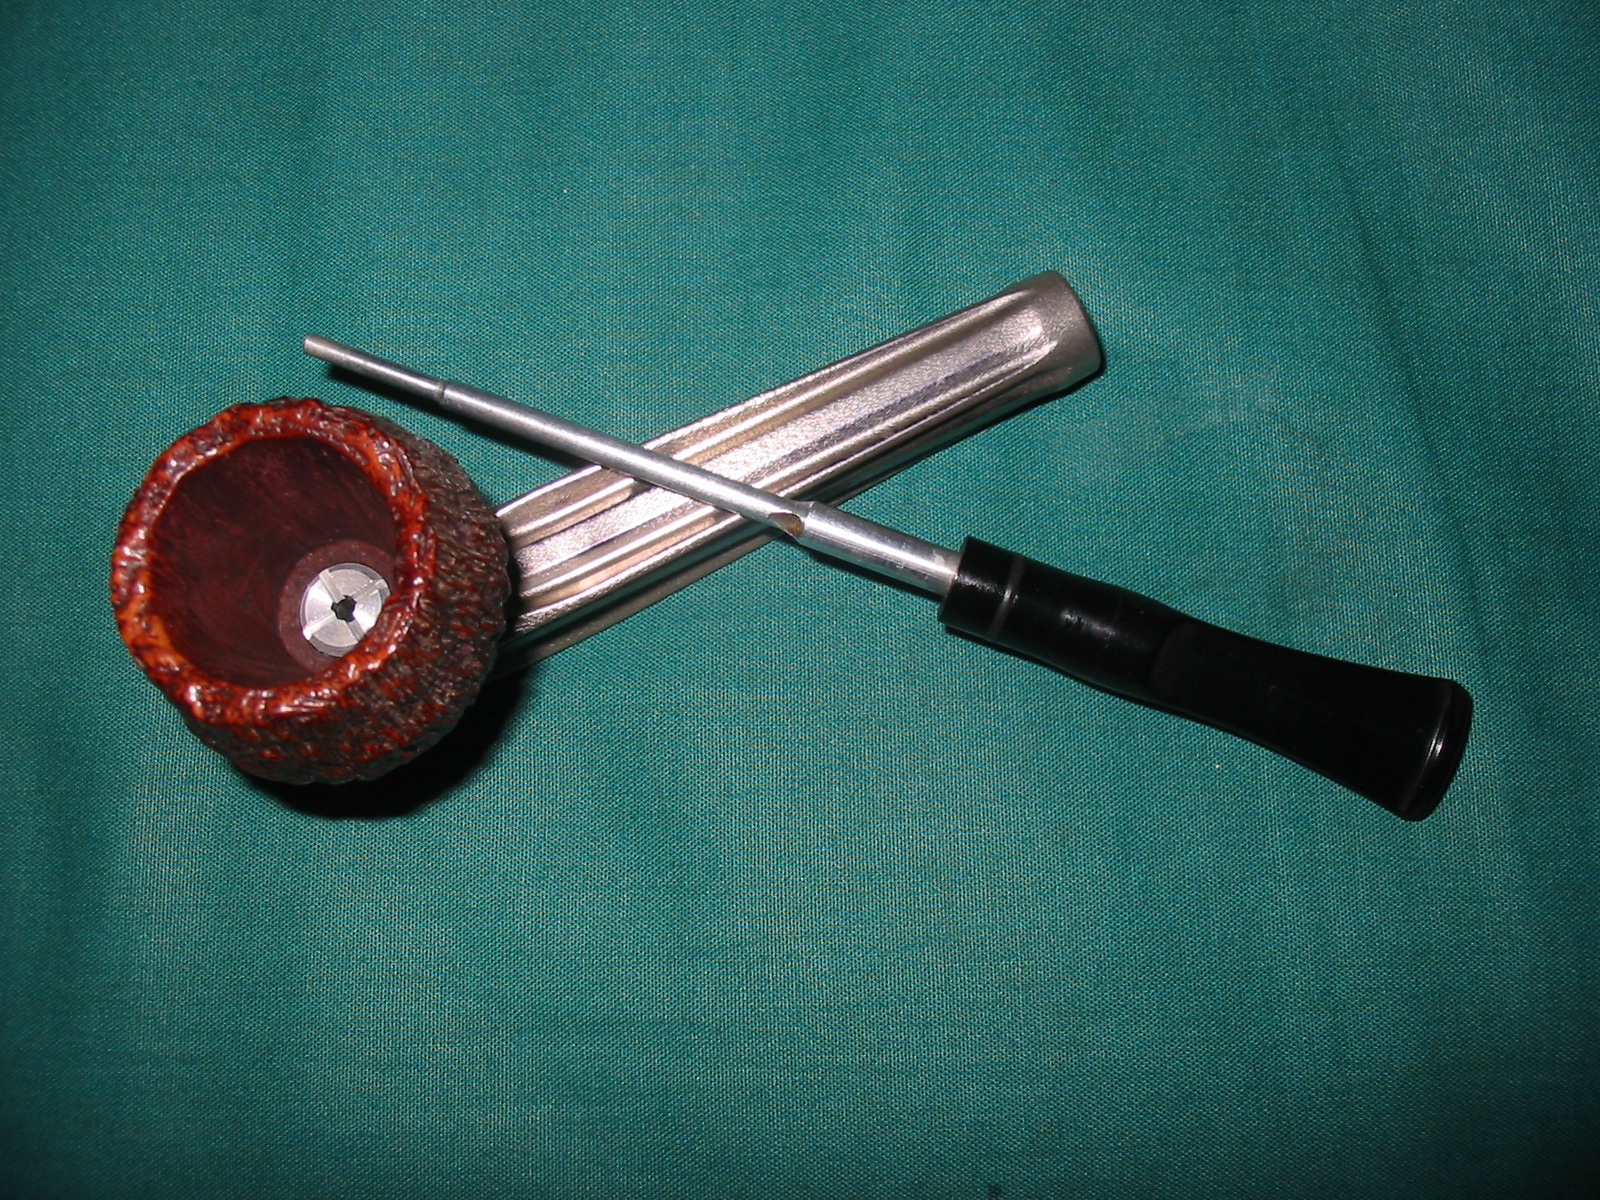
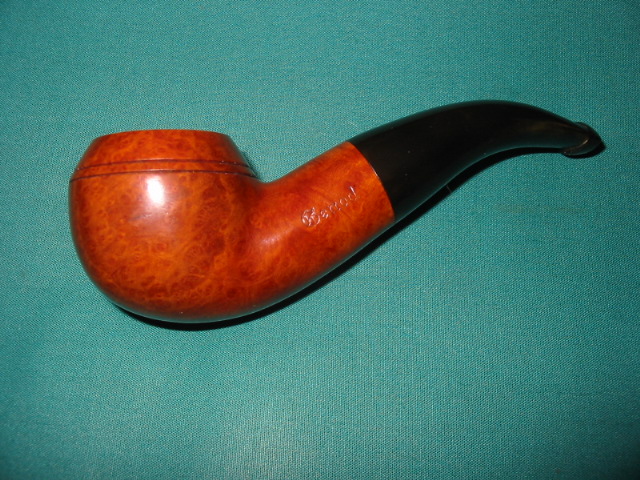
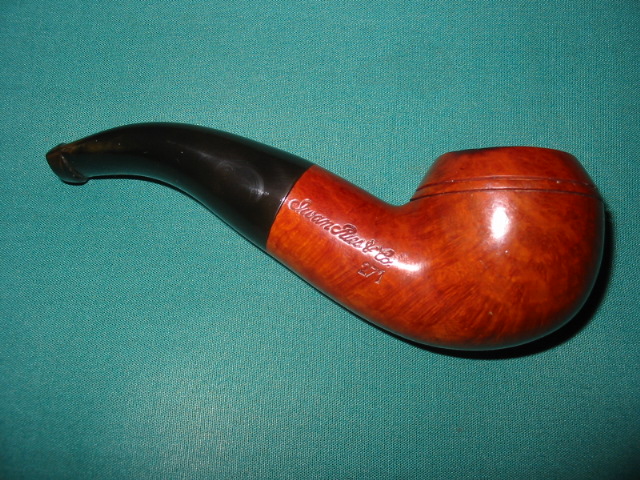
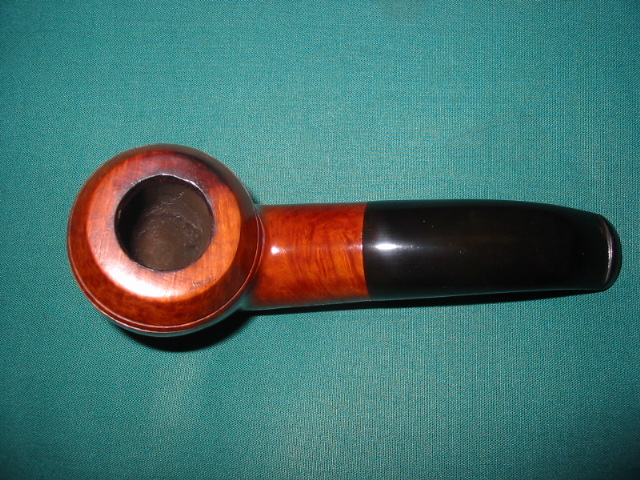
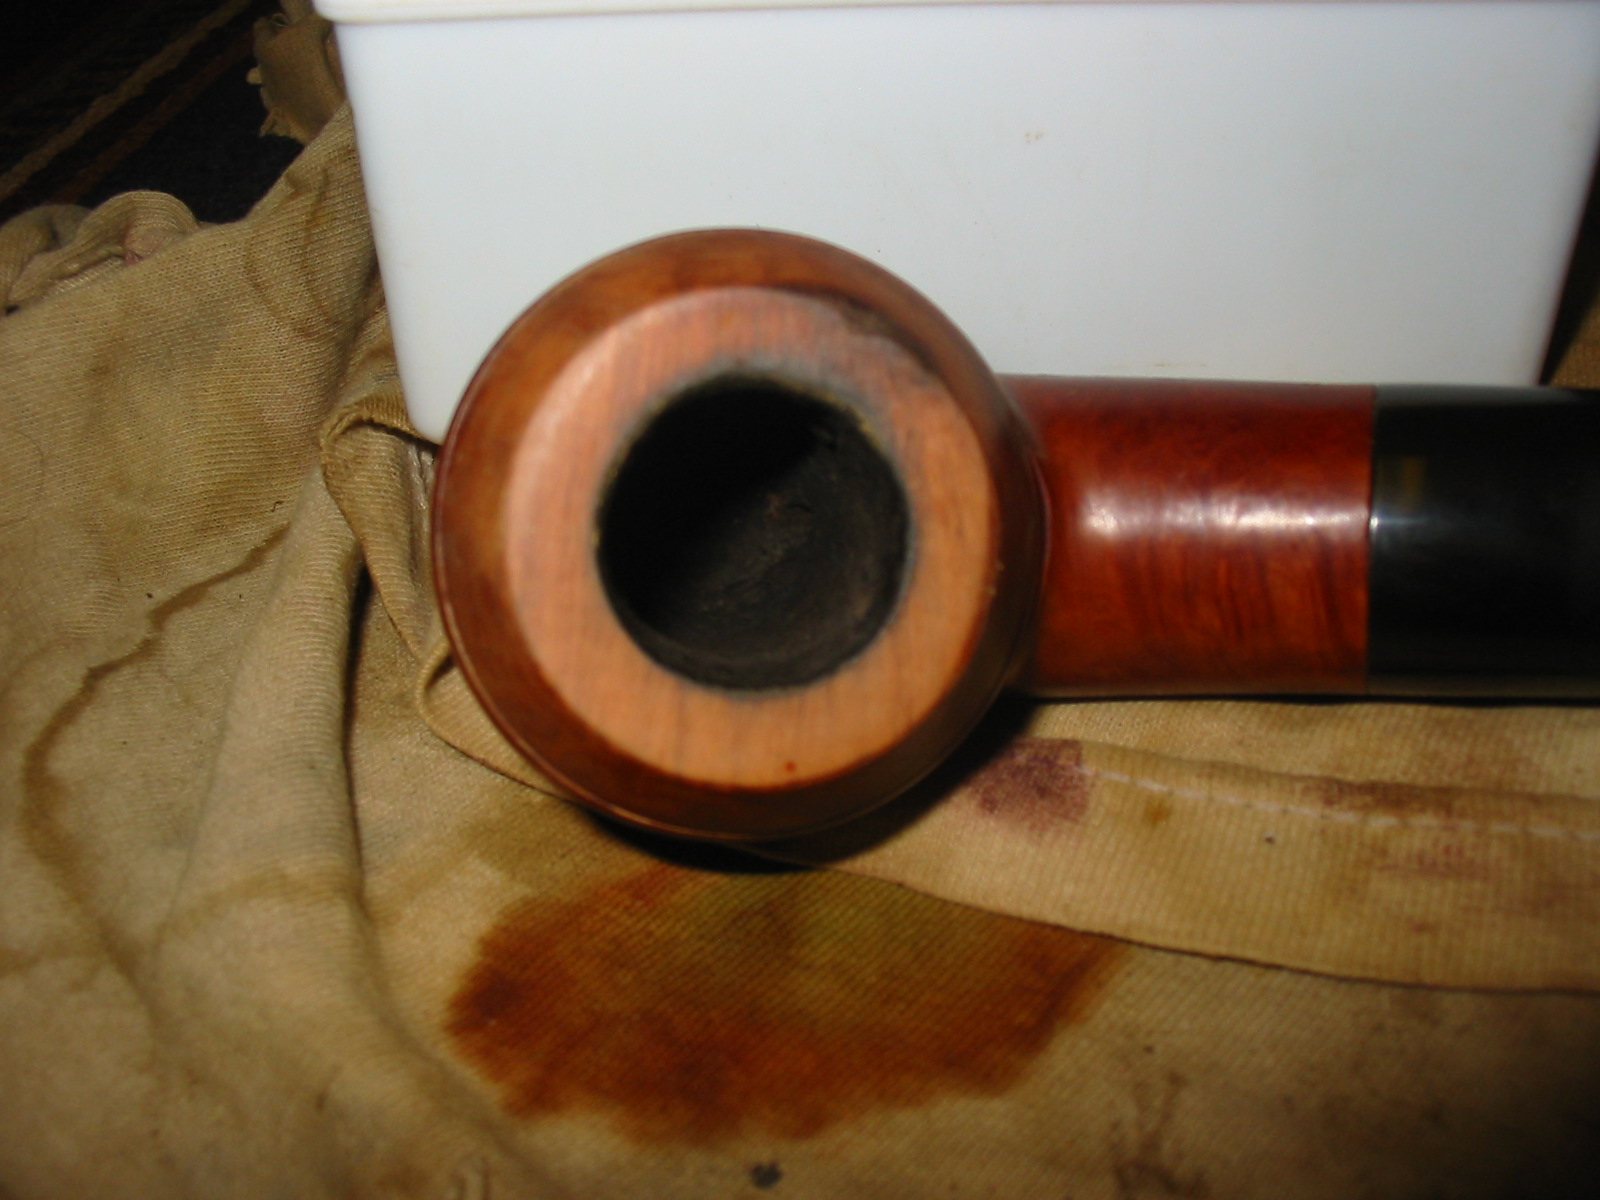
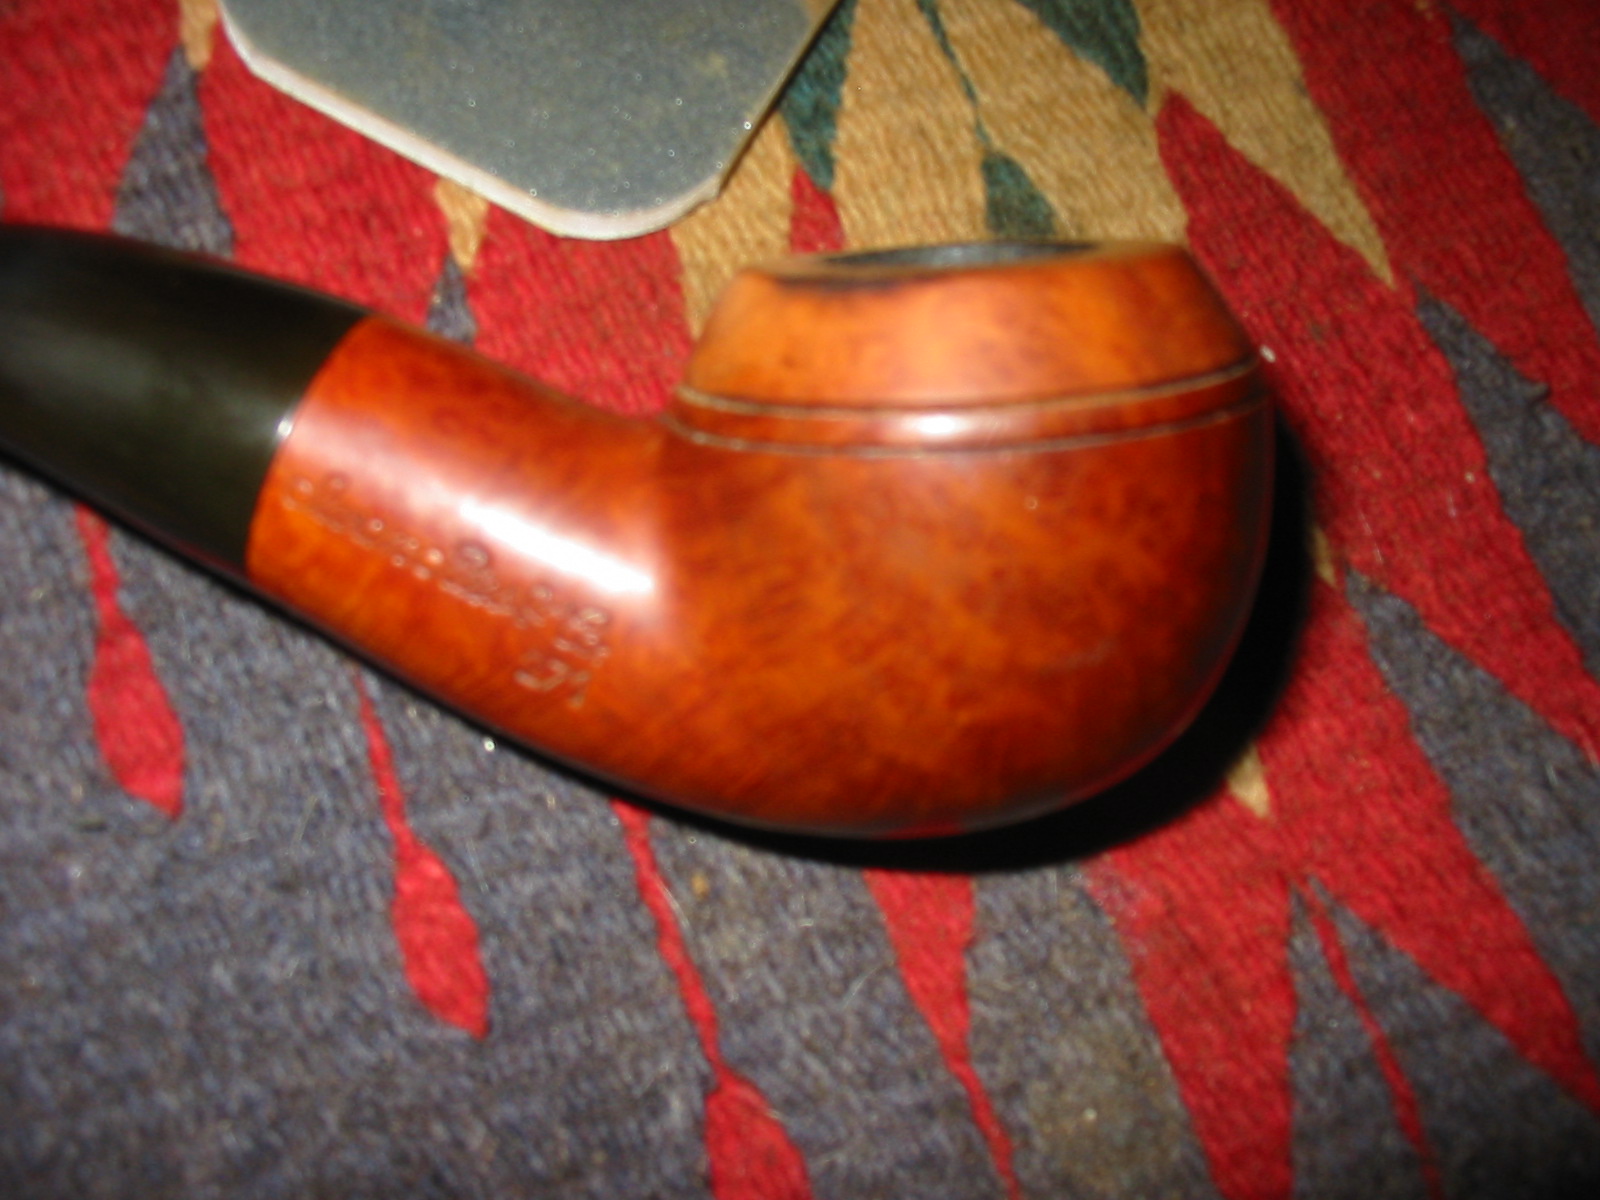
Below are three more photos of the pipe showing what it looked like when I brought it home to refurbish.
IMG_3524

IMG_3526

IMG_3527

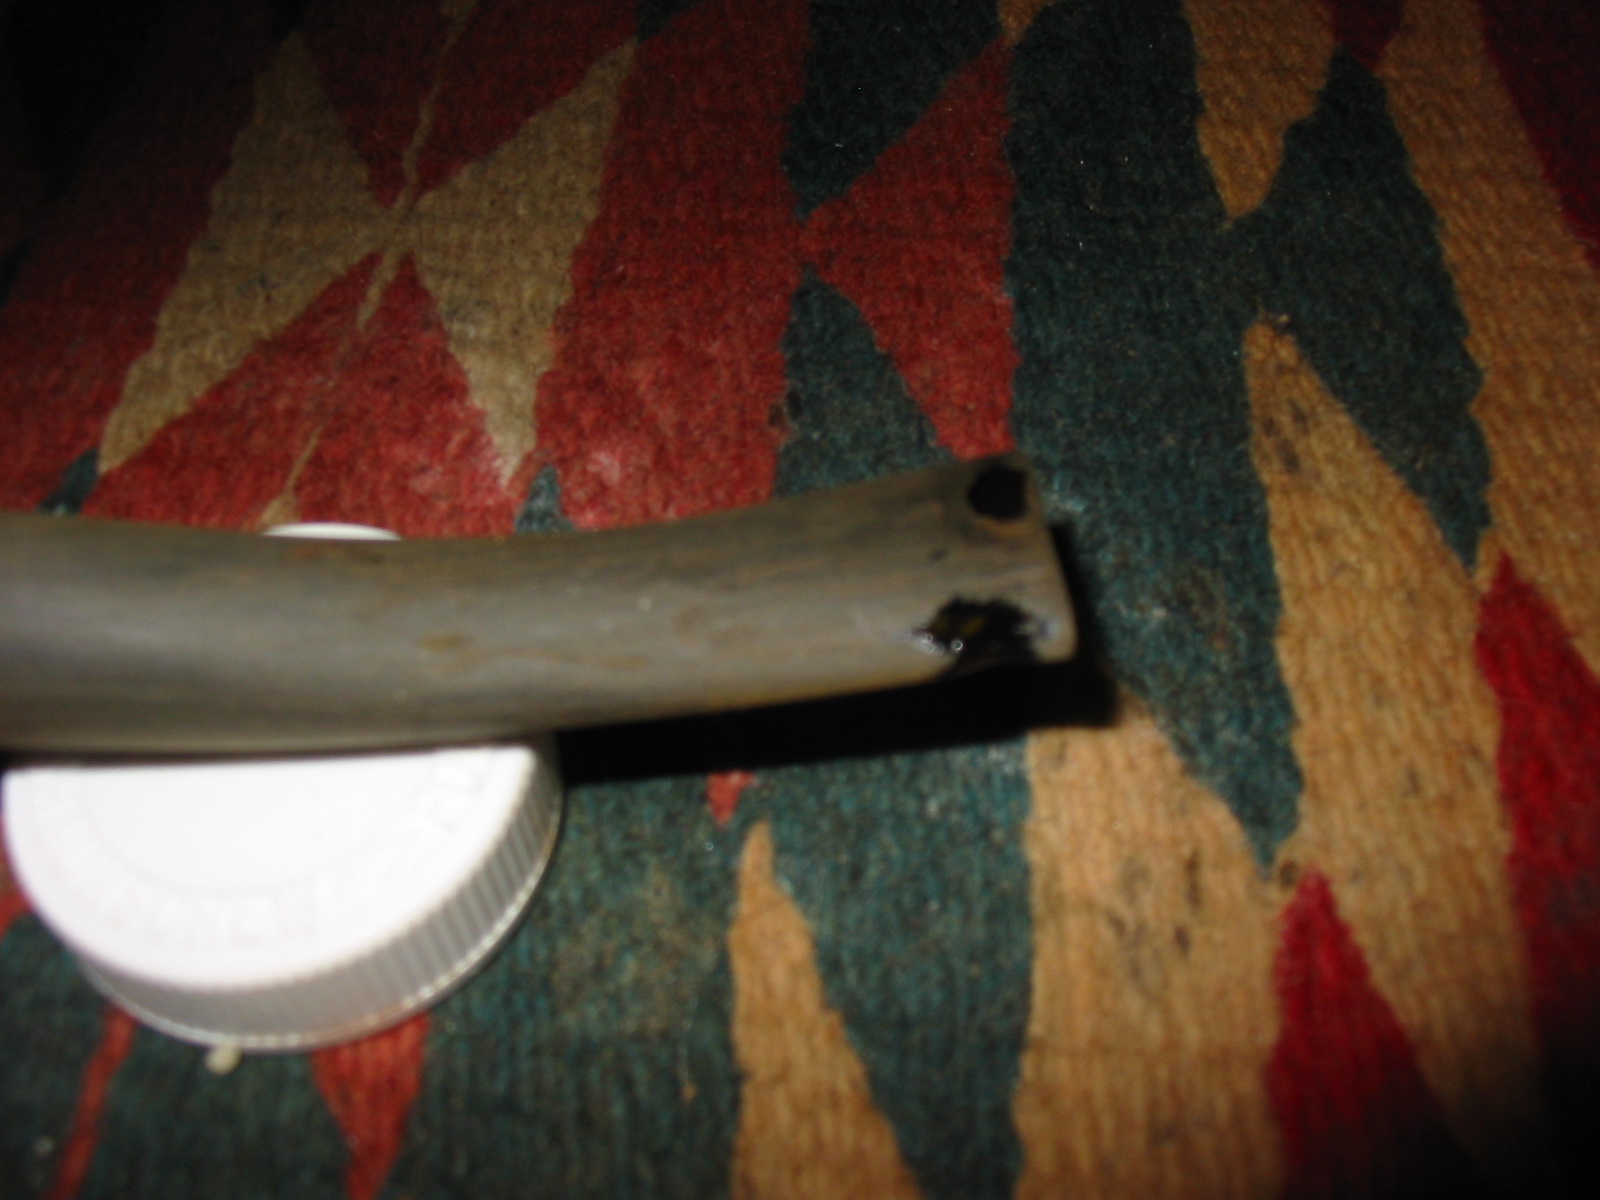
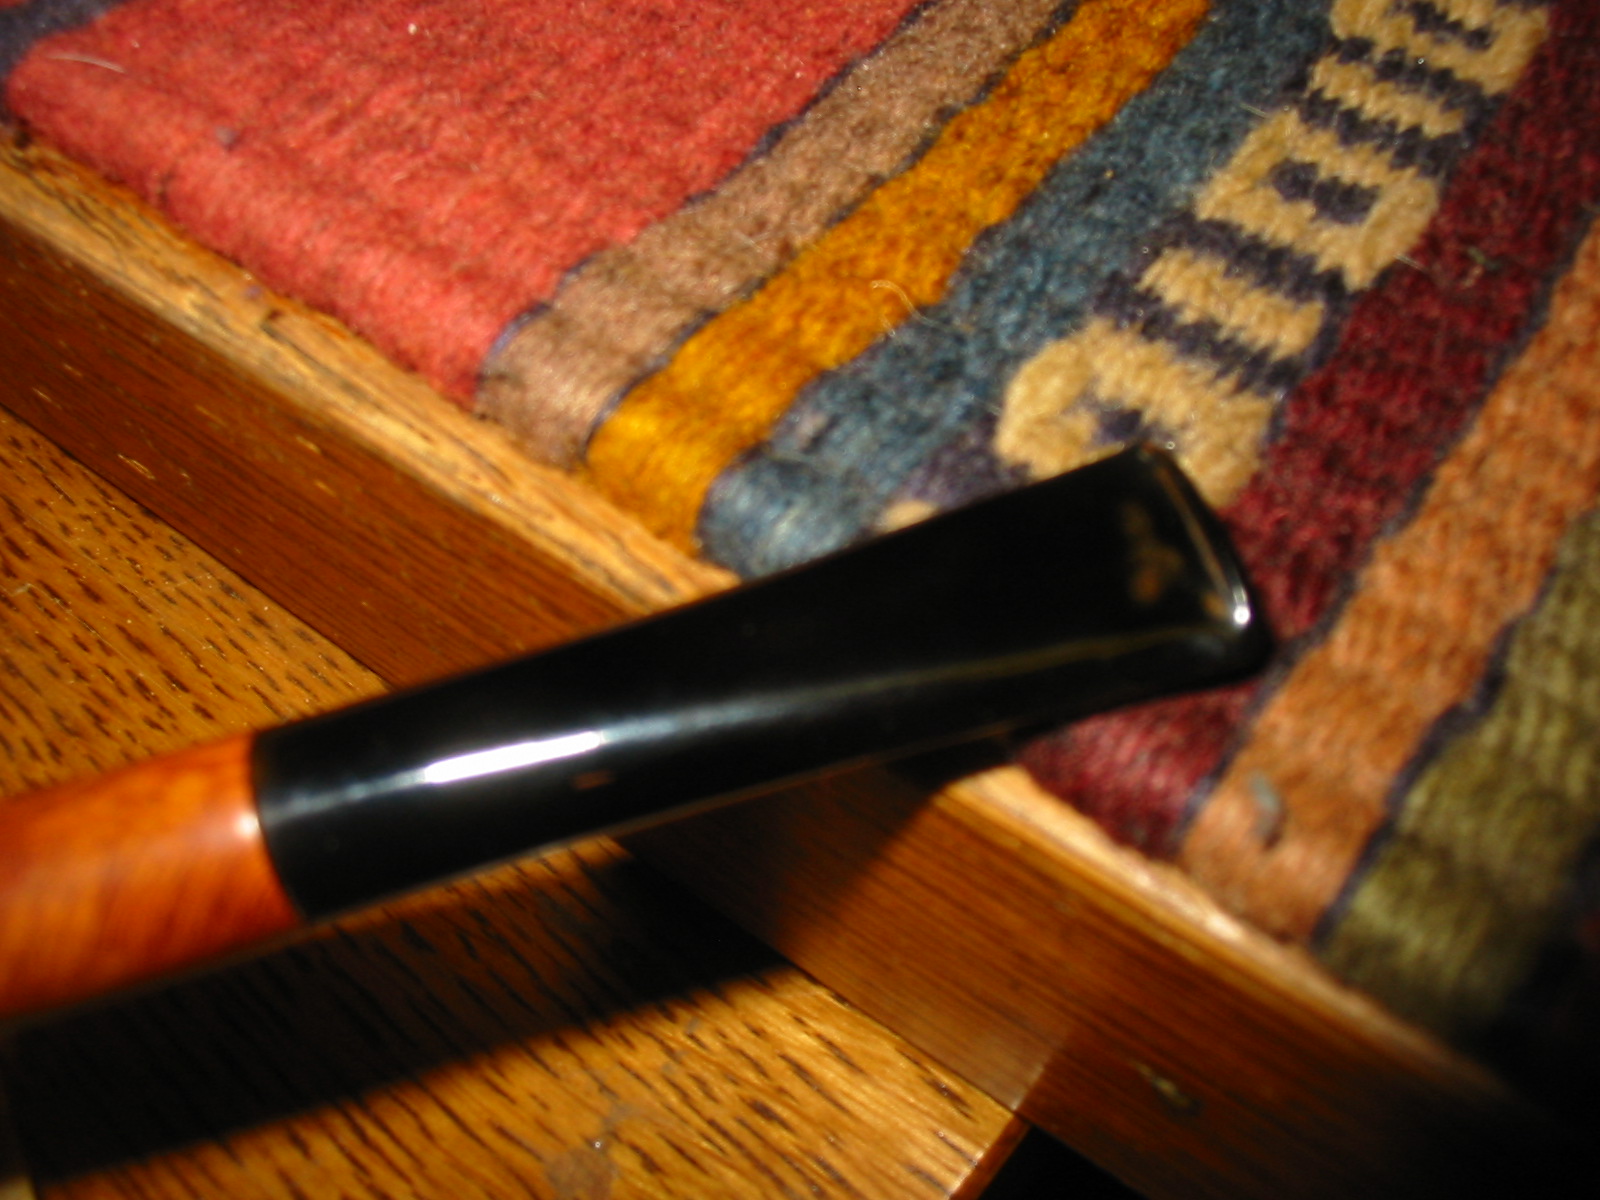
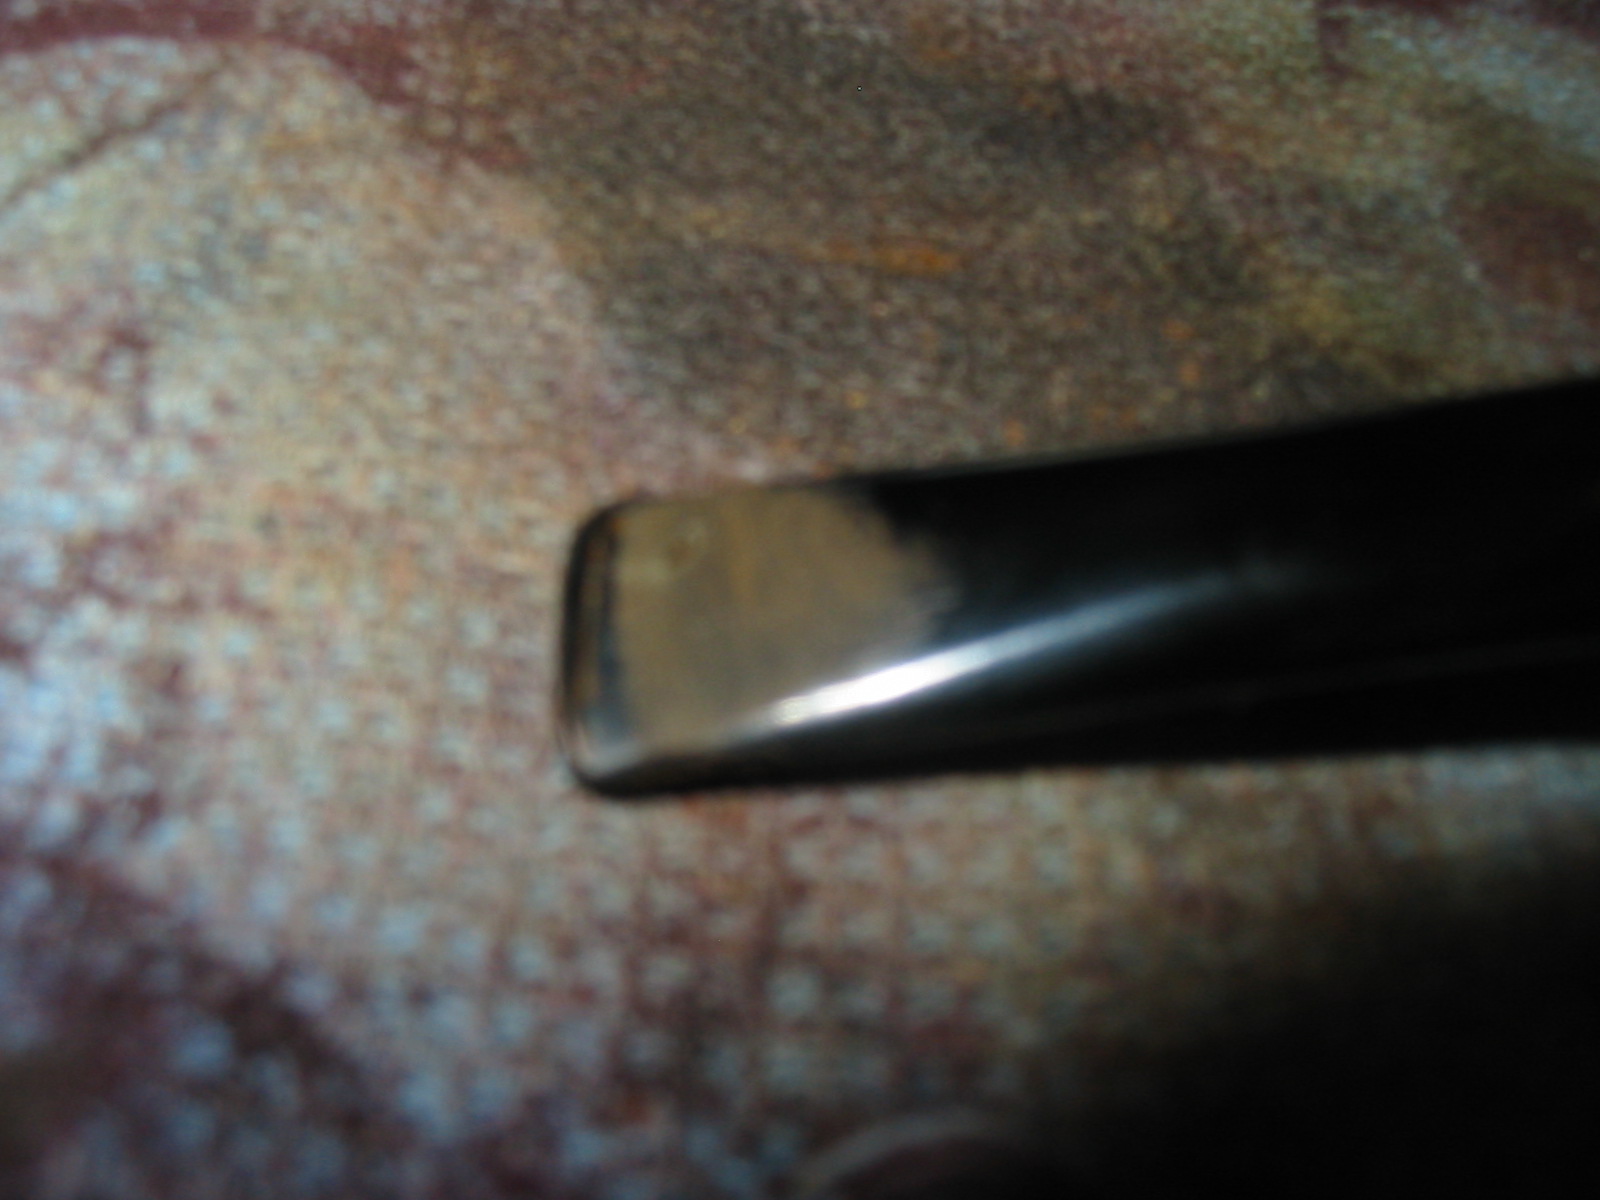
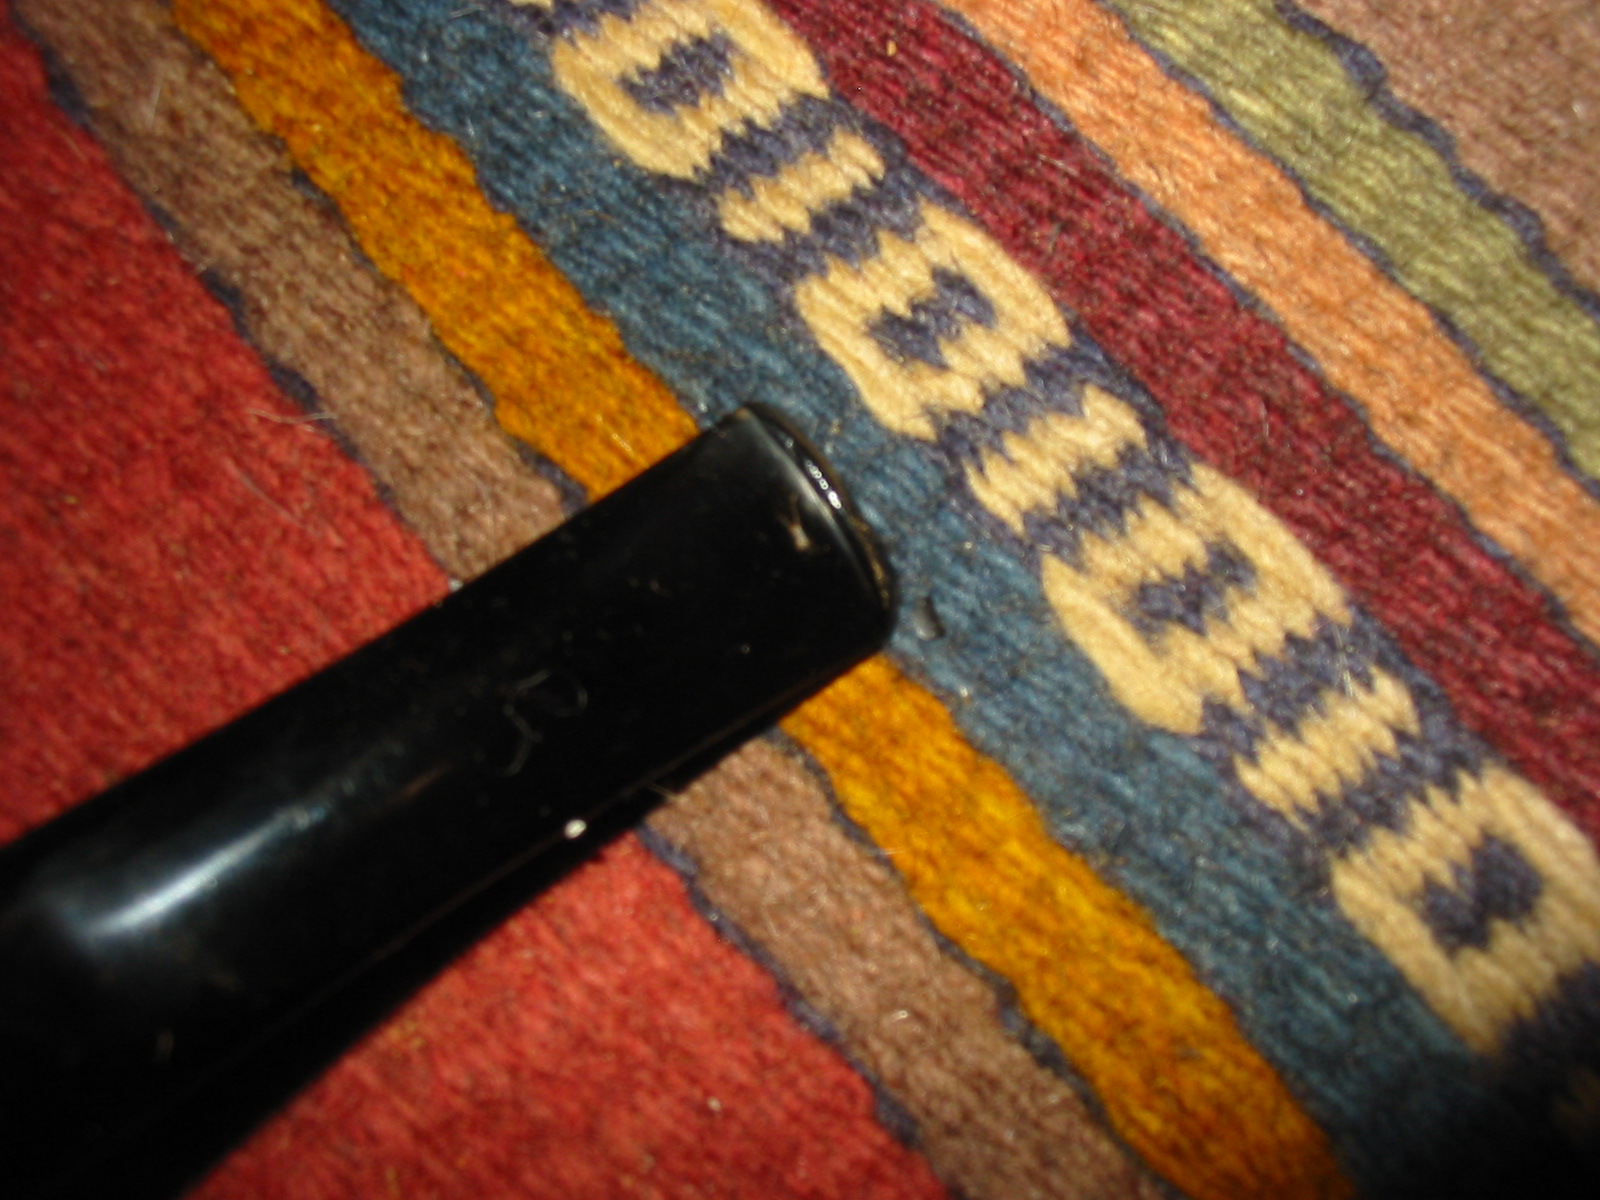
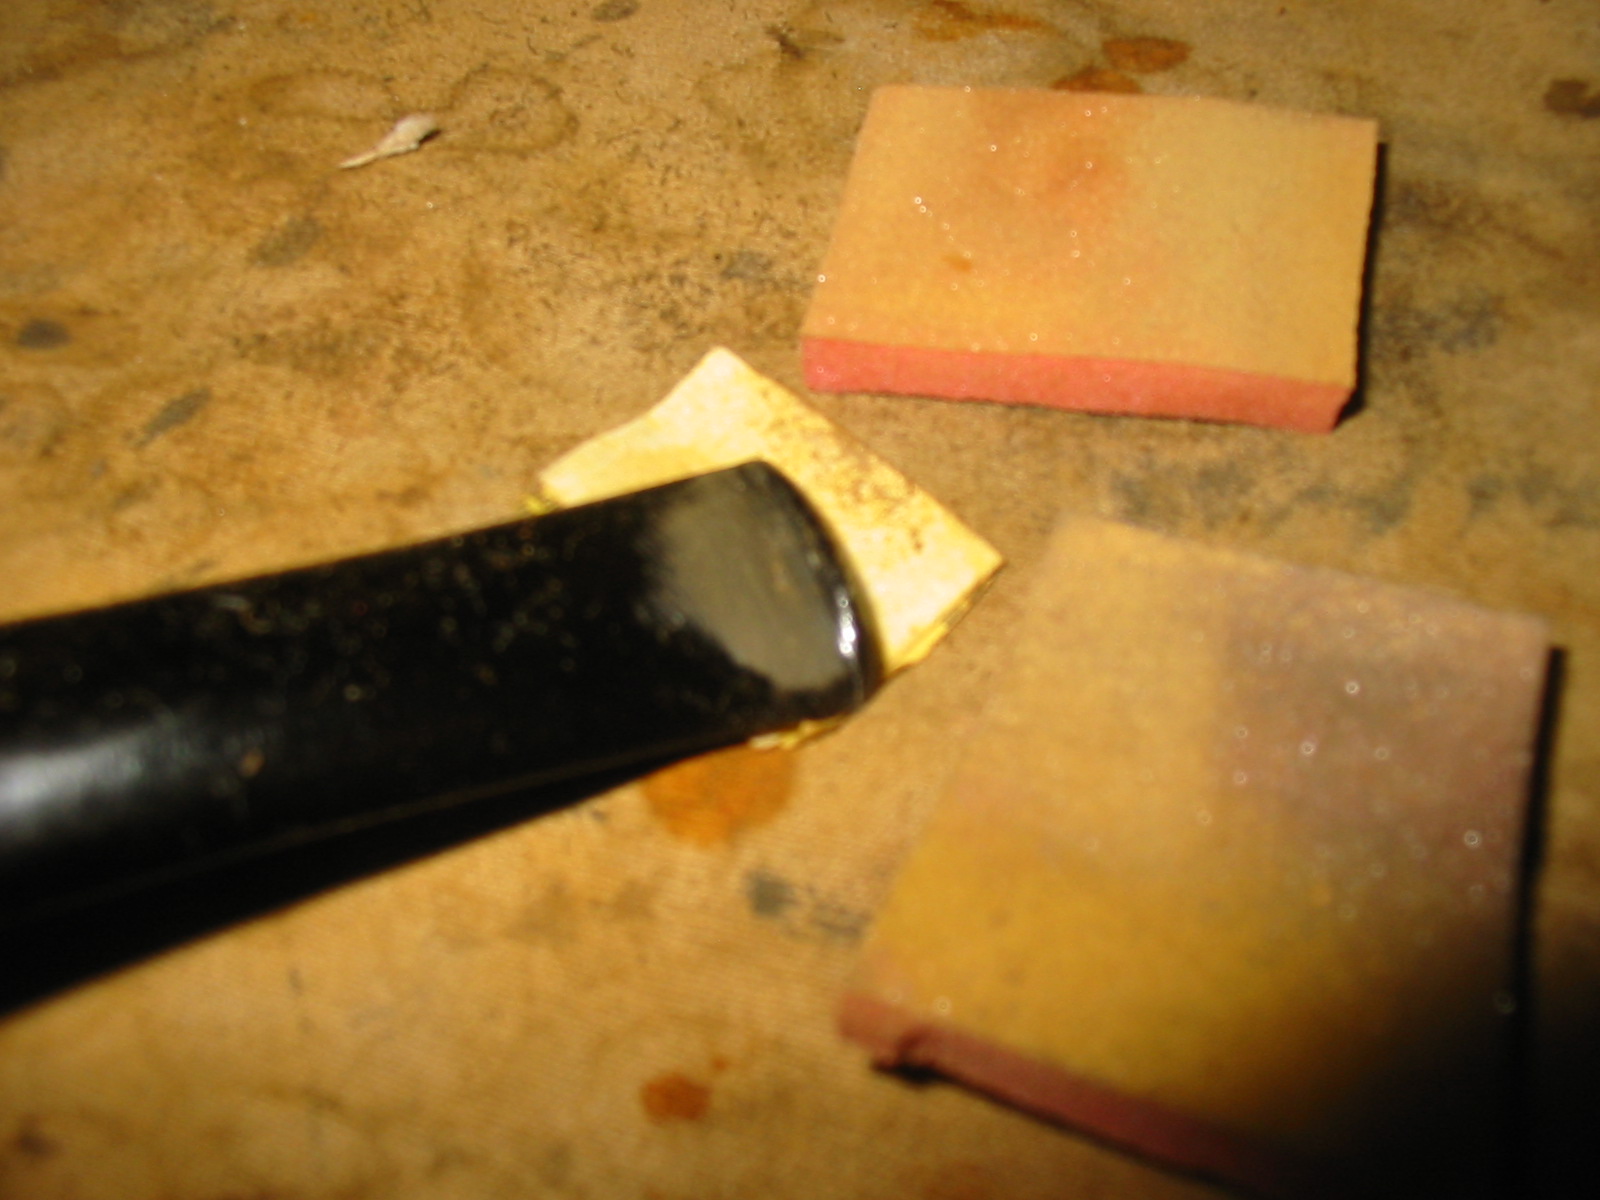
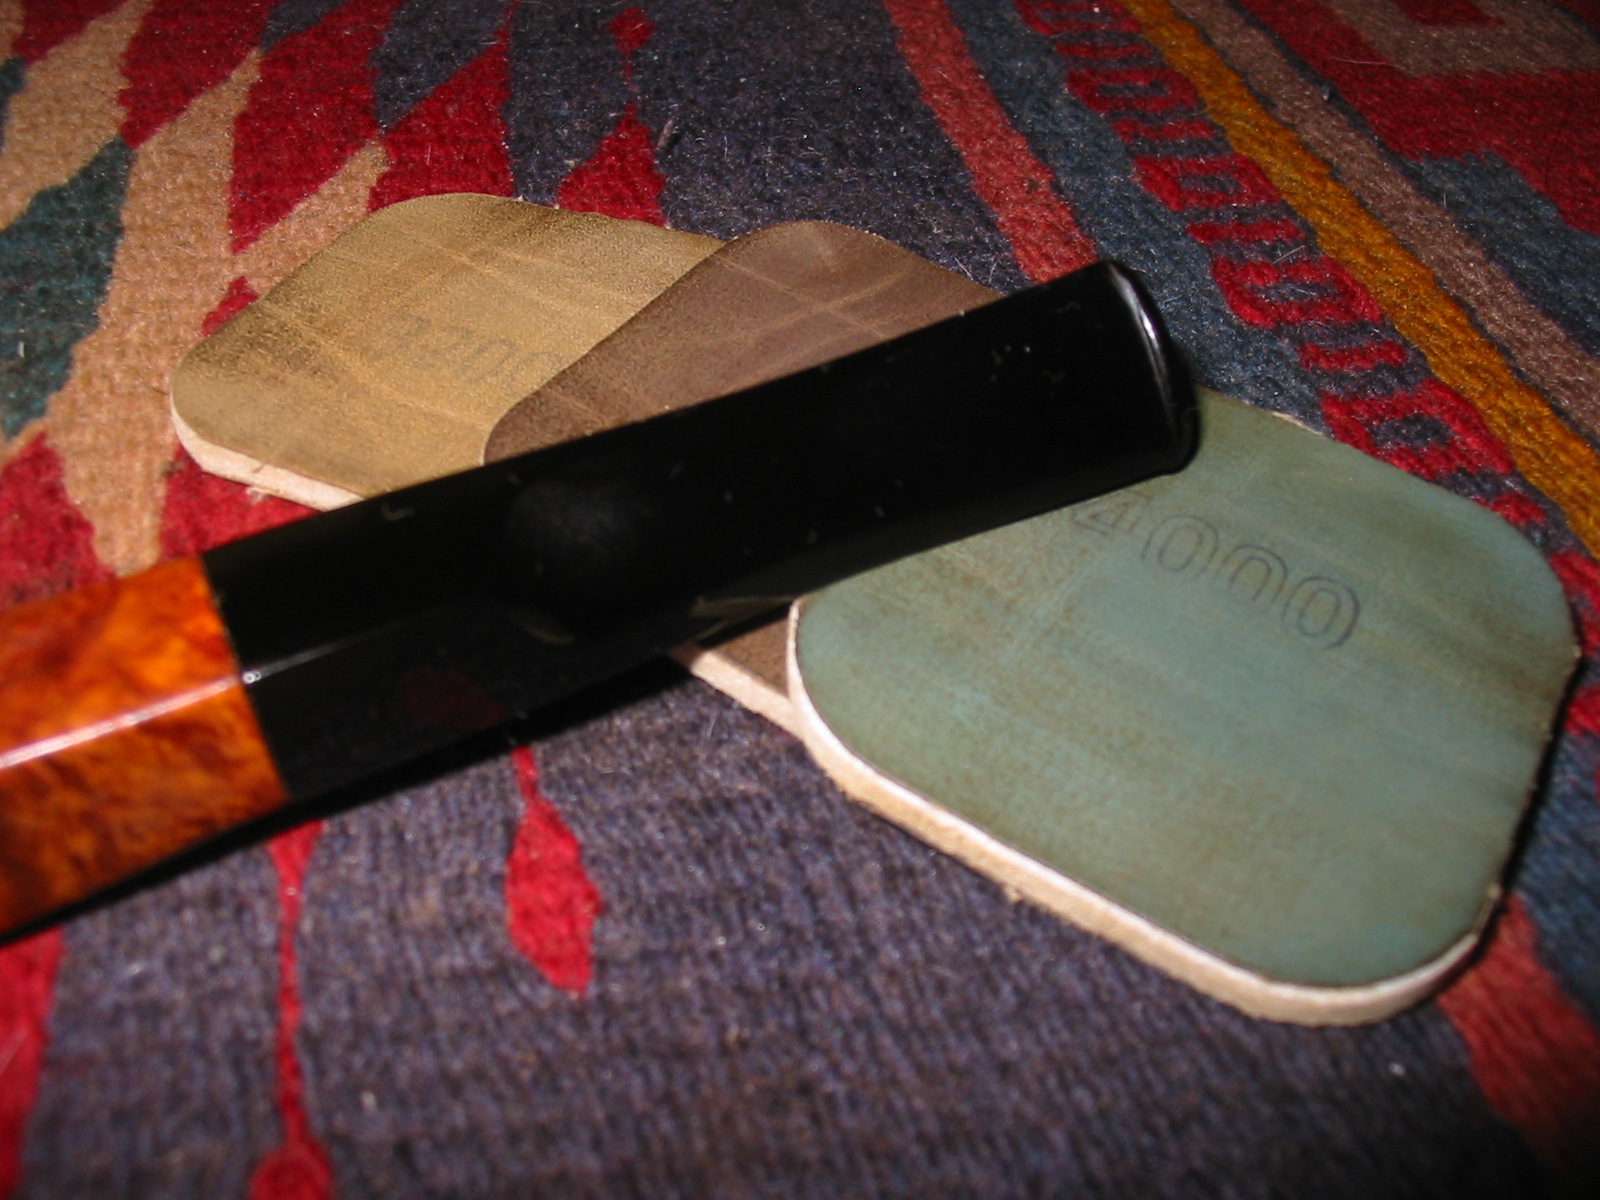
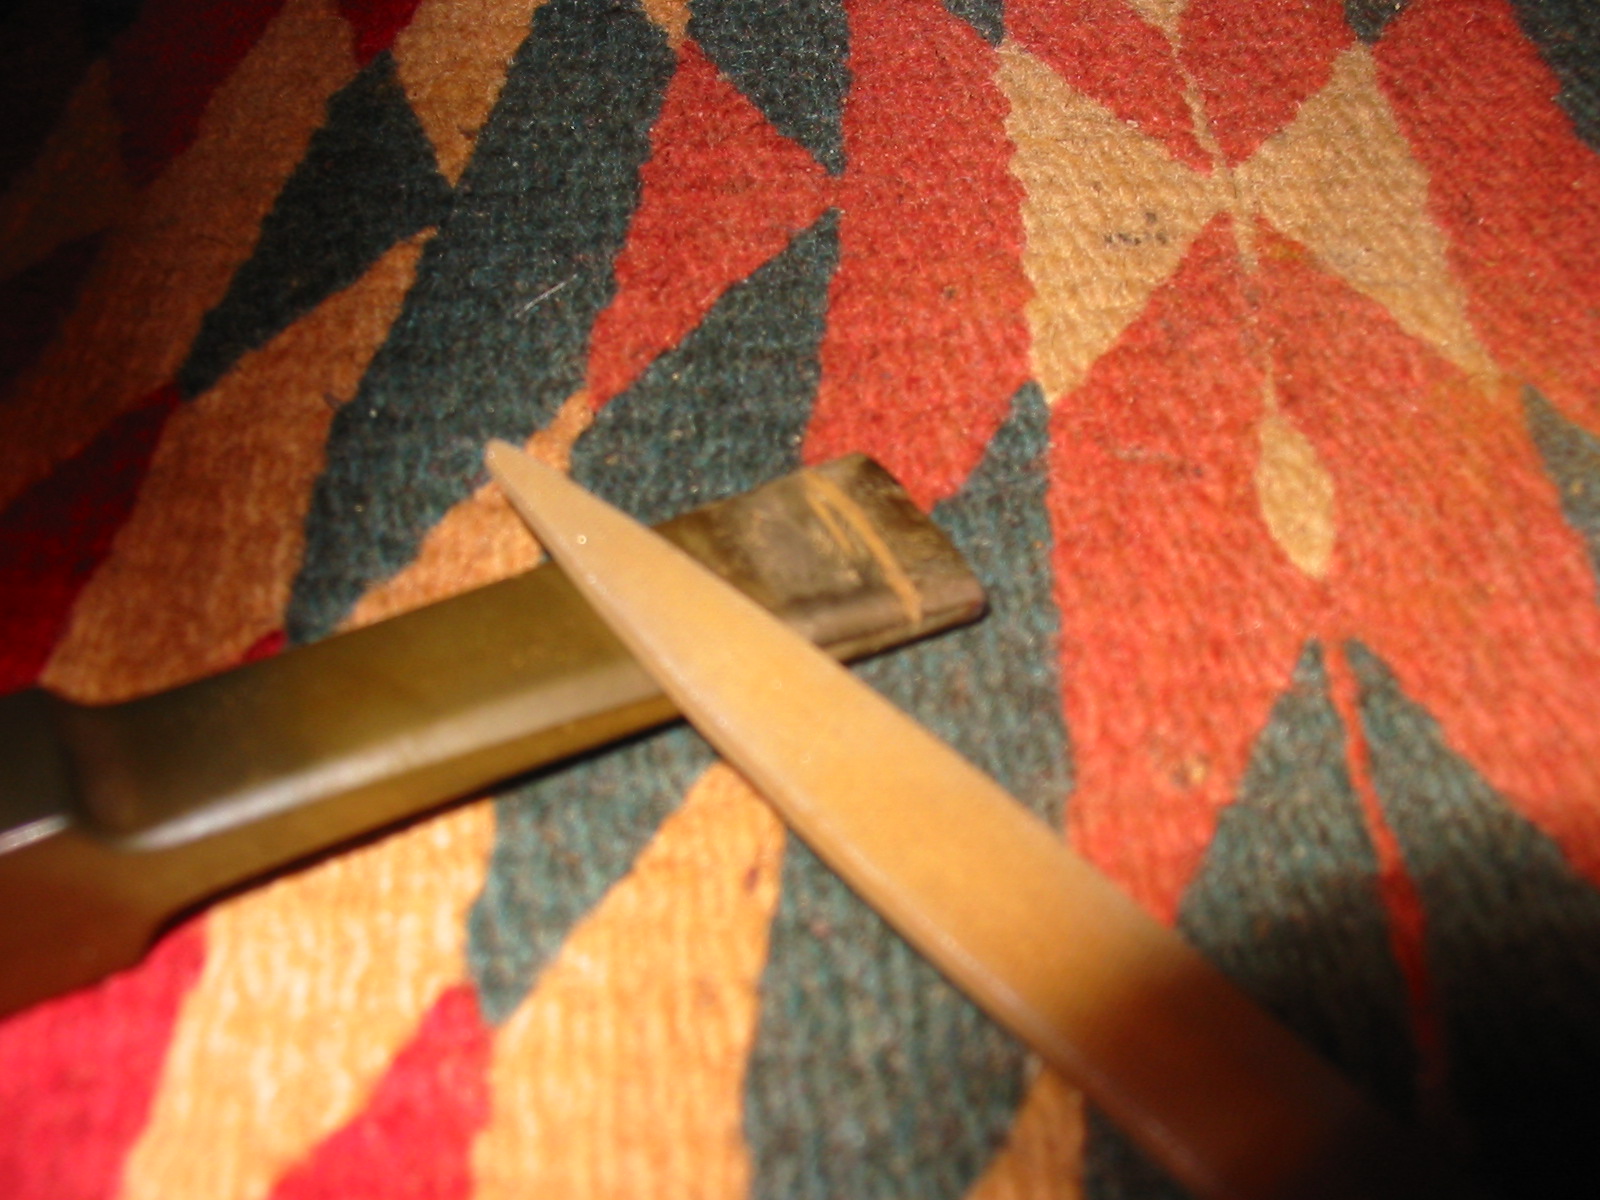
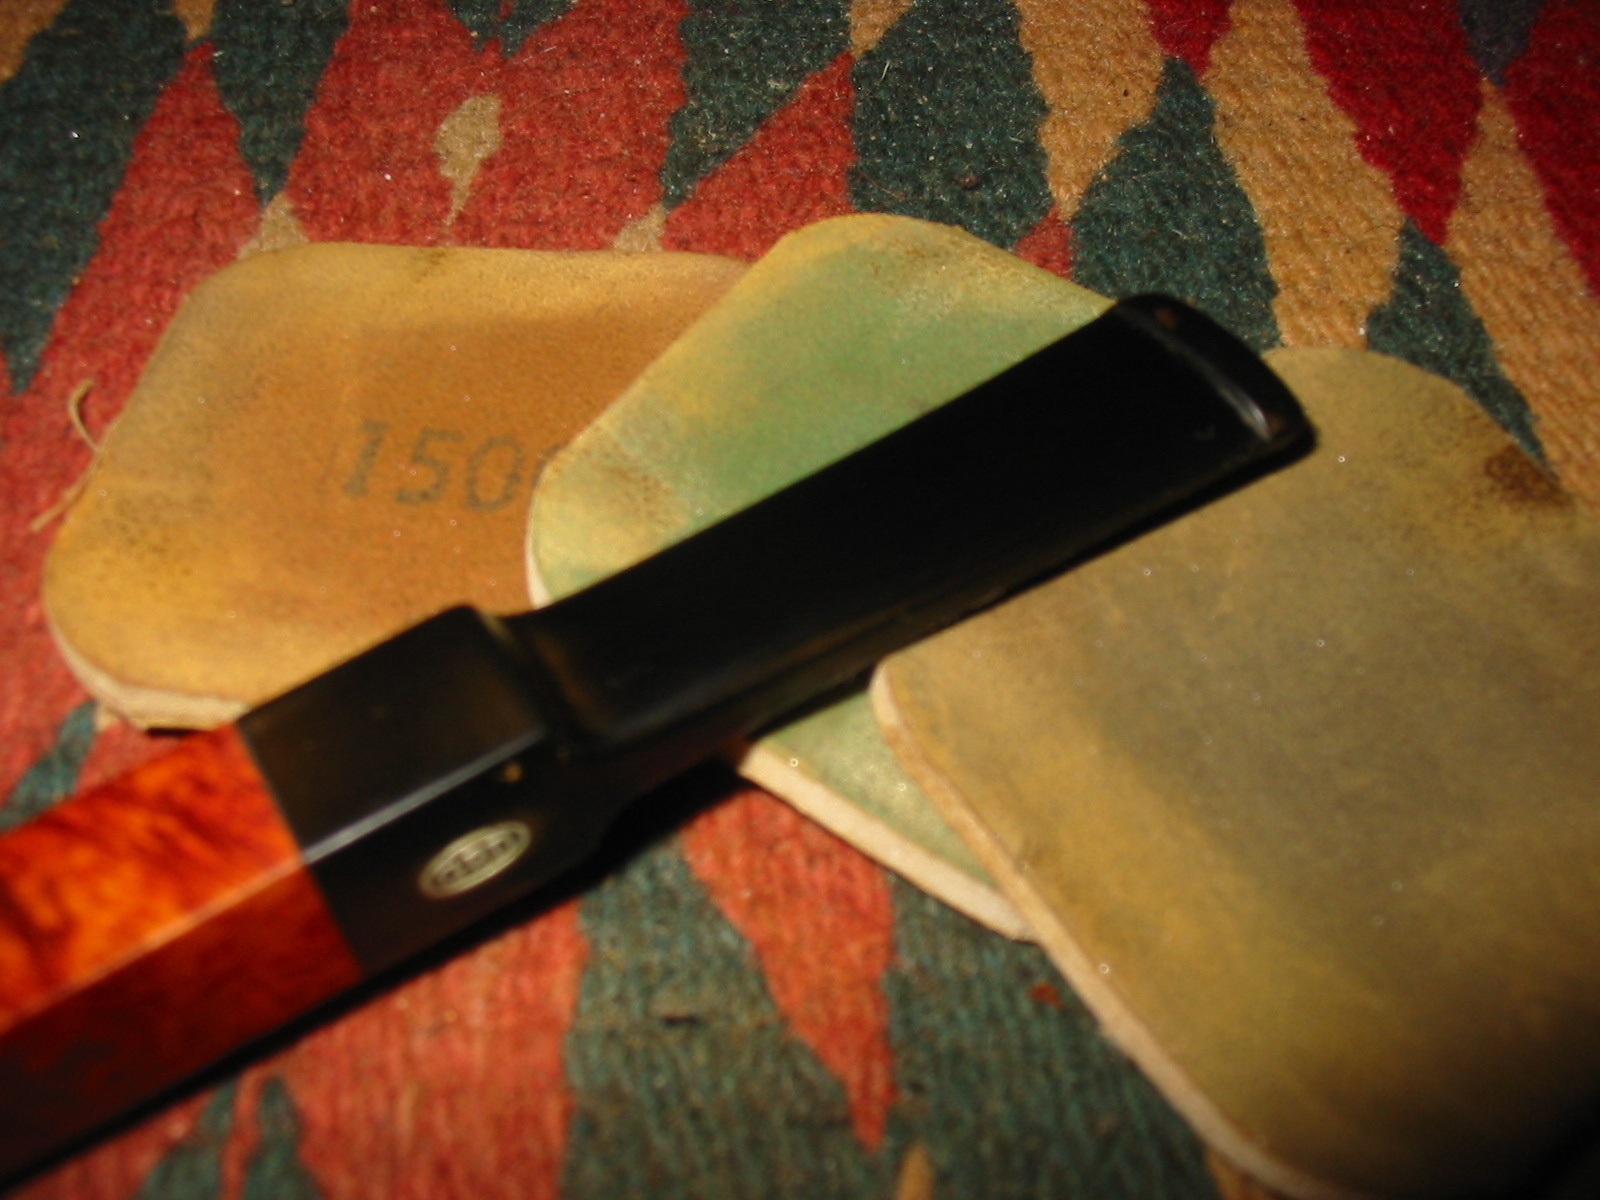
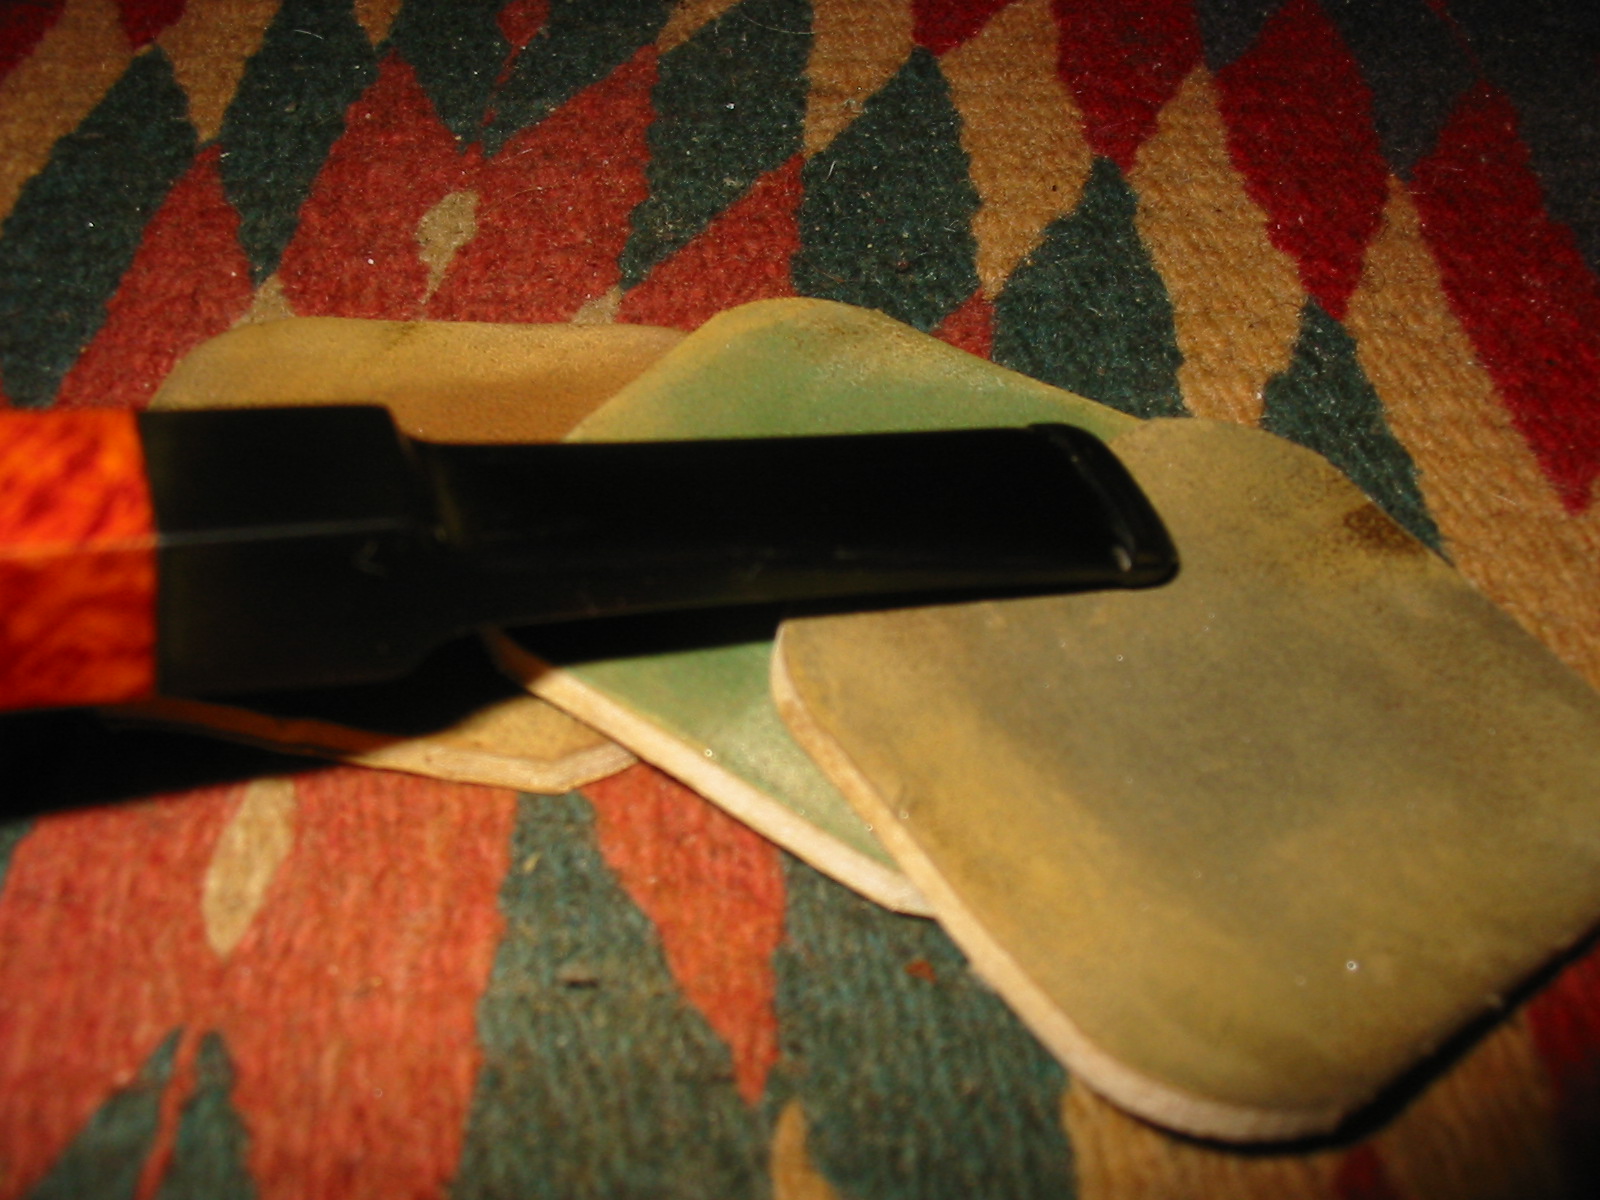
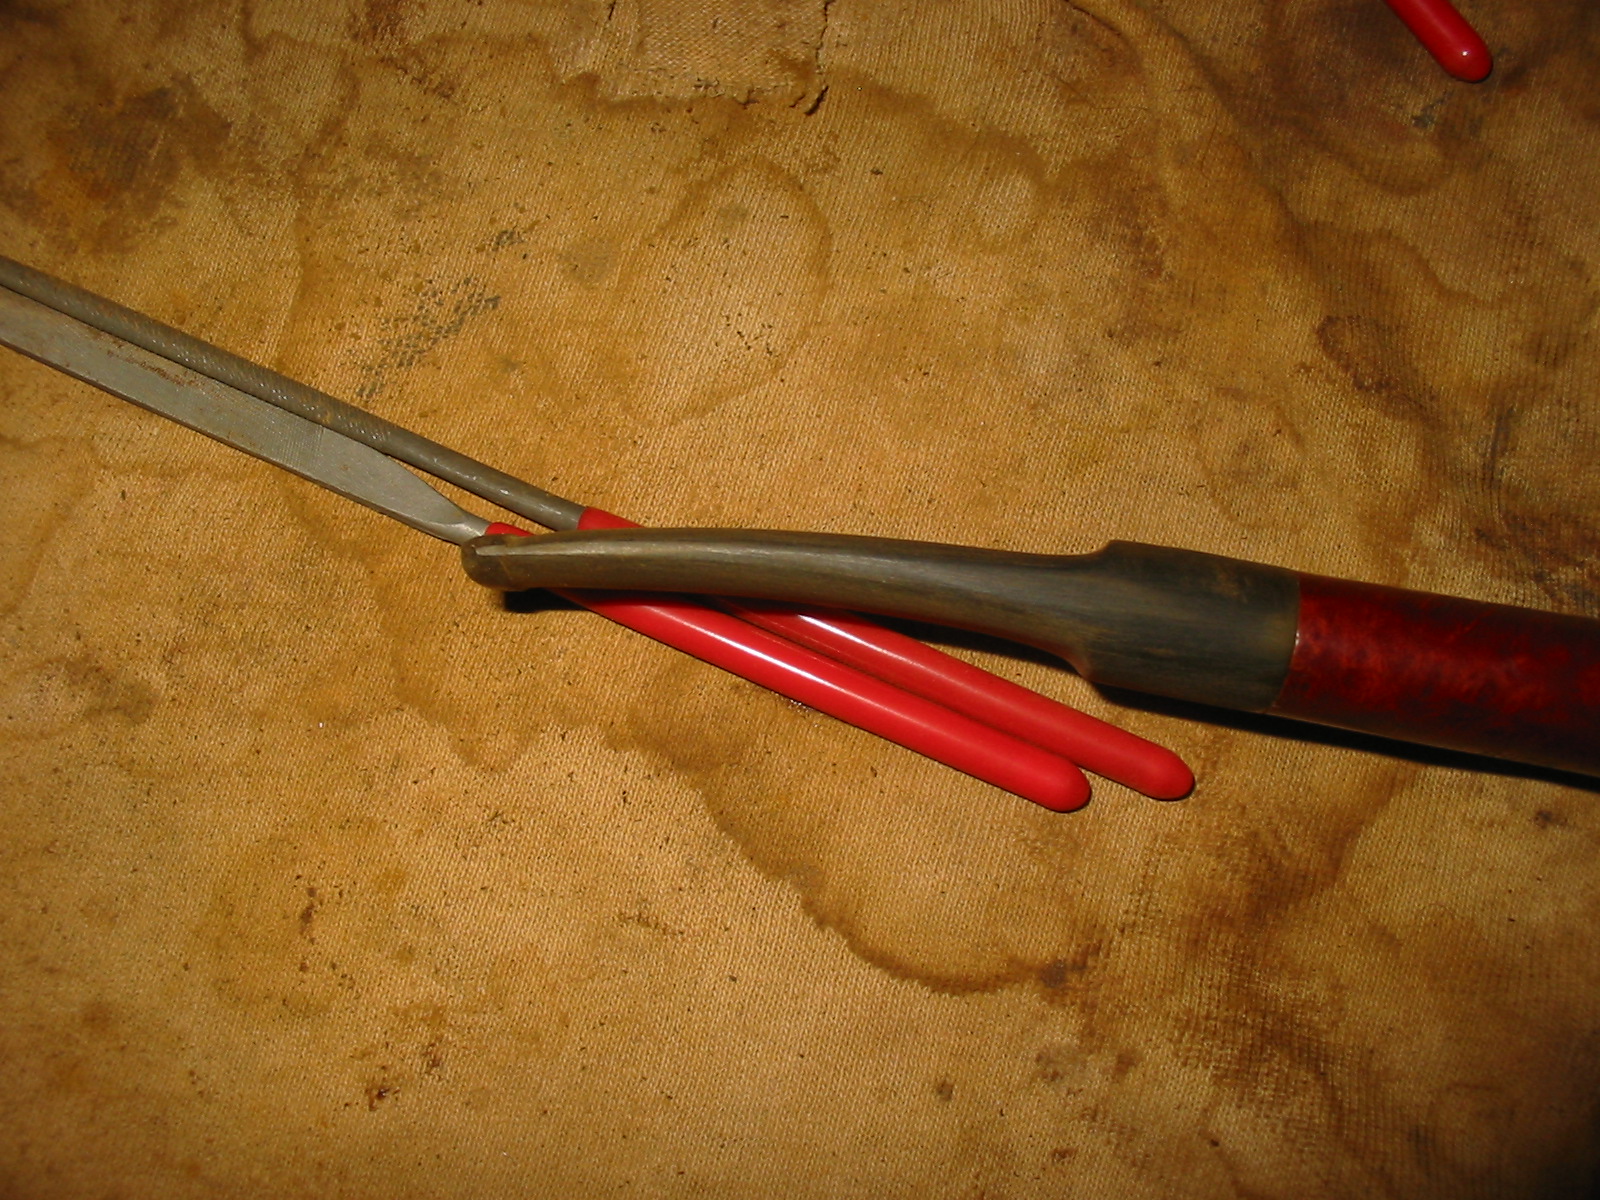
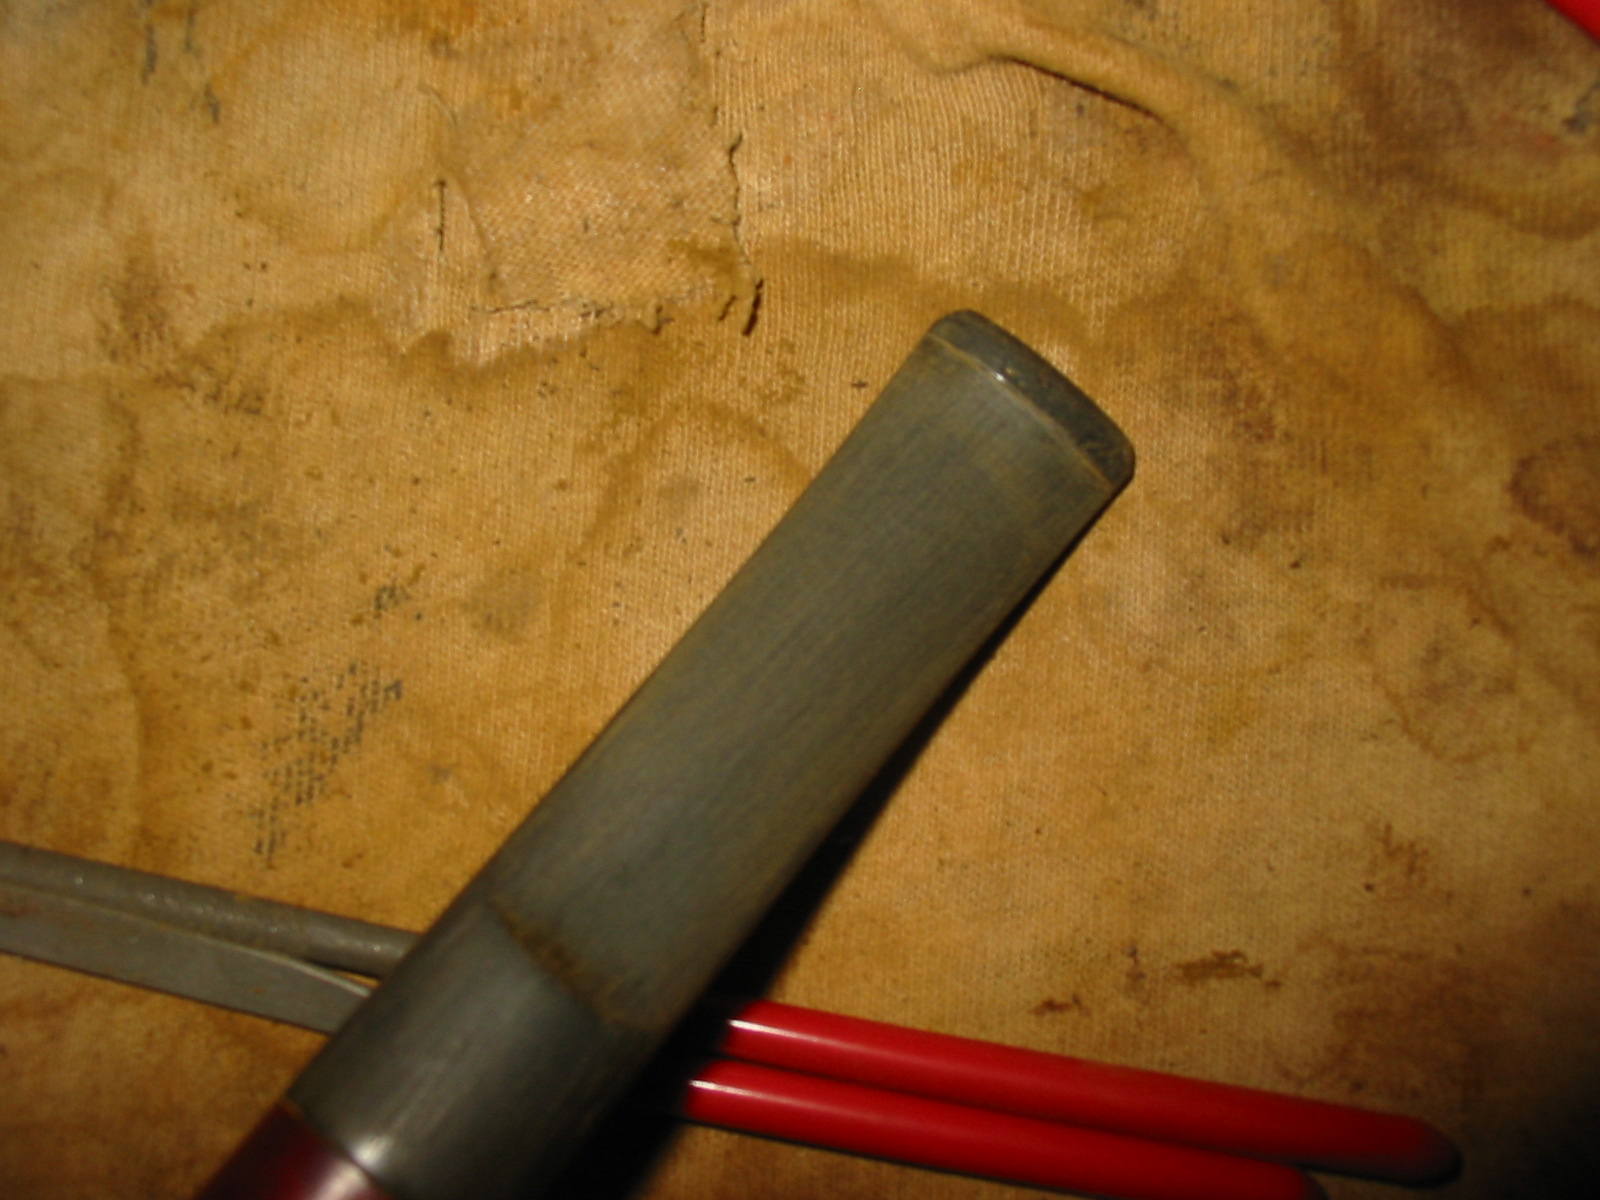
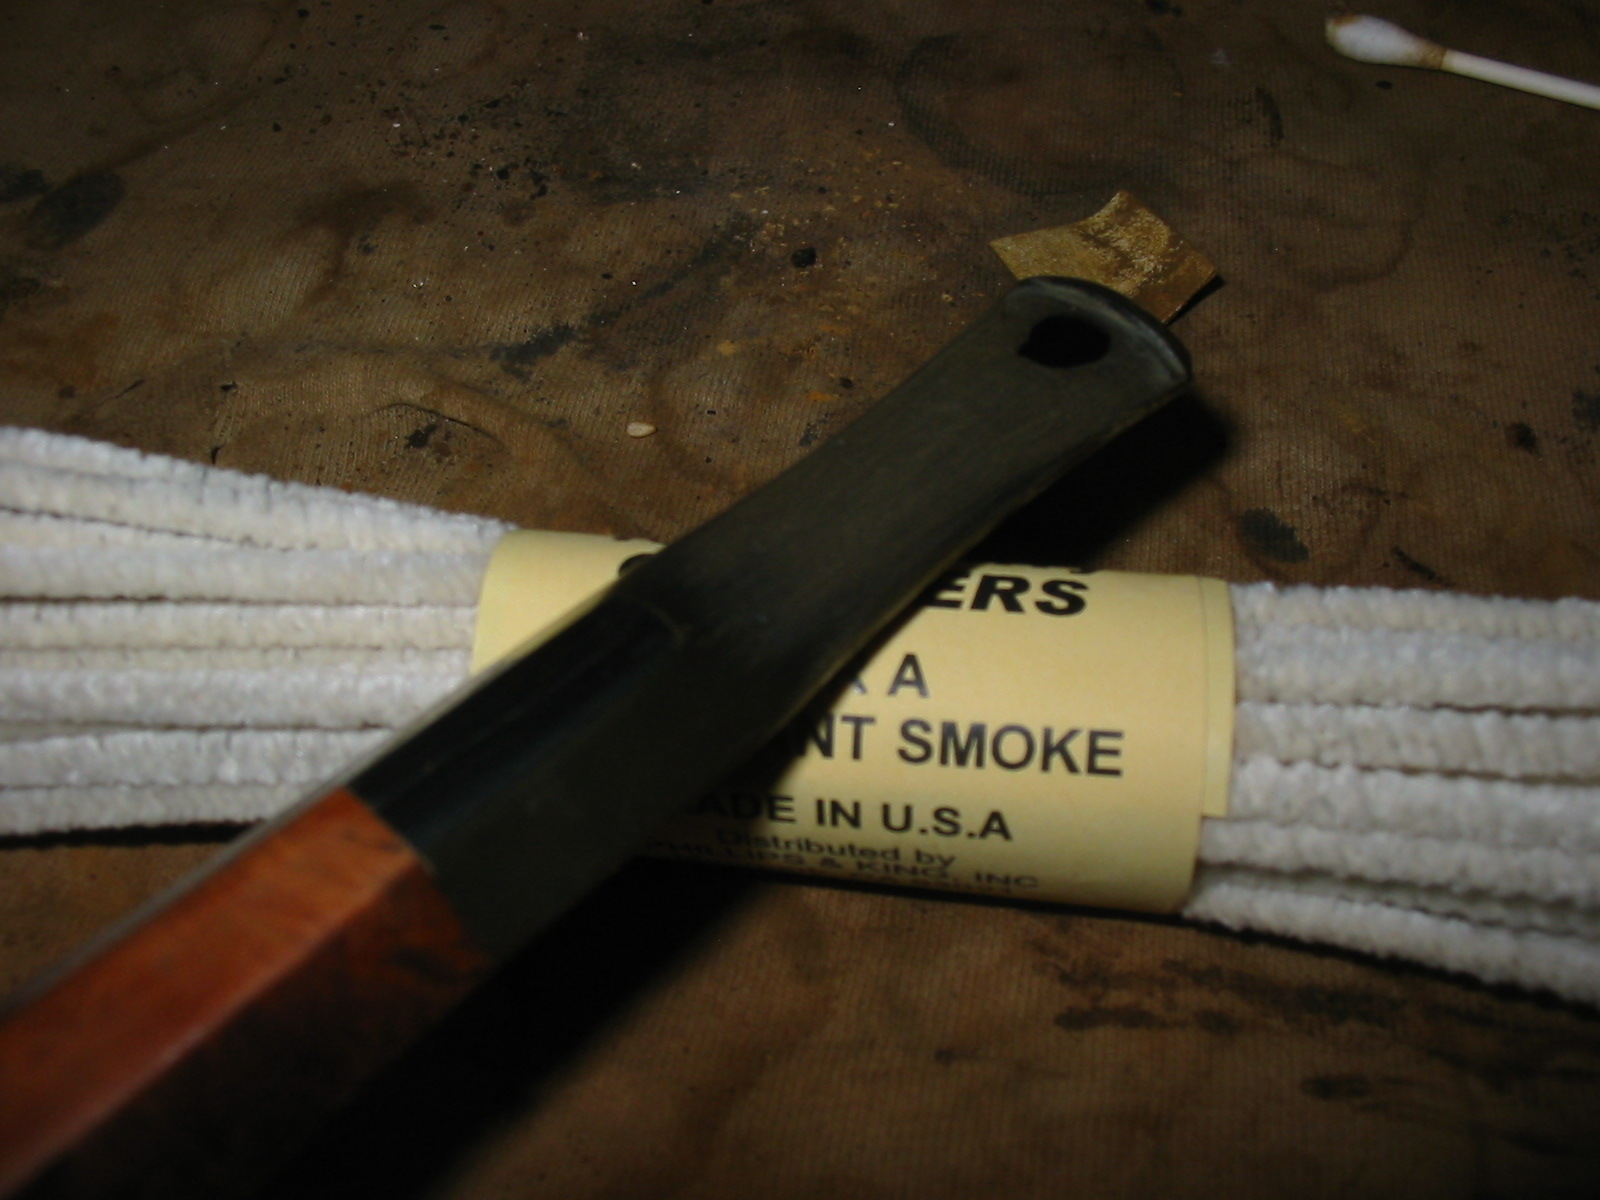
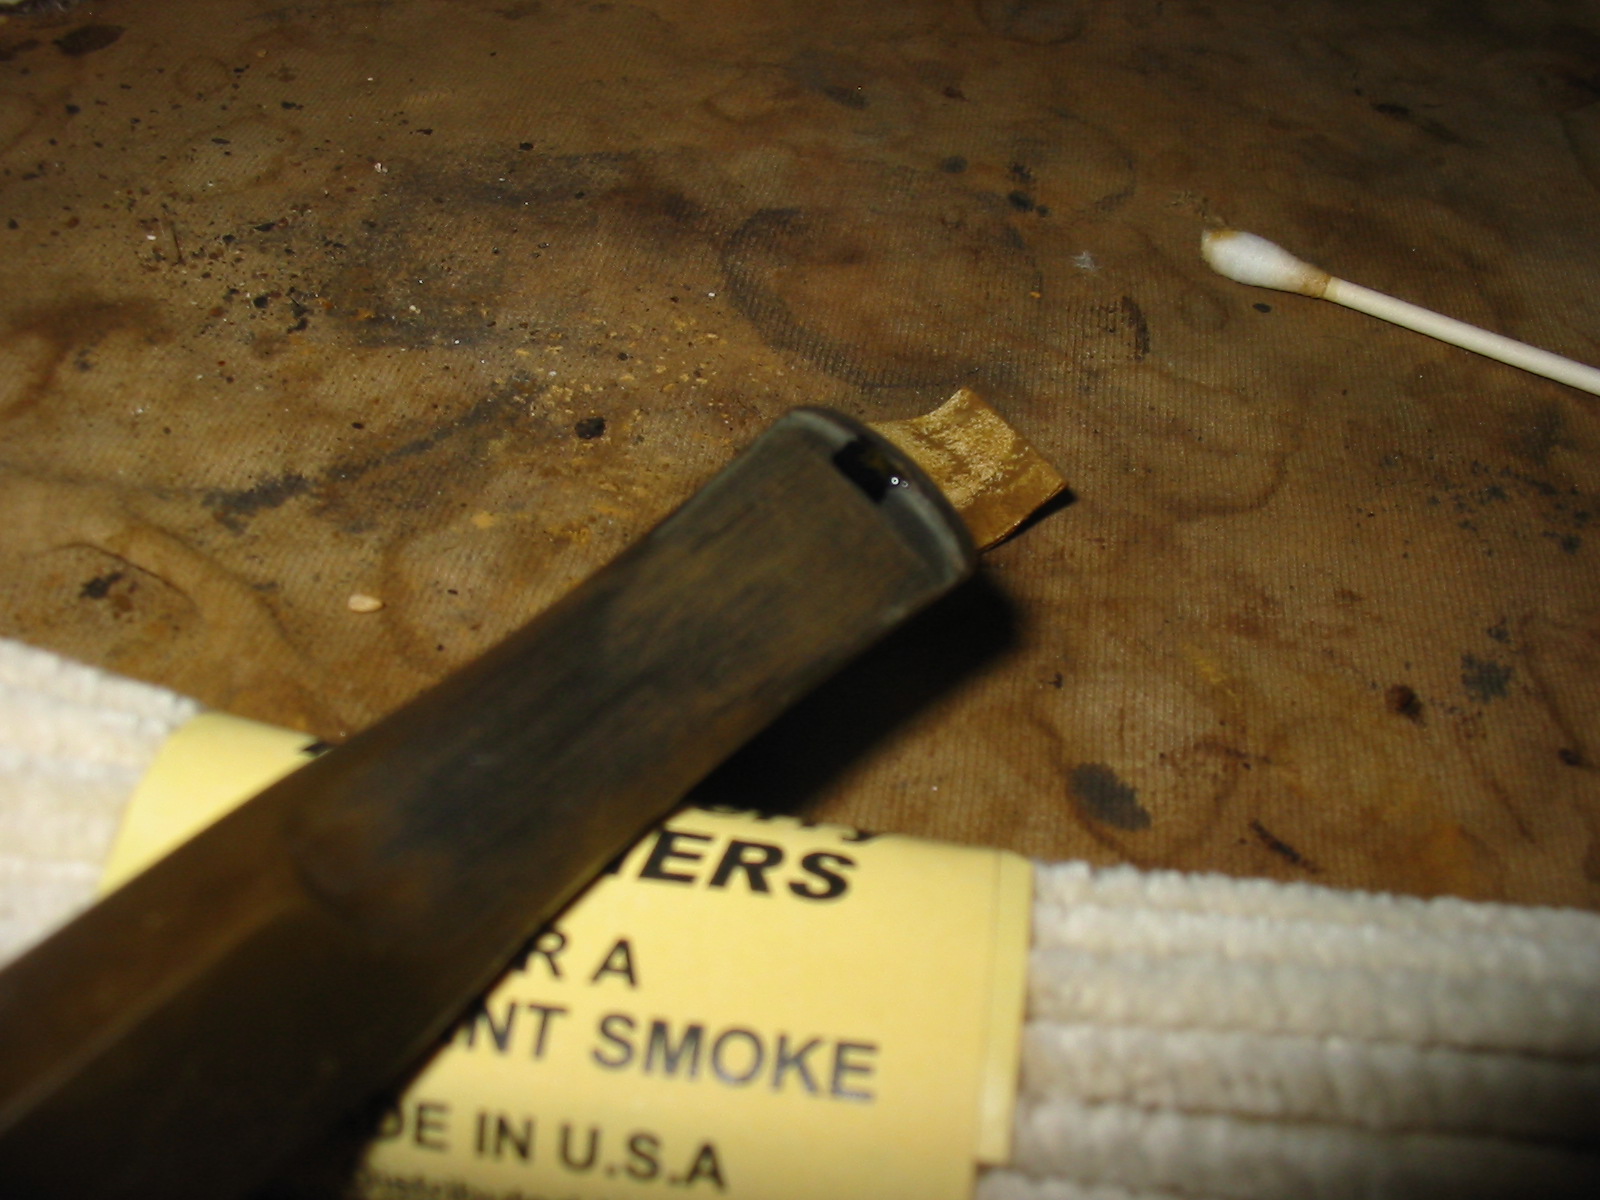
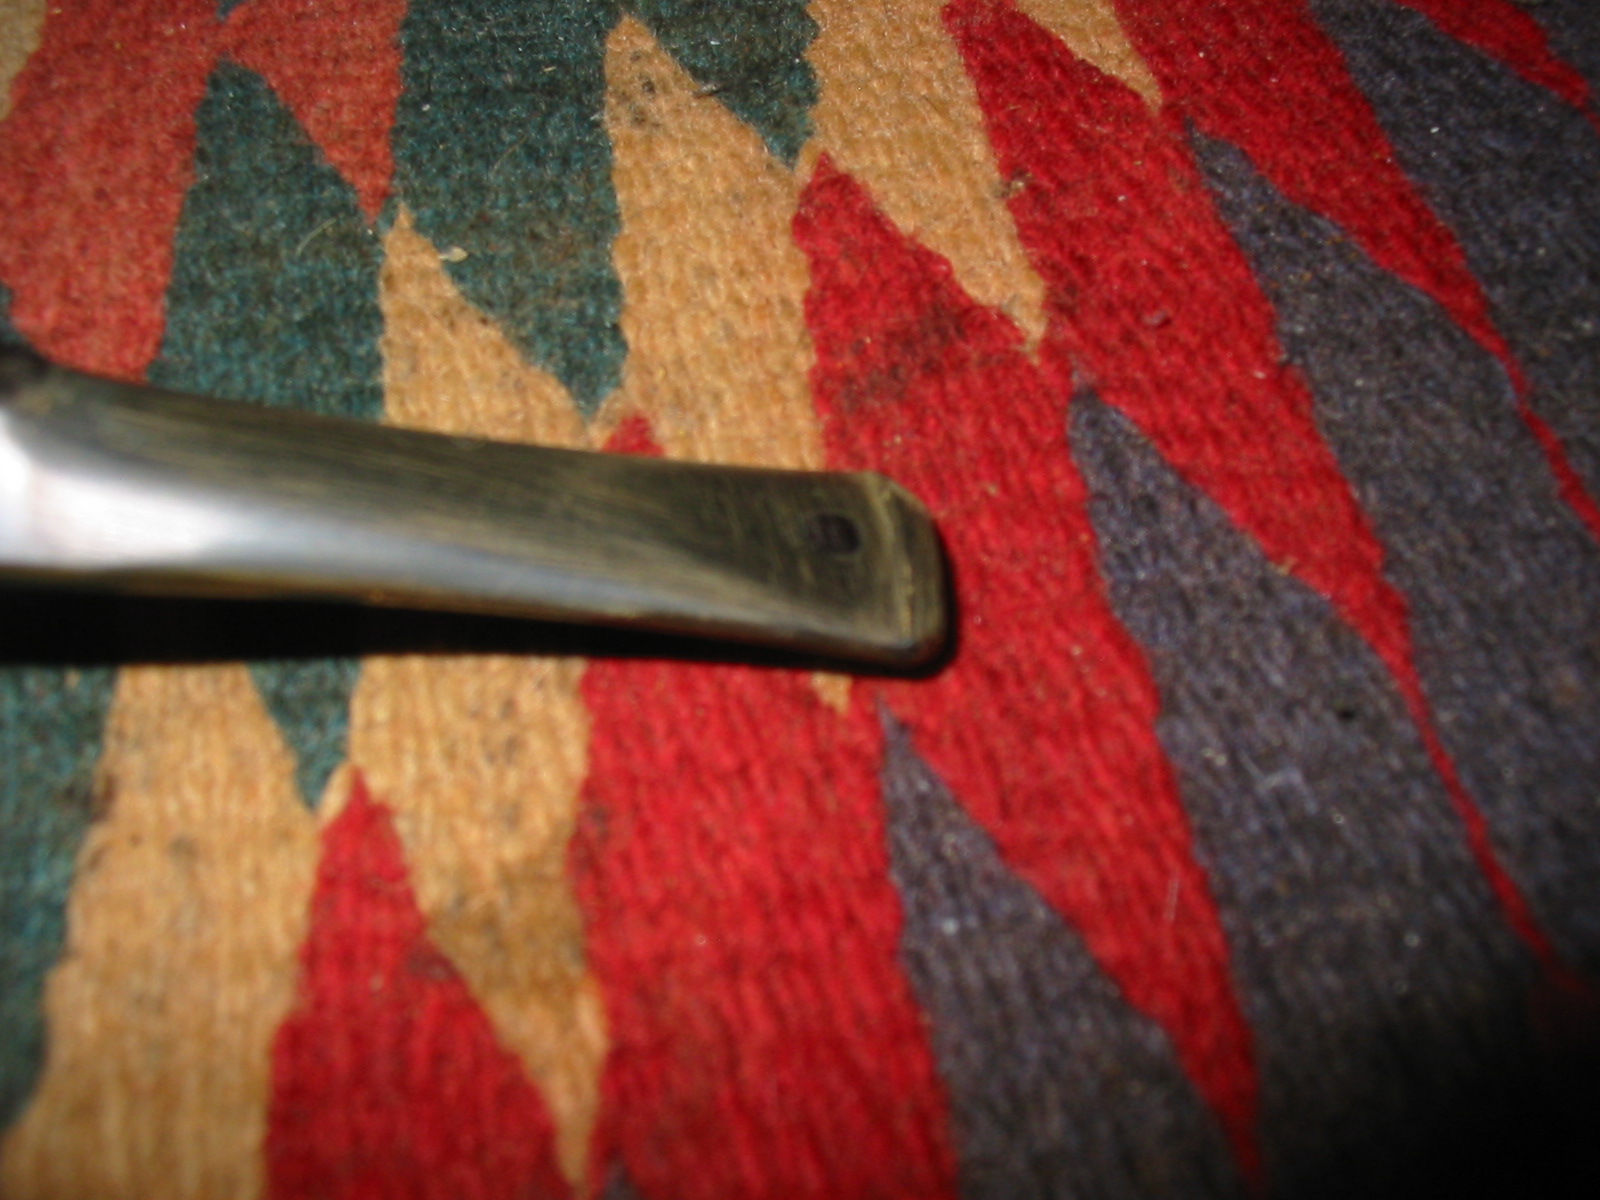
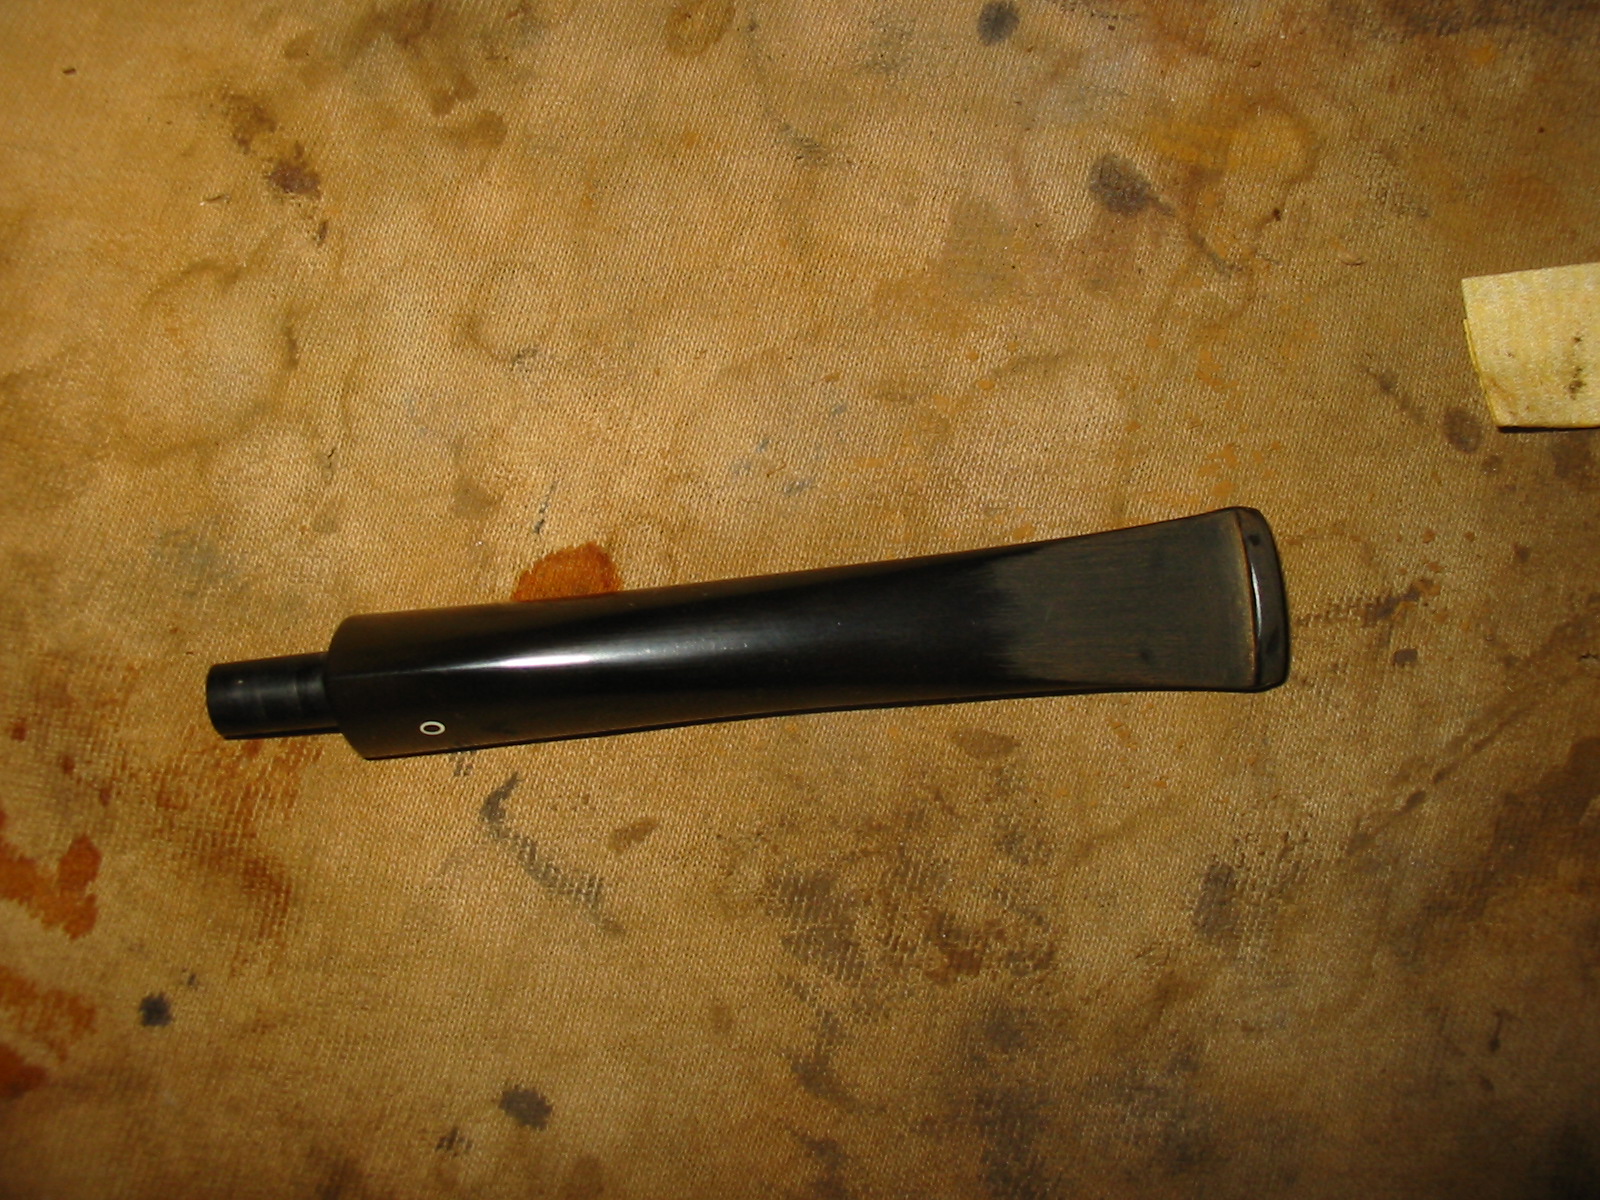
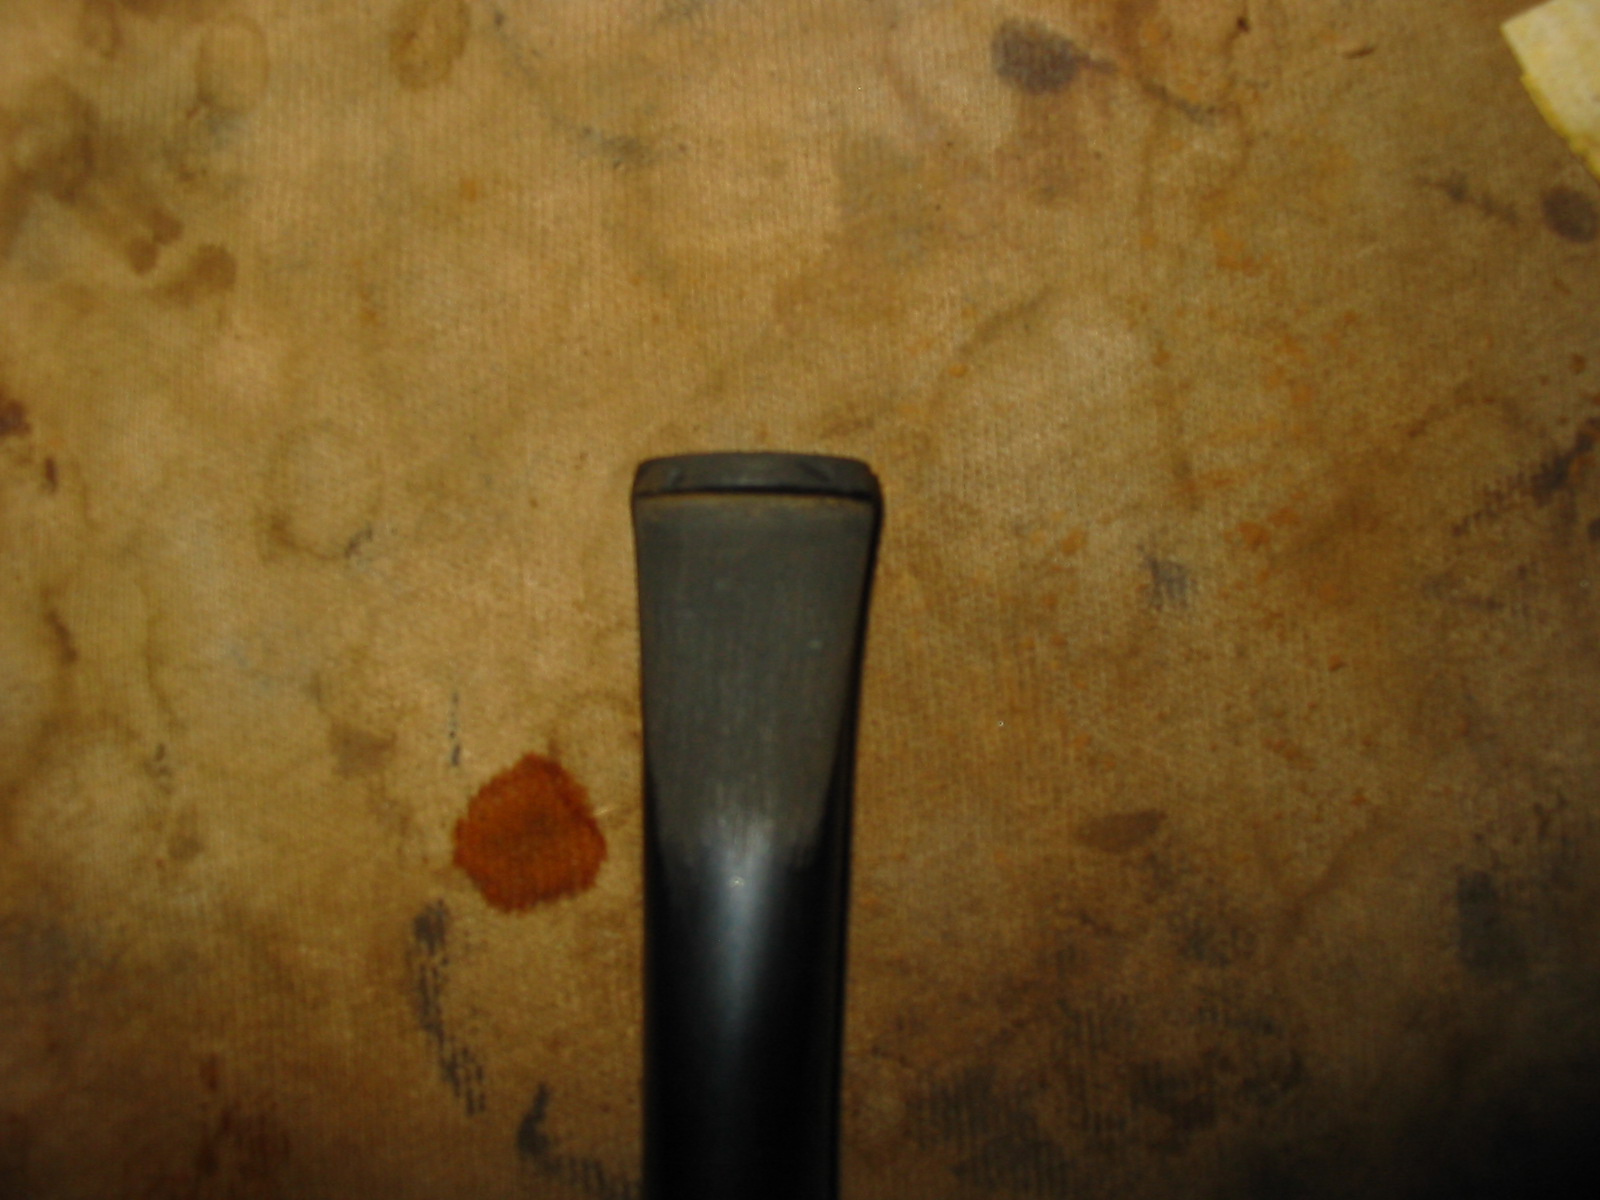
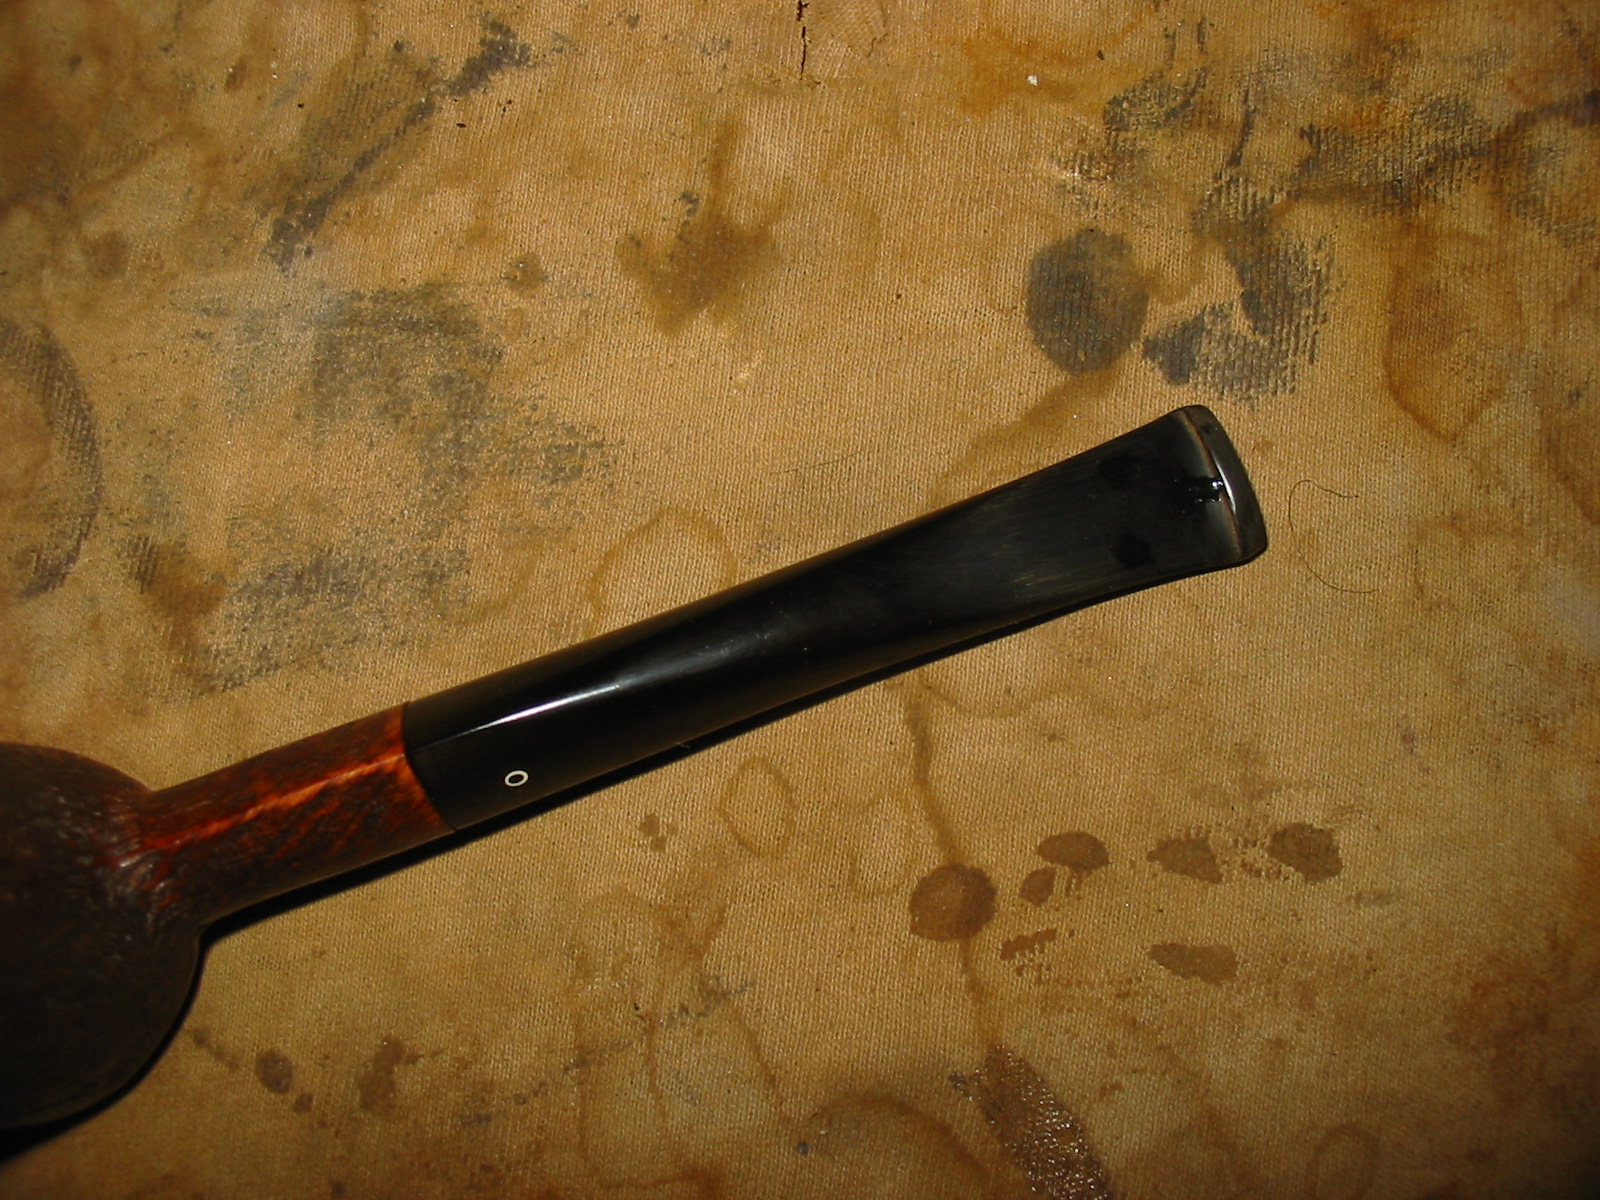
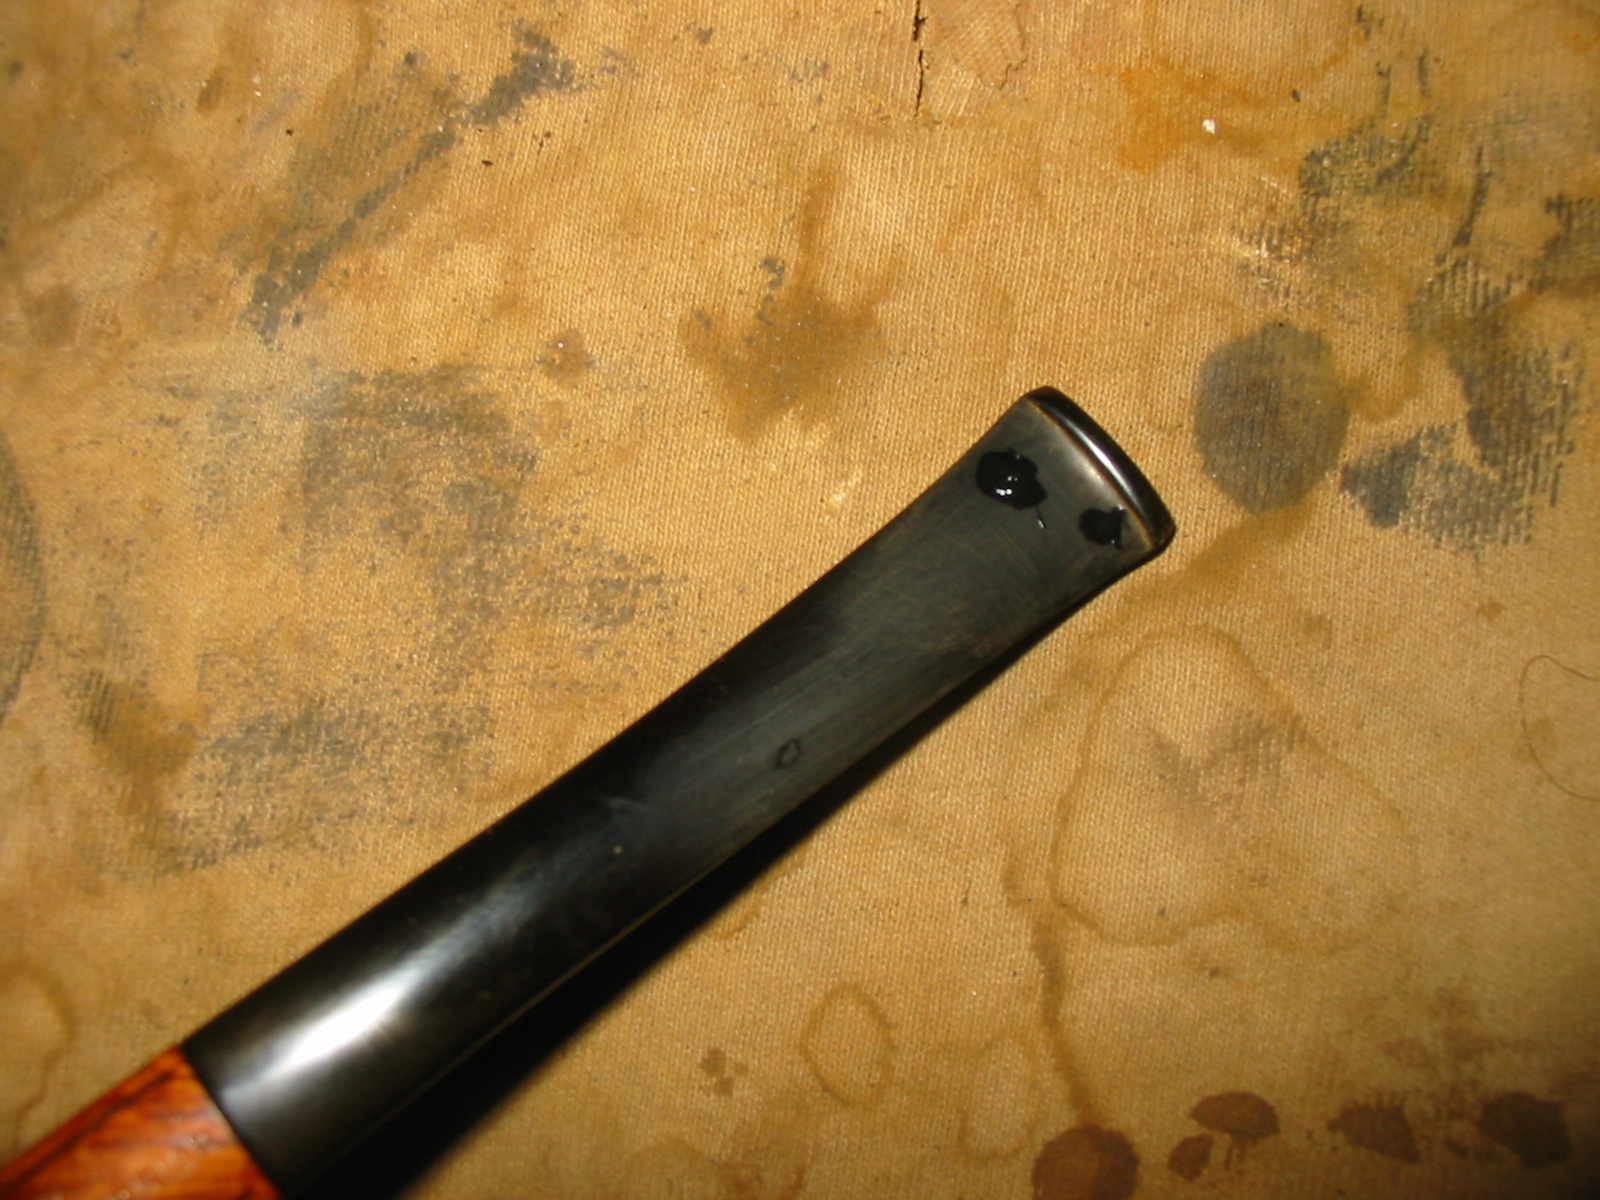
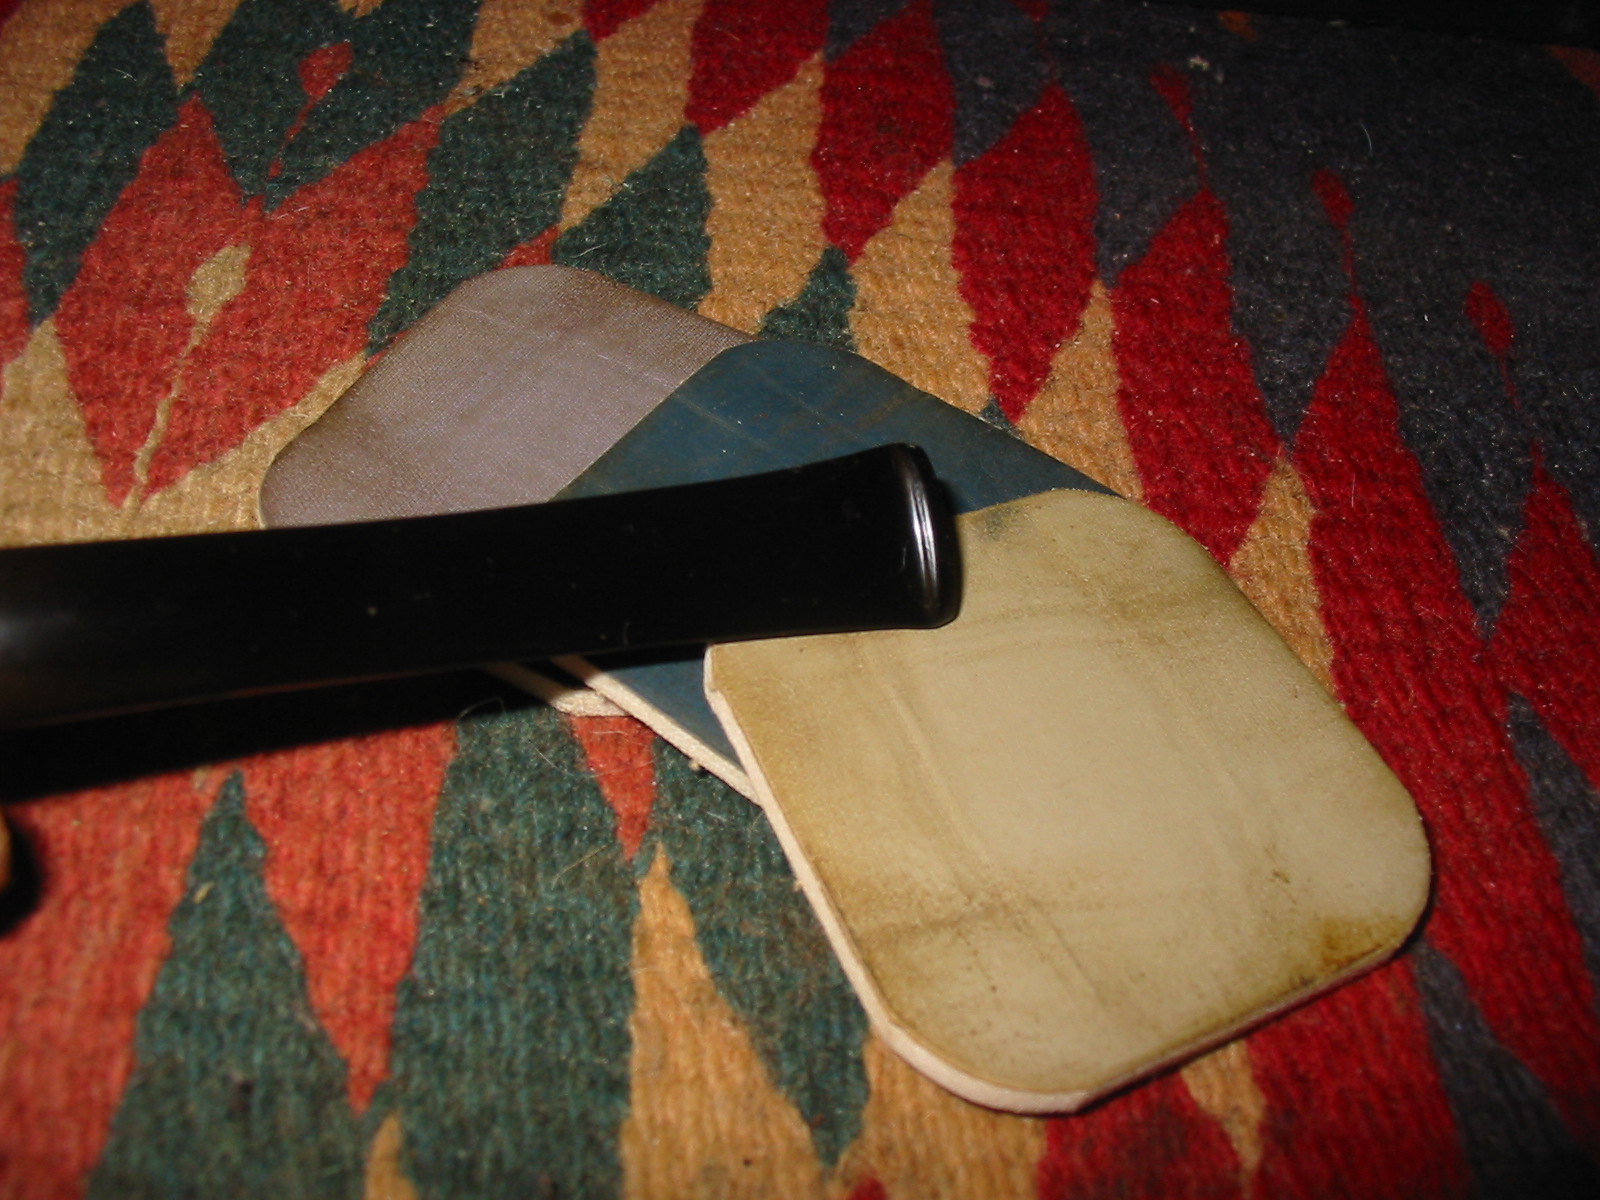
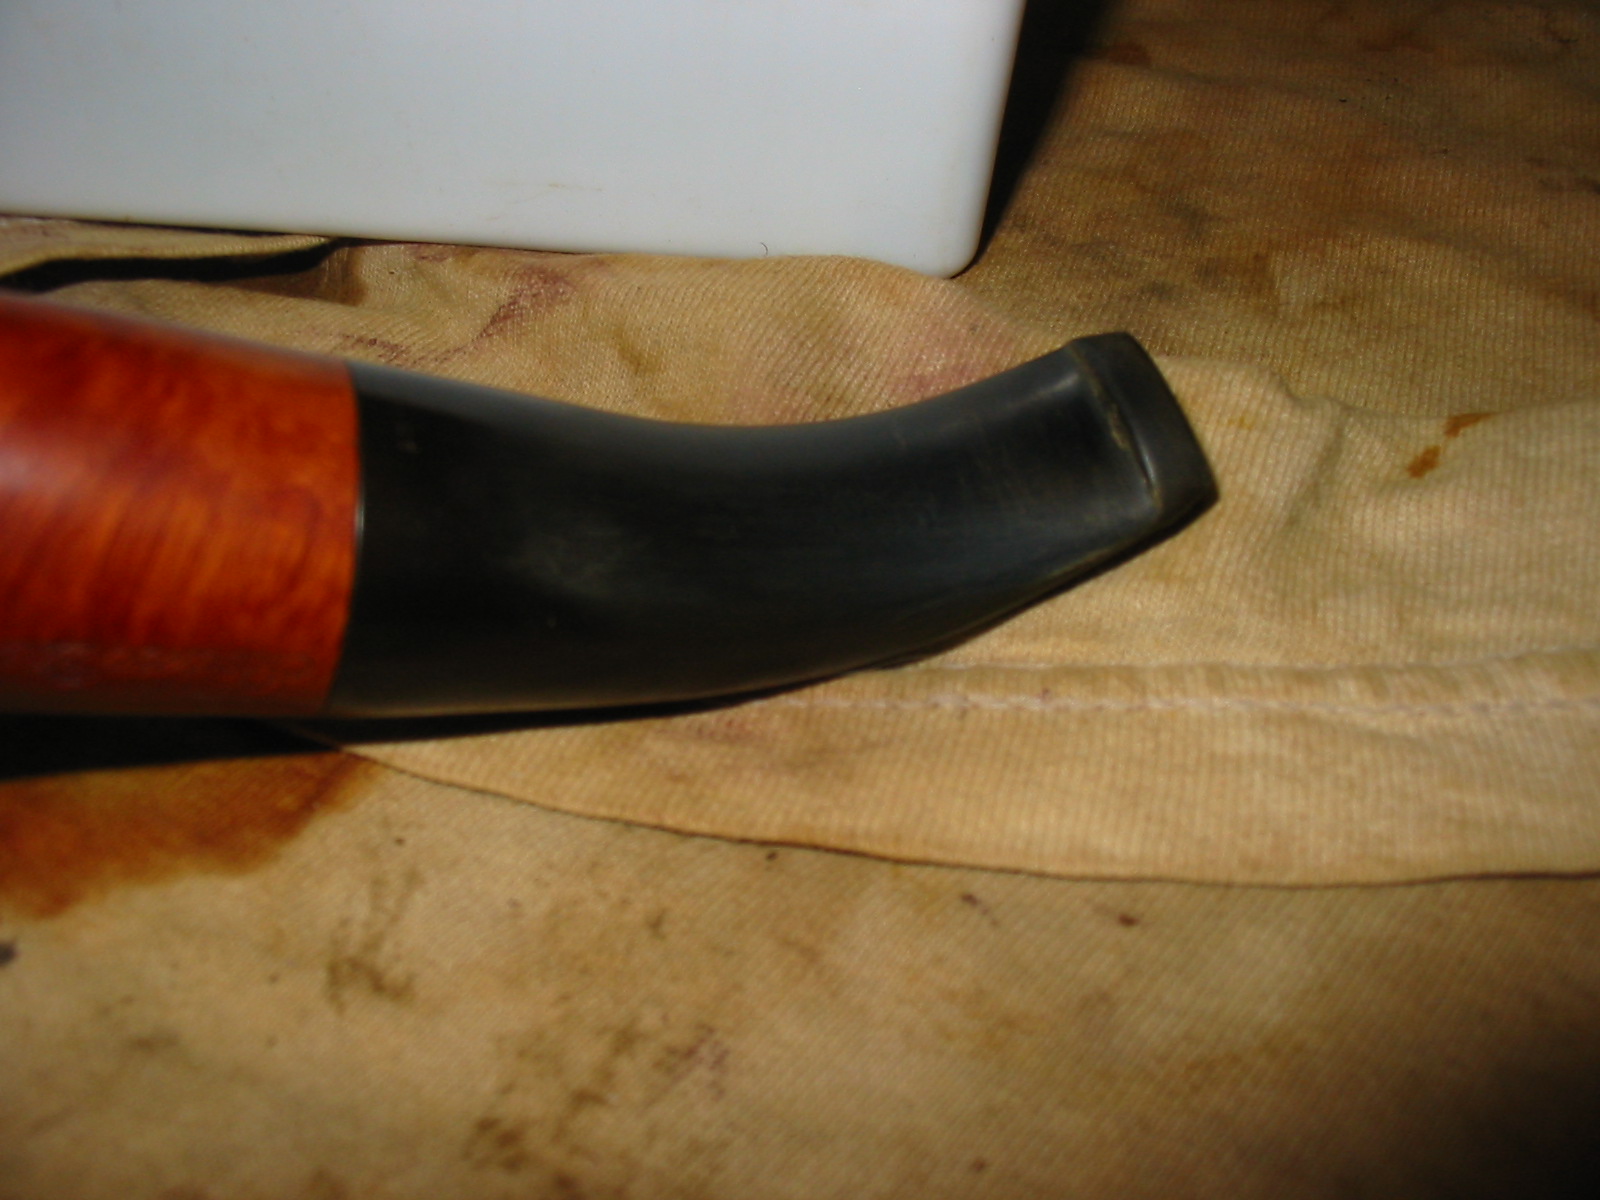
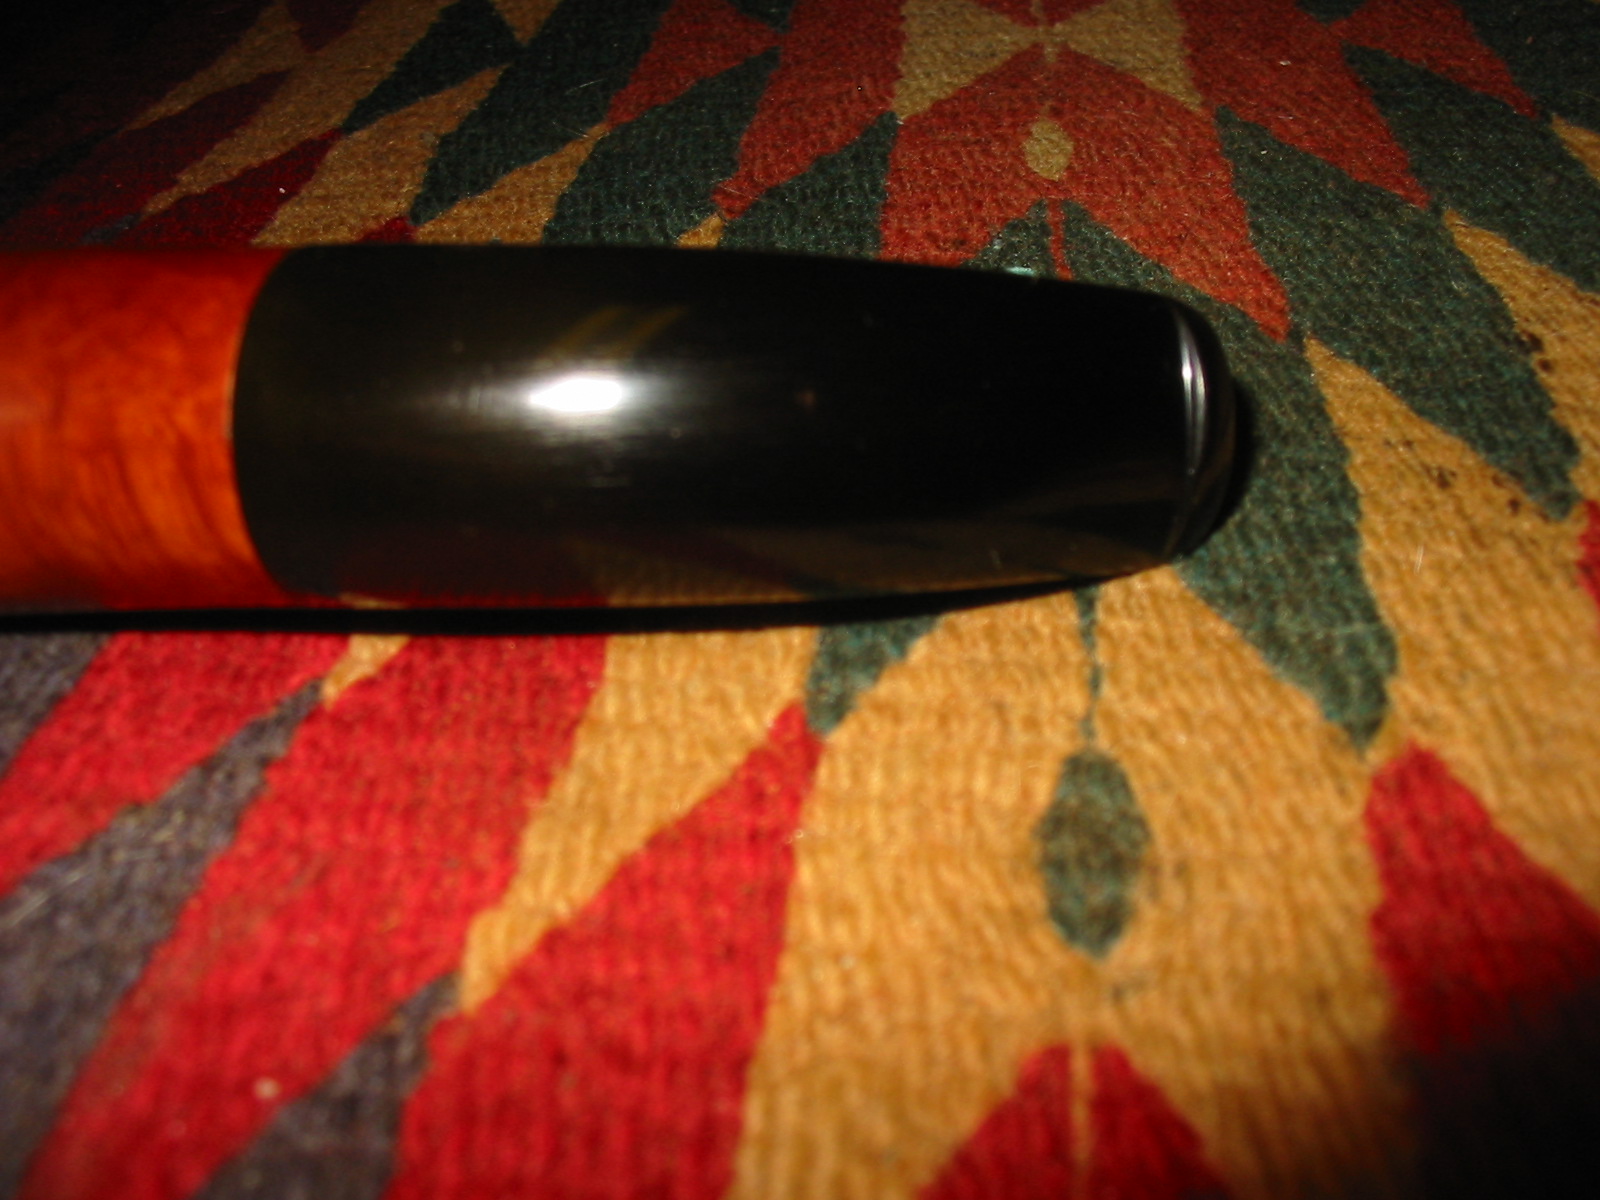
I took several photos of the end of the stem to show the tooth mark damage that was present. It truly was the only thing wrong with this pipe. The first photo shows the underside of the stem but does not show the size or the depth of the bite mark at the top of the photo.
IMG_3528

IMG_3529

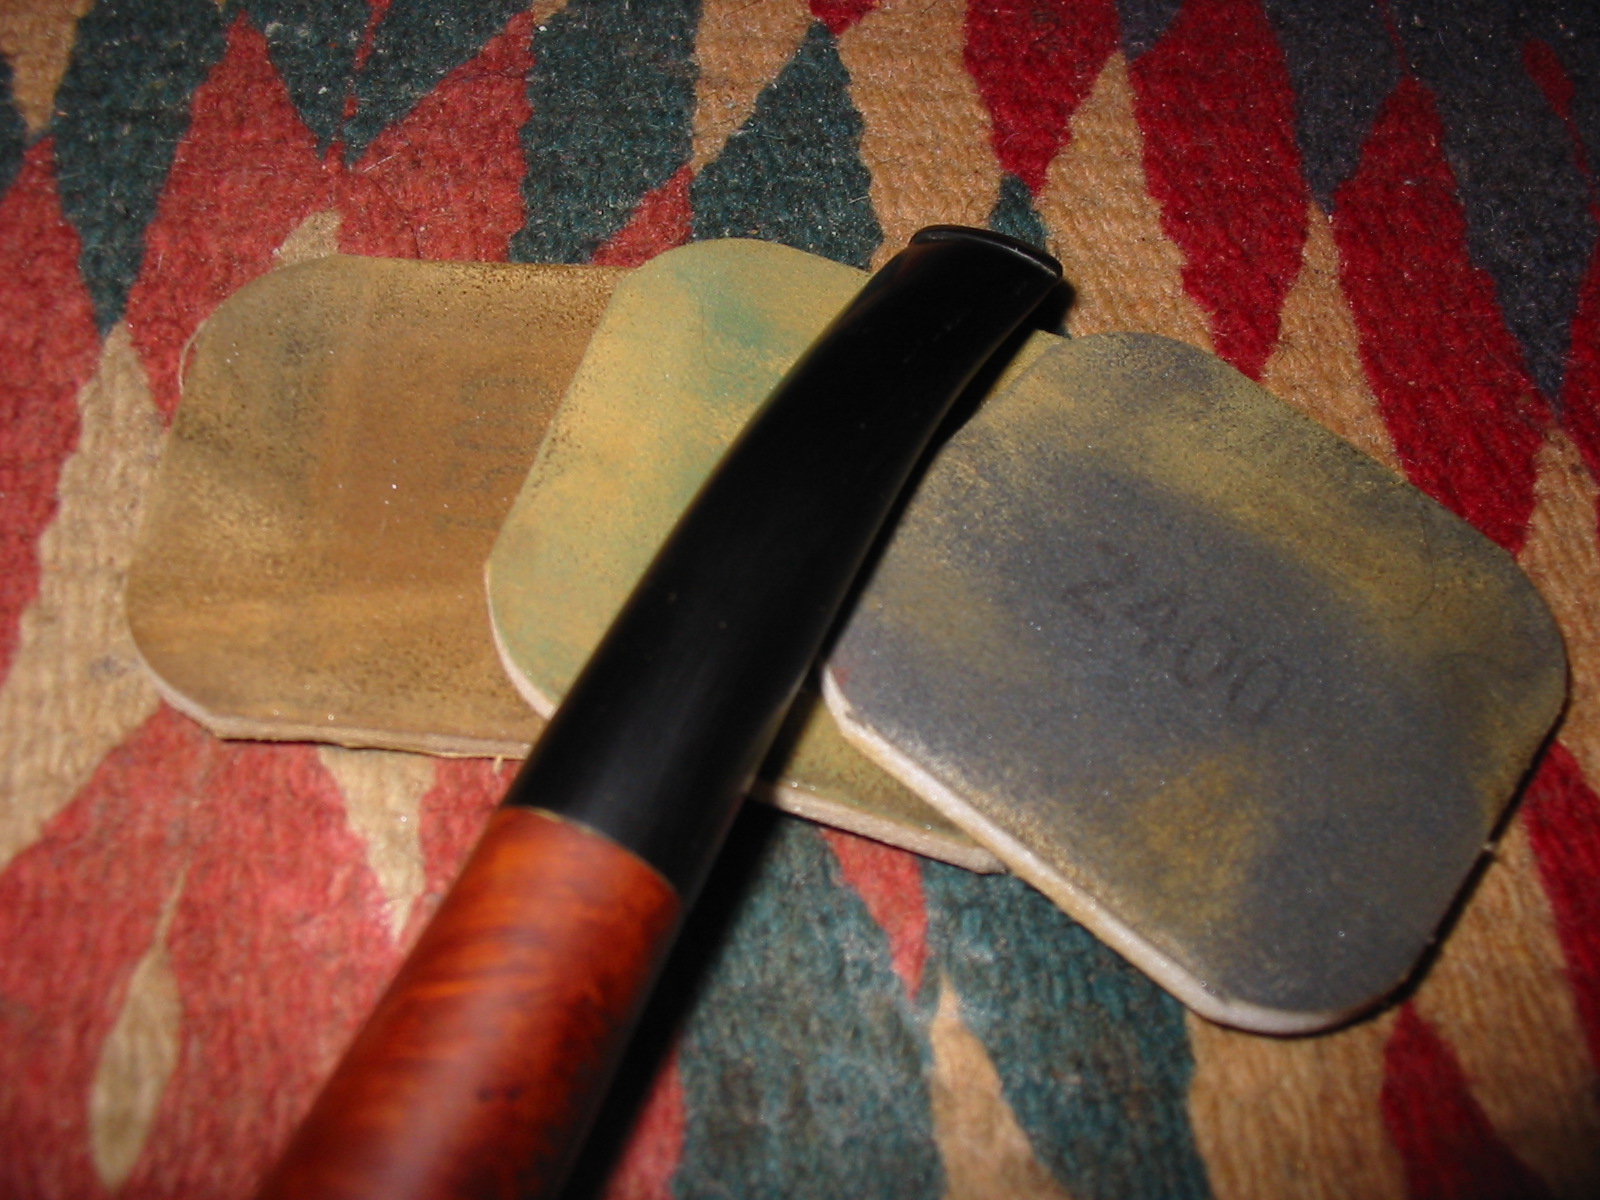
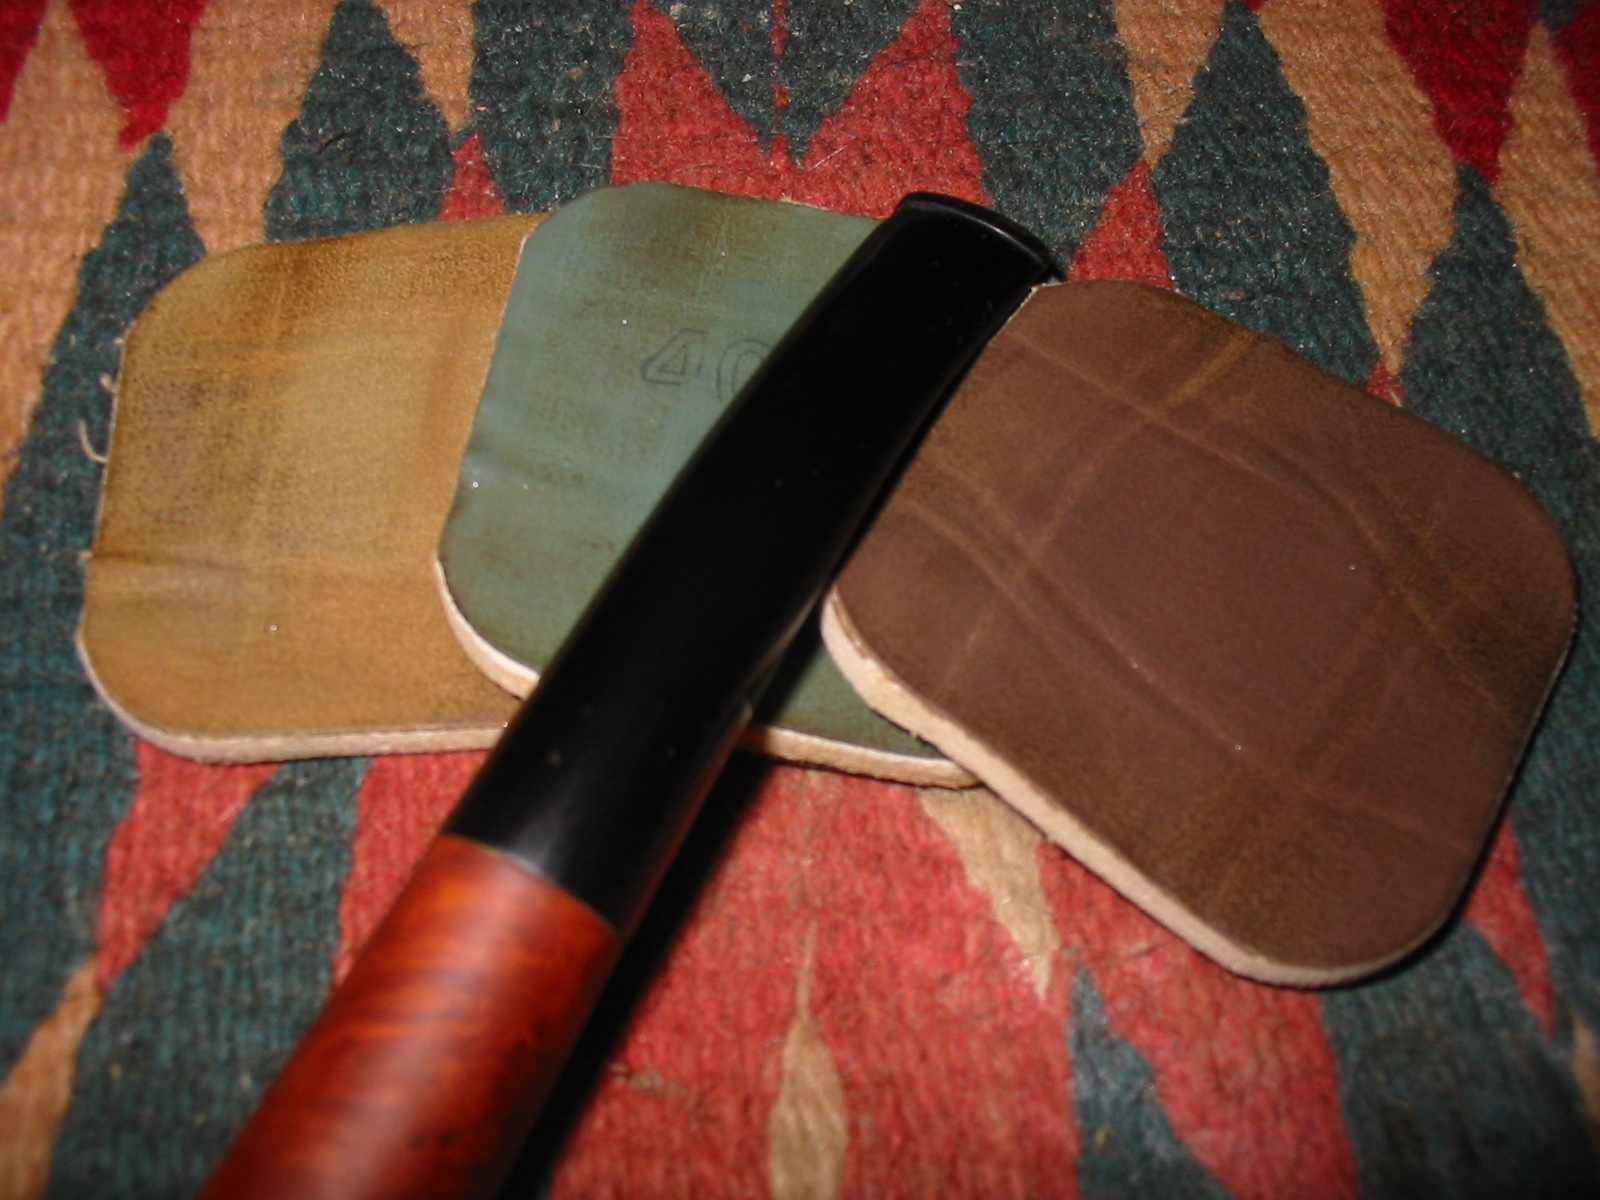
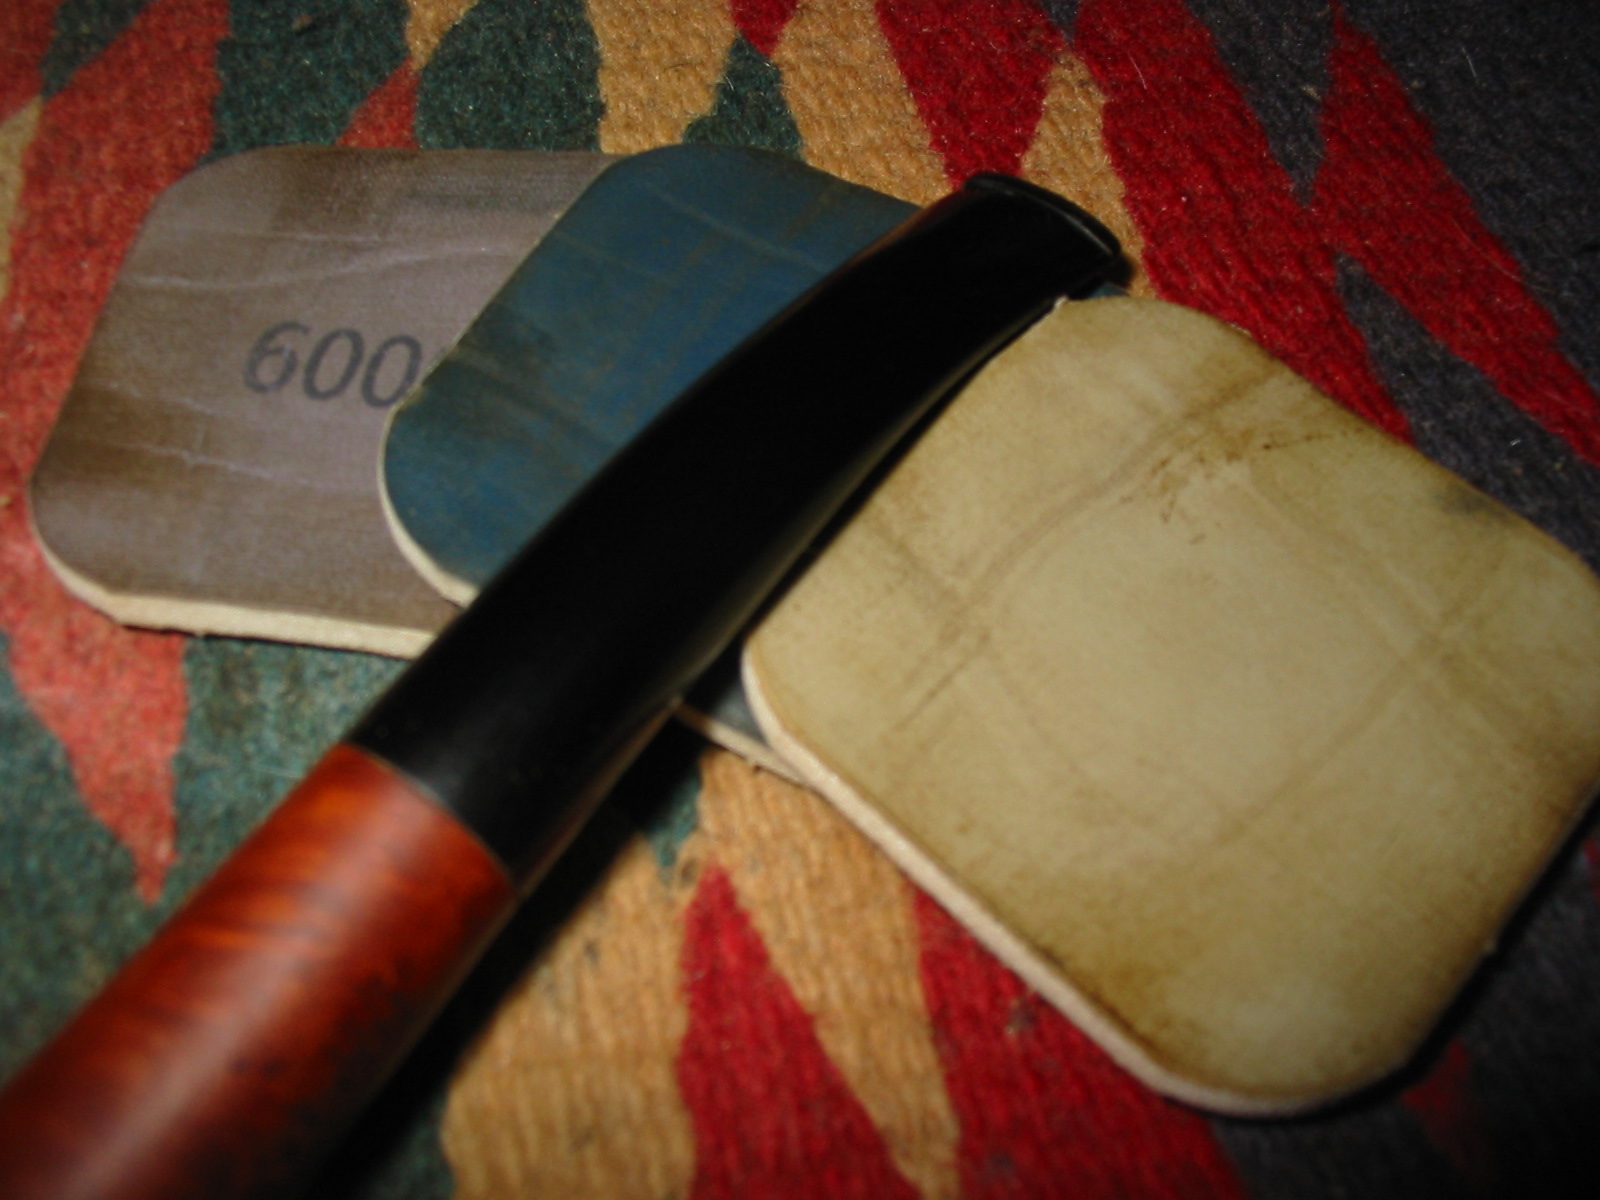
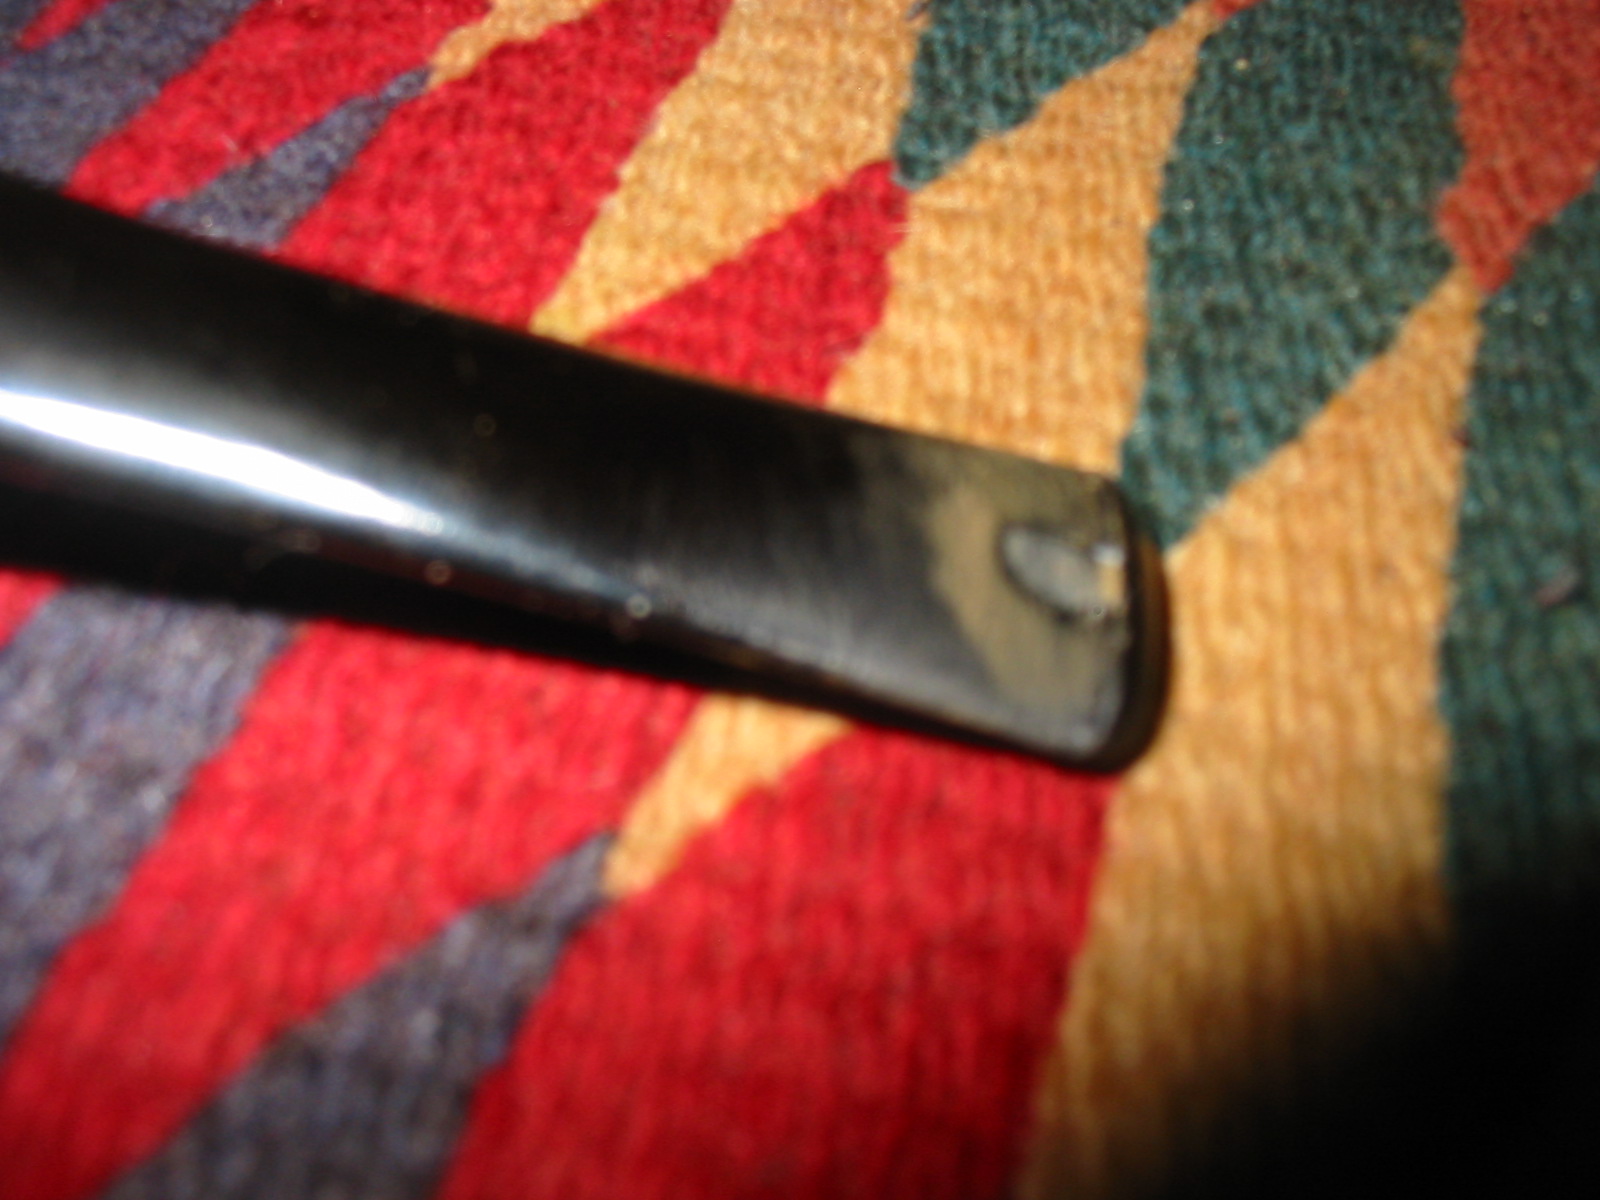
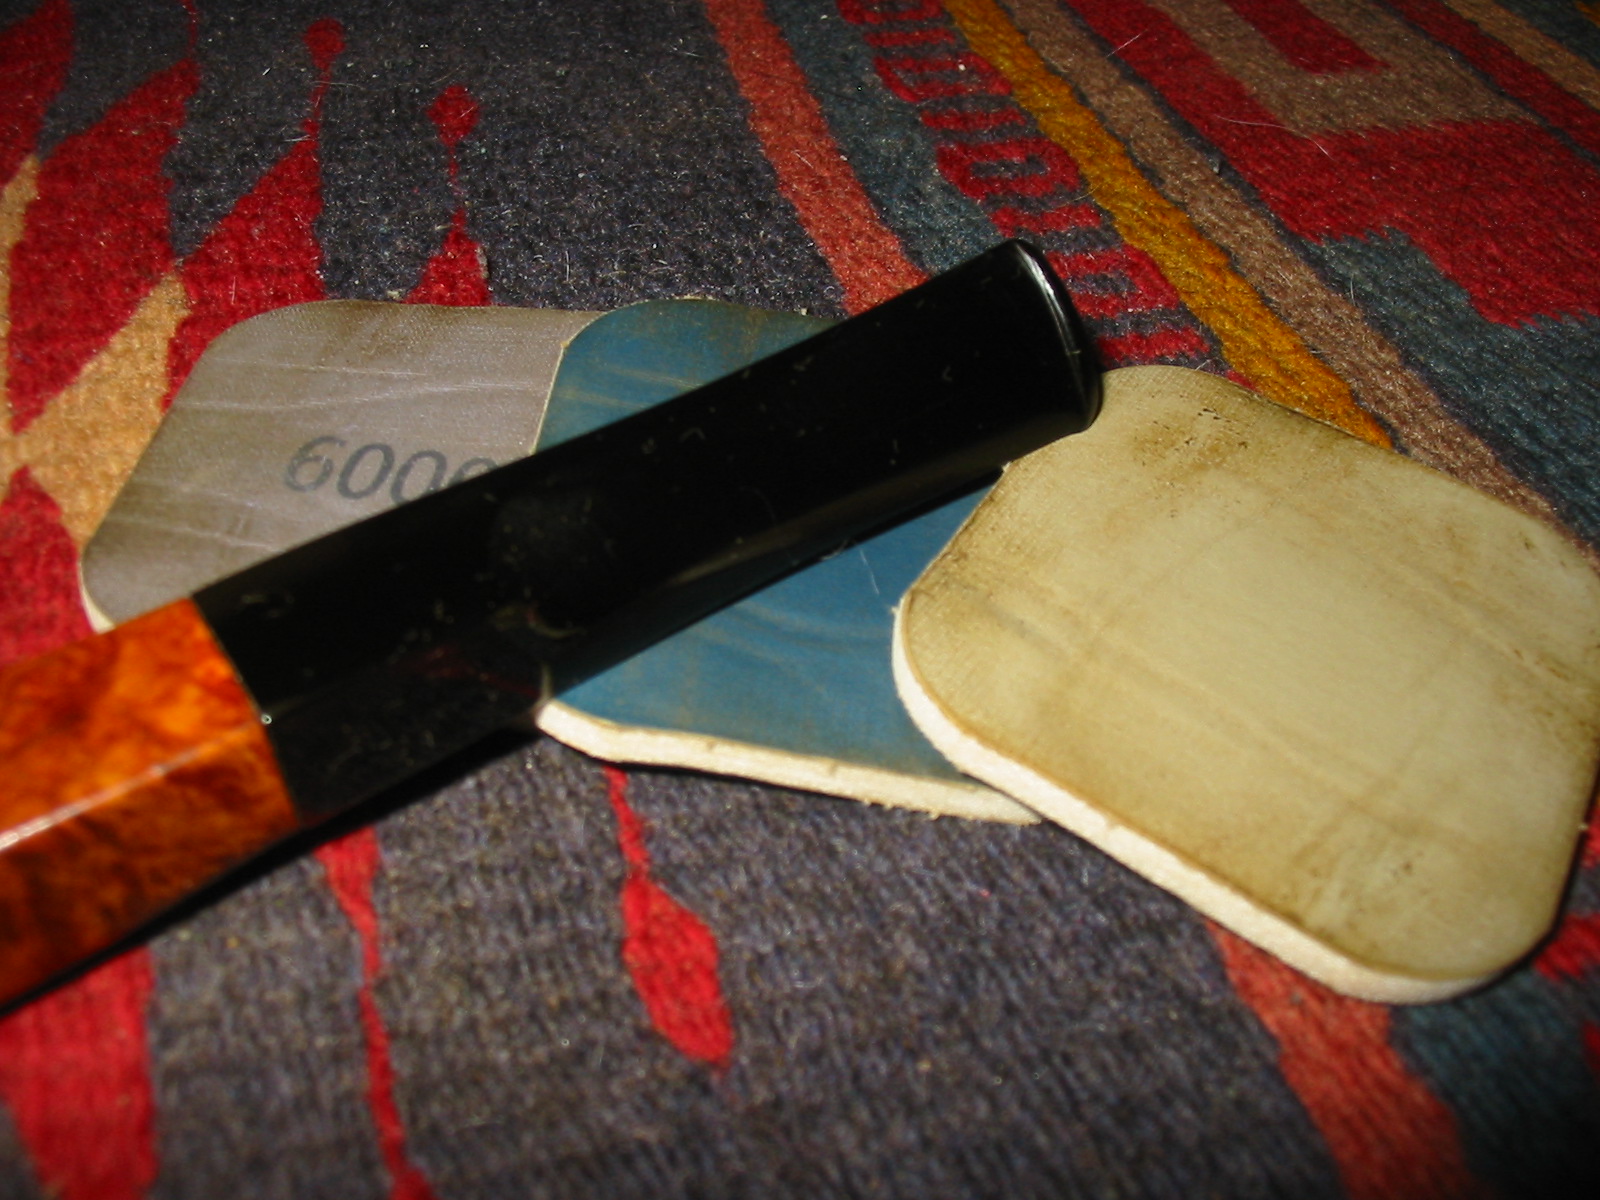
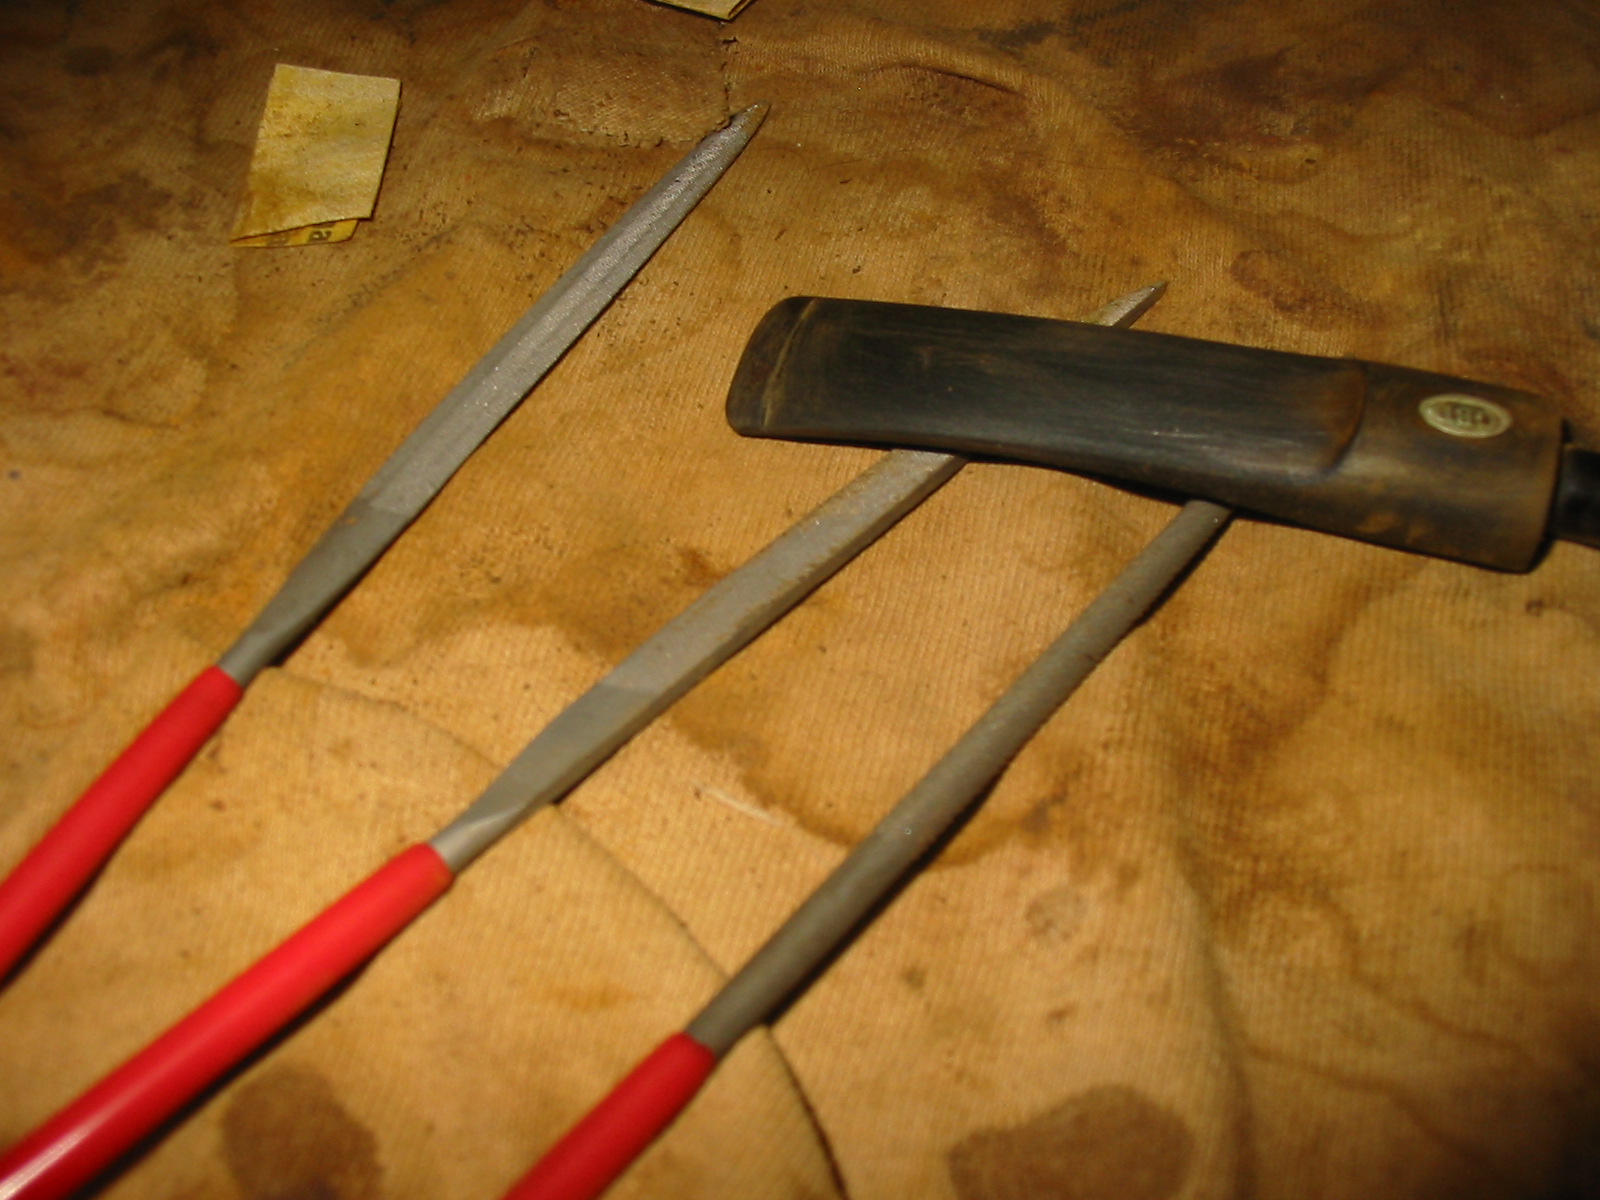
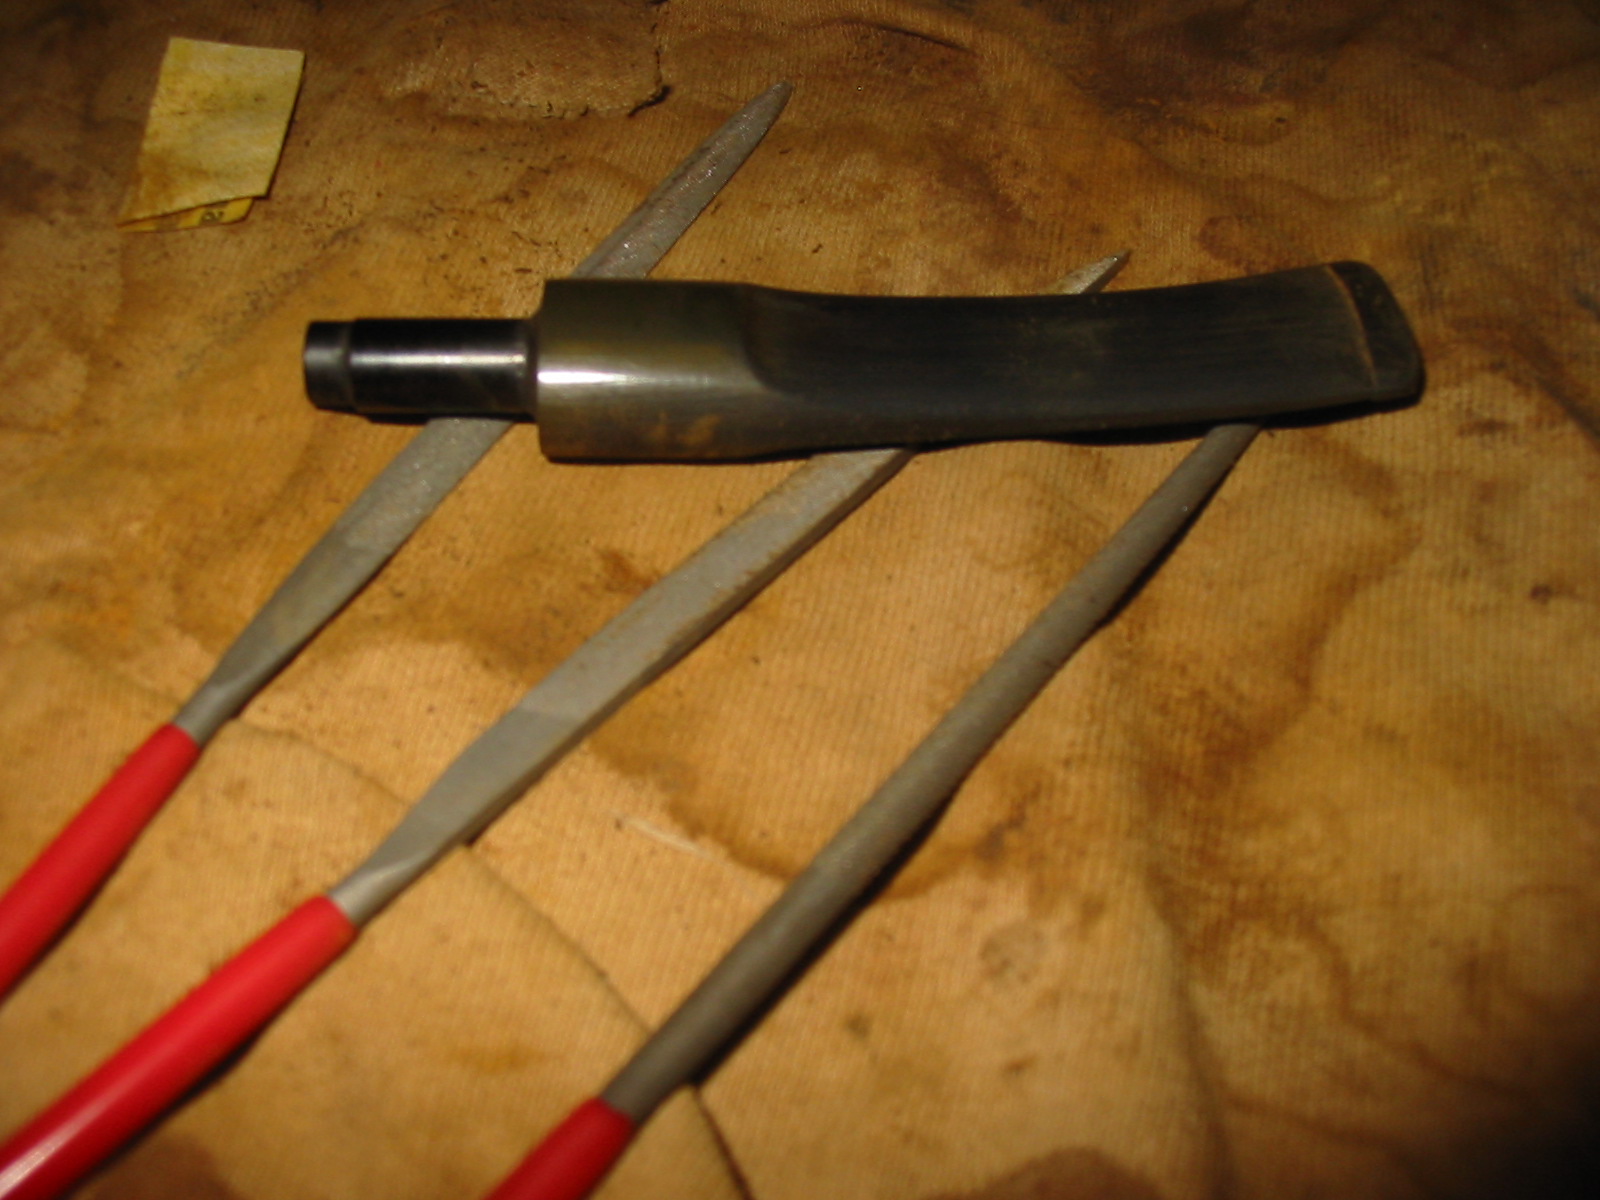
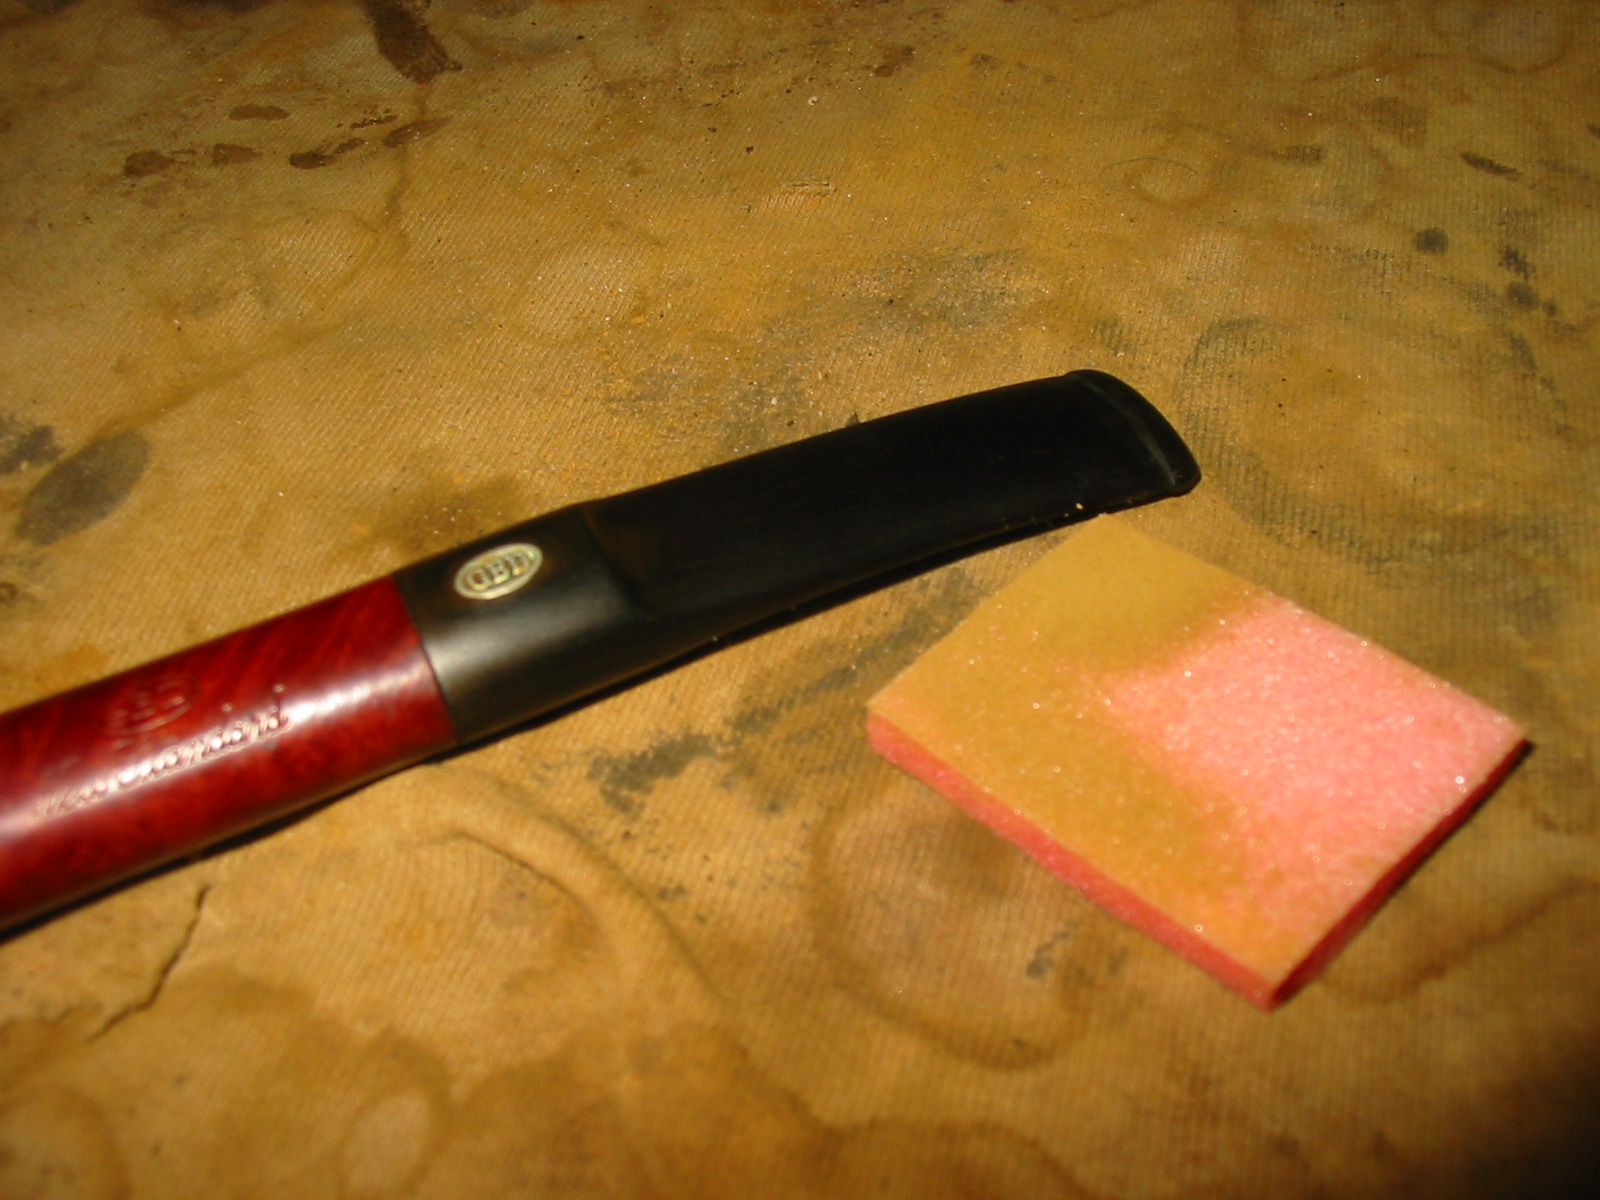
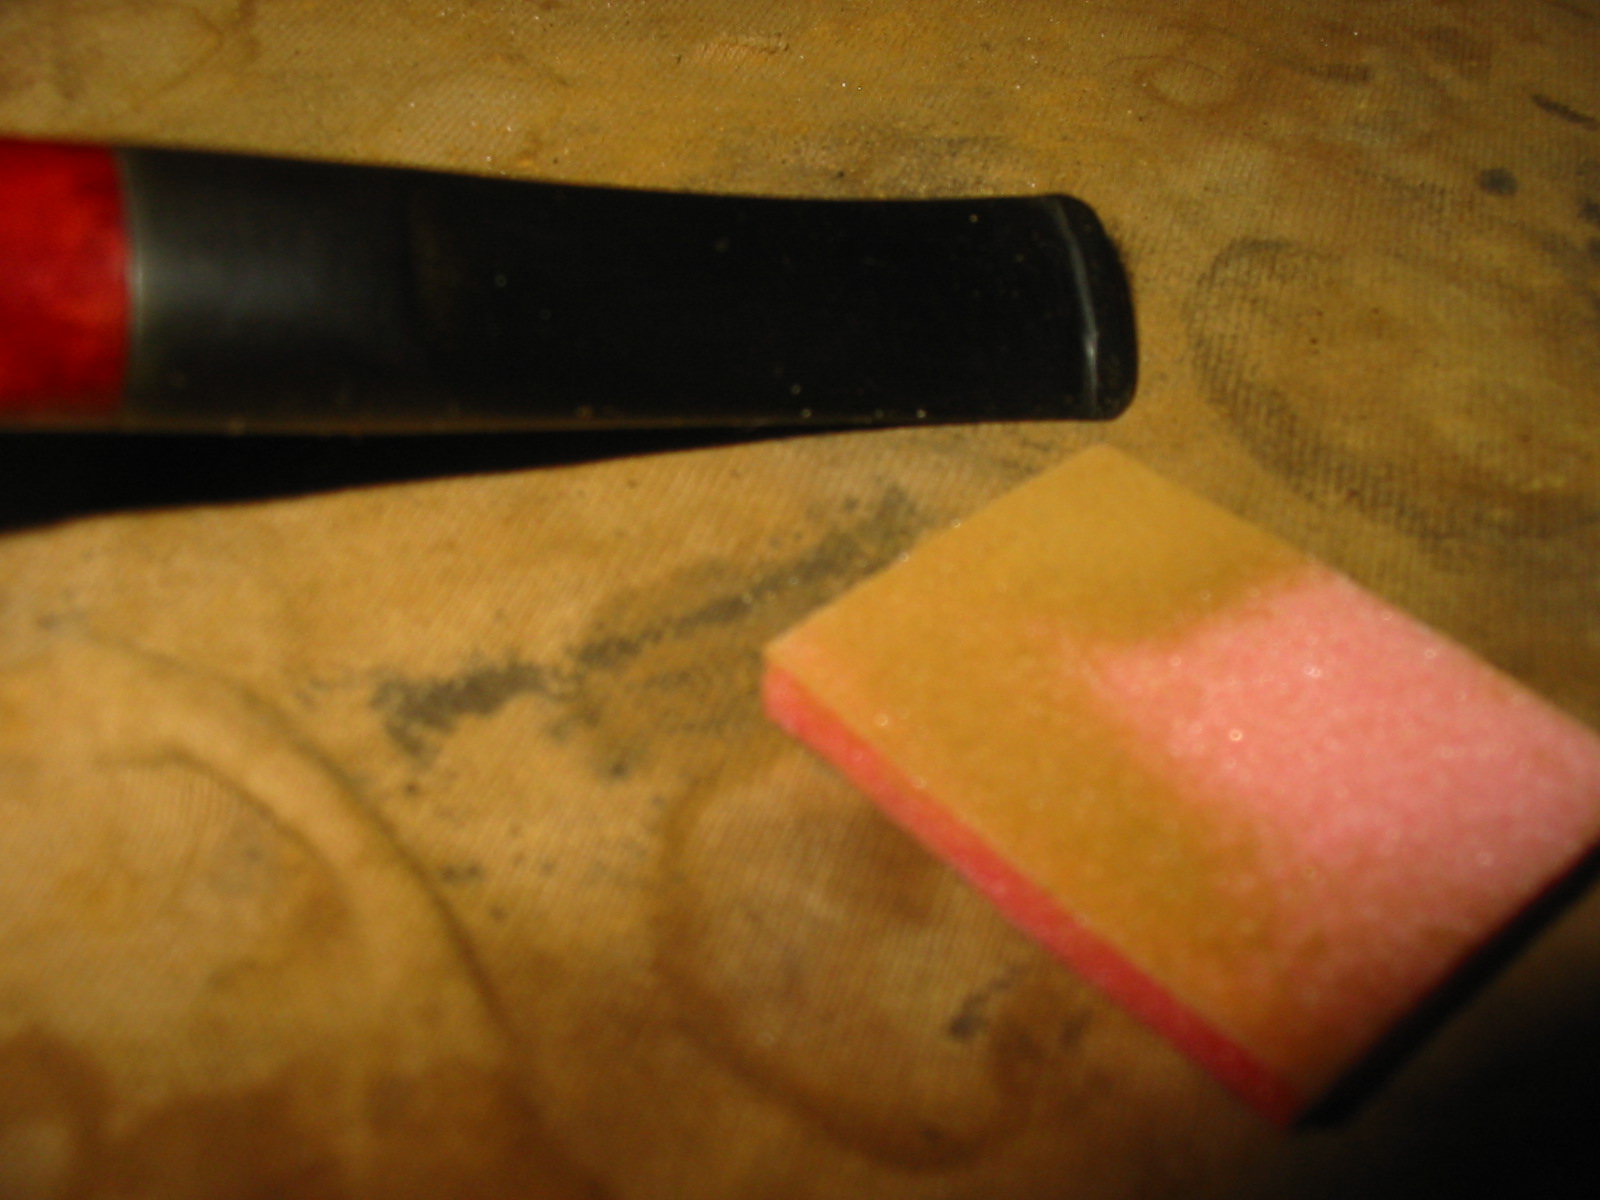
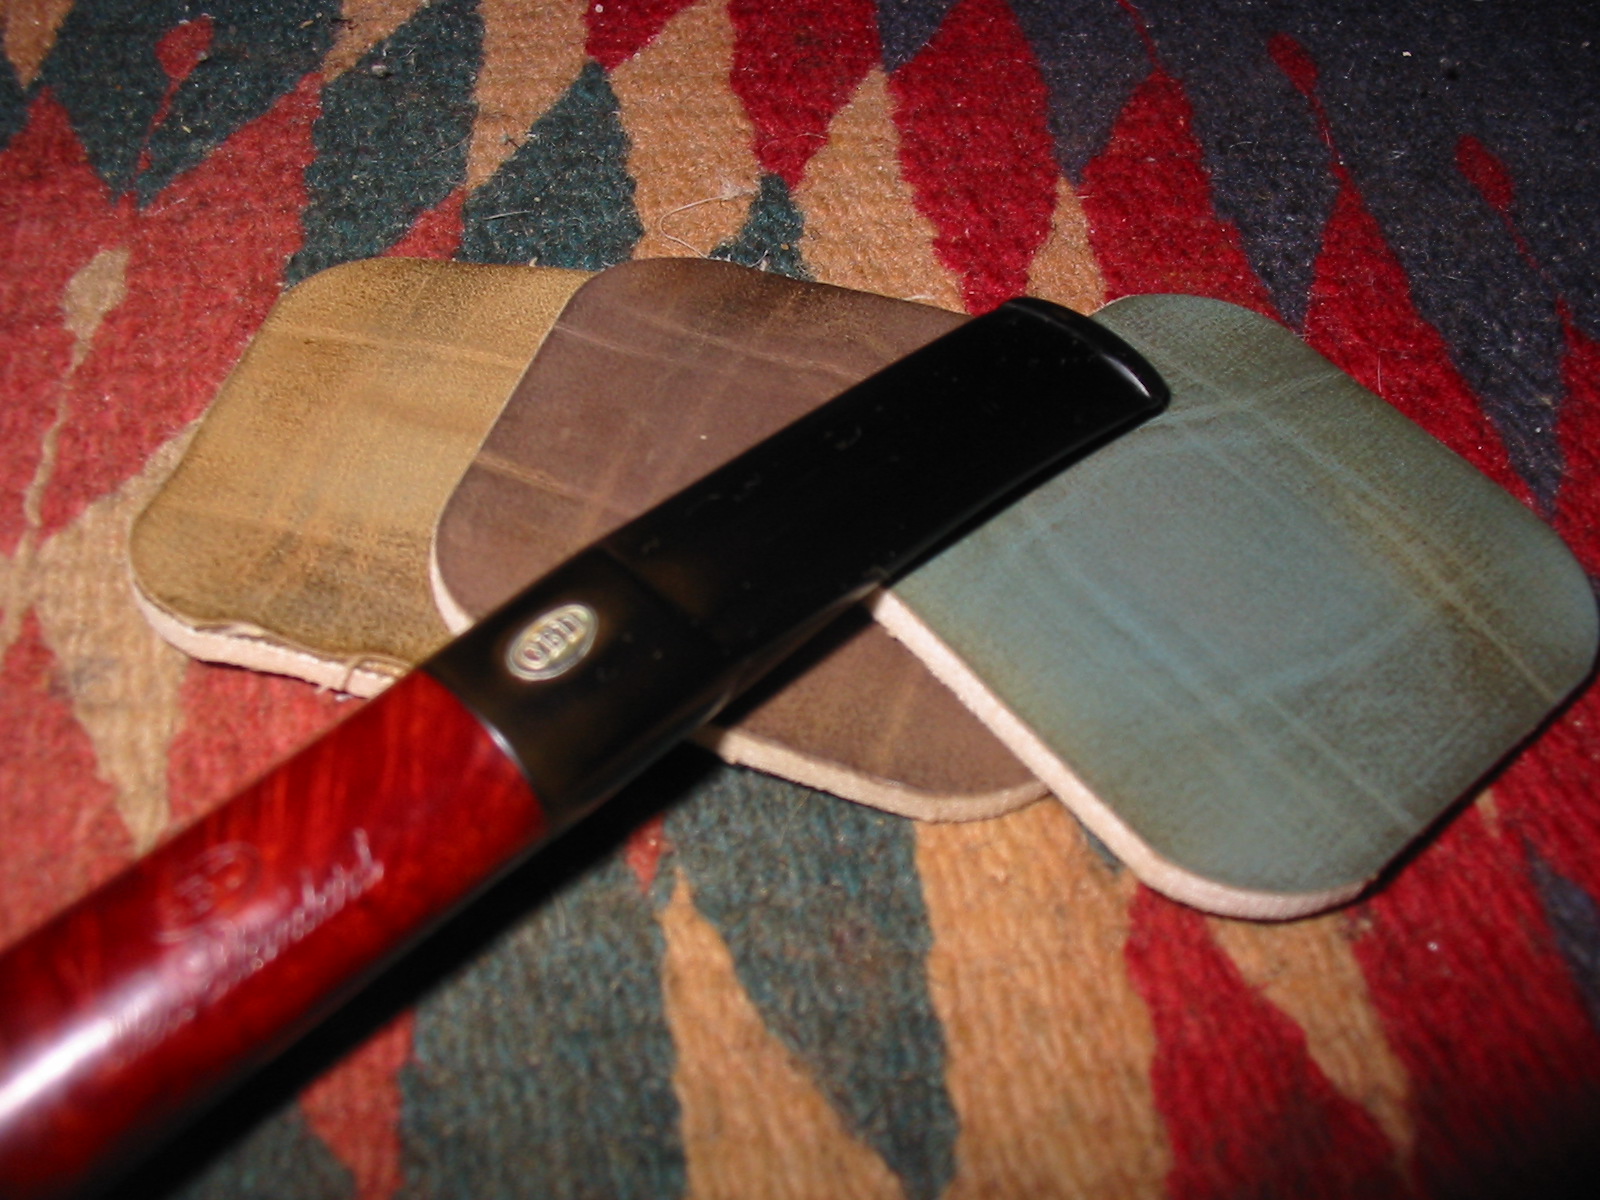
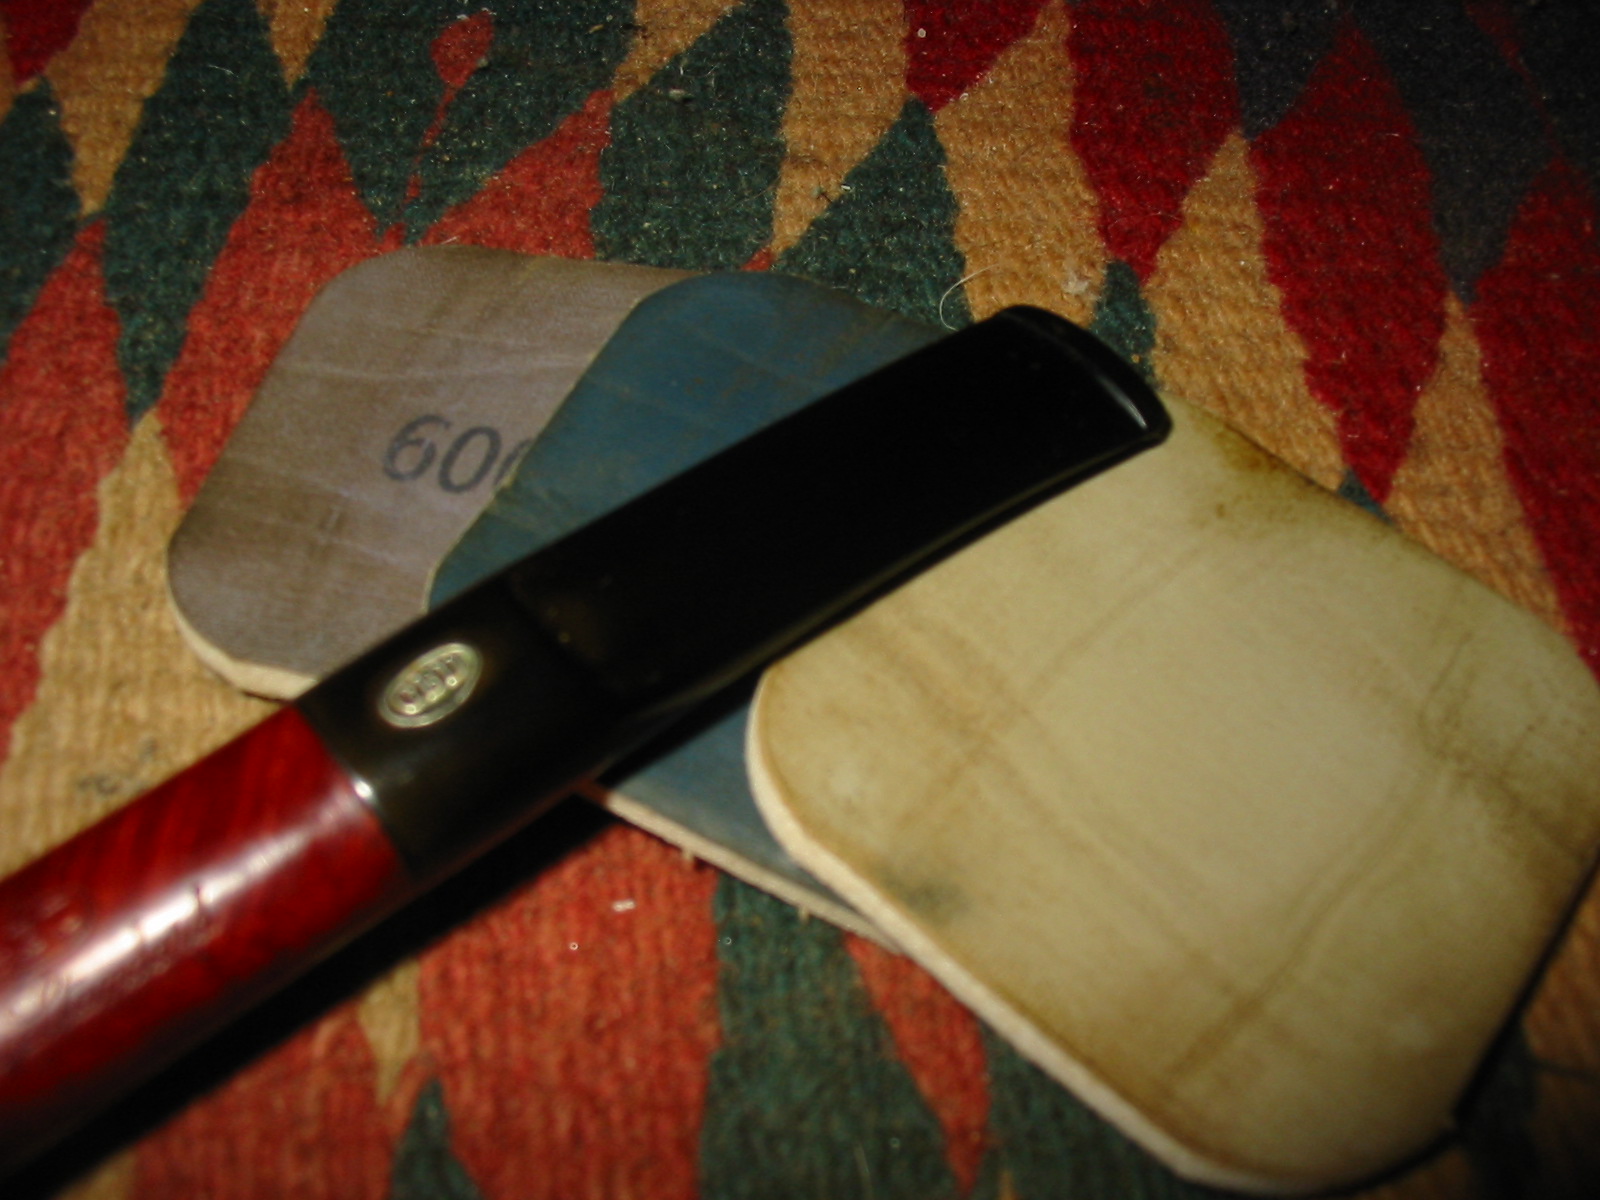
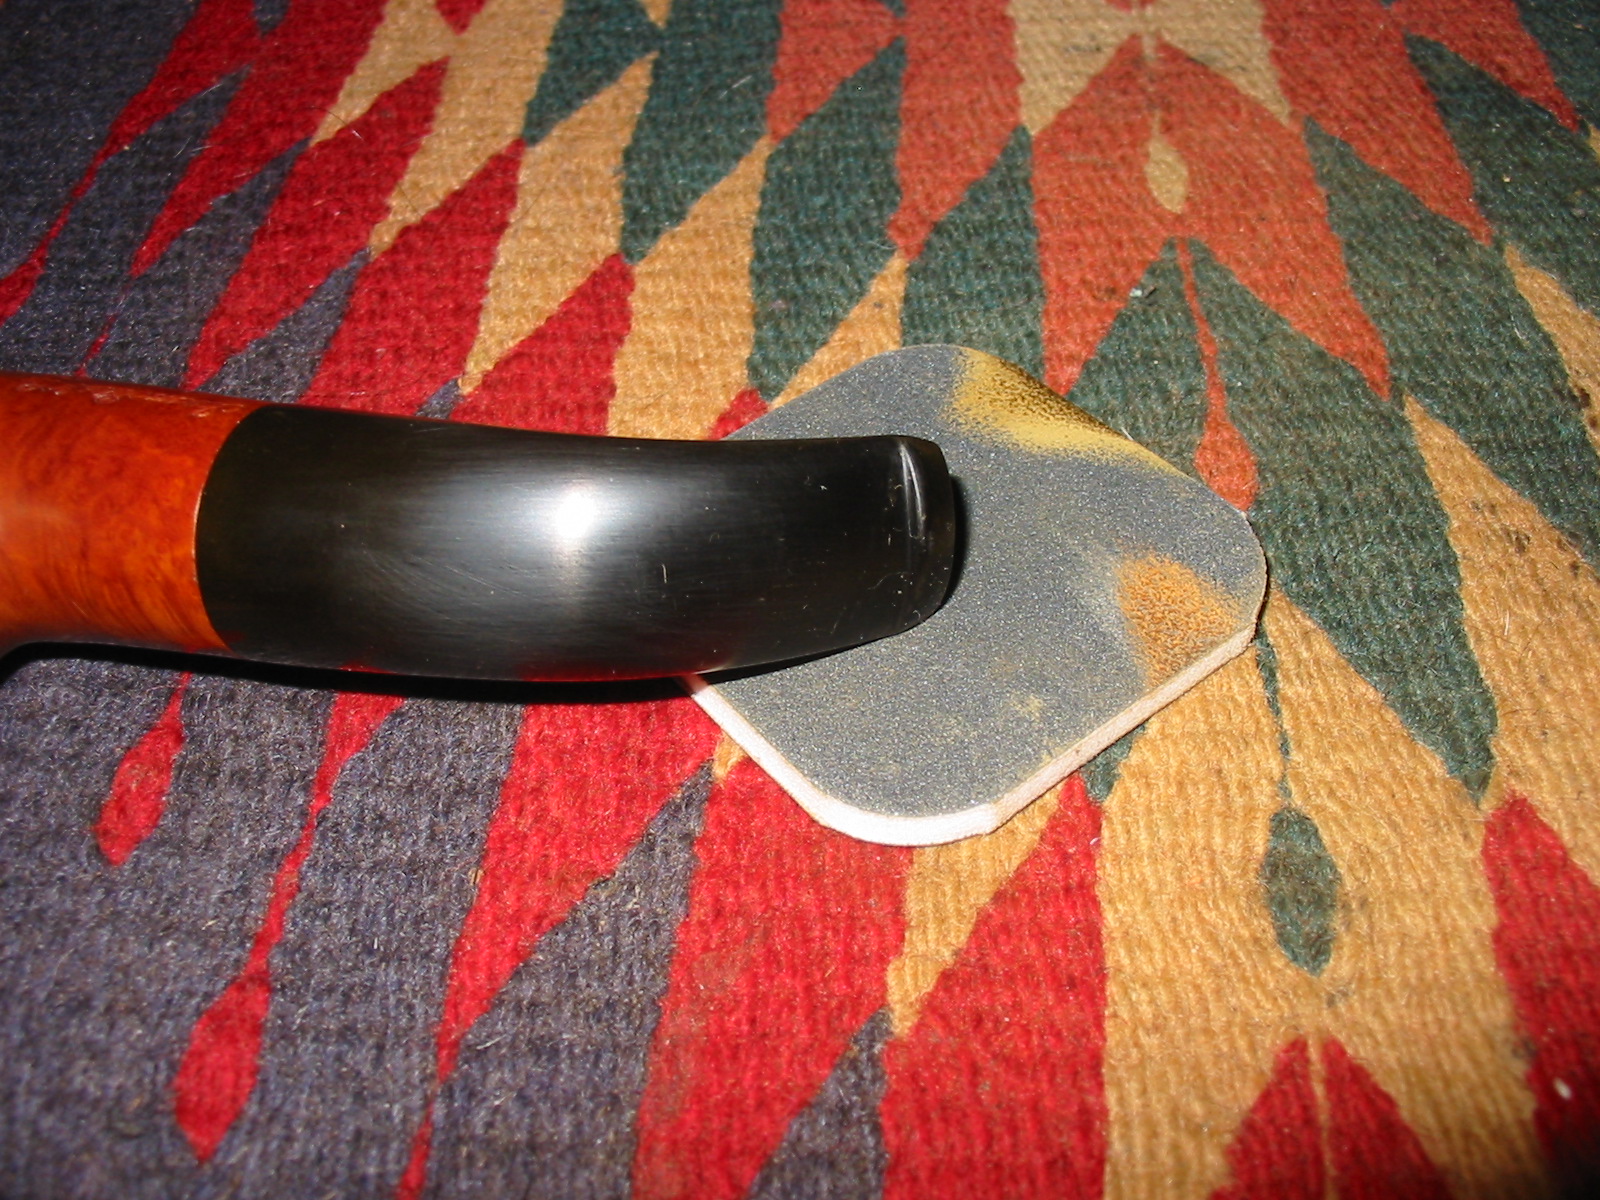
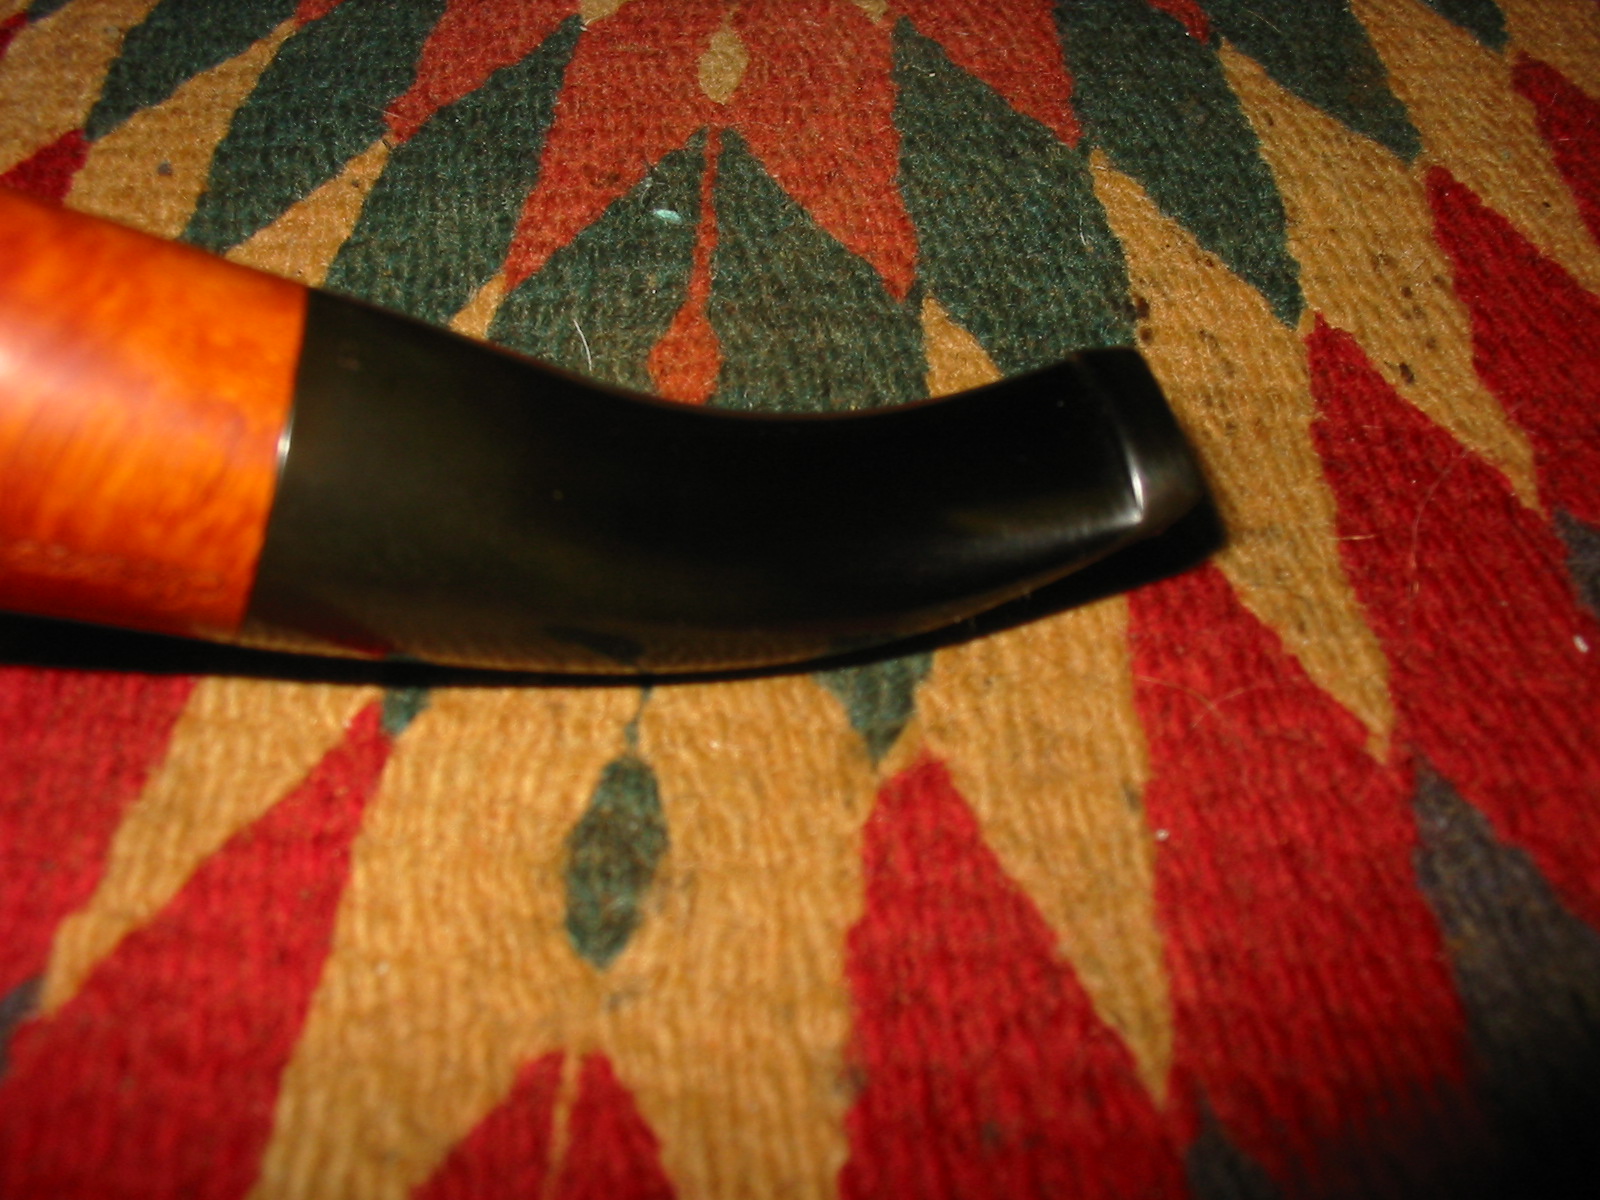
I heated the stem with a heat gun to try to lift the tooth marks. The ones on the top of the stem lifted almost to the surface and a little sanding took care of the remnants there (Photos 1 and 2 below). The ones on the underside were deeper. Two of them lifted to the surface and with sanding disappeared. The one on the left side of Photo 3 was very deep and the surface of the vulcanite was broken so that it did not lift. It left a pit in the surface of the stem. I picked it clean with a dental pick.
IMG_3530

IMG_3531

IMG_3532

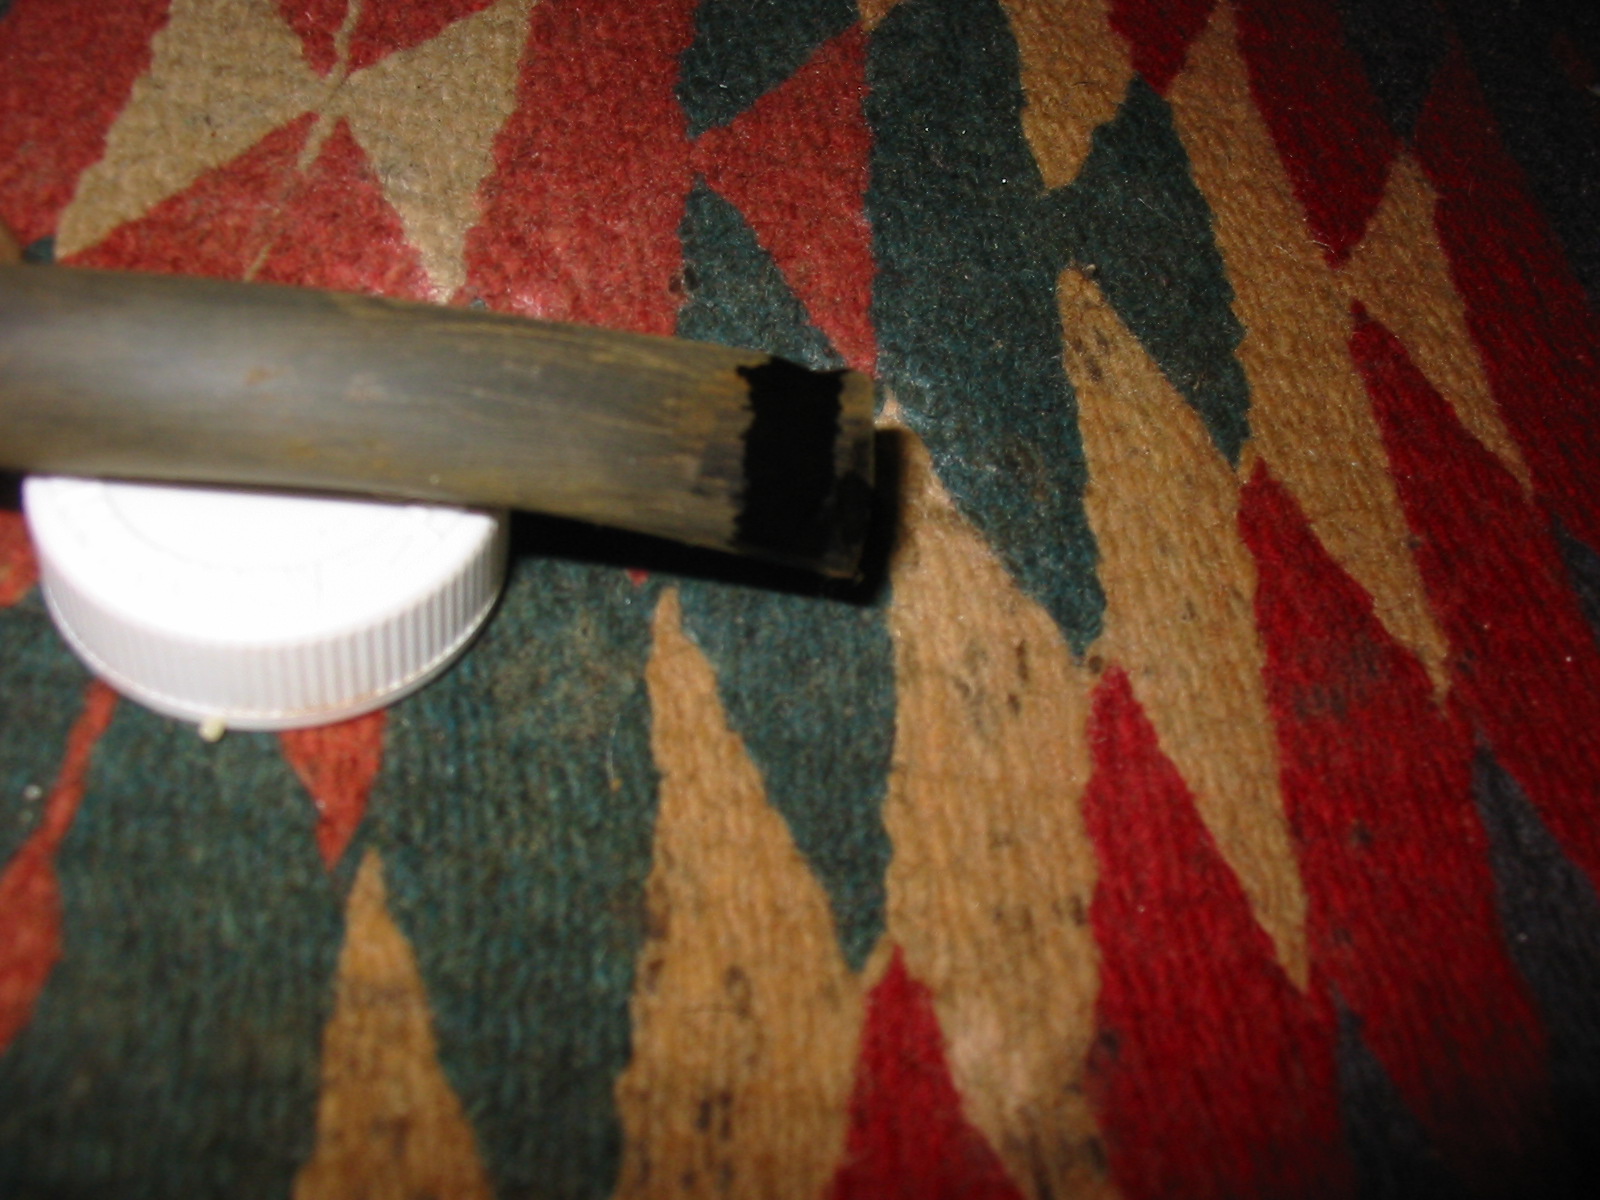
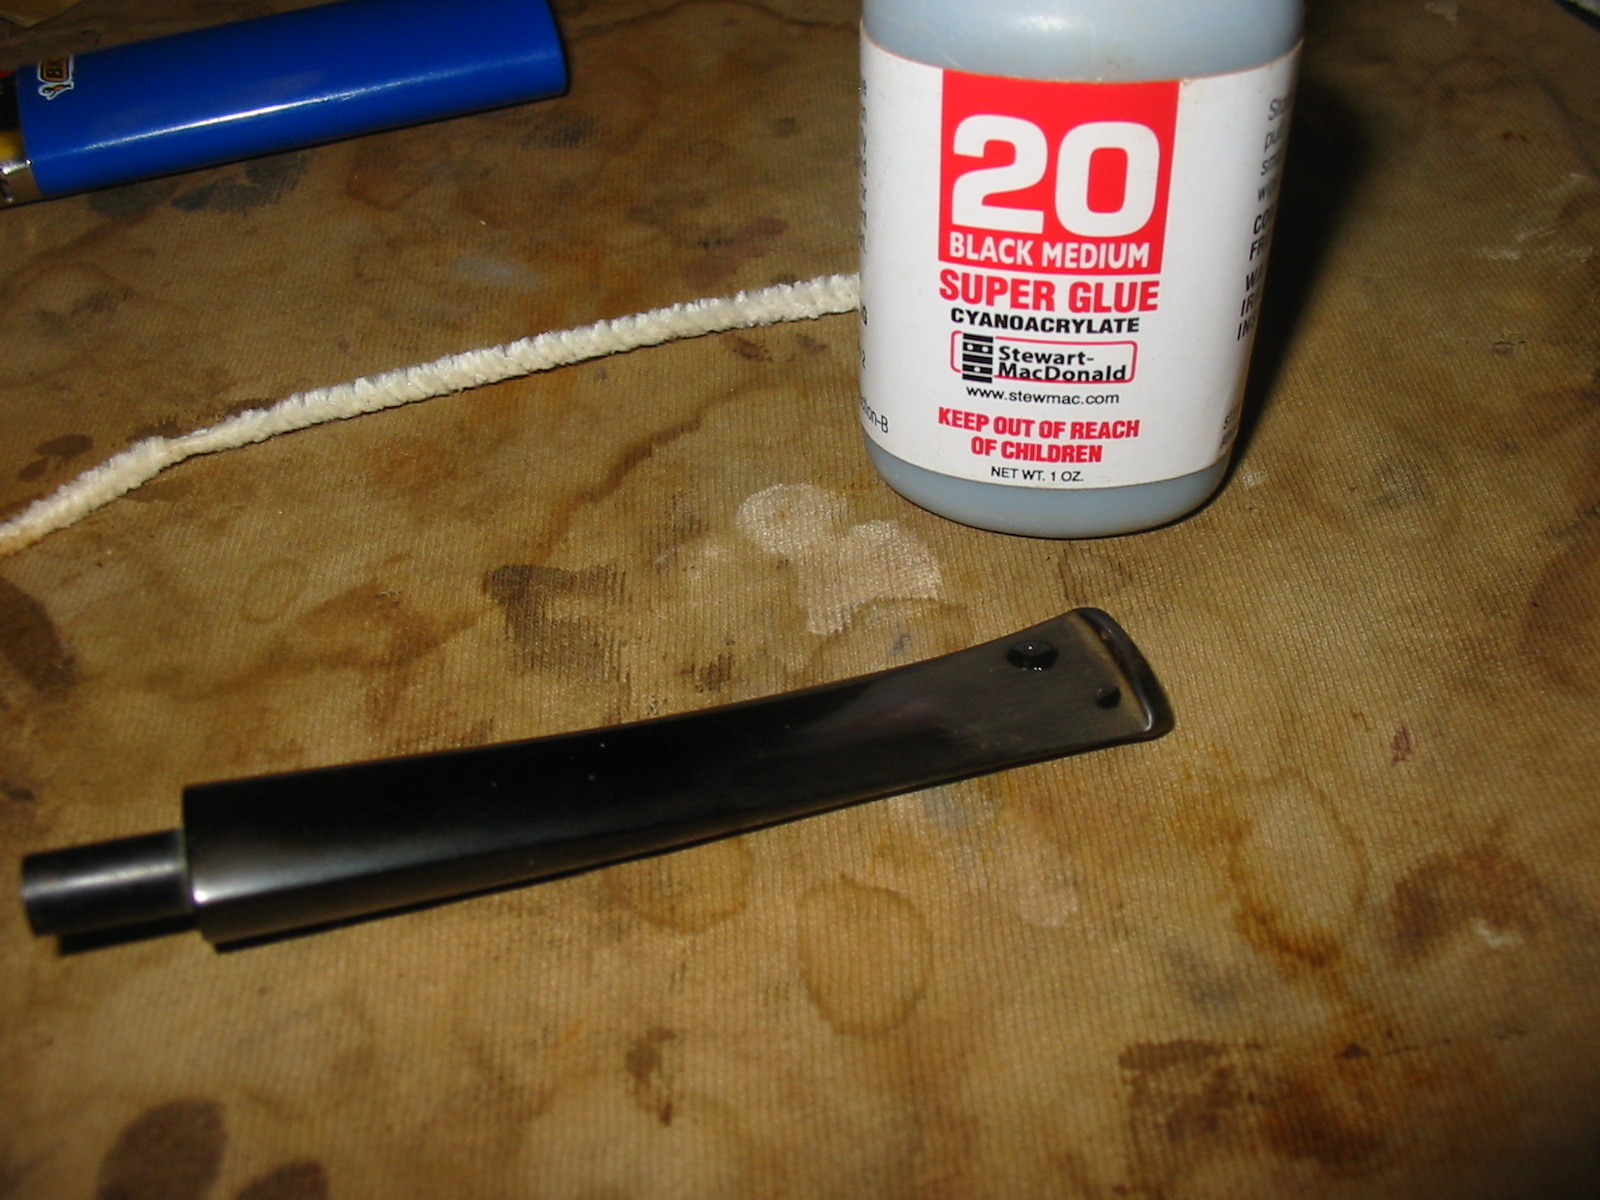
I wiped the sanded area of the stem down with Everclear on a cotton pad to clean the surface before using black superglue to repair the deepest bite mark and to also fix a small one to the right of it. The next two photos below show the drops of superglue on the surface of the stem. I set the stem aside for the glue to cure and went on to clean the bowl and rim.
IMG_3534

IMG_3533

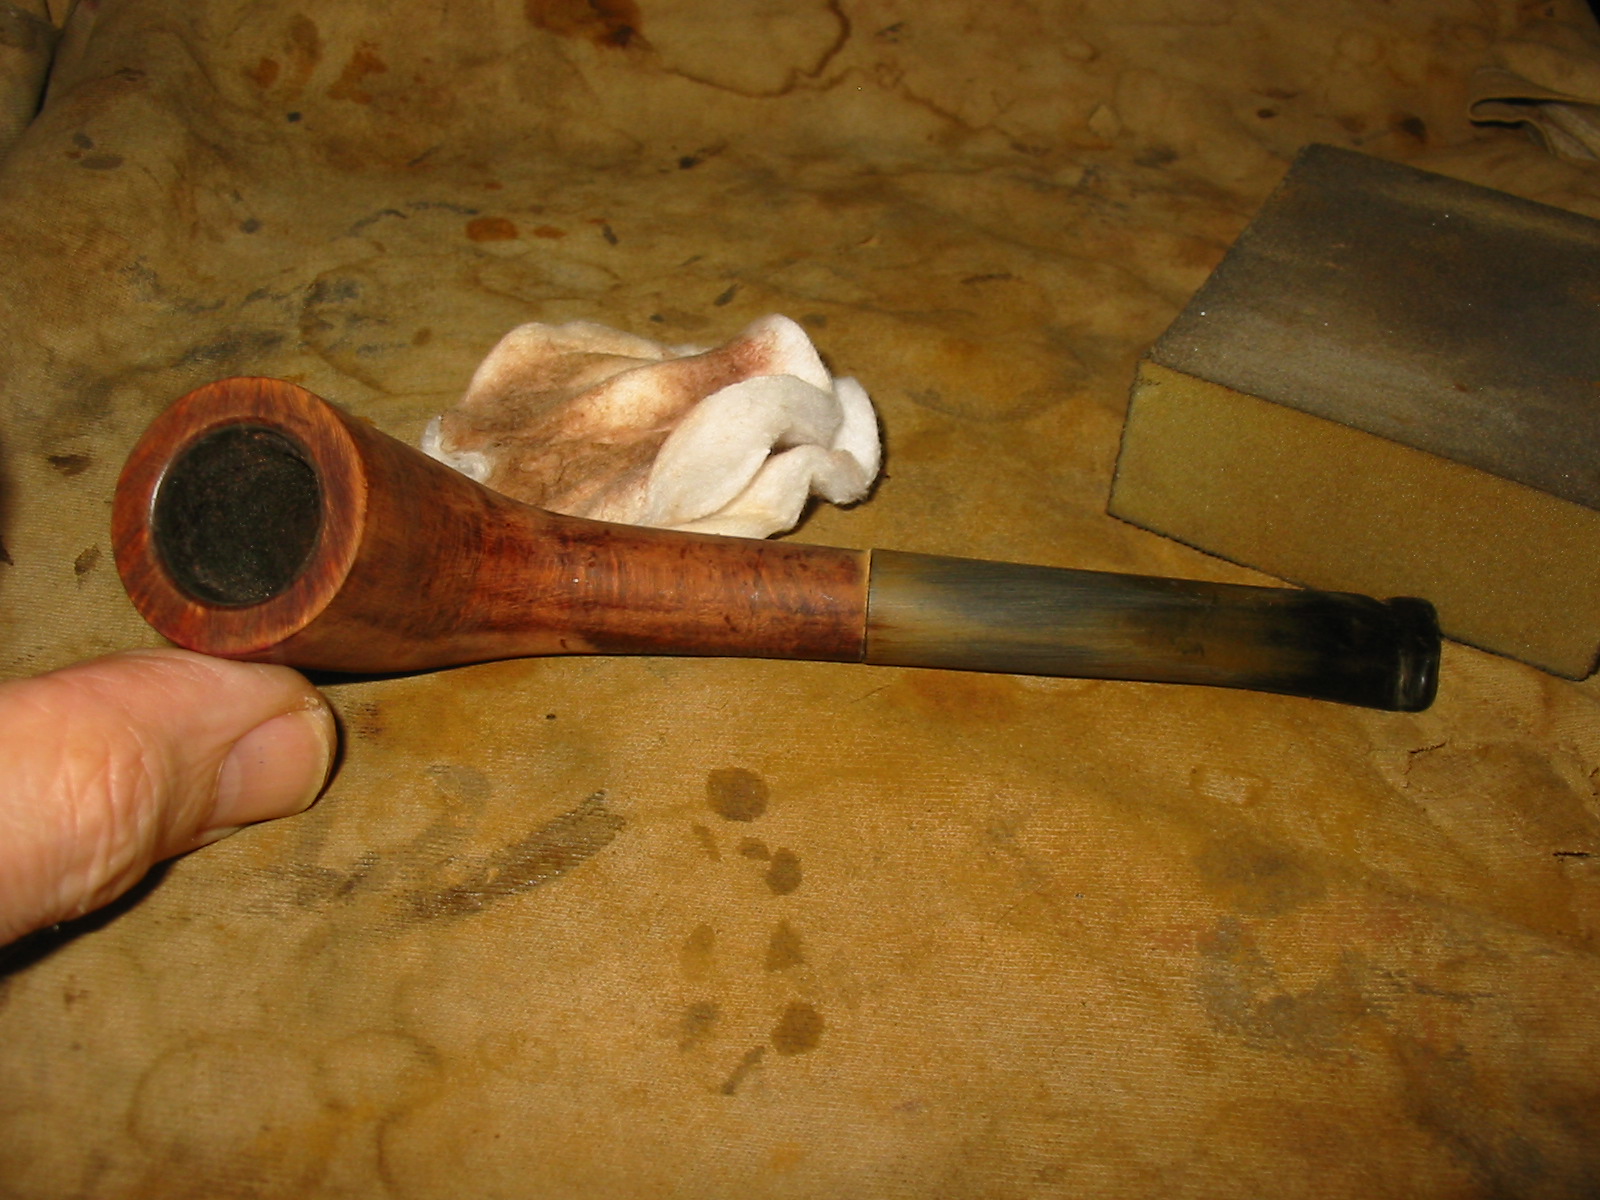
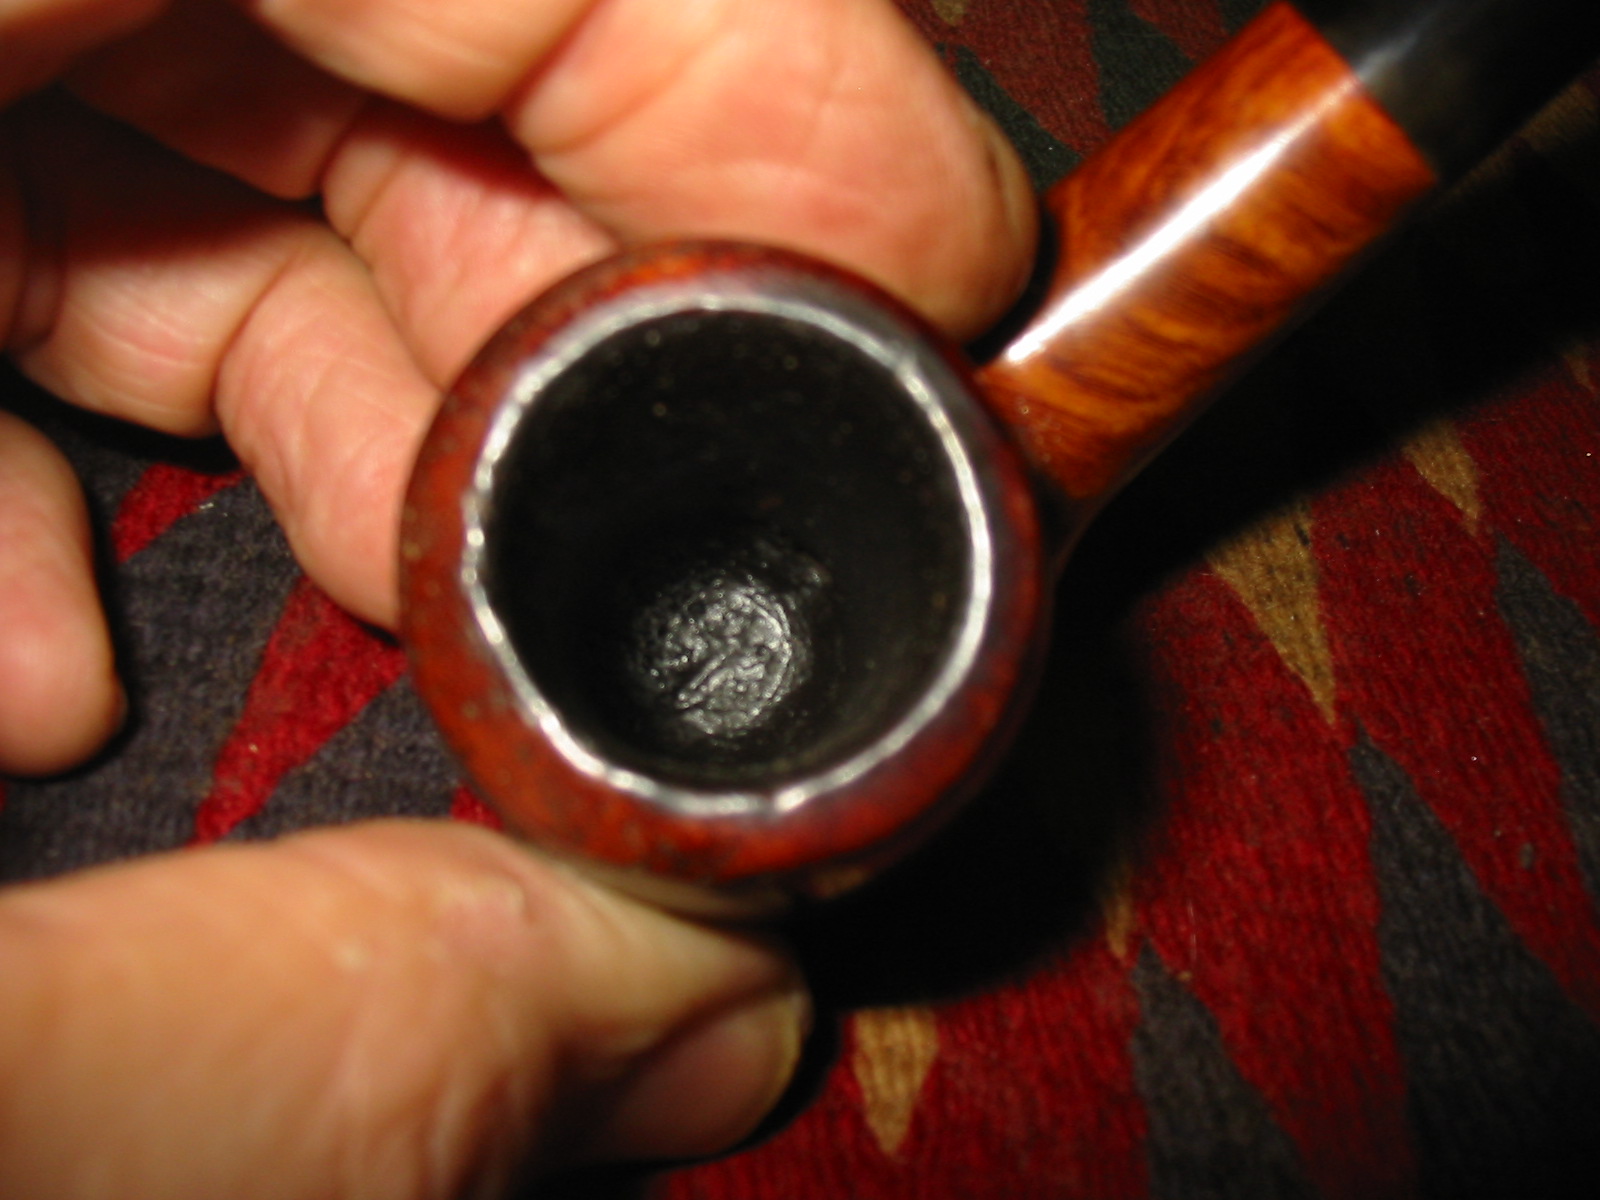
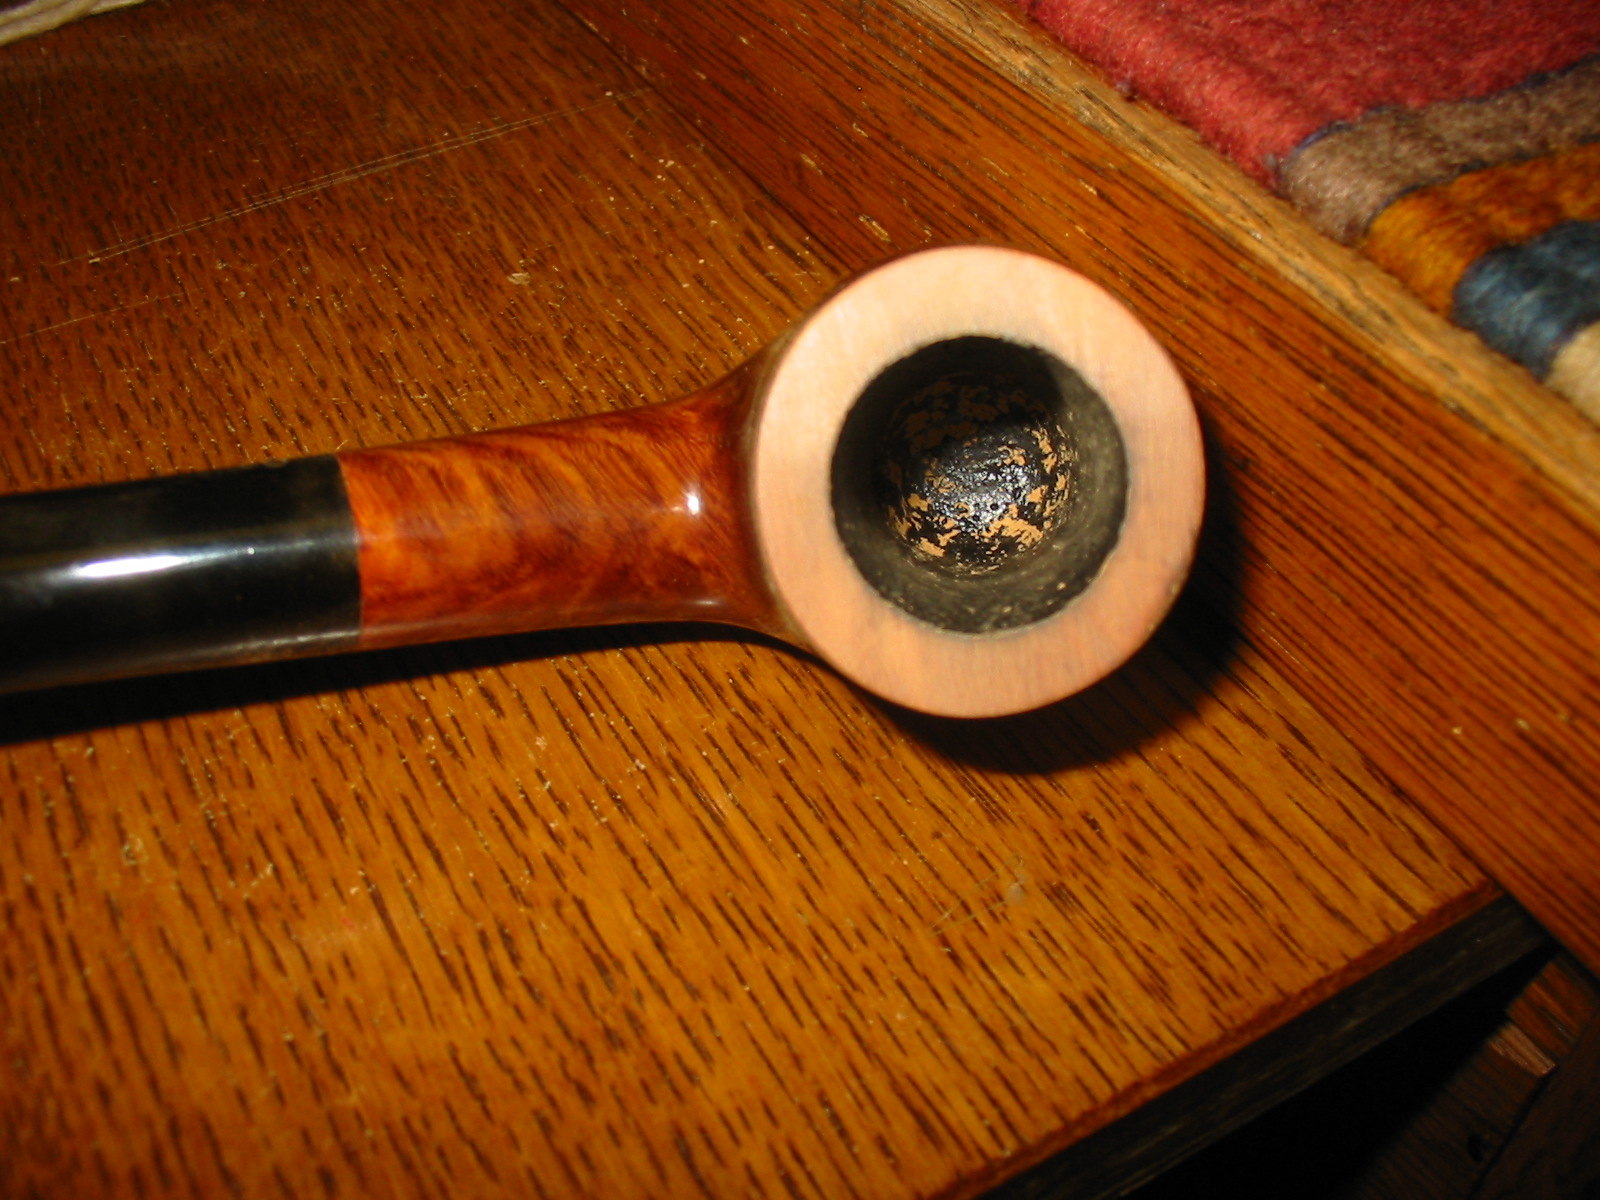
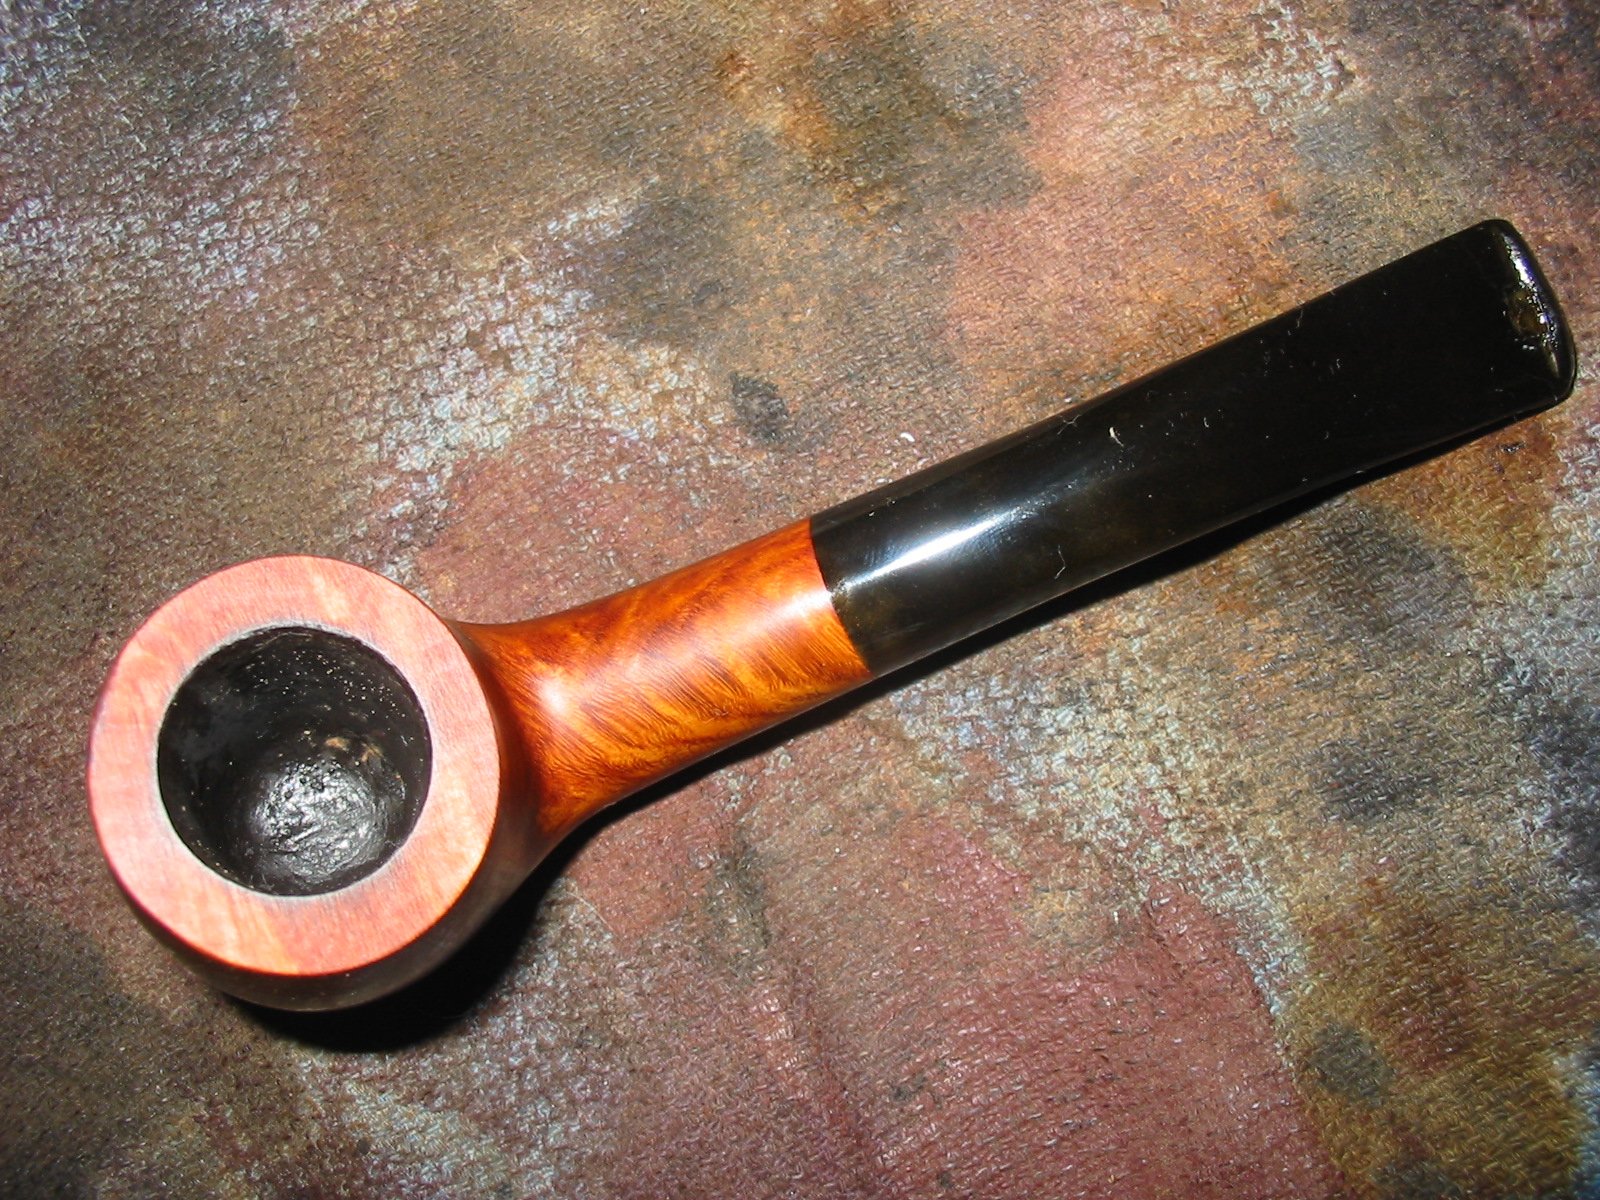
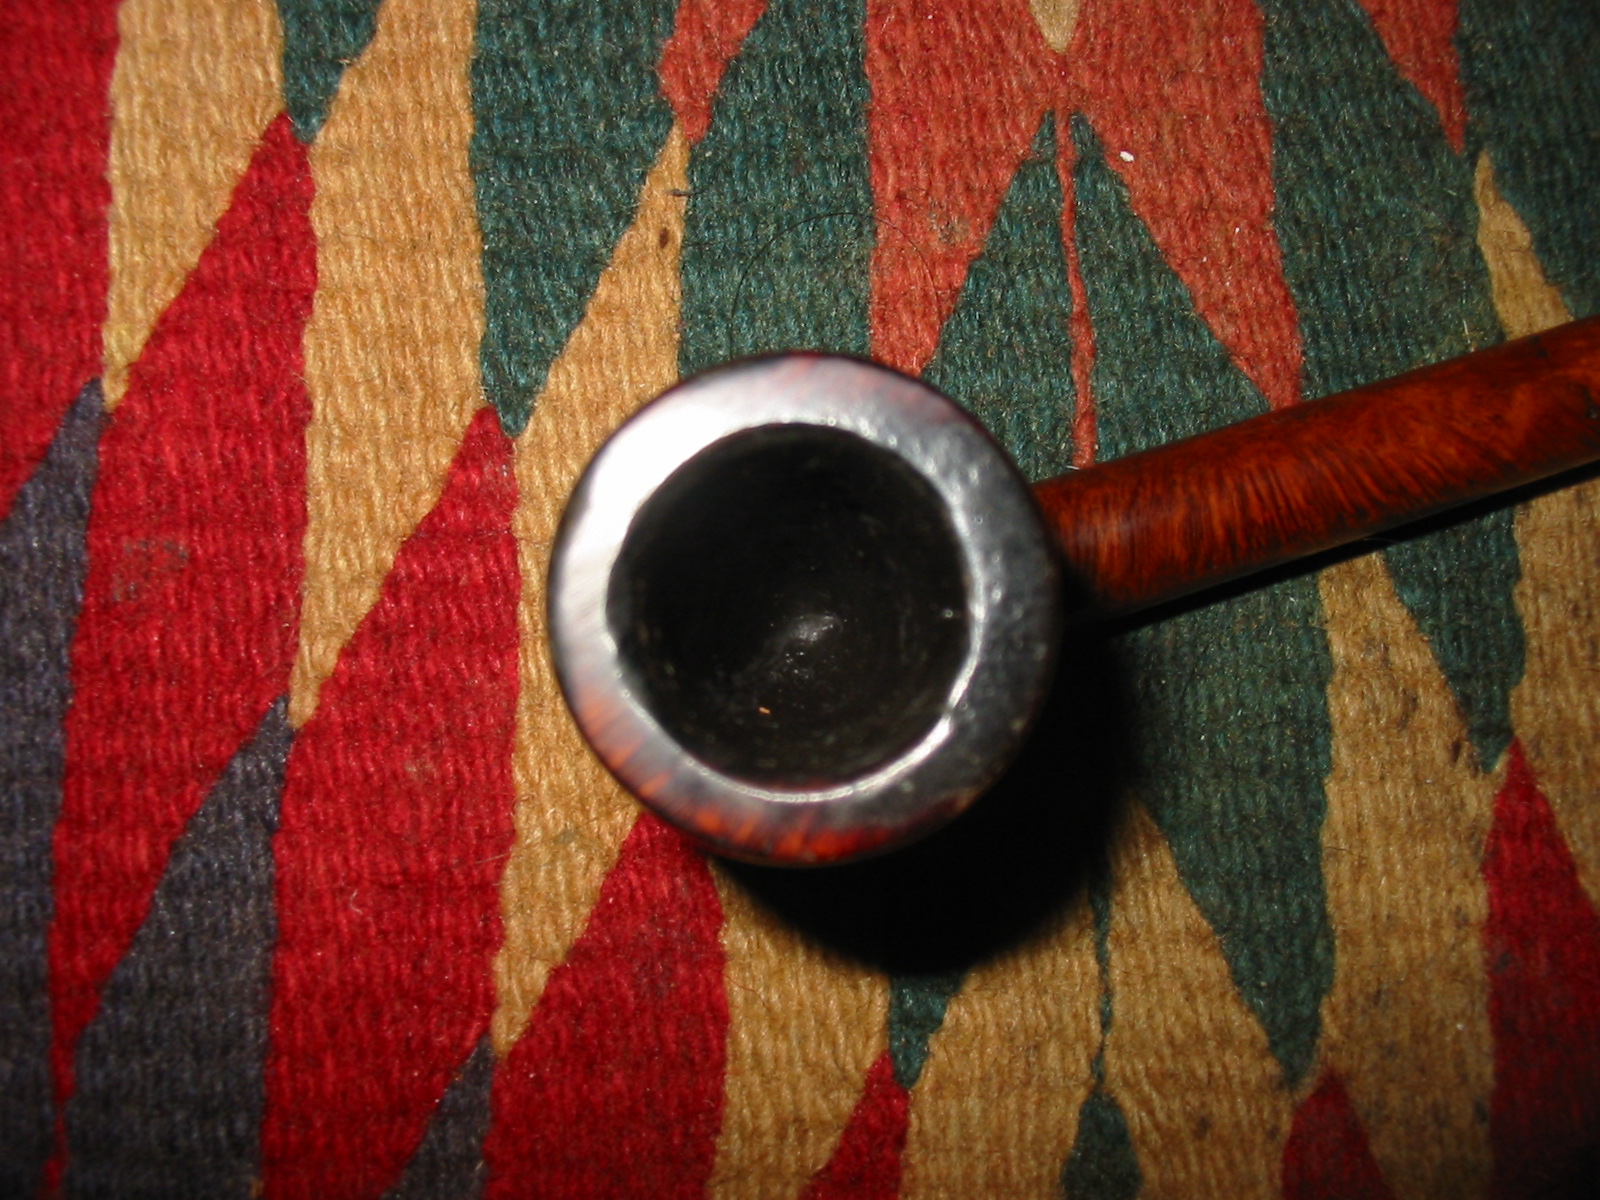
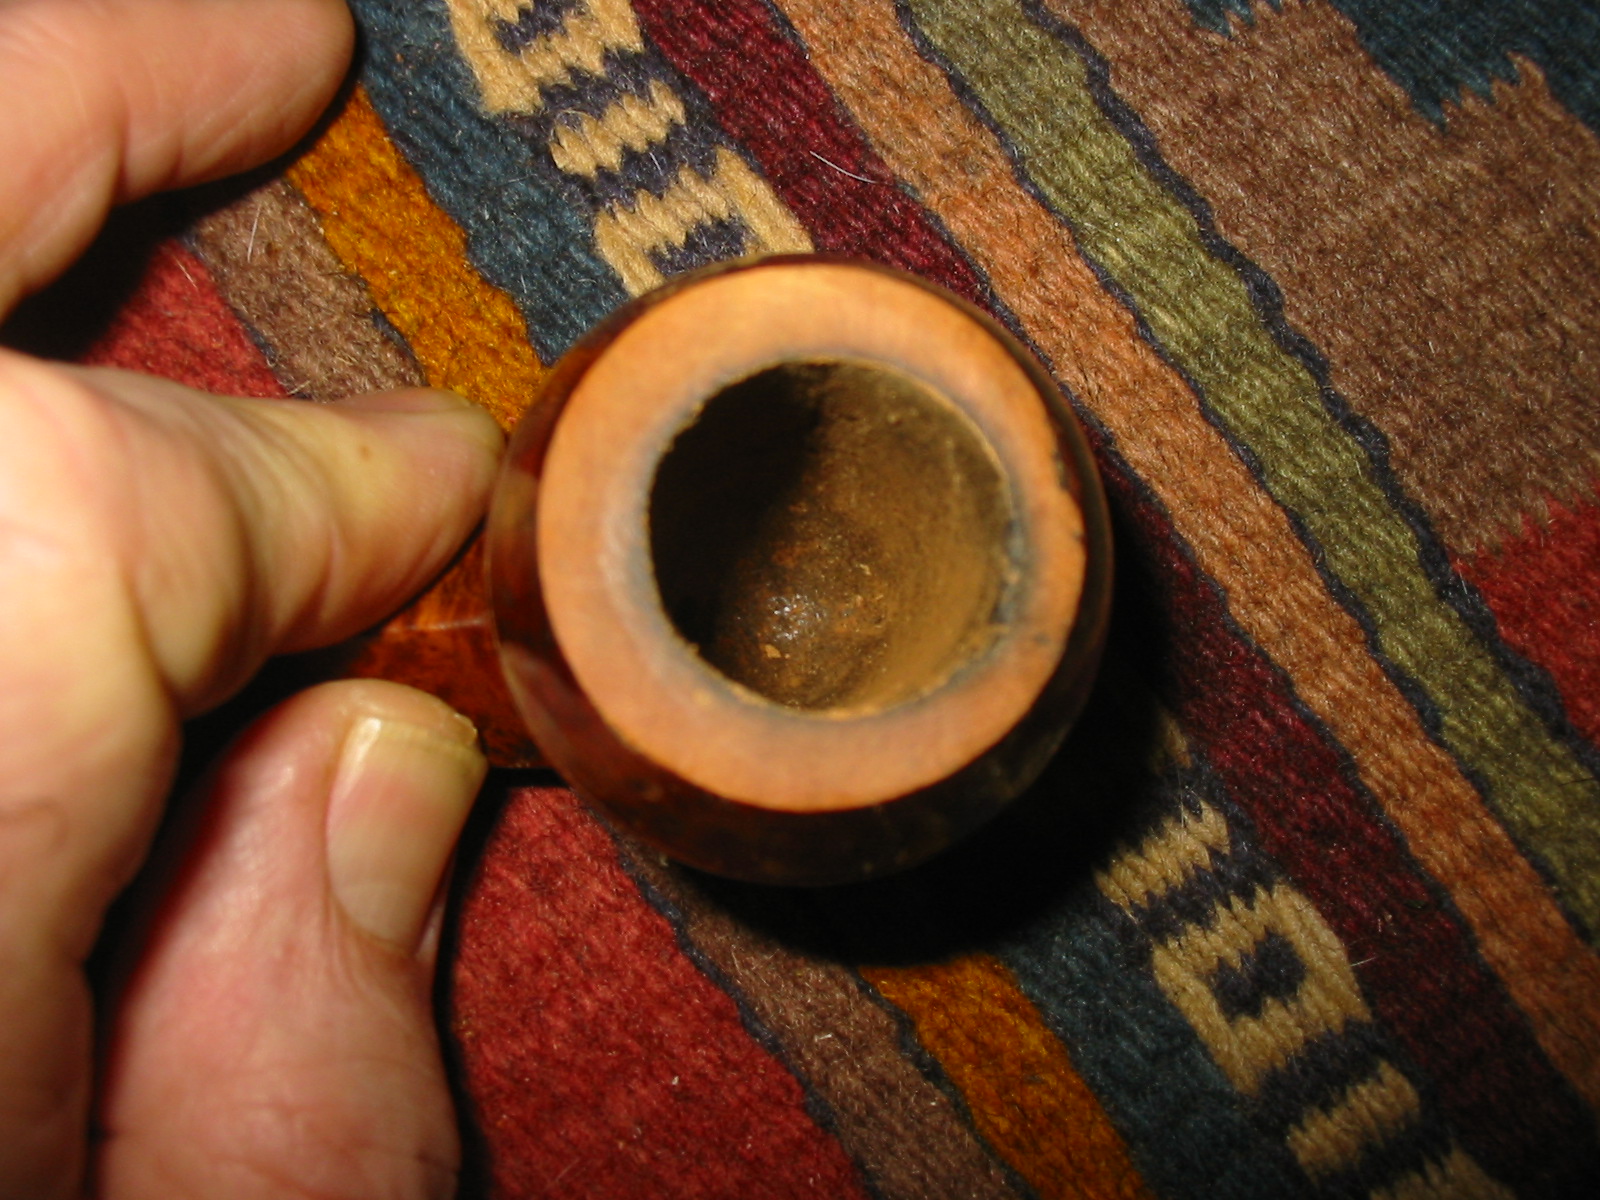
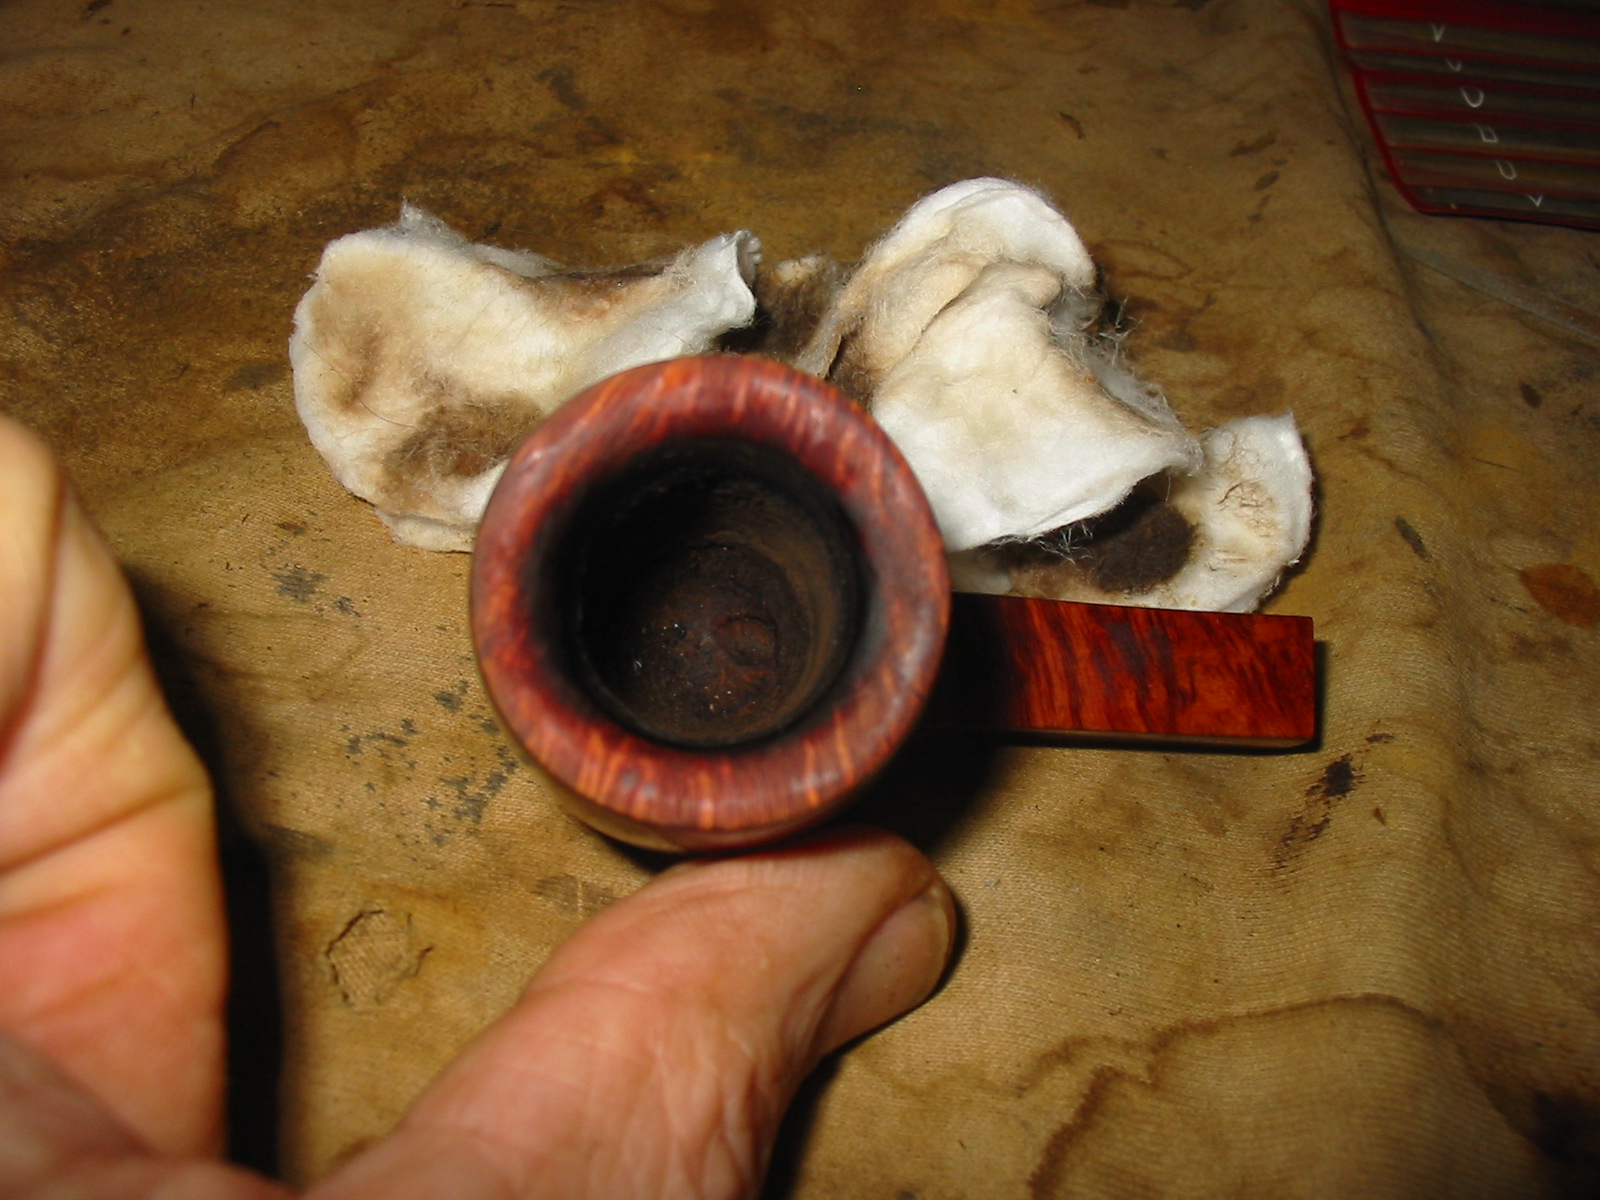
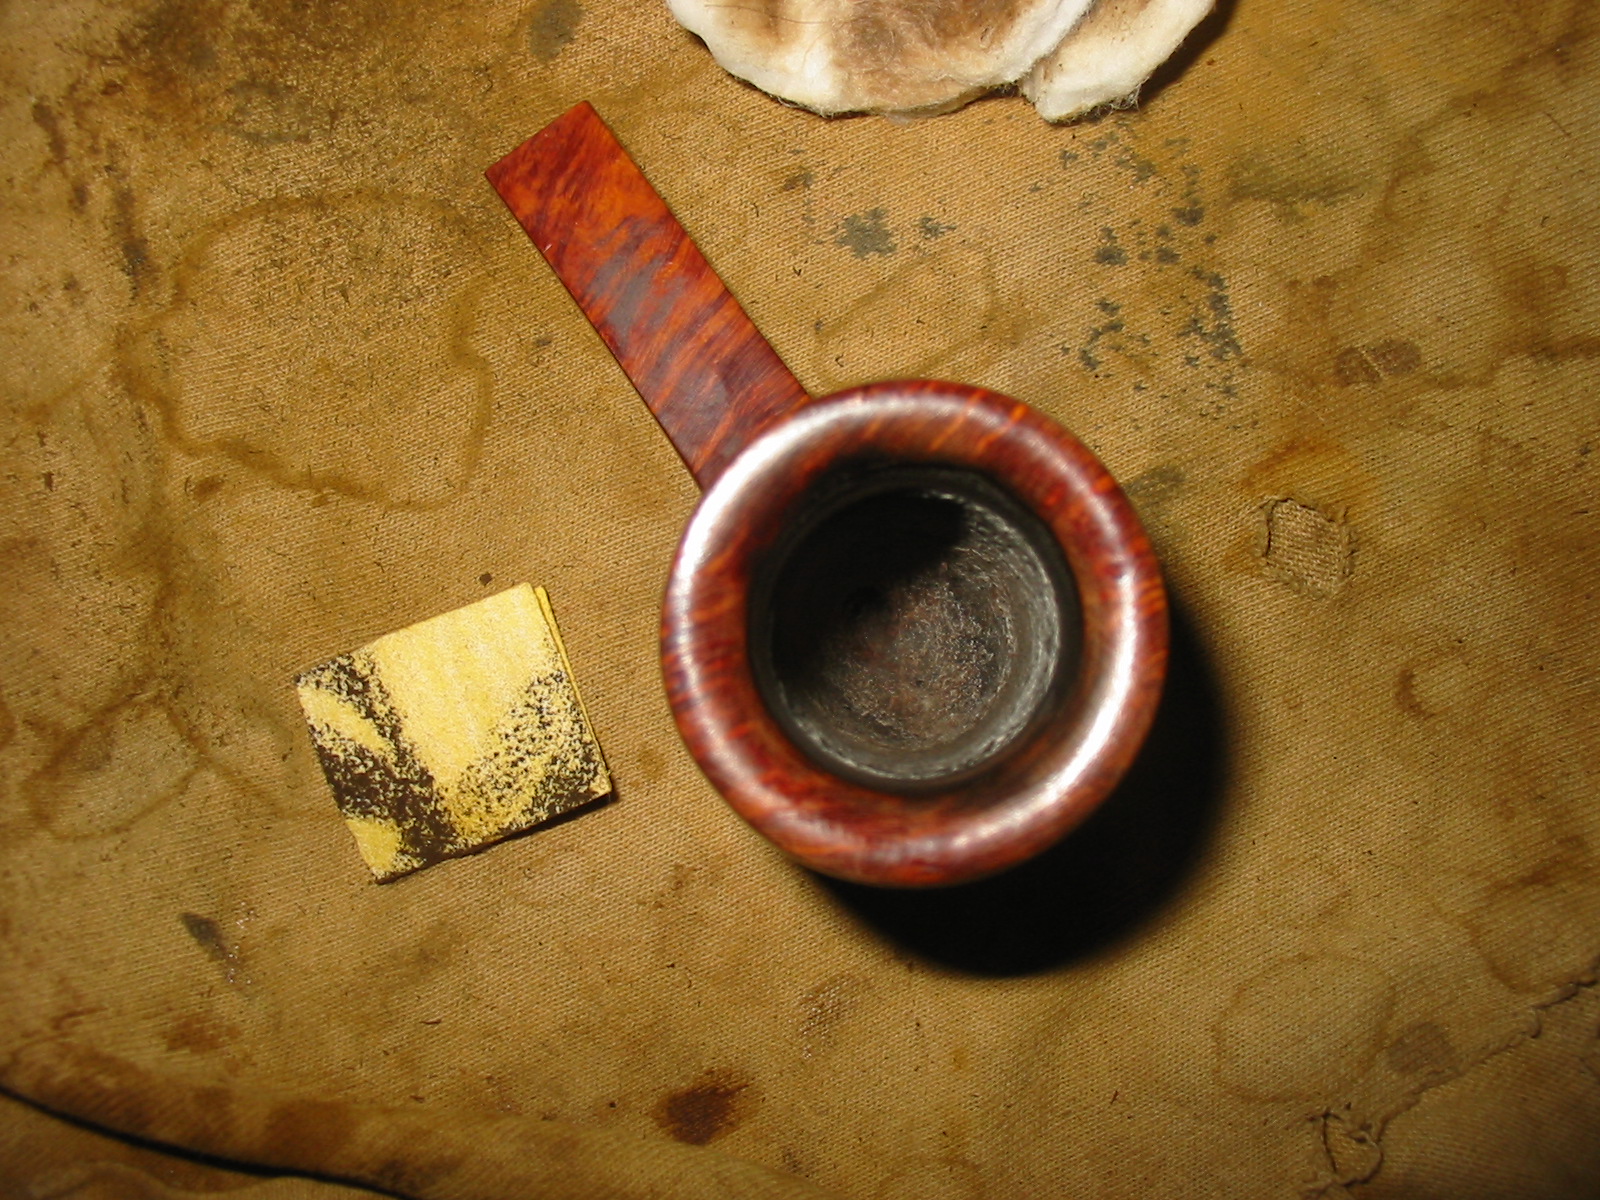
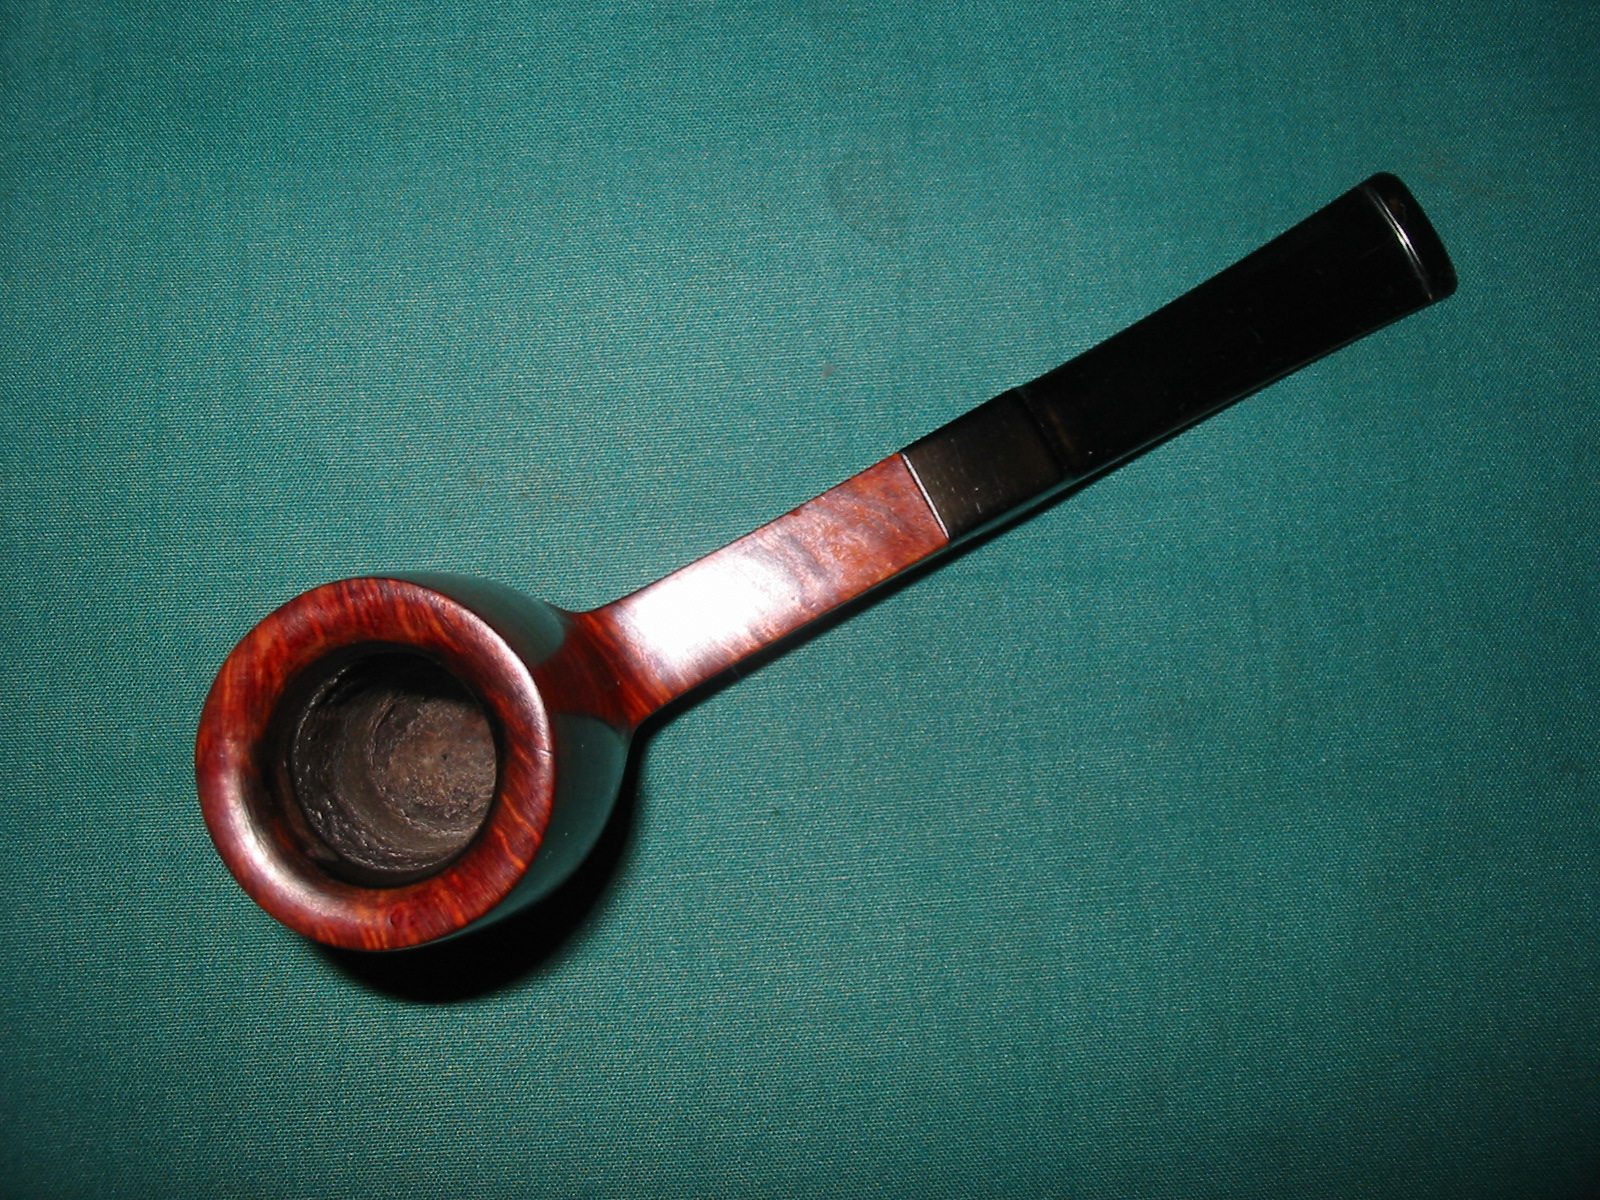
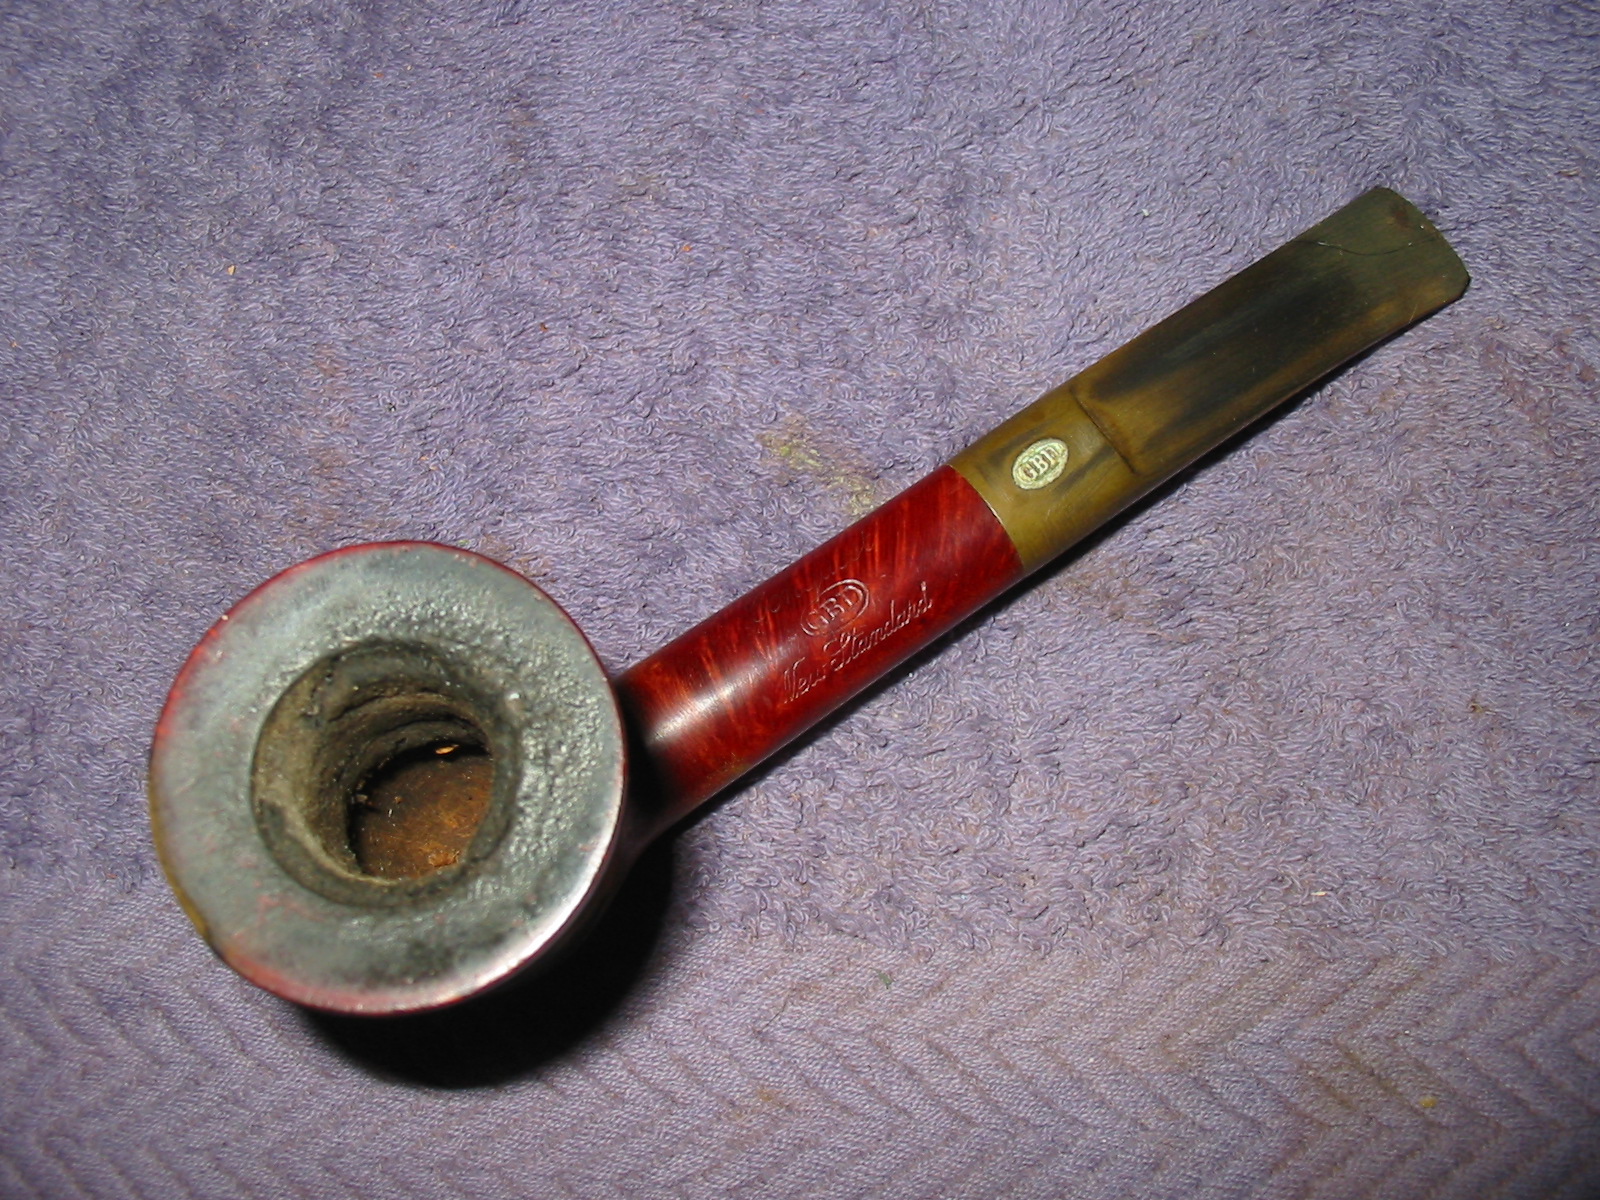
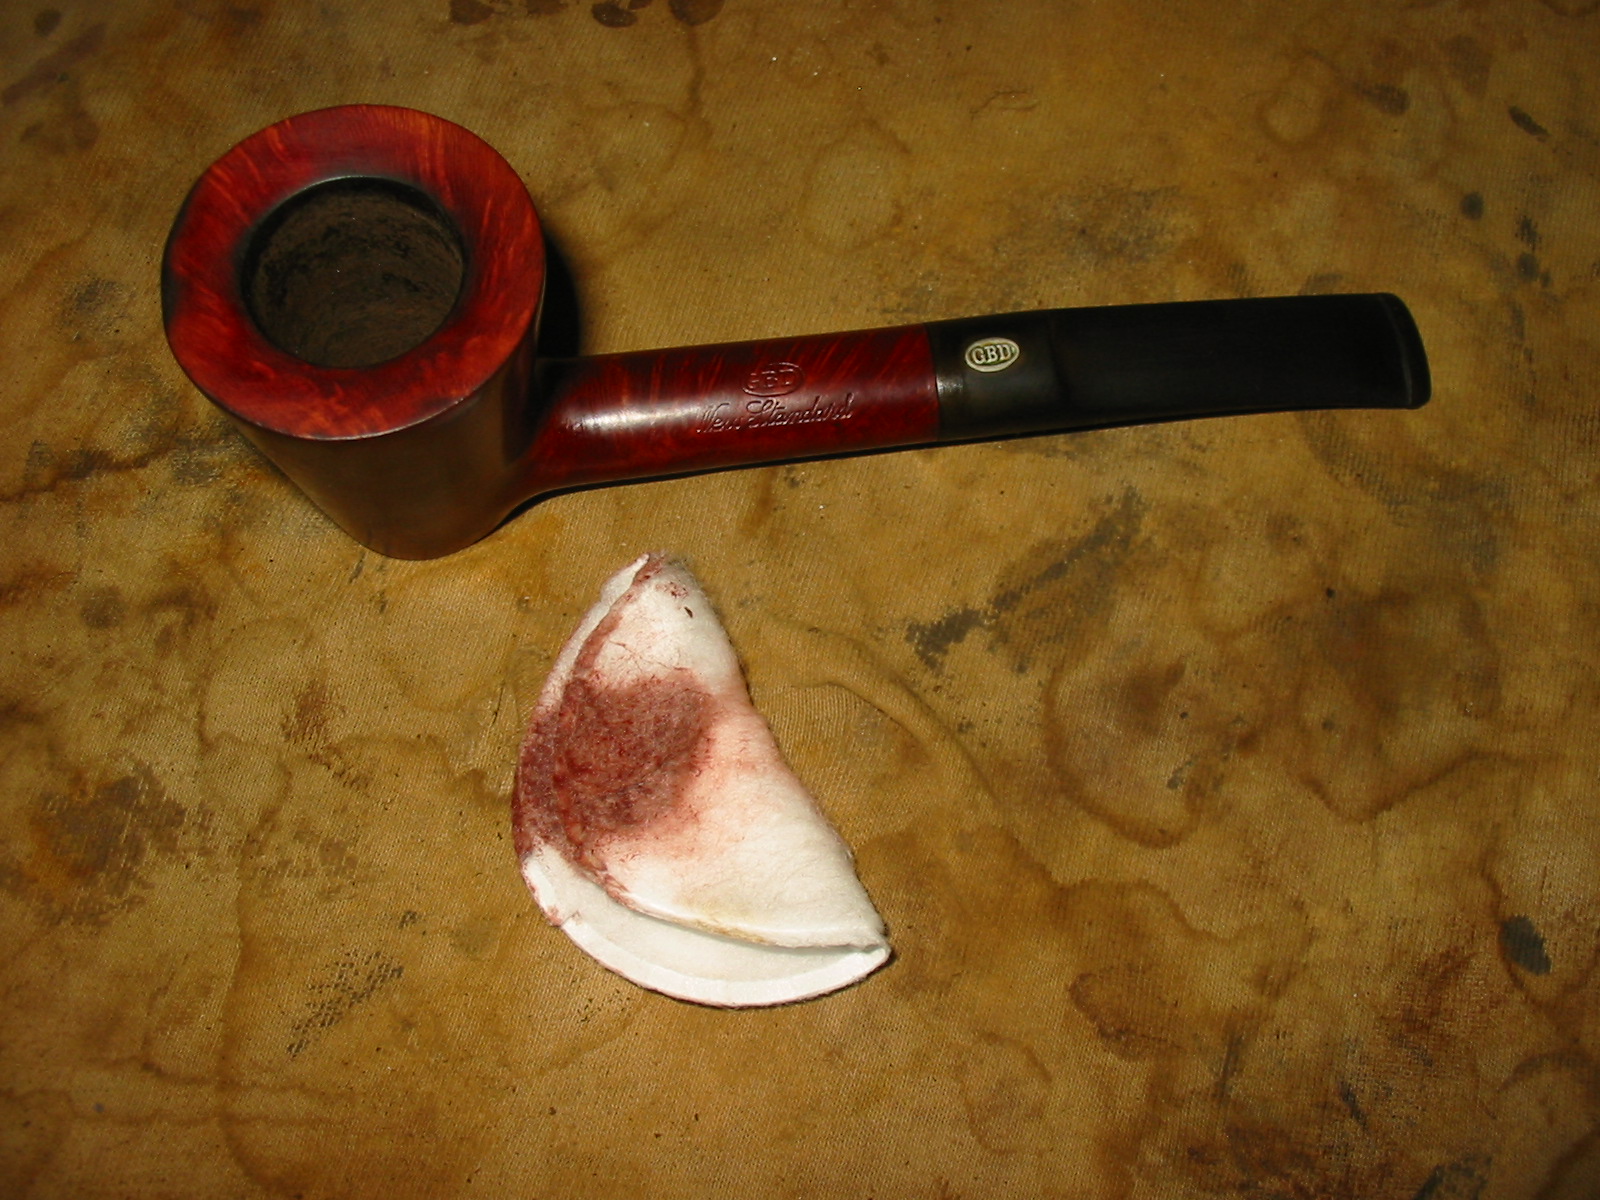
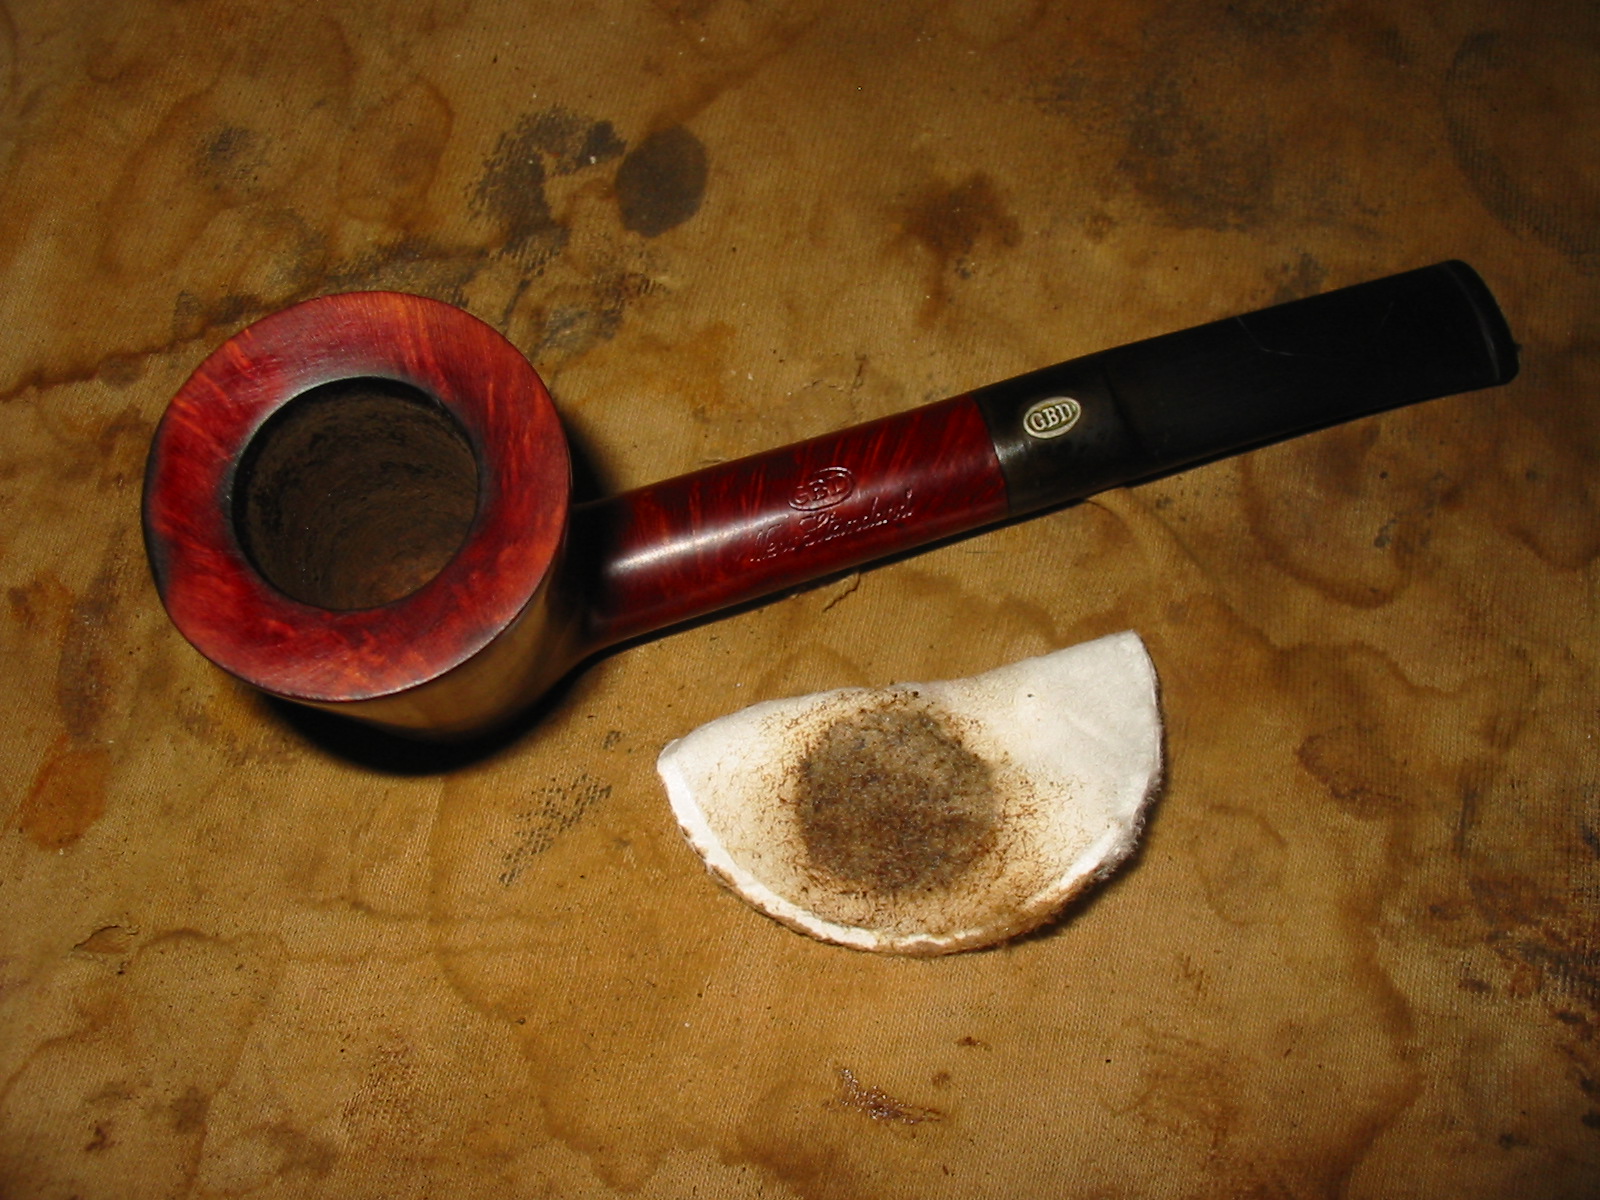
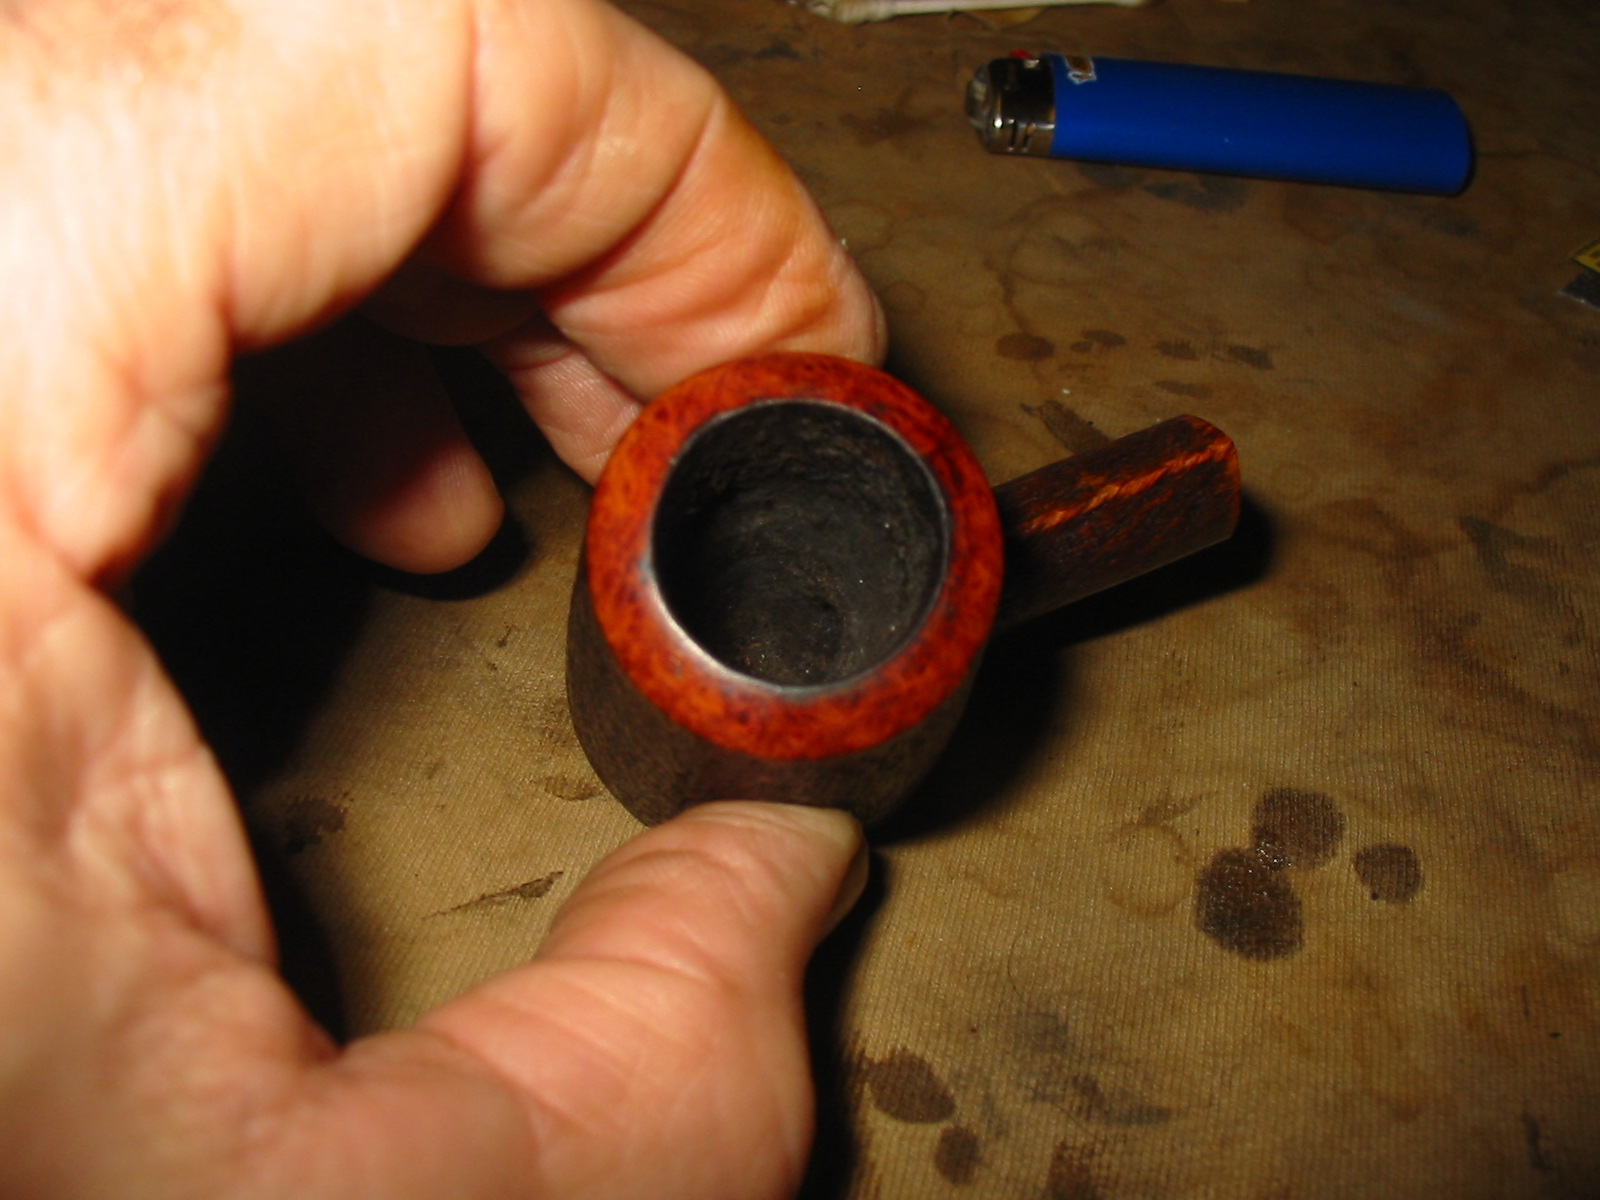
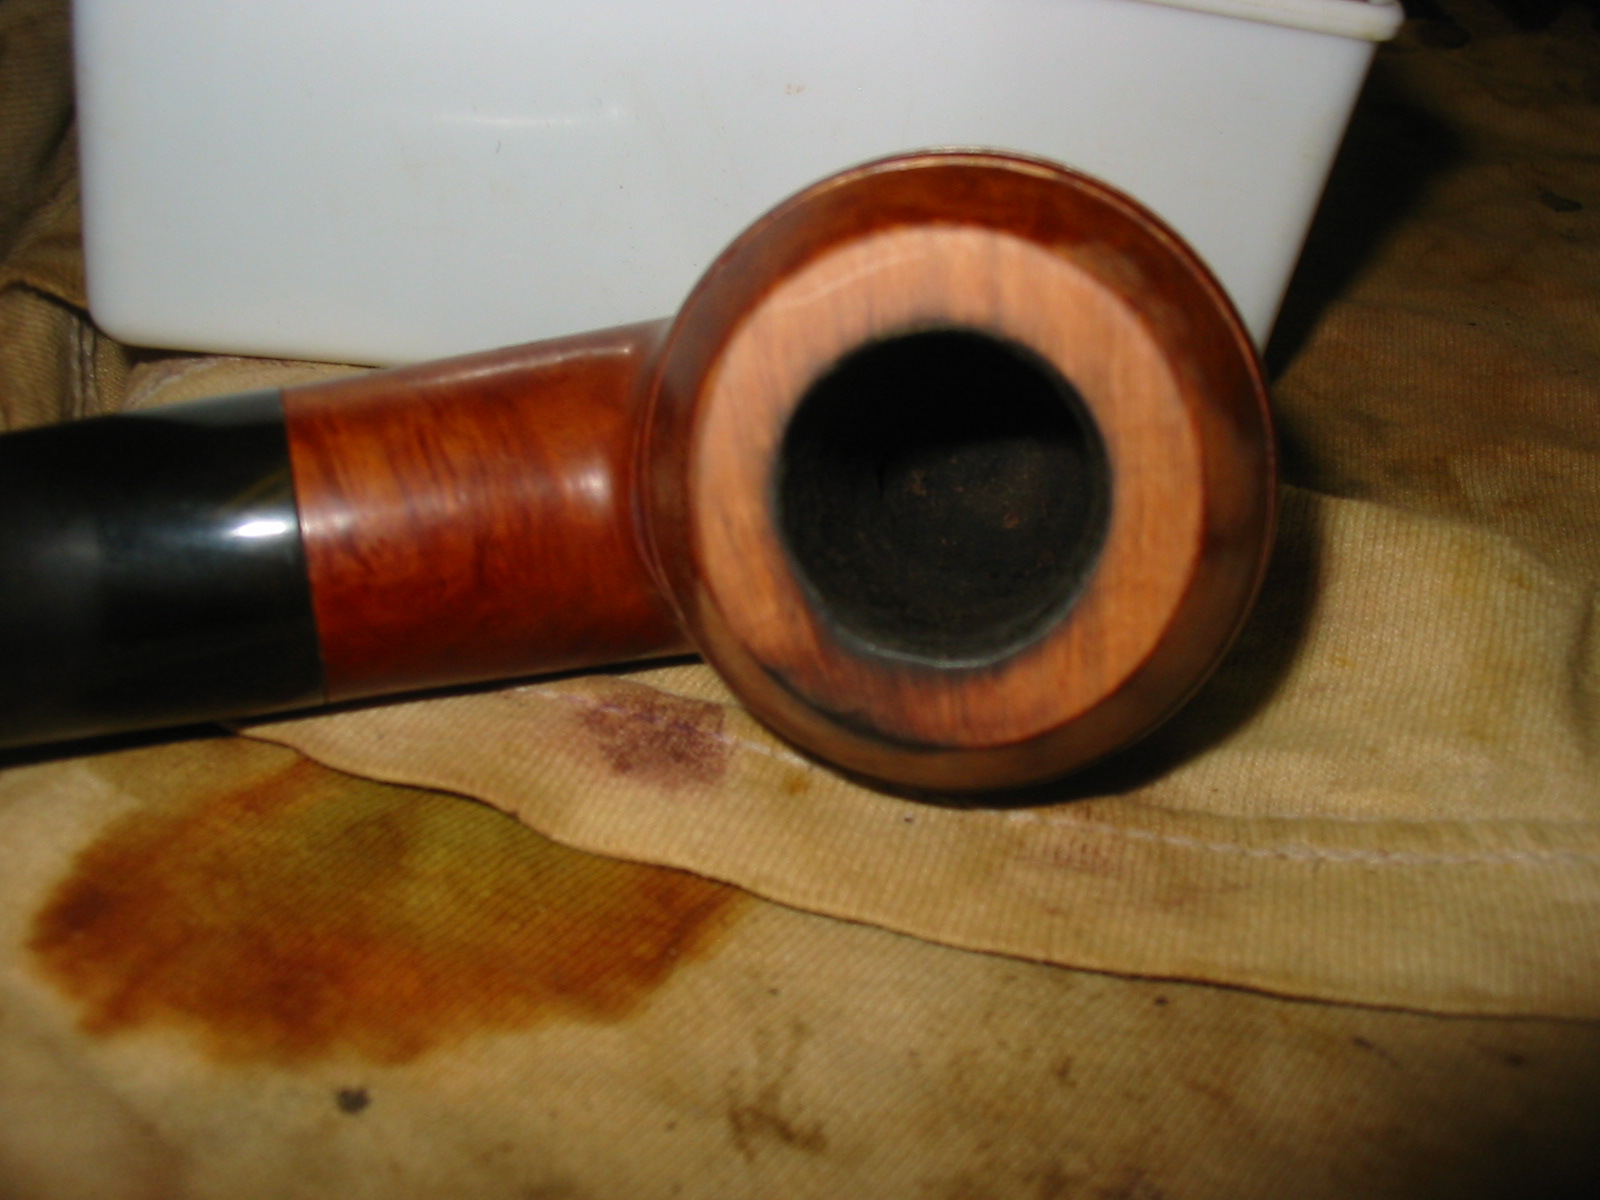
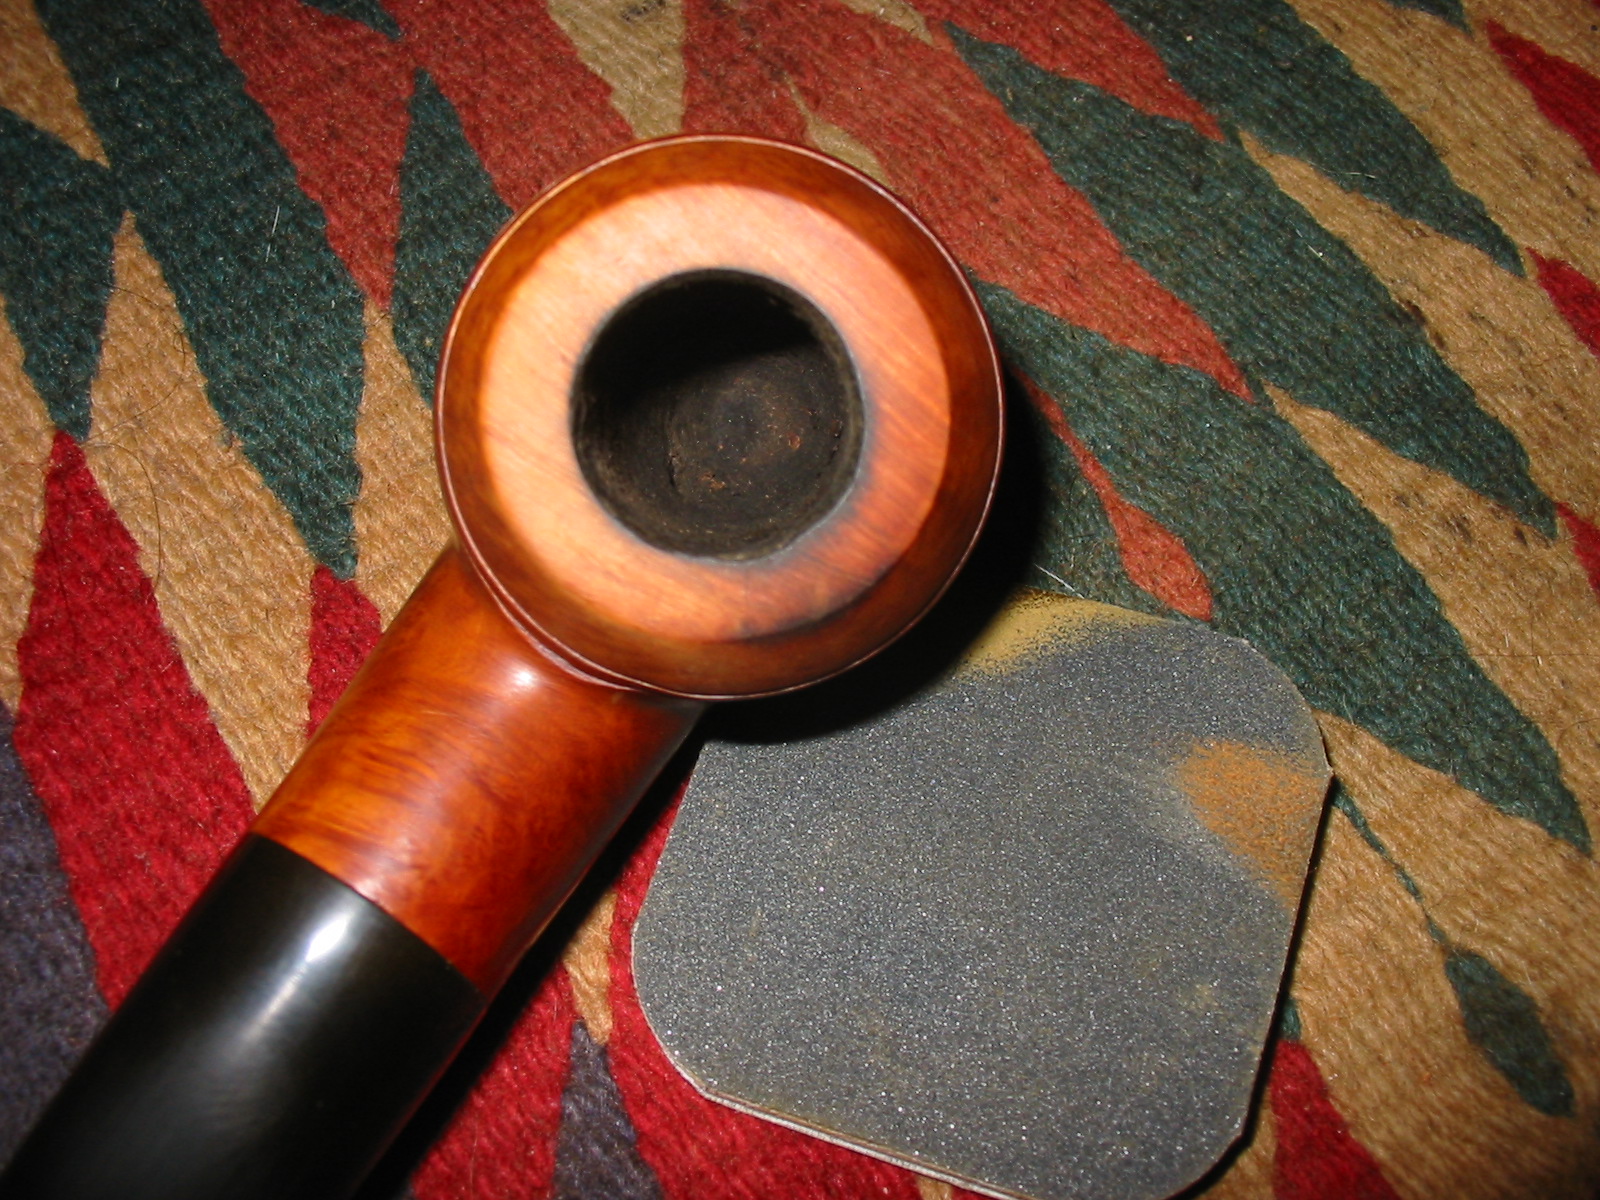
I scrubbed the tars on the rim with saliva on a cotton pad until they were gone. The photo below shows some of the buildup still remaining that took a bit more elbow grease to remove. I also wiped down the rest of the bowl with a damp cotton pad to remove grime and dust.
IMG_3535

IMG_3536

IMG_3537

IMG_3538

IMG_3539

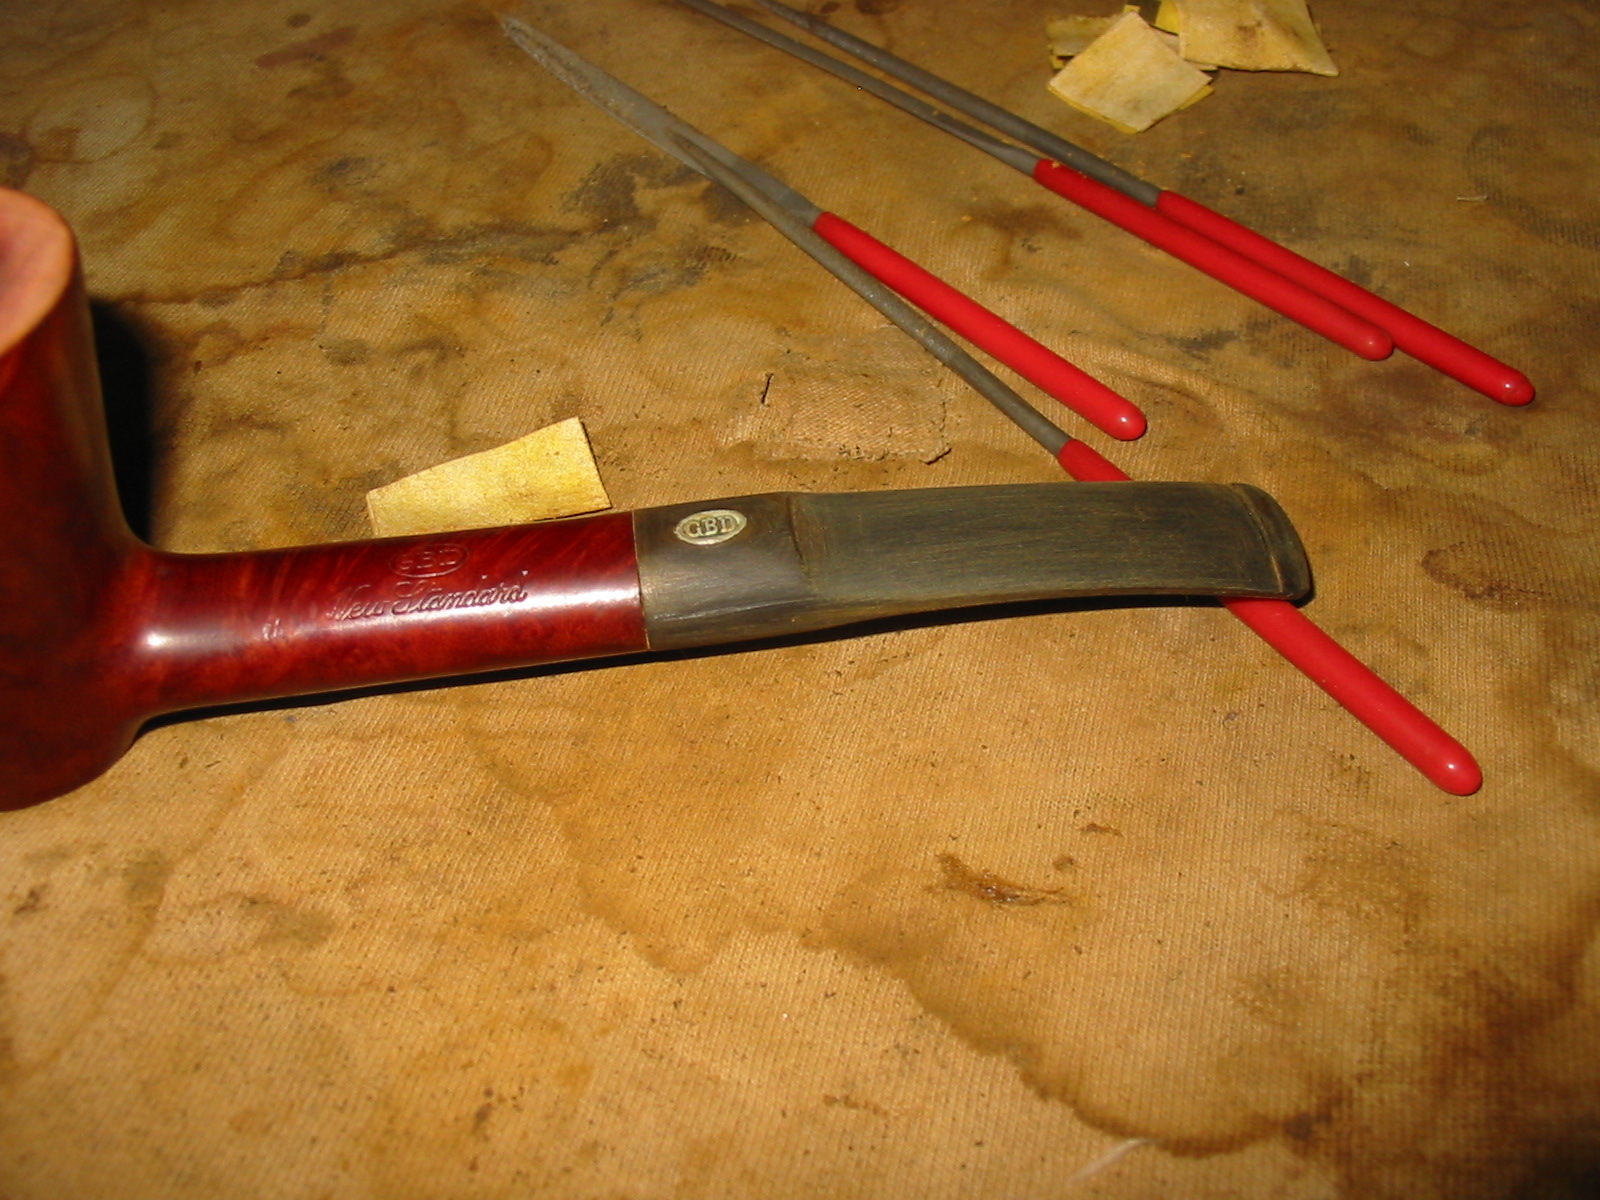
I cleaned out the shank with cotton swabs, pipe cleaners and Everclear to remove tars and oils left behind by smoking. I reinserted the stem in the shank and set the pipe down to continue to dry. There were two small marks left behind after I had sanded the top of the stem so I used the black superglue on them as well and set the pipe to rest on a dental pick while the glue on both sides of the stem dried.
IMG_3544

IMG_3545

IMG_3546

IMG_3547

IMG_3548

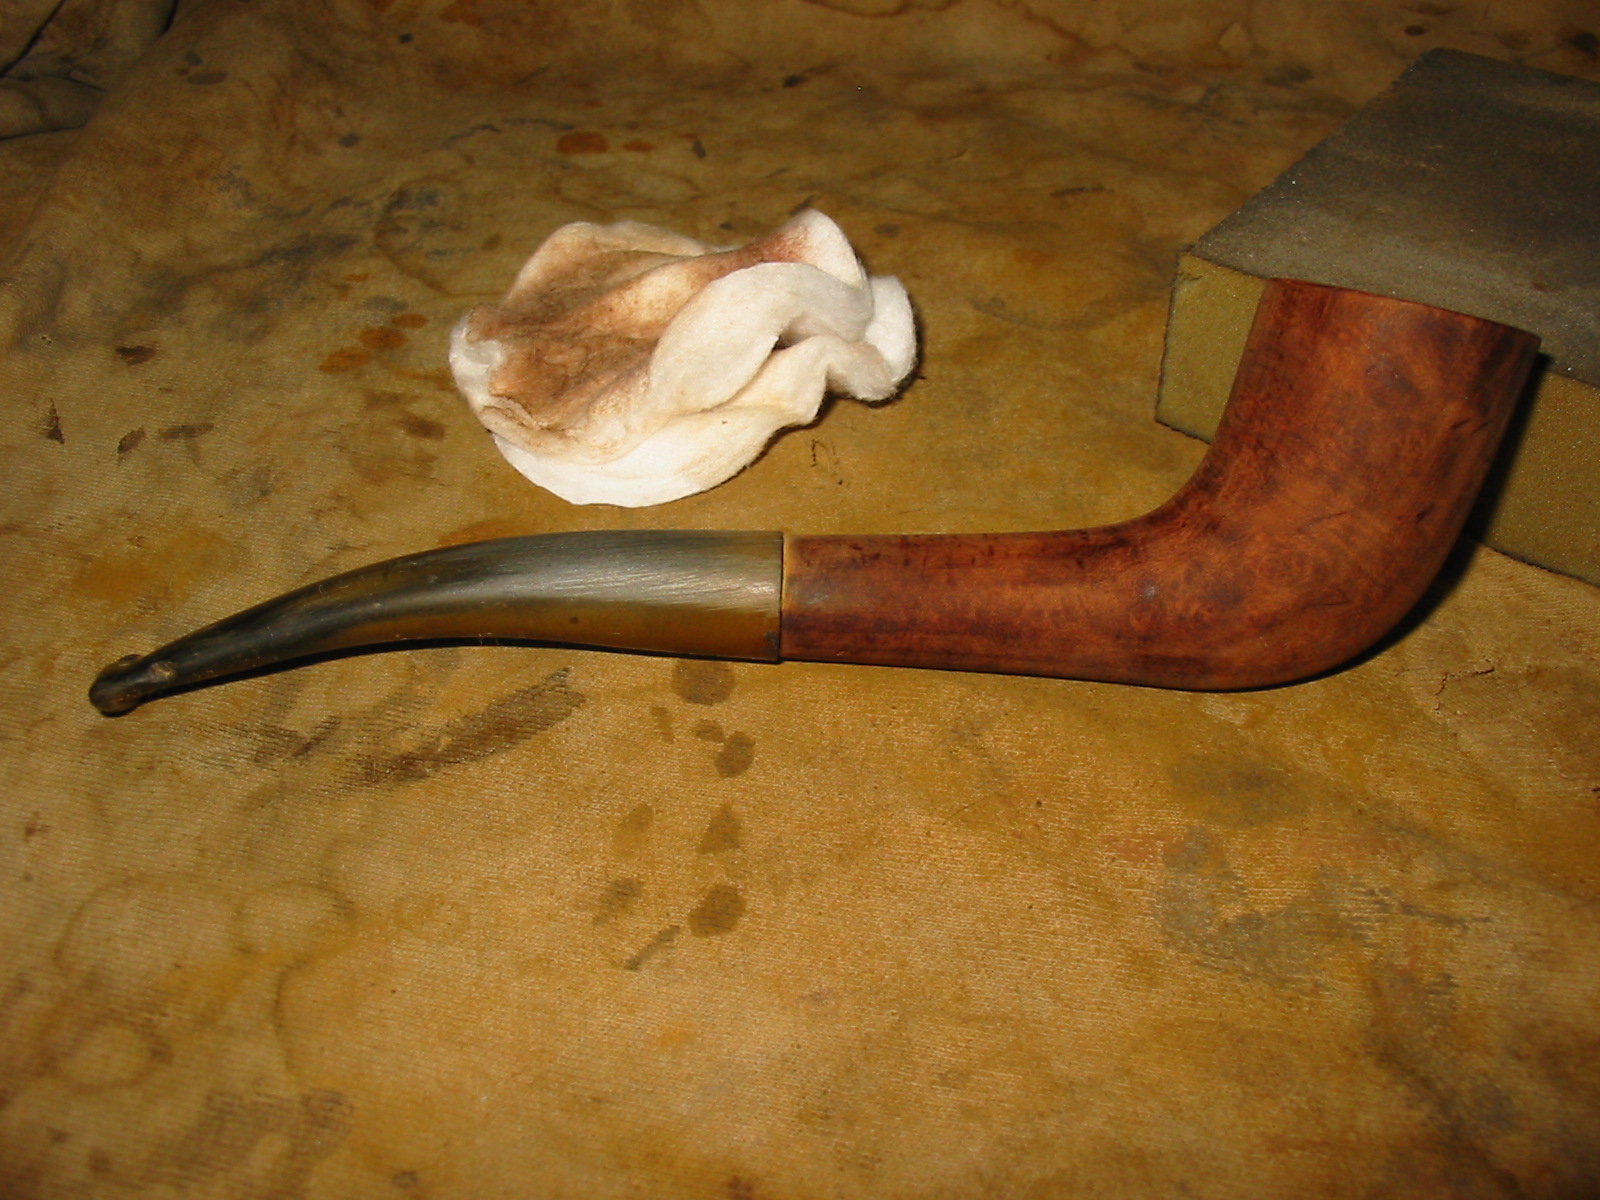
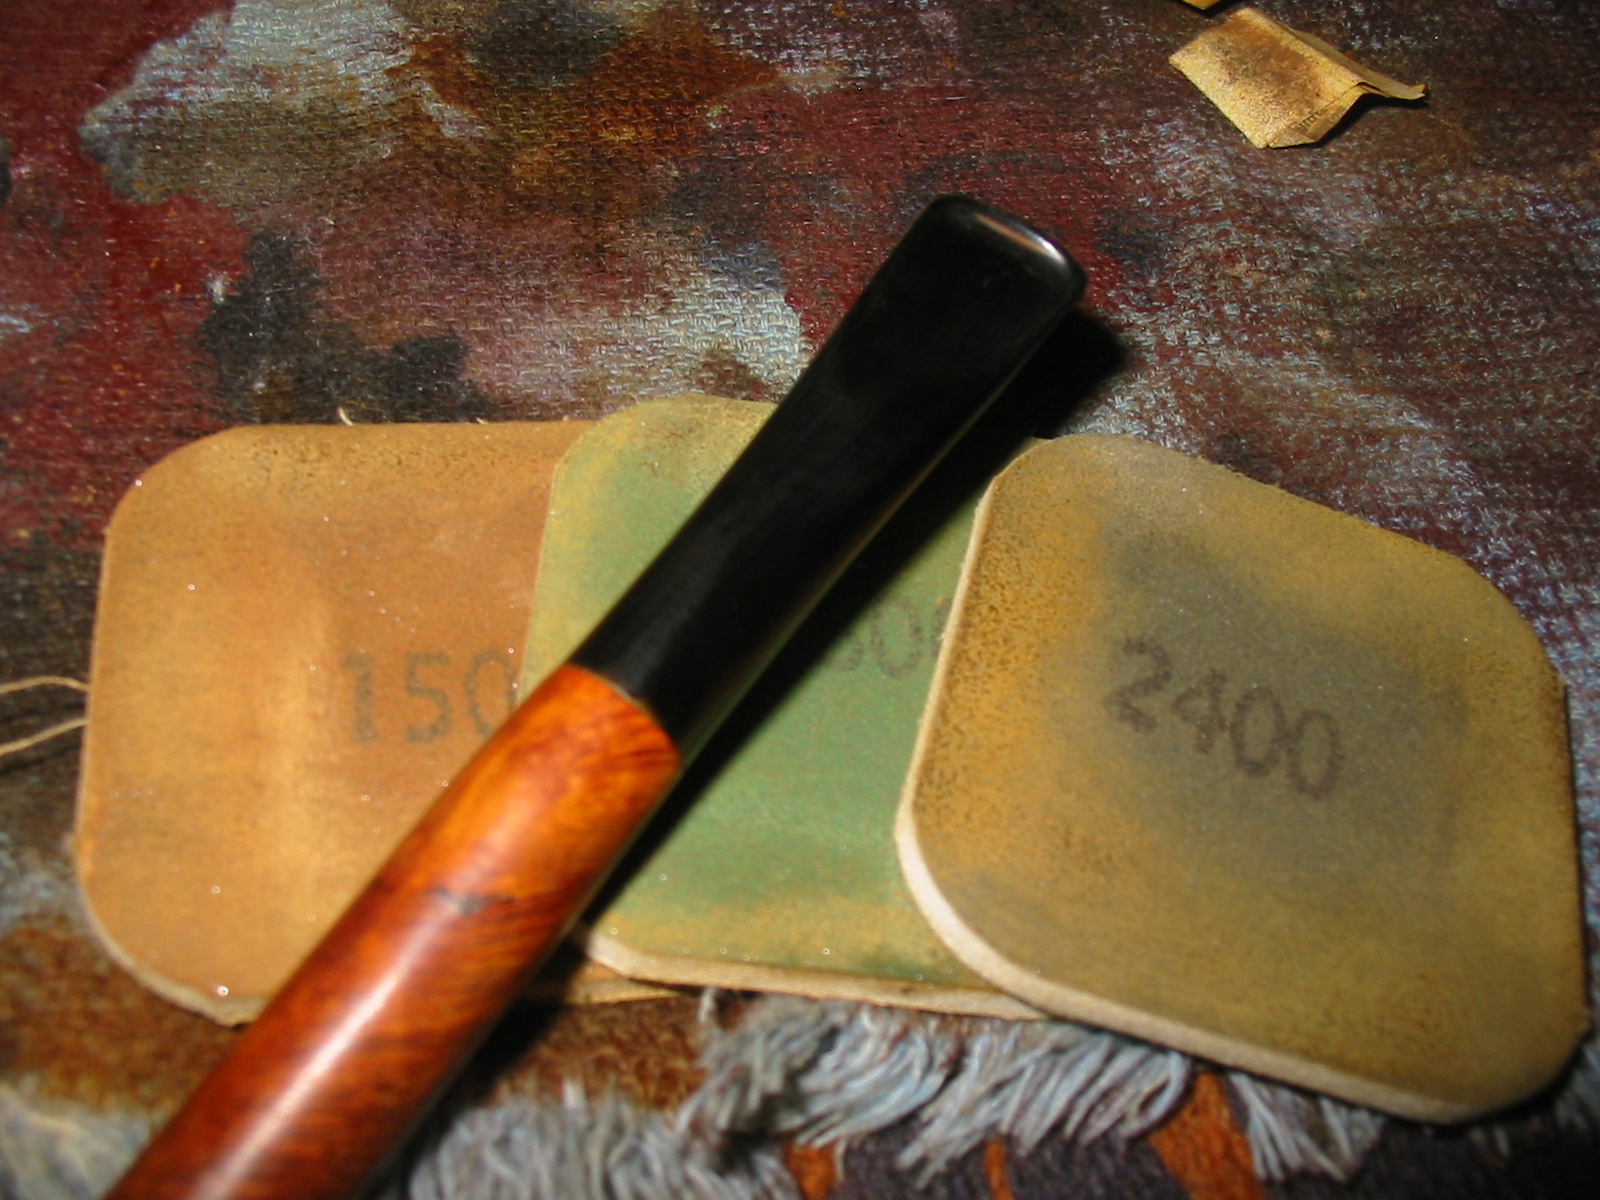
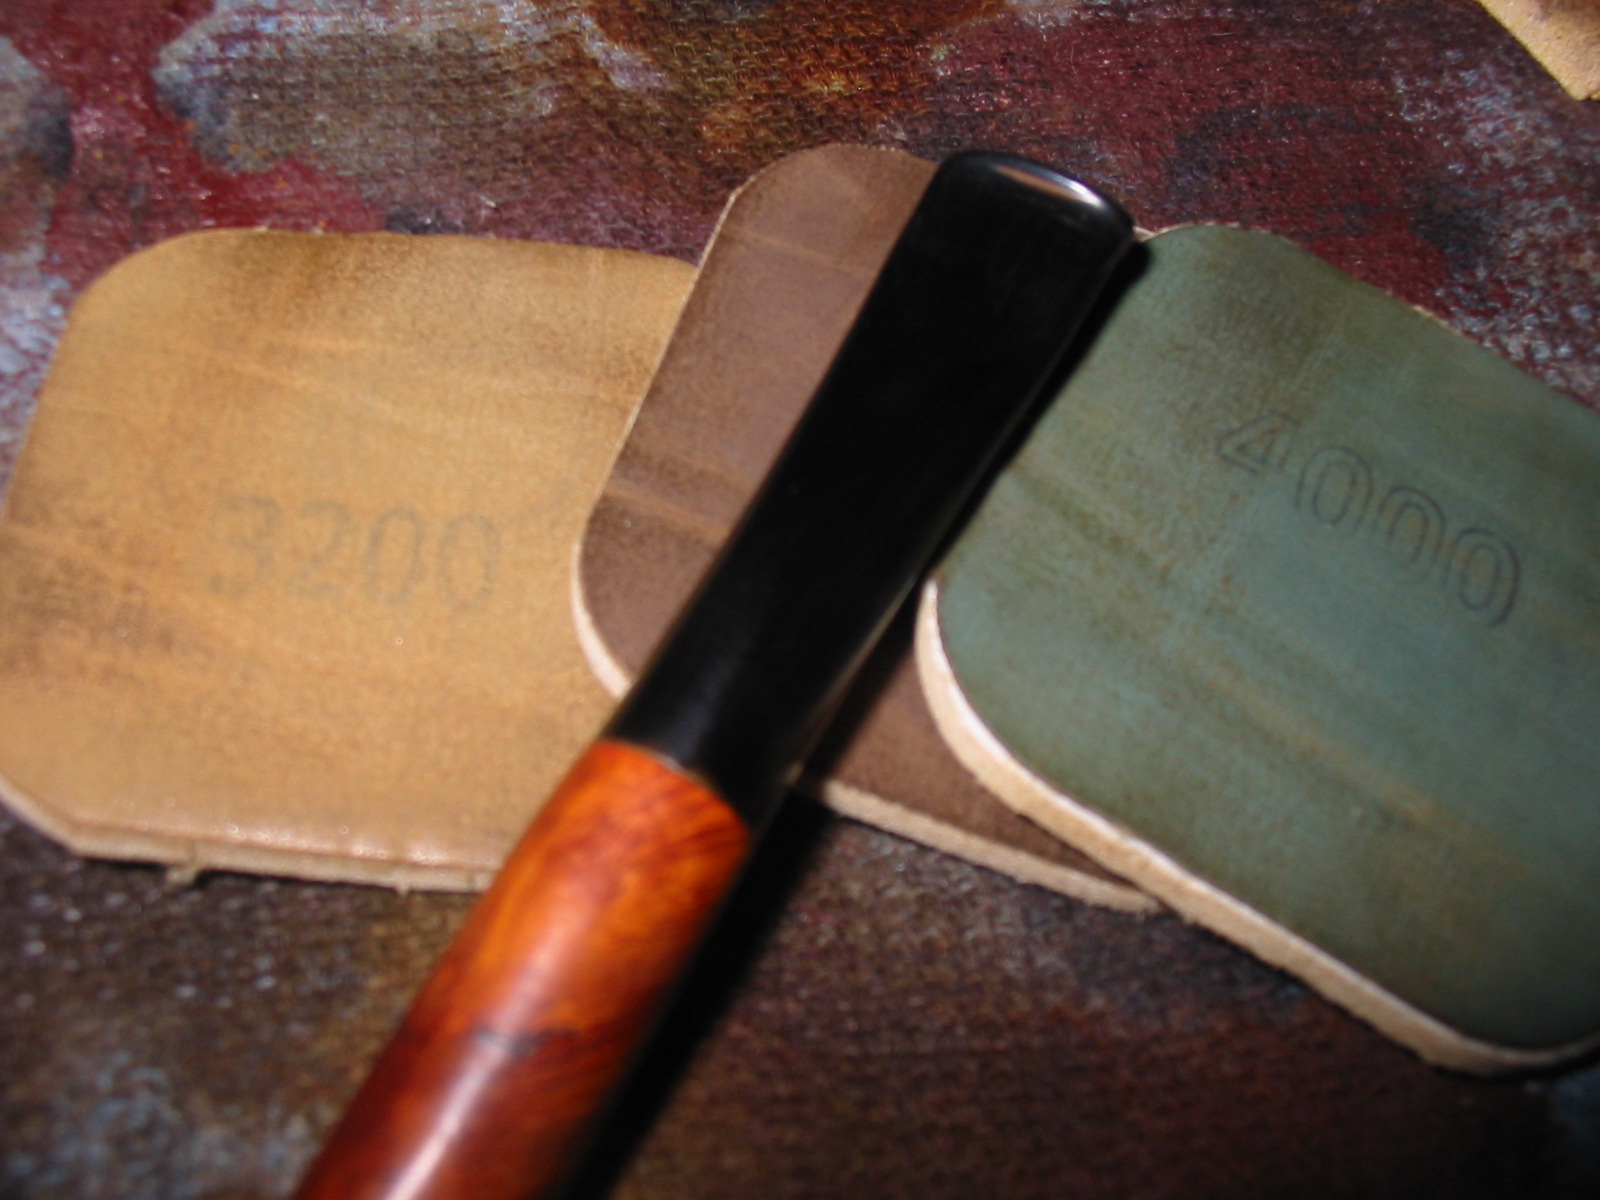
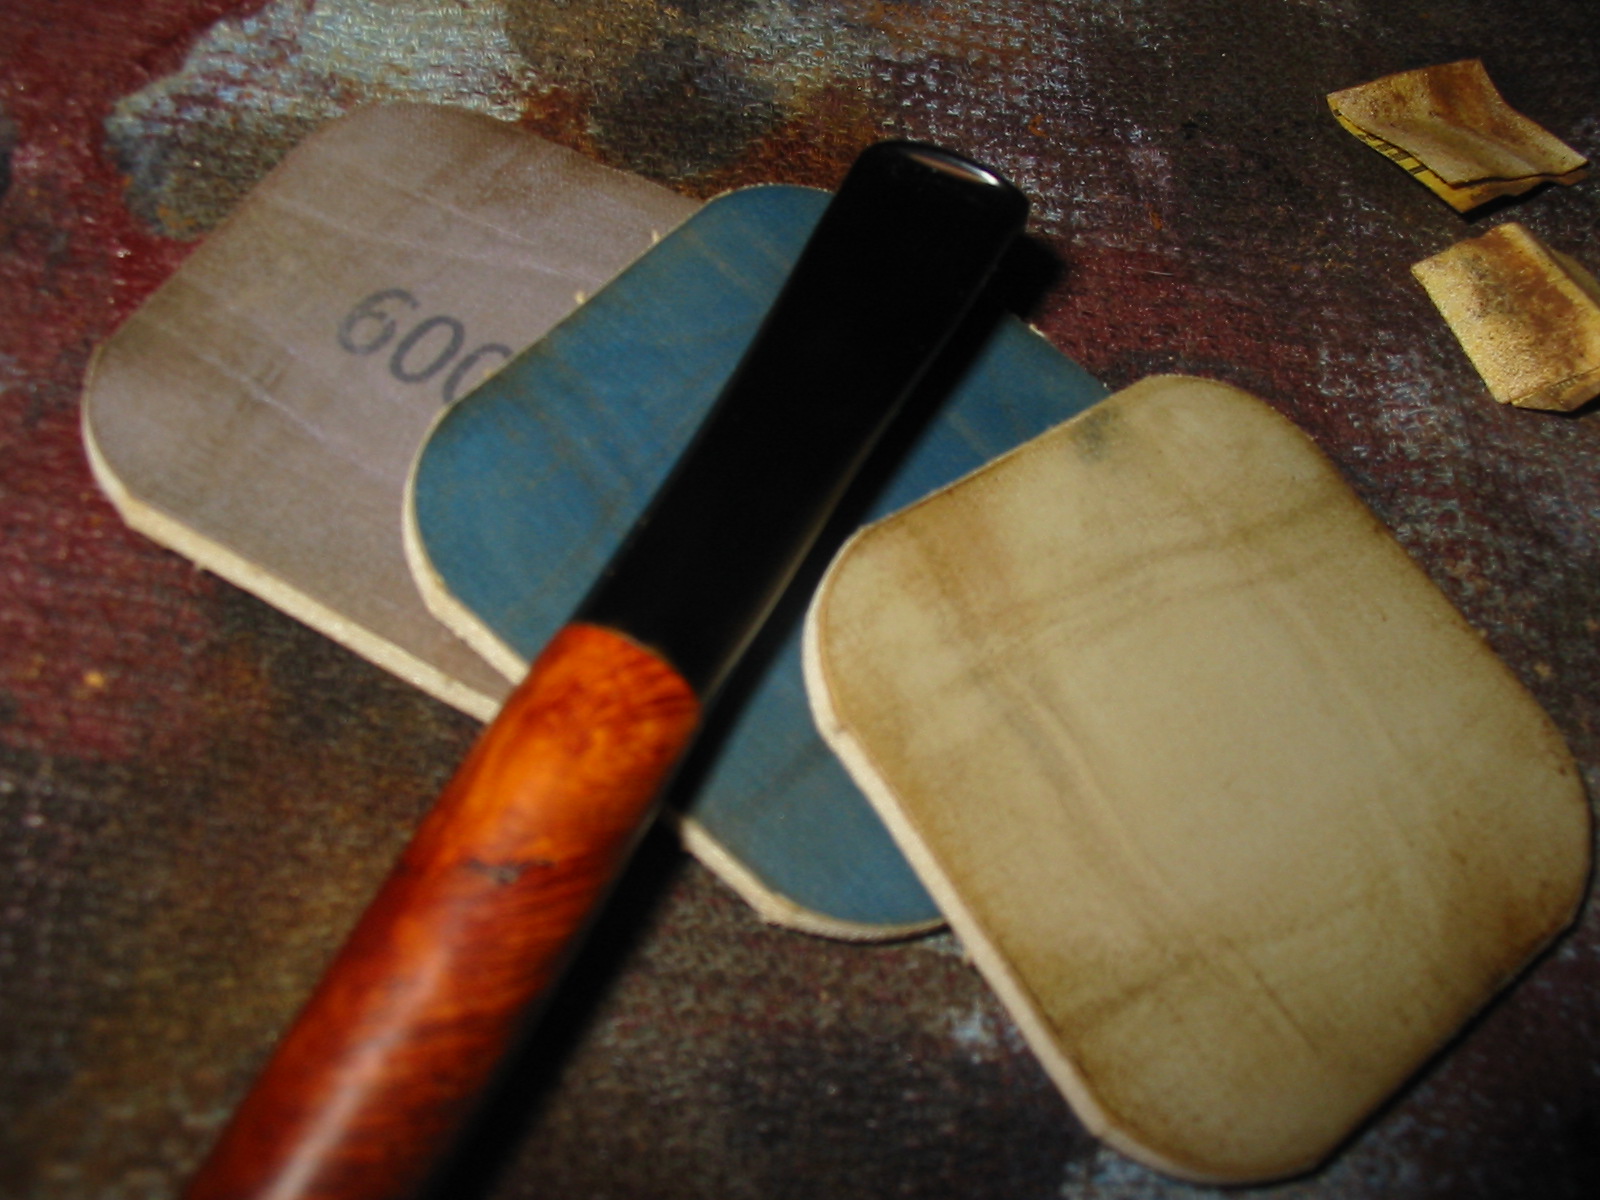
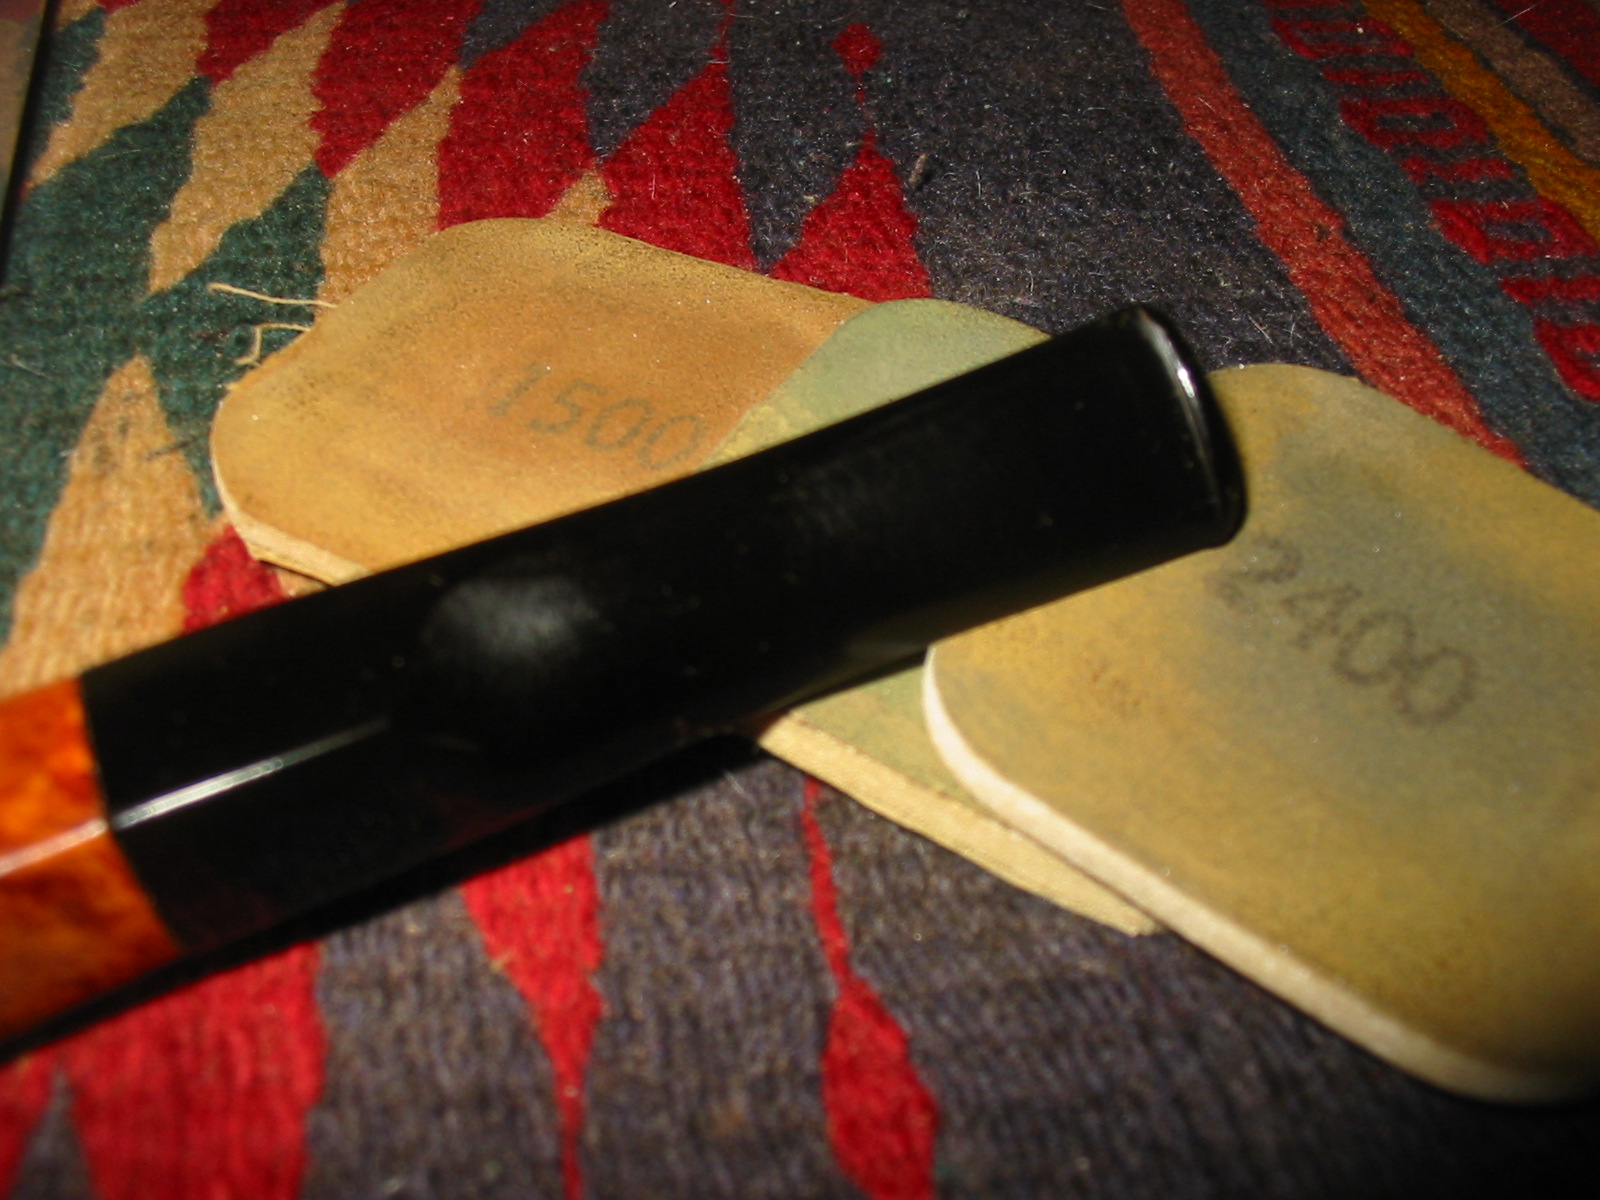
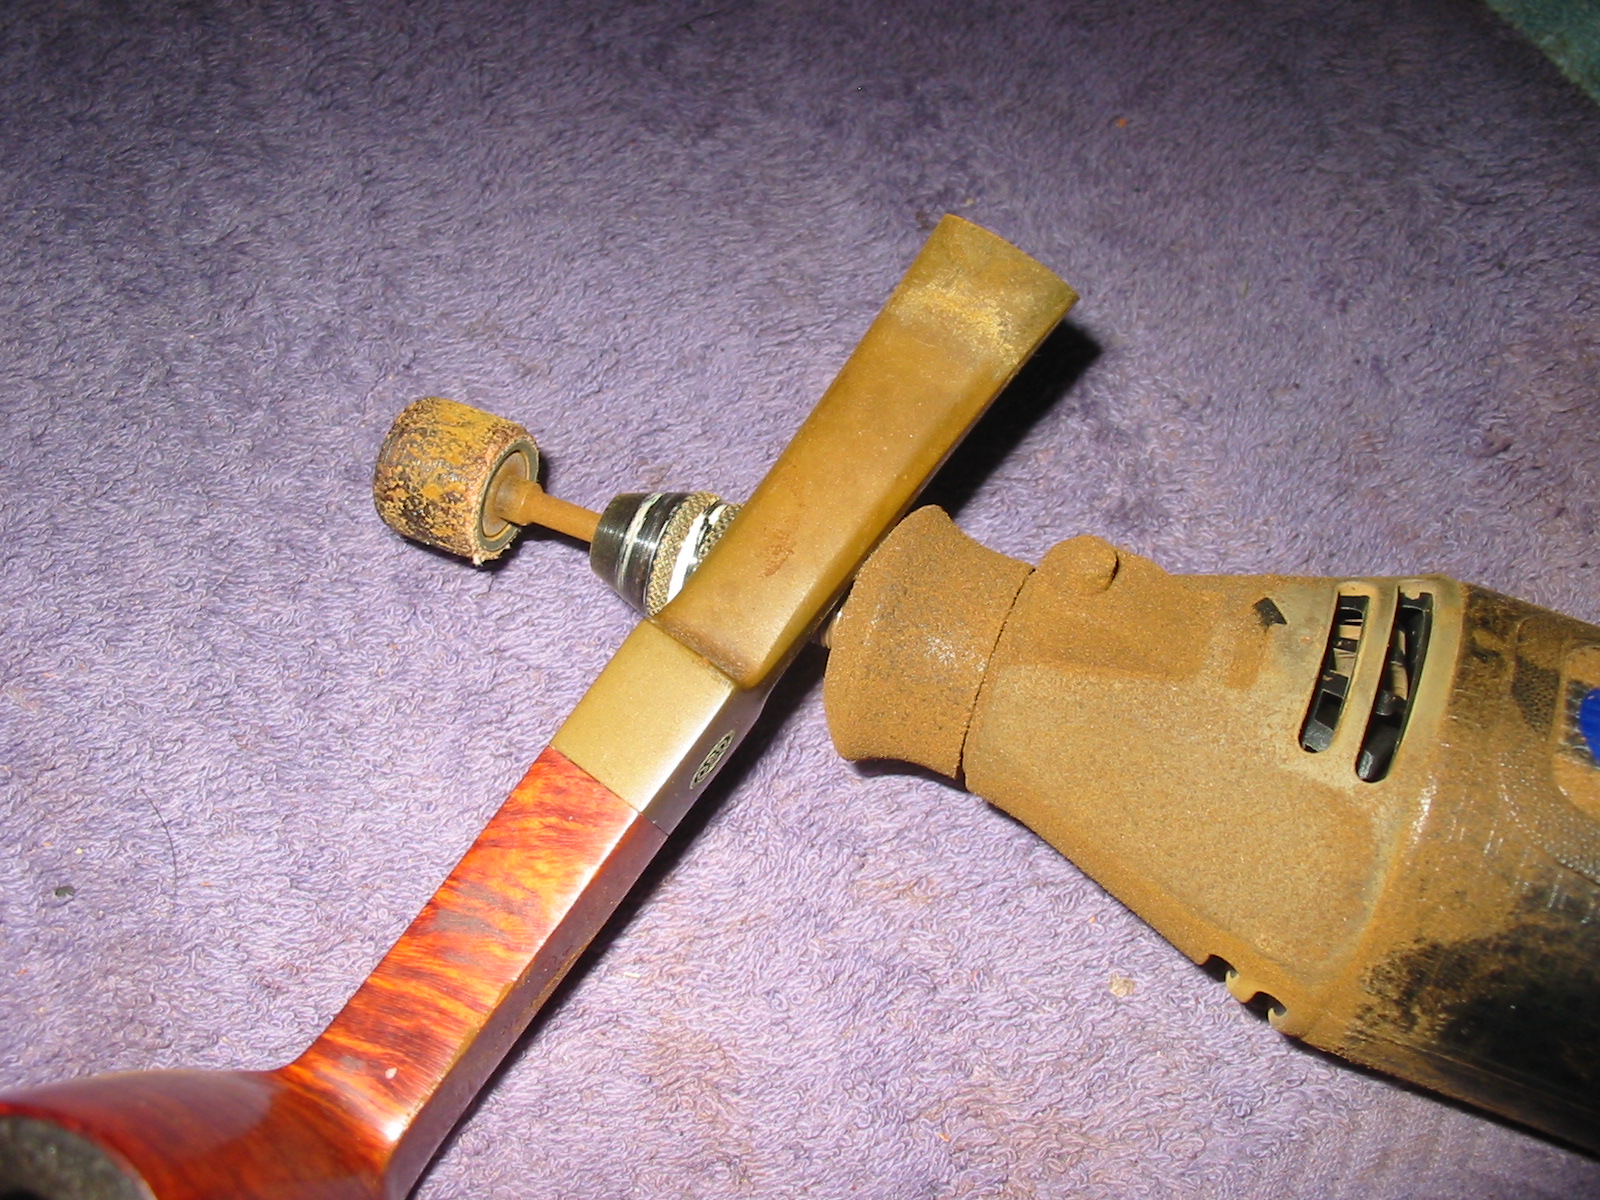
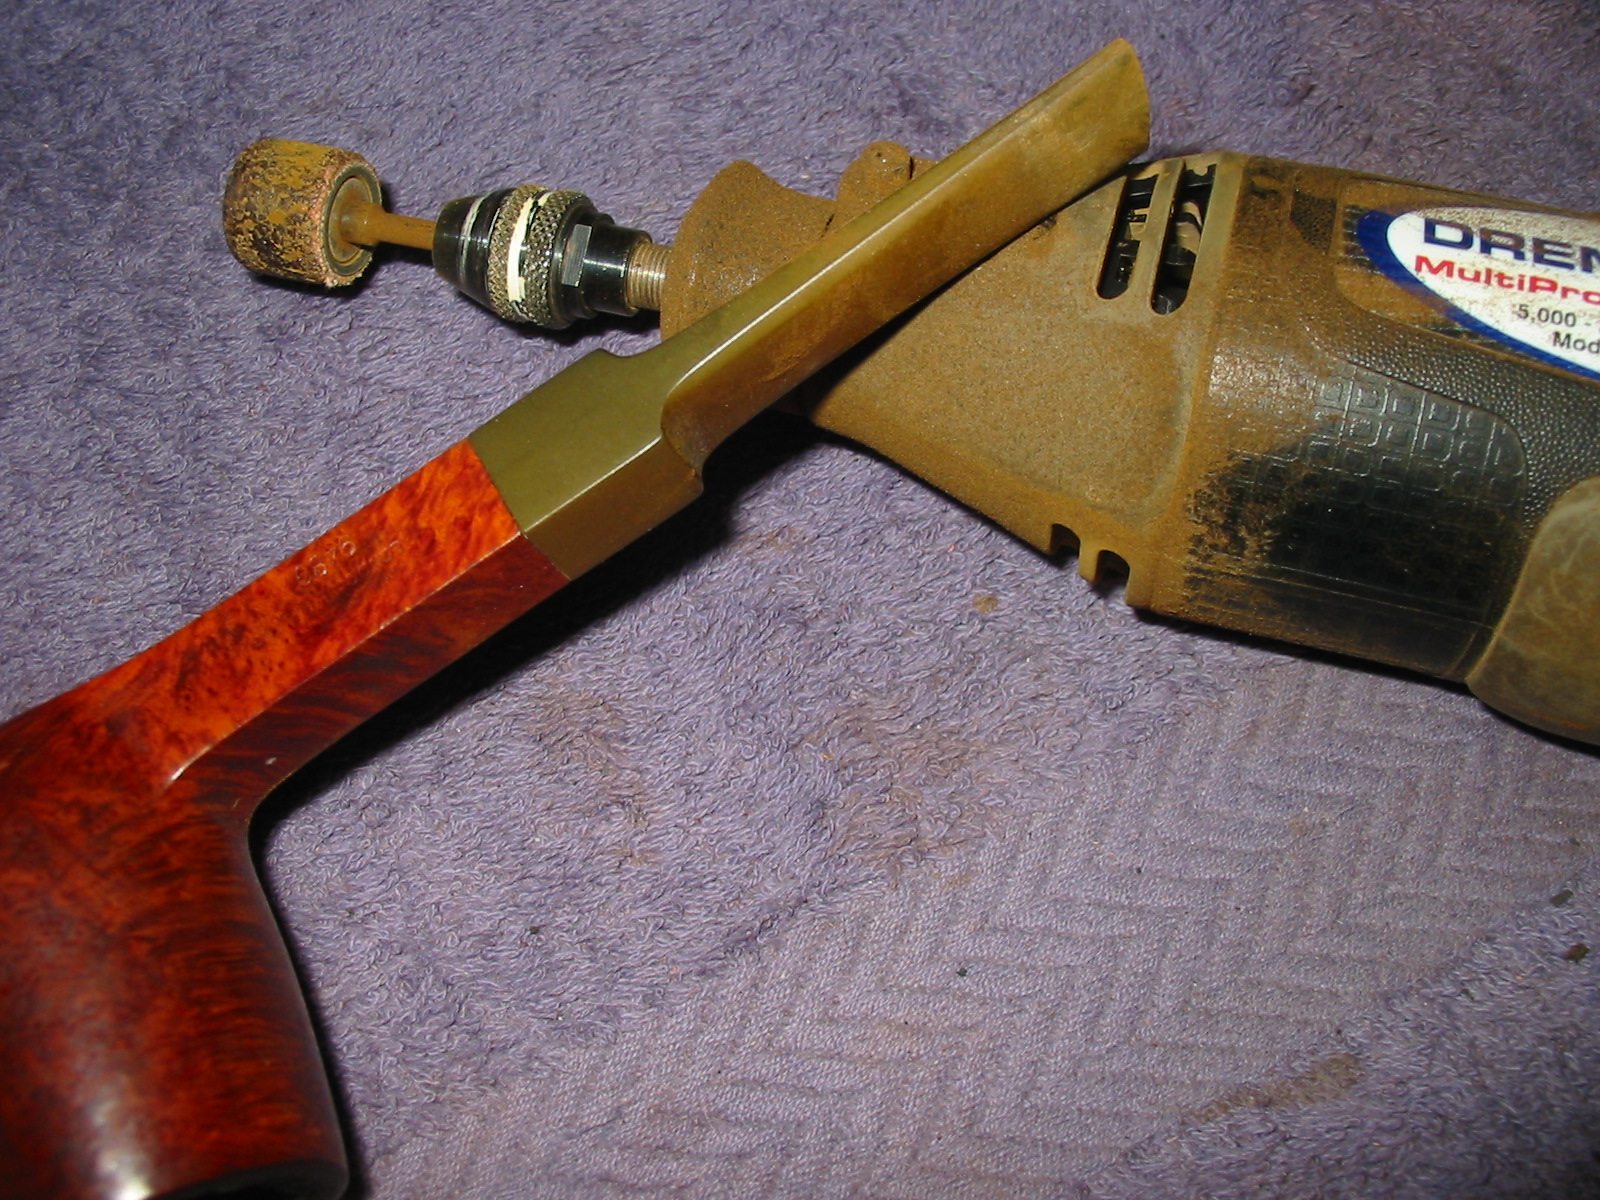
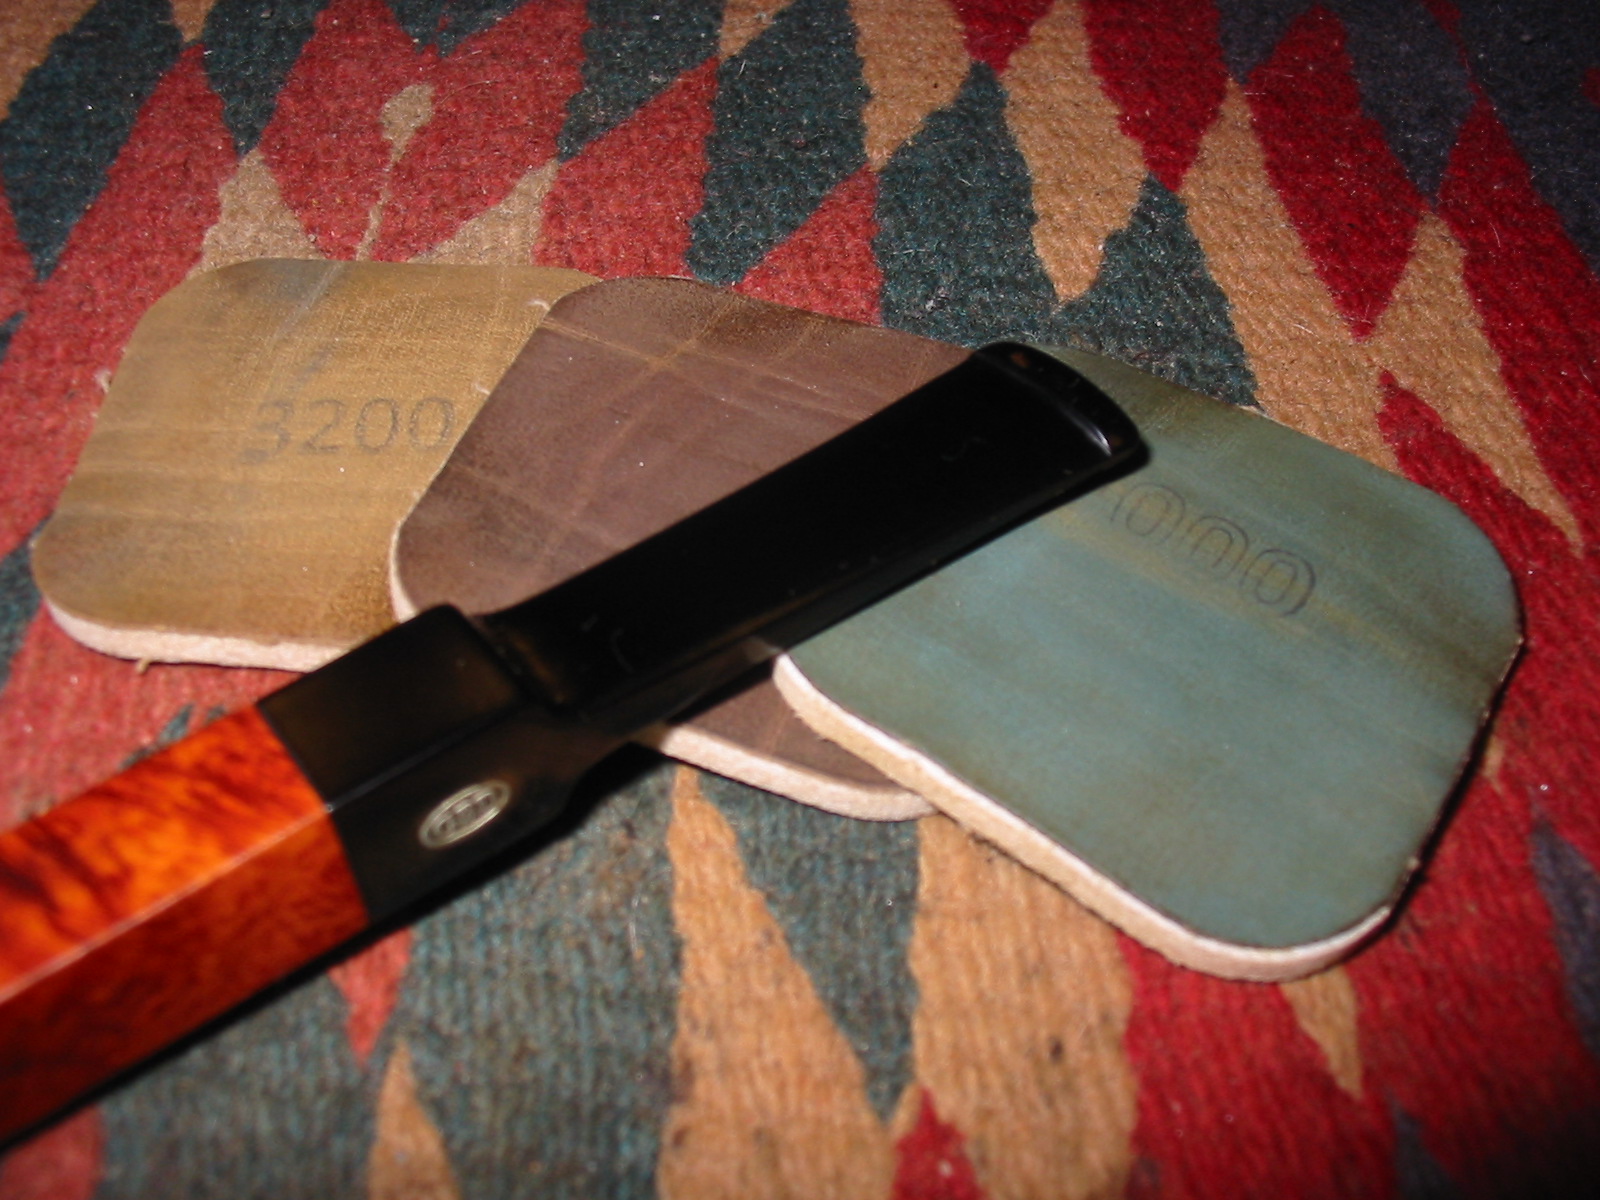
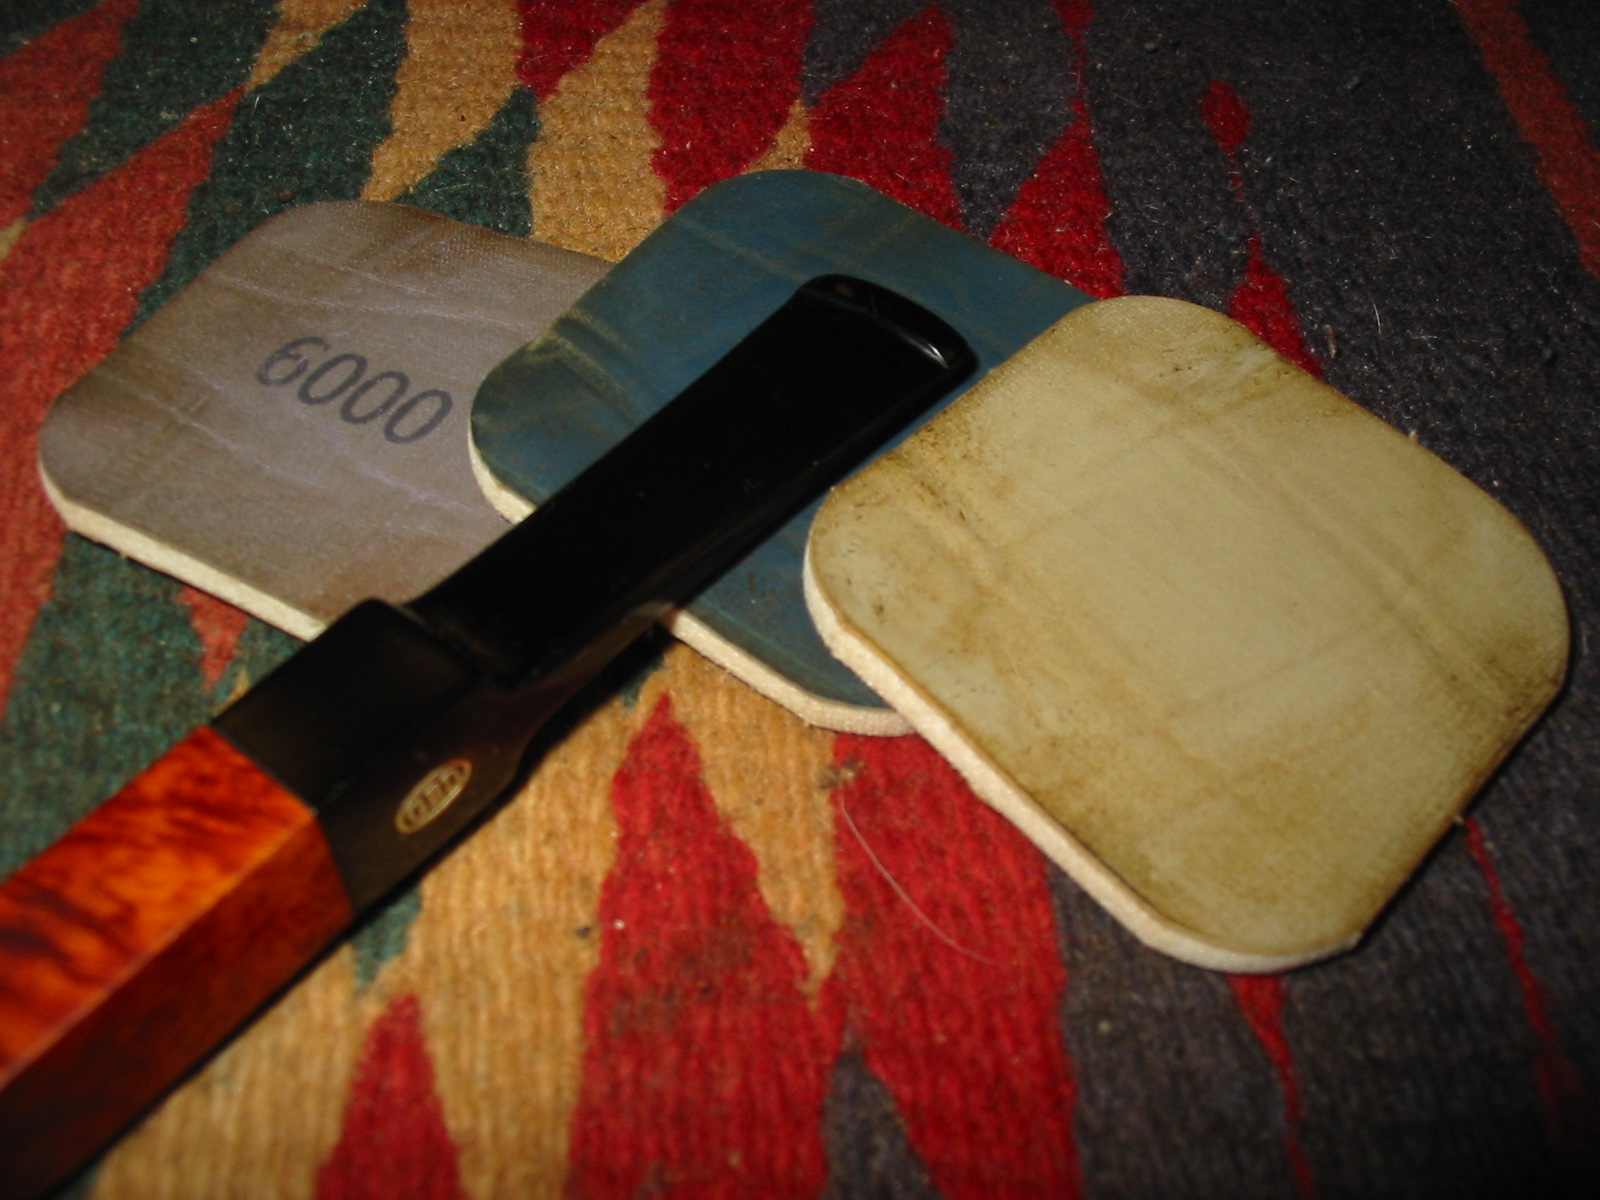
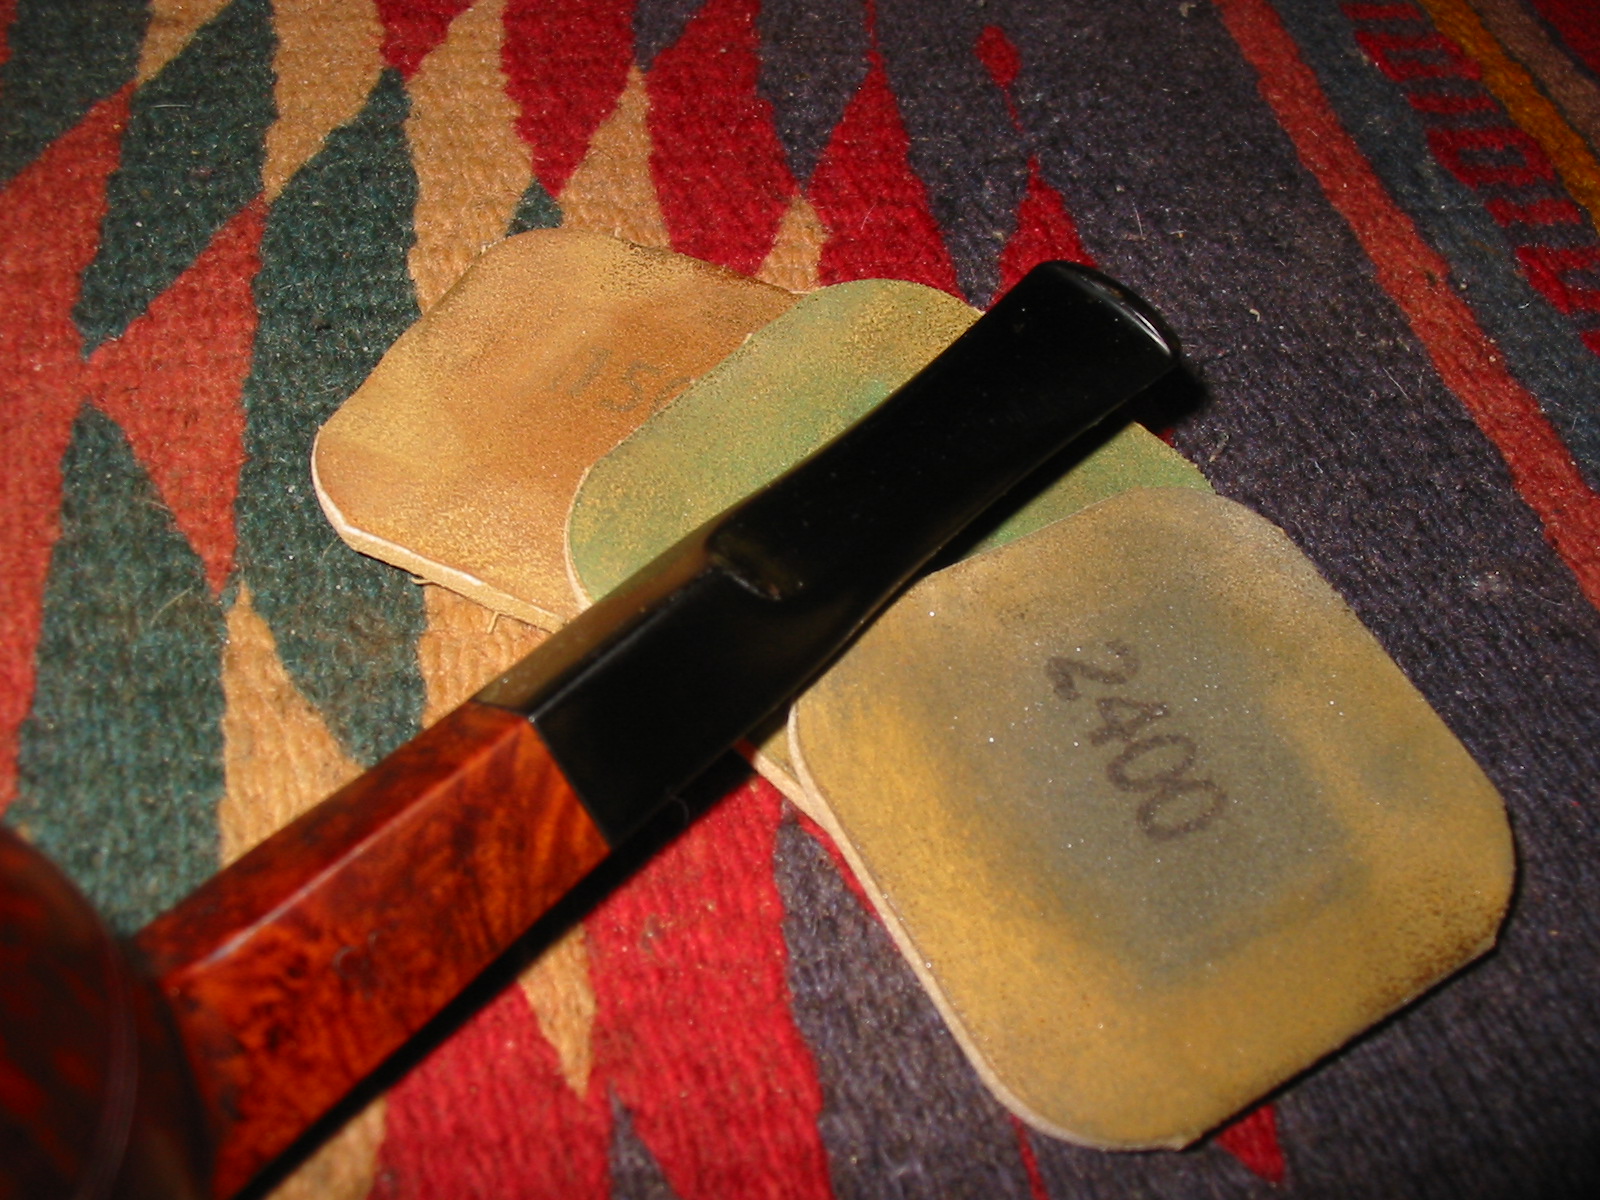
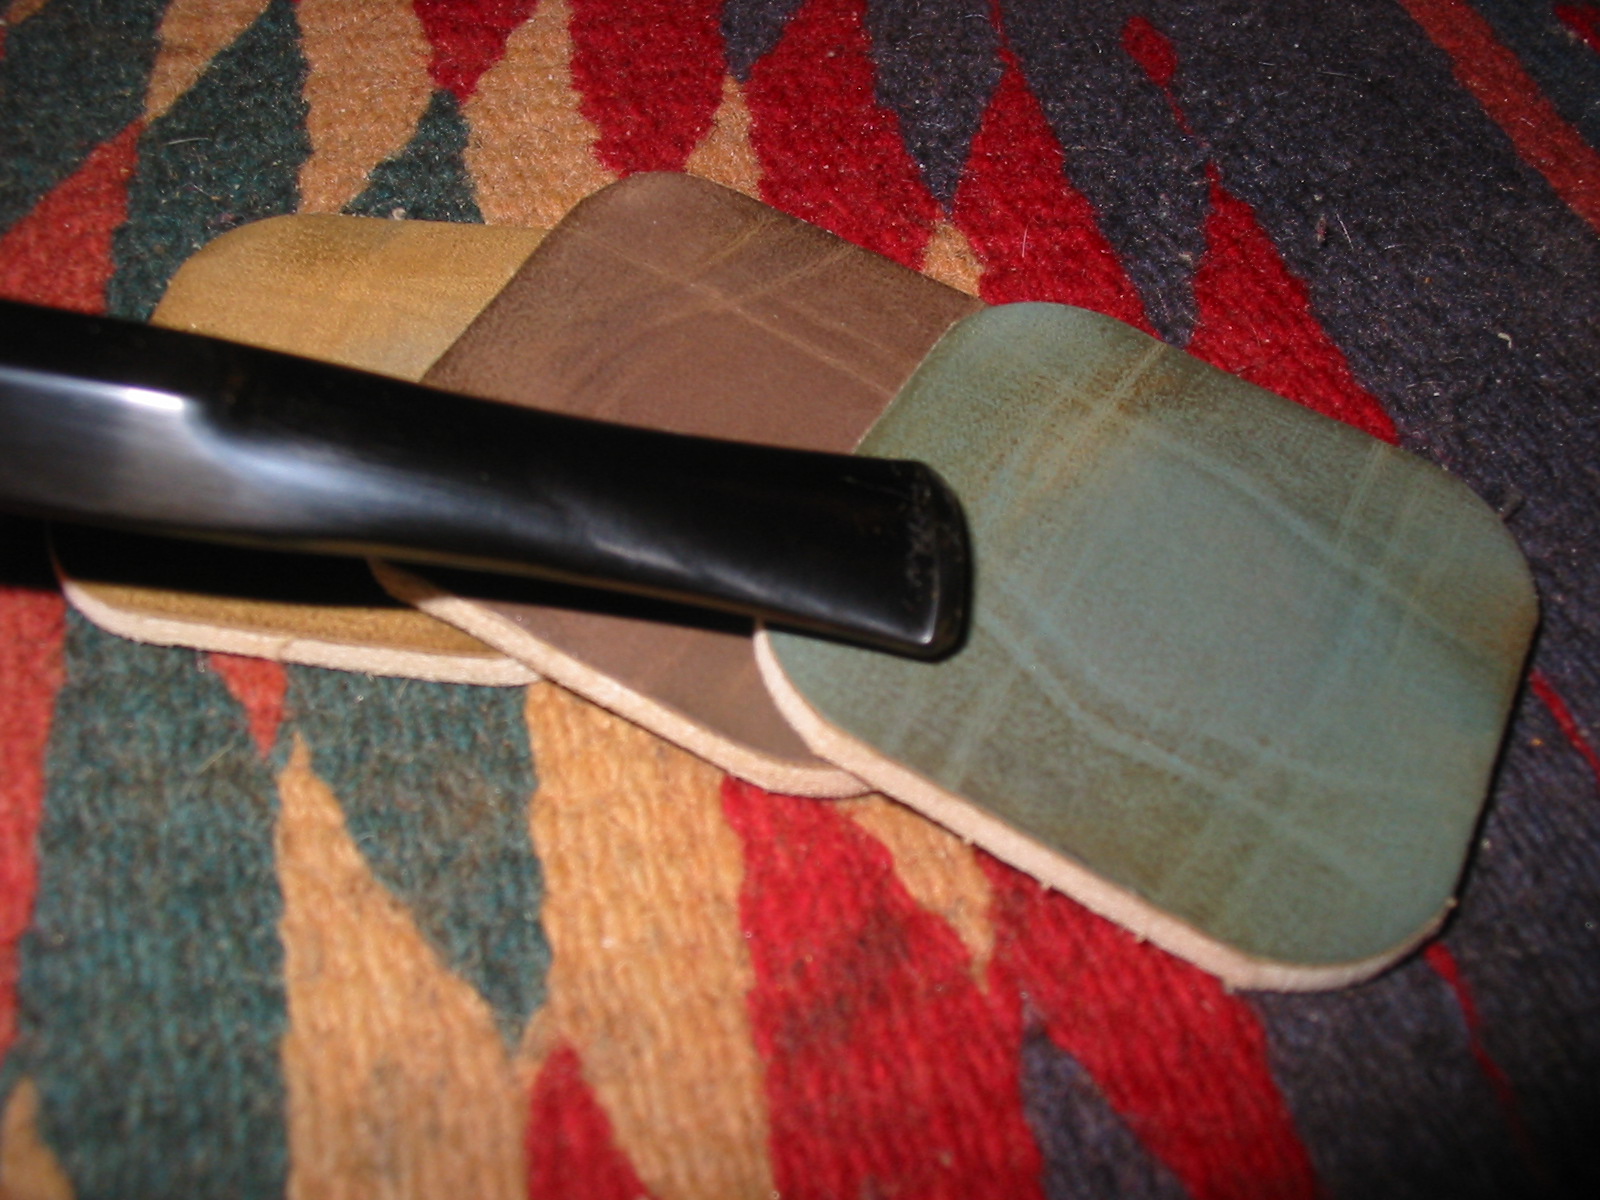
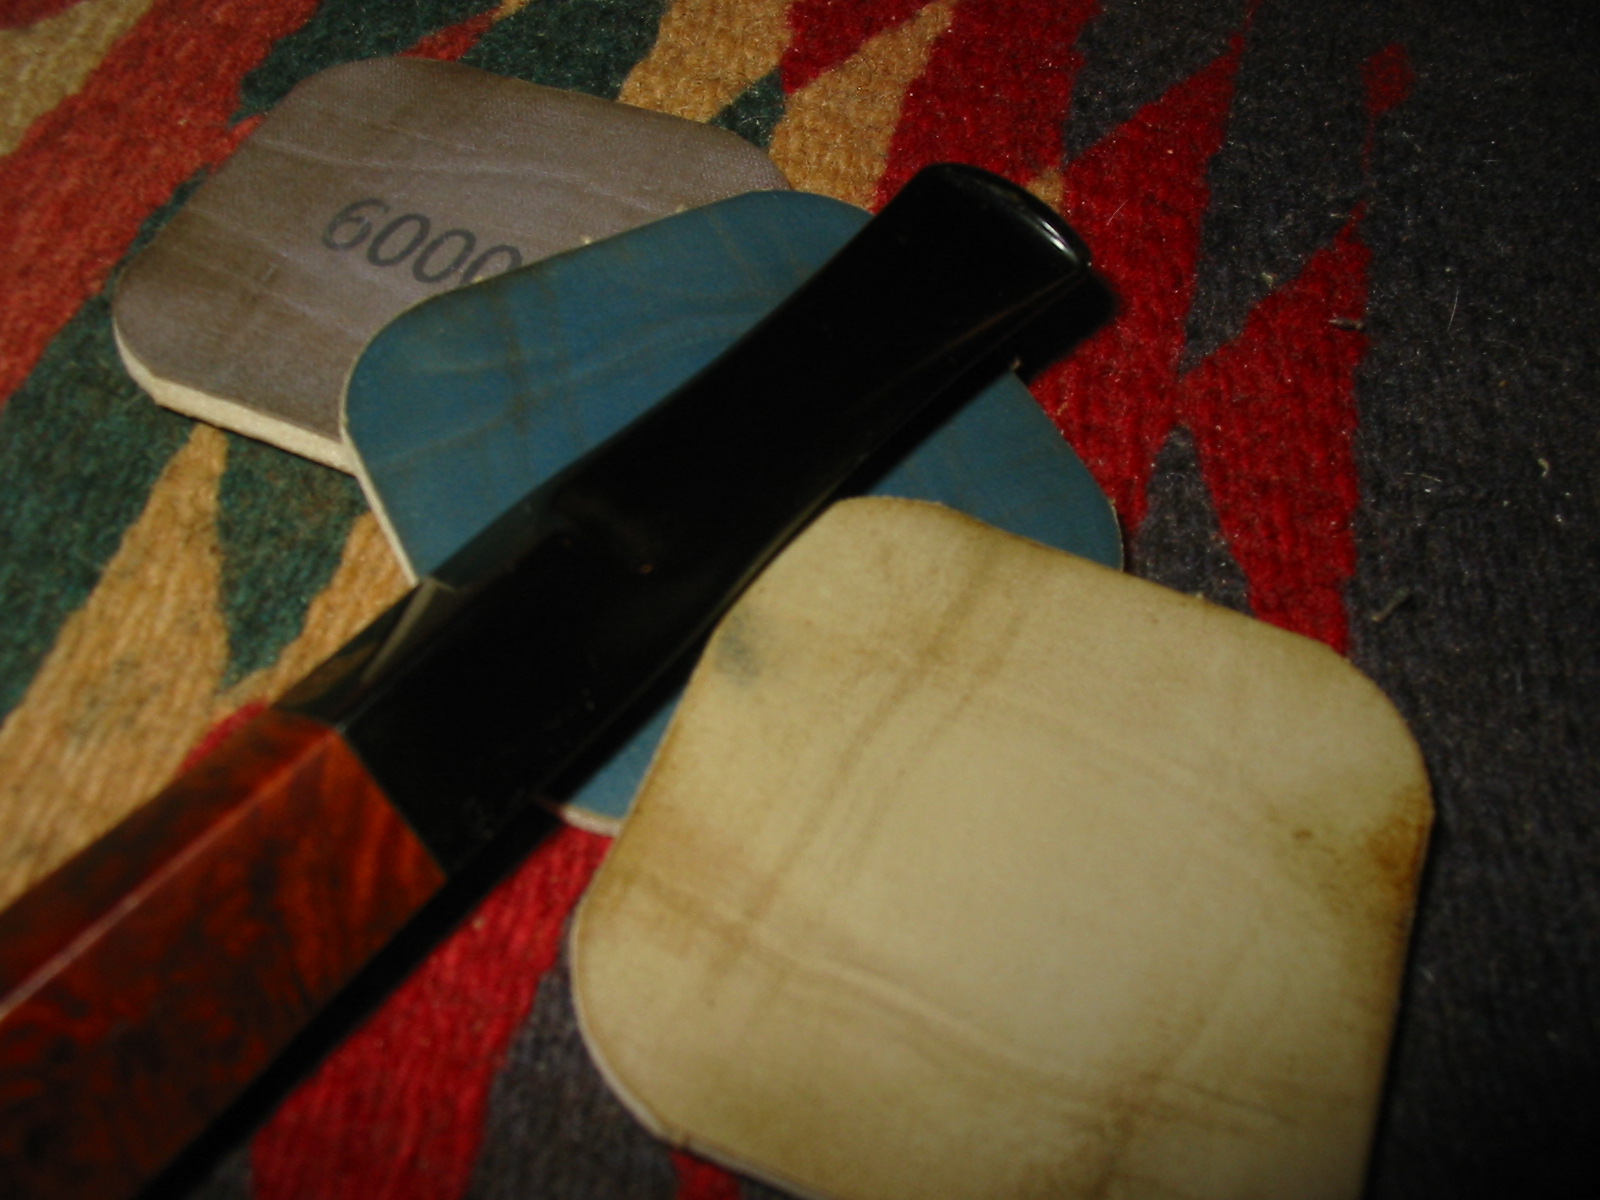
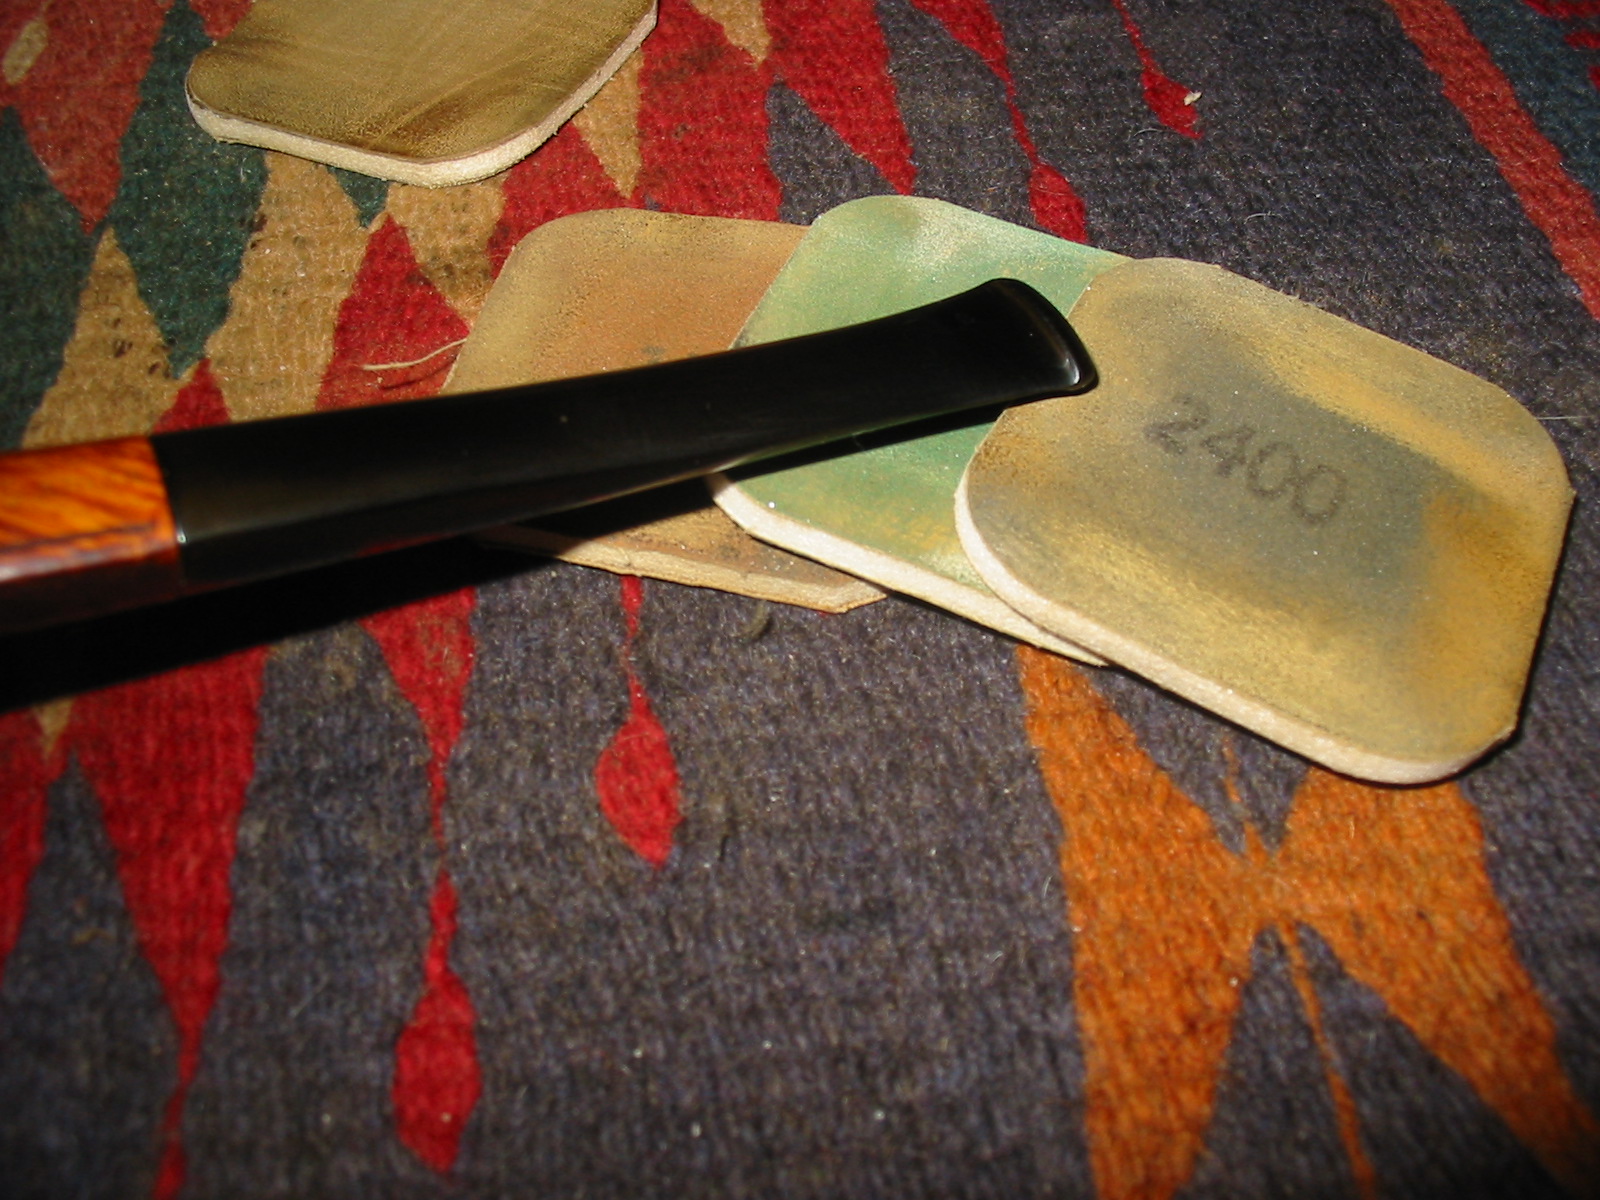
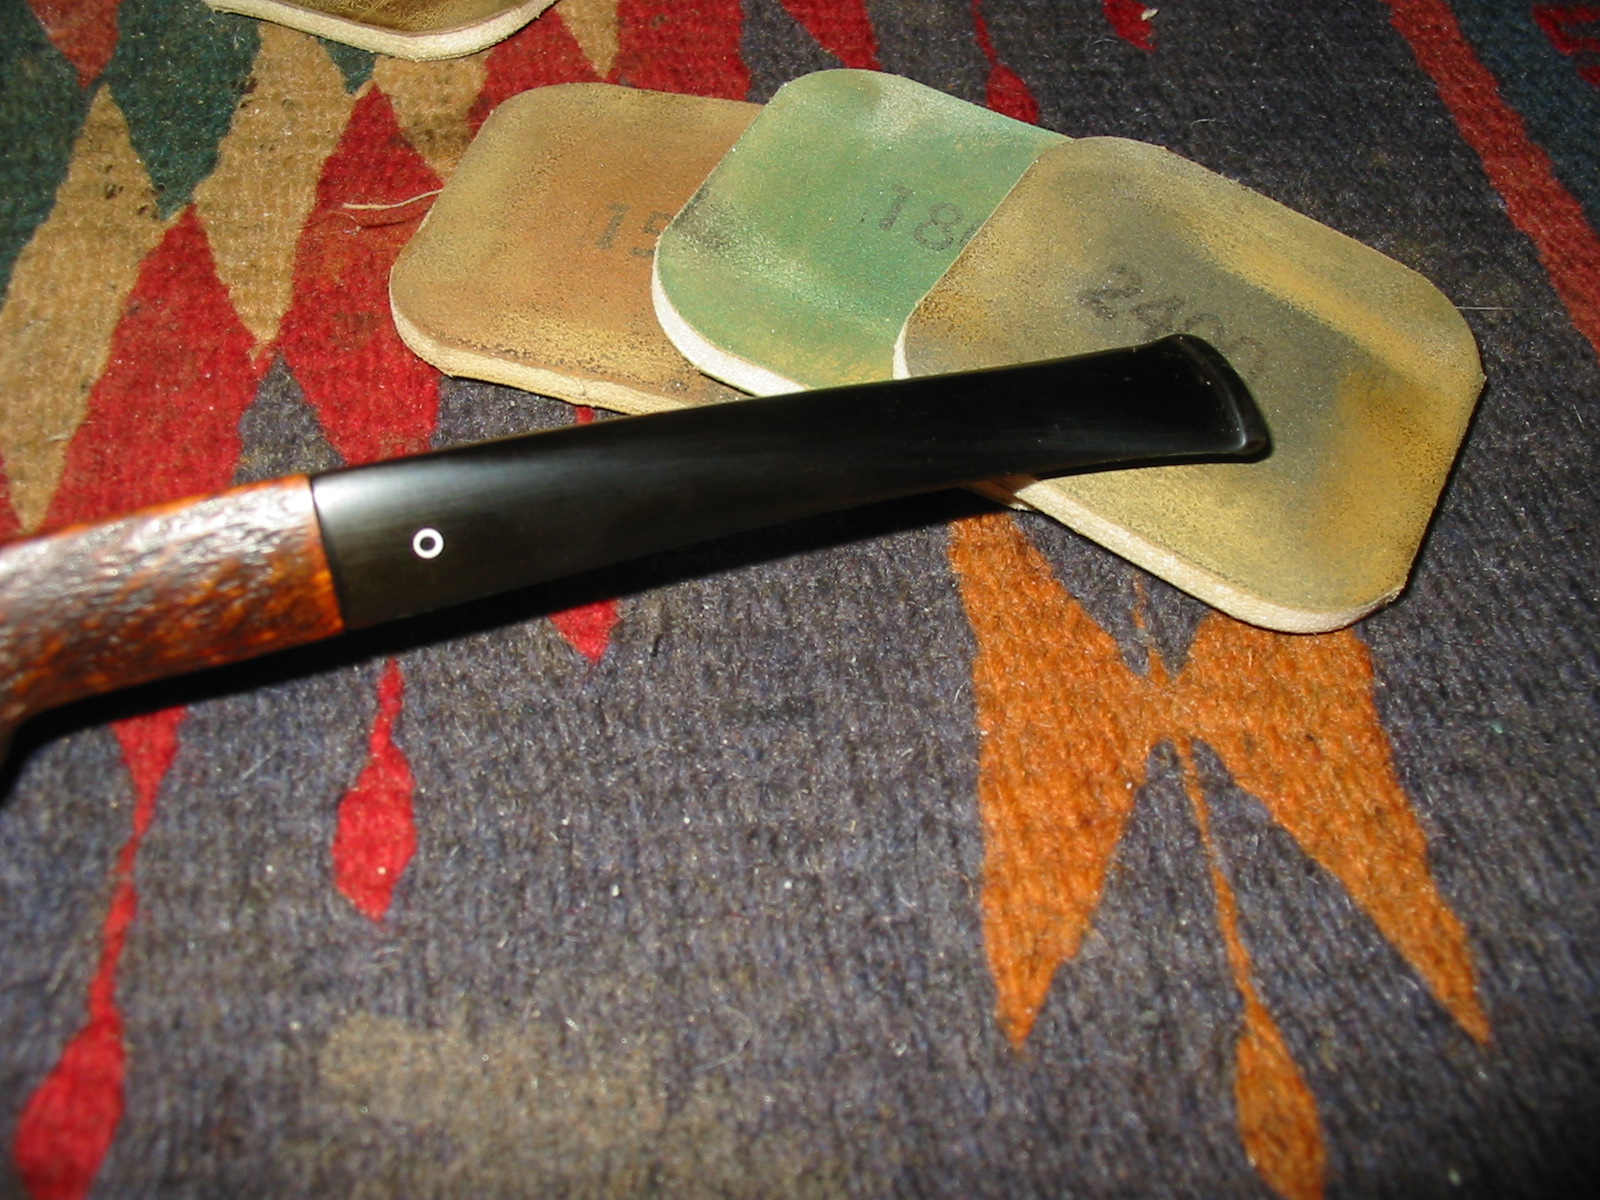
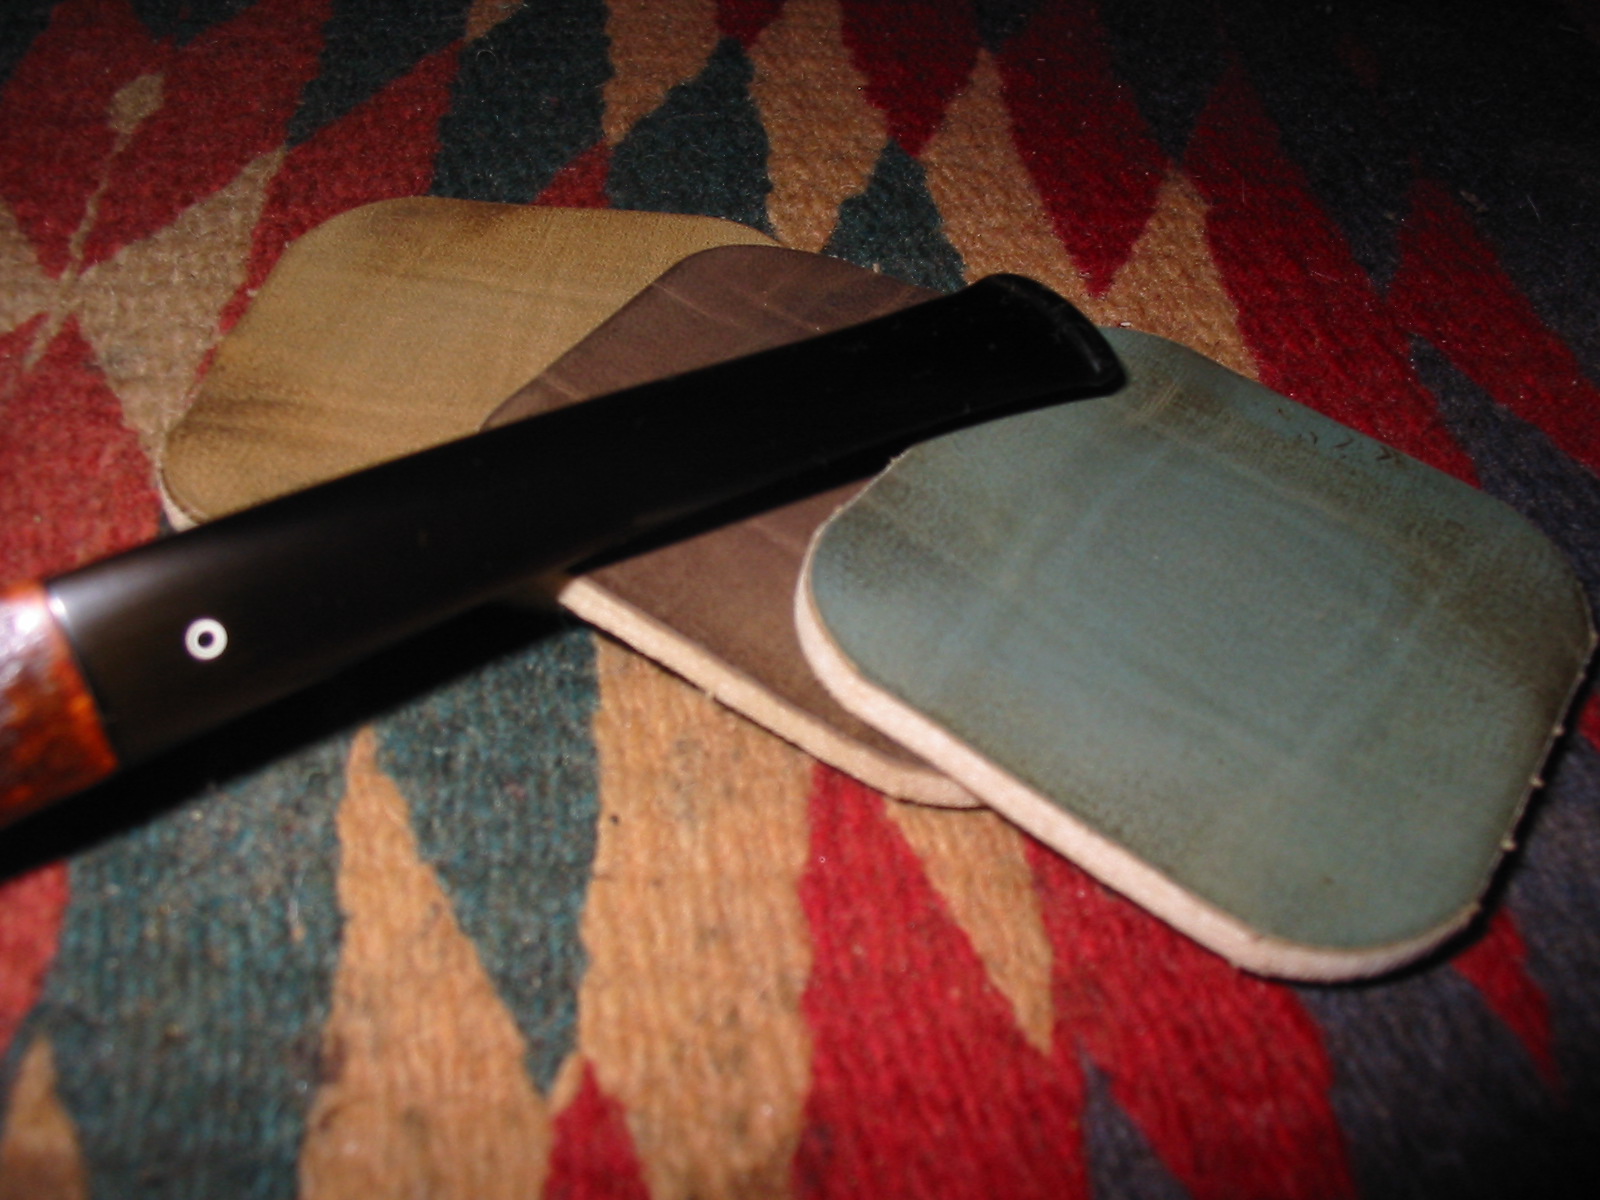
Once it was dry I sanded the excess with 220 grit sandpaper, a medium grit sanding sponge and then micromesh sanding pads. I wet sanded with 1500-2400 grit sanding pads and dry sanded with 3200-12,000 grit pads. After sanding with each group of three grits I wiped the stem down with Obsidian Oil and went on to sand with the next group of three.
IMG_3574

IMG_3575

IMG_3576

IMG_3577

IMG_3578

IMG_3579

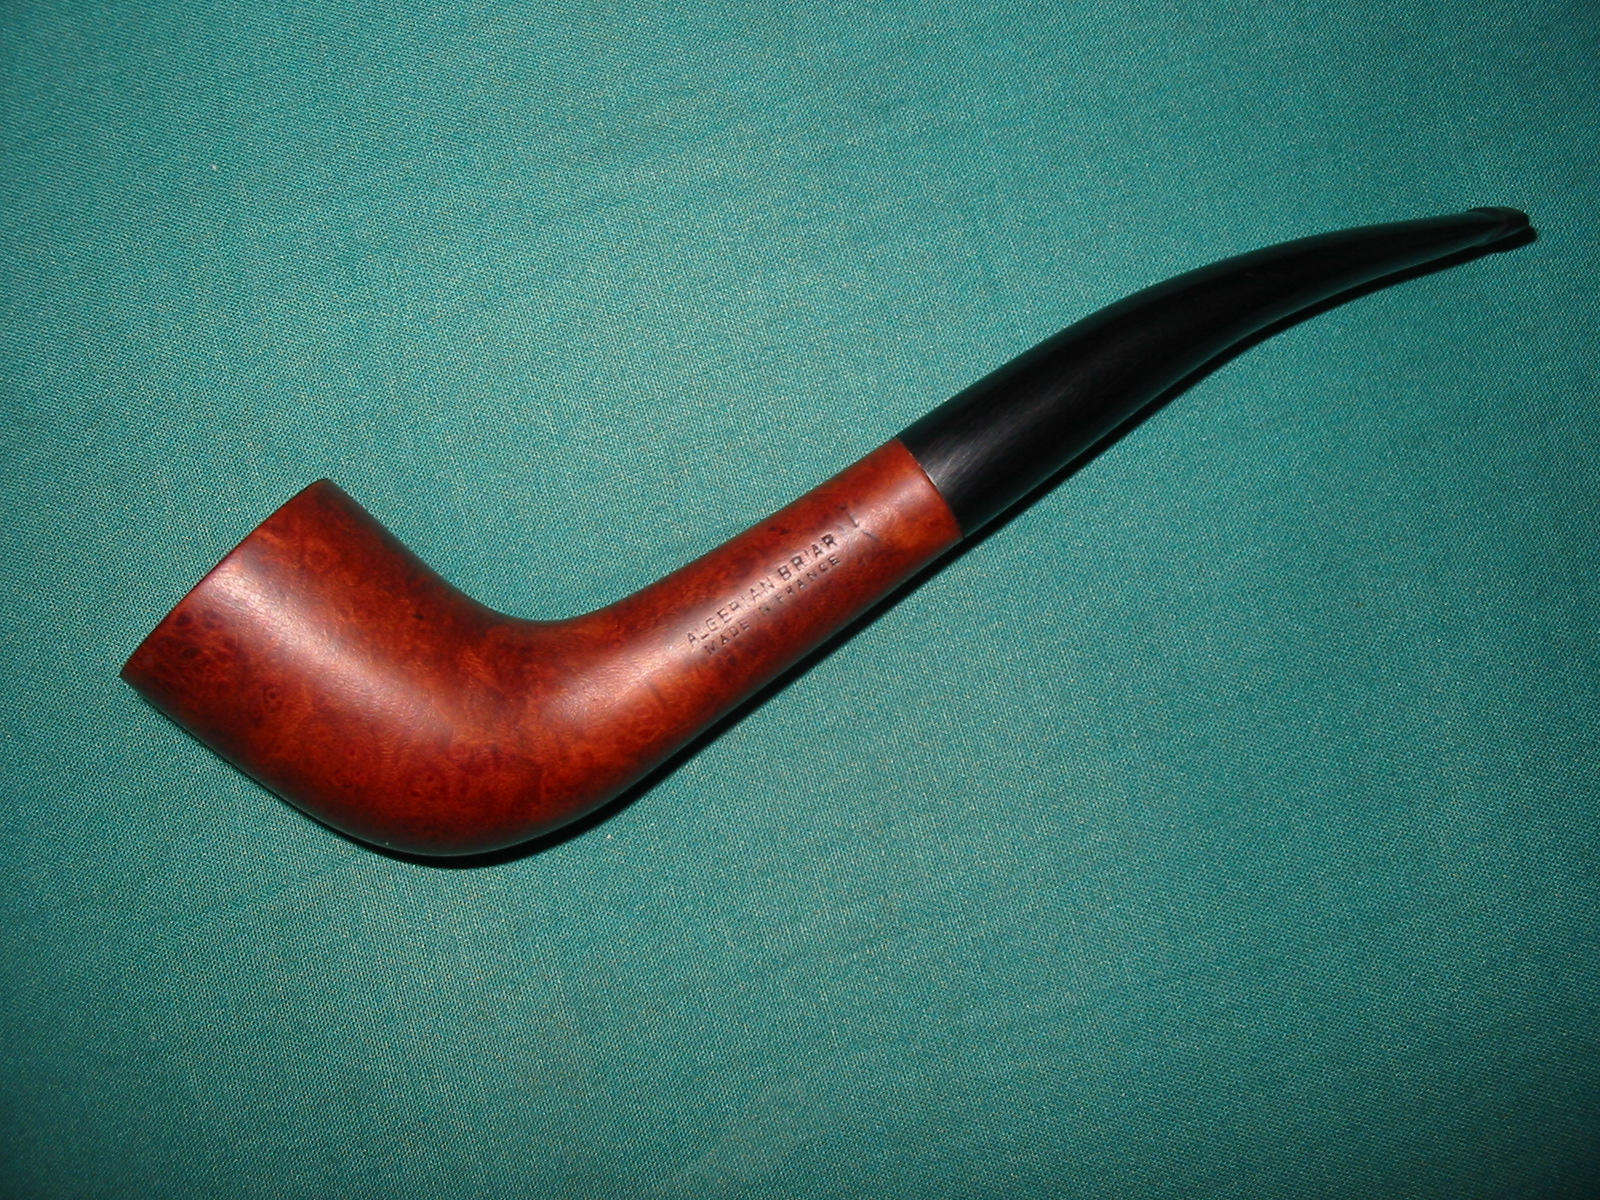
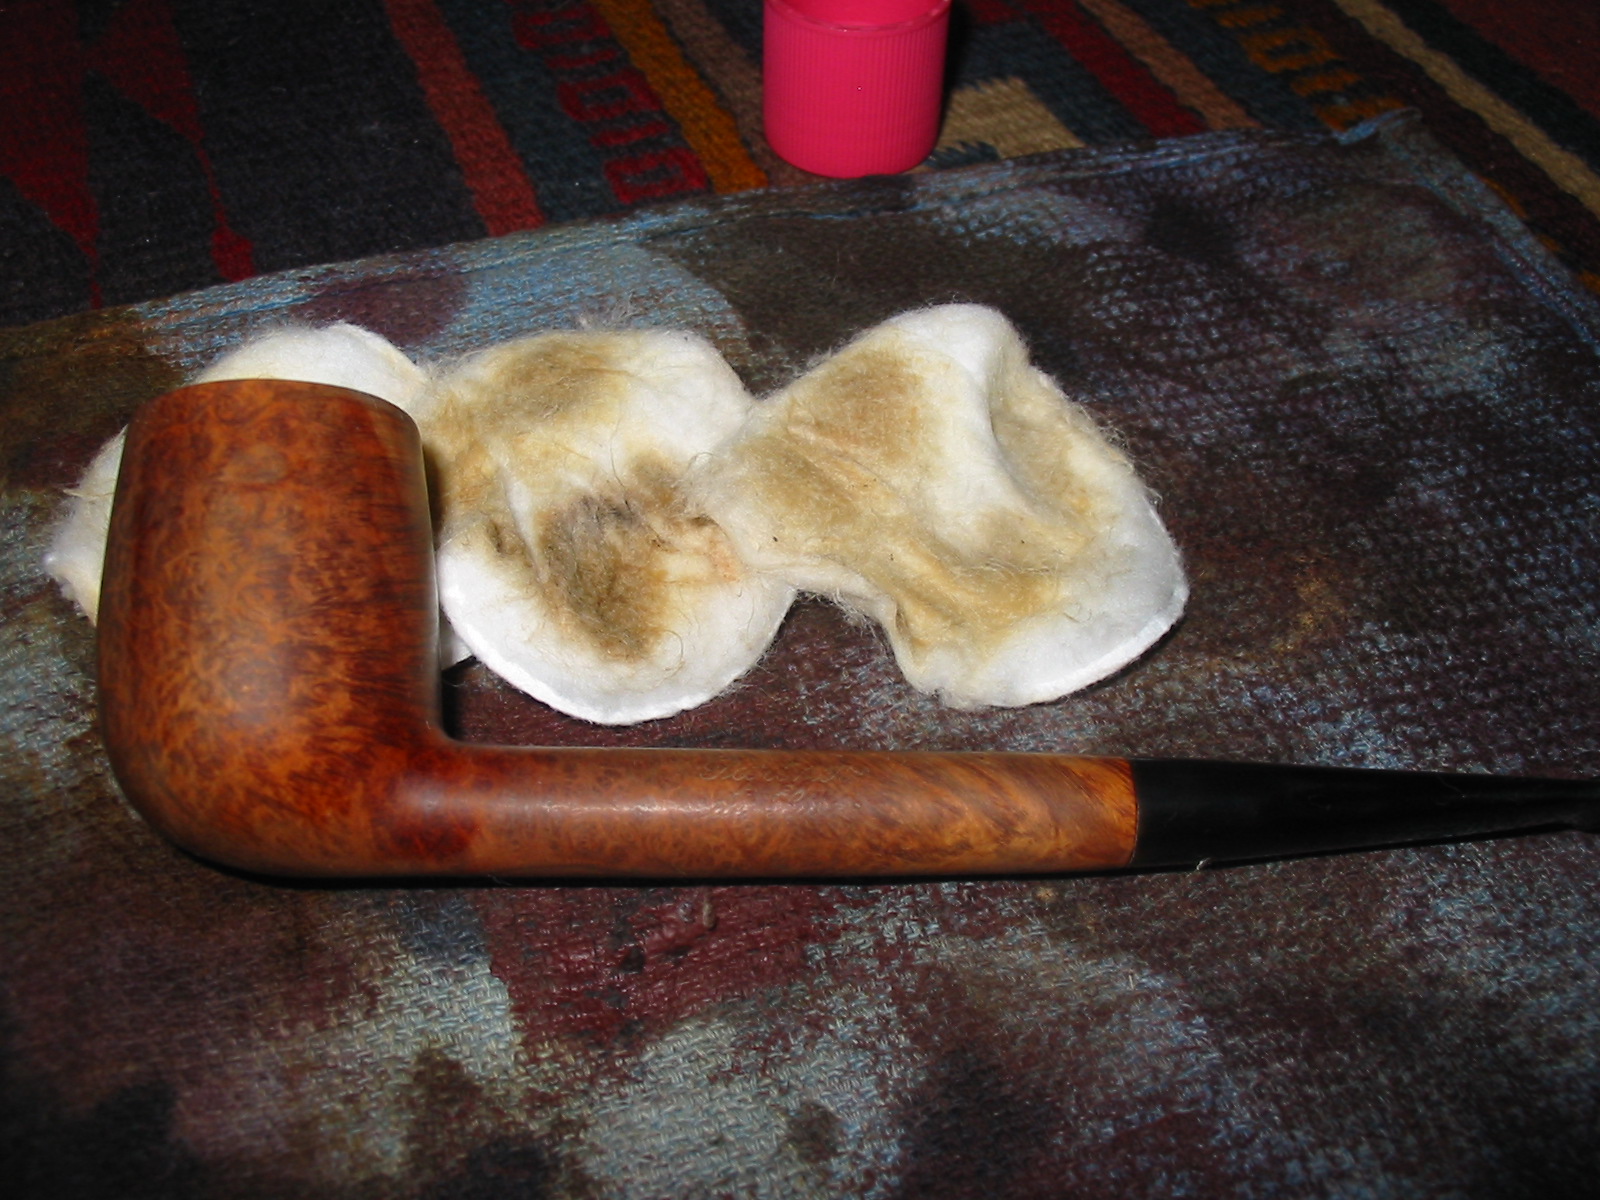
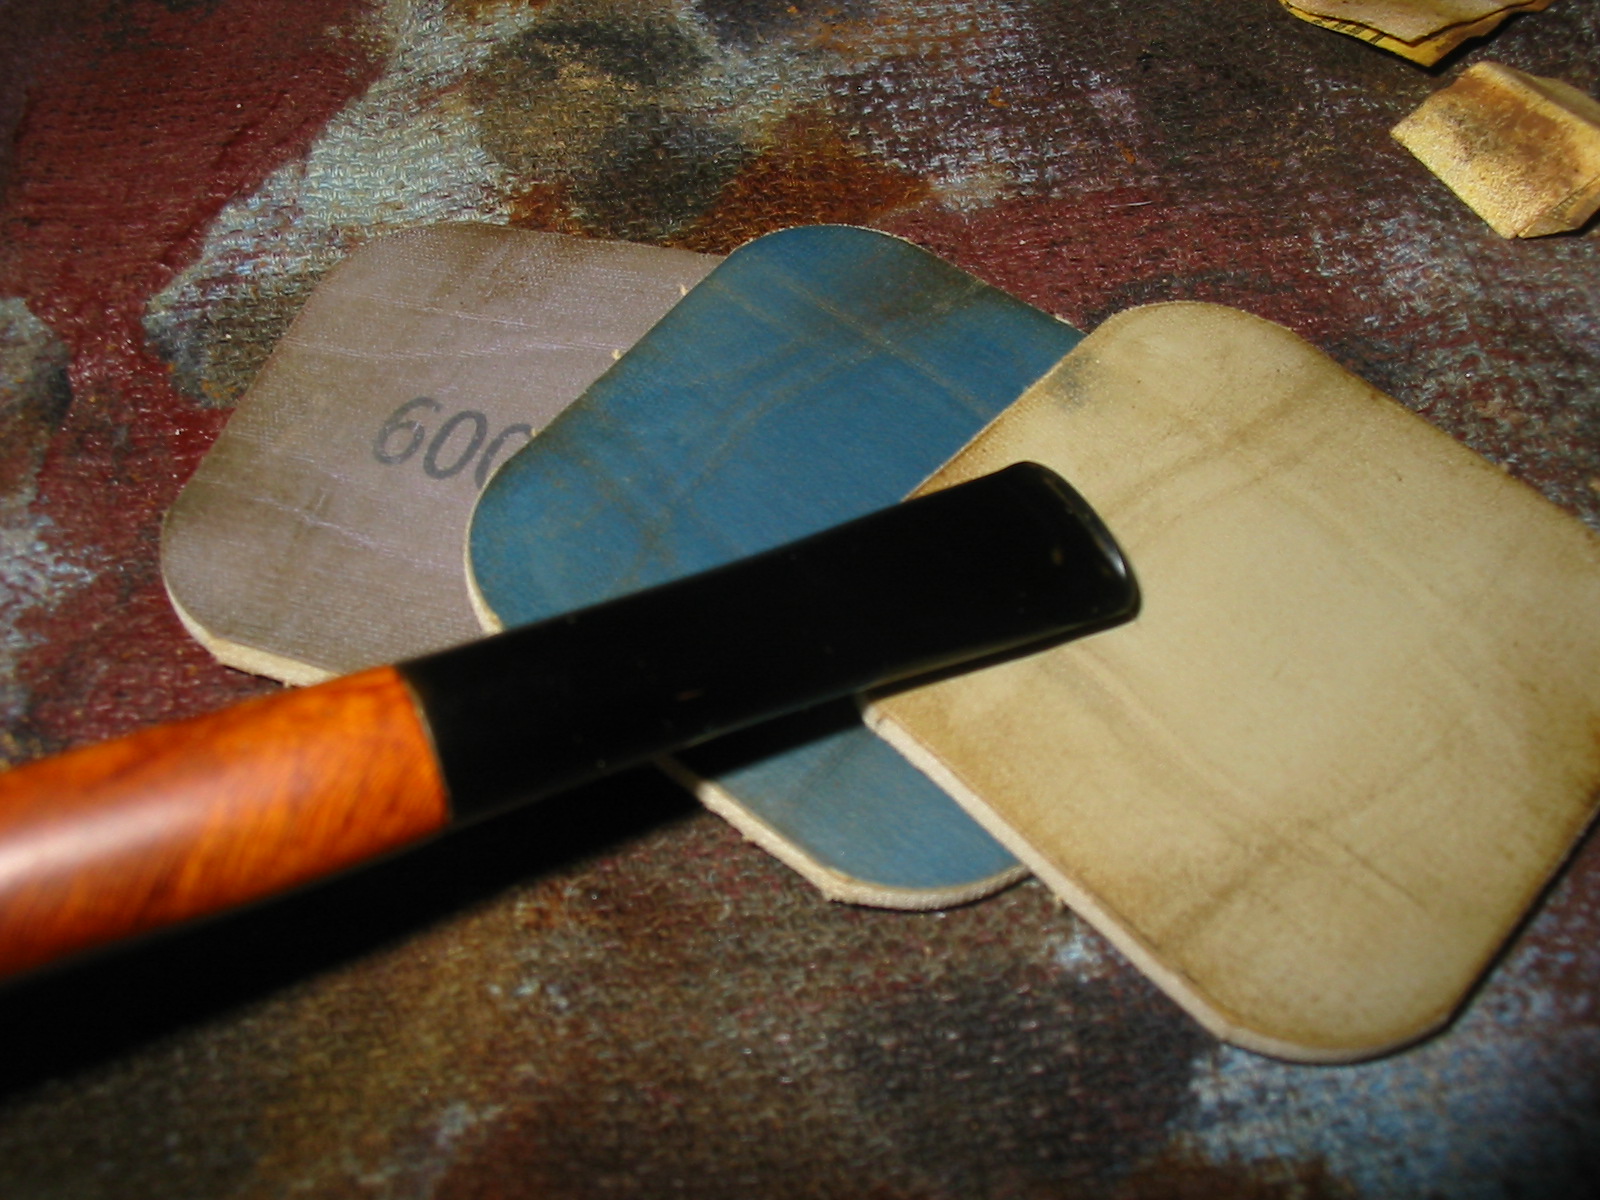
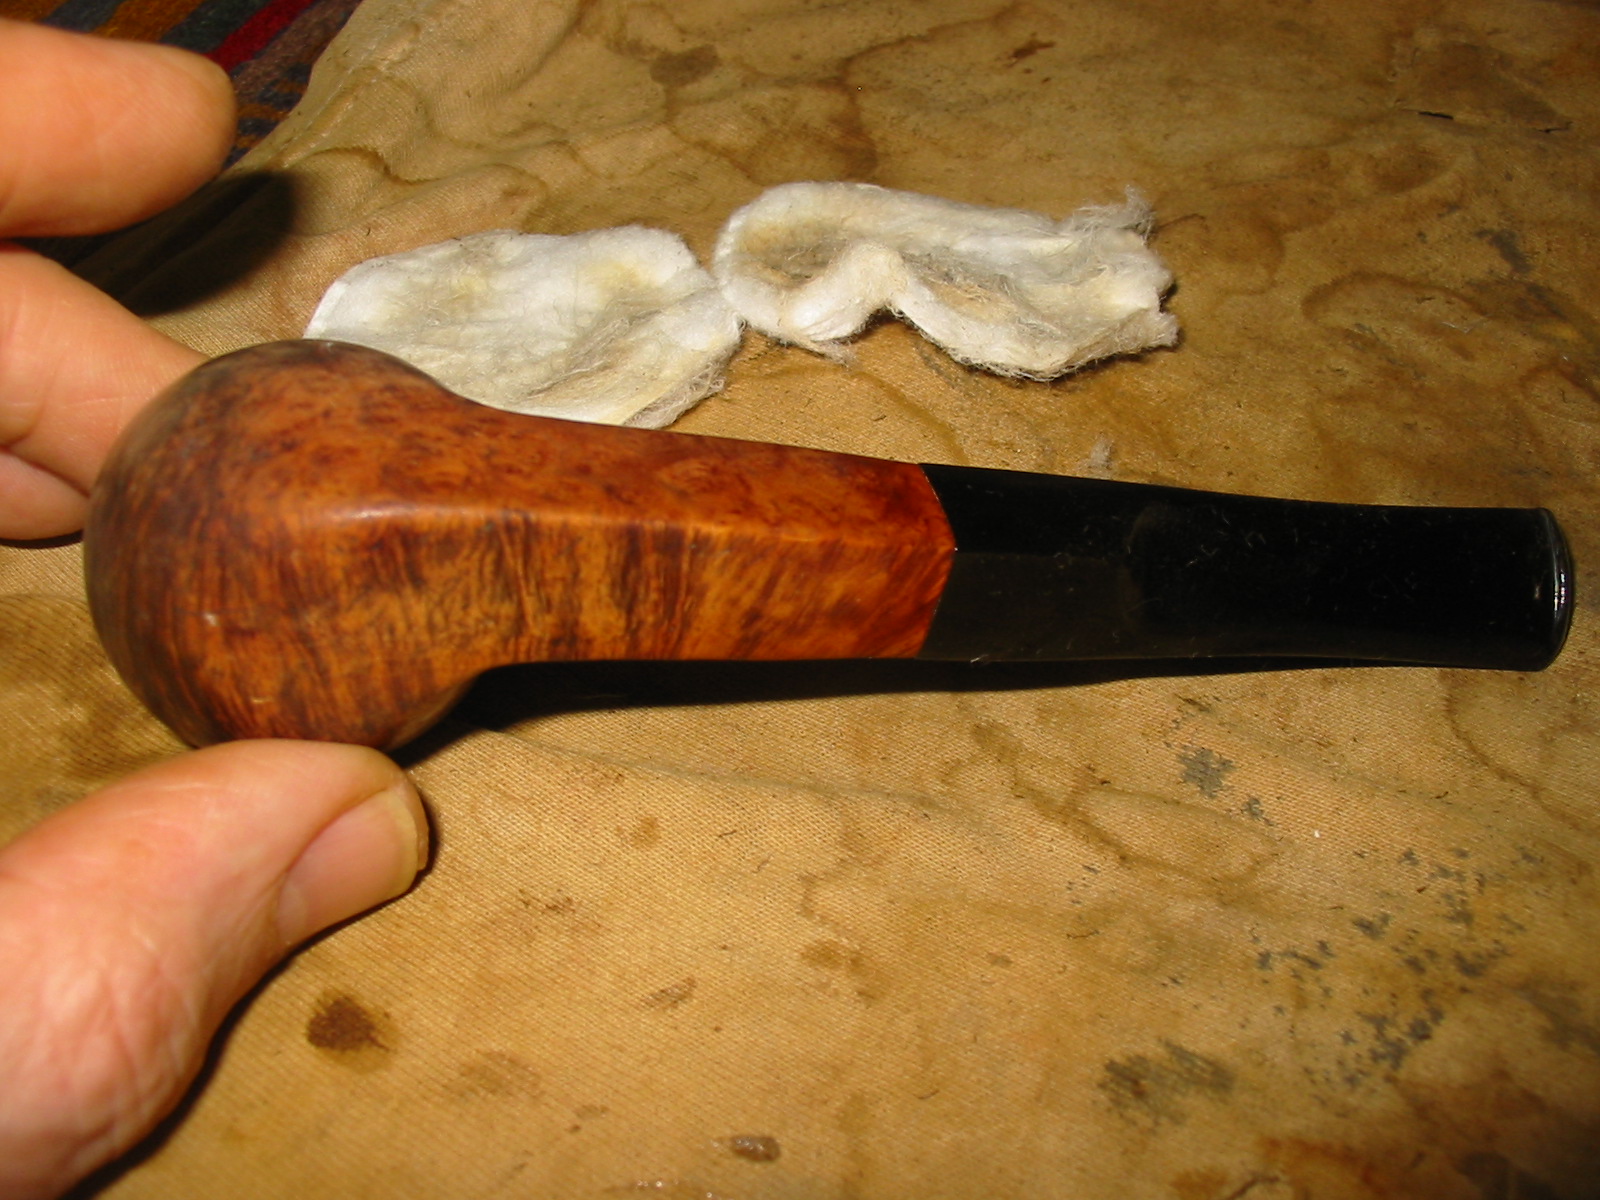
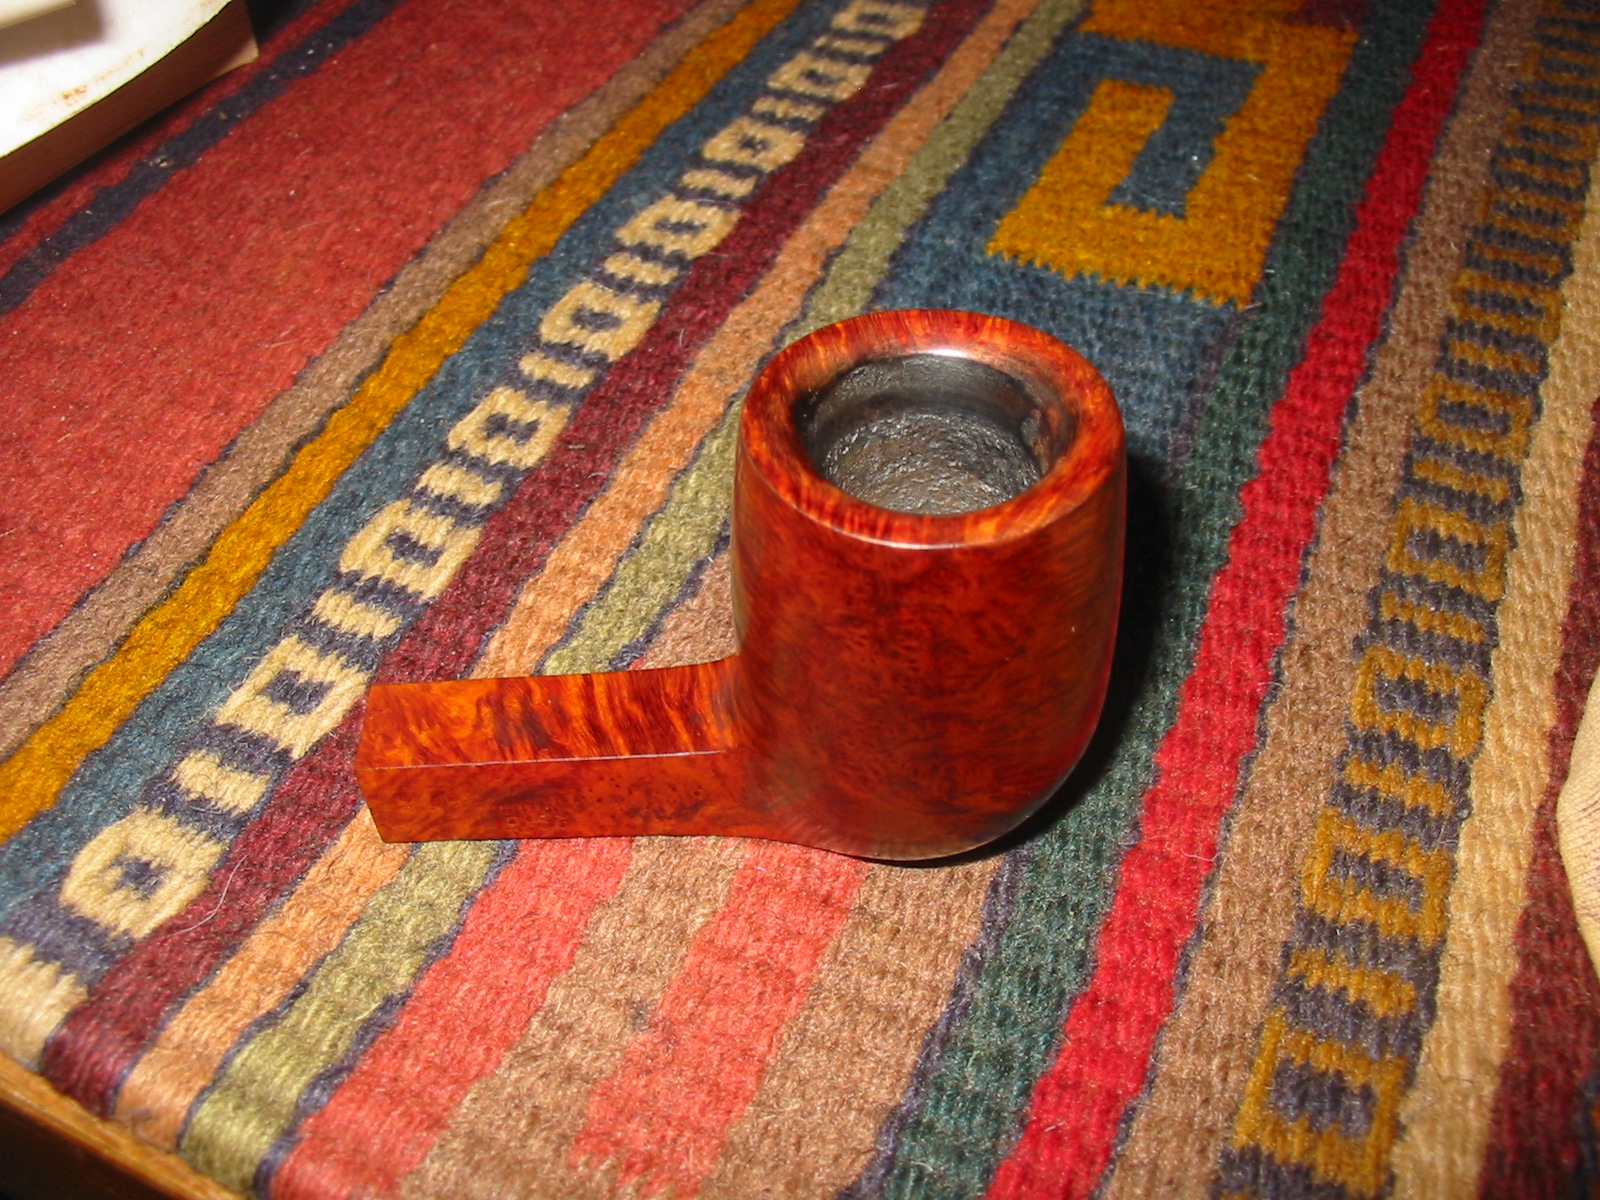
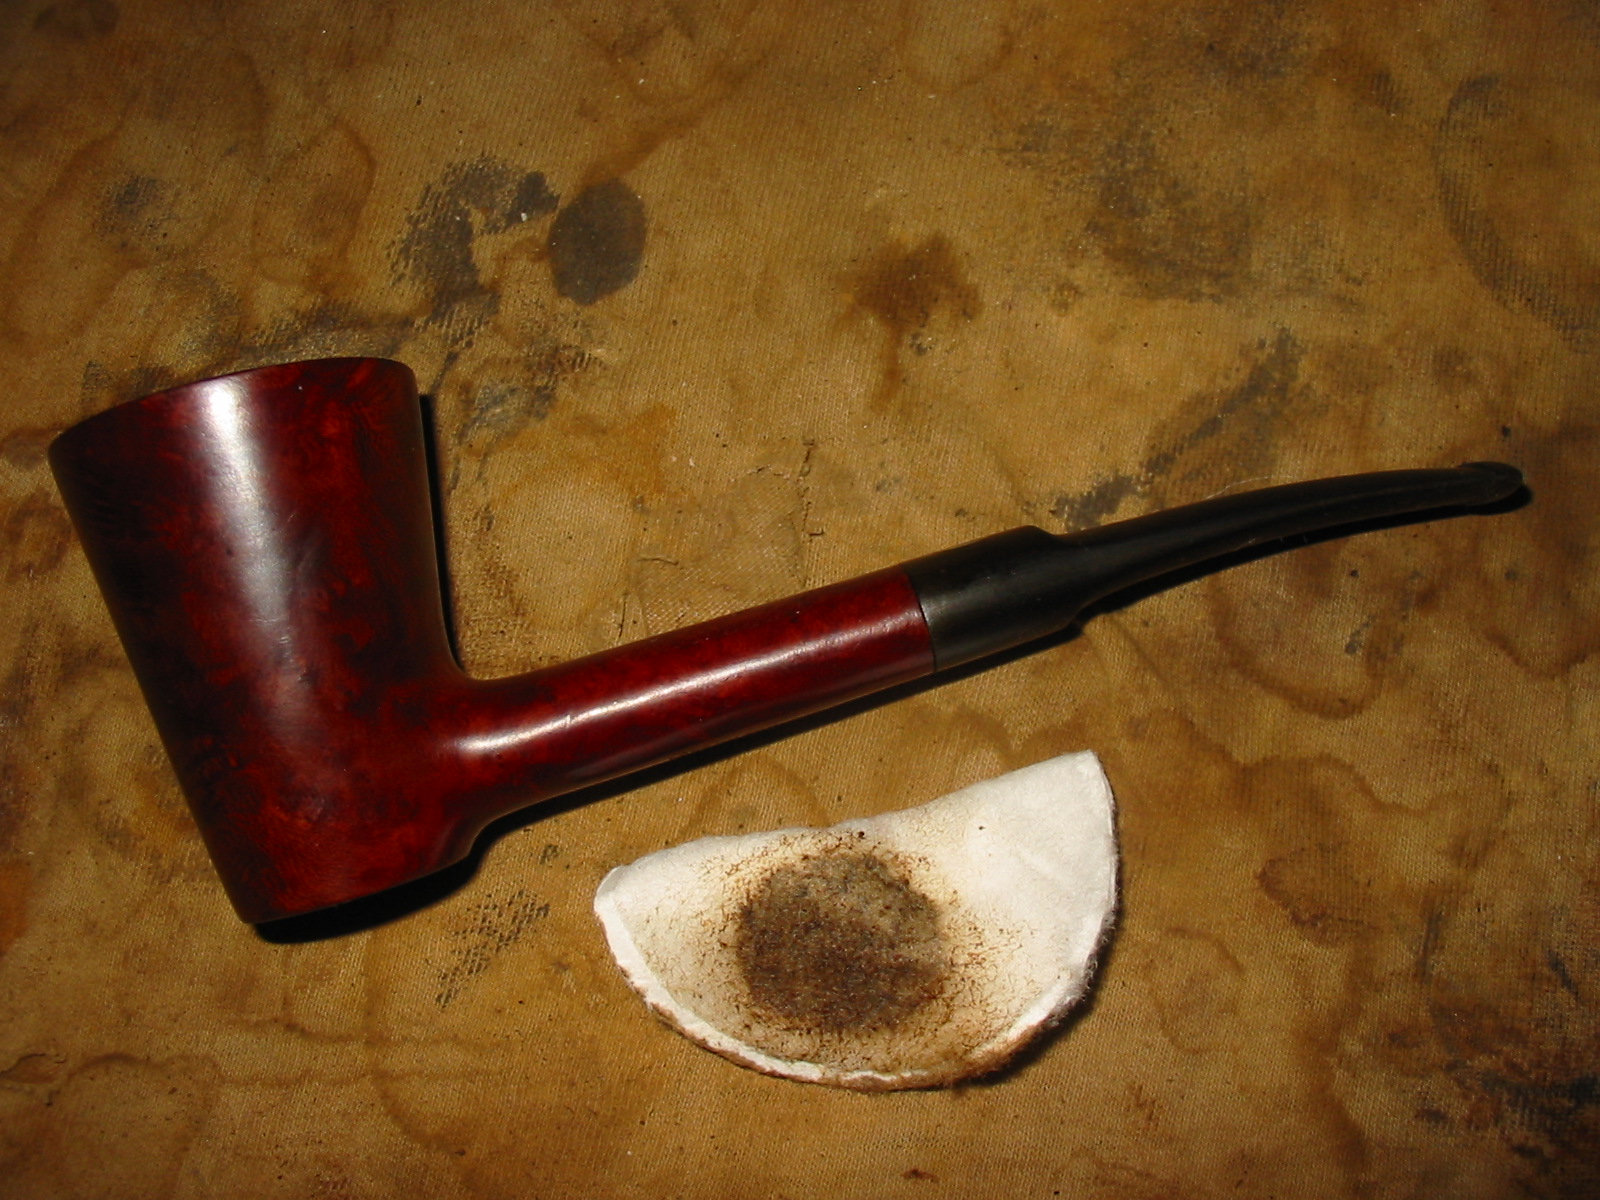
When I had completed the sanding with the micromesh pads I wiped the stem down a final time with the oil and then buffed the bowl and stem with White Diamond on the buffing wheel. I completed the refurbishing with repeated coats of carnauba wax on the buffing wheel applied to the stem and Halcyon II wax hand applied to the bowl. I buffed the bowl and stem with a clean soft flannel buff for a final shine. It is nice to have a bit of history on an old pipe. The added story of the purchase is something that adds colour to the pipe and makes it unique in my collection.
IMG_3581

IMG_3582

IMG_3583

IMG_3585

I received an email from Rob on New Years afternoon giving some more detail on the date and stamping of the pipe. I include Rob’s note in full.

Hello Steve. Happy New Year!

I spoke to my father and have some more information for you. The “386” represents two things. The “3” is the price category. At that time Julius had 1 through 6 for pricing. Your pipe would have been in the middle. The “86” represents the style. I asked my father about the style associated with that number WITHOUT showing him the photos. He was able to describe it in detail, triangular shank/stem and all. He hasn’t made an “86” in a long time. It was his own custom shape. It looks somewhat like “poker” to me. Also, some other interesting bits of trivia- typically the “3” would would have been within a circle (ie- his pipes have been known as Circle 3’s, Circle 4’s etc., and continue to be known as such based on price). Your pipe is very old. Julius only made 200-300 “Craft” stamped pipes. Those that didn’t have circle around price number are even fewer and older. For awhile he didn’t have a circular stamp and that’s where yours fits in. So, you have a real gem and rarity! It looks great in the pictures. My father doesn’t use a computer, so next time I see him I’ll be sure to show him on my iPhone or iPad. He will enjoy seeing it and be glad that it’s in the hands of someone who appreciates it!

Hope this information had been helpful.

Sincerely,
Rob Vesz

Reworking a Couple of Pipes with my Son in Law on a Grey Vancouver Day


On a recent pipe hunt my son in law went with me and picked up a couple of pipes of his own. The first one was an interesting little Medico VFQ apple with a red stem. The stem was not too badly damaged. It was a filter pipe and still had the old paper Medico tube in the shank. The bowl was a mess. The rim had been burned and chipped and the bowl was badly caked and it looked as if the previous owner had smoked gooey aromatics in it that left behind a heavy residue of tar in the bottom of the bowl. It had hardened into lava like material. He liked the stem colour and the shape of the old pipe so I said to go ahead and pick it up and the two of us could work on it and bring it back for him. So he shelled out the $12.50 for the pipe and it became his first estate purchase of the trip.
IMG_3549

IMG_3551

IMG_3553

This old pipe took every trick I had up my sleeves to refurbish. The stem was nylon not rubber so it was fussy to clean up. Every scratch shows in nylon and it cannot be buffed except with a very gentle hand. Everything had to be done by hand. I worked on the stem while Lance worked on the bowl. I sanded the stem from the button up the stem for about an inch to remove the calcification on the end and remove the tooth chatter on the top of the stem. On the underside there were a couple of deeper tooth marks that needed attention. I heated the nylon carefully with a lighter to try to raise the dents in the stem. I moved quickly across the surface so as not to melt the nylon. All but one of them lifted nicely – it remained a stubborn part of the sanding process. I sanded the stem with 220 grit sandpaper and then with a medium grit sanding sponge. I finished by sanding the stem with micromesh sanding pads from 1500-12,000 grit – wet sanding with the first three grits and then dry sanding with the remaining grits. I rubbed the stem down with Obsidian Oil. I also sanded the aluminum tenon with the 2400 grit micromesh pad to remove the oxidation on it. I polished it with a silver polishing cloth.

In the mean I had Lance top the bowl and flatten out the rim surface. Then he beveled the outer edge to give the pipe a rounded look like it had previously. He gave the inner edge a slight bevel as well. There were three flaws in the rim surface where the fills were missing. I had him repair these with briar dust and super glue. He then topped the bowl lightly a second time to smooth out the fill repairs. He wiped the bowl down with acetone and sanded it with the sanding sponge. He gave it a quick sand with 1500-2400 grit micromesh as well and then stained it with a black undercoat making sure that the stain went into the grooves that were carved in the bowl surface. He then wiped it down with acetone and sanded it again to remove the black stain from the surface of the bowl leaving it deep in the grooves and around the rim. The black feathered out down the bowl sides and at the tenon shank union. He sanded the aluminum band with a 3200 grit micromesh sanding pad to polish it and then restained the bowl with a red mahogany Miniwax stain. We buffed the pipe with White Diamond and then gave the stem very lightly making sure to not let it heat up. We gave the entirety several coats of carnauba wax. Here is the first pipe he had ever refurbished after it was finished.
IMG_3565

IMG_3566

IMG_3567

IMG_3570

The second pipe was less of a challenge and it was found second on the hunt. It is a Kirsten SX. With a little research we found out that the X designation added to the shape and size S usually meant Brass but that during the 1960’s there was a brief period of time where the SX was an antiqued black and silver finish. That is what he had! Thus we were able to date the pipe a bit for him. The bowl was unsmoked new stock and was probably a replacement. The stem was oxidized and covered with tooth chatter. The barrel was oxidized and much of the antiquing had worn of the finish. The valve at the end was stuck in place. The ramrod was oxidized and dirty. It would be a very easy refurbishing job. Considering the pipe cost him $15 it was well worth the effort.
IMG_3554

IMG_3555

IMG_3556

IMG_3557

Lance took the pipe apart unscrewing the bowl and removing the stem and ramrod from the barrel. The valve at the end was stuck so we had to drive it out with piece of rod I have here. Once it was apart we each went to work cleaning the parts. Lance worked on the barrel and the valve cleaning the outside and the inside of the parts. I worked on the ramrod and the stem. He cleaned out the valve with cotton swabs, pipe cleaners and Everclear and also cleaned out the inside of the barrel with the same. He polished the barrel with silver polish to remove the oxidation and then we washed the barrel with a wash of black aniline stain to give it a bit of an antique look. I sanded out the tooth marks on the stem and polished the ramrod. Lance then sanded the stem with micromesh sanding pads from 1500-12,000 grit. Once the stem was polished he rubbed it down with Obsidian Oil and then we gave the stem a quick buff with White Diamond on the buffer. We rubbed Vaseline into the O-rings on the valve and the stem/ramrod then reassembled the pipe. We gave the entire pipe a light buff with carnauba wax and a soft flannel pad to polish it. Here is the finished pipe.
IMG_3559

IMG_3560

IMG_3561

IMG_3562

IMG_3564

When we finished we filled a bowl with well aged Balkan Sobranie Virginian No. 10 and retired to the porch to have a bowl and a visit. It was a great way to spend a grey Vancouver day and get to know my son in law a bit better. We are already planning more hunts and pipe refurbishing sessions. It is great to have someone working with me who is interested in learning the tricks of the hobby living so close by.

Reworking A Previous Refurbishment – A Genod Rhodesian


In photographing my Rhodesian pipes last evening I was examining this pipe and decided to work it over again. It is stamped Genod on the left side of the shank and Iwan Ries & Co. on the right side. I wrote about the work on it in this previous blog post: https://rebornpipes.wordpress.com/2012/09/04/reviving-a-genod-shaped-like-a-9242-gbd/ I think I worked on it the first time quite a few years ago and have learned a few more tricks since I did that old pipe.

The four photos below show what it looked like when I started this time around. The burn mark on the top and side of rim was quite prominent. There was a slight dip in the outer rim edge of the burn. The stem had some tooth damage as can be seen in the last two photos.

Image

Image

Image

Image

The stem had some bite marks next to the button on the top and the bottom and there was oxidation along the edges. The angle of the button was not clean and had scratches and marks as well. I sanded the stem with 220 grit sandpaper, medium grit sanding sponge and micromesh sanding pads from 1500-12,000 grit. I wet sanded with the 1500-2400 grit and dry sanded with the the remaining grits through 12,000 grit. I buffed the stem with White Diamond and then rubbed it down with Obsidian Oil.
IMG_3080

IMG_3081

IMG_3088

IMG_3089

IMG_3090

IMG_3091

The rim was damaged from a burn and I had not done much with it above so I decided to gently top the bowl and sand the burn mark to try and minimize its extent. I sanded entire crown around the bowl above the two lines. Once the burn mark was a minimize as I could make it I sanded it with a medium grit sanding sponge and then with micromesh sanding pads. I restained the pipe with an oxblood aniline stain thinned 2:1 with isopropyl to get the colour I wanted for the bowl. I buffed it and waxed it first with White Diamond and then carnauba.
IMG_3082

IMG_3083

IMG_3084

IMG_3085

IMG_3086

IMG_3087

I reinserted the stem and buffed the whole pipe with White Diamond a final time and then gave the entirety several coats of carnauba wax. The photo below shows the finished pipe. It is far better looking now after the rework than when I took it from the cupboard.
IMG_3092

IMG_3093

IMG_3094

IMG_3095