by Steve Laug
In November I received an email from Mario about working on some of his Dad’s pipes. Here is what he wrote to me.
I am desperately seeking help restoring and repairing some of my dad’s smoking pipes. I have tried reaching out to the only two known pipe repair establishments I could find in the entire country but one is not currently taking repair orders and the other said she didn’t want to try to repair these pipes without having even seen them. Would you be willing to take on the repairs or can you recommend anyone? Thank you much!!!—Mario
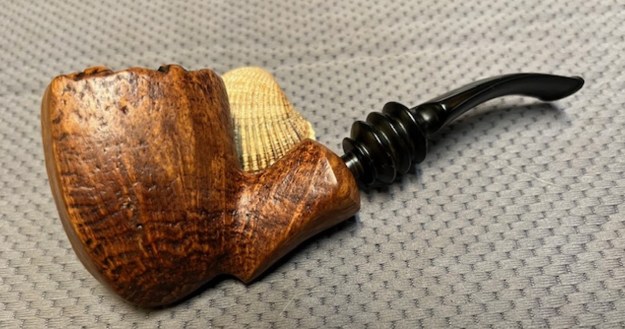
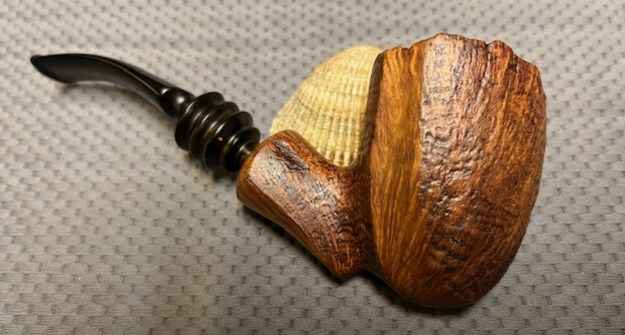
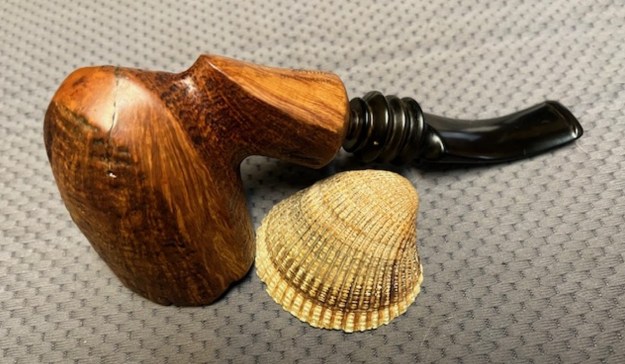
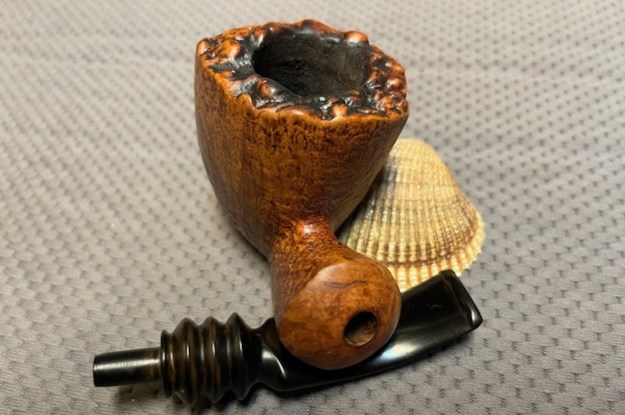
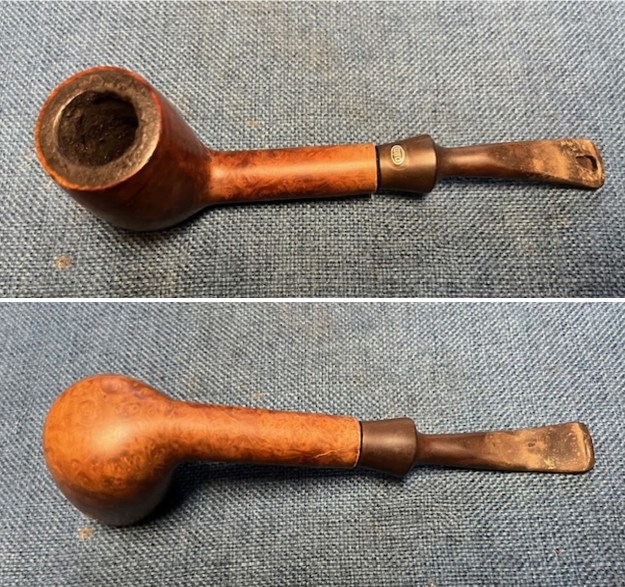
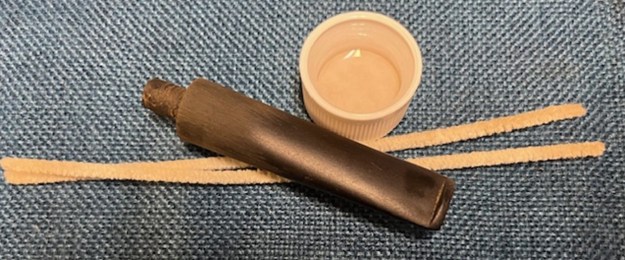
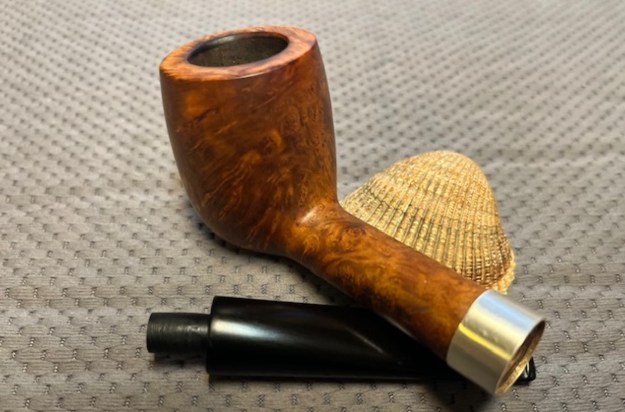
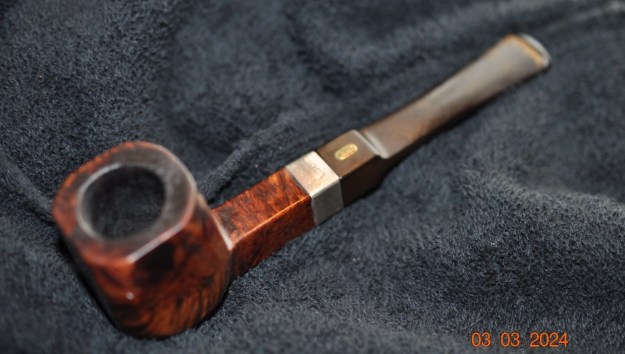
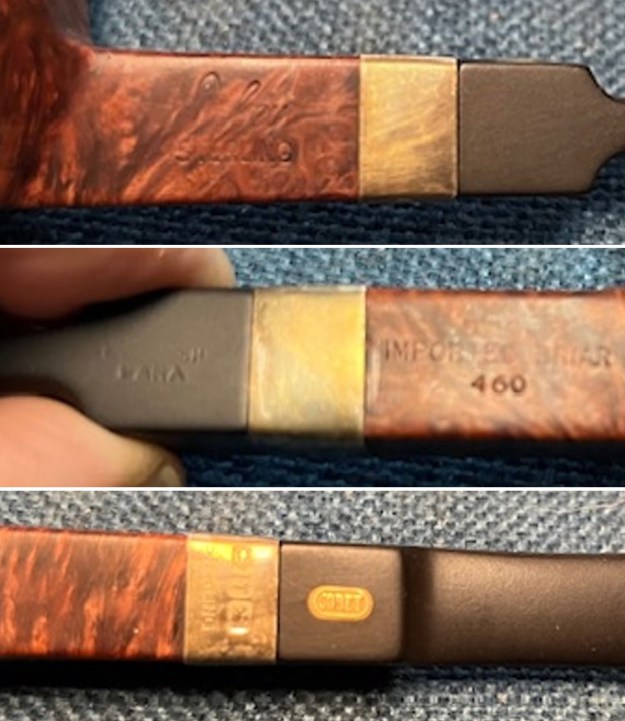
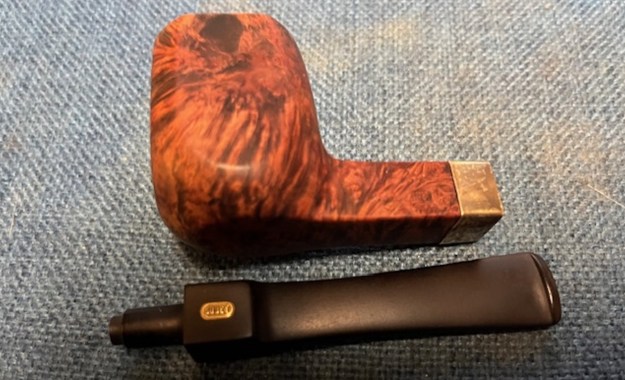
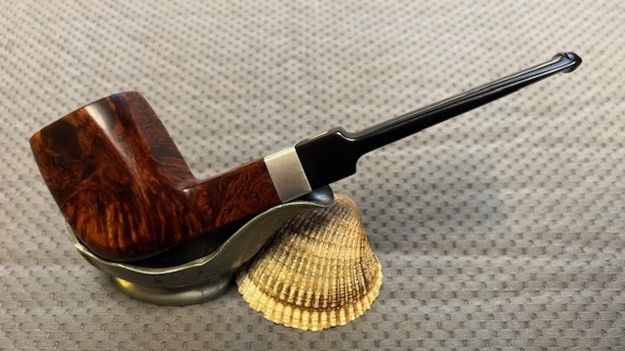
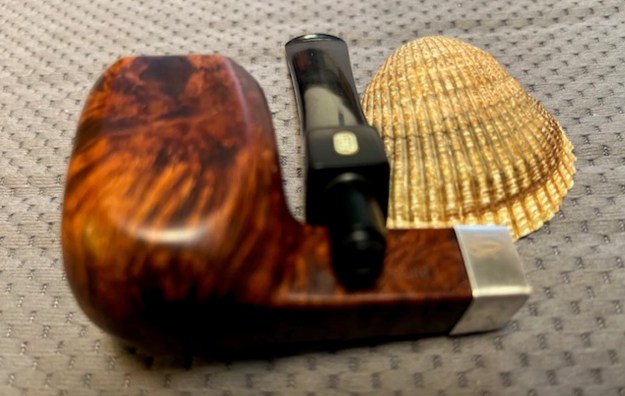
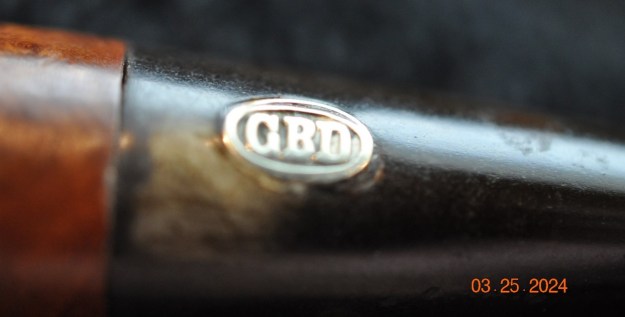
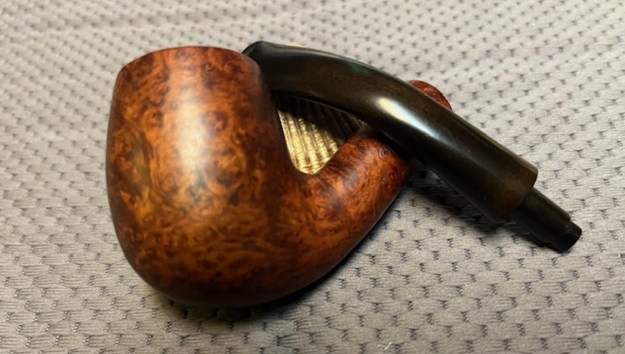
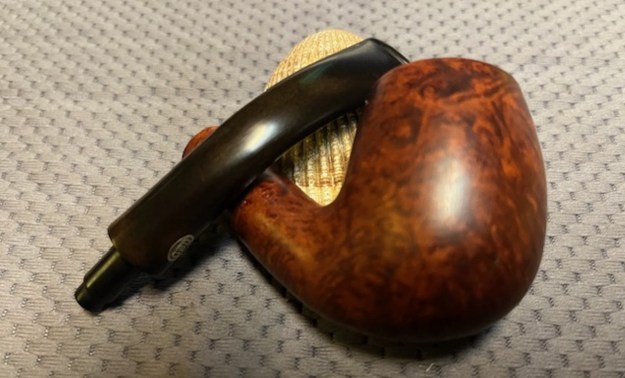
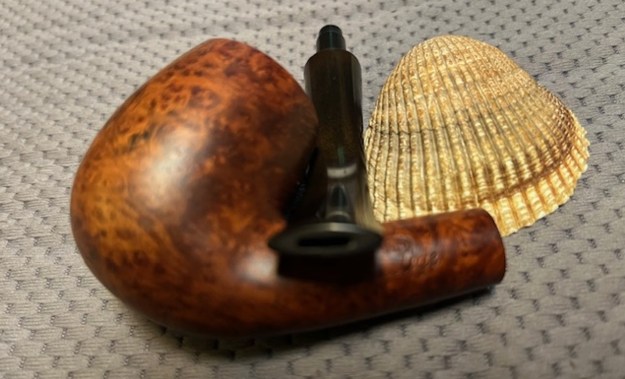
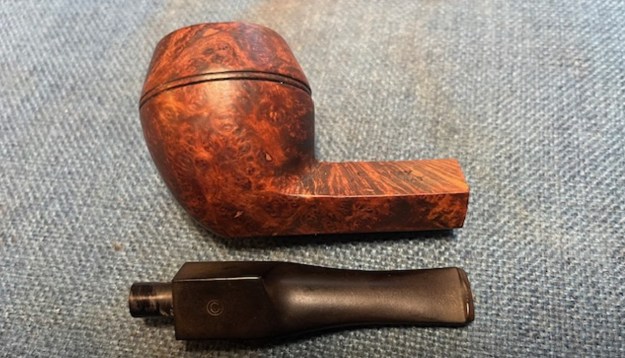
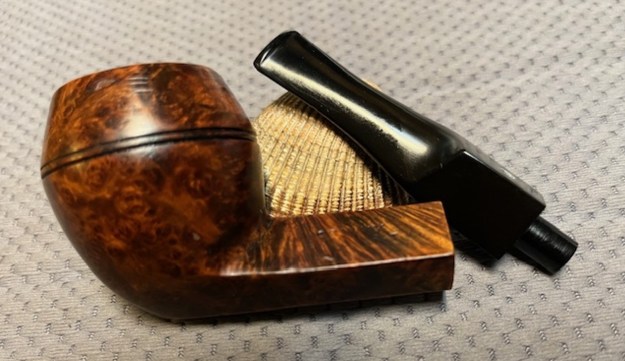
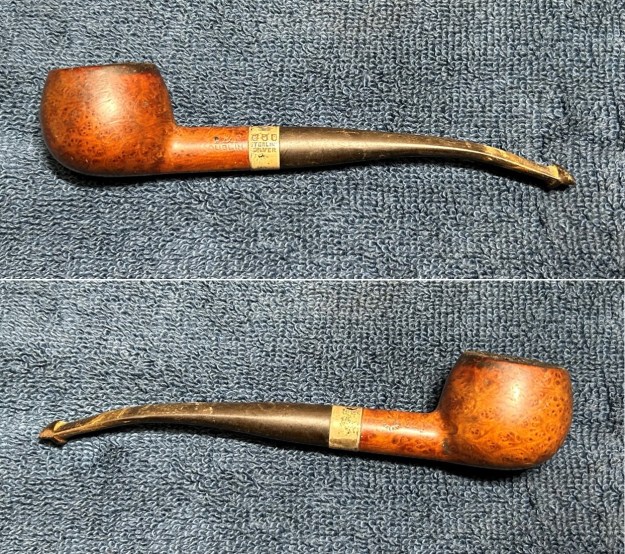
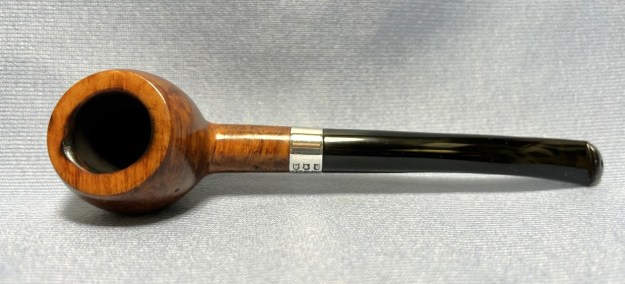
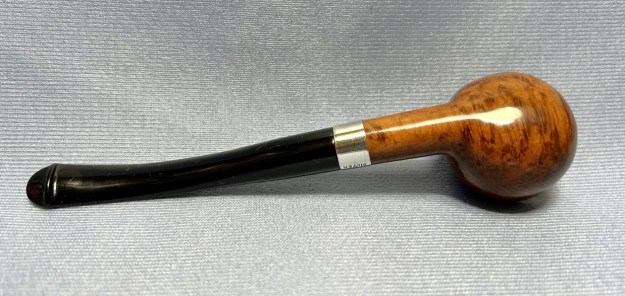
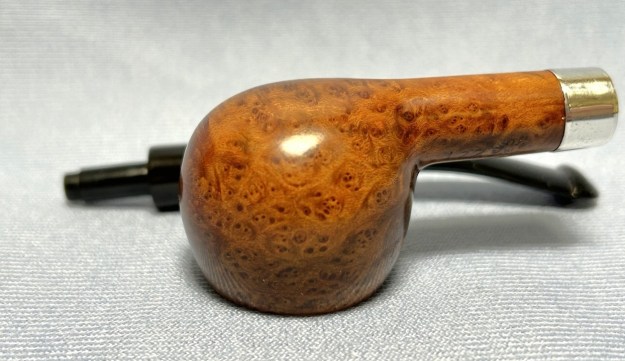
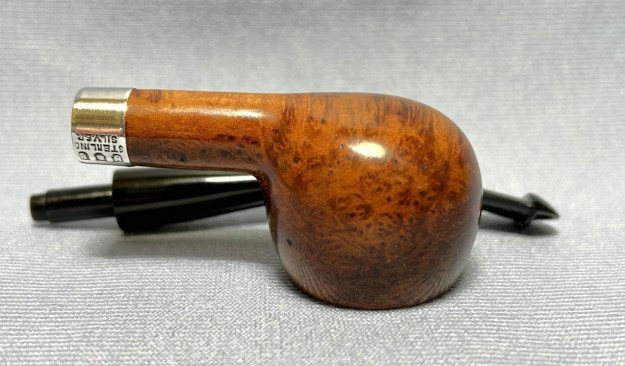
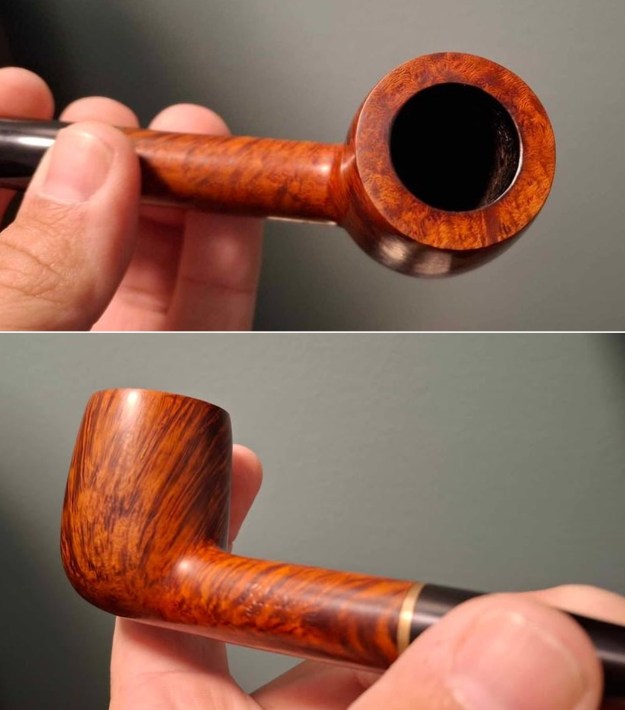
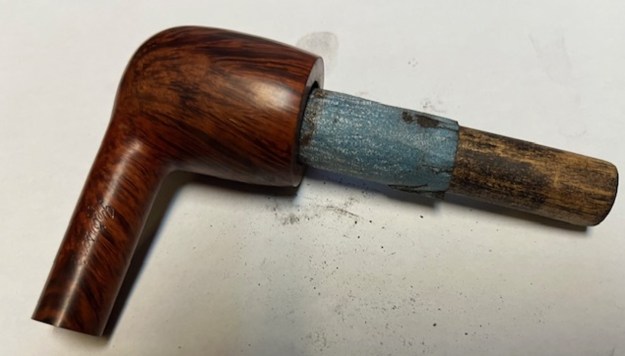
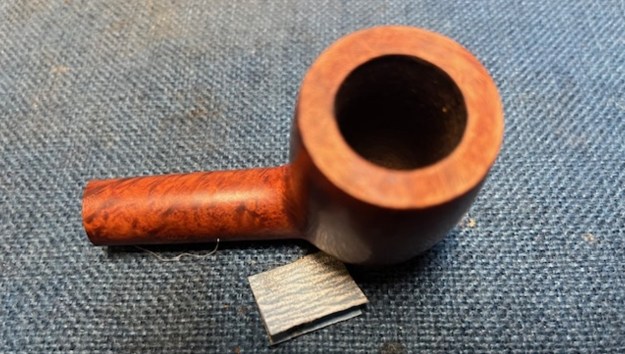
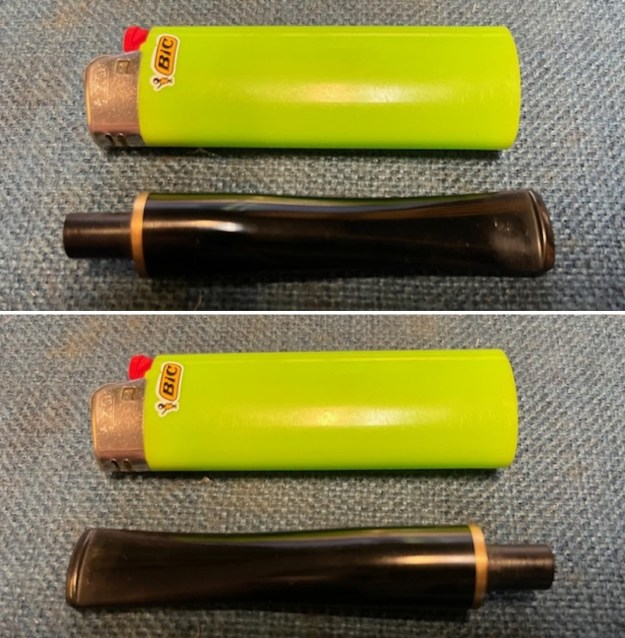
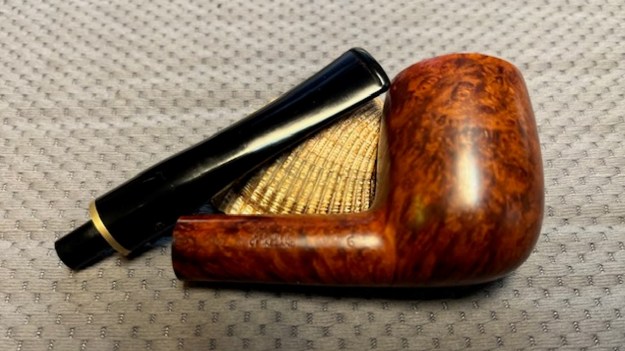
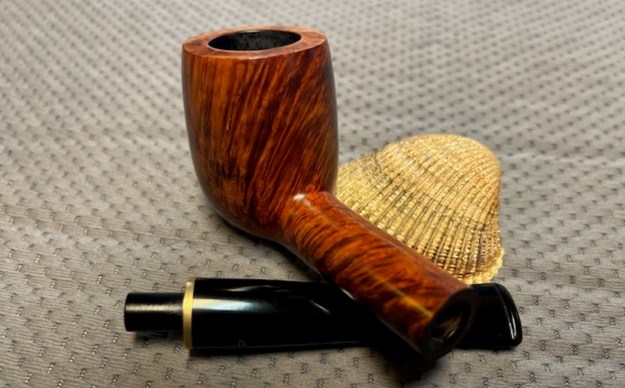
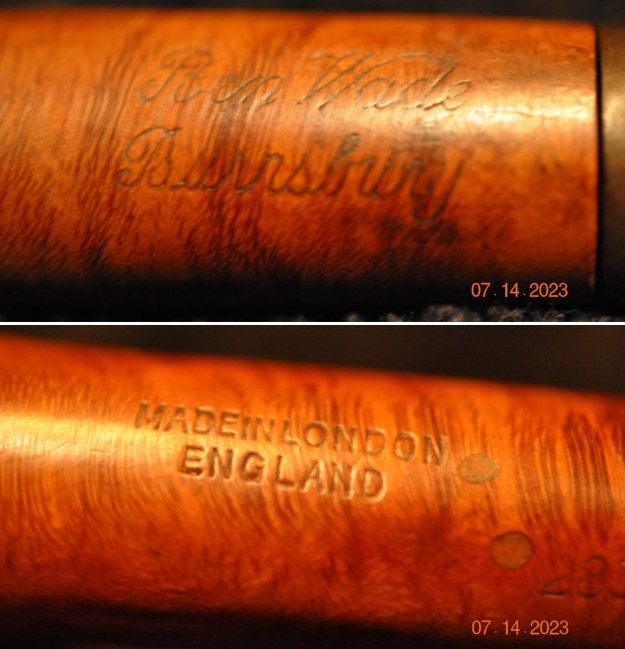
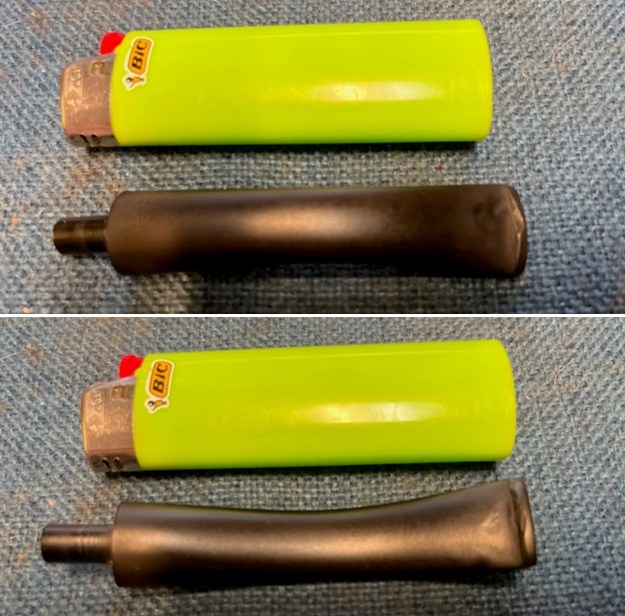
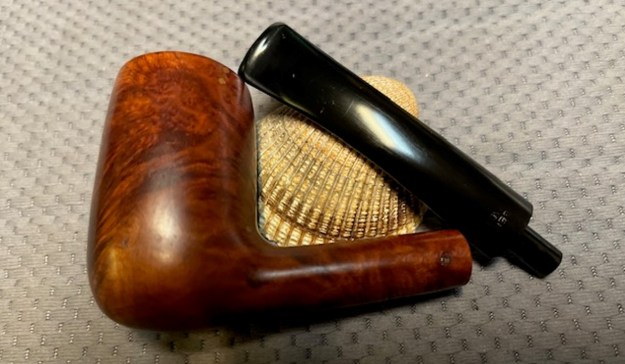
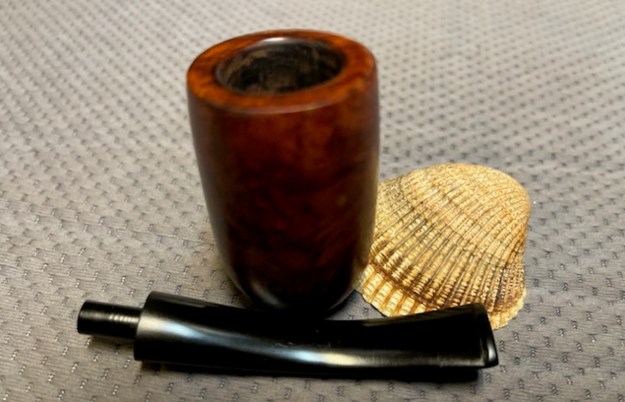
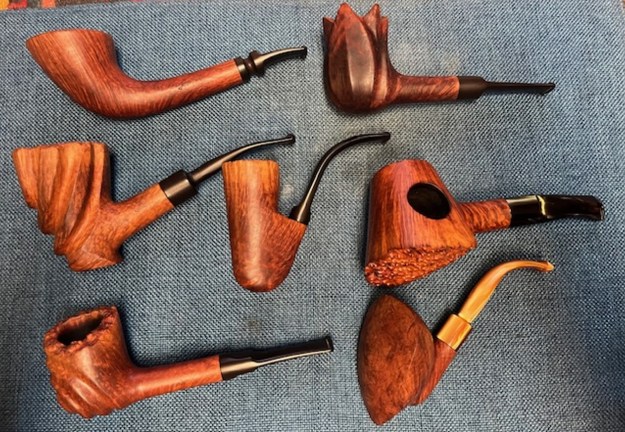
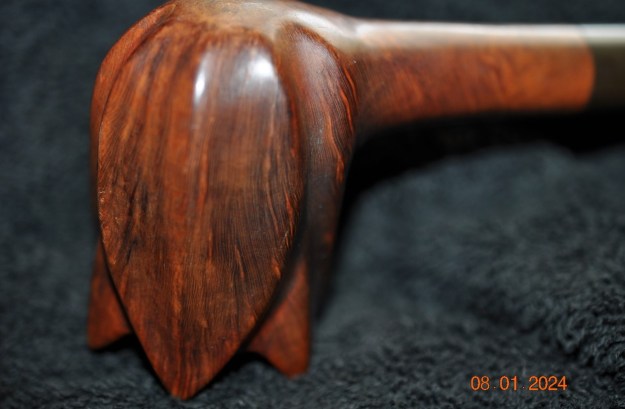
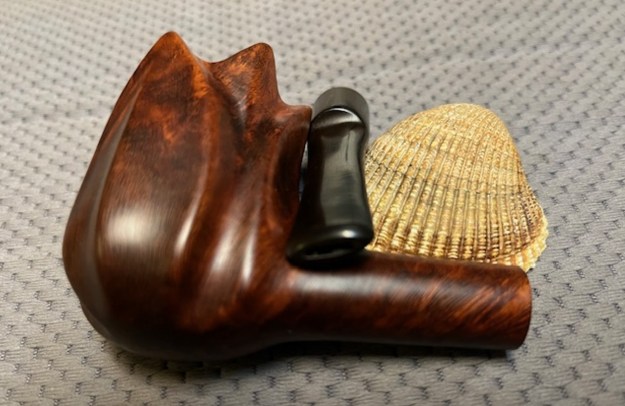
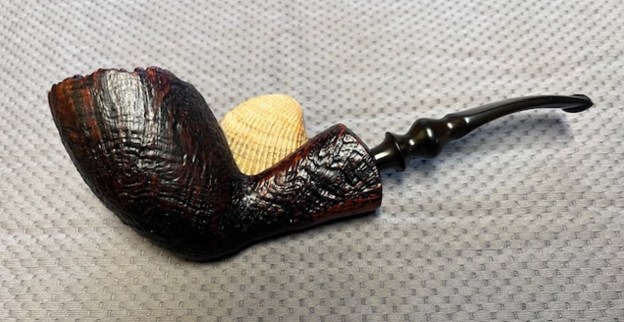
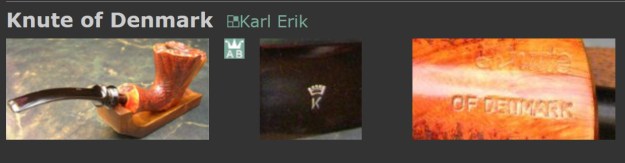
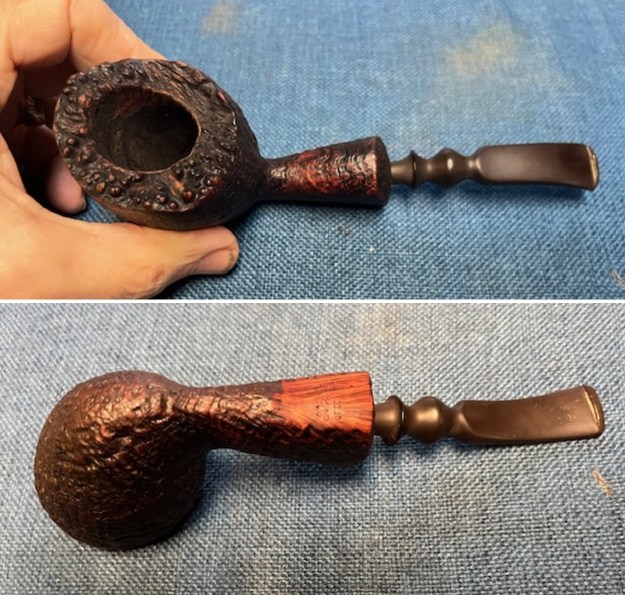
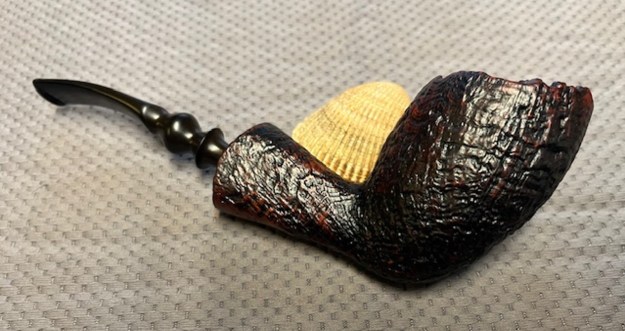
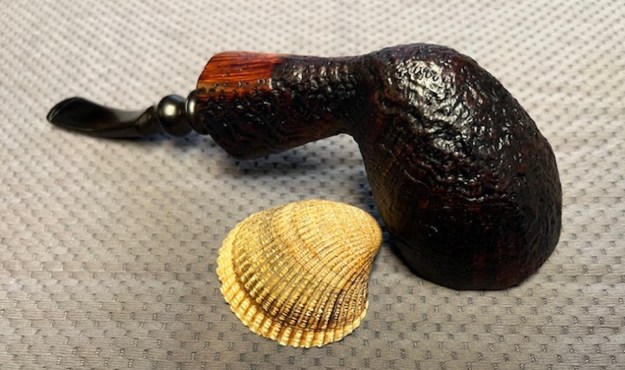
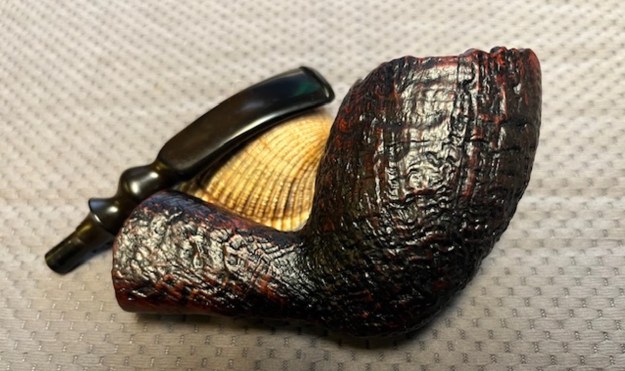
I wrote him back and asked him to send me photos of the pipes. He sent some single photos of the meerschaum bowl and stem, several of the leather clad Canadian and the photo of the rack and six pipes shown below. I looked through the photos and this is what I saw. There were two leather clad pipes a Canadian and a Pot. Both of them were cracked on the shanks and had been self-repaired with wire to hold the cracked shank together. The leather cladding was torn and the stitching was rotten and broken around the bowl. To me they were both irreparable. There was a lovely older Meerschaum with a horn stem that needed a good cleaning and repairs to the horn stem. There were two Knute Freehand pipes with original stems that were dirty but fixable. The plateau on the smooth one had a large chunk of briar missing. There was a Wilshire Dublin with a chewed and misfit stem. Finally, there was a billiard that had been restemmed with a fancy GBD saddle stem on it. They were a messy lot but I told him to send them on to me. They arrived yesterday and the condition of the pipes in the photos was confirmed. They were a mess and needed much work. I have included Mario’s group photo below to show the lot.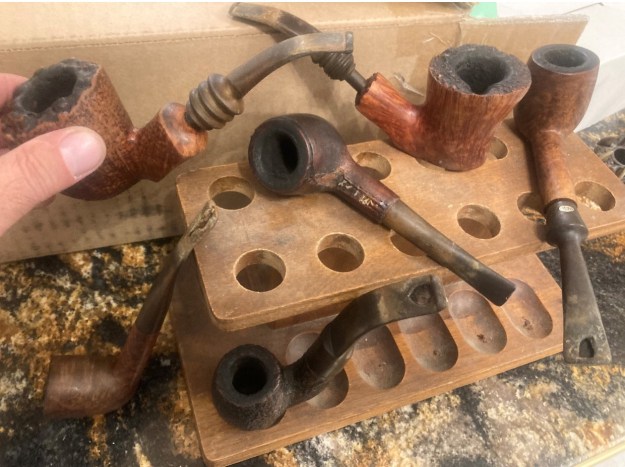 This afternoon I decided to start working on the fourth of the pipes – a sandblast freehand. It was the one on the left top held in the hand in the photo above. It was a Freehand Shape with a plateau rim top and a smooth shank end. It had a fancy turned saddle stem that was oxidized, calcified and had lots of tooth marks and chatter on both sides near the button. The bowl had a thick cake on the walls and a heavy lava coat in the plateau on the rim top. It was internally a mess. The finish was dirty and had grime ground into the sides of the bowl. There a crack running from the heel of the bowl half way up the bowl on both sides mid bowl. The shank was in good shape with no nicks or cracks. The pipe was stamped on the underside of the shank and read Knute [over] Of Denmark. There was no other stamping on the shank sides. I took photos of the pipe when I unpacked it to examine it. I have included those below.
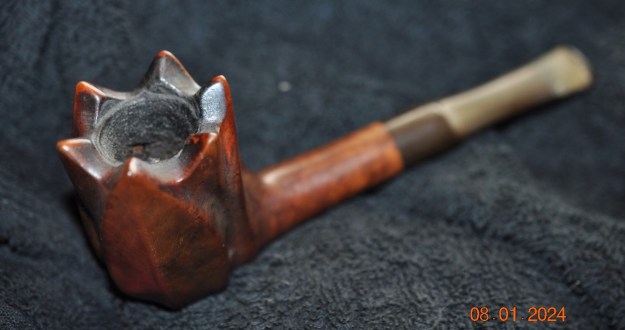
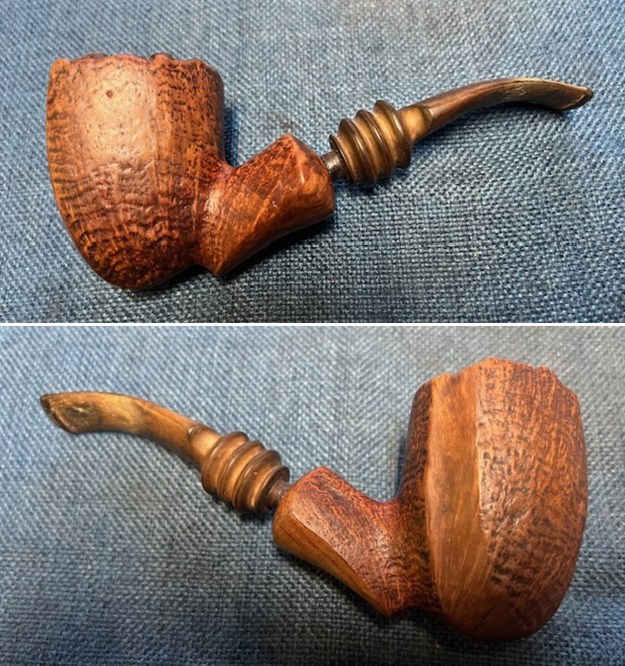
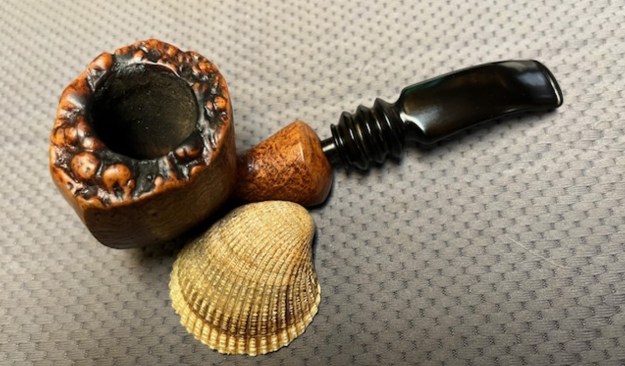
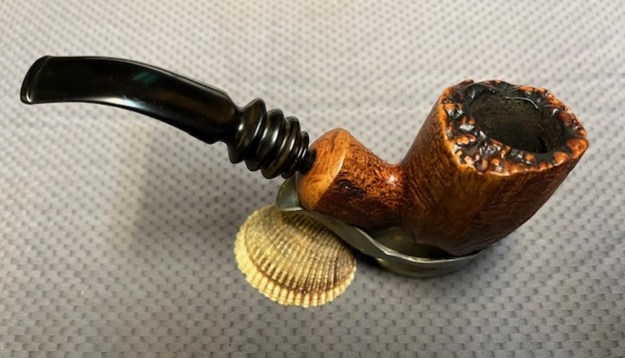
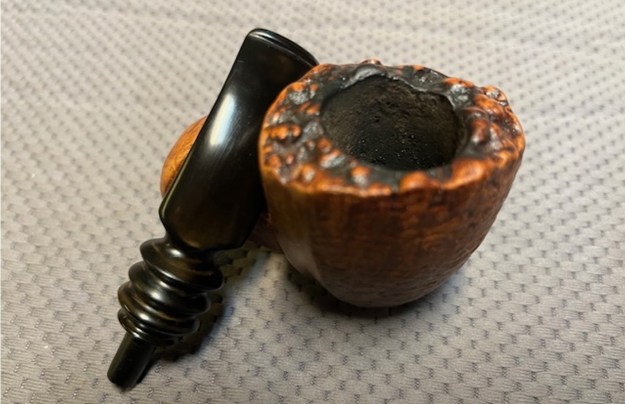
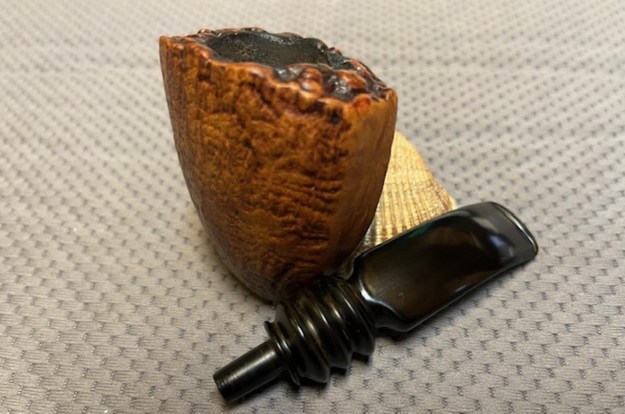
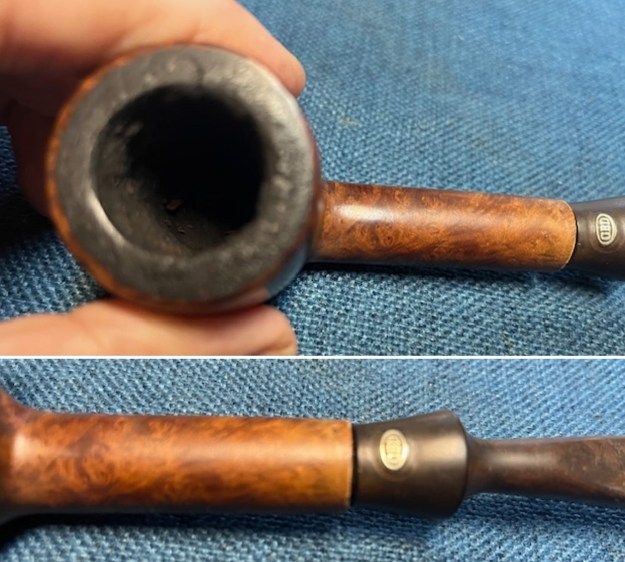
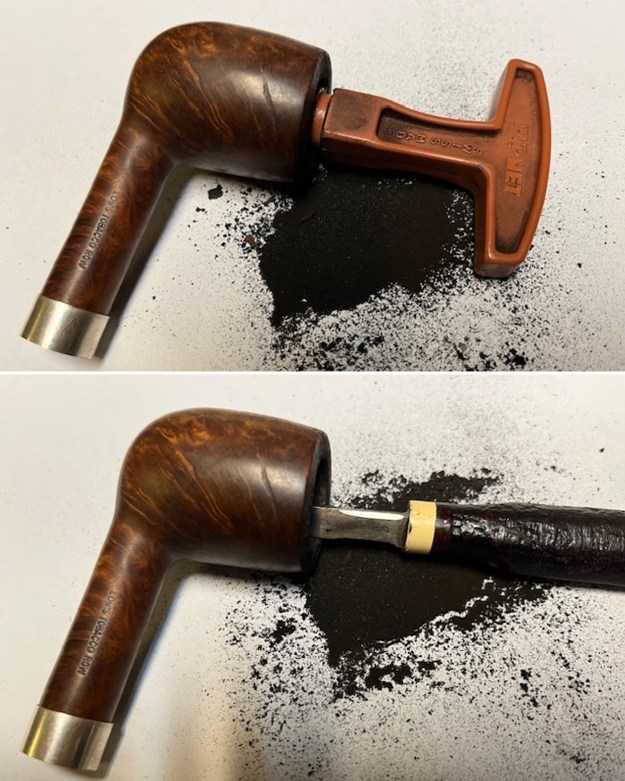
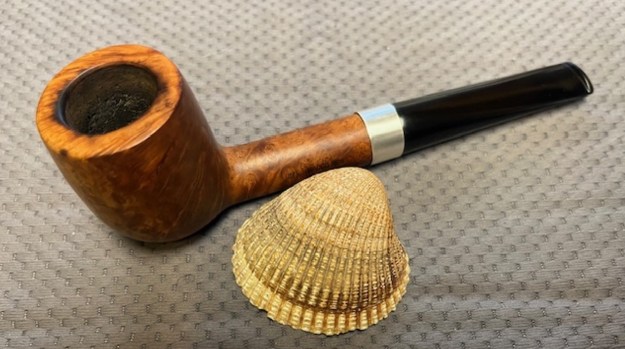
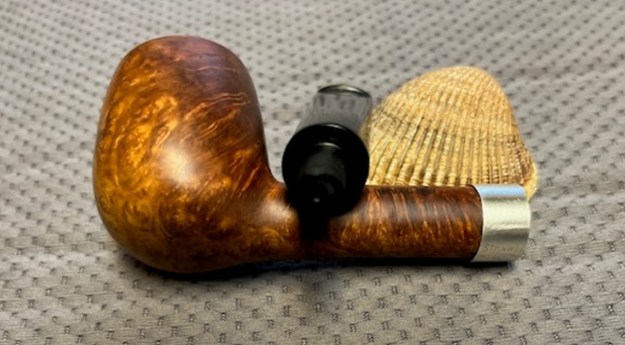
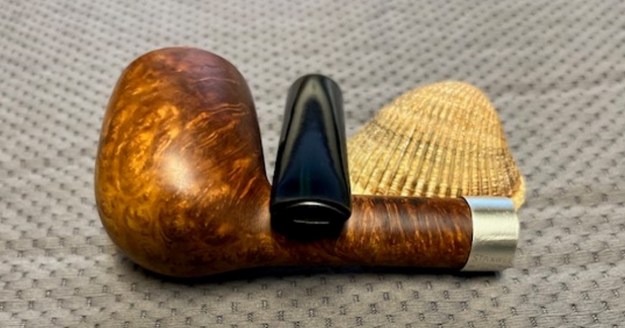
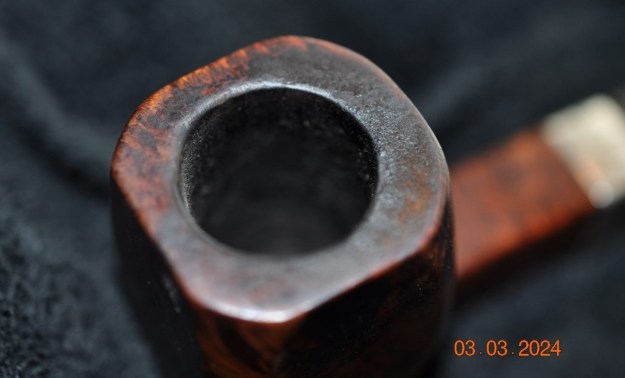
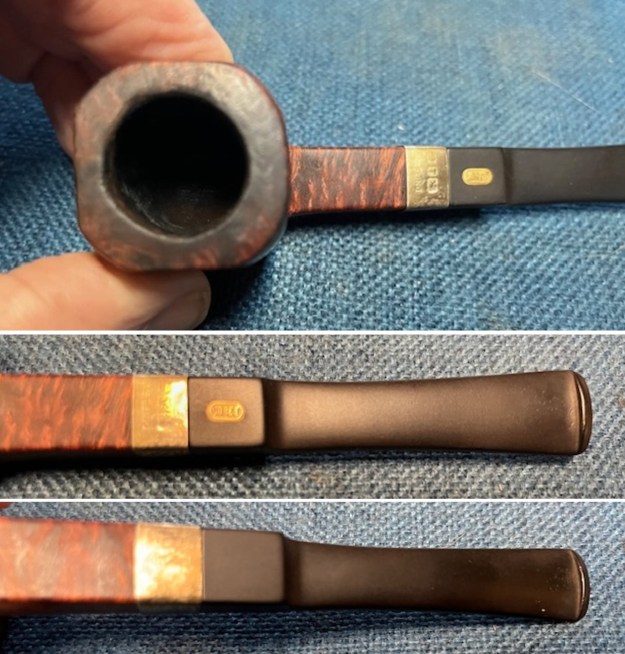
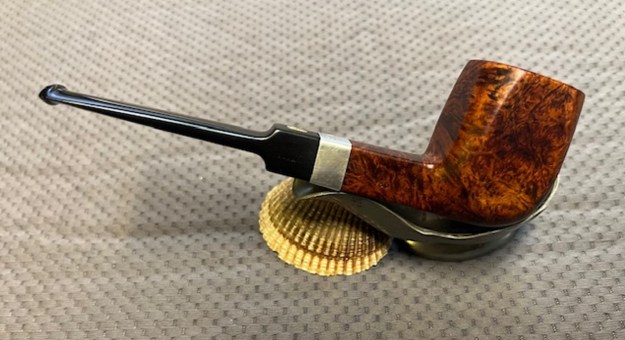
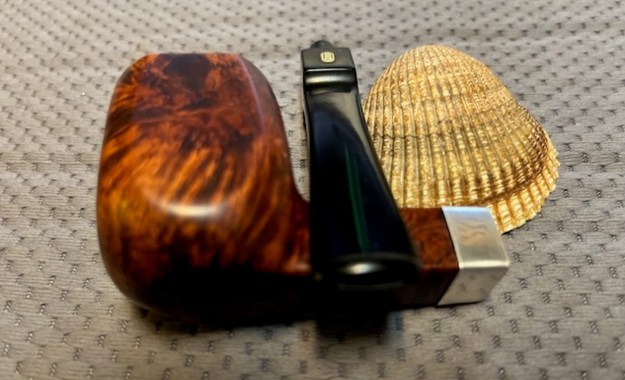
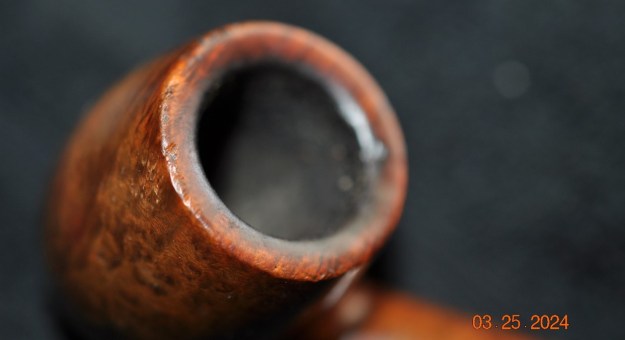
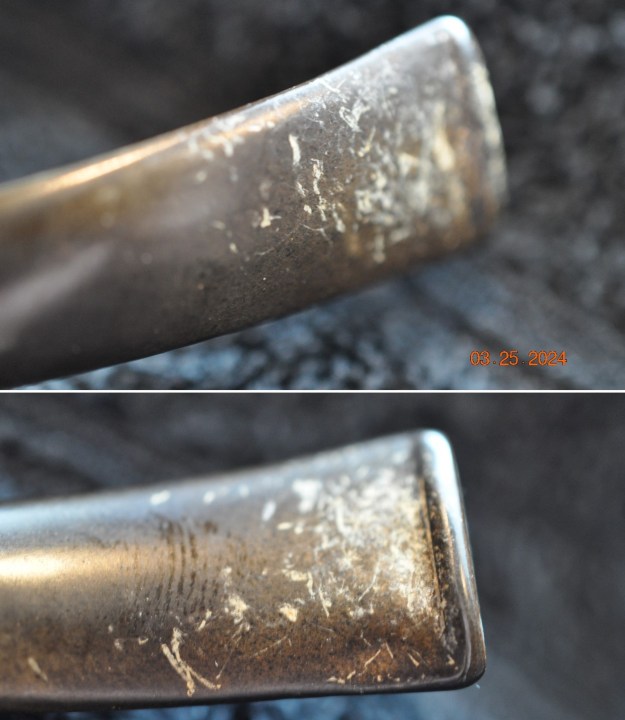
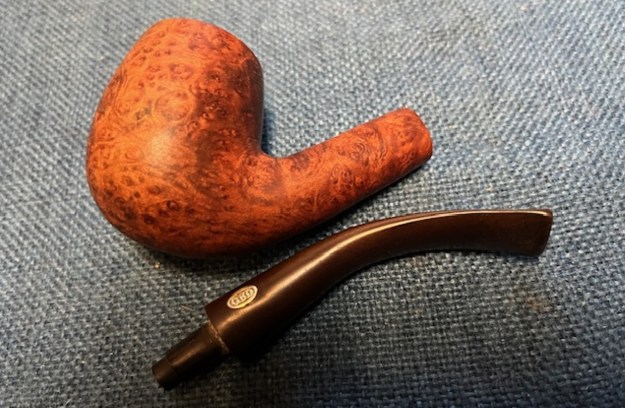
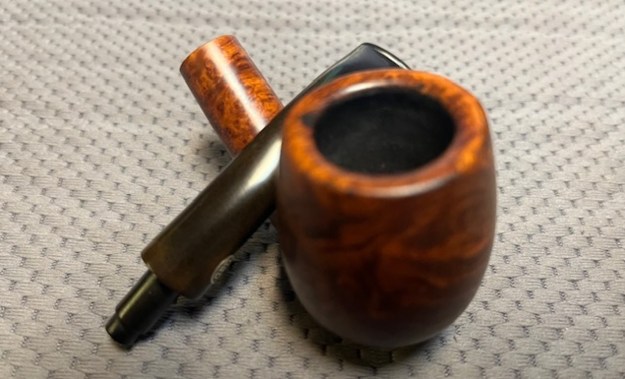
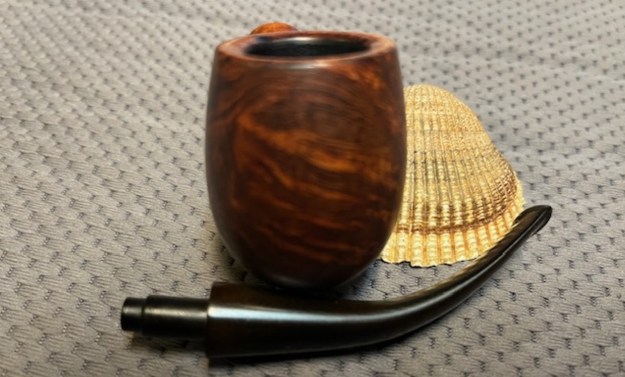
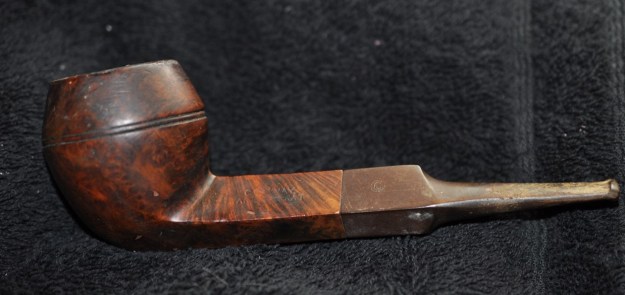
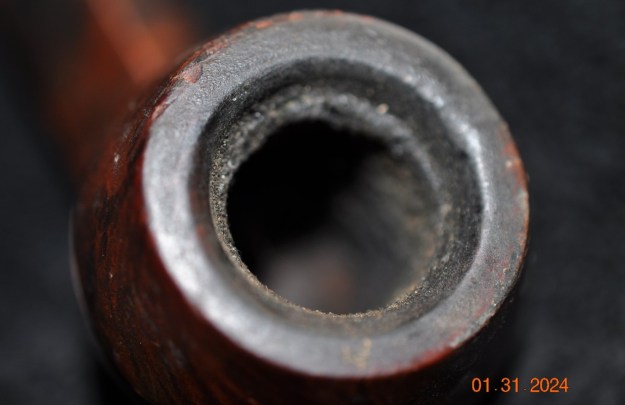
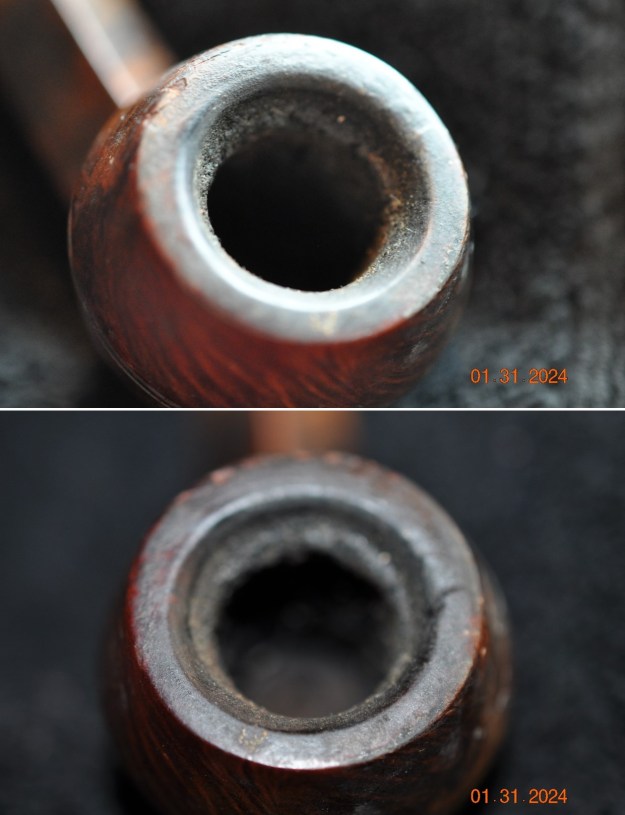
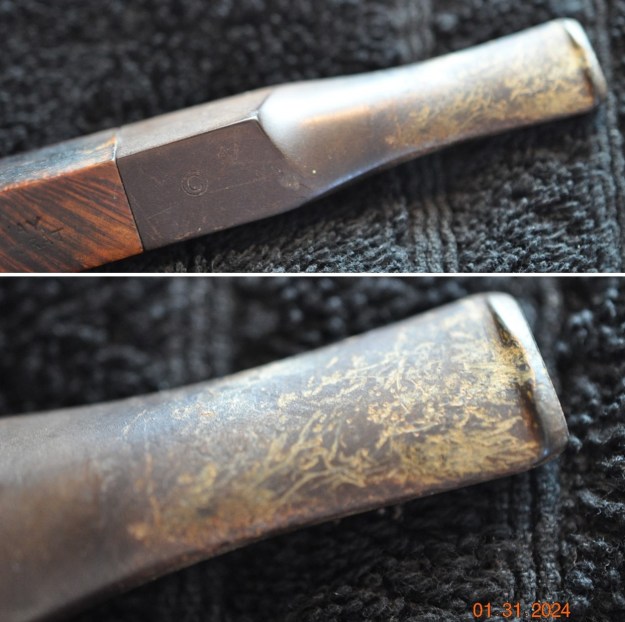
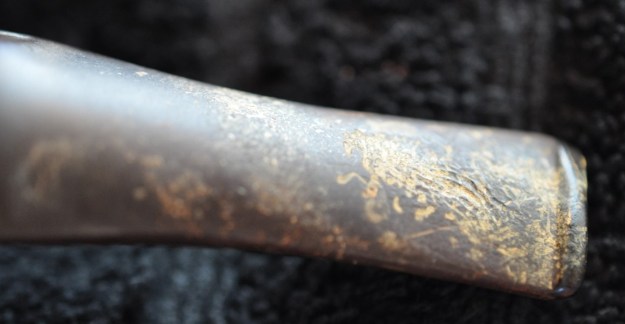
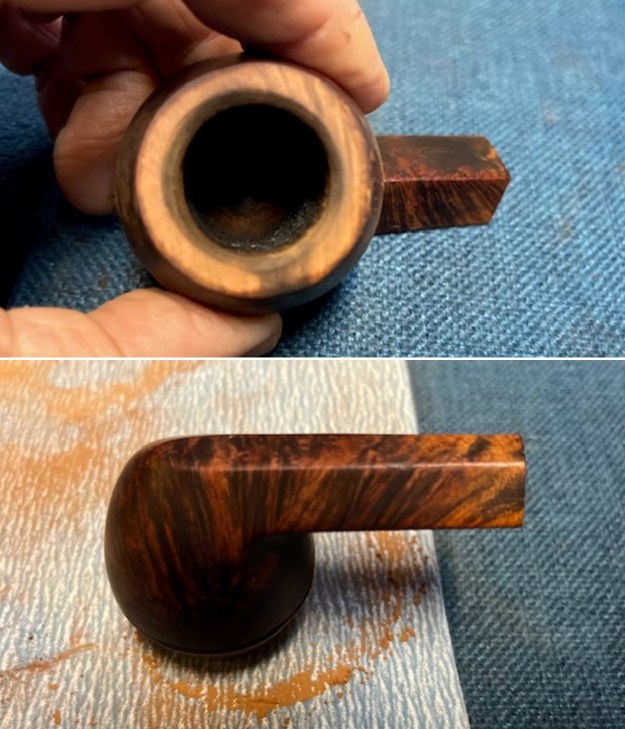
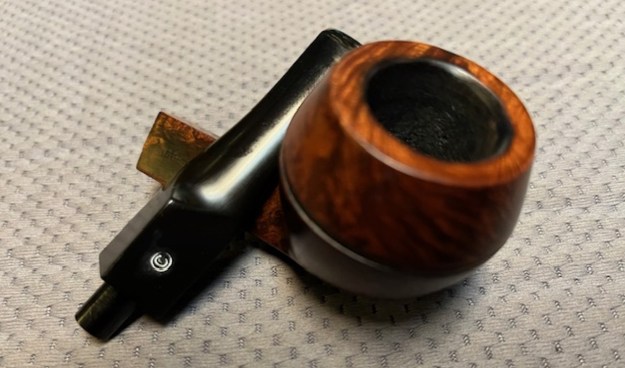
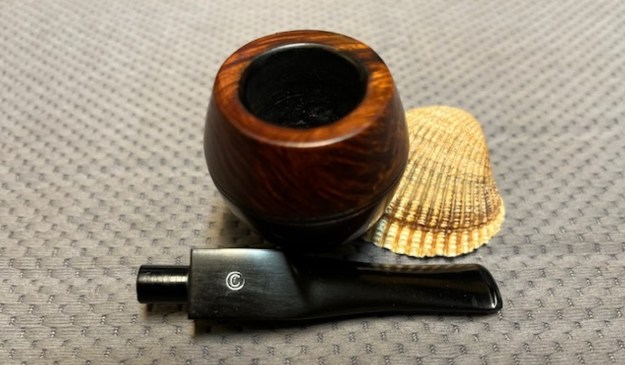
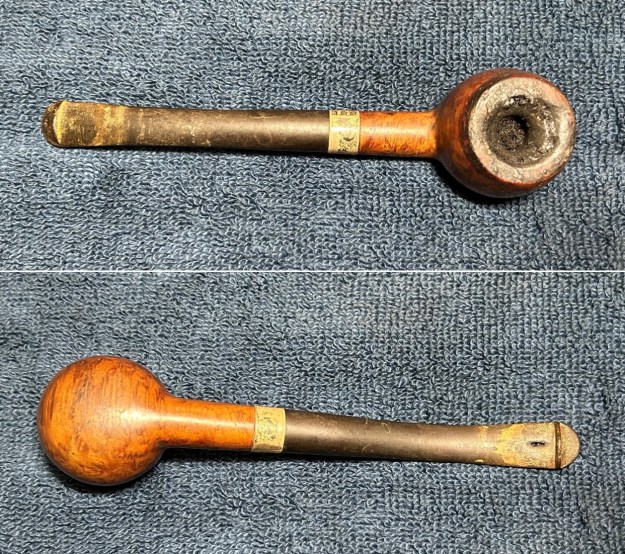
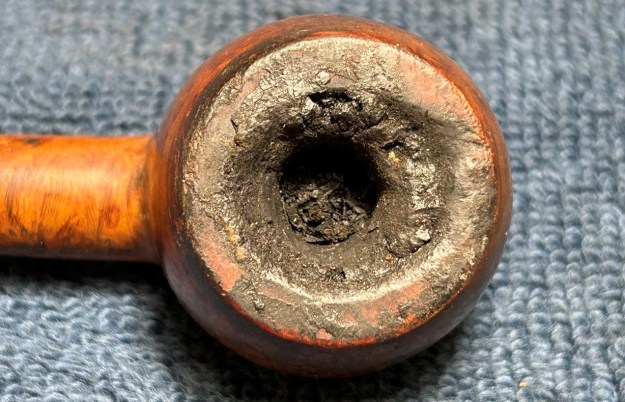
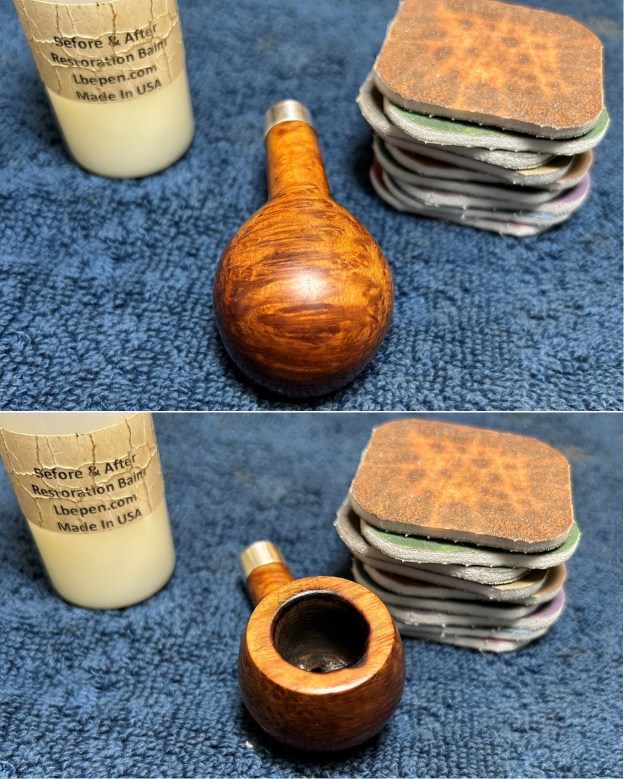
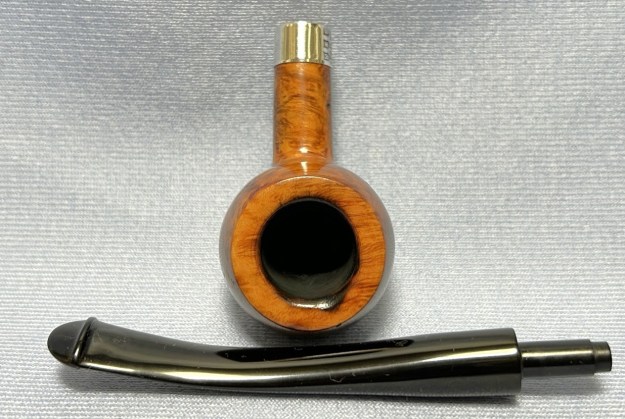
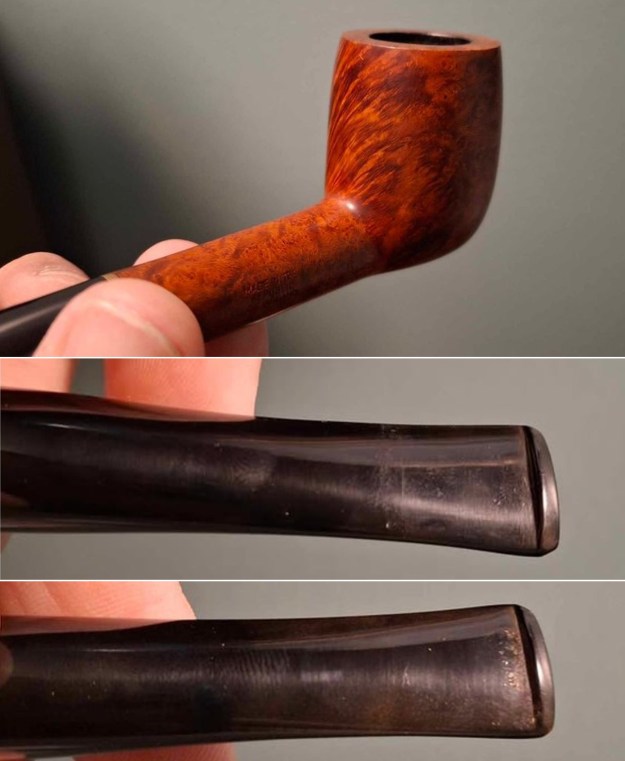
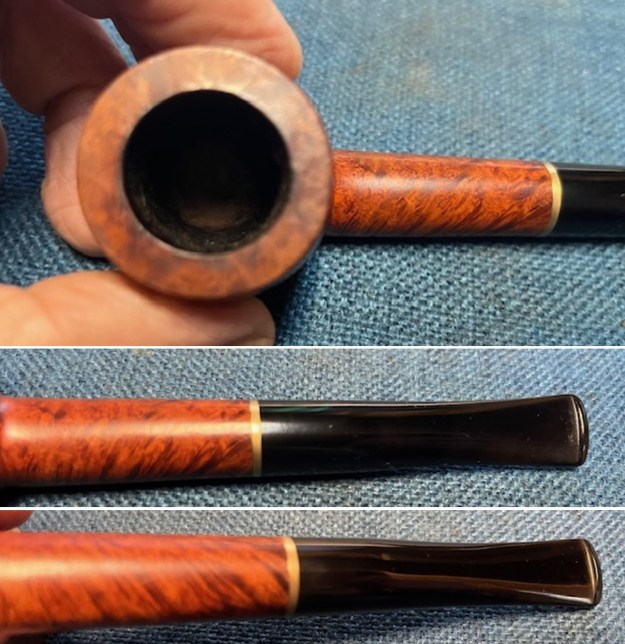
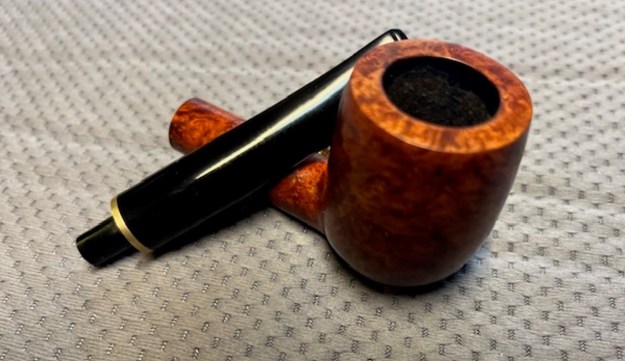
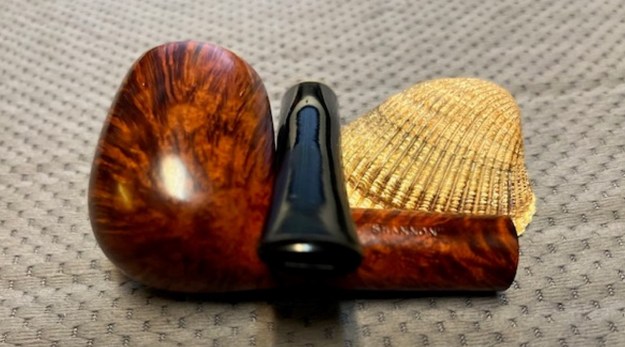
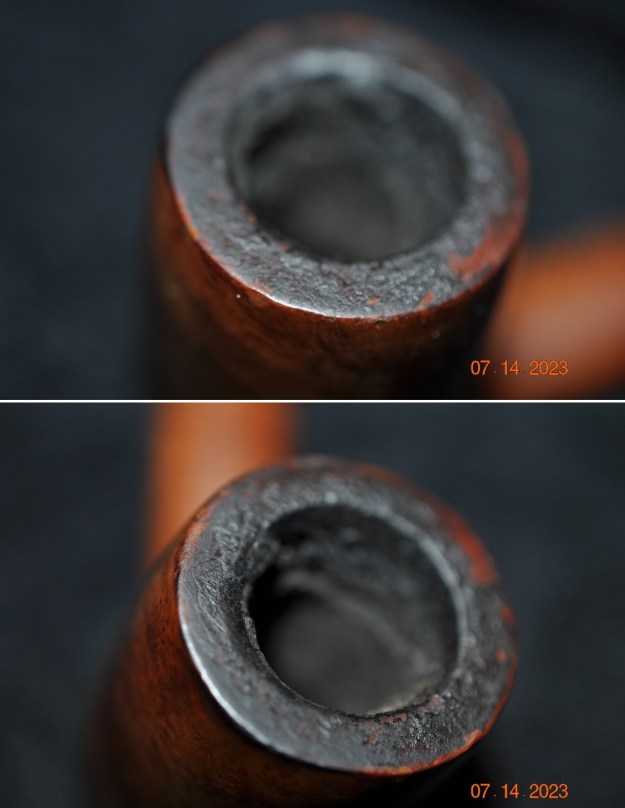
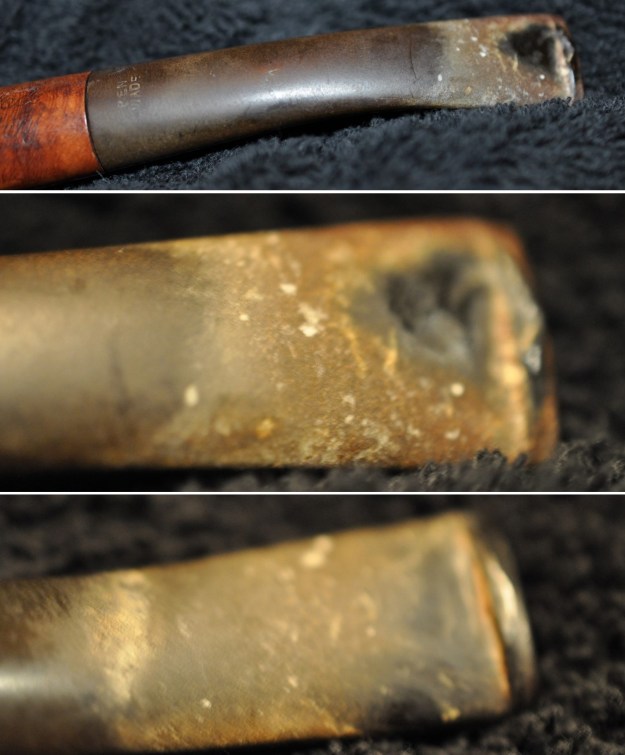
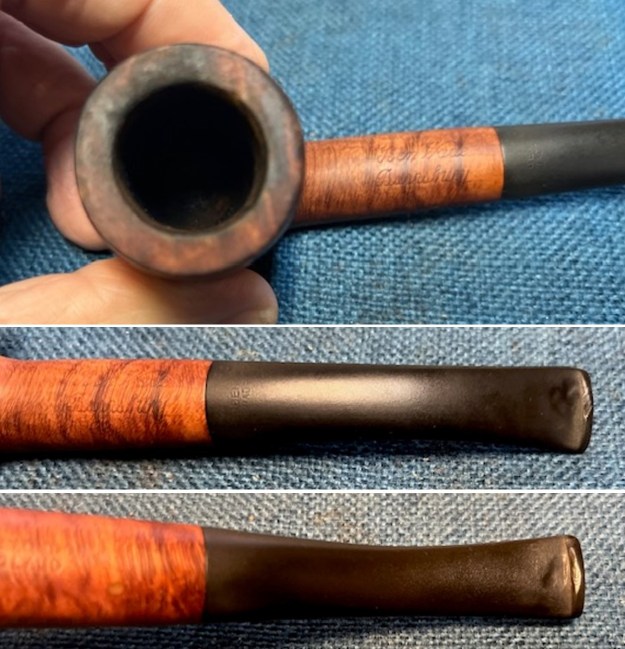
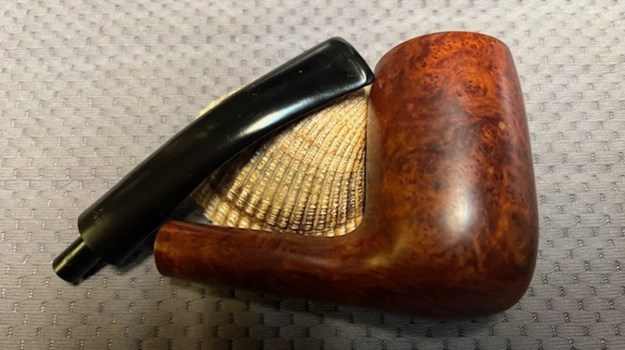
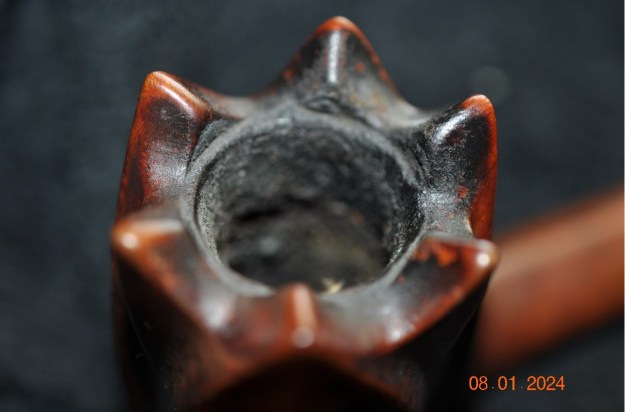
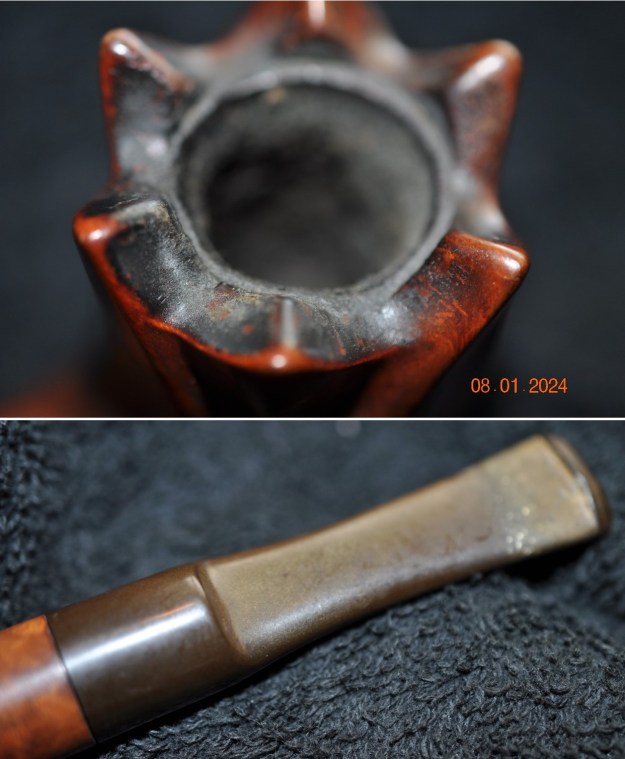
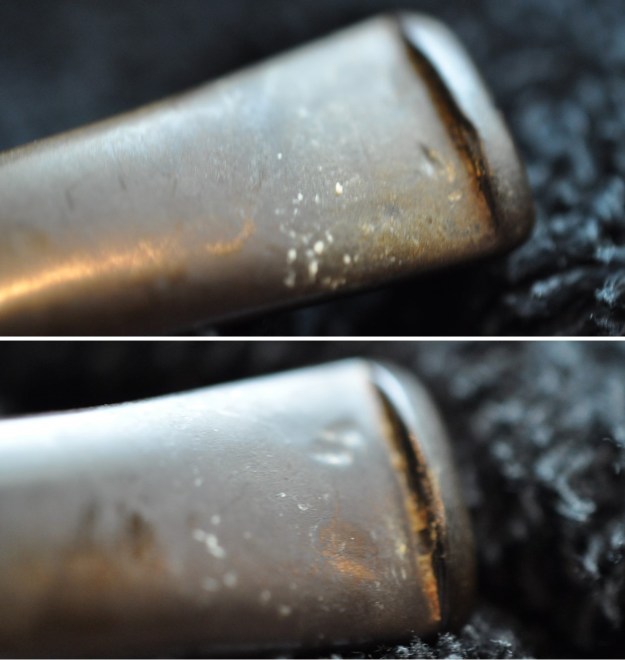
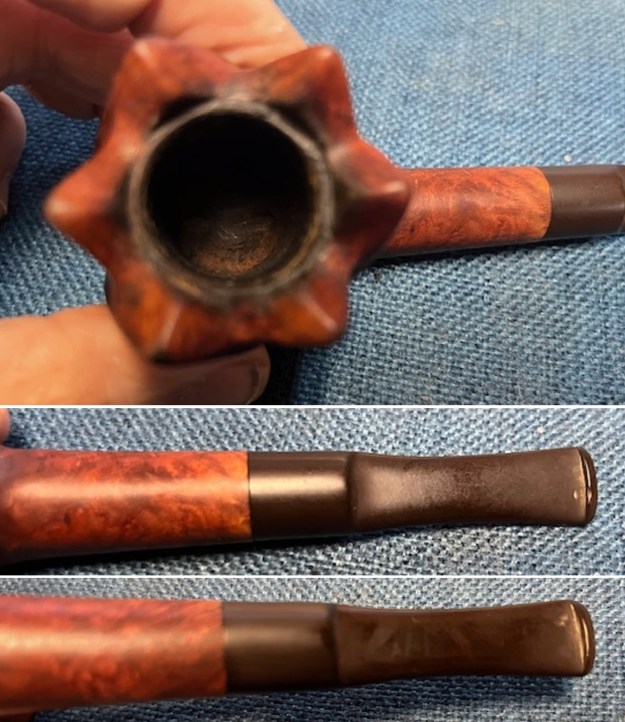
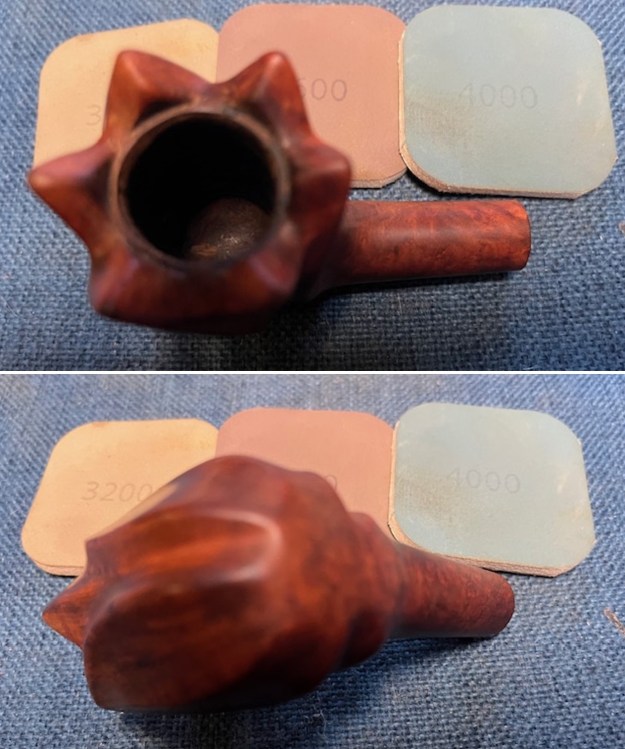
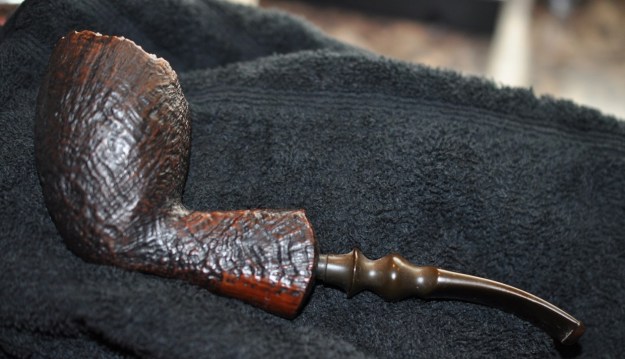
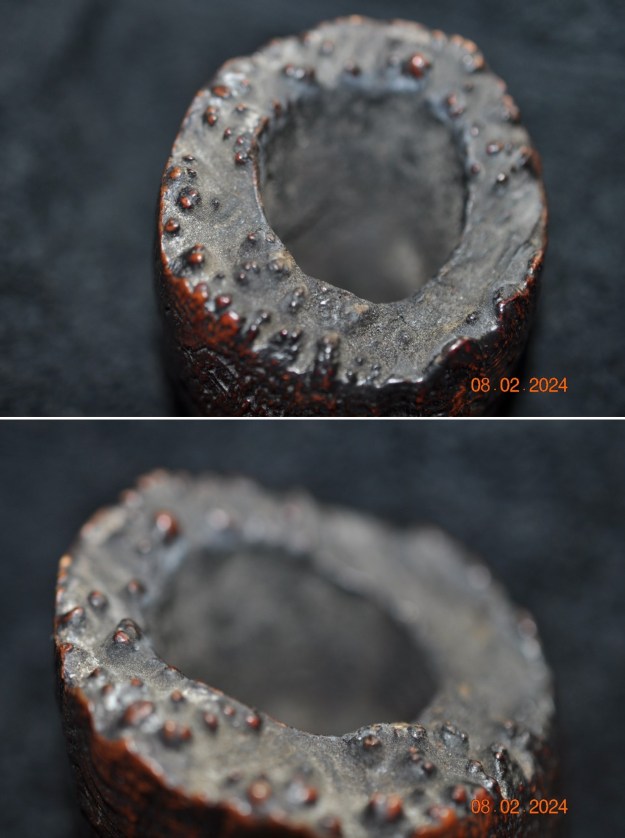
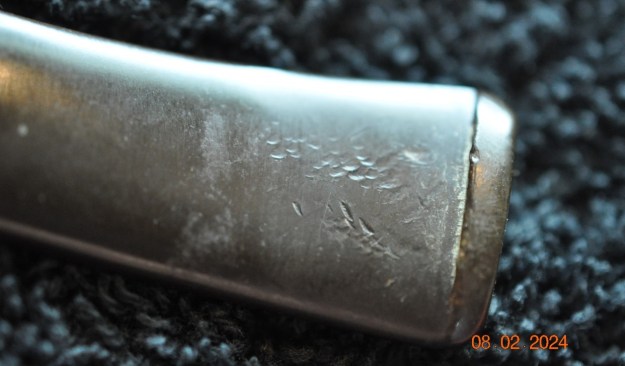
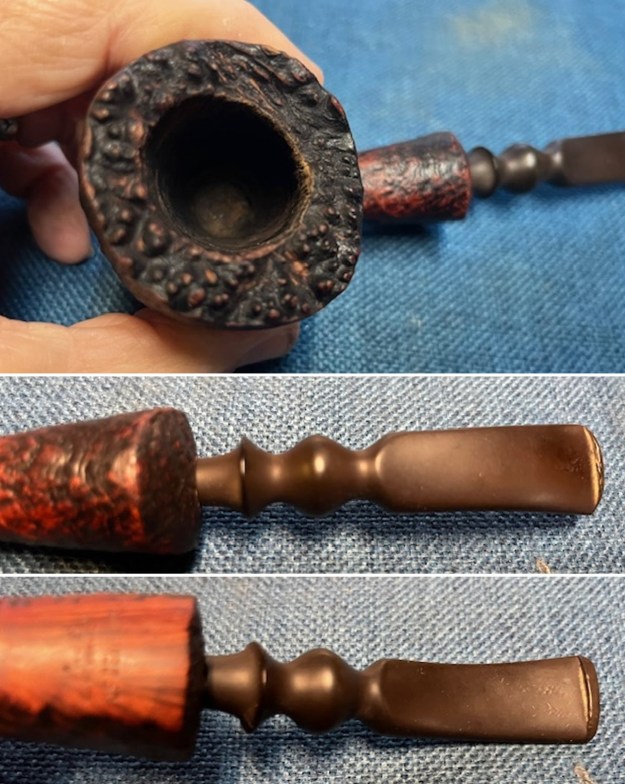
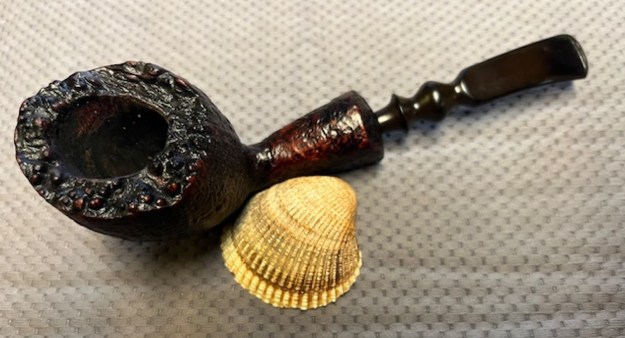
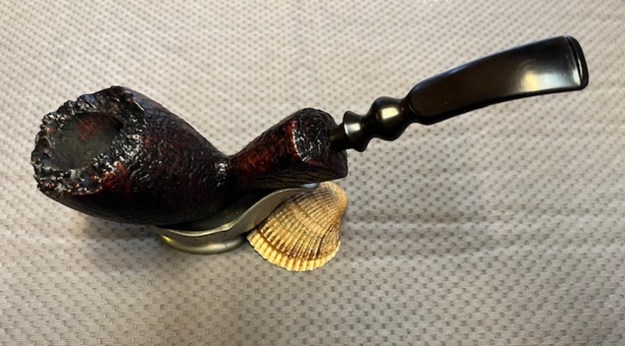
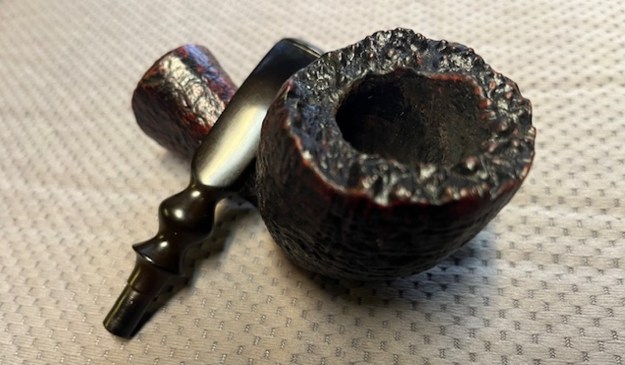
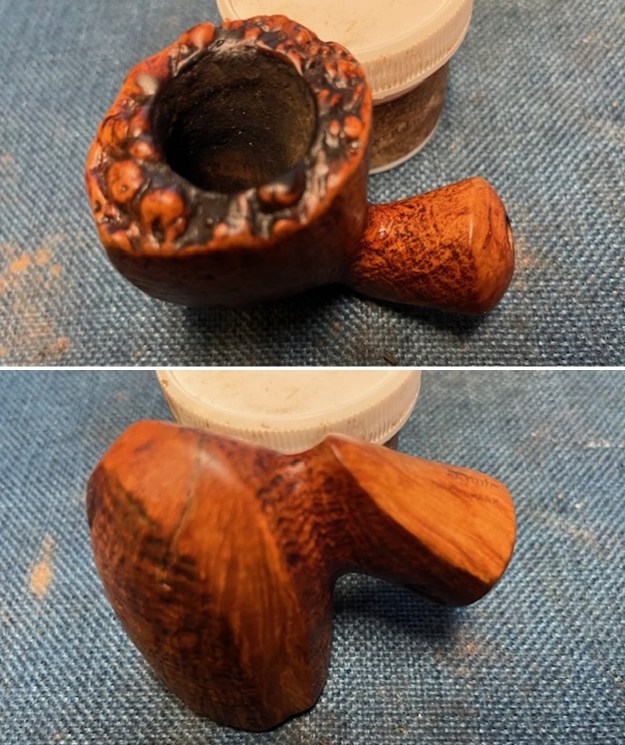
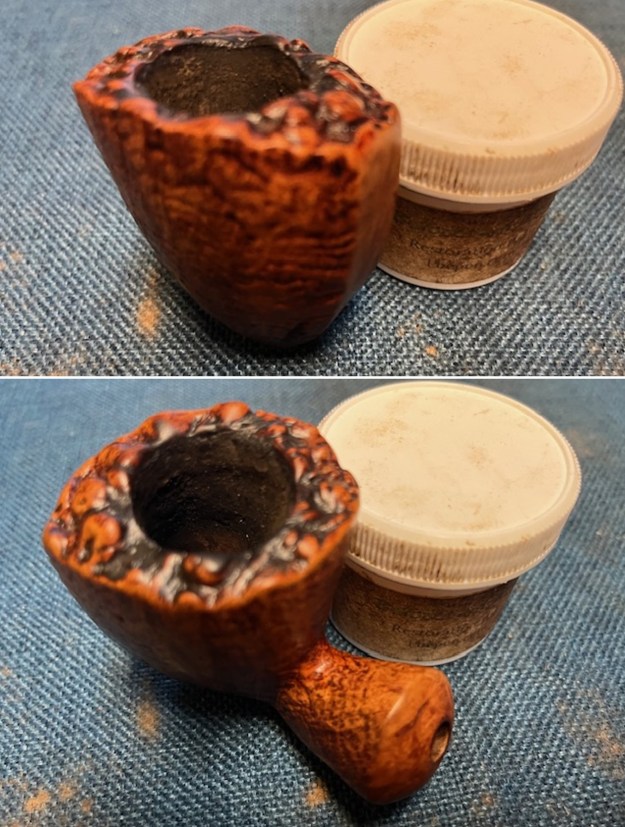
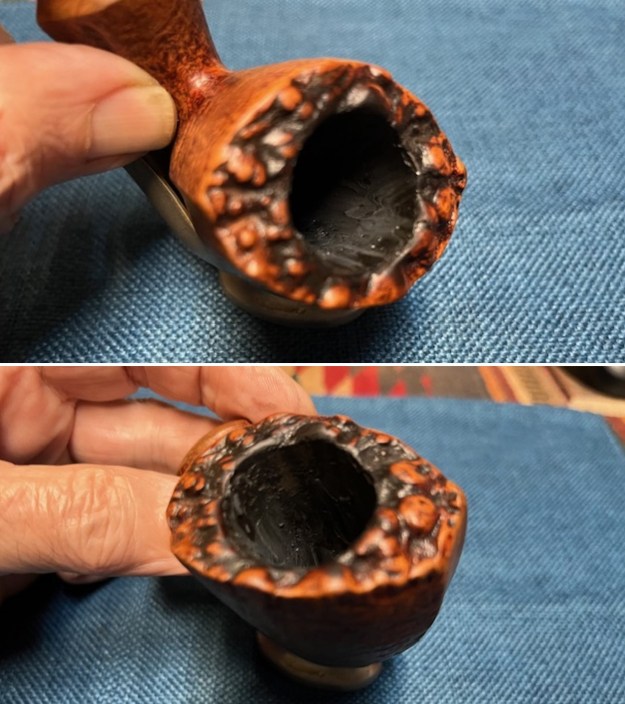
 I took a photo of the bowl and rim top to show the condition of both. You can see the debris in the bowl and lava in the plateau surface of the rim top. I also took photos of the heavily oxidized and calcified stem showing the tooth marks and chatter on both sides ahead of the button.
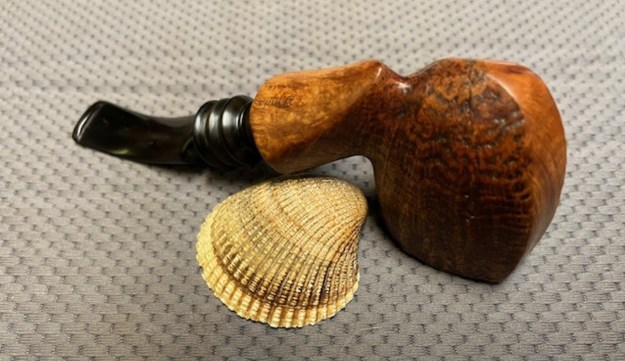
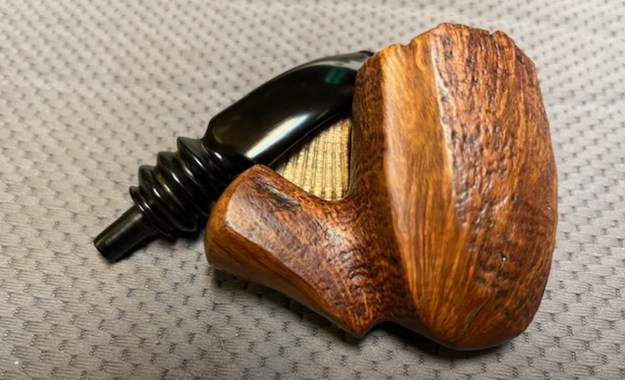
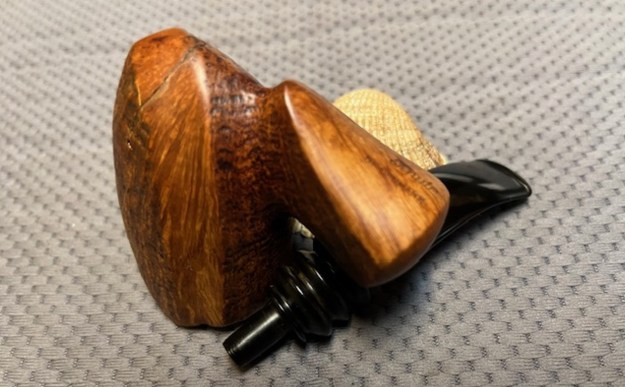
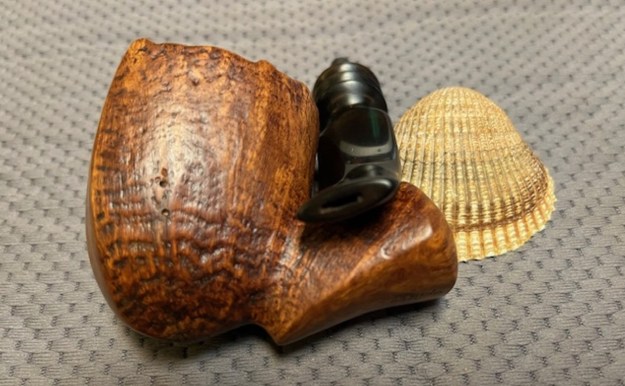
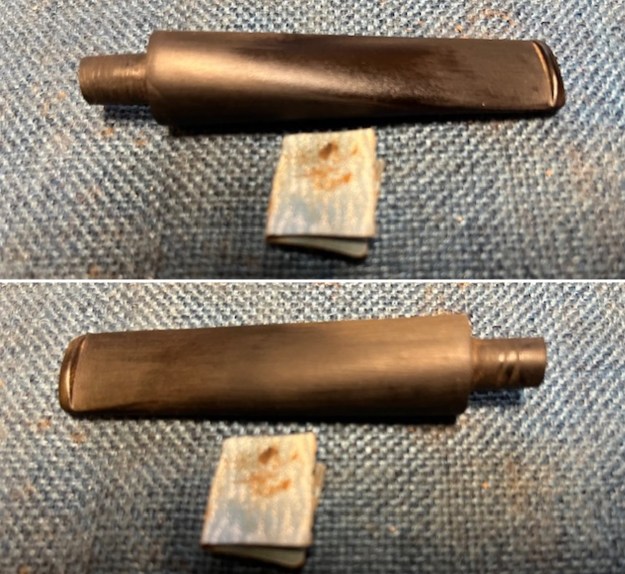
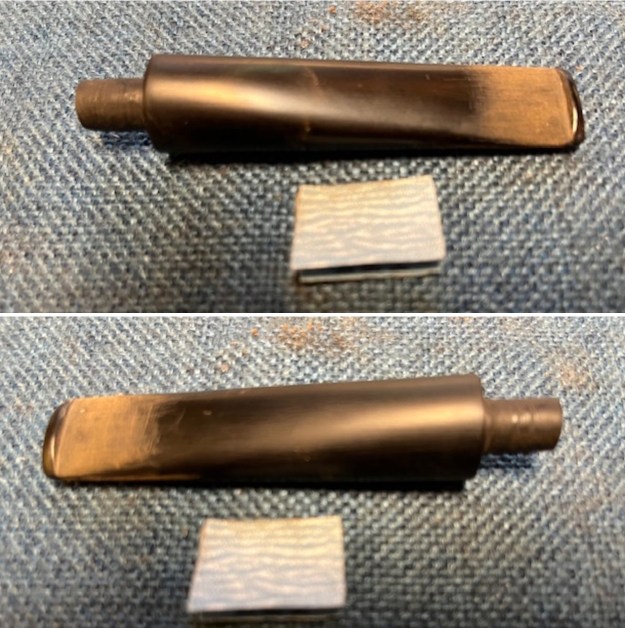
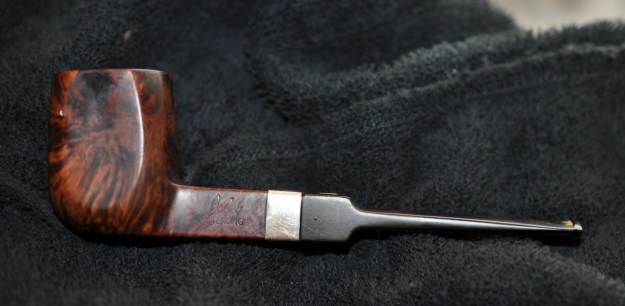
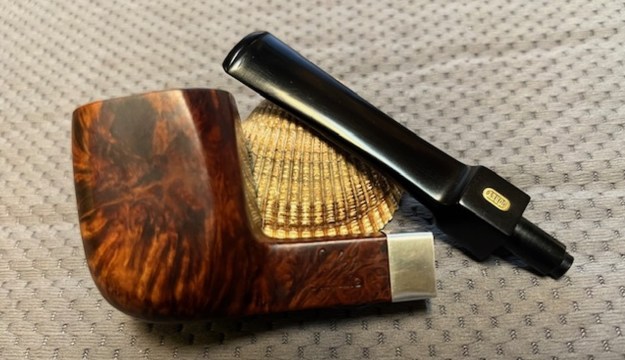
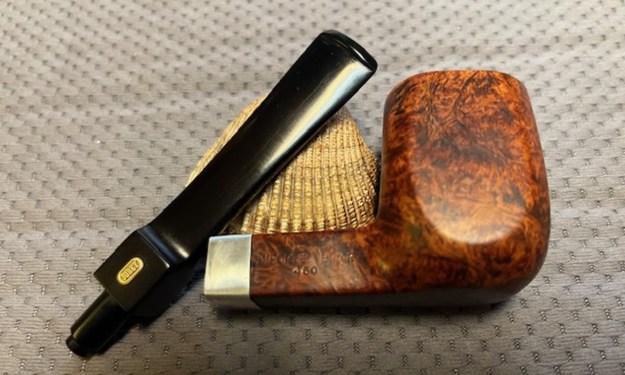
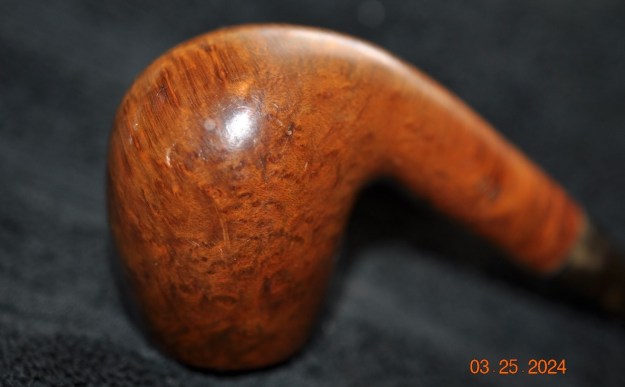
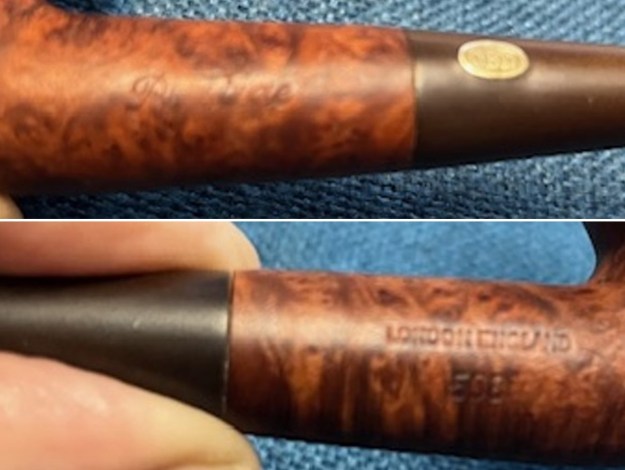
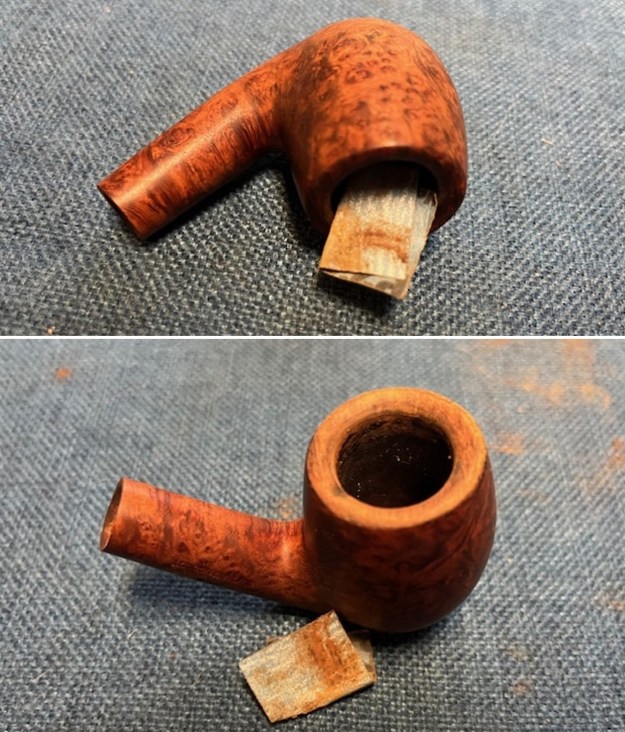
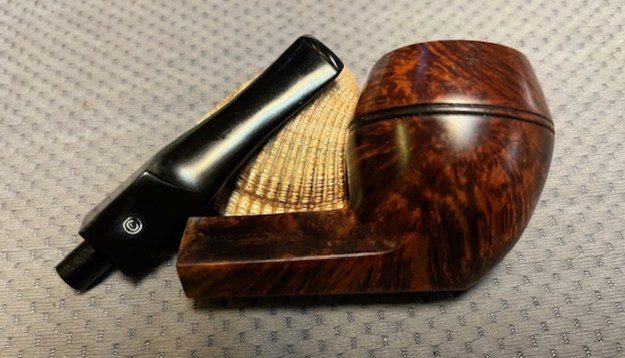
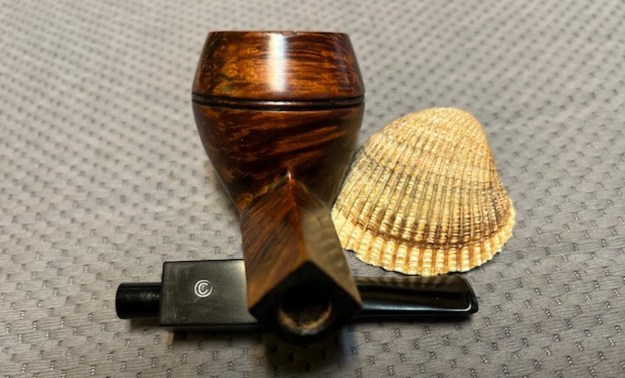
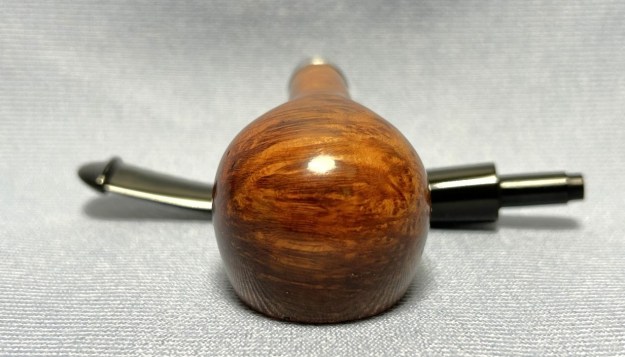
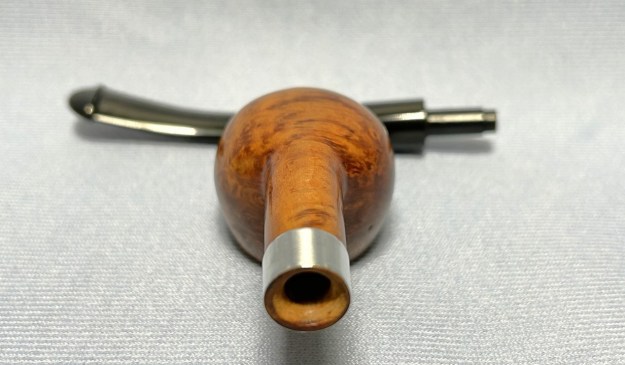
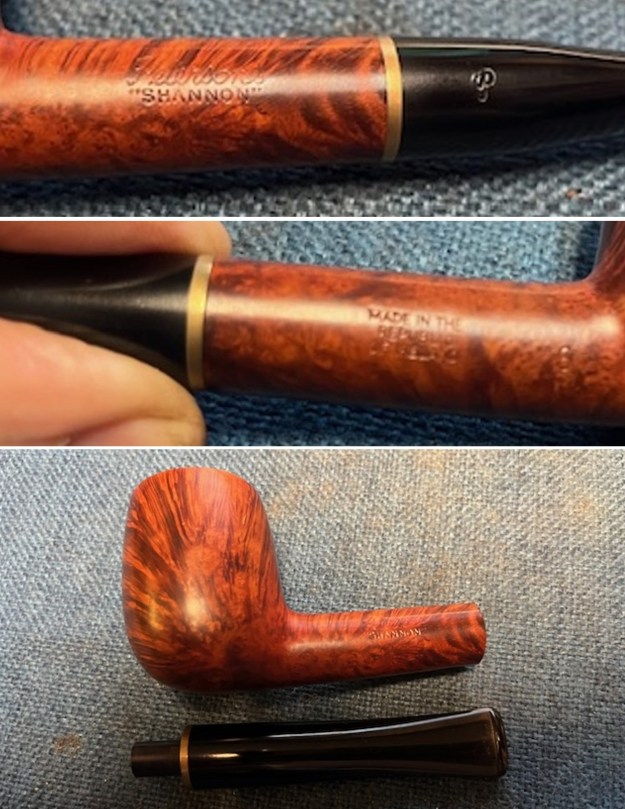
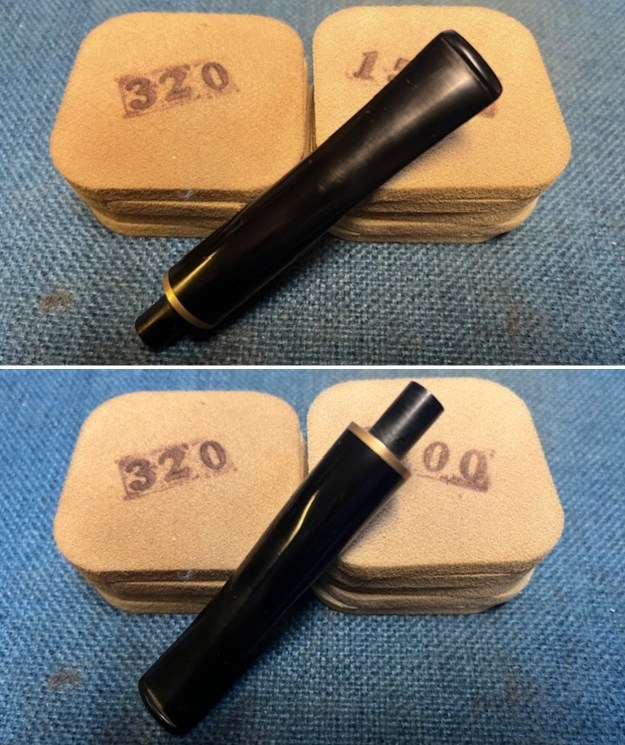
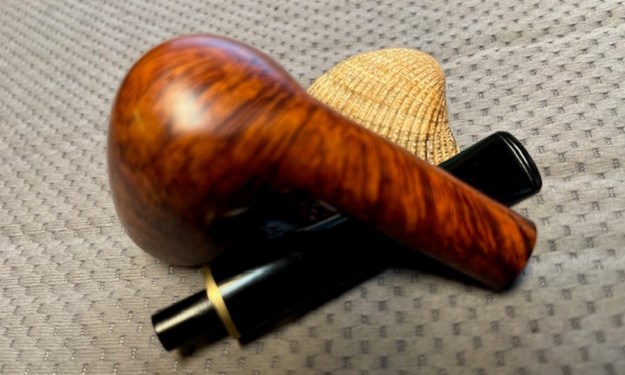
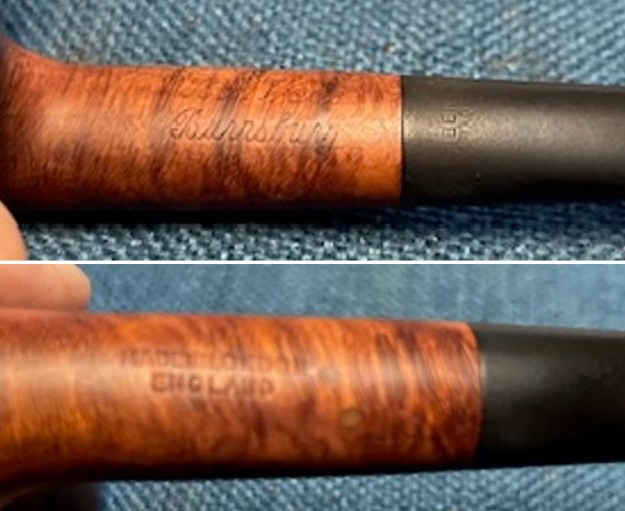
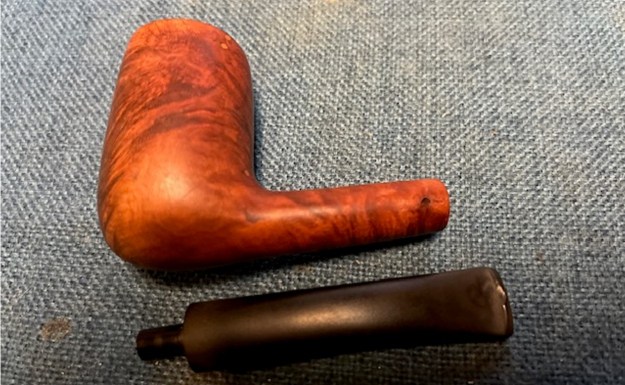
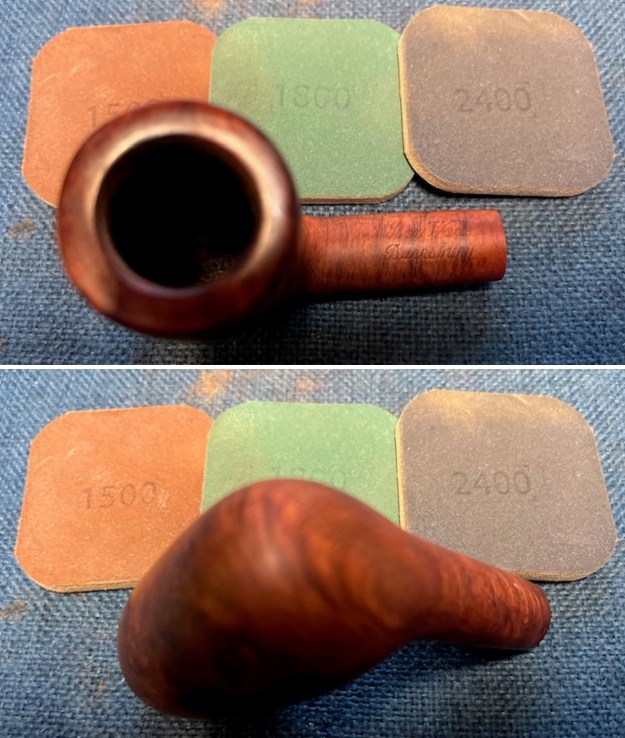
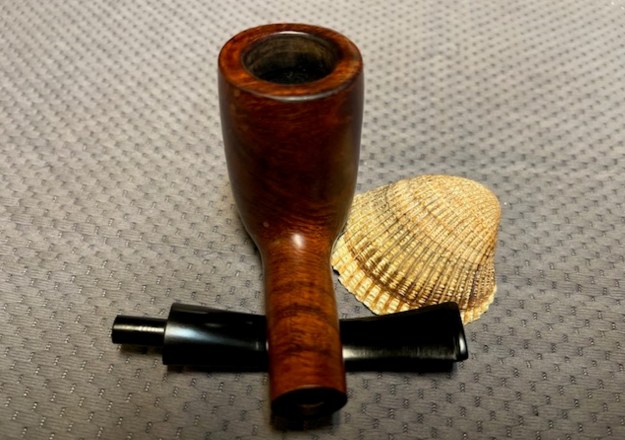
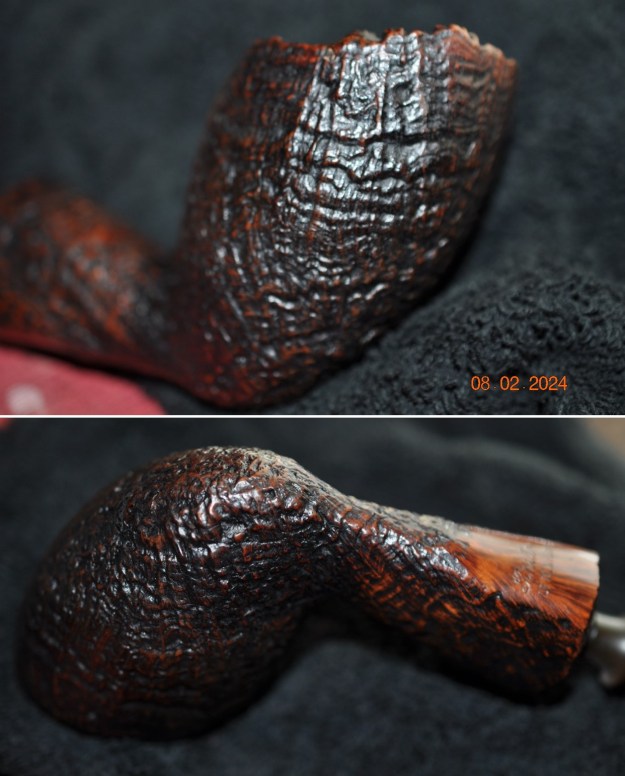
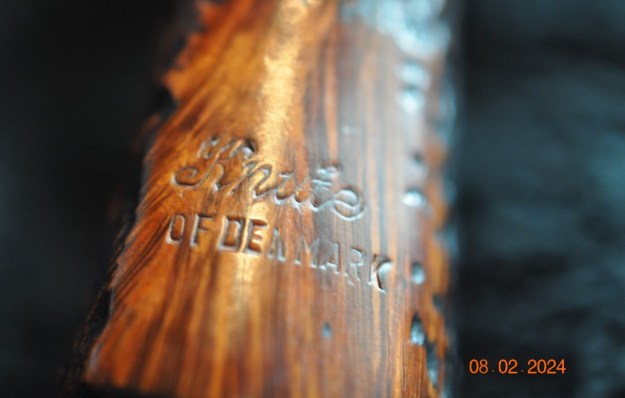
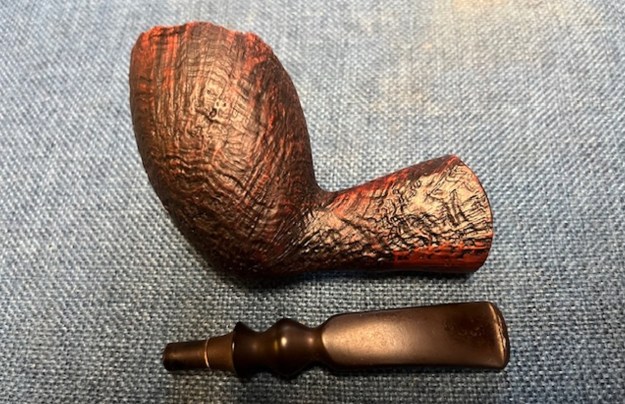
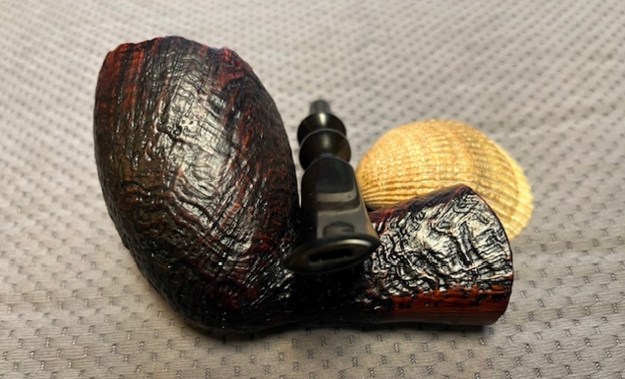
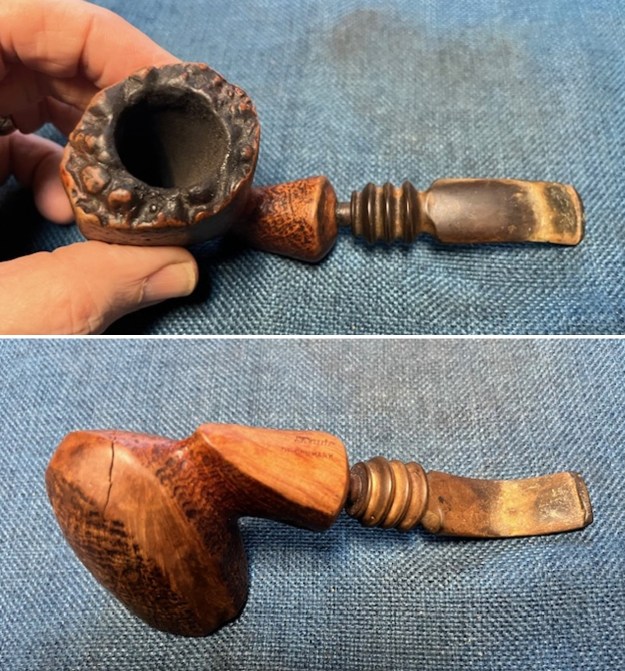
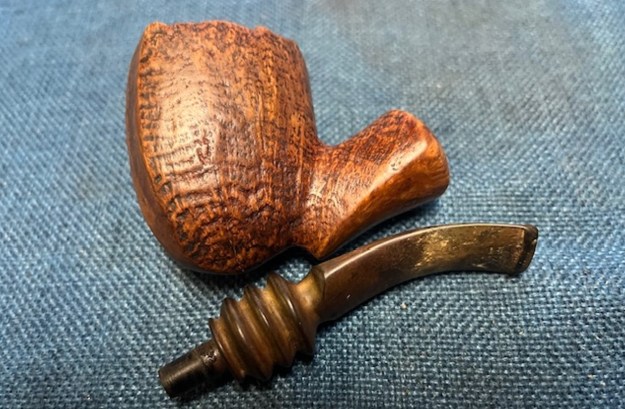
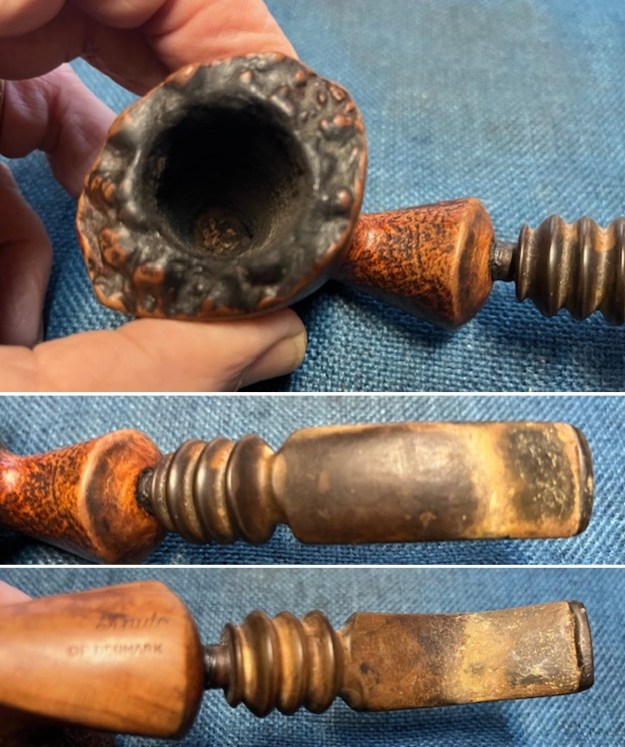 I took a photo of the stamping on the underside of the shank. It is clear and readable as noted above. I took a photo of the bowl with the stem removed to give a sense of the proportion and appearance of the pipe without the stem.
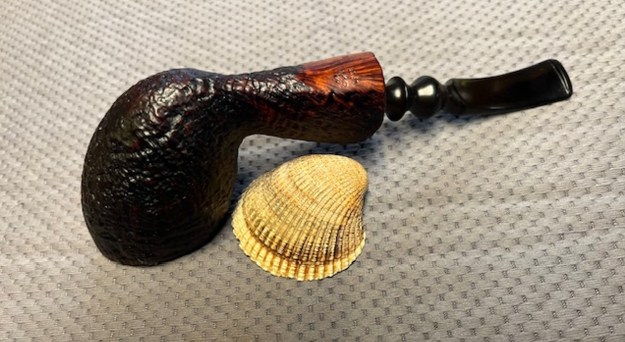
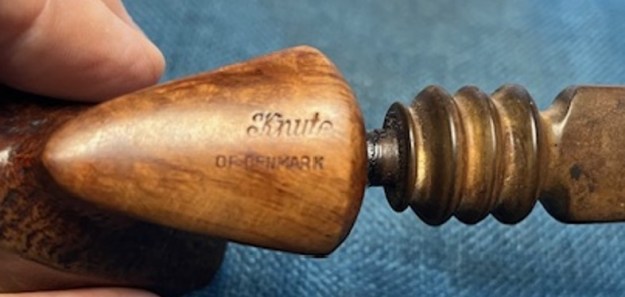
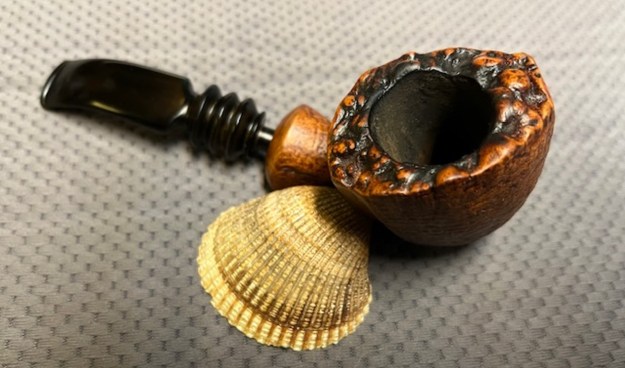
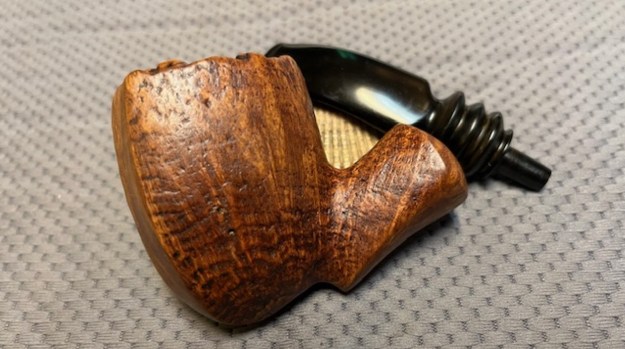
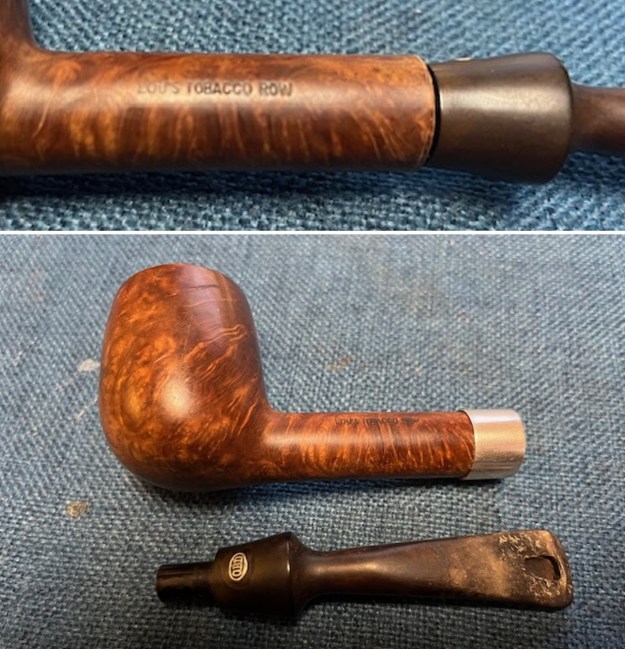
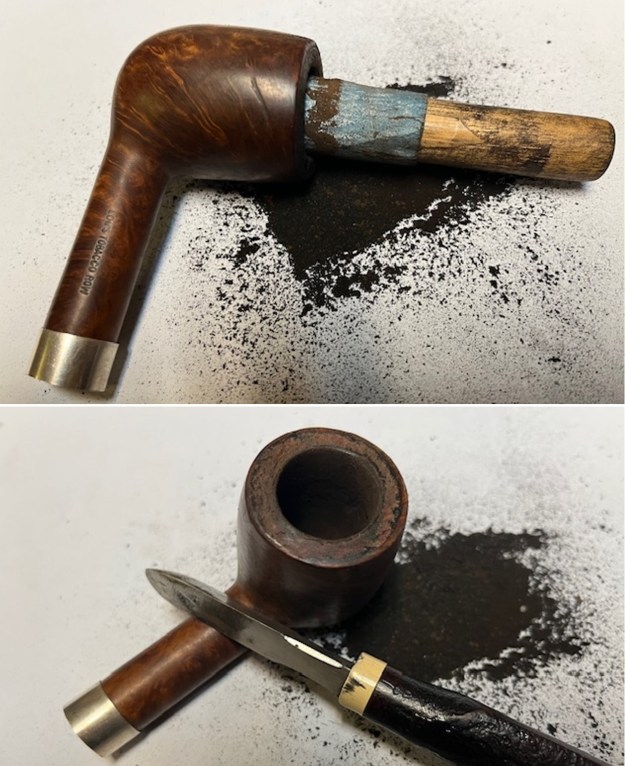
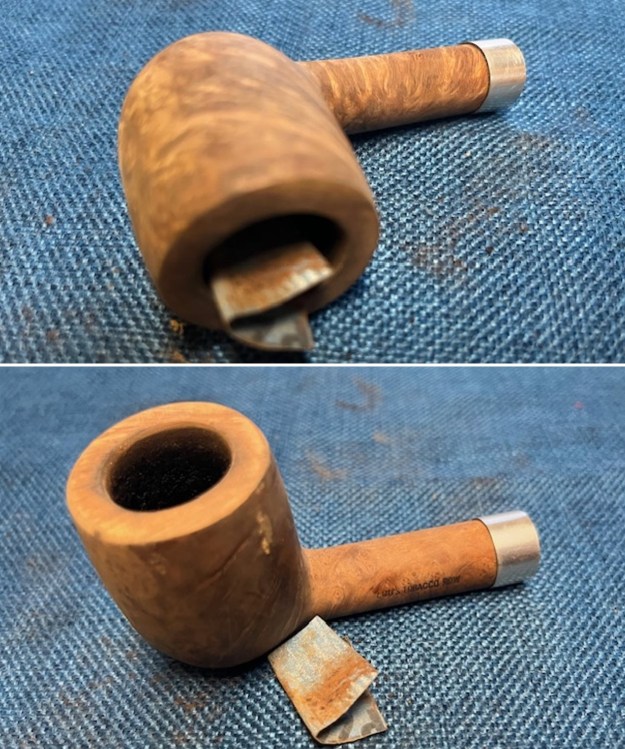
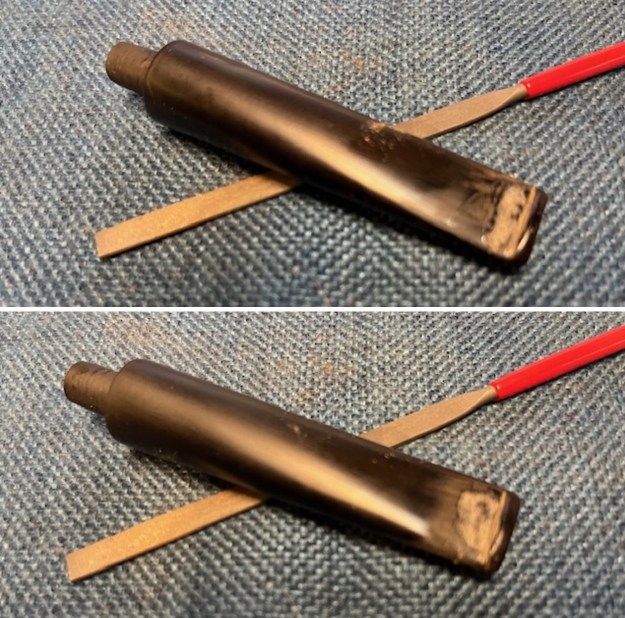
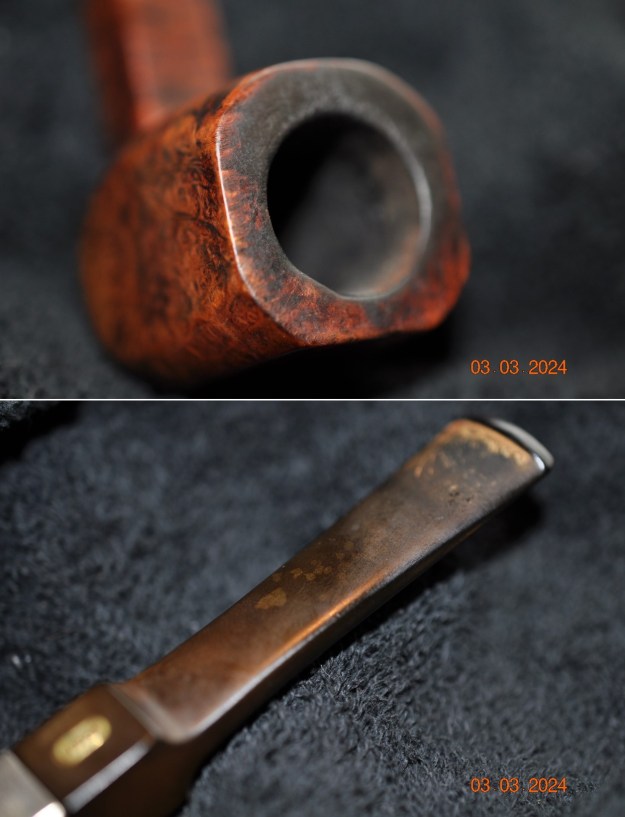
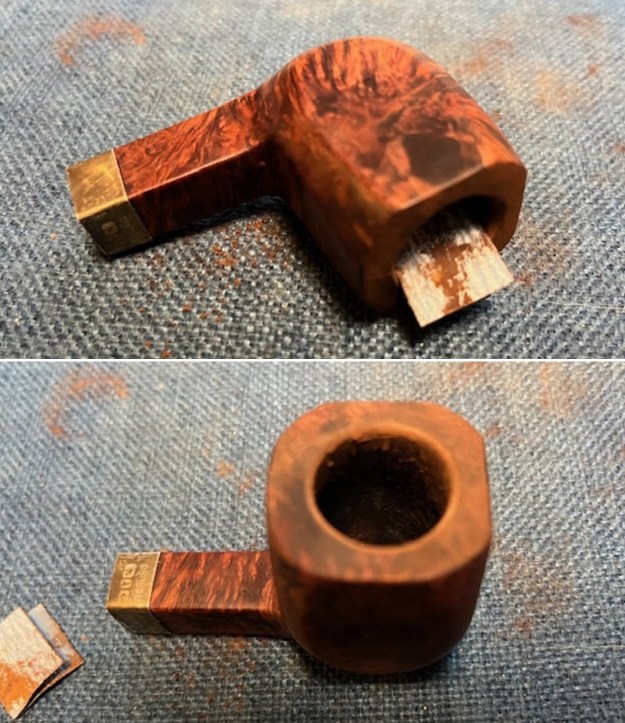
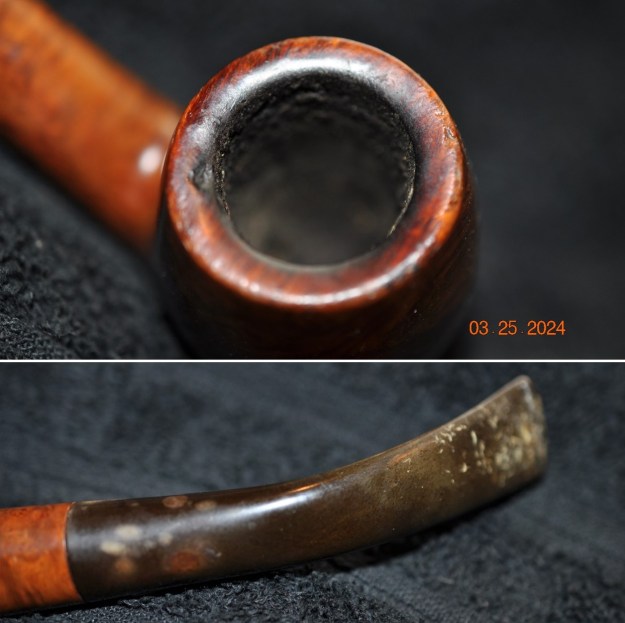
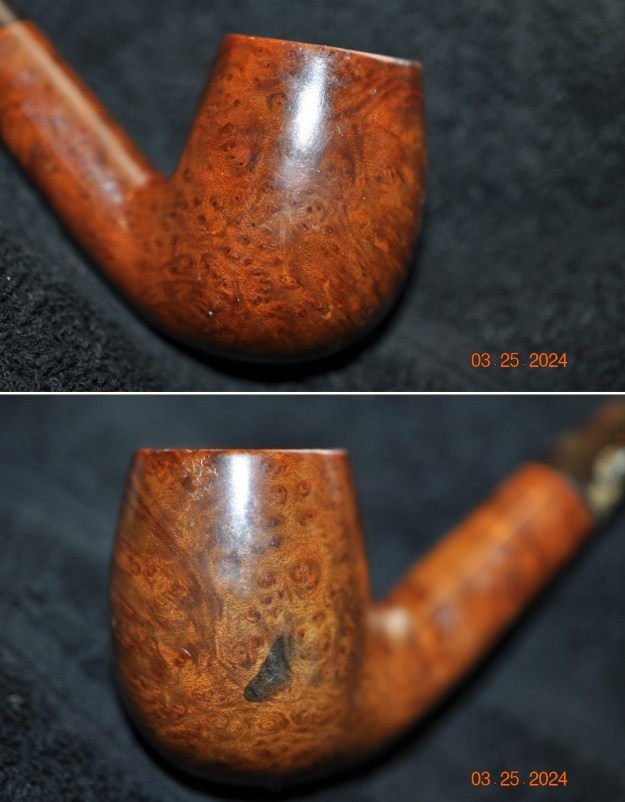
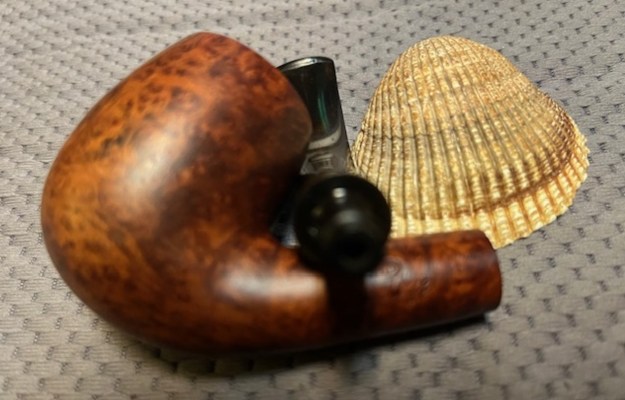
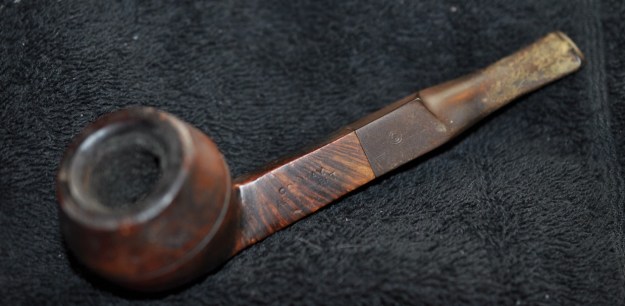
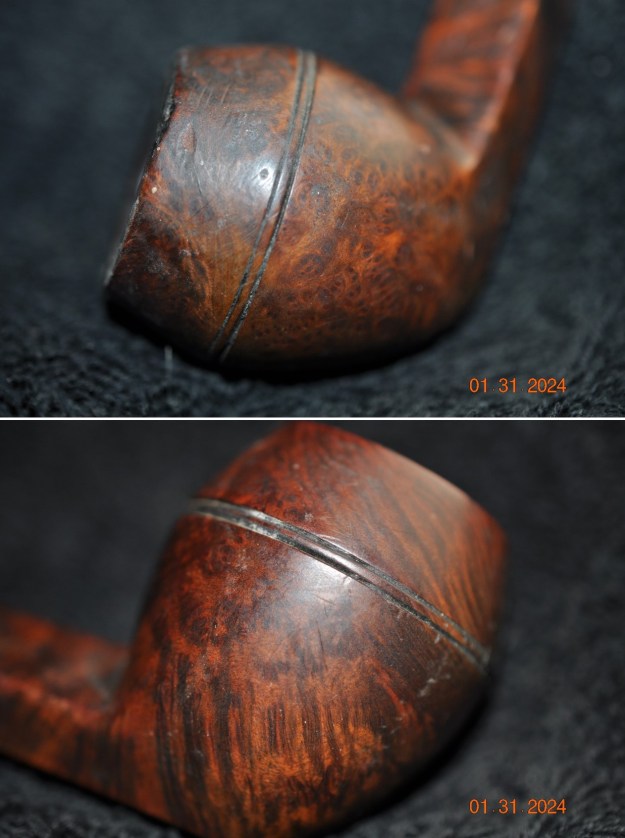
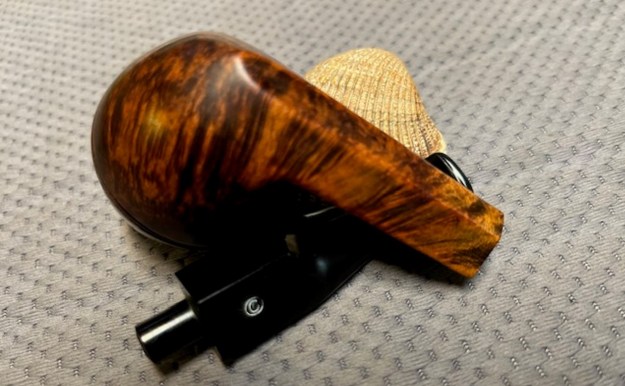
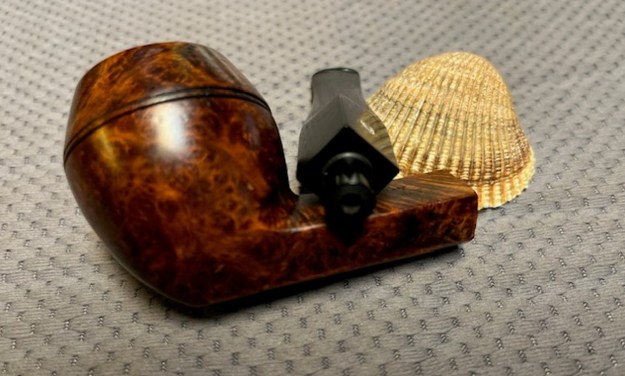
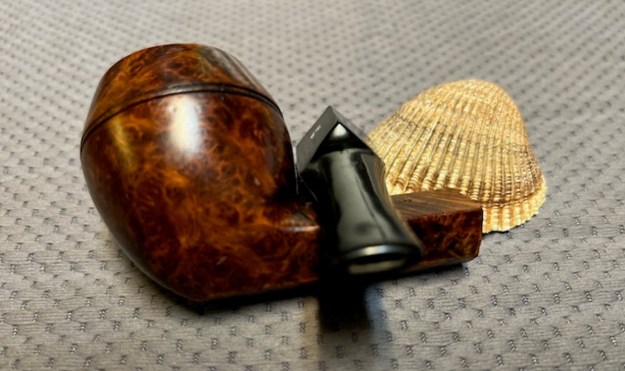
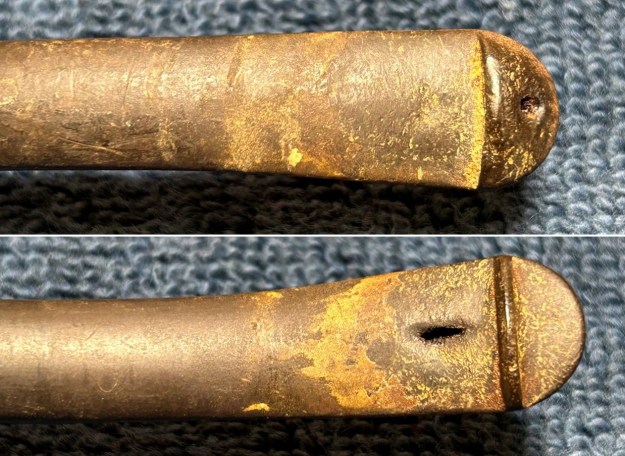
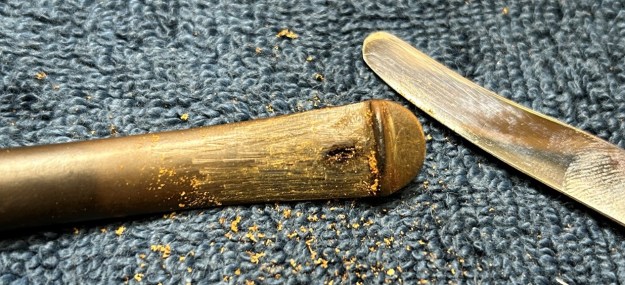
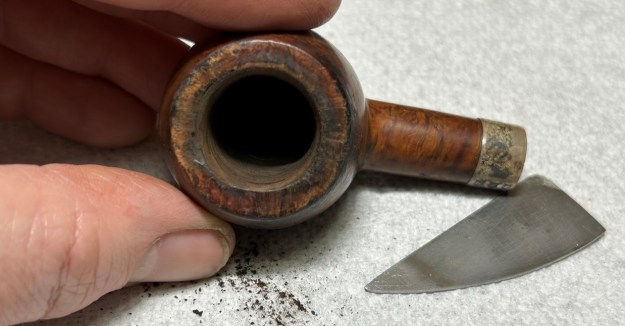
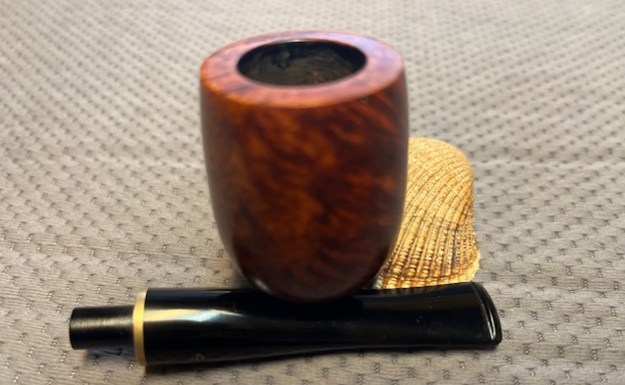
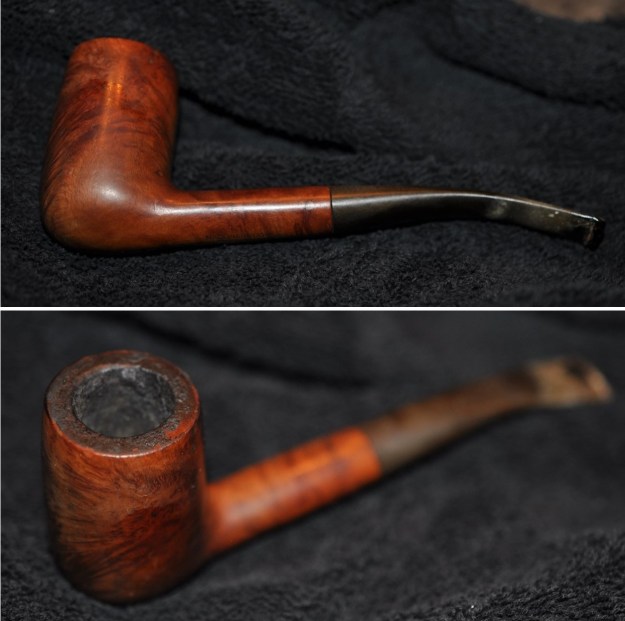
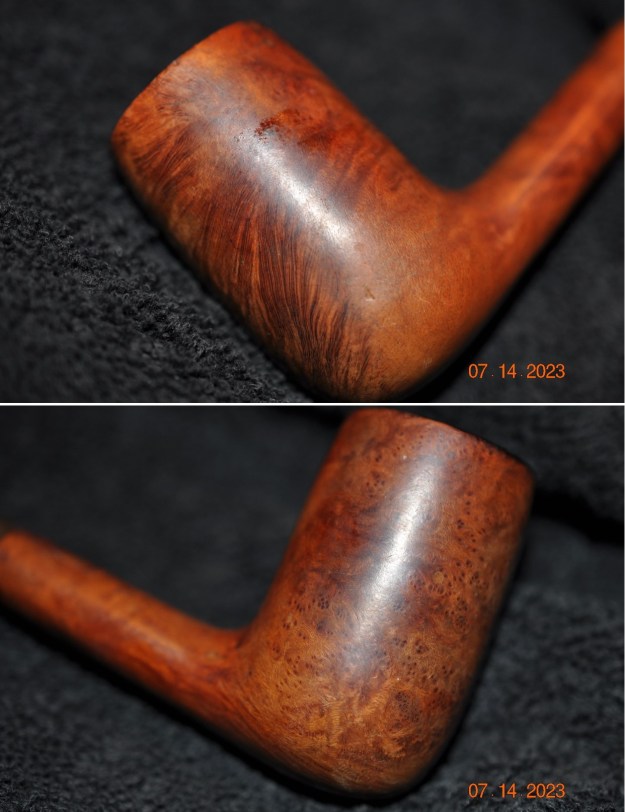
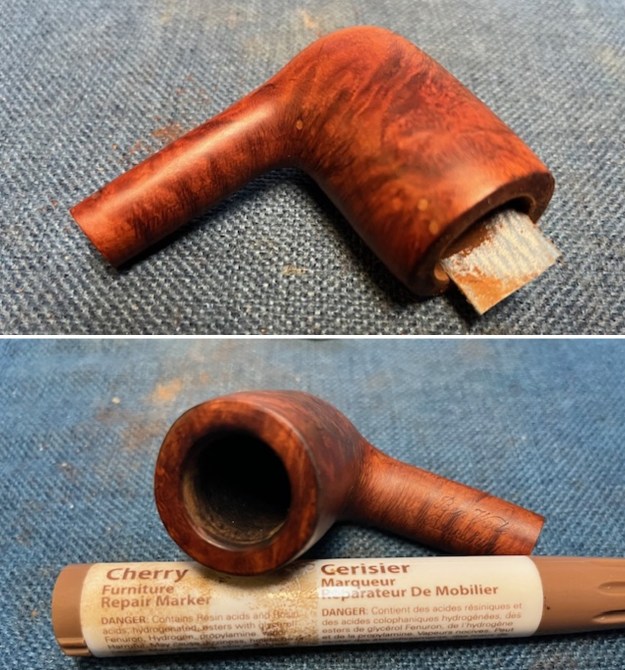
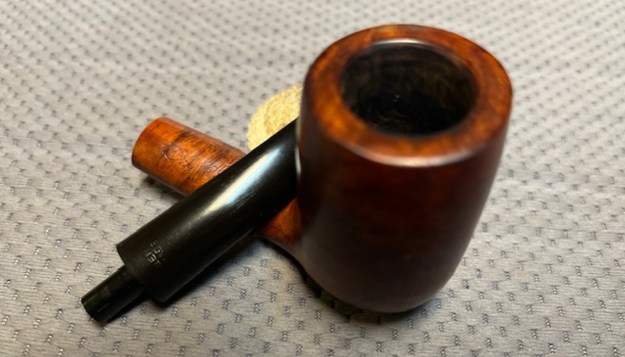
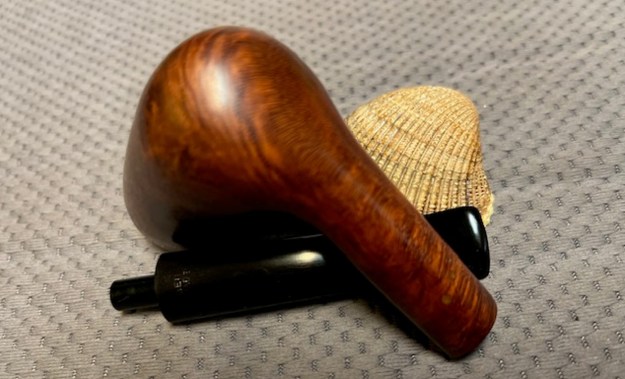
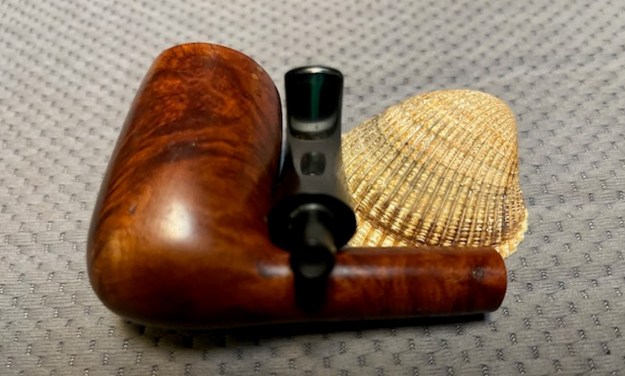
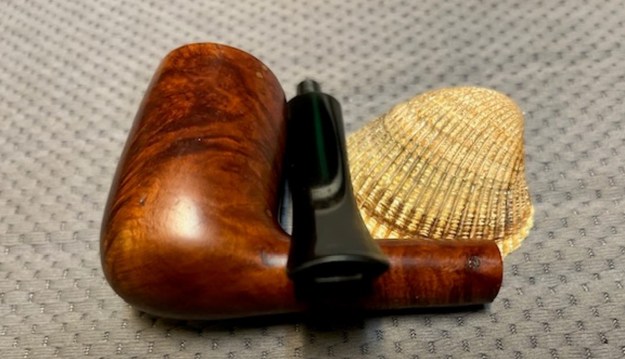
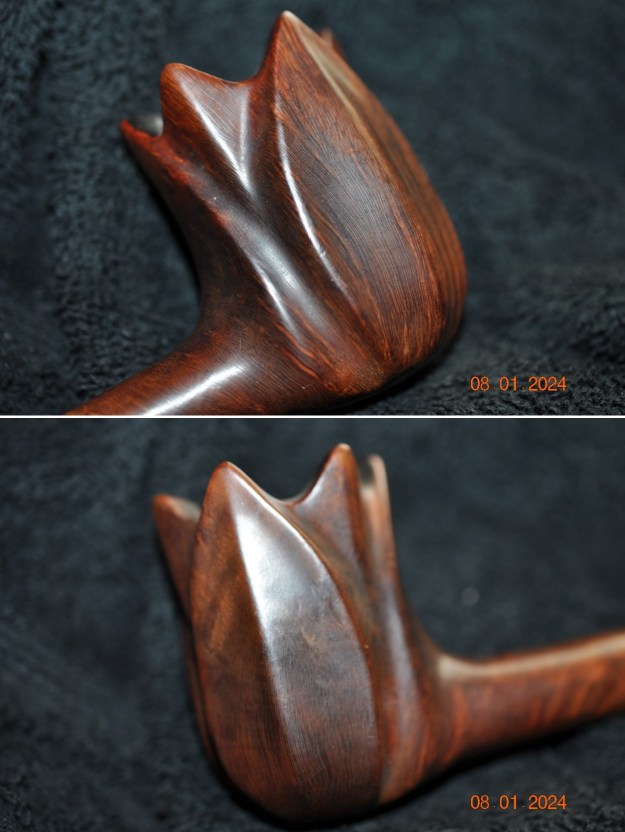
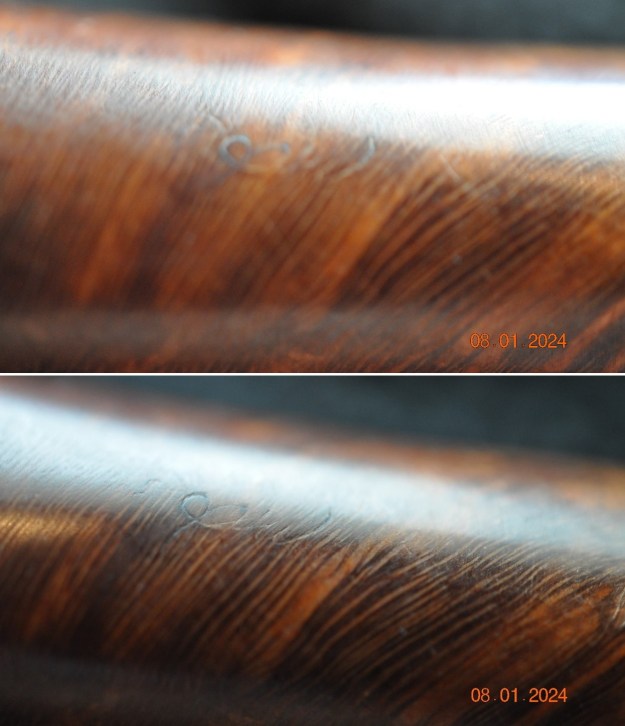
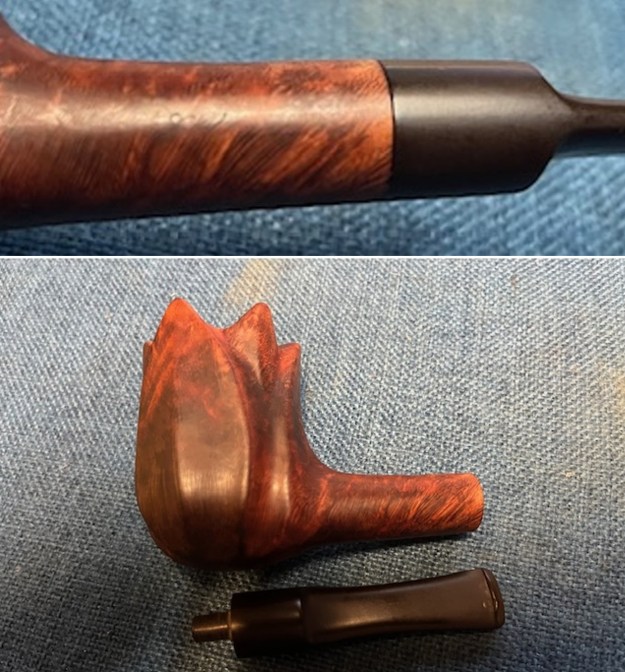
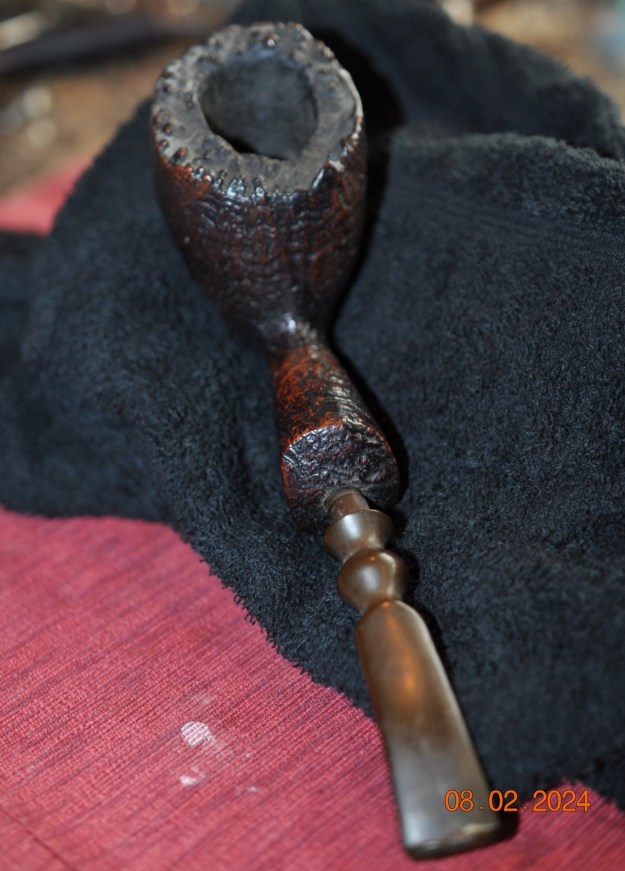
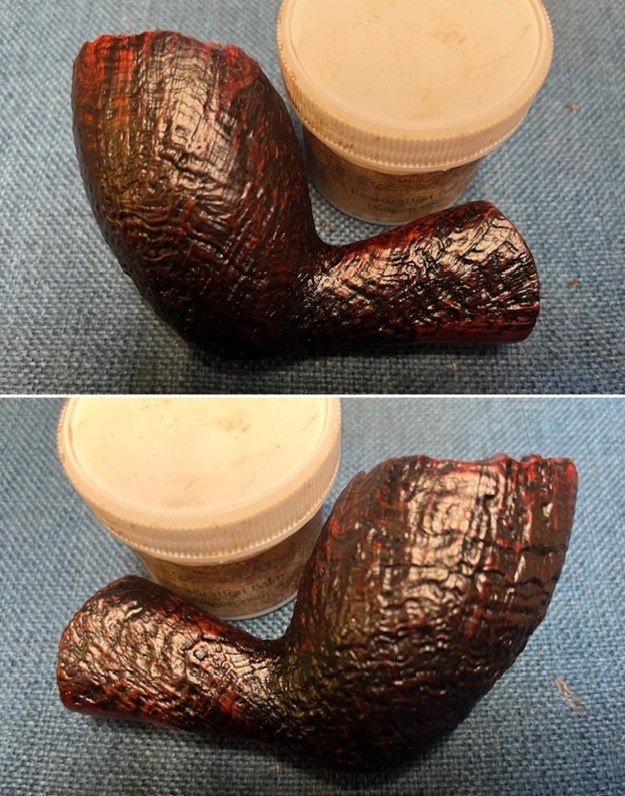
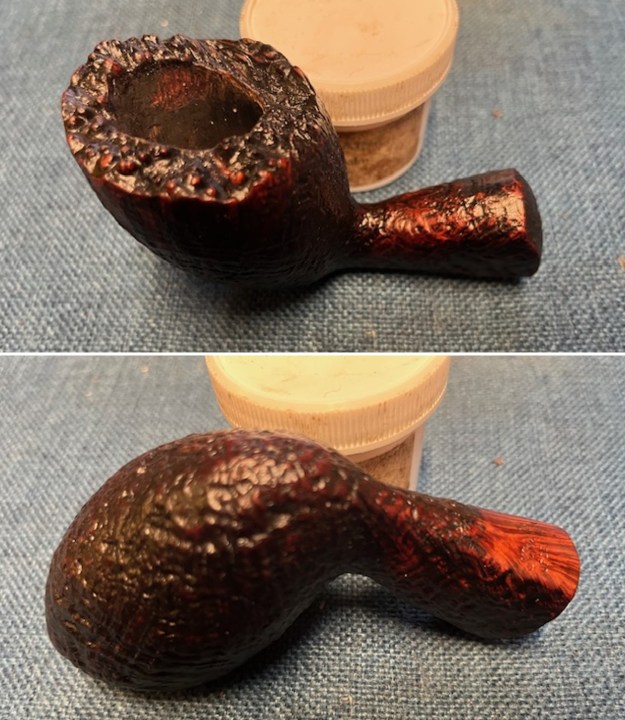
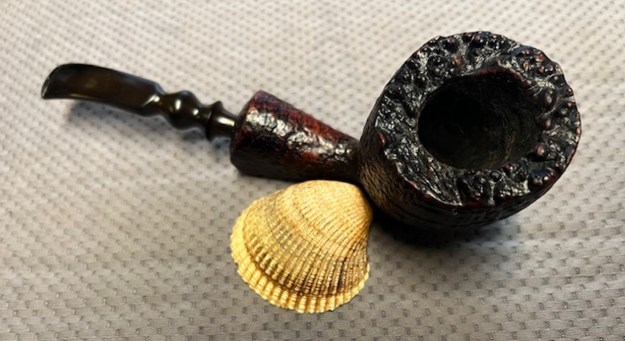
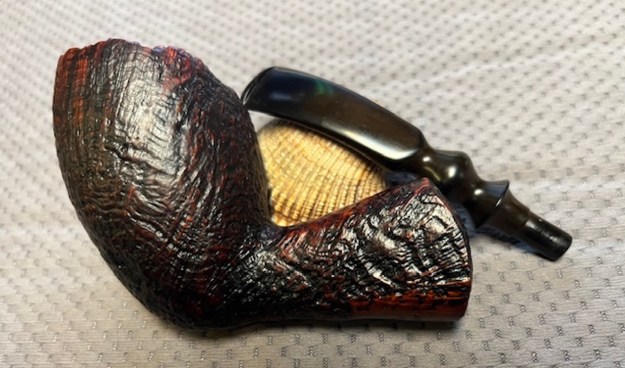
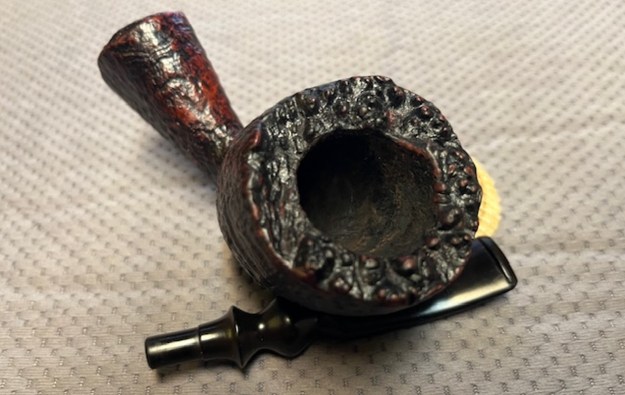
 I took photos of the crack in the bowl sides before I started my clean up and repairs. It looks like the kind of crack that come from a bowl being dropped on a hard surface.
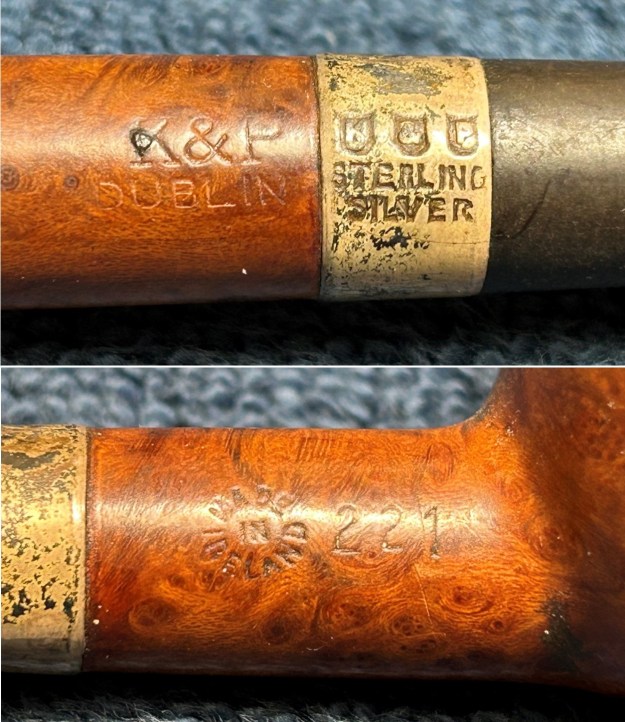
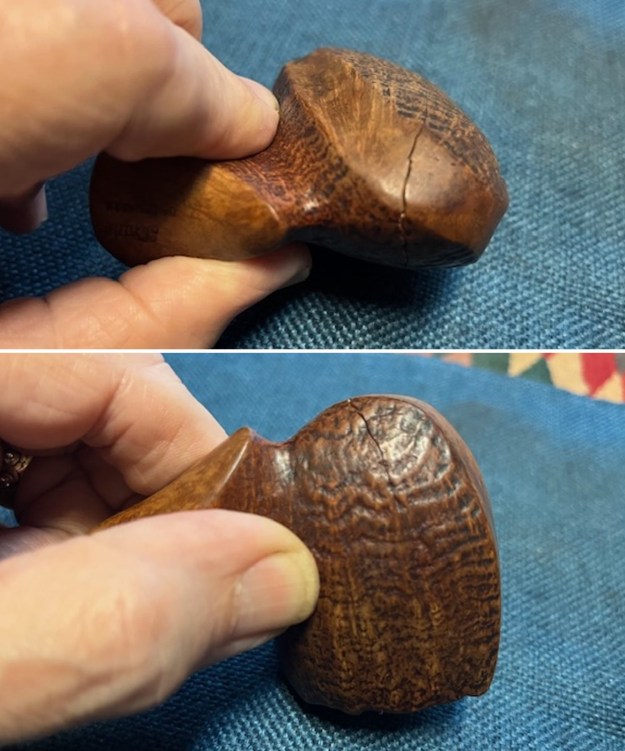 Before I started my work on the pipe I wanted to remind myself of the provenance of the pipe. I remembered that it was linked to Karl Erik as I have worked on quite a few Knute Freehands. I wanted to know where this pipe fit into the Karl Erik lines so I turned to the first of two sites that I always check to gather information on a brand. I turned to the first source of information site – Pipephil’s (http://www.pipephil.eu/logos/en/logo-k3.html) got a quick overview on the brand once again connecting it to Karl Erik.
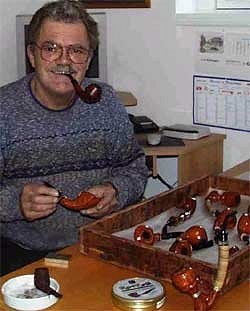
 I turned to Pipedia (https://pipedia.org/wiki/Karl_Erik). Pipedia had this great picture of Karl Erik Ottendahl and I decided to include it here as a reminder of the artisan who first carved and released this pipe. Reminded of the tie to Karl Erik, I knew a bit about the pipe at hand. I turned to address the pipe itself. There it is clearly identified and linked to Karl Erik Ottendahl. It is designated as a second and frequently having rustication. The interesting thing is that his pipe does not look like a second at all and I wonder if the Knute is a line of Karl Erik’s rather than a second. Who knows? This one is a very well done sandblast pipe. Now it was time to work on the pipe and bring it back to life. The crack needed to be repaired and the bowl brought back to life.
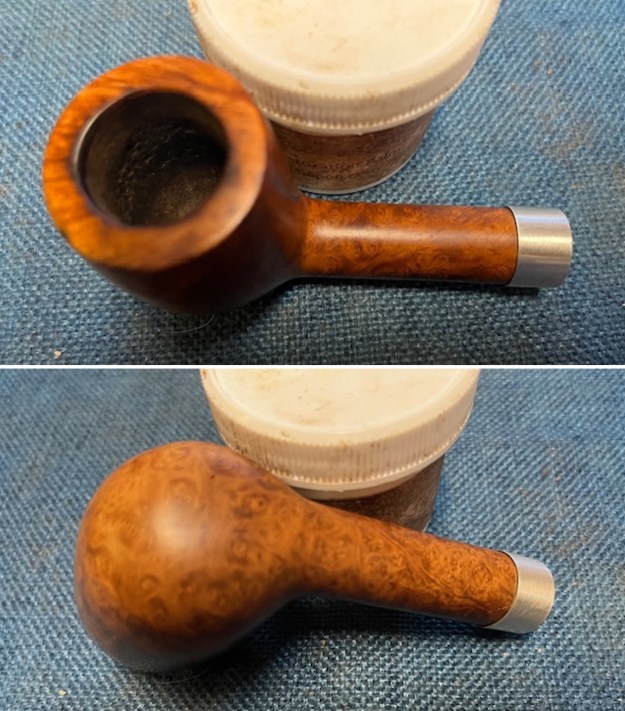
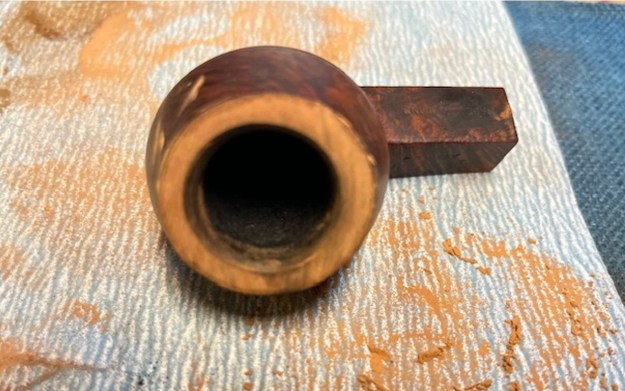
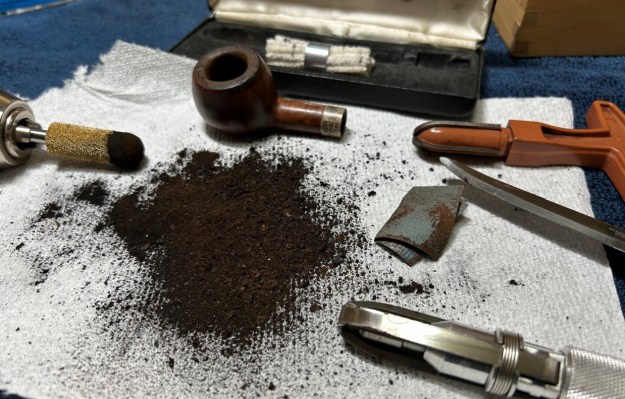
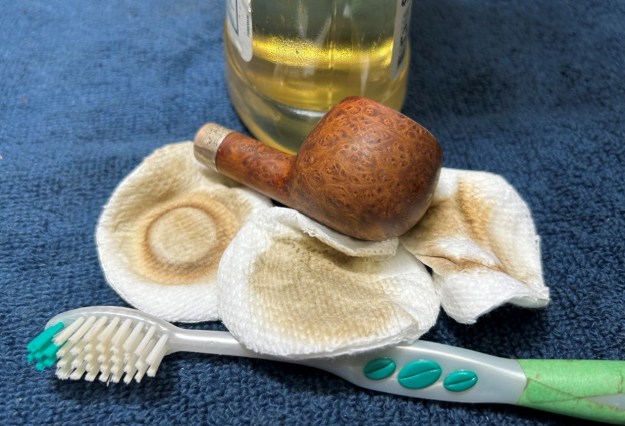
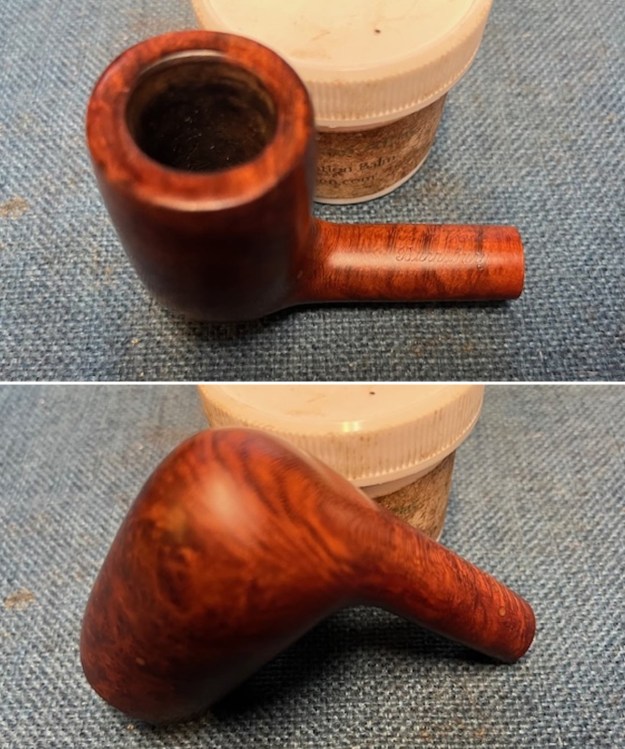
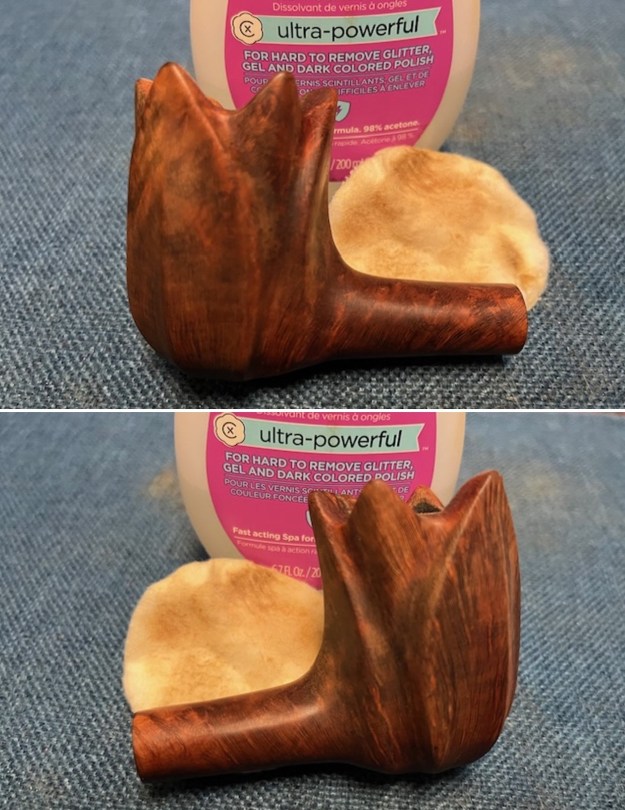
I started my work on the pipe by starting the process of cleaning the pipe. I carefully reamed the bowl with a PipNet Pipe Reamer remove from the bowl leaving bare briar. I cleaned up the remnants of cake with a Savinelli Fitsall Pipe Knife and removed the remaining debris. I sanded the bowl walls smooth with a piece of 220 grit sandpaper wrapped around a piece of dowel. I scraped the lava coat off the rim top – both the rusticated portion and the plateau rim top with the Savinelli Pipe Knife and removed all of it.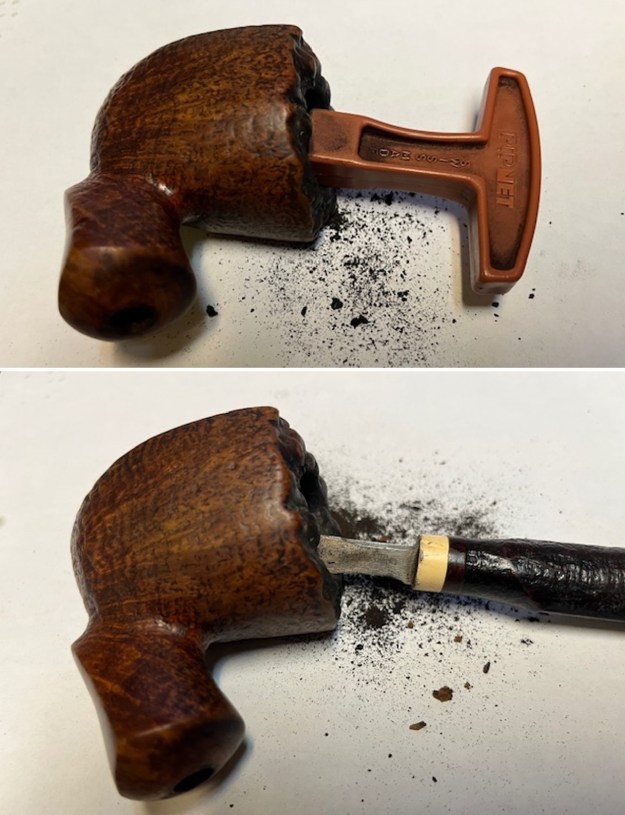
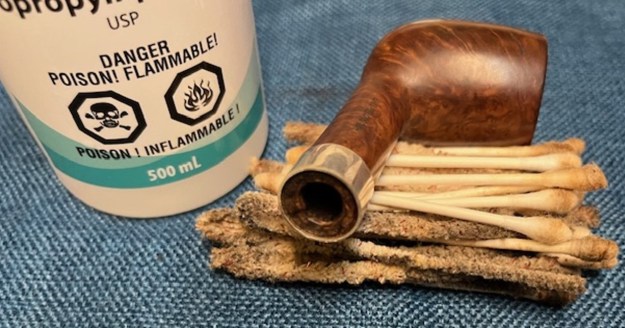
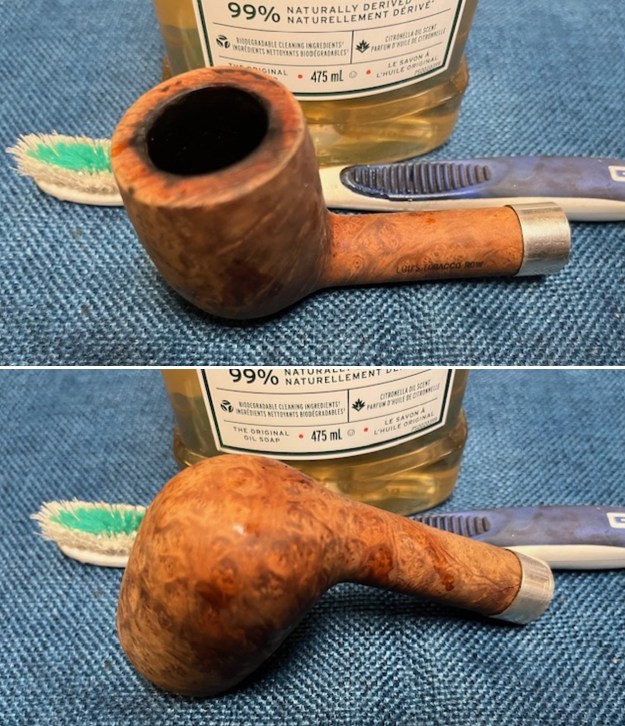
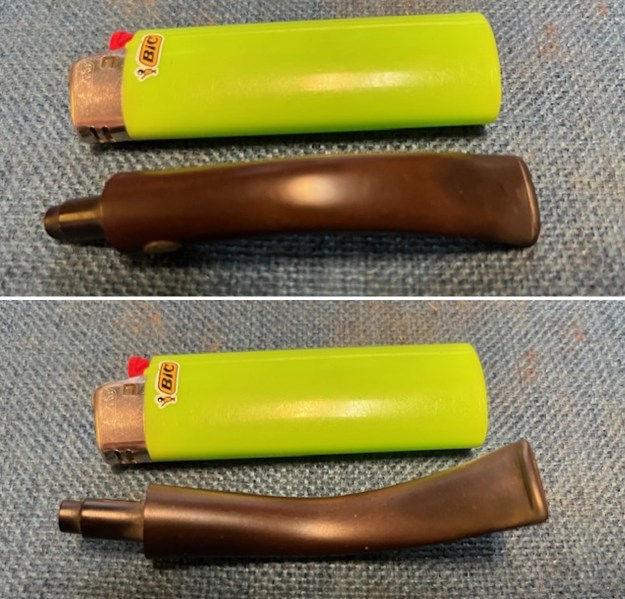
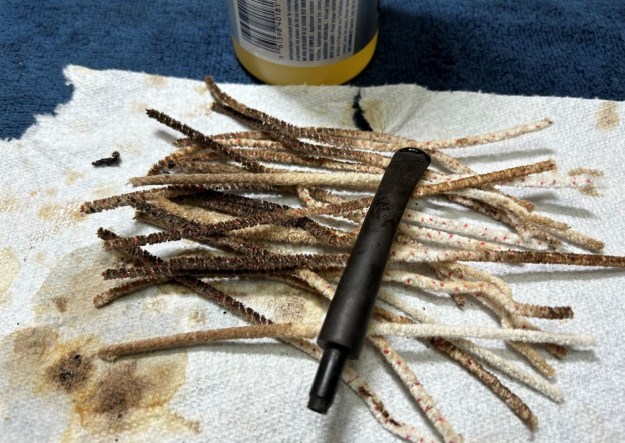
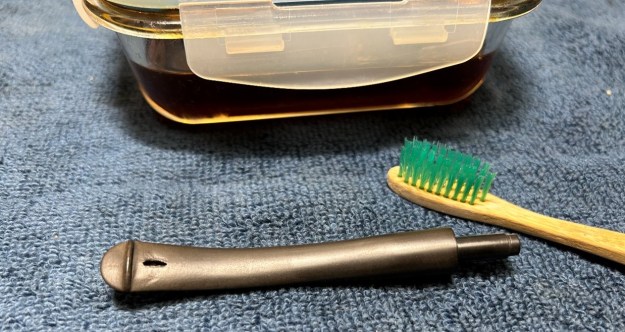
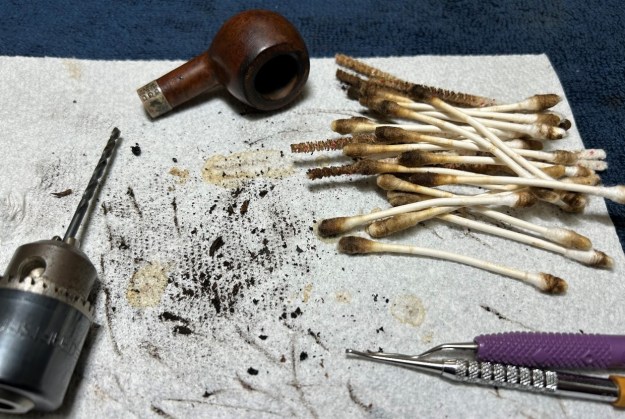
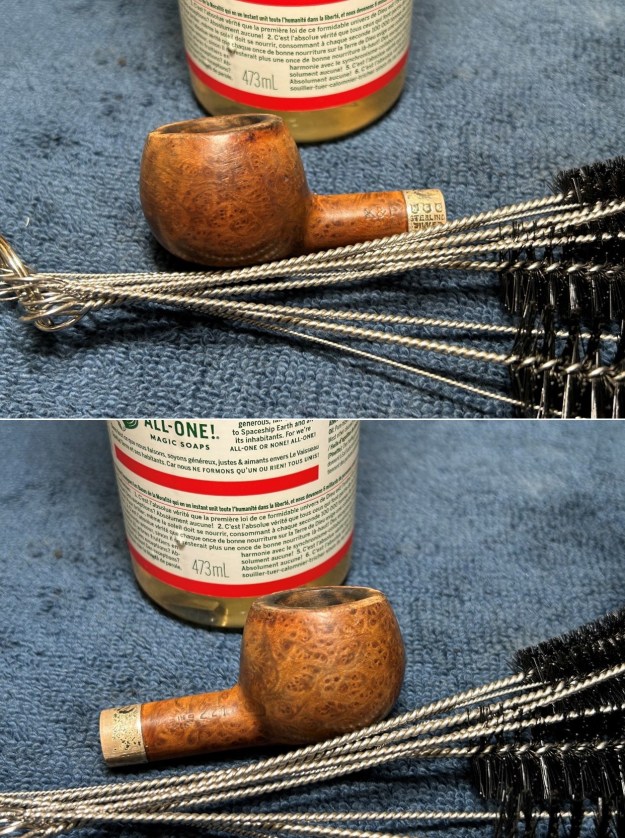
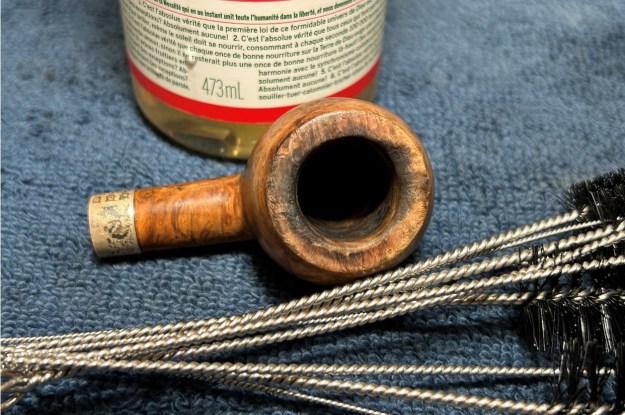
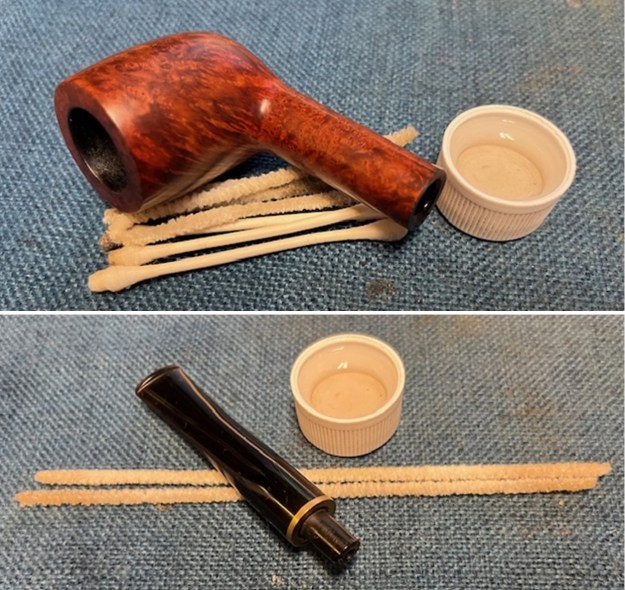
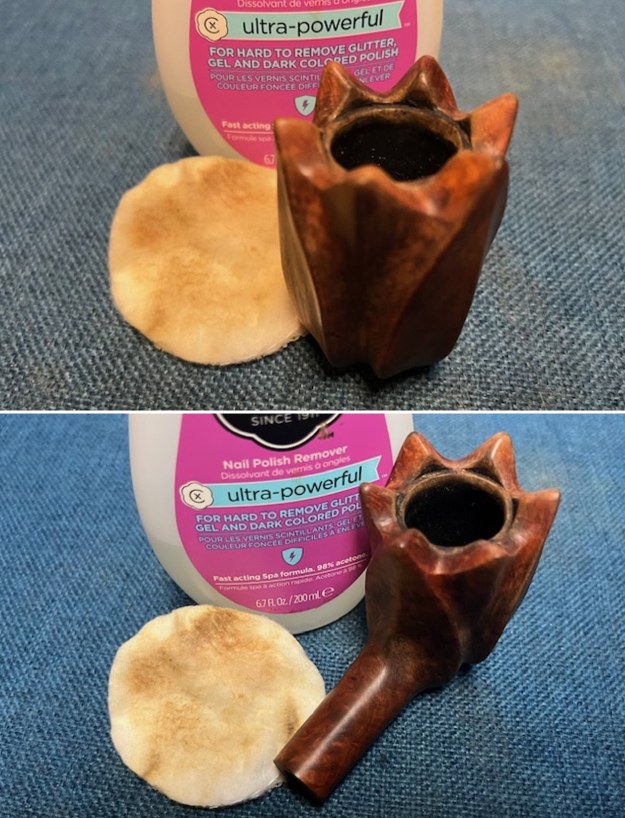
 I cleaned out the internals of the bowl and shank with pipe cleaners, cotton swabs, shank brushes and 99% isopropyl alcohol. It was very clean and it looked and smelled far better. I also cleaned out the internals in the stem with the same tools and alcohol.
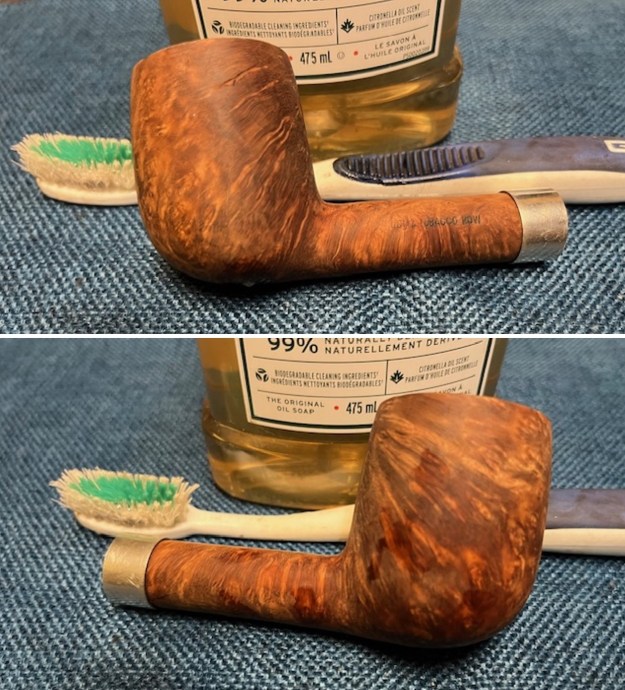
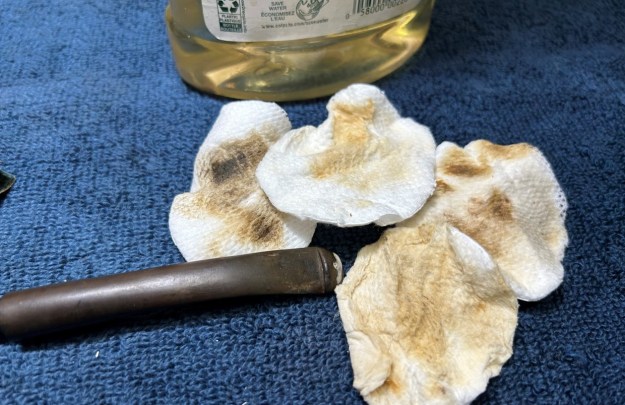
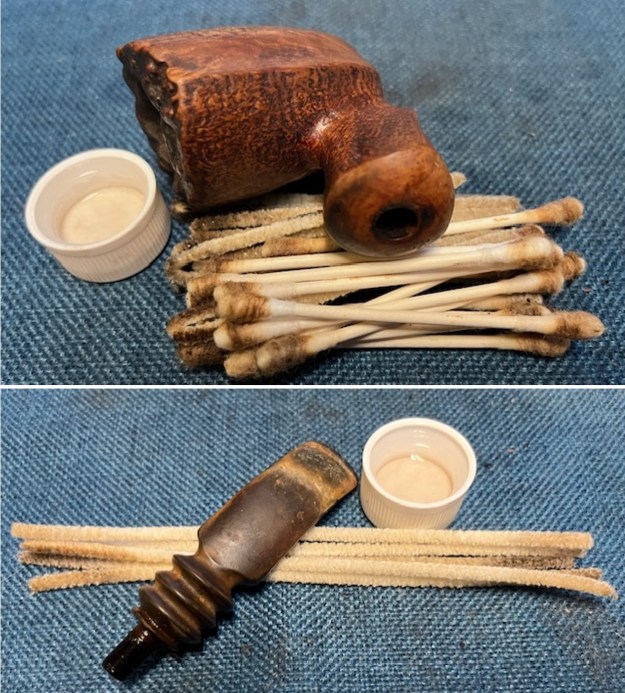 I scrubbed the externals of the bowl and shank with undiluted Murphy’s Oil Soap and a tooth brush. I worked over the bowl, shank and rim top with the soap and then rinsed it off warm water. The bowl looked extremely good. The cracks around the bowl heel and sides were clean. The plateau top had some darkening and burn marks.
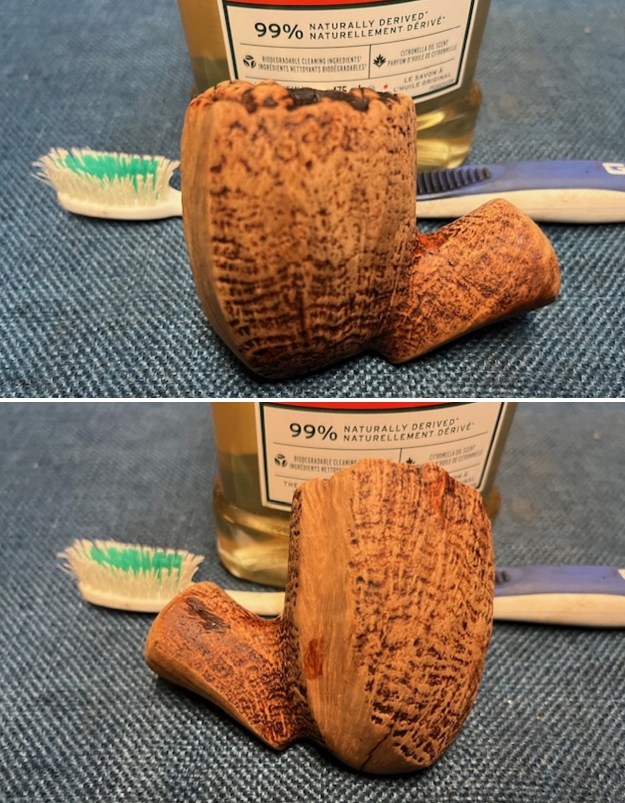
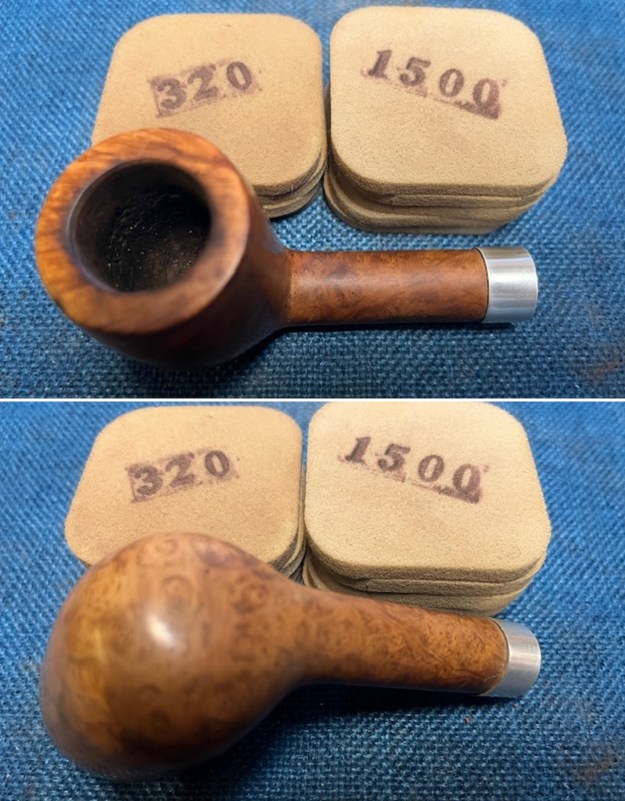
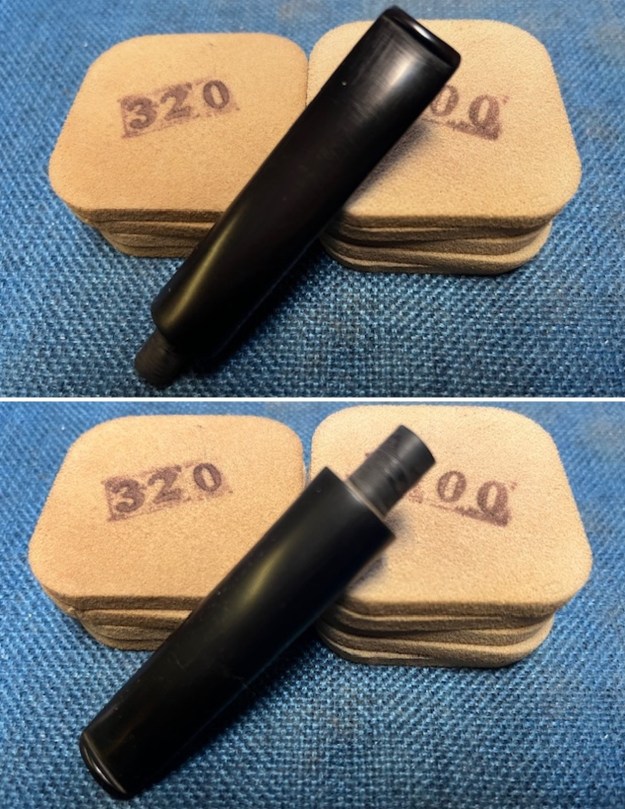
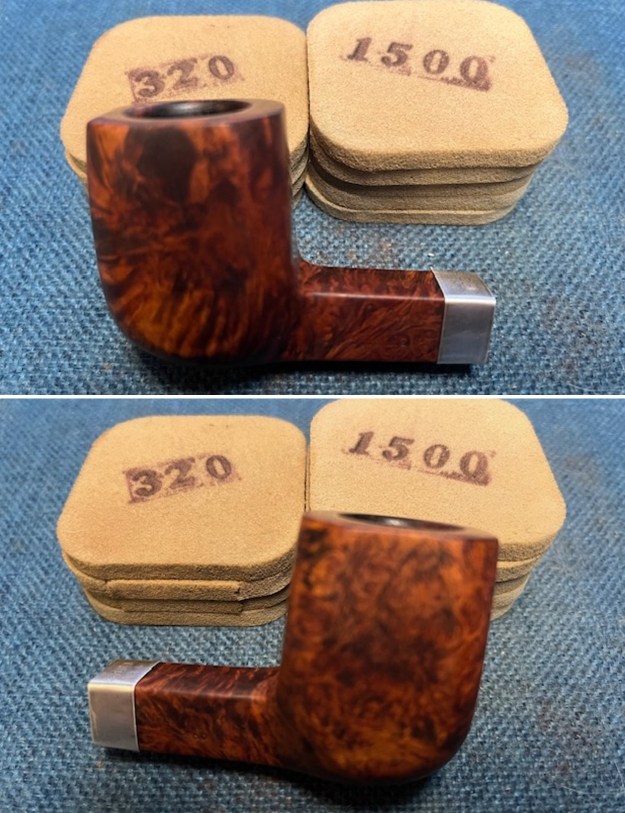
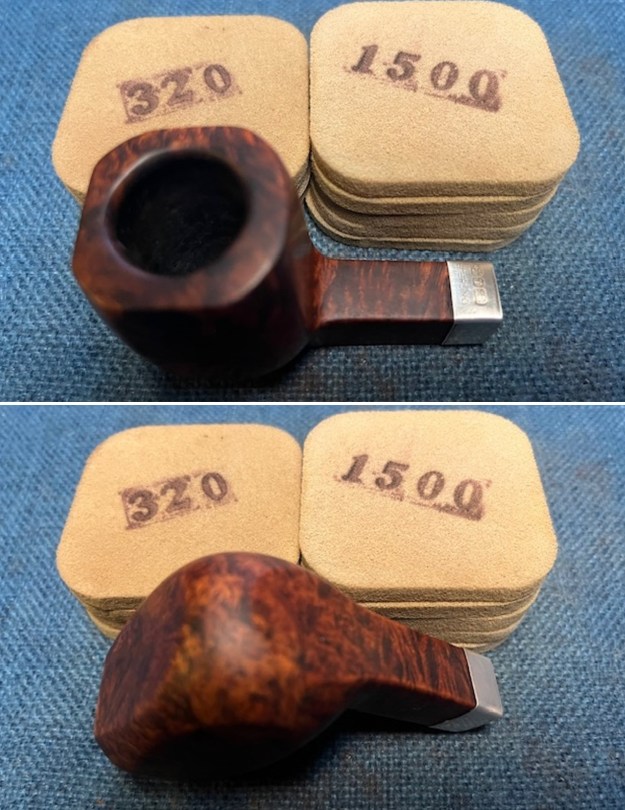
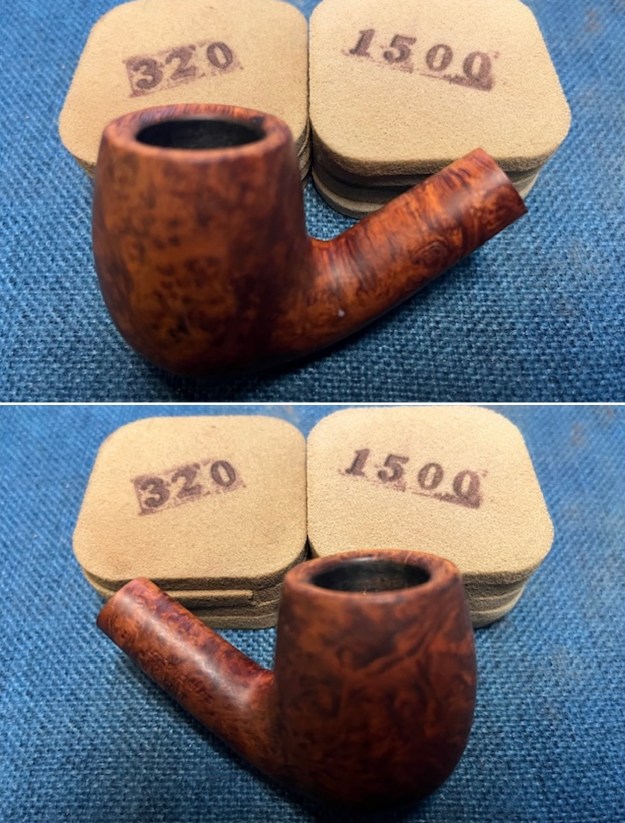
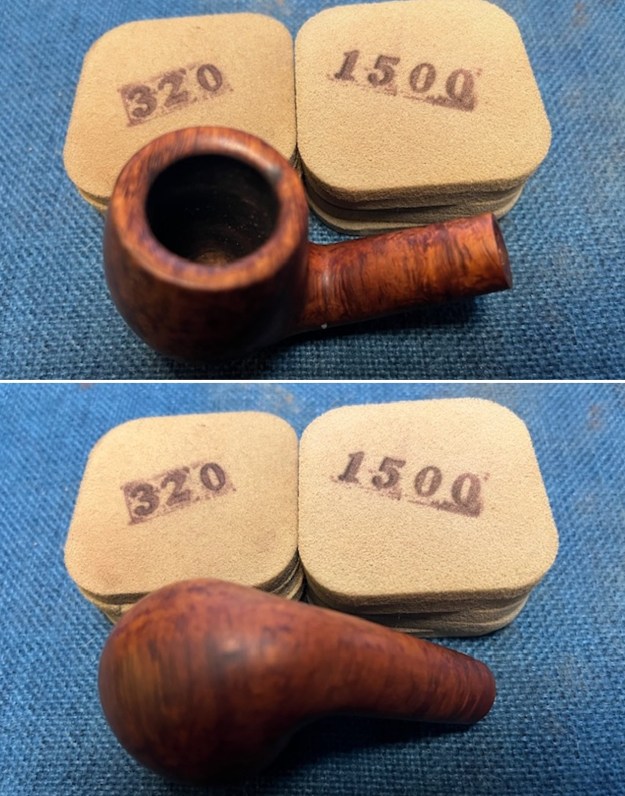
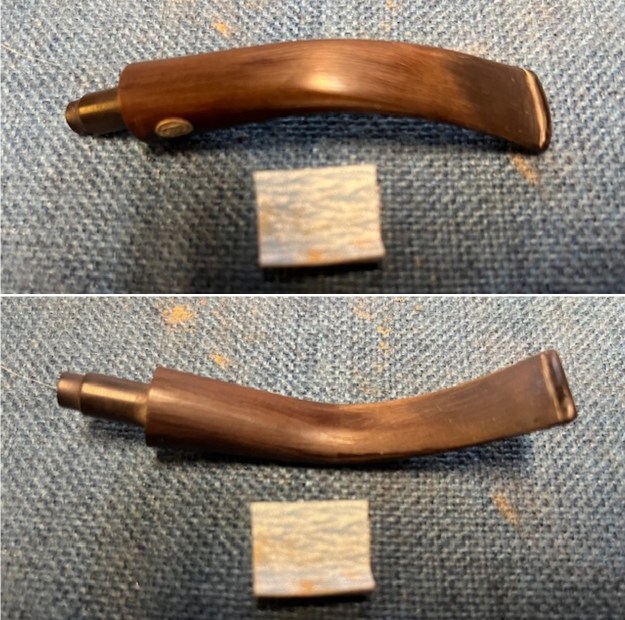
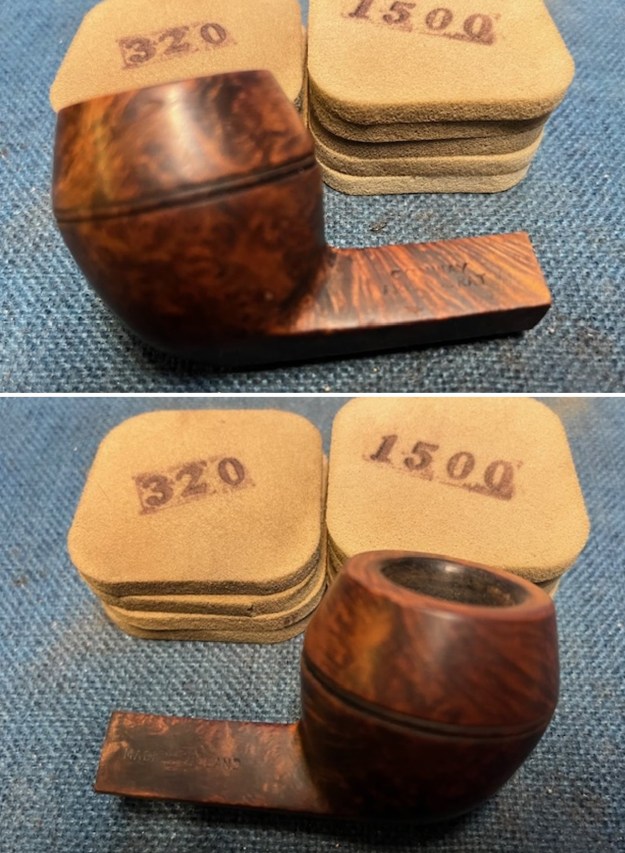
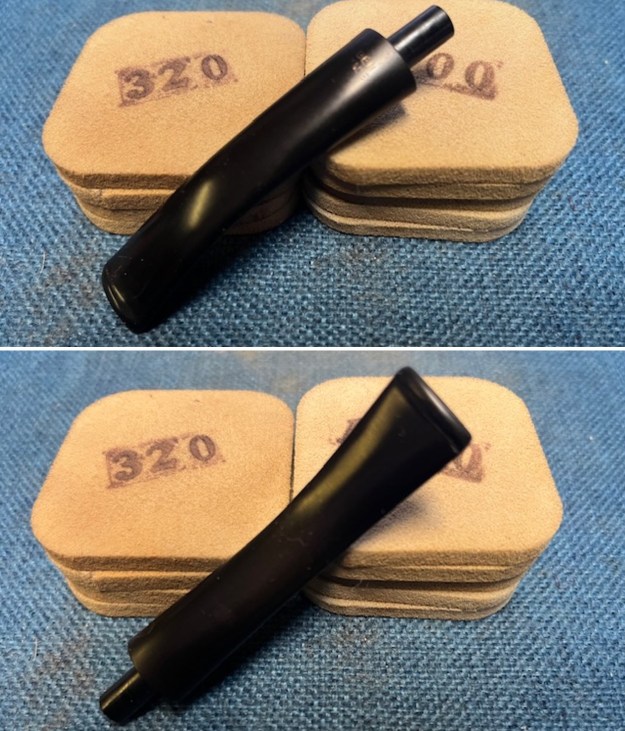
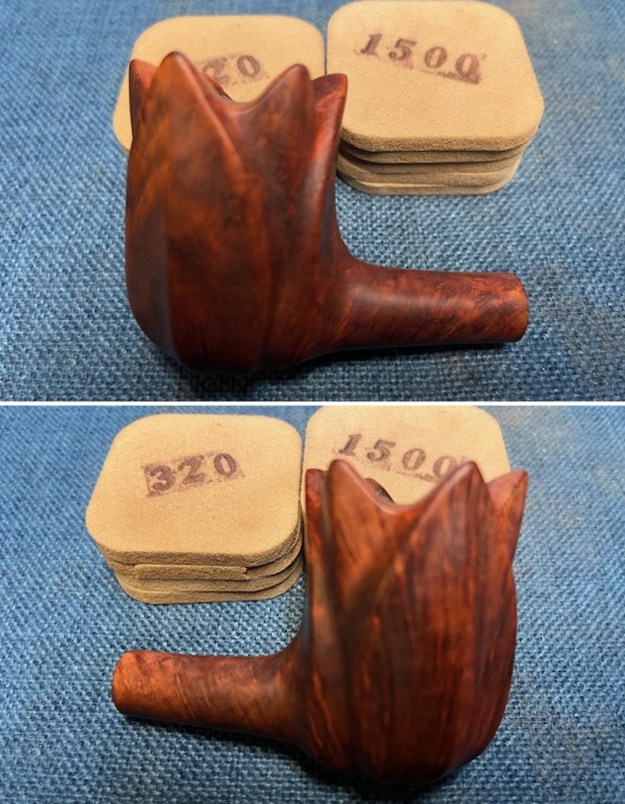
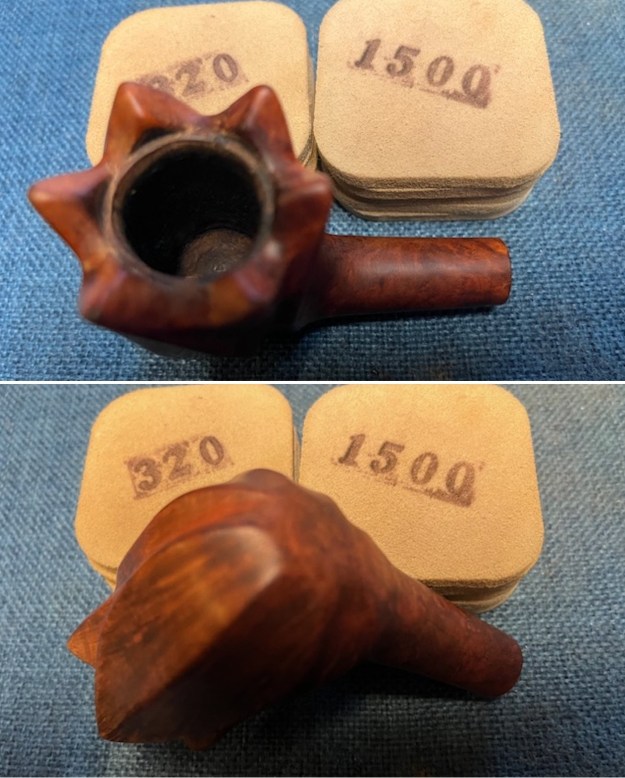
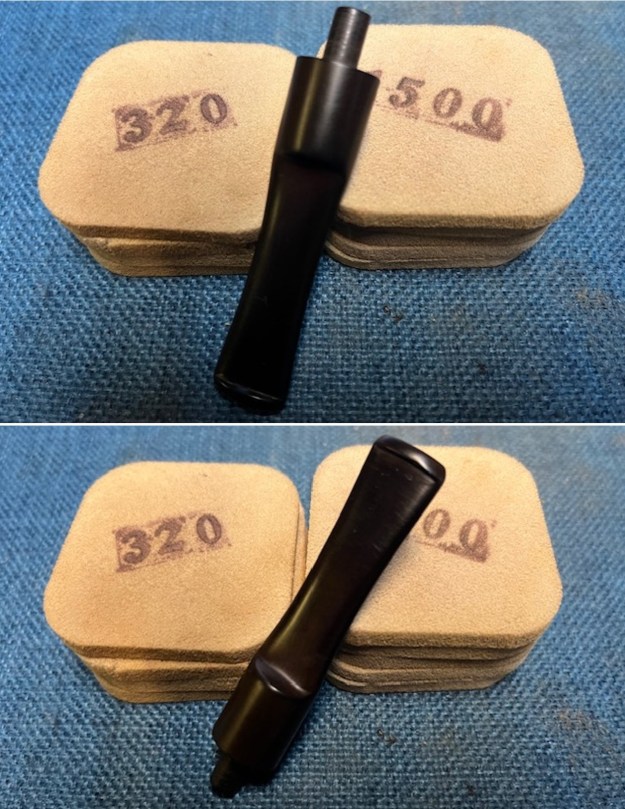
 I worked over the rim top with a brass bristle wire brush to clean up the rim top. I sanded the rim top high spots in the plateau with a 320 grit sanding pad. The clean high spots would provide a great contrast.
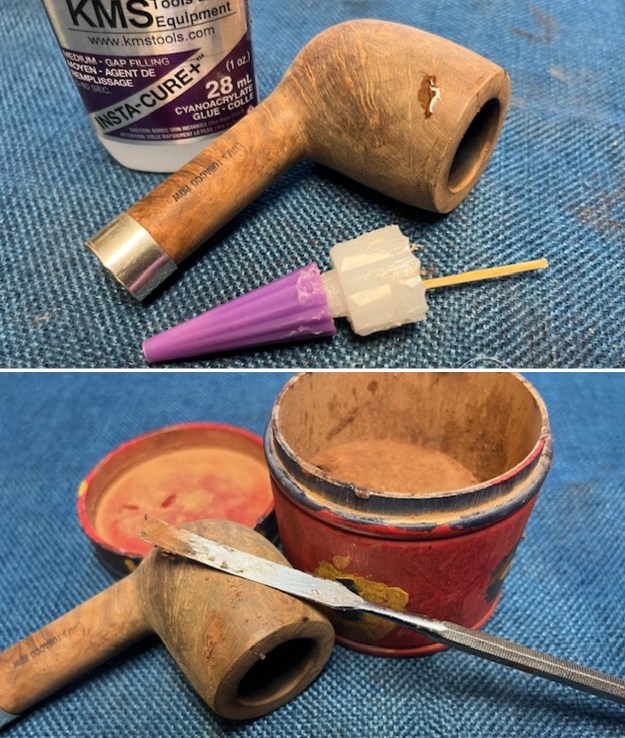
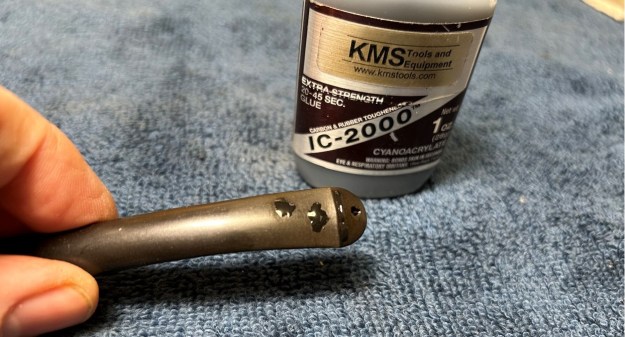
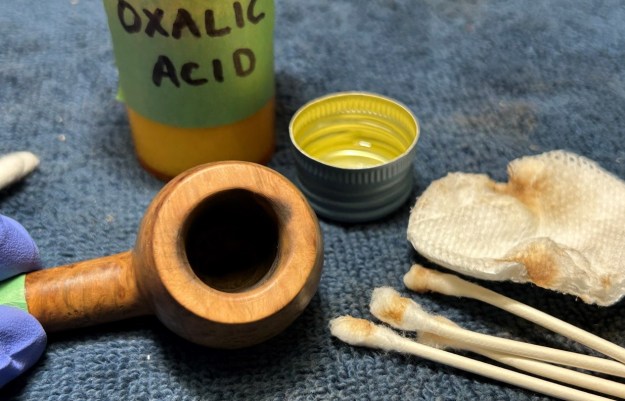
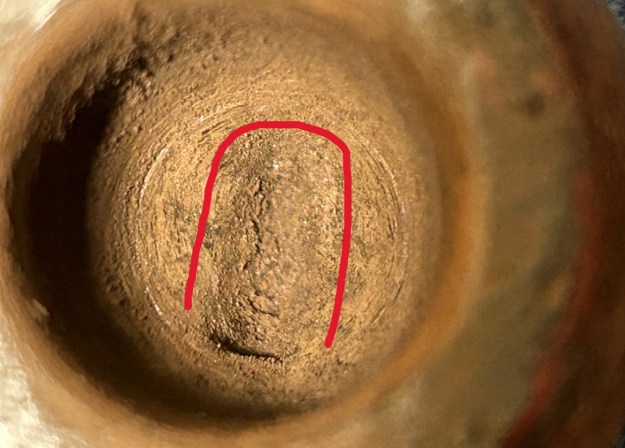
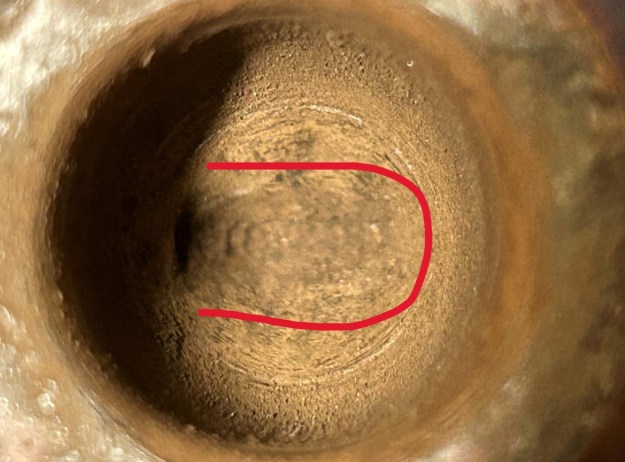
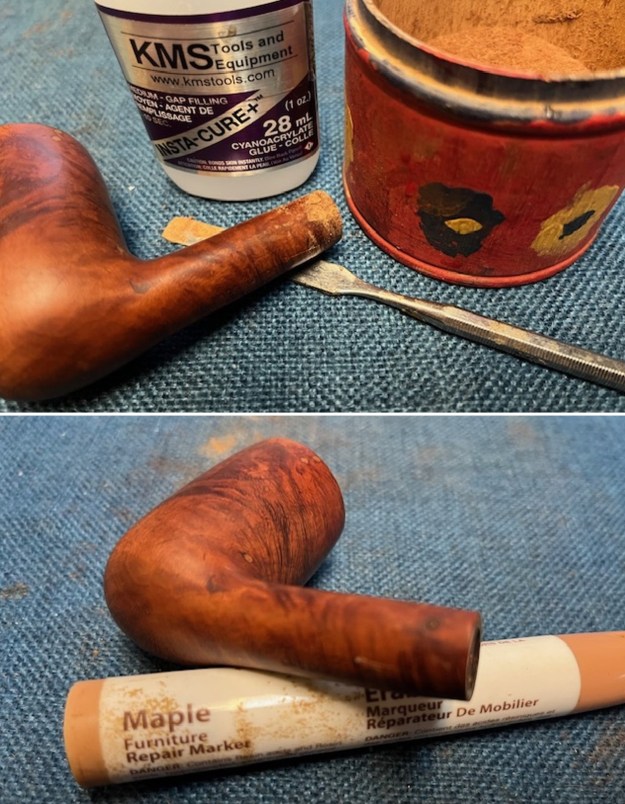
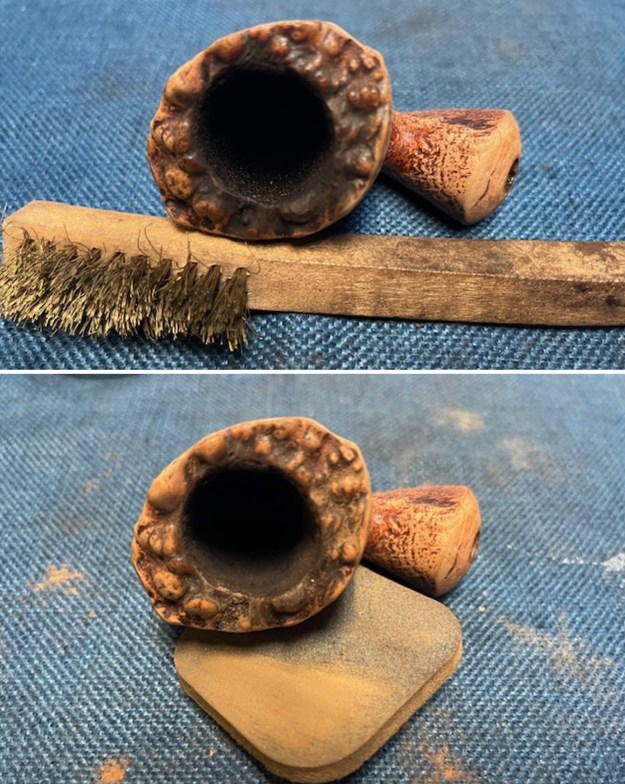 Now it was time to address the crack in the bowl running up both sides from the heel. The inside of the bowl is clean and no cracks run through from the outside of the bowl. I am pretty confident that the cracks came when the pipe was dropped on the ground. I used a micro drill bit and drilled small pilot holes at the end of the crack on each side of the bowl. I have circled the drill holes on both sides of the pipe in red for quick reference.
 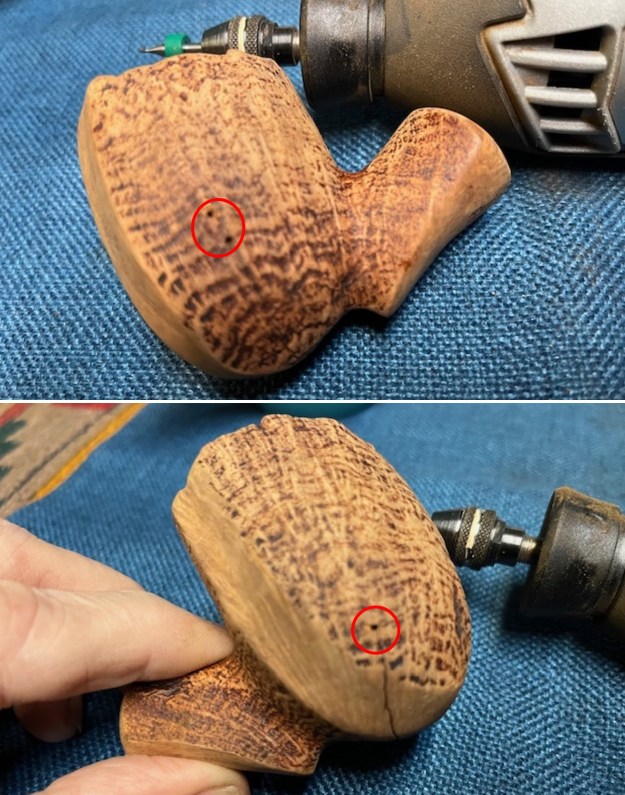 I filled in the cracks with clear CA glue and briar dust and used a dental spatula to press the material into the crack.
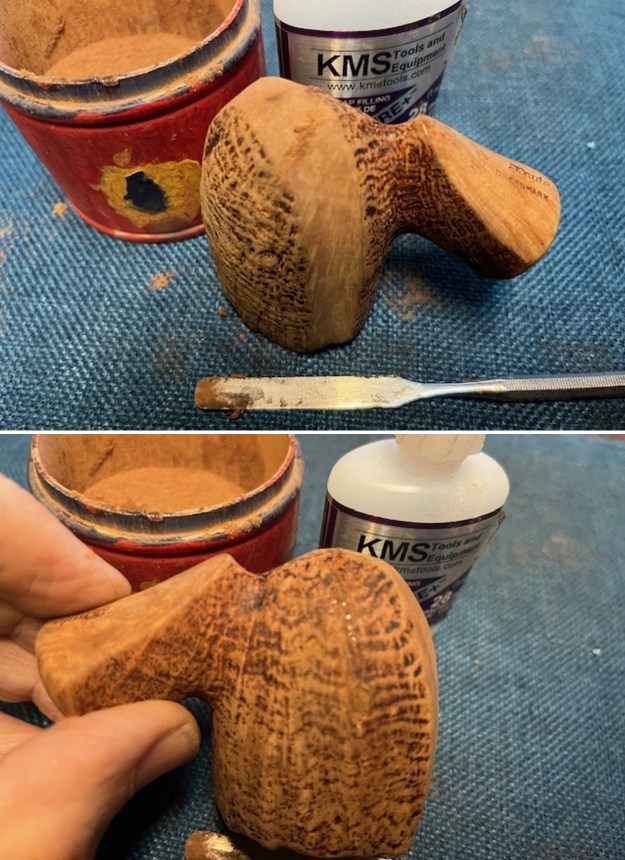 I worked over the repaired areas with a brass bristle wire brush. I followed the flow of the sandblast finish with the brush and was able to clean up the debris from the repairs in the grain of the crack.
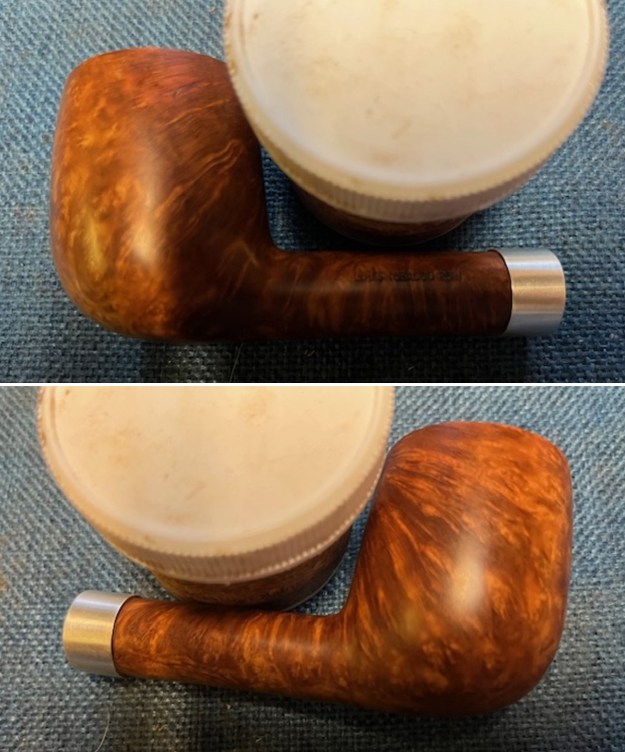
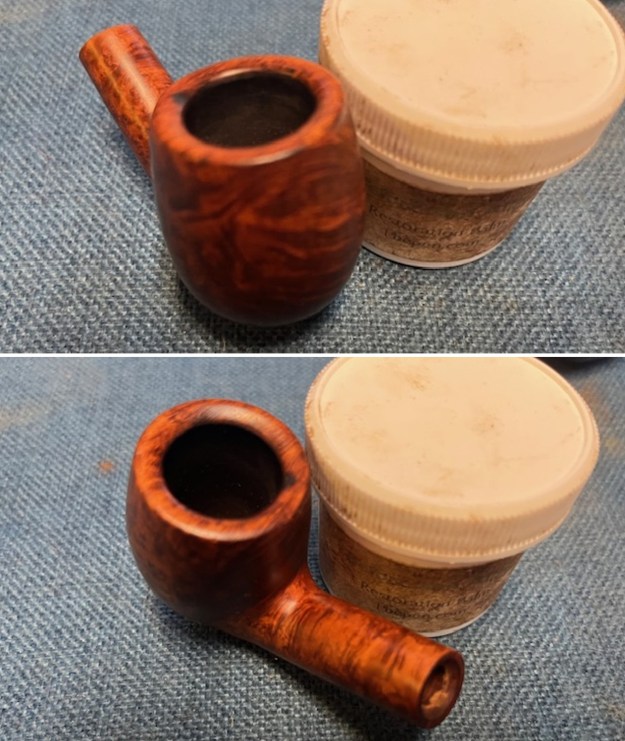
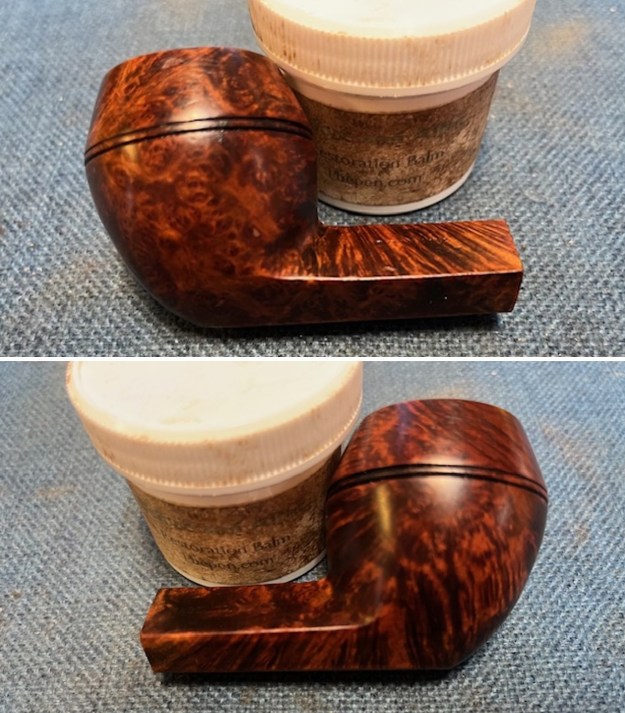
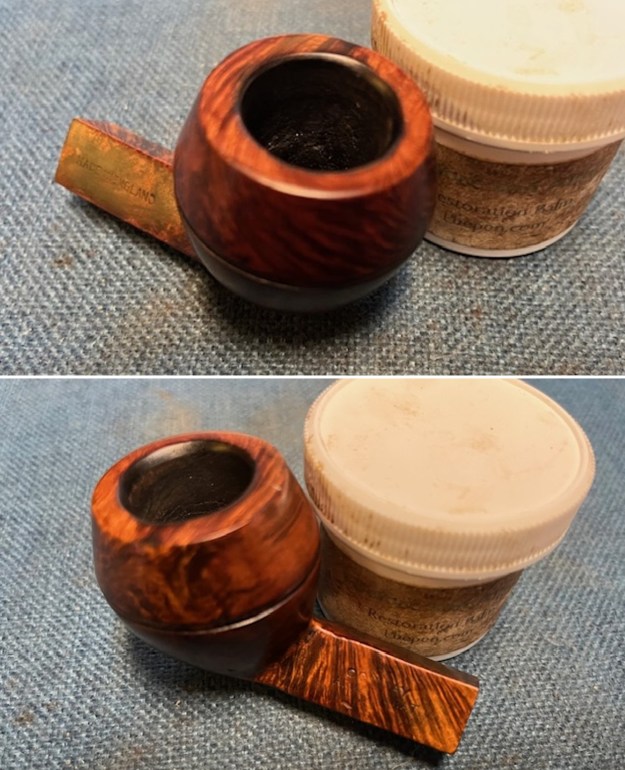
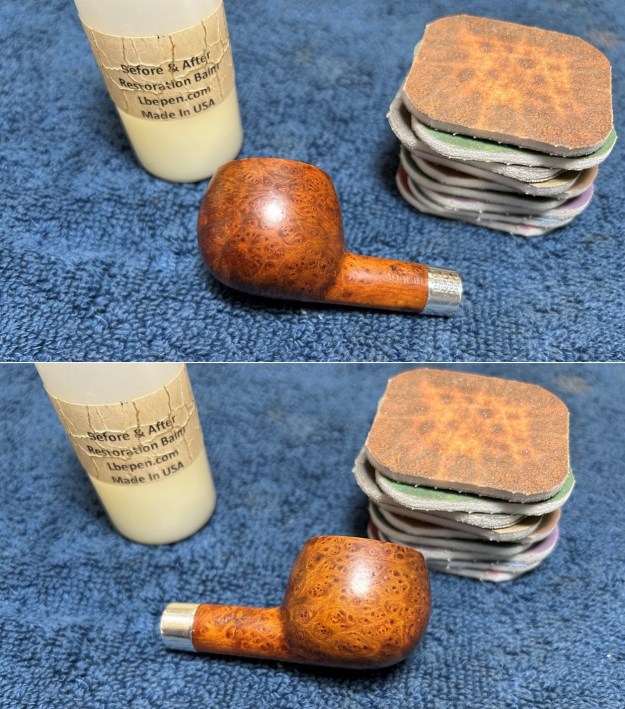
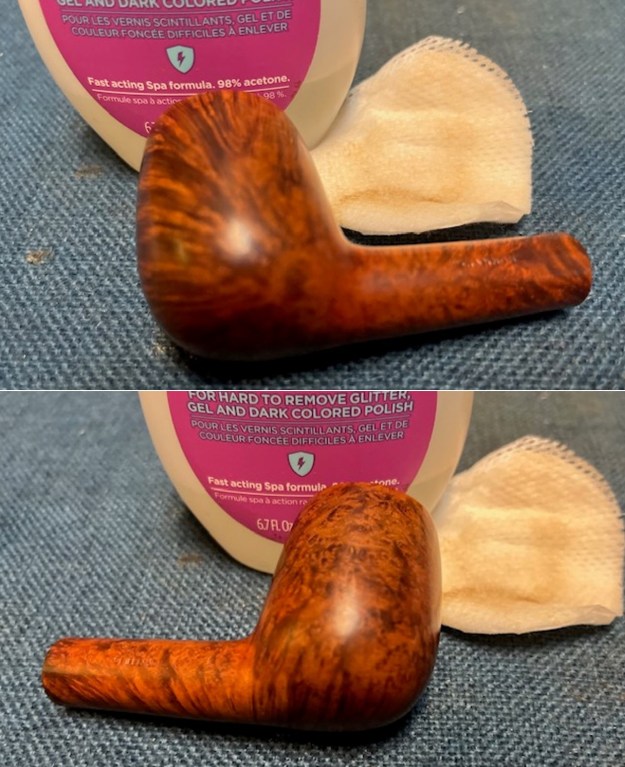
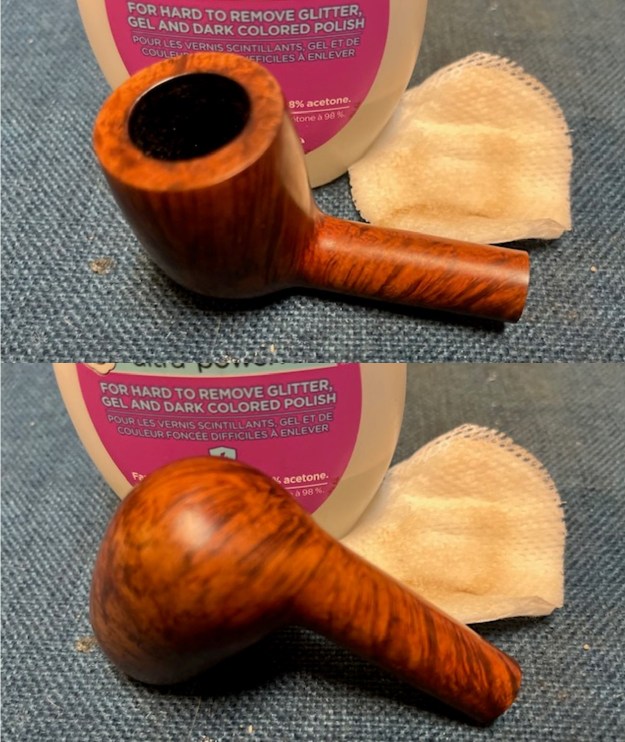
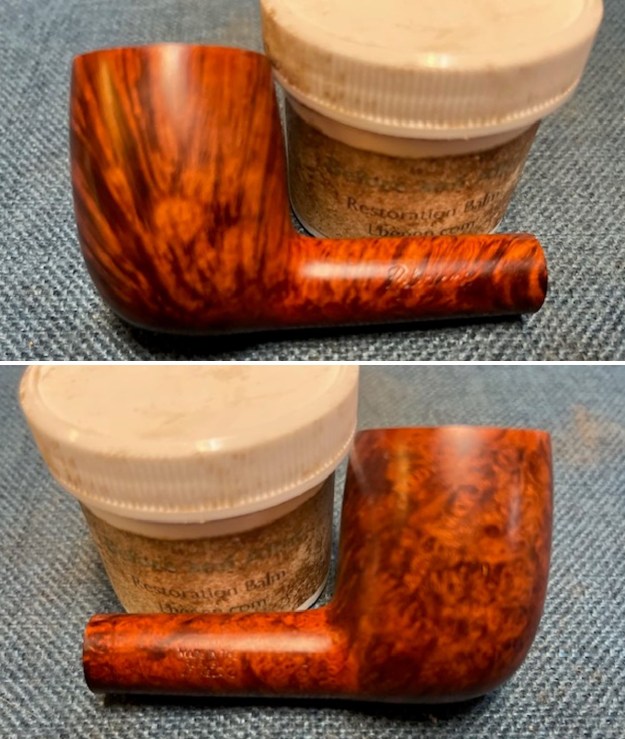
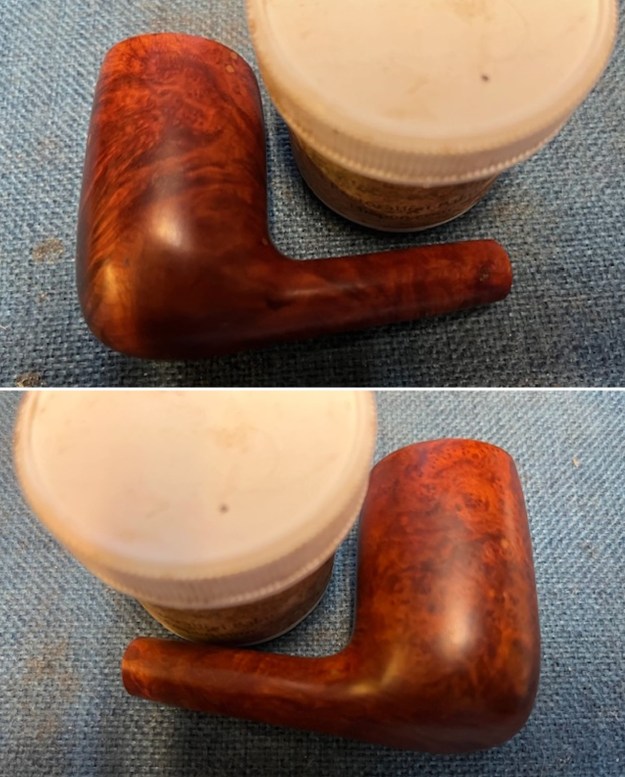
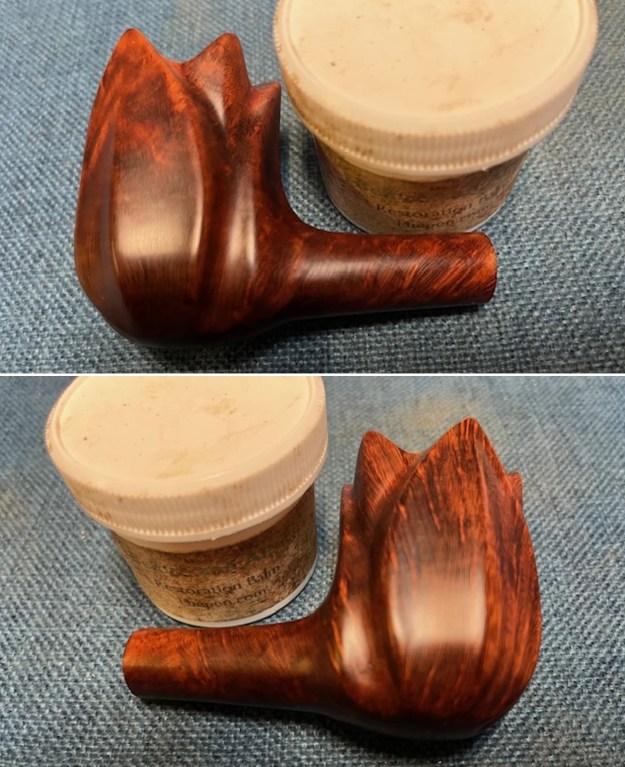
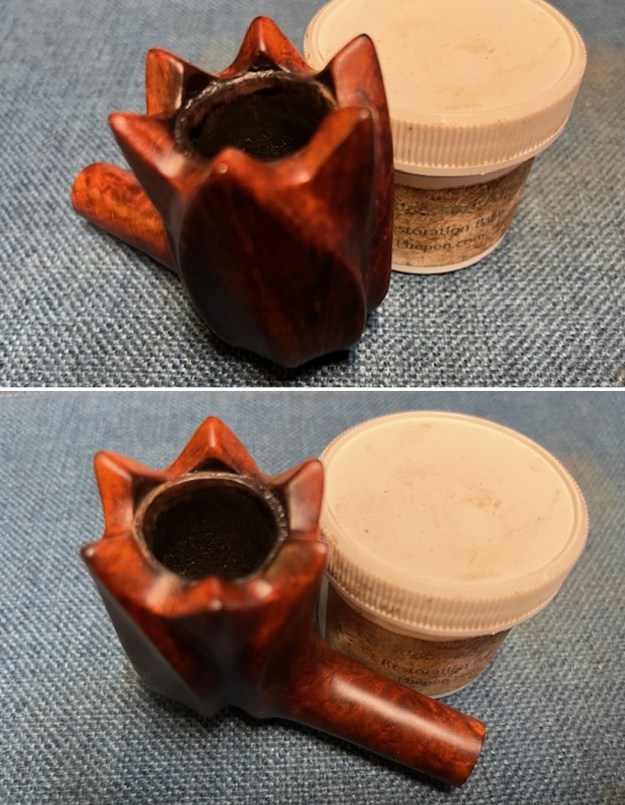
 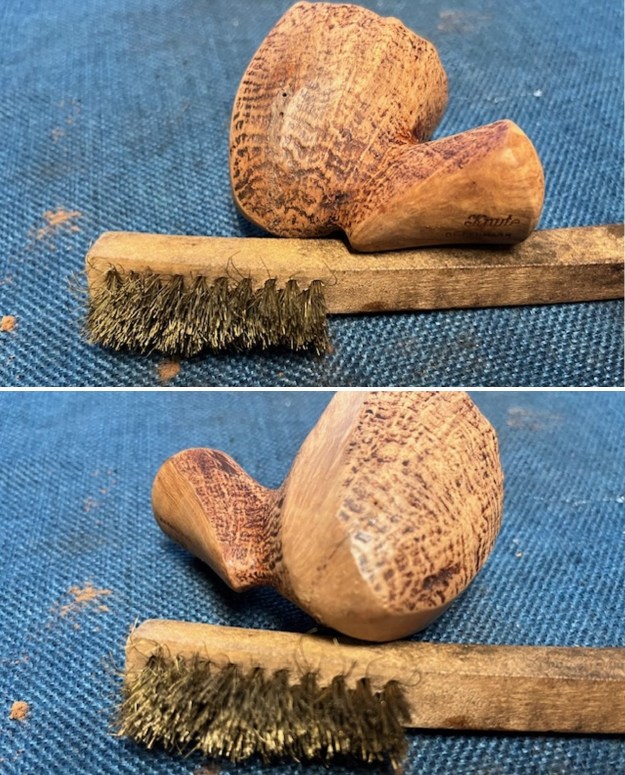 I worked some Before & After Restoration Balm into the sandblast finish and the plateau rim top. I worked it in with my finger tips on the smooth portions of the finish and with a shoebrush on the plateau and the sandblast. I let the Balm do its magic for 15 minutes then buffed it off with a cotton cloth. The rich colours of the finish on this Knute looked amazing.
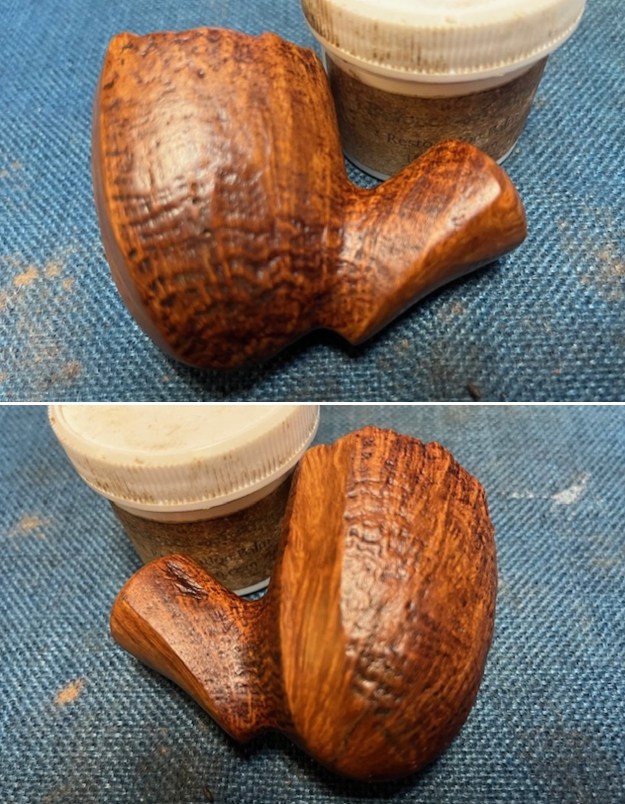
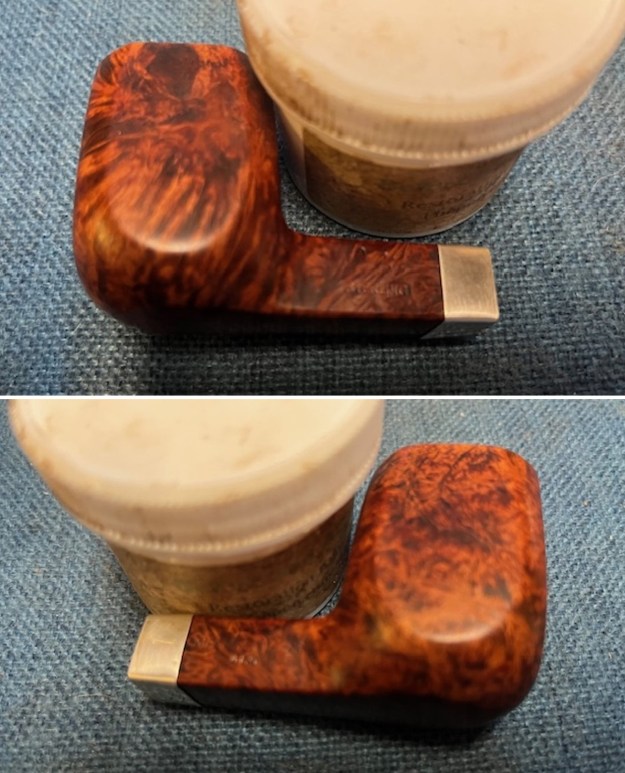
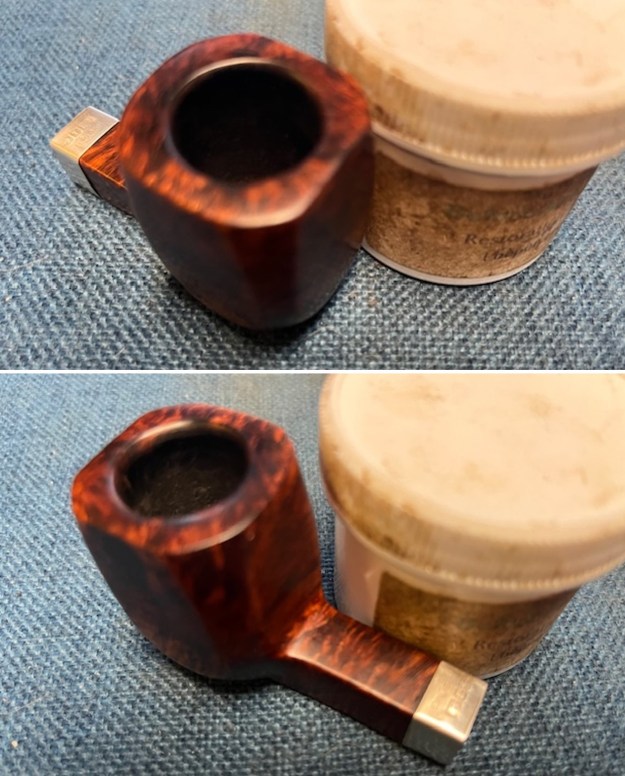
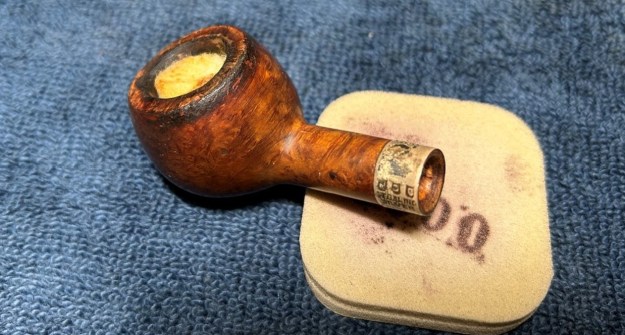
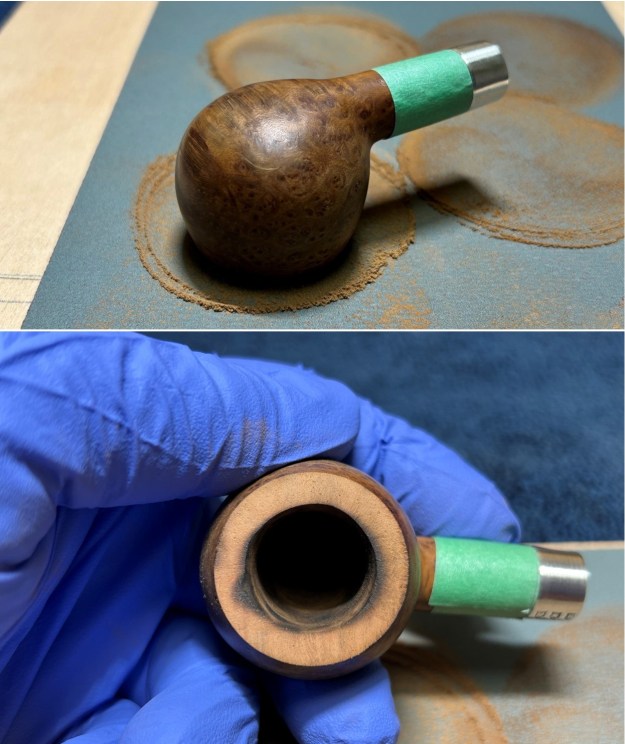
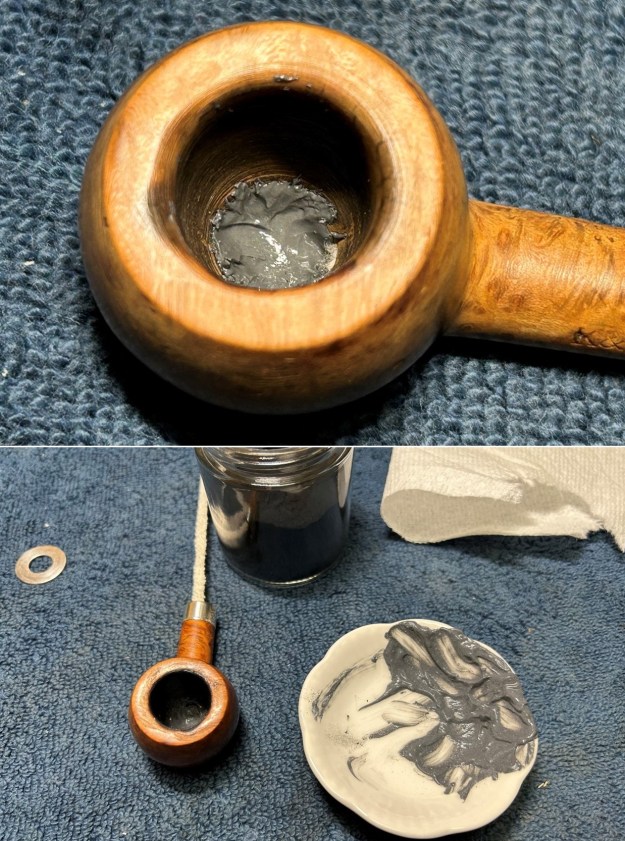
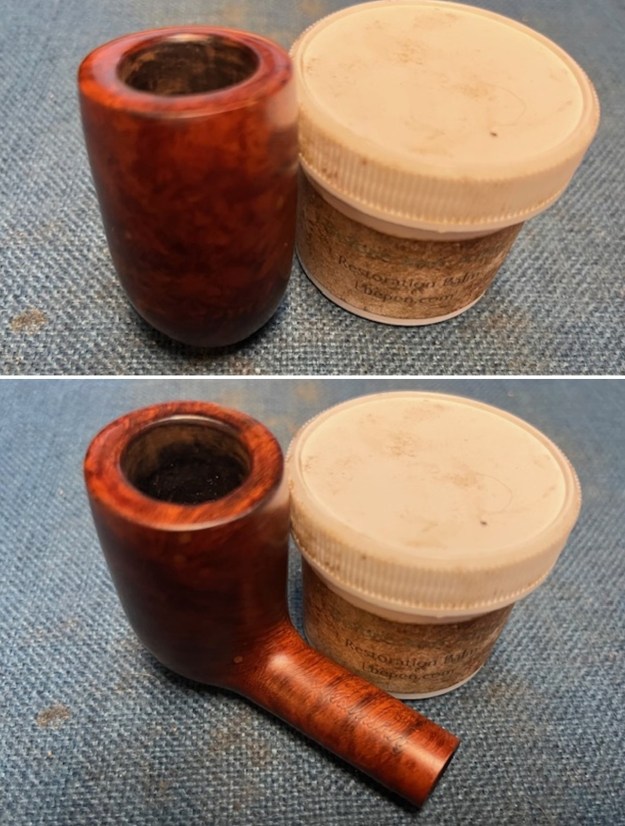
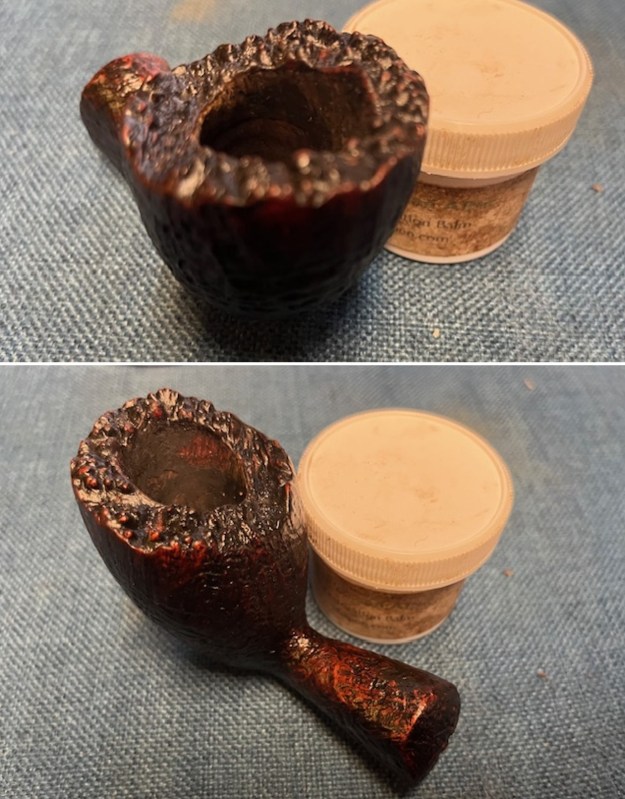
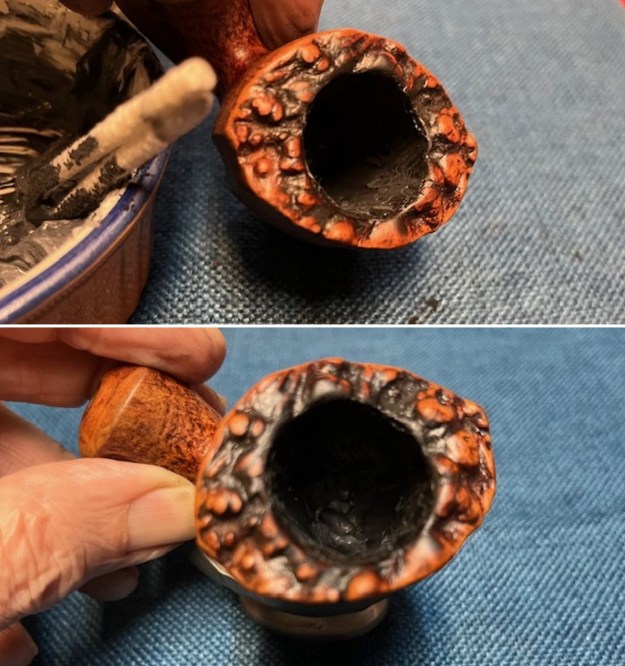
 I painted the walls of the bowl with a mixture of sour cream and activated charcoal powder. The mixture works to provide a bowl coating. I applied it with a folded pipe cleaner. I put a pipe cleaner in the airway to close the entry into the bowl. The bowl coating would give the bowl some initial protection as it is broken in through smoking. The natural buildup of carbon will further protect the bowl. I set the bowl in a pipe rest to let the mixture harden and cure.
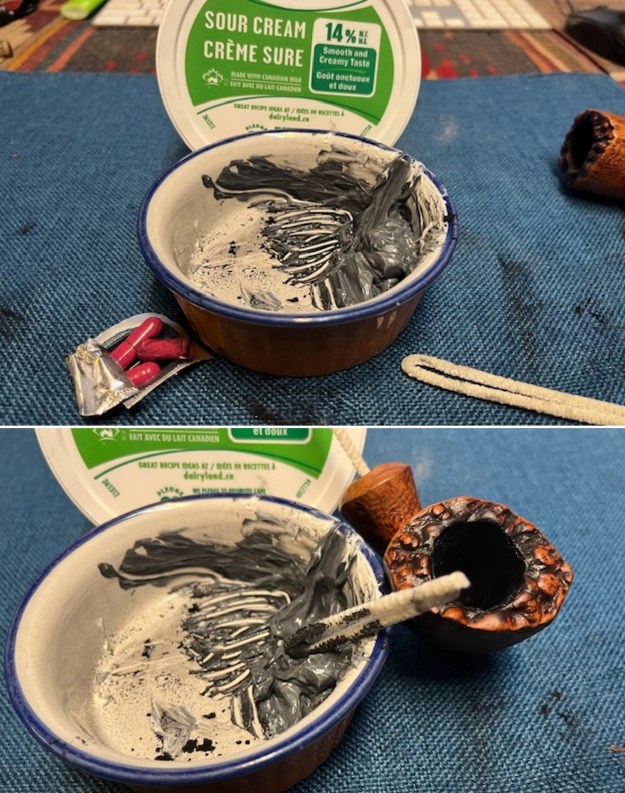
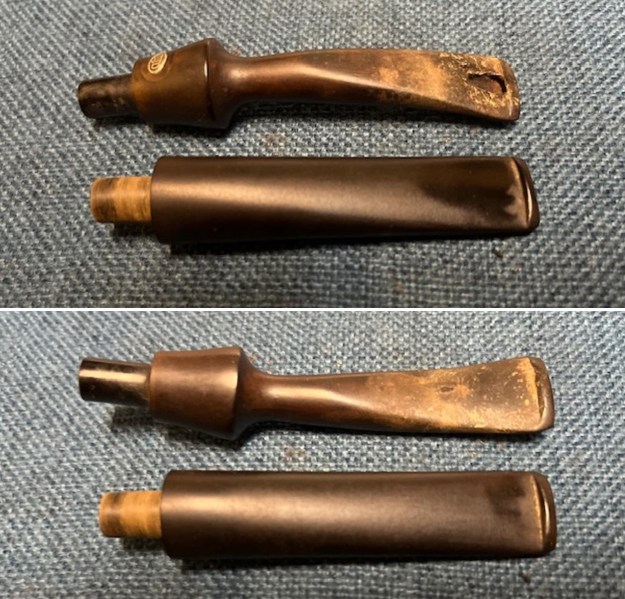
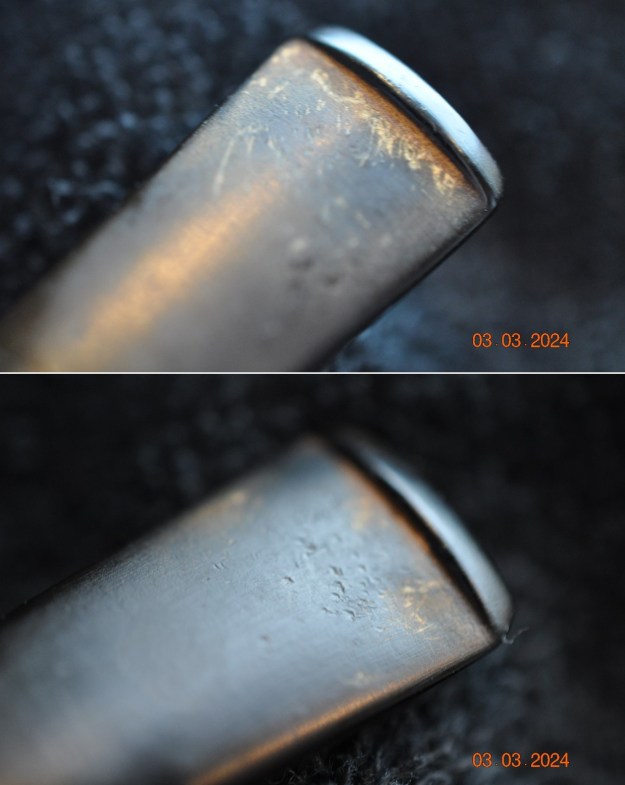
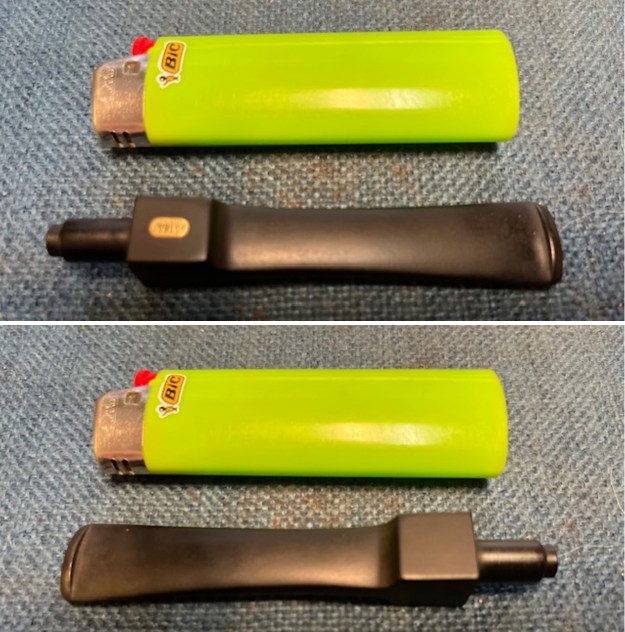
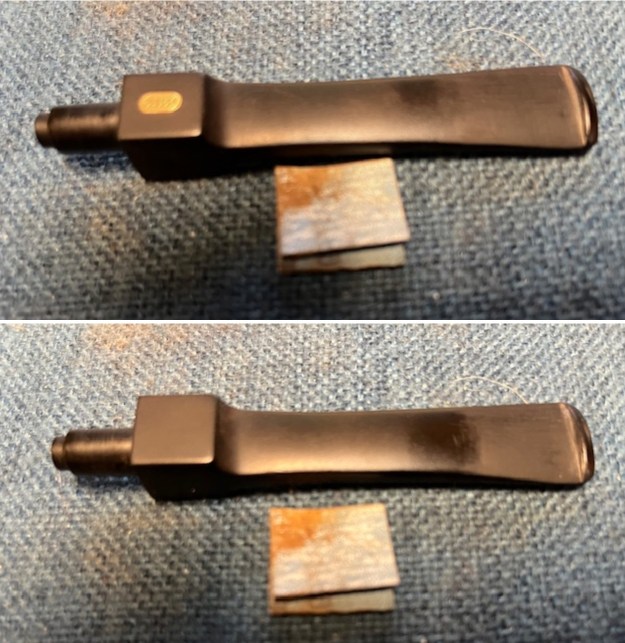
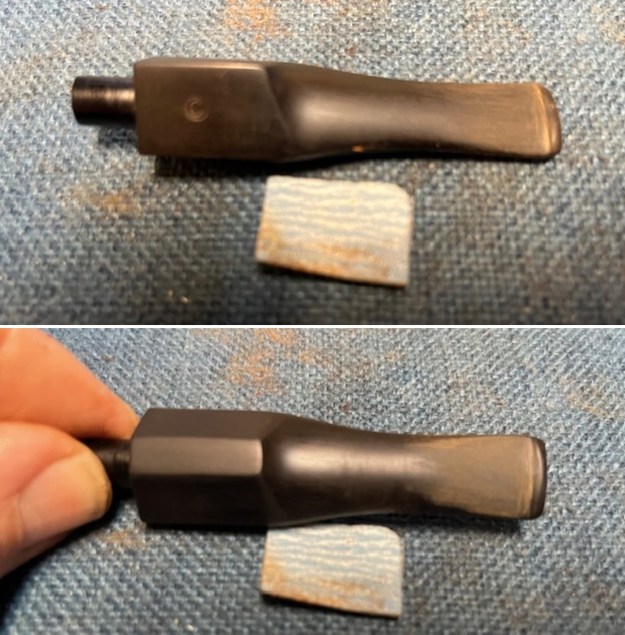
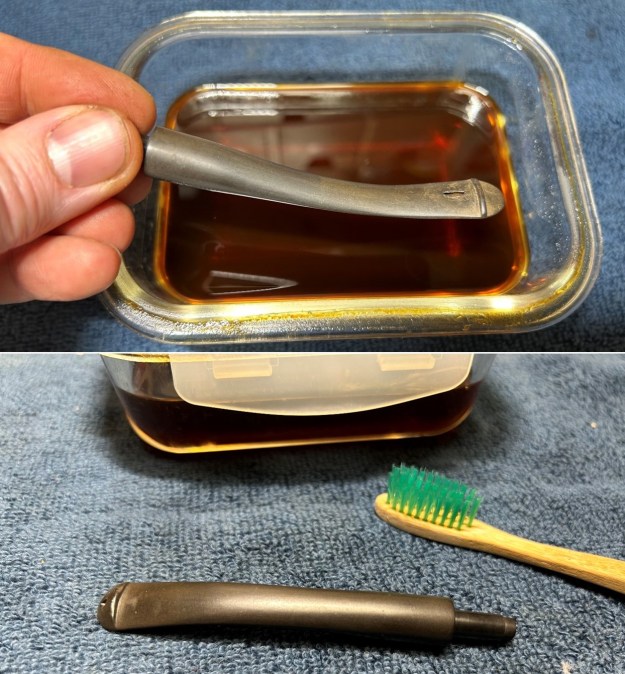
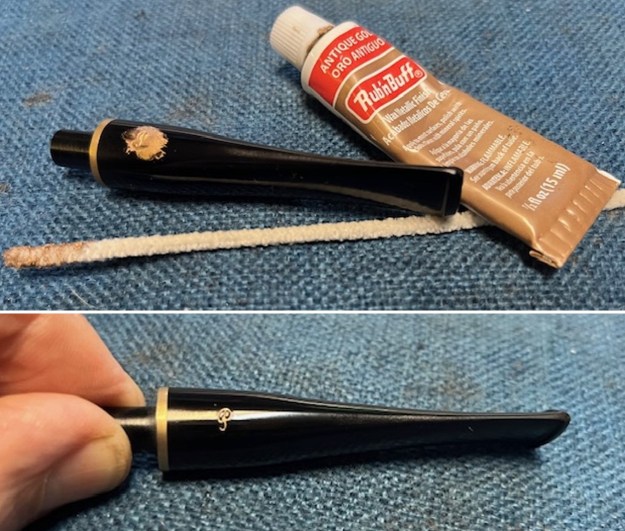
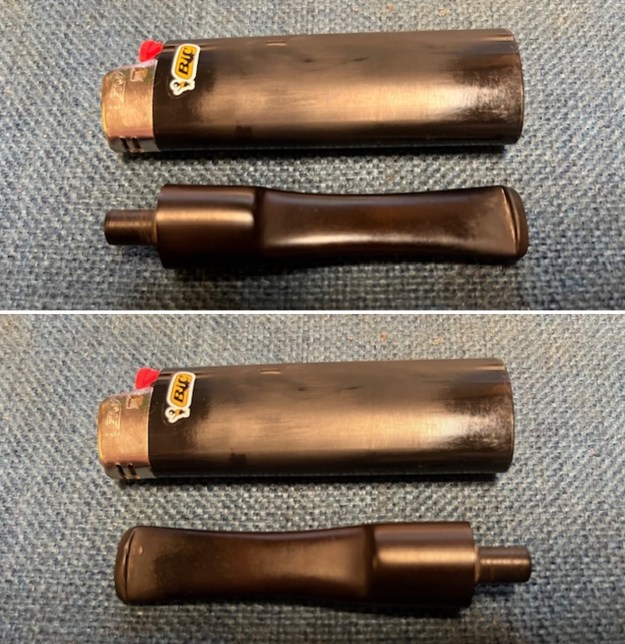
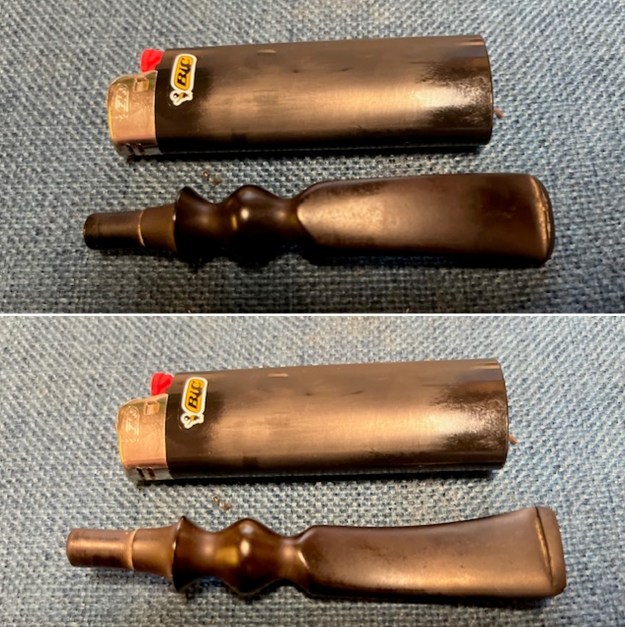
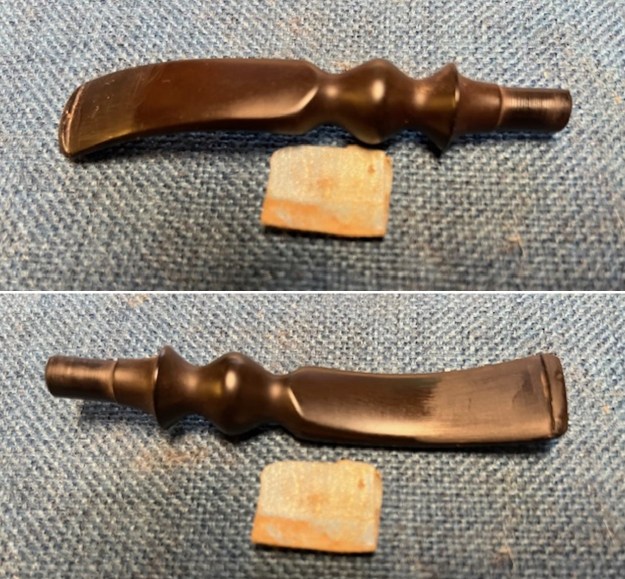
 I set the bowl aside and turned my attention to the badly oxidized stem. I scrubbed the stem surface with Soft Scrub cleanser to break through the oxidization and calcification. It took a lot of scrubbing and scraping of the grime from the surface but it finally began to show black.
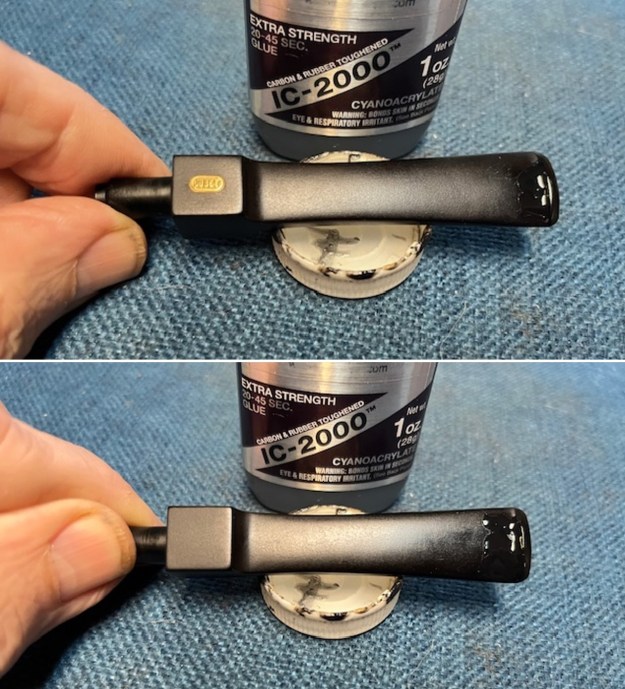
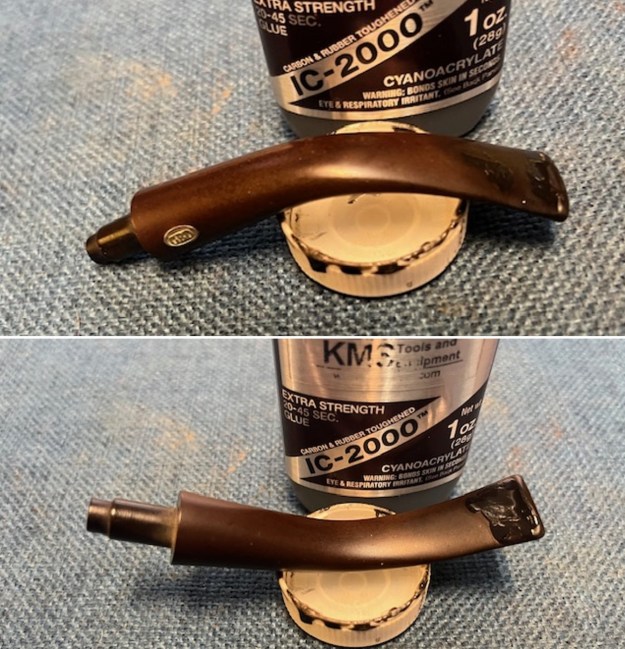
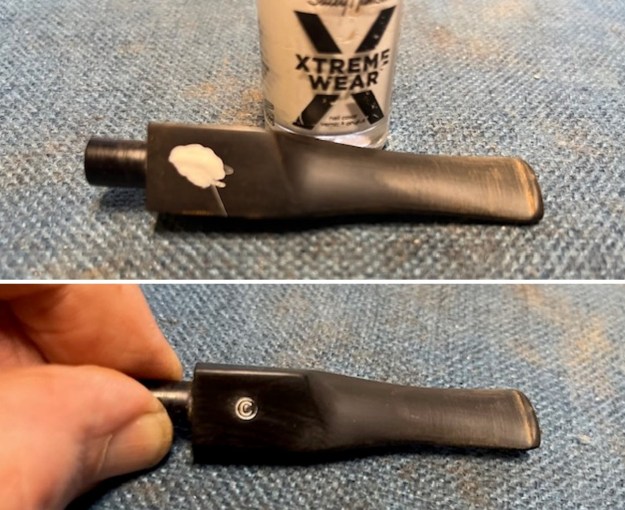
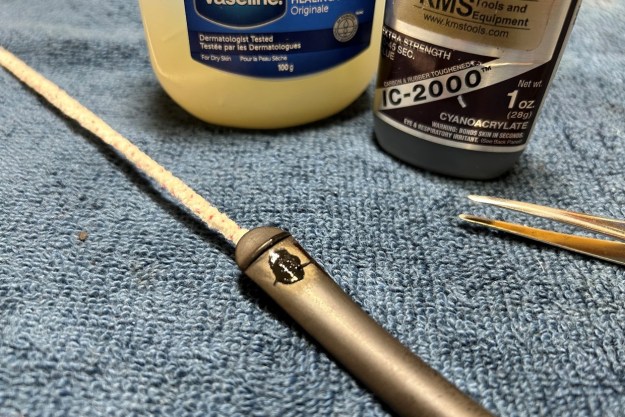
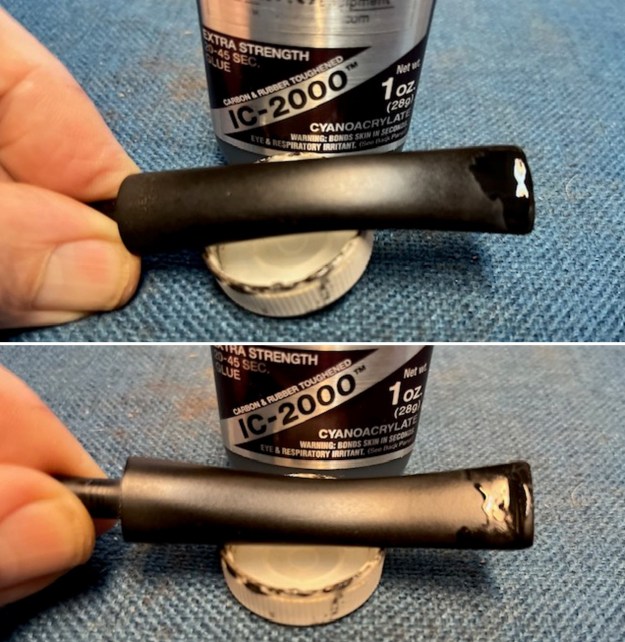
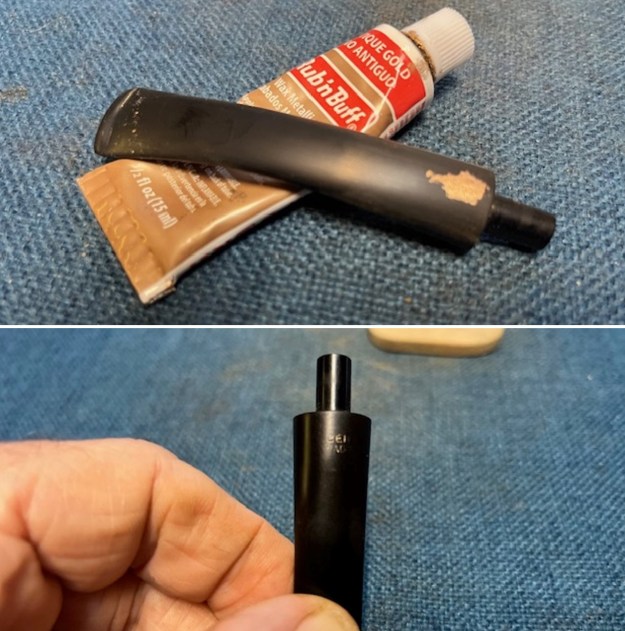
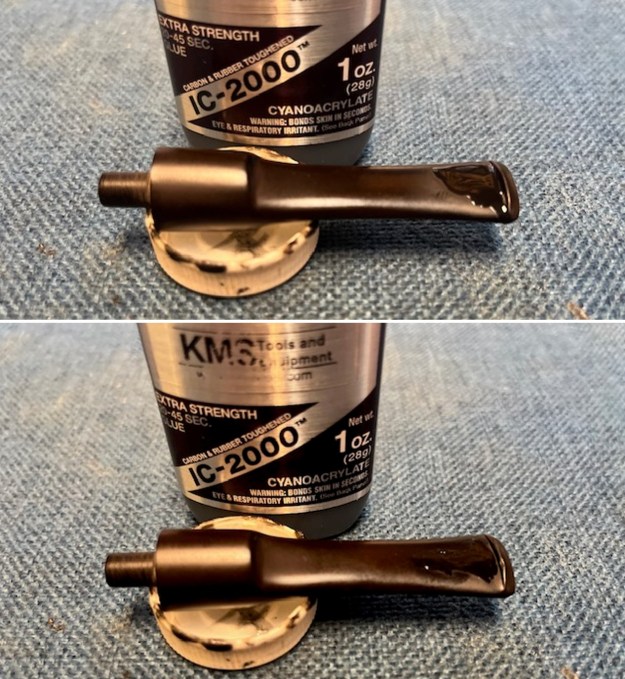
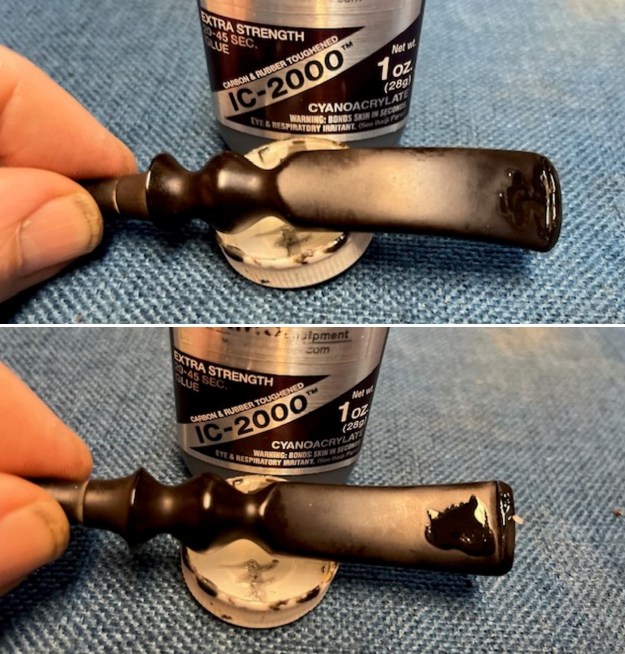
 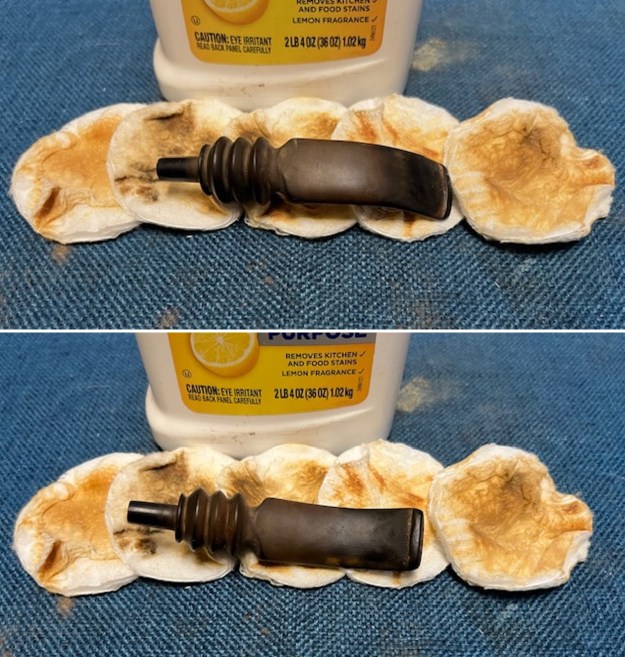 There were deep tooth marks on the top and underside of the stem ahead of the button. I filled them in with black CA glue strengthened with rubber and carbon. It dries hard but it still is a bit flexible. I flattened the repairs with small flat file.
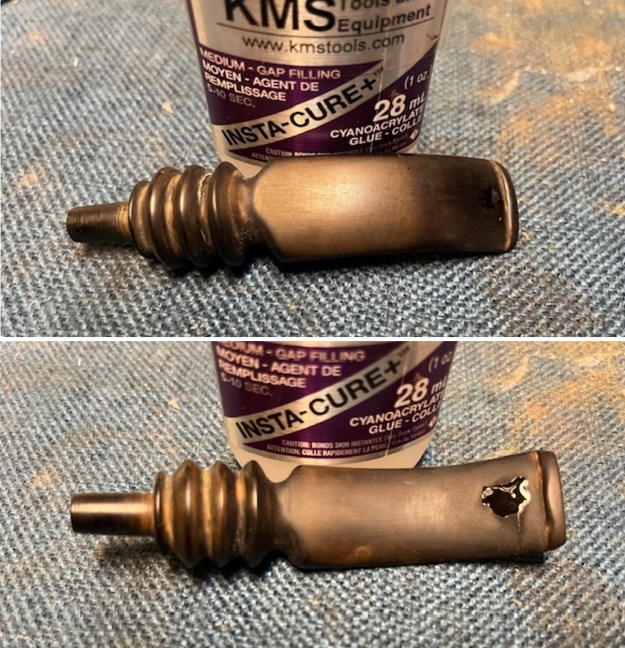
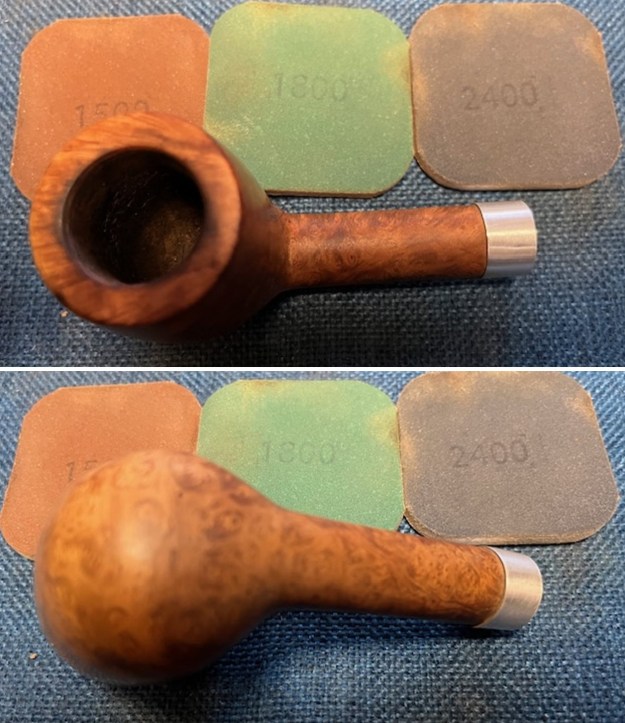
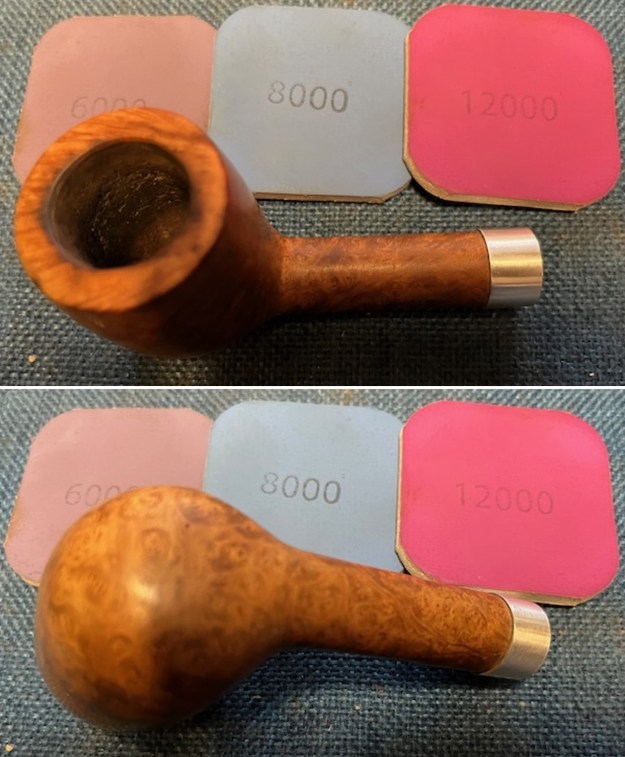
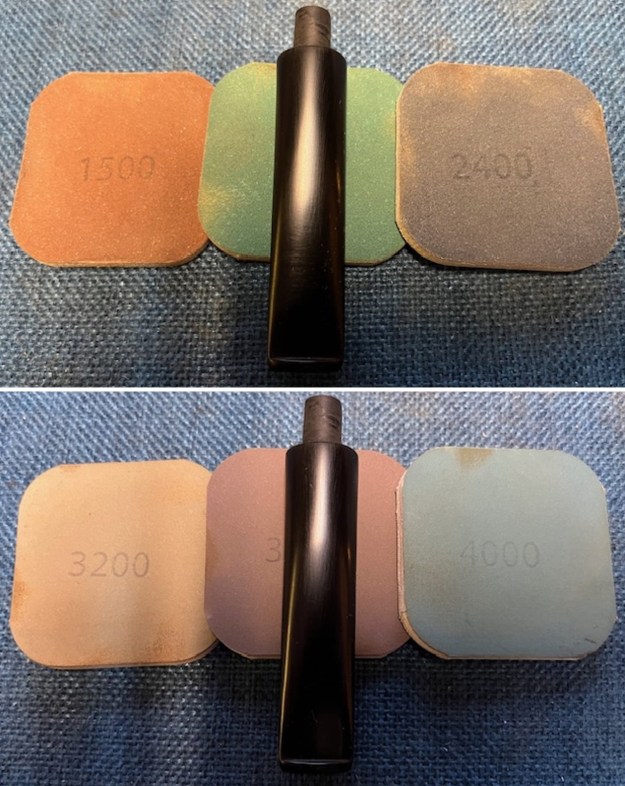
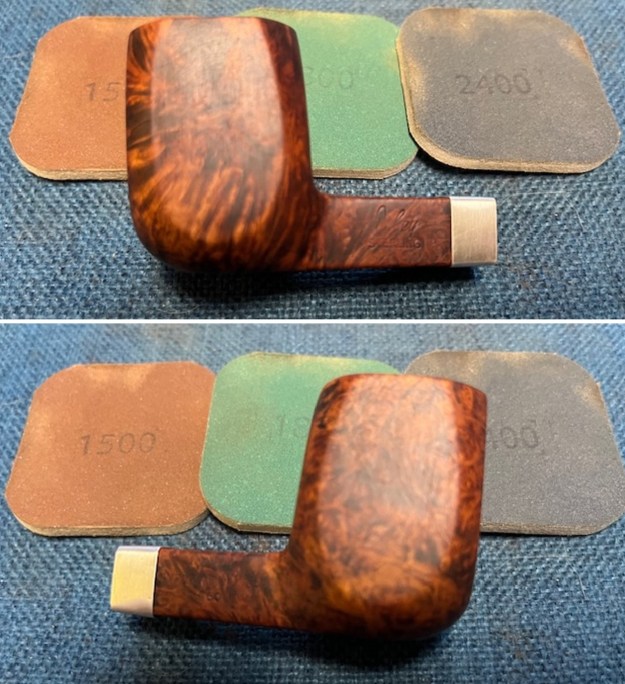
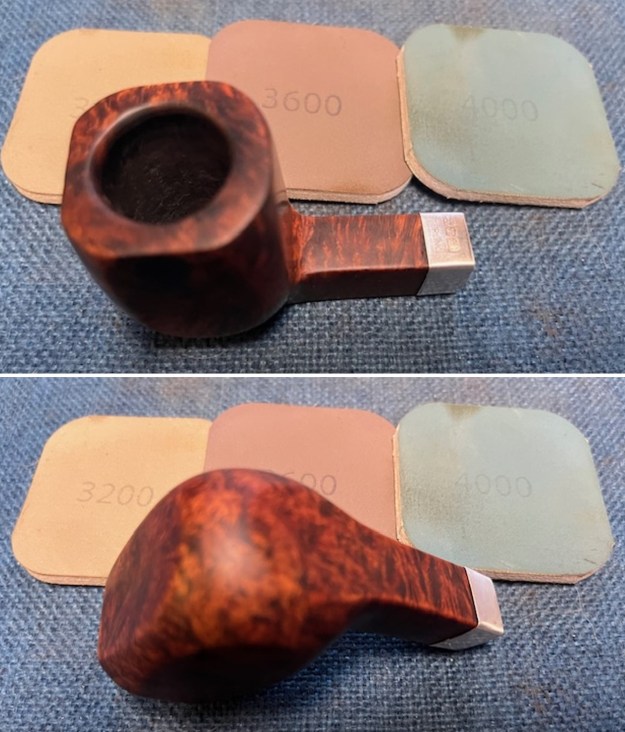
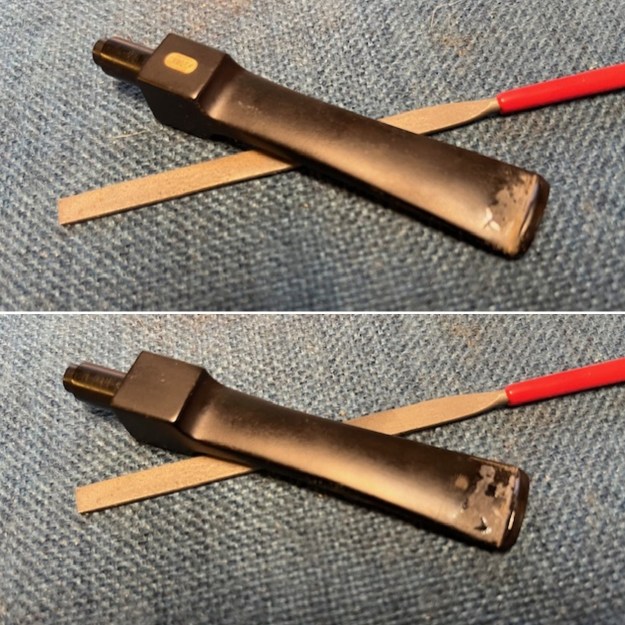
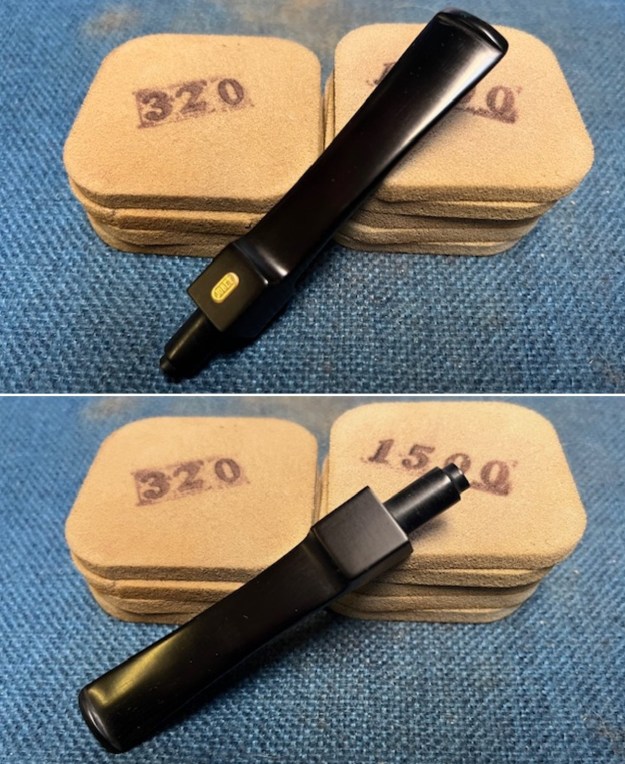
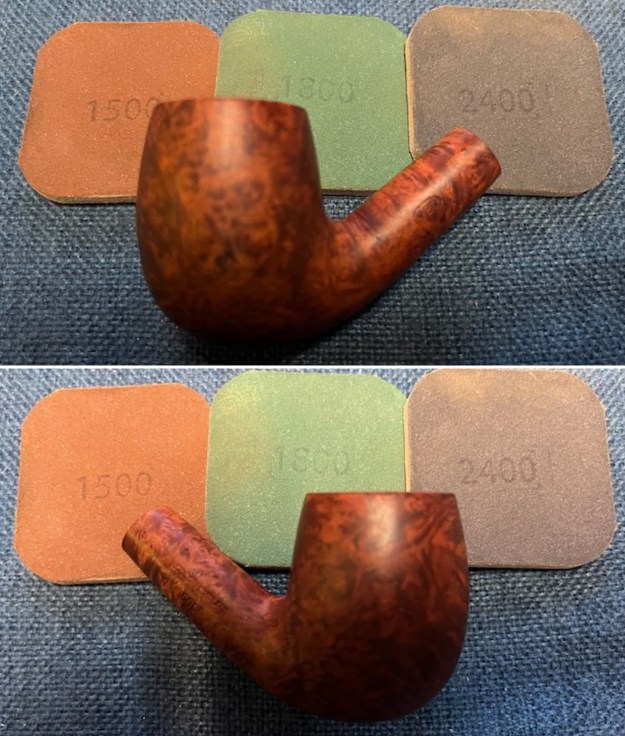
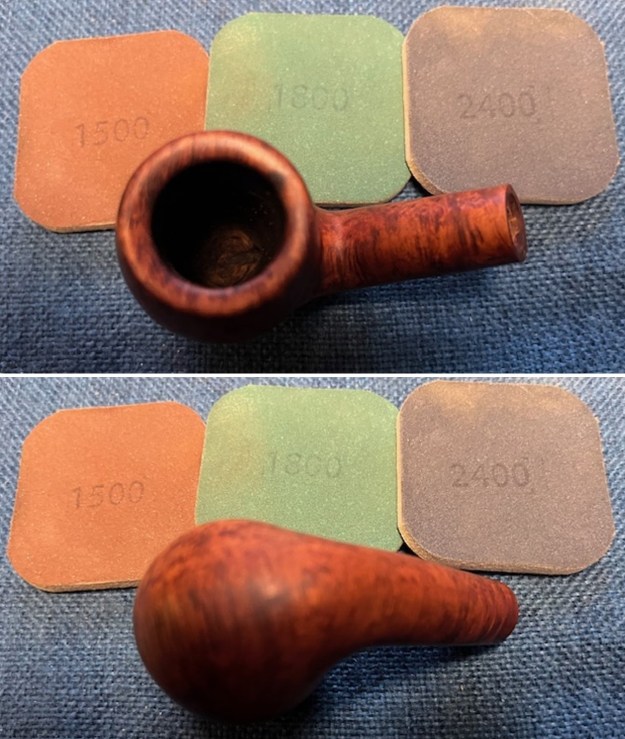
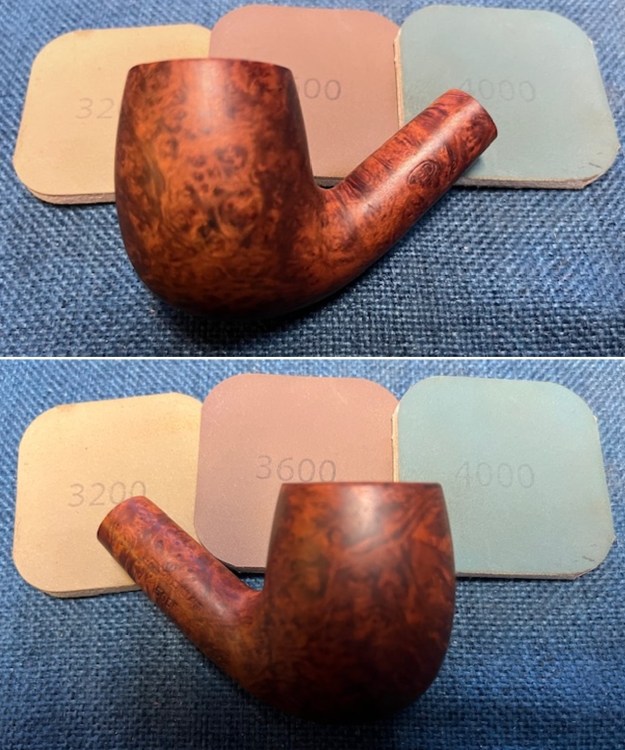
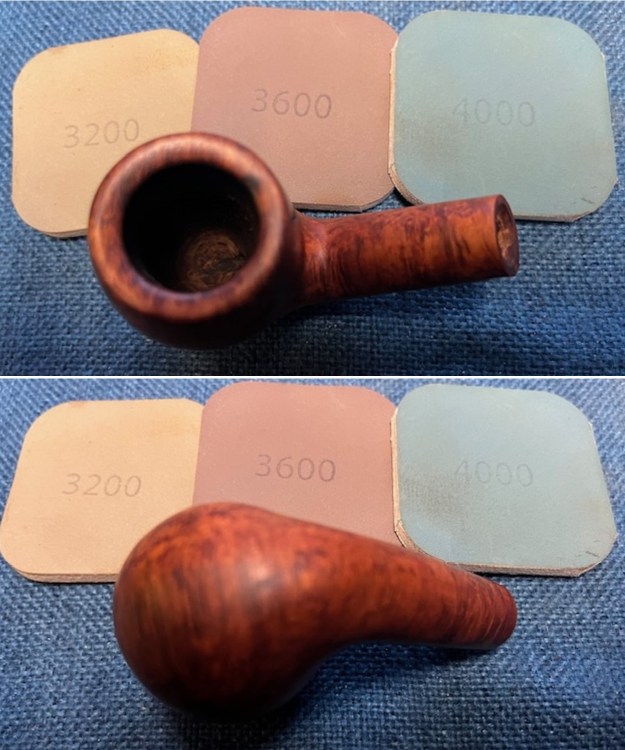
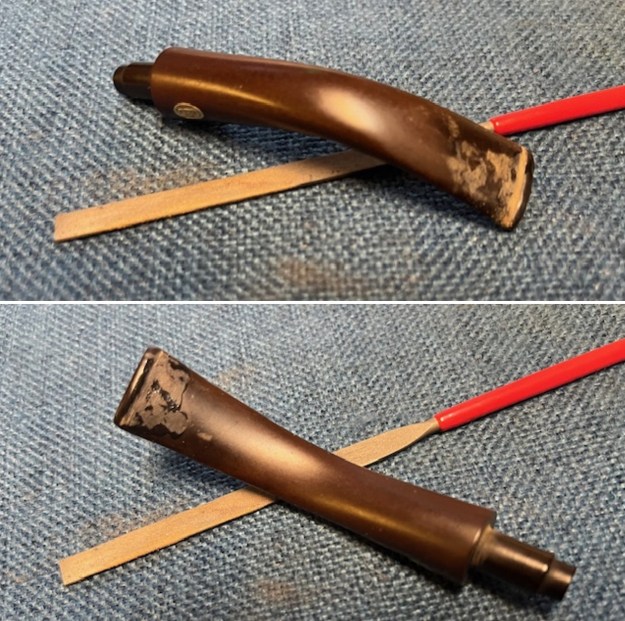
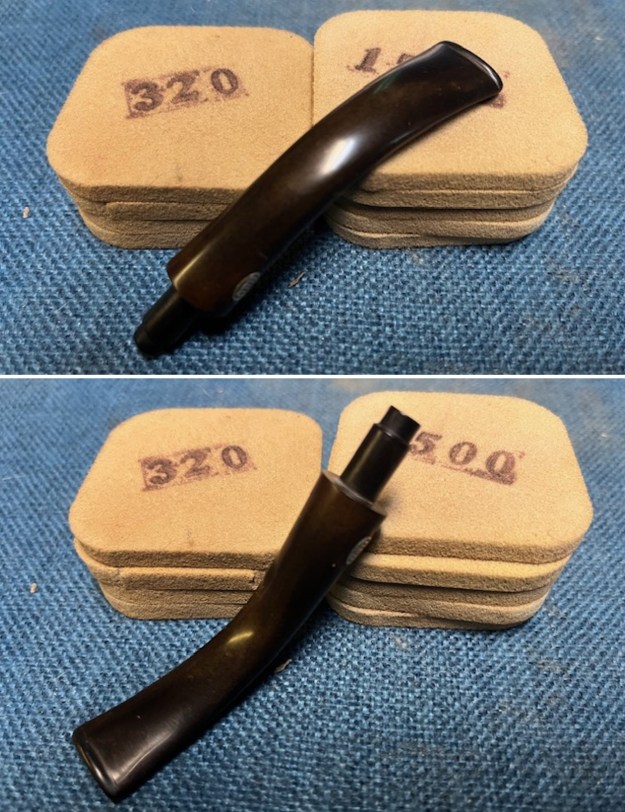
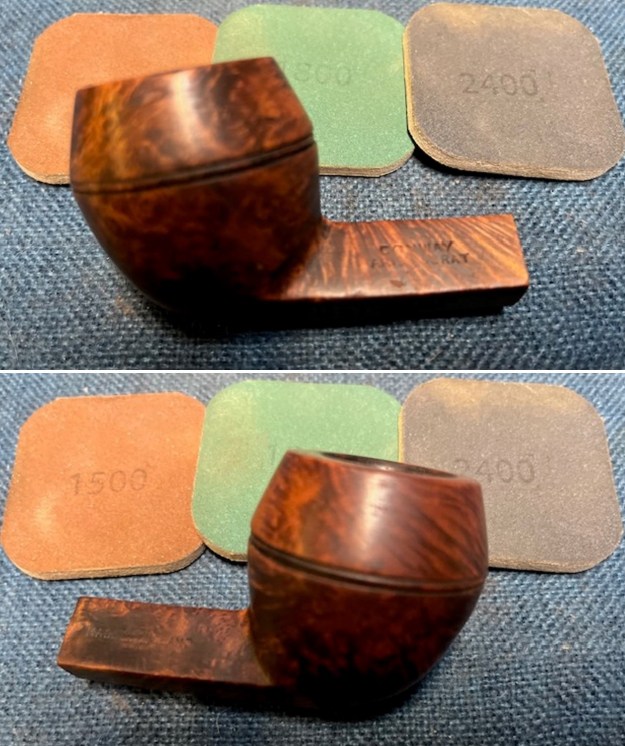
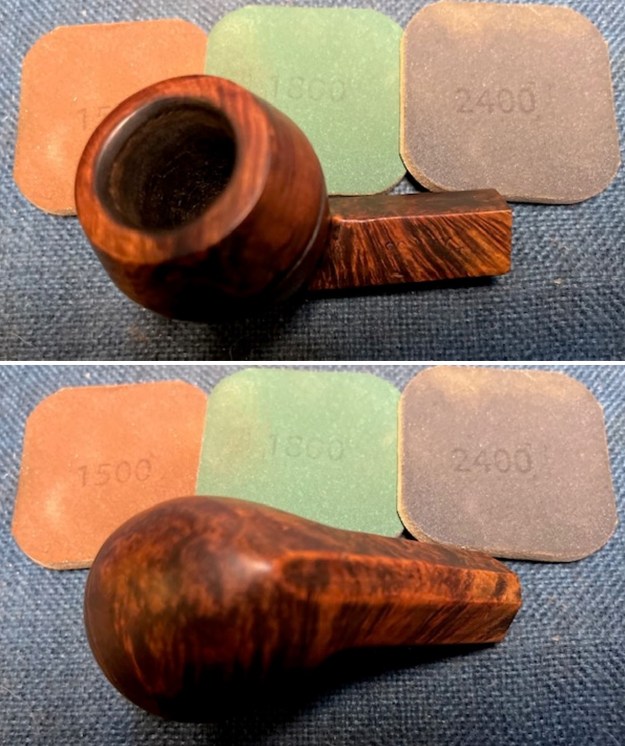
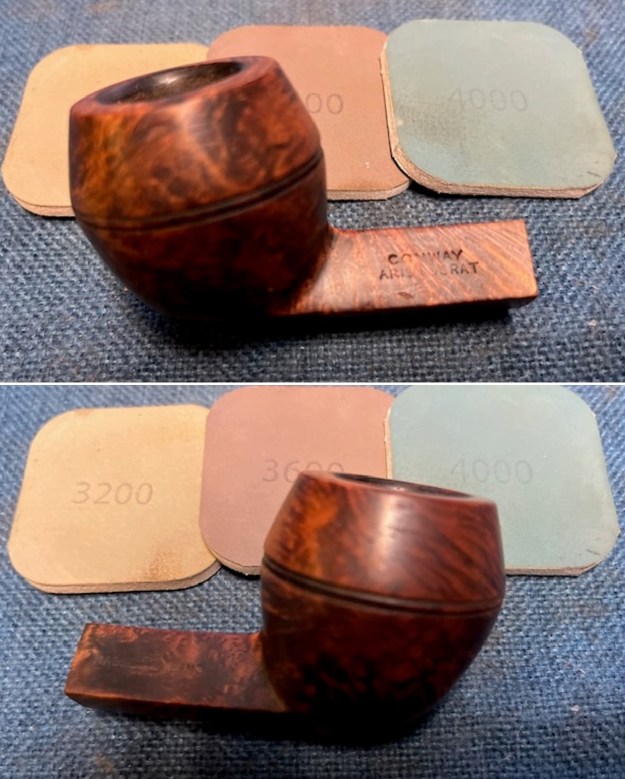
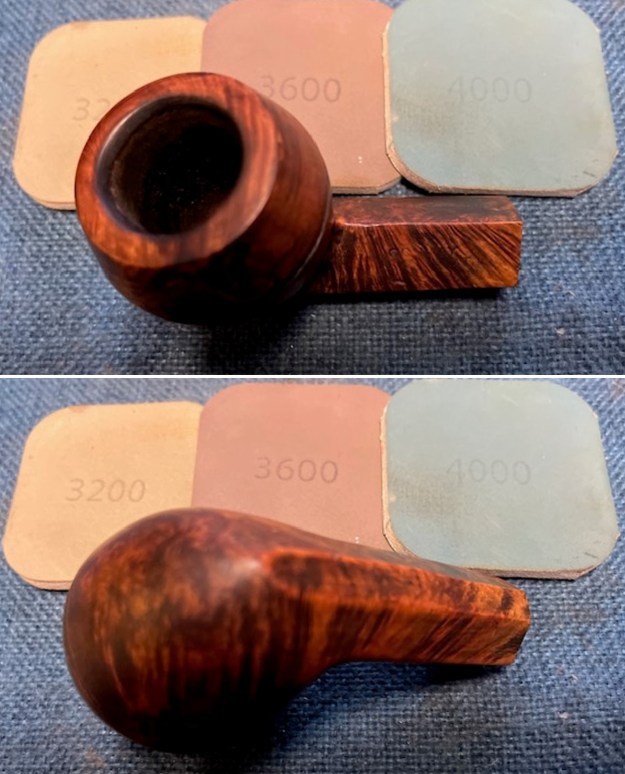
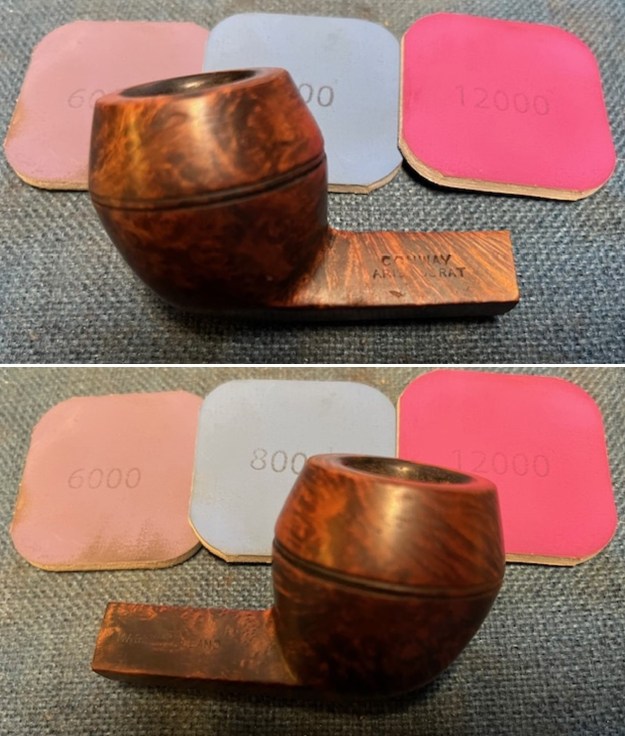
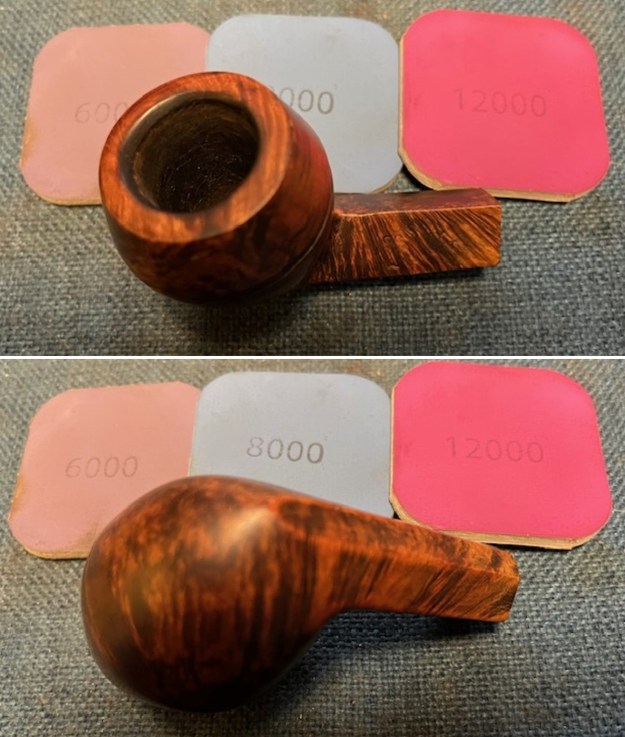
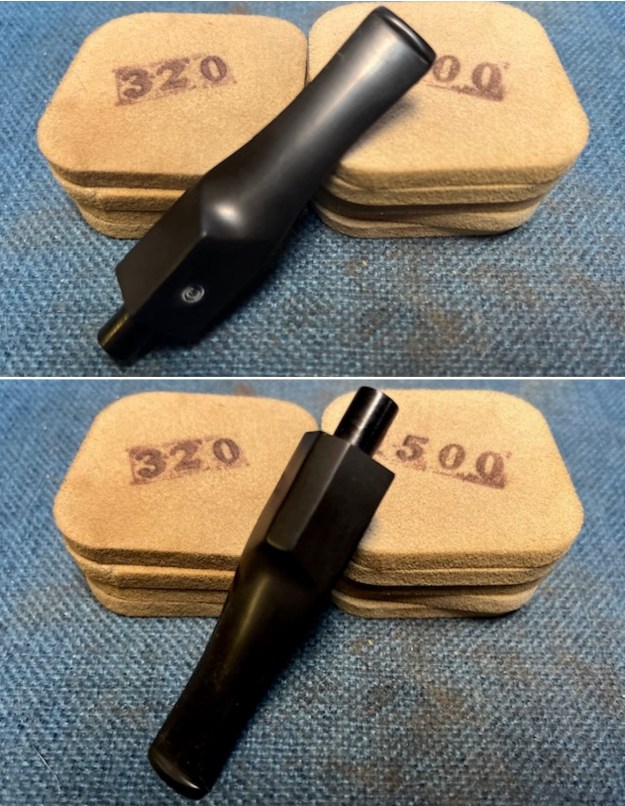
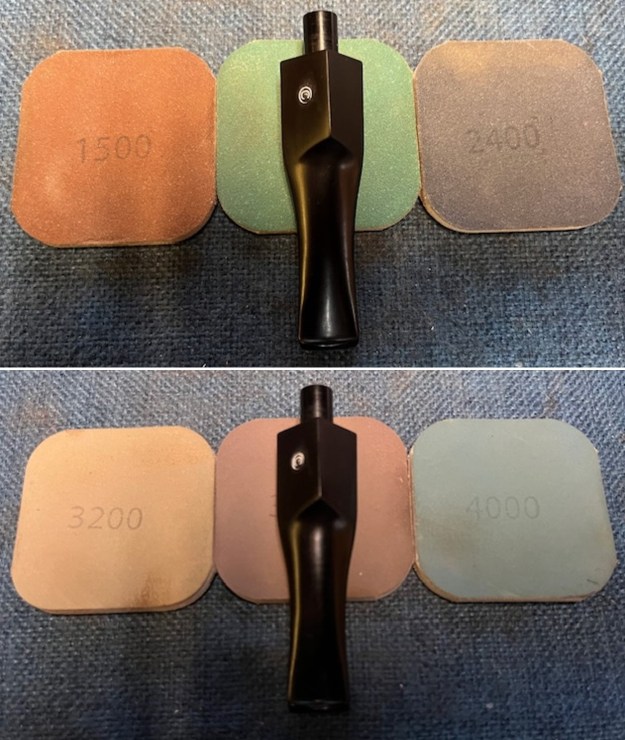
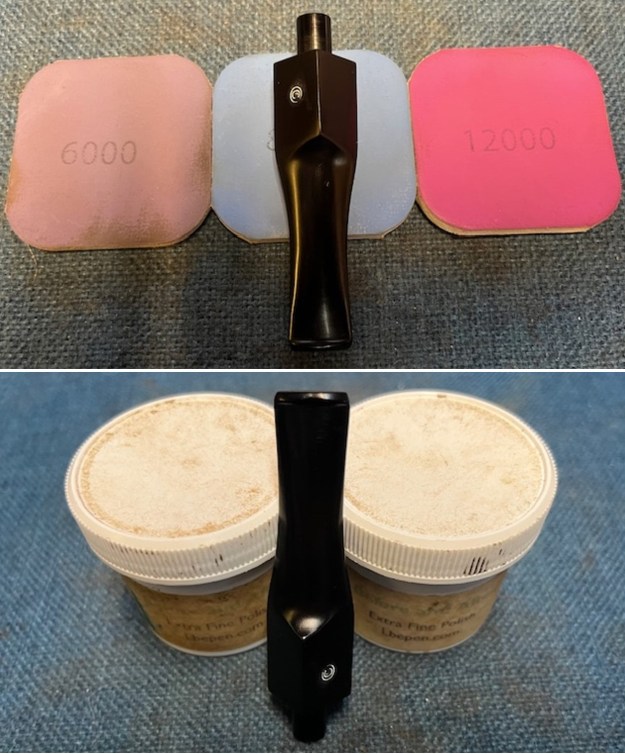
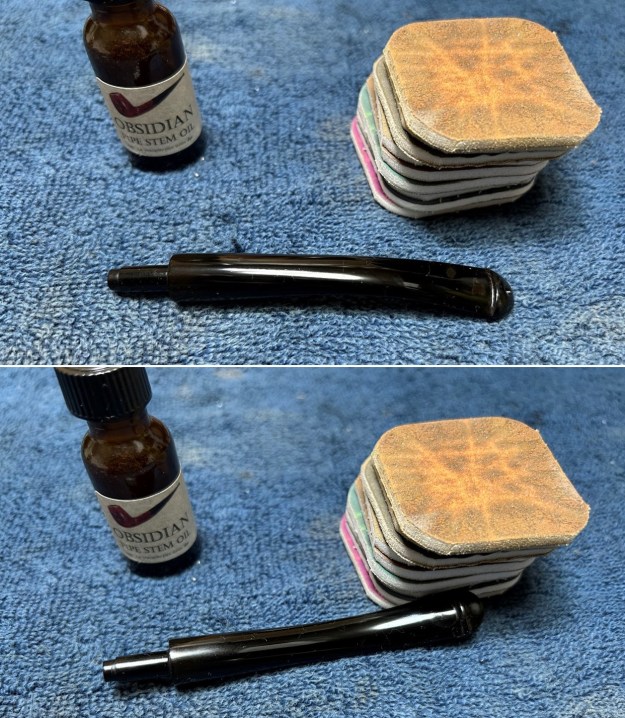
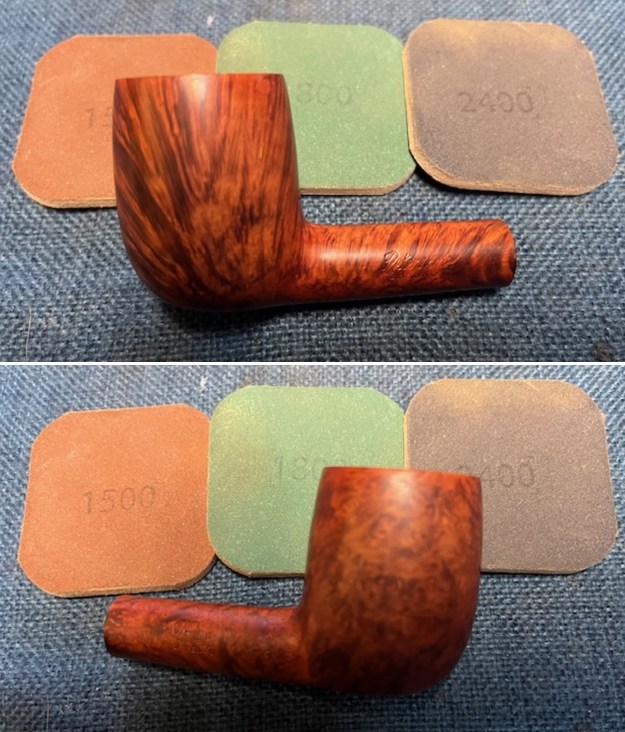
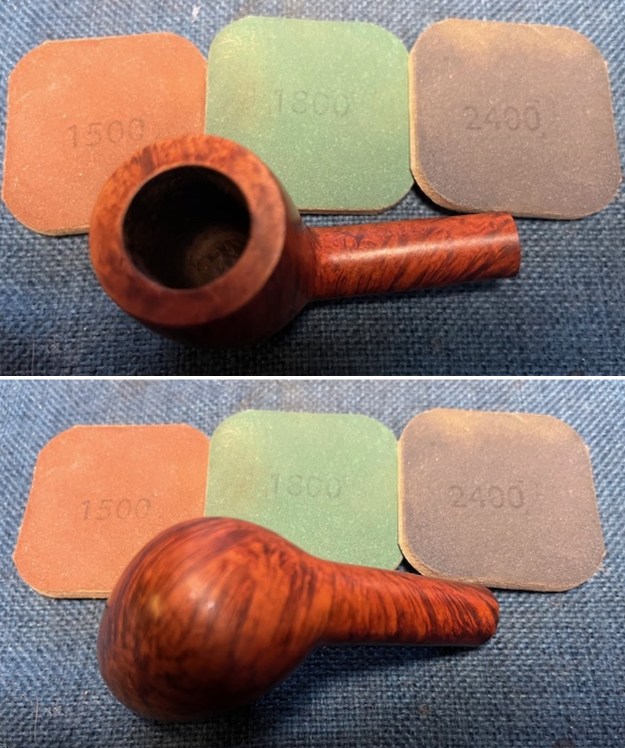
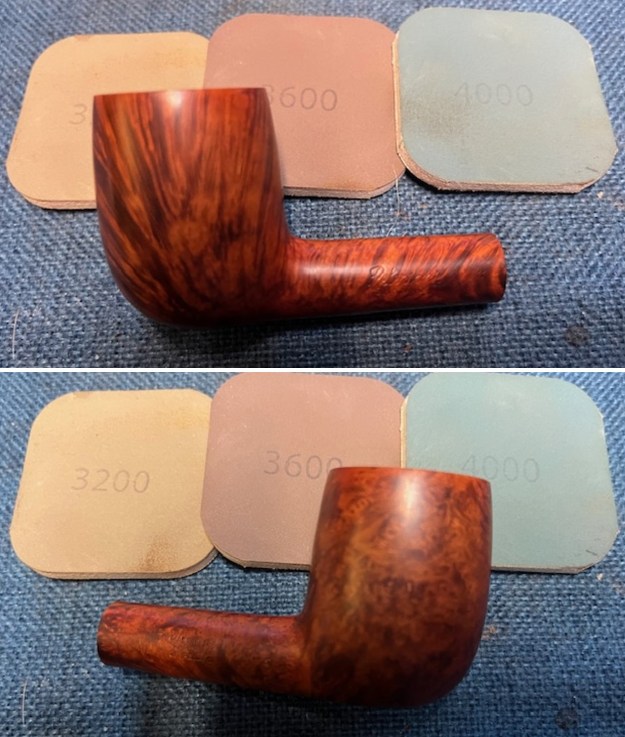
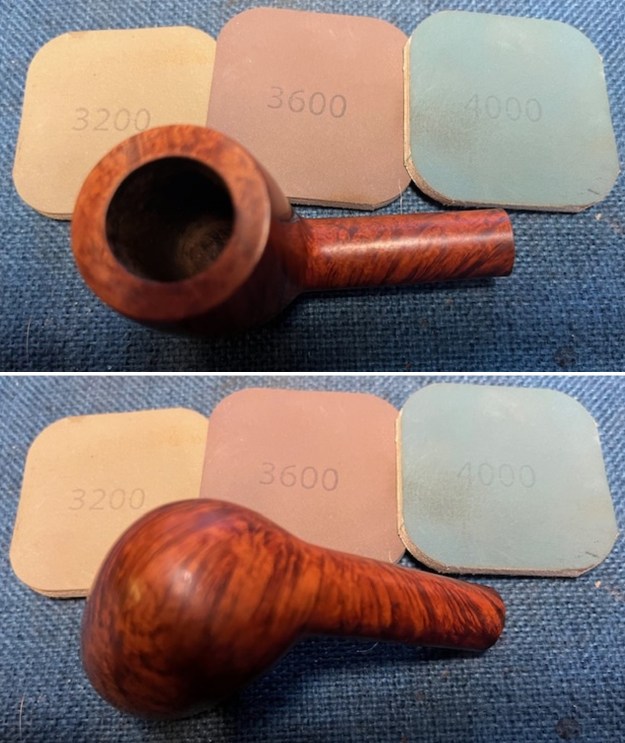
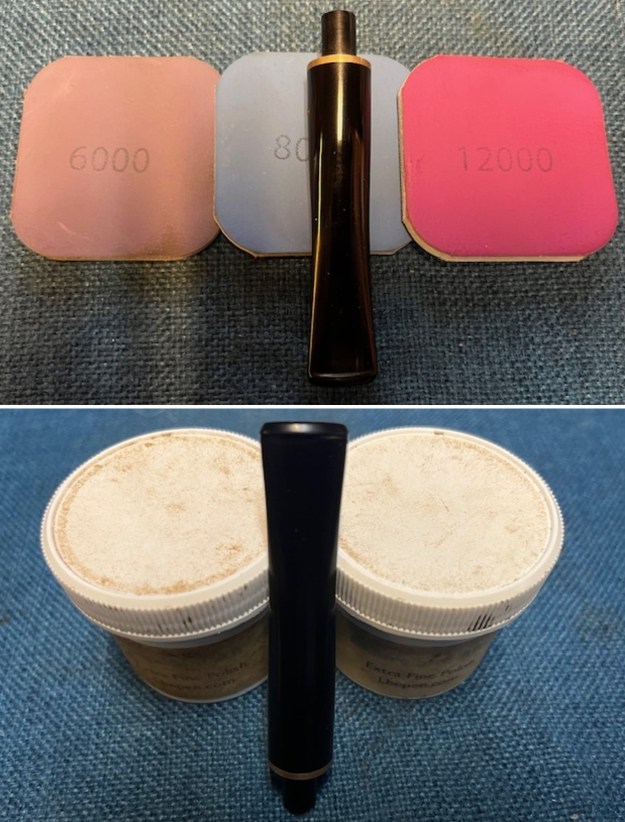
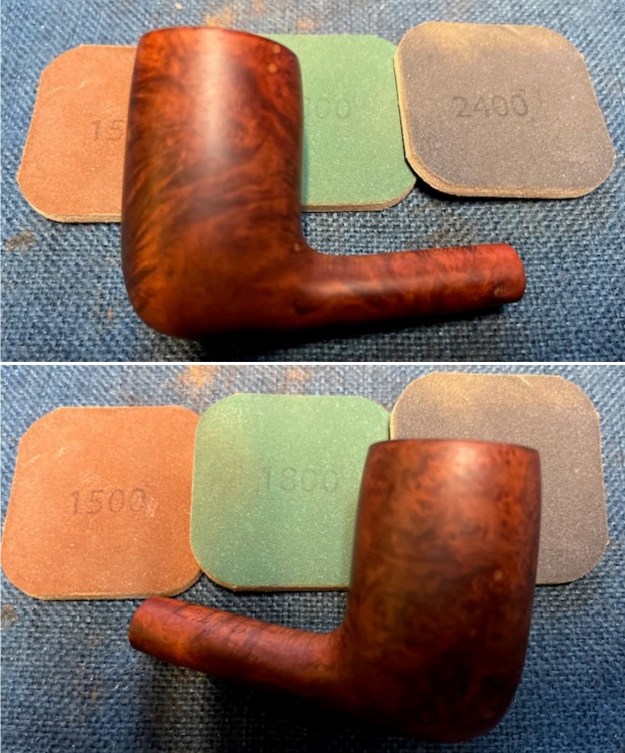
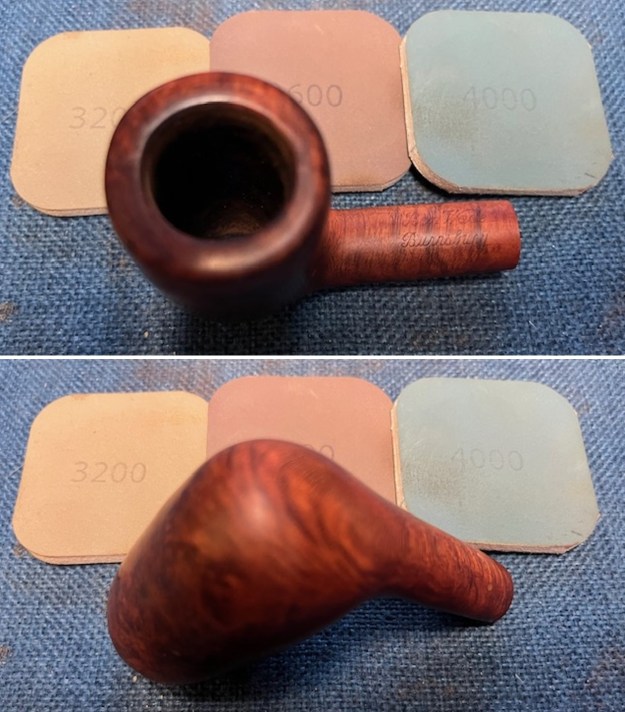
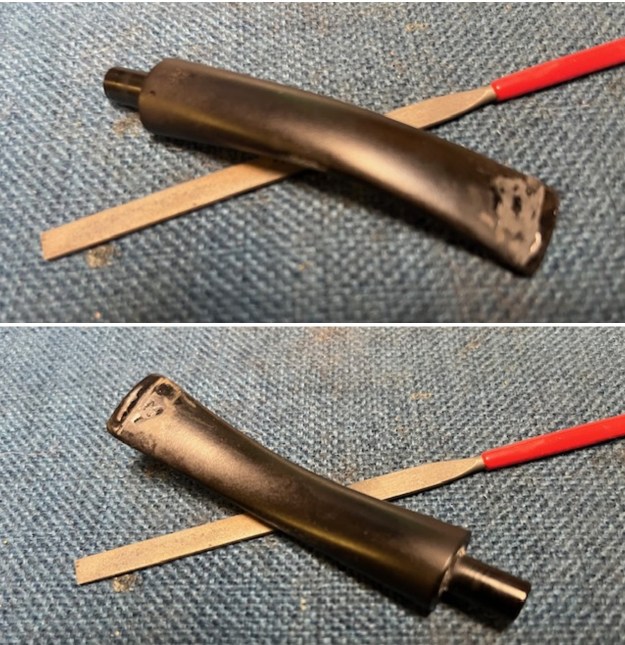
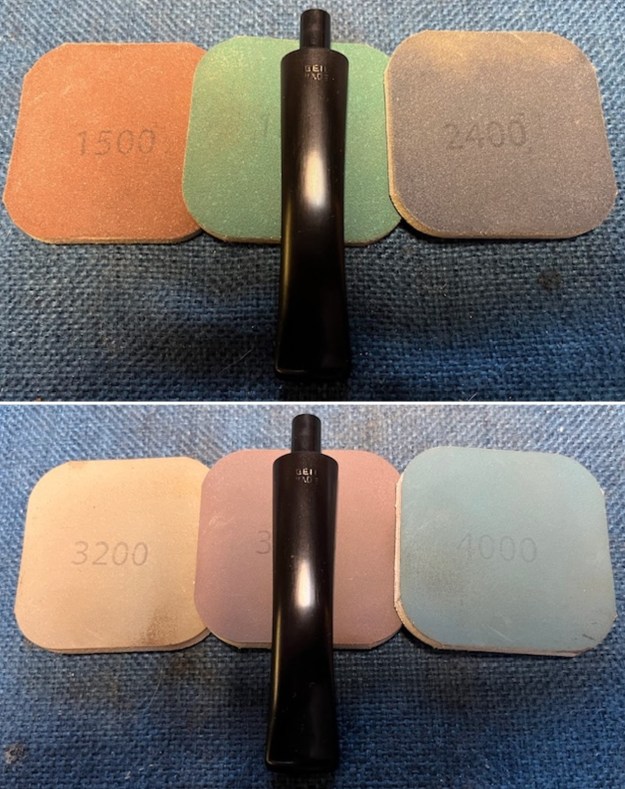
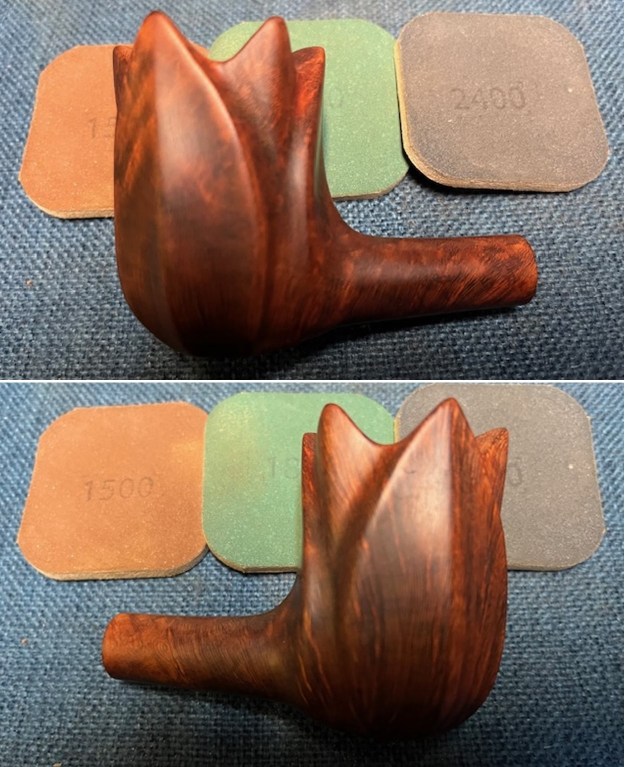
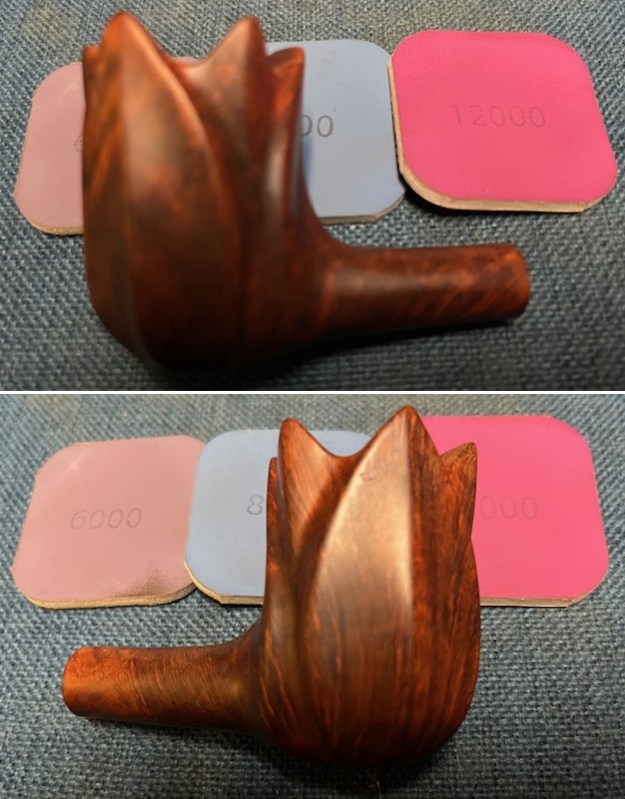
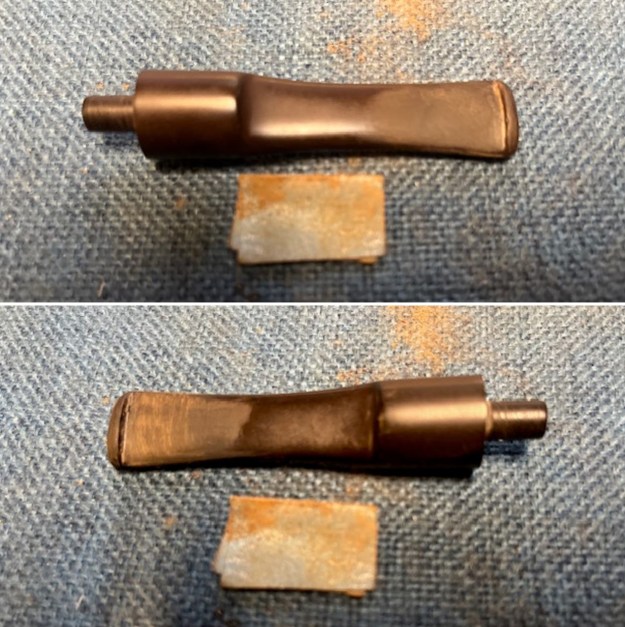
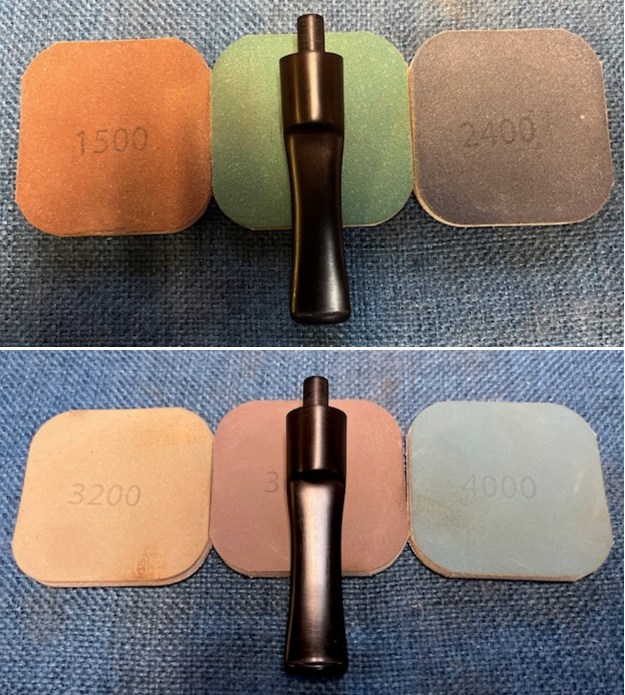
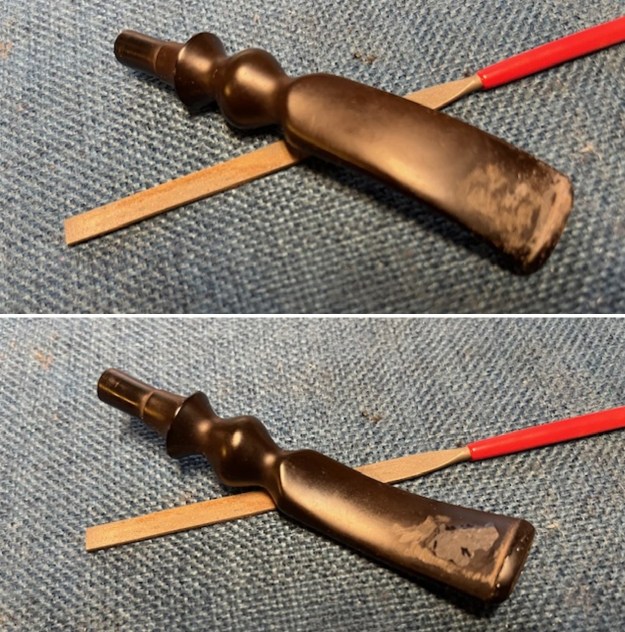
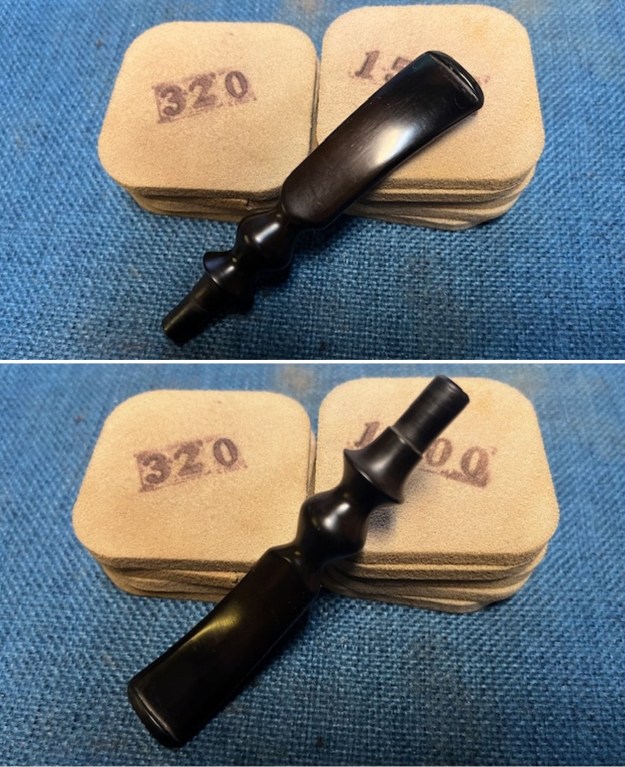
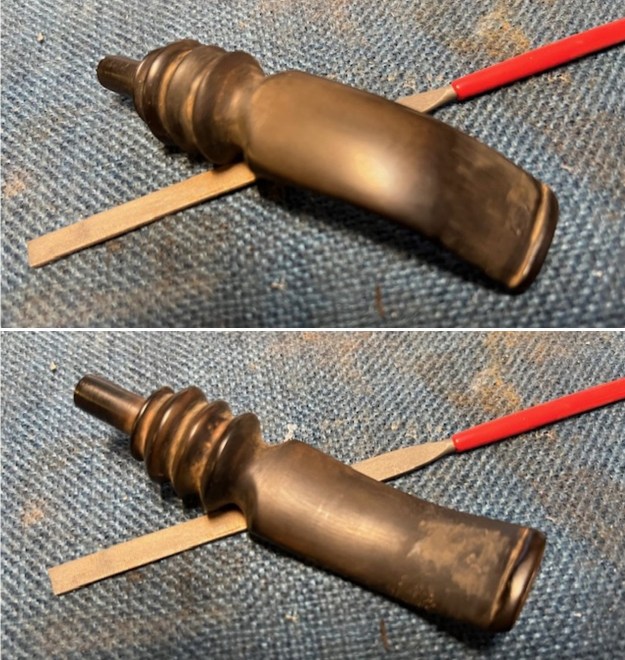 I sanded the repaired areas and the rest of stem with 320-3500 grit sanding pads to smooth it out and remove remaining oxidation. I wiped the stem down after each pad with an Obsidian Oil cloth. It was beginning to look very good.
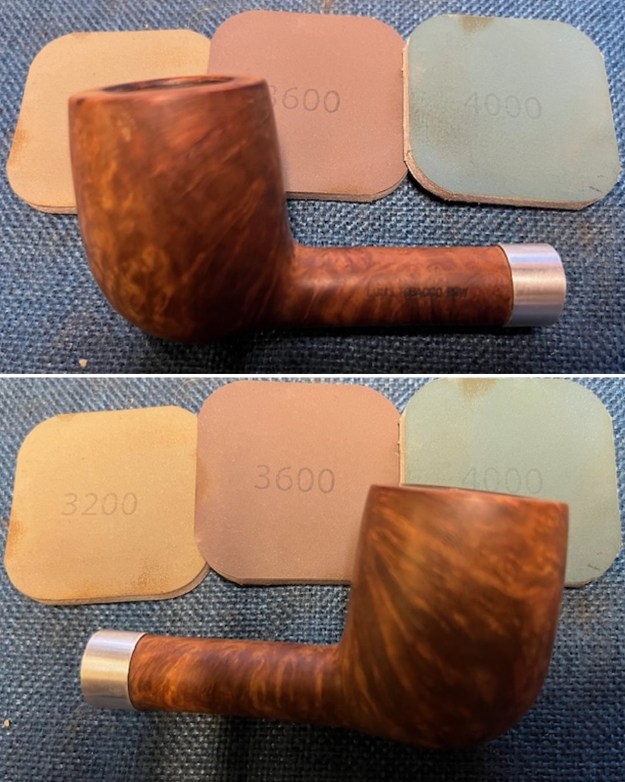
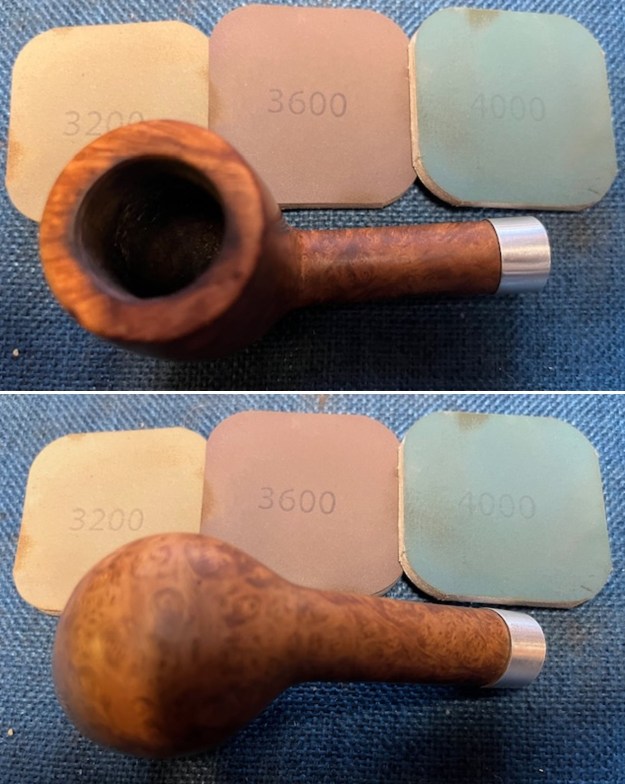
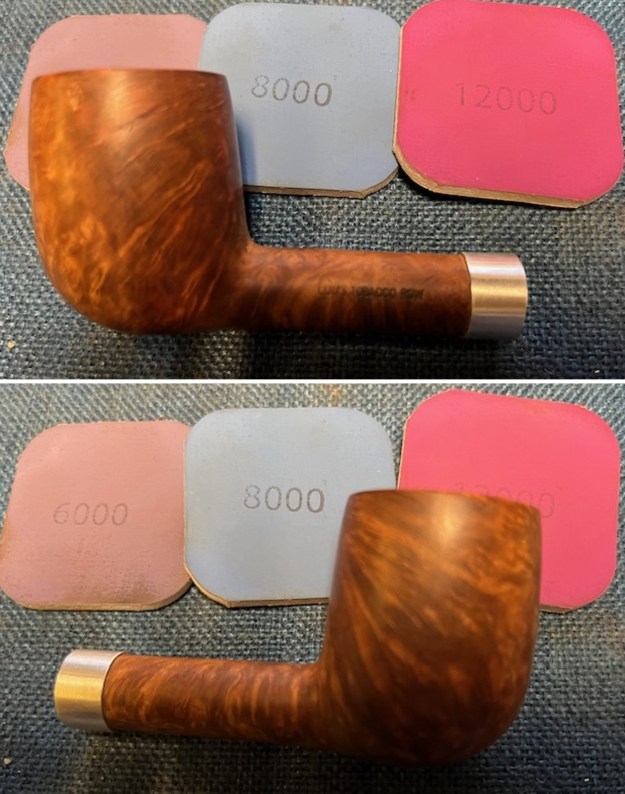
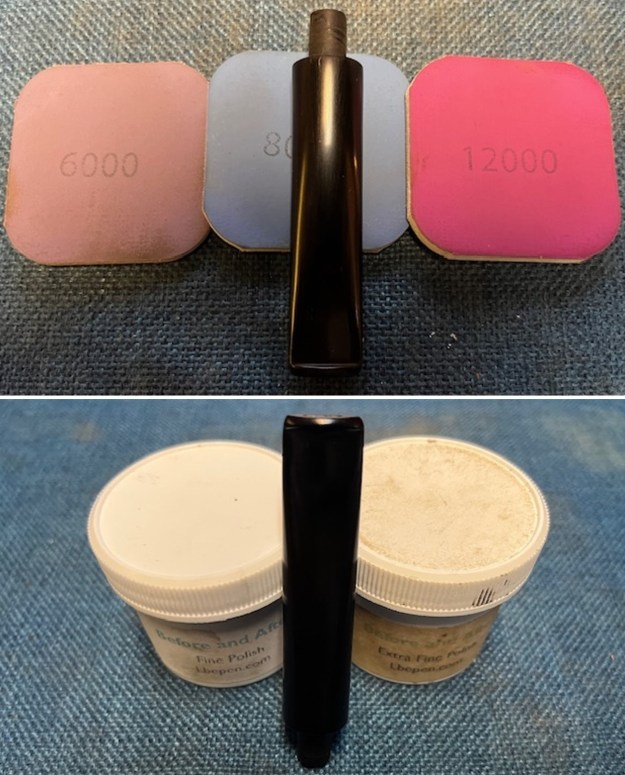
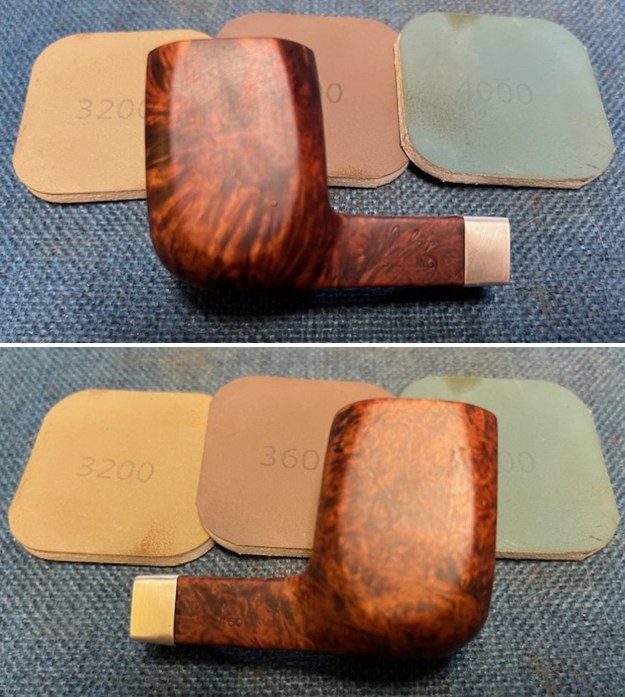
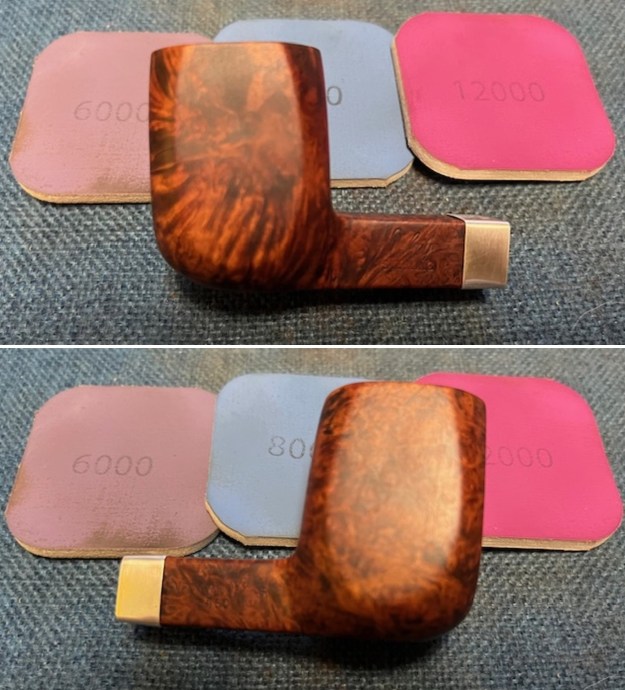
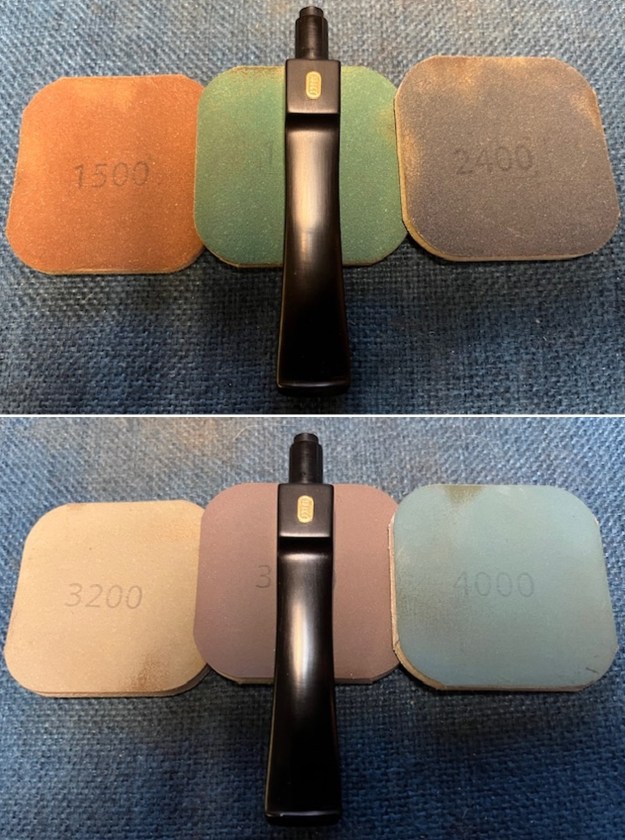
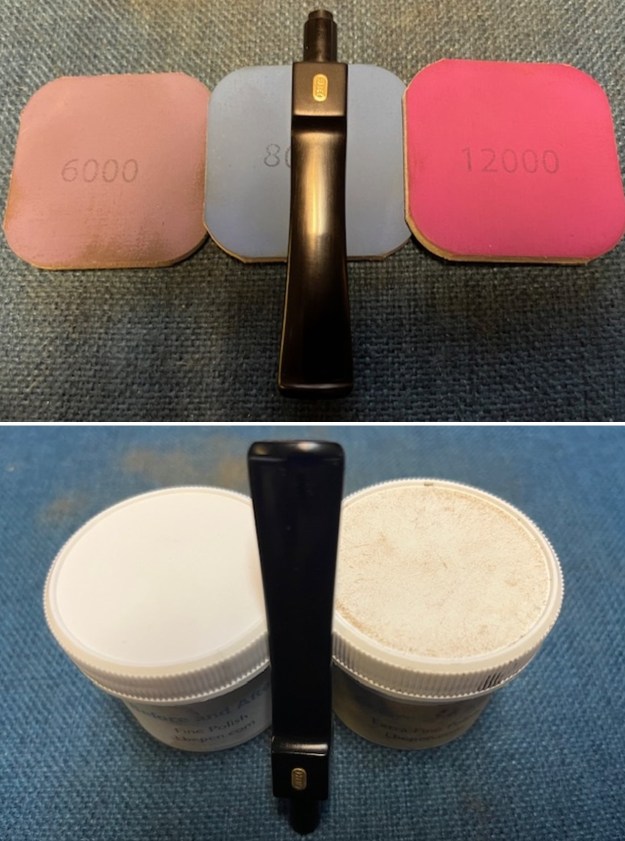
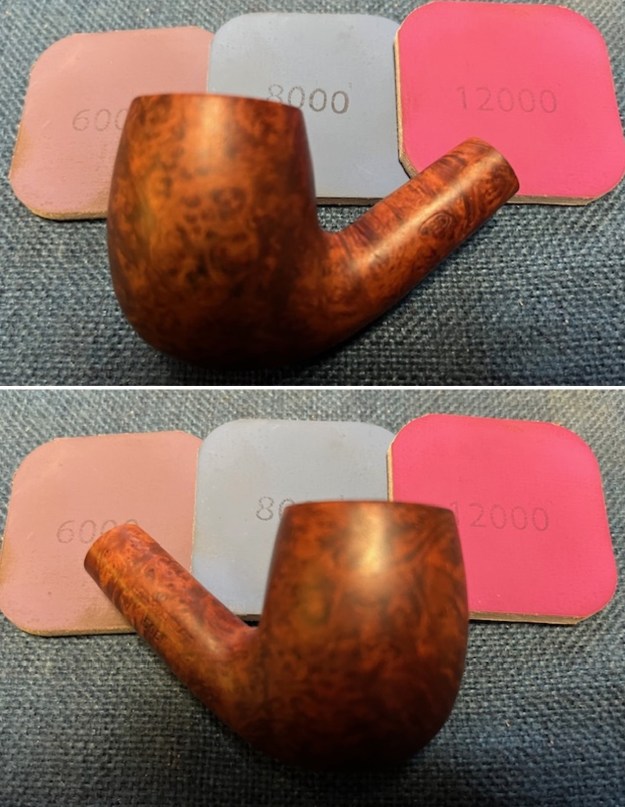
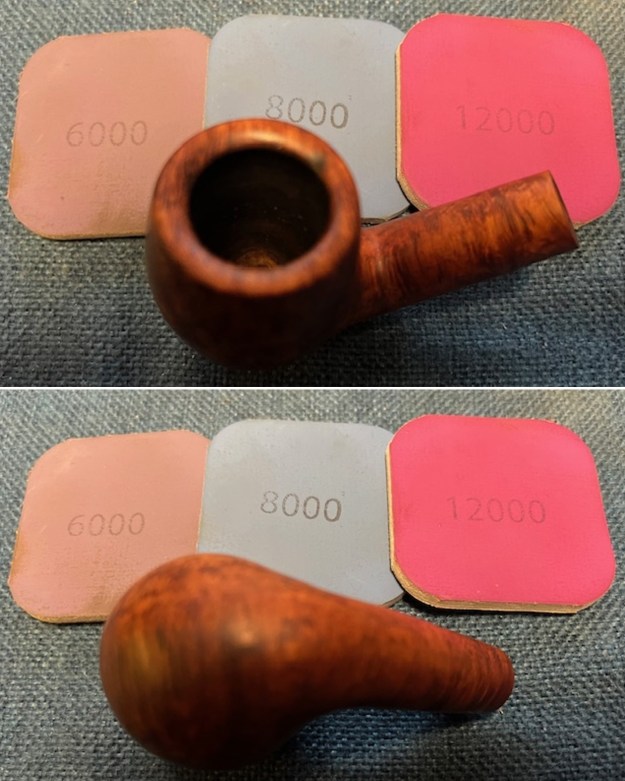
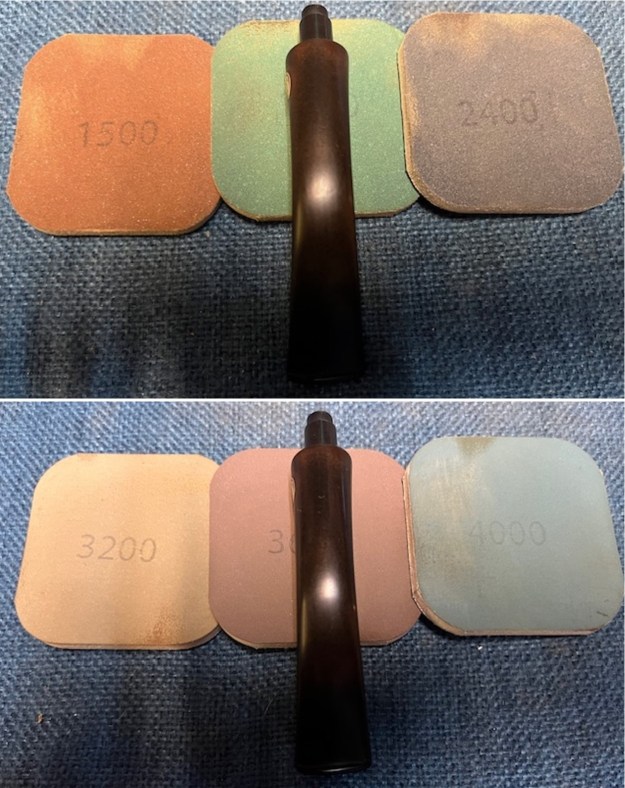
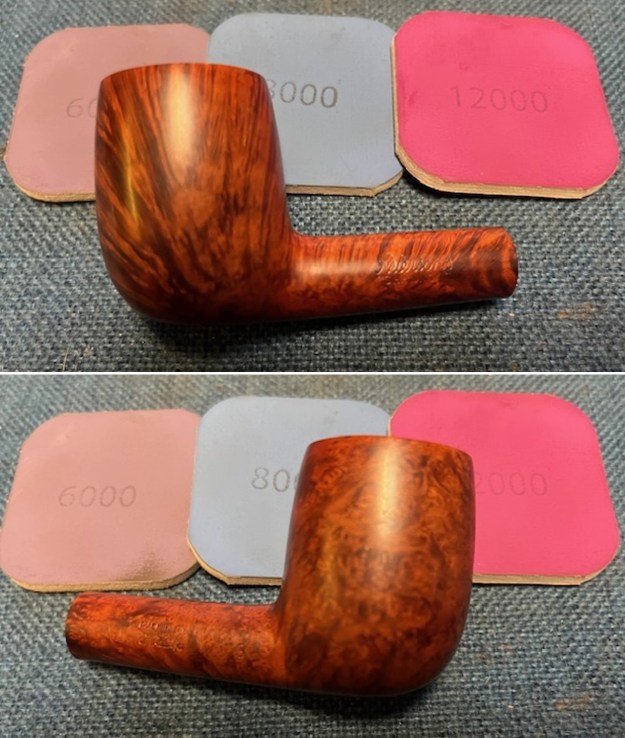
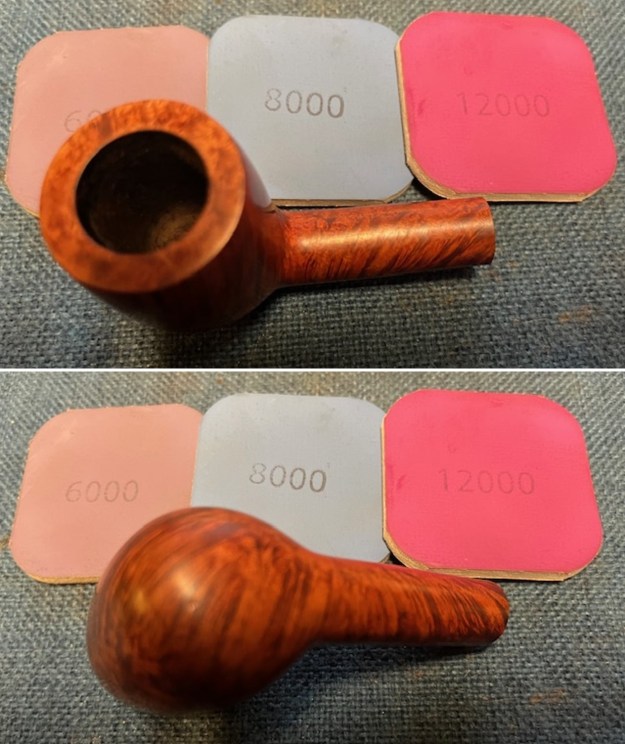
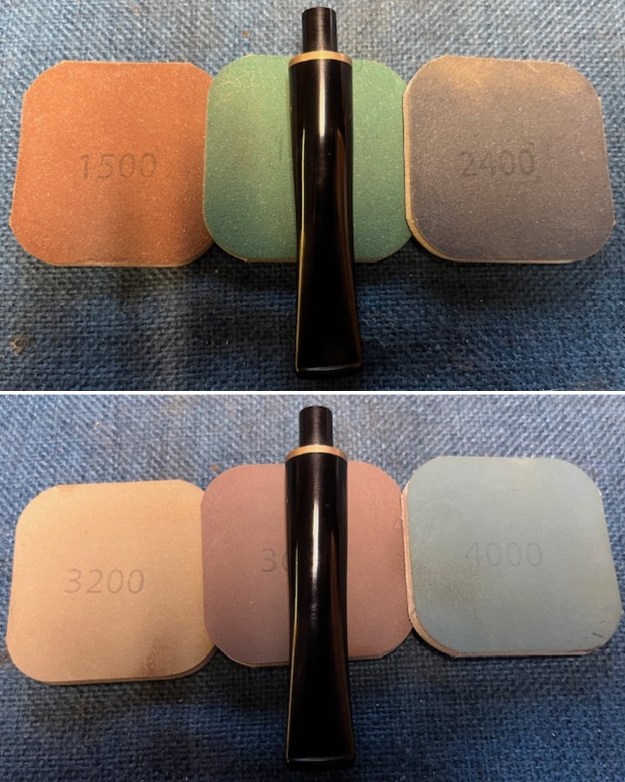
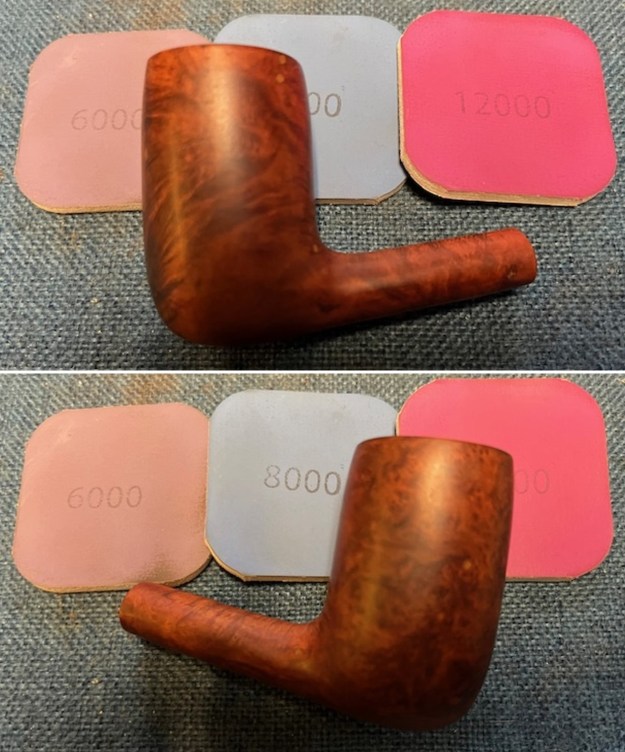
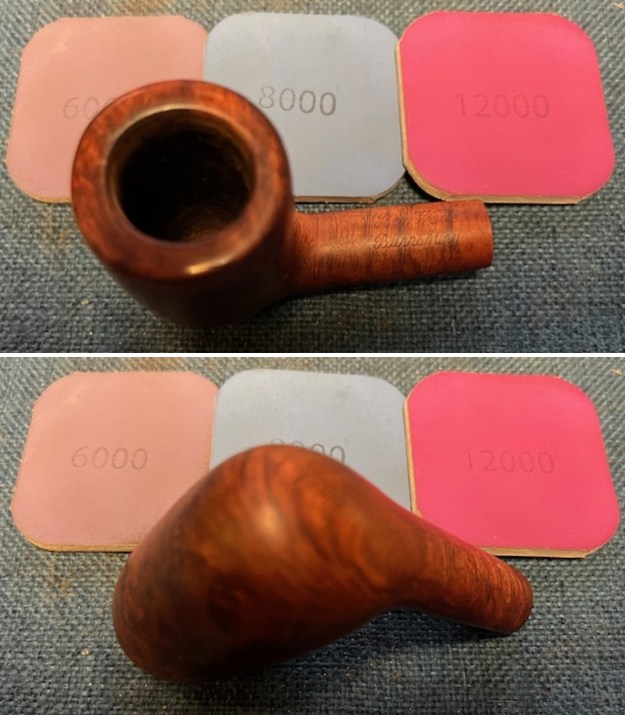
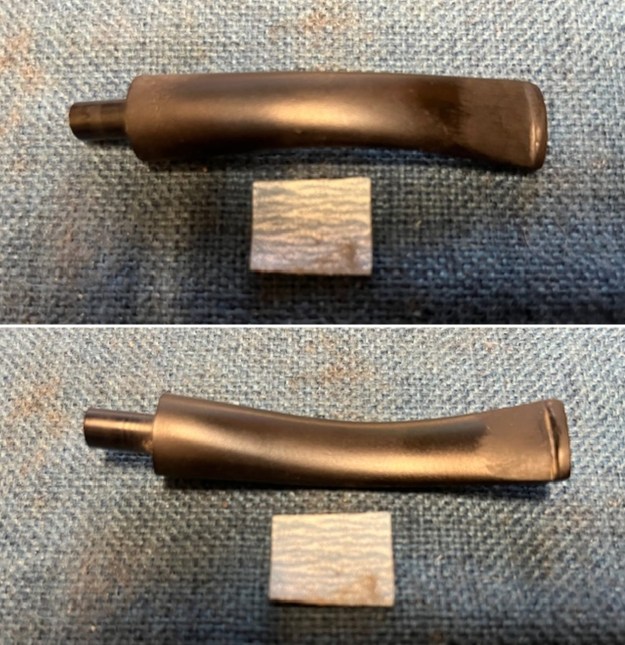
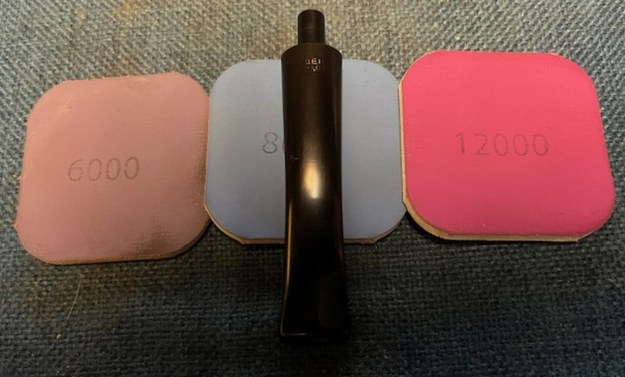
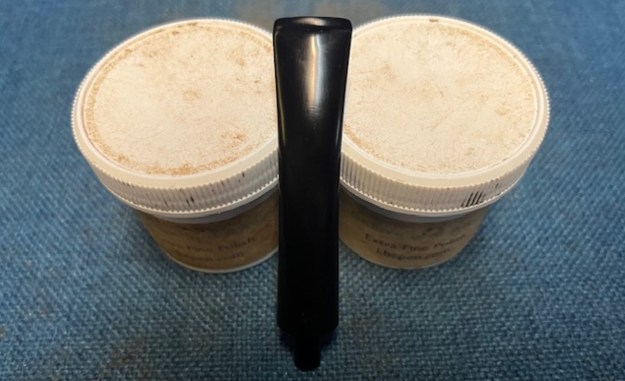
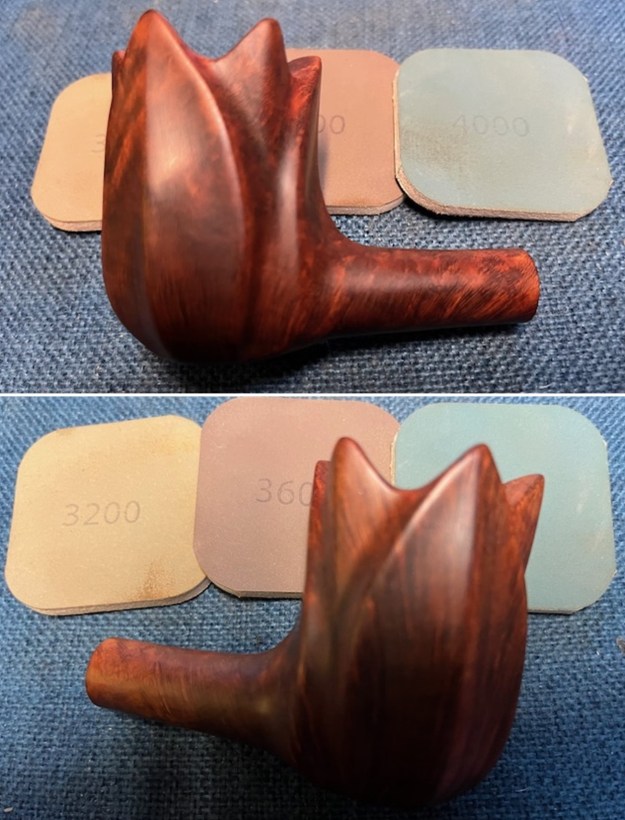
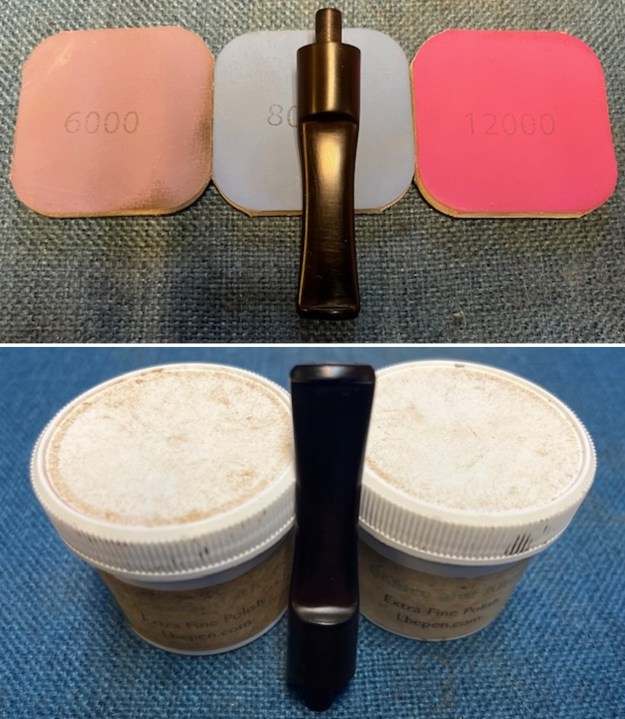
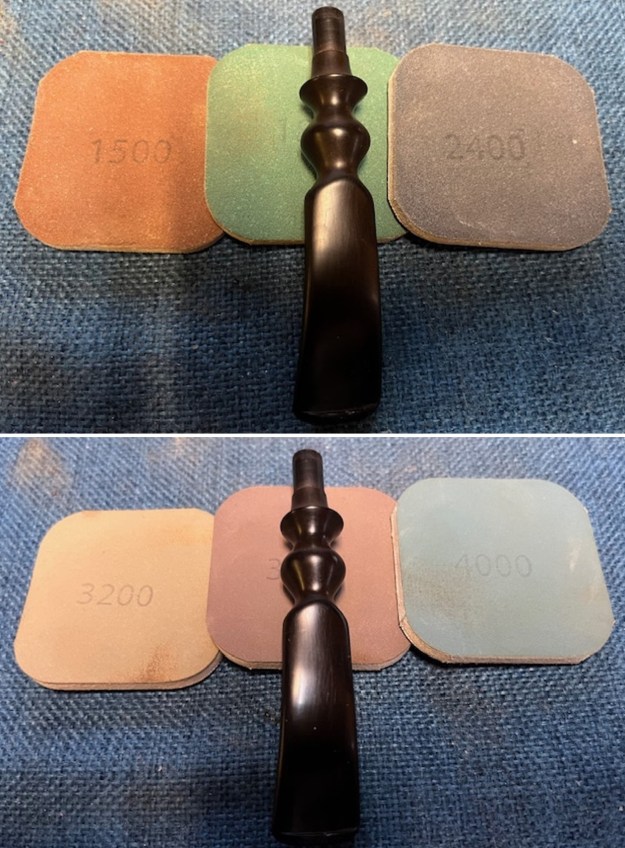
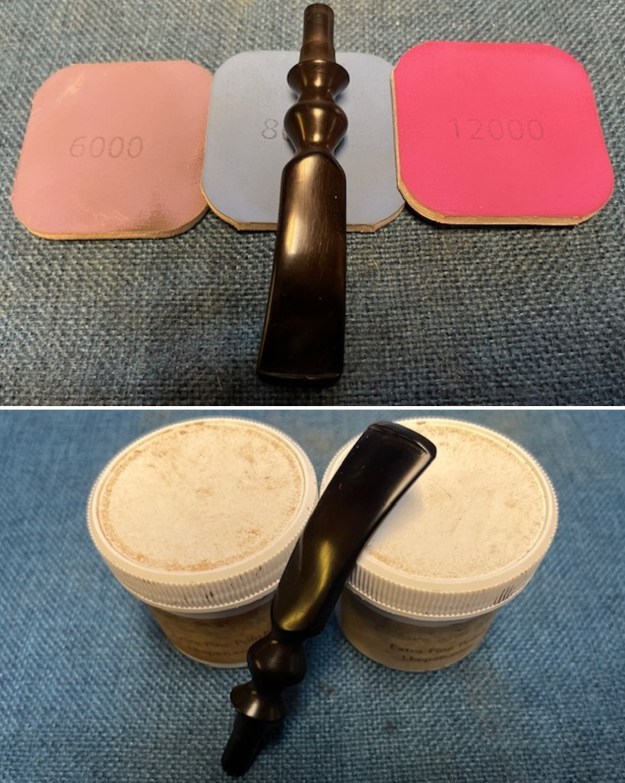
 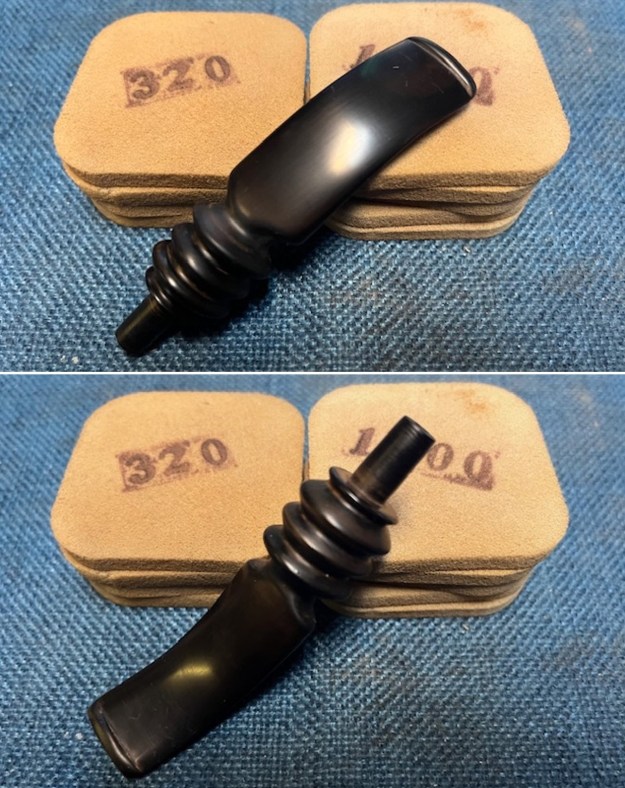 I polished the stem with micromesh sanding pads – 1500-12000 grit pads. I wiped it down with a damp cloth after each sanding pad. I used Before & After Pipe Polish – both Fine and Extra Fine to further polish the stem.
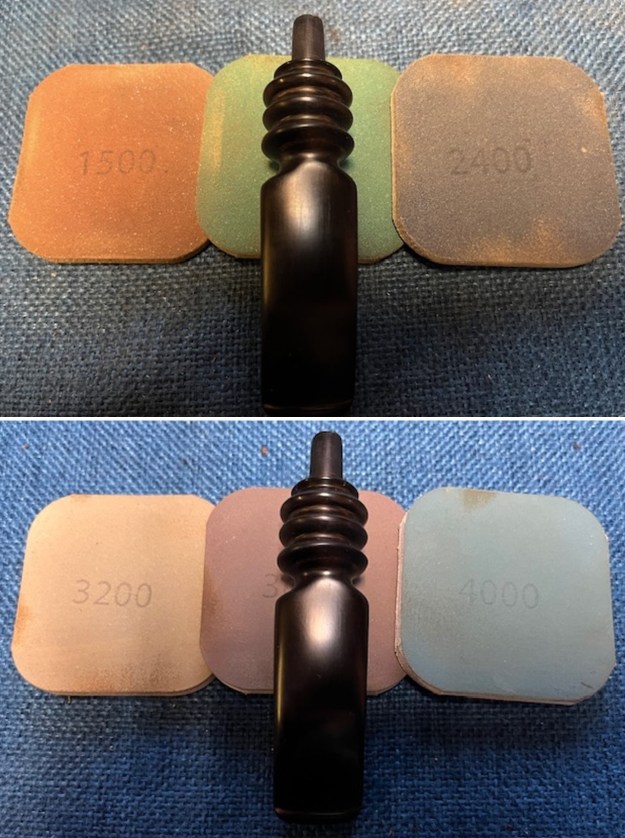
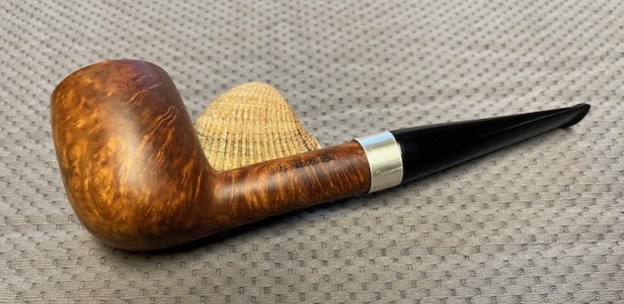
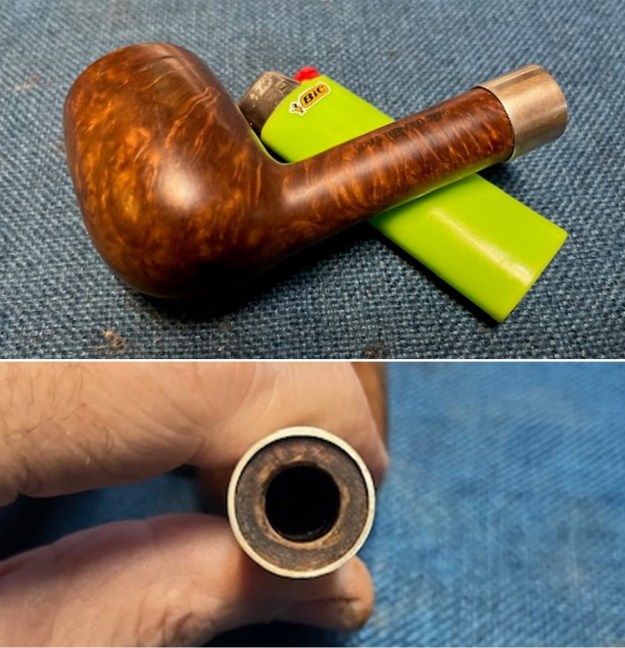
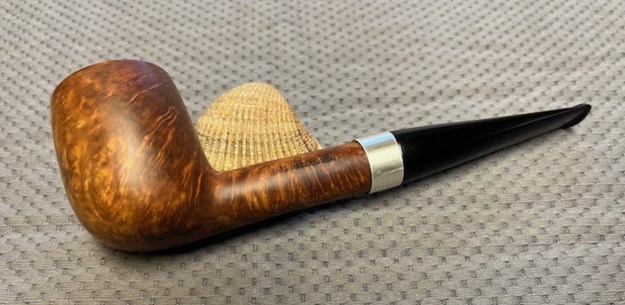
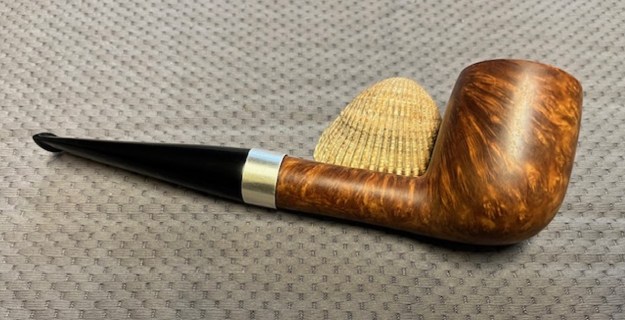
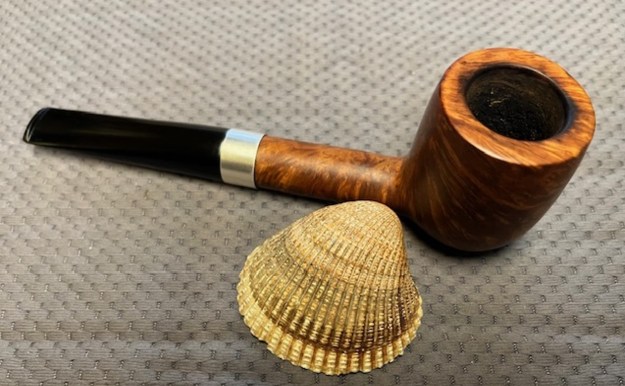
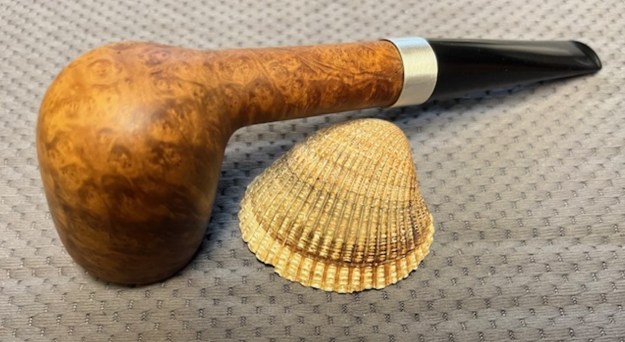
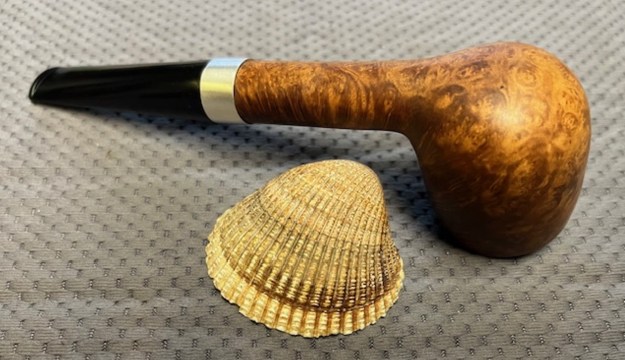
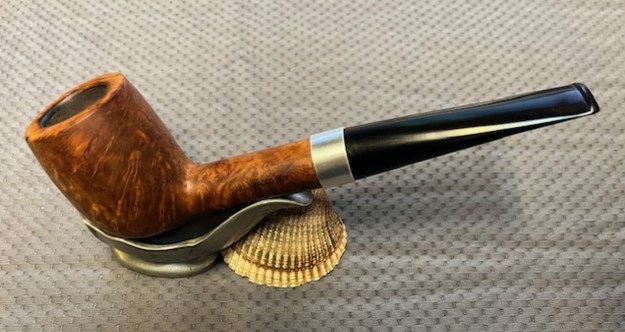
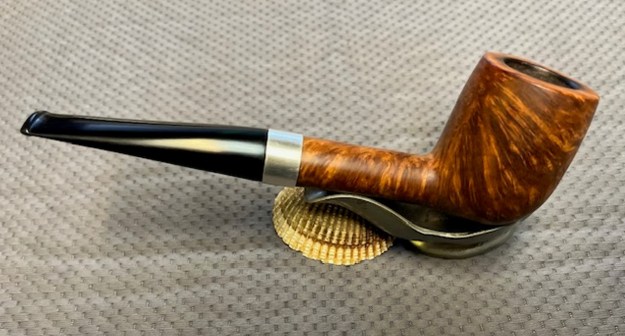
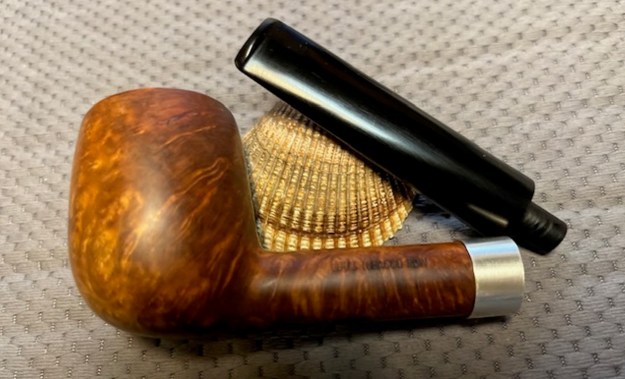
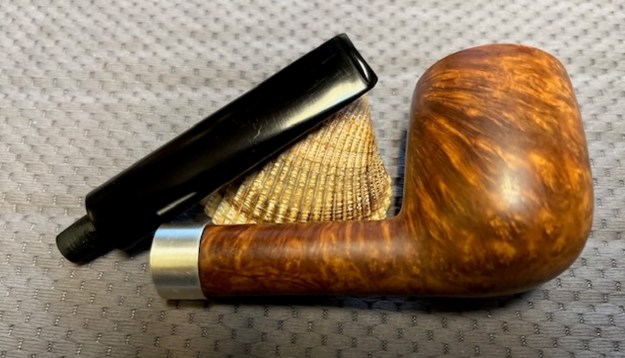
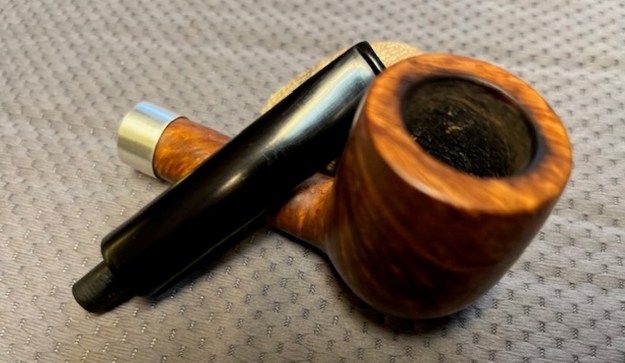
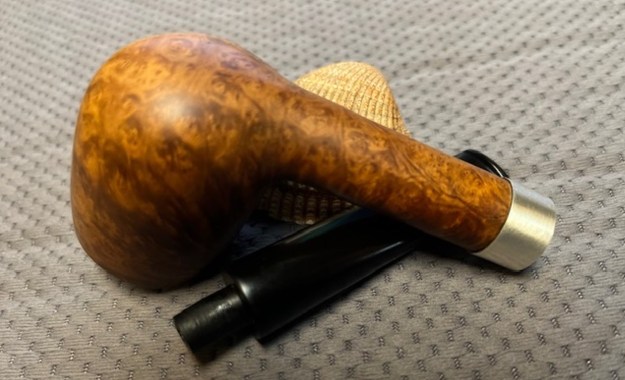
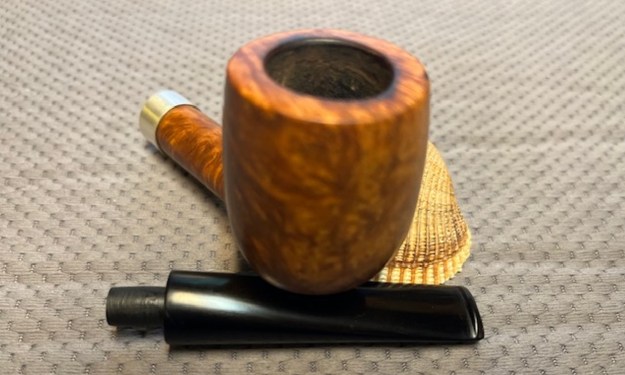
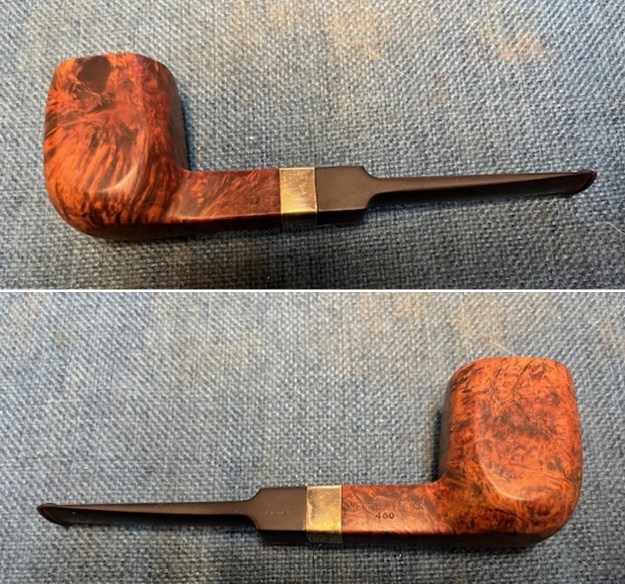
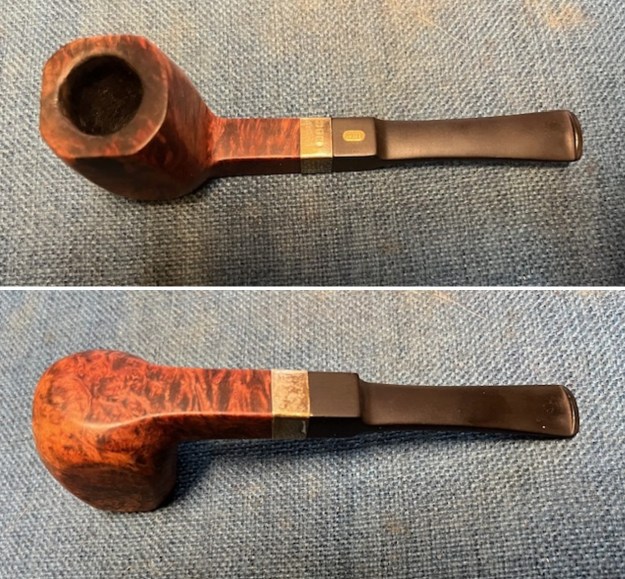
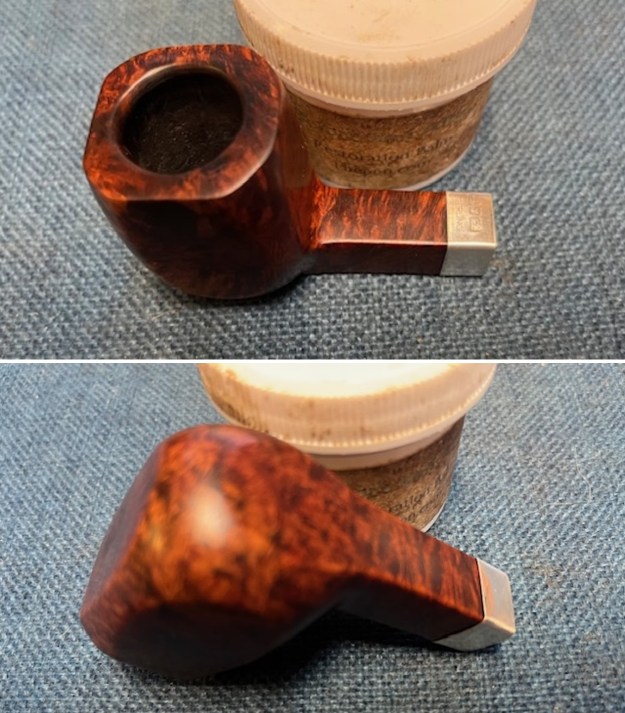
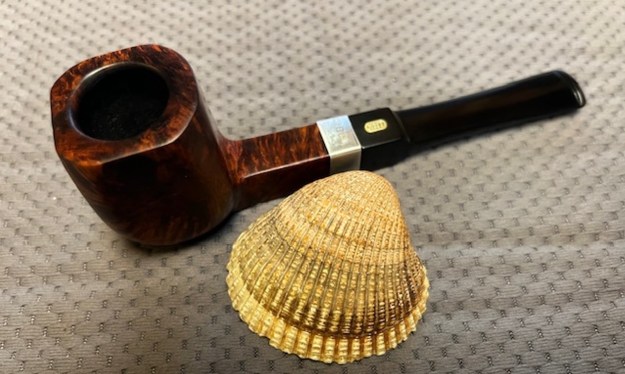
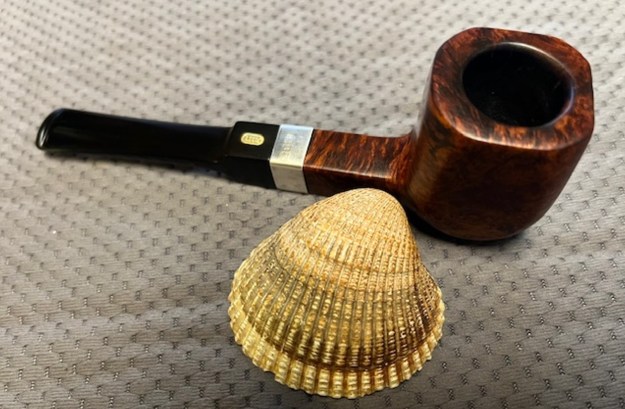
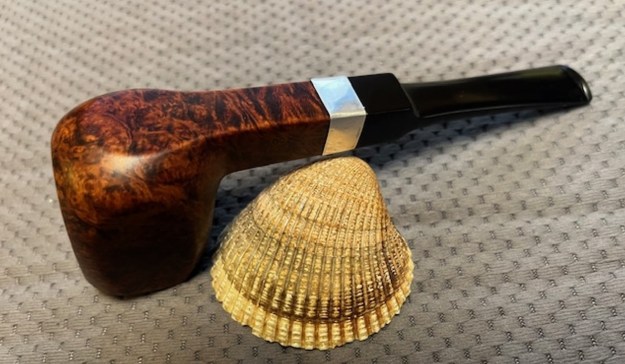
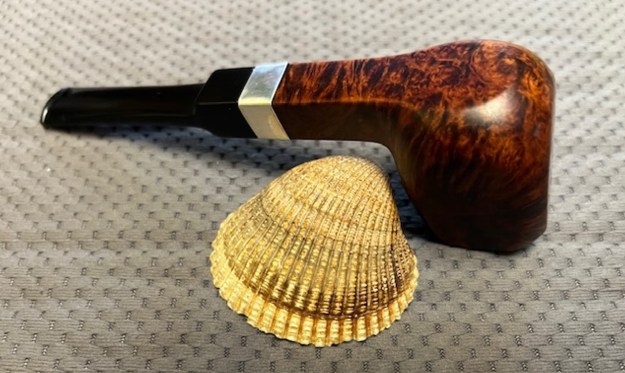
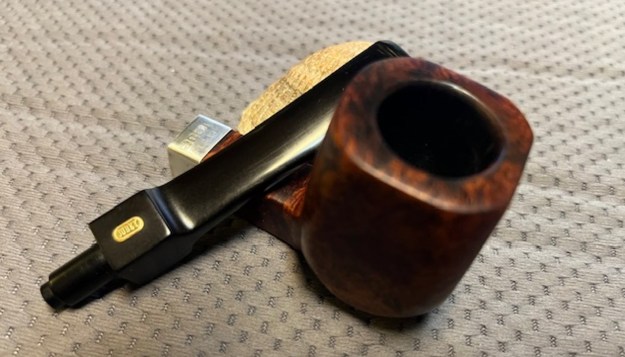
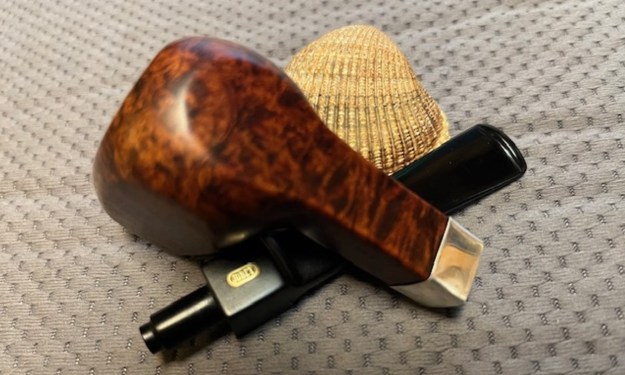
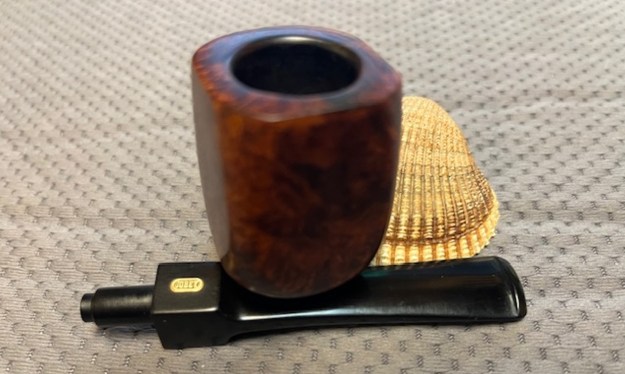
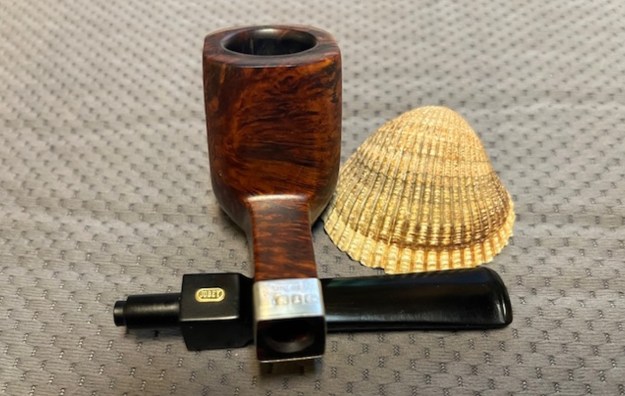
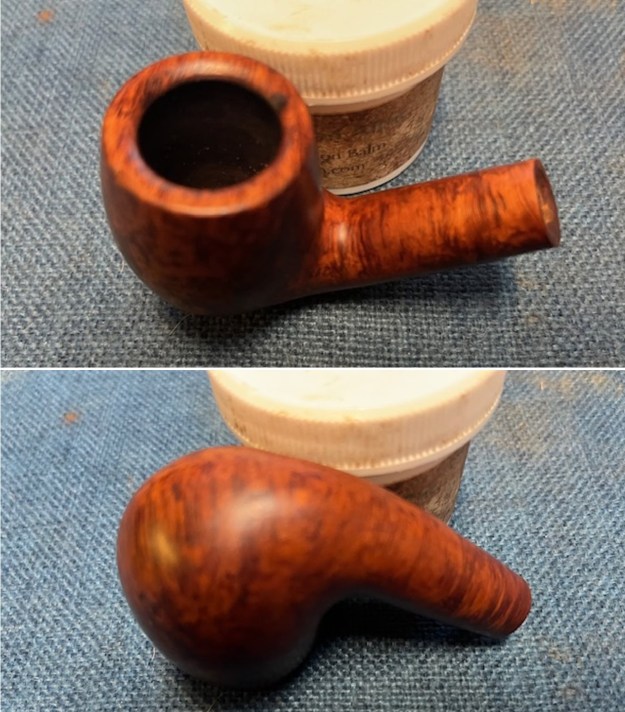
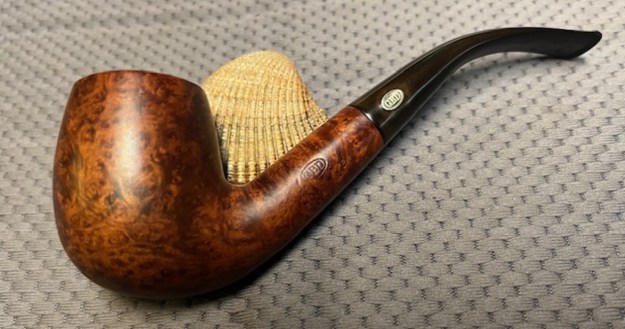
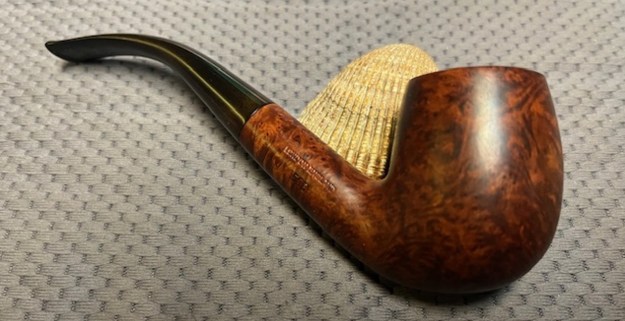
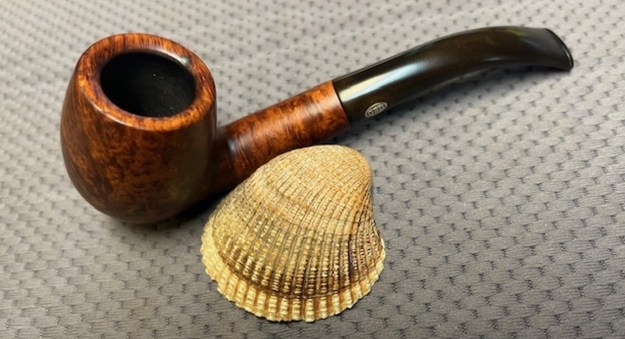
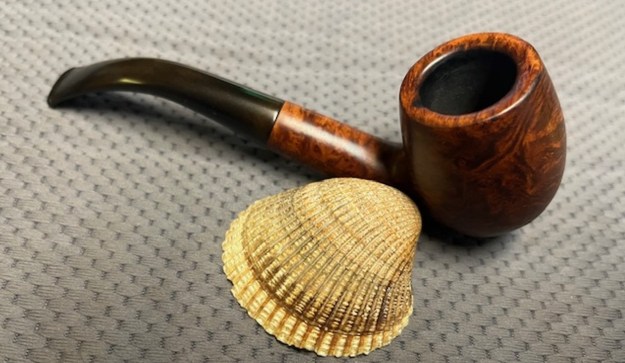
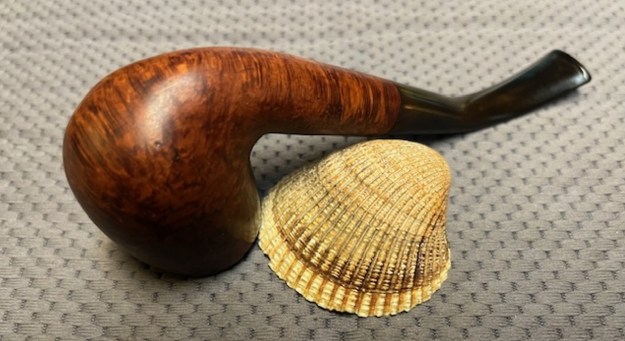
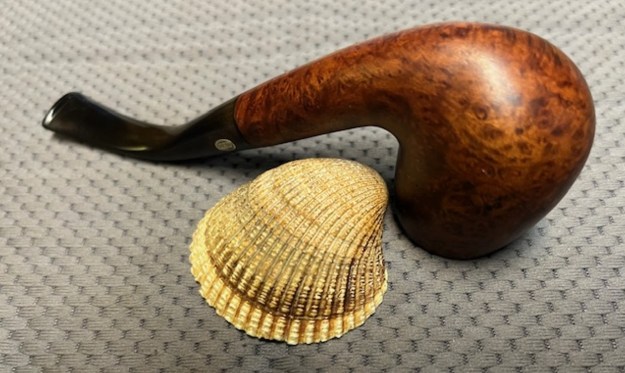
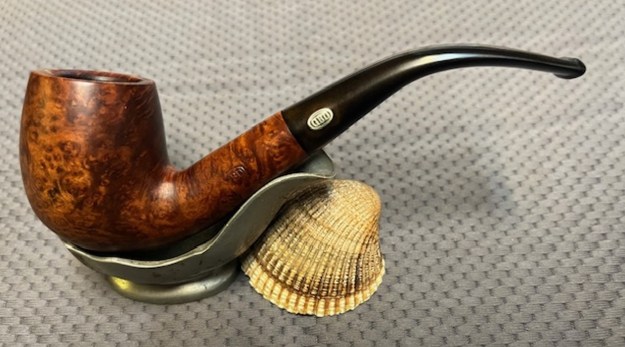
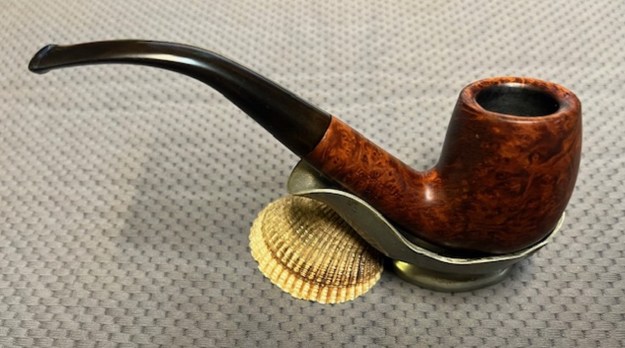
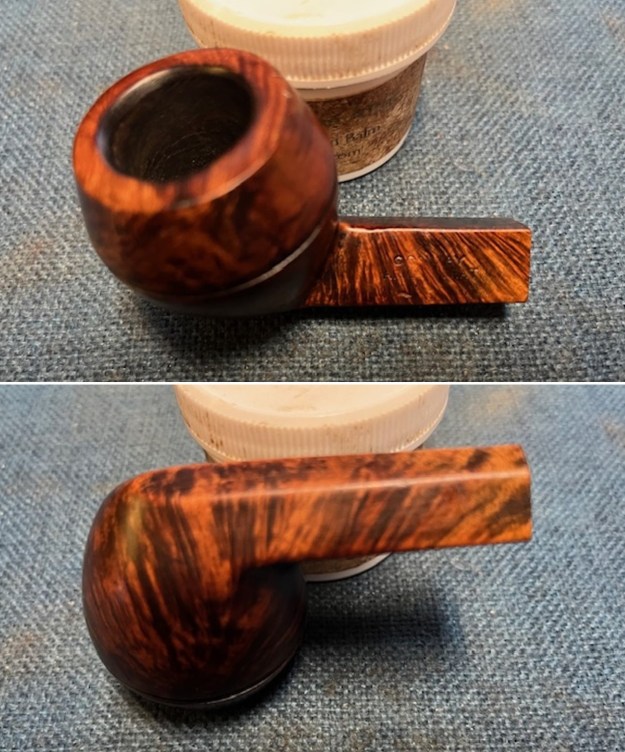
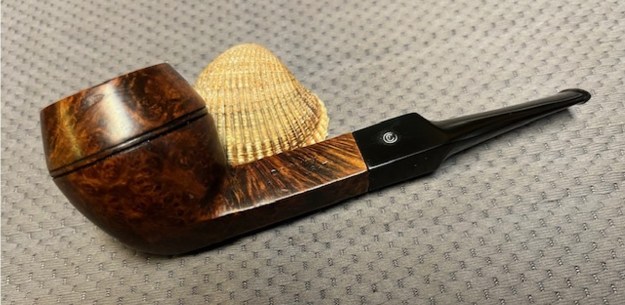
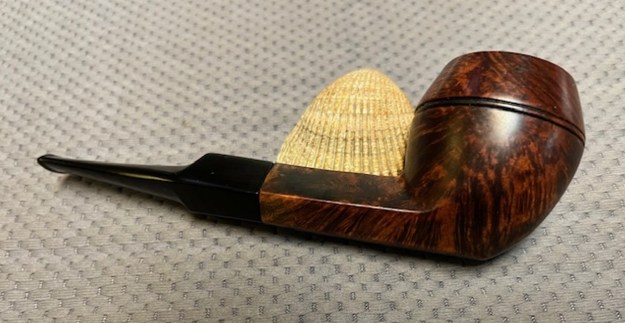
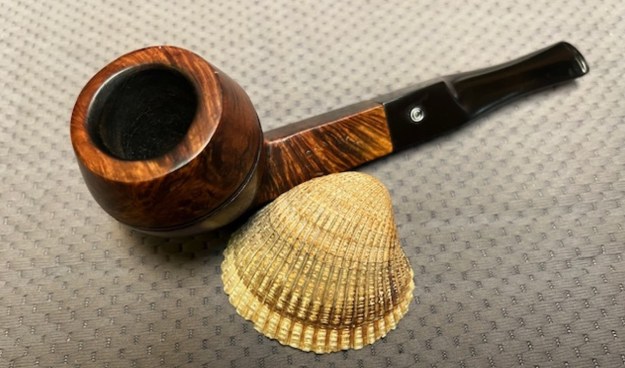
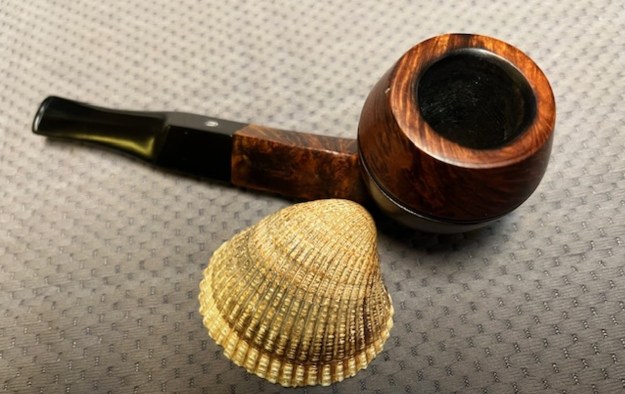
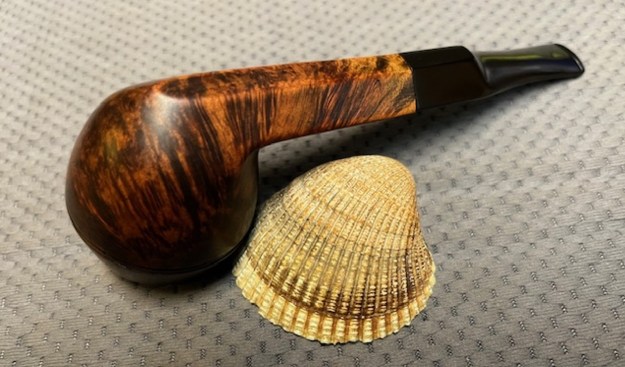
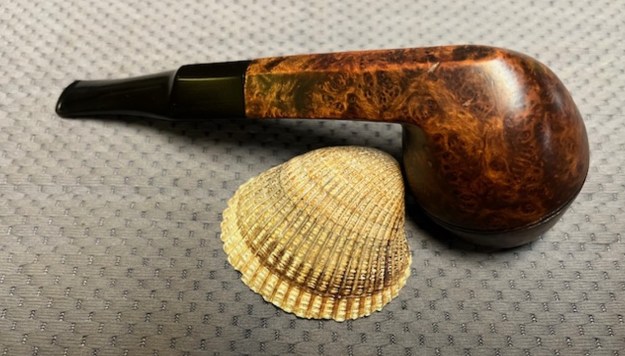
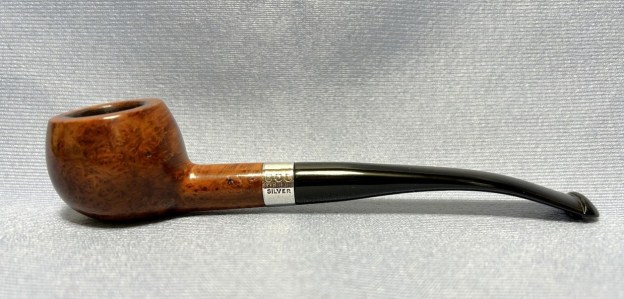
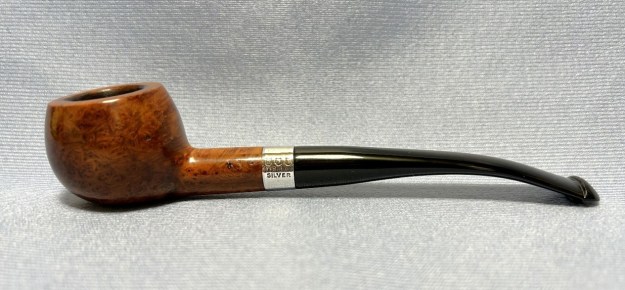
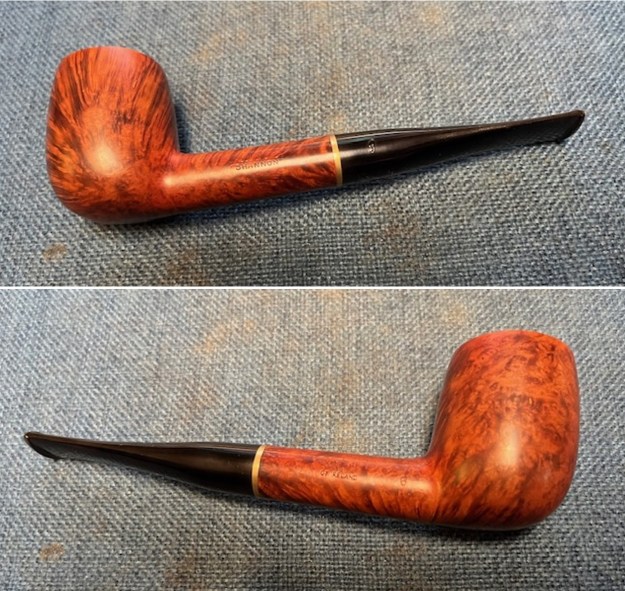
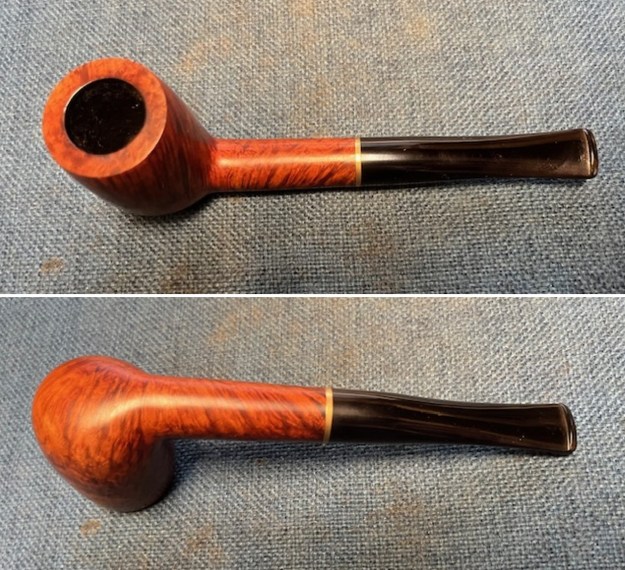
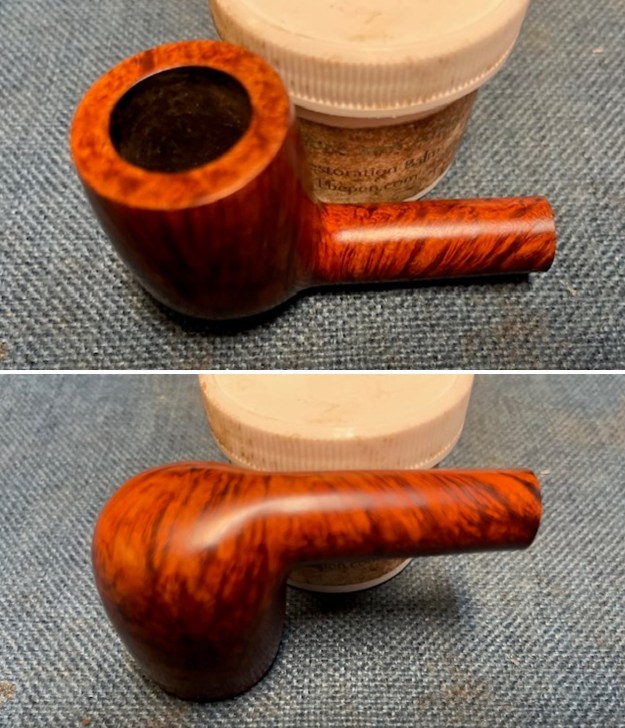
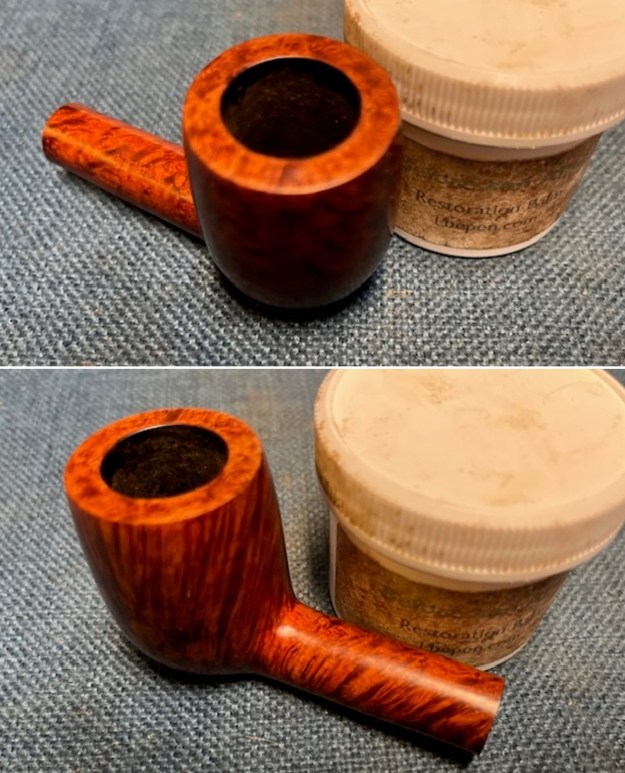
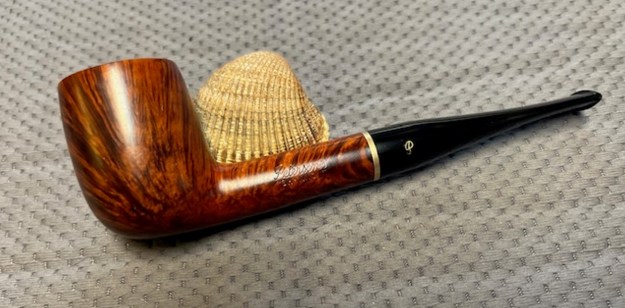
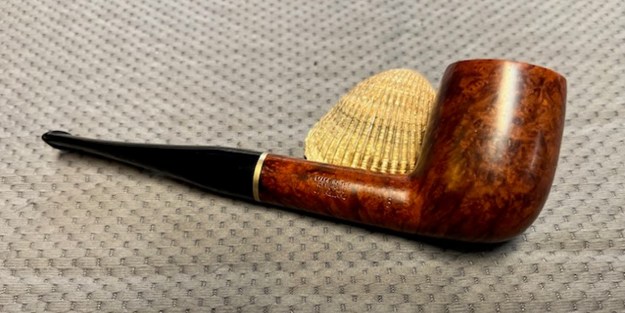
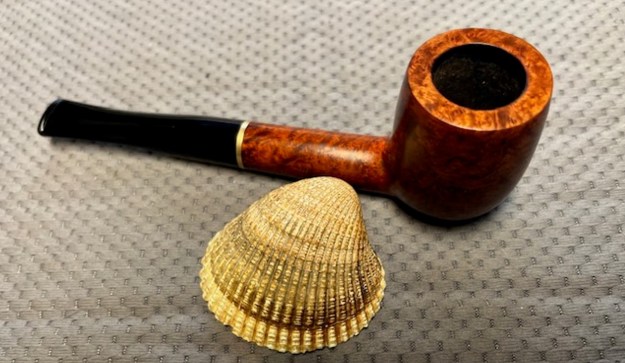
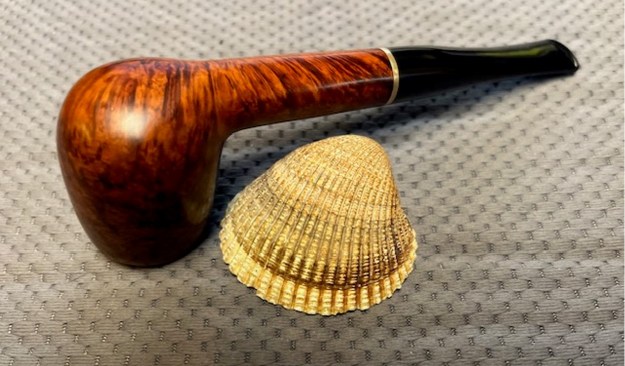
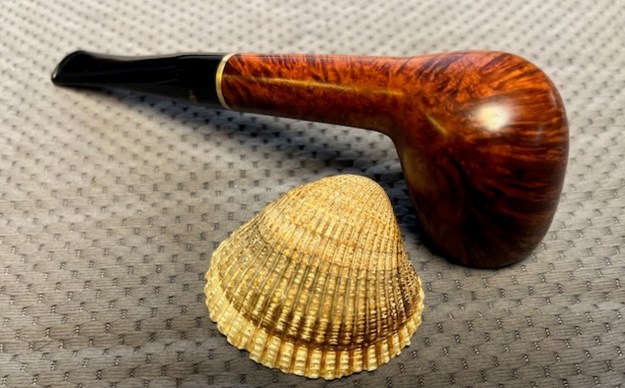
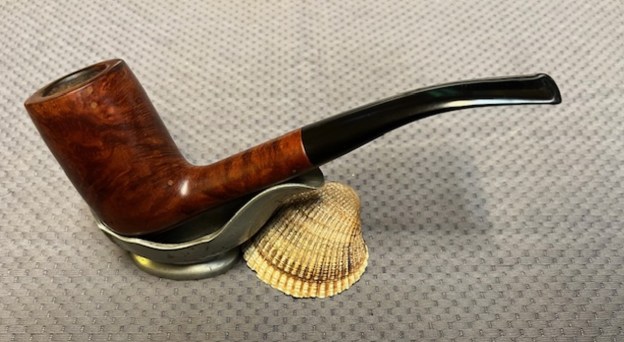
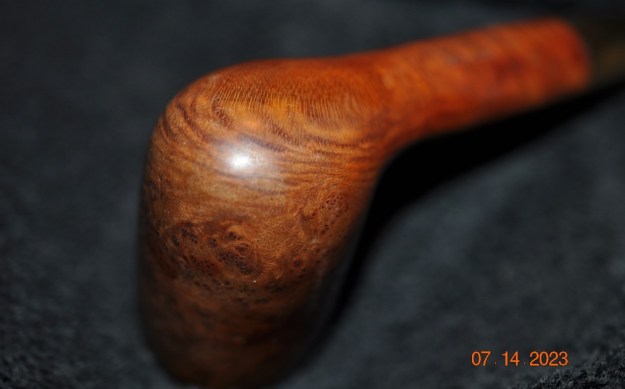
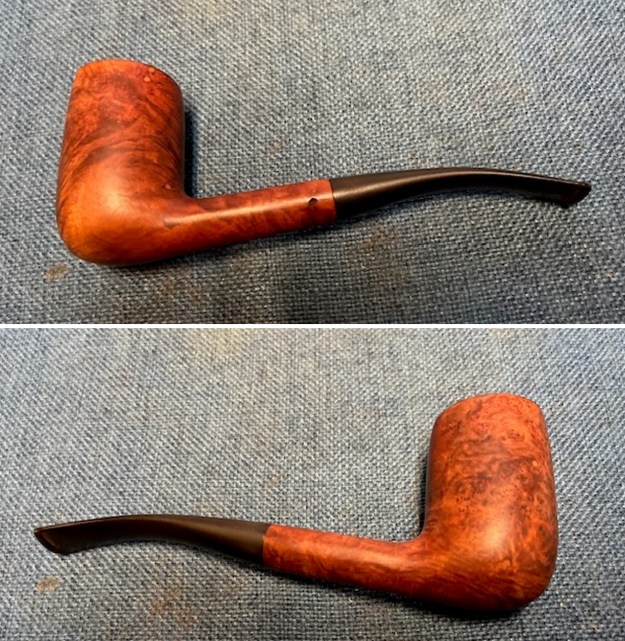
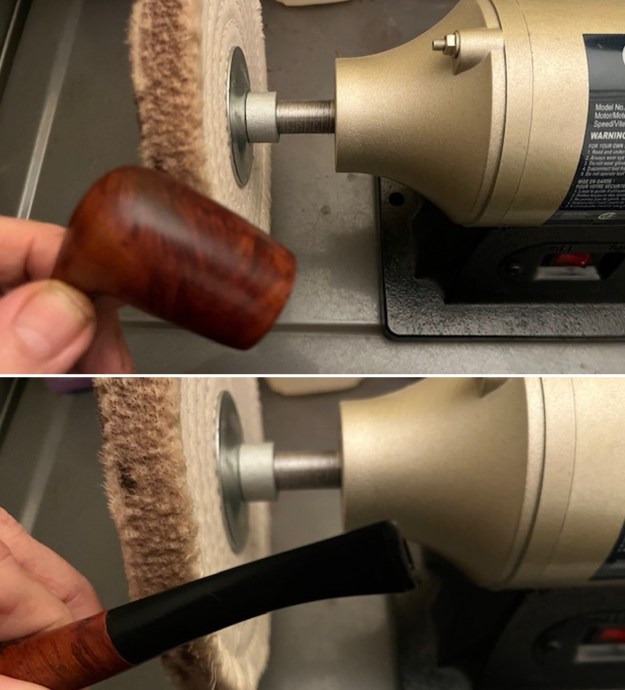
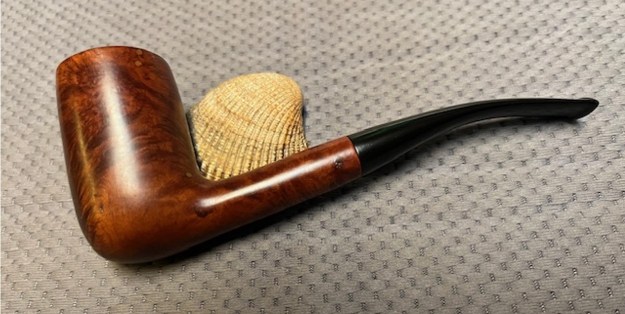
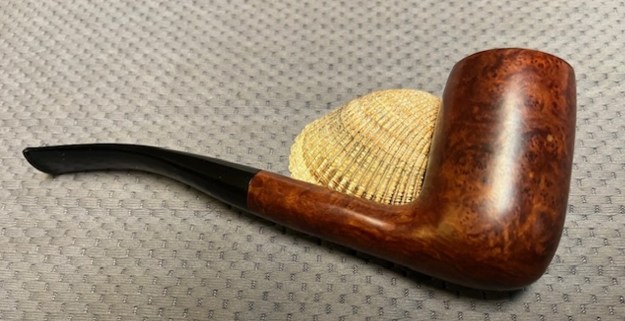
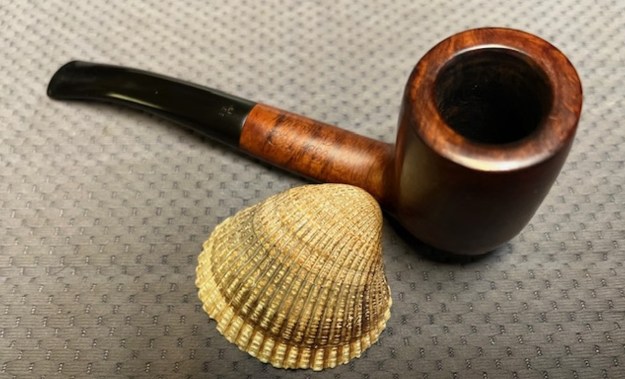
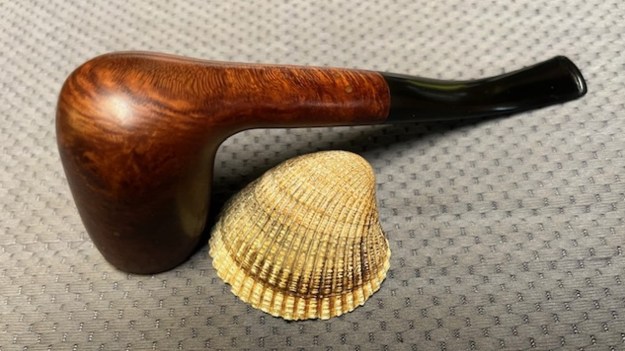
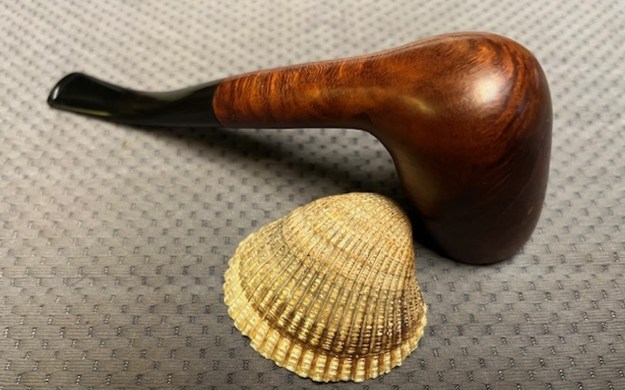
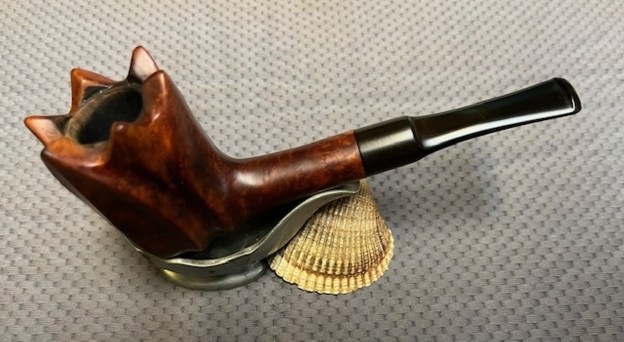
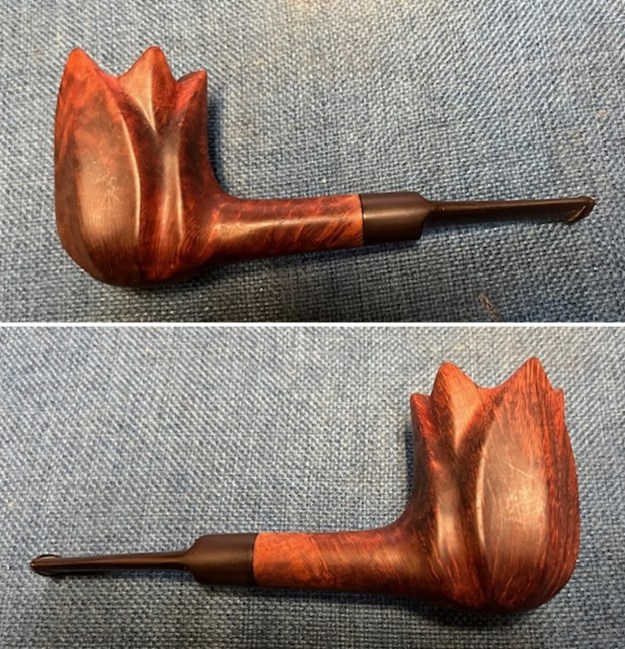
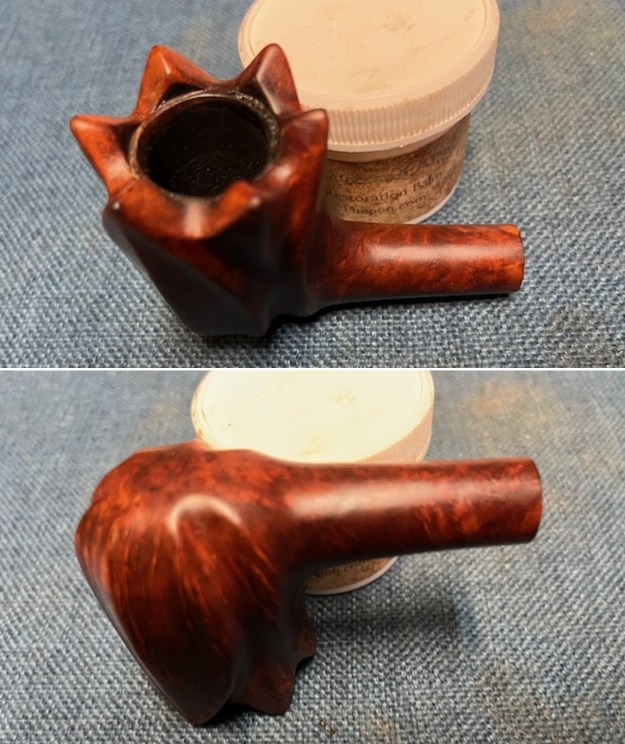
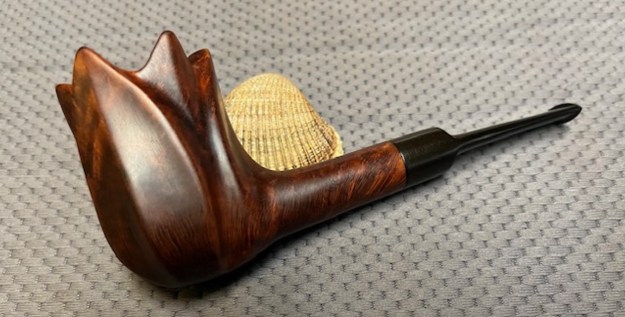
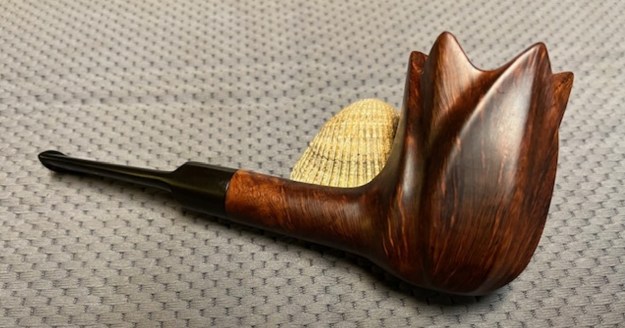
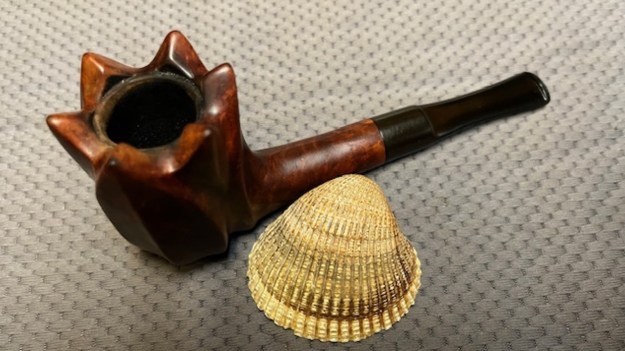
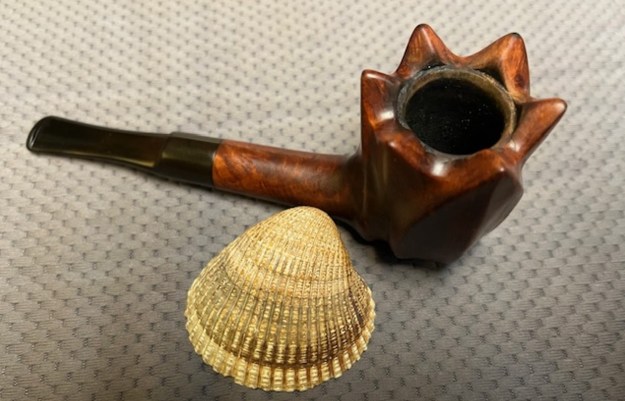
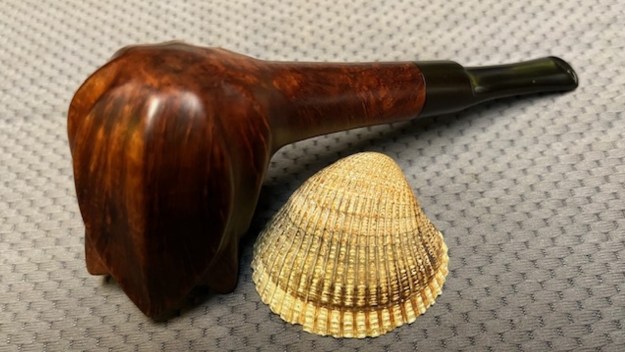
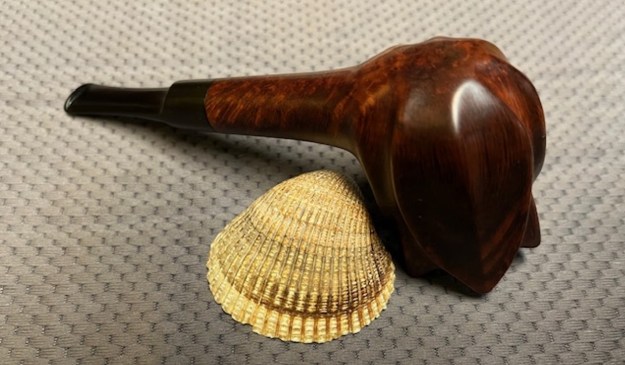
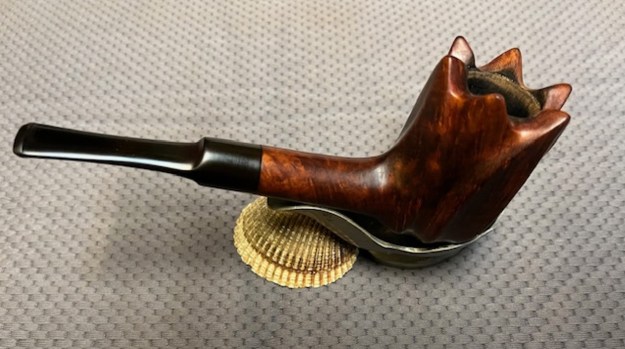
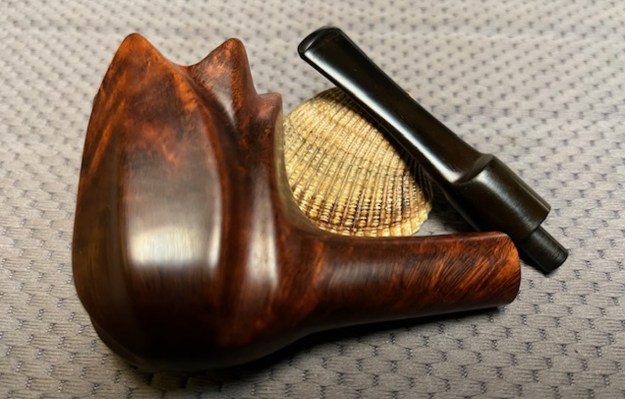
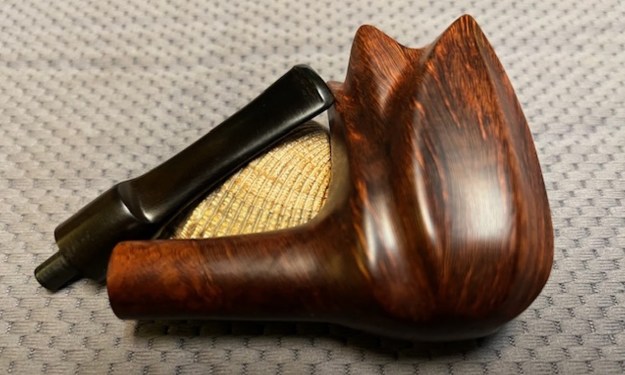
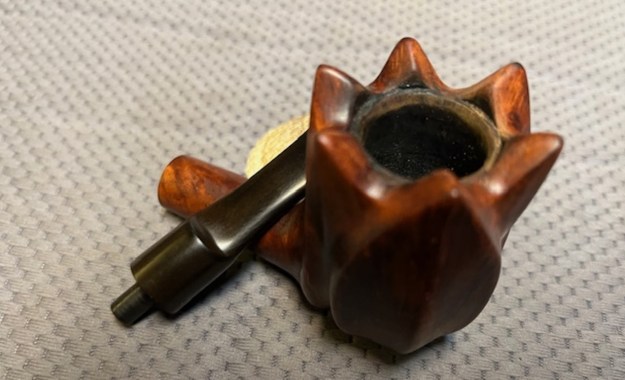
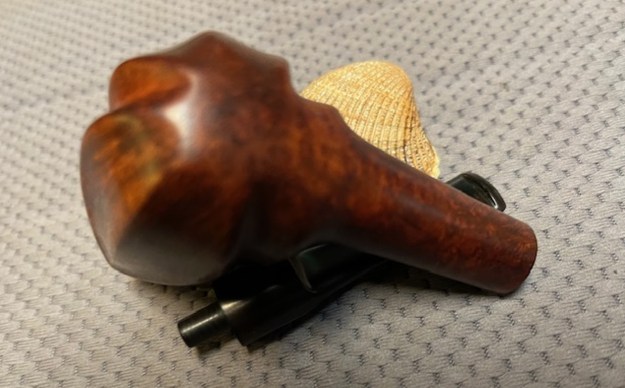
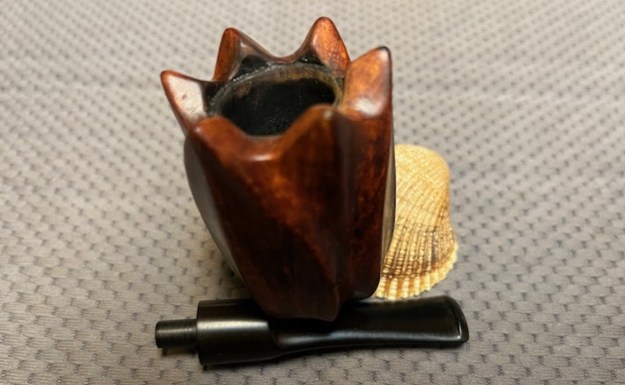
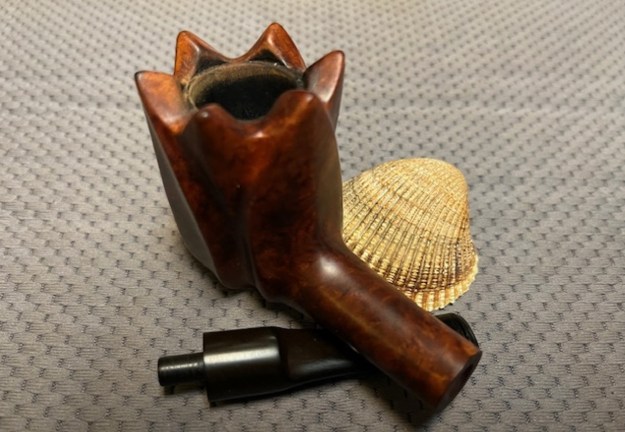
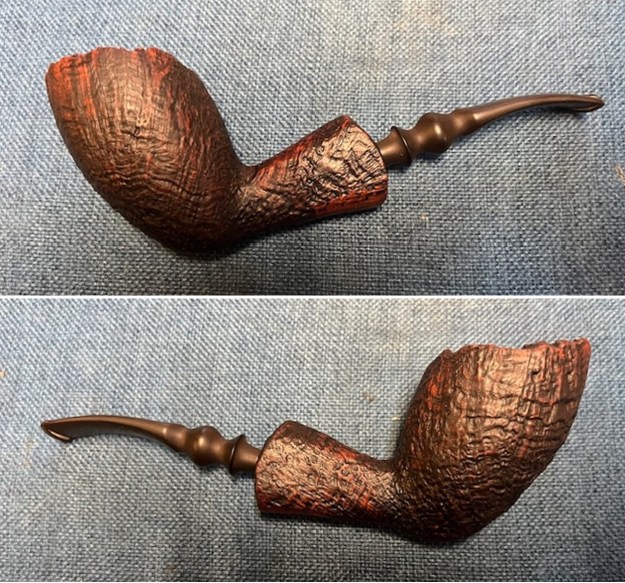
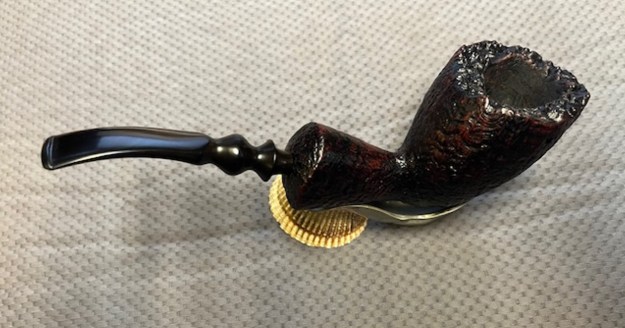
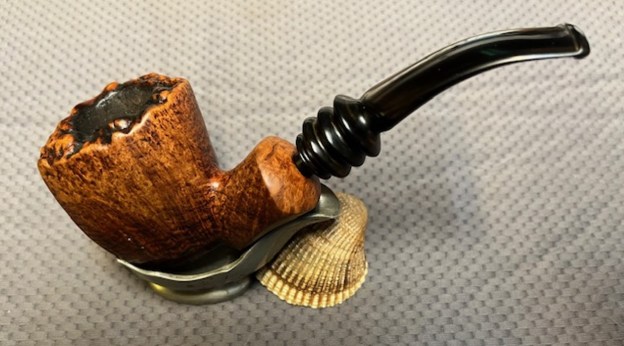
 I put the stem back on the Knute of Denmark Sandblast Freehand pipe and took the pipe to the buffer. I carefully buffed the bowl and stem with Blue Diamond to polish the briar and the vulcanite. Blue Diamond does a great job on the smaller scratches that remain in the vulcanite. I gave the bowl multiple coats of Conservator’s Wax and the stem several coats of carnauba wax and buffed the pipe with a clean buffing pad to raise the shine. I hand buffed it with a microfiber cloth to deepen the shine. The pipe polished up really nicely with a great contrasting stain look to the briar. The finished pipe is shown in the photos below. This is a beautiful Karl Eric Made Knute of Denmark Freehand – the fancy turned stem and plateau rim top give the pipe a great look. The dimensions of the pipe are Length: 6 inches, Height: 2 ½ inches, Outside diameter of the bowl: 1 ½ inches wide x 2 inches, Chamber diameter: 7/8 of an inch. The weight of the pipe is 2.26 ounces/64 grams. This is the fourth of six pipes that am restoring for Mario from his Dad’s collection. I look forward to hearing what he thinks of this newly restored pipe. Thanks for reading this blog and my reflections on the pipe while I worked on it!