by Steve Laug
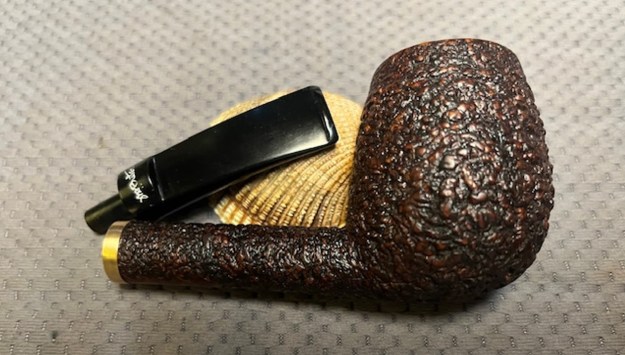
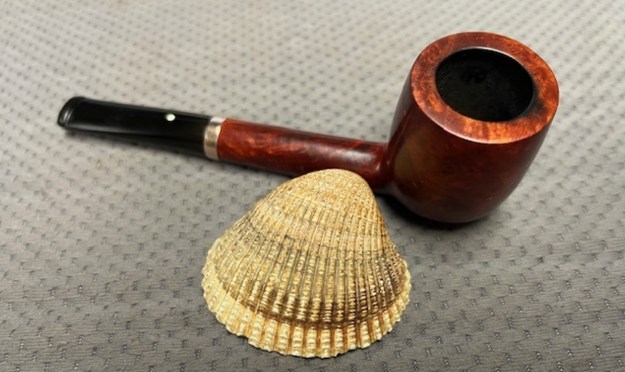
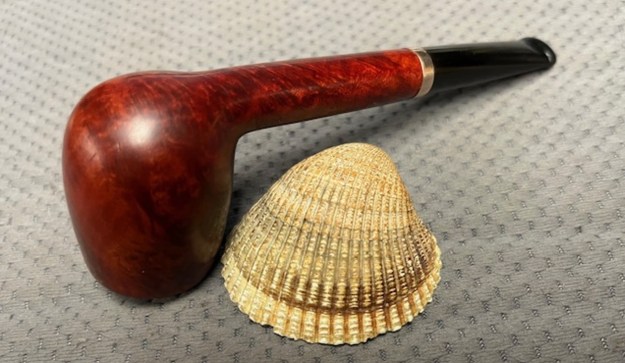
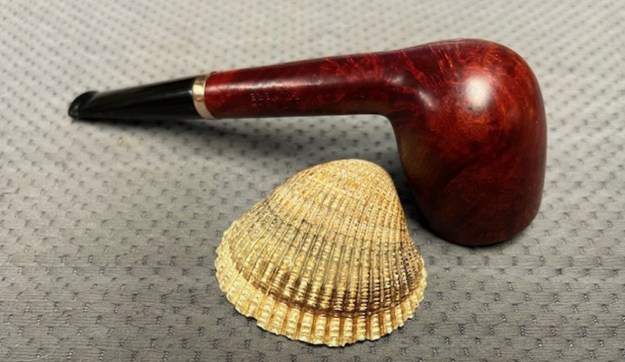
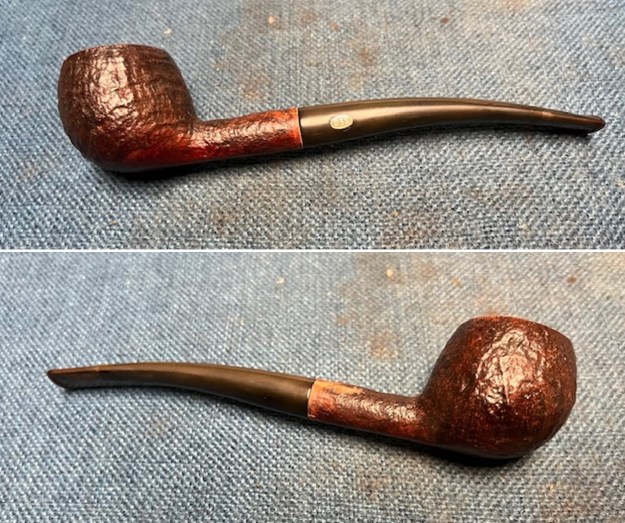
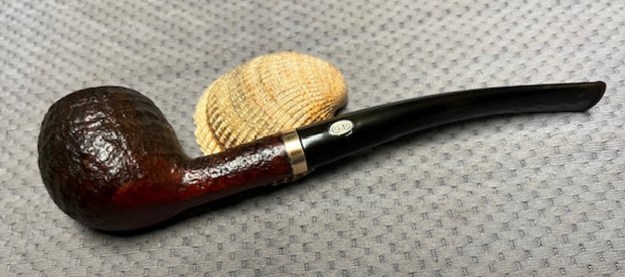
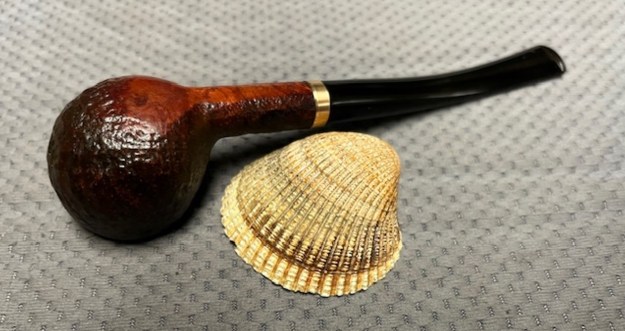
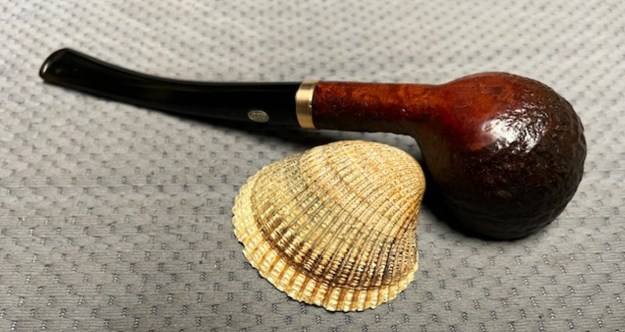
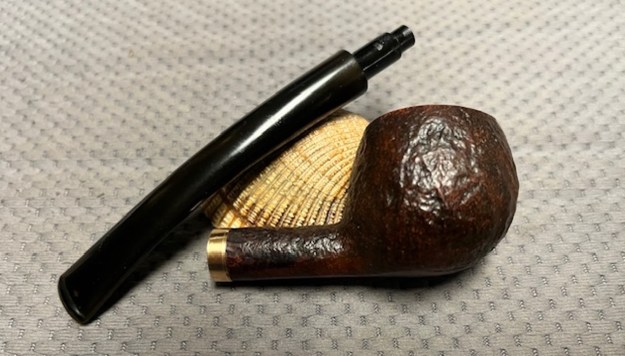
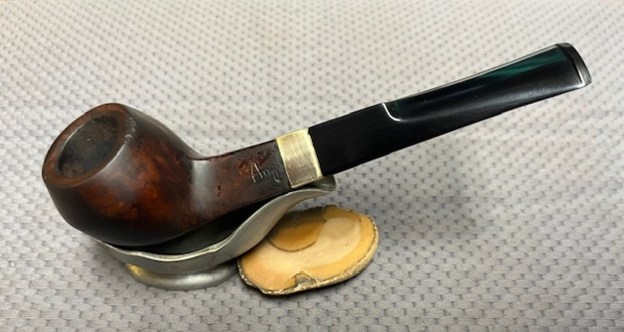
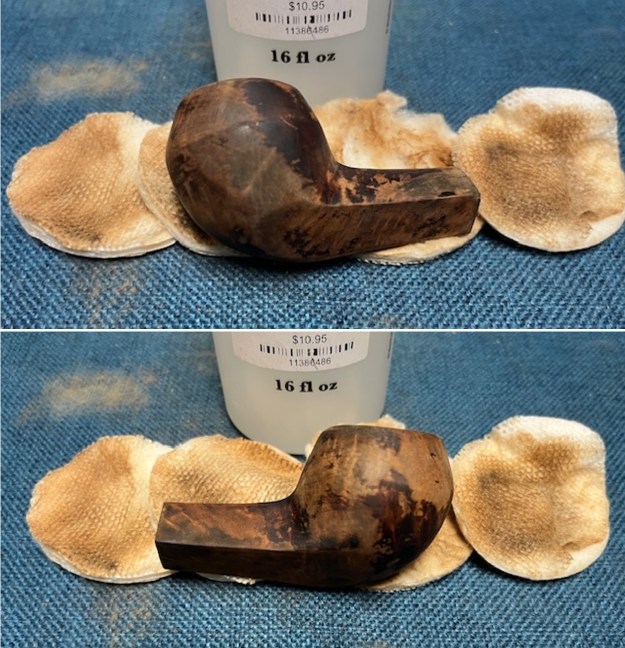
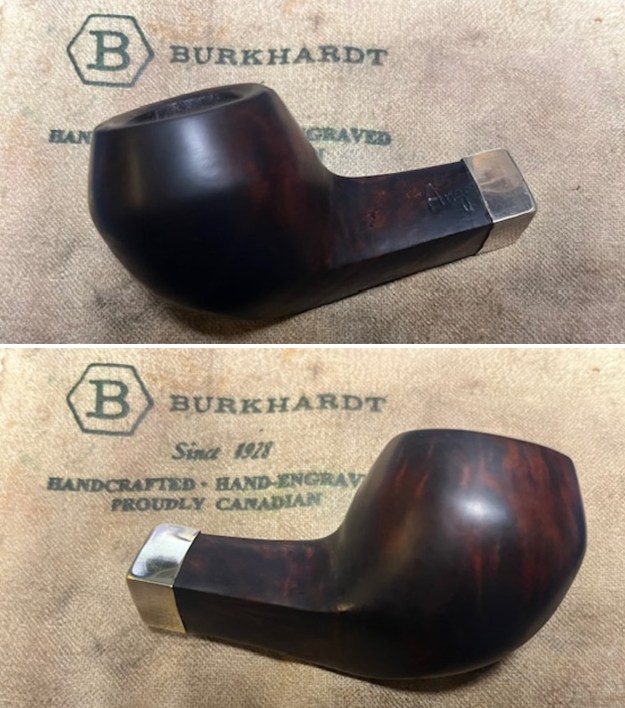
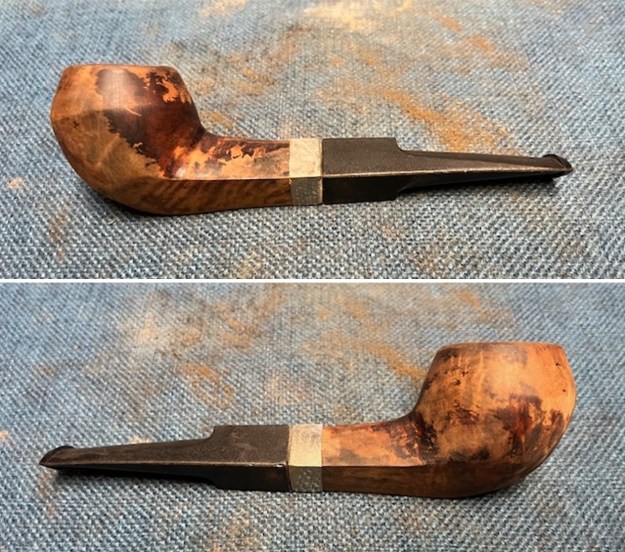
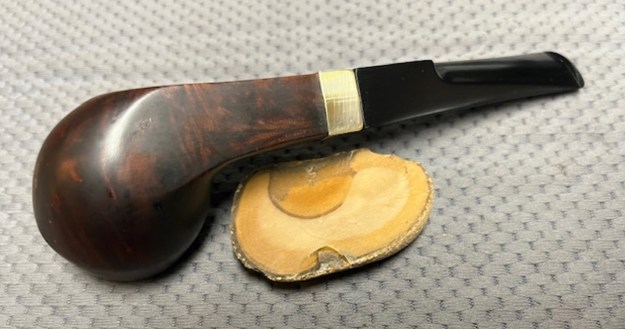
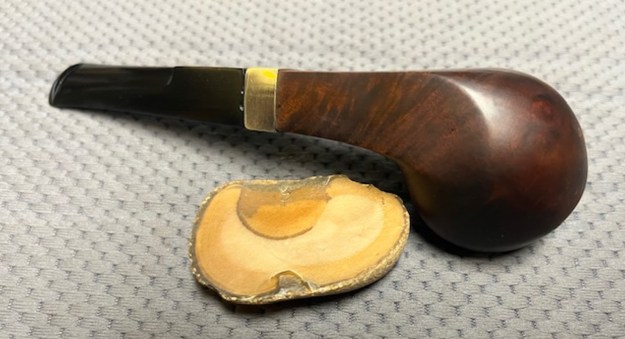
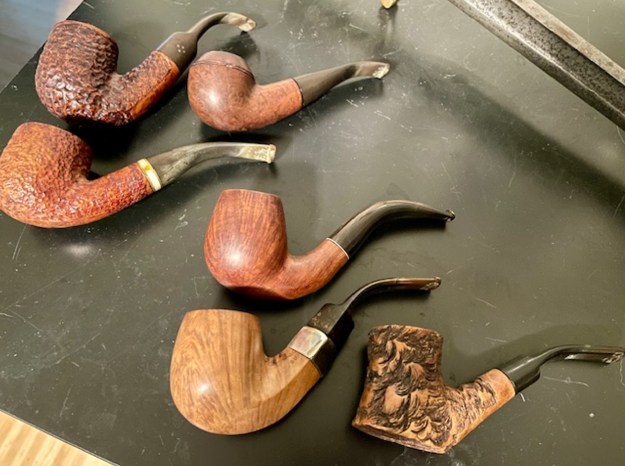
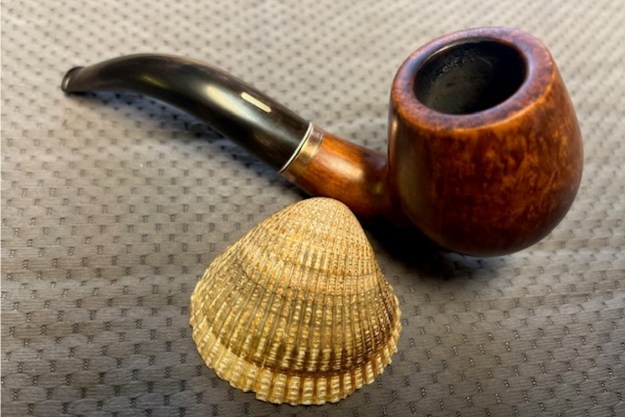
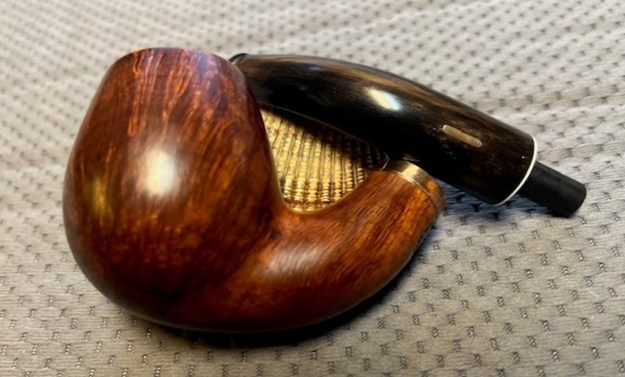
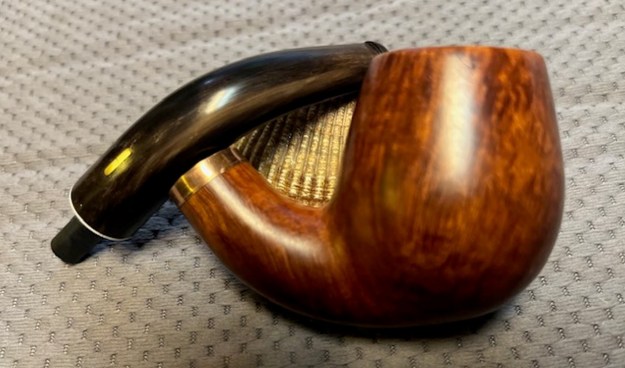
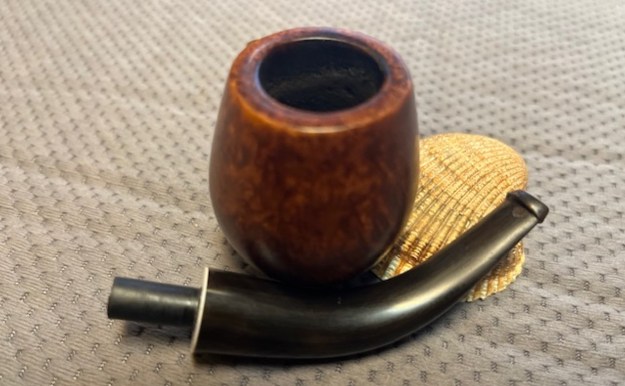
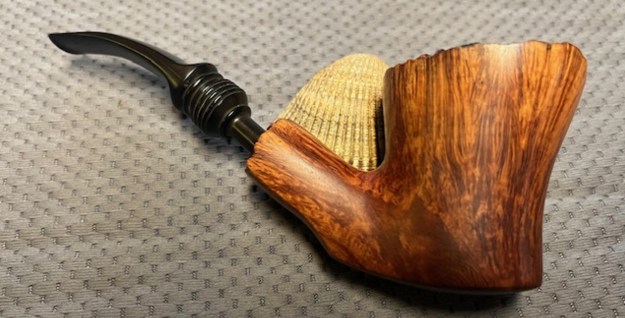
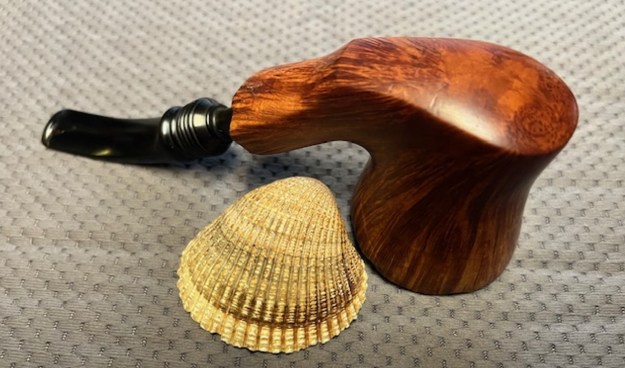
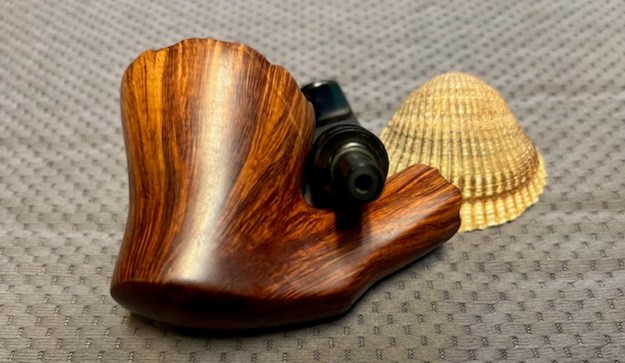
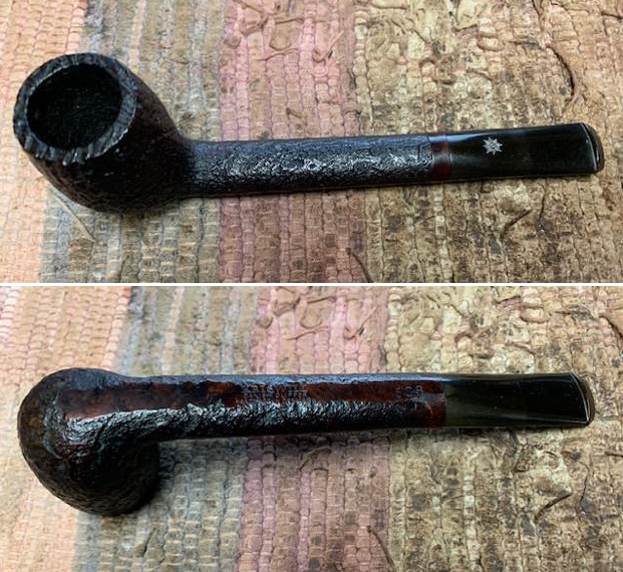
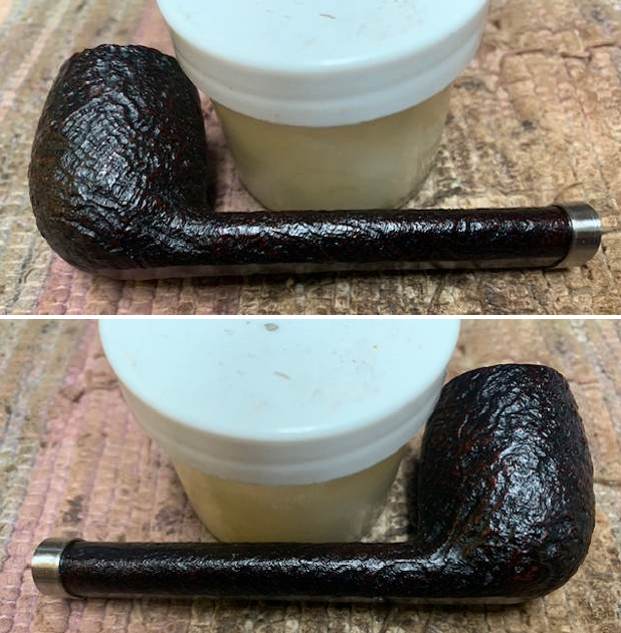
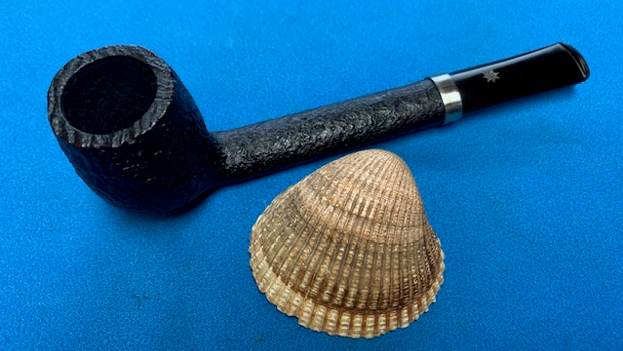
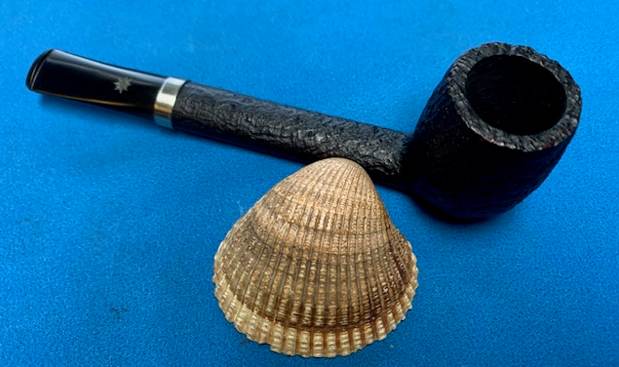
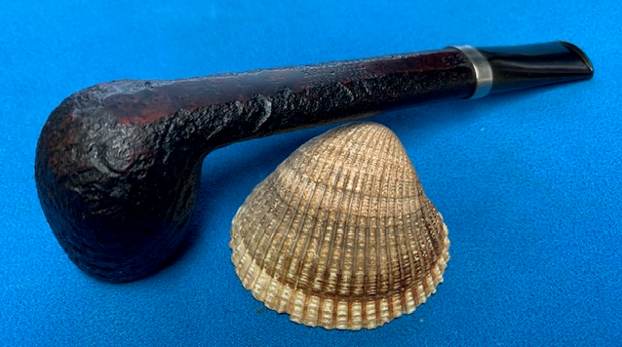
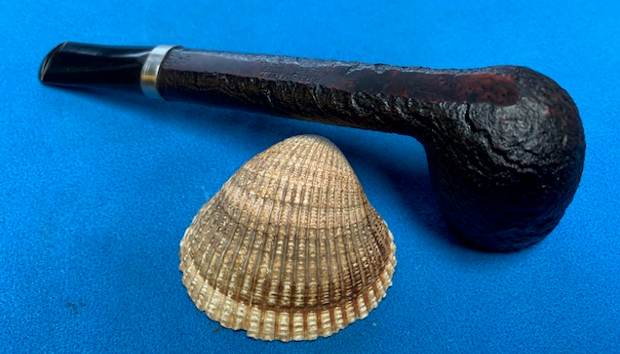
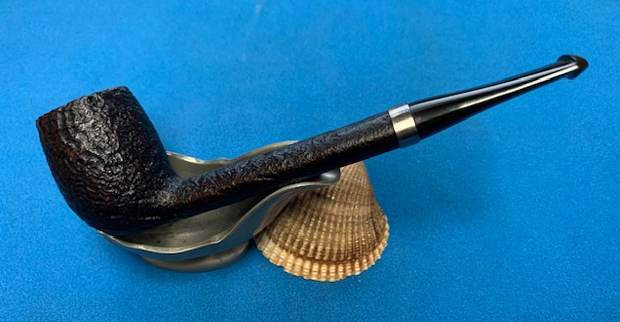
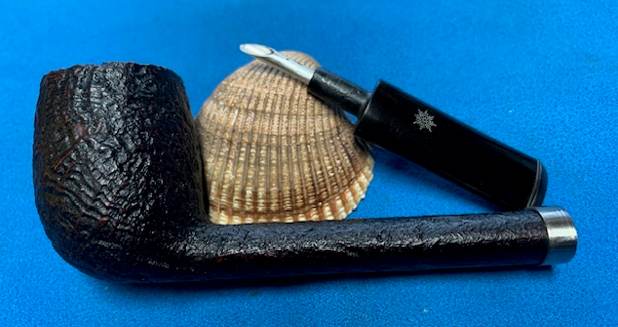
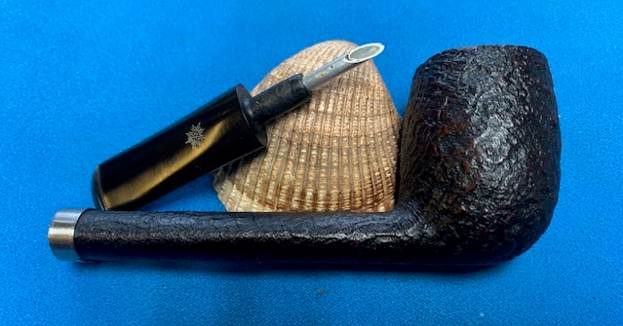
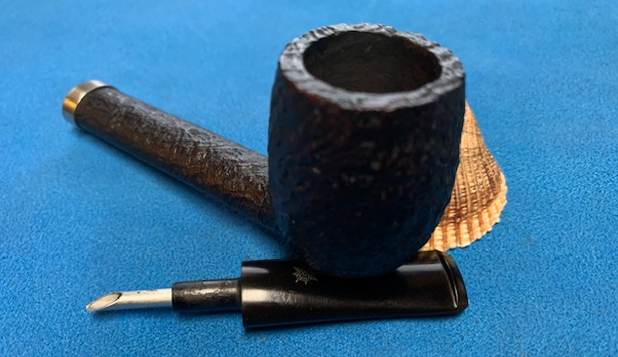
While I was in Idaho with Jeff I worked on a few pipes that caught my eye. The first one I chose to work on is made by a pipemaker I have had on my Bucket List of pipes I wanted work on and potentially own. We picked the pipe up from a seller in Macon, Georgia, USA on 03/08/2025. I would call the pipe a Billiard shaped pipe with a slightly bent acrylic saddle stem. It is stamped on the underside of the shank and reads Butera [over] Textured Classic. Against the shank end it is stamped 3 Star. From the heavy cake in the bowl and the thick lava coated rim top I could tell the previous owner loved aromatic tobaccos. The top of the shank had a small ½ inch crack on the right side from the end toward to the bowl. The finish was heavily rusticated almost with a similar style rustication as a Castello Sea Rock. The finish was dirty and dusty in the valleys of the rustication. The shank was black, tarry and oily. The stem sat well against the cracked shank. It was dirty with calcification and some with thick oil and tar in the airway from the tenon to the button. There were deep tooth marks and chatter on both sides ahead of the button. The top side of the saddle stem bore the M. Butera signature in faded white. I took some photos of the pipe before I started my work on it.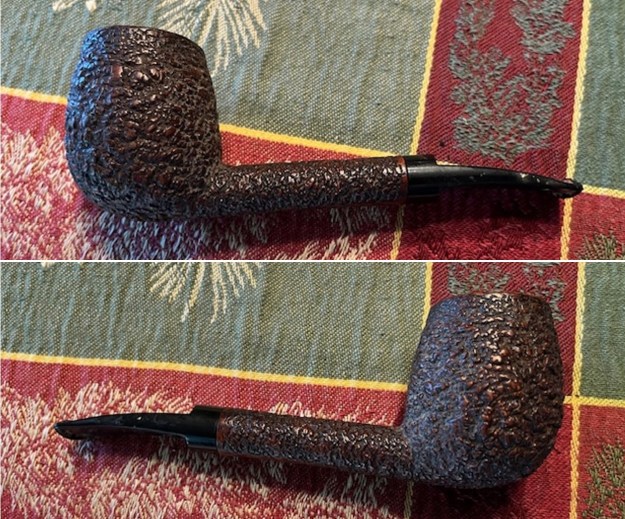
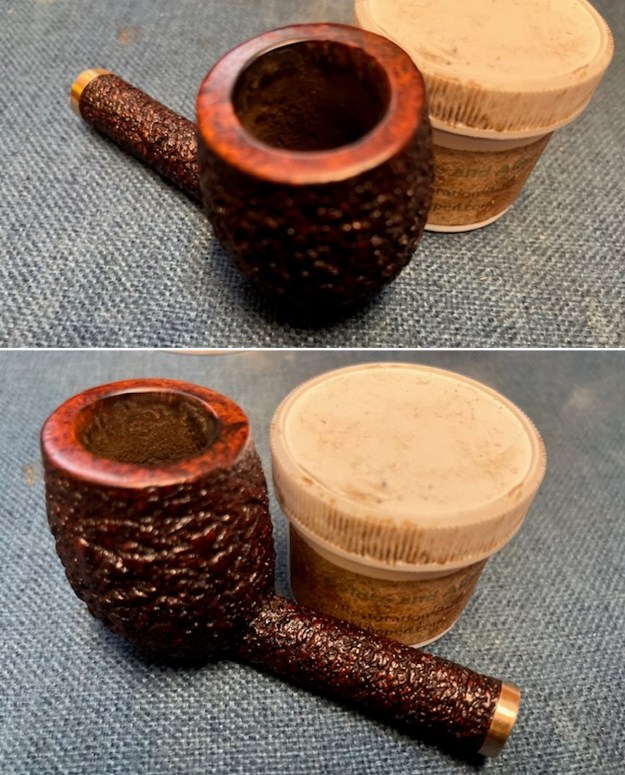
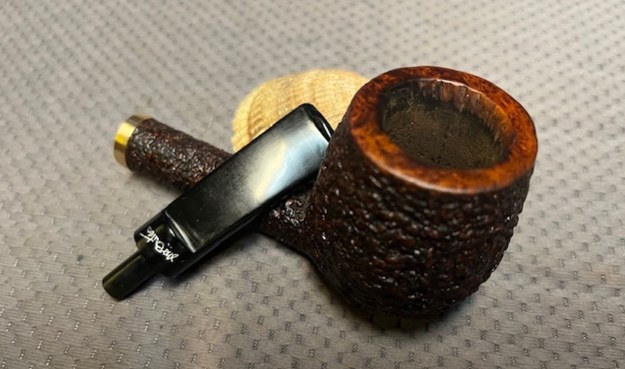
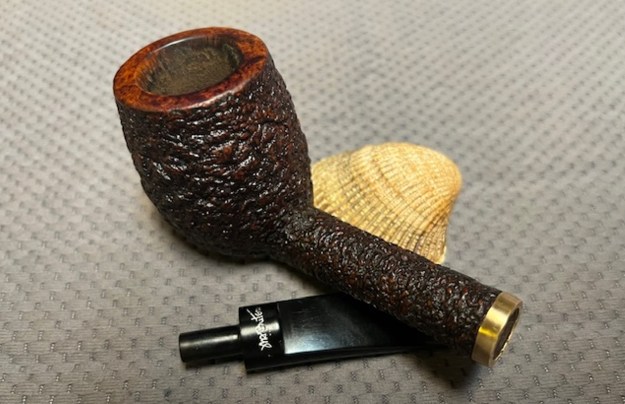
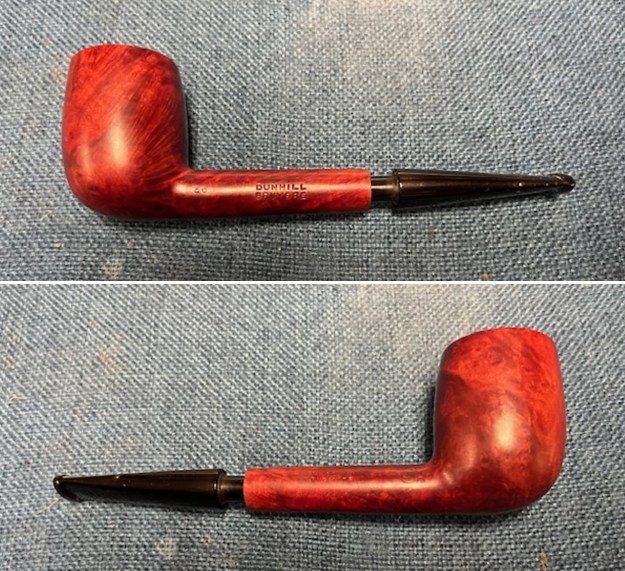
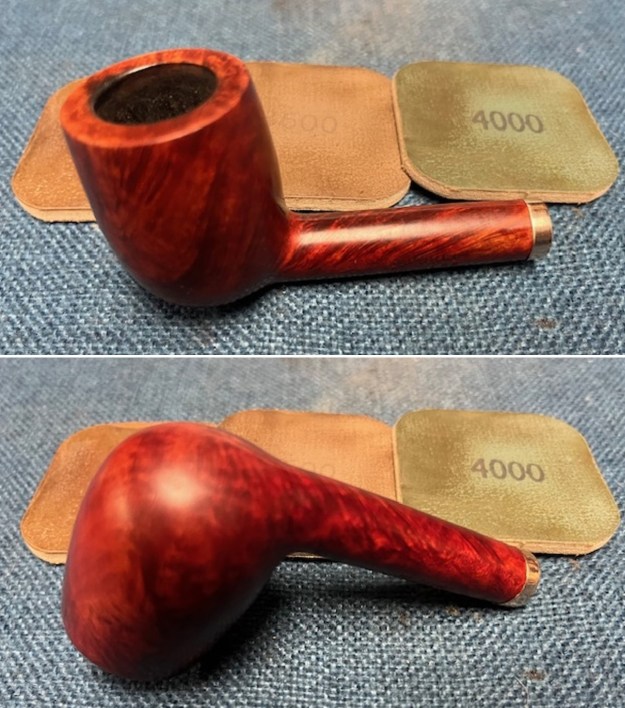
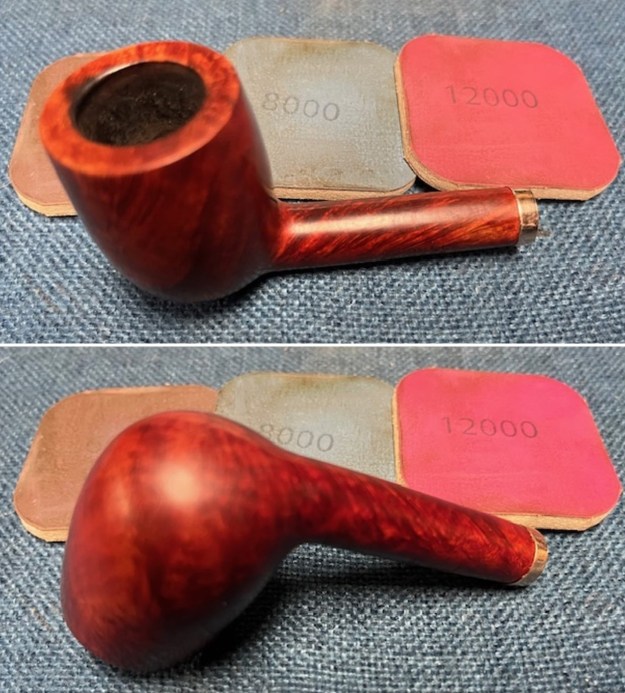
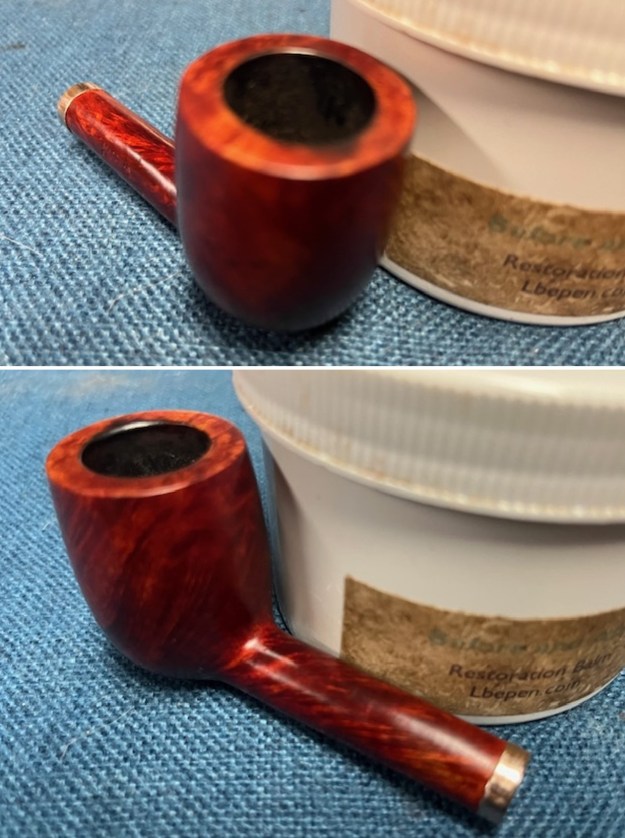
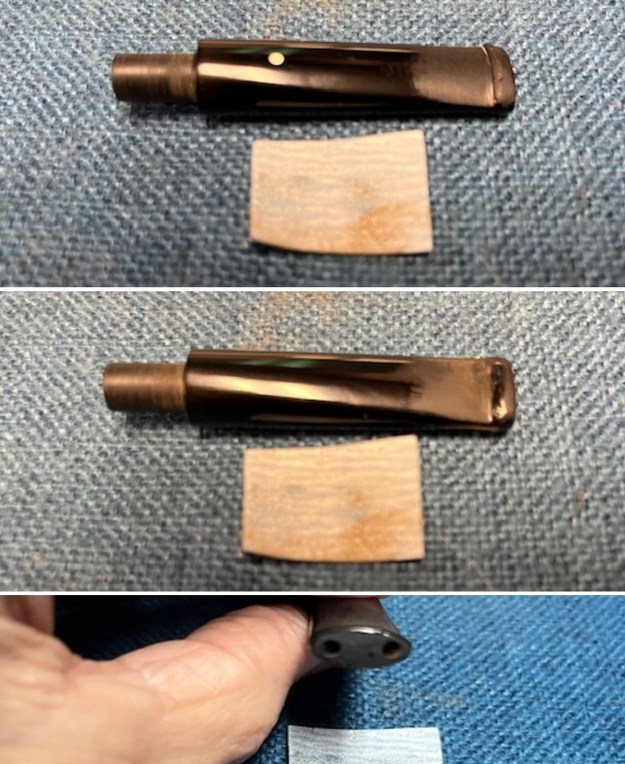
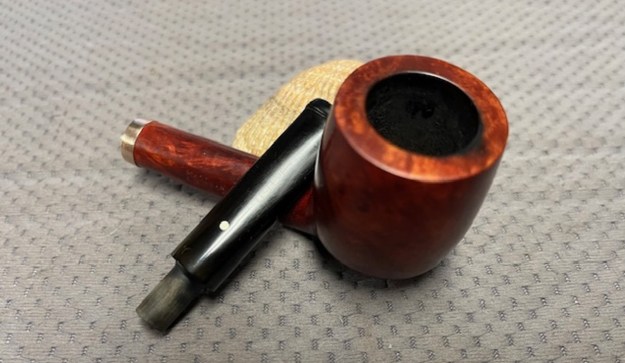
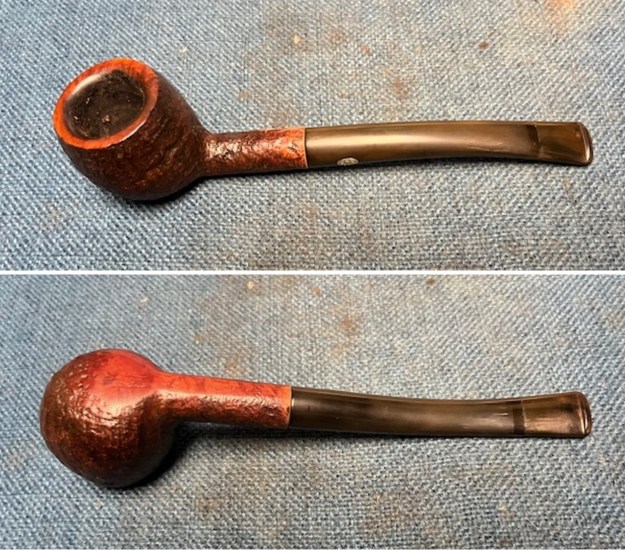
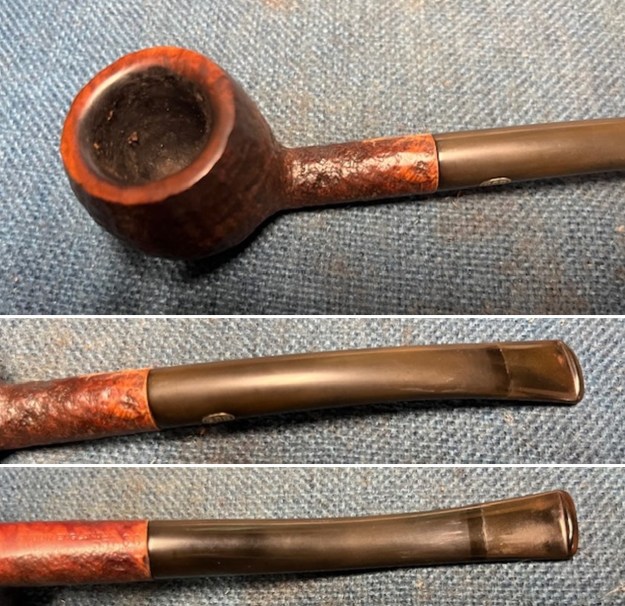
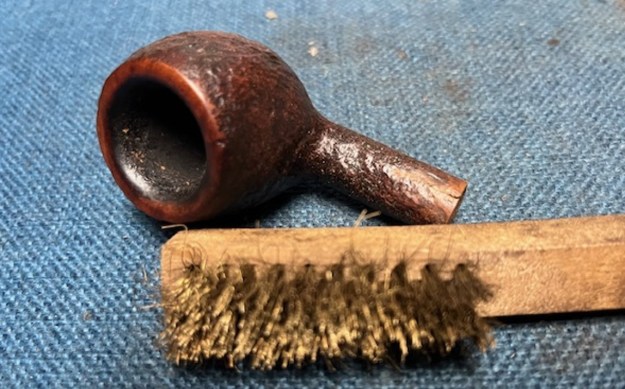
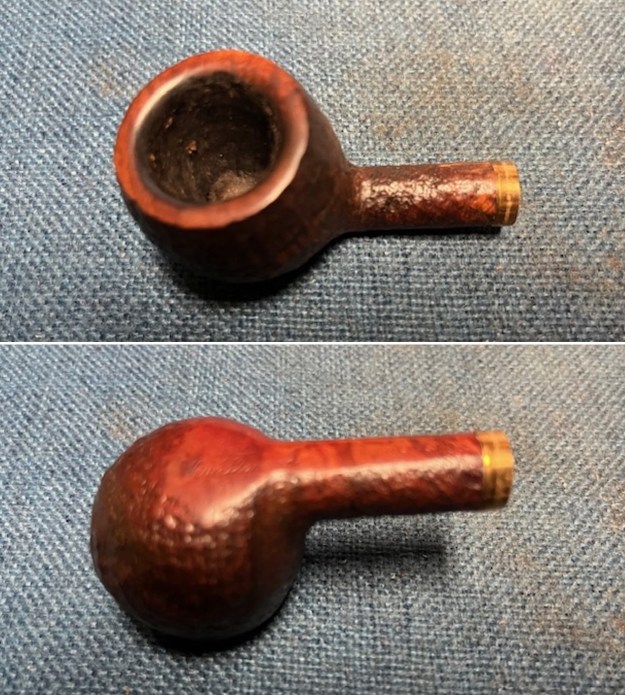
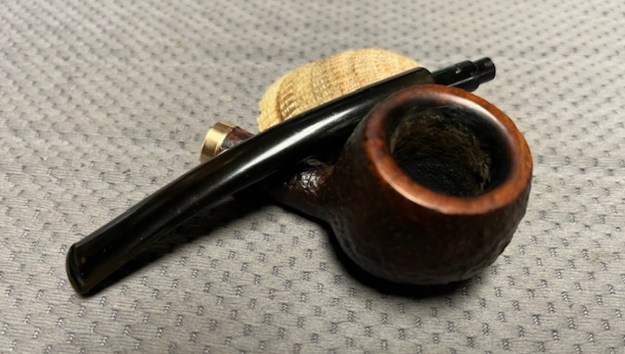
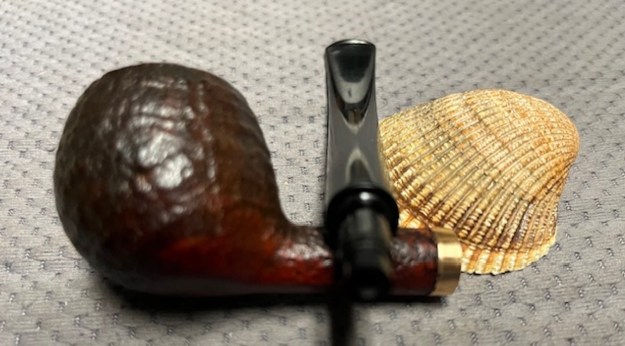
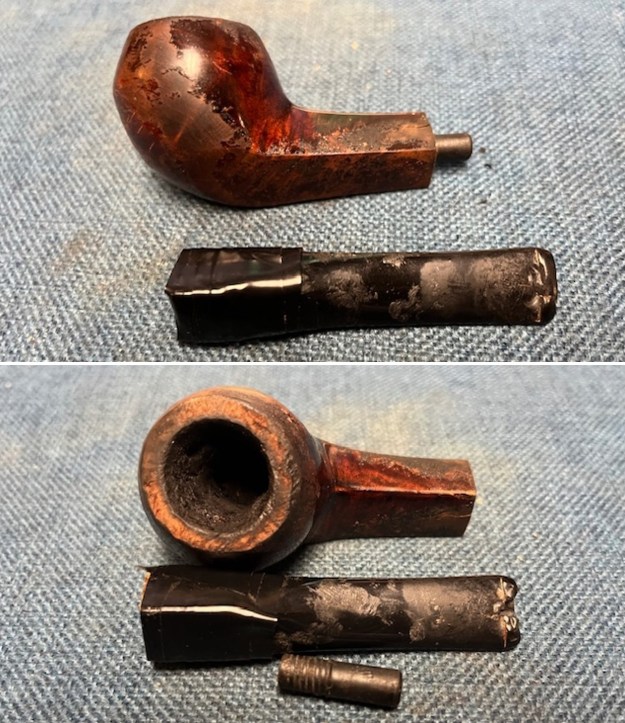
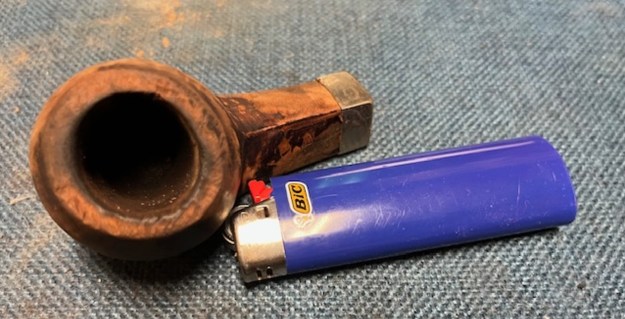
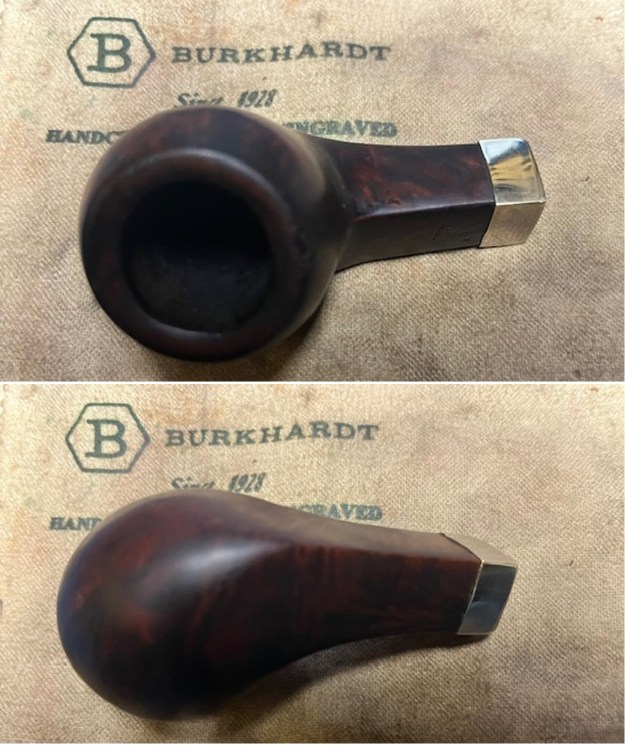
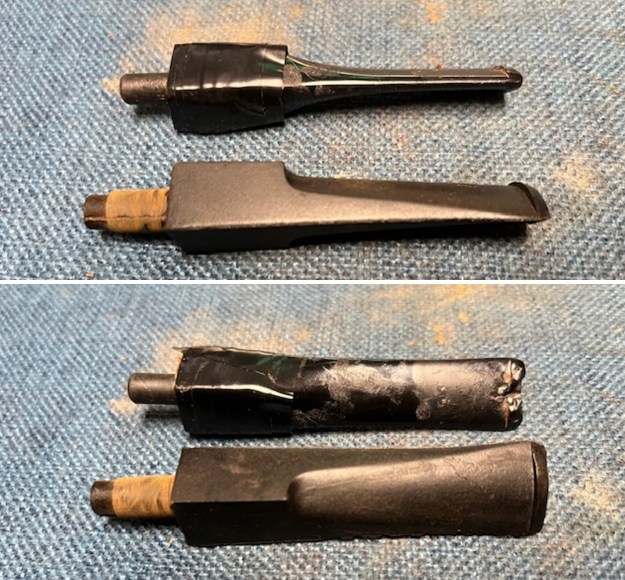
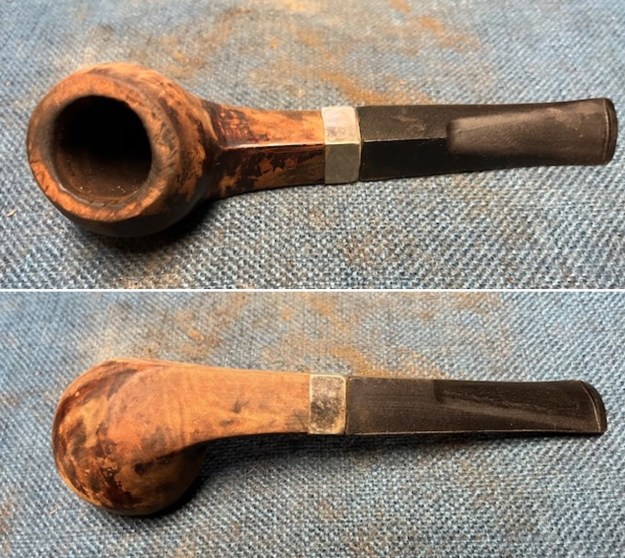
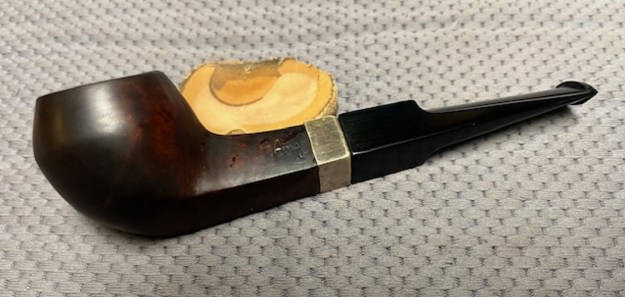
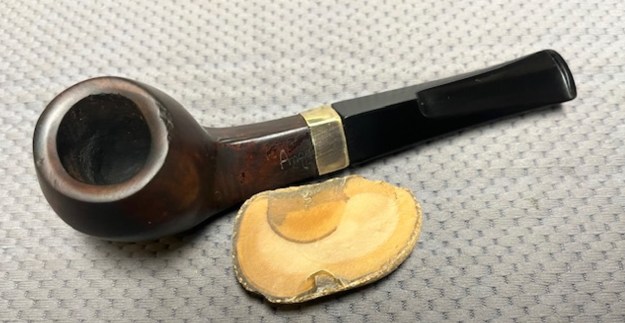
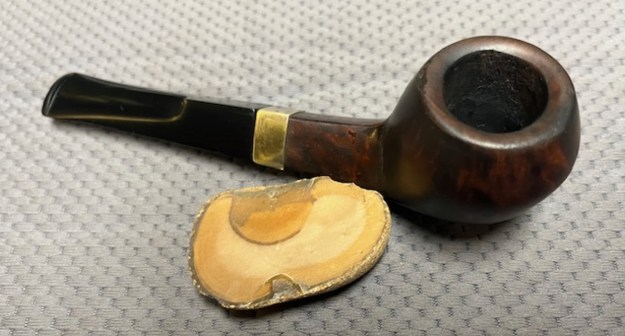
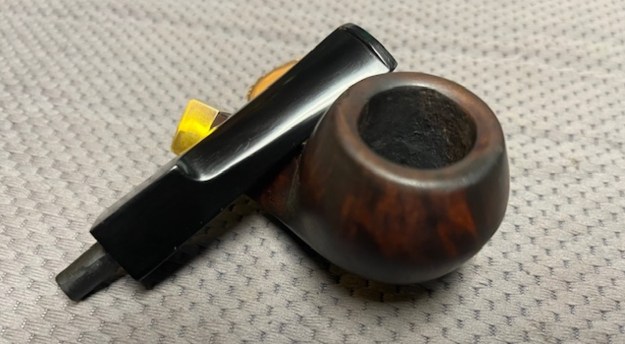
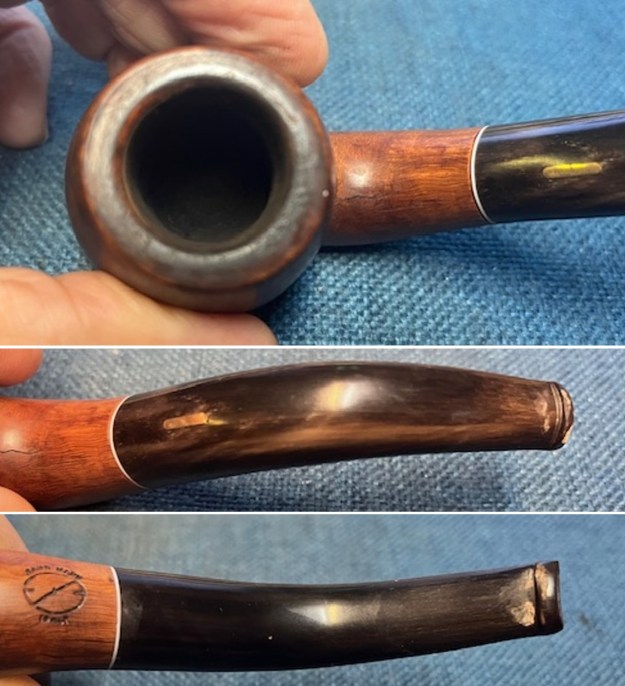
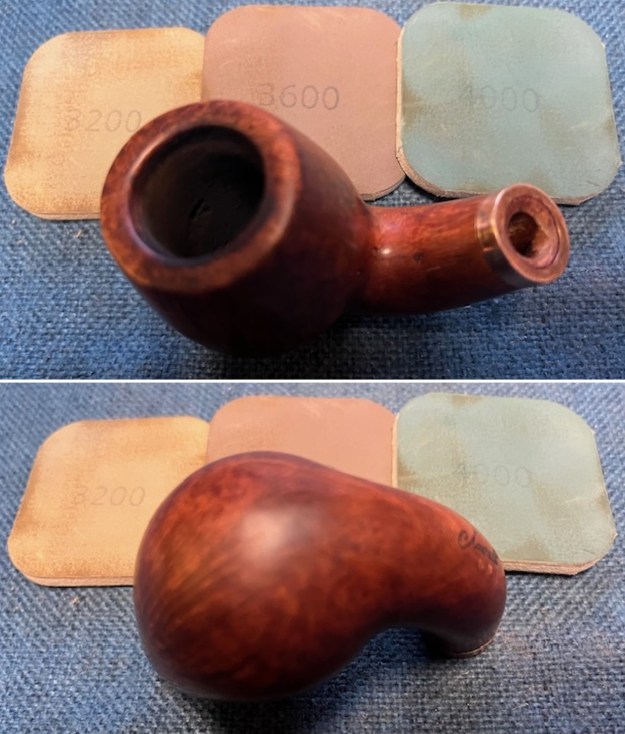
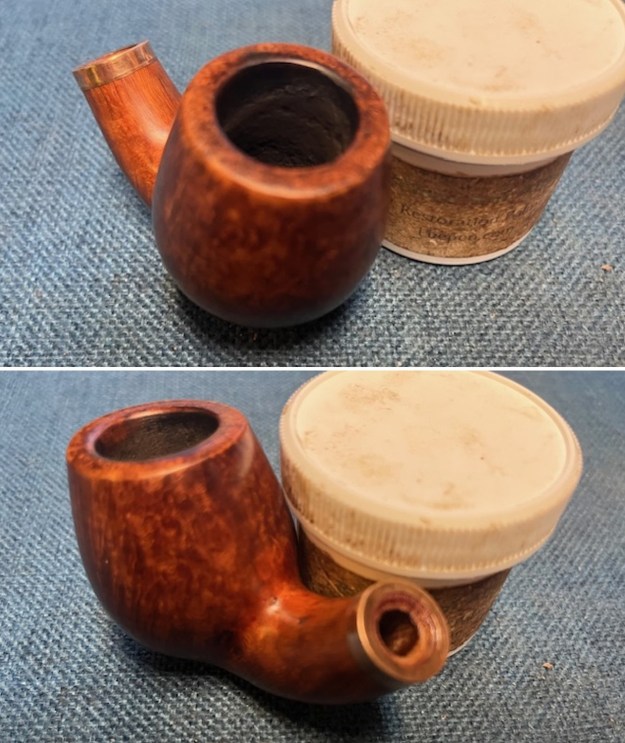
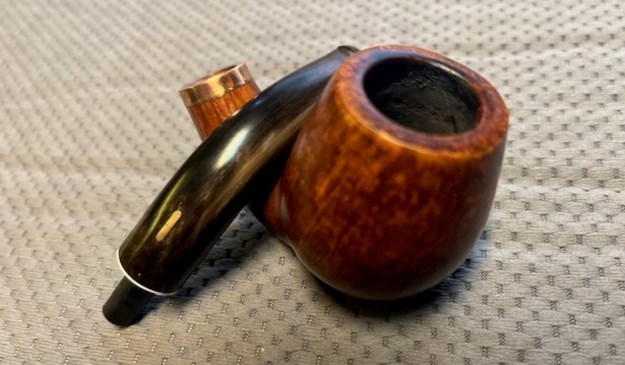
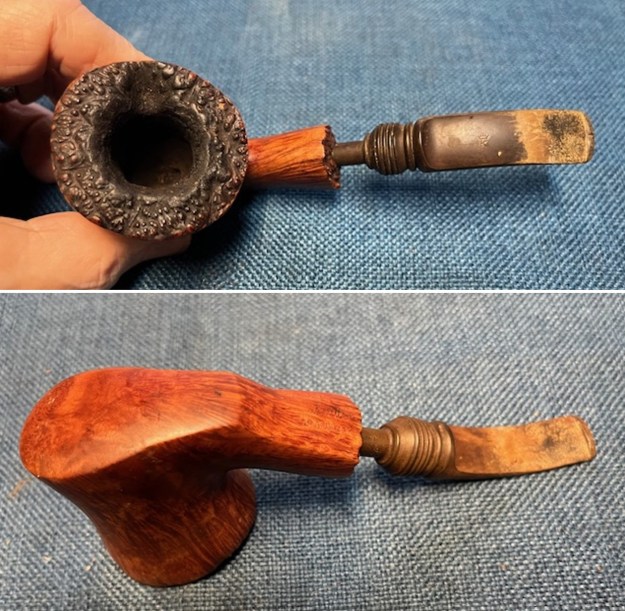
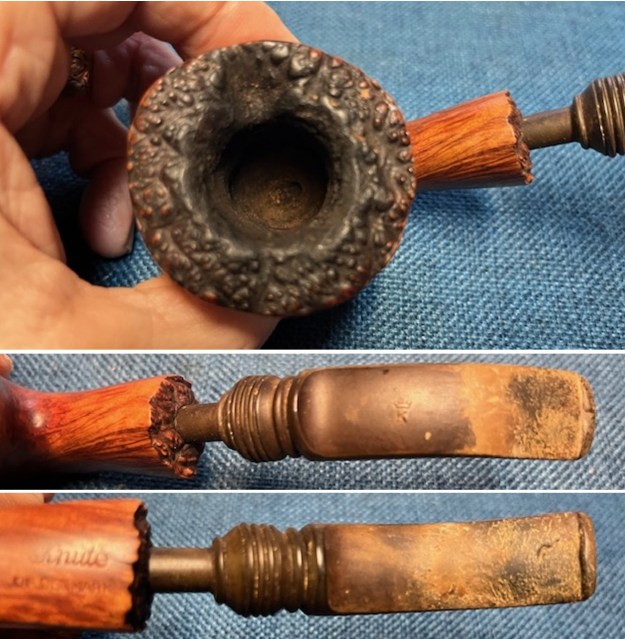
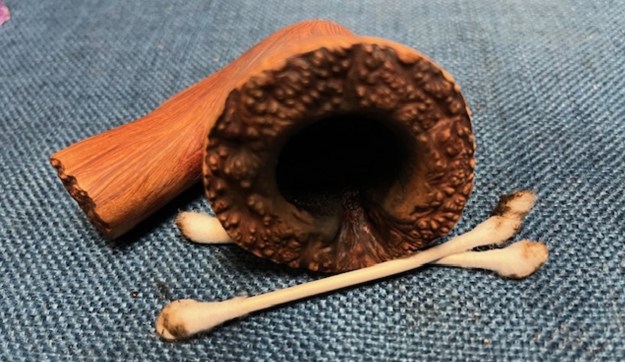
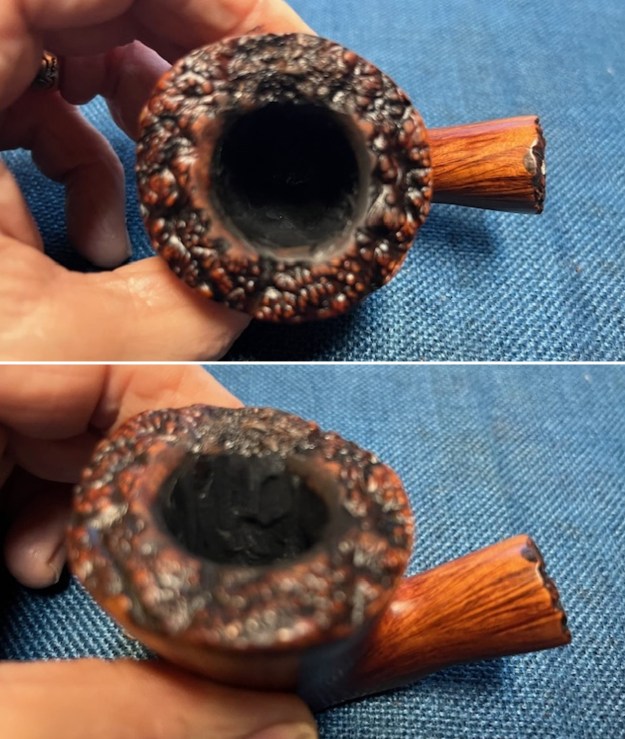
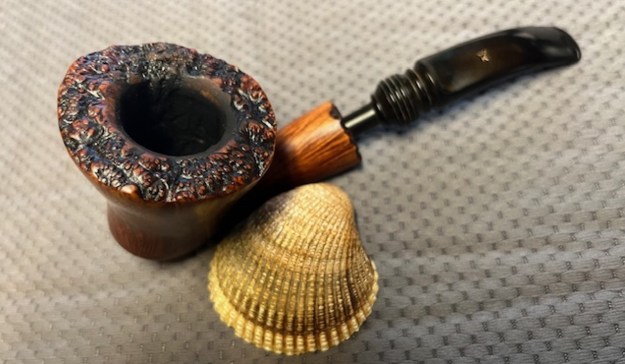
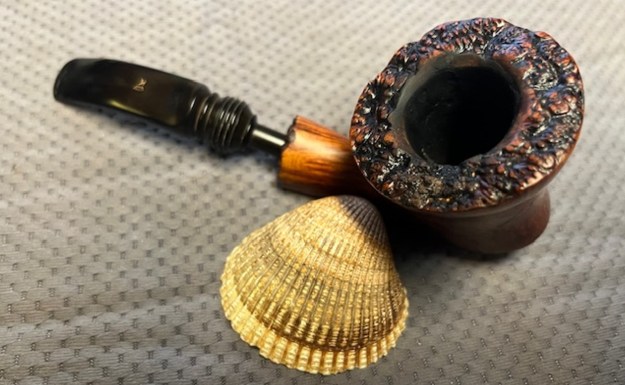
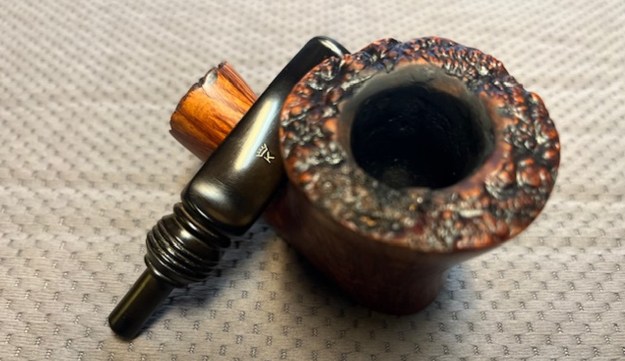
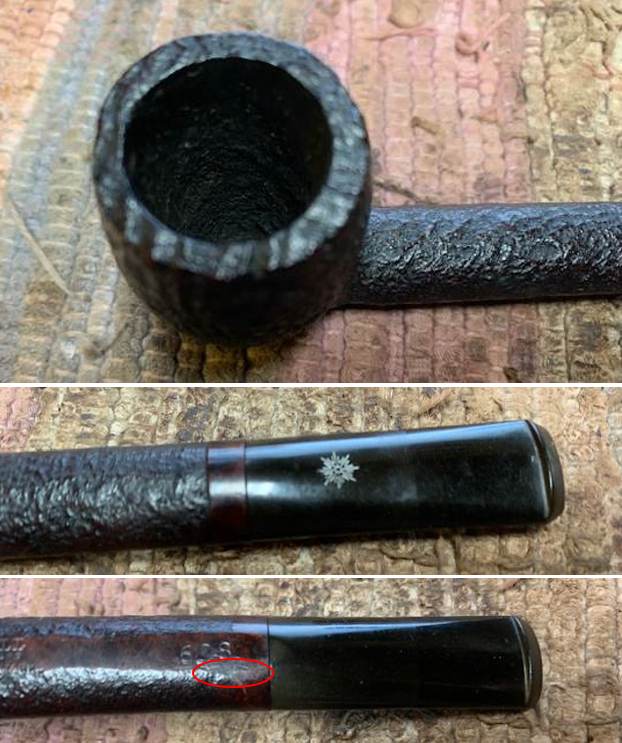
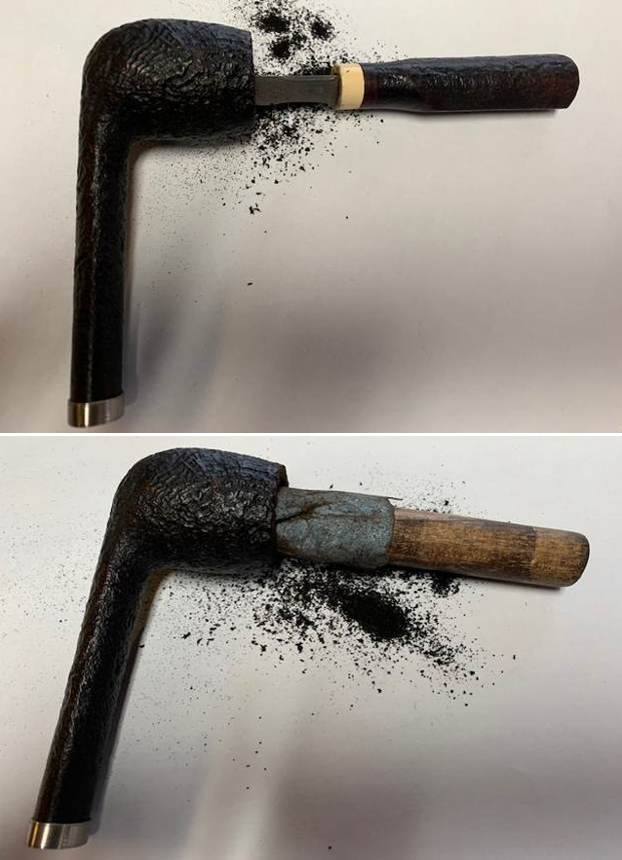
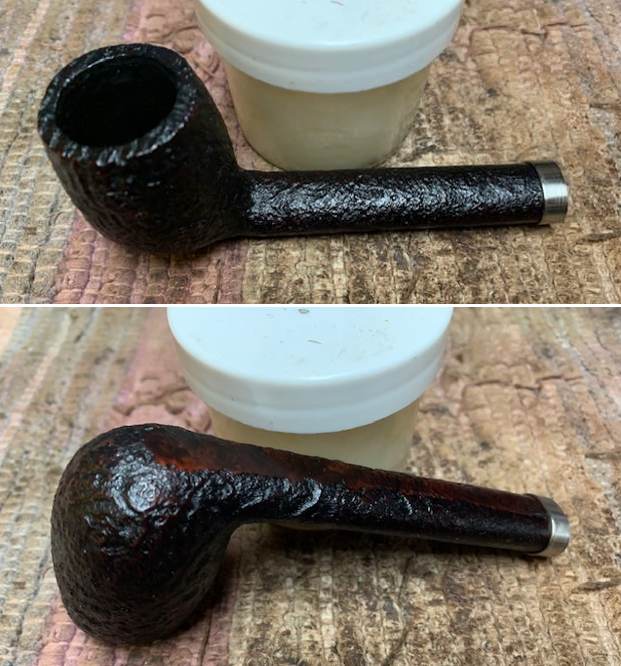
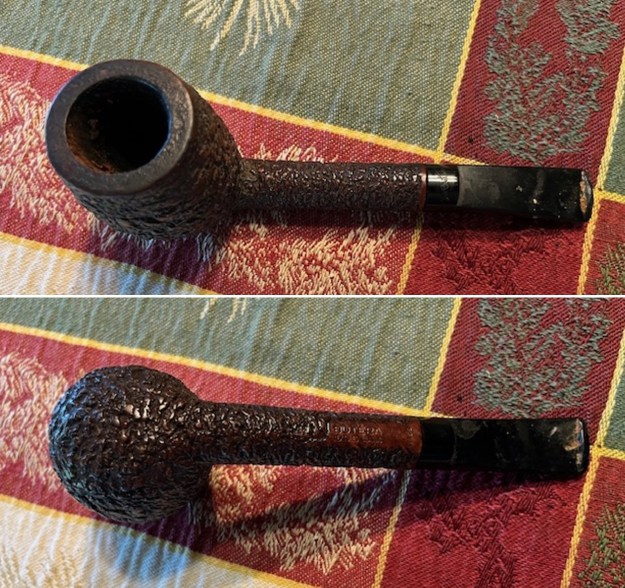 I took a photo of the bowl and rim top to show the cake in the bowl. The rim top had a thick coat of lava overflowing on top with damage around the top and inner edge. I took photos of the top and underside of the stem showing the tooth marks and calcification on the acrylic saddle stem surface.
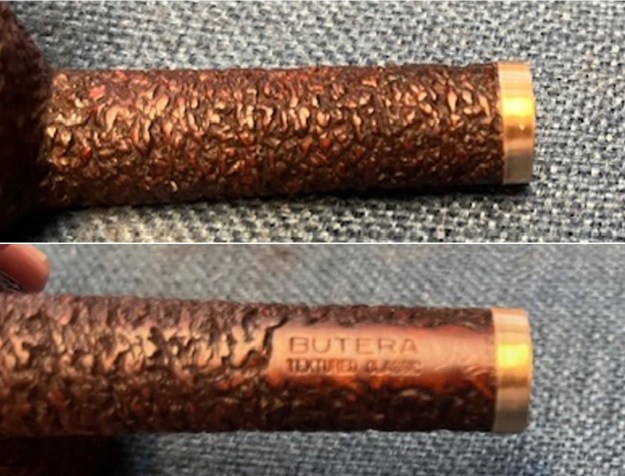
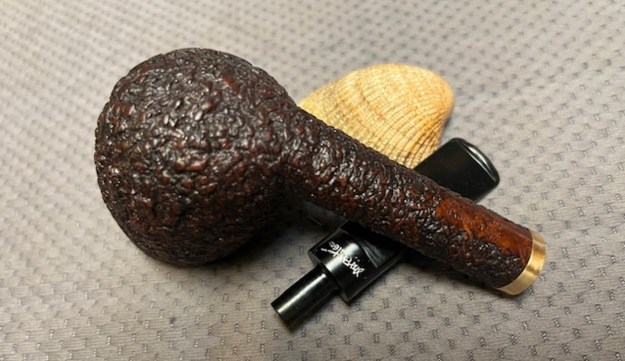
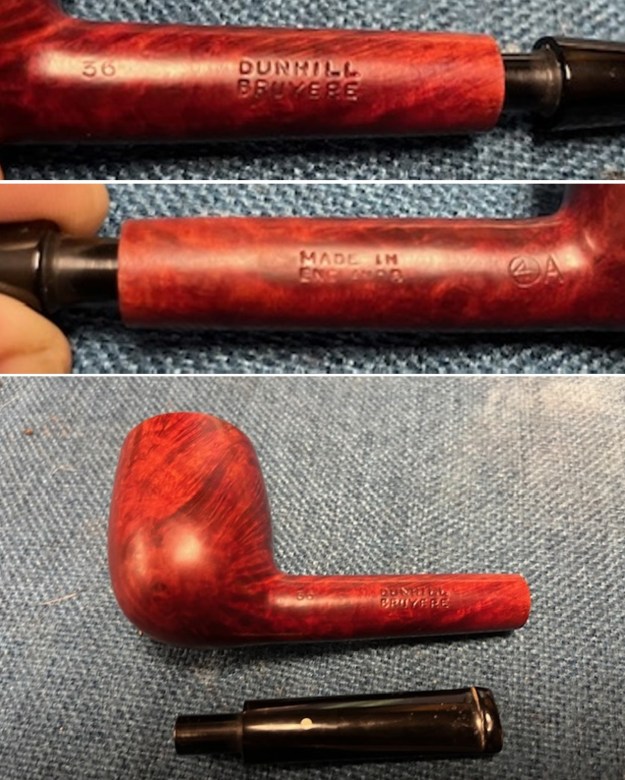
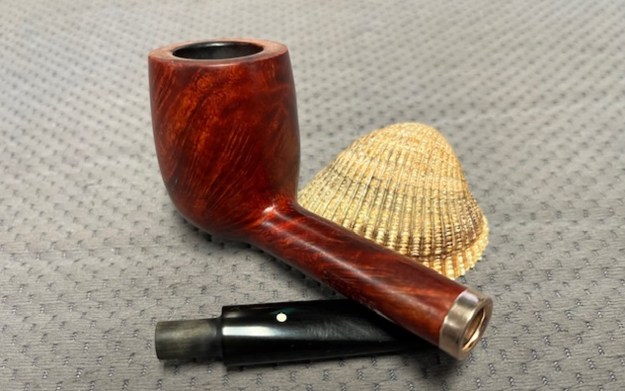
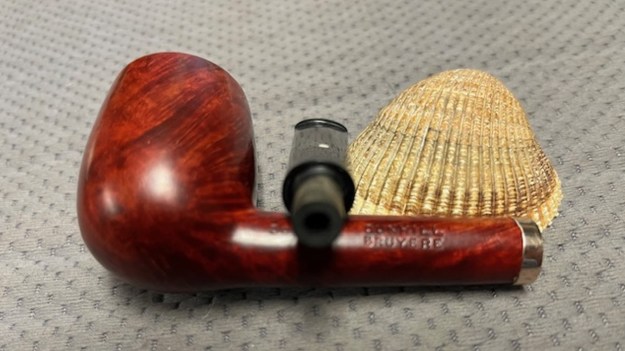
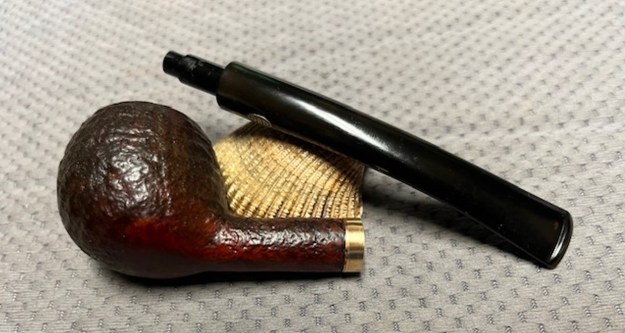
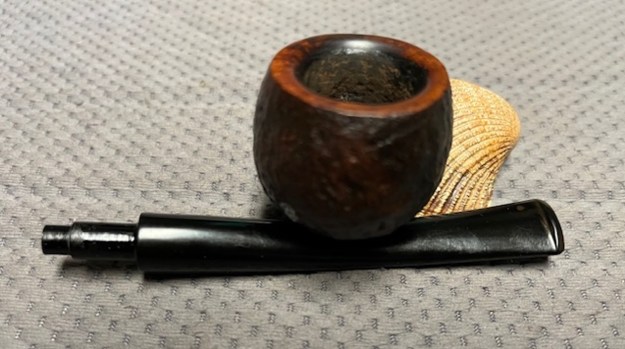
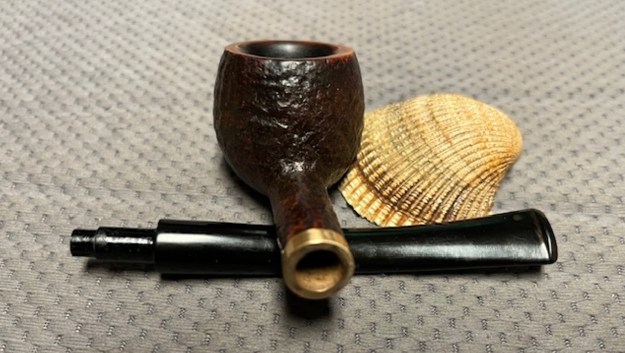
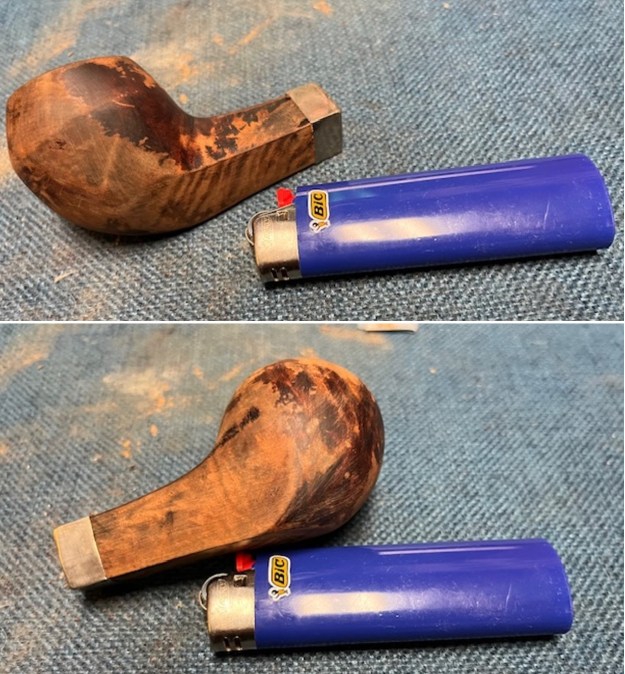
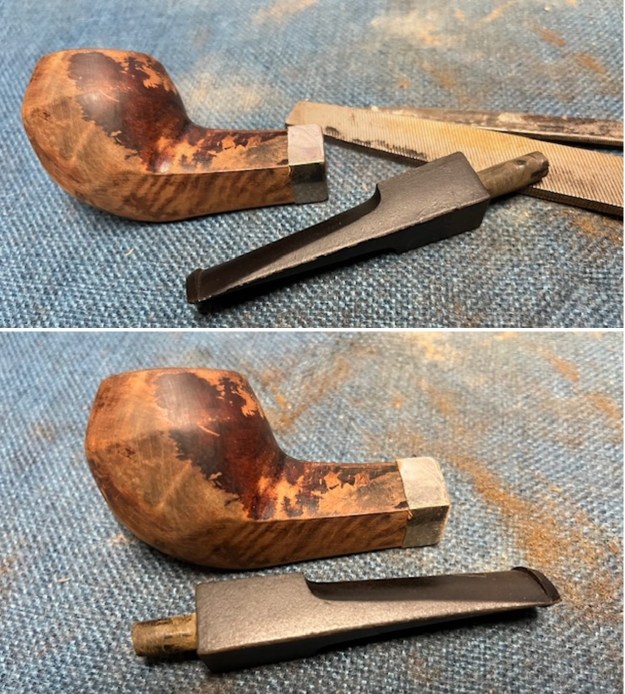
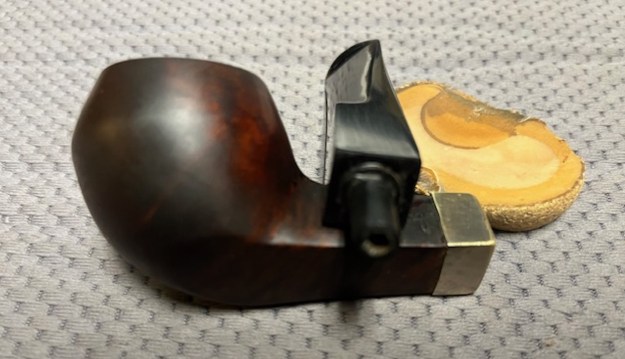
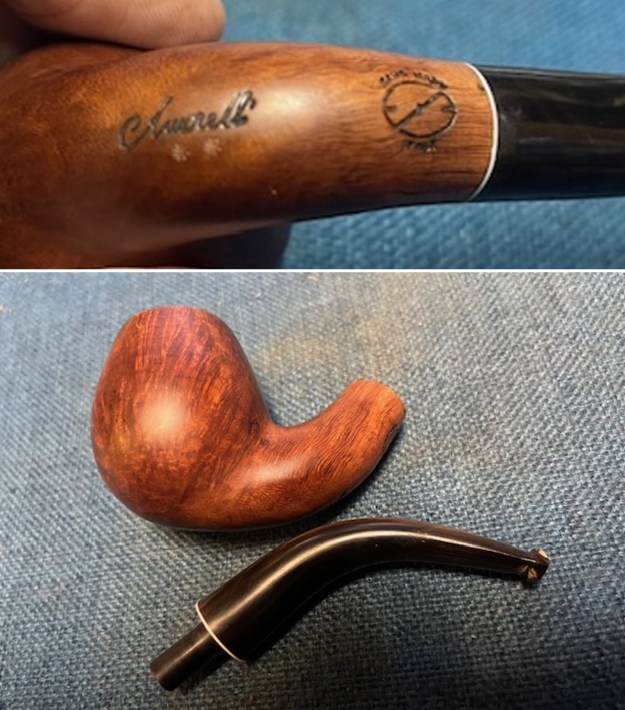
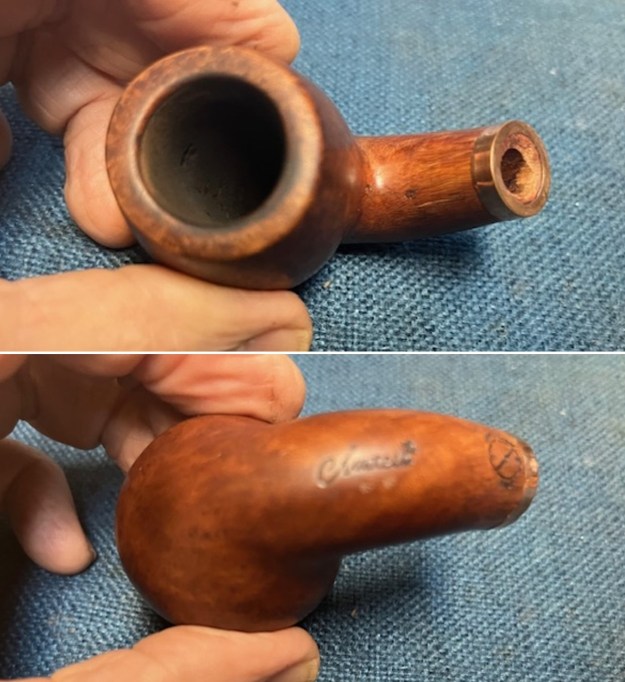
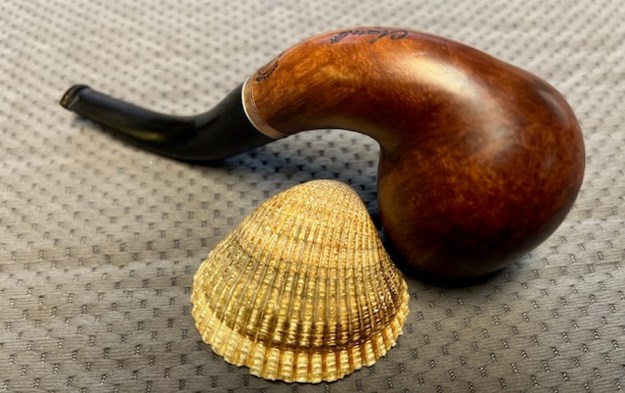
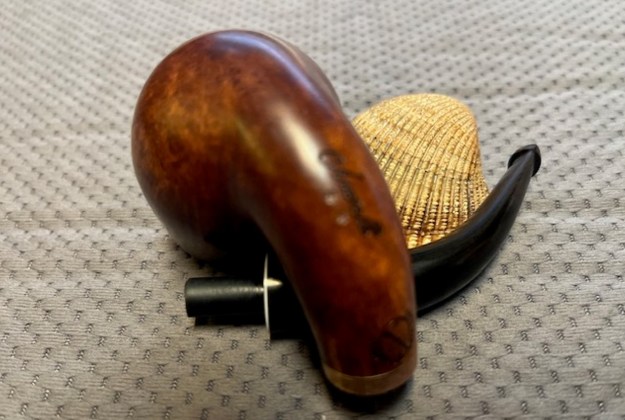
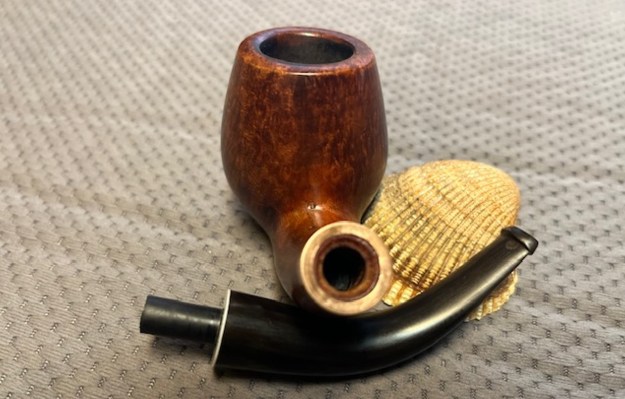
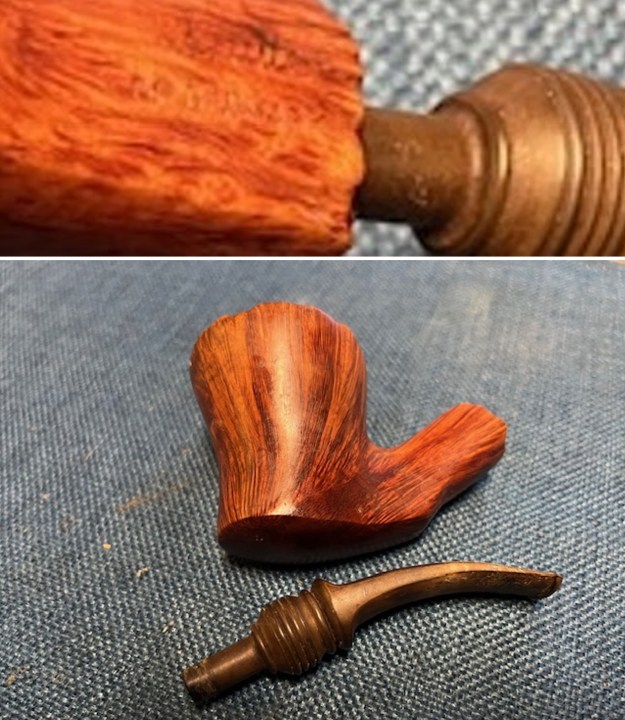
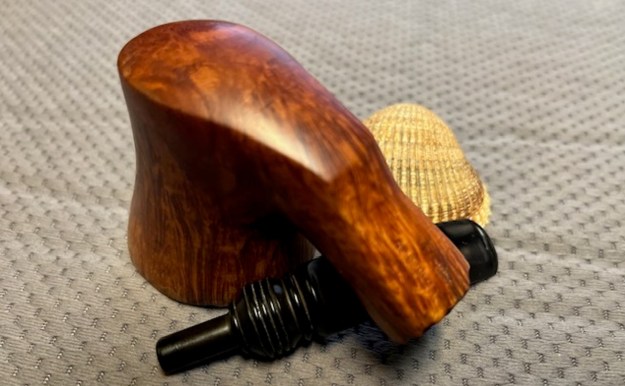
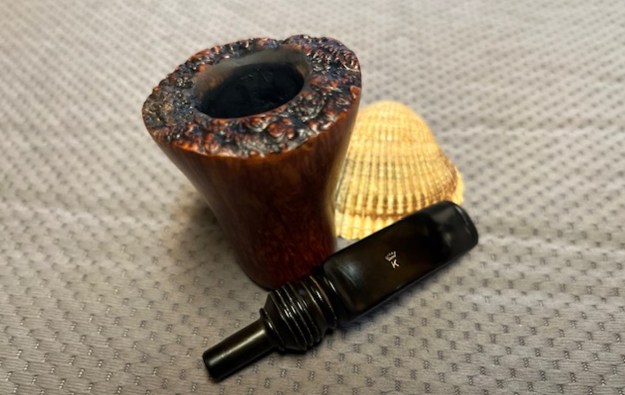
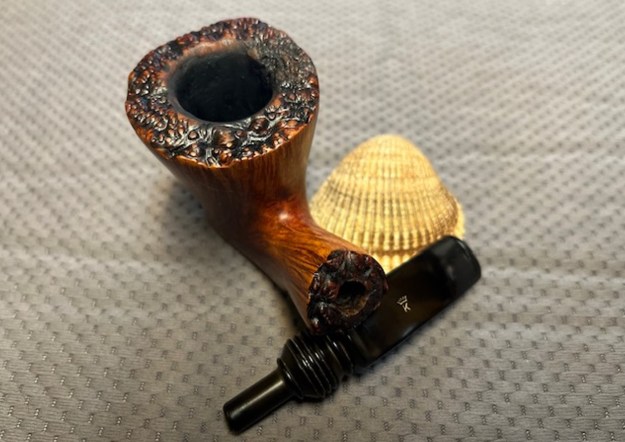
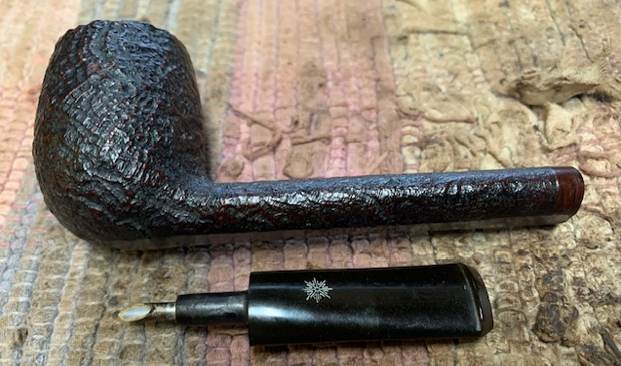
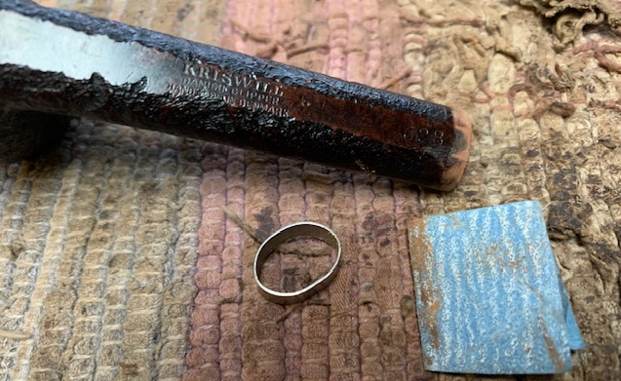
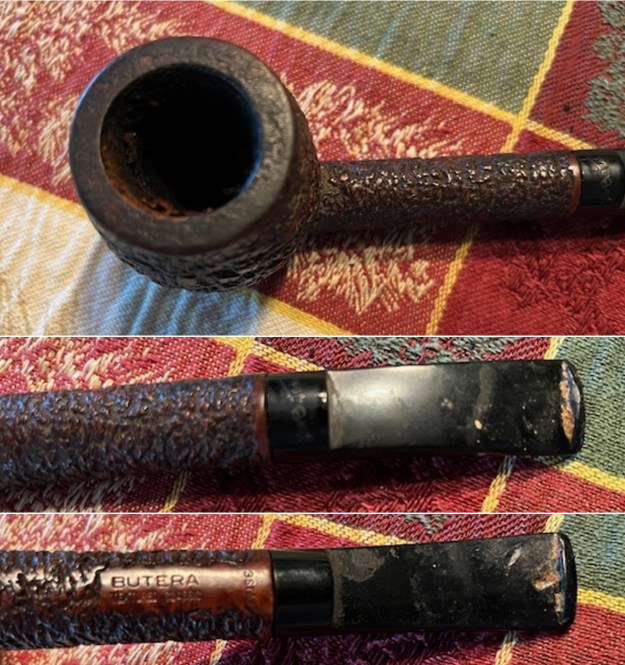 The stamping is very clear and readable in the photo below. It reads as noted above. I removed the stem from the shank and took a photo of the parts to show the parts of the pipe. The finish on the pipe is very worn and tired looking. The signature on the top of the saddle stem is hidden under the grime and debris on the surface.
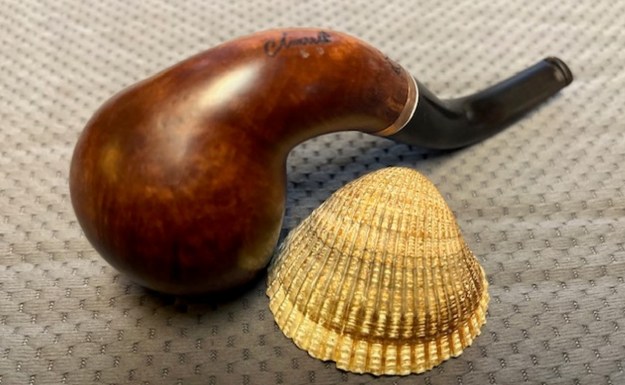
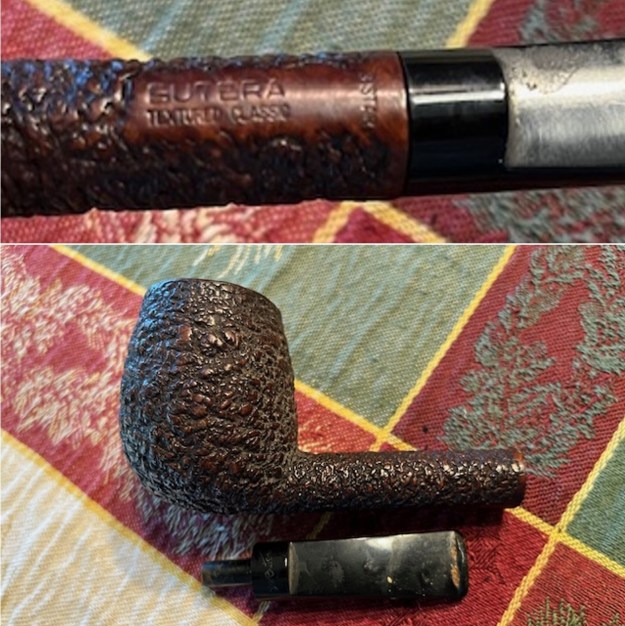 I have been keeping an eye out for a Mike Butera carved pipe for a very long time. I believe that I met Mike at the Chicago Pipe Show many years ago and was struck by the beauty of the pipes that he carved. I was not in the position to purchase one then as I had already spent my budget. It was one of those times that you go home regretting not taking the plunge. Now some 25-30 years ago we found one that caught my attention. I was glad to be visiting in Idaho with Jeff and was able to see it firsthand. The above photos really don’t capture the depth and beauty of the rustication and the shape. I decided to start working on it at Jeff’s.
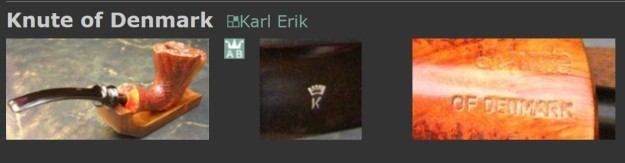
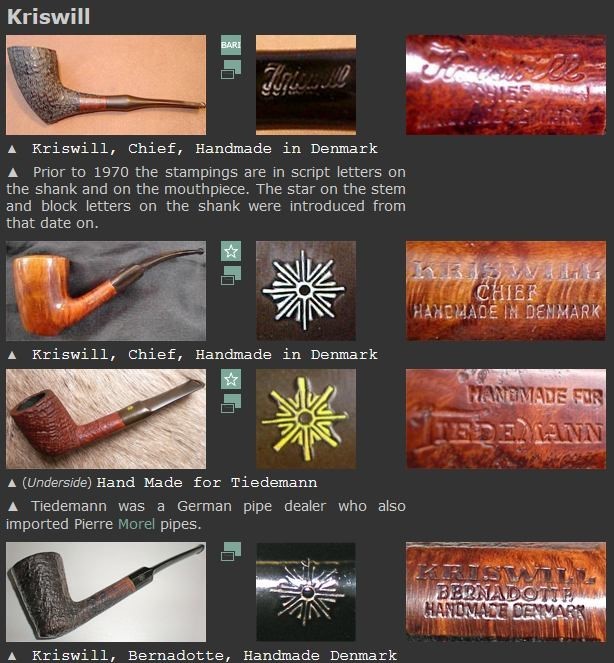
Before I started my work on the pipe I looked up some details on Mike Butera’s pipes. I turned first to Pipephil’s site to get a quick summary (http://www.pipephil.eu/logos/en/logo-b8.html). I have included a screen capture of the section on the brand as well as the sidebar information. The pipe I am working on is stamped like the first one in the photo below. The info below the first photo gives a date of carving for the pipe. The embossed signature on the stem was done in the mid 1980s. Artisan: Mike Butera started making pipes in the early 1980s and attended his first pipe show as pipemaker in 1985. But his responsibilities at the head of a large tobacco distribution company kept him more and more out of the workshop since 2005. Production 1997: ~150 pipes/year. Production 2007: a few pipes/year.
From there I turned to Pipedia (https://pipedia.org/wiki/Butera) to read the article there on the brand. It is a short article and well worth the time to read. I learned much from the article regarding the pipes he made. I also remembered that I have smoked several tins of Butera pipe tobacco over the years. I quote the article below.

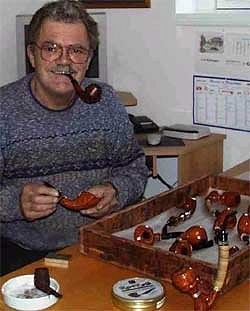
Mike Butera, courtesy TobaccoDays.com
Michael Butera’s pipes are very hard to find these days because of minimal current production and high collector appeal. His pipes are still Butera’s first love, but the responsibilities of owning large pipe tobacco distribution company and a very successful line of premium cigars kept him out of the workshop more than he would like during his active tobacco and cigar business years. Twenty+ years ago, at his peak pipe production, he was making 150 to 200 pipes a year and traveling to Italy regularly to select the best briar. Now, even though he has sold his pipe tobacco business and his cigar distribution, he makes only a few pipes for several repeat customers and for a couple of pipe Shows each year in his extensive garage workshop at his Houston home. You can continue to see him at the Chicago Show where he exhibits his latest pipes and some of his vast collection and where he leads the Pipemaking Seminar with Lee Von Erck before the Show. Along with Lee he is considered the Dean of American Pipemakers. Butera had a great deal to do with the training of Michael Frey, Steve Weiner, Larry Roush and Premal Chheda.
Often referred to as America’s greatest pipemaker, Butera won awards for his pipes on a regular basis. At the first pipe show he ever attended as a pipemaker, in 1985, he won the Best Standard Shape award. He won awards every year he actively presented pipes at Pipe Collectors International shows – nine straight years. His pipes have achieved legendary status, coveted by collectors and commanding impressive prices. He attained this level of respect through a simple philosophy: “I will not market anything that doesn’t represent the best, to my own taste, in its category.”
In an article, called Go West, which originally appeared in the French Pipe Mag, Erwin Van Hove has this to say about the dramatic influence Mike Butera has had on the American Pipe making scene:
“At the end of the 70s and the beginning of the 80s, a comet blazed across the heavens of the American pipe universe. Mike Butera, an American insurance broker and passionate pipe smoker, an admirer of the technical perfection and of the aesthetics of the famous Italian and Danish pipe makers, made a pilgrimage to the Mecca of pipe design. He travelled throughout Europe, visiting among others one of the most prestigious carvers of that time, Baldo Baldi. During those travels he became friends with Carlo Scotti, the owner of the most famous Italian brand, Castello. He studied their techniques as well as the refined aesthetics of their creations.”
“Mike Butera had found his vocation. After returning to the United States not only did he enter the cigar and tobacco trade, he also started to carve pipes. He did so meticulously, with the soul of a perfectionist. Straight away he won a competition for pipe makers, amazing colleagues and connoisseurs alike by the quality of his work. This had never been seen before! An American was able to produce pipes that could rival European high grades, pipes that were beautiful and presented an execution and finish that were beyond reproach. The era of the ugly and monstrous freehands was over. The genuine American high grade had been born. From then on, the American pipe makers had a role model, a point of reference. More than just an admired carver, Mike Butera became a living legend. All passionate pipe lovers knew his name and his reputation, but those who had the privilege of smoking a Butera were few. Being an overworked businessman, he produced only a few pipes a year. His creations are therefore, even to this day, prized collectable pieces that sell for exorbitant prices.”
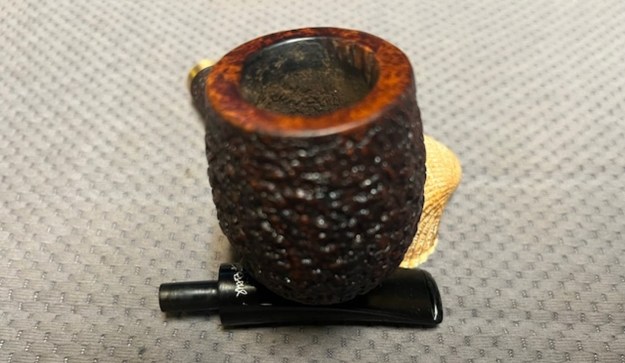
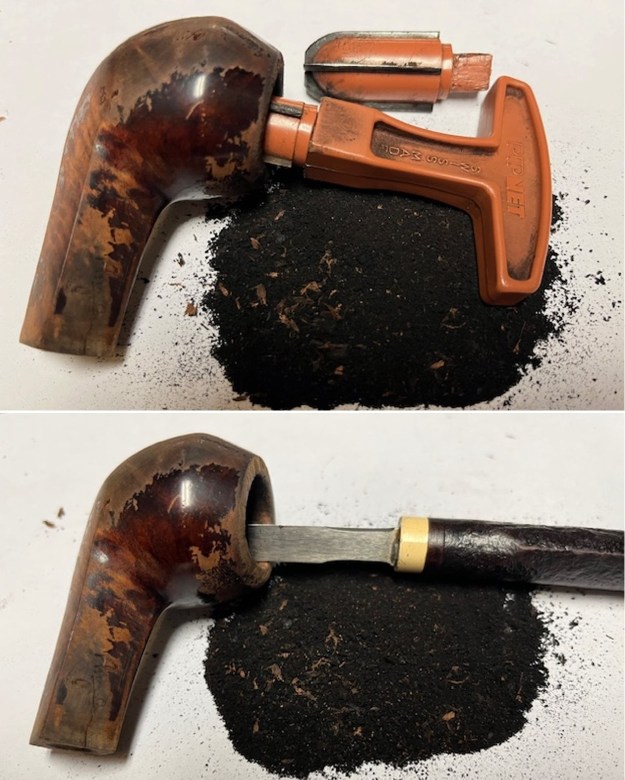
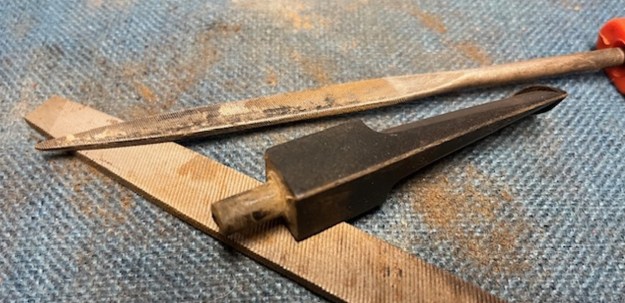
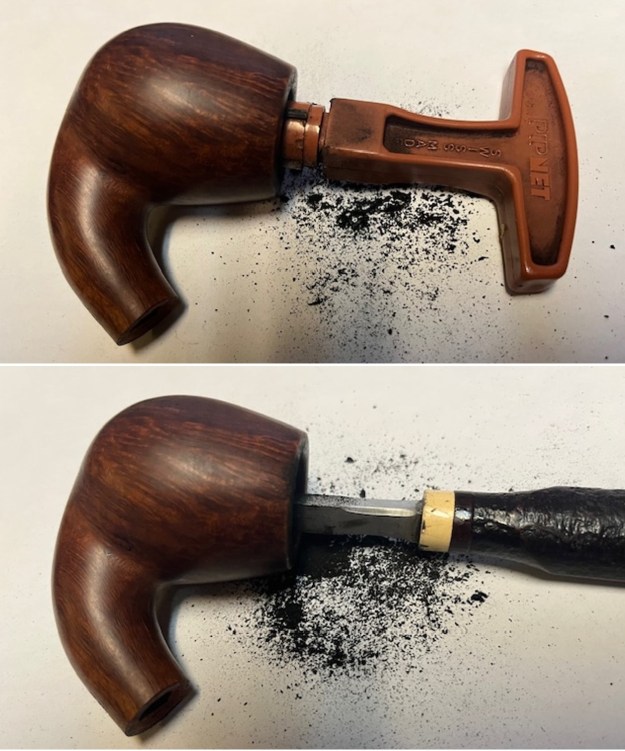
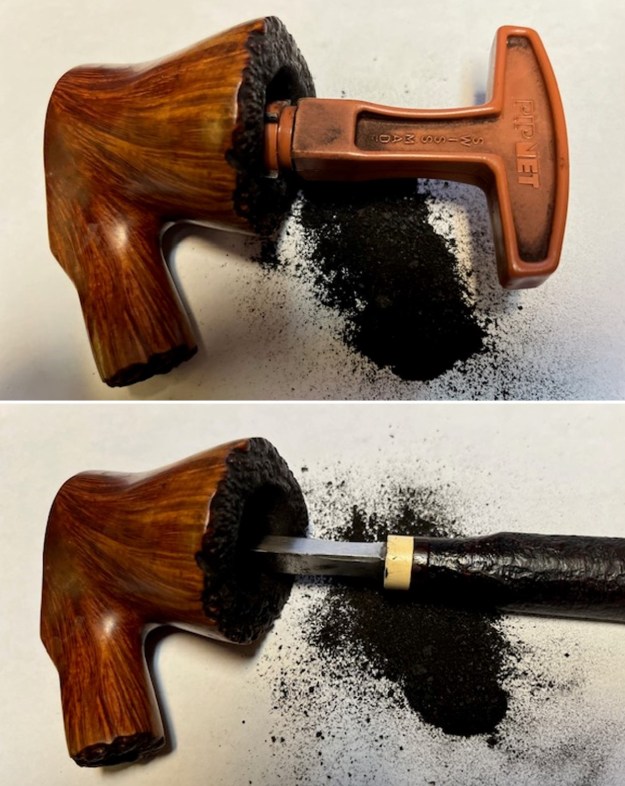
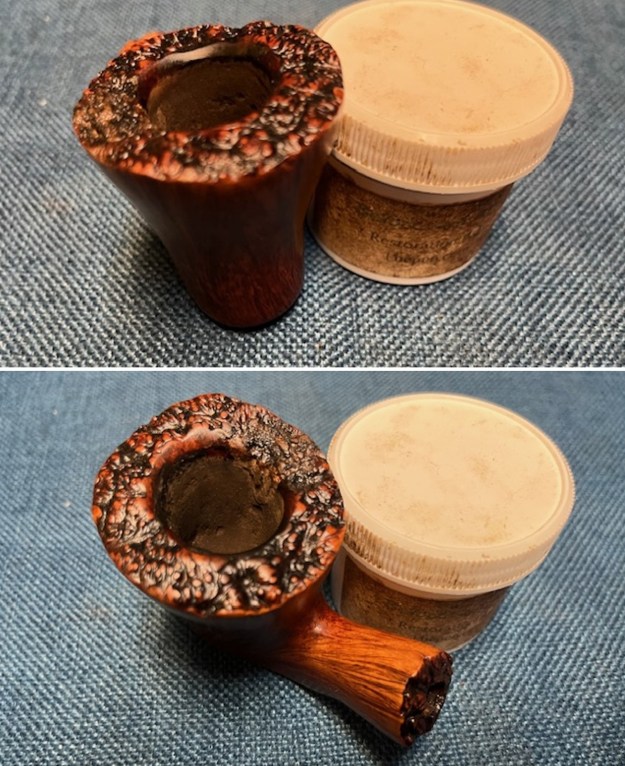
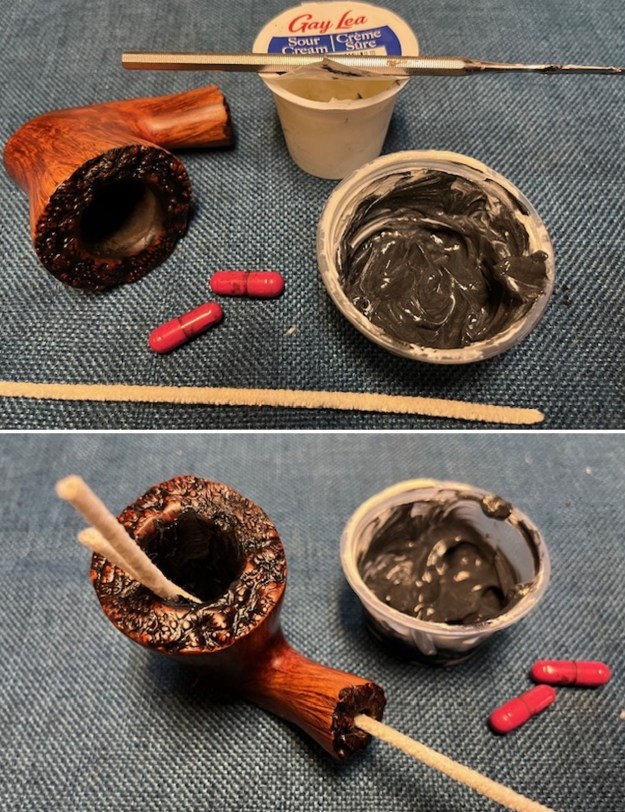
I started my work on the pipe by reaming it with a PipNet pipe reamer and cleaning up the reaming with a Savinelli Fitsall Pipe Knife. I scraped the lava built up on the rim top with a small blade. It looked much better after the clean up.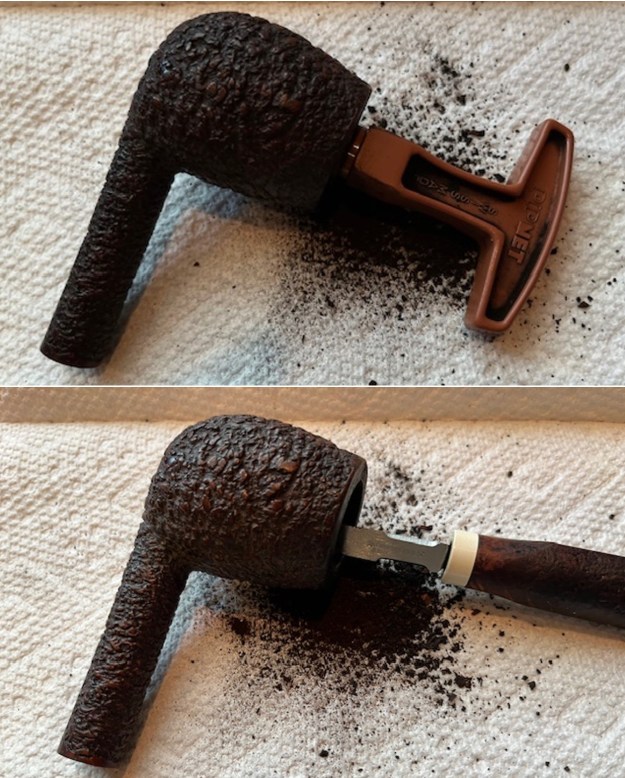
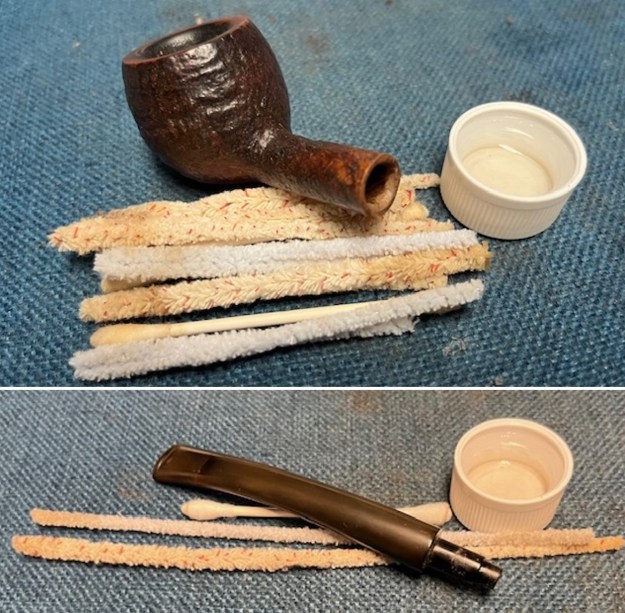
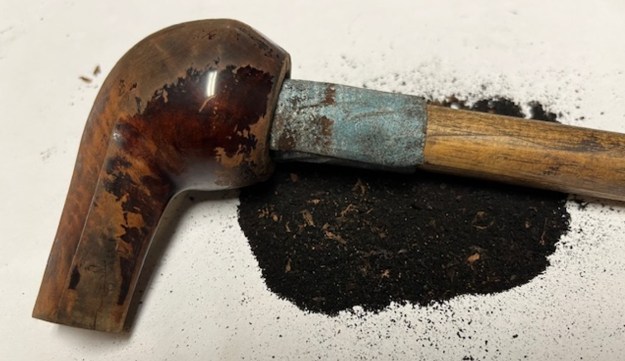
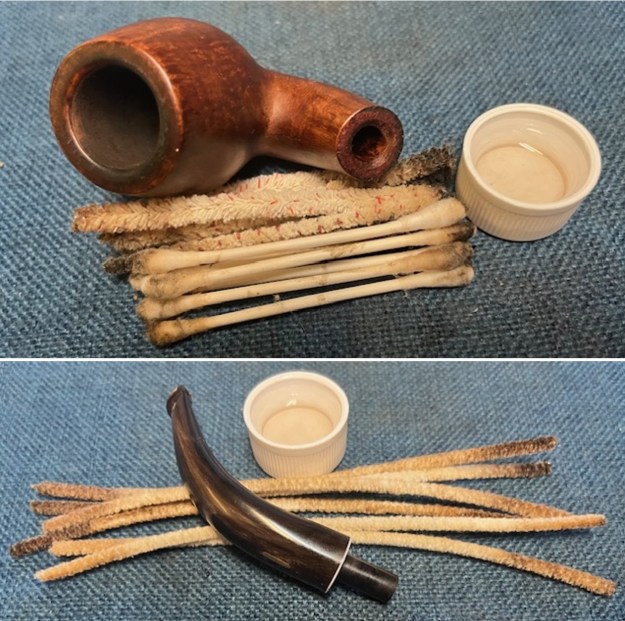
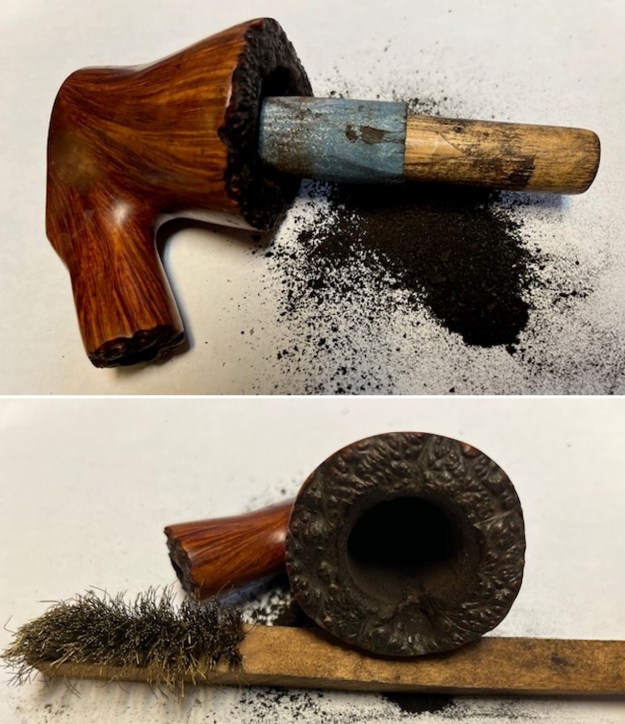
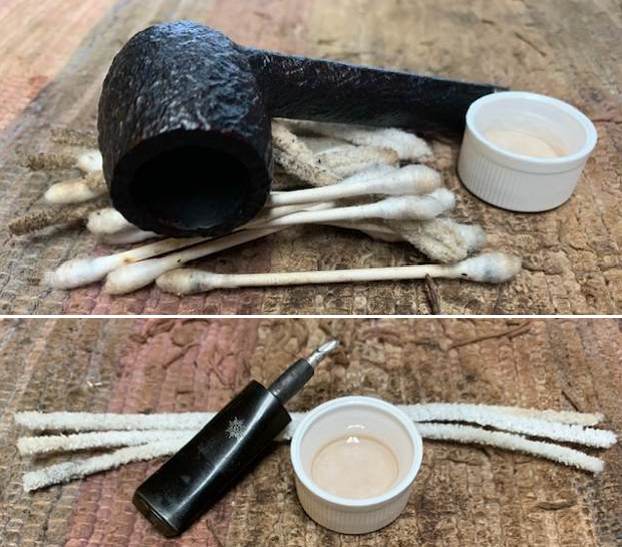
 I cleaned out the inside of the shank and the airway in the stem with alcohol, pipe cleaners and cotton swabs. I removed the tars and oils with the cleaners and the alcohol. The first photo shows the crack on the right top side of the shank.
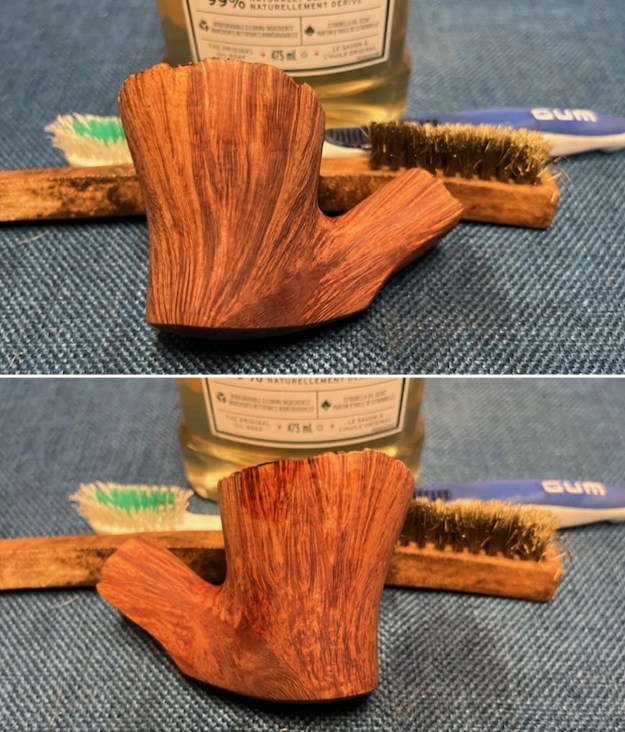
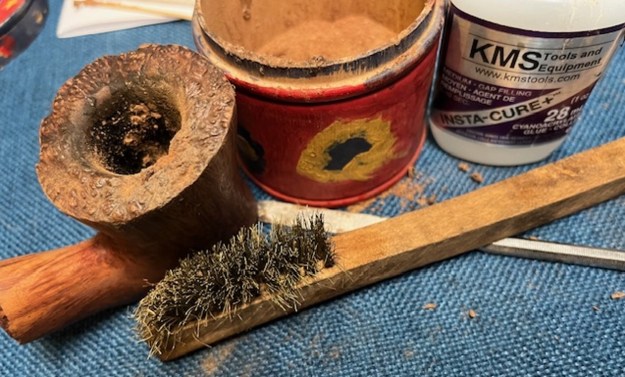
 I scrubbed the rusticated surface of the bowl and shank with a tooth brush and undiluted Murphy’s Oil Soap to remove the debris and dust in the depths of the rustication. I rinsed it with warm water. I dried off the briar with a soft cloth. It looked very good at this point in the process.
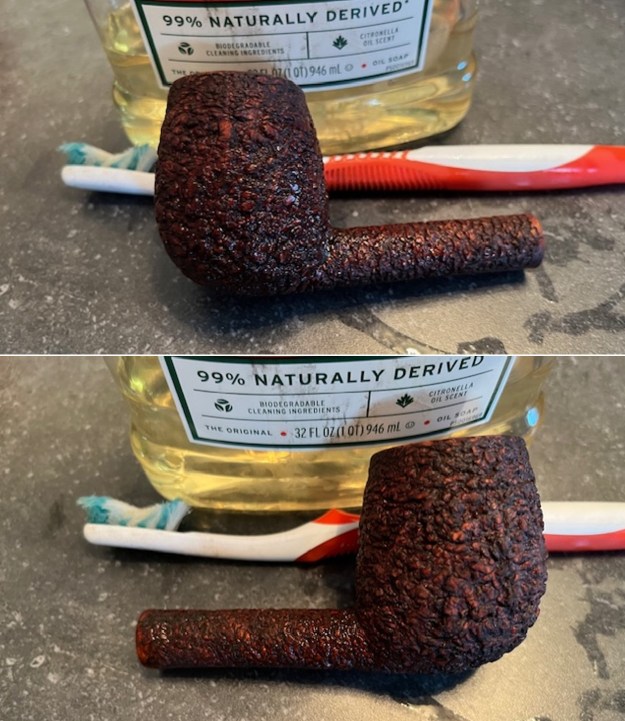
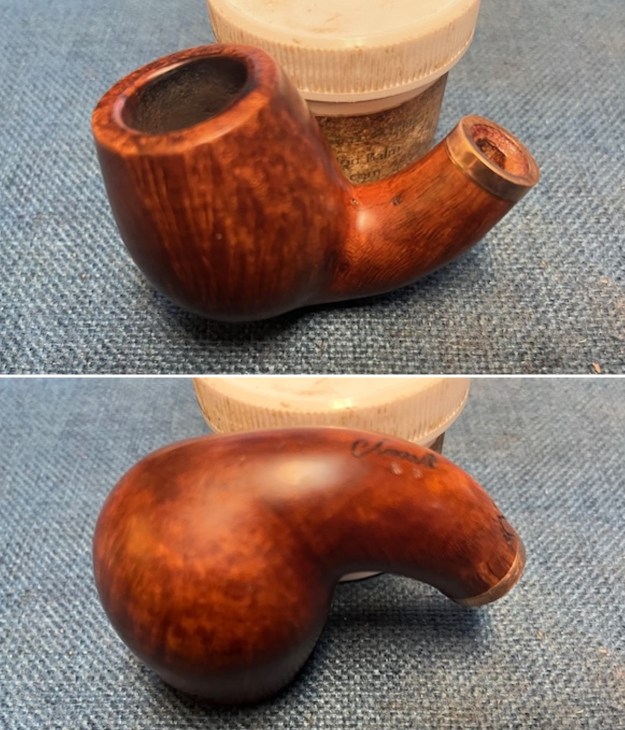
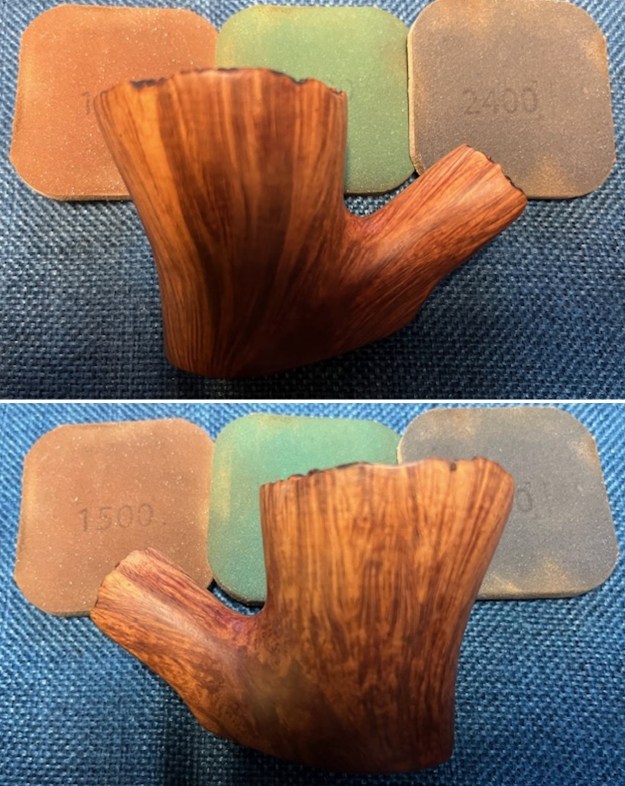
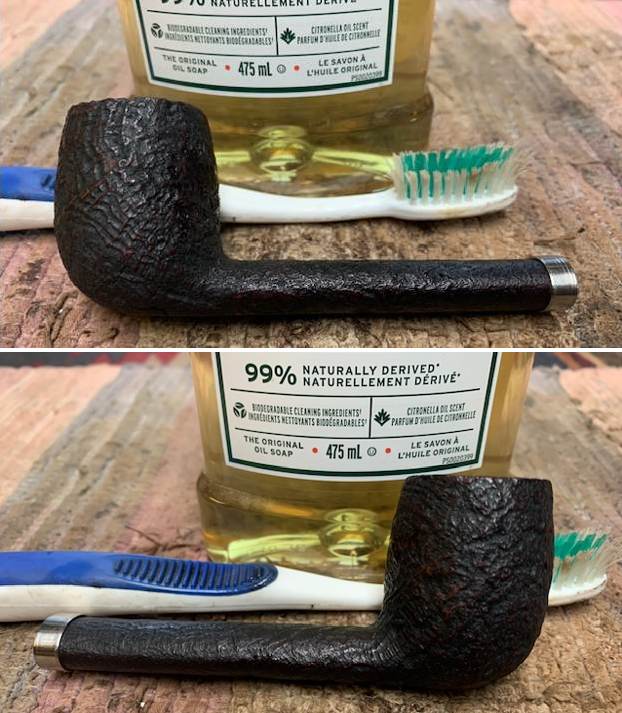
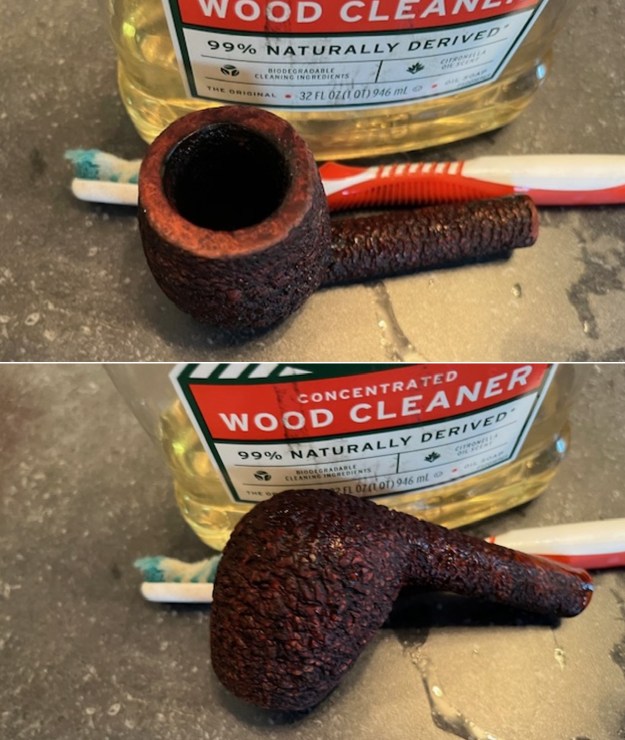 I wiped the bowl down with EVO (extra virgin olive oil) and a paper towel to enliven the depths and heights of the rustication. It really took on depth and contrast between the surfaces of the finish. Once I got home I would rub it down with Before & After Restoration Balm.
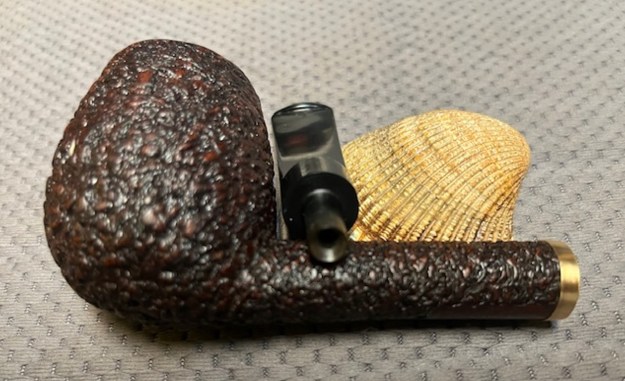
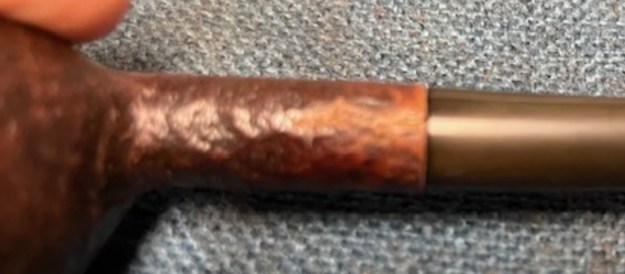
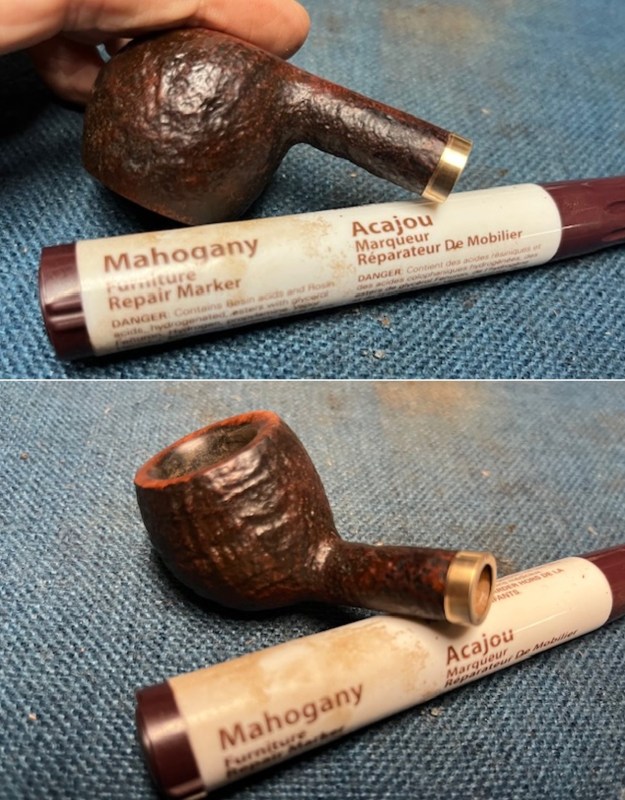
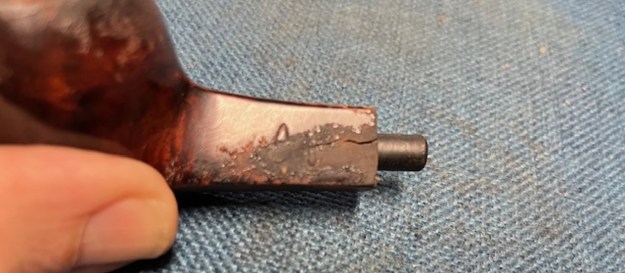
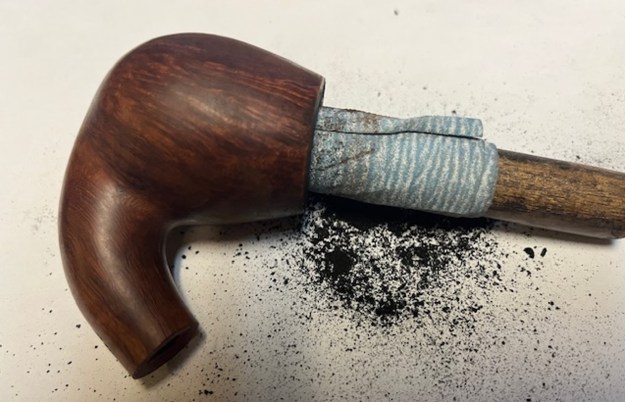
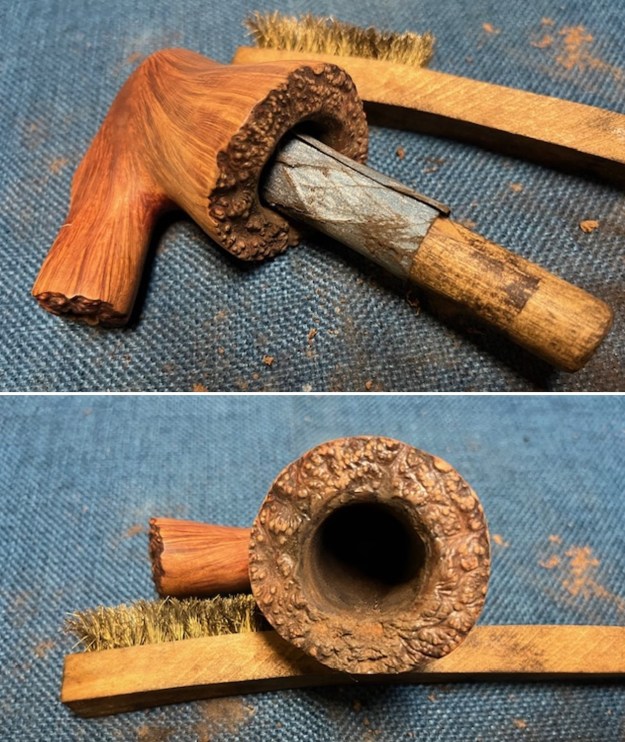
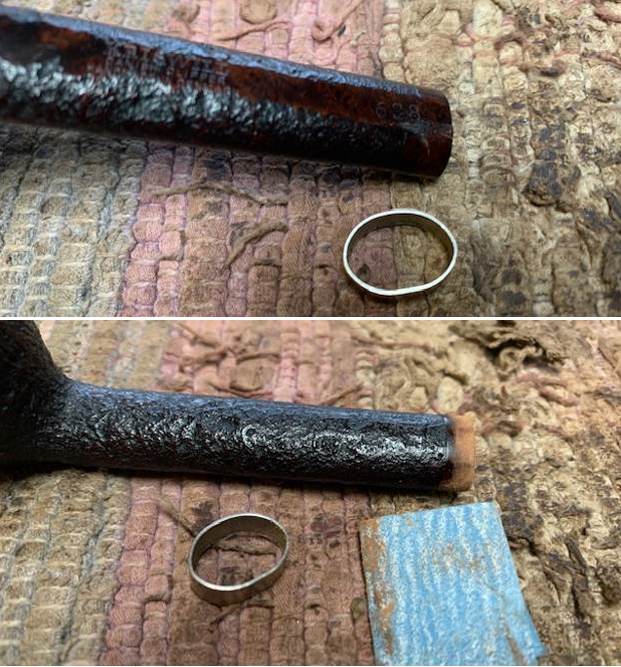
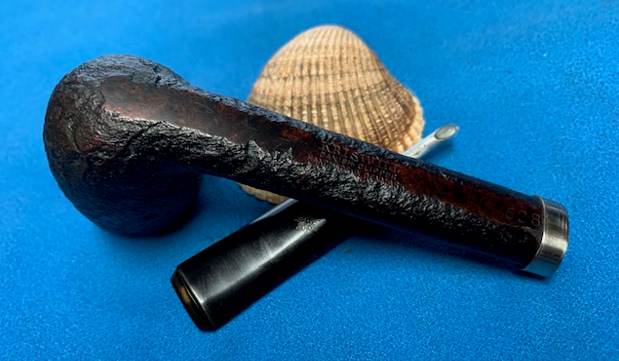
 I took a photo of the crack in the shank. It is on the right side of the shank toward the top. It is fairly wide open. I will need to band it to do the repair.
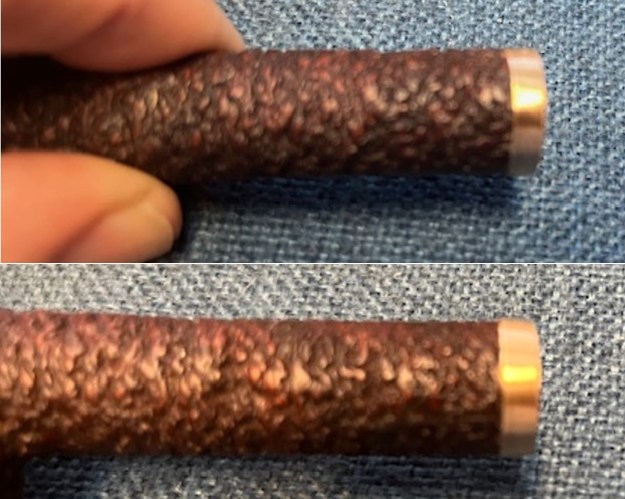
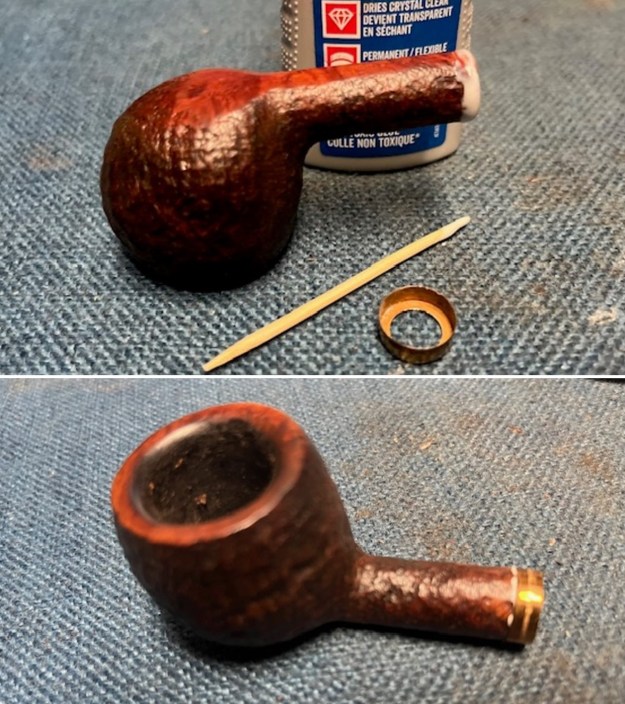
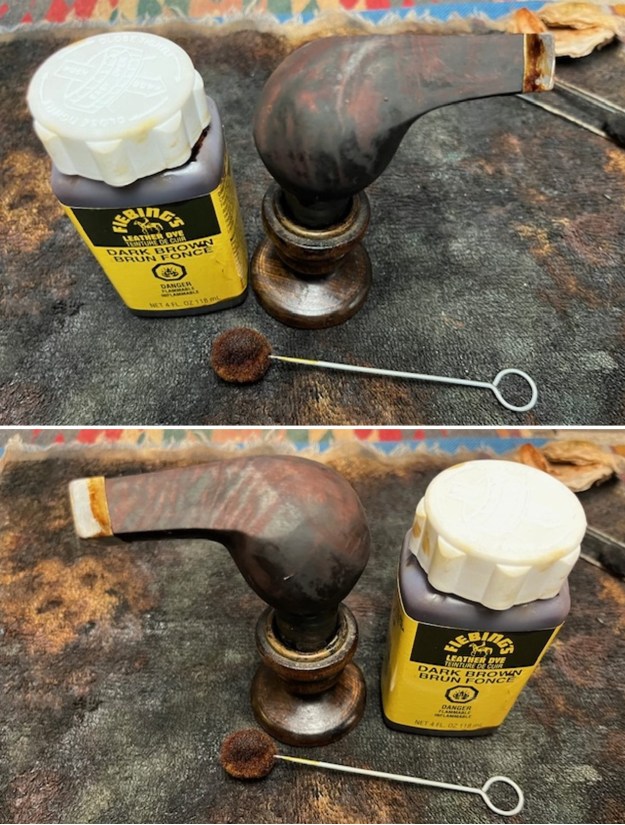
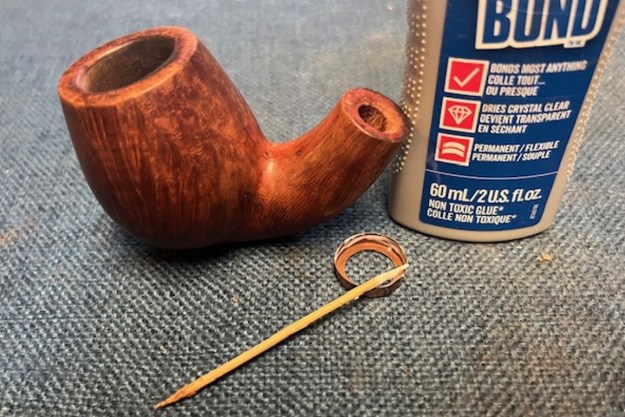
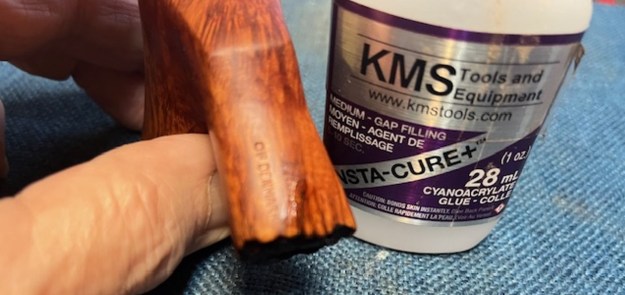
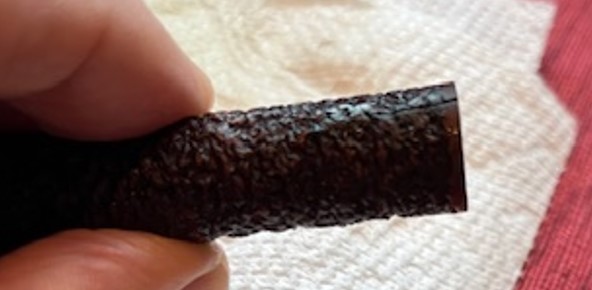 I set the pipe aside until I returned to Canada. The first afternoon home, I chose a thin brass band to bind the shank together. I reduced the depth of the band on a topping board. I used a tooth pick to put some clear CA glue in the cracked then quickly pressed the band onto the shank end. It touches the 3 Star stamp on the underside of the shank but it truly brought the crack together.
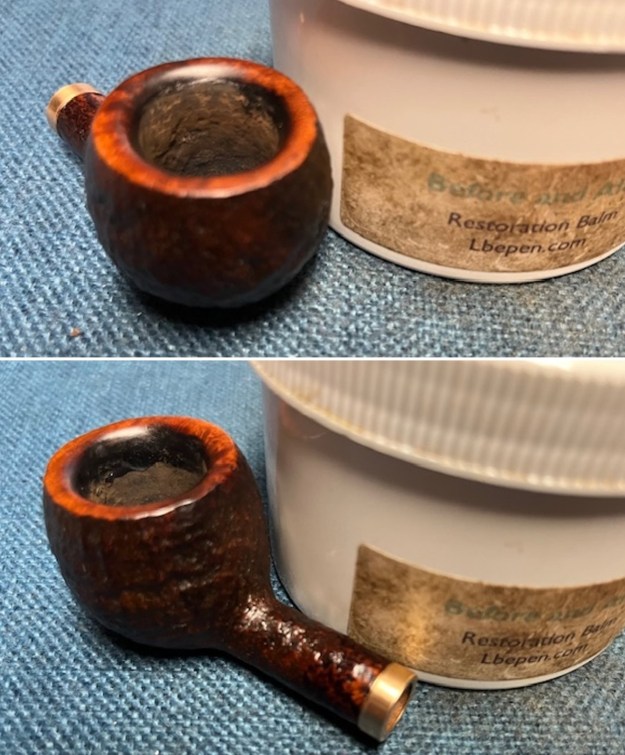
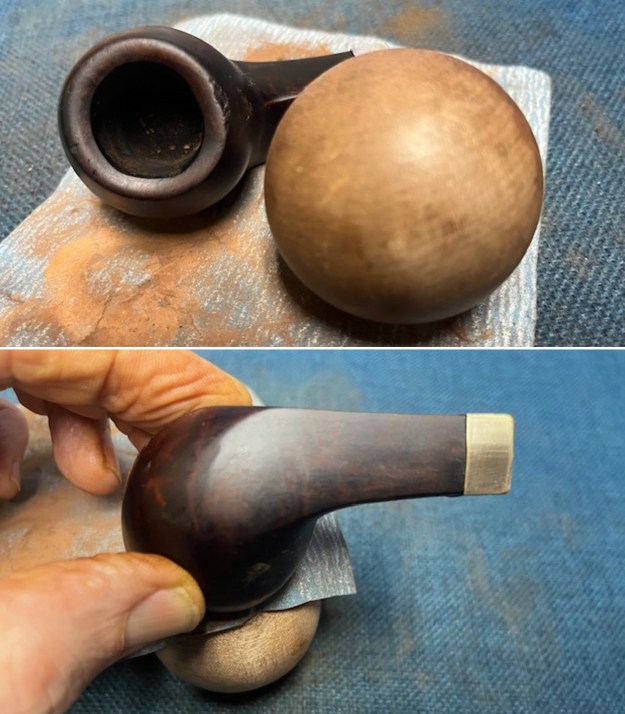
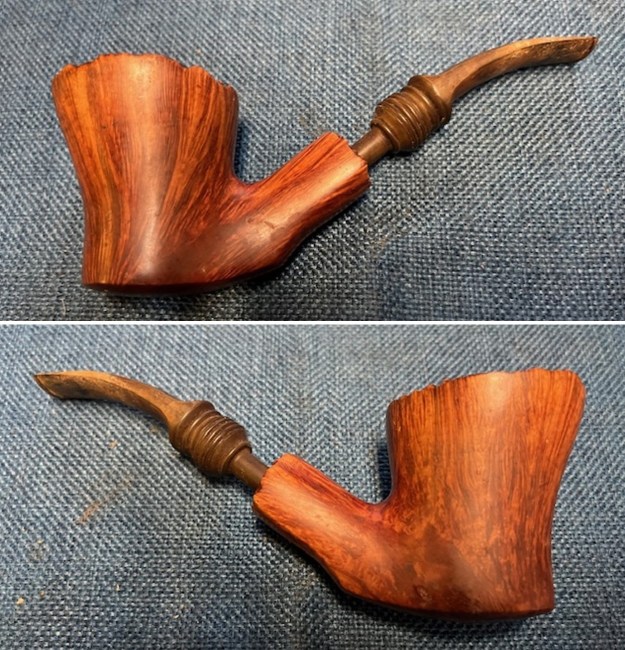
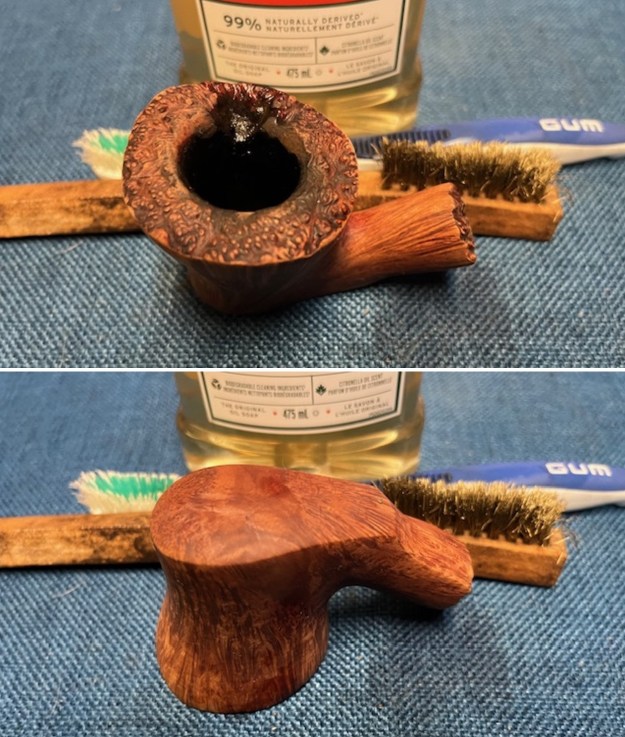
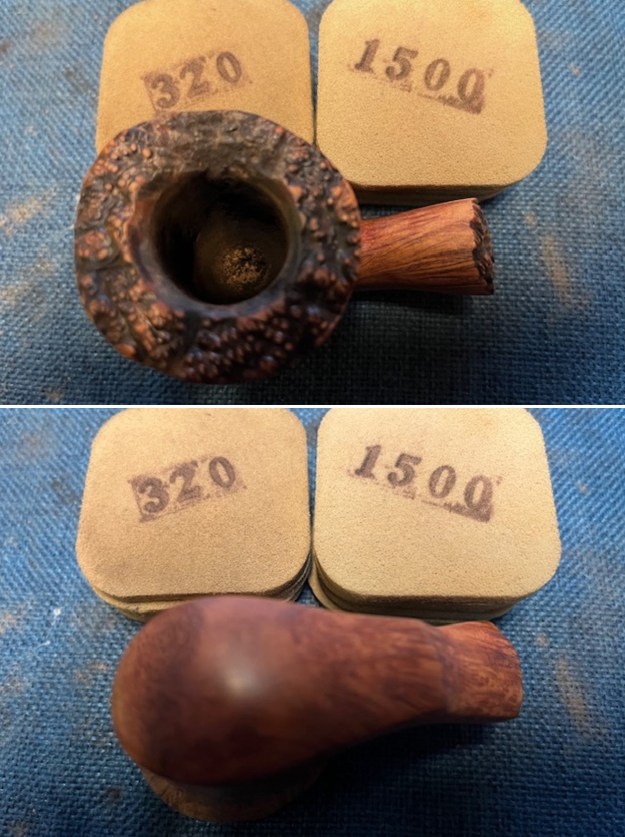
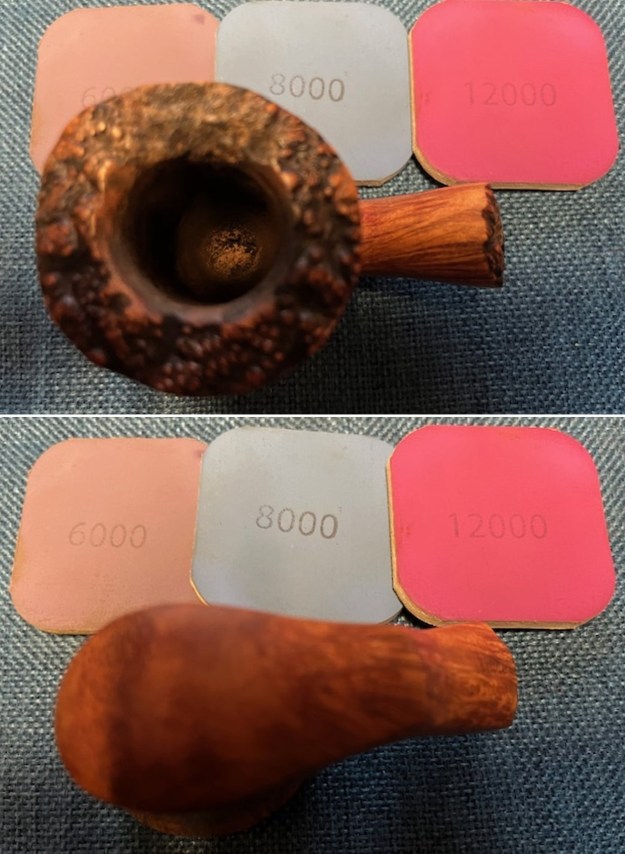
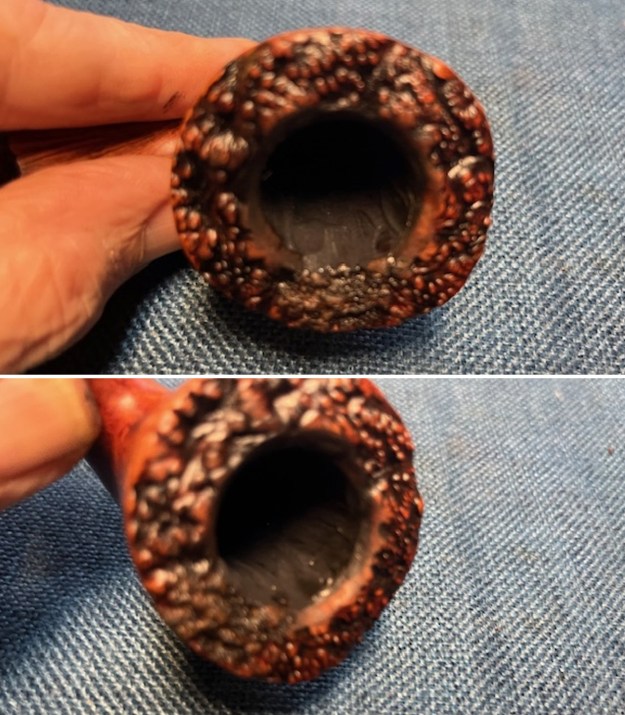
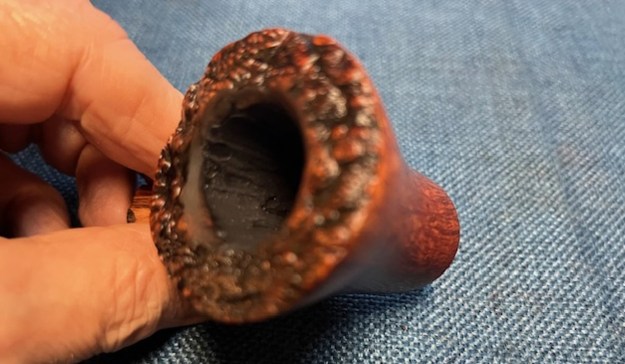
 I sanded the walls of the bowl with a piece of 220 grit sandpaper wrapped around a piece of dowel. I smoothed out the walls and they looked very good and smooth once finished. It looked very good.
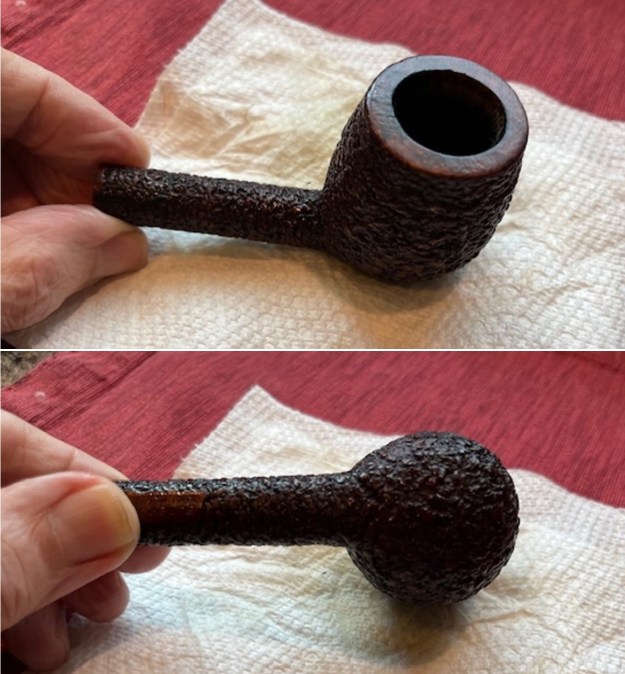
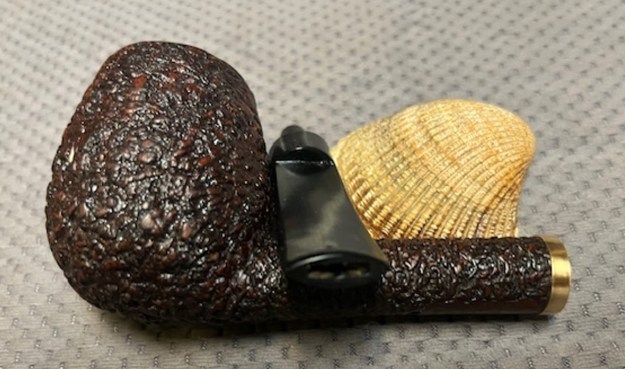
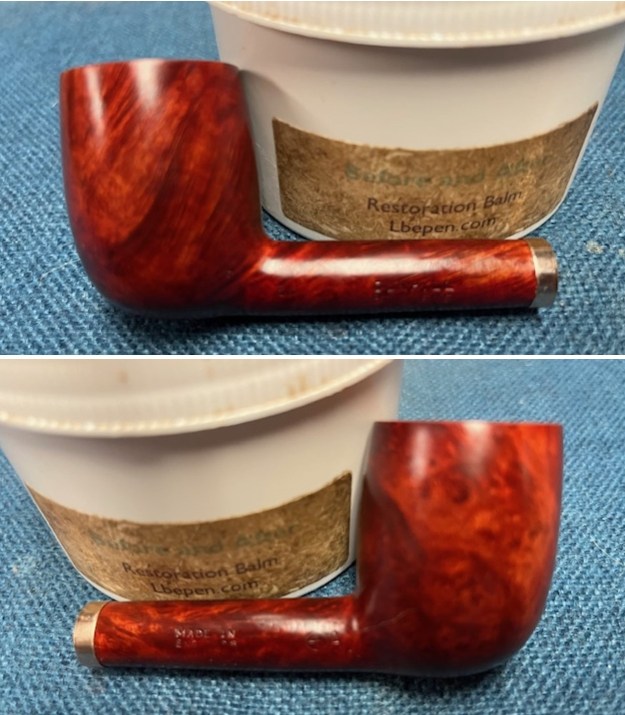
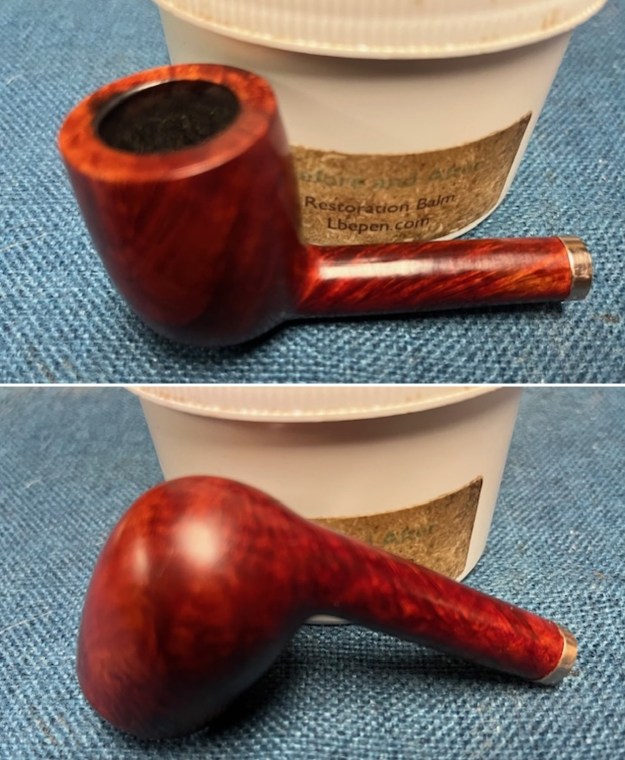
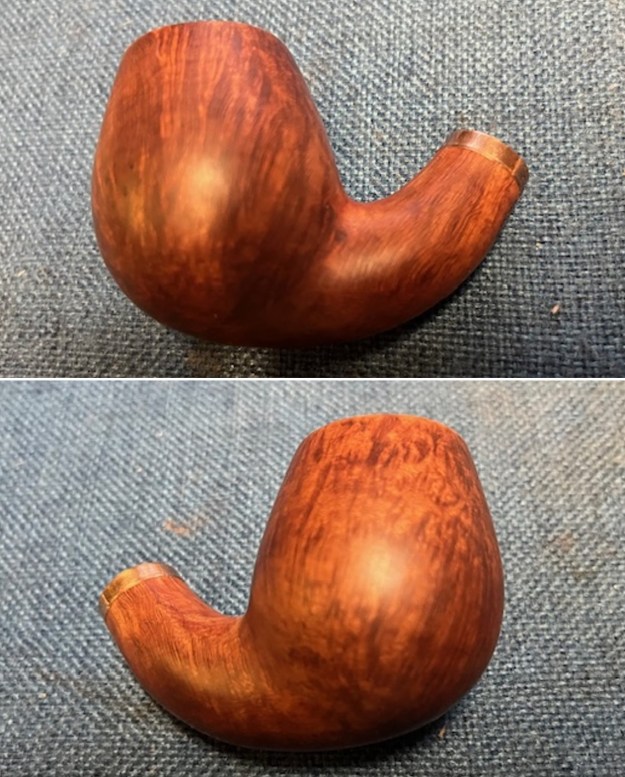
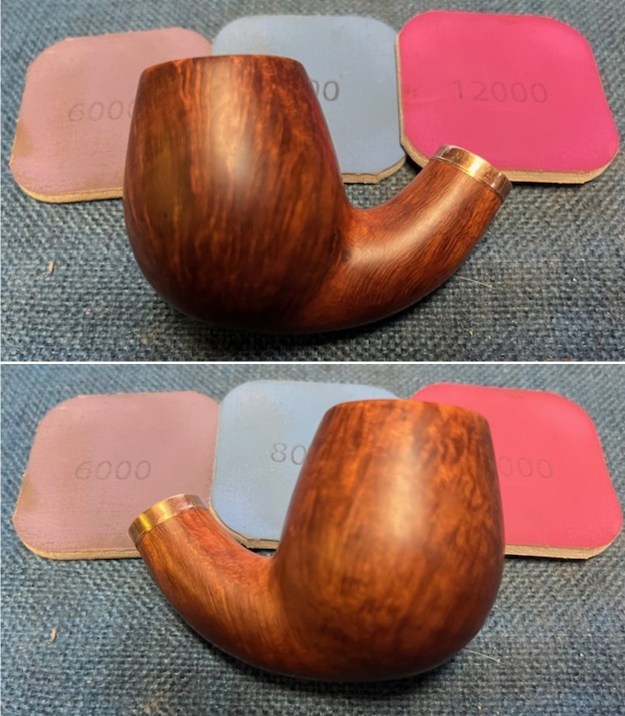
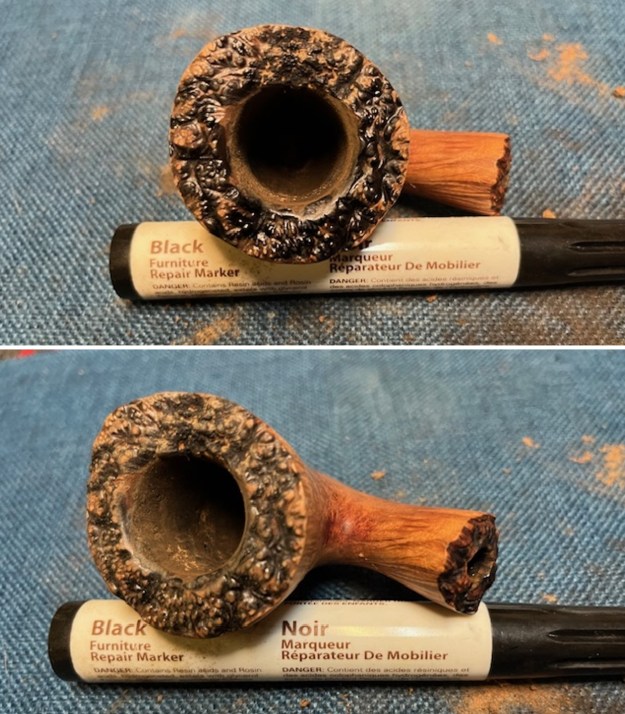
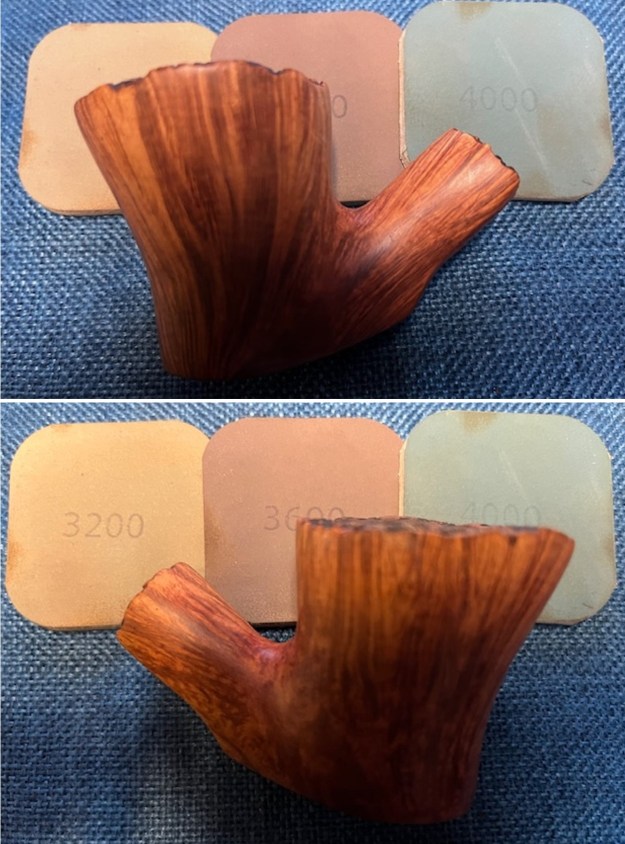
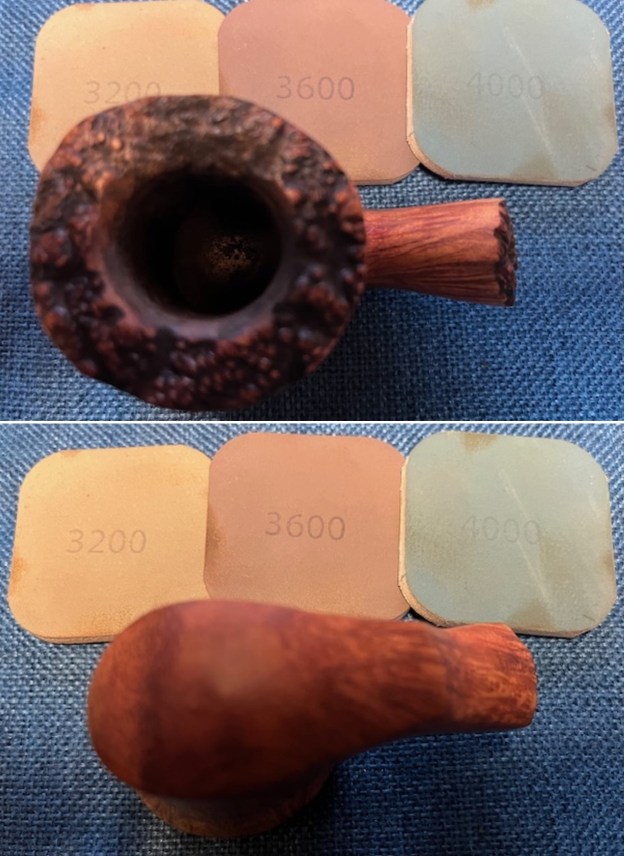
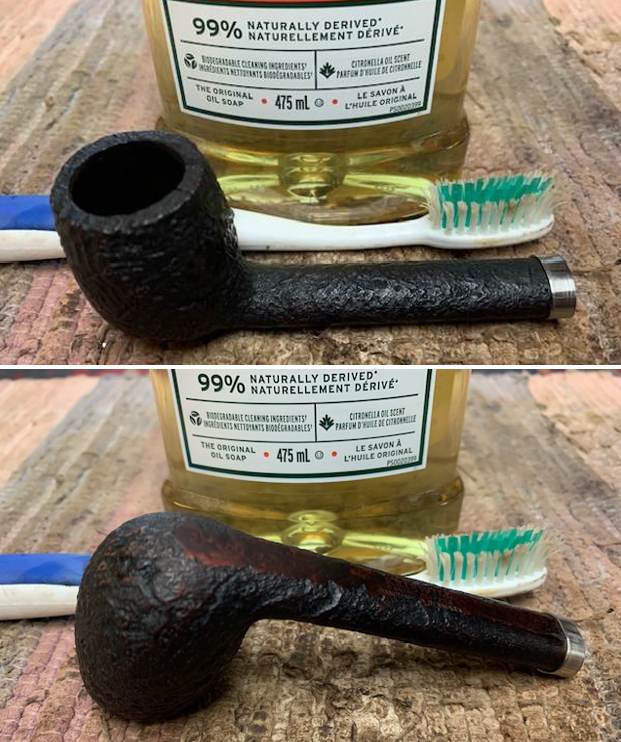
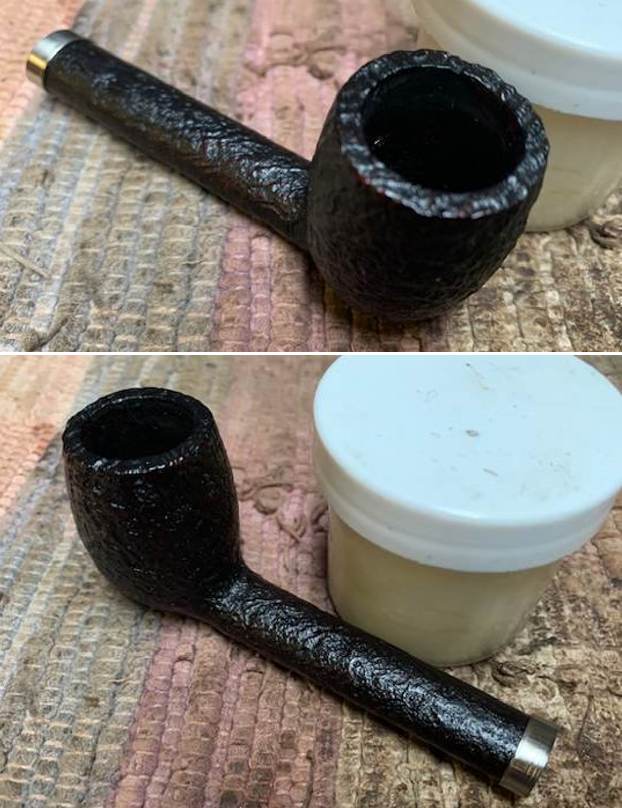
  I worked some Before & After Restoration Balm into the surface of the briar with my fingertips and a horsehair shoe brush to clean, enliven and protect it. I let the balm sit for a little while and then buffed with a cotton cloth to raise the shine. The photos show the bowl at this point in the restoration process.
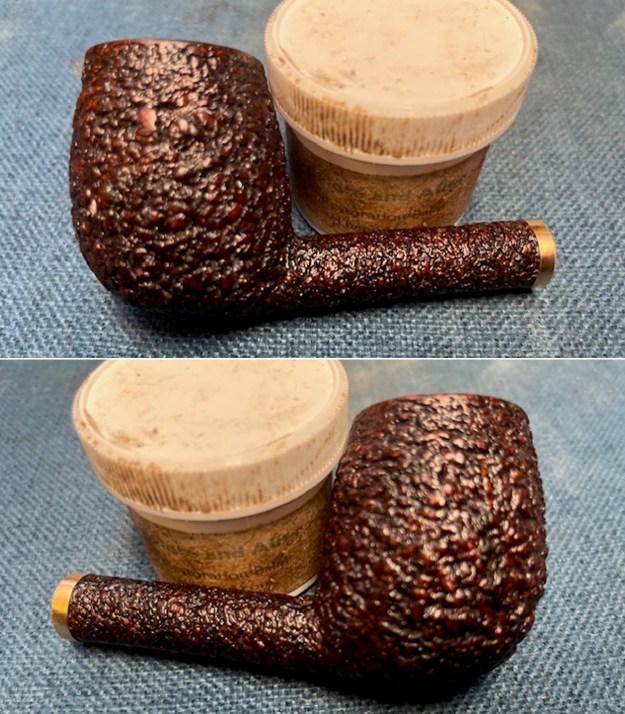

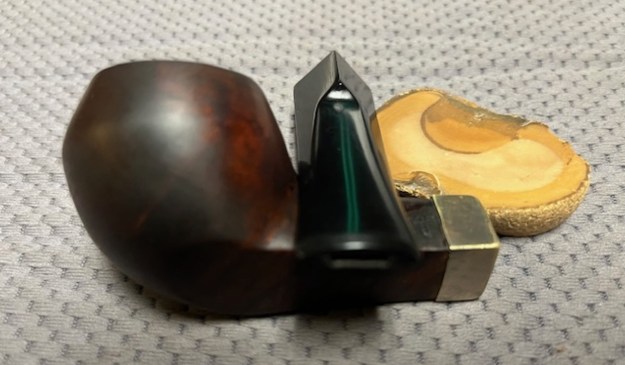
 Now back to the stem. I cleaned it with a tooth brush and Soft Scrub cleaner. I worked over the surface to remove the debris on the surface. I rinsed it with warm water to remove the soap and debris. I took photos of the stem after the clean up. It looked very good.
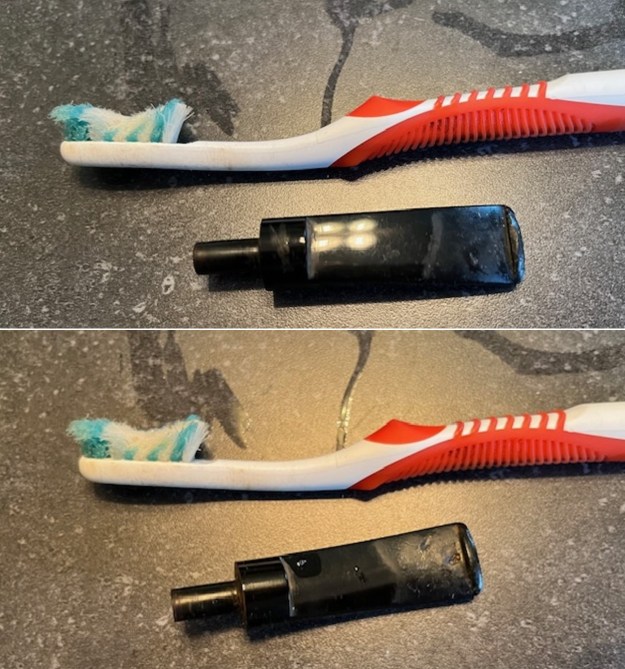
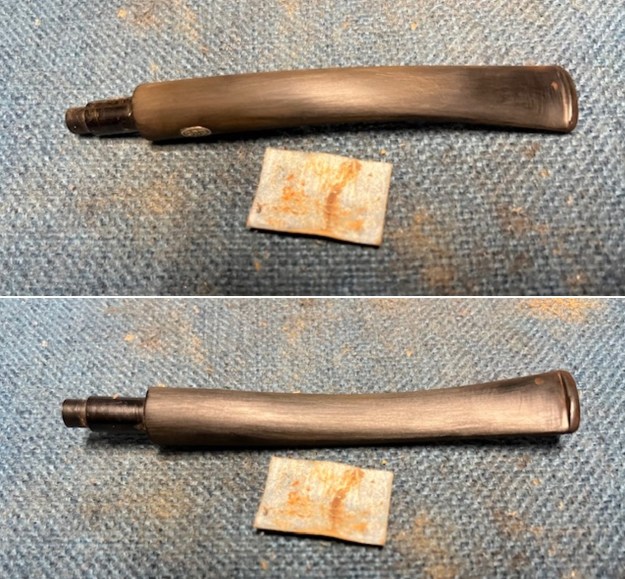
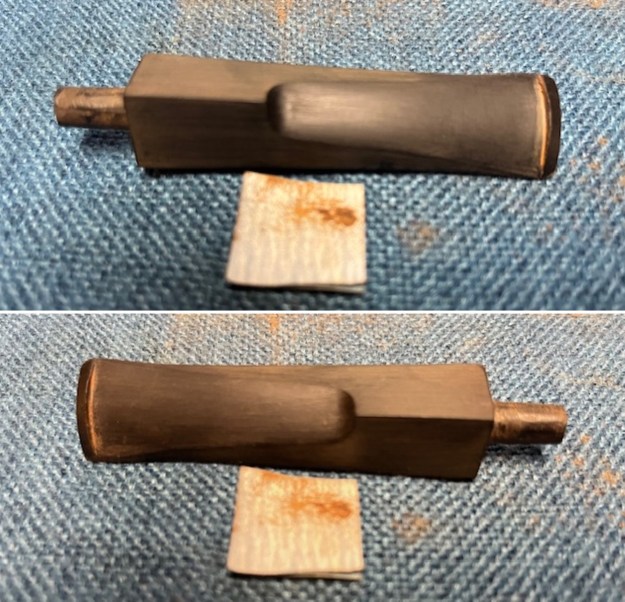
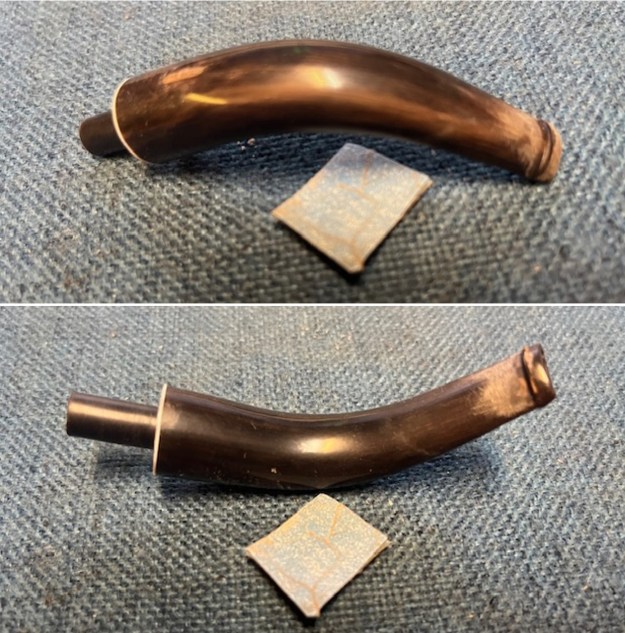
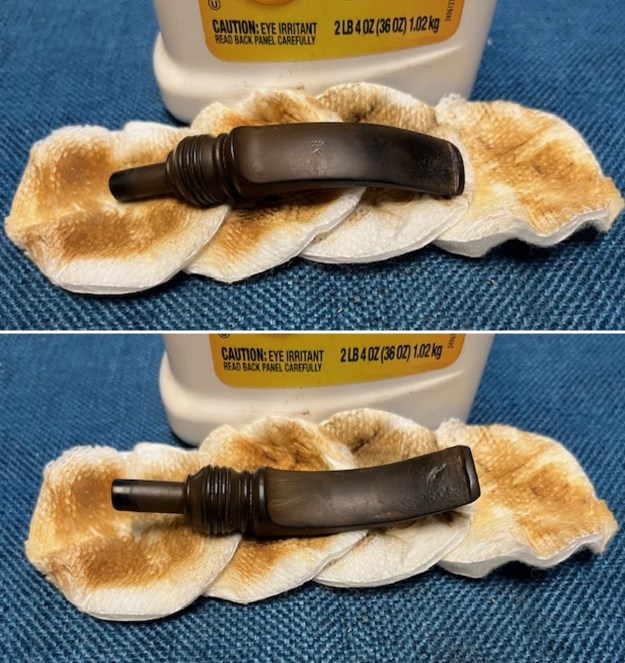
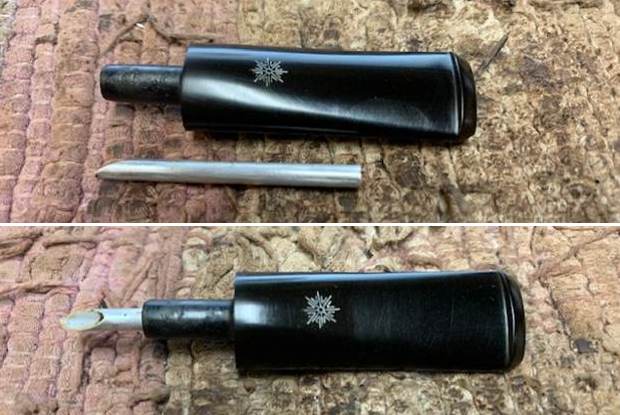
 I filled in the tooth marks on the top and the underside of the acrylic stem with black CA glue. Once the repairs cured I used a file to flatten them into the surface. I sanded it with 220 grit sandpaper.
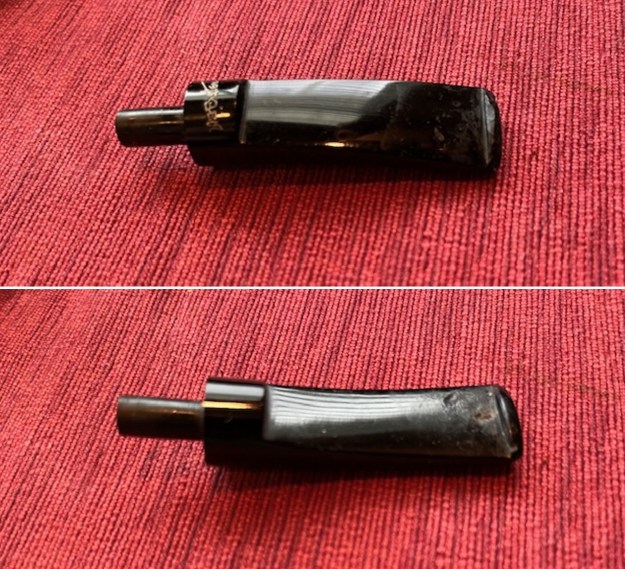
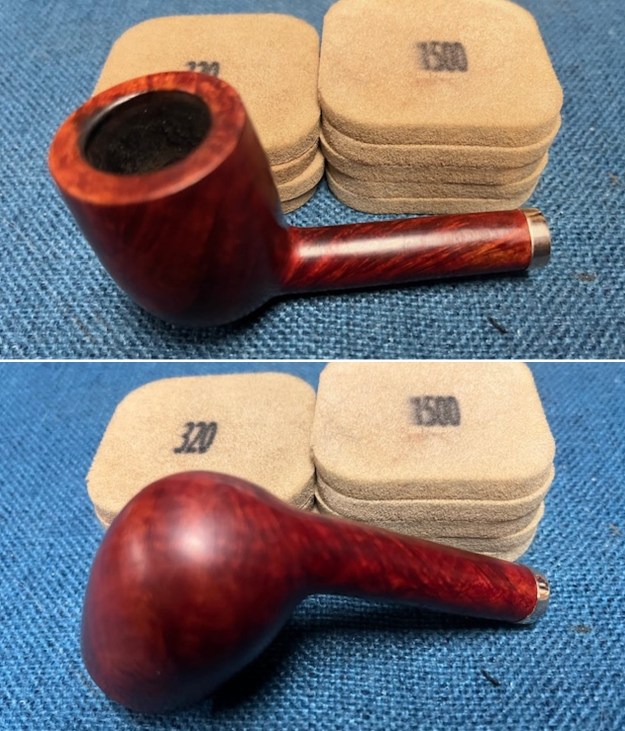
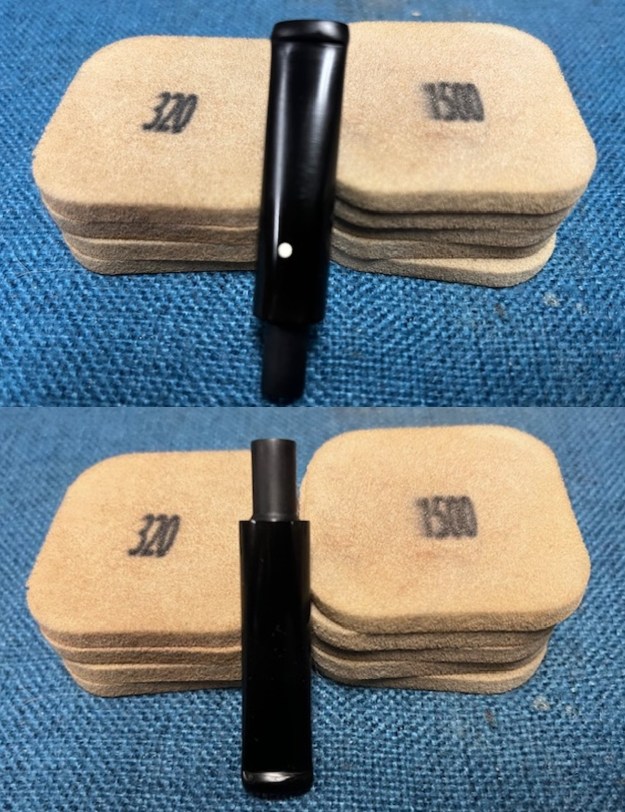
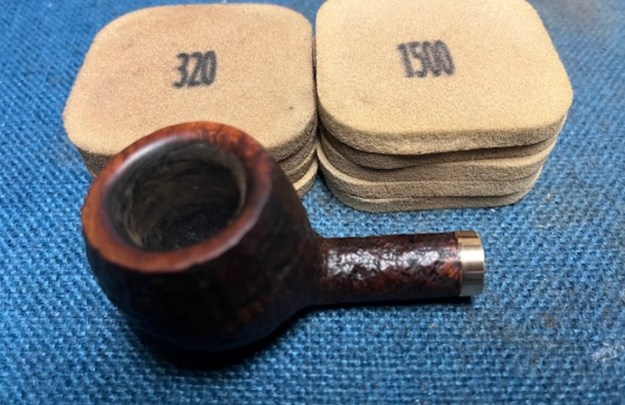
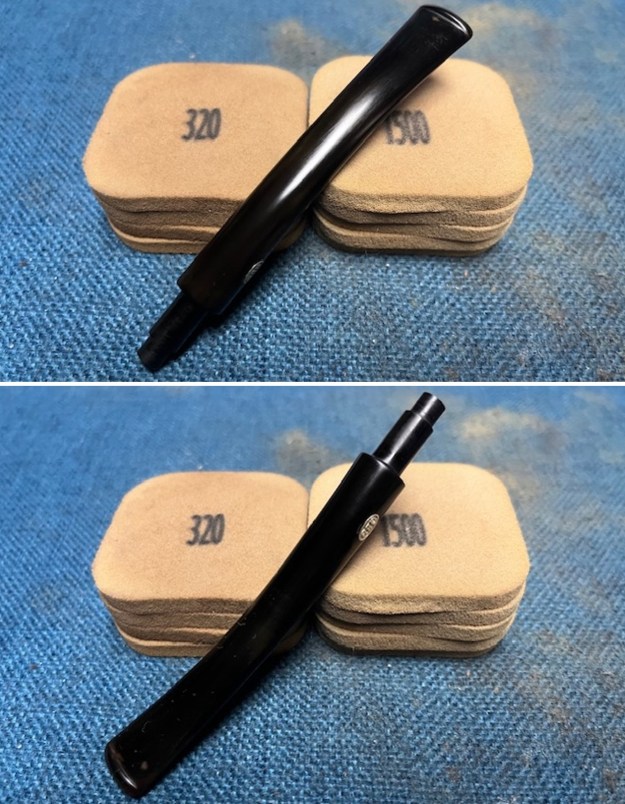
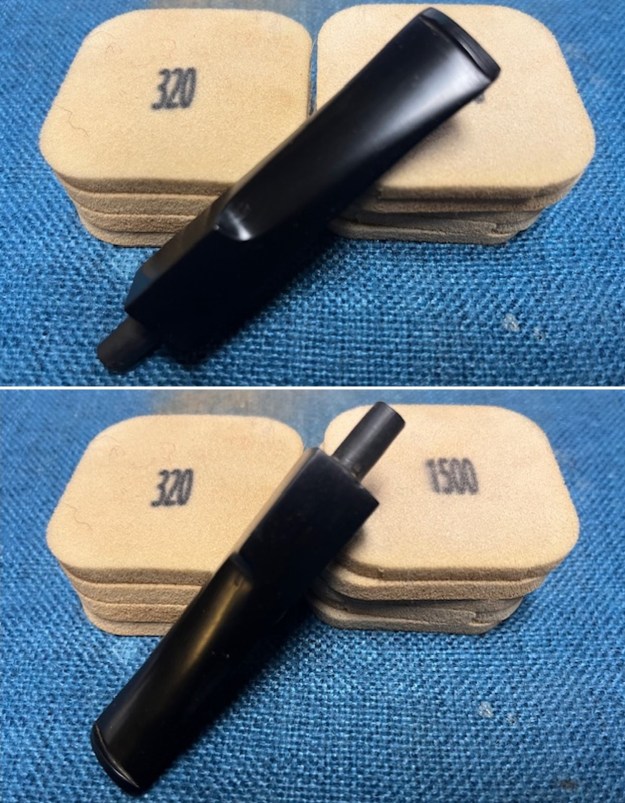
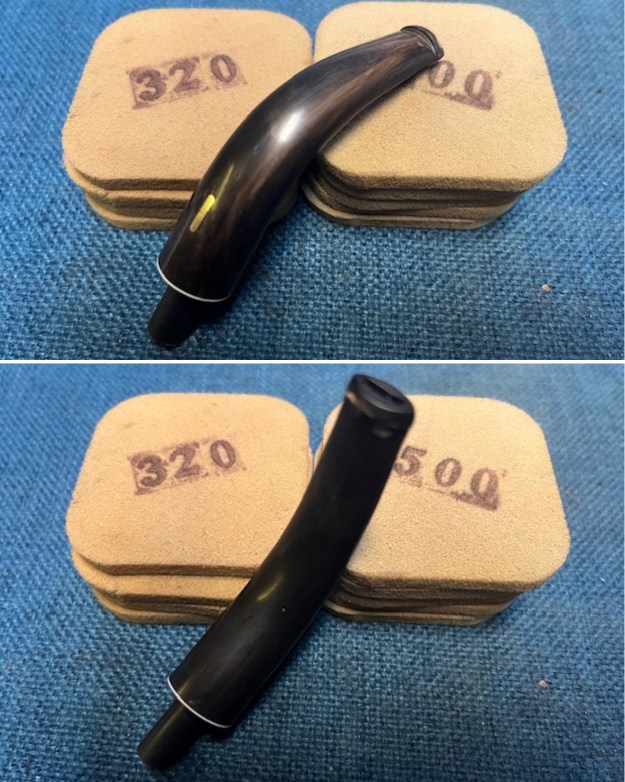
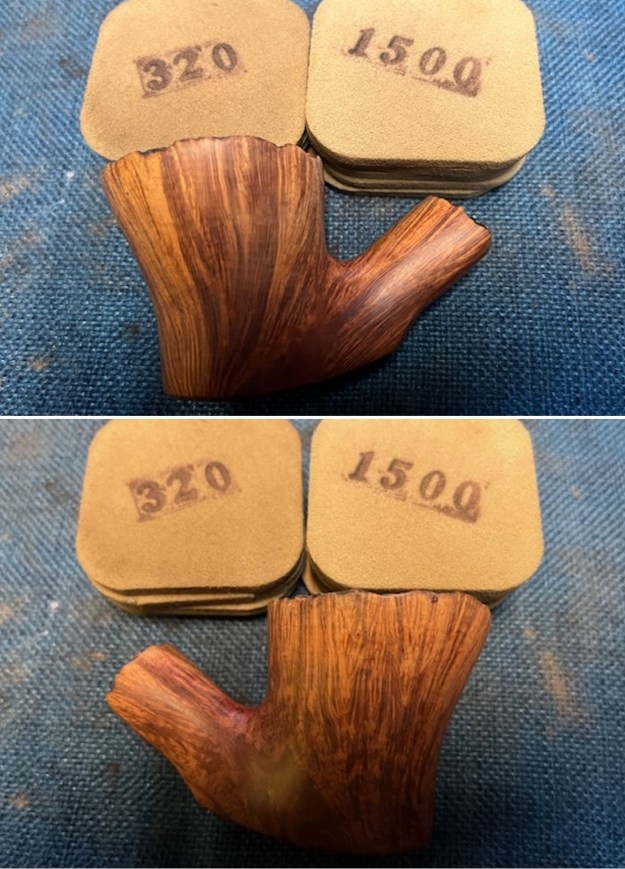
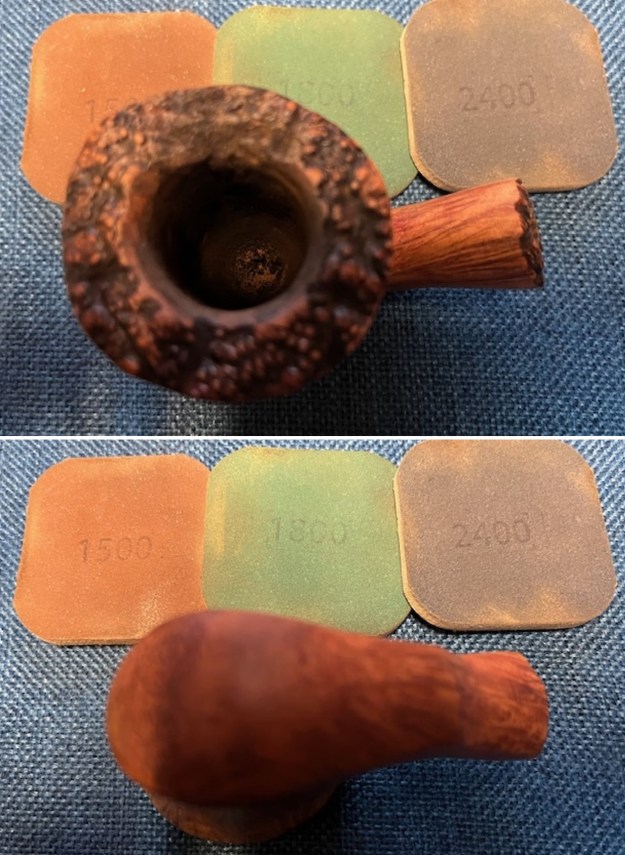
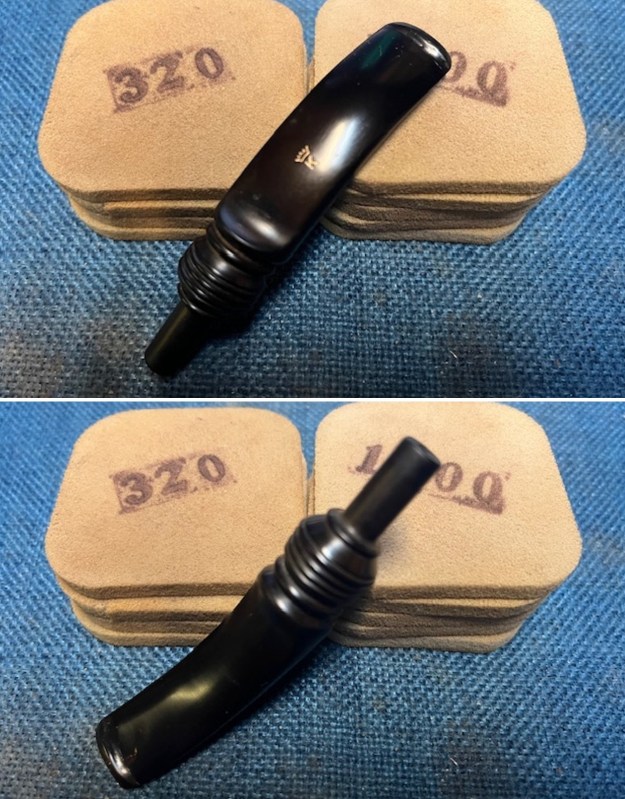
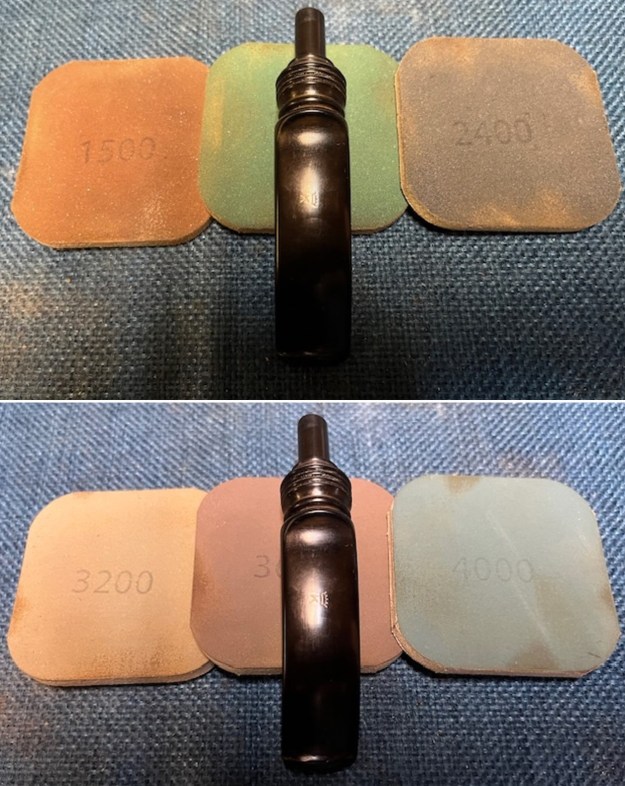
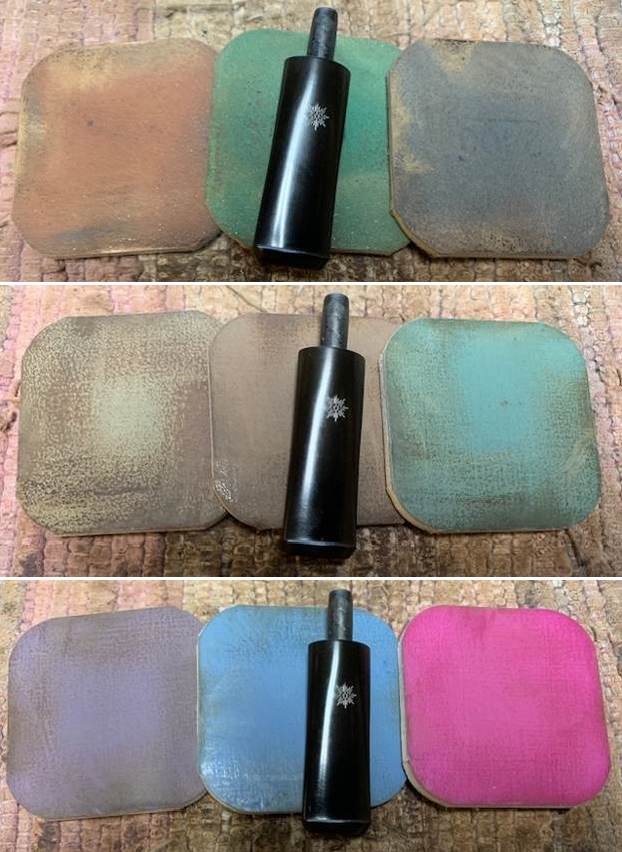
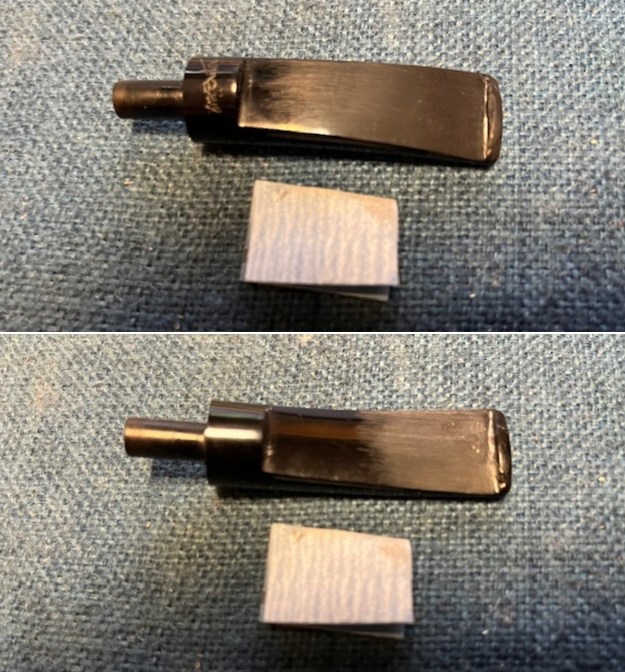 I sanded the stem further with 2×2 inch sanding pads to smooth out the stem surface. I wiped it down with a damp cloth after each sanding pad. I took photos of the stem after the sanding.
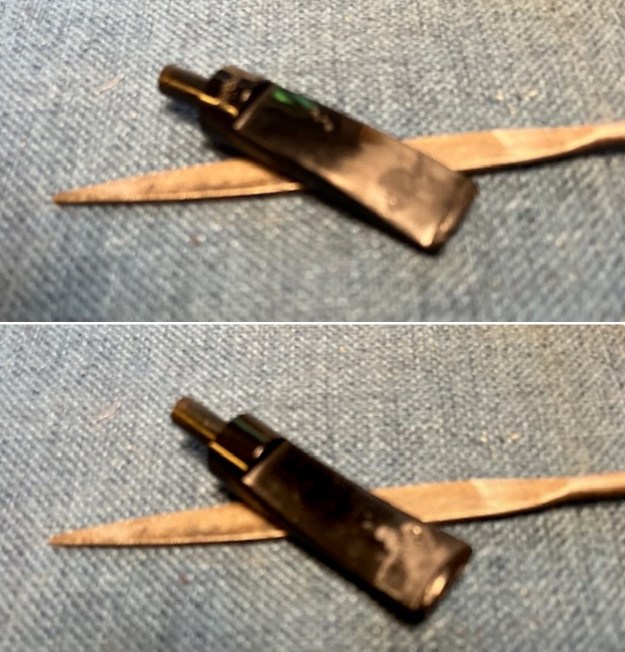
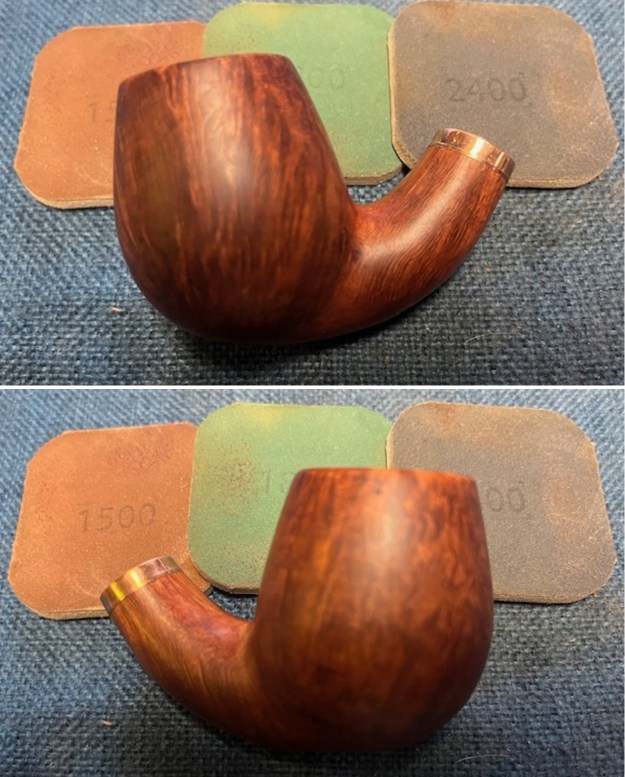
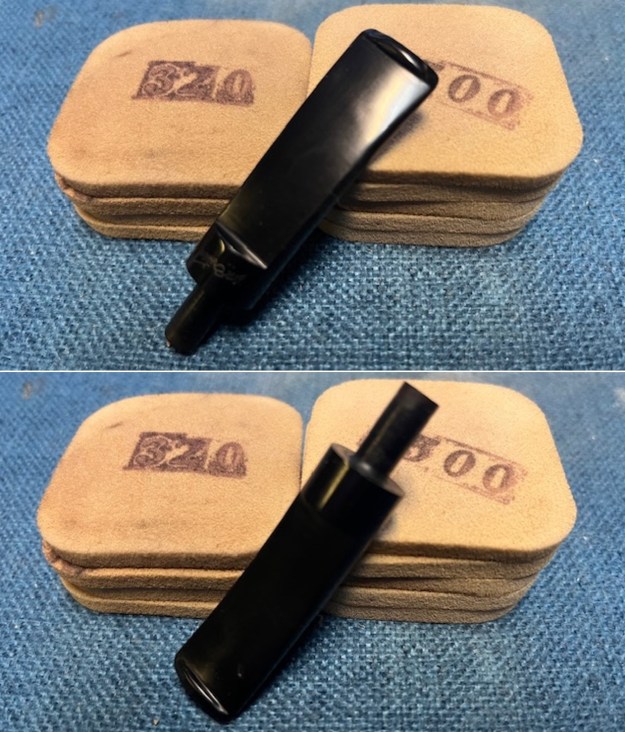 I touched up the stamping on the top of the saddle stem with white acrylic fingernail polish. I worked it into the stamp with a tooth pick. Once it had cured I scraped off the excess and then sanded it with a 1500 grit sanding pad. It looked much better.
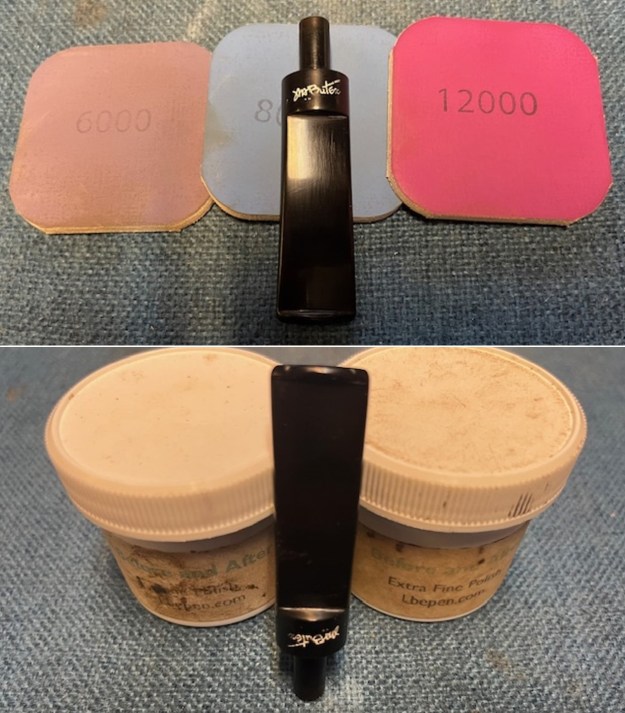
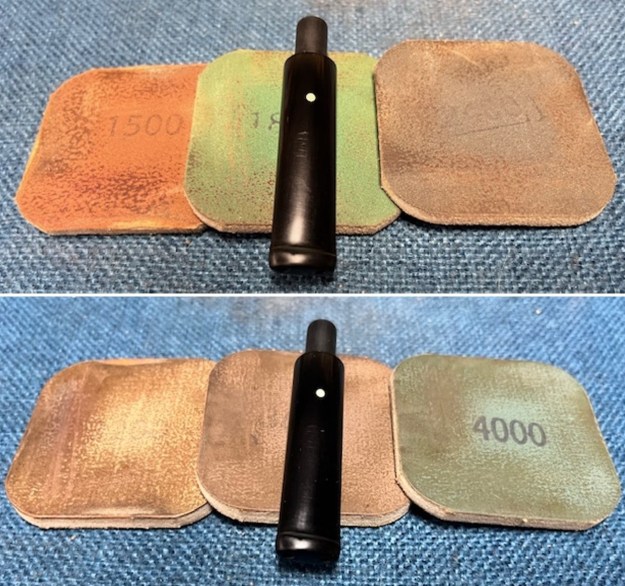
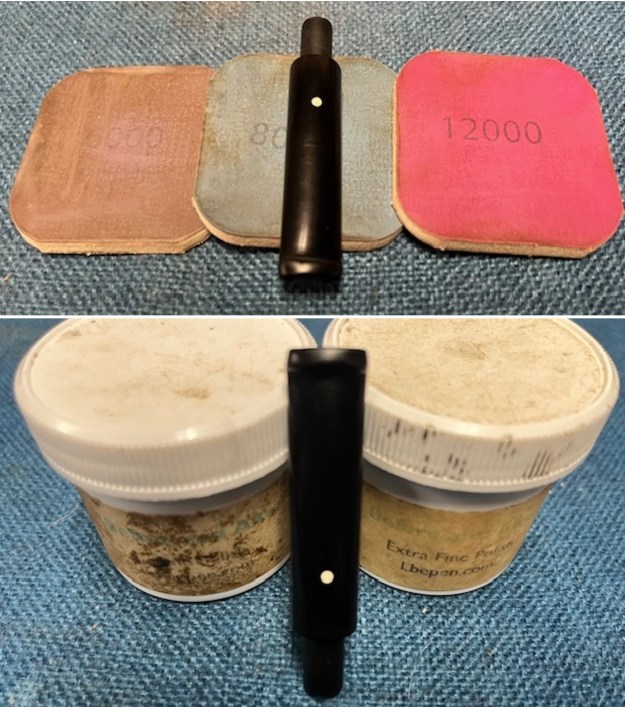
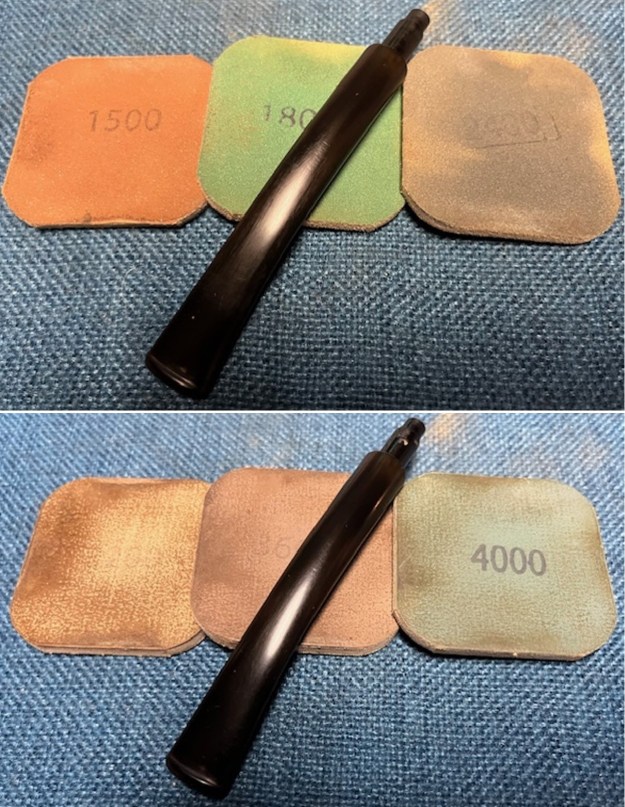
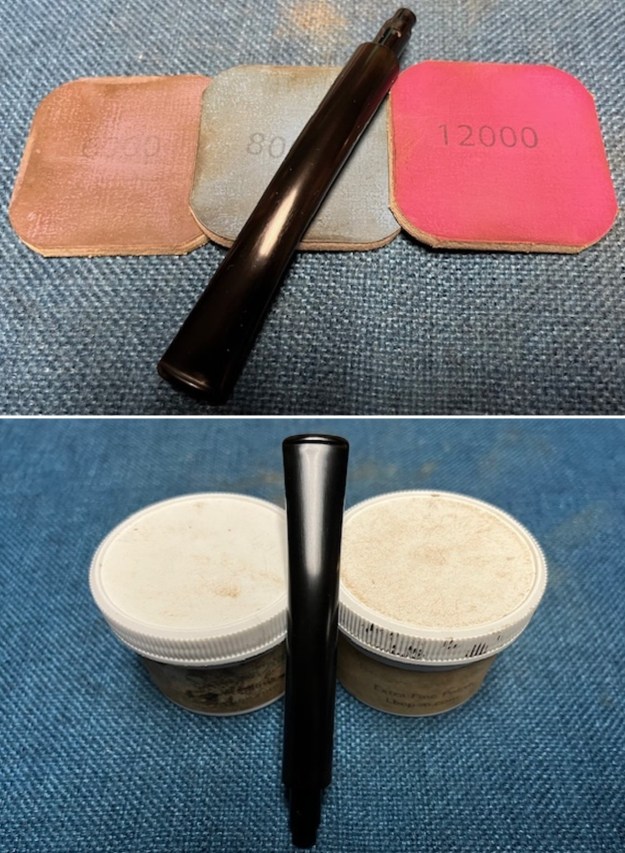
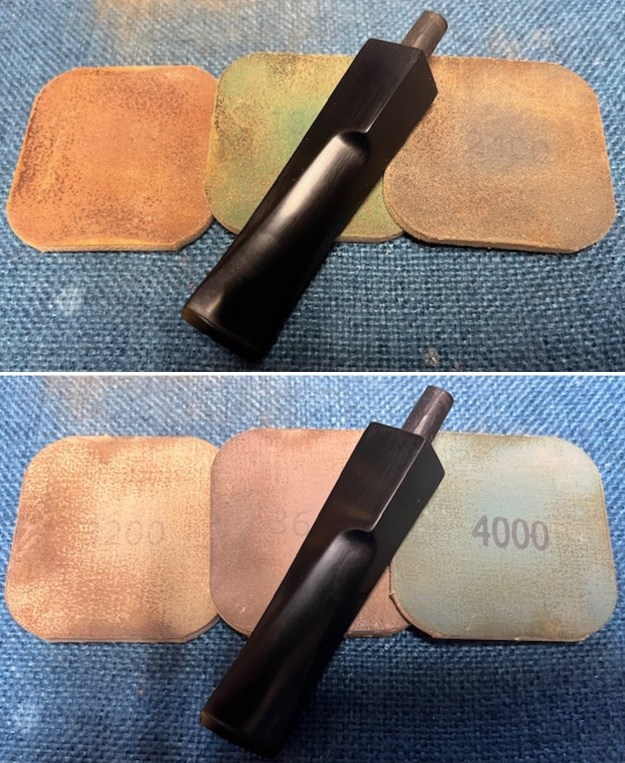
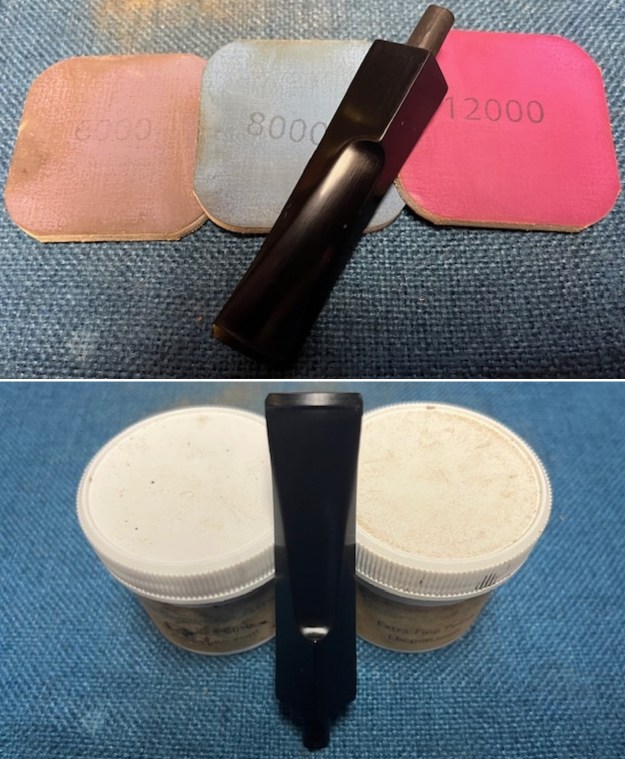
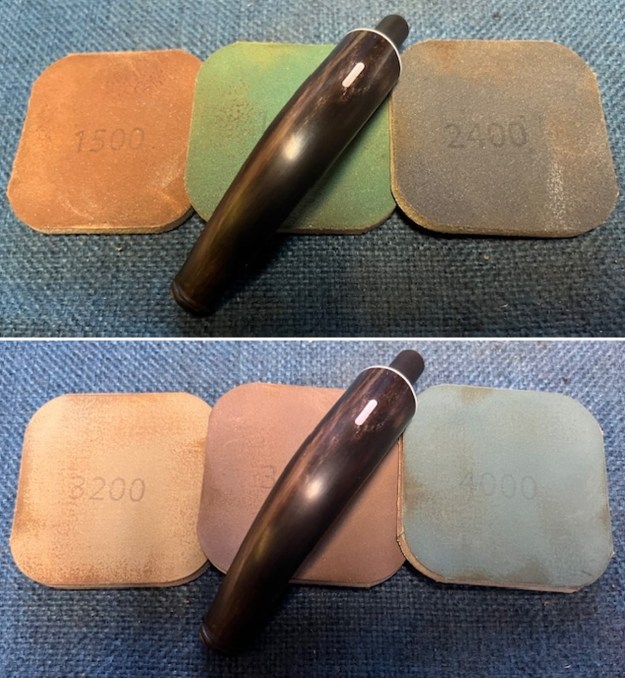
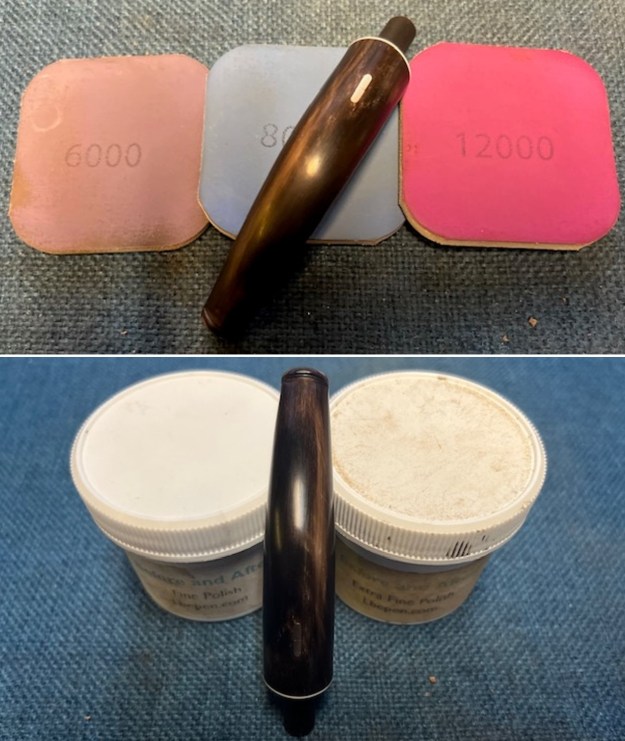
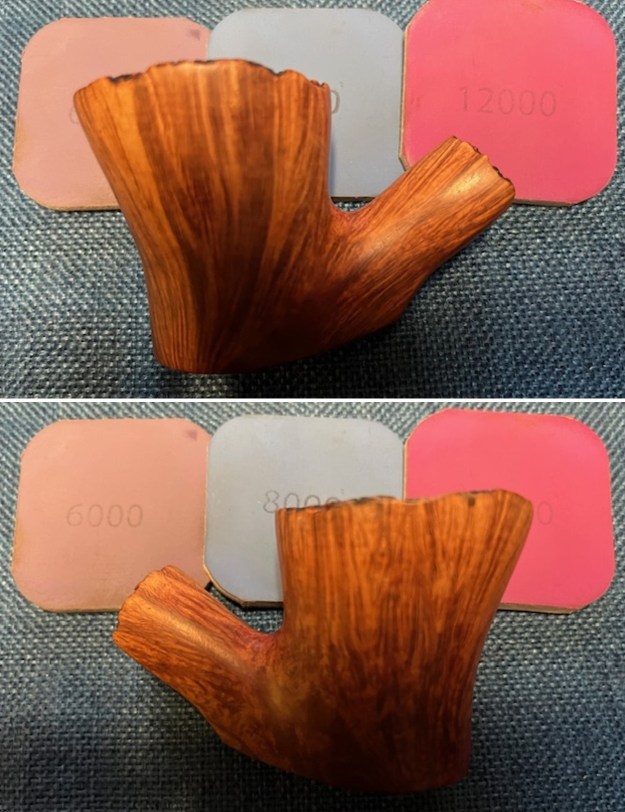
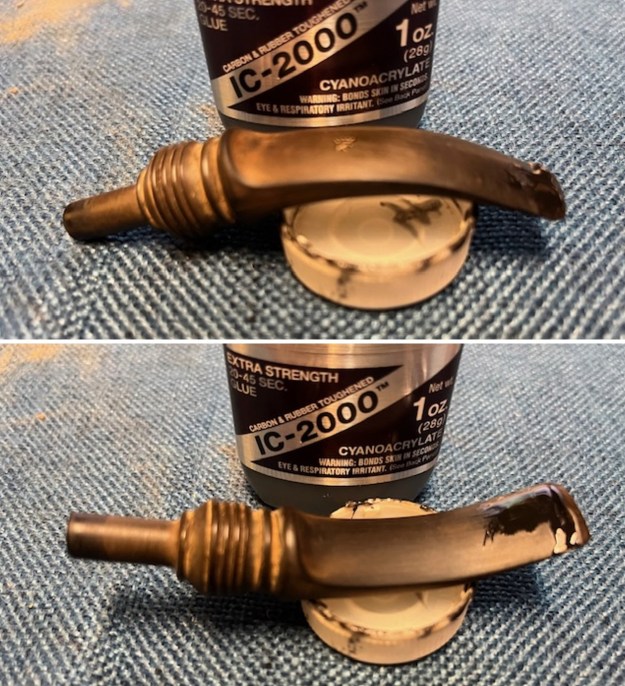
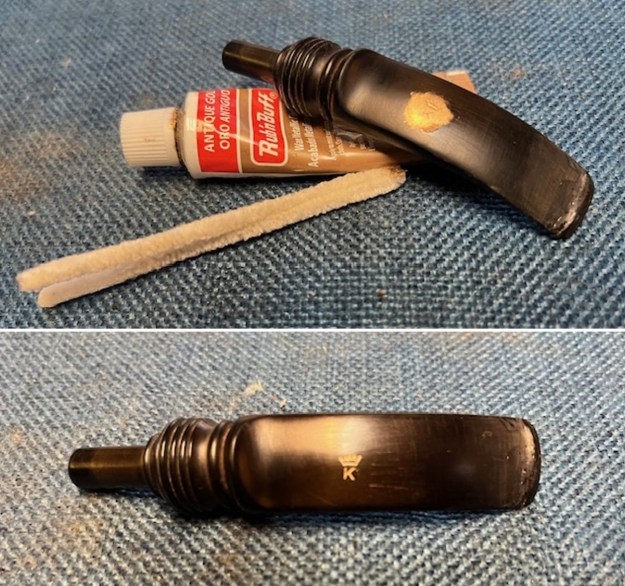
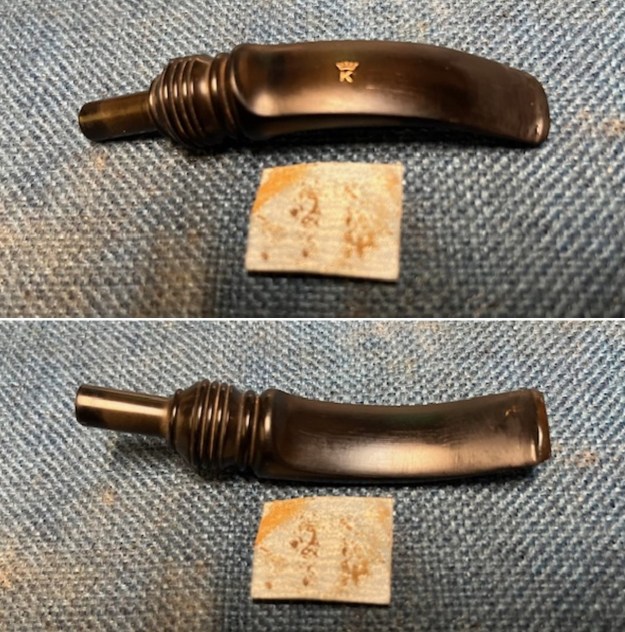
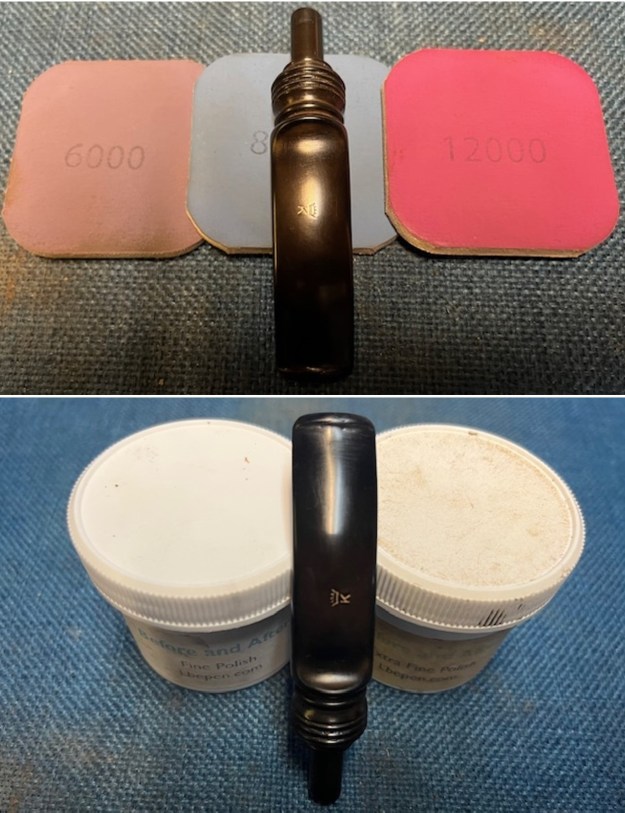
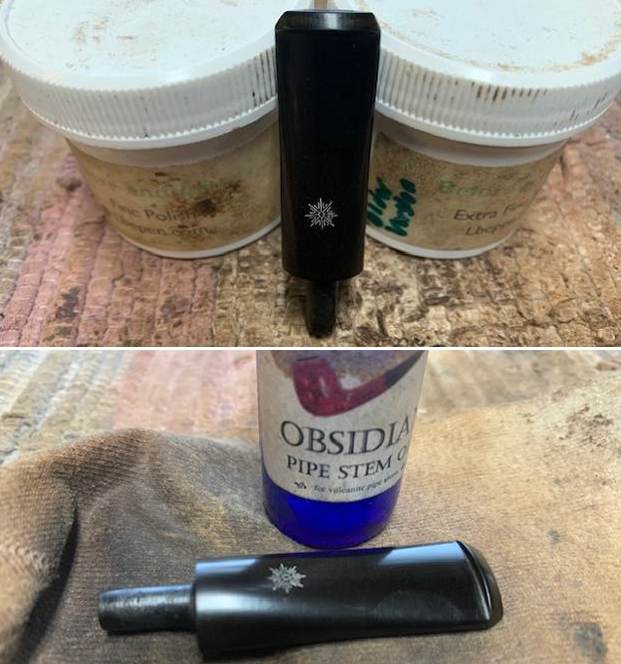
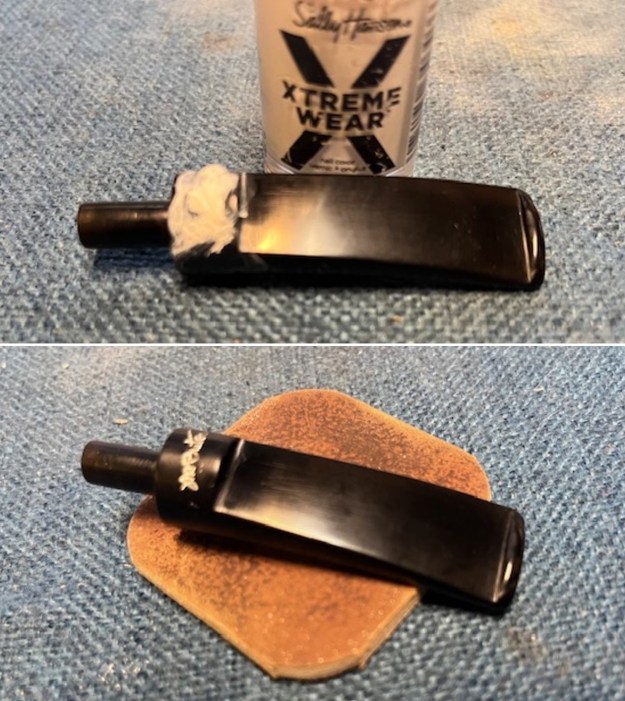 I polished the stem with micromesh sanding pads – wet sanding with 1500-12000 grit sanding pads. I wiped it down after each sanding pad with some Obsidian Oil. I finished polishing it with Before & After Pipe Stem Polish – both Fine and Extra Fine and buffed it off with a cotton cloth.
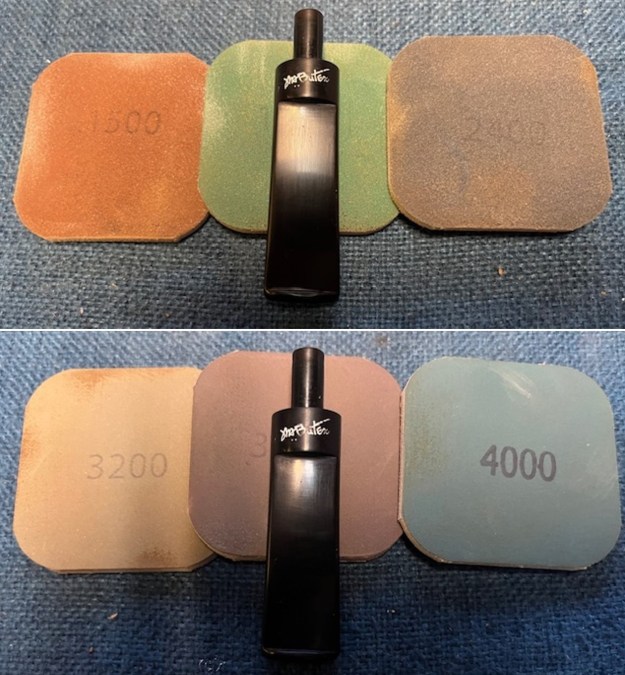
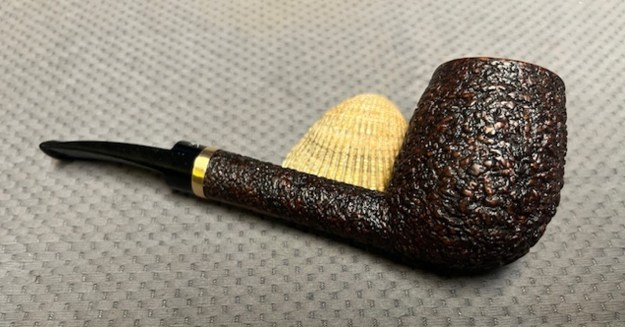
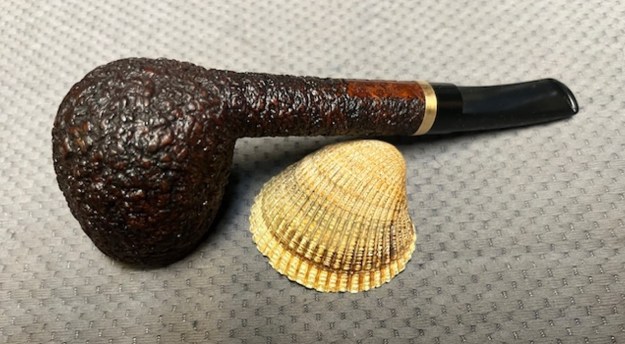
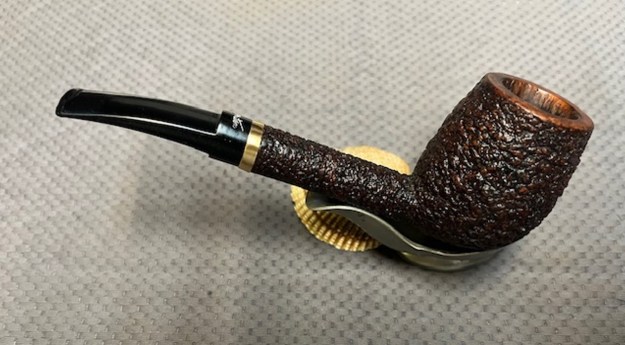
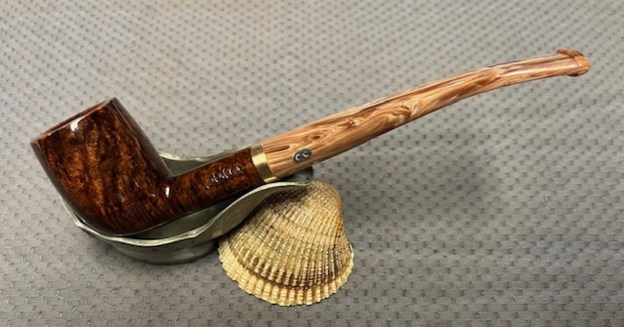
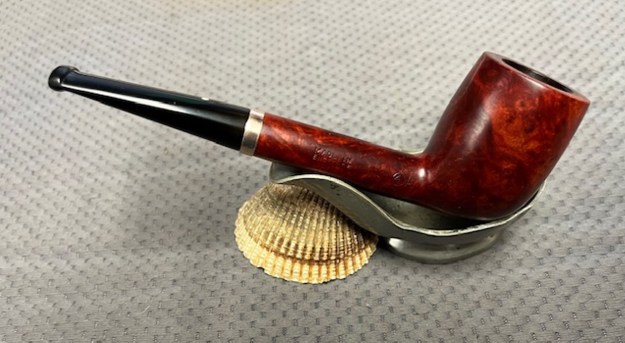
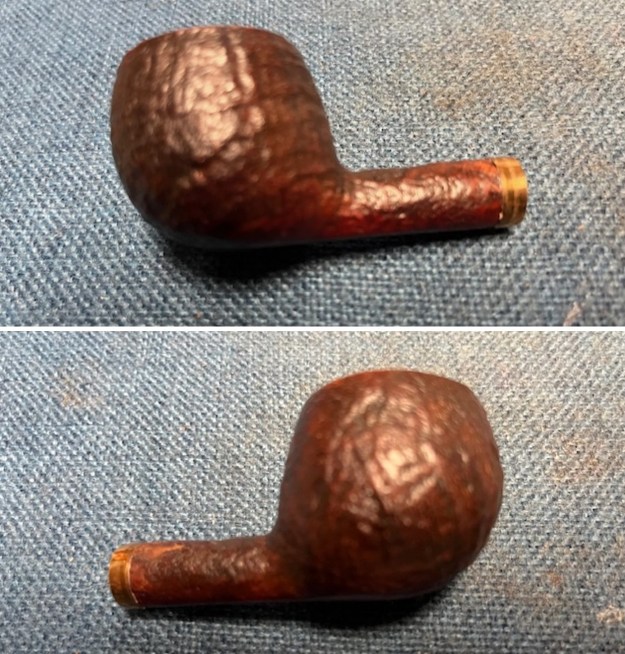
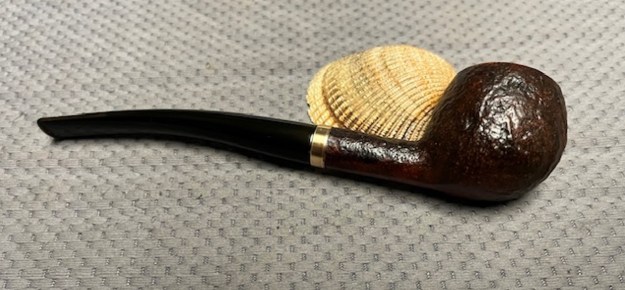
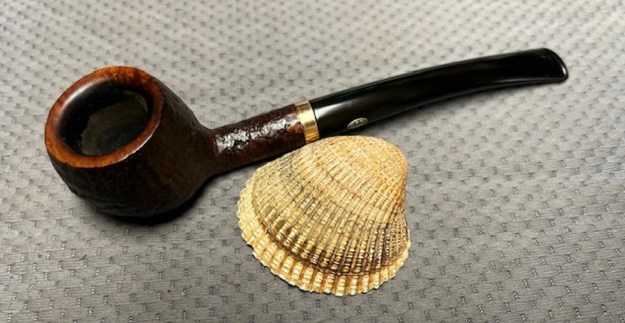
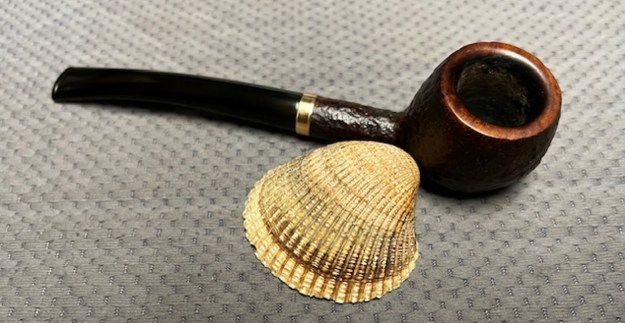
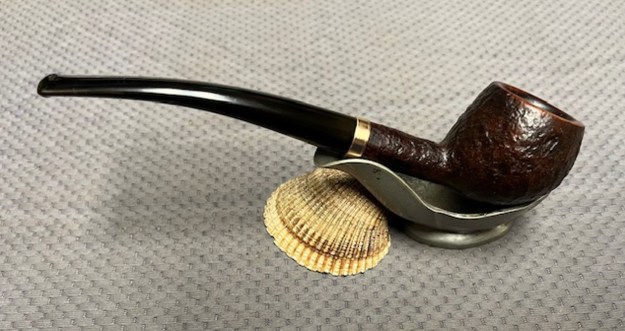
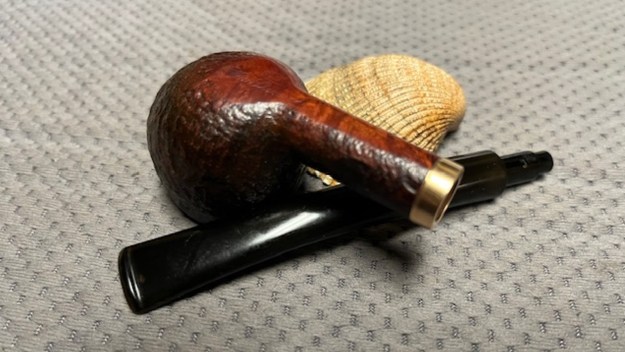
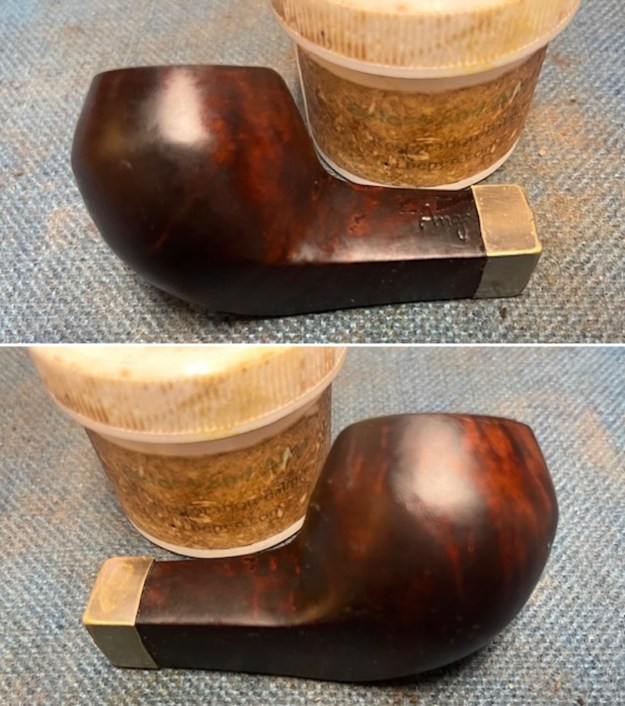
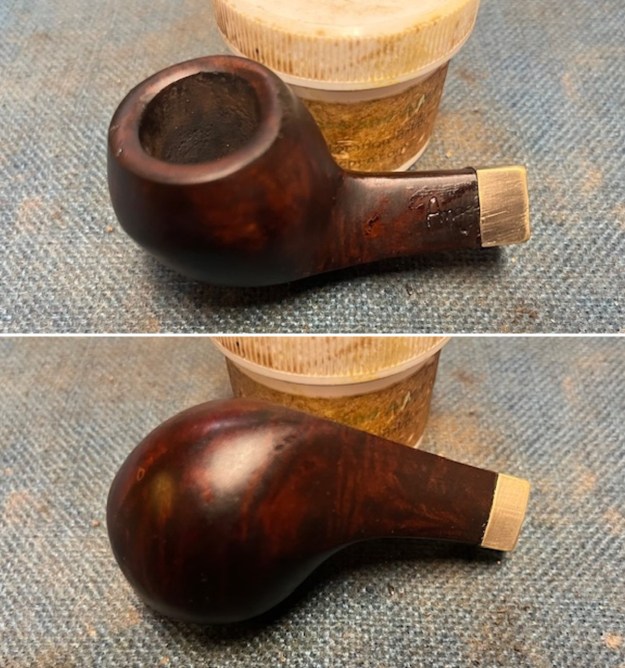
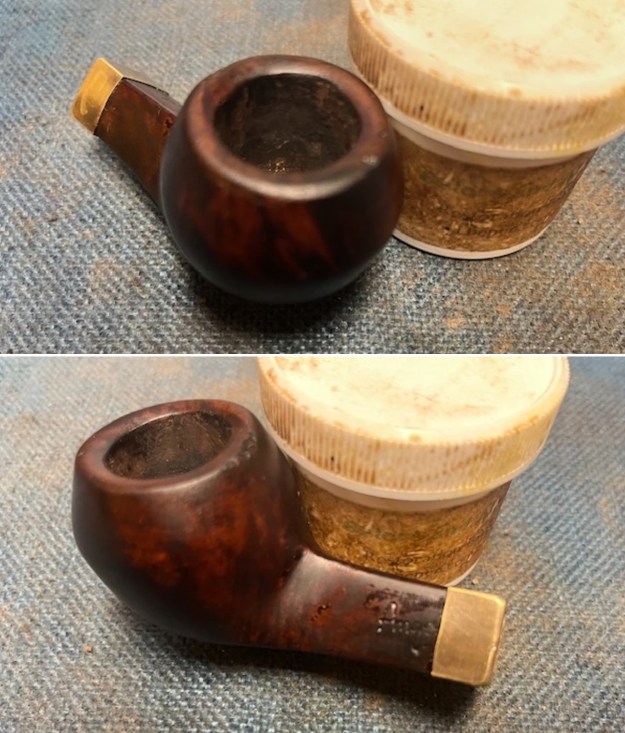
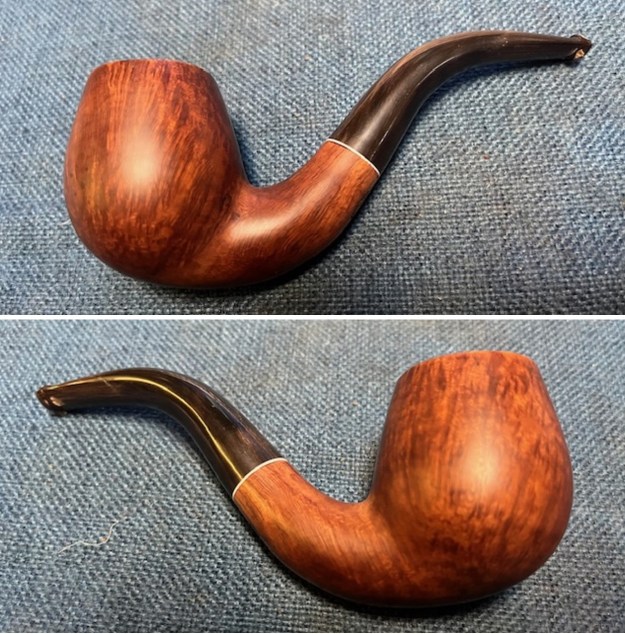
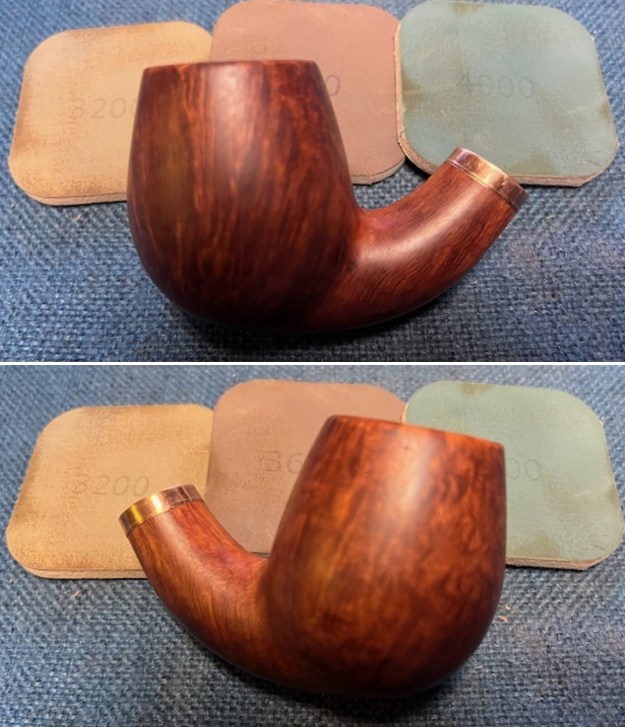
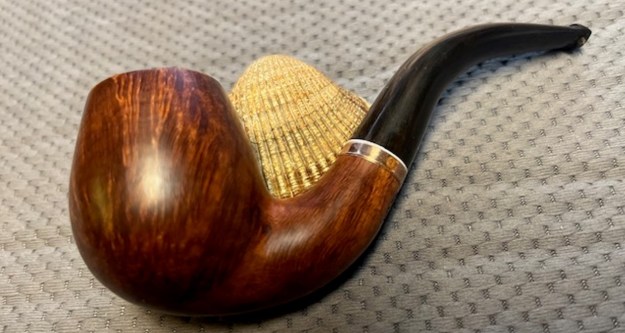
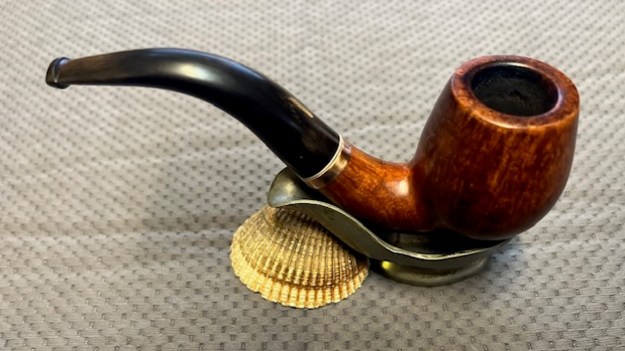
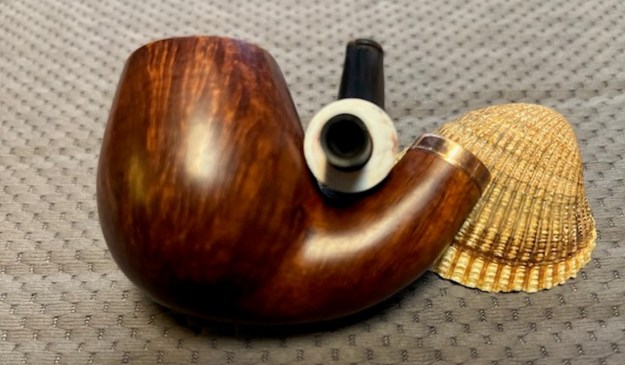
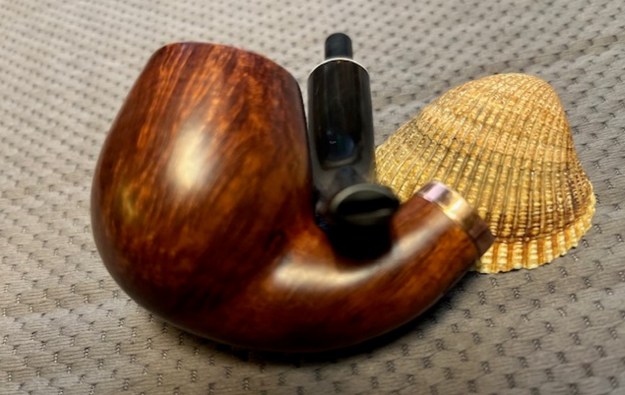
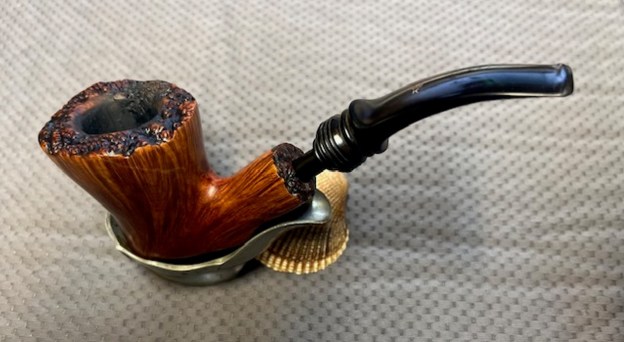
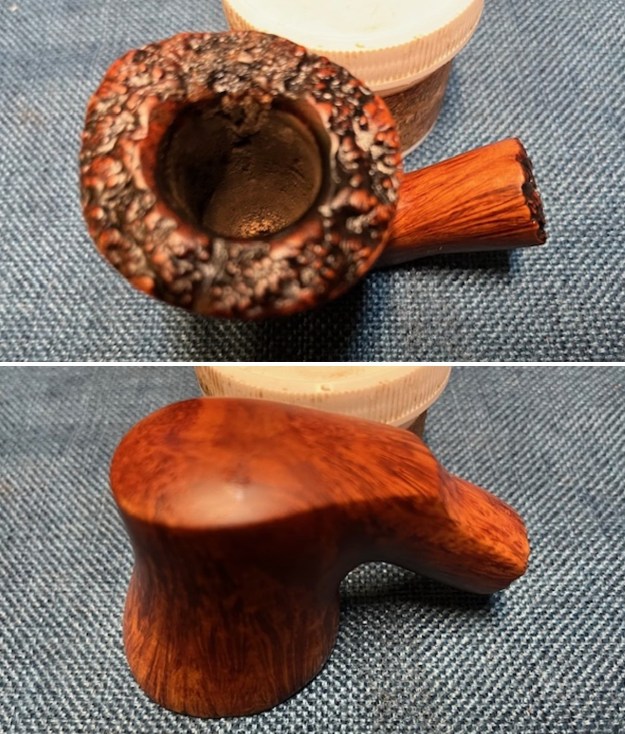
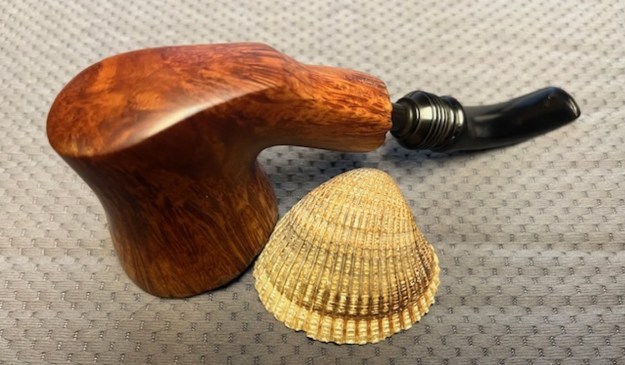
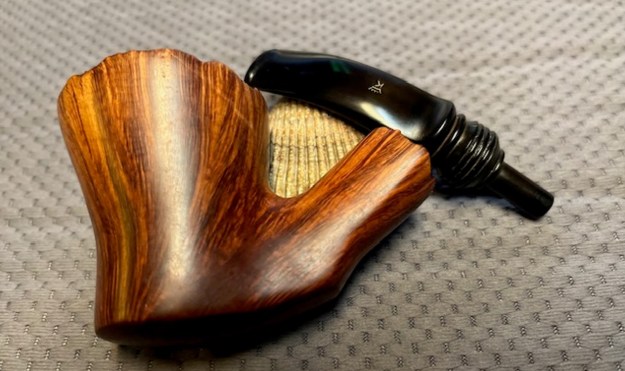
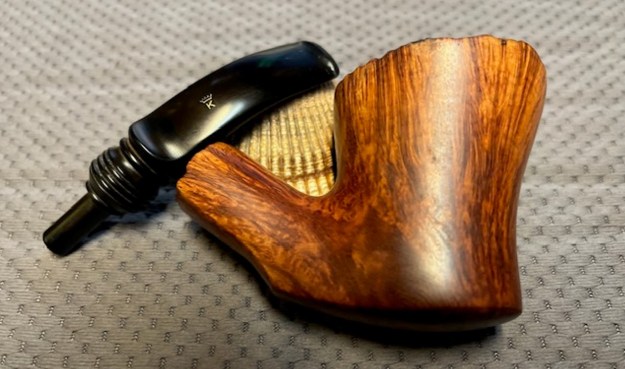
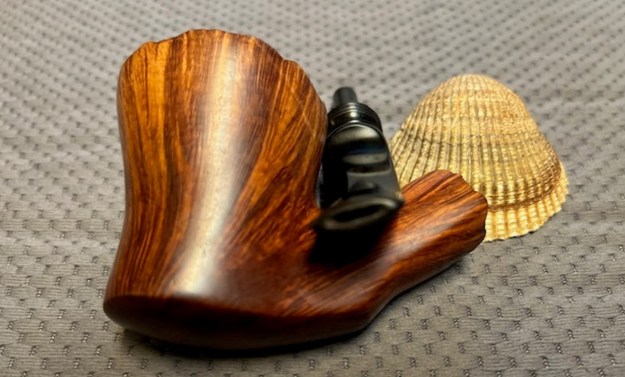
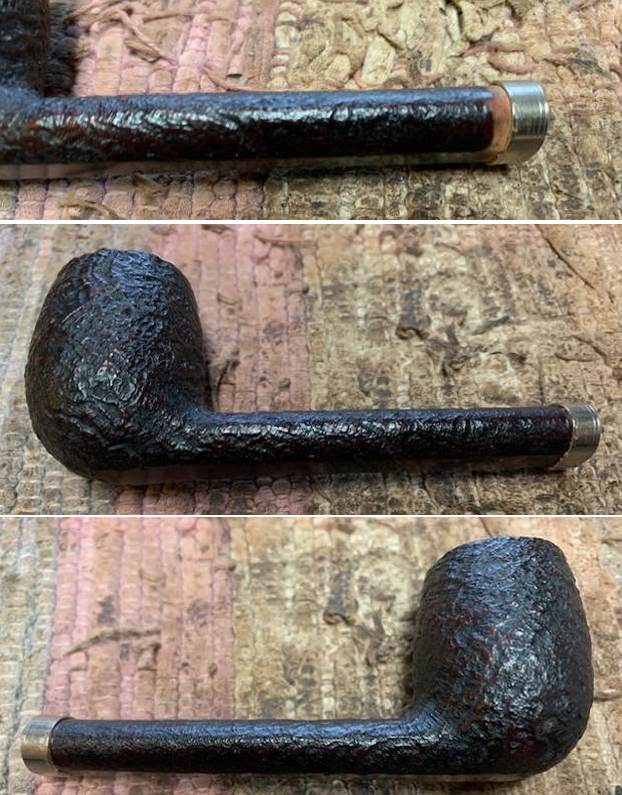
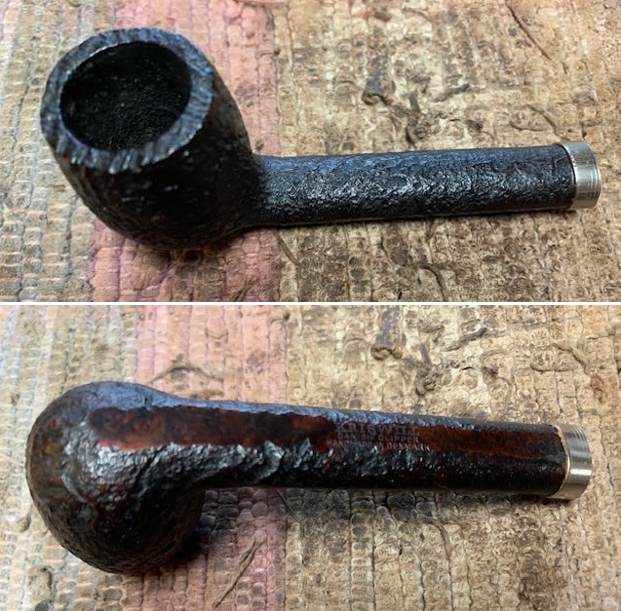
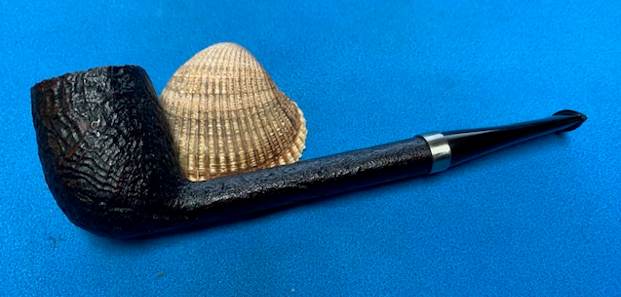
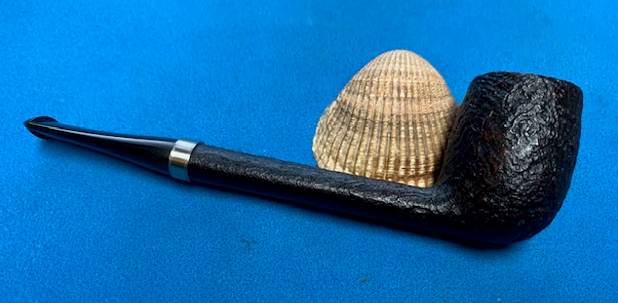
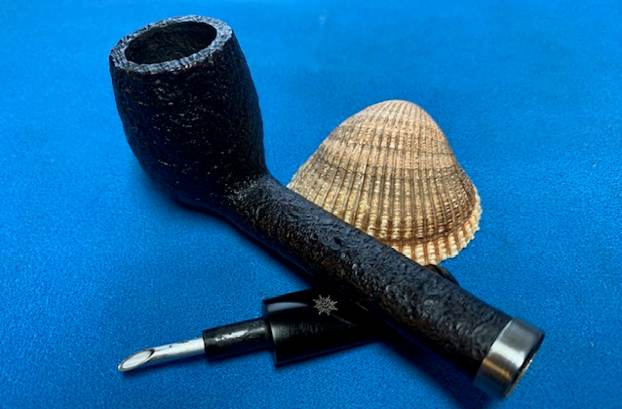
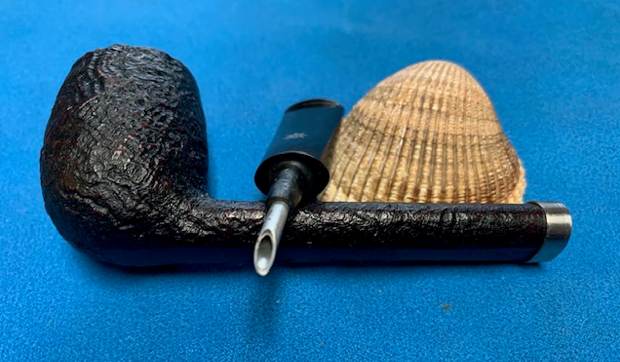
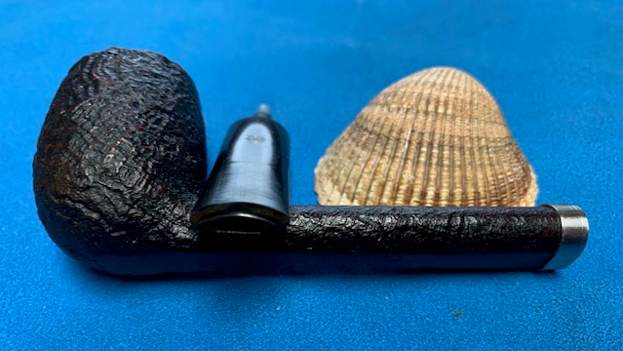
 This is a beautiful Butera Textured Classic 3 Star Billiard with an acrylic saddle stem. The thin brass band works for me and is a pleasant break between shank and the stem. It has a great look and feel. The shape of the bowl, the heavily rusticated Sea Rock style finish and the cut of the briar work well together to give the bowl a very tactile feel in the hand. I polished stem and the bowl with Blue Diamond polish on the buffing wheel. I gave the bowl and the stem multiple coats of carnauba wax. I buffed the pipe with a clean buffing pad to raise the shine. I hand buffed it with a microfiber cloth to deepen the shine. The Mike Butera Textured Classic 3 Star Billiard polished up pretty nicely. The finish took on life with the buffing. The rich stains work well with the polished acrylic stem. The finished pipe has a rich look that is quite catching. Have a look at it with the photos below. The shape, finish and flow of the pipe and stem are very well done. The dimensions are Length: 6 inches, Height: 2 inches, Outside diameter of the bowl: 1 3/8 inches, Chamber diameter: 7/8 of an inch. The weight of the pipe is 2.12 ounces/60 grams. It is a beautiful pipe. I will be loading it with a rich Virginia tobacco and enjoying it on my porch on the weekend. Thanks for walking with me through the restoration.


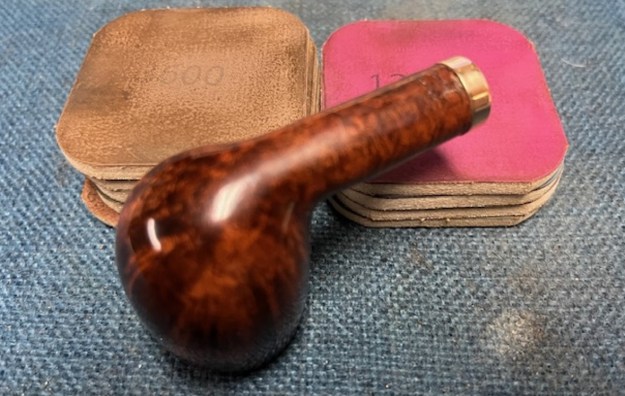
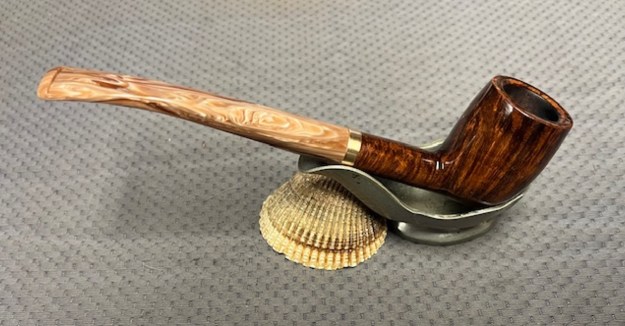
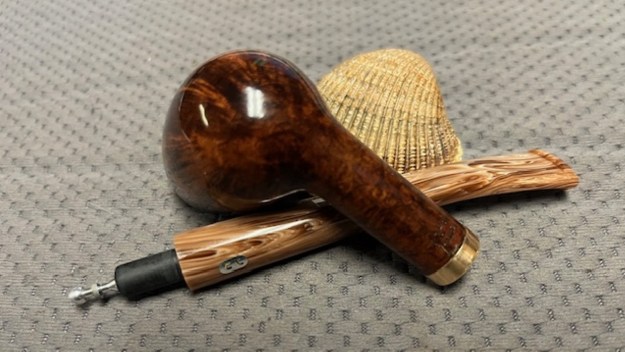
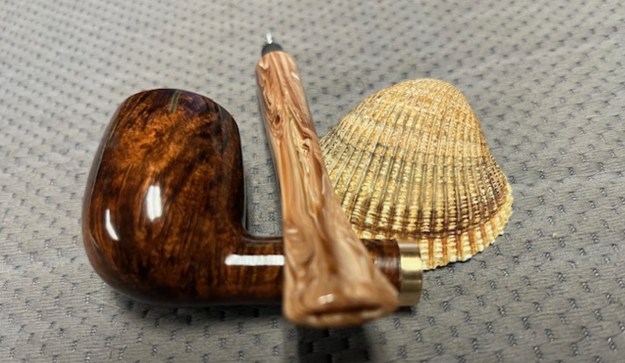
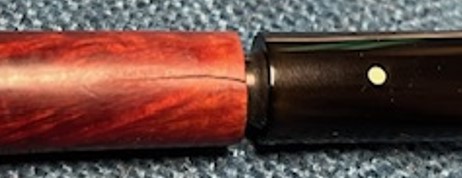
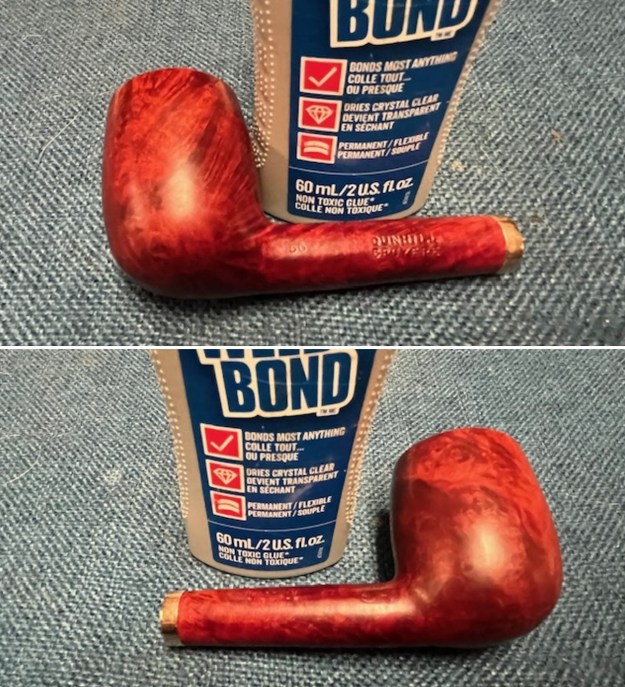
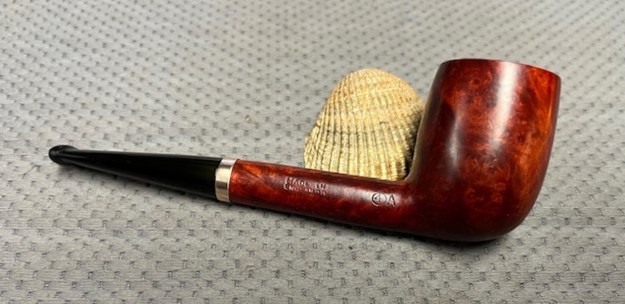
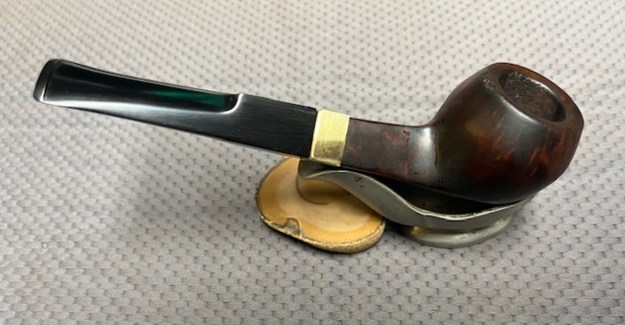
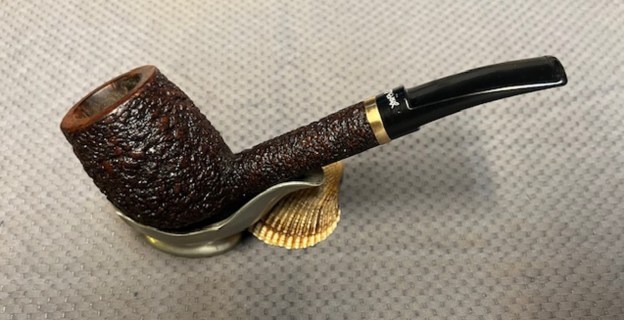
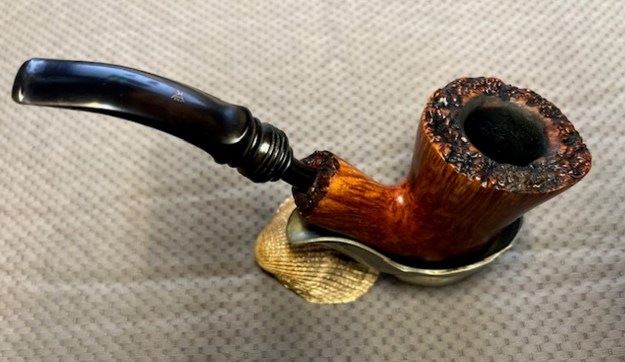
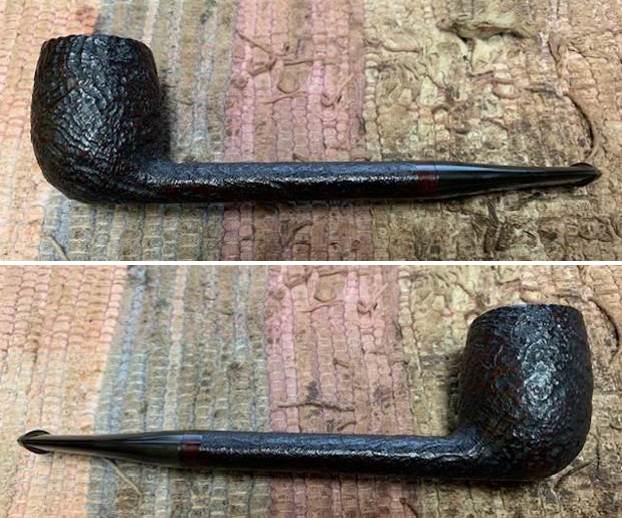
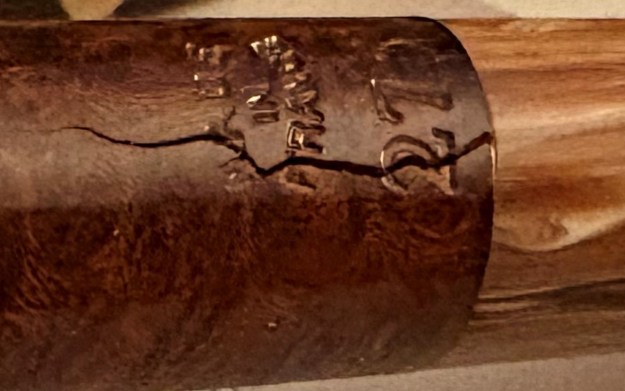 Jay dropped the pipe by on the weekend and we chatted about the repair. I took photos of the pipe when I brought it to the work table today. It is a pretty pipe with a nougat coloured acrylic stem. The bowl and shank were very clean. The pipe was stamped on the left side of the shank and read Chachom [over] Nougat. It was also stamped on the underside of the shank and read Made in France in a rhombus and underneath that it bore the shape number 275. The crack on the underside of the shank was about an inch long and with the stem in place was quite wide open. It went between the 2 and 7 of the shape number and proceeded up between the F and R of France and through the M in Made. Jay had given the stem a slight bend and it looked very good.
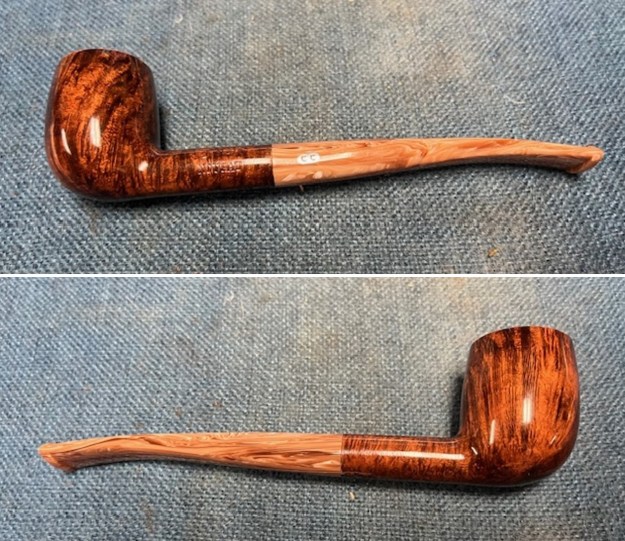
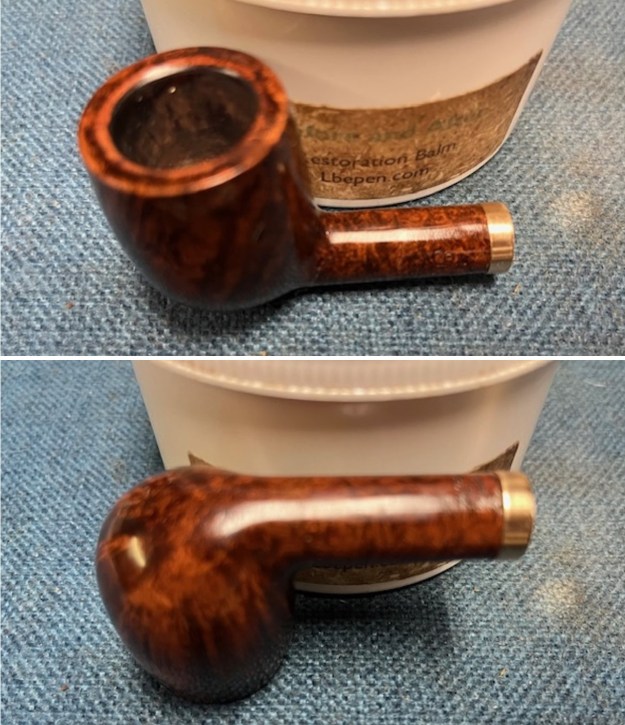
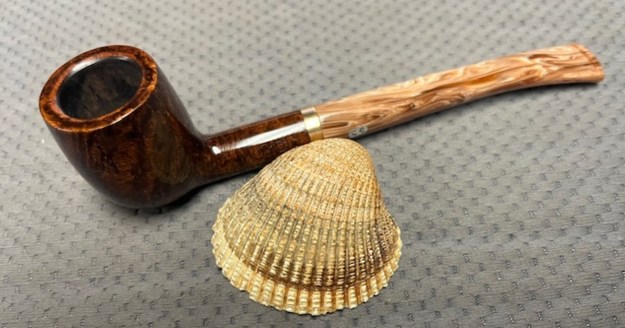
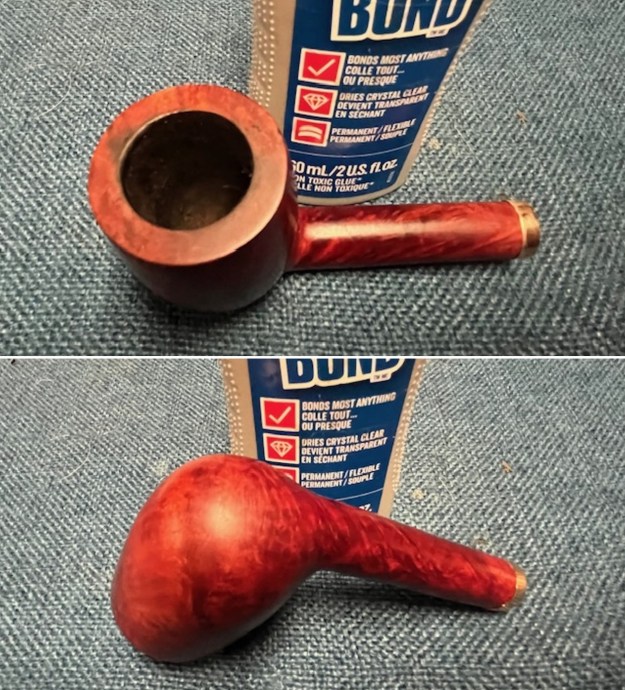
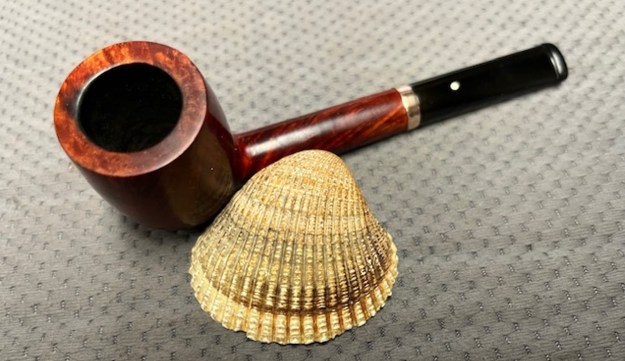
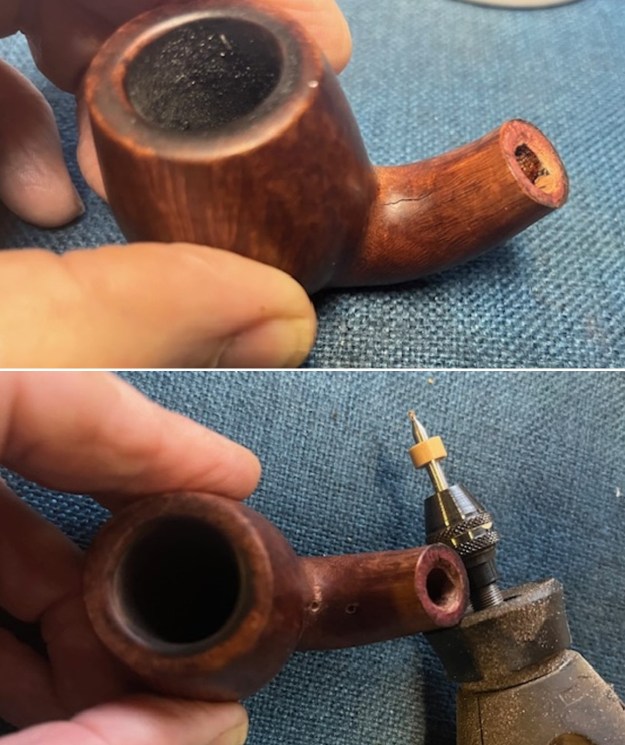
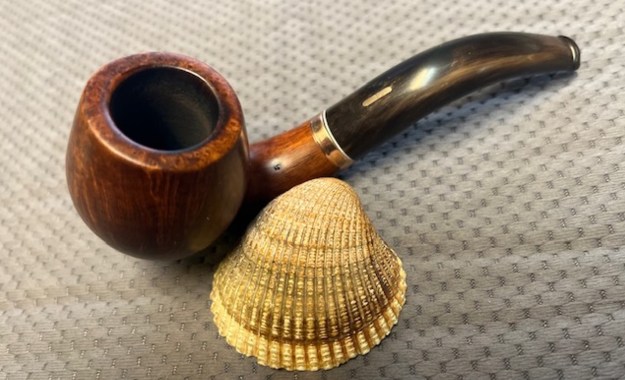
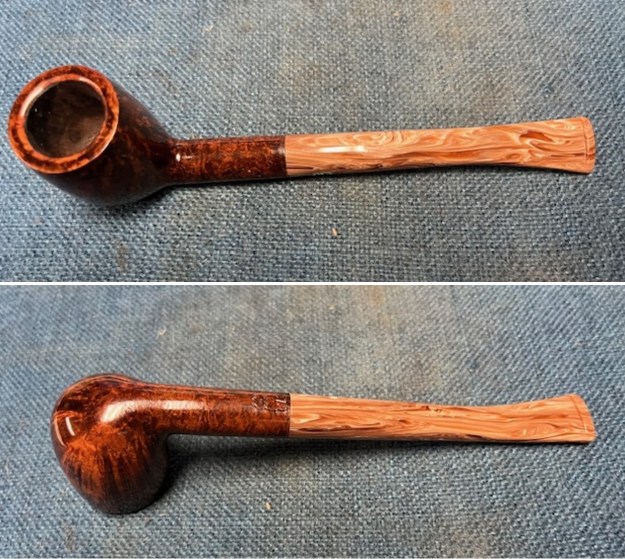 I took a close up photo of the bowl and rim top to show how clean and pristine the condition the pipe was in. The stem was a great acrylic Nougat colour that was also in pristine condition with no tooth marks or chatter on the surface.
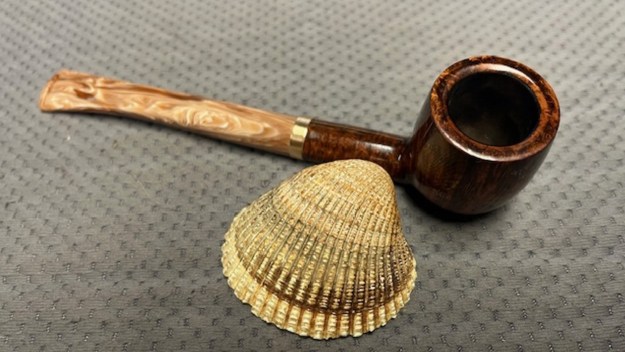
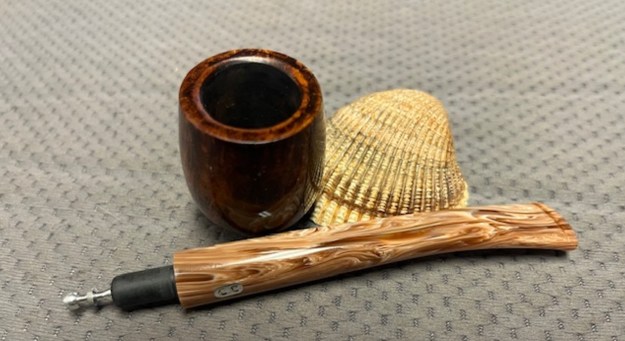
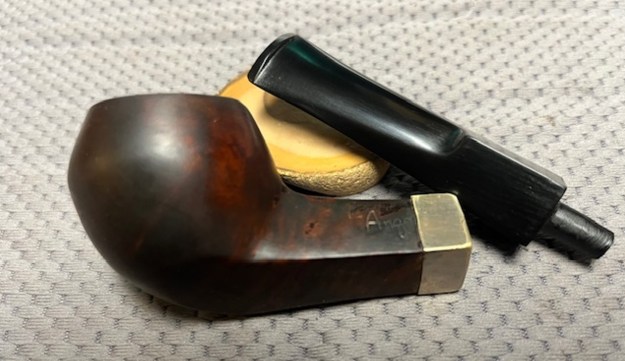
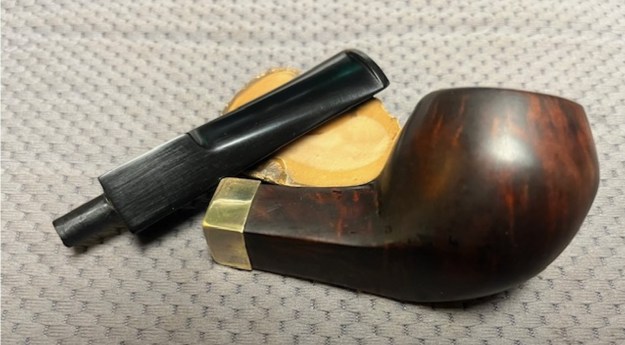
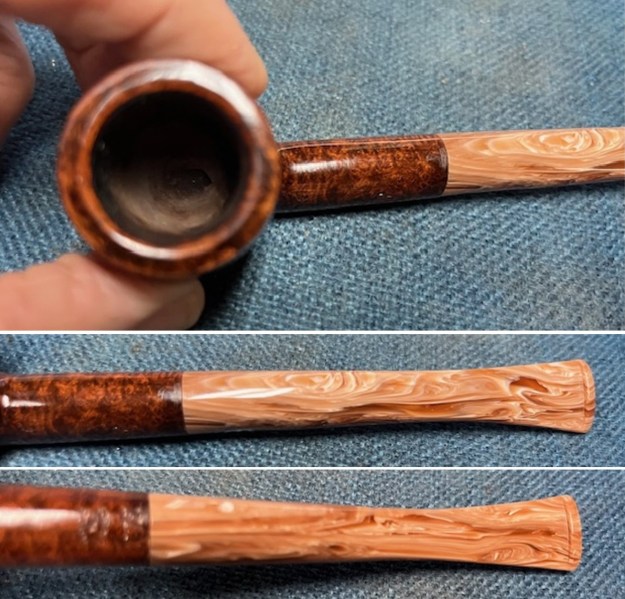 I took photos of the stamping on the shank sides and the logo on the stem. They were clear and readable. I removed the stem from the shank and took a photo of the pipe to show the look of the bowl and the stem.
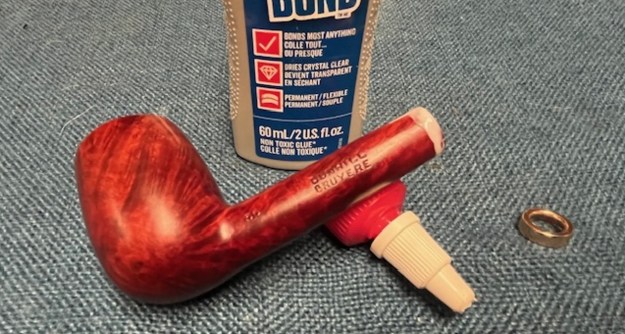
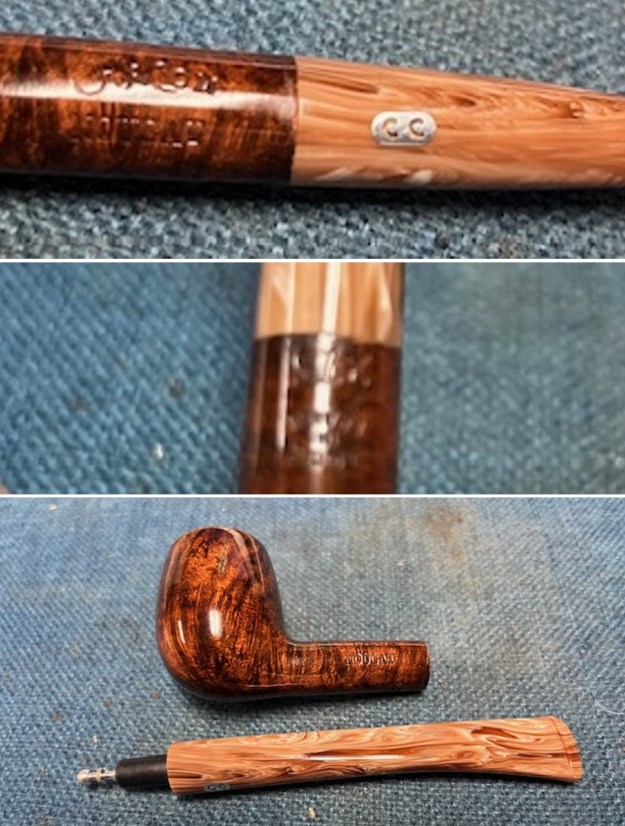 I looked up the Chacom Nougat on google and found a listing for this exact pipe on the site of Victory Pipes (https://victorypipes.ca/shop/shop-tobacco-pipes/chacom-pipes/chacom-nougat-tobacco-pipe-shape-275/). I have included the description of the pipe below.
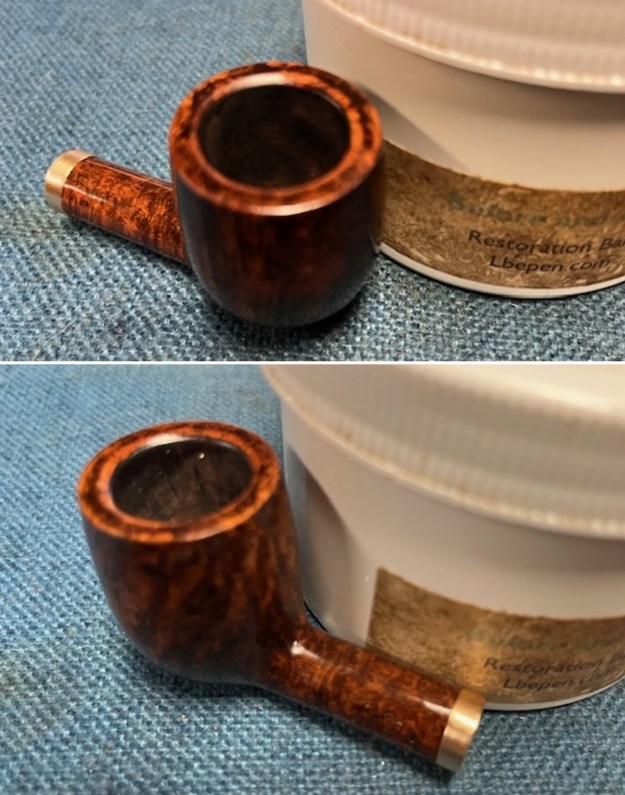
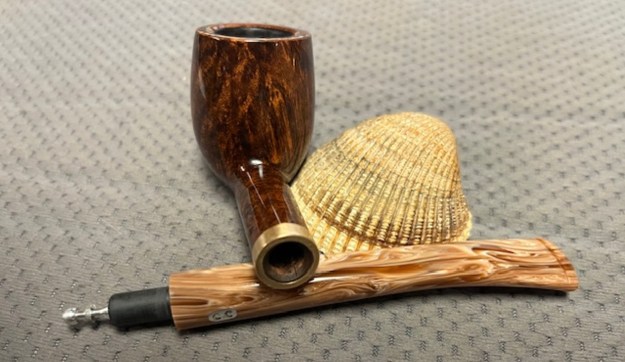
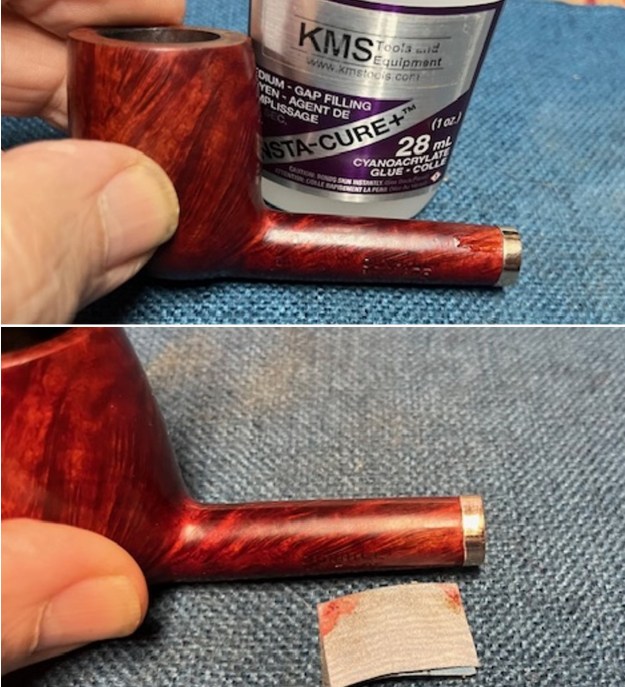
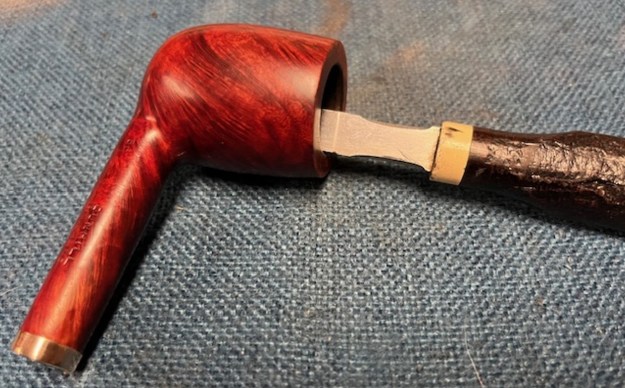
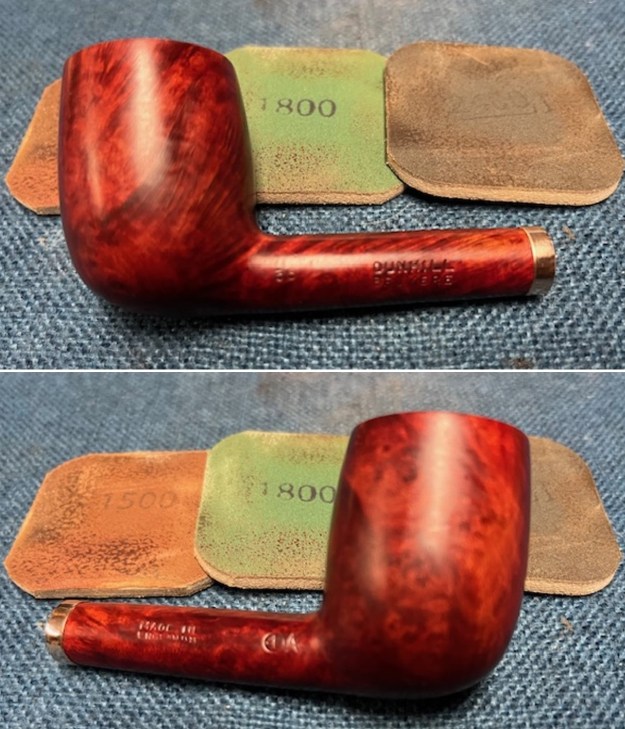
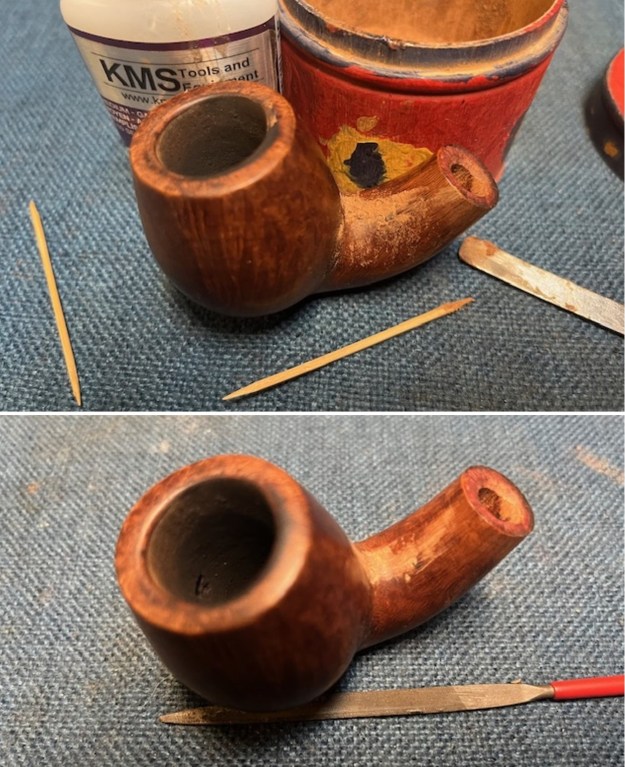
 I cleaned out the crack with some alcohol on a cotton swab. I used a microdrill bit to put a tiny hole at the end of the crack. It is visible in the photo below. I used a tooth pick to run a bead of clear CA glue in both the pinhole I drill and the length of the crack. Once it was in place I squeezed the crack together and let the repair harden. The CA dries quickly so it did not take to long. I then put some white glue on the inside of a brass band and pressed it onto the shank end to hold the repair together. Once the band was set and the repairs had hardened I carefully sanded it smooth with a folded piece of 220 grit sandpaper. I followed up on that with a 320-3500 grit sanding pads to smooth it out.
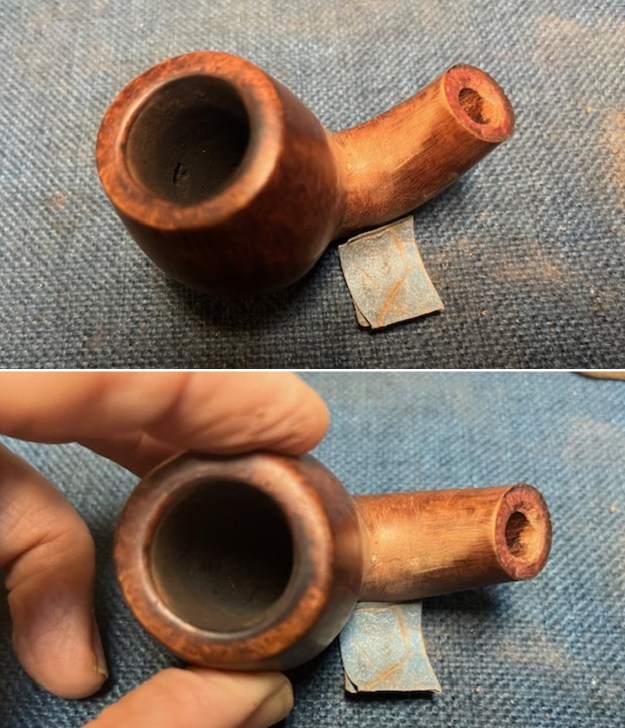
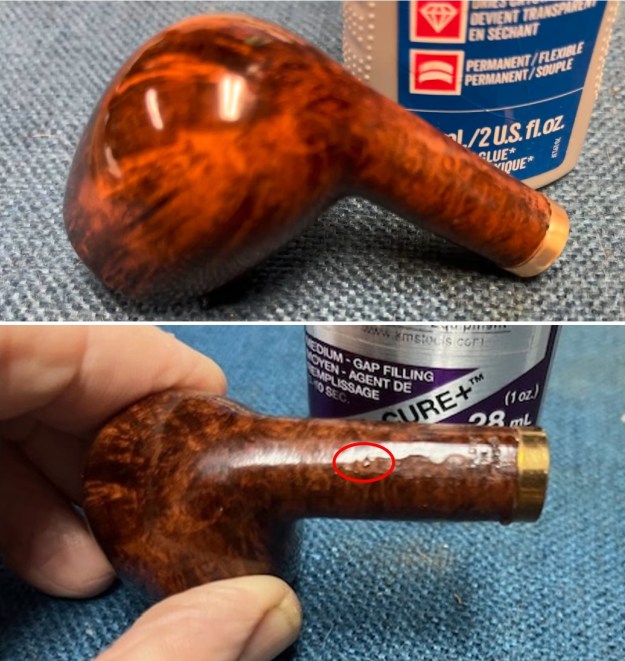 Once I smoothed out the repaired I polished the area of the repair and the brass band with 1500-12000 grit sanding pads. Once I finished the polishing the repair looked very good and the band also began to really shine.
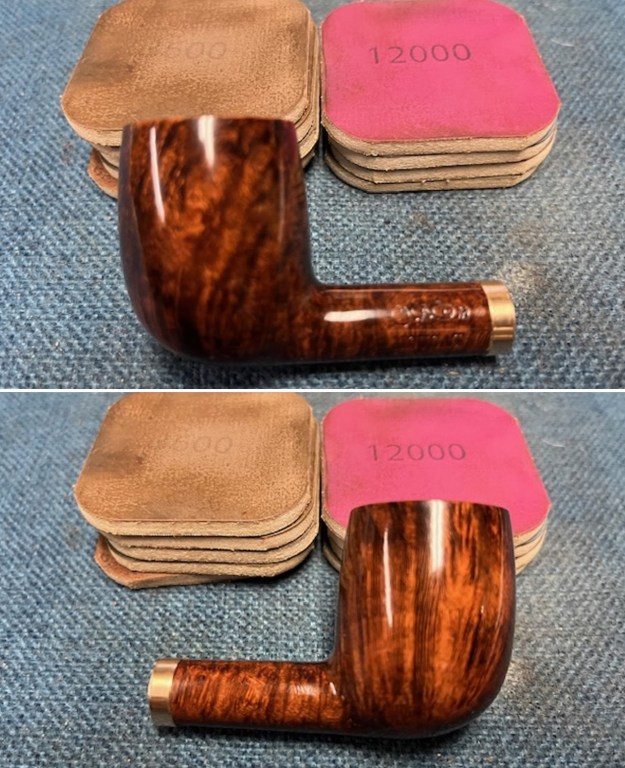
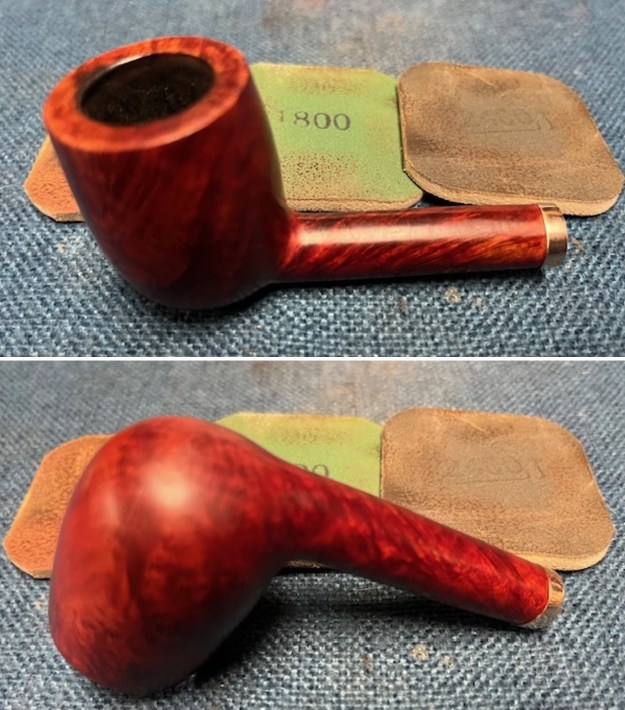
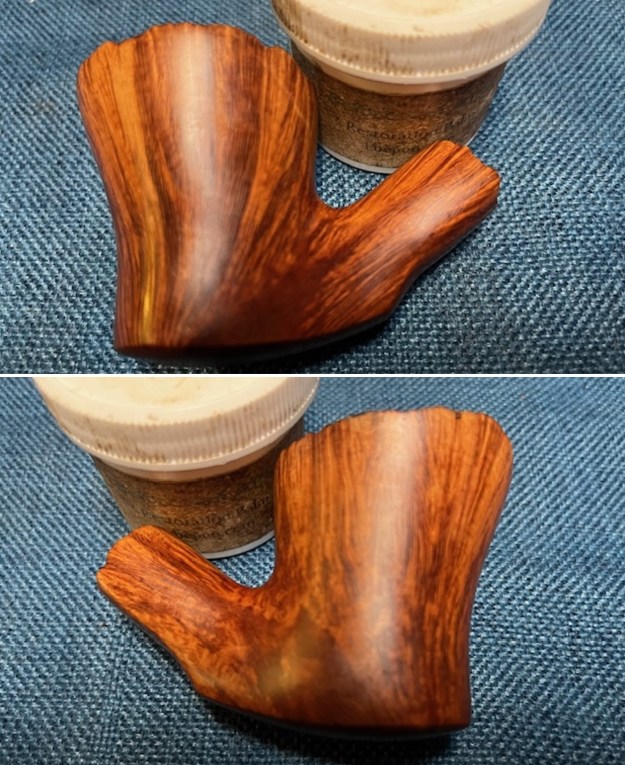
 I worked some Before & After Restoration Balm into the surface of the briar with my finger tips to get into the wood. The product is incredible and the way it brings the grain to the fore is unique. It works to clean, protect and invigorate the wood. I let it sit and absorb into the briar and then buffed it off with a soft cloth.
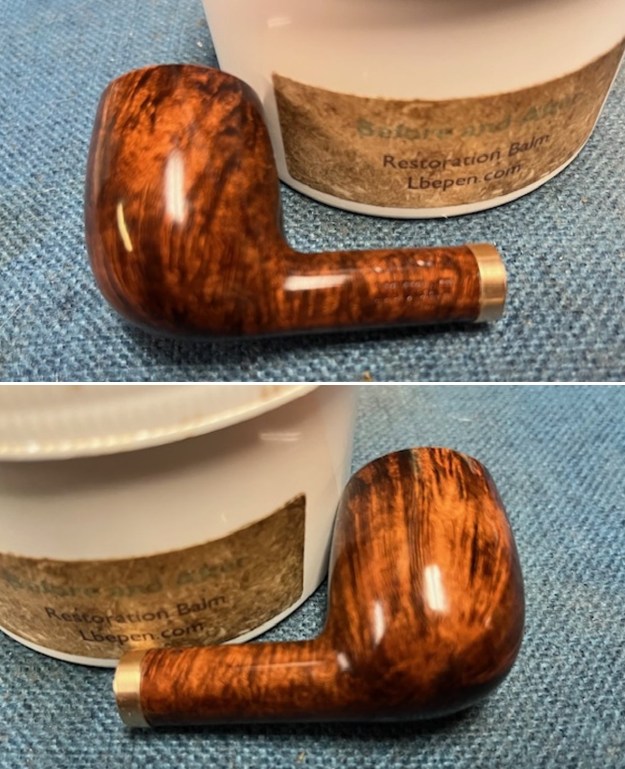
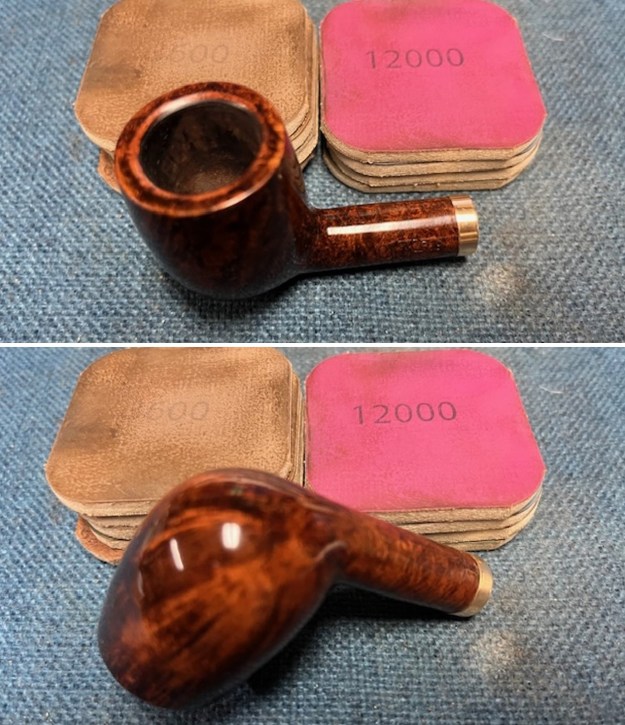
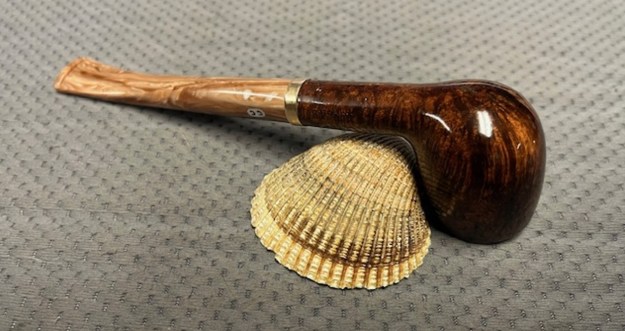
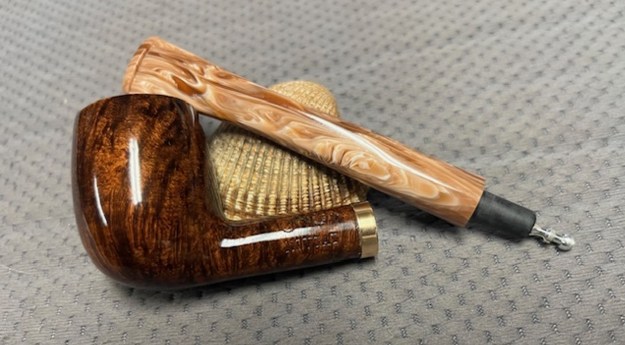
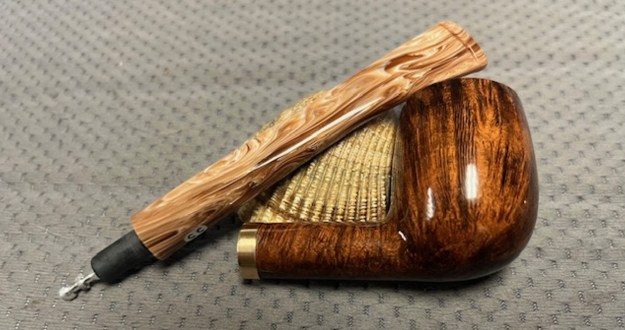
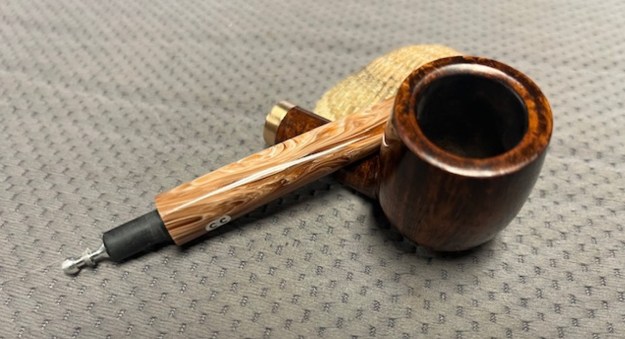
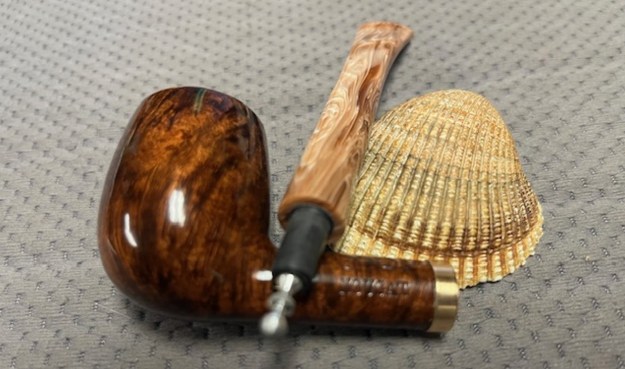
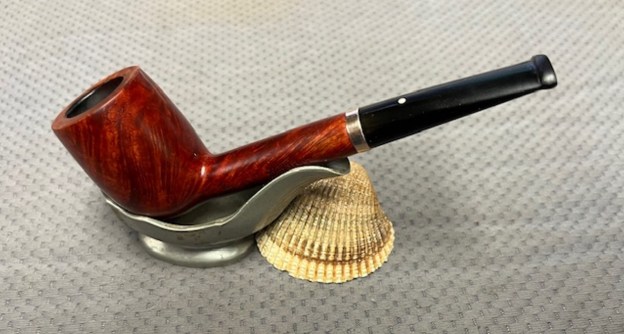
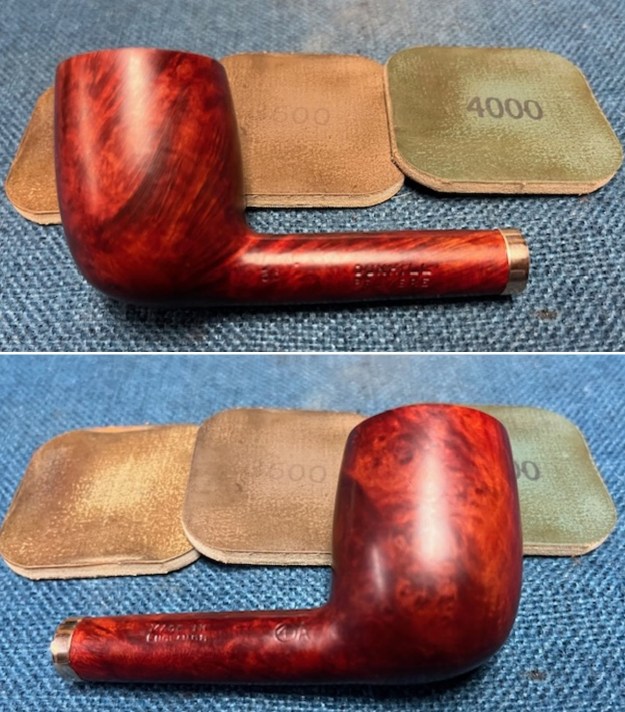
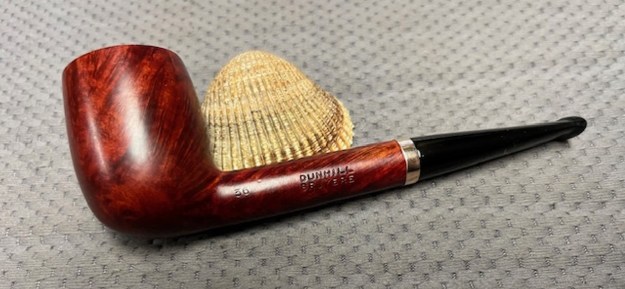
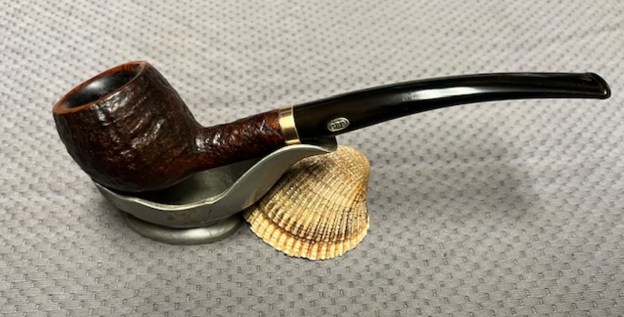
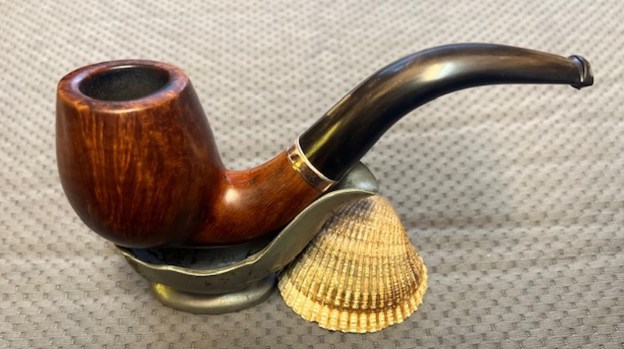
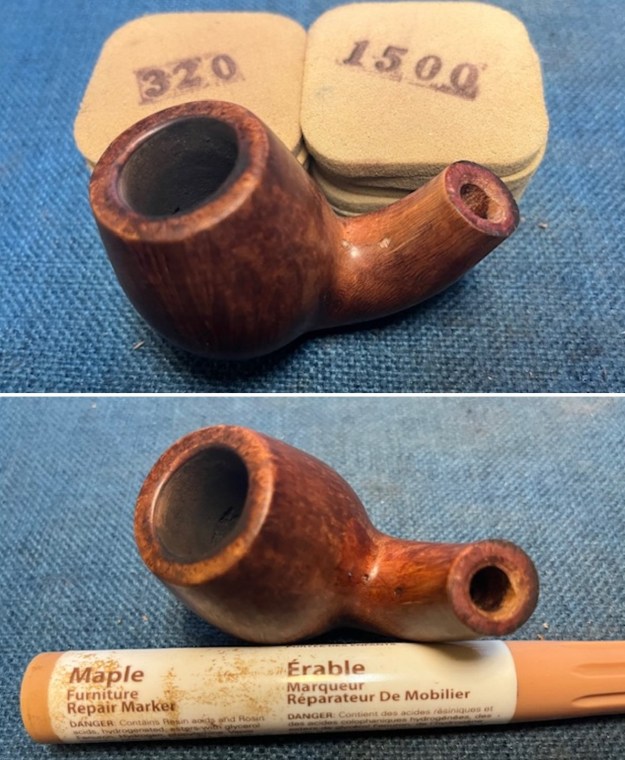
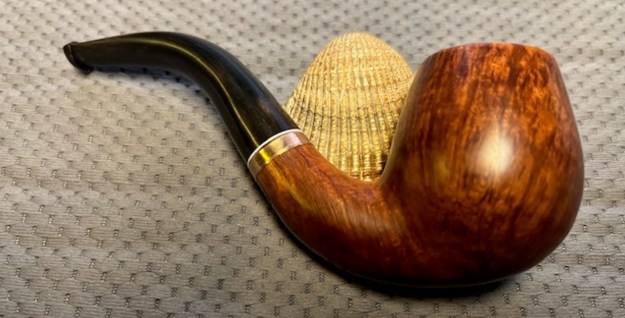
 I finished the repair on the cracked shank on the Chacom Nougat 275 Billiard and took it to the buffer. I buffed the bowl, brass band and the stem with Blue Diamond on a buffing pad and following that by giving the bowl and stem multiple coats of carnauba wax. I buffed it with a clean buffing pad to raise the shine. It is a beautiful pipe. It will be heading back to Jay later this week. Have a look. Thanks.
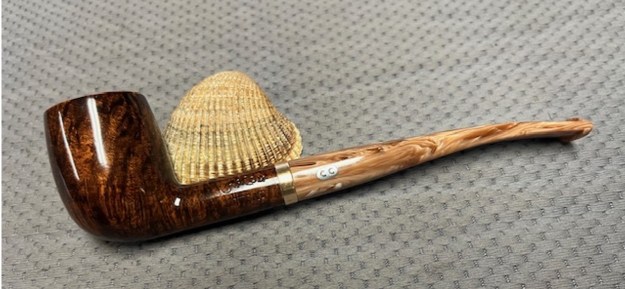


