Tag Archives: Repairing a cracked bowl

Short Snorter Imported Briar


Blog by Dal Stanton

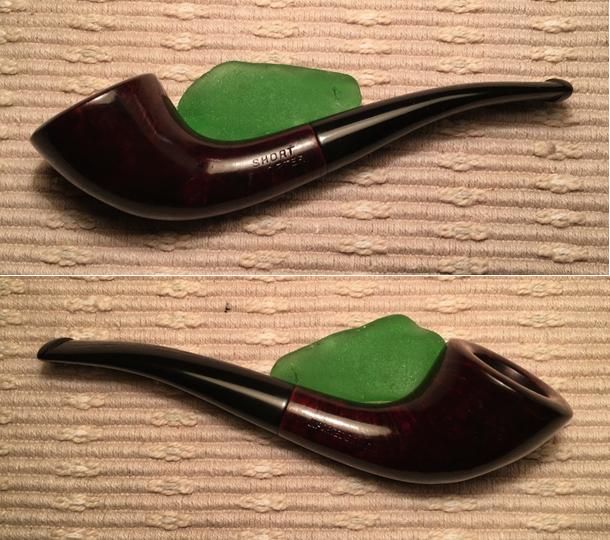
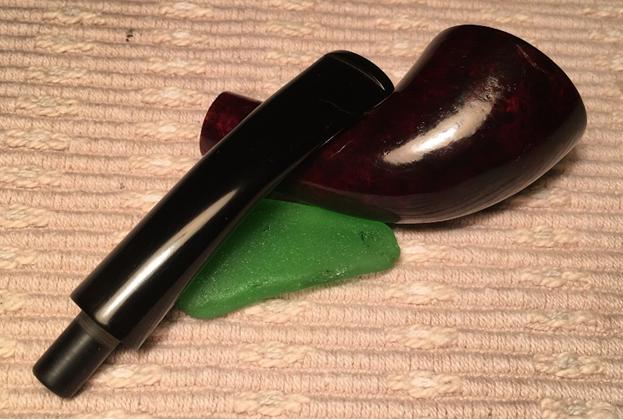
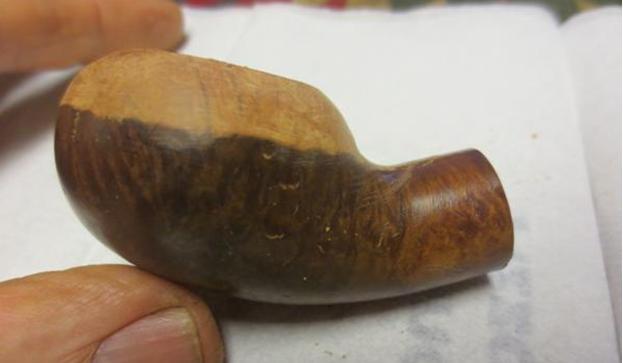
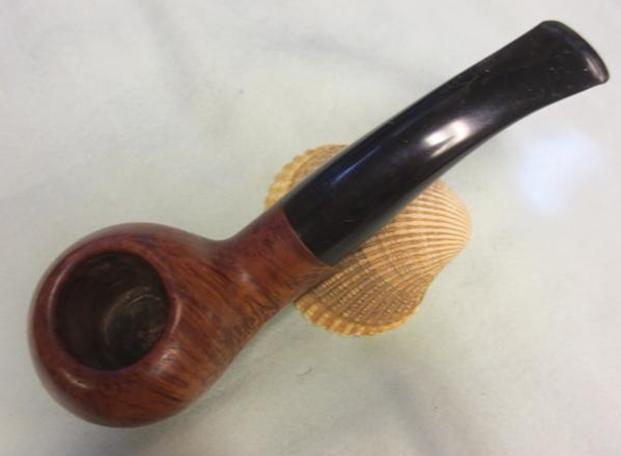
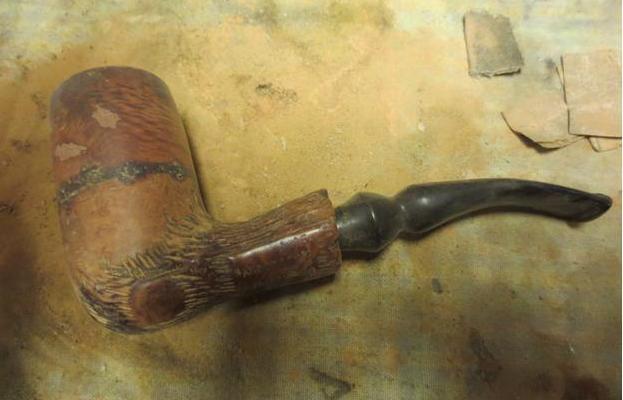
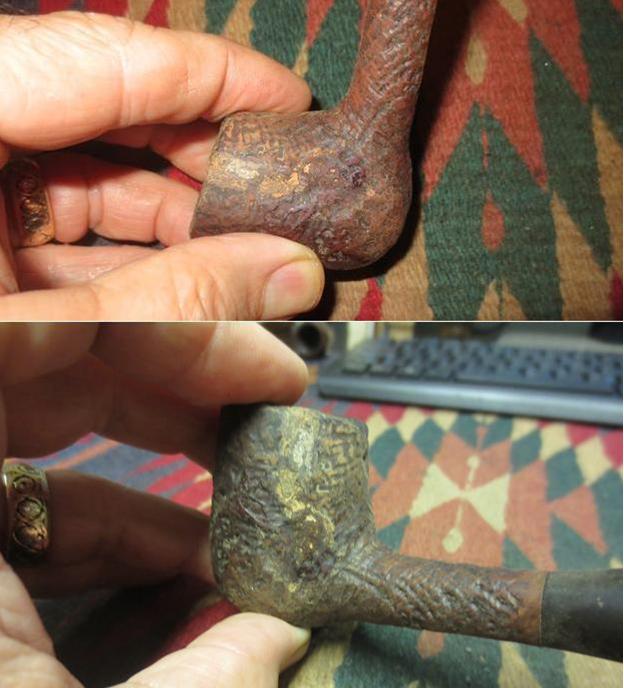
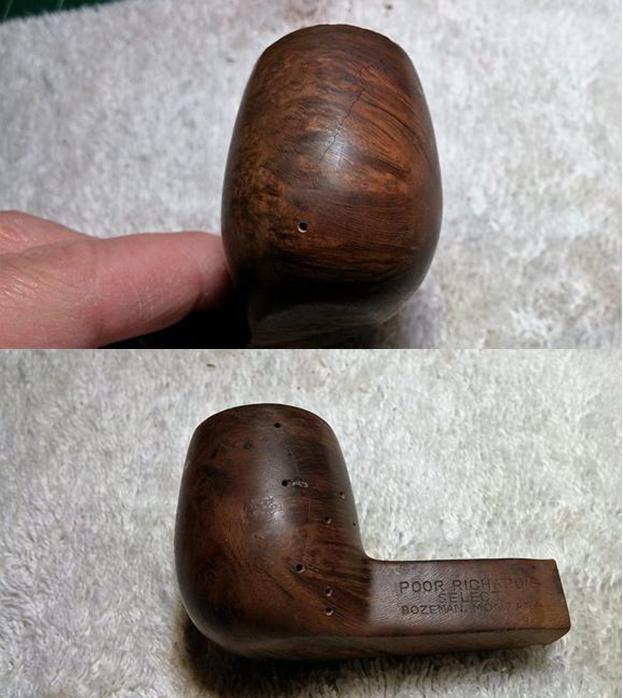
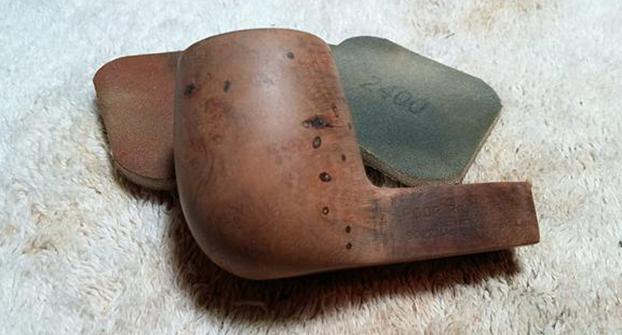
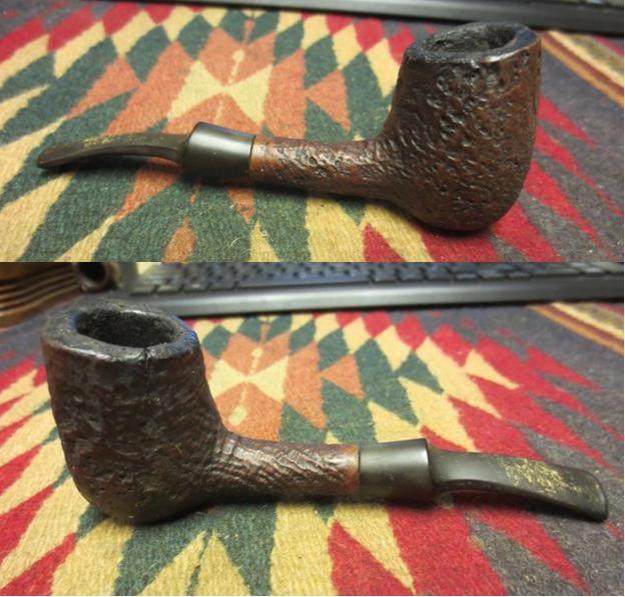
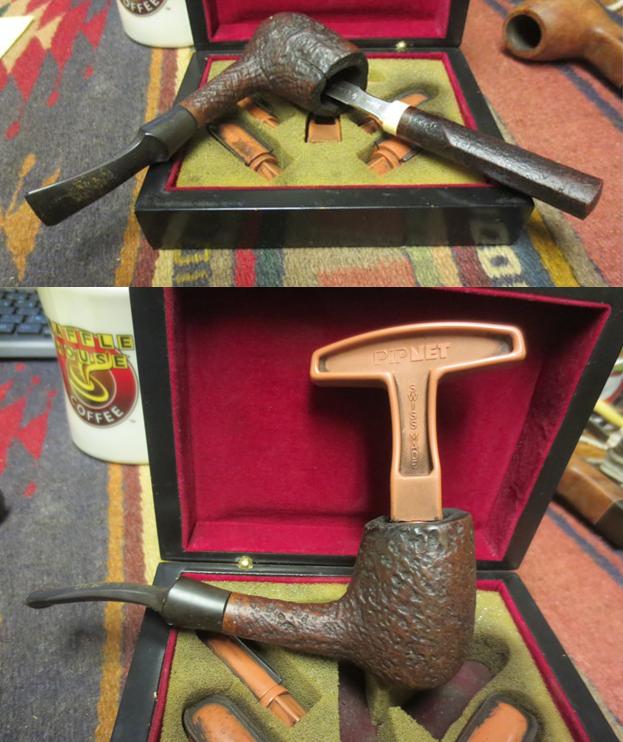
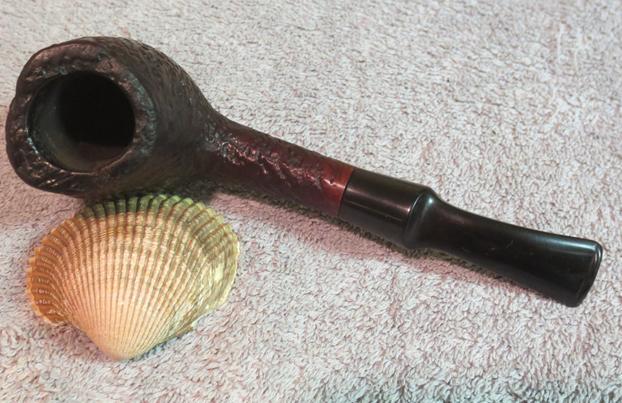
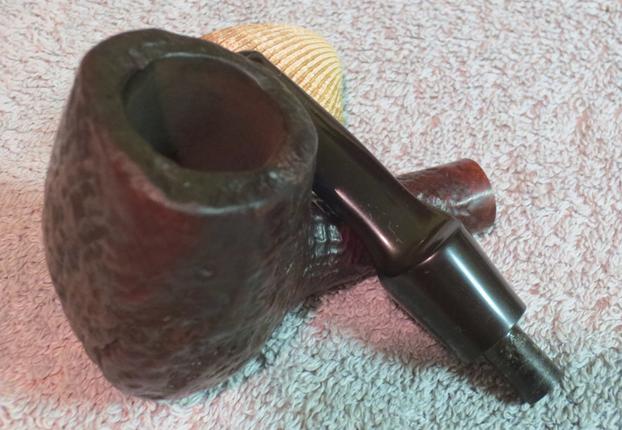
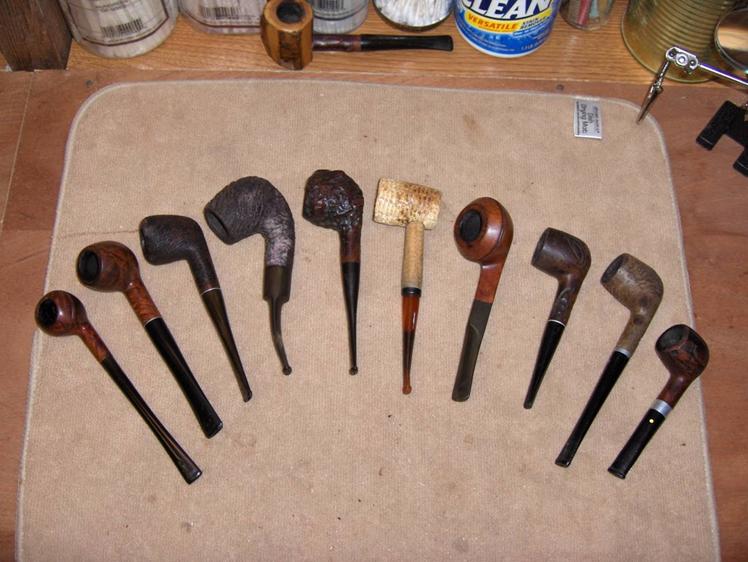
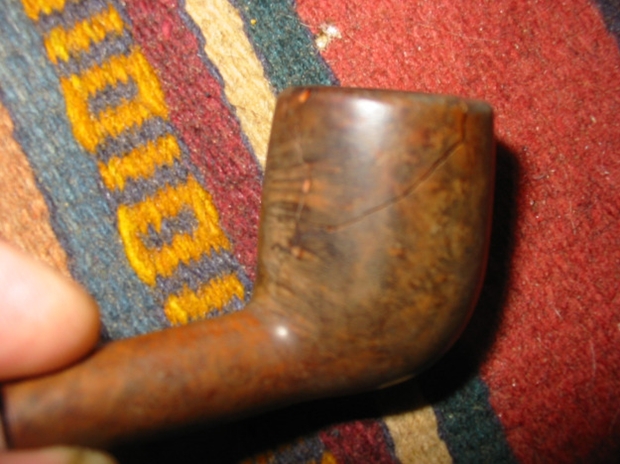
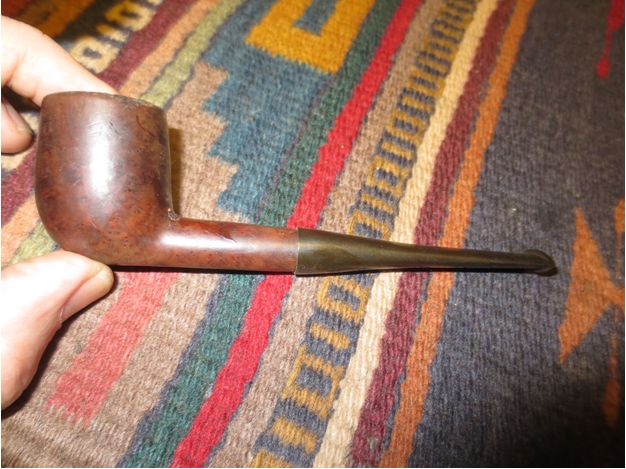
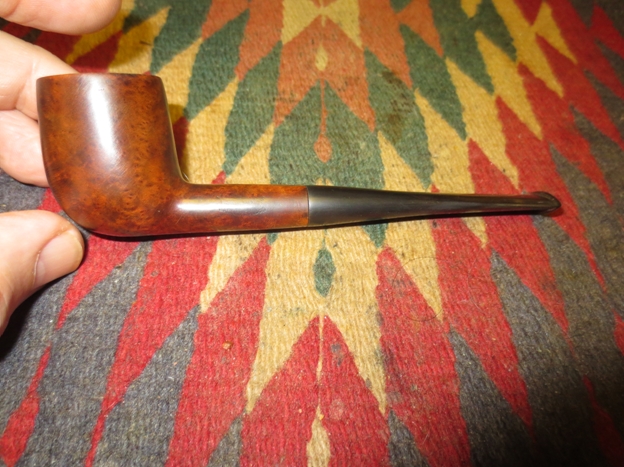
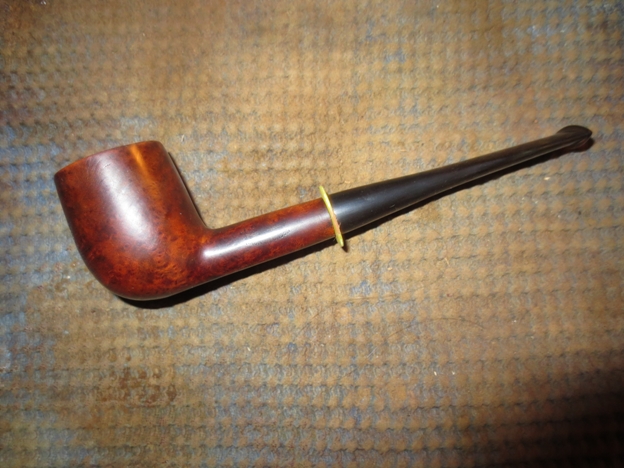
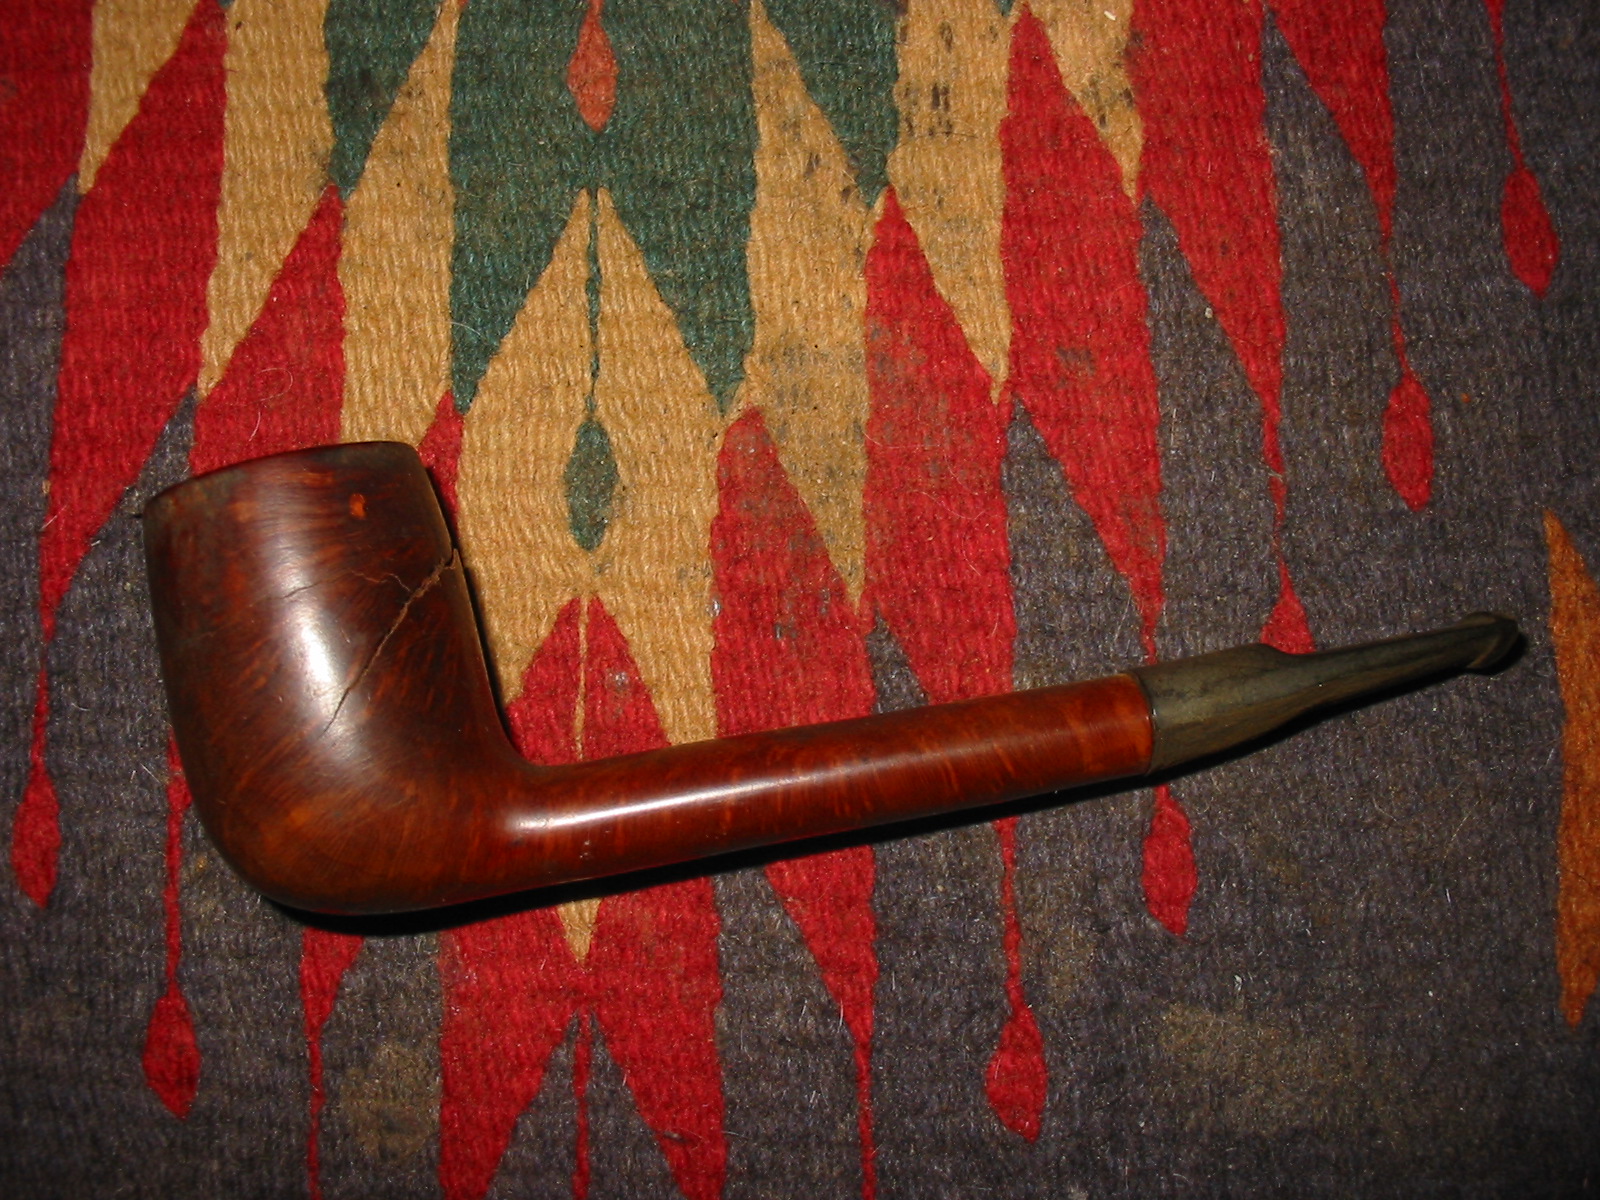
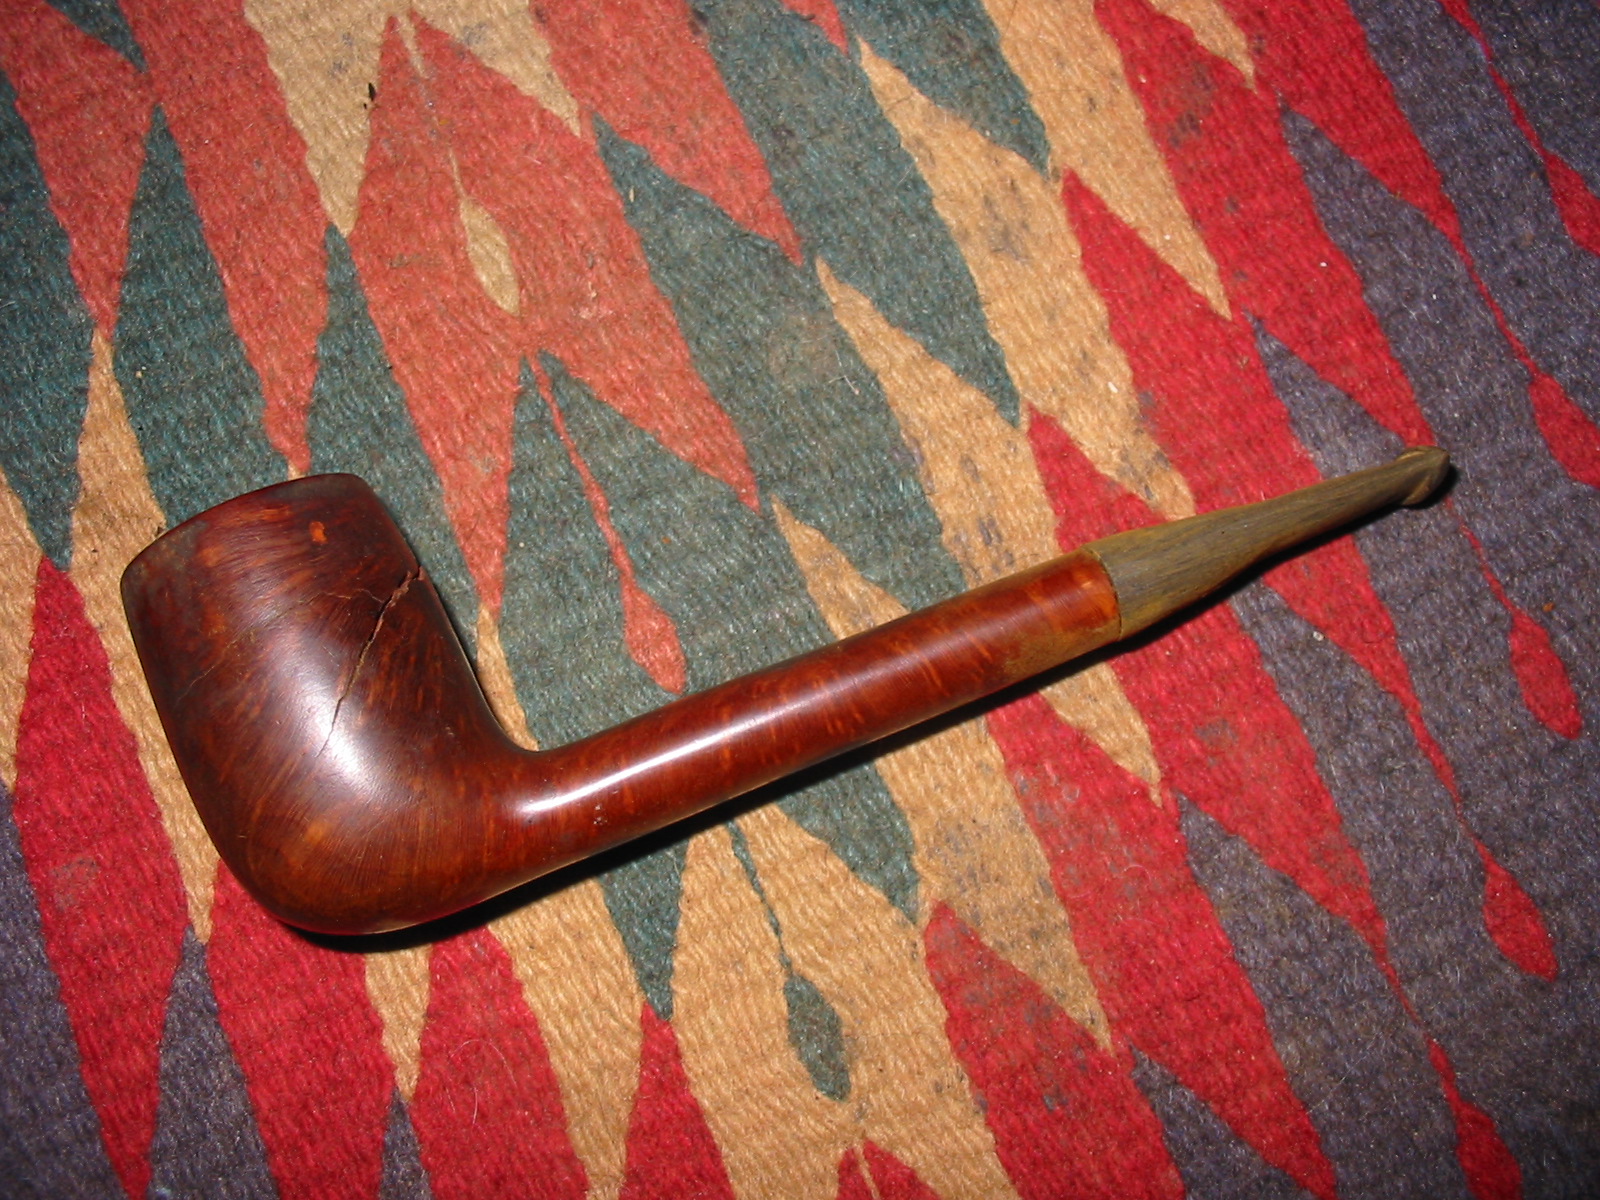
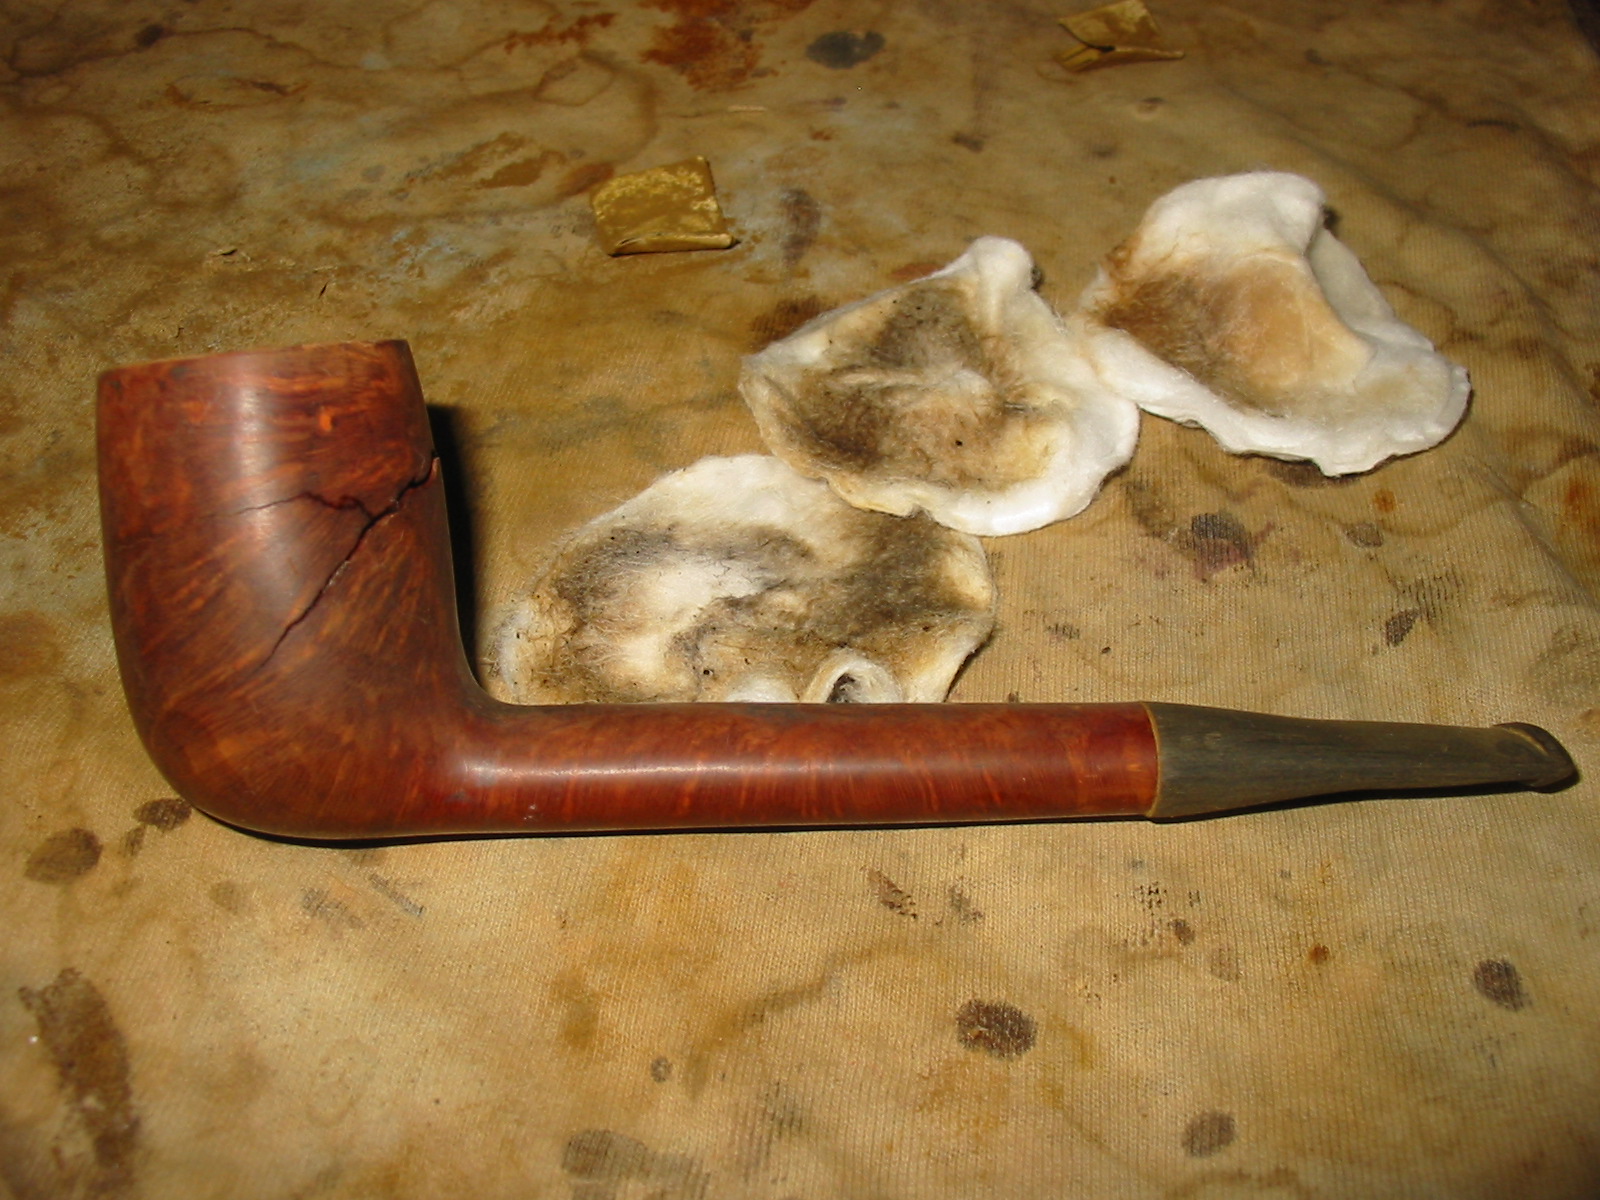
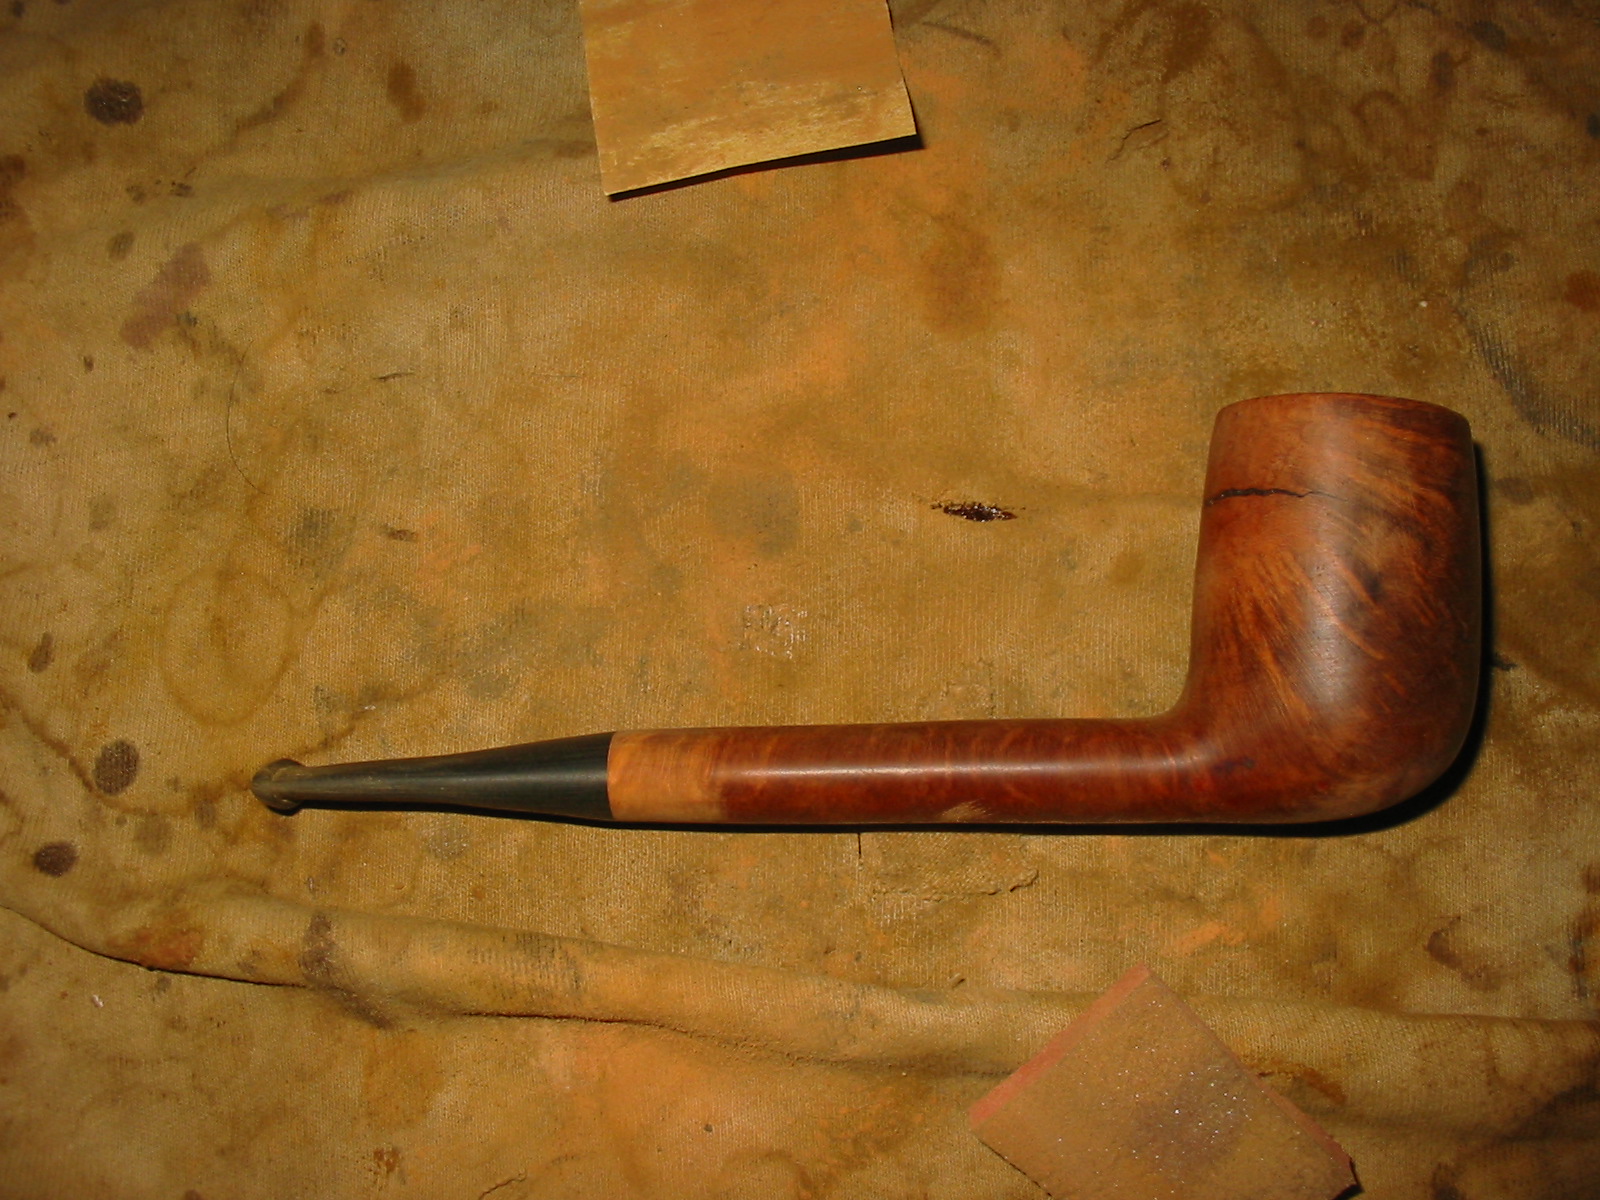
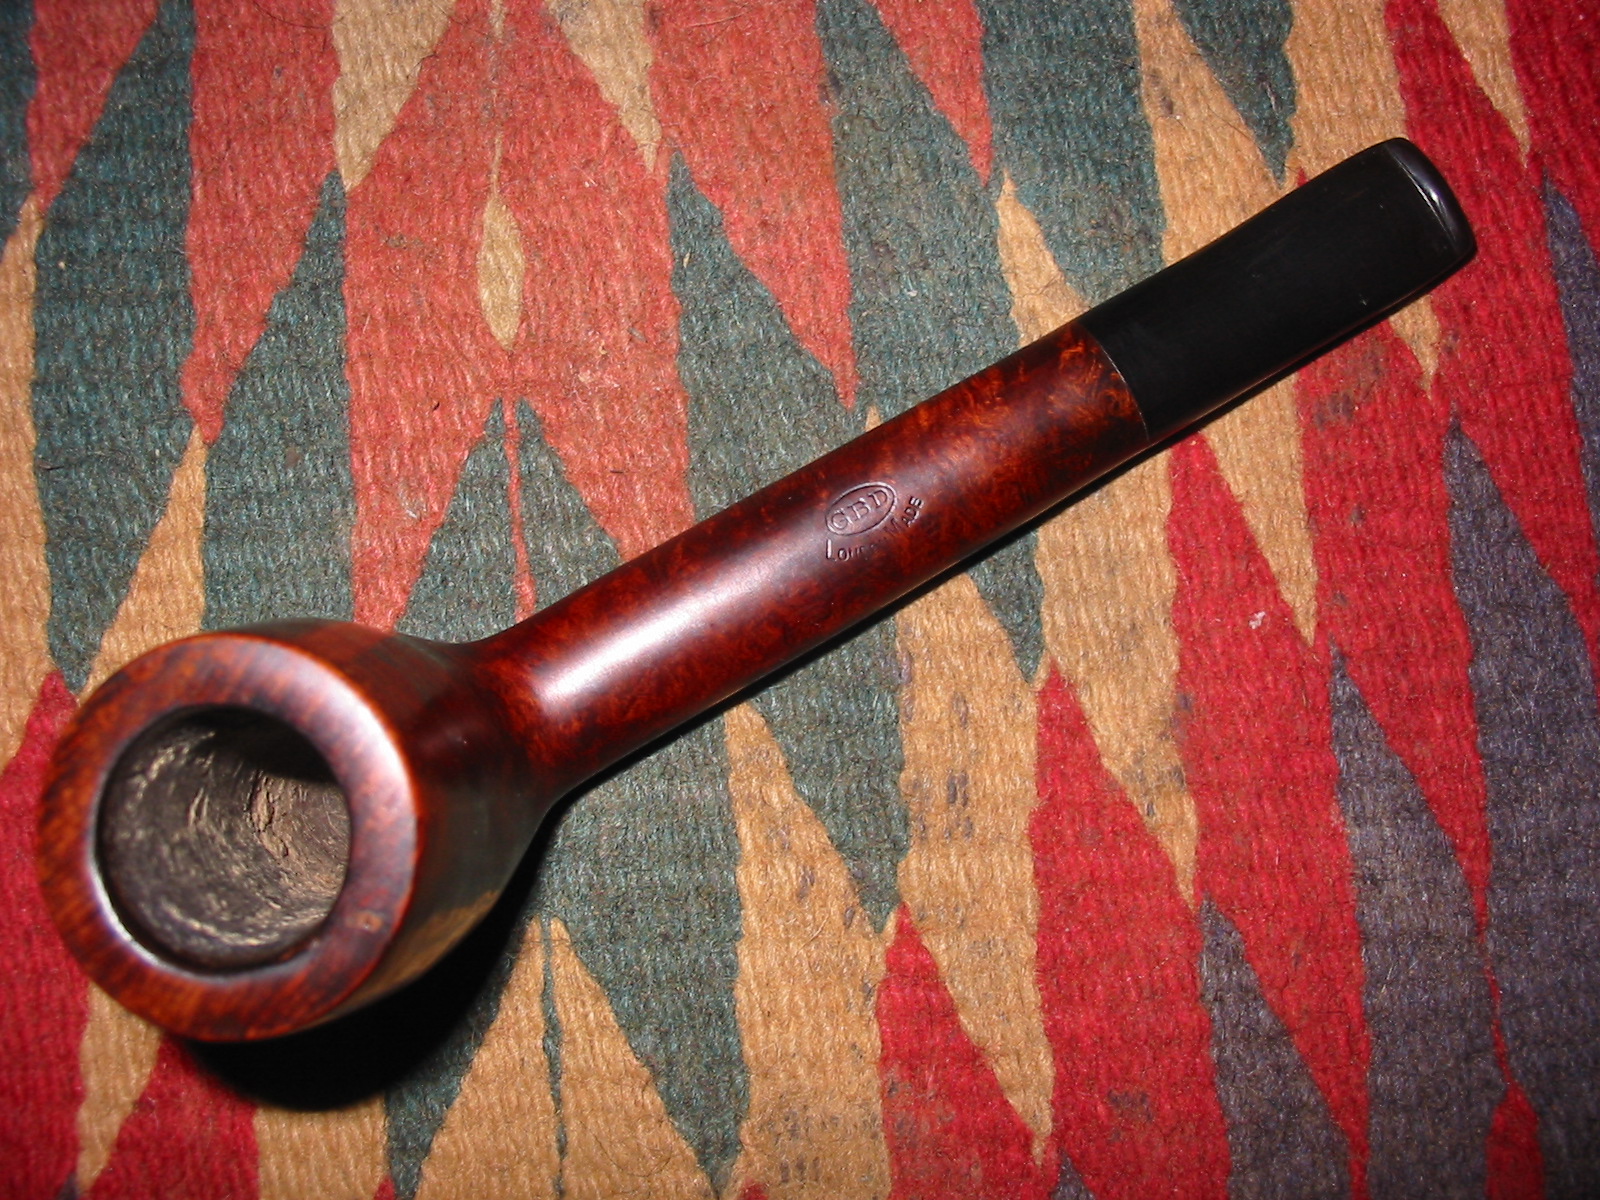
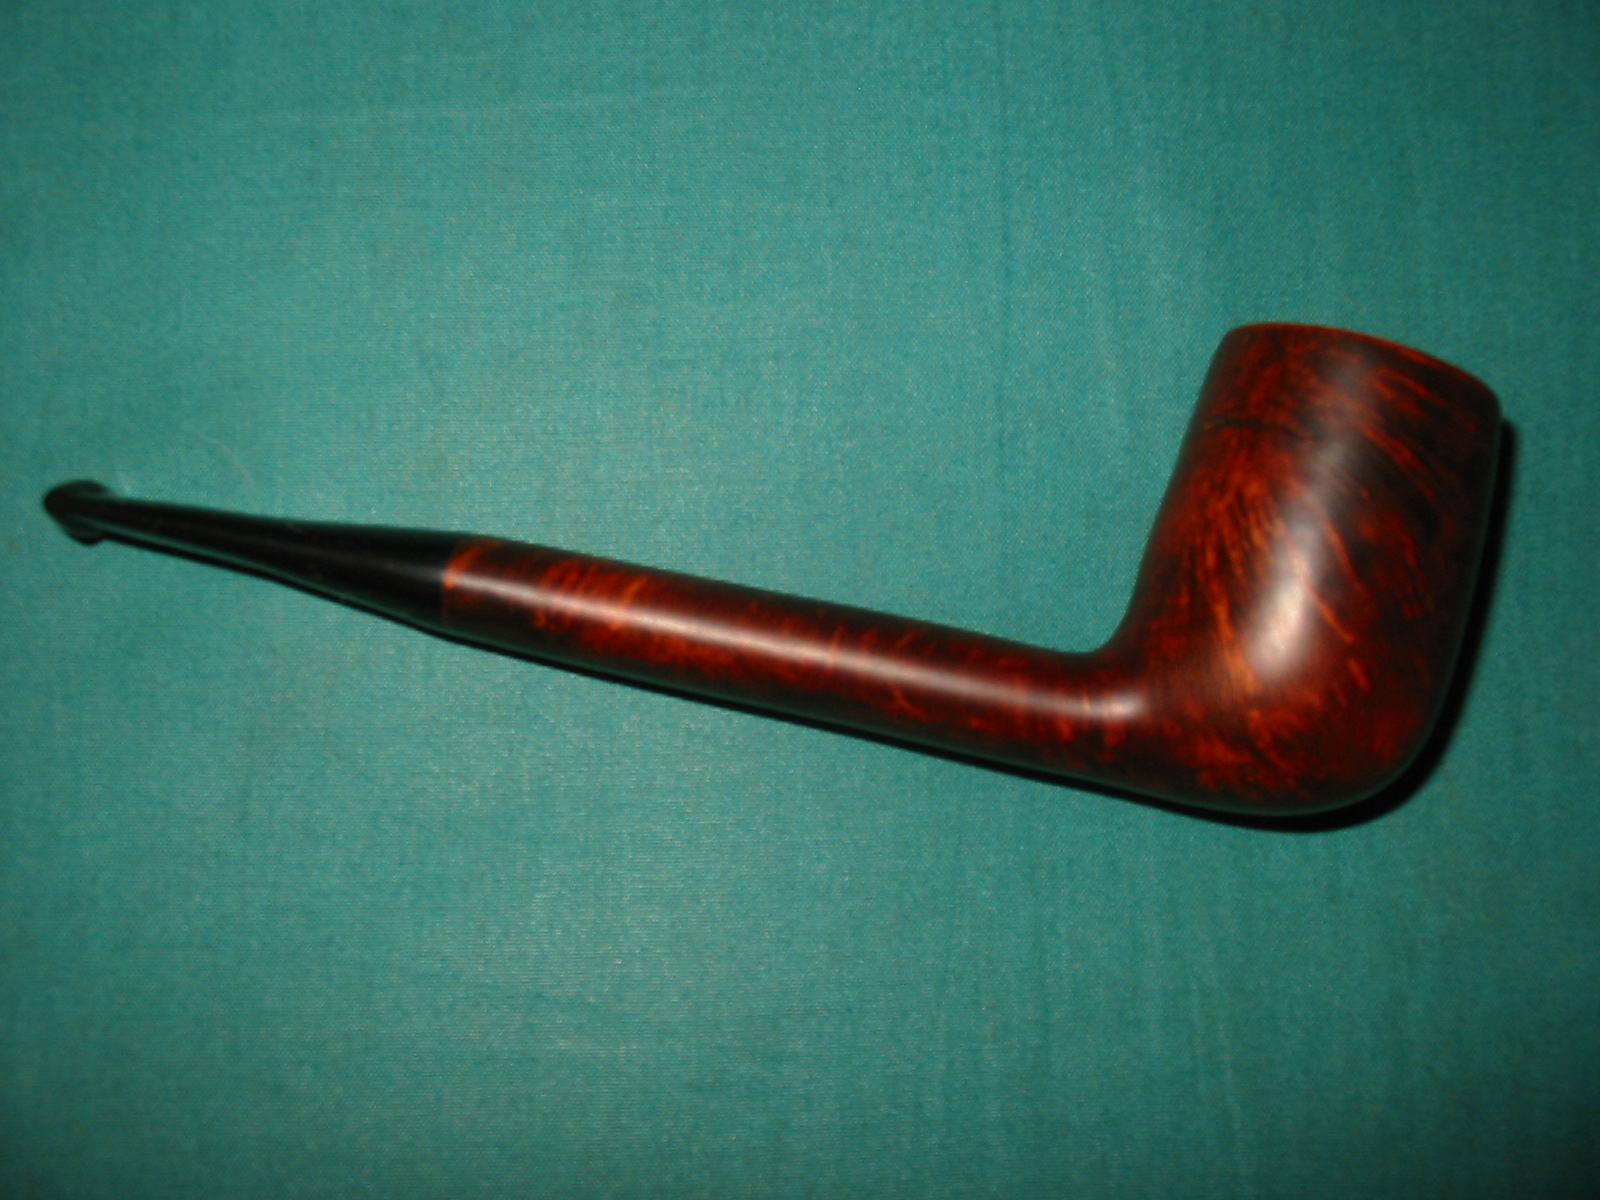
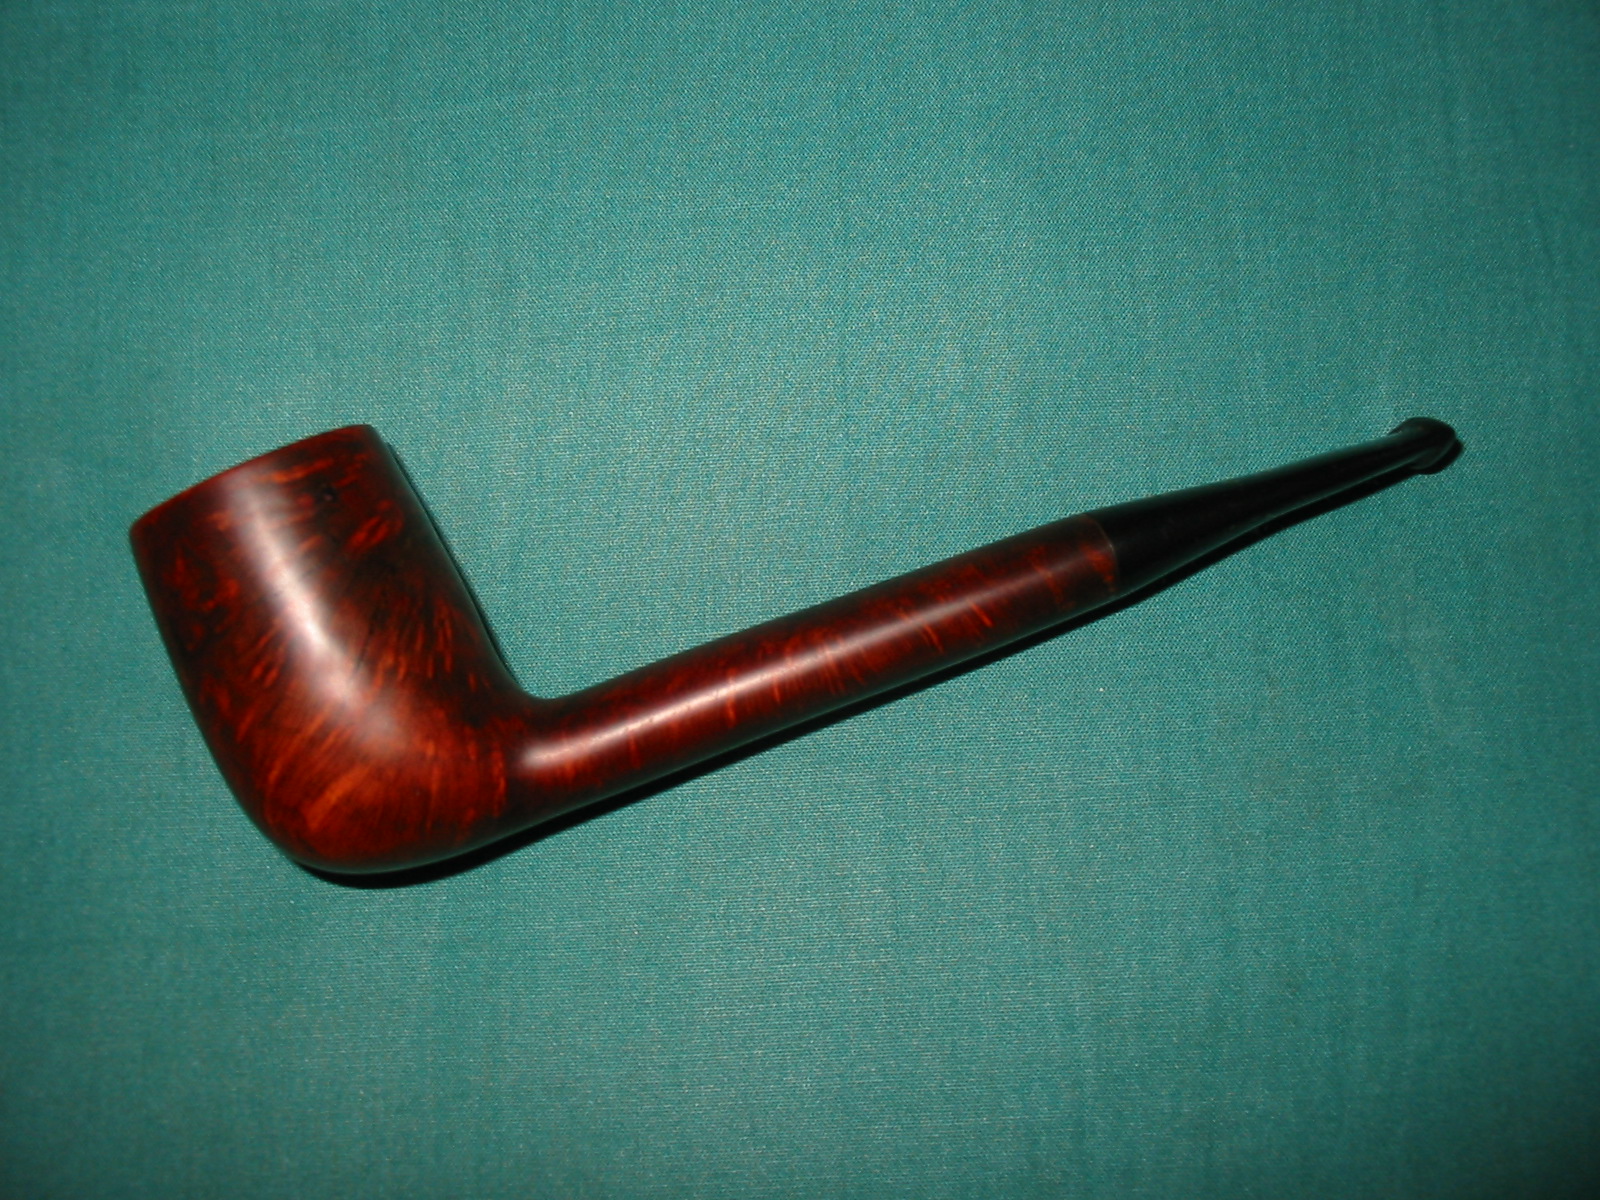
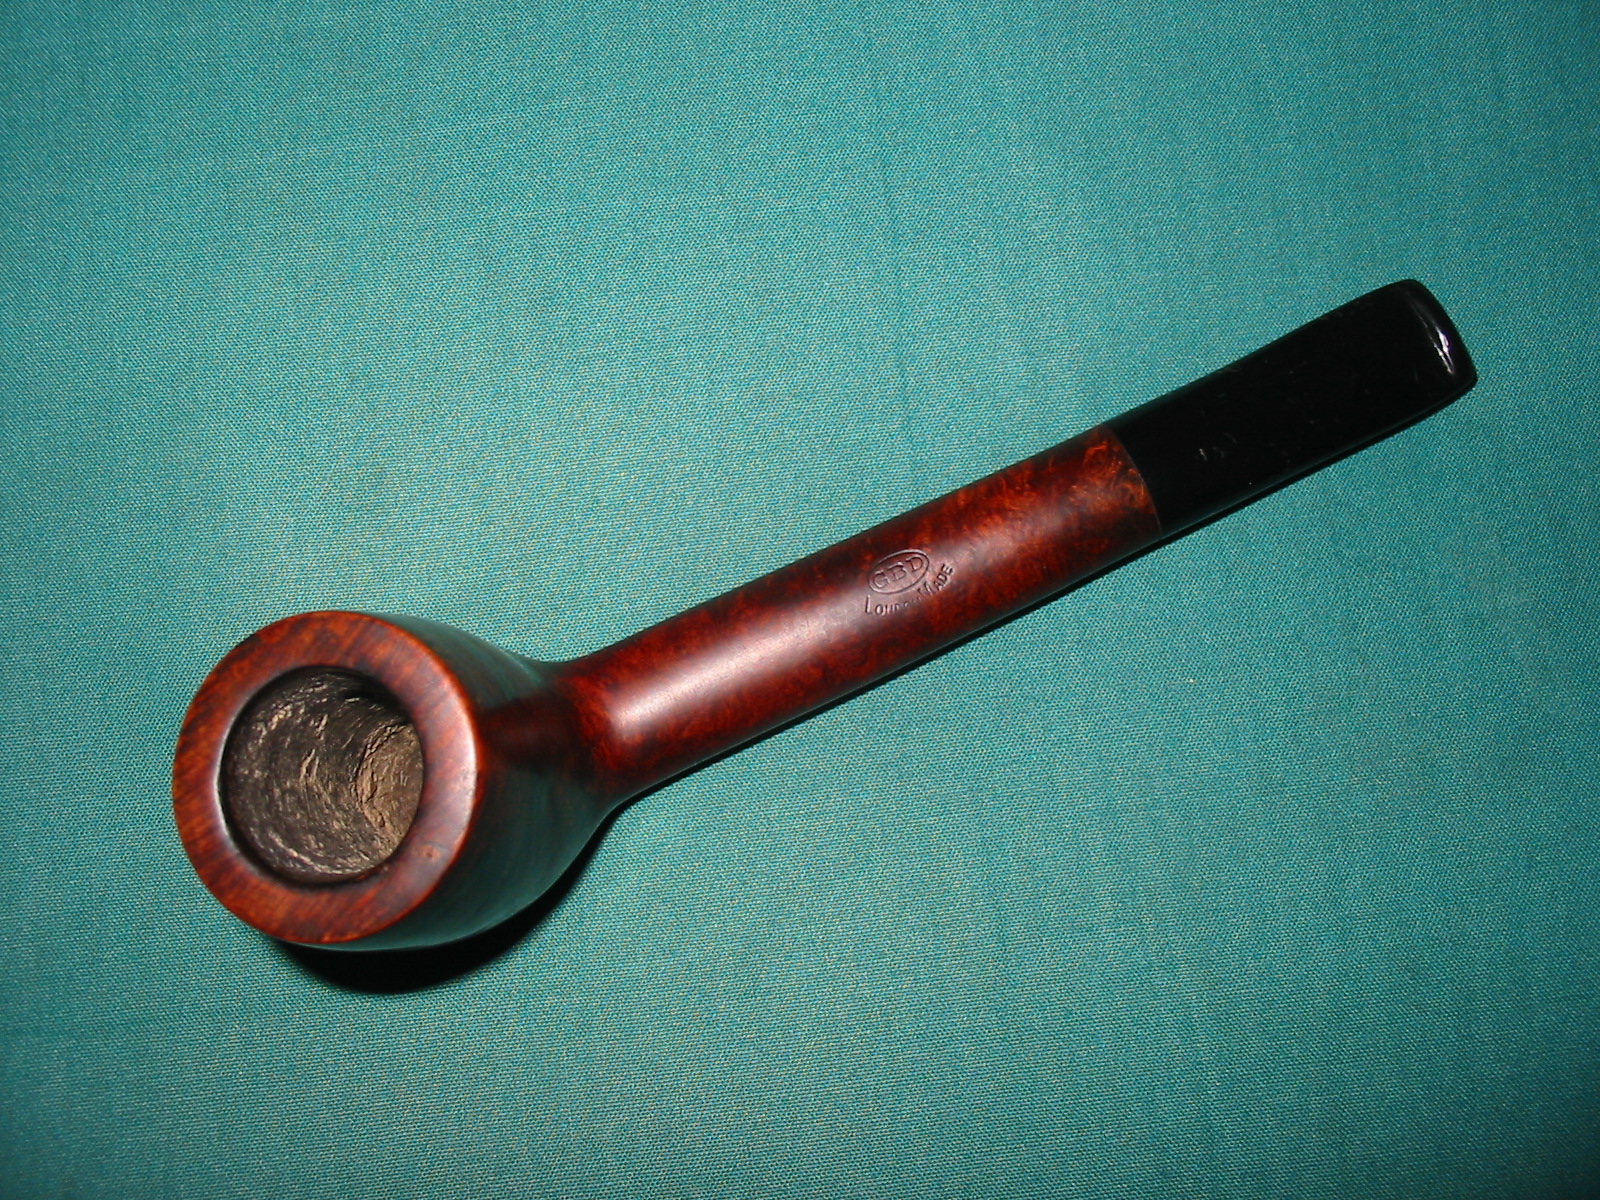
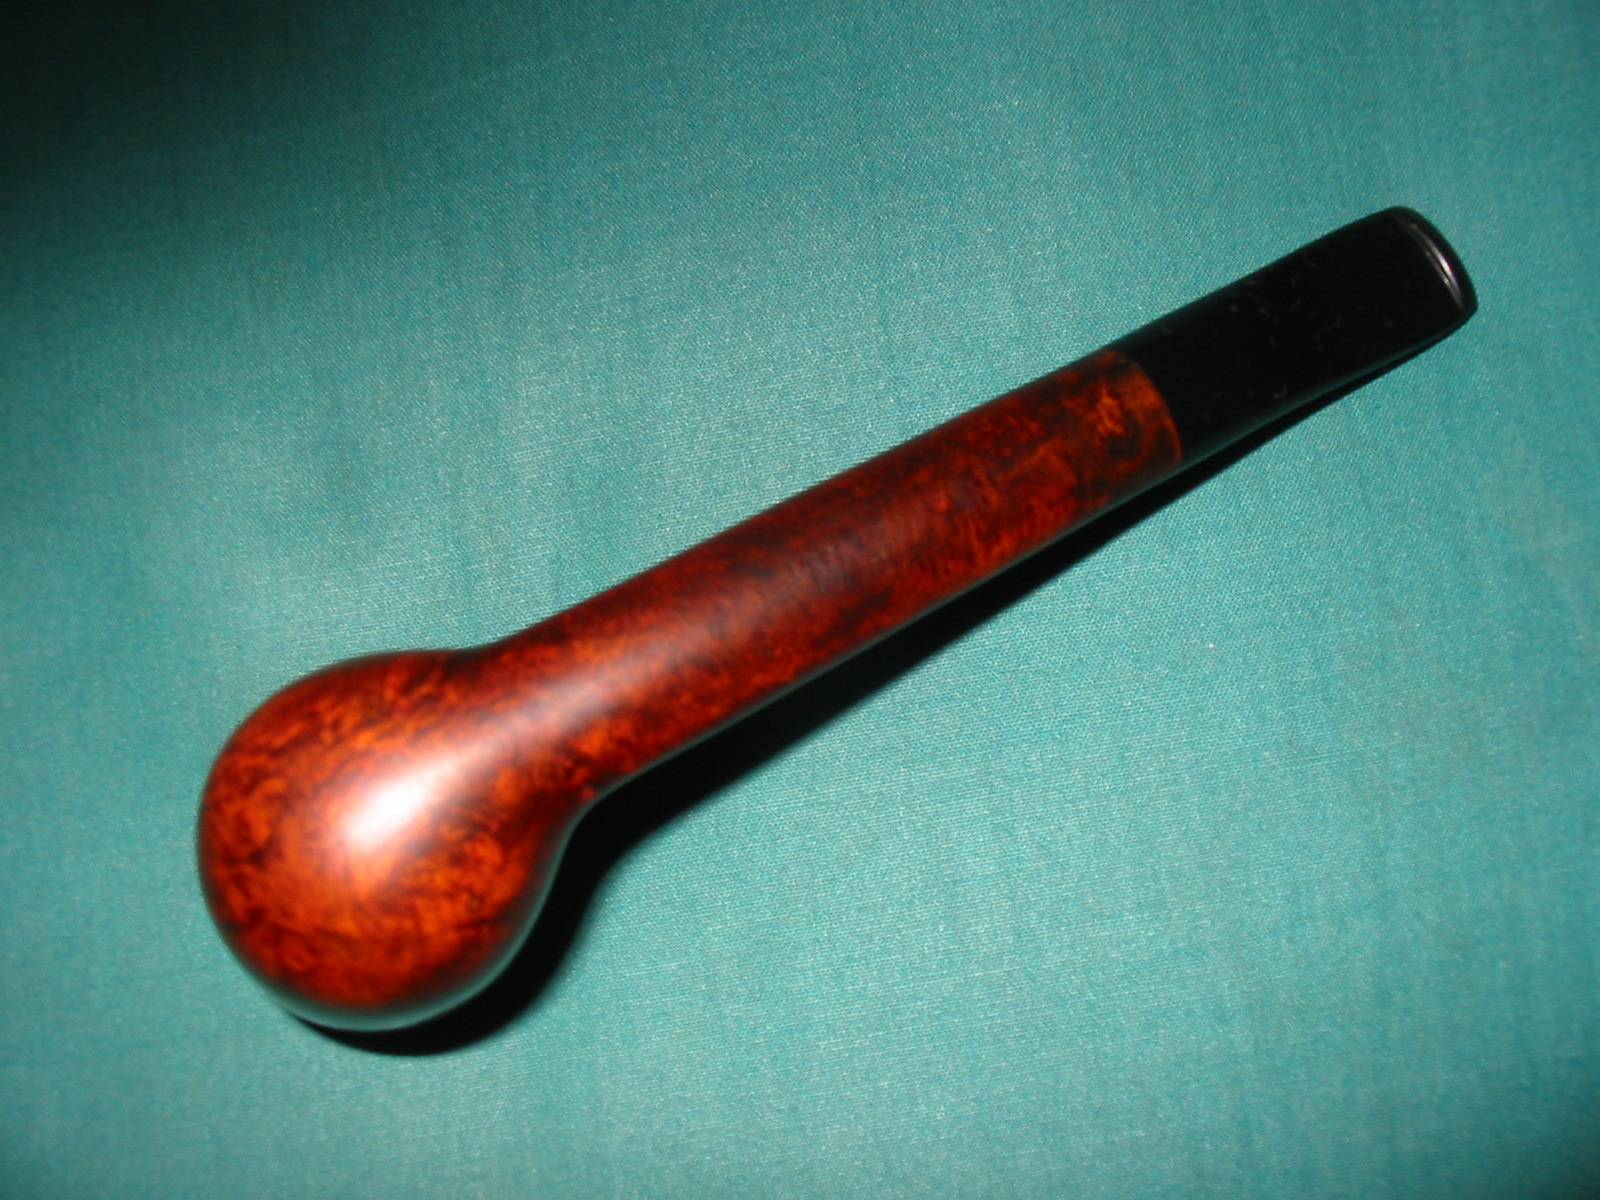
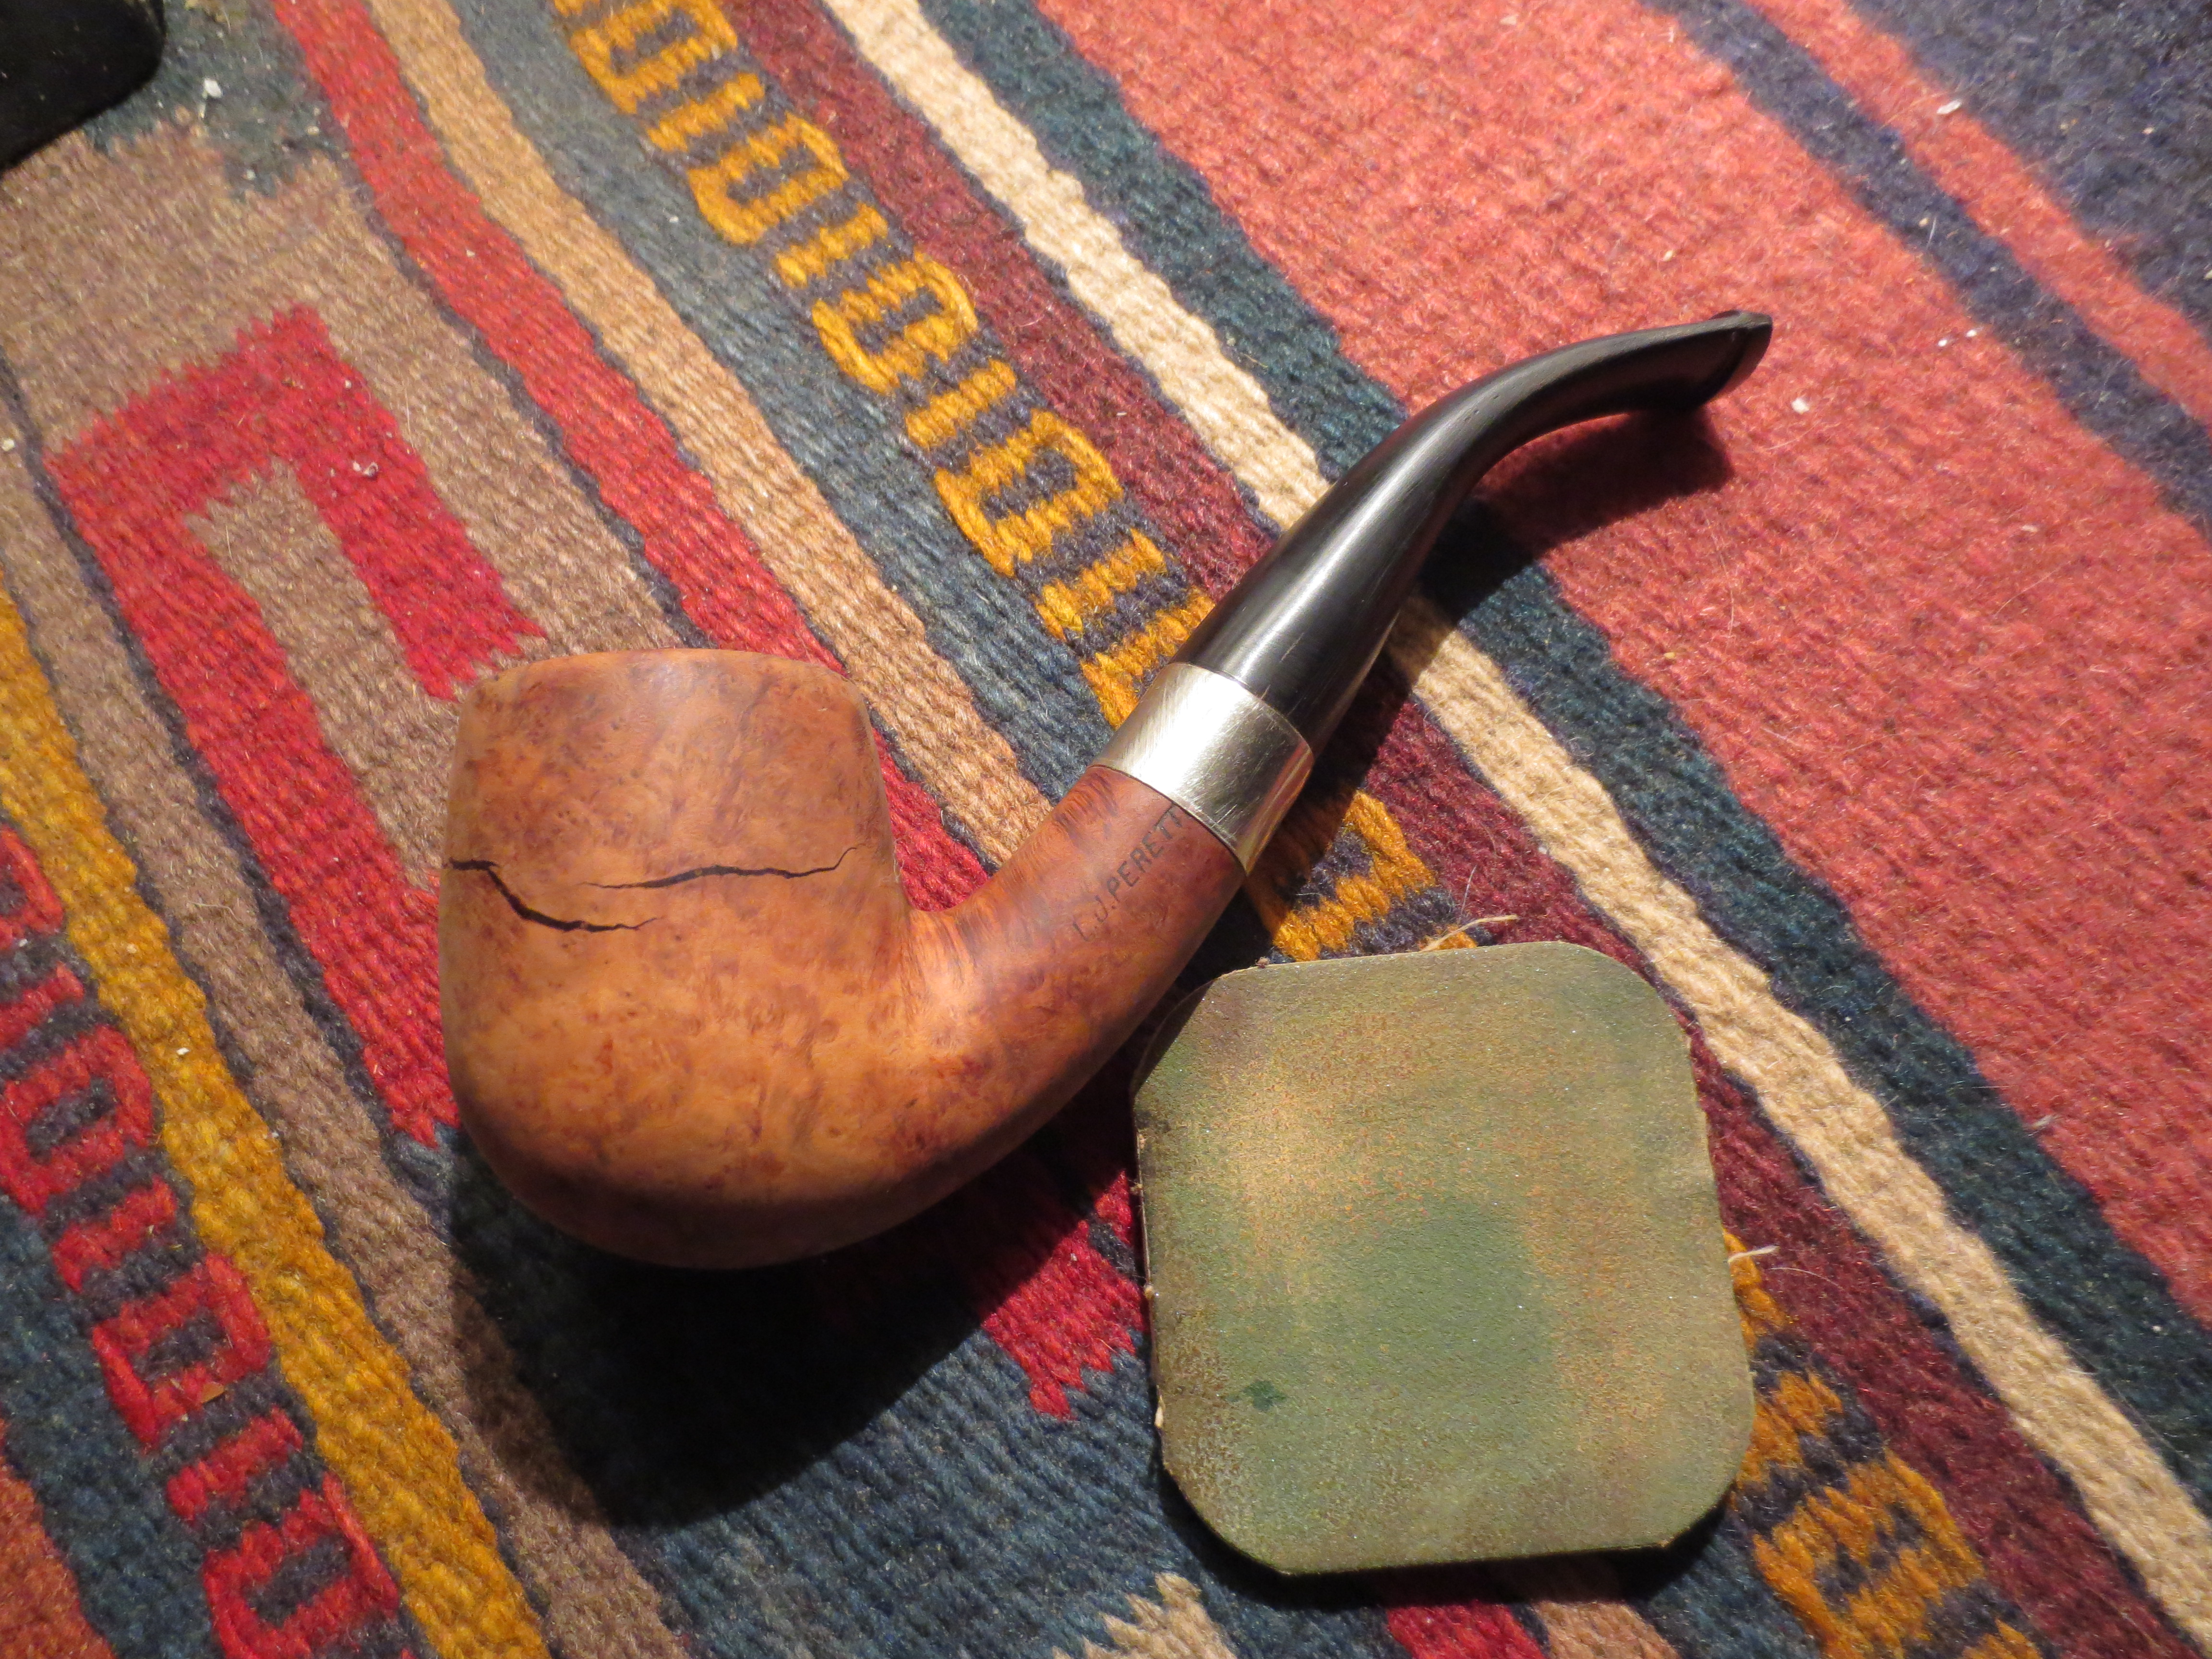
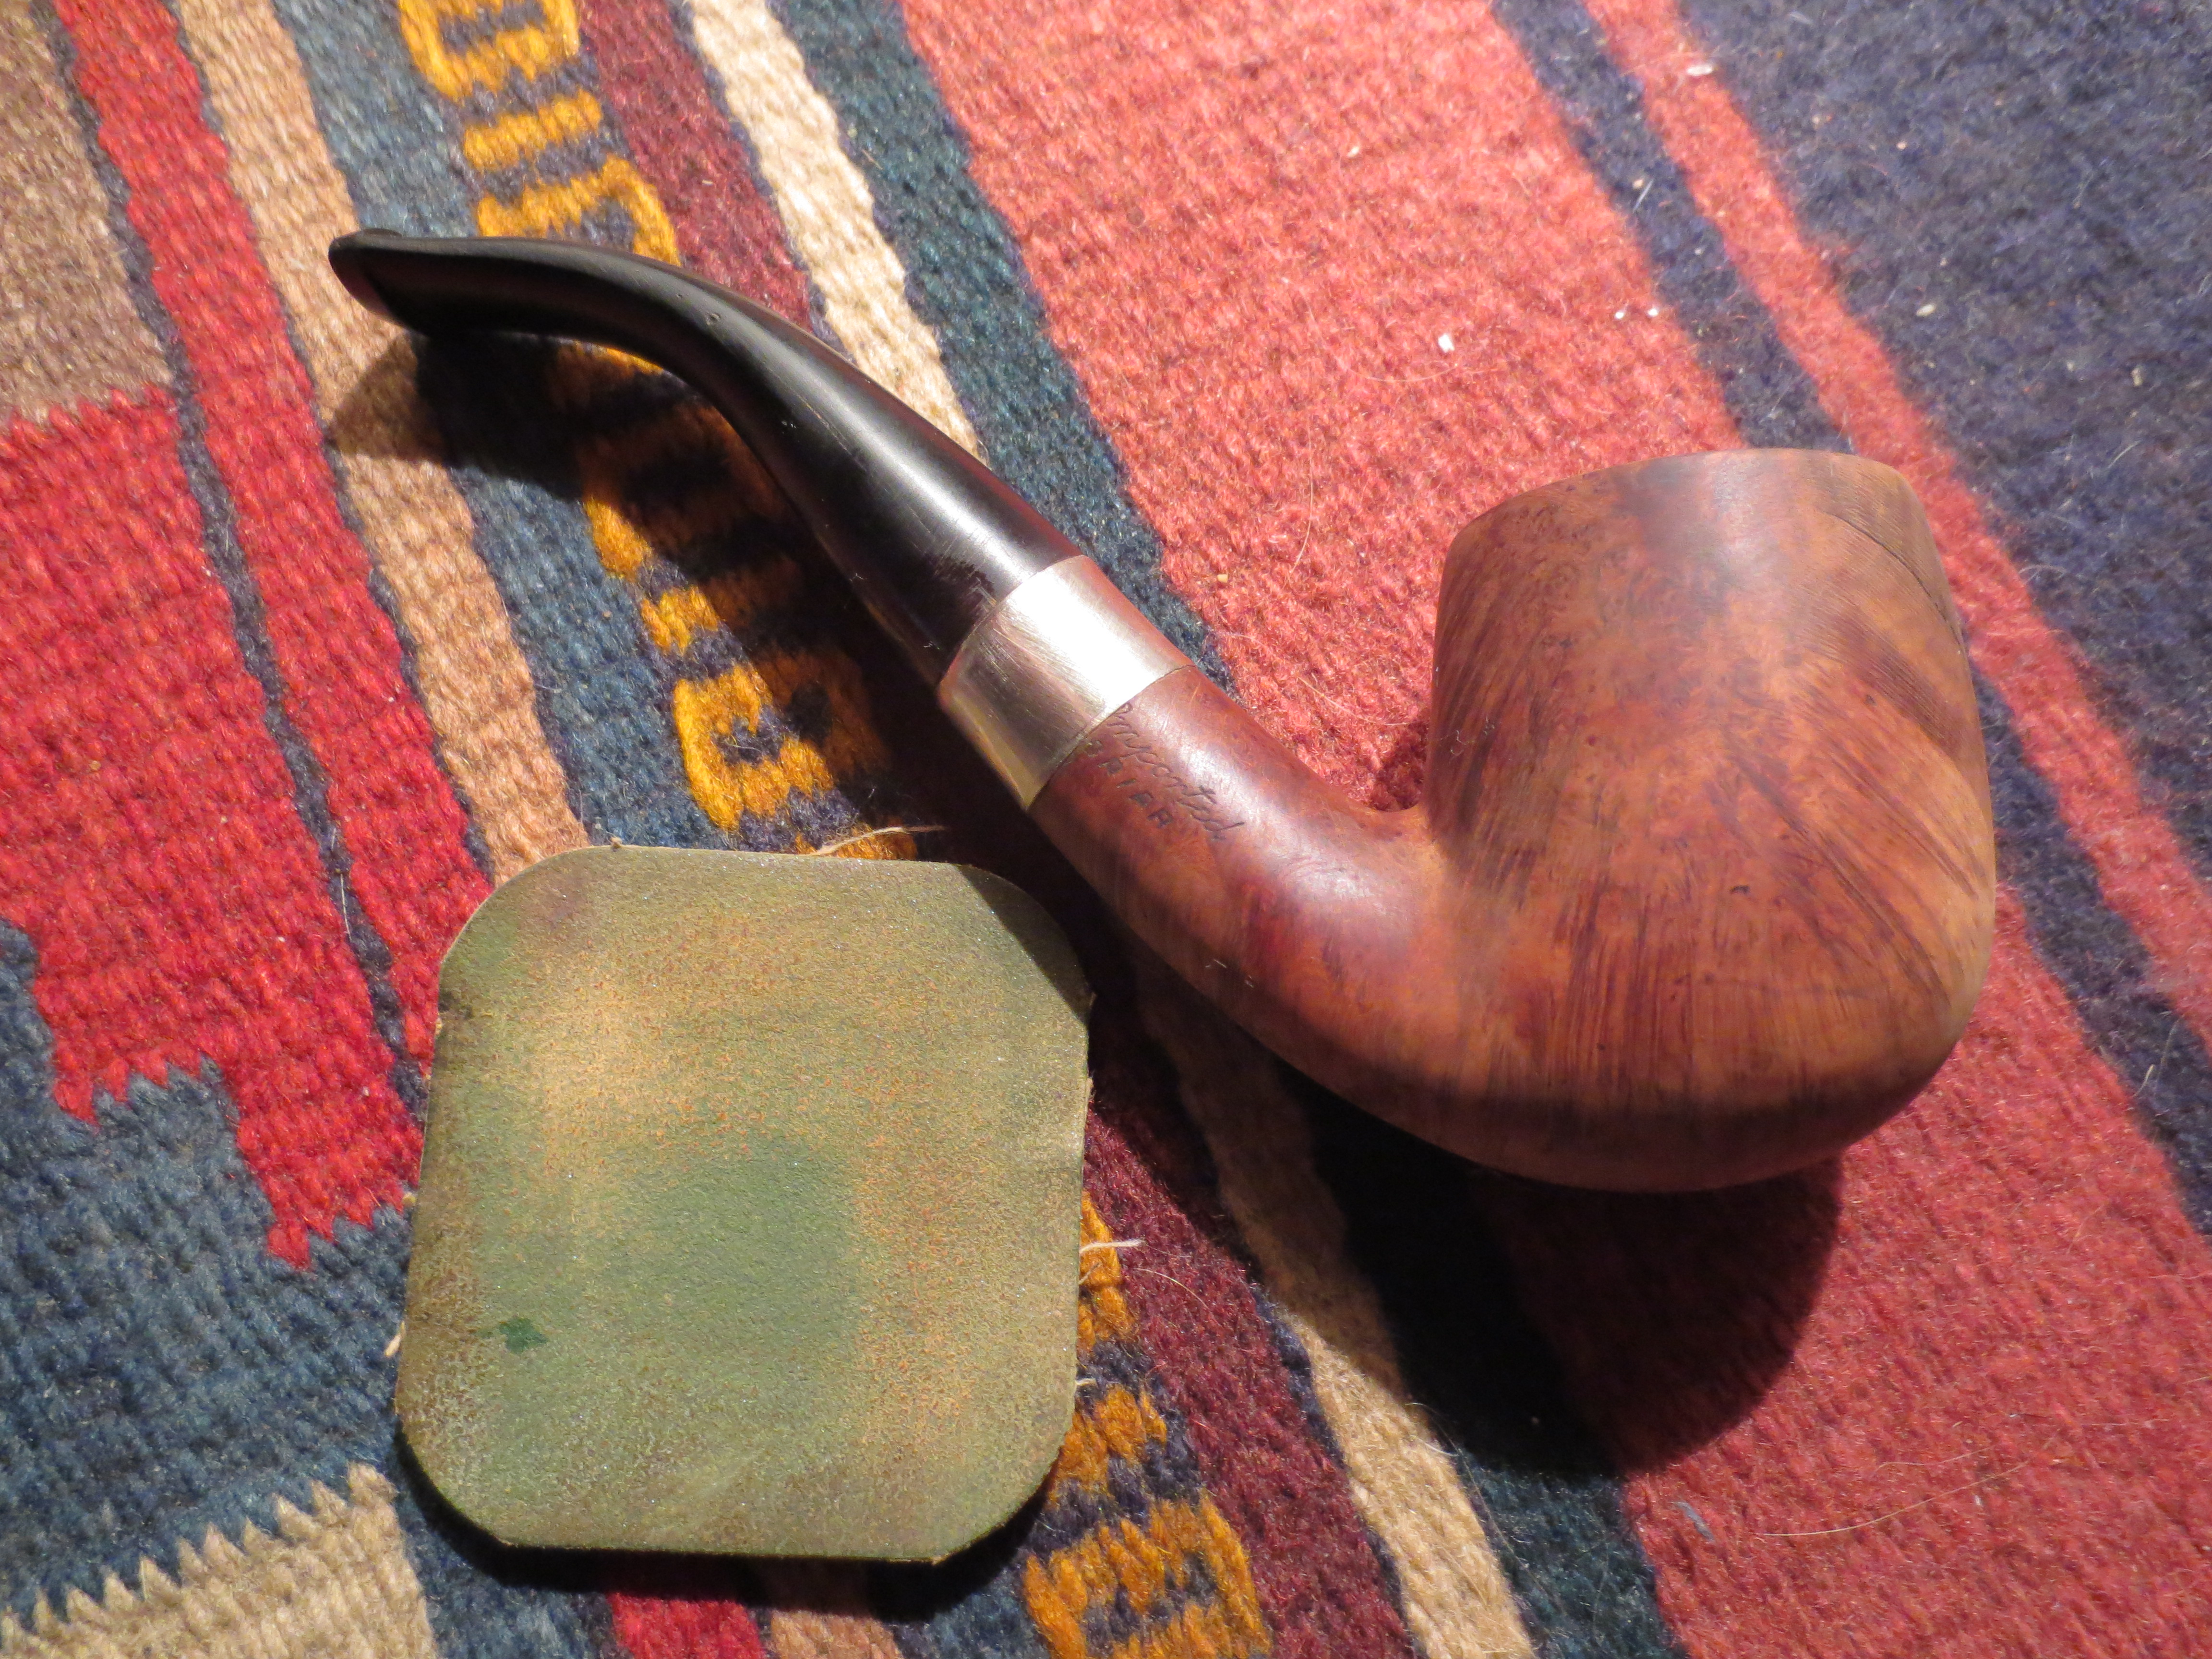
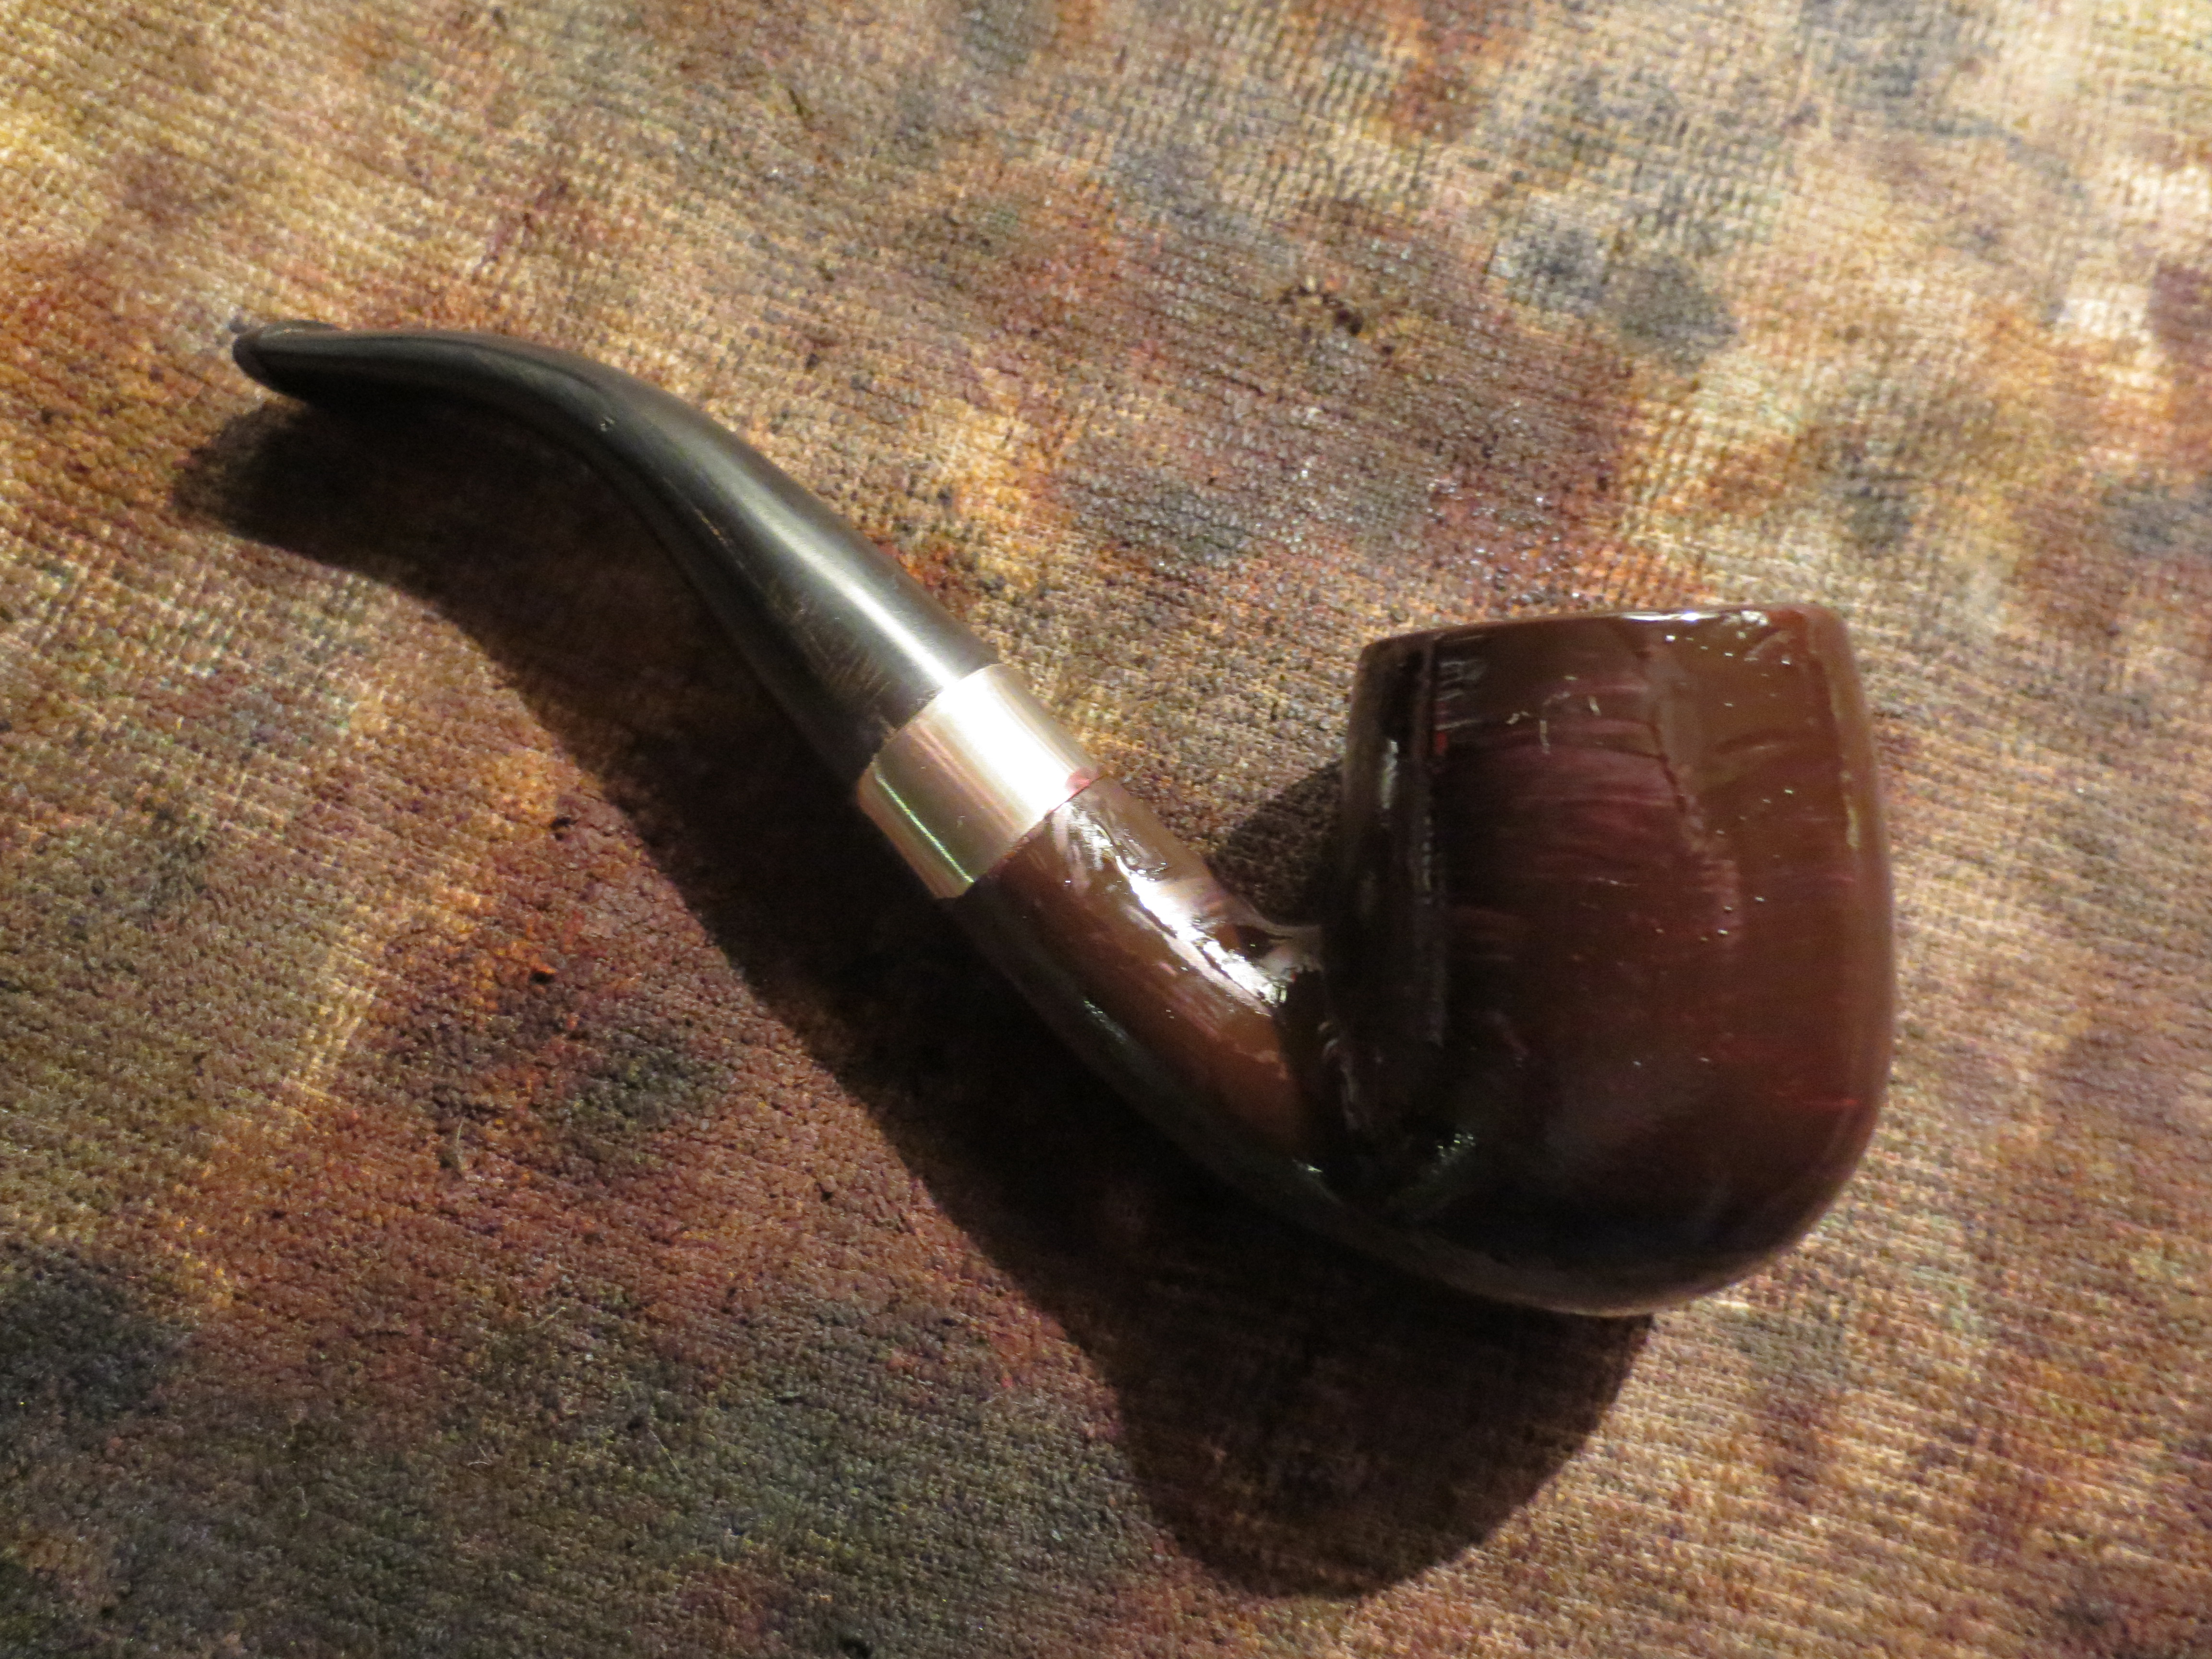
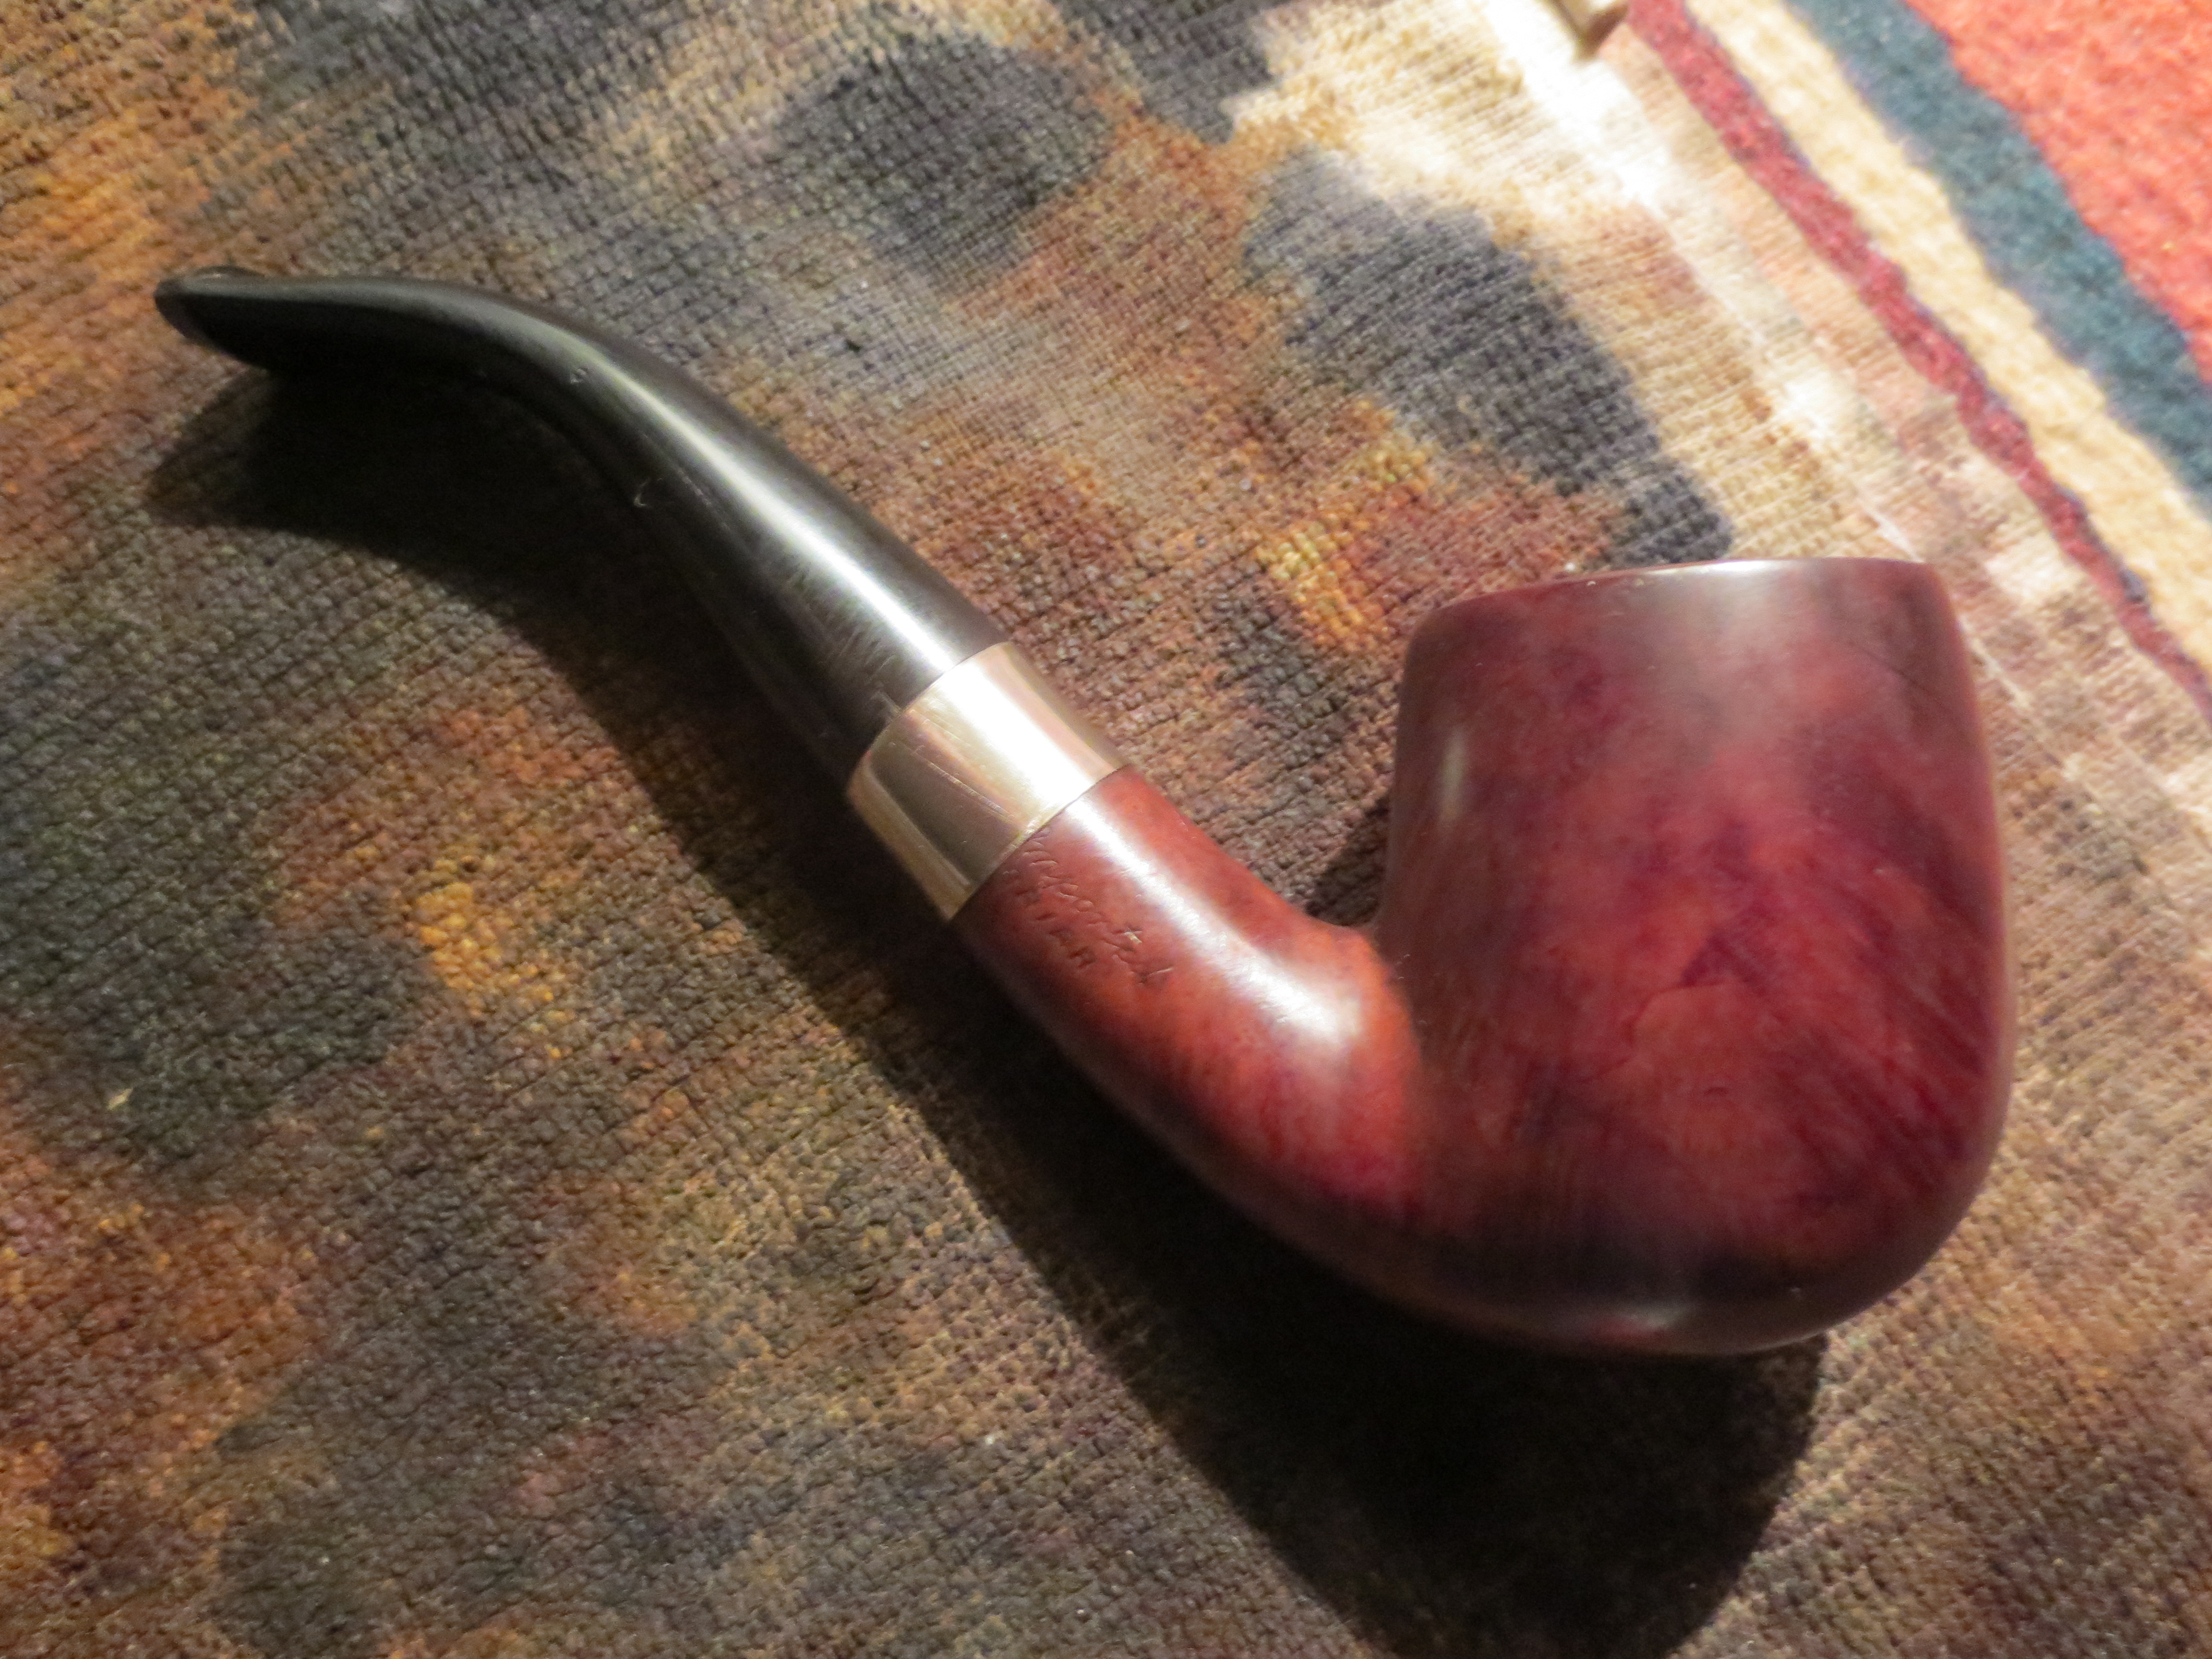
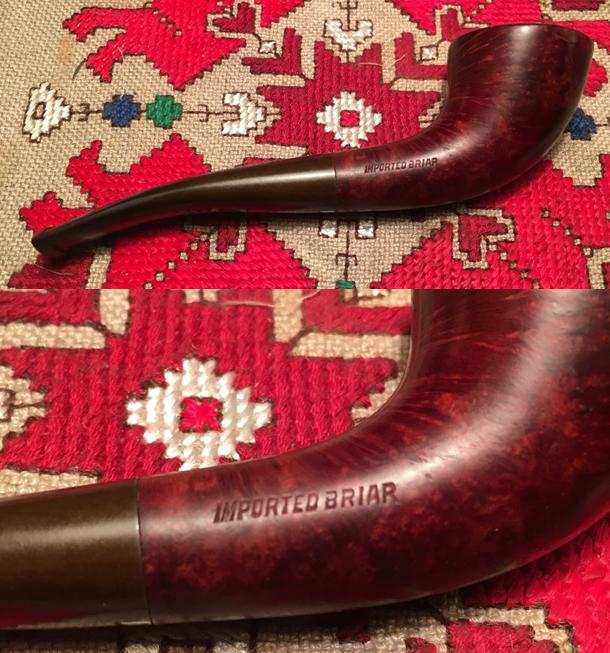
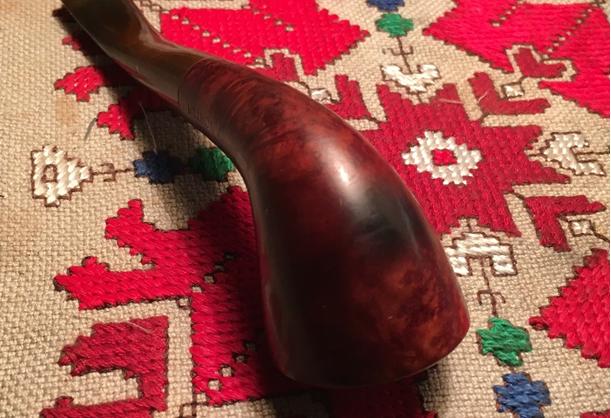
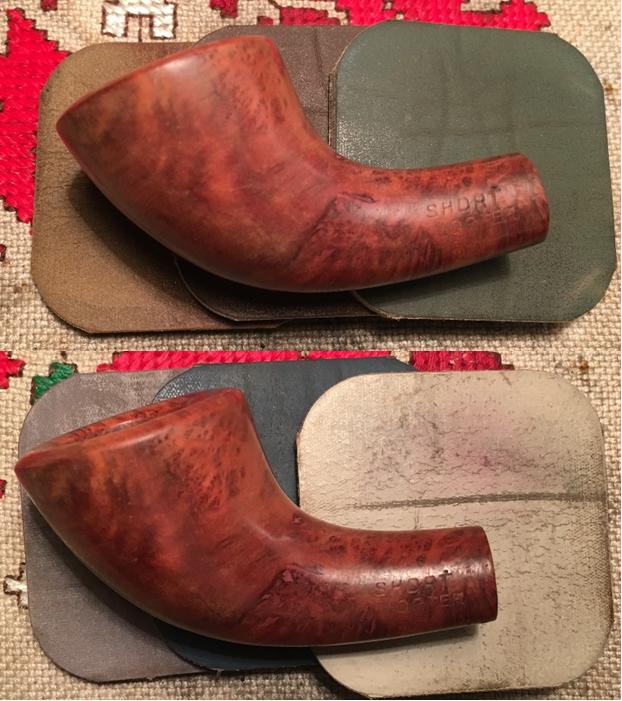
When I landed this little pipe last March, I rolled together 3 other pipes from the same seller, reducing postage costs – I’m always happy when I can save!  The eBay seller listed the pipe as a ‘Short Norter’ stamped on the left side of the shank.  The right side was stamped, Imported Briar.  The pipe’s petite size listed was 5 1/4″ long 1 1/4″ tall and 3/4″ bowl opening.  Even though she was so small, the shape was what drew me in.  This is what I saw.short1 short2
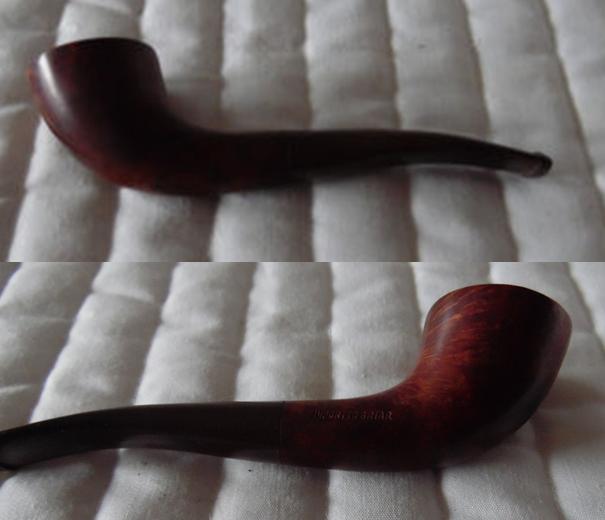
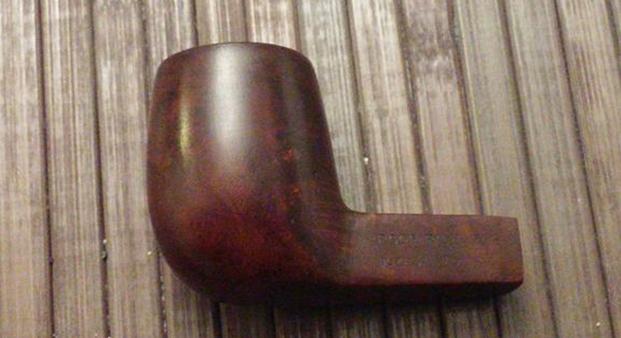
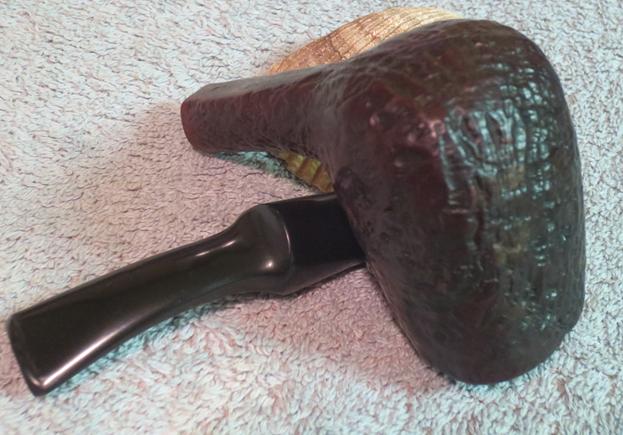
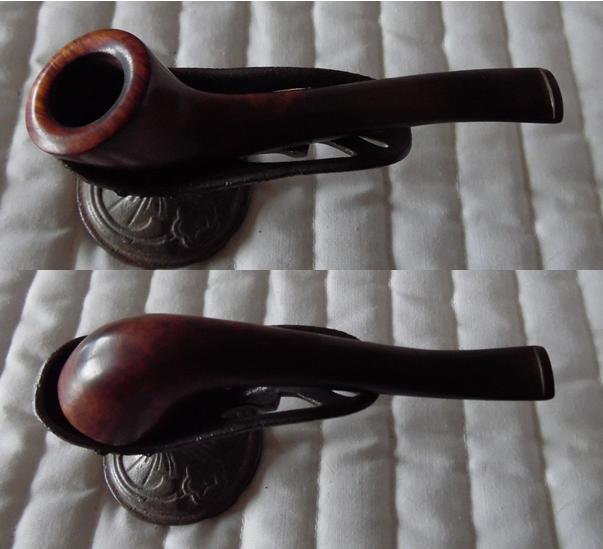
Poor quality of photography notwithstanding, all the potential was there – the unique shape that I had yet to identify or collect, the rich briar grain peeking out here and there and the petite demeanor – perhaps this is a ladies’ pipe?  But then, the name?  Short Norter – the eBay nomenclature.  Despite the less than feminine name, I liked the pipe.  With a quick trip to Pipedia’s shape chart, I found what I believed matched the Short Norter – the Horn shape.short3
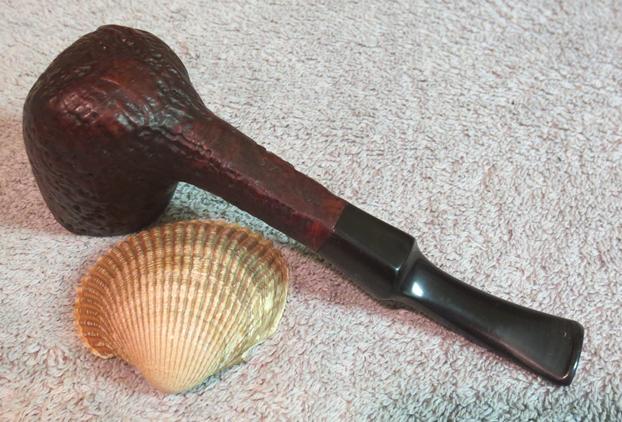
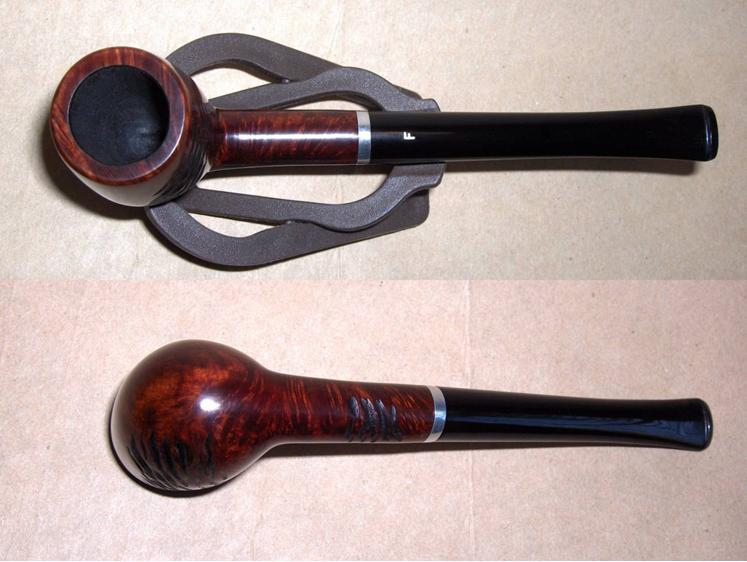
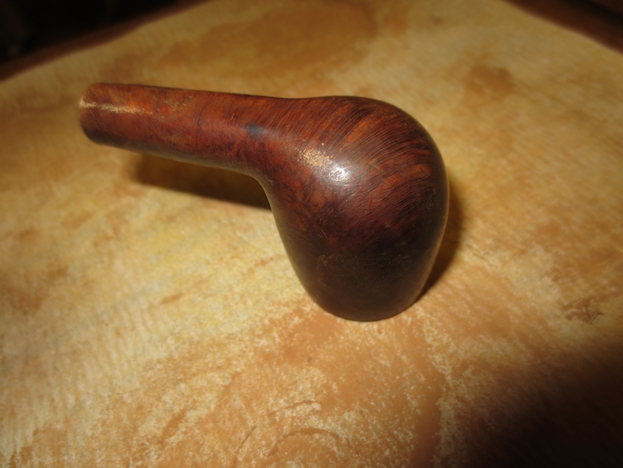
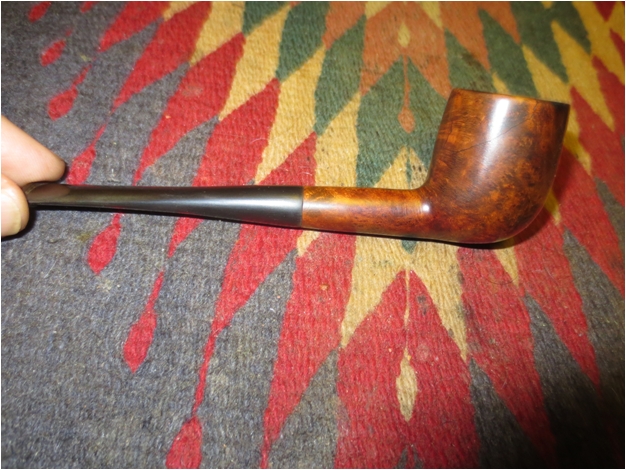
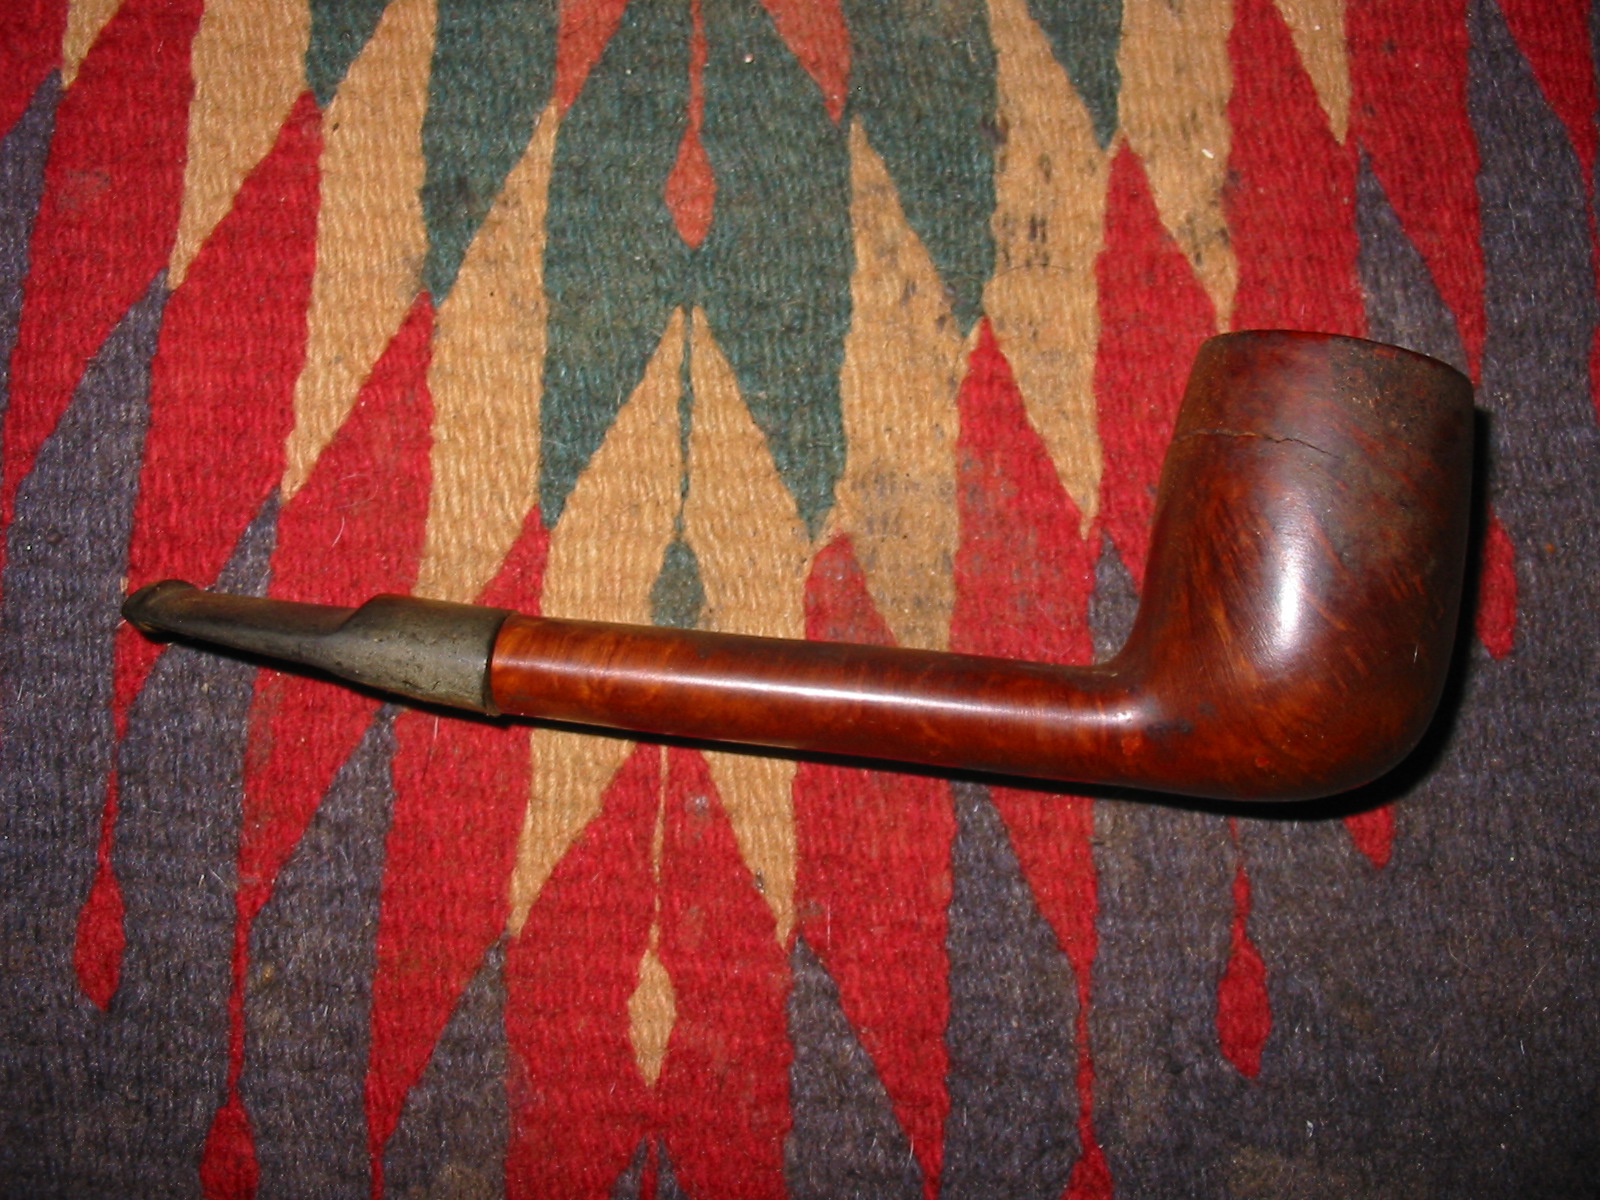
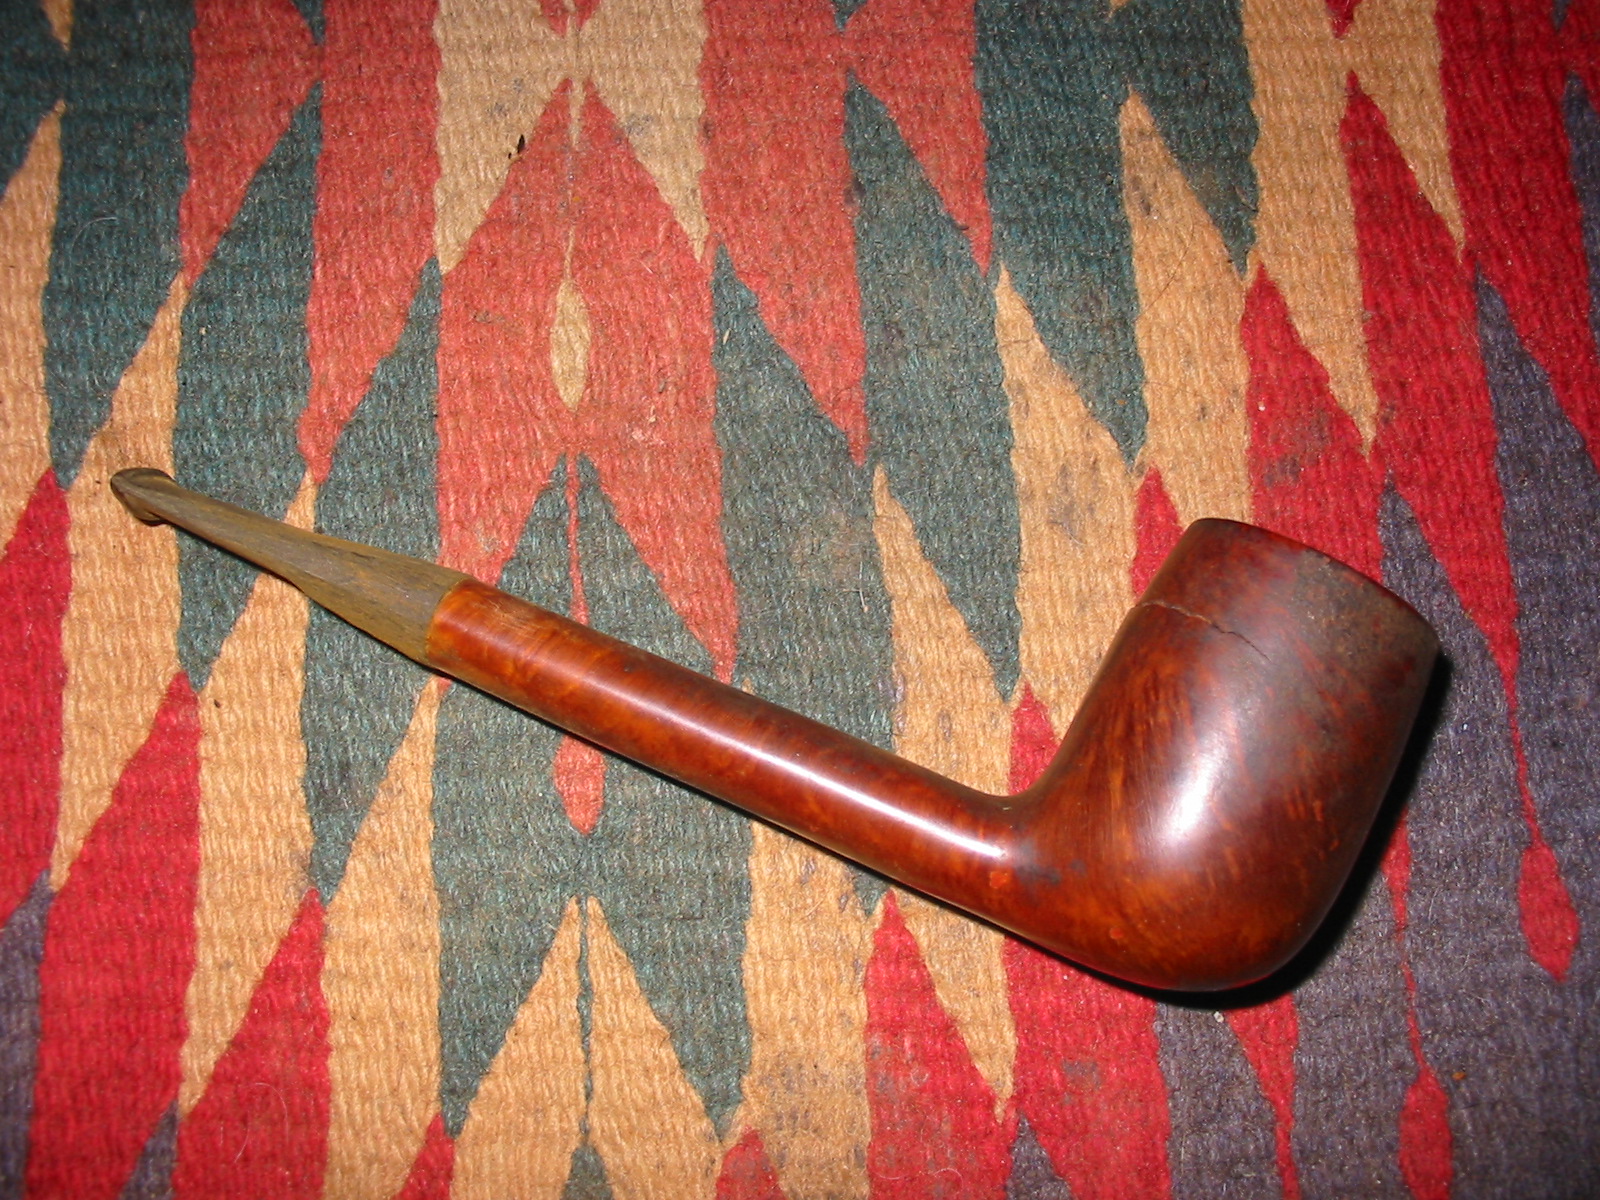
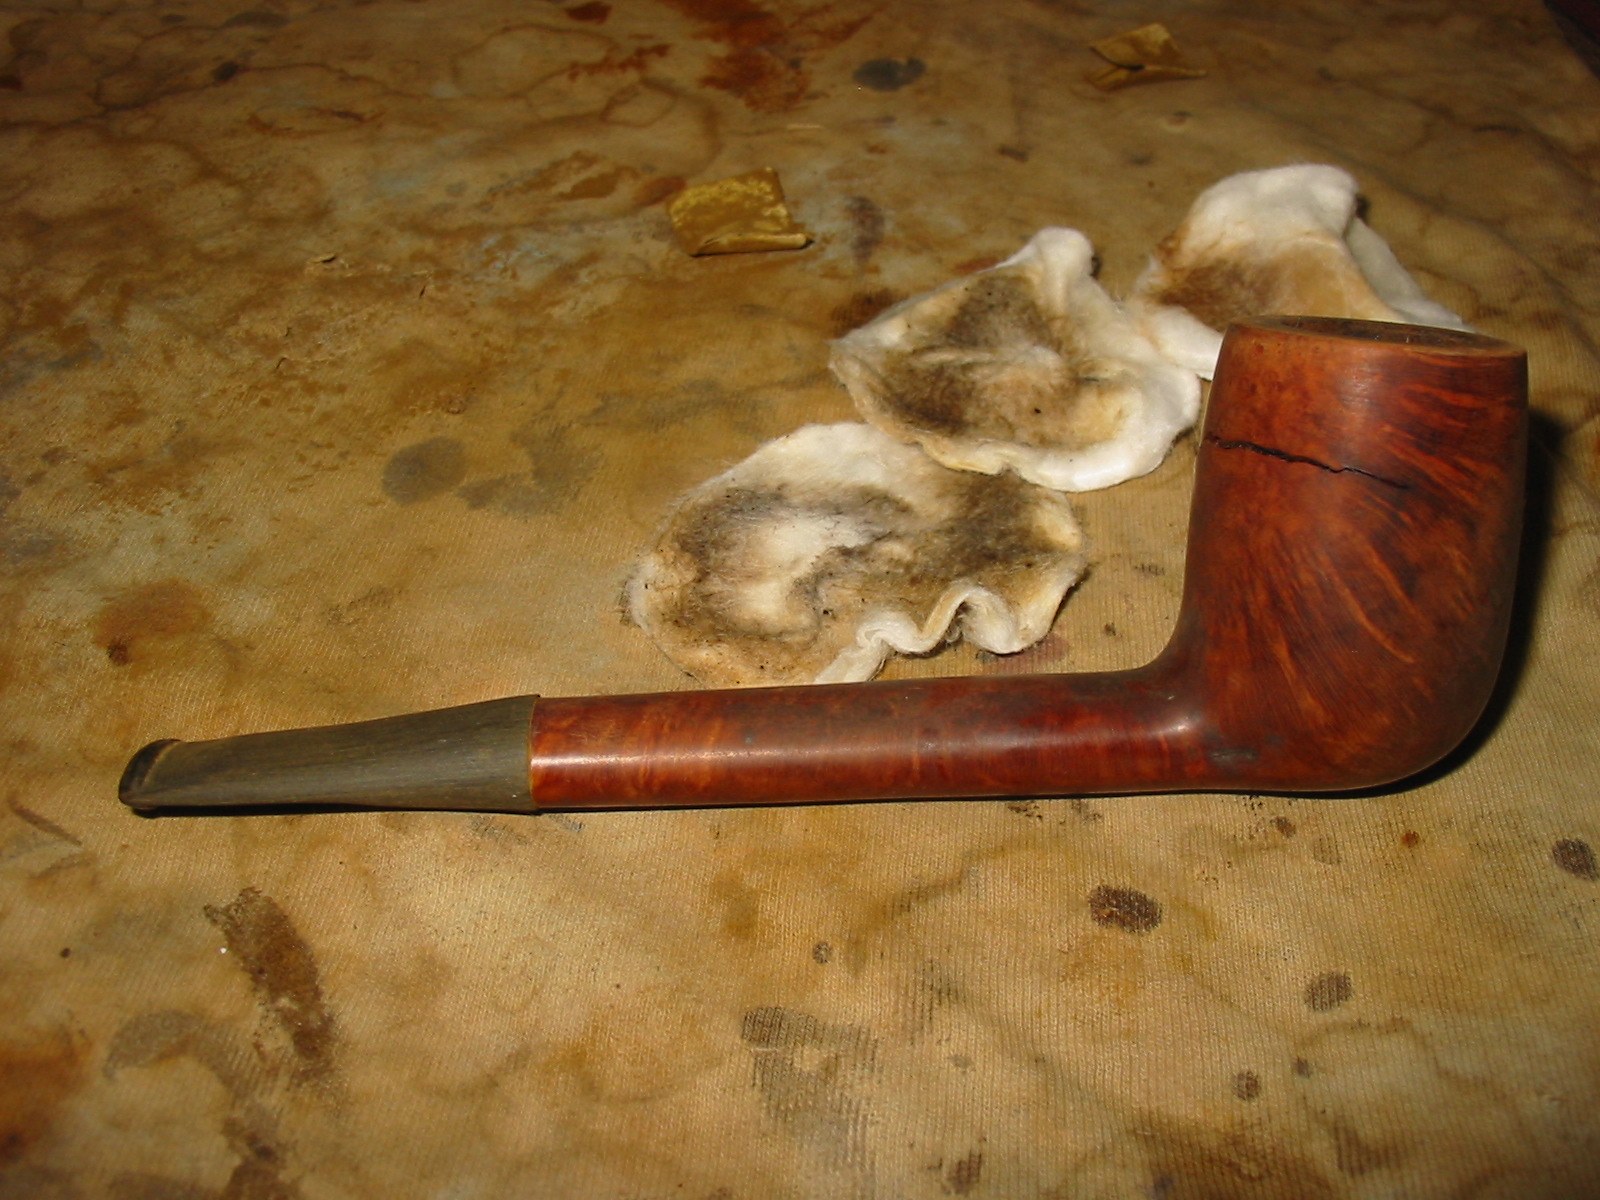
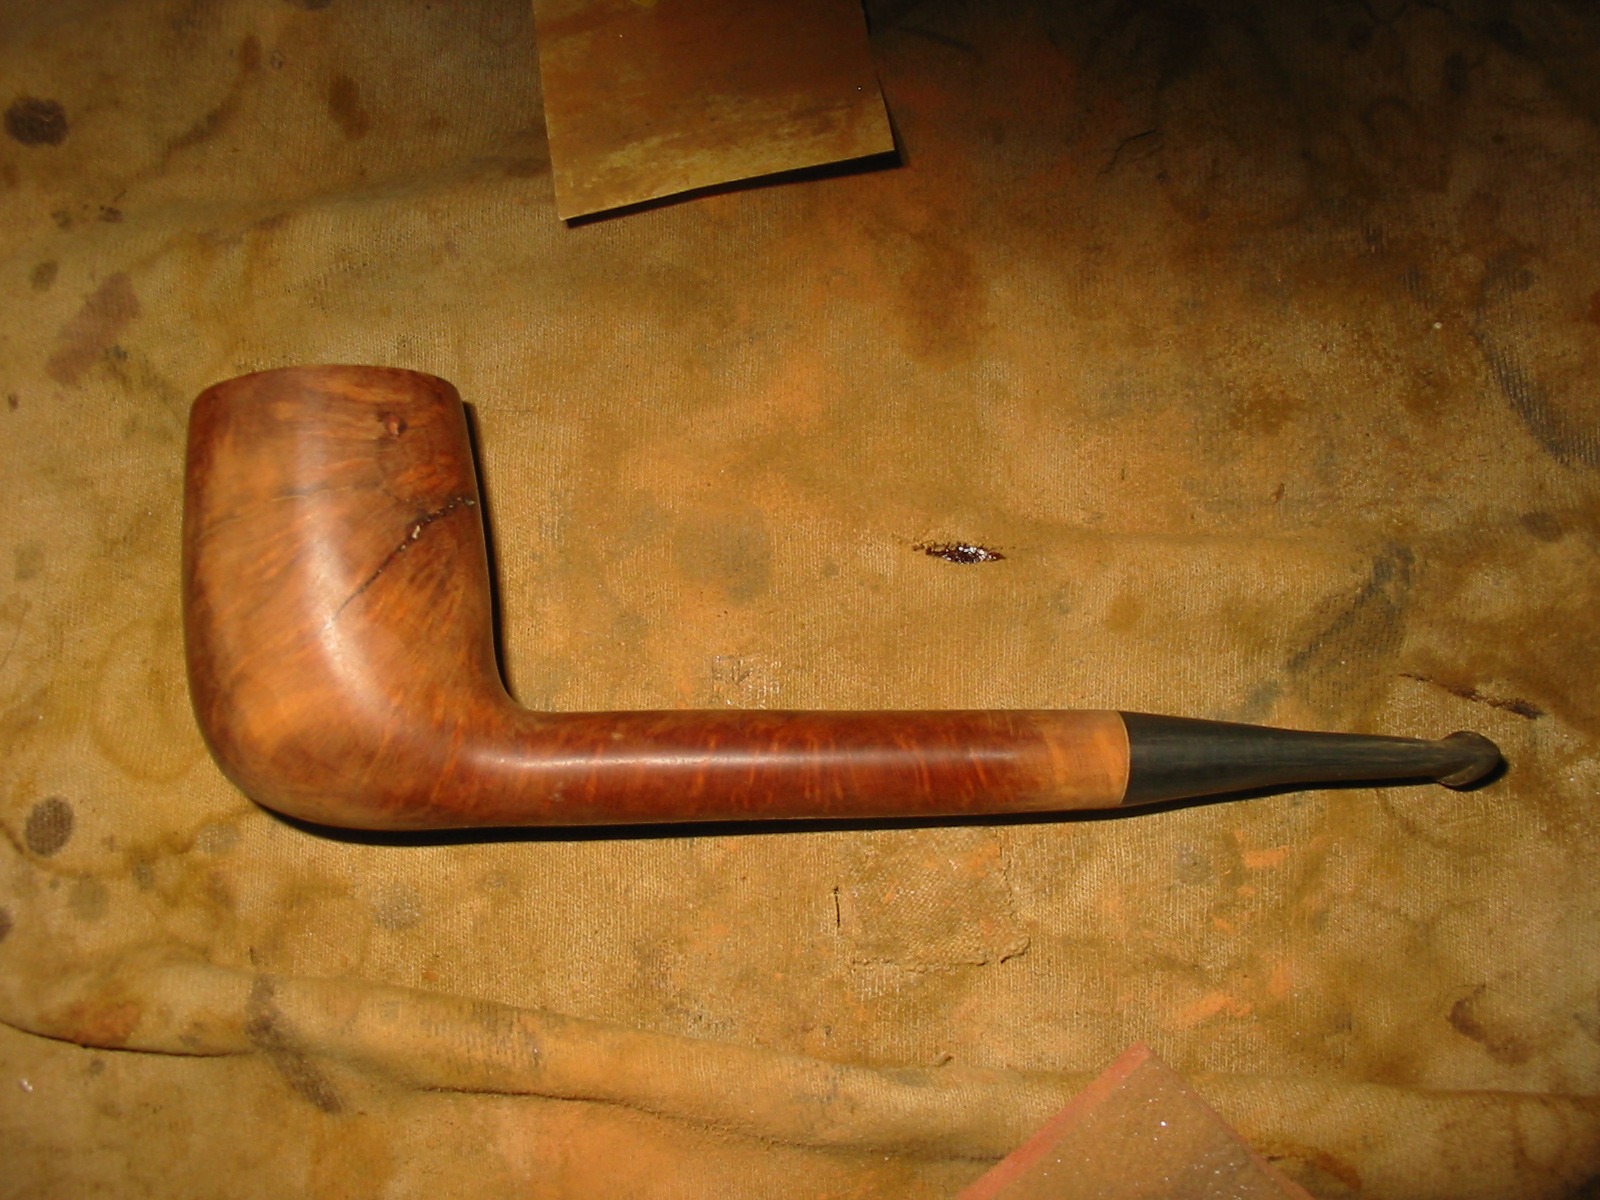
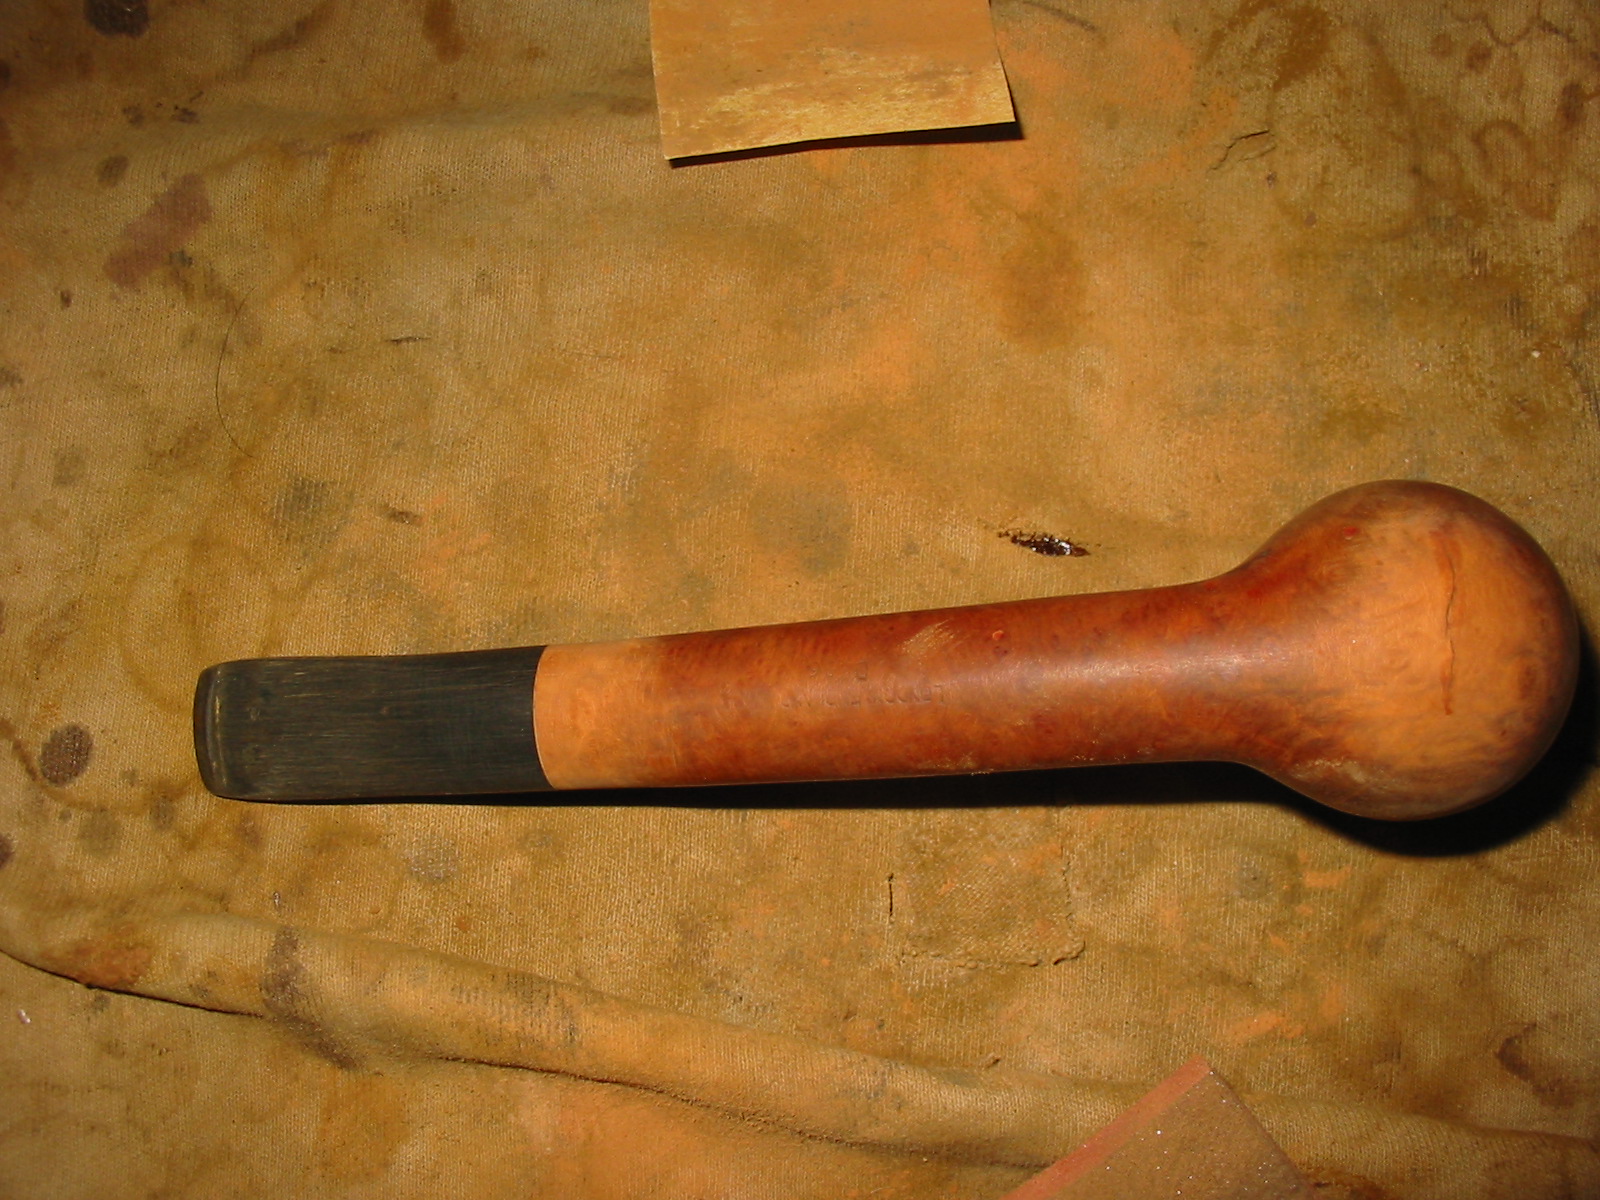
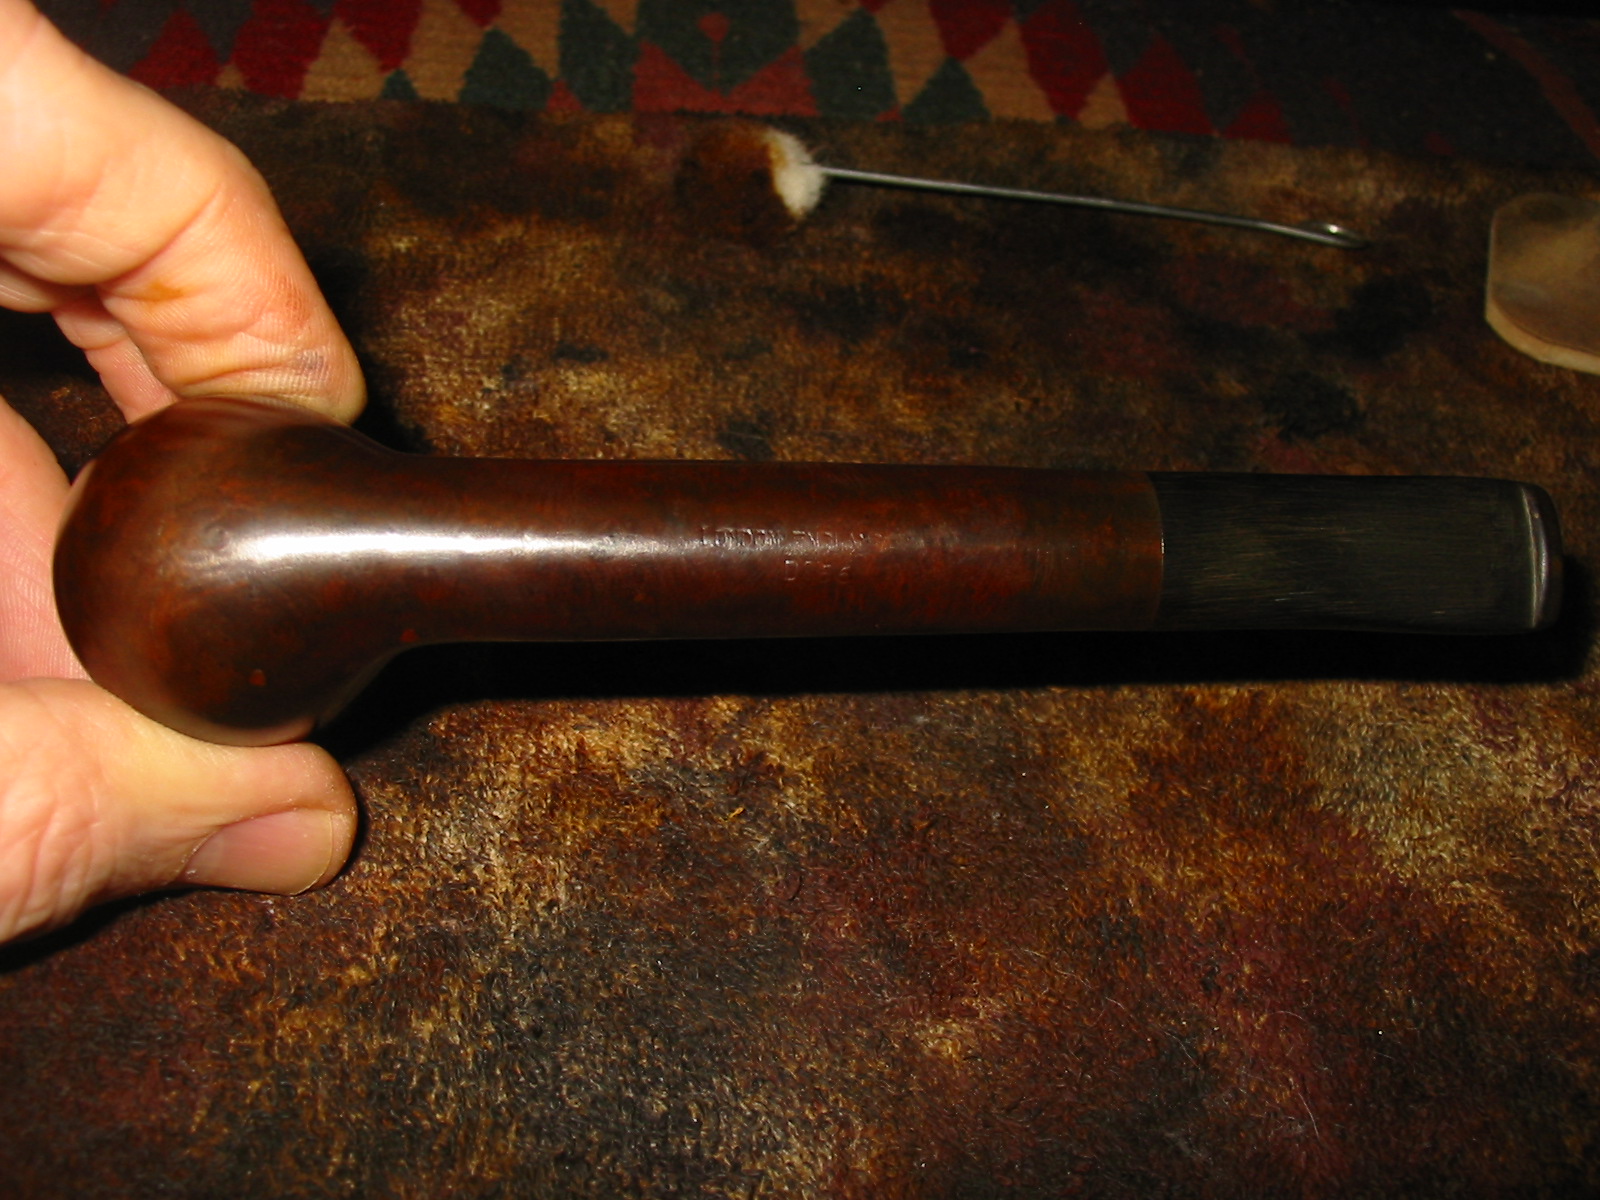
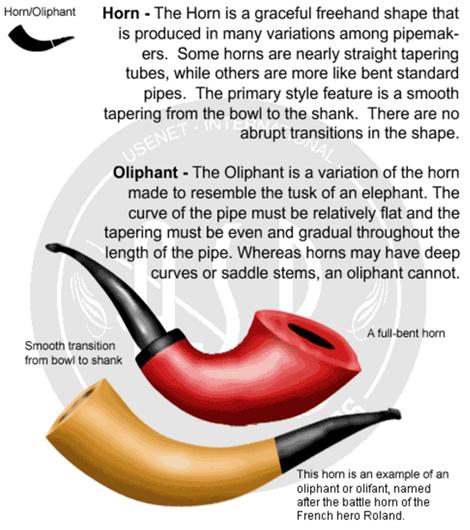
When I took the Short ‘Norter’ Imported Briar out of the ‘Help me!’ basket now months later, I am still struck by the size and I really like the sleek contour of this Horn shape.  When I started research on the pipe in preparation for her restoring, I ran into a brick wall trying to find Short ‘Norter’ in all the usual places, but I did run across other references which were close.  One was, ‘Short Snorter’ and it was a pipe.  After taking another close look at the stamping, I discovered that the ‘S’ was almost totally obliterated by a divot in the briar.  Only a small peek remained of the top of the ‘S’. Finally, my beautifully shaped Horn ladies’ pipe is officially christened, Short Snorter – a pipe any high classed pipe woman would covet, or it would seem!  Here are pictures filling in the gaps from my work table here in Sofia, Bulgaria.short4 short5 short6 short7 short8 short9
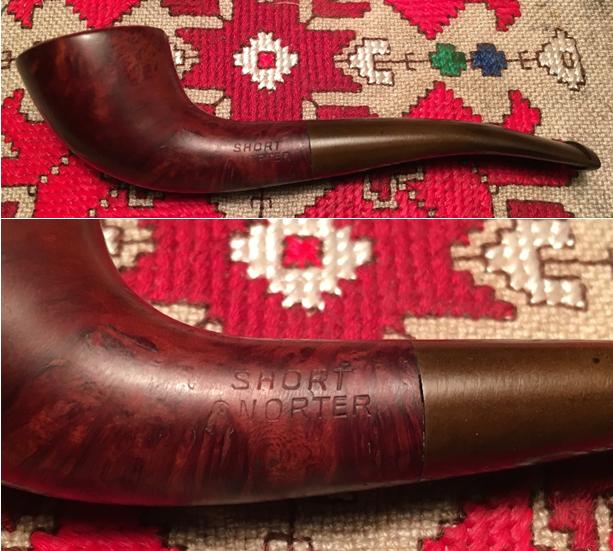
In the little I found on the internet about the Short Snorter, it is described as a nose burner or as a pocket pipe, but most often with other shapes than the horn.  Steve looked up the Short Snorter in the book, Who Made That Pipe, and it indicates that it was made by Weber or Wally Frank.  With that information, I looked at old Wally Frank catalogues, but did not see the Short Snorter.  I suppose the name is apropos, but I think a lady pipe smoker would give this pipe a look see.

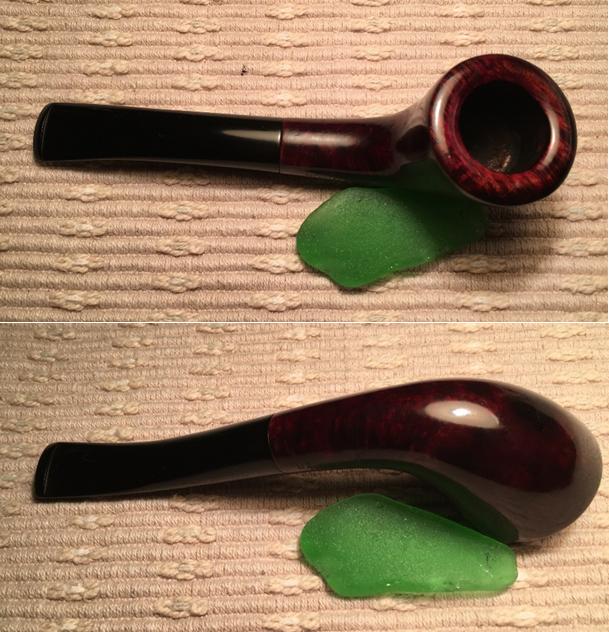
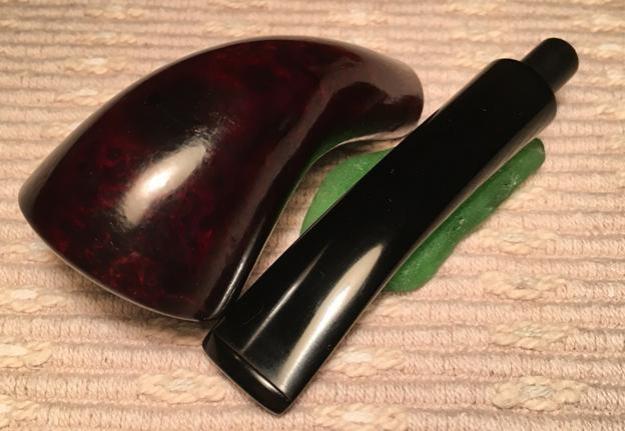
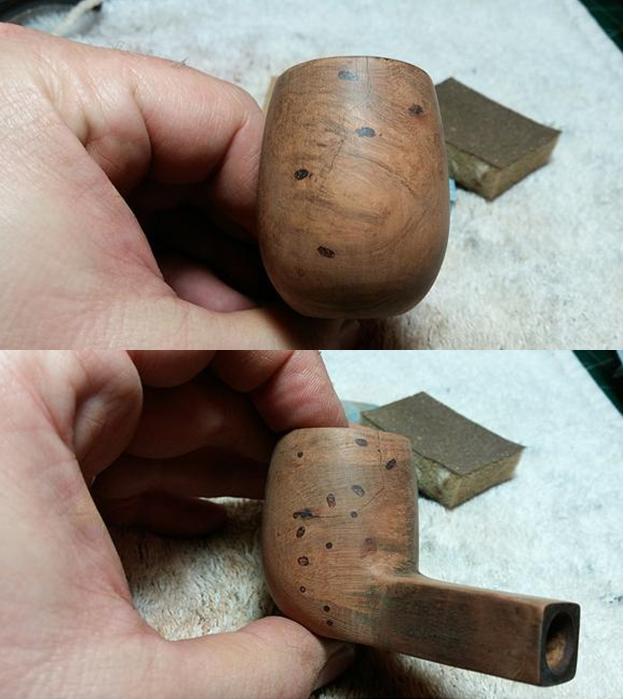
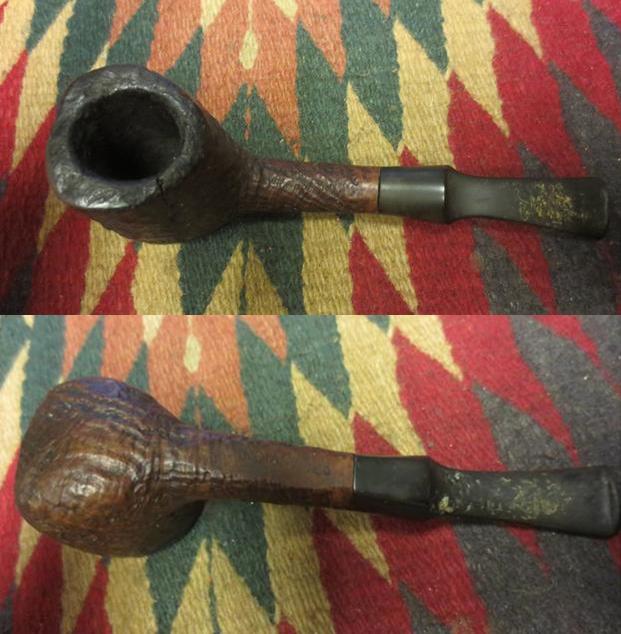
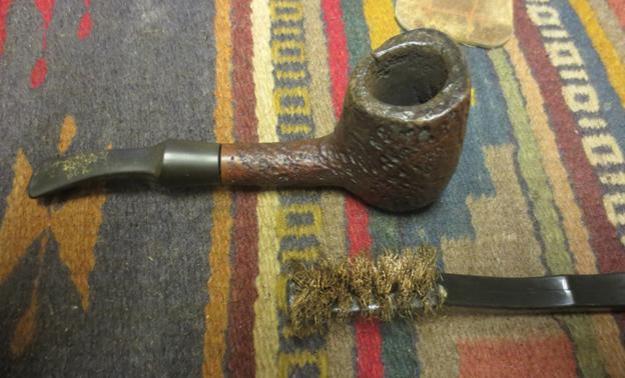
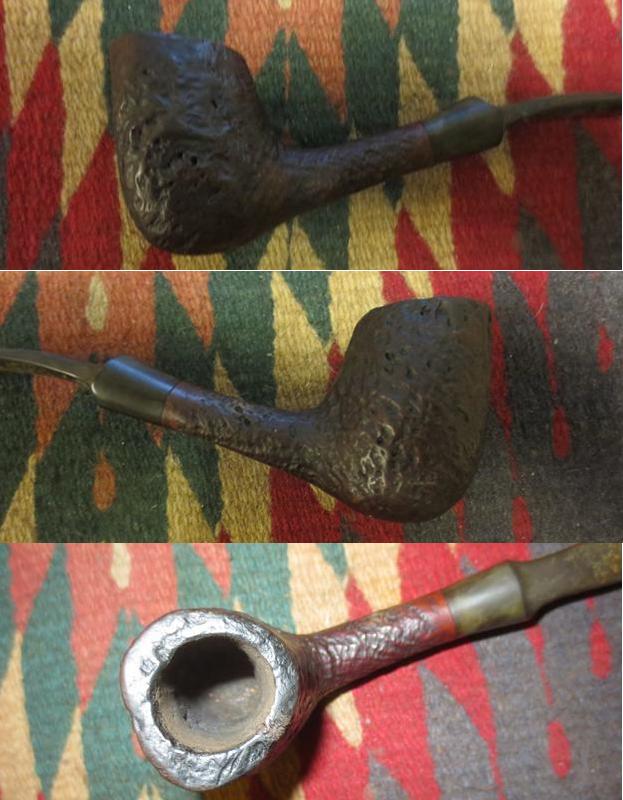
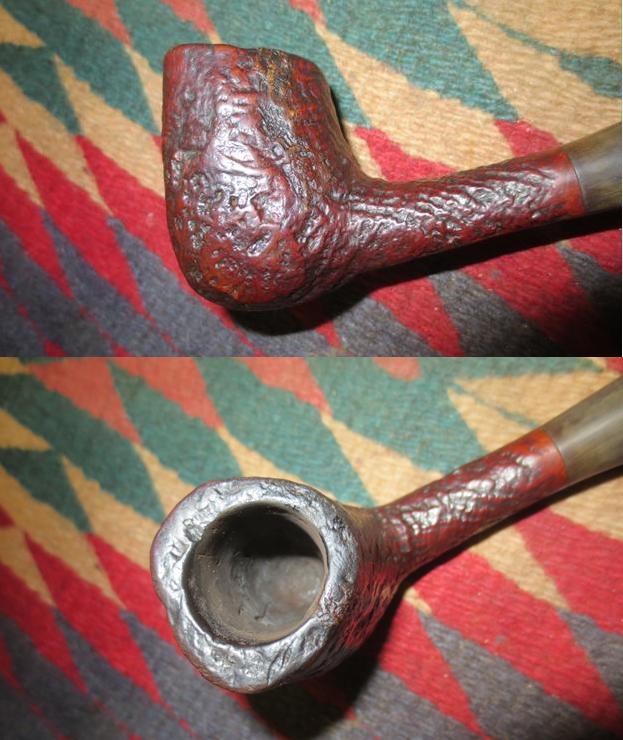
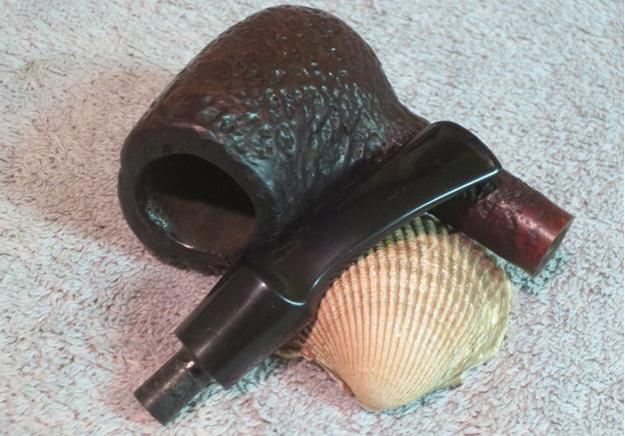
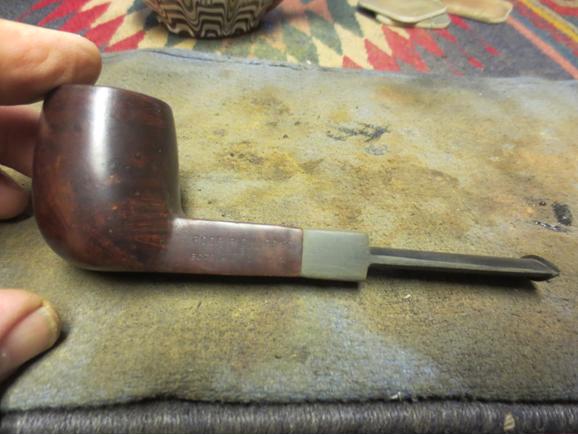
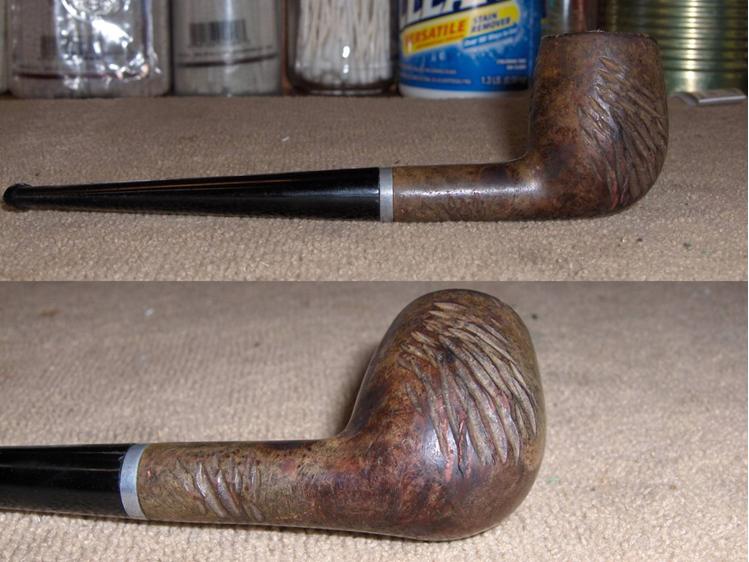
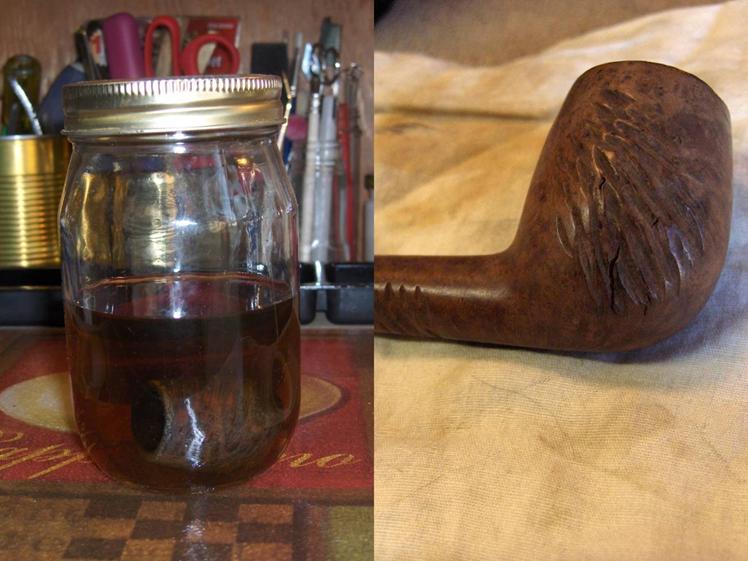
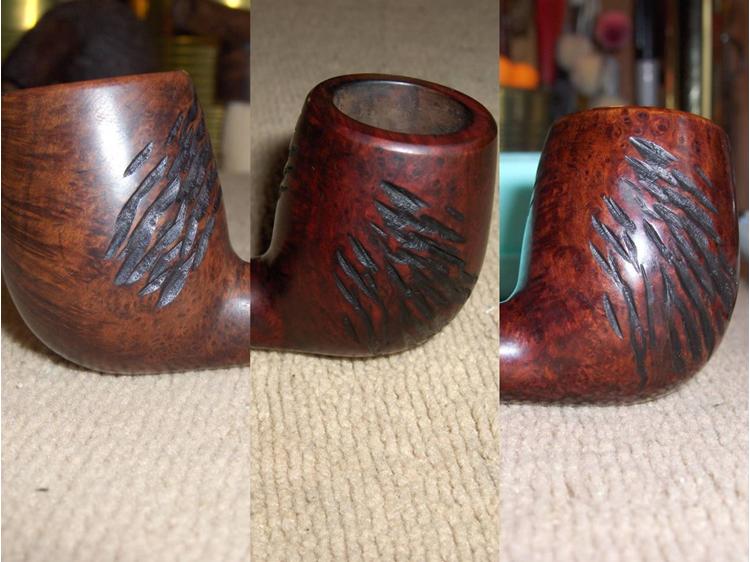
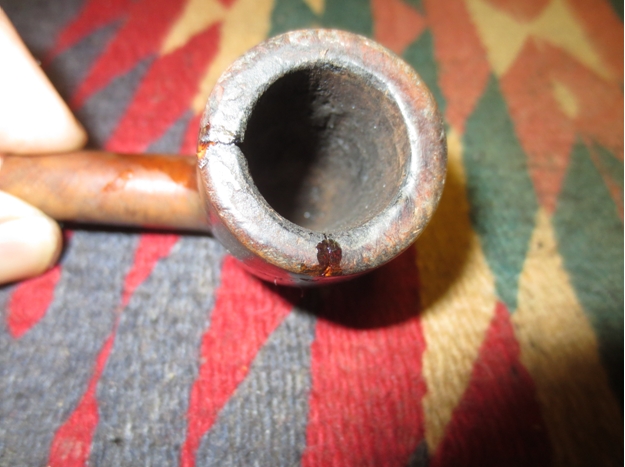
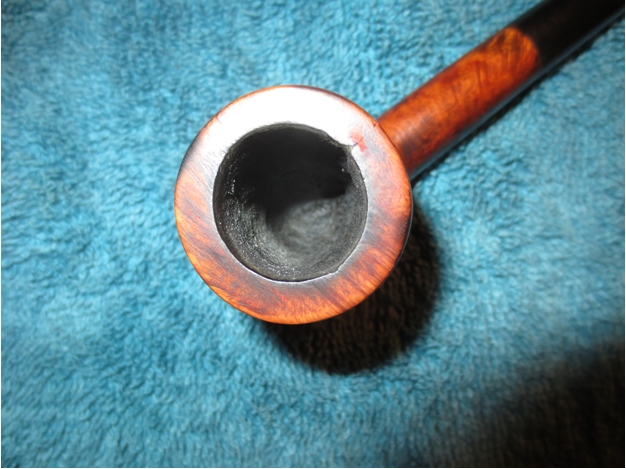
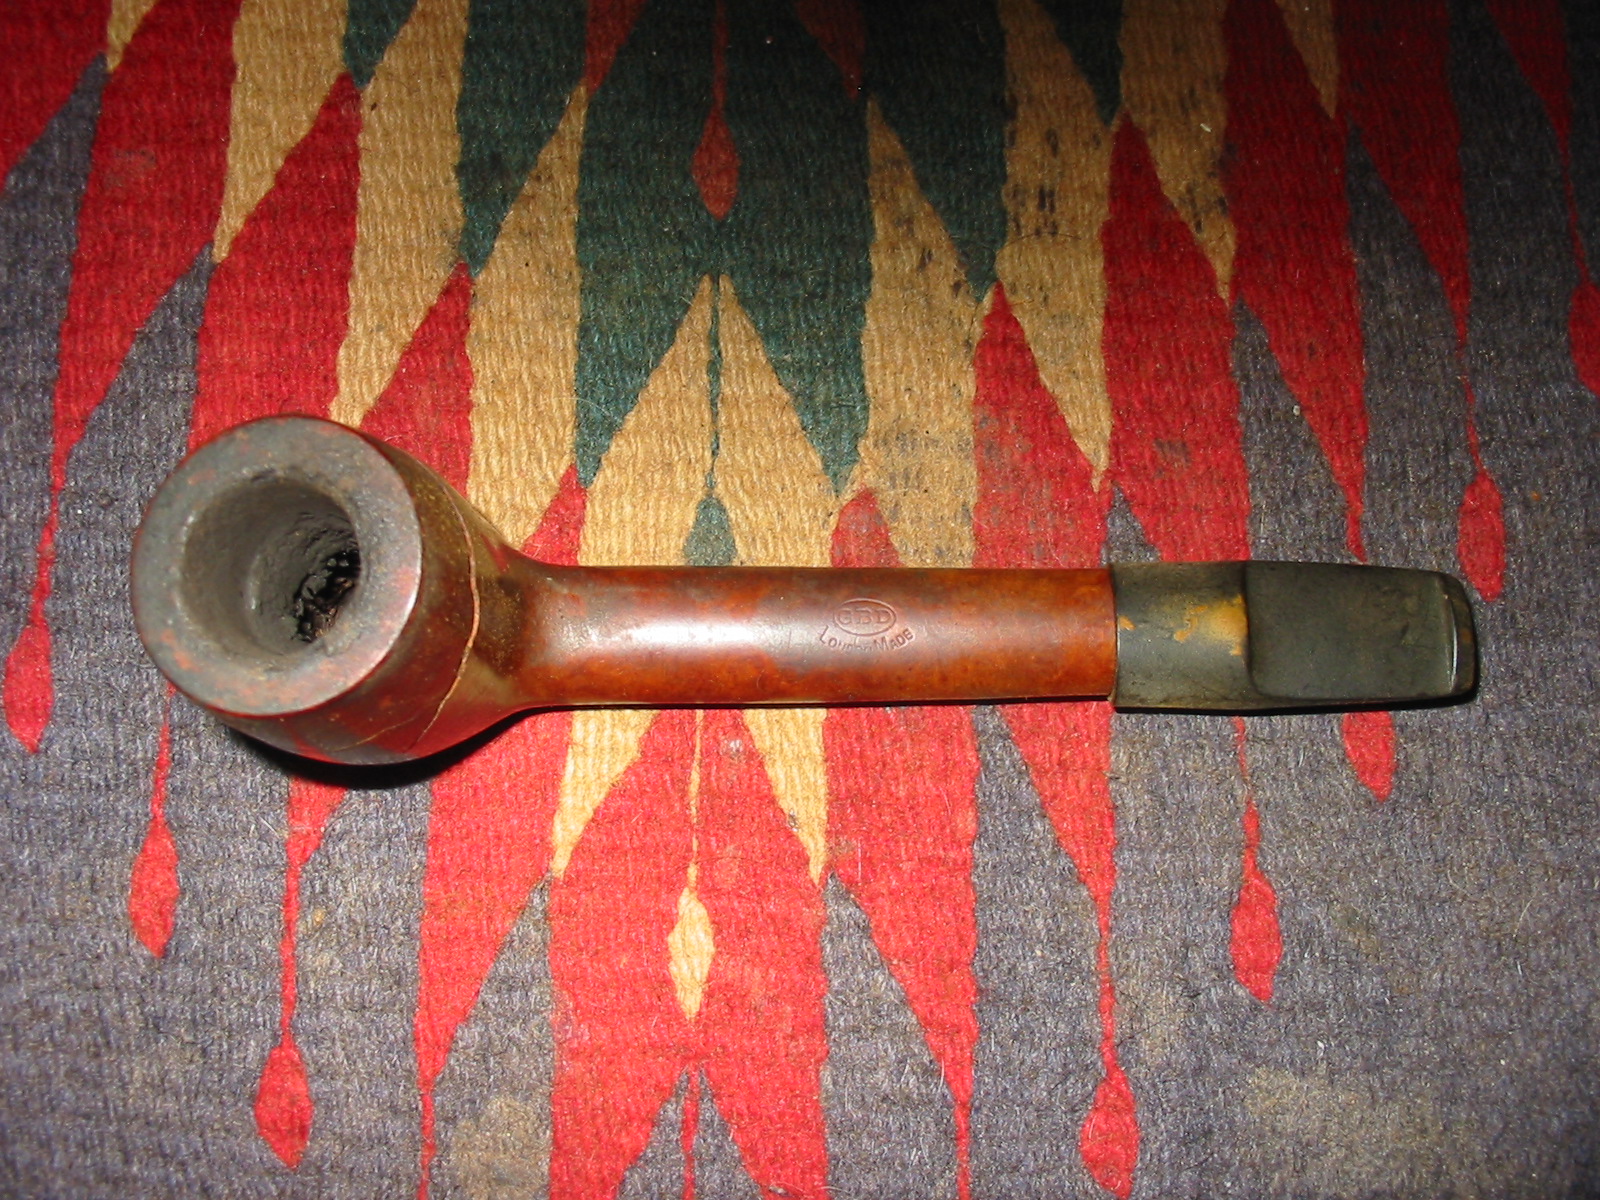
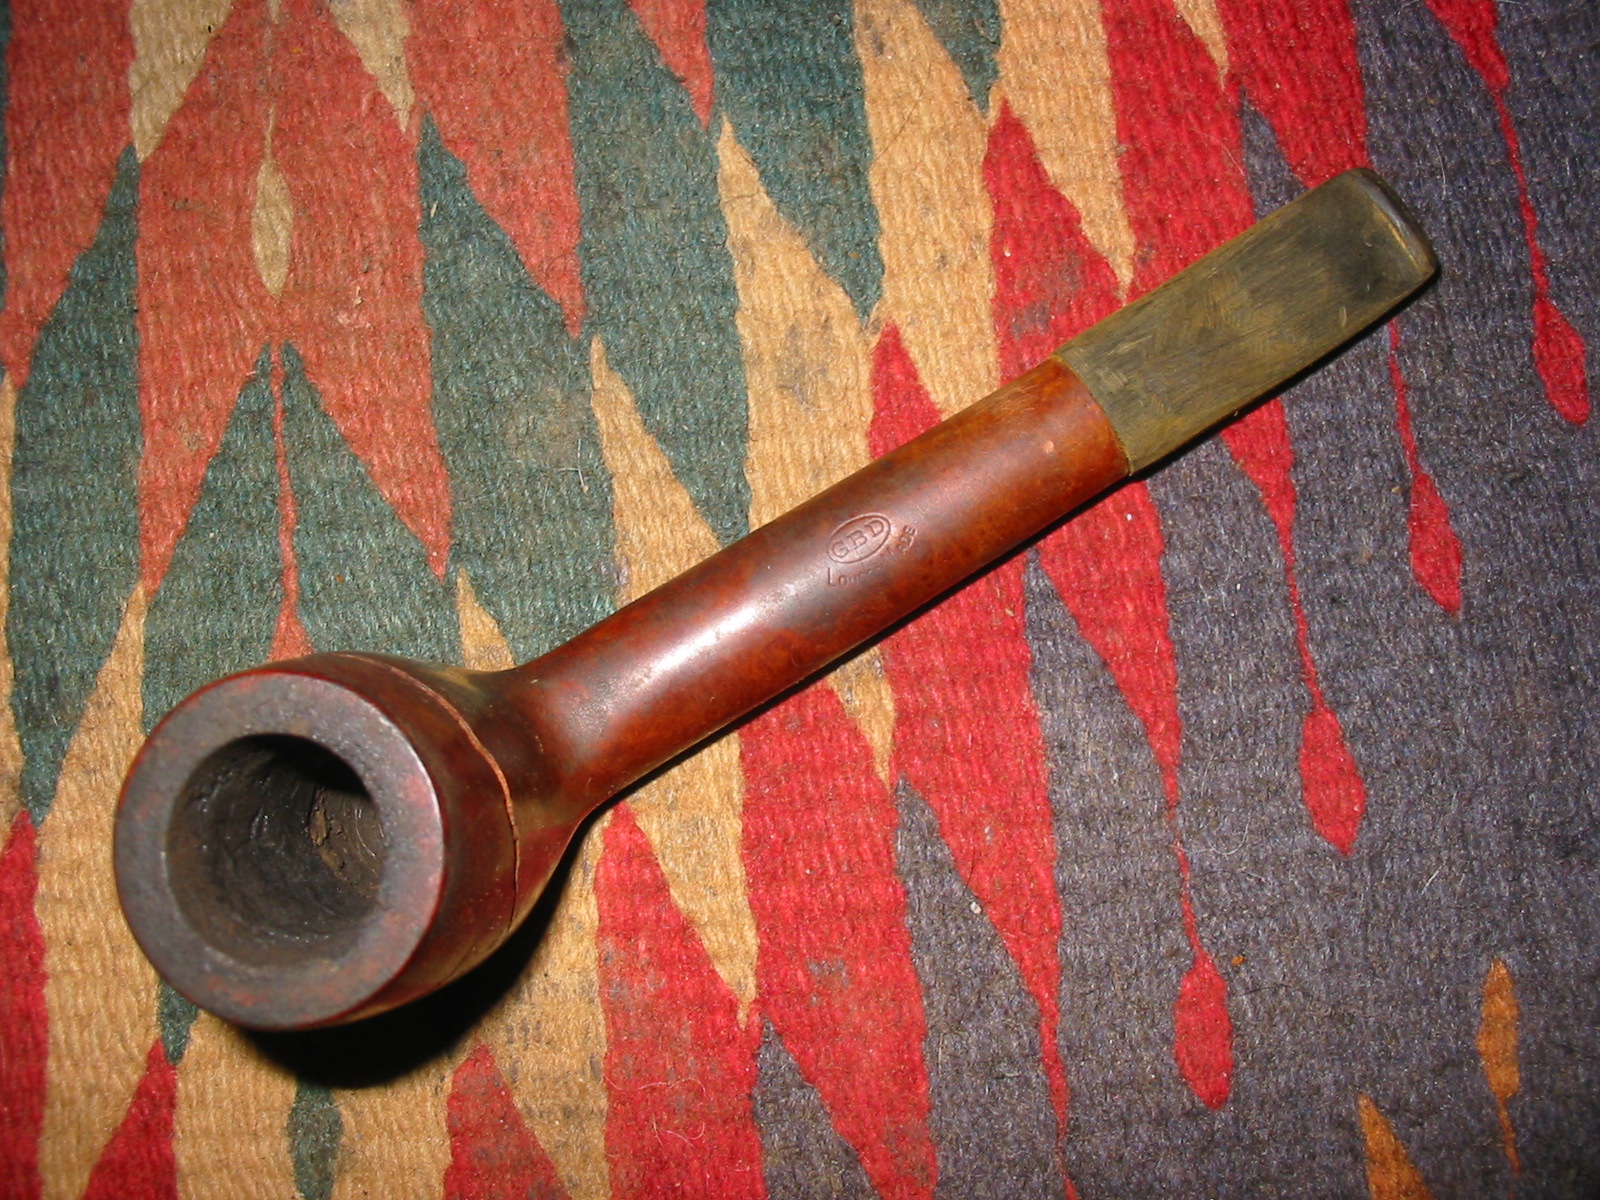
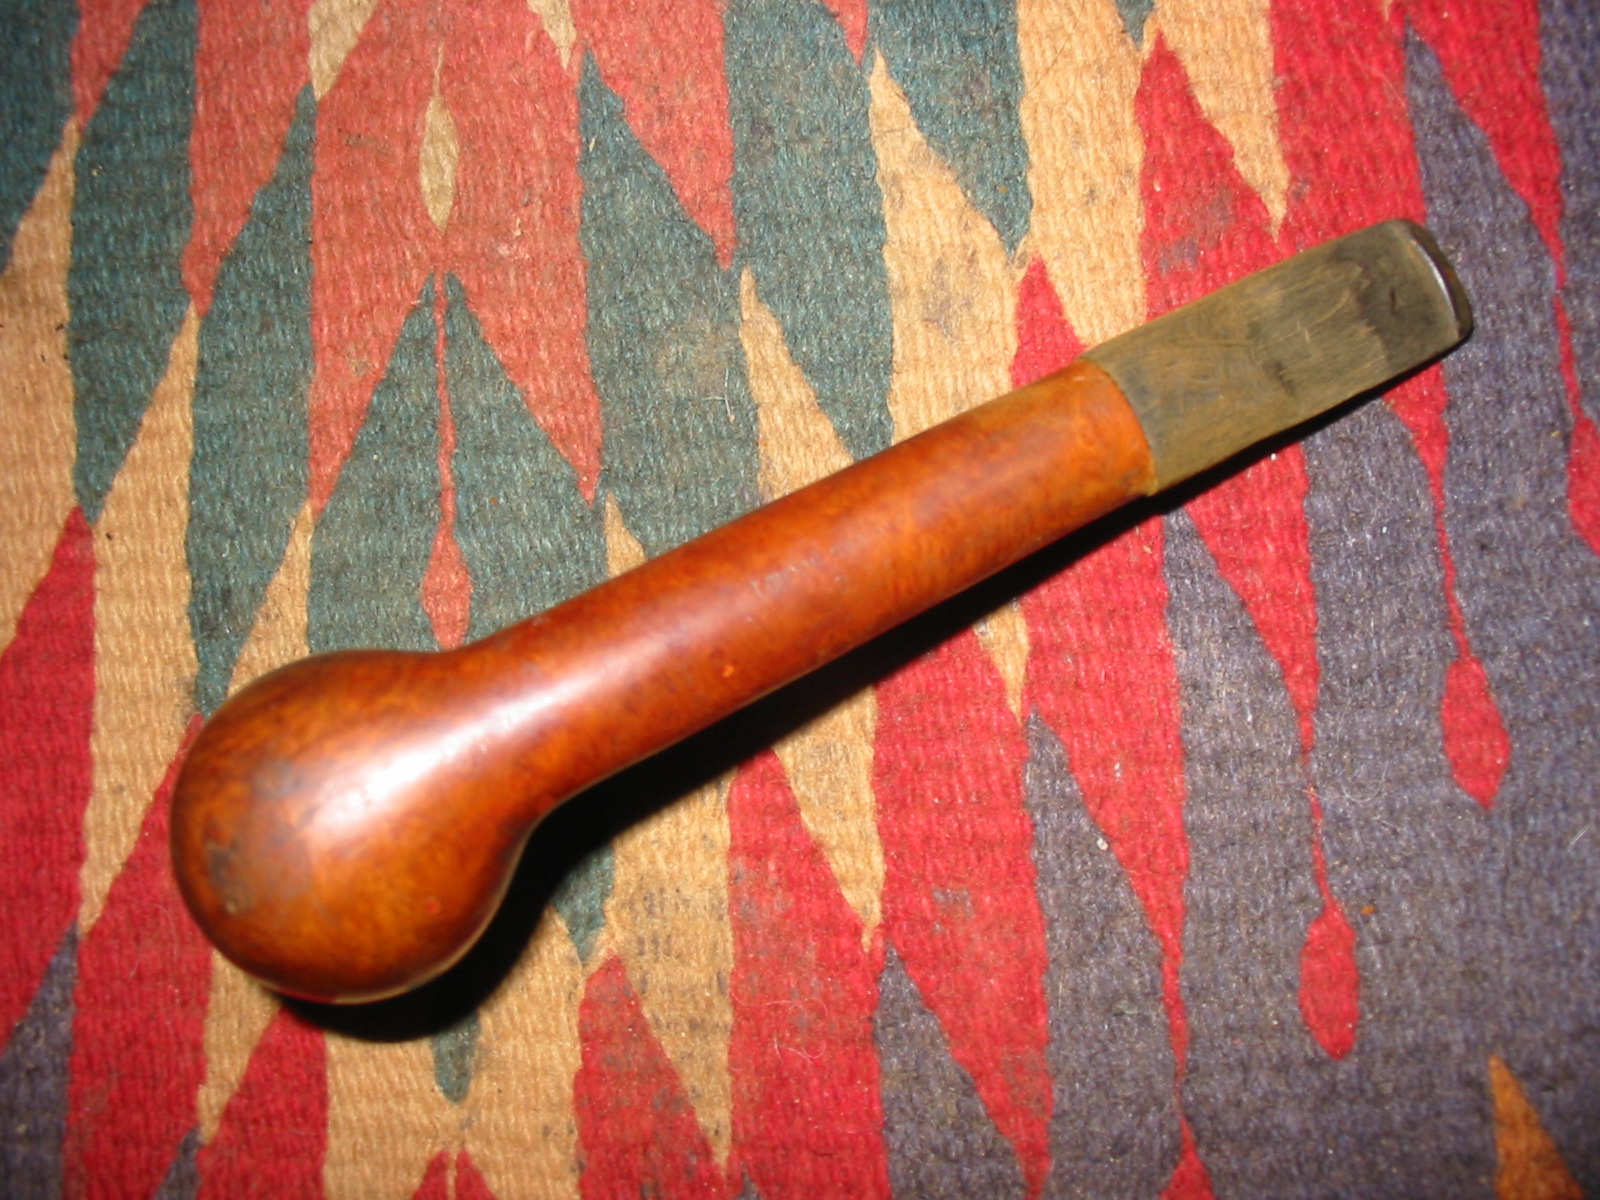
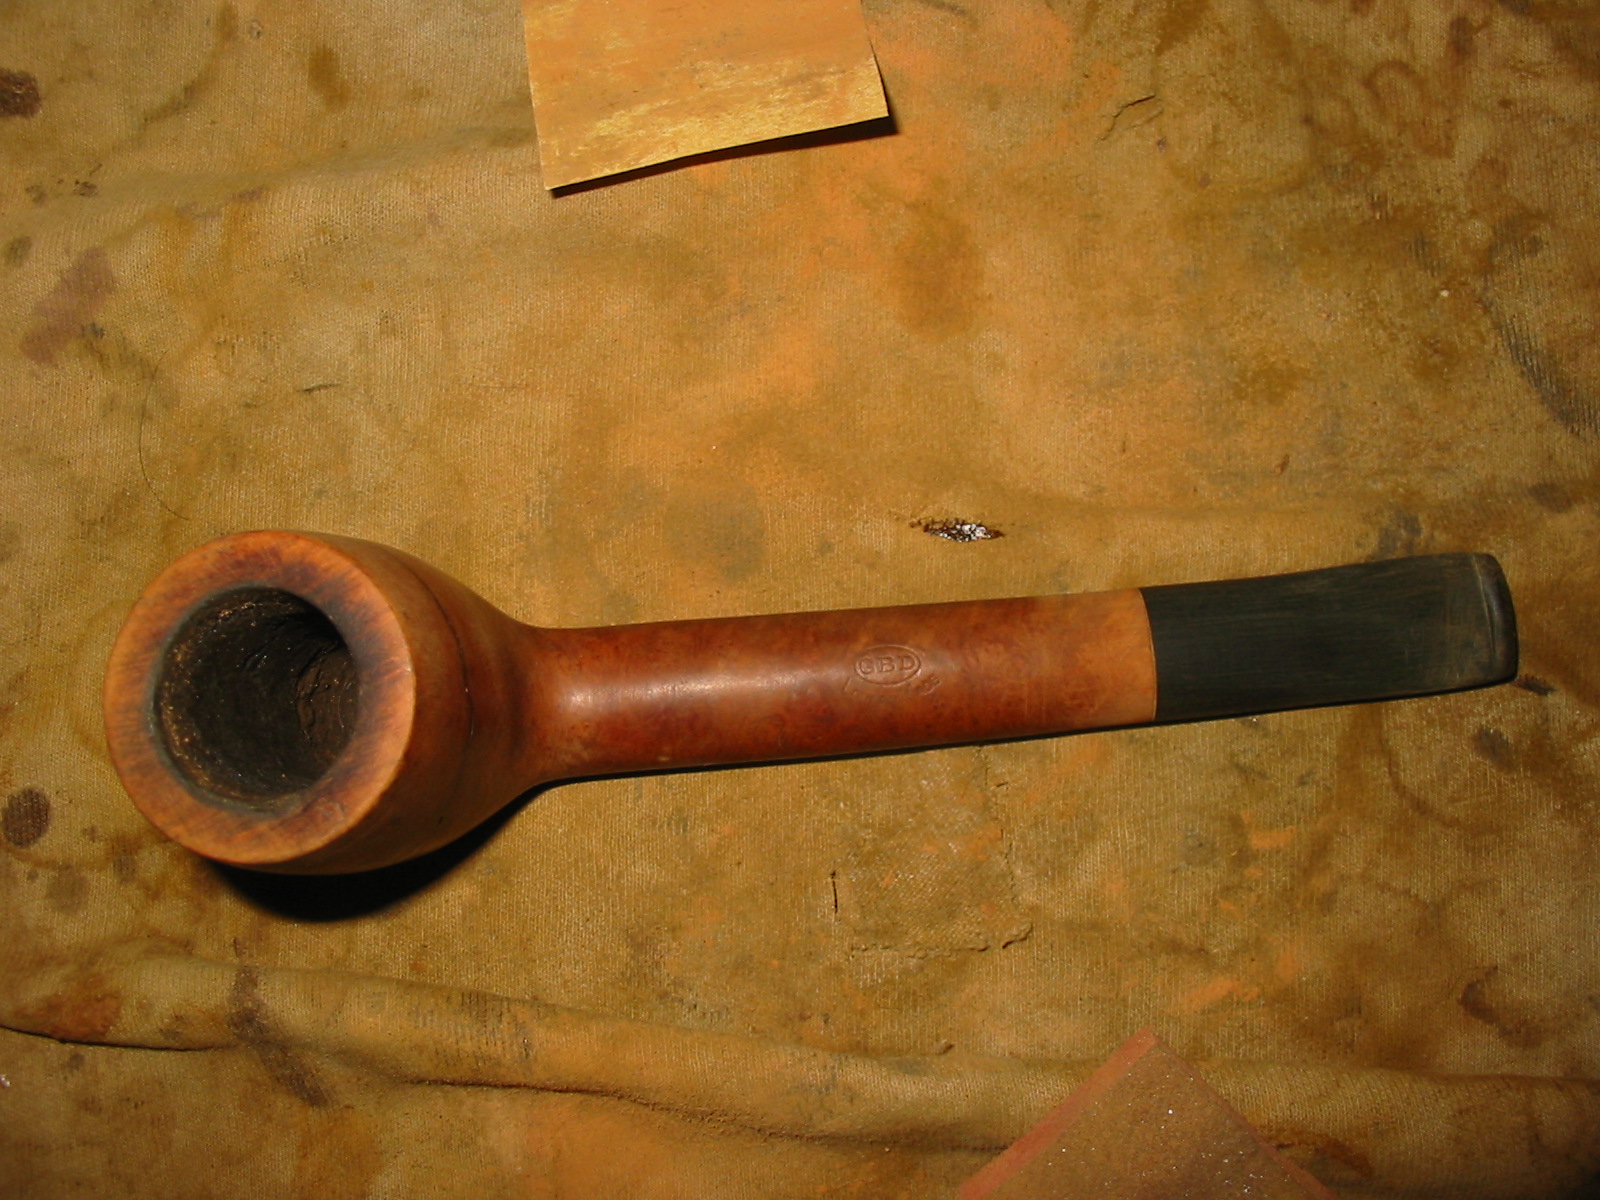
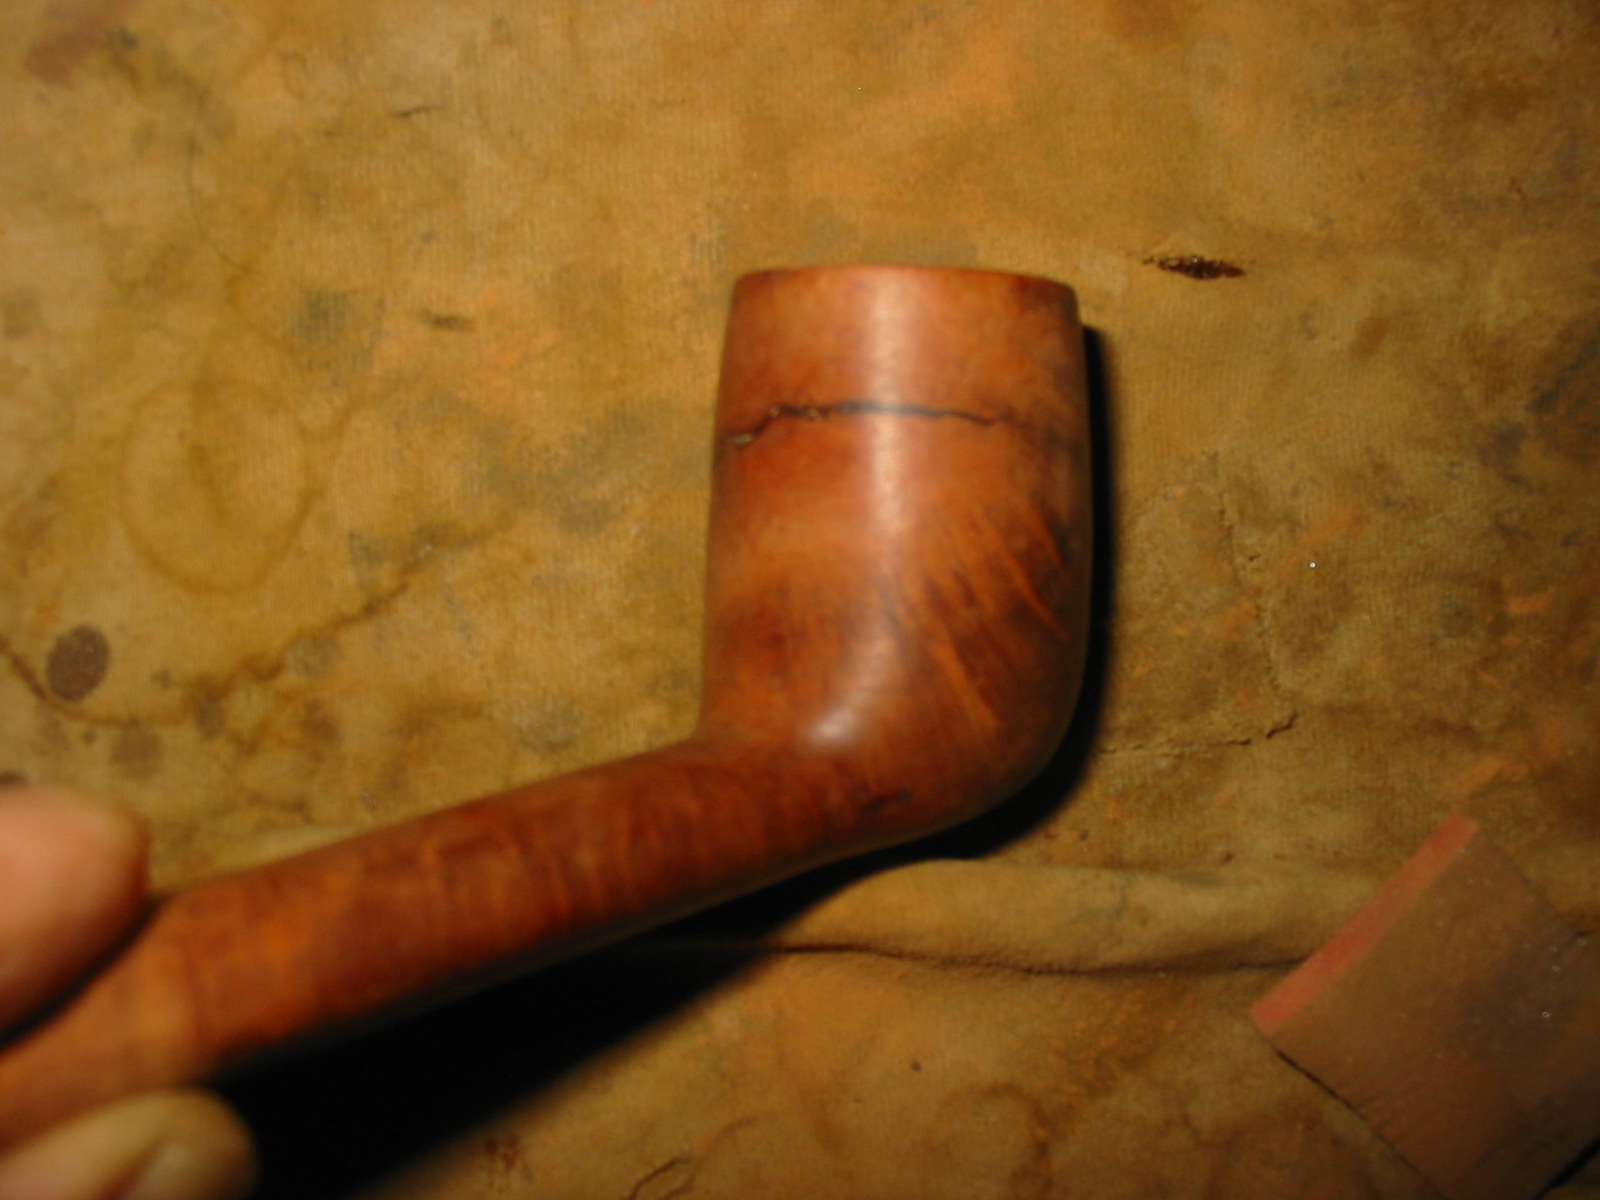
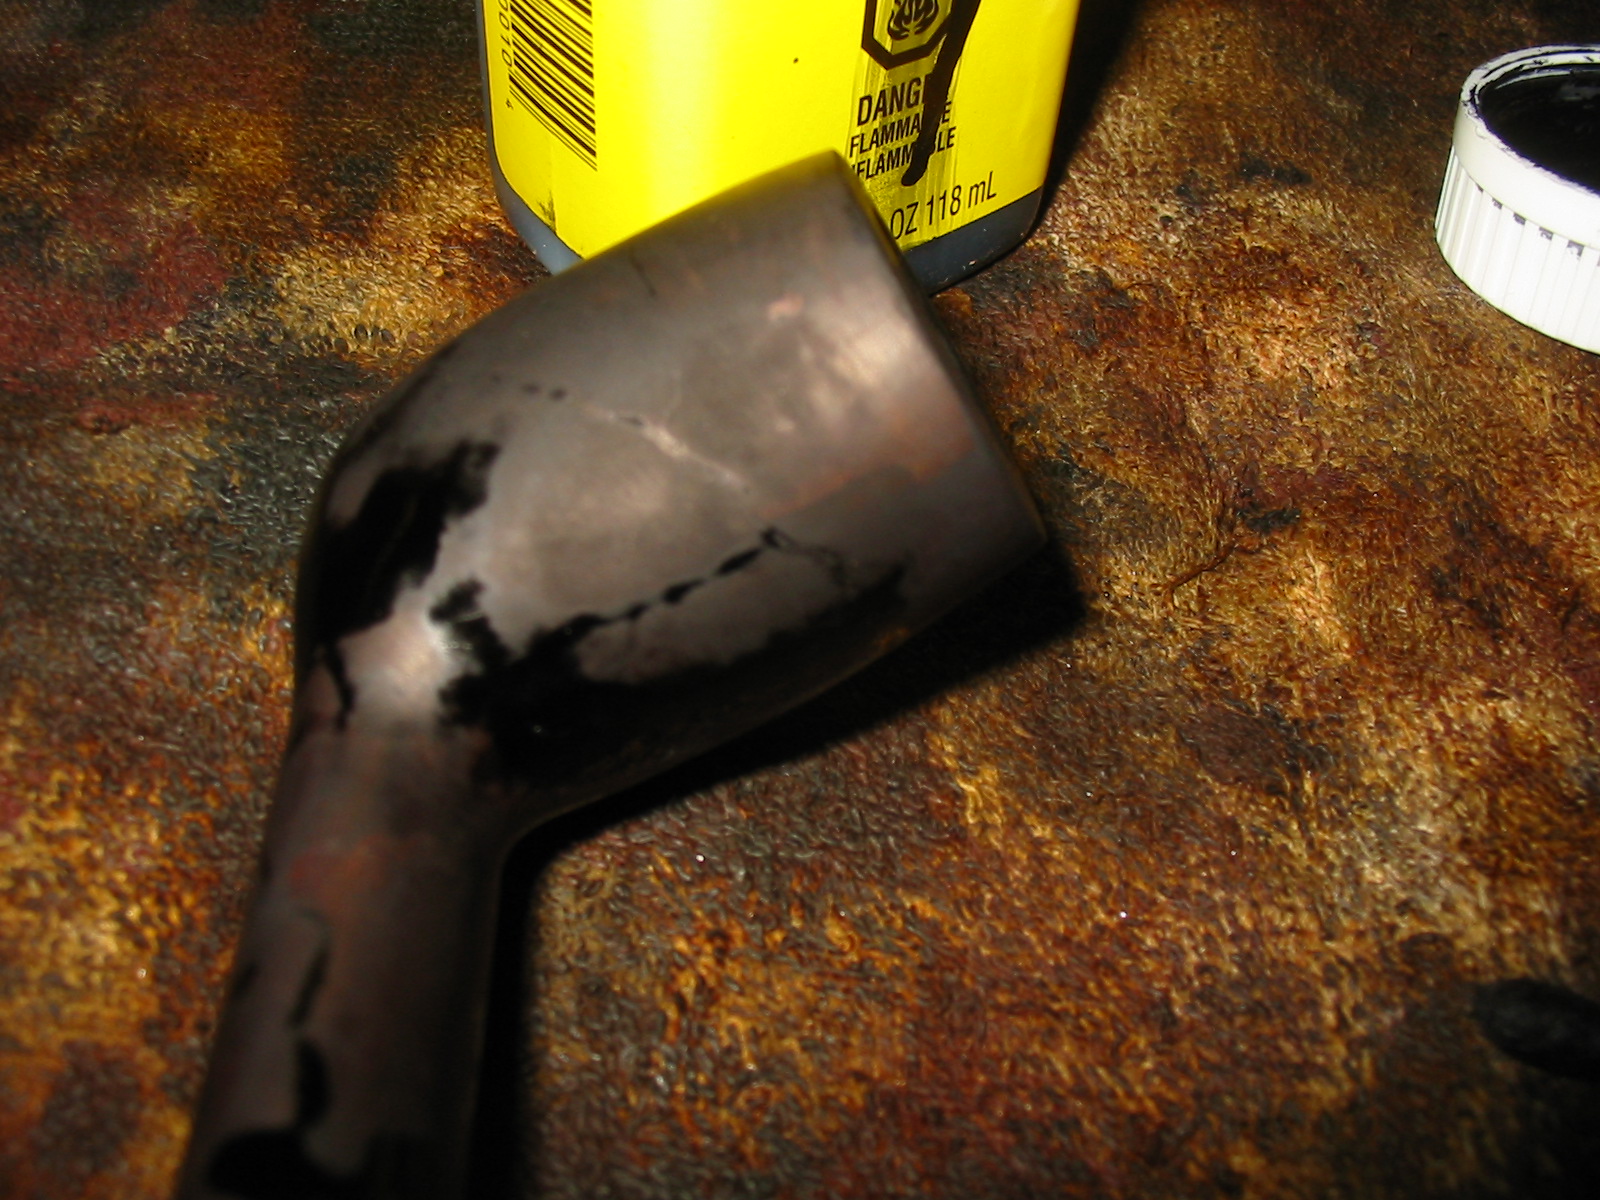
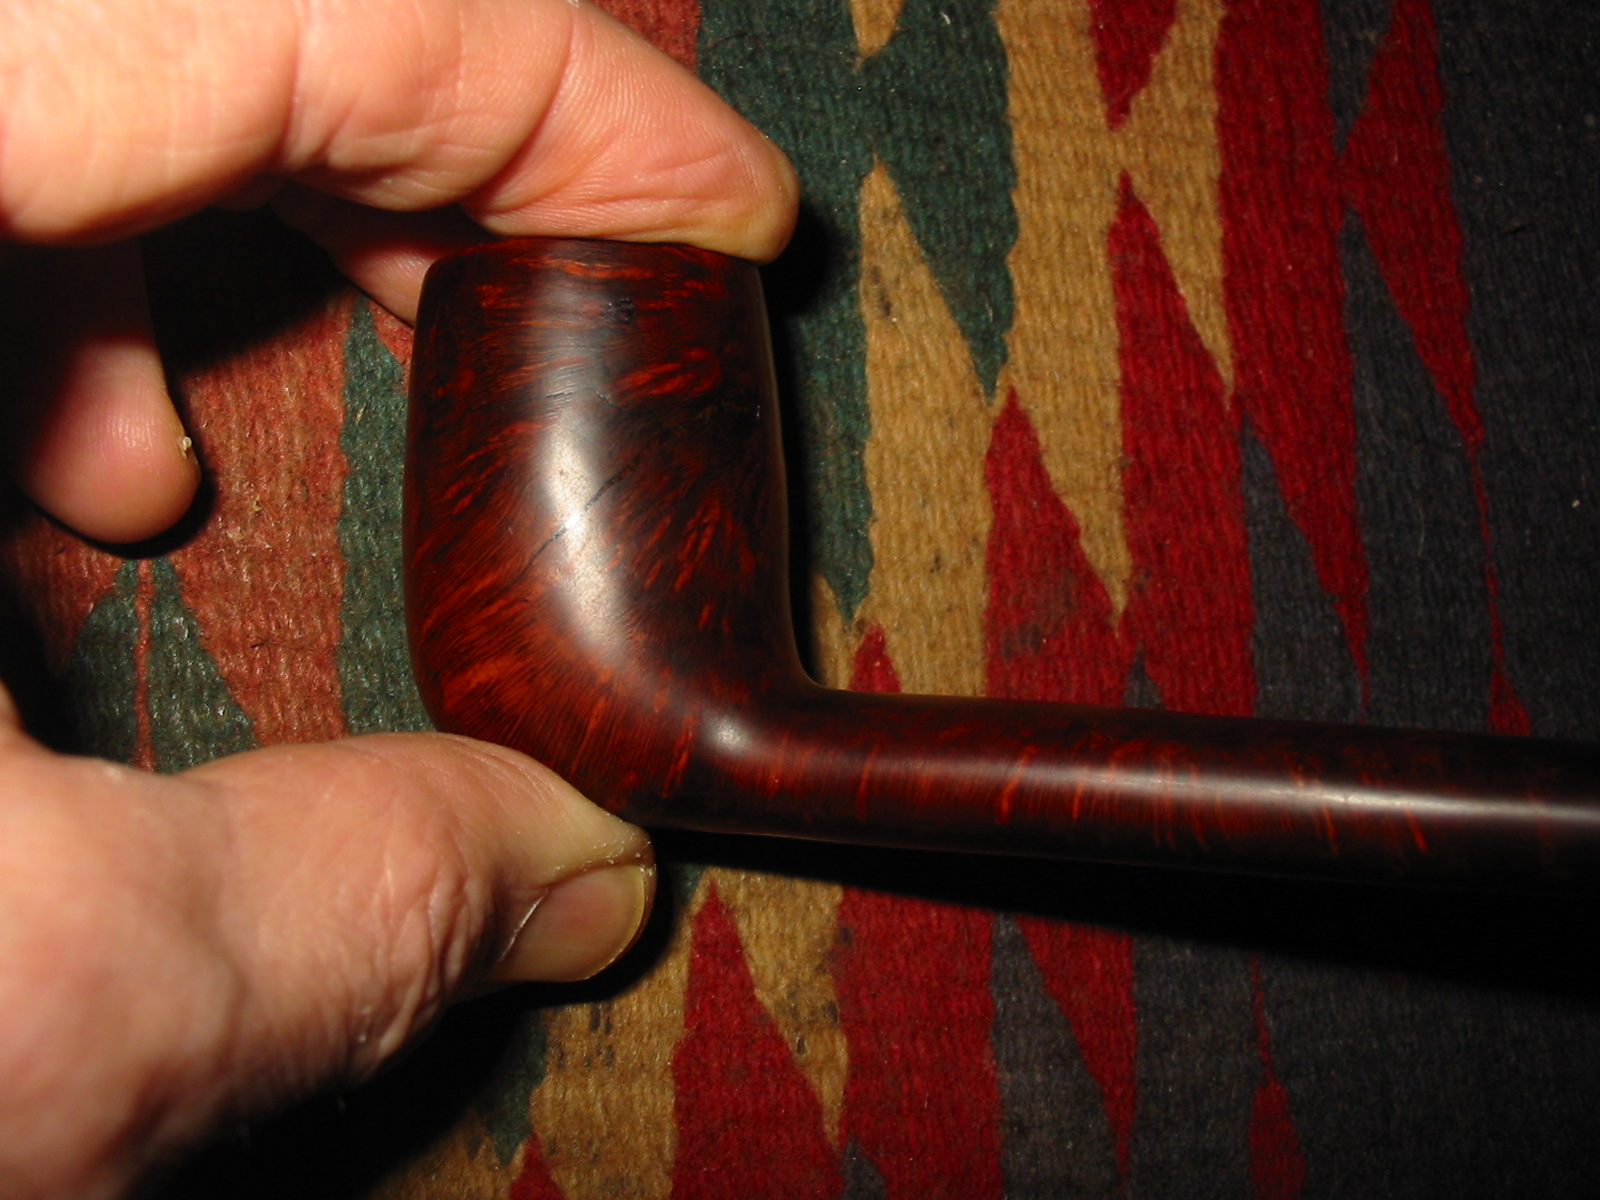
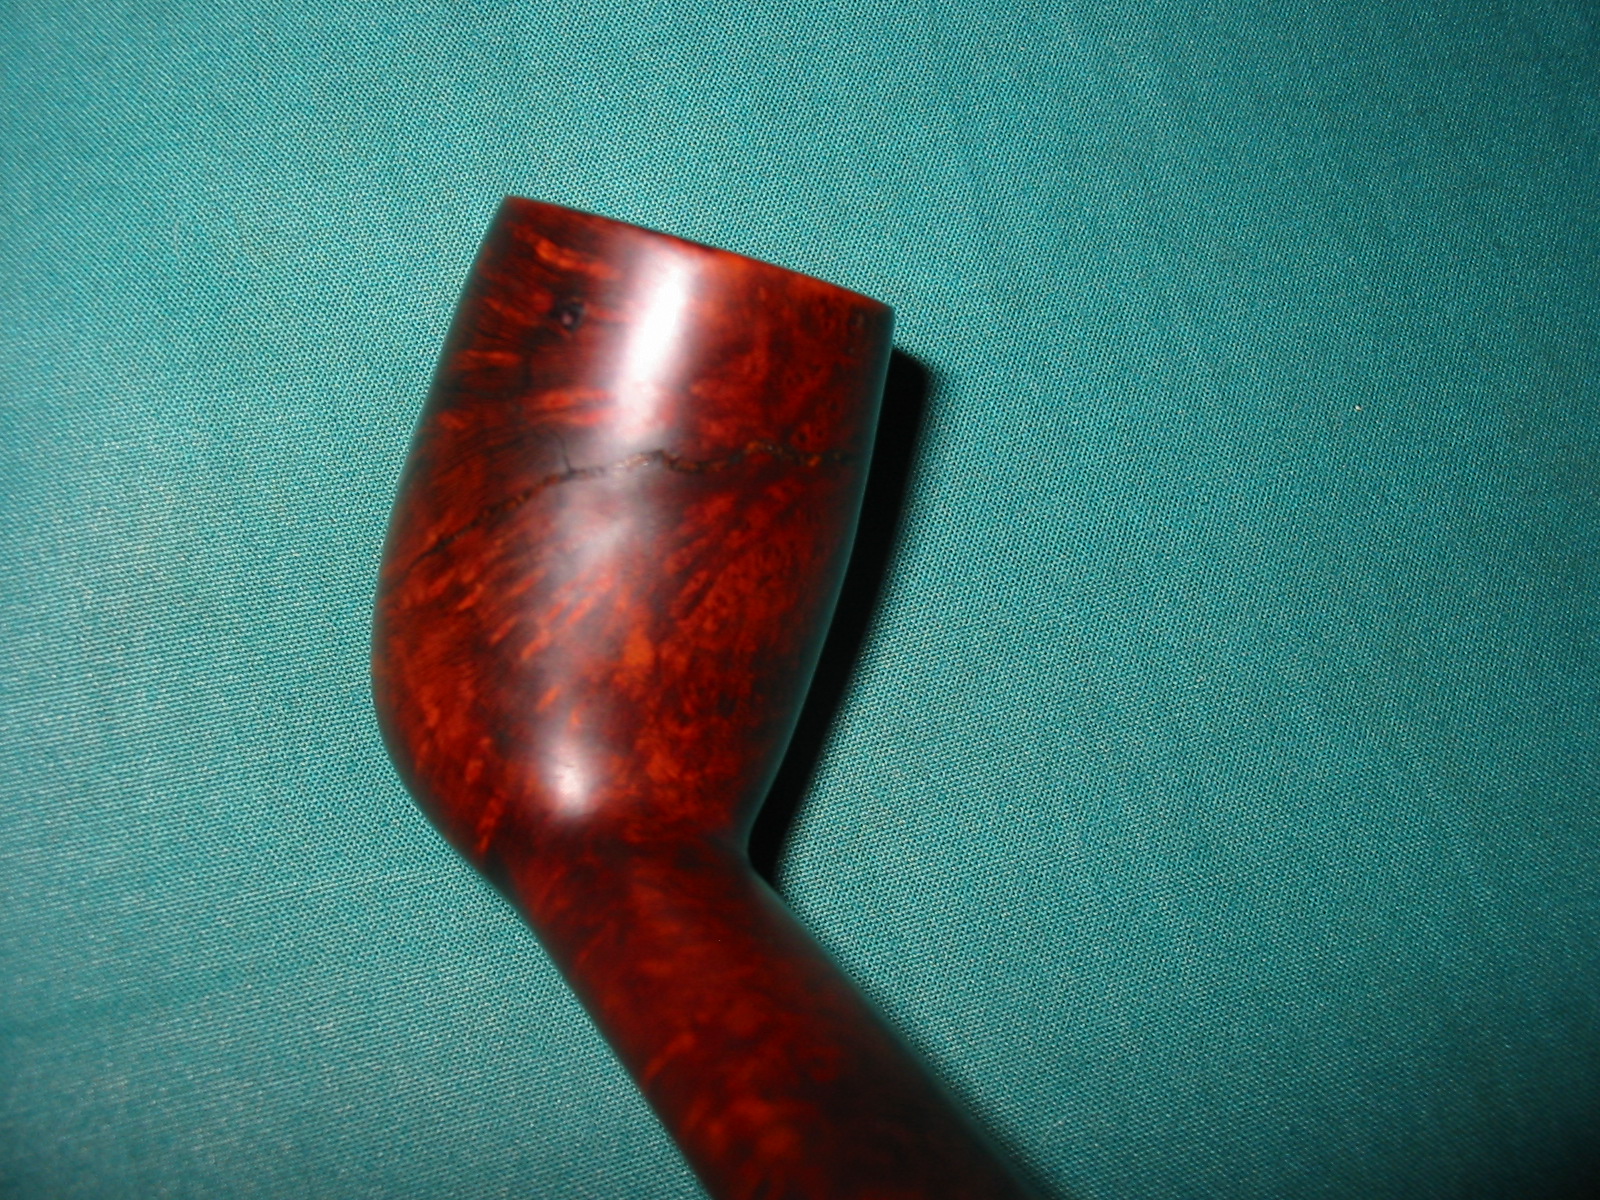
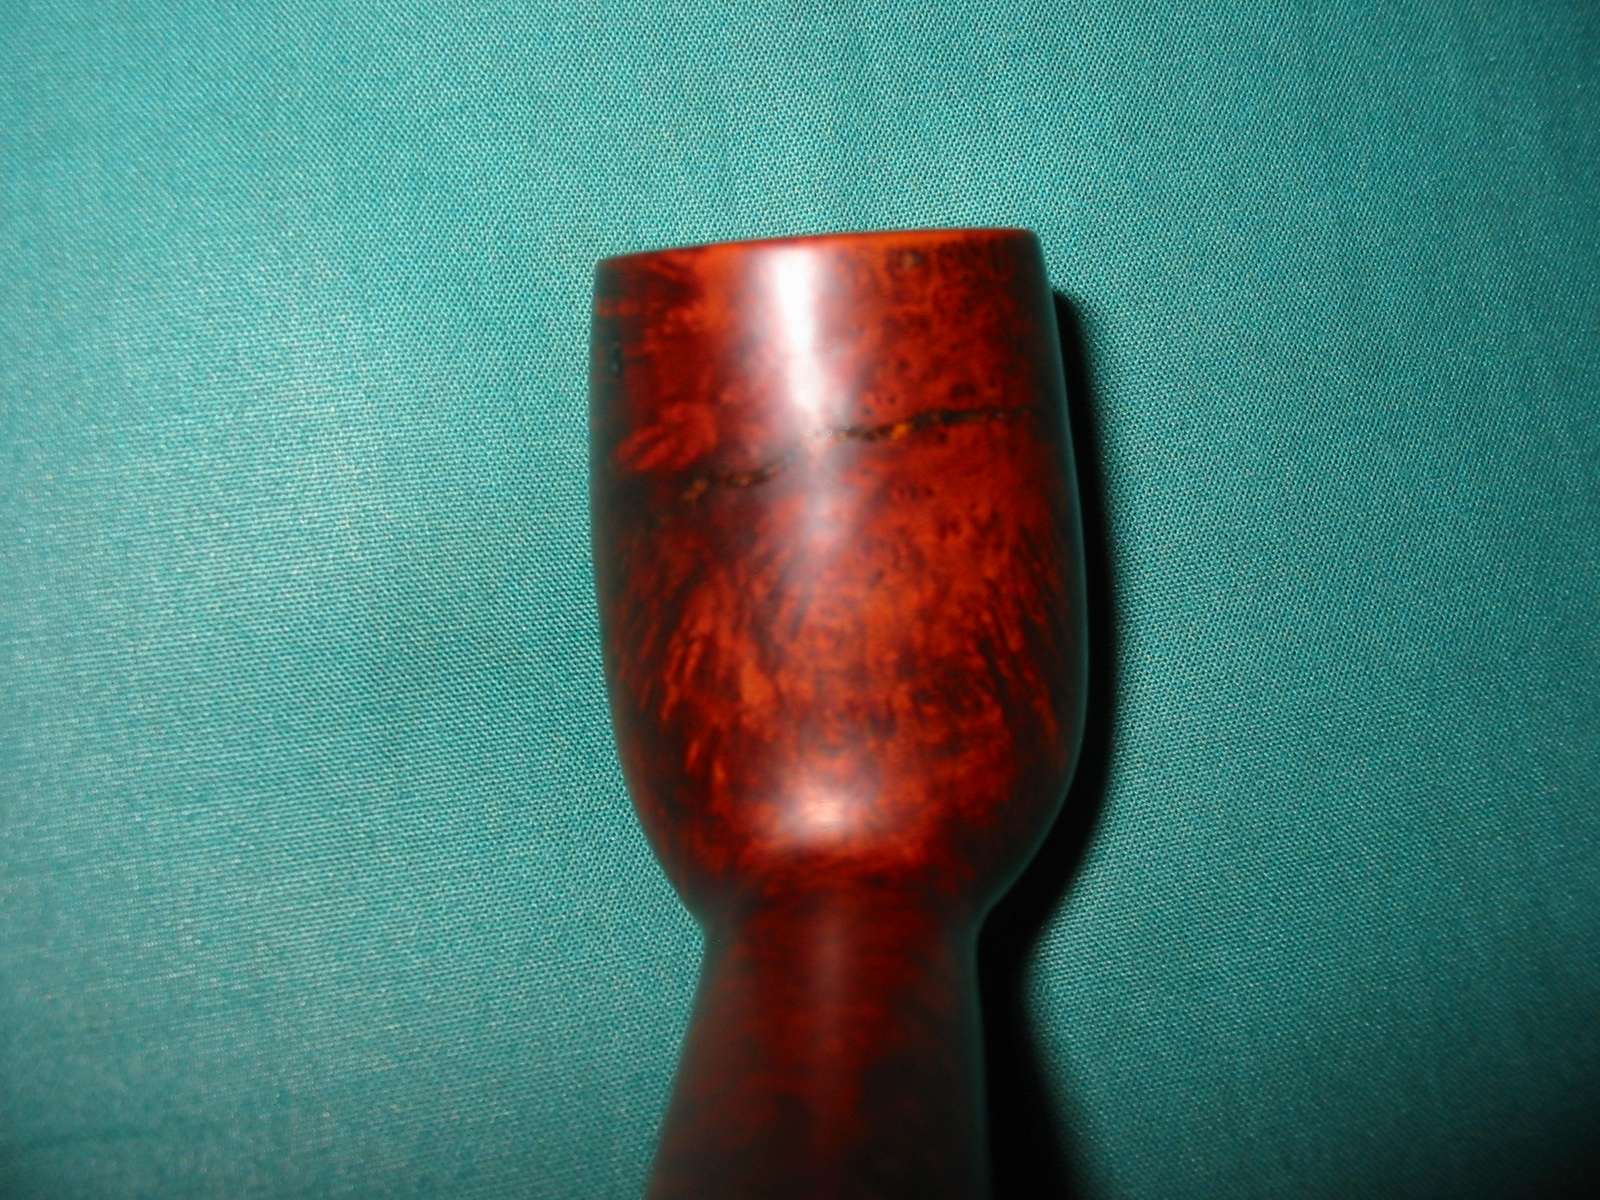
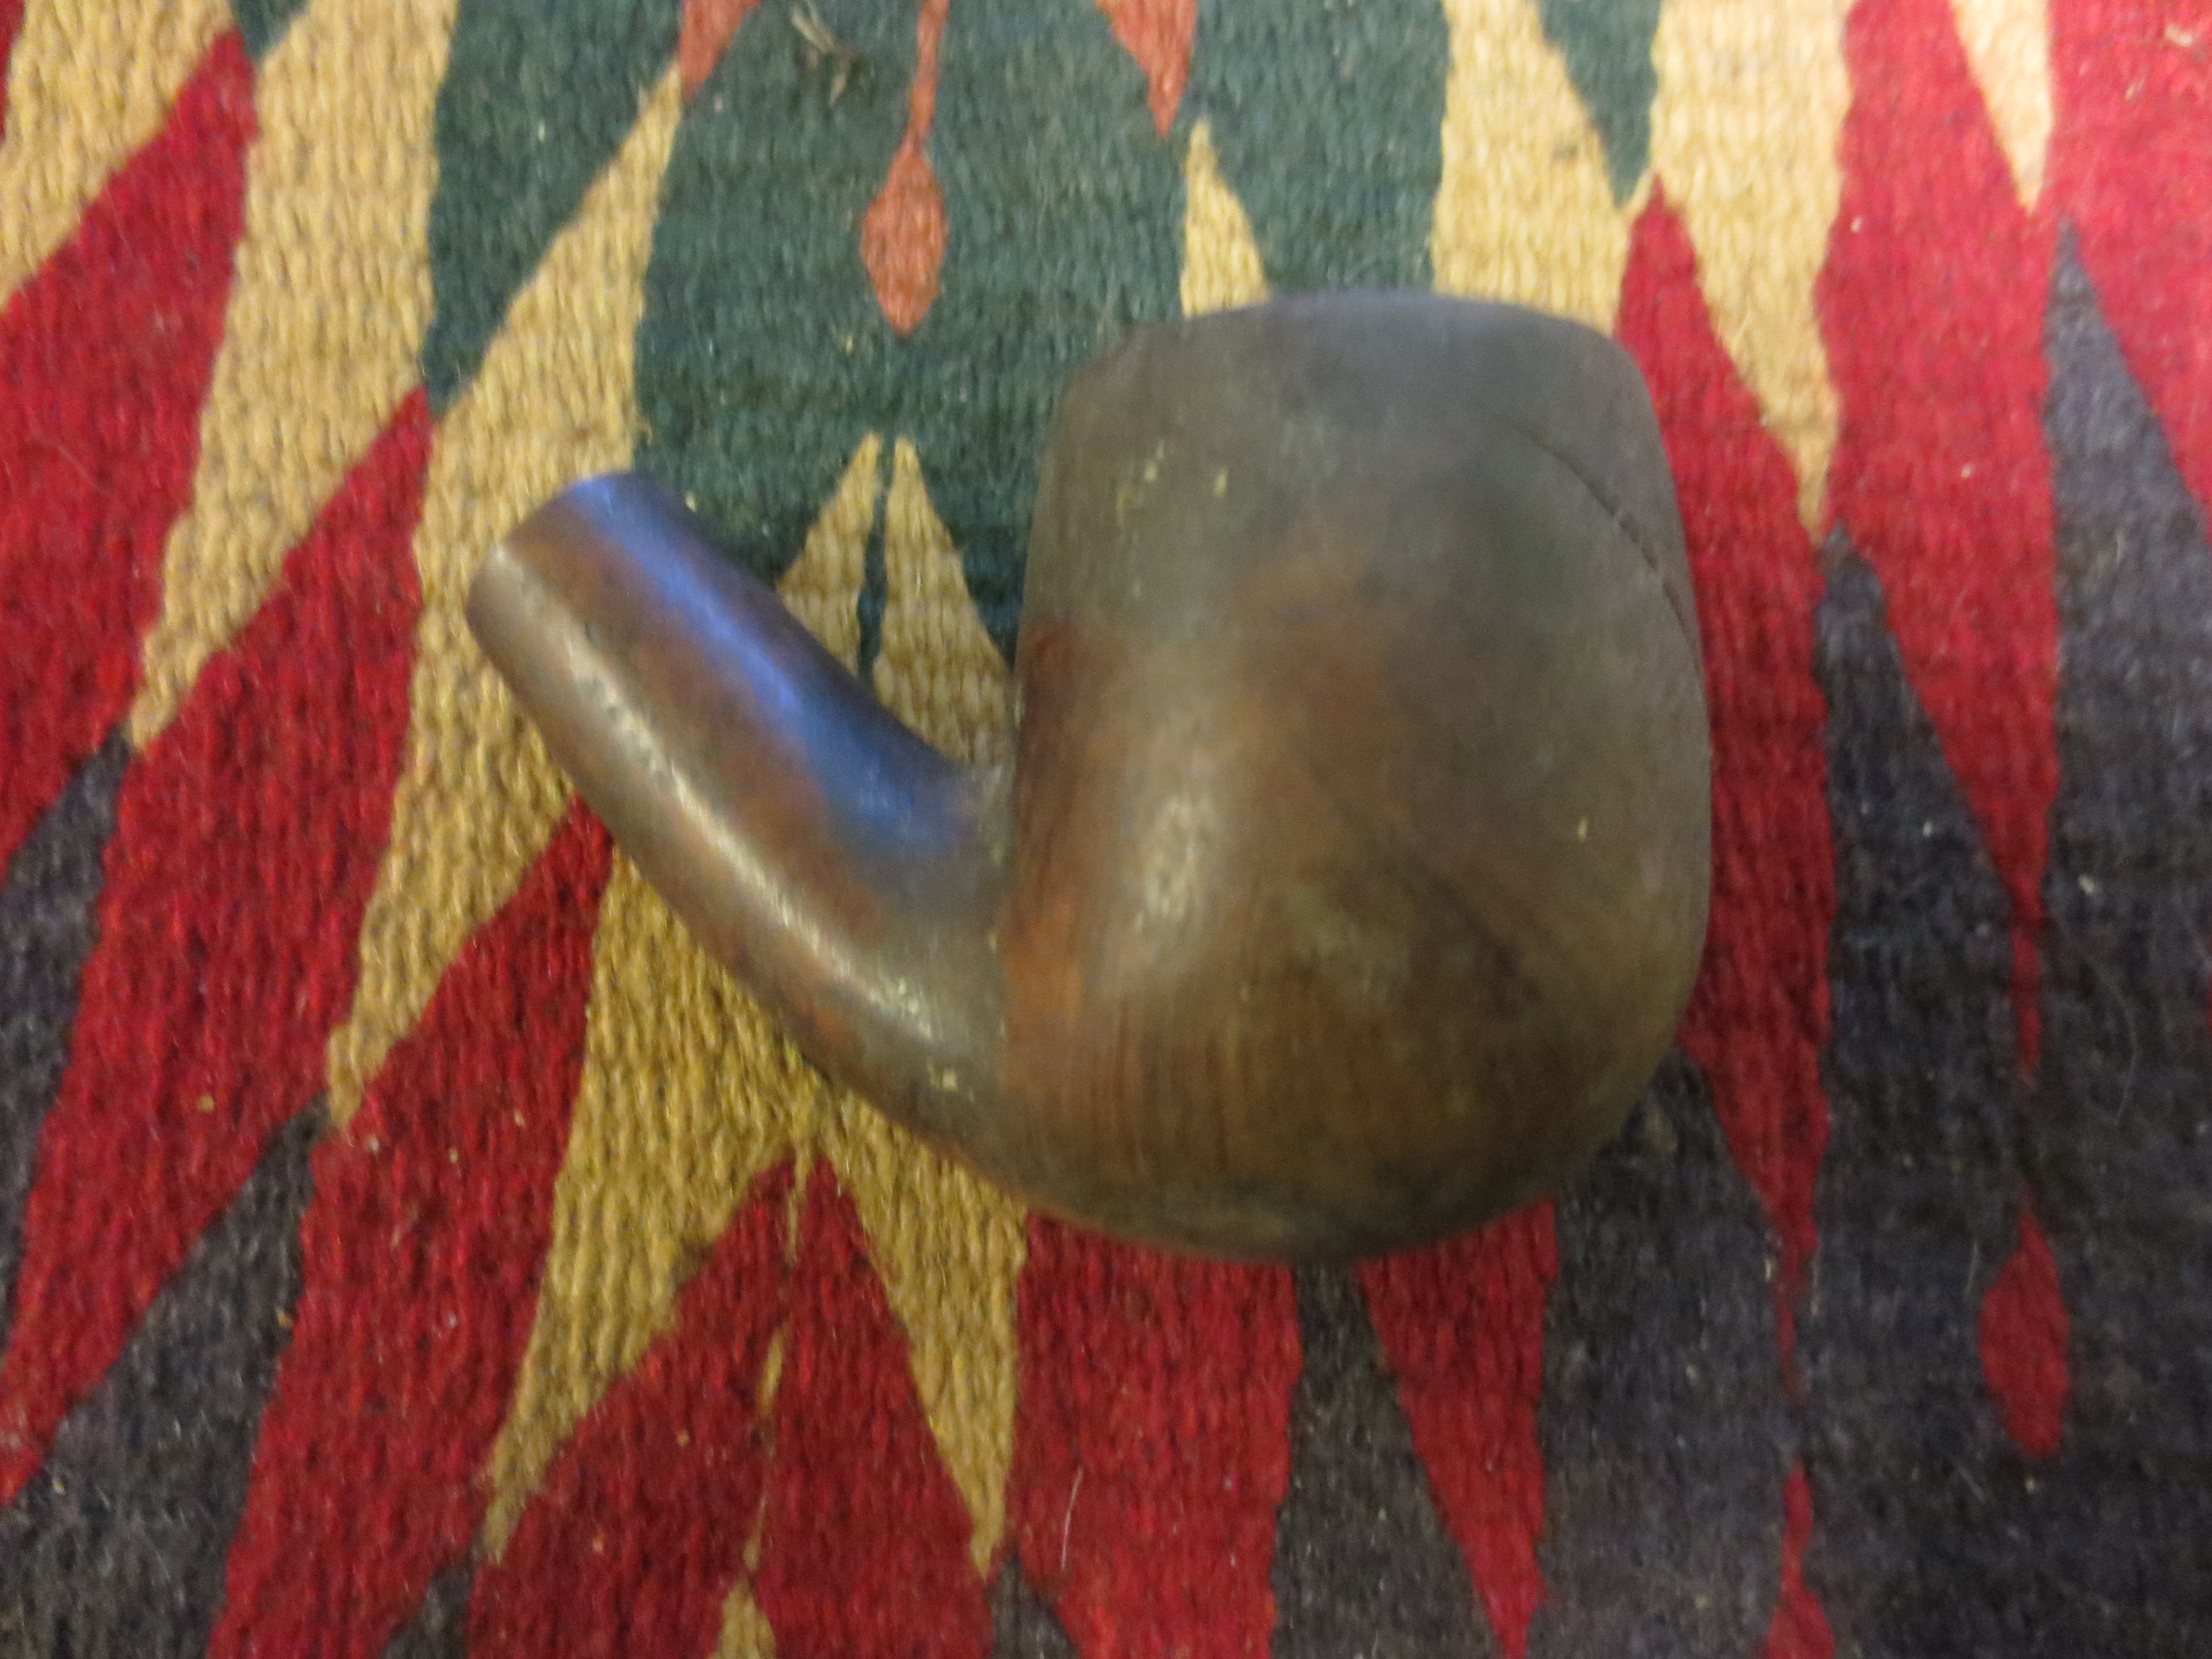
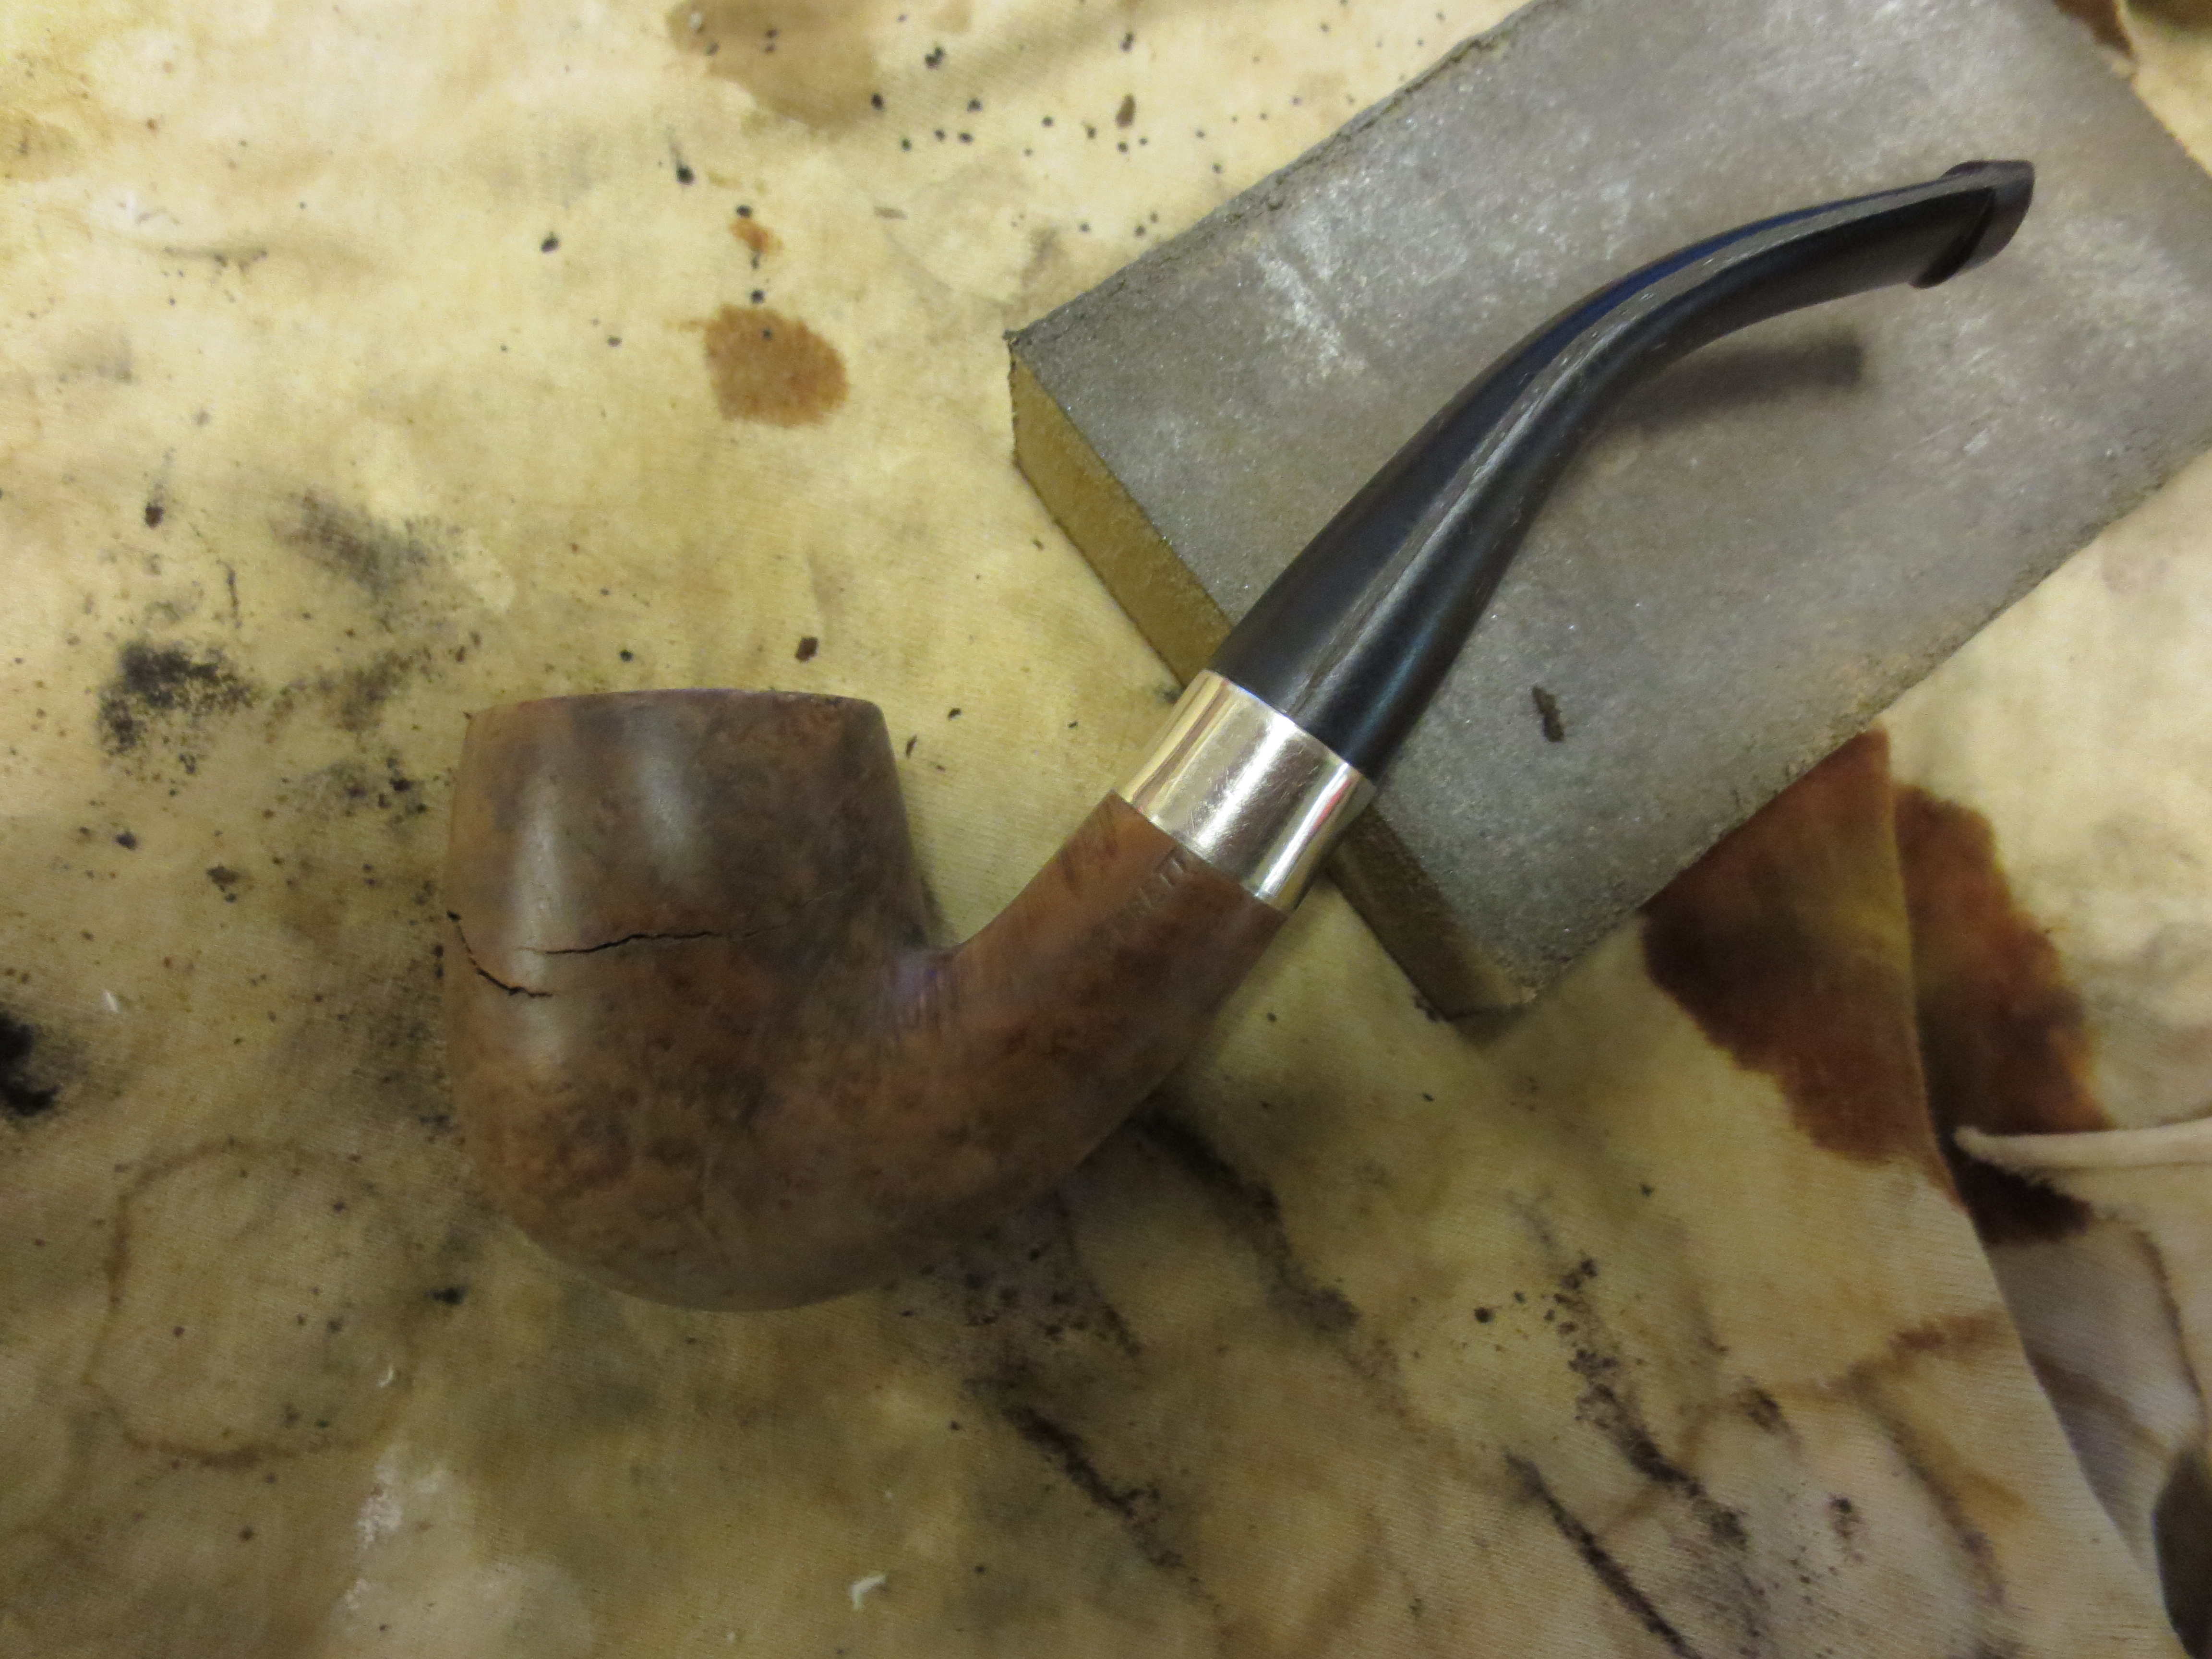
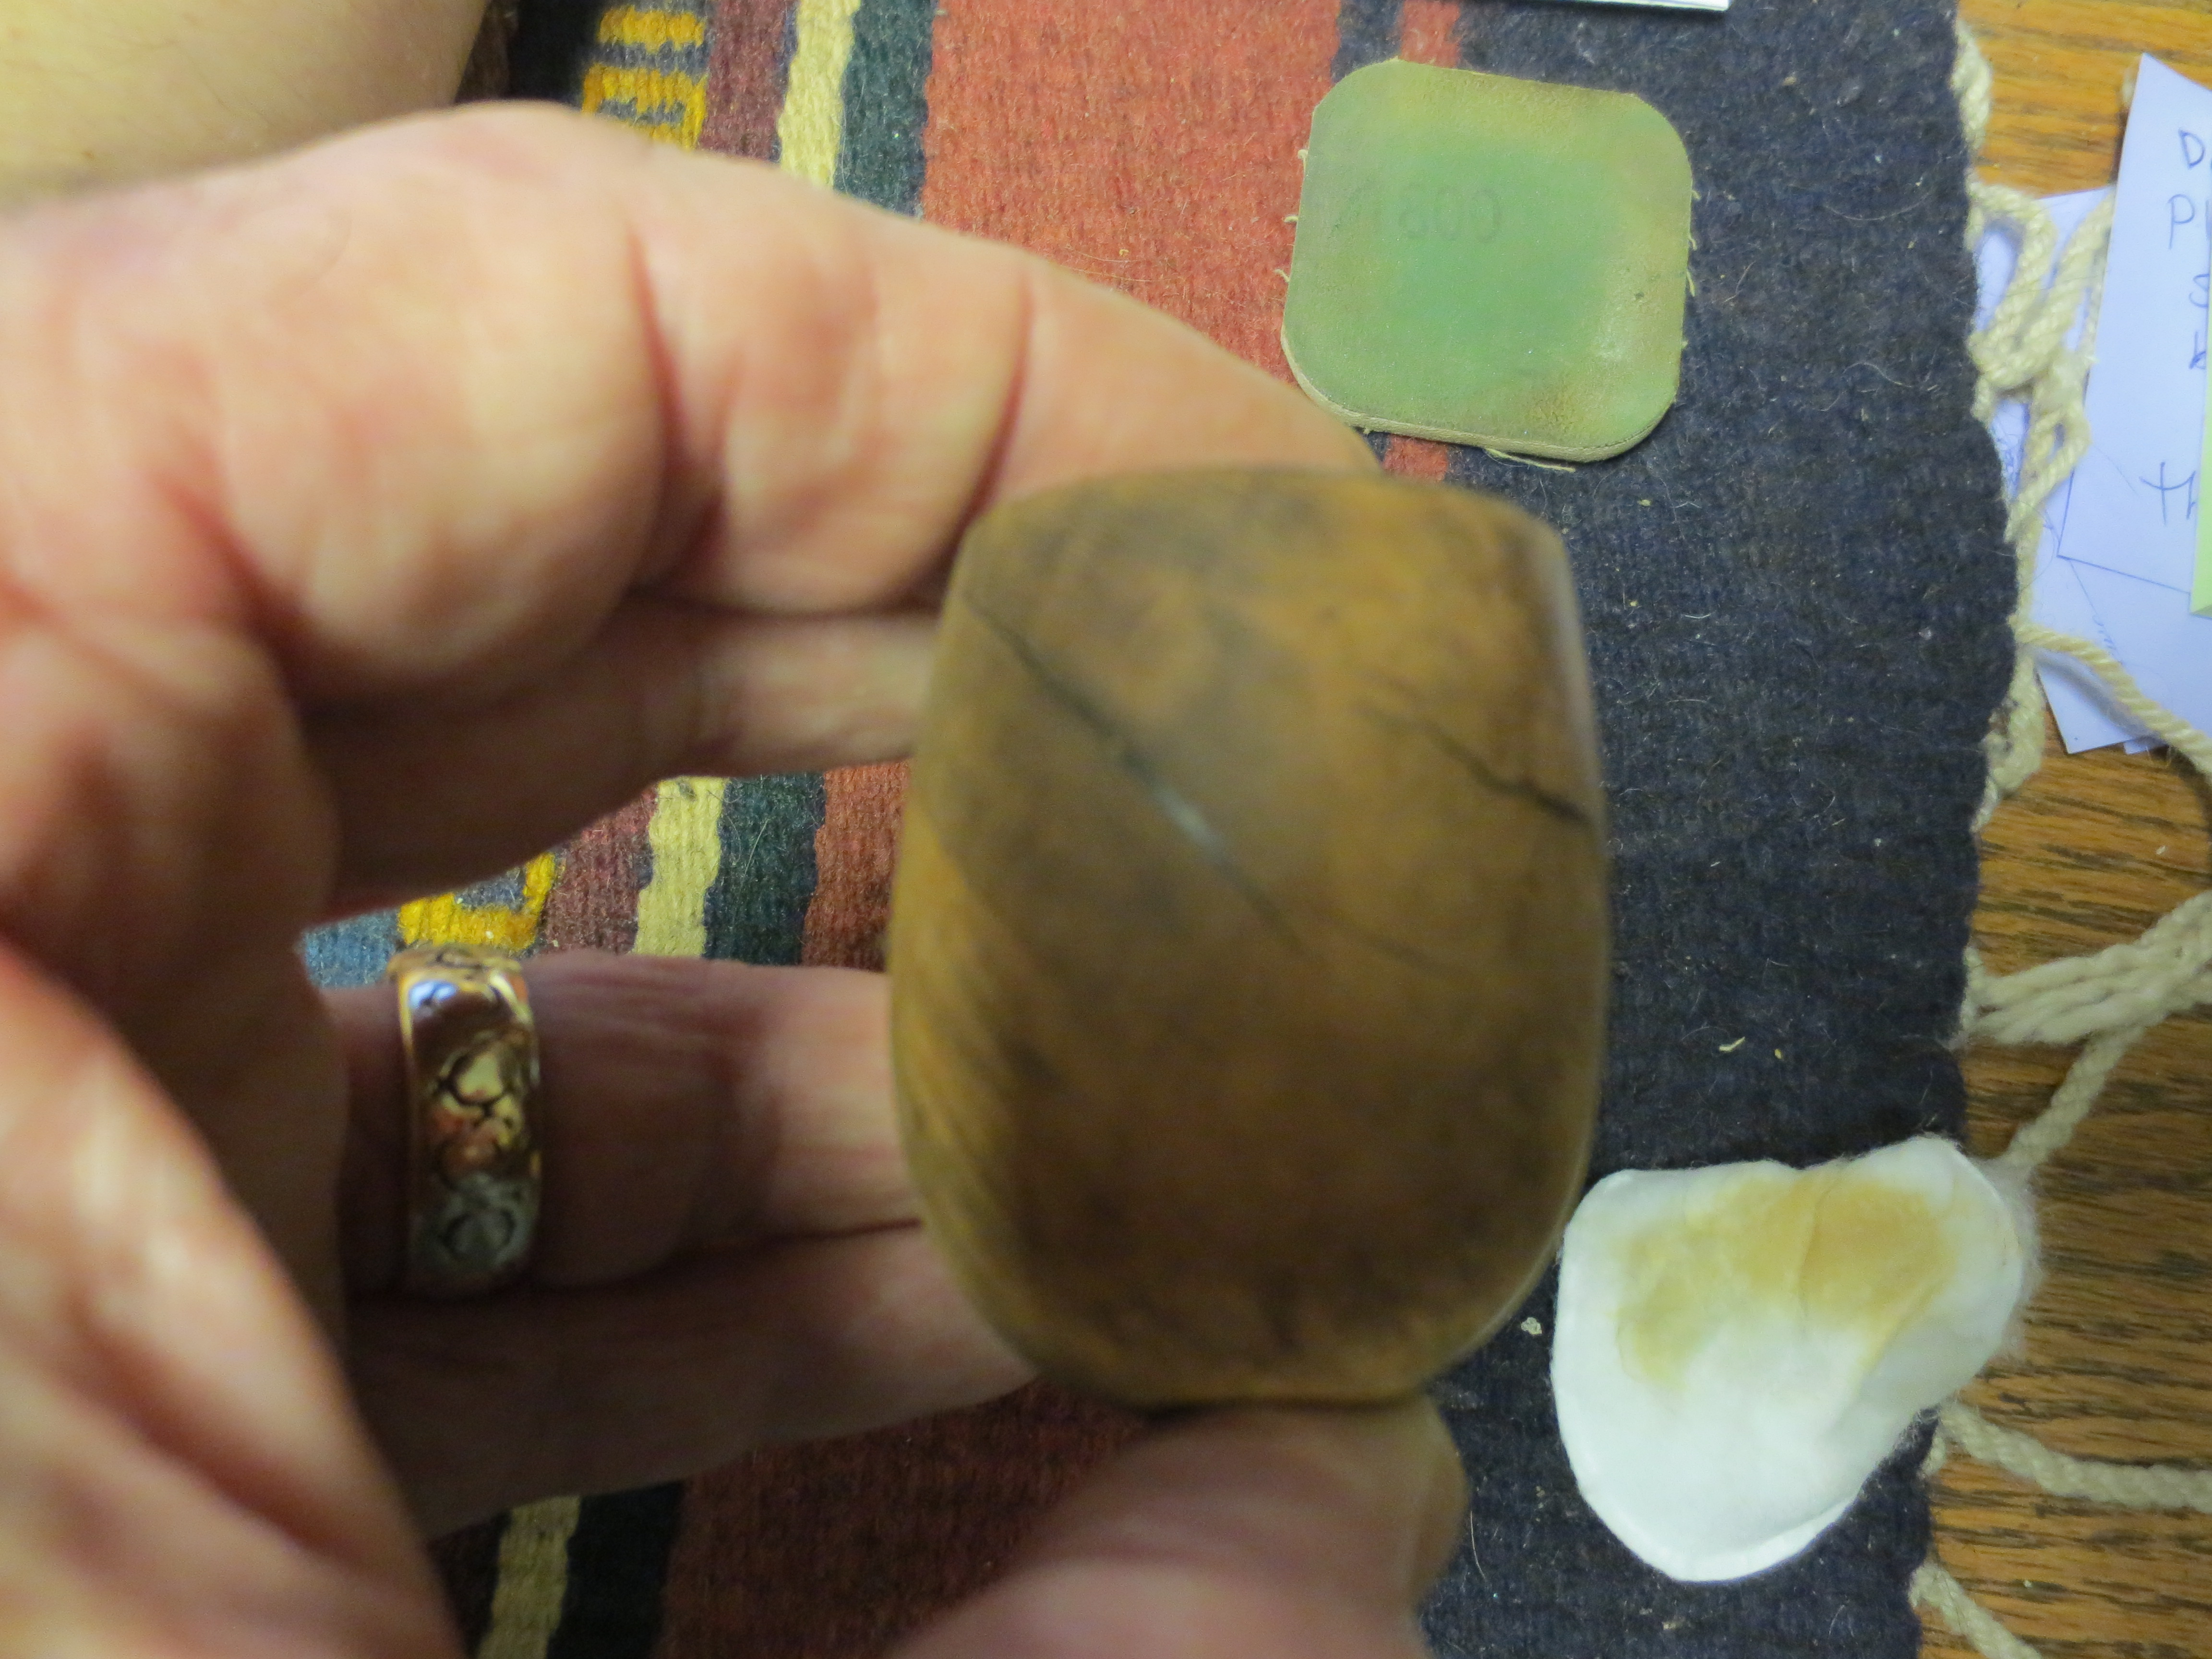
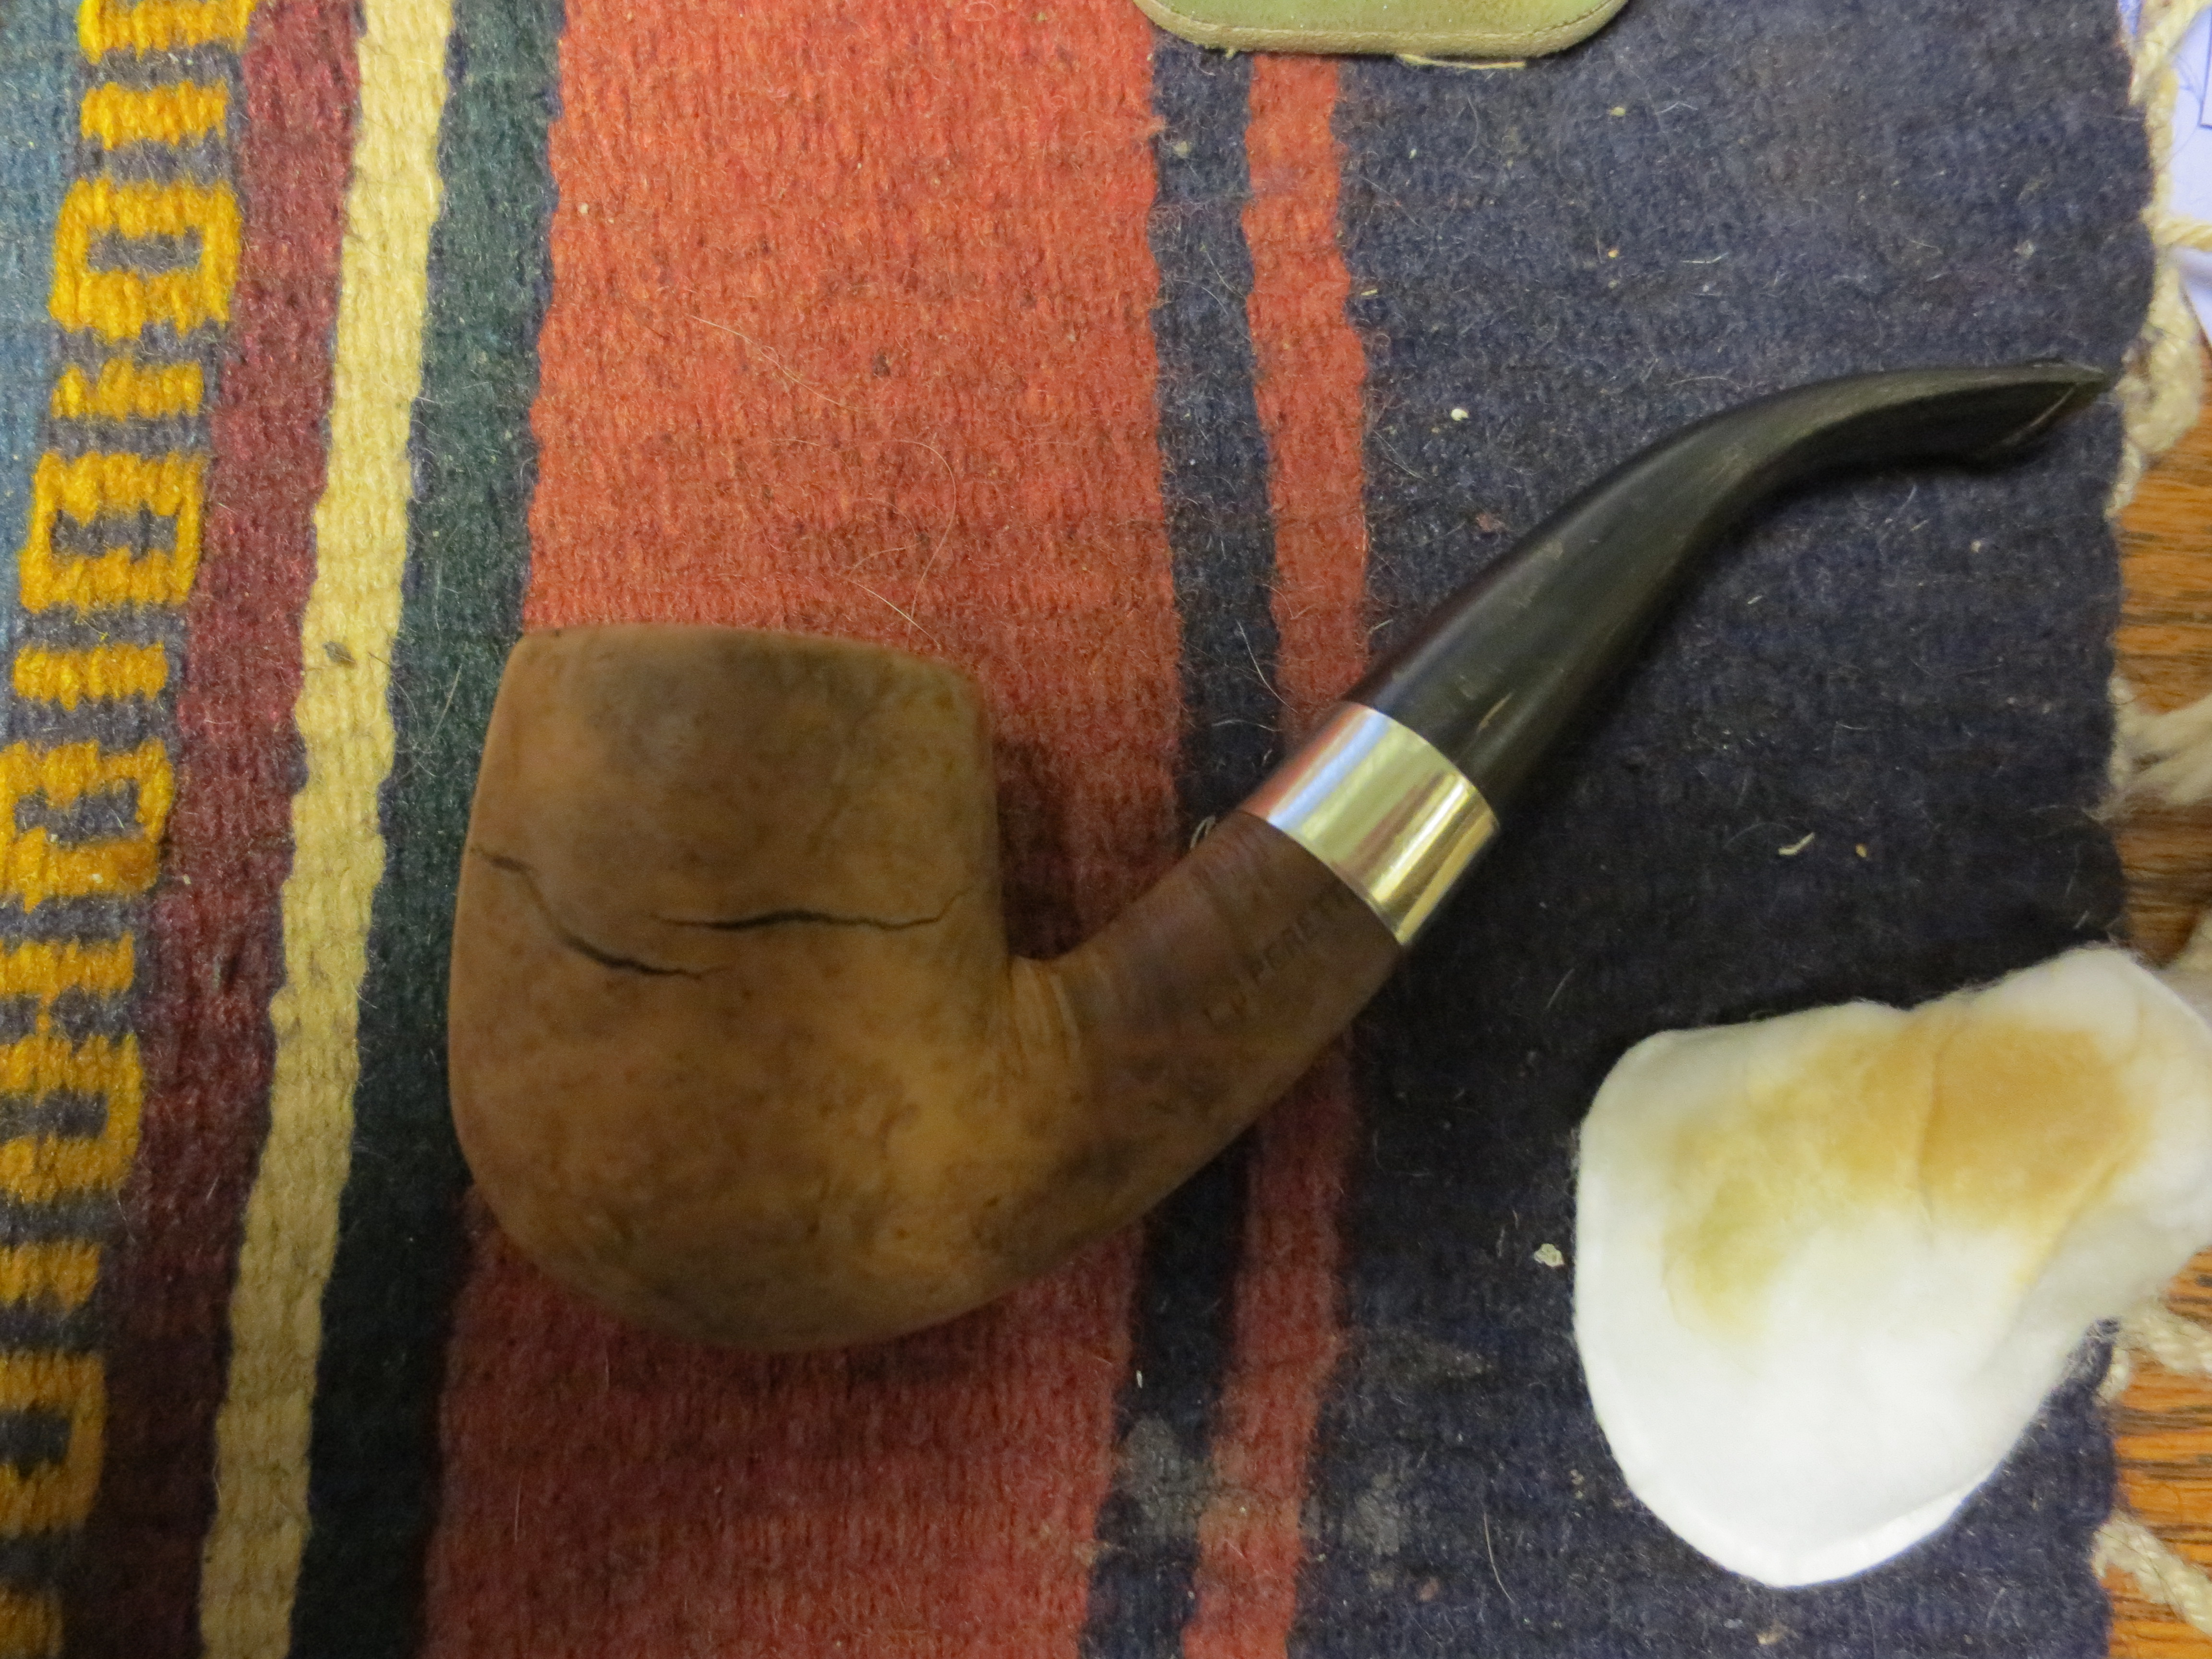
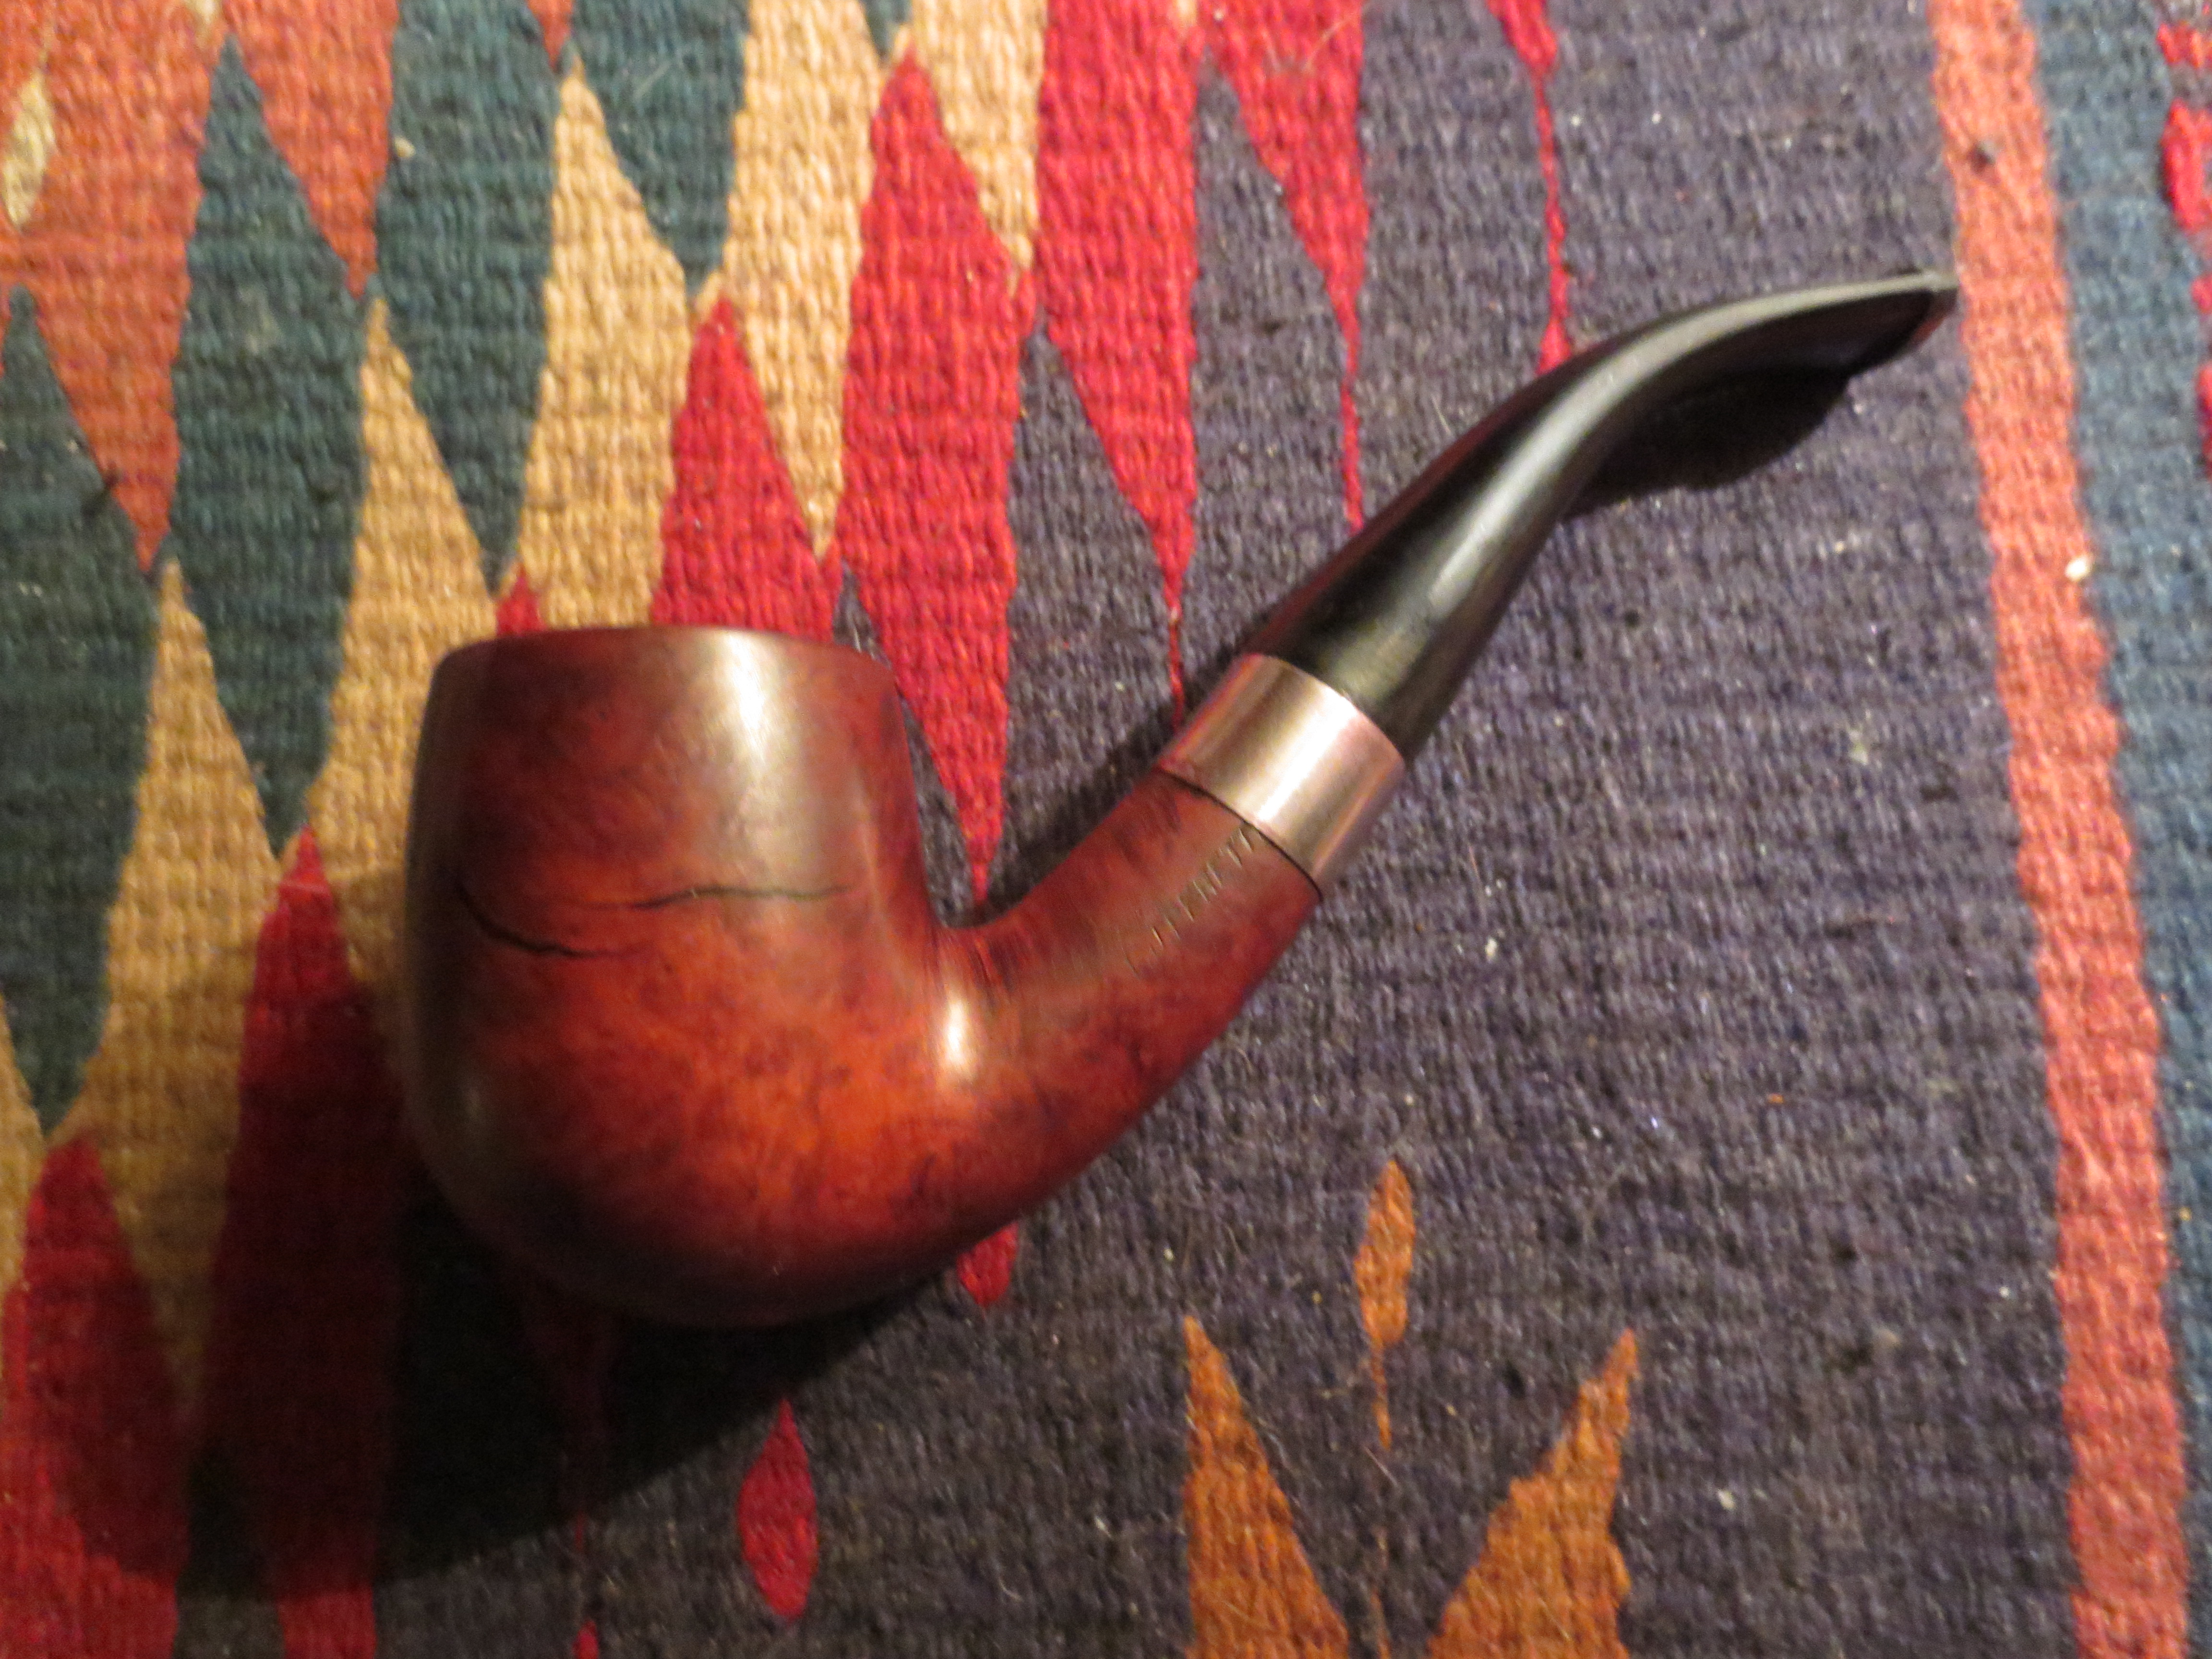
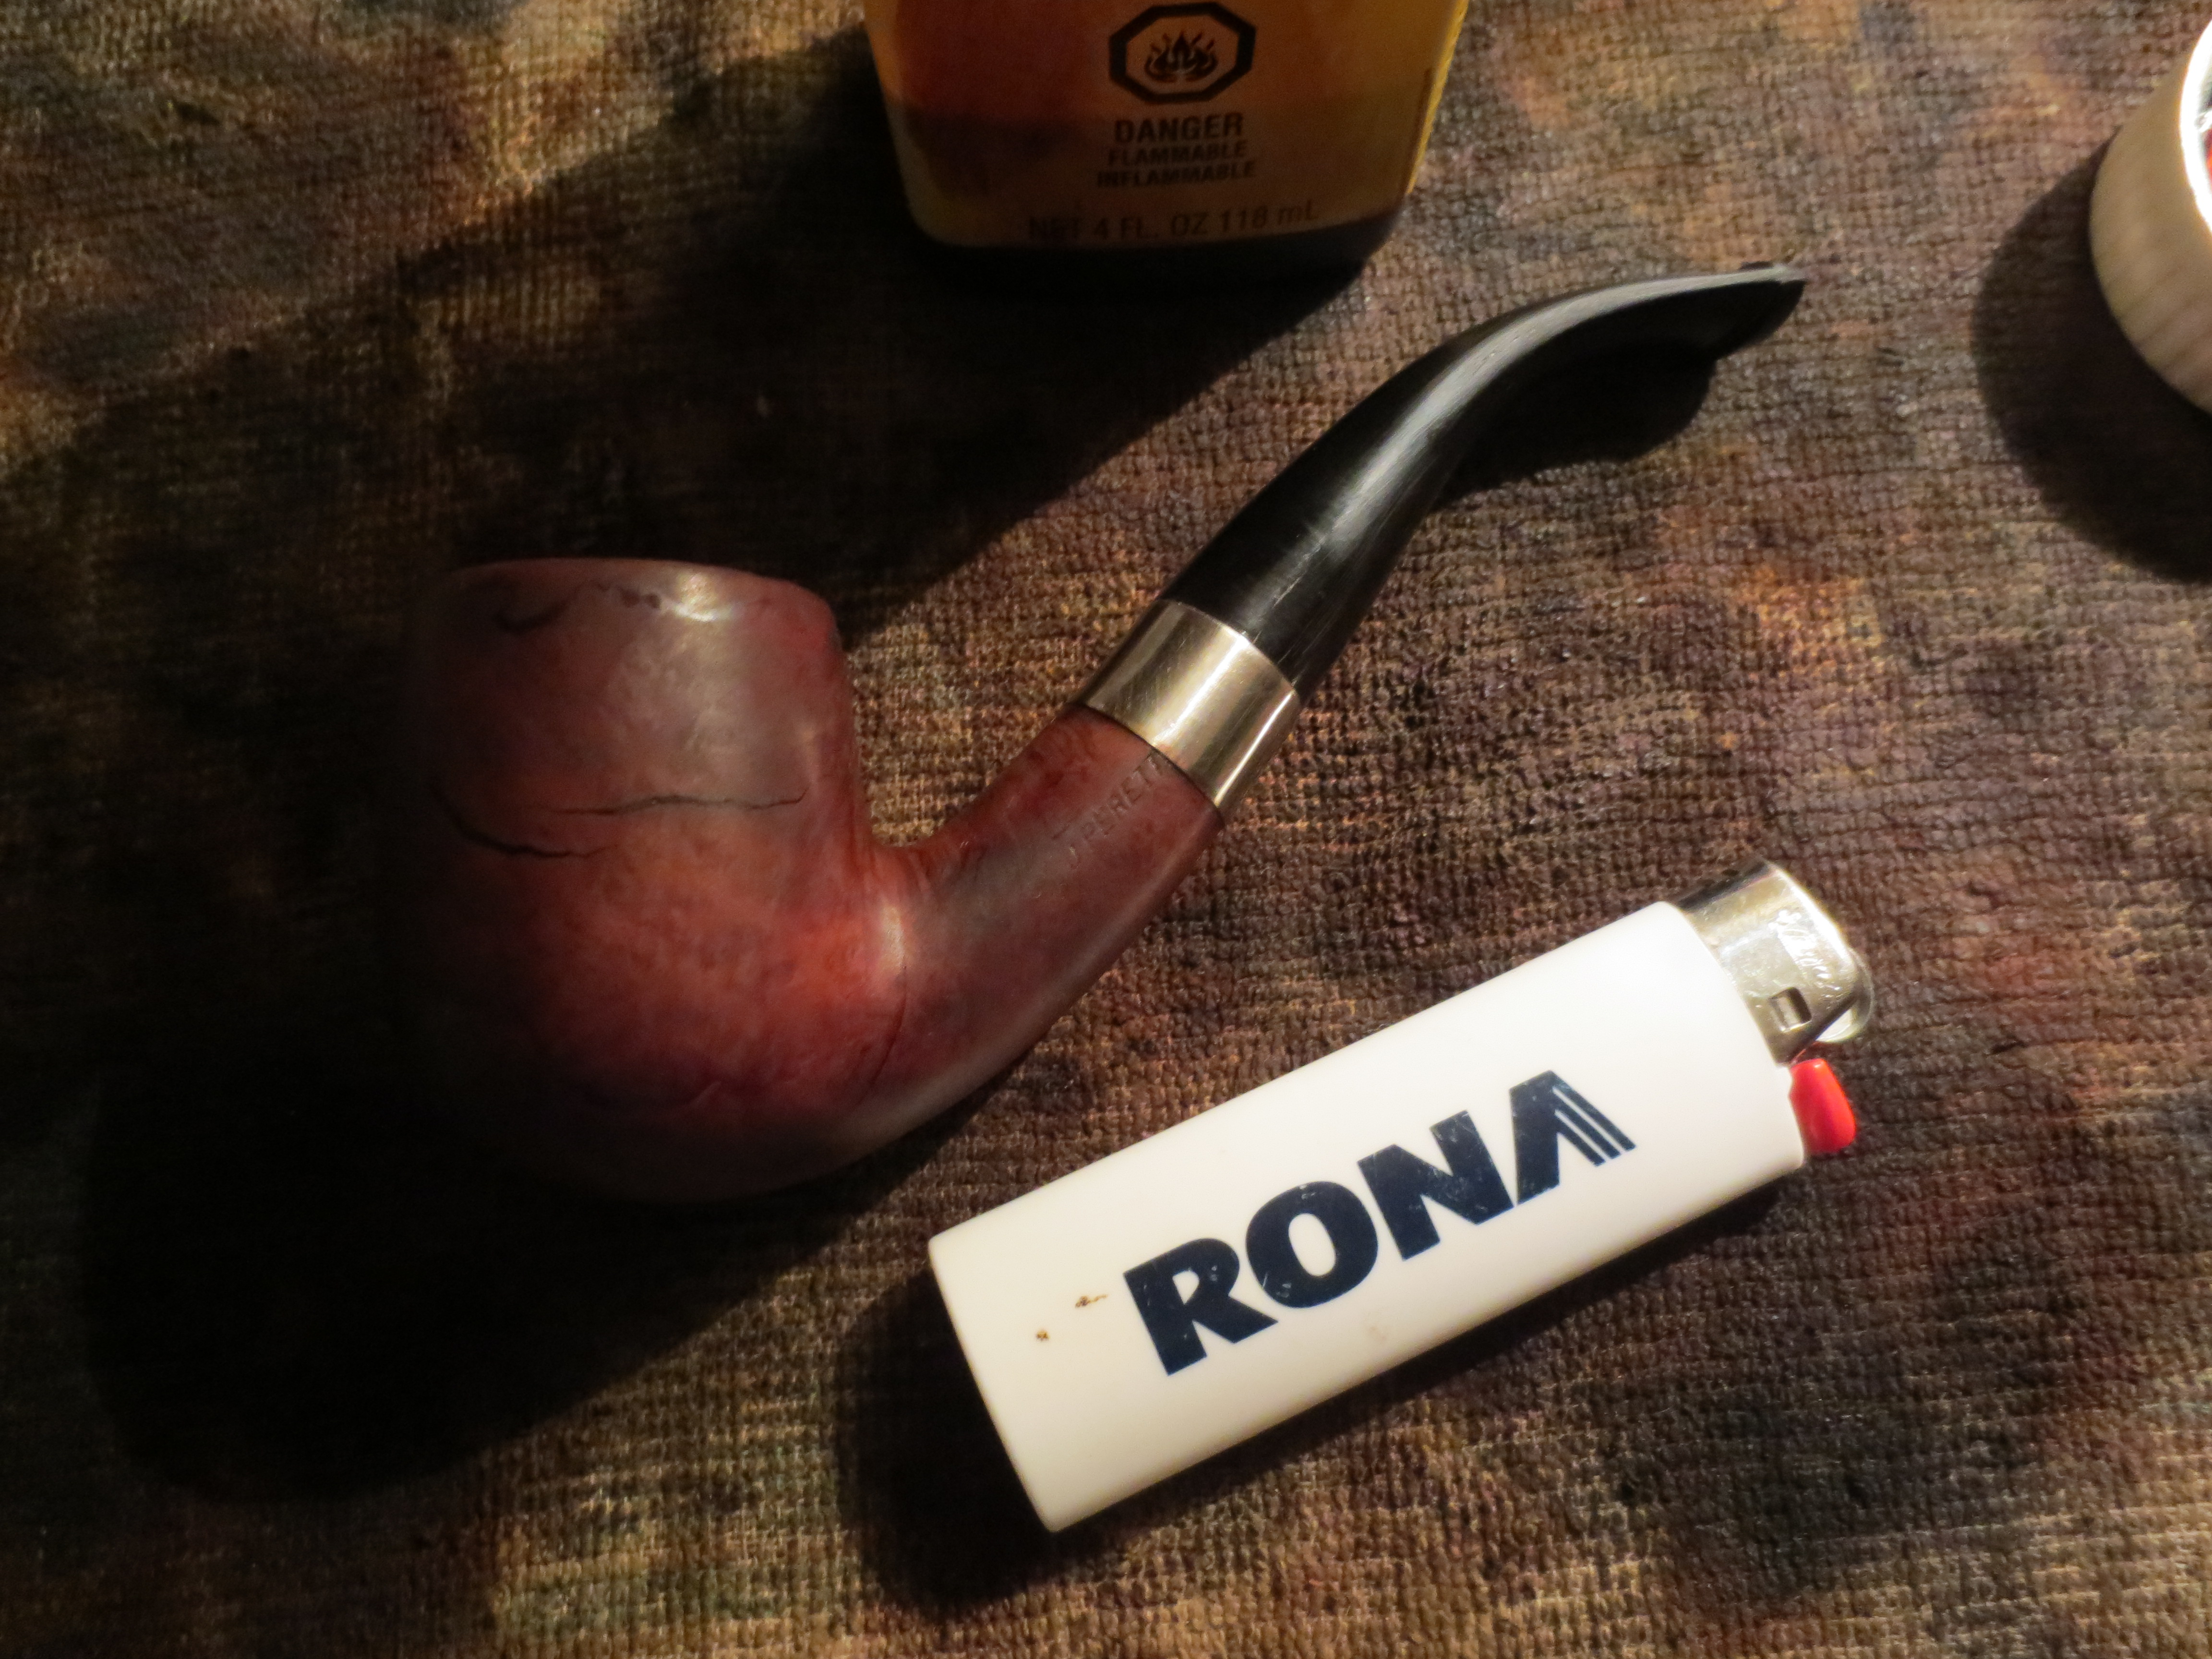
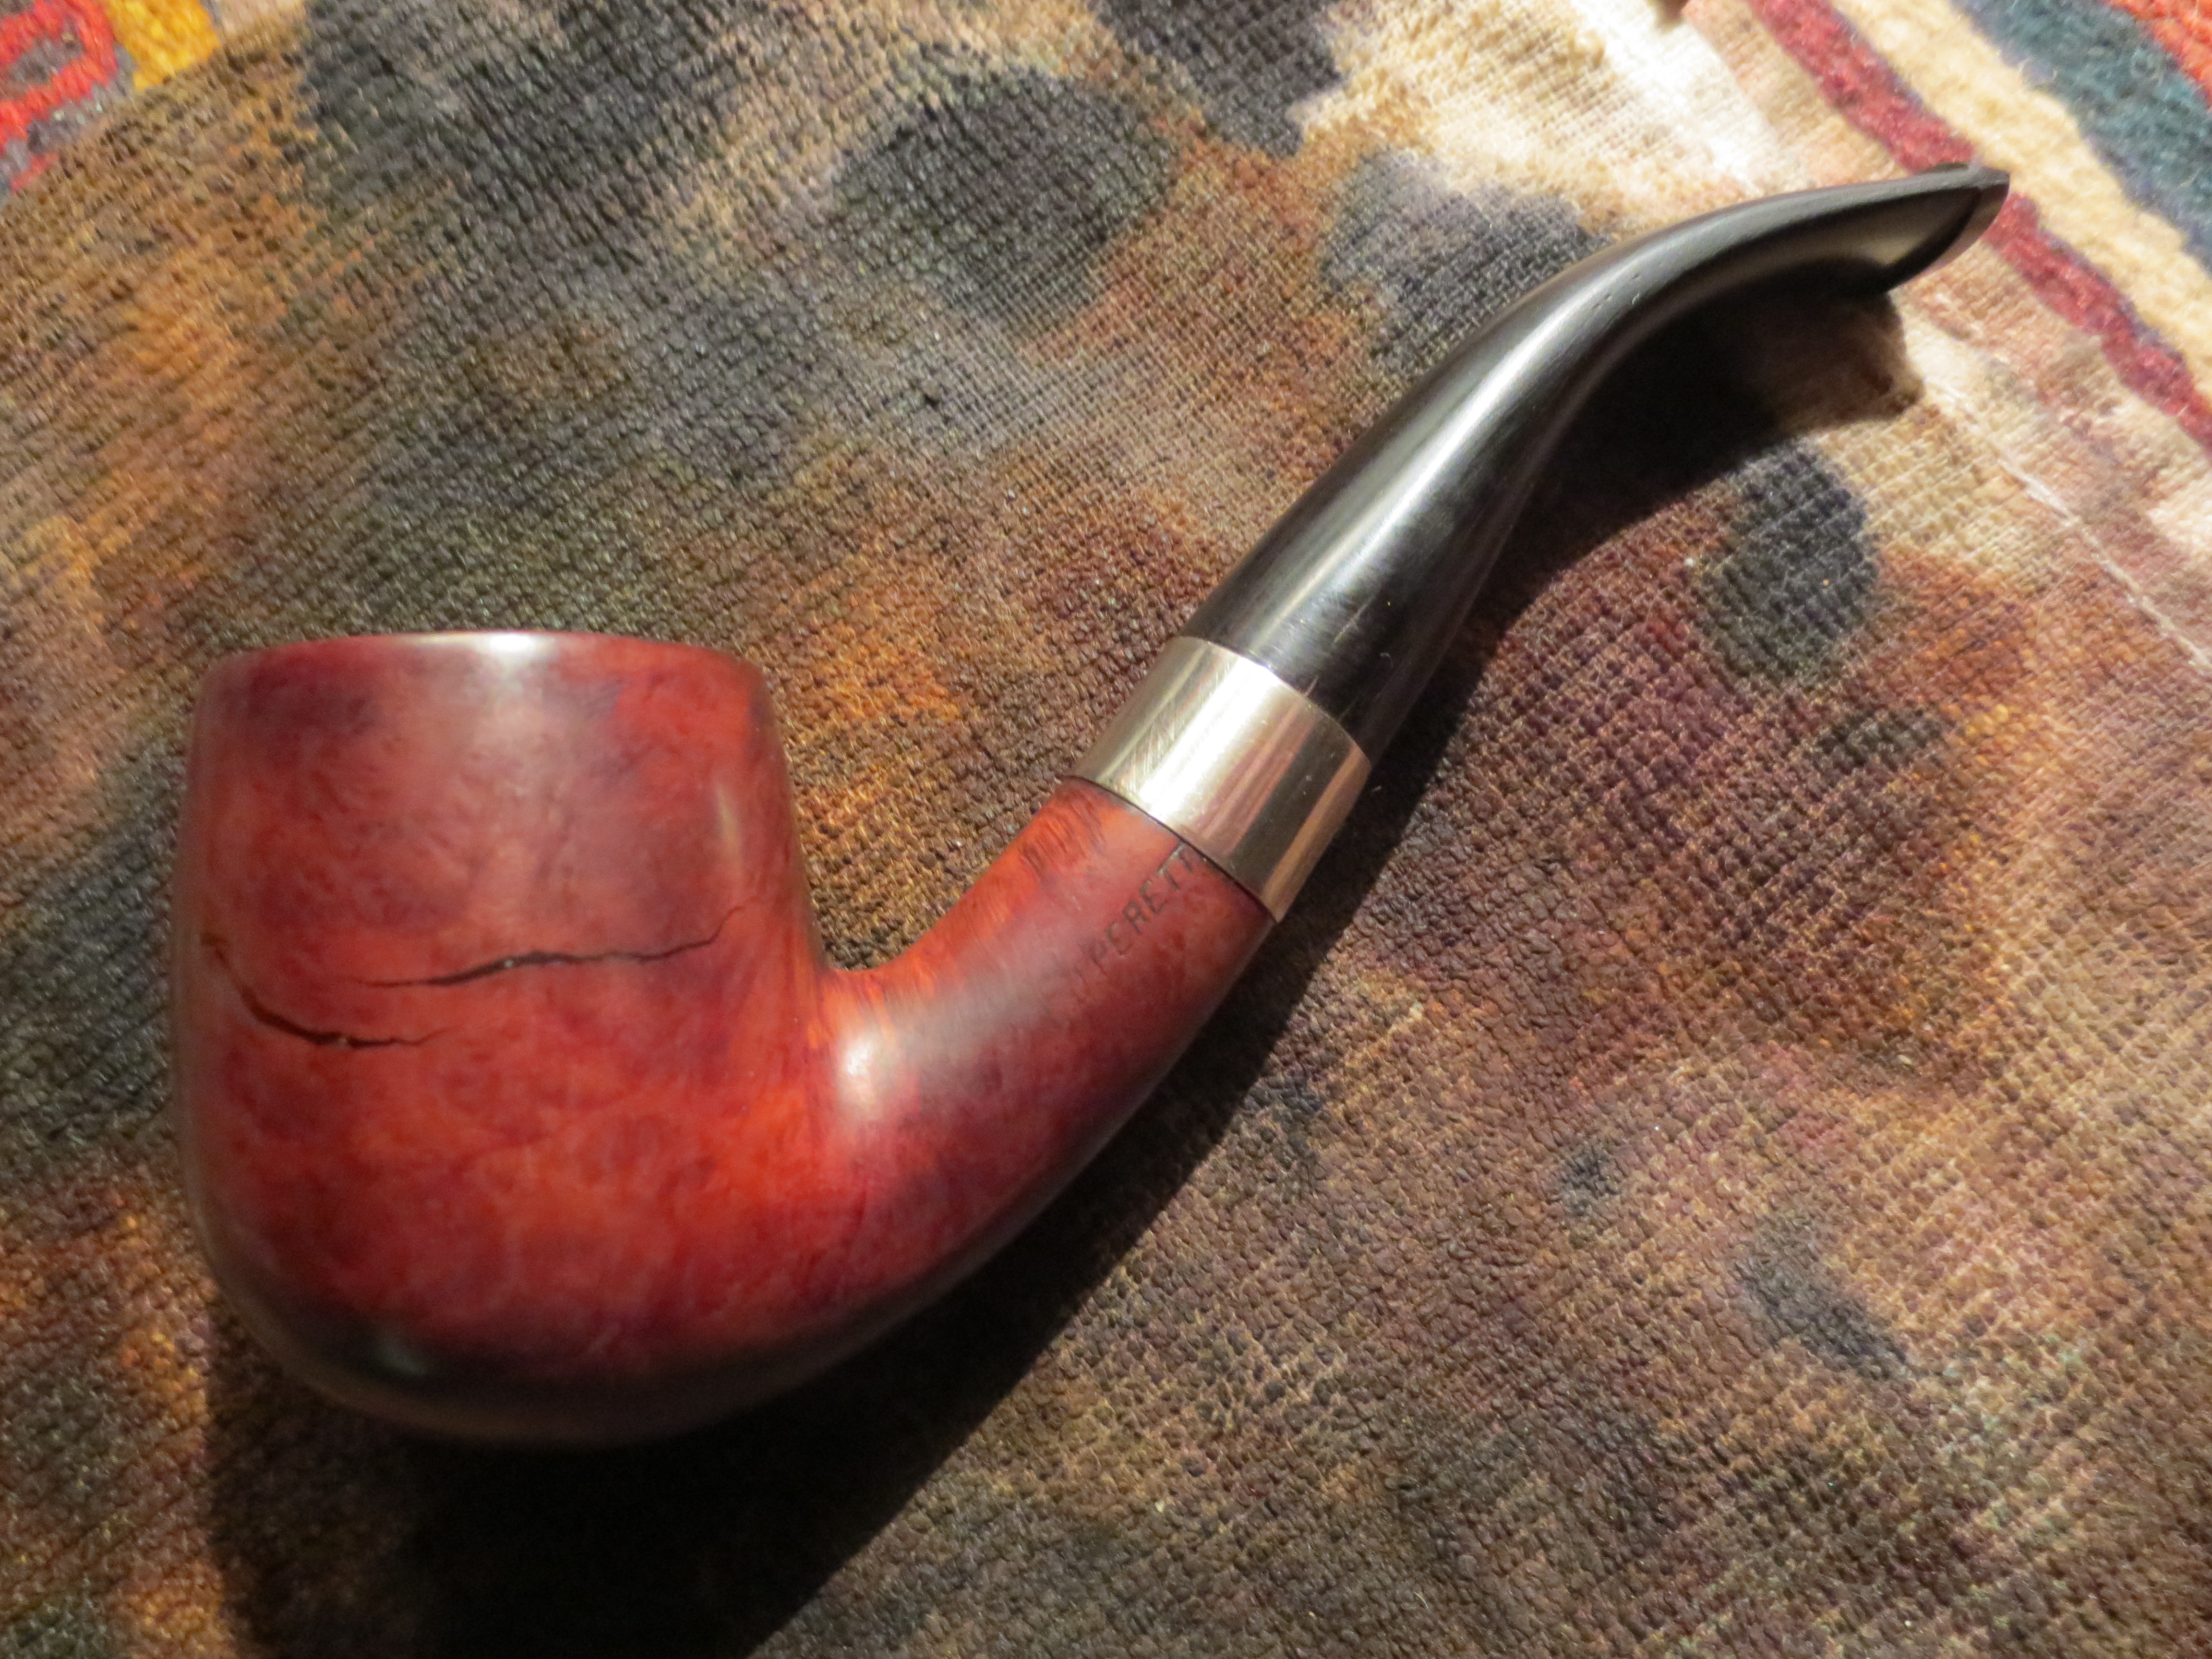
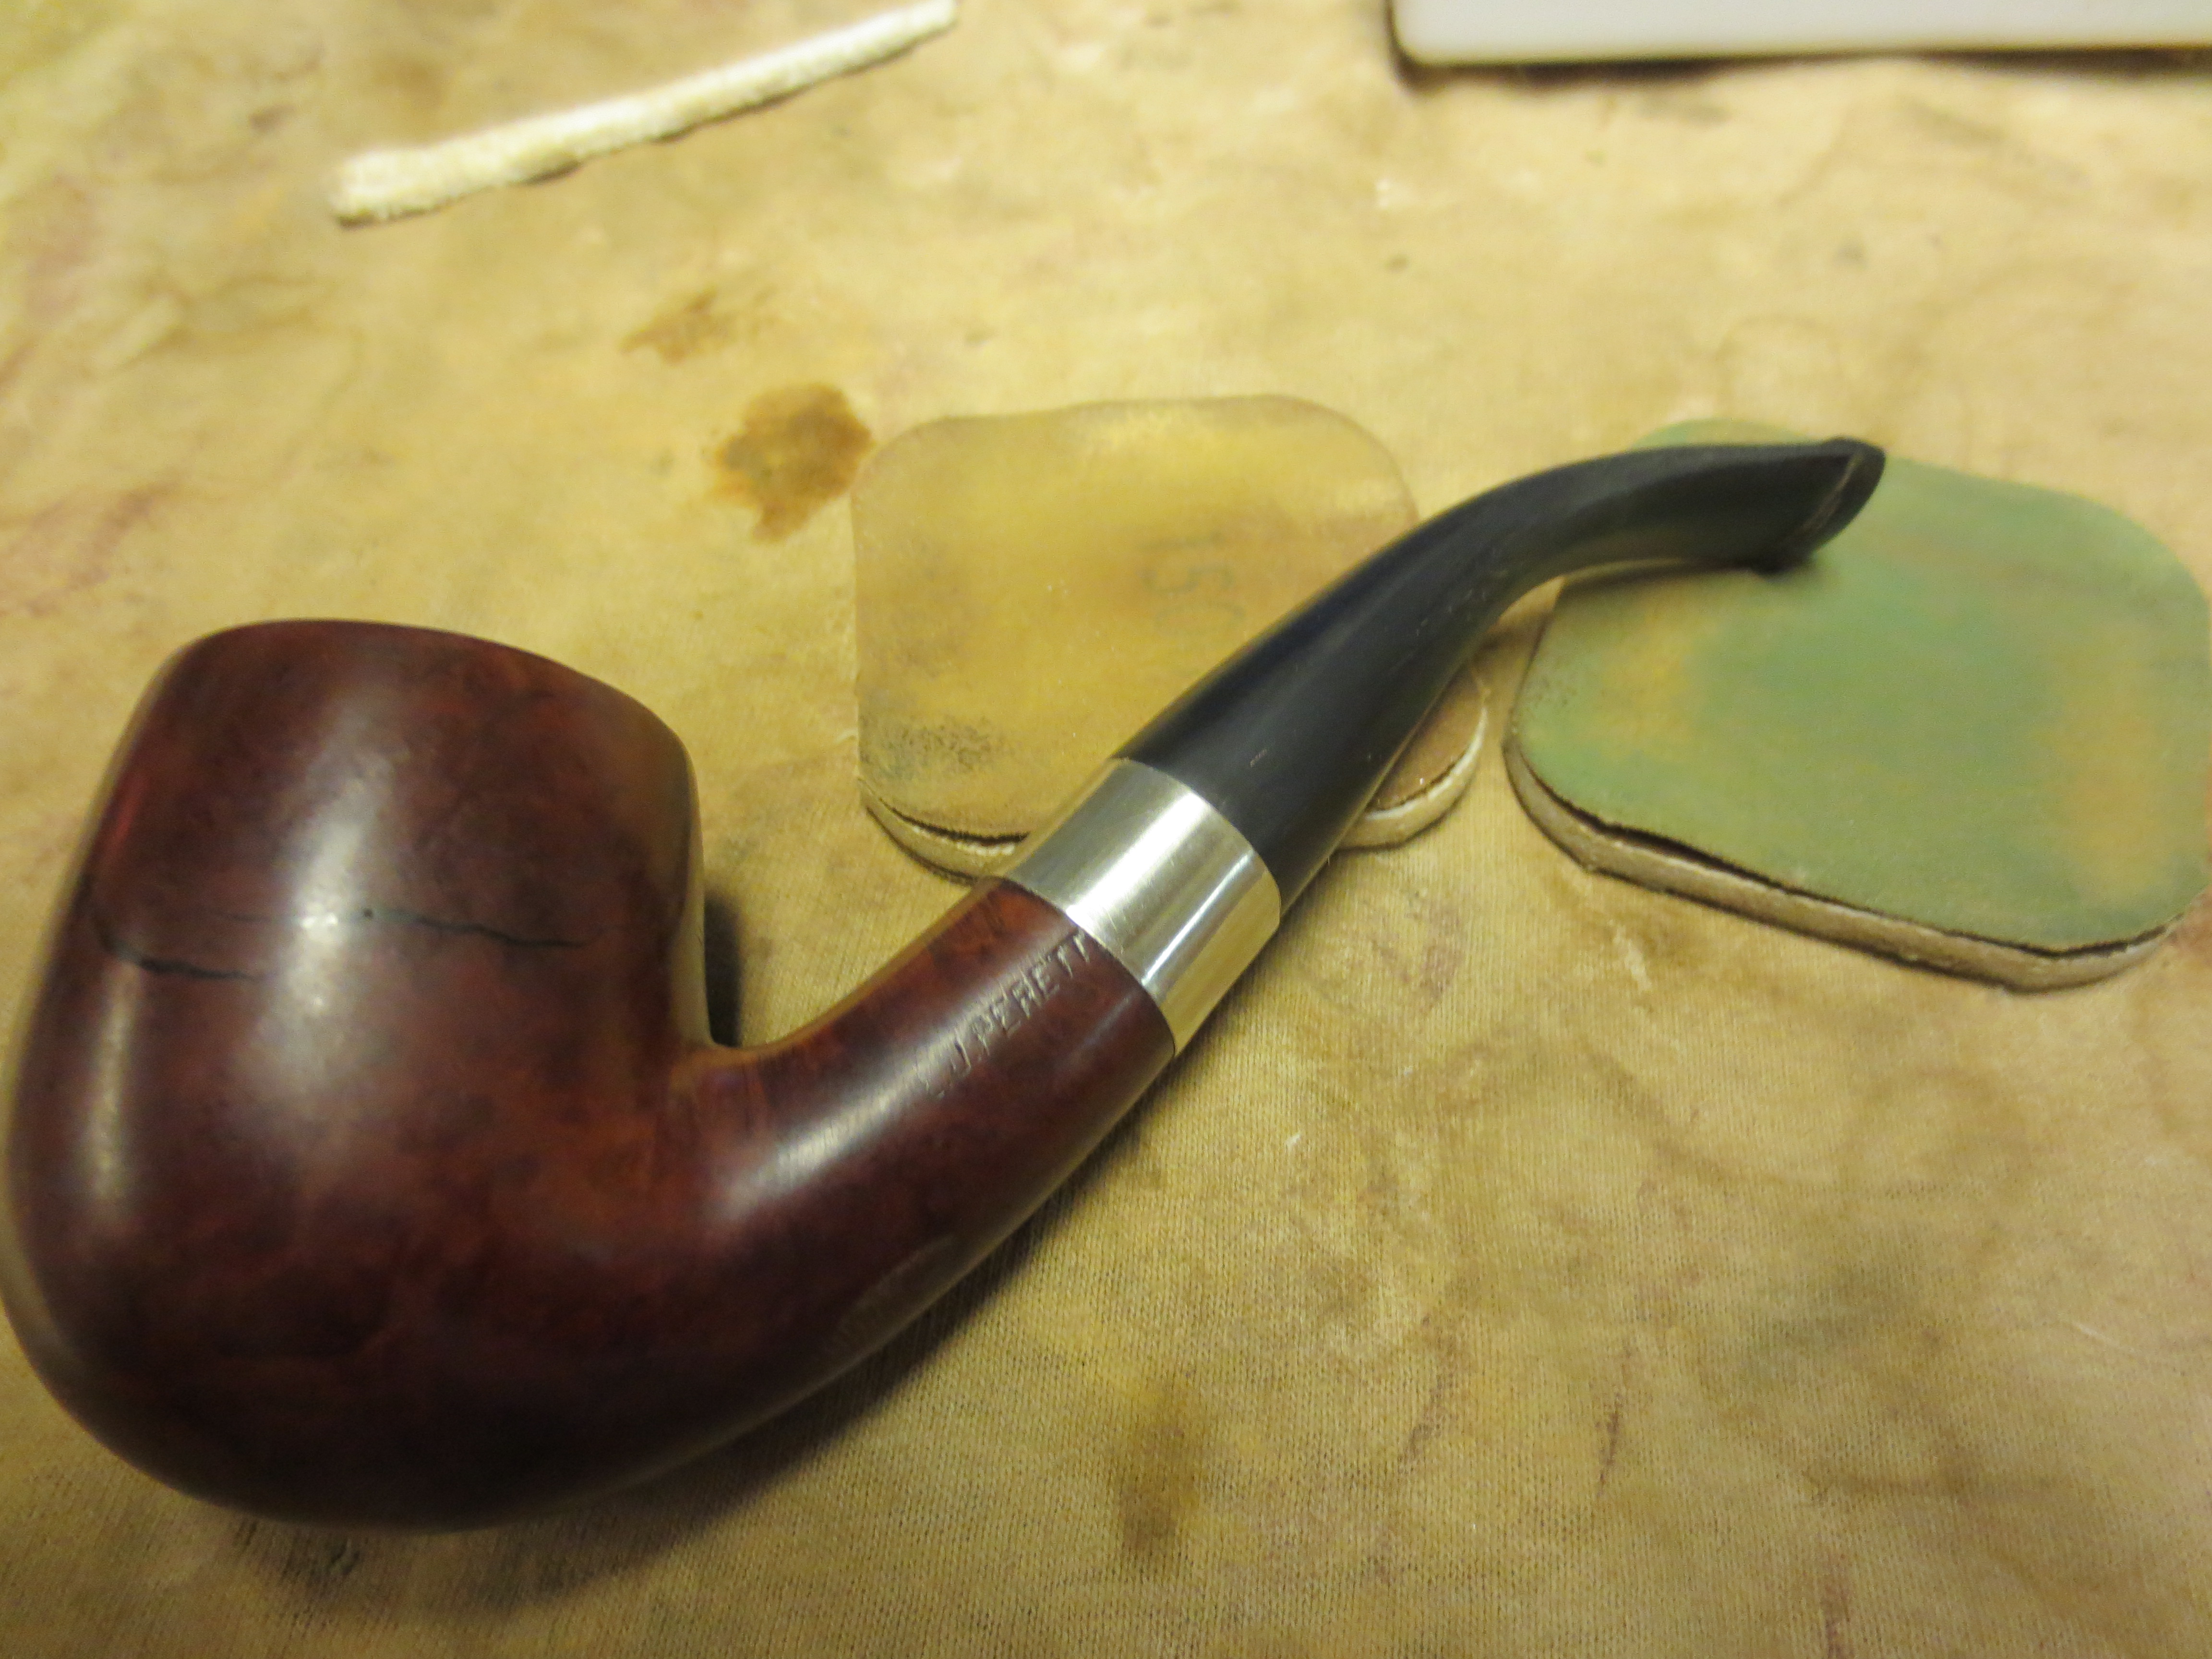
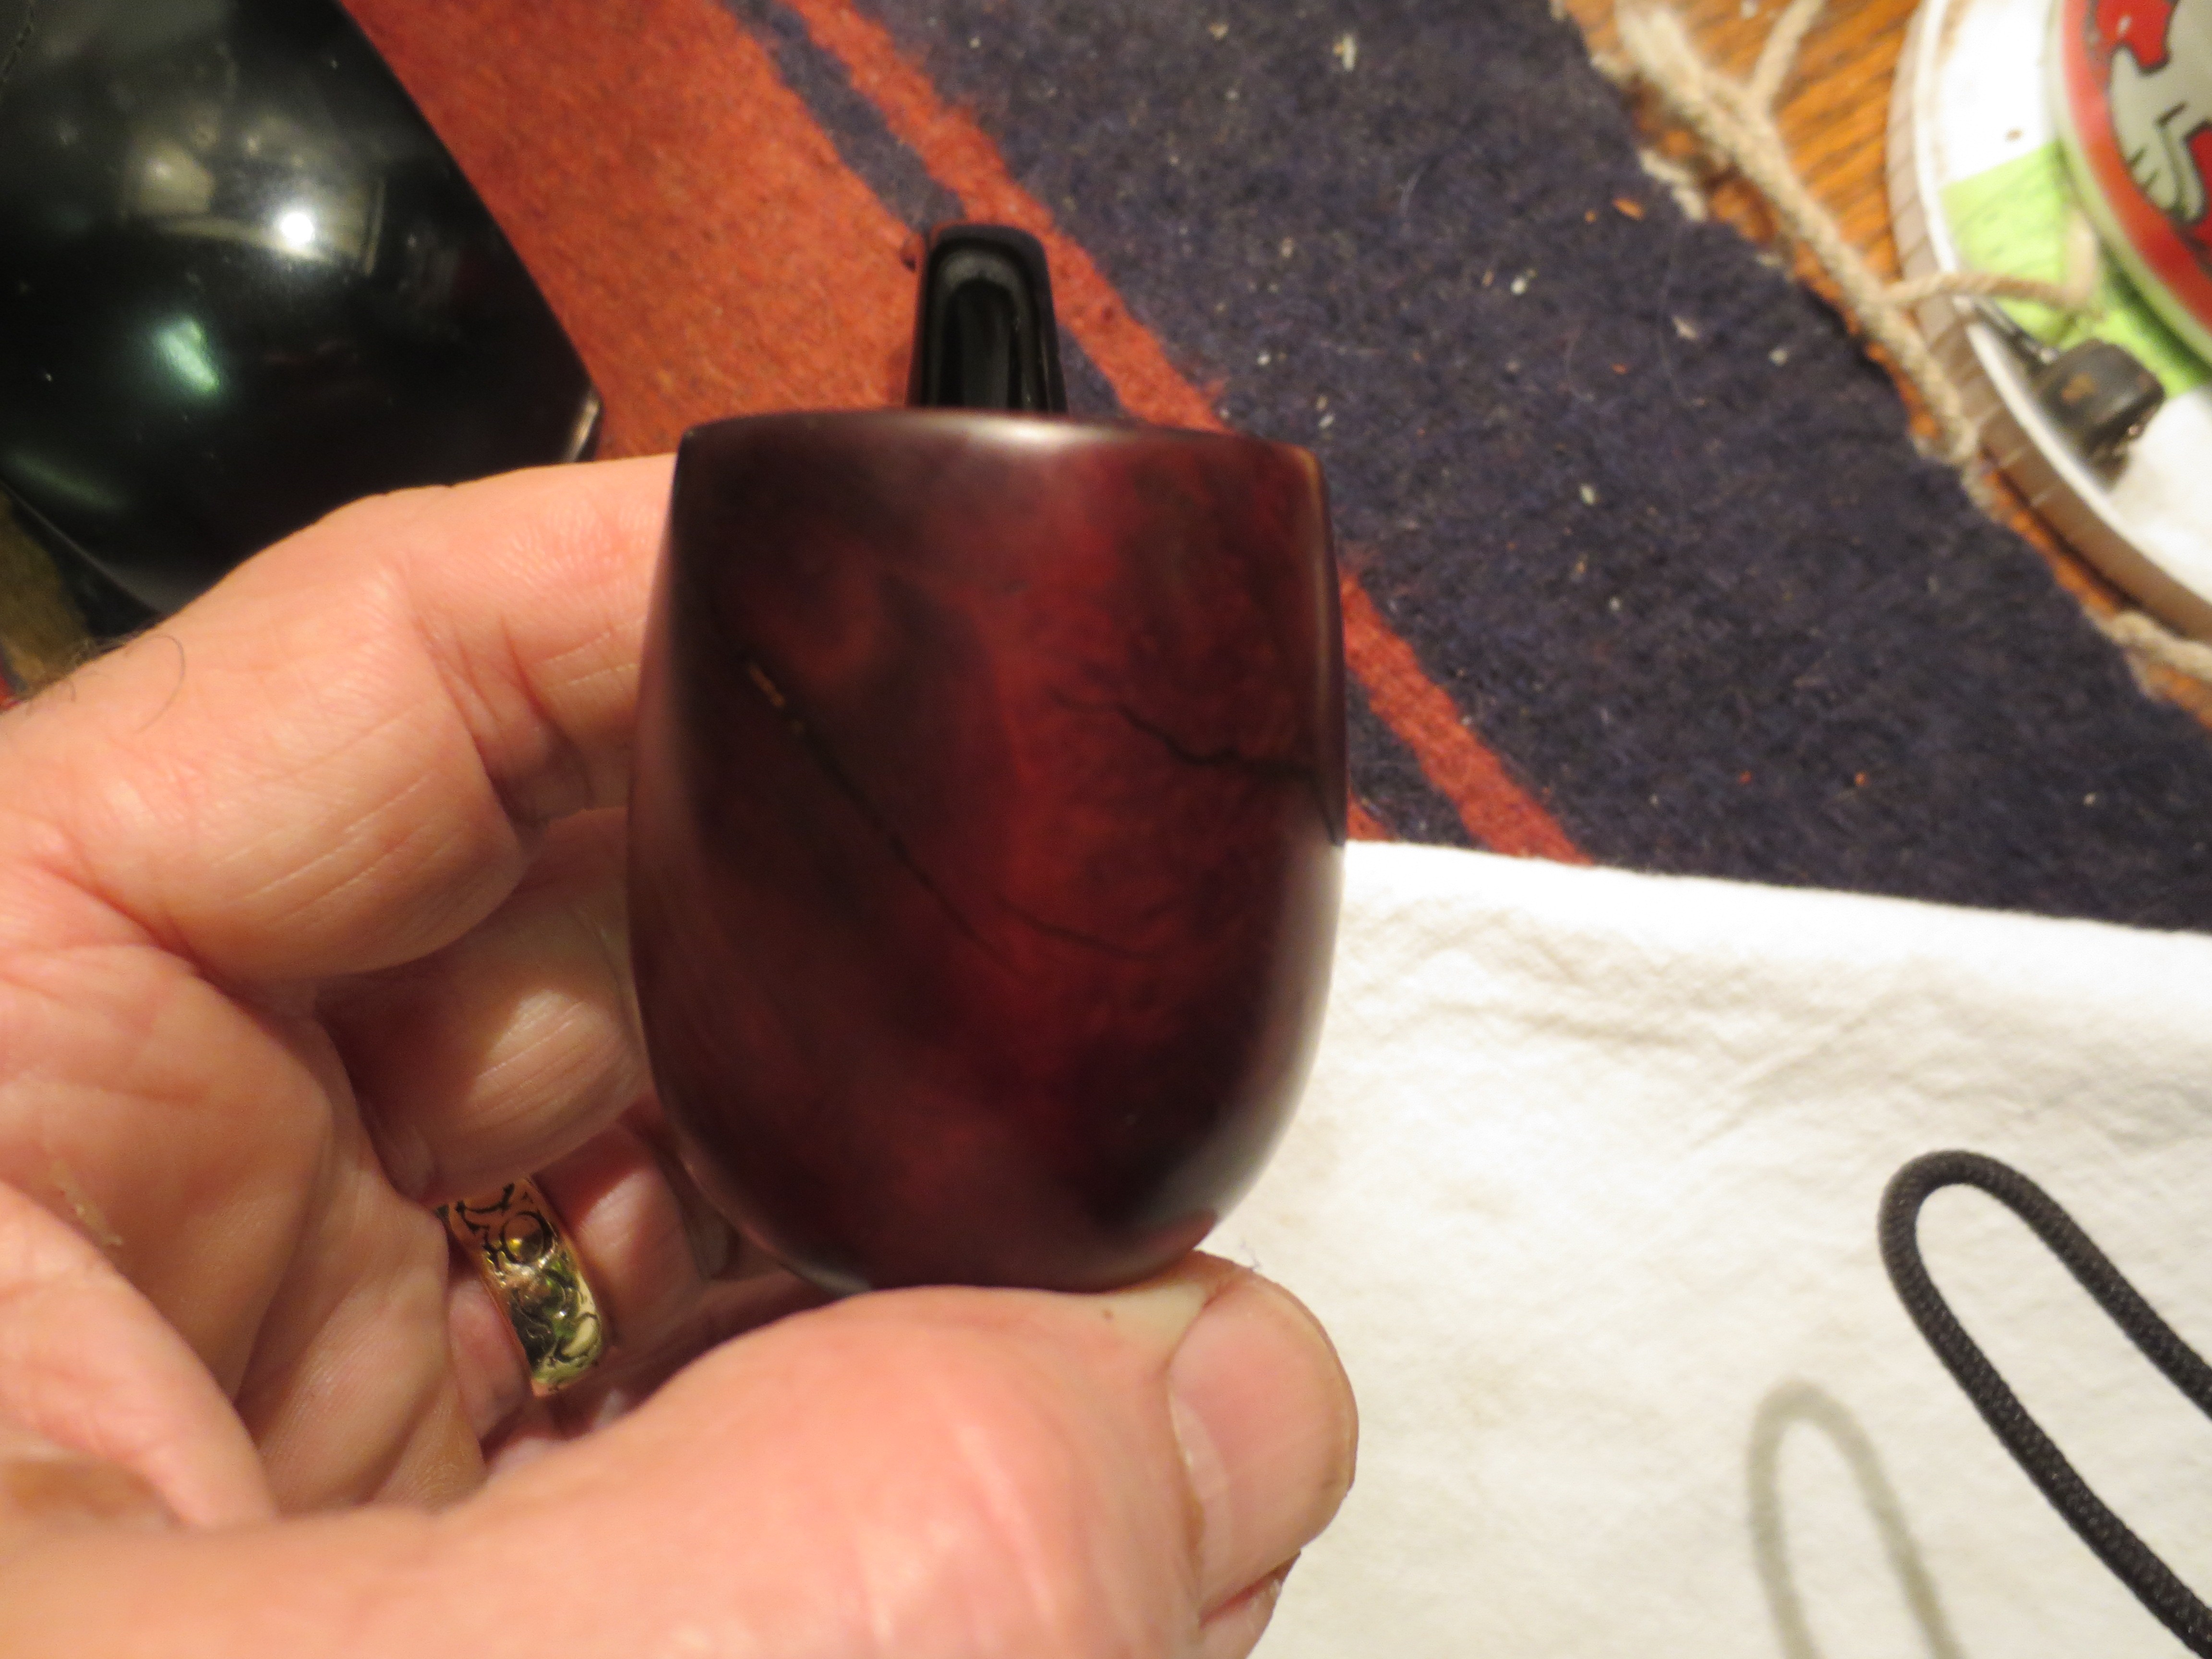
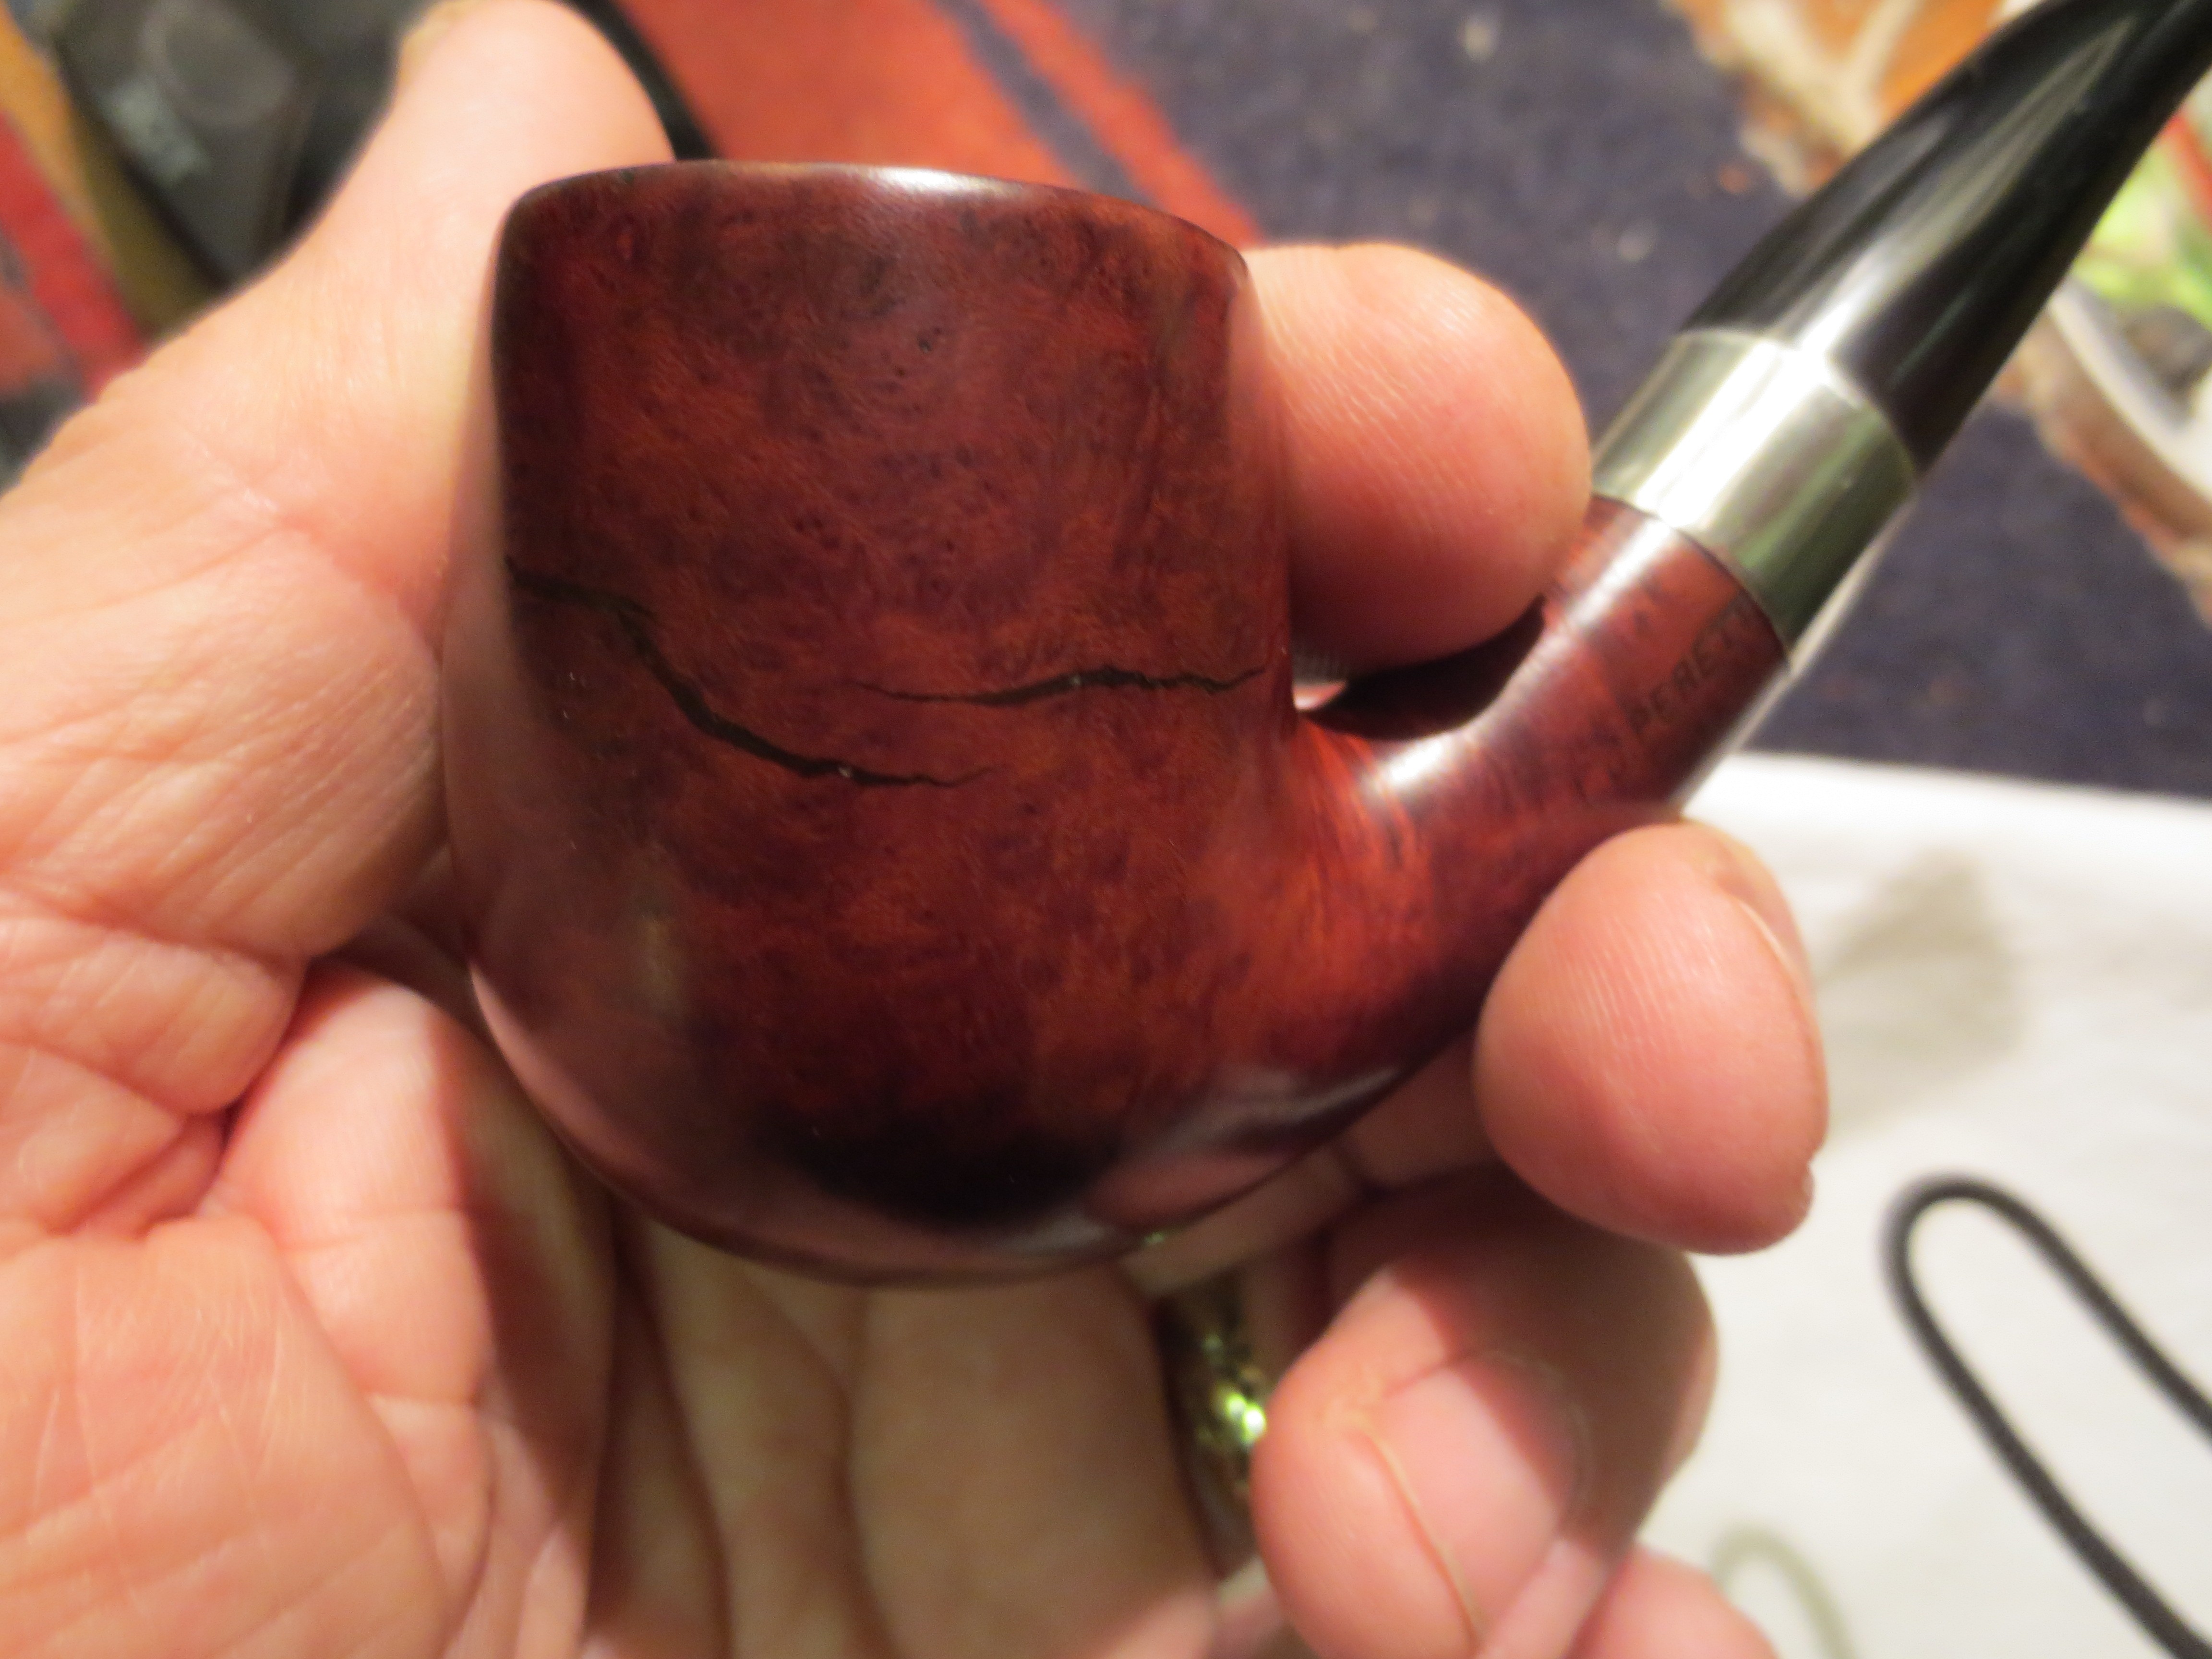
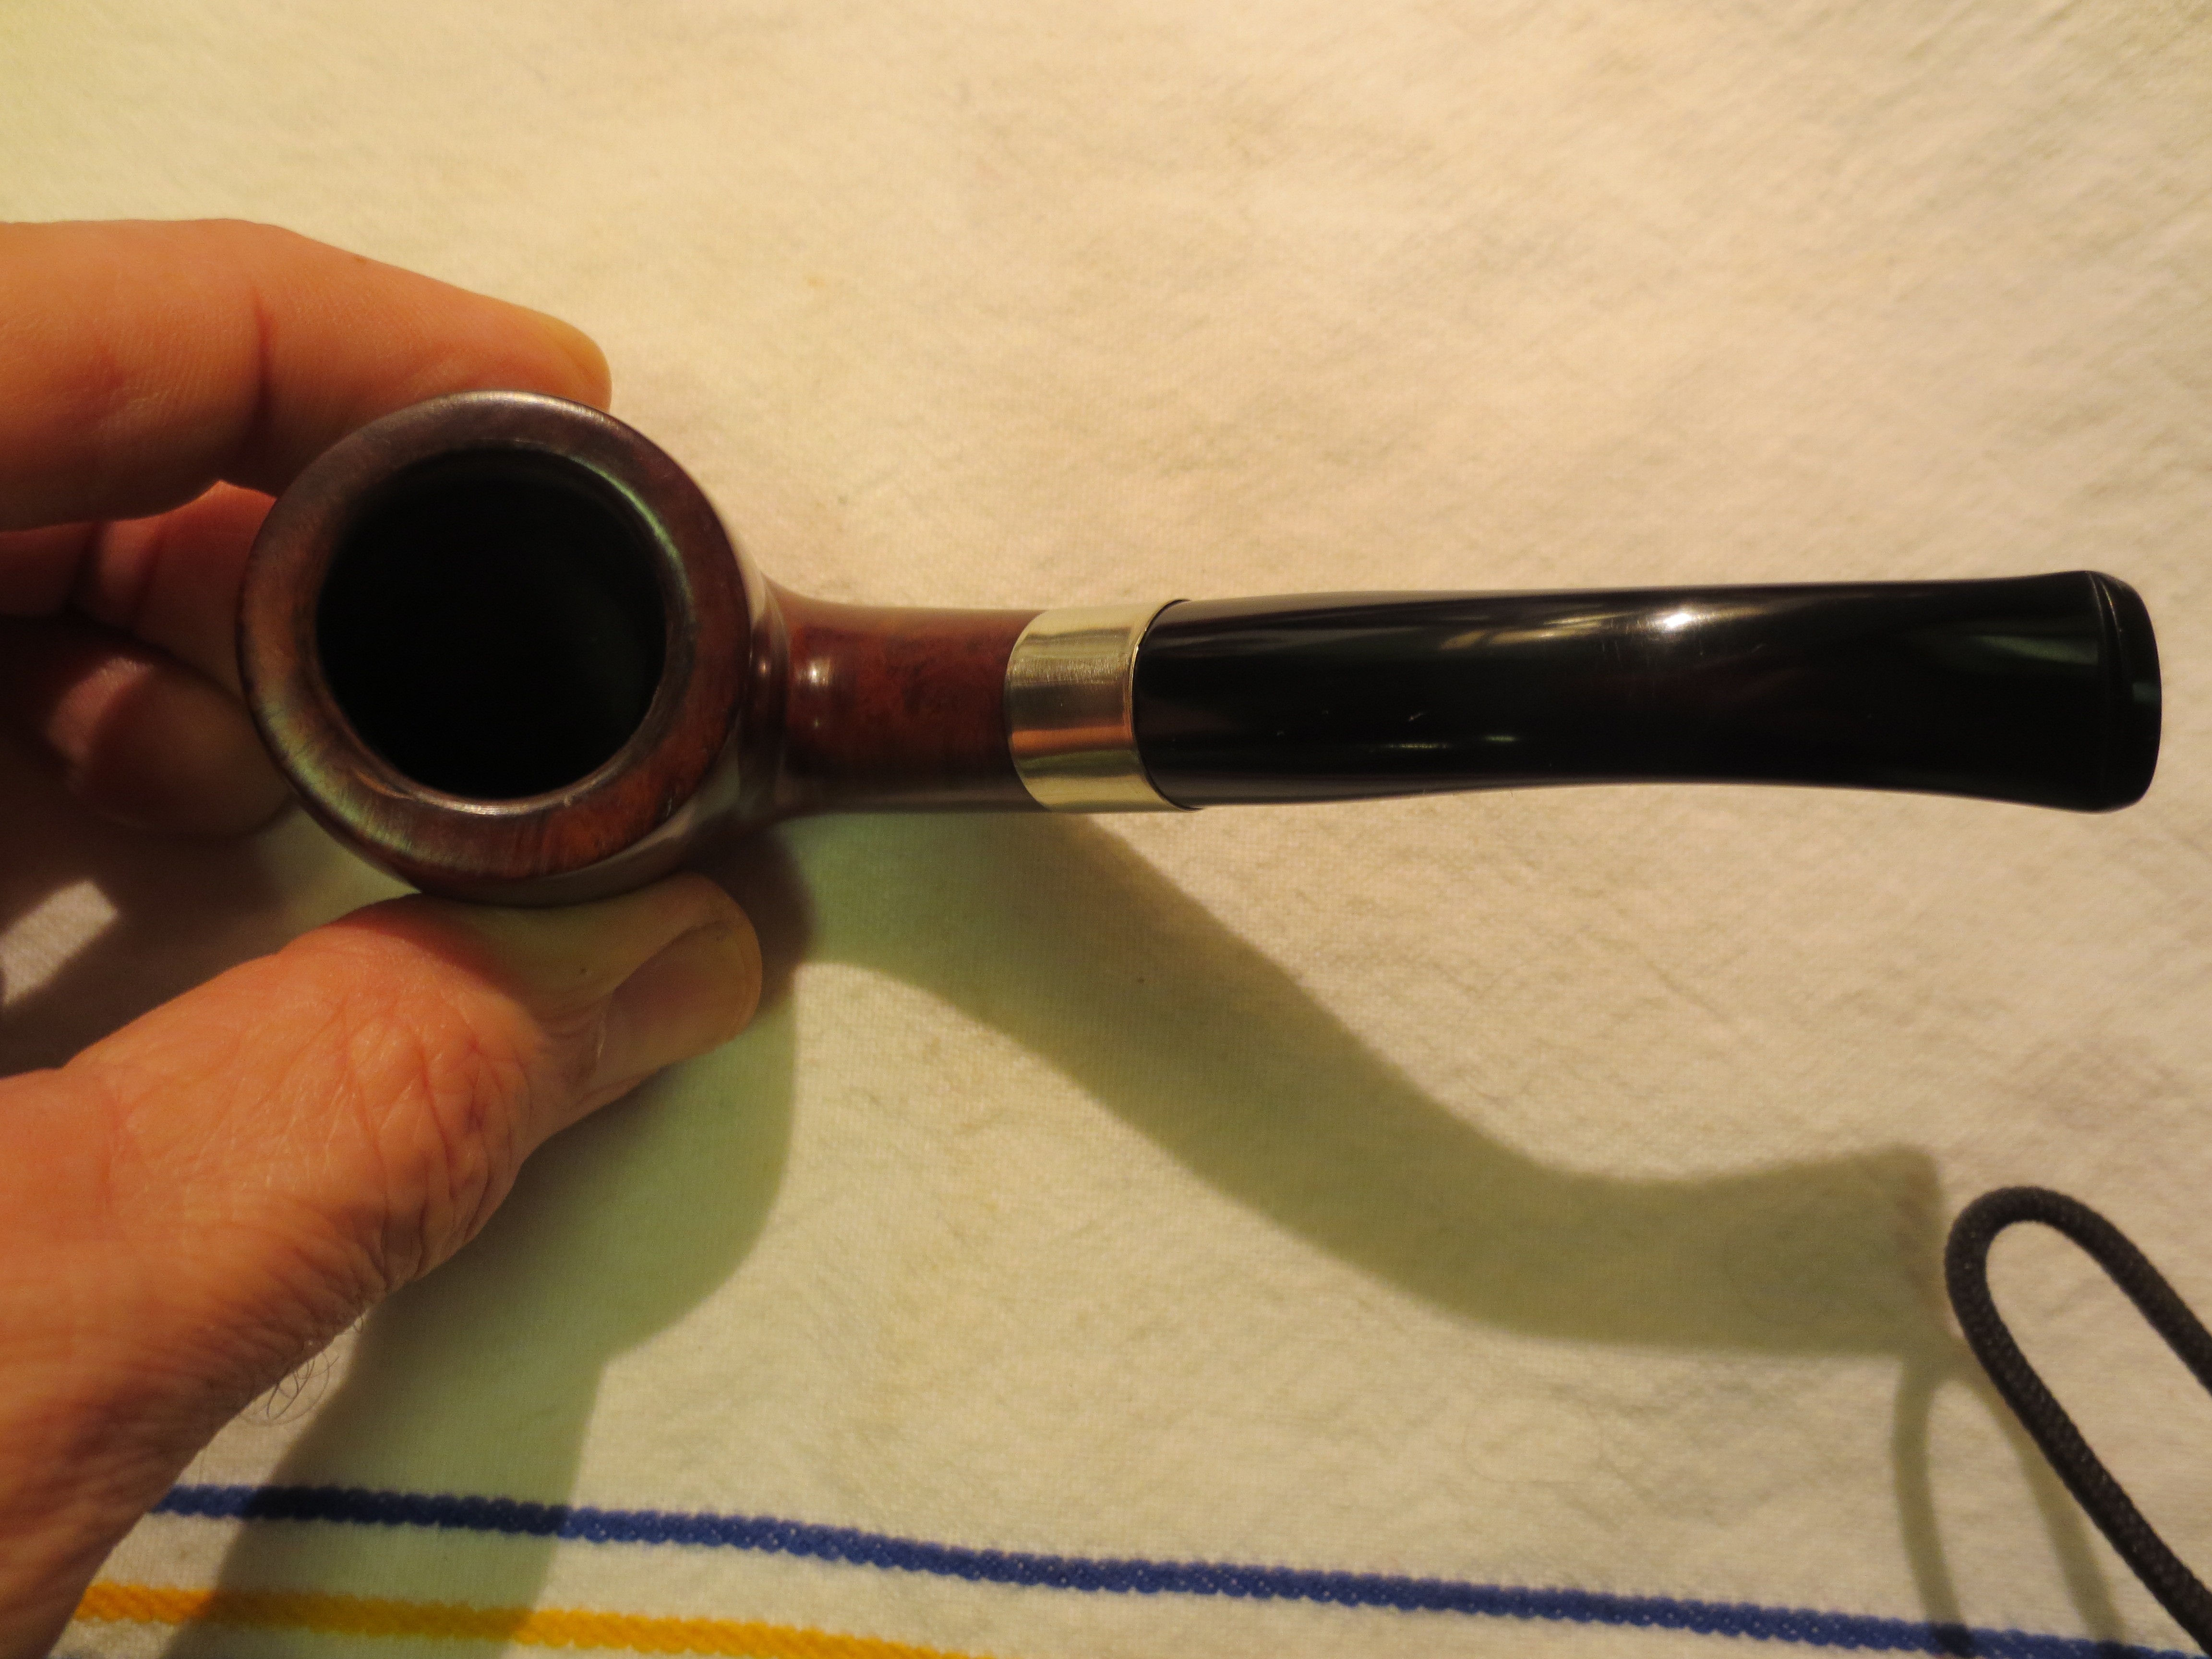
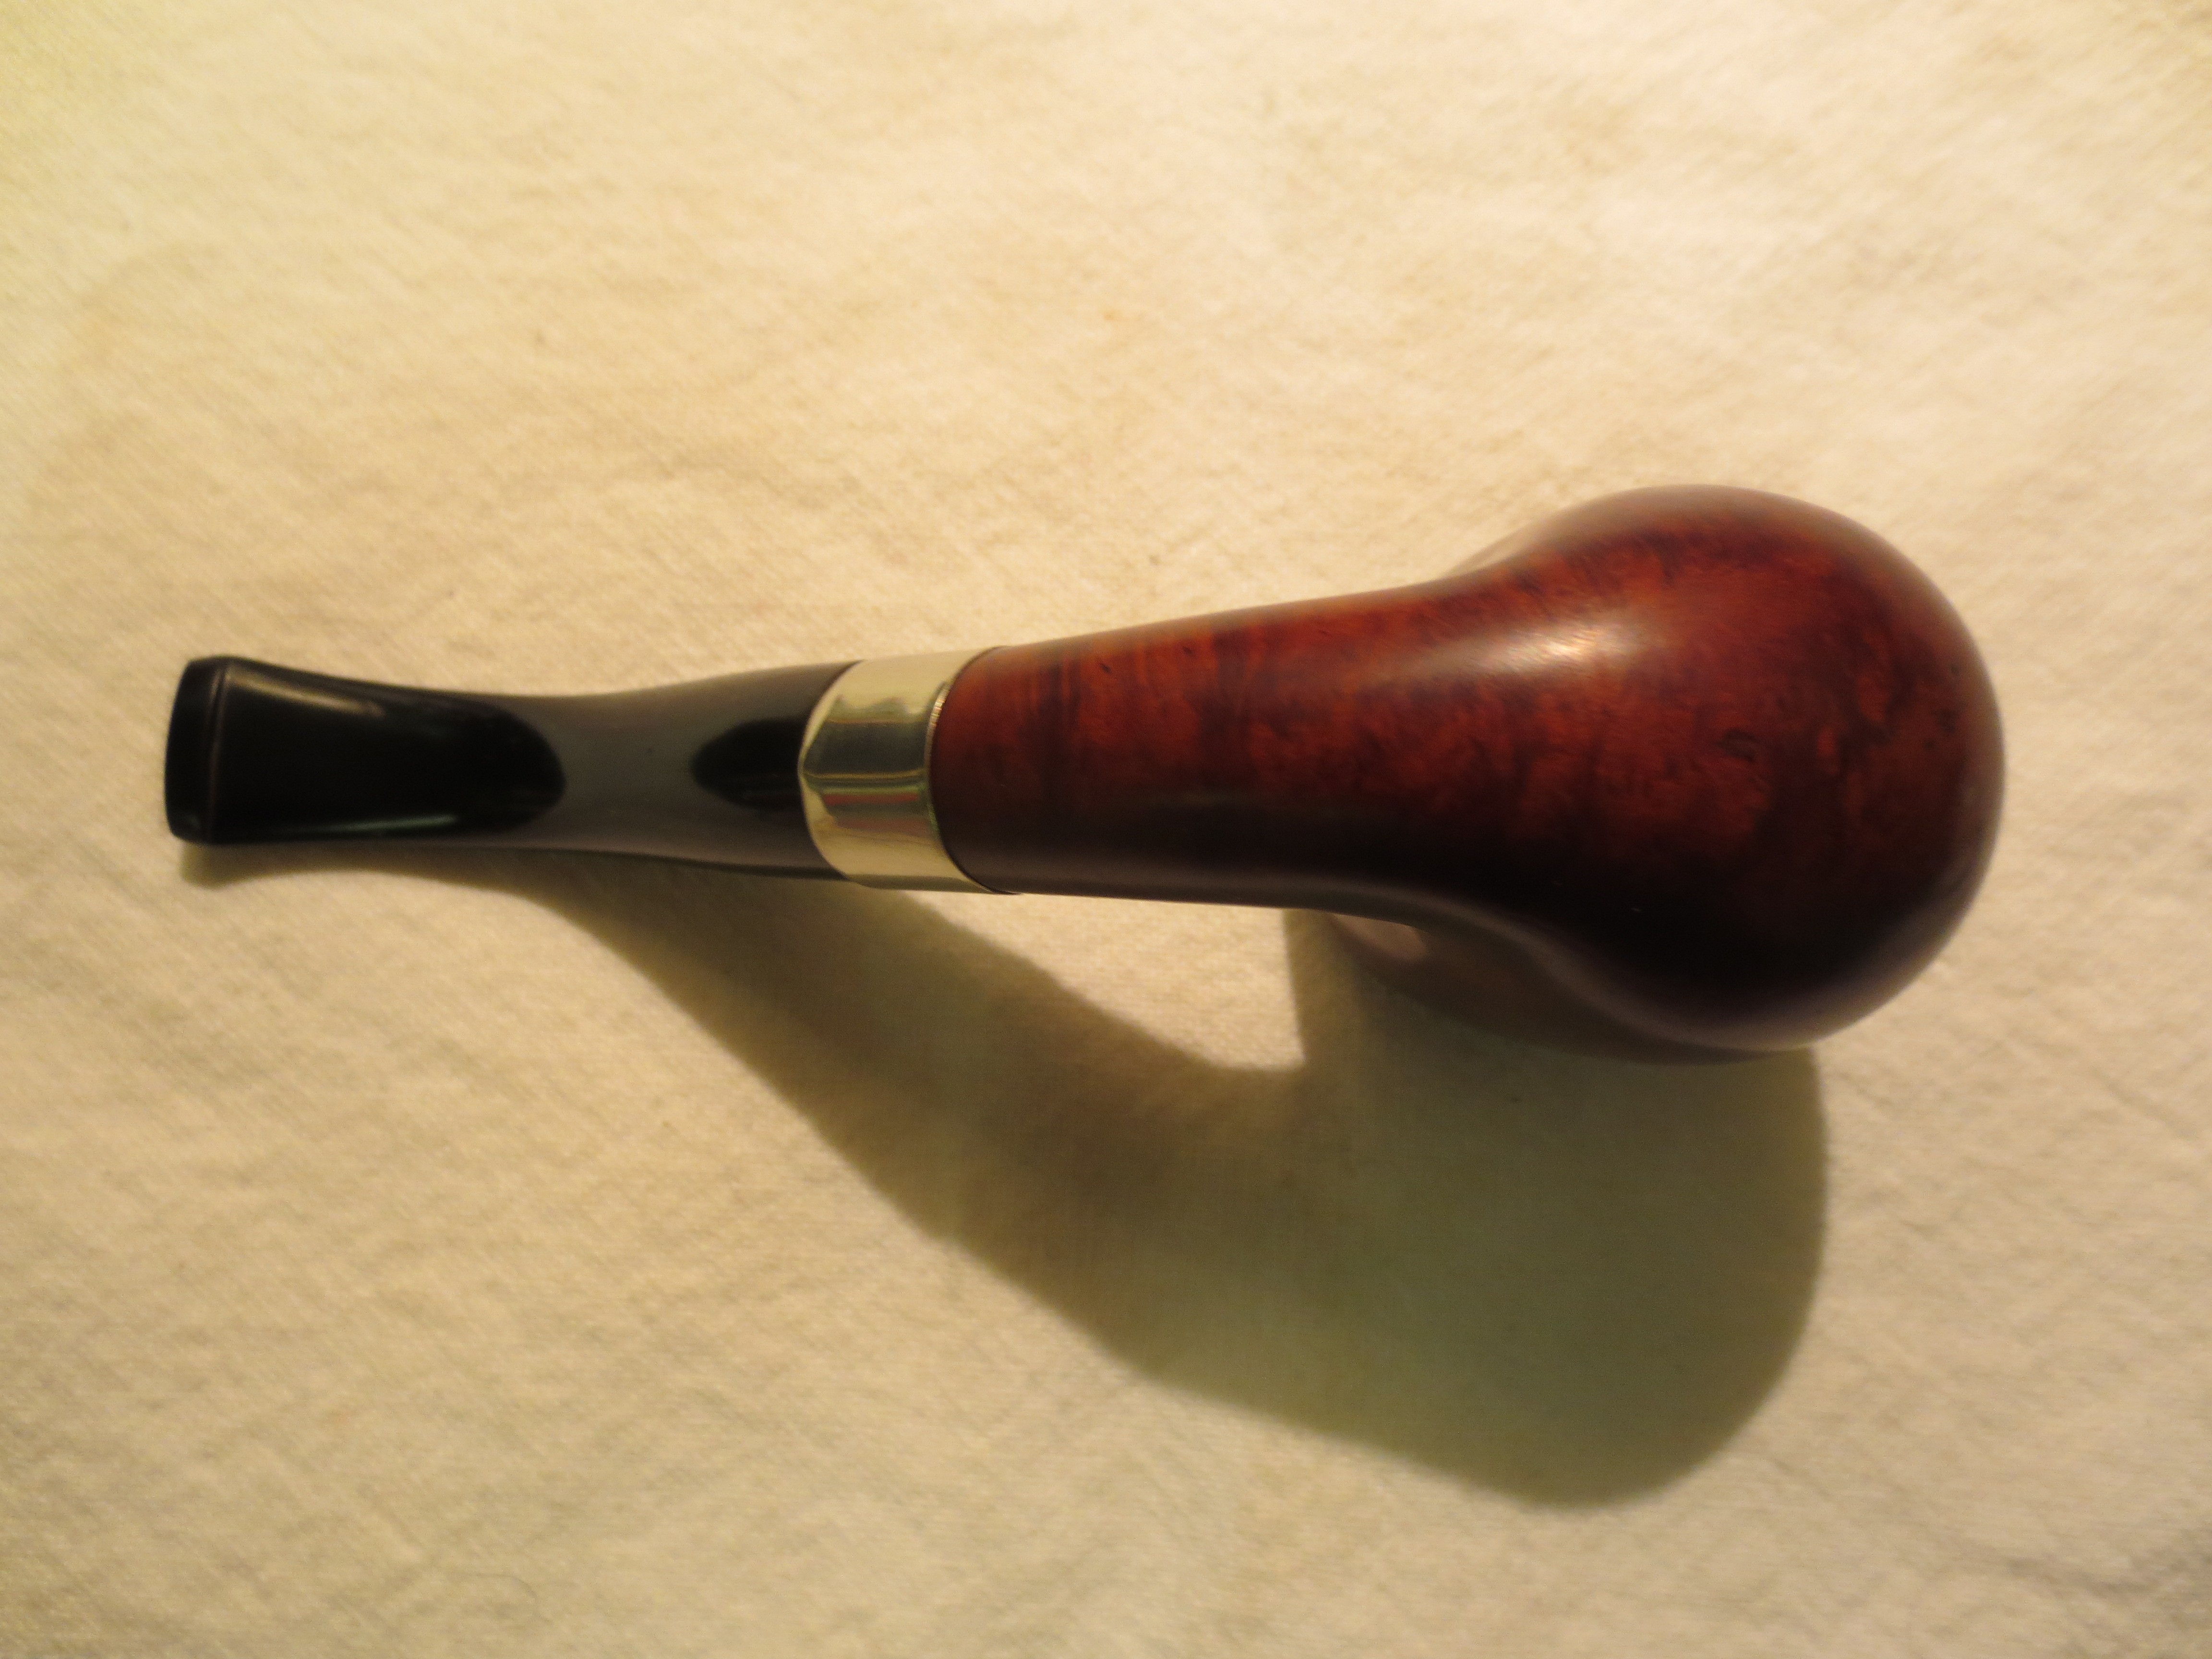
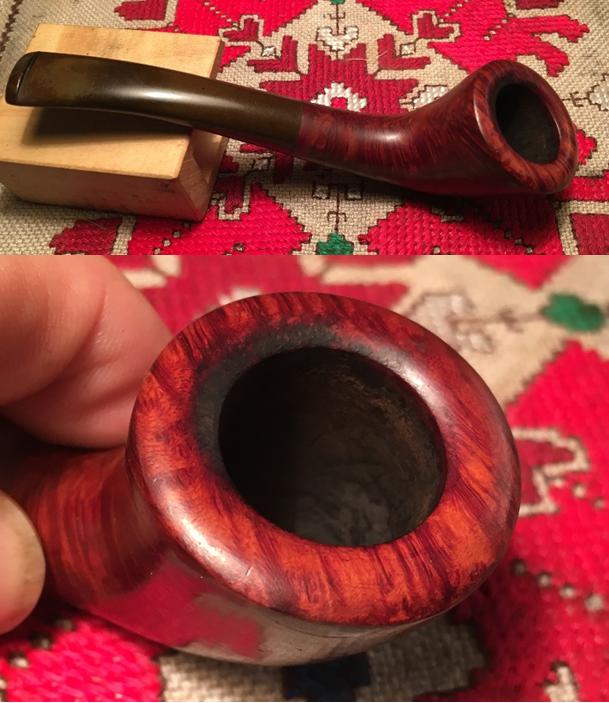
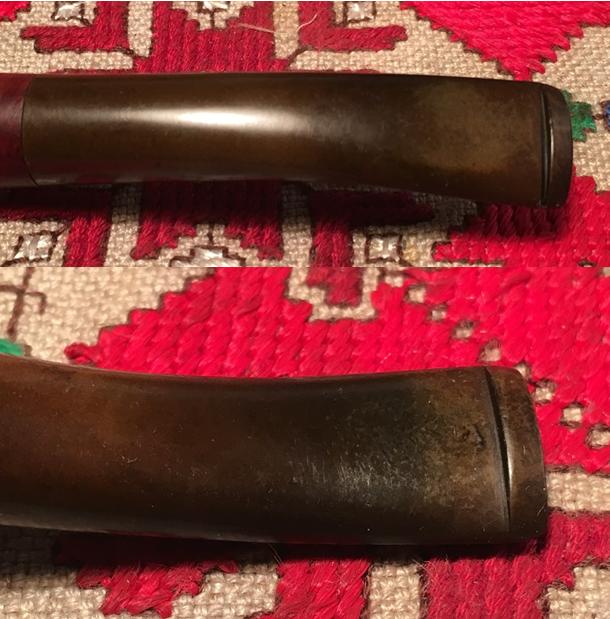
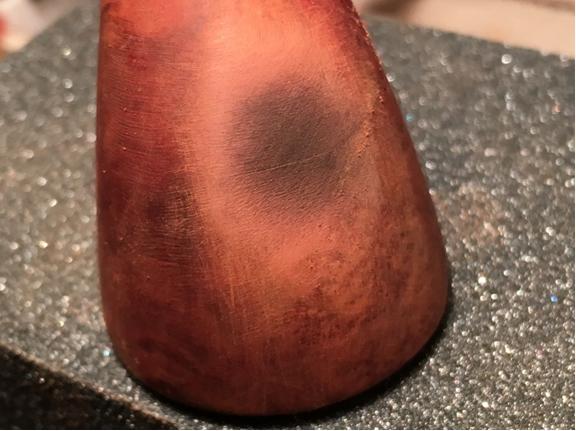
The stummel surface is generally in very good shape and the briar grain has much appeal for a smaller pipe.  The rim has an attractive oval bevel but a moderate burn area covers a portion where I presume the flame was drawn over the briar in lighting the tobacco.  The one troubling spot is the burn mark on the front of the bowl.  The last steward appears to have been a heavy puffer heating up the briar enough to cause the burn.  I’ll need to check the internal front fire chamber area to detect possible thinness and potential for a burn through.  To remove the scorched area the old finish needs to come off.  The stem is heavily oxidized but there is not much tooth chatter to speak of on the bit.  The button appears to be in good condition.

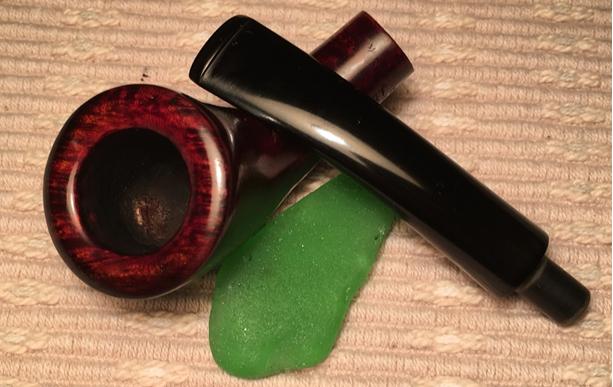
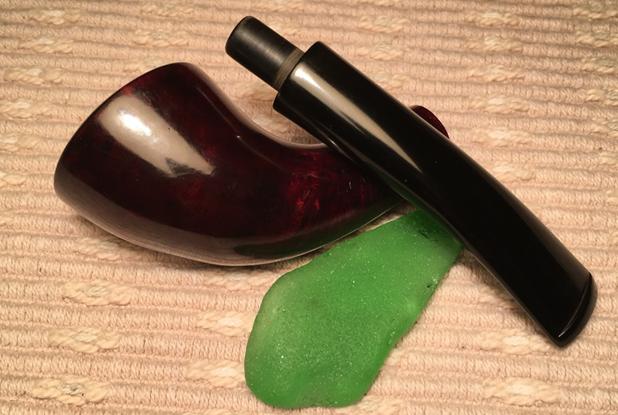
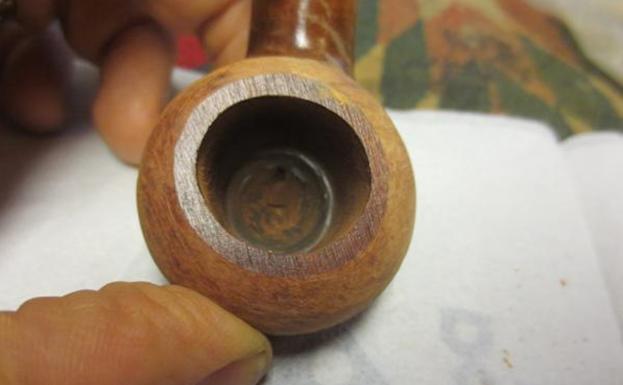
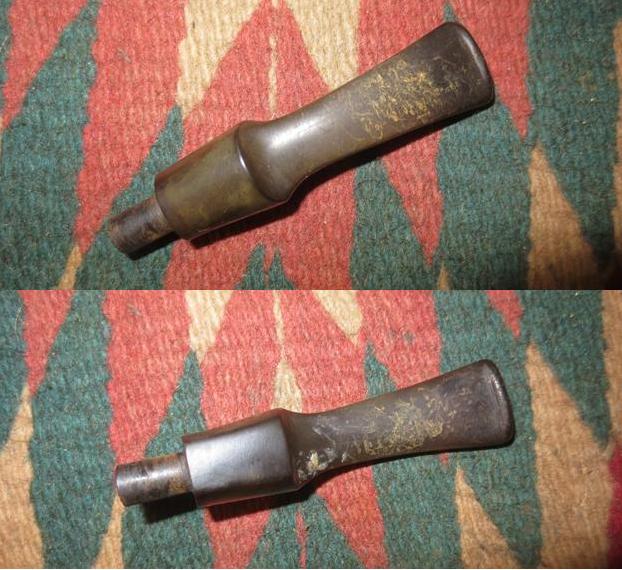
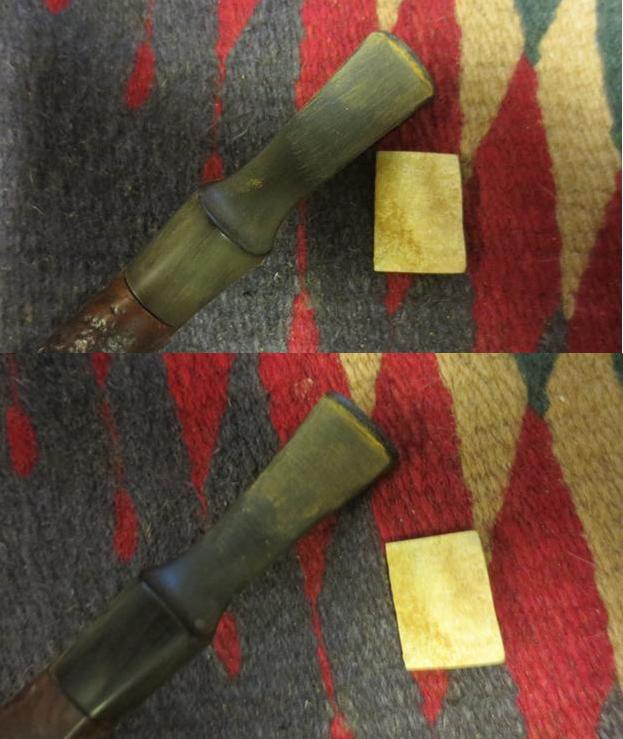
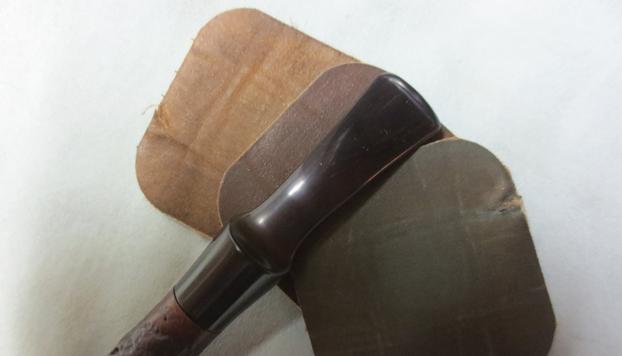
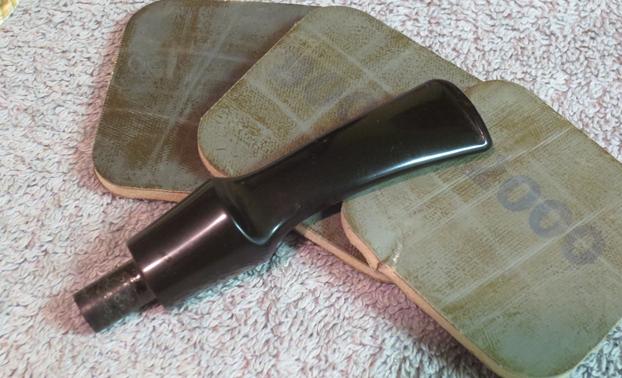
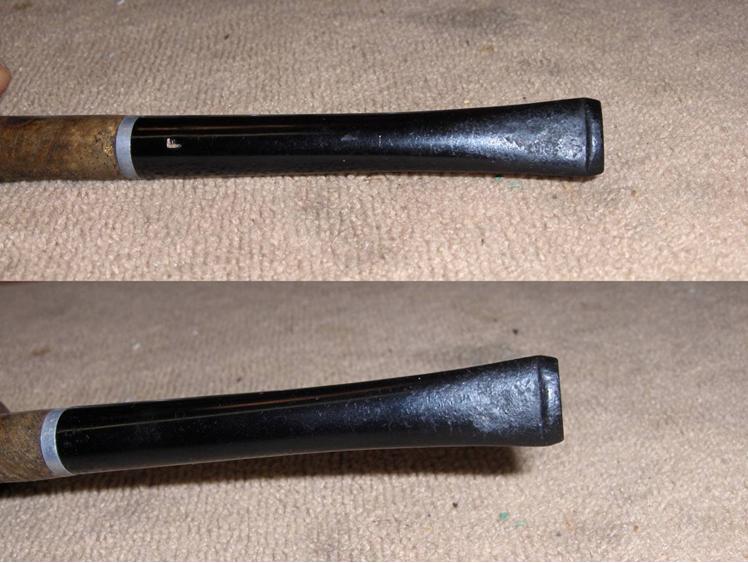
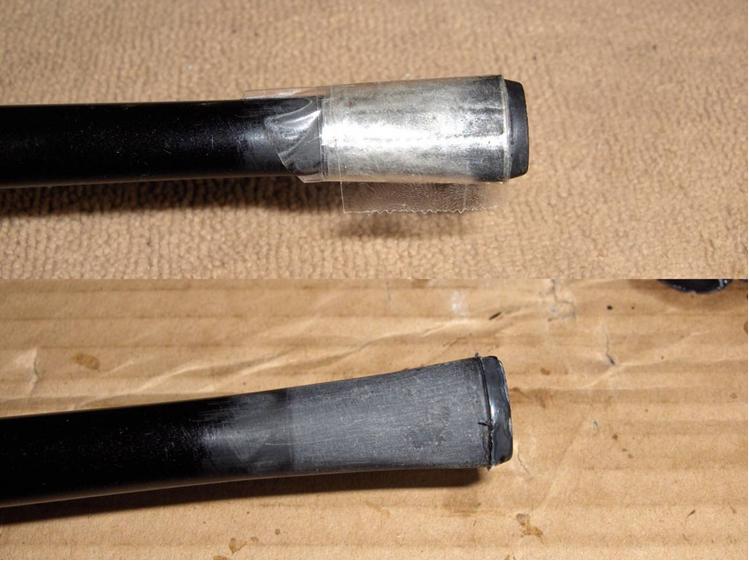
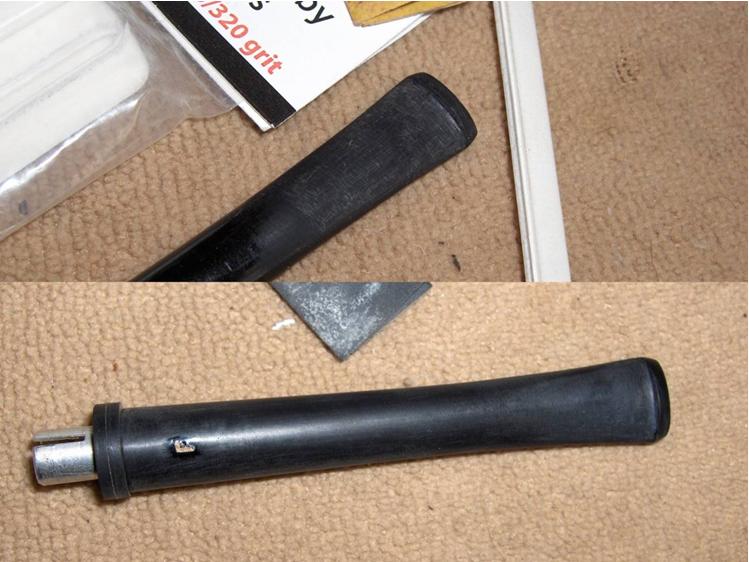
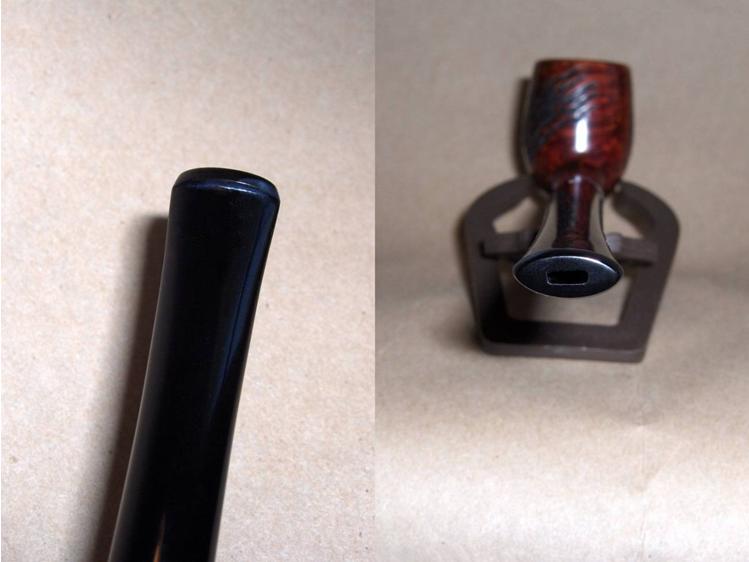
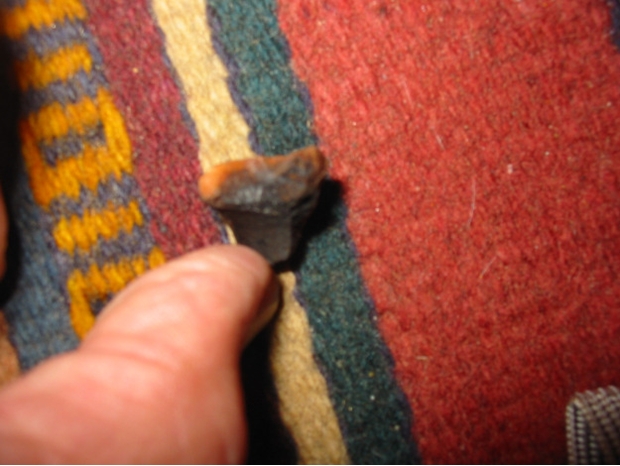
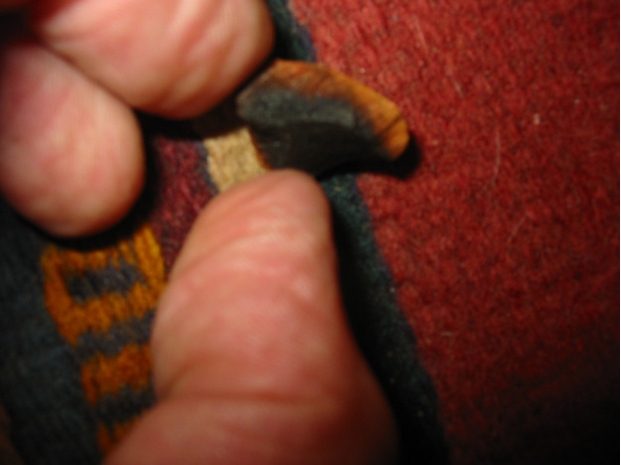
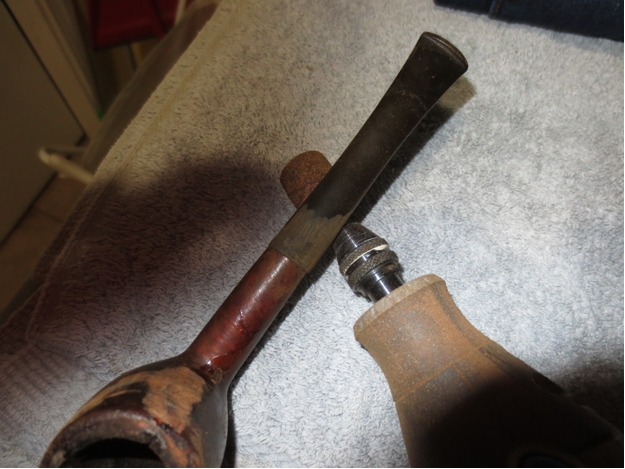
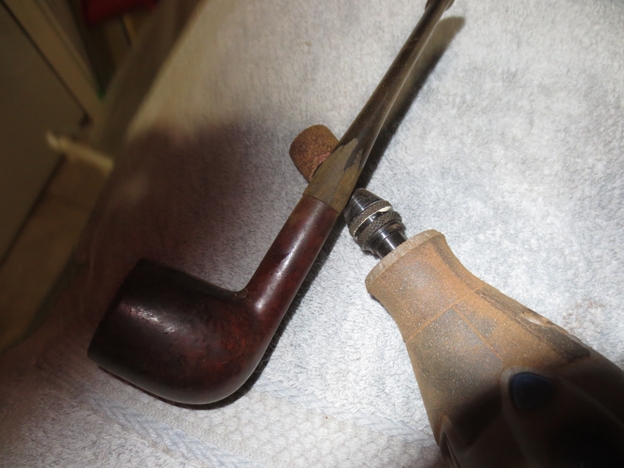
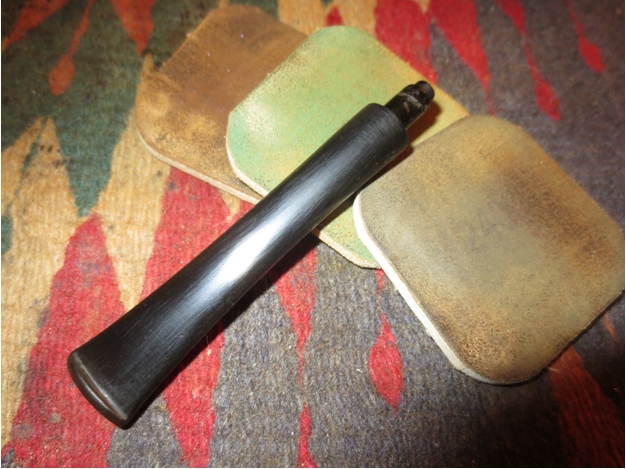
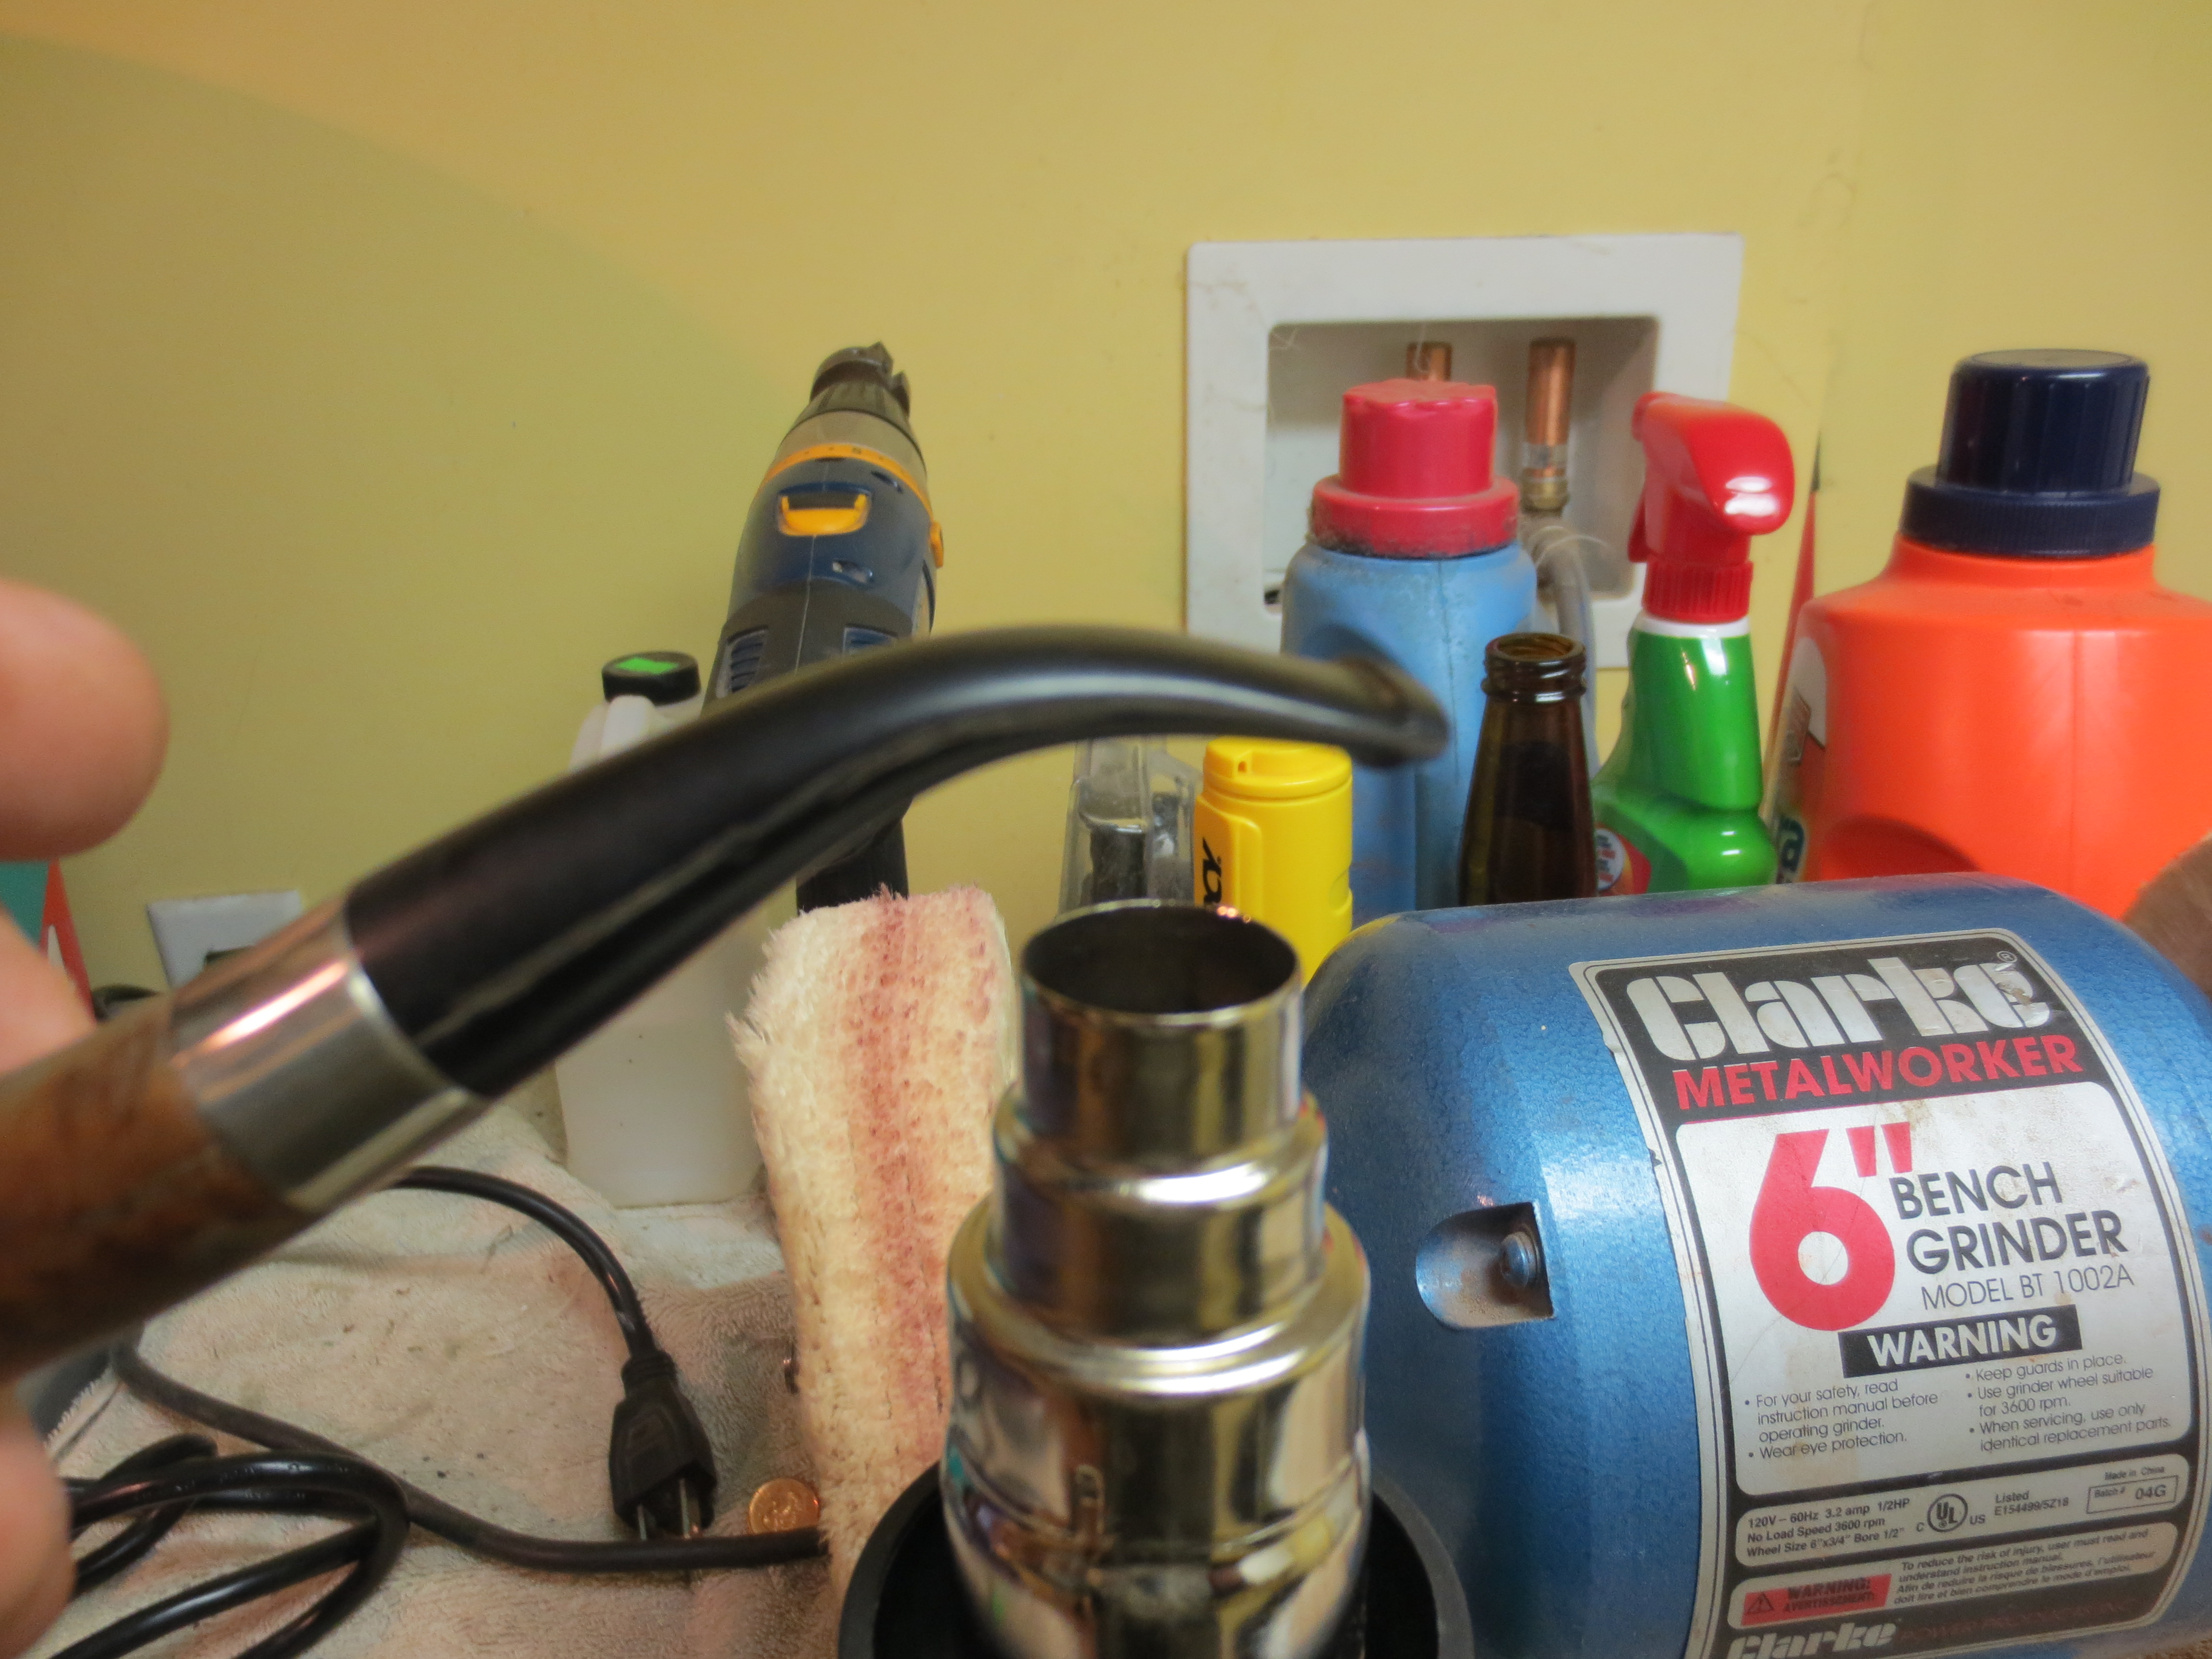
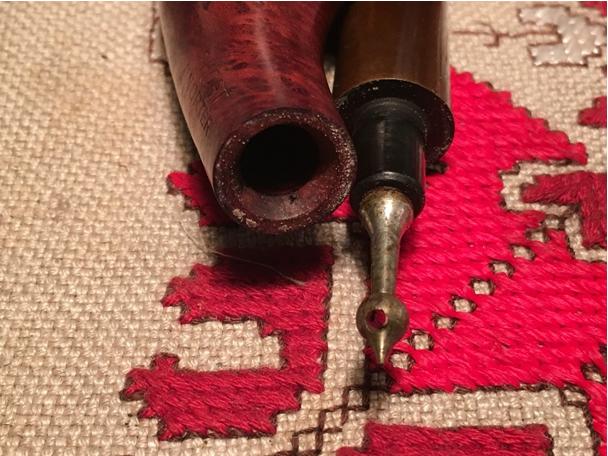
The first order of business in the rebirth of this Short Snorter Imported Briar Horn is to plop the stem into a bath of Oxiclean to begin the process of raising the oxidation out of the vulcanite.  Before I do this I try to remove the stinger, resembling the cupola of a Russian Orthodox Church.  I don’t much like stingers in general, but I’m not able to coax a pipe cleaner through it to help retrieve the stem from the Oxiclean bath.  I try pulling on the stinger but it doesn’t budge.  After a few failed attempts, I light a candle and warm the stinger which expands the stingy vulcanite holding it in place.  Whoa!  When I finally extract the stinger, it’s the longest stinger I’ve seen to date – especially in such a small pipe!  I’m not sure why it’s so long but I wonder if it has anything to do with the small design and the intent to restrict the airflow?   Perhaps, the burn was a result of poor movement of air and the steward had to puff harder therefore more heat???  Speculation, but the stem is now in the bath working on the oxidation and the stinger is official retired to the stinger bottle.short10 short11
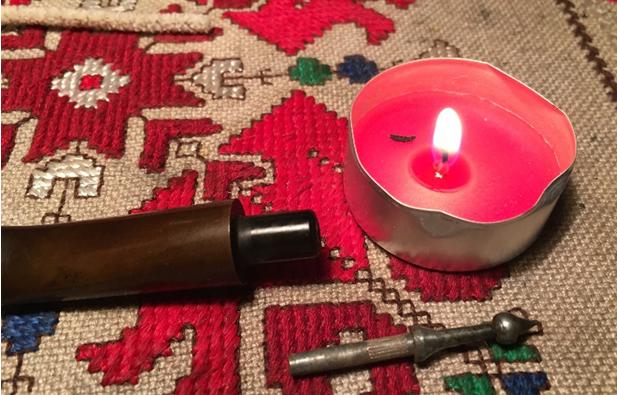
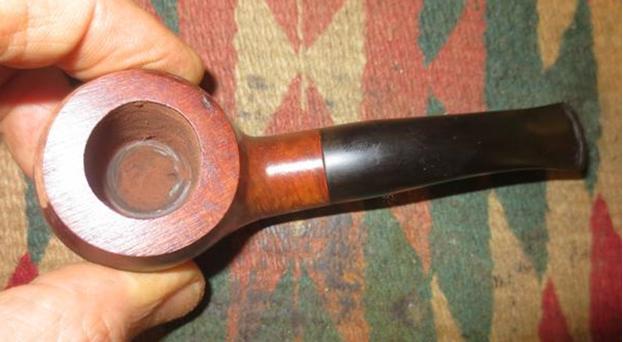
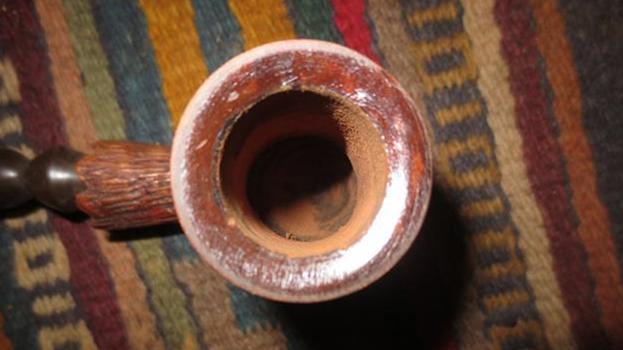
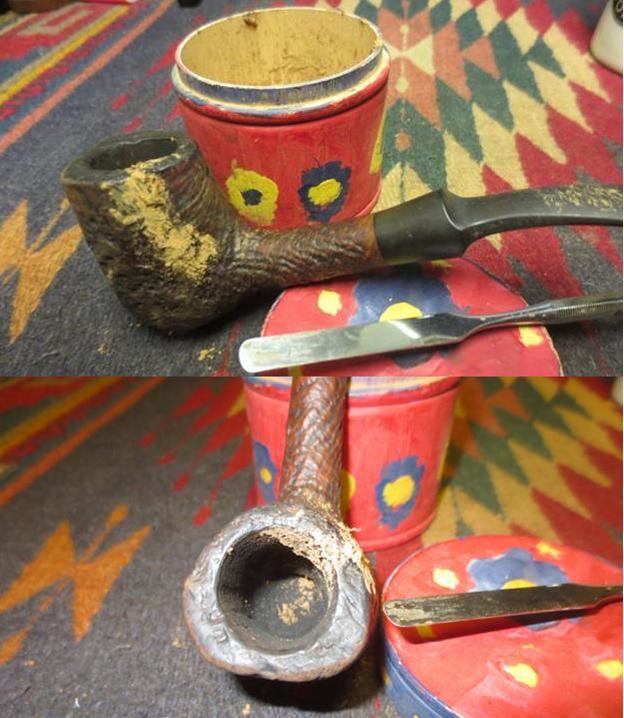
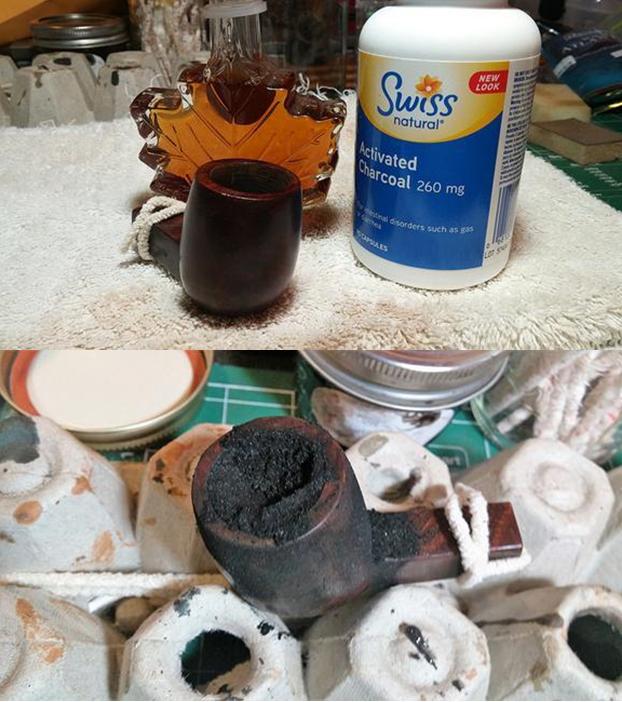
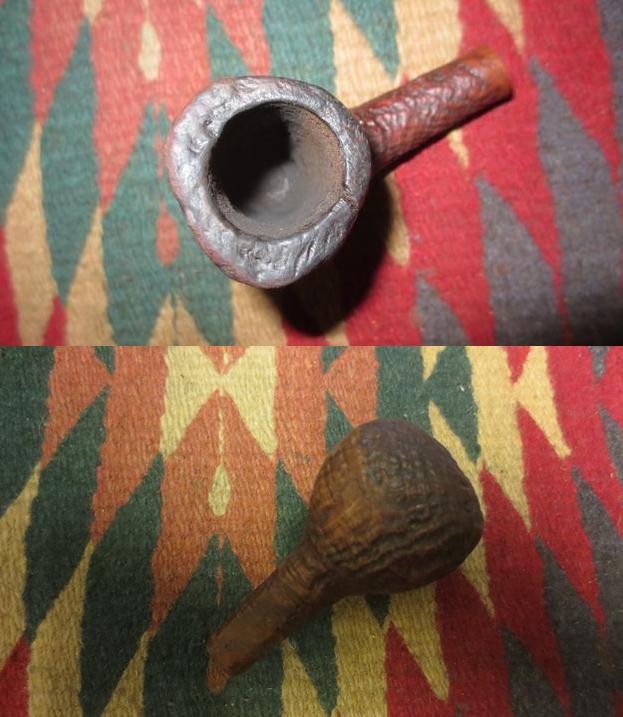
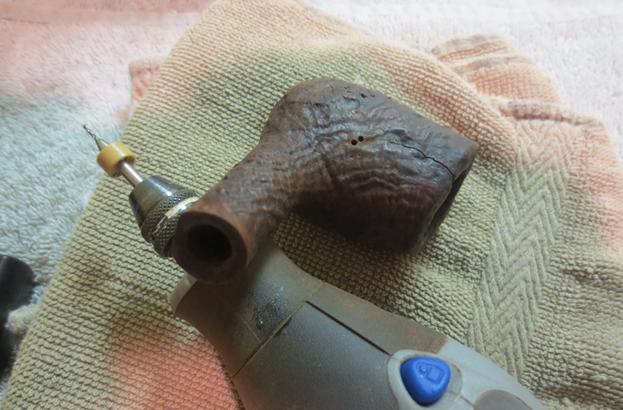
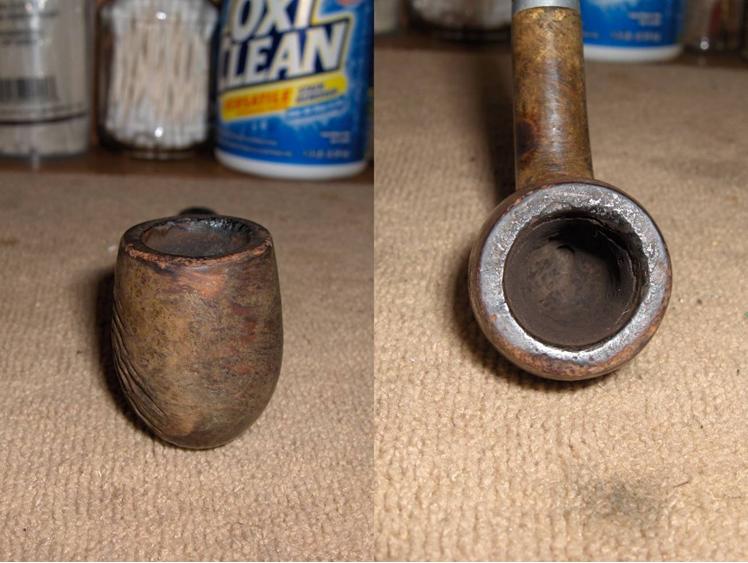
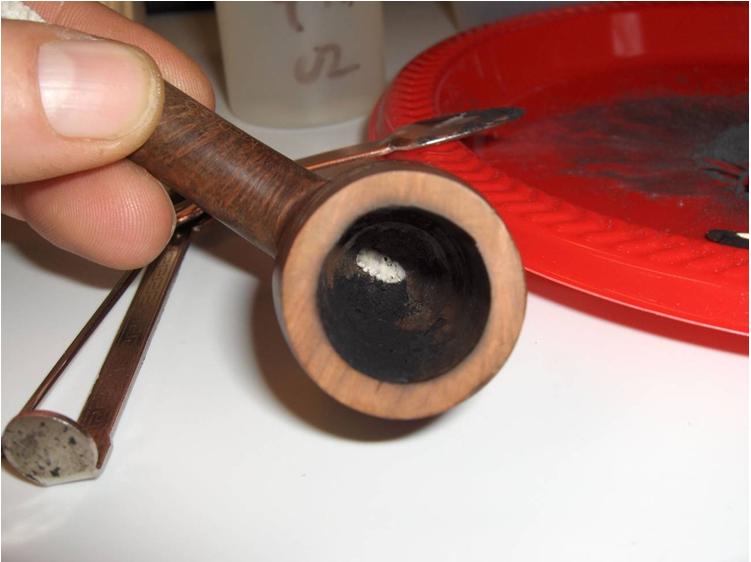
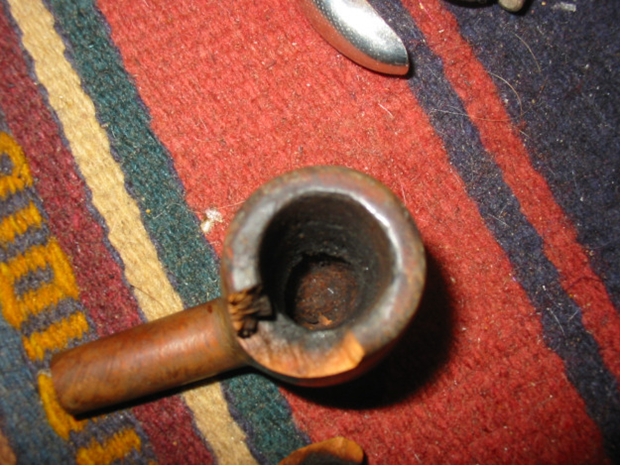
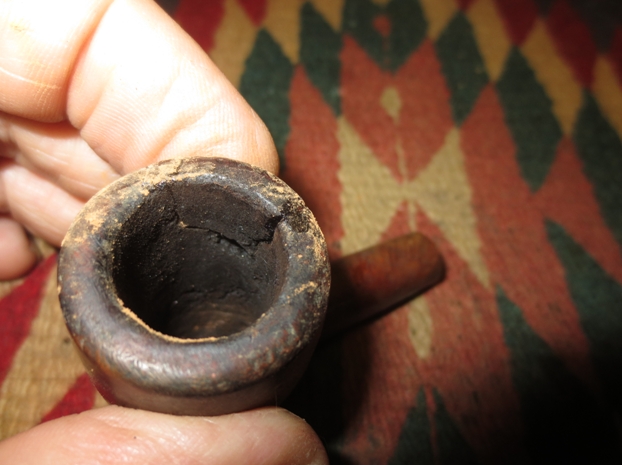
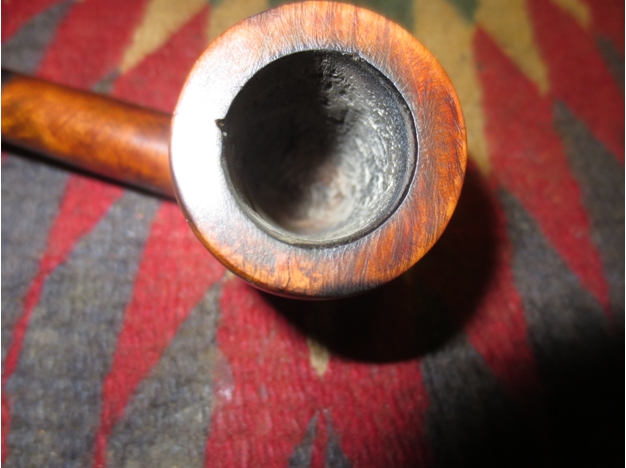
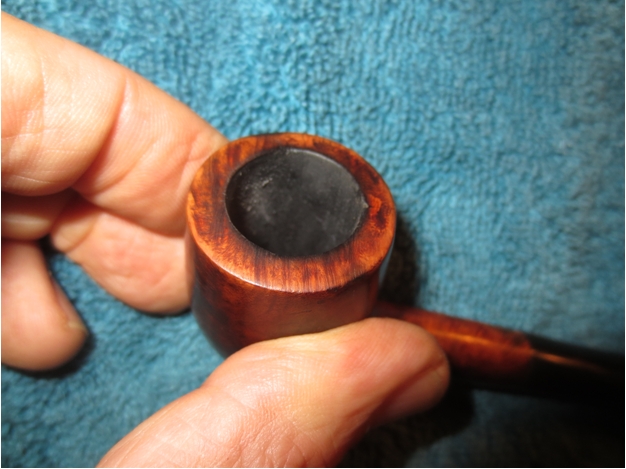
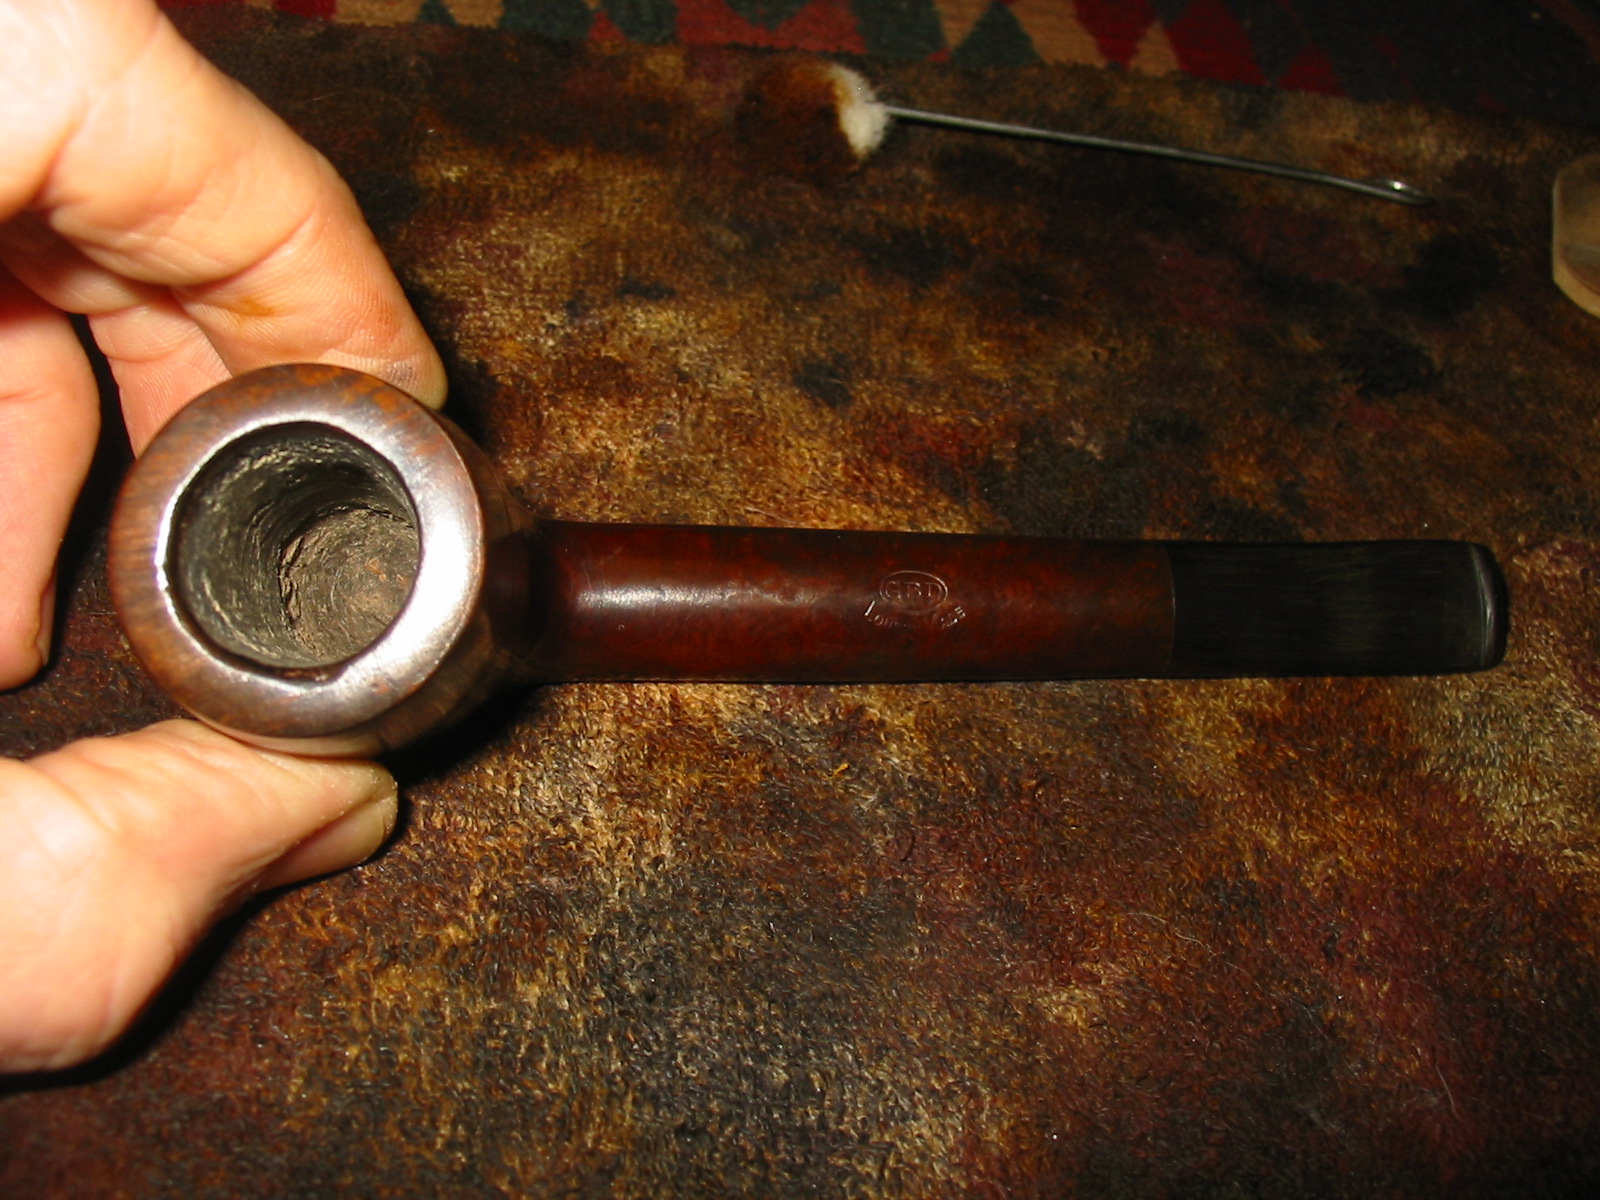
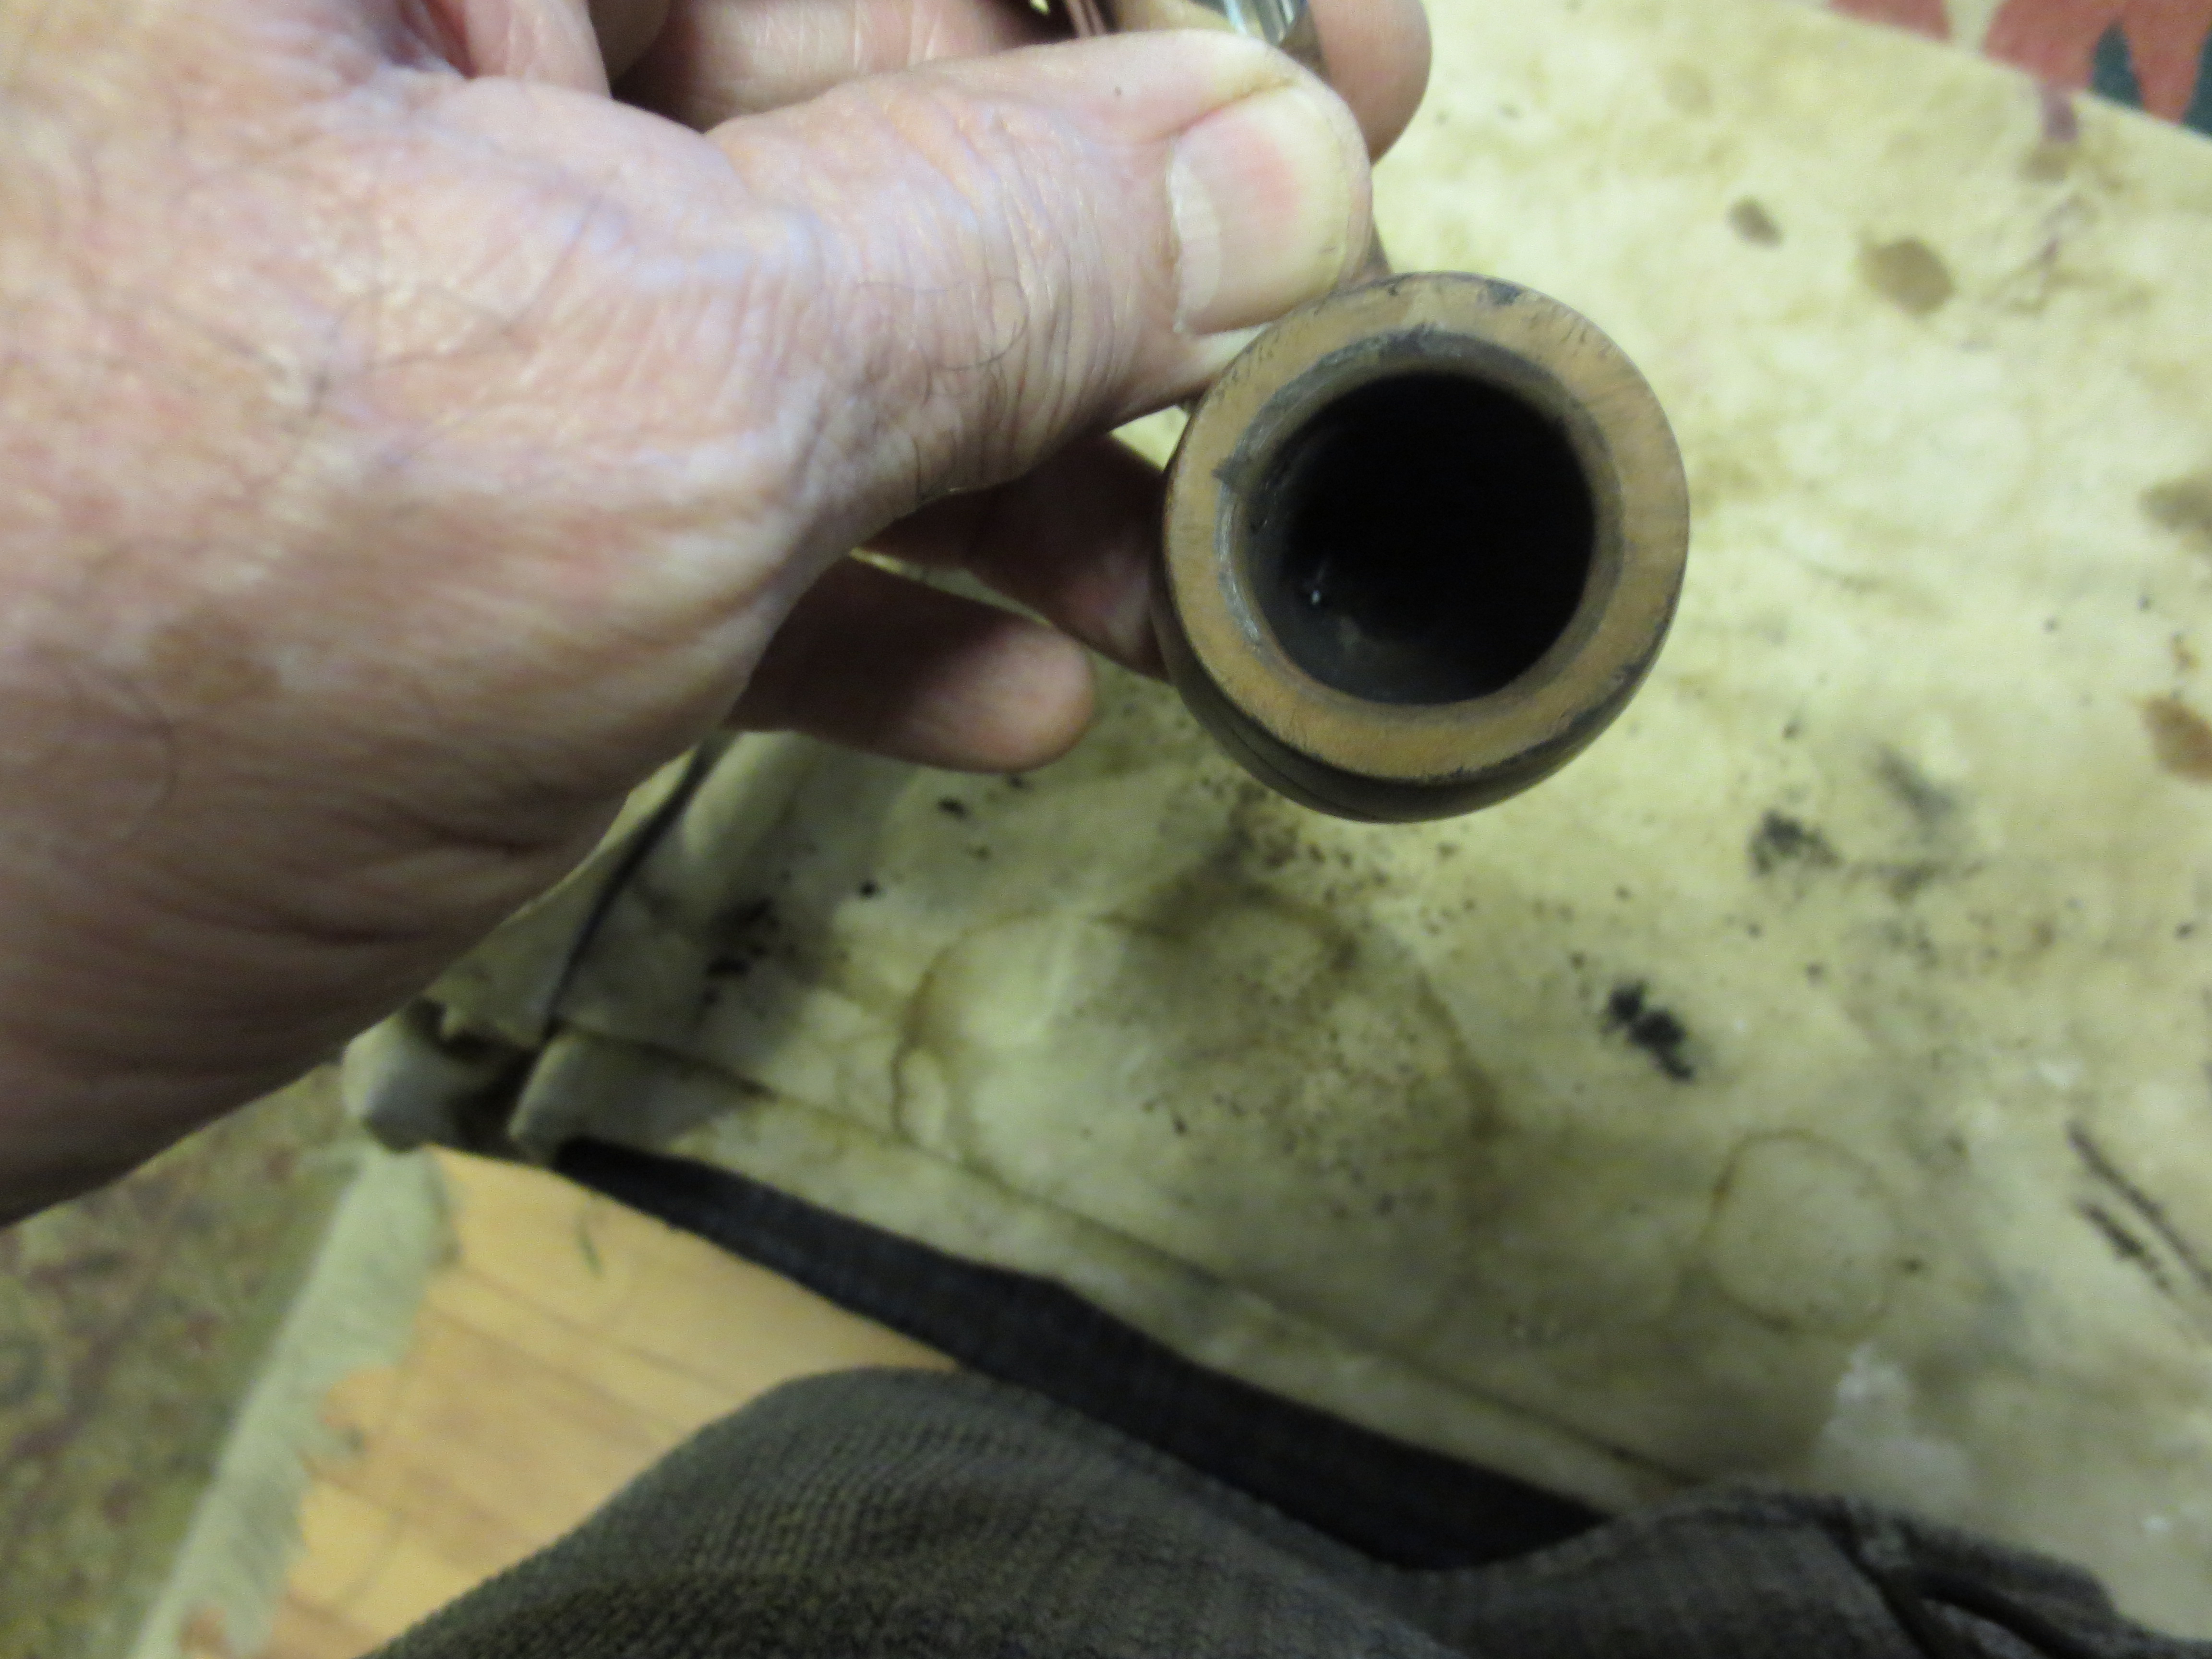
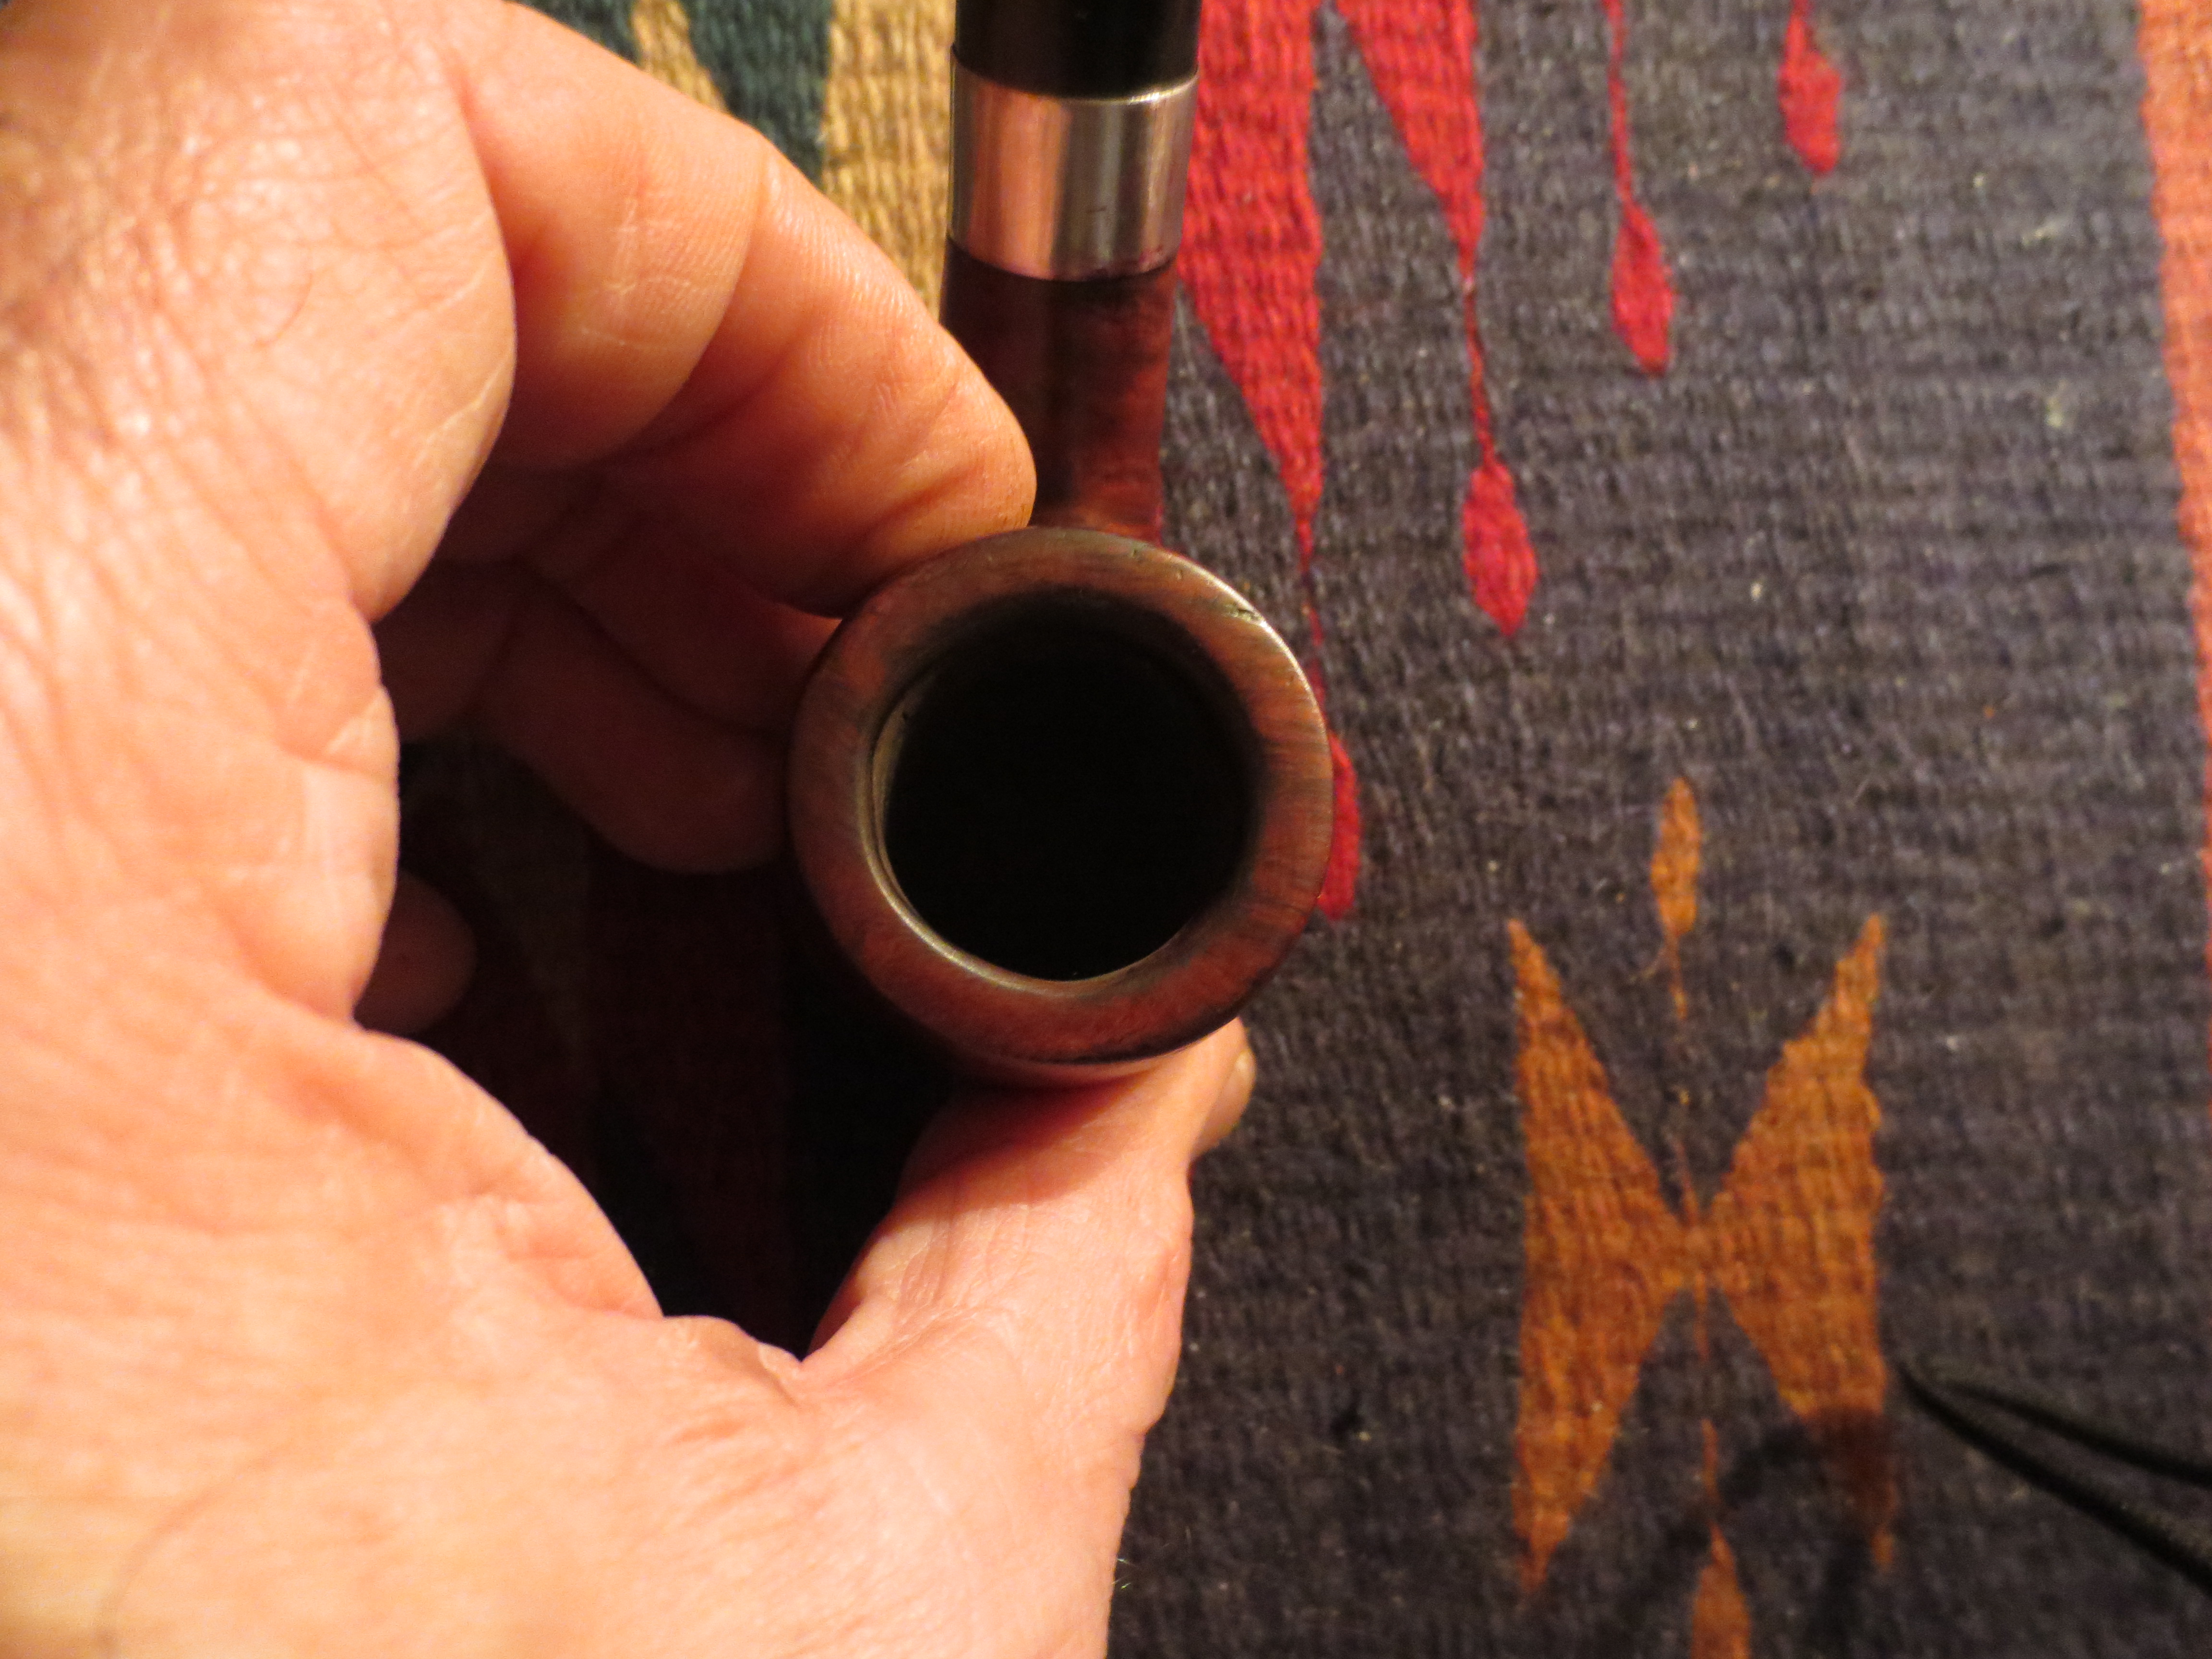
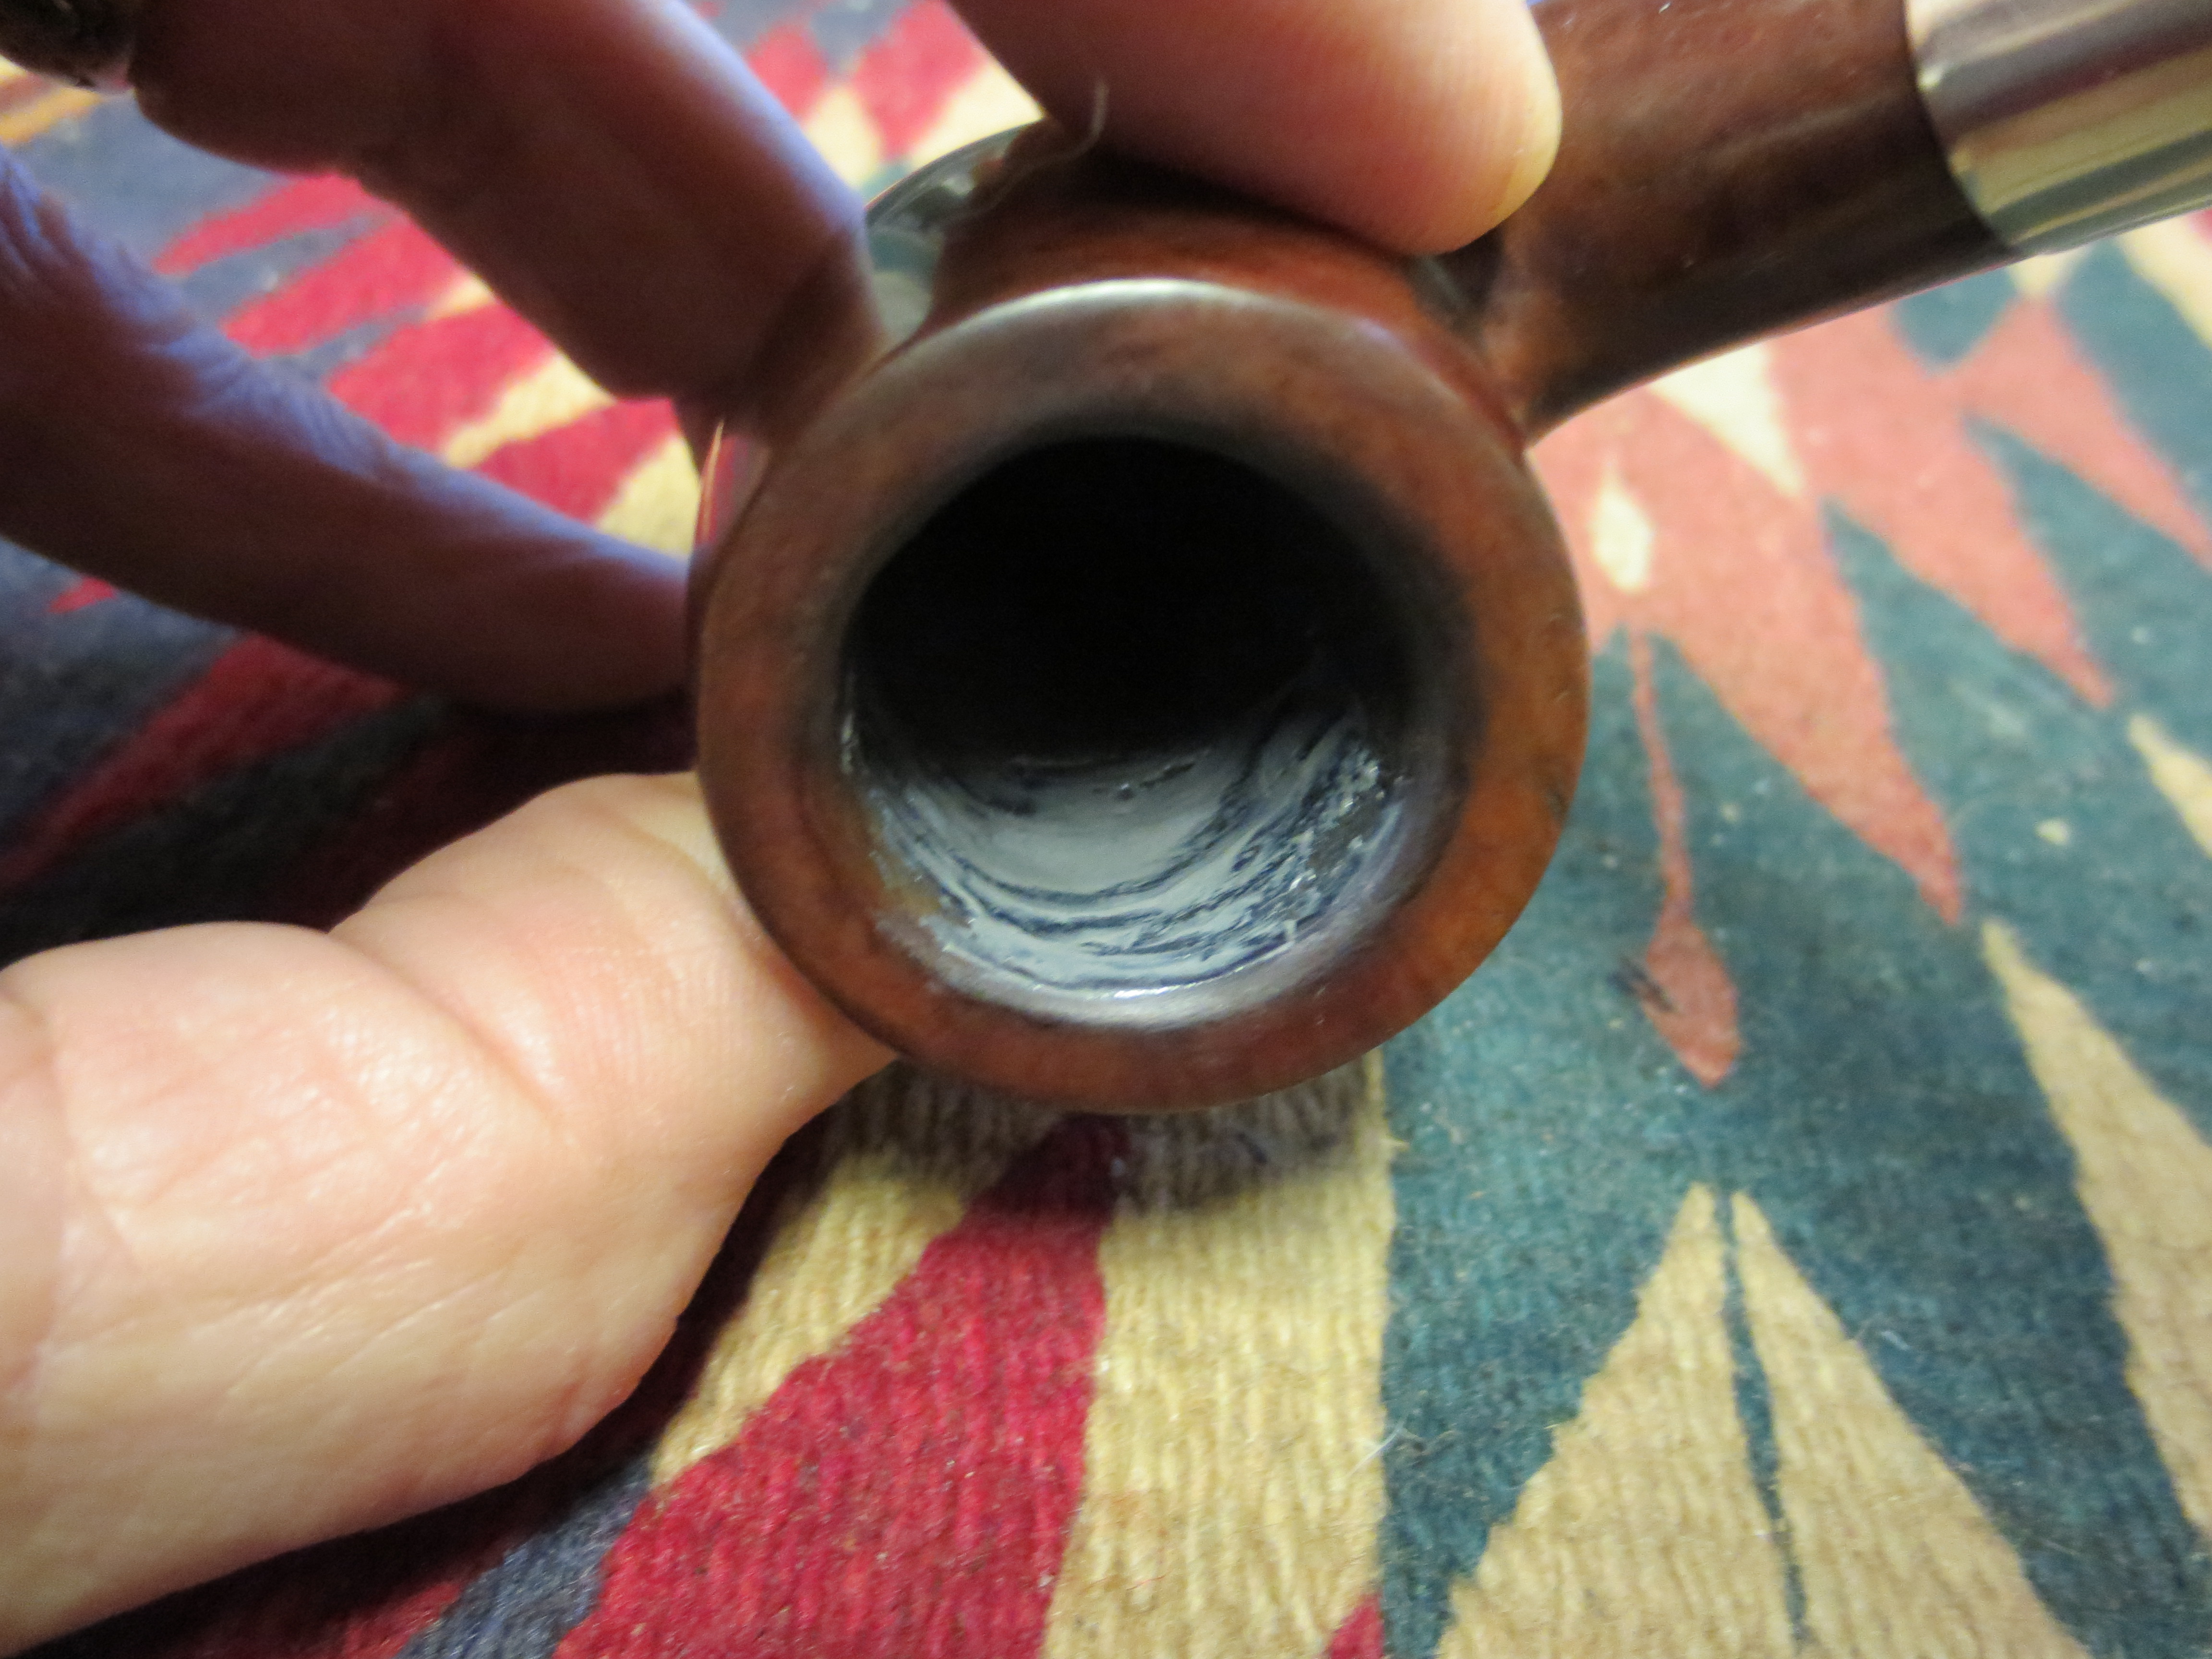
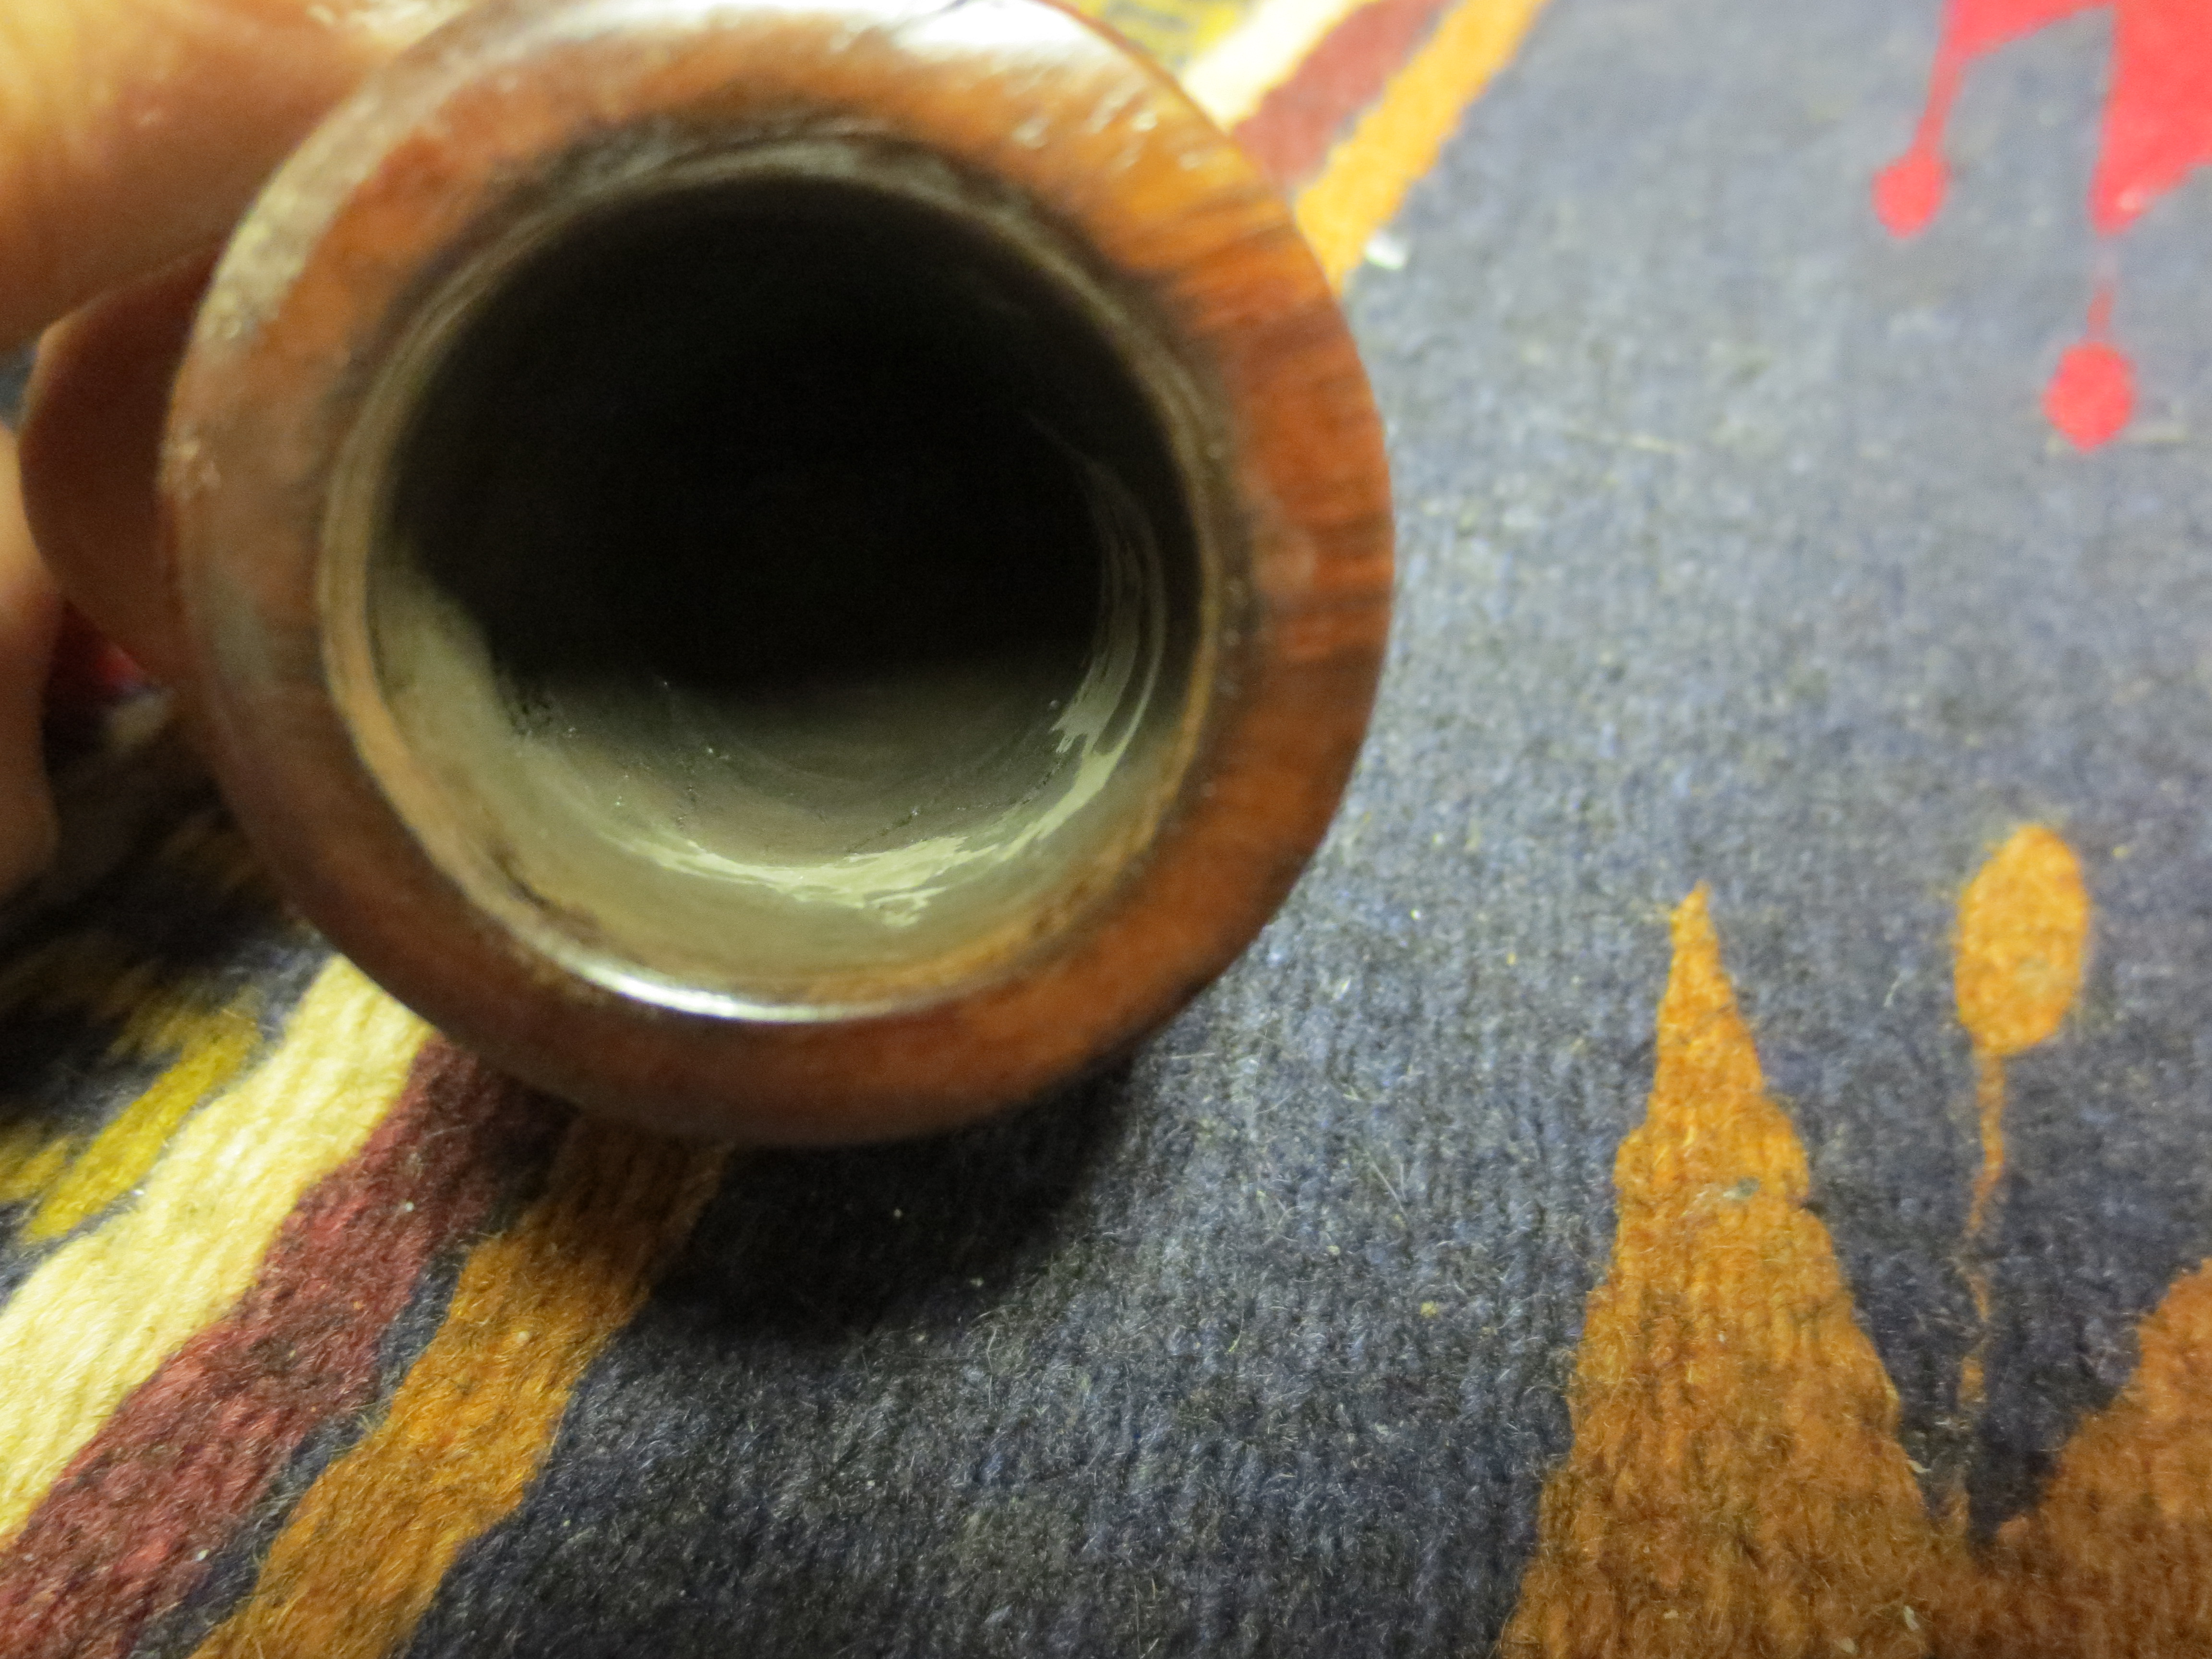
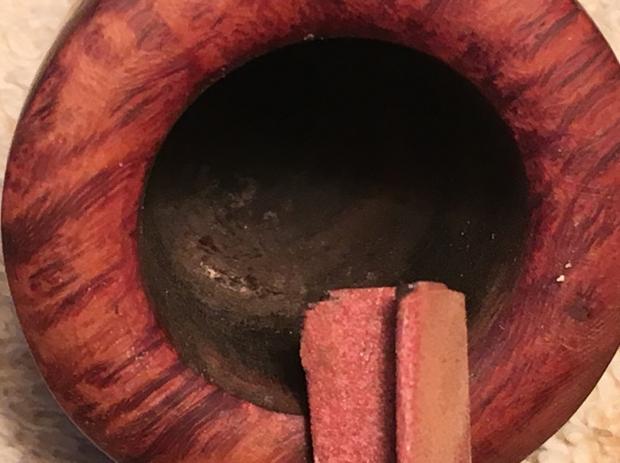
With the stem in the bath, I want to ream the fire chamber to bring it down to the briar for a fresh start but also to examine the front of the chamber corresponding to the external burn area.  Since there was almost no cake build up on the wall, I use the Savinelli Pipe Knife to clean what remains.  I then take 240 grit sanding paper rolled around a dowel rod to sand the fire chamber wall and to clean the remaining residue.  I finished with a quick wipe of the cotton pad with a bit of alcohol on it to remove the carbon dust.  The pictures show the progress.short12 short13
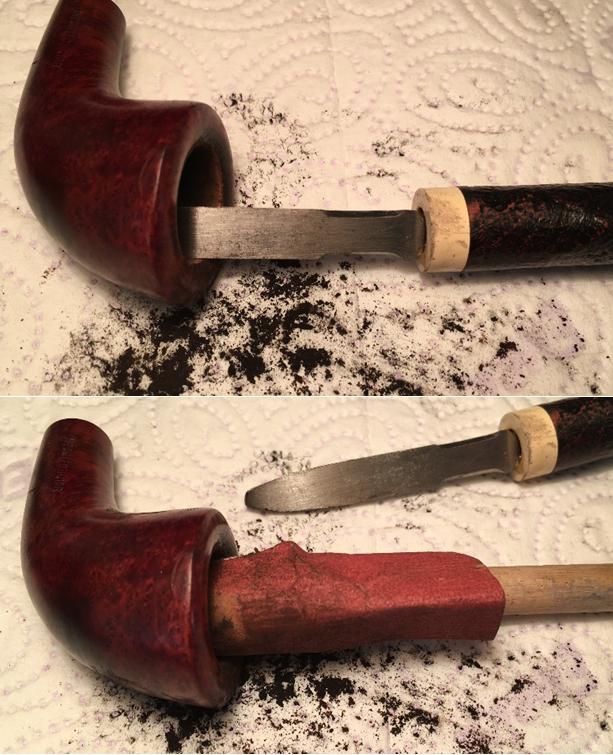
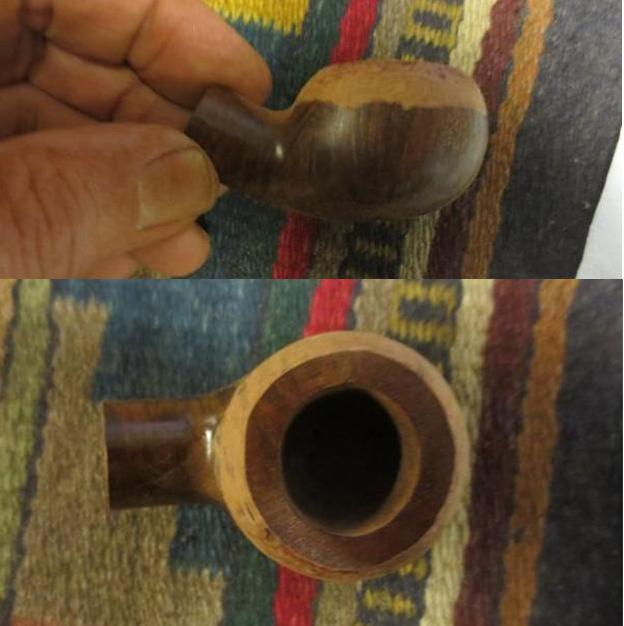
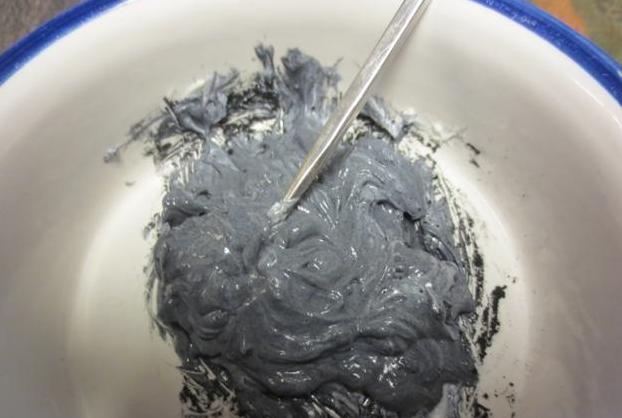
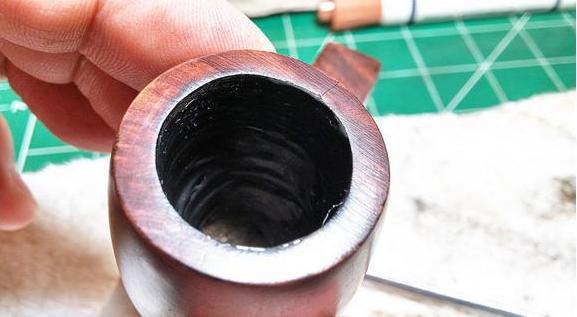
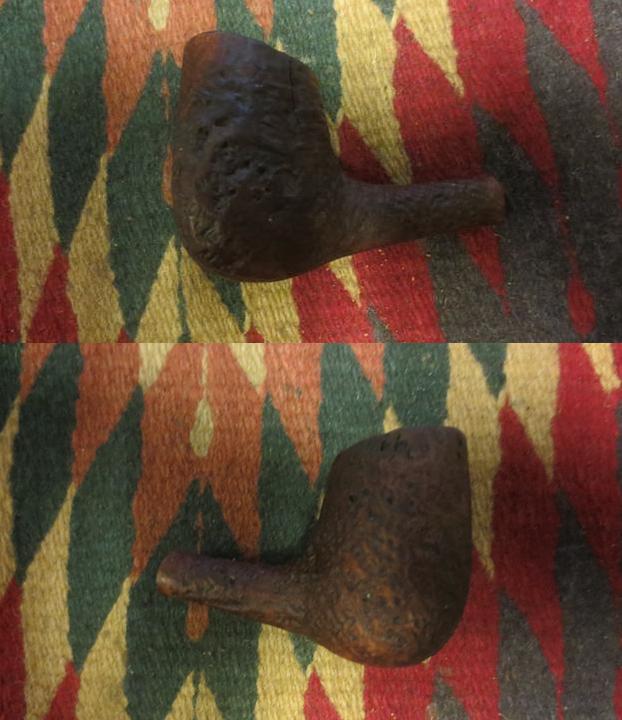
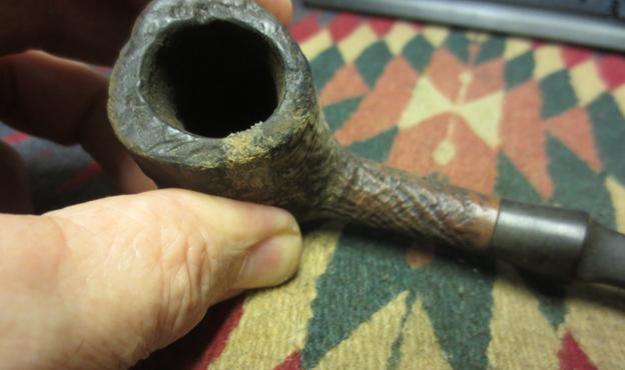
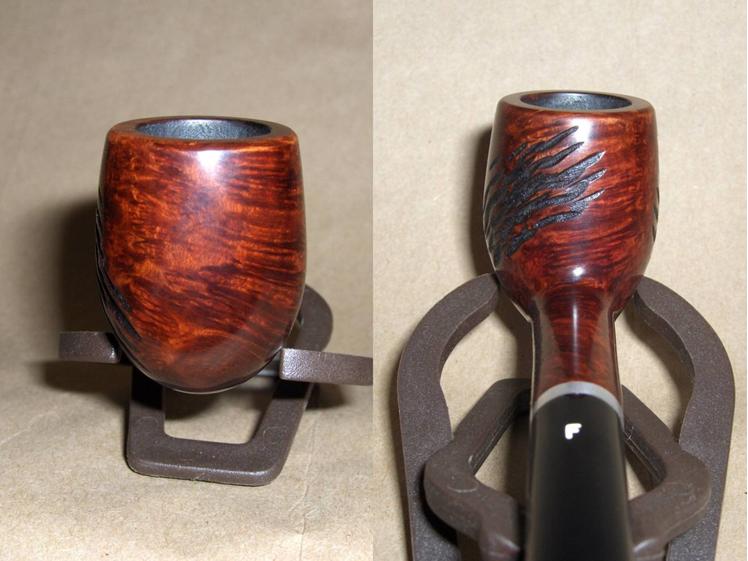
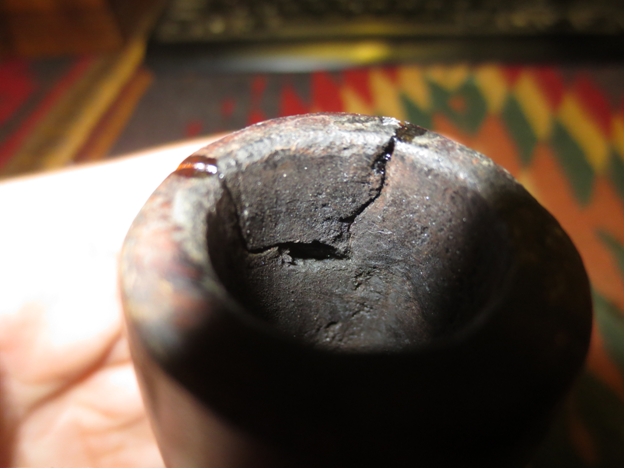
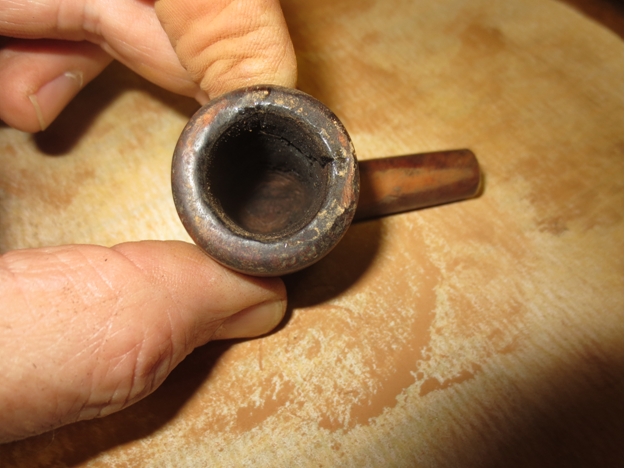
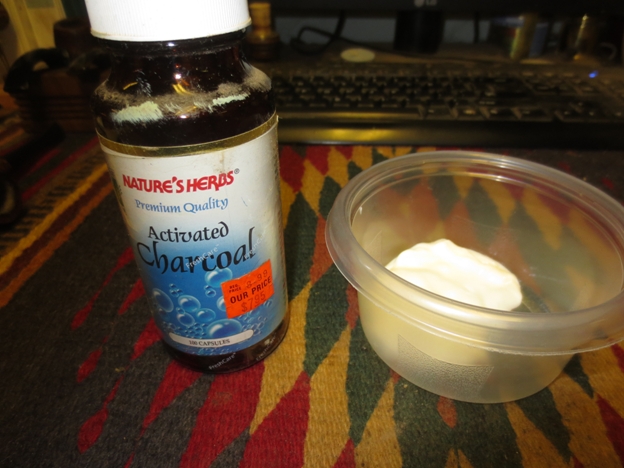
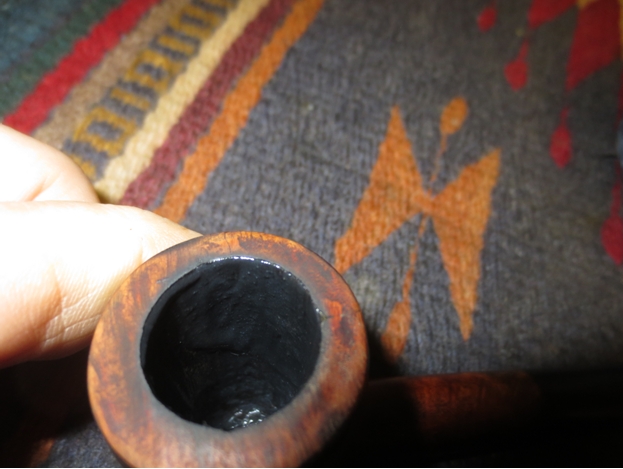
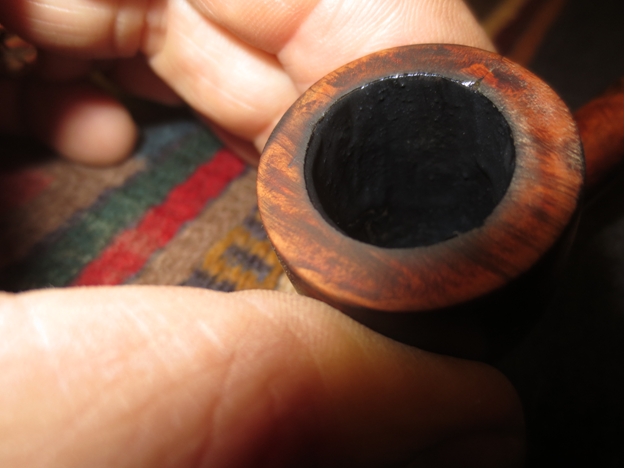
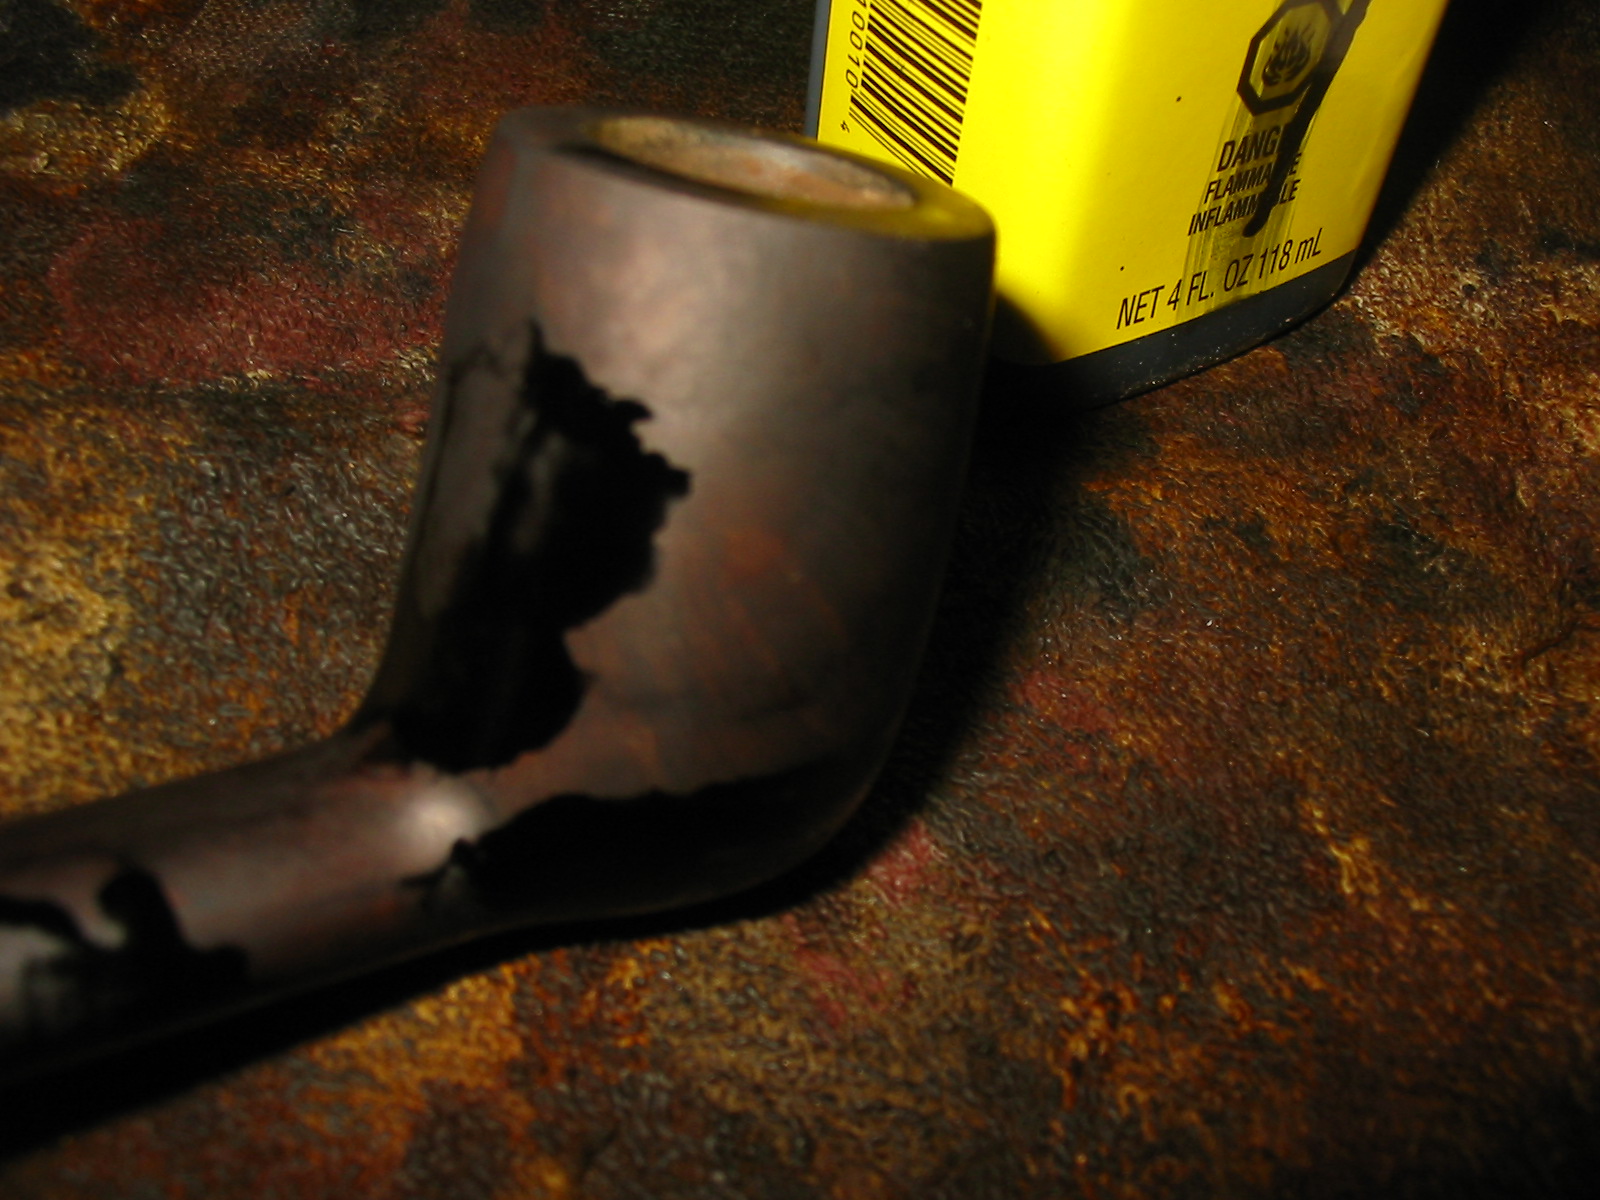
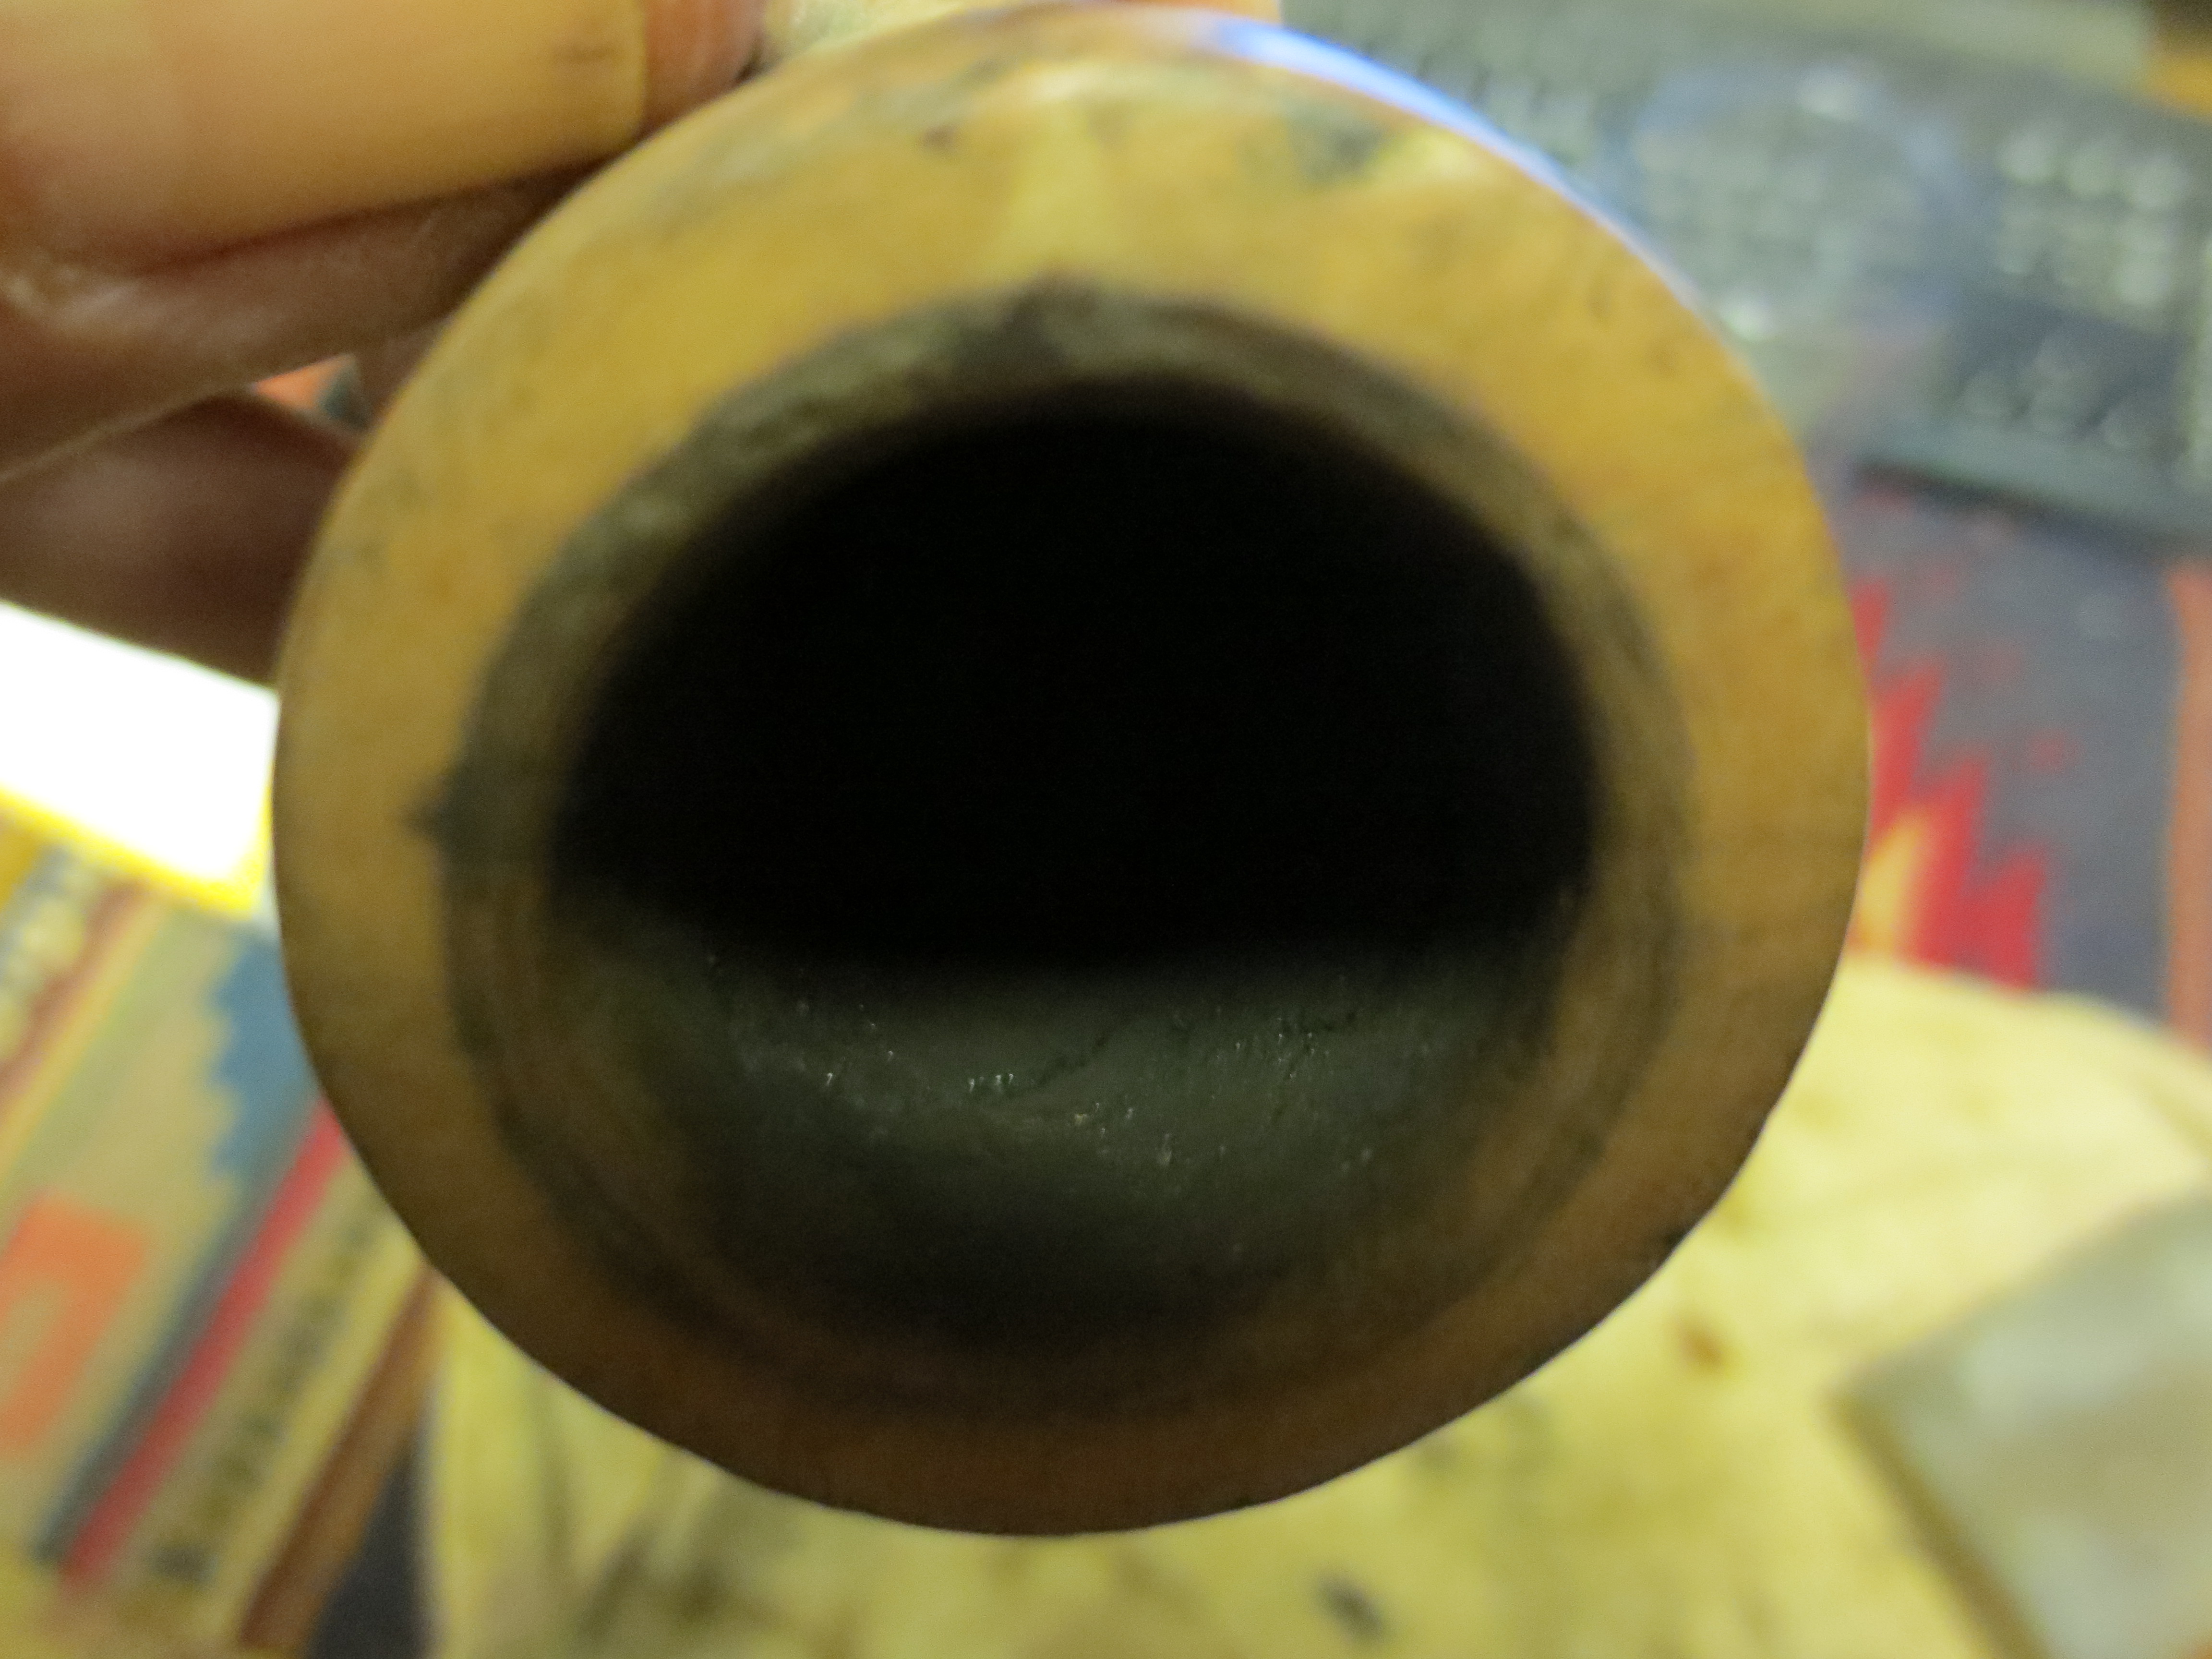
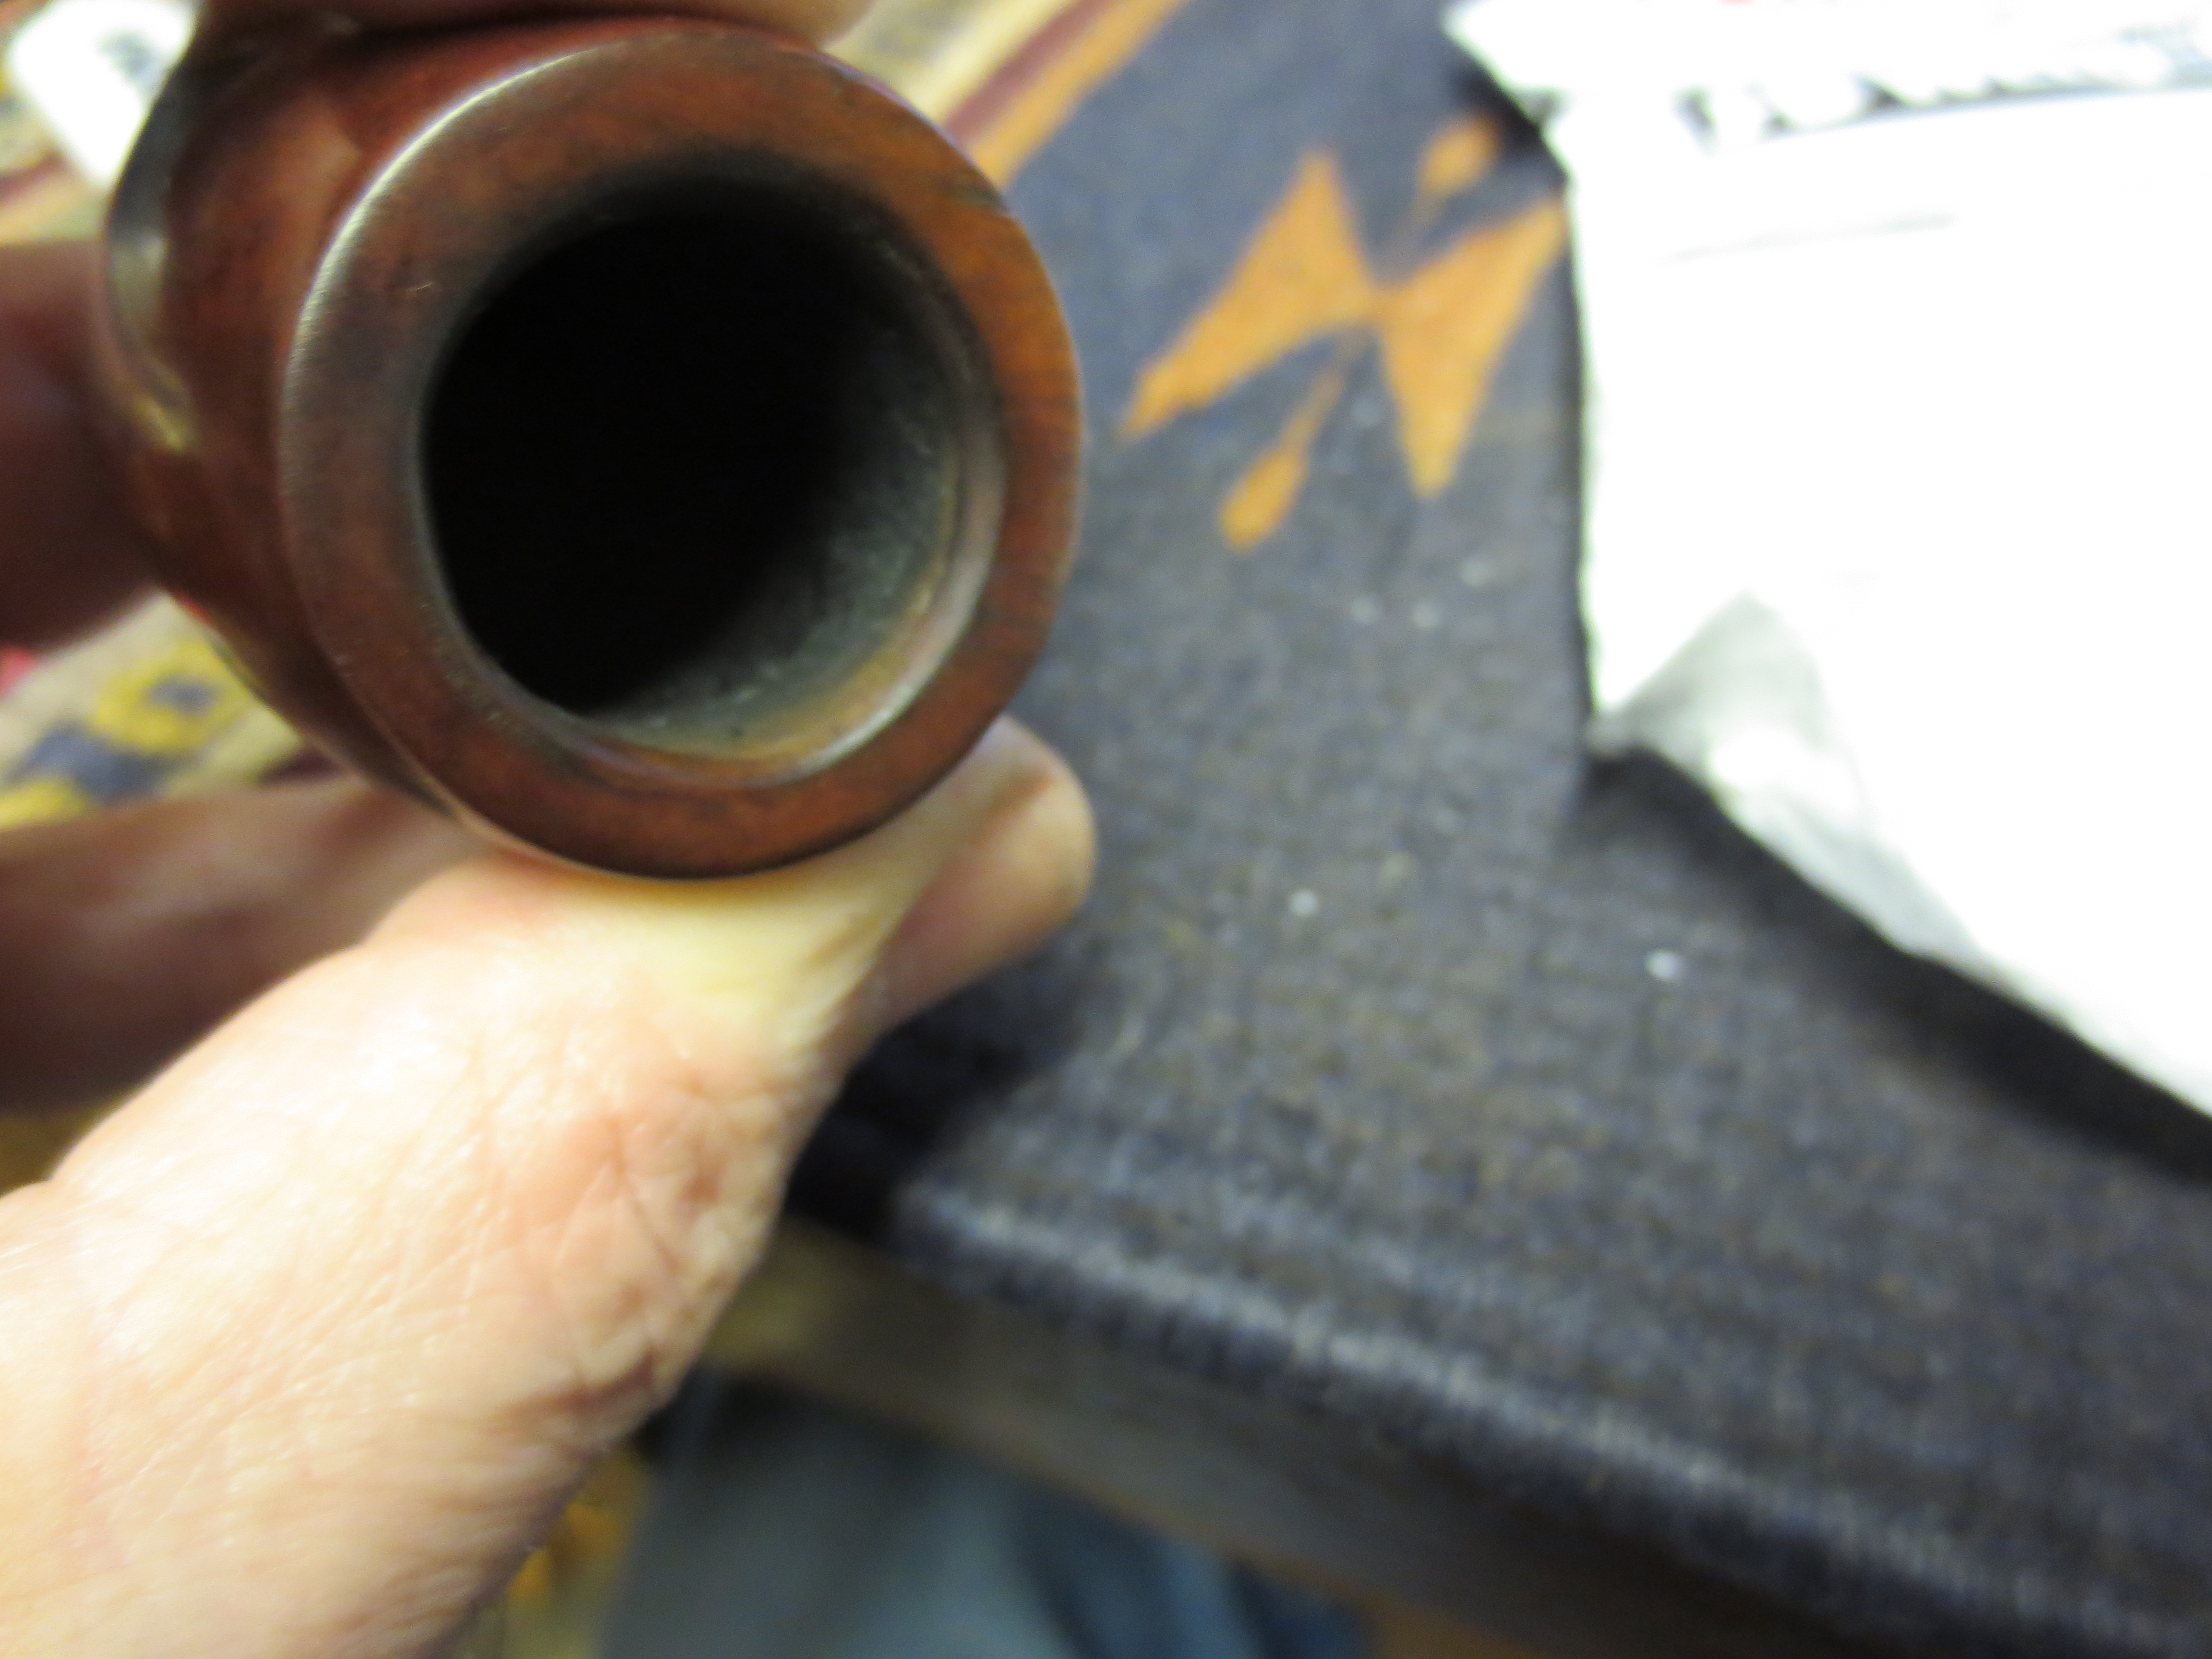
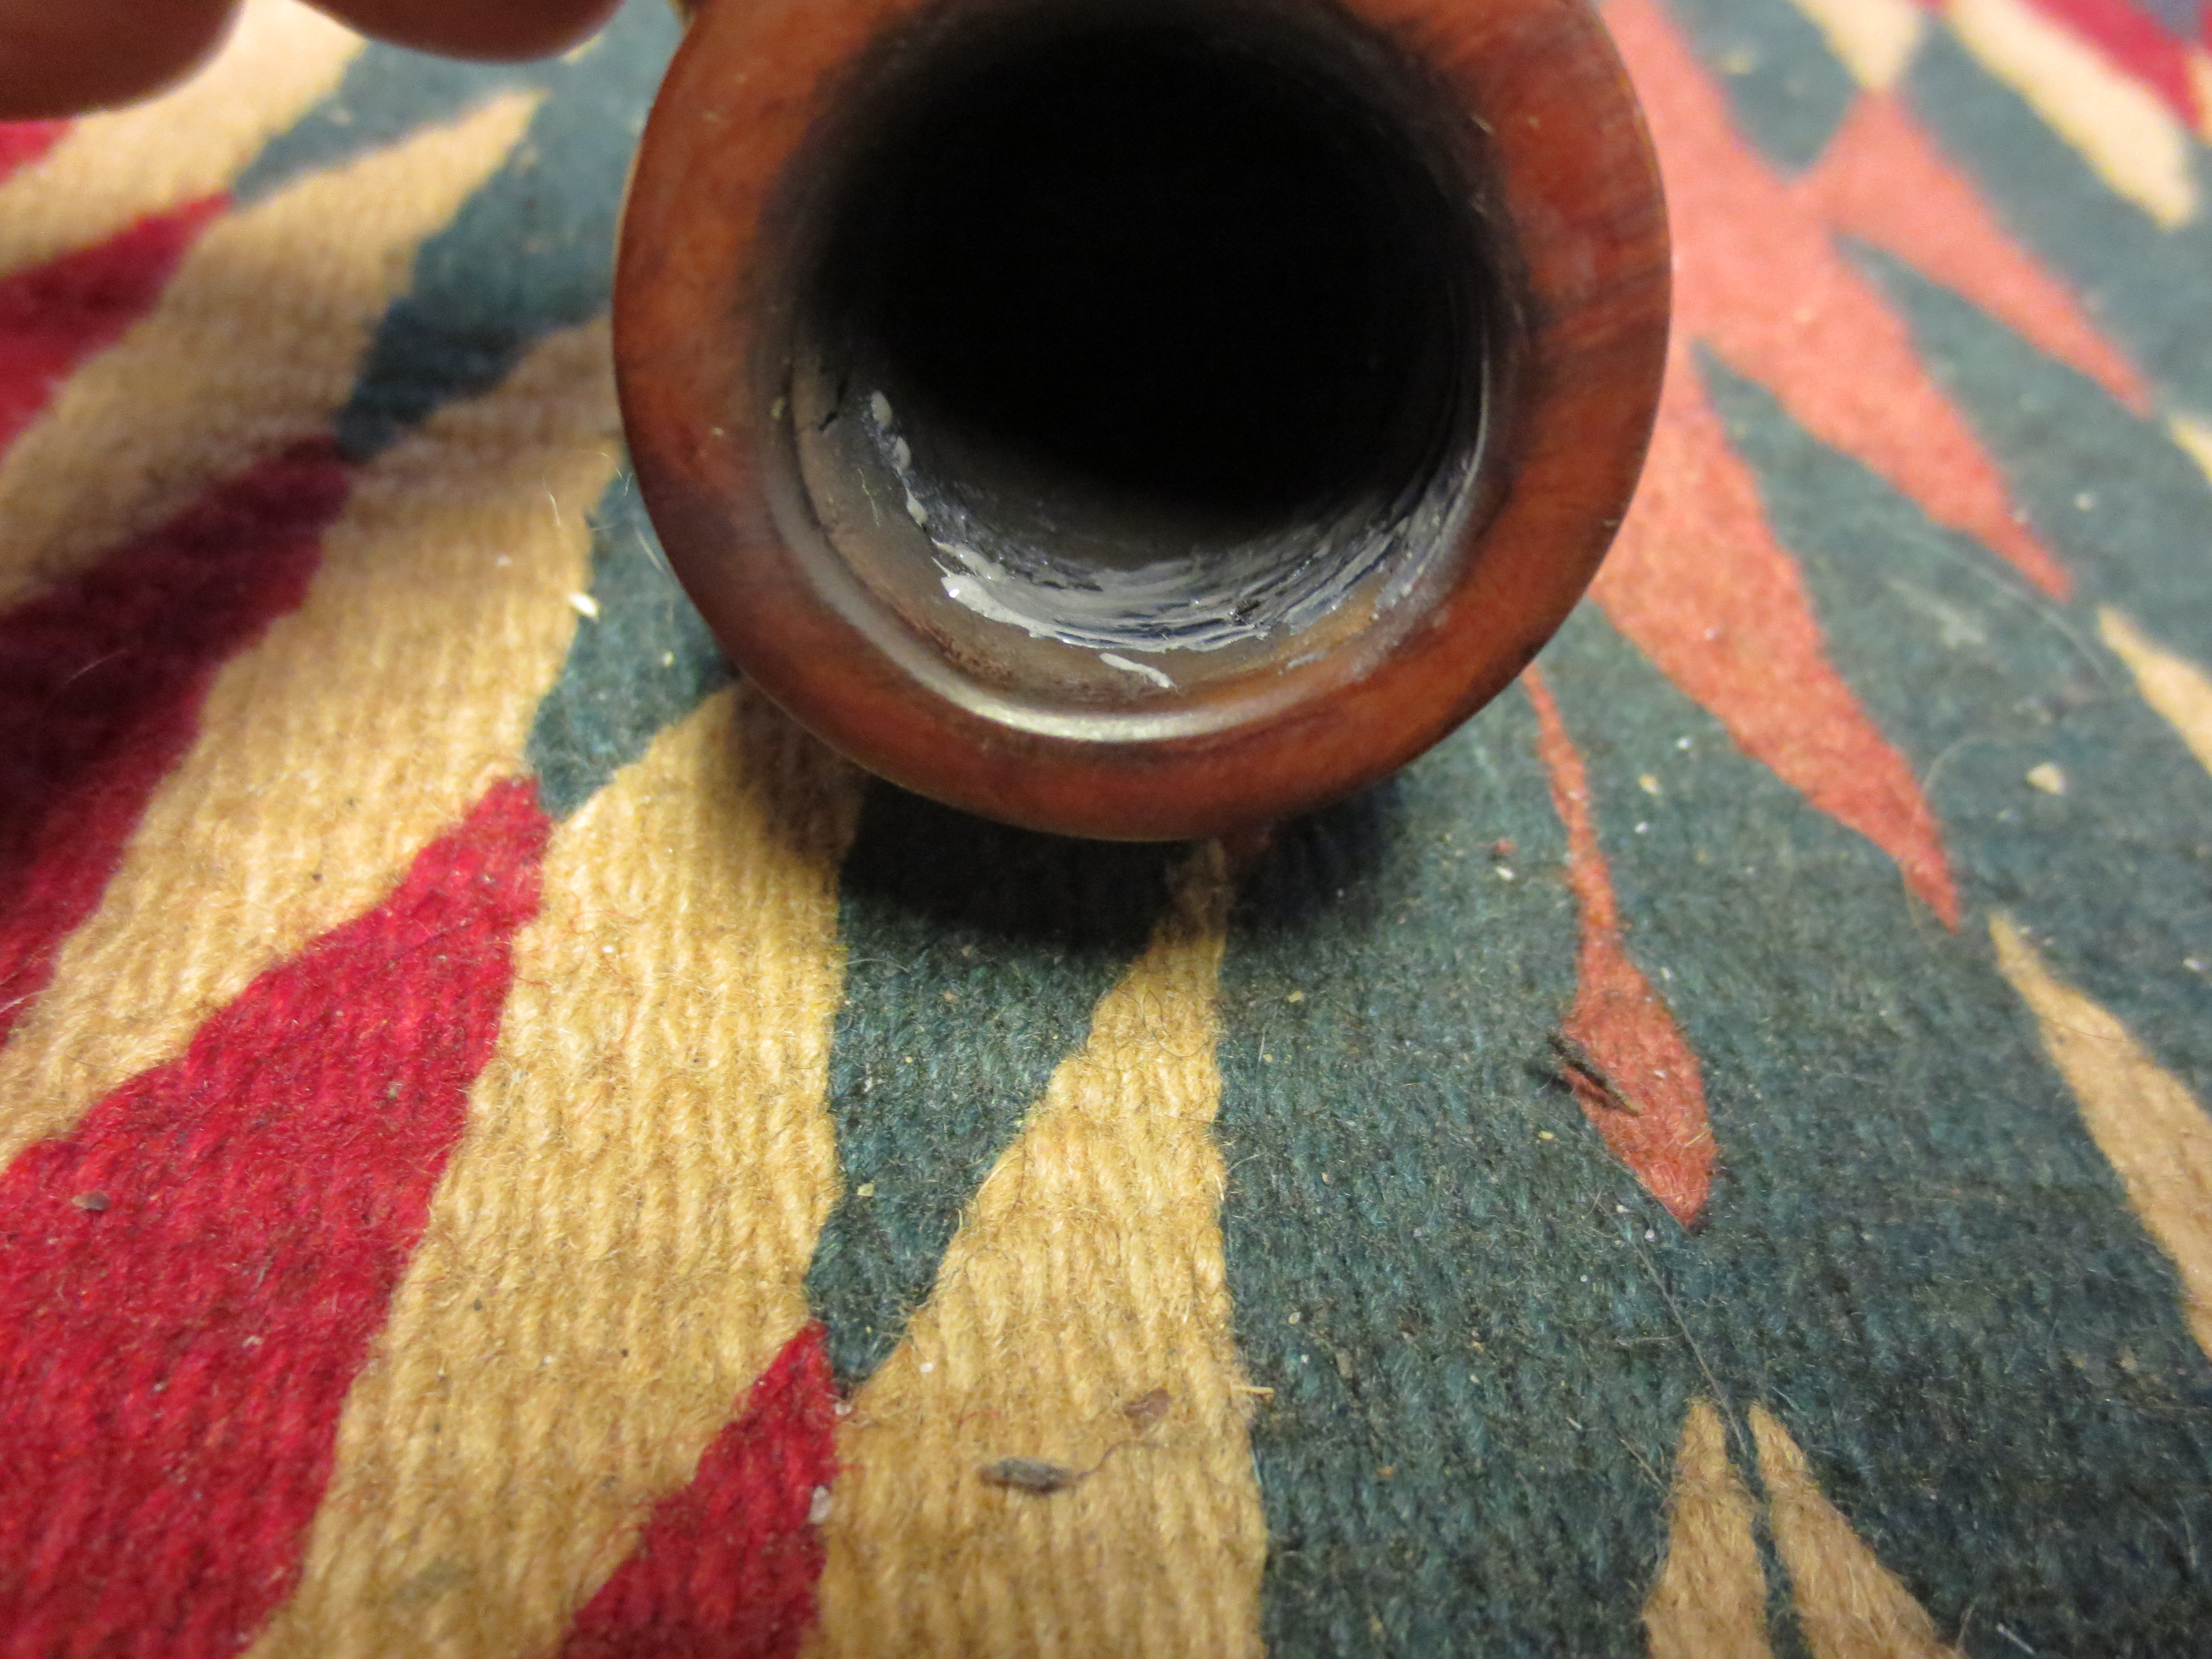
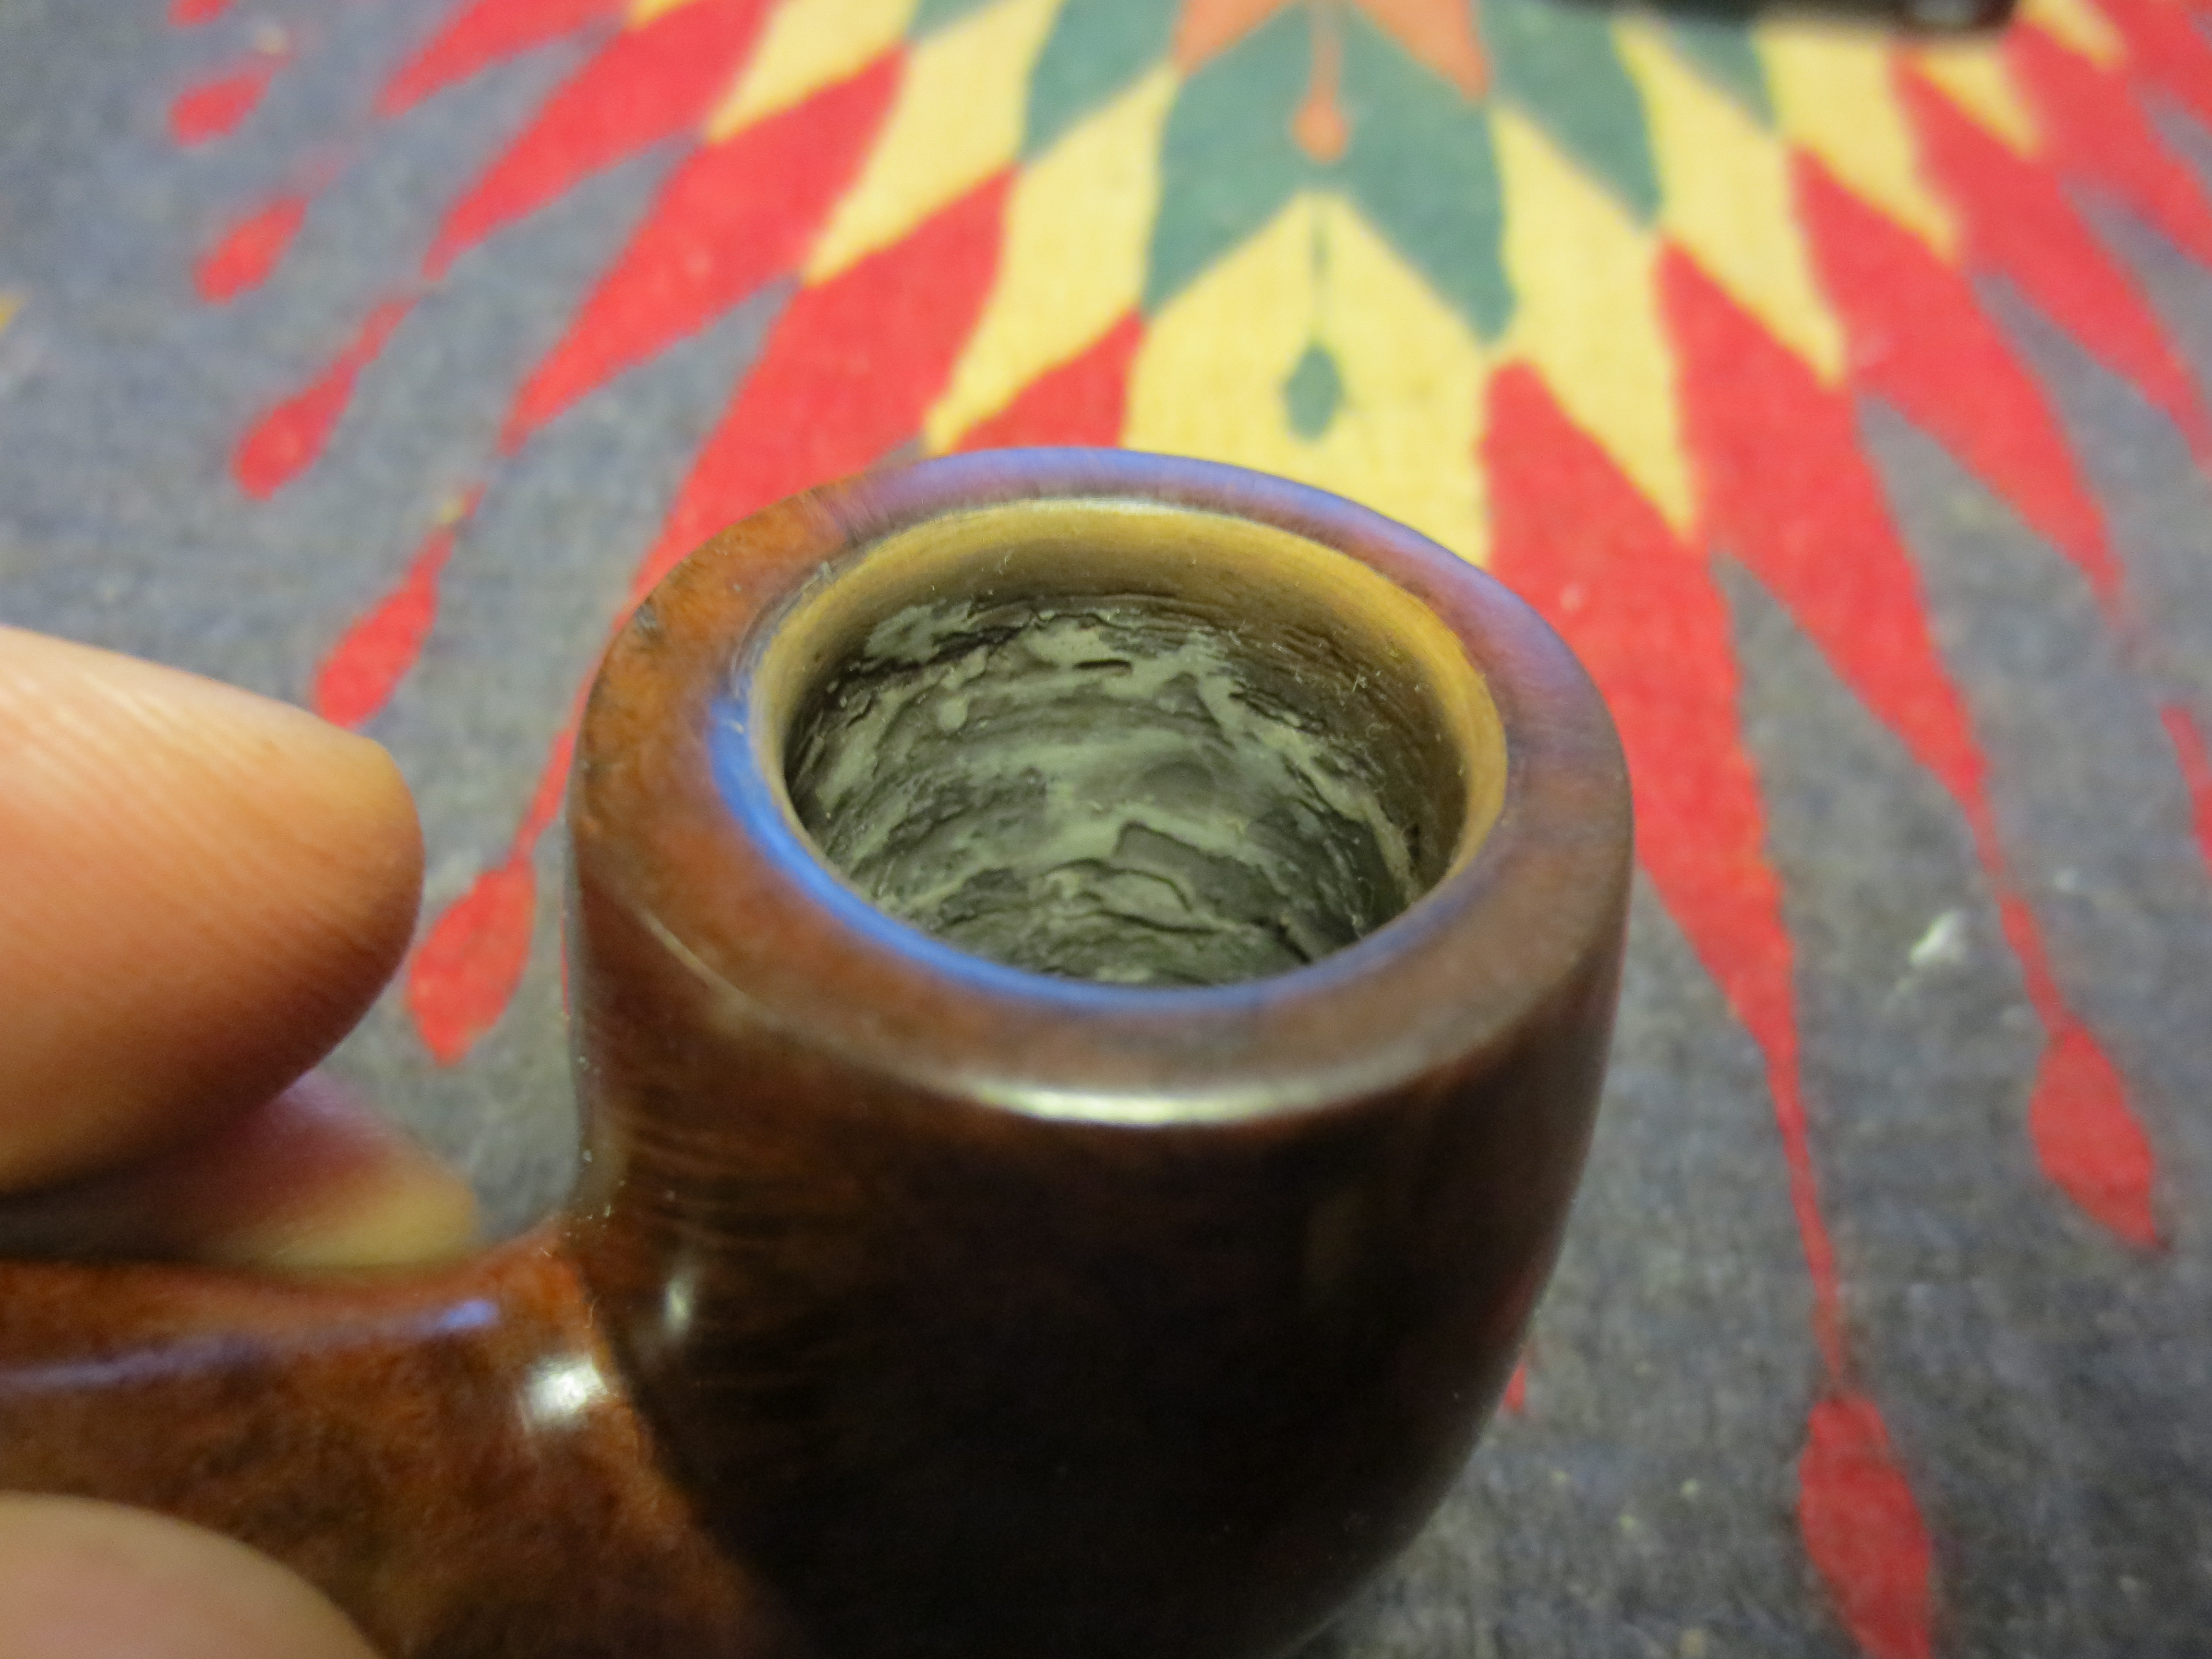
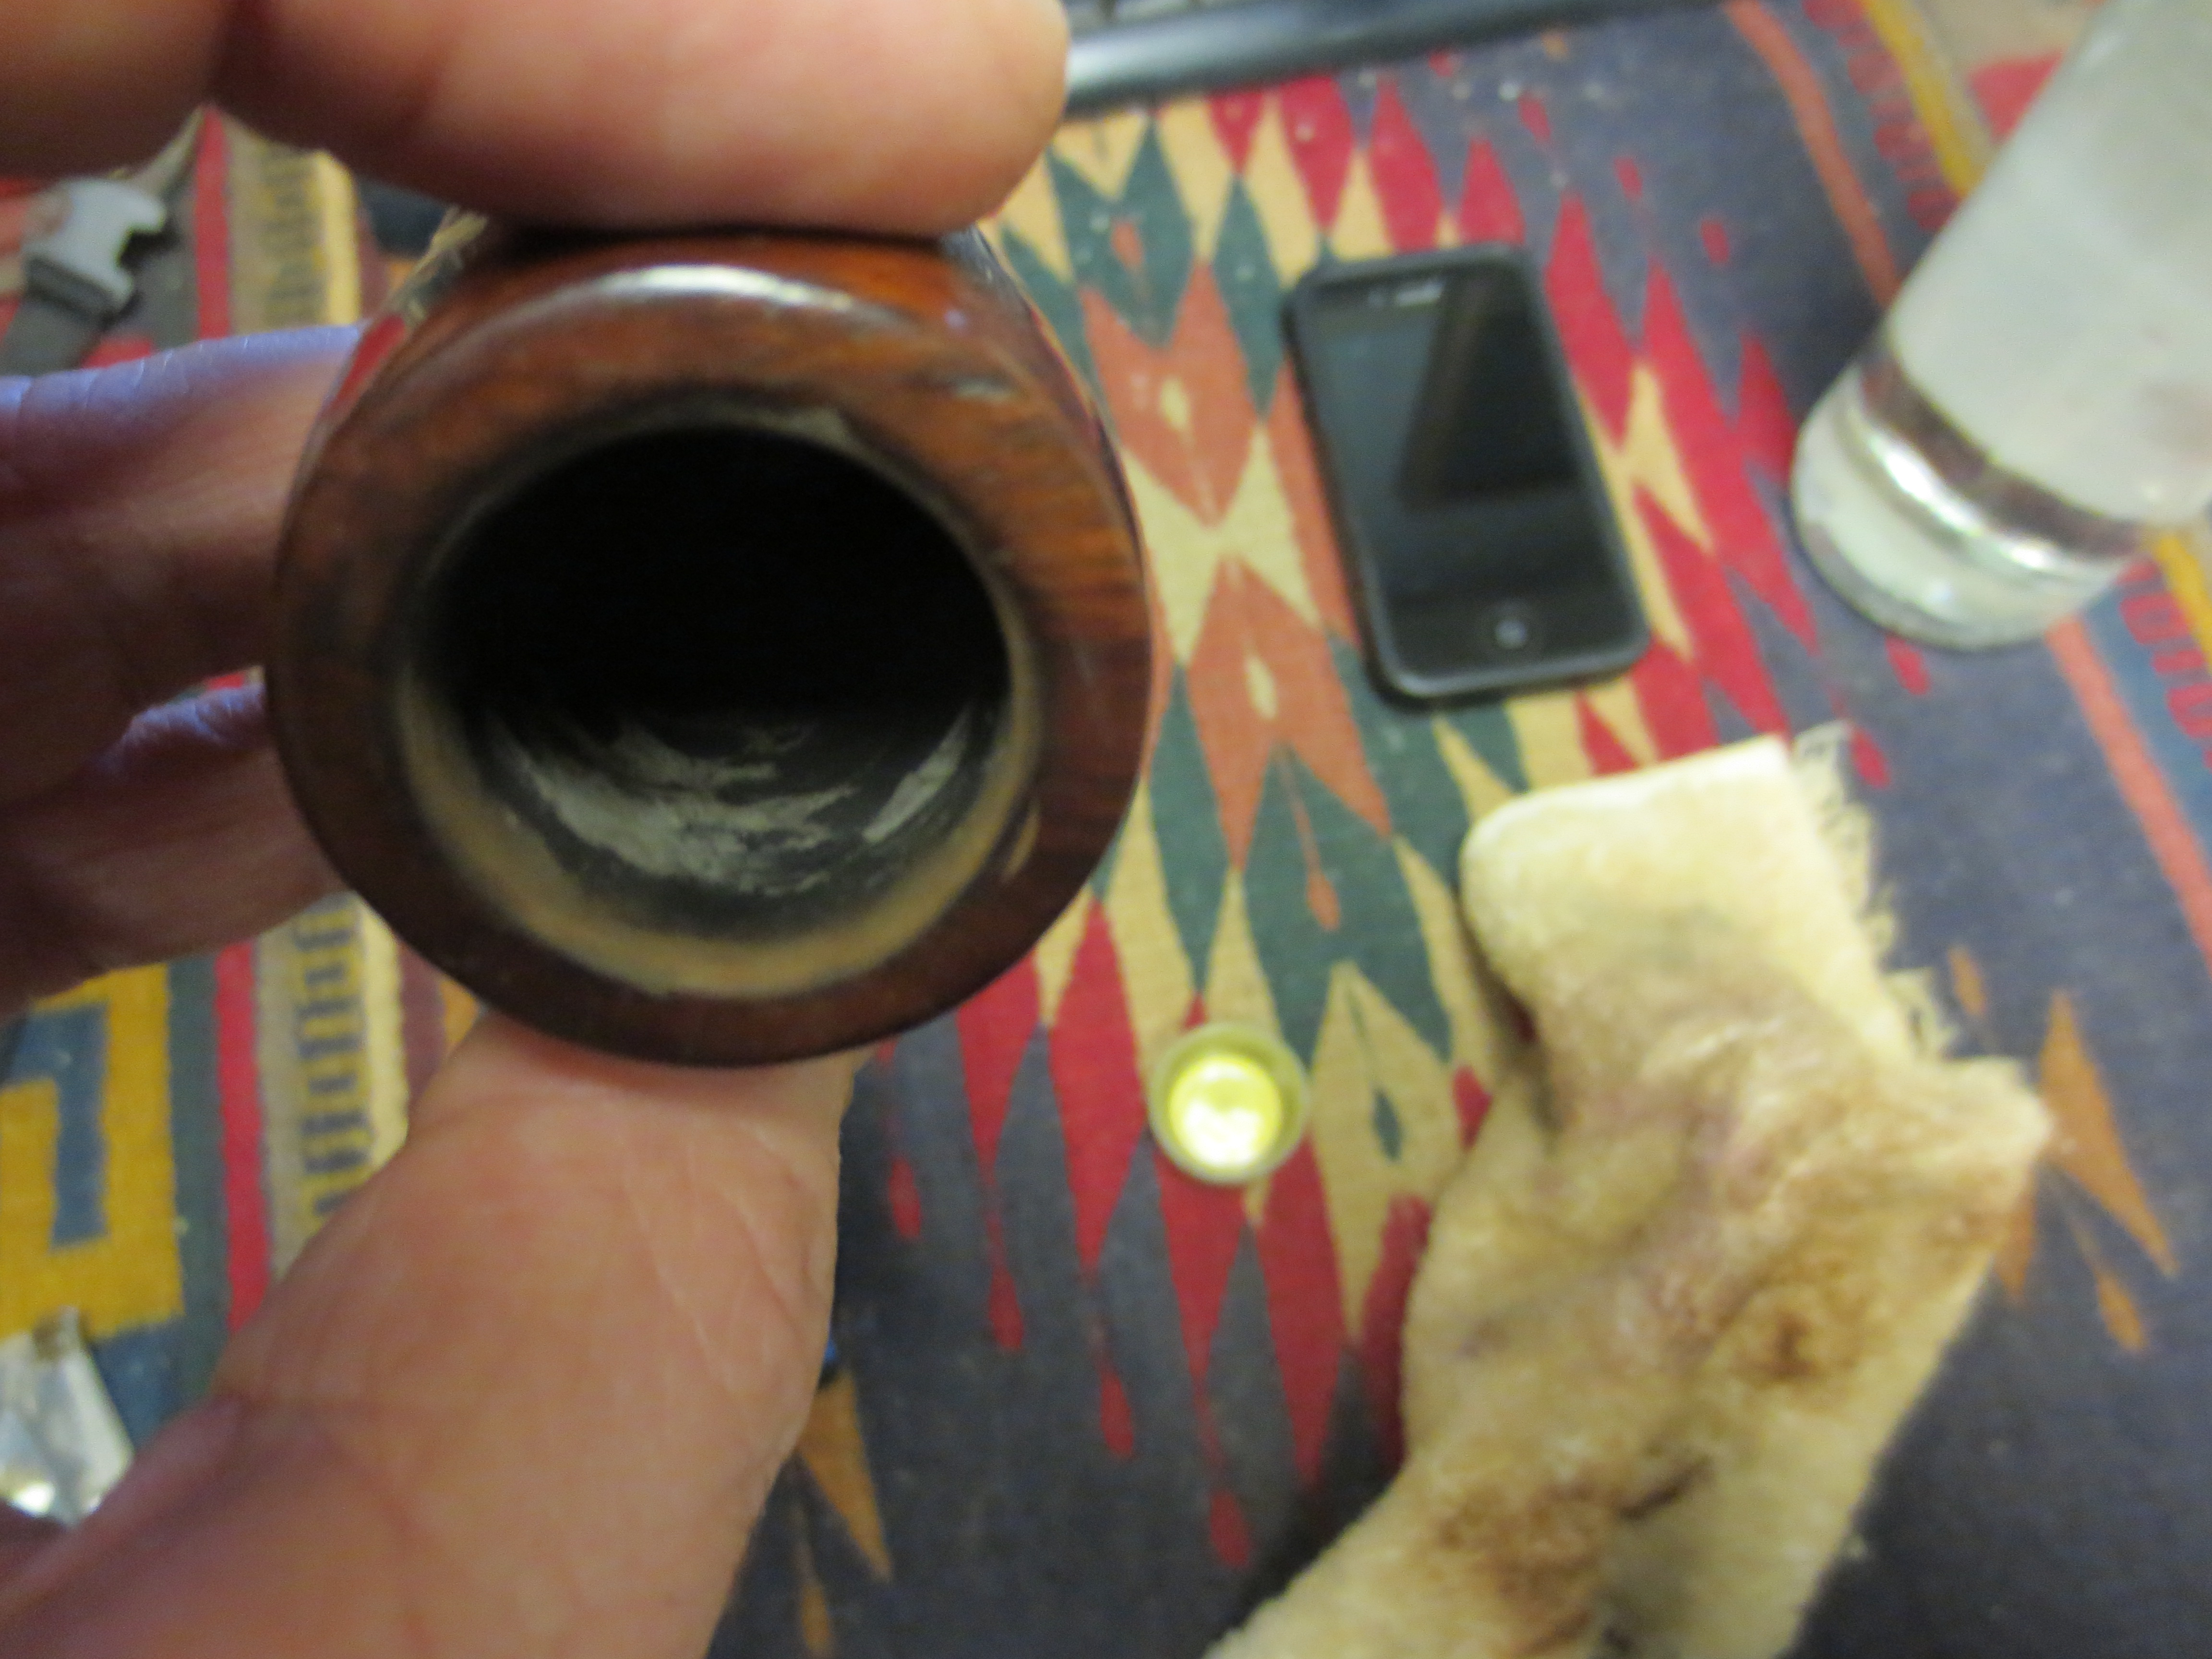
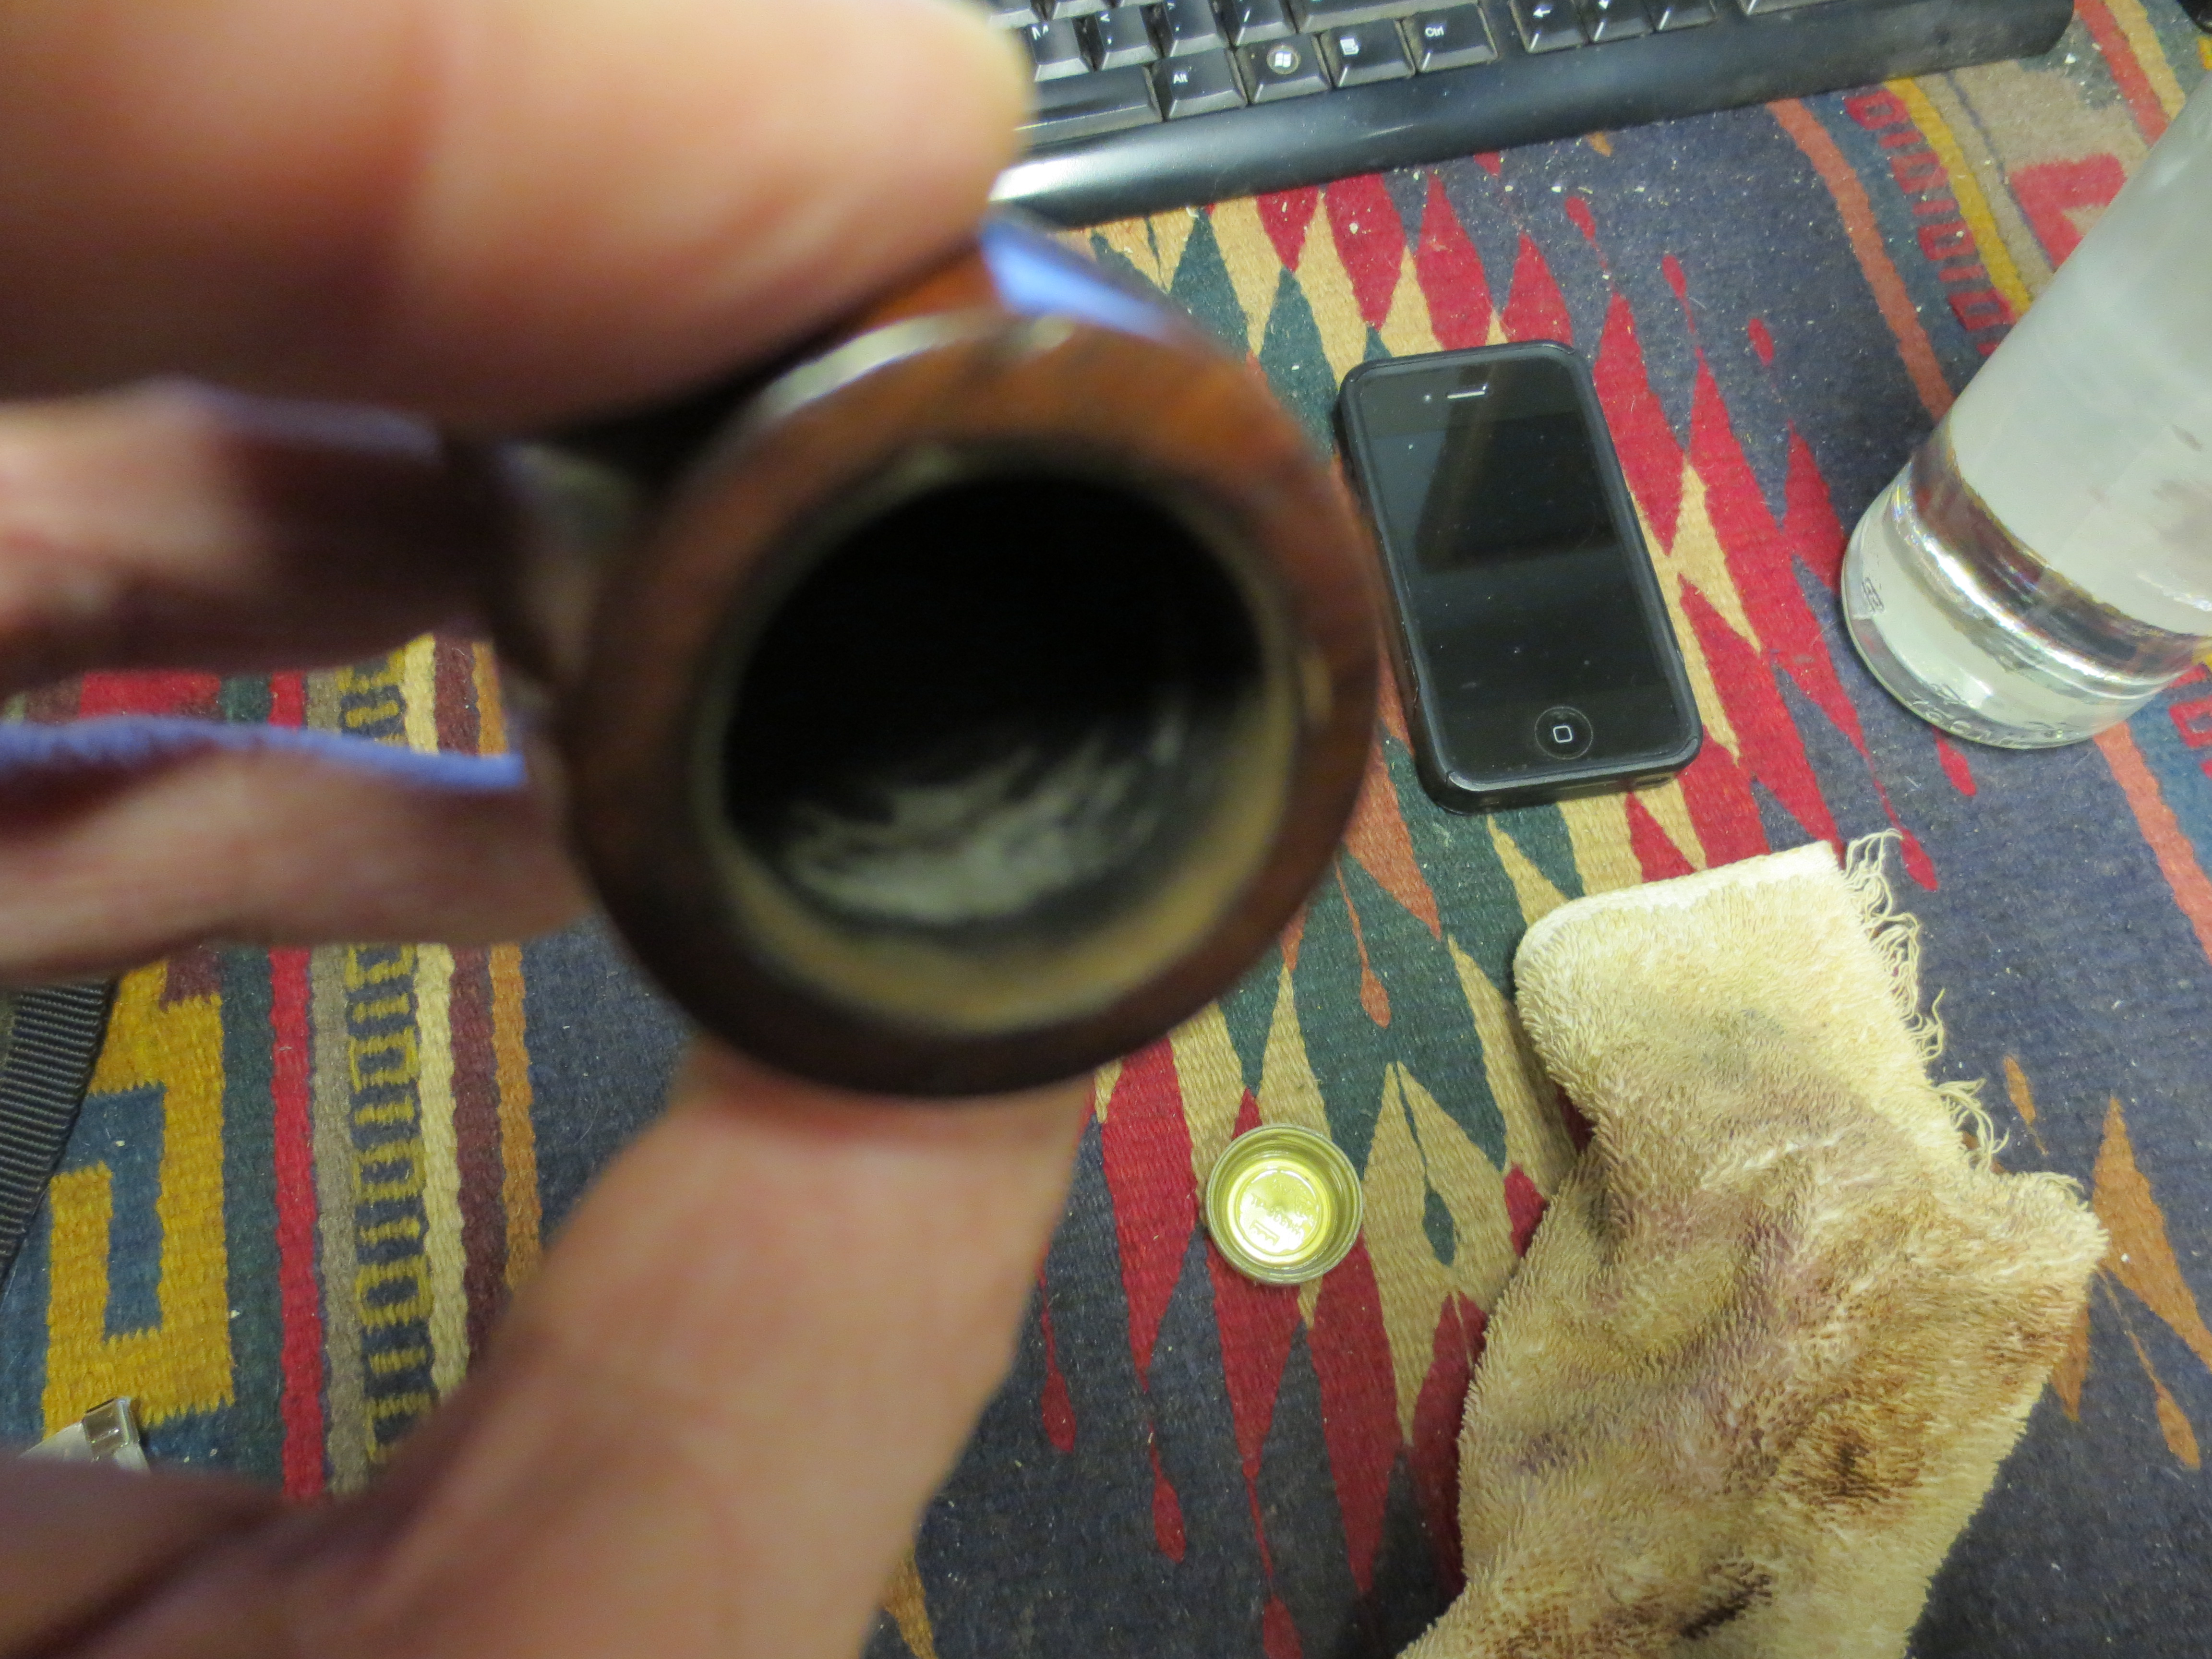
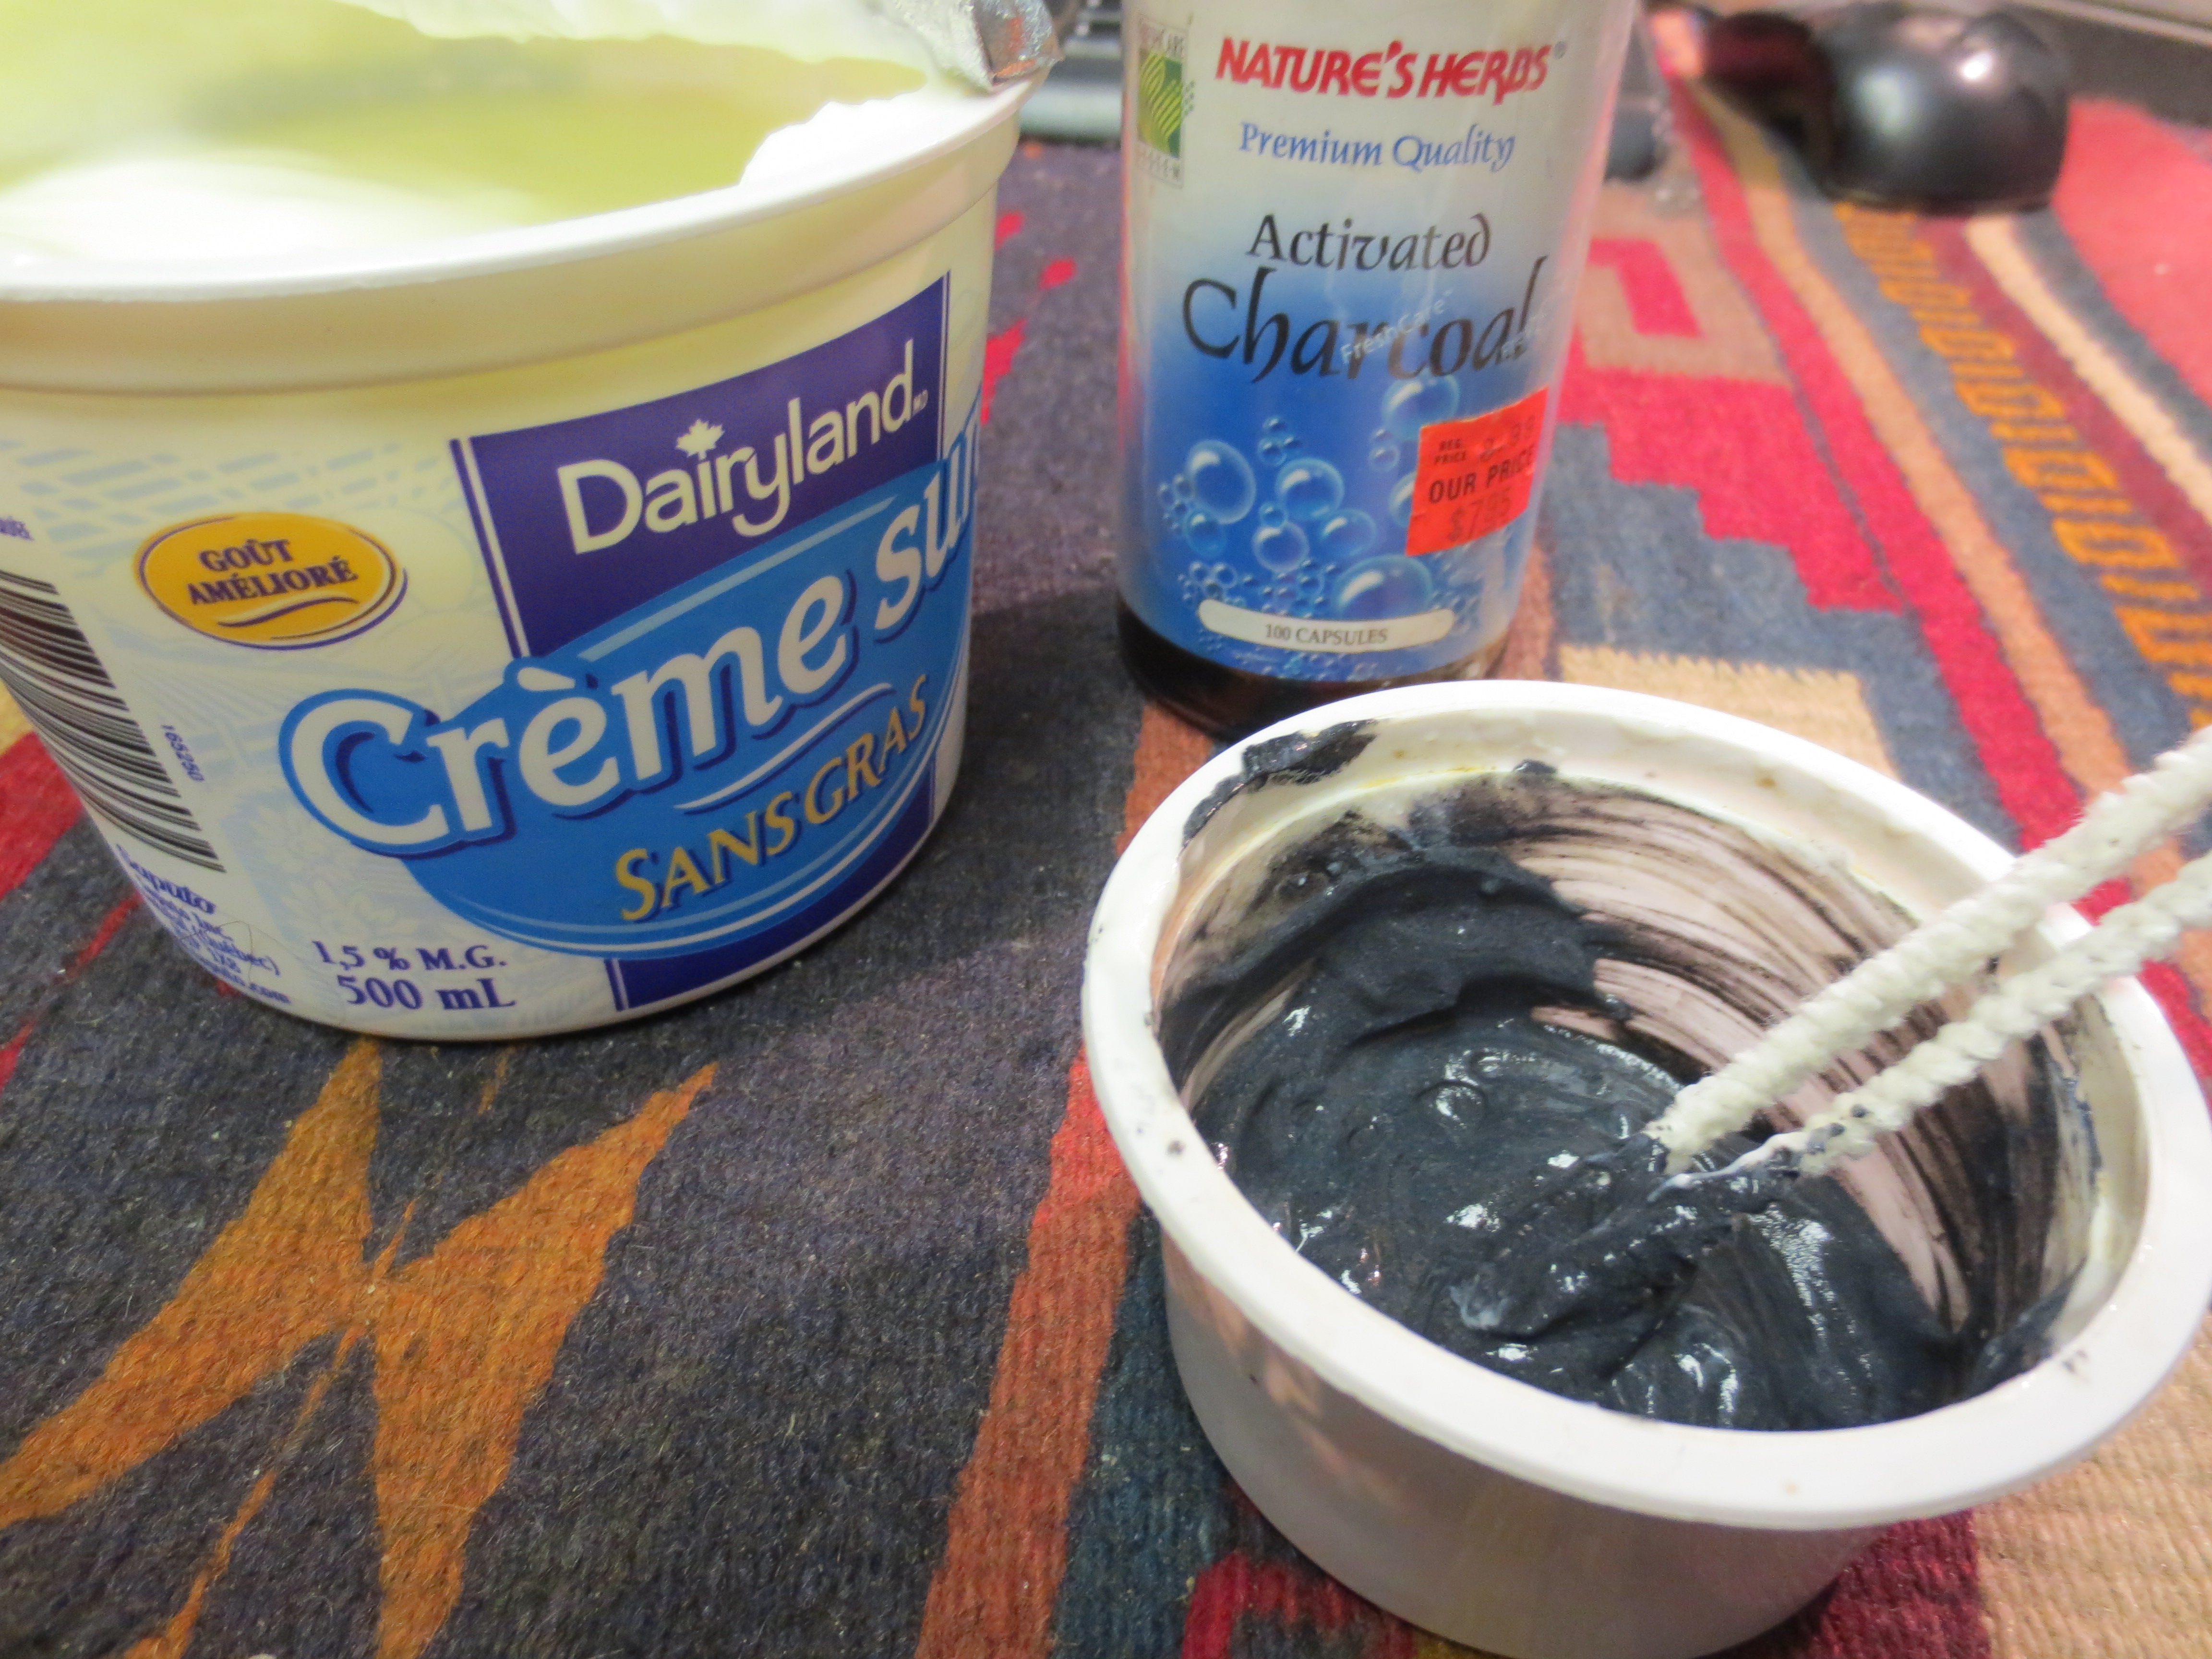
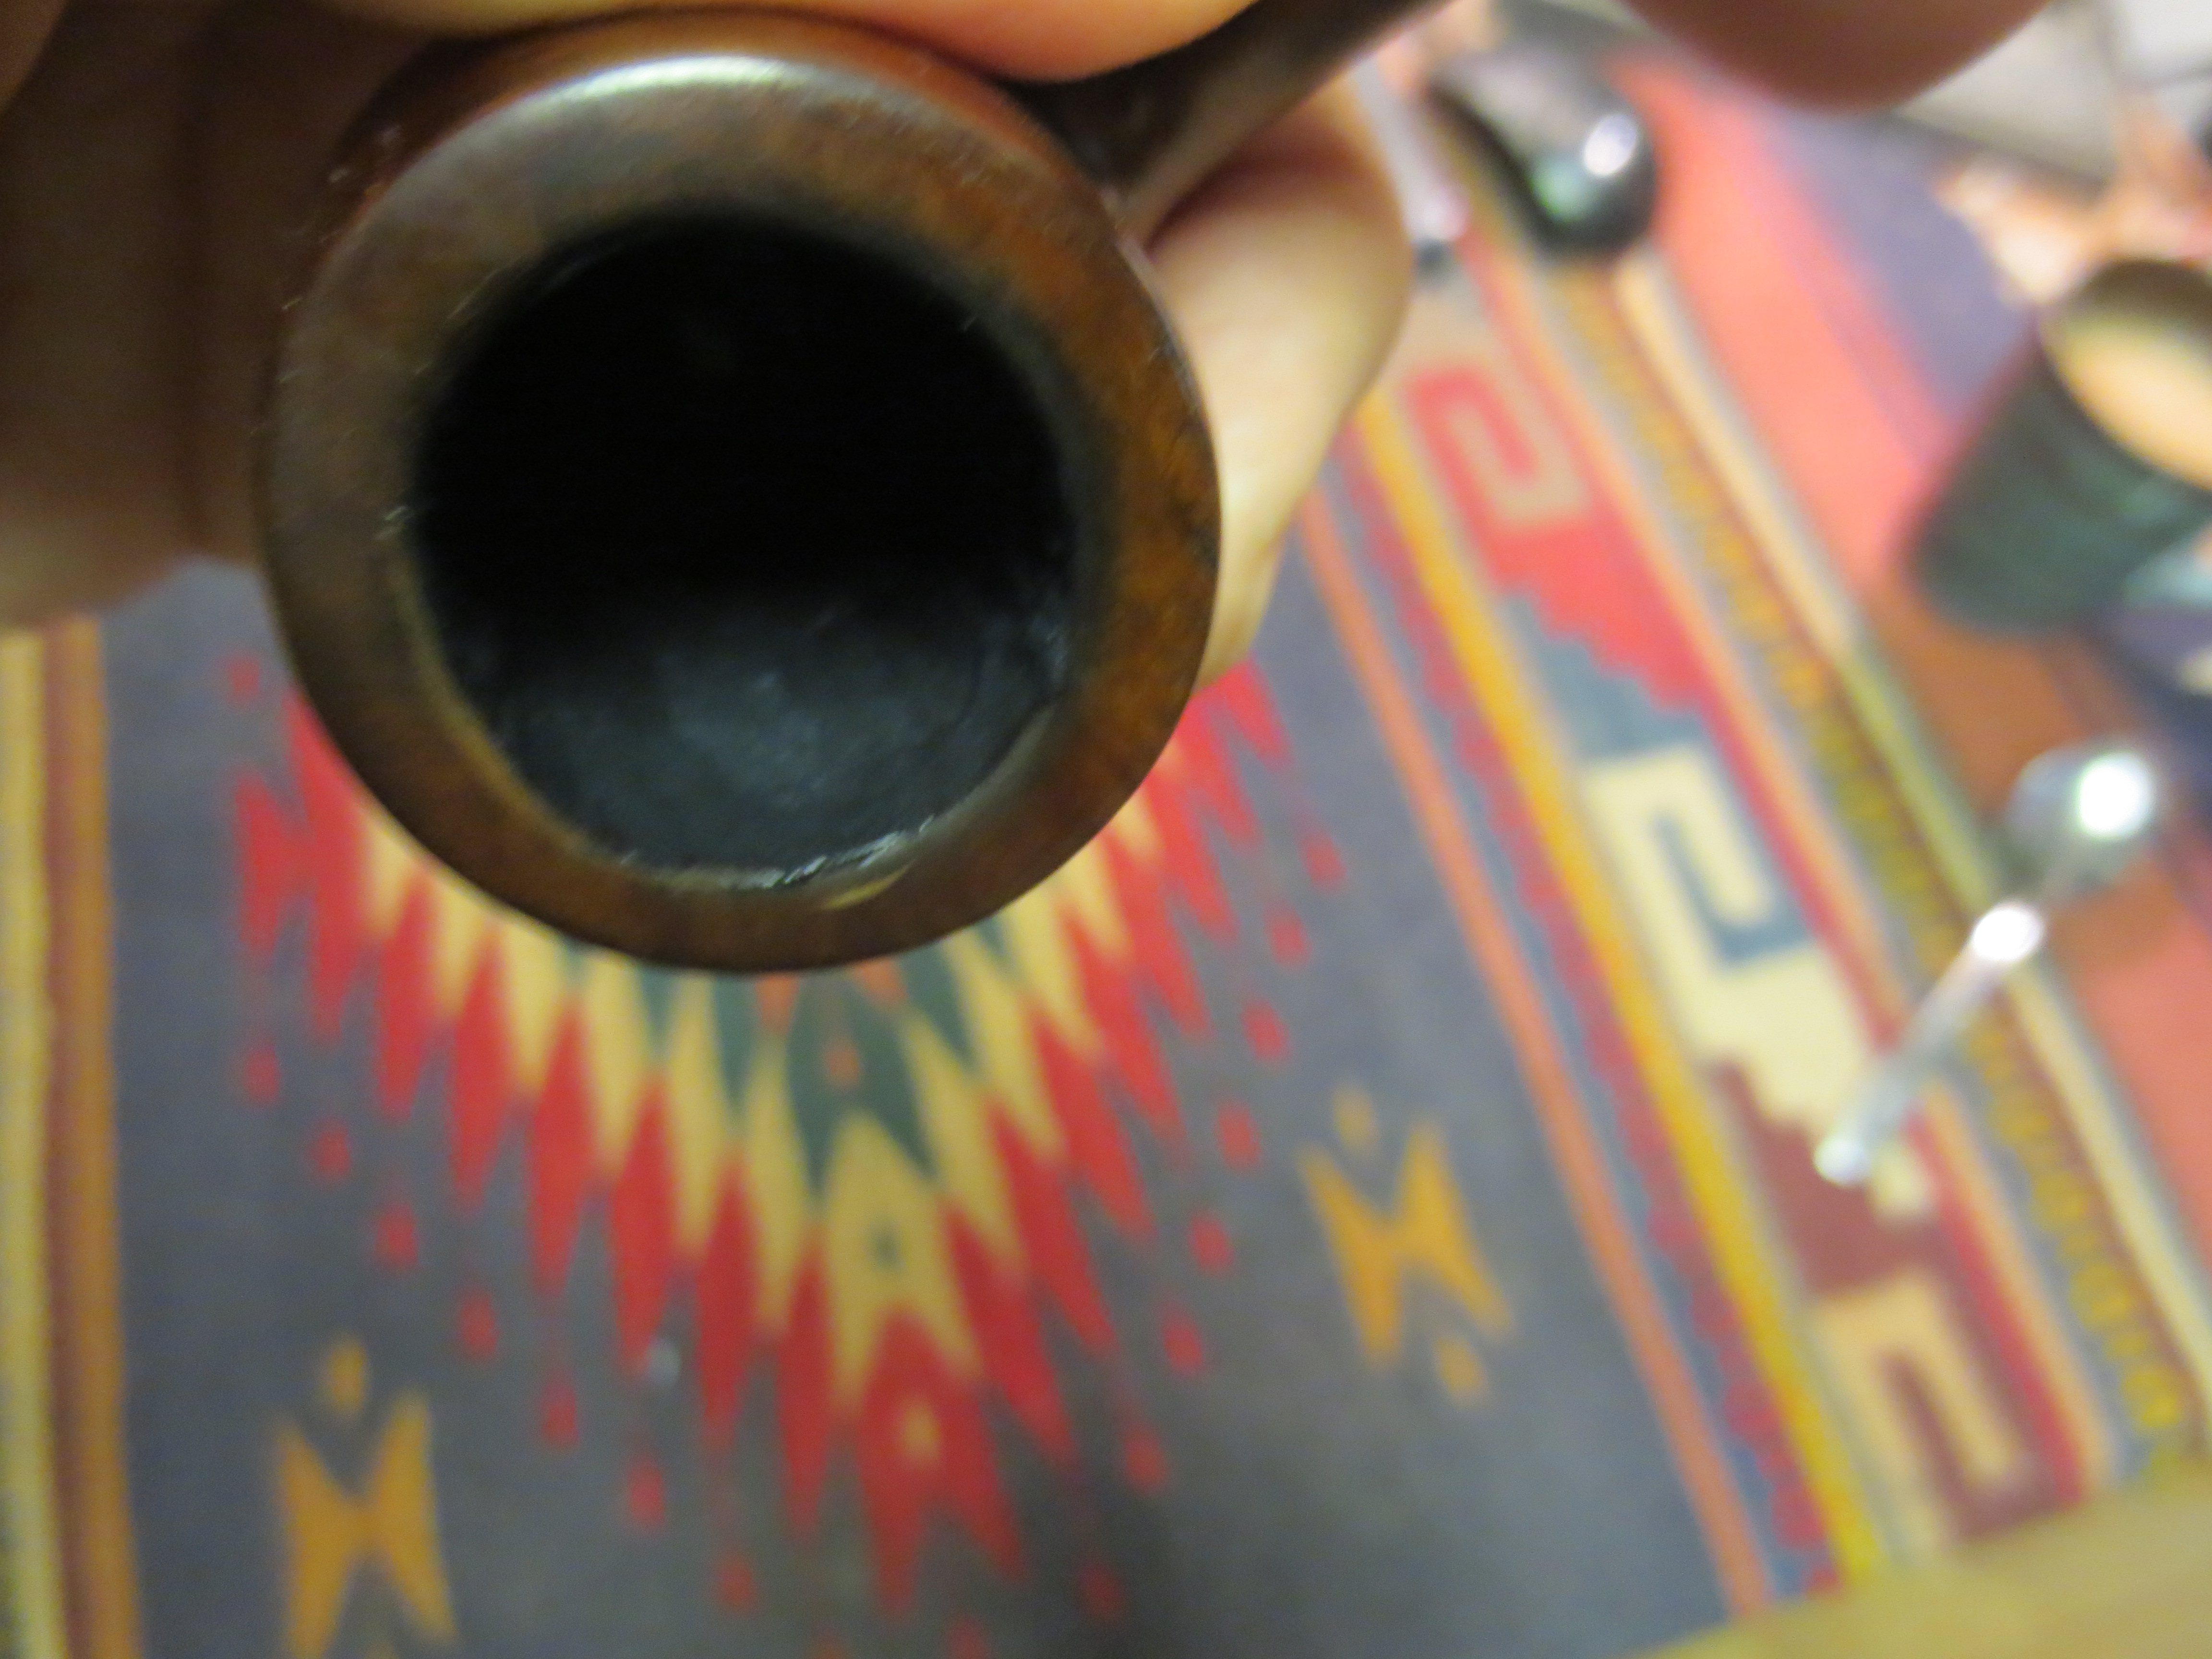
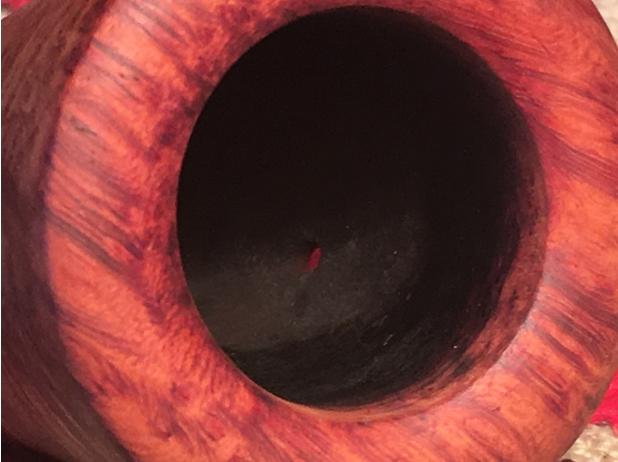
With the fire chamber cleaned I take a few close-ups looking specifically at the integrity of the wall.  The second picture below is oriented to the front where the burn would be.  Using my pinky finger, I feel the texture of the wall and I don’t detect any internal burns or soft spots but there is a bit of a rounded area toward the external burn area – thinning wall?  The natural ‘horn’ curvature could potentially lean toward a thinning of the front of the stummel if the fire chamber expands – burns or excessive reaming?  I will need to add a protective layer with either Pipe Mud or a Sour Cream/Yogurt Charcoal mix to coat the fire chamber wall – especially in the front area. This will be necessary if this little pipe tends to overheat.  short14
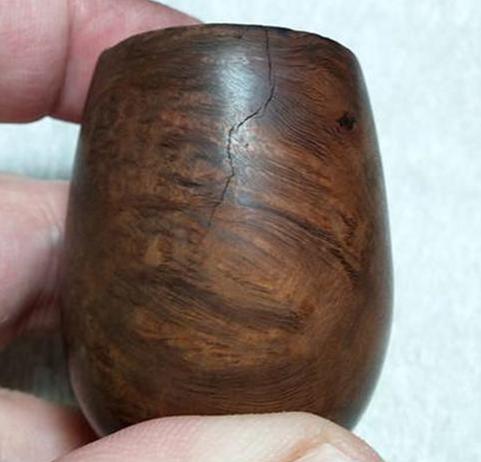
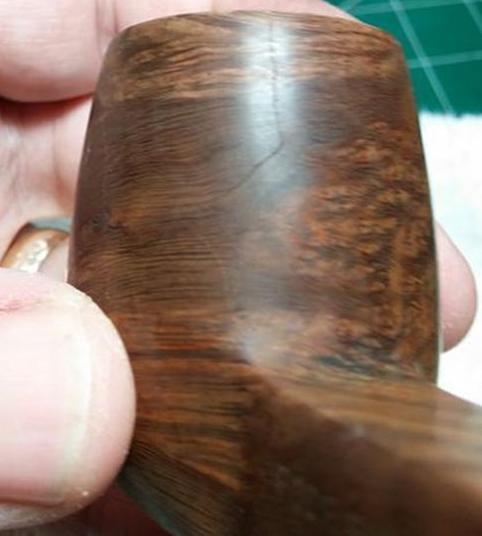
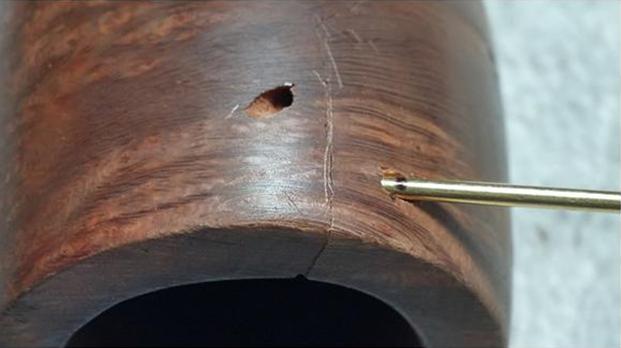
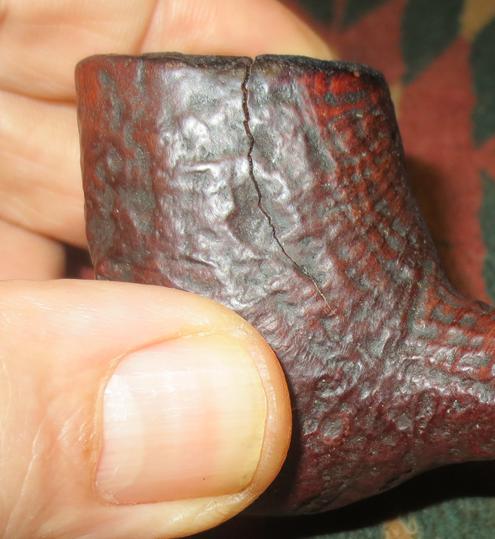
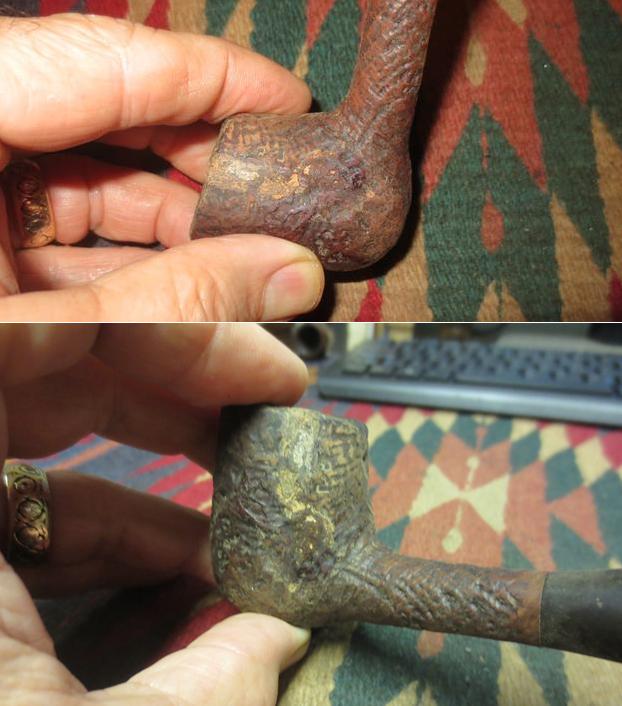
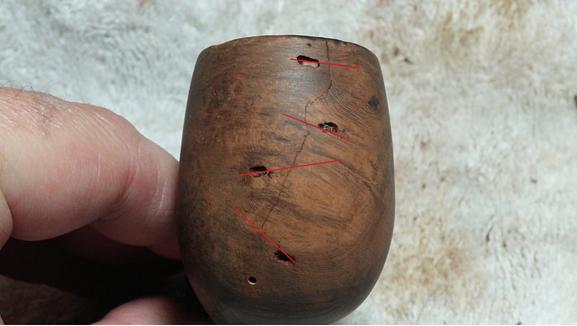
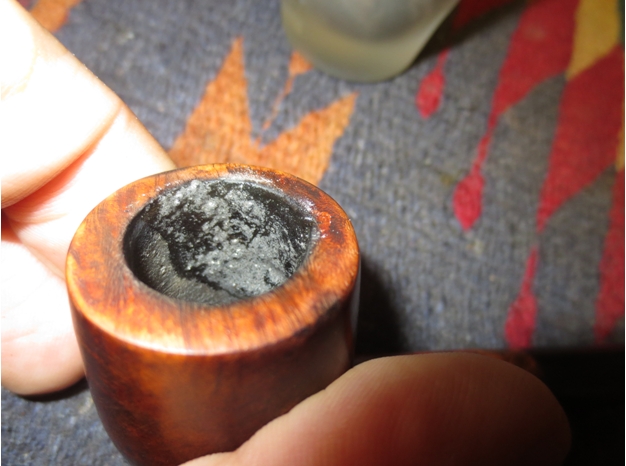
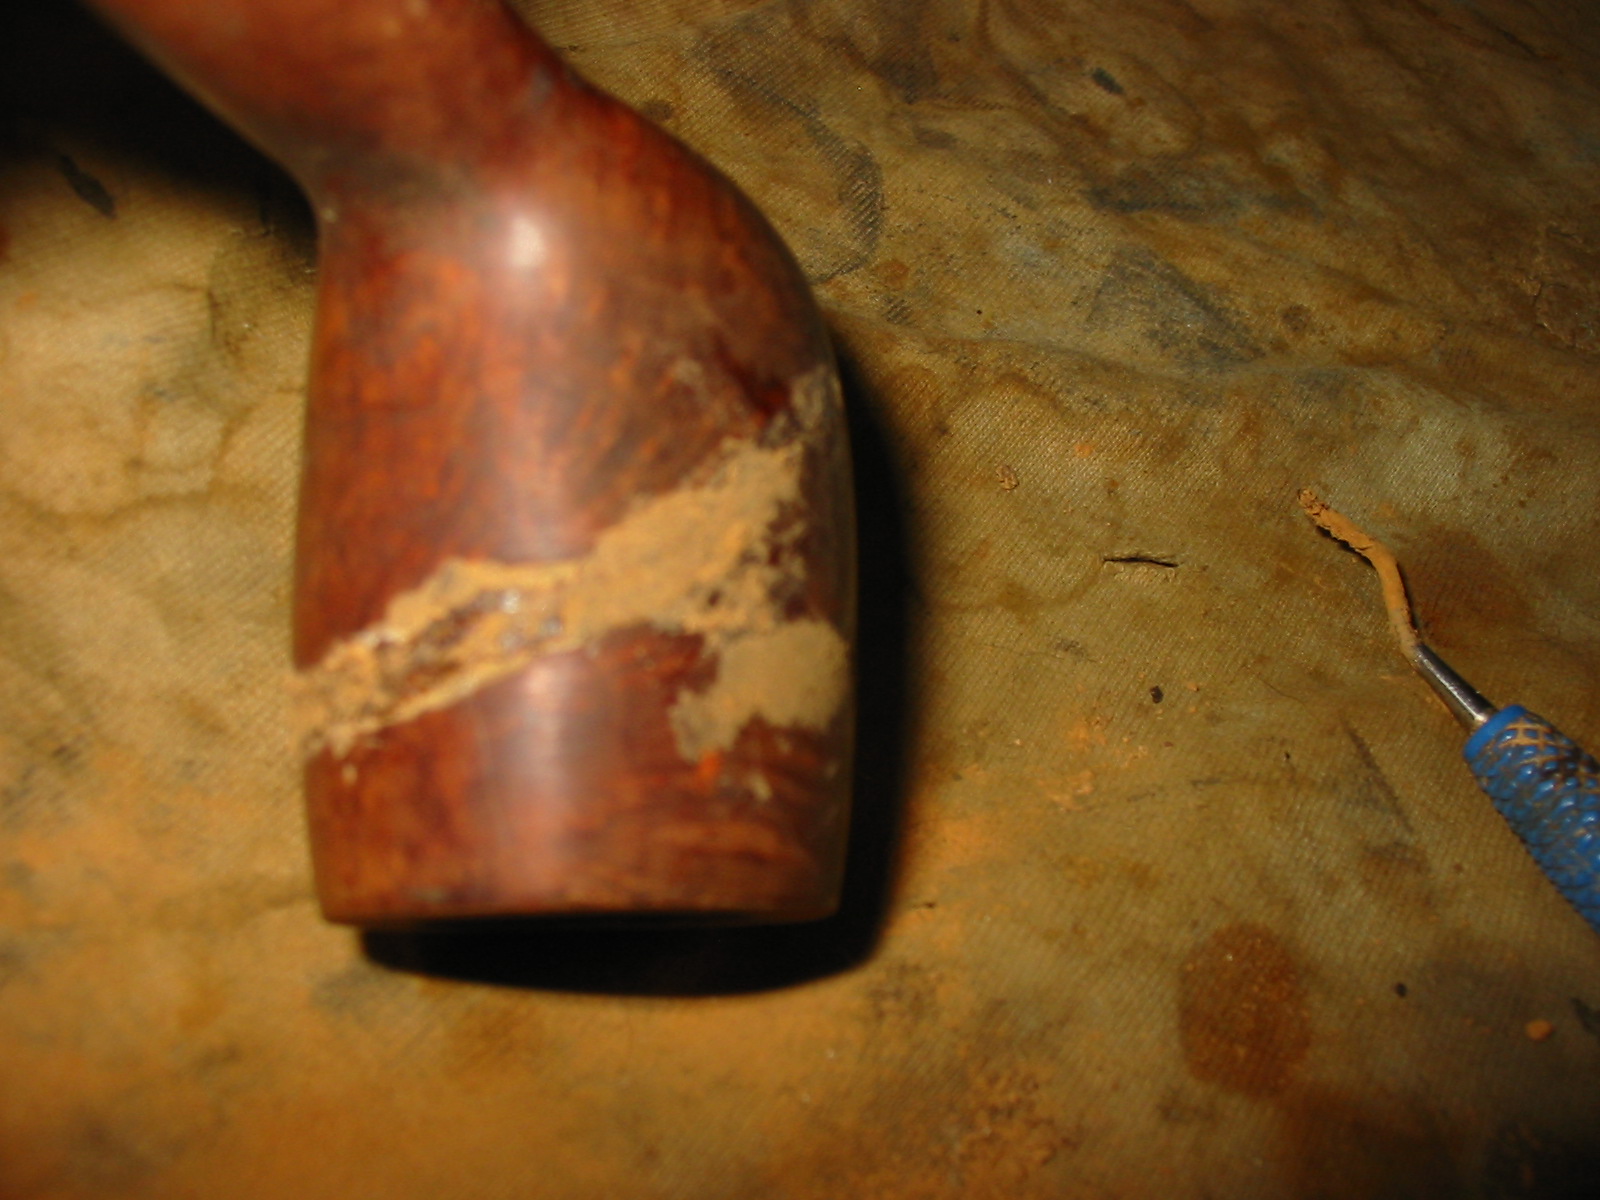
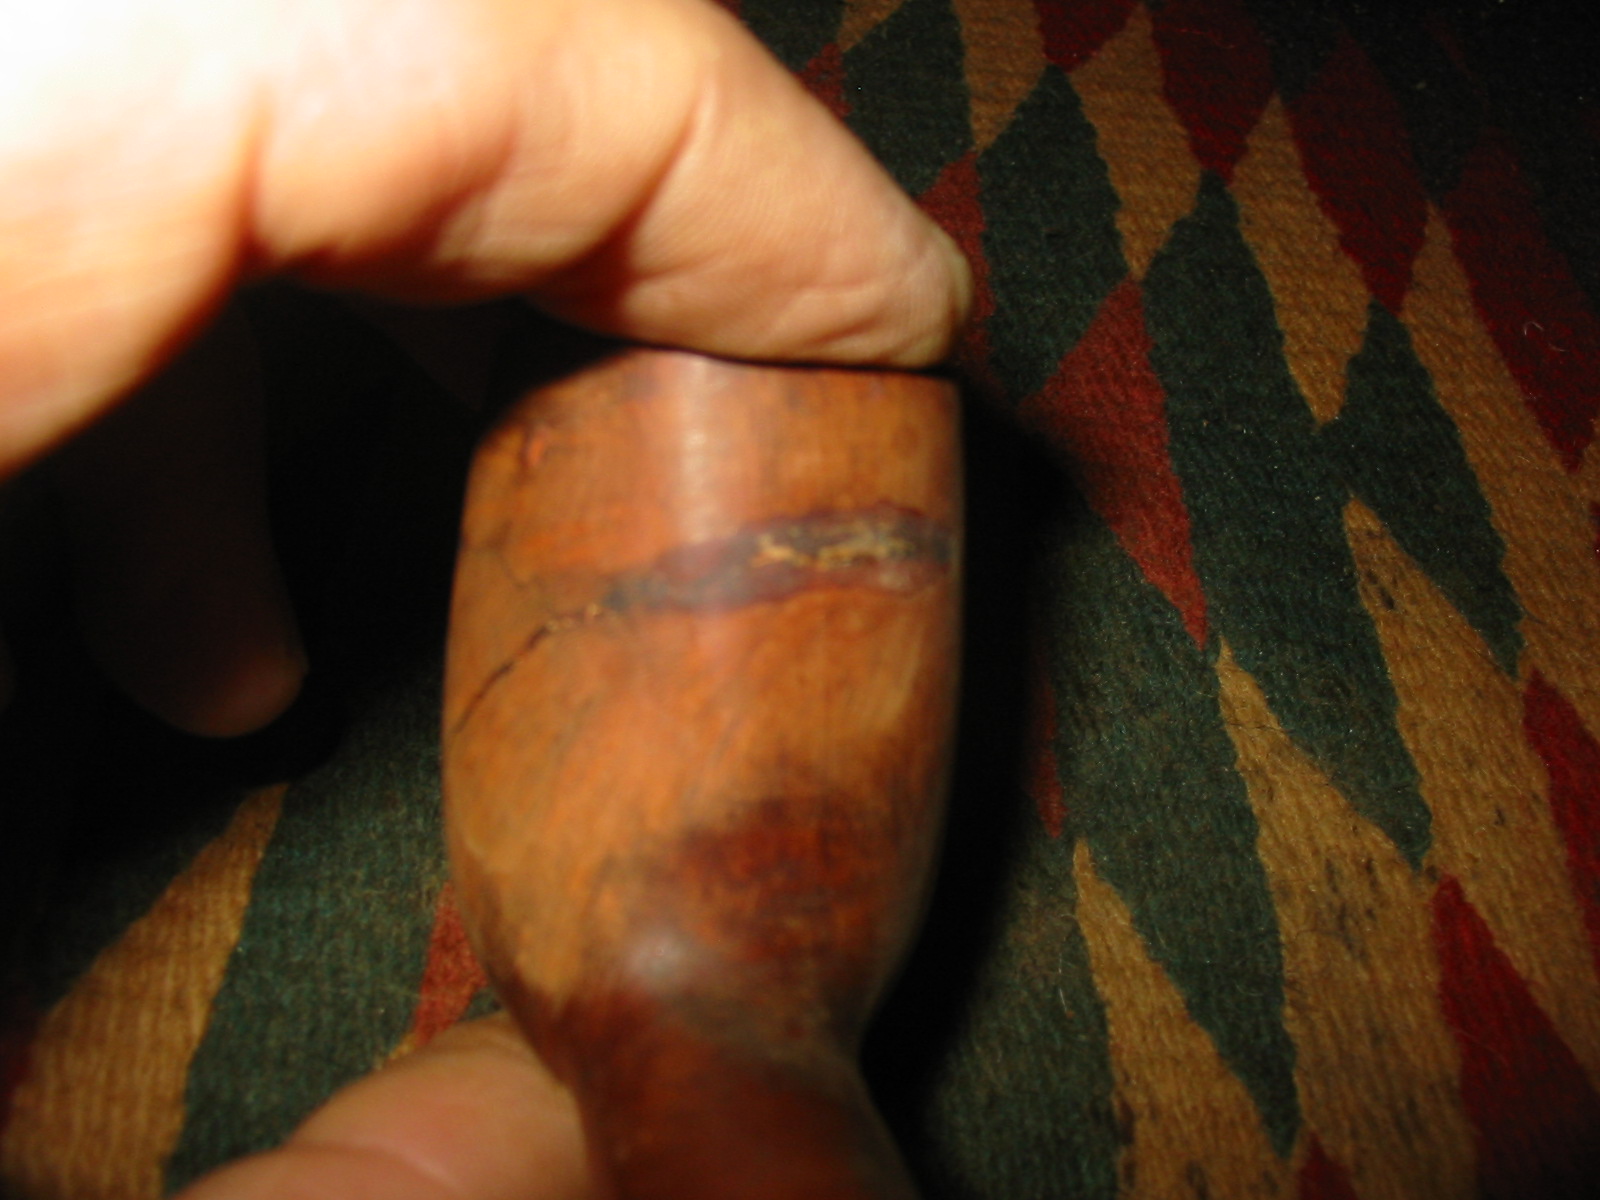
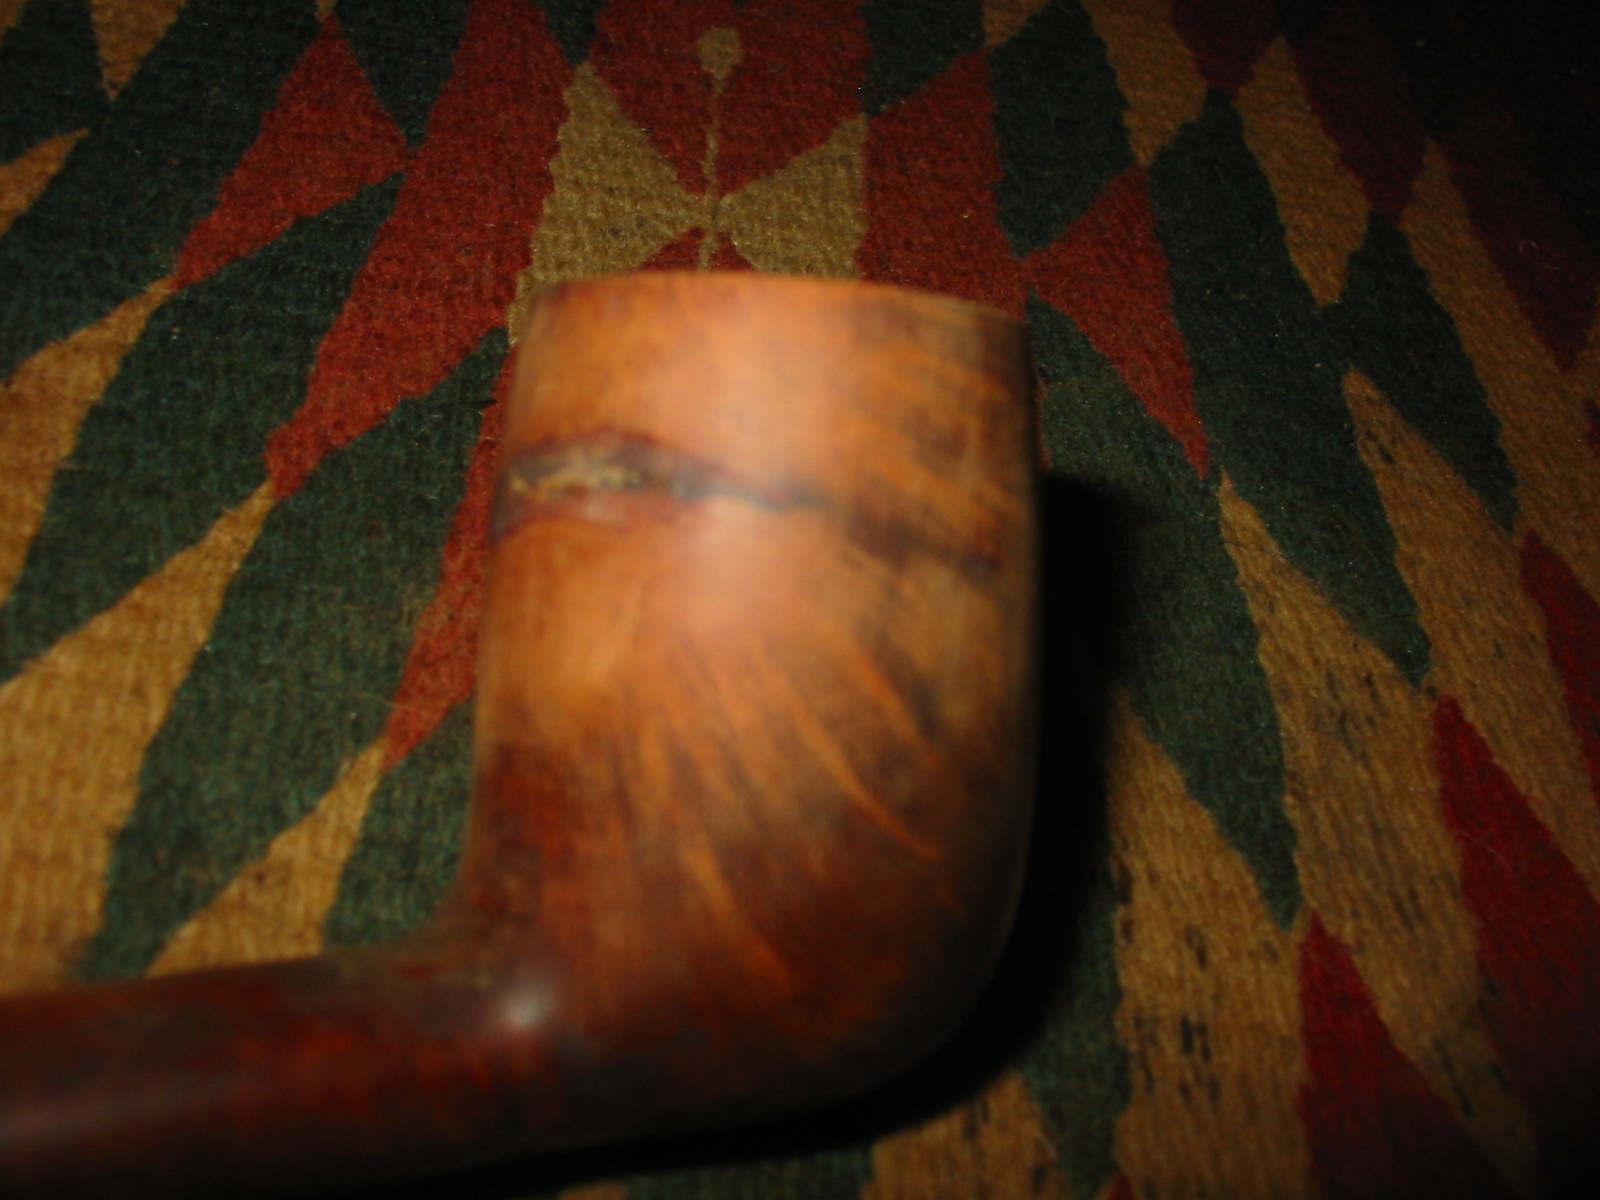
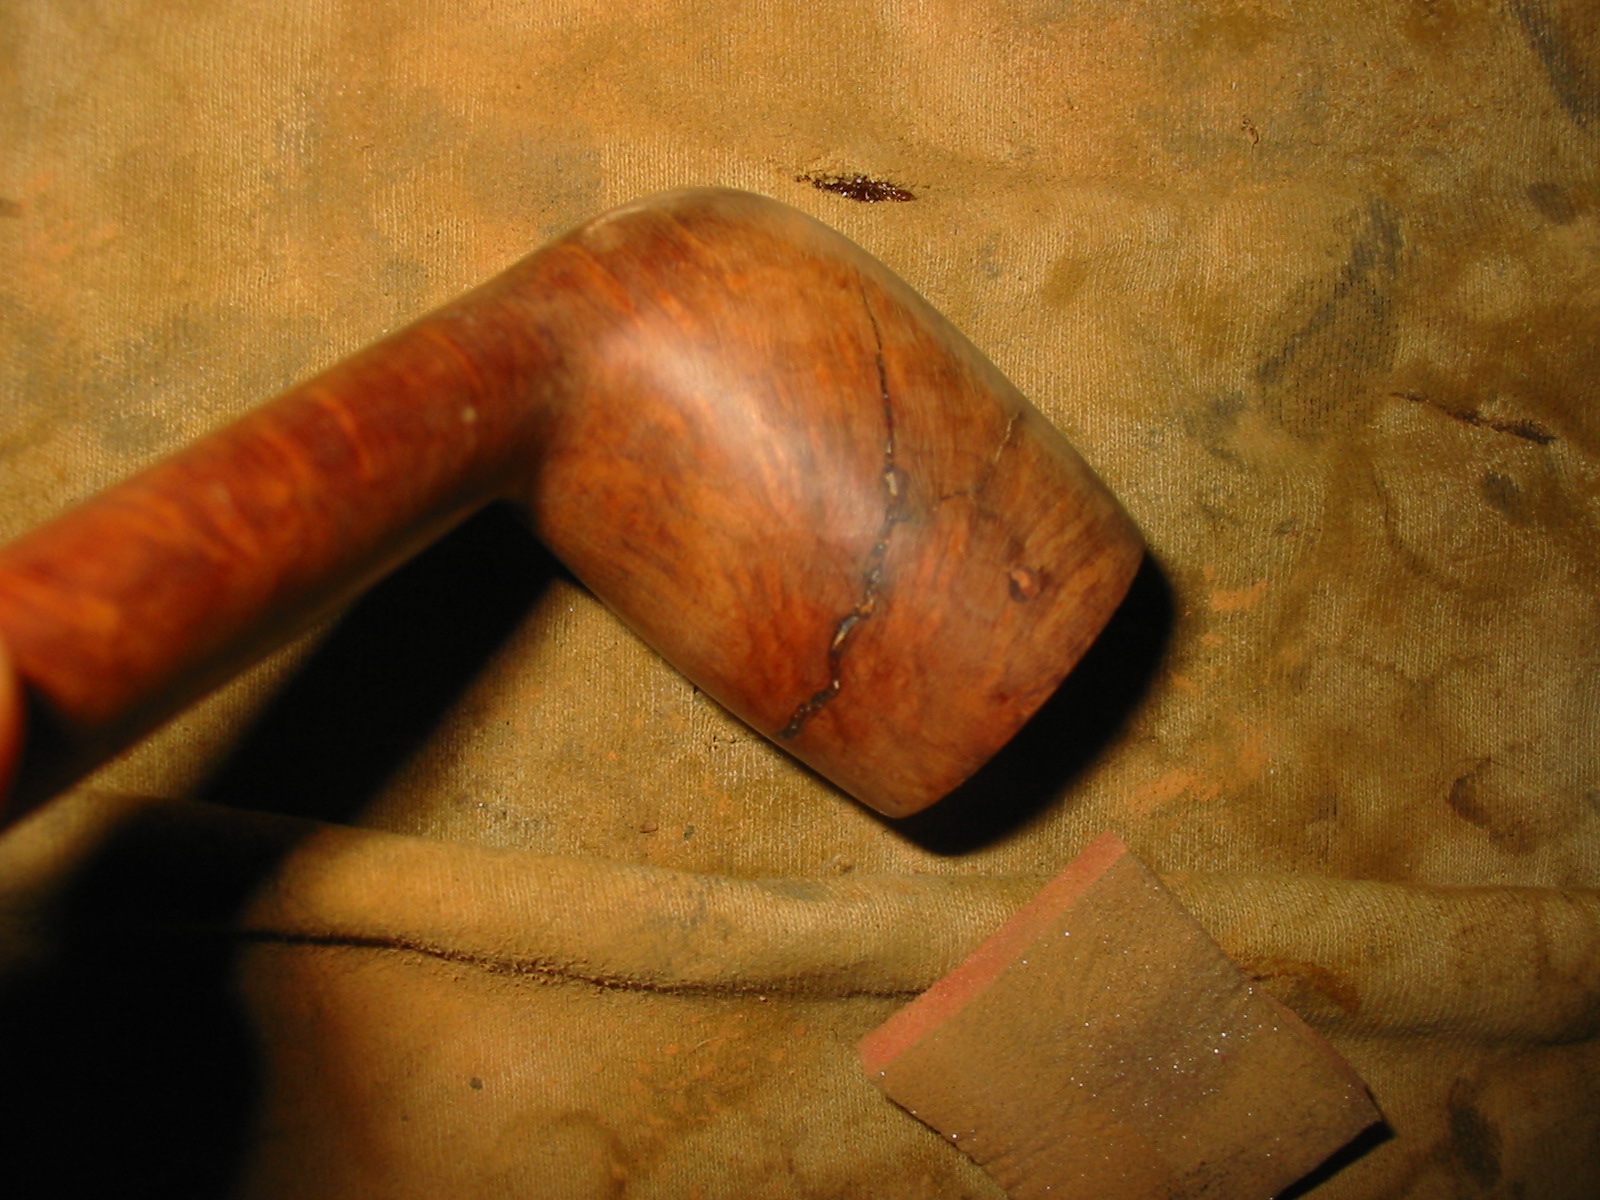
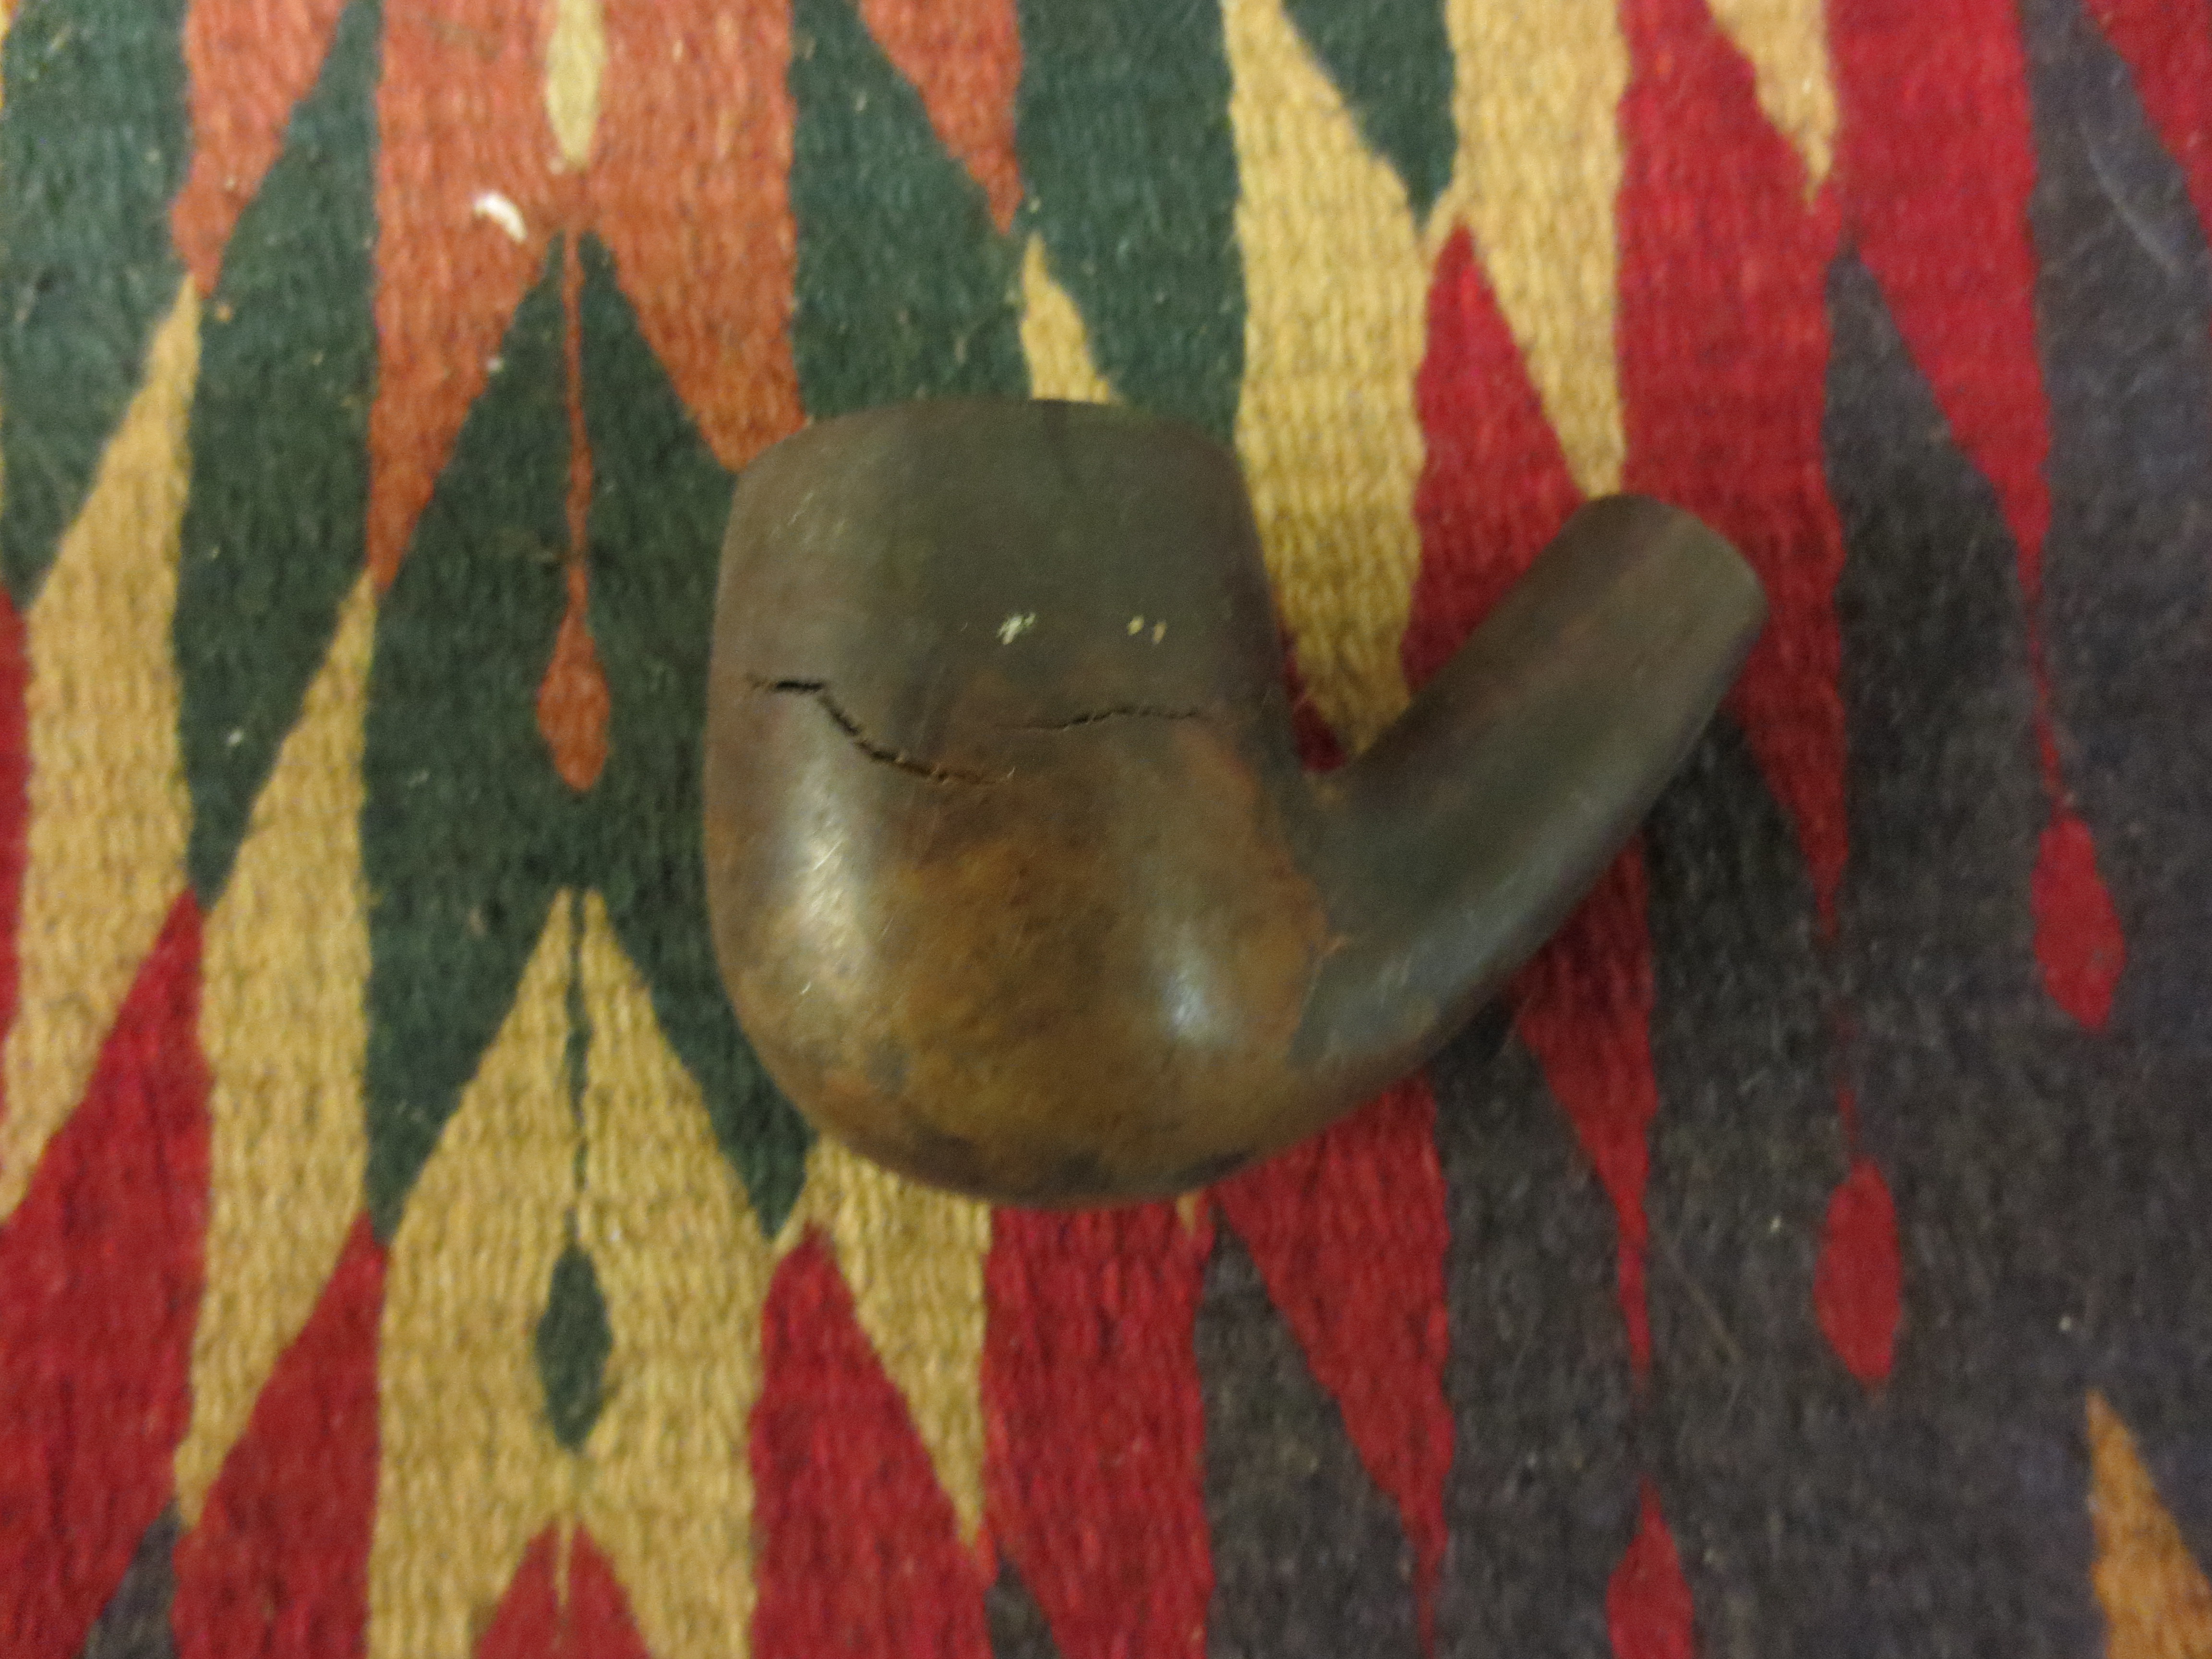
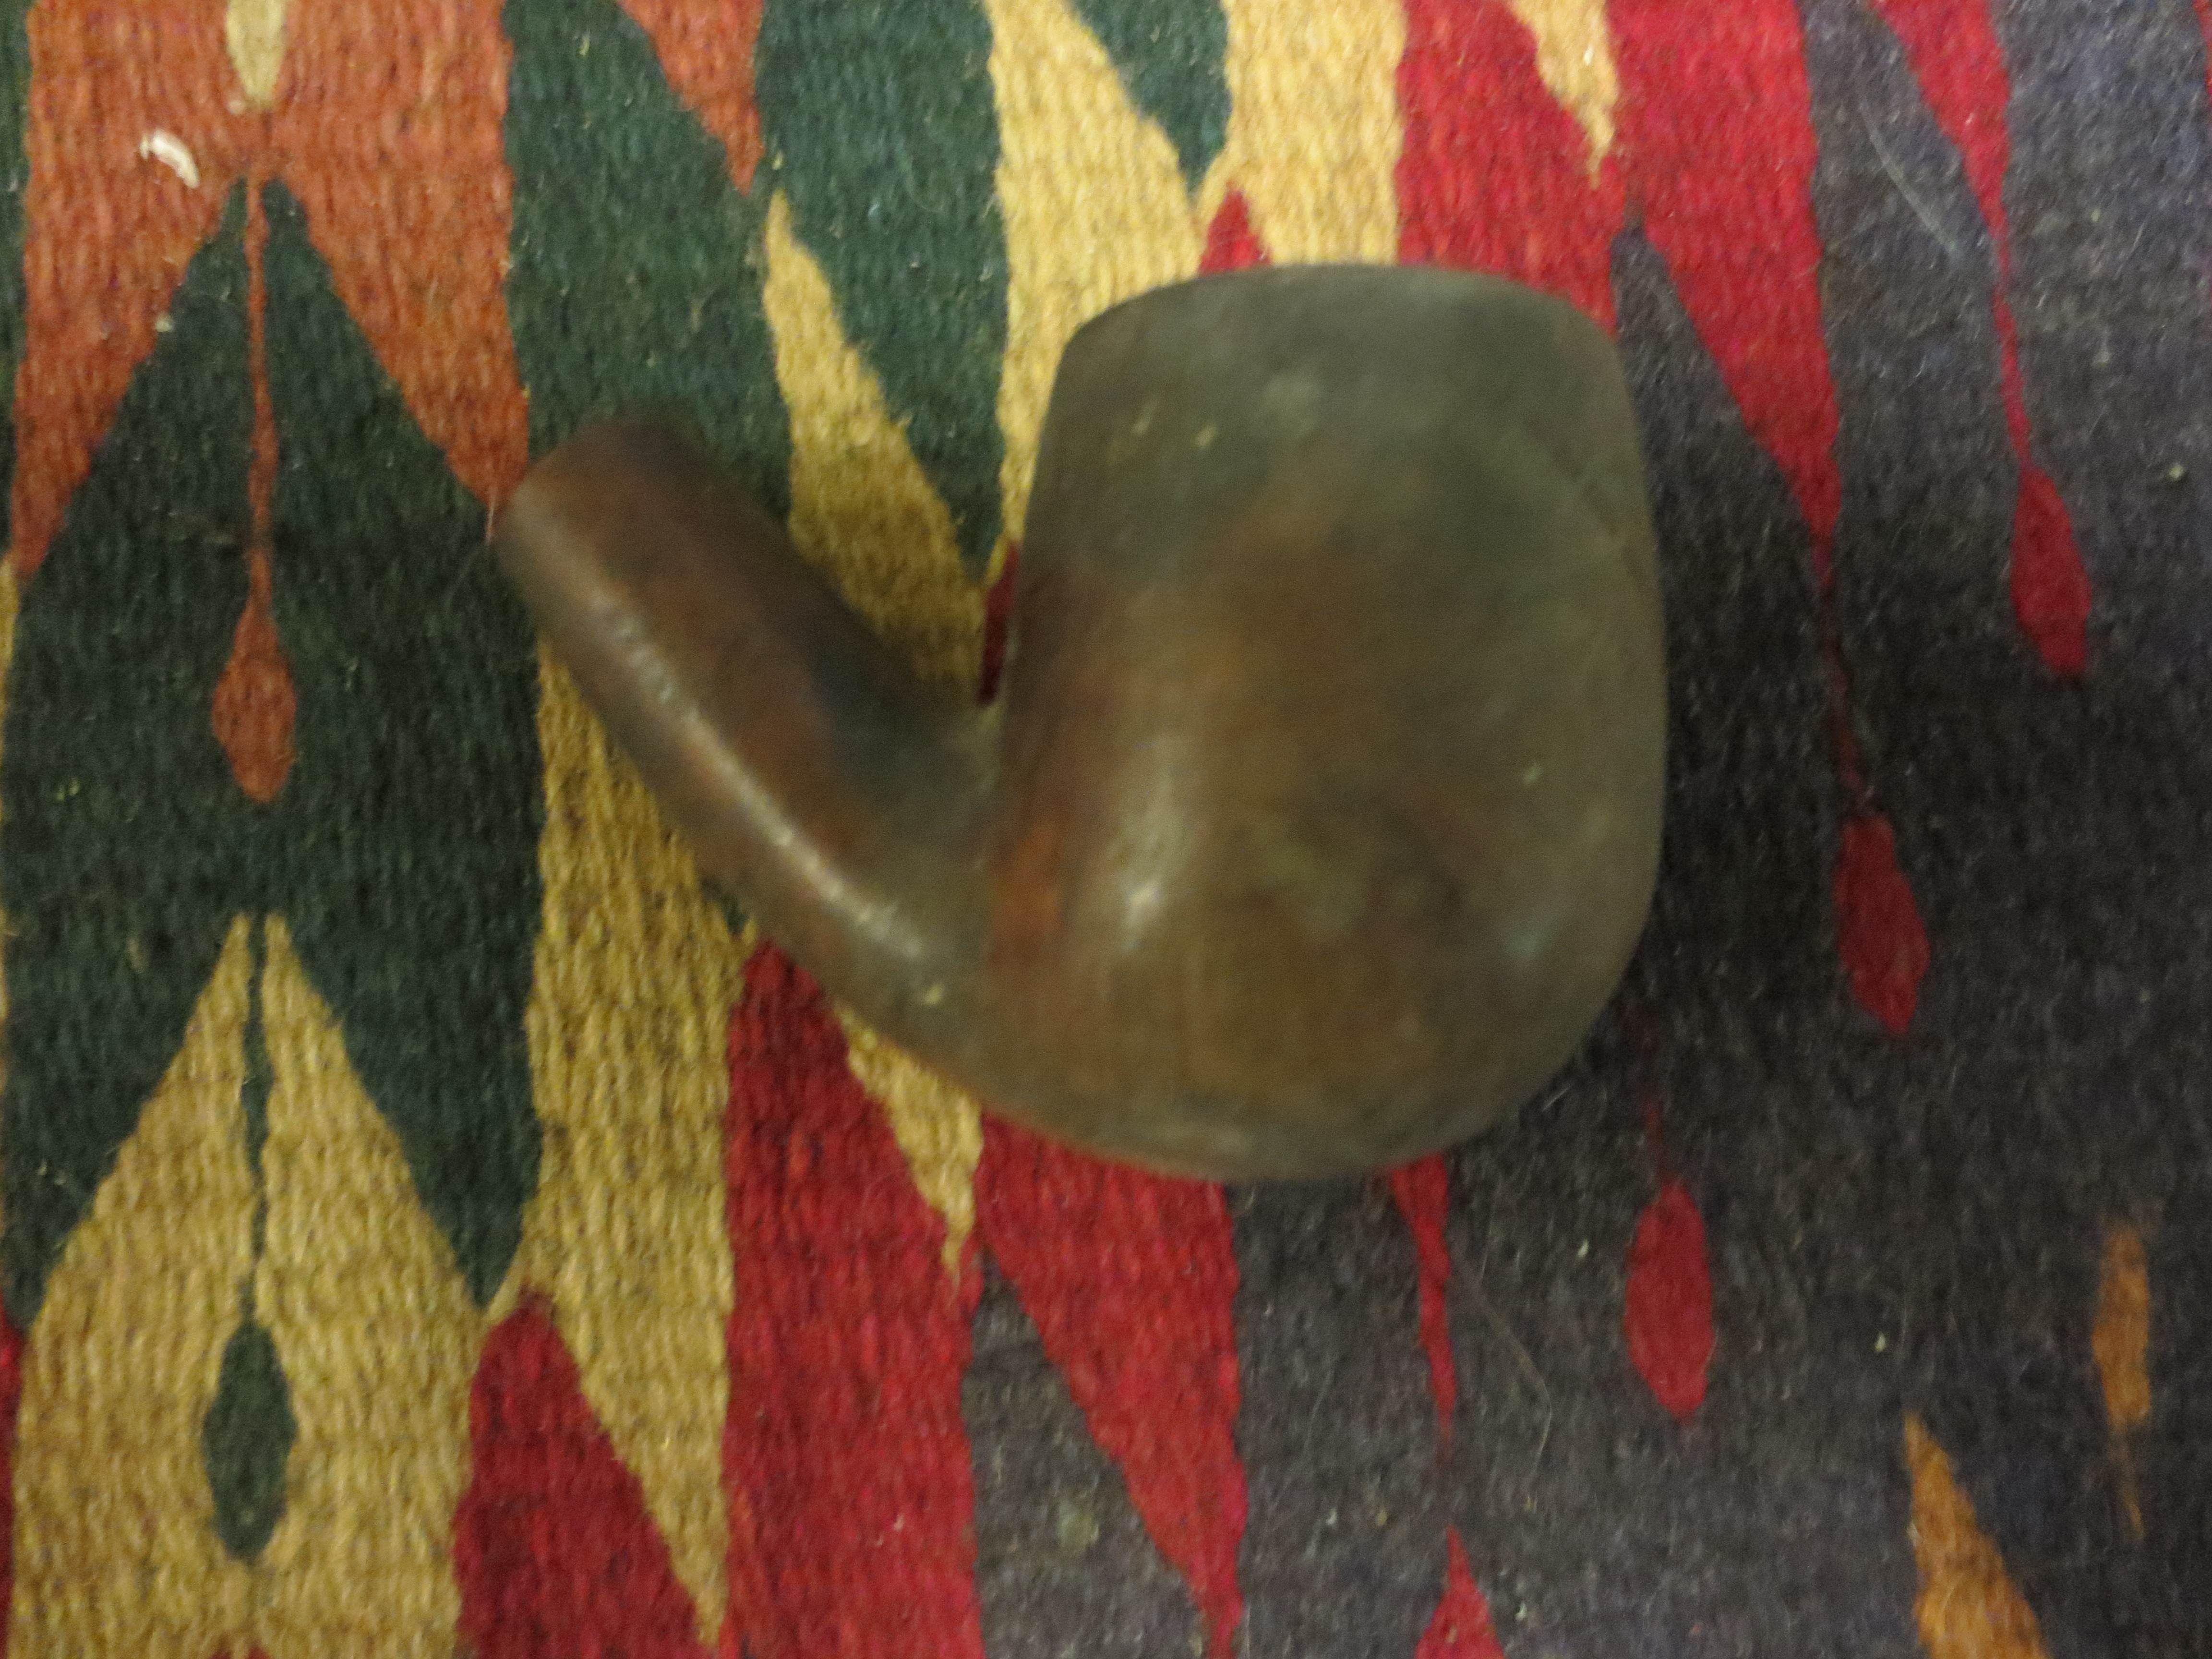
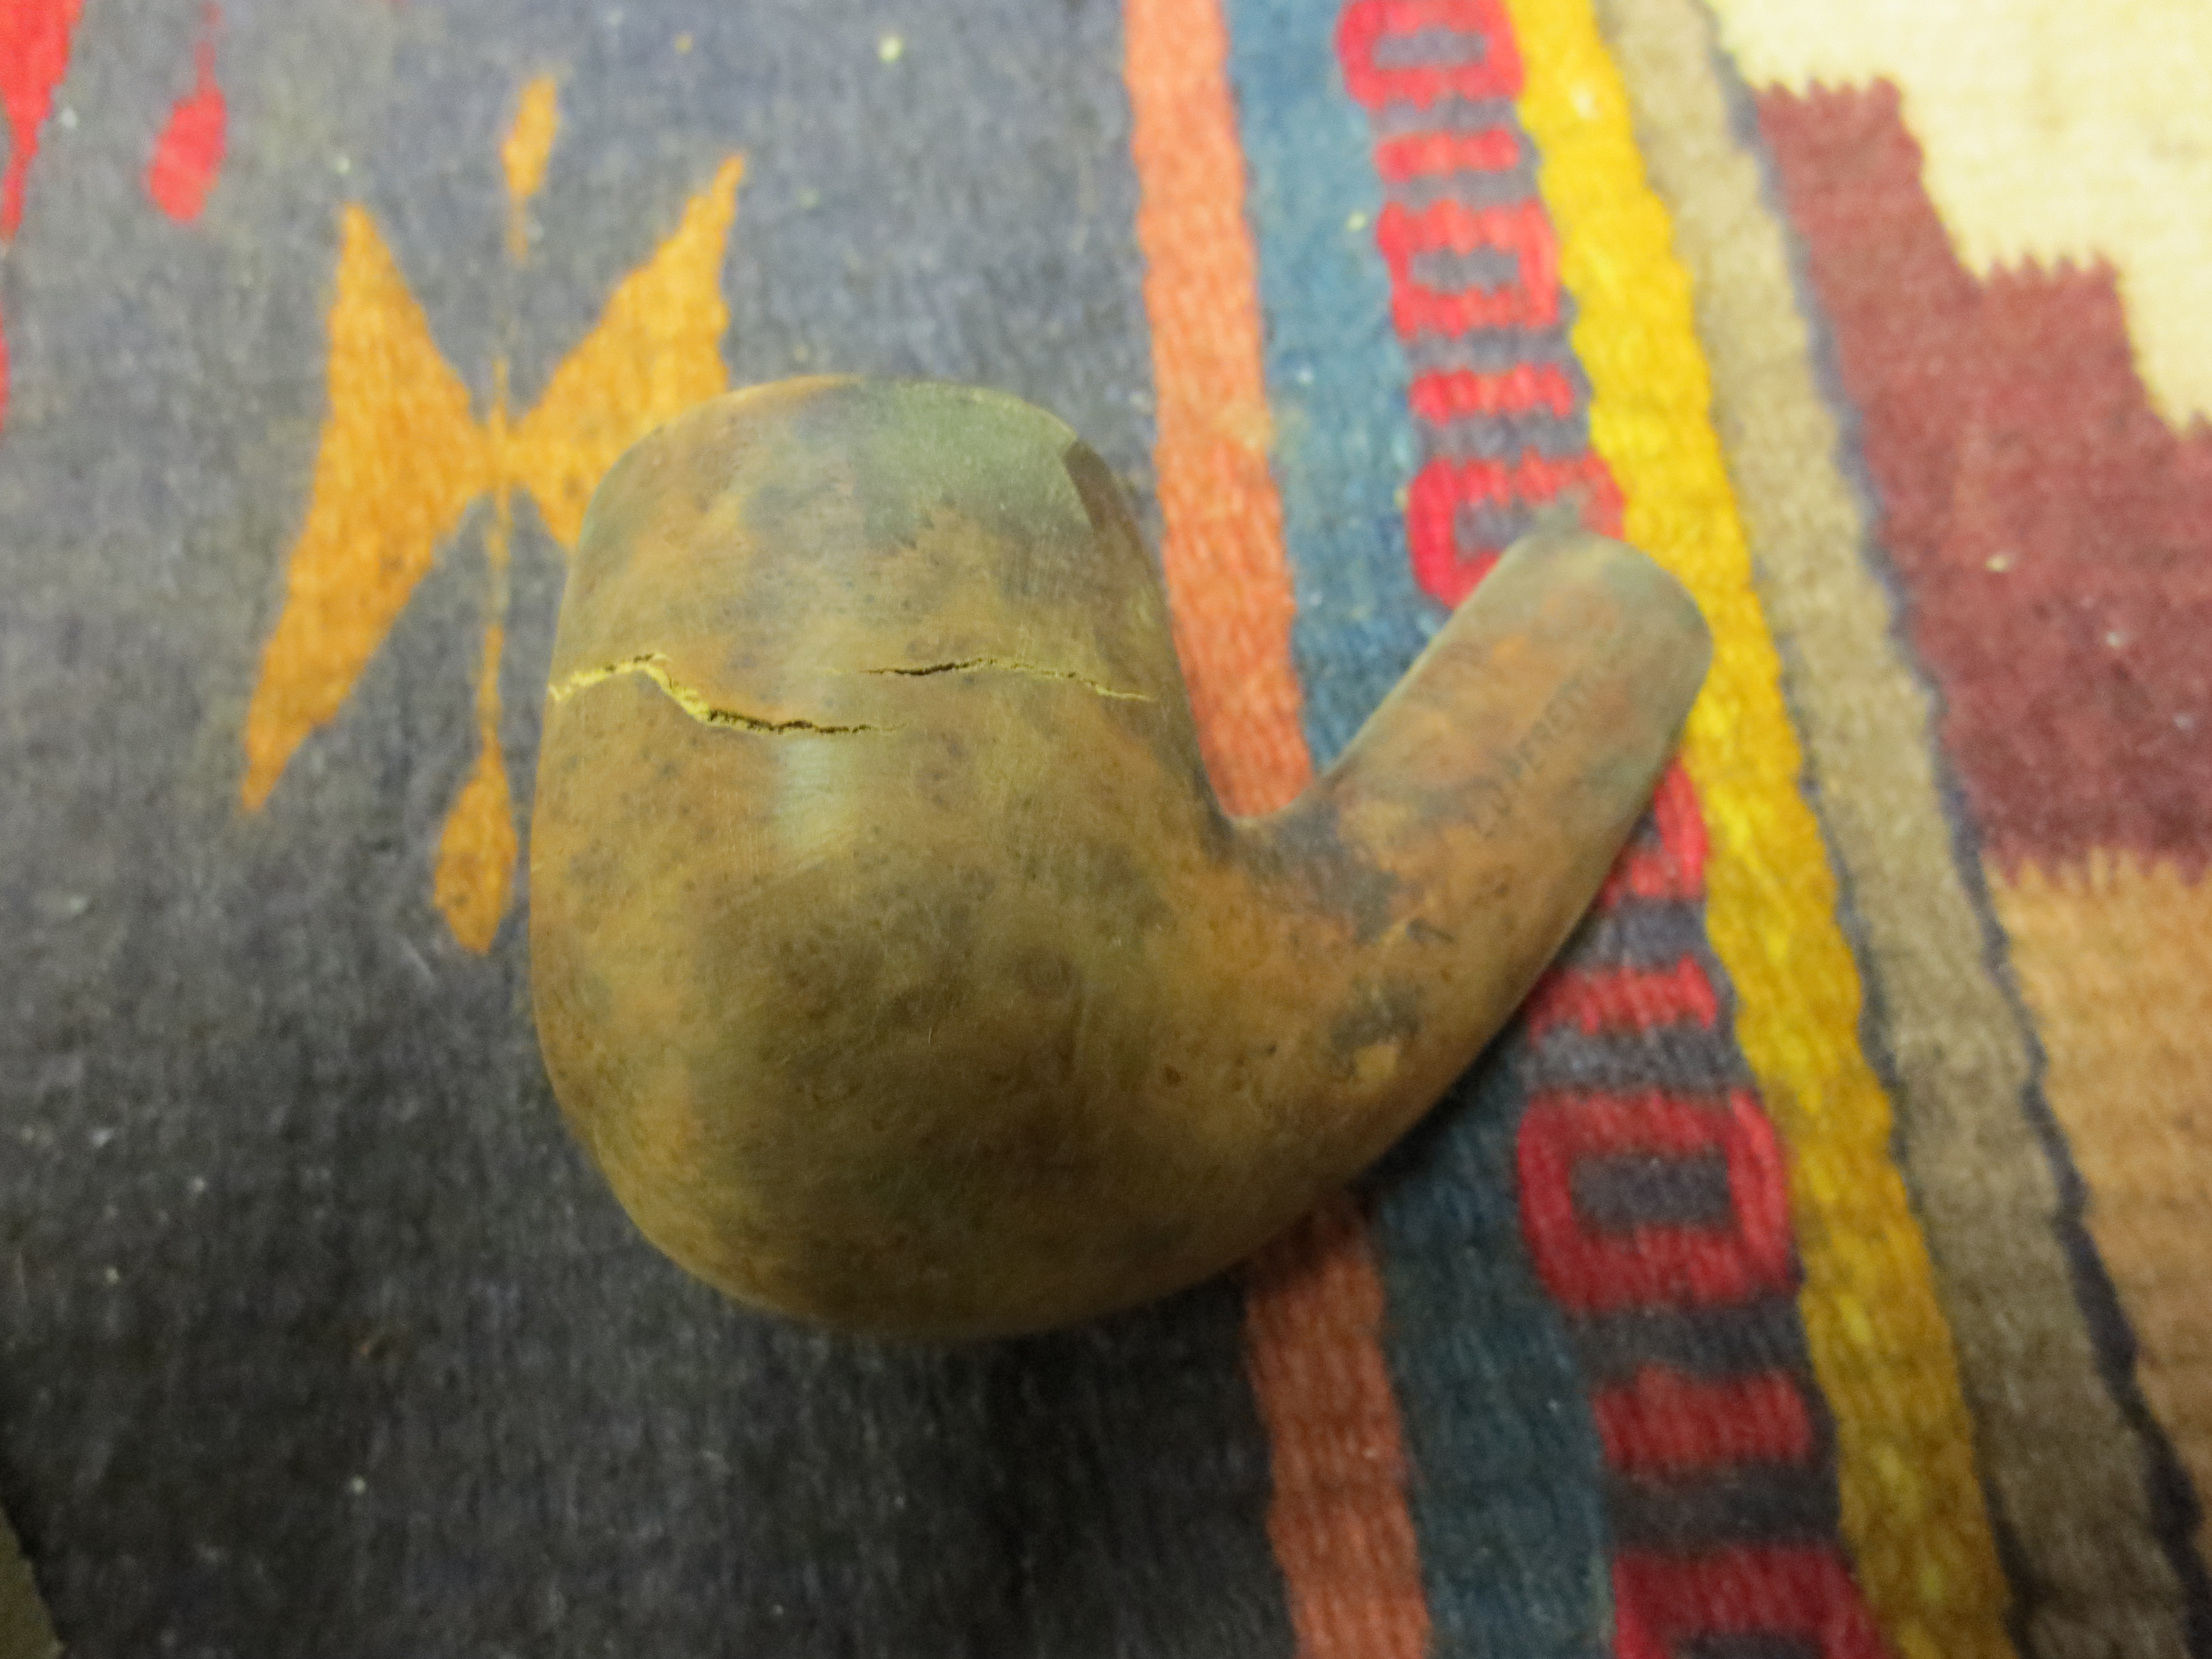
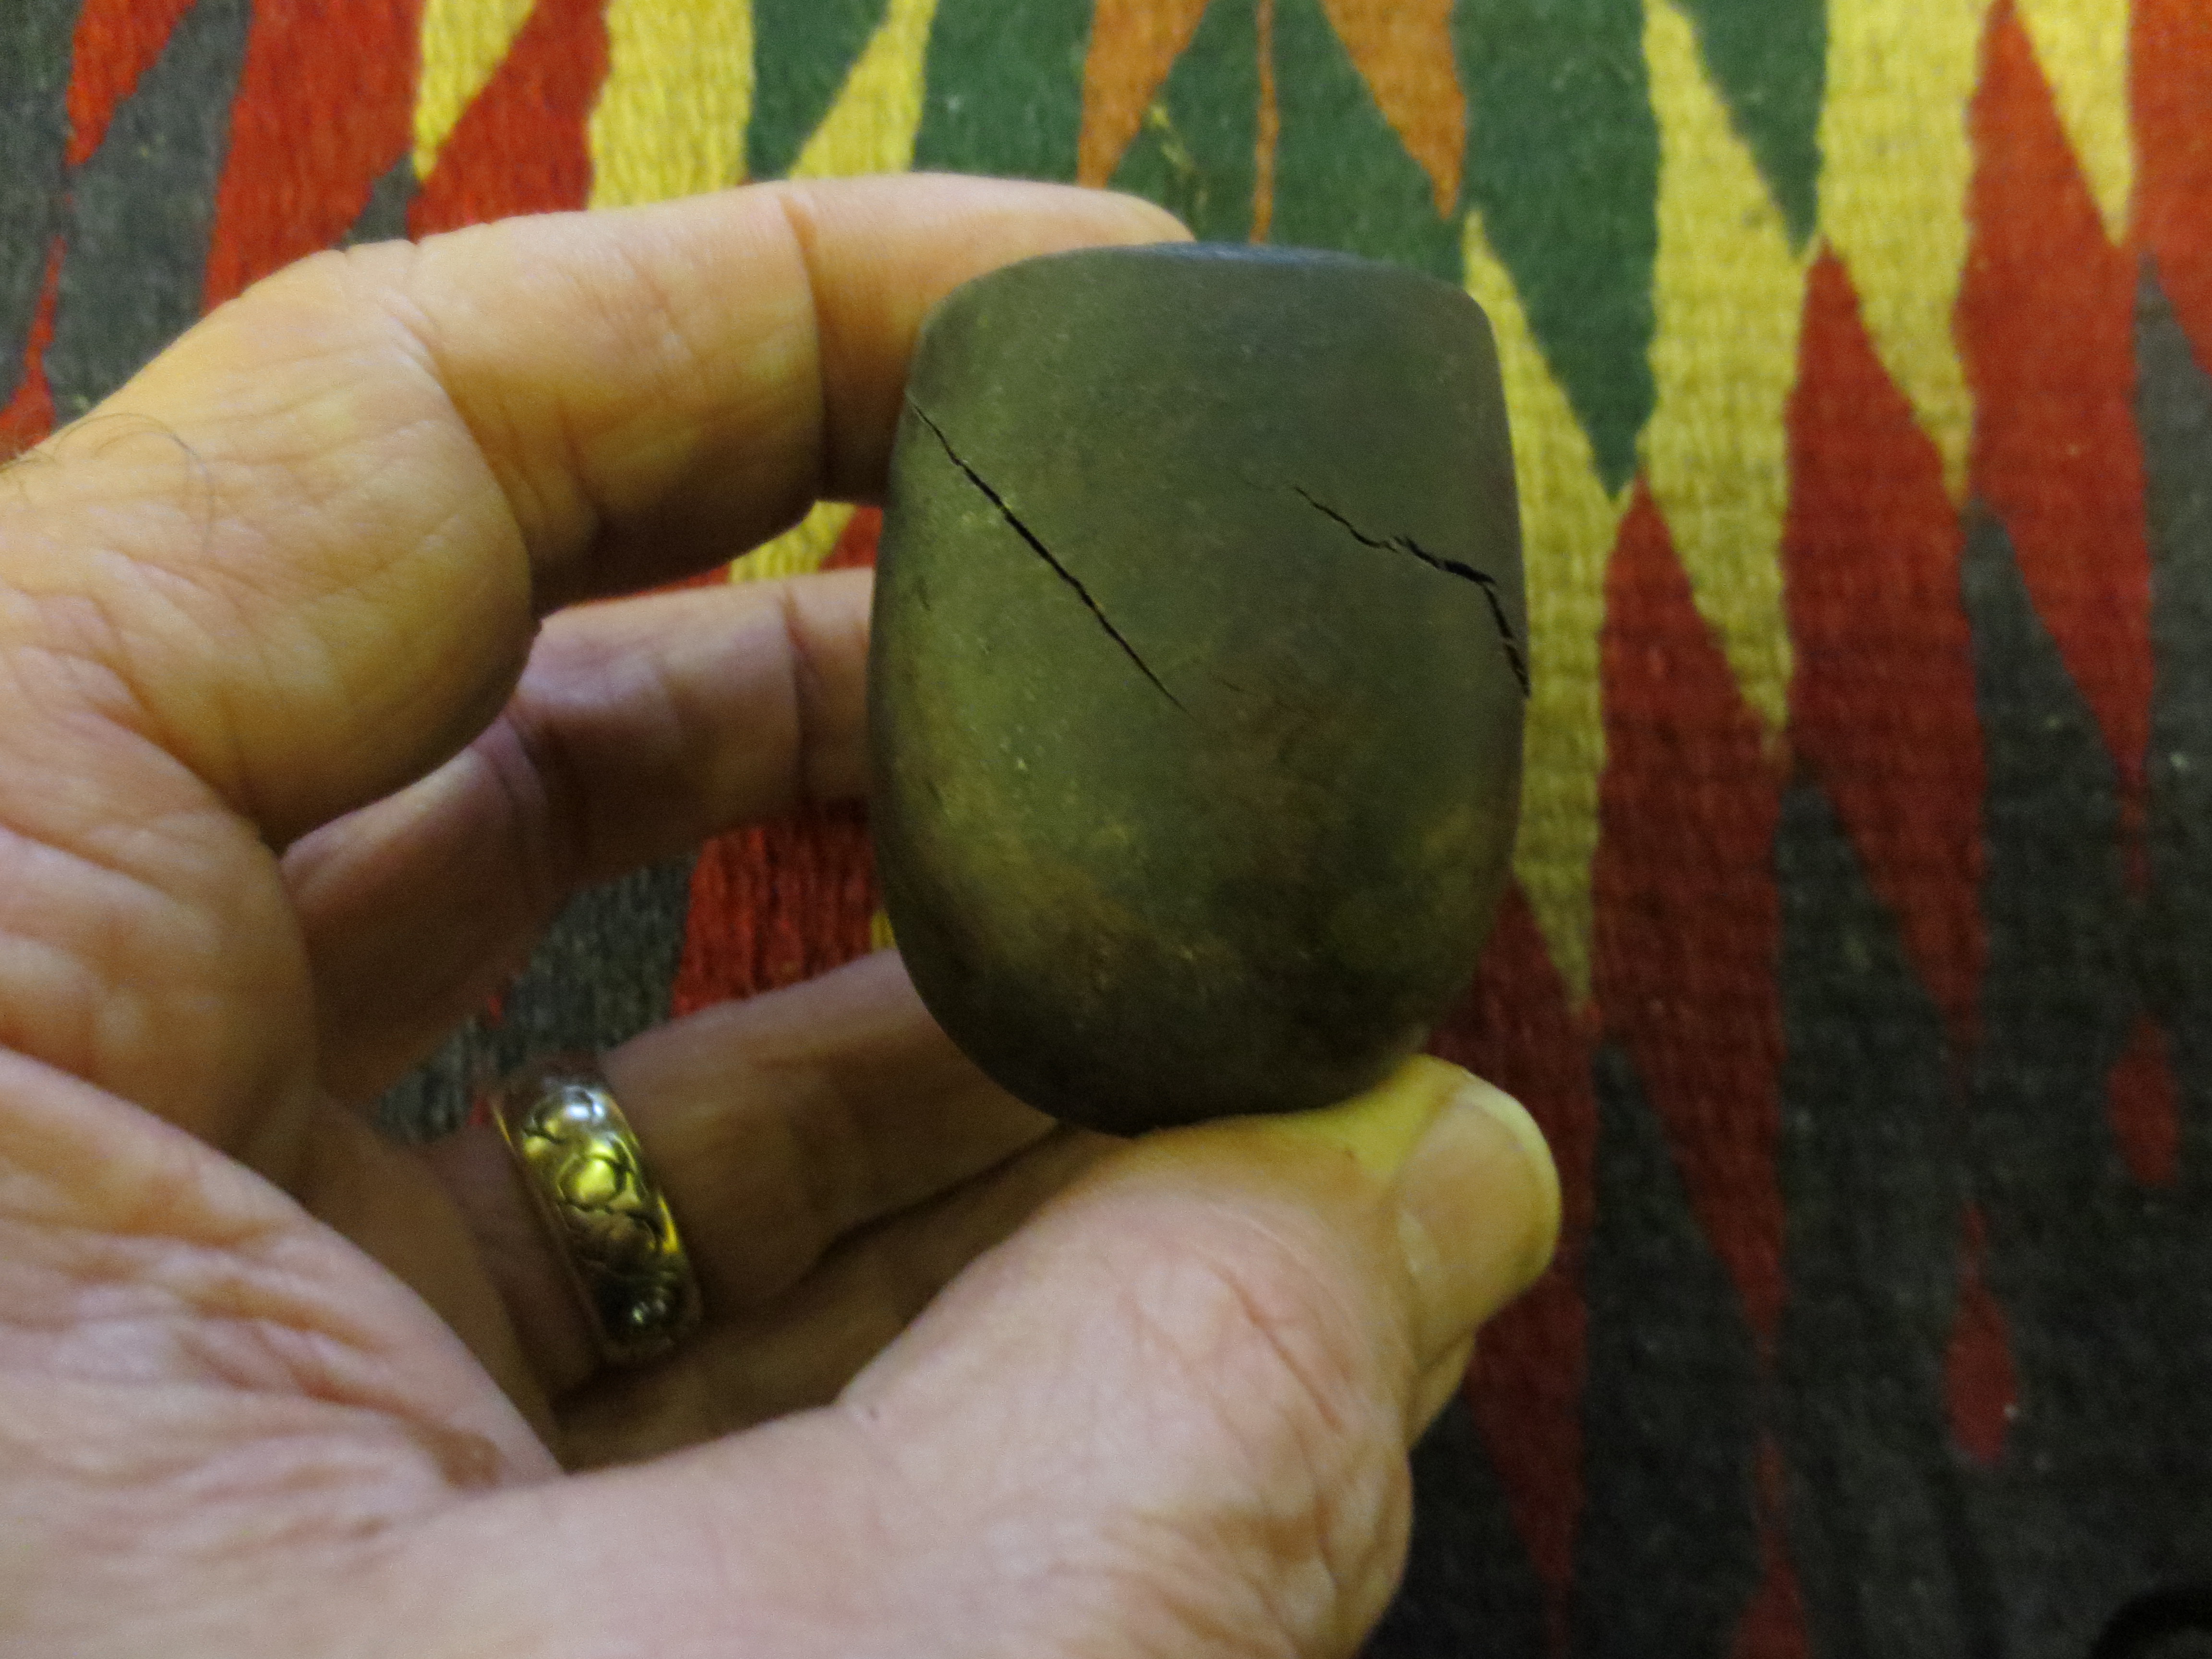
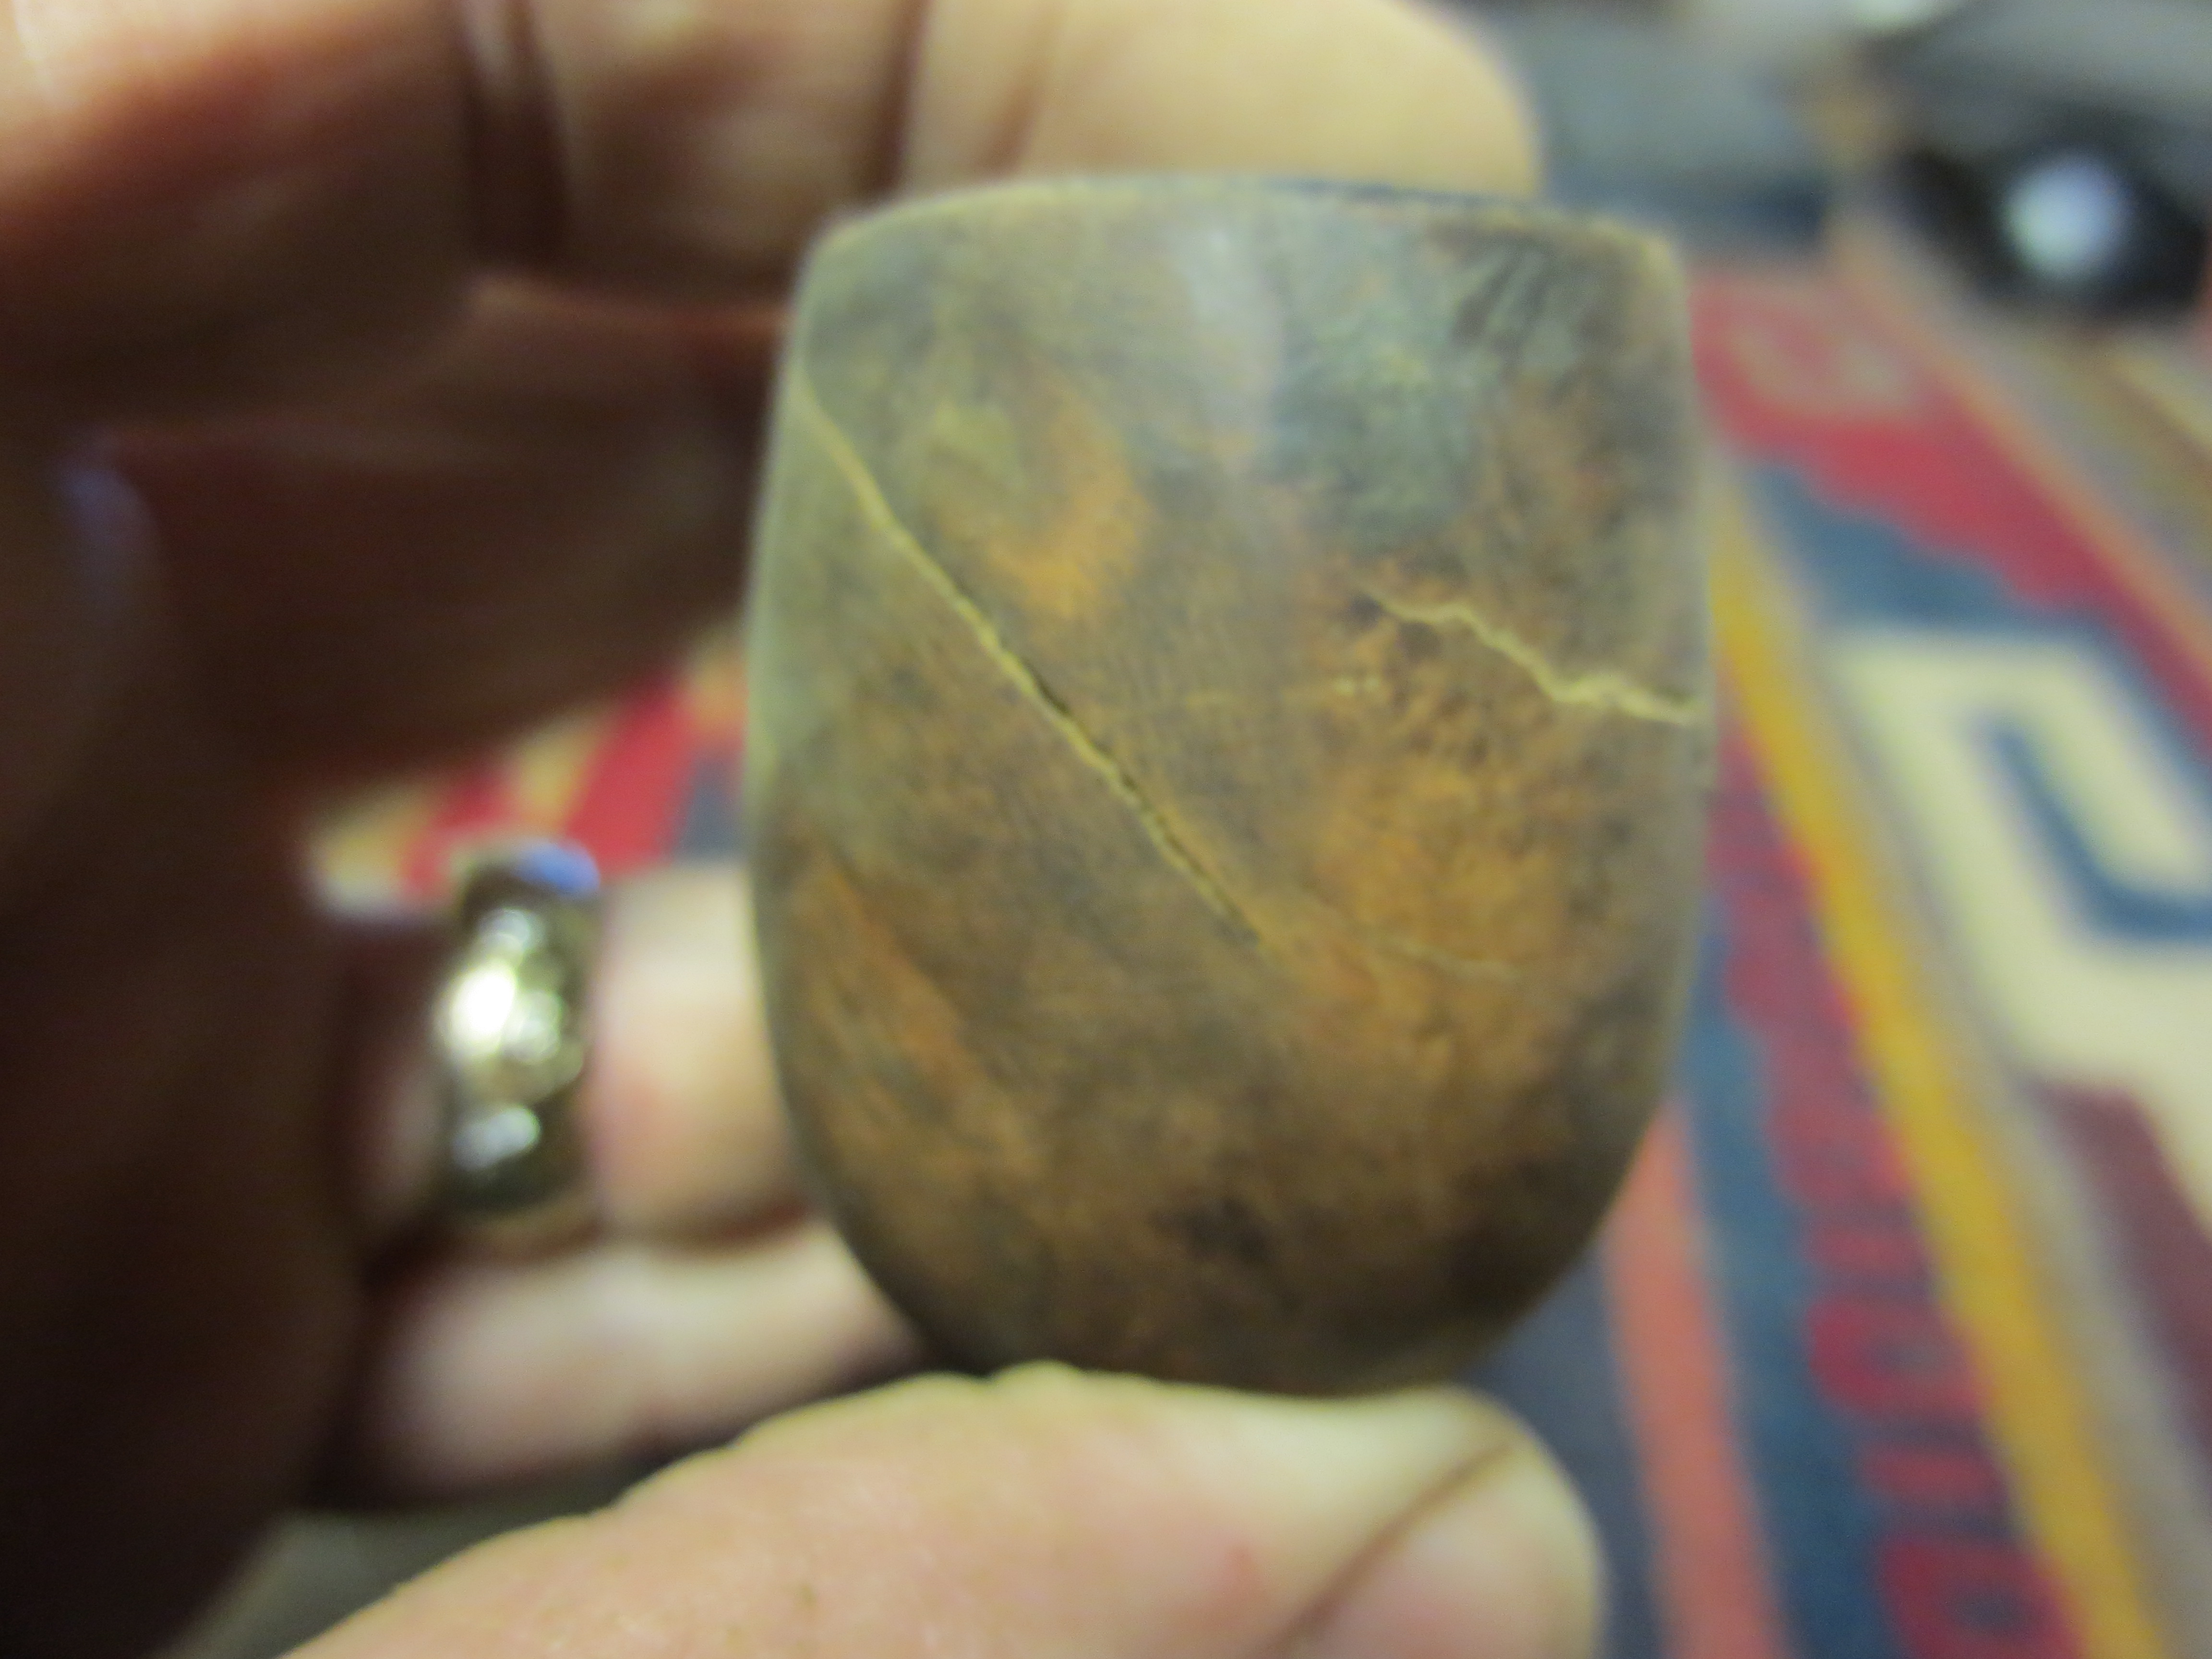
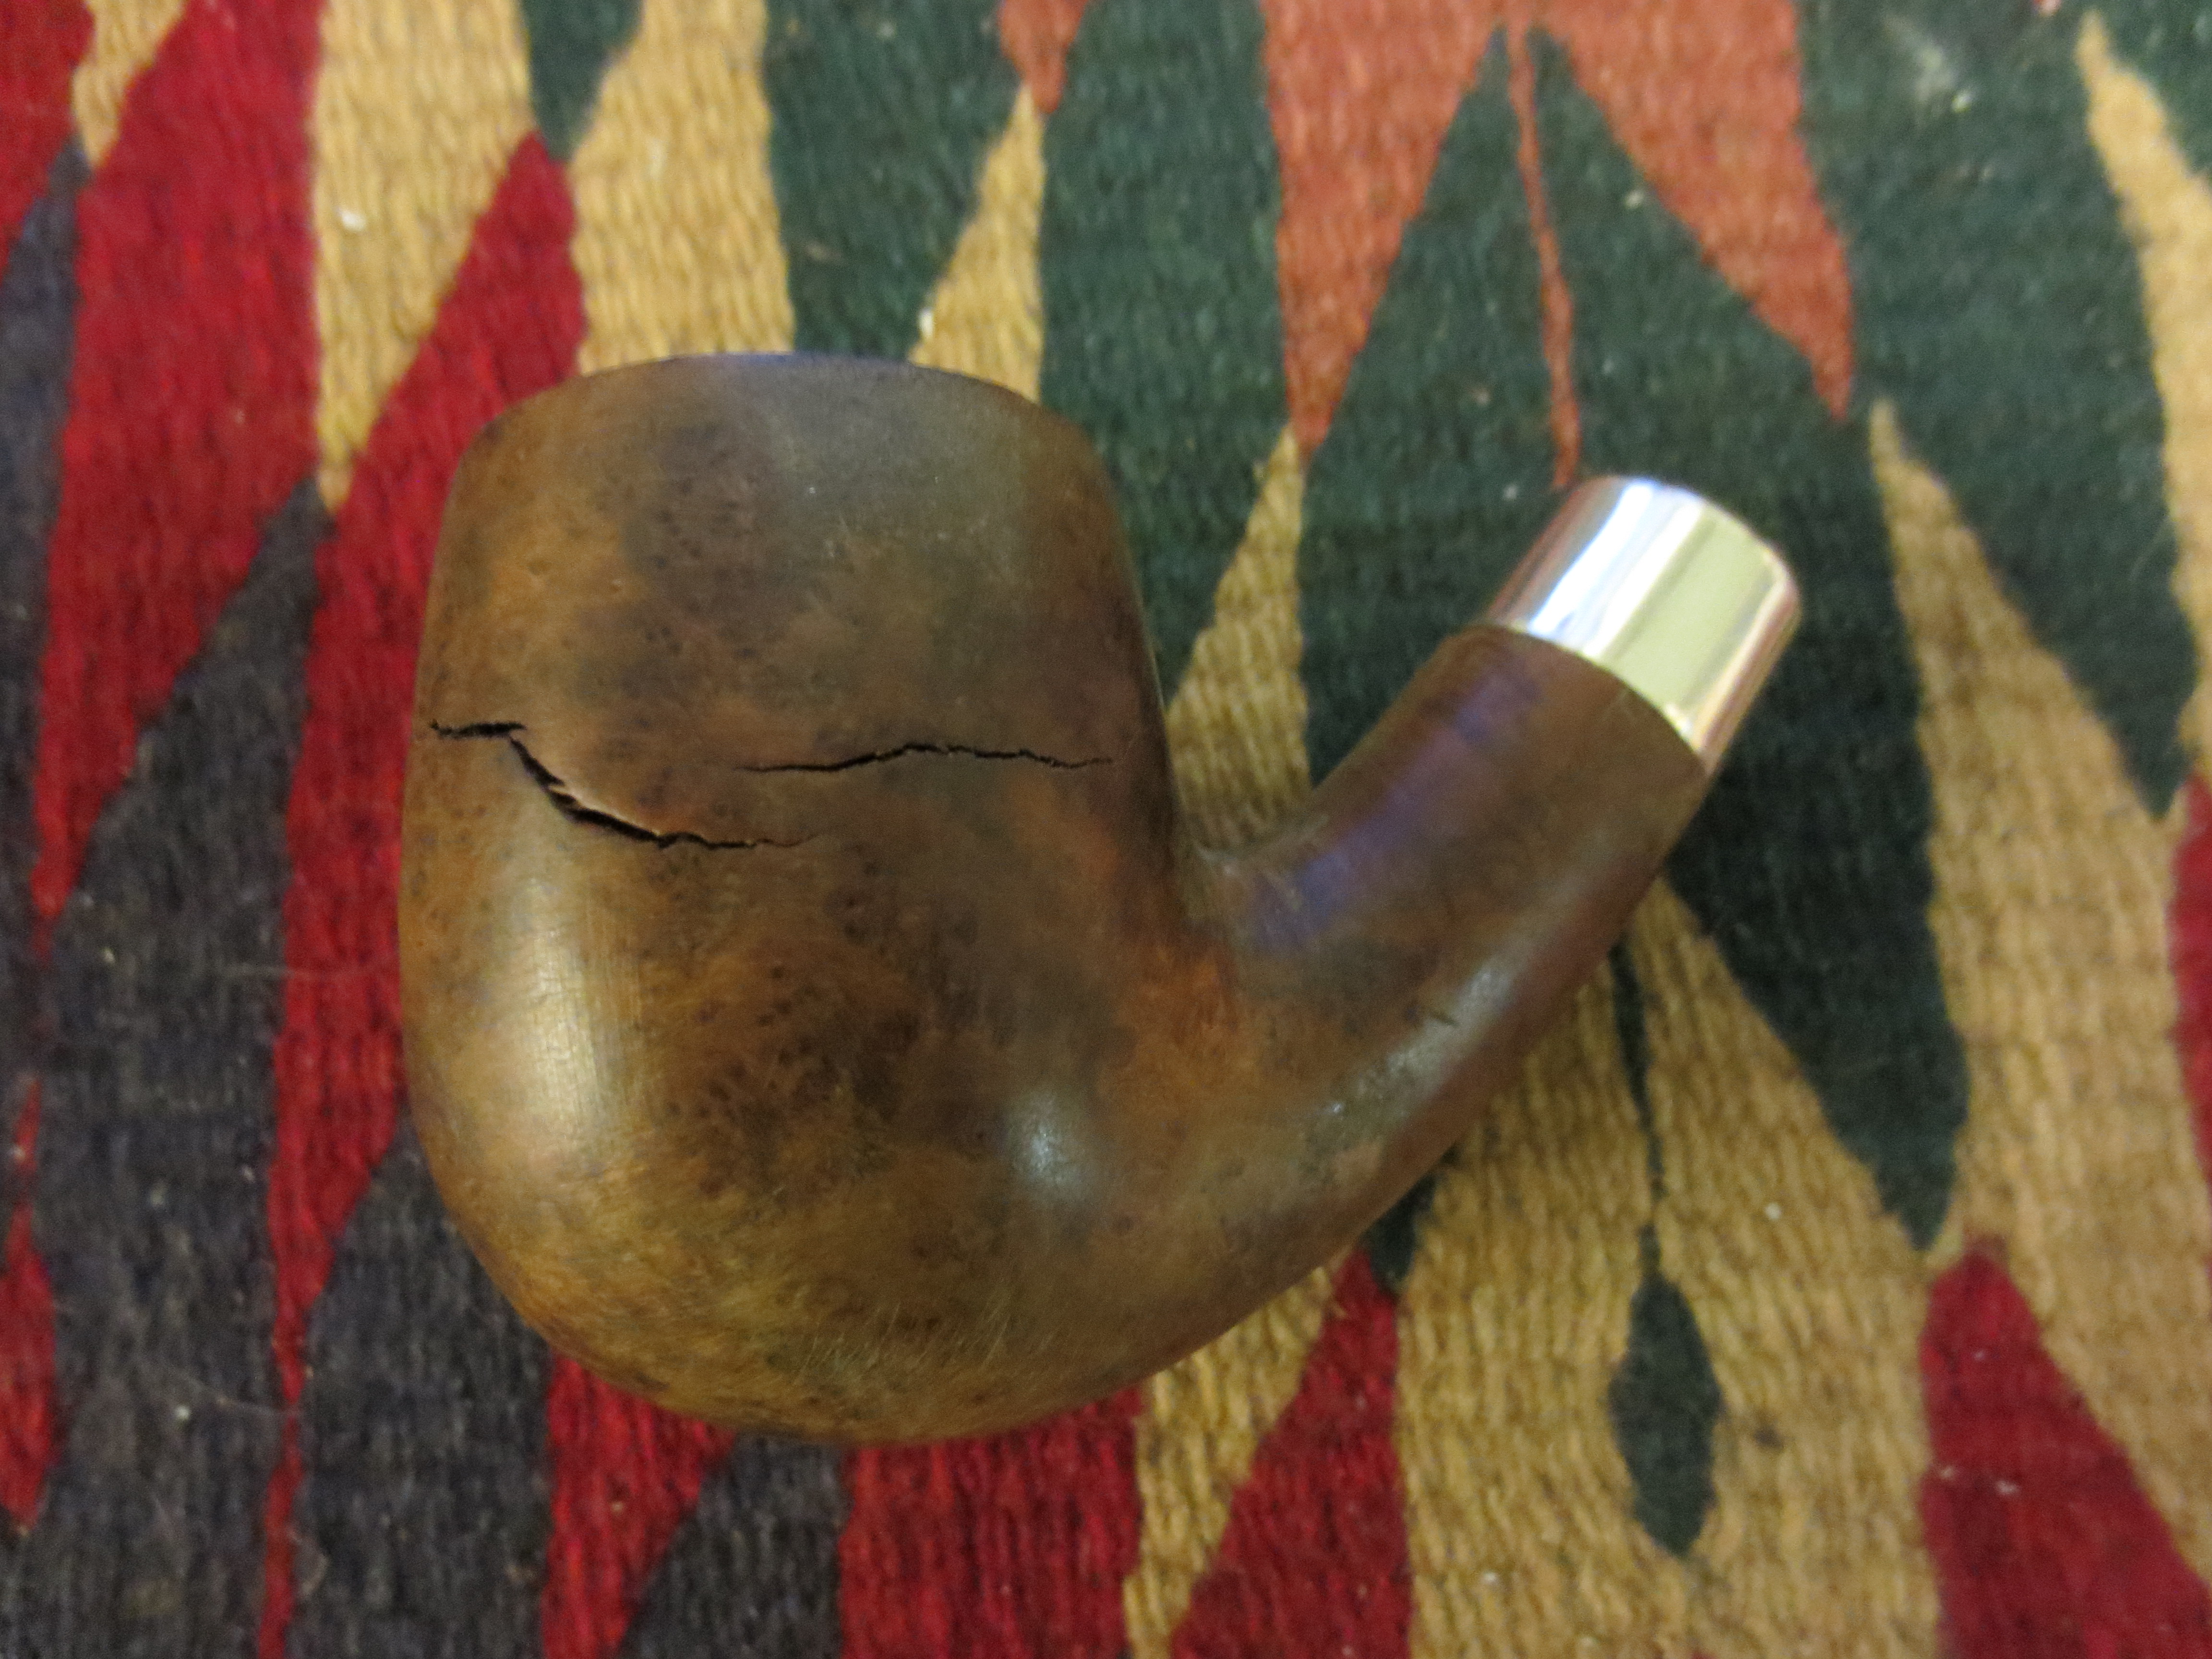
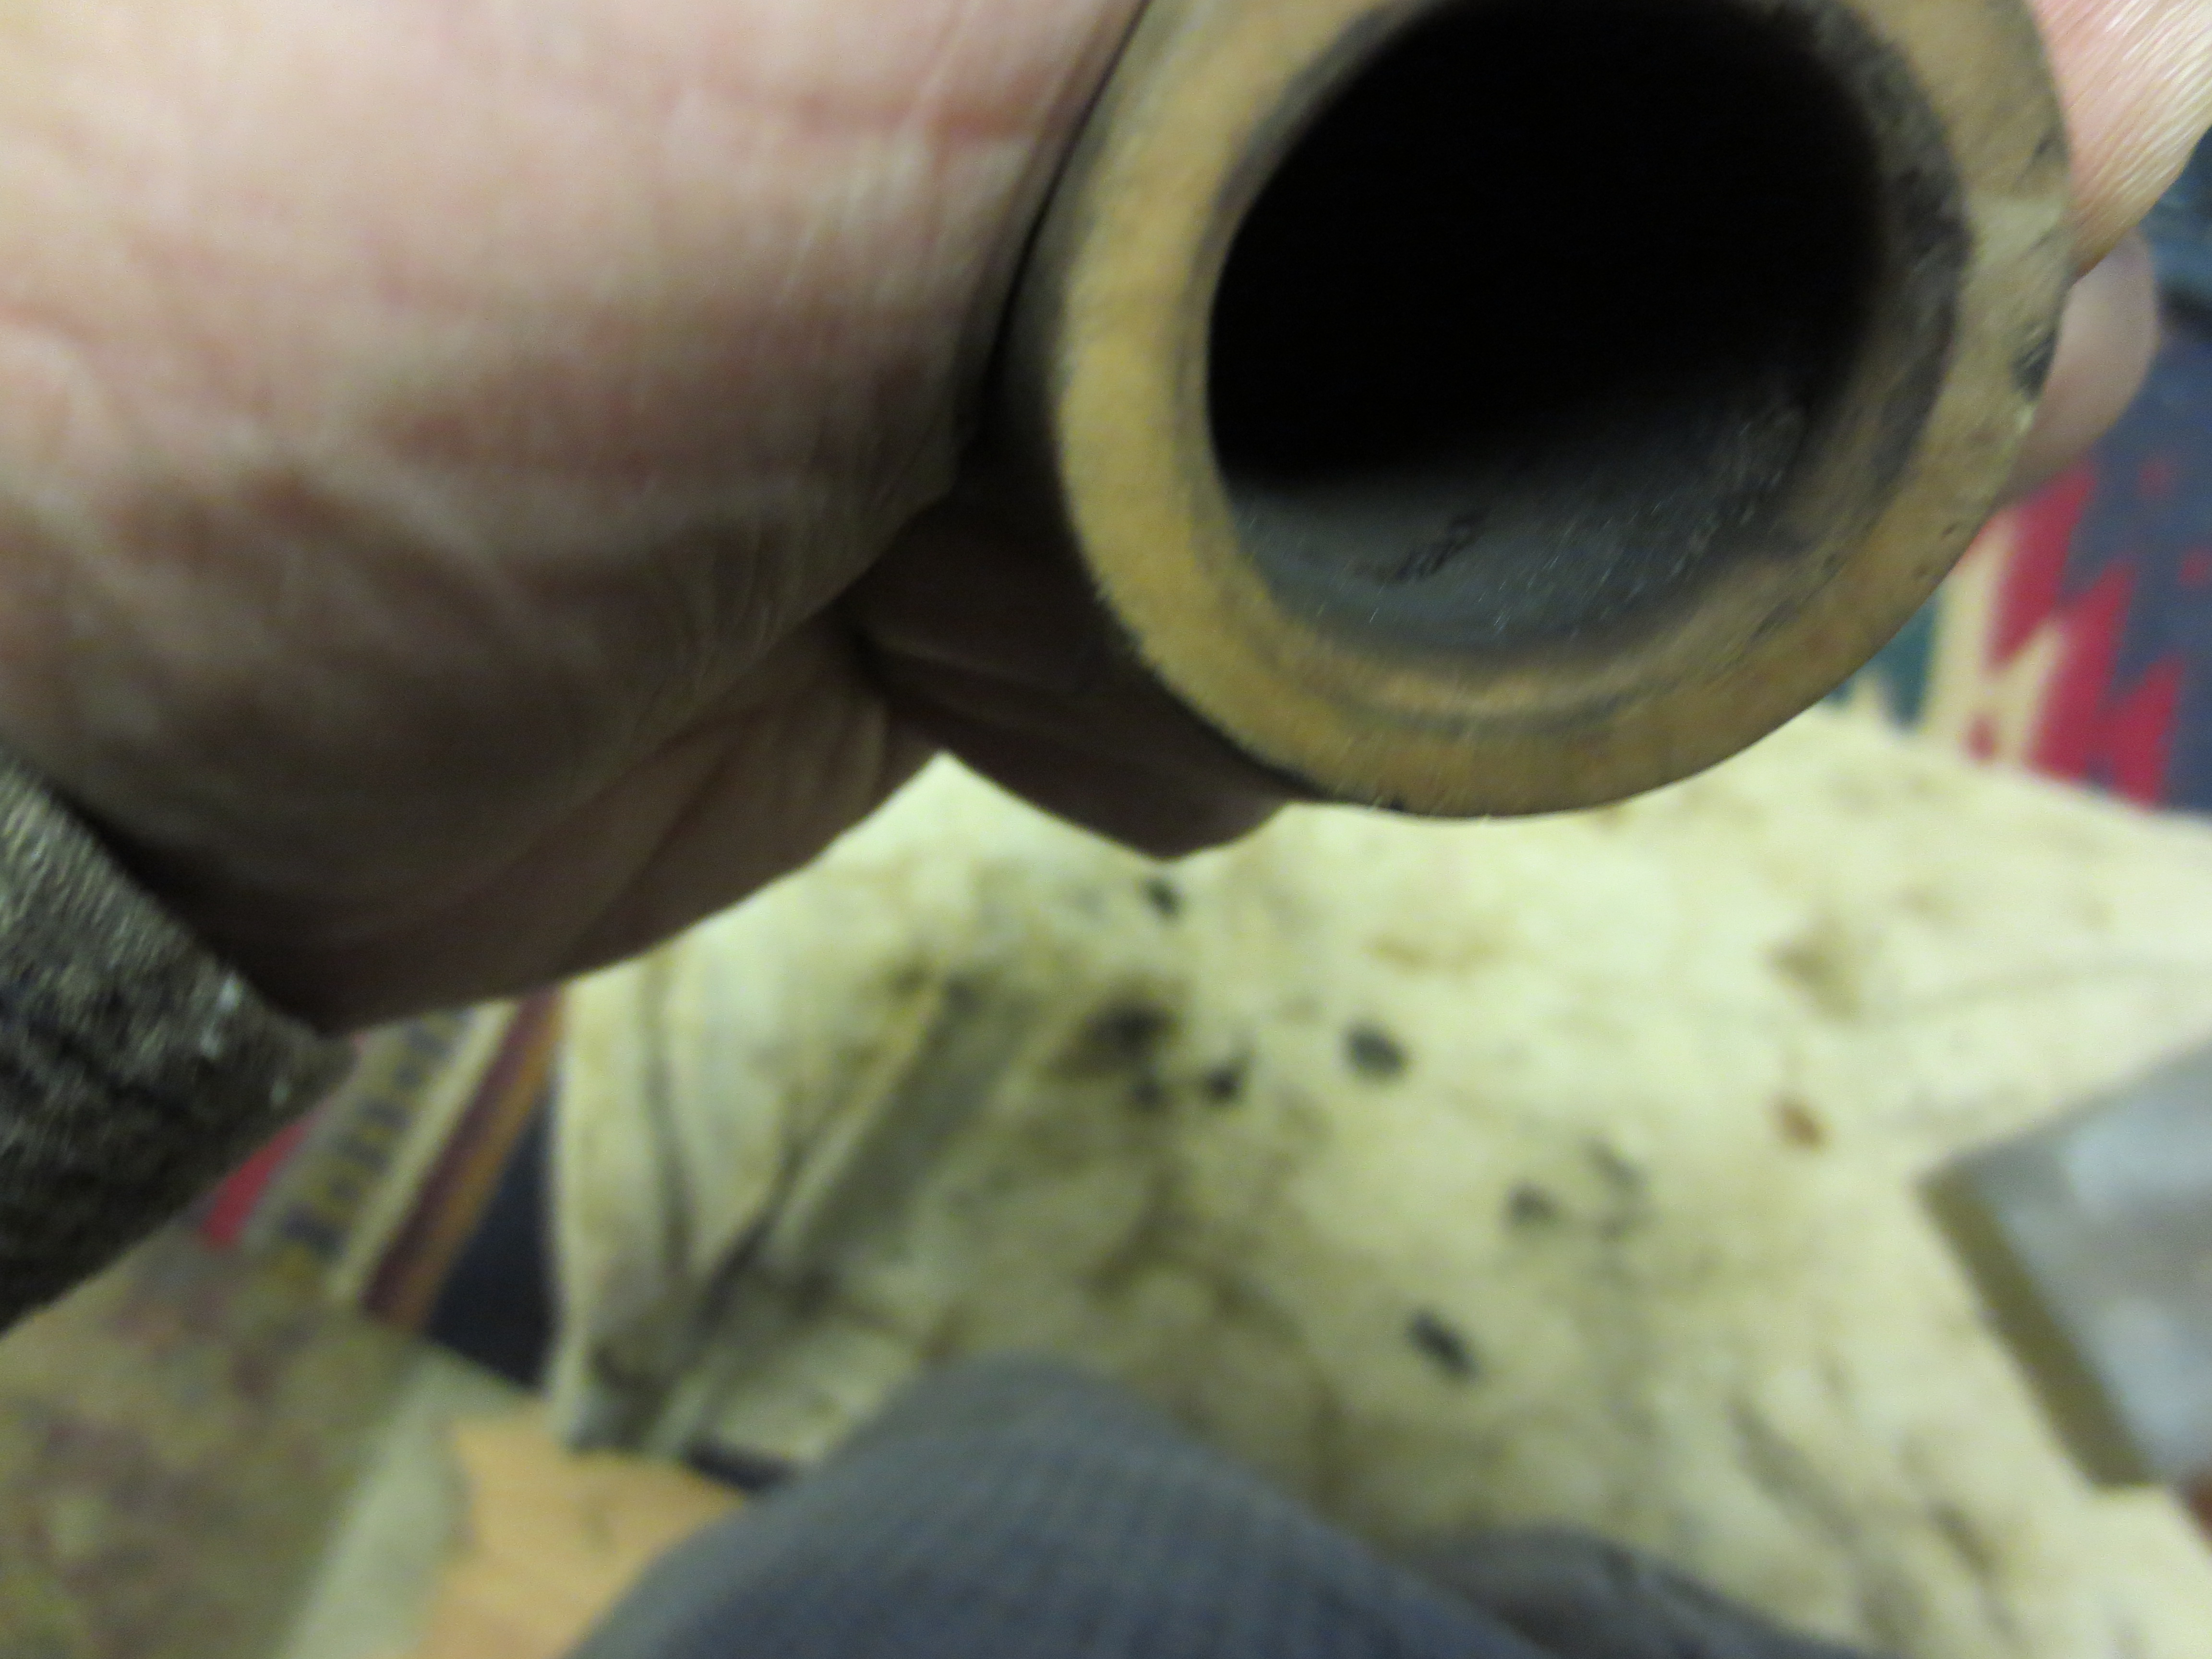
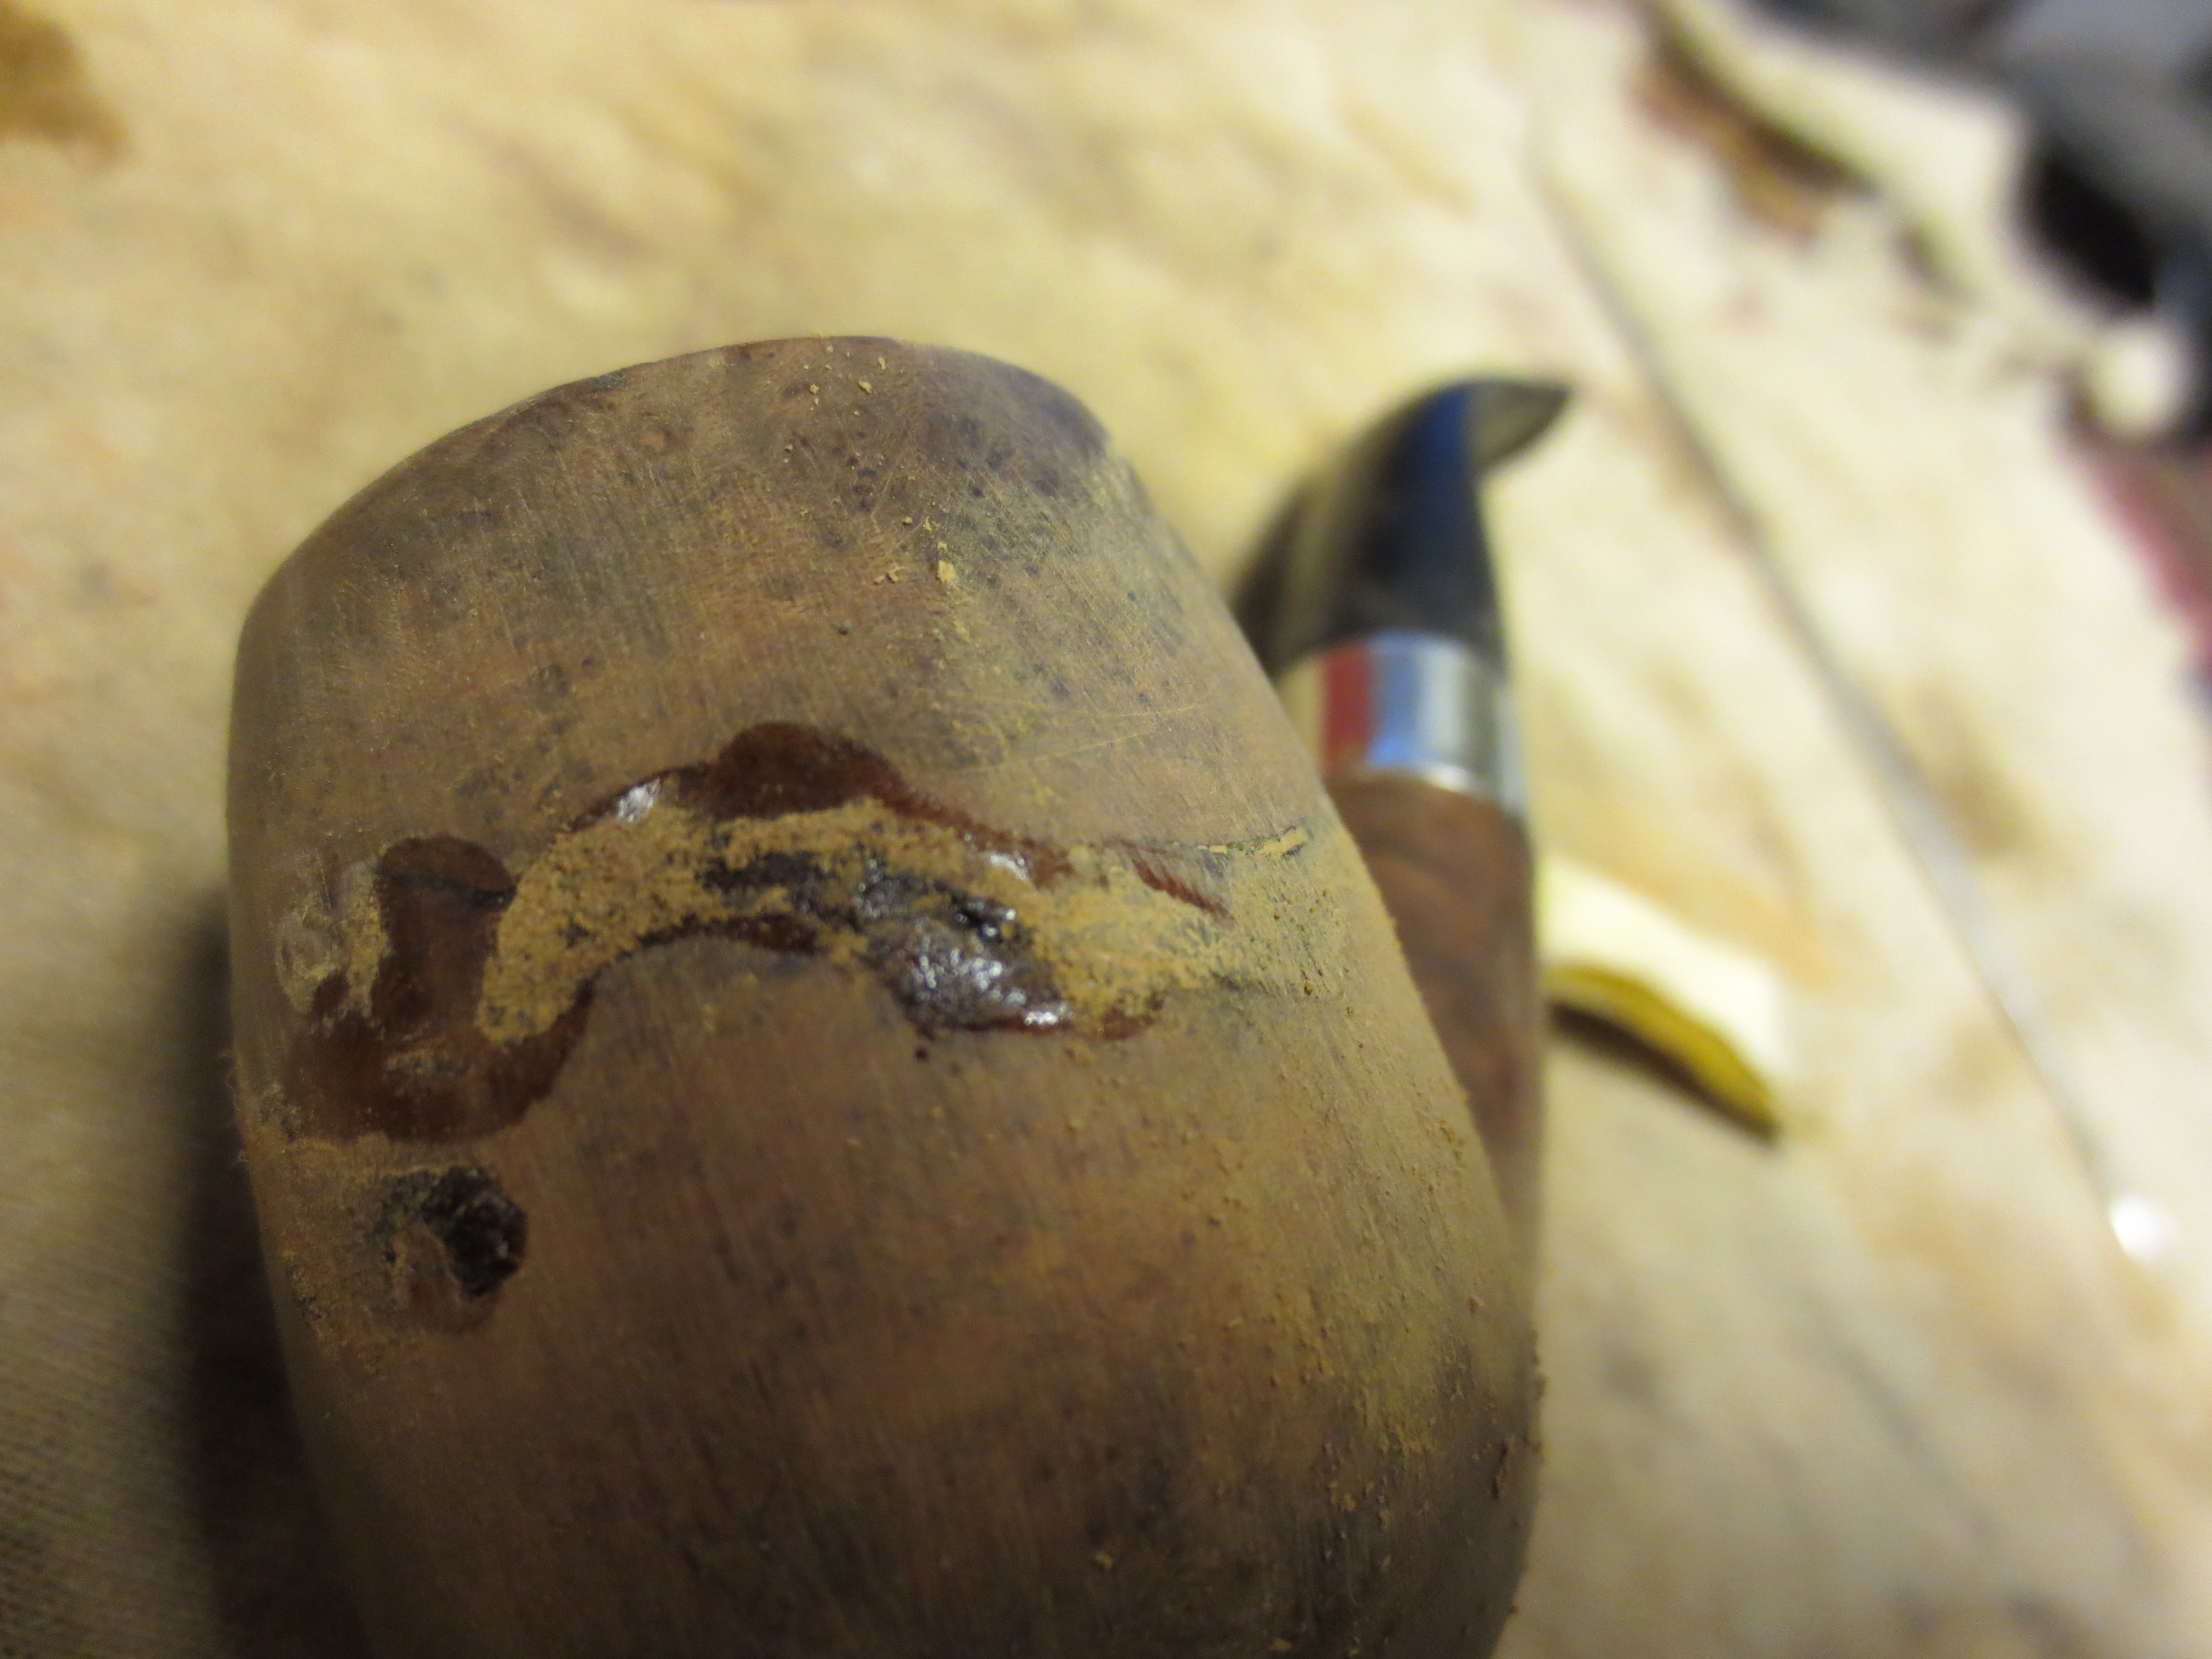
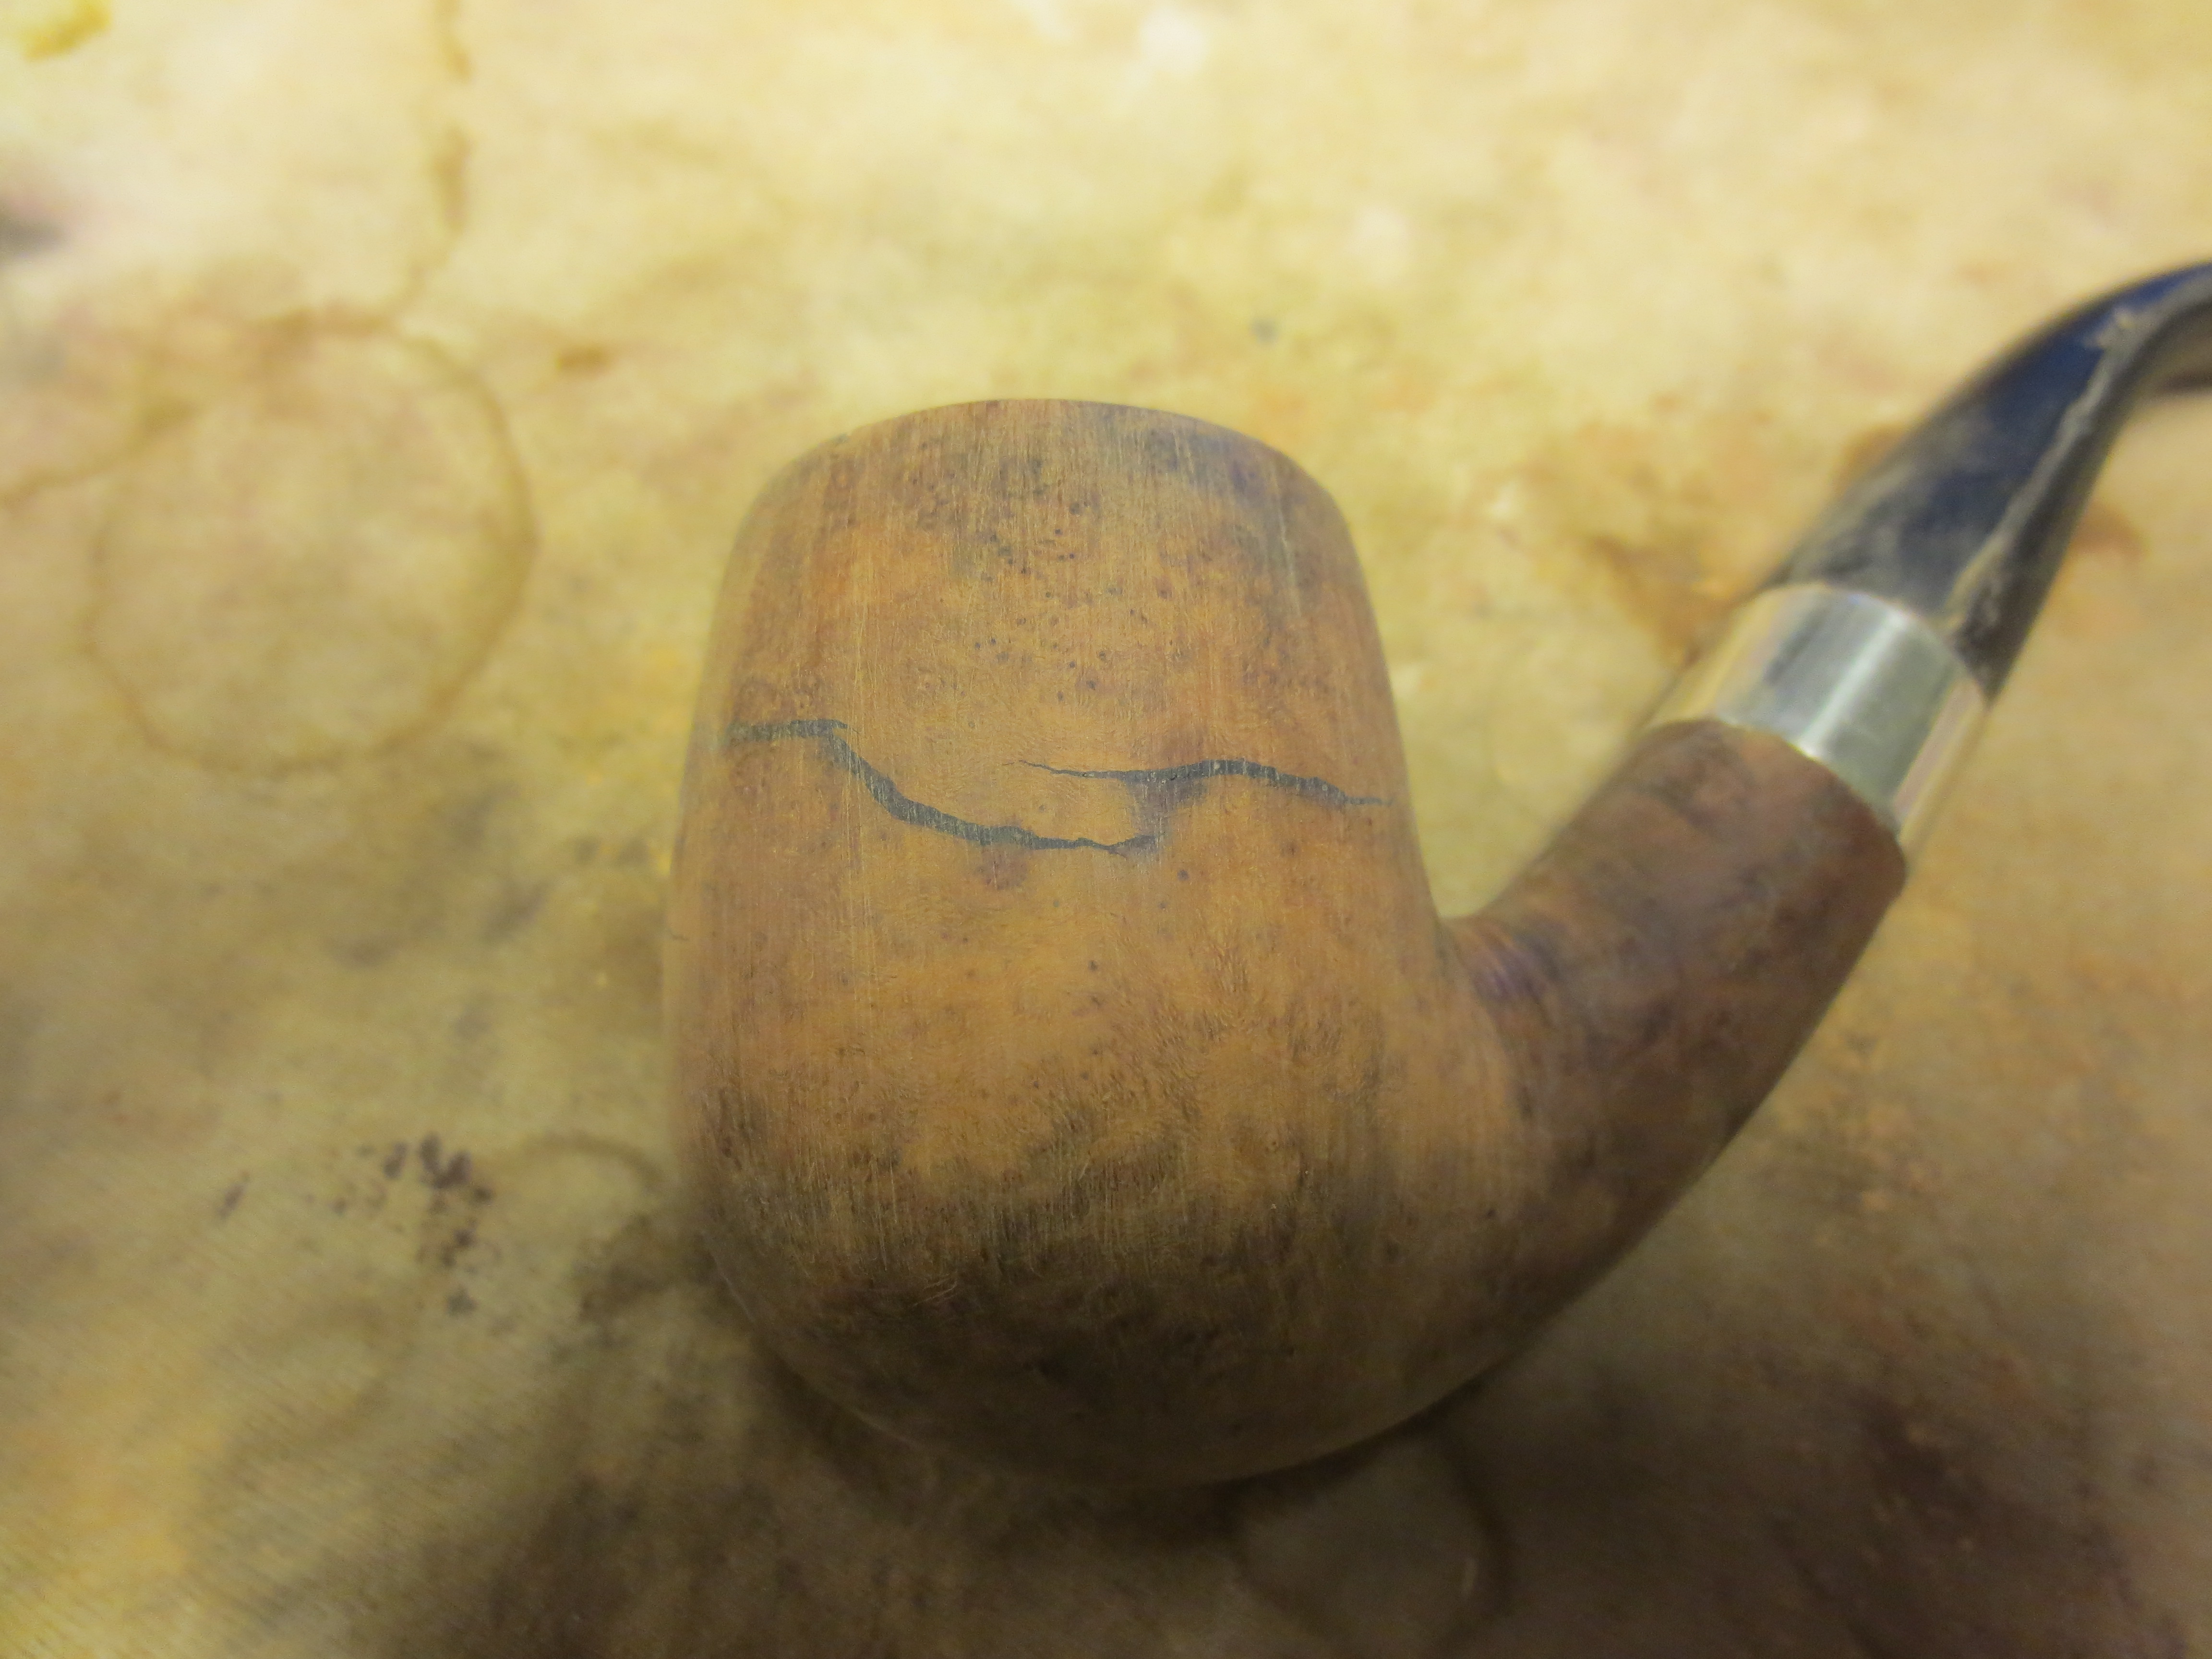
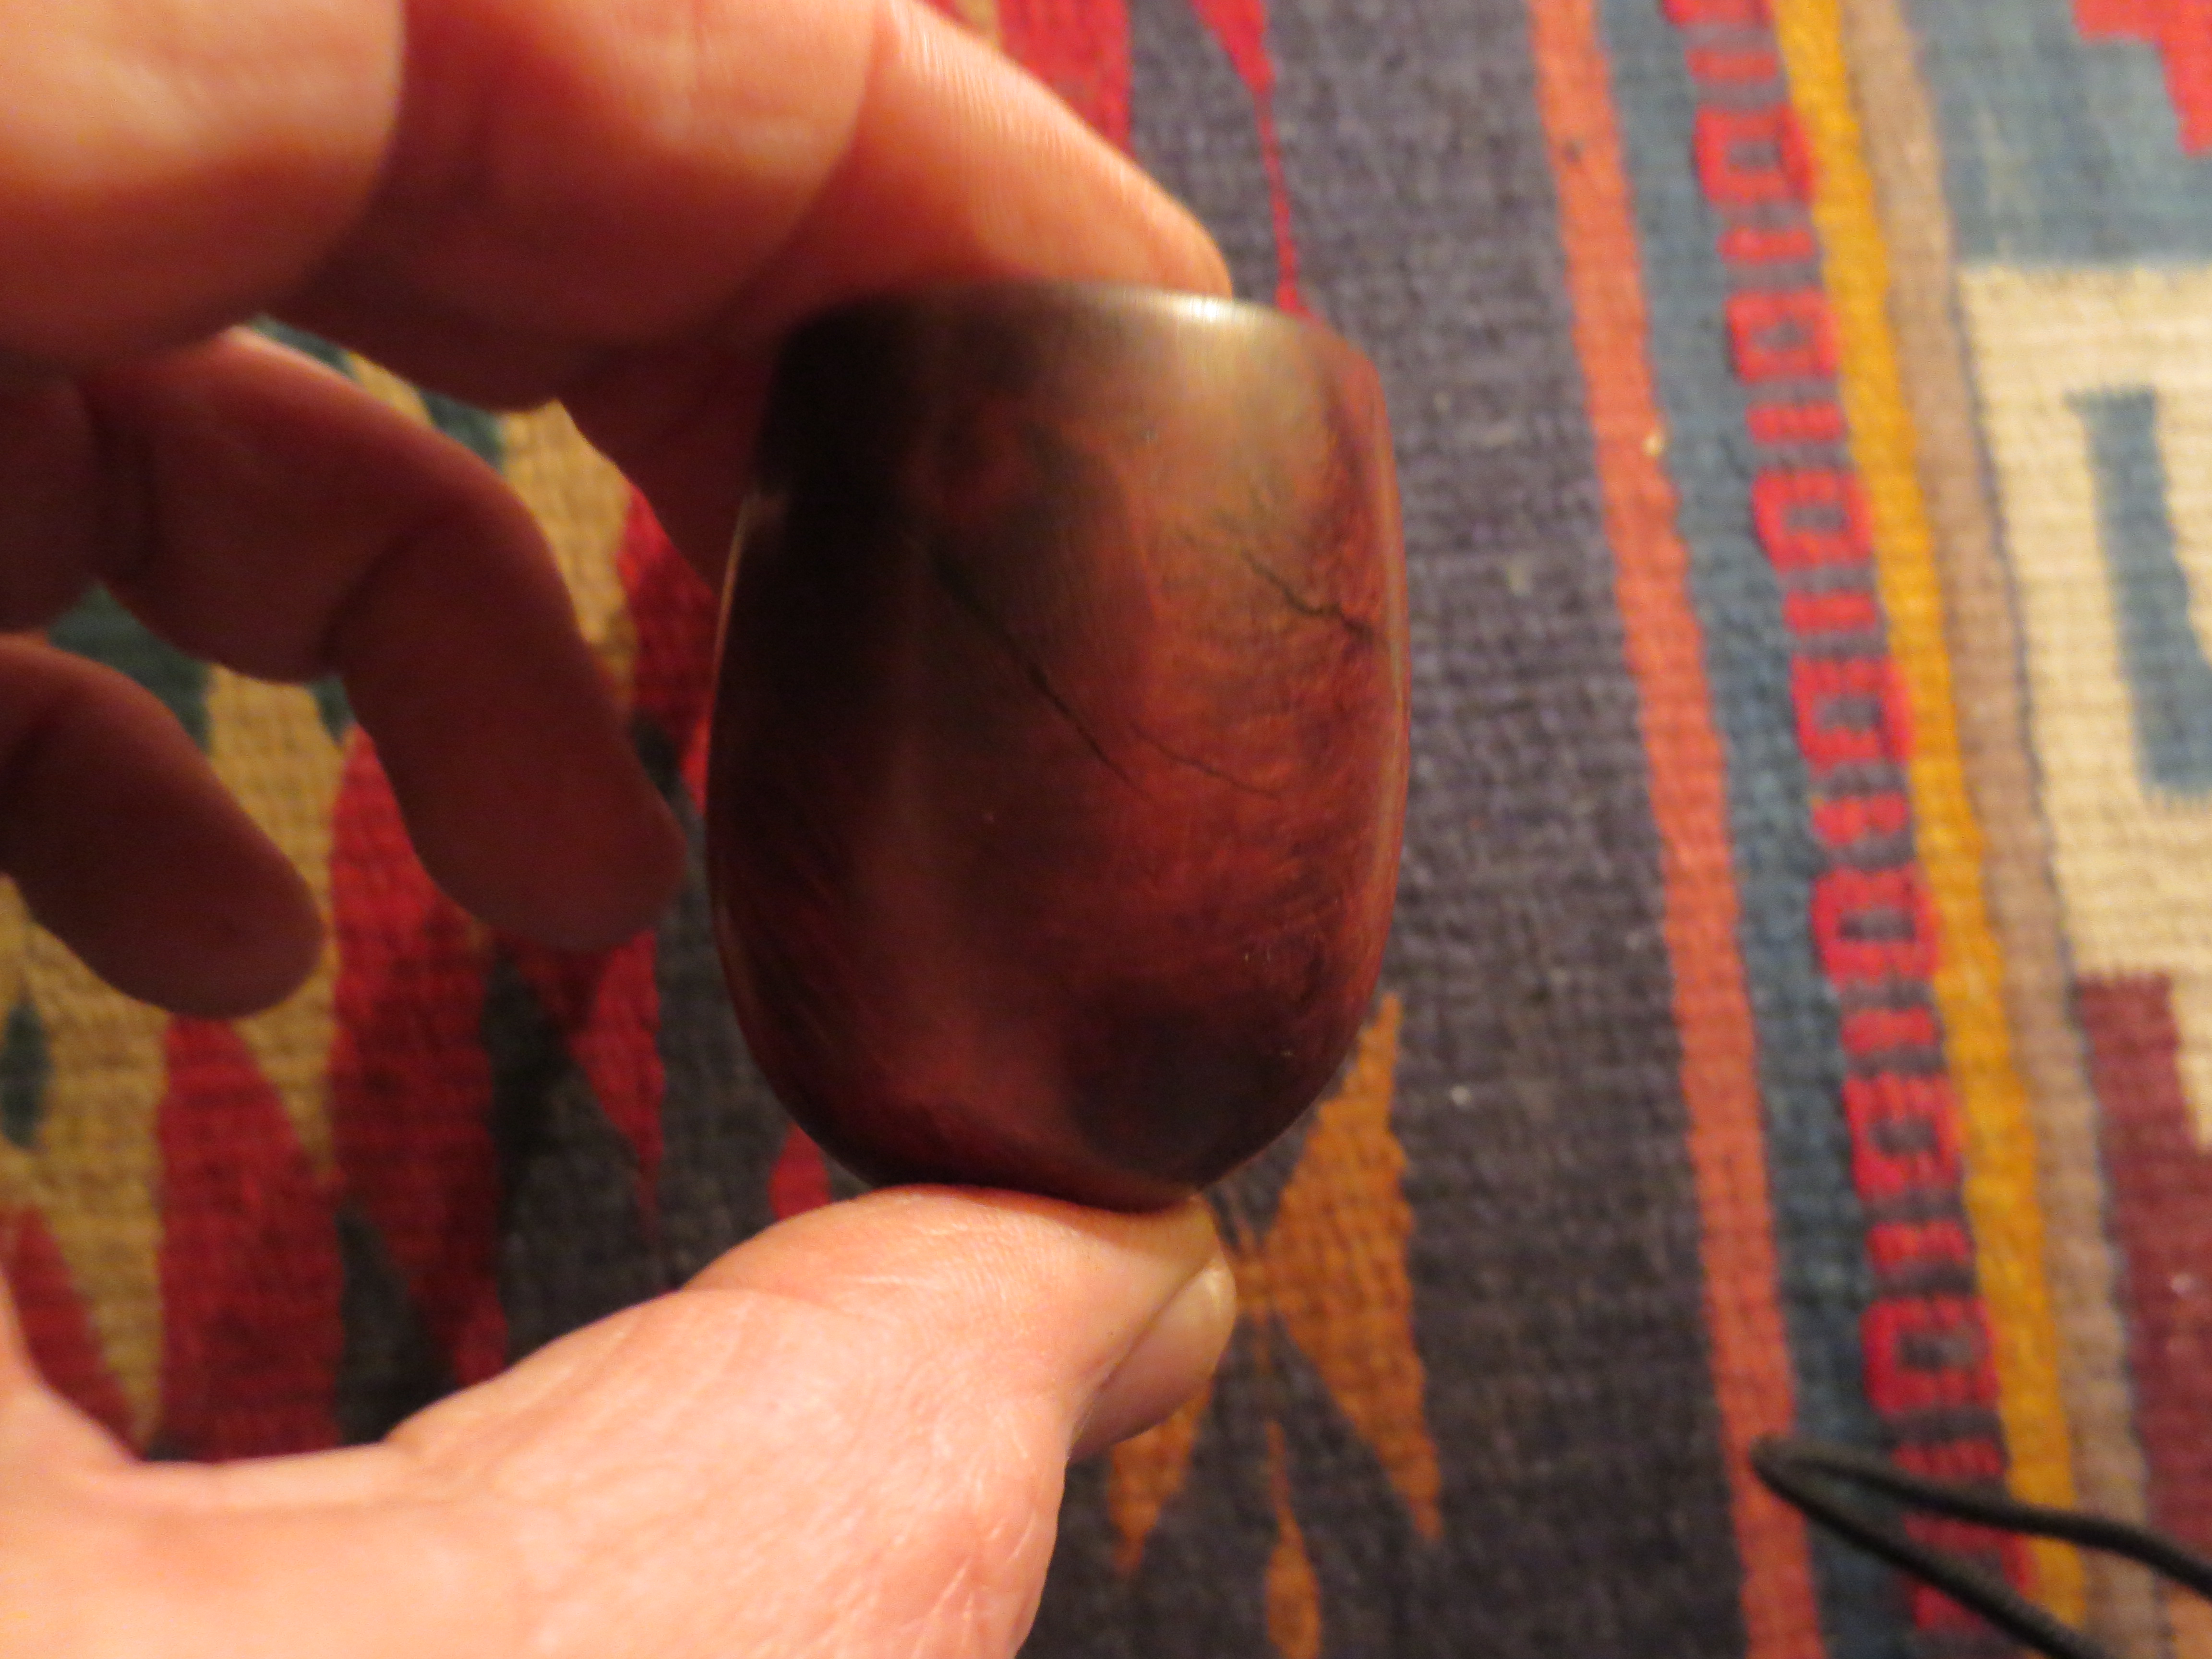
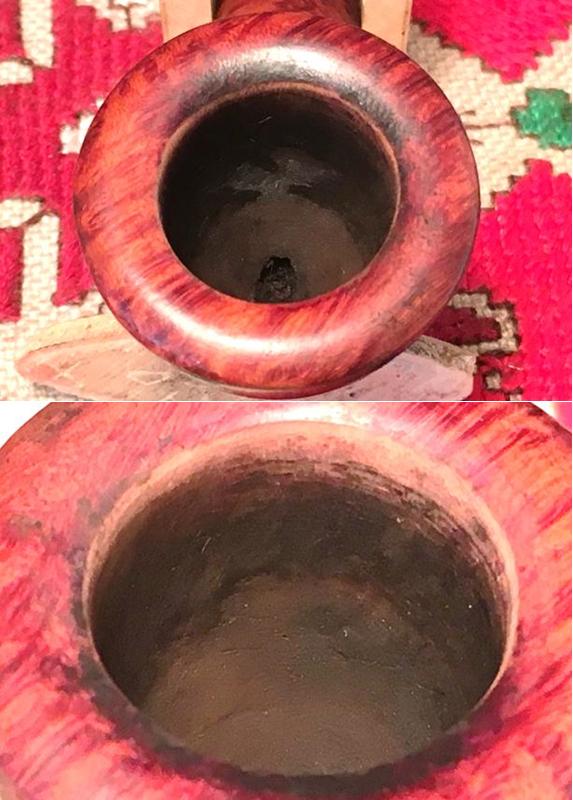
Cleaning the stummel’s external surface, I take a cotton pad with Murphy’s Oil Soap undiluted and scrub the stem surface. I also employ a brass brush to work on the tar deposit on the backside of the rim.  Following the scrub, I rinse the stummel with warm tap water, careful to not allow water in the enter the stummel.  The rim cleans up very nicely.  To address the burn blotch on the front of the stummel and I use a medium grade sanding sponge to remove the dark area.  After a time of working on the burn spot, a troubling question starts to dog me:  Does this burn spot go through to the fire chamber?  Or is it only on the external…  If it goes all the way through, then all I’m doing is further thinning an already thin patch of briar with sanding.  Steve confirmed that I was indeed making things worse.  The last picture in the set below I sent to Steve and it was he who identifies in that photo the crack crossing laterally in the middle of the burn spot.  Ugh.short15 short16 short17
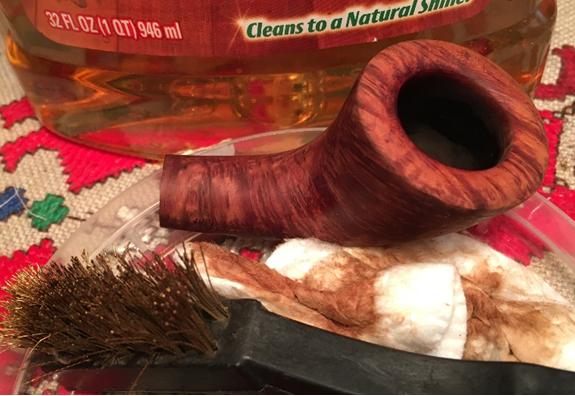
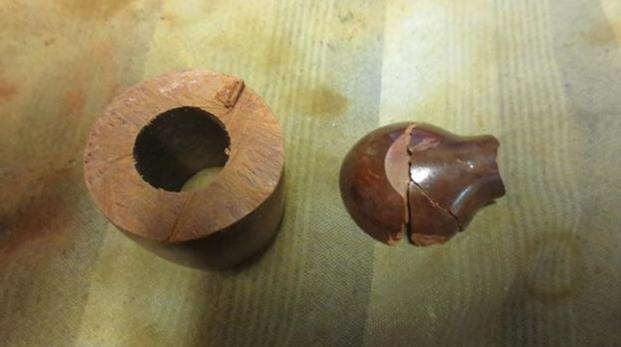
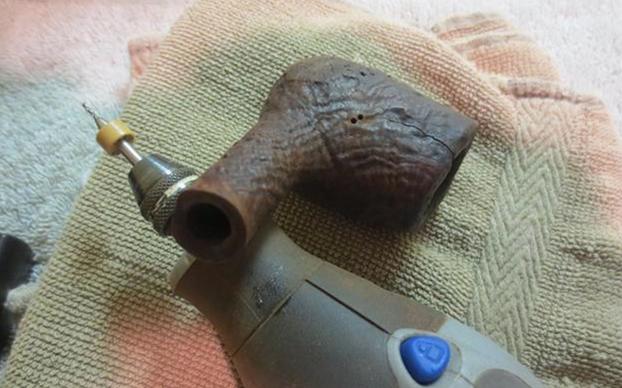
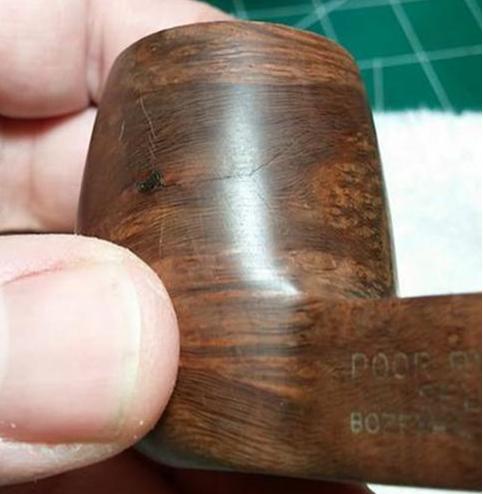
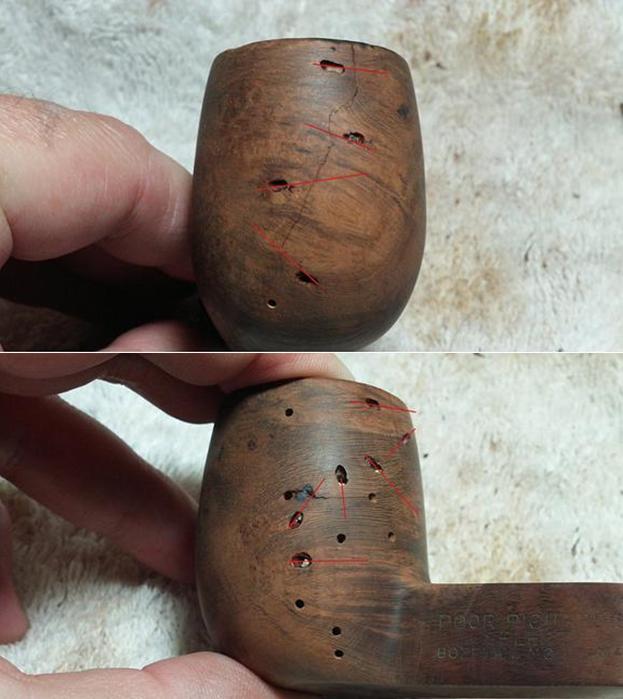
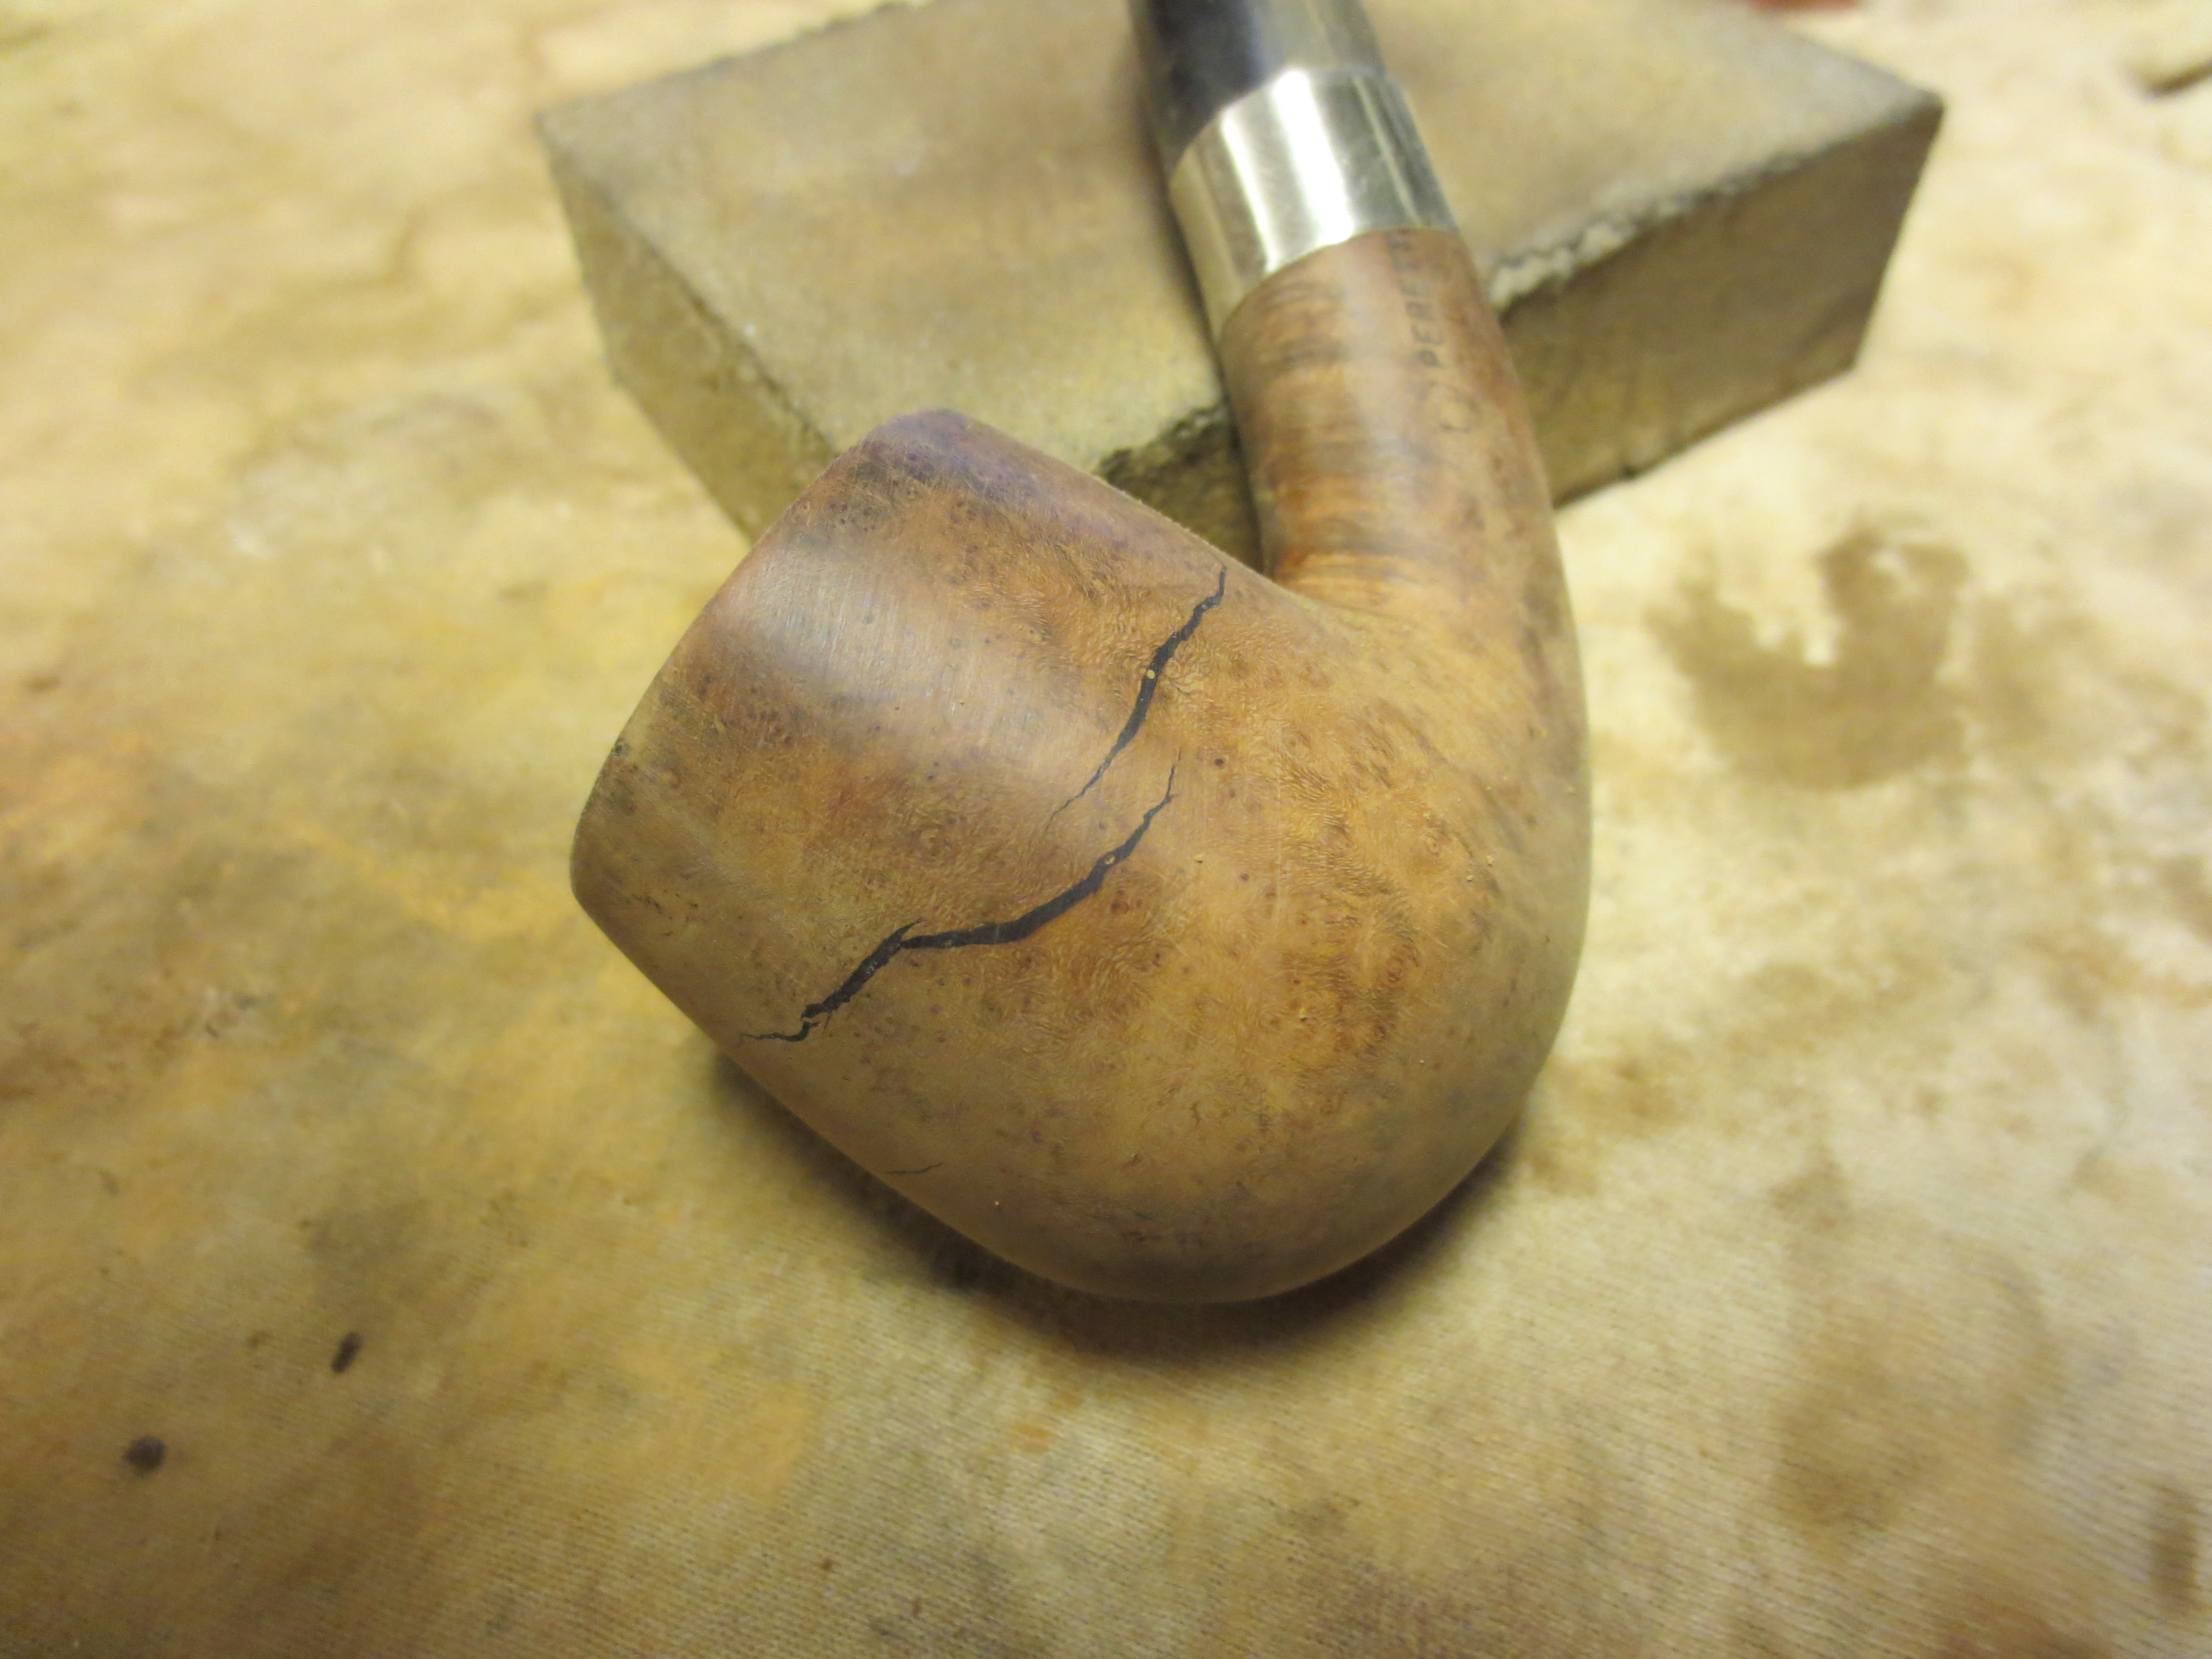
Another opportunity to hone in on the various skills necessary in restoring pipes!  I had the opportunity to fix a crack previously and it is necessary to drill holes on the far ends of the crack to stop the crack creep.  Armed with a magnifying glass to see the crack clearly, I use the sharp dental probe to mark the ends of the crack hopefully to provide a guide for the drill.  I use a 1.5mm bit in the Dremel and I need to drill the holes without going through into the fire chamber.  Well, it was going so well, until it wasn’t.  I suppose it was the combination of the texture of the briar being more crusty feeling, drilling free-hand, or the thin wall that I already suspected – one or any combination of all three….  The first hole is successful, but the second finds day-light.  The briar is much thinner than I had guessed.  The question now is the extent of the burn impact. Is this Short Snorter’s life about to be cut shorter than we all thought!  I use the dental probe to scratch around the holes and pressing to find soft charred briar to reveal more weakness.  I do not find anything other than the hole that I created. short18 short19
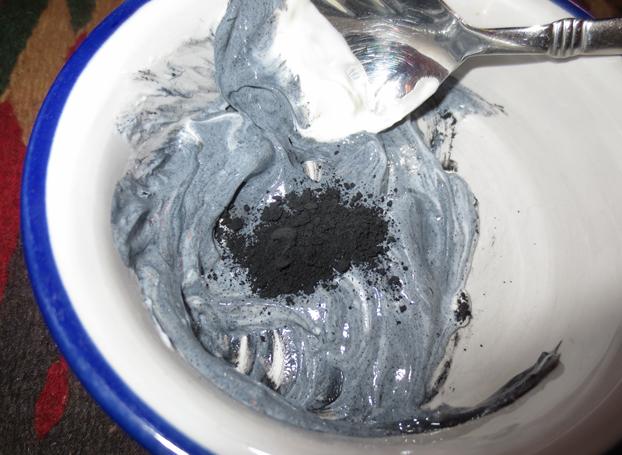
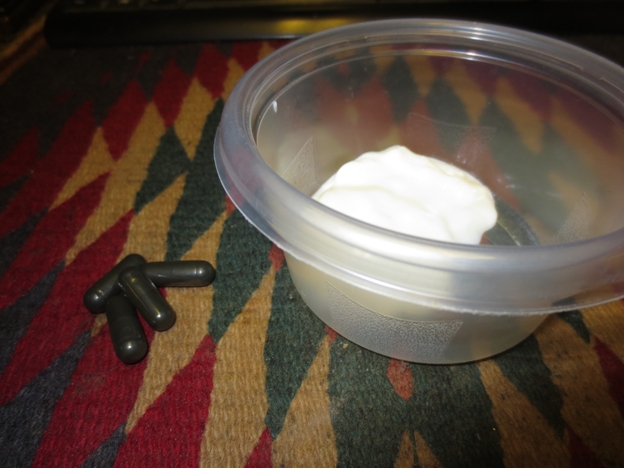
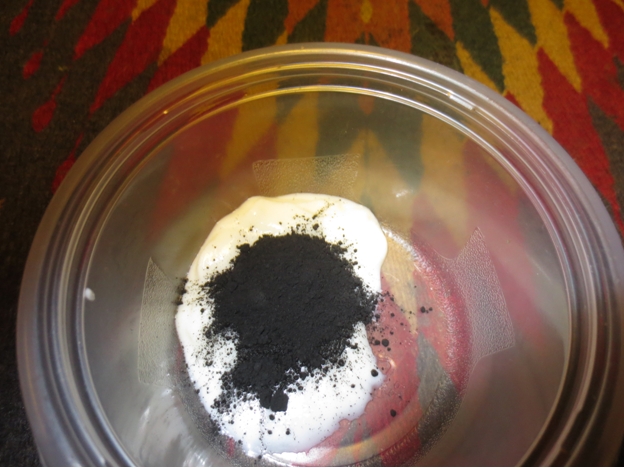
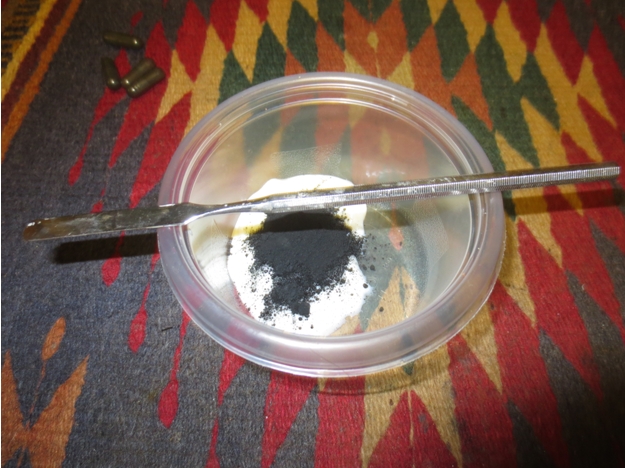
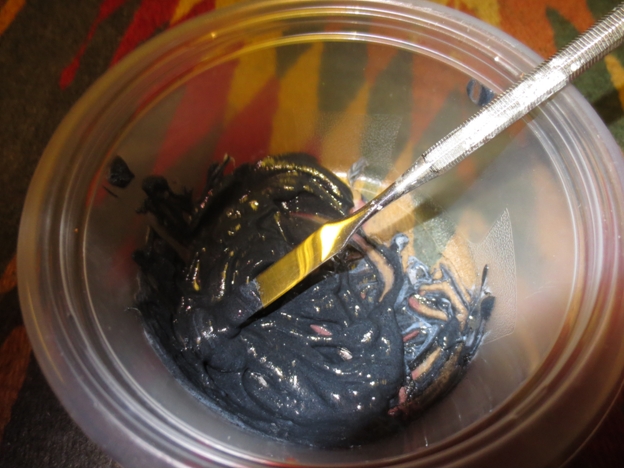
So, the worst that can happen is that this beautiful little Short Snorter becomes a ‘technique pipe’.  I decide to proceed with filling the drill holes with a mixture of briar dust and super glue.  For the external surface, I’ll need to sand down the hole patch areas during the finishing process, then dark staining the stummel to blend and mask the burned area.  For the internal wall, I will mix a batch of the Charcoal and Sour Cream lining paste and apply it to the firewall.  Hopefully, this will provide enough additional heat buffer to protect the thin condition of the briar in the front.  The protective coating will also provide a basis for a protective cake to develop.

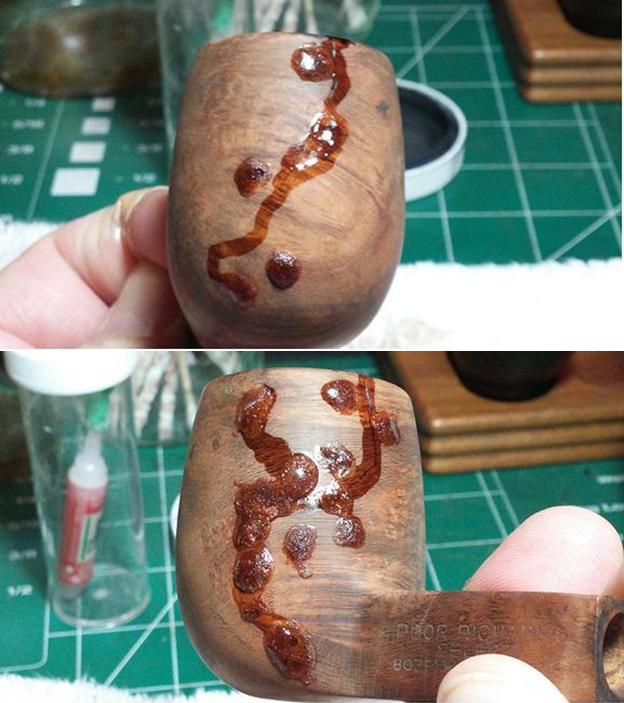
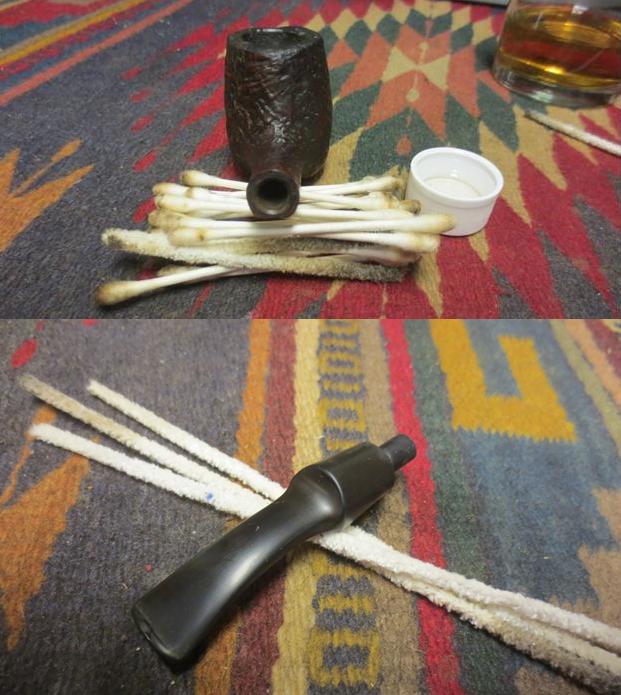
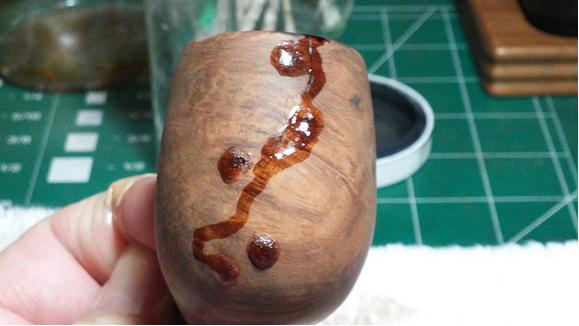
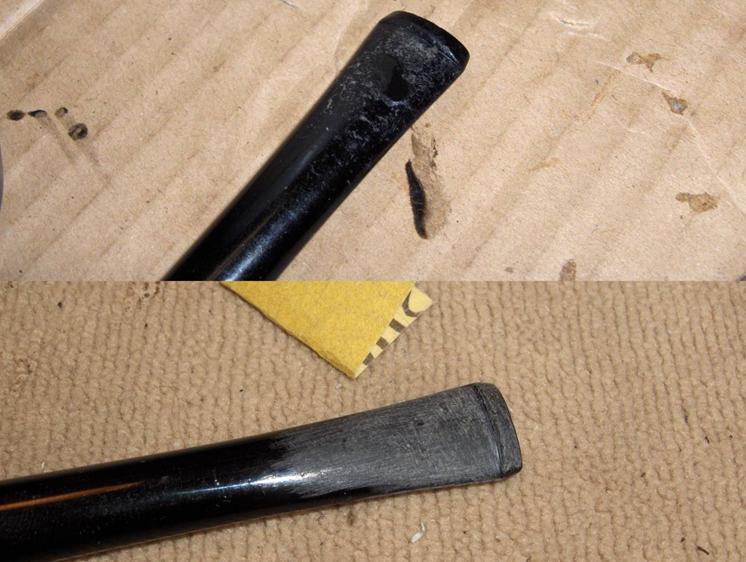
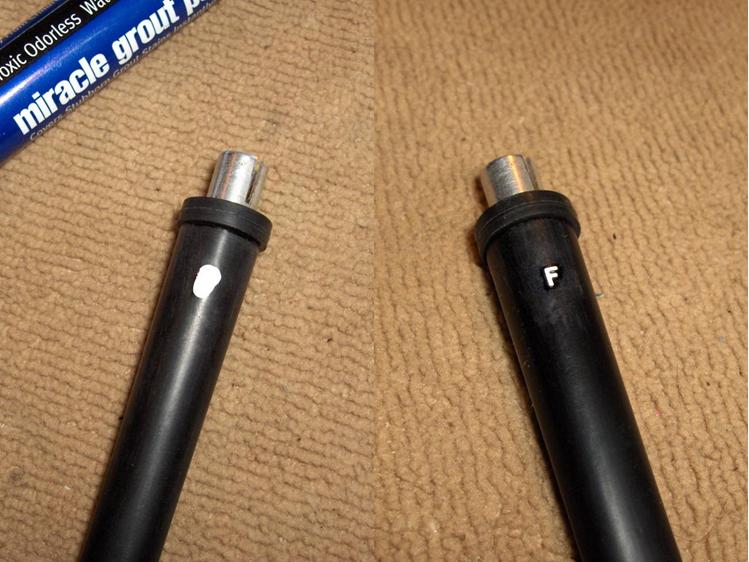
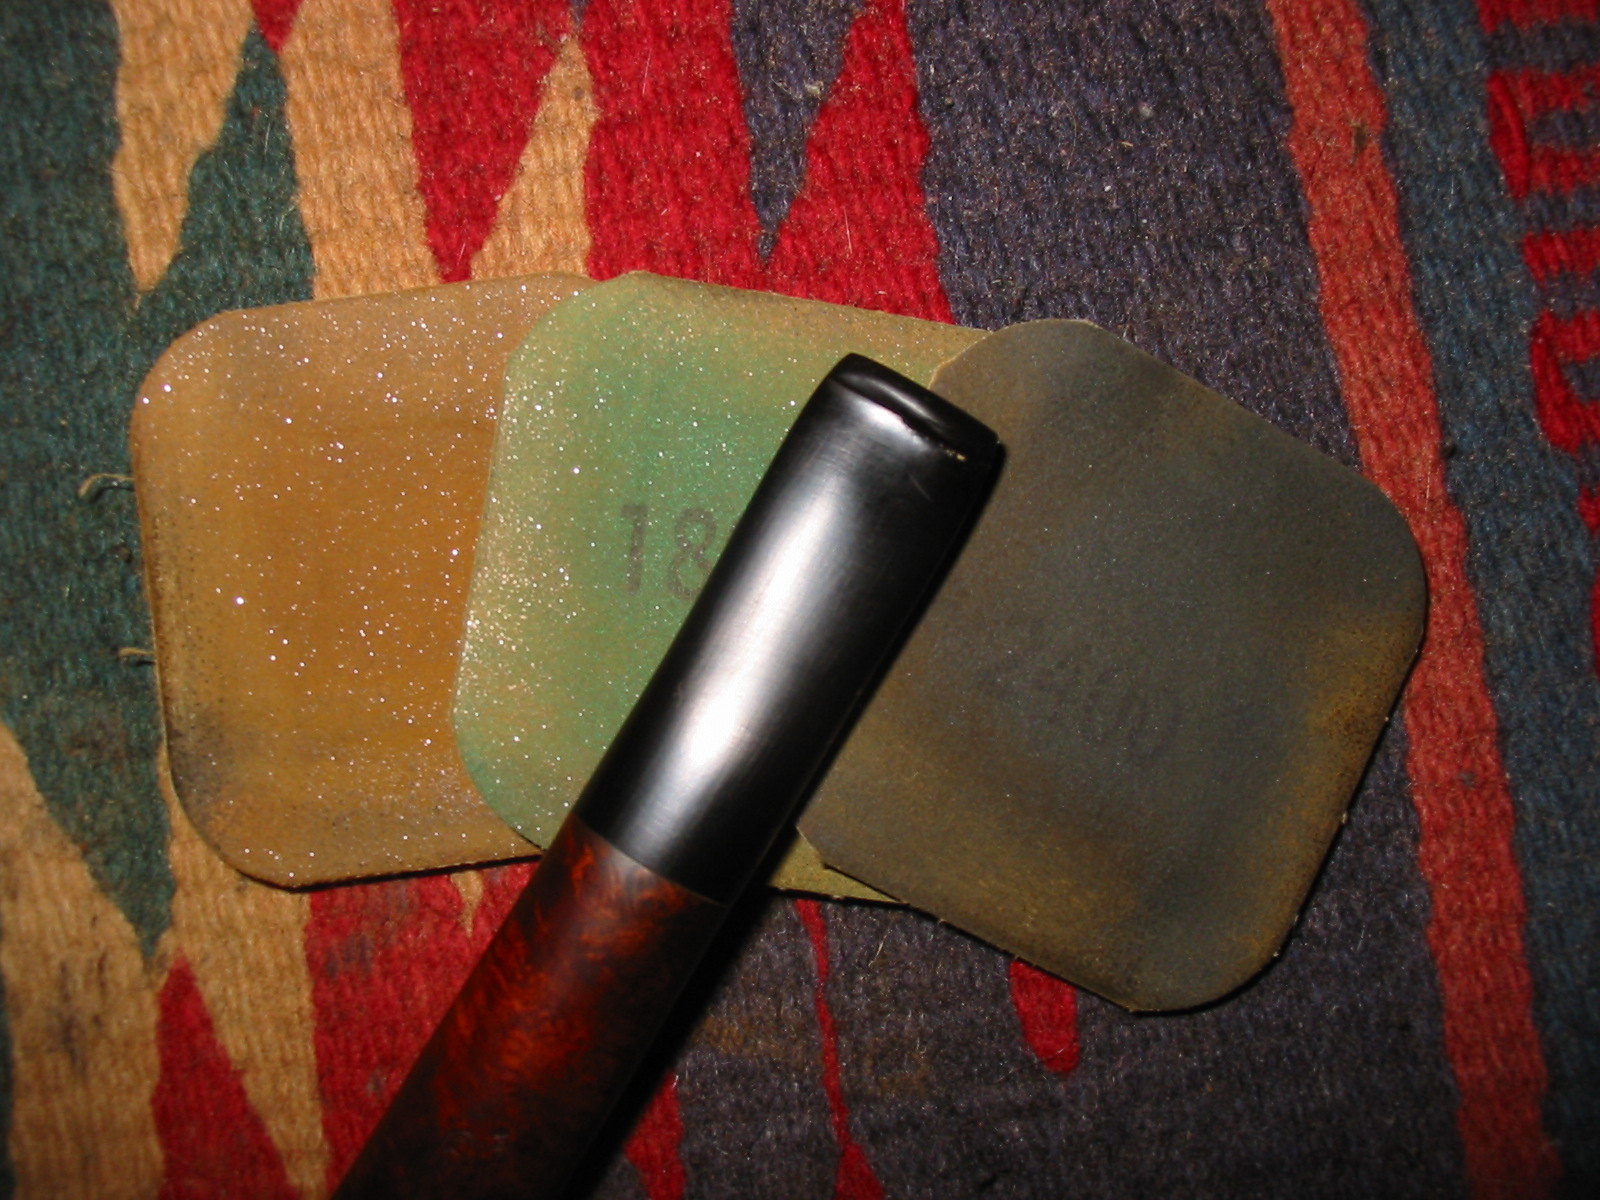
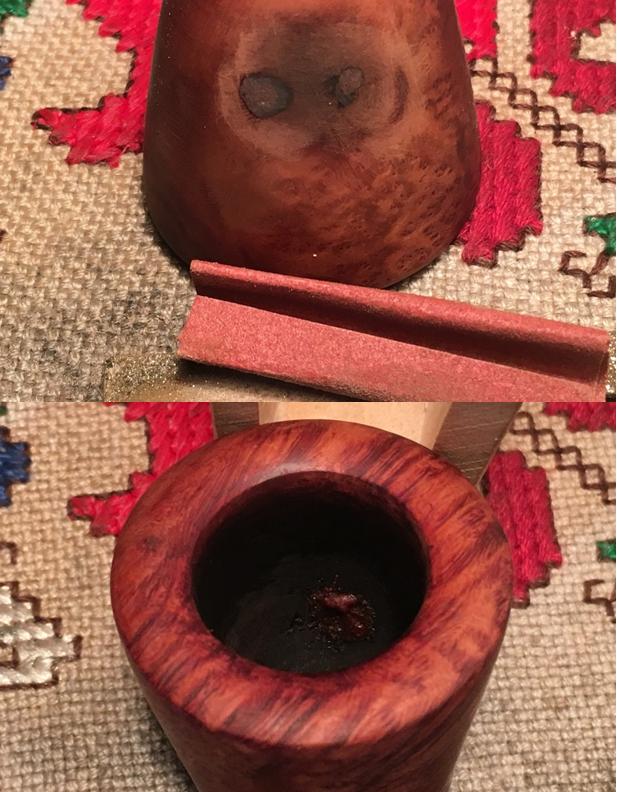
With the stummel on the mat, I need a change of scenery to think things through.  I retrieve the stem from the Oxiclean bath and take 600 grit paper, wet sanding the stem to remove the raised oxidation on the vulcanite stem.  I follow this with 0000 steel wool preparing the surface for moving to the micromesh polishing later.  Then I take pipe cleaners dipped in isopropyl 95% and clean the internal airway of the stem.  It was not very dirty.short20Ok, back to the stummel.  I use a cotton pad with isopropyl 95% to clean both the external surface as well as the fire chamber.  I take briar dust and mix it with super glue to form a putty.  I use a dental spatula and tooth pick to scoop some of the putty and apply it to the holes.  I’m not concerned that the putty goes through to the internal wall – I want to build a little protective mound of hardened briar putty.  Later it will be covered by the Charcoal/Sour Cream layer of insulation.  The pictures show the progress with the regress!short21 short22
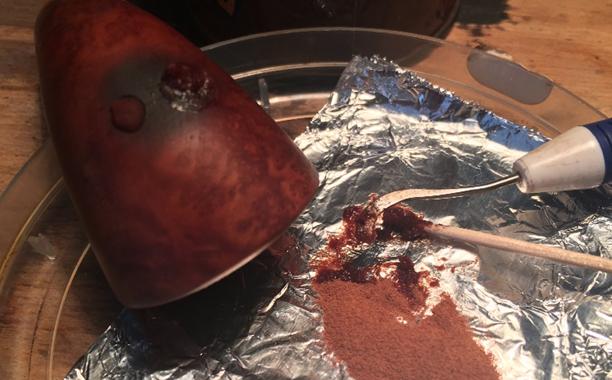
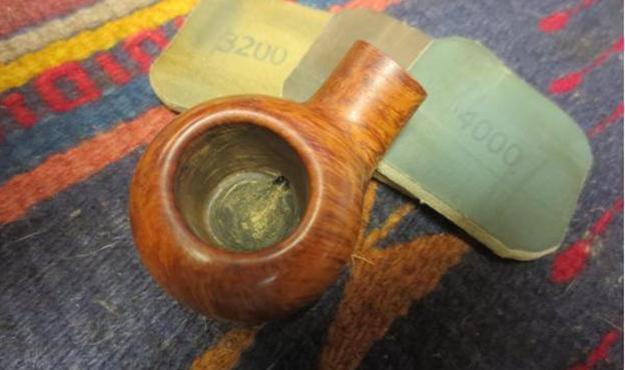
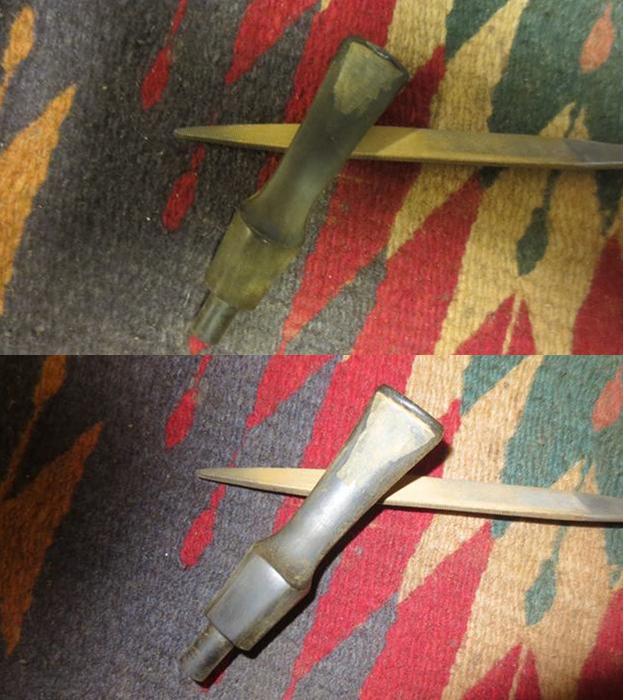
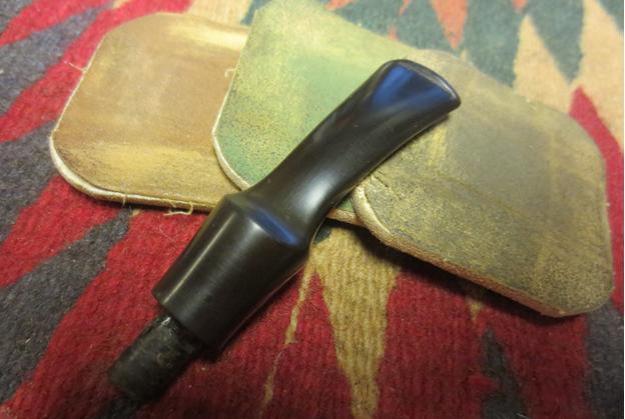
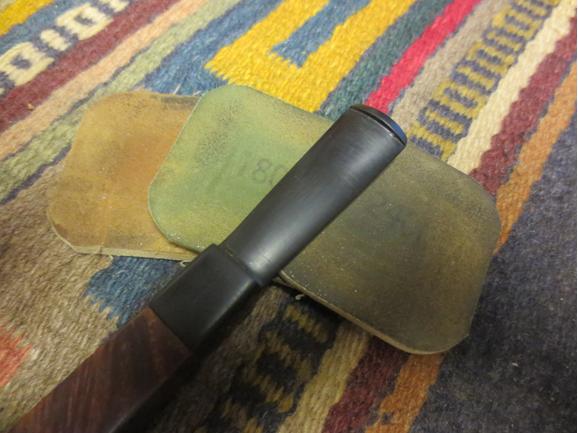
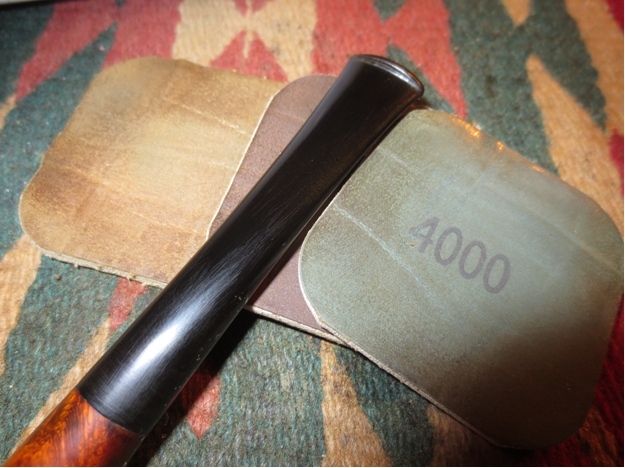
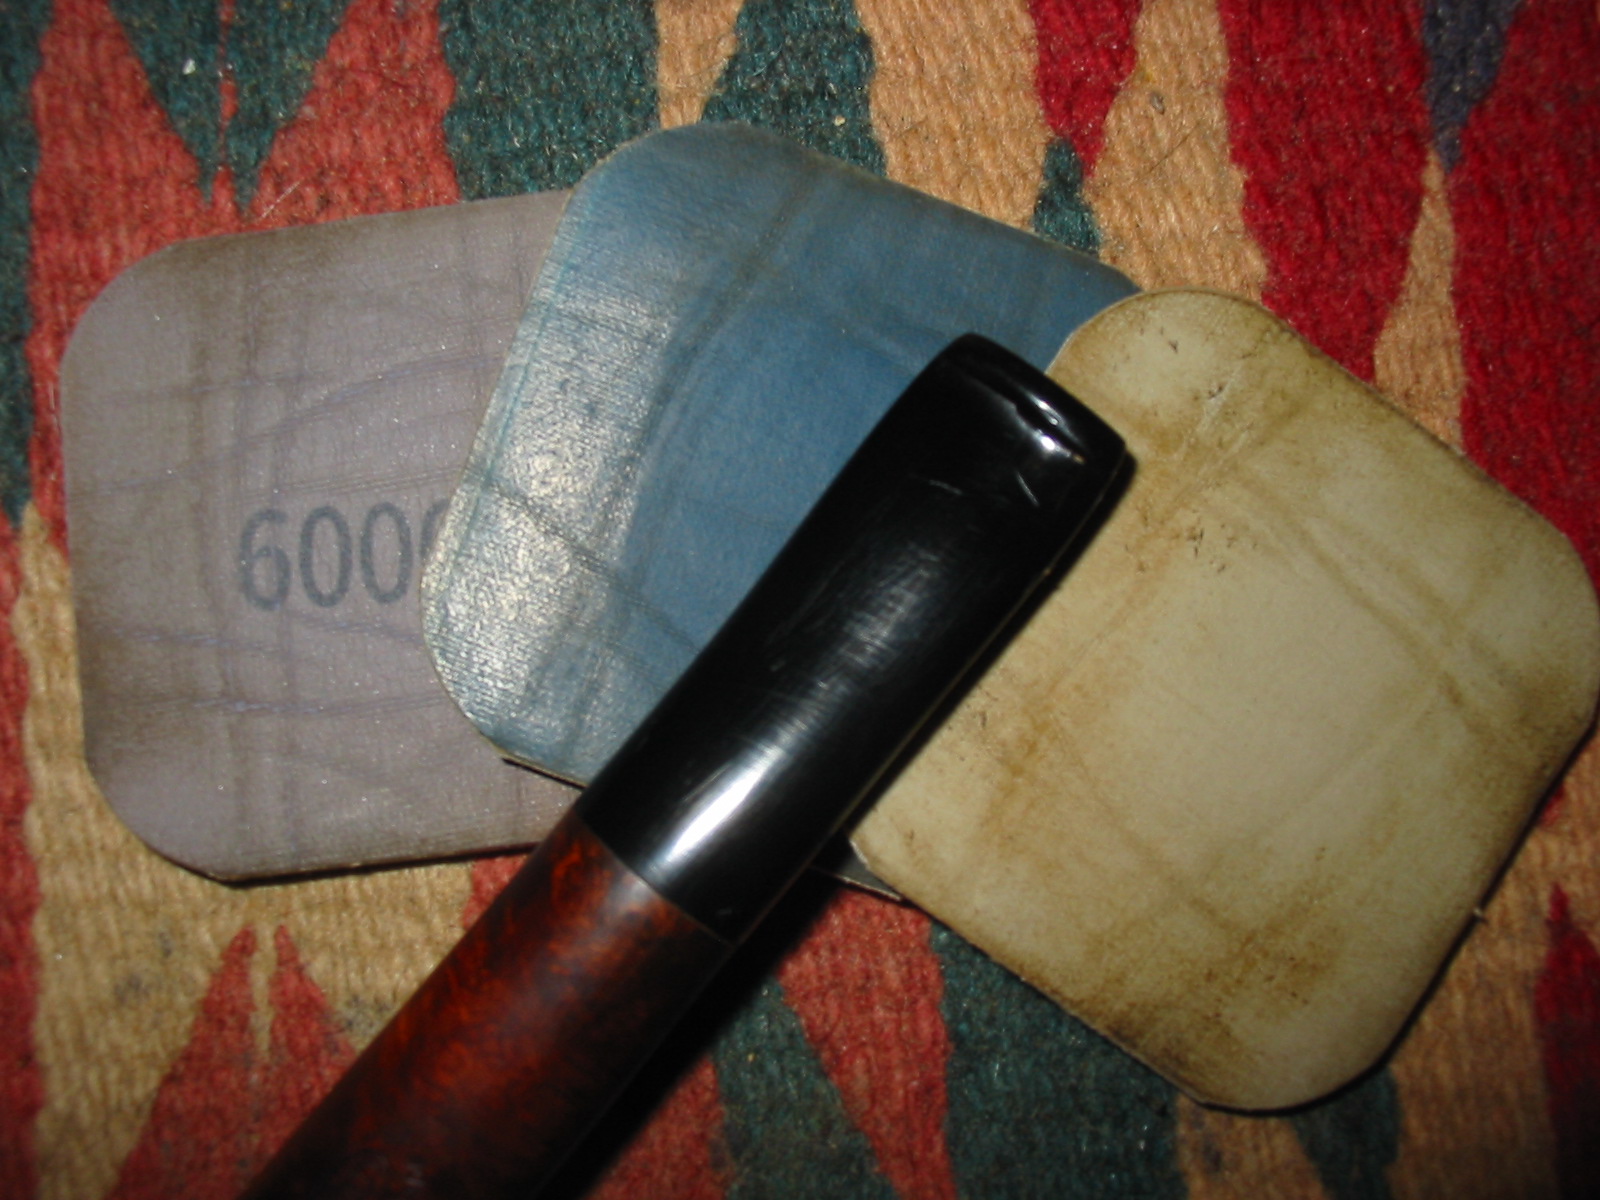
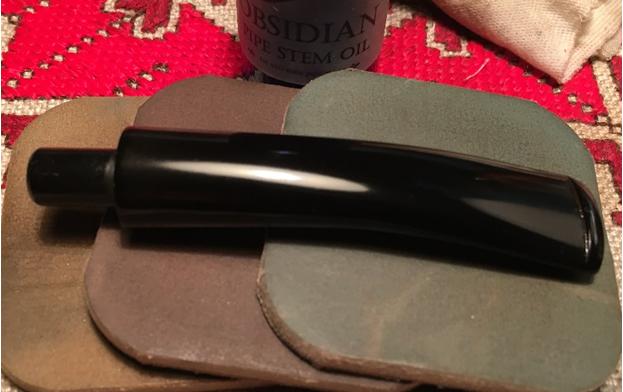
With the briar dust putty curing, I take up the stem and begin the micromesh process first by wet sanding the stem with pads 1500 to 2400.  When complete I apply a coat of Obsidian Oil to the stem to rejuvenate the vulcanite.  I follow this dry sanding with pads 3200 to 4000 and then 6000 to 12000 and I follow each set with an additional application of Obsidian Oil.  I put the stem aside to dry. I never tire witnessing the shiny pop of vulcanite after the micromesh process.  The pictures show the progress.short23 short24 short25
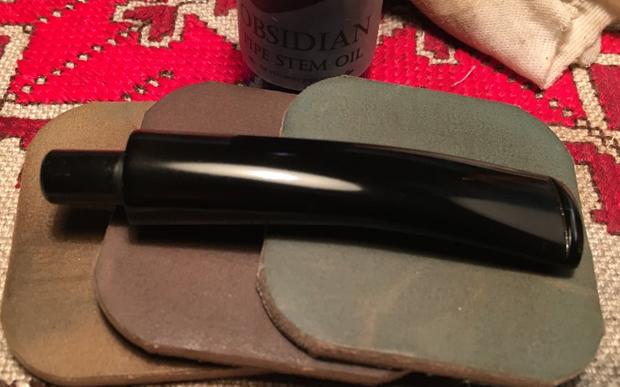
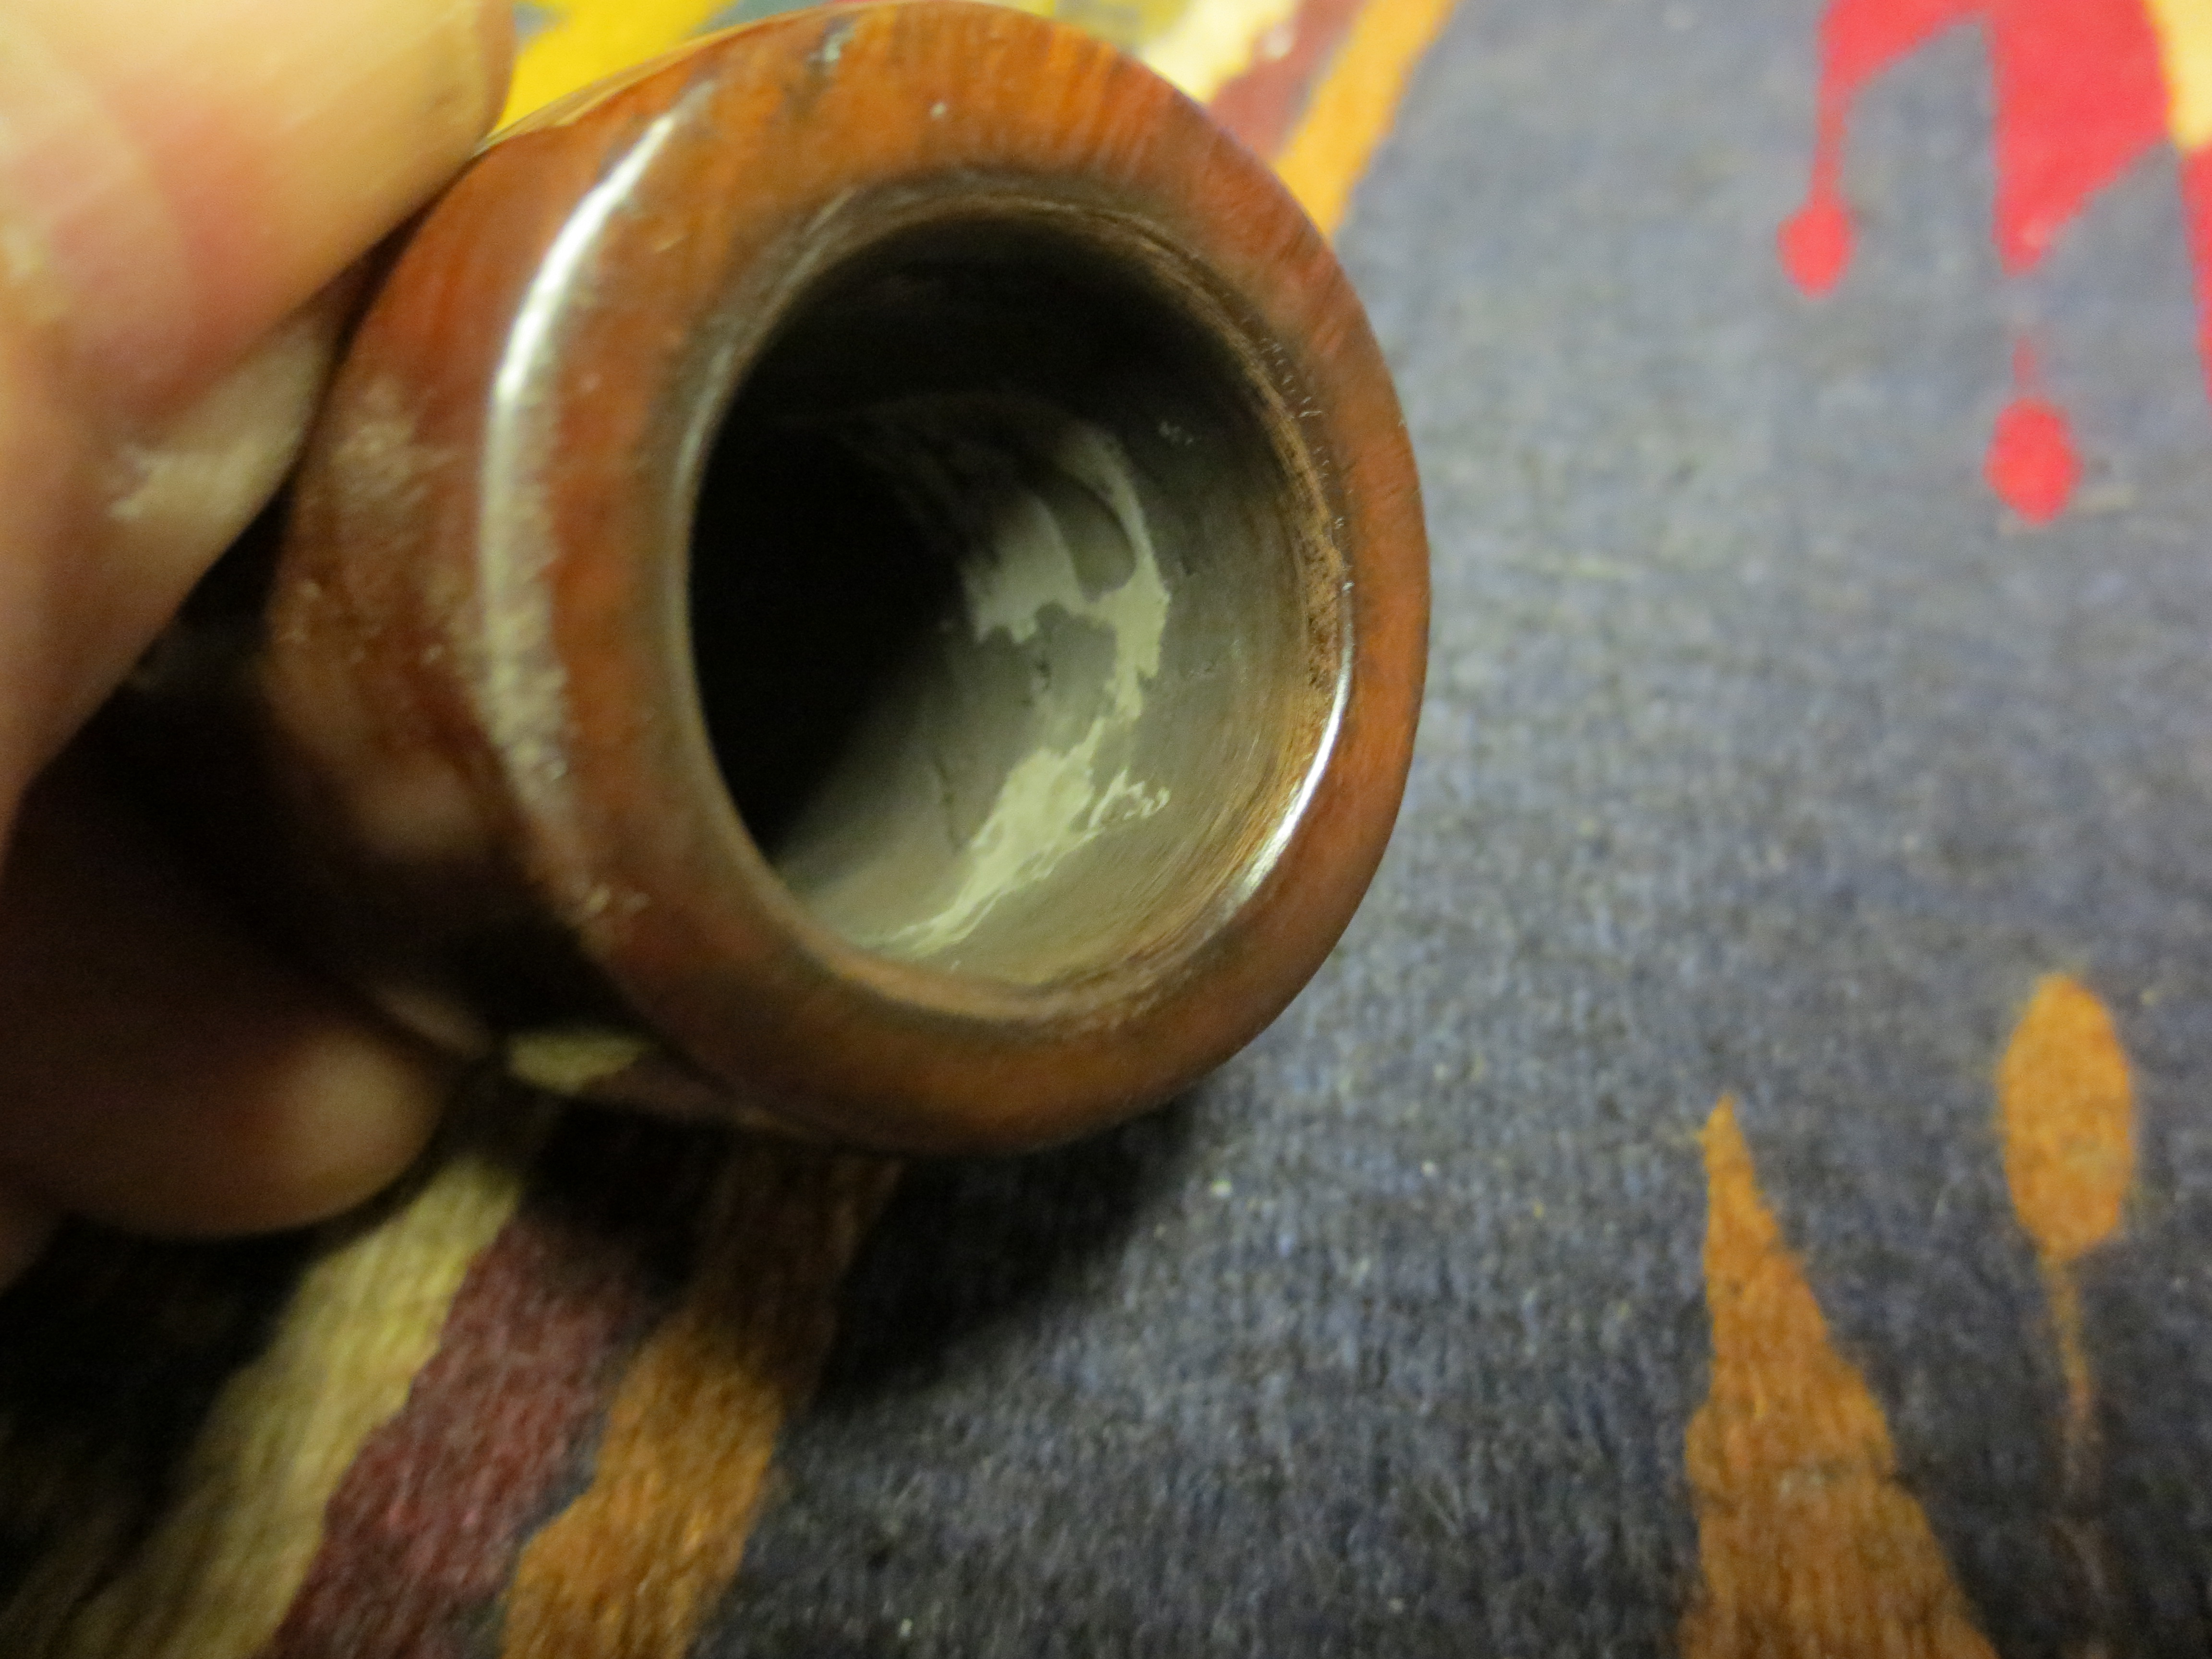
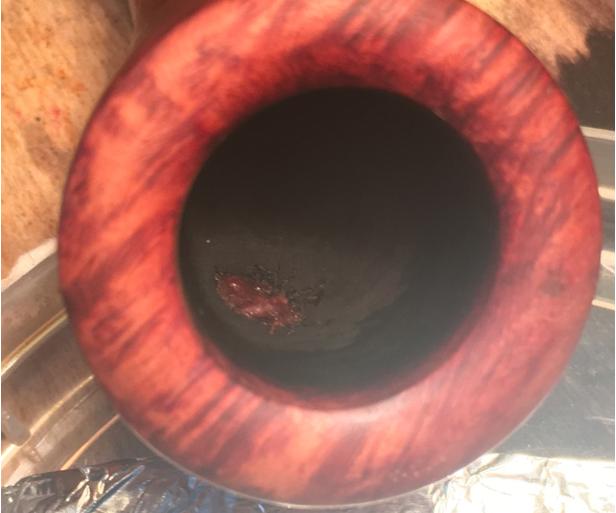
With the briar dust superglue cured after a full 24 hours, I take another close-up of the work areas and then take a flat needle file and file strategically the fills in the two crack holes that were drilled – one well, the other one breaking through the firewall.  After bringing both fills almost to the briar surface level, I use 240 grit paper, rolling it into a very tight tube, I remove all the excess fill bringing the patch to the surface.  Then, turning to the Briar dust putty in the fire chamber, I use the flat needle file and reach into the bowl and take off most the overflow.  Then, with the 240 grit paper I smooth the patch but I leave a small briar dust patch over the internal wall breach.  I hope this adds protection underneath the insulation layer that I will do later.  The pictures tell the story.short26 short27 short28 short29
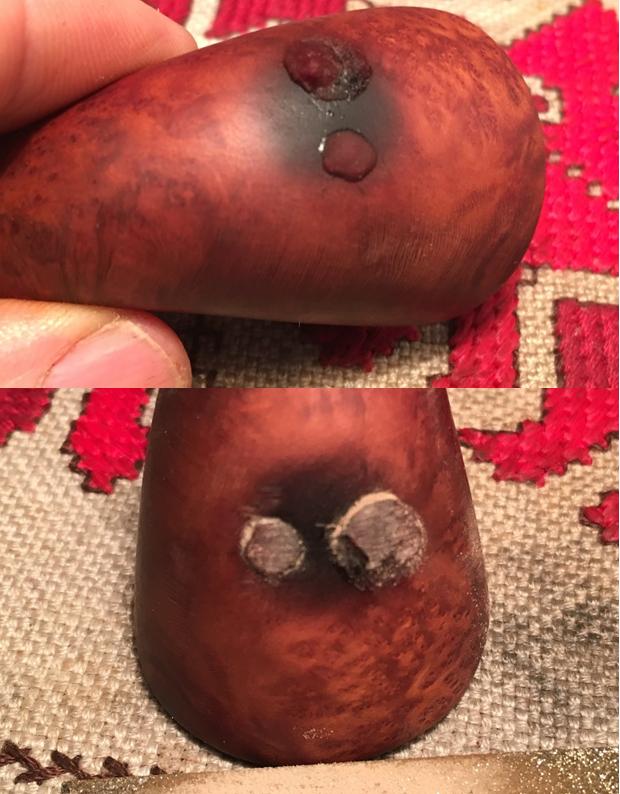
With all the attention with the crack repair, I realize I have yet to clean the internals of the stummel.  I do that with Q-tips and pipe cleaners dipped in isopropyl 95%.  Thankfully, there was very little work to do.short30
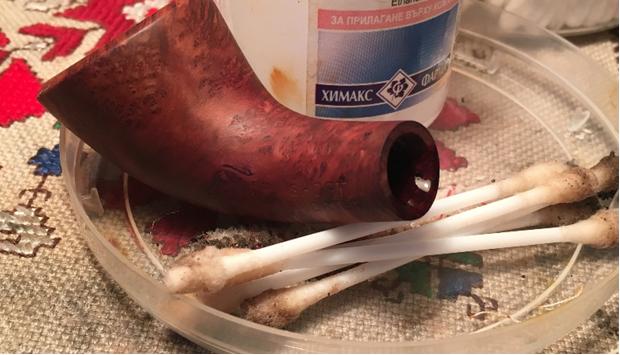
At this point the question that presents itself is, do I proceed with mixing up a charcoal and sour cream (or yogurt) insulation paste and coat the chamber or do I proceed with working on the external briar of the Short Snorter.  Since I will need to have a thumb and cork in fire chamber for all the external briar projects, I need to wait to do the fire chamber work near the end – probably before the final polishing phases.

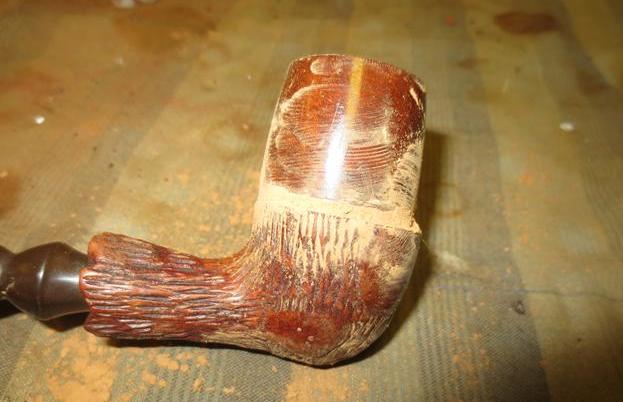
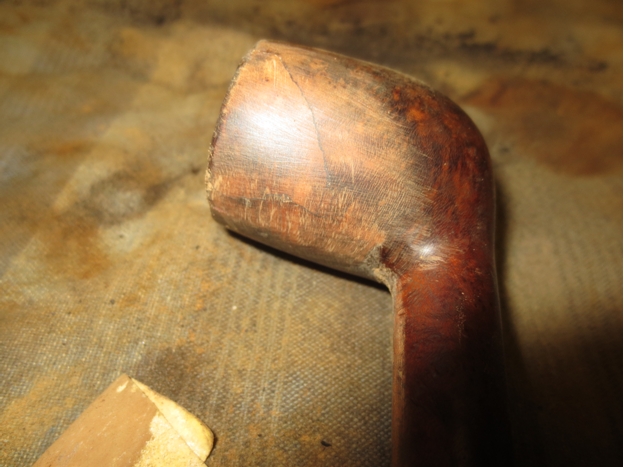
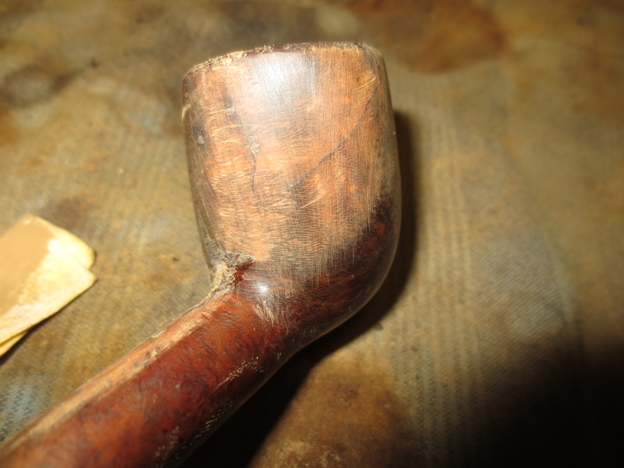
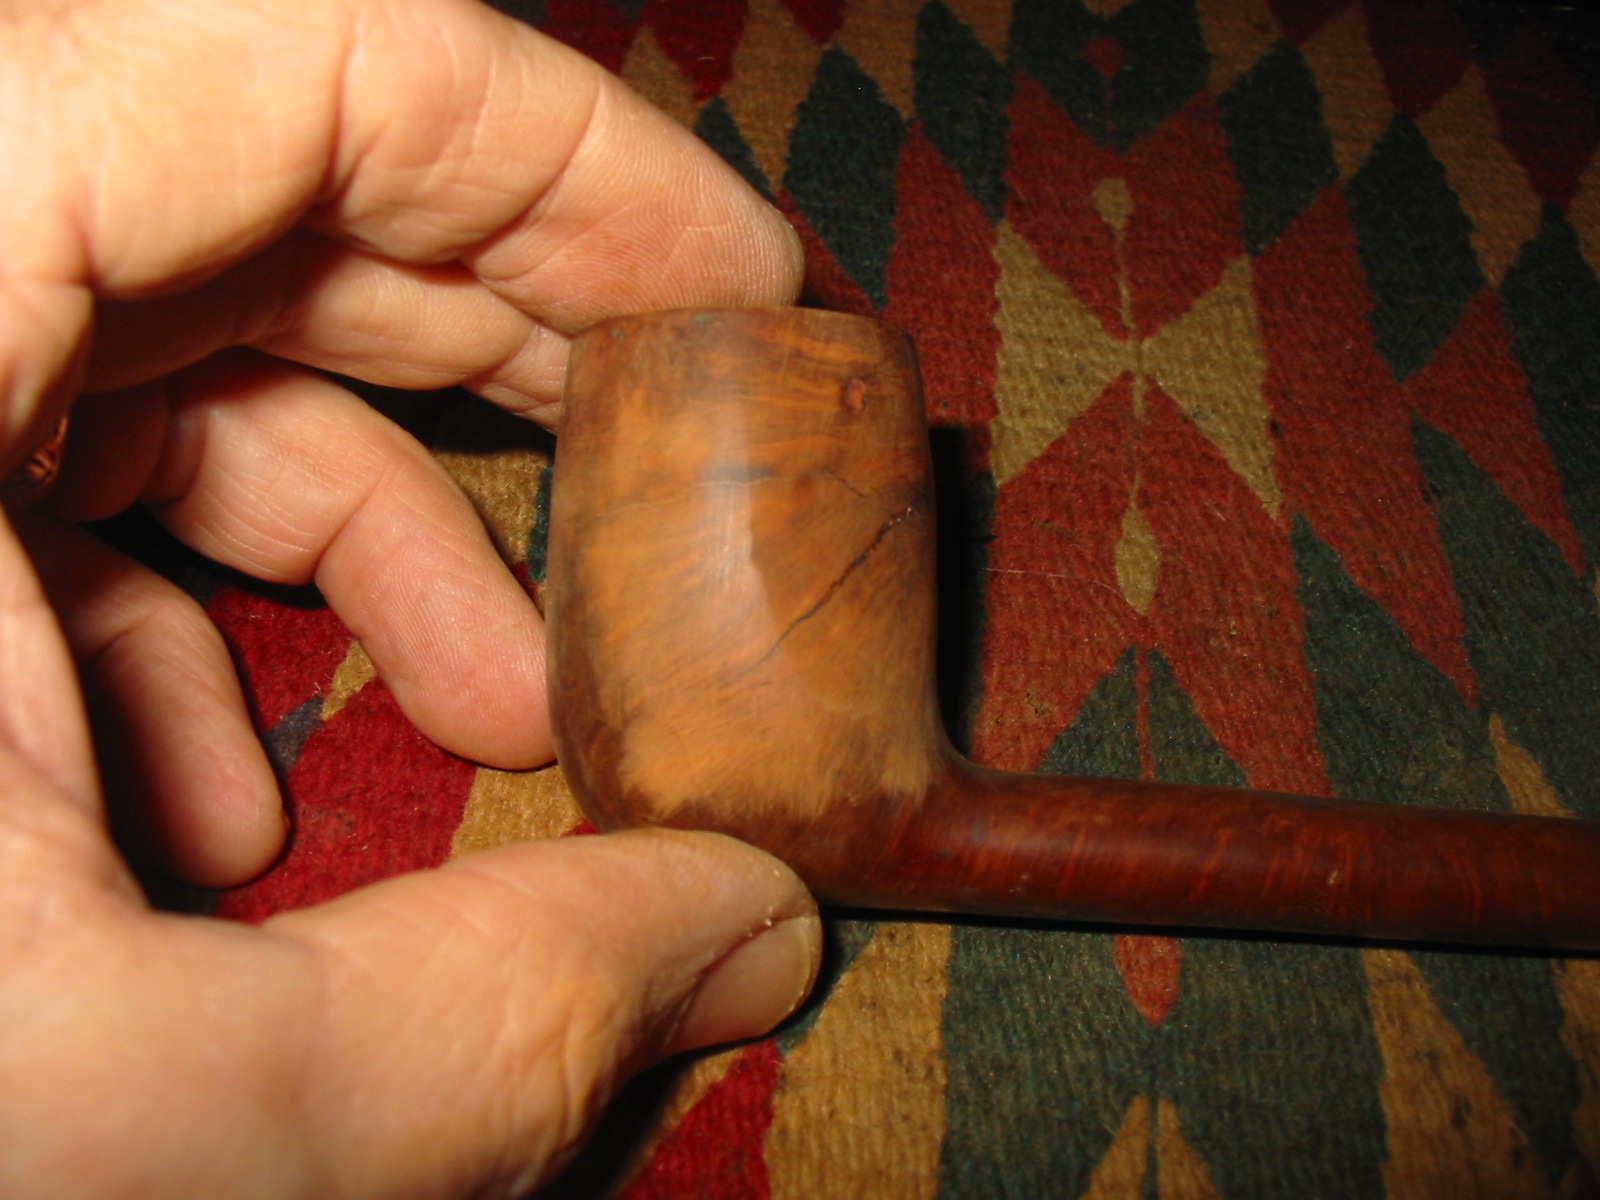
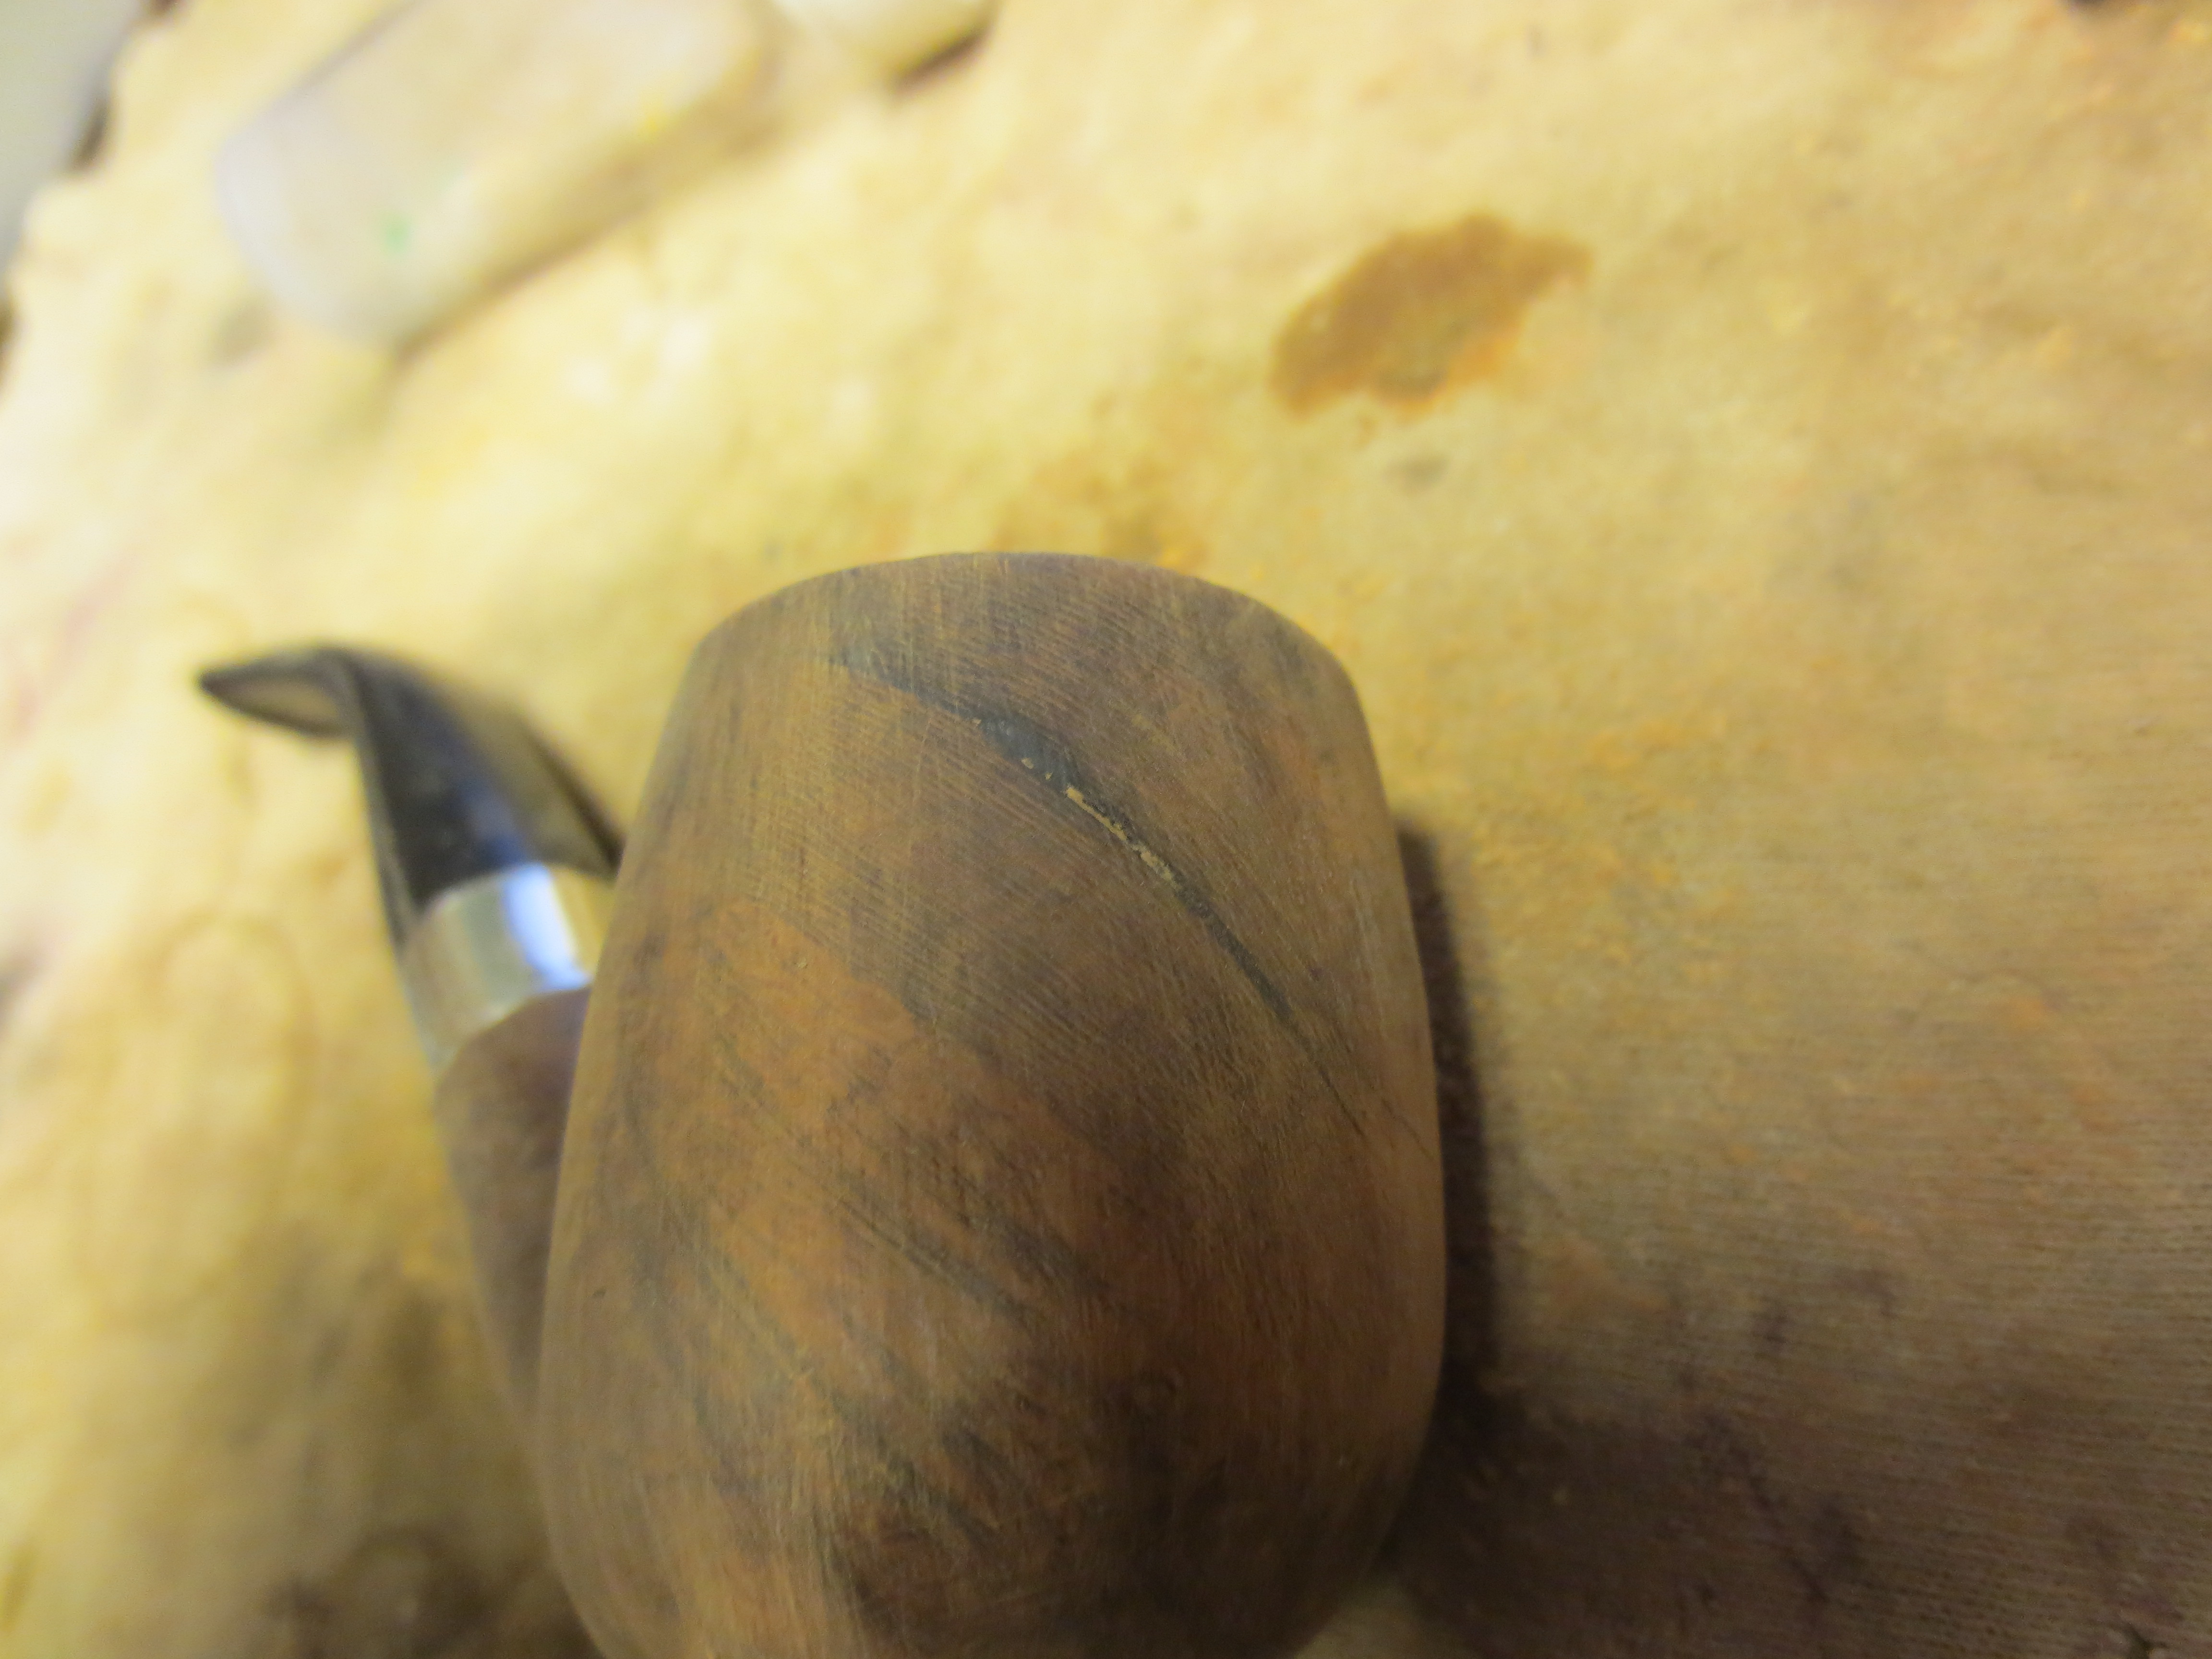
I take a close look at the stummel surface and detect some shiny spots revealing the presence of the old finish.   I want to remove all the old finish left behind by the Murphy Oil Soap cleaning.  Using the light sponge sand I sand down the surface followed by wet sanding with micromesh pads 1500 to 2400, then 3200 to 4000 and finishing with pads 6000 to 12000.  The pictures show the progress.short31 short32
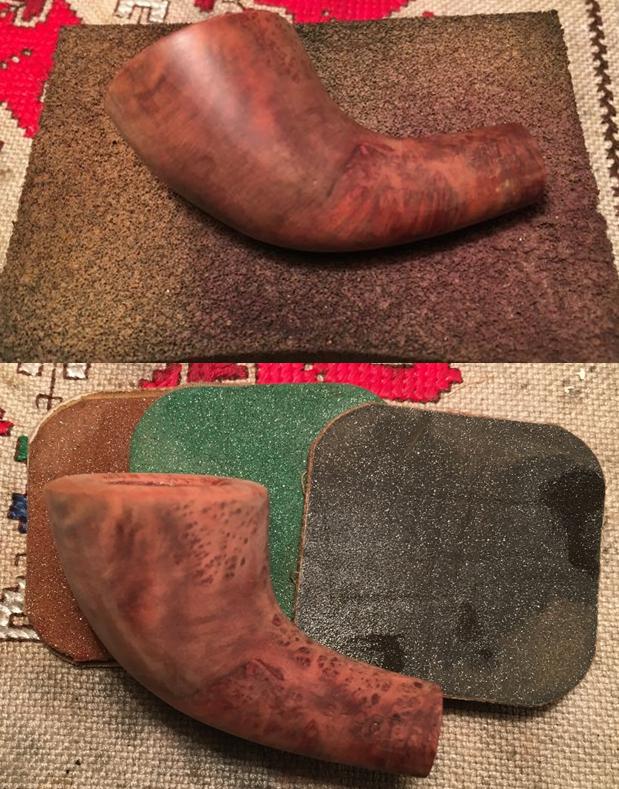
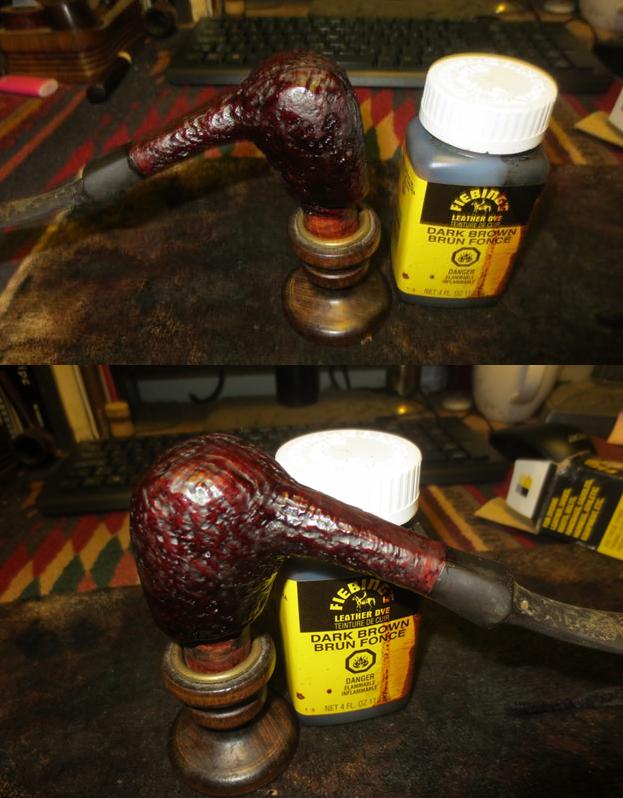
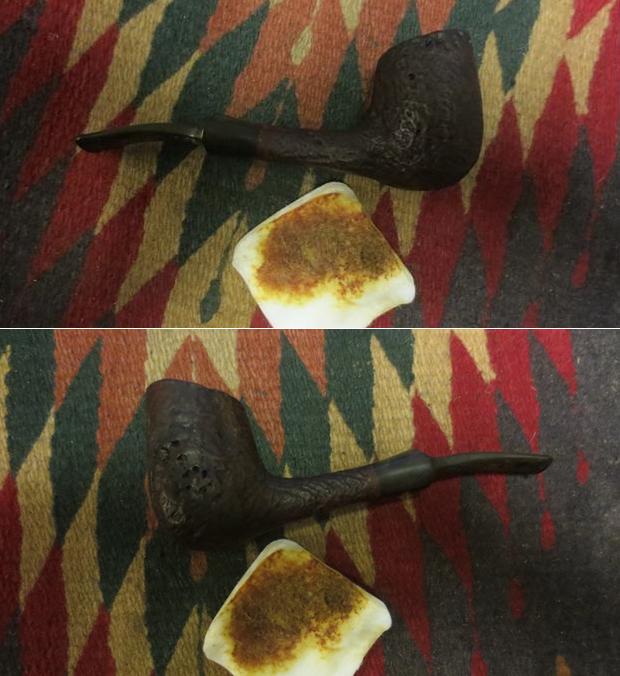
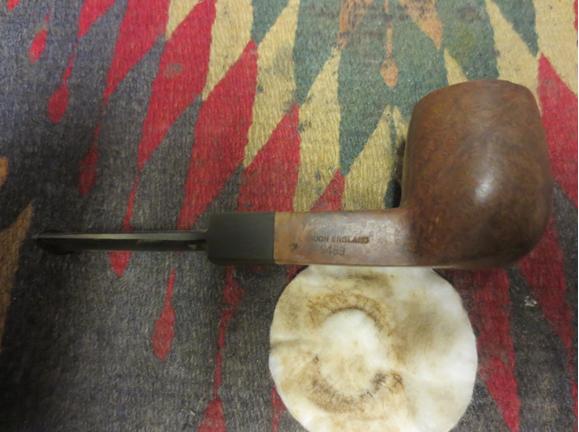
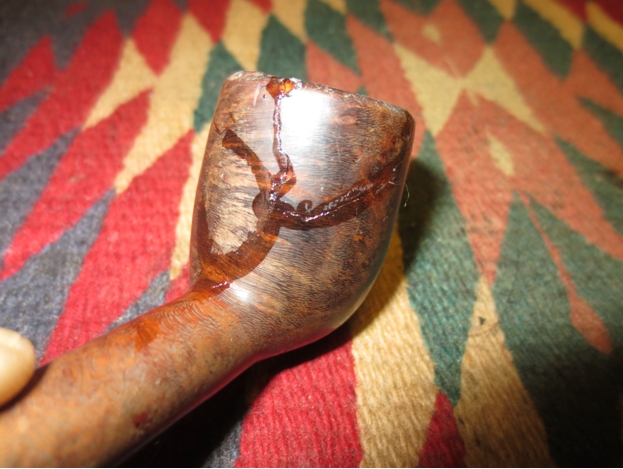
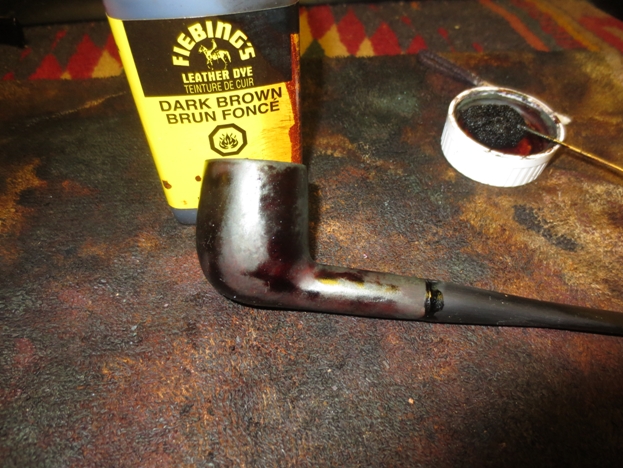
To mask and blend the burn spot on the front of the stummel, I use aniline-based Dark Brown Leather Dye hopefully to accomplish this.  With a cork stuck snuggly in the fire chamber to serve as a handle to rotate the stummel, using a bent non-bristled pipe cleaner, I apply the dye liberally around the stummel, rotating it to be sure the dye reaches the inverted rim.  After the application, I flame it using a lit candle waiting for that purpose. The alcohol in the dye burns off quickly setting the hue in the grain.  When cooled, I apply a second coat of dye to the stummel surface and again I flame it.  I let the dye set overnight.  The picture shows the flamed crusted state.short33The next morning, anxious to see the ‘unwrapped’ stummel and the results of Fiebing’s Dark Brown Leather Dye, I take the Dremel and mount the hand-held extender with a felt wheel and apply Tripoli to the stummel surface to remove the dye crust.  The dark stain did well in blending the burn spot on the stummel.  That is looking good.  Two problem areas emerge – the rim showed a gap in the coverage of the dye on the inner rim.  It must have been the overhang of the cork I was using….  An easy patch worked well as I use a dark walnut stain stick and paint the rim. short34 short35After the Tripoli buff with the Dremel felt wheel, I also detect pits in the briar surface in the upper left joint of the shank and stummel – not sure how I missed these but I see them now and I don’t like seeing them now.  Of course, it would have been easier addressing these during an earlier stage of restoration, but I’ll make a go at a patch now.  I take Hot Stuff Special ‘T’ CA Glue, a bit thicker than regular CA glue, and apply a dribble on the end of a toothpick then I dab a bit of the glue from the toothpick strategically on a pit.  The thicker glue beads up nicely on the pit and doesn’t run over the surface.  Using the toothpick, instead of applying glue straight from the bottle spout, allows a better control of the amount of glue in play.  I put the stummel aside to let the ‘T’ CA Glue cure and then later I’ll strategically sand these patches – hopefully keeping the patch area to a minimum. I didn’t do anything with the crevice obliterating the ‘S’NORTER’.  The pictures show the progress.short36 short37After the ‘T’ CA Glue cures, I use 240 grit paper to sand tightly on the glue mounds – trying to keep the patch area to a minimum.  After the 240 I use 600 grit paper on the area and then a very quick run through the complete set of 9 micromesh pads, 1500 to 12000.  I then apply Dark Walnut with a stain stick to the sanded areas.  After drying a bit, I use a cotton pad with isopropyl 95% to wipe down the stummel to blend the stain of the entire surface along with the patch area.  This helps but I’m wishing I would have done this earlier and not missed them!!!  The pictures show the progress.short38 short39 short40
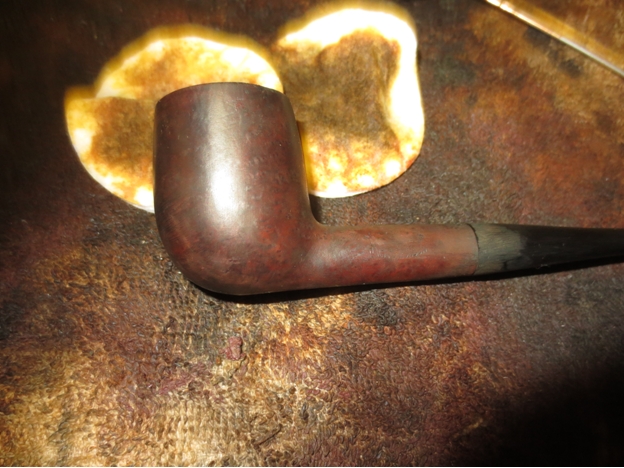
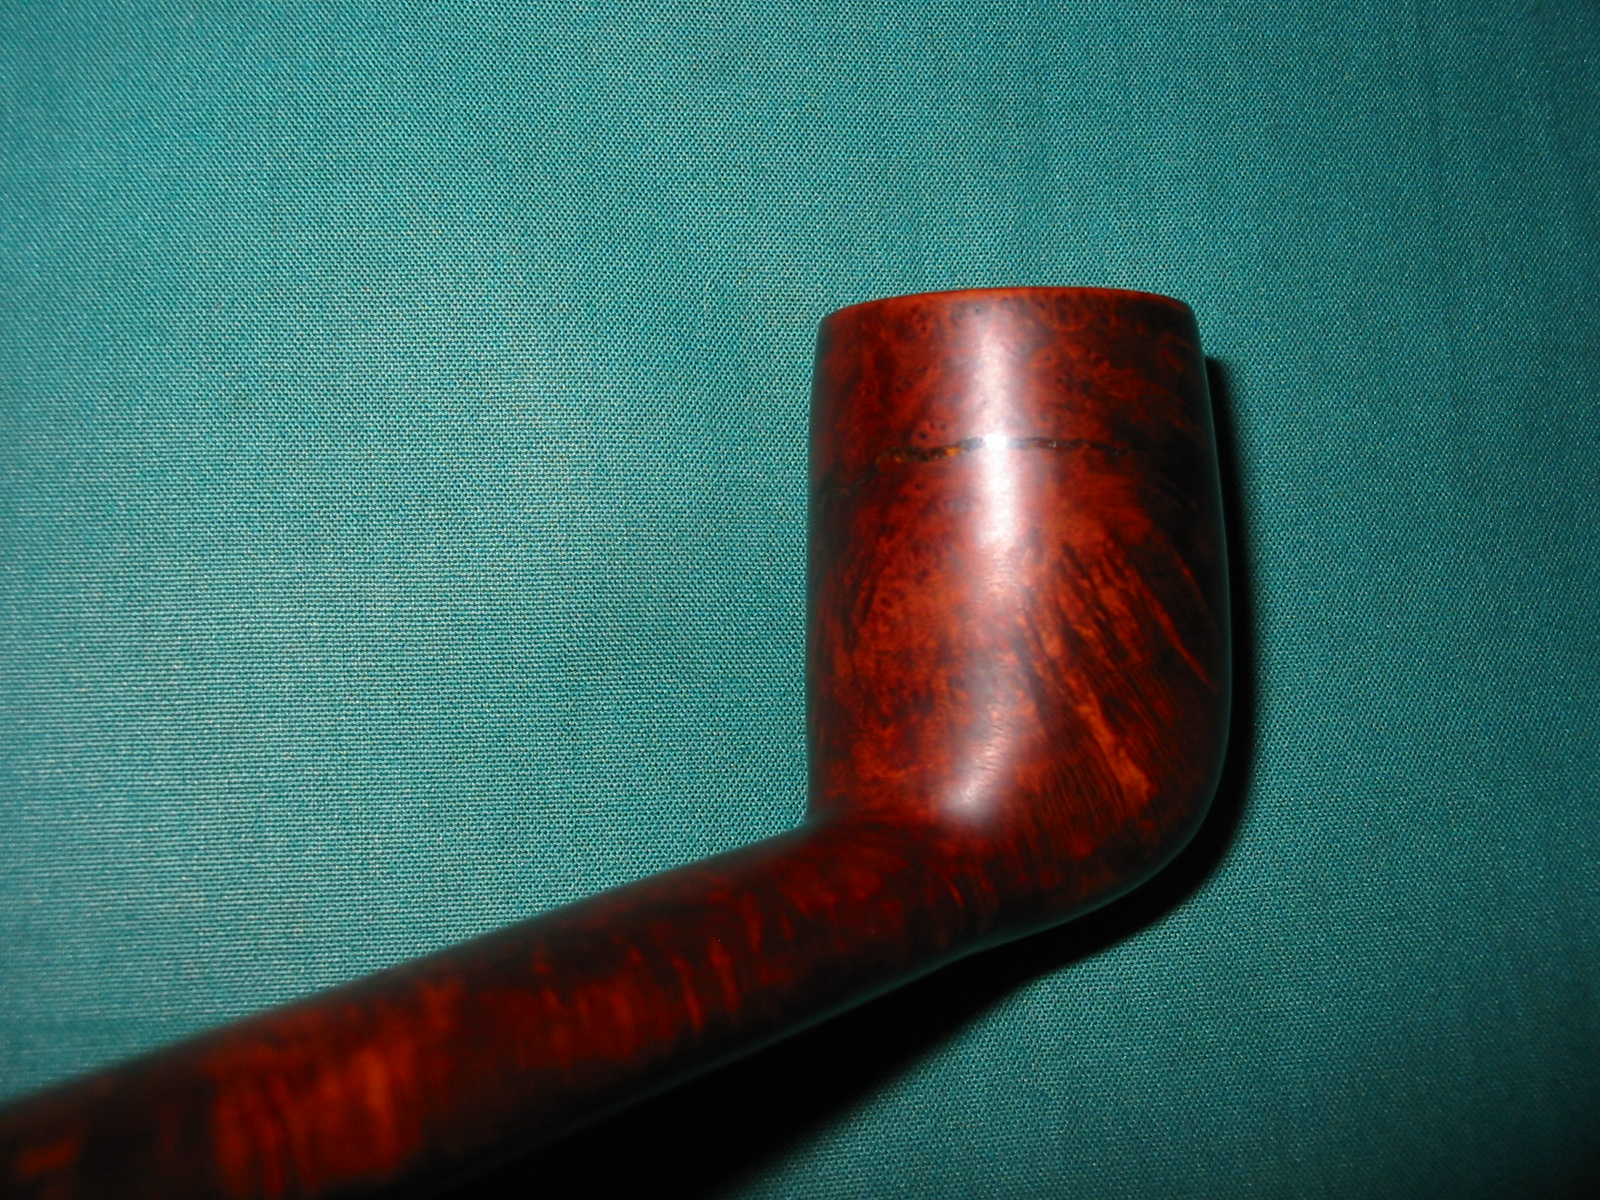
I want to apply one final coat of stain to the stummel to blend further the patches but also to tweak the hue toward the red ranges.  I mix Fiebing’s Dark Brown Leather Dye 1 part to 2 parts of Fiebing’s Oxblood.  As before, I apply the dye mixture with a folded pipe cleaner to the surface liberally and flame it.  After the surface is cool to the touch, I apply a second coat of Dark Brown Oxblood and flame it.  I set the stummel aside for the night and the next day clear the flamed crust with the Dremel felt wheel using Tripoli compound.  To blend the stained surface and give an even effect, I lightly wipe down the surface with a cotton pad with isopropyl 95%.  I’m pleased with the hue that is emerging.  The pictures show the progress!short41 short42
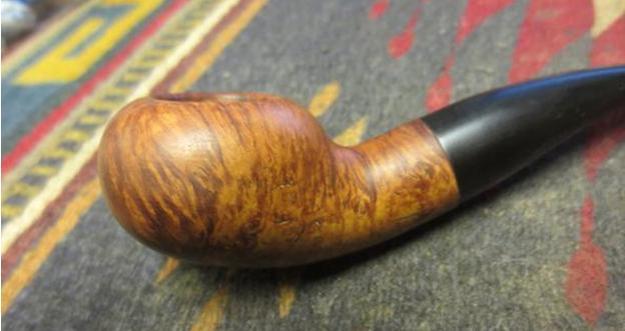
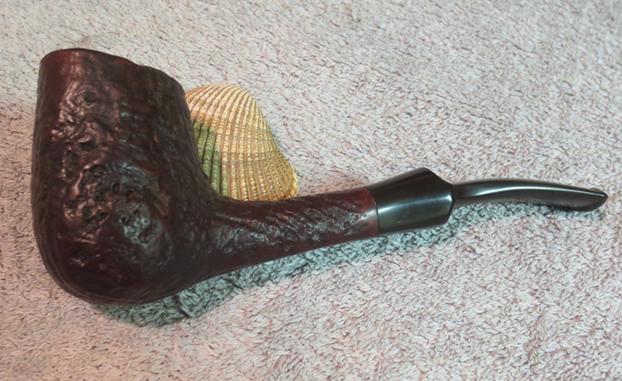
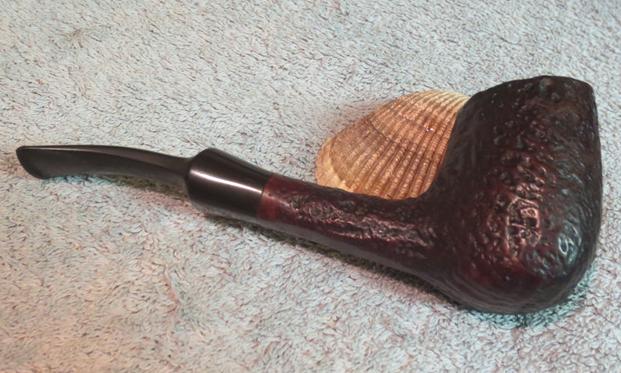
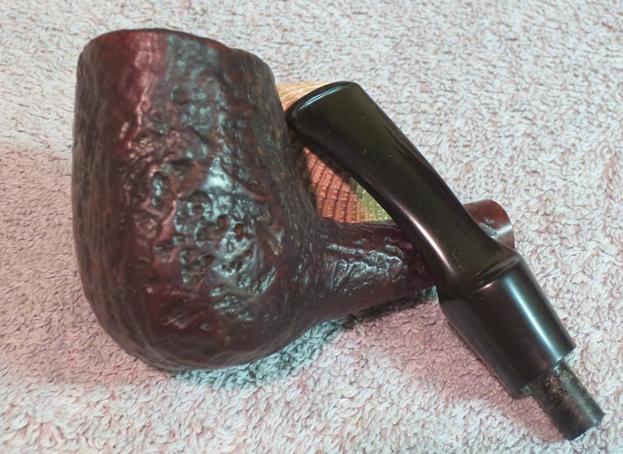
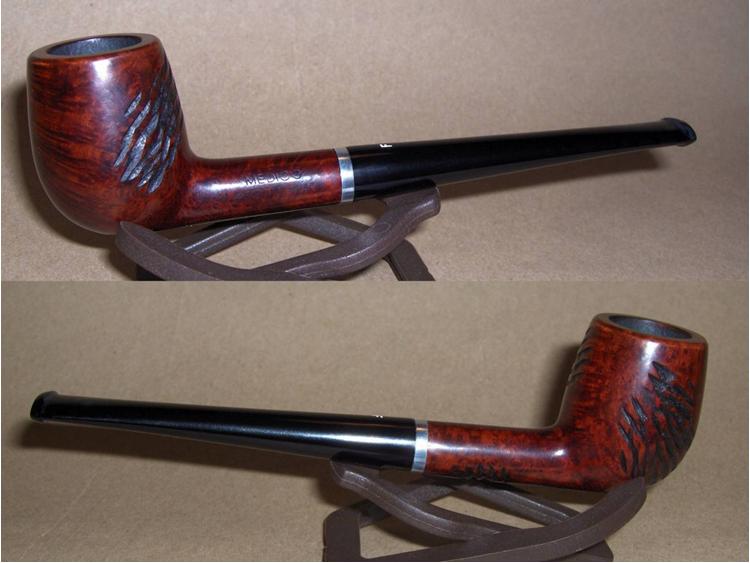
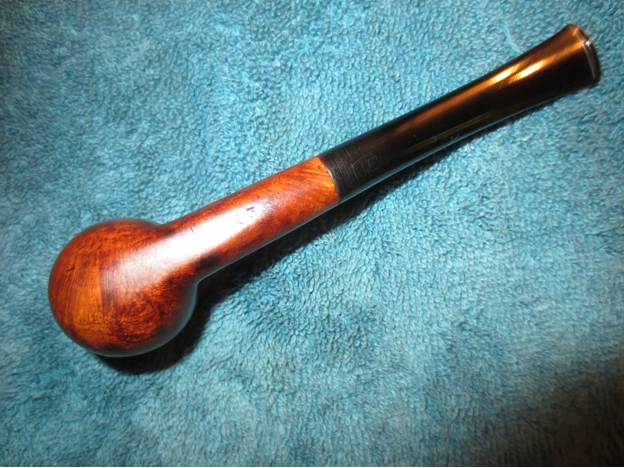
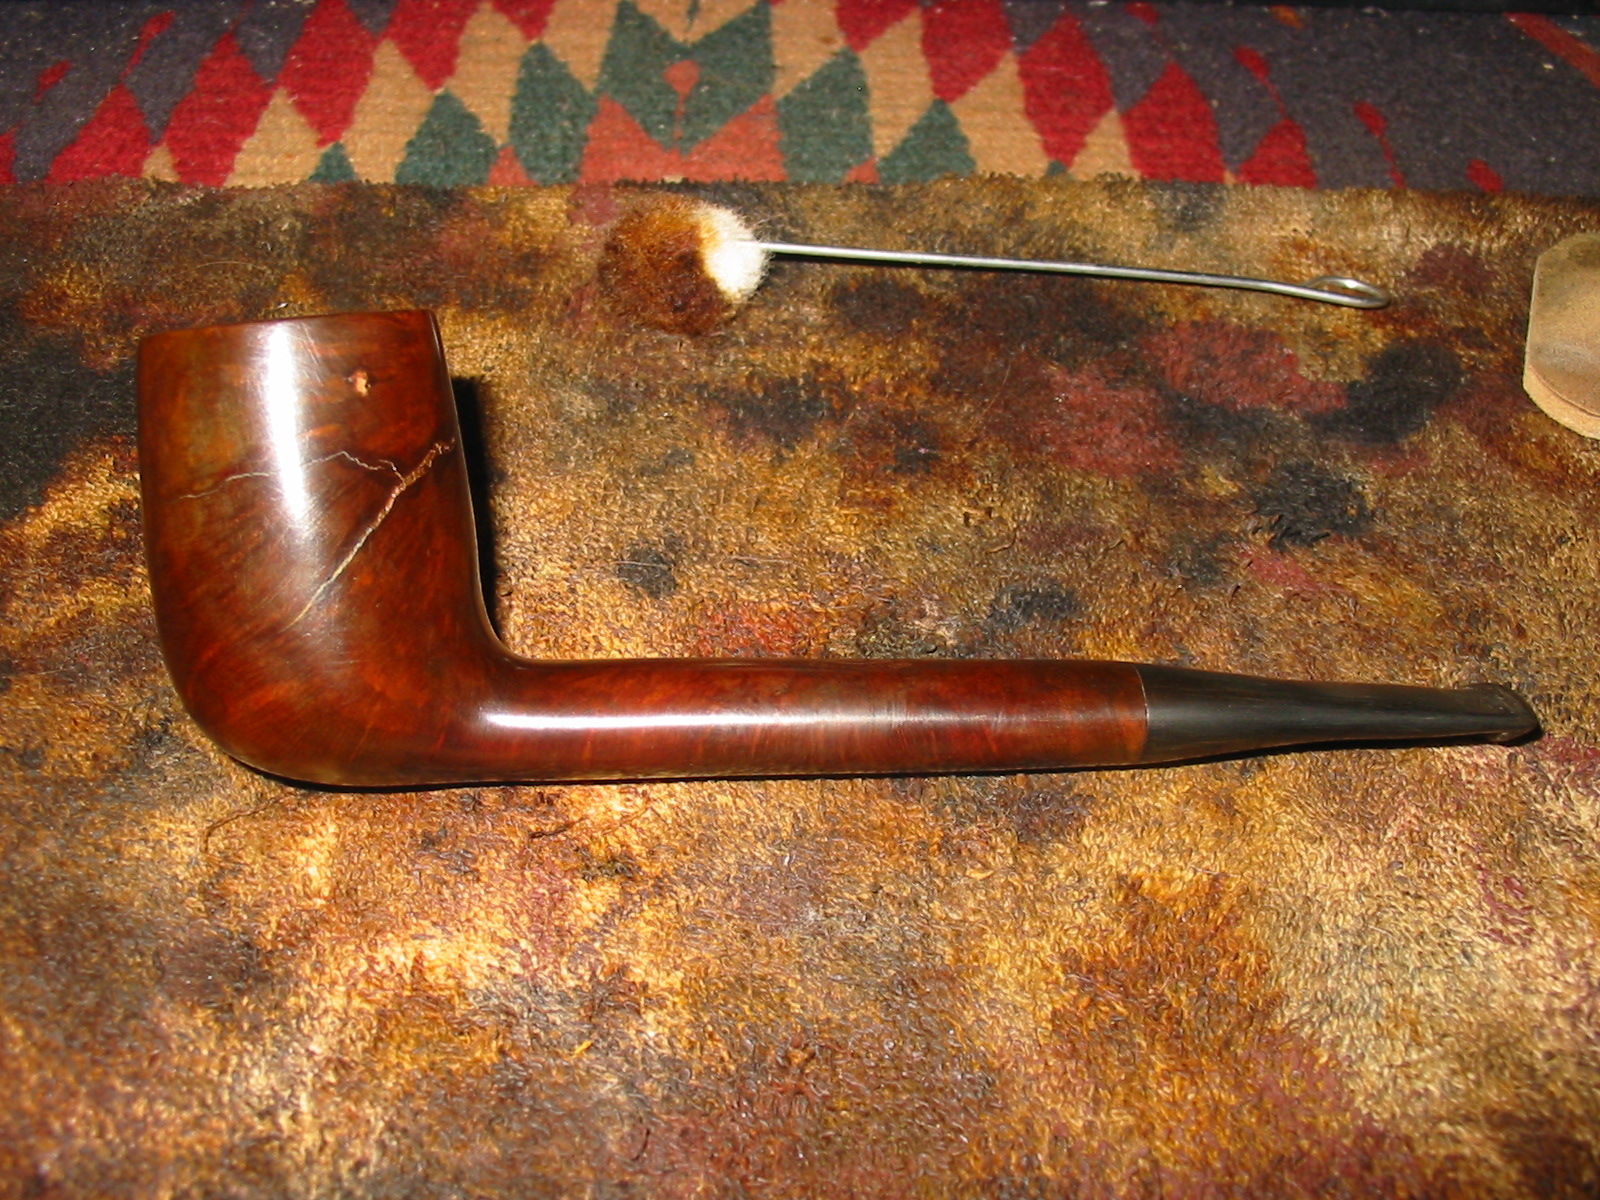
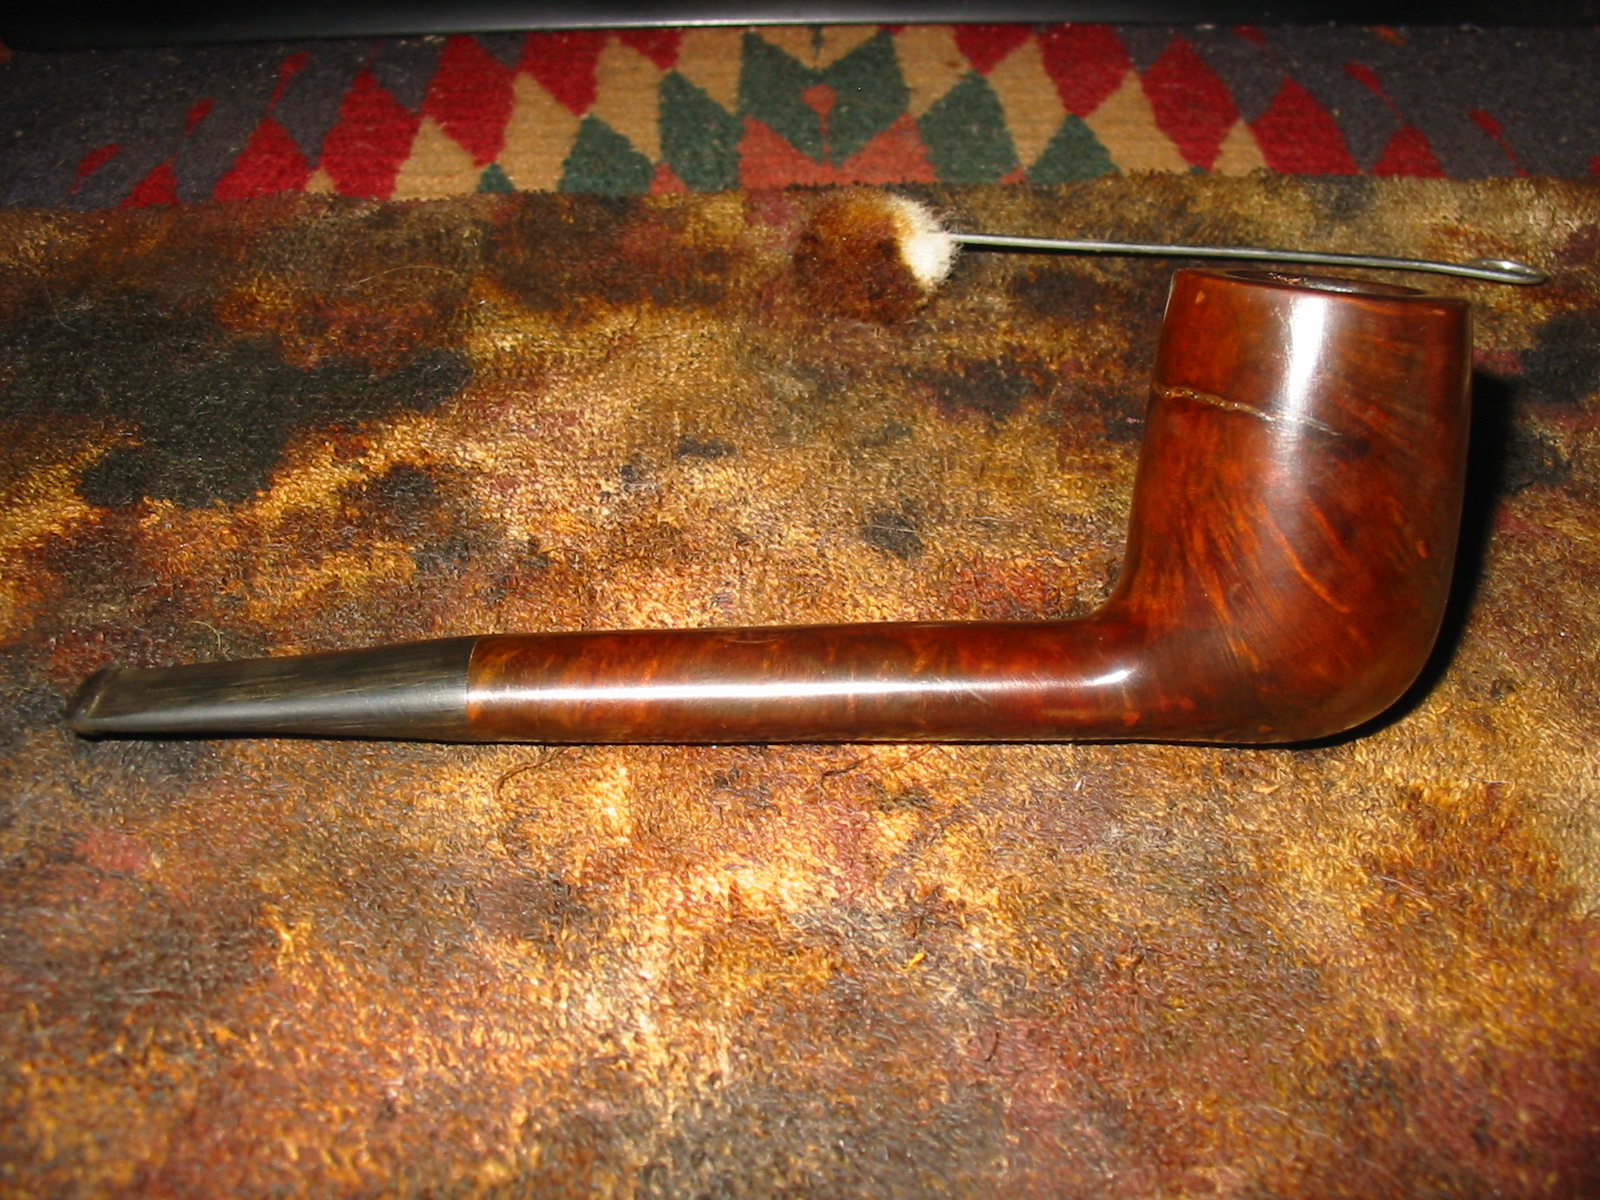
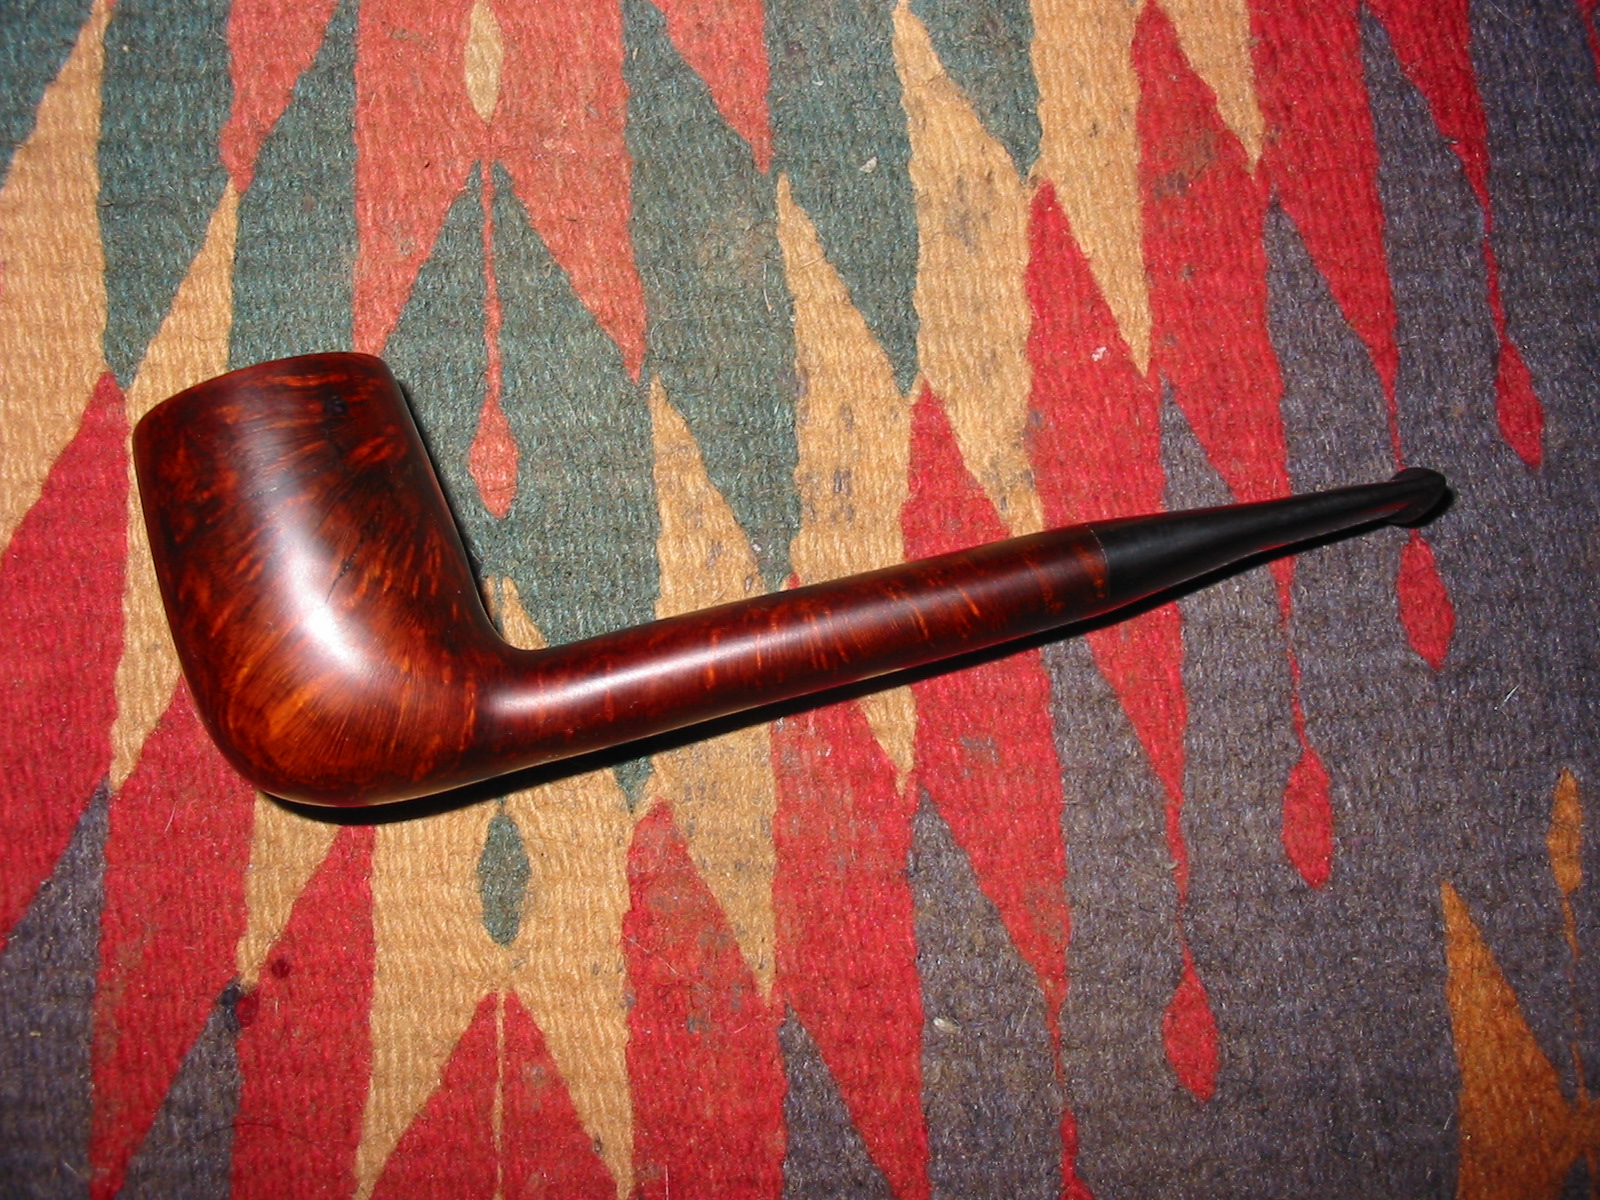
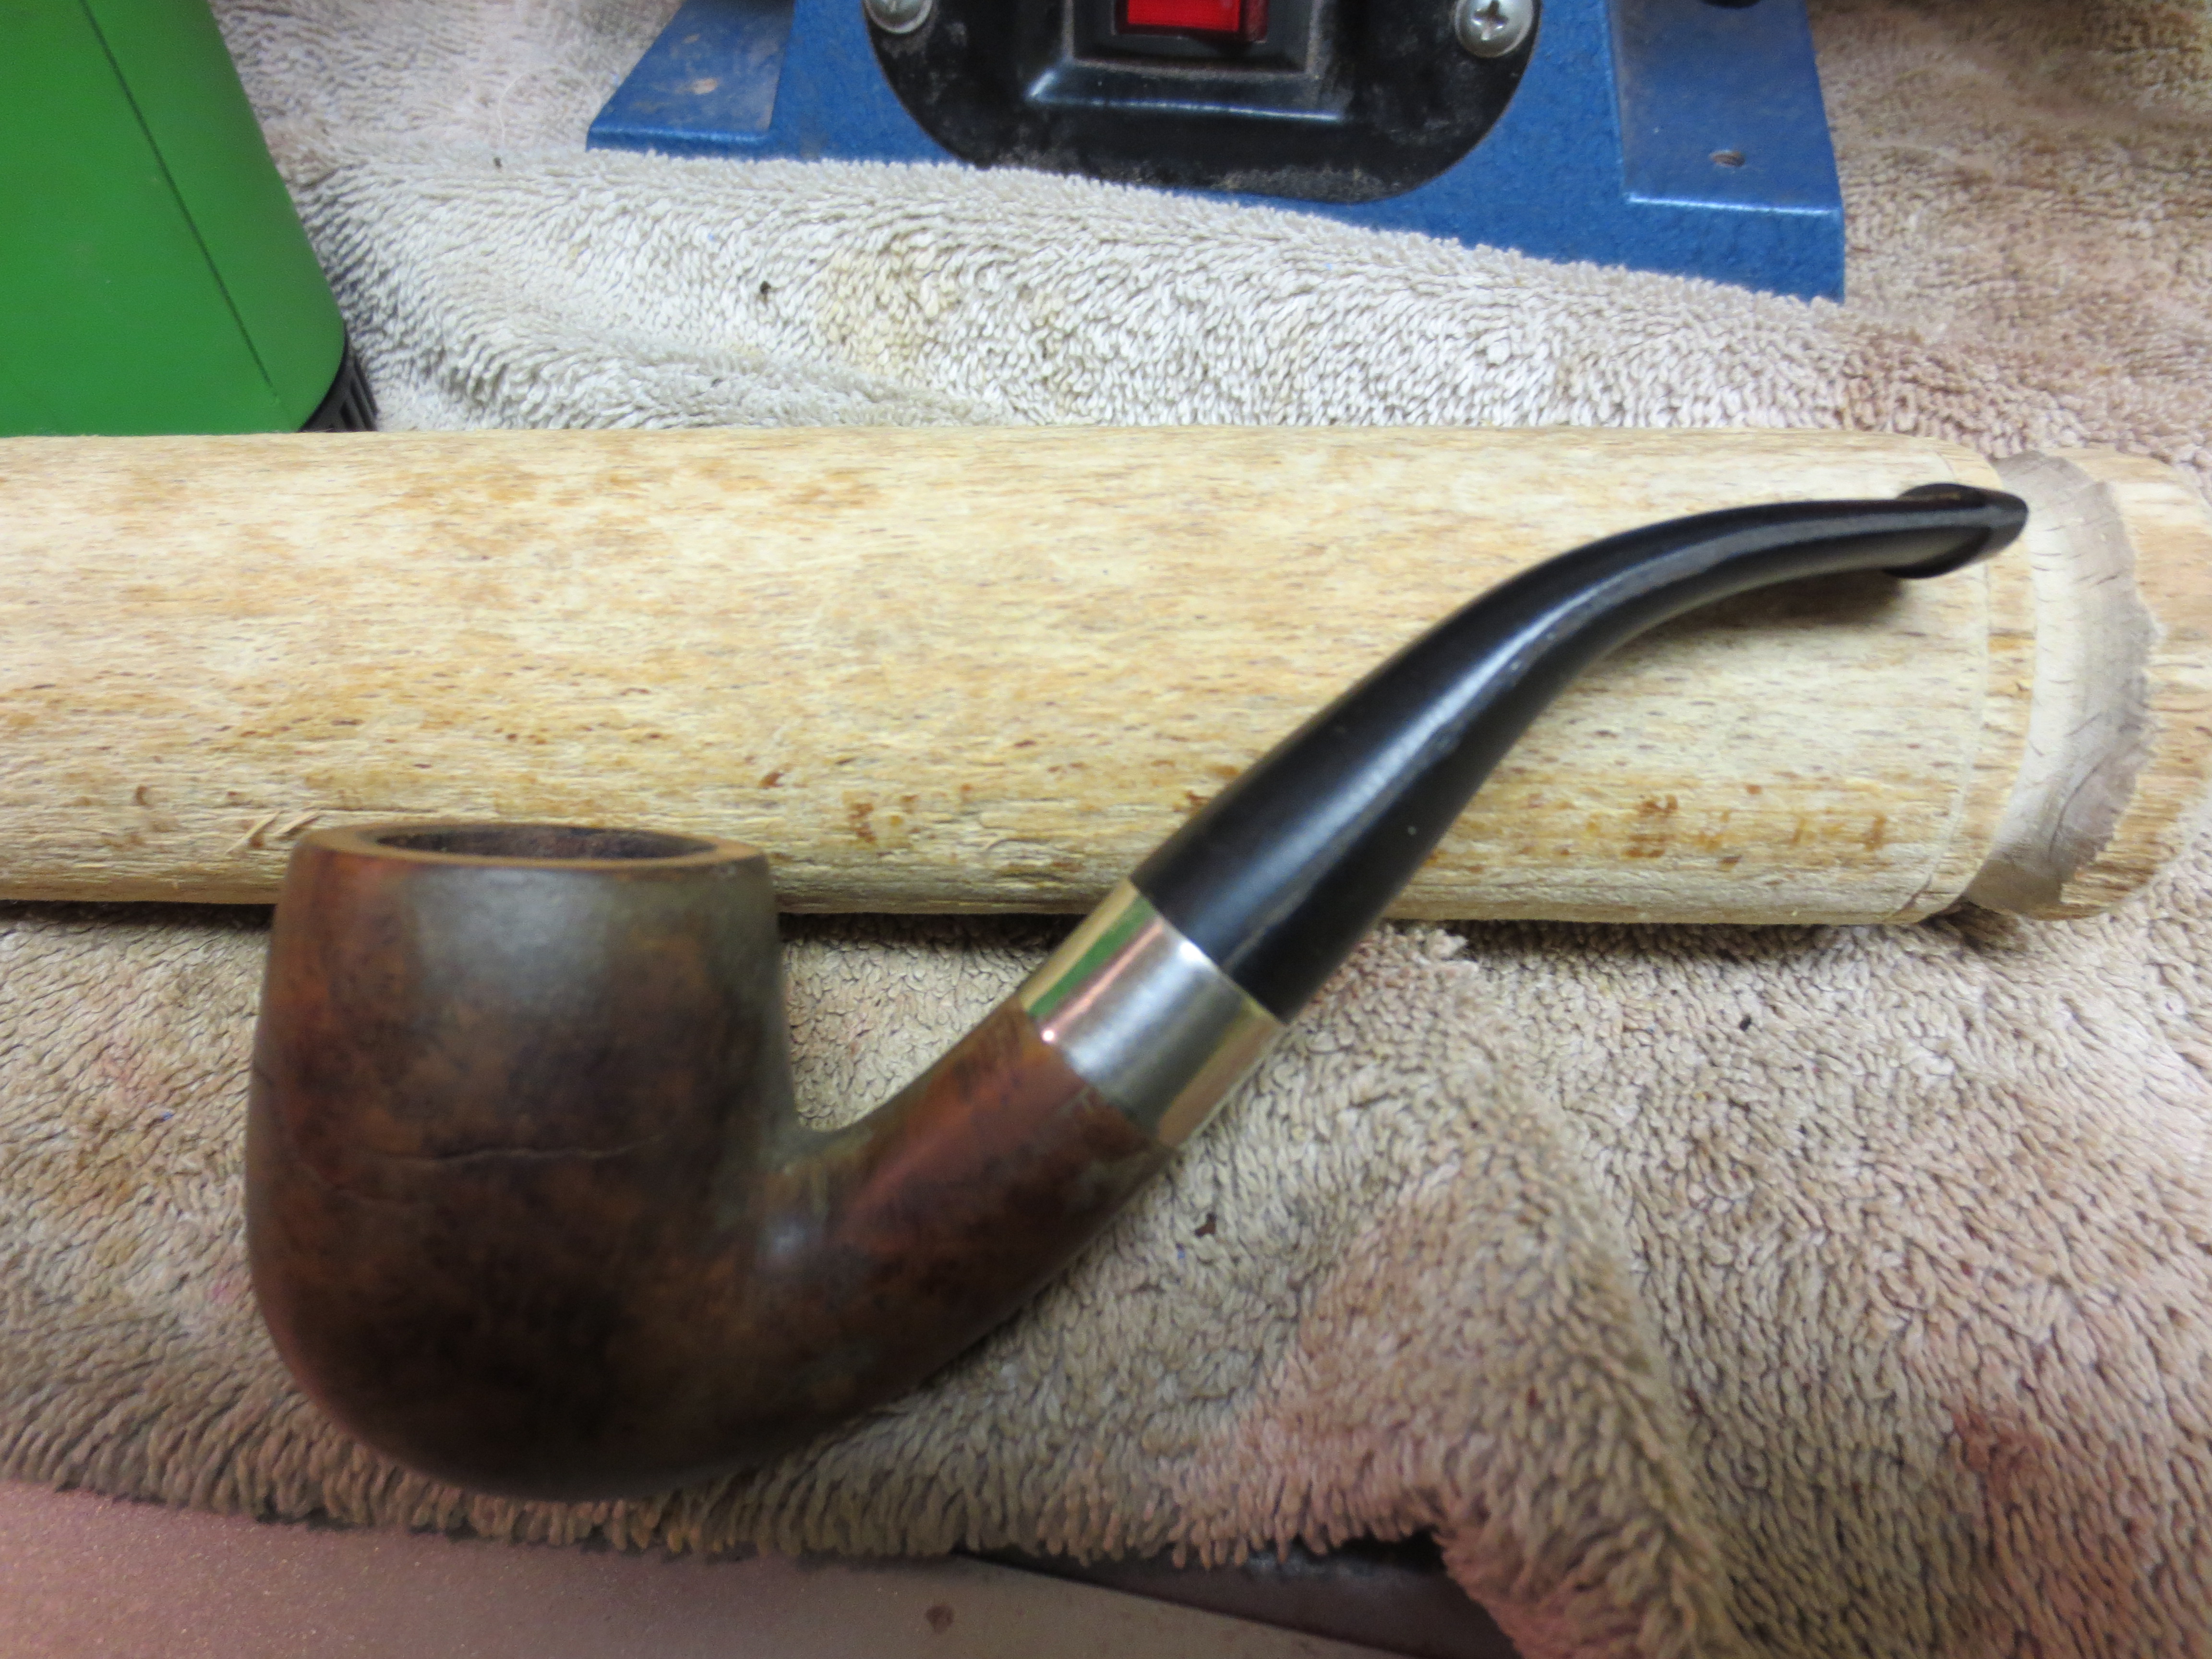
Rejoining stummel and stem I use the Dremel with a felt wheel to buff them with Blue Diamond compound.  Following this, I mount the cotton wheel on the Dremel and increase the speed of the Dremel from the slowest RPM for the felt wheels and compounds, to the next higher speed.  I apply carnauba wax over stem and stummel several times to build up a shine as well as a protective layer.  I’m pleased with the transformation of this pipe.

After consulting with Steve, I decided that this Short Snorter’s one last challenge would be better addressed in the US.  The front fire chamber wall needs a better solution than what I can provide here in Bulgaria.  Steve recommended I consider the solution that Charles Lemon, of DadsPipes.com, has used with good success – applying JB Weld to the area in need of greater reinforcement.  Since JB Weld is not on the shelves here (yet!) and I can’t find a satisfactory alternative, this little pipe is going for a long ride in about a week to Denver, where my wife and I will be celebrating Christmas with our family!  I’ll add a Christmas Addendum later!

When I look at this Short Snorter Imported Briar Horn before me, I still think this is a beautiful ladies’ pipe!  Of course, with a name like ‘Short Snorter’, the pipe lady smoking this elegant, petite horn shaped pipe, packed with her preferred aromatic blend, will undoubtedly have a bit of attitude and spunk!  Or, at least as it would seem to me.  Thank you for joining me!short43 short44 short45 short46 short47 short48 short49

What to do with a cracked bowl – Options for their repair


Blog by Steve Laug

Often a pipe crosses my work table that has a dual attraction – it had obviously been someone’s favourite pipe or it was one that belonged to a loved one and it was severely damaged with a cracked bowl that provides a challenge. No one wants to throw away a pipe that is part of a family history and has deep personal stories attached. The cracked bowl can make that appear to be the only choice. However, it is not the only choice as there are other options. Each of these options has been used repeatedly by me or by one of the other writers on rebornpipes. They do work well and provide more years of service from a cracked pipe.

Method #1 The bowl can be shortened if the cracked portion is high enough on the bowl.

Method #2 A cracked bowl can be shortened and a new section can be spliced on top of the remaining bowl. The original height can be restored.

Method #3 The crack can be filled in and repaired with a mixture of briar dust and super glue that is used like putty. Others have used chimney repair/mortar repair mix or JB Weld to repair the cracks.

Method #4 The cracks can be stitched together with small pieces of wire set at angles to pull the crack back together.

In this blog I will explain each of these methods of dealing with cracked bowls. I will talk through the process of each of the four options and provide photos to illustrate the work. Each of the photos come from previous blog posts on rebornpipes.

Method #1 Shortening a cracked bowl. This is by far the easiest method of repairing a cracked bowl. I only use this method in cases where the crack is not long and the look of the bowl once I have removed the offending portion is still pleasing to the eye. I have received bowls that were cut off this way and were just too ugly to leave. (The photos that I am using on this repair came from a pipe purchased on eBay from the Dutchman. It was a Rhodesian that he had cut off and then sold the pipe as fully restored. It was not! I reshaped the pipe and reclaimed it.) My methodology is basic and straightforward.

1. Use a microdrill bit on a Dremel to drill a pin hole at the end of the crack. This stops the crack from spreading further.

2. Cut off the cracked portion of the bowl using a coping saw, table saw or band saw. I have even used a Dremel and sanding drum to bring it reasonably close to the finished height.
crack13. Top the newly cut off bowl to ensure that it is straight and smooth. Check it often in the process to make sure that things are straight.

4. Reshape the new top of the bowl either by hand or with the Dremel to give it a finished look that tapers upward from the bulging sides of the bowl. (This pipe took a lot of shaping work. The next three photos give different angles of the progress along the way.crack2crack35.  Sand out the scratches left behind by the Dremel sanding drum and fine tune the shaping of the bowl and rim with 220 grit sandpaper. I have found that this grit of sandpaper is very effective for shaping and leaves behind scratches that are easier to sand out than 180 grit or coarser grits. It still cuts away the excess but does not leave a lot of damage to the finish to repair.crack46. Sand the bowl with a medium and a fine grit sanding sponge. This will polish the briar and when you have finished with it you will see the scratches that have been left behind that require further attention.Crack57. Wipe the entire bowl and shank down with acetone to remove the finish on the lower portion of the bowl. It will also remove a lot of the stain that is present in that portion so that blending in the two areas of the bowl is easier to achieve.

8. I finish sanding the bowl with micromesh sanding pads – wet sanding it with 1500-2400 grit pads and dry sanding it with 3200-12000 grit pads. Each successive grit of micromesh sanding pad polishes the bowl more. The bowl is ultimately very smooth and the scratches that remain stand out and can be addressed by repeating the process noted in 5 and 6 above.crack69. Heat the bowl with a heat gun or blow dryer and stain it with an aniline based stain. The heated briar opens the pores so that the stain is taken in. I light the stain on fire with a lighter and it sets it in the grain.

10. If the stain is too dark, wipe it down with a cotton pad and alcohol.

11. Buff it with Blue Diamond and give it several coats of carnauba wax. Buff it with a clean buffing pad to raise the shine.Crack712. If you have done a good job reshaping the bowl it will look natural. Examples of this are a billiard that with shortening become a pot, an apple that with shortening becomes a prince… etc.

Method #2 Splicing two bowls together. A cracked bowl can be shortened and a new section can be spliced on top of the remaining bowl. The original height can be restored. This method is labor intensive and involves cutting the bowl off of a donor pipe that is junk and then working to fit it to the cut off base of a cracked bowl.

1. Cut of the cracked portion of the bowl and flatten the remaining base and shank on a topping board.

2. Cut off the donor bowl the same height as the cracked portion you removed from the other bowl. Don’t worry about diameter or finish at this point.crack83. Drill a series of microdrill holes in the base. These will go around the bowl centered in the briar that remains of the bowl walls.crack94. Cut off pieces of stiff metal or a paper clip. In this case I used small brads. These pieces need to be about 3/4 to 1 inch tall.

5. Set the wires in the drilled holes in the base of the pipe. They should stand straight up all around the bowl.

6. Set the cut off bowl on top of the wires and line up the front, back and sides. Push down on the bowl hard enough to mark the holes that need to be drilled on the cut off bowl but not too hard as you will bend the wires.

7. Remove the cut off bowl and microdrill the holes in that portion to match the bottom.

8. Super glue the pins or wires in place in the base. Once the glue sets put the top portion of the bowl on the pins. Do not push it into place at this point.crack109. Paint the surfaces of the both pieces of the bowl with a two-part epoxy and slowly press the top portion of the bowl onto the pins. Maneuver it until the bowl lines up on the bottom portion.crack1110. Let the epoxy cure. Then use a Dremel and sanding drum or a spade drill bit to even out the inside of the bowl. You want a clean fit of the bowl sides so that there is no ledge or shelf between to two halves.crack1211. Use a Dremel and sanding drum to reshape the bowl so that the parts align and the transition is smooth and the bowl looks natural. Fill in any gaps in the joint with super glue and briar dust.crack1312. At this point you have a choice. You can either rusticate the entire bowl or you can rusticate the joint of the two bowls.

13. Mix a batch of bowl coating using charcoal powder and sour cream or plain yogurt. Stir them together until you get a charcoal grey paste. Paint the inside of the bowl with the mixture using a folded pipe cleaner. Make sure to smooth it out. Set the bowl aside to dry. Once it cures the inside is complete.crack14crack1514. Stain the bowl and rim to your own taste. If you rusticate it you can do a contrast between black and brown or even different browns to accentuate the grooves and smooth portions.crack16

Method #3 Filling the crack. The crack can be filled in and repaired with a mixture of briar dust and super glue that is used like putty. Others have used chimney repair/mortar repair mix or JB Weld to repair the cracks.

1. Drill a pin hole at the end of the crack to stop it from spreading further down the bowl or across the bowl.crack172. Clean out the crack in the bowl with a dental pick to remove the debris and any dust from the crack.

3. Press briar dust into the crack with a flat blade or a dental spatula. I use the dental pick to make sure that there are no air pockets in the dust.crack184. Some folks vary the slightly and mix the slow curing super glue and briar dust on a small jar lid and press the mixture into the crack. Personally I use the method I explained above and put the glue in afterwards. Both methods or variations will work.

5. Fill in the crack over the briar dust with clear super glue. I have found that this takes time and should be done slowly so as not to overdo.

6. Press more briar dust into the super glue to ensure that the crack is filled in.

7. Once the repair is cured I sand the patch with either a folded piece of 180 grit sandpaper or a Dremel and sanding drum. I sand it until it is even with the bowl sides. I love using this method on sandblast pipes as it is easy to blend the repair into the finish.crack198. Smooth out the sanded area with 220 grit sandpaper and then with micromesh sanding pads.

9. I use a stain pen or a black sharpie to stain the repair and then restain the entire bowl to blend in the patch with the bowl colour.crack20crack2110. Mix a batch of bowl coating using charcoal powder and sour cream or plain yogurt. Stir them together until you get a charcoal grey paste. Paint the inside of the bowl with the mixture using a folded pipe cleaner. Make sure to smooth it out. Set the bowl aside to dry. Once it cures the inside is complete.crack22
Method #4 Stitching the Cracks. The cracks can be stitched together with small pieces of wire set at angles to pull the crack back together. This method was used by Charles Lemon on a pipe we worked on together. The pipe traveled back and forth across Canada. Charles stitched the bowl together with brass wire. Here is his methodology. With this method I am giving more detail to explain the process.

1. There were two major cracked areas at the front and back of the bowl. Both cut all the way through the chamber walls, all but slicing the bowl in half lengthwise. The front crack looked like a clean break running from the rim down the face of the bowl to the bottom of the tobacco chamber. The rear crack wasn’t as straightforward. Instead of a single linear crack, the damage at the rear started at the rim, dropped down to roughly the centre of the bowl, and took a sharp left as it sought out an old fill – a natural weak spot in the briar. From the fill the crack had “spidered”, with thinner cracks running up, down and across the bowl. The cracks could be visibly moved by squeezing and releasing the bowl. Without some way to lock the briar in position, the bowl would have to be retired.crack23crack24crack252. Drill a pin hole at the end of each of the cracks to ensure that the existing spider cracks did not run further into the briar. Be careful not to drill through to the tobacco chamber. These “end cap” holes would stop the cracks.crack263. In a bowl as seriously damaged as this one glue alone would not provide sufficient holding power to keep the cracks tight and immobile. There would need to be some sort of physical reinforcement of some kind to ensure that the bowl stayed in one piece after being placed back in service.

Charles and I took on this pipe as a challenge to a conversation we had had earlier regarding when or if a bowl was irreparable.

4. The cracks would have to be pinned using metal wire. In this case a length of 1.2mm brass rod did the trick. Match the diameter of the rod to a micro drill bit and drill pin shafts across the crack, through the curved walls of the bowl, without drilling into the chamber. These shafts only had one end and the pin would be inserted across the cracks.

5. The next close-up picture shows the flat angle of the drilling. A brass rod is in position to show how the process will work. The rod length was marked and then cut shorter so that when fully seated in the shaft, the outer end of the rod would be below the outer surface of the briar. The brass pin was roughened with 220-grit sandpaper to give the glue more gripping surface. Super glue was dripped into the shaft before pushing the pin home.crack276. The second shaft was at an angle relative to the first one – in the photo it is clear that it’s not even close to parallel. This is deliberate. Each pin was drilled at an opposing angle to its neighbours. Doing this assured that any movement of the briar as it heats and cools will be blocked by one or more pins. If the pins were parallel, pressure in the wrong direction could push the crack open again.

7. In all ten brass pins were installed – four in front and six in back – and seven end cap holes were drilled to stop the cracks (all but one of these in the back). The red lines in the photos below show the direction of the pin shafts. You can see how the pins work to stitch the crack shut. The front repair doesn’t look too bad, but the rear of the bowl looks like it was attacked by termites!crack288. With the pins in place the crack no longer moved. The lack of movement shows that the bowl was acting as a single piece of briar instead of several bits of loosely connected wood.

9. Patch the 17 end cap and the pin holes with super glue and briar dust as shown in the photos below.Crack2910. When the glue has cured in the fills, file and sand the patches until they are flush with the surface of the briar.crack3011. Sand the entire bowl with micromesh sanding pads to remove the scratches in the briar and further blend the repairs into the briar. The photo below shows the filled end cap and rod holes. They are smooth and flush with the briar.crack3112. At this point the bowl is ready to stain. The large number of repairs required a darker finish than would have originally been used on this pipe. In this case the stain undercoat was Fiebing’s Black water-based leather dye. This was used to bring out the grain. When that coat had dried the bowl was polished with 0000 steel wool and water. This left the grain stained black while the rest of the wood remained lighter. The second stain coat was a wash of Fiebing’s Dark Brown stain diluted about 50% with alcohol that was used as a wash over the briar repeatedly until the coverage was good. After that coat had dried a medium stain pen was used over the repaired fills to help push them to the background without obliterating the grain altogether.

13. Buff the pipe with White Diamond on the buffing wheel and give it multiple coats of carnauba wax. Buff lightly with a clean buffing pad to give the pipe a shine. In the photo below you will note that the fills and cracks have disappeared almost completely. The stain is translucent enough to allow the grain to shine through. The cracks across the rim are hard to find. The repairs are still visible under strong light, but the repair passes the casual inspection test.crack3214. To further stabilize the repair JB Weld was pressed into the cracks on the inside of the bowl. After the JB Weld had cured sand out the excess. The idea is to only leave the JB Weld in cracks themselves and leave behind smooth chamber walls.crack3315. Mix a bowl coating of either the kind described in the other methods above or the one that Charles used on this pipe. He mixed activated charcoal powder and maple syrup. He coated the walls with the syrup and then packed the bowl with charcoal powder. Once dry dump out the excess powder. The coating provides an extra layer of protection for the repairs as well as a consistent surface upon which to build a new layer of cake.crack3416. Wipe down the bowl exterior and let the interior cure.

17. The photo below shows the repaired rim and the repaired interior with the bowl coating. The pipe was finished.crack35crack36
In all of the methods used the repaired pipes have been repeatedly smoked since the repair was made and there is no sign of cracking continuing or spreading. Each bowl has begun to build up cake and the pipes are serving well in delivering a cool dry smoke. The old battered and repaired pipe has a restored dignity and will last for more years to come.

One of his Dad’s Pipes that needed work


Blog by Steve Laug

Not long ago I received a second pipe that was sent to me from Dawson Creek, British Columbia for repair.  It had belonged to the sender’s father and he wanted it restored so he could use it again. When it arrived it was obvious that I was dealing with a Stanwell product. It was stamped Scandia over Made in Denmark and was followed with the shape number 209. It had a classic Danish look with the flared saddle stem and the almost triangular shaped bowl. The stem was oxidized and worn with the edge between the button and stem worn away. The sandblast was dirty and the finish tired. But the worst issue was that the bowl itself had a large crack running from the rim down the bowl on the left side of the bowl toward the back. It took some photos and emailed them to the sender to let him know the state of the pipe after my assessment. He was surprised that the crack was there as he did not remember seeing it. I begin this blog with those photos below.Scandia1 Scandia2After photographing the crack in the side of the bowl I took some photos of the entire pipe to give an idea of the look of the pipe and the work that lay ahead of me. You can see the overall condition of the pipe from the photos below. I really like the shape of the bowl and the flow of the stem and shank. The pipe had good lines.Scandia3 Scandia4To begin the process of repairing the bowl I need to carefully ream it back to bare briar. I wanted to see if the crack extended into the bowl and how deeply it went down into it if it did. I also wanted to assess the overall condition of the bowl interior. I started reaming it with a Savinelli Pipe Knife so that I would not put too much stress on the cracked area. I finished carefully reaming the bowl with a PipNet pipe reamer to clean off the cake below the rim.Scandia5The crack went down about ¼ inch into the bowl from the rim. I used a brass bristle brush to scrub the top of the rim to remove the tars and lava overflow on the rim surface. I used a rolled piece of 220 grit sandpaper to sand out the interior of the bowl and remove the remnants of the carbon build up around the cracked area.Scandia6I scrubbed the exterior of the bowl and rim with a tooth brush and Murphy’s Oil Soap to clean off the grime and wax in the grooves of the sandblast. I wanted the surface clean so that I could repair the crack. I rinsed the pipe with running water and dried it off.Scandia7The next series of photos show the bowl after cleaning. The bowl was ready to repair.Scandia8 Scandia9I used the Dremel and a microdrill bit to put two pin holes at the end of the crack. I used a lens to look for the end and then drilled the first hole. When I took it back to the work table I looked at it under the lens again and notice that I missed the end by just a short distance. I drilled the second hole in the bowl side. I also sanded out the internal edge of the bowl and used the drill to put a hole at the end of the internal crack.Scandia10I used the dental pick to clean out the crack on the bowl side and pressed briar dust into the crack with a dental spatula. Once it was full I put drops of clear super glue on top of the crack to seal the area. I put more briar dust on top of the super glue and spread it out with the spatula. I put briar dust on the top edge of the rim and used the glue there and on the internal crack.Scandia11I sanded the filled in area with a folded piece of 220 grit sandpaper to smooth out the repaired areas and used a dental pick to create some grooves to follow the blast pattern.Scandia12 Scandia13The texture of the rim repair was rougher than the side of the bowl so I sanded it with a medium grit sanding block to smooth it out. I also sanded the inside of the bowl with a rolled piece of sandpaper to smooth out the repair on the interior wall. I wiped the bowl down with alcohol on a cotton pad to remove the sanding dust and stained the pipe with a dark brown aniline stain. I flamed it and repeated the process until the colour was matched. I used a black Sharpie pen to touch up the grooves in the patch and blended the repair with more stain.Scandia14The next photo shows the repaired areas and bowl.Scandia15The stain was too opaque for me so I washed it down with alcohol on cotton pads until the stain was more transparent.Scandia16With the bowl repair completed I turned my attention to the oxidized stem. It was not too bad – light oxidation and lots of tooth chatter. Fortunately there were no deep tooth marks. The sharp edge of the button was also very worn down and would need to be redefined.Scandia17I used a flat blade needle file to reshape the button edge and remove the tooth chatter and marks around the edge of the button. I also reshaped the curved edge of the button with the file.Scandia18I sanded the file marks out of the stem with a folded piece of 220 grit sandpaper. I worked over the rest of the stem with the sandpaper to remove the light oxidation on the saddle area.Scandia19I gave the bowl a light buff with Blue Diamond on the wheel to get a feel for the look of the bowl at this point in the process. You can see the repaired area in the two photos below. It will take some more blending with stain pens and sandpaper before it is finished.Scandia20I cleaned out the mortise and the airway in the shank as well as the airway in the stem with pipe cleaners, cotton swabs and alcohol. You can see from the photo of the stem that the polishing of the stem is coming along as well. The oxidation is pretty well gone and the sanding marks are disappearing.Scandia21I used my normal polishing process with micromesh pads – wet sanding with 1500-2400 grit pads and dry sanding with 3200-12000 grit pads. Between each set of three pads I rubbed the stem down with Obsidian Oil and when I finished with the 12000 grit pad I gave it a final coat of oil and set it aside to dry.Scandia22 Scandia23 Scandia24I lightly buffed the bowl with Blue Diamond to raise a shine and buffed the stem a bit more vigorously. I gave the stem several coats of carnauba wax and buffed it to a shine with a clean buffing pad. I gave the bowl several coats of Conservator’s Wax and buffed it with a clean buffing pad. The finished pipe is shown in the photos below. The repair is finished and the inside and the outside of the bowl look really good. It should last the pipe man who sent it to me for a long time as he enjoys a pipe that his dad smoked. Thanks for looking.Scandia25 Scandia26 Scandia27 Scandia28 Scandia29 Scandia30 Scandia31 Scandia32ADDENDUM

I decided to give the pipe a little more protection by putting a bowl coating on the interior walls of the pipe. I mixed some sour cream and charcoal powder to make a grey paste and apply it to the bowl. I used a dental spatula to put the mixture on the walls of the pipe and then used my finger to smooth it out. The mixture is neutral once it dries and imparts no flavour to the tobacco as the pipe is smoked. It merely serves to protect the repaired walls until a cake is developed in the bowl.char1Char2Char3

I set the pipe aside to dry overnight. The next two photos show the interior of the bowl this morning after a night of curing. I will leave it to cure throughout the day and it should be good to pack up and send back to Dawson Creek.Char4Char5

A Humpty Dumpty Cross Canada Project – Could this Poor Richards Select Square Shank Billiard 9489 ever be whole again?


Blog by Steve Laug and Charles Lemon

My brother sent me a box of pipes and bowls that he had picked up. In it was an old square shank billiard that had seen far better days. The bowl sported a thick cake and was cracked 2/3rds of the way down the bowl on the front and another crack on the back of the bowl that went across the bowl to the left side. The finish was rough but there was some nice grain. Its stem was chewed up and was broken and smelly. I threw the unredeemable stem away. The bowl went into the parts box to be cannibalized for repairs. It was interesting that the pipe was stamped Poor Richard’s over Select over Bozeman, Montana on the left side of the shank. I grew up in Idaho and spent a lot of time in my early years in Bozeman. My youngest brother went to school there and my second brother was married there. Lots of family ties. It was stamped London England over 9489 on the right side. The 9489 stamp told me that it was a GBD product. Something about it intrigued me. I wondered if it might not be a candidate for a second collaboration with Charles Lemon of Dadspipes. It would be another test to our theory that just about any pipe can be restored and reused. I wrote to him and sent him some photos to see if he was game for taking it on. This project would provide some unique challenges to us both or it may end up as kindling.Dick1 Dick2 Dick3 Dick4I took a photo of the bowl from the top looking into it. The cake is unbelievable even to me with all the pipes I have worked on. This stuff was as hard as concrete and seemed impervious to the reamers in my kit. No wonder the bowl was cracked on the front and the back sides.Dick5 I dropped the bowl in an alcohol bath to soak and while it soaked I decided to see what I could find out about the connection of the pipe to Bozeman. I did a Google search for Poor Richard’s and found that the pipe shop is still open. It is located in downtown Bozeman. I read through their website and gleaned the following photo and history. http://poorrichardsbozeman.com/about-poor-richards/Dick6From its beginnings in 1962 as the Ellen News at 17 West Main Street, owners Dick Wike and Hal McDowell wanted to achieve a modern-looking newsstand in the building which had formerly been home to Cuttings Newsstand, Lawton’s News and the Stag Pipe Shop. After the partnership dissolved the following year, Wike went on to expand the line of pipes and tobaccos offered, as well as the variety of paperback books, magazines and newspapers offered. A theatre expansion project in 1968 necessitated a move a few doors down, and a name change in the process. On September 9, 1968, Poor Richard’s opened at its current location at 33 West Main Street. Successive owners Richard Fish, sisters Nicole and Glenn Close, Sarah and Dan Cole, and Kate Wiggins added their personal stamp to the offerings.

Today, Poor Richard’s offers its customers a wide variety of merchandise:
• Local Montana and regional books, including Falcon Guides
• Local, regional and national newspapers, including the Wall Street Journal and the Sunday New York Times
• Over 500 magazines and periodicals
• A large selection of fine cigars, including Padron, Arturo Fuente, Partagas, Macanudo, Punch, Romeo y Julieta, Oliva, and more…
• Pipes, including Peterson, Savinelli, Federico Rovera and more…
• Fine tobaccos and accessories

Knowing the background to a pipe is always interesting to me and adds another dimension to the restoration. It was time to stop reading however, and address the issues of the cake and a new stem. I soaked the bowl in an alcohol bath for over three days hoping to soften it. It did not work. It was impervious to the cutting blades on the PipNet and the KleenReem reamers. They would not even dent the hard carbon. I chipped at it with a pen knife and was able to clean off the rim and scrape a bit of the cake around the bowl edge. I tried the reamer again with no success. Knowing that Charles would work on the bowl and that was the hardest part, I did not want to send him the bowl with the cake intact. I put the sanding drum on the Dremel and attacked the bowl. It was slow going but after working at it for over 30 minutes I was able to get about half way down the bowl. I used a sharp knife to open the bottom half of the bowl more and then the Dremel once more to take it to the bottom. I have never fought a cake this hard before. I wrapped the cutting head on the PipNet reamer with sandpaper and worked on the inside of the bowl. I used a folded piece of sandpaper to clean up the inner edge of the bowl. There is still a lot to be done but at least Charles has a bit of a “clean” slate to begin with. You can see the crack from the top of the bowl on both the front and the back. The one on the front goes down over half way on the front side. The one on the back descends half way down and turns toward the left for about a half an inch.Dick7With the bowl cleaned I want to rough fit the stem before I sent it to Charles. I turned the tenon and made a snug fit of the square shank replacement stem. Fitting a new stem to these old timers is always a pain because none of the angles are actually square and the sides are of different sizes. Thus the stem has to be custom fit. I used the Dremel and sanding drum to take down a lot of the excess vulcanite and then followed up with a flat file to make the transition from the shank to the stem smooth and even.Dick8Once the fit was close I sanded the stem with 220 grit sandpaper to bring the angles in line with the shank and to smooth out the file marks. It took a lot of sanding and it is still not finished at this point. I would finish sanding and fitting it after Charles had repaired the bowl.Dick9 Dick10 Dick11 Dick12The bowl and shank had a white scum on the briar and in the stamping. It was hard to remove. I lightly sanded it and then scrubbed the bowl down with acetone on cotton pads to remove it and the remaining finish on the bowl. The pipe has some nice grain and once it cleaned up and repaired it will be interesting to see.Dick13 Dick14 Dick15 Dick16With the bowl cleaned up I was ready to send the reamed and cleaned stummel to Charles for the bowl repair work on the pipe this time. Once Charles had it in hand he would carry on with the repairs….

Time passed slowly for me as the pipe travelled from British Columbia to Ontario. Charles sent me a message on Skype saying that the pipe had arrived and he was ready to start the work on it. I turn over this part of the narrative to him.

(Charles picks up the narrative now.)

The cracked stummel arrived from Steve today. I was keen to get my first close-up look at it – Steve had sent me pictures of course, but nothing beats a hands-on examination. I was pleasantly surprised by the amount of clean-up work Steve had already done. I knew he had reamed it (at great effort), but he’d also done a nice job removing the dirt and grime on the outside of the bowl. Apart from a small amount of rim tar, I could concentrate immediately on the major issue of the crack repairs. I shot these pics to show the state of the stummel when I received it.Dick17 Dick18 Dick19There were two major cracked areas at the front and back of the bowl. Both cut all the way through the chamber walls, all but slicing the bowl in half lengthwise. The front crack looked like a clean break running from the rim down the face of the bowl to the bottom of the tobacco chamber. The rear crack wasn’t as straightforward. Instead of a single linear crack, the damage at the rear started at the rim, dropped down to roughly the centre of the bowl, and took a sharp left as it sought out an old fill – a natural weak spot in the briar. From the fill the crack had “spidered”, with thinner cracks running up, down and across the bowl. Yikes! Its times like this that I marvel at the sheer power of neglected cake to inexorably break a pipe bowl into pieces. Pipers take heed – ream your bowls!

I’ve worked on cracked bowls before, but the majority that have come across my work table have been tight cracks that don’t penetrate the chamber walls. These cracks, by contrast, could be visibly moved by squeezing and releasing the bowl in my hand. Without some way to lock the briar in position, this bowl would have to be retired.

While I worked on a plan to knit Humpty Dumpty back together again, I took steps to ensure that the existing spider cracks did not run further into the briar. I fitted a micro drill bit to my electric hand drill and popped a tiny hole at the end of each fissure in the wood, careful not to drill through to the tobacco chamber. These “end cap” holes would stop the cracks in their tracks, though there were quite a few of them around the back of the bowl.Dick20 Dick21Glue alone would not provide sufficient holding power to keep the cracks tight and immobile. I would need to add physical reinforcement of some kind to ensure that the bowl stayed in one piece after being placed back in service. I had never used the procedure before, but I decided that I’d have to try to pin the cracks. I dug about in my supplies and found a length of 1.2mm brass rod I thought would do the trick, and matched it up to a micro drill bit from my tool kit. I would have to drill pin shafts across the crack, through the curved walls of the bowl, without drilling into the chamber. I muttered a short prayer to the Pipe Gods, and then sank the first shaft just below the rim across the rear crack.

This close-up pic shows the flat angle at which I drilled, and the brass rod in position. I marked the rod length and then cut it a bit shorter so that when fully seated in the shaft, the outer end of the rod would be below the outer surface of the briar. I roughed up the brass pin with 220-grit sandpaper to give the glue more gripping surface, and then ran a drop of CA glue into the shaft before pushing the pin home.Dick22Sharp-eyed readers will also have noticed that the second shaft had been drilled when I took the pic above. Note the angle of this shaft relative to the first one – it’s not even close to parallel. This is deliberate. Each pin was drilled at an opposing angle to its neighbours. This way any movement of the briar as it heats and cools will be blocked by one or more pins. If the pins were parallel, pressure in the wrong direction could push the crack open again.

In all I installed ten brass pins – four in front and six in back – and sank seven end cap holes (all but one of these in the back). I had expected the pinning to be both nerve wracking and time consuming, but after the first couple of pins I caught my stride and set the stummel aside to let the glue cure a short 30 minutes later. The Pipe Gods must have approved of the work as I didn’t drill through the chamber wall once. Whew! I snapped these pictures of the bowl after the pinning. The red lines show the direction of the pin shafts. You can see how the pins work to stitch the crack shut. The front repair doesn’t look too bad, but the rear of the bowl looks like it was attacked by termites!Dick23 Dick24The proof of any repair is in the pudding, so to speak. I won’t be on hand to witness the first firing of this pipe after the work is done, but I can happily report that I can no longer make the cracks move no matter how hard I squeeze the bowl. That’s a very good sign, as it shows that the bowl is acting as a single piece of briar instead of several bits of loosely connected wood.

With the bowl structurally sound again, it was time to sort out the damage inflicted on the stummel by some maniac with a drill. I patched over all 17 (!!) holes with CA and briar dust and let the CA cure before filing and sanding the fills flush with the surface of the briar. This is a process I’ve done many times on many different pipes, so I figured this would be the easy part of the repair. Ironically, the fills took up more of my time, energy and patience than the pinning as I had to revisit several of the fills more than once to ensure a smooth finish. I also realized that a few of the pins were left slightly too long – the brass kept shining through two of the fills – which necessitated extra work to get everything in order before staining. Eventually, though, perseverance paid off.Dick25 Dick26 Dick27 Dick28I topped the bowl gently at this point to remove the excess CA glue and remove a few tiny dings. I then prepped the stummel for stain by sanding with 1500 – 2400 grit Micromesh sanding pads.Dick29 Dick30 Dick31With the crazy number of fills in the briar, I knew I’d have to go with a darker finish than I’d usually select. I started with a coat of Fiebing’s Black water-based leather dye to bring out the grain as much as I could. I let the colour dry and then wiped off the excess with 0000 steel wool and a bit of fresh water. This left the grain stained black while the rest of the wood remained lighter. I then made a wash of Fiebing’s Dark Brown dye diluted about 50%. I washed the colour over the briar repeatedly until I got close to the amount of coverage I was looking for. I let the dye dry so I could assess how well the fills were hidden. Still fairly prominent. A few scribbles with a medium stain marker helped push the fills to the background without obliterating the grain altogether.Dick32I left the stummel overnight at this point. I wasn’t sure that I was done with the stain, but I was getting tired and didn’t want to mess up the work with a bad decision or a shaky hand. The next morning, however, the stain seemed to have settled into its intended depth and coverage. The fills were reasonably subdued by the stain, so I took the stummel to the bench and gave it a light buffing with White Diamond compound followed by Carnauba wax. I’ve got to buy a lotto ticket this week – if the Lotto Gods smile on me even half as much as the Pipe Gods did here, I’ll be retiring early. The fills and cracks have disappeared almost completely, though the stain is translucent enough to allow the grain to shine through. Even the cracks across the rim are hard to find. What a relief after the hours of filling and sanding! The repairs are still visible under strong light, but the stummel certainly passes the casual inspection test.Dick33 Dick34 Dick35 Dick36Before sending the stummel back to Steve, I filled and further stabilized the repair from the interior of the bowl by pressing JB Weld into the cracks. There was also a spot on the front chamber wall that looked suspiciously like the beginnings of a burnout that I filled in the same way. I let the JB cure and then sanded out the excess epoxy. This produced nice smooth chamber walls with JB Weld left only in the repaired areas. JB doesn’t “breathe” like wood as it heats and cools, so I wanted only the required amount of it left in the bowl.Dick37 Dick38 Dick39 Dick40I finished off the repair with a bowl coating of activated charcoal powder and maple syrup. This coating is largely cosmetic in this case, used to hide the JB, but it will provide an extra layer of protection for the repairs as well as a consistent surface upon which to build a new (and hopefully well-trimmed) layer of cake. Dick41 Dick42(Steve picks up the narrative again.)

Charles had sent the package Express Post and it did not take long to get it back. When I got home from a short business trip I went to the post office to pick it up. I carried the box home excited to see what Charles had done with the mess that I had sent him. It is one thing to see the photos and follow the process but truly a different story when you hold it in hand.

When I opened the box I was not prepared for the beautifully restored bowl that was carefully wrapped inside. Charles had done a masterful job on the bowl repair. The cracks were virtually invisible. The measles of the end caps were basically small specks and hardly visible at all. It was amazing! Charles had accomplished a bit of a miracle in my book. This one was a pipe I wondered if we would be burning rather than loading up. But the bowl was perfect.

Now it was back in my hands to finish the stem that I had previously roughly fit to the shank before sending the bowl off to him. I also needed to address the small dent that went all around the end of the shank. It looked like there had been a band of some sort on the shank for adornment as the shank was the one thing on the pipe that was not cracked. I would have to address that later in the process.

First I worked on the stem. I sanded it with 220 grit sandpaper to bring the surface of each side of the square stem to the same height as the shank.Dick43 Dick44 Dick45 Dick46The fit was good and once the band was in place would look even. I wet sanded the stem with 1500-2400 grit micromesh sanding pads and rubbed the stem down with Obsidian Oil. I dry sanded with 3200-4000 grit pads and then gave it another coat of oil. I finished sanding it with 6000-12000 grit pads and gave it a final coat of Obsidian Oil. I let the oil dry.Dick47 Dick48 Dick49I buffed the stem with Blue Diamond on the wheel and then inserted it in the shank. Things lined up nicely but there was an indentation around the top, bottom and sides of the shank where it appeared there had been a band of some sort. The photo below shows the worst of the indentations.Dick50I went through my box of bands which are almost all round. That is not a problem as it is easy to square up a round band. But as Charles said above, the Pipe Gods were smiling on me and I found that I had one square band and it was exactly the size and depth I needed to fit the shank, cover the indentations and cover the stamping on the sides. I pressed the band in place. The band is worn and battered but it adds a bit of flair to the pipe.Dick51 Dick52 Dick53 Dick54 Dick55To clean up the dents and wear on the band I used a tiny upholstery hammer to tap out many of the dents and wrinkles on it. I also used it to flatten the end of the shank and smooth it out. I heated the band with a lighter to warm the metal and then tapped it until it was as smooth as I could get it. The photos below show the pipe at this point in the process. The new stem fits well and the band sets of the pipe very nicely in my opinion. It smooths out the transition between the shank and the stem.Dick56 Dick57 Dick58 Dick59However, I was not happy with the still battered appearance and some of the rounded edges on the corners of the band. I took the band off the shank and used a flat blade screw driver to square up the angles and to flatten the band from the inside. I was able to remove more of the dents and wrinkles. I put some all purpose glue on the shank and pressed the band back in place. I took the following photos. Thanks for looking.Dick60 Dick61 Dick62 Dick63 Dick64Charles, this was a fun project to work on together. I look forward to firing up this old timer.  The proof is indeed in the pudding as you said above. That will be the real test of the new life of this pipe repair. I am also thinking of contacting the Poor Richard’s Pipe Shop in Bozeman, Montana with a bit of a story of the resurrection of this pipe and its cross Canada journey from Vancouver to Kitchener and back again. Let’s keep our eyes open for another joint project… there still may be another pipe out there that stymies us… until then keep up the good work my friend. IT is always a pleasure to work together. I think you said it best in one of our back and forth interchanges – if we lived closer together we would be in trouble. Take care.

Midterm Exam #1: Repairing a Cracked Bowl on a Pre-1956 Medico Billiard


Blog by Anthony Cook

Anthony1 The photo above represents the start of my first semester at the University of Reborn Pipes (by the way, Steve, we need T-shirts, a mascot, and a fight song). It was taken several months ago and it shows the first batch of pipes that I had collected for restoration practice. It’s a motley crew to be sure, but I have a special fondness for each of them. You never forget your first, as they say.

I’ve completed the restoration of the majority of these since the photo was taken (sadly, I failed the cob test, but it was rigged I tell you), but four of them were placed back into the box after cleaning and have remained there. Those four had issues that required either tools, materials, or experience that I just didn’t have at that point. Over time, other pipes attracted more of my attention and those remainders continued to linger in the dark and gather dust once again.

Now that I’ve acquired a few credit hours, I thought it might be time to drag them back out into the light; sort of as midterm exams to see if I’ve learned anything. The pipe that is second from the right in the group photo above is the one that I selected for my first exam.Anthony2 It’s an unnamed Medico billiard. The stamping on the shank reads simply “MEDICO” over “IMPORTED BRIAR” and the stem bears the “F” stamp found on some older Medicos. I learned from Dave Whitney, author of Old Briar, that the “F” stamp was probably discontinued in 1955, which gave me some idea of the pipe’s age.

The main reason that this one was shuffled back into the box was because of the extensive damage to the bowl. There were large fills within the carved rustication on the right side and several cracks had developed in the area both outside and inside the bowl. I discovered during cleaning that at least one of them penetrated completely into the chamber.

Below, you can see more of the original pictures that I took of the pipe shortly after it arrived. I had not done anything with it other than ream the bowl at the time these photos were taken.Anthony3

Anthony4

Anthony5 As I mentioned, I had already cleaned the internals of the pipe before dropping it back in the box. So, I started work by dropping the stummel into a jar of alcohol to soften the lacquer finish. The metal ferrule at the end of the shank was loose enough to fall off. So, it was removed it and set aside. After a couple of hours, I removed the stummel from the bath and wiped it down with a cotton cloth. Then, I used acetone and #0000 steel wool to remove the lacquer coating. I also picked out the pinkish-orange putty from the fills, and then used the pick to scrape any loose or charred wood from the cracks.Anthony6 A lot of scratches and gouges were revealed once the rim was clean. So, I set up my topping surface and lightly sanded the majority of the blemishes away using 220-grit and 320-grit sandpaper.Anthony7 I mixed together powdered pumice, activated charcoal, and sodium silicate to make a bowl patch. After protecting the airway with a pipe cleaner, I applied a small amount of the patch mix directly to the cracks with a flat toothpick and firmly tamped to push it into the cracks. Then, I used the scoop on my pipe tool to apply a thin layer across the entire area for protection.Anthony8 Next, I addressed the cracks and pits on the outside of the bowl by filling them with a few layers of briar dust and CA glue. I applied the glue with the end of a toothpick to avoid getting glue into the carved areas as much as I could. After the patches had dried, I sanded them down with 220-grit and 320-grit sandpaper. The same progression of grits was used to put a slight chamfer on the outside of the rim to remove the gouges that remained there. While I was working the bowl, I also sanded the chamber patch smooth with 400-grit paper.Anthony9 I sat the stummel aside for a time to pay some attention to the stem. There was a lot of chatter near the button and tooth dents on both sides of the stem. I applied black CA glue (medium thickness) to the dents with a toothpick and dripped a couple of drops of activator over it to set it up quickly. When it was completely dry, I sanded out the glue patch and leveled the chatter with 220-grit paper. The two photos below show the patch before and after rough sanding.Anthony10 While I was working, I decided that I didn’t like how worn and rounded the edge of the button had become. So, I decided to build a new, sharper edge. I wrapped clear packing tape around the stem to mask it just below the button. I built up the layers until it was the depth that I wanted my new button to be. Then, I used a flat toothpick to “paint” black CA glue (thick) along the edge of the mask and dripped activator over it when I was satisfied with the coverage. Before the glue could completely set up, I quickly peeled the tape away to reveal my new (although rough at this point) button edge.Anthony11 I used 220-grit paper and a sanding file to start shaping the button, and then 320-grit and 400-grit to refine the button shape and further blend the patch area. I also used 400-grit paper to remove the unsightly (to my eyes) molding seams along the sides of the stem. I placed a rubber washer over the tenon to preserve the sharp edge of the stem face and lightly sanded the entire stem with 600-grit and 1200-grit paper.Anthony12 The stem logo was in fair condition, but the paint was cracked and discolored. So, I filled it in using a grout pen and carefully sanded off the excess with 1200-grit paper. The grout paint left a slight, white residue smeared around the logo, but that would be removed with further polishing.Anthony13 Before polishing the stem, I rubbed it down with a drop of mineral oil, let it sit for a couple of minutes, and wiped it away. I hoped that this would moisturize the surface a bit and maybe prevent some of the nylon fiber splintering that always seemed to leave behind fine scratches in the finished stem. Then, I polished with micro-mesh pads 1500-grit to 12000-grit. I added a second and third drop of oil between 2400/3200 and 4000/6000 pads. I was pretty pleased with the results. The final stem was much more blemish-free that the previous nylon stems I’ve worked on.

With the stem finished up, I returned to the metal ferrule that I had set aside earlier. I gave it a once over with #0000 steel wool, and then polished it with Semichrome polishing paste and a soft cloth. I buffed of the excess with my Dremel and a small buffing wheel to give it a nice shine.Anthony14 Back to the stummel, I applied a 3:1 mixture of isopropyl alcohol and Fiebing’s black dye, hand-buffed the stummel with a soft rag to remove the excess, and then used 600-grit paper to remove the scratches and most of the dark stain except for inside of the carved rustications and what had set into the grain. I also made small adjustments to the width and angle of the rim chamfer with the sandpaper to make sure that it was even all the way around.

Next, I applied a 3:1 stain solution of isopropyl alcohol and Fiebing’s dark brown, buffed off the excess by hand, and lightly sanded the entire stummel with 1200-grit sandpaper to smooth the surface and soften the edges of the rim. Then, I applied a 3:1 solution of ox blood stained and hand buffed again.

Finally, I polished the stummel with micro-mesh pads 1500-2400 before applying a 4:1 mahogany dye mix. I wiped the stummel down with an alcohol dampened cloth until I achieved a dark copper color and finished up by polishing with the remaining micro-mesh grits.Anthony15 Then it was time to put all of the pieces back together and give the pipe the final touches. I reattached the ferrule to the stummel with some 5-minute epoxy. When that had set, I applied a bowl coating mix of sour cream and activated charcoal to help promote the cake formation in the repaired chamber. I let that dry for about two hours before reattaching the stem and taking the pipe to the buffer. I buffed the stummel and stem with White Diamond, and then I gave the pipe several coats of carnauba wax.

With all of that done, I turned in my first exam. I’m feeling pretty good about it, but I never really know how I’ve done on these things until the grades finally come back. I’m not going to worry about it now, though. I still need to cram for the second exam. It’s going to be a long night.Anthony16

Anthony17

Anthony18

Anthony19

A Bit of an Experiment – Restoring a Broken Bowl on a Hardcastles Jack o’ London Billiard


Blog by Steve Laug

Having had a long week at work with nary a break in the busyness I needed a bit of a diversion on the weekend. I had an old Hardcastle’s Jack o’ London billiard in the cupboard that I probably should have thrown away but did not. I picked up the nice little billiard on one of my pipe hunts months ago. When I reamed it after I brought it home the bowl cracked and a large piece fell out of the right back side of the bowl. Up on examination it was on its way to being a burn out as the interior wall on the crack was charred and damaged. I took pictures of the bowl to show the damage at that time. For some reason I did not throw it away but rather put it in the cupboard and figured I could use the briar for other repairs.

But this weekend I took it out and decided to experiment with it and see what I could do with the damaged bowl. I debated whether to cannibalize it and save the parts or to rework it. I had already scavenged the stem and reused it on another Hardcastle’s pipe bowl that I restored so I only had the bowl. If the repair worked I would have to fit a new stem on the pipe before I could smoke it.

Here are some photos I took when the bowl cracked during the initial reaming. I took quite a few because I had not had that happen before in my experience. Looking at the photos you can clearly see the damage to both the remaining bowl and the chunk of briar that fell out. It was seriously damaged and one that I seriously considered throwing away that day. The rim was a mess as well besides being cracked and broken and the inner edge was out of round and the top beaten around the outer edge. The bowl was heavily caked and it looked to have been a good smoking pipe for the previous pipeman. There were even some fragments of unsmoked tobacco in the bottom of the bowl.Jack1

Jack2

Jack3

Jack4

Jack5

Jack6 Out of boredom and the need for something to keep my hands busy while my dog was being groomed I decided to experiment with repairs on the bowl. I cleaned up the broken pieces of the briar both the edges on the bowl and broken pieces with alcohol and cotton swabs and picked out any remaining loose pieces of briar or charred pieces of briar. I knew that I could easily patch the external side of the bowl and make it look acceptable but I was not sure what I would do with the internal side. I used a pen knife to scrape out the remaining cake in the bowl and to make sure there was no loose carbon that would get in the way of the repair before gluing in the piece. I applied clear super glue to both the bowl and the chunk of briar being careful to keep it out of the interior of the bowl and pressed the piece in place. In the photos below you can see how the glue ran down the exterior of the back side of the bowl but not on the inside.Jack7

Jack8 I applied some more glue to the cracks on the outside of the bowl so that I could push briar dust into any spaces or chips in the briar between the pieces.Jack9

Jack10 With the chunk of briar glued in place and the external cracks patched it was time to look at the damage on the inside of the bowl and determine what to do. I know that in the past I have used J.B. Weld and Greg and others have used fireplace cement to repair the inside surfaces of the bowl but I had in mind a different experiment. Both the J.B. Weld and the fireplace cement dry and are neutral after curing. They are both impervious to heat or moisture but I wanted to see if I could use all natural substances and work a repair that would hold up. I knew that only time would tell if it actually worked but I figured that I had nothing to lose with this old pipe. If it did not work it would go back to the scrap yard and come back to life in repairs on other pipes. But if it did work I would have a useable yard pipe that I could smoke while working with little concern of damaging or ruining it in the process. Too me it was worth a try.

The next series of two photos show the inside of the bowl. The cracks and damage to the inside of the bowl was quite extensive. But it was still worth trying a repair.Jack11

Jack12 I fit a stem on the shank from my can of stems with minimal sanding of the tenon for a good fit in the shank. The diameter of the stem would need to be adjusted but that would not be too much of a problem.Jack13

Jack14

Jack15 The next two photos show the variation in diameter of the shank and the stem.Jack16

Jack17 I use a Dremel and sanding drum to take down the excess material as close to the shank as possible without damaging the shank. I also decided to use the Dremel and sanding drum on the overflow of super glue and briar dust on the outside of the bowl as I planned on sanding the bowl anyway.Jack18

Jack19

Jack20

Jack21 Once I had the fit of the stem close and the majority of the glue and briar dust patch smoothed out I took it back to the work table and sanded both the bowl and the stem with 220 grit sandpaper to smooth out the scratches in the briar and the vulcanite.Jack22

Jack23 The rim needed to be topped to smooth out the damage to the top and the outer edges. I set up the topping board with 220 grit sandpaper and pressed the bowl flat against the sandpaper. I sanded it in a circular motion until I had removed the damaged rim surface and the damaged out edge.Jack24

Jack25

Jack26 I forgot to take a photo of the rim at this point but you can see in the photos of the staining that it is sharp and clean on the outer edge. I sanded the briar with a medium and a fine grit sanding sponge to minimize the scratches even more and then heated the bowl before I applied a dark brown aniline stain. I applied the stain, flamed it and repeated the process until I had good even coverage on the bowl.Jack27

Jack28 The dark brown stain was quite opaque so I wiped down the bowl with isopropyl alcohol on cotton pads to remove and thin down the stain coat.Jack29

Jack30 The top of the rim can be seen in the next photo. The damage to the rim top has been minimized and the surface is smooth. There is still some damage on the inner edge but that will be addressed when I do the internal repairs to the bowl walls.Jack31 I buffed the bowl with Red Tripoli and then wiped it down again with alcohol. The colour was just what I was looking for at this point in the process. It was a rich brown stain that allowed the grain – birdseye and mixed to show through the finish. It also did a decent job covering the repair to the other side of the bowl.Jack32

Jack33

Jack34

Jack35 I buffed it again with White Diamond to raise the shine. The stem still needed some fine tuning for a better fit against the shank and some sanding to remove the oxidation and scratches but the pipe was beginning to look good.Jack36

Jack37

Jack38

Jack39 I took the next close up photos to show the work that still needed to be done on the rim and the look of the repairs on the right side of the bowl. The bowl surface and rim surface was very smooth but still needed to be sanded with micromesh pads to take out the scratches and polish the briar to a deep shine.Jack40

Jack41 With exterior at a good place to take a break it was time to address the inside of the bowl. I mixed a batch of pipe mud using cigar ash and water. I mixed it to a thicker than usual consistency so that I could press it into the damaged area of the bowl wall. I did not want it runny or soupy but I still wanted it wet enough that the mud was well mixed and would stick. I painted it on the wall in the damaged area with a folded pipe cleaner and pressed it into the cracks with the spoon end of a pipe nail. I also pressed it in with the end of my finger. I repeated the application of the mud until the surface of the wall was smooth and showed no pits or divots. I set the bowl aside to dry over night as I wanted the mud to harden and also wanted to see if it was solidly stuck in the damaged areas.Jack42

Jack43 In the morning, after curing over night I inspected the patch on the inside of the bowl. I used my dental pick to make sure that the patch was well set in the divots in the wall of the bowl and then smooth out the surface with a pen knife.Jack44

Jack45 I let it dry for about four more hours while I did other things and then decided to mix a batch of bowl coating to paint the bowl interior. I mix a batch of bowl coating using sour cream and activated charcoal powder. I use a finely ground powder that comes in capsules.Jack46

Jack47 I take apart the capsules and dump the charcoal powder into the sour cream.Jack48 I use a dental spatula to mix the charcoal and sour cream into a black paste. I work the paste until all the sour cream and charcoal are combined.Jack49

Jack50 I used the spatula to apply the paste to the walls of the pipe and then smoothed it out using a folded pipe cleaner.Jack51 The entire bowl is coated with the paste and after smoothing it out with the pipe cleaner looks like a dark grey almost black coating around the sides and bottom of the bowl. I put a pipe cleaner in the airway so that I would not get the paste in the airway when smoothing it out.Jack52

Jack53

Jack54 I wiped down the top of the rim with a bit of saliva on a cotton pad and then set the bowl aside to let the coating cure. Once the coating cured it would provide a protective layer over the bowl interior and facilitate the buildup of a new cake.

While the bowl coating was drying I worked on the stem. I sanded it with 220 grit sandpaper with a plastic washer between the shank and stem to smooth out the transition between the two. When I had finished sanding the stem with the 220 grit sandpaper I sanded it with a medium and a fine grit sanding sponge.
Jack55

Jack56

Jack57

Jack58 I wet sanded the stem with 1500-2400 grit micromesh sanding pads to minimize the scratches.Jack59 I dry sanded the stem with 3200-4000 grit micromesh sanding pads and then buffed the stem with Red Tripoli to further polish the stem.Jack60 I brought it back to the work table and dry sanded it with 6000-12,000 grit sanding pads. I buffed the stem with Blue Diamond on the wheel and then rubbed it down with Obsidian Oil and let it soak in.Jack61 I sanded the bowl and shank with micromesh sanding pads – wet sanding 1500-2400 grit pads and dry sanding with 3200-12,000 grit pads. I buffed the bowl with Blue Diamond to polish the briar. There are some fine scratches that seem to be around the junction of the shank and stem. I buffed it with Red Tripoli again and with White Diamond and then with Blue Diamond. I polished the stem and bowl with carnauba wax and buffed it to a shine with a clean buffing pad to raise the shine. The finished pipe is shown in the photos below.Jack62

Jack63

Jack64

Jack65 The next photos are close up pictures of the repair. They also that the carbon/sour cream bowl coating has dried and is a dark grey colour. The cracks on the exterior are smooth to touch and do not feel like cracks. The repairs to the top of the rim still show as a red coloured spot at the back of the rim. The stain took to the patch a little lighter than the rest of the bowl. It is smooth to the touch but still shows. The internal bowl coating has dried to the touch and gives a nice coat that is cover the repairs on the bowl wall. The carbon bowl coating has small particles of carbon in the finish. These will provide something for the new cake to bind to when it is smoked. All that remains is to let the coating cure for a few days and then load a bowl and smoke it.Jack66

Jack67

Jack68

Jack69

Repairing a Cracked Bowl on a GBD London Made Canadian


Blog by Steve Laug

Andrew sent me this old pipe as a bit of a challenge and I thought I would give it a go. This was a great looking pipe at one point in its life – nice grain. It is stamped GBD in the oval on the top of the shank with LONDON MADE in an arc under the oval. That leads me to believe the line is the LONDON MADE rather than the location. On the underside of the shank it is stamped: LONDON ENGLAND over D256. The 256 is the correct shape for an oval shank Canadian but I had not seen the D stamping before a number on GBD pipes.

The finish was rough and there was split in the back side of the bowl that ran horizontally in an arc across the bowl about ½ inches from the top. It was as if the grain had separated that way across the back of the bowl. It follows the arc of the grain in that part of the briar. From the main split there was a tiny crack branching off into another line of grain on the left side of the bowl. The weird thing about the split is that it was only external. There was no sign of it inside the bowl after removing the thin cake. The stem was not with the pipe so it would need to be restemmed. I found an old saddle stem in my can of stems that would work for this pipe after I modified it.
IMG_5336

IMG_5337

IMG_5338

IMG_5339

In talking on the phone with Tim West last evening while I was ordering parts for repairs I discussed this pipe with him. He said that in his estimation the crack being only on the outside of the bowl suggested that the issue was a moisture problem.

I shaped the stem with a Dremel and a sanding drum. I removed the saddle on the stem and converted it into a taper shape and also narrowed it to fit the dimensions of the oval shank. The next four photos show the newly fit stem and the rough shaping that I did with the Dremel. All that remained in the stem fit was a lot of hand sanding!
IMG_5343

IMG_5344

IMG_5345

IMG_5346

I reamed the bowl with a PipNet reamer to remove the existing cake and to check the interior walls of the bowl. They were not cracked as noted above. I washed down the pipe with acetone on cotton pads to remove the grime and the finish in preparation for doing the repair on the cracks. I picked out the debris in the cracks with a dental pick and cleaned out the sides and interior of the cracks. I washed that part of the bowl down a final time with acetone to clear away any debris left behind by my picking at it.
IMG_5348

IMG_5349

I packed briar dust into the cracks with a dental pick and then dripped super glue on top of the briar dust to bond it and make a fill for the crack. The next series of photos show the repair at this point from various angles.
IMG_5350

IMG_5351

IMG_5352

Once the glue was dry and the patches were solid I sanded the patch with 220 grit sandpaper to smooth it out to match the surface of the bowl. I sanded it with medium and fine grit sanding sponges afterward to smooth it out further. The next photos show the initial sanding of the patches. There was still much sanding to do and some more filling in spots that were low.
IMG_5353

IMG_5354

IMG_5355

IMG_5356

I sanded the bowl and the new stem further with 220 grit sandpaper to remove the finish and smooth out the transitions. On the crack repair I wanted to even out the transition between the fill and the surrounding briar. On the new stem shank union I wanted to make that transition between the briar and the vulcanite stem seamless.
IMG_5357

IMG_5358

IMG_5359

IMG_5360

The next series of three photos show the newly sanded repair. It looks better but there are still a few areas that will need to be filled and sanded some more.
IMG_5361

IMG_5362

IMG_5363

At this point in the process I was still undecided as to whether I would stain the repaired bowl or rusticate it. I posted on an online forum to see what others thought and the audience was split. I decided to stain it and see how the repair looked. If I changed my mind I could rusticate it later. I wanted to use a contrast stain on the bowl to minimize the look of the crack so I used a black aniline stain to do the undercoat. It would also highlight any areas on the repair that needed more attention. I applied the stain, flamed it and did the same again until the coverage I was looking for was achieved.
IMG_5364

IMG_5365

I took three photos of the repair after staining to show what the repair looked like at this point.
IMG_5366

IMG_5367

IMG_5368

When the stain was dry I wiped it down with isopropyl alcohol to lighten it and bring out the grain. I wanted the black stain to settle into the grain and highlight the stripes. I wiped it down with acetone as well to further lighten the stain. I buffed the pipe with red Tripoli and White Diamond to further lighten the black undercoat. I stained it with a top coat of dark brown aniline stain, flamed and restained it for the coverage I wanted. It must be remembered at this point that this was not the finish coat but merely the way in which the repair is highlighted and makes it clear where I still need to do some work on the fills. The photos below show the repair and make it very clear where there was still work to do. This meant more filling of the crack with briar dust and superglue and more sanding. It also meant that I would need to restain that particular area of the pipe
IMG_5369

IMG_5370

IMG_5371

IMG_5372

Once the pipe was at this point several things stood out to me. I really like the grain patterns on the bowl and shank and I need to continue to work on the patch until it was well blended. So I took it to the buffer and buffed it with White Diamond and then took it back to the work table to do some more work on the patch.I sanded down the area around the repair with 220 grit sandpaper and then packed in more briar dust with the dental pick. I added more superglue until the repair was mounded slightly. While this would take more work in terms of sanding, I knew it would make the patch as perfect as possible.

Once I had the patch sanded back to match the surface of the surrounding briar with the 220 grit sandpaper, I sanded it further with medium and fine grit sanding sponges and then with 1500-2400 grit micromesh sanding pads. The scrathes left behind by the sandpapers disappeared with the micromesh sanding. I restained the area with the black undercoat, sanded it again and then gave it a topcoat of dark brown aniline stain a second time. I did not bother sanding and restaining the whole pipe as my plan was to sand the entire bowl to create the contrast I wanted with the two stains. I sanded the pipe with 1500-2400 grit micromesh sanding pads to blend in the freshly stained portion of the pipe with the rest. The next three photos show the status of the repair at this point.
IMG_5377

IMG_5378

IMG_5379

I continued to sand the bowl and shank being careful around the stamping on the top and bottom of the shank with the micromesh sanding pads until the top stain was almost translucent. I wanted the top coat to be there but I wanted the grain to pop through it. I also wanted the colour to blend in such a way that the dark repair would not be hidden completely but would be minimized. The next four photos show the pipe after all of the sanding and a buff with White Diamond to enhance the shine.
IMG_5373

IMG_5374

IMG_5375

IMG_5376

I worked on the stem to remove several small tooth marks on the underside and one on the topside of the stem. I then sanded the stem with 220 grit sandpaper to further shape it and get the flow of the taper just right. I sanded it with medium and fine grit sanding sponges and then used my normal range of micromesh sanding pads to finish the work. I wet sanded with 1500-2400 grit and then dry sanded with 3200-12,000 grit pads. I rubbed the stem down with Obsidian Oil and let it soak into the vulcanite.
IMG_5382

IMG_5383

IMG_5384

I did some more sanding with micromesh sanding pads on the stem to remove some of the light scratching that showed up under the flash and then buffed the stem and bowl with White Diamond. I gave them both multiple coats of carnauba wax to protect and give it a shine. The first three photos below show the repair as it stands now. The surface of the bowl is smooth to the touch. The light and the dark spots on the repair are some of the briar dust in the patchwork. Some takes the stain and is dark and there seem to always be light spots as well. This old pipe has come a long way since I received it in the mail.
IMG_5389

IMG_5390

IMG_5392

The finished pipe is shown in the next series of four photos. The stem fit came out nicely. The change from a saddle to a taper style worked well. The contrast stain looks great on the pipe. Over all I am well pleased that I decided to stain it and not rusticate it. I look forward to loading up a bowl and enjoying the “new” pipe.
IMG_5385

IMG_5386

IMG_5387

IMG_5388

Can a Cracked Bowl be Repaired? – Taking a Lesson from Gan Barber’s Work


Blog by Steve Laug

Many of you have read the piece that Gan wrote on “All the King’s Horses and All the King’s Men – A Peterson Adventure” https://rebornpipes.wordpress.com/2012/10/03/all-the-kings-horses-and-all-the-kings-men-a-petersen-adventure-gan-barber/ In it he described the process of reconstructing a Peterson that was in pieces. It arrived with cracks and he put the pieces back together. Since interacting with Gan on that pipe and rereading his article I have wanted to try my hand at repairing a cracked bowl. Finally I picked one up in an EBay lot that I purchased. It was an L. J. Perretti Smooth Bent Billiard. It was in rough shape and needed a stem. I figured I would practice some of the magic Gan used on the Peterson pipe he wrote about on this one.

This Perretti had some deep cracks that ran through the bowl from outside to the inside. Once I had reamed the extremely thick cake out of the bowl I could see that the cracks went all the way through the briar. There were deep gouged areas on the inner walls of the bowl directly behind the cracks. The wood was not charred so it was not a true burnout. I think that a combination of too thick a cake and possible flaws in the briar made these cracks appear. Interestingly the cracks follow the grain all the way through the pipe. I shined a light through the cracks and I could see light on the opposite wall of the pipe bowl. There were two large cracks on the left side and one running with the grain on the front of the bowl. The one on the front was not as open and it did not go all the way through the briar. The ones on the left side were quite open and cavernous.

The first series of seven photos shows the state of the bowl when I began the experiment. I figured I had nothing to lose on this one. If it fell apart or did not work out it was not a great loss at all, but it would fun giving it a try. I wanted to try out some of the methods that Gan used in his reconstruction of the Pete on this one and see what I could do with it.

IMG_0880

IMG_0881

IMG_0957

IMG_0961

IMG_0958

IMG_0959

IMG_0960

After reaming thick cake back to the bare wood I sanded the exterior with 240 grit sandpaper to clean off the finish and get a better look at the nature and depth of the cracks. I wanted to be able to more clearly see how far across the bowl they stretched and if the cracks followed the grain. I had already seen the state of the inside bowl walls. The left side interior showed damage from the crack extending into the bowl. The front side was less damaged. It had some very minor cracks on the inside walls. I blew air through the shank into the bowl and plugged the top of the bowl to see where the air came through the walls. The only one that really allowed airflow was the larger crack on the left side toward the front of the bowl. The next three photos show the sanded bowl. I left sanding dust in the cracks to highlight their depth and the extent of damage.
IMG_0961

IMG_0962

IMG_0963
I decided to put the bowl in the alcohol bath. I wanted to soften the remaining cake in the cracks and crevices inside the bowl and also soften the grime within the cracks. I had no idea what would happen to the bowl as it soaked. I almost expected it to come out of the bath in several pieces. I got busy with work and other demands and ended up leaving it in the bath for over 24 hours. When I finally removed it and let it dry for several days I figured that the drying would probably make the cracks worse.
IMG_0964

IMG_0965
When I removed the bowl from the bath it was not in pieces but the cracks did open a bit wider on the side of the bowl. The finish and grime was gone and I could clearly see what I had to do if I was going to repair this bowl. The end of the shank had also been damage and chipped so I decided to band it to give me a smooth edge for the new stem I was going to turn for it. I used a nickel band, heated it with the heat gun and pressure fit it on the shank of the pipe. The one bonus in the process was that the grain on this pipe was actually quite nice. The next three photos show the dried and banded bowl and shank. There was still a lot of sanding that would need to be done to prepare the bowl for the repairs and even more sanding once those were done.
IMG_1037

IMG_1036

IMG_1038
I selected a stem that had the same diameter as the shank and turned the tenon on the Pimo Tenon Tool. I finished the fit by hand with a little help from the sanding drum on the Dremel. Once I had a good fit I set up the heat gun and heated the stem to bend it to match the bend of the bowl and bring the tip even with the top of the bowl. The next three photos show the heating and bending process as well as the finished look of the pipe with its new stem.
IMG_1039

IMG_1040

IMG_1041
After I restemmed the pipe I did some more sanding on the bowl. I wanted a clean surface to work with when I did the patches on the cracks. I also cleaned out the inside of the bowl with sandpaper and a dental pick. I wanted to clean out the interior cracks in the bowl as well as the exterior ones. Each would use a different kind of patch but each needed a clean surface to work with. The next five photos show the cleaned exterior of the pipe and two photos of the interior. Still more work needed to be done to clean them up before I patched them.
IMG_1042

IMG_1043

IMG_1044

IMG_1045

IMG_1046
For the exterior cracks I decided to use a patch mix of briar dust and superglue. I cleaned the cracks out with my dental pick and some Everclear. Once they were clean I packed them with briar dust, tamping it into the cracks with both the flat head of a tamper and also the tip of the dental pick. Once they were filled the first time I dripped the superglue into the cracks. The glue binds the dust and the surrounding briar and also compacts the briar dust. I then retamped in some more briar dust and repeated the process until it was filled. The next six photos show the process of filling the cracks around the bowl.
IMG_1047

IMG_1048

IMG_1049

IMG_1050

IMG_1051

IMG_1052
Once all the cracks were filled I sanded the bowl with 240 grit sandpaper to remove the excess material on the surface of the bowl. You will note the scratches in the surface of the briar. These would be removed in the successive sanding that still would be done to the bowl. The cracks are filled and the surface hard. The briar dust and superglue form a good bond with the crack and when dry are dark black in colour. They are hard to the touch even with the dental pick. The next four photos show the bowl after sanding. The surface is smooth to the touch.
IMG_1053

IMG_1054

IMG_1055

IMG_1056
The scratches on the bowl have been minimized with the fine grit sanding sponge pictured above. I continued to sand until the marks were gone using 320 grit sandpaper. Once I had the bowl to that point I wiped it down with Everclear on a cotton pad. The three photos below show the bowl after the wash.
IMG_1057

IMG_1058

IMG_1059
I continued to sand the bowl with micromesh sanding pads from 1500-12,000 grit to smooth out the surface of the bowl. The micromesh left the surface ready to be stained. The cracks are still visible in terms of the black lines but the cavernous gaps are filled and repaired.
IMG_1058

IMG_1060

IMG_1061
I decided to stain the bowl with a rich oxblood aniline paste stain. I applied it to the bowl, flamed it and applied it a second time and flamed it. Once it was dry I wiped it off and hand buffed the surface. My purpose was not to hide the flaws but to minimize the glaring nature of the repairs. The next six photos show the staining and rubbed down bowl. I was not happy with the coverage but I buffed it quickly with White Diamond to see what I had to work with. The final photos in the series of six show the buffed and polished look of the bowl.
IMG_1063

IMG_1064

IMG_1065

IMG_1066

IMG_1067

IMG_1068
I decided to give the bowl a second staining of a dark brown aniline colour. This was a mix of dark brown and alcohol 1:1. I applied it and flamed it. I repeated the process to darken the colour of the bowl. The four photos below show the result of the application of the brown stain.
IMG_1069

IMG_1070

IMG_1071

IMG_1072
After the stain had dried it was time to address the inside of the bowl. I sanded it out quickly with a Dremel with a sanding drum attachment. I was careful not to change the shape of the bowl but to merely remove any carbon cake that still remained. I wiped the inside down with Everclear and then flamed it to dry out the surface of any moisture. I then mixed a batch of JB Weld. This would be the first step in doing the interior repairs. I packed it into the cracks on the inside of the bowl using the spoon end of the pipe nail. I continue to pack it into the bowl cracks until they were smooth. The four photos below show the mix and the patch in the bowl. It has a drying time of 6 hours to dry to touch and 24 hours to cure.
IMG_1073

IMG_1074

IMG_1075

IMG_1076
While the bowl was drying I worked on the new stem. I sanded down the castings on the side of the stem and polished it with micromesh sanding pads. I used 1500-12,000 grit micromesh pads on the stem. I pictured three photos below to show the process.
IMG_1077

IMG_1078

IMG_1079
The next series of eight photos show the patch after it had dried. I also reapplied the JB Weld after the initial 12 hours so that it filled in the places where it had shrunk as it dried. The patch dried a fine grey coloured. I sanded it down until it was only in the cracks themselves and not in the clean briar. I wanted to give the briar as much absorption area as possible as the JB Weld does not absorb moisture at all. It dries to a neutral, hard metallic material that has no taste.
IMG_1080

IMG_1081

IMG_1082

IMG_1083

IMG_1084

IMG_1085

IMG_1086

IMG_1087
Once the JB Weld was cleaned up and reduced to only filling the cracks it was time for the second step of the bowl interior renewal. I mixed a batch of bowl coating composed of activated charcoal powder and sour cream. I stirred the batch until it was a consistent blue/black grey colour. I applied it to the entire bowl from top to bottom with a folded pipe cleaner. Once it dries it is a solid black colour and neutral in taste. It gives the bowl an additional layer of protection until the cake builds up. The next three photos show the mix and the application in the bowl.
IMG_1105

IMG_1107

IMG_1108
With that done, both the inside and the outside cracks are repaired and the pipe is back in service. I gave the entire pipe a final buff with White Diamond and then applied multiple coats of carnauba wax for protection. The final photos below give you an idea of how the pipe looks today. It is still curing from the bowl coating but I will load it and smoke it once that has cured. The finish of the two stains worked well to blend in the repairs but not hide them. The surface is smooth and the open cracks have been repaired. Now the ongoing test begins. Will the patches hold up or will the new heat from the fired tobacco open them a second time? Time will tell but it is worth the experiment in my opinion.
IMG_1089

IMG_1090

IMG_1091

IMG_1092

IMG_1093

IMG_1094