Tag Archives: refinishing

Piet Binsbergen “Hot Rods” – Piet Binsbergen


Well I am known as the visual artist, the mad man, the cowboy with a drill bit! This story is about my custom pipes offering you some history and the reasons why I do what I do.

I enjoy pushing boundaries at times and do so due to my training in the arts up to masters’ level. I do pipe repair and still hold firm that pipes need to brought back to life as close to their original state as possible. I would never dream of doing a custom job on a Dunnie shell for instance, or a pipe that remains in a repairable state.

My “Hot Rods” are custom renditions which I keep in my own collection. These are pipes lying in ICU close to flat line. They are in a poor state, often with busted shanks or missing or broken stems. You name it, these pipes have a terminal diagnosis.  From here on I have fun. I tend to push myself a little further each time with the challenge being to save the pipe at all costs. Some I have won and others lost but no matter how bad they are, I give them my best shot.

Now a bit of Pipe lore history from the dark continent, South Africa. Smokers here are few and far between. As RSA is no bigger than the state of Texas our smokers per capita will never service the demand for good pipes and tobacco. We have but a few collectors. The majority are smokers who pride themselves in workhorses such as the famous Keyser pipe smoking OTC heavily doused aro’s in them. Now, we were a British colony until the mid-1960’s so it is not uncommon to find older GBD’s, Pete’s and even antique Dunnies floating around here. As a matter of fact most British pipe makes are here in their dozens with the American and European pipe manufacturers taking a back seat.

During the apartheid years most countries in the world imposed sanction on South Africa reducing the inflow of pipes to a trickle. Being a commonwealth country we were still able to obtain Brit pipes. America and the most of Europe would have nothing to do with us. Most imported tobacco ground to a halt with South African tobacco farmers inventing the most hideous blends the world has ever seen. During the late 80’s and 90’s the South African rand lost plenty of value and after the new ANC Government took charge in 1994 we have been experiencing a slippery slope with the current exchange rate. An example of this is the pound stirling sitting at 12 to 1  and the US dollar close to 9 to 1.

The abolishment of Apartheid and the emergence of the New Democratic South Africa meant that the world re opened trade relations with South Africa. This meant that the tobacco shops locally were now again stocking Italians, Danish and American pipes. Great you may say. Think again! With the current exchange rate, expect to pay an average of $250-00 for a mid-range Savinelli which has established itself well here during the post-apartheid years. So what do we do? The solution is simple. Hunt ebay, import good tobacco and say your prayers that your orders and purchases arrive in one piece and that Mr Import Duty Officer does not sniff you out.

My journey into pipe restoration was born from a need to survive. I needed to learn the trade with speed if I was going to dabble in this pass time. It took years of experimentation and thank the Pope for the internet indeed. I found pipes in barns, begged friends and ex pipe smokers and family members for their boxed pipes to experiment on. I made headway and met some great people along the way. Mike Mitchely “Muddler”, David Peterson from the Virtual Smoking Lounge, Steve Laug, Jan Pietenpauw, Alan Philips from Sturks tobacconist in Cape town, Charl Goussard, Dean Swanepoel and the list goes on. I made friends not only locally but worldwide. We traded, gifted and swopped pipes and tobacco. My friends sent me pipes as gifts with the result being that I have to date Lee von Erck, Rad Davis, Mark Tinsky, Chris Askwith pipes in my collection to name just a few. For this I am eternally grateful.

As soon as my skills were honed I put up a website (www.binsbergenpipes.co.za) in the hope that I may meet fellow smokers and collectors around the world. I was surprised! I met people who wanted pipes cleaned, repaired, restored etc. My client base now reaches the far corner of the globe. What seems to be happening is that most of my friends locally and abroad, shop on ebay and send the pips to me for restoration.  The result is that I am paid for my services with pipes, tobacco, etc. as I simply cannot accept money from friends.  The regular Jo Soap down the road however, is billed for my services which to date keeps this pass time self-sufficient. I am not making any profit and I am happy with this arrangement as this life style now pays for itself.

A big pipe enthusiasm injection for South Africa came with the inception of the Brotherhood of International Pipe Smokers forum in December 2010. In conversation with a fellow pipe smoker from Cape Town, Dean  Swanepoel who is a web designer, we bounced around the idea of the first South African based Pipe Forum. The first question was who would join this forum? After all we are up against the big guns, Pipe Chat, Tamp and Puff, Brothers of Briar, Smokers Forum and many more. We took the leap of faith and soon friends made on other forums came to the BIPS campfire. It was decided to keep BIPS a closed forum holding membership low in order to keep a sound brotherhood medium. Members are recruited on an “invite in” basis only, not that we are snobs but in order to keep a tight nit community of brothers who care for one another. It has become a cyber-home for all the members, a place to kick up feet and enjoy the pleasures of wood and leaf.

In returning to my “hot Rod” pipes, it was important to offer the background history in order for the reader to understand the viewpoint of a South African repairman. Now, where do I find the pipes? Well, I scout antique markets over weekends and public holidays. South African’s seem to be patriotic buggers at heart and such markets are well attended with buyers seeking out Afrikana memorabilia of years past. This is where I find the gems at give-away prices. Make no mistake, they are near dead and price says it all. I pay on average for the pipes you will see here a mere average of R 30-00 ($ 5.00 to $8.00). It was here I noticed the inflow of many Brit pipes, especially GBD’s. These are entry level pipes from the 50’s and 60’s, nothing special at all.  GBD Populars and New Standards seem to be in overflow. Also Sasieni seconds destined for international markets stick their heads out once in a while. I have found some big scores too, a 1959 Dunnie Shell in mint condition in its box with booklet and sock, some Peterson’s,  BBB’s and Comoy’s either carrying the original names or their second lines. Either way, this makes little difference as we are after old wood which become reborn.

What you are about to see are the finished pipes. Some have made their way into my smoking rotation; others are yet to get there. Either way, welcome a part of my crazy world. In conclusion, most of the pipes were found at markets, others come from friends as far north as Michigan and down south in Mexico City. Unfortunately I do not have before pictures but you may get the idea.

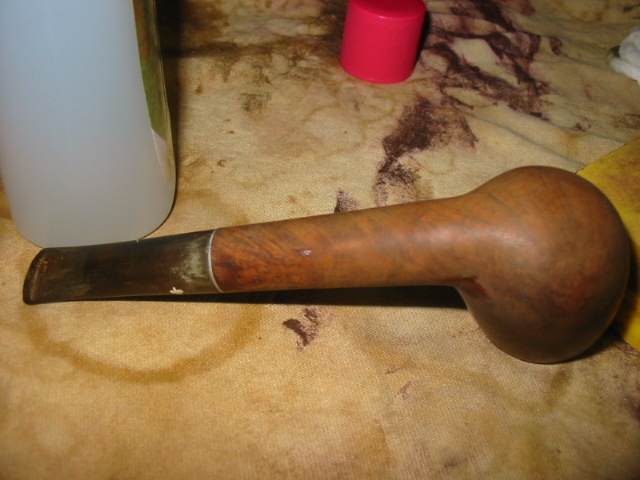
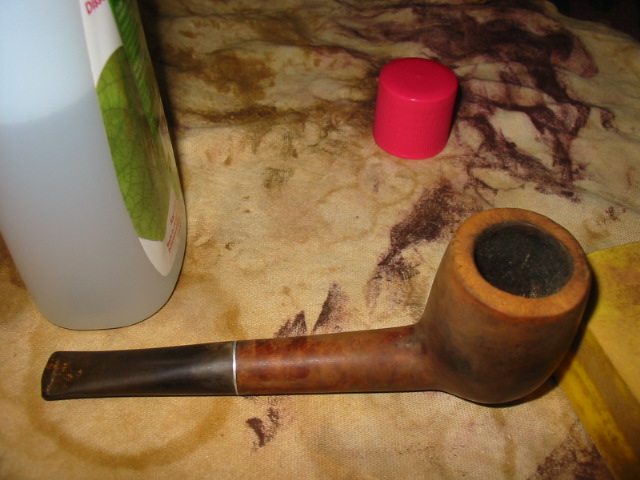
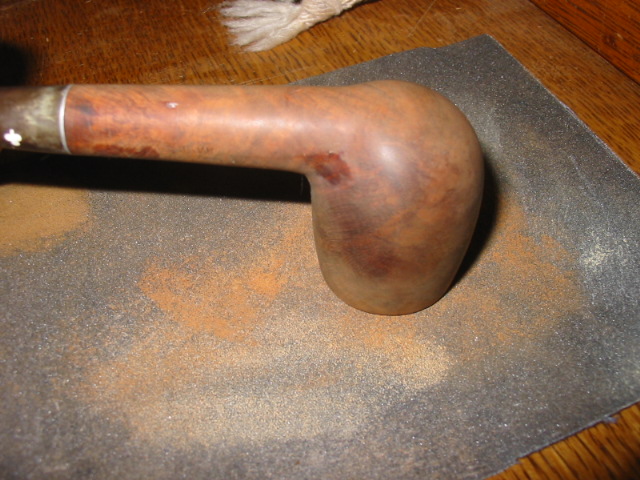
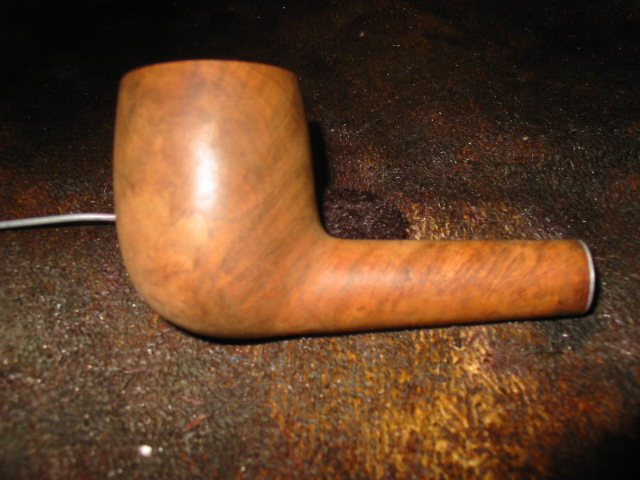
Most of the pipes come to me looking like this, and trust me, this is a good one with a solid heart beat!Image
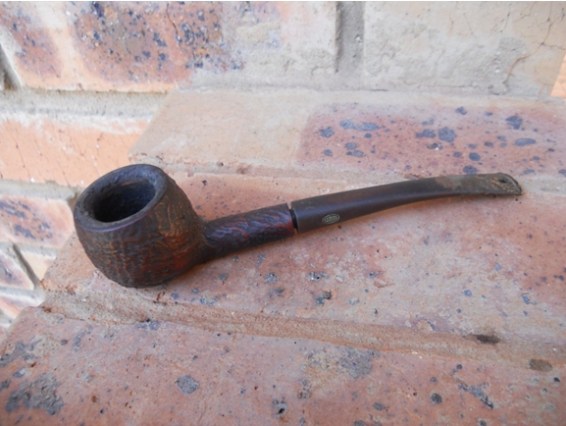
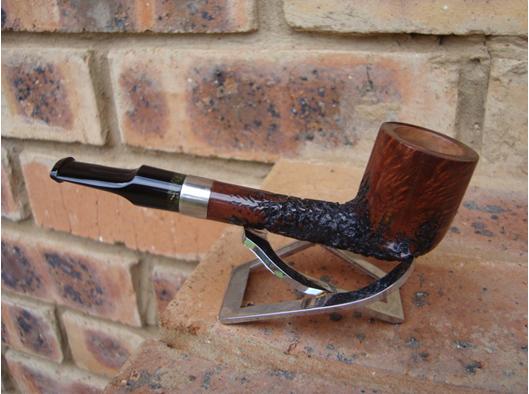
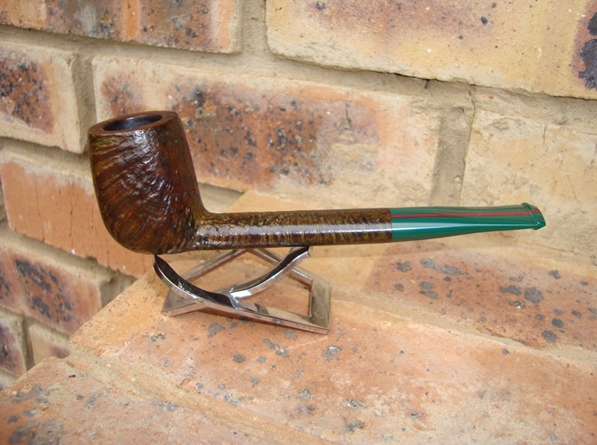
The Green Mamba

Pipe: GBD Canadian (Cadogan era, 1980’s) Shape 262

Location: Mexico City

Price: Gift from Eric Hyland (Mr. E)

Diagnosis: Broken Clear Lucite Stem

Sandblasted the stummel. Stained the pipe green. Fabricated a green Lucite stem. Image
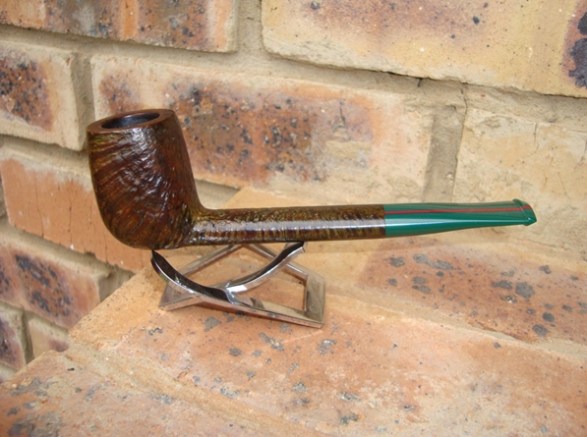
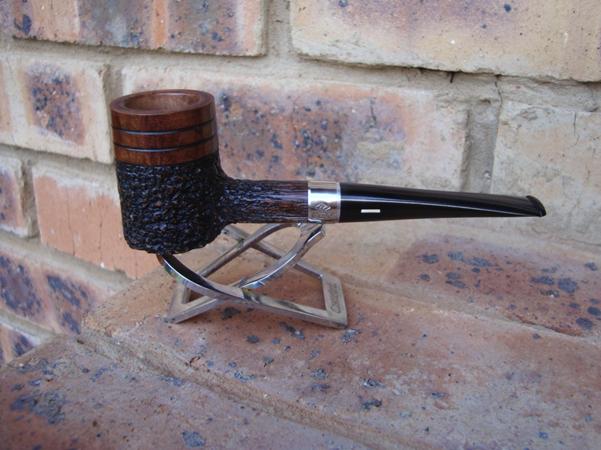
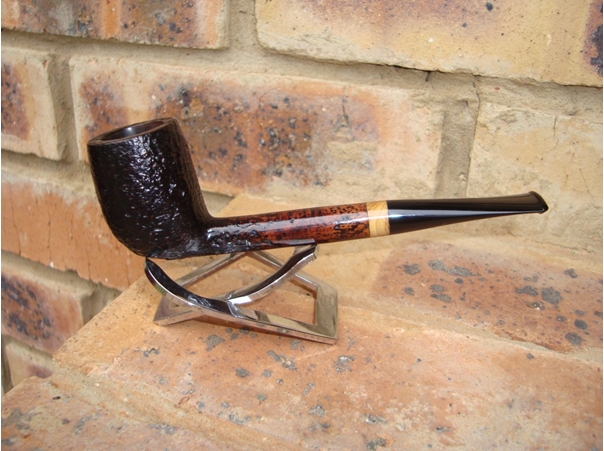
The Fire Starter (Blitzkrieg)

Pipe: GBD Popular, Shape 3781

Location: Cape Town, South Africa

Price: Gift from Alan Philips (Sturks Tobacconist)

Dignosis: Ugly chubby Lovat, a perfect candidate

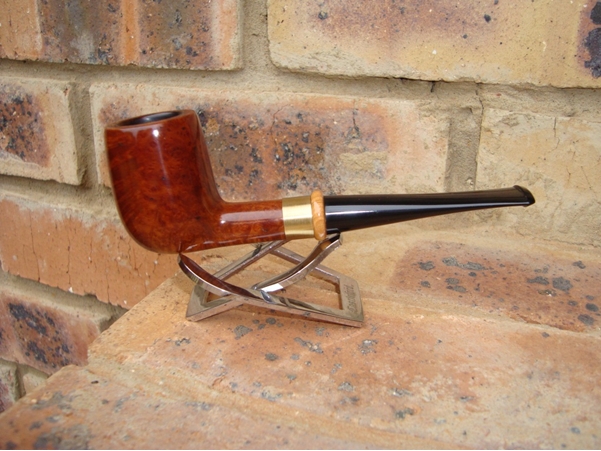
Sandblasted the stummel as it was full of putty fills. Replaced the stem adding an olive wood shank ring. Sanded the shank and shaded the stem to go from yellow through red to black using leather dye hence the name fire starter. The process is time consuming as the stains go on and sanded with 1200 grit paper, restained and so on in order to obtain the shading in colour. Image
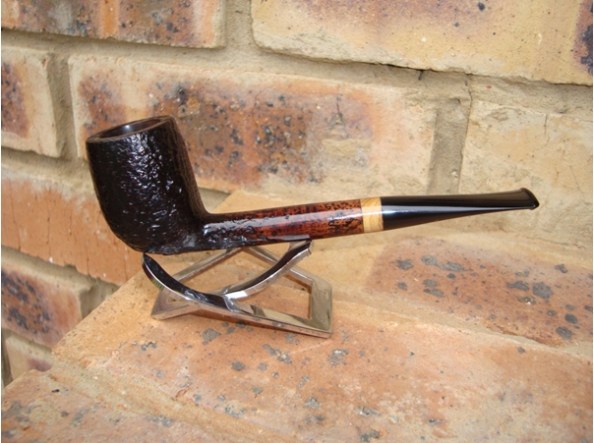
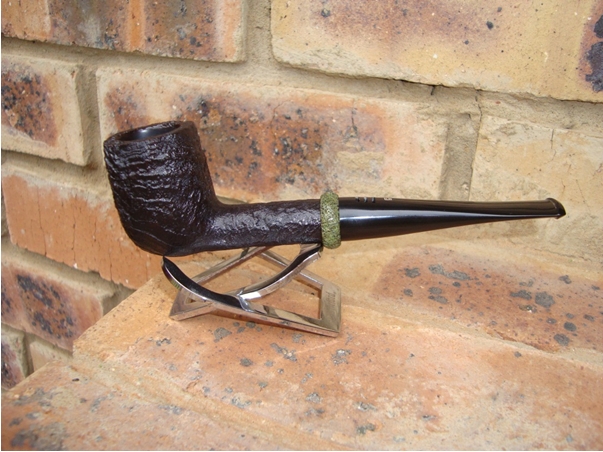
The Hippo

Pipe: Carey Magic inch Pipe

Location: Michigan, USA

Price: Gift from Chuck Rewalt (Velveteagle)

Diagnosis: Smooth bowl full of fills and dents. Chewed mouth piece. Heavily smoked and caked.

Sandblasted the stummel. Stained it black. As this is a “magic inch” pipe the stem needed to be salvaged. I sanded the teeth marks out and reshaped the bit. This was difficult as the stems are plastic castings. I added a hippo bone shank ring stained green that I got from the pipe maker Jan Pietenpauw. Image

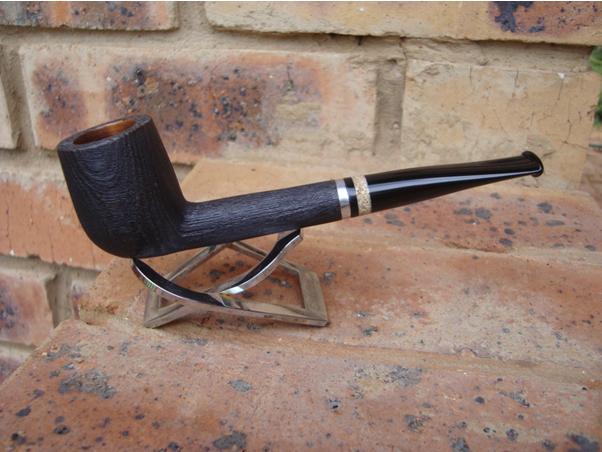
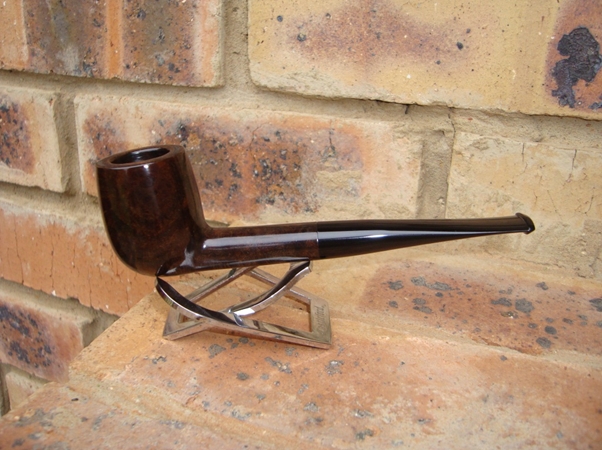
The Black Beauty

Pipe: GBD Popular, shape unknown

Location: Johannesburg, South Africa (antique market)

Price: R 20-00 (ZAR)

Diagnosis: Snapped stem, heavily smoked, Burn mark on bowl from leaving the pipe in an ashtray next to a burning ember or cigarette. This was a major eyesore.

Replaced the stem. Did not opt for any shank adornments here. Sanded the bowl and stained it black to hide the burn mark in the wood. Image
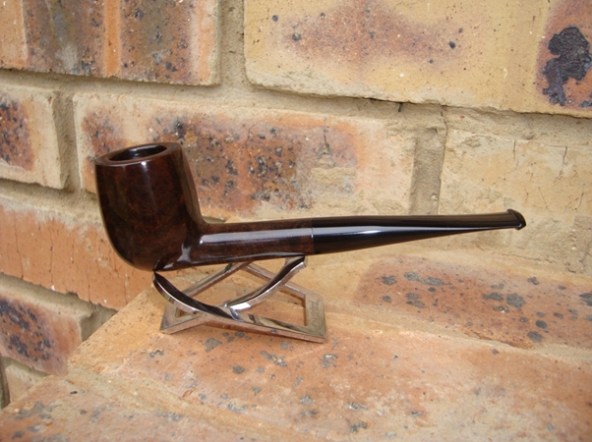
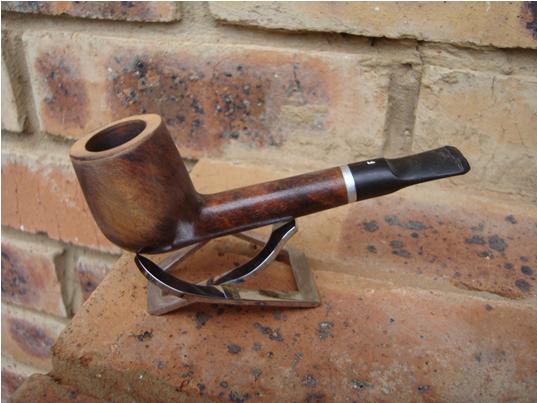
The Red Head

Pipe: GBD Popular, shape 3781

Location: Pretoria, South Africa (antique market)

Price: R20-00 (ZAR)

Diagnosis: Broken stem. Heavily smoked, dings on rim from knocking pipe on hard surface.

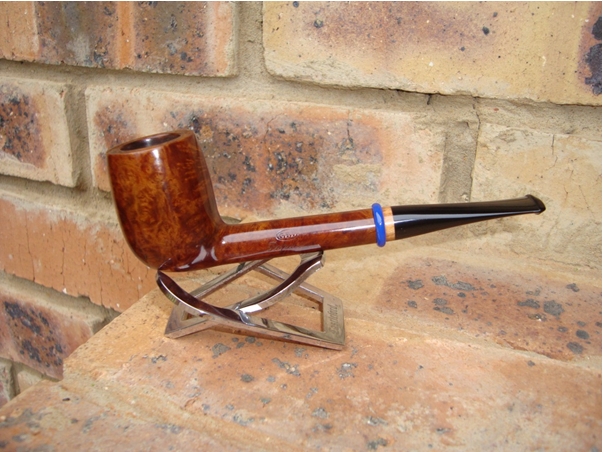
Under all the dirt, grime and dents the wood on this one was good. I lost 0.5 mm on the rim to remove dents. Sanded the bowl and restained it. Replaced the stem adding an olive wood flush shank ring and contrasting it with a blue raised Lucite ring. Image
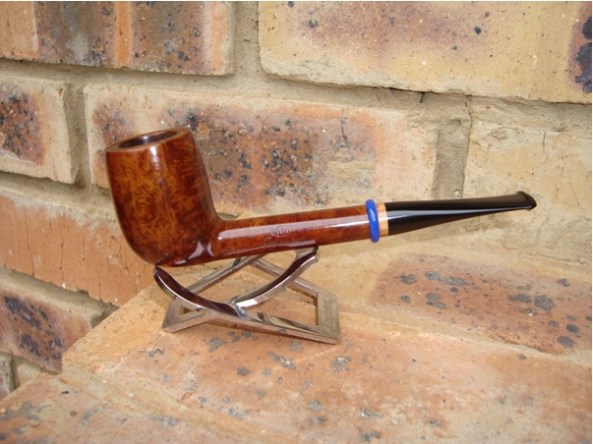
The Reject

Pipe: GBD, Cadogen era Billiard, shape unknown, stamped RJ (I take it that GBD stamped the pipe reject as it carries no marking on the stummel but has GBD printed on the stem)

Location: Pretoria, South Africa (antique market)

Price: R 50.00 (ZAR)

Diagnosis: Cracked shank. Stem was intact but it was a yellow Lucite saddle with restricted draw.

Heavily smoked. Dings on bowl.

A tough call. Repaired cracked shank by spinning brass sleeve to fit flush on the shank. Added olive raised shank ring. Sanded and restained the bowl. Image
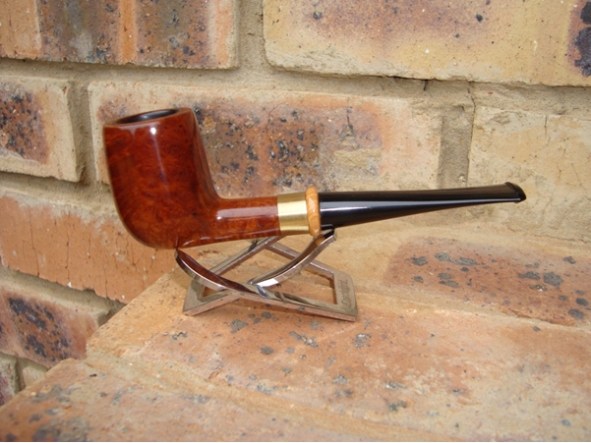
The Half & Half Virgin

Pipe: GBD Virgin, Shape Unknown

Location: Ghana, Africa.

Price: Gift, Duncan Nebbe (Rhodesian). Scored in a lot of GBD pipes on Ebay. Most were cleaned, this one flat lined.

Diagnosis: The lot of pipes were in a barn or some place exposed to the elements for many years (we suspect). Fine cracks appeared on the outside of the bowl. Stem broken. In a shocking state. It lay around the in the trash box for some weeks before it called to me.

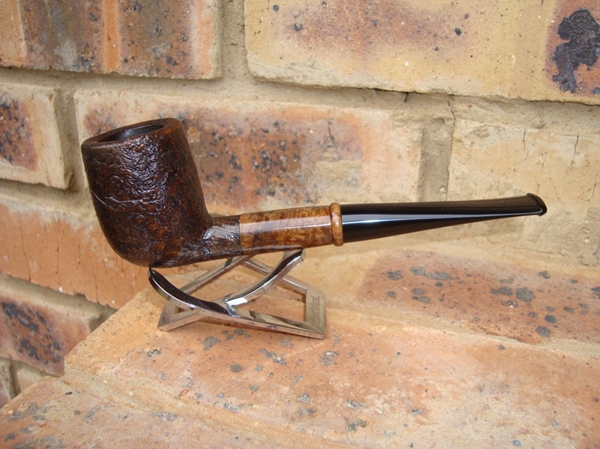
We all know GBD Virgin are not blasted pipes due to the quality of the wood. This one needed to be blasted to remove the surface cracks in the wood. I masked the shank in order to retain some faint nomenclature and the word ‘Virgin’.  Bowl restained and a new stem fitted. Tambotie shank ring added. Image
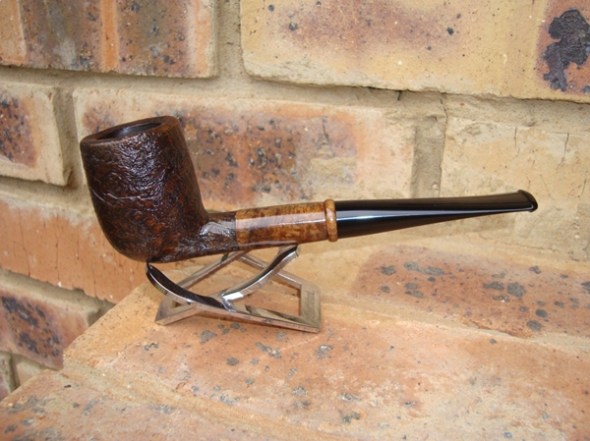
The MOERSE Billiard

Pipe: Byford/Orlik, shape unknown

Location: Pretoria, South Africa (Hospice charity shop)

Price: R15.00 (ZAR)

Diagnosis: Heavily smoked. Dings on rim from knocking pipe on hard surface. Dings and fills on the bowl. Stem clogged and chewed.

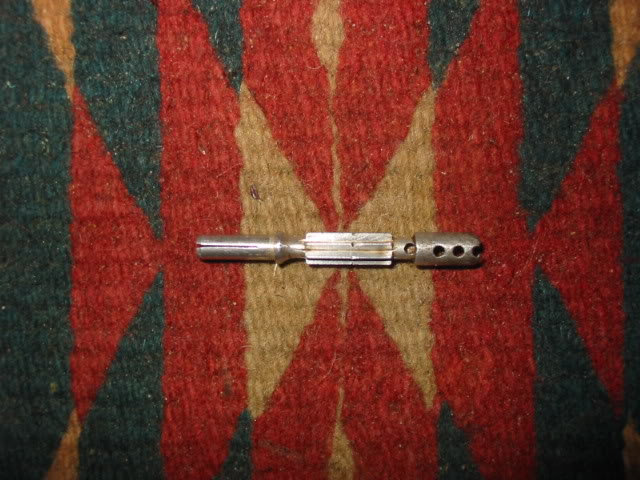
The Byford was a system pipe in its heyday.  The stem consisted of 3 tubes running back and forth in the stem in order to cool and purify the smoke. If it is not cleaned regularly the system gets clogged and there is nothing one can do to save it. I replaced the stem. The alu butt on the shank comes standard with the pipe. It was cleaned and polished. Buckeye Burl shank ring added. Bowl sanded and stained. Image
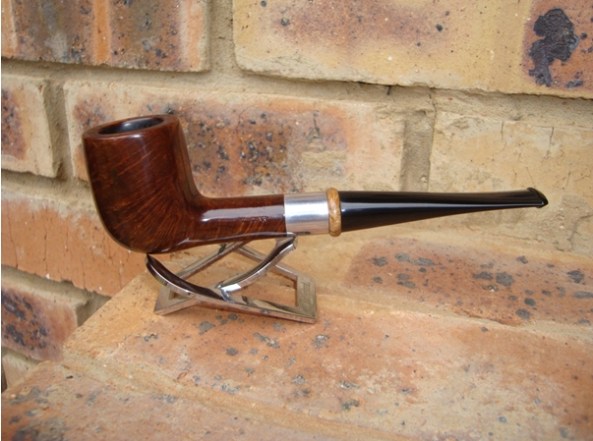
LOJ se Vlieg Masjien (Lord Oom Jan’s Flying Machine)

Pipe: Keyser Hygienic patent, shape Unknown.

Location: Pretoria, South Africa (Antique market)

Price: R10-00 (ZAR)

Diagnosis: Cracked shank. Broken Stem. Heavily smoked.

For those of you who are familiar with the Keyser pipe, this looks nothing like it. I may get shot for tampering with tradition South African pipe lore but this is how it came out. Named after the South African carver Jan Pietenpauw (LOJ) as parts for the pipe were salvaged from his reject box in order to fix the pipe. Brass shank ring added to repair the crack in the shank. Buckeye burl extension added to seat the shank extension. Stem was replaced by spinning down a pre mould to create a military mount fit. Image
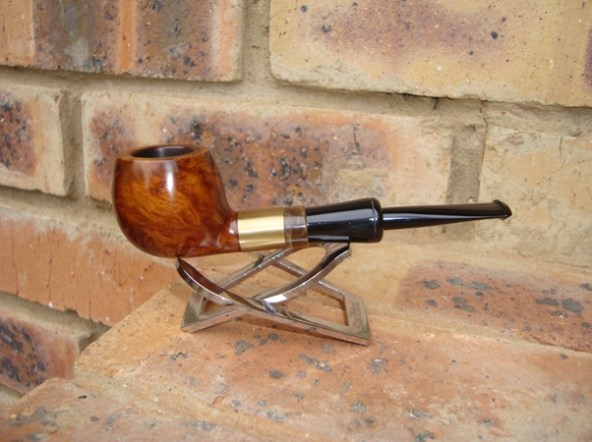
This little Dr. Plumb Bulldog is a beauty


Blog by Steve Laug

This little pipe came to me via a friend in Germany. I finished cleaning up what has turned out to be a very nice squat straight bulldog that is stamped Dr. Plumb Extra on one side and 13 D.R.G.M. on the other. I have been familiar with Dr. Plumb pipes for quite a while and love the fact that they were a GBD seconds line. In fact they often share the same numbering system for shapes. This little guy had some serious issues when I took it under my wing. It needed a bit of work. The bowl was scorched along the front outer edge of the rim as it looked to have been lit with a torch lighter. The finish was shot and not only faded and washed out but also pitted and darkened along the bowl sides. The stem was oxidized and a bit chewed on the end. The stinger apparatus was dark and filled with tars and hardened tobacco oils.

My friend had started removing the burn mark and the bowl angles were slightly out or line. I finished removing the scorched briar and reworked the angles on all the outer edges of the bowl to keep the perspective and rim correct. I gave a ream and clean to remove any of the remaining cake and the sanding dust that had become embedded in the cracks in the cake. I put the bowl in the alcohol bath and then worked on the stem.

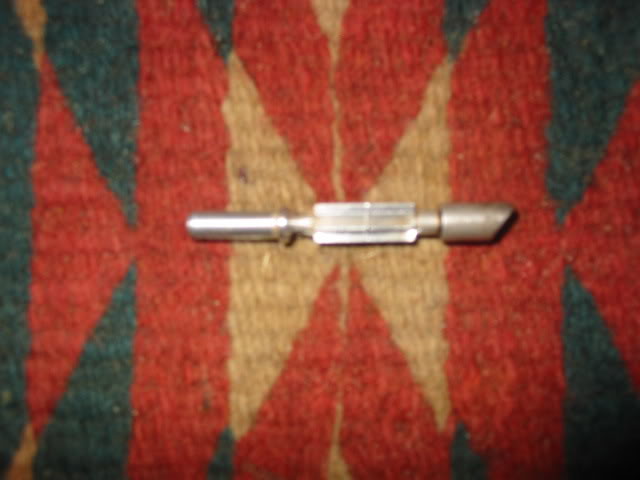
The pipe had the strangest stinger contraption I have ever seen that extends into the bottom of the bowl. It almost looks like a motorcycle exhaust pipe. I have inserted a few pictures of the stinger and fit in the bowl. I removed the stinger and placed in a small bowl of alcohol to soak. The stem was badly oxidized – not the brown oxidation that sat on the surface but a deep oxidation that left the stem a deep brown under the surface. I had been soaking the stem in Oxyclean while I worked on the burn on the rim of the bowl so that when I removed it from the water the oxidation had been brought to the surface. I used my buffer to remove the surface oxidation that had softened. I use Tripoli at this stage and work the stem carefully on the buffer to avoid rounding the shoulders on the stem. Then I sanded it with 240 grit sandpaper until it was matte black and clean. I then sanded it with 400 and 600 grit wet dry sandpaper and water to remove the scratches. I finished the stem by sanding with the micromesh pads 1500-6000 grit until the stem had a sheen to it. ImageImage
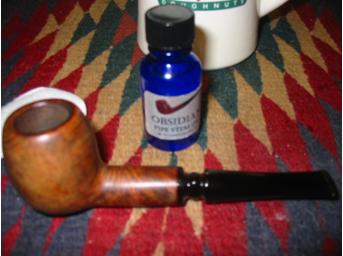
I then took the bowl out of the alcohol bath and dried it off. I sanded it with the 1800-2400 grit micromesh pads until the surface was free of scratches and grooves and was smooth. Then I refinished it with an oxblood aniline stain to bring out the red highlights in the briar. I put the stem back on the pipe and took it to the buffer to buff with White Diamond. Once finished I gave the whole pipe several coats of carnauba wax. ImageImageImage

KBB Yello-Bole Premier – Stem repair and refurbishing


Just received that old propeller KBB Yello Bole pipe that I picked up off ebay. The bowl is in better shape than the pictures on ebay showed it. The burned spot on the Bakelite stem on the right side bottom was actually very deep. I cleaned it with alcohol and a dental pick to take out the affected material. It was a sizeable dent. I then cleaned and dried it and used a clear epoxy to build it back up. I am sanding it now to make sure the transition is smooth but at least it is gone. The hole is filed and a bit dark but the stem has black/grey streaks in it anyway so it is functional. Here are the photos from ebay showing the before.
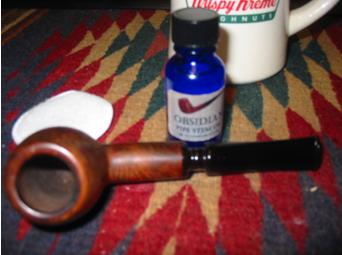
ImageImage

In examining the pipe it is clear that it is an old timer – propeller logo on the stem, bakelite stem, and the stamping. It is stamped KBB in a clover and Yello-Bole Honey Cured Premier over Imported Briar. Once I had repaired the stem with the epoxy as described above I scrubbed the top to remove the tars and grime. The shank and inside the stem was clogged with tars and took a lot of bristle cleaners and alcohol to get it to come out clear. The finished stem came out smooth and solid. It still shows some of the shape of the burn but the affected part was removed. The bowl was cleaned with oil soap and then hit with a quick coat of medium brown stain, polished and waxed. This time I did it all by hand without a buffer. I used the micromesh pads and I really love the way they work.

Along with the pictures above here are some shots that show the state of the bowl before cleaning.

ImageImage

Here are pictures of the finished pipe in all of its beauty.

ImageImageImage


Refurbed Social by Comoy’s


This afternoon late the postie delivered the Social pipe made by Comoy’s that I picked up off Ebay a few weeks ago. I took it apart and went to work. The bowl was pretty caked and broken up inside… cake falling off the walls. The The top was tarred. I reamed and cleaned it. Interestingly this is an old timer. It has the old orific button as I show in one of the before shots of the stem. It has some kind of reservoir between then end of the stepped tenon and the the airway into the bowl. It is below the airway and the tenon is drilled with the airway high to match up.
I put the bowl in an alcohol bath and cleaned it up. The mess came off really well. I then sanded the bowl with 600, 1800, 2400 and 4000 grit and then restained it with a medium brown stain. The Stem was soaking in Oxyclean and when I removed it I cleaned the grime off of it. It was a bit oxidized so that came off no problem. I then buffed the entirety with white diamond and then Carnuba. Here are the before shots:
ImageImageImageImage

You will note there are some pretty deep dents in the side of the bowl. These came out a bit but they remain as character marks. There were some on the underside of the shank as well. They too remain.

After refurbishing:

ImageImageImageImage

Refurb on a Irwin (GBD Second) Saddle stem Billiard


The 1976 GBD Catalogue says this about the Irwin pipes: “The warm dual-tone brown finish deepens with repeated smoking. Finest Rum is used in the special process of maturing these fine pipes. Its smooth flavour complements the natural taste of fine tobacco.” Knowing that when I came across this old timer I put in the pile to recondition while I was off this week. It is stamped Irwin over London England on the left shank. On the right side is the shape number 1207. It was caked a bit so I reamed the bowl and wiped it down with alcohol. The shank was dusty and dirty so it was cleaned as well. The bowl then went into the alcohol bath and sat for a half hour while I worked on the stem. It was in pretty good shape with a minimum of teeth chatter. I sanded out the tooth marks and sanded the residual oxidation on the stem. I then buffed the stem and polished it.

Once I was finished I took the bowl out of the bath and wiped it down. It was clean and once it dried was ready for sanding in preparation for a new coat of stain. I wiped it down with clean alcohol to remove any dust and then stained it with a cherry stain to bring out the brown highlights in the finish. I then buffed the entirety and waxed it with carnauba. I am very happy with the results. Thanks for looking. Here are the before shots:

Image

Image

Here are the pictures after refurbishing

ImageImageImage

Seeing through the grime – a story told by an old pipe


I had this story I had written sitting on the hard drive. I reworked it quite a bit the last two evenings and thought I would post it. In it I try to capture the old stories that I find in the estate pipes I seek to bring back to life. Thanks for reading it.

Awhile ago I was working on cleaning up an old estate pipe. I had purchased this old timer on eBay and when I came home from work one afternoon I found it had arrived in the mail. When I opened the box I could not believe my eyes. The pictures the seller posted on eBay did not begin to capture the sorry state of this poor pipe. It was a disaster – the bowl was caked to the point of not holding any more tobacco. I could barely fit a pencil in what remained of the tobacco chamber. The cake that filled the bowl was not the typical hard carbon but was crumbling and very soft. The stem would not fit all the way into the shank as both it and the inside of the shank were covered with tar and a white lime crust. The airflow on this poor old timer certainly must have been miniscule, but there was no way I was going to put this thing in my mouth to even blow on it. I found that once I removed the stem that it had the weirdest stinger apparatus I have ever seen that would have constricted the airflow even more. It was short, thick metal and absolutely crammed full of tars and unidentifiable tan chunks. I know, the word “chunks” does not help understand what I am talking about but I don’t know how else to describe the brown stuff that was thick and packed all over this stinger. The metal of the stinger was rough and appeared to be pitted or at least it had craters and crevices all over the sides and top of it. It was in truly sad shape. It certainly must have been a beautiful pipe when all this started. It was that hope of hidden beauty beneath the grime that drew me to this pipe and caused me to want to take a risk on cleaning and restoring it. On top of that was also the challenge of restoring what looked to be a hopeless cause.

I carefully wiped the outside of the bowl with a damp rag to get some of the surface grime off. I wanted to see what the grain looked like underneath the grit. I carefully separated the stem from the shank and removed the stinger for a soak. I then used several reamers that I have to ream both the bowl and shank of the pipe. All of this was preliminary to the actual cleaning work. I wanted to be able to more knowledgeably assess the condition of the pipe under the years of grime. What a lot of carbon dust lay on the paper that I put on my work table. The grain did not look too bad. There was some interesting curly birdseye on one side and flame grain on the back and front of the bowl. A twisting grain flowed across both the bottom of the pipe and the shank. I turned the pipe over in my hands to inspect it for cracks. I have found that there are often cracks in pipes that have been smoked this hard. Surprisingly, there were none in this bowl at all. But this pipe had been smoked right through the bottom of the bowl – yes burned out. That would not surprise you if you had seen the condition of the pipe. But what made it surprising to me was that the bottom of the bowl had been plugged and repaired with a well worked briar plug. It had darkened but I could still see that it fit very snugly and carefully and showed some thoughtful work at the hands of a good repairman. All this caused me to reassess what I had originally concluded about the pipe and the piper who used to smoke it.

A pipe, that at first glance, appeared to have been “abused” this much, must have been ignored and not cared for by its owner. But I am not convinced of that verdict – in fact I was beginning to conclude just the opposite – it must have been a well loved and favourite pipe. The fact that it had obviously been smoked to the same point before in its life and then repaired with a well done plug and then smoked to the same point of cake again says a lot about what kind of pipe it must be and what kind of smoke it must have delivered to it owner. On the one hand, the original owner did not take care of his pipe in terms of daily maintenance and cleaning. I don’t think it had ever seen a pipe cleaner in all of its years. But on the other hand, he cared enough to take the time to have a well done plug put in the bottom of the bowl to fix the burn out and then smoked it again to this point a second or maybe a third or fourth time. That is the contradiction that exists when I look at a pipe like this. There is more to the story than initially meets the eye.

Only when it is stripped down and cleaned do I get a bit more of the story underneath all the surface grime. I think that the old fellow who must have owned this pipe would have been interesting to spend time with having a talk. I am certainly making an educated guess but I believe that this was a pipe that belonged to an old timer. By the looks of it, I would say it would have been disposed of with his other non-sellable or unwanted estate items. The fact is that if that was not true it would still be in his mouth. I would guess that he was a one pipe guy who refused to give up on an old friend and kept repairing and smoking his old buddy. Each problem that came up was a puzzle to be addressed and repaired before the pipe was returned to its smoking regimen. There is a silver band on the pipe that probably is original and matches the shape of other pipes like this one that I found on the web, but it is also engraved with what appeared to be initials – a monogram that possibly identified it as his. The band had turned around on the shank several times and had been obviously re-glued several times to keep it with the pipe. It was a not only a mark of ownership but of pride. It made me wonder if he had it engraved himself of if one of his children might have had it done as part of a very personal gift for “dad”. In the bottom of the bowl there remained a bit of old and very dry tobacco. The bowl had been smoked to that point and left. There is no way of knowing what the tobacco was as it was pretty well destroyed. But it was there and was crumbling with the cake in the bowl. It gave me pause to wonder what happened to the guy that made him stop at that point of the bowl and lay his pipe down.

As I moved to do the first stage of cleaning the stem I was amazed to see is that the stem was actually pristine under the grime. There were no tooth marks or bites on it. There was no sign of the kind of abuse that I have come to expect in this kind of pipe. Sure, the button was clogged and airway was almost solid with tars but there are no bite marks at all on the stem. There are no scratches and no problems that a good buffing and cleaning would not take away. That too tells me something of the old pipesmoker. He was not a clencher. He did not chomp on his bit. It was the original bit and it was in good shape under the grime. He was a man who held his pipe in his hand while he enjoyed the process of sipping the smoke. He was obviously one who was not to be hurried in his process and did not want to be bothered by anything that stopped the enjoyment of his pipe. I appreciate the care that he took to not bite the stem after having repaired many stems that have been marked by the fangs of the owner.

The cleanup was finished and the bowl was refinished and re-stained with a cherry stain to match the original colour of the pipe when it was made. The silver was polished and the stem was polished to a pristine black. The bowl was coated with a charcoal based coating to give it a bit of protection as I work to rebuild a hard cake in the bowl. I loaded a bowl of my favourite Virginia/Perique blend for the inaugural smoke. I chose a quiet spot to relax while I put the fire to the tobacco and sipped the smoke. The flame jumped to the tobacco and the smoke began to curl around the lip of the bowl and out the edges of my mouth as I puffed. Ahhh, now I had joined the ongoing story of this pipe to my own history. It smoked very well and delivered a cool flavourful smoke to the bottom of the bowl… I think next bowl I will remove that odd old stinger and see what I get from it. What a great pipe. I think I had begun to understand the charms of this old pipe. I tip my “new” pipe in quiet thanks to the old piper who had pointed the way to this well loved pipe.

Re-staining Estate Pipes – A Pictorial Essay


Blog by Steve Laug

I am often asked by other hobbyist pipe refurbishers how I go about re-staining the pipes that I refurbish. I have answered the question in different ways over the years as I have worked out my own process. This past weekend I had some time and a box of pipes to work on so I decided to document the process I use. I took photos of four old pipes that I was reworking; these photos take you through my methods from start to finish. I have added written commentary to explain what I have done. The method I describe is how I work with estate bowls like these. I am certain that there are other methods that can be used with equal success. This is the one I have arrived at over the past ten years as I have been reworking estate pipes. I am sure that it will continue to evolve in the years ahead as it has over the past years. Here it is for your perusal and use. Feel free to use it, enjoy the process of rejuvenating the finish of an old pipe, adapt it and modify it as you will. Email your modifications and additions to the method to as we work to keep the fire alive in the home based pipe restoring hobby – slaug@uniserve.com.

I need to make a final confession before I jump ahead to describe and document the process. I totally forgot to take pictures of the state these old pipes were in when I received them. As is often the case for me, the cleaning process took on a life of its own and once it is moving along I find it hard to slow it down. So, with that out of the way, I begin with pictures of the pipes after I removed them from an hour soak in an alcohol bath.

Out of the alcohol bath
Once I have chosen the pipes to restore I remove the stems and place them in a soak of Oxyclean and water while I work on the bowls. I place the bowls in an alcohol bath. I use a plastic jar with a screw on lid to hold the 99% isopropyl alcohol for the bath. It is roughly a large mouthed quart sized jar and will hold four bowls. The size also allows me to reach in and retrieve them when they are finished. I reuse the alcohol in the bath for a long time. I find that it turns dark from the stains and the sediment settles to the bottom of the jar. I pour off the alcohol regularly and wash the jar so that there is no sediment remaining. I also top up the jar with fresh alcohol to keep the levels high enough to cover the bowls.

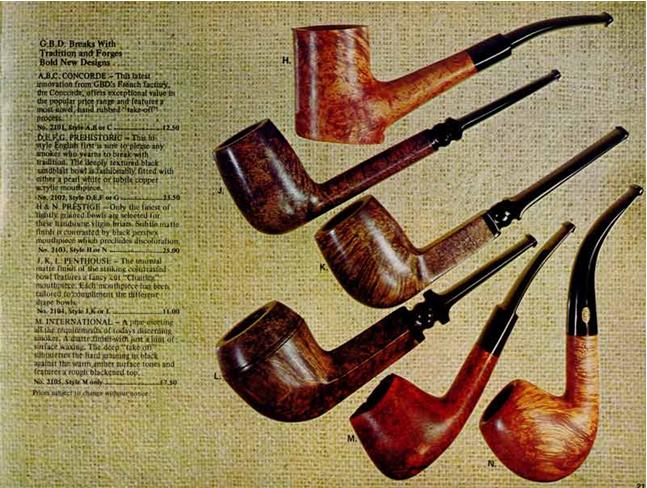
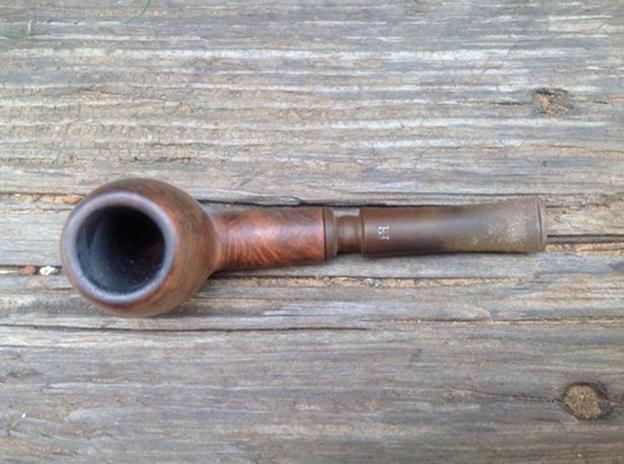
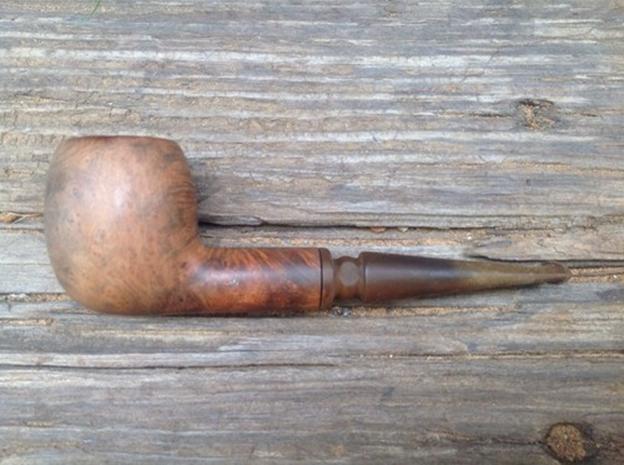
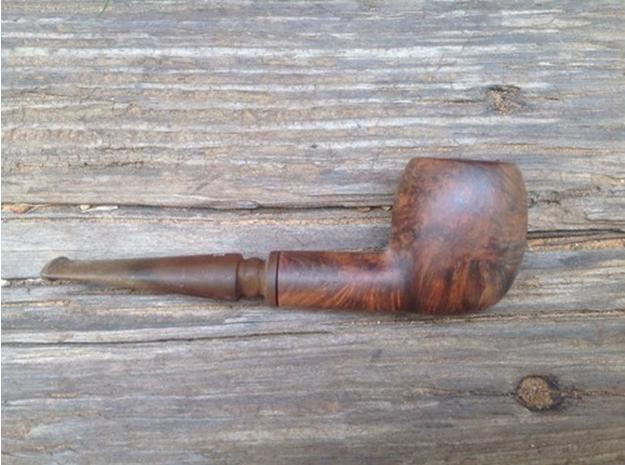
The first two pictures below show the four bowls after they have been removed from the bath and have been dried. (In each photo the bowls will be in the same order for ease of recognition.) Starting at the top left and working left to right you will see the effects of alcohol bath in removing finish. I have found that it does not remove all the stain but it removes the finish, waxes and oils that are over the stain. When the bowls are removed they have a flat finish look to them. The top left bowl has a slightly yellow stain once the varnish coat was removed. The top right bowl has a reddish stain that was also under a coat of varnish. The bottom left is a prehistoric GBD finish/sand blast with a dark red/brown stain. The pipe on the bottom right has a dark brown stain and had a coat of shellac or varnish over it. The varnish on the last pipe had turned milky white even before I put it in the bath and increased when I took it out of the alcohol bath. The fourth bowl will take the most work to remove the finish. All will need more hand work with an alcohol soaked soft cloth and a soft bristle tooth brush to remove the residual finish. The smooth bowls will be sanded and further cleaned.
restaining-1

restaining-2

Washed and sanded
The pictures below show the bowls after they have been washed in alcohol and sanded and rewashed and re-sanded repeatedly. The stain colour is removed as much as it will be at this point in the process. There is still a lot of work to do on each bowl before staining can be done. The top coat of varnish, wax and the grit and grime have all been removed at this point. From the pictures you can see that there is still some varnish on the bottom right pipe but the majority has been removed and the others are getting ready to go to the next step in the process. Once I finished this stage of sanding I washed them a final time with a tack (soft cotton material) cloth to remove dust and such and also let me see any remaining shiny spots on the finish.
restaining-3

restaining-4

Two of my favourite tools are shown in the following pictures (I use both constantly in the process of refurbishing and always have them near at hand) – a tooth brush and a dental pick. The dental pick allows me access to the rings on the bulldogs. I carefully use it to follow the rings around the bulldogs and clean out the grit that gets stuck in them. I follow that up with the tooth brush which allows me to rub the alcohol into the rings and to scrub other places in the blast on the prehistoric and stubborn shiny spots on the smooth pipes. They both are used in cleaning rims and the dental pick also precedes my pipe cleaners in the shank. I have straightened one end to make access to the shank easier. These pictures show the bowls after the third sanding and alcohol wash. I also sand the rims with 400, 600 and then finally with 1200 to remove any grit or rough spots on the finish. All the bowls have been sanded with 1200 grit sand paper. I sand them one more time with the 1200 grit sandpaper and then I use micromesh pads to get a good smooth surface on the bowl. If you choose to go for a scratch-free finish you can examine the bowls with a jewellers loop under a bright light and re-sand as necessary to remove any noted scratches. For the majority of the old timers that I refurbish, I sand until they are scratch free to the naked eye in a bright light. To my mind some of the deeper nicks and such lend character to the old pipe and contribute to the look of age. My main requirement is that they are smokeable when I am finished and that they look good for their age. Should you choose to go further with the finish the choice is yours as you re-work them.
restaining-5

restaining-6

The next picture shows the foursome after all the smooth pipe bowls and smooth rim on the sand blast have been sanded with 1800/2400/4000 micromesh pads. They are smooth to the touch and have a rich shine to them. This is a good time to give them an inspection for any marks or scratches that you want deal with further. After I inspect them this last time, I wipe them down with an alcohol damp cloth to get any residual grit or dust off the bowls and set them aside. The bowls are ready to be re-stained.
restaining-7

Re-staining the bowl
In preparation for staining each pipe bowl, I insert folded pipe cleaners in the shanks to enable me to manipulate them with ease while I am applying the stain. This gives me some flexibility in turning the bowl at different angles to apply the stain coat. You will note the Fiebing’s stain in the previous picture – that is the stain I use. It comes in a variety of colours and is an aniline (alcohol based) stain. It works extremely well on wood. All of these bowls were given a first coat of Fiebing’s Dark Brown stain applied heavily. While it is still wet I use a match to light the stain to set it in the grain. It does not light the bowl on fire at all but only burns off the alcohol in the stain coat. For these four bowls, I started with the blast and liberally applied the stain to the bowl. I start with the bowl held bottom up and let the stain flow toward the tops. I follow the flow of the stain to ensure that I have thoroughly and evenly covered the entire bowl surface. I finish the first coat using the dauber pictured in the lid below to stain the rim. I reapply the stain to make sure the coat is even and not streaked.
restaining-8

The picture below was taken after the second application and flaming of the stain. After the first coat of stain is dry to touch, I give each bowl a second coat of stain and set it aflame with a match or lighter. After flaming the stain the bowls are basically dry to the touch and I set them aside until they are thoroughly dry. (I often let the bowls sit over night to dry.) The next day (or later the same evening if I get impatient or curious) I take them to my buffers and see what they will look like with a light touch on the buffing wheel. I generally use the Tripoli buff with a light touch, though I have also used the White Diamond buff as well. For those who do not have a buffer I have also sanded the bowls at this point with 1200 grit sand paper or higher. If the stain is too dark to my liking I wipe the bowls with an alcohol damp cloth until I get the colour the way I want it on each pipe. That is one of the beauties of aniline stain! The briar in each pipe bowl will make them quite unique looking once the stain is buffed.
restaining-9

While the bowls are drying I turn to work on the stems. Throughout the process described above, the stems have been soaking in an OxyClean bath. I put a mixture of once scoop of OxyClean into a one quart plastic covered jar and mix it with hot tap water. I shake it until the powder is all dissolved and the liquid is a milky white. Then I place the stems in the bath to soak. Generally I soak them a minimum of two hours but often will leave them in the wash over night. They remain in the bath the entire time I am working on the bowls.

With this foursome I grew impatient and was curious to see the finished product once I buffed the stain off the bowls. The bowls were dry so I took them to the buffer. The following pictures show the bowls – stained, buffed and polished. At this point in the process, I still need to wax them with carnauba but the pictures give you the idea of what they look like. Each pipe bowl took the dark brown stain in its own way. To me one of the joys of the process is arriving at this step and seeing the freshly stained bowls. I love the contrasting colours and grain that comes through in the pipes.
restaining-10

restaining-11

restaining-12

restaining-13

The final pictures in this essay show the finished product using two of the pipes. I finished working on the stems while the stain was drying. They are both WDC pipes. The apple is an Aristocrat shape 11. The bulldog is a Royal Demuth shape 79. Both are screw mount stems with interesting diffusing apparatus in them.
restaining-15

restaining-14