Blog by Dal Stanton
Athens, Greece, has been fertile ground for me in landing some nice pipes in the Athenian ‘wild’. An area very close to the well-known Acropolis summit and near-by Mars Hill, where the Apostle Paul gave his defense of the Christian faith, is the Monastiraki market area. I have found several keepers in this area. I was drawn to one antique shop that spilled out onto the sidewalk of a typically narrow, crowded street. As I looked over the plethora of paraphernalia in the shop, my eye caught sight of two lonely pipes among statuettes, ash trays, jars and lamps. Immediately I knew one was a definite possibility – a Pete. I looked quickly to determine if it was Pre-Republic or Republic of Ireland. It was a Republic, but seemed to carry some weight of years. What also caught my attention was that it was on the smaller side as far as I’ve seen of Petersons. The shape number on the right side of the shank was 313. The other pipe keeping company with the Pete was a Bewlay London Made ‘Reject’. Interesting. I’m always interested in pipes with the mark, ‘Reject’. The shop owner was all business and I wasn’t as happy with the bundled deal as I had wished, but I wanted the Pete and he’s now with me here in Sofia, Bulgaria.
 This Peterson System Standard 313 has been in my ‘Help Me!’ basket for some time until my brother-in-law, Greg, commissioned it to be restored along with a Comoy’s Pebble Grain Modern Poker. He and his wife, Sarah, my wife’s sister, were visiting us here in Bulgaria, and Greg trolled through my buckets of pipes until he found these two – he commissioned both when he couldn’t decide! The Pete and the Comoy’s both benefit the Daughters of Bulgaria, helping women and girls that have been trafficked and sexually exploited. Thanks, Greg!
With this being the first Peterson System Pipe on my worktable, I’m looking forward to learning what I can. The first thing I did was to identify the shape number of this Peterson. Not long-ago Steve posted on rebornpipes a very interesting Peterson of Dublin Pipe Catalogue which he thought was dated about 2010. I enjoyed looking through it then and tucked it away in my mind for when I would bring a Peterson to the worktable. I found the shape 313 in the Standard Quality Smooth section of the catalogue which I included below. It’s on the far right of the first row. The description of the Standard Quality was helpful. What I also found interesting and helpful was the description of the Peterson System Pipe. When this design hit the market in the late 1800s it was innovative then and continues to be popular today. Two design innovations were the focus: a trap (or sump) that collected the moisture in the mortise and the well-known ‘P-Lip’ stem, which stands for ‘Peterson’. This design was supposed to be superior by directing the smoke to the upper part of the mouth rather than burning the tongue. It is also engineered to compress the air as it moves toward the button. I’ve included the description and a cutout showing the design from the same catalogue.
 I love working on vintage pipes – I only wish they could talk and tell their stories while I restore them! With this Peterson now on my work table, I take some pictures to chronicle his condition and to get a closer look.


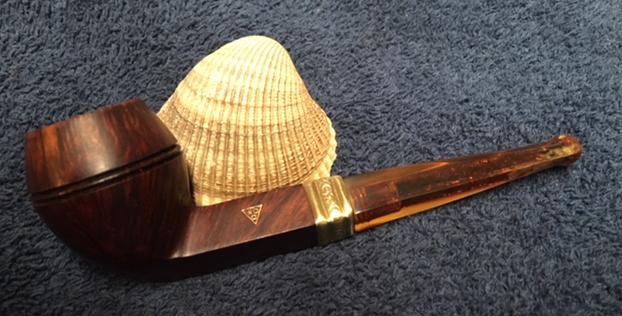
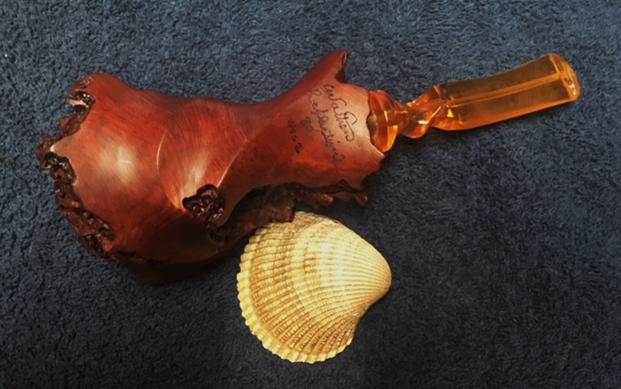
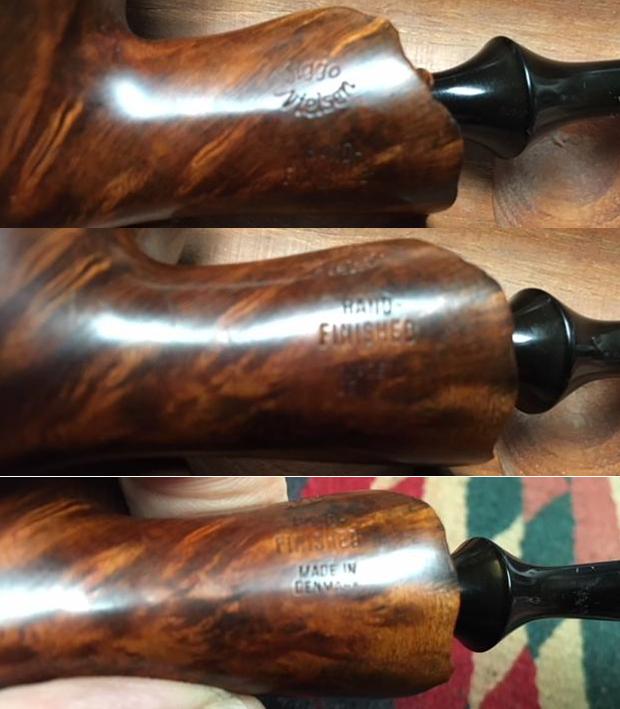
 The nomenclature is clear. On the left side of the shank is stamped in arched fashion, ‘PETERSON’S’ over ‘SYSTEM’ over ‘STANDARD’ in straight letters. Above this stamp, on the nickel ferule is ‘K&P PETERSON’S’. The right side of the shank bears the ‘MADE IN THE REPUBLIC OF IRELAND’ placing it in the Republic Era – from 1949 until the present (from the Pipedia article: A Peterson Dating Guide; A Rule of Thumb, by Mike Leverette).
 I’ve also been curious about the ‘faux’ hallmarks stamped under the K&P on the ferrule. From the same helpful Pipedia article I read this:
Before we close this section on silver hallmarks, we must address the marks that many people refer to as hallmarks. Peterson uses three marks on some of their pipes that are not silver hallmarks but are rather another Peterson logo (See Enclosure 4).
These marks are:
- A Shamrock for the many shamrocks found in Ireland
- A Prone Fox representing the famous fox hunts in Ireland’s history, and
- A Stone Tower for the many hundreds of stone towers spotted throughout Ireland
Again, these are not genuine silver hallmarks. 

 I’m indulging in a bit of history to better appreciate the K&P Peterson’s on my worktable. Another question, “K&P”? Again, Mike Leverette’s Dating Guide article helps with a concise history along with pictures from Pipedia’s main Peterson article:
The history of Ireland is an old and honorable one; 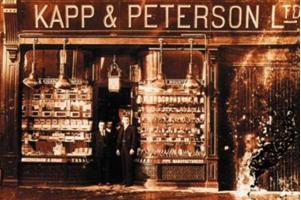 steeped in warfare, family, racial and religious traditions. No other country can compete in comparison. However, the first couple of millennia of Irish history have no relevance to this dating guide. Should you wish to read more on the history of the Irish, I recommend “The Story of the Irish Race” by Seamus MacManus who gives a very vivid, and near as we can tell, an accurate portrayal of their history.
History pertinent to our purposes began in the year 1865; the year Charles Peterson opened a small tobacco shop in Dublin. Later in 1875, Charles 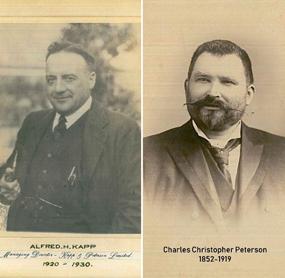 Peterson approached the Kapp brothers, Friedrich and Heinrich, with a new pipe design and with this, a very long-lived partnership was formed, Kapp & Peterson. This new pipe design is the now famous Peterson Patented System Smoking Pipe. By 1890, Kapp & Peterson was the most respected pipe and tobacco manufacturer in Ireland and rapidly gaining followers in England and America. In 1898 another of Peterson’s remarkable inventions became available, the Peterson-Lip (P-Lip) mouthpiece, also known as the Steck mouthpiece. So, for the purpose of this dating guide, we will study Irish history, relevant to our pipe dating needs, from 1870s until now.
Before we start with this Peterson dating guide, an observation; the Kapp Brothers originally came from Nuremberg, Germany. They were making pipes at least as early as the 1850s (their Dublin shop opened in 1855) and in many of the shapes we now associate with Peterson since the Kapp Brothers simply took their existing shapes and incorporated Charles Peterson’ s patented design into them. From their inception, Kapp & Peterson’s goal was to make a good smoking pipe that the ordinary, common working man could afford, and we believe they have, very admirably, lived up to this.
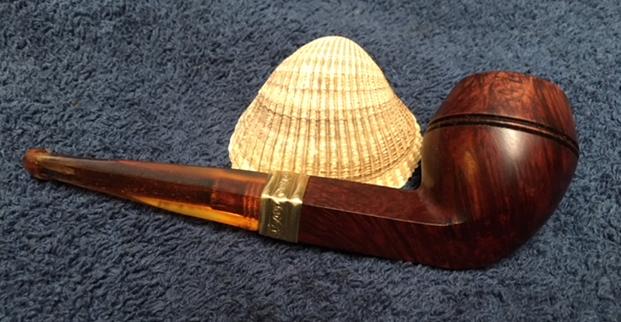
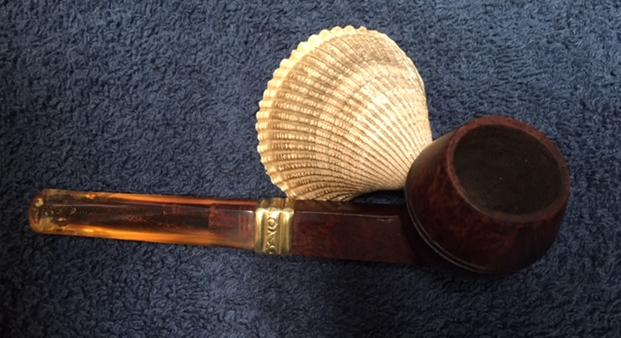
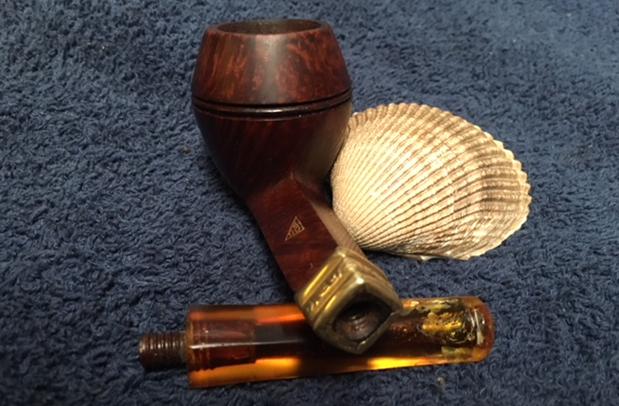
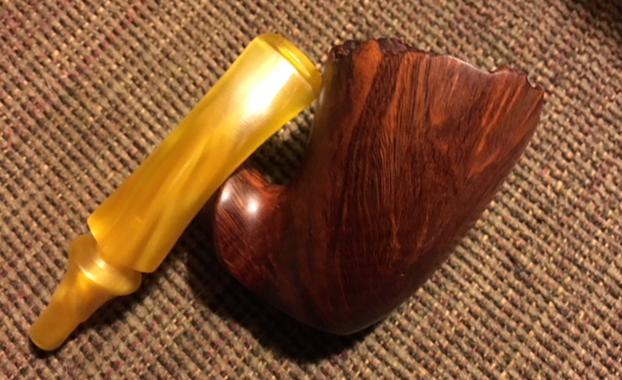
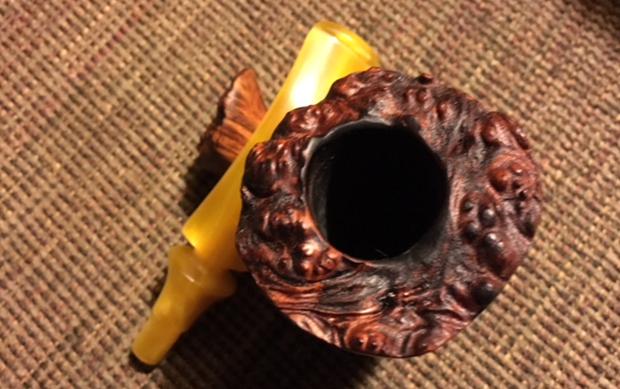
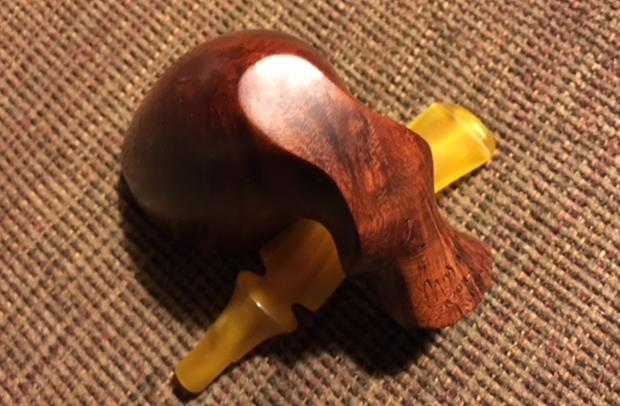
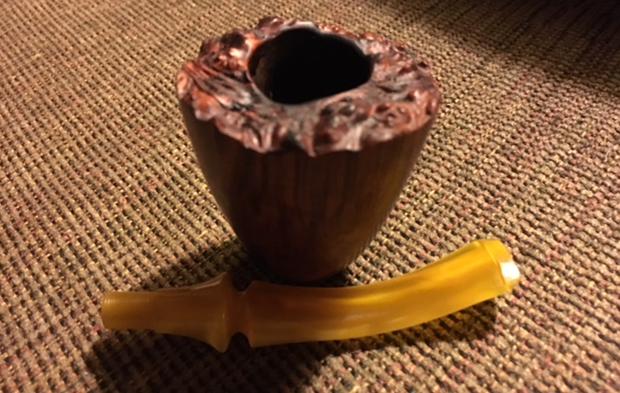
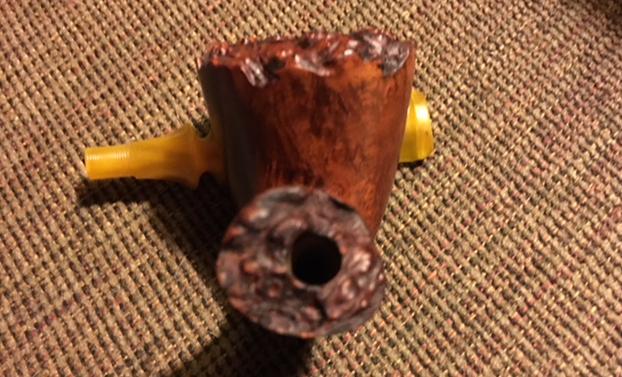
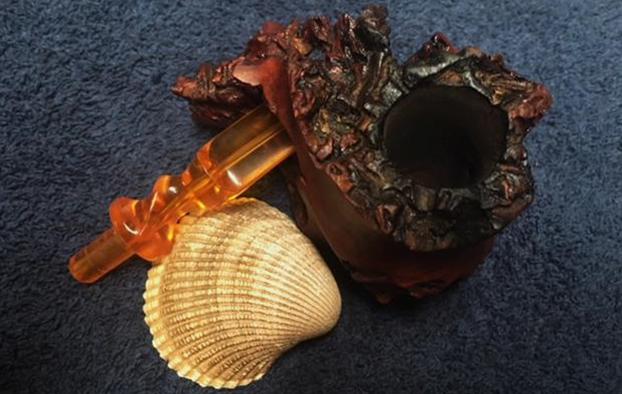
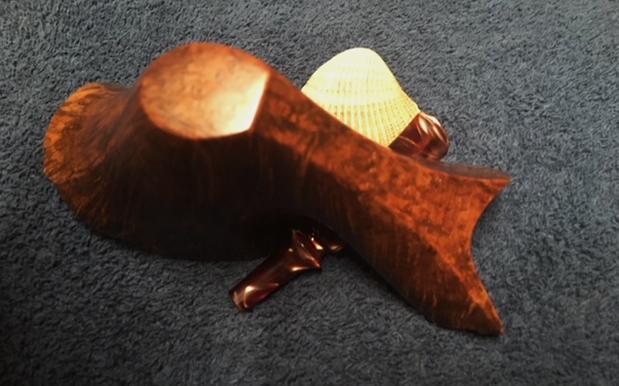
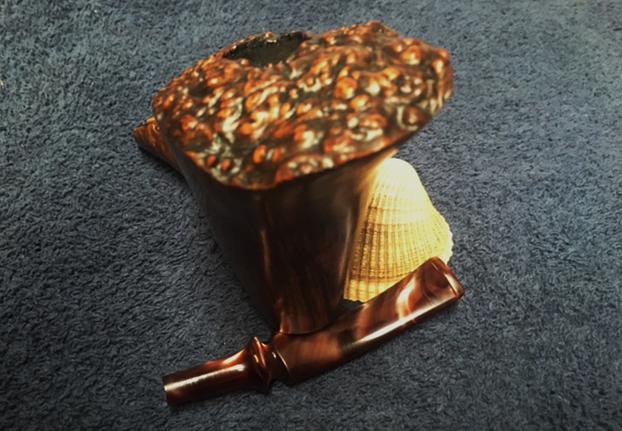
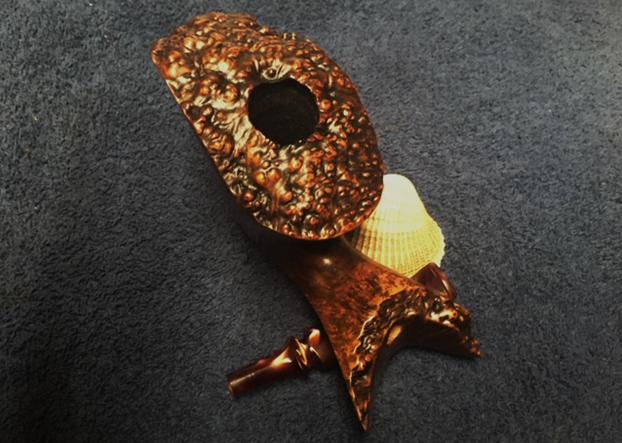
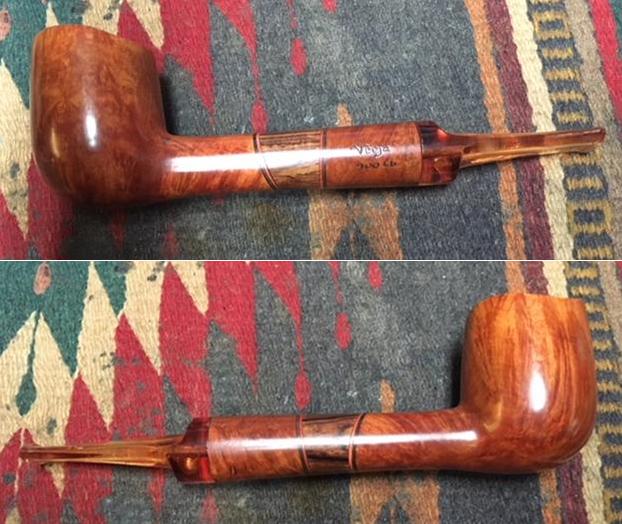
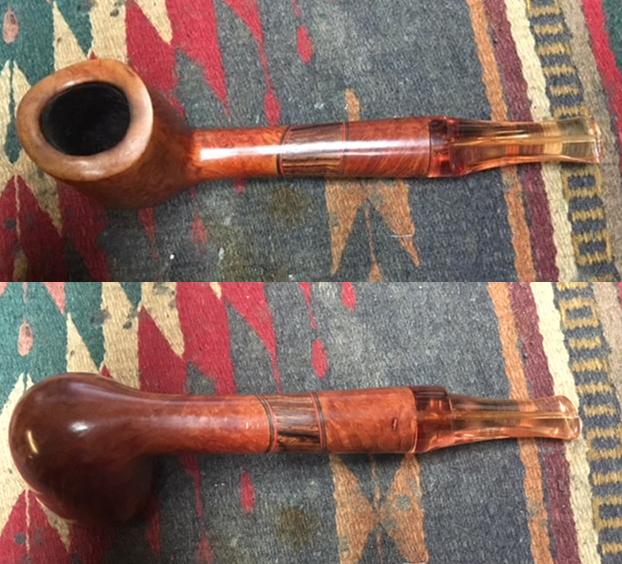
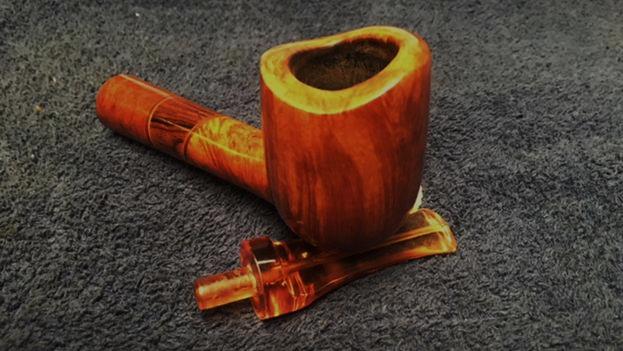
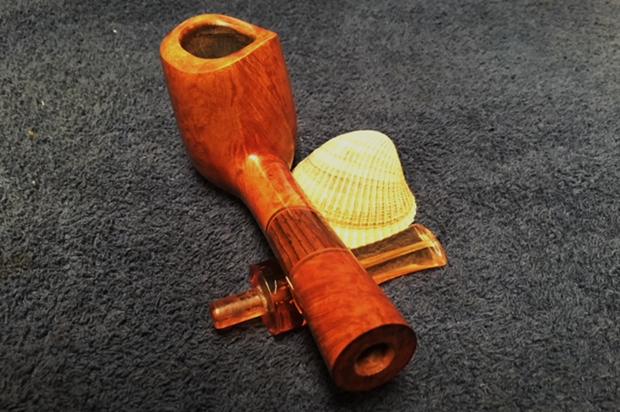
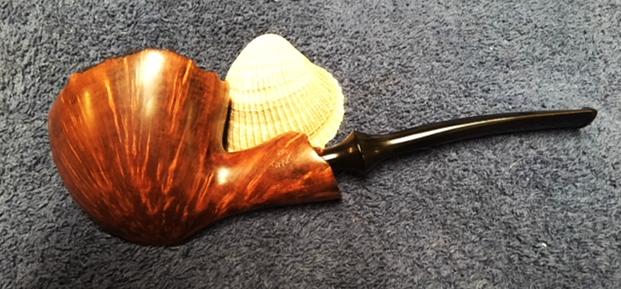
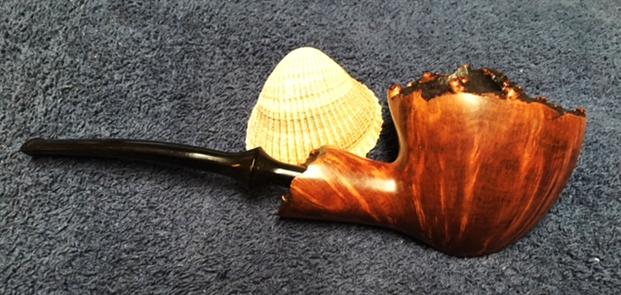
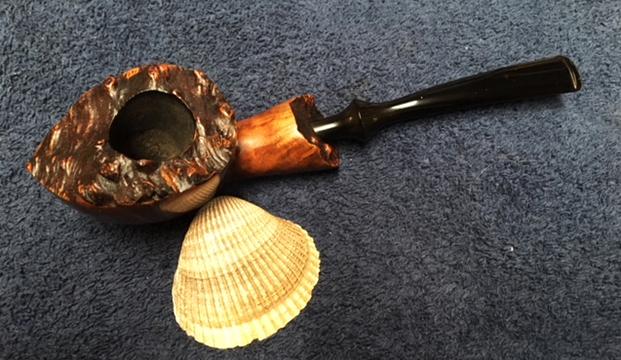
With a great admiration for the pioneering businessmen and pipe men, Kapp and Peterson, I now turn to the Peterson System Standard 313 on my table – really a quintessential working man’s pipe. It gives that kind of persona. The chamber is still loaded with the former steward’s tobacco! Whenever I see this I wonder if this was the last bowl enjoyed on this side of life. I’ll never know, and the Pete still isn’t talking! The chamber has moderate cake build-up and the rim has some lava flow and some scorching. The stummel generally is in good shape with typical marks of wear, but nothing too serious, and it is darkened with grime. There is one fill I detect on the front, right of the stummel which I record with a picture. The nickel ferrule has some dark areas on it which will hopefully clean up and shine up. The System P-Lip stem has a good collection of tooth chatter, but I don’t detect any clench dents. 
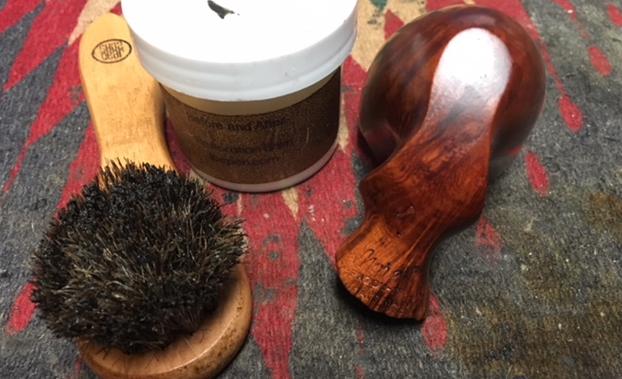
 I begin the restoration of this Peterson by first adding the stem to a soak of Before and After Deoxidizer along with a Peretti and Comoy’s stem that are in the queue along with their respective stummels. Before I place the stem in the Deoxidizer, I clean the internals of the System Stem P-Lip for the first time, and I now understand some of what I’ve read about the difficulty in cleaning these stems! They are engineered to narrow down toward the button and the P-Lip draft hole is smaller than usual. I read from the Pipedia Peterson article above that Falcon pipe cleaners are thinner and can be used well with these stems. Good to know! With pipe cleaners dipped in isopropyl 95% I clean the stem and this keeps the Deoxidizer from becoming soiled as quickly. I let the stem soak for several hours. After removing the stem, I let it drain of the Deoxidizer and then wipe off the raised oxidation using cotton pads wetted with light paraffin oil. The oxidation wipes off as a nasty brown goo. The System stem looks good after it is wiped down well.
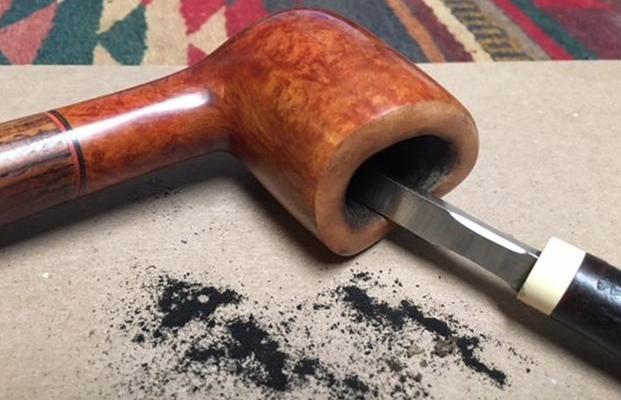
 Putting the stem to the side, with the stummel now in hand, I clean the old baccy out of the chamber. The tobacco still has a sweet aroma to it – I’m not a tobacco blend expert or else I might hazard a guess! Using the Pipnet Reaming Kit, I start with the smallest blade and ream the chamber removing the carbon cake down to the fresh briar. Since the bowl diameter is smaller, I only use the first blade. I then utilize my Savinelli Fitsall Tool, which I find to be very handy. It can remove some carbon at the floor of the chamber missed by the Pipnet blade and it scrapes the walls more closely giving me greater control. Wrapping a piece of 240 grit sanding paper around the Sharpie Pen, I sand the chamber walls removing even more carbon residue and getting down to the briar for a fresh start. Finally, I use a cotton pad wetted with isopropyl 95% and clean the chamber of the carbon dust. Looking at the chamber, I see no problems – it looks great.

 Turning to the externals, I use undiluted Murphy’s Oil Soap with cotton pads to scrub the grime off the bowl and rim. I also use a brass brush on the rim which is dark from some scorching. After this, I rinse the stummel with tap water. While I was doing this, I allowed the water to run over the nickel ferrule and rubbed it with cloth to see if this would help clean it up. There is still what looks like corrosion on the nickel-plated surface. I’ll do some Google research later to see what the next step might be to clean the nickel safely. I also am not able to remove the darkened briar on the rim. I’ll need to give it a gentle topping to remove it.
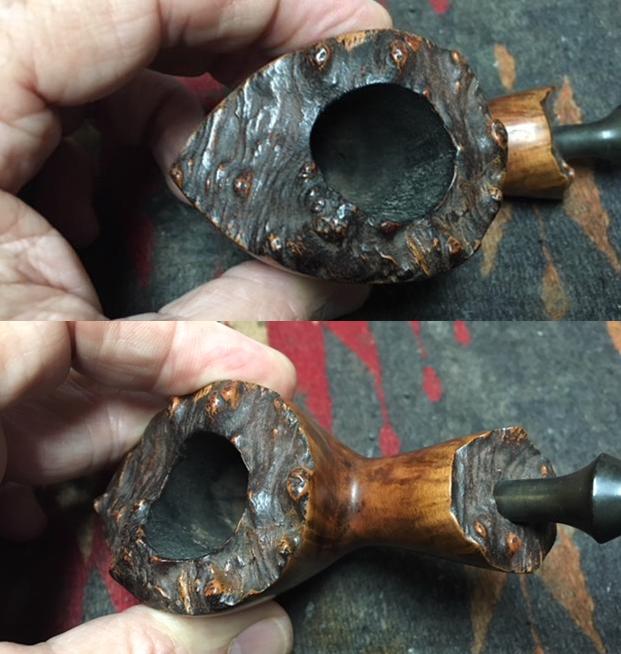
 While I think about these challenges, I clean the internals of the stummel. Using pipe cleaners, cotton-buds and shank brushes dipped in isopropyl 95%, I go to work. Well…, some time later, I’m still not 100% satisfied with the cleaning of the Peterson ‘sump’ and draft hole. The old tar and oil gunk is thick and only after employing many weapons in the arsenal is it starting to shape up. The sump has collected the moisturized gunk as designed. Along with pipe cleaners, cotton buds and different sized shank brushes, I also use both a dental spatula and probe to stir up and scrape the mortise and sump walls. I take a picture to show this frontal attack – it isn’t pretty. Now, to continue the cleaning I’ll use the kosher salt and alcohol approach. Using kosher salt, which does not leave a taste as iodized salt does, I fill the chamber with salt, cup the top of the bowl with my palm and give it a shake to displace the salt. I then set it in an egg crate to keep it stable. Using a cotton ball, I create a wick to stuff down the mortise to act as a wick drawing more of the oils and tars out of the briar. I make the wick by stretching and twisting the cotton ball and then guiding the end down into the draft hole as far as I can get it – I use a piece of thin metal coat hanger wire to push the cotton through the draft hole. I also push the cotton down into the sump. Once that is done, using a large eye dropper, I fill the bowl with alcohol until it surfaces over the salt. After a few minutes – after it’s been absorbed, I top it off again. I set the stummel aside to soak through the night.
 The next morning, the salt-alcohol soak did the job! The salt is soiled, and the cotton wick is full of tars and oils. After dumping the expended salt in the waste basket, I wipe the bowl out with a paper towel and blow through the mortise to loosen and left-over salt. I run a pipe cleaner and alcohol through the draft hole and a cotton bud as well in the sump and the mortise walls to make sure all is clean and I’m happy to report that it is! From this cleaning, I think a wise practice for any Pete steward would be to clean your pipe often! Don’t allow too much gunk to collect in the sump.
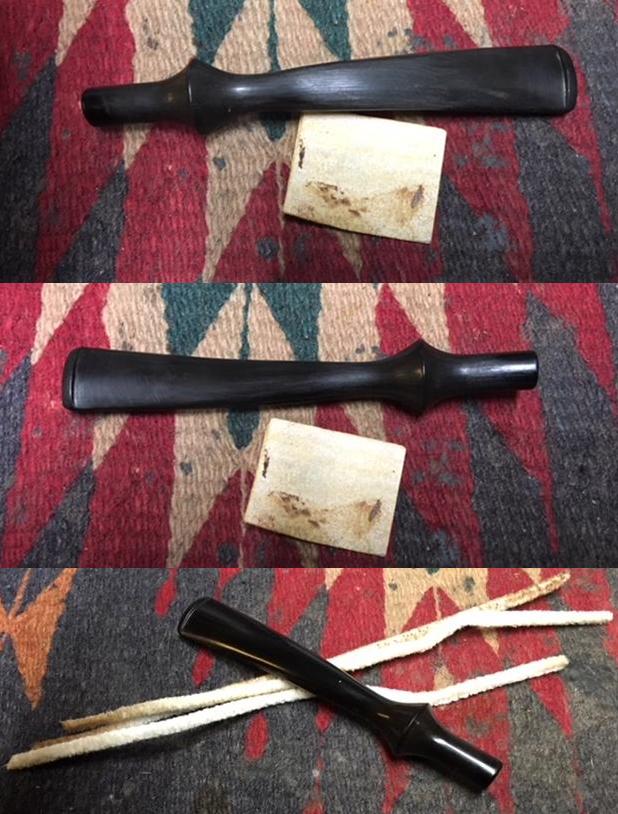
 Turning to the Peterson-Lip stem, I use 240 grit paper to sand focusing on the tooth chatter on P-Lip button and the upper and lower bit. I also refresh the lines of the button contours using a flat needle file. To erase the scratches made by the file and 240 paper, I use 470 paper. I then employ 600 grade paper sanding the entire stem and follow this with 0000 steel wool which begins the buffing up of the vulcanite.

 Before moving on to using micromesh pads on the stem, I use Before and After Fine and Extra Fine Polish on the stem to enrich the vulcanite. For each polish successively, I place a bit on my finger and work it into the vulcanite. I then wait a few minutes and wipe each successive polish off with a cotton cloth which also buffs up the vulcanite gloss.
 I put the stem aside and look again at the Peterson stummel. I have two initial challenges to solve. The rim’s dark ring from it being scorched. Secondly, the small fill on the right-front quadrant of the stummel. I use a dental probe and dig at it a bit to see how solid the fill is. Some of the fill material flaked off and left a small indentation as a result. This needs to be filled again and masked. I will patch it before moving ahead with the stummel surface. But first, I work on the rim. I use a chopping board with 240 grade paper on it. To top the inverted stummel, I use uniform, easy circular motions and I don’t need to take much off – just enough to remove the scorched wood. Switching the paper on the chopping board to 600 grade paper, I top the stummel a bit more to smooth out the 240 scratches. I take pictures to show the progress.

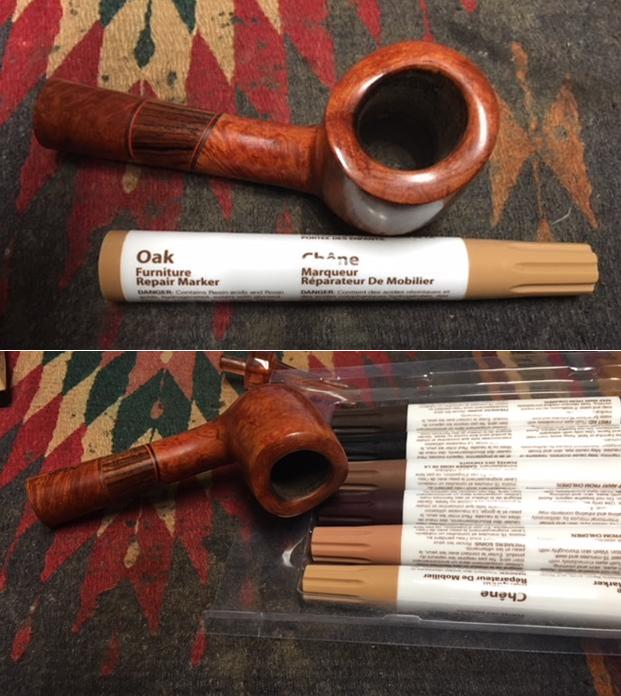
 I notice that there is still a bit of dark wood on the outer rim lip. I’ll take care of that when I’m sanding the stummel rounding off the edge slightly. I’ll stain the rim’s bare briar a bit later to match the stummel’s surface.
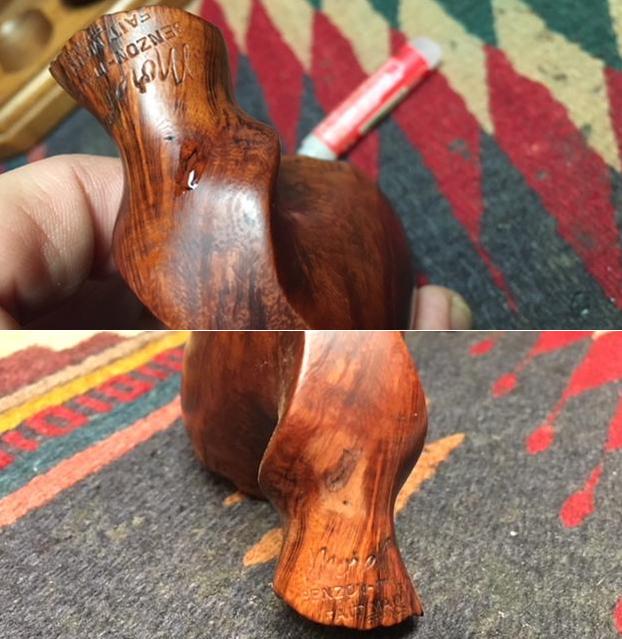
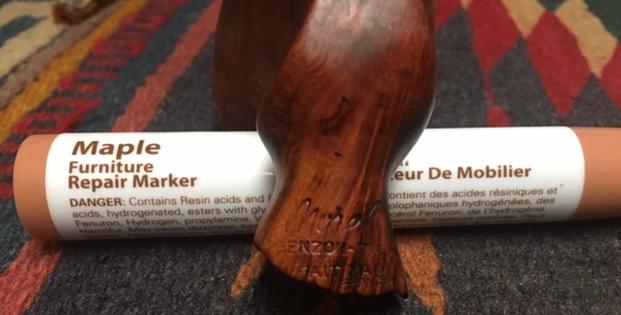
  Now, to address the fill. I again use a dental probe to scrape the old fill and to remove what is not solid. To darken the old, remaining fill, I use a cherry stain stick to darken and color the fill so that it will blend with the briar grain better – I hope! I then apply a small drop of clear super glue to the hole. I use a toothpick to guide the super glue to the patch – while I was doing this, the power went out and I had to finish using the sunlight coming into the open window! I put the stummel aside and wait for the CA glue to cure and the lights and internet to come back on!
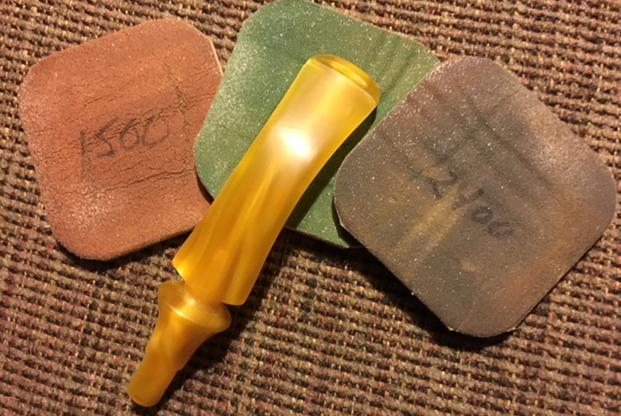
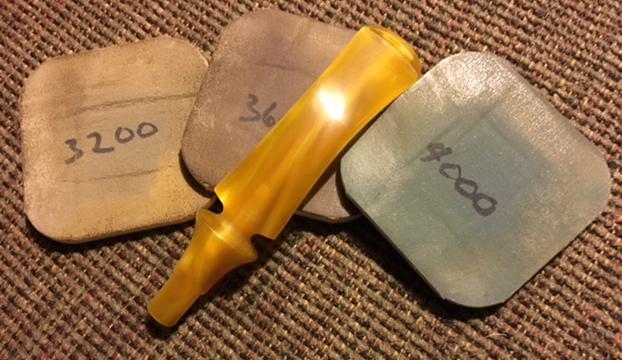
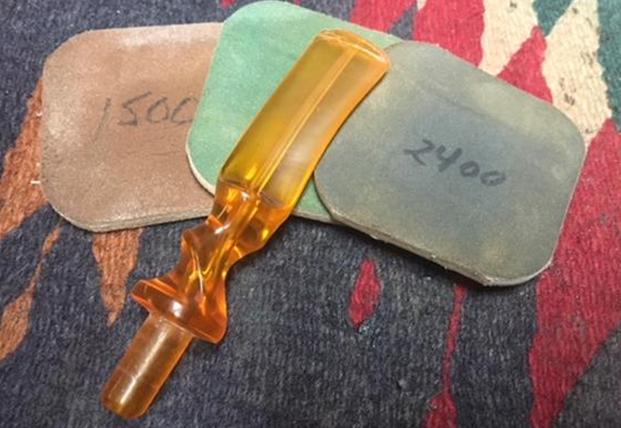
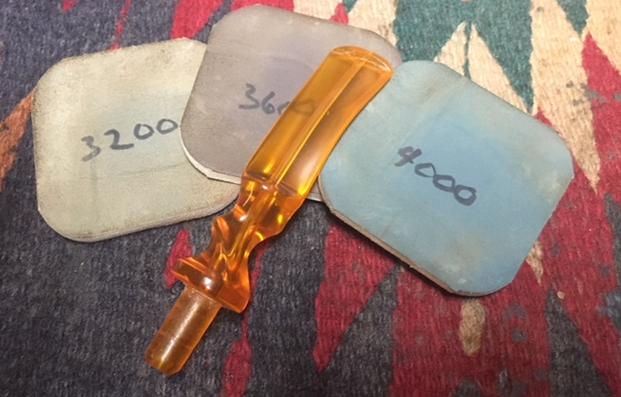
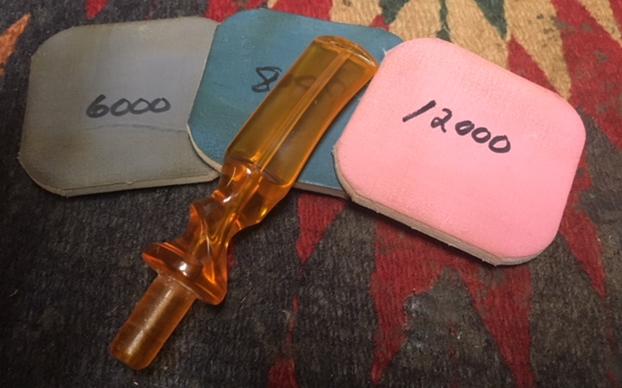
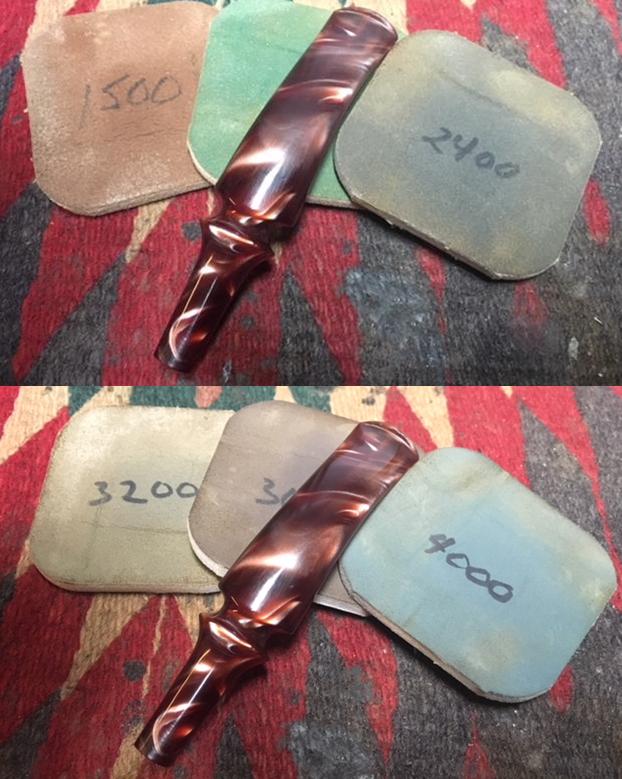
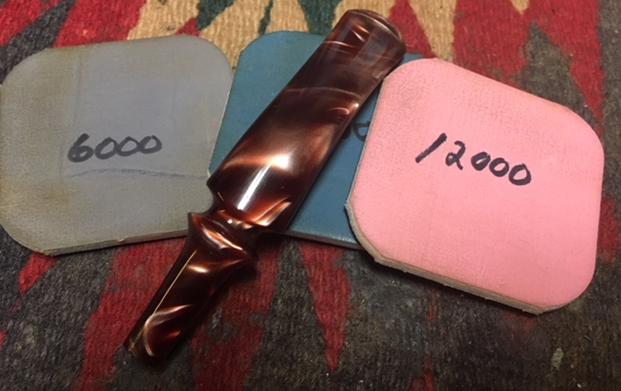
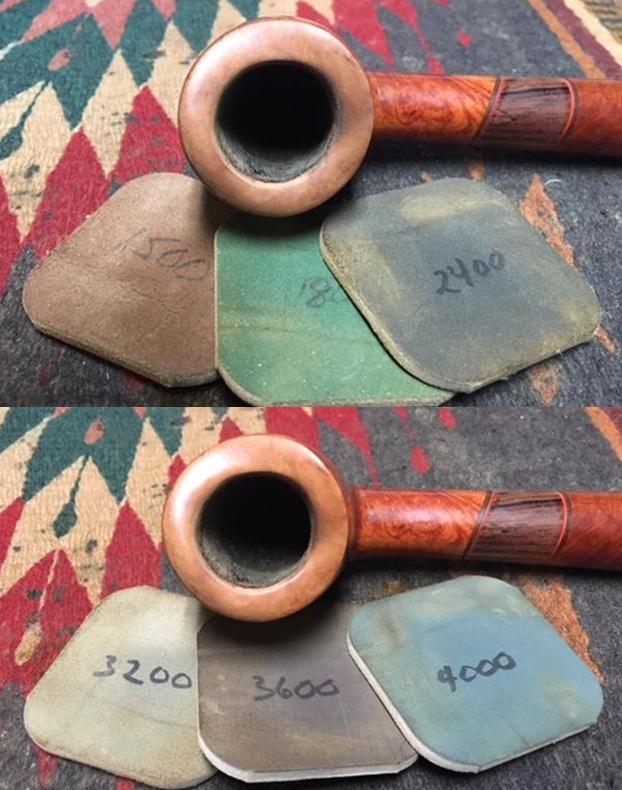
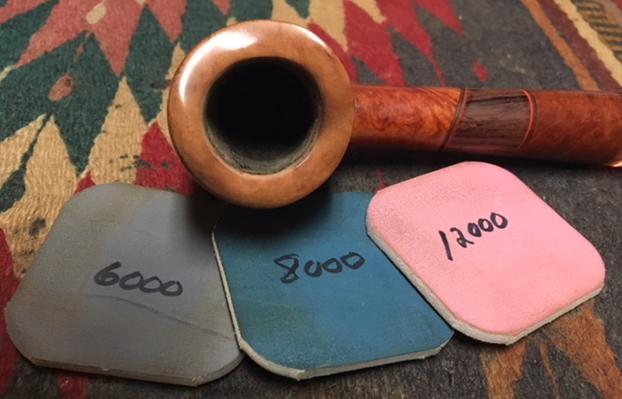
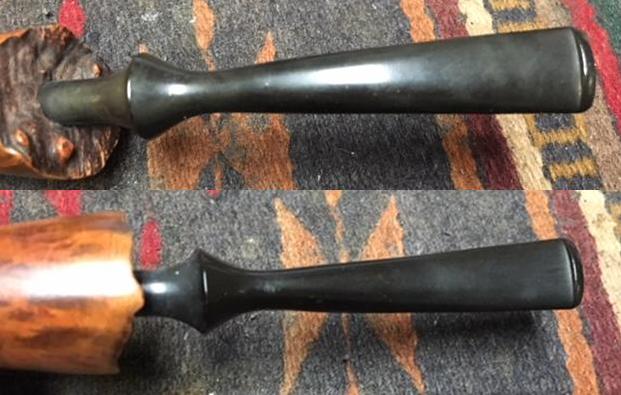
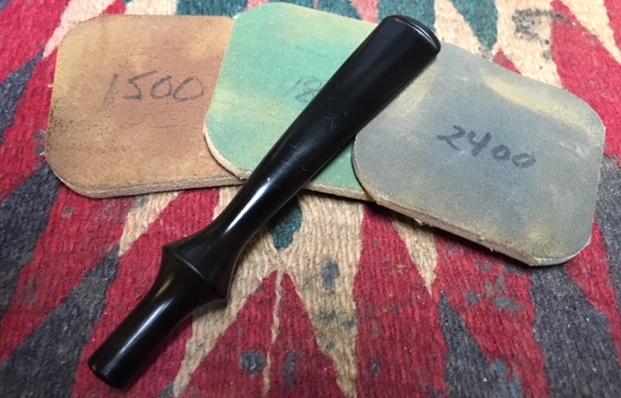
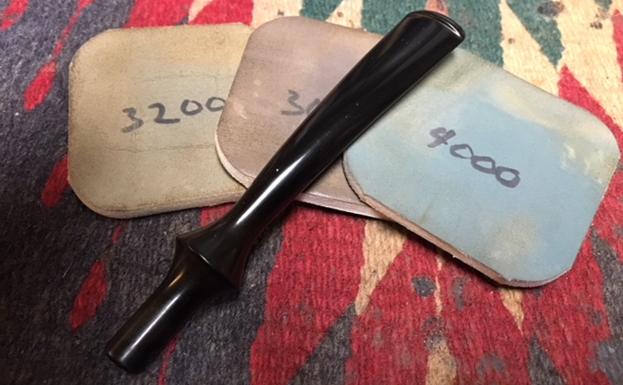
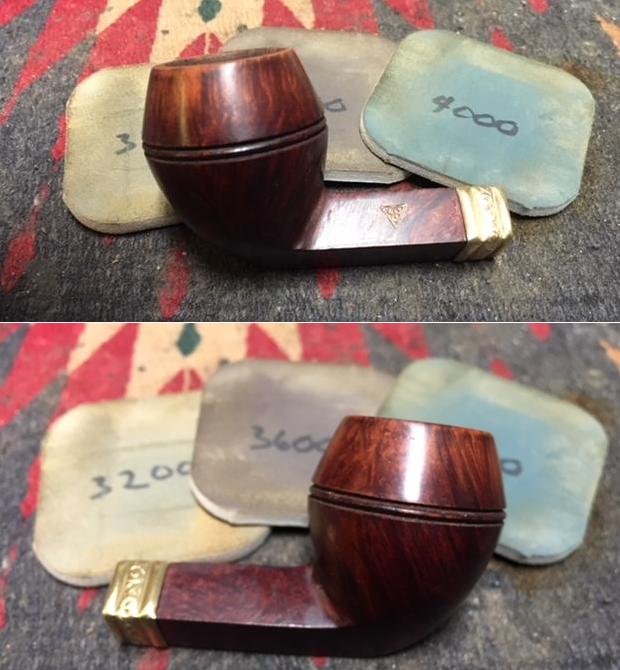
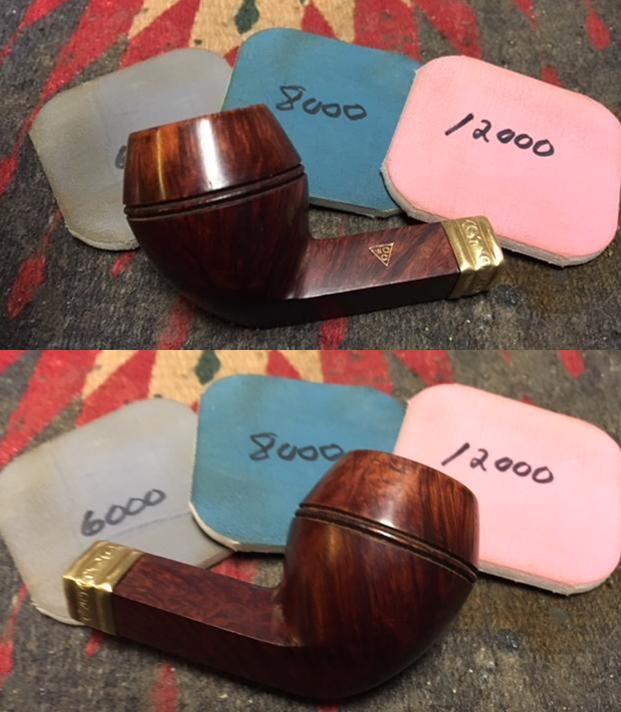
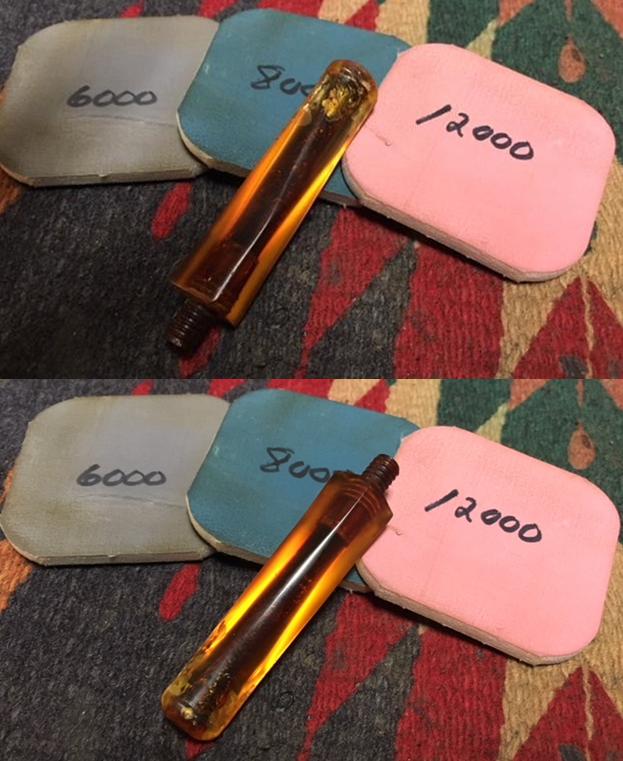
 I decide to work on the stem using the micromesh pads. Starting with pads 1500 to 2400 grade, I wet sand the System stem. Then, using 3200 to 4000 and 6000 to 12000 I dry sand the stem. Following each set of 3 pads, I apply Obsidian Oil to revitalize the vulcanite. I never grow tired of watching the pop in the vulcanite when it turns to that glassy gloss! The Peterson-Lip System stem is looking good. I put it aside to dry and absorb the Obsidian Oil.
 I turn back to the stummel. The CA glue has cured on the patch and I begin the process of removing the patch mound by using a flat needle file. The most important part of this process is to keep the file on the hardened glue and not slide off and to impact needlessly the neighboring briar. I want to keep the area needing repair and refinishing as small as possible! I file the glue mound down until it’s almost at the level of the briar surface. Then, using a tightly rolled piece of 240 grit paper, I sand the mound further, so it is flush with the briar. Finally, I use 600 grade paper to smooth the patch out preparing it for dye stick to blend the patch. I think its going to blend very well with the briar.
 Now, to the rim. I use 240 grit paper rolled tightly and I run it around the outer rim edge to give it a slight rounding to remove the remnants of damage on the rim. I gently pinch the rolled paper over the rim edge with my thumb, so I create the slight bevel. I also do the same, very lightly, to the inside rim edge. I follow by doing the same with a rolled piece of 600 grade paper. Finally, I take the stummel back to the topping board once more on 600 grade paper simply to redefine a crisp line around the rim after the beveling. I think it looks great and ready for the next step.

 I’m hoping that I can match the dye stick color correctly! I read on rebornpipes, Steve was restoring a Peterson System Standard and needed to use a dye stick on the rim. He used cherry and said that it matched the Peterson schema well. I’ll do the same and see how it goes! I apply dye to the both the fill patch and the rim. I wait a while for the dye to thoroughly dry before proceeding.
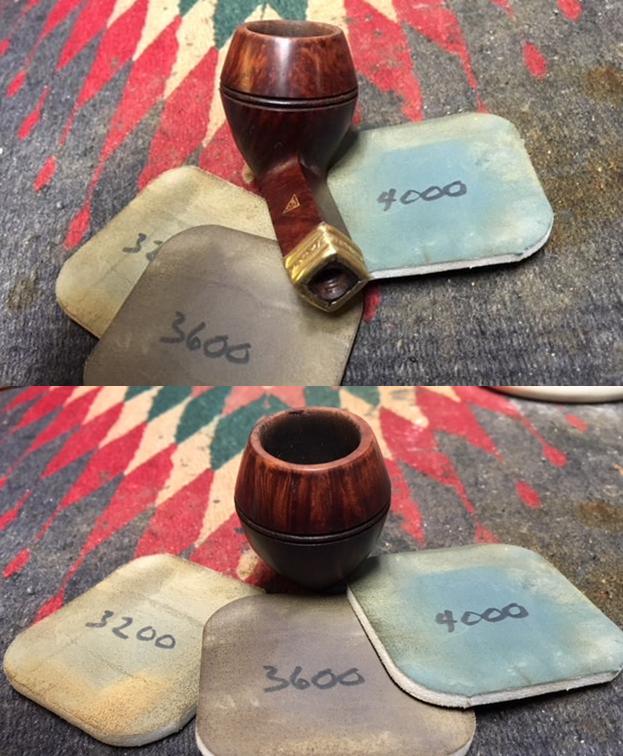
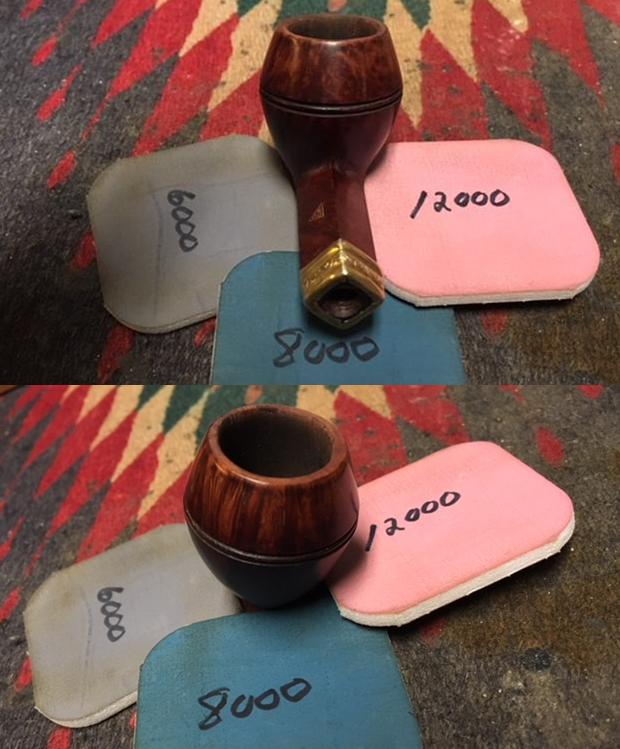
 I then sand the stummel with micromesh pads. I wet sand using pads 1500 to 2400, and then dry sand with pads 3200 to 4000 and 6000 to 12000. To protect the Peterson’s nomenclature, I stay clear of the until the later pads – and even then, a very light touch.
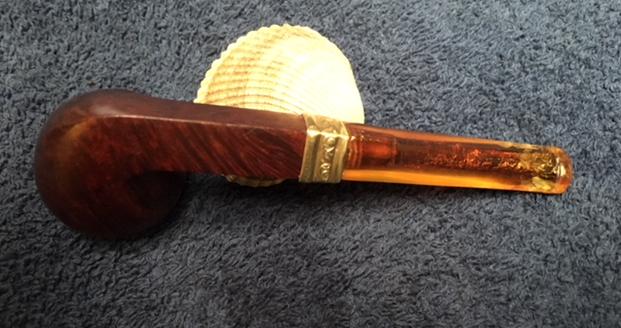
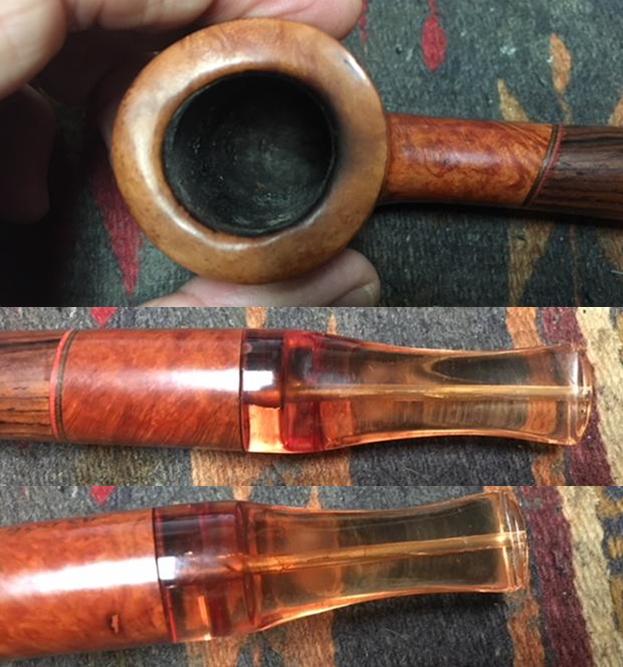
 As you can see in the pictures above and the focused one immediately below, the nickel ferule of this Pete needs help dealing with the corrosion – it is an eyesore. Care must be given because metals can be a bit tricky. One approach that works for silver might turn another metal black! After doing some quick ‘How to clean/polish nickel plating’ searching on Google, the approaches I found were helpful. The general theme is to start conservatively and then to work more aggressively – that is, simply washing the nickel with warm water (every source warned about the need to use warm water with nickel – not hot nor cold) and a mild liquid dish detergent. I do this to begin, and it does brighten the ferule but does not help with the corrosion. The next step is to make a paste using baking powder (a mild abrasive and acidic) with water. This I do next with better results. At first, I have too much water, but eventually I find the ratio to create a thicker paste. I then apply the paste with my thumb and work it in around the entire ferule but concentrating on the corrosive spots – the main one being over the ‘Peterson’s’ stamp. Afterwards, I gently rinse the ferule with warm water. I like the progress, but I return to the paste and this time use a cotton pad dipped a bit into the paste and use it in a circular motion over the spot and then rinse. I buff the ferule with a cloth and I like the results! The corrosion on the nickel is greatly reduced and the ferule looks shinier – but not pristine, still holding some scuffs from life. I think this is good because he is an older Pete after all!

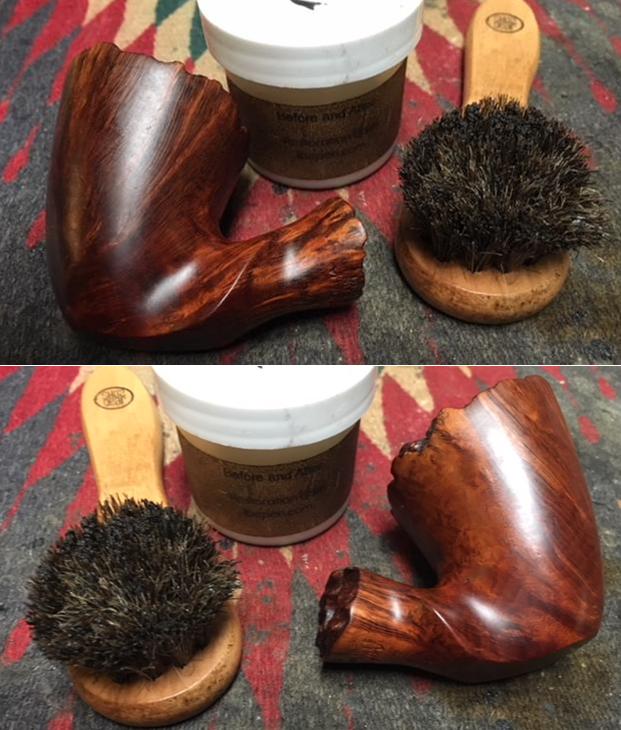
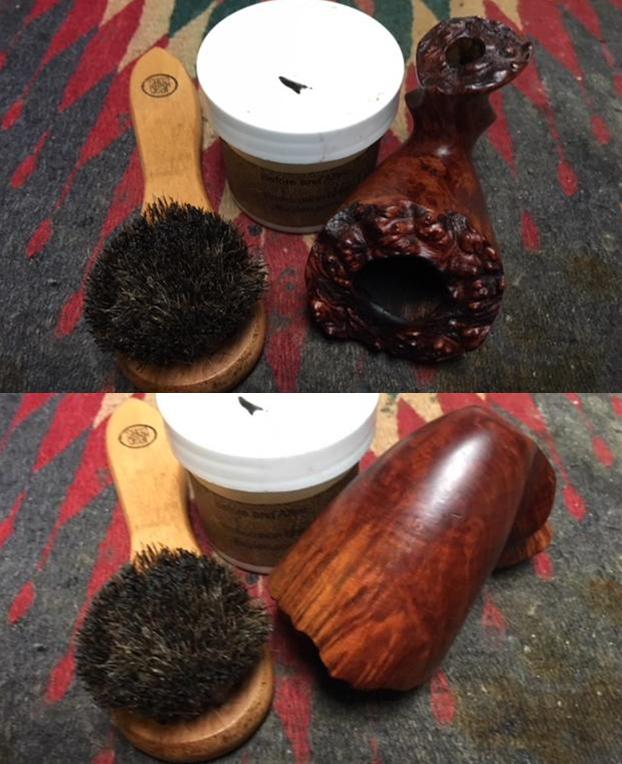
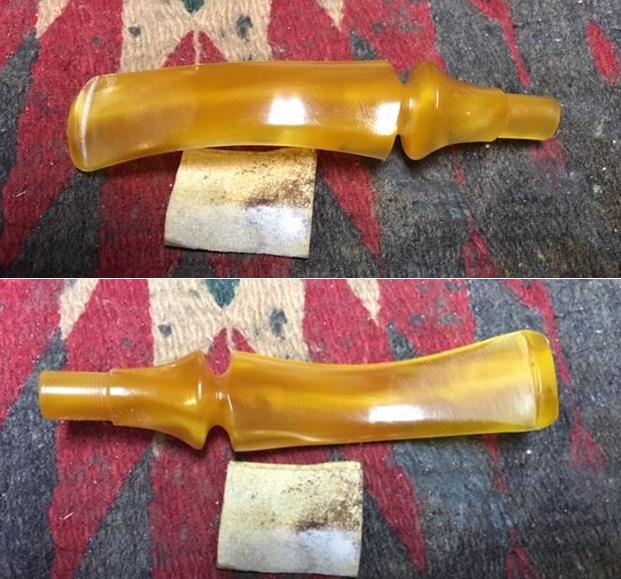
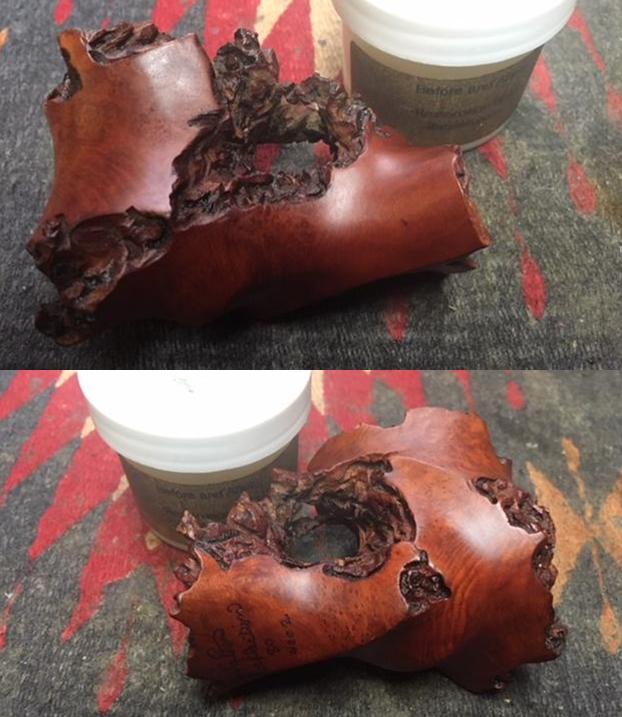
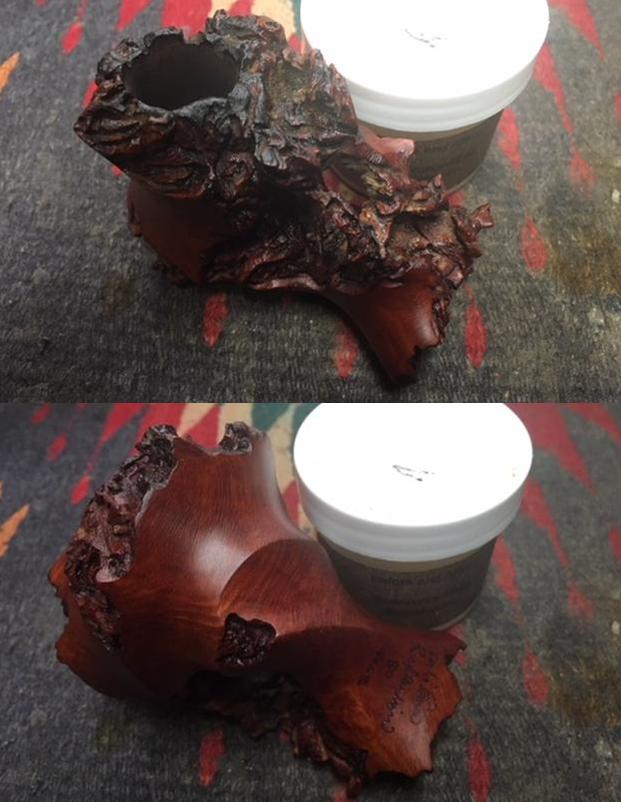
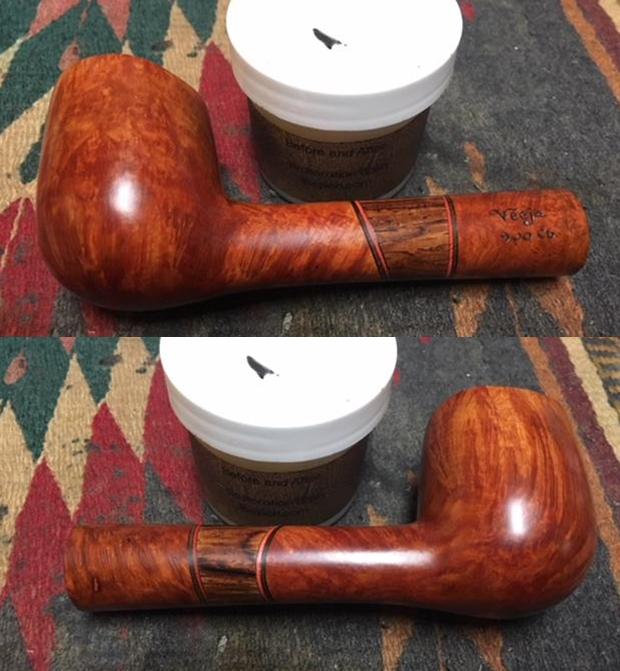
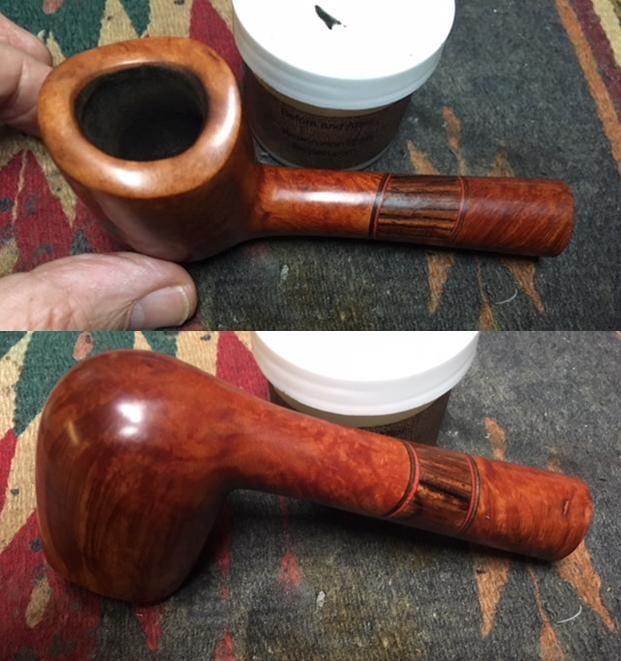
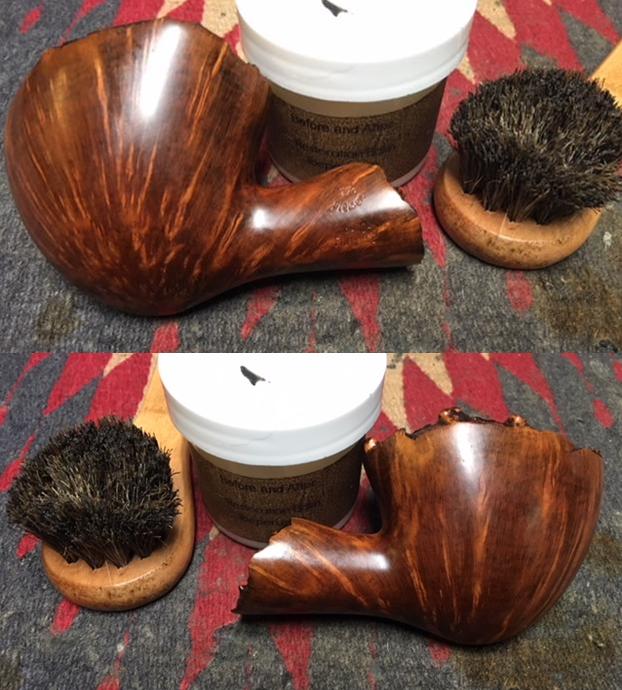
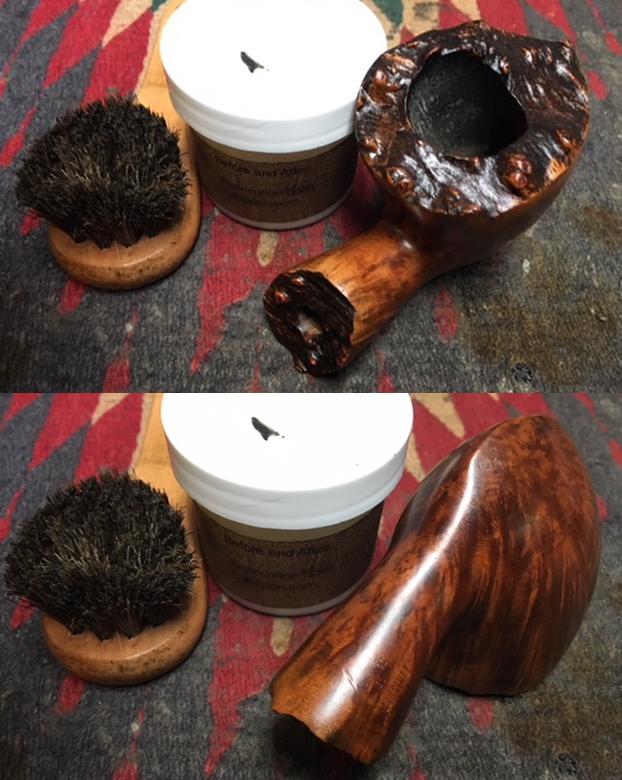
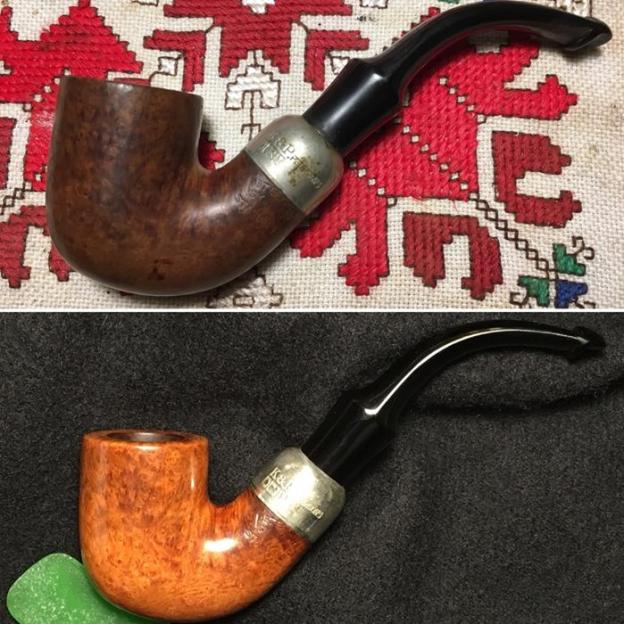
 The Pete is looking great. Before moving to the final stages using abrasive compounds on the stem and stummel, I apply Before and After Restoration Balm to the stummel which has a way of enriching and deepening the briar. In keeping with the product’s name, I take some before pictures to compare with the after pictures – that always interests me. I put some on my finger and work the Balm into the briar. The Balm starts more liquidy and gradually firms up into a thicker, wax-like consistency. After applying, I prop the stummel on an egg crate and let it sit for some minutes to absorb the Balm. Then, after about 20 minutes, I wipe the Balm off, buffing up the shine with a cloth. Then I take the ‘after’ pictures which are below for comparison. I like the results.

 Because of the military style stem, I leave the stummel and stem separated as I apply compounds and wax. I begin by mounting a cotton cloth buffing wheel to the Dremel dedicated to the application of Blue Diamond compound. With the Dremel set to the slowest speed, I apply the compound to the stummel in a slow, patient, methodical manner. I use the sheen created on the briar by the overhead lamp to see the compound as I move it and direct it over the surface. For the System stem, I switch cotton cloth buffing wheels and apply White Diamond, which is a finer abrasive than Blue Diamond. For both compounds, I don’t apply much pressure to the wheel but allow the speed and the abrasive compounds to do the work. After the compounds, I wipe stummel and stem with a felt cloth to remove compound dust before applying the wax. Then, again changing to another cotton cloth buffing wheel, and increasing the Dremel to about 40% power, I apply a few coats of carnauba wax to both stummel and stem and complete the process with a rigorous hand buffing with a micromesh cloth to raise the shine.
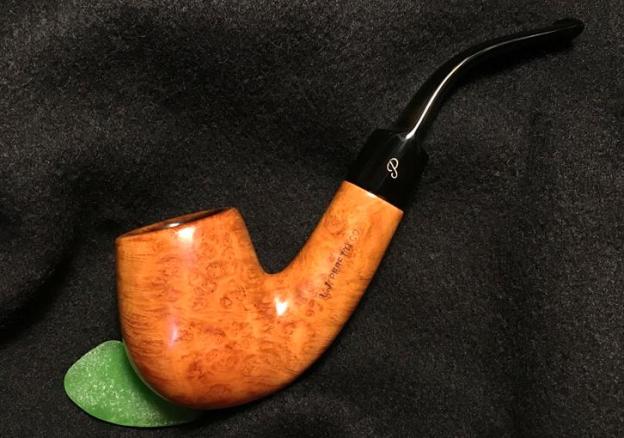
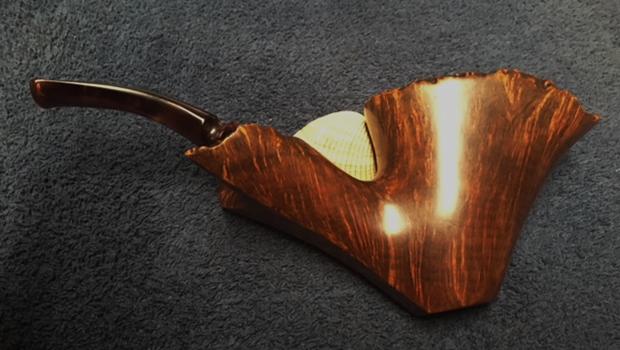
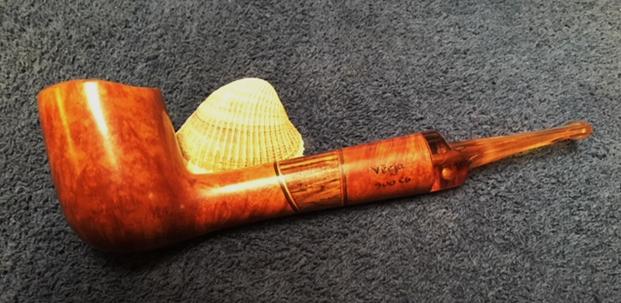
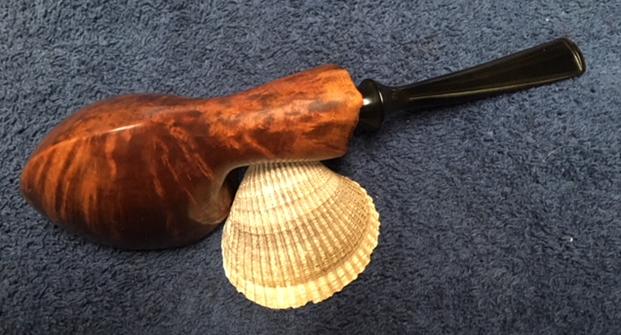
Oh my! The image that comes to my mind as I look at this Republic of Ireland Peterson, is that of a leprechaun, smoking his newly shined up pipe, doing a jig as he dances down the street! This is the first Peterson on The Pipe Steward worktable and I’m pleased with the results and appreciate more the history of this well-known, proud Irish pipe name. The grain of this Peterson System is surprisingly expressive and eye catching for a ‘Standard’ grade – a workingman’s pipe. The nickel ferule came out great providing a classy transition for the military styled P-Lip System stem. I’m pleased with the results! Greg commissioned this Peterson System Standard 313 and he will have first dibs on it in The Pipe Steward Store. This pipe will benefit the work of the Daughters of Bulgaria – women and girls who have been trafficked and sexually exploited. The pictures start with a before and after! Thanks for joining me! 


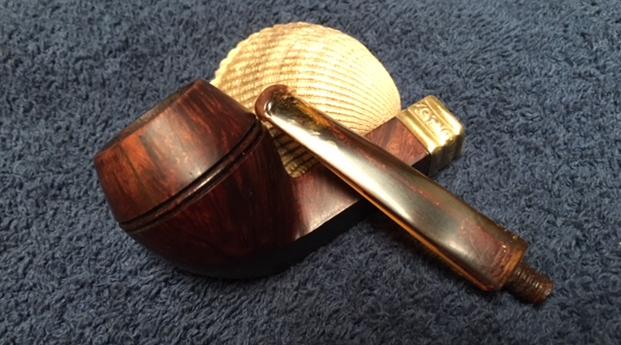
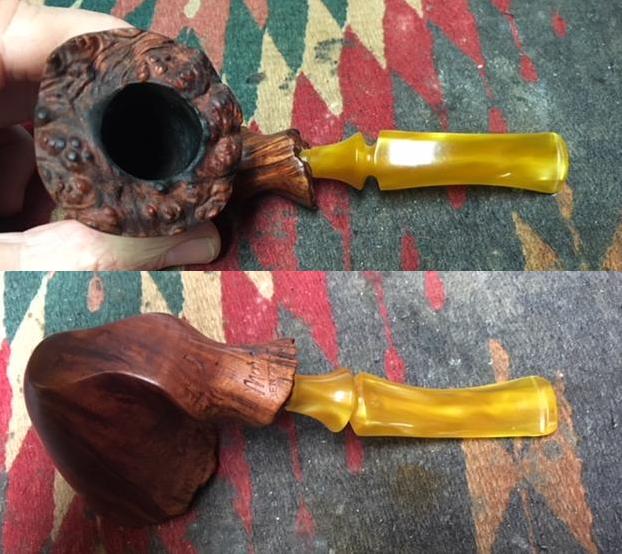
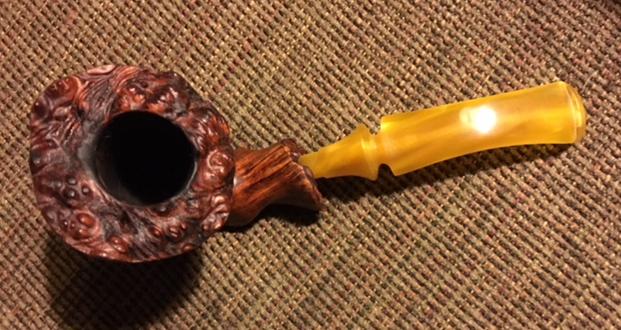
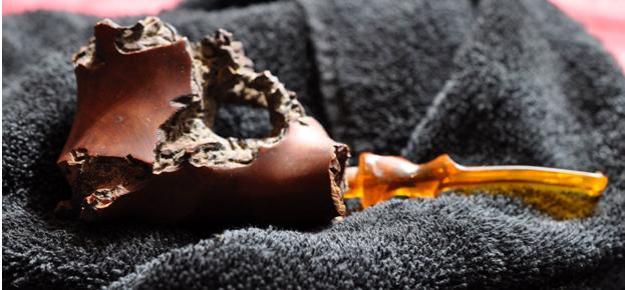
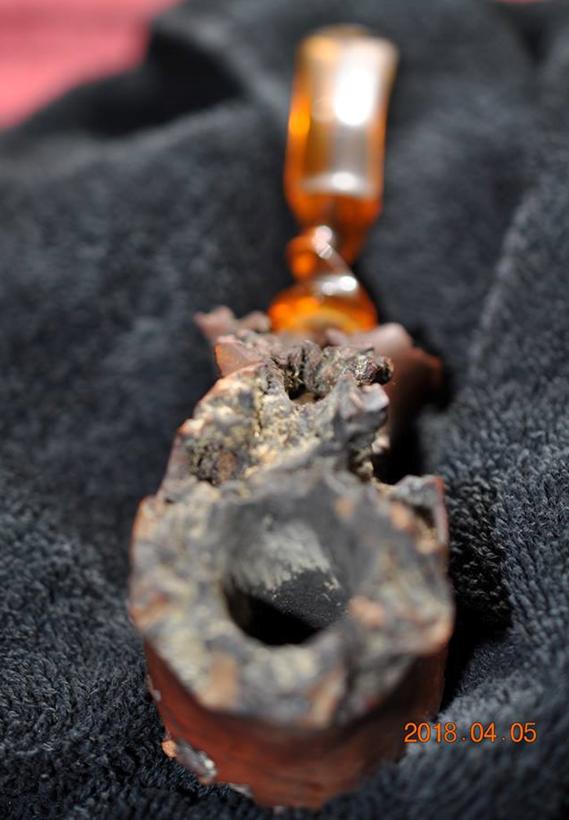
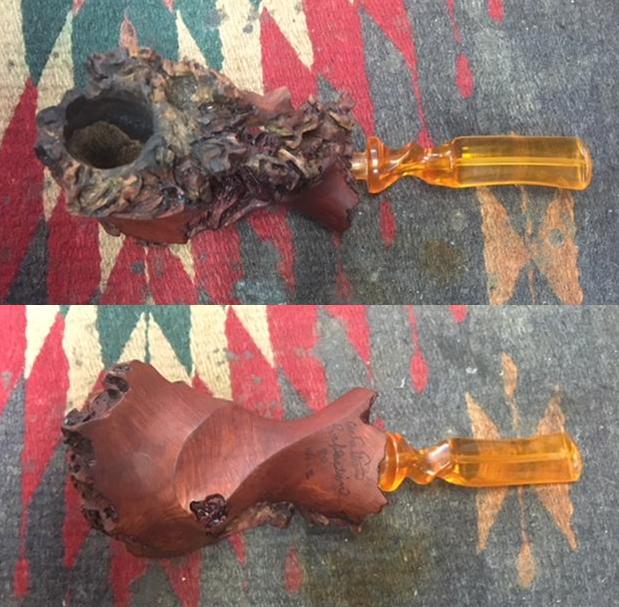
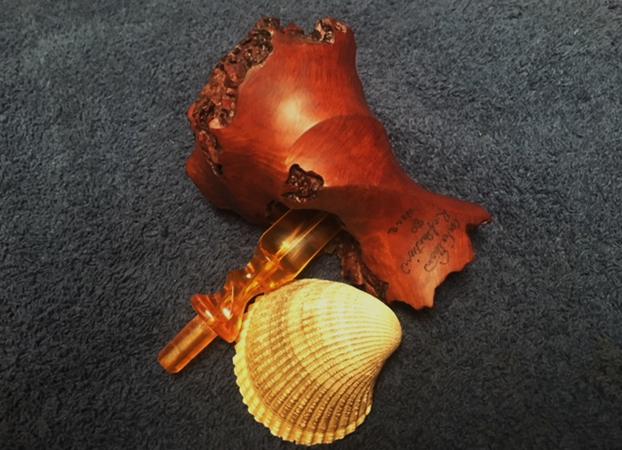
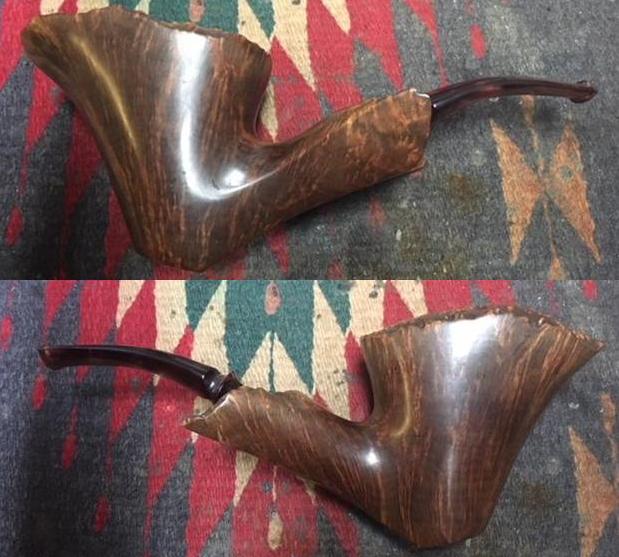
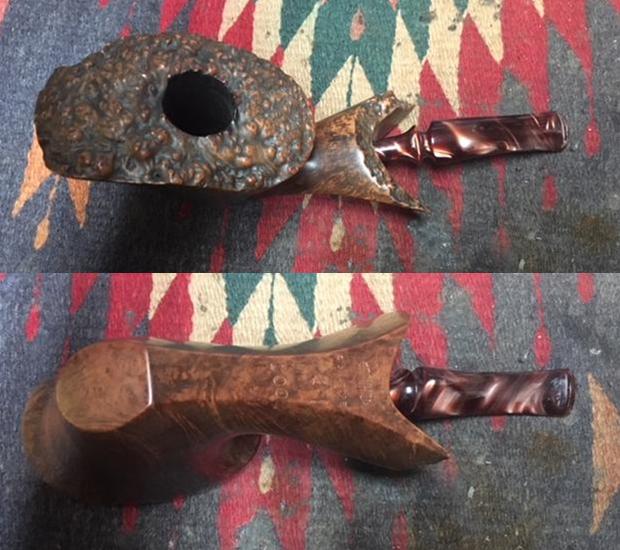
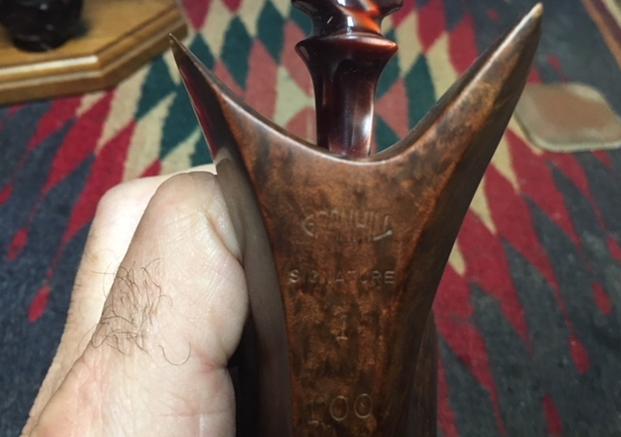
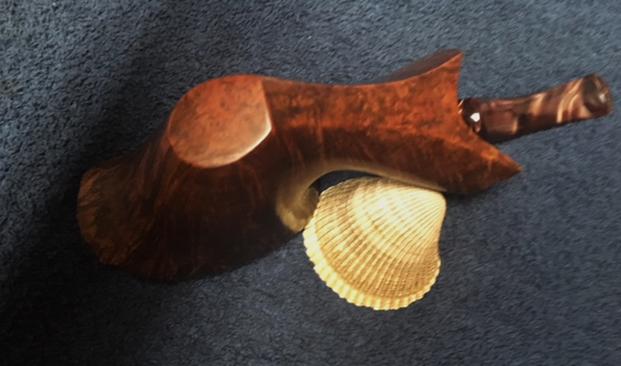
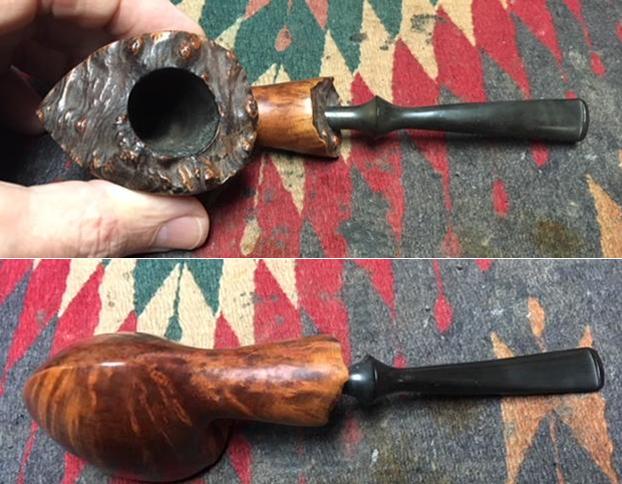
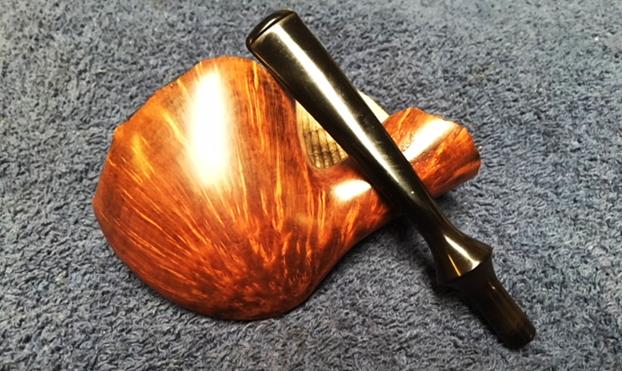
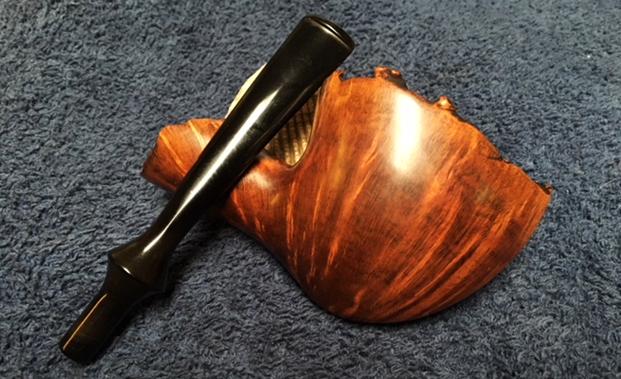
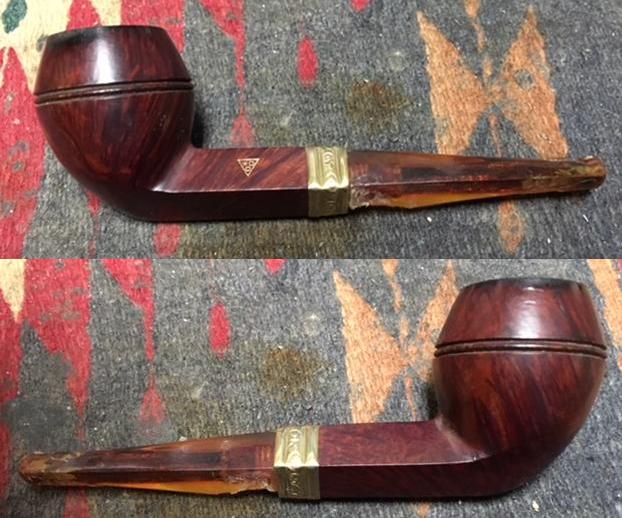 You can see the work that Paresh and Abha had done to the rim top to clean it up and remove the damage. He had also worked over the inner edge of the bowl to smooth out the damage to the edge. You can also see the extensive damage to the stem in these photos.
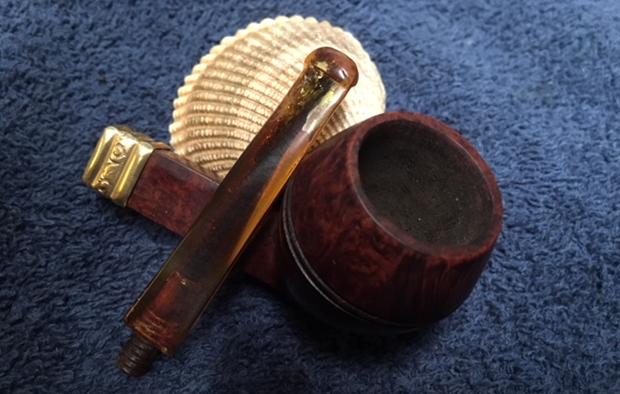
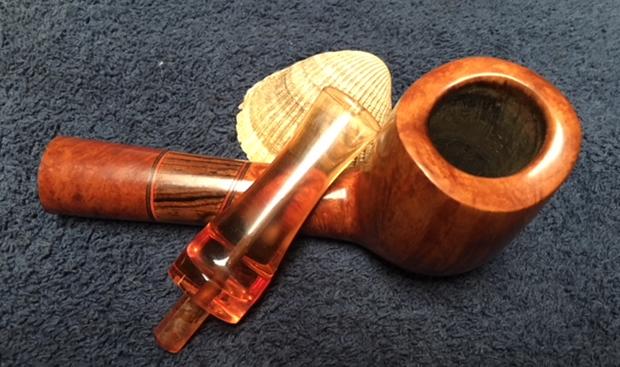
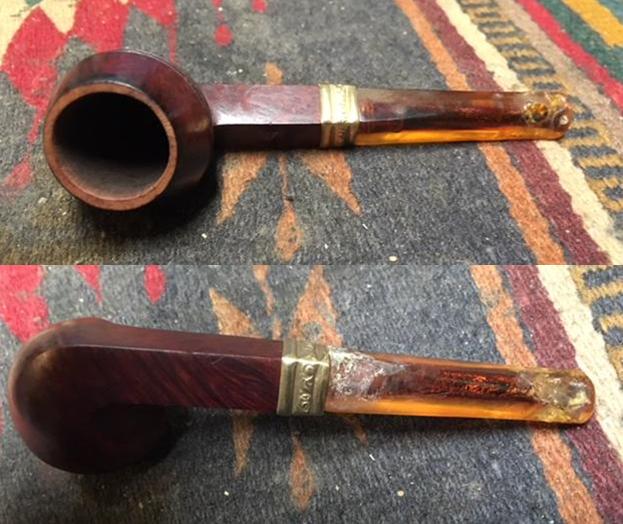 I took some close up photos of the bowl and stem to give a better idea of what I was working with on this pipe. The rim top was clean but there was darkening down the edges of the cap for about a quarter of an inch. The stem was a mess. Paresh had tried to repair the damage and tooth marks with some clear super glue that he picked up in India. He found that it was inferior and did not harden quickly. Once it did the repair tended to fall out. It was very frustrating. He was able to patch the tooth marks on the stem but not the missing chunk at the stem/shank union.
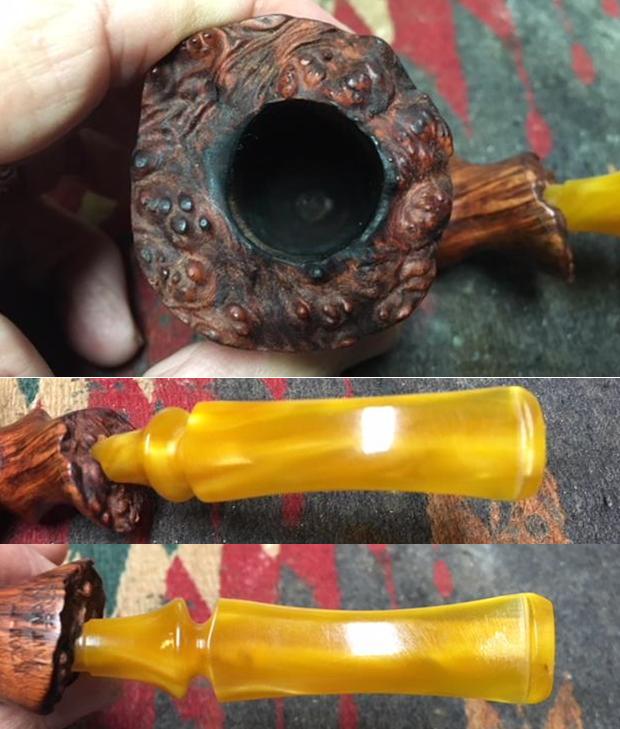
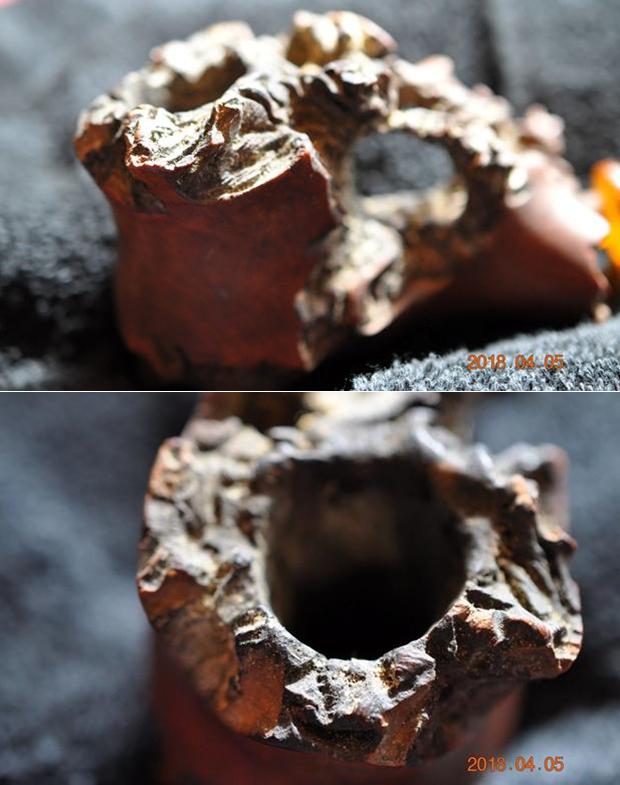
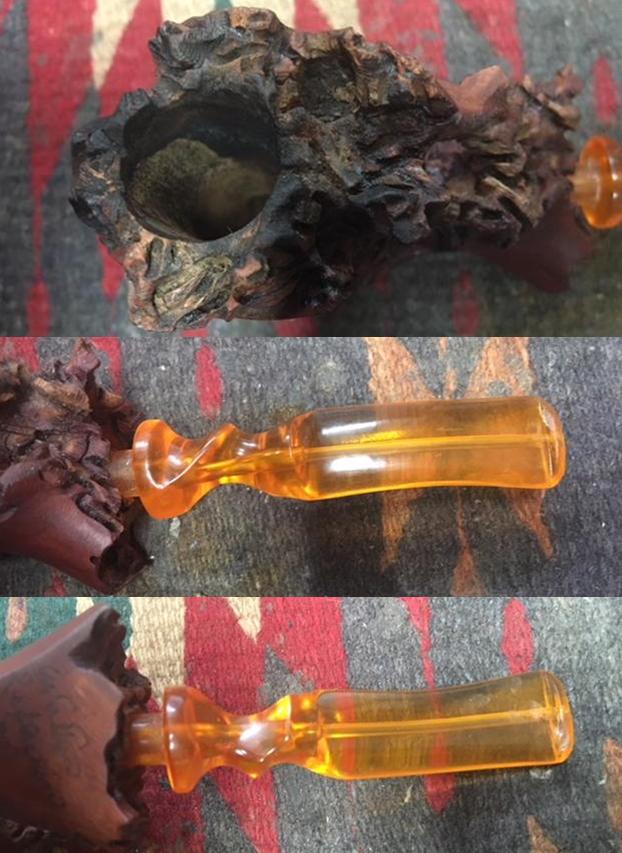
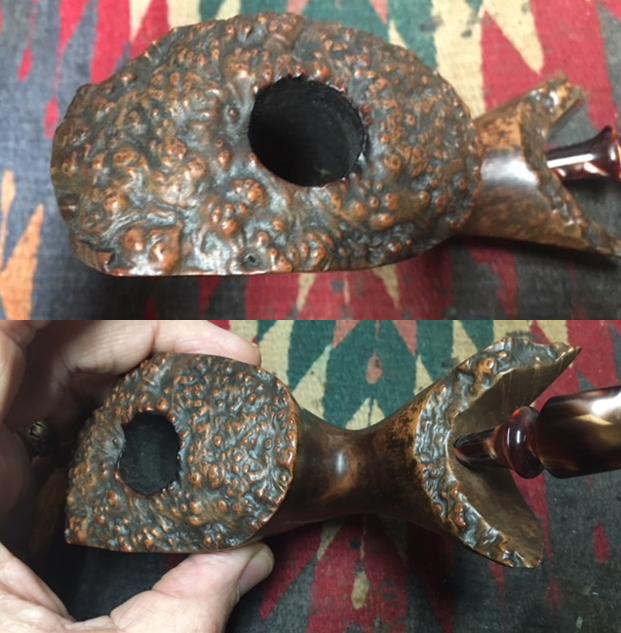
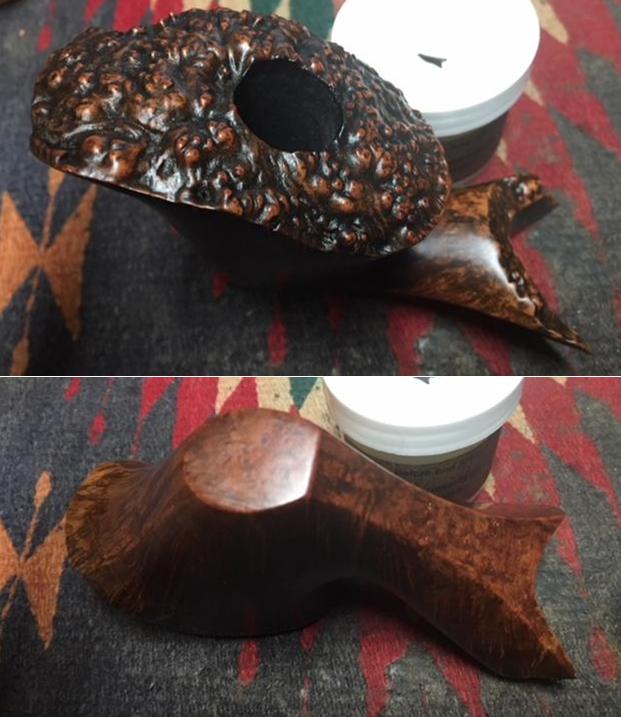
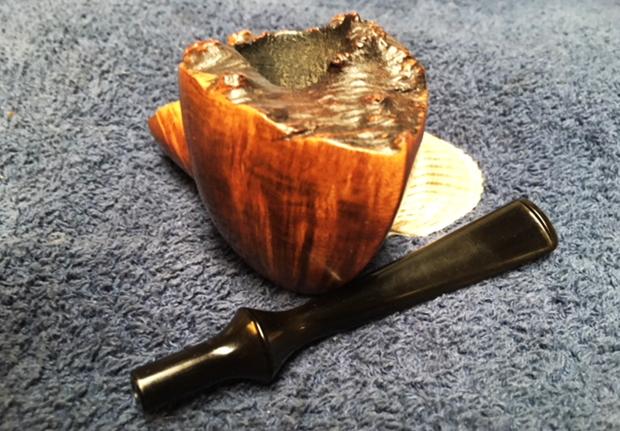
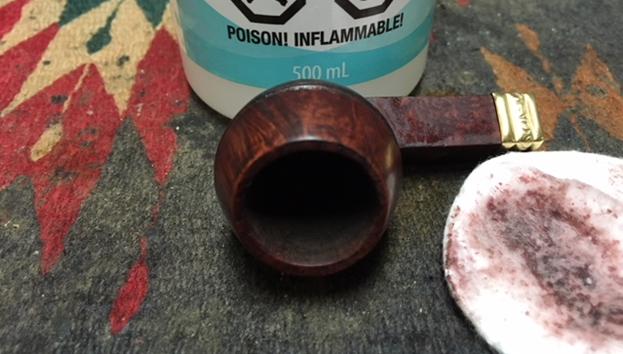
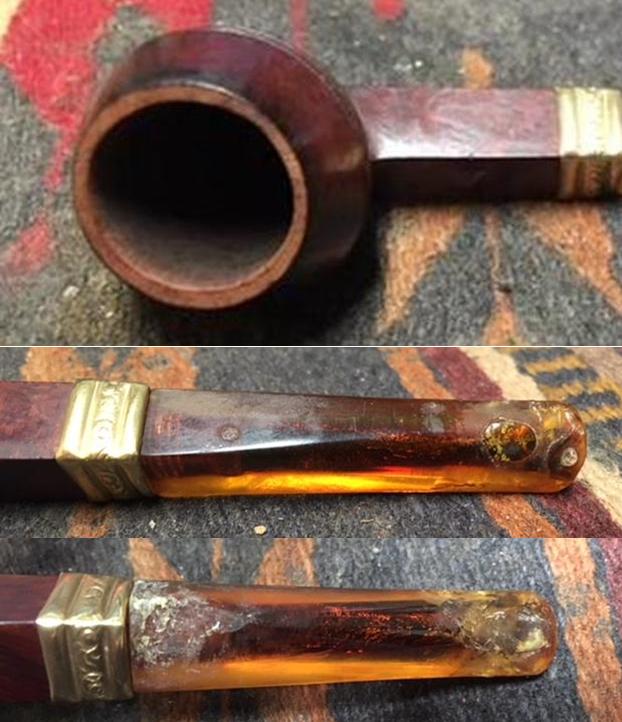 The bowl was the easiest part of the restoration on this old pipe so I started there. I worked on the darkening along the top edge of the cap and was able to remove it with micromesh sanding pads. I used 1500-2400 grit pads to remove the damage and then polished it with 3200-12000 grit pads. I wiped it down with a damp cotton pad after each pad to check out the progress. I polished the rim top at the same time. The photos tell the story.
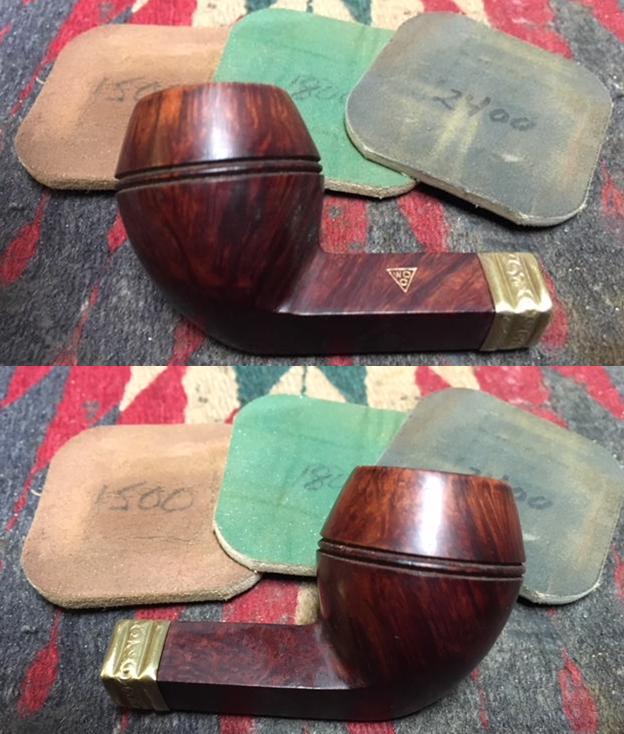

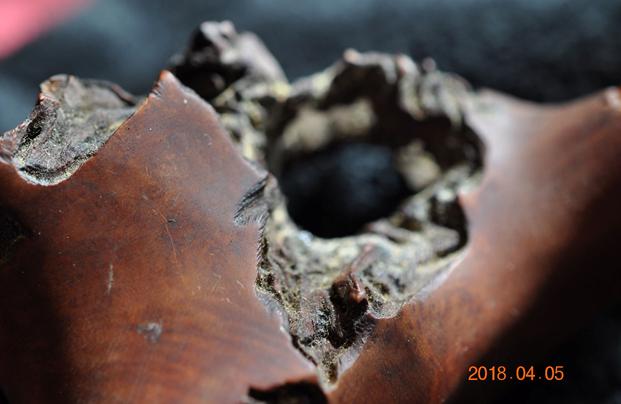
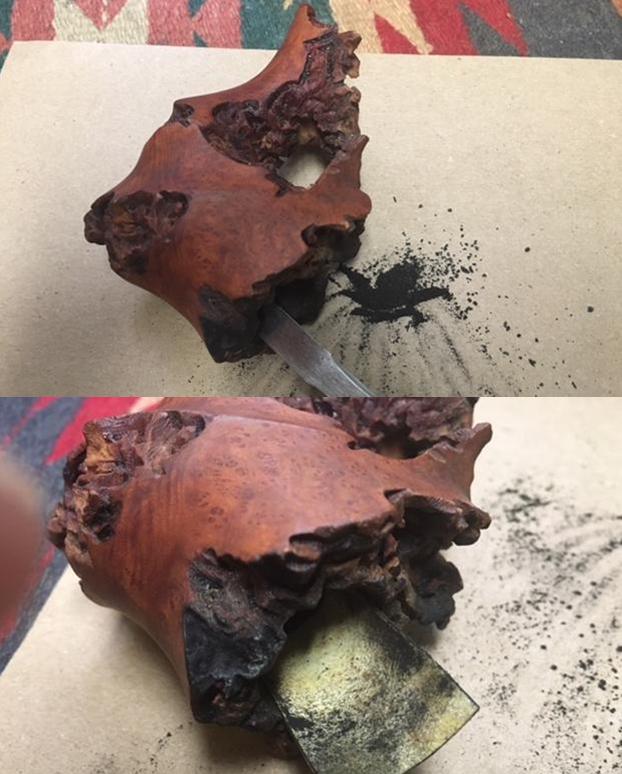
 With the rim darkening removed and the rim and cap polished it was time to touch up the stain to blend it into the rest of the bowl. I used a Mahogany stain pen and stained the cap and the rim top. The match was a little darker than I wanted and not as transparent either. I wetted a cotton pad with alcohol and wiped down the cap to blend the stain and make it more transparent. This did the trick and I was happy with the finished colour. The photos show the process.
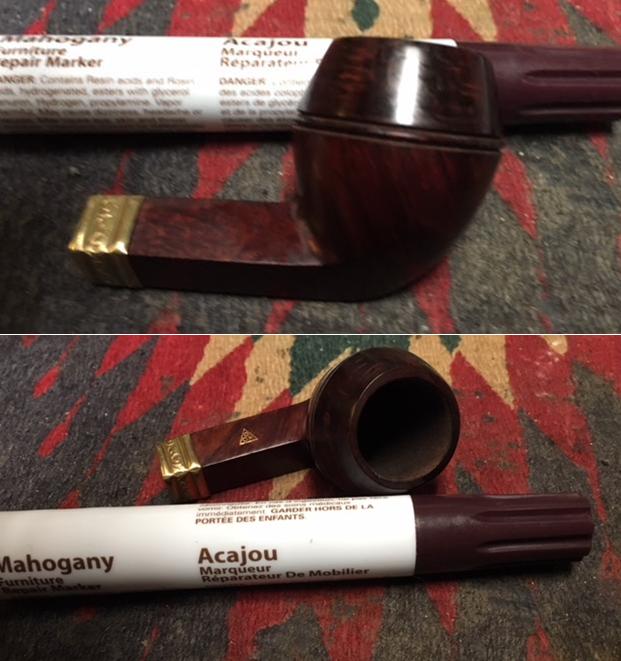
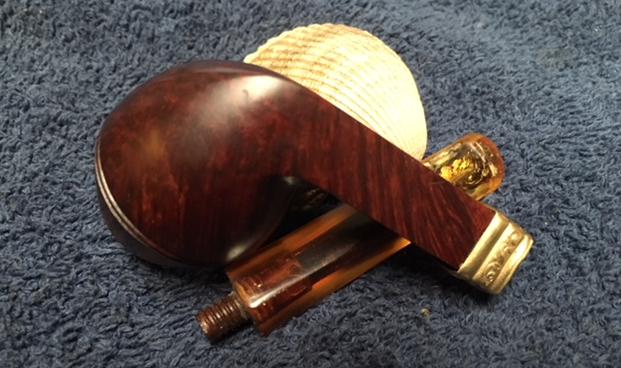
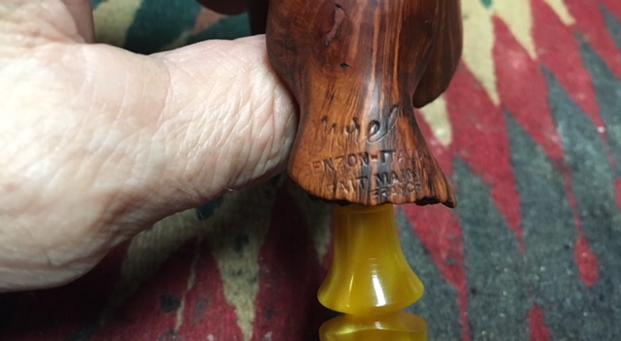
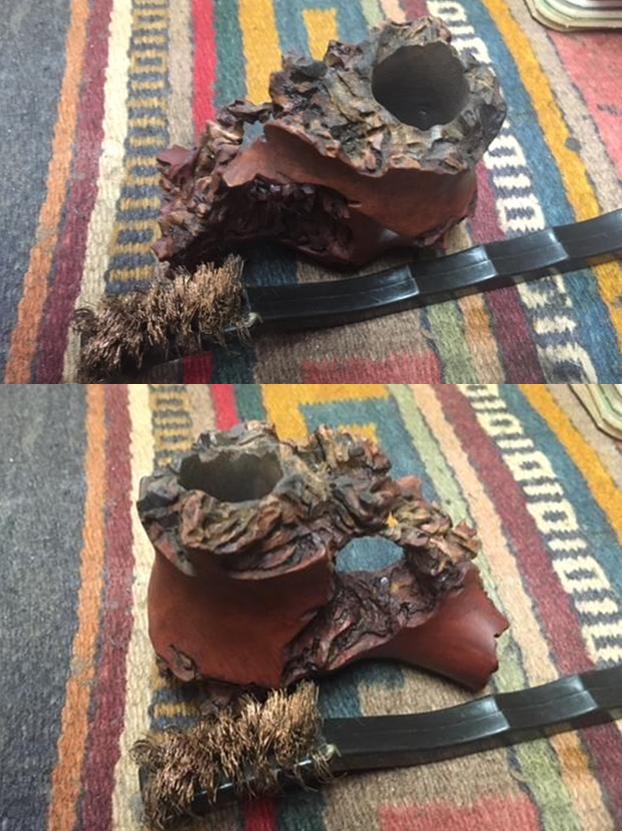
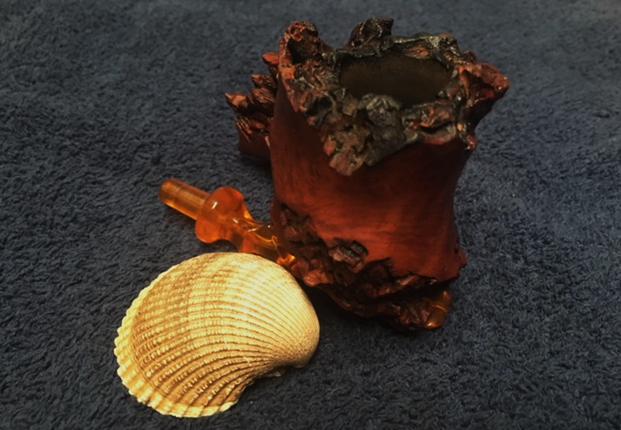
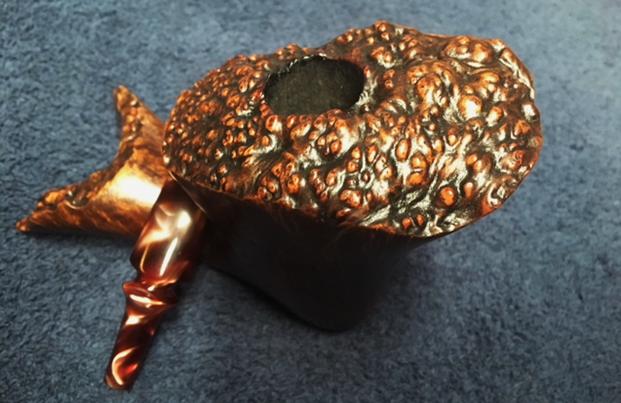
 I slipped the loose brass shank cap/band off the shank and used a tooth pick to put some all-purpose glue around the shank end. I pressed the band in place on the shank and wiped off the excess glue that squeezed out with a damp cotton pad.
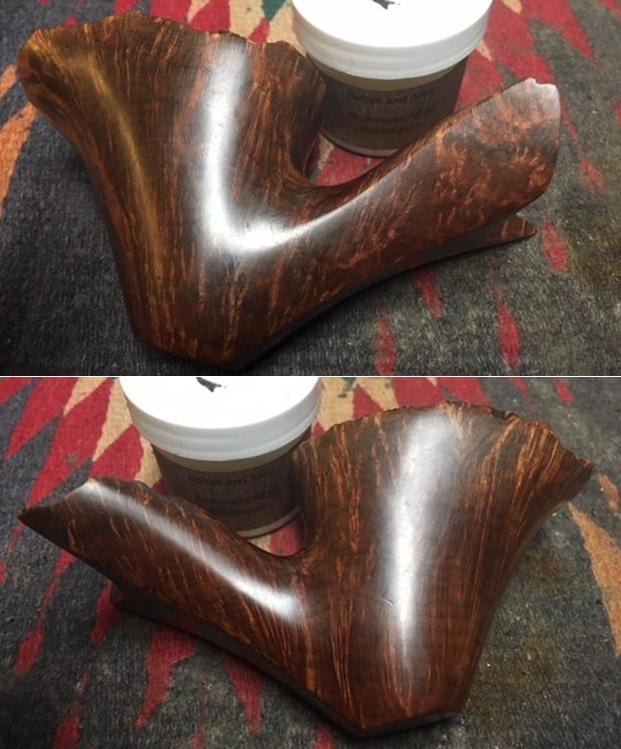
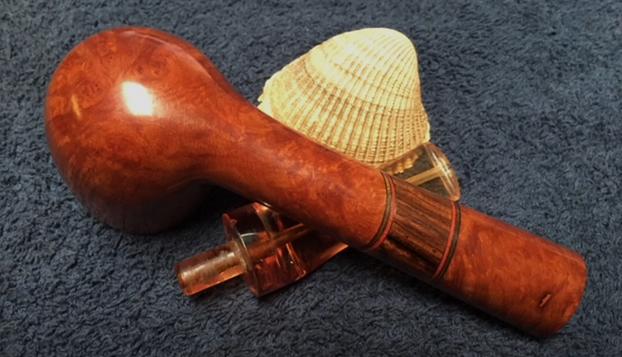
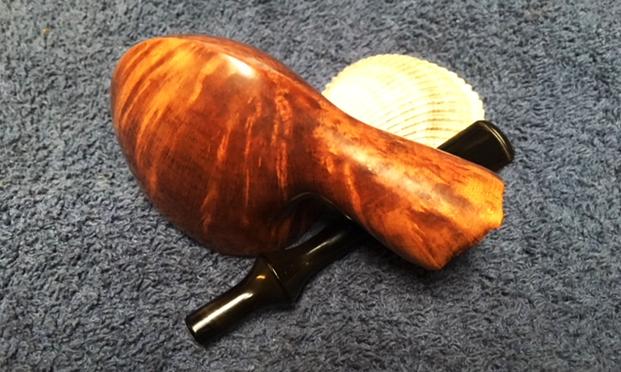
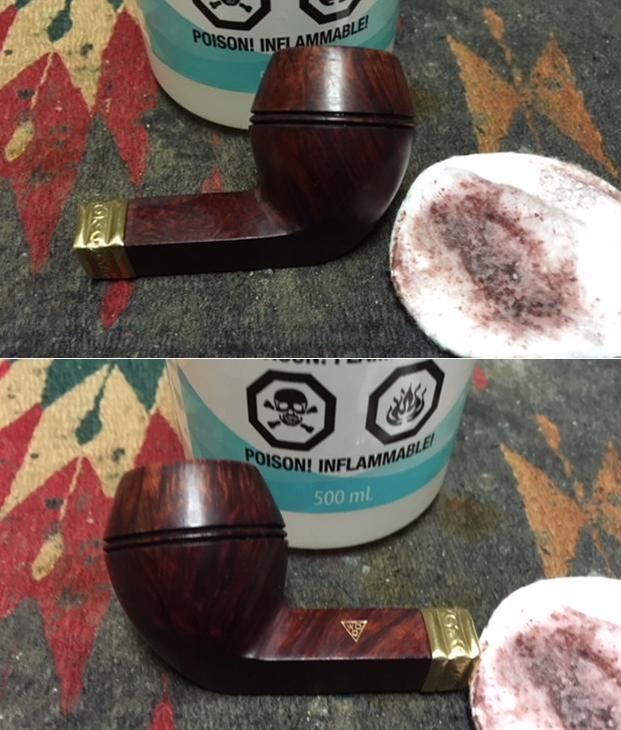
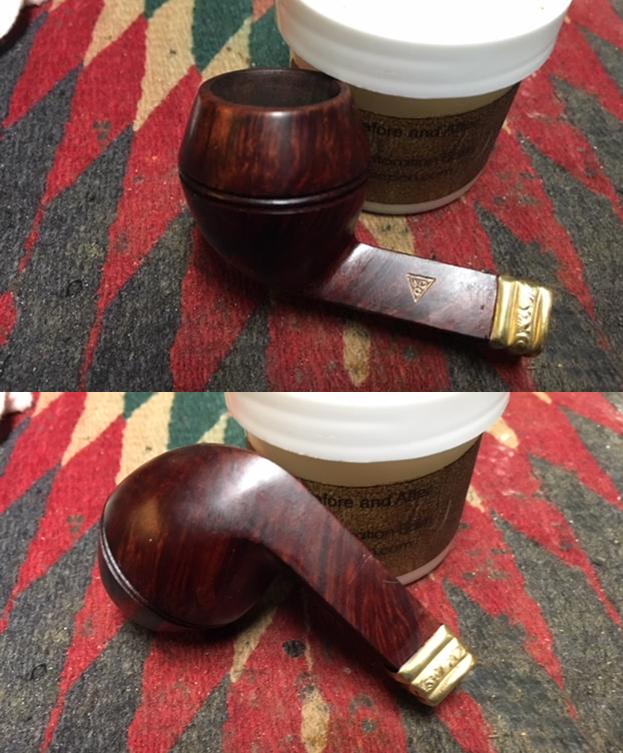
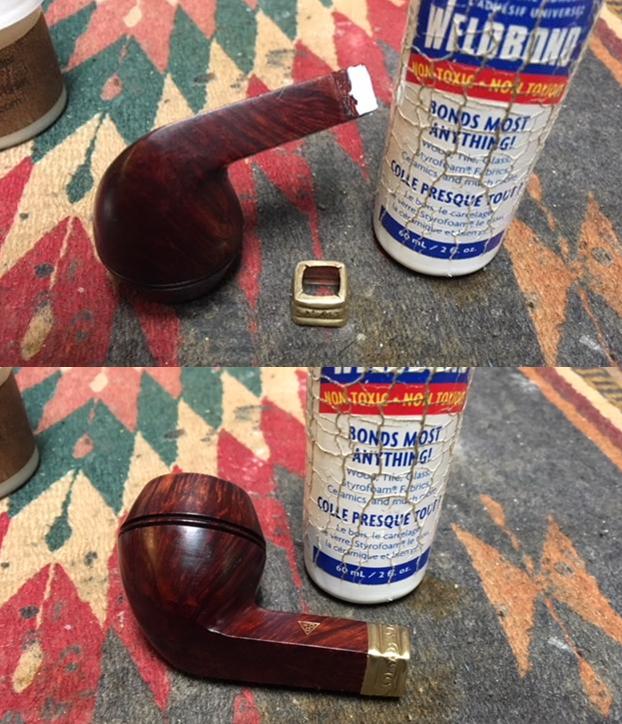 The briar was clean but dried out and in need of some deep cleaning. I rubbed the bowl down with Before & After Restoration Balm to deep clean the briar bowl and shank. The product works to clean, enliven and protect the briar. I hand rubbed it with my fingers, working it into the exterior of the pipe. I wiped it off and buffed it with a soft cloth to polish it. The pipe really began to have a rich shine. I took some photos of the bowl at this point to mark the progress in the restoration.
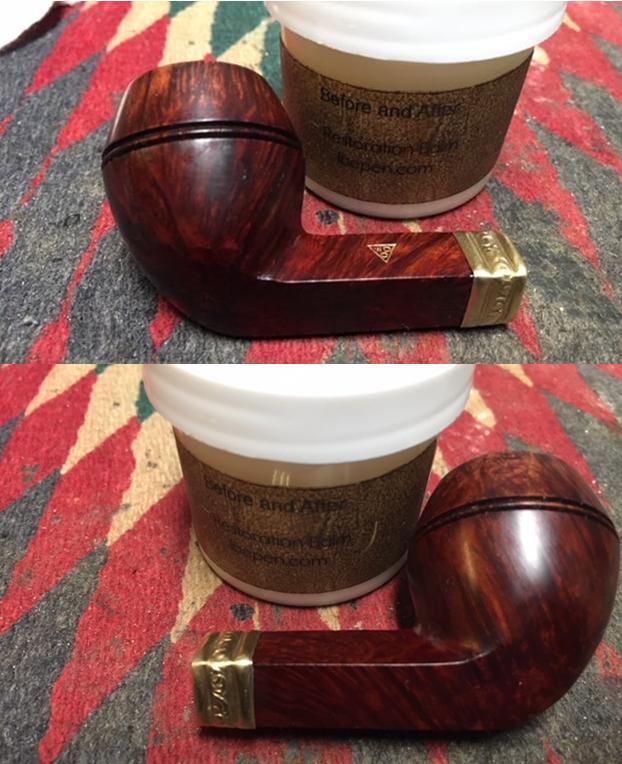
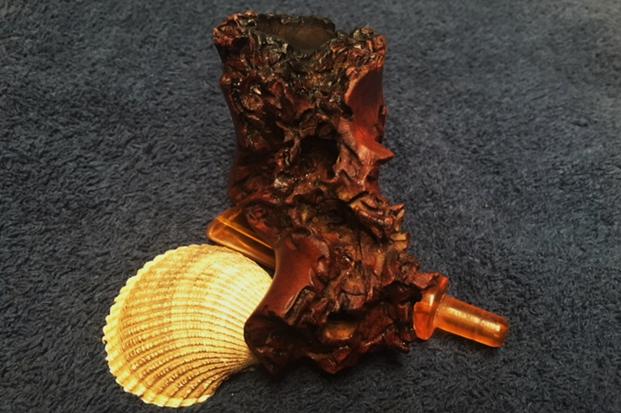
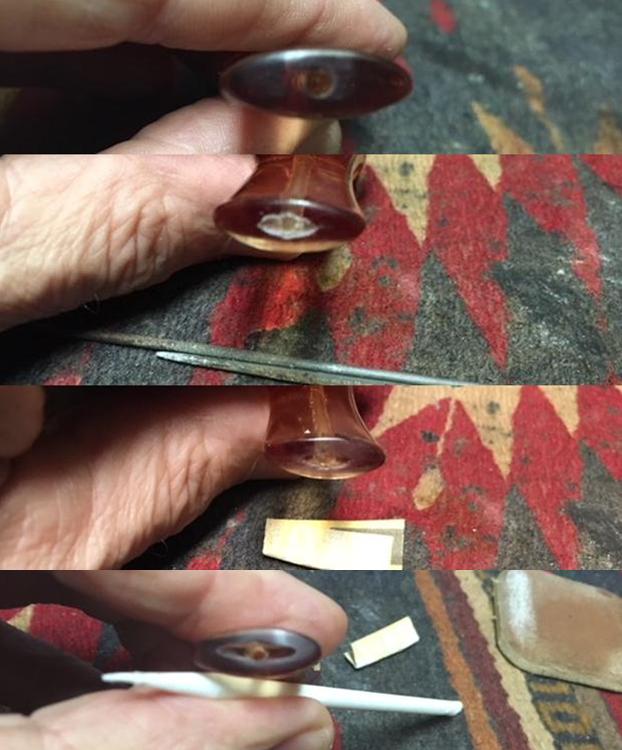
 I set the bowl aside and turned my attention to the stem. I used a needle file to clean up the edges of the button on both sides. I also used the file to smooth out the repairs that Paresh had made to the tooth marks on the surface of the stem. He had done a good job and now it was time to blend them into the surface of the stem.
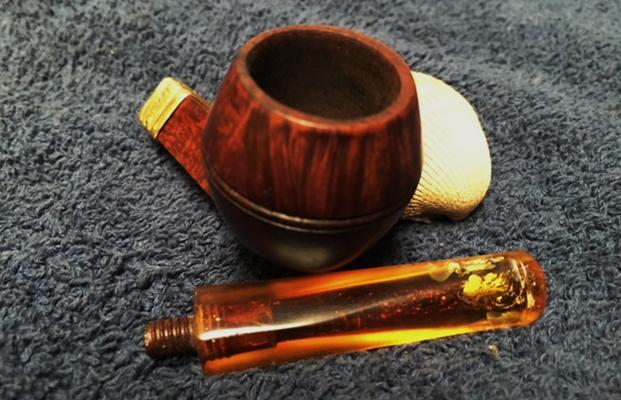
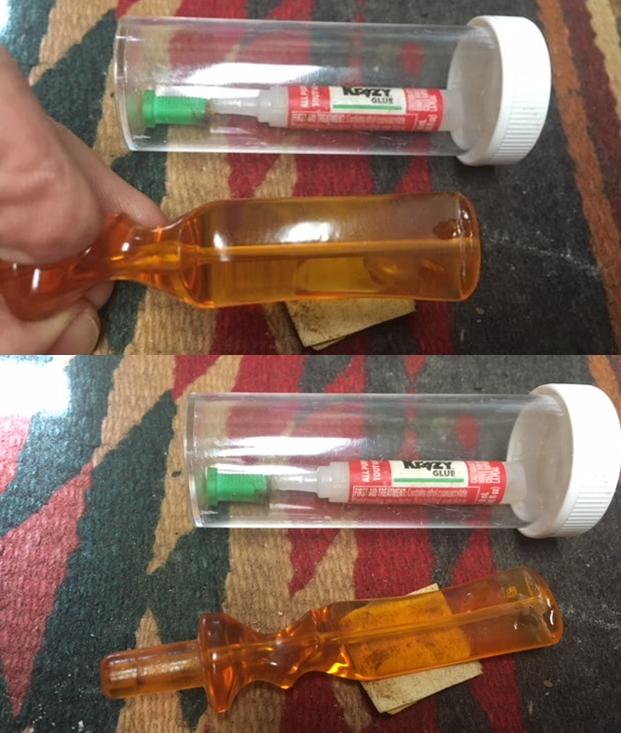
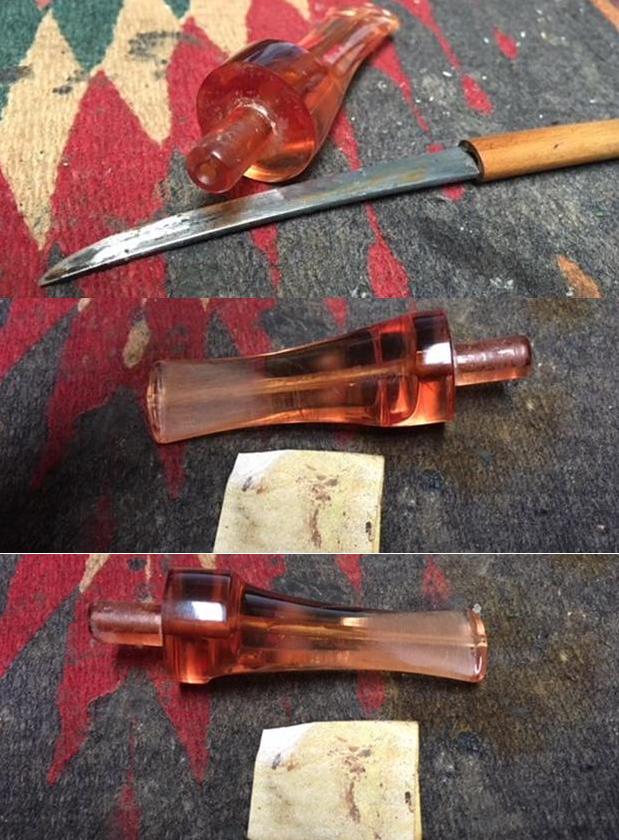
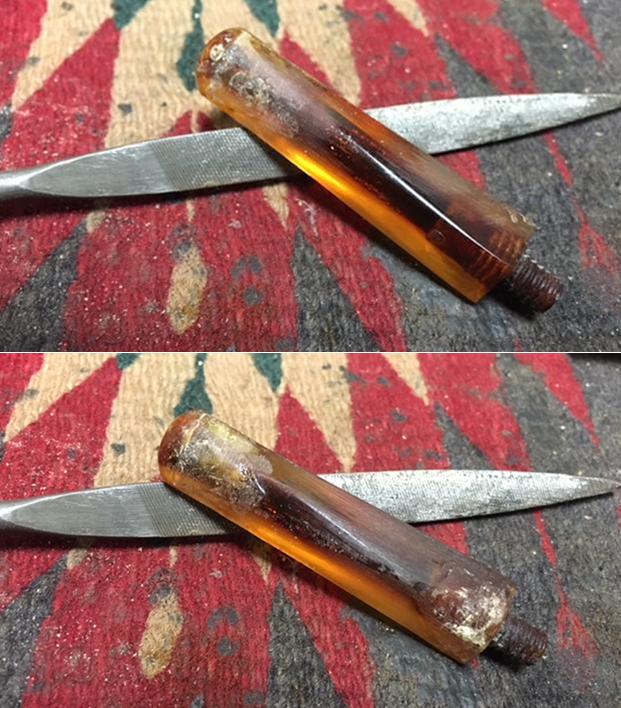 I sanded the file marks out of the stem surface with 220 grit sandpaper and blended the repairs into the surface of the stem. I filled in the missing chunk of Bakelite with multiple layers of amber super glue. I could have used clear glue but I had the amber around and it is a thicker product so it used it. I use layers so that the repair does not get to thick. It makes the drying time shorter and I think it gives a better bond.
 I laid the stem aside and went to bed. I touched up the final layer of glue in the morning and went to work. The stem had the entire day to cure. When I returned in the evening I sanded the repaired area with 220 grit sandpaper and reshaped the entire stem surface to make the flow of the taper correct. I would need to add some more glue to the patch but progress was being made. Slowly but surely I was conquering this repair.
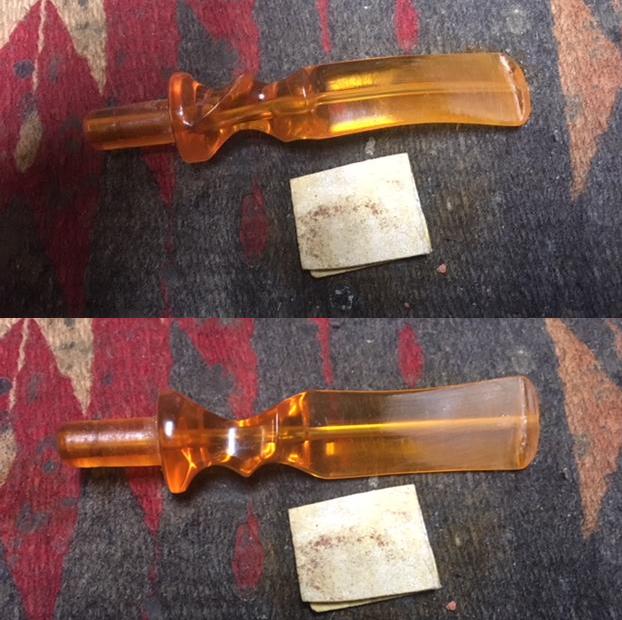
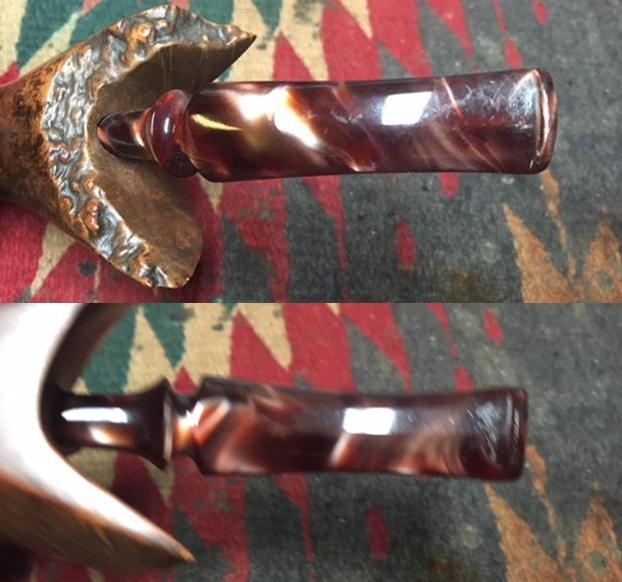
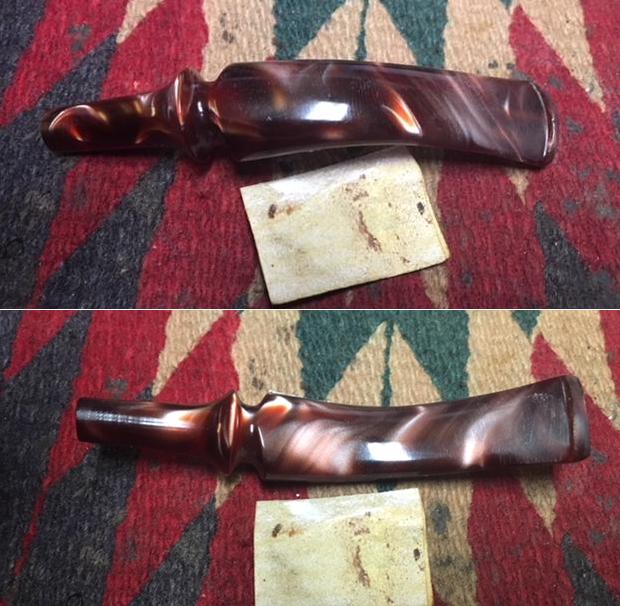
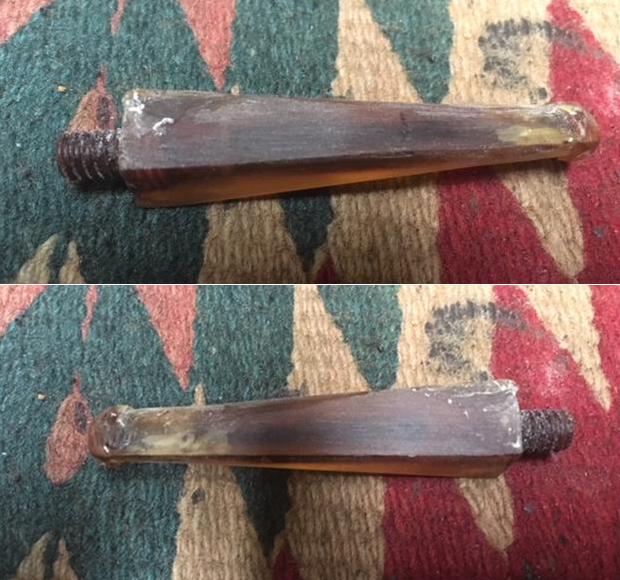 I touched up the glue repairs and wiped the stem down with Obsidian Oil. I took the next two photos to send on Whatsapp to Paresh and Abha. The stem is looking really good. There is still a lot of polishing to do but it is getting there.
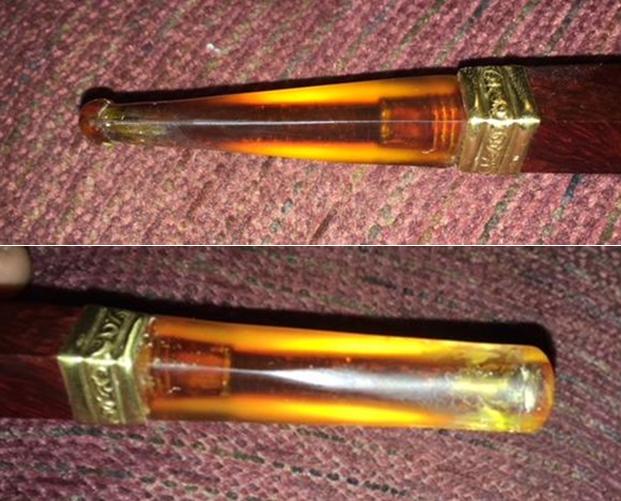 I polished the stem with 400 grit wet dry sandpaper to remove the scratches and polish the Bakelite.
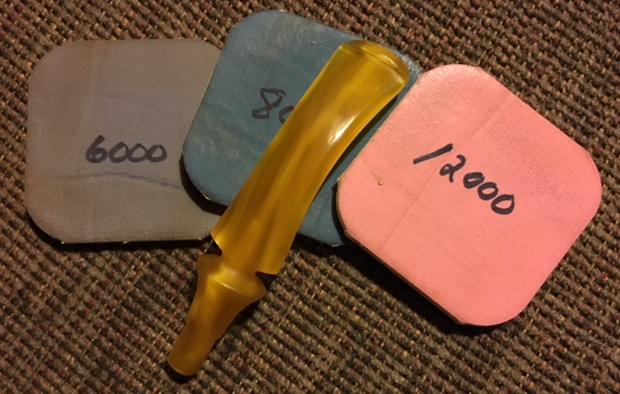
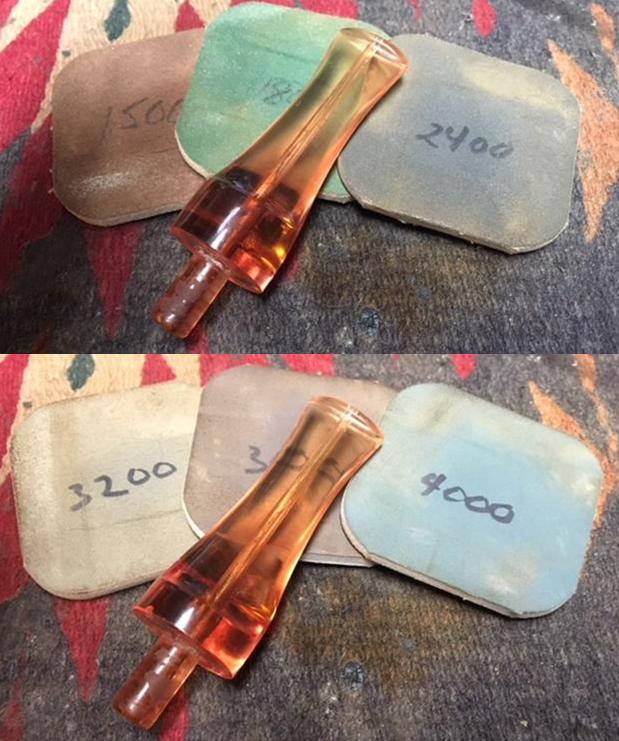
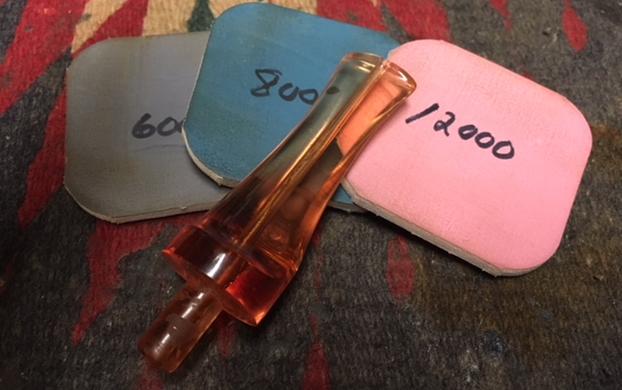
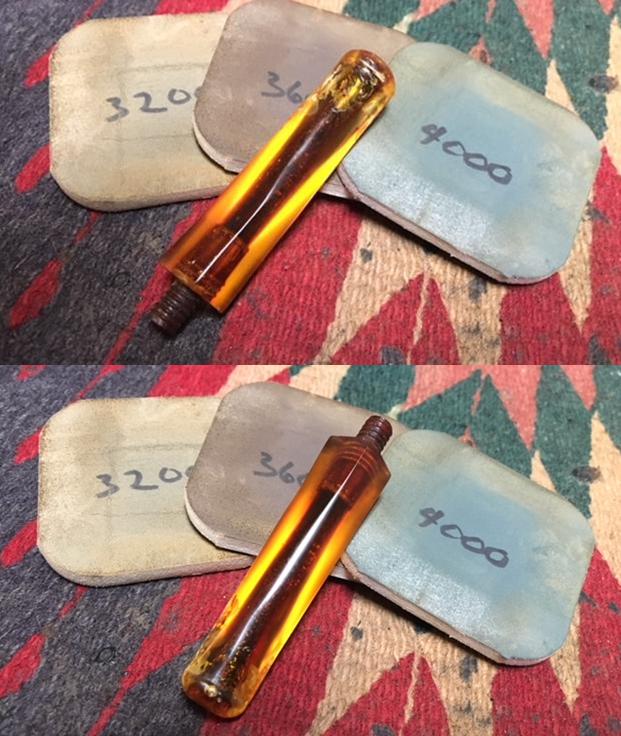
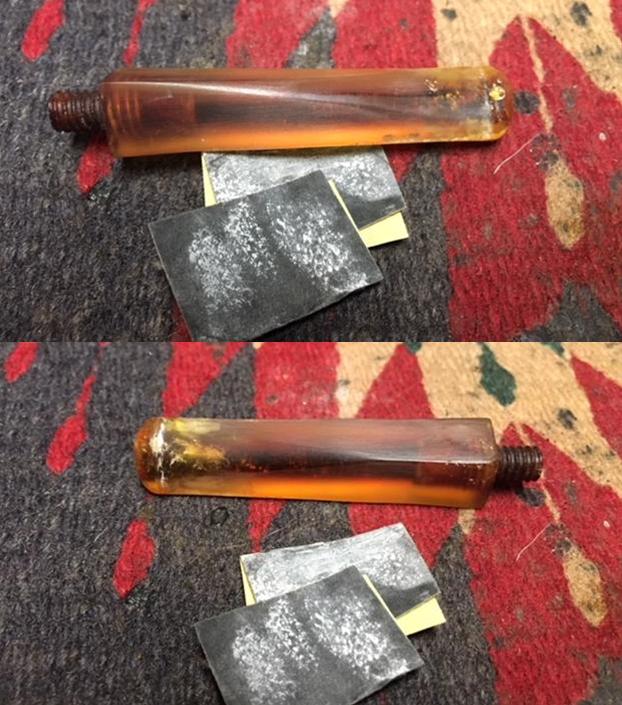 I polished the stem with micromesh sanding pads – wet sanding it with 1500-2400 grit pads and dry sanding with 3200-12000 grit pads. I wiped it down with Obsidian Oil after each sanding pad. I gave it a final coat of oil and set it aside to dry.
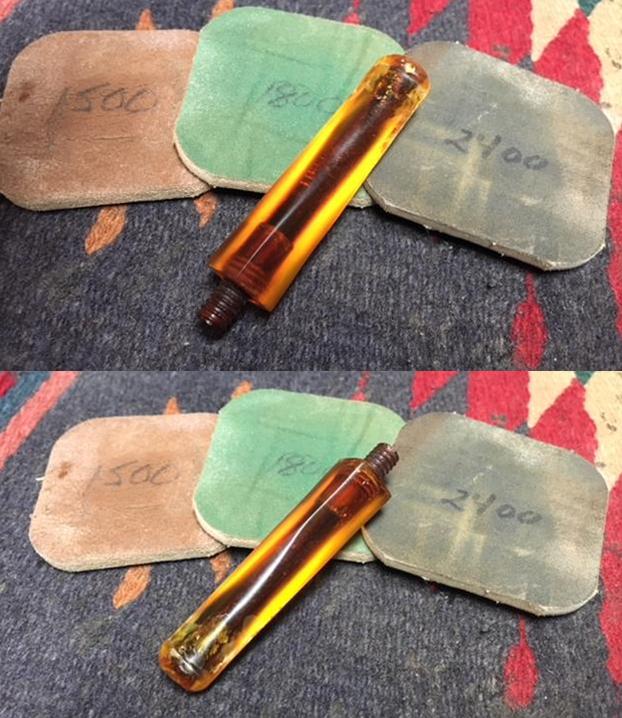
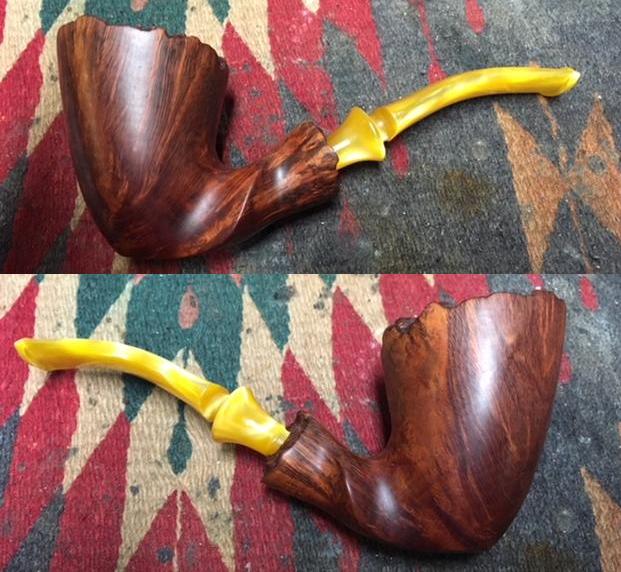
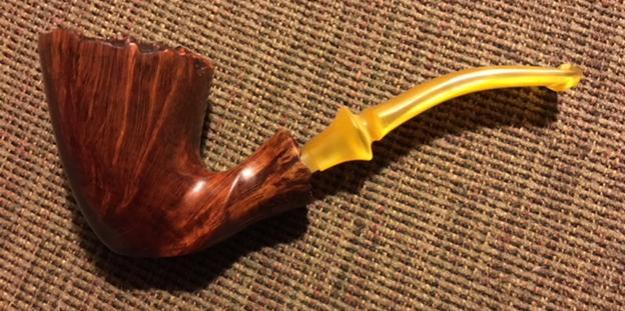
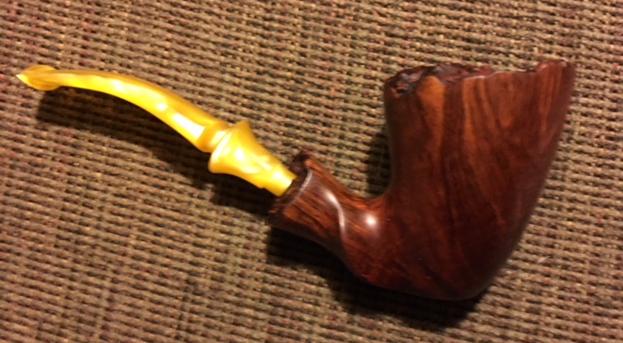
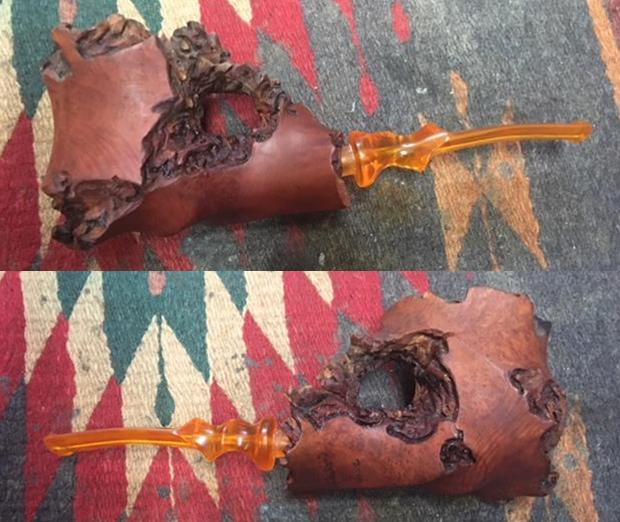
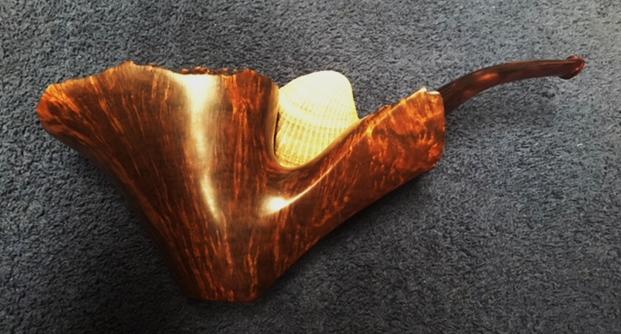
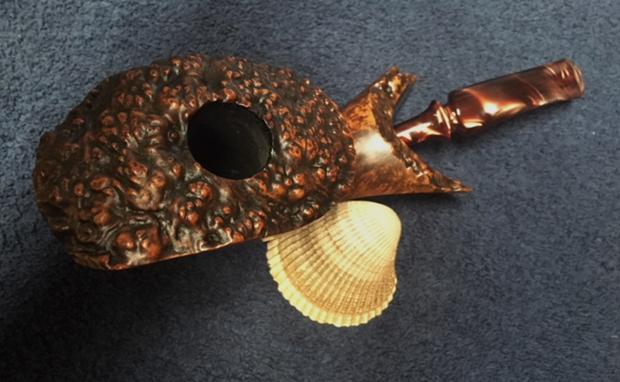
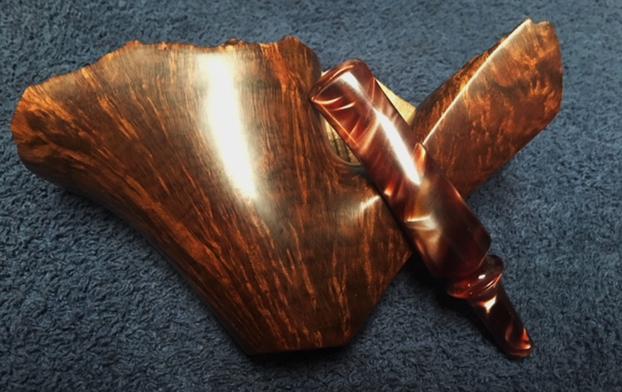
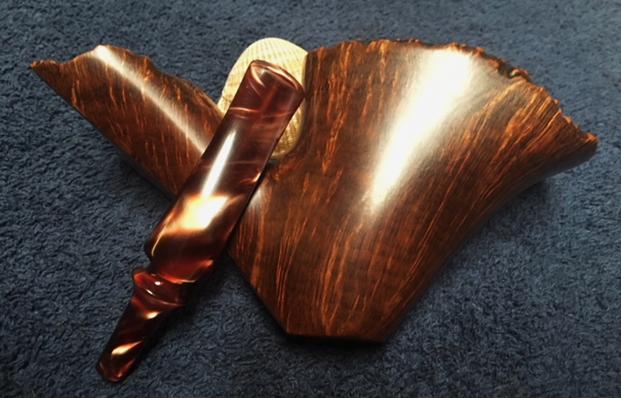
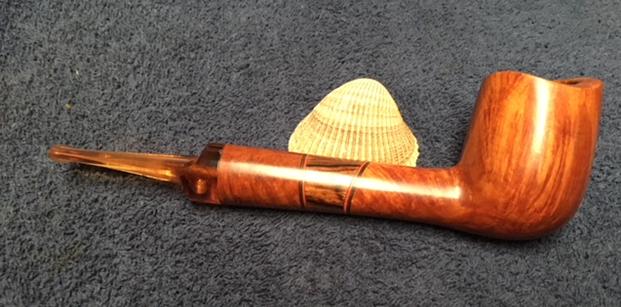
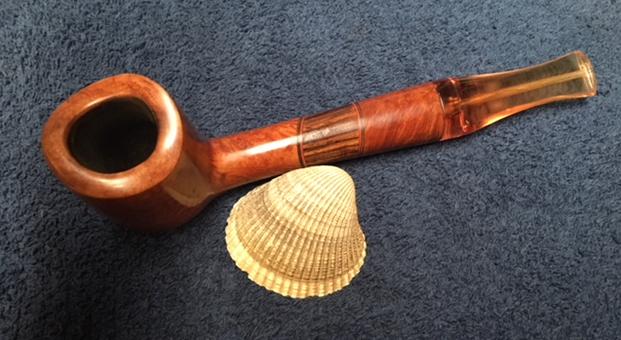
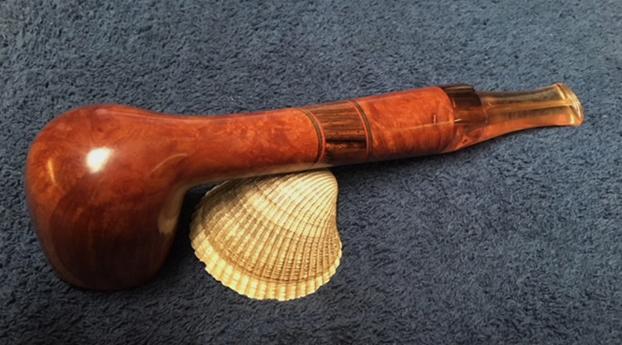
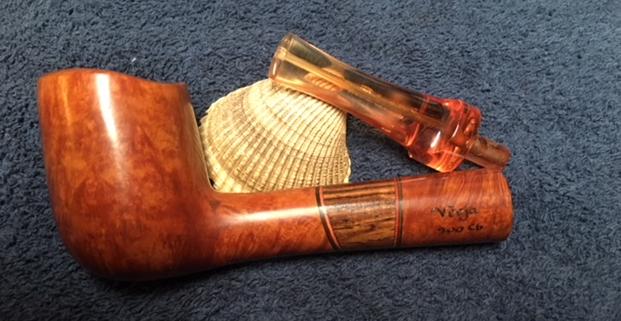
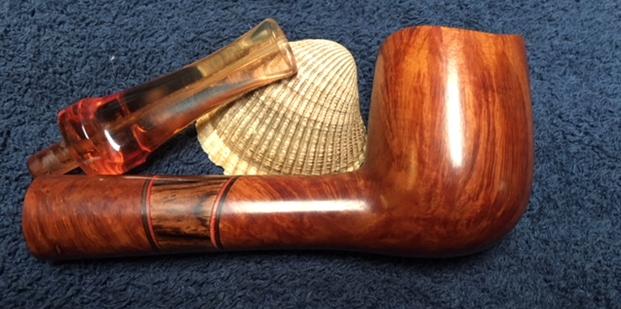
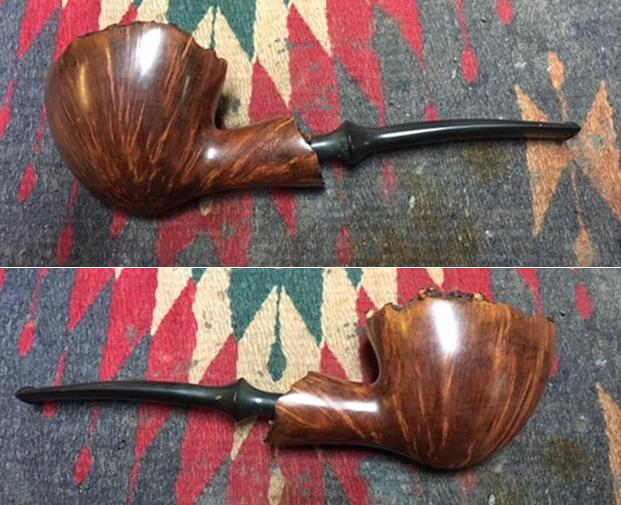
 I carefully polished stem and bowl with Blue Diamond (using a soft touch) to polish out the remaining small scratches. I gave the bowl and the stem multiple coats of carnauba wax and buffed the pipe with a clean buffing pad to raise the shine. I gave the stem several coats of Conservator’s Wax and hand buffed it with a soft cloth. I hand buffed it with a microfiber cloth to deepen the shine. The pipe polished up pretty nicely. The transparent medium brownish red stain worked really well with the golden/amber Bakelite stem. The finished pipe is shown in the photos below. The dimensions of the pipe are Length: 4 3/4 inches, Height: 1 3/4 inches, Outer diameter of the bowl: 1 inch, Chamber diameter: ¾ inches. This is the first of three of Paresh’s Grandfather’s pipes that he sent me to finish. I will set it aside and when the others are finished I will pack them up and send them back to India. I look forward to hearing what he thinks of it once he gets to load it with his favourite tobacco and carry on the pipe man’s legacy of his Grandfather. Thanks for walking through this restoration with me as I worked over this beauty.