Blog by Paresh Deshpande
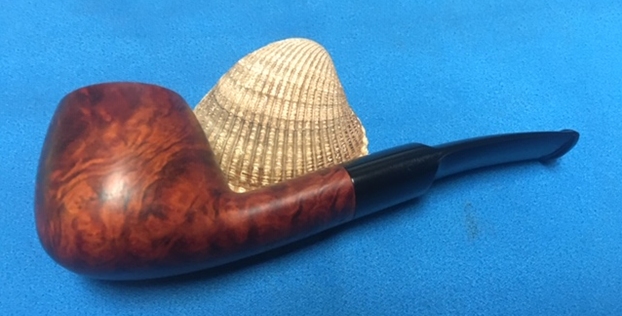
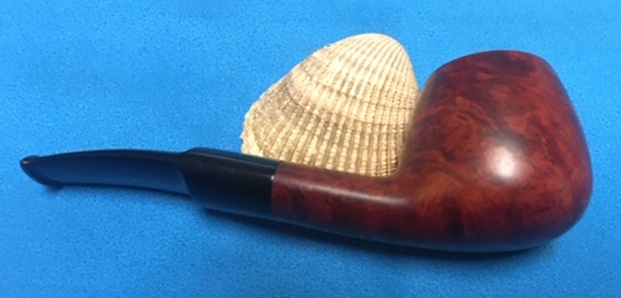
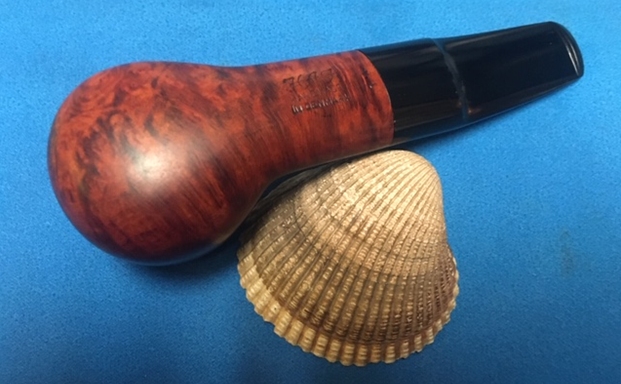
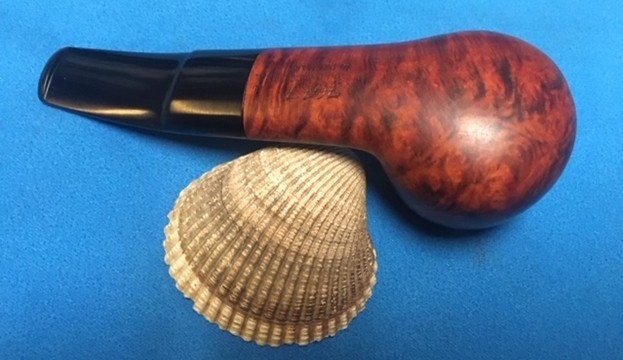
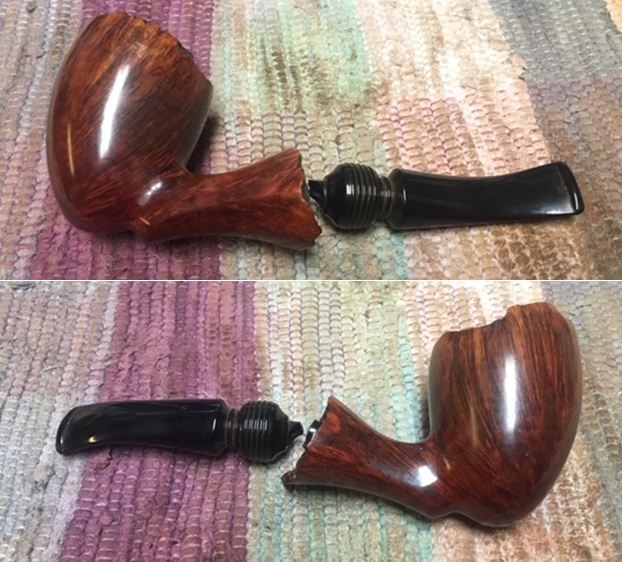
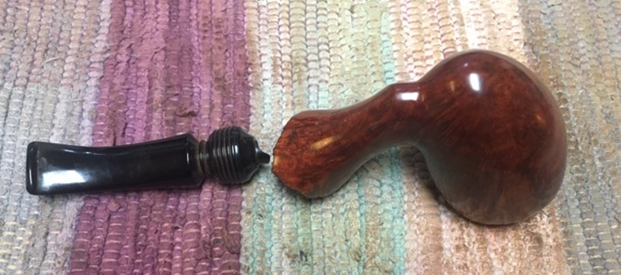
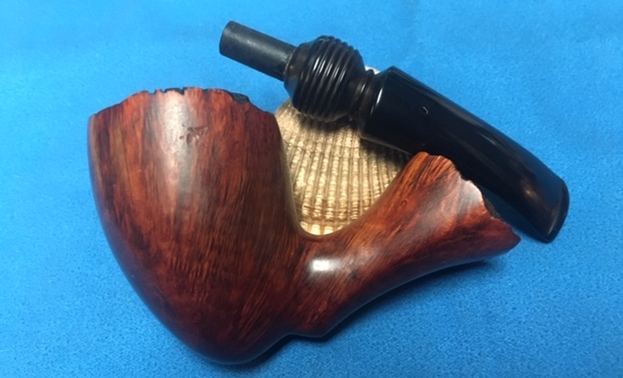
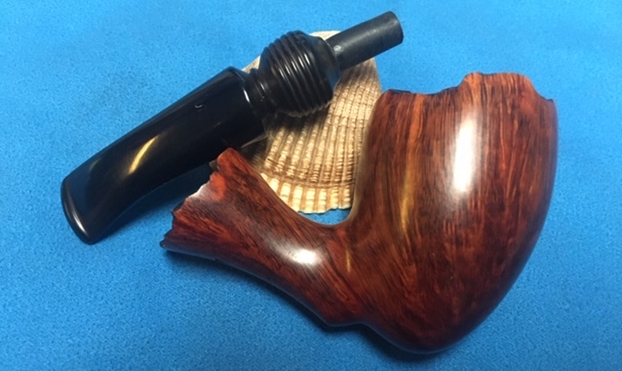
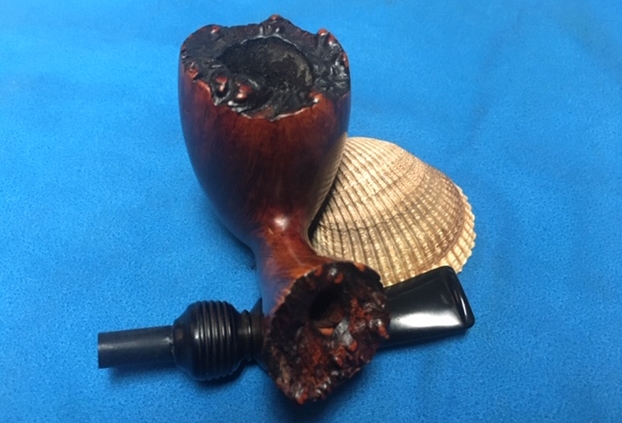
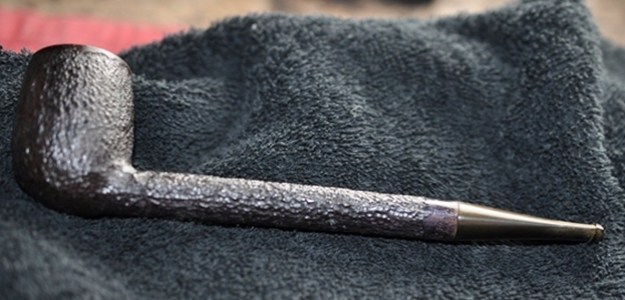
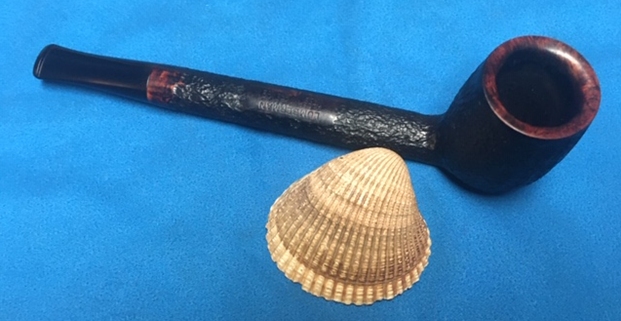
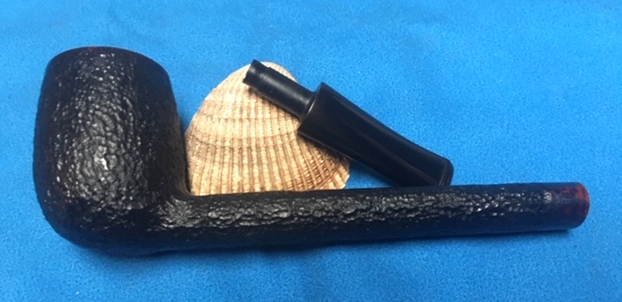
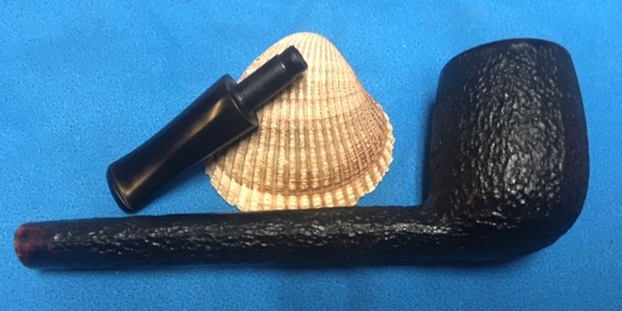
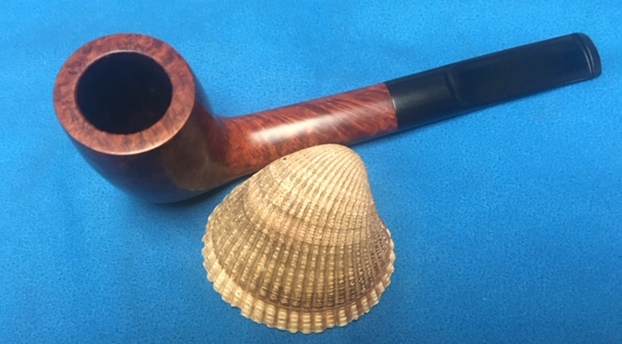
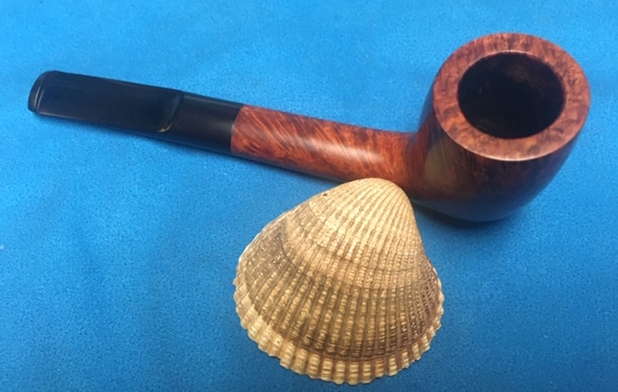
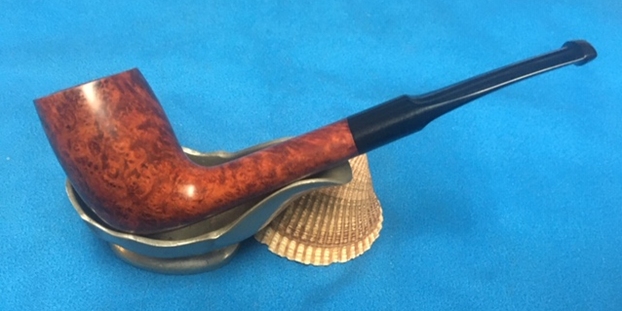
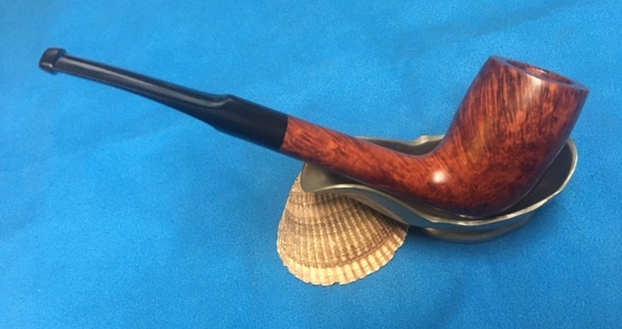
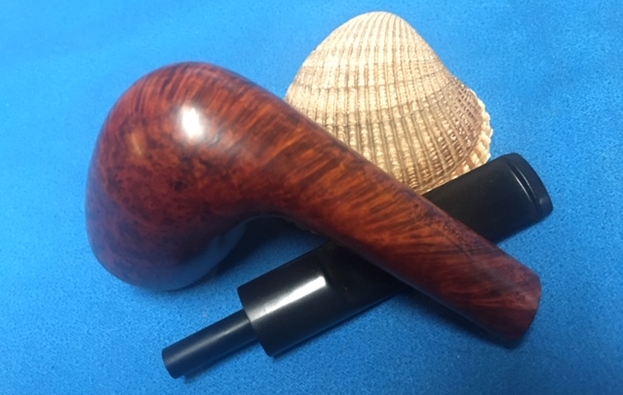
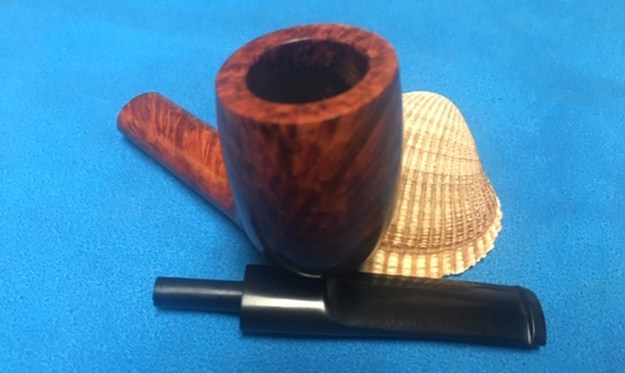
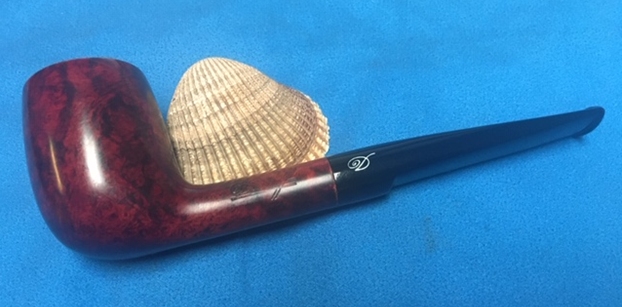
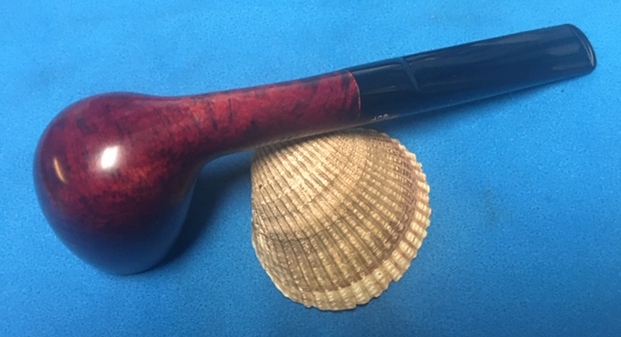
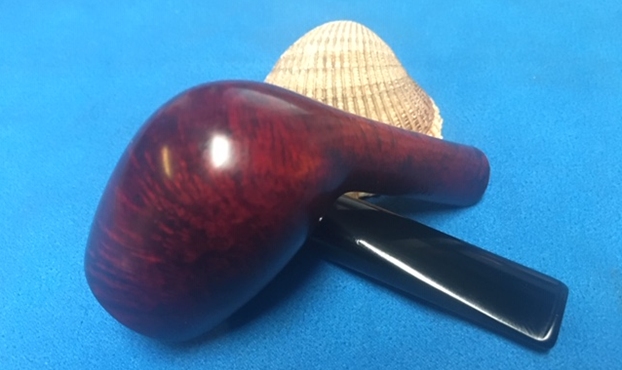
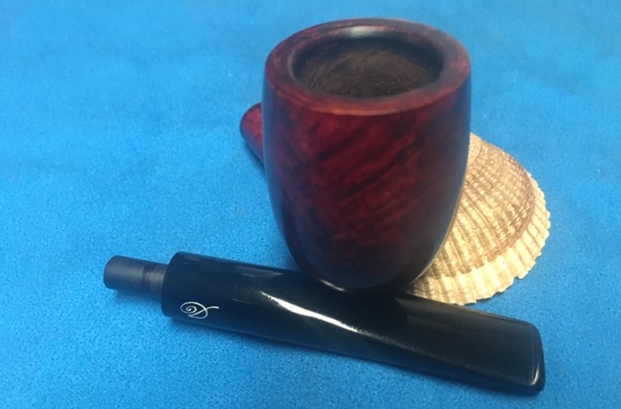
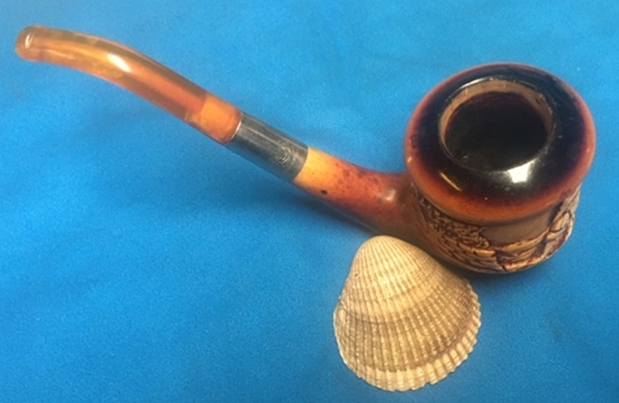
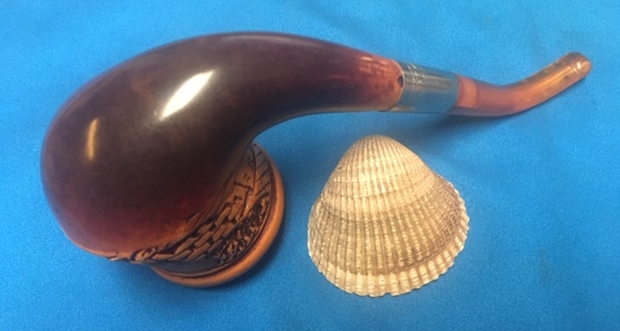
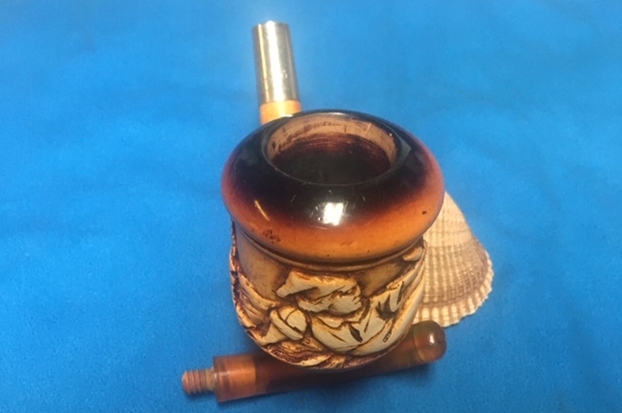
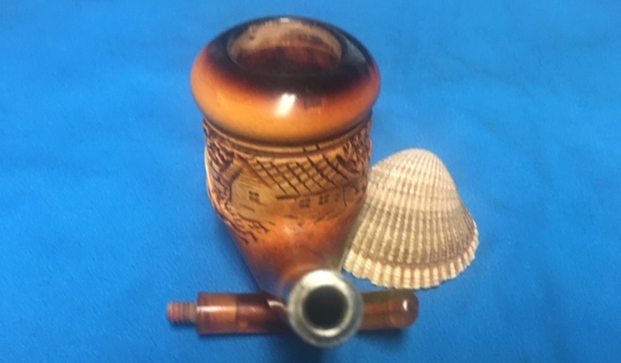
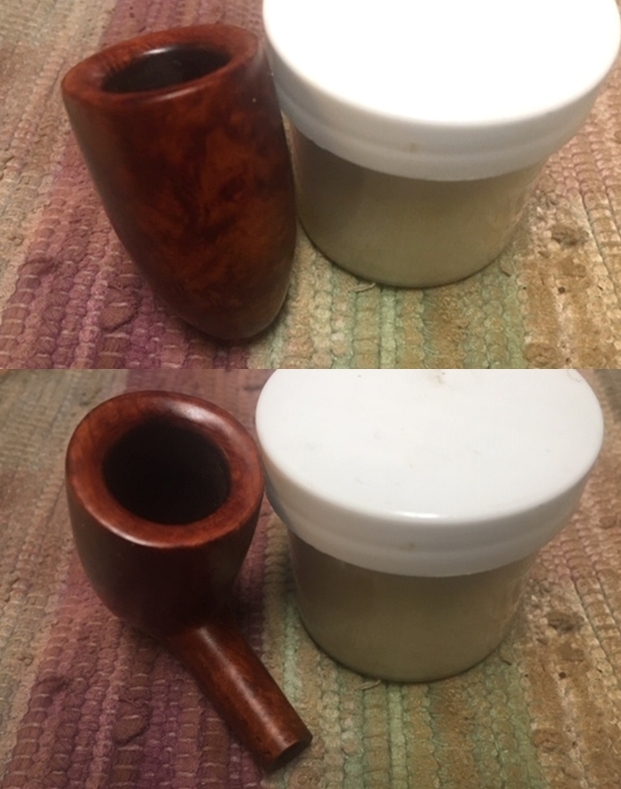
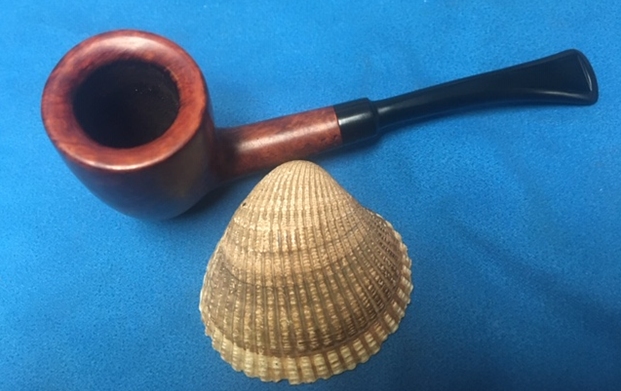
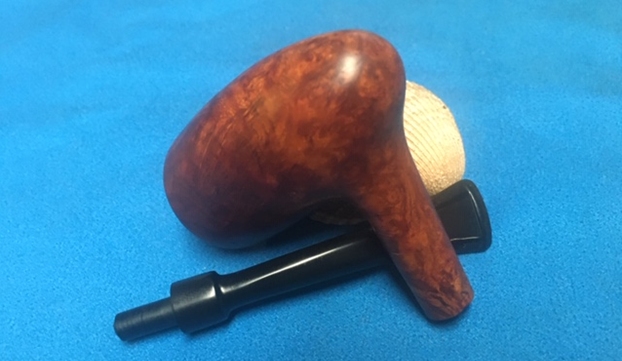
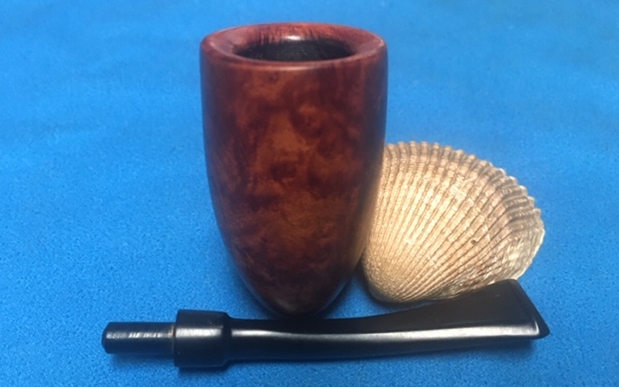
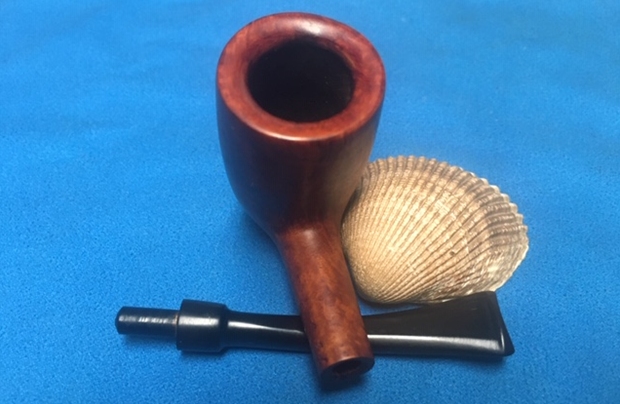
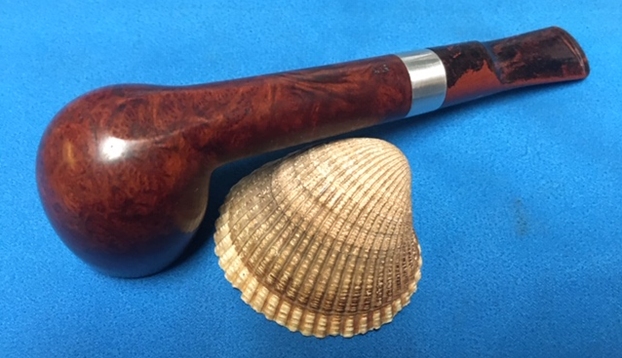
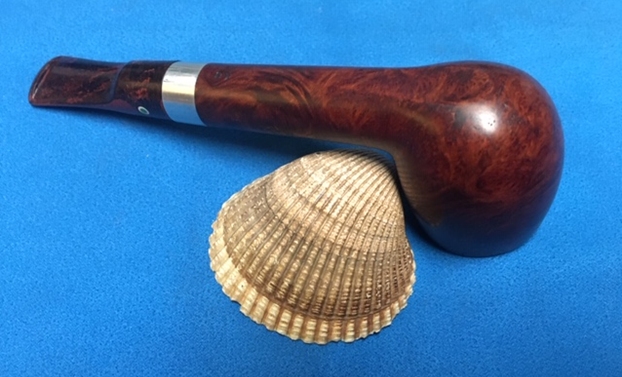
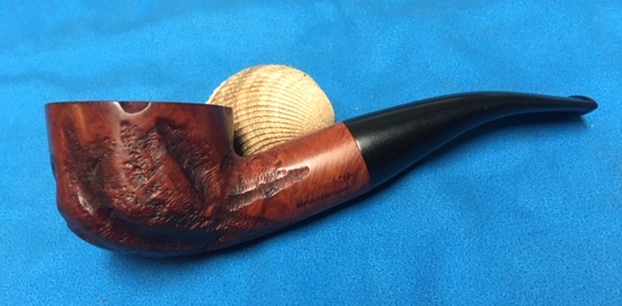
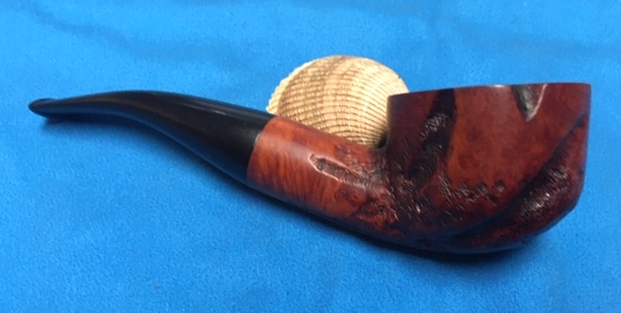
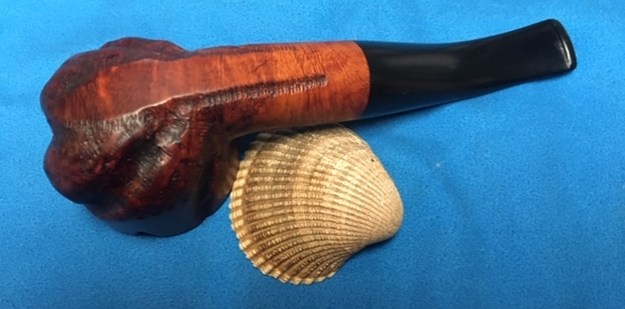
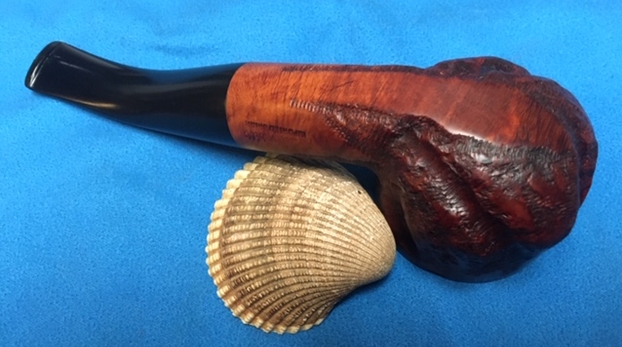
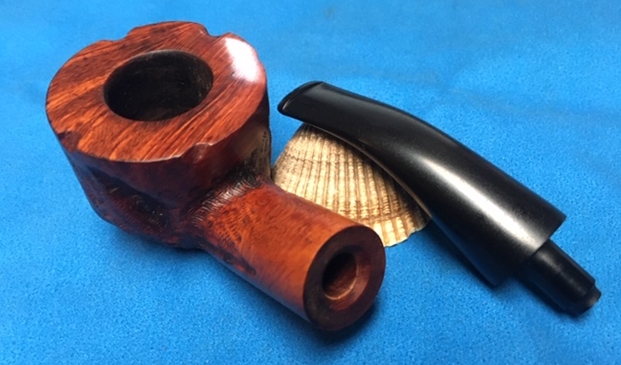
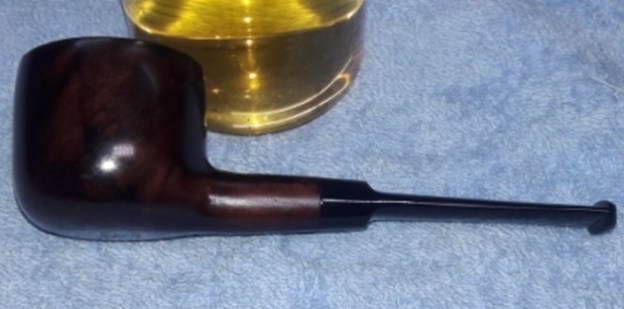
I had purchased this pipe lot of two unmarked beautiful looking pots on eBay with the intention of either selling or gifting. The price was very low and from the pictures, the pipes screamed quality and appeared solid. Here are a couple of pictures of this pair that were posted by the seller.

 Once the pipes were delivered home (my work place is away from where my family resides), Abha my wife, checked them out and informed me of the following;
(a) Both pipes are similar with only difference being in the size, one is large Pot while the other is a medium.
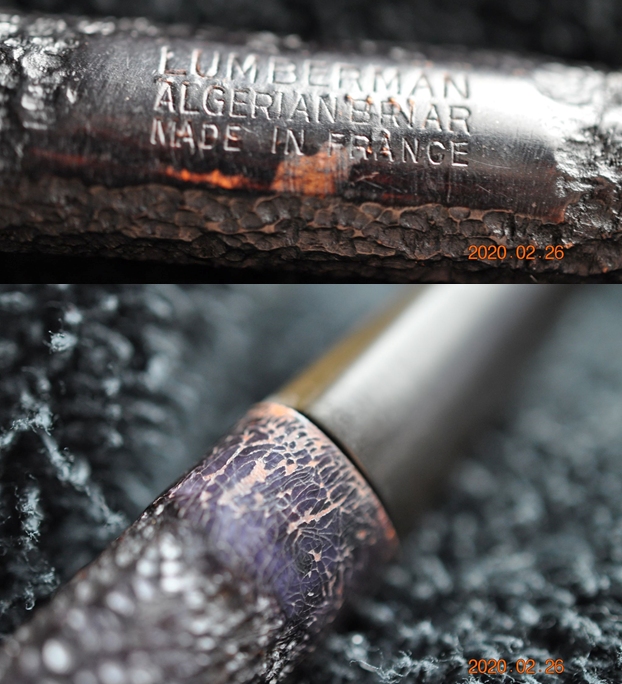
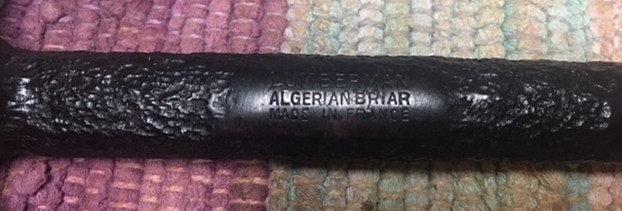
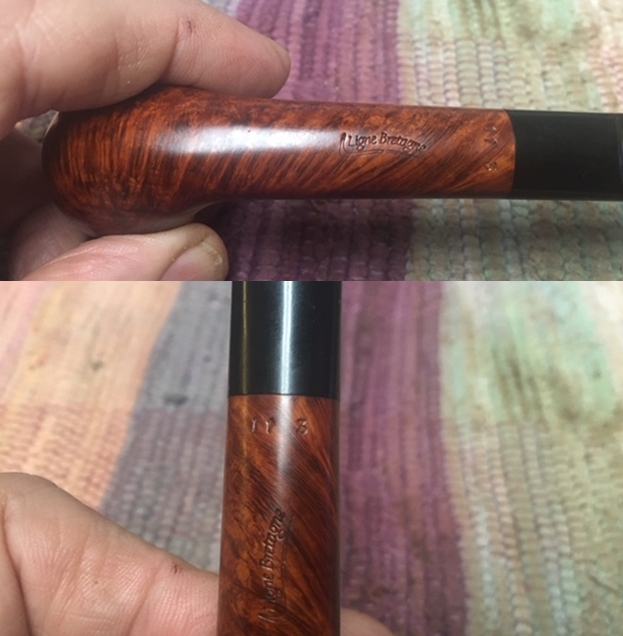
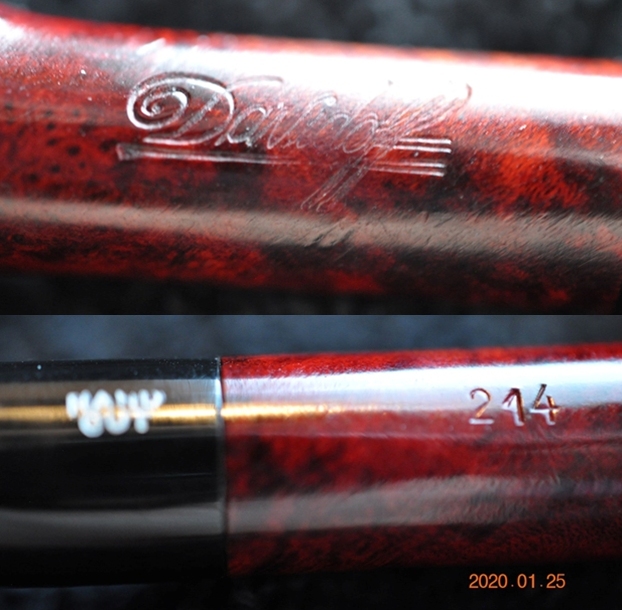
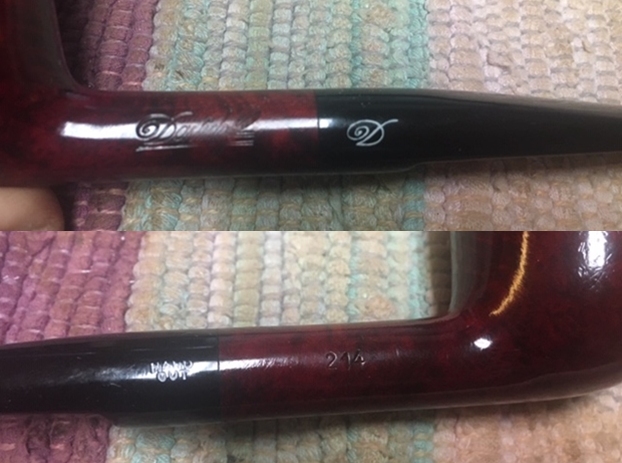
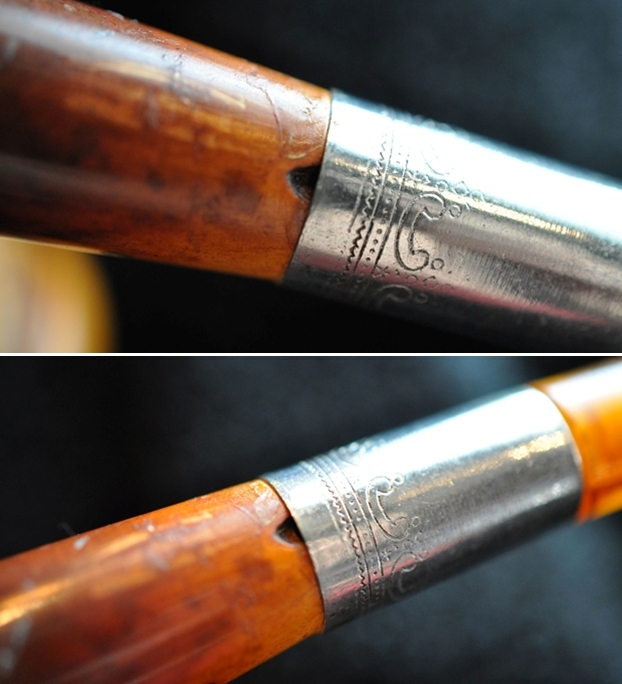
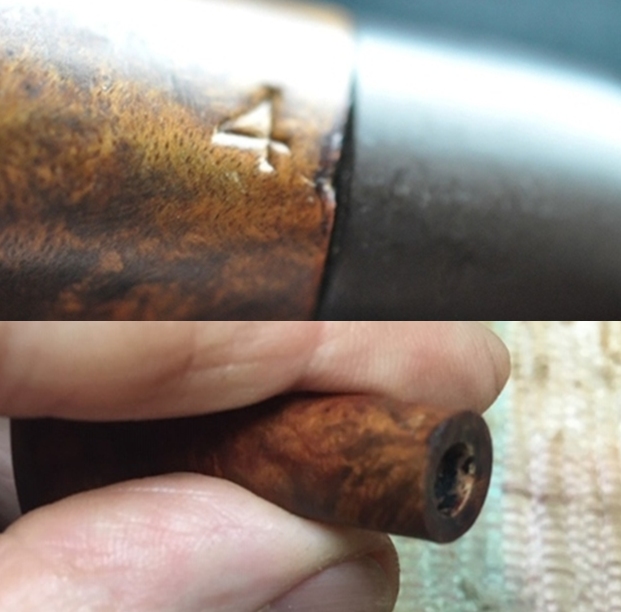
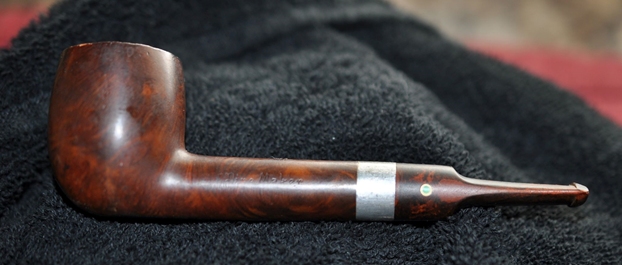
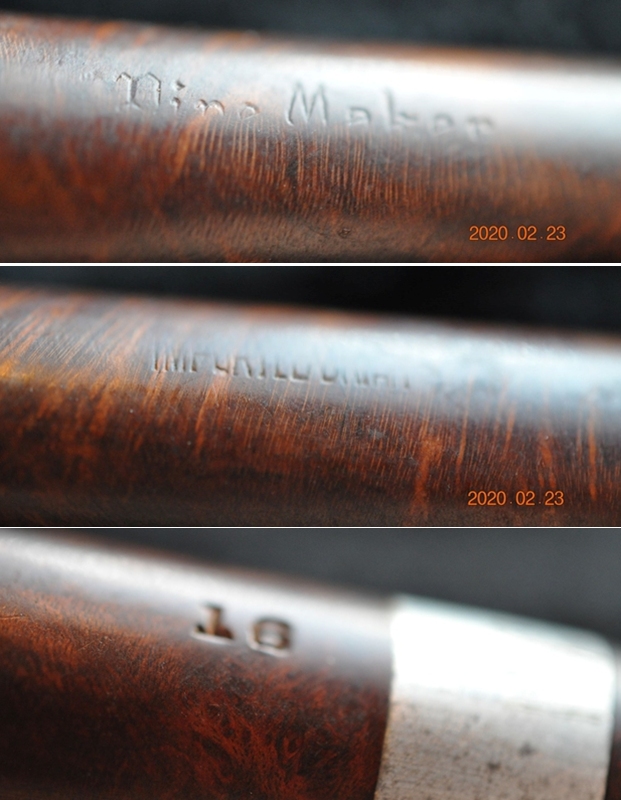
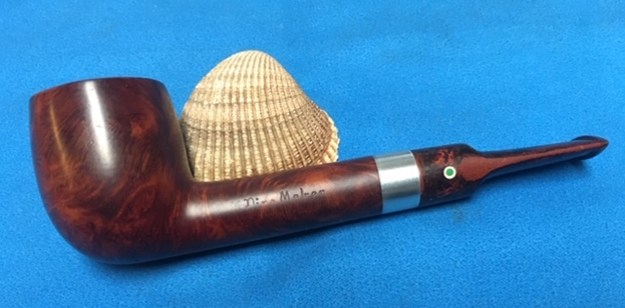
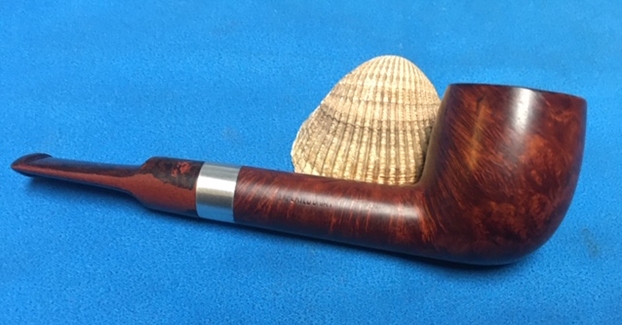
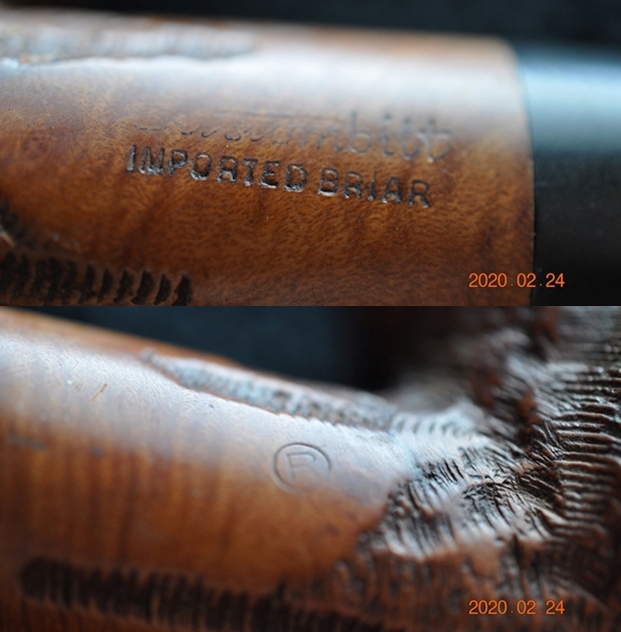
(b) The only stamping seen is on the right side of the shank and reads “MADE IN” over “LONDON, ENGLAND”. The stem is devoid of any stampings. The overall feel of the pipe is that of high quality.
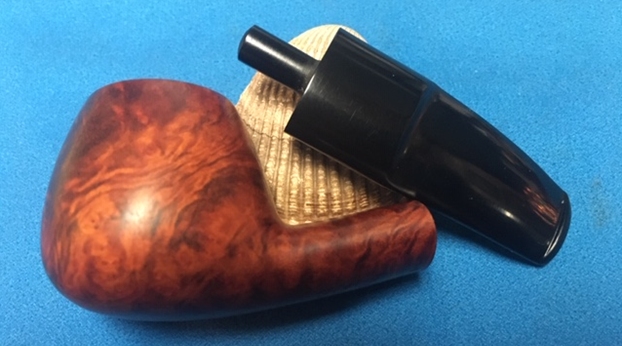
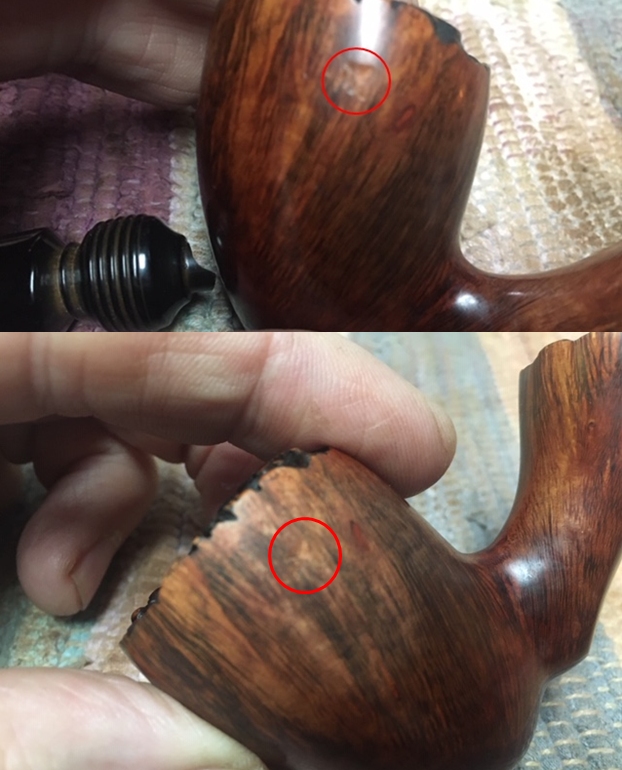
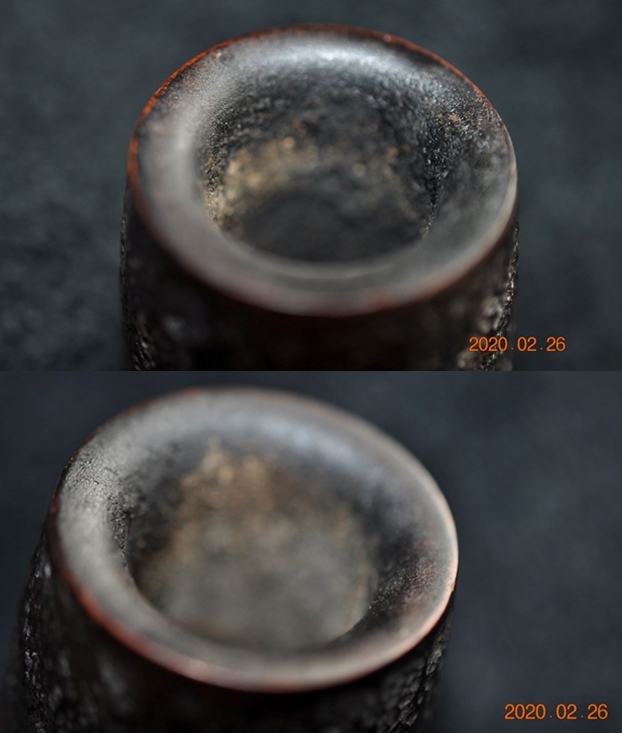
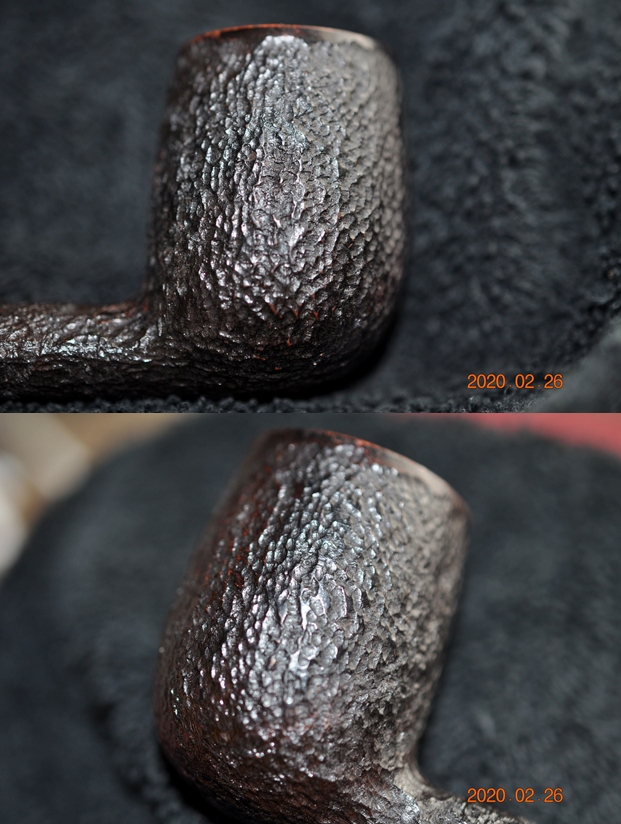
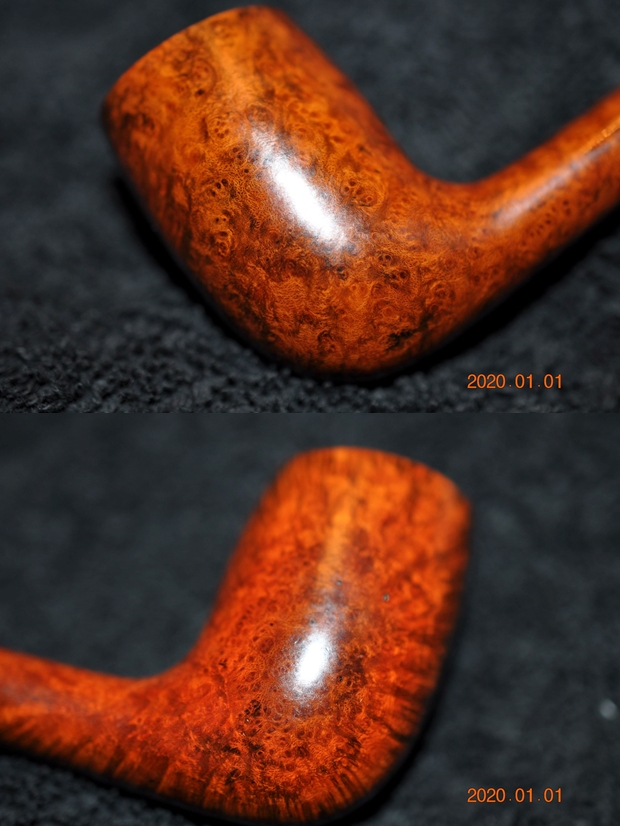
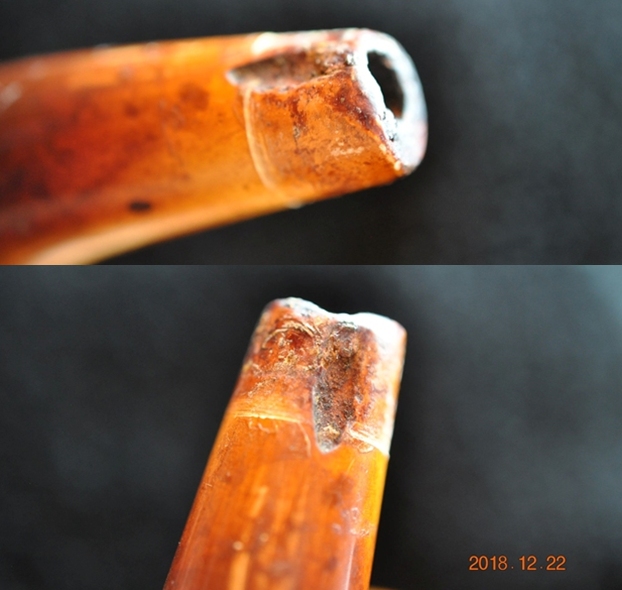
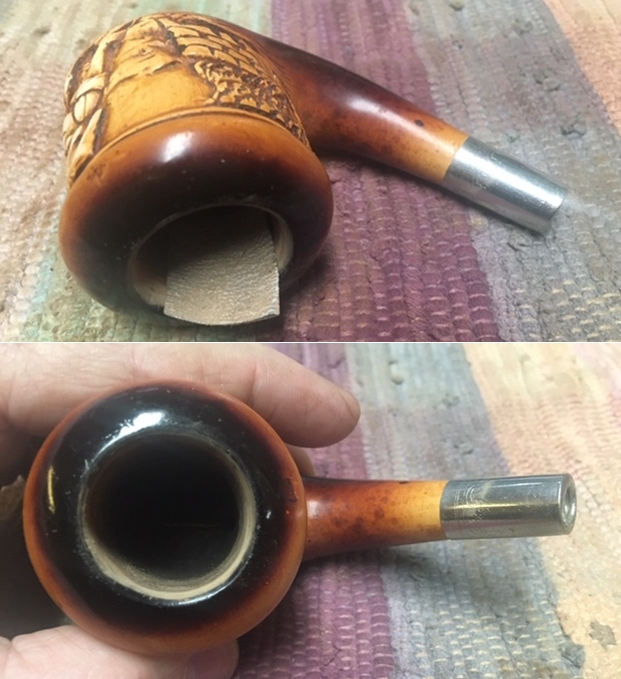
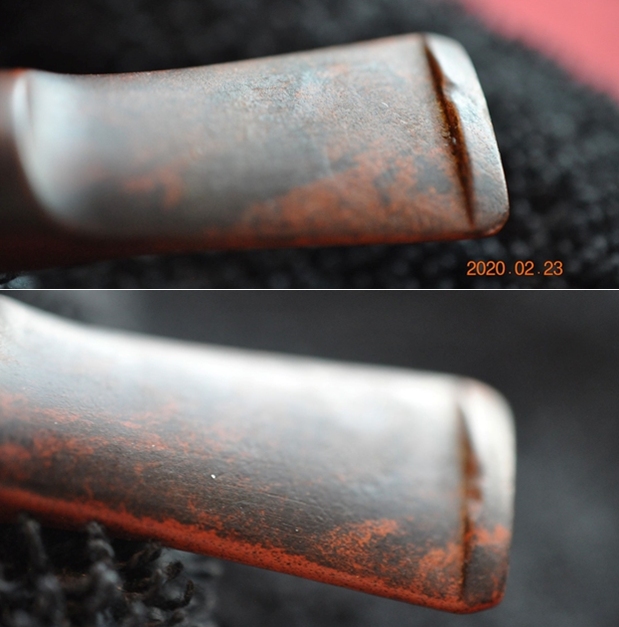
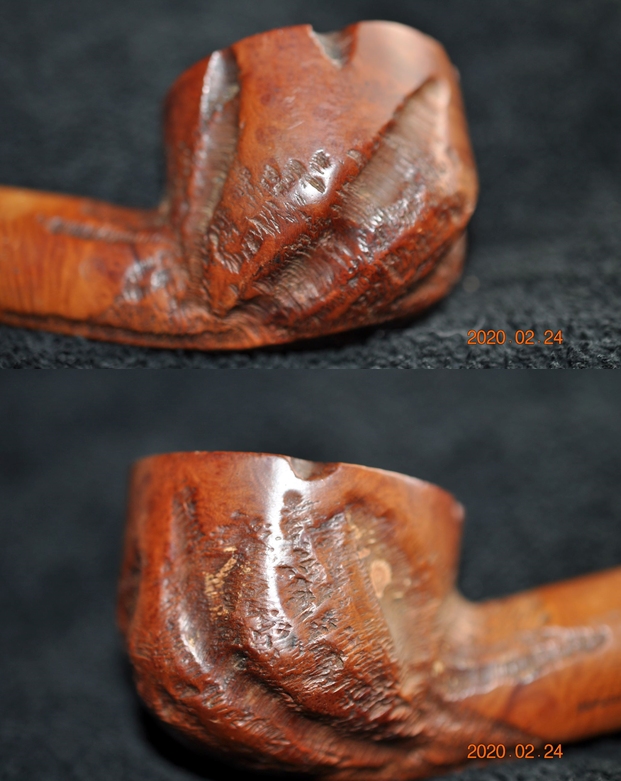
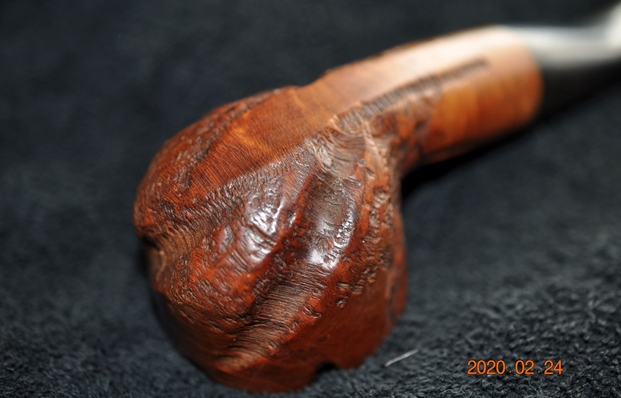
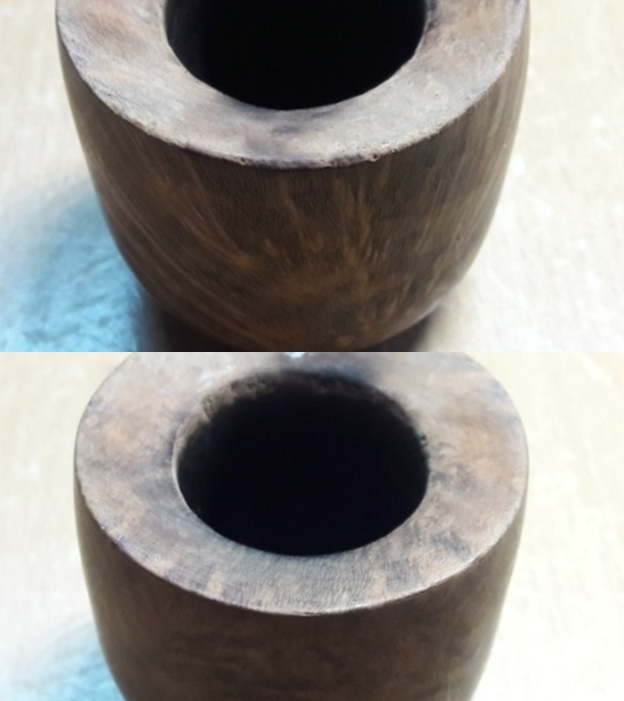
(c) Both pipes have a darkened spot each, the larger one has it on the heel and the other on the bottom left side of the stummel.
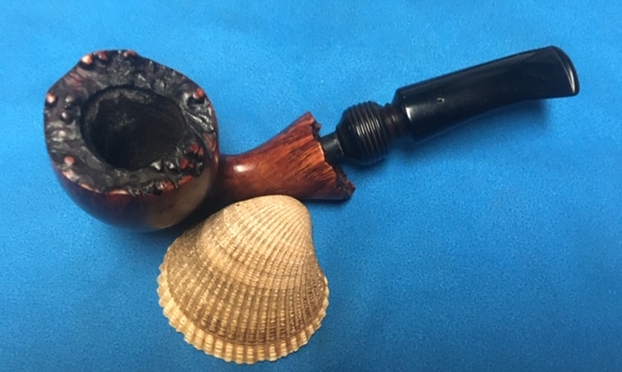
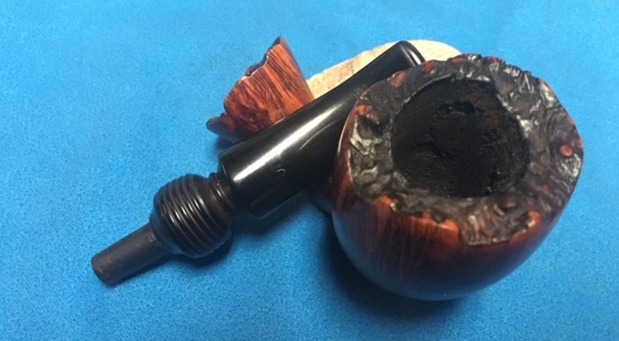
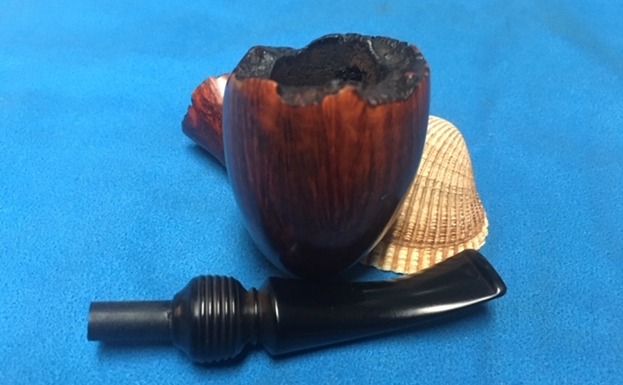
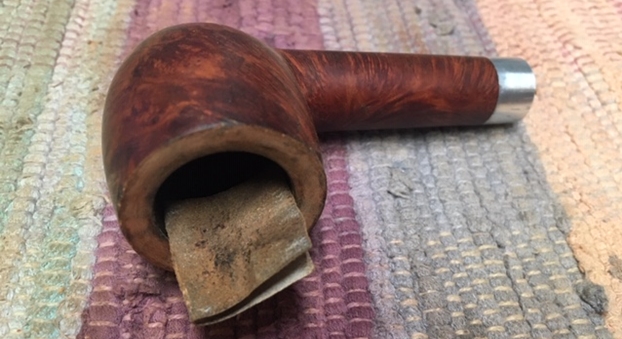
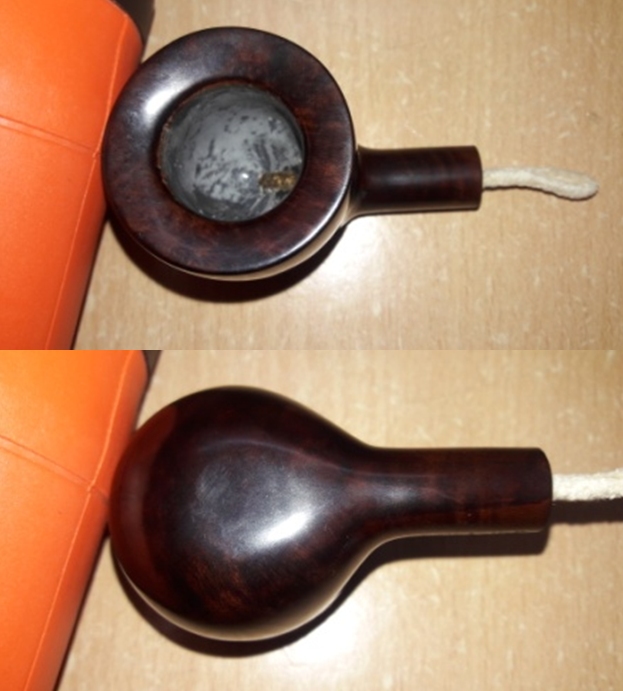
The last piece of information was something that troubled me. I had seen a dark spot on the heel of one pipe, but it appeared to be a smear of grime and dirt. Here are the pictures of the spots that Abha had sent me. It definitely appeared to be the beginnings of a burn out!! Truth is, after the initial surprise of being misinformed by the seller on eBay had subsided, I did not find these damages very alarming and I felt that these two beauties still had many years of smoke left in them with some minor repairs. The matter rested till I received about 40 pipes that Abha had sent me duly cleaned for my part of refurbishing. Both these pipes were part of that parcel that I had received.
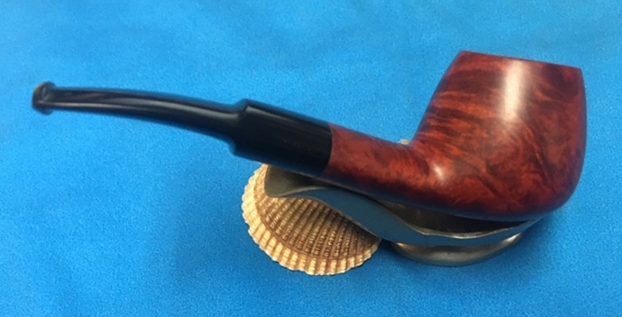
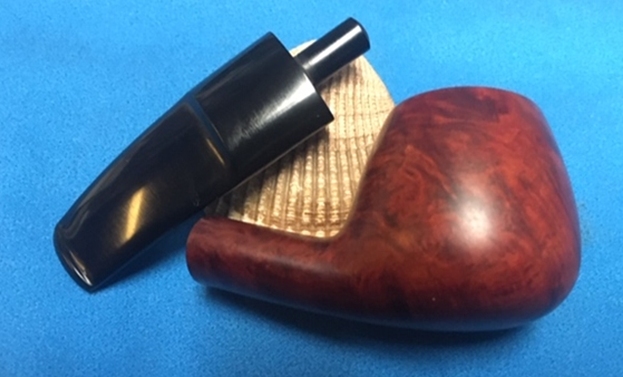
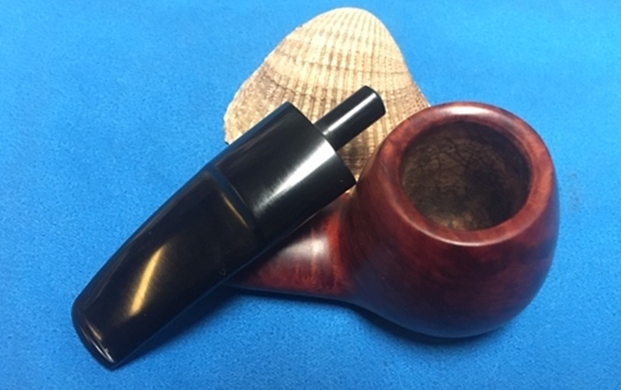
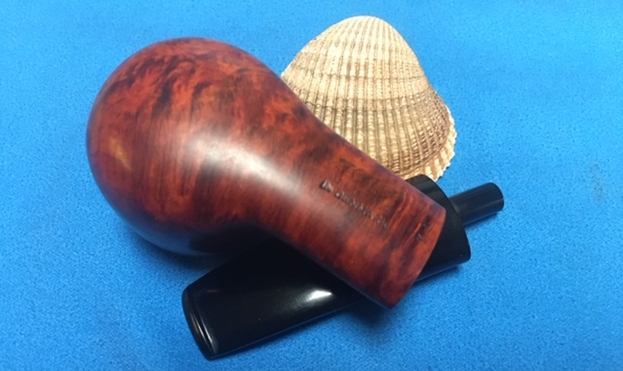
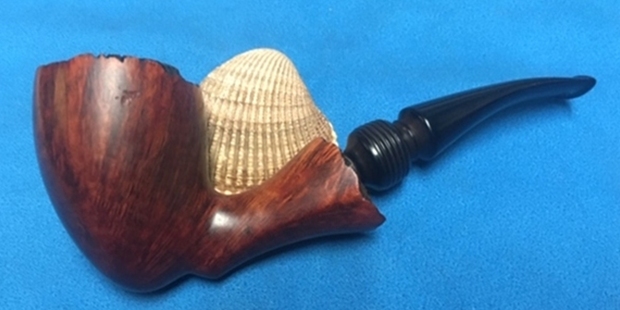
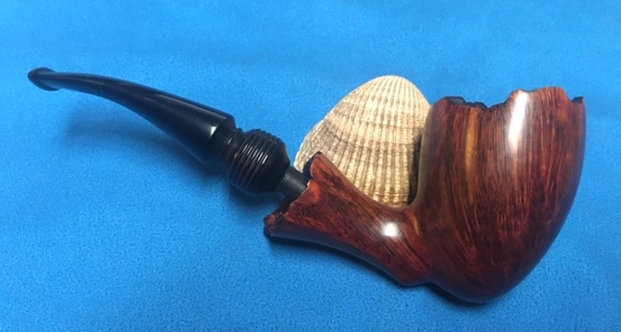
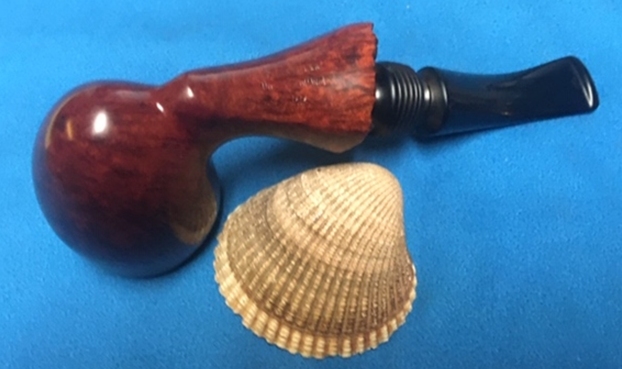
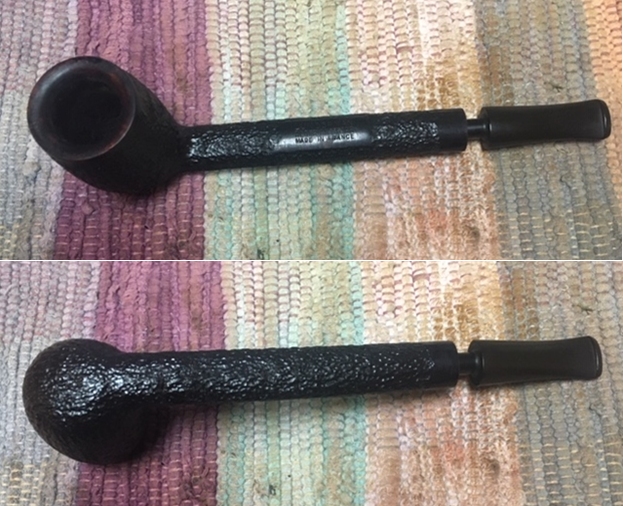
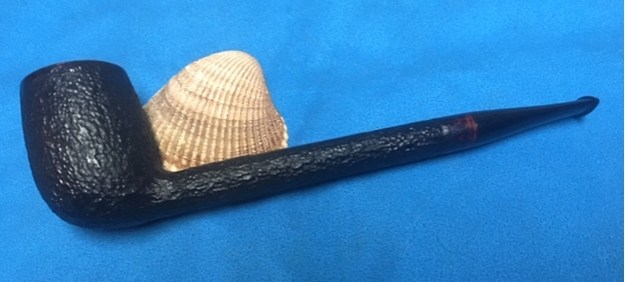
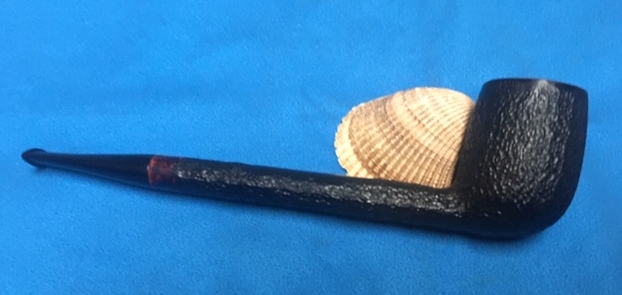
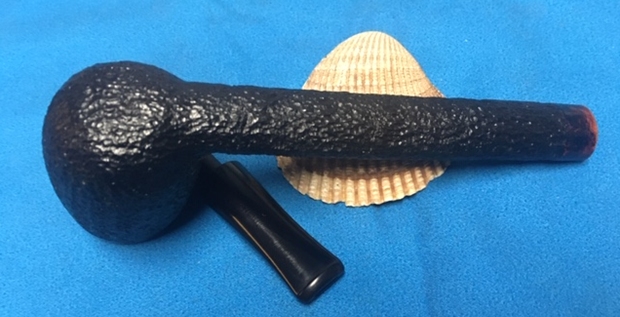
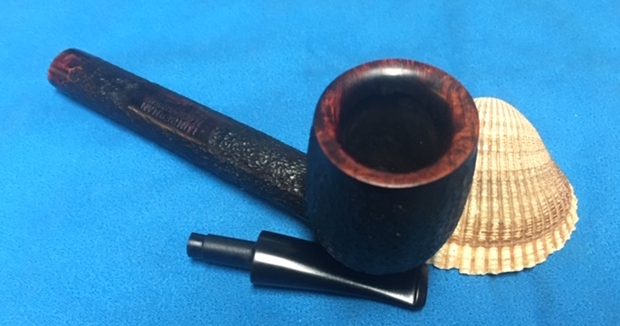
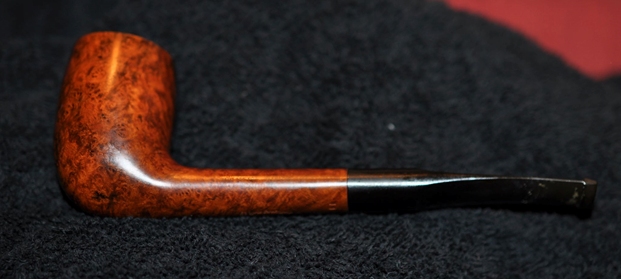
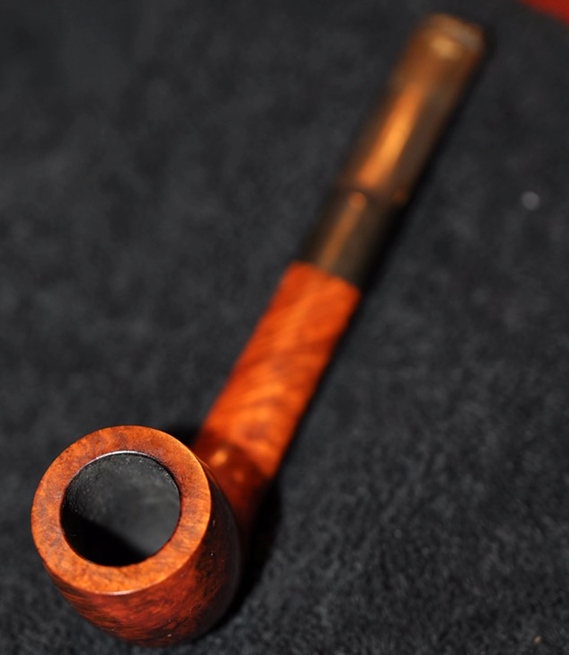
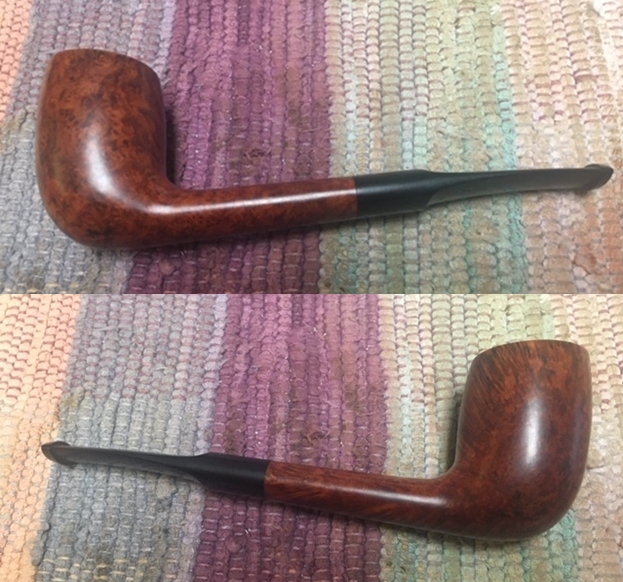
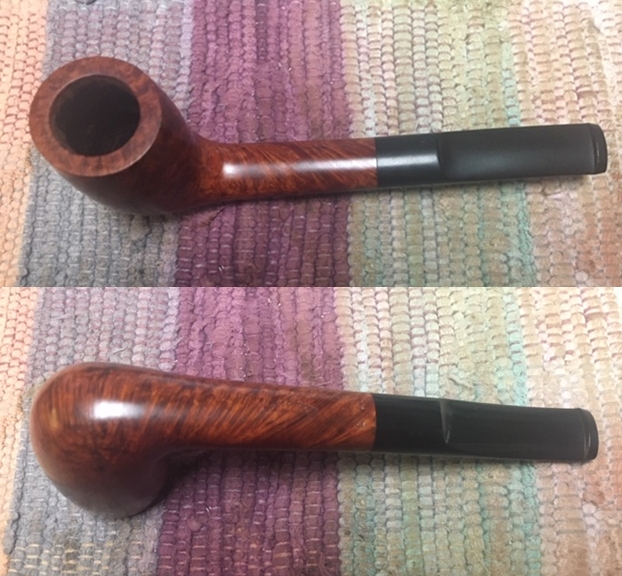
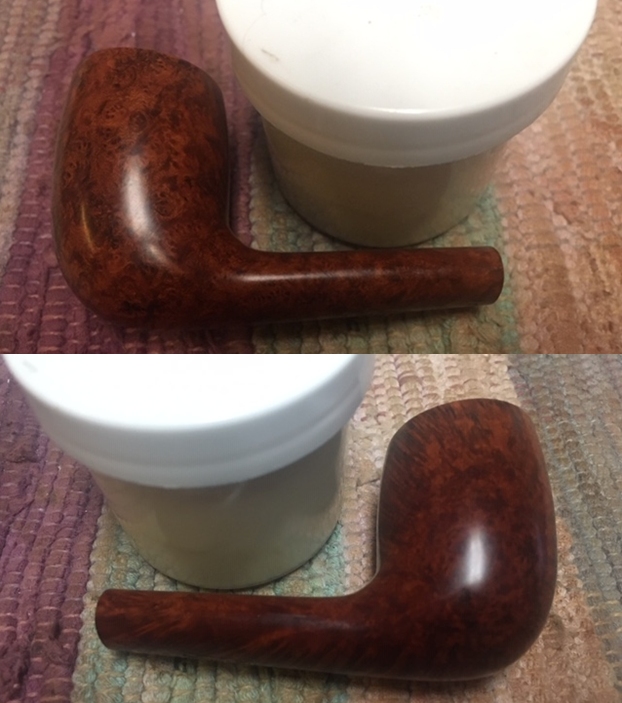
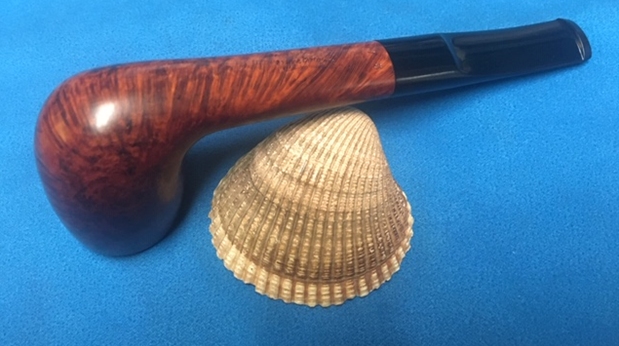
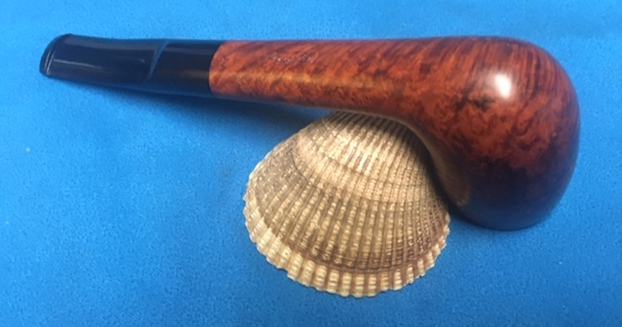
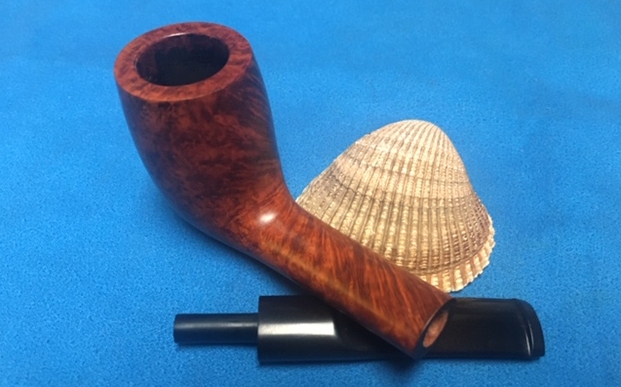
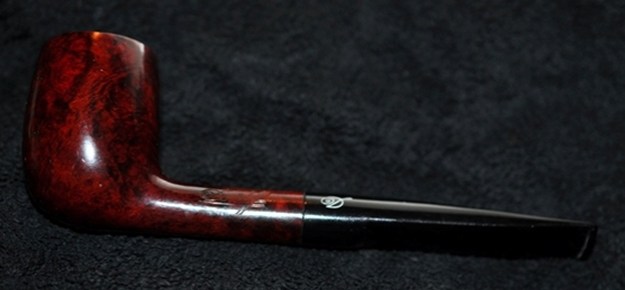
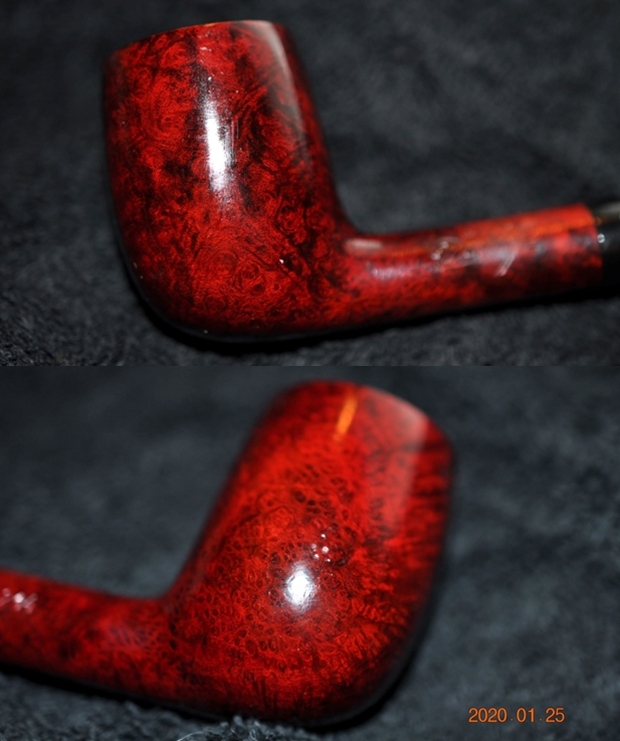
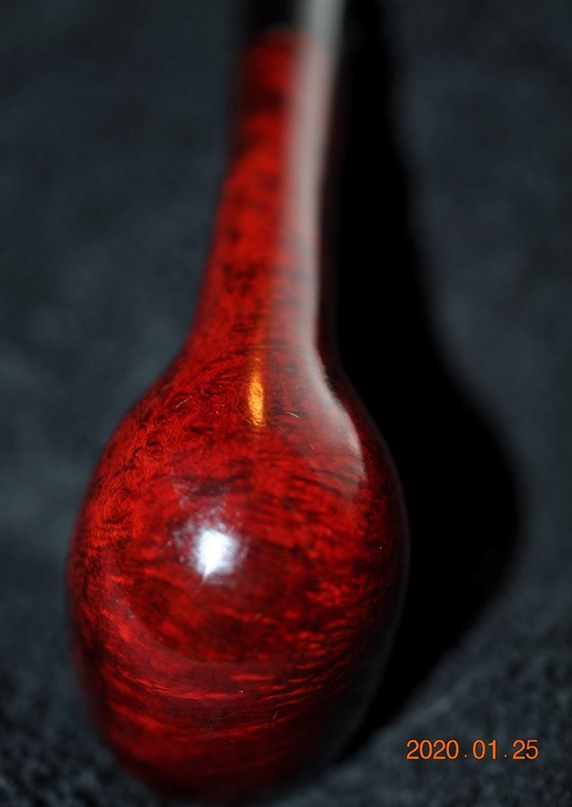
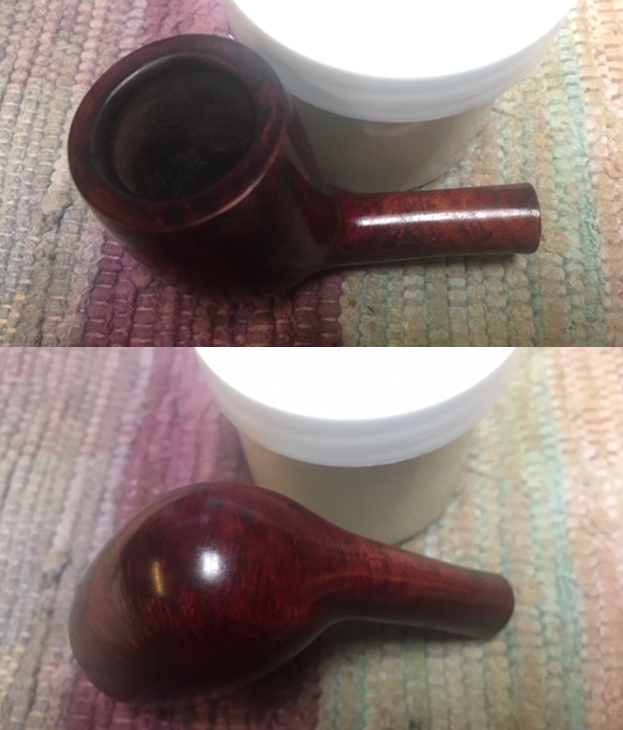
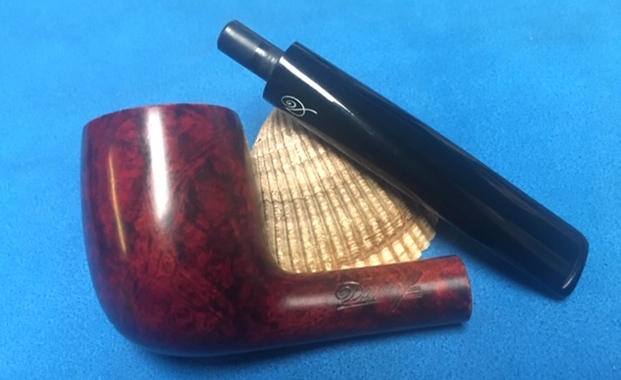
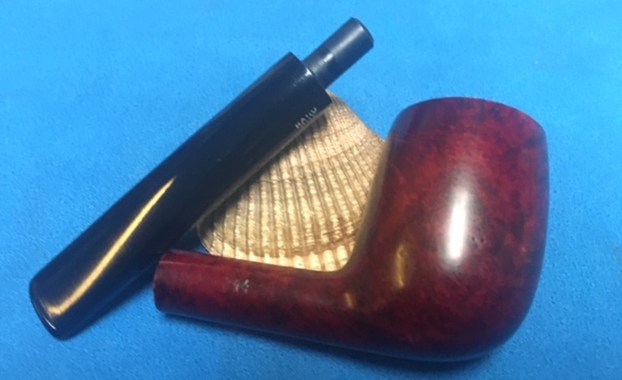
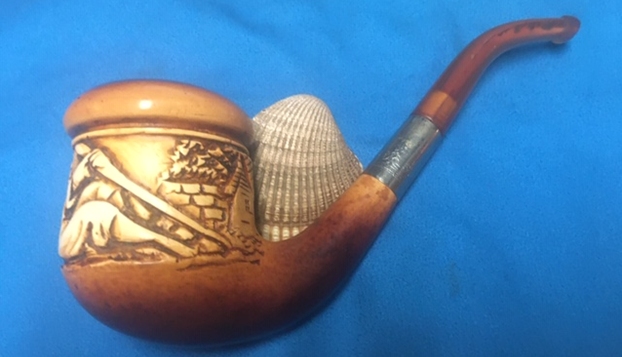
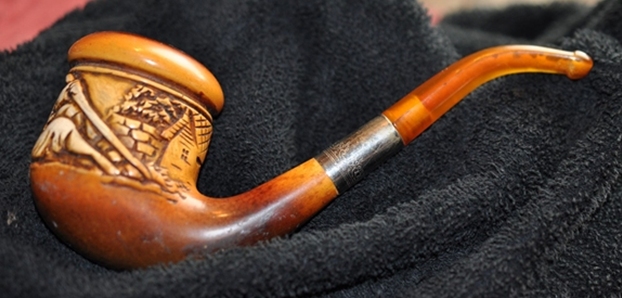
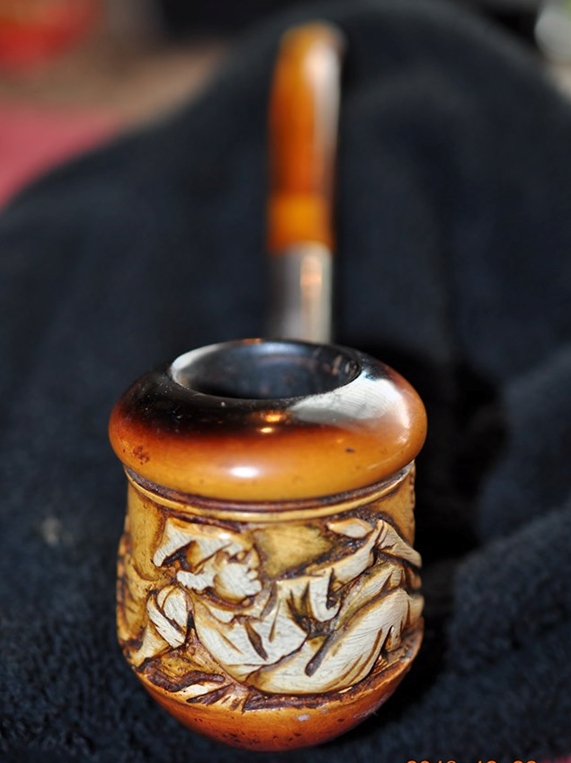
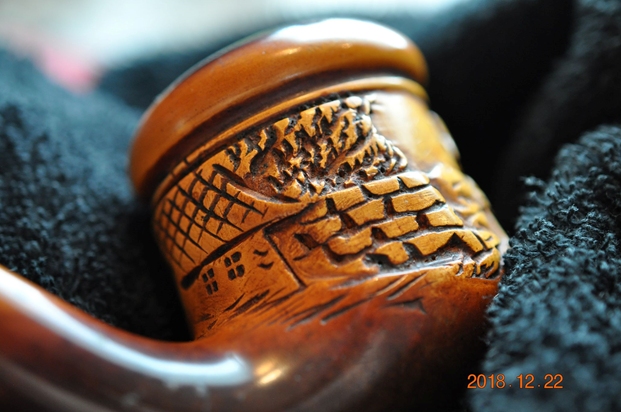
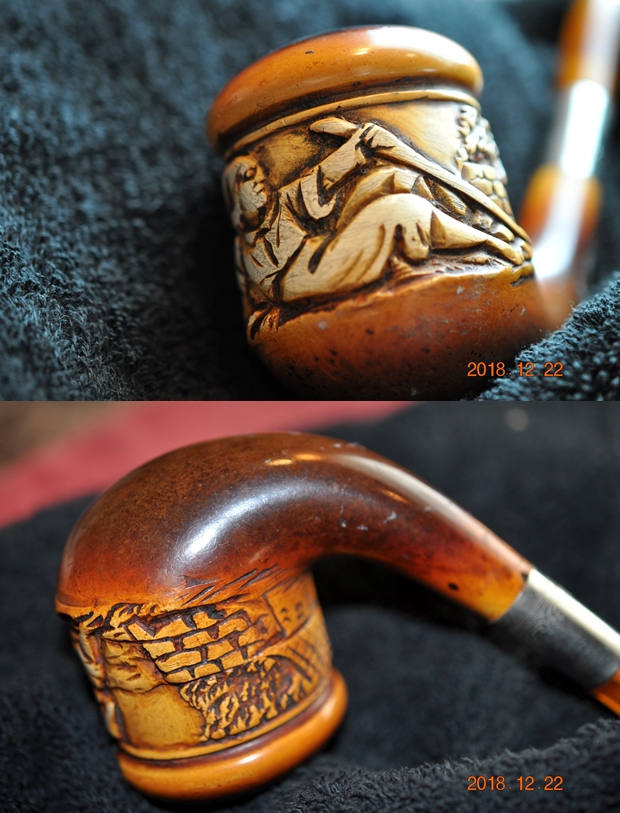
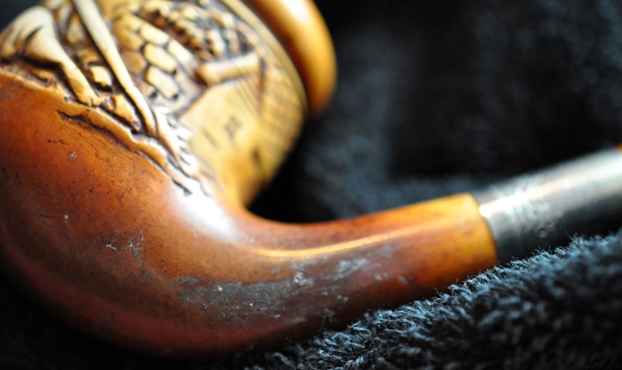
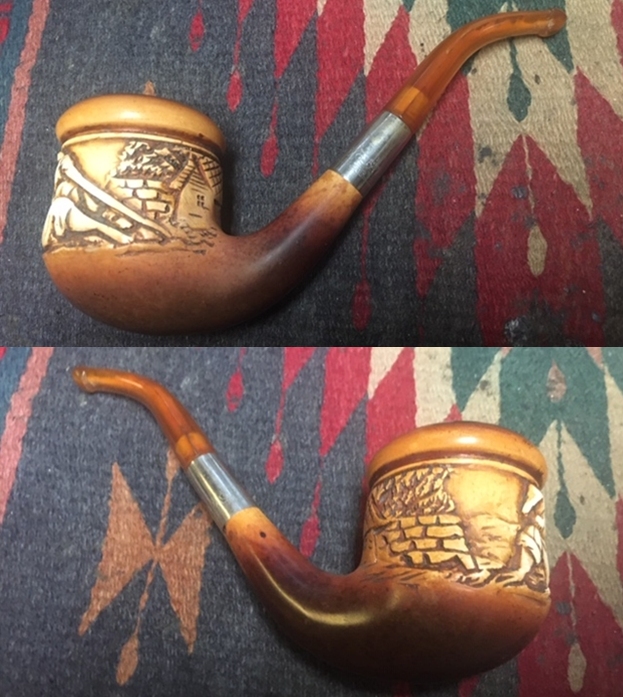
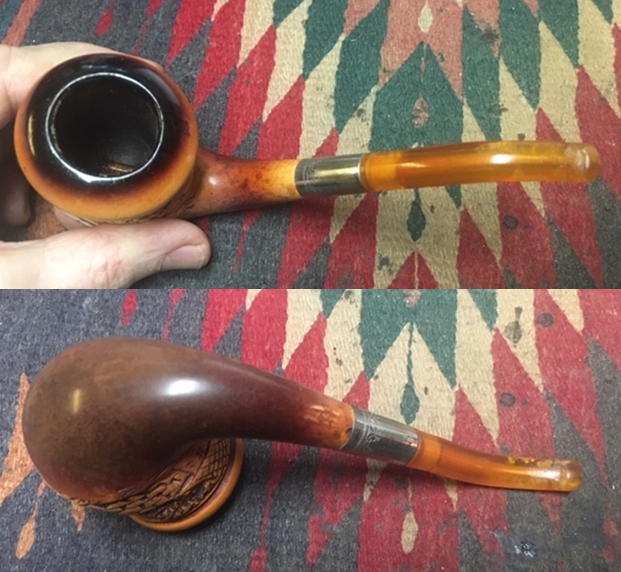
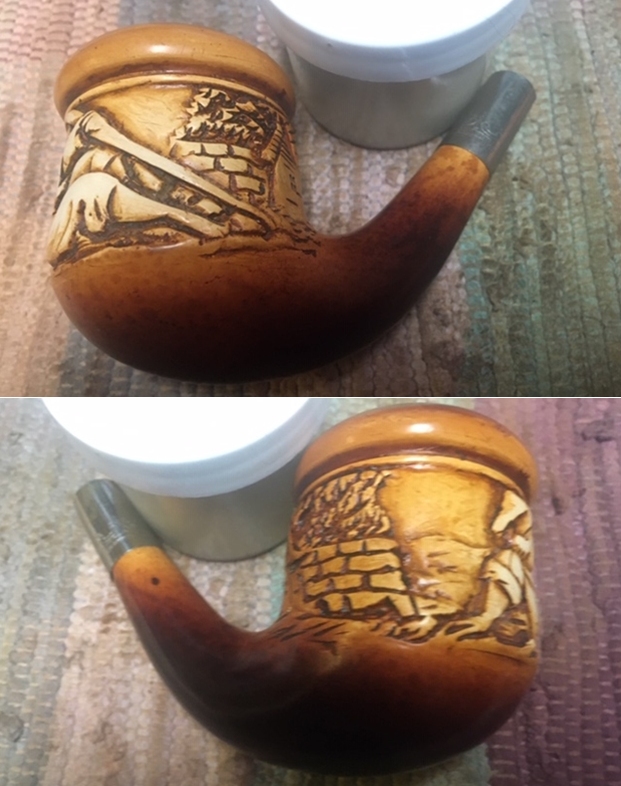
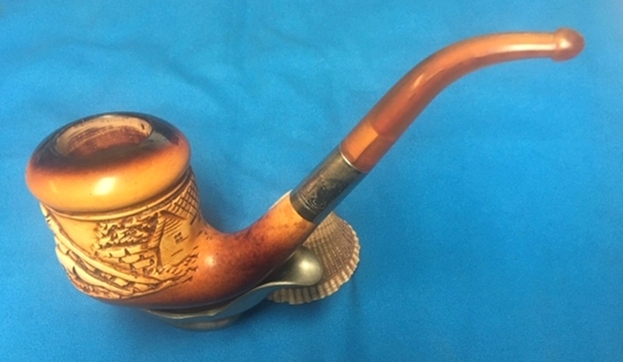
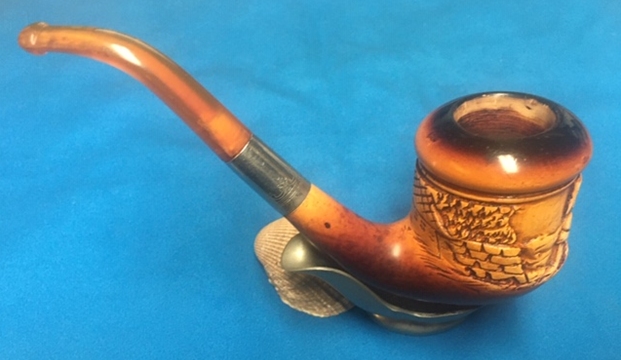
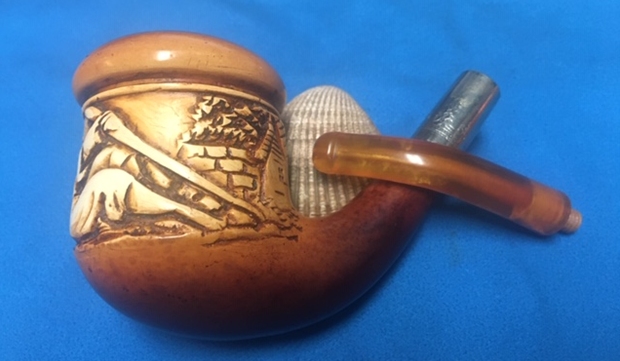
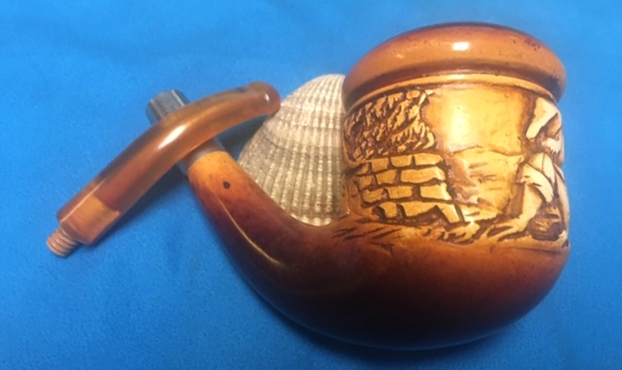
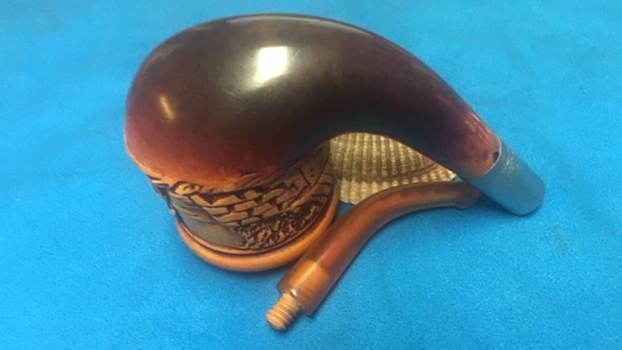
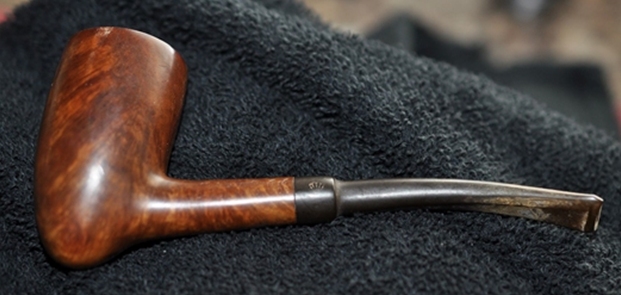
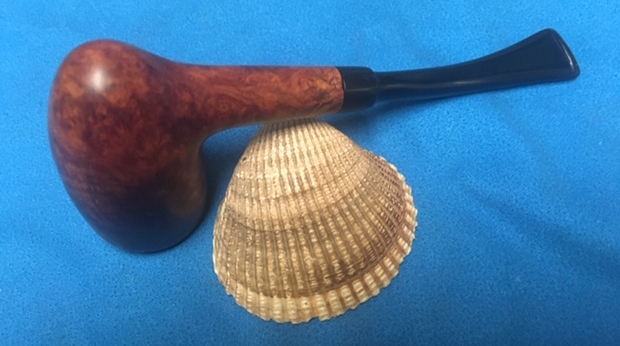
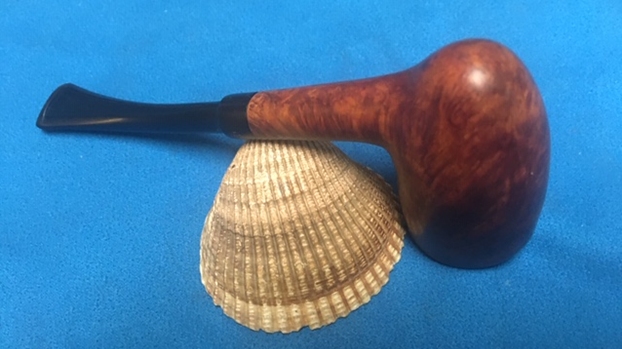
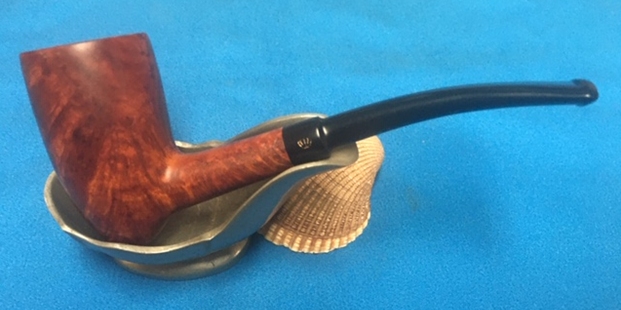
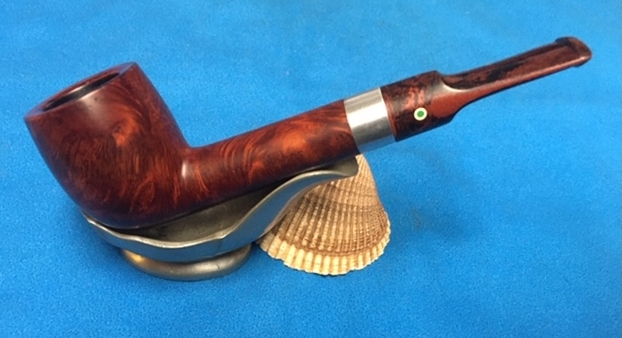
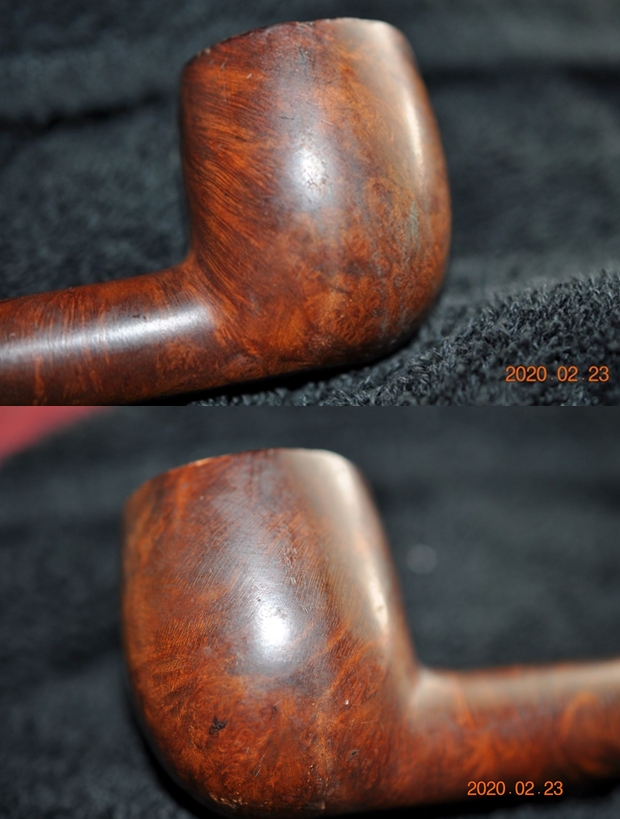
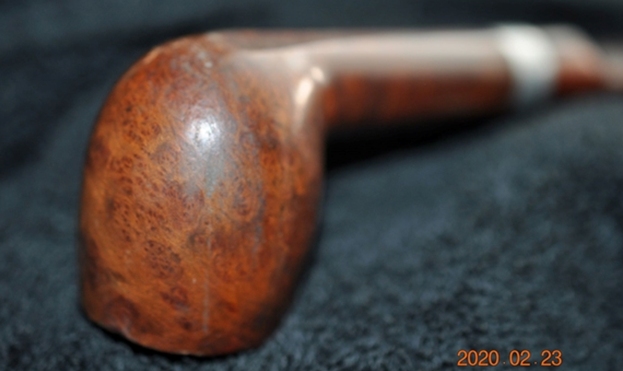
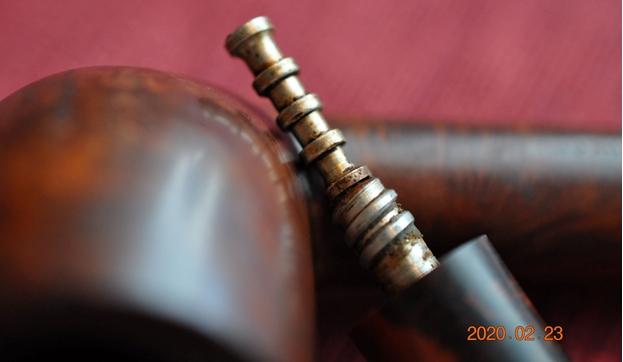
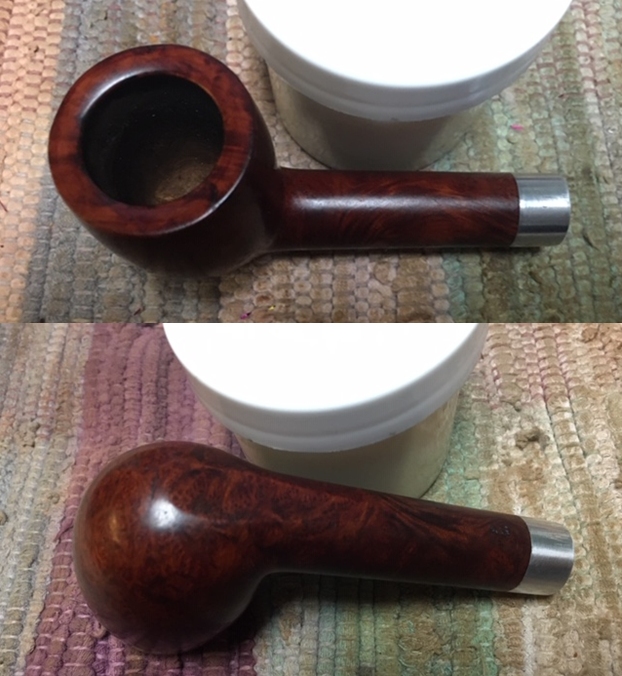
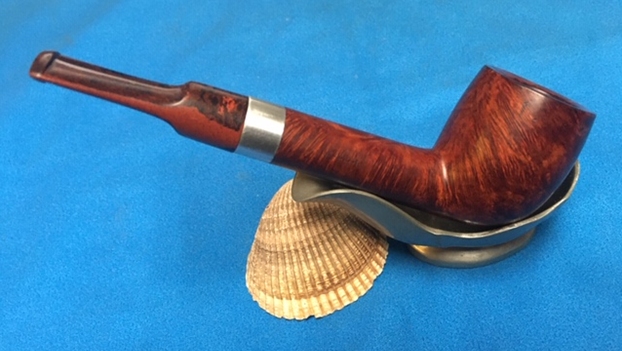
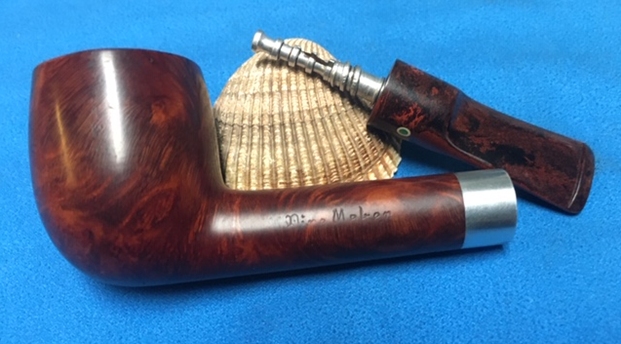
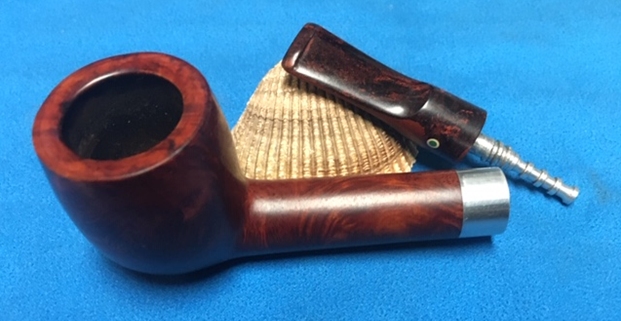
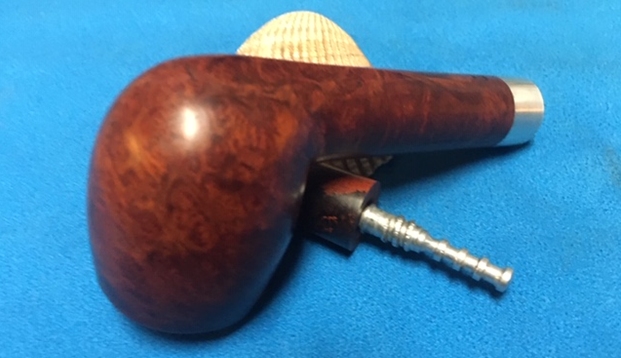
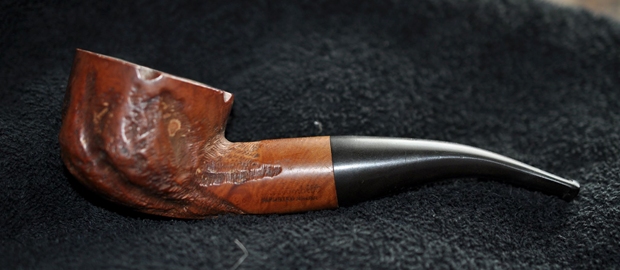
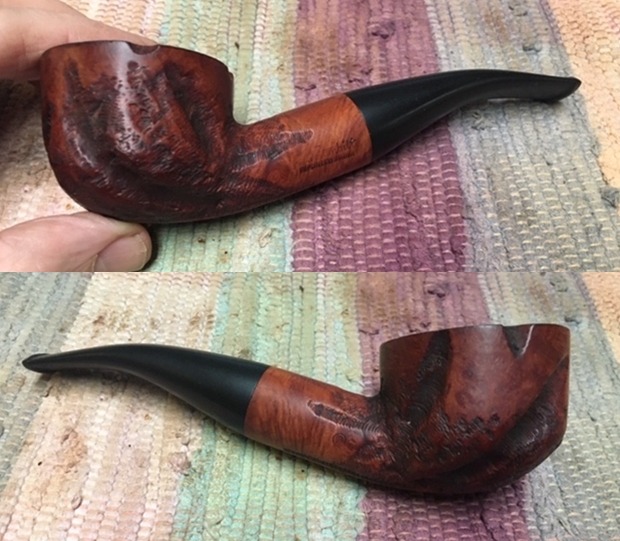
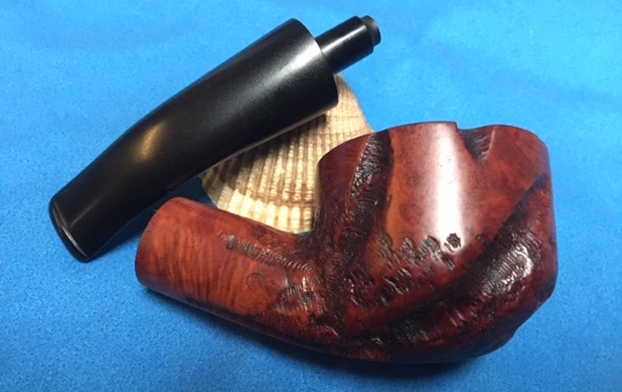
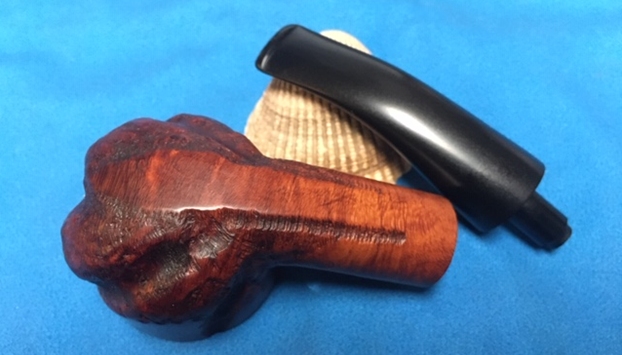
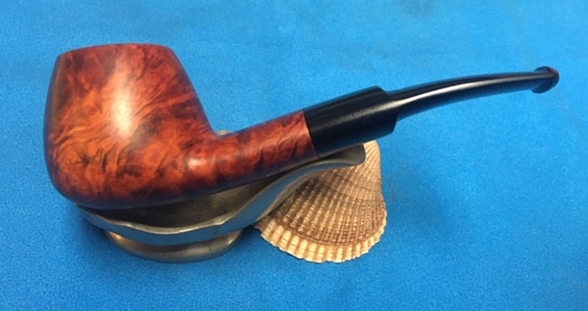
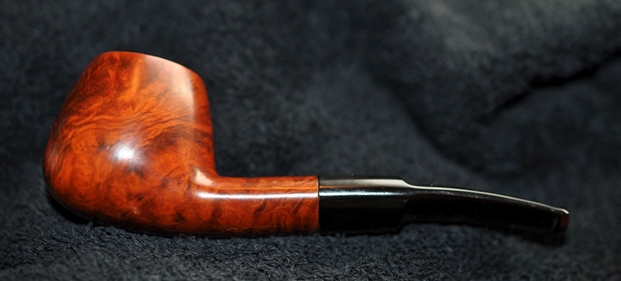
I decided to work on the larger pot first. The pipe has a beautiful mix of swirls and cross grains. In fact, the USP of the stummel lies in the solid hand feel and robustness of the build. The quality of briar is top notch and without any fills at all on this piece. It is stamped on the right side of the shank as “MADE IN” over “LONDON, ENGLAND”. The high quality vulcanite saddle stem is sans any stampings. There are not very many clues that can point me towards the provenance of this pipe. The only fact that can be established is that this is a London made pipe. The build quality, the shape and stem type reminds me a lot of Charatan’s pipe, most notably their Belvedere line. In fact, I do have a Charatan’s Make BELVEDERE pot shaped pipe that I had received as part of my Mumbai Bonanza and the similarities are striking. Also, while surfing the net, I came across a MOUNTBATTEN pot which again resembled the pipe on my work table. Here are pictures of both these pipes, the first two are of the Mountbatten and the next two are that of Belvedere pot.
 With Mountbatten being a Charatan’s second and observing the similarities between these three pipes, it may be surmised that there is a possibility that the pipe presently on my work table is made by Charatan’s for some pipe shop, which was not uncommon in the past. Any confirmed input to either support or refute my assumption is most welcome.
Initial Visual Inspection
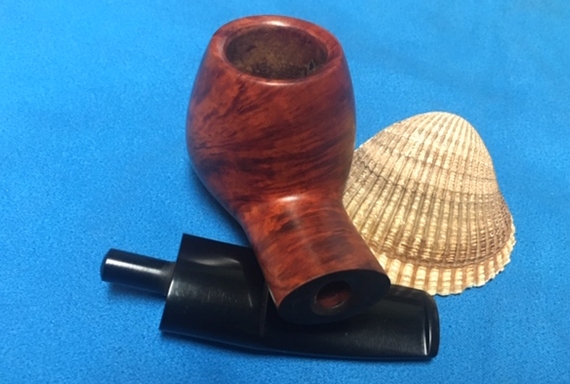
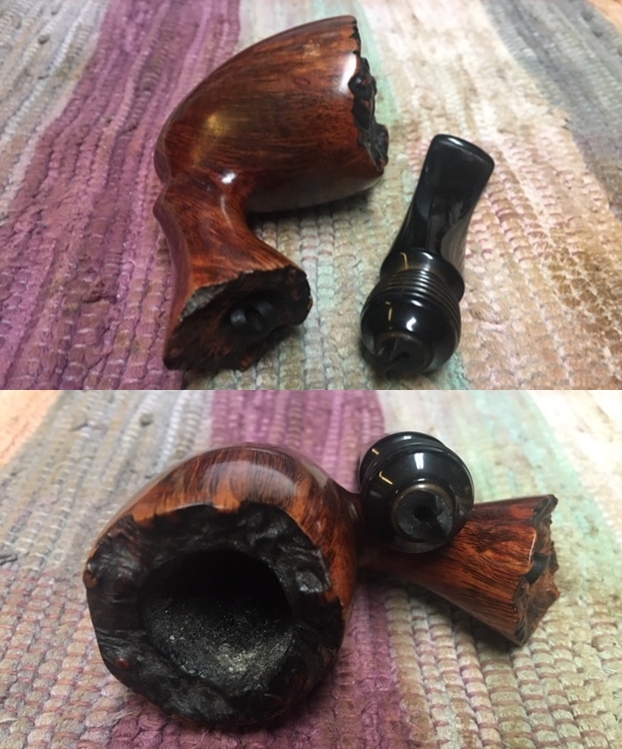
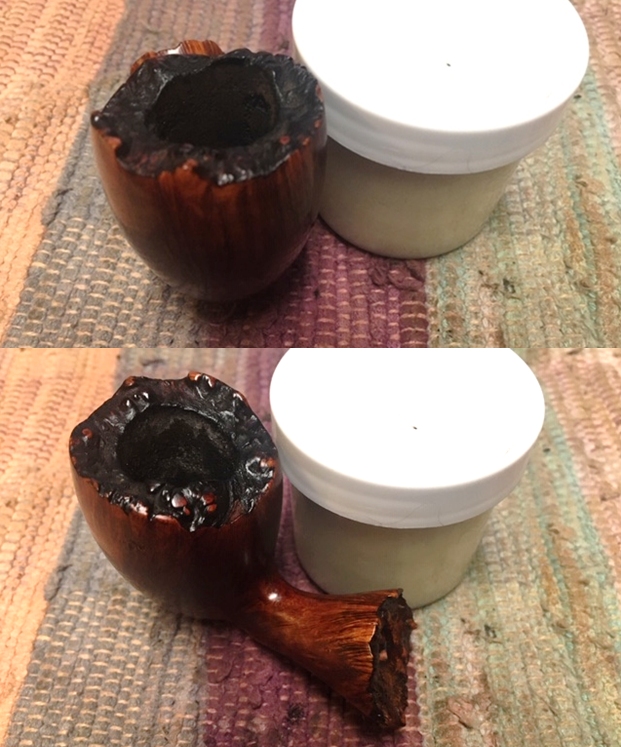
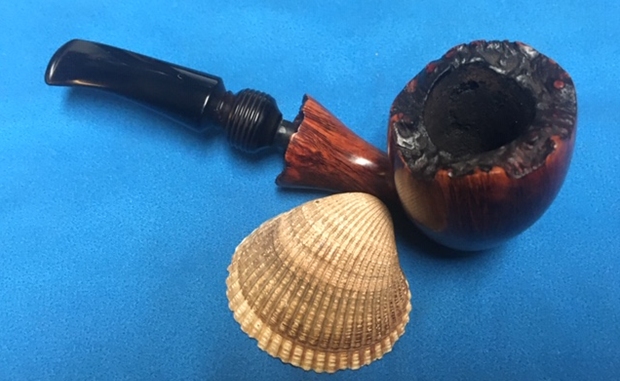
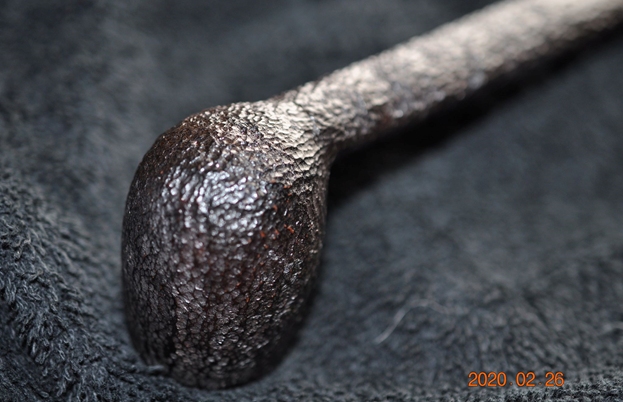
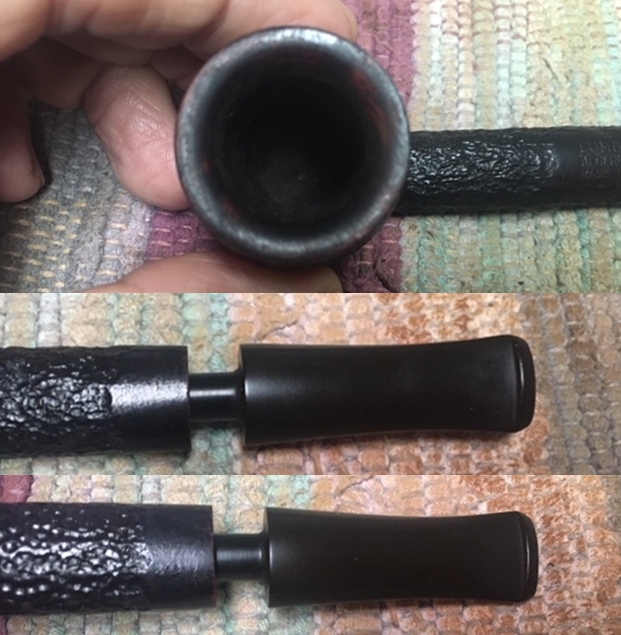
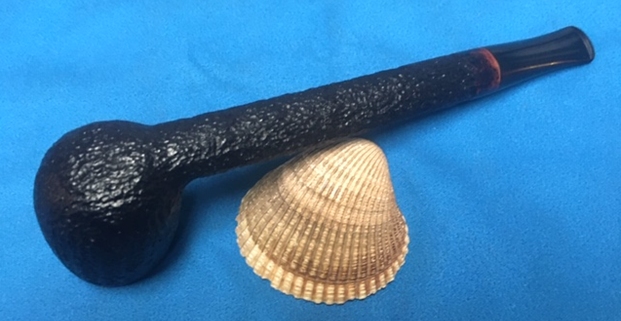
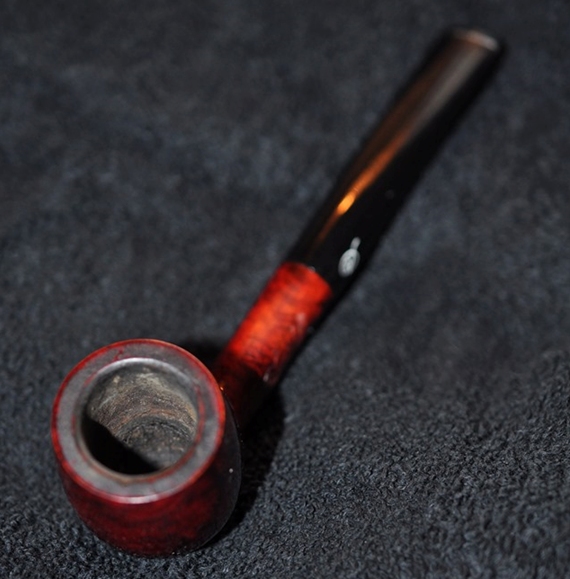
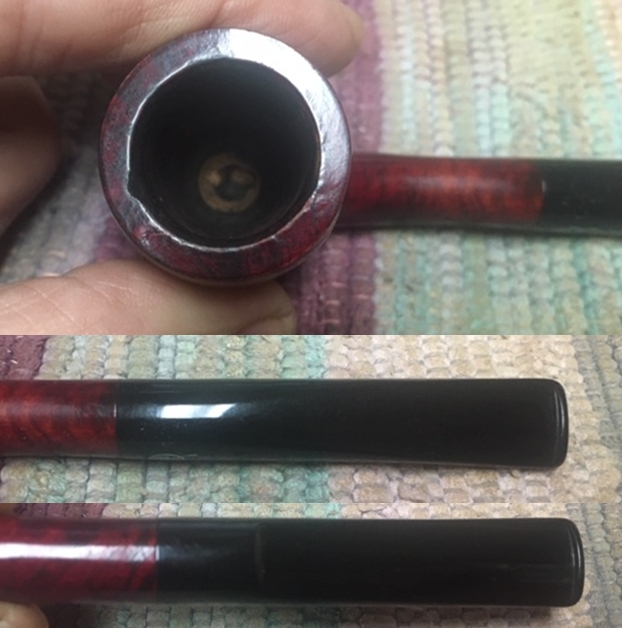
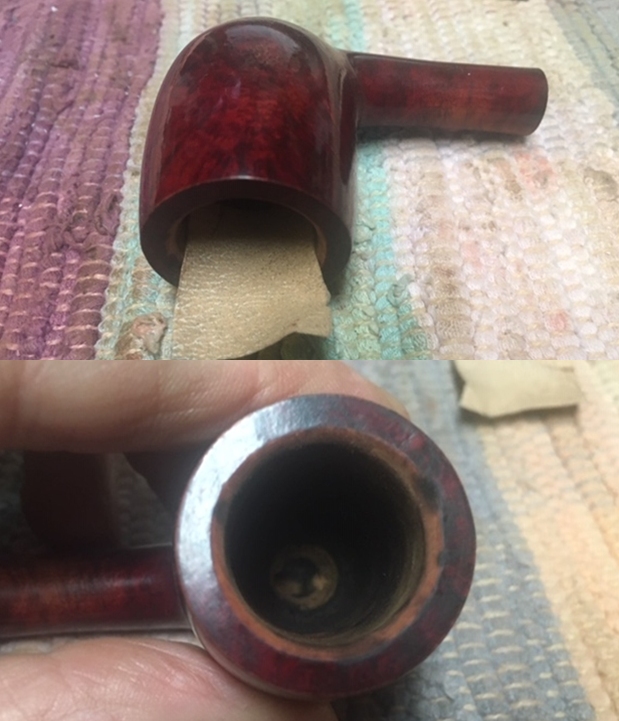
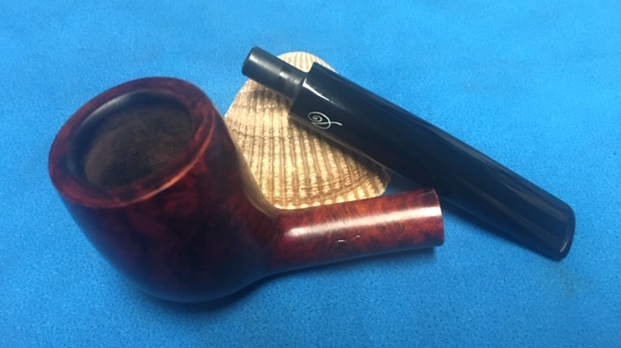
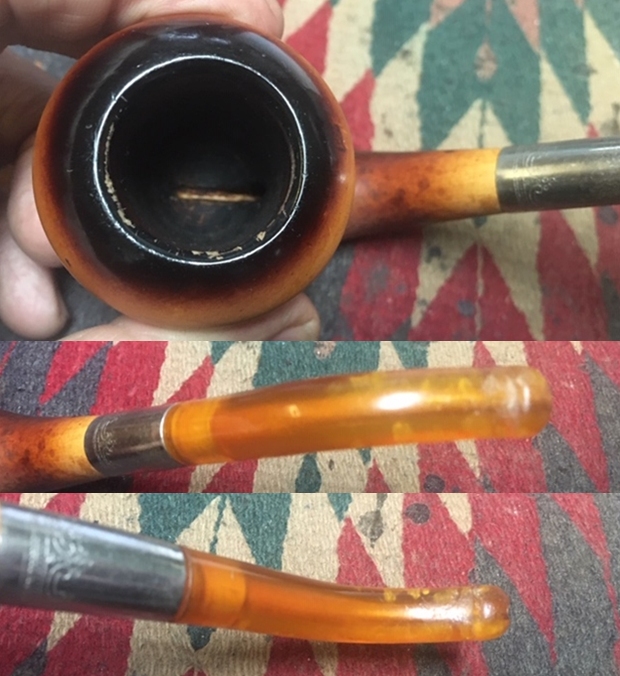
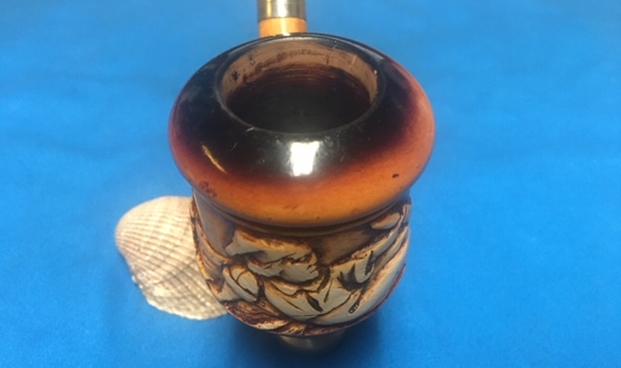
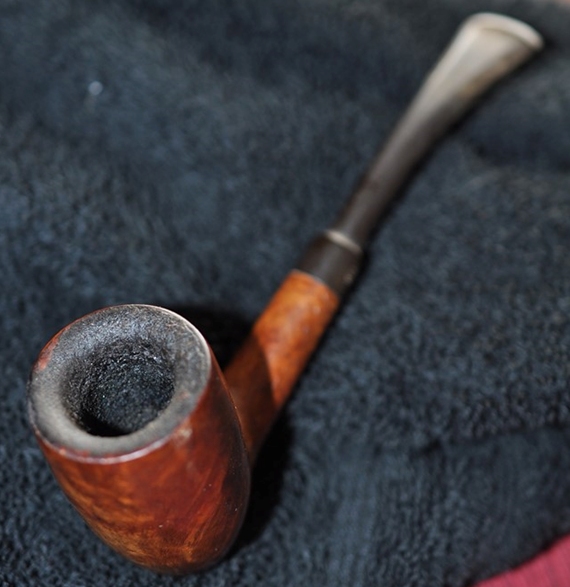
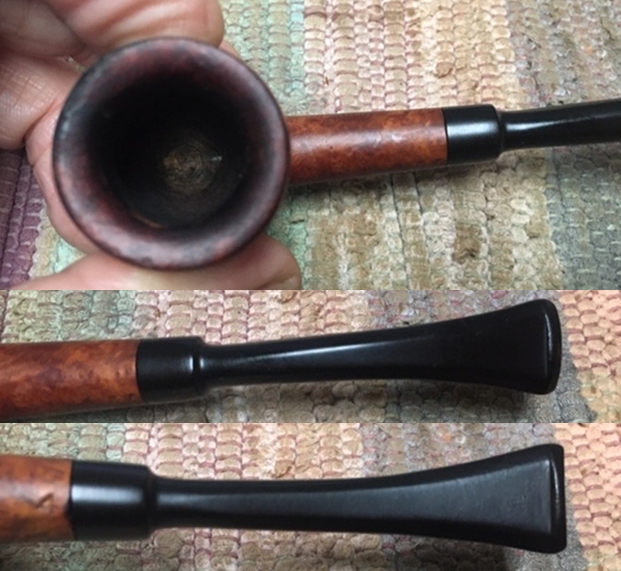
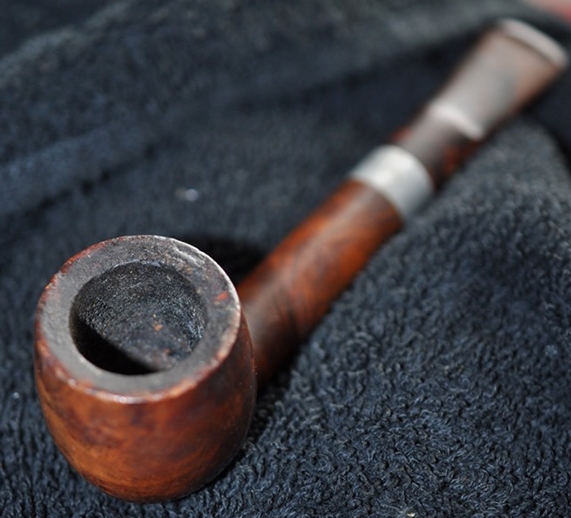
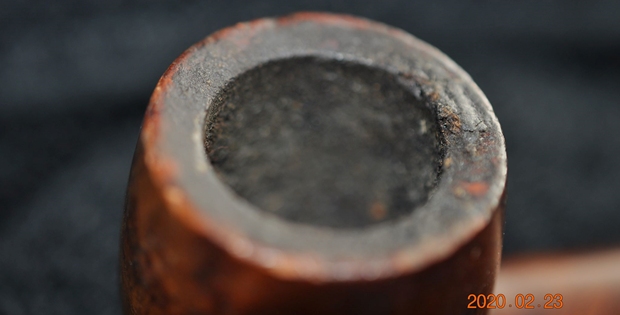
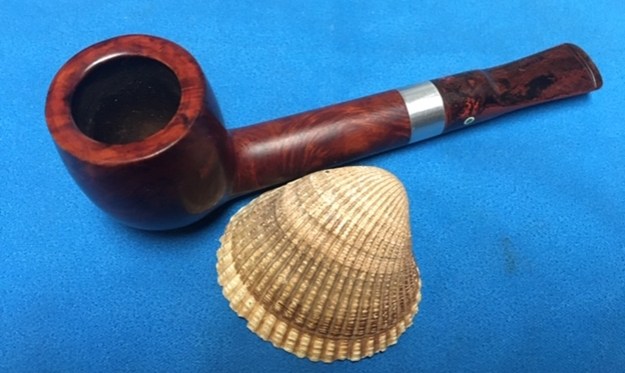
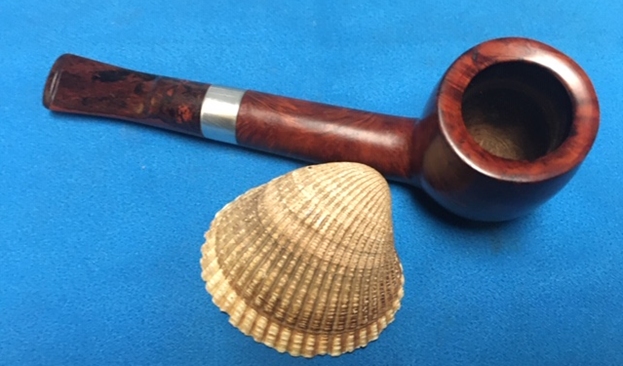
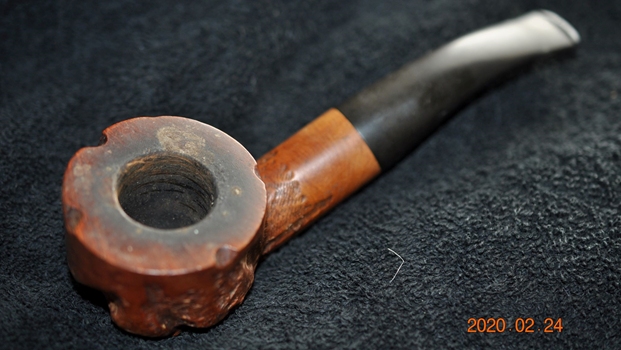
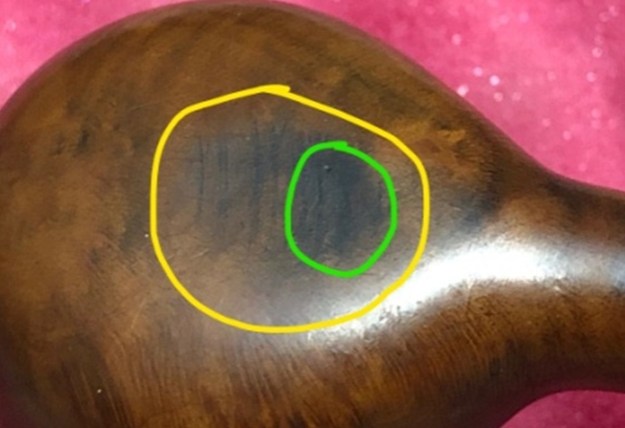
The chamber has a thick even layer of cake with heavy lava overflow over the inward sloping rim top surface. The deposition of heavy lava overflow is predominantly seen on the backside of the rim surface in 6 ‘O’ clock direction. A number of dents and dings are seen on both outer and inner rim edges. I suspect charring to the inner rim edge in 1 ‘O’ clock and likely in the 6 ‘O’ clock direction. The extent of the charring and the condition of the walls of the chamber can be ascertained only once the cake has been taken down to the bare briar. The foot of the stummel did show the sign of beginnings of a burn out that was considerably darker towards the draught hole (encircled in green) and extending outwards away from the draught hole half way across the foot. The damage to the heel and the resulting severity of the burn out will be confirmed after reaming. There are some very strong ghost smells to the chamber which will need to be addressed.
 The stummel is covered in oils, dust and grime giving it a dull and lackluster appearance. The stummel feels solid and well carved and nice mixed grains can be observed all over the surface through all the grime. There is not a single fill anywhere on the bowl. Other than the charring observed at the foot of the stummel, the stummel has a robust and solid feel. The mortise is cleaned and clogged with the accumulation of old and dried oils, tars and gunk. This will need to be cleaned.
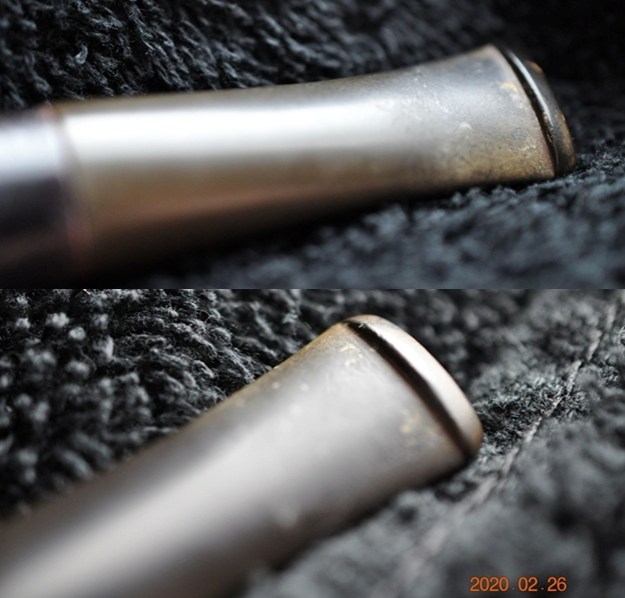
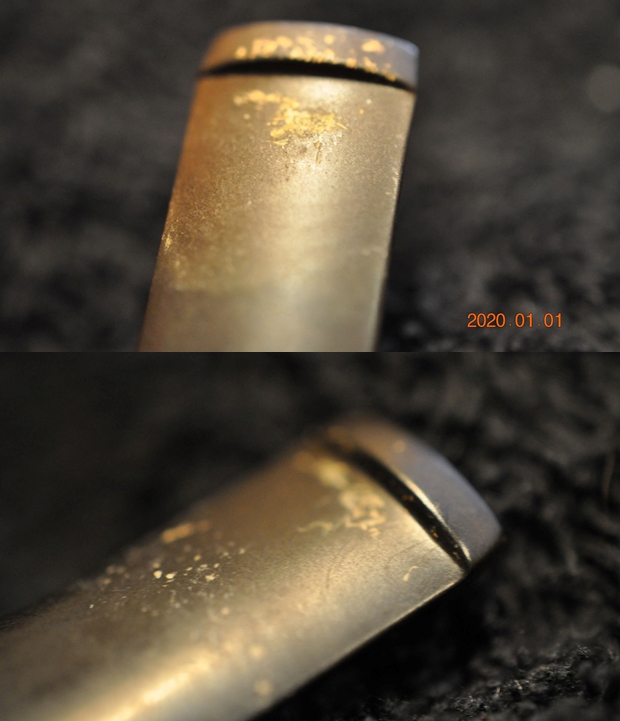
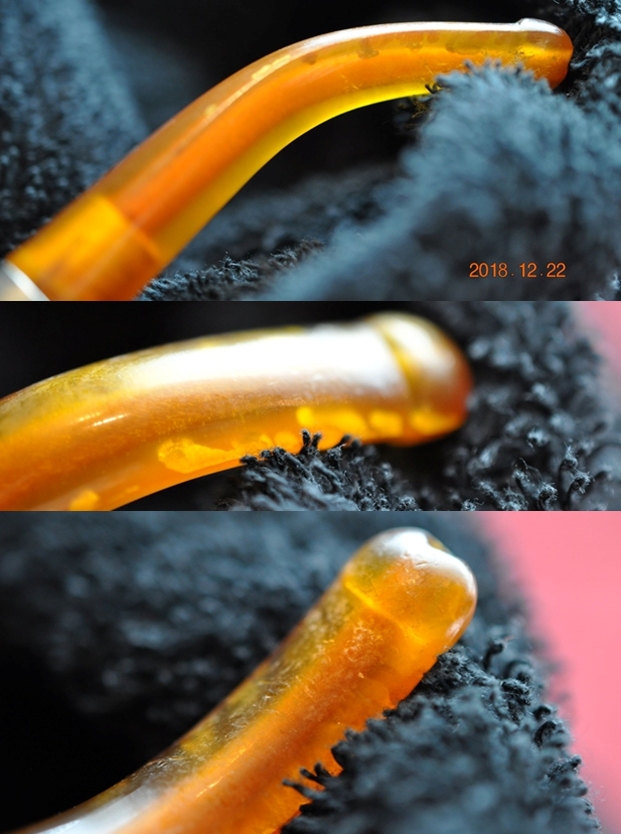
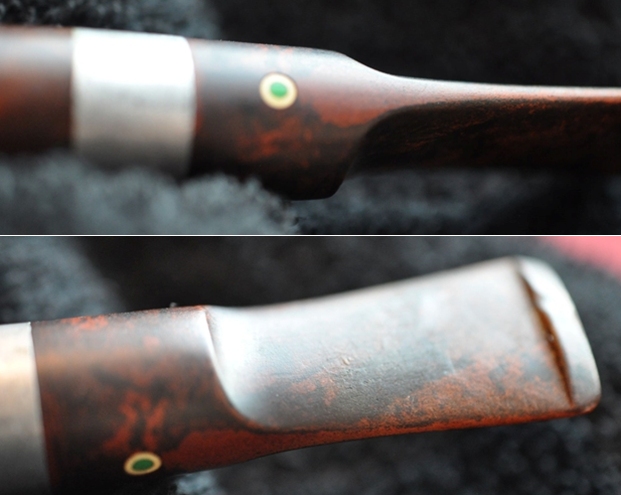
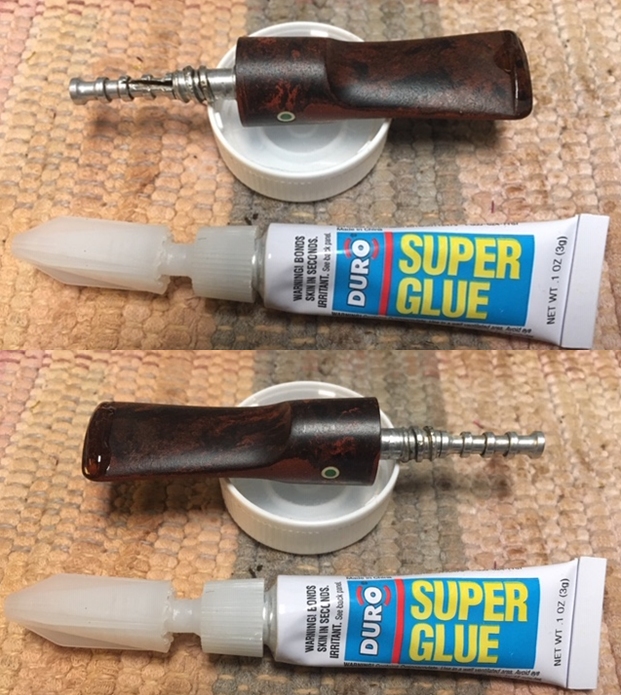
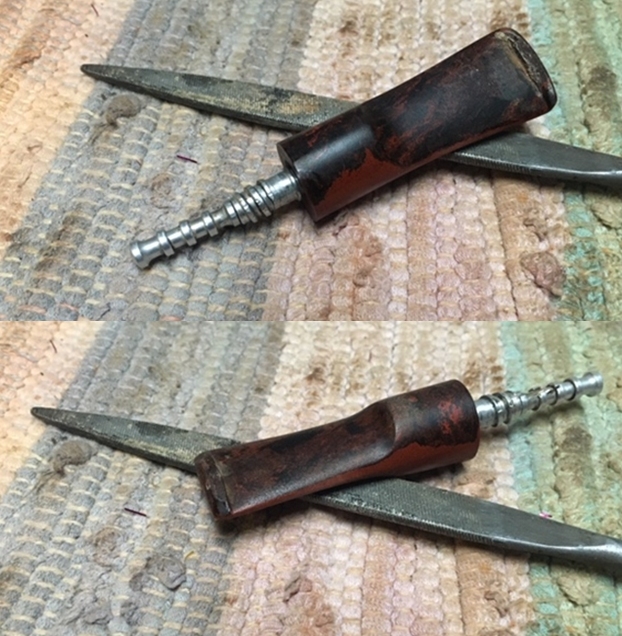
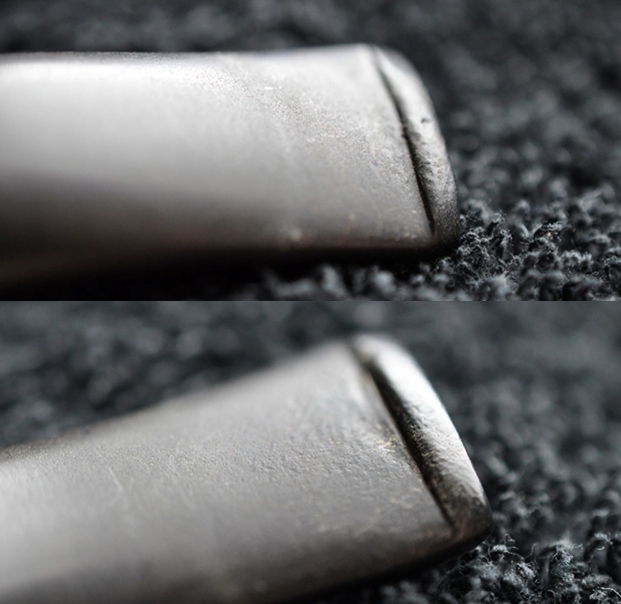
 The vulcanite saddle stem is heavily oxidized with signs of calcification on either surface of the stem about an inch from the button edges. There is no serious tooth chatter or indentation or button damage to the stem. The tenon end and horizontal slot shows signs of accumulation of old oils, tars and gunk. The high quality vulcanite stem should clean up nicely.
 Initial Cleaning By Abha…
The initial cleaning on this pipe was done by Abha, my wife (she has cleaned up around 40-50 pipes and these have now reached me for further restoration). She reamed out the complete cake and further smoothed out the chamber walls with a folded piece of 220 grit sand paper. She further cleaned out the internals of the shank with pipe cleaners and alcohol and cotton buds. She followed the internal cleaning of the shank with external cleaning of the stummel using Murphy’s Oil soap and hard bristled tooth brush and dried it with paper napkins and cotton cloth.
Next she cleaned out the internals of the stem air way and immersed it in “Before and After Deoxidizer” solution along with the stem of the other pot in line for restoration. Once the stem had soaked overnight, she cleaned the stem under running warm water and scrubbed the raised oxidation from the stem surface using Scotch Brite pad. She further removed the oxidation by scrubbing the stem with 0000 grade steel wool and applied a little olive oil to rehydrate the stem. Once The Pipe Is On My Work Table…
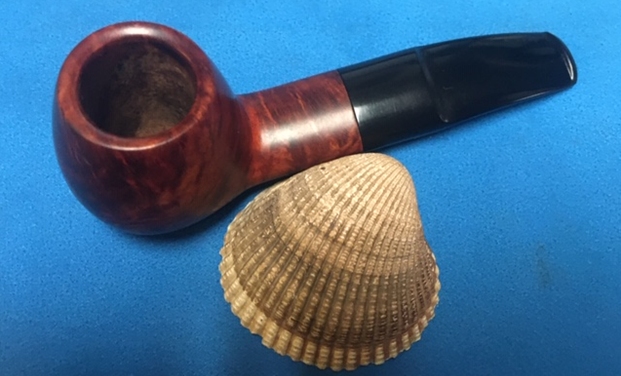
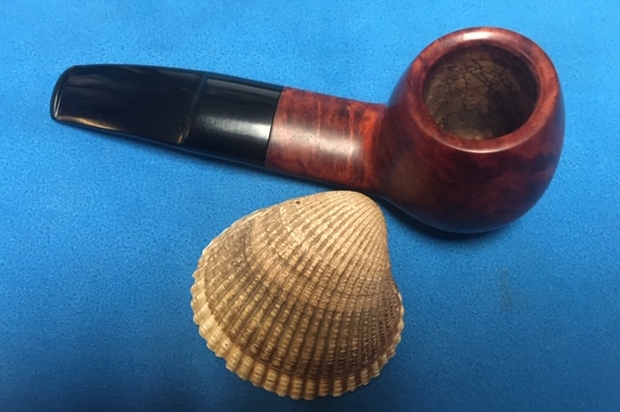
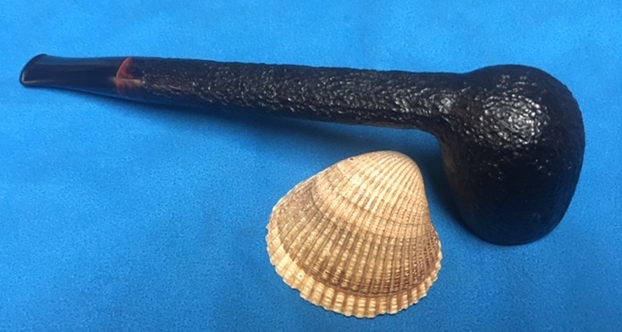
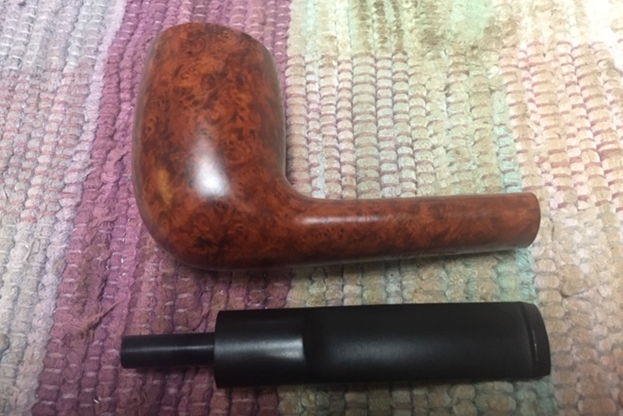
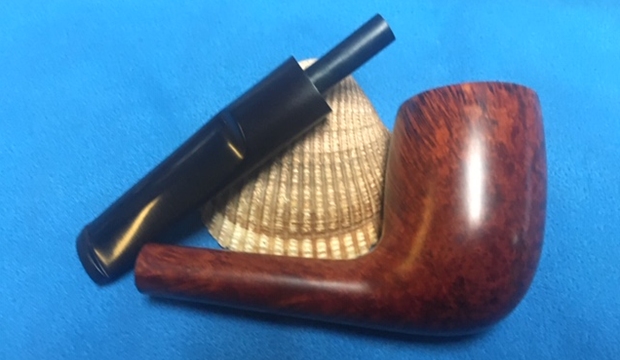
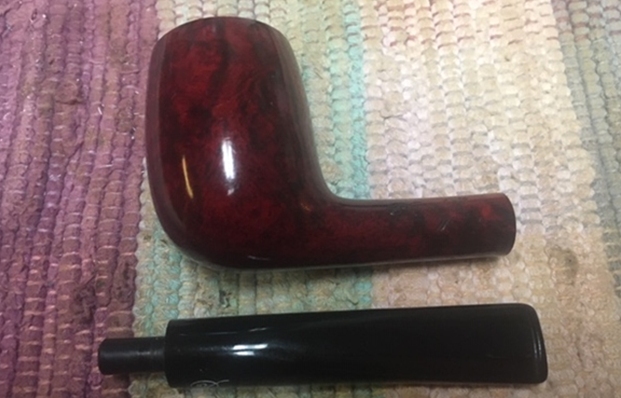
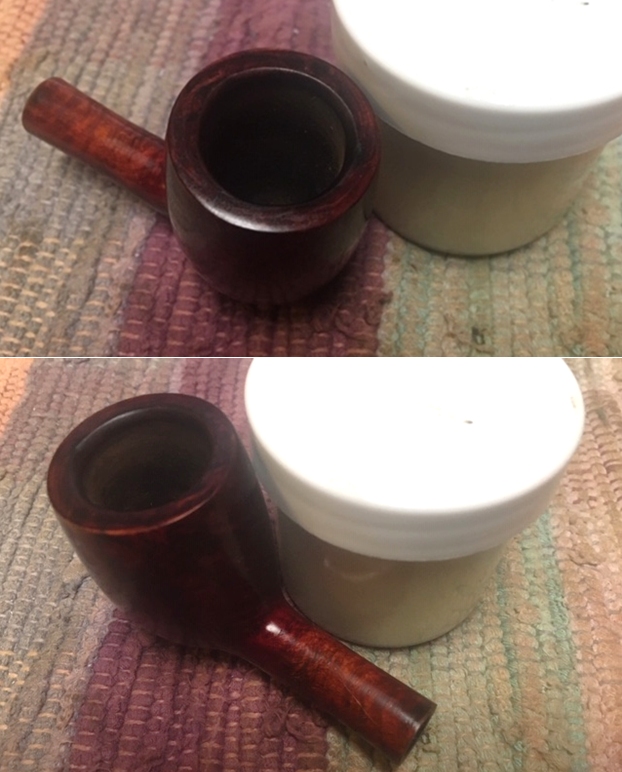
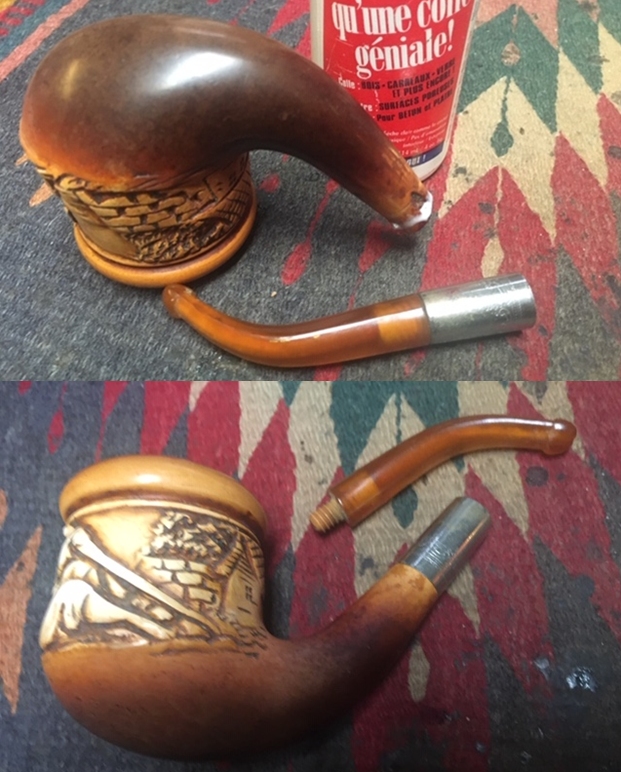
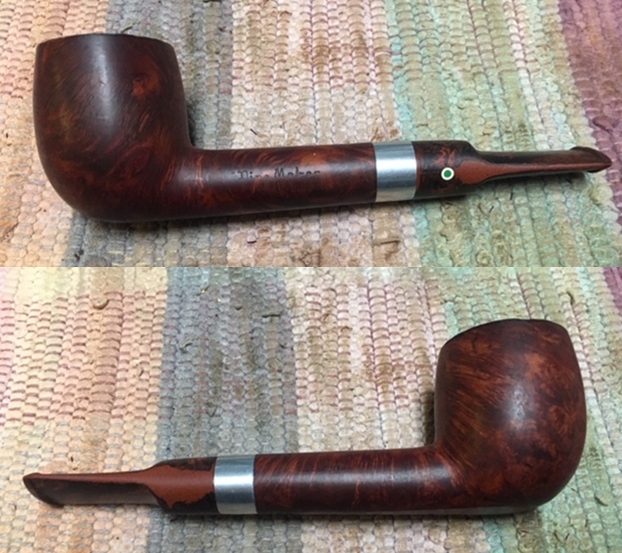
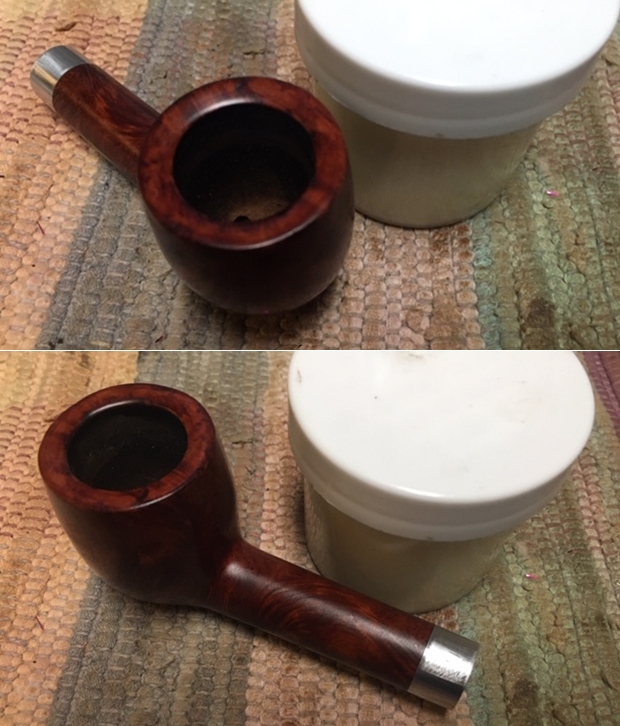
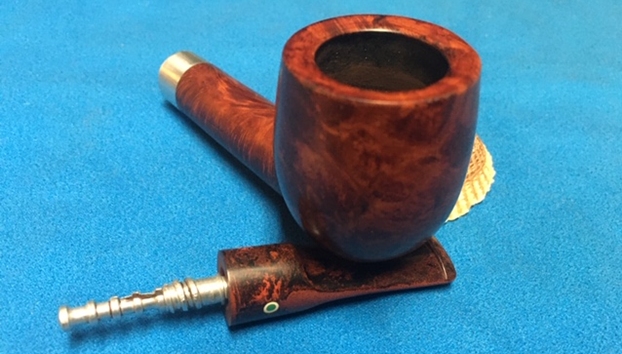
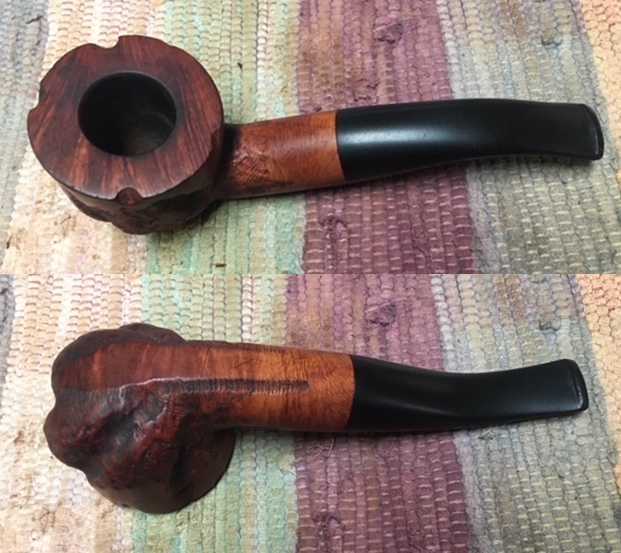
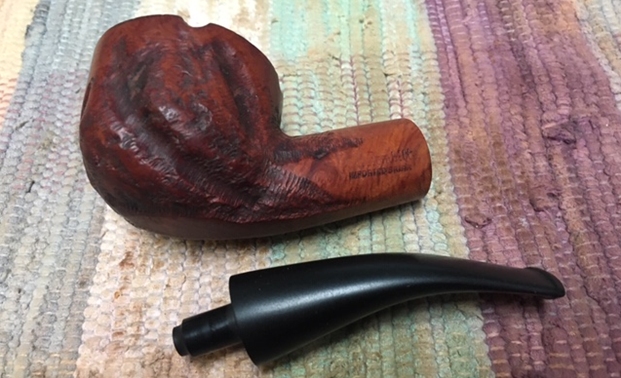
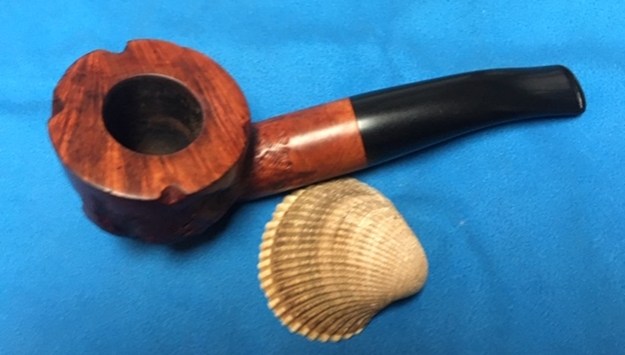
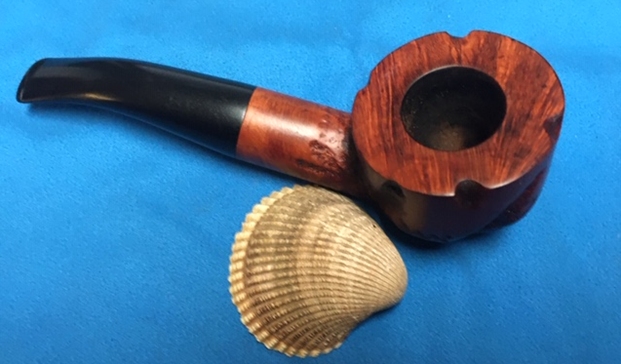
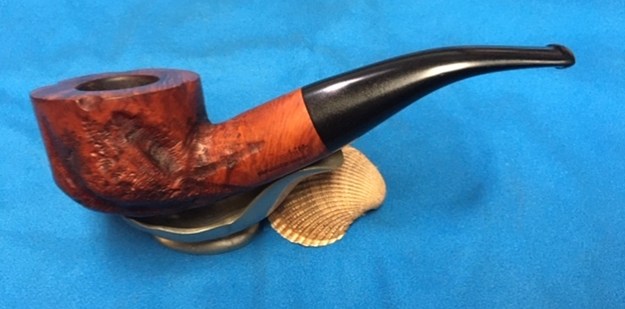
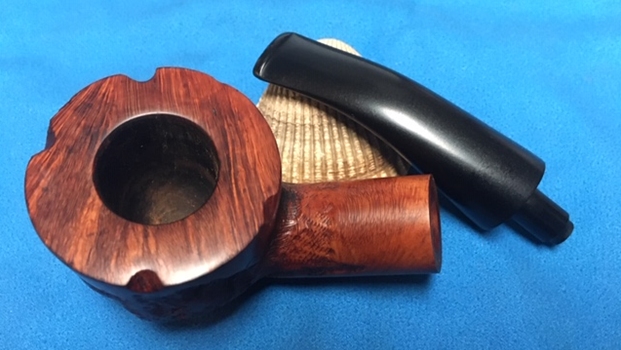
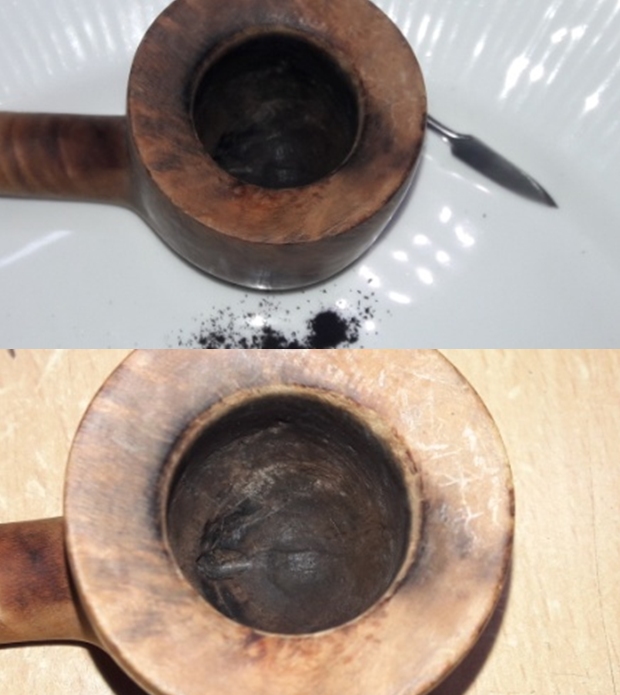
Now that the cleaned pipe is on my work table, I proceed to carry out my appreciation of the work that needs to be done on this pipe to restore it. The cleaned up pipe presented a clearer picture about the actual condition and the work required on this pipe. Here is how the pipe reached me.
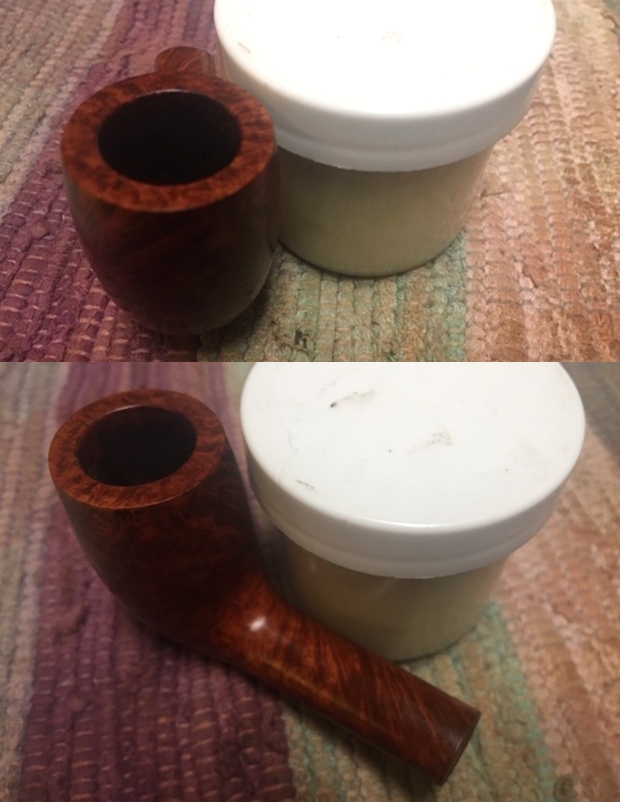
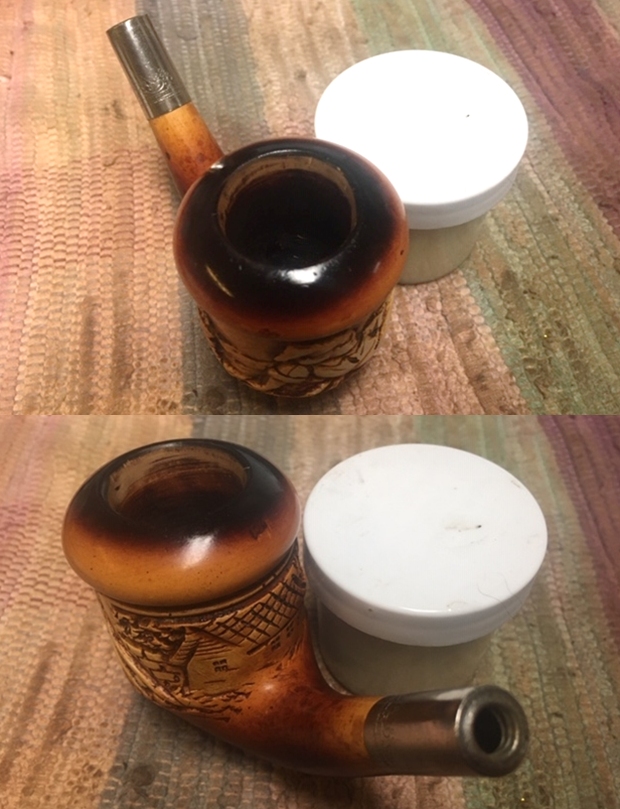
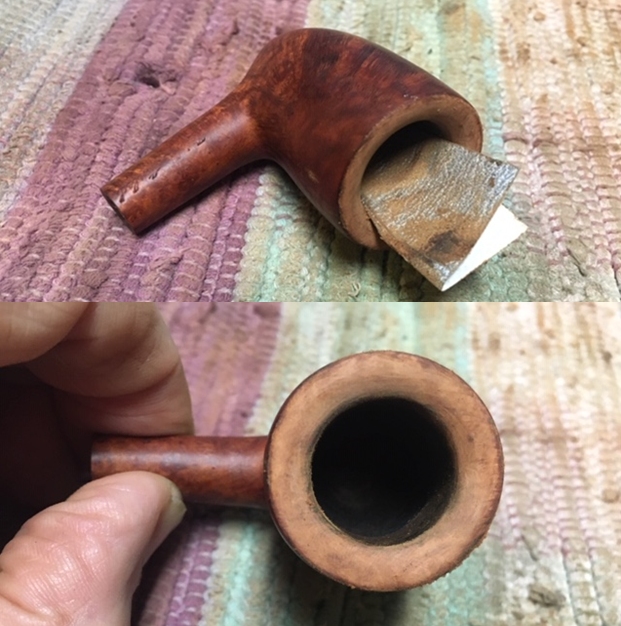
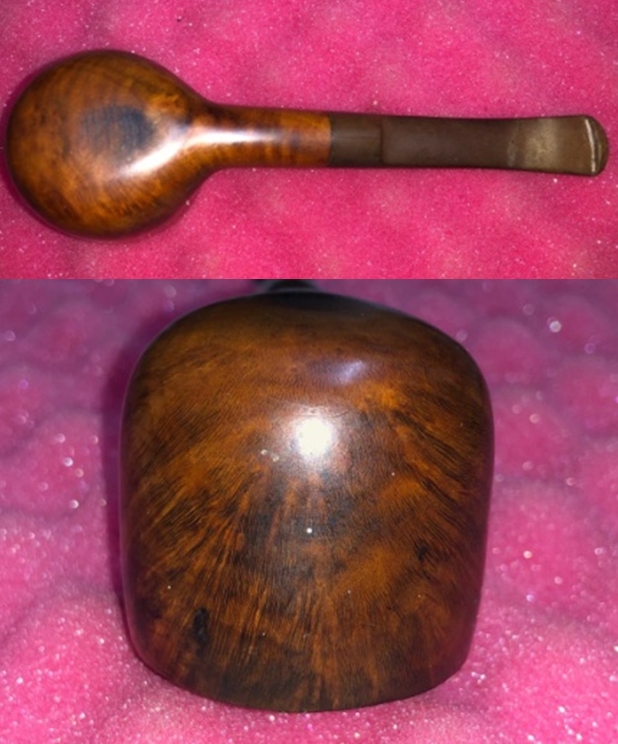
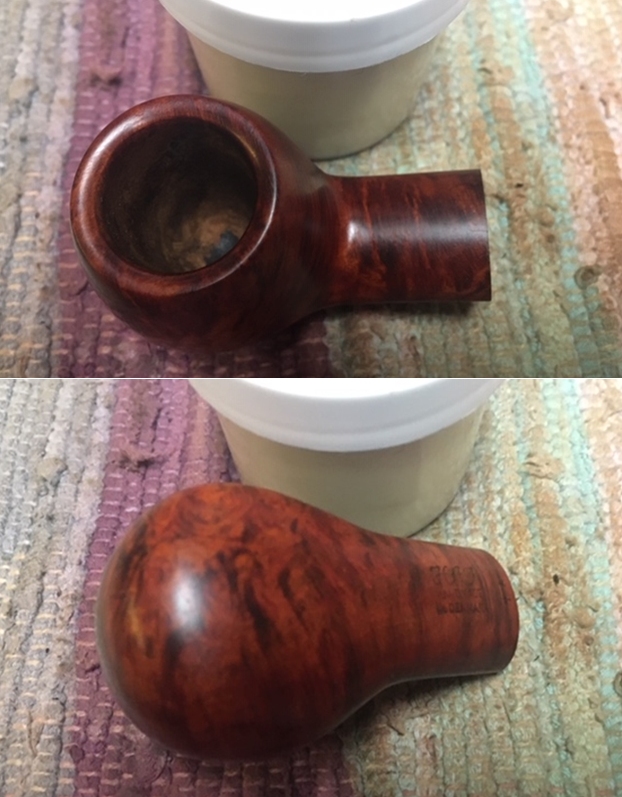
 The stummel was clean and free of any accumulated grime. As observed earlier, there is not a single fill anywhere on the stummel. The only cause of concern is the darkened spot over the foot of the stummel. I felt the spot for softness with my nail and it appeared sufficiently solid, thus confirming that it’s not an all out burned heel. Rest of the stummel feels solid and robust to the touch. This piece of briar should polish up nicely.
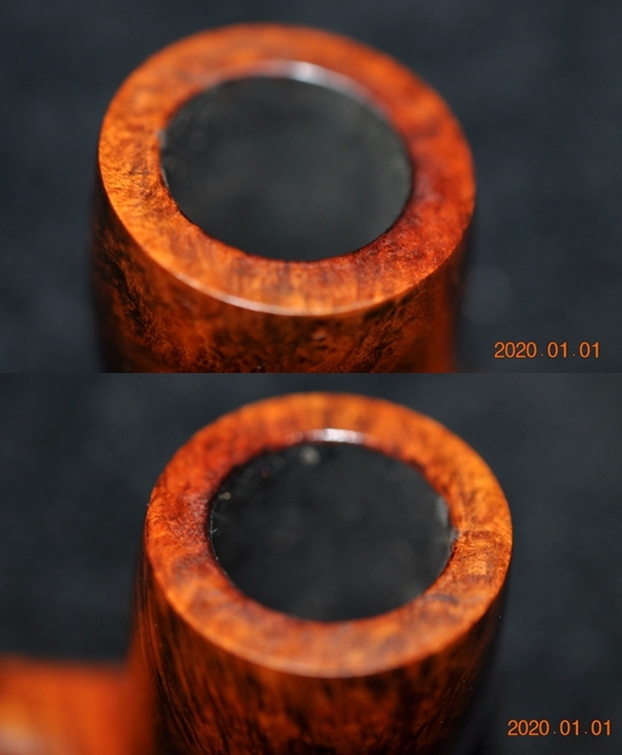
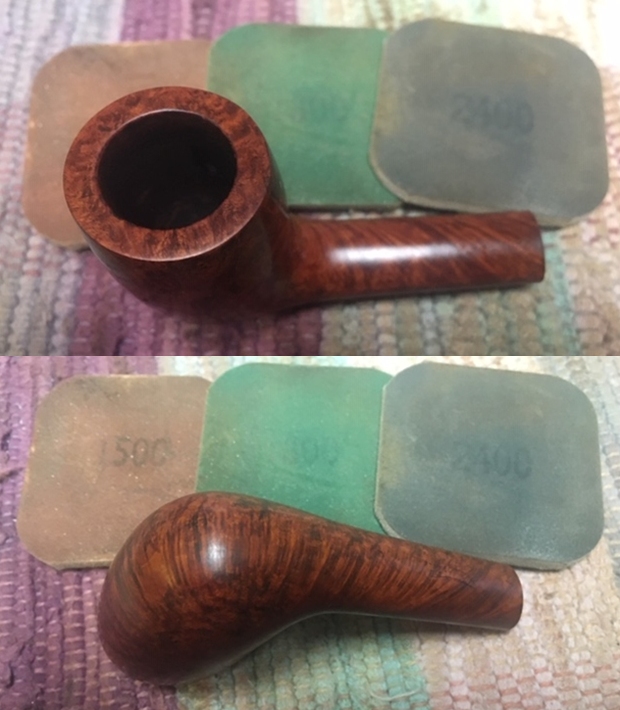
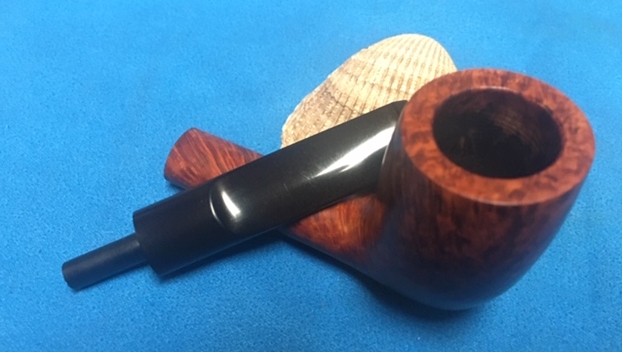
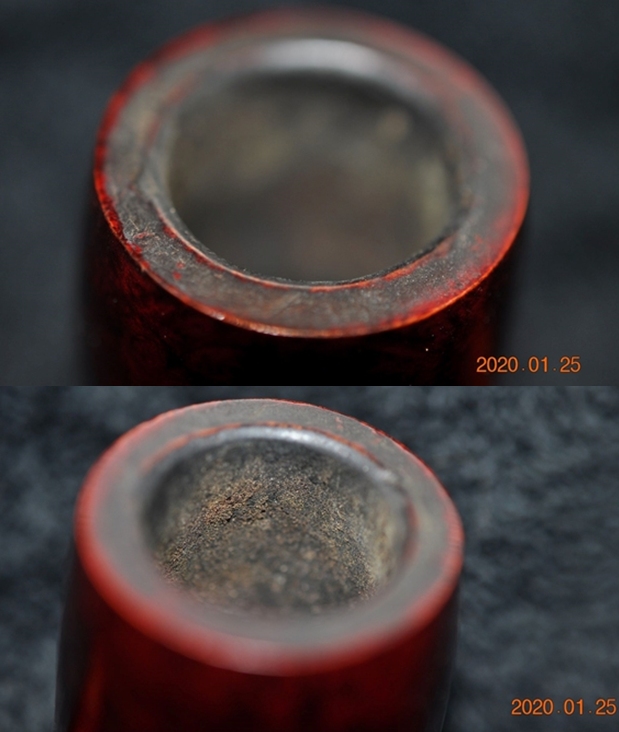
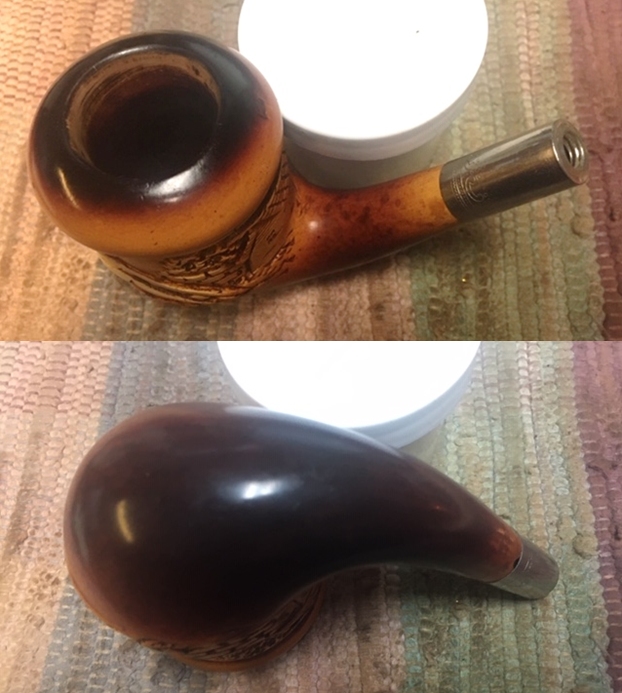
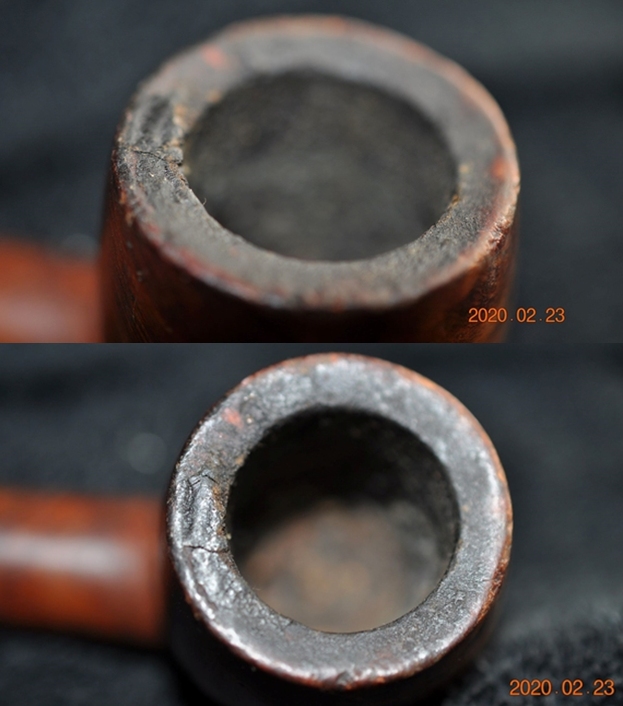
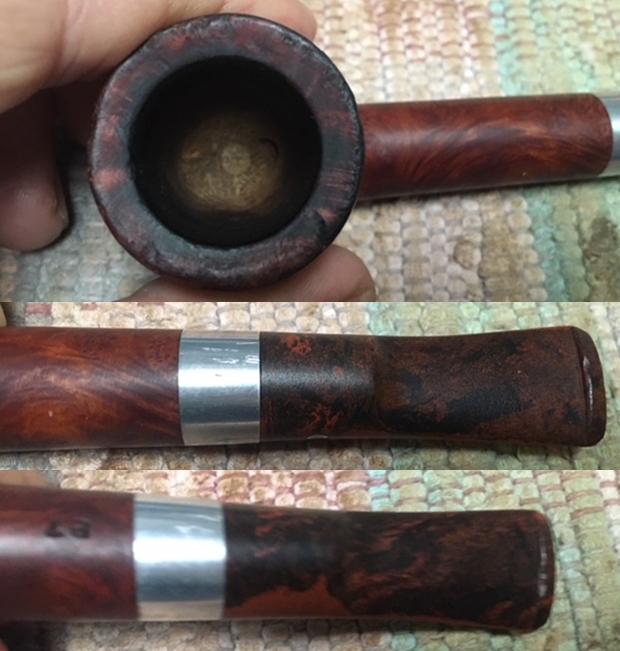
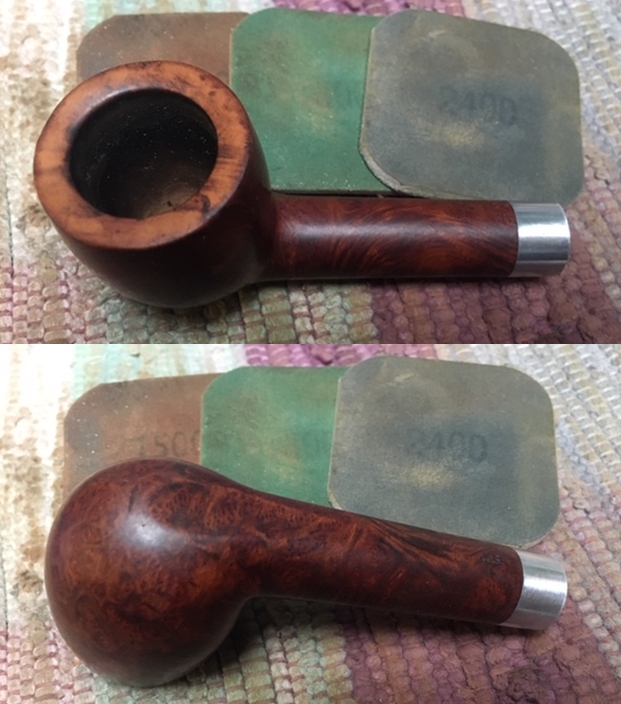
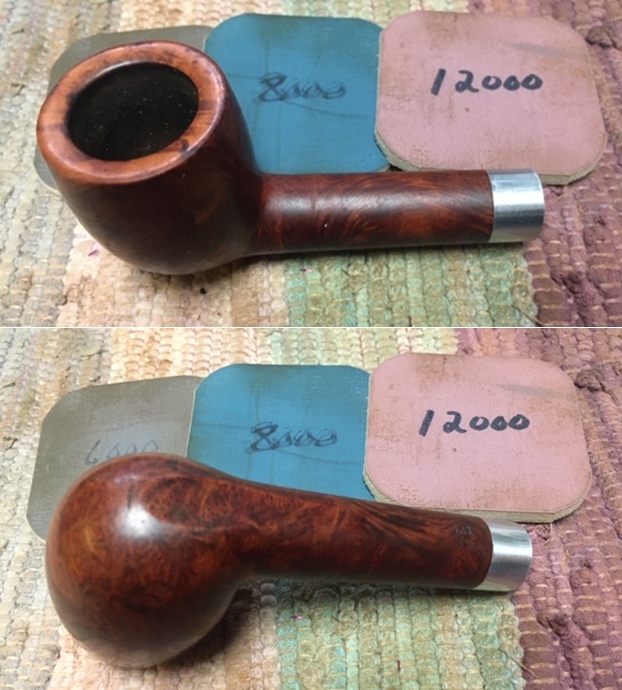
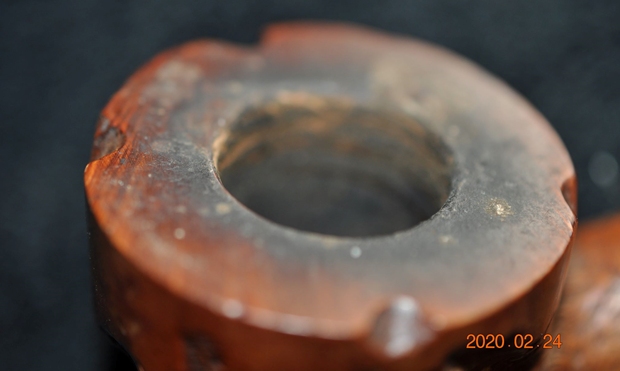
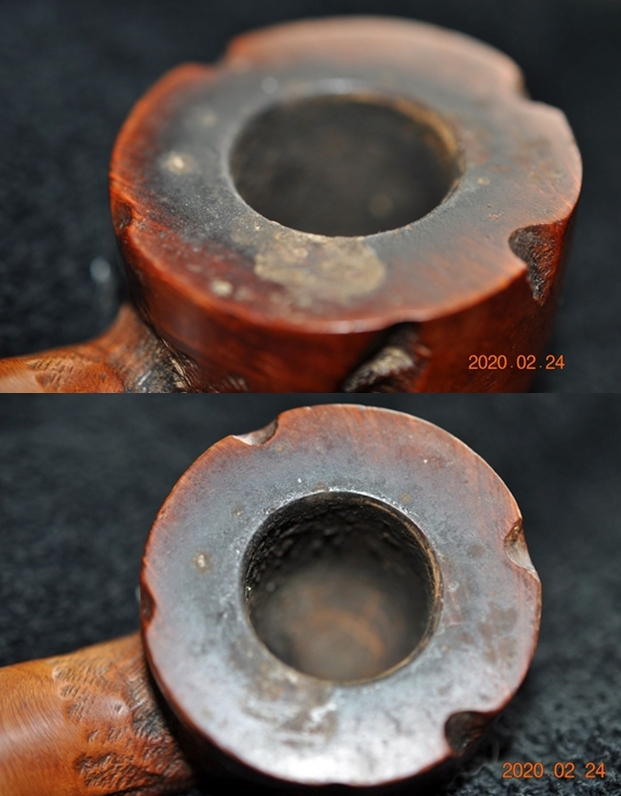
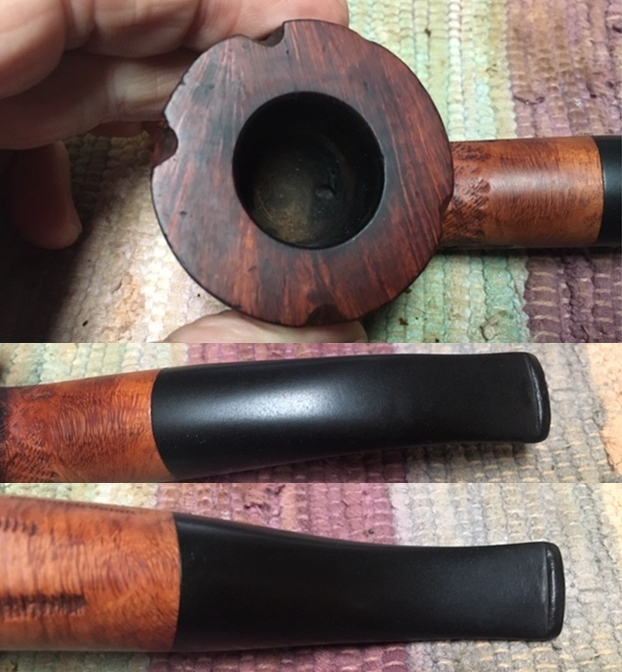
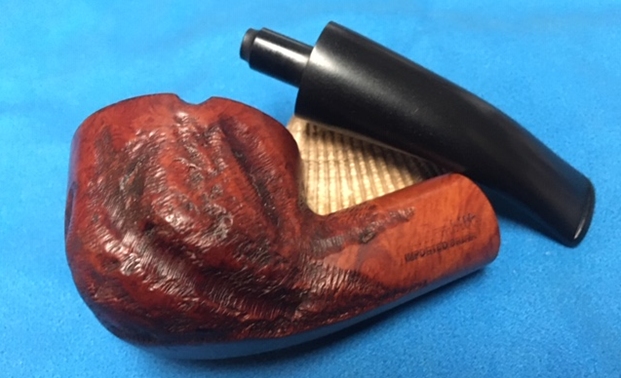
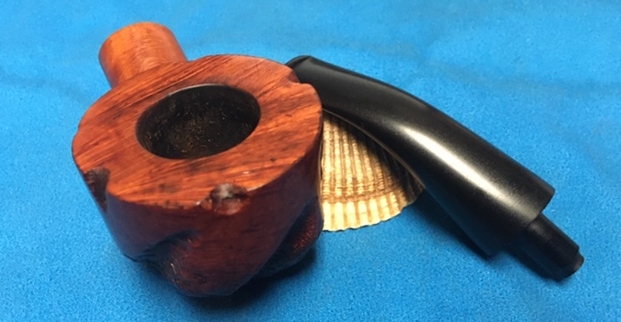
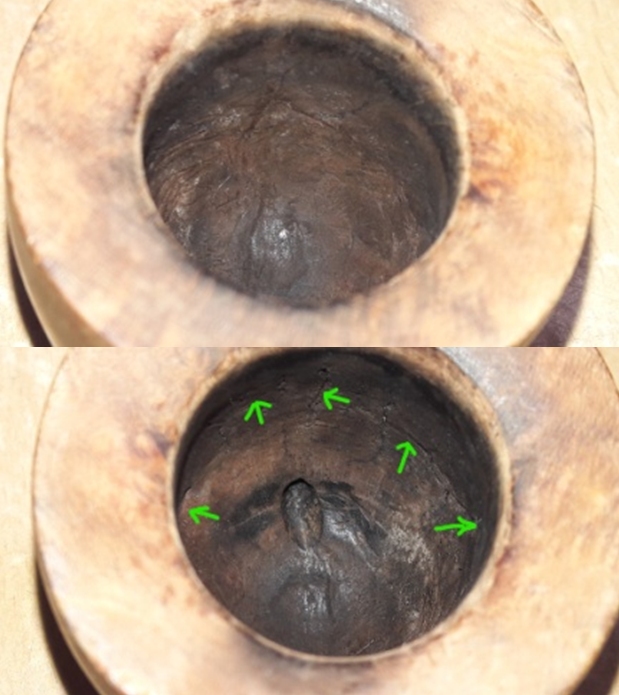
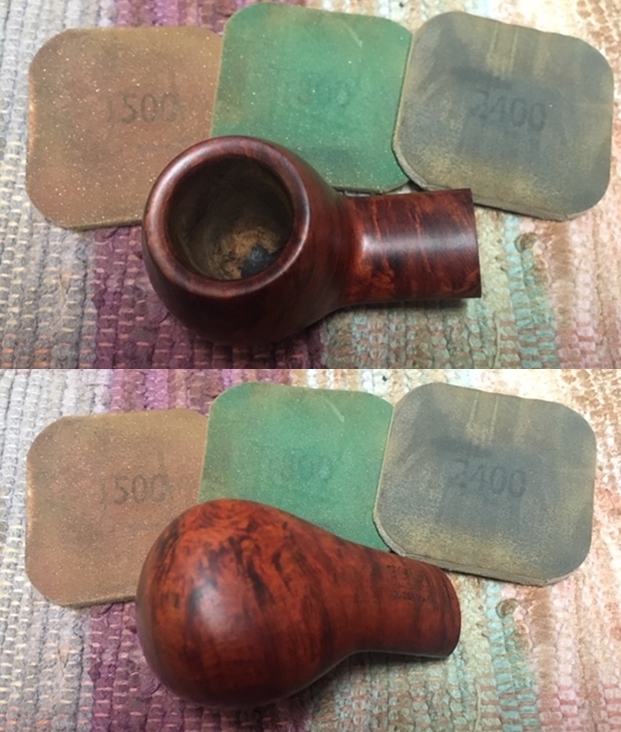
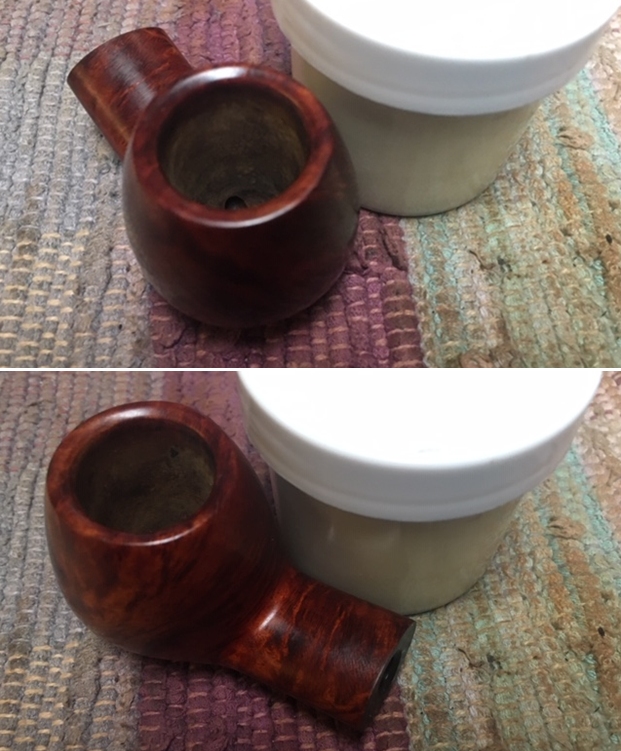
 I was eager to understand the extent of burn out in the heel of the bowl. True enough, I could make out a dark patch just in front of the draught hole approximately at the center of the heel (marked in yellow). The chamber shows a few vertical minor heat lines all along the front of the walls emanating from the dark patch and further branching out horizontally to either side. The entire heel of the bowl appears dark and when seen in conjunction with the foot darkening, this issue needs to be investigated and addressed. The inward sloping rim top surface is in decent condition with the inner rim edge showing slight deformation and darkening in 6 o’clock and 1 o’clock direction (circled in red). The outer rim edge show few dents and dings. Thus, I would need to address issues of the darkened heel, inner rim edge and dents and dings to the outer rim edge.

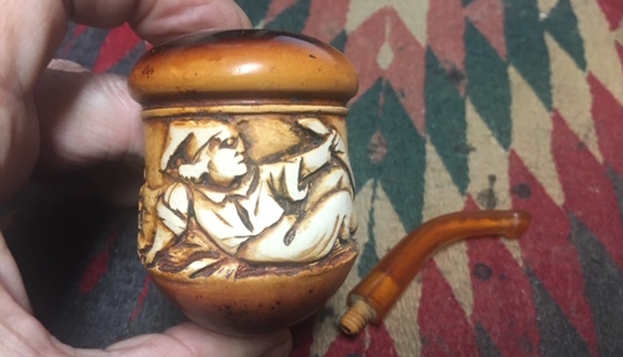
 The mortise and shank is nice and clean. The ghost smells are history and reflects the thoroughness with which Abha cleans the internal and external of the pipe.
 The stem had cleaned up nicely and is in pristine condition. Whatever, little oxidation remains, will need to be removed by sanding with a folded piece of 220 grit sand paper and follow it up with polishing with micromesh pads.
  The Process
The first issue on the agenda that I decided to tackle was to address the dark patch to the heel observed just in front of the draught hole and correspondingly to the foot of the stummel. The black patch is bounded by the yellow arrows and the alignment of the web of these minor heat fissures is indicated by the green arrows. With a pointed dental tool, I scraped the black patch in the heel of the chamber and completely removed the dead charred briar from the surface till I reached solid intact briar. Thereafter, I removed the charred briar from the heat fissures till I had reached solid briar. Once the dead and charred briar was removed, there was a need to give a protective coat over the surface to avoid direct contact of the briar with the burning tobacco as the thickness from these damaged areas were slightly reduced. I would achieve this by coating the walls of the chamber with J B Weld mix.
 I preceded the stummel repairs first by coating the walls of the chamber with a slightly thick layer of J B Weld. J B Weld is a two-part epoxy Cold Weld in two tubes; hardener and steel which are mixed in two equal parts (ratio of 1:1) with hardening time of 5-6 minutes and complete curing time of 6-8 hours. I poured the contents of the two tubes and mixed it well. I inserted a petroleum jelly coated regular pipe cleaner through the draught hole to prevent it from getting blocked due to the J B Weld mix. I applied this mix, as evenly as possible, over the entire chamber wall surface. I worked fast to ensure an even coat over the chamber walls before the weld could harden. I set the stummel aside for the application to harden and cure overnight.
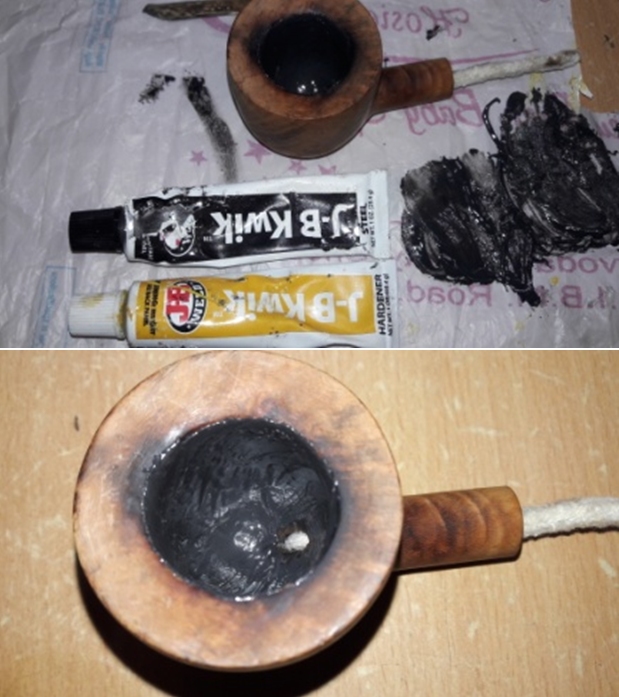 While the J B Weld coat was curing, I worked the stem by first sanding it down with a folded piece of 220 grit sand paper. This step addresses the twin issues of removing residual stubborn oxidation and also smooth out the minor tooth chatter from the bite zone. I wiped the stem with Murphy’s Oil soap and cotton swab to remove the resulting sanding dust. I rubbed in a small quantity of EVO in to the stem and set it aside to rehydrate.
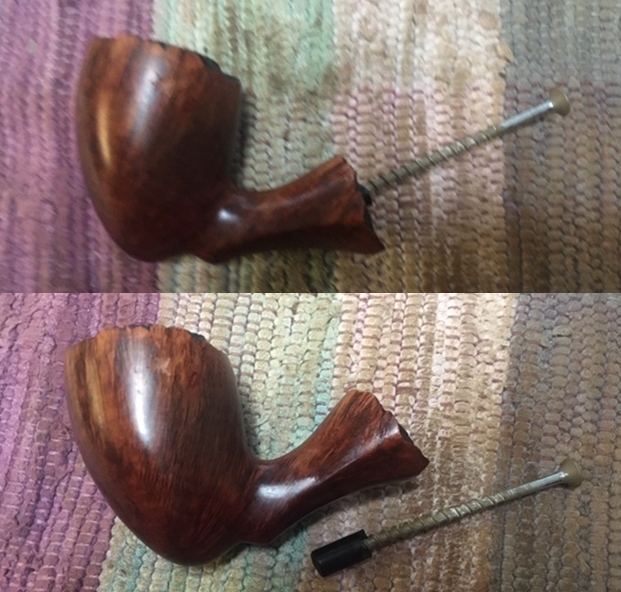
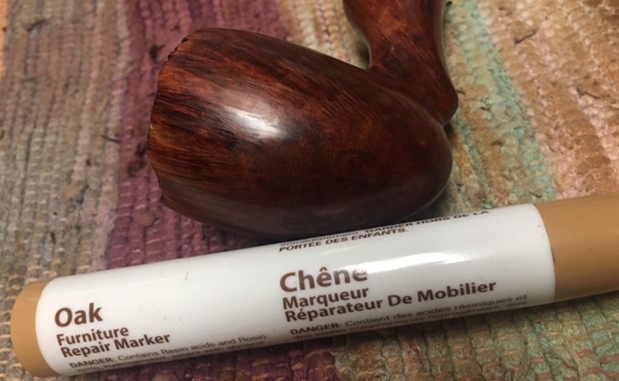
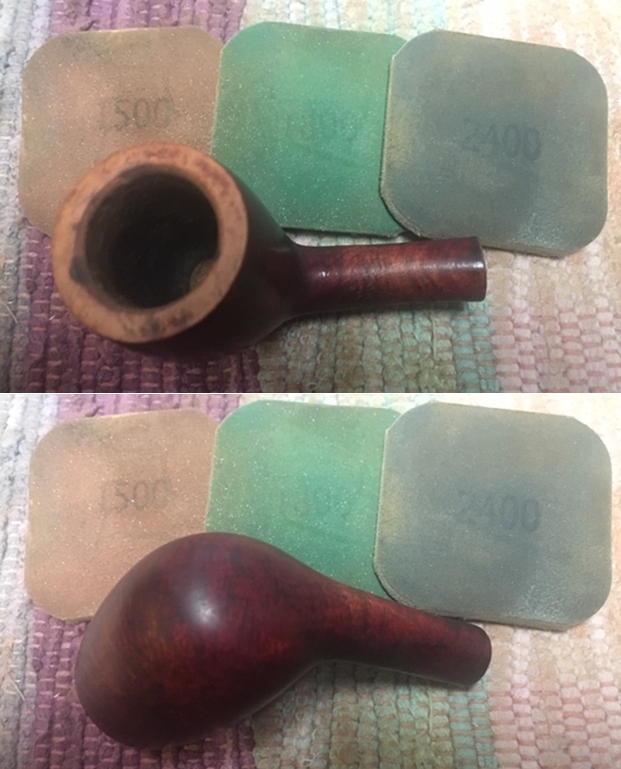
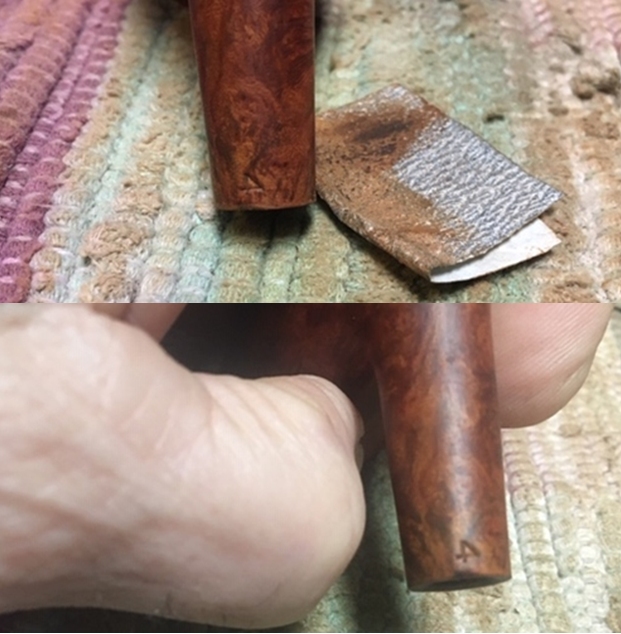
 Turning my attention back to the stummel, I sand the entire stummel surface with a folded piece of 220 grit sand paper to remove the minor dents and dings from the surface. This also helped to lighten the darkened spot from the foot of the stummel.
 Staying with the stummel repairs, the next issue I addressed was that of the damage to the rim top surface. The rim top surface is sloping inwards, making topping impossible without compromising the profile integrity. To address the issue of darkened rim surface, I sand it with a folded piece of 220 grit sand paper pinched between my thumb and fore finger, moving along in the direction of the surface profile. Simultaneously, I addressed the issue of charred inner rim edge and the dings and chips to the outer edge, by creating a slight bevel to both the rim edges. I am happy with the appearance of the stummel at this stage.
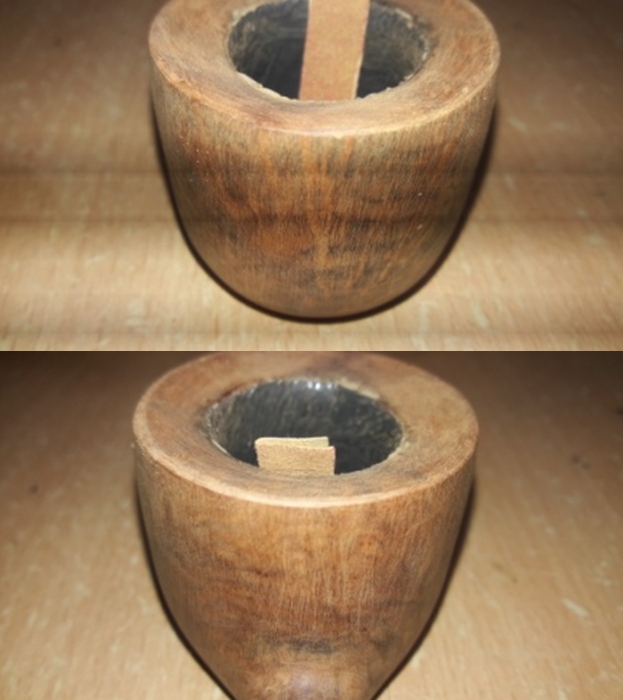

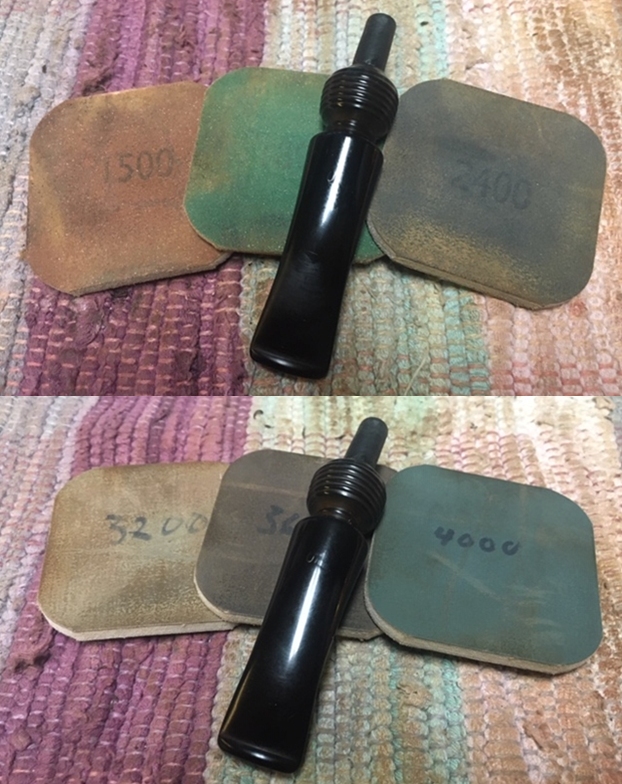
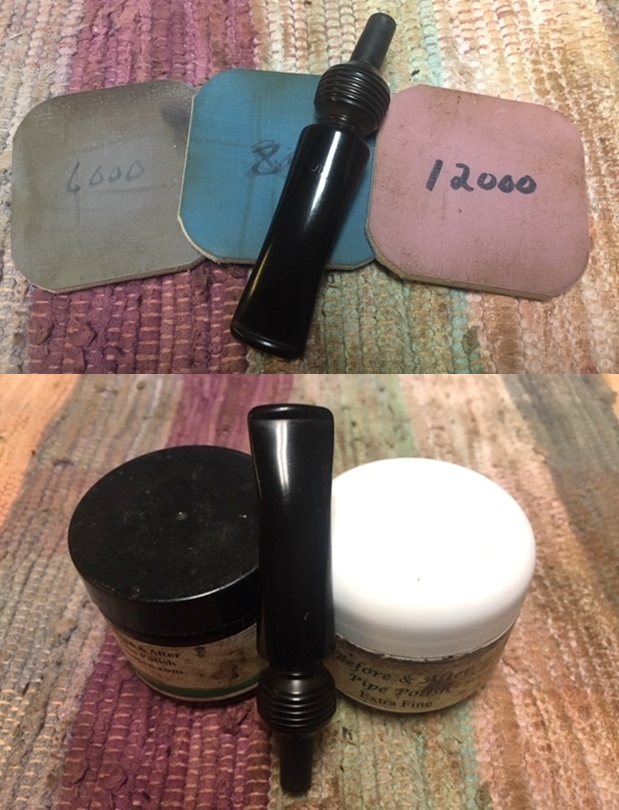
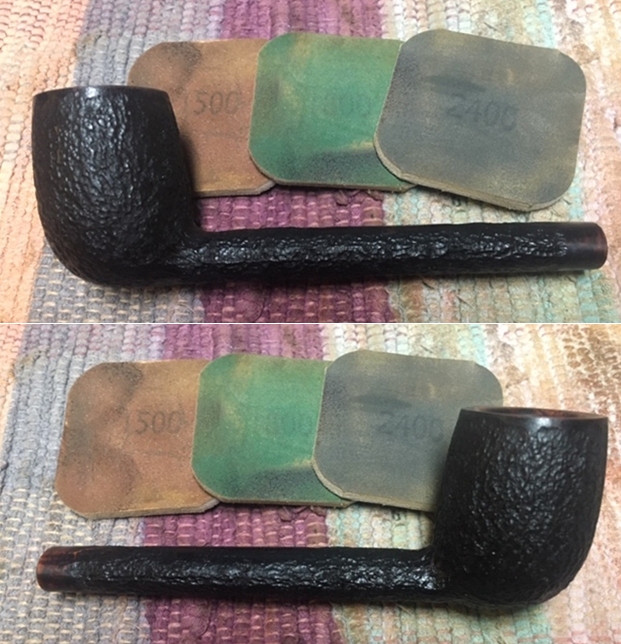
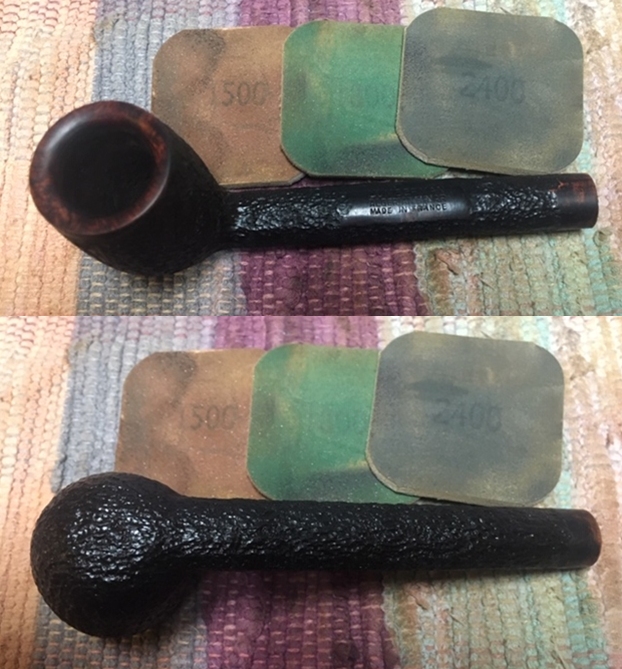
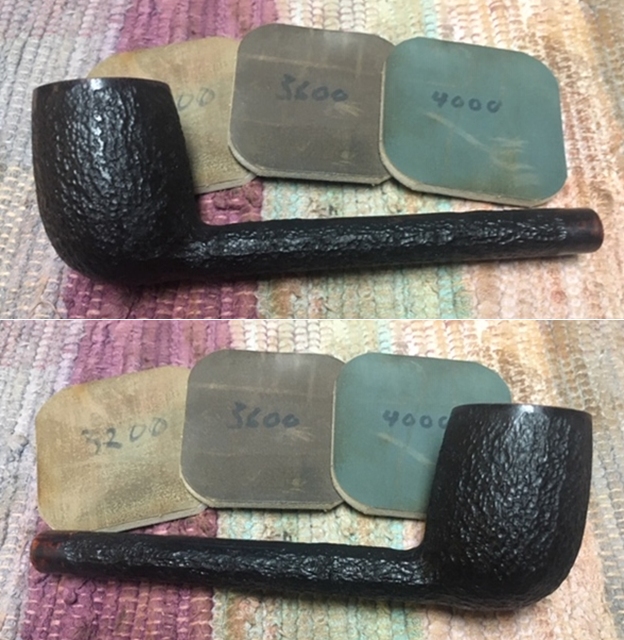
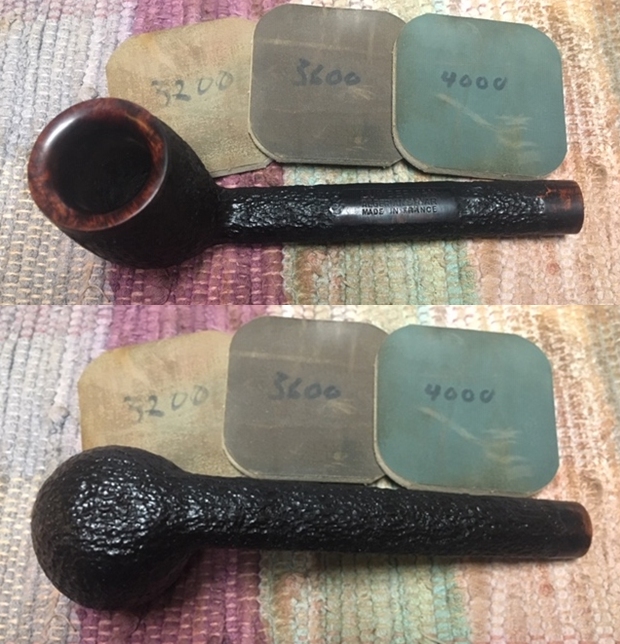
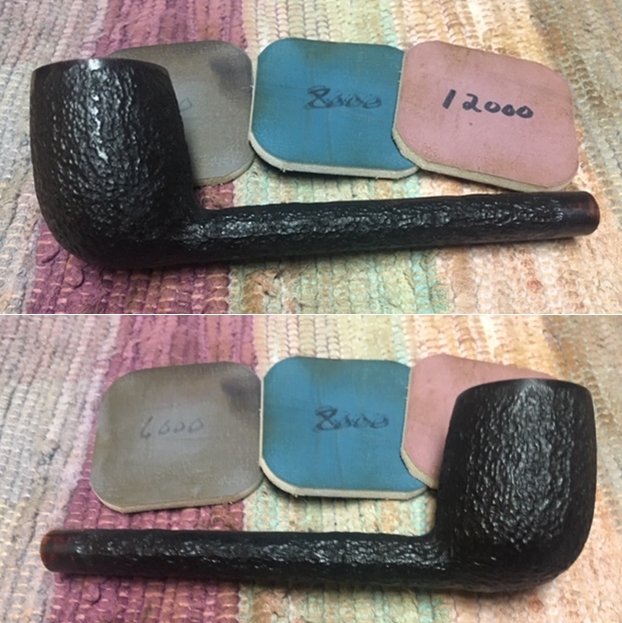
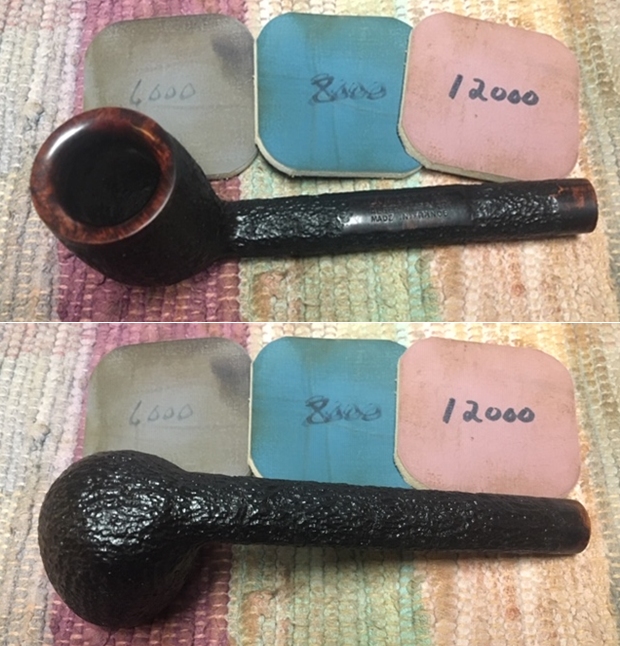
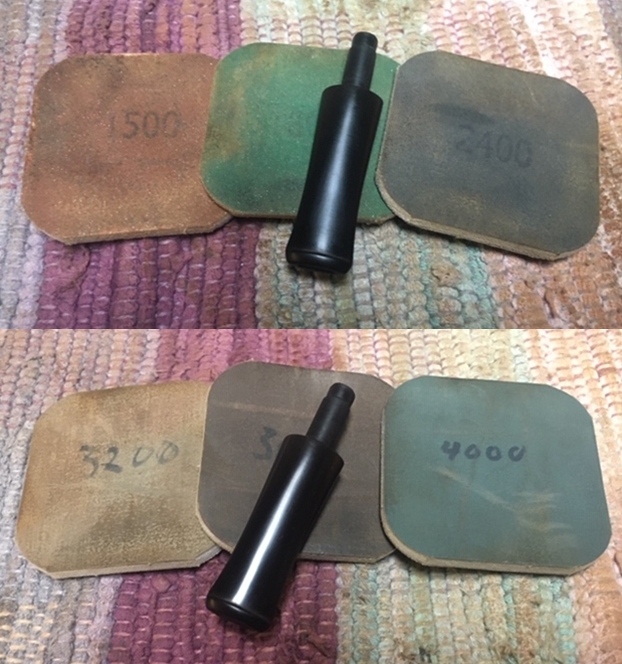
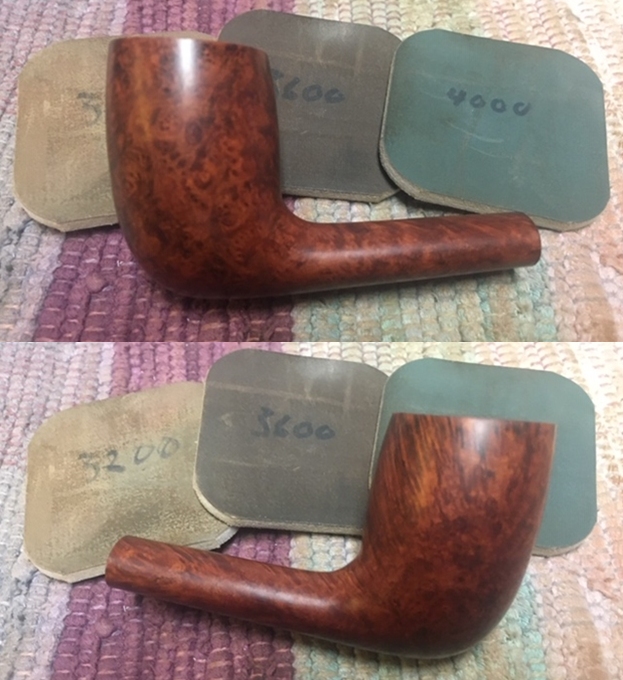
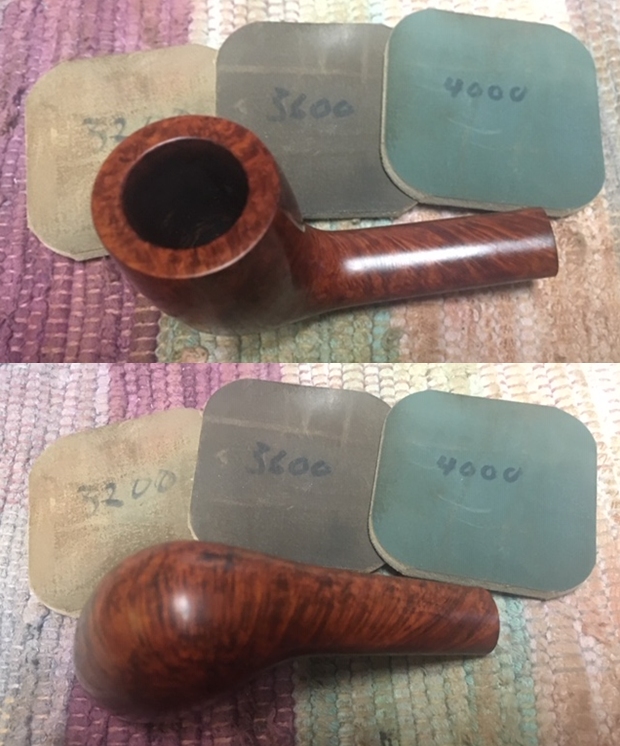
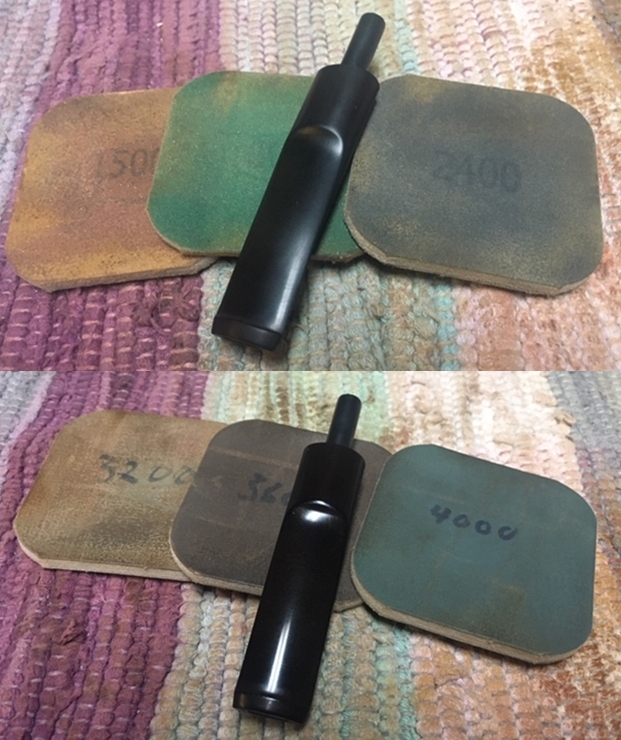
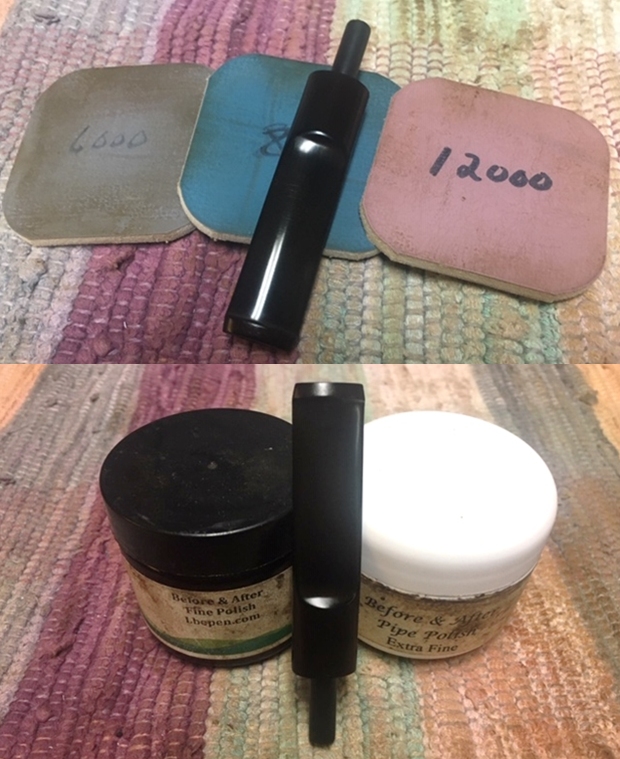
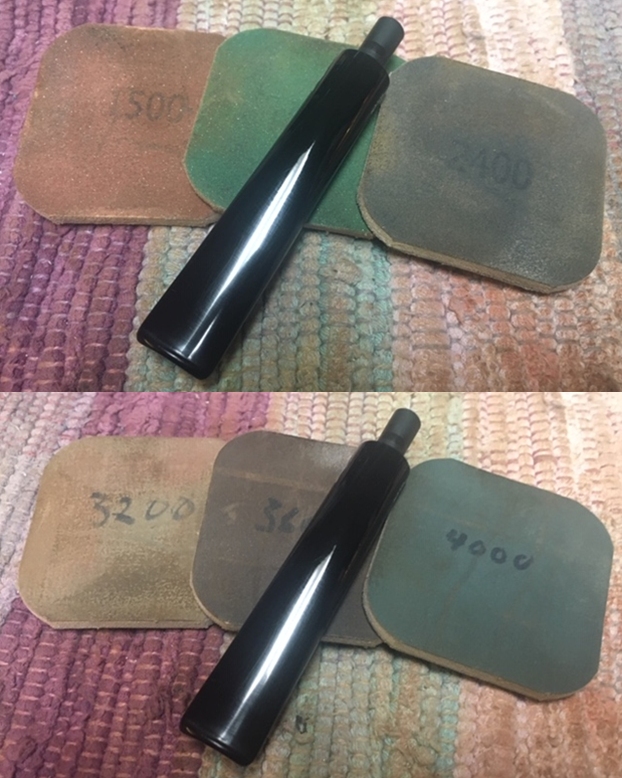
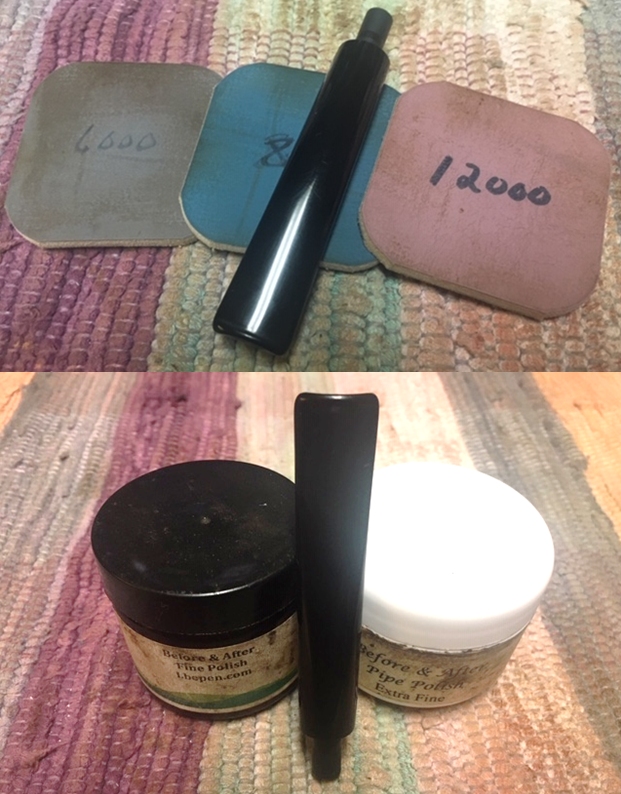
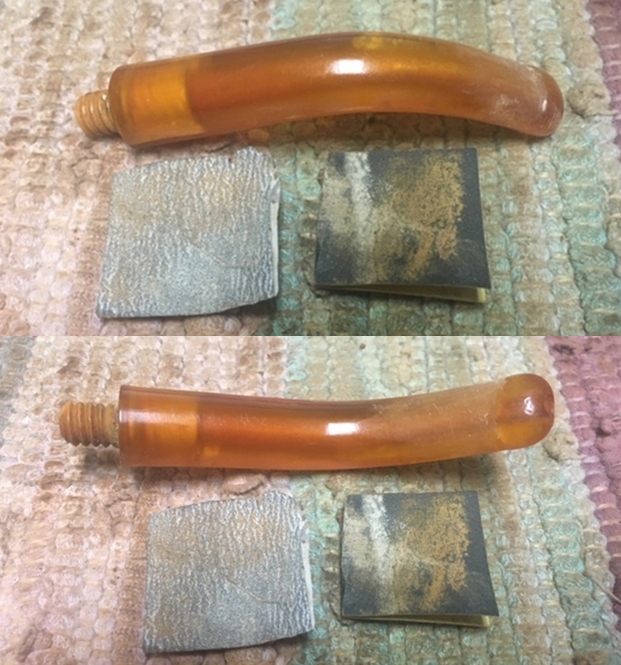
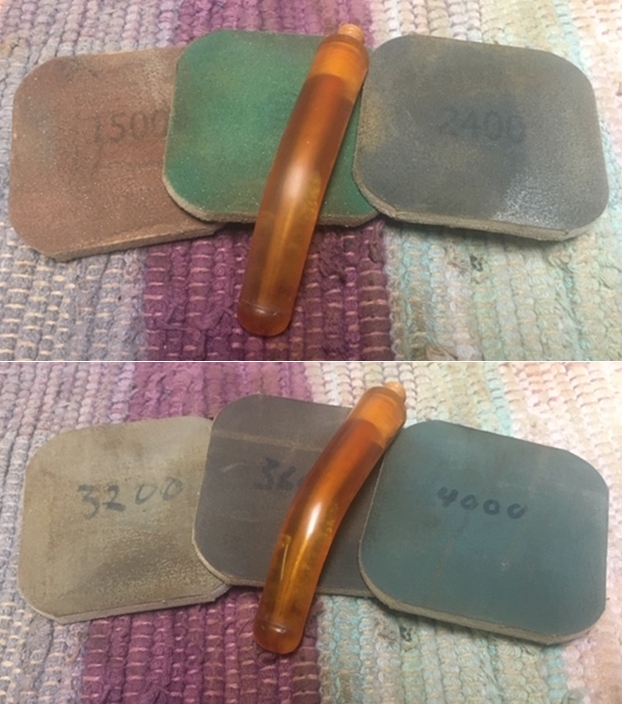
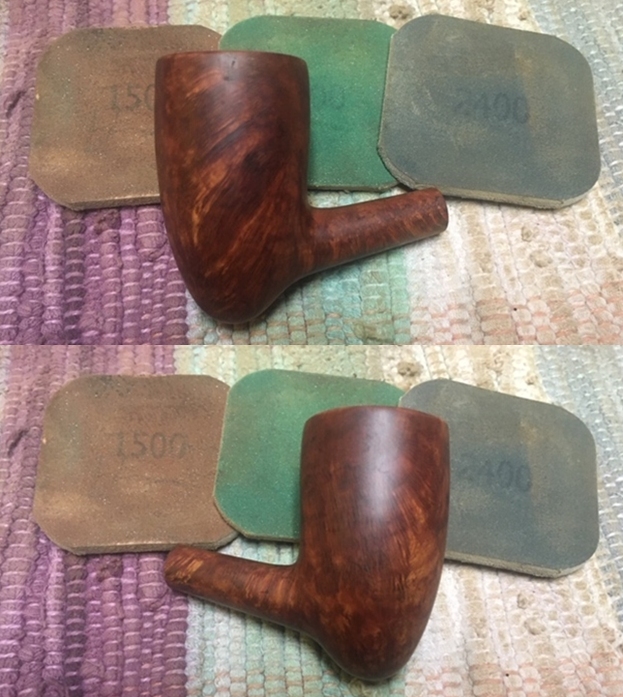
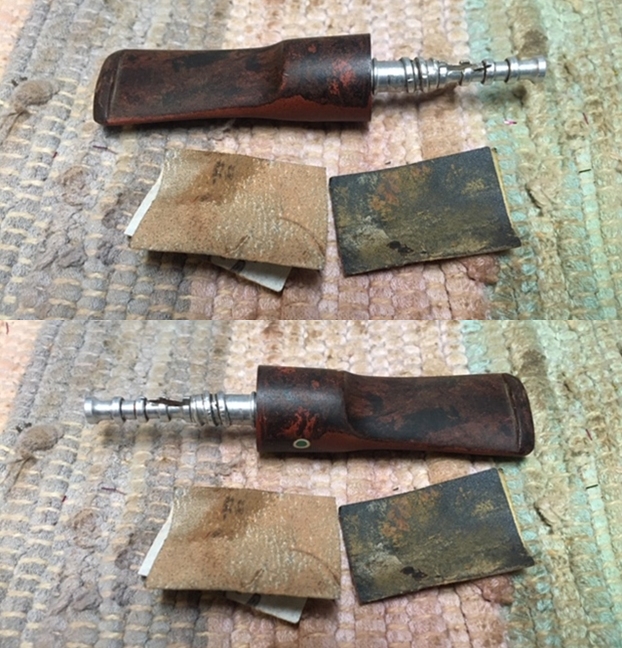
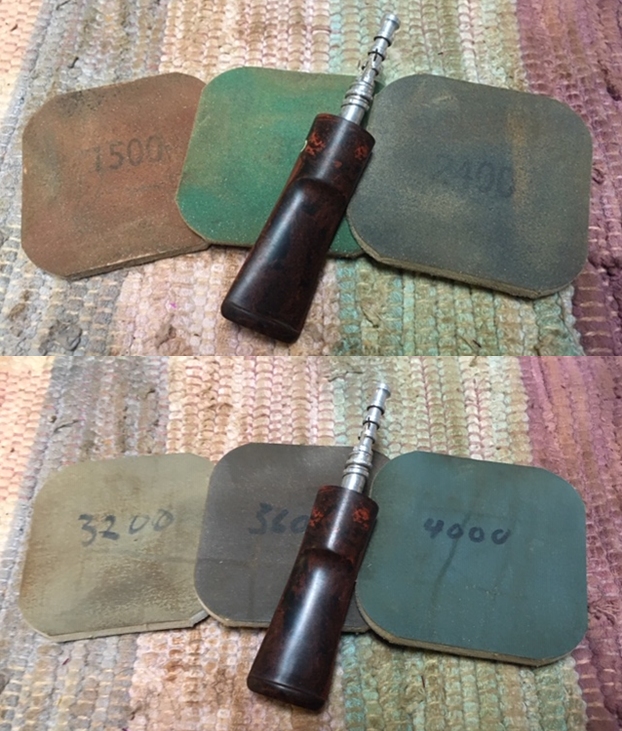
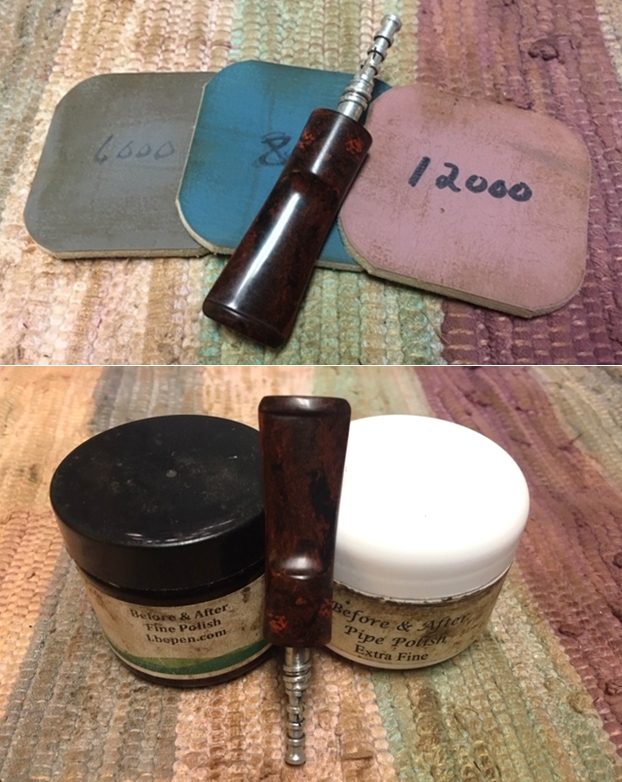
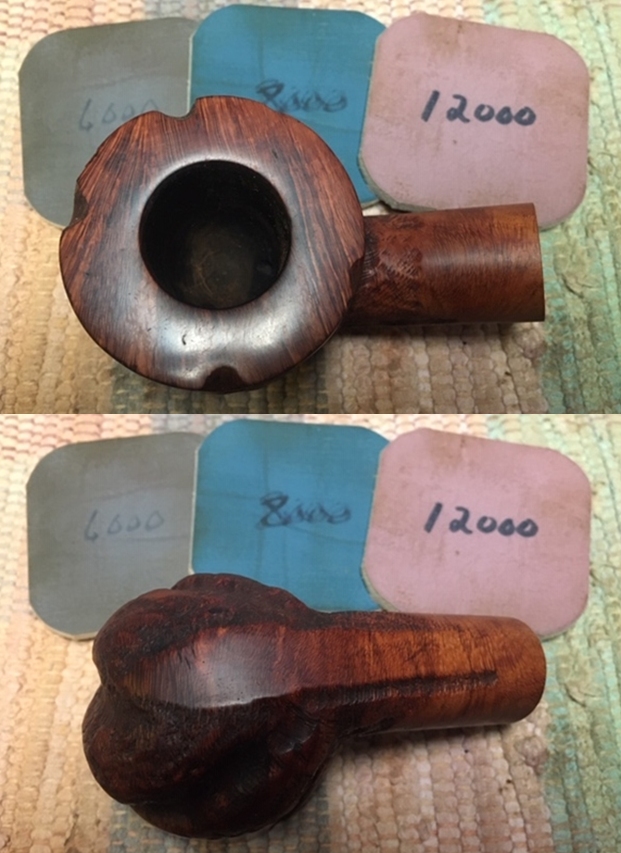
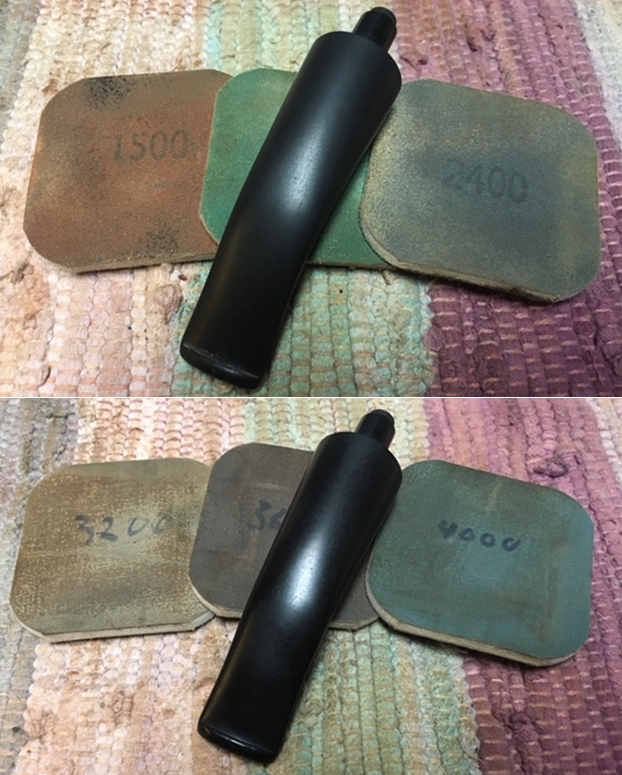
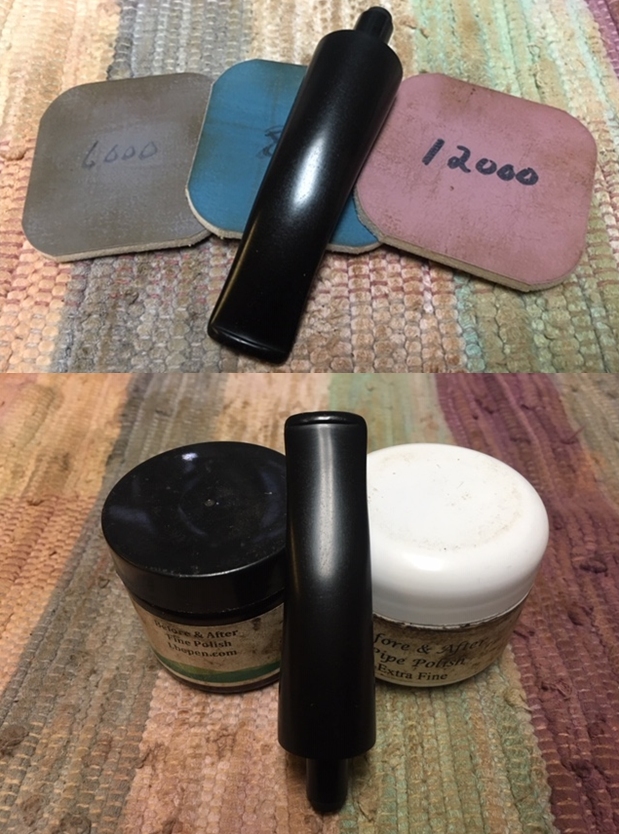
 I switch back to the stem and further sand it with 400, 600 and 800 grit sand paper. I wiped the stem with cotton pad dipped in alcohol to remove the resultant dust. I rubbed some extra virgin olive oil into the stem and set it aside to be absorbed. I polished the stem with micromesh pads, wet sanding with 1500 to 12000 grit pads. I rubbed a little extra virgin olive oil in to the stem at the end of all the micromesh pads. I finished the polishing of the stem by rubbing a small quantity of Paragon wax and giving it a final polish with a soft cotton cloth. The stem is now nice, smooth and shiny.
 With the stem polishing completed, I moved ahead with completing the stummel repairs. The J B Weld coat had hardened considerably by this time. I mount a sanding drum on to my hand held rotary tool and setting the speed to half of the full RPM, I sanded the excess coat from the chamber walls. To further fine tuned and keep the coat to a minimum thickness, I further sanded the coat with a 150 grit sand paper till I had a coat of a thickness that was just sufficient to protect the briar underneath. Here is how the chamber appeared at this stage.
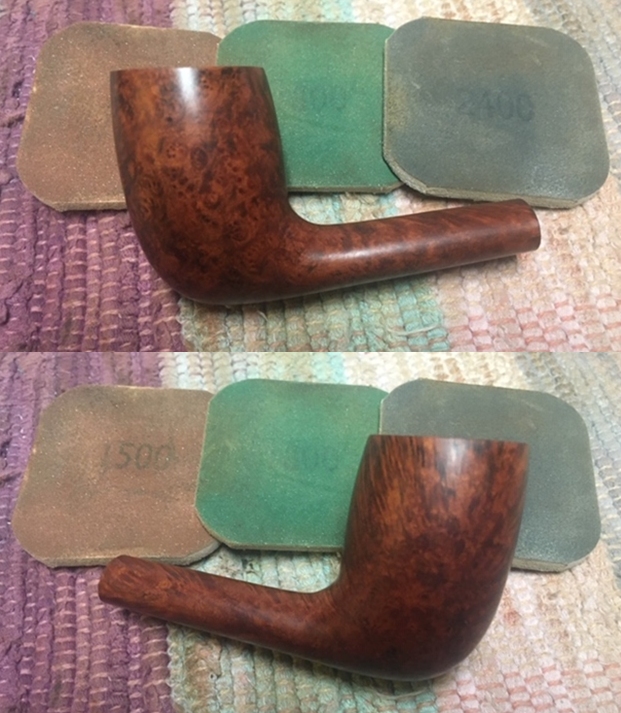
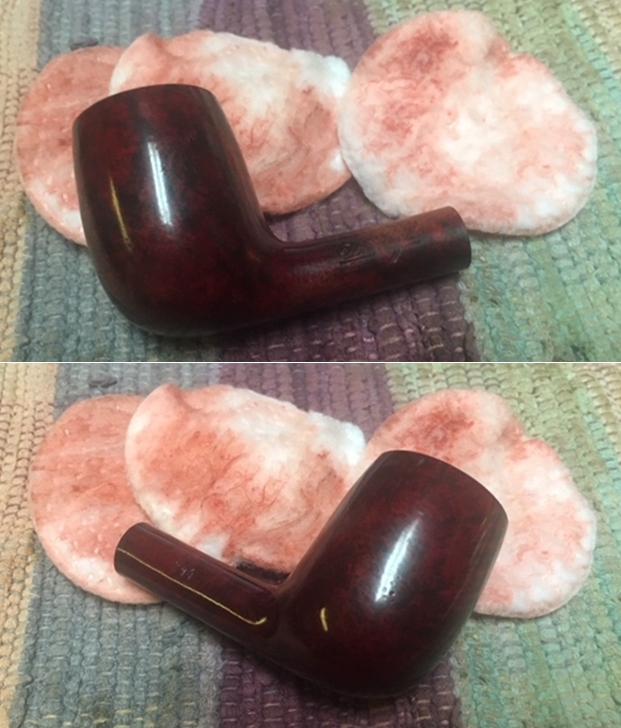
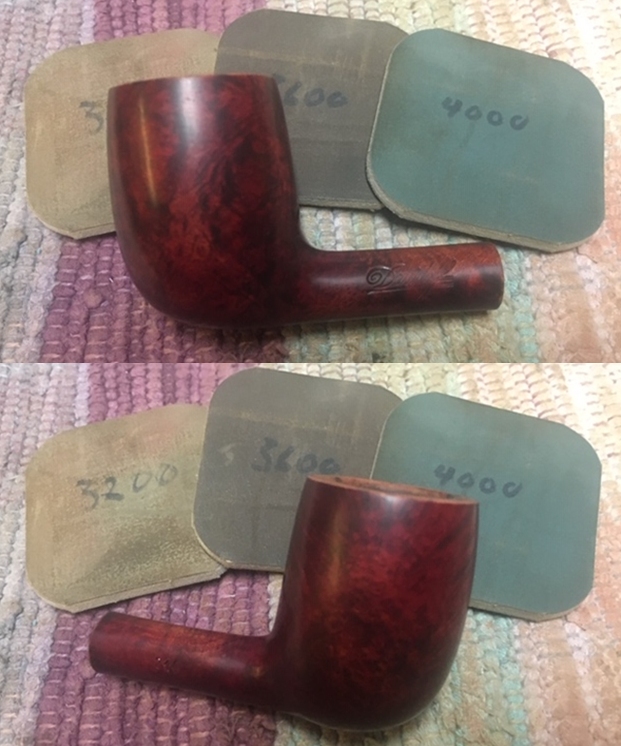
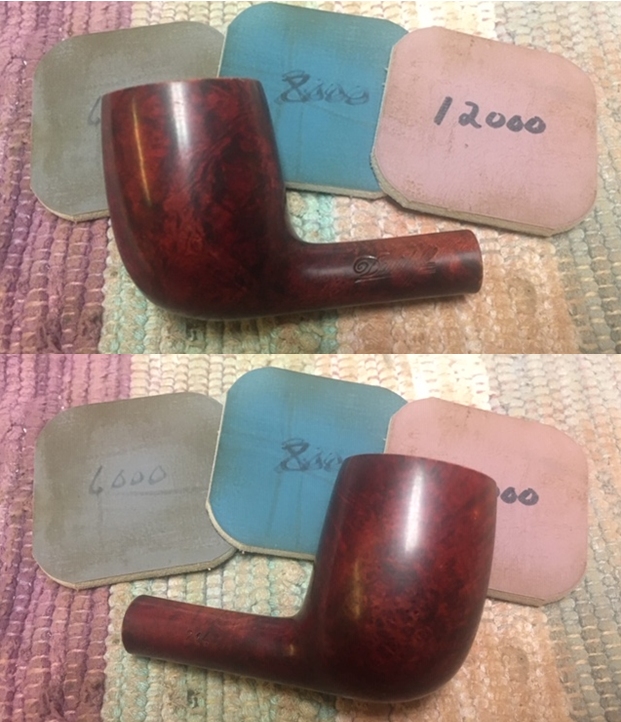
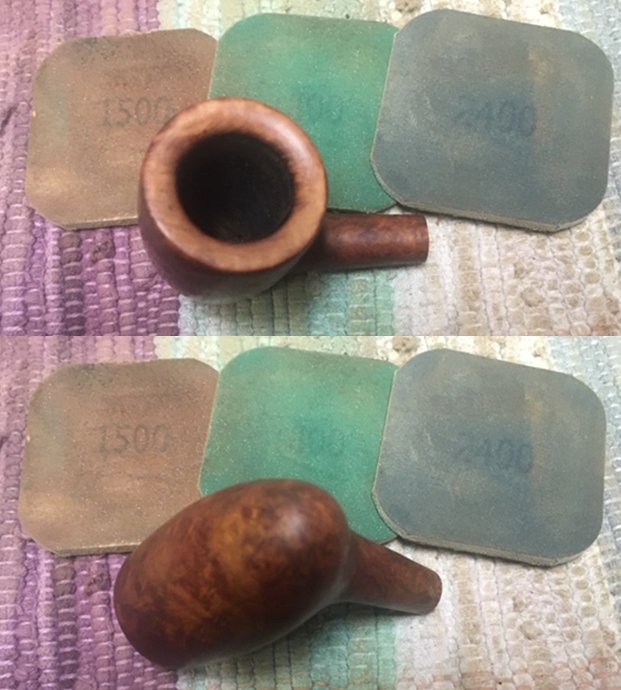
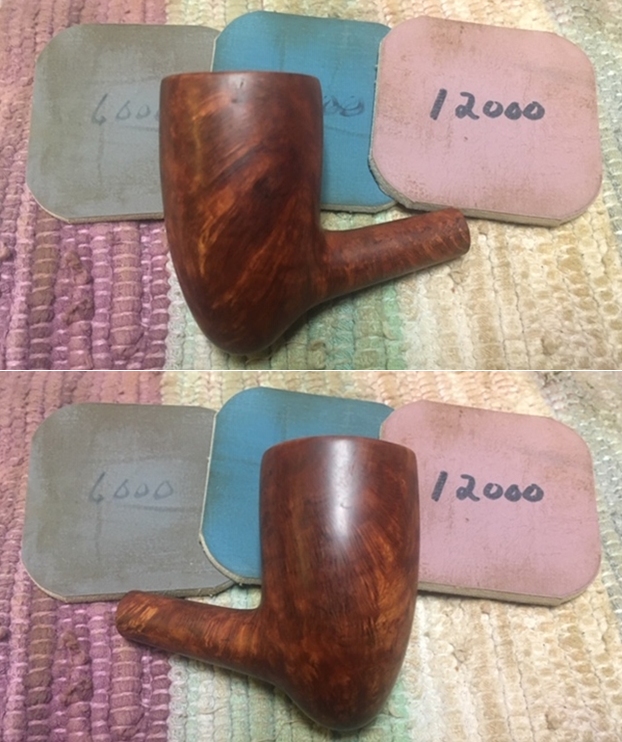
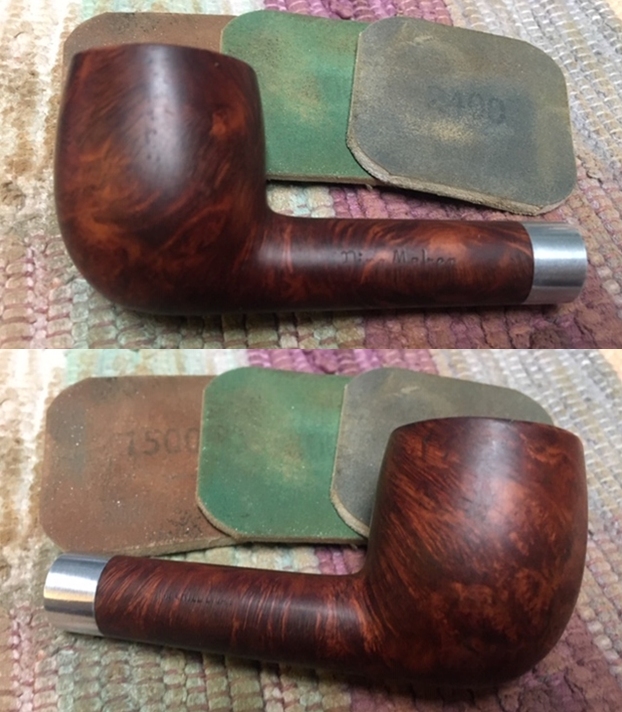
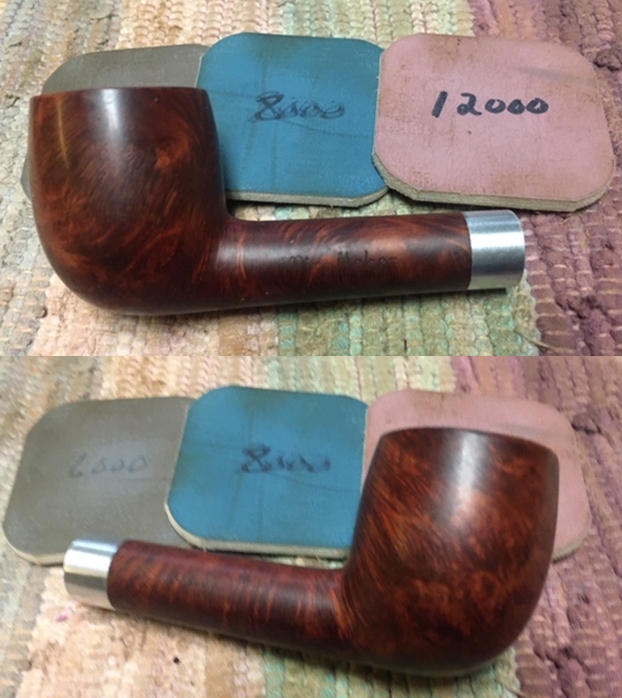
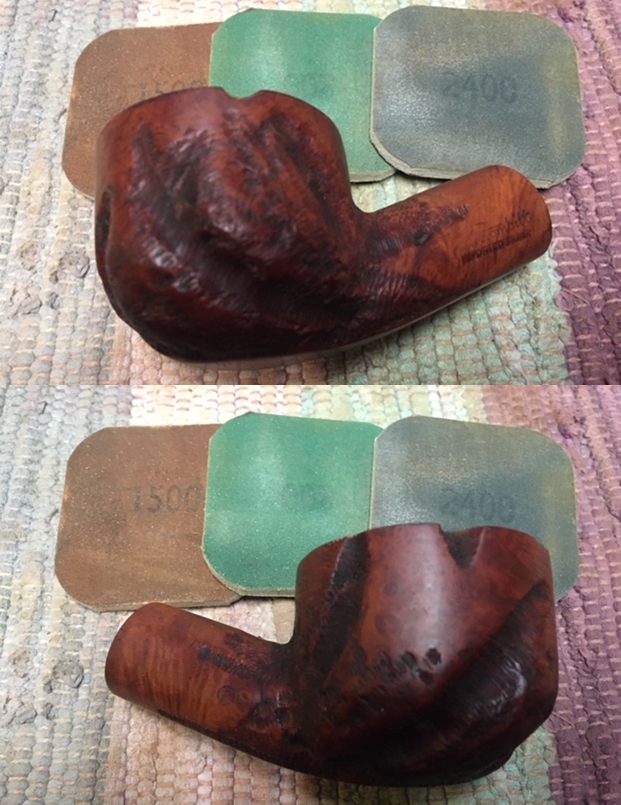
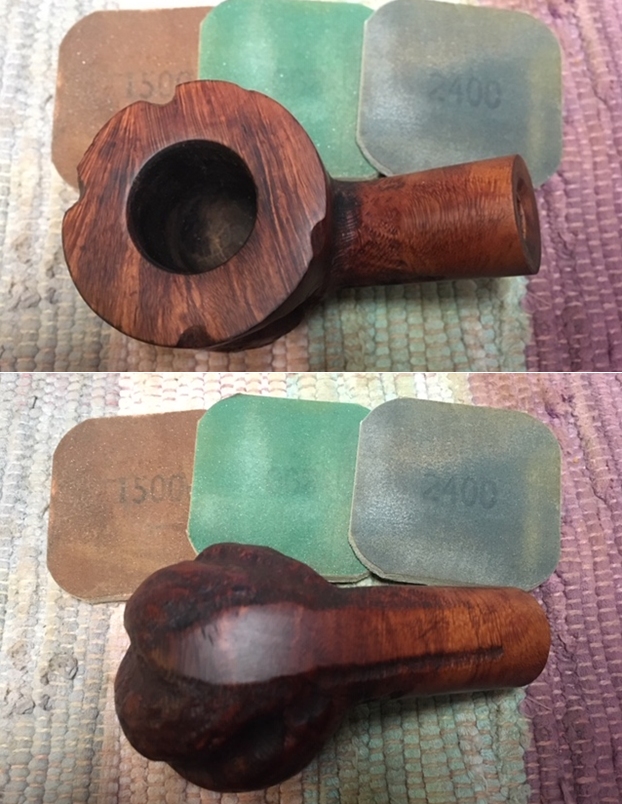
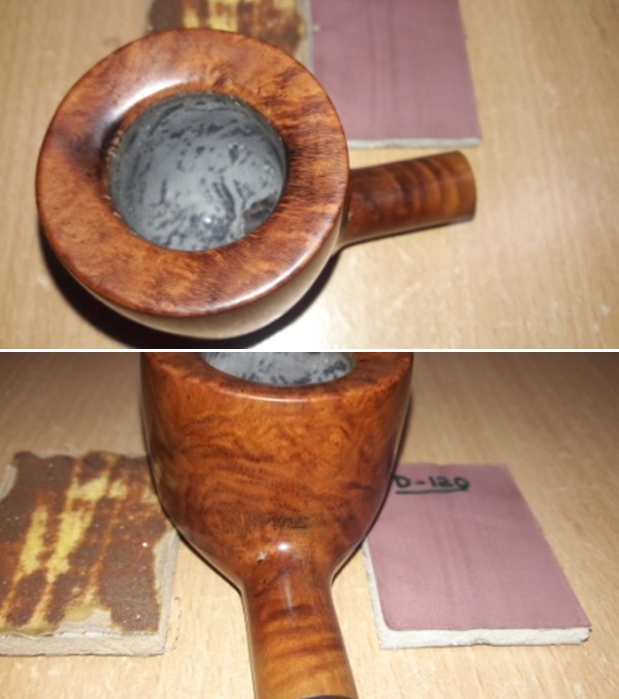
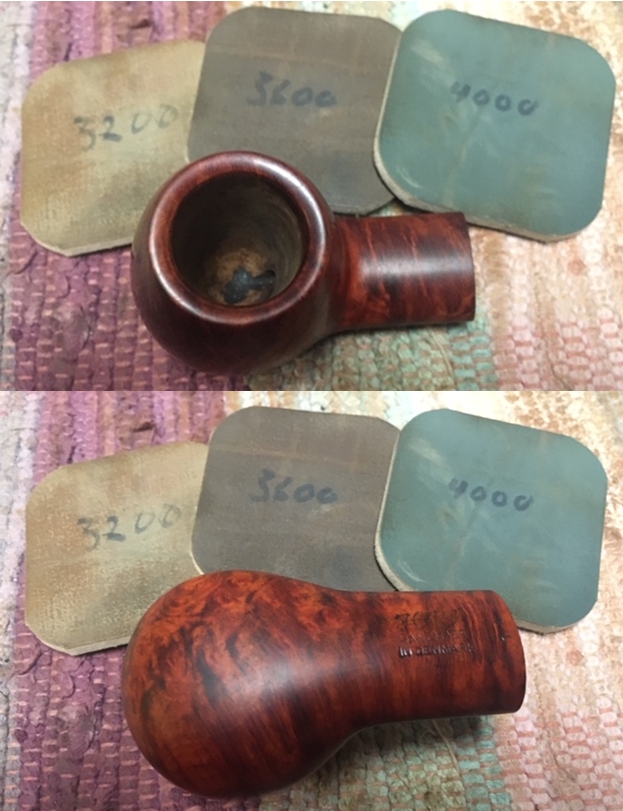
 I polished the stummel with micromesh pads, wet sanding with 1500 to 12000 pads. I wiped the surface with a soft cloth at the end of the micromesh cycle. The stummel looks amazing with a deep shine and beautiful grains popping over the stummel surface. However, the dark rim surfaces in 1 o’clock direction and the dark spot at the foot of the stummel do not present a visually appealing picture. I had the option of either masking them under a darker stain or to let them be. I shall decide after I am done with polishing with Blue Diamond, hoping that this would further lighten these spots.
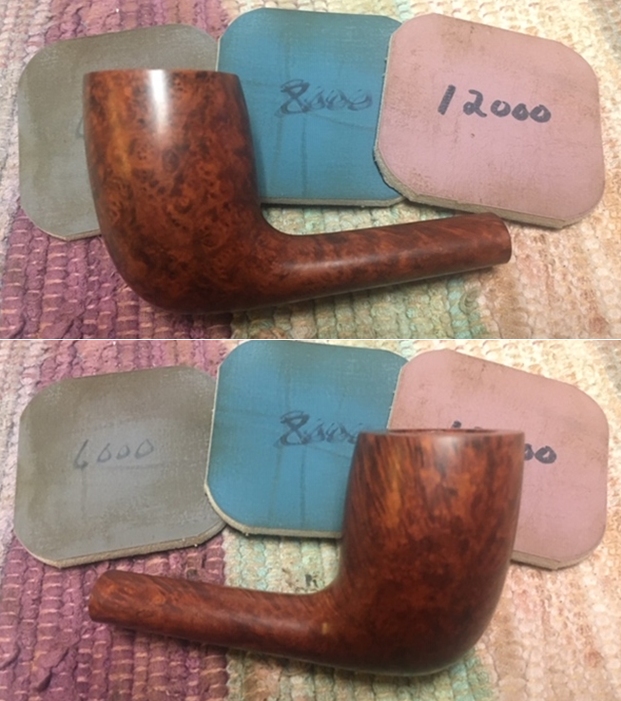
 I followed up the polishing by applying “Before and After Restoration” balm. This balm protects and enriches the briar surface and is highly recommended for use in any restoration of briar pipe. I rubbed it deep in to the stummel surface and set it aside to be absorbed for 20 minutes. I was pleased by the appearance of the stummel, less the dark spots on the rim edge and on the foot of the stummel.
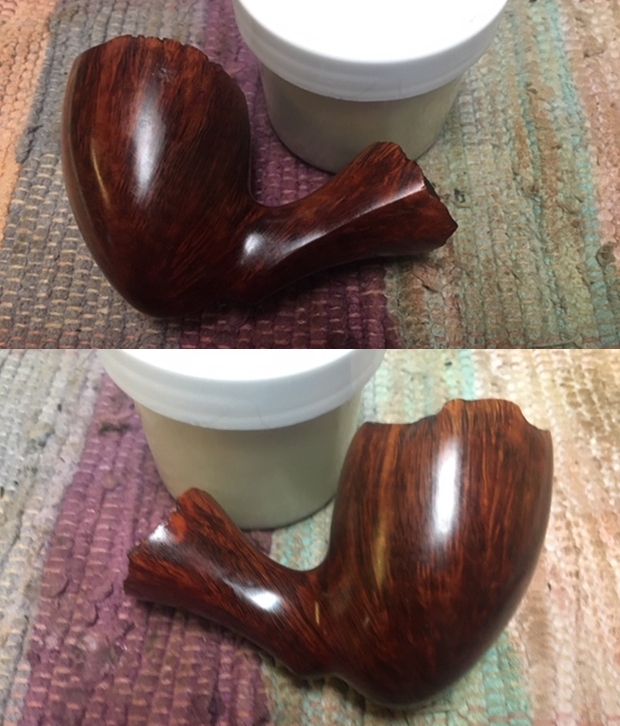
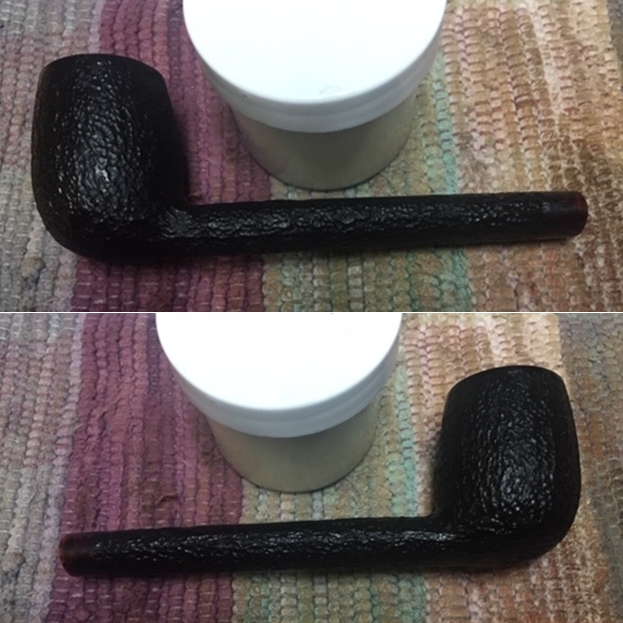
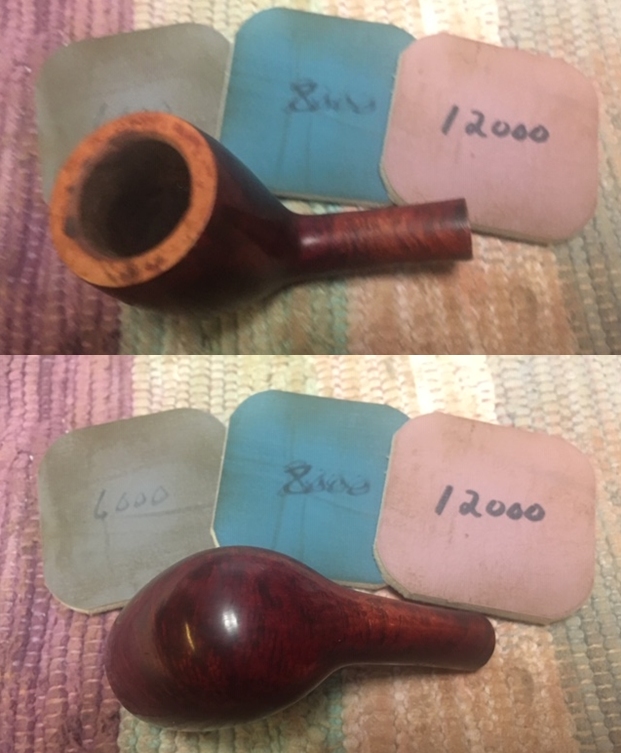
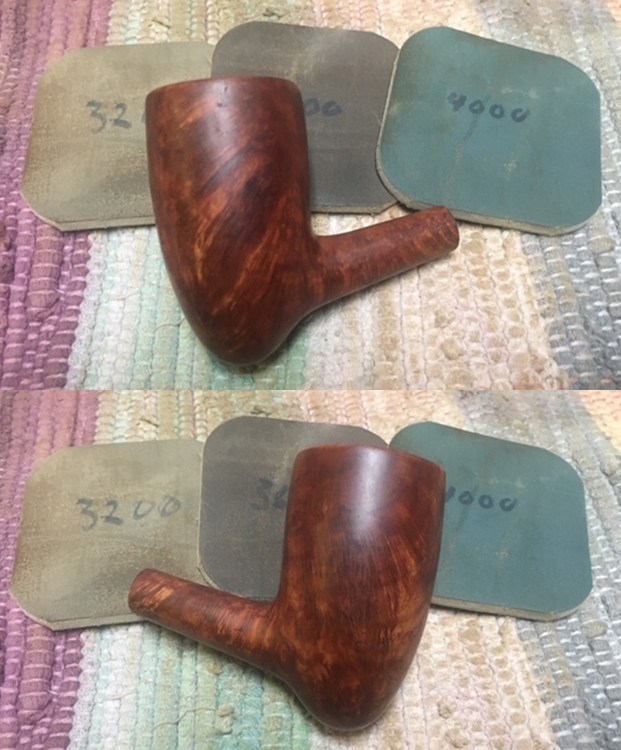
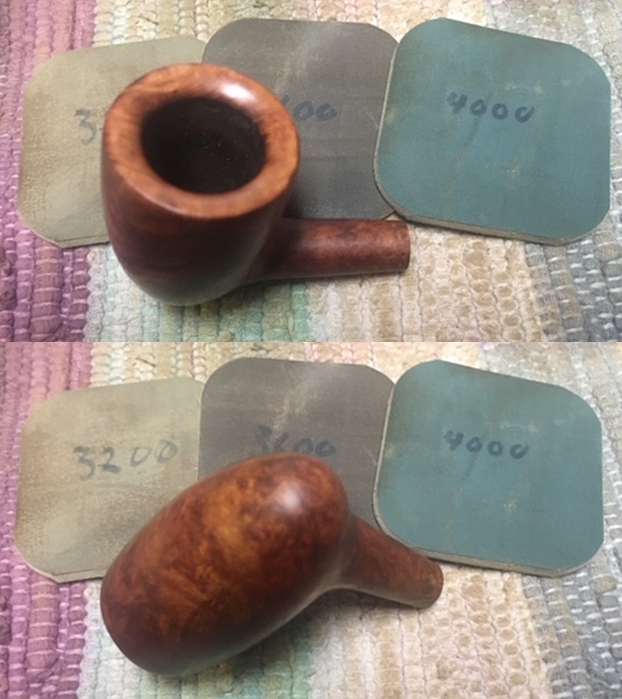
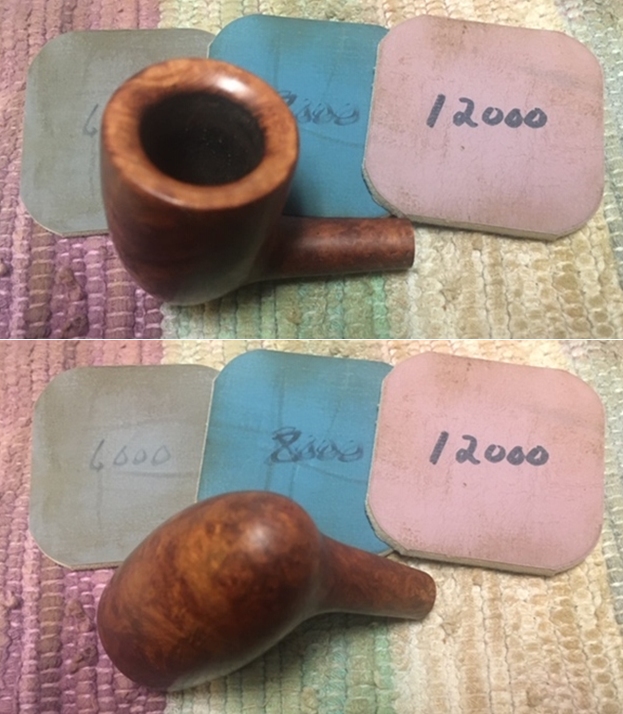
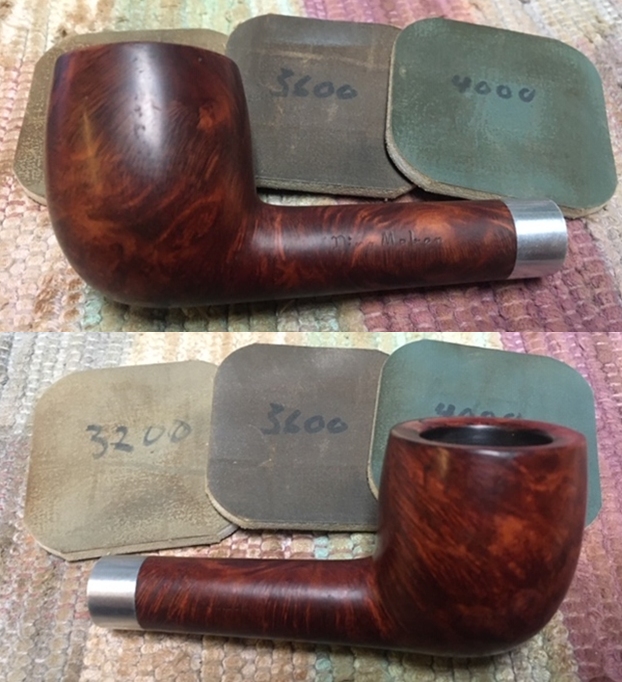
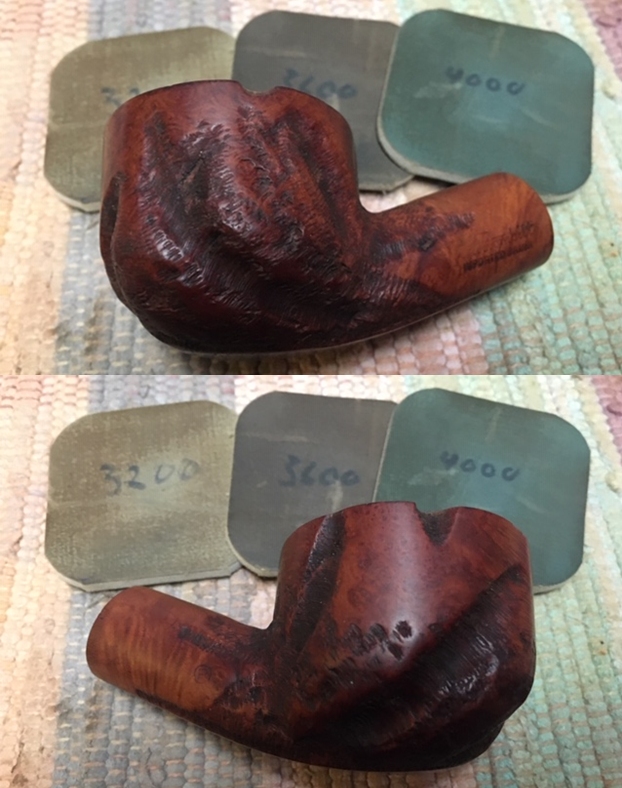
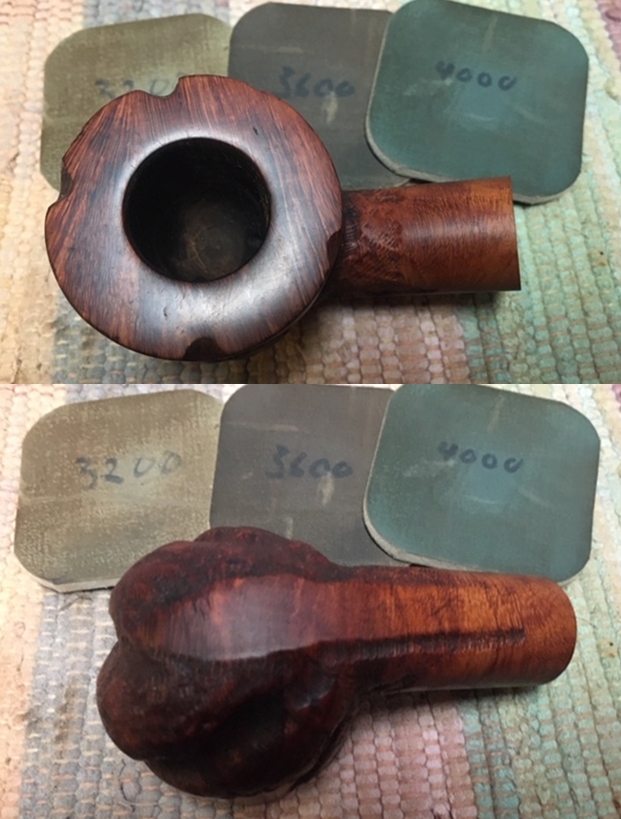
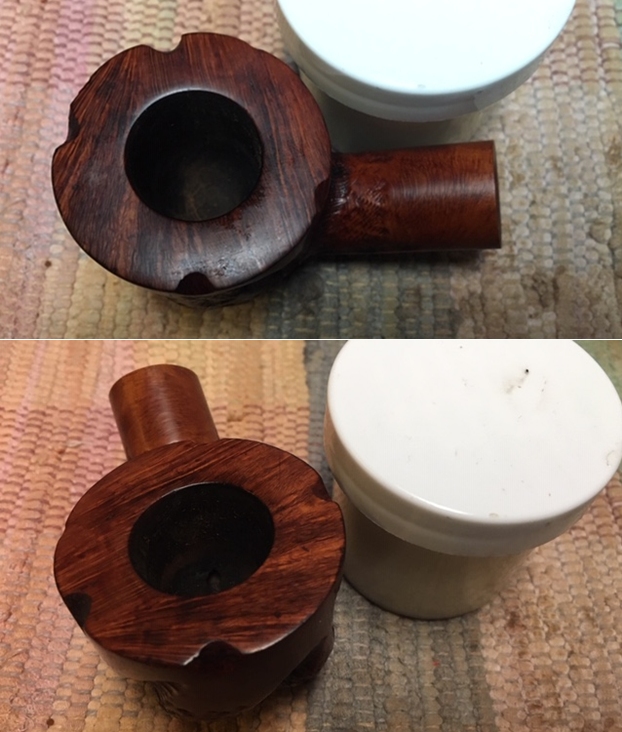
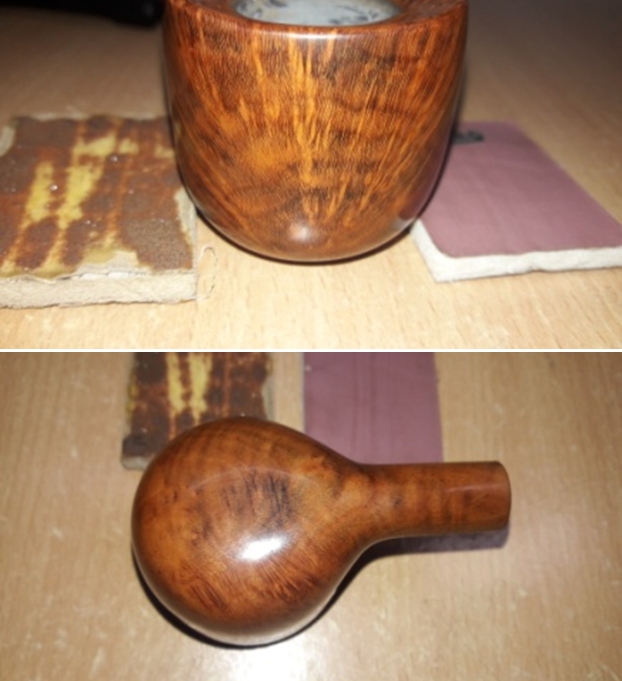
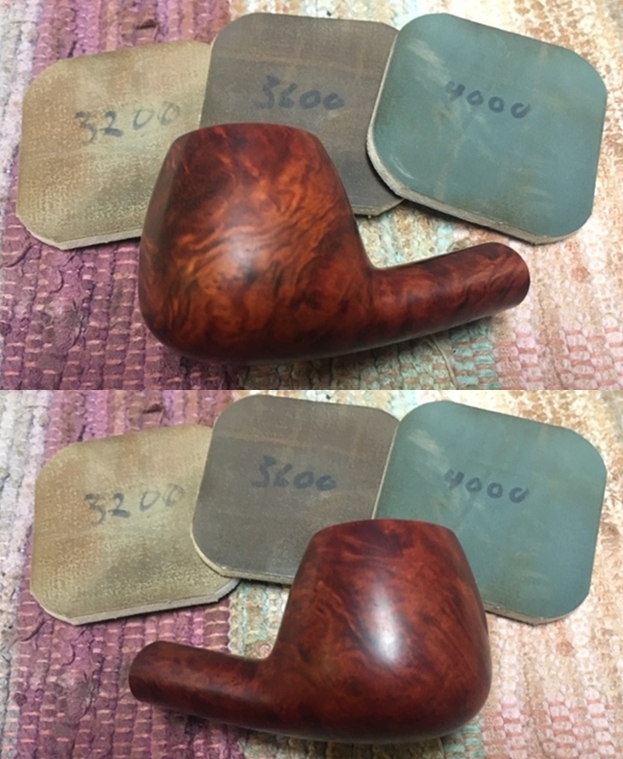
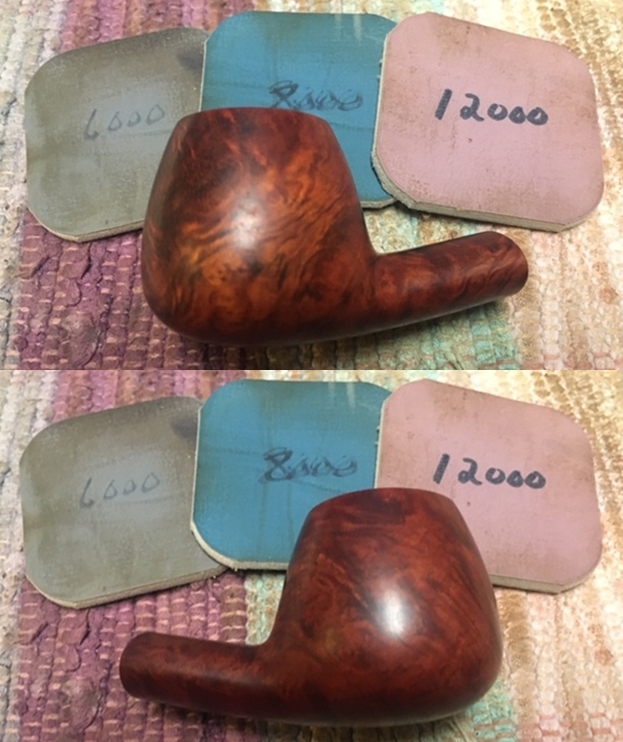
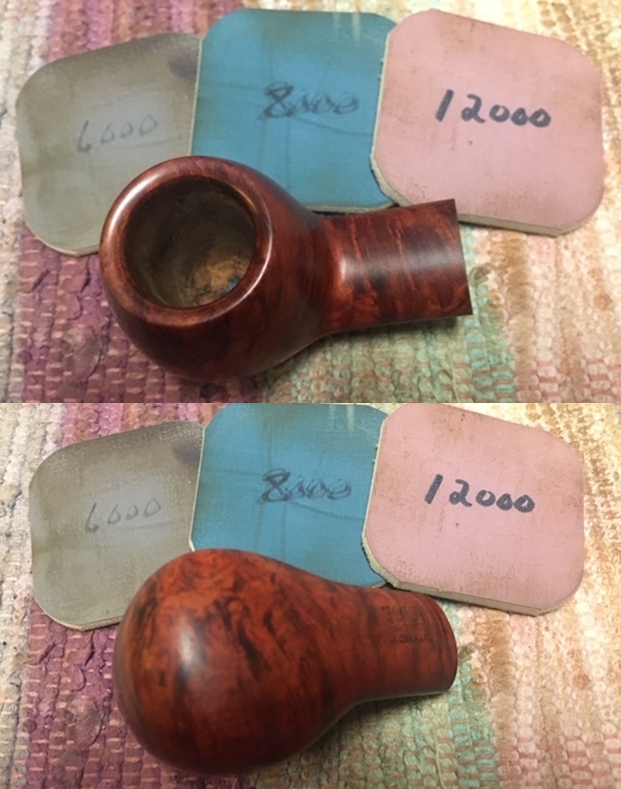
 I mounted a cotton cloth buffing wheel on to my hand held rotary tool and applied a coat of Blue Diamond to the stummel, hoping to see a slight change in the appearance of the dark spots. However, these spots are still prominent and will need to be masked. Here are the pics of the pipe at this stage.
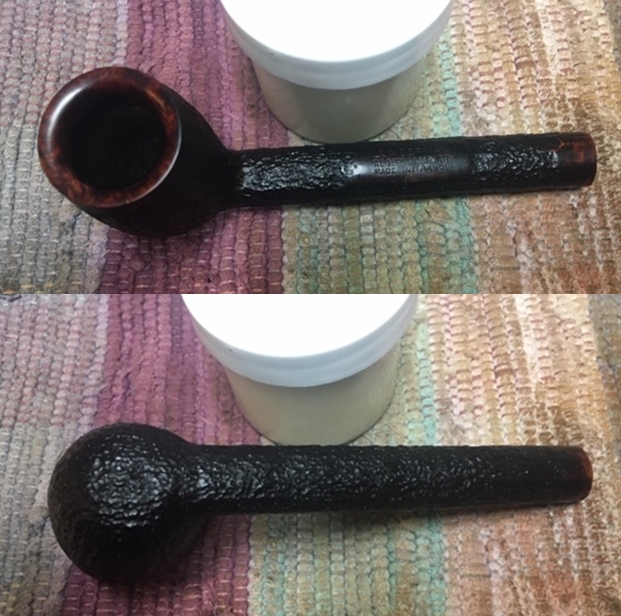
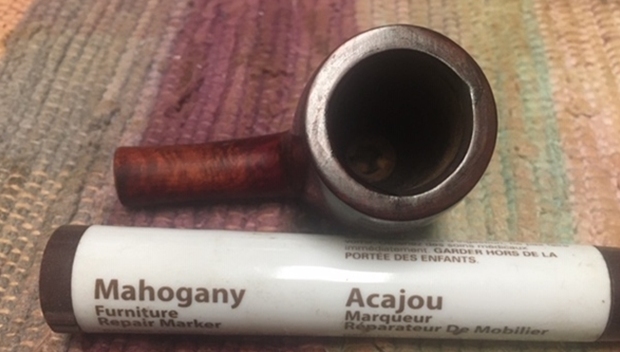
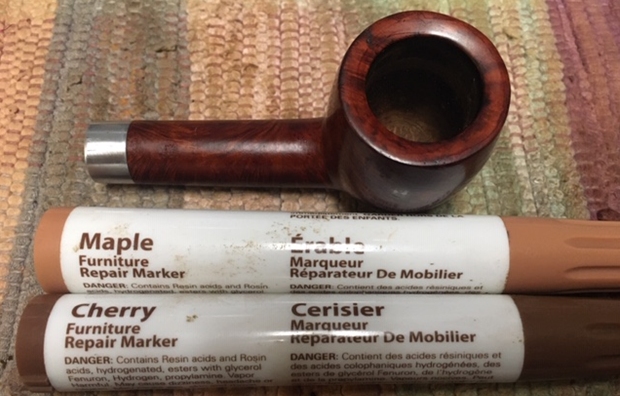
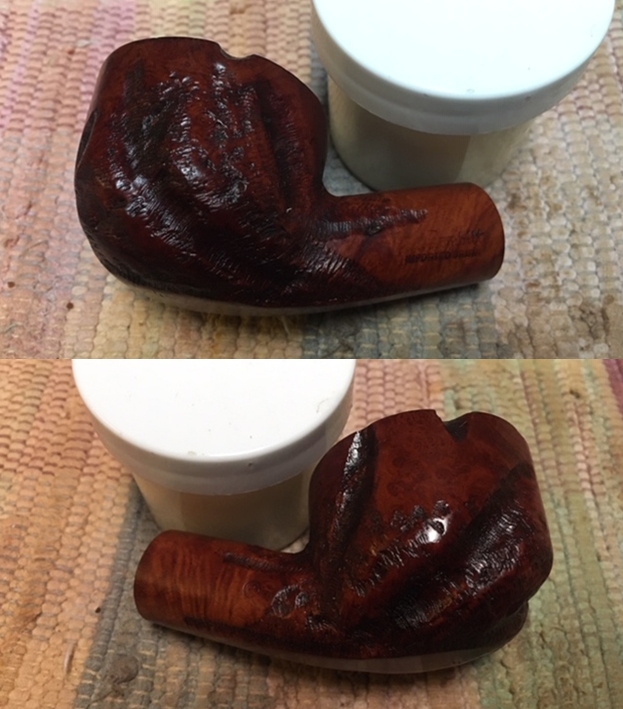
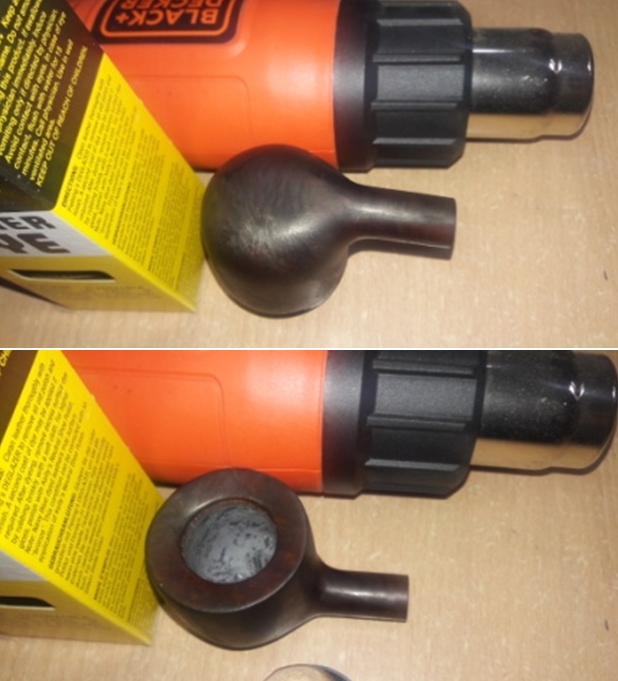
 I decided to stain the stummel with a Cordovan stain in the hope that it would help in a nice blending of the dark spots with the rest of the stummel. I heated the stummel surface with my heat gun to open up the pores on the stummel so that the stain is well set. I dipped a folded pipe cleaner in Fiebing’s Cordovan leather dye and liberally applied it over the heated surface, flaming it with the flame of a lighter as I went ahead to different self designated zones of the surface. This helps in even application and in the setting of the stain in the grain of the briar. I set the stummel aside for the stain to set into the briar.
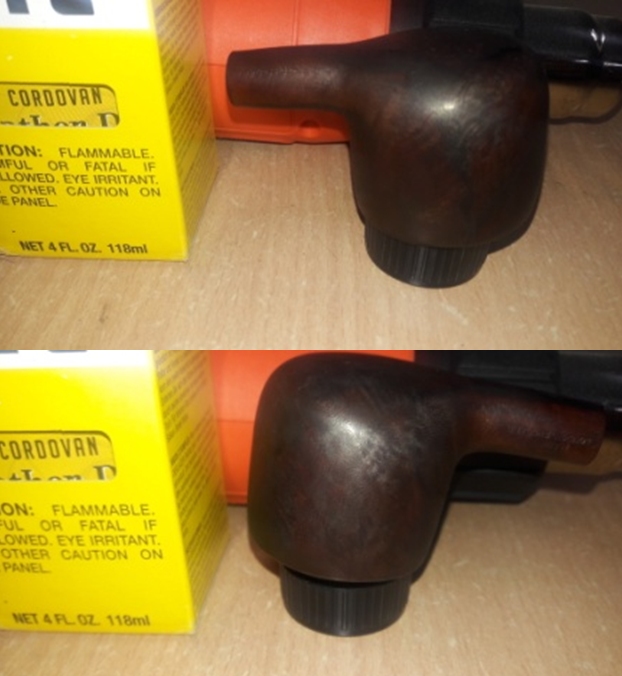
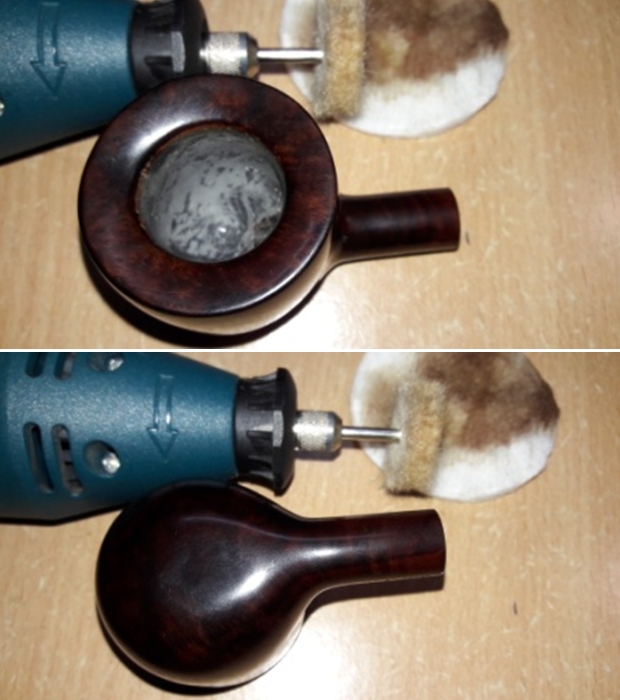
 The next afternoon, I mounted a felt cloth buffing wheel on to my hand held rotary tool and using Red Tripoli proceeded, as my dear friend Dal Stanton likes to say “unwrap the coat of stain to reveal the grain” from the stummel surface. I set the tool at its slowest speed, again my recent experience while working on Steve’s pipe came in handy and the damage that can be caused due to heating while using the felt buffing wheel still fresh in my memory; I began to peel off the stain from the stummel surface first. The stain peeled out gradually. This was followed with wiping the stummel with a cotton swab and alcohol to lighten the stain a little as it was too dark for my liking. This also helped in cleaning the surface of all the residual stain and highlighting the grains.
 I set the stain by again heating the stummel surface with the heat gun. This is an essential step as, if missed, there is a possibility of the stain running down the hands of the smoker who decides to carry forward the trust in this pipe.
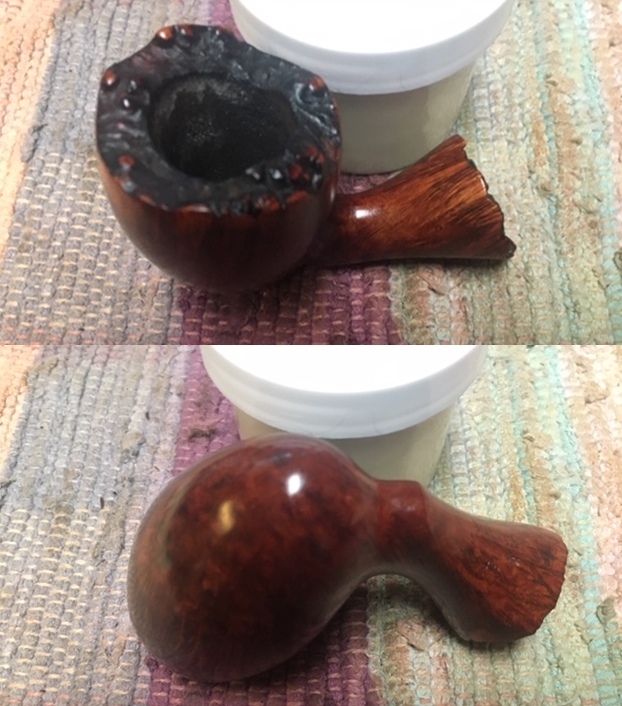
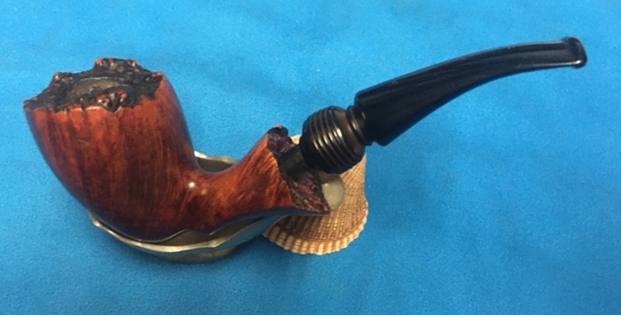
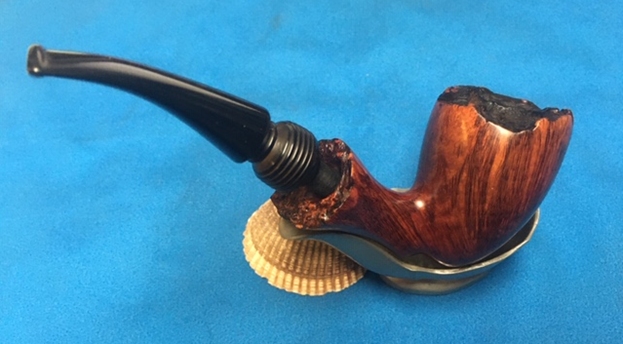
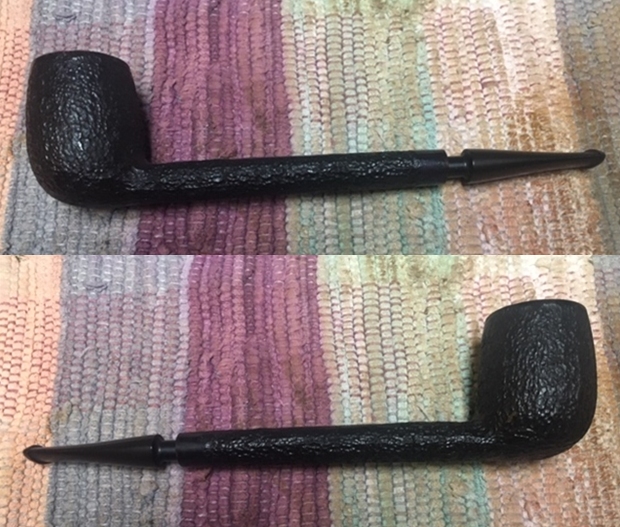
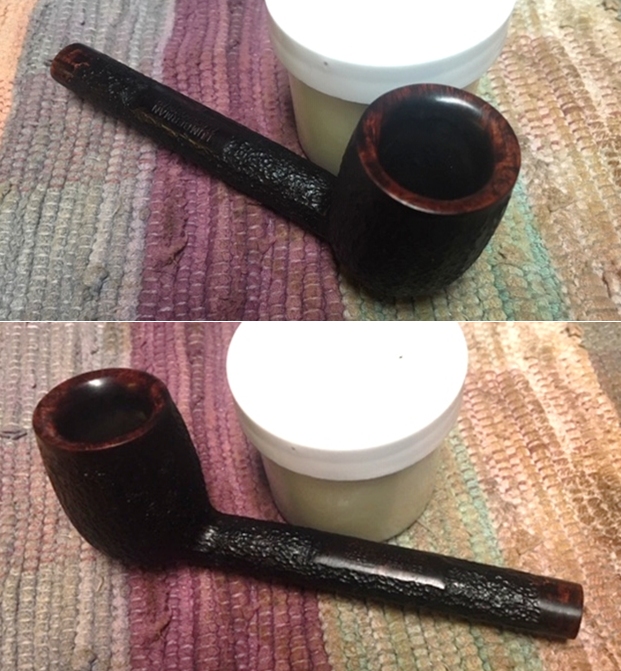
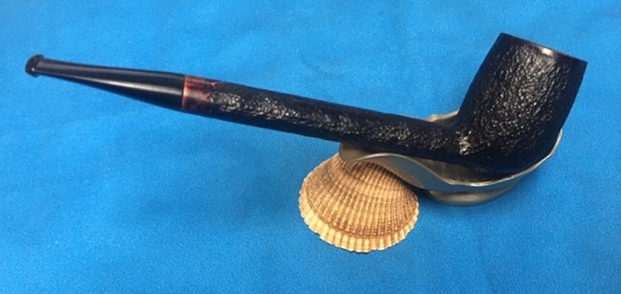
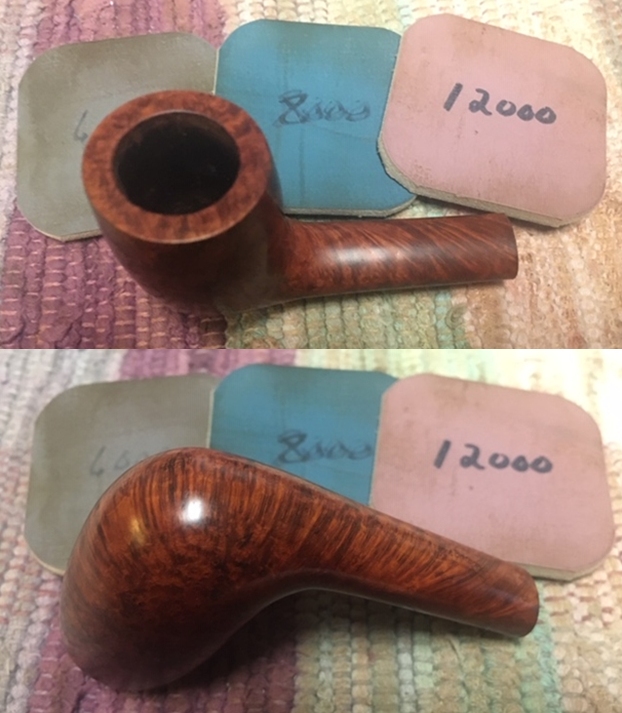
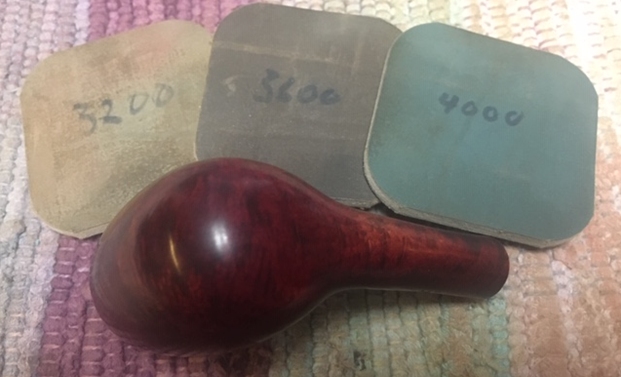
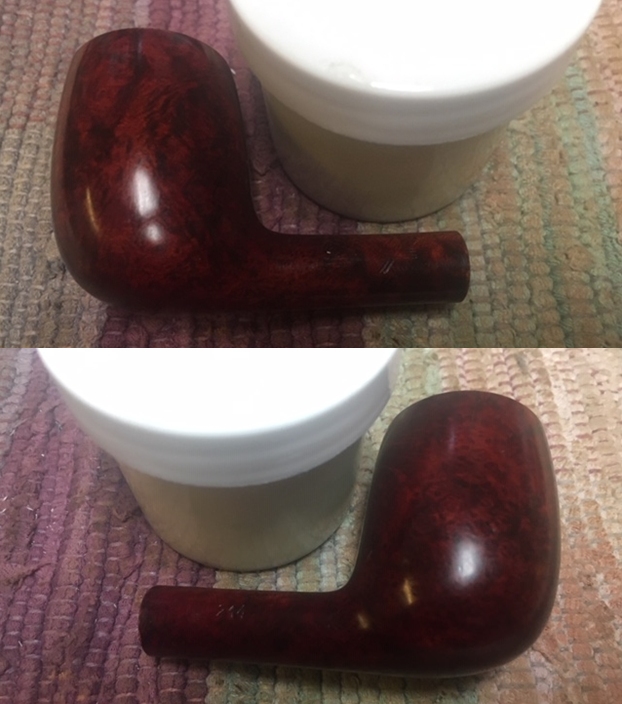
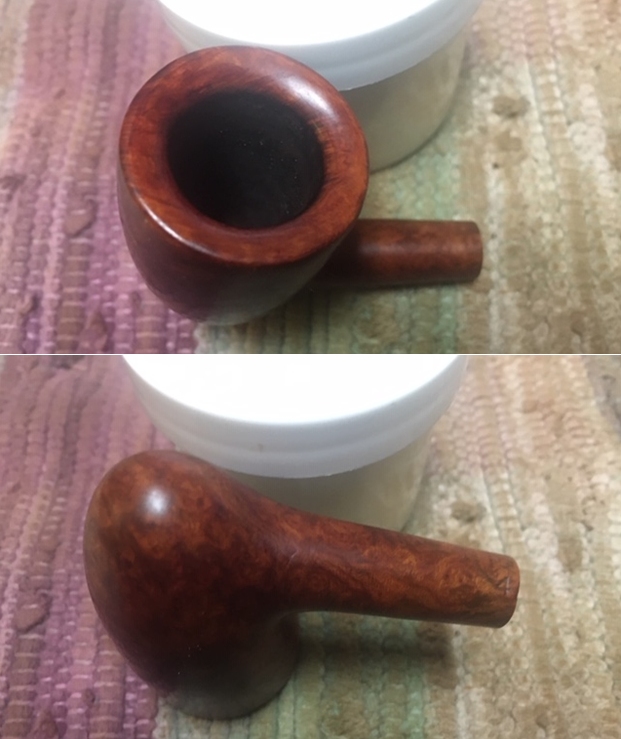
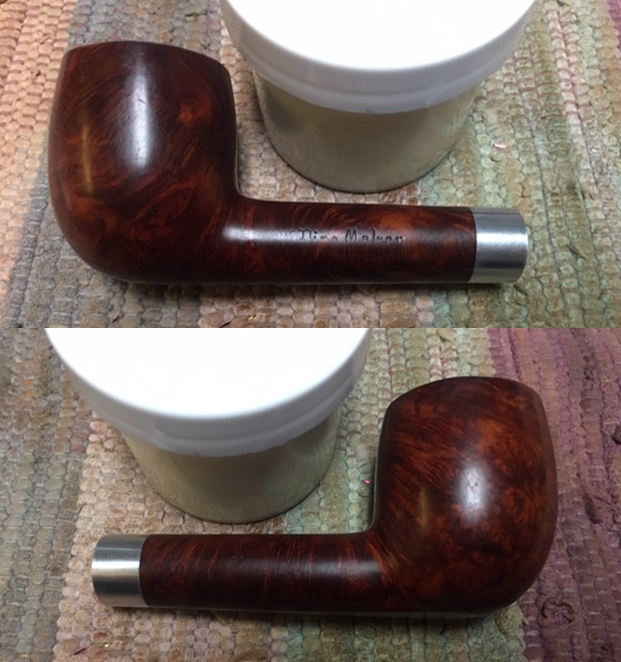
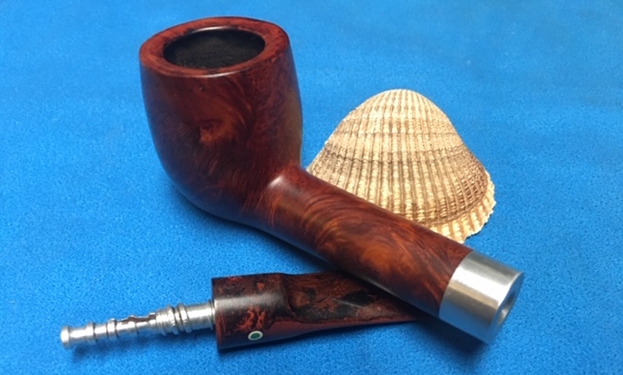
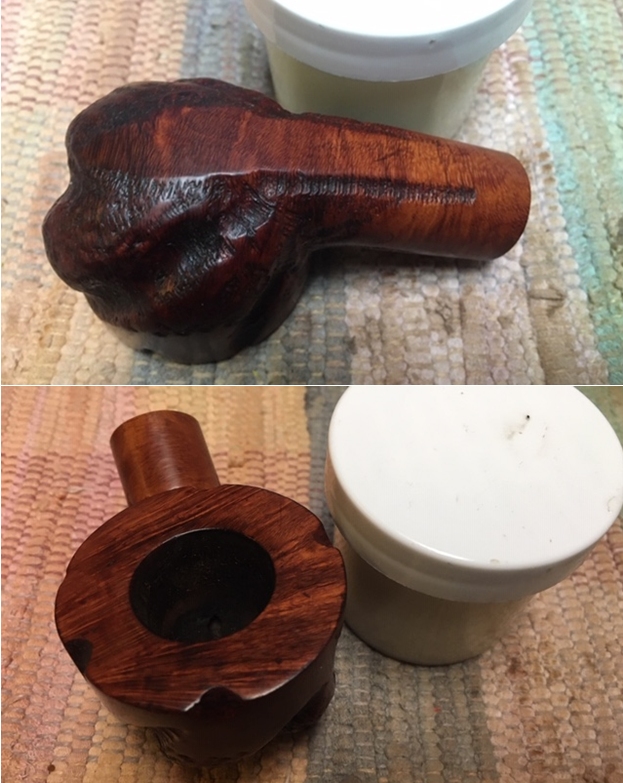
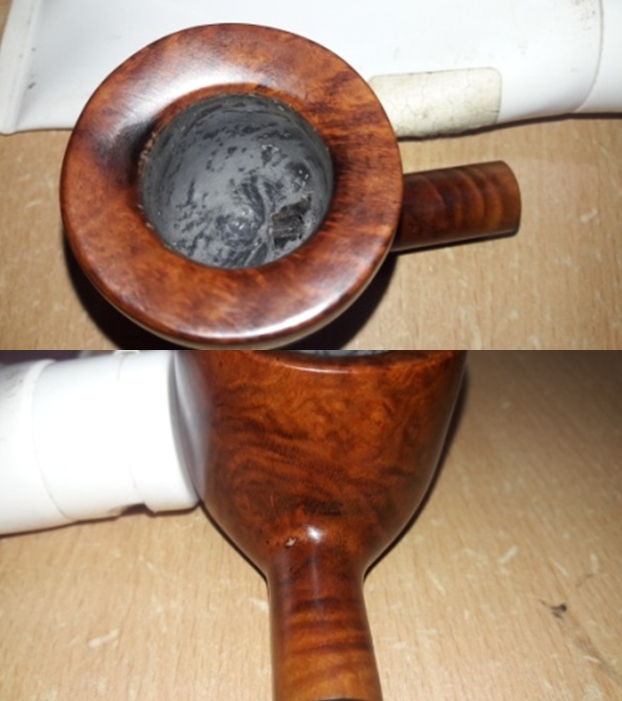
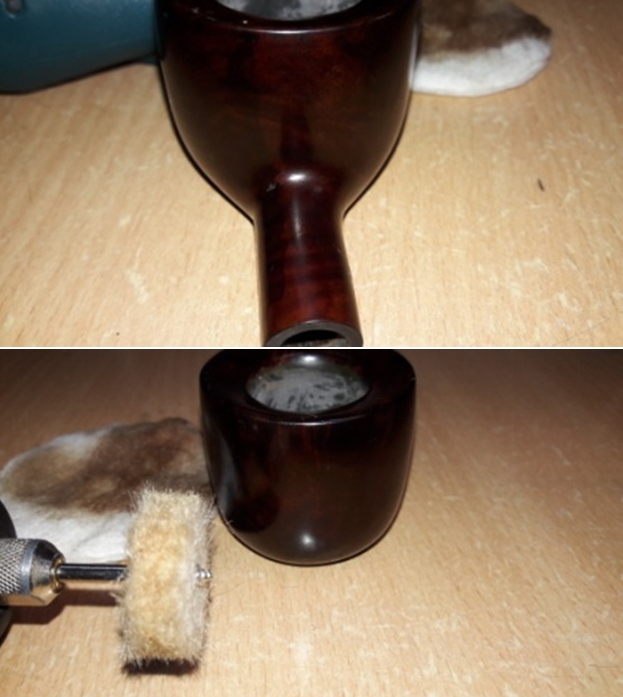
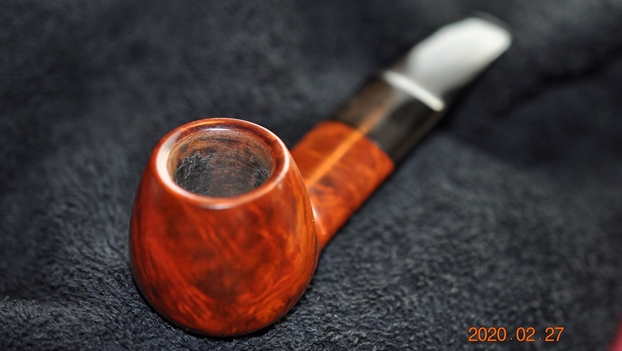
 To apply the finishing touches, I mounted a cotton cloth buffing wheel on to my hand held rotary tool and applied a coat of Blue Diamond to the stummel and the stem to polish out the minor scratches. Next, I mounted a cotton cloth buffing wheel and setting the speed to ¼ of the full power, I applied a thick coat of carnauba wax over the stummel and the stem. I worked the complete pipe till the time all the wax was absorbed by the briar. The pipe now boasted of a beautiful and lustrous shine. I vigorously rubbed the pipe with a microfiber cloth to deepen the shine and also to clean away any residual wax that had been left behind. I am very happy with the way this beauty has turned out.


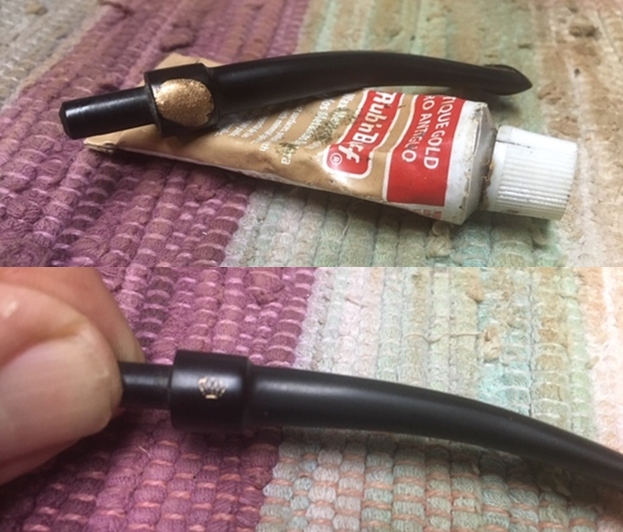
 P.S. There was only one more issue that needed to be addressed and one that could not be ignored, being a functional issue. After I had protected the heel of the stummel and the walls of the chamber with a coat of J B Weld, it was necessary to prevent this coat from coming in to contact with the burning tobacco. I addressed this by mixing activated charcoal and plain yogurt to a thicker consistency, just enough that it would spread easily and applied it evenly all along the chamber walls after inserting a folded pipe cleaner through the draught hole to keep it open. Once dry and set, this will not only protect the walls but also aid in faster buildup of cake.
 I wish to thank all readers for sparing their valuable time to read through this write up.
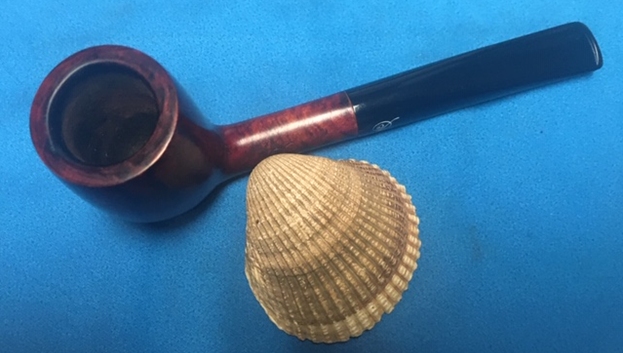
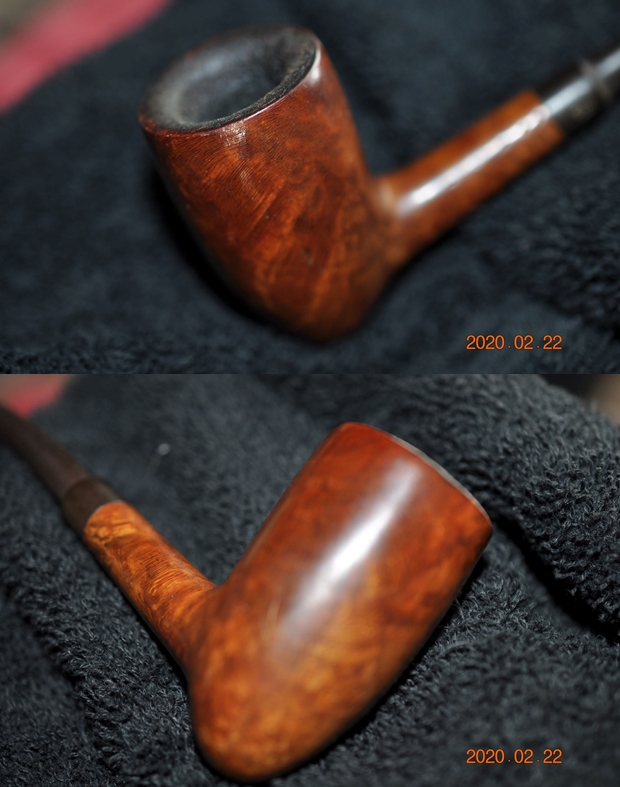
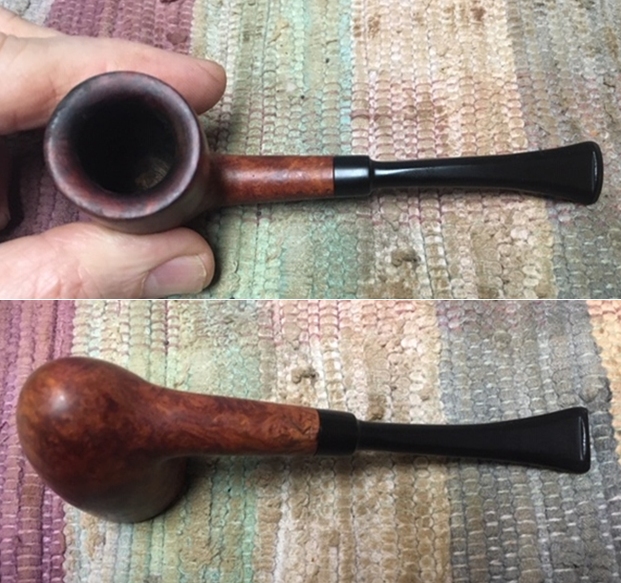
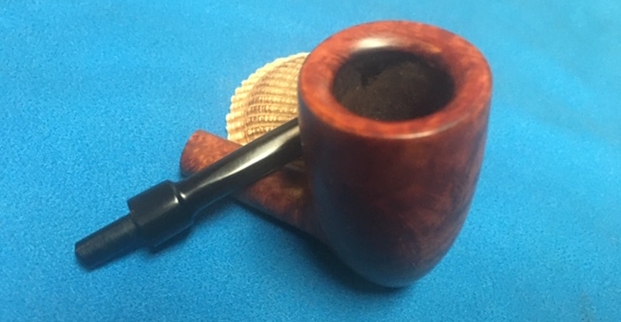
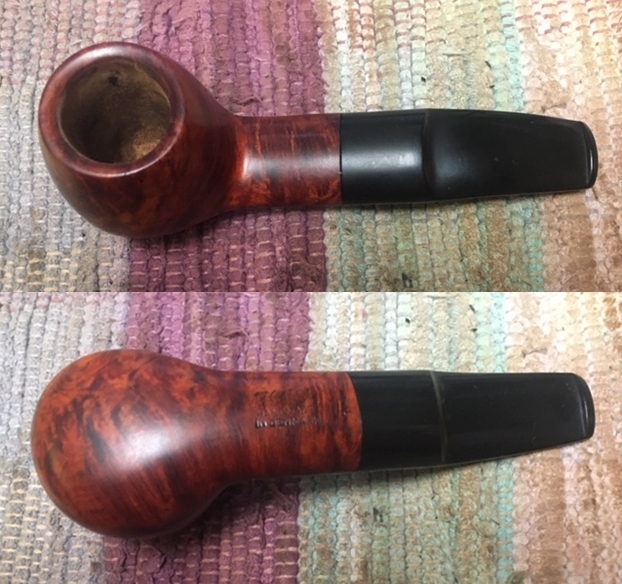
 Jeff has gotten very good at capturing the condition of the bowl and rim top with his photos. You can see the work that is ahead of us in terms of the spotty cake on the walls of the bowl. It is kind of odd in that the other portions of the bowl have been sanded smooth. The rim top looks pretty good.
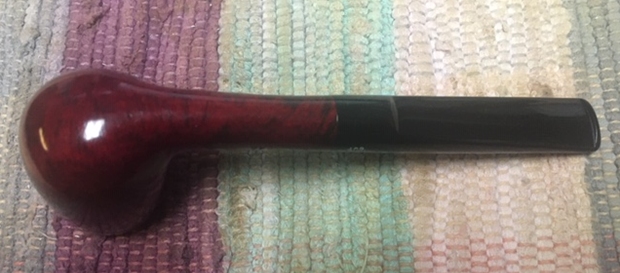
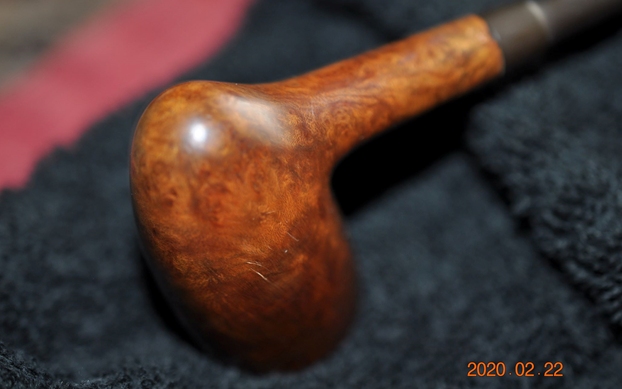
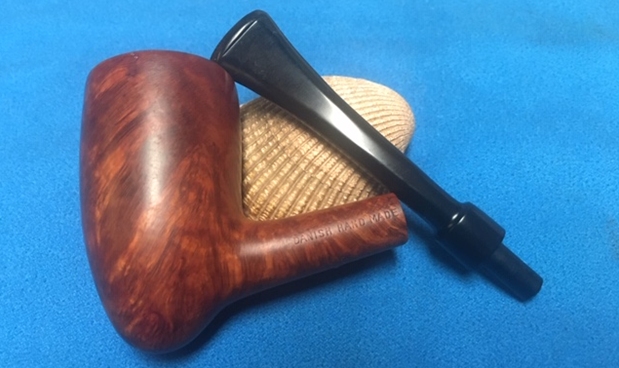
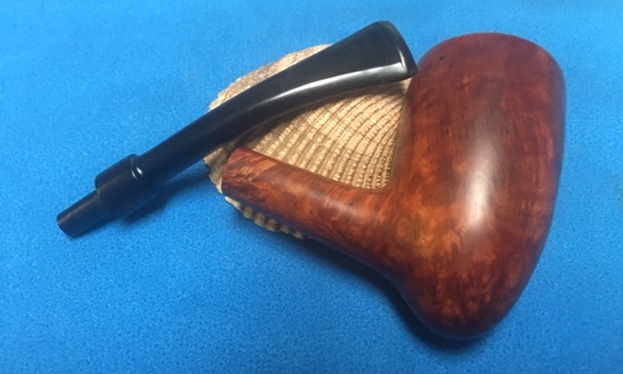
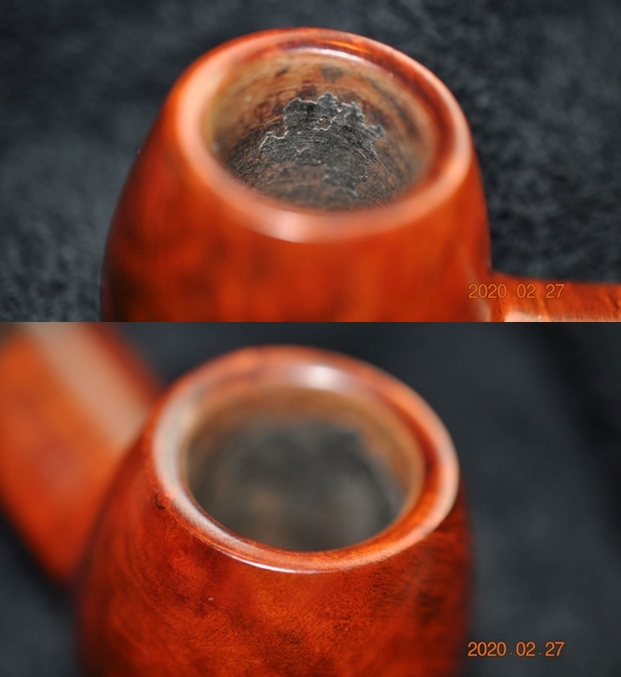 The next set of photos show the grain on the sides and heel of the bowl. It is an interesting combination of grain – cross grain and swirls. I look forward to seeing what this one looks like once it is clean and restored.
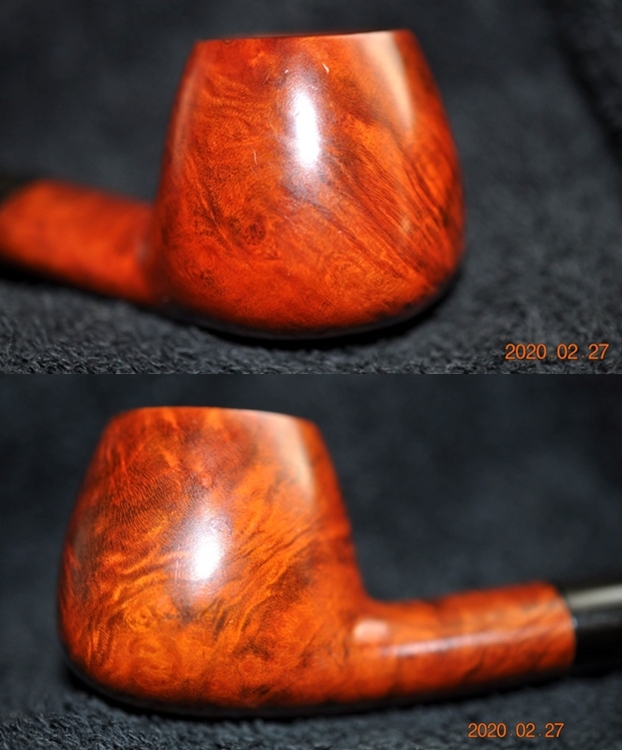
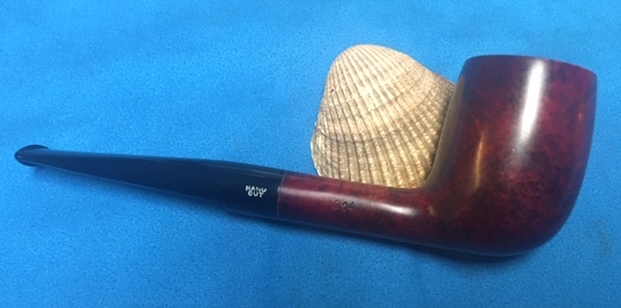
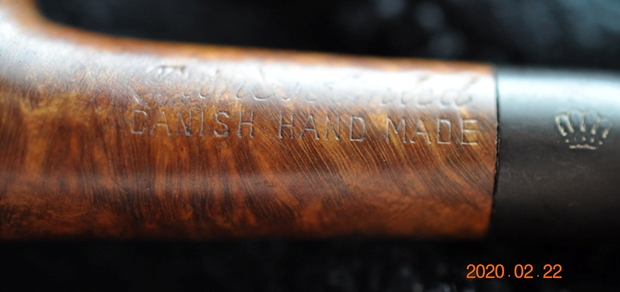
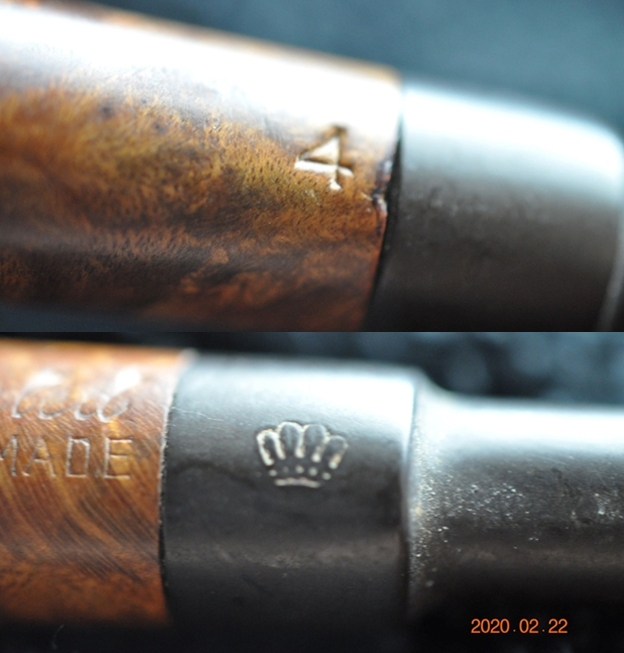
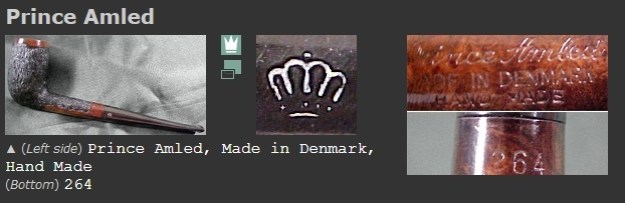
 He took a photo of the stamping on the underside of the shank. The HAJ stamp is readable as is the Handmade in Denmark and the shape number stamp.
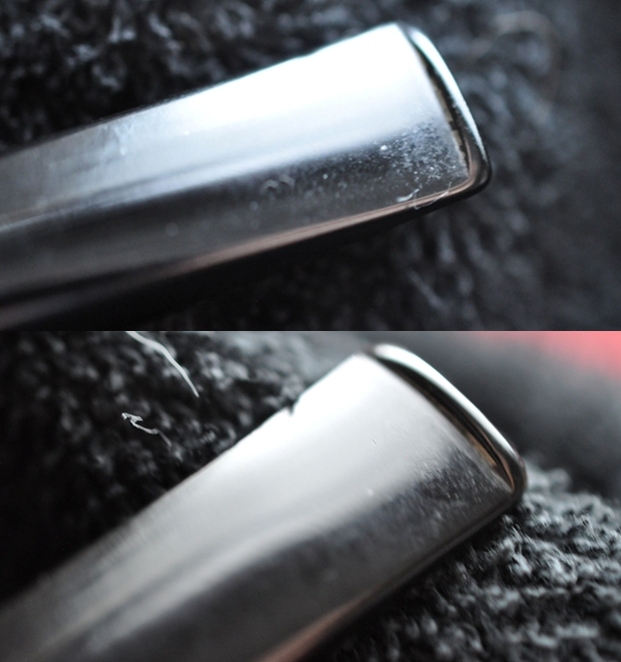
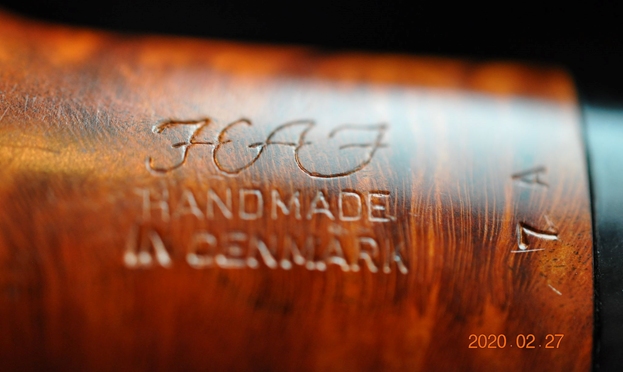 The next photos show the stem surface. It was very dirty and had light tooth marks and chatter on both sides ahead of the button.
 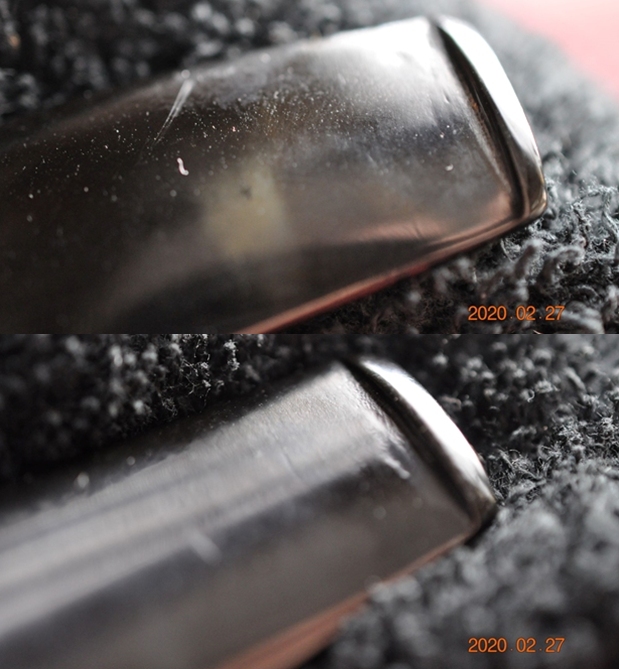 Before I started to work on the pipe I wanted to learn as much as I could about the brand. I have heard of or worked on a HAJ pipe before so I had no idea who made the pipe. I turned first to Pipephils site to see if there was any information on the Danish Made HAJ pipe and came up empty. I turned to Pipedia and looked for the HAJ brand and found that under the Danish pipe makers there was a listing. (https://pipedia.org/wiki/Hans_Aage_J%C3%B8rgensen). I quote the totality of the information included on the listing below:
 Now it was time to work on the pipe itself. Jeff had once again done a great job in cleaning this pipe. It looked far better than what it was like when we found it. Because of the spotty reaming job previously he took it through the whole gamut we use when reaming a bowl. He reamed the bowl with a PipNet Pipe reamer and took the cake back to bare briar. He cleaned up any stubborn spots on the bowl walls with a Savinelli Fitsall Pipe Knife. He scrubbed out the internals with alcohol, pipe cleaners and cotton swabs until the pipe was clean. He scrubbed the exterior of the bowl with Murphy’s Oil Soap and a tooth brush to remove the grime and grit on the briar and the slight darkening on the inwardly beveled rim top. The finish looks very good with good looking grain around the bowl and shank. Jeff scrubbed the stem with Soft Scrub and then soaked it in Before & After Deoxidizer to remove the oxidation on the vulcanite. When the pipe arrived here in Vancouver for the second stop of its restoration tour it looked very good. I took photos before I started my part of the work.
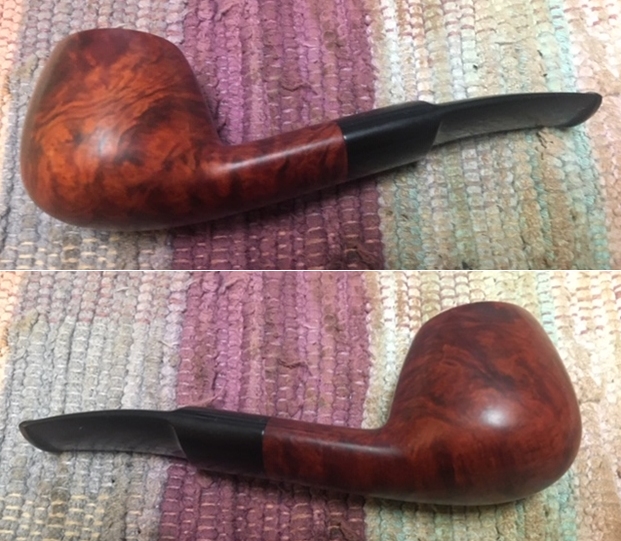
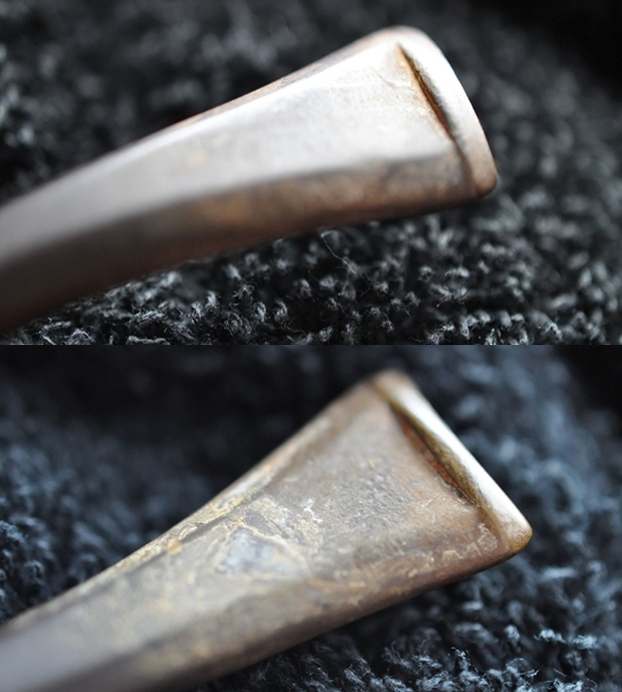
 I took some photos of the inwardly beveled rim top and stem. Once Jeff removed the spotty cake in the bowl the inside and outer edge looked very good. The close up photos of the stem shows that is it very clean and there is some tooth chatter and marks on the button surface and just ahead of the button.
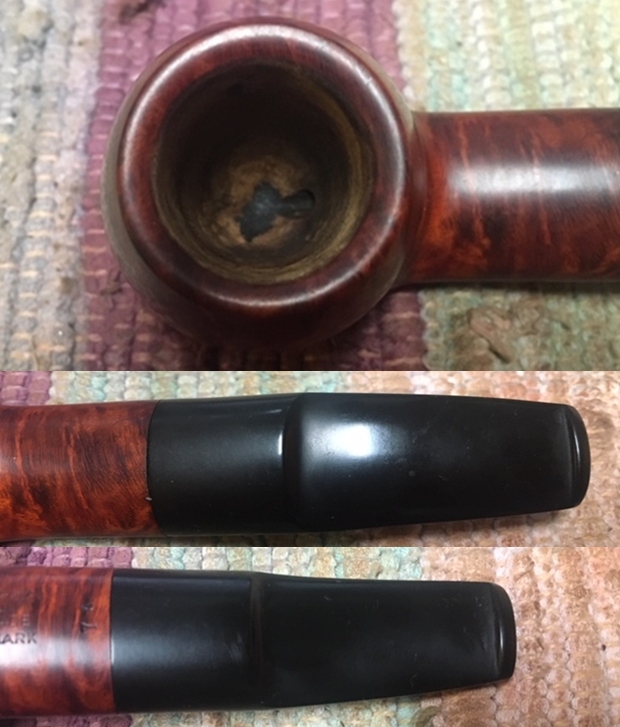 I took a photo of the stamping on the underside of the shank to show what it looked like after the cleaning.
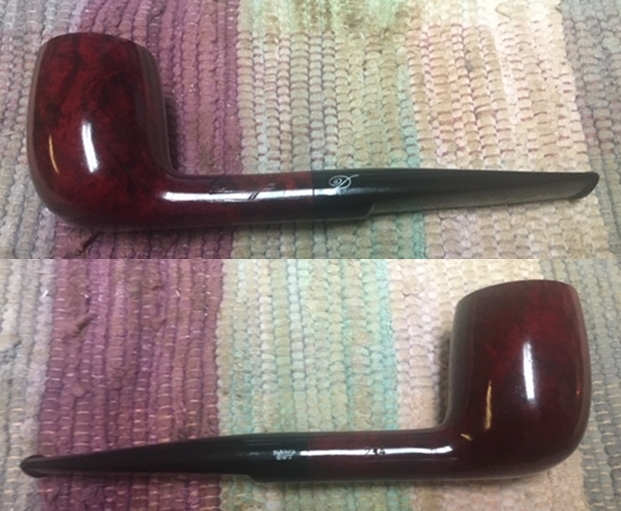
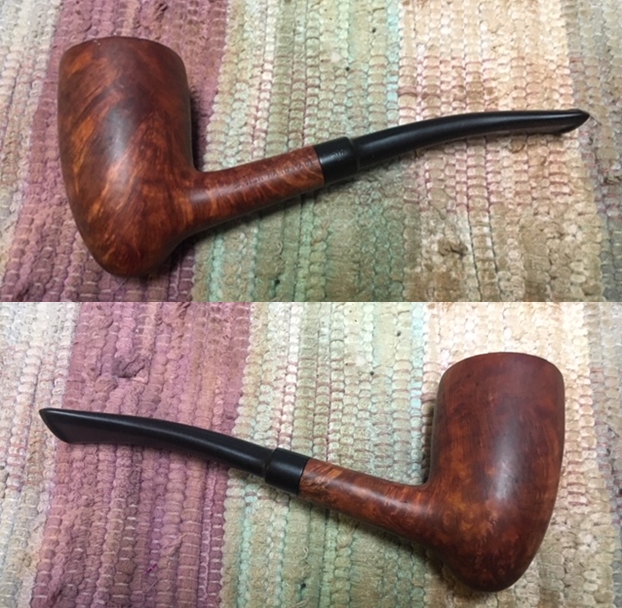
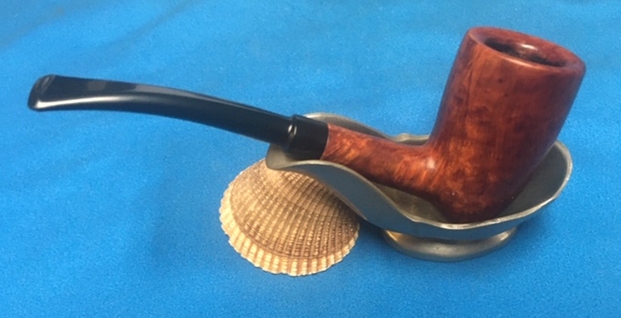
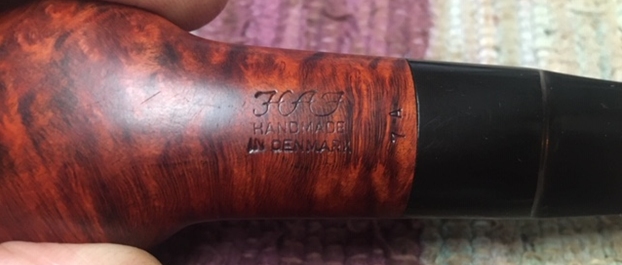 I took the stem off the bowl and took a picture of the pipe. It really is a pretty little pipe with a classic Danish look to it.
 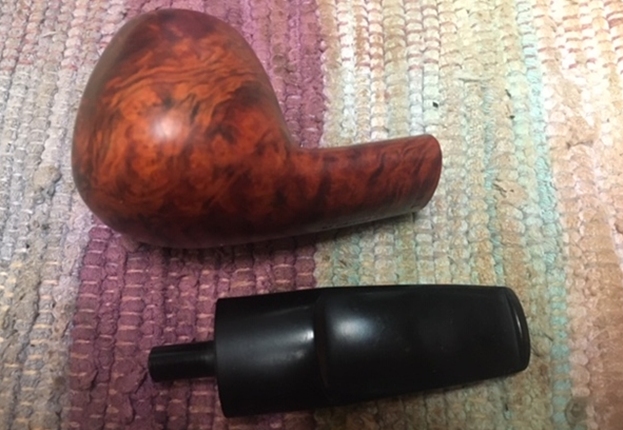 I was happy with the way the rim top and edges looked after Jeff had done his cleanup work so I did not need to do anymore except to polish them. I polished the briar with micromesh sanding pads – dry sanding with 1500-12000 grit pads. I wiped the bowl down after each pad with a damp cloth. The grain really began to stand out and the finish took on a shine by the last sanding pad. The photos tell the story!
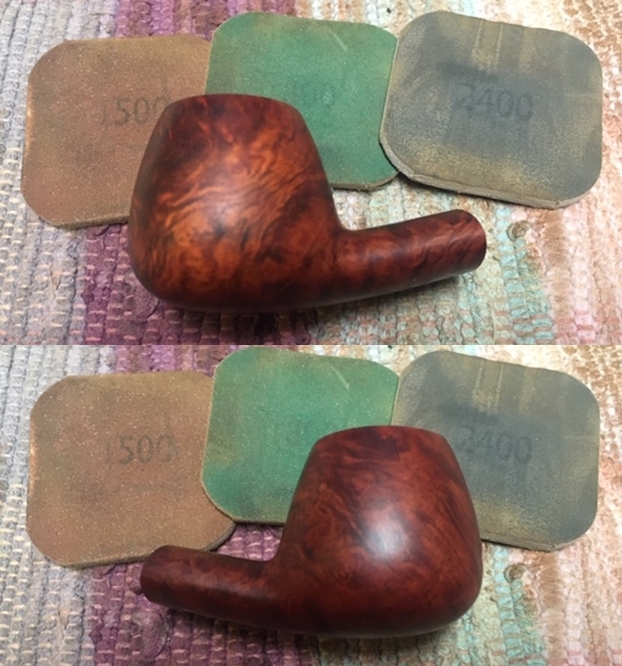
 I worked some Before & After Restoration Balm into the surface of the briar with my fingertips. The product works to clean, enliven and protect the briar. I let the balm sit for about ten minutes and then buffed with a cotton cloth to raise the shine. The photos show the bowl at this point in the restoration process.
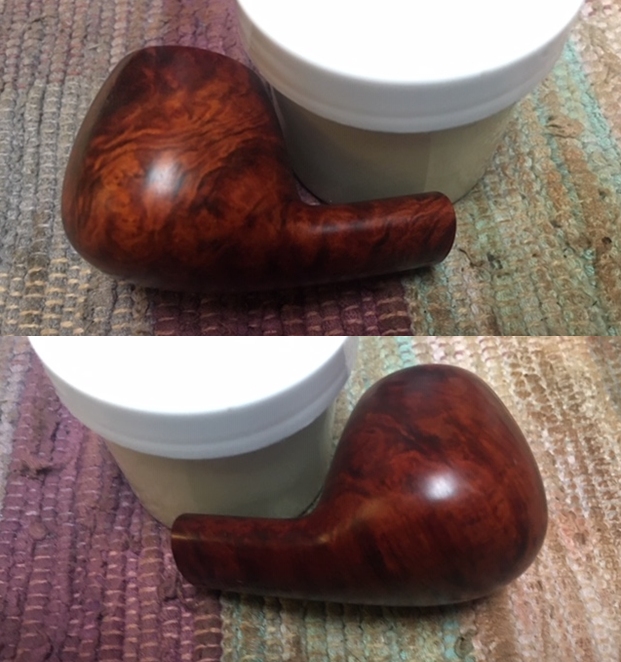
 I set aside the bowl and turned my attention to the stem. I sanded out the tooth marks and chatter with 220 grit sandpaper and started polishing it with 400 grit wet dry sandpaper.
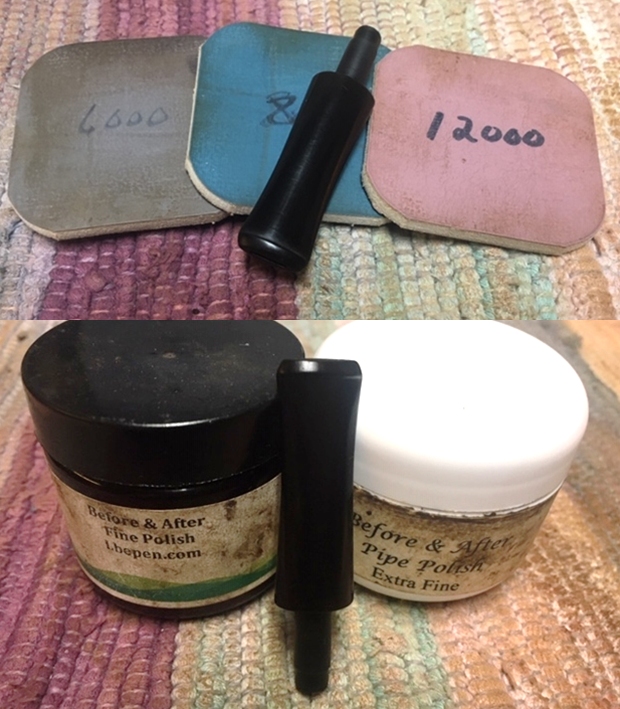
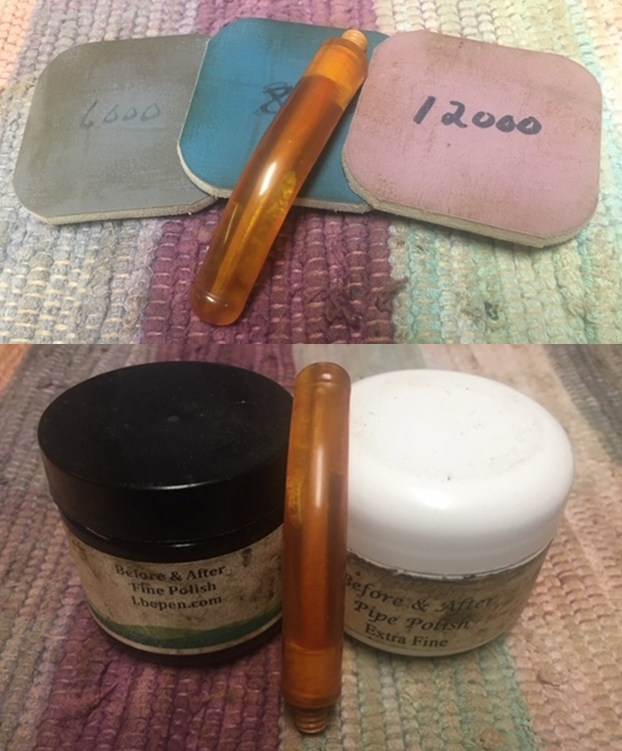
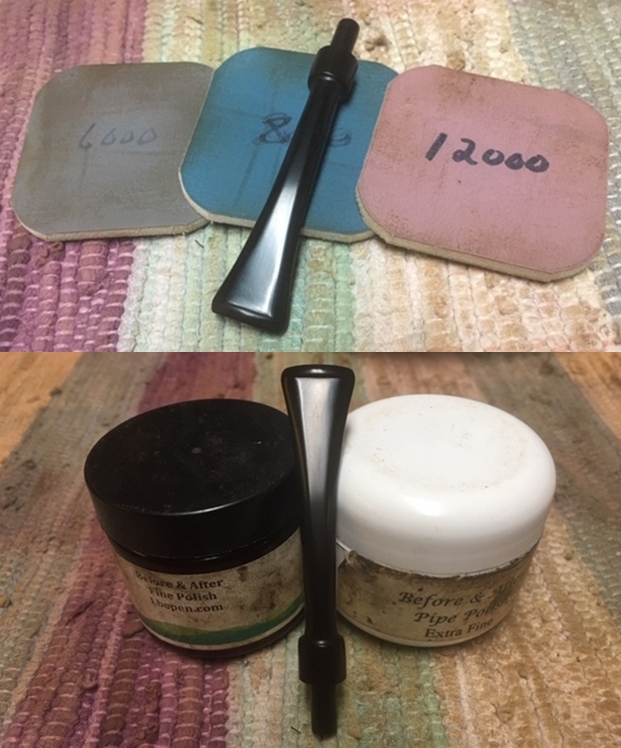
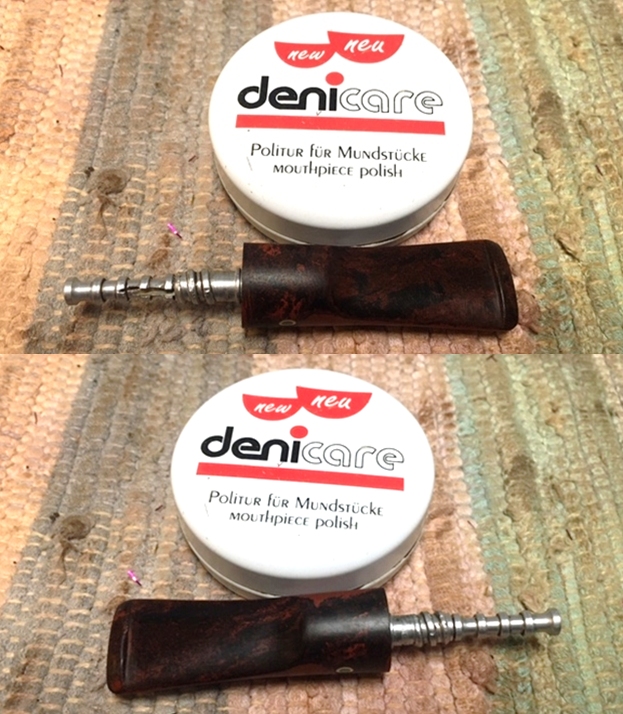
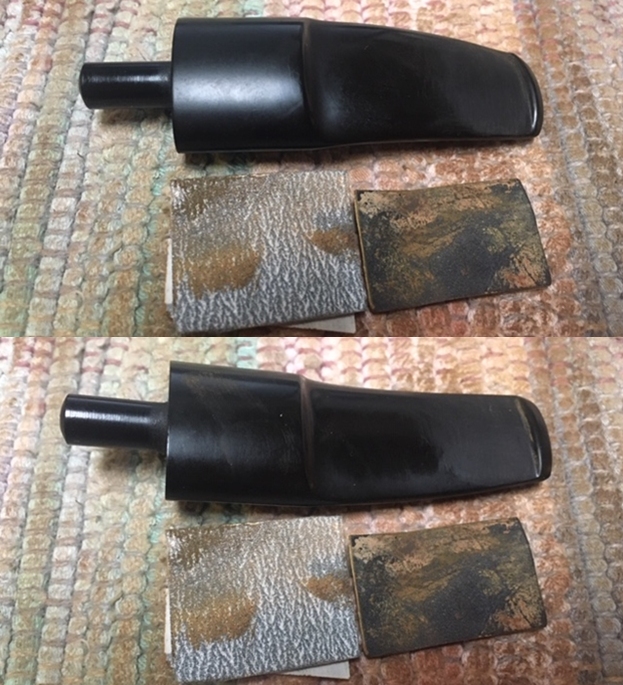 I polished the stem with micromesh sanding pads – dry sanding with 1500-12000 grit sanding pads. I wiped it down after each sanding pad with a cloth containing some Obsidian Oil. I finished polishing it with Before & After Pipe Stem Polish – both Fine and Extra Fine and buffed it off with a cotton cloth.
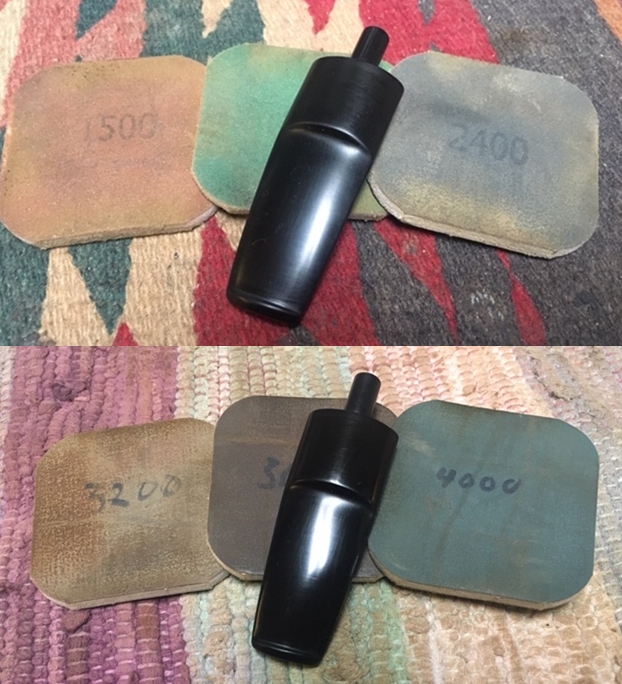
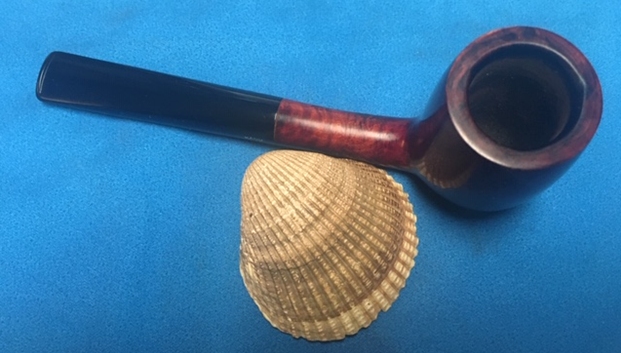
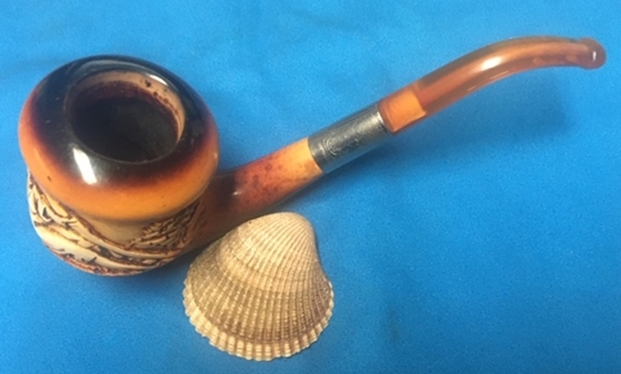
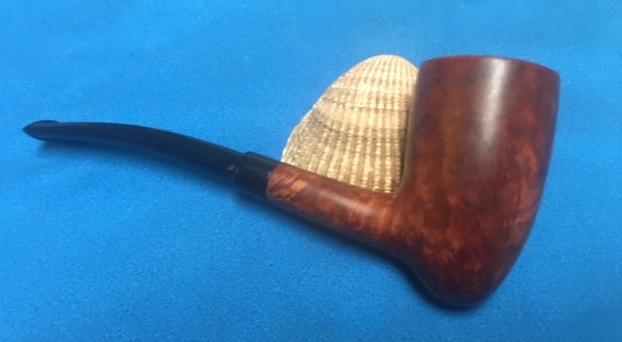
 This oval shank bent Brandy made by HAJ is a real beauty. It is a Hand Made in Denmark pipe. The shaping and carving follows the grain and highlights the mix of grains around the bowl. The finish on the pipe is in excellent condition and the contrasting stains work well to highlight the stunning grain on the pipe. The polished black, oval shaped vulcanite saddle stem adds to the mix. With the grime and debris gone from the finish and the bowl it was a beauty and the grain just pops at this point. I put the stem back on the bowl and buffed the pipe with Blue Diamond on the buffing wheel. I carefully avoided the stamping on the shank during the process. I gave the bowl and the stem multiple coats of carnauba wax on the buffing wheel and followed that by buffing it with a clean buffing pad on the buffer. I hand buffed the pipe with a microfiber cloth to deepen the shine. The finished ¼ bent Brandy shape is quite nice and feels great in the hand. Give the finished pipe a look in the photos below. I can only tell you that like the other pipes I am working that it is much prettier in person than the photos capture. The dimensions of the pipe are Length: 5 inches, Height: 1 ½ inches, Outside diameter of the bowl: 1 ¼ inches, Chamber diameter: ¾ of an inch. Thanks for walking through the restoration with me as I worked over another interesting pipe. This pipe will be added to the Danish Pipe Makers section of the rebornpipes store soon. If you want to add it to your collection send me an email or a message! Thanks for your time.