Tag Archives: polishing stems

My Final Restoration from Bulgaria – A Find in Athens: Refreshing a Fun Lorenzo Carnevale San Remo Italy 8672 Apple


Blog by Dal Stanton

A personal note:  After living over 25 years in Europe and the past 14 in Sofia, Bulgaria, this restoration marks my final offering from Bulgaria as my wife and I transition to the US and will be basing in Denver, Colorado.  We will miss Bulgaria deeply and the work we have devoted our lives to.  Yet, after a hiatus for the move, I will continue to collect and restore pipes benefiting the Daughters of Bulgaria – women and girls who have been trafficked and sexually exploited.   

While living in Bulgaria, I’ve had the opportunity on several occasions to visit our neighbor to the south, Greece.  I was in Athens, Greece, a few years ago, and this story unfolded which I repeat here.  I was tooling through the Monastirski Market area at the foot of the Acropolis, next door to the Forum.  As I explored, I found one shop nestled on a tree-covered side street with a table set on the front sidewalk with all kinds of paraphernalia. It drew me like a bee to pollen!  Two congenial men were sitting behind the table conversing in Greek. I assumed they chatted about all manner of life, family, politics…, and what is usually the case, as I drew near, their conversation stopped, and the English began.  As I perused the table with strategic disinterest, I saw one pipe on the table that did not grab me too much.  The shop owner asked me if I was interested in pipes?  I said yes, and he said that he had many more that he didn’t know what to do with…. “Oh, my…” – my heart skipped a beat!  In his wonderfully, friendly, thick Greek accent and manner of hospitality, he said, ‘Come with me.”  As he pulled a chain out of this pocket a full ring of keys followed. He led me down a narrow, alley walkway along the side of the shop.  We stopped and he unlocked a side door that led immediately up the stairs to an ‘upper room’ where, as he explained with a subdued, secretive flourish, he seldom brought customers.  When we entered the room, I saw why.  It was his special place – family pictures were arrayed everywhere; icons of the Greek Orthodox Church were given special deference as they hung from places of honor. Many shelves full of his collections.  He pulled my attention away from the array to a slew of pipes displayed in a case hanging on the wall and arranged beneath on a cluttered table.

I took it all in.  He explained that his good friend, from Armenia, asked him to sell off his collection of pipes and he gave me a price for everything, including the wall-hanging display case.  With gratitude to him for his generous offer, I had to decline as I was flying back to Sofia and would have no room in my luggage for all of it.  I suggested to him that his friend could possibly make more money if he sold the pipes and case separately and he confided that he knew little about pricing pipes individually.  As we talked, I discovered that he was a board member of a foundation that assisted orphaned children Armenia – the home of his friend.  That opened the door for me to share that I too, was a board member of the Daughters of Bulgaria Foundation and I shared with him why I collected pipes – to restore and sell them to benefit the Daughters and their children.  He encouraged me to go through the collection and pull out pipes that interested me and make him an offer.  In Mediterranean culture, very much like Bulgarian culture – relationship is supreme, and we had talked of things near and dear to our hearts.  Pipes became the doorway to a deeper fellowship that we both understood and appreciated.   I left the shop owner with a firm handshake, a parting picture, and an appreciation for him and his journey.

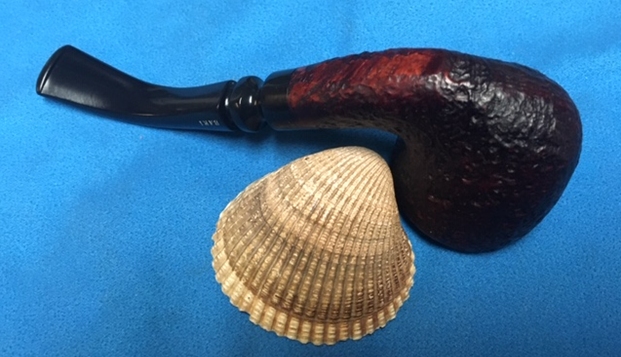
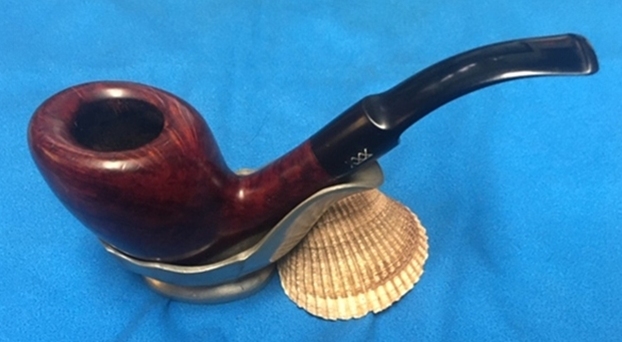
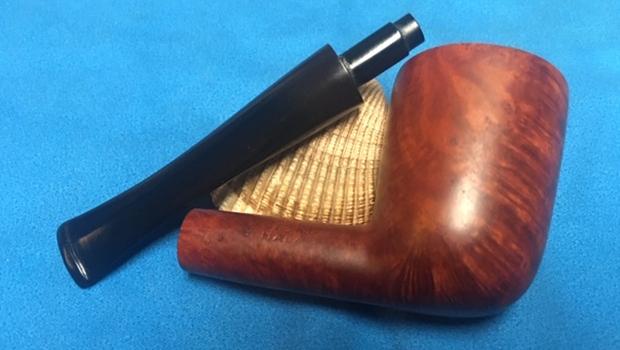
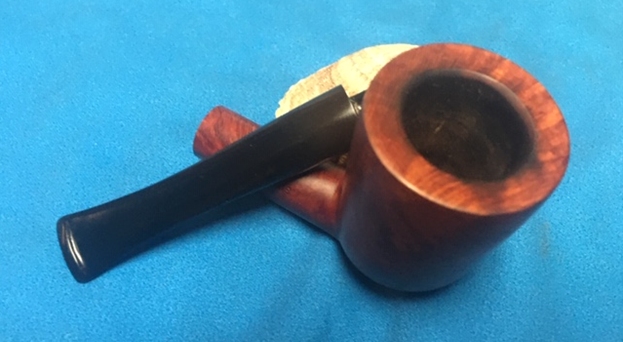
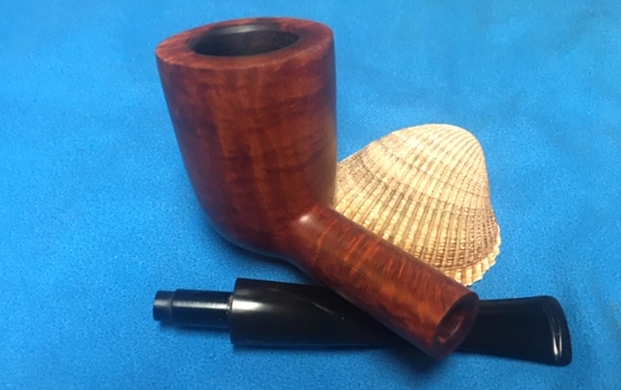
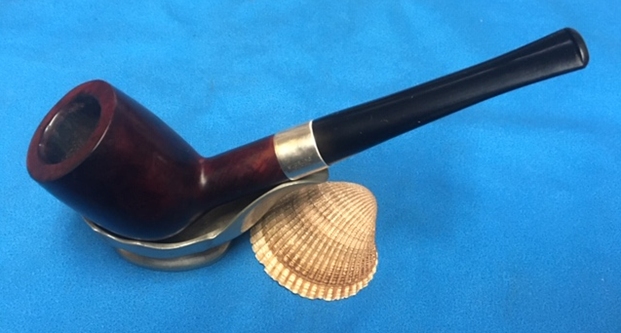
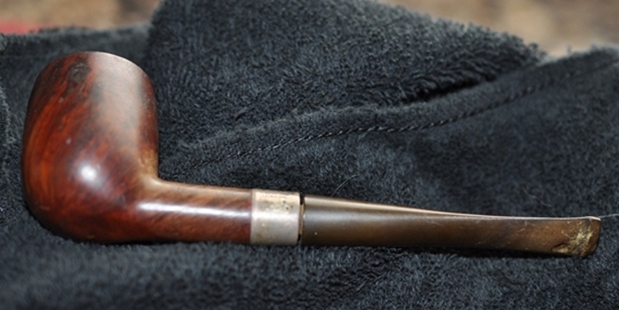
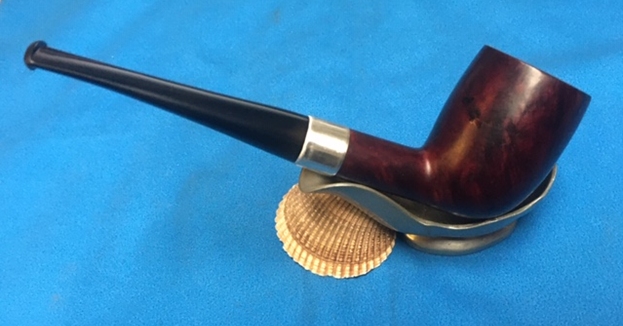
I also left his shop with some special pipes and friendly prices 😊.  The Lorenzo Carnevale Sanremo of Italy (above), now on my worktable, a Savinelli Roley Pocket Pipe (below), and a sorry looking Bent Billiard (center) that appeared to have no name – at least in the dim light of the upper room, I could not see any, but later I discovered it was a Savinelli Oscar.

The Lorenzo Carnevale along with the other pipes, traveled back to Sofia with me and were posted in the For “Pipe Dreamers” Only! online collection where Nathan saw it and commissioned it along with 3 other pipes – Comoy’s Sunrise Volcano, Savinelli Dry System 3621 Blasted, and a French Pipstar Standard 06 026 Dublin Sitter.

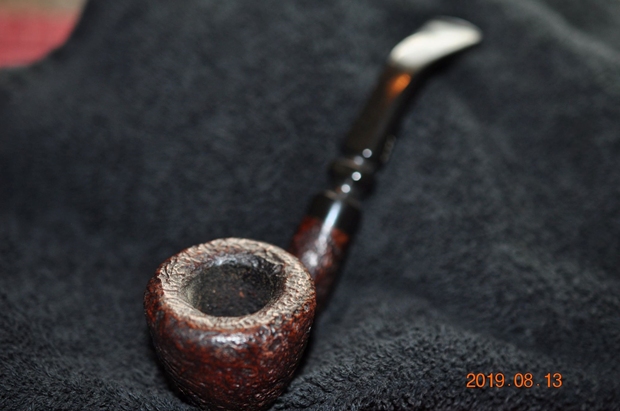
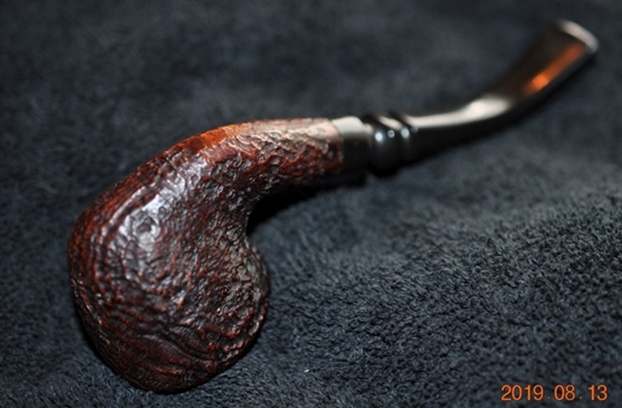
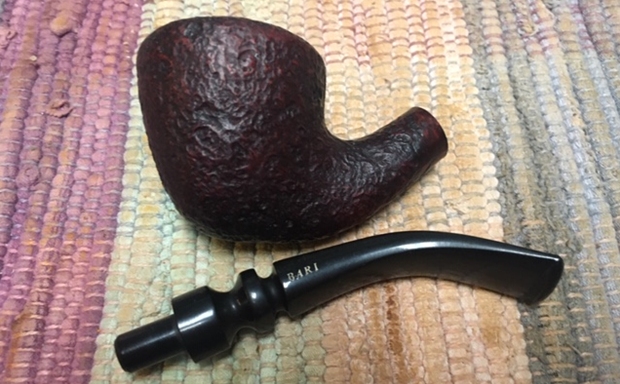
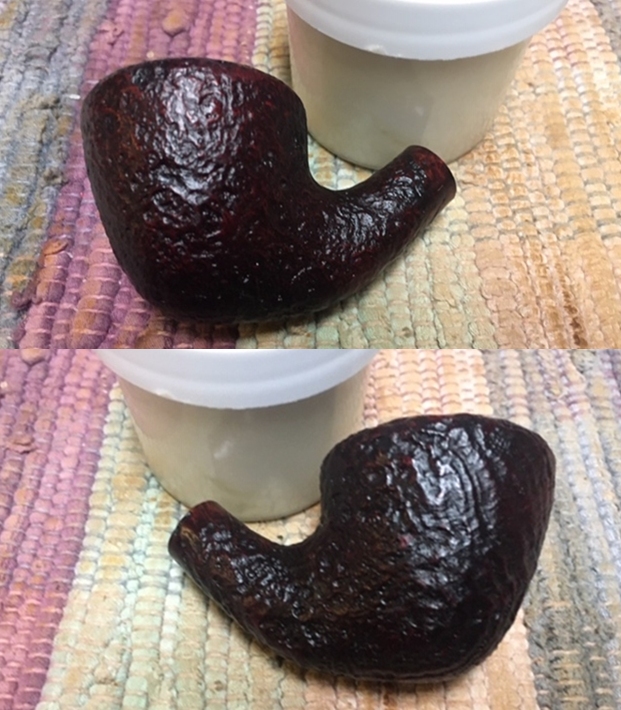
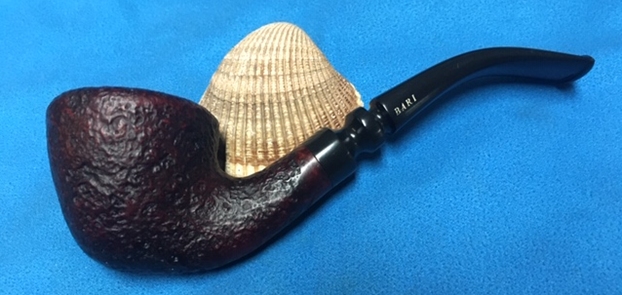
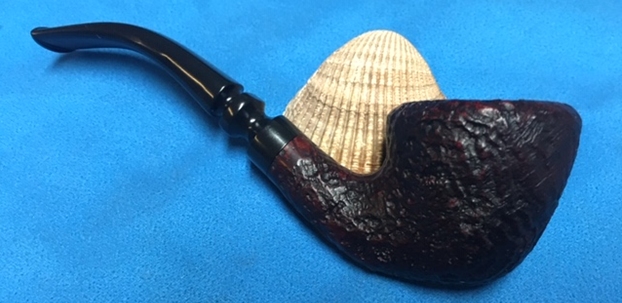
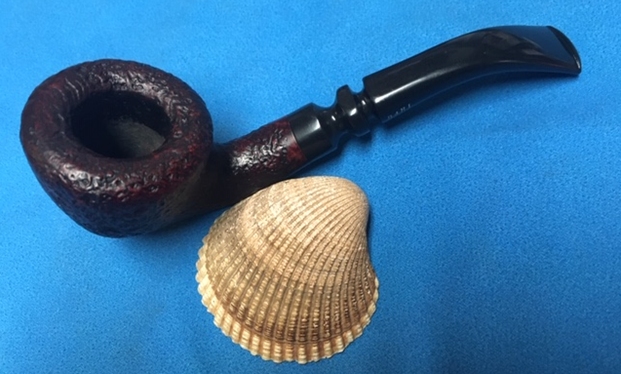
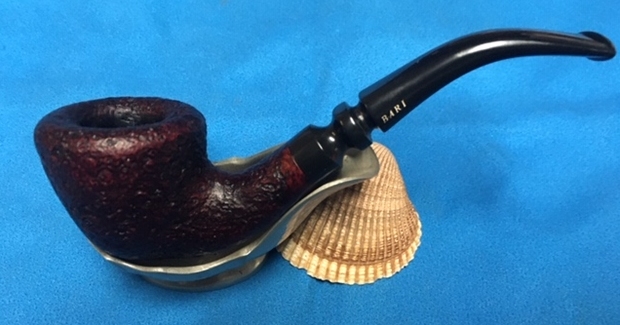
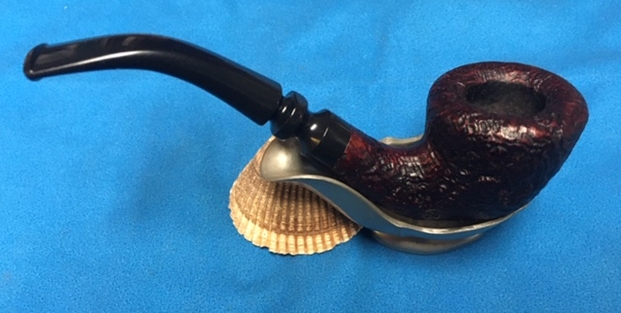
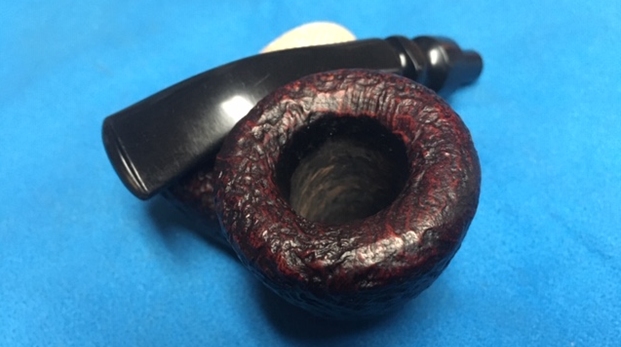
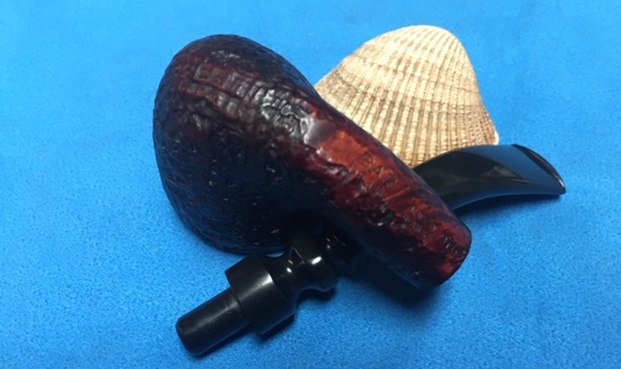
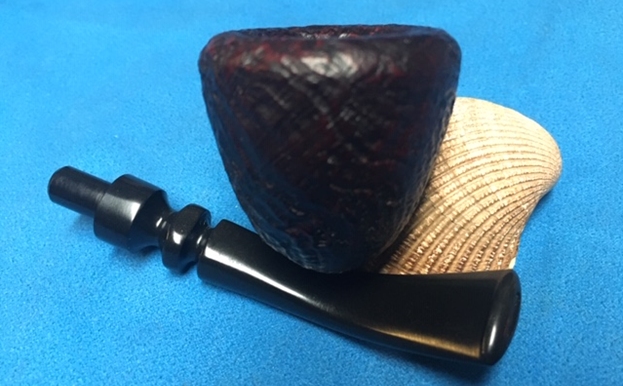
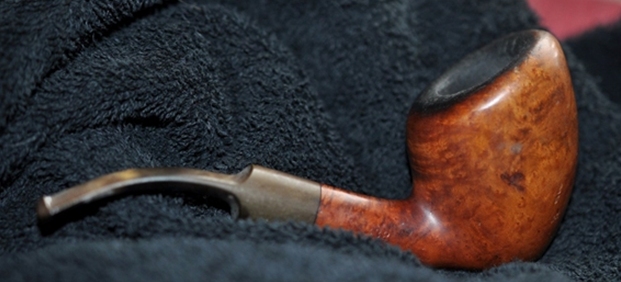
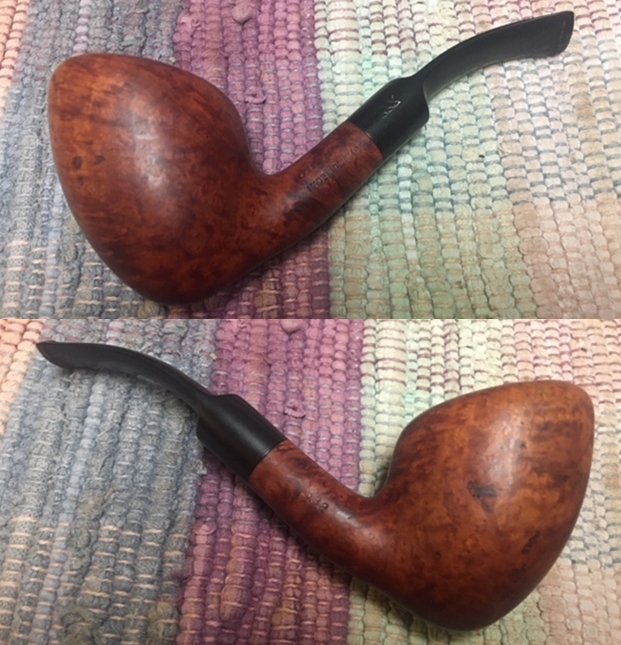
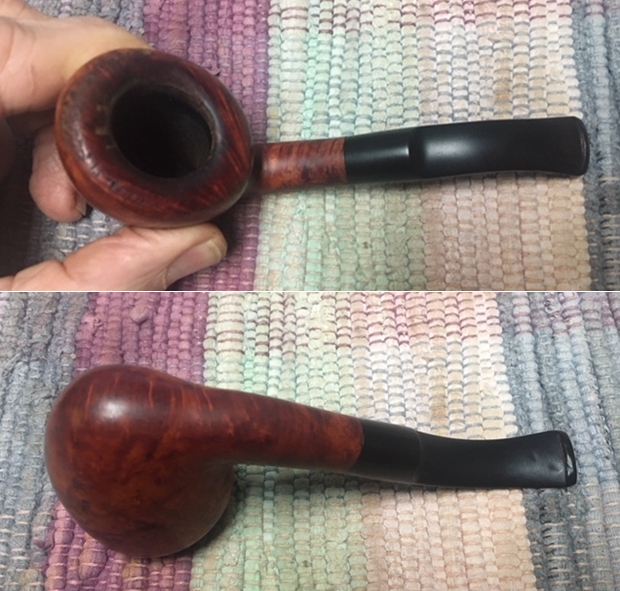
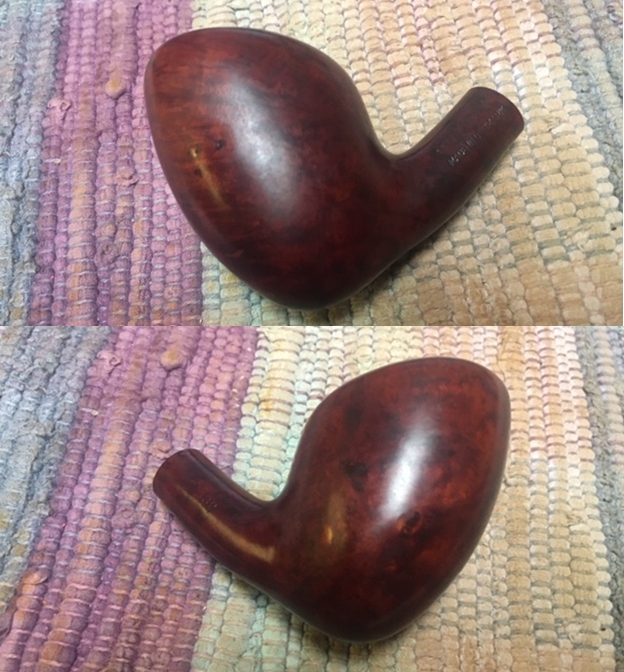
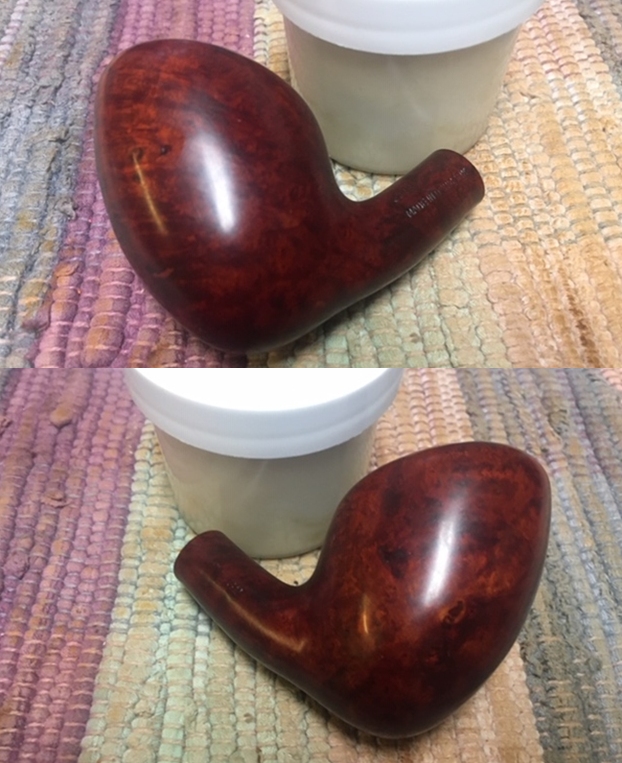
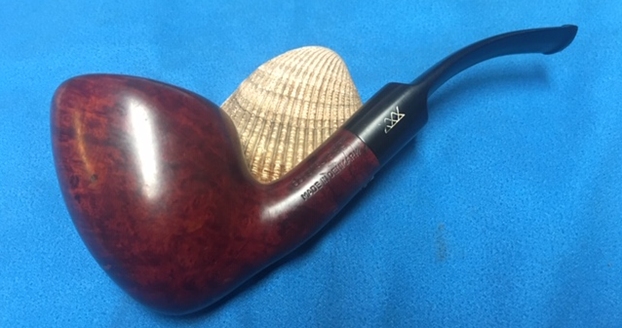
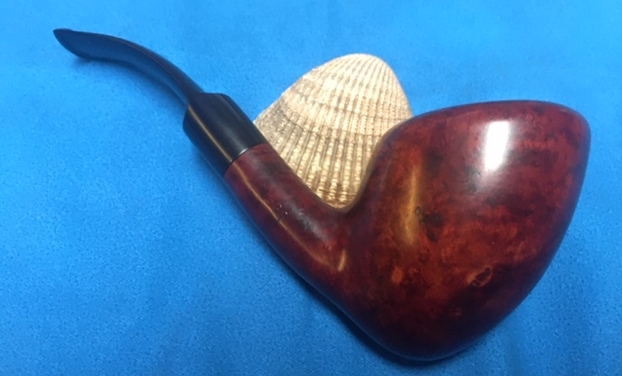
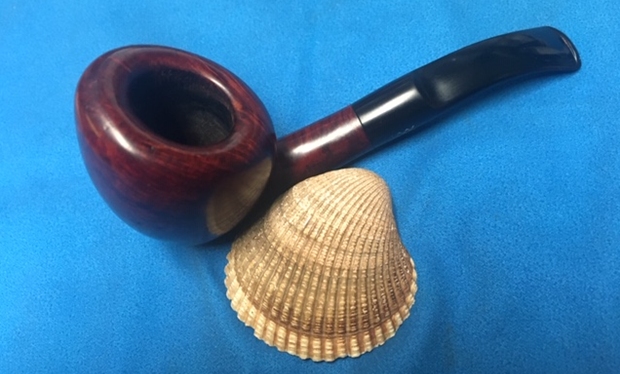
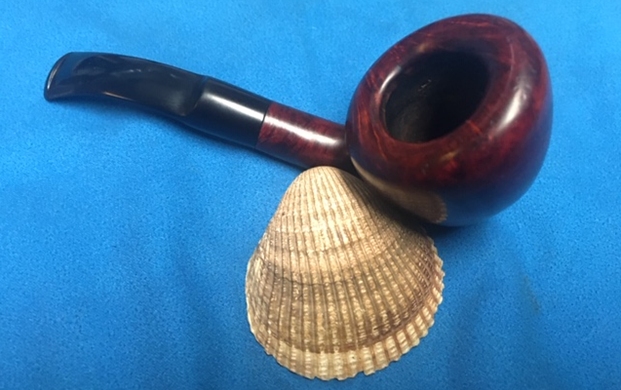
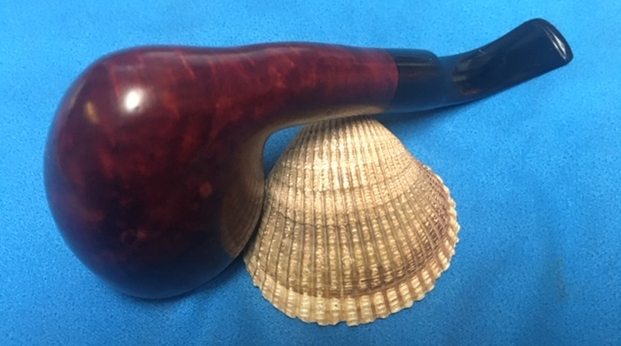
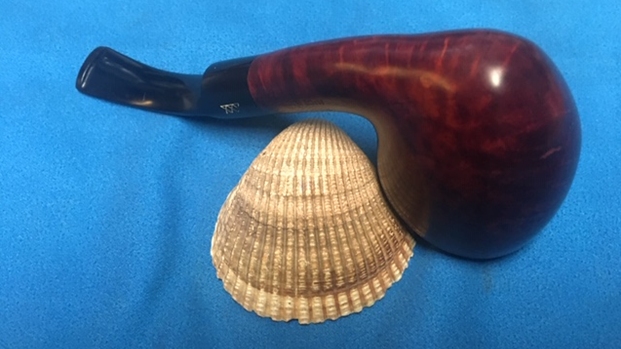
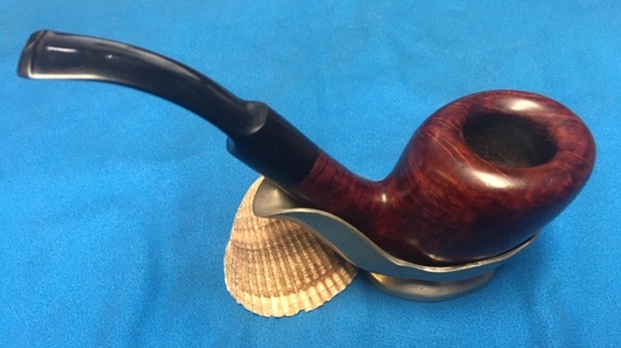
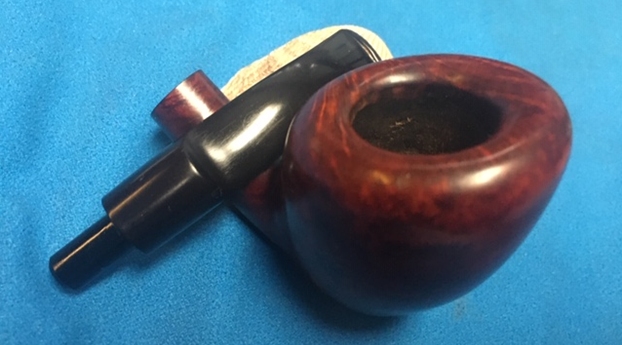
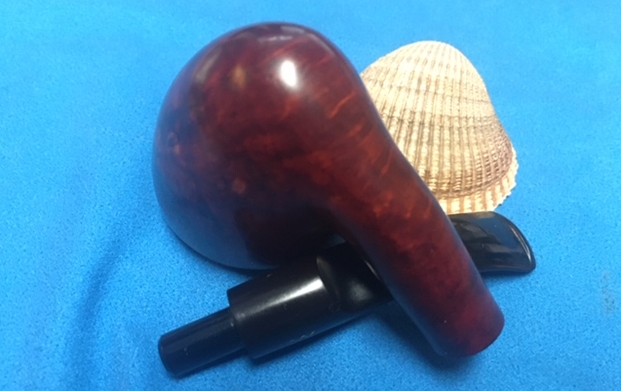
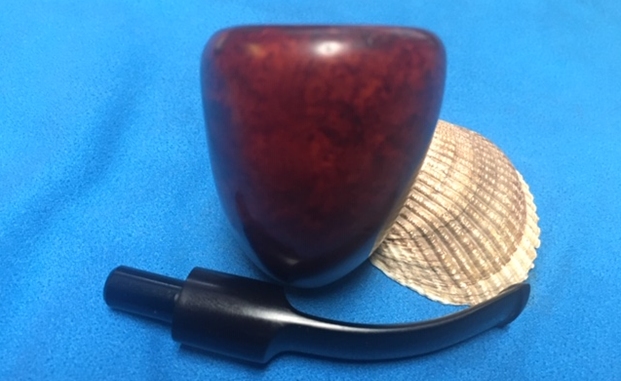
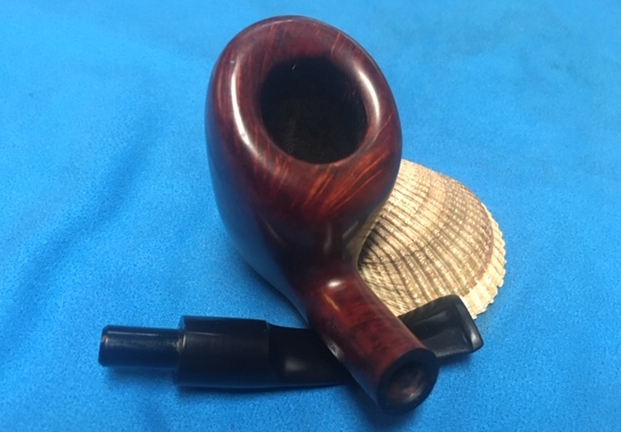
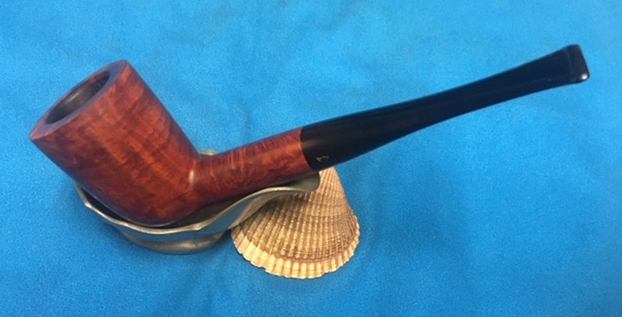
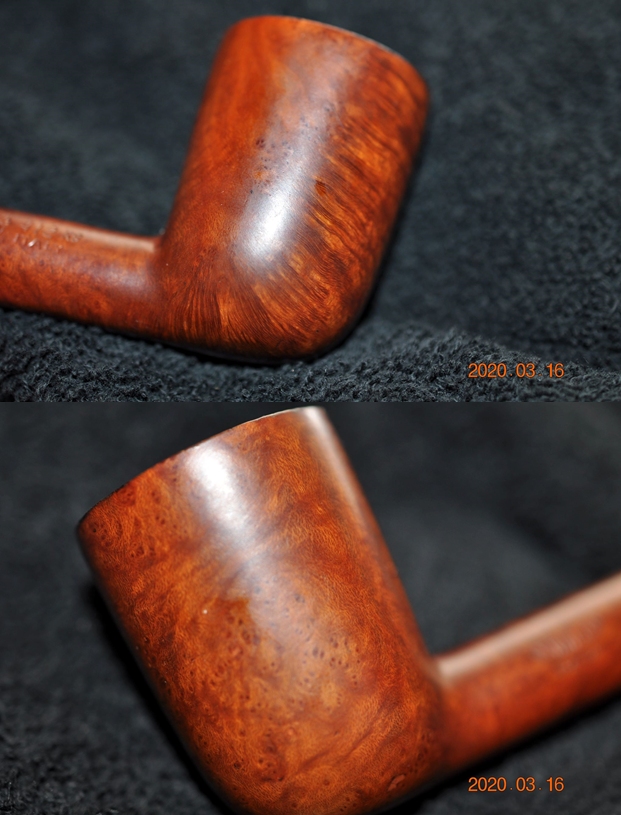
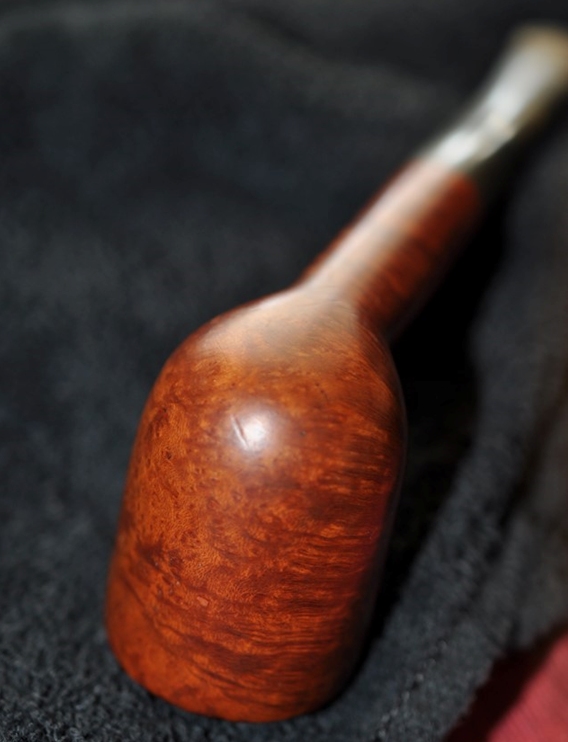
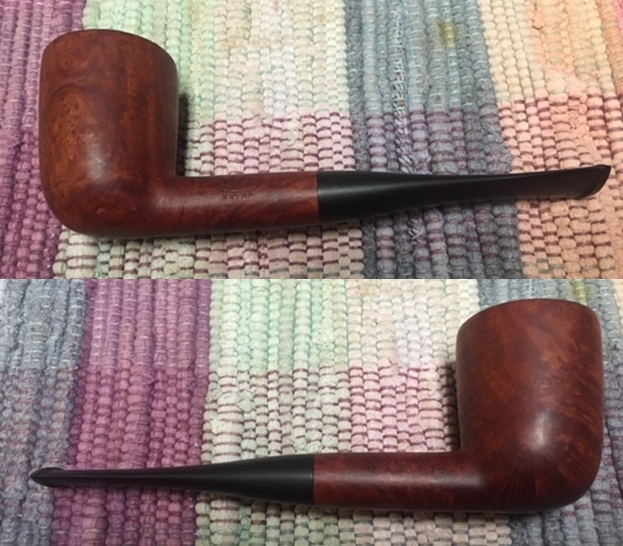
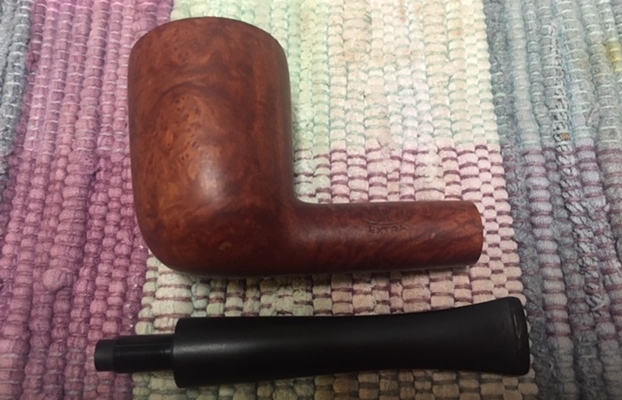
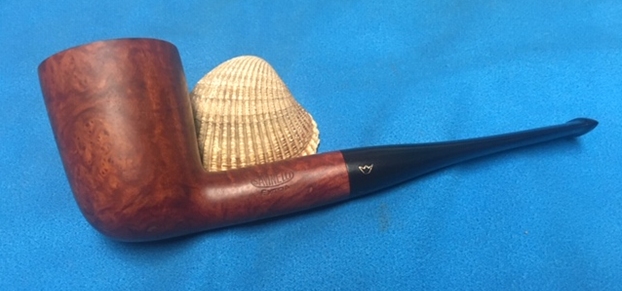
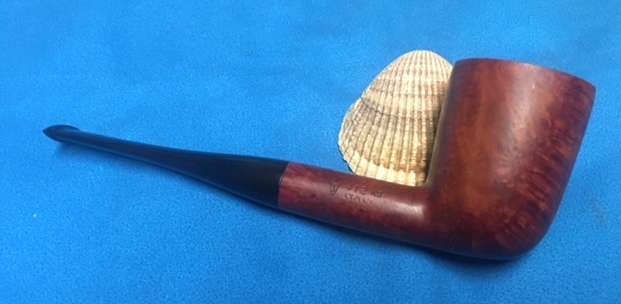
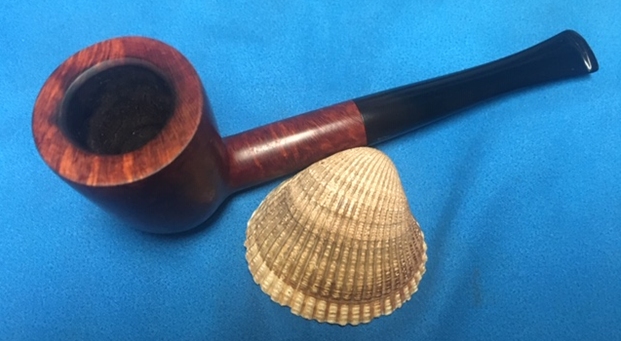
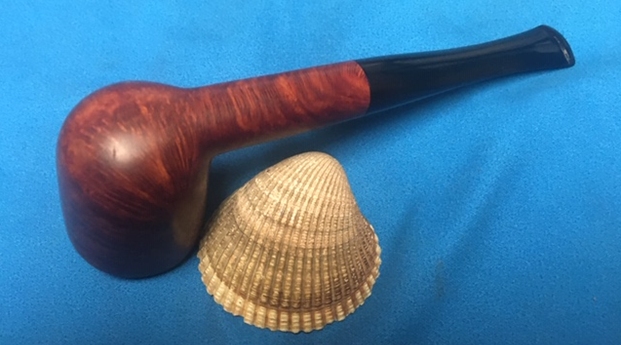
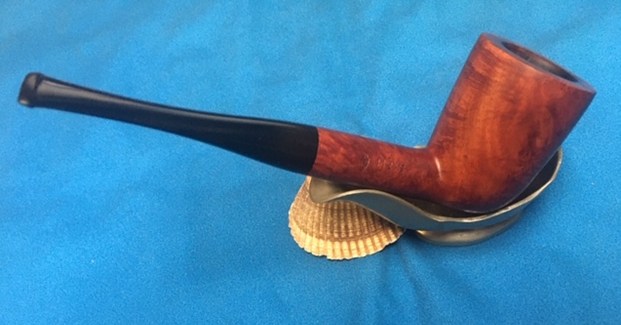
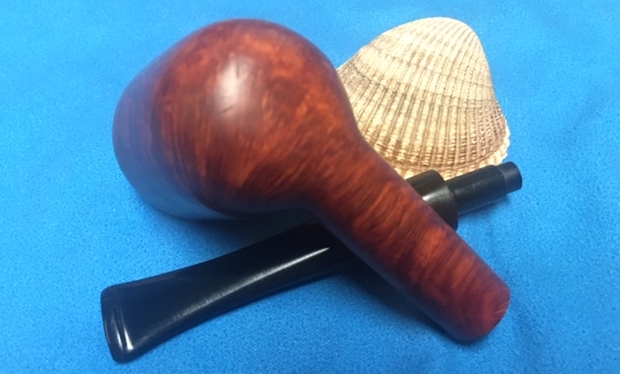
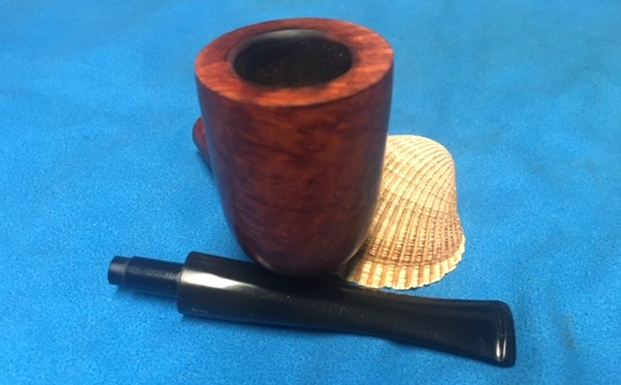
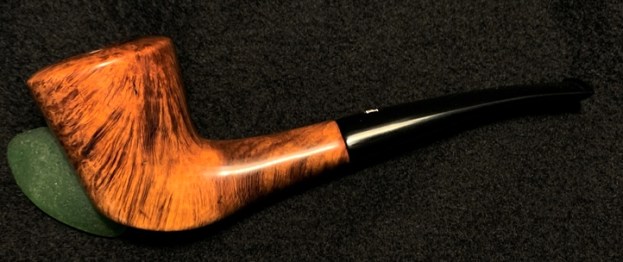
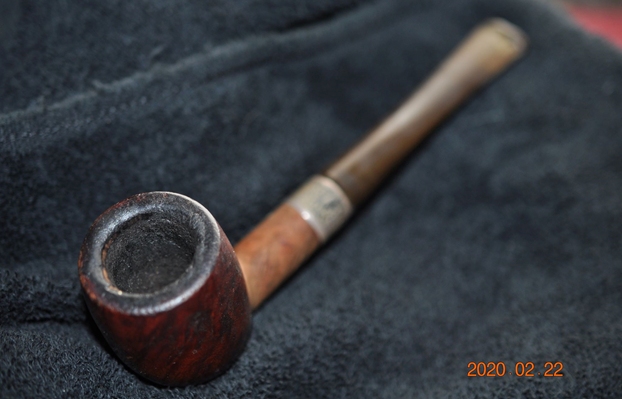
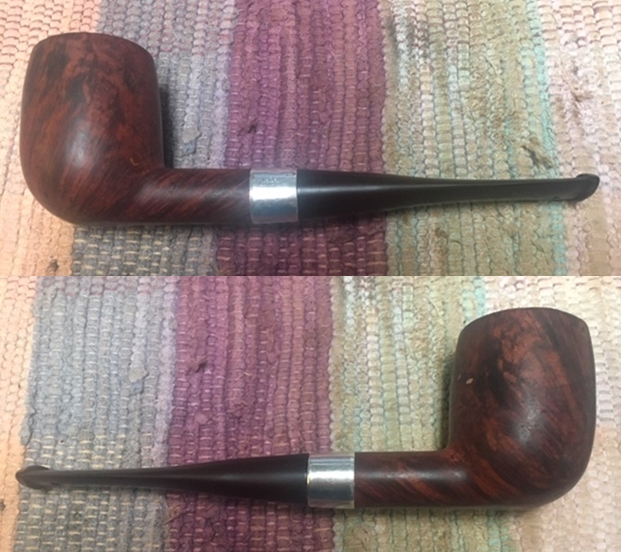
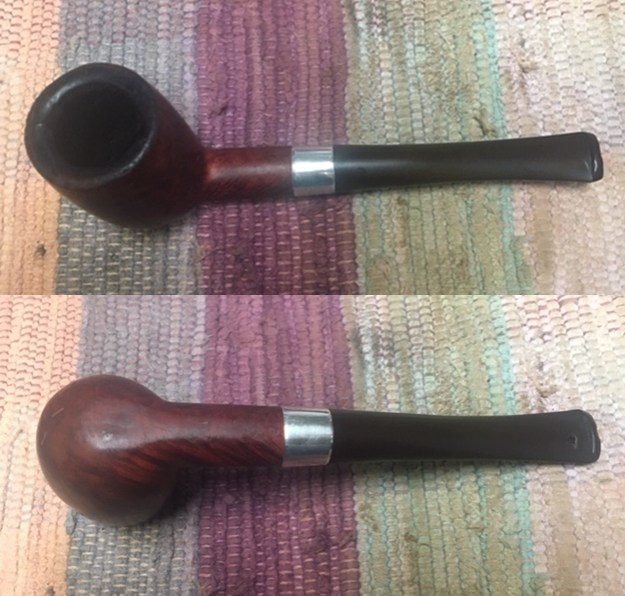
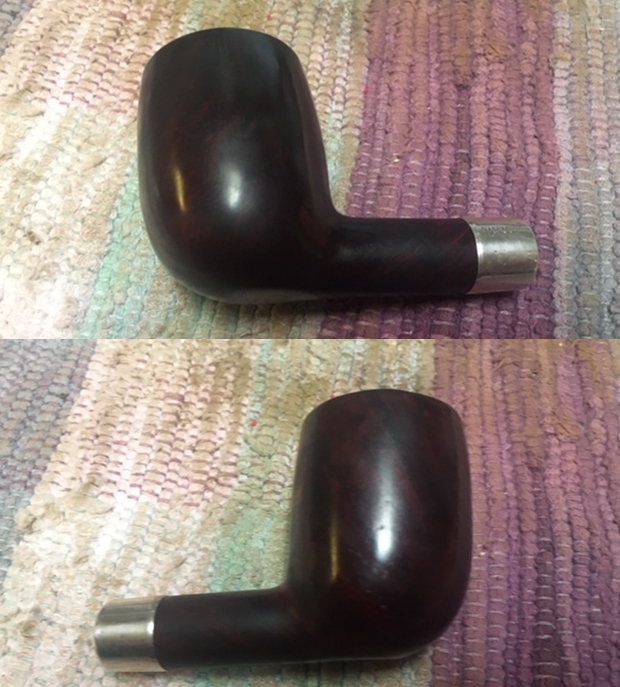
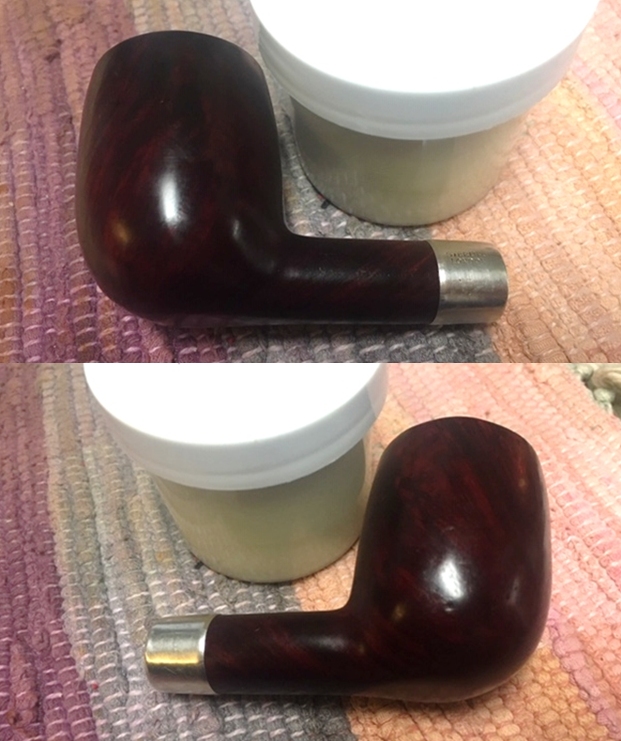
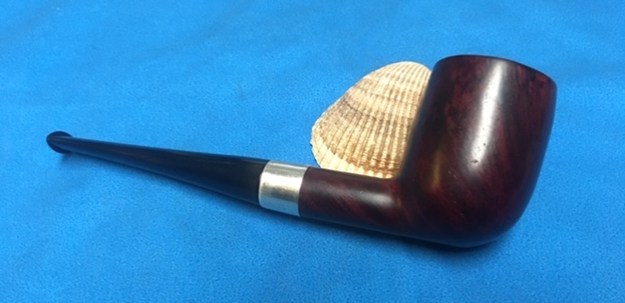
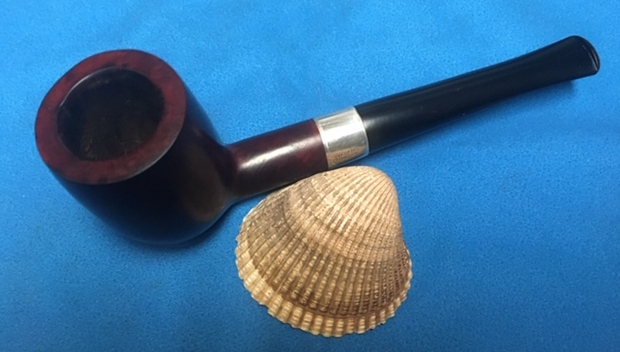
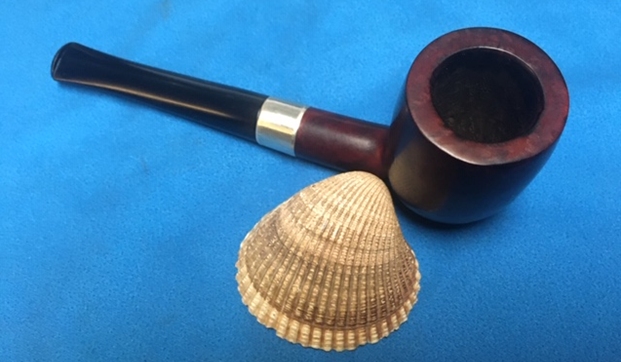
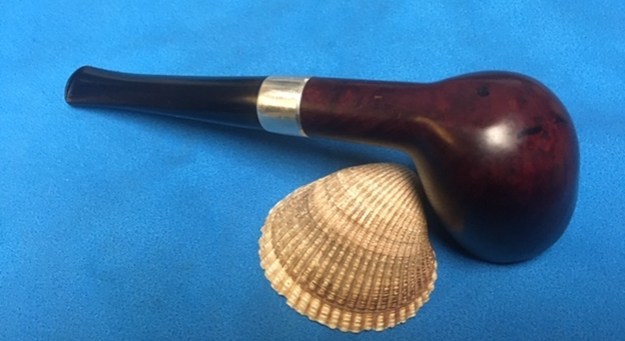
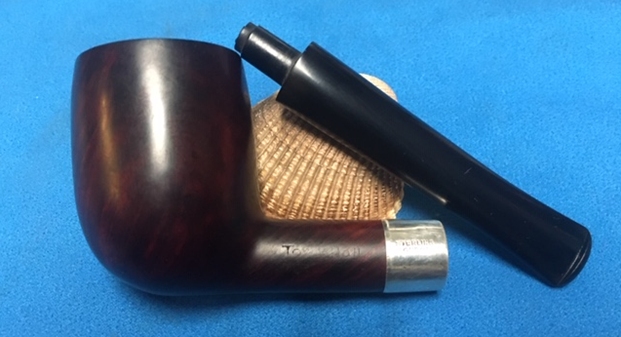
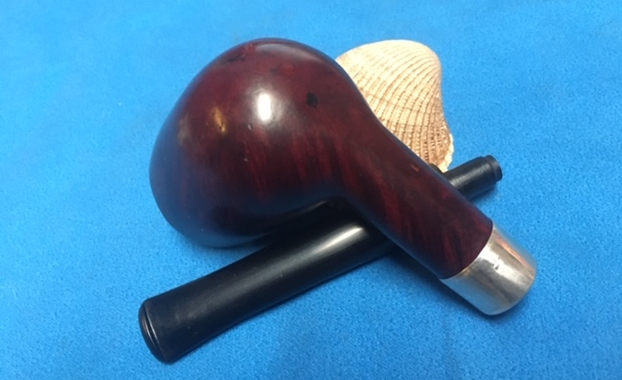
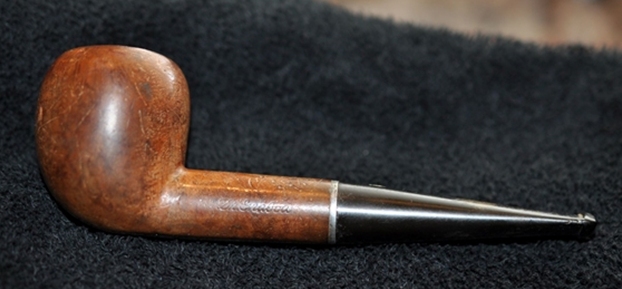
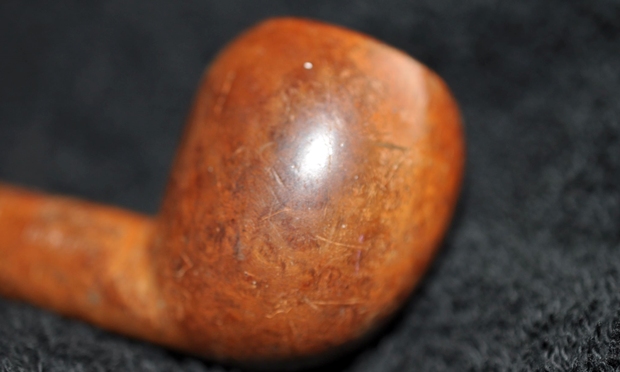
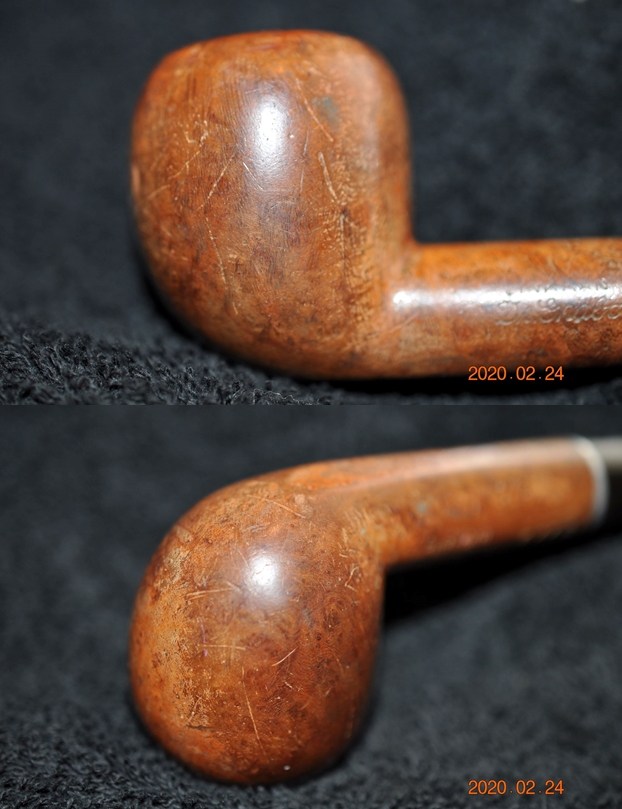
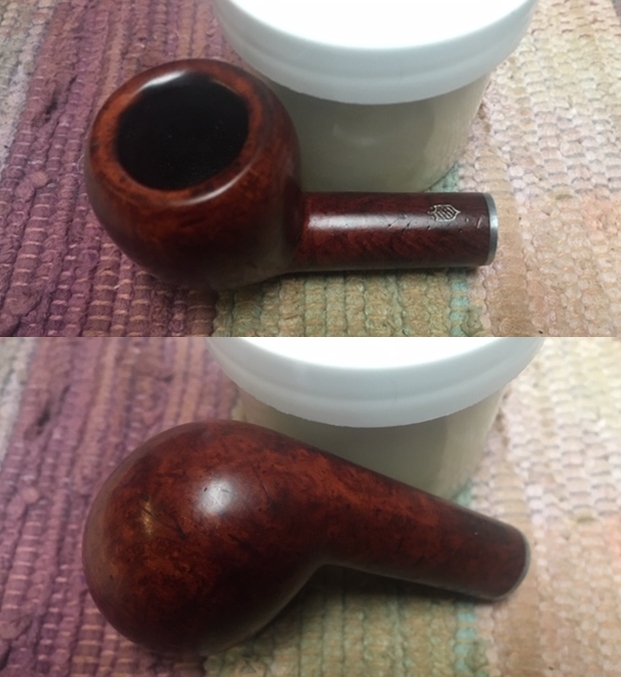
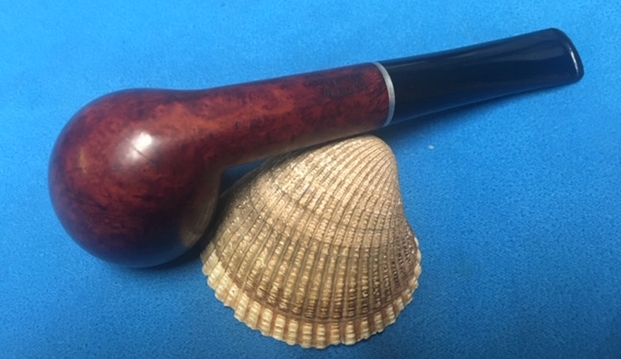
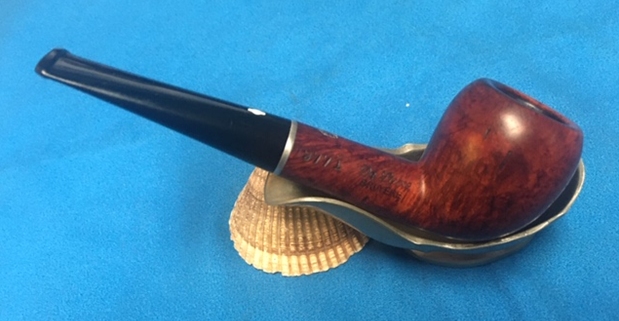
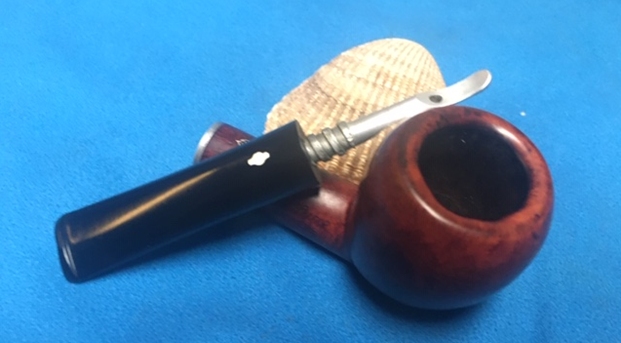
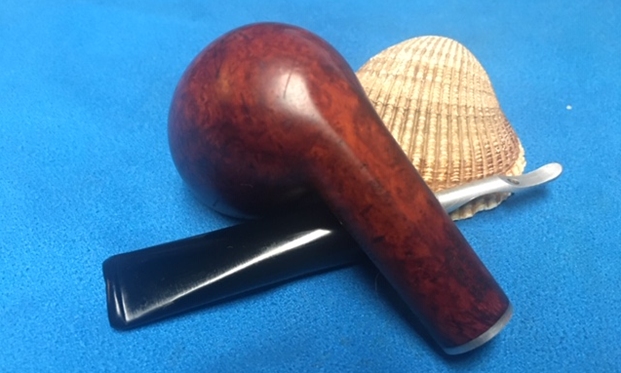
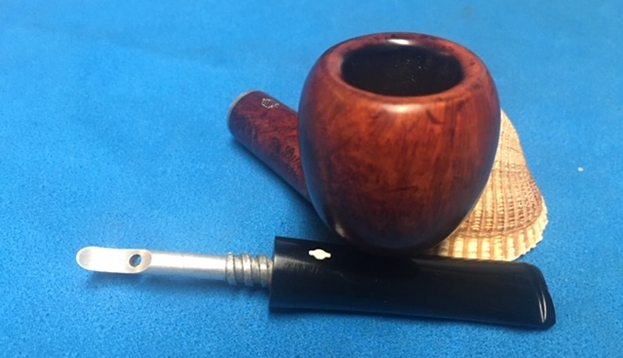
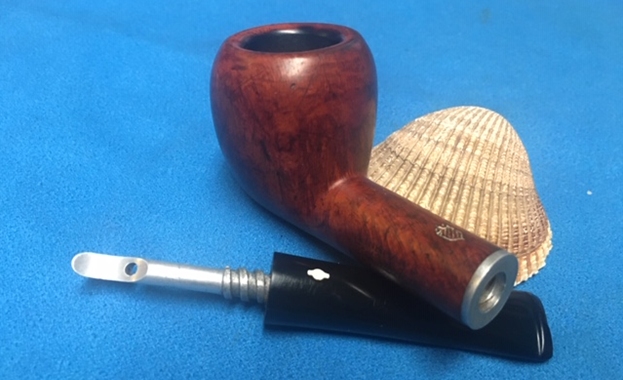
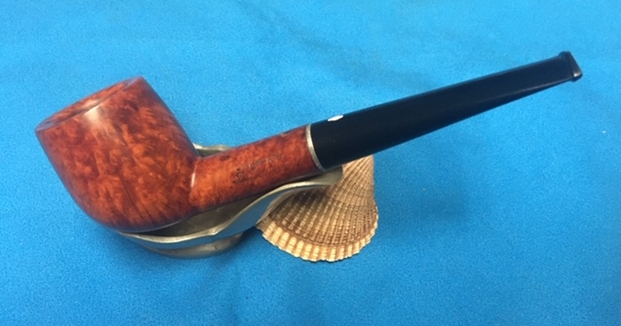
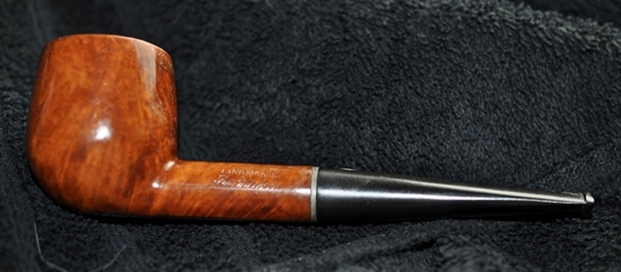
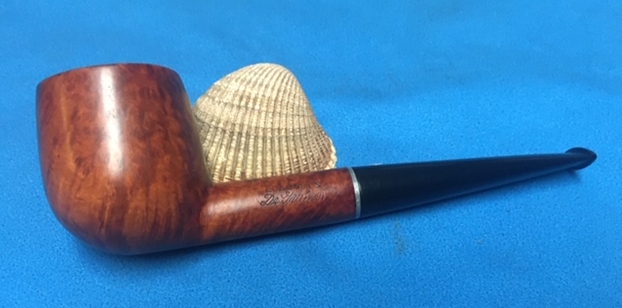
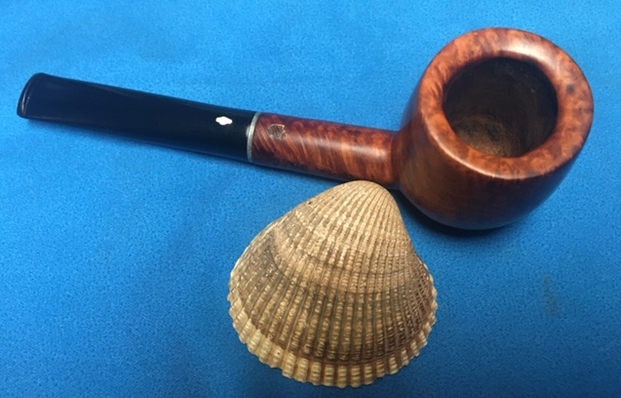
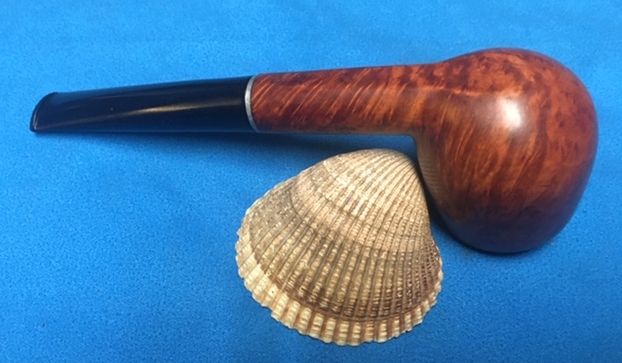
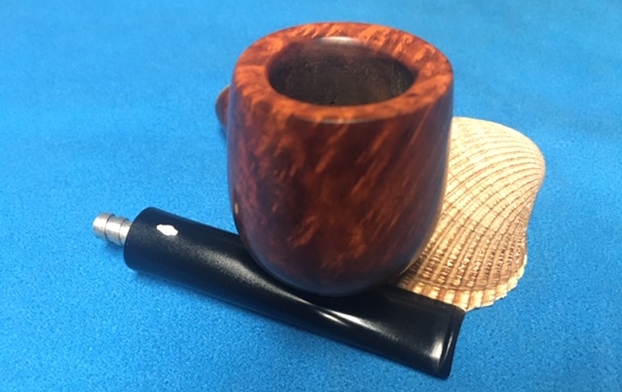
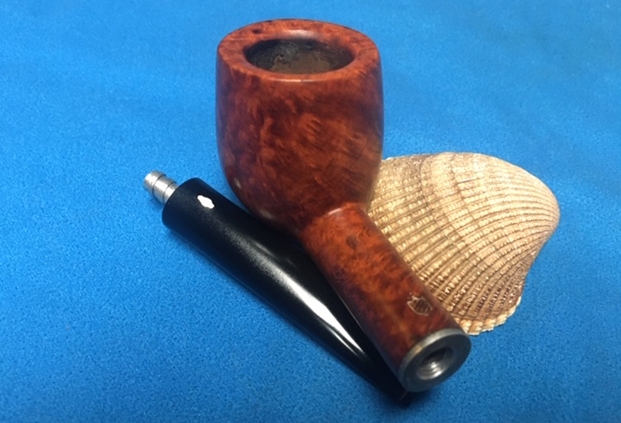
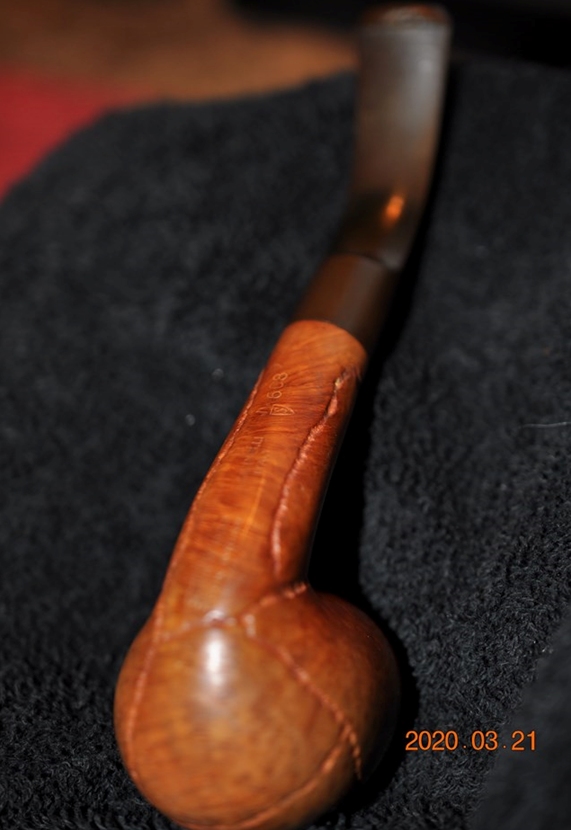
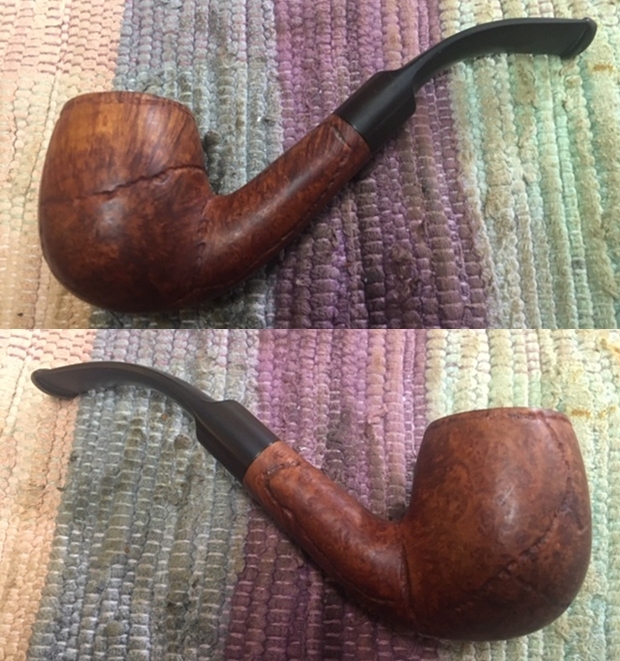
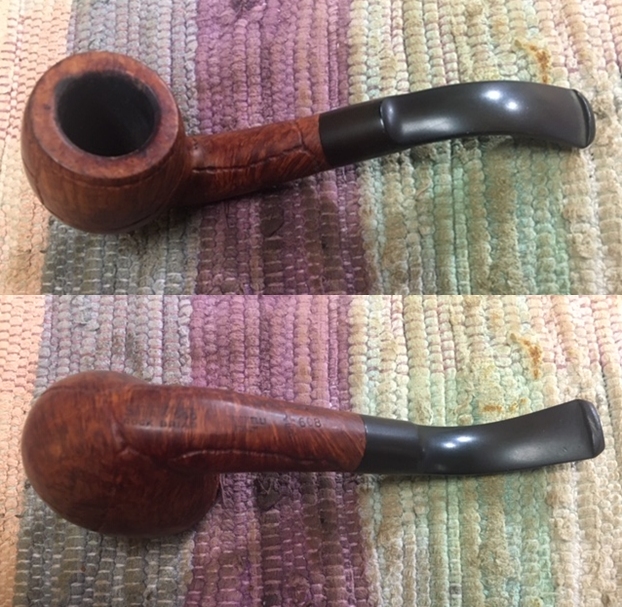
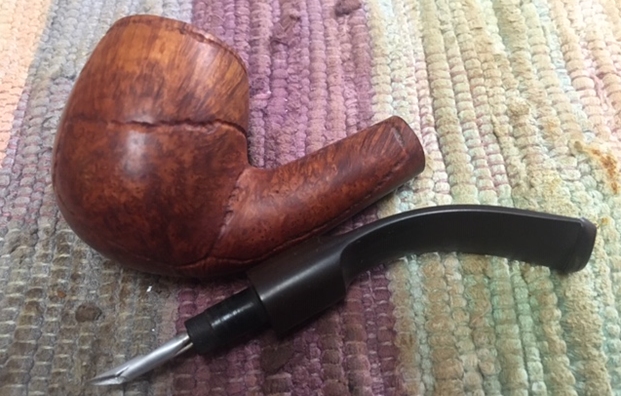
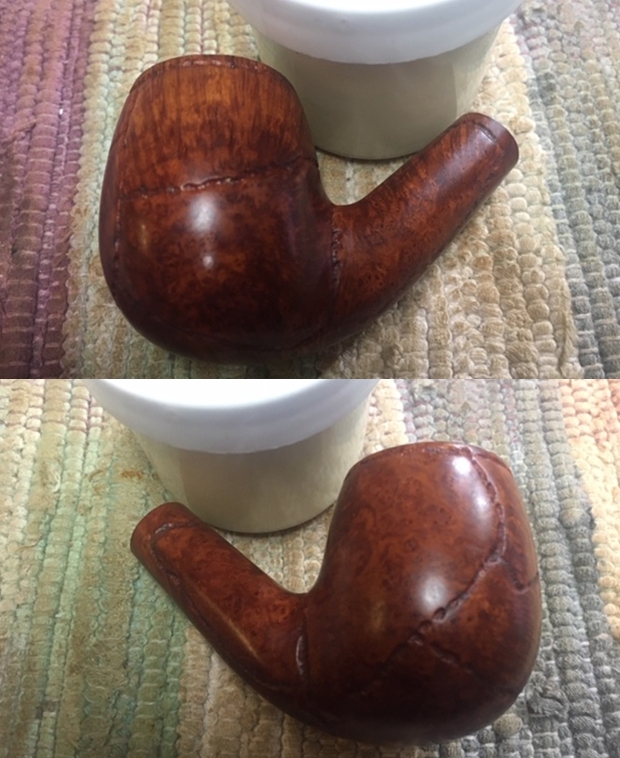
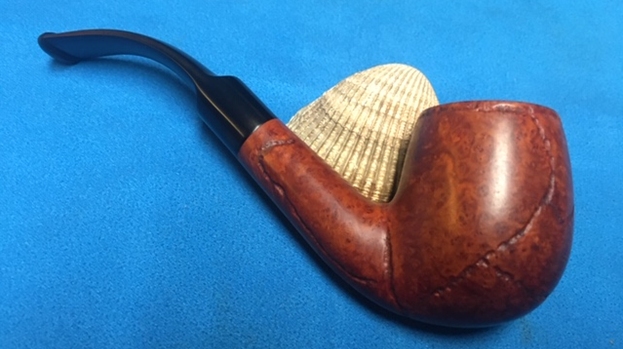
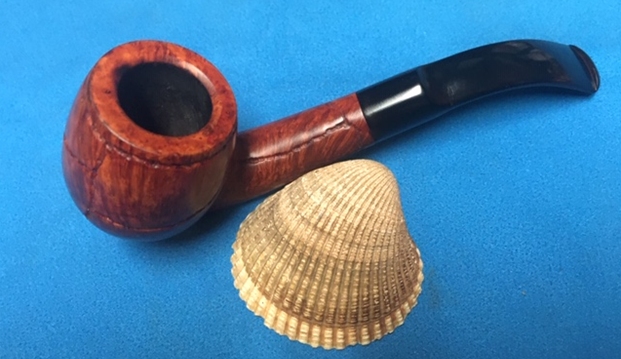
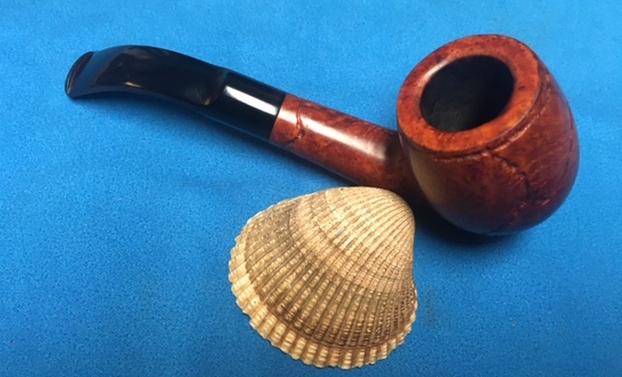
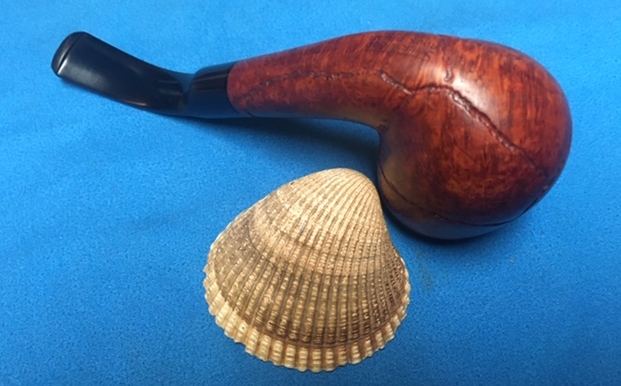
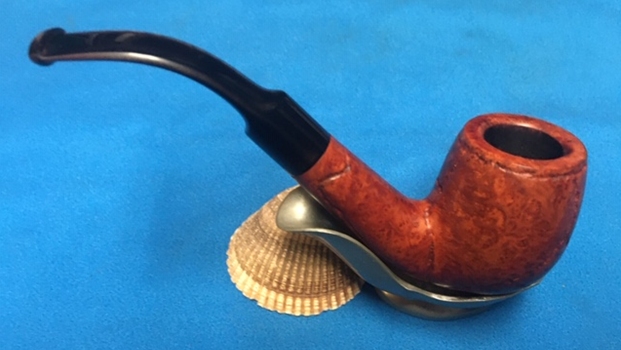
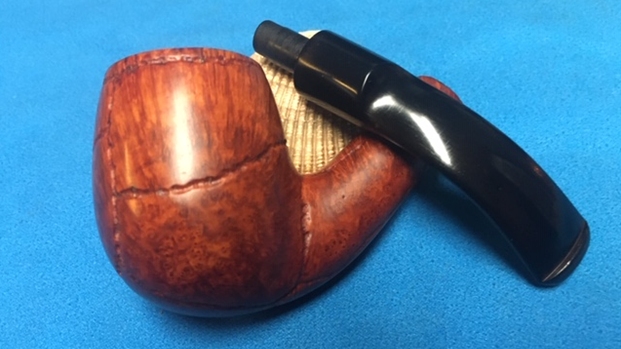
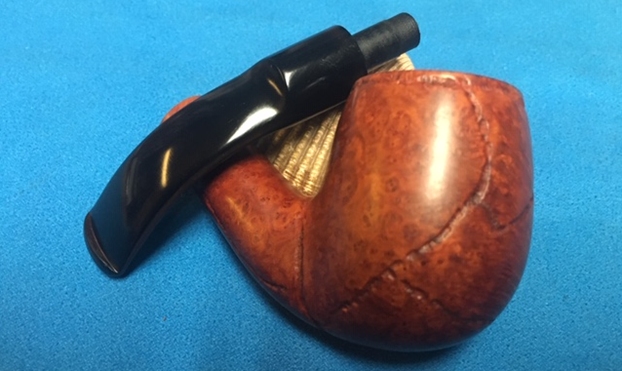
The ‘fun’ Lorenzo Carnevale is the last of the four pipes commissioned by Nathan benefiting the Daughters of Bulgaria.  I call it ‘fun’ because it shows some entertaining attitude!  And here are pictures that got Nathan’s attention. 
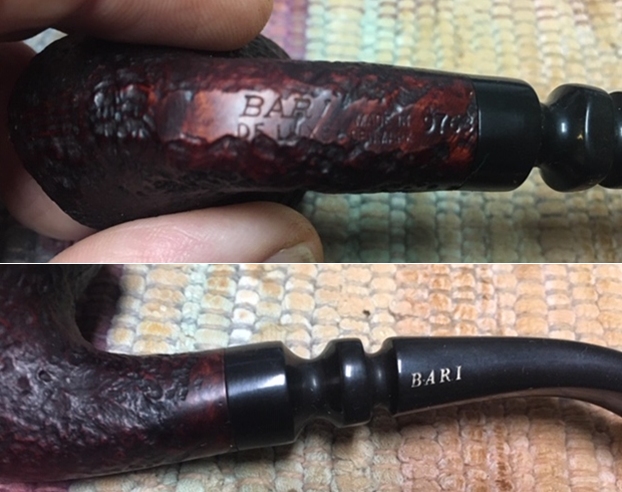
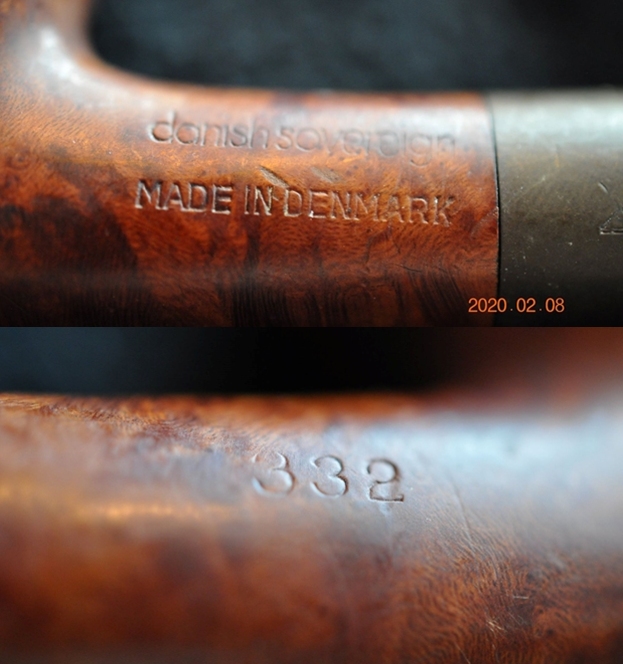
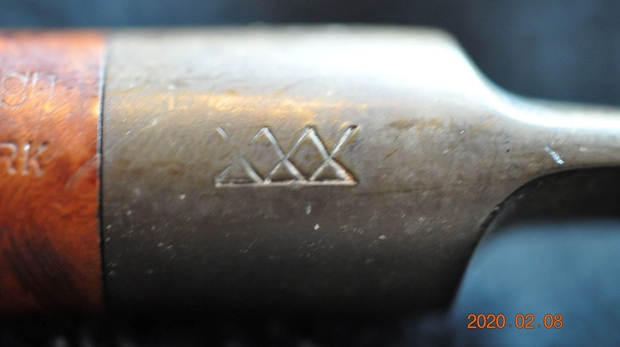
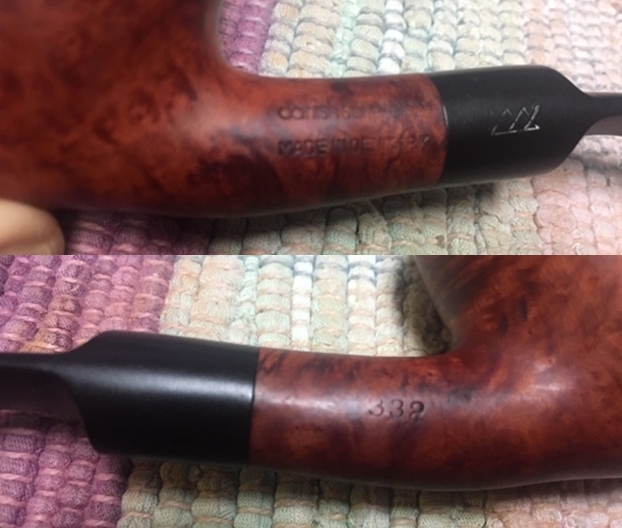
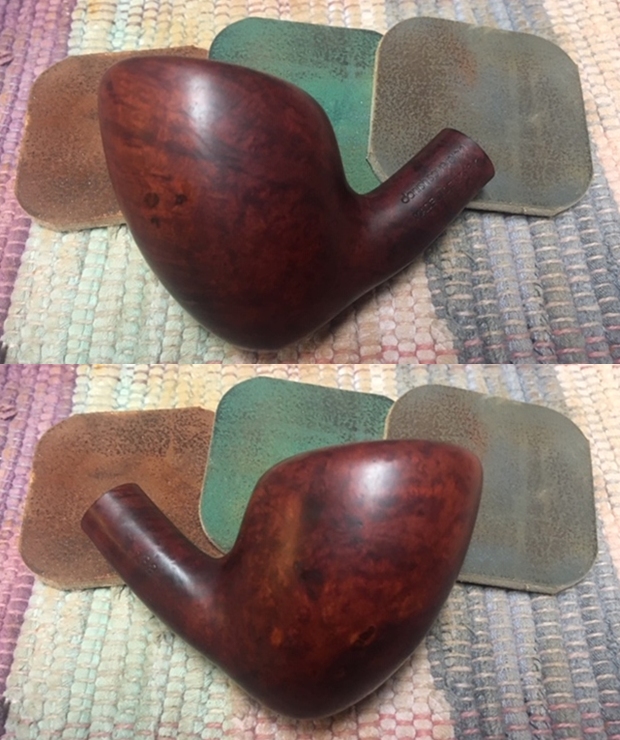
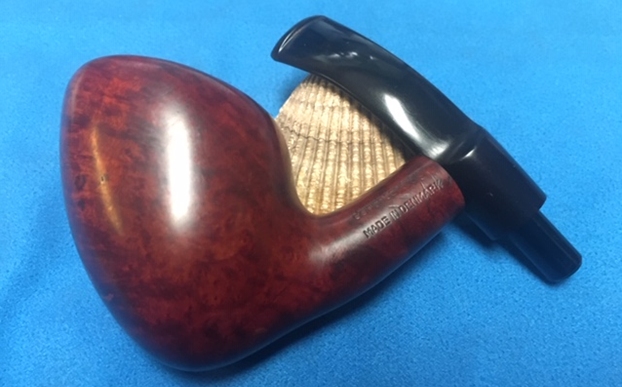
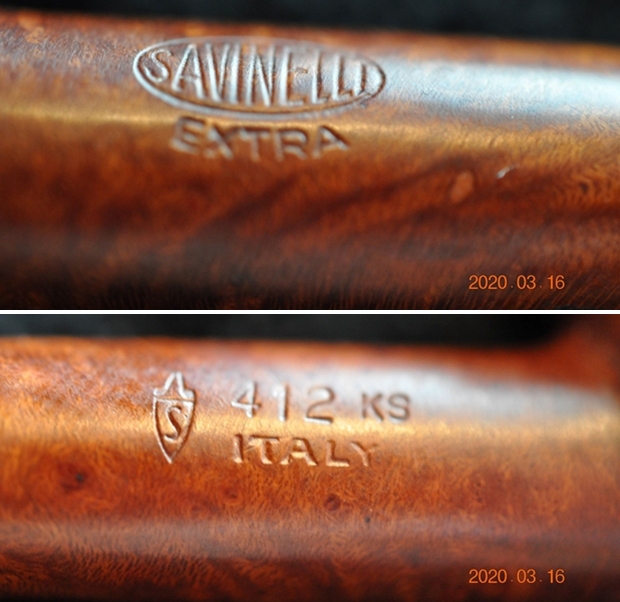
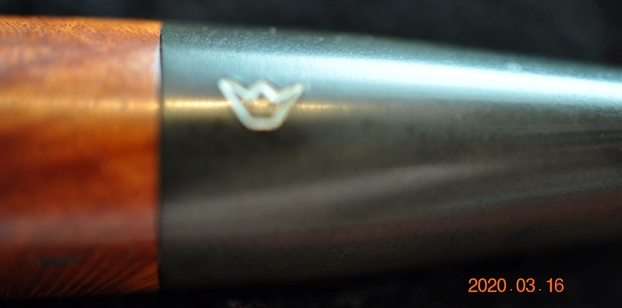
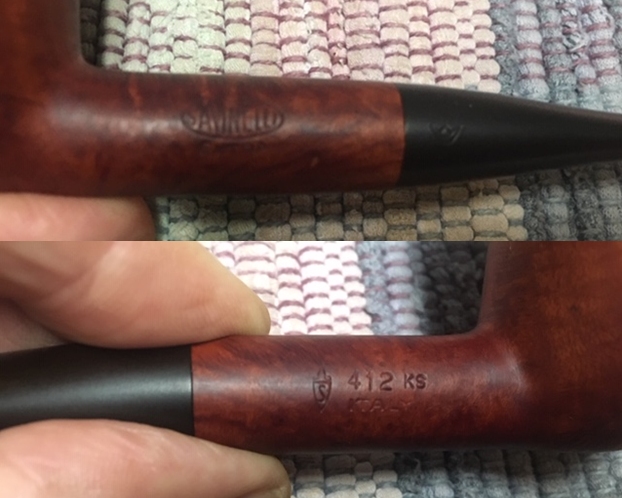
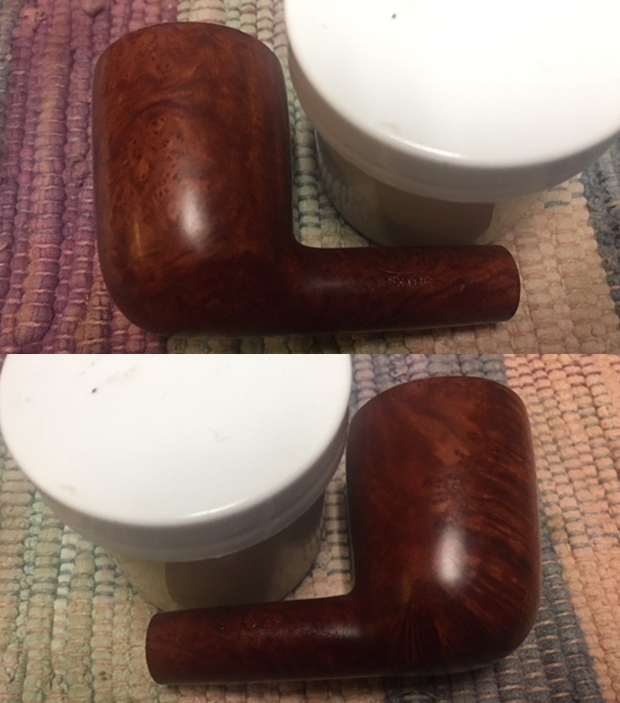
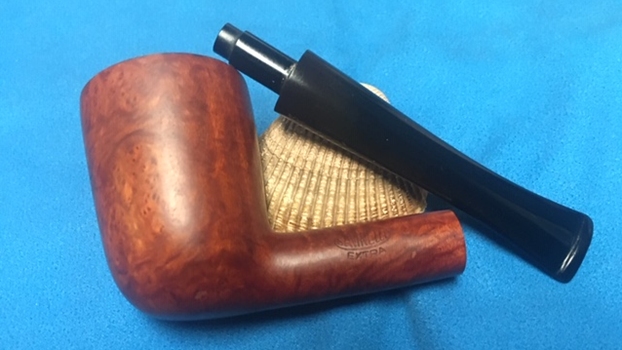
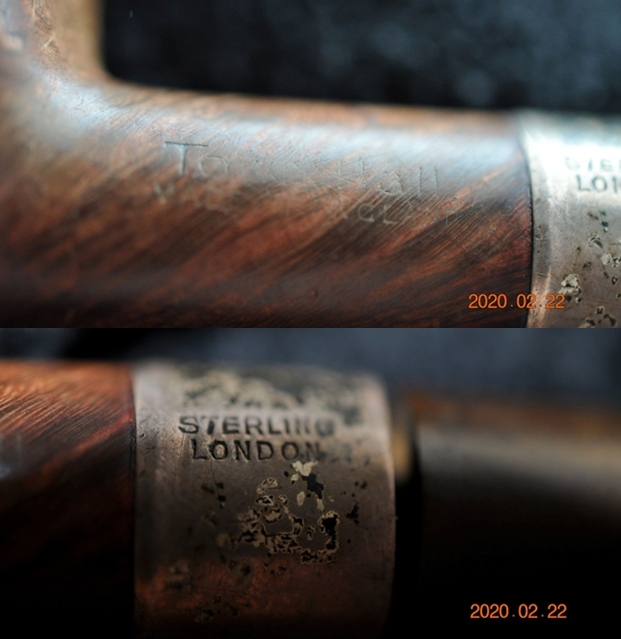
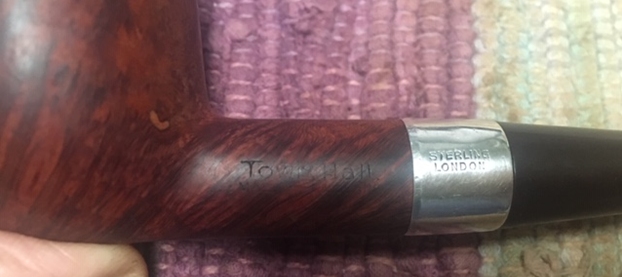
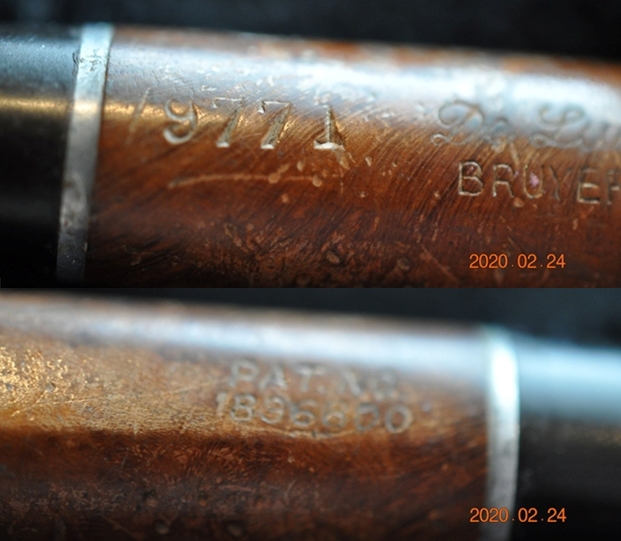
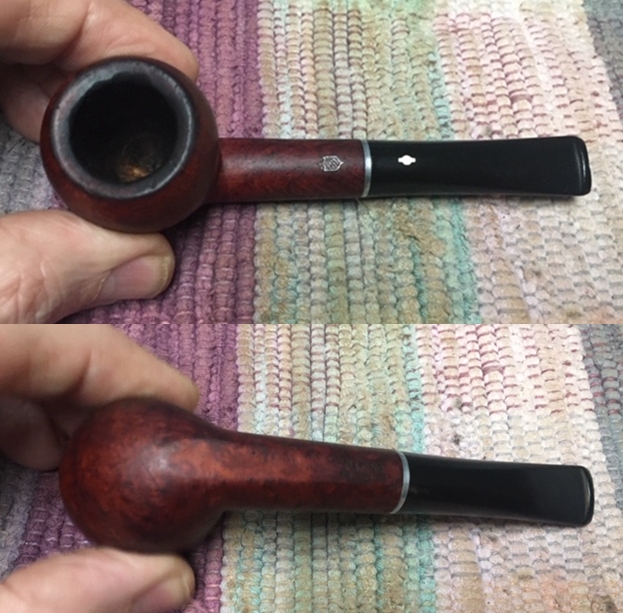
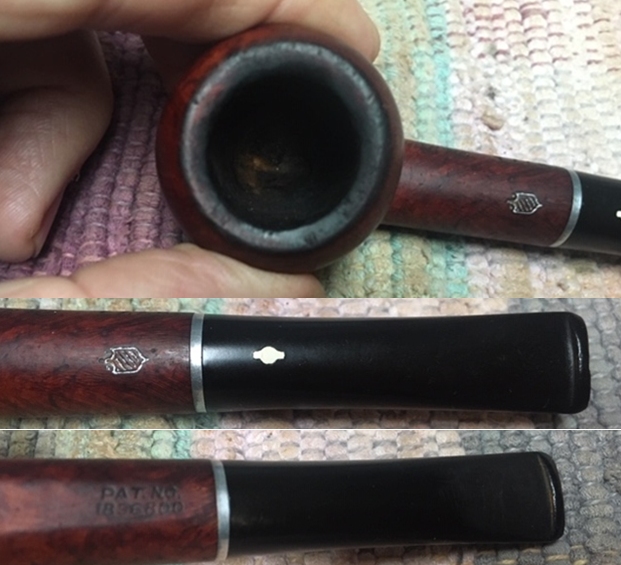
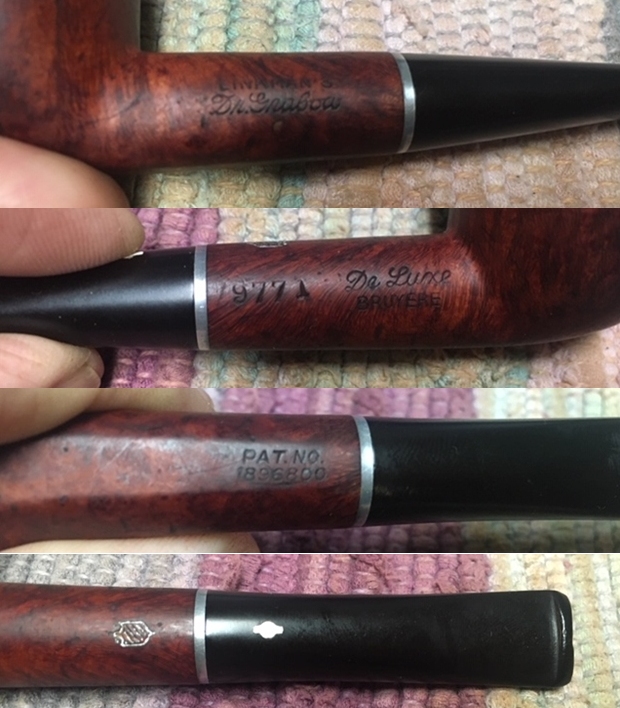
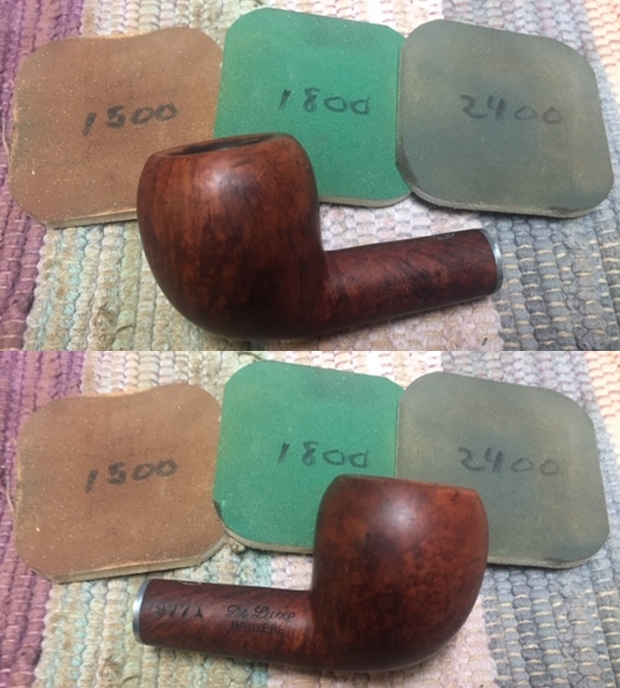
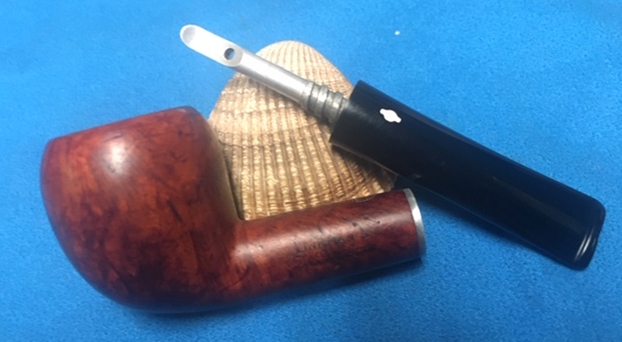
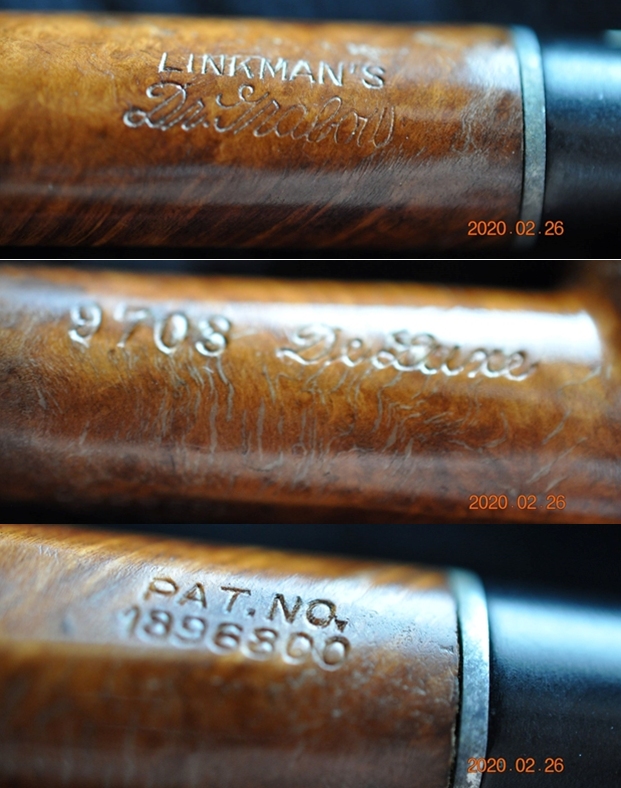
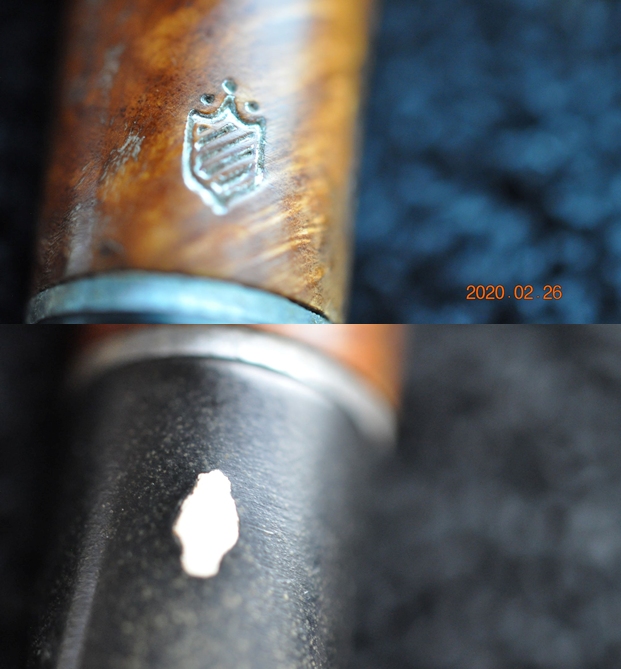
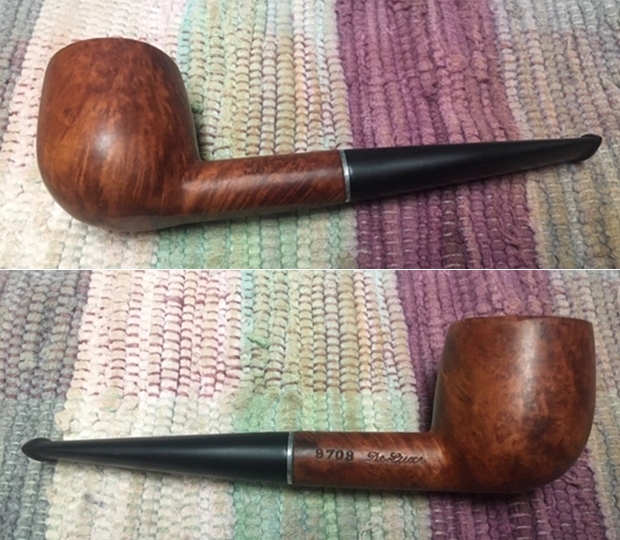
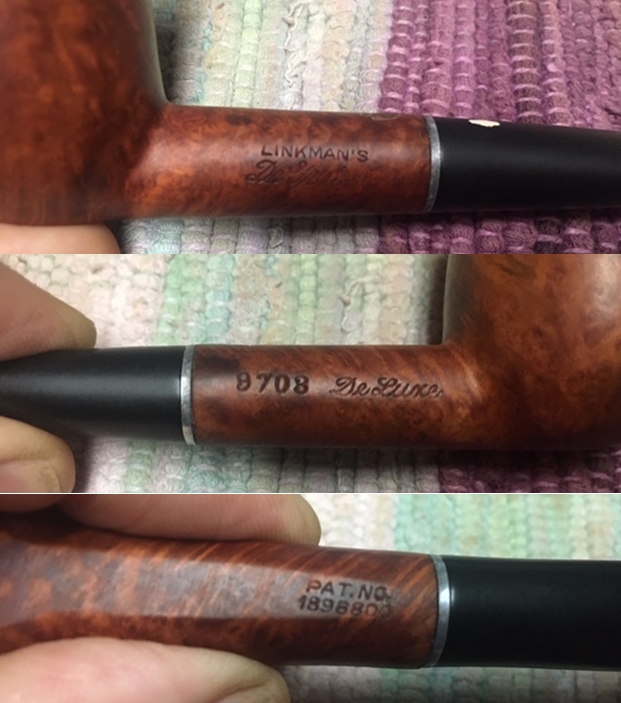
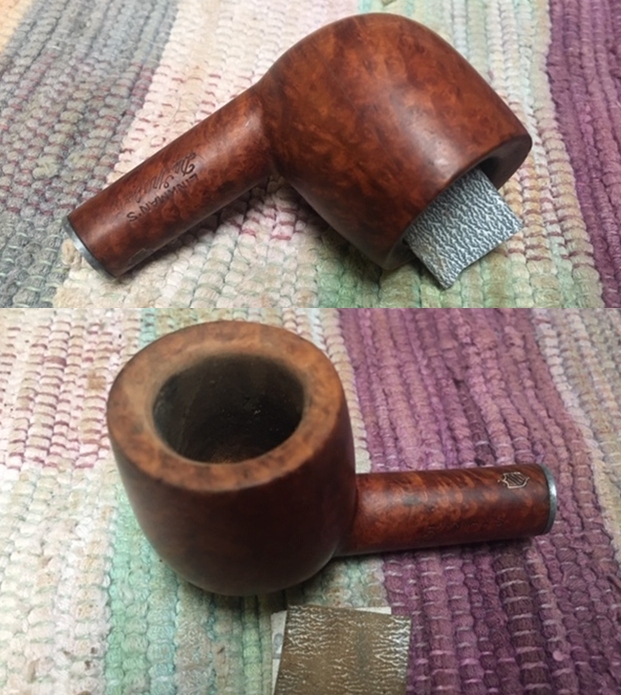
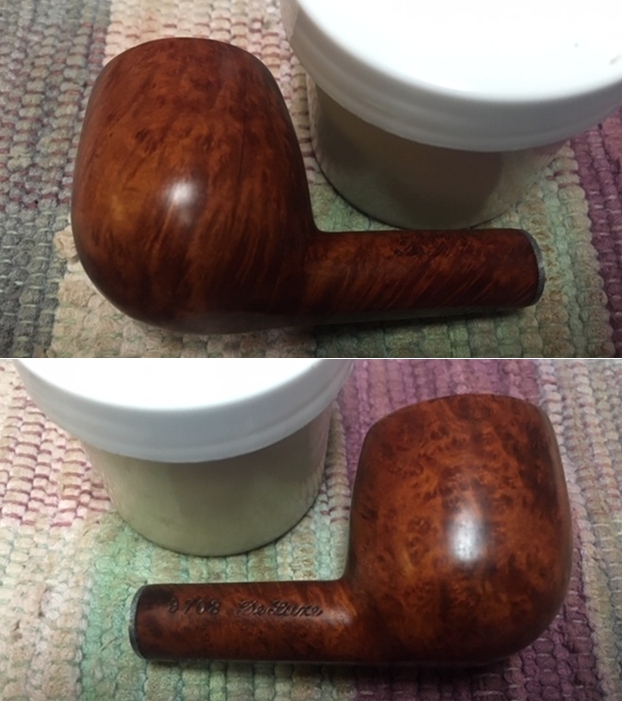
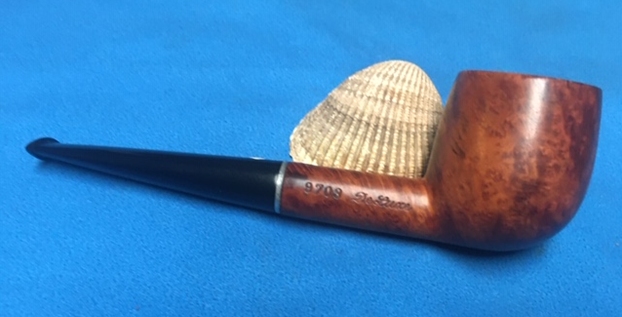
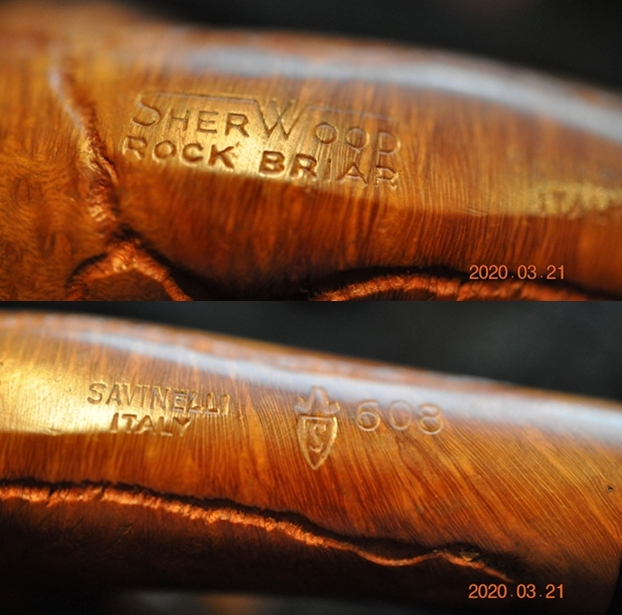
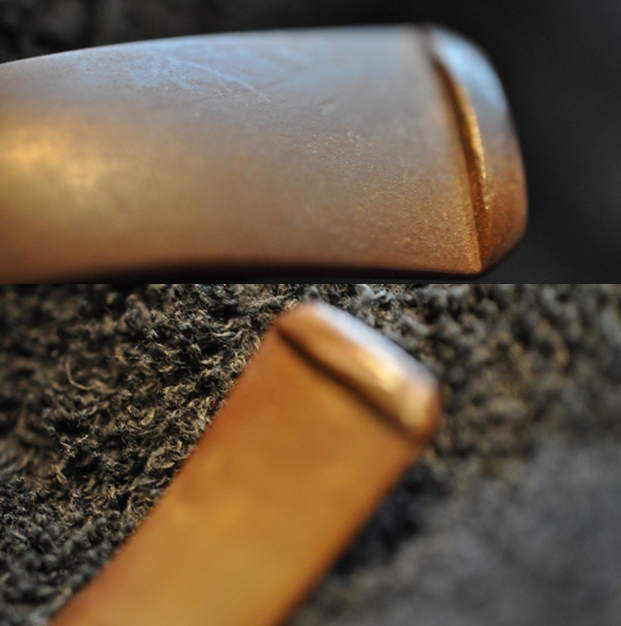
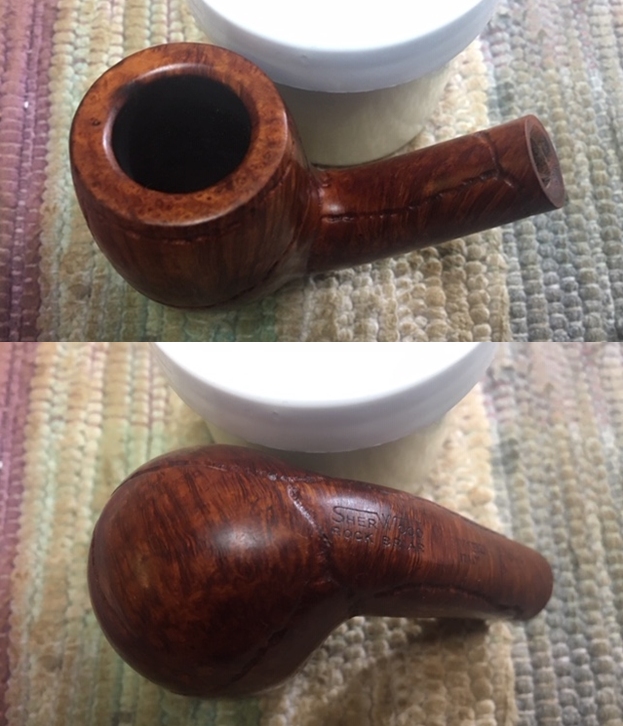
The nomenclature is stamped on the underside of the shank amid the rusticated surface.  It is stamped with a fancy cursive ‘Lorenzo’ [over] CARNEVALE [over] SANREMO with ITALY offset to the right below.  The Lorenzo stem stamp is a classic cursive ‘L’ which appears to be gold lettering.
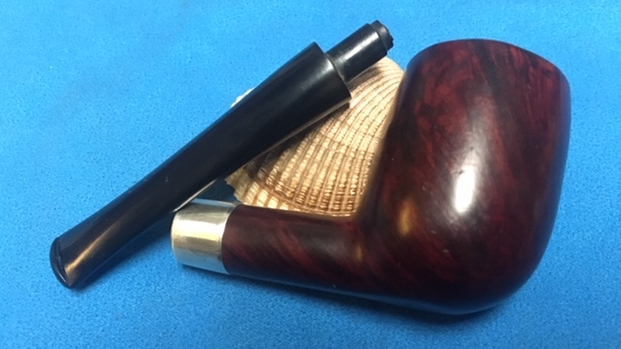
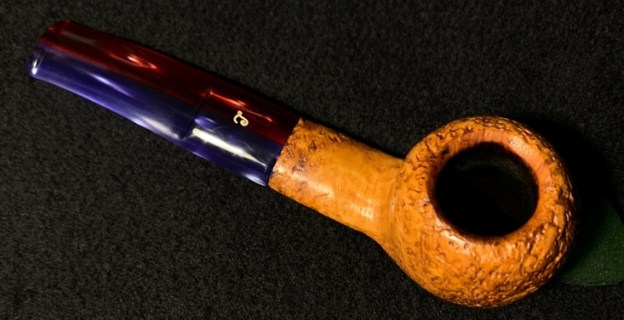
“Carnevale” is the obvious Italian word for ‘carnival’ which sets the tempo for this rusticated Apple shaped pipe with a festive split two-toned slightly bent acrylic stem showing blues and reds. The pipe challenges you to smile!  Its diminutive size is length: 5 1/4 inches, height 1 1/4 inches, bowl width: 1 1/4 inches, chamber width: 7/8 inches, and chamber depth: 1 1/8 inches.

Not as familiar with Lorenzo as I am with other prominent Italian pipe makers, I was interested to read Pipedia’s Lorenzo article:

Following Rossi (1886 in Barasso) and Ceresa (1897 in Cassano Magnano) the third pipe manufacture in the Lombardian province of Varese was established in 1900 in the picturesque city of Gallarate by two brothers. Fratelli Lana (Lana Bros.) produced briar pipes for the Italian market under their own brand name.

In 1922 Fratelli Lana went into a close co-operation with the merchant’s family Tagliabue from Milano. Sales outside of Italy began immediately and the demand throughout Europe steadily increased. By 1939 the manufacture had grown to factory size with 120 persons employed – a considerable number for the time. The program remained unchanged for decades: cheap, unpretentious budget pipes for the mass markets. Most of them didn’t even have any stampings besides “Genuine Bruyere” or similar. A large share of the production emerged as fabrications for other firms so that an own style of the Lana pipes was hardly recognizable.

From 1969 on Lorenzo Tagliabue changed the brand’s name to Lorenzo Pipes. The reason currently qouted is another pipemaking firm named Tagliabue.

This next excerpt I found especially interesting because I had known that Lorenzo pipes tended to be on the ‘edgy’ side of things:

Lorenzo Pipes became cult throughout the 1970s and 1980s. In order to strive another cliche than the gentleman with the stronger statue: the pipesmoking university student of these years, clothed in turtleneck pullover and NATO-parka, can actually not be conceived without a Lorenzo! Well, to be sure he had to select his Lorenzo very carefully from the show-cases in order to find one with less than six blinking fills. Lorenzo dealt very generously with putty. All the same, the pipes smoked very good-natured, they were considered to be hypermodern and flamboyant and, perhaps best of all, they gave you the indispensable highbrow touch!

the Pipedia article describes also that after a family crisis in 1983, Lorenzo Tagliabue lost all interest in the company and it was acquired for a time by Comoy’s of London, but today it is under the ownership of the Aliverti family when in 1988 all rights were purchased to the Lorenzo trademark from the Tagliabue family and production of the renown Lorenzo Pipes resumed.

The nomenclature of the Carnevale mentions a city: Sanremo.  Not sure why a city was mentioned whether it had to do with the history of Lorenzo pipes or some other reason, but I did a quick search on the internet to find out.  It didn’t take long to understand the Carnevale name.  Sanremo is known in Italy for its annual ‘Carnival of Flowers’.    The Wikipedia article was very helpful.  This history of this annual festival in March goes back to 1904.  As a celebration of flowers, the main event is a parade made up primarily of ‘floral carriages’ or floats very reminiscent to me of California’s Rose Parade. (Picture: LINK)

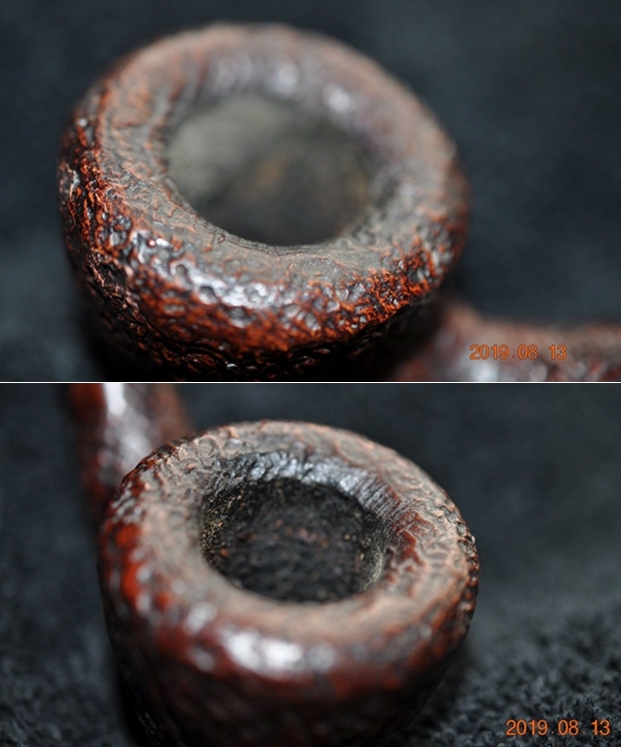
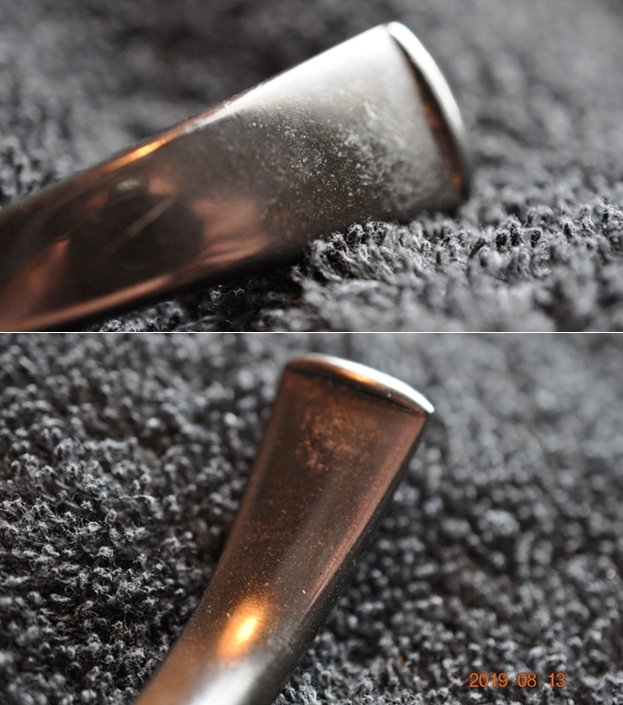
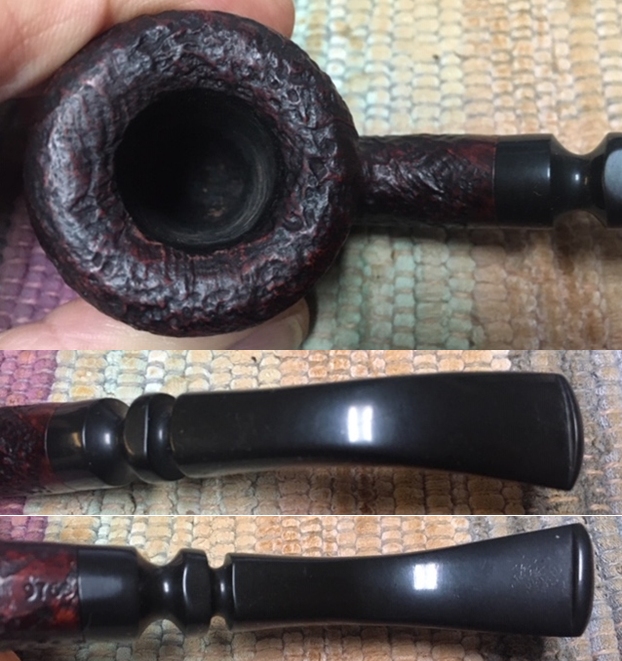
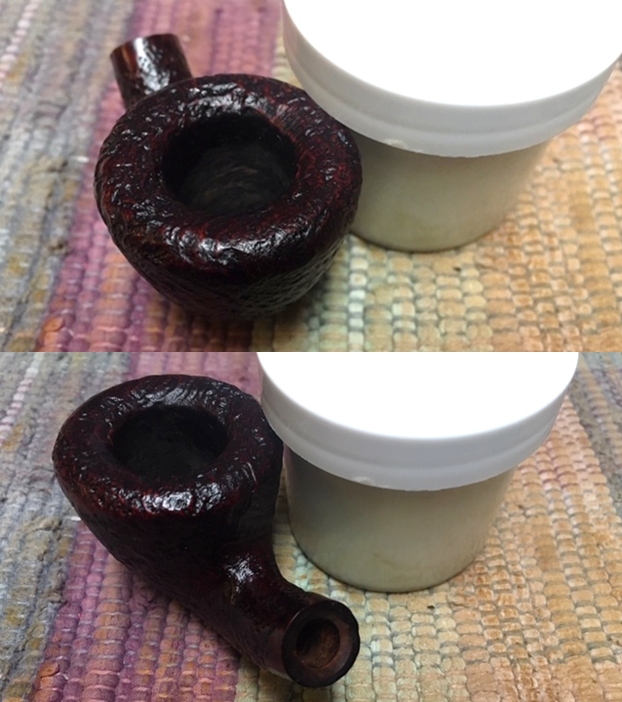
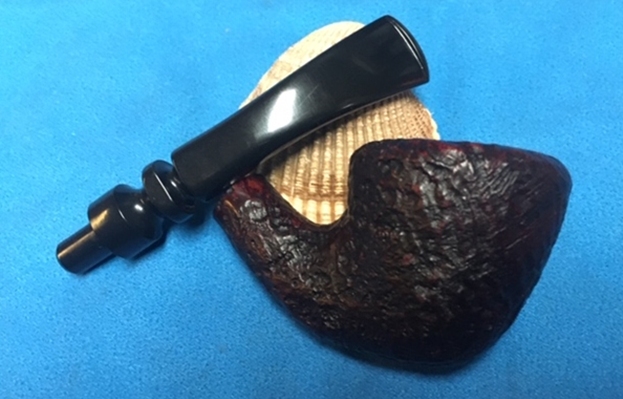
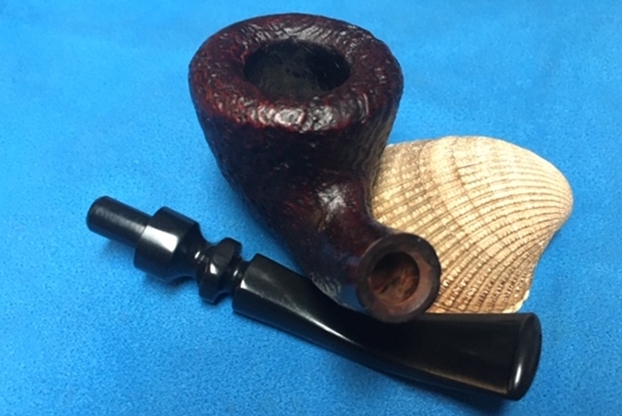
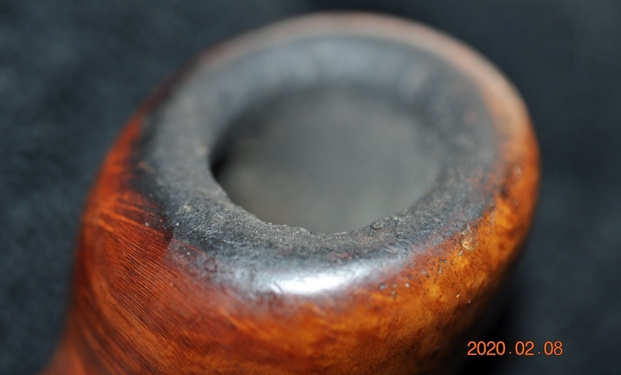
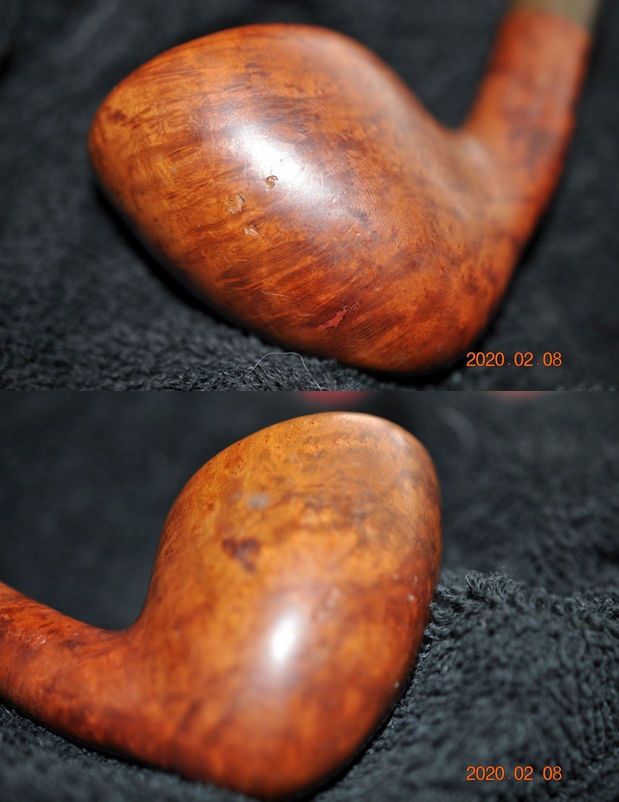
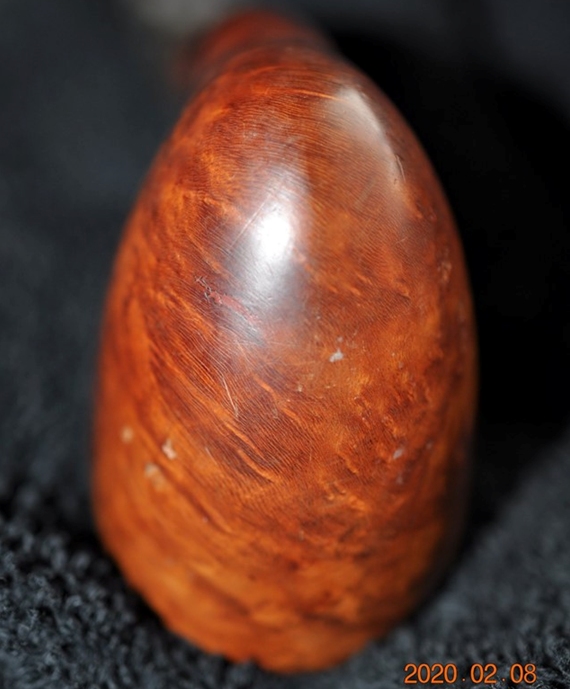
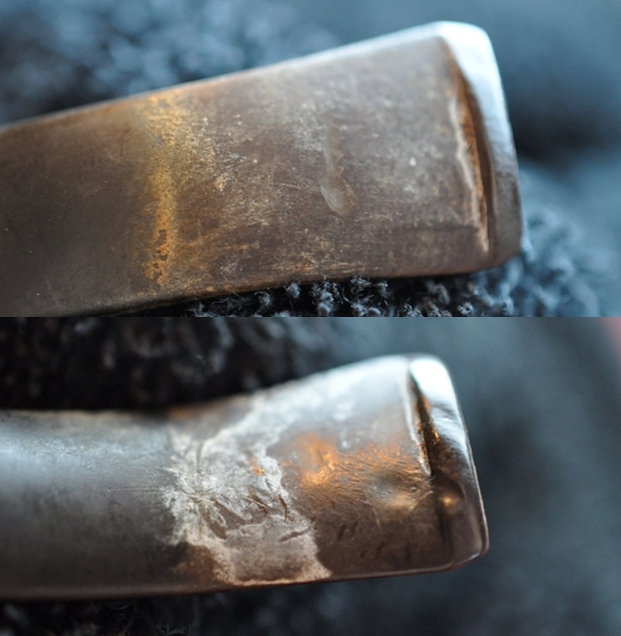
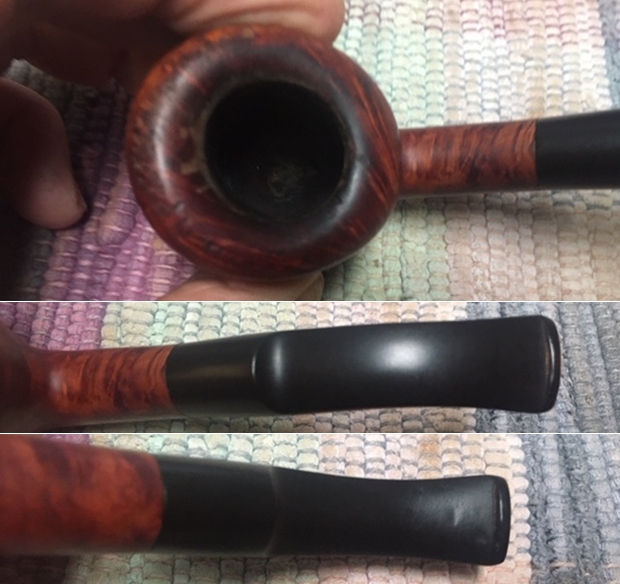
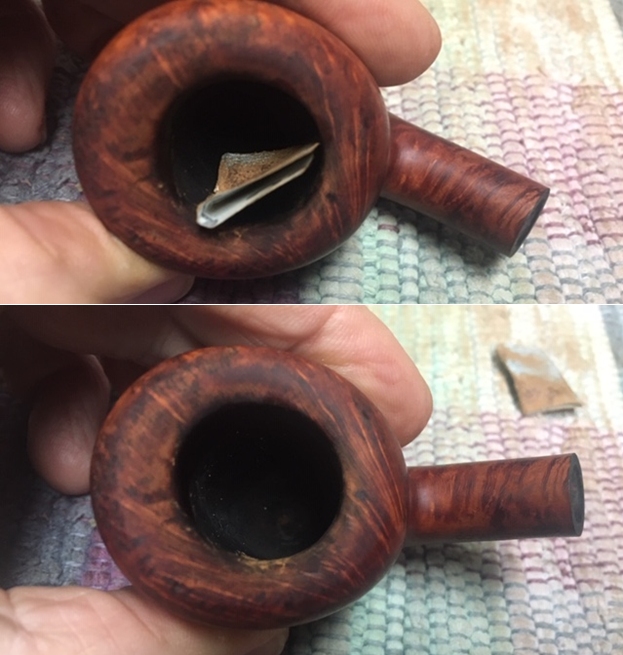
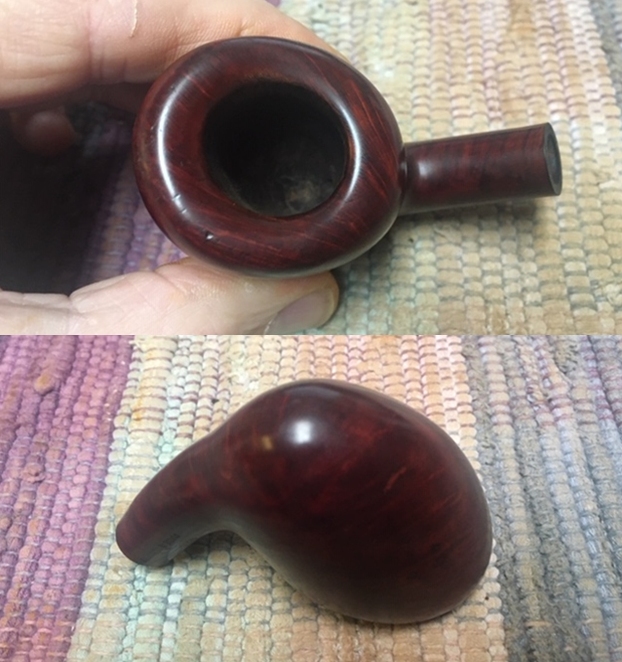
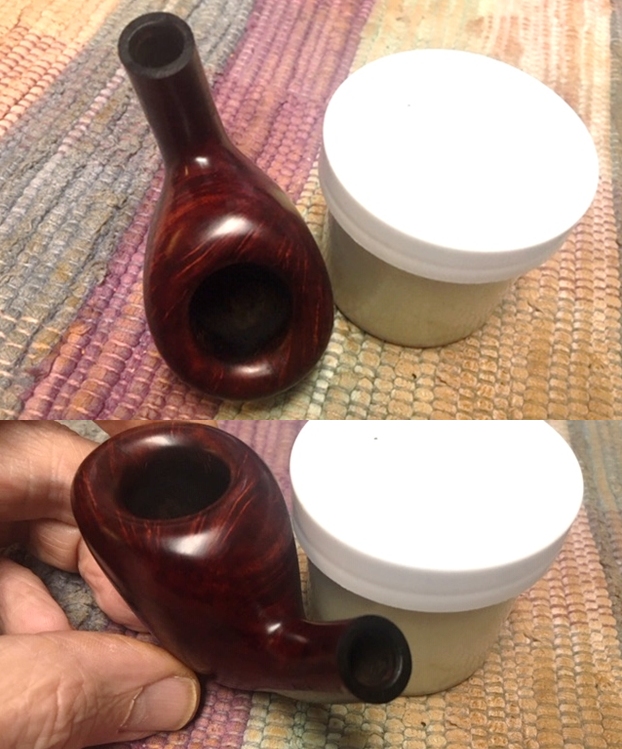
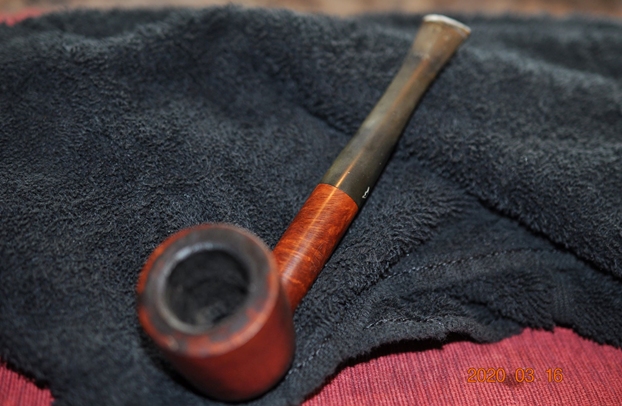
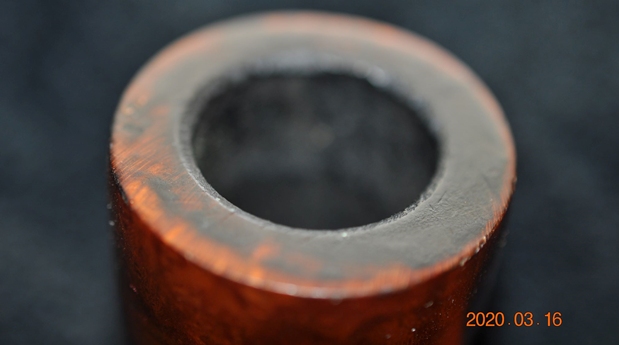
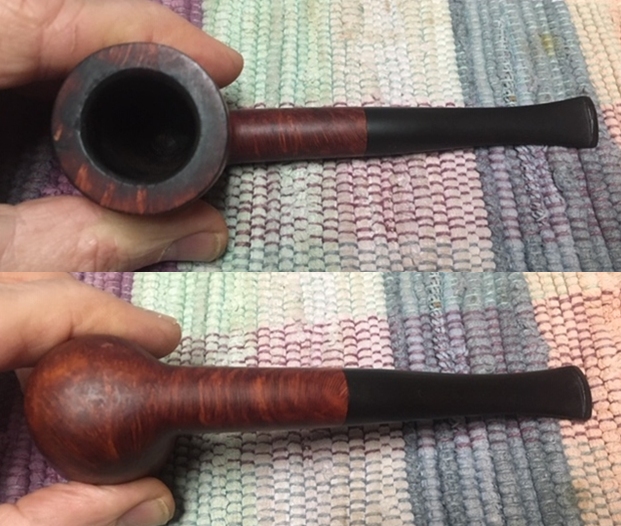
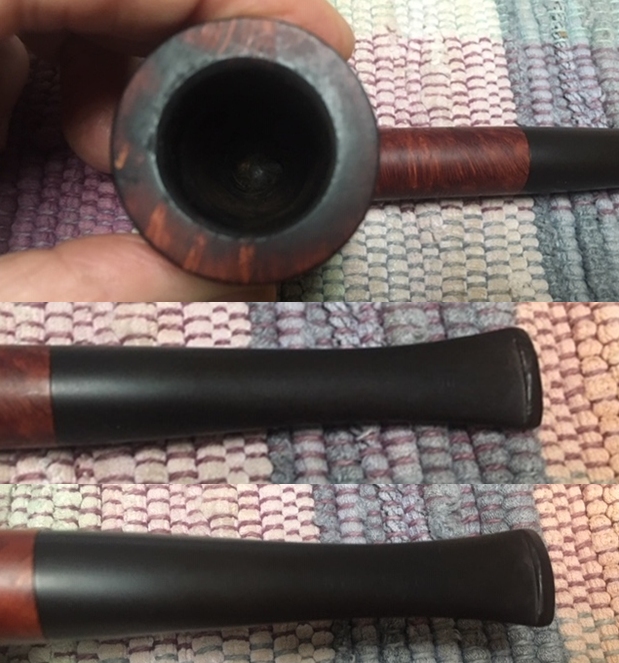
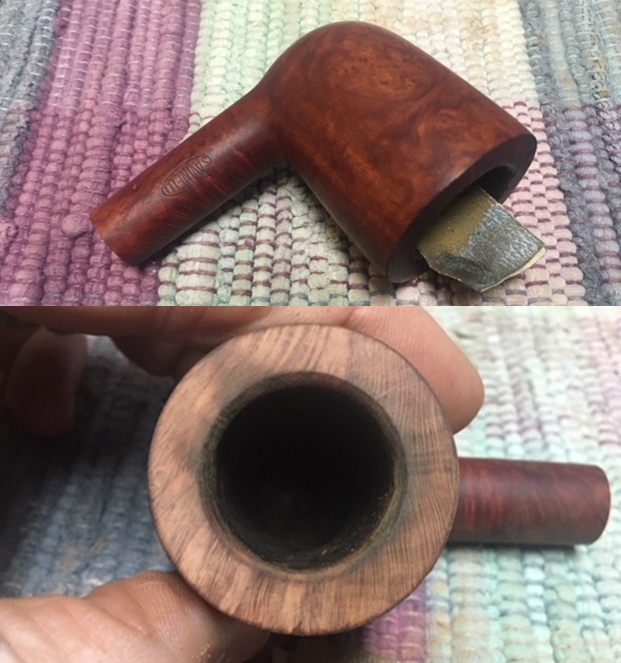
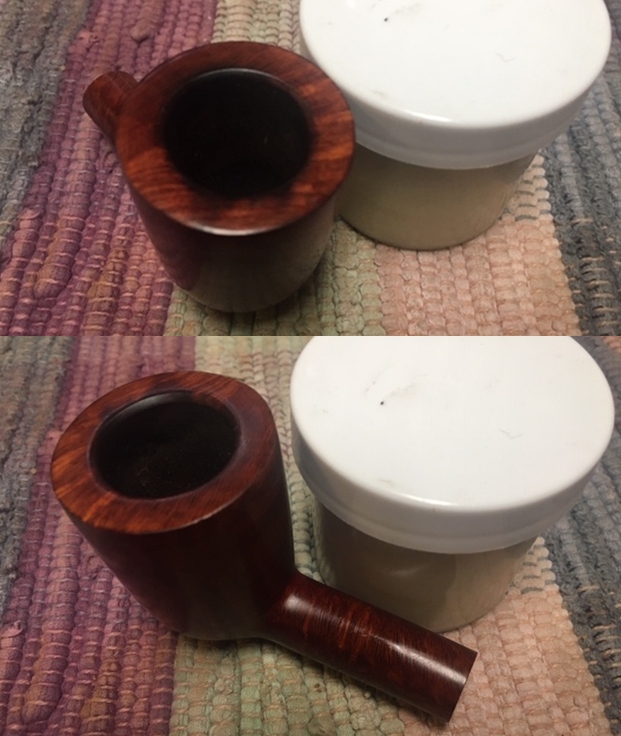
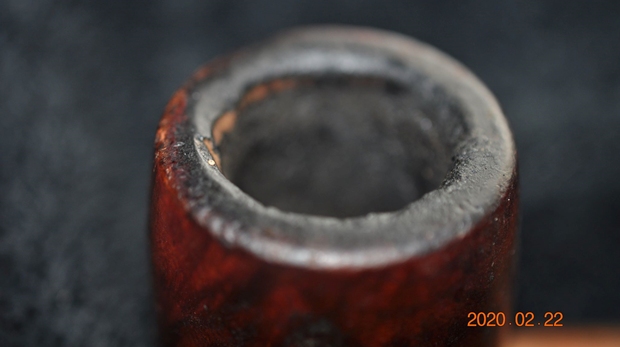
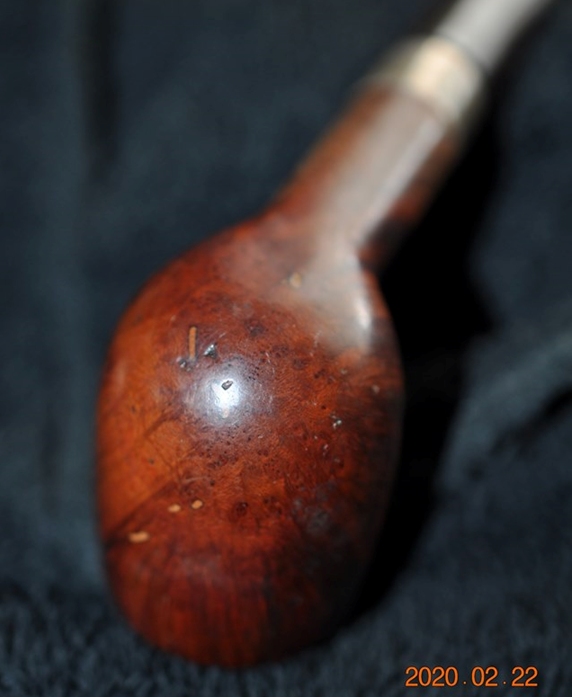
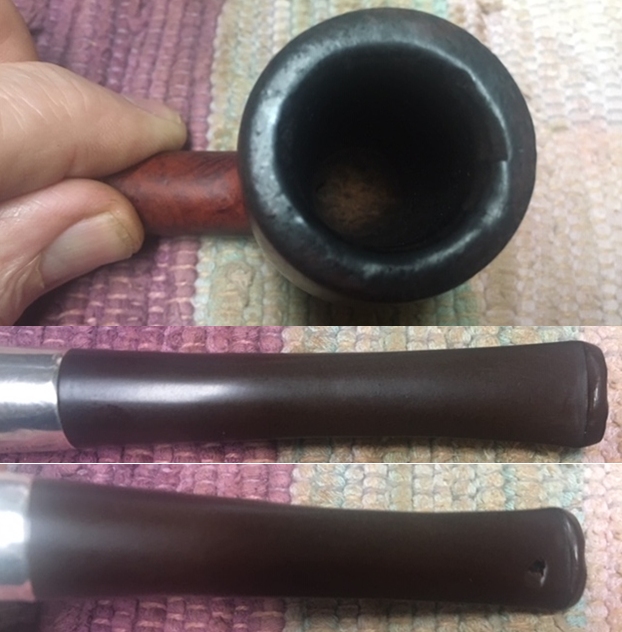
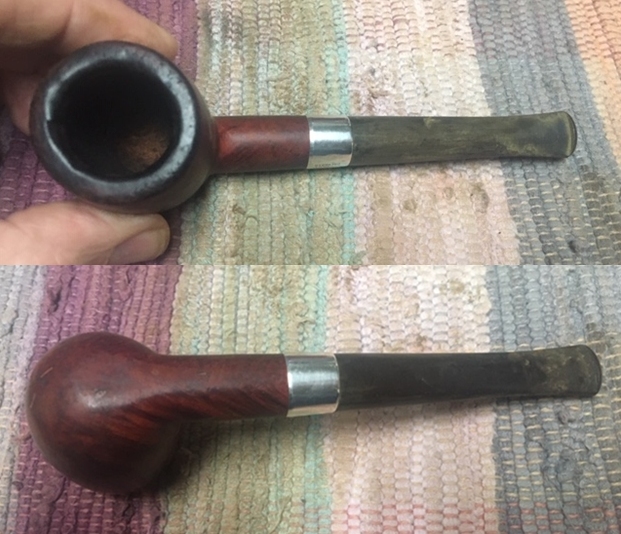
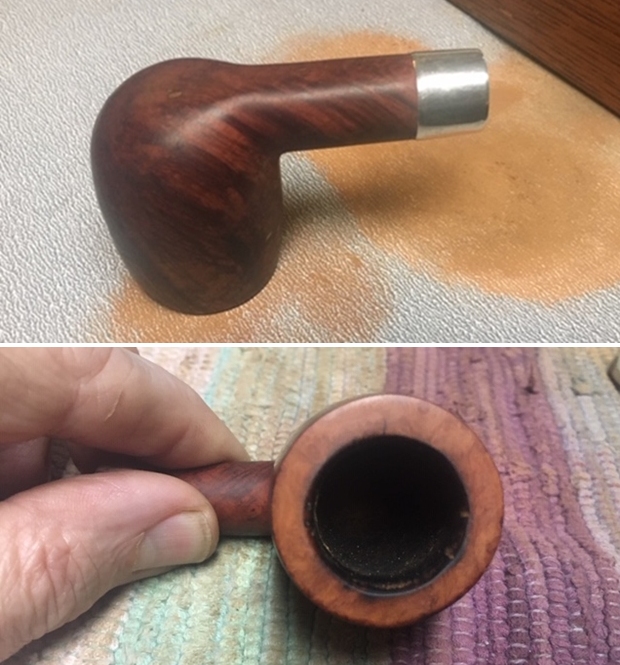
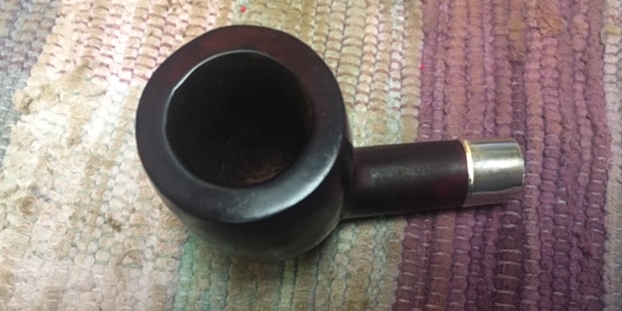
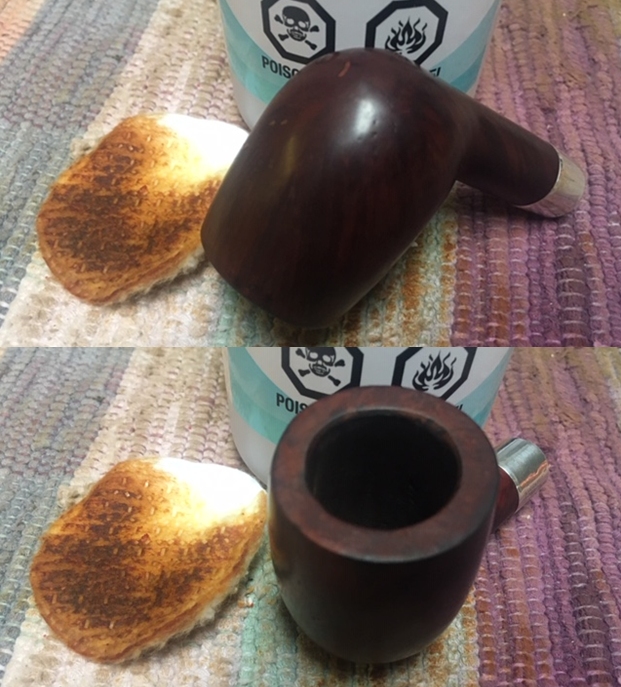
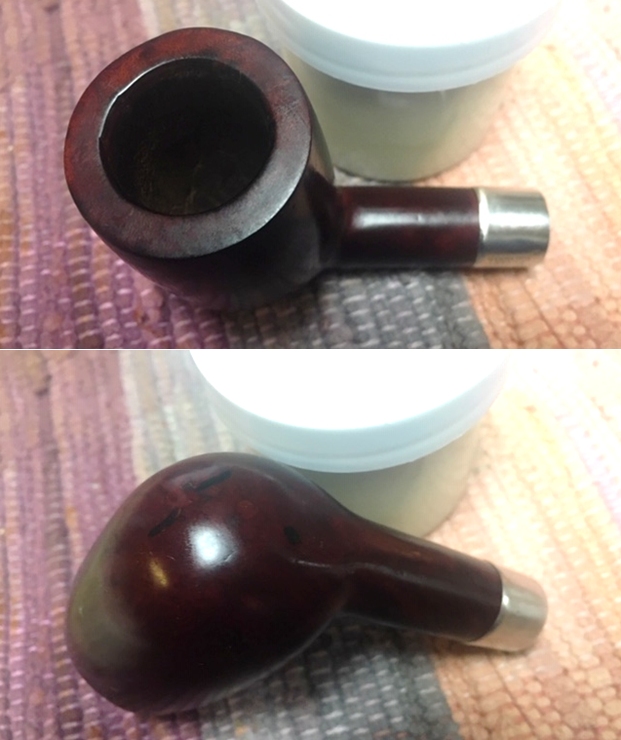
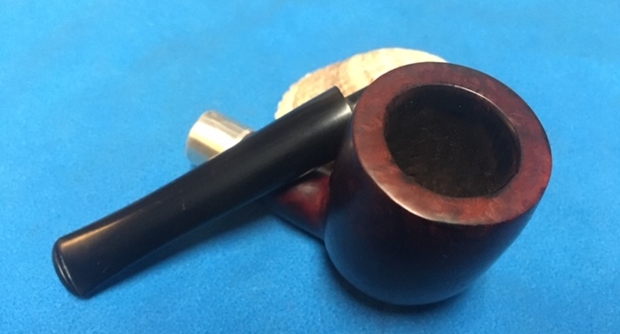
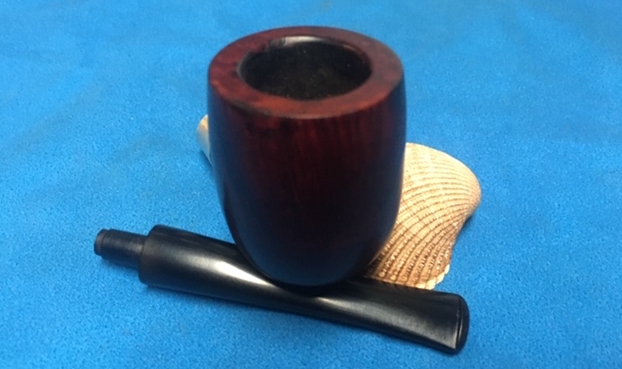
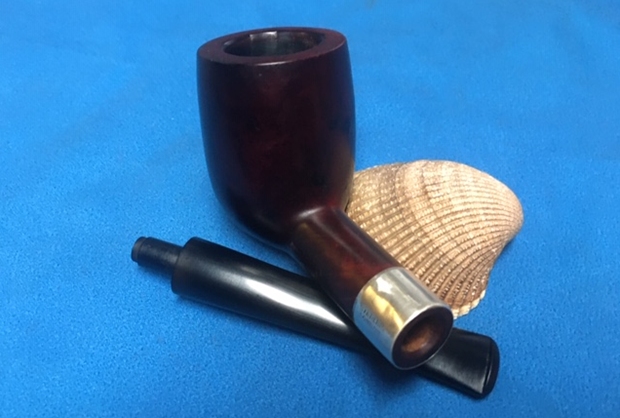
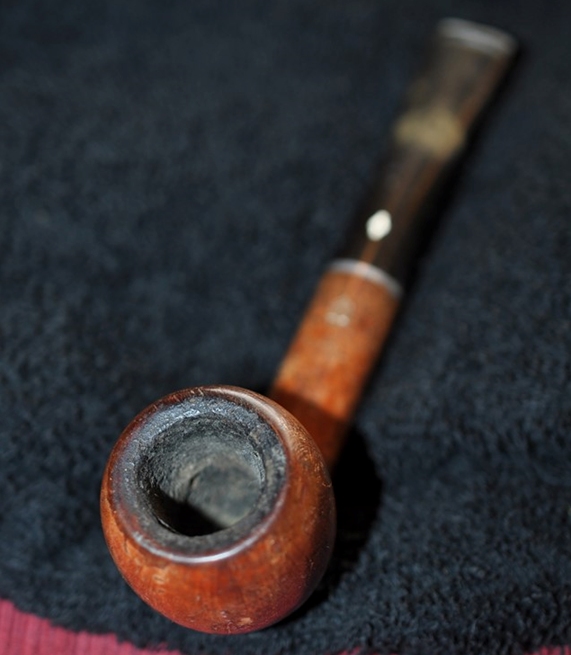
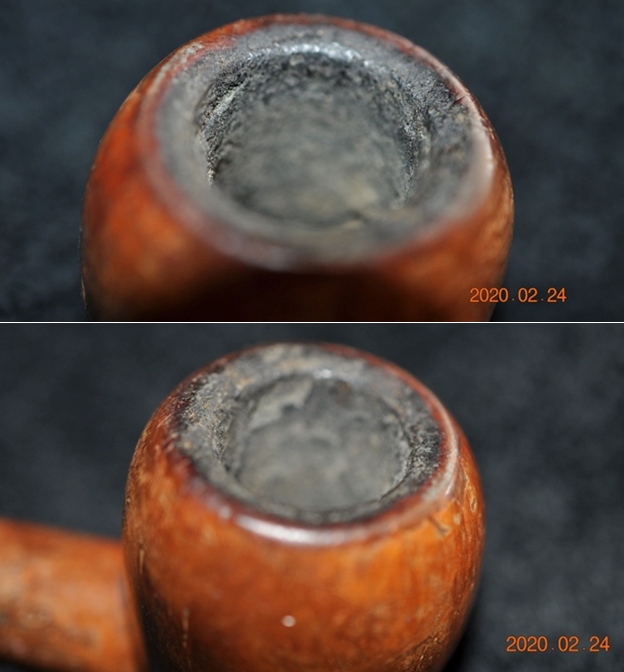
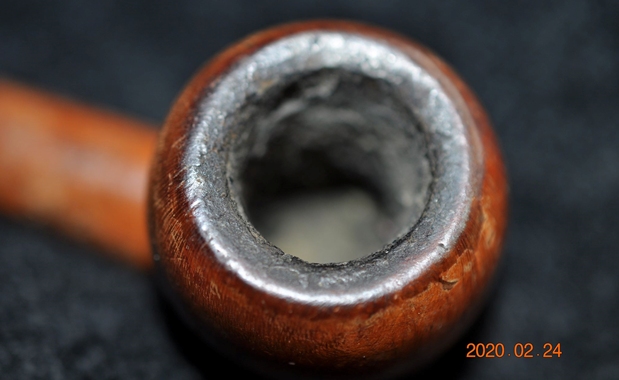
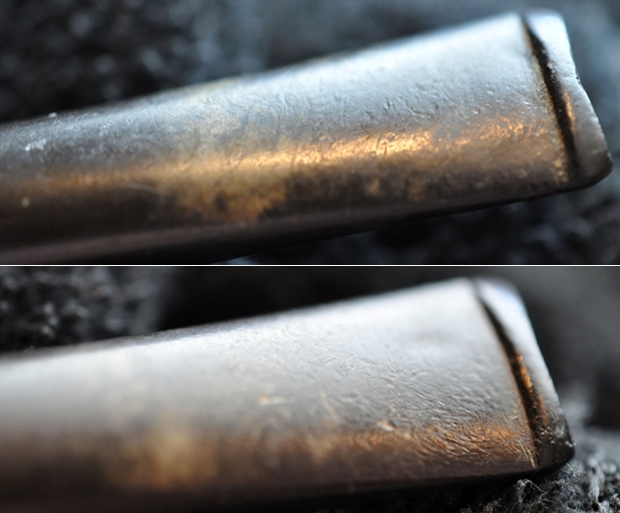
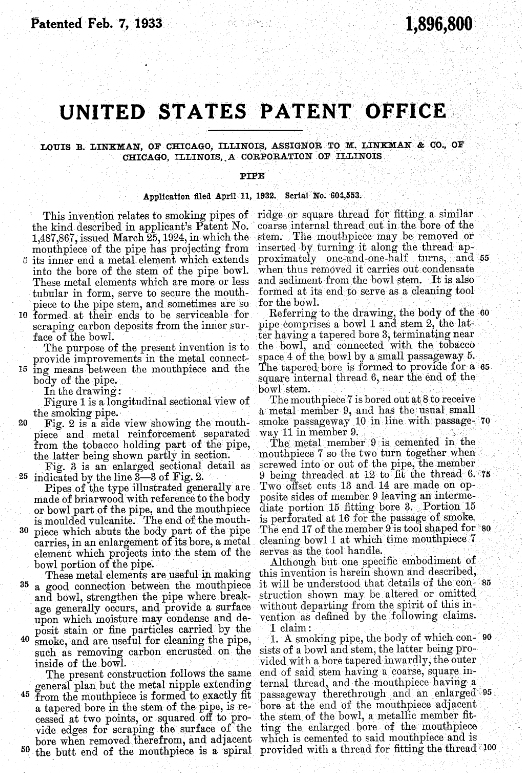
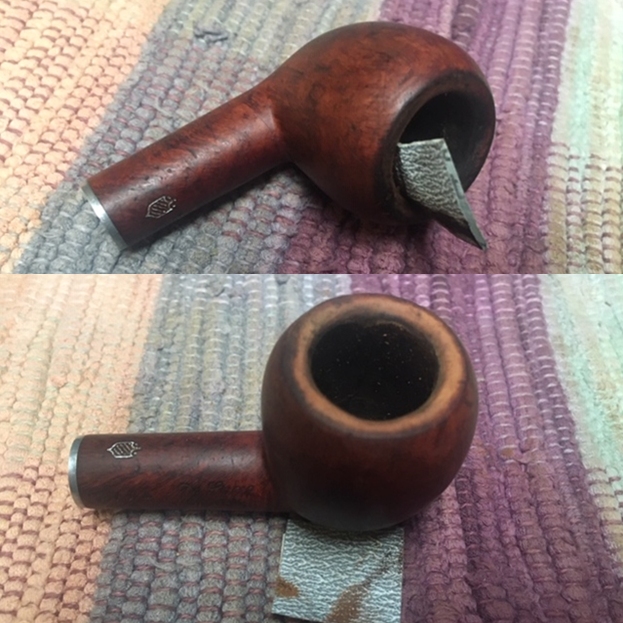
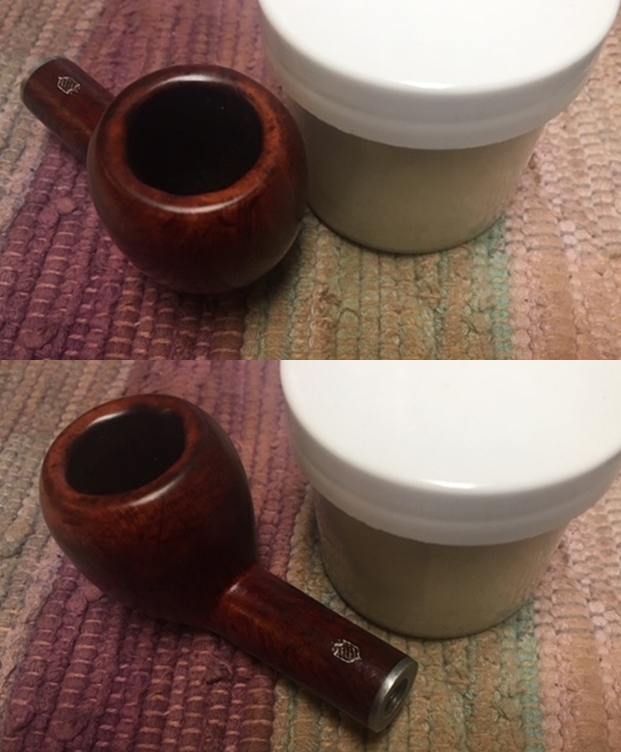
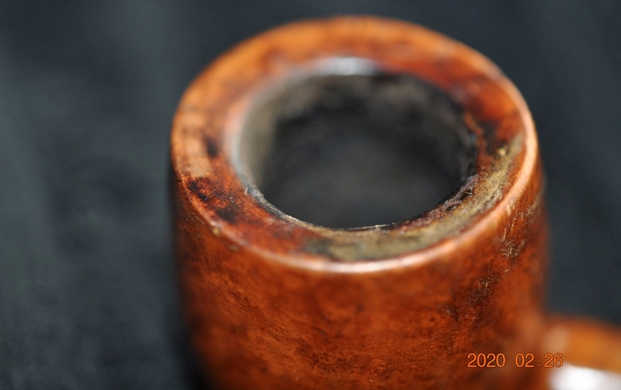
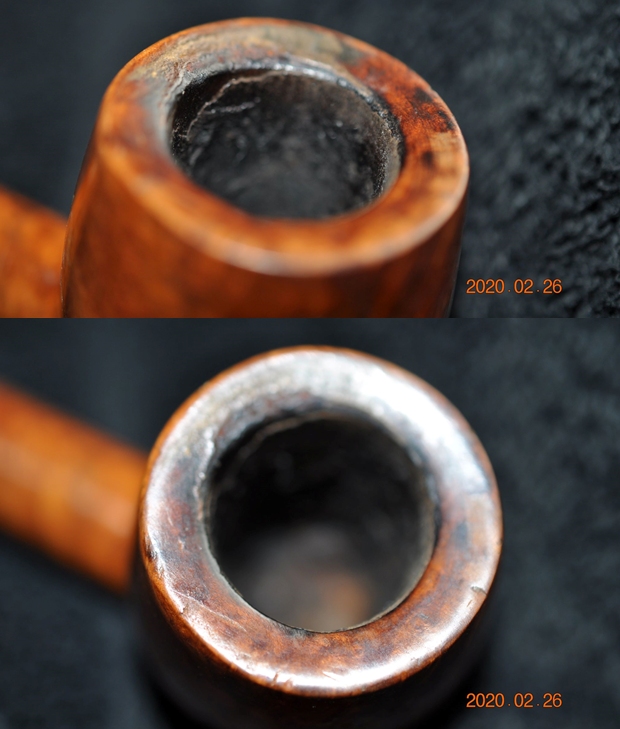
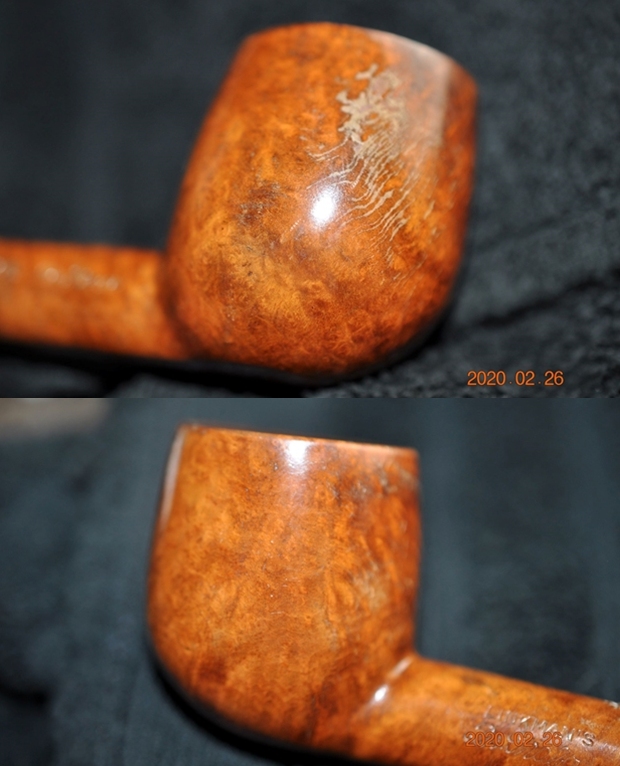
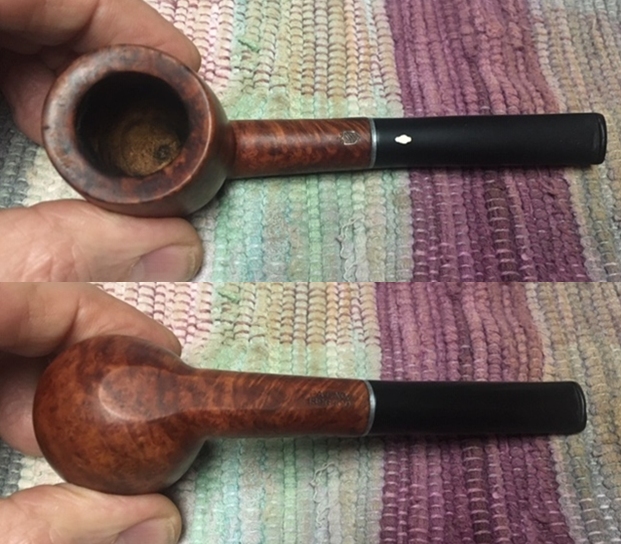
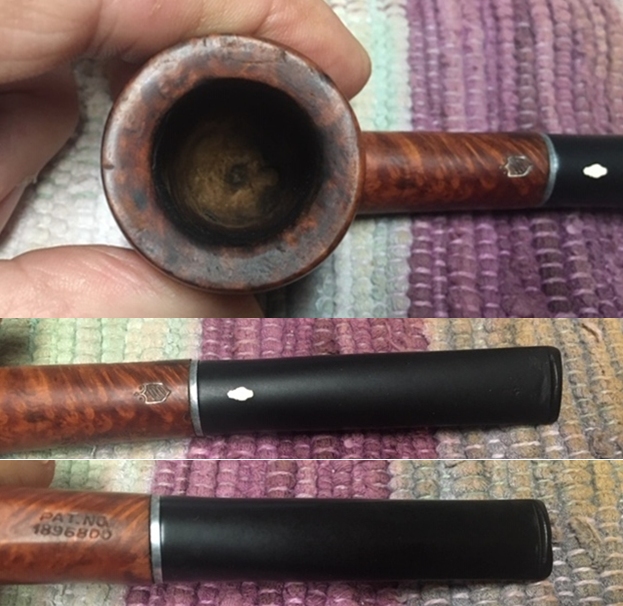
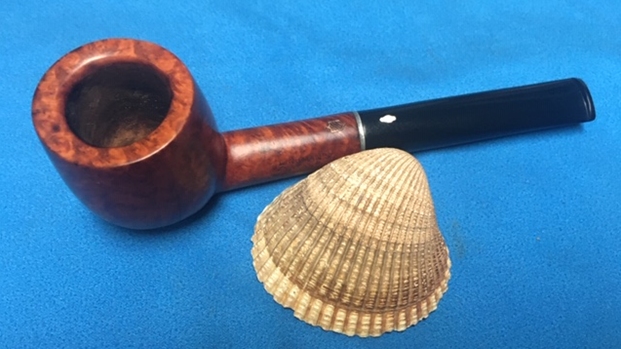
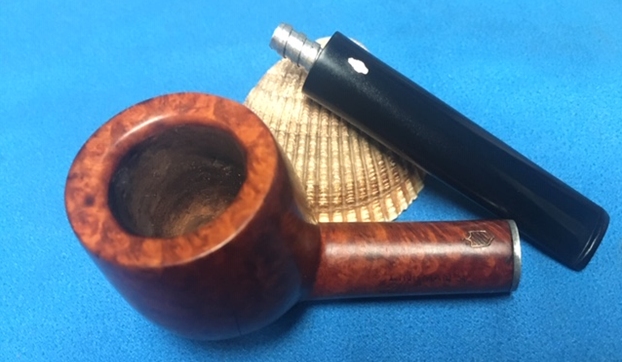
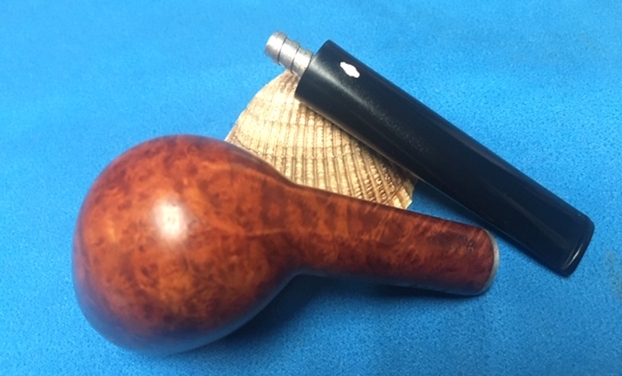
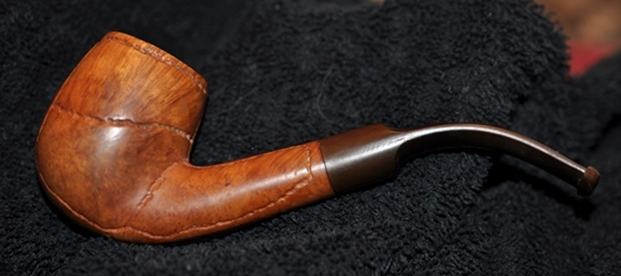
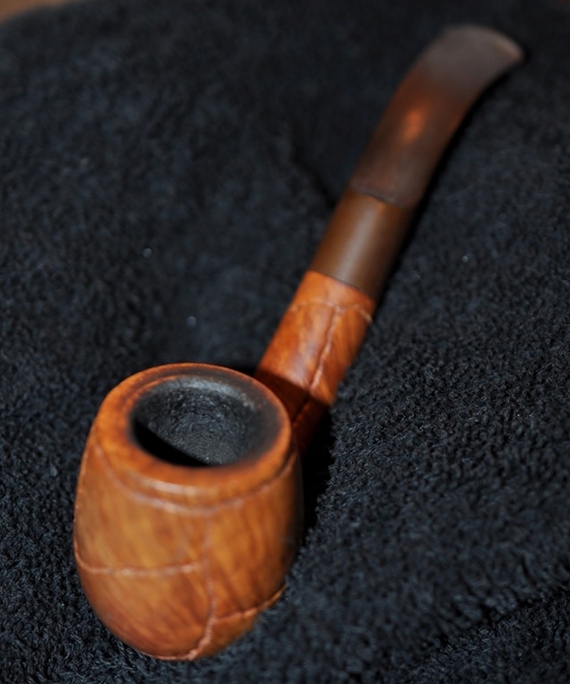
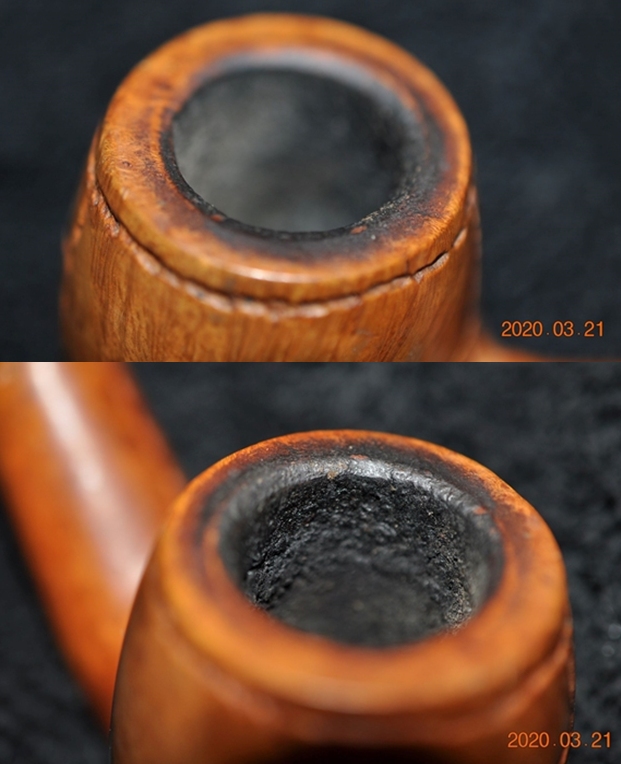
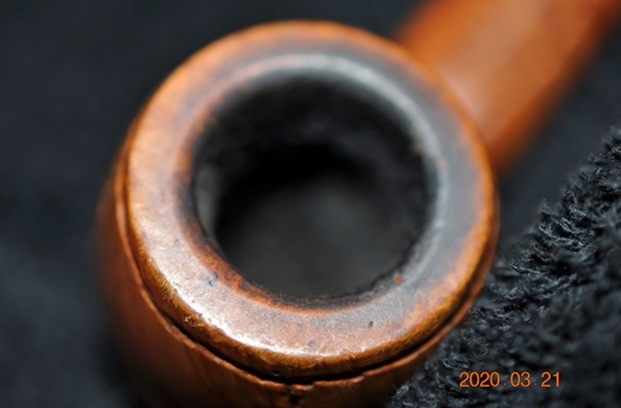
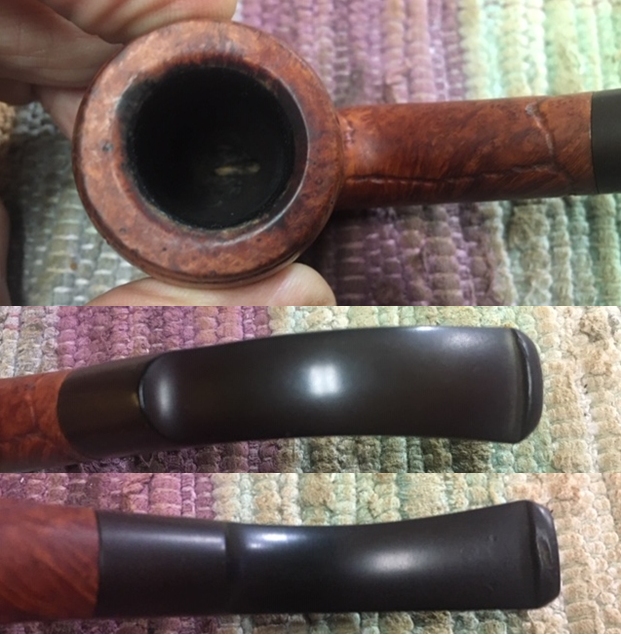
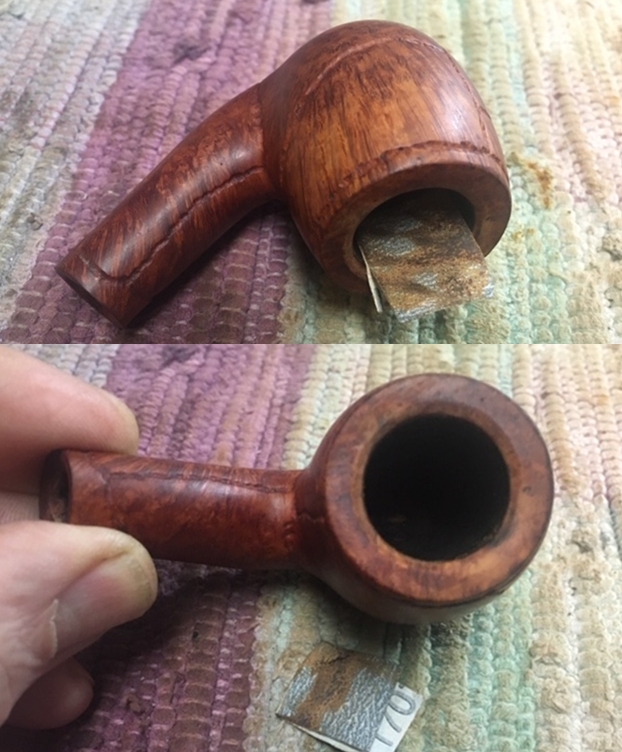
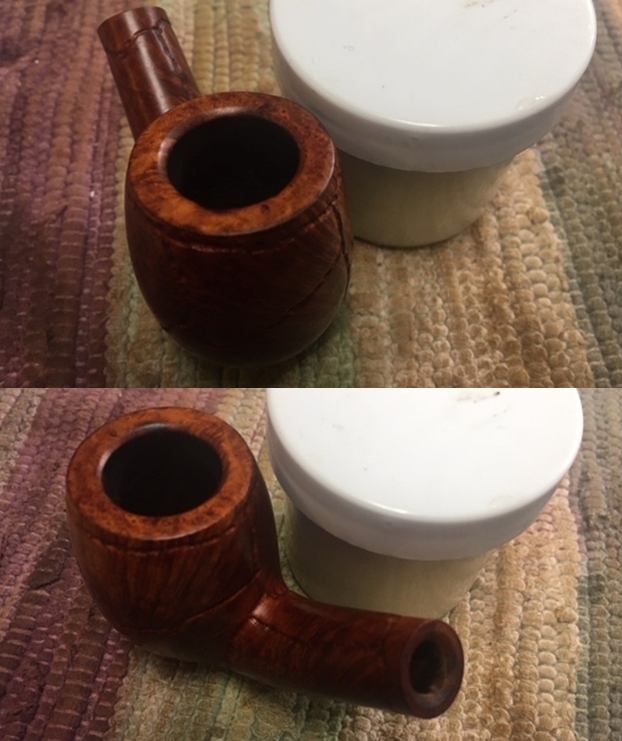
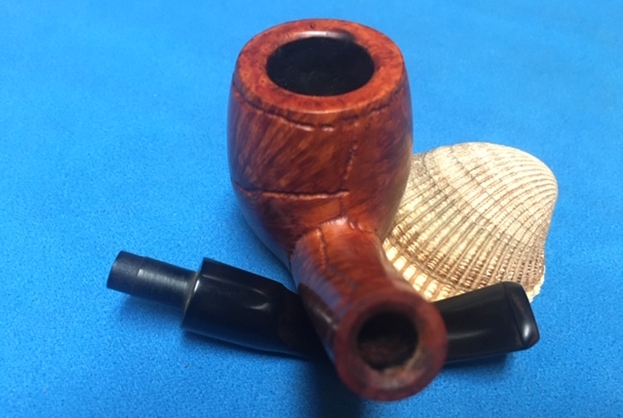
With a better understanding of the pipe now on my worktable, the pipe itself seems to be in good shape.  It needs cleaning.  There is a shelf of cake in the upper chamber but then it seems to widen out going toward the floor.  The aft side of the rim is darkened from lighting the chamber.  The acrylic stem has little chatter but is rough.  Sanding should smooth it out.  Here are few pictures of the issues. 
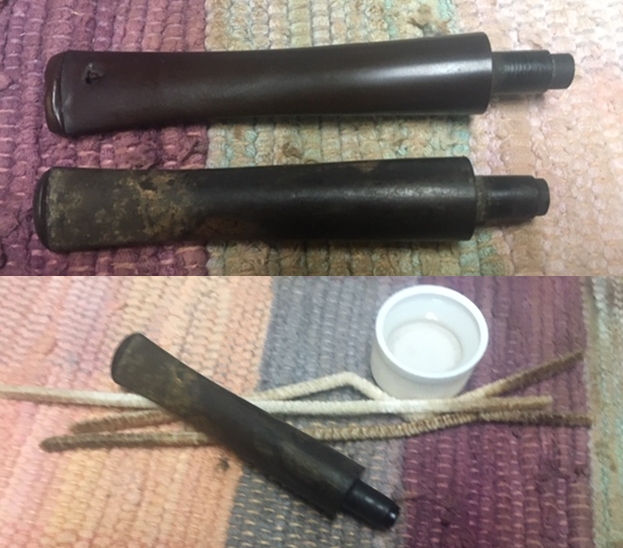
I begin the refreshing by giving the pipe a general cleaning.  Starting with the stem, I clean the acrylic stem’s airway using pipe cleaners wetted with isopropyl 95%.  It takes one pipe cleaner to confirm a clean airway.Next, the chamber is cleaned using the Pipnet Reaming Kit.  I use 2 of the 4 blades available.  The cake is light.  I transition to the Savinelli Fitsall Tool to give the chamber walls a quick scraping.  Finally, the chamber is sanded with 240 grade paper wrapped around a Sharpie Pen.  After wiping out the chamber, an inspection confirms no heating problems. To begin the cleaning of the external rusticated surface of the Apple shaped bowl, undiluted Murphy’s Oil Soap is used with a cotton pad.  A bristled toothbrush also helps to clean the rusticated surface.  The brass bristled brush helps also to clean the darkened area on the rim. After a time of scrubbing, the stummel is transferred to the kitchen sink to start cleaning the internals. Using the shank brushes and anti-oil liquid dish soap I scrub the internal mortise and airway.  After a thorough rinsing, the stummel is back on the worktable.Next, to continue the internal cleaning, one cotton bud and one pipe cleaner wetted with isopropyl 95% confirm the internals are clean!  Nice for a change.
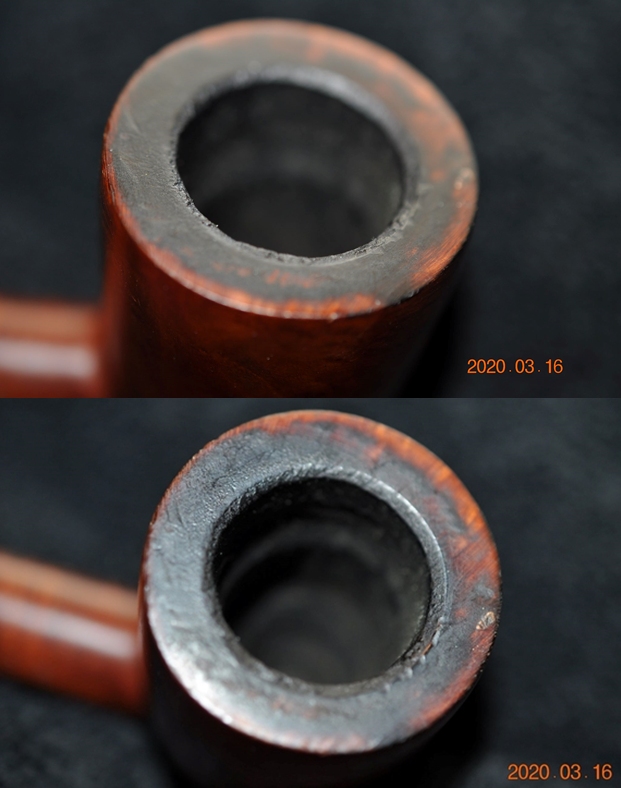
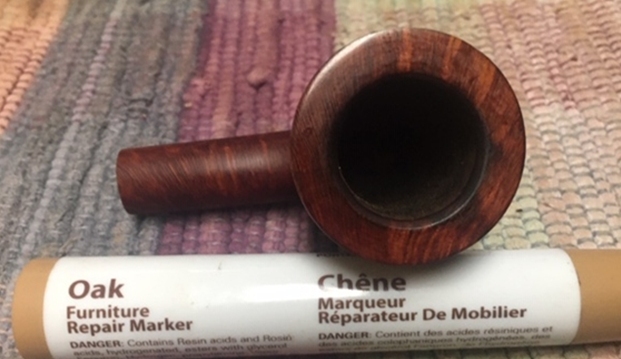
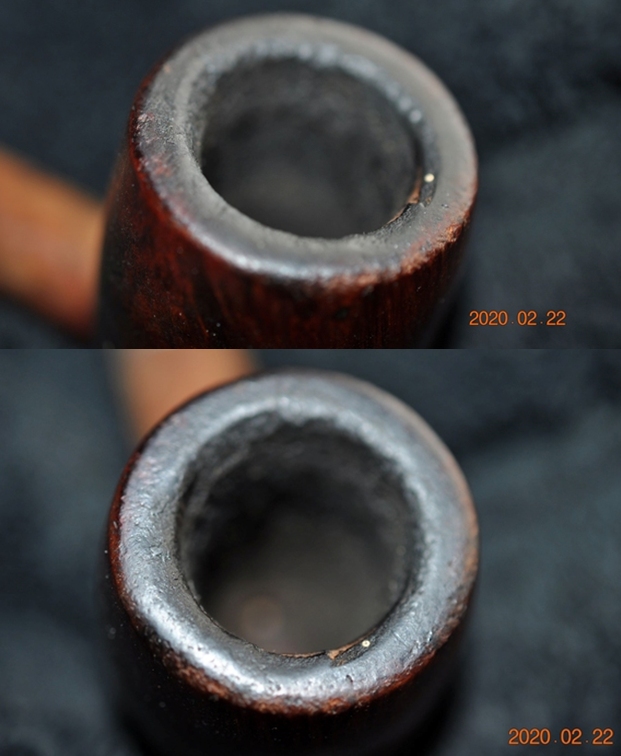
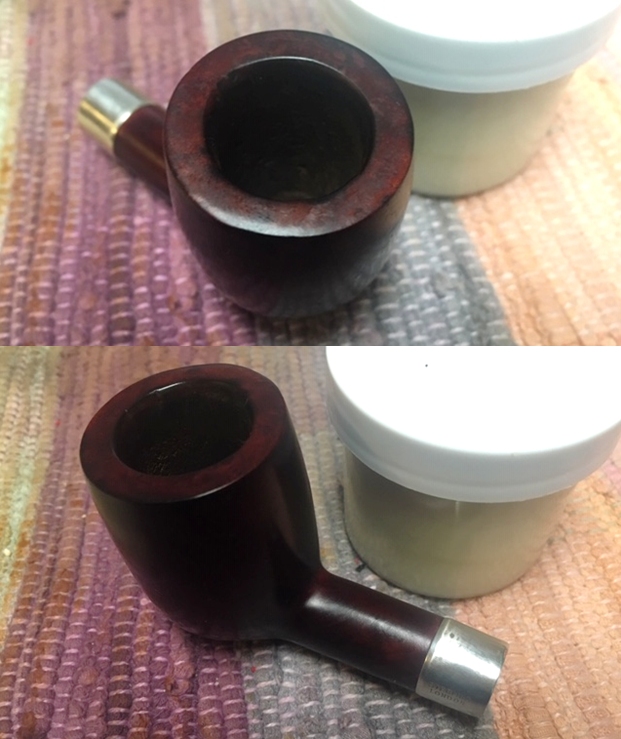
With the rusticated surface, to clean the internal rim edge I use a roll 240 grade paper to address the darker area on the backside of the rim.  That is much better. 
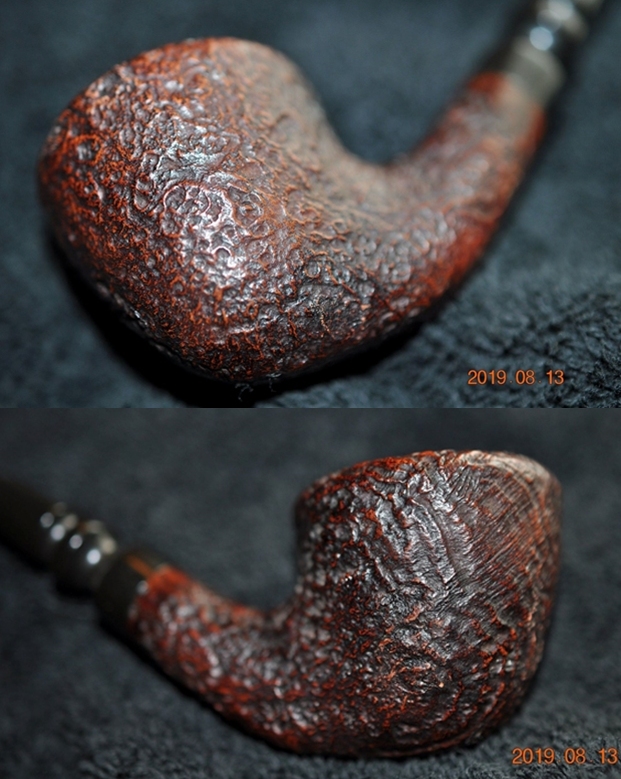
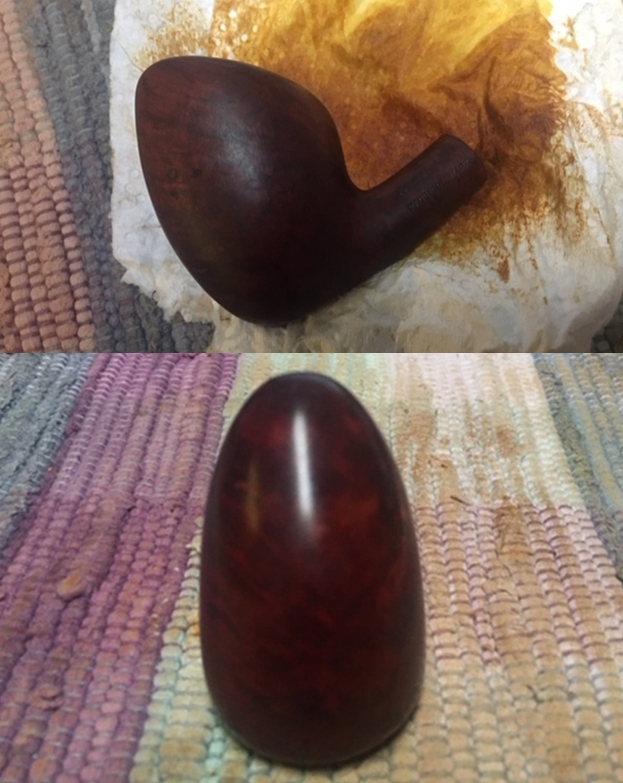
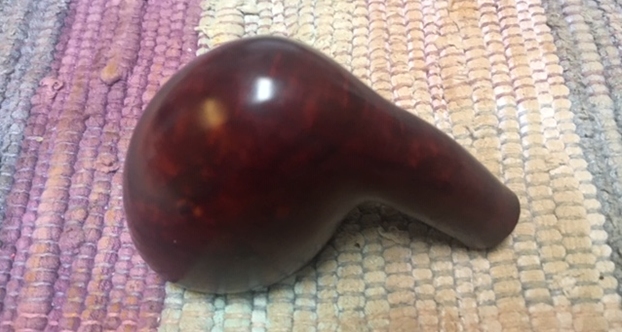
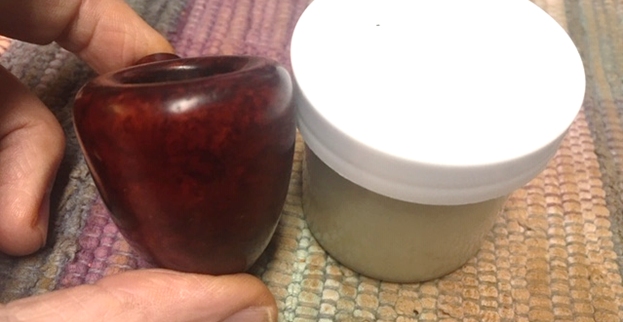
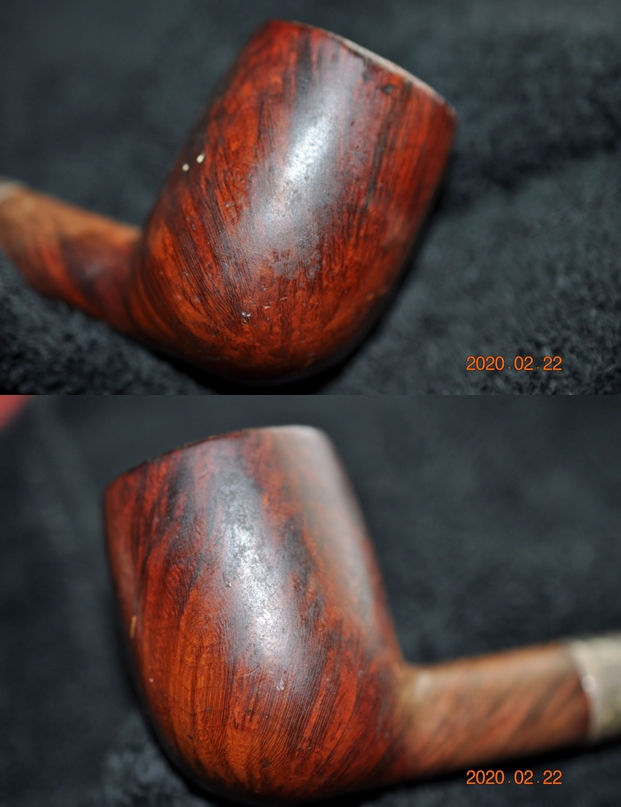
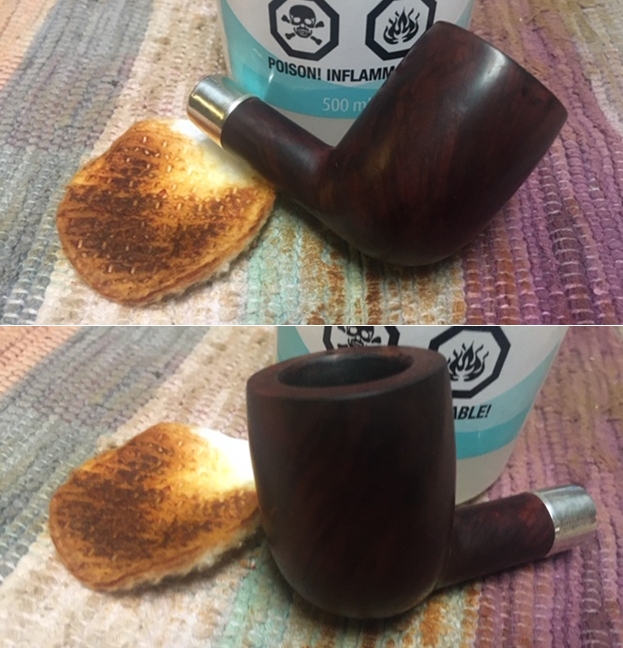
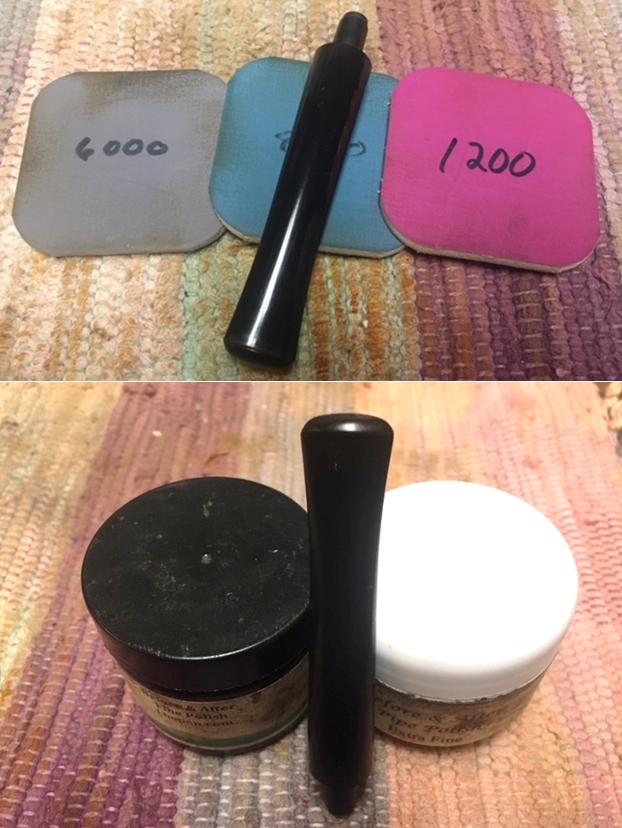
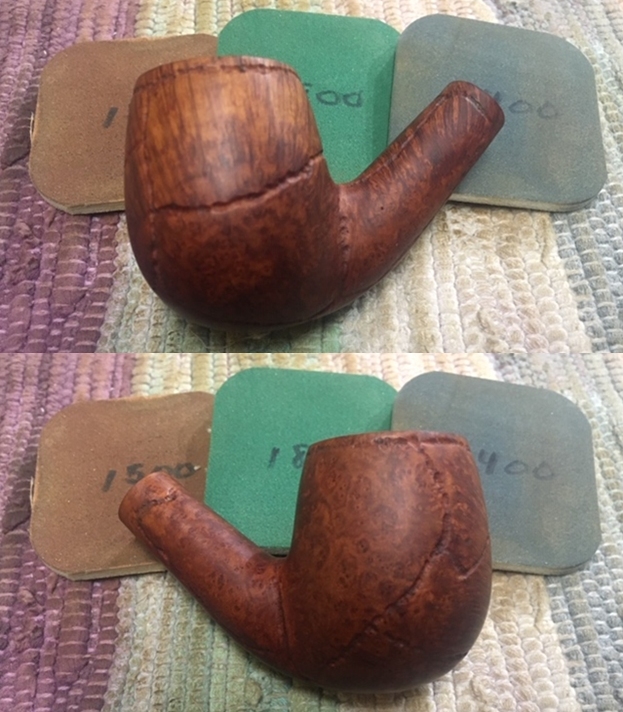
Next, with the surface cleaned and the rim freshened, I apply Mark Hoover’s product, Before & After Restoration Balm to the rusticated Apple bowl.  I put a little on my fingers and I work it into the briar surface well.  It starts as a cream and then thickens to a wax-like consistency as it’s worked into the briar.  After applying the Balm, I put the stummel aside for 15 or so minutes for the Balm to be absorbed.  The picture shows this period.  Afterwards, I buff the bowl with a microfiber cloth to clear the excess and raise the buffed shine of the stummel.  I like what the Balm does.  The style of the rustication, more of a pitting, does not show a lot of grain but the Balm deepens the entire surface presentation. 
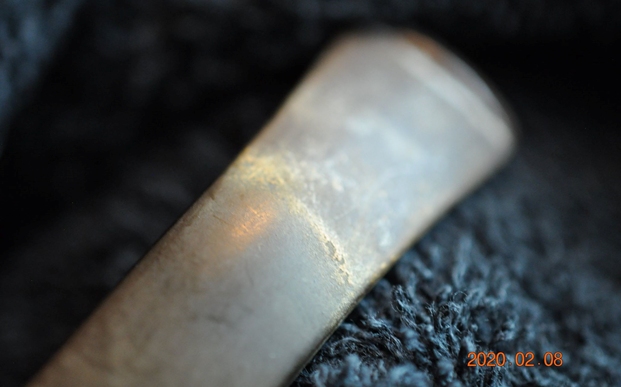
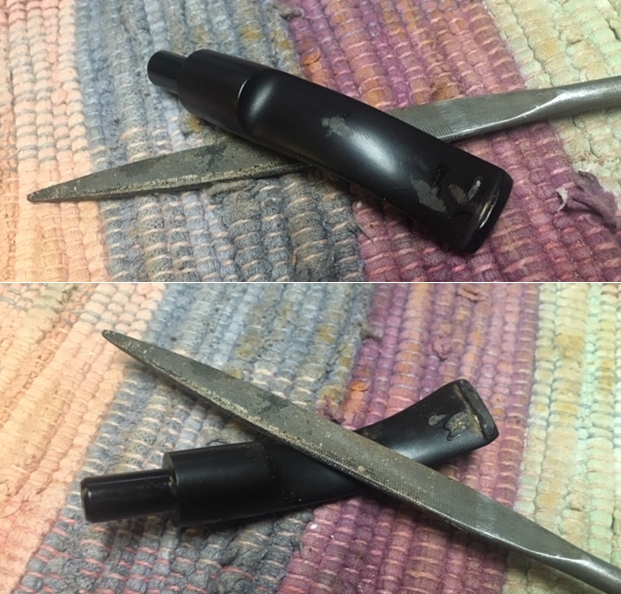
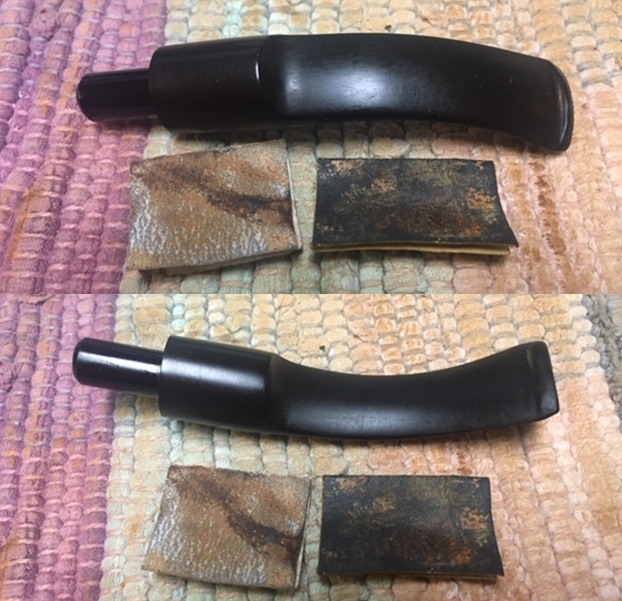
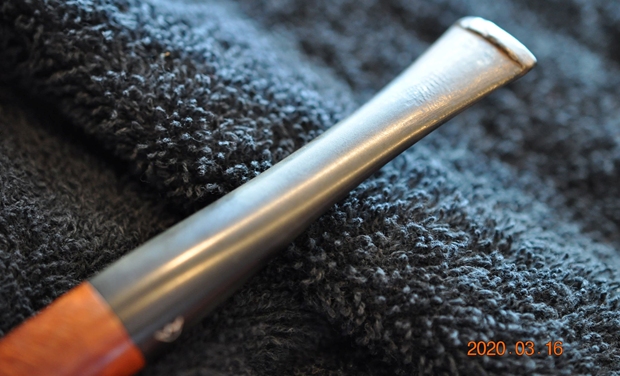
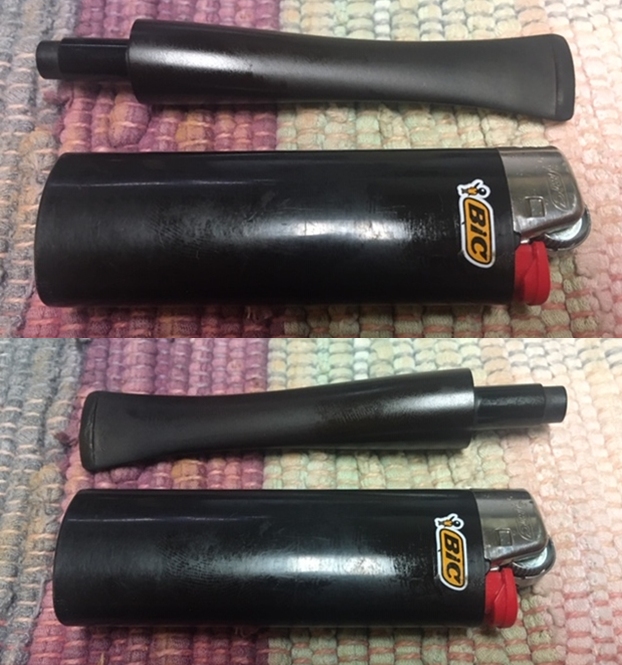
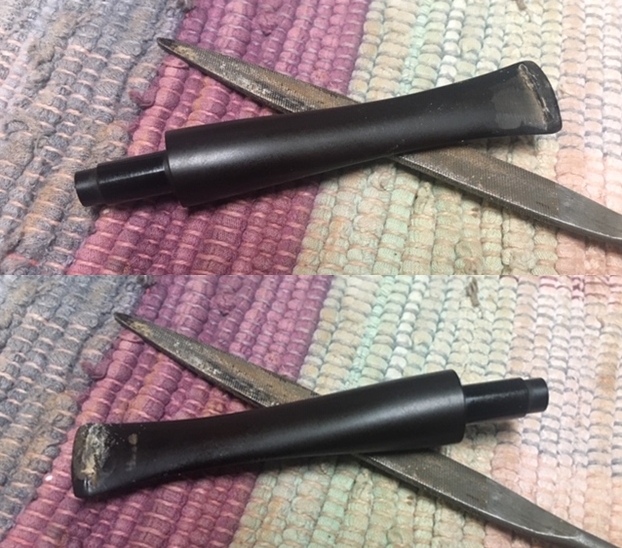
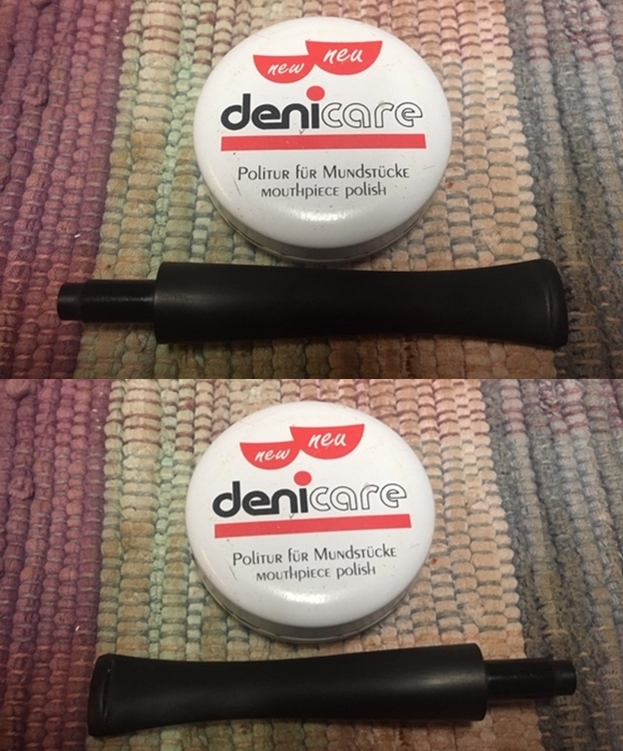
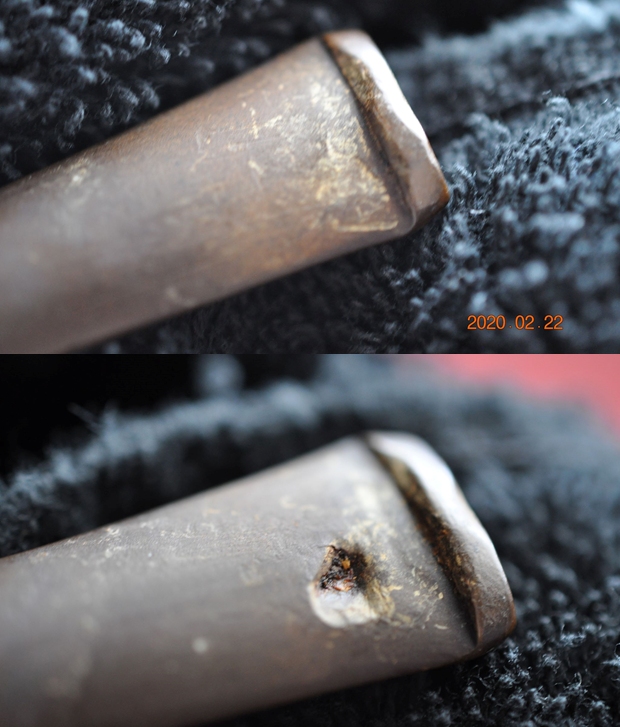
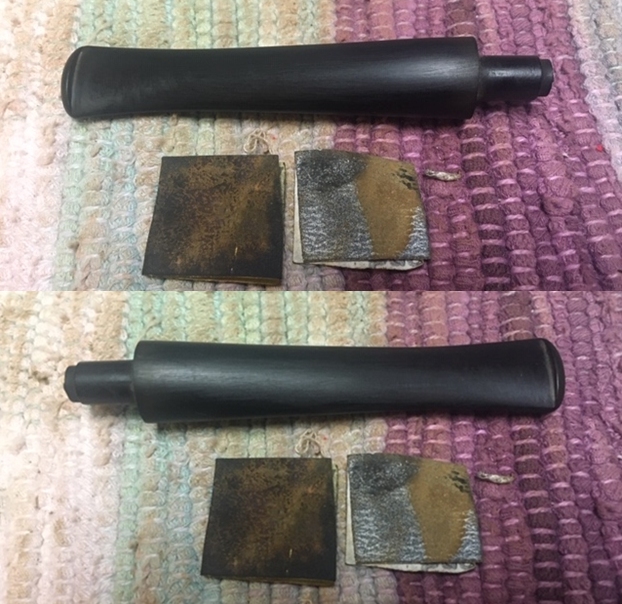
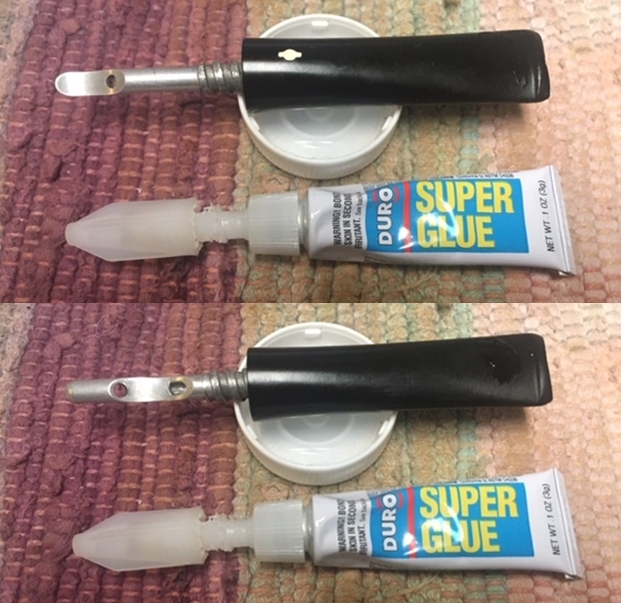
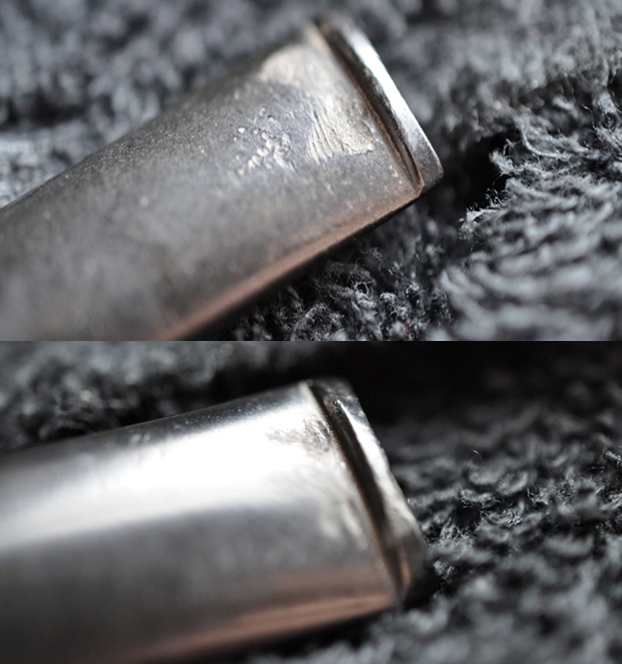
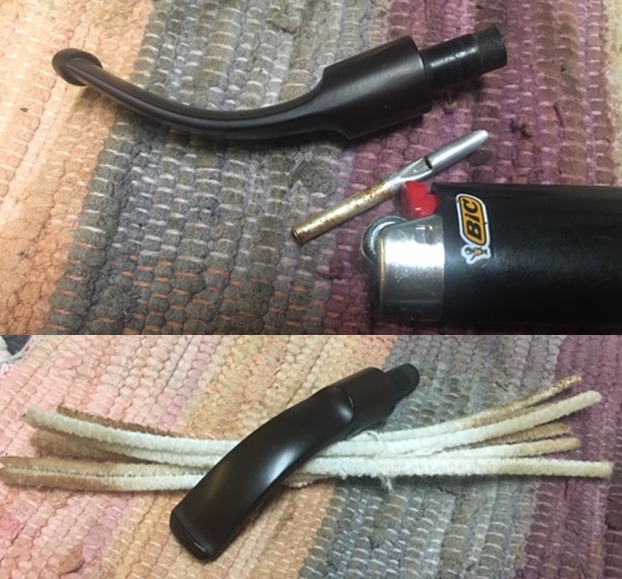
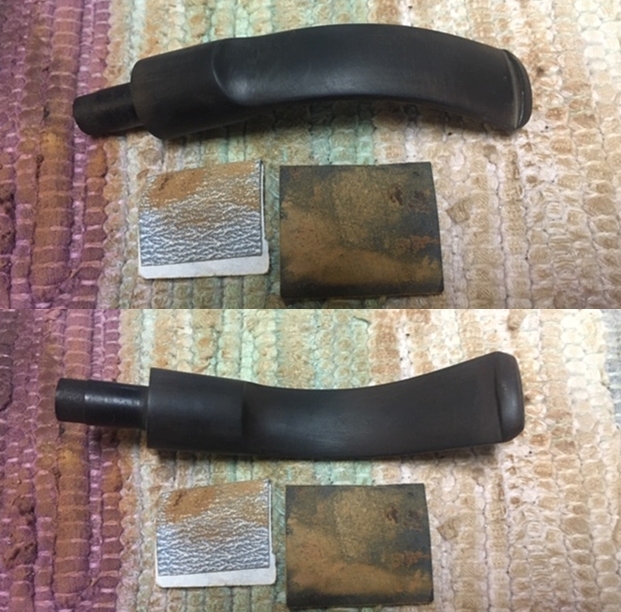
Turning to the stem, there is little tooth chatter but more of a roughness on the bit where there has been gentle use.I use 240 grade paper to sand out the bit. A flat needle file also refreshes the lines of the button.  The sanding is expanded with 240 paper to the edge of the saddle to address random scratches and to have a uniform treatment of the lower stem. 
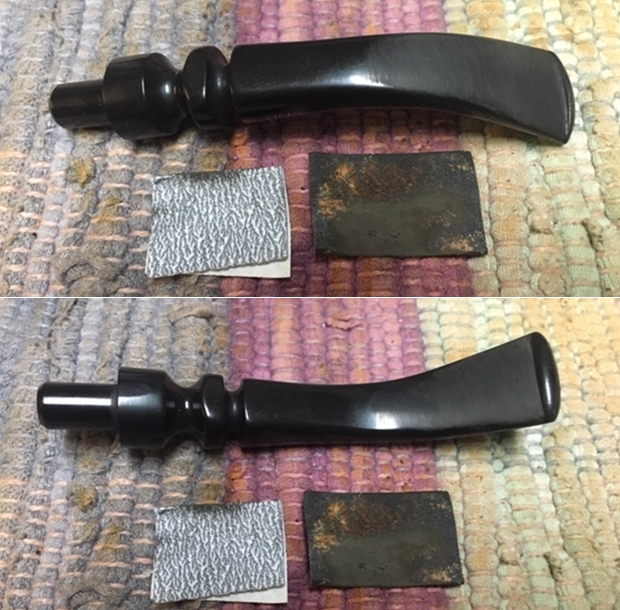
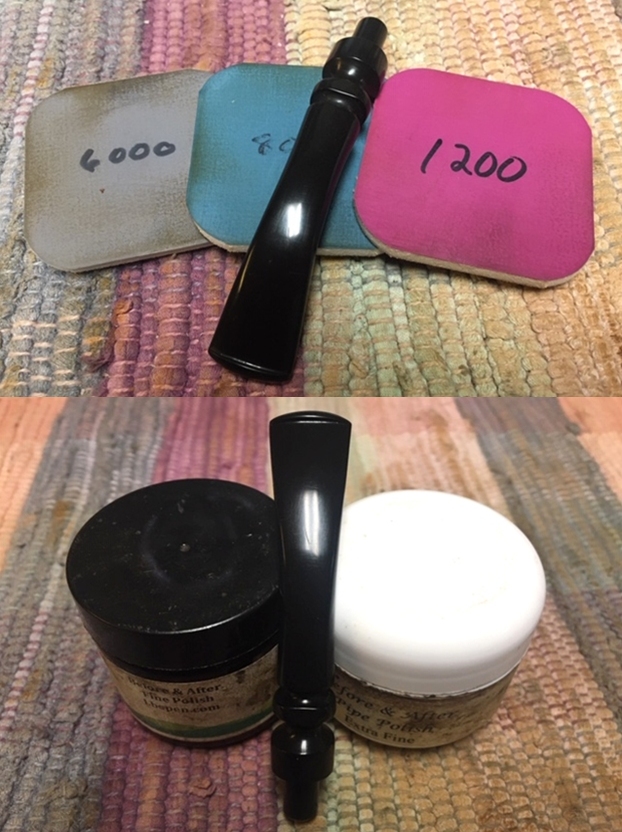
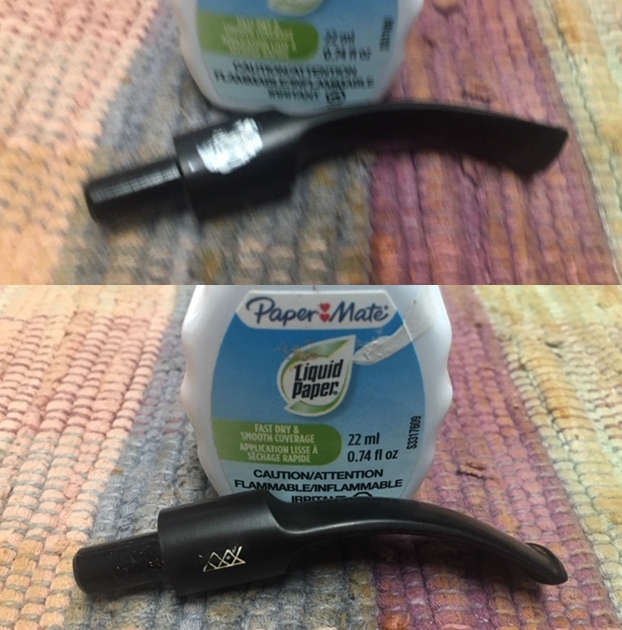
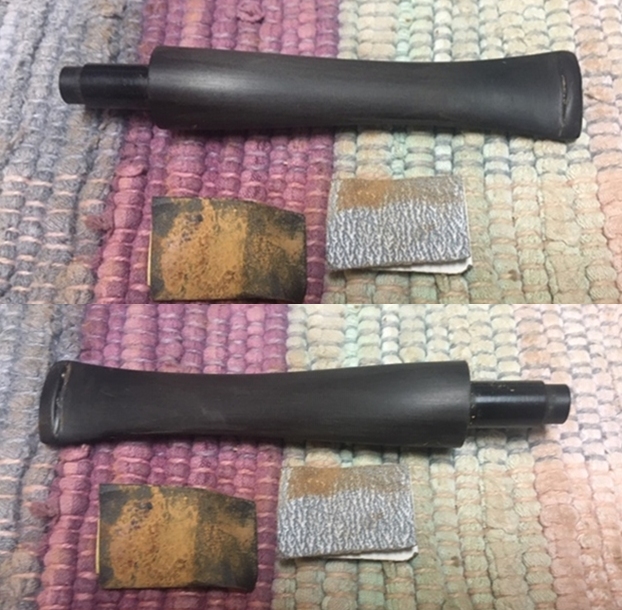
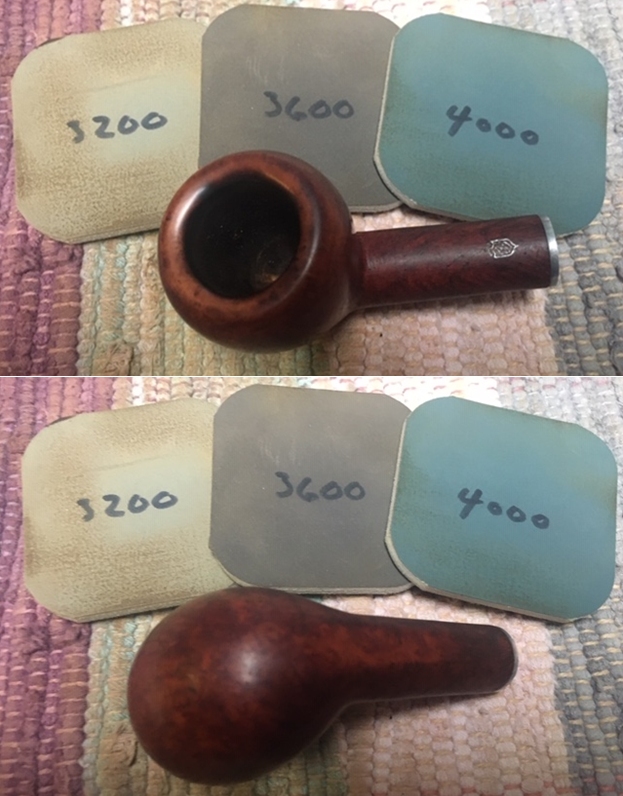
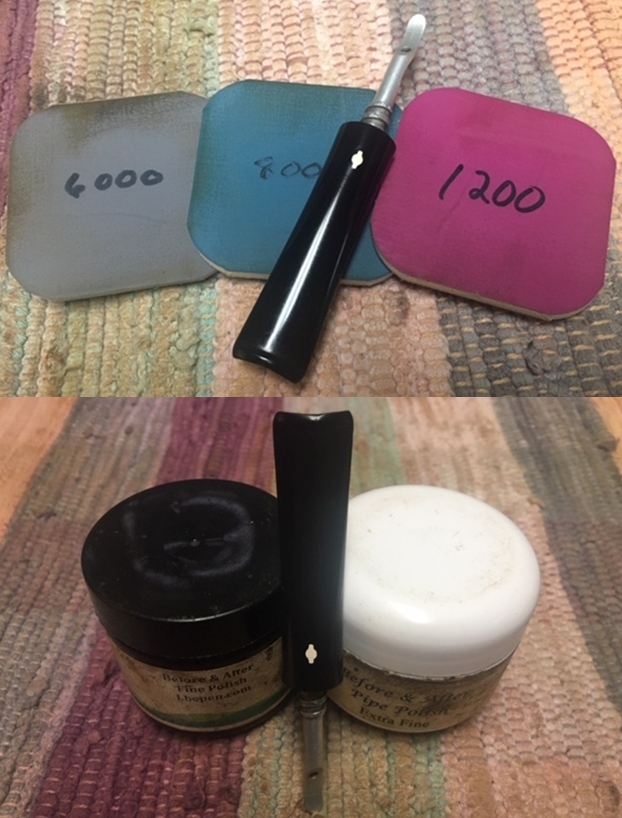
From the 240 sanding paper, I now wet sand with 600 grade paper up to the saddle and then follow with an application of 000 steel wool.
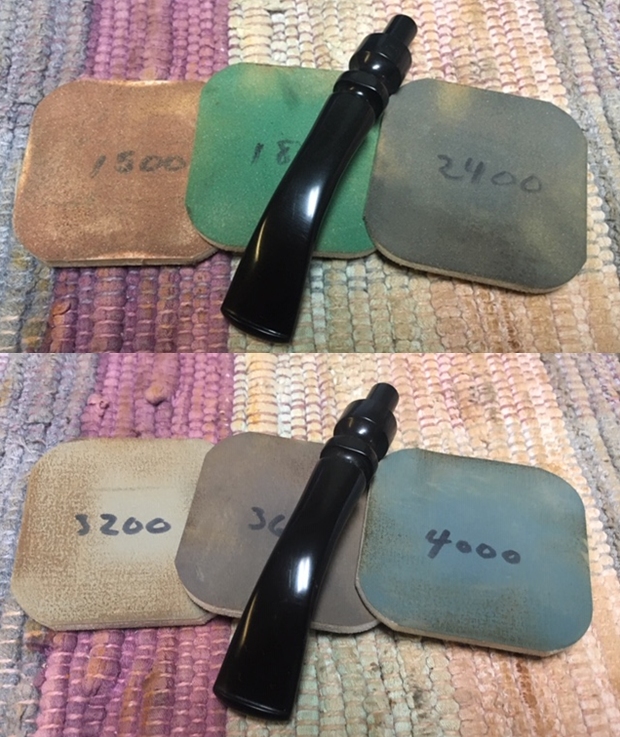
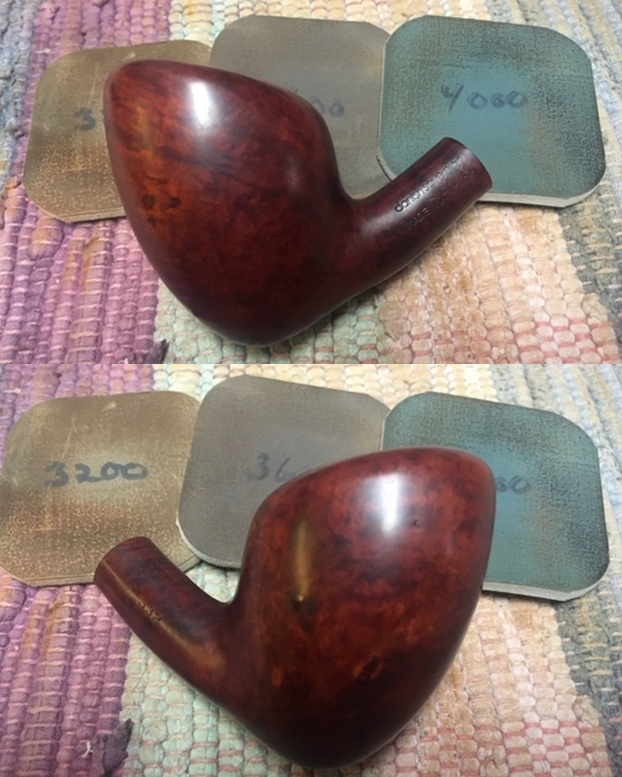
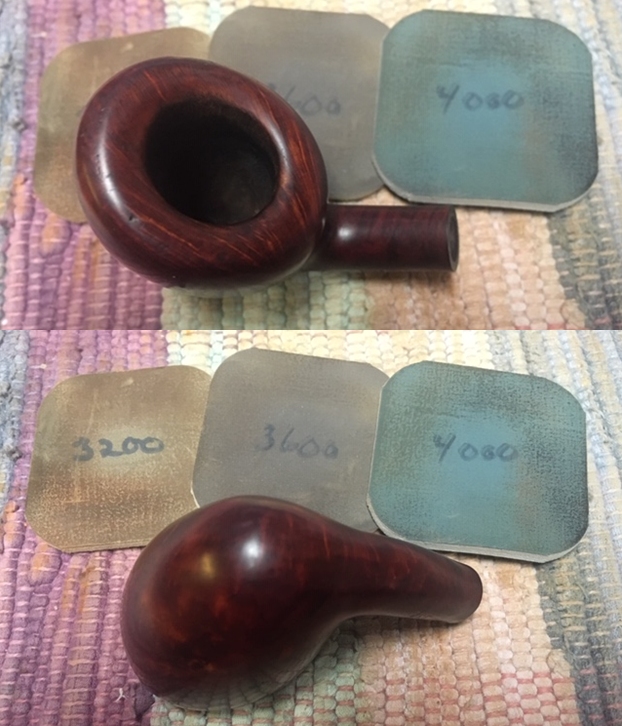
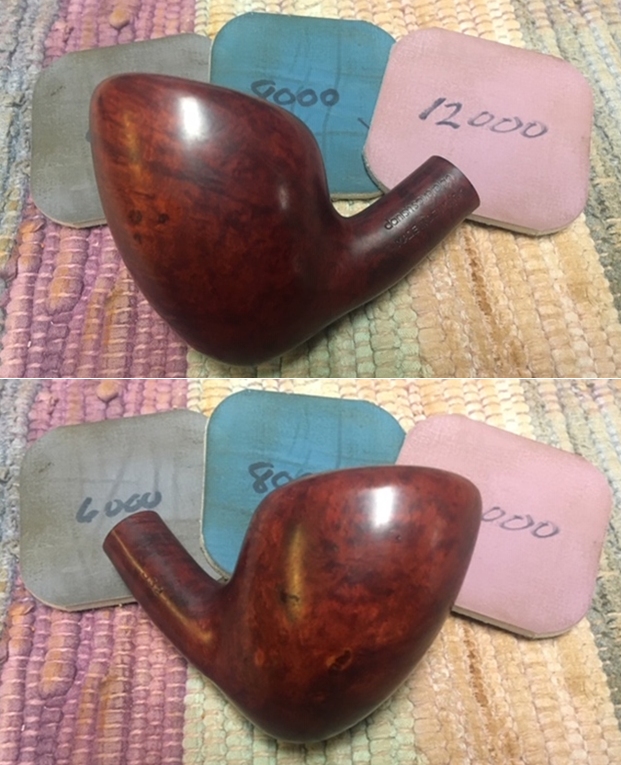
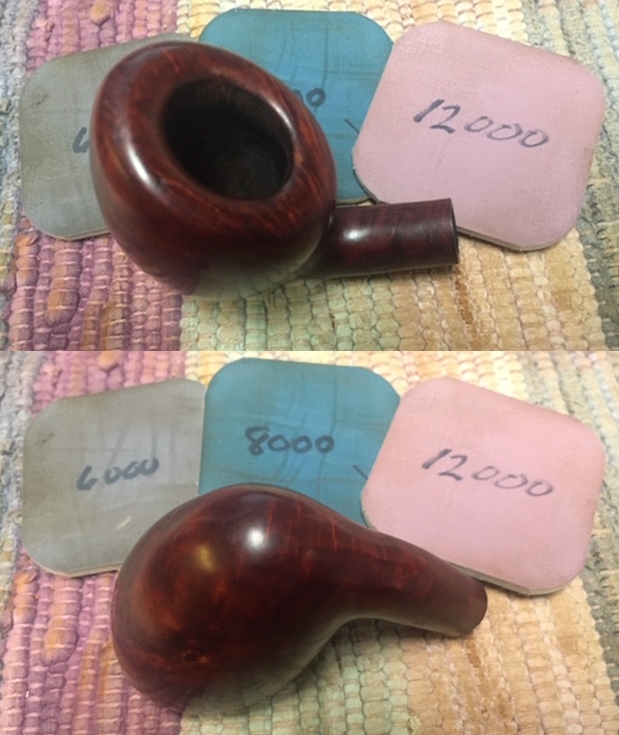
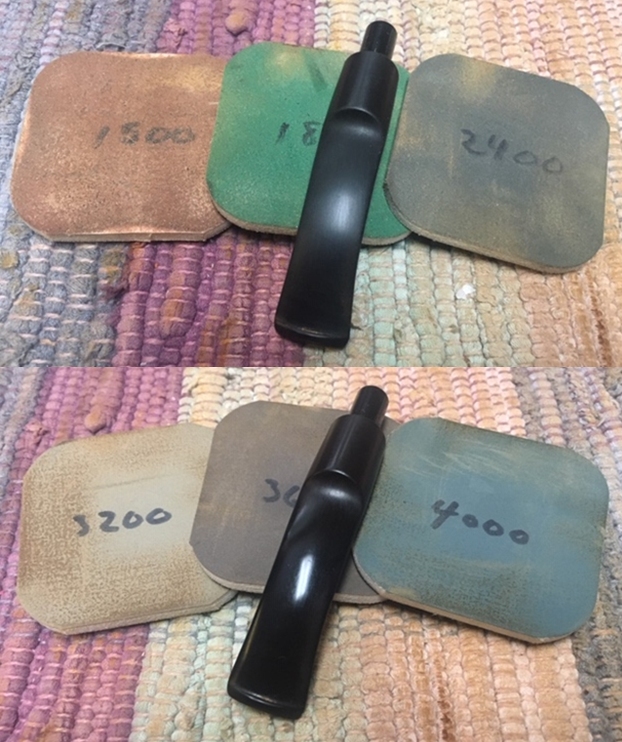
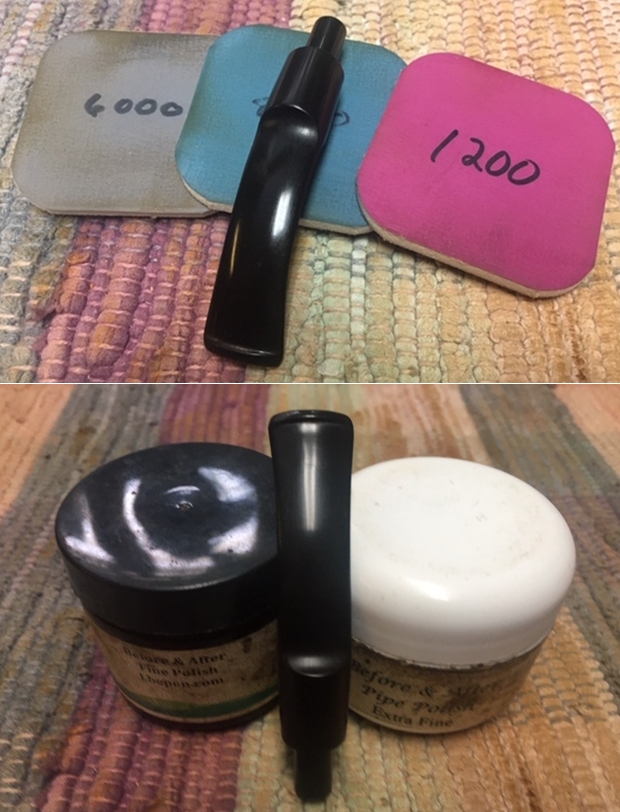
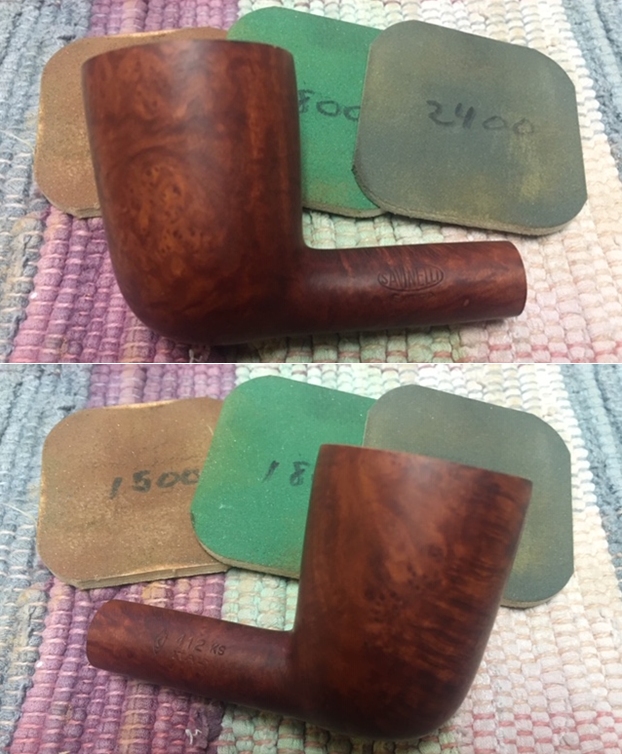
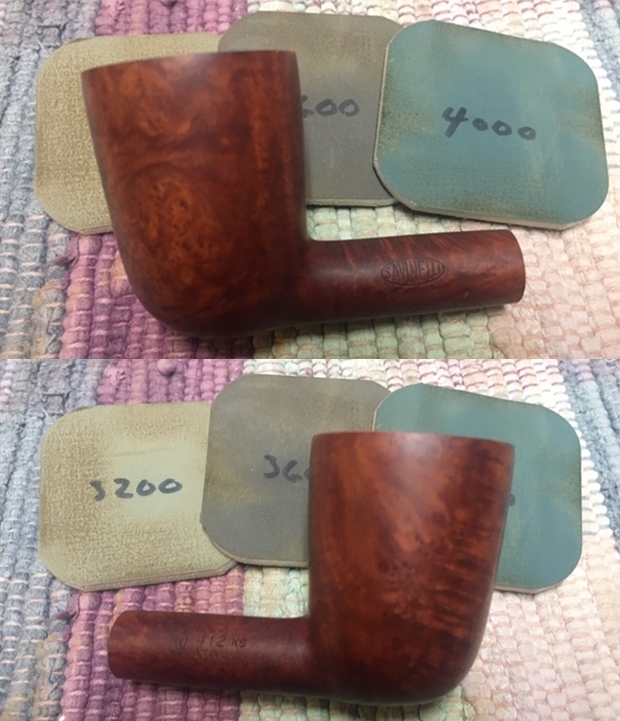
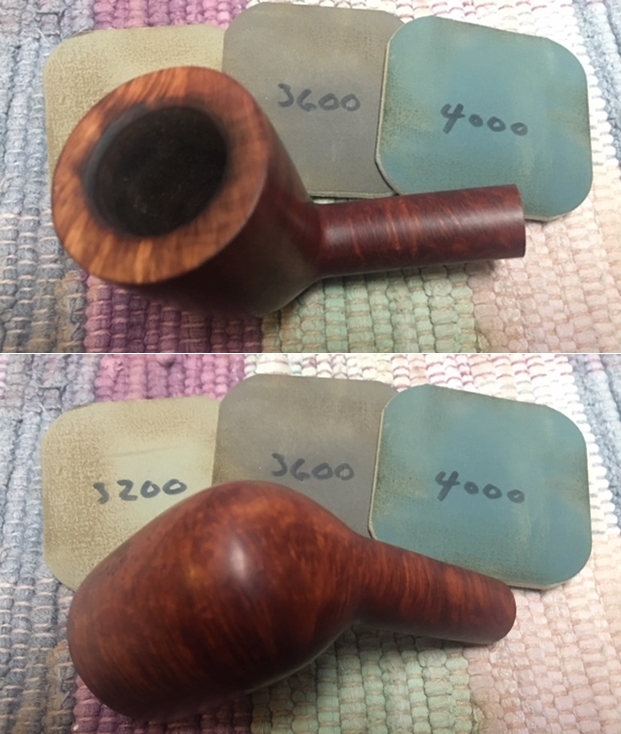
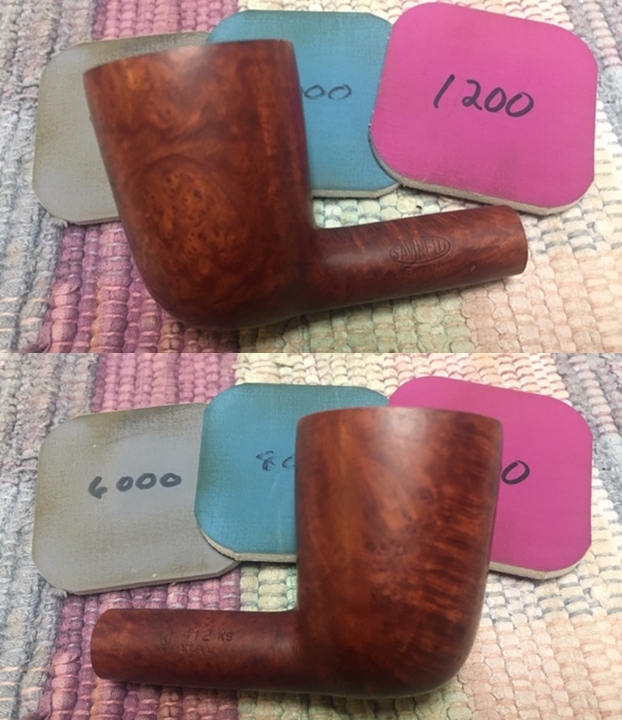
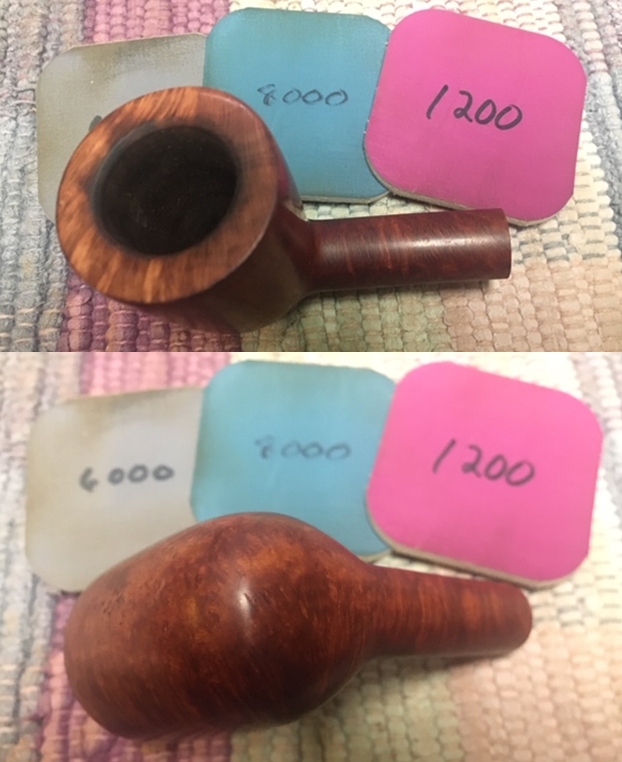
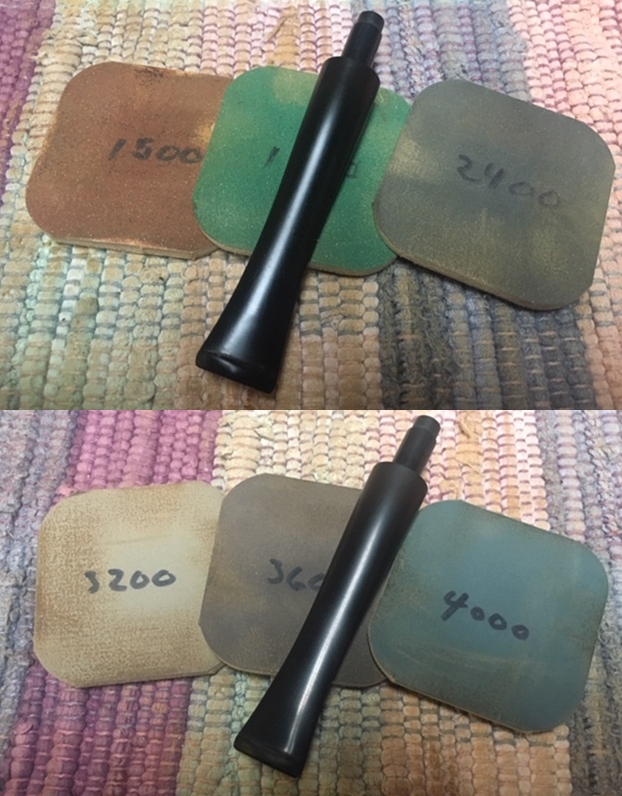
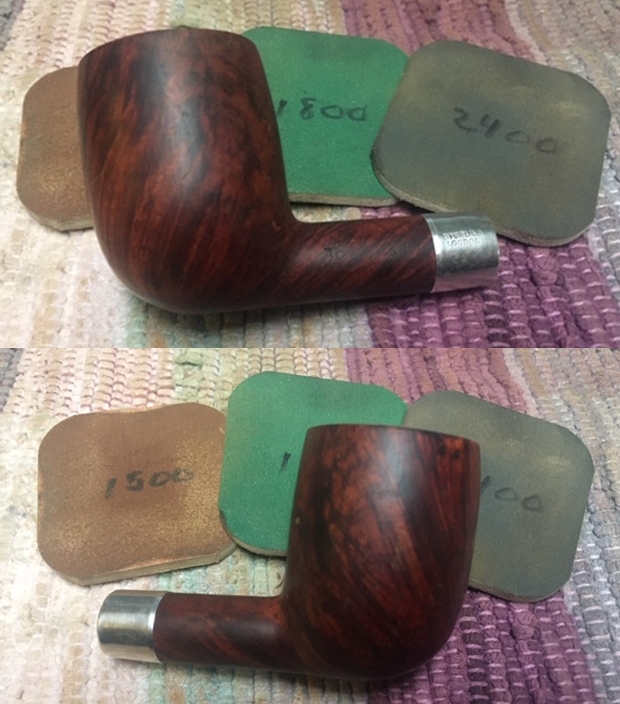
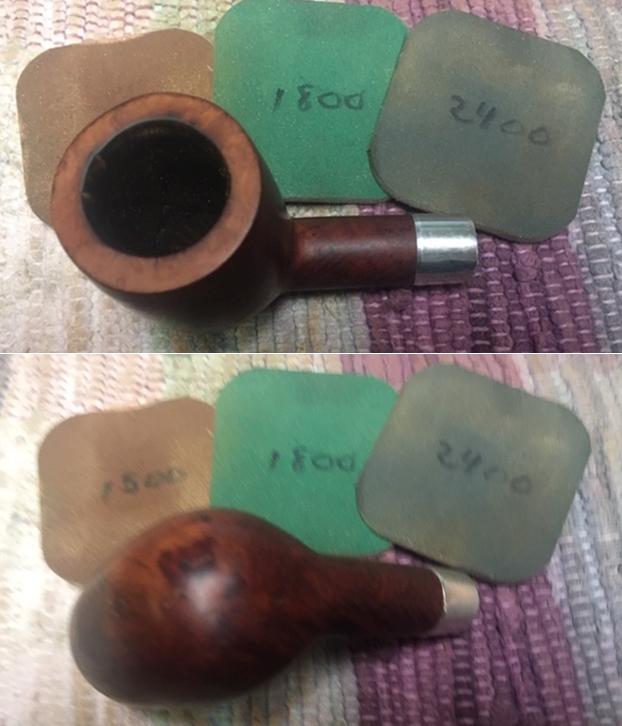
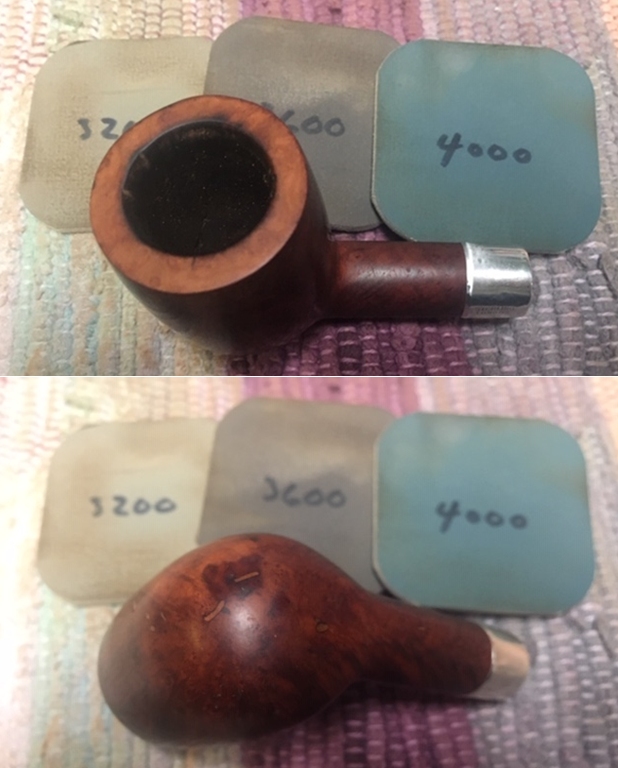
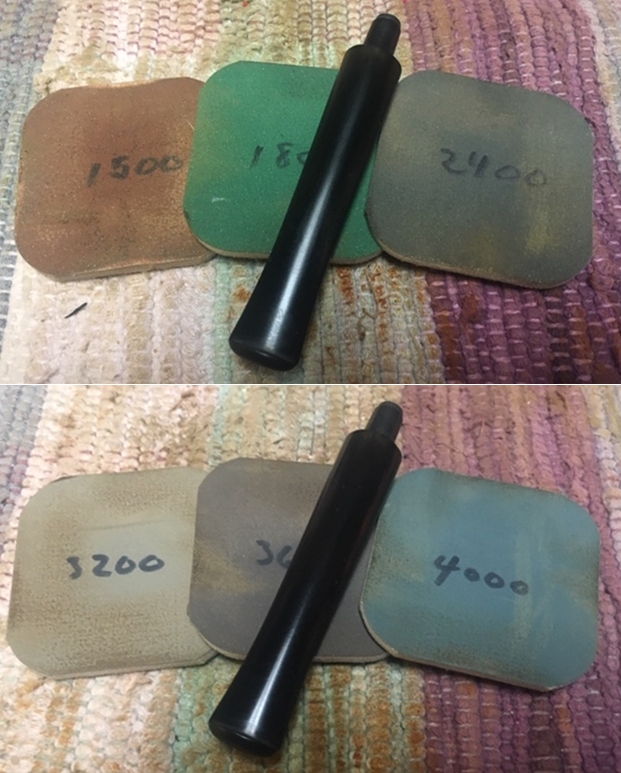
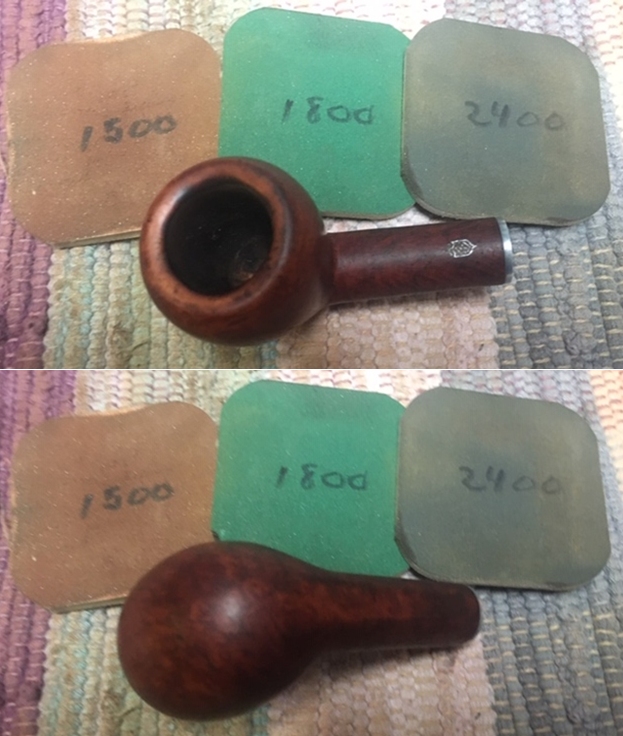
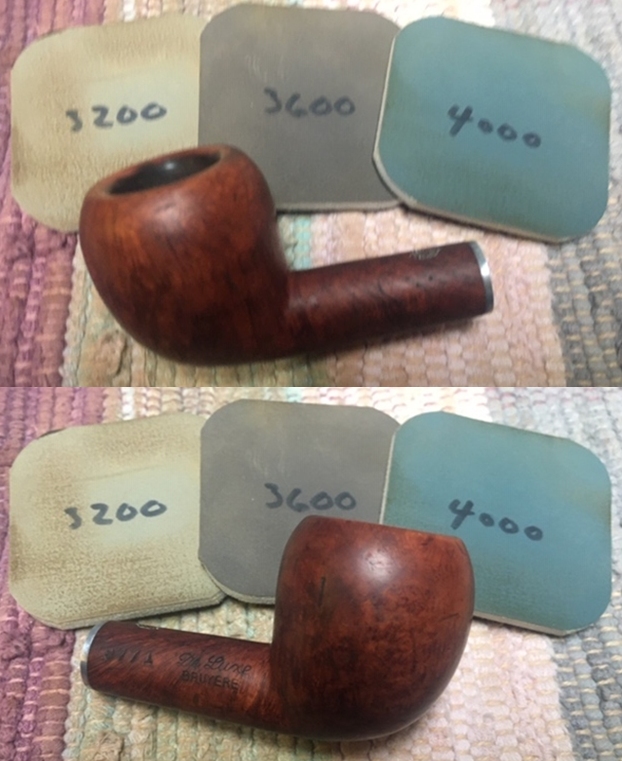
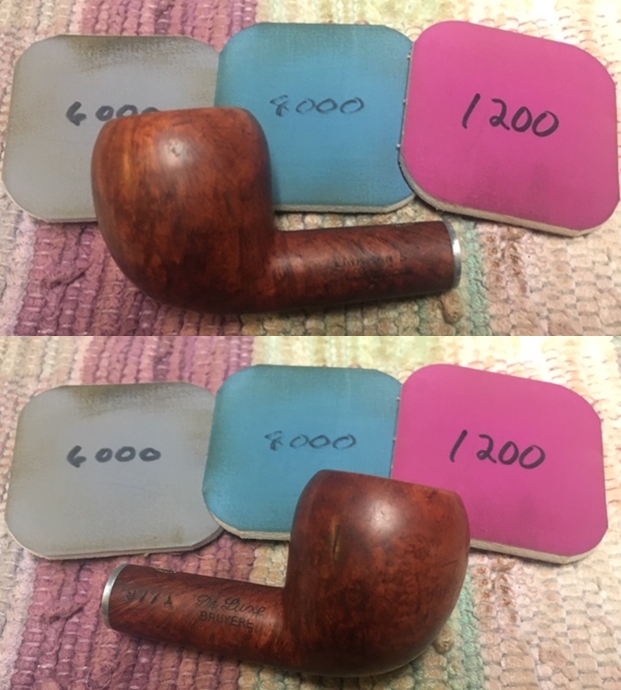
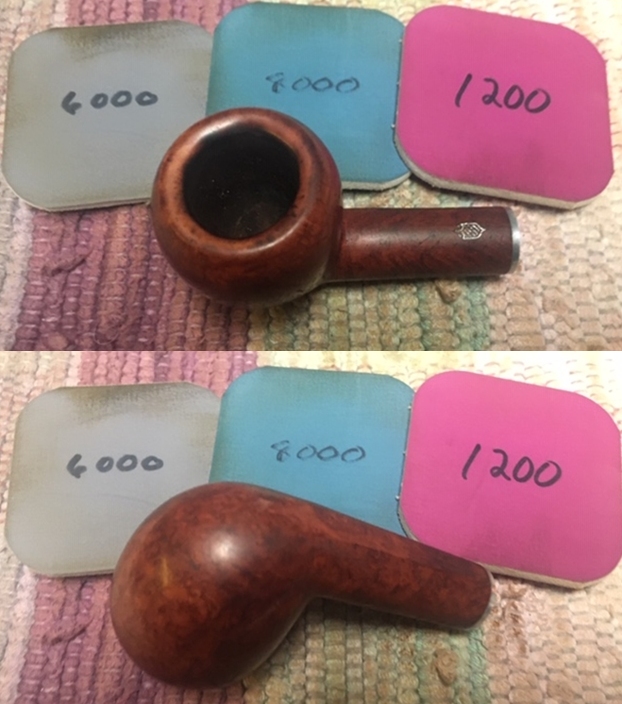
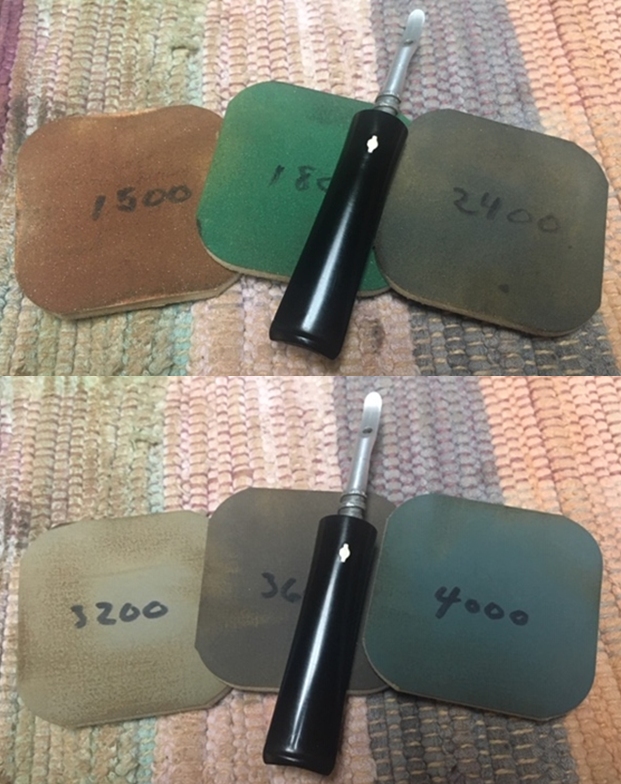
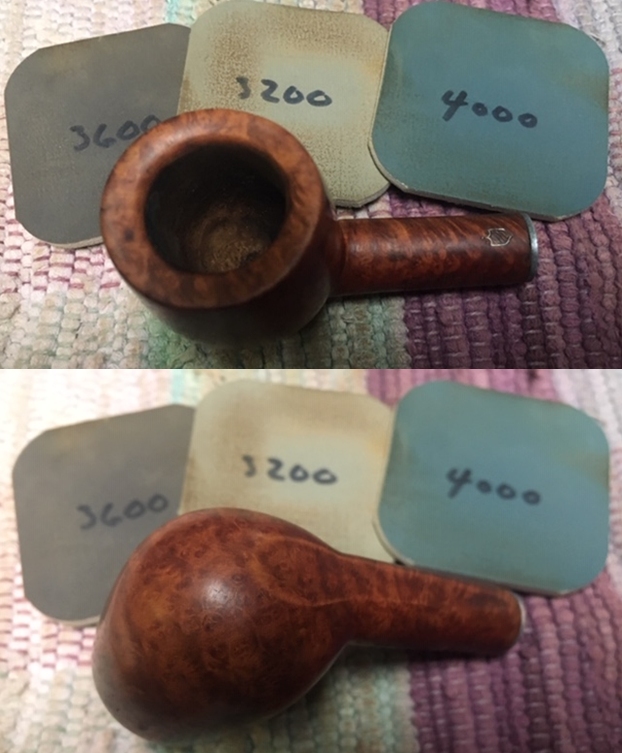
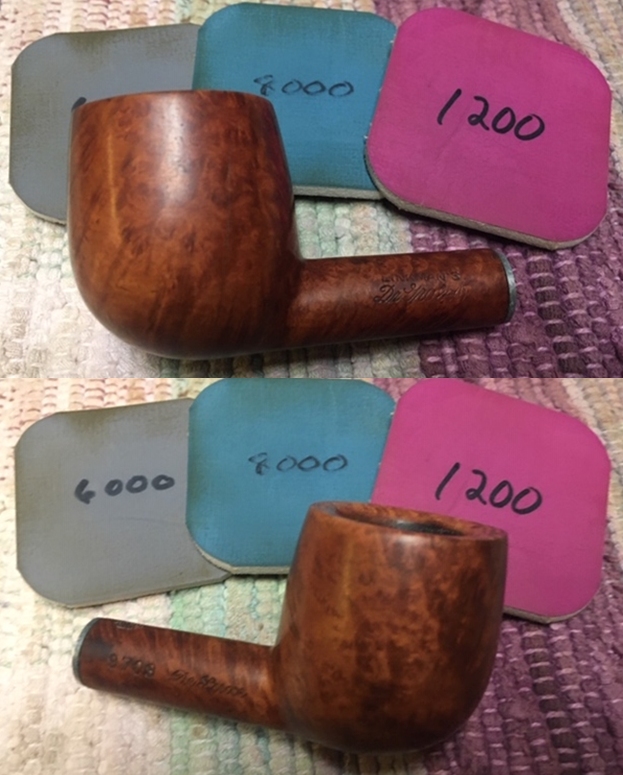
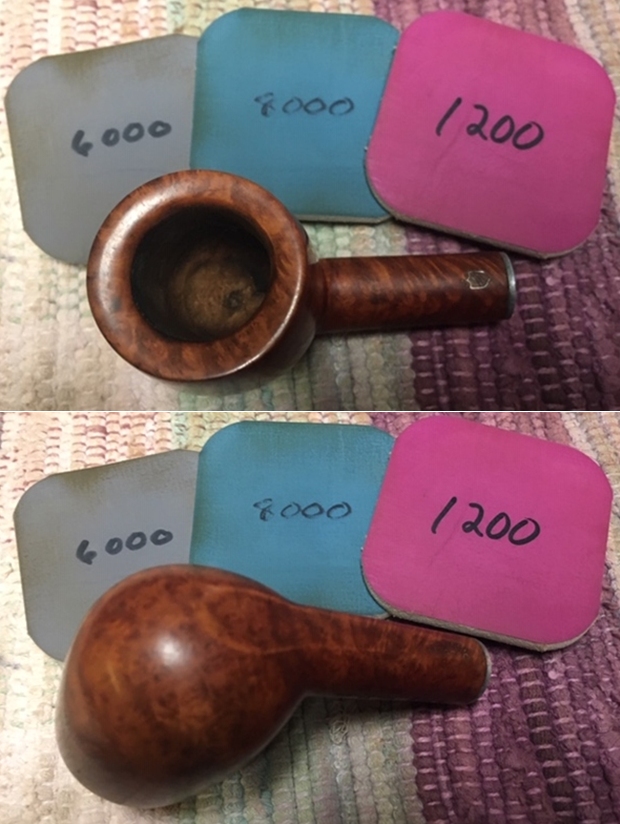
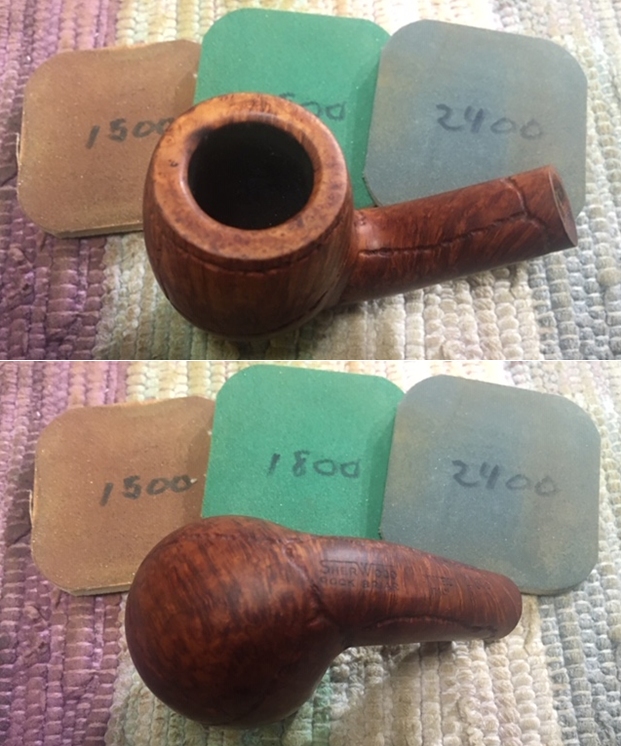
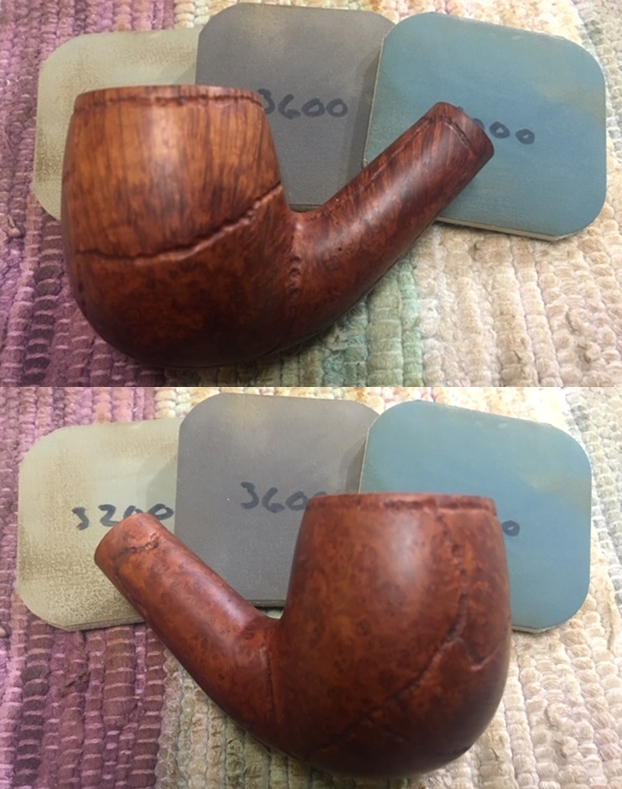
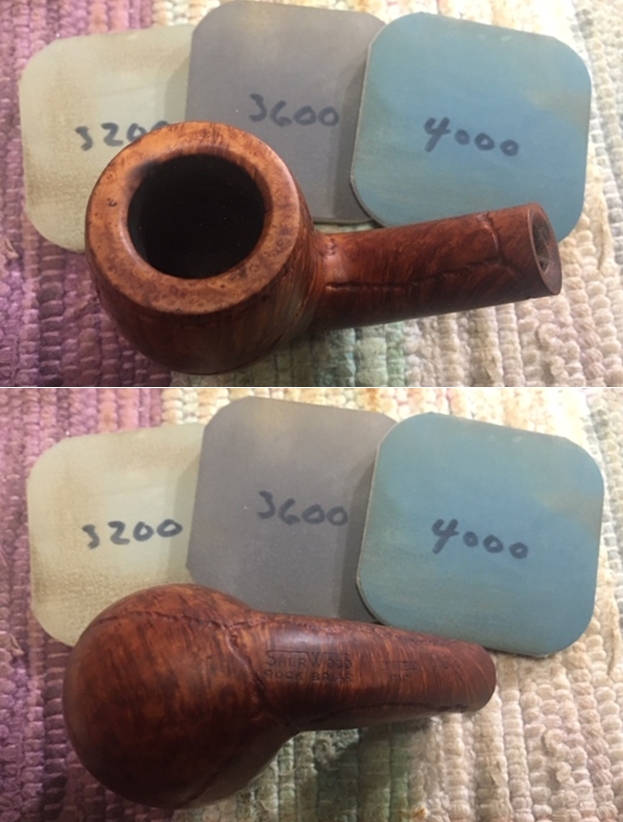
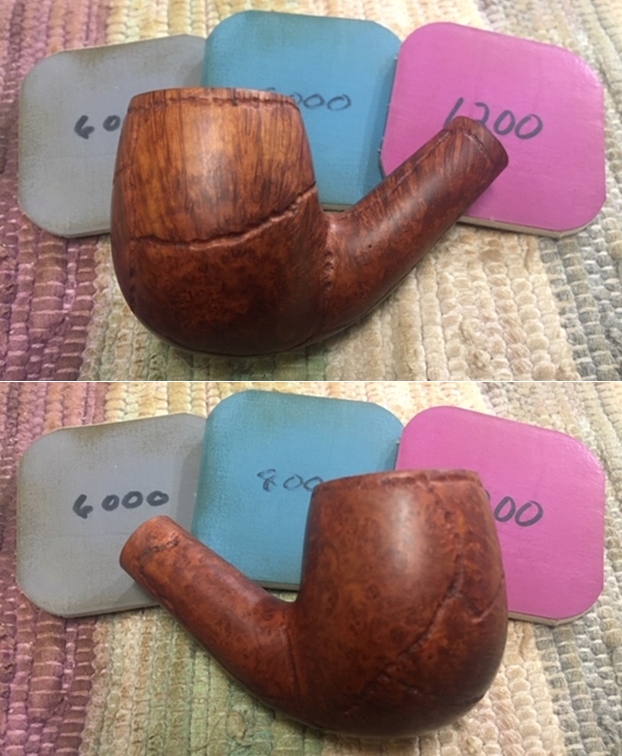
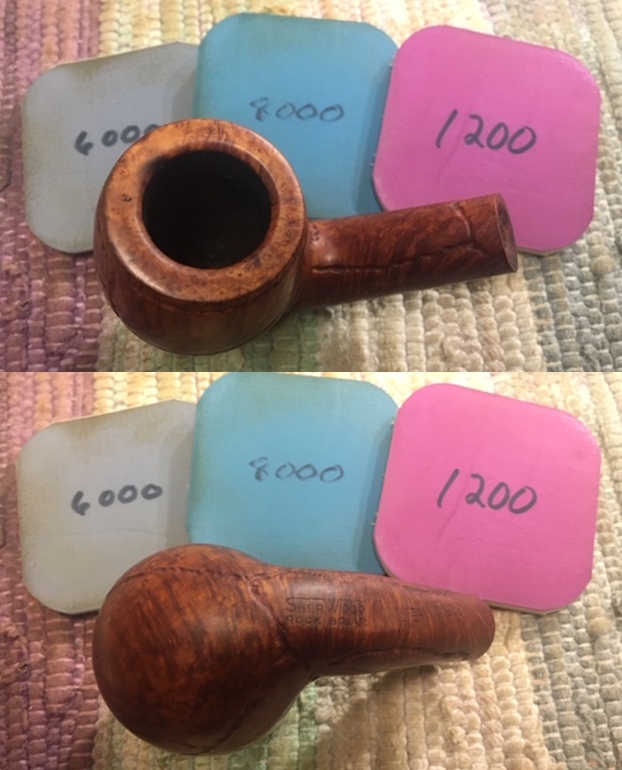
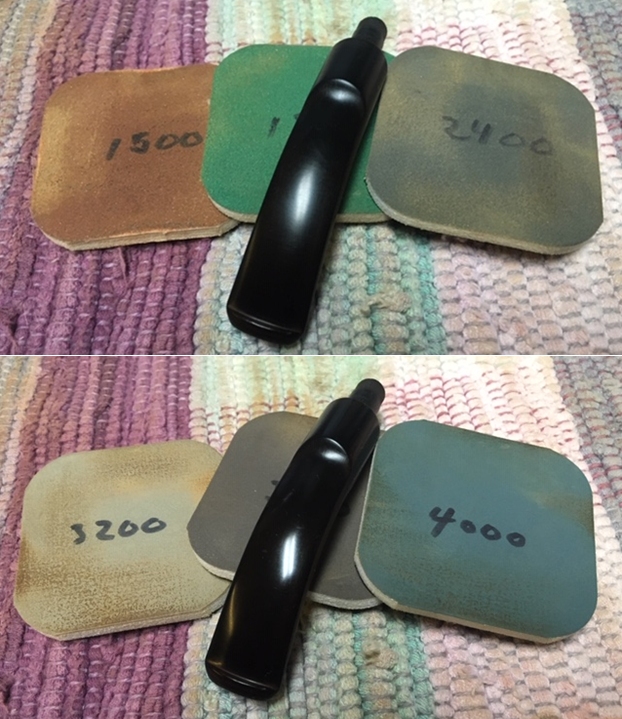
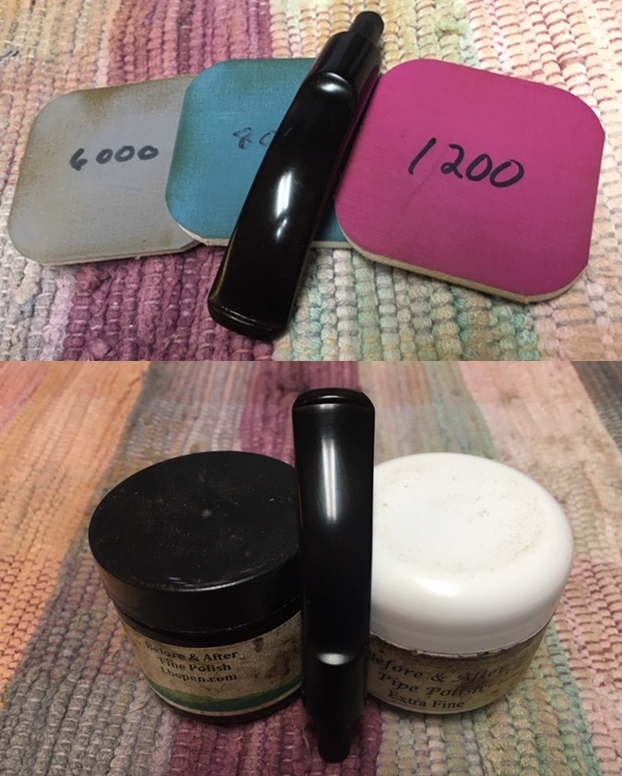
Moving now to the full regimen of micromesh pads, I wet sand the entire stem with pads 1500 to 2400.  Following this, I dry sand with pads 3200 to 4000 and 6000 to 12000.  Between each set of 3 pads, Obsidian Oil is applied.  I’m not sure it does anything for the acrylic, but I apply it anyway.  The micromesh process does a great job bringing out the acrylic ‘pop’! 
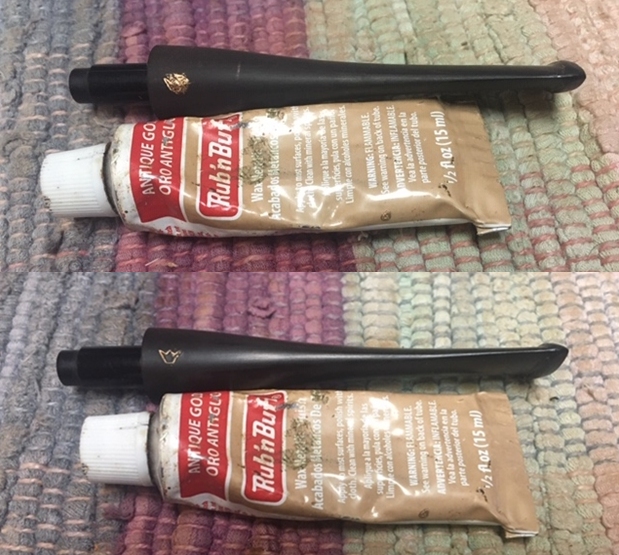
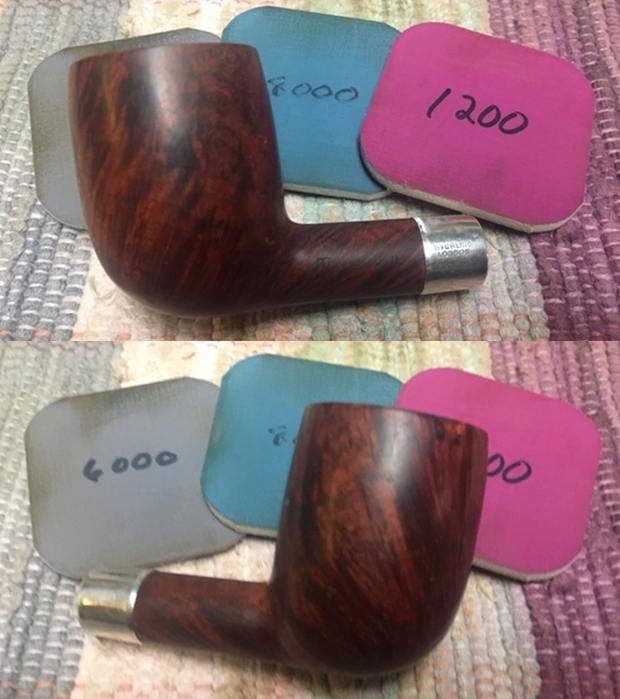
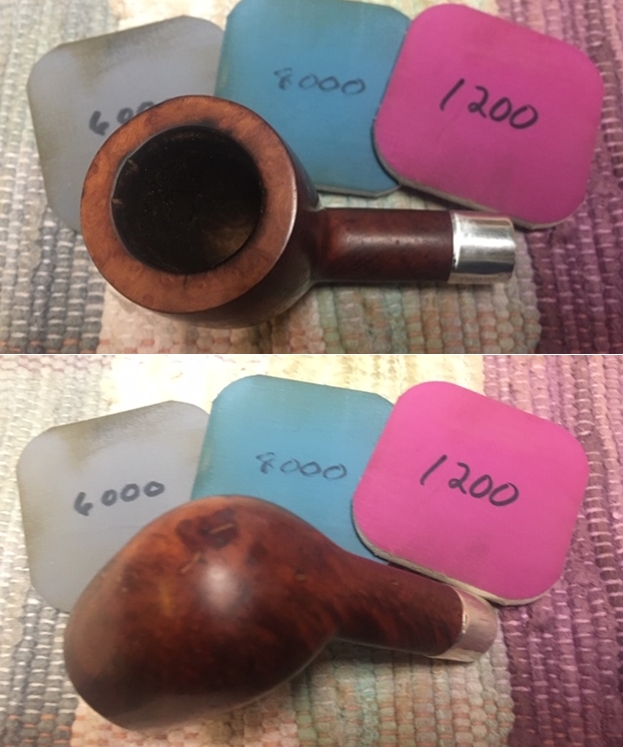
Now on the home stretch.  After reuniting the stem and stummel, a cotton cloth buffing wheel is mounted to the Dremel with the speed set at the lowest speed, Blue Diamond compound is applied to the stem only.  I set the Dremel to the lowest speed because I don’t want to risk overheating and having melted the acrylic with too much friction with the abrasive compound.  I keep the wheel rotating and don’t sit on one spot for long. I also don’t apply the compound to the rusticated stummel because I don’t want to fill all the rustication pits with compound dust!  That would not be easy to clean.After the compound, another cotton cloth wheel is mounted on the Dremel with the speed set at 40% full power.  Carnauba wax is then applied to both stem and stummel.  I’m not concerned about the wax on the stummel.  I keep the application light and I’m careful to spread and dissolve the wax into the briar with the buffing action of the Dremel.  After applying the wax, the pipe receives a hearty hand buffing to dispense wax that wasn’t assimilated and to raise the shine.
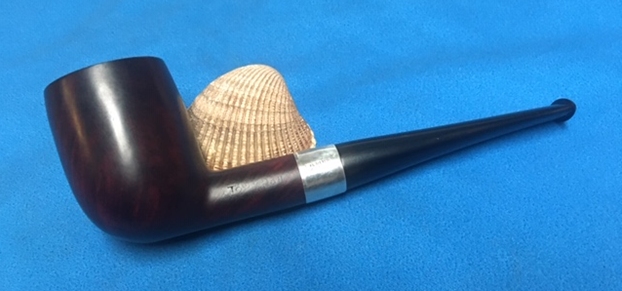
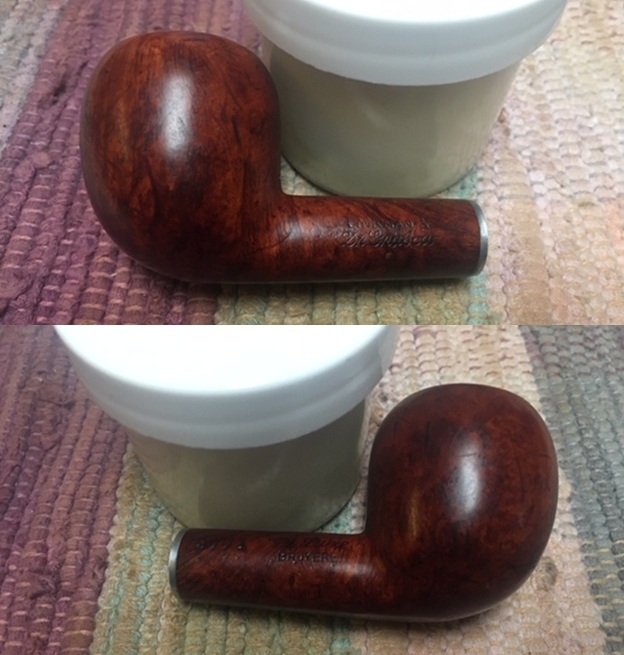
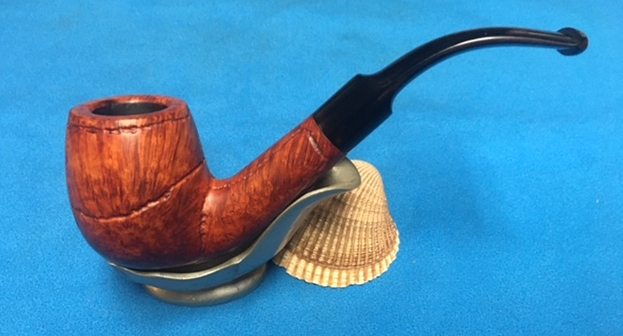
This was an easy but fun restoration.  The Lorenzo Carnevale Sanremo Apple lives up to the Lorenzo reputation of producing pipes that are ‘edgy’.  The saddle tan rusticated Apple bowl is expressive and when tied to the two-toned red and blue acrylic stem, the pipe truly expresses the carnival theme of colors and flowers commemorating the well-known festival in Sanremo, Italy.  This fun pipe was a good conclusion to the 4 pipes Nathan commissioned from the For “Pipe Dreamers” Only offerings.  Nathan has the first opportunity to acquire the Lorenzo Carnavale Sanremo Apple from The Pipe Steward Store benefiting the Daughters of Bulgaria – women and girls who have been trafficked and sexually exploited.  Thanks for joining me!

Fresh Life for a Bari De Luxe 9763 Bent Dublinesque Freehand


Blog by Steve Laug

The next pipe on the work table is a sandblast bent Dublin shaped Bari, at least that is my description of it. The bowl is round with a crowned rim top. On the underside of the shank it reads Bari over De Luxe followed by Made In Denmark and ends with the shape number 9763. The finish is sandblasted on the entire bowl and the blast is deep and tactile with some great grain as well. The rim top is sandblasted and crowned. The pipe was dirty and the oxblood finish flat but otherwise the pipe was in good shape. The bowl had a thick cake and the inner edge of the rim looked to be in good condition. The shank is round and flows out the bowl with a slight bend. The stem is vulcanite and has a fancy round turning before second round edged rectangular bead. The blade of the stem is also a round edge rectangle. It is stamped on the left side of the stem and reads Bari. The stem had tooth marks and chatter on both sides near the button. It was oxidized and had some calcification on the end. Jeff took some photos of the pipe to show the general condition of the pipe before he started his clean up. Jeff took some close-up photos of the rim top and bowl to show the overall condition. There is some light lava in some of the grooves but overall it is just dusty. The edges look very good.He took some photos of the sides and heel of the bowl to show the condition of the finish on the pipe. The photos show the beautiful grain around the bowl. Under the dust and grime it was a nice looking bowl. I think it will be a beautiful pipe once it is restored.He took a photo of the stamping on the underside of the shank. It was stamped Bari over De Luxe followed by Made in Denmark and the shape number 9763.The next two photos show the top and underside of the stem. It is dirty and has calcification on both sides at the button. There is also some tooth chatter and some light tooth marks.I have worked on quite a few Bari’s in the past and did the work on the brand information so rather than rework all of that I am including the information I found while working on a Bari De Luxe Freehand. I quoted a section from Pipedia on Bari pipes (https://pipedia.org/wiki/Bari). I am including the material that I found previously on the brand. It is good to be reminded of the fact that Viggo Nielsen was the pipe maker. I quote:

Pipedia states that Bari Piber was founded by Viggo Nielsen in Kolding, Denmark around the turn of 1950/51. His sons Kai and Jørgen both grew into their father’s business from a very young age and worked there till 1975. Both have become successful pipe makers.

Bari successfully adapted the new Danish design that had been started mainly by Stanwell for its own models. Bari was sold in 1978 to Van Eicken Tobaccos in Hamburg, Germany though the pipes were still made in Denmark. From 1978 to 1993 Åge Bogelund and Helmer Thomsen headed Bari’s pipe production.

Helmer Thomson bought the company in 1993 re-naming it to “Bari Piber Helmer Thomsen”. The workshop moved to more convenient buildings in Vejen. Bogelund, who created very respectable freehands of his own during the time at Bari got lost somehow after 1993. Bari’s basic conception fundamentally stayed the same for decades: series pipes pre-worked by machines and carefully finished by hand – thus no spectacular highgrades but solid, reliable every day’s companions were what they turned out. The most famous series are the smooth “Classic Diamond” and the blasted “Wiking”.

Now that I was reminded about the Viggo Nielsen connection it was time to work on the pipe on my end. When I received it Jeff had once again done an amazing job cleaning the pipe. He reamed it with a PipNet pipe reamer and got rid of the cake. He cleaned up the reaming with a Savinelli Fitsall Pipe Knife so that we could see the walls of the bowl and assess for damage. He cleaned the internals of the shank and stem with alcohol, pipe cleaners and alcohol. He scrubbed the exterior with undiluted Murphy’s Oil Soap and a tooth brush. He rinsed the pipe under warm water. He dried it off with a cloth and then let it air dry. The stem was scrubbed with Soft Scrub and soaked in Before & After Deoxidizer. It came out looking very good. The finish on the bowl and the rim top cleaned up nicely. I took pictures of the pipe to show how it looked when I unpacked it. I took a close up photo of the rim top to show how clean the sandblast was. The inner edge of the rim and the ridges and valleys of the blast looked good. The stem looked good just some light tooth chatter and light tooth marks near the button.I took a photo of the stamping on the underside of the shank and the Bari stamp on the left side of the saddle stem.I took the stem off the bowl and took a picture of the pipe to show the flow of the bowl and the angles of the stem and shank. It is a great looking pipe.The pipe was in excellent condition so I started with the bowl. I worked some Before & After Restoration Balm into the smooth briar with my fingertips and a horsehair shoe brush. The product is a great addition to the restoration work. It enlivens, enriches and protects the briar while giving it a deep glow. I appreciate Mark Hoover’s work in developing this product. I set the bowl aside and turned my attention to the stem. I sanded the surface of the stem with 220 grit sandpaper to remove the tooth marks and chatter. I started the polishing process with 400 grit wet dry sandpaper.I polished the stem with micromesh sanding pads – wet sanding with 1500-12000 grit sanding pads. I wiped it down after each sanding pad with Obsidian Oil. I polished it with Before & After Pipe Stem Polish – both Fine and Extra Fine. I buffed the stem with a soft cloth to raise the shine. I am on the homestretch with this Bari De Luxe. As always I am excited to finish a pipe that I am working on. I put the pipe back together and lightly buffed it with Blue Diamond on the buffing wheel. I used a gentle touch on the sandblast portion of the bowl. I gave the bowl multiple coats of Conservator’s Wax and the stem multiple coats of carnauba wax. I buffed the pipe with a clean buffing pad and hand buffed it to raise the shine. It is fun to see what the polished bowl looks like along with the polished vulcanite stem. This Bari De Luxe 9763 is a nice looking pipe. It is quite comfortable in hand and should be so when smoking. It is quite light and well balanced. Have a look at it with the photos below. The dimensions are Length: 5 inches, Height: 1 ¾ inches, Outside diameter of the bowl: 1 ½ inches, Chamber diameter: ¾ of an inch. It is another beautiful pipe and one that will be residing in my rack at least for a while. I like the shape and feel of this one and I am looking forward to firing up a bowl of Virgina/Perique in it later today! Thanks for walking through the restoration with me as I worked over this pipe. Thanks to each of you who are reading this blog.

What a Mess – Restoring a Stanwell Made Danish Sovereign 332


Blog by Steve Laug

The next pipe on the table is from the next box of pipes I am working through. It is a Stanwell Made Danish Sovereign 332. The acorn/pear shaped bowl, round shank and saddle stem made up a nicely made pipe in a classic Danish shape. The smooth finish showed great grain through the ground in dirt and grime. There are also quite a few fills and deep gouges in the surface of the briar. It was stamped on the left side of the shank and read Danish Sovereign over Made in Denmark. On the right side it had the shape number 332 stamp. The finish was very dirty with a heavy coat of grime ground into the bowl and rim top as can be seen in the photos. The bowl had a thick cake with a lava overflow onto the rim top and the inner edge of the bowl. There were hash marks on the top front of the rim top and nicks around the edges. The stem was oxidized, calcified and there were tooth marks and chatter on both sides and on the top and bottom edges of the button. It was also stamped with three XXX marking it as a second. Jeff took photos of the pipe before he cleaned it up so you could see what we saw. Jeff took photos of the rim top to show lava build up around the rim, the edges and cake in the bowl.  This one was obviously someone’s favourite pipe and it was a mess. You can also see the hash marks on the front edge and top of the bowl. Jeff took some photos of the bowl sides and heel to show the absolutely dirty finish ground into the briar. It was a dirty pipe but I think it will be a beautiful one once we are finished. You can see all the damaged areas and fills on the bowl in these photos. The bowl is really quite dirty. The stamping on the sides of the shank is shown in the photos below. It is clear and read as noted above.  There was a triple XXX stamped on the left side of the stem. The stem was a good fit to the shank. It was oxidized, calcified and had debris stuck to the surface of the vulcanite. It also shows the tooth marks on the stem and on the button surface.  I turned first to Pipephil’s site (http://www.pipephil.eu/logos/en/logo-d2.html) to see what information I could find there. On the site was a pipe similarly stamped to the one that I am working on. It is clearly identified as a Stanwell second that was marketed only in the USA and Canada.I turned to Pipedia to read more about the brand (https://pipedia.org/wiki/Danish_Sovereign). There was nothing definitive there only a statement that it may be a Stanwell second line.

It looks I am dealing with a pipe made especially for the American and Canadian market by Stanwell. Now it was my turn to work on the pipe now. I was really looking forward to what the pipe would look like once Jeff had worked his magic. What would the rim top look like? What would the dirty bowl look like? I had no idea. When I took it out of the box I was struck great job cleaning up the pipe Jeff had done. It was impressive! He had reamed the pipe with a Pipnet piper reamer and taken the cake back to bare briar. He cleaned up the remaining cake with a Savinelli Fitsall Pipe Knife. He scrubbed the interior of the bowl and shank with pipe cleaners, cotton swabs and alcohol to remove the tars and oils. He scrubbed the exterior of the pipe with Murphy’s Oil Soap and a tooth brush to remove the grime from the finish. He worked on the rim top lava and darkening with the soap and tooth brush. He scrubbed the inside of the stem with alcohol and pipe cleaners. He scrubbed the exterior with Soft Scrub and then soaked it in Before & After Deoxidizer. He washed the stem off with warm water to remove the Deoxidizer. The pipe looked far better. I took photos of the pipe when I received it before I started working on it. I took photos of the bowl and rim top as well as the stem to show how clean they were. You can see the hash marks on the front of the rim top and the darkening and damage to the inner edge of the rim. There are nicks on the top all the way around. The stem is clean and the tooth damage on the button top and bottom edges.   I took a photo of the stamping on the underside of the shank. The stamping is readable as noted above.    I decided to start my work on the pipe by addressing the damage to the rim top and edges. I used a folded piece of 220 grit sandpaper to smooth out the inner edge and sand the darkening on the top and smoothing out the nicks and scratches and minimizing the hash marks on the front top and outer edges.    I filled in the deep gouges and nicks in the briar on both sides of the bowl with clear super glue and when the glue cured I sanded them smooth to blend them into the surrounding briar.    I stained the briar with a tan stain. I applied it to the stummel with a dauber and then flamed it with a Bic lighter. I repeated the process as often as needed until I was happy with the coverage on the briar. I set it aside to cure for several hours.    I wiped the bowl down with alcohol on a paper towel to make the stain a bit more transparent. I buffed the bowl on the buffer with Red Tripoli to polish it and get a sense of what the bowl looked like at this point in the process.    I polished the briar with micromesh – wet sanding with 1500-12000 grit micromesh sanding pads. I wiped the bowl down after each sanding pad with a damp cloth.  I rubbed the briar down with Before & After Restoration Balm. I worked it into the briar with my fingertips. The product works to clean, enliven and preserve the briar. I let it sit for 10 minutes while I worked on the stem. After the time passed I buffed it with a cotton cloth to deepen the shine. The briar really comes alive with the balm.      I set the bowl aside and turned my attention to the stem. I filled in the indentations on the button edge and built it up with clear super glue. Once the repair cured I used a needle file to reshape the button edges and also flatten the repaired areas.    I sanded the stem with 220 grit sandpaper to finish the shaping and to remove the remaining oxidation. I started polishing the stem with 400 grit wet dry sandpaper. I wiped the stem down with Obsidian Oil before further polishing it.   I used some Paper Mate Liquid Paper to touch up the white that remained in the XXX stamp on the left side of the stem.   I polished the vulcanite with micromesh sanding pads – 1500-12000 grit pads. I wiped it down with Obsidian Oil after each sanding pad. I used Before & After Pipe Polish – both Fine and Extra Fine to further polish the stem.    This Danish Sovereign 332, made by Stanwell with a saddle vulcanite stem turned out very nice. The mix of brown stains highlights the grain around the bowl sides and bottom. The rim top and edges look very good. The finish on the pipe is in excellent condition. I put the stem back on the bowl and carefully buffed the pipe with Blue Diamond on the buffing wheel. I gave the bowl and stem multiple coats of carnauba wax on the buffing wheel and followed that by buffing the entire pipe with a clean buffing pad. I hand buffed the pipe with a microfiber cloth to deepen the shine. The finished Bent Acorn is very nice and feels great in the hand. Give the finished pipe a look in the photos below. It is a nice pipe whose dimensions are Length: 5 inches, Height: 2 ¼ inches, Outside diameter of the bowl: 1 ½ inches, Chamber diameter: ¾ of an inch. Thanks for walking through the restoration with me as I worked over another beautiful pipe. This Stanwell made Danish Sovereign 332 will be going on the rebornpipes store shortly. If you are interesting in adding it to your collection let me know! Thanks for your time.

New Life for a Savinelli Extra 412KS Dublin


Blog by Steve Laug

The next pipe on the table came to us from one of Jeff’s pipe hunts. It is an interesting straight Dublin shaped pipe with darkening and lava around the rim edge and top. It is stamped with a oval with SAVINELLI inside and EXTRA below that on the left side of the shank. On the right side of the shank it was stamped with the Savinelli “S” shield and the shape number 412KS over Italy. The stamping is clear and readable. The pipe has a combination of brown stains that highlighted some nice mixed grain around the bowl sides. The finish was very dirty with grime ground into the bowl. The bowl had a thick but even cake in the bowl and a heavy lava overflow on the inner edge of the top and beveled edge all around the bowl. It was hard to know what was underneath the lava and grime in terms of damage to the inner edge and the top of the rim. The taper stem was oxidized and there were tooth marks and chatter on both sides and on the top and bottom edges of the button. There was gold crown stamped on the stem. Jeff took photos of the pipe before he cleaned it up. Jeff took photos of the rim top to show the thick cake in the bowl and the lava overflow on the rim top and the beveled inner edge of the rim.  Jeff took some photos of the bowl sides and heel to show the great looking grain around the bowl. It is actually a nice looking pipe.  The stamping on the sides of the shank is shown in the photos below. They look very good and readable.  There is also a crown on the left side of the taper stem. The stem was a very good fit to the shank. It was oxidized, calcified and had debris stuck to the surface of the vulcanite. It also shows the tooth marks on the stem and on the button surface.  I turned to Pipephil (http://www.pipephil.eu/logos/en/logo-savinelli2.html) to read about the Extra Line. It is a smooth finished pipe with the same stamping on the shank and on the stem as the one that I am working on. I have included the screen capture from the site below.Armed with that information and a clearer picture of the original pipe I turned to work on the pipe on my work table. Jeff had done a great job cleaning up the pipe as usual. He reamed the pipe with a PipNet reamer and cut back the cake back to the bare briar. He cleaned up the walls with a Savinelli Fitsall Pipe Knife. He scrubbed the interior of the bowl and shank with pipe cleaners, cotton swabs and alcohol to remove the tars and oils. He scrubbed the exterior of the pipe with Murphy’s Oil Soap and a tooth brush to remove the grime from the finish. He worked on the rim top lava and darkening with the soap and tooth brush. He scrubbed the inside of the stem with alcohol and pipe cleaners. He scrubbed the exterior with Soft Scrub and then soaked it in Before & After Deoxidizer. He washed it off with warm water to remove the Deoxidizer. The pipe looked far better. I took photos of the pipe when I received it before I started working on it. I took photos of the bowl and rim top as well as the stem to show how clean they were. You can see the damage and the darkening on the inner edge and the top on the right front and the rear of the bowl. The stem looks clean of oxidation and the tooth marks and chatter are fairly light.  I took photos of the stamping on the sides of the shank. They are clean and readable and read as noted above.    I took a photo of the pipe with the stem removed to show the overall look of stem, tenon and profile of the pipe.I decided to start my work on the pipe by addressing the darkening on the rim top and the inner edge. I topped the bowl on a topping board with 220 grit sandpaper on a board. I used a folded piece of 220 grit sandpaper to work on the inner edge to remove the darkening. It took a bit of work but I was able to remove the majority of it and the end product looked much better. I polished the bowl and rim with micromesh sanding pads – wet sanding with 1500-12000 grit pads. I worked over the rim top and edge of the bowl with the pads. I wiped the bowl down with a damp cloth after each pad to remove the sanding debris.      I used an Oak stain pen to blend the cleaned rim top into the colour of the rest of the bowl. The match was perfect.I rubbed the briar down with Before & After Restoration Balm. I worked it into the briar with my fingertips. The product works to clean, enliven and preserve the briar. I let it sit for 10 minutes while I worked on the stem. After the time passed I buffed it with a cotton cloth to deepen the shine. The briar really comes alive with the balm.   I set the bowl aside and turned my attention to the stem. I decided to “paint” the stem surface to raise the dents in the vulcanite. The process worked very well.     I built up the edges of the button and filled in the small dents in both sides of the stem. Once the repairs had cured I used a needle file to recut the edge of the button. I worked over the oxidation on the stem and blended the repaired area of the button with 220 grit sandpaper. I started polishing the stem with 400 grit wet dry sandpaper. At this point it is starting to look much better.   I touched up the gold crown on the stem side with Rub’n Buff Antique Gold. I pressed the gold into the stamp and buffed it off with a cotton pad.   I rubbed the stem down with Denicare Mouthpiece Polish – a red, gritty Tripoli like substance that is a paste. I rubbed it into the surface of the stem and polished it off with a cotton pad. I have found that is a great intermediary step before polishing with micromesh pads. I am not sure what I will use once the final tin I have is gone!     I polished the vulcanite with micromesh sanding pads – 1500-12000 grit pads. I wiped it down with Obsidian Oil after each sanding pad. I used Before & After Pipe Polish – both Fine and Extra Fine to further polish the stem.   This Savinelli Extra 412KS Dublin is a great looking pipe. The mix of brown stains highlights the mix of grain around the bowl sides, top and bottom. The finish on the pipe is in excellent condition and the contrasting stains work well with the polished black vulcanite taper stem. I put the stem back on the bowl and carefully buffed the pipe with Blue Diamond on the buffing wheel using a light touch on the briar. I gave the bowl and stem multiple coats of carnauba wax on the buffing wheel and followed that by buffing the entire pipe with a clean buffing pad. I hand buffed the pipe with a microfiber cloth to deepen the shine. The finished Savinelli Extra 412KS Dublin is quite nice and feels great in the hand. Give the finished pipe a look in the photos below. The dimensions of the pipe are Length: 5 ¾ inches, Height: 2 inches, Outside diameter of the bowl: 1 ½ inches, Chamber diameter: 7/8 of an inch. Thanks for walking through the restoration with me as I worked over another beautiful pipe. This pipe will be added to the Italian Pipe Makers section of the rebornpipes store soon. If you want to add it to your collection send me an email or a message! Thanks for your time.


A Fresh Start for a Pipstar Standard Dublin Sitter of Saint Claude, France


Blog by Dal Stanton

The Pipstar Standard 06 026 Dublin Sitter now on my worktable, is simply a cool looking pipe.  I was attracted to it because of the Dublin Sitter shape eBay description and the grain had great potential. I like the lines and the very gentle bend of the stem flowing out of a rounded sitter heel.  The pipe really doesn’t sit well as a sitter, but the flat rounded bottom is more for artistic consideration (as a French pipe) than utilitarian.  I saw it on the eBay auction block from a seller in Akron, Ohio.  My bid held true and the Pipstar Standard Dublin made its way to Bulgaria where I posted it in the ‘For “Pipe Dreamers” Only! online virtual ‘Help Me!’ baskets where pipe men and women commission pipes to be restored.  These hopeful restorations benefit the Daughters of Bulgaria, the work in Bulgaria helping women and girls who have been trafficked and sexually exploited.  This is where Nathan saw the Pipstar along with 3 other pipes he commissioned to benefit the Daughters.  Here are pictures of the Pipstar Dublin Sitter that got his attention. The nomenclature is found stamped on the underside of the shank.  The stamping reads ‘PiPstar’ bracketed, followed by ‘STANDARD’.  Underneath this is stamped ’26 026’ which I assume is a shape number that I’m sure, will remain a mystery.  The stem bears an interesting stamp of a ‘P’ and a miniature star to its right.There isn’t much information about the Pipstar name.  Pipedia shows it to be a brand of C.J. Verguet Frères – a French factory in St. Claude that began in the 19th century.  It also cites that,

In 1906, its merger with Sina & Cie., gave rise to a large company within the Oppenheimer Pipe group and run by Lucien Verguet.  In 1917, the factory produced 4.8 million pipes and bowls.

More information was offered on pipephil.eu with a Pipstar panel stating that the company closed it’s doors in St. Claude in 1970.  This let’s me know that the dating of the Pipstar on the table is at least that old. Now looking at the St. Claude, France, made Pipstar Dublin Sitter on the worktable, it appears to have originally had an Oxblood or red finish.  Looking at the stummel there are a few blotches of what appears to be dye hanging on from former days.  What’s interesting to me is that the brown leftover is attractive.  I’ll be interested to see how the stummel cleans up. There are also nicks and scratches on the stummel from normal wear and usage. The chamber has thick cake buildup which will need to be cleaned out to allow fresh briar to emerge.  This also allows inspection of the chamber walls to detect heating problems.The stem has thick oxidation which needs addressing.  The picture from the eBay seller shows this very well.  There is a bite compression on the lower bit, but overall, not in bad shape.Beginning the process of restoring and recommissioning this French Pipstar Standard, I clean the airway with pipe cleaners dipped in isopropyl 95%.Next, to begin addressing the deep, heavy oxidation on the entire stem, a ‘Soft-Scrub-like’ product called CIF, available here in Bulgaria, is used along with 000 steel wool.  I use the steel wool and CIF to break up the oxidation with the hope that it enables the Before & After Deoxidizer soak to follow to be more productive. After a few hours, I fish out the Pipstar stem and clear the liquid from the airway with pipe cleaners wetted with isopropyl 95%.  Cotton pads wetted with alcohol are also used to wipe away oxidation that has been raised.To help begin the conditioning process, paraffin oil, a mineral oil, is applied to the vulcanite stem.  The stem is then put to the side to absorb the oil.After putting the stem to the side, I start the work on the stummel by cleaning the chamber of the cake build-up.  I take a starting picture and using the Pipnet Reaming Kit, I go to work starting with the smallest blade head.  I discover quickly that the conical Dublin chamber angles too sharply for a ‘regular’ reaming blade to traverse.  Instead of pressing down on the blade head, which will cause a ‘reaming ridge’ I simply press toward the walls of the chamber to remove cake buildup.  I use two blade heads in this manner and then switch to the Savinelli Fitsall tool to reach the narrower areas of the chamber.  I also utilize an older, vintage Kleen Reem Pipe Tool which can close and expand the cutting blades orientation.  It works well in the Dublin chamber! After cleaning the cake buildup, I wipe the chamber with a cotton pad wetted with isopropyl 95% to clear the carbon dust and examine the chamber.  The chamber is healthy regarding heating and burning issues, but I detect what I was mindful of earlier – what I call a ‘reaming ridge’.  Overzealous reaming when the chamber narrows to a tighter angle than the reaming blade can pass results in the blades cutting into the chamber wall above the floor of the chamber. Moving on to the cleaning of the external surface, undiluted Murphy’s Oil Soap is used with a cotton pad to scrub the smooth briar surface.  I’m interested to see how the Oxblood spots fair in the cleaning. A brass bristled brush is also employed to clean the rim as well as my Winchester pocketknife to scrape some hard gunk carefully off the rim. Next, the stummel is transferred to the kitchen sink where the cleaning commences on the internals.  Using shank brushes and anti-oil liquid dishwashing soap with warm water, I work on the internals of the pipe, scrubbing the mortise.  After a thorough rinsing, the pipe is back on the worktable.After the cleaning, the Oxblood stained spots are as firm as ever hanging on while the rest of the briar surface is cleaning nicely.  I’ll need to address these spots. I continue with the internal cleaning regimen using cotton buds and pipe cleaners wetted with isopropyl 95%. I also utilize a small dental spoon to scrape the internal walls and excavate old tars and oils.  This helps a great deal.  After some time, the buds and pipe cleaners begin to emerge lighter.  I stop cleaning now to continue at the end of the workday with a kosher salt and alcohol soak to continue to clean and freshen the internal briar.I take another look at the Oxblood stains on the stummel.  I first try rubbing alcohol on the spots, but this does not phase them. Next, using a cotton pad, acetone is applied to the stains and some color was raised on the cotton pad.  In the end, I decide to put the stummel in a soak with acetone to break down the old dye. With the stummel soaking, I return to the stem.  The lower bit has a small bite compression which I address using the heating method.  I use a Bic lighter to paint the lower bit and as the vulcanite heats, the compression expands to regain its original condition, or closer to it.  This compression responds well as the comparison of the pictures shows.  Sanding should easily dispatch the compression.Next, using a flat needle file, the button lips on the upper and lower sides are refreshed.  With 240 grade paper, the bit is sanded and the remaining compressions are dispatched.Using 240 grade paper, sanding is expanded over the entire stem to address latent oxidation.  Not shown is the plastic disk I use to sand against to prevent shouldering the stem facing.Next, 600 grade paper is used to wet sand the stem followed by applying 000 grade steel wool.  Throughout the sanding I’m mindful of the Pipstar stem stamping.Moving now to apply the full regimen of micromesh pads, using pads 1500 to 2400, I wet sand followed by dry sanding with pads 3200 to 4000 and 6000 to 12000.  Between each set of 3 pads Obsidian Oil is applied to further condition and to prevent the development of oxidation.  The stem pops! The stummel has been soaking in an acetone bath for a few hours.  After fishing the stummel out of the acetone, steel wool helps in removing the Oxblood stain spots that lingered.  It continued to need quite a bit of sanding from the steel wool but in the end, the stummel is now clean, natural briar.  Due to this soak, there is no need to further soak the stummel with alcohol and kosher salt. To clean the stummel of the minor nicks and dents that comes through normal wear, and to freshen the surface, sanding sponges are used starting with the coarser sponge and graduating to the finer sponges.  In total, 4 sponges are applied in sanding the briar surface.  The pictures show the results after 4 sponges.  The grain has started to make a nice appearance! Continuing with the external briar sanding and polishing, the full regimen of micromesh pads is applied.  Beginning by wet sanding with pads 1500 to 2400, then dry sanding follows with pads 3200 to 4000 and 6000 to 12000. I reunite the St. Claude made Pipstar Standard Dublin stem and stummel to get a fresh look at the progress. It’s looking great!  I’m at the point in the process where a decision is needed regarding whether to apply a dye to the briar surface or to leave the natural briar hue that is emerging through the process.  The purpose of applying a dye, probably Light Brown, would be to bring more distinction to the dark grains and the lighter wood.  Yet, the natural grain is rocking by itself.  I decided to ask the expert – my wife.  Without hesitation she said that this pipe needed no dye to help it.  Decision made!Staying with the natural briar hue, next Mark Hoover’s (www.ibepen.com) Before & After Restoration Balm is applied.  This is an excellent product Mark has produced that teases out and deepens the natural hues of the briar.  Applying it now, I place a small amount on my fingers and word it into the briar.  At the start, it has a cream-like texture but thickens as it’s worked into the briar surface.  After applied, I set the stummel aside for 15 or so minutes while the Balm does its thing – the picture below is during this period.  I then use a microfiber cloth dedicated to wiping off the excess Balm (and I use the cloth to refresh other pipes with a quick buffing) and then buff the surface.  The results are as good as hoped!While the Restoration Balm was working on the stummel, the Pipstar stem also receives the treatment of Before & After Fine and Extra Fine Polishes.  Starting with the Fine Polish, I apply the black oily liquid to the stem and work it in well.  After some minutes, the excess polish is wiped off.  Following this, the same process with the Extra Fine Polish is done.  After some minutes, the excess is wiped off and the stem is buffed up with a microfiber cloth.  These polishes continue the removal of oxidation and conditions the stem according to Mark’s billing.Before moving on to apply compound and wax, the Pipstar stem stamping needs refreshing.  To do this, white acrylic paint is used.  I place a small amount of paint onto the stamping and then I dob it dry using a cotton pad.  Following this, the flat side of the toothpick is used to scrape the excess gently from the stem surface.  The stamping is left refreshed with new paint.  The star looks good! On the home stretch – after rejoining stem and stummel and mounting a cotton cloth buffing wheel on the Dremel set and 40% full power, Blue Diamond compound is applied to the pipe.  After completing this, the pipe is wiped/buffed with a felt cloth to clean it of compound dust in preparation for application of the wax.Next, another cotton cloth buffing wheel is mounted on the Dremel at the same speed.  A few coats of carnauba are then applied to stem and stummel.  After application of the wax, a microfiber cloth is used to give the pipe a rigorous hand buffing to raise the shine and to disperse any wax that was not distributed.Wow!  I’m pleased with the results!  The French Pipstar Standard’s grain is beautiful as it climbs the Dublin bowl and swirls here and there with bird’s eye and flame formations.  The original presentation of this pipe was with an Oxblood or reddish stain, but I believe the natural grain is much more appealing when the grain is as expressive as on this gently bent Dublin semi-Sitter.  The rounded rim and the rounded heel complement each other and the gentle slight bend of the oval stem create an extremely attractive ensemble.  This is the third of the 4 pipes that Nathan commissioned from the For “Pipe Dreamers” Only! online collection.  He will have the first opportunity to acquire the French Pipstar Standard in The Pipe Steward Store benefitting the Daughters of Bulgaria – women and girls who have been trafficked and sexually exploited.  Thanks for joining me!

New Life for a Comoy’s Second – A Town Hall Made in England 136 Billiard


Blog by Steve Laug

I am getting to the bottom of the current box of pipes for restoration. I think there were probably 40+ pipes in the box when I started. I am down to the last two. I took out an interesting older billiard that Jeff and I had picked up on our Oregon Coast Pipe Hunt. It was a well-shaped billiard that was absolutely filthy but there was something about it that ticked the boxes for me. The exterior of the bowl was coated with sticky oils and grime around the walls. The rim top was beat up pretty badly and there was a thick coat of lava and burn marks on the rim top and inner edge. There was a thick cake in the bowl. Between the lava and the cake overflowing the bowl it was hard to know what the inner edges looked like. The exterior edge was nicked and chipped with quite a bit of damage. The stem was oxidized and had tooth marks and chatter on both sides near the button. There was also a large hole in the underside of the stem – a large bite through that covered about half of the area ahead of the button. Jeff took photos of the pipe before he started his work on it. Jeff took some photos of the rim top from various angles to show the condition. You can see the thick lava on the top and the dust and debris as well as some damage on the rim. There is a thick cake in the bowl and lava on the inner edge. The next photos show the bowl sides and heel. The finish around the bowl was very worn and tired looking. There were spots of paint on the briar as well as quite a few fills on the heel and the front of the bowl. There was some amazing grain showing through the thick grime on the finish. The next photos capture the stamping around the shank and band. Jeff did not get a good photo of the shape number and worn stamp on the right side of the shank so I have not included that. The stamping read as noted above and they are faint but readable with a light and lens. The silver band is also stamped Sterling London.The stem was oxidized and calcified and the photos below show the tooth marks and chatter on the surface. The second photo shows the large bite through on the stem surface ahead of the button. This stem will need to be replaced.  I turned to Pipephil to try and figure out any information regarding the Town Hall brand. I was not familiar with and was hoping I would get some info (http://www.pipephil.eu/logos/en/logo-t7.html). I did indeed find out that it was a Comoy’s Second. The photo of the stamping looks like what I have. The stamp on the right side of the shank in the photo below is very faint on the pipe I am working on. I have included the screen capture of the section on the brand below. I then turned to the Pipedia article on Comoy’s pipes (https://pipedia.org/wiki/Comoy%27s). I read through the article until I came to the section entitles “Seconds made by Comoy’s”. I scrolled through the list of brands and the Town Hall was listed. (There is a typo in the name in the list as it runs the two words together.) I have emboldened and underlined the name in the list below.

Ace of spades, Ancestor, Astor, Ayres, Britannia, Carlyle, Charles Cross, Claridge, Coronet?, Cromwell, Dorchester, Dunbar, Drury Lane, Emerson, Everyman, Festival of Britain, Golden Arrow, Grand Master, Gresham, Guildhall, Hamilton (according to Who Made That Pipe), Kingsway, Lion’s Head, Lord Clive, Lumberman, Hyde Park, Lloyds, Mc Gahey, Moorgate, Newcastle, Oxford, O’Gorman, Rosebery Extra, Royal Falcon, Royal Guard, Royal Lane, Scotland Yard, St James, Sunrise, Super Sports, Sussex, The Academy Award, The Golden Arrow, The Mansion House, The Exmoor Pipe, Throgmorton, Tinder Box Royal Coachman, Townhall, Trident, Trocadero, Westminster, Wilshire

I knew that I was working on a Comoy’s Made pipe and once I read that I could see the classic Comoy’s Billiard shape and the shape number confirmed that. Armed with that information and a clearer picture of the original pipe I turned to work on the pipe on my work table. Jeff had done a great job cleaning up the pipe as usual. He reamed the pipe with a PipNet reamer and cut back the cake back to the bare briar. He cleaned up the walls with a Savinelli Fitsall Pipe Knife. He scrubbed the interior of the bowl and shank with pipe cleaners, cotton swabs and alcohol to remove the tars and oils. He scrubbed the exterior of the pipe with Murphy’s Oil Soap and a tooth brush to remove the grime from the finish. He worked on the rim top lava and darkening with the soap and tooth brush but it was in rough condition. He scrubbed the inside of the stem with alcohol and pipe cleaners. He scrubbed the exterior with Soft Scrub and then soaked it in Before & After Deoxidizer. He washed it off with warm water to remove the Deoxidizer. The pipe looked far better. I took photos of the pipe when I received it before I started working on it.  I took a photo of the rim top showing the damage to the rim top and the damage on the inner edge of the bowl. It was in rough condition. There was some darkening and nicks around the outer edge of the bowl and some burn areas on the inner edge. The stem was also in rough condition with a large bite through on the underside.I took a photo of the stamping on the shank. The stamping is clean and still readable.I decided to start with finding a new stem for the pipe. I took the stem off and looked for a replacement. I have so many pipes to work on that I am not bothering with filling in bite throughs at this point. I am leaving this to the master Paresh Deshpande to do! I found a suitable estate stem that was the right diameter and right tenon size. It is slightly shorter and a bit less tapered than the one that was on the bowl but it would work. I cleaned the airway in it with alcohol and pipe cleaners to get a good start on it then put it in place on the shank and took some pictures of the new stem. I decided to address the damage to the rim and the edges of the bowl – both outer and inner. I topped the bowl with a piece of 220 grit sandpaper. I sanded the inner and outer edges with a folded piece of 220 grit sandpaper to remove them and to remove the damages. Once it was finished it looked a lot better. There were a lot of fills around the sides and heel of the bowl. I checked them for soundness and filled in some of the more damaged ones with clear super glue. Once the repairs cured I sanded them with a piece of 220 grit sandpaper to smooth them and blend them into the surrounding briar.I polished the rim top and bowl with micromesh sanding pads – wet sanding with 1500-12000 grit pads and wiped the bowl down after each sanding pad. The fills were very obvious on this pipe and to me they were just ugly enough to bother me. I could have stained just the rim top to match but figured I would try to mask the fills a bit with a darker stain. I used what is labeled as a Light Brown stain to cover the bowl and rim. I applied the stain and then flamed it to set it in the grain of the bowl. It was dark but I think it will look good once I am finished. I let it sit for several hours then buffed it off with Red Tripoli on the buffing wheel to get a feel for what it looked like at this point. I wiped the bowl down with isopropyl alcohol to make the stain coat a little more transparent and show the grain on the bowl. I rubbed the briar down with Before & After Restoration Balm. I worked it into the briar with my fingertips. The product works to clean, enliven and preserve the briar. I let it sit for 10 minutes while I worked on the stem. After the time passed I buffed it with a cotton cloth to deepen the shine. The briar really comes alive with the balm. I set the bowl aside and turn to address the issues with the stem. The stem was in decent condition with no bite marks. It was dirty and oxidized as could be seen in the photos above. I sanded out the oxidation with 220 grit sandpaper and started polishing it with 400 grit wet dry sandpaper.I polished the stem with micromesh sanding pads – wet sanding it with 1500-12000 grit pads. I wiped it down after each pad with some Obsidian Oil to preserve the stem and to give some bite to the sanding. I finished the polishing with Before & After Pipe Polish – both Fine and Extra Fine polishes. I rubbed the stem down with the polishes and buffed it with a cotton pad. I gave it a final coat of Obsidian Oil. This Comoy’s made Town Hall 136 Billiard was one I was looking forward to seeing come together. The new light brown stain hides the fills nicely while still highlighting the grain around the bowl – sides, top and heel. The polished black vulcanite taper stem that I fit to the shank works very well with the look of the pipe. I put the stem back on the bowl and carefully buffed the pipe with Blue Diamond on the buffing wheel. I gave the bowl and stem multiple coats of carnauba wax on the buffing wheel and followed that by buffing the entire pipe with a clean buffing pad. I hand buffed the pipe with a microfiber cloth to deepen the shine. I polished the silver band with a jeweller’s cloth. The finished Billiard is quite nice and feels great in the hand. Give the finished pipe a look in the photos below. The dimensions of the pipe are Length: 5 ¾ inches, Height: 2 inches, Outside diameter of the bowl: 1 3/8 inches, Chamber diameter: ¾ of an inch. Thanks for walking through the restoration with me as I worked over another beautiful pipe. This pipe will be added to the British Pipe Makers section of the rebornpipes store soon. If you want to add it to your collection send me an email or a message! Thanks for your time.

Restoring a Second Linkman’s Dr. Grabow 9771 De Luxe Bruyere Acorn


Blog by Steve Laug

I am getting to the bottom of the current box of pipes for restoration. I think there were probably 40+ pipes in the box when I started. I am down to the last four. Two of them are Linkman’s Dr. Grabow pipes. The first Linkman’s I took out of the box and restored was a billiard. It is stamped Linkman’s Dr. Grabow on the left side of the shank and 9708 De Luxe on the right side of the shank (https://rebornpipes.com/2020/05/20/113190/). It was time to work on the second Linkman’s pipe – an Acorn shaped pipe. It was stamped the same way as the first on both sides of the shank – Linkman’s Dr. Grabow on the left and with a different shape number 9771 De Luxe Bruyere on the left side.  On the underside it bears a Patent Number 1896800. The pipe was dirty and there was some lava and burn marks on the inwardly beveled rim top and inner edge. There was a thick cake in the bowl. The exterior of the pipe was varnished and was scratched and wearing off. The stem was lightly oxidized and had tooth marks and chatter on both sides near the button. Jeff took photos of the pipe before he started his work on it. Jeff took some photos of the rim top from various angles to show the condition. You can see the thick lava on the top and the dust and debris. The varnish coat is crackling and will need to be removed. There is a thick cake in the bowl and lava on the inner edge. The varnish coat was crackling and scratched on the exterior of the bowl but there was great grain shining through. This would be a beautiful pipe once the varnish coat and grime was removed. The next photos capture the stamping around the sides of the shank. They read as noted above and they are clear and very readable. I forgot to note above that there was a worn silver chevron on the top side of the shank at the end. The topside of the stem had the propeller logo that was always associated with the Linkman brand. Jeff removed the stem from the shank and took a picture of the stinger apparatus. This time it is not missing and it is not removable but is an integral part of the tenon. Is it and earlier or a later edition of the pipe? Who knows! The stem was oxidized and calcified and the photos below show the tooth marks and chatter on the surface. They do not look deep but there a lot of them.   I have included the same information that I included in the previous restoration of the first Linkman’s Dr. Grabow for ease of reference.

I turned to Pipephil to pin down the dates of the pipe (http://www.pipephil.eu/logos/en/logo-l4.html). I have included the screen capture of the section on the brand below.The M. Linkman and Co. was established by Louis B. Linkman and August Fisher in 1898. The company closed down in the 1950s and the Dr Grabow branch was sold to Henry Leonard and Thomas Inc. Early Linkman’s pipes were stamped MLC in an oval.

I then did a patent search on the US Government Patent site using the patent number on the underside of the shank. I found the following Patent information. It specifically refers to the stinger apparatus that is attached to the tenon. It was filed in April 11, 1932 by L.B. Linkman. I am including the full patent information below. I knew that I was working on a pipe made after Feb. 7, 1933 when the patent was granted and prior to the early 1950s when the company was closed. Armed with that information and a clearer picture of the original pipe I turned to work on the pipe on my work table. Jeff had done a great job cleaning up the pipe as usual. He reamed the pipe with a PipNet reamer and cut back the cake back to the bare briar. He cleaned up the walls with a Savinelli Fitsall Pipe Knife. He scrubbed the interior of the bowl and shank with pipe cleaners, cotton swabs and alcohol to remove the tars and oils. He scrubbed the exterior of the pipe with Murphy’s Oil Soap and a tooth brush to remove the grime from the finish. He worked on the rim top lava and darkening with the soap and tooth brush. He scrubbed the inside of the stem with alcohol and pipe cleaners. He scrubbed the exterior with Soft Scrub and then soaked it in Before & After Deoxidizer. He washed it off with warm water to remove the Deoxidizer. The pipe looked far better. I took photos of the pipe when I received it before I started working on it.  I took a photo of the rim top showing the damage to the inward bevel on the rim and the damage on the inner edge of the bowl. There was some darkening and nicks around the out edge of the bowl and some burn areas on the inner edge. The stem looks very good – light tooth marks near the button.I took a photo of the stamping on the shank. The stamping is clean and still readable.I took the stem off and took a photo of the appearance of the pipe. It is missing the stinger. It is not cut off but it is a removable one. It is missing but the draught is much better without it.I decided to address the damage to the beveled rim and the edges of the bowl – both outer and inner. I sanded it with a folded piece of 220 grit sandpaper to remove them and to remove the damages. Once it was finished it looked a lot better.I polished the rim top and bowl with micromesh sanding pads – wet sanding with 1500-12000 grit pads and wiped the bowl down after each sanding pad. I rubbed the briar down with Before & After Restoration Balm. I worked it into the briar with my fingertips. The product works to clean, enliven and preserve the briar. I let it sit for 10 minutes while I worked on the stem. After the time passed I buffed it with a cotton cloth to deepen the shine. The briar really comes alive with the balm. I set the bowl aside and turn to address the issues with the stem. I filled in the deep tooth marks on each side of the stem just ahead of the button with clear super glue. Once the repairs cured I sanded them out with 220 grit sandpaper and started polishing it with 400 grit wet dry sandpaper. I polished the stem with micromesh sanding pads – wet sanding it with 1500-12000 grit pads. I wiped it down after each pad with some Obsidian Oil to preserve the stem and to give some bite to the sanding. I finished the polishing with Before & After Pipe Polish – both Fine and Extra Fine polishes. I rubbed the stem down with the polishes and buffed it with a cotton pad. I gave it a final coat of Obsidian Oil. This older Linkman’s Dr. Grabow 9771 De Luxe Bruyere straight Acorn is another interesting piece of pipe history. The mix of brown stains highlights the mix of nice grain around the bowl – sides, top and heel. With the varnish removed the finish on the pipe is in excellent condition and the contrasting stains work well with the polished black vulcanite saddle stem. I put the stem back on the bowl and carefully buffed the pipe with Blue Diamond on the buffing wheel using a light touch on the briar. I gave the bowl and stem multiple coats of carnauba wax on the buffing wheel and followed that by buffing the entire pipe with a clean buffing pad. I hand buffed the pipe with a microfiber cloth to deepen the shine. The finished Linkman’s Dr. Grabow De Luxe Bruyere Billiard is quite nice and feels great in the hand. Give the finished pipe a look in the photos below. The dimensions of the pipe are Length: 5 inches, Height: 1 ½ inches, Outside diameter of the bowl: 1 ¼ inches, Chamber diameter: ¾ of an inch. Thanks for walking through the restoration with me as I worked over another beautiful pipe. This pipe will be added to the American Pipe Makers section of the rebornpipes store soon. If you want to add it to your collection send me an email or a message! Thanks for your time.

Restoring a Linkman’s Dr. Grabow 9708 De Luxe Billiard


Blog by Steve Laug

I am getting to the bottom of the current box of pipes for restoration. I think there were probably 40+ pipes in the box when I started. I am down to the last four. Two of them are Linkman’s Dr. Grabow pipes. The first one I took out of the box was the billiard. It is stamped Linkman’s Dr. Grabow on the left side of the shank and 9708 De Luxe on the right side of the shank. On the underside it bears a Patent Number 1896800. The pipe was dirty and there was some lava on the inwardly beveled rim top and inner edge. There was a thick cake in the bowl. The exterior of the pipe was varnished and almost looked like it had been done over the grime on the briar as a sales ploy. The stem was slightly underturned but would be fine once cleaned up. It was lightly oxidized and had tooth marks and chatter on both sides near the button. Jeff took photos of the pipe before he started his work on it. Jeff took some photos of the rim top from various angles to show the condition. You can see the lava on the top and the dust and debris. The varnish coat is crackling and will need to be removed. There is a thick cake in the bowl and lava on the inner edge. The varnish coat was crackling on the exterior of the bowl but there was great grain shining through. This would be a beautiful pipe once the varnish coat and grime was removed. The next photos capture the stamping around the sides of the shank. They read as noted above and they are clear and very readable. I forgot to note above that there was a worn silver chevron on the top side of the shank at the end. The topside of the stem had the propeller logo that was always associated with the Linkman brand.The stem was lightly oxidized that the photos below show the tooth marks and chatter on the surface. They do not look deep but there a lot of them.I turned to Pipephil to pin down the dates of the pipe (http://www.pipephil.eu/logos/en/logo-l4.html). I have included the screen capture of the section on the brand below.The M. Linkman and Co. was established by Louis B. Linkman and August Fisher in 1898. The company closed down in the 1950s and the Dr Grabow branch was sold to Henry Leonard and Thomas Inc. Early Linkman’s pipes were stamped MLC in an oval.

I then did a patent search on the US Government Patent site using the patent number on the underside of the shank. I found the following Patent information. It specifically refers to the stinger apparatus that is attached to the tenon. It was filed in April 11, 1932 by L.B. Linkman. I am including the full patent information below. I knew that I was working on a pipe made after Feb. 7, 1933 when the patent was granted and prior to the early 1950s when the company was closed. Armed with that information and a clearer picture of the original pipe I turned to work on the pipe on my work table. Jeff had done a great job cleaning up the pipe as usual. He reamed the pipe with a PipNet reamer and cut back the cake back to the bare briar. He cleaned up the walls with a Savinelli Fitsall Pipe Knife. He scrubbed the interior of the bowl and shank with pipe cleaners, cotton swabs and alcohol to remove the tars and oils. He scrubbed the exterior of the pipe with Murphy’s Oil Soap and a tooth brush to remove the grime from the finish. He worked on the rim top lava and darkening with the soap and tooth brush. He scrubbed the inside of the stem with alcohol and pipe cleaners. He scrubbed the exterior with Soft Scrub and then soaked it in Before & After Deoxidizer. He washed it off with warm water to remove the Deoxidizer. The pipe looked far better. I took photos of the pipe when I received it before I started working on it.  I took a photo of the rim top showing the damage to the inward bevel on the rim and the damage on the inner edge of the bowl. There was some darkening and nicks around the out edge of the bowl and some burn areas on the inner edge.I took a photo of the stamping on the shank. The stamping is clean and still readable.I took the stem off and took a photo of the appearance of the pipe. It is missing the stinger. It is not cut off but it is a removable one. It is missing but the draught is much better without it.I decided to address the damage to the beveled rim and the edges of the bowl – both outer and inner. I sanded it with a folded piece of 220 grit sandpaper to remove them and to remove the damages. Once it was finished it looked a lot better.I polished the rim top and bowl with micromesh sanding pads – wet sanding with 1500-12000 grit pads and wiped the bowl down after each sanding pad. I rubbed the briar down with Before & After Restoration Balm. I worked it into the briar with my fingertips. The product works to clean, enliven and preserve the briar. I let it sit for 10 minutes while I worked on the stem. After the time passed I buffed it with a cotton cloth to deepen the shine. The briar really comes alive with the balm.  I set the bowl aside and turn to address the issues with the stem. I sanded out the tooth marks and chatter on the top and underside of the stem with 220 grit sandpaper and started polishing it with 400 grit wet dry sandpaper.I polished the stem with micromesh sanding pads – wet sanding it with 1500-12000 grit pads. I wiped it down after each pad with some Obsidian Oil to preserve the stem and to give some bite to the sanding. I finished the polishing with Before & After Pipe Polish – both Fine and Extra Fine polishes. I rubbed the stem down with the polishes and buffed it with a cotton pad. I gave it a final coat of Obsidian Oil. This older Linkman’s Dr. Grabow 9708 De Luxe straight Billiard is another interesting piece of pipe history. The mix of brown stains highlights the mix of nice grain around the bowl – sides, top and heel. With the varnish removed the finish on the pipe is in excellent condition and the contrasting stains work well with the polished black vulcanite saddle stem. I put the stem back on the bowl and carefully buffed the pipe with Blue Diamond on the buffing wheel using a light touch on the briar. I gave the bowl and stem multiple coats of carnauba wax on the buffing wheel and followed that by buffing the entire pipe with a clean buffing pad. I hand buffed the pipe with a microfiber cloth to deepen the shine. The finished Linkman’s Dr. Grabow De Luxe Billiard is quite nice and feels great in the hand. Give the finished pipe a look in the photos below. The dimensions of the pipe are Length: 5 ½ inches, Height: 1 ½ inches, Outside diameter of the bowl: 1 ¼ inches, Chamber diameter: ¾ of an inch. Thanks for walking through the restoration with me as I worked over another beautiful pipe. This pipe will be added to the American Pipe Makers section of the rebornpipes store soon. If you want to add it to your collection send me an email or a message! Thanks for your time.


A Savinelli Sherwood Rock Briar 608 Bent Billiard


Blog by Steve Laug

The next pipe on the table came to us from one of Jeff’s pipe hunts. It is an interestingly rusticated Bent Billiard with darkening around the rim edge and top. It is stamped with Sherwood over Rock Briar on the heel of the bowl followed by the Savinelli “S” shield and the shape number 608 over Italy on the shank. The stamping is clear and readable. The pipe has a combination of brown stains and the worm trail rustication is not only tactile but also a purposeful pattern to the finish. The finish was very dirty with grime ground into the bowl. The bowl had a thick but even cake in the bowl and a heavy lava overflow on the inner edge of the top toward the back of the bowl. There was darkening on the briar around the inner edge and the top of the rim. The saddle stem was oxidized and there were tooth marks and chatter on both sides and on the top and bottom edges of the button. There is no stamping on the stem. Jeff took photos of the pipe before he cleaned it up. Jeff took photos of the rim top to show the thick cake in the bowl and the lava overflow on the inner edge of the beveled rim.  Jeff took some photos of the bowl sides and heel to show the “worm trail” rustication around the bowl and the great looking grain as well. It is actually a nice looking pipe.  The stamping on the underside of the shank is shown in the photos below. They look very good and readable.The stem was a very good fit to the shank. It was oxidized, calcified and had debris stuck to the surface of the vulcanite. It also shows the tooth marks on the stem and on the button surface.  I am including the section from the previous blog I did o the Sherwood Rock Briar pipe that I restored. I quote:

I turned to Pipephil (http://www.pipephil.eu/logos/en/logo-savinelli3.html) to read about the Sherwood Rock Briar. It is a smooth pipe with the worm trail carving around the bowl. Sometimes I wonder if it was not Savinelli’s answer to the Custombilt Craze or what Lorenzo was selling that was similar. This is definitely tamer! I have included the screen capture from the site below. Armed with that information and a clearer picture of the original pipe I turned to work on the pipe on my work table. Jeff had done a great job cleaning up the pipe as usual. He reamed the pipe with a PipNet reamer and cut back the cake back to the bare briar. He cleaned up the walls with a Savinelli Fitsall Pipe Knife. He scrubbed the interior of the bowl and shank with pipe cleaners, cotton swabs and alcohol to remove the tars and oils. He scrubbed the exterior of the pipe with Murphy’s Oil Soap and a tooth brush to remove the grime from the finish. He worked on the rim top lava and darkening with the soap and tooth brush. He scrubbed the inside of the stem with alcohol and pipe cleaners. He scrubbed the exterior with Soft Scrub and then soaked it in Before & After Deoxidizer. He washed it off with warm water to remove the Deoxidizer. The pipe looked far better. I took photos of the pipe when I received it before I started working on it. I took photos of the bowl and rim top as well as the stem to show how clean they were. You can see the darkening on the inner edge and the top on the right front the bowl. The stem looks clean of oxidation and the tooth marks and chatter are very clear in the photos.    I took a photo of the pipe with the stem removed to show the overall look of stem, tenon and profile of the pipe. There was a crimped aluminum tube in the tenon once the stem was off and it inhibited airflow and was really unnecessary.I decided to start my work on the pipe by addressing the darkening on the rim top and the inner edge. I used a folded piece of 220 grit sandpaper to work on the edge and the rim top at the front of the bowl to remove the darkening. It took a bit of work but I was able to remove the majority of it and the end product looked much better.I polished the bowl and rim with micromesh sanding pads – wet sanding with 1500-12000 grit pads. I worked over the rim top and edge of the bowl with the pads. I wiped the bowl down with a damp cloth after each pad to remove the sanding debris.   Because the bowl and rim top looked so good I decided to move on to rubbing the briar down with Before & After Restoration Balm. I worked it into the briar with my fingertips and a horse hair shoe brush to get it into the crevices. The product works to clean, enliven and preserve the briar. I let it sit for 10 minutes while I worked on the stem. After the time passed I buffed it with a cotton cloth to deepen the shine. The briar really comes alive with the balm. I set the bowl aside and turned my attention to the stem. I decided to pull the crimped tube in the tenon so I heated it with a lighter and twisted it free. Behind and under the aluminum tube there was a lot of tars and oils so I recleaned the inside of the stem with pipe cleaners and alcohol.   I worked over the oxidation on the stem and the button with 220 grit sandpaper and sanded it until I had removed it. I started polishing the stem with 400 grit wet dry sandpaper. At this point it is starting to look much better.   I rubbed the stem down with Denicare Mouthpiece Polish – a red, gritty Tripoli like substance that is a paste. I rubbed it into the surface of the stem and polished it off with a cotton pad. I have found that is a great intermediary step before polishing with micromesh pads. I am not sure what I will use once the final tin I have is gone!   I polished the vulcanite with micromesh sanding pads – 1500-12000 grit pads. I wiped it down with Obsidian Oil after each sanding pad. I used Before & After Pipe Polish – both Fine and Extra Fine to further polish the stem.   This Savinelli Sherwood Rock Briar 608 Bent Billiard is another interesting looking pipe. The mix of brown stains highlights the smooth briar between the rusticated patterns around the bowl sides, top and bottom. The finish on the pipe is in excellent condition and the contrasting stains work well with the polished black vulcanite saddle stem. I put the stem back on the bowl and carefully buffed the pipe with Blue Diamond on the buffing wheel using a light touch on the briar. I gave the bowl and stem multiple coats of carnauba wax on the buffing wheel and followed that by buffing the entire pipe with a clean buffing pad. I hand buffed the pipe with a microfiber cloth to deepen the shine. The finished Sherwood Rock Briar 608 Bent Billiard is quite nice and feels great in the hand. Give the finished pipe a look in the photos below. The dimensions of the pipe are Length: 5 ½ inches, Height: 2 inches, Outside diameter of the bowl: 1 ¼ inches, Chamber diameter: ¾ of an inch. Thanks for walking through the restoration with me as I worked over another beautiful pipe. This pipe will be added to the Italian Pipe Makers section of the rebornpipes store soon. If you want to add it to your collection send me an email or a message! Thanks for your time.

Recommissioning a Smart Savinelli Dry System 3621 Bent Dublin


Blog by Dal Stanton

This is the second of 4 pipes that pipe man Nathan, from St. Louis, has commissioned from the online ‘Help Me!’ baskets that I call ‘For “Pipe Dreamers” Only!’ – a collection of pipes waiting to be commissioned by pipe men and women which benefit the Daughters of Bulgaria – women and girls who have been trafficked and sexually exploited.  I acquired this Savinelli Dry System along with almost a twin brother from a seller in Poughkeepsie, New York.  What attracted me initially to the pair was the ‘Peterson-like’ description – ‘Dry System’.  I also liked the tight 3/4 bend and the ‘Dublin-esque’ conical bowls – a tight configuration that got my attention immediately.  They almost seemed identical, but one had the shape number 3621, the one on my worktable now, and the other had 362.  When I unpacked them here in Bulgaria and took a closer look, I could see the differences.  Both have identical shapes but the 362 was a lighter rusticated finish with a smooth rim.  The 3621, Nathan’s choice, is a darker blasted finish with a blasted rim.  These pictures show the before & after comparison of the results of my first restoration, the Savinelli Dry System 362, which is now under the watchful care of a steward in Jackson, Mississippi.  It turned out great!Nathan commissioned 4 pipes after seeing some of my other restorations posted on various pipe Facebook groups.  I appreciate the opportunity to work on this next pipe that got Nathan’s attention, the Savinelli Dry System 3621. The smooth underside panel holds the nomenclature.  To the left is stamped arched, SAVINELLI [over] DRY [over] SYSTEM (reversed arch) forming a unified oval stamping.  The Savinelli crown ‘S’ logo is to the right of this.  Then on the far right of the logo is 3621 [over] ITALY.  The nickel shank cap is stamped on the left side with ‘SAVINELLI’ along with ‘S’ on the topside of the military stem. In my previous research, I found nothing about the Dry System on Pipedia but Pipephil.eu helped with some useful information – especially about the shape number differences.  Looking at the Savinelli shapes chart on Pipedia’s Savinelli article, shapes 362 or 3621 were not among those listed.  Pipephil.eu provided this on the Savinelli Dry System with the information that the Dry System could be stamped with either 3 or 4 digits for the shape number:I find interesting that the panel above also references a link comparing Savinelli’s Dry System P-Lip stem with the Peterson standard. Repeating my previous research: I found the most information about the Savinelli Dry System on another site as I broadened my online search.  A South African based tobacconist, Wesley’s  (See LINK), provided a gold mine of information about the Savinelli Dry System:

Launched in 1981, it had taken several years of research into the negative points of existing system pipes, in order to improve on them. Perseverance paid off – by combining trap and filter, and enlarging the smoke hole, Savinelli achieved the “Dry System”, which in our opinion is the best answer to “Wet Smoking” so far developed.

Especially for new pipe smokers, the Savinelli Dry System pipe incorporates everything needed to provide a cool, dry smoke.

The name “Dry” comes from the introduction of the Balsa “filter” into the traditional system pipe – the “System” being the presence of the built-in moisture trap in the shank, linked with the “smokehole on the top” mouthpiece. The balsa mops up the moisture in the smoke hence the term “Dry” system, and if the pipe is smoked without the balsa all that will happen is that this moisture will condense and collect in the trap. It can then either be mopped up with a folded pipe cleaner or flicked out. Just be careful where you flick it!

Put this all together and you can see why we say these are technically our best designed pipes. But the technical qualities are not all these pipes have to offer. Extra bonuses are the feel, the finishes and the balance.

This information marks the genesis of the Savinelli Dry System line in 1981. Added to this information, Wesley’s included the following benefits of the Savinelli system with a helpful cut-away showing the internals:The description of the ‘smokehole’ of the mouthpiece, is interesting in the way it disperses the smoke so that it avoids tongue burn as well as keeping moisture entering the stem from the mouth. The trademark filtering system is also optional – use of the balsa insert which I use with great satisfaction with some of my own Savinelli pipes.  Yet, even if you do not utilize the absorbing qualities of the balsa insert, the built-in moisture trap will hold the moisture for clean-up after smoking.  Sounds good!

Wesley’s Tobacconist also included this helpful Shapes Chart for the Savinelli Dry System pipes. The description for the 3621 suggests:

Regular shapes 3613 & 3621 are ideal for the new pipe smoker or for a short smoke for anybody.

Looking now at the 3621 now on my worktable, the chamber shows thick cake that will be removed to recover fresh briar and to inspect the condition of the chamber walls. The blasted rim and stummel have grime and in need of cleaning.  The blasted briar landscape is attractive, and I look forward to what cleaning will reveal.  The nickel shank cap is in ok shape but needs cleaning and polishing. There are evidences of the nickel plated surface around the facing having come off revealing the base metal beneath.  The stem has deep oxidation and will take some work to clean it out.   The P-Lip, which is much easier to clean than Peterson’s version, has some compressions and chatter and needs sanding out.

To begin the recommissioning of this Savinelli Dry System 3621, the military stem’s airway is cleaned using pipe cleaners and a cotton bud dipped in isopropyl 95%. As I said above, this P-Lip system is much friendlier than Peterson’s!  The cotton bud reaches up into the balsa wood filter cavity to clean.  The pipe cleaner works through the airway and P-Lip ‘smokehole’.To get a head start on the deep oxidation, a ‘Soft-Scrub’ like product available here in Bulgaria is used with 000 grade steel wool.  I’m hoping to break up the oxidation to enable the Before & After Deoxidizer to be more productive.Next, the Savinelli stem joins other stems in the Before & After Deoxidizer soak.  I leave it in the soak for several hours, but it seems that more hours does not translate into more effectiveness.After removing the stem from the Deoxidizer, the liquid is drained back into the vat and I help by squeegeeing with my fingers.  Pipe cleaners and cotton buds wetted with isopropyl 95% are used to clear the liquid from the airway and filter cavity. Cotton pads wetted with alcohol also wipe the surface to remove raised oxidation.To help with conditioning the vulcanite stem, paraffin oil is applied, and the stem is set aside to absorb the oil.Turning now to Dublin stummel, I first take a picture to show the starting point.  I remember my experience with the 3621’s brother – the conical chamber is angled severely toward the floor of the chamber. To avoid carving a reaming ‘shelf’ from using the regular reaming blade heads, I go directly to using the Savinelli Fitsall Tool which lives up to its billing.  My general rule of thumb in reaming to determine if you’ve removed all the carbon cake build up is, cake crunches as you’re using the tool, but wood surface is smooth.  After cleaning the carbon cake off the walls of the chamber, the chamber is sanded using 240 paper wrapped around a Sharpie Pen.After reaming is completed, an inspection of the chamber reveals healthy briar – no burning or heating problems.Next, using undiluted Murphy’s Oil Soap, a cotton pad goes to work on cleaning the blasted surface of the Savinelli Dublin stummel.  A bristled toothbrush assists in cleaning the blasted surface and the brass wired brush helps with lava flow on the blasted rim.Next, the stummel is transferred to the kitchen sink where internal cleaning is commenced using warm water with anti-oil dish liquid soap and shank brushes.  After scrubbing and rinsing thoroughly, the stummel comes back to the worktable.Next, internal cleaning is continued using pipe cleaners and buds wetted with isopropyl 95%.  The built-in moisture trap has done a good job of trapping the gunk in the trap.  It takes many buds and pipe cleaners wetted with isopropyl 95% to do the job.  Using a small dental spoon also helps by scraping the buildup on the internal walls allowing me to scoop out the old gunk left behind.  When the buds and pipe cleaners start emerging lighter, I call it a cease fire with the plan of continuing the cleaning at the end of my work day using a kosher salt and alcohol soak to further clean and refresh the internals for the new steward.Pausing now to examine the stummel after cleaning, I like the blasted finish.  The finish is thin, but a good foundation is present. On the rim, I’m interested to observe that the right side has more of a rough blasted surface, but the left side is smoother.  Looking at the picture above you can see the grain moving upwardly toward the rim.  What one would expect the rim to be showing as a result, would be the bird’s eye grain formations.  Hence, smoother roughness on the left side of the rim.  Also, on the rim, the Savinelli folks cut a ‘smart bevel’ on the internal rim edge.  My next step before sprucing up the stummel’s color is to refresh the bevel. To do this, I use a hard surface to back 240 sanding paper and recut the bevel. I follow the 240 paper with 600 grade paper.  The results are good!  This slight bevel which reveals some smoother briar will look great later in contrast to the rough, blasted rim surface. To refresh the stummel’s hue, I use Fiebing’s Dark Brown Leather Dye to provide an undercoat foundation.  The great thing about blasted surfaces, they are forgiving but later with some light sanding, the tips of the blasted briar landscape can give an attractive lighter contrasting that gives the surface depth and character.  I assemble the desktop staining module and after covering the nickel shank cap with masking tape, I heat the stummel with the hot air gun to help the briar surface to open and be more receptive to the dye. I then paint sections of the stummel with a folded pipe cleaner and flaming it as I go.  The lit candle ignites the alcohol in the aniline dye and after it combusts it leaves the pigment in the grain.I then put the newly stained stummel to the side for several hours allowing the new dye to set.With the stummel on the side, I turn to the military mount P-Lip Savinelli stem.  I take another closer look at the issues with the stem.  Both upper and lower bit have some tooth chatter, but it is minor.  It should sand out without difficulty. The bigger issue is the oxidation. The picture below tries to show the contrast between the inserted part of the stem that is black, without oxidation, and the rest of the exposed stem.  UV light is not good for vulcanite and the oxidation comes primarily because of this.To address the oxidation and the light tooth chatter, 240 grade paper is used to sand the upper- and lower-bit area.The sanding it expanded to address the oxidation throughout the stem.  To protect the Savinelli ‘S’ stem stamping, I cover it with masking tape.After the 240 grade paper, the entire stem is wet sanded with 600 grade paper and this is followed with 000 grade steel wool.Continuing with the stem, the full regimen of micromesh pads is applied.  Starting with pads 1500 to 2400, the stem is wet sanded.  Following this the stem is dry sanded with pads 3200 to 4000 and 6000 to 12000.  Obsidian Oil is applied between each set of 3 to condition the stem as well as protect it from oxidation. Turning now back to the stummel, the flamed dye has been resting for several hours and ready to be unwrapped.  To do this, a cotton cloth buffing wheel is mounted to the Dremel with the speed set at about 40% full power.  Tripoli compound is used to help clear the fire crusted dye revealing the blasted surface beneath.After using the cotton cloth buffing wheel, I transition to a felt buffing wheel again using Tripoli compound with the Dremel set to the slowest speed.  I lightly go over the rough blasted surface primarily to buff the peaks of the blasting with the coarser wheel to create flecking in the surface.  This gives the surface more contrast and depth.I then wipe the dyed surface with a cotton pad wetted with alcohol not so much to lighten the dye but to blend the hue and to dissolve any dye clumps that didn’t dissolve during the buffing process.I reattach the stem and mount another cotton cloth buffing wheel to the Dremel setting it at 40% full power.  I then apply Blue Diamond compound to the Savinelli blasted surface and to the stem.After completing the application of Blue Diamond compound, I look at the stummel more closely.  I’m getting the desired flecking affect in the blasted surface, but I’m not satisfied with the hue of the flecks.  The flecks appear more of a light brown rather than a darker, richer reddish bend. I decide to apply a dye wash of red aniline dye over the dark brown. After heating the stummel once again, I apply the red dye over the entire stummel surface with a folded pipe cleaner.  After applying the dye thoroughly, the stummel is set aside for a few hours for the overcoat red dye to set.After a few hours, I again use the Dremel and apply Blue Diamond compound with a cotton cloth buffing wheel.  I realize later that I didn’t picture this process.  I like the results of the overcoat red dye wash.  Next, to prevent the new dye coming off on the hands later when the pipe is put into surface, I warm the stummel with the hot air gun.  This emulates the heating up of the stummel when lit and this usually is when newly dyed briar leaches dye onto the hands. After heating the stummel, I give it a rigorous hand buffing using a cotton cloth to remove the raised dye. Before moving on to the waxing of the stem and stummel, I have a few mini projects to do.  The first is to clean and shine the nickel-plated shank cap.  I first use a tarnish remover which is applied to the nickel with a cotton pad. After the liquid is buffed on, I rinse the cap with tap water.  The tarnish remover does some good but leaves a lot to be desired.  The nickel cap is rough, and you can see some small patches of the nickel I referenced earlier have worn off.After the tarnish remover, I transition to using Blue Diamond compound on the nickel.  After mounting another cotton cloth buffing wheel onto the Dremel dedicated to nickel buffing and I methodically apply the compound to the metal working around the cap.  I like these results.  The nickel has cleaned and shined up very nicely.The second mini project is to color the Savinelli ‘S’ stamping on the stem.  Using white acrylic paint, I place a small amount of paint on the ‘S’ and then dob it dry with a cotton pad.Then I use the flat edge of a toothpick rubbing gently over the stamping removing the excess paint from the stem.  The ‘S’ is left with color and with definition.In the home stretch – another cotton cloth buffing wheel is mounted on the Dremel with the speed at 40% of full power.  Carnauba wax is then applied to both stem and stummel.  After a few coats of wax, the pipe is given and rigorous hand buffing to raise the shine and to disperse undissolved carnauba wax.Ugh – I thought I was finished but remembered that I was going to further clean and freshen the internals with a kosher salt and alcohol soak.  After twisting and stretching a cotton ball to form a wick, I use a wire to help guide the cotton wick down the airway into the mortise/trap and airway. The cotton wick serves to draw out the residual tars and oils during the soak process.  After inserting the wick, kosher salt is placed in the bowl.  Kosher salt has no aftertaste unlike iodized salt.  Using a large eye dropper, Isopropyl 95% fills the bowl until it surfaces over the salt.  After a few minutes, the alcohol is absorbed into the internal cavity and I top off the alcohol once again.  After several hours, the wick and salt do not appear to have been soiled at all.  I hope this means that the internals are clean.  After removing the expended salt from the bowl, paper towel is used to wipe the chamber and I blow through the mortise to make sure all the salt crystals have been removed.  I follow this by using one cotton bud and pipe cleaner to confirm that the internals are indeed clean.  I forgot to picture this!After reassembling the pipe and a quick hand buffing with a microfiber cloth, the recommissioning of this Savinelli Dry System 3621 is completed.  The tight Dublin bend presents a smart, compact look, with a genuinely nice flow from the bowl through the nickel shank cap that is carried through the military mount P-Lip stem.  The smooth briar contrasts are nice – the internal rim ring and the nomenclature panel.  Nathan commissioned this Savinelli Dry System 3621 and will have the first opportunity to acquire him in The Pipe Steward Store.  This pipe benefits the Daughters of Bulgaria – women and girls who have been trafficked and sexually exploited.  Thanks for joining me!