Blog by Paresh Deshpande
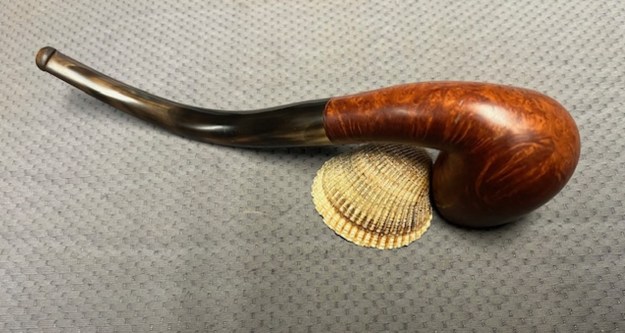
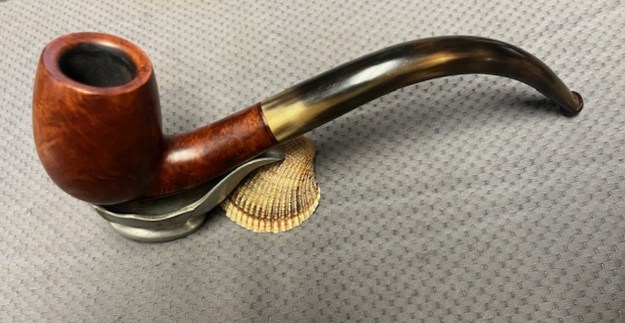
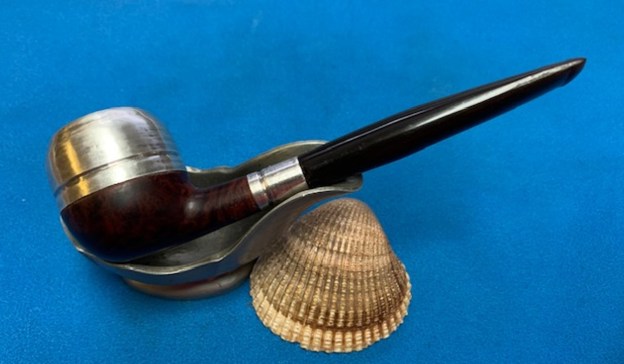
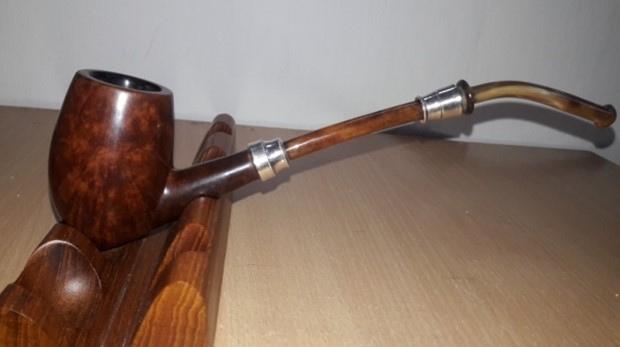
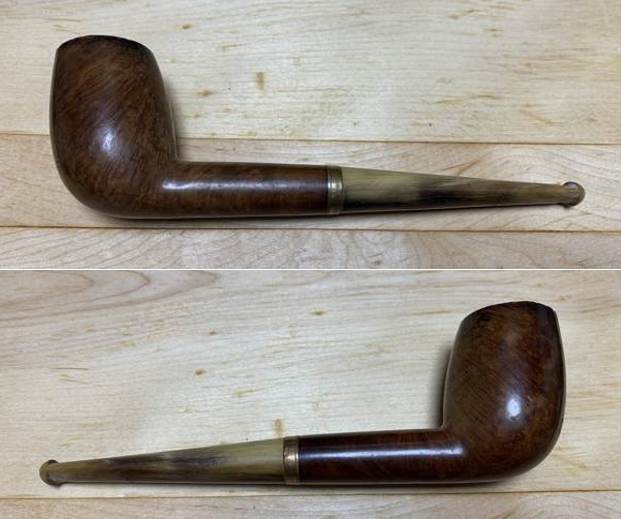
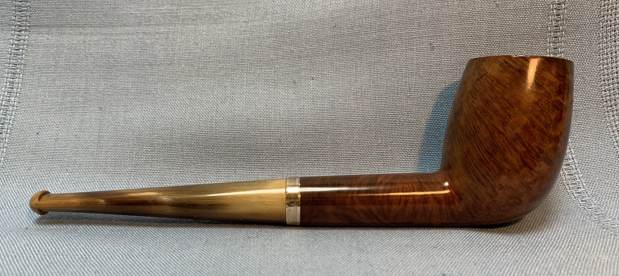
The next project that I selected to work on is a beautiful Horn shaped pipe with a horn stem and nickel ferrule. This pipe came to be in my possession as a part of 40 odd estate pipes that I had purchased from a French Seller a few years ago. Unfortunately, I had neither chronicled nor taken pictures of this lot when it reached us, as at that point in time I had no intention of passing these restored pipes in to the trust (as my Mentor Steve points out) of fellow Pipers.
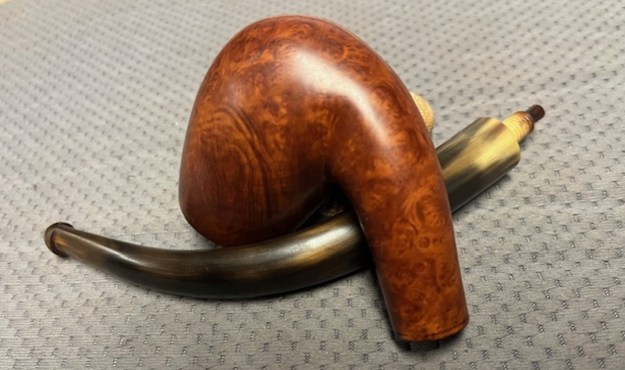
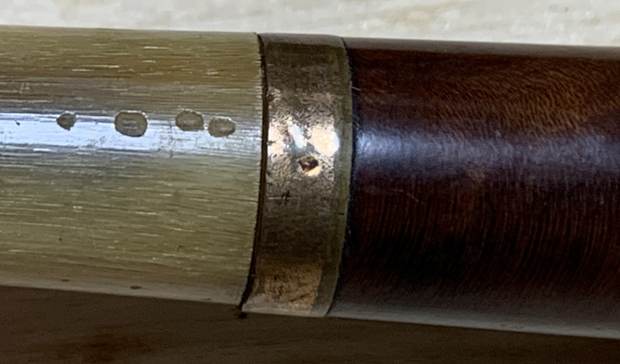
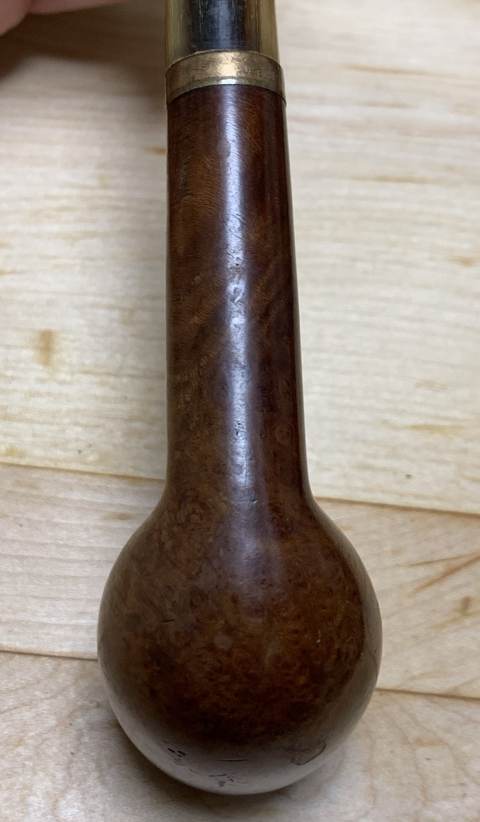
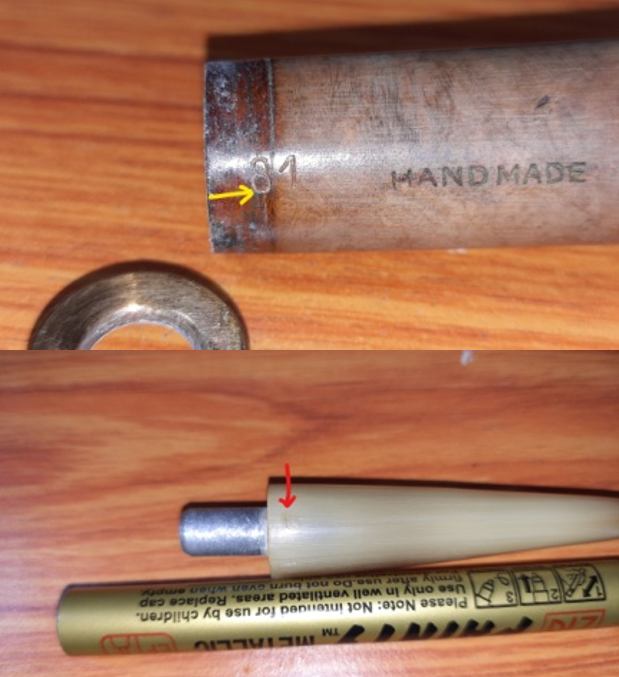
This beautiful elegantly shaped pipe on my work table has stunning cross grains and swirls over the sides and back of the stummel while the front and lower surface boasts of distinct bird’s eye grains. It is stamped as “BUTZ- CHOQUIN” over “A” over “METZ”. The nickel ferrule bears three faux hallmark stampings and a rhombus with two letters. All these markings on the ferrule are severely worn out and do not contribute in any which way in establishing the provenance of this pipe. I have previously worked on Butz- Choquin pipes with A METZ stamping and from what I recollect; this stamp was used when BC pipes were made out of the French town of A Metz, i.e. prior to 1950s. To refresh my memory, I visited the write up that I had posted on rebornpipes. Here is the link to the write up (https://rebornpipes.com/2020/10/19/restoring-an-early-butz-choquin-a-metz-no-2/).
I have reproduced some of the information from the write up and also arrive at an approximate date based on this information.
I searched pipedia.org to see if it contained the details that I sought. The site has very scant information about the brand with lots of pictures, but what is available makes it an interesting read and I quote;
“The pipe, from Metz to Saint-Claude. Jean-Baptiste Choquin of Metz started out as a tobacconist. This enterprise was prosperous; he had several employees. Among those, there was a certain Gustave Butz who was its first workman and who became his son-in-law by marrying Choquin’s daughter Marie in 1858.
In 1858 Jean-Baptiste Choquin created, in collaboration with Gustave Butz, the Choquin pipe. This bent pipe with a flat-bottomed bowl was finished with an albatross-bone mouthpiece, fixed with silver rings. (The above describes the CHOQUIN A METZ pipe I had worked on earlier dating it to 1858)
In 1858, still in Metz, Gustave Butz built an establishment for the manufacture of the Choquin pipe which took the name of Butz-Choquin. In 1951, the Berrod-Regad company bought the trademark, continuing manufacture until 2002. Departing from Metz, the workshop was relocated to Saint-Claude, then also called “the world capital of the briar pipe,” under the Berrod-Regad group. The Berrod-Regad group would go on to completely rebuild the network of representatives until finally entering the export market in 1960 and has since won several prizes, as well as the Gold Cup of French good taste.
In a few years, the brand’s collection increased from ten to seventy series. 135 years after it was founded, the pipe is still well-known not only in France but throughout the world. In 2002, the Berrod family, wishing to preserve manufacture of pipes in Saint-Claude, handed over the company to Fabien Guichon, a native of the area, who will continue to develop the brand during the 21st century.”
From the above reading, this pipe is pre-1951 when Berrod- Regad purchased the trademark and relocated the workshop to Saint- Claude. The stampings of A METZ is the proof pointing towards pre-1951, the birth town of Butz- Choquin pipes. Secondly, the horn stem with the round orifice points towards the early 1920s when vulcanite was the preferred choice of material for making stems. However, it is equally true that during World War II, since rubber was an essential war material and was difficult to obtain it for making stems, horns/ bone stem came in to favor again till the end of the Great War. Thus I think that this pipe is either from the period 1939 to 1945 (higher probability) or from between the era 1910 to 1920s.
Initial Visual Inspection
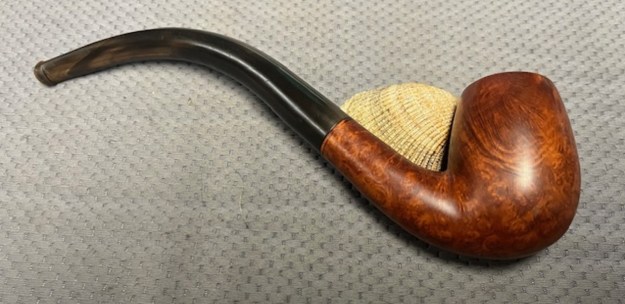
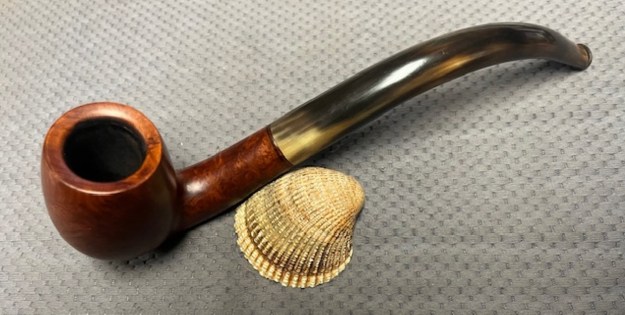
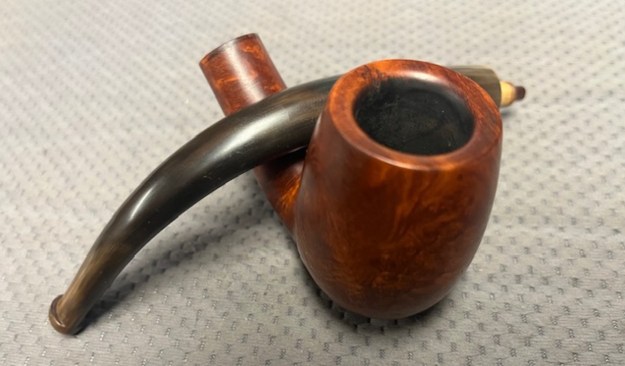
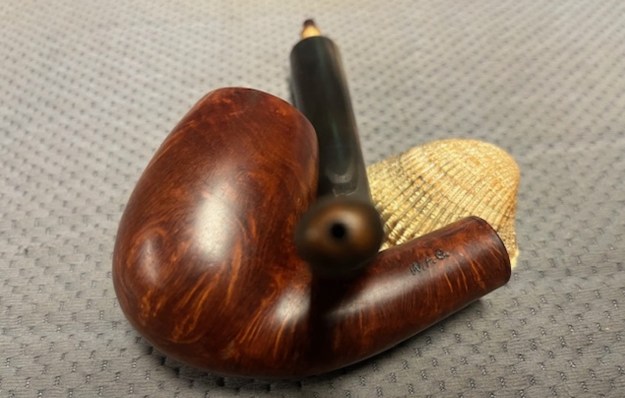
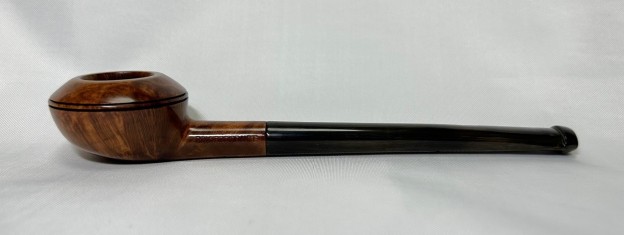
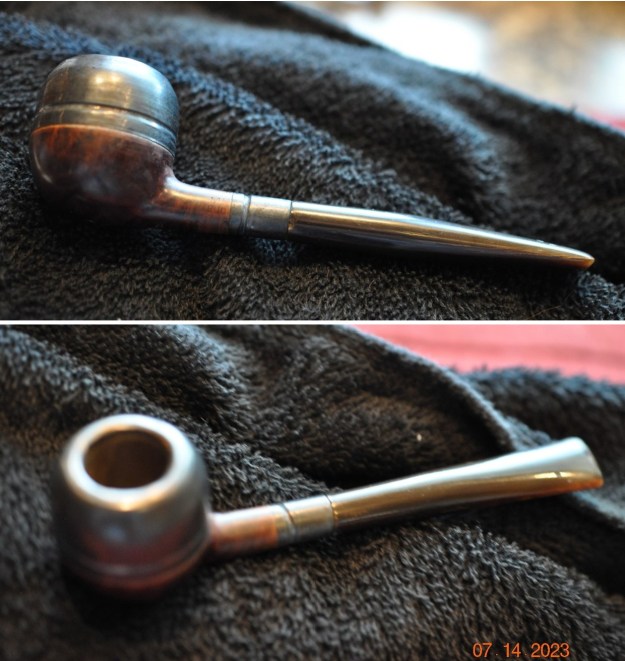
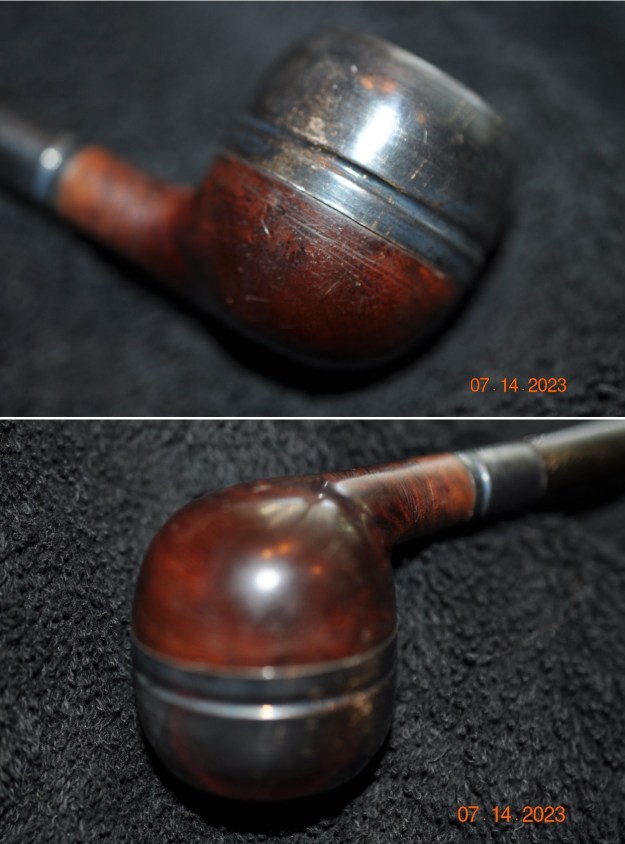
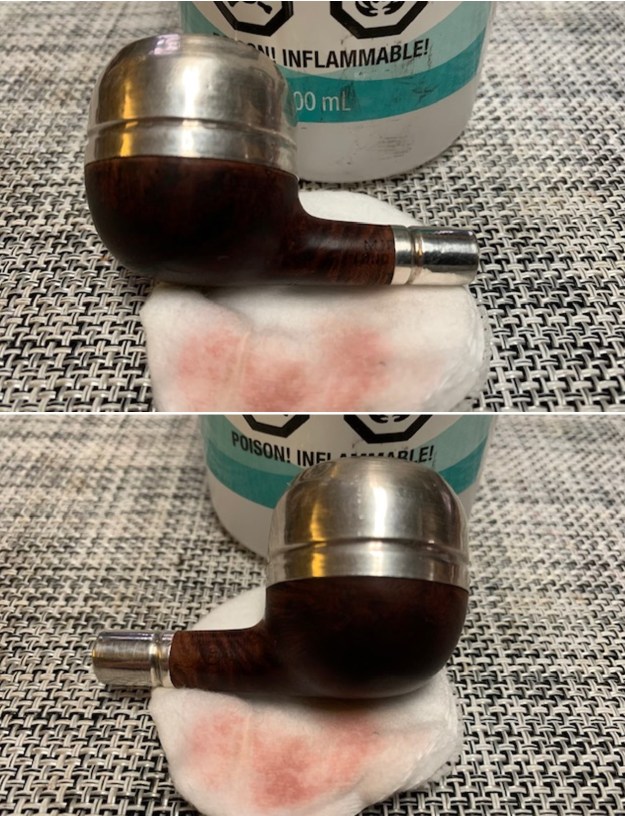
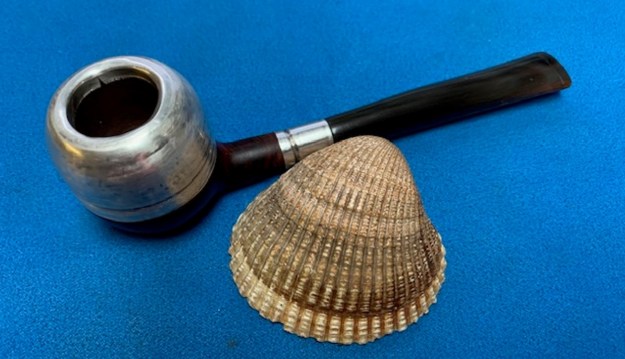
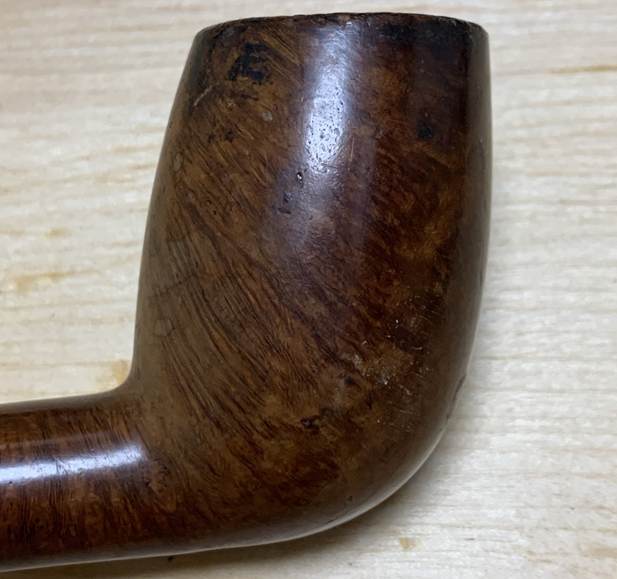
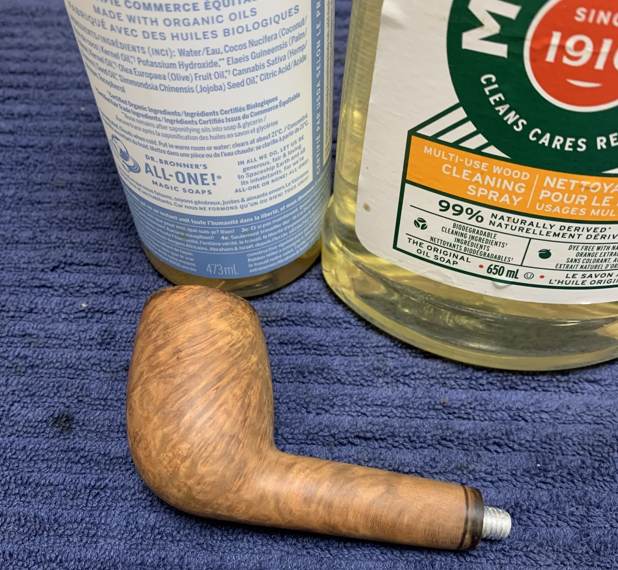
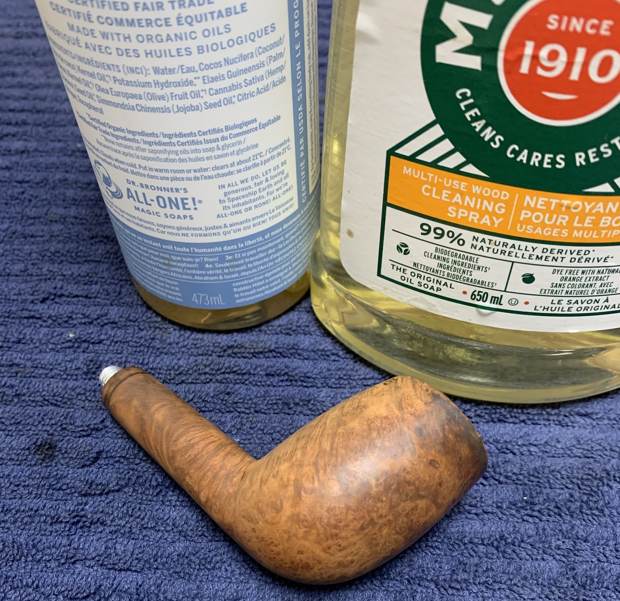
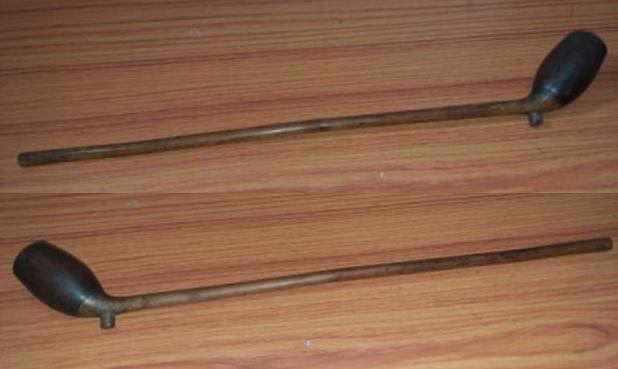
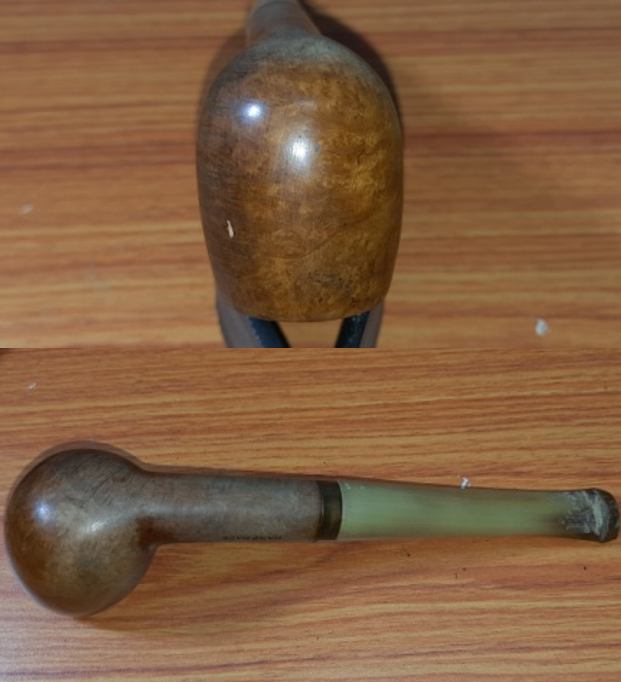
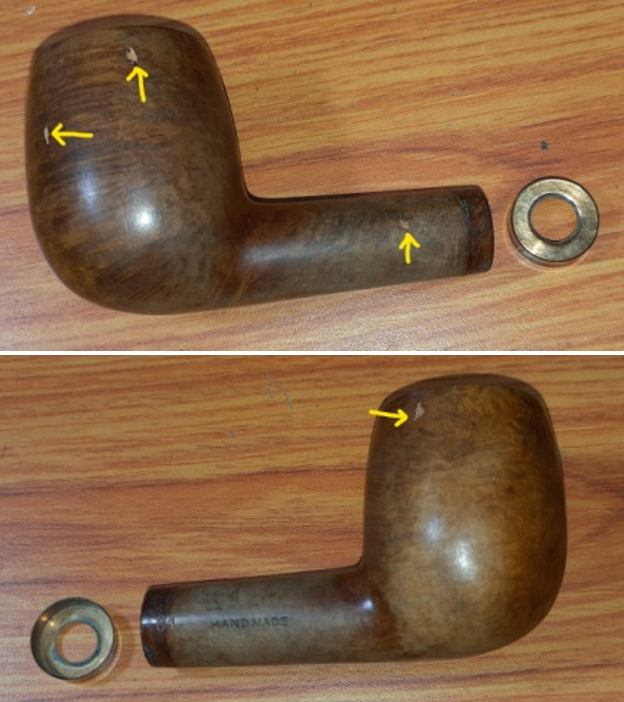
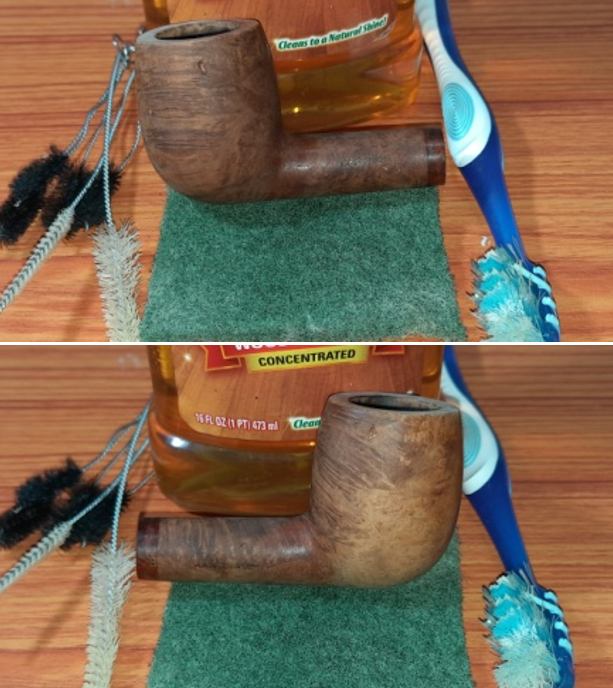
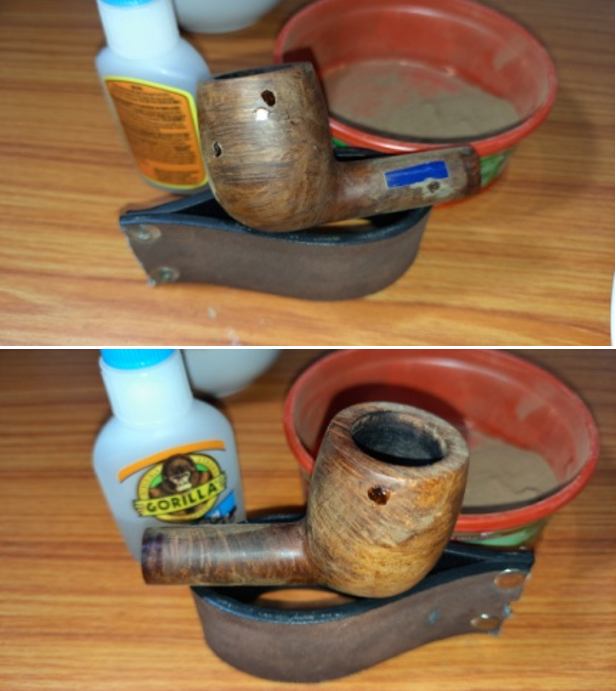
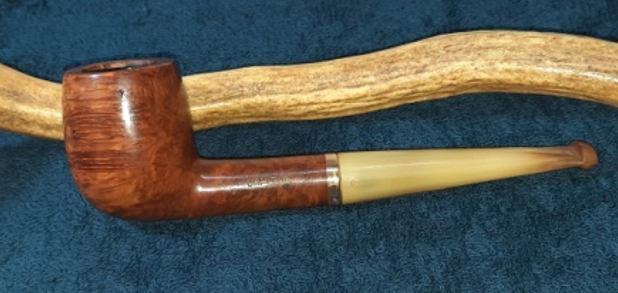
The pipe currently on my work table is an excellent example of quality craftsmanship using equally high quality briar wood. It appears that the carver followed the grains in the briar to decide on the shape and not the other way round. There is a thin layer of cake in the chamber with no overflowing lava over the rim top, in fact, the rim top is clean. The stummel surface is dull and lackluster and would benefit from a nice cleaning and polishing regime. The cross grains and the bird’s eye grains will come to the fore once the stummel is polished. The inner rim edge is beveled and is smooth and even. The outer rim edge is uneven with a couple of deeper dents and dings along the edge. The tapered horn stem has bite marks on both surfaces in the bite zone. The seating of the longish wood tenon in to the mortise is loose but otherwise in good condition. The nickel band is oxidized and sans any damage. Below are pictures of the pipe before I started my restoration work.

 Detailed Inspection
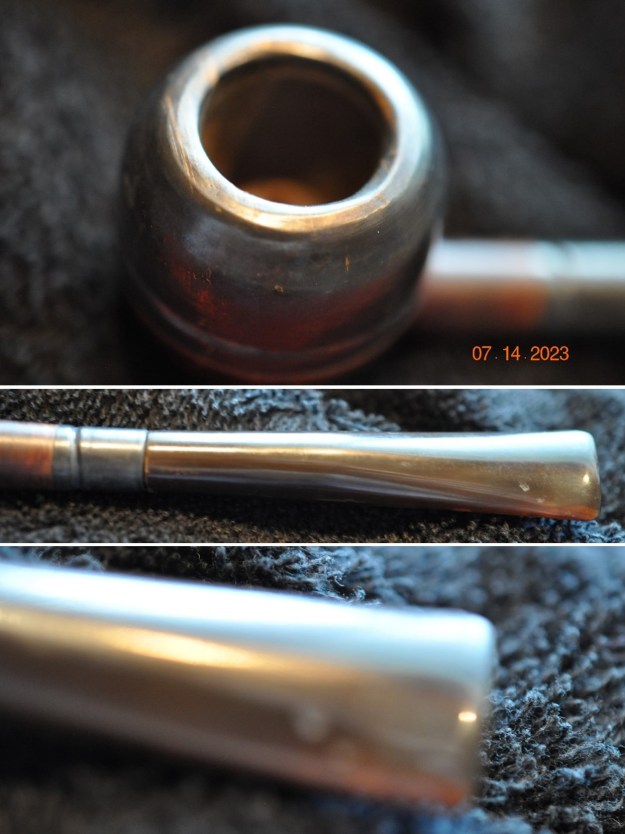
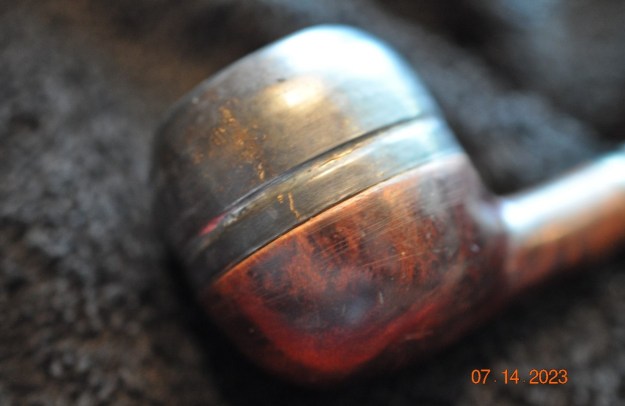
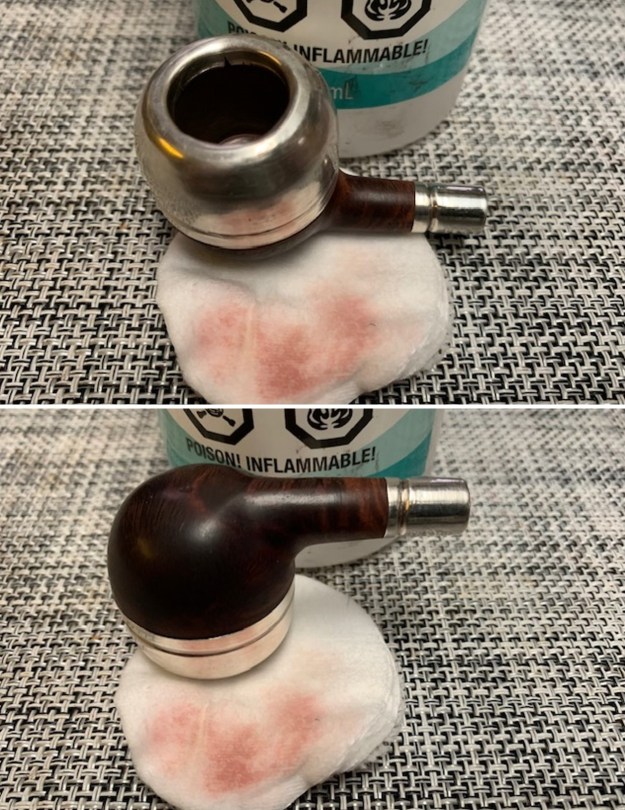
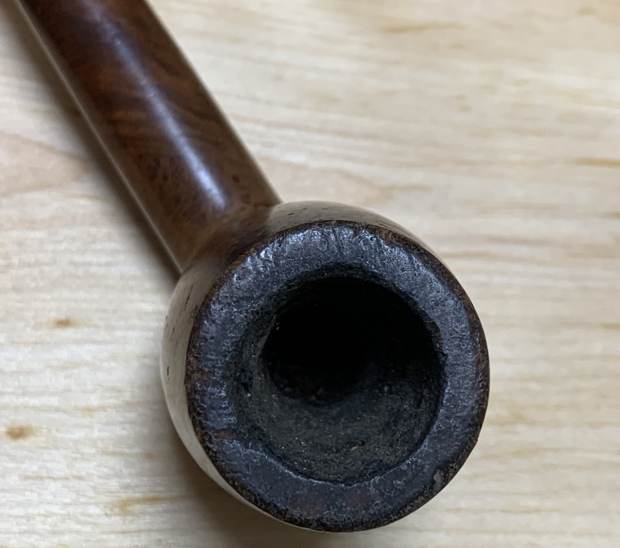
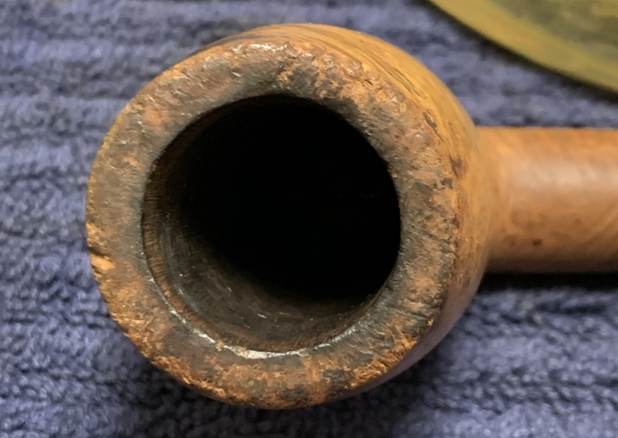
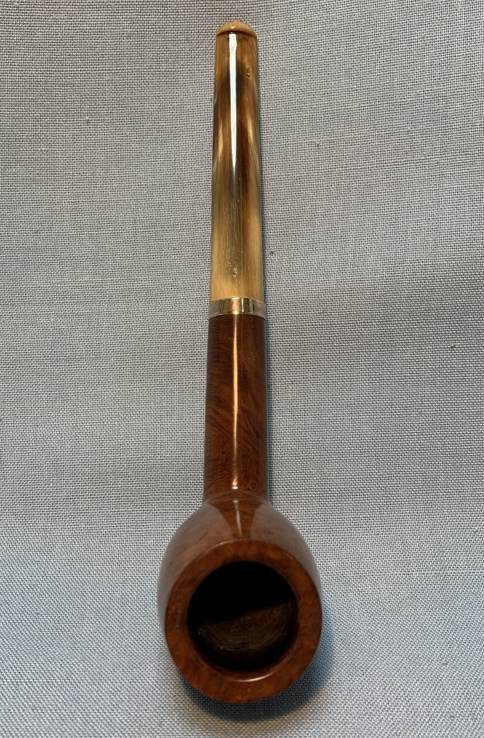
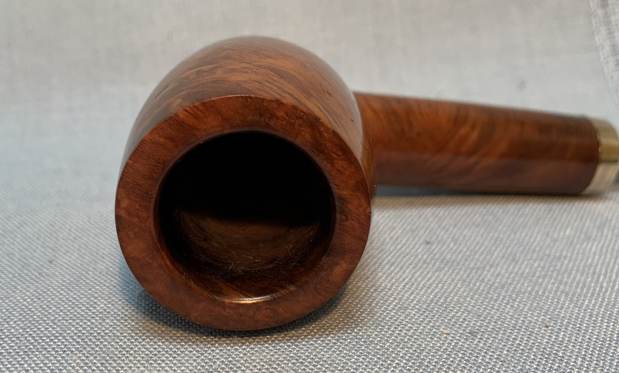
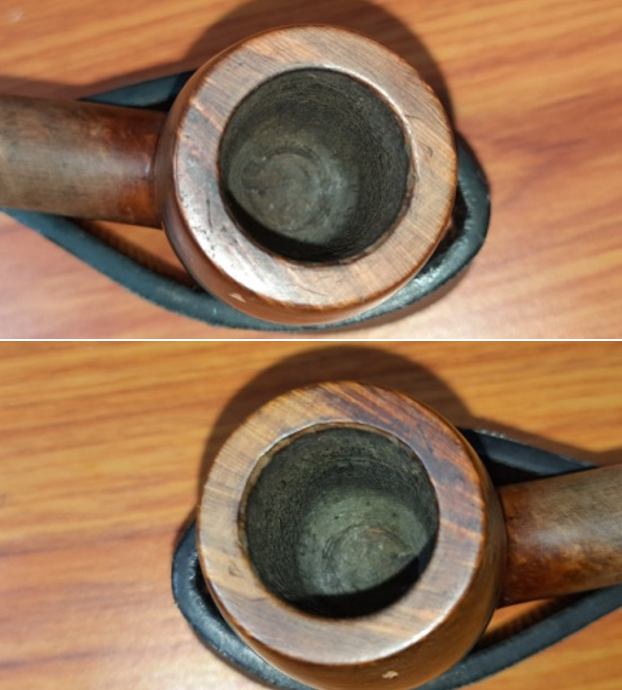
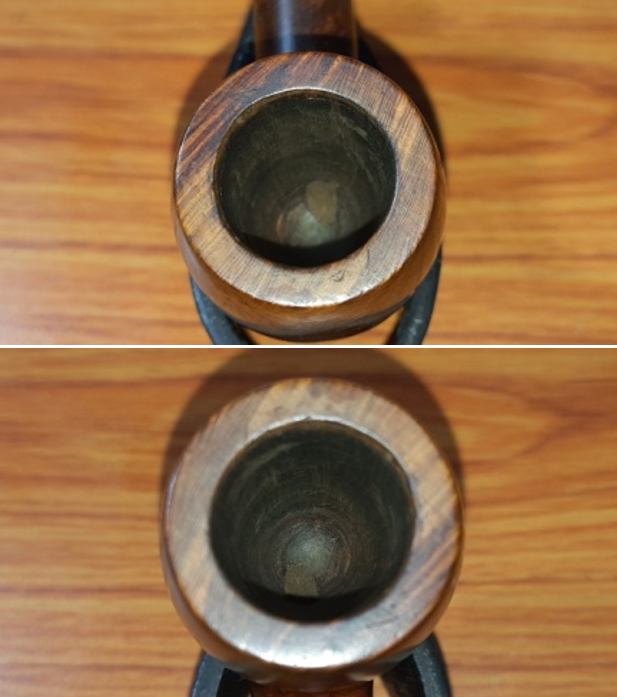
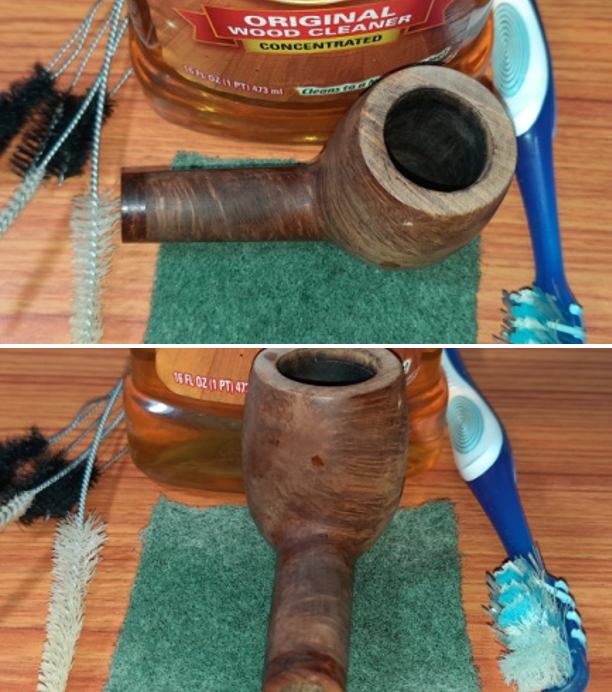
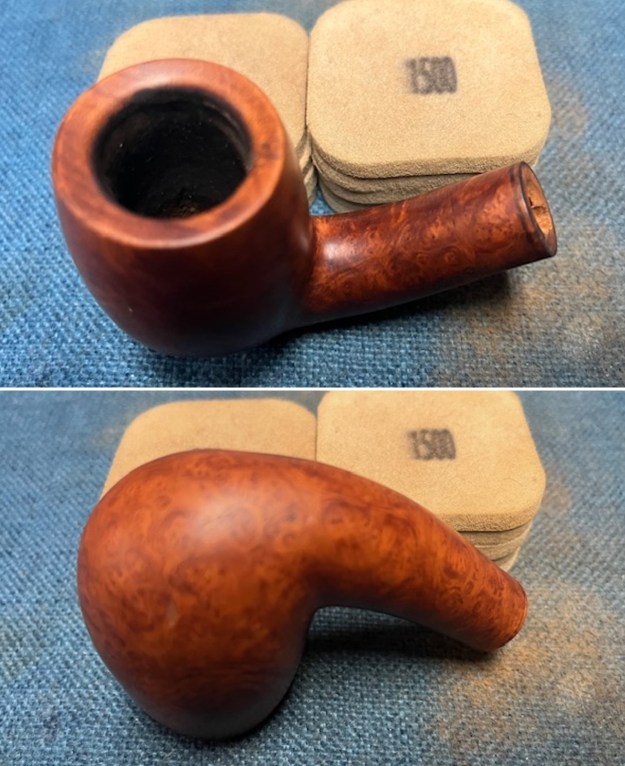
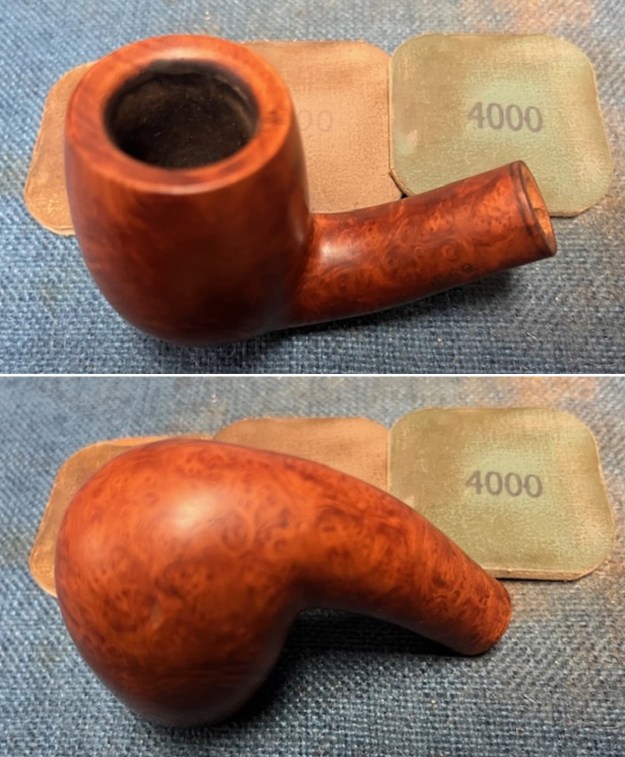
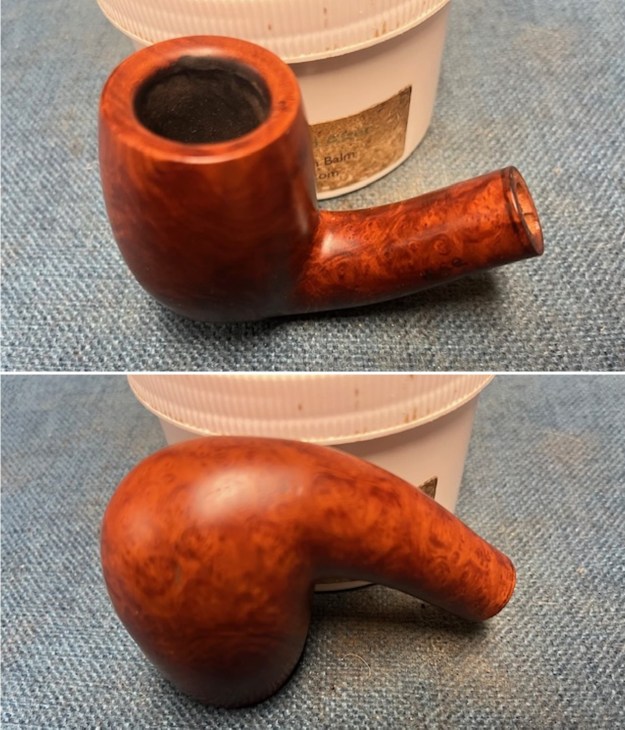
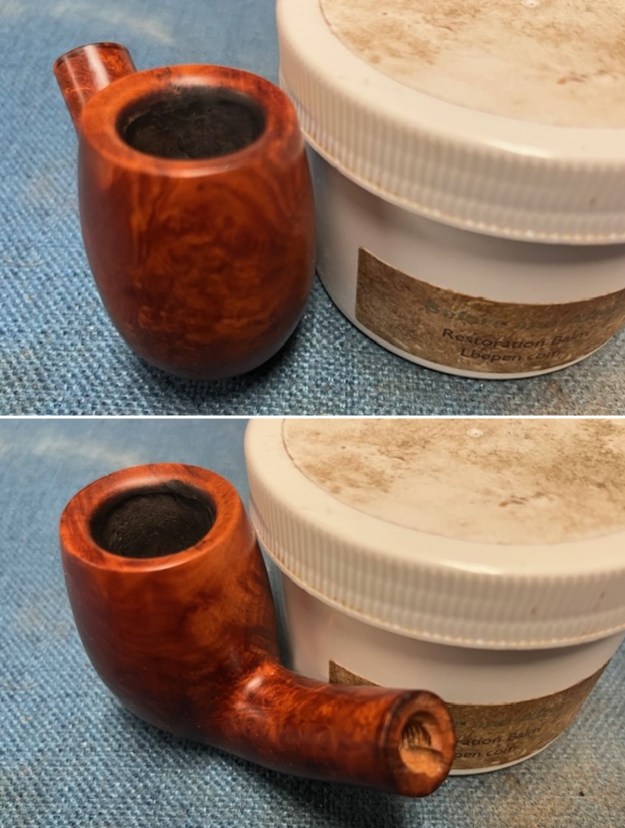
The chamber has a very thin layer of even and crumbly cake. It seems that the chamber was reamed prior to the pipe being put away. The rim top surface is clean with no signs of lava overflow or charring. The inner edge has a slight bevel which I think is not original to the pipe. However it has been well carved and does not detract from the beauty of the pipe. The outer rim edge has a number of dents and ding most likely caused due to striking the rim edge against a hard edge. The rim top surface has circular scratches akin to sanding marks left behind after topping the surface. The chamber has very little odor and the little ghost smells that remain will be eliminated once the stummel internals are cleaned.
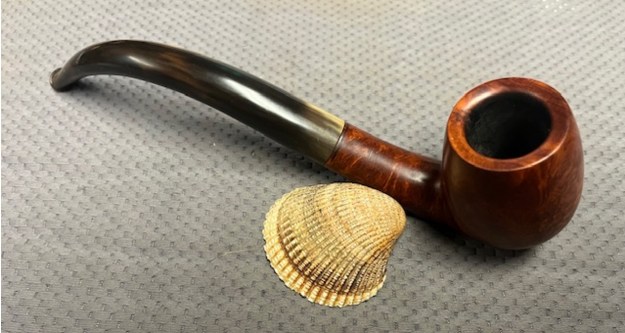
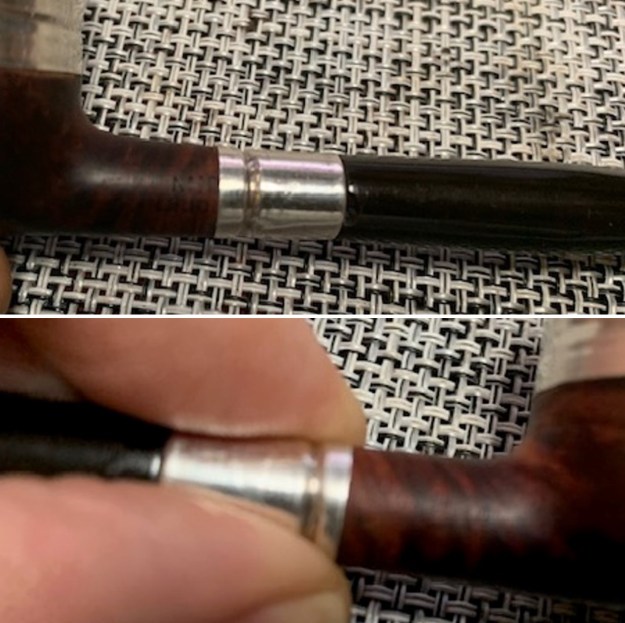
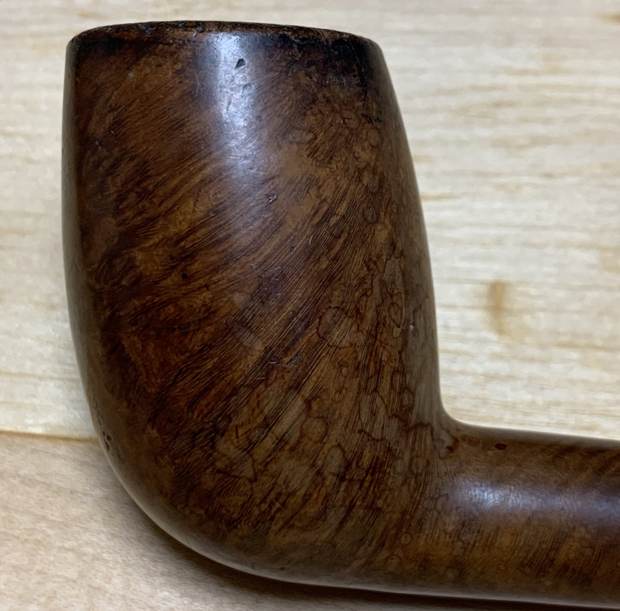
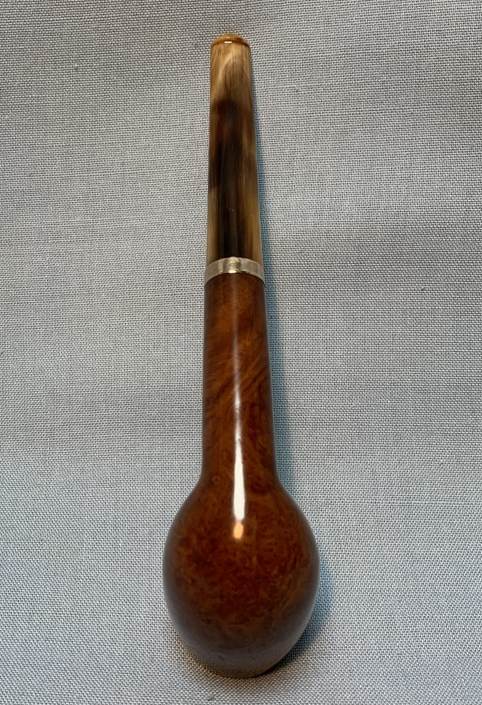
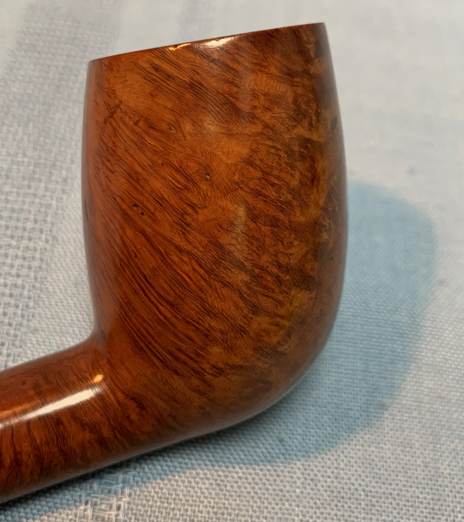
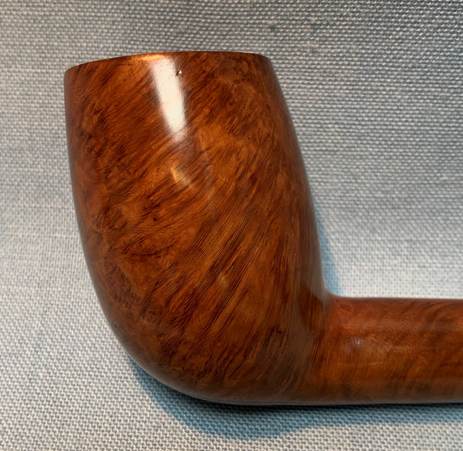
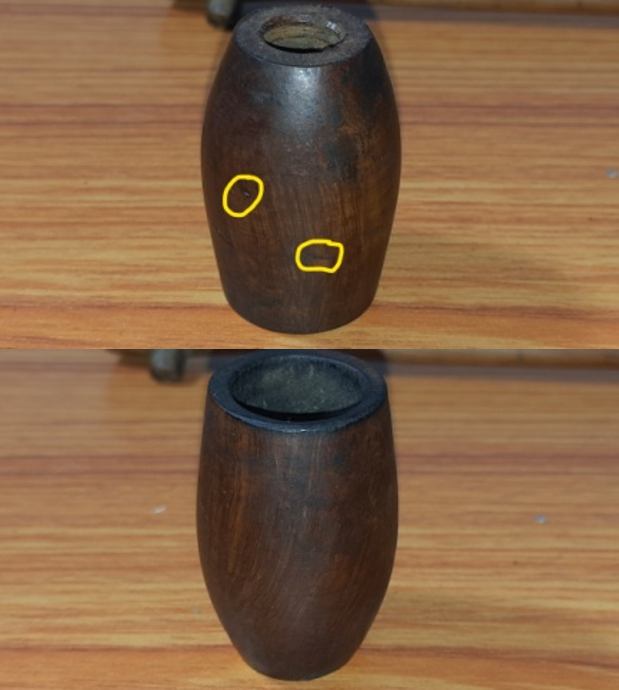
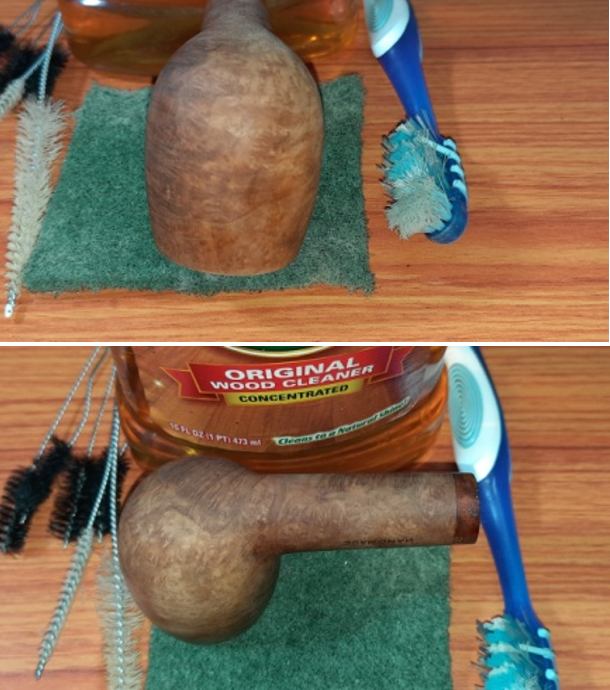
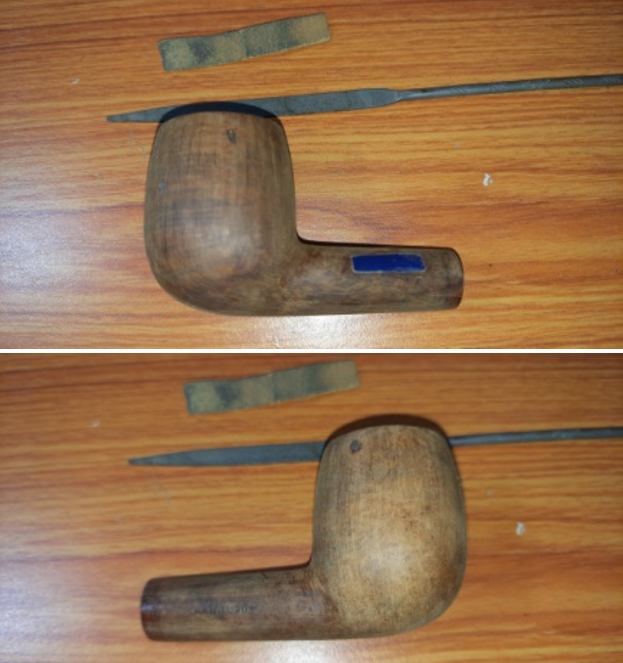
 The stummel is covered in oils that have attracted dust and grime and the stummel appears dull and lackluster. The cross grains and bird’s eye and swirls across the briar surface that can be seen through from under all the grime. The stummel surface does show a few scratches, noticeably to the front and foot of the stummel. There is a small chip off from the upper shank surface near the nickel band. The mortise shows remnants of old oils, tars and ash, but not stinking stuff!! The nickel shank band itself is oxidized and all the faux markings are well rubbed and worn out. I am especially not too worried about the worn out stampings of the band as these are just for decorative purpose only.

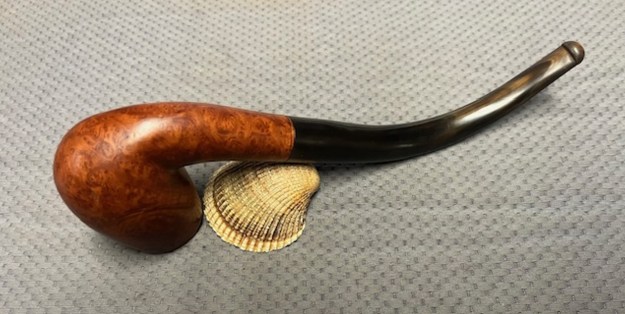
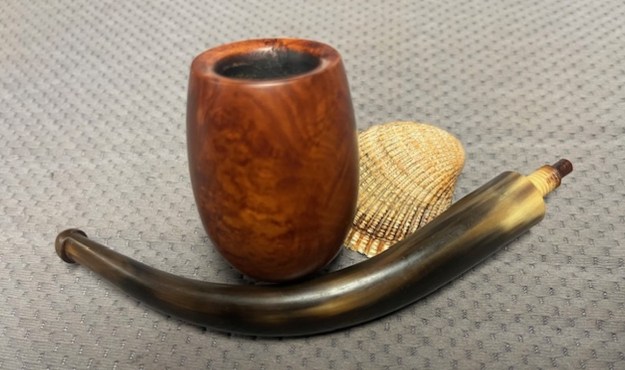
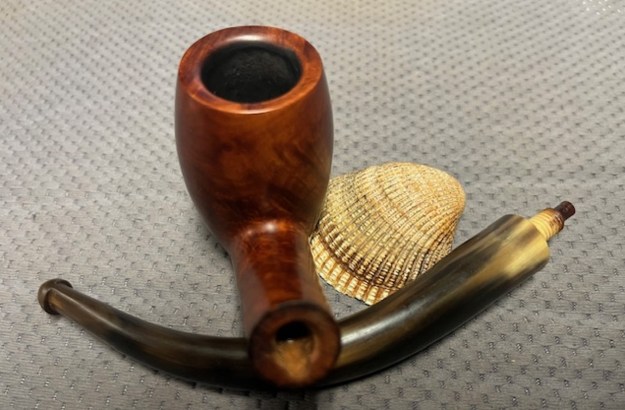
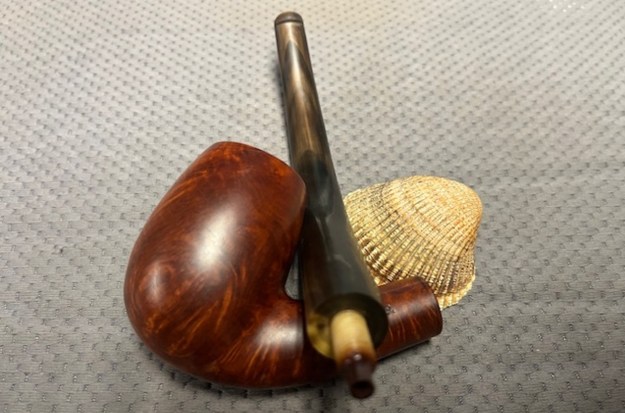
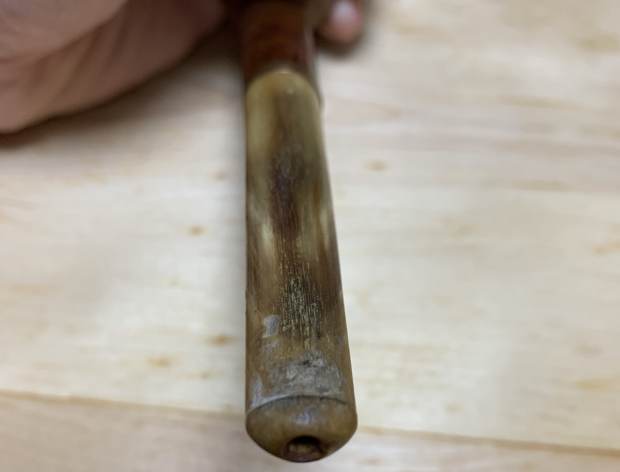
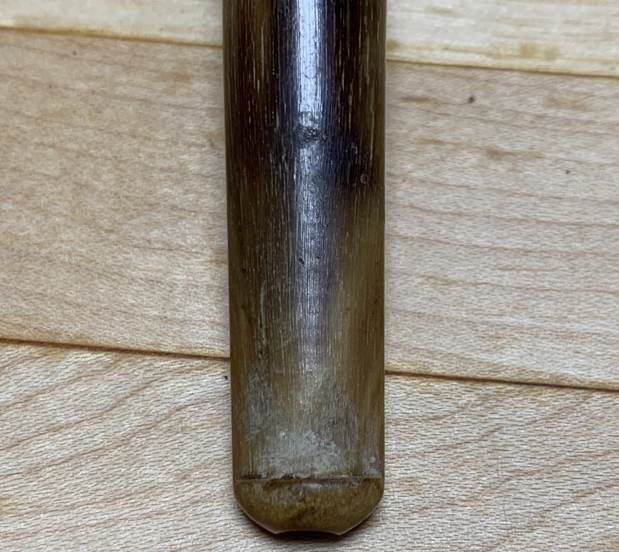
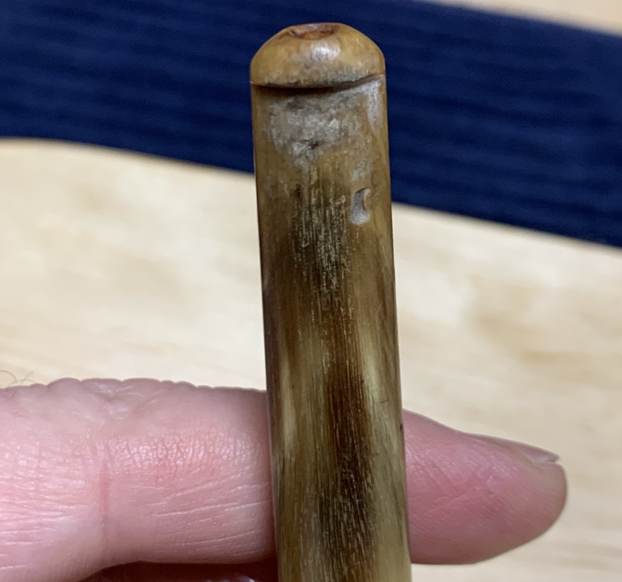
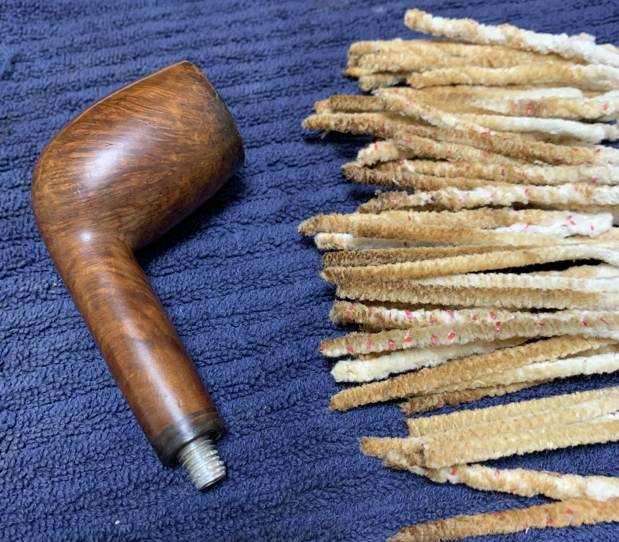
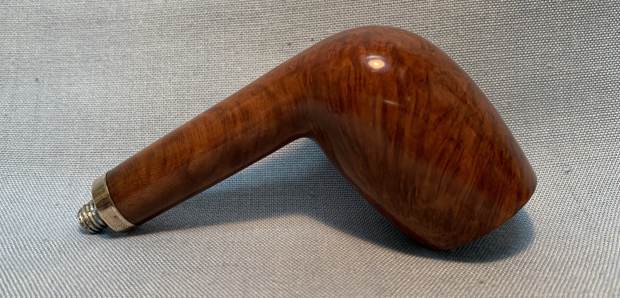
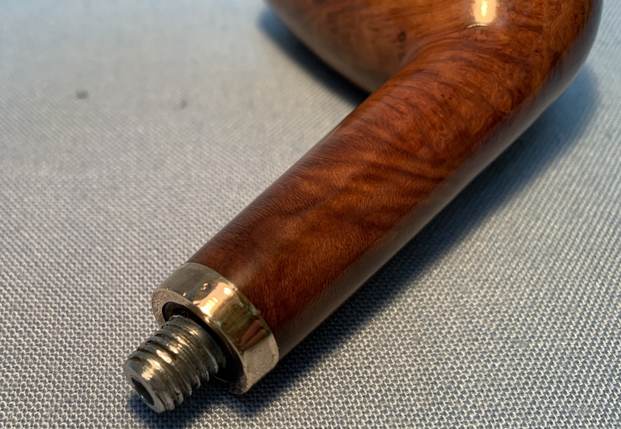
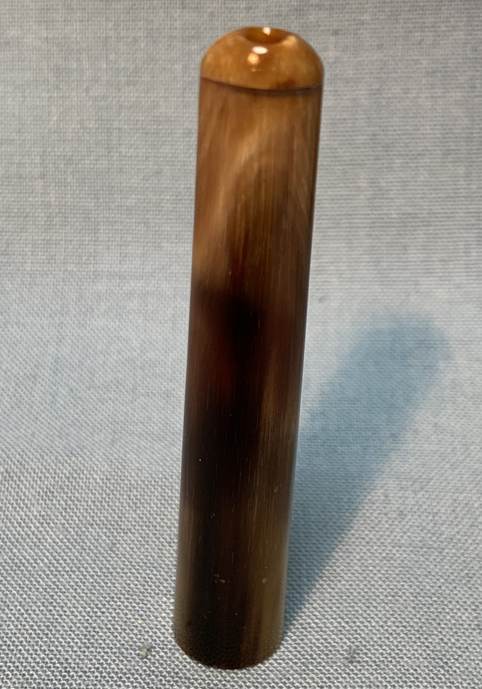
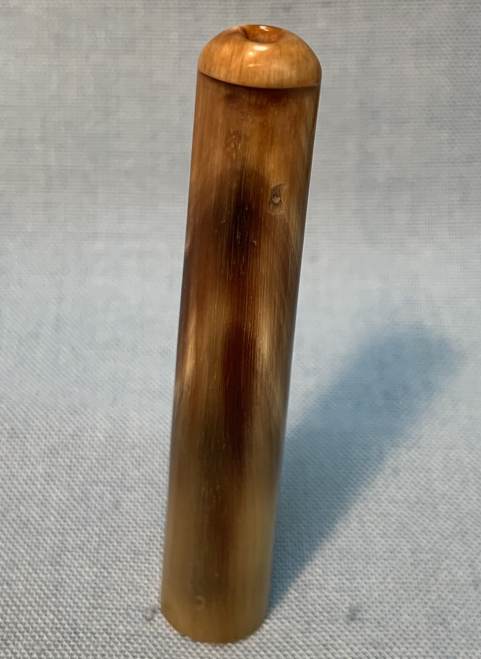
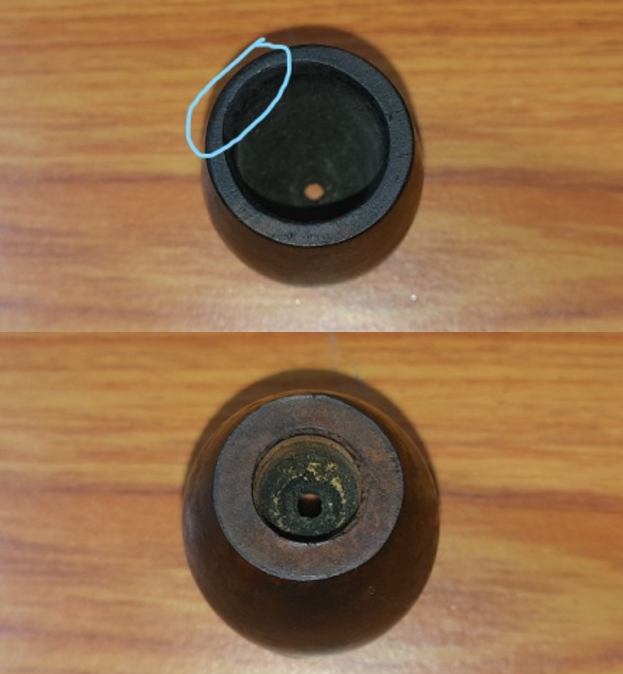
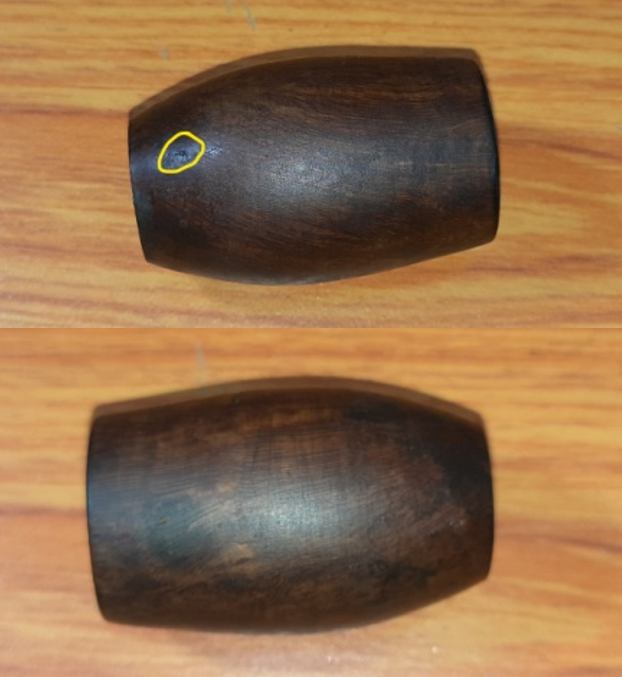
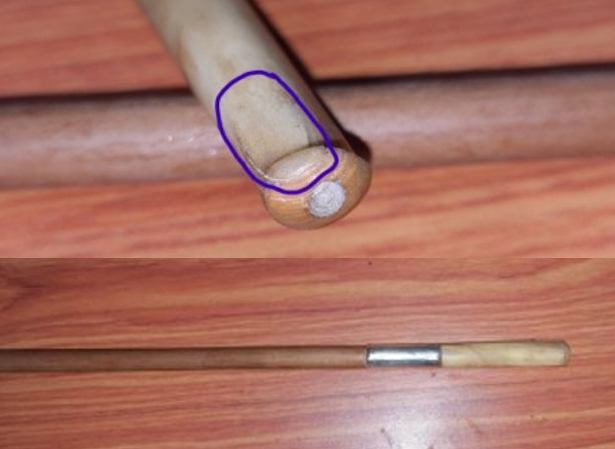
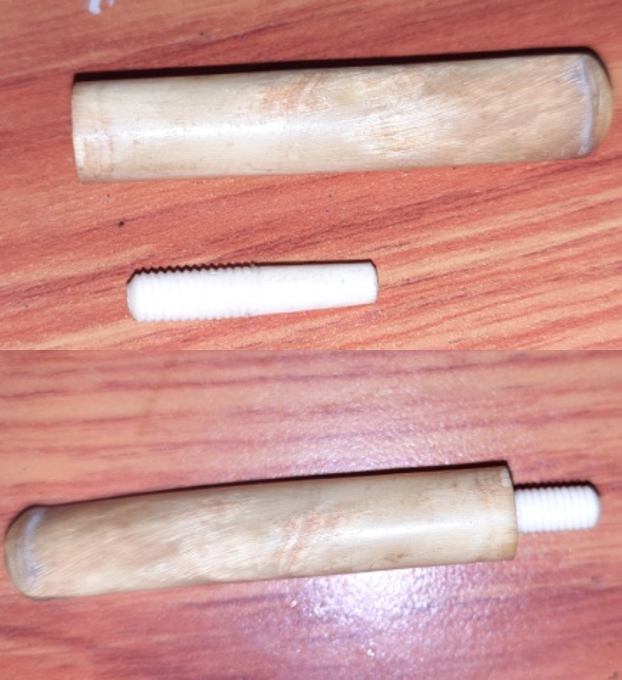
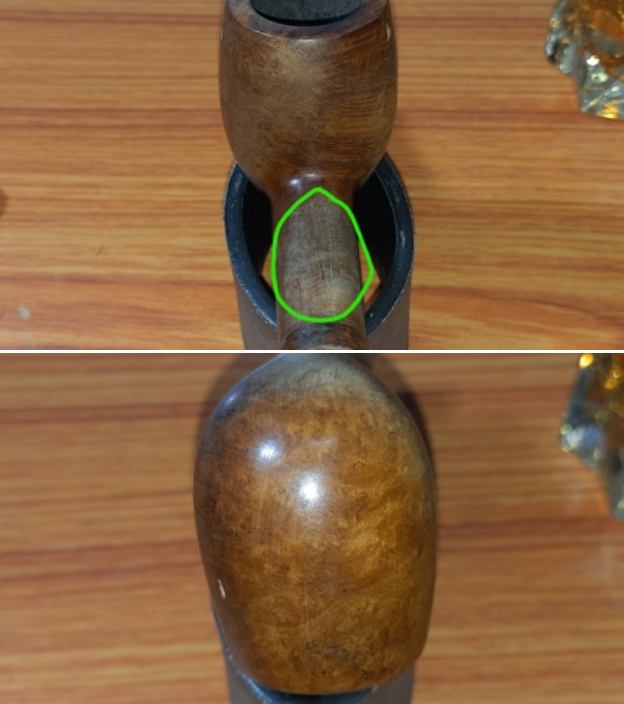
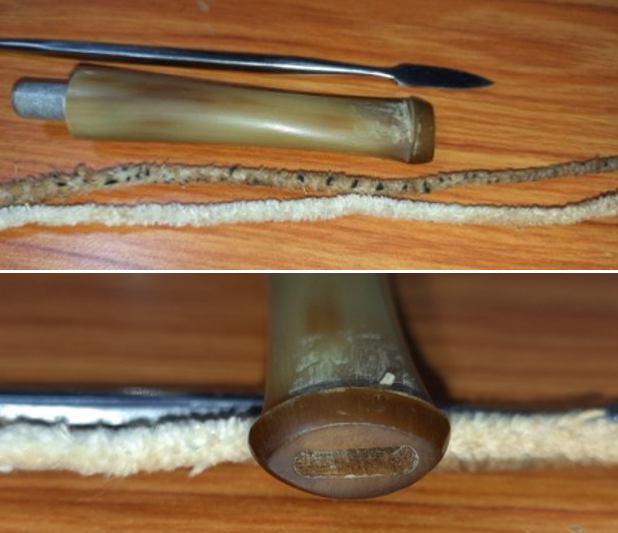
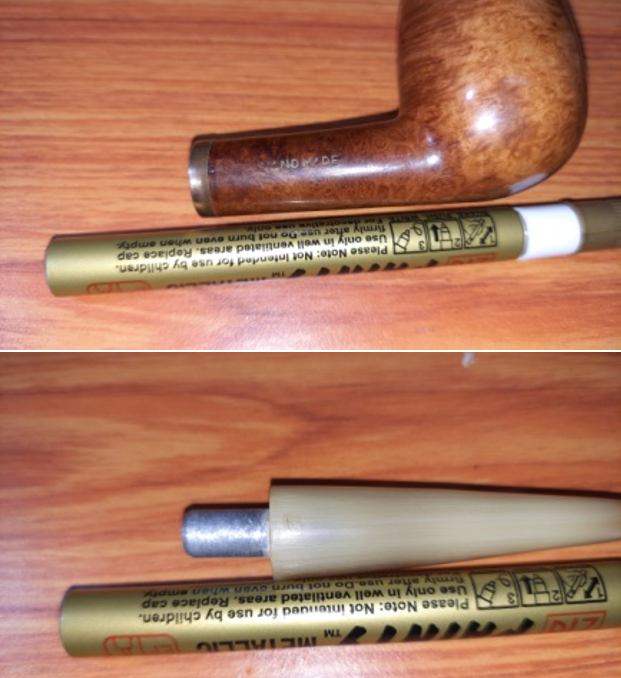
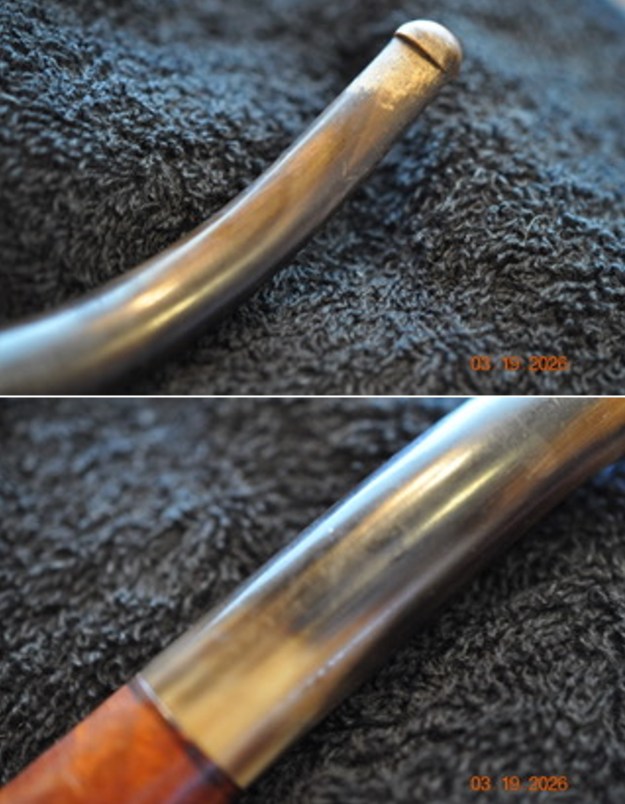
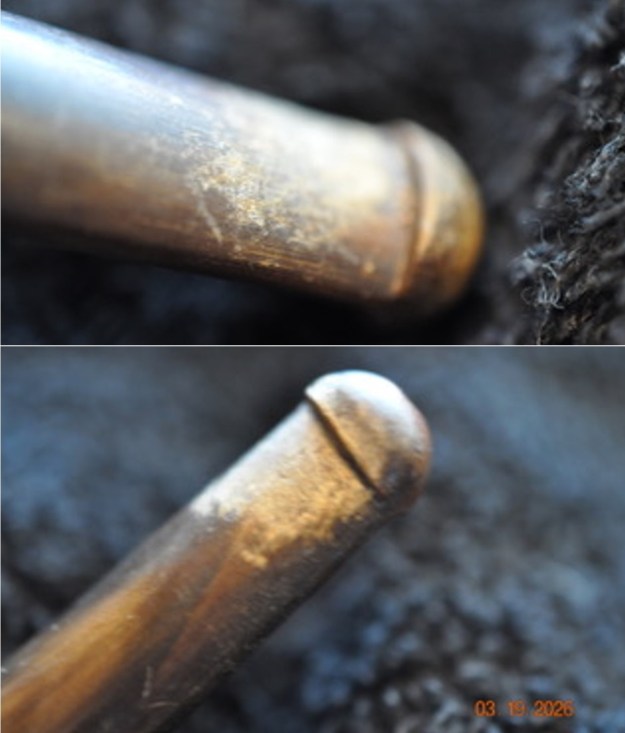
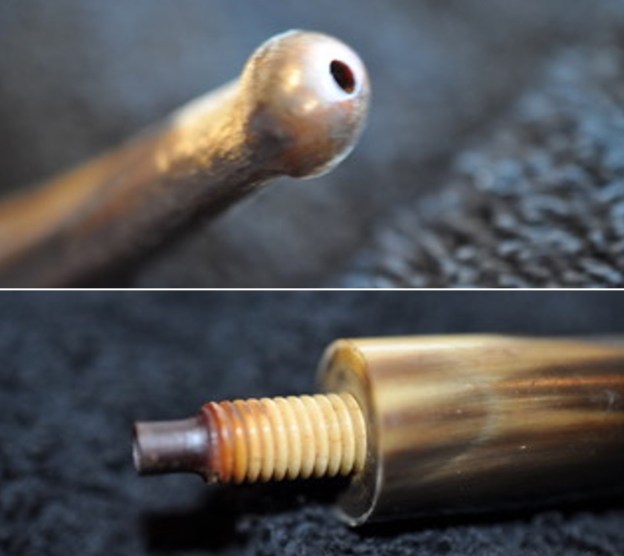
 The tapered horn stem has tooth marks on both the upper and lower surface of the stem in the bite zone. The button lips, however, are sans any damage. I was unsure, from the appearance, if the tenon was a bone or made of wood. To confirm, I ran a sharp thin blade over the surface. The movement was smooth and easy without any bite. This confirmed that the hard surface could only be bone!! The round slot and tenon end opening has old residual oils and tars. The seating of the stem in to the mortise is not flush and very loose.
 The Process
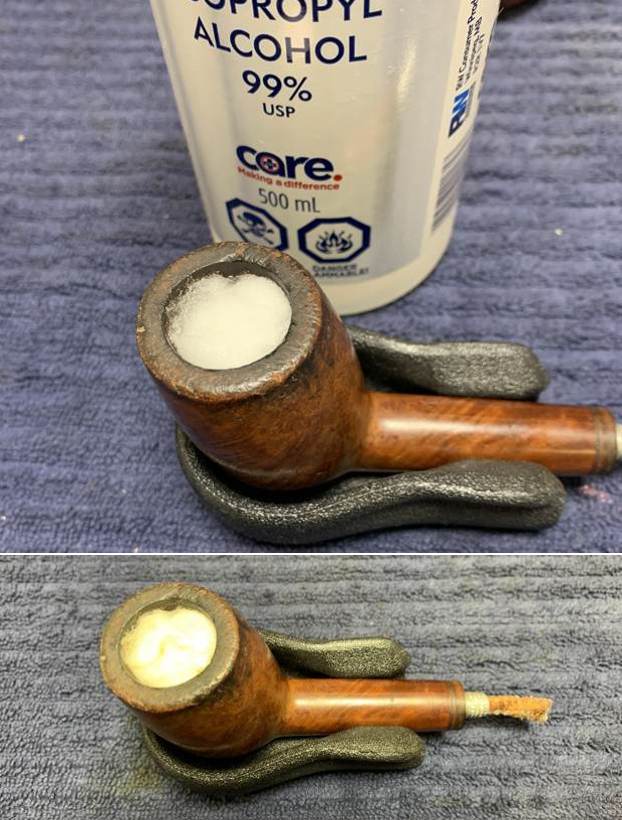
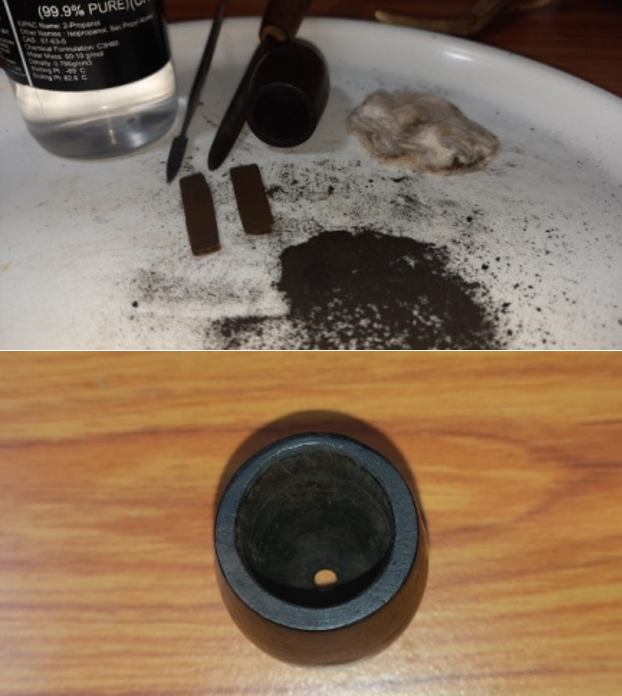
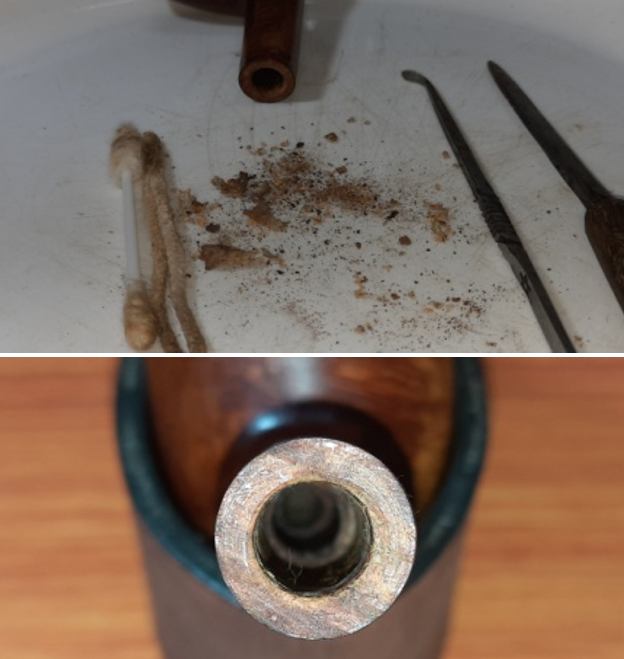
I started the process of refurbishing by reaming the chamber first. Using reamer head sizes from 1 to 3 of the PipeNet pipe reamer, I took the cake down to the bare briar. The amount of carbon that was dislodged from the chamber was really surprising as I had appreciated a thin layer of carbon and the quantity of carbon that was removed was anything but a thin layer. With my fabricated knife, I removed all the cake and took it down to the bare briar. I further sand the chamber wall with a folded piece of 180 grit sandpaper to smooth out the wall and remove the last bit of stubborn carbon that remained stuck to the chamber. To finish the reaming process, I wiped the chamber walls with a cotton swab dipped in alcohol to clean the last traces of residual carbon dust. I was happy to note a clean and well seasoned solid chamber.
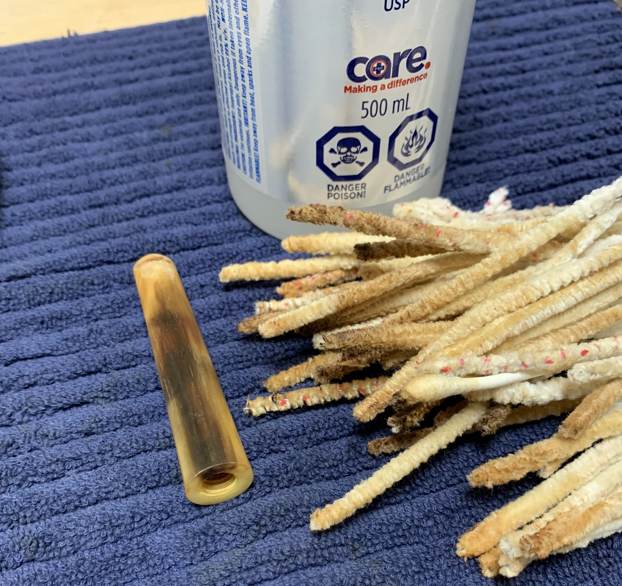
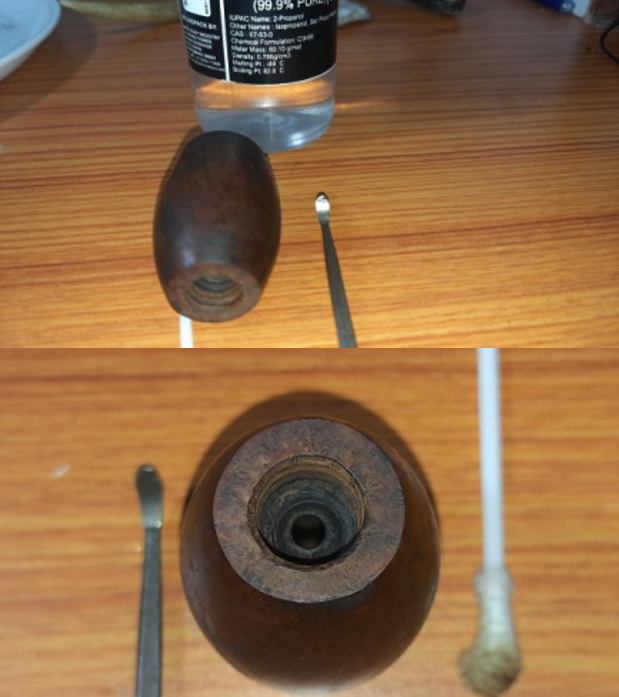
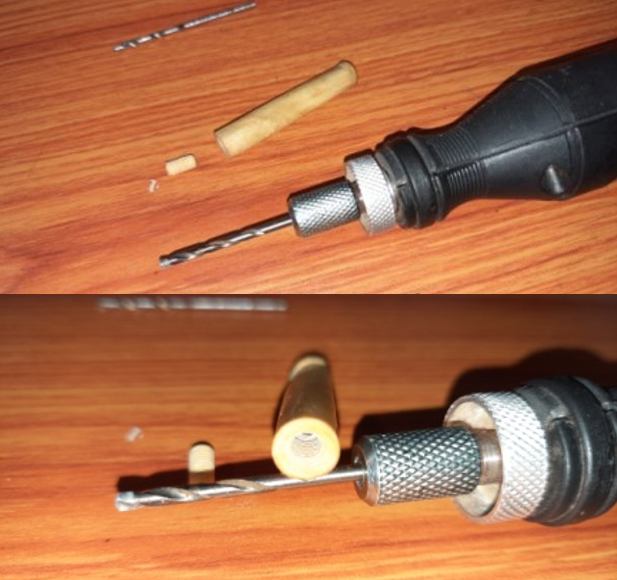
 Next I cleaned out the shank internals. Early on, I realized that I could not pass a pipe cleaner trough the draught hole due to blockages in the shank airway. I used the drill bit of a Kleen Ream reamer to dislodge this block of dried oils and gunk. I further scraped out all the dried and crumbly oils and tars from the walls of the mortise with my fabricated tool. I cleaned out the mortise and shank walls with q-tips and pipe cleaners dipped in alcohol. I shall continue further cleaning of the shank and mortise while going through the other processes.
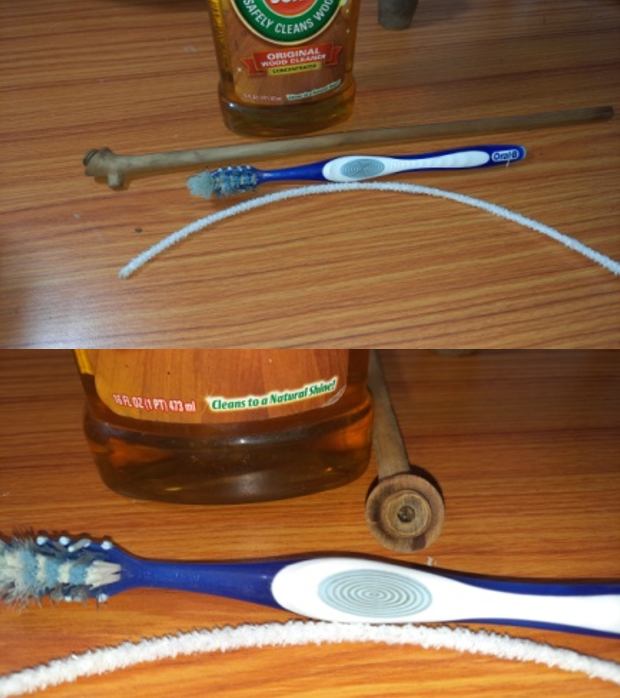
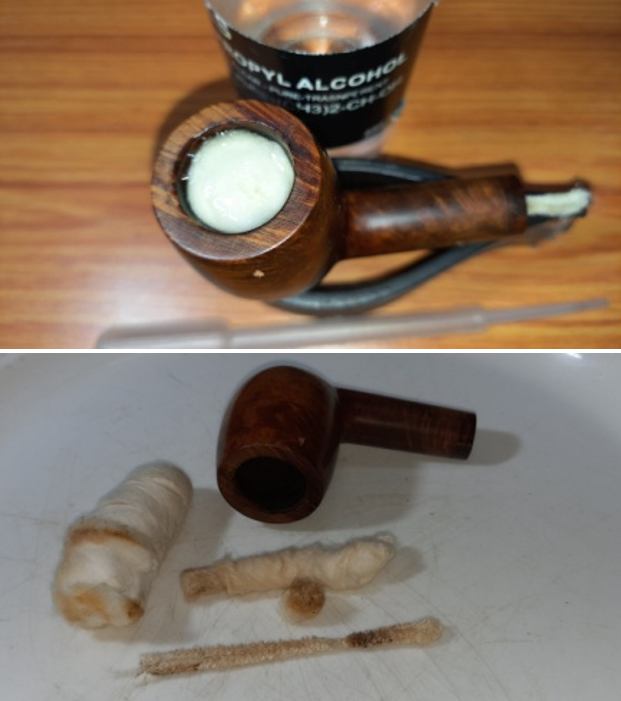
 I kept the stummel aside and cleaned the internals of the stem with a thin shank brush and anti-oil dish washing soap. This ensures a thorough cleaning of the stem airway while saving me number of pipe cleaners, elbow grease and most importantly, time. With the stem internals cleaned, I scrubbed the external surface with the dish soap and Scotch Brit pad. I was particularly careful while cleaning the tenon surface as the old residual oils and tars were deeply embedded in to the surface. I rinsed the stem under warm running water and wiped it with a paper napkin to dry it.
 I addressed the tooth chatter in the bite zone by sanding the bite zone with a folded piece of 150 grit sand paper followed by 220 grit sand paper. I could have filled the tooth indentation with clear superglue, sanded and polished the stem, but decided against this since the stem was thick and the tooth chatter was superficial enough to be addressed just by sanding it out.
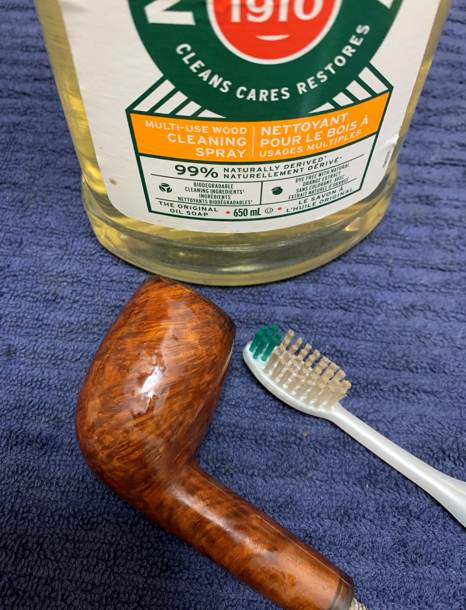
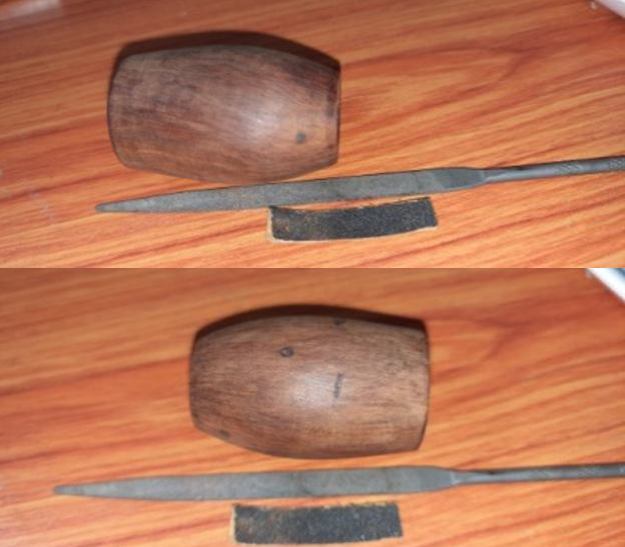
 Next, I cleaned the exterior of the stummel. I used a hard bristled tooth brush, Scotch Brit pad and Murphy’s Oil soap to scrub the stummel. After the scrub with oil soap, I washed the stummel, stem and shank extension under running warm water with anti oil dish washing detergent till the surface was clean and dried it using paper towels and soft cotton cloth. I simultaneously cleaned the internals of the shank with the detergent and hard bristled shank brush and set the stummel aside to dry out naturally. The stummel surface has cleaned up nicely with the beautiful grain patterns on full display.

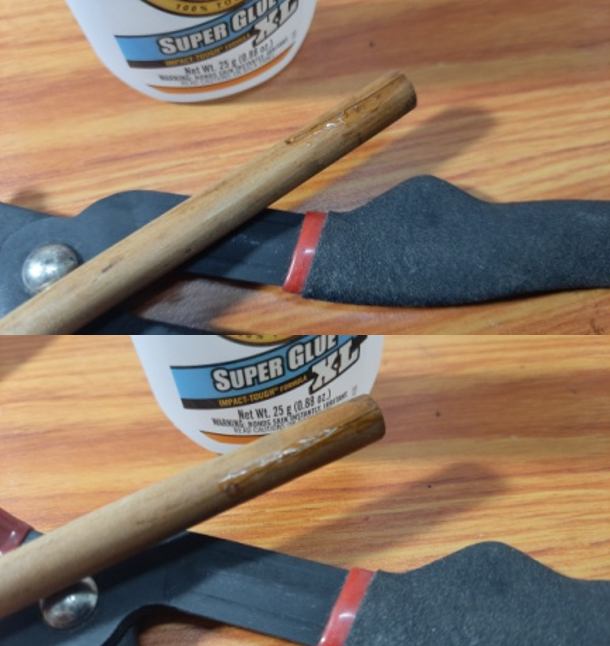
 Following the external clean up of the stummel, I spot filled the small chipped off surface from the shank’s upper surface near the nickel band and also the dings that were seen over the outer edge of the rim with CA superglue. I set the stummel aside for the glue to cure.
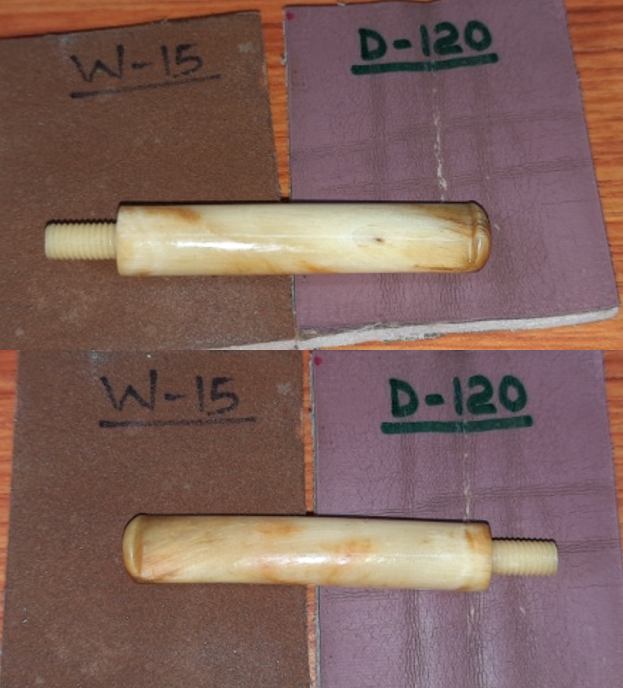
 While the stummel repair was curing, I dry sand the horn stem with 220, 320, 400 and 600 grit sandpapers followed by wet sanding with 800 and 1000 grit sandpapers. I applied a small quantity of EVO to the stem and set it aside to be absorbed by surface.
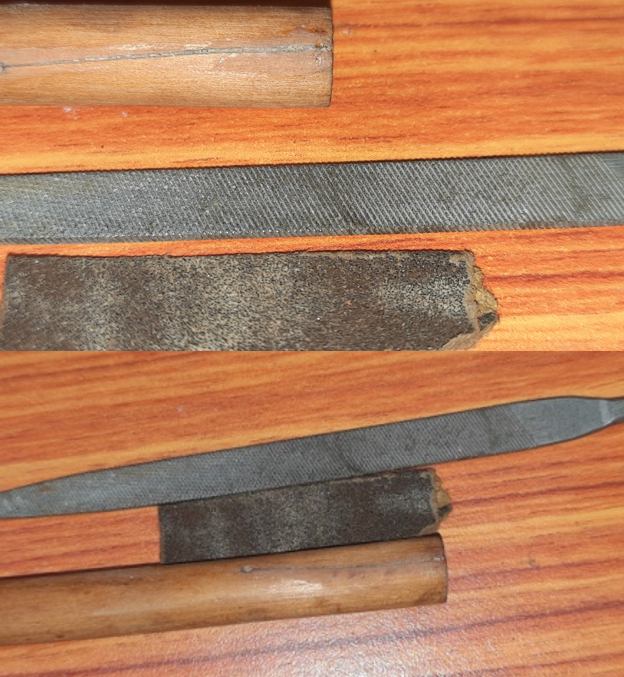
 With the stem set aside, using a flat head needle file, I sand the repairs over the upper shank surface and the outer rim edge to achieve a rough match with the rest of the stummel surface. I further blend in the repairs by sanding the entire stummel surface with 220 grit sandpaper.
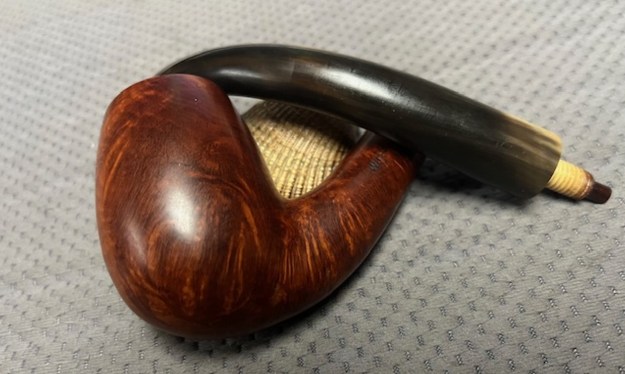
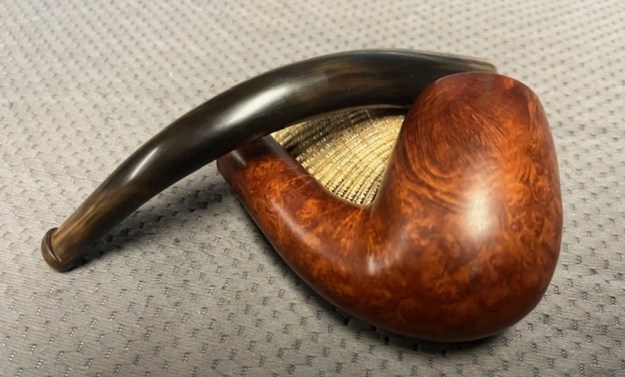
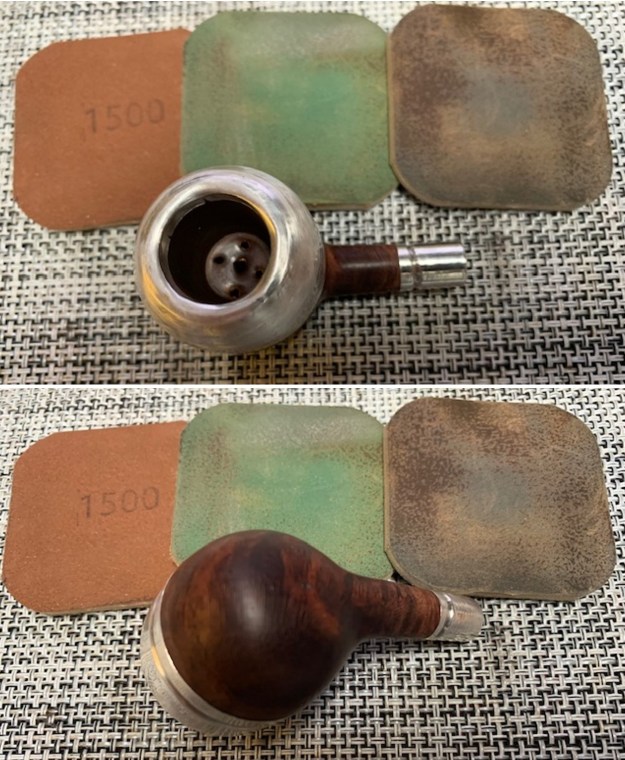
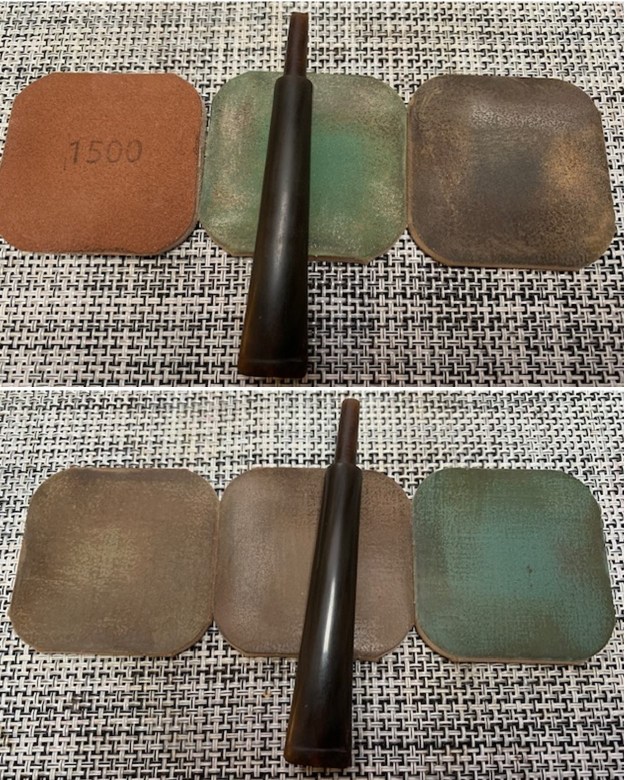
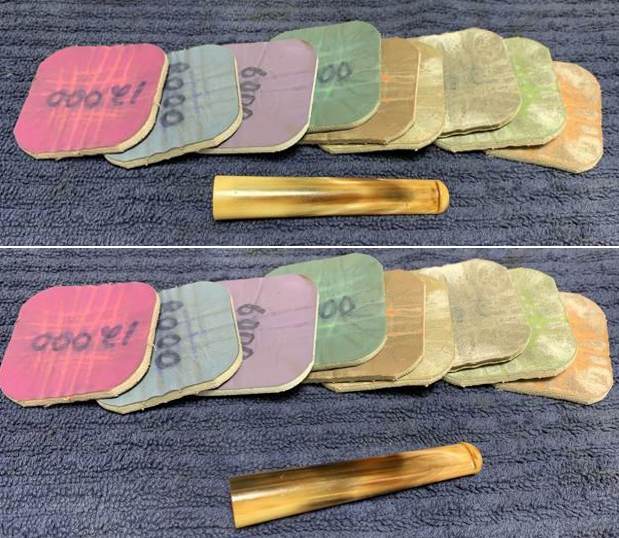
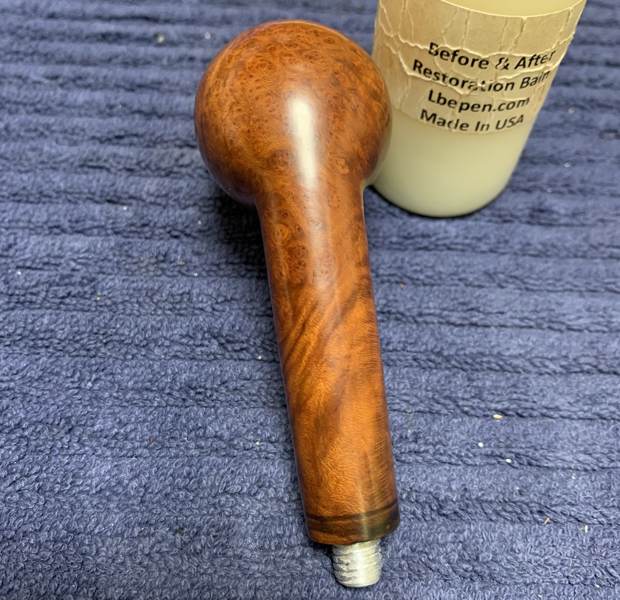
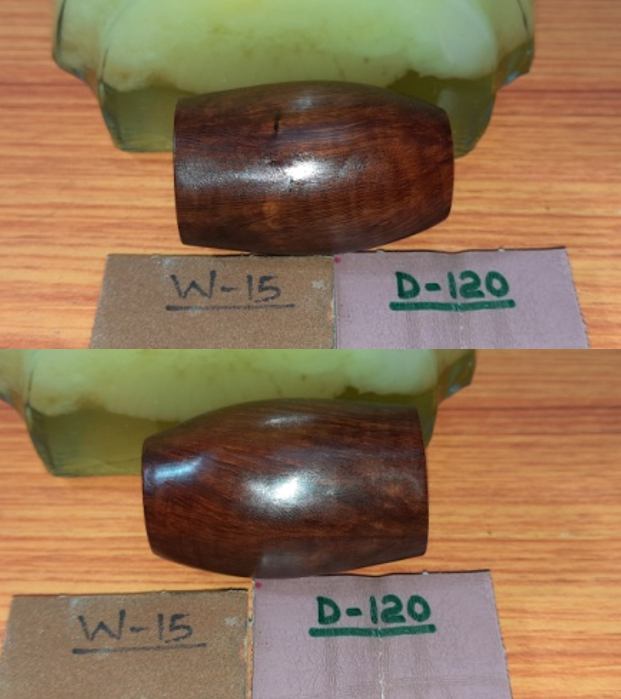
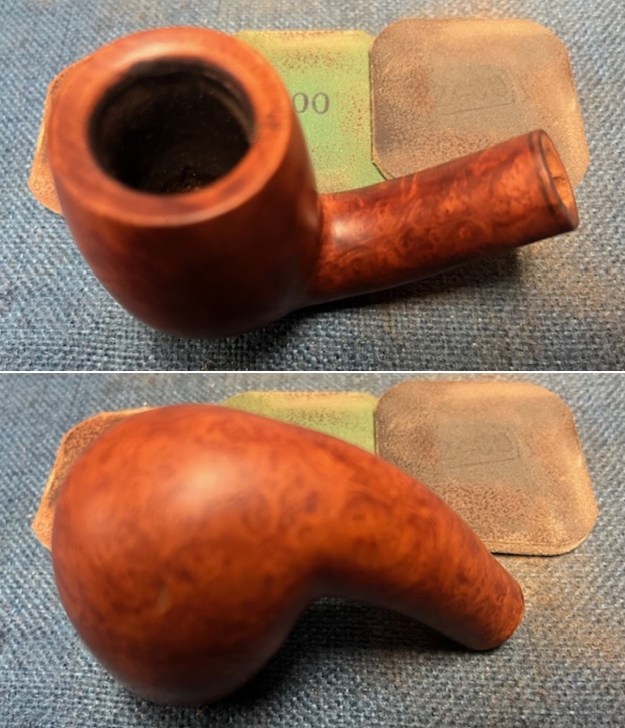
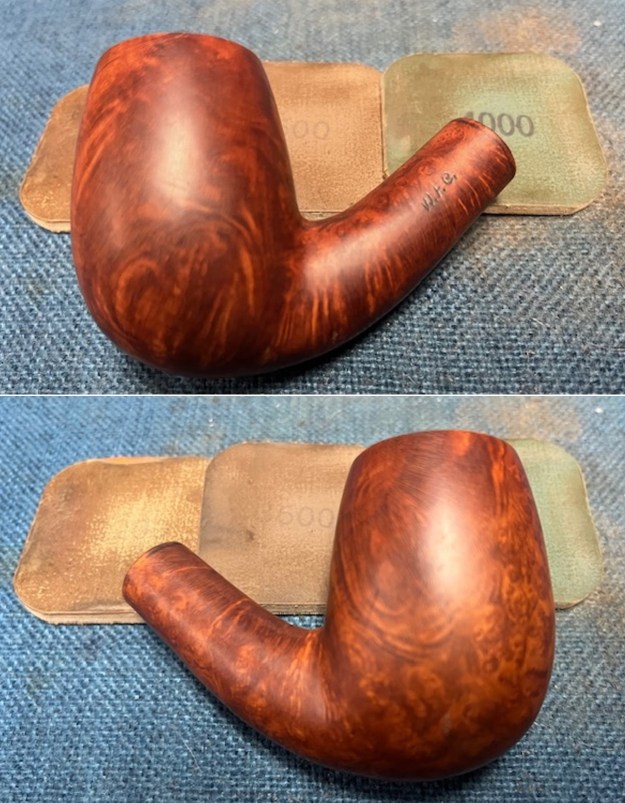
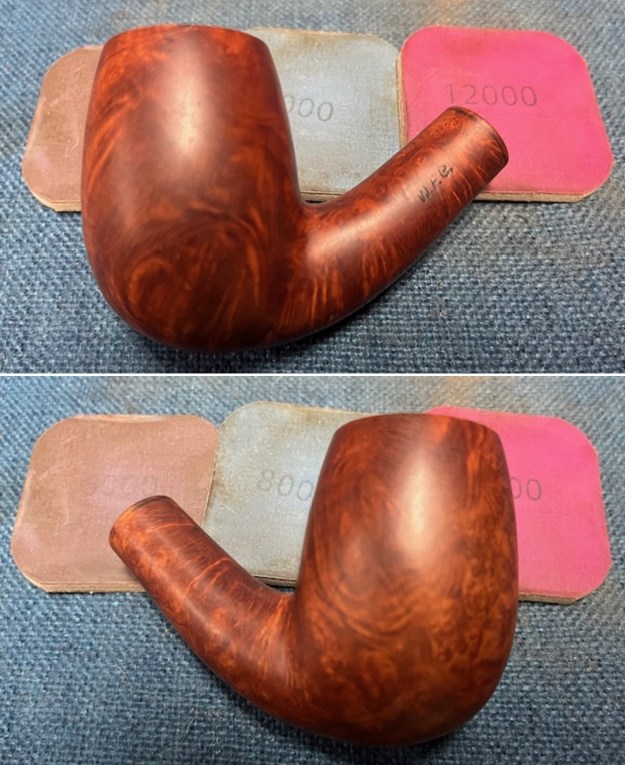
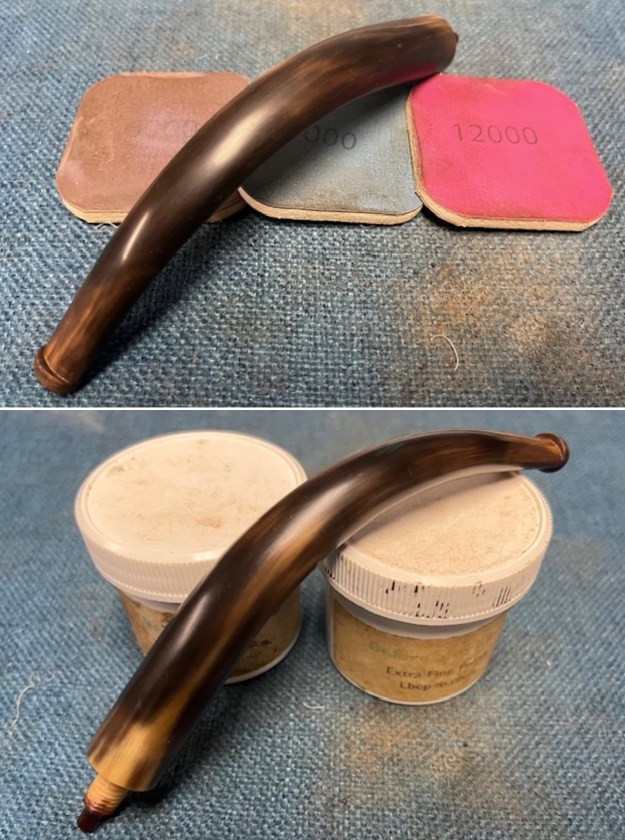
 To bring a nice shine and eliminate the scratch marks left behind by the abrasive sandpaper, I wet sand the entire stummel with 1500 to 12000 grit micromesh pads, wiping frequently with a moist cloth to check the progress. I rubbed a small quantity of “Before and After Restoration Balm” deep in to the briar with my finger tips and let it rest for a few minutes. The balm almost immediately works its magic and the briar now has a nice vibrant appearance with the beautiful grain patterns displayed in their complete splendor. I further buffed it with a horse hair brush. The contrast of the dark browns of the grains with the natural patina of the rest of the stummel adds an interesting dimension to the appearance of the stummel.

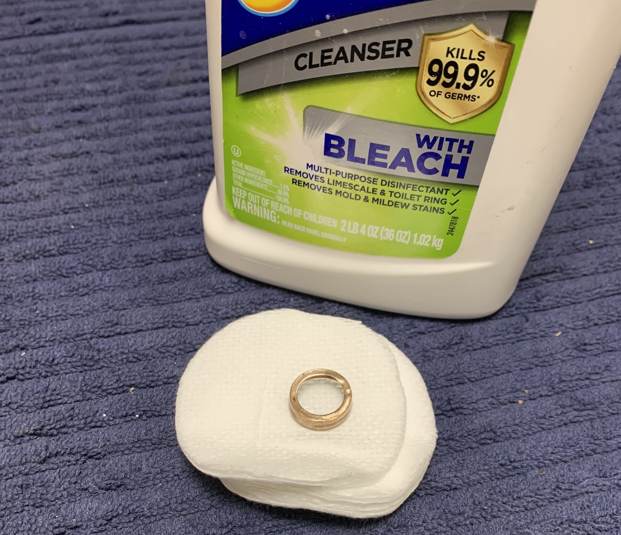
 I completed the mundane but equally important task of polishing the nickel band. I used a local product that is available only in India to polish the band. The liquid polish was applied to the band and wiped it out after a few seconds. The polish completely removed the oxidation and gave a nice shine to the band by polishing it with a jeweler’s cloth.
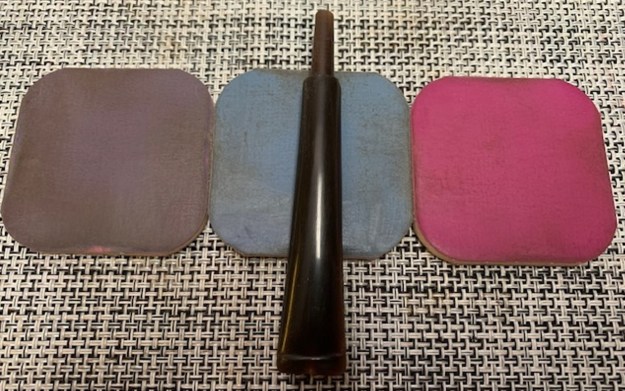
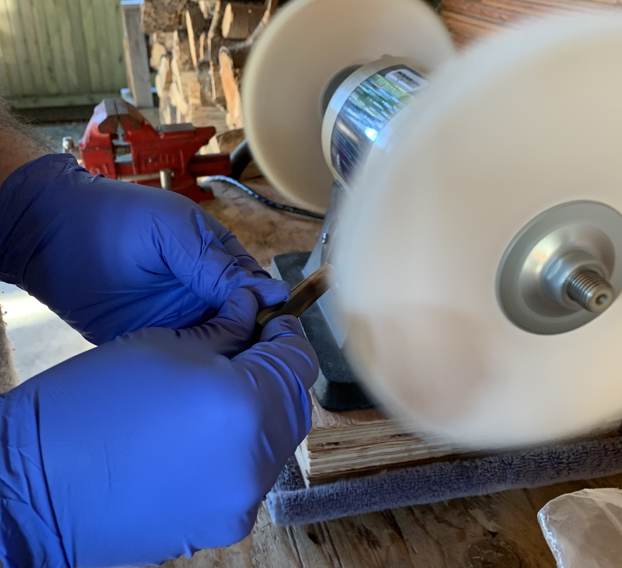
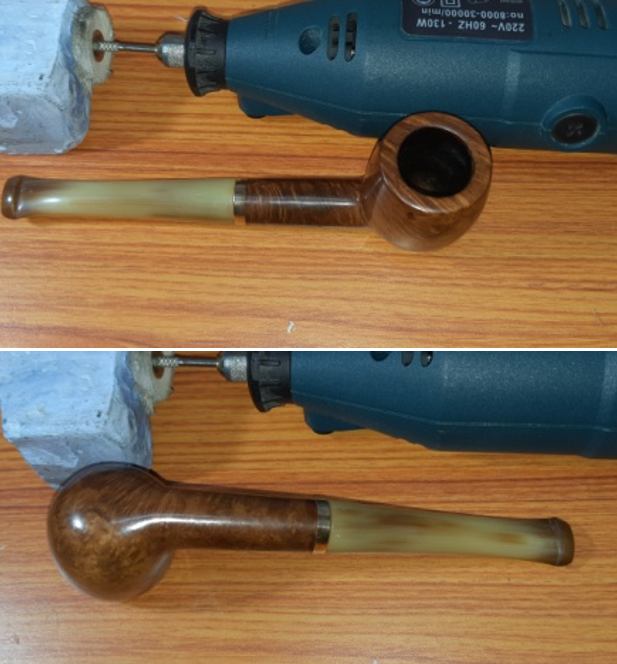
 This brings me to the most important process indicating the completion of this restoration which is imparting a high gloss finish to the pipe by polishing. I mounted a cotton cloth buffing wheel onto my hand held rotary tool and polished the stummel and stem with Blue Diamond compound. This compound helps to remove the minor scratch marks that remain from the sanding.
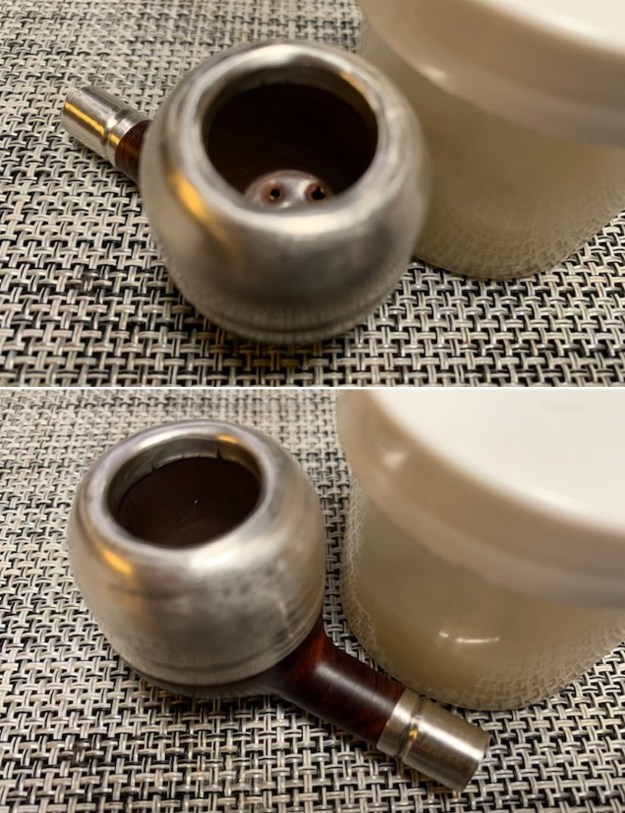
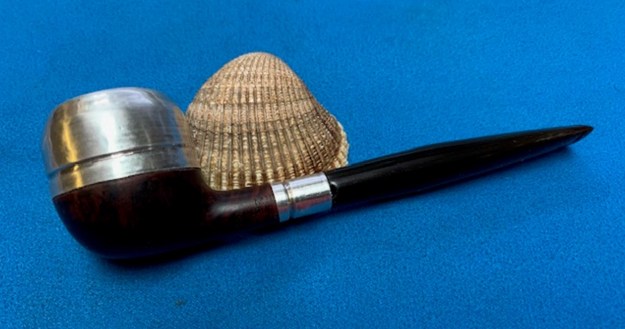
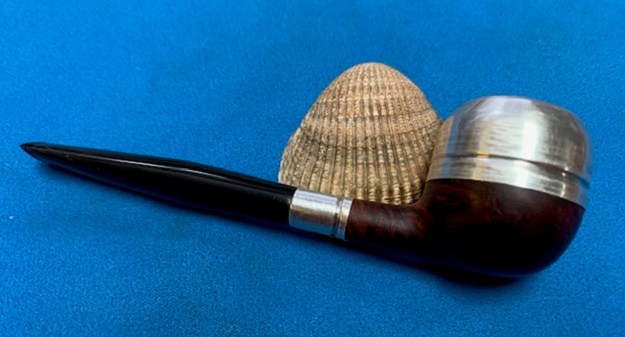
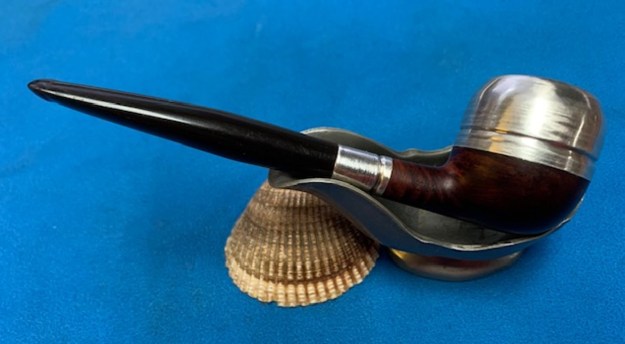
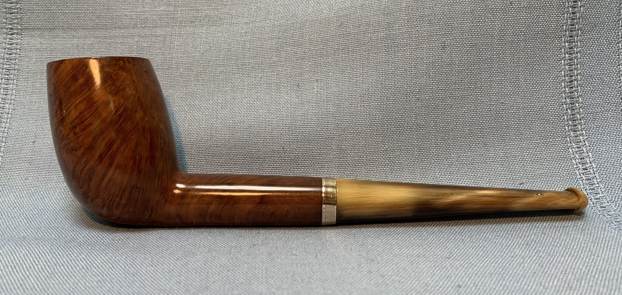
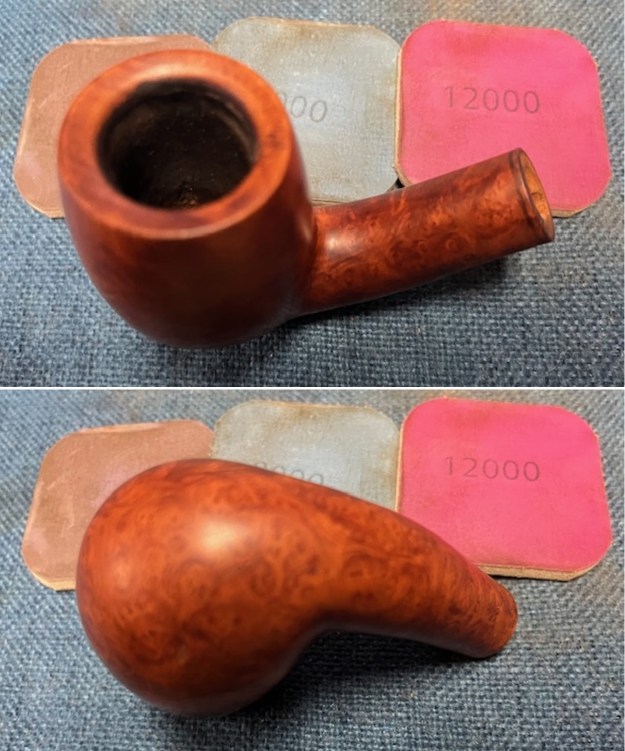
 Next, I mounted another cotton buffing wheel that I have earmarked for carnauba wax and applied several coats of the wax. I mounted a clean cotton cloth buffing wheel and gave the entire pipe a once over buff. I finished the restoration by giving the entire pipe a rigorous hand buffing using a microfiber cloth to raise the shine further. The finished pipe with the aged patina to the briar looks amazingly beautiful.


 P.S.: Astute readers must have noticed that there were two issues that I had brought out during my detailed visual inspection, first was the loose seating of the stem in to the shank and the second was that this seating was not flush, but does not find a mention in the entire process of repairs/ restoration. Well, truth be told, I had not addressed these issues specifically. However, somewhere along the way these issues resolved themselves.
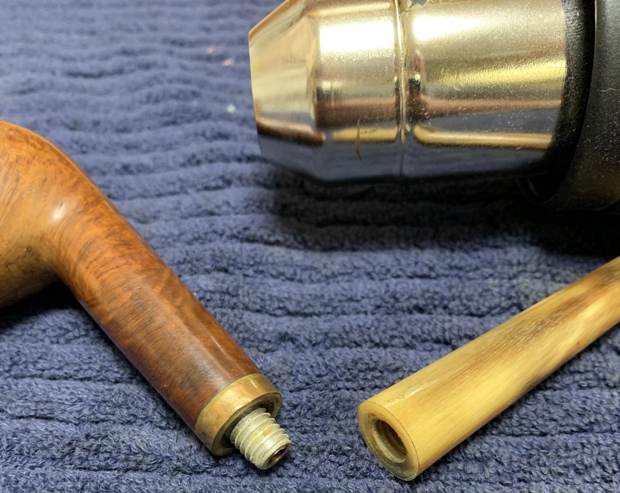
Let me explain. The reason for loose seating of the stem in to the mortise was primarily due to drying up of the briar wood and the bone tenon from years of disuse. When the internal and external surfaces of the stummel were cleaned and rinsed using warm water, the briar absorbed some moisture causing the briar to swell and ultimately resulting in a snug fit of the stem in to the mortise.
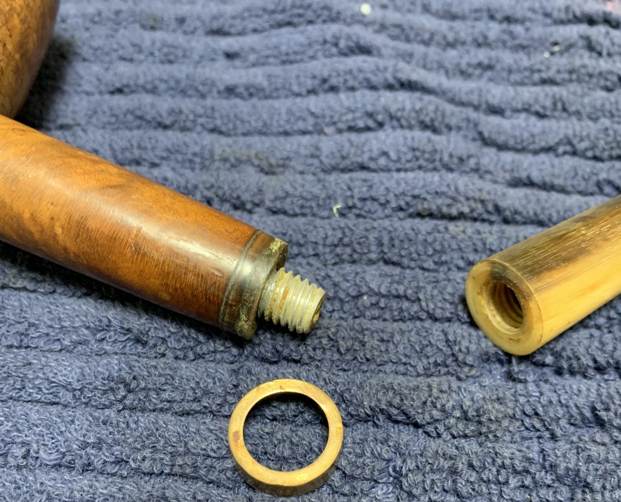
The reason for the stem face not seating flush with the shank face was the old oils and gunk that had accumulated in the mortise and along the shank walls. Once the mortise and shank internals were thoroughly cleaned and the shank briar wood was adequately moistened, the seating was flush and snug.
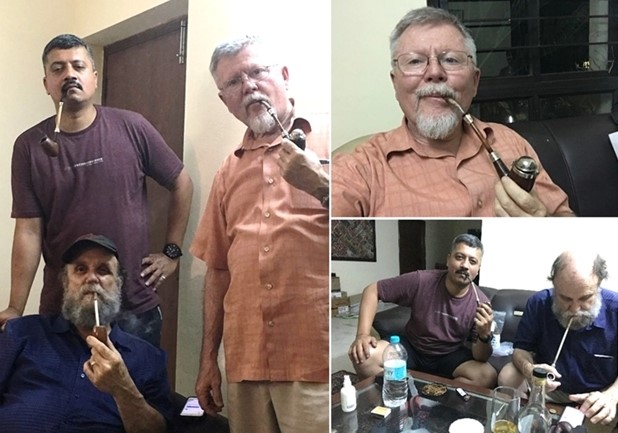
This pipe had caught the fancy of a fellow piper here in India and has now reached him. I wish him many happy and blissful smokes in the years ahead.
I wish to thank all esteemed readers for your time in reading through the write up and being a part of this project. Looking forward to your comments…

 Jeff took photos of the bowl and rim top to show the condition of the bowl. You can see the thick cake in the bowl and the lava on the rim top of the bowl. It is really a well used pipe that obviously had been someone’s favourite. The photos of the stem show the condition of the surface and the bone tenon.
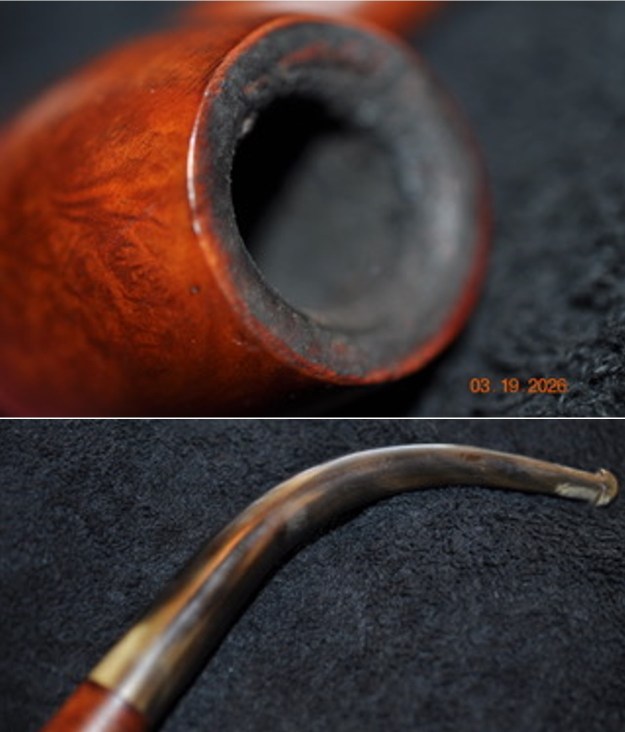
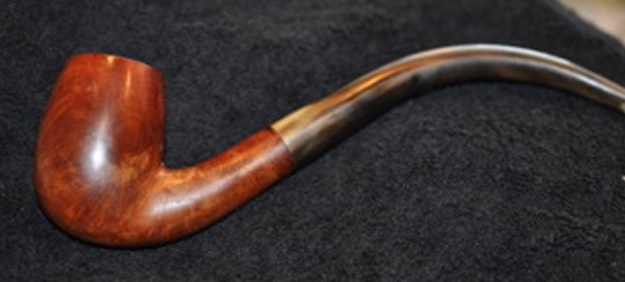
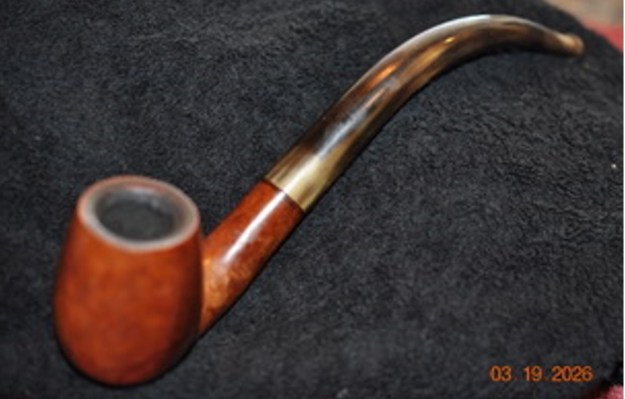
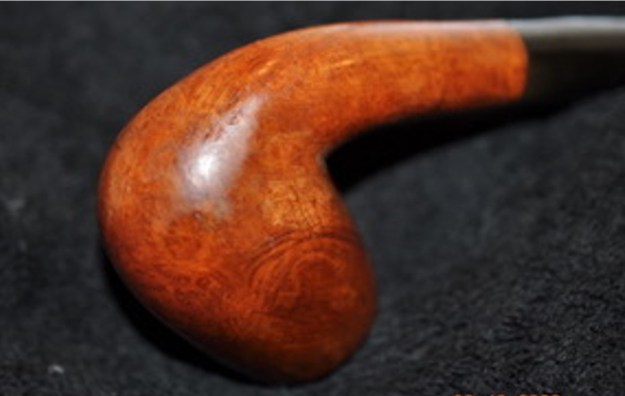
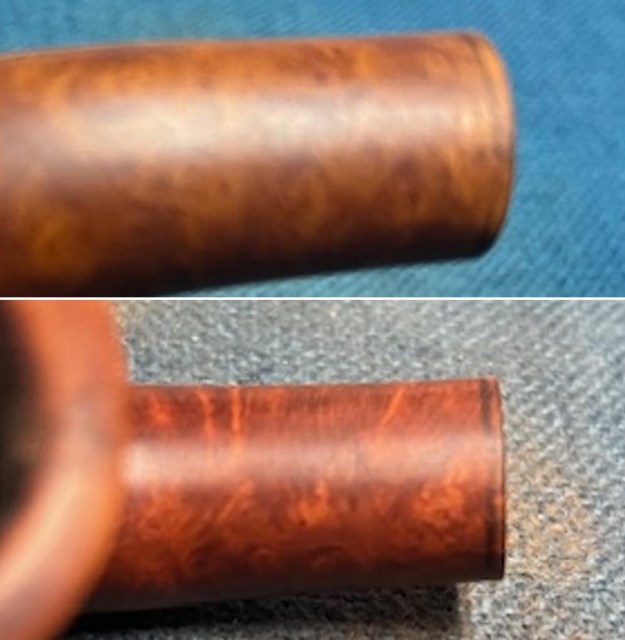
 Jeff took photos of the bowl and shank from various angles. You can see the grain in the briar in each of the photos below. It is a great piece of briar with nice grain that follows the shape.
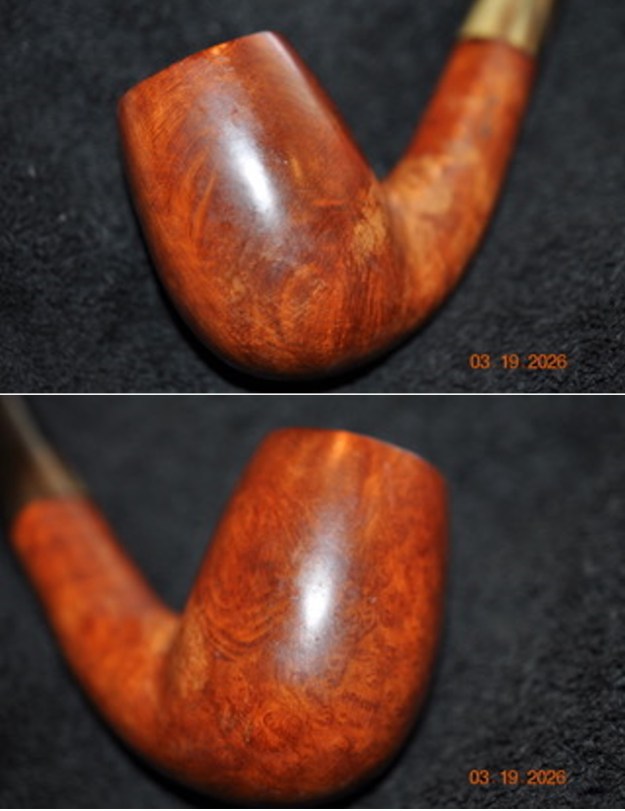
 He took a photo of the initials on the left side of the shank. They are clear and readable as noted above. It definitely looked like it was stamped rather than etched and is quite clear. Are they someone’s initials or are they initials of a company.
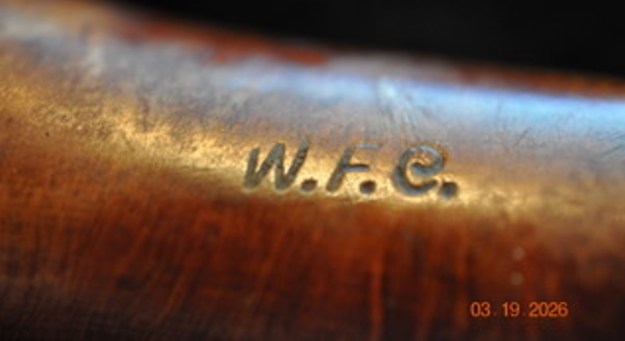 It was time to work on the pipe. As usual Jeff had done a thorough cleanup on the pipe. He cleaned up the reaming of the bowl with a PipNet pipe reamer and a Savinelli Fitsall pipe knife to remove the cake. He scrubbed out the mortise and the airway in the shank and the stem with alcohol, cotton swabs, shank brushes and pipe cleaners. He scrubbed the exterior of the bowl, rim, shank and stem with a tooth brush and Murphy’s Oil Soap to remove the oils and tars on the rim and the grime on the finish of the bowl. He rinsed it under running water. One of the benefits of this scrub is that it also tends to lift some of the scratches and nicks in the surface of the briar. He dried it off with a soft cloth. He scrubbed the stem surface off with Soft Scrub and rinsed it off with warm water. The pipe looked good.
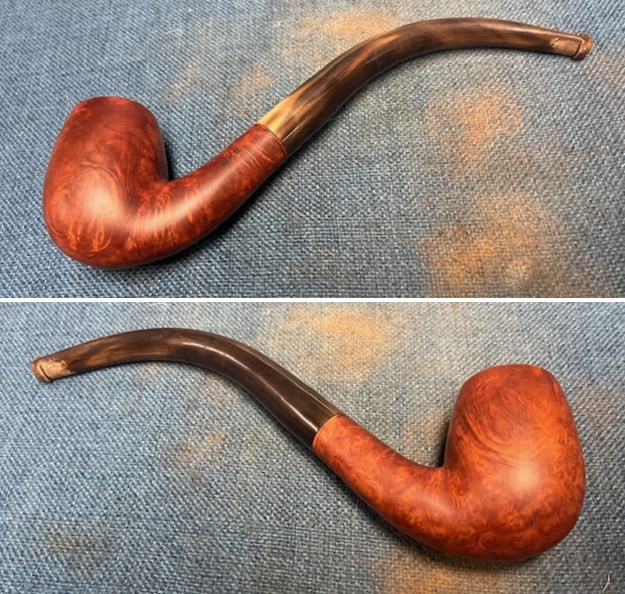
 I took a photo of the rim top and stem to show the condition. The finish on the rim top looked spotty. The vulcanite saddle stem had light tooth chatter and marks on both sides ahead of the button and on the button edges.
 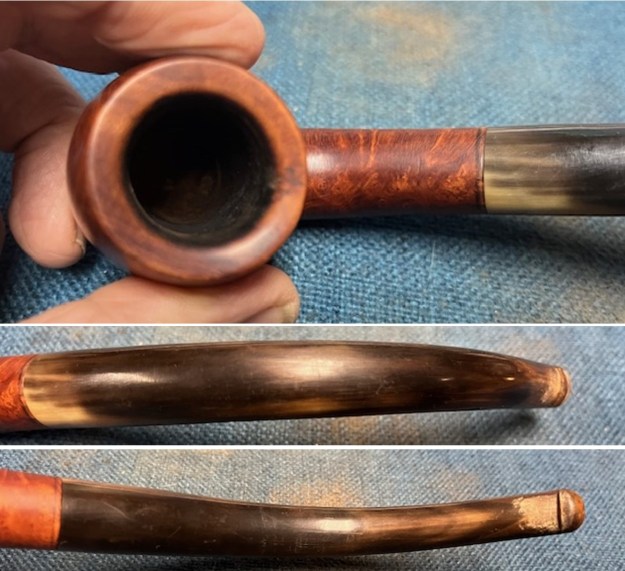 The stamping on the underside and left side of the shank is clear and readable as noted above. There was a stamp on the left side of the saddle was readable but the white in the stamp was gone. I removed the stem from the shank and took a photo of the pipe to give a sense of the whole. It is a nice-looking long shank apple and should clean up very well.
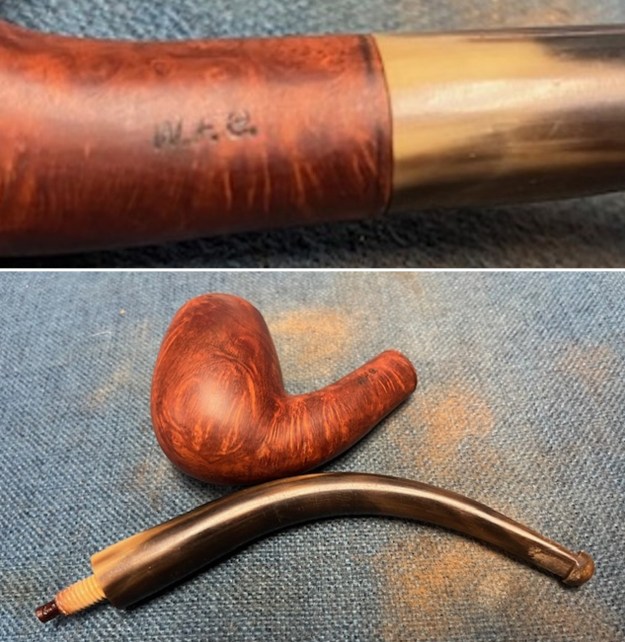 I took some photos of the darkening around the shank end of the pipe. It appears that the darkening could have come from a tin shank band. I will work on it and think about the possibility of adding a new band to it.
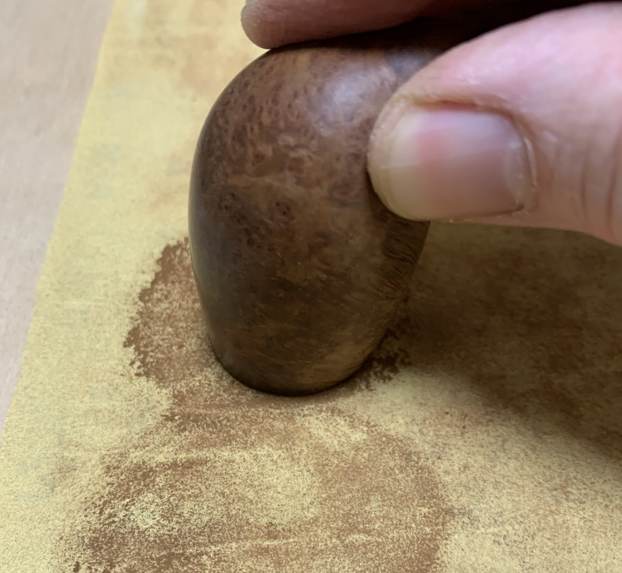
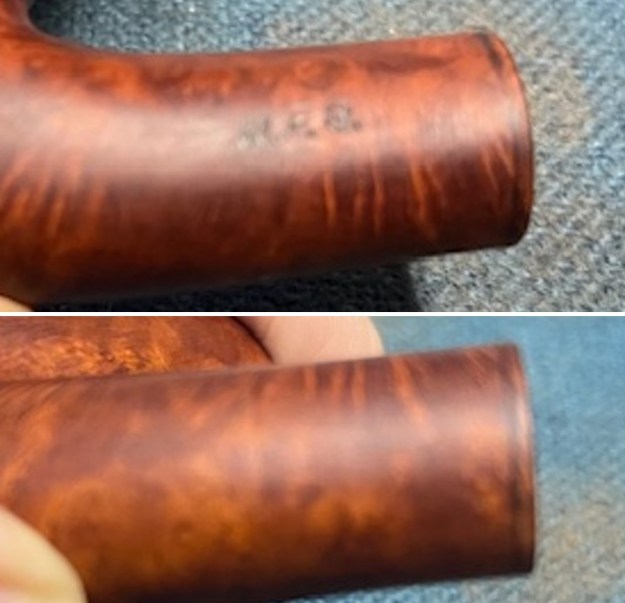
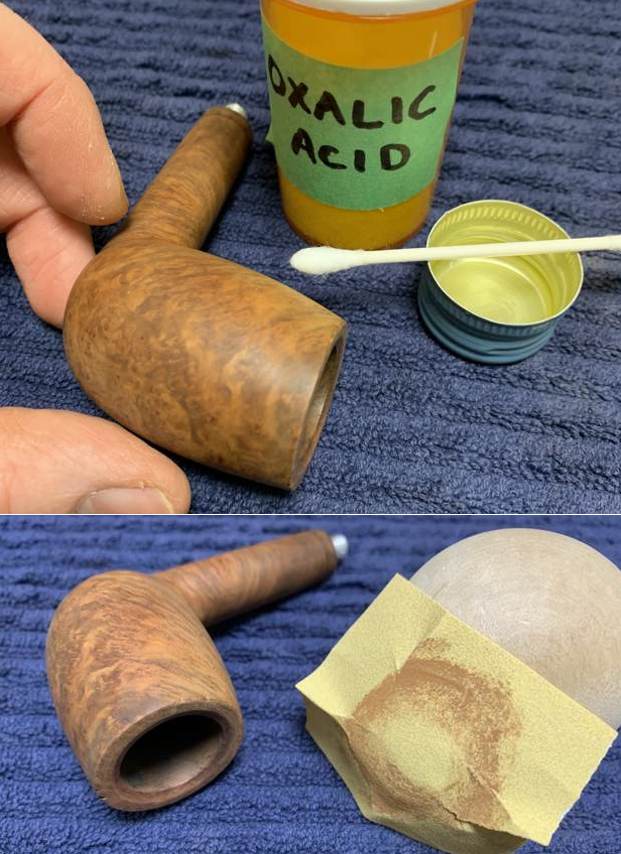
 I sanded the briar with 320-3500 grit 2×2 inch sanding pads. I carefully worked around the stamping on the shank side. I wiped it down after each pad with a damp cloth to remove the sanding debris.
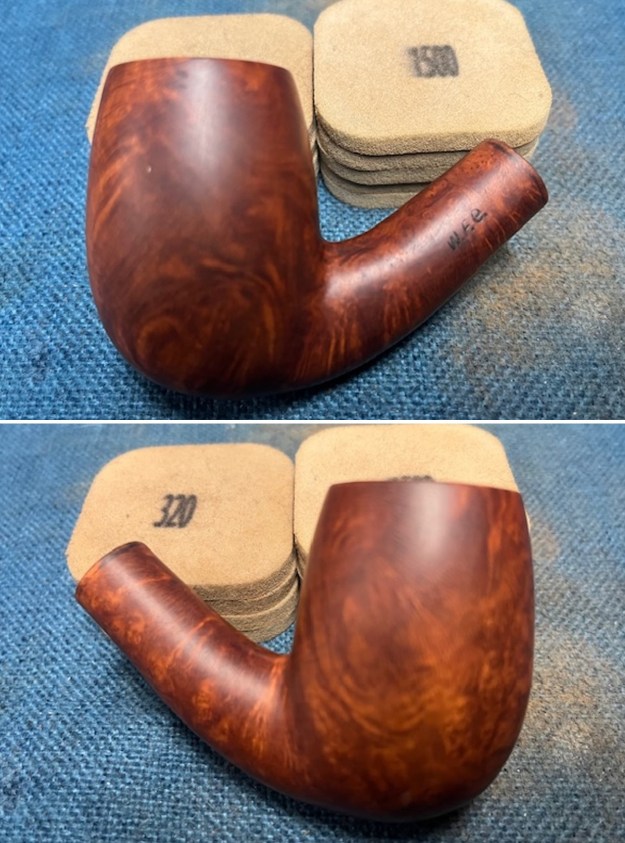
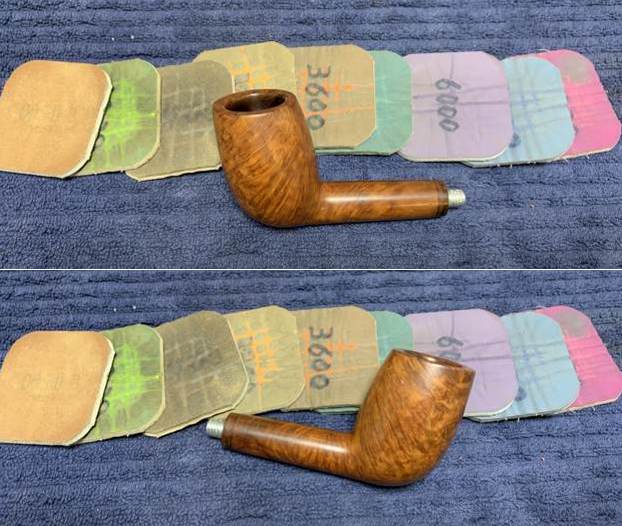
 I blended the repair into the surrounding briar and polished the briar with micromesh sanding pads – I dry sanded the briar with 1500-12000 grit sanding pads. I wiped the bowl down with a damp cloth after each sanding pad to remove the debris. It really took on a rich shine.
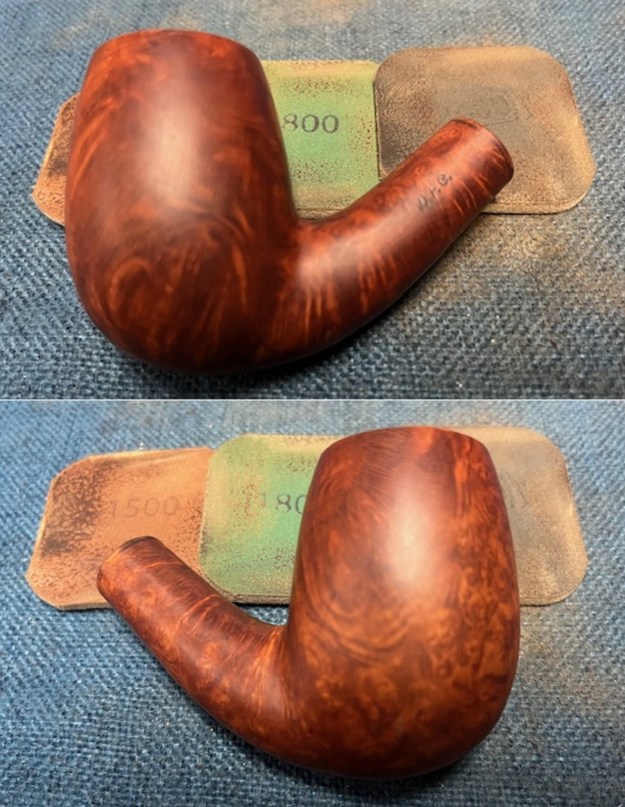
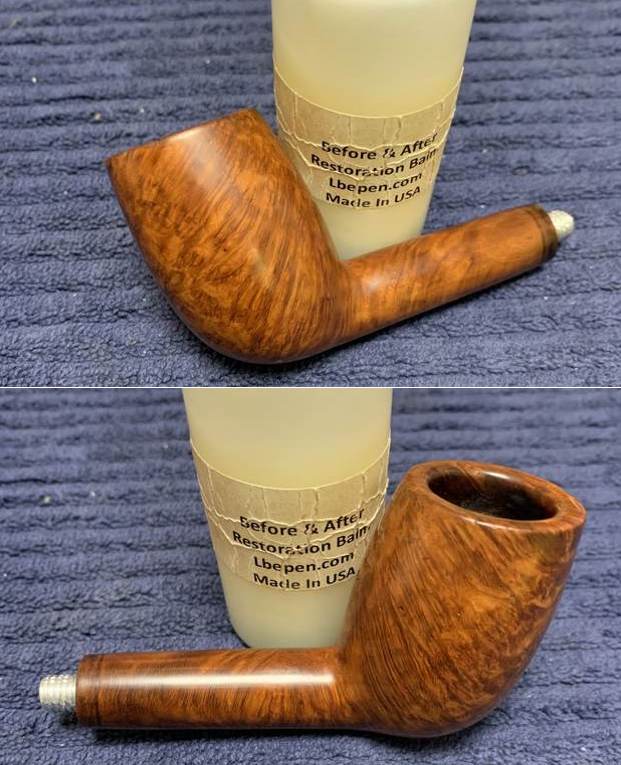
 I worked some Before & After Restoration Balm into the surface of the briar with my finger tips and a horse hair shoe brush to get into the rusticated portions. The product is incredible and the way it brings the grain to the fore is unique. It works to clean, protect and invigorate the wood.
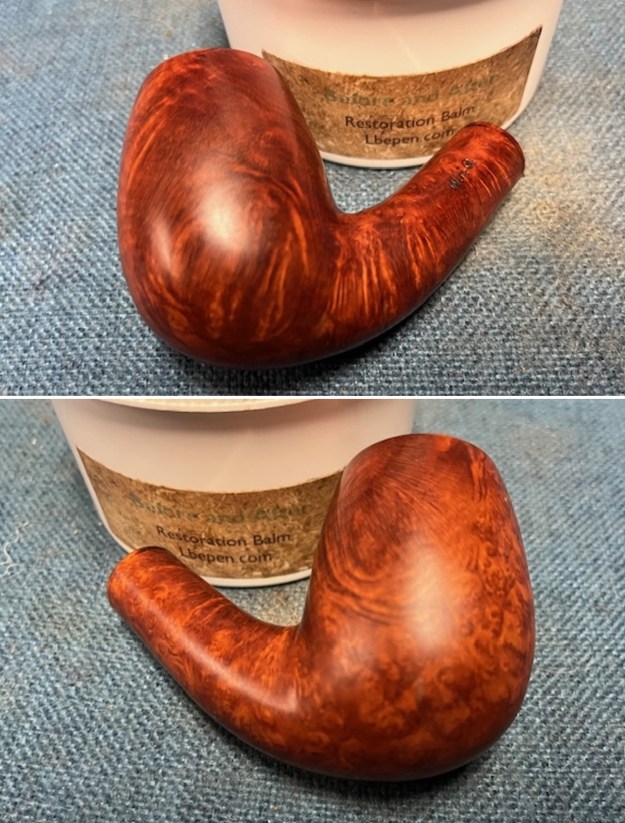
 I sanded the stem with 320-3500 grit sanding pads to remove the tooth chatter and the marks in the stem surface. I wiped it down after each sanding pad with an Obsidian Oil soaked cloth. It began to look very good.
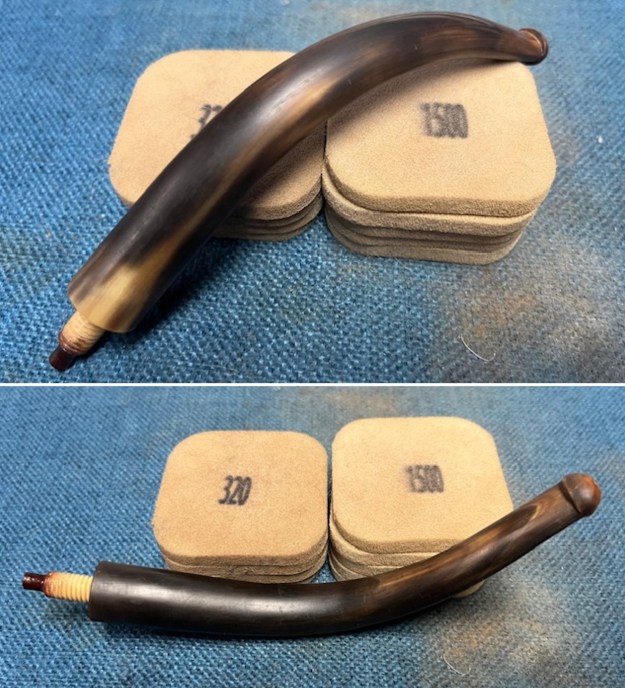 I polished the stem with micromesh sanding pads – dry sanding it 1500-12000 pads. I wiped it down with Obsidian after each pad to remove the dust and polishing debris. I polished it with Before After Pipe Polish – both Fine and Extra Fine. I gave it another coat of Obsidian Oil.
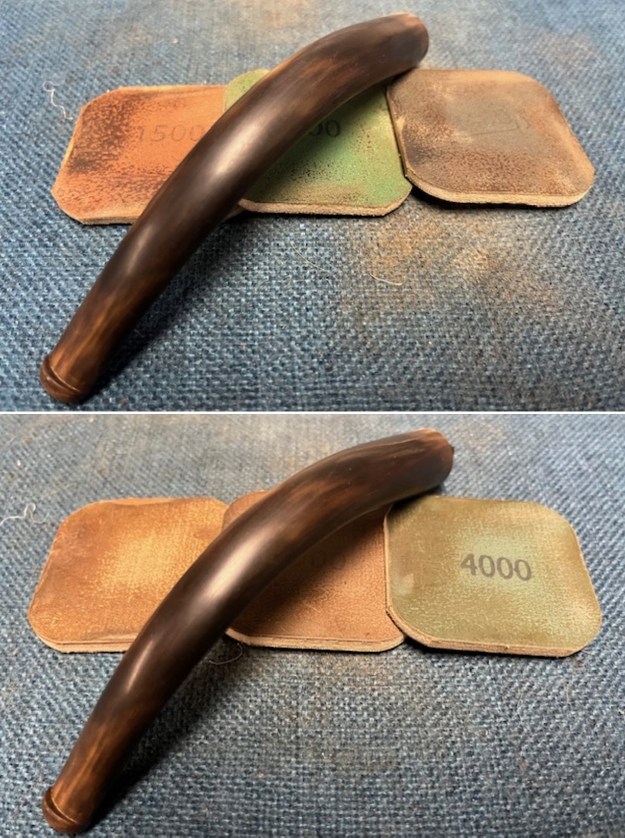
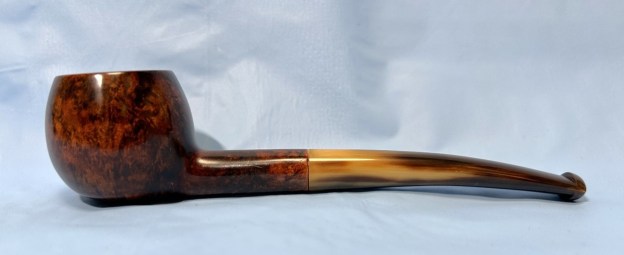
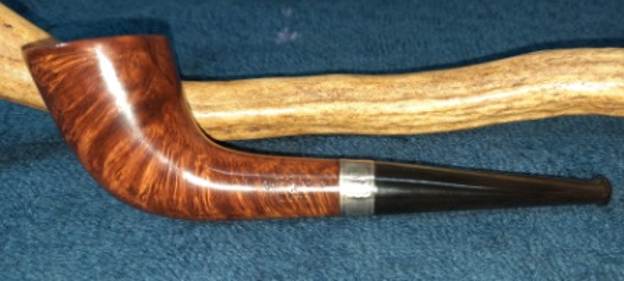
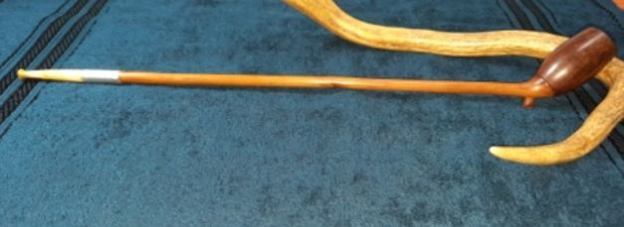
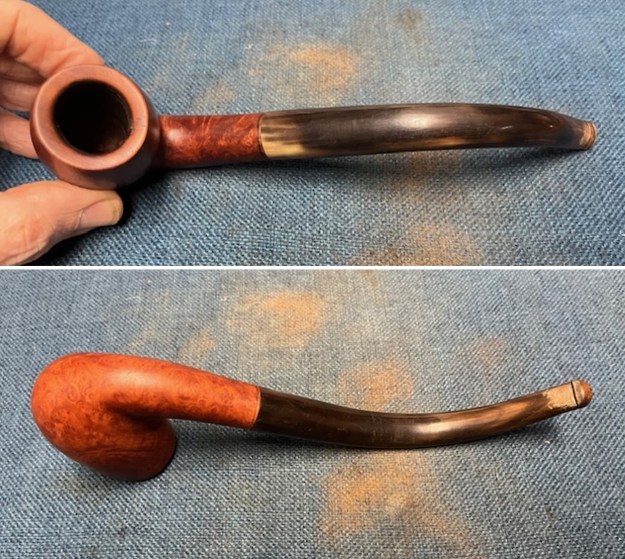
 This Large French Made WFC Bent Billiard with a horn stem turned out very nice. The mix of brown stains highlights the grain worked well with the smooth taper horn stem. The rim and bowl look very good. The finish on the pipe is in excellent condition. I screwed the horn stem back on the shank and carefully buffed the pipe with Blue Diamond on the buffing wheel. I gave the bowl and stem multiple coats of carnauba wax on the buffing wheel and followed that by buffing the entire pipe with a clean buffing pad. I hand buffed the pipe with a microfiber cloth to deepen the shine. The finished Large Swan Neck WFC Bent Billiard is unique and feels great in the hand. Give the finished pipe a look in the photos below. It is a nice pipe whose dimensions are Length: 8 inches, Height: 2 ½ inches, Outside diameter of the bowl: 1 ¼ inches, Chamber diameter: 7/8 of an inch. The weight of the pipe is 81 grams/2.89 ounces. Thanks for walking through the restoration with me as I worked over another beautiful pipe. This one will be going on the rebornpipes store, in the French Pipe Makers Section shortly. If you are interested in adding it to your collection let me know by message or by email to slaug@uniserve.com. Thanks for your time.