Blog by Paresh Deshpande
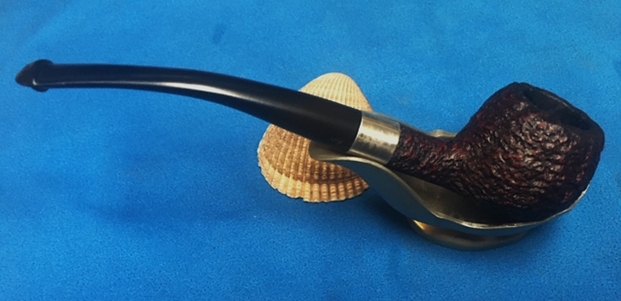
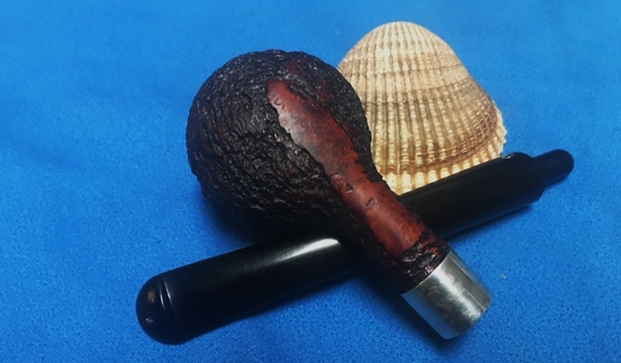
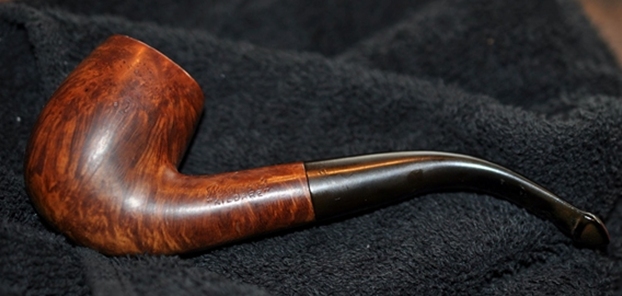
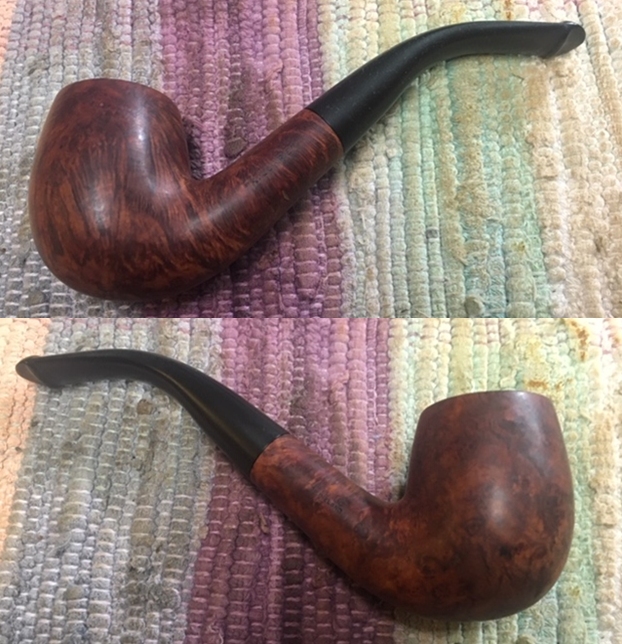
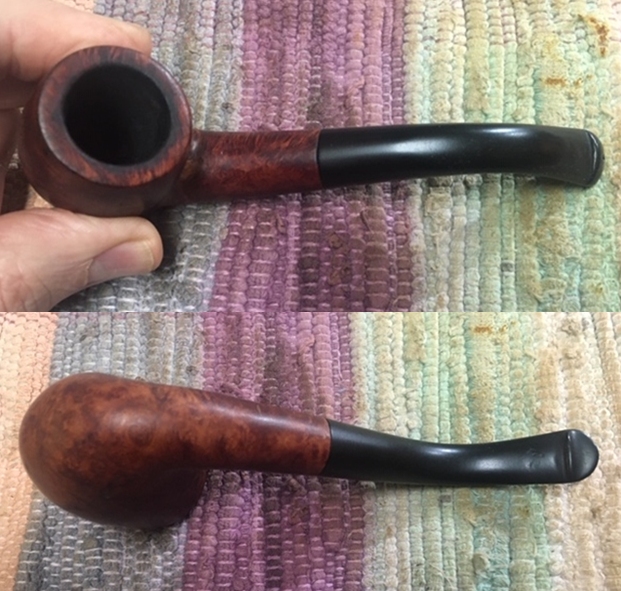
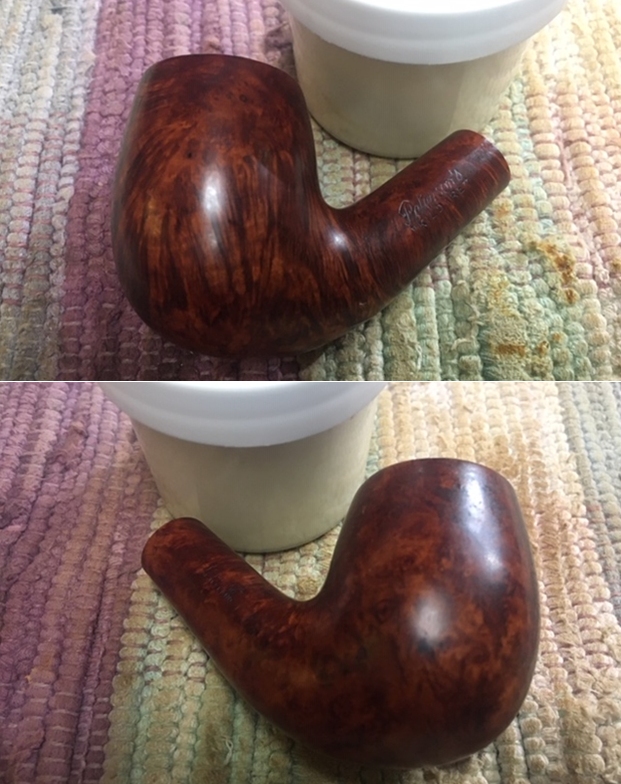
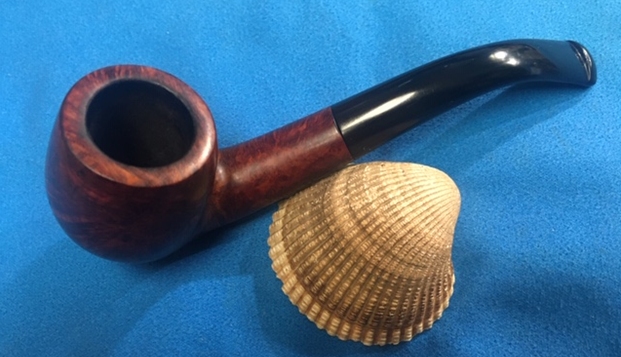
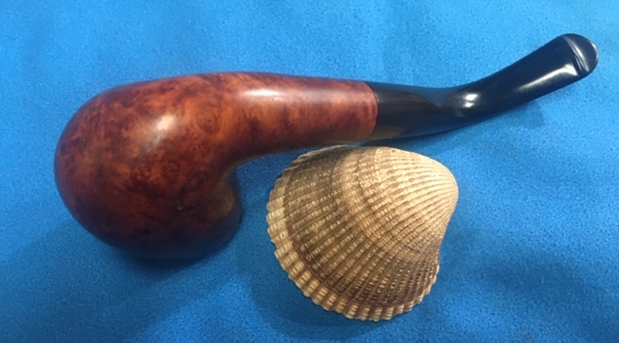
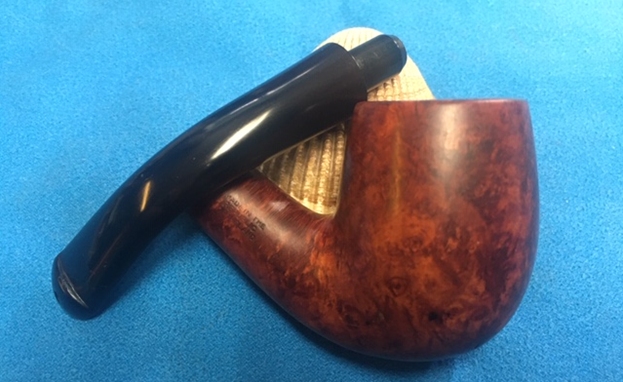
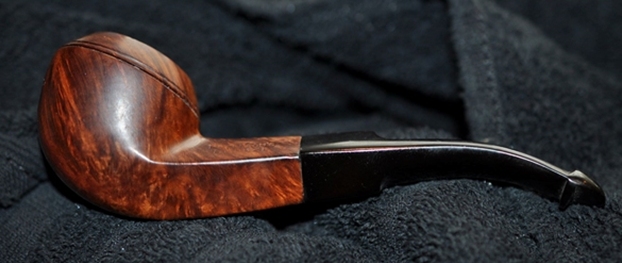
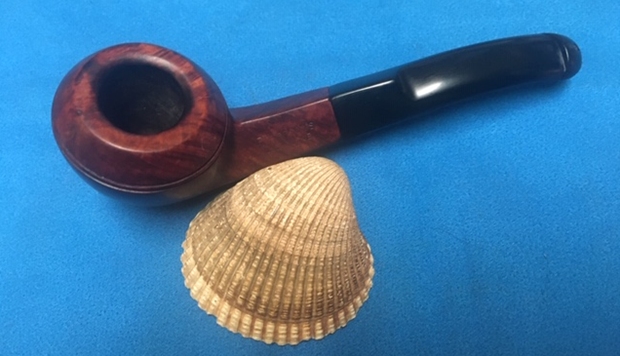
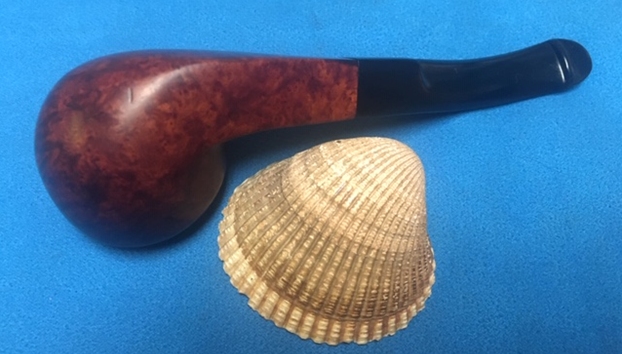
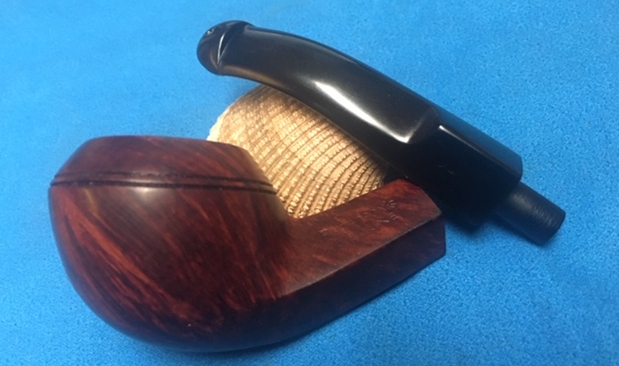
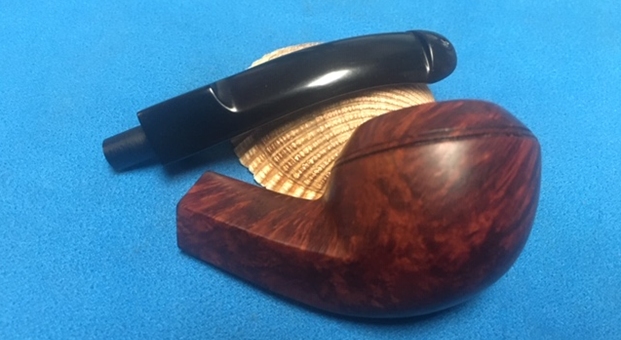
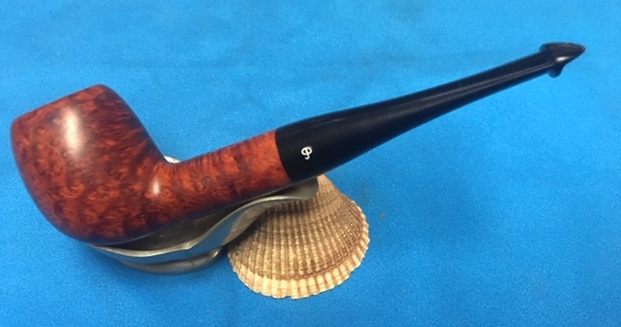
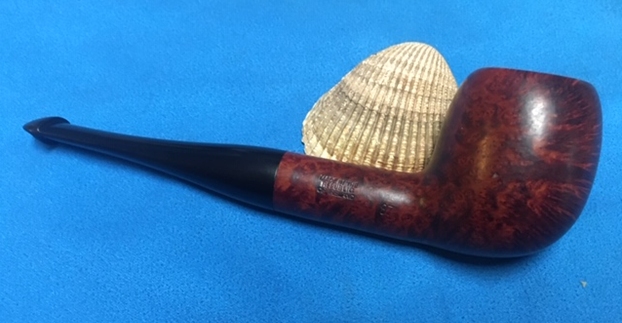
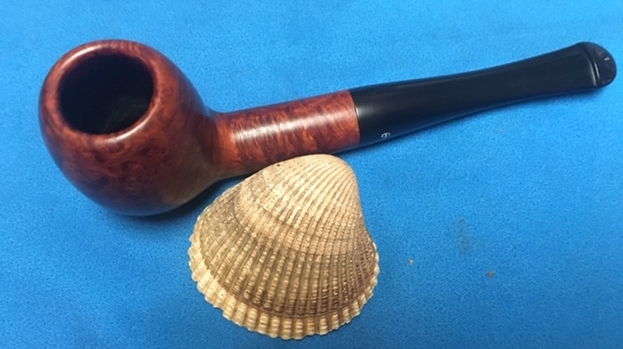
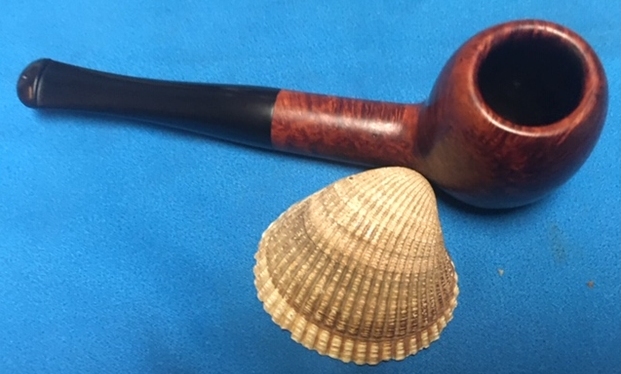
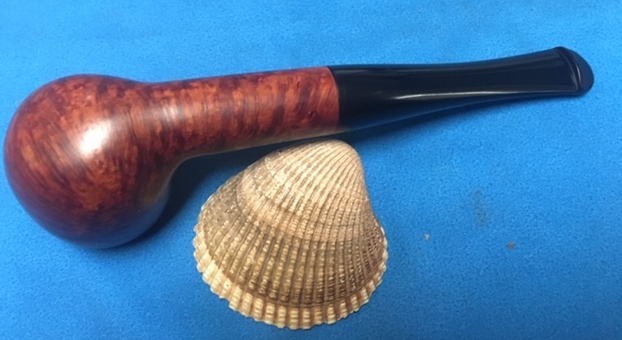
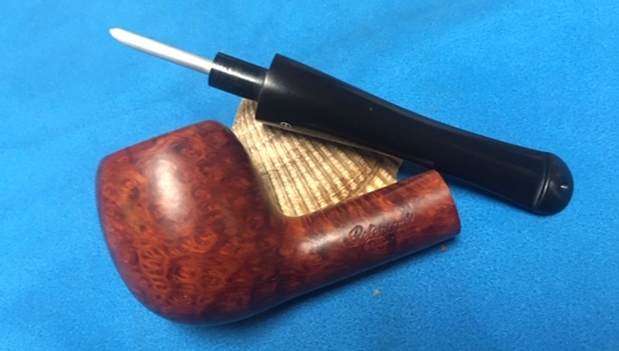
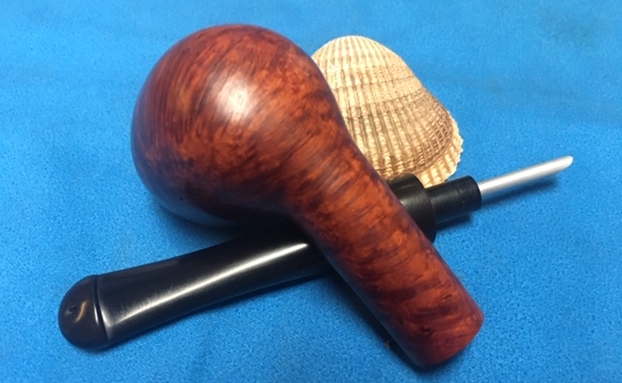
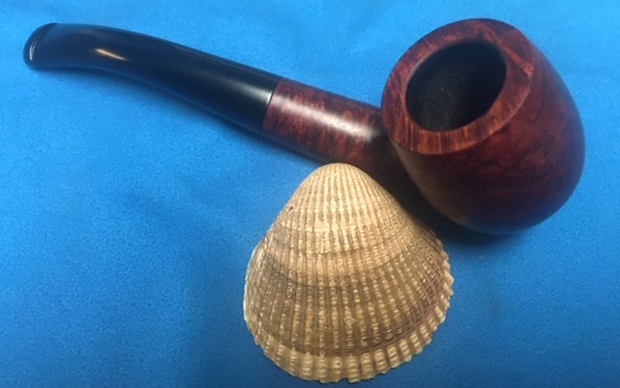
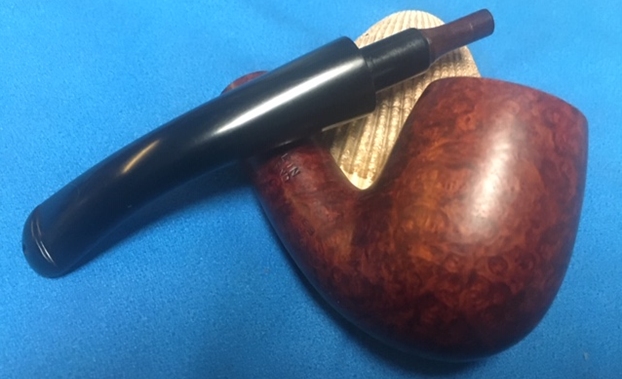
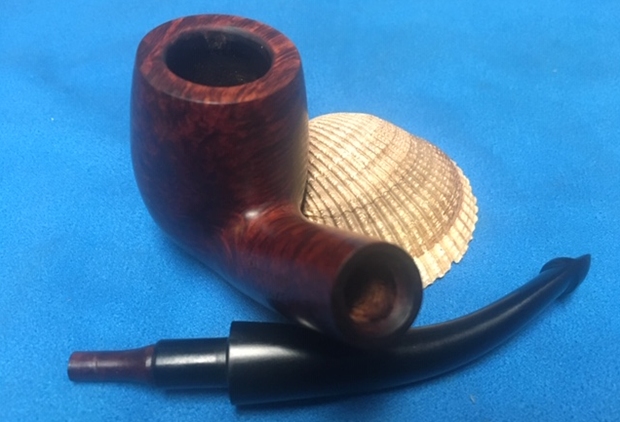
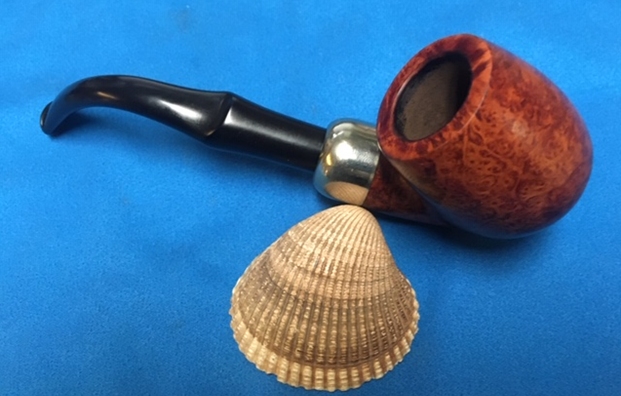
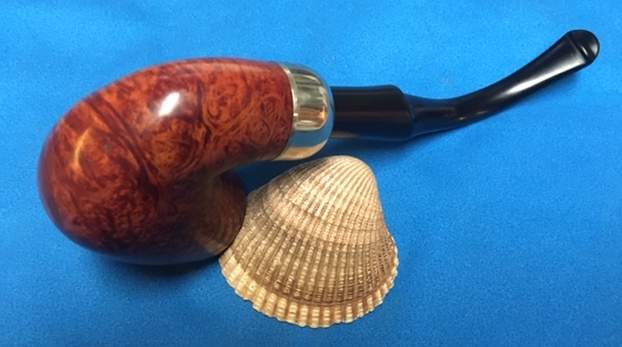
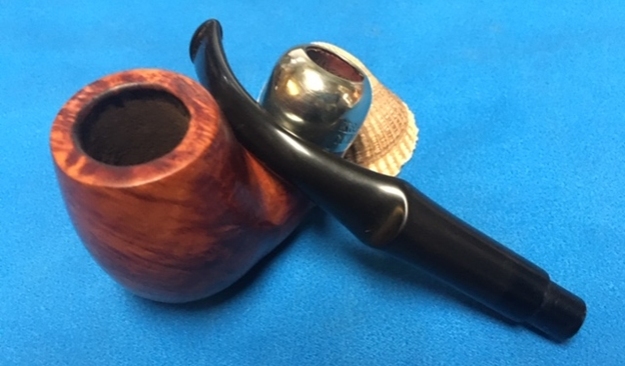
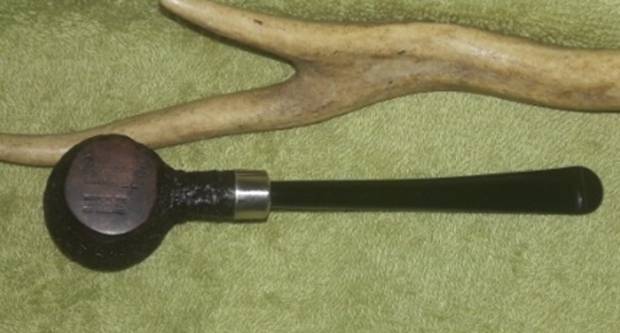
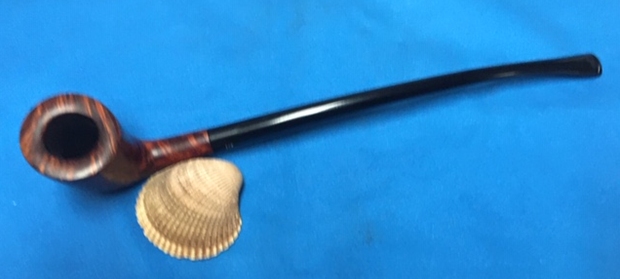
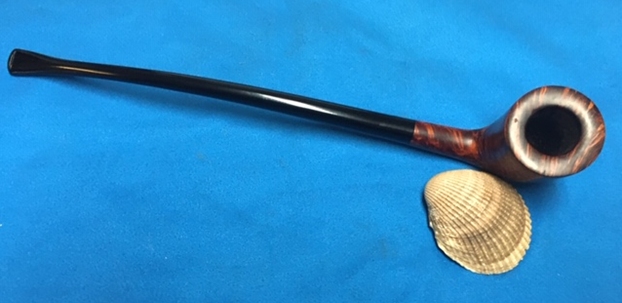
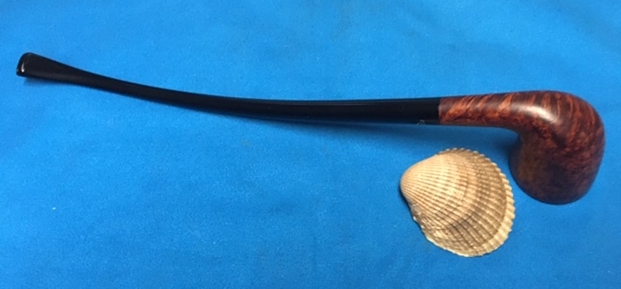
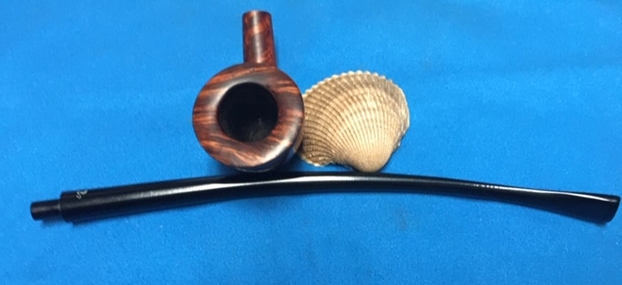
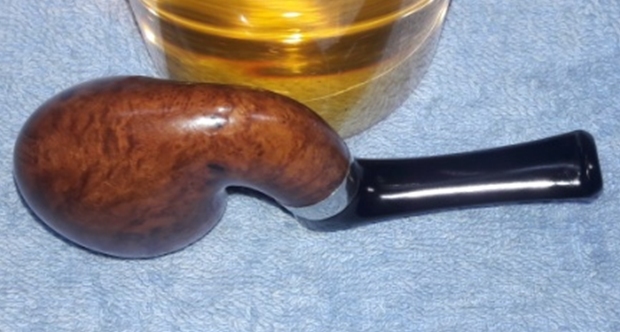
Over the last month and a half, I have worked on five Peterson’s pipes to be added to my personal collection; two from my inherited lot (DONEGAL ROCKY # 999 and KAPMEER # 120S) and three that I had purchased on eBay, a Peterson’s SYSTEM # 31 just so that I could include it in my rotation, a Peterson’s BARREL and a Peterson’s OLD ENGLISH COLLECTION. Continuing with my work on Peterson’s in my collection, the next and sixth pipe that is now on my work table is one from my inheritance; a unique small system pipe with oval shaped chamber/ stummel. The stem folds itself over the rim top, further making it compact enough in size to be carried in one’s vest pocket.
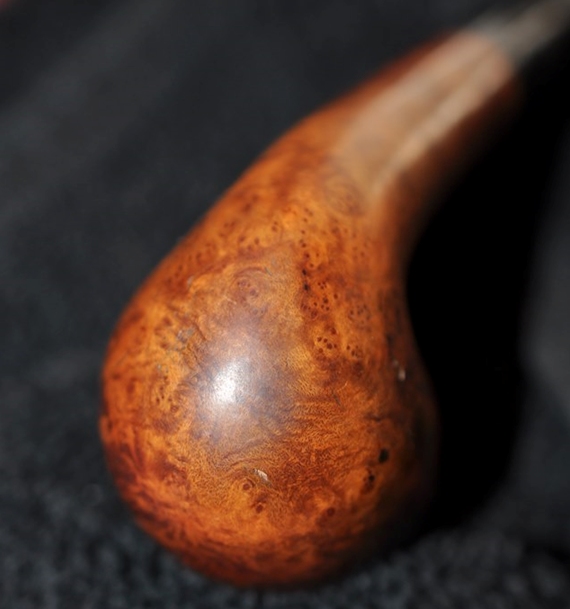
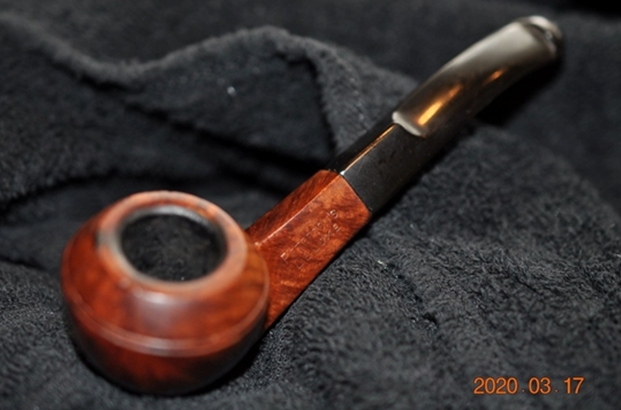
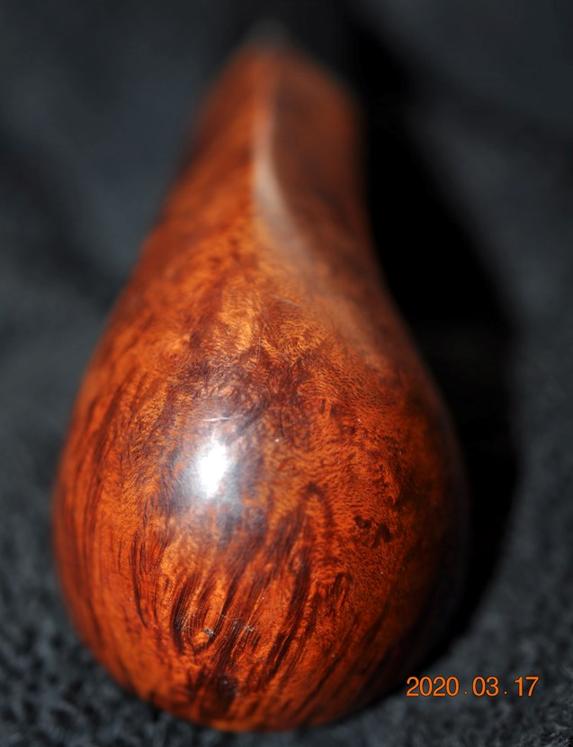
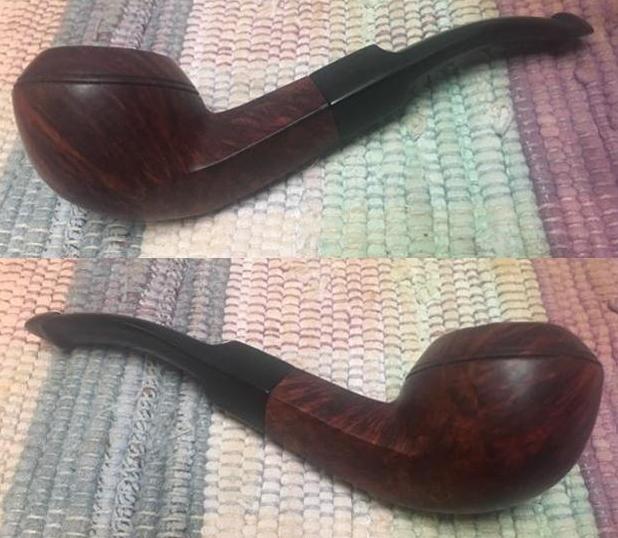
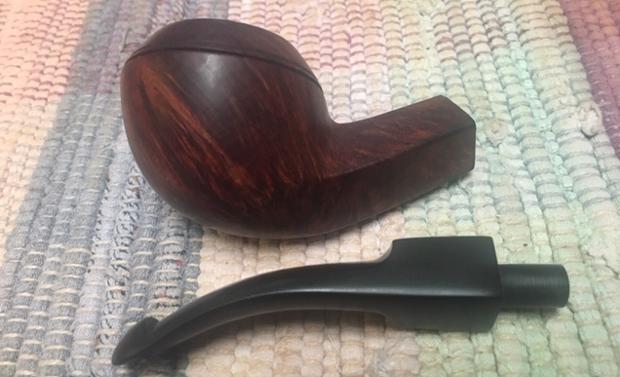
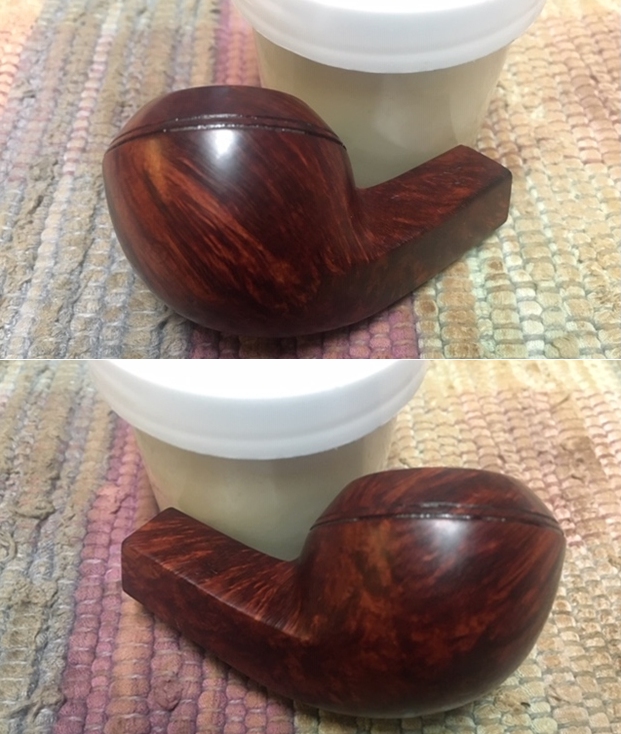
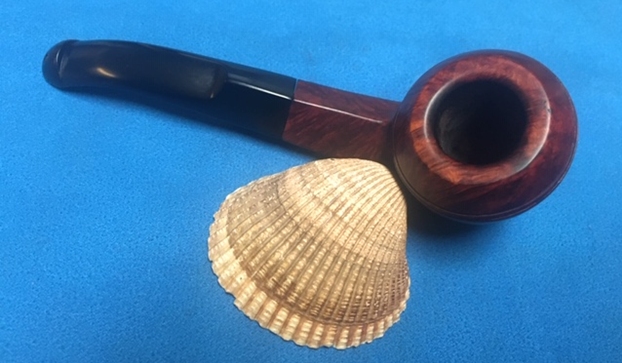
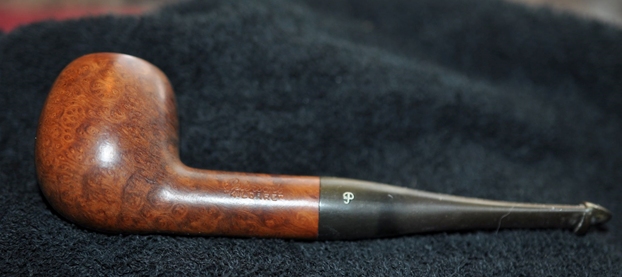
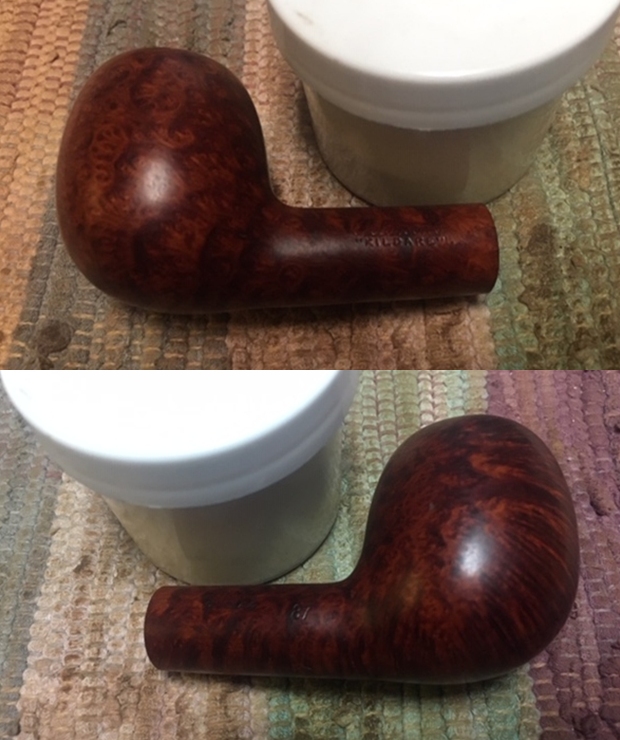
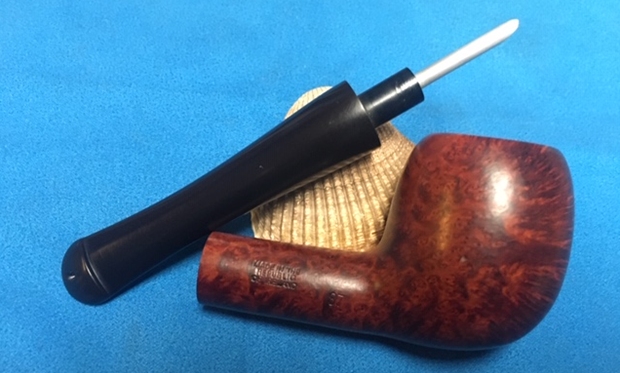
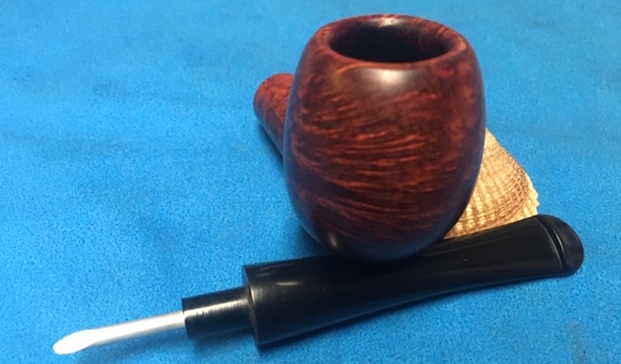
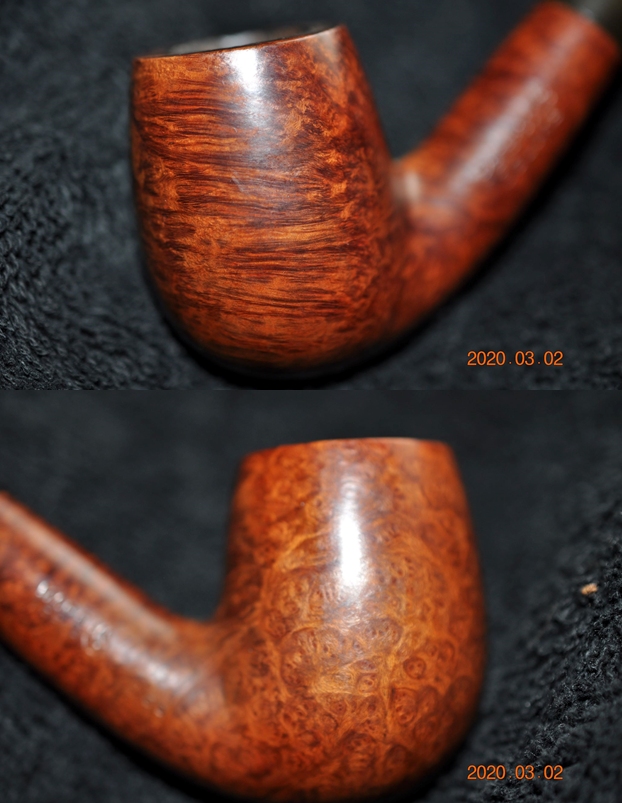
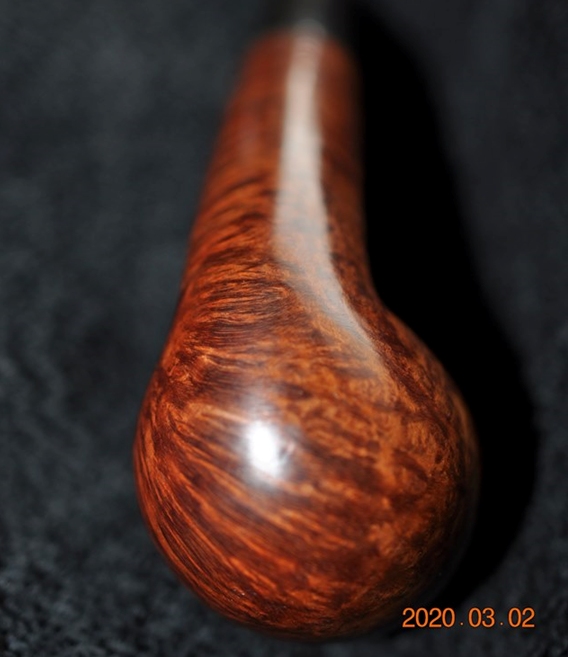
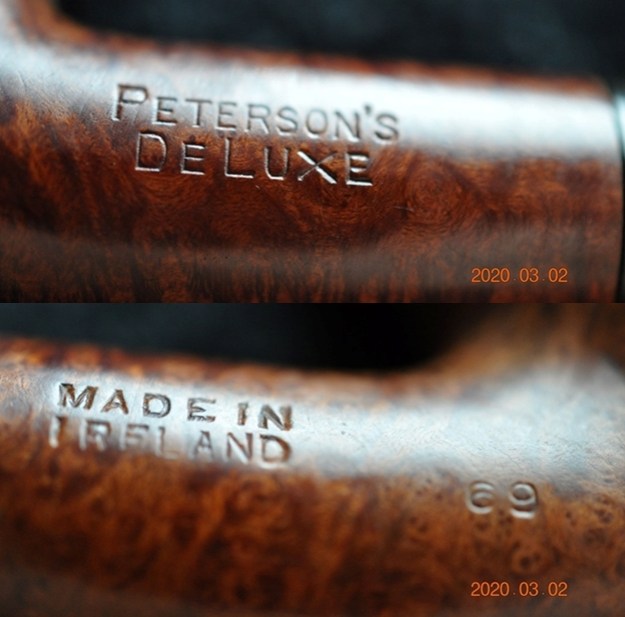
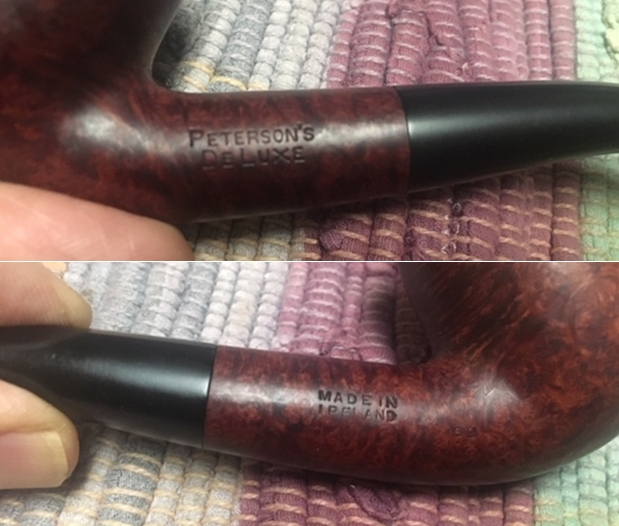
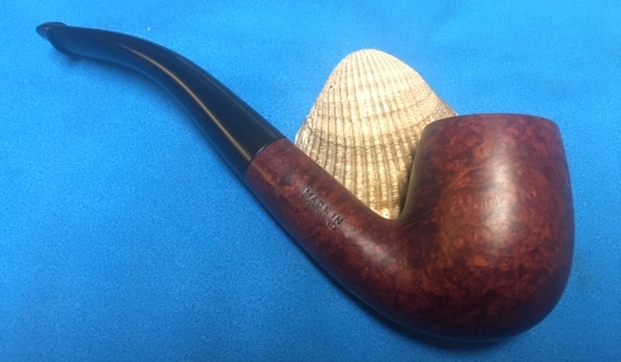
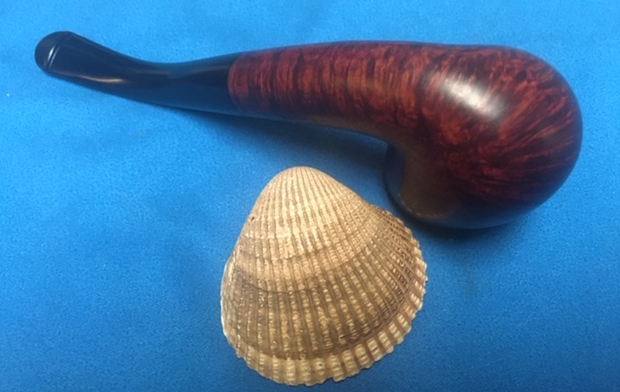
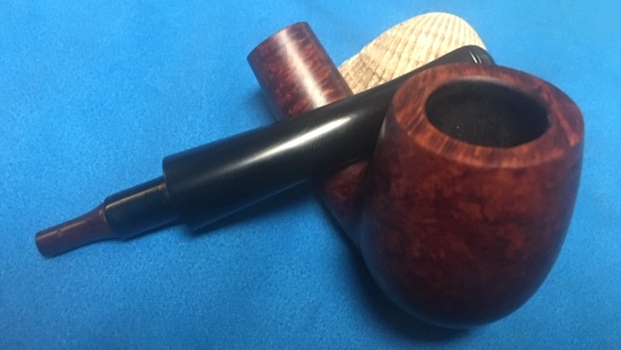
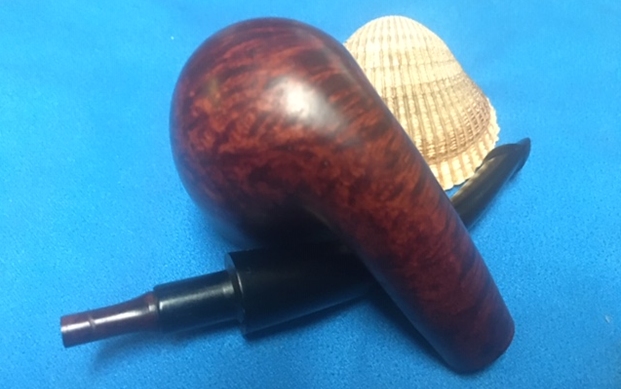
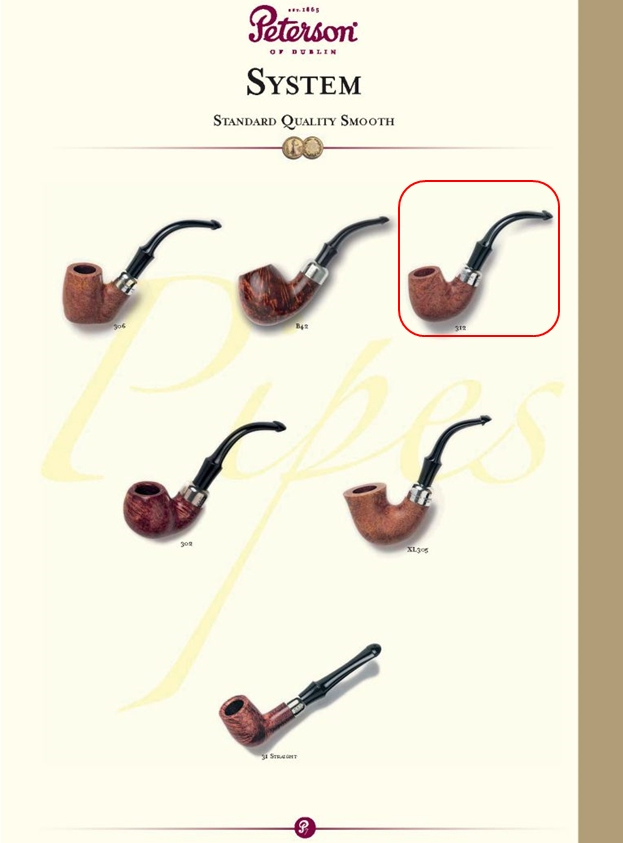
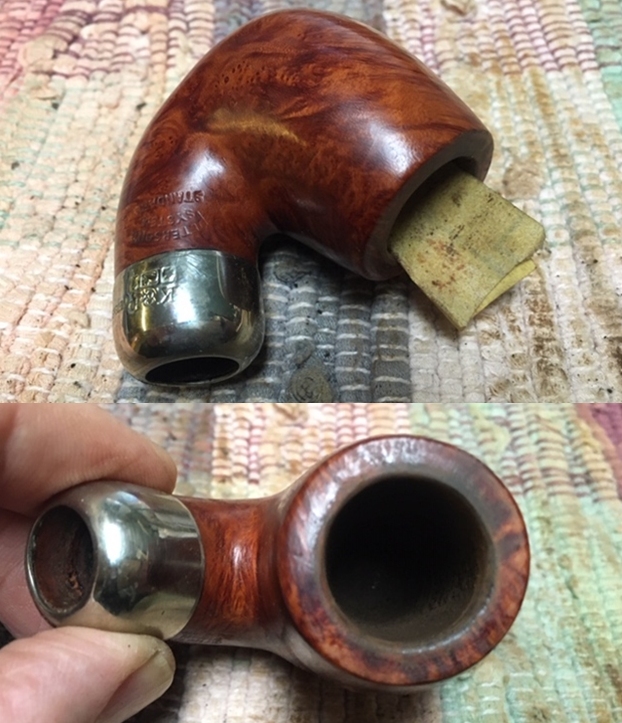
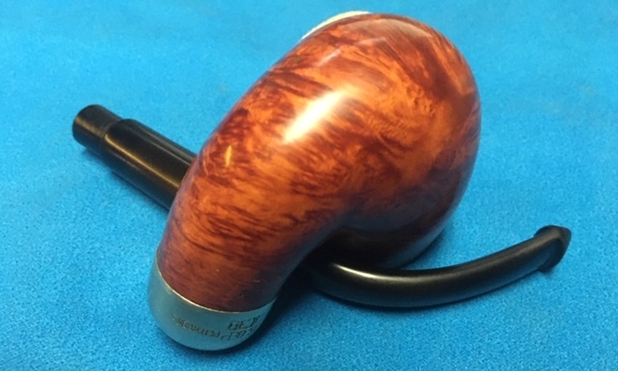
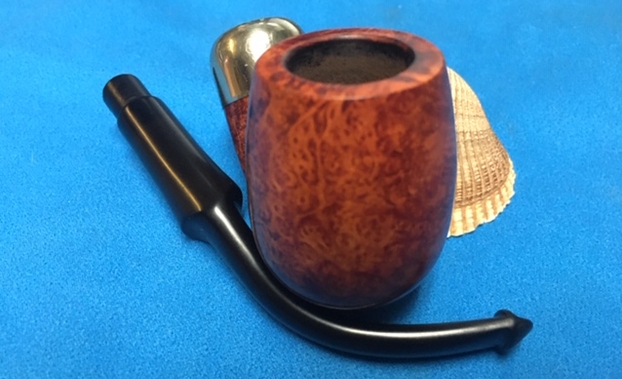
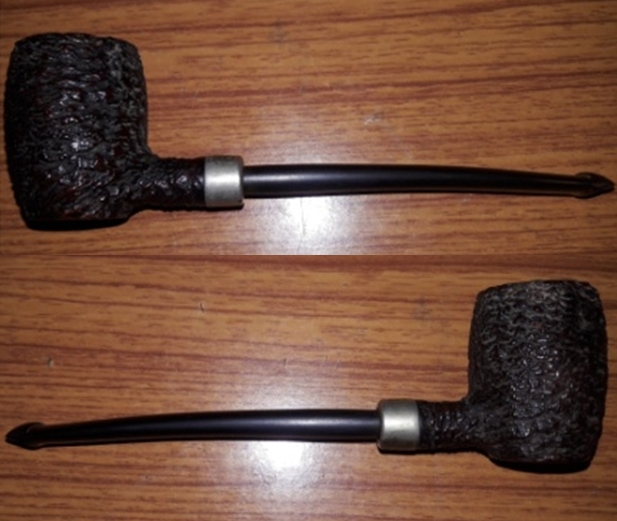
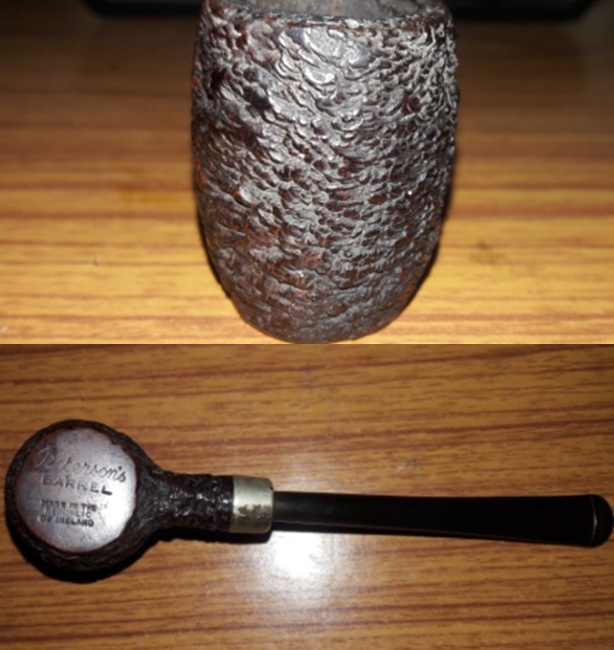
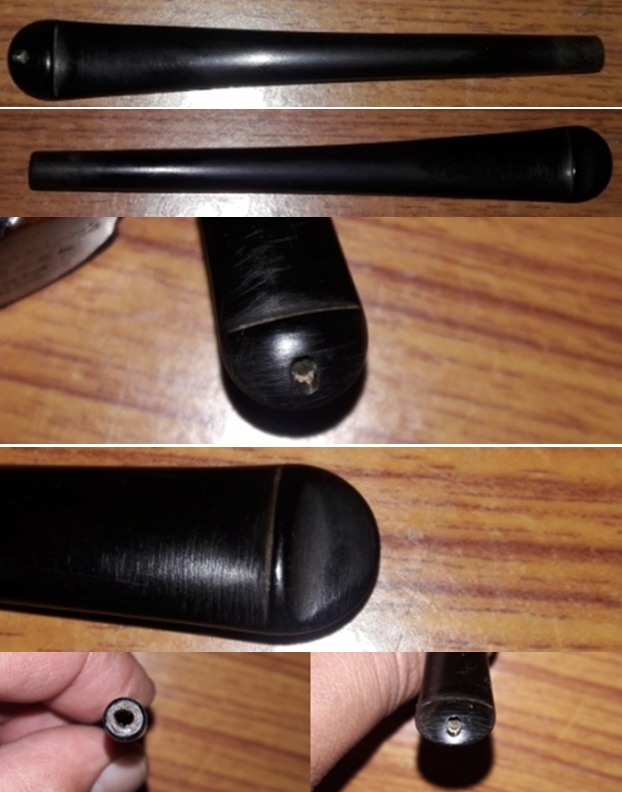
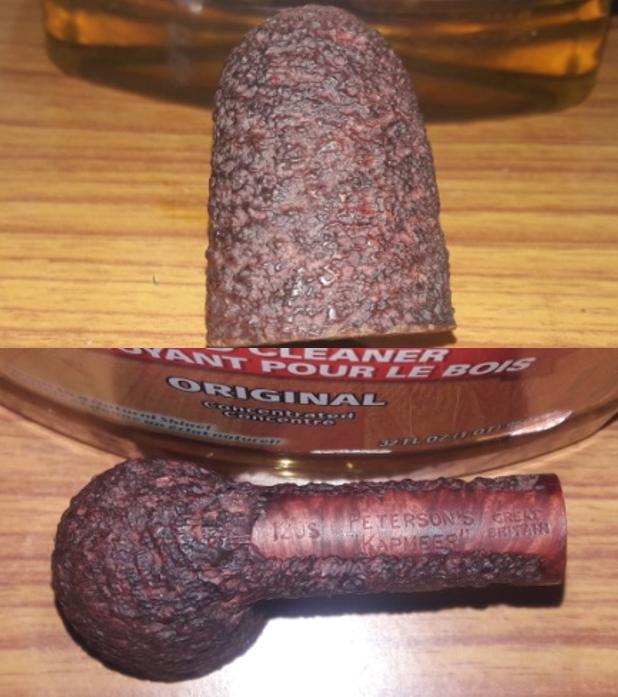
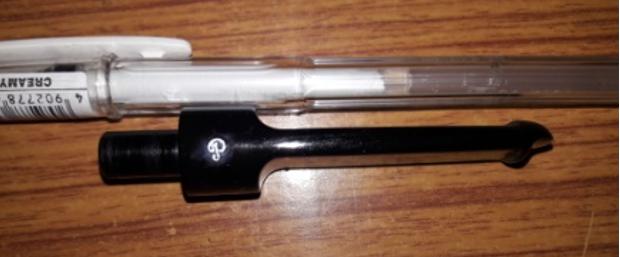
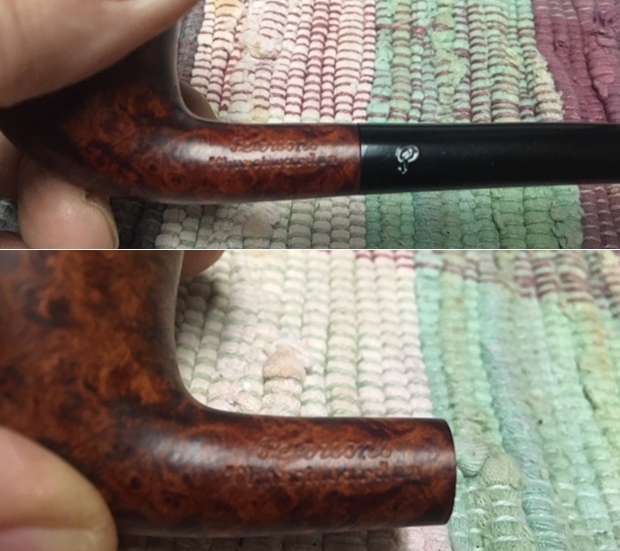
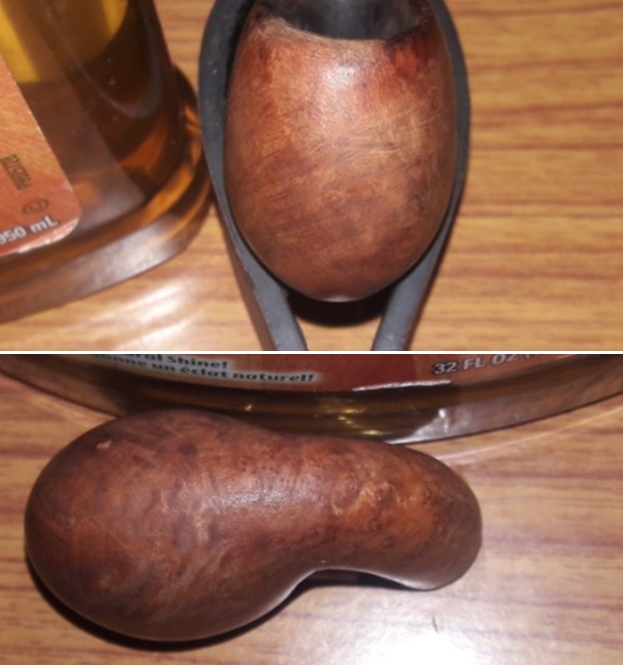
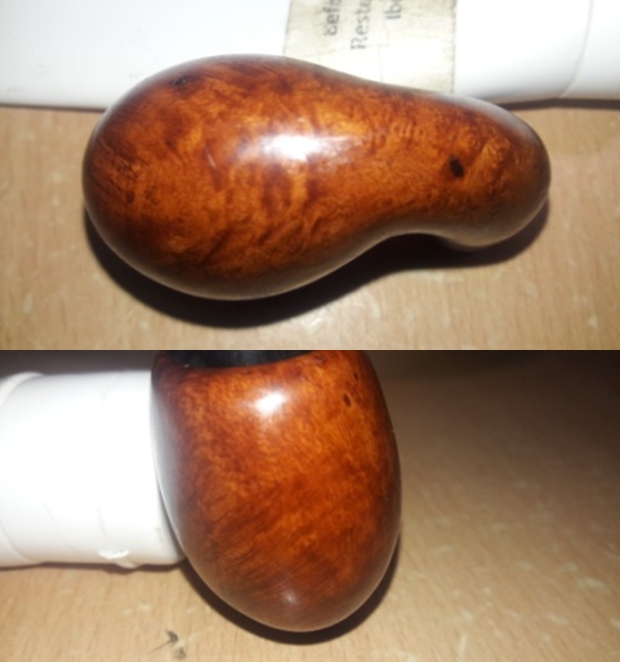
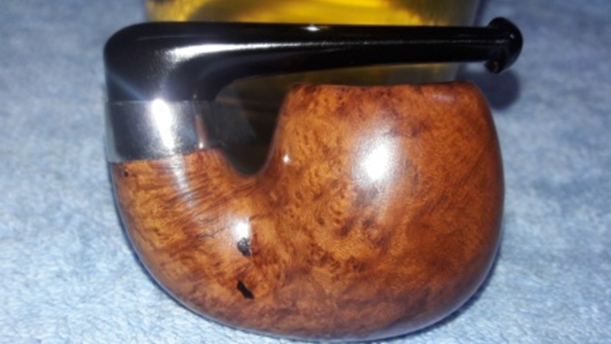
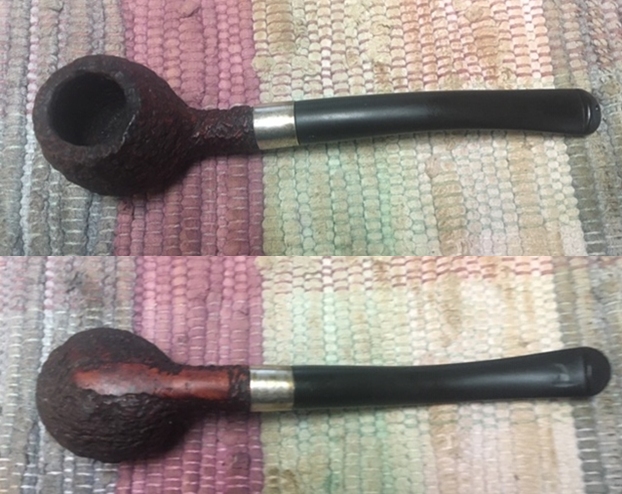
The smooth stummel of this pipe has a beautiful mix of Bird’s eye on the foot of the stummel and cross grain on the front, back, sides and the upturned shank of the stummel. An oval shaped stummel, short upturned shank with a nickel plated ferrule at the shank end and a proportionate vulcanite stem with an orifice for a slot, makes it a visually appealing pipe. It is stamped on the left side of the shank as “K & P” over “3”. The shank end is adorned with a nickel ferrule that is stamped in three shields as “K” “&” “P” over three faux hallmarks a Shamrock, a Prone Fox, and a Stone Tower. The stummel is devoid of any COM stamp that would help in dating this pipe. Even the stem is unstamped.  Since I have been recently working on Peterson’s pipes in my collection and reading about it as much as I could, I knew that K & P pipes did not have any COM stamp during the early part of the Patent Era. Furthermore, this pipe has a reservoir/ sump in the mortise making it a System pipe!! The stem slot is a round orifice which points to this pipe being an old one. Thus from these facts, I can safely presume this pipe to be from the Patent Era, that is from 1875 to 1922.
However, in spite of my extensive research on Peterson’s pipes for shapes and models from this era, I came a cropper!!!! In case any of the esteemed readers has some additional information on this pipe, I would request you to share it on Reborn pipes for the benefit of our community.
Initial Visual Inspection
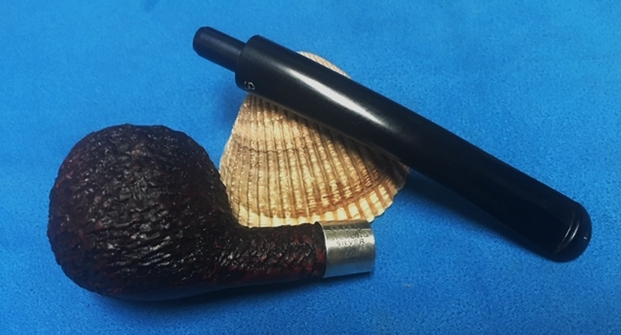
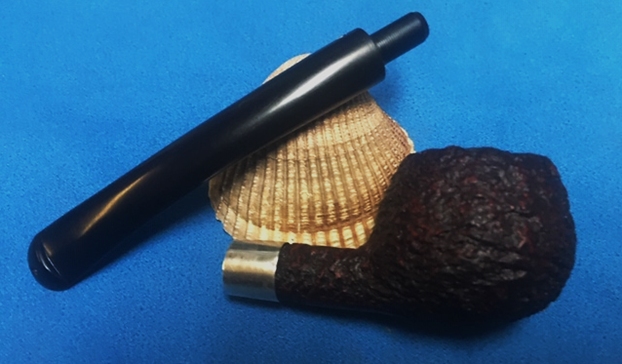
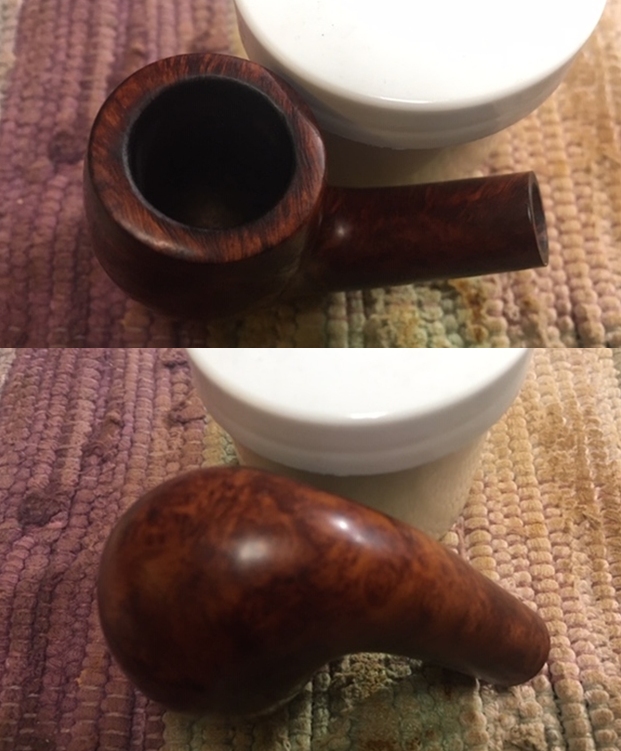
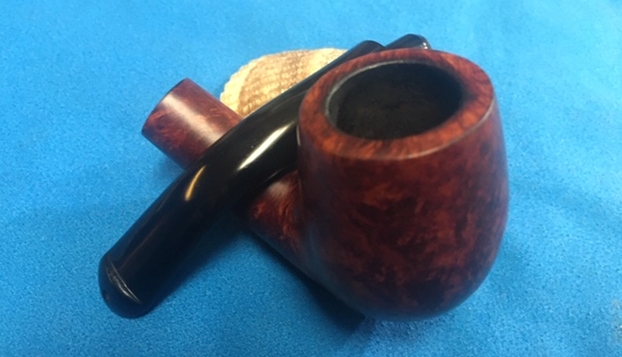
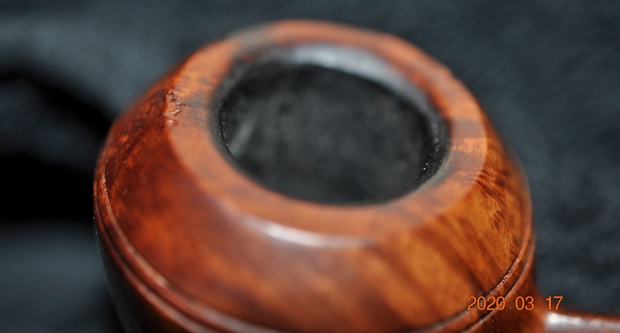
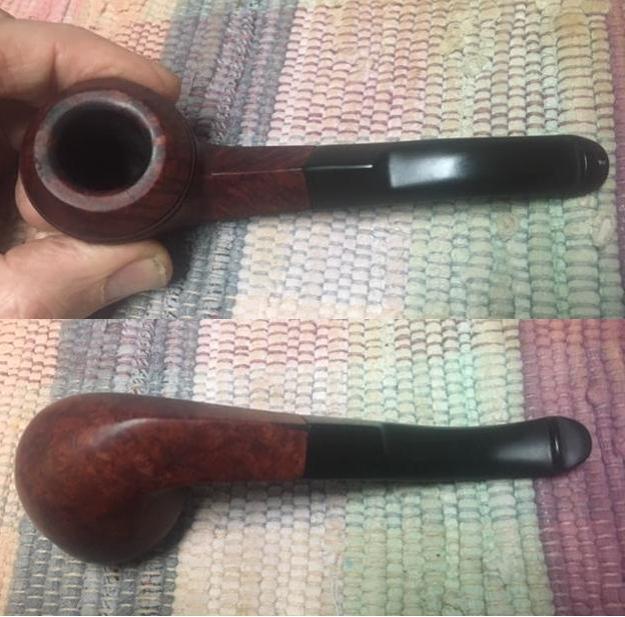
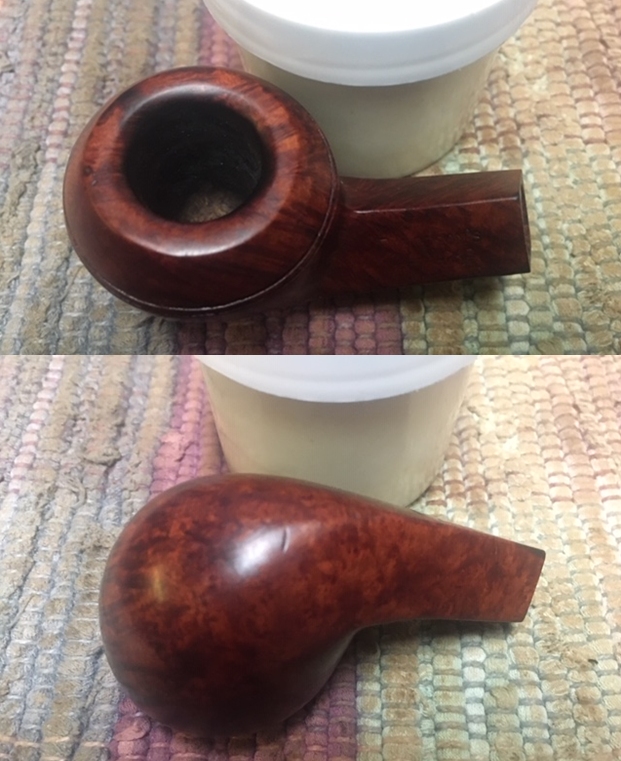
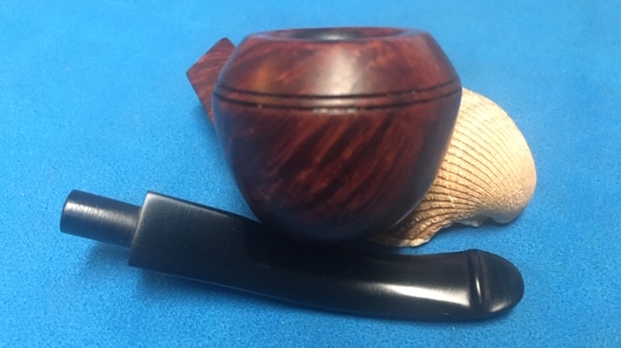
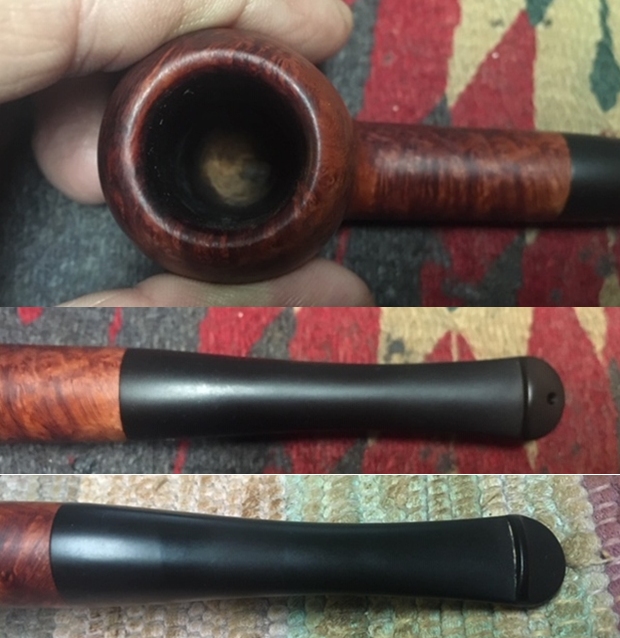
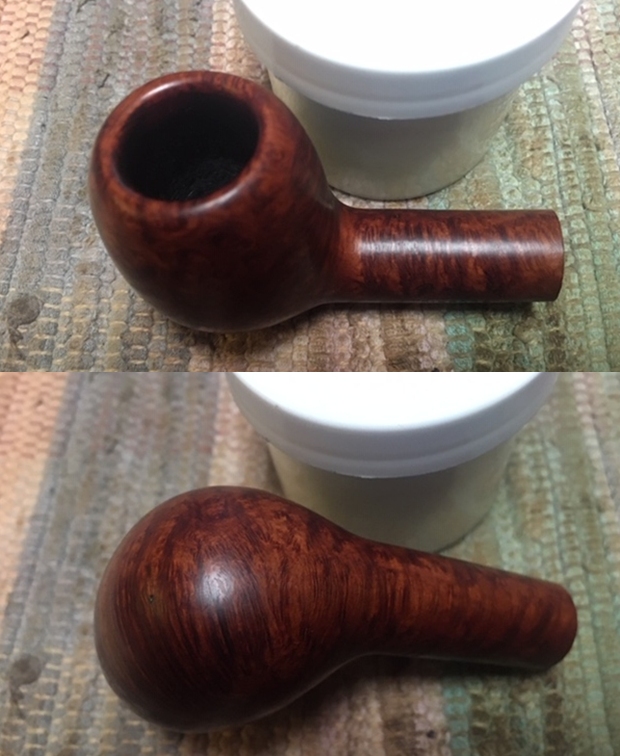
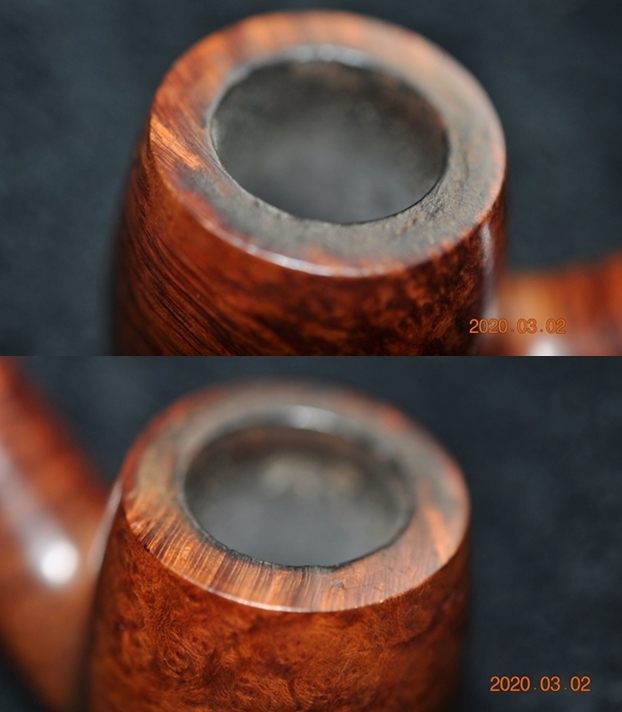
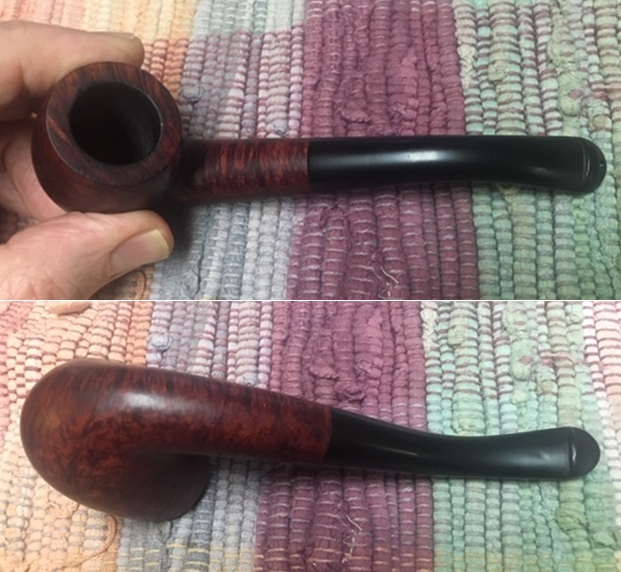
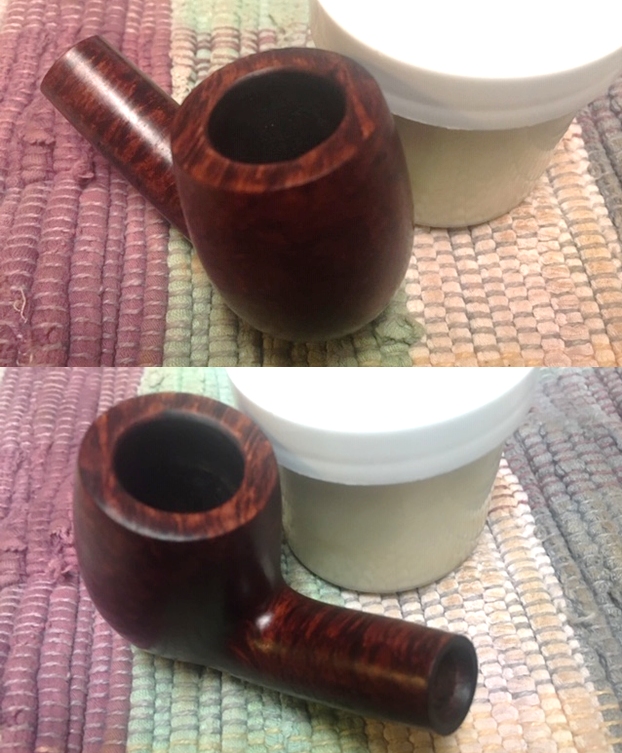
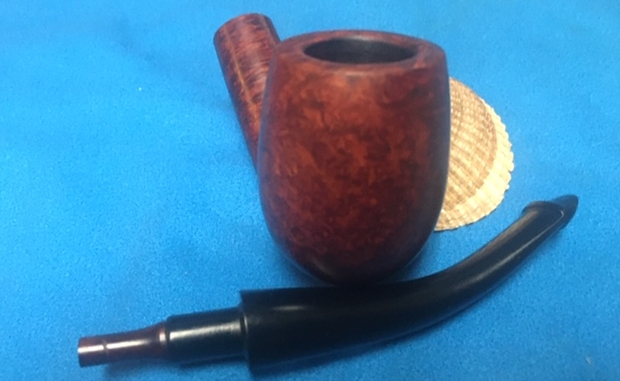
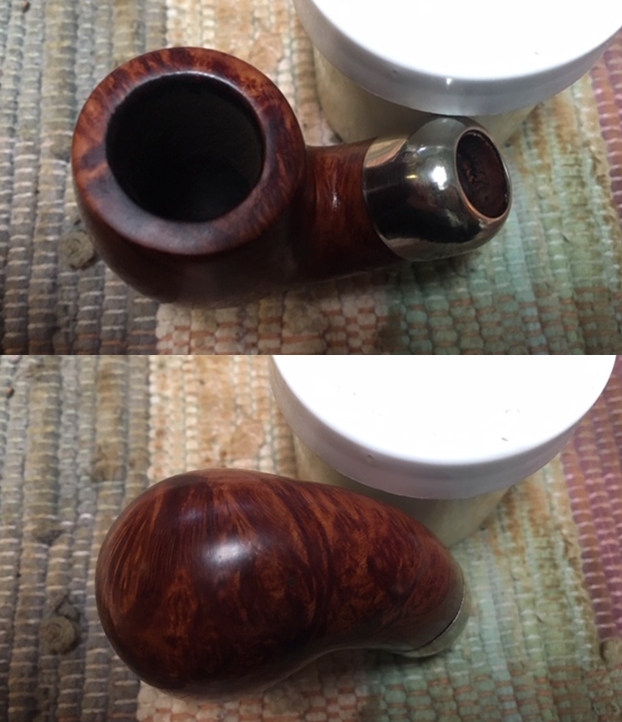
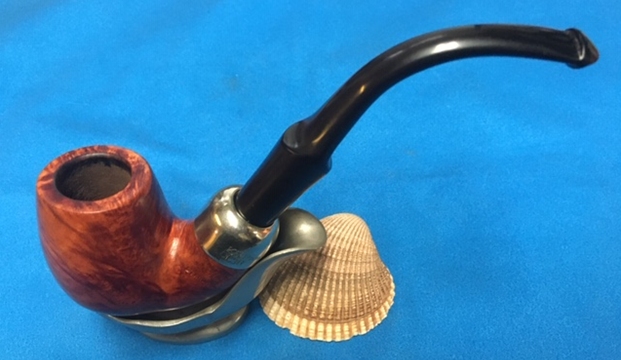
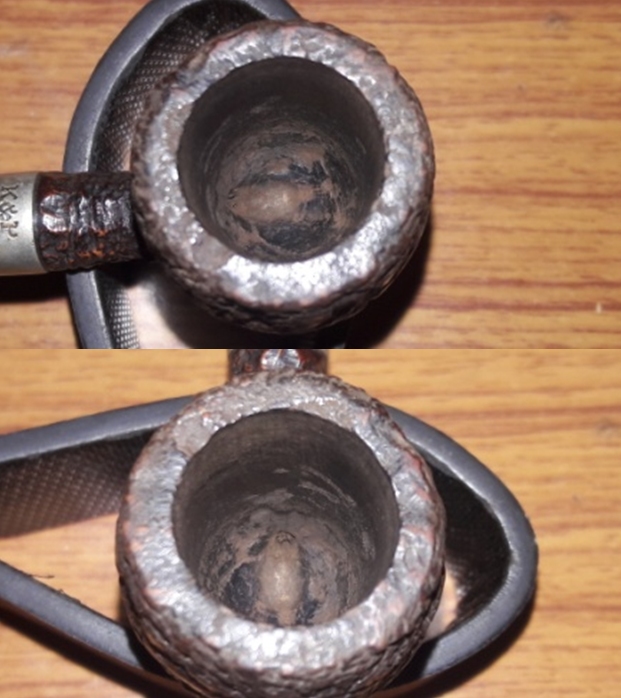
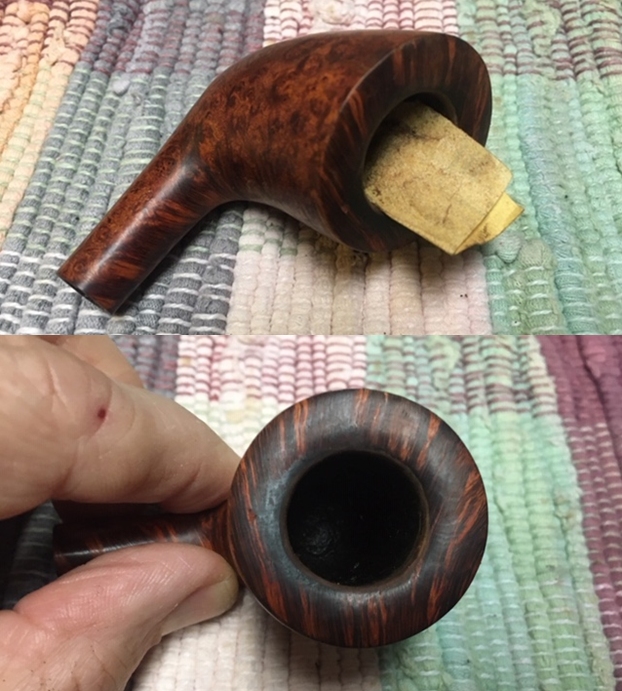
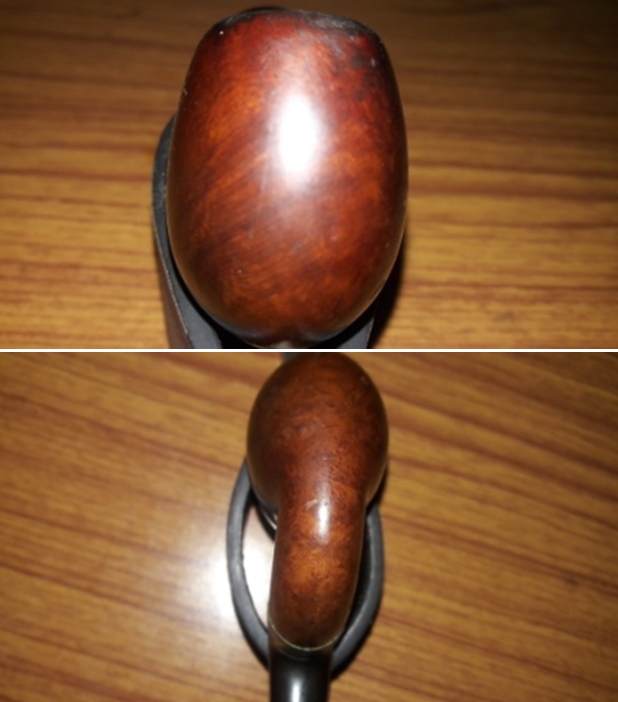
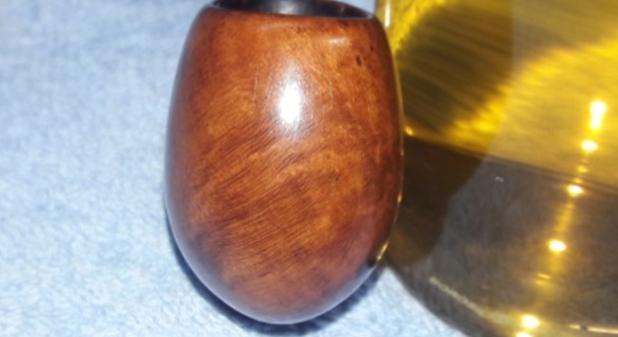
The smooth stummel on this pipe is covered in a thick layer of dust and sticky grime giving it a dull and lackluster appearance. Through all the grime, bird’s eye and cross grains can be still seen at the foot and on sides, front and back of the stummel respectively. The rim top surface appears uneven and is covered in dust, heavy lava overflow, grime and will need to be cleaned and polished. There are a few scratches on the left side of the stummel which will need to be addressed. A few fills seen on either side of the stummel need to be refreshed. The stummel has developed a nice patina which I shall endeavor to preserve.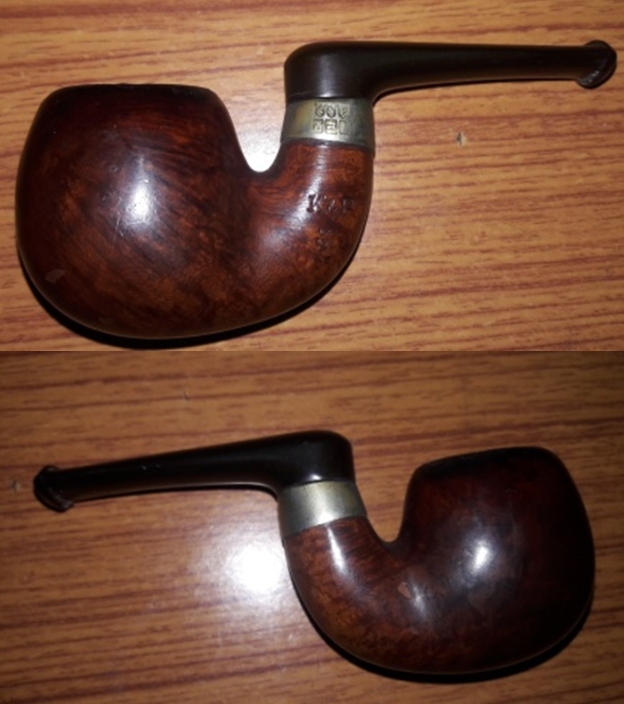
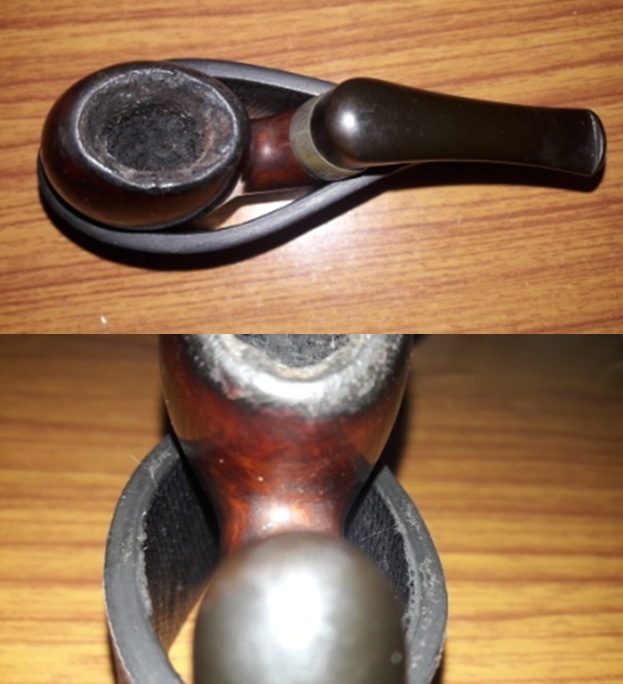
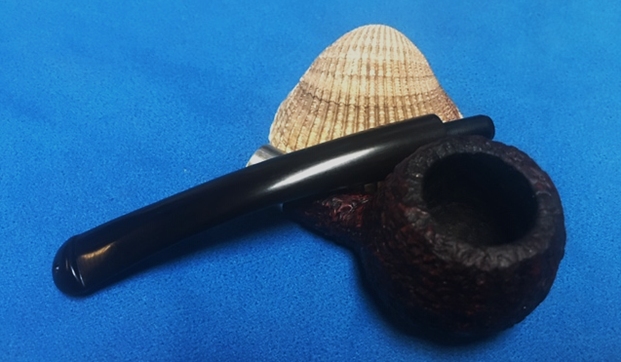
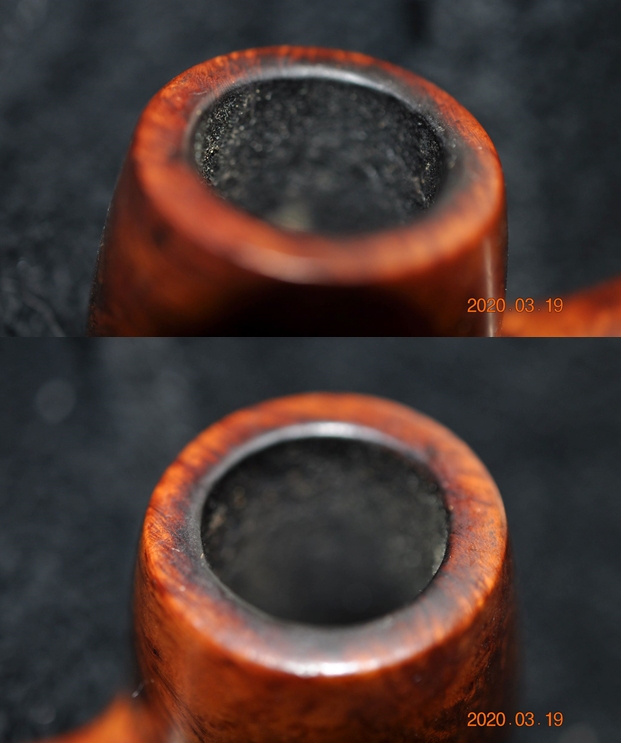
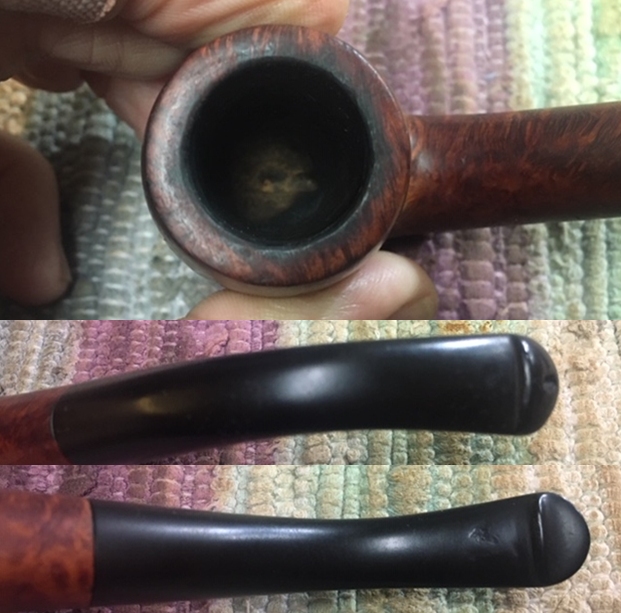
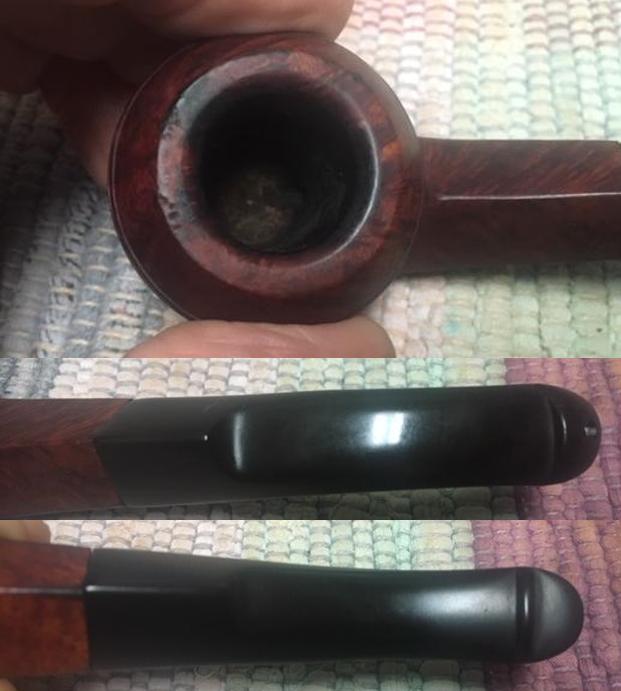
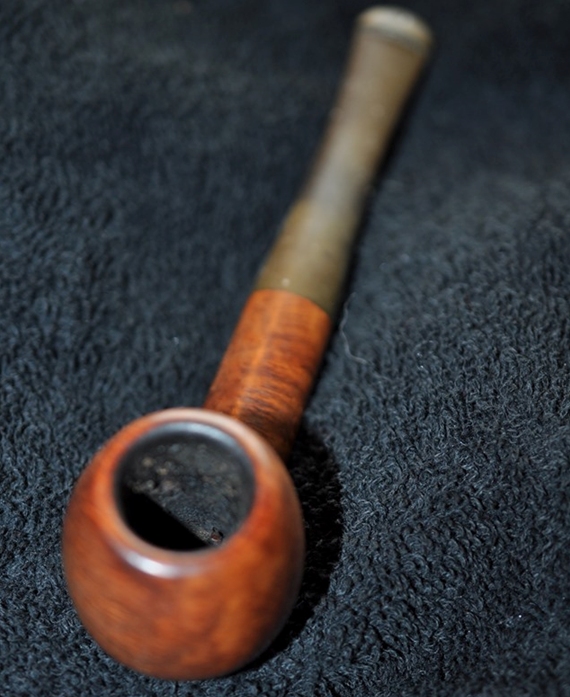
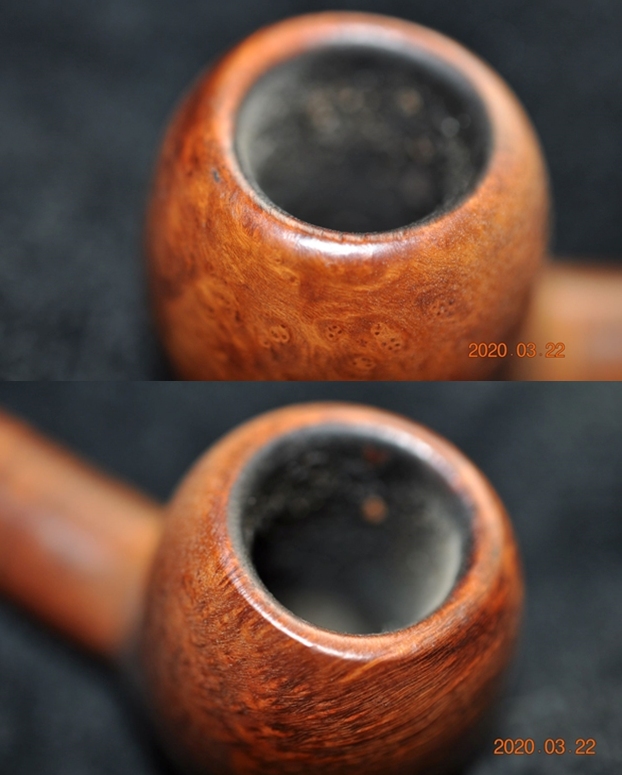
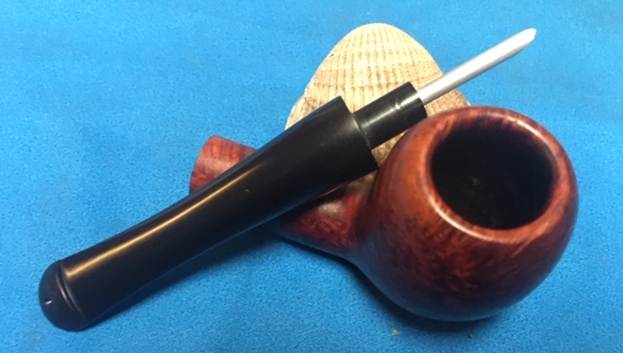
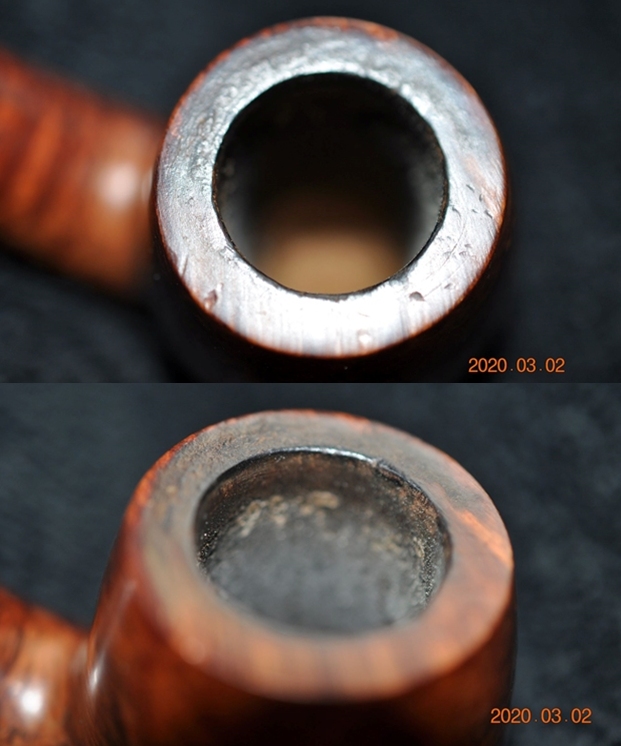
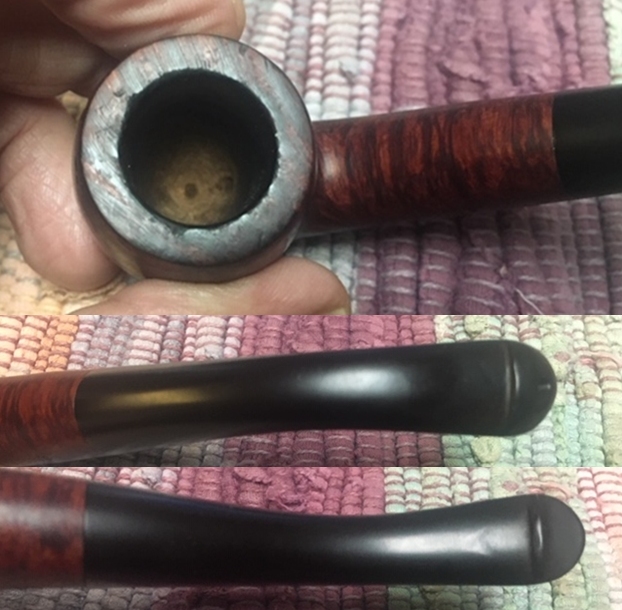
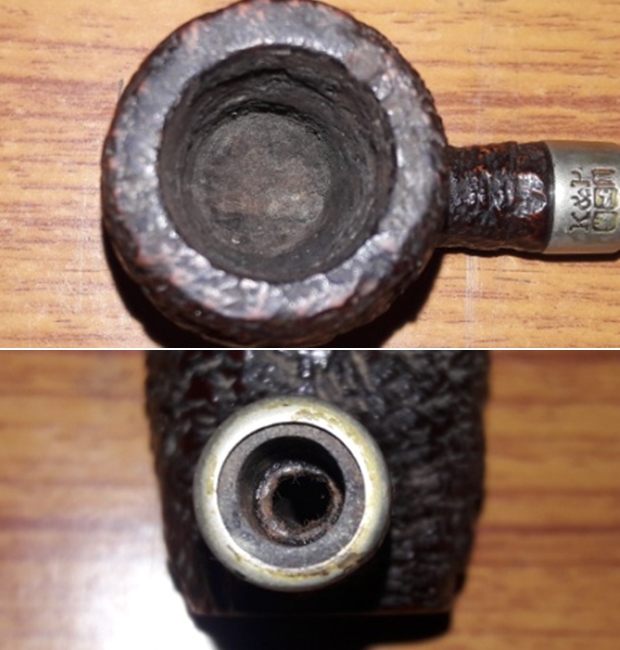
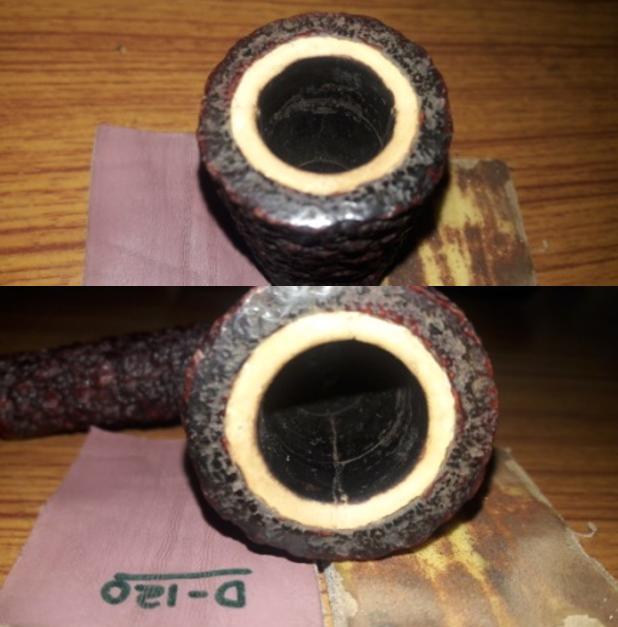
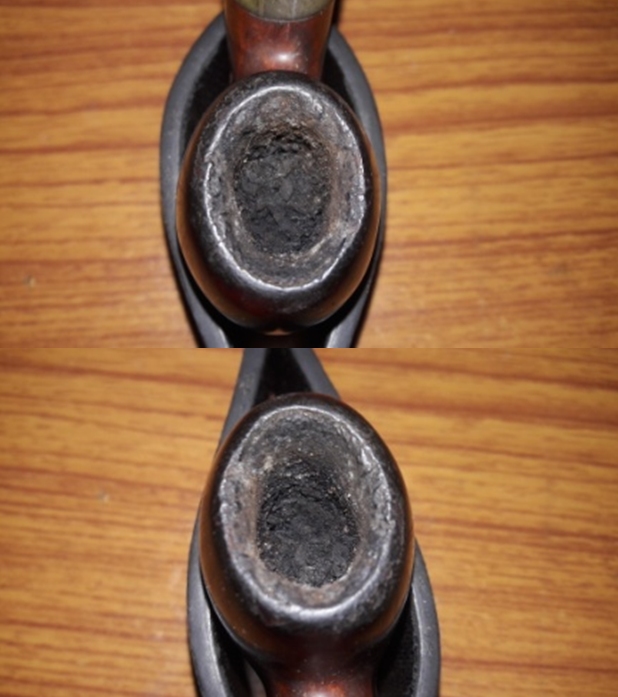
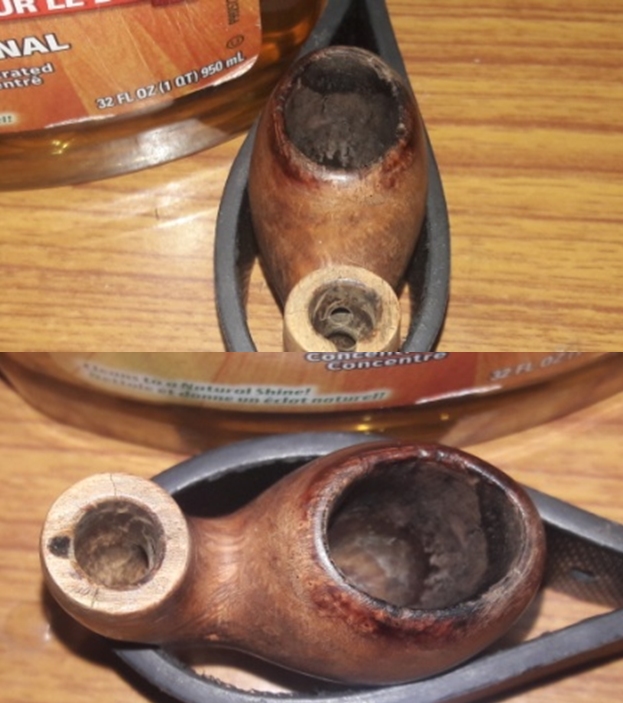
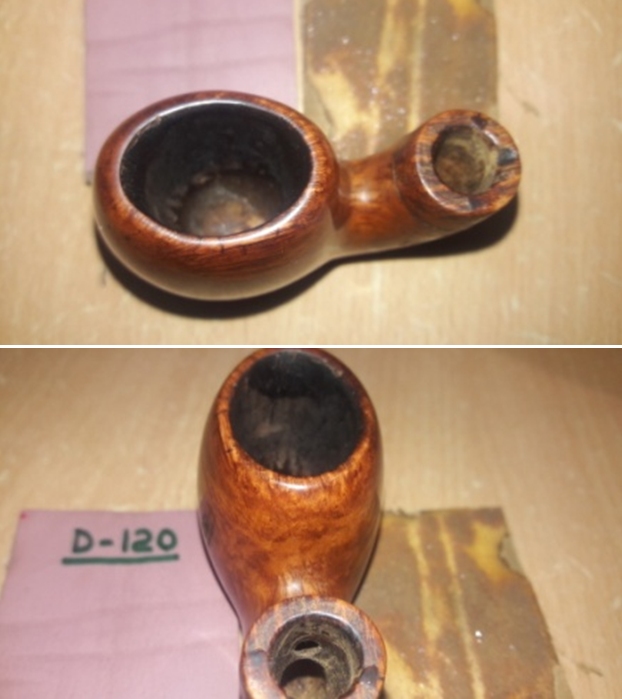
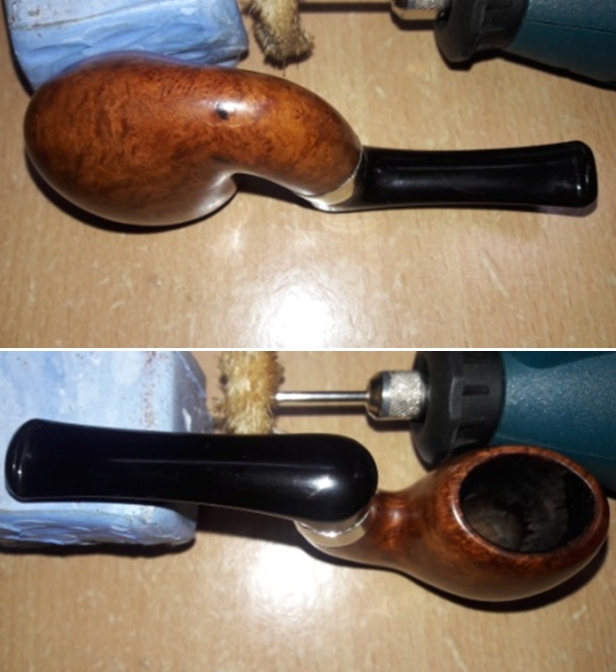
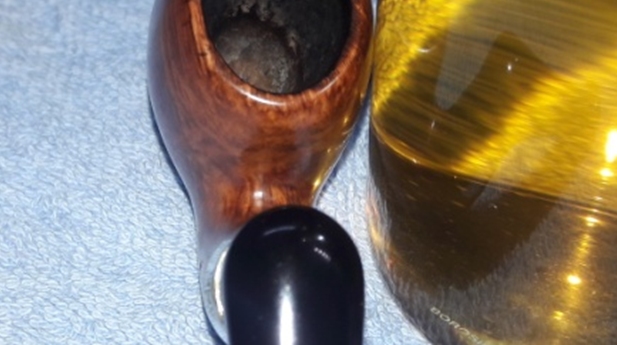
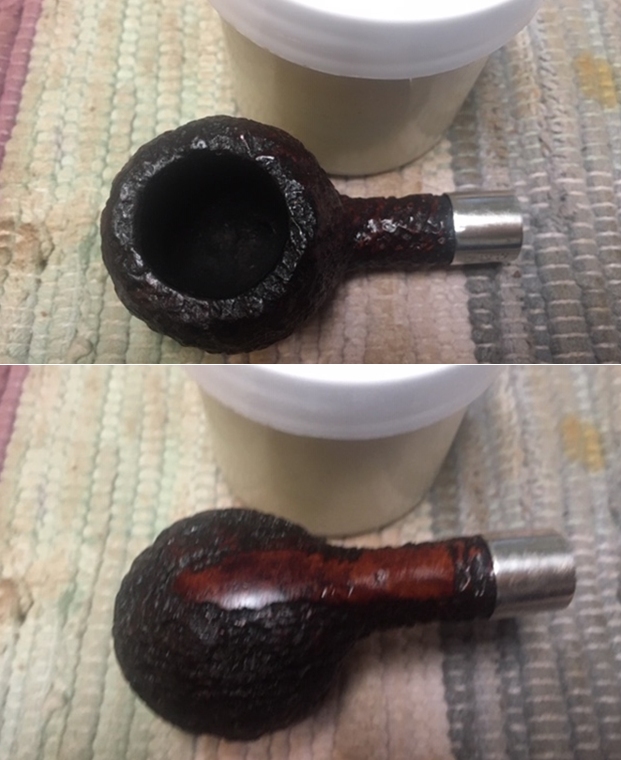
 The chamber has a thick layer of uneven cake with lava overflow over the rim top surface. Remnants of half burnt tobacco can be seen at the bottom half of the stummel. The condition of the inner walls of the chamber will be ascertained once the existing cake has been taken down to the bare briar. The draught hole is completely blocked with absolutely no draw. This needs to be addressed. The thin and delicate rim edge appears to be severely damaged with dents and dings all around; however, the extent of this damage will be ascertained once the cake and lava overflow from the chamber and rim top is entirely removed. There is a very strong smell to the chamber which, perhaps, may reduce appreciably after the chamber has been cleaned. The mortise and sump are clogged with dried oils and tars.
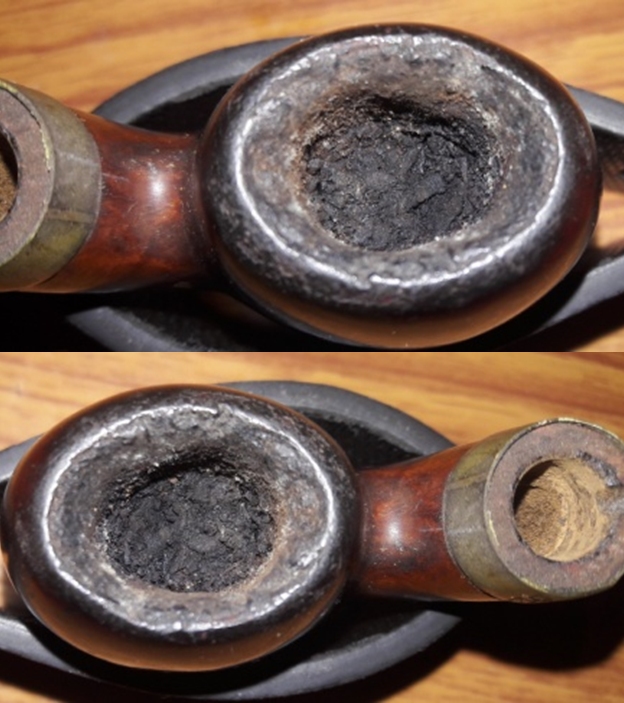
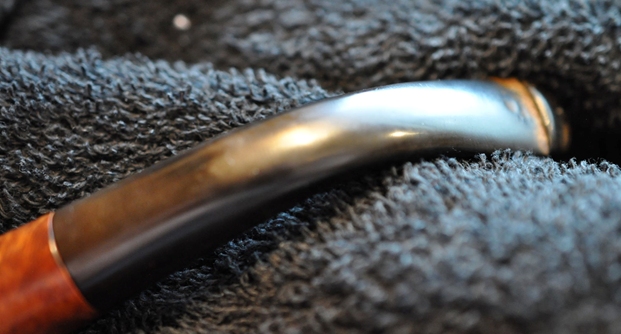
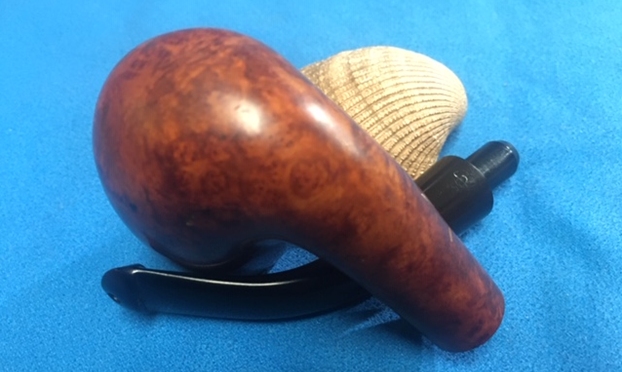
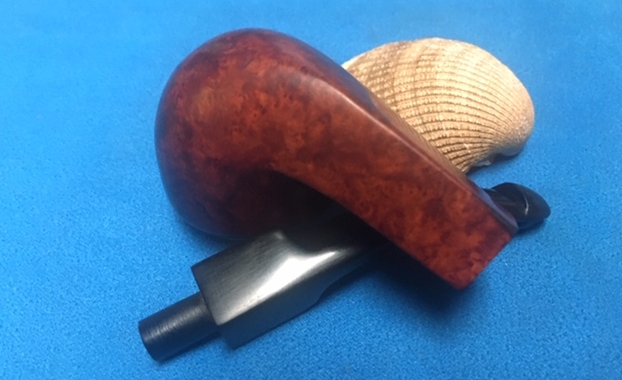
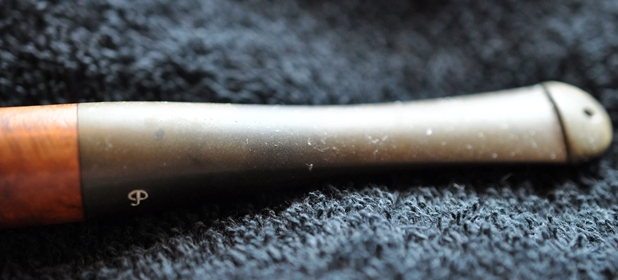
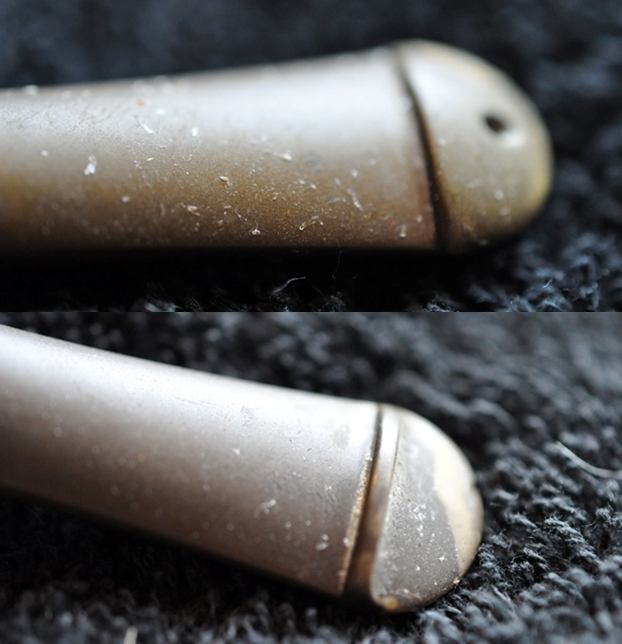
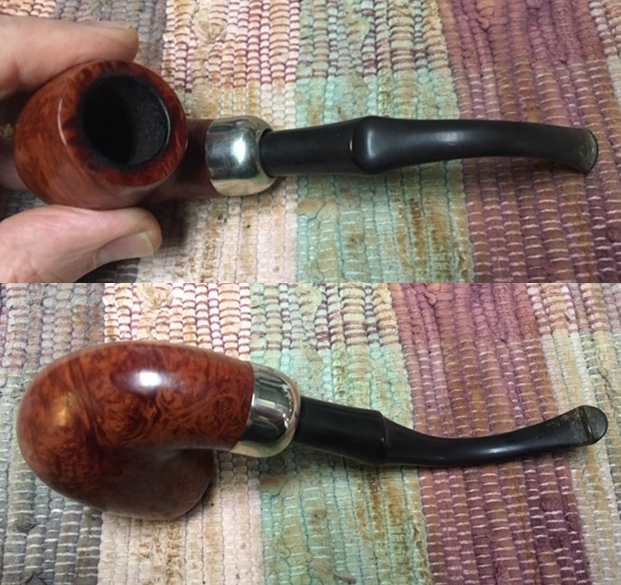
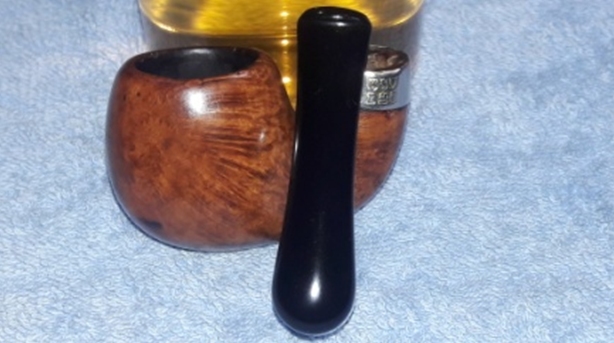
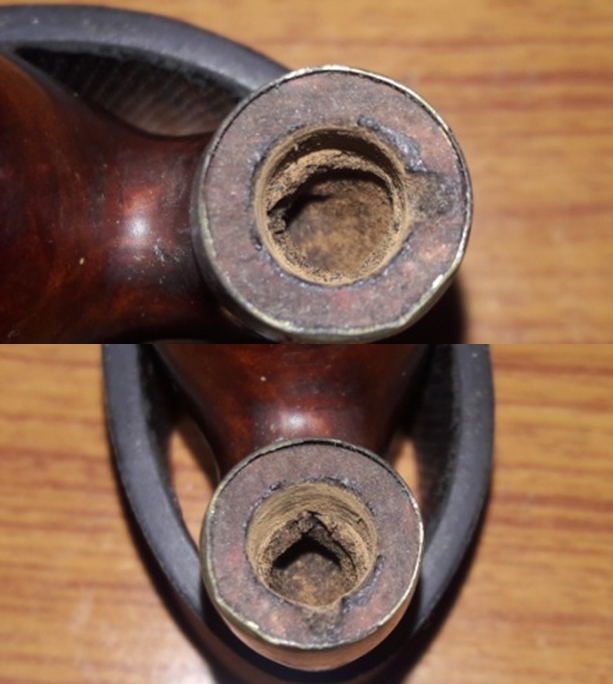 The nickel ferrule at the shank end, though heavily oxidized, is undamaged. It is cut at an angle to accommodate the stem when it is turned over the stummel. The ferrule, once cleaned should polish up nicely.
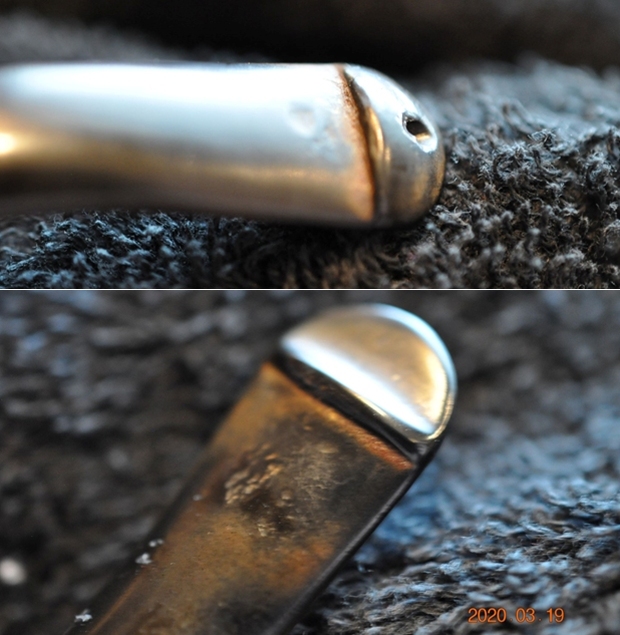
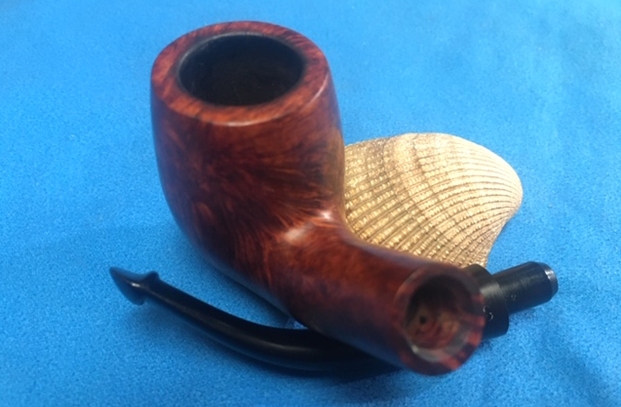
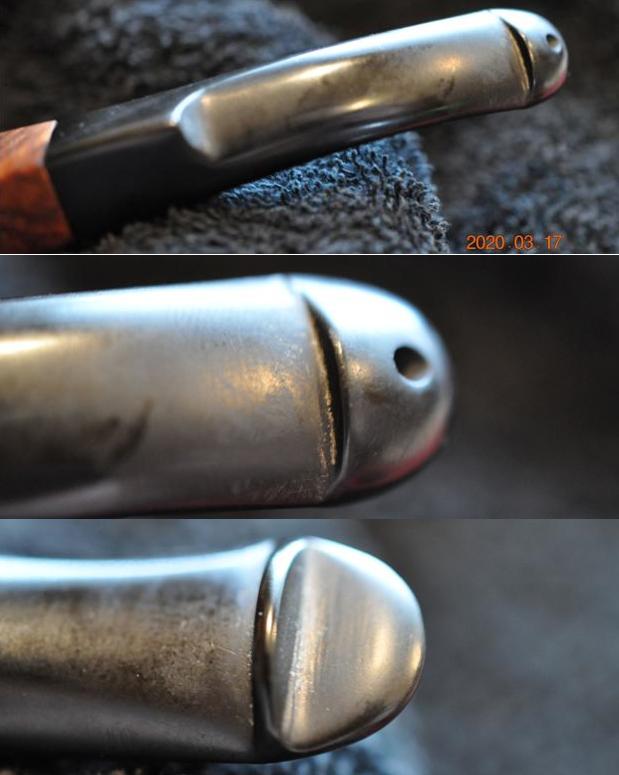
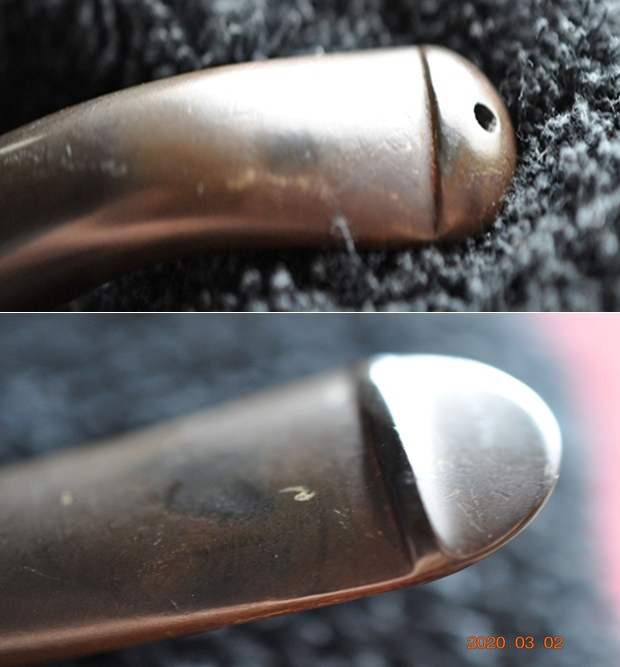
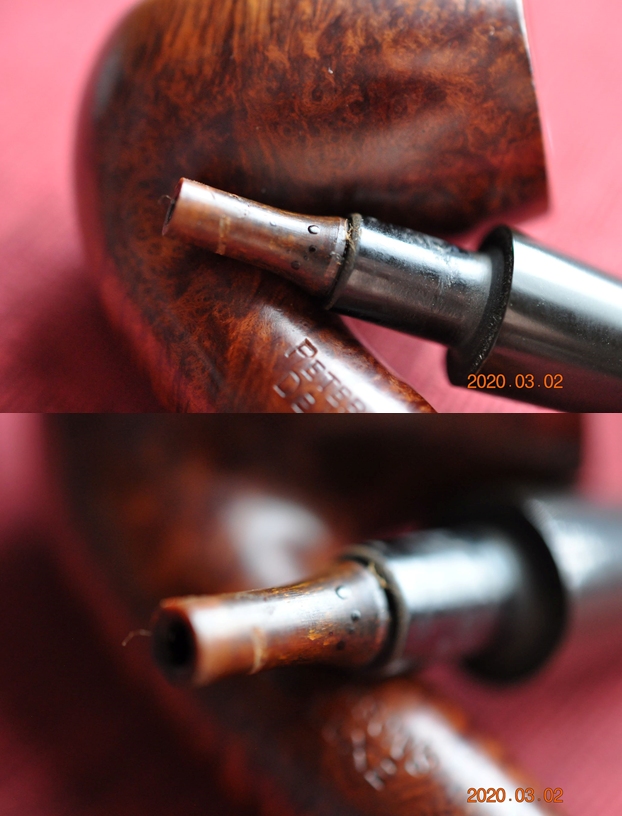
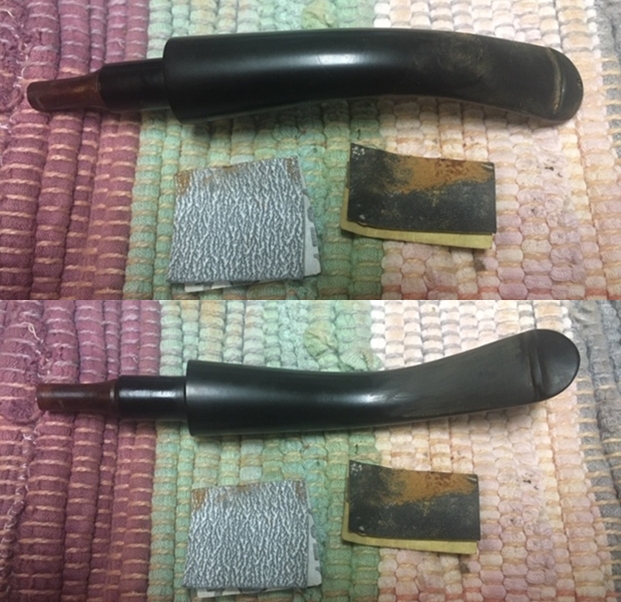
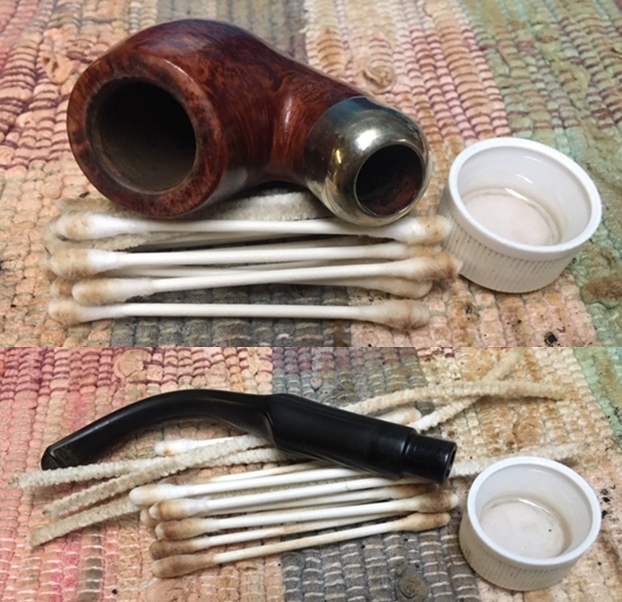
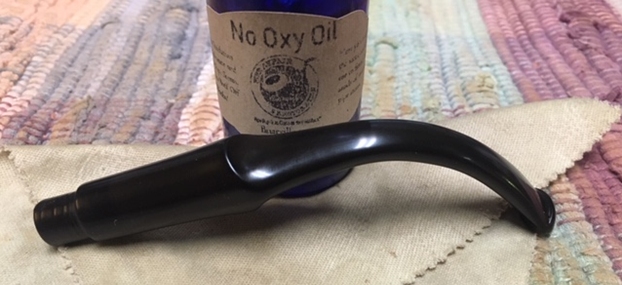
 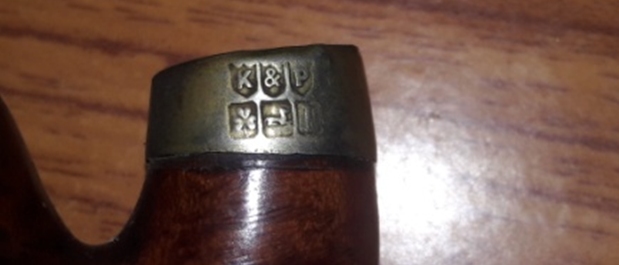 The vulcanite stem is heavily and deeply oxidized with tooth indentations on the button edge and chatter on either surfaces of the stem in the bite zone. The tenon end shows heavy traces of dried oils and tars. It’s going to take some elbow grease to clean up this stem to a nice deep and shining black. The perpendicular tenon end will make the internal cleaning a bit challenging. The orific slot shows deposition of dried oils and tars. The stink from the stem and clogged airway will take a lot of effort and time to clean up.
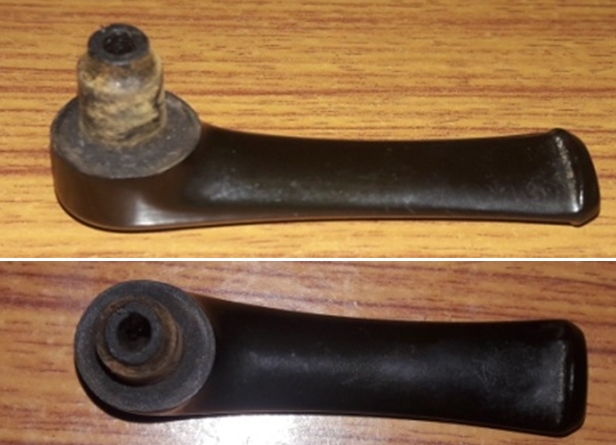

 The Process
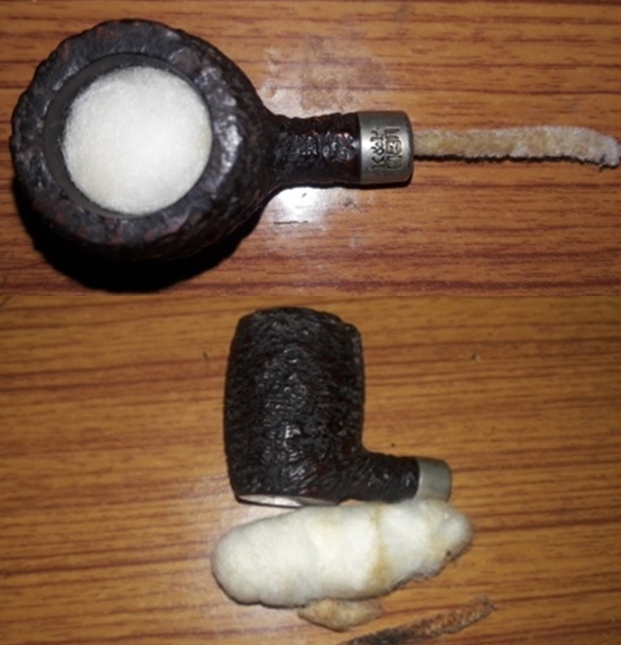
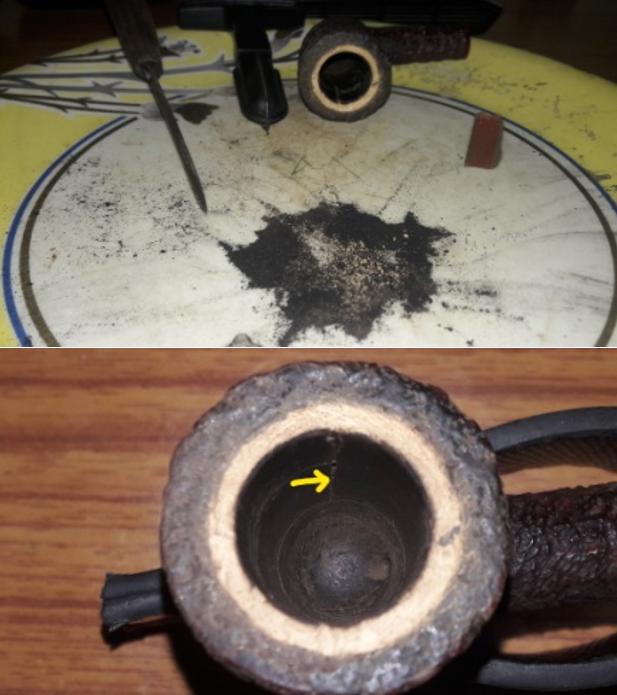
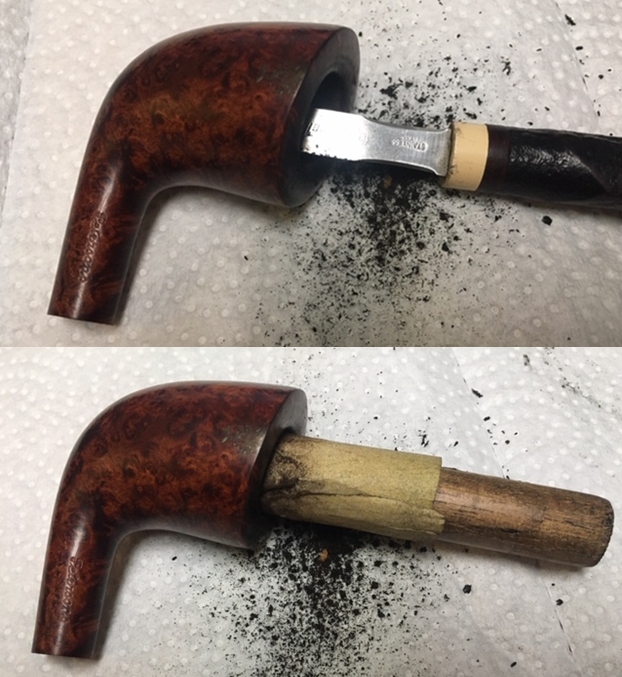
I began the process of refurbishing this pipe by using my fabricated knife to remove the unburnt tobacco and thick layer of cake. I further took the cake down to the bare briar with a folded piece of 150 grit sand paper. Once the walls of the chamber were rid of all the remnants of the cake, the chamber walls were found to be smooth and without any damage. With my modified and straightened cloth hanger used as a poker, I cleaned the grime and cake that covered the draught hole at the heel of the stummel. I further wiped the chamber with a cotton swab wetted with isopropyl alcohol to completely remove the sanding dust.
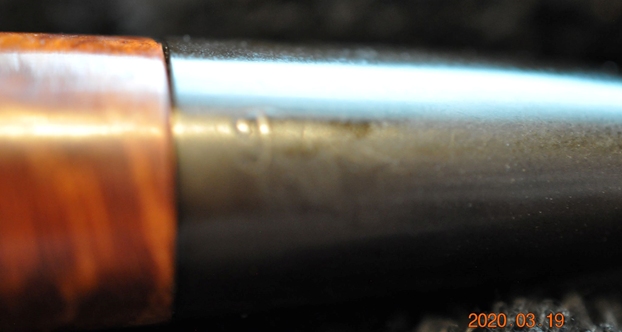
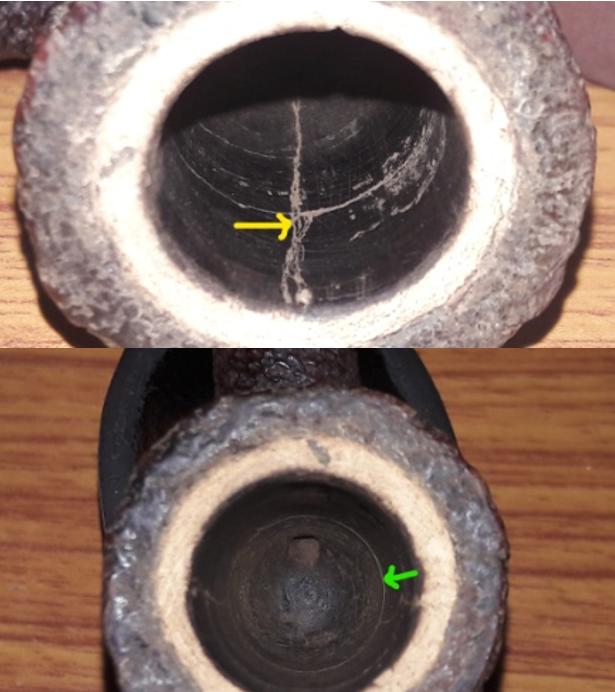
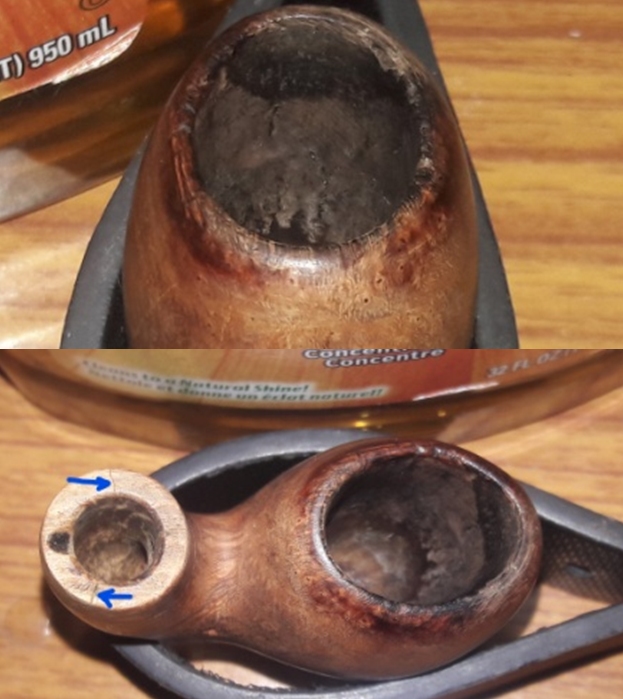
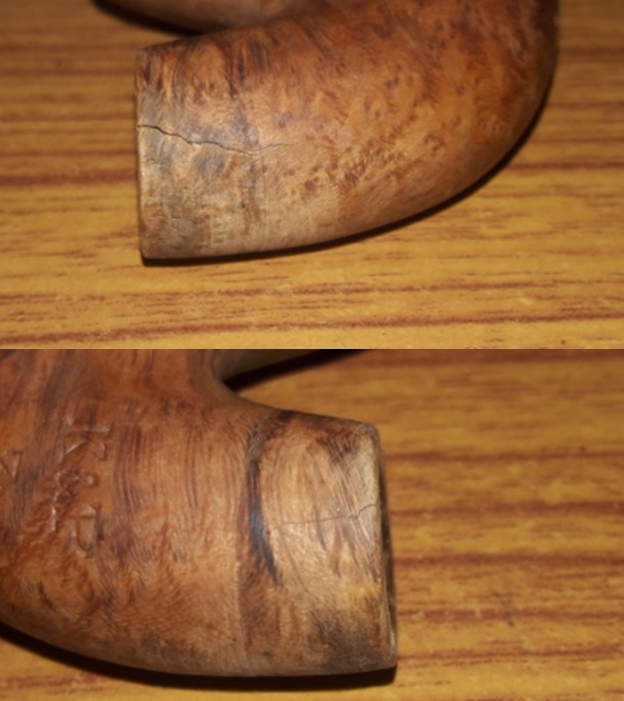
 While handling the stummel for internal cleaning of the chamber, the nickel ferrule came off, revealing a crack on the left side. This crack extends from the shank end rim surface (indicated with a yellow arrow) and along the shank on the left side (indicated with blue arrows). The extent of the crack will be determined once the dirt, grime and dried glue are removed from the surface. The edges of the ferrule are slightly uneven while the insides of it have traces of deeper oxidation.
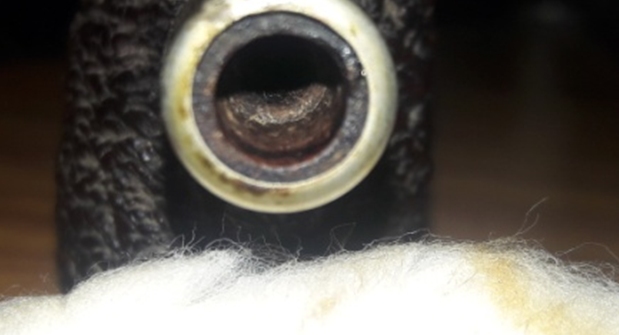
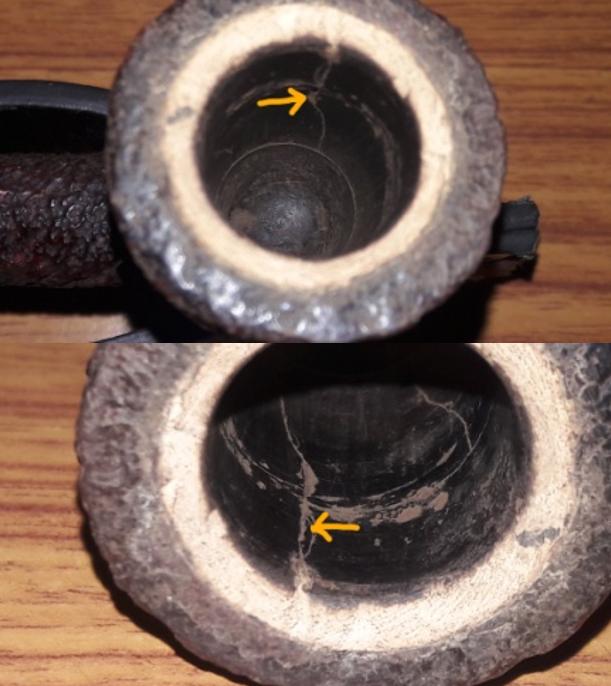
 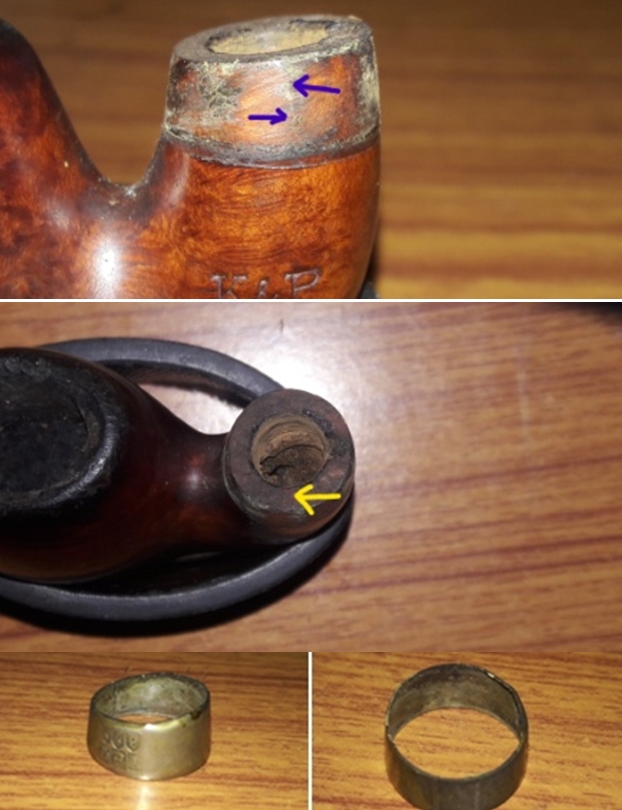 I scraped the shank internals with a fabricated tool to remove all the crud that had accumulated along the shank walls and further cleaned it with bristled and regular pipe cleaners dipped in isopropyl alcohol. A huge pile of q-tips, pipe cleaners and lots of elbow grease later, the sump and mortise still appear dirty. I shall further draw out all the residual oils, tars and gunk by subjecting the chamber and the shank to a salt and alcohol bath. I gently scraped the shank end rim surface to remove all the accumulated oils and grime. Now that the shank end rim was cleaned, a second crack on the right side came to the fore (indicated in yellow arrows). This project is turning out to be more time consuming than I had anticipated. I shall deal with these cracks after I am done with internal and external cleaning of the stummel. I cleared the draught hole using a fabricated poker and further cleaned it using pipe cleaners and alcohol.
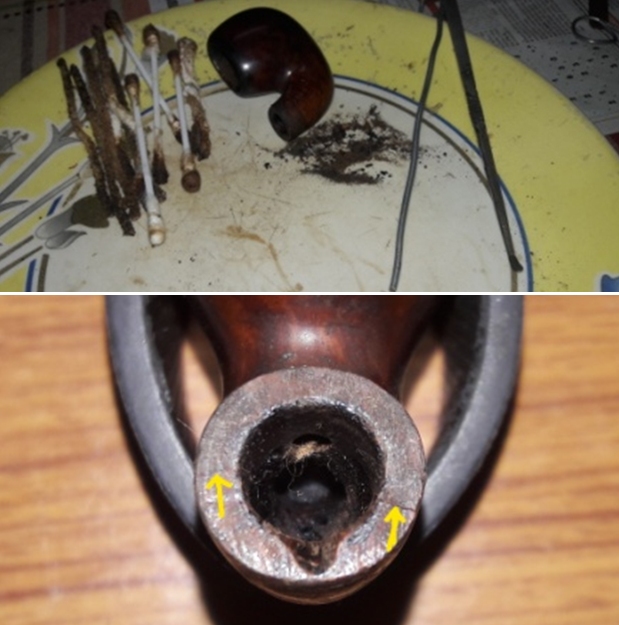
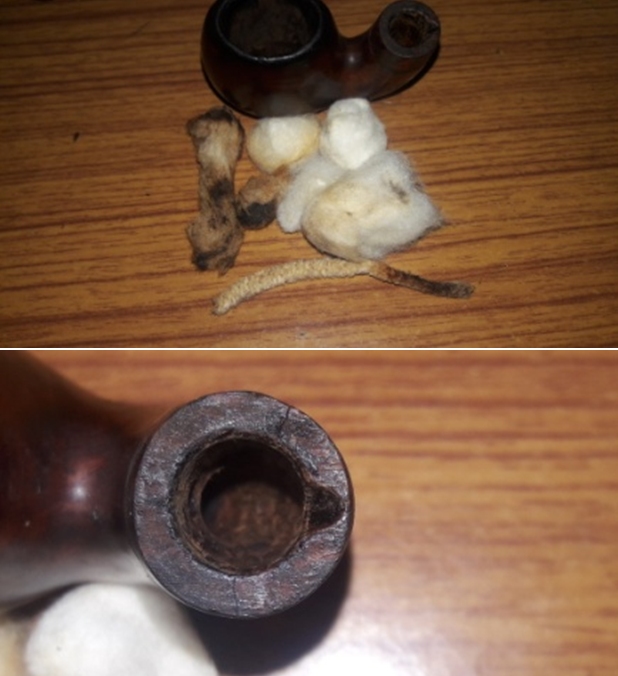
 I continued with the cleaning of the chamber and shank internals with a salt and alcohol bath. I use cotton balls which is an at par substitute to Kosher salt as I have realized over the years. I draw out a wick from the cotton and along with a folded regular pipe cleaner; insert it in to the mortise and through the draught hole into the chamber. Thereafter, I packed the chamber with cotton balls to about quarter of an inch below the rim’s inner edge and soaked the cotton balls with isopropyl alcohol up to the brim. About half an hour later, the level of alcohol had gone down, having being absorbed by the cotton. I topped it up once again and set it aside overnight. By the next afternoon, the cotton and alcohol had drawn out all the remaining oils and tars from the chamber and mortise, fulfilling its intended task. I removed the cotton balls and ran pipe cleaners through the mortise to clean out all the loosened tars and gunk. Using my fabricated tool, I scraped out the entire loosened gunk from the sump and further cleaned it with alcohol and q-tips. The chamber now smells clean and fresh. I set the stummel to dry out naturally.
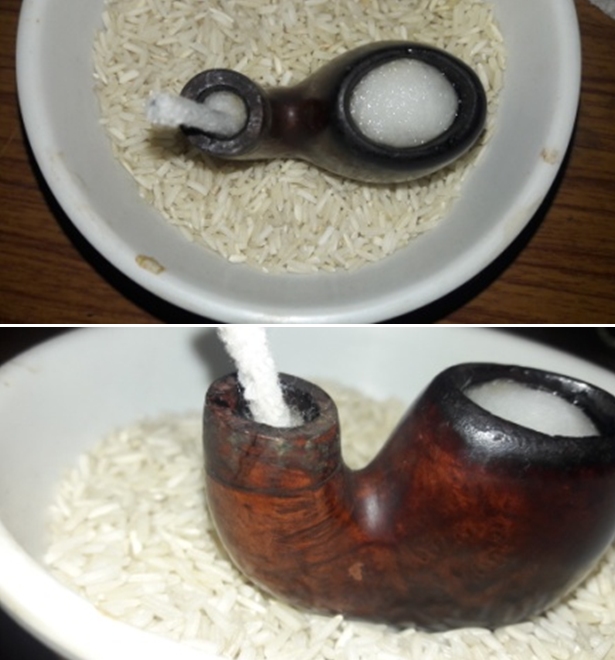
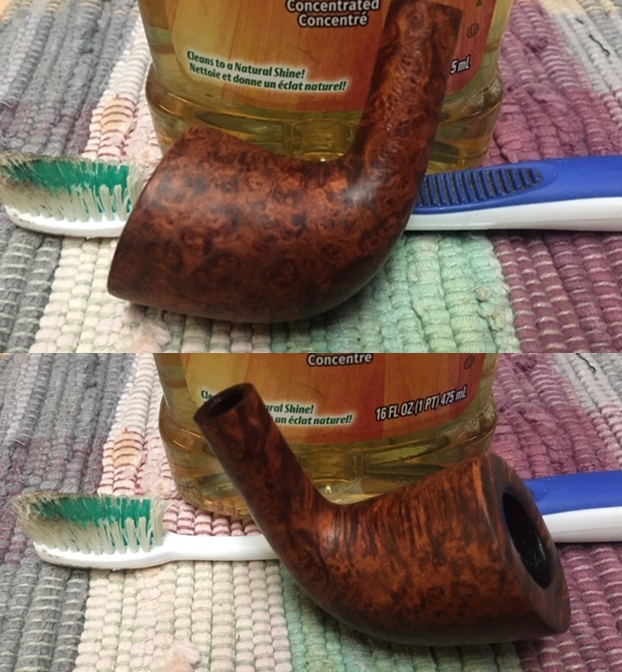
 Now that the internals of the stummel were cleaned, I scrubbed the external surface of the bowl with undiluted Murphy’s oil soap and hard bristled tooth brush. I deliberately cleaned the thin delicate rim top and the surface just below the rim edge with Scotch Brite and a soft bristled brass wire brush to remove the entire lava overflow and dried it using paper towels and a soft cotton cloth. The shank end rim surface and the shank were deliberately cleaned to remove the grime and dirt so that the exact extent of the two cracks could be fathomed.
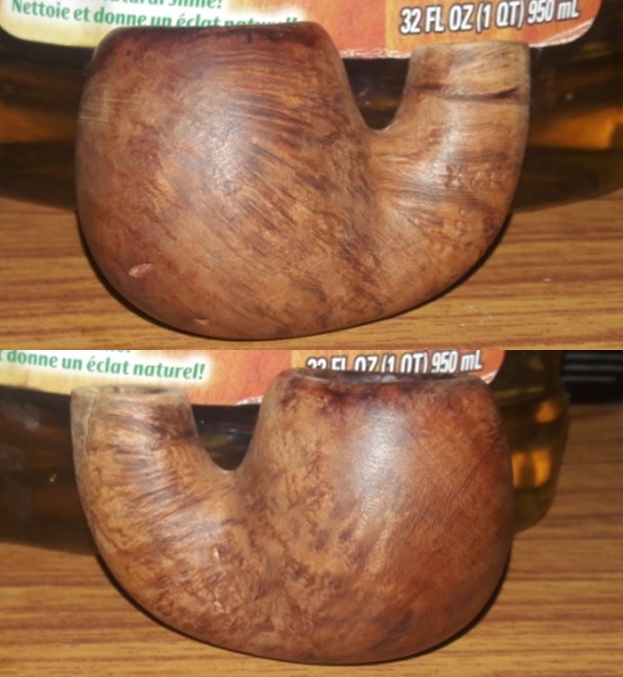
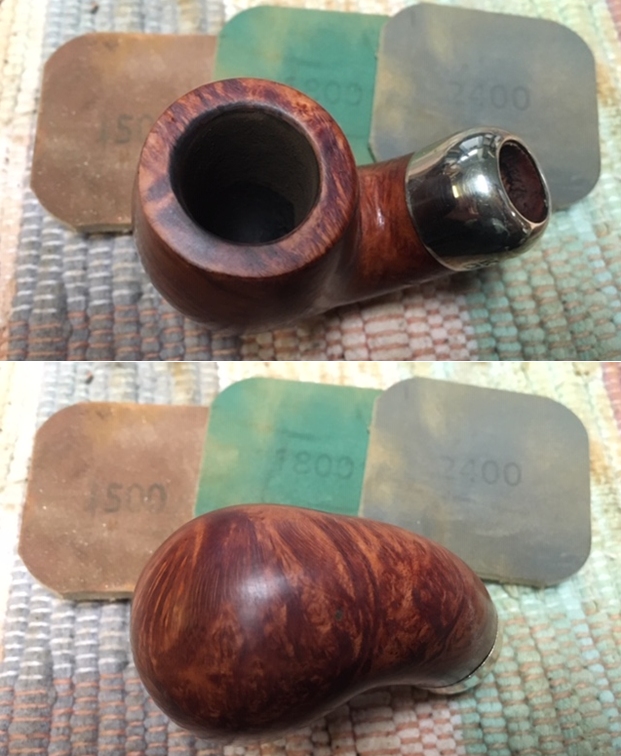
 The thin rim top is generously peppered with nicks, dings and dents. The fills and cracks that are visible on the stummel surface are marked in yellow circles and blue arrows respectively. I removed the old fills and prepared the stummel for a fresh fill. Using my dental tools, I progressed to removing the fills. I know these pictures do not present a very encouraging scenario at this stage, but I shall prevail…
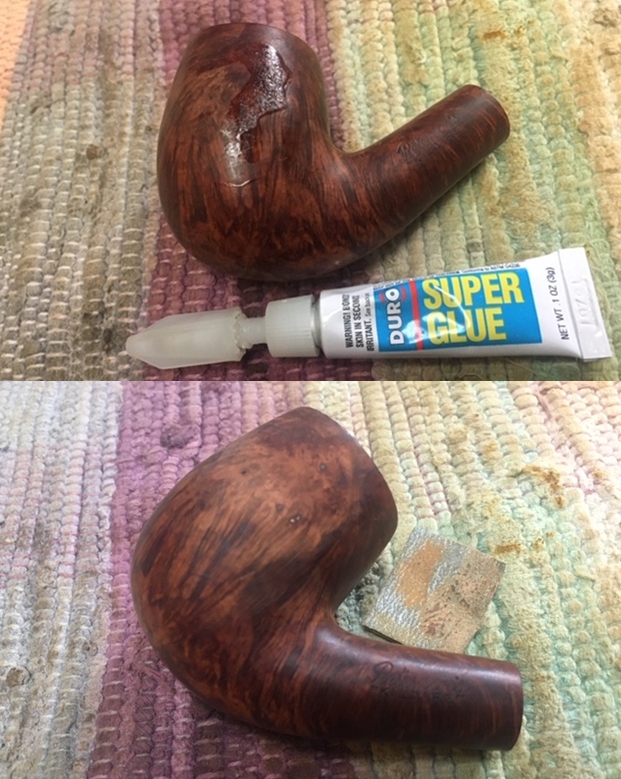
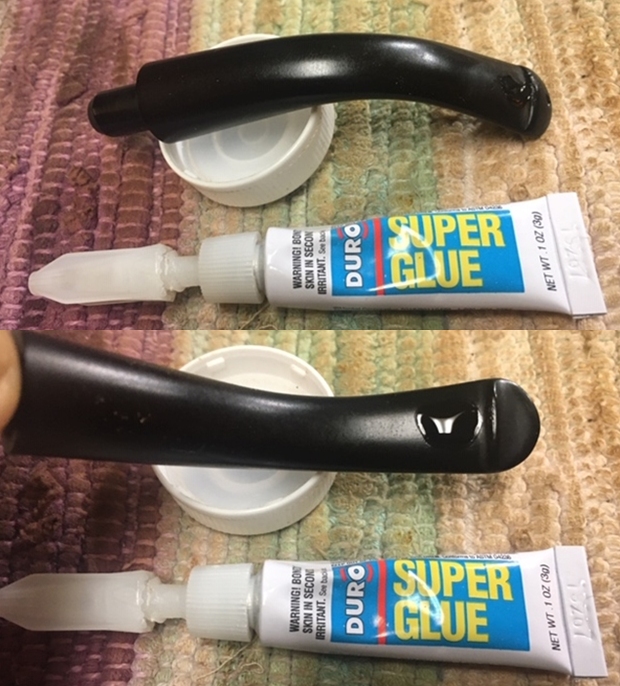
 I wiped the surface from where the old fill was gouged out, with isopropyl alcohol to clean the area. I let the stummel dry out completely and after all the alcohol had evaporated, proceeded to fill the gouges with CA superglue and briar dust using the layering technique where I put down a thin layer of superglue in to the fill and press briar dust over the glue. I continue with this process till the fill rises above the rest of the stummel surface. Once all the gouges were filled up, I set the stummel aside to cure for the next 24 hours.
 While the stummel fills were curing, I worked the stem. The stem air way was filthy to say the least. Using a shank brush and dish washing soap, I cleaned the stem air way. I further cleaned the stem internals with hard and regular pipe cleaners and isopropyl alcohol. A lot of elbow grease and a pile of pipe cleaners later, the pipe cleaners did not emerge as white as I wanted. The perpendicular positioning of the tenon to the rest of the stem made cleaning of the air way all the more difficult. In my exuberance, I chipped the very end of the tenon… Some additional unwarranted work and time penalty!!
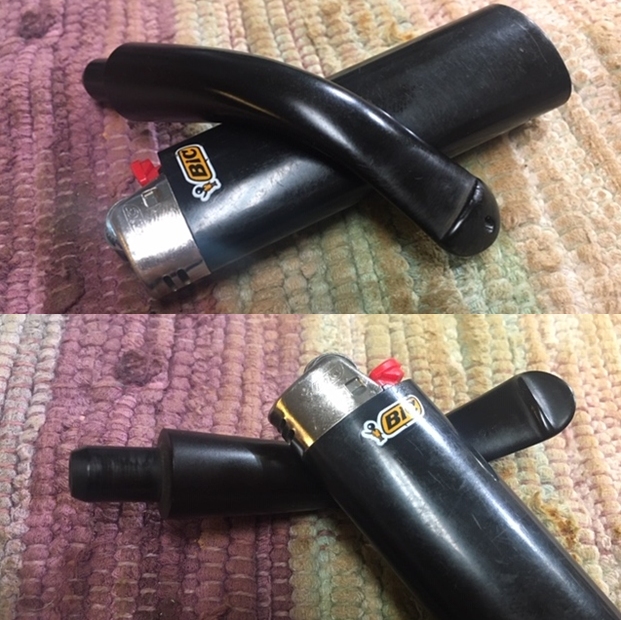
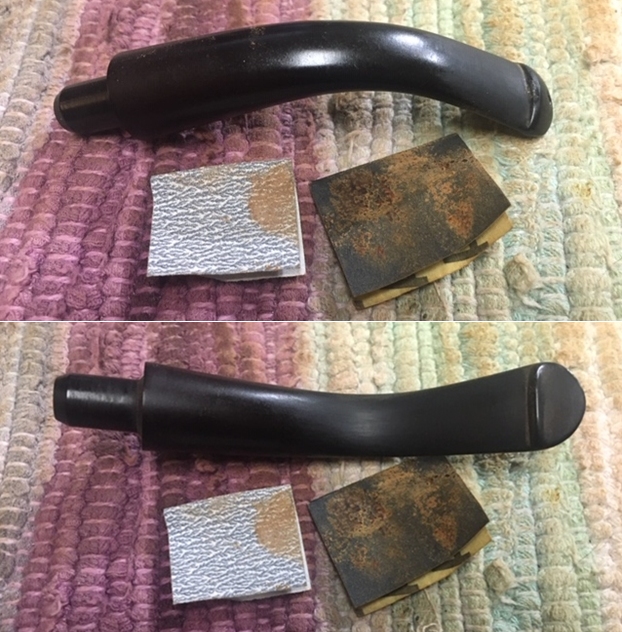
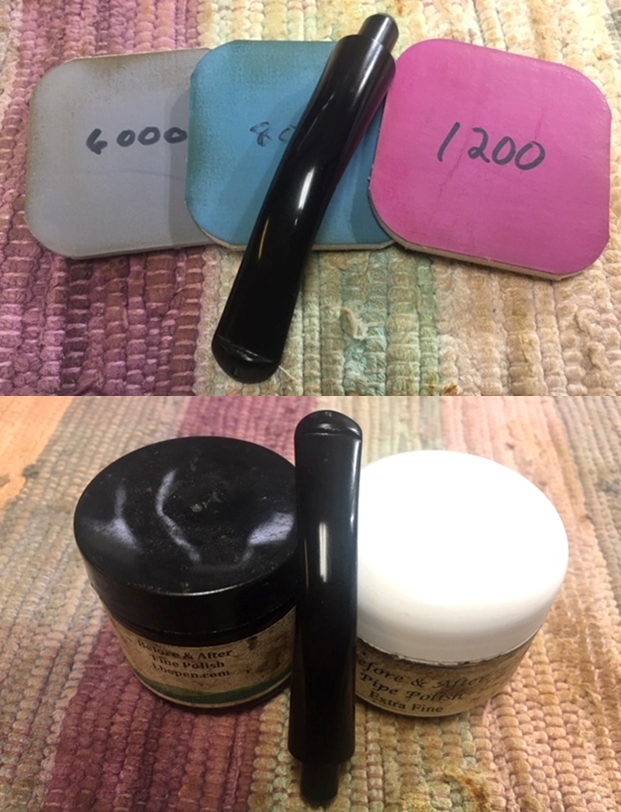
 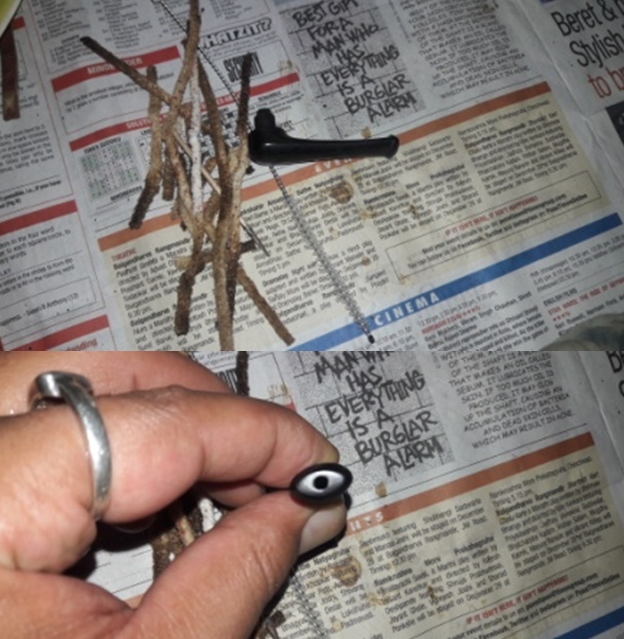 With the stem internals now somewhat clean, I moved to external cleaning of the stem surface by sanding the surface with a piece of 220 grit sand paper and thereafter dunking the stem in to “Before and After Deoxidizer” solution developed by my friend Mark Hoover. The solution helps to draw out heavy oxidation to the surface making its further removal a breeze, while the minor oxidation is eliminated to a very great extent. I usually dunk stems of 5-7 pipes that are in-line for restoration and the K & P # 3 pipe is marked in pastel pink arrow. I generally allow the stems to soak in this solution overnight for the solution to do its work.
 Next day, I remove the stems from the deoxidizer solution and clean them under warm running tap water to remove all the solution. I scrubbed the stem surface first with scotch brite pad followed by a piece of 0000 grade steel wool. This helps in removing all the raised oxidation from the stem surface. I rubbed a little Extra Virgin Olive oil in to the stem and wiped the excess with a paper napkin. This was followed by inserting a petroleum jelly smeared folded pipe cleaner in to the tenon for reconstruction of the tenon end. Using a mix of CA superglue and food grade activated charcoal, I began the arduous process of rebuilding the chipped tenon end and also the bite marks on the button edges on both sides in the bite zone. I set the stem aside for the fill to cure and harden completely.
 I took a stock of the progress made till now on this pipe; stummel internals/ externals cleaned, old stummel fills have been refreshed and cured, stem internals cleaned, stem oxidation removed to a great extent, stem repairs set aside for curing. Addressing the stummel cracks, sanding of the stummel and stem fills, refurbishing the nickel band and final polishing is all that remains to be completed.
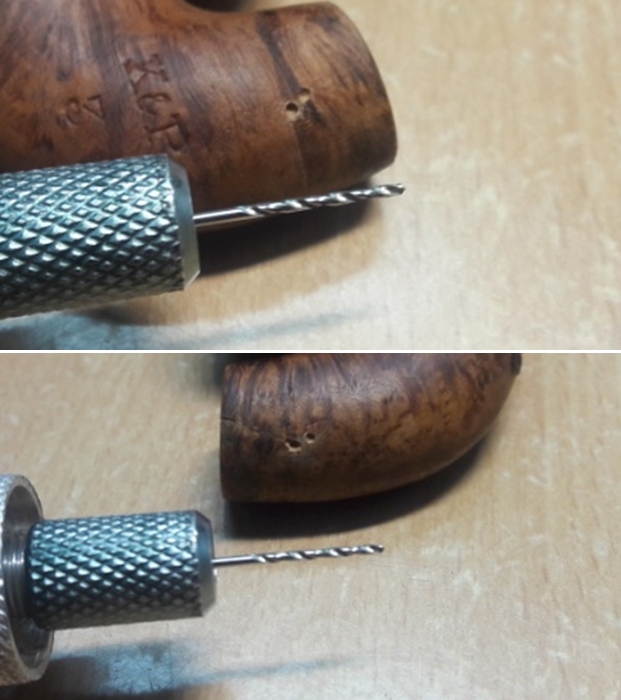
Next, I address the two cracks at the shank end. Using a magnifying glass and a white correction pen, I marked the points for the counter holes at the end points along the extent of the cracks seen on the stummel. I drilled counter holes with a 1mm drill bit mounted on to my hand held rotary tool, deep enough to serve as a counter hole while taking care that I did not drill a through and through hole. These counter holes arrest and prevent the spread of the cracks further.
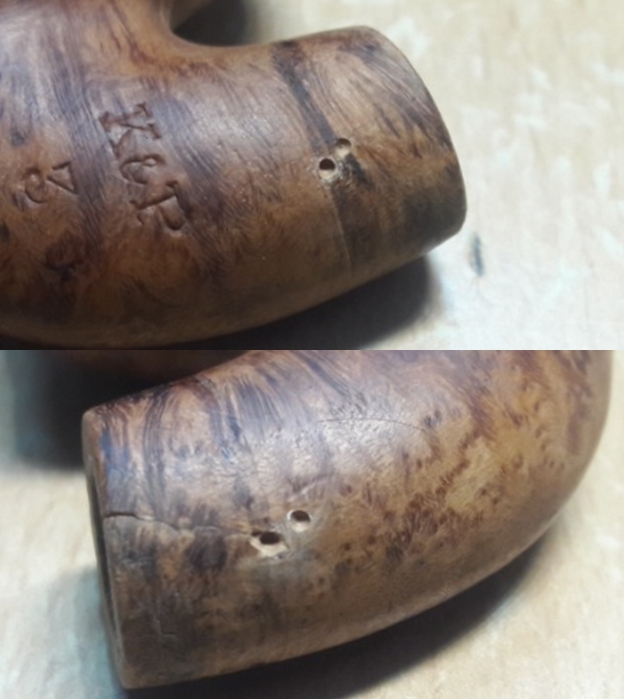 I filled these cracks and counter holes with a mix of briar dust and CA superglue using the layering method (layer of superglue followed by sprinkling of briar dust and repeated it till desired thickness of fill was achieved) and set it aside for the fills to cure. I ensured that I filled the thin outer edge of rim top surface that I will subsequently sand down to match with the rest of the rim surface. I set the stummel aside for the fills to harden.
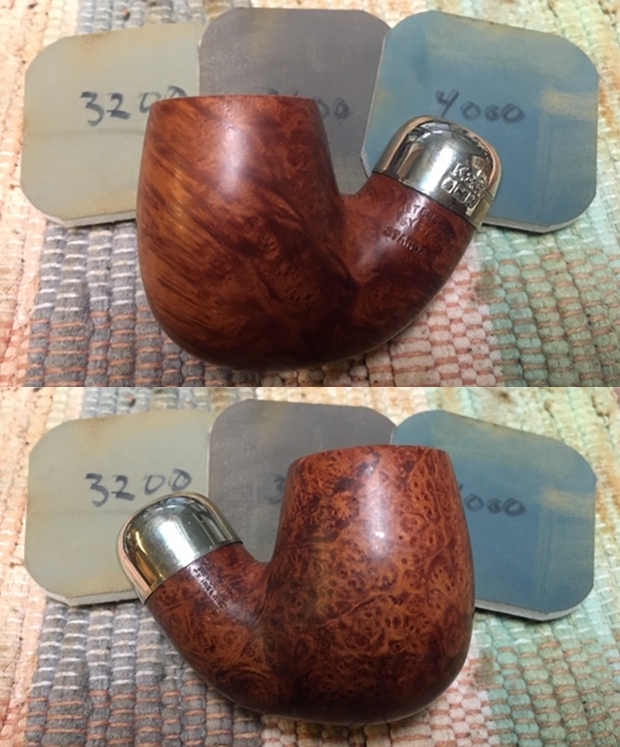
 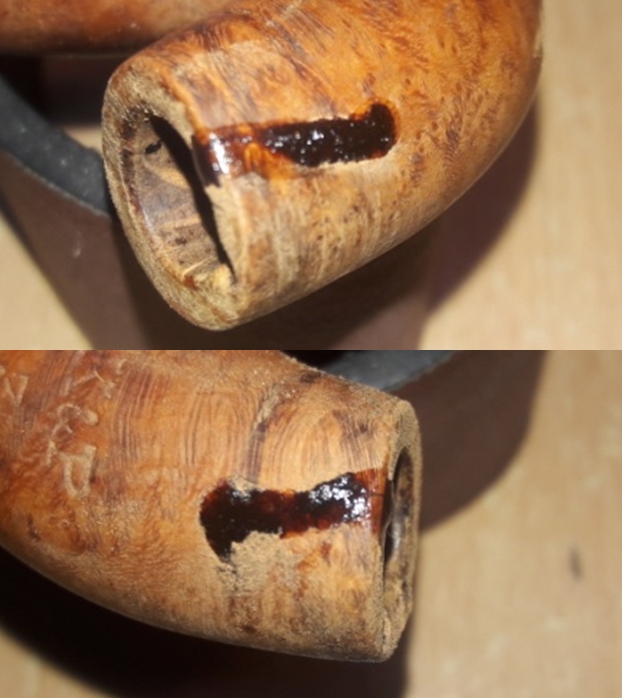 I cleaned the nickel shank band with Colgate Toothpowder, which Abha, my wife, uses to polish her silver and gold cutlery and jewelry. This compound is a very fine powder and is least abrasive with fantastic results. The band is now a nice shining piece of nickel and should provide a nice contrast to the shining black stem and the dark brown stummel. The patches of deep oxidation that were observed were also completely eliminated.
 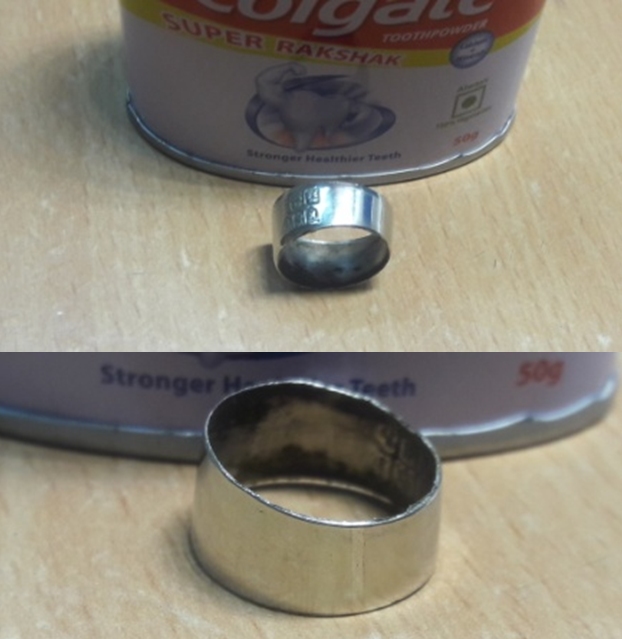 With the stummel fills nicely cured, it was time again to work on it. Using a flat head needle file, I sanded the fills and followed it by sanding with worn out folded piece of 150 grit sand paper. I sand the thin rim top surface with the same sand paper to minimize the numerous chips, dents and dings. I did not resort to topping since the oval shape with a slight saddle dip in the centre makes it difficult to top without compromising the shape of the rim top. A couple of dents and chips are still visible, but I shall let them be as a part of this pipe’s journey from my grandfather then to with me now!!! The fills have blended in quite well. However, I shall strive to further achieve a near perfect blend during further sanding and polishing with micromesh pads. The shank end crack repairs are now solid and have blended in really well. Yeah, I am pleased with this progress.
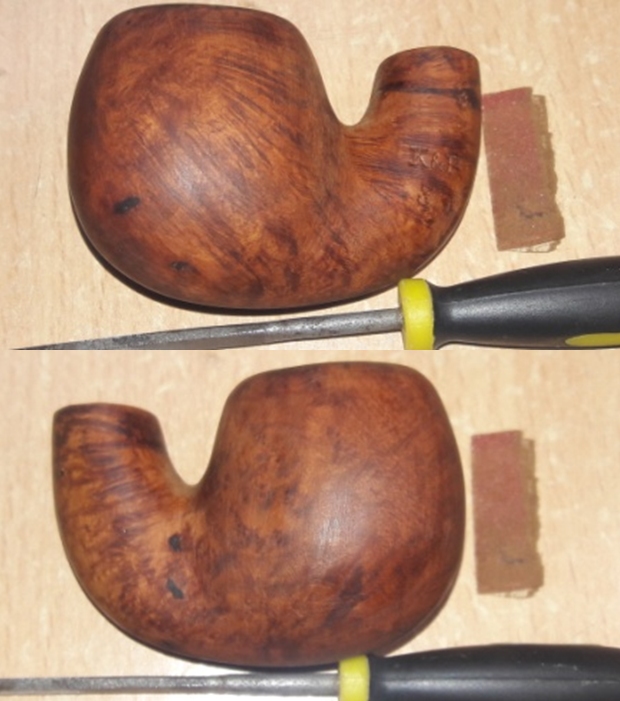
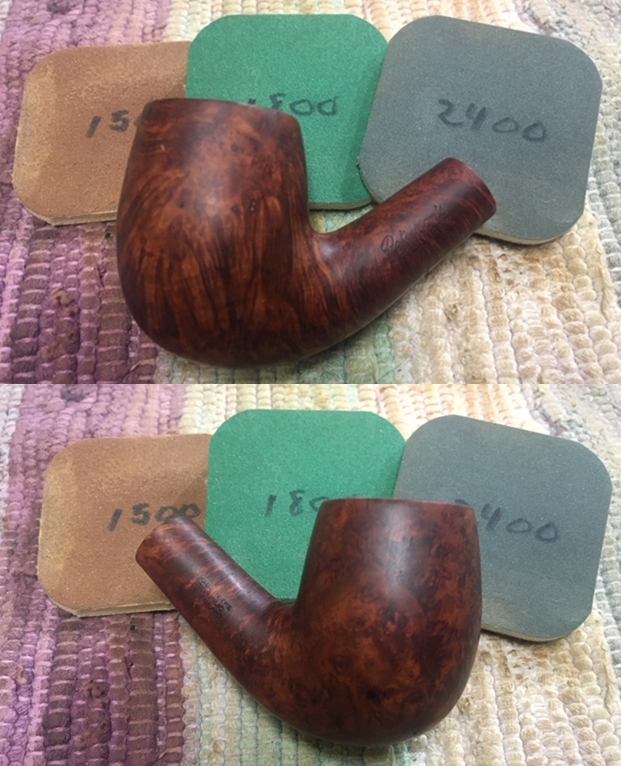
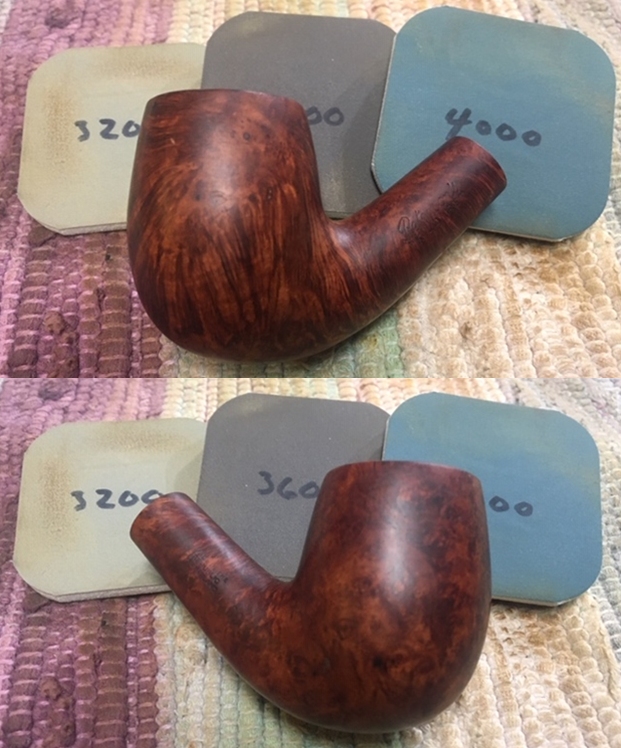
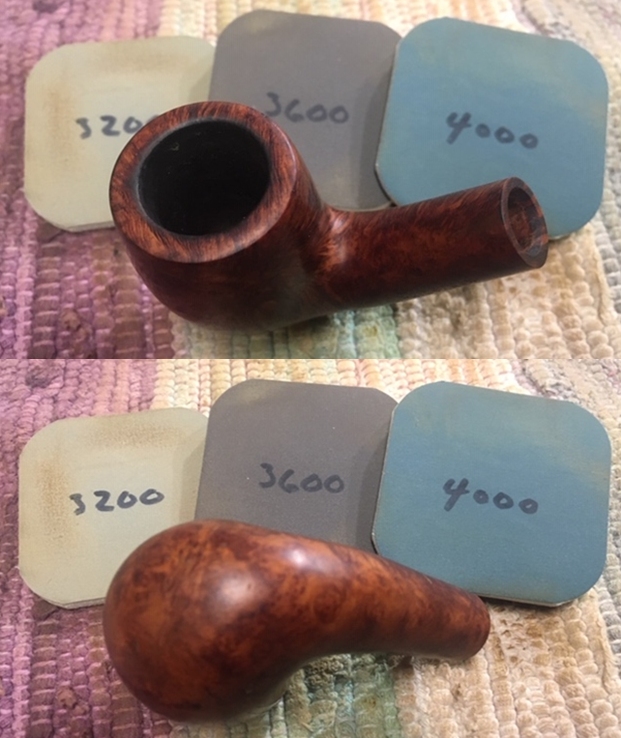
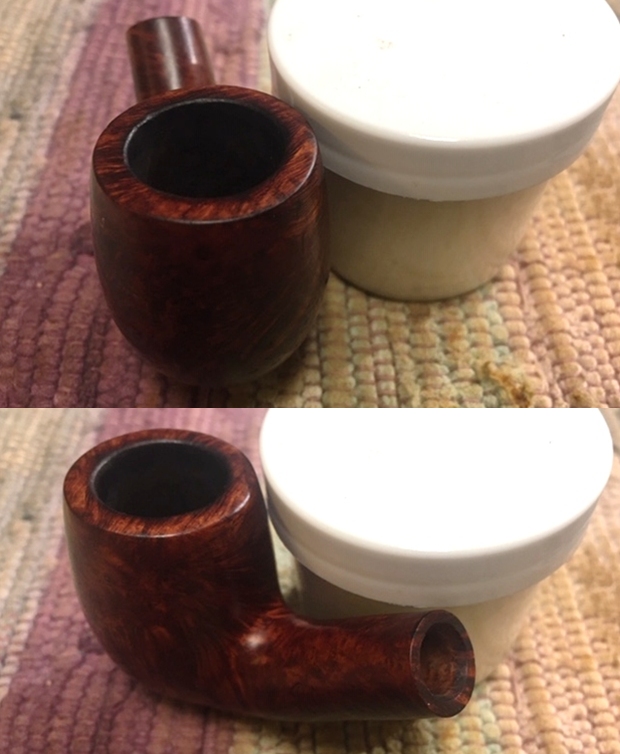
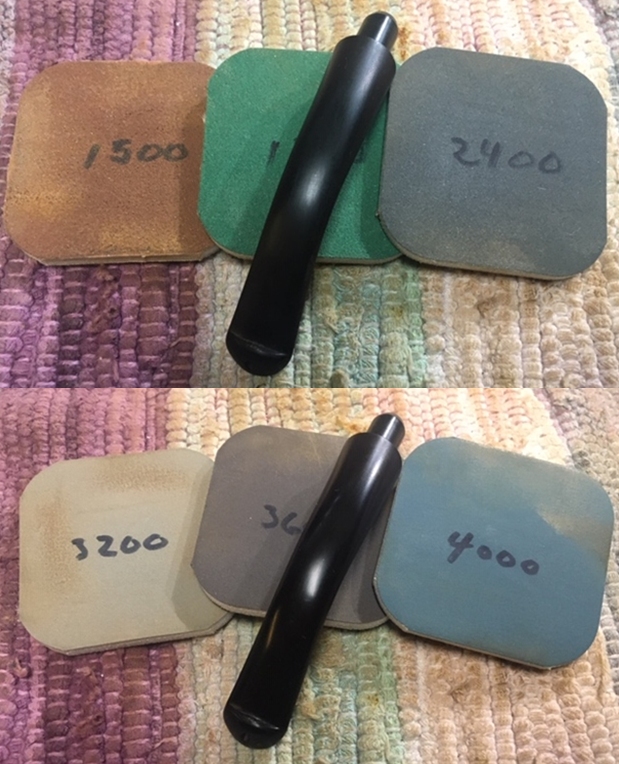
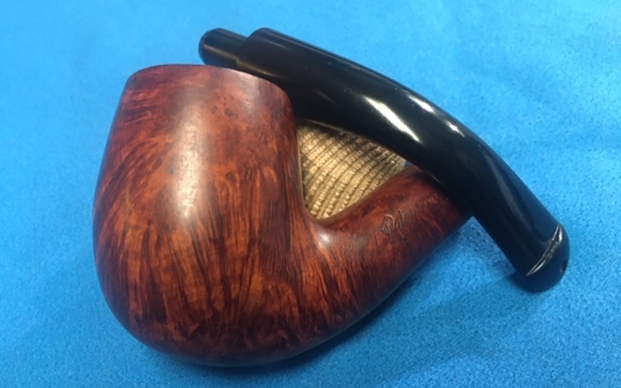
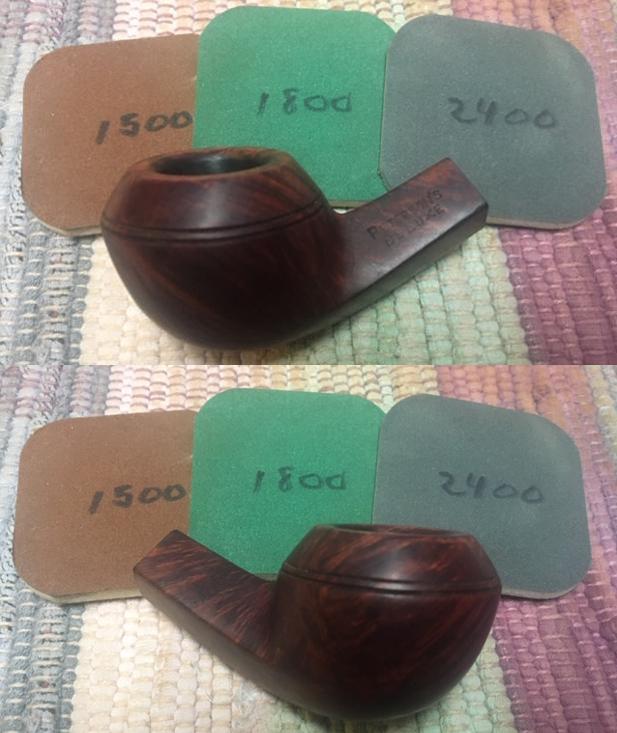
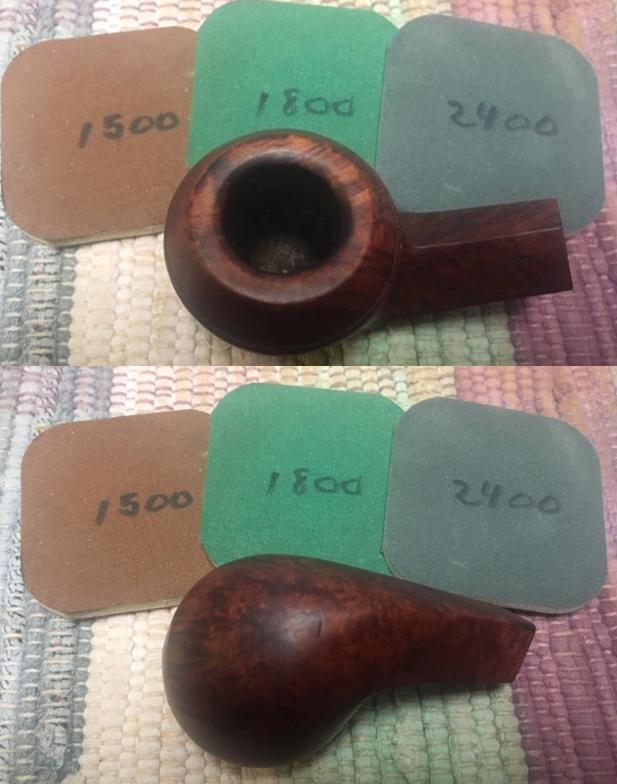
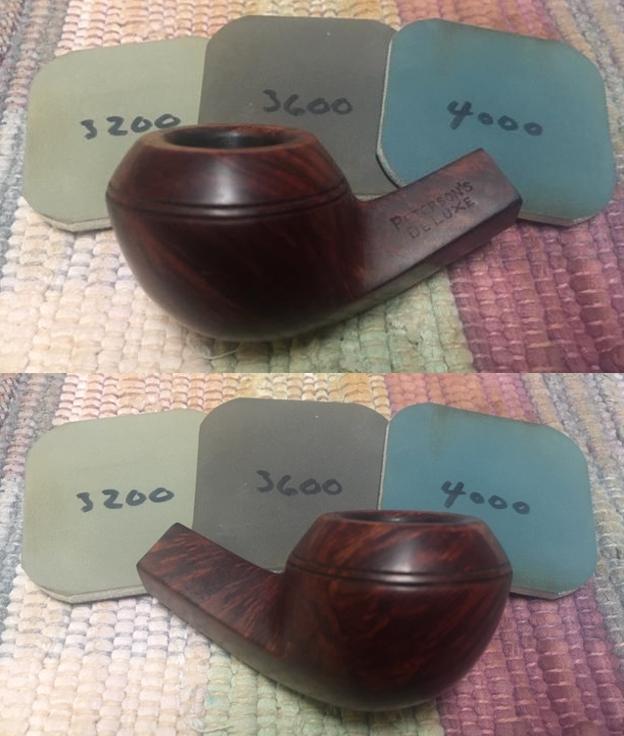
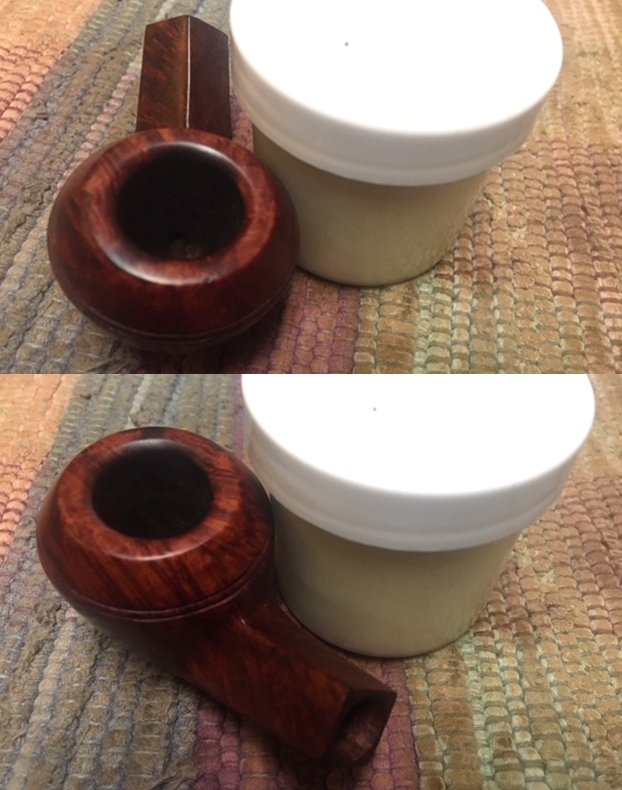
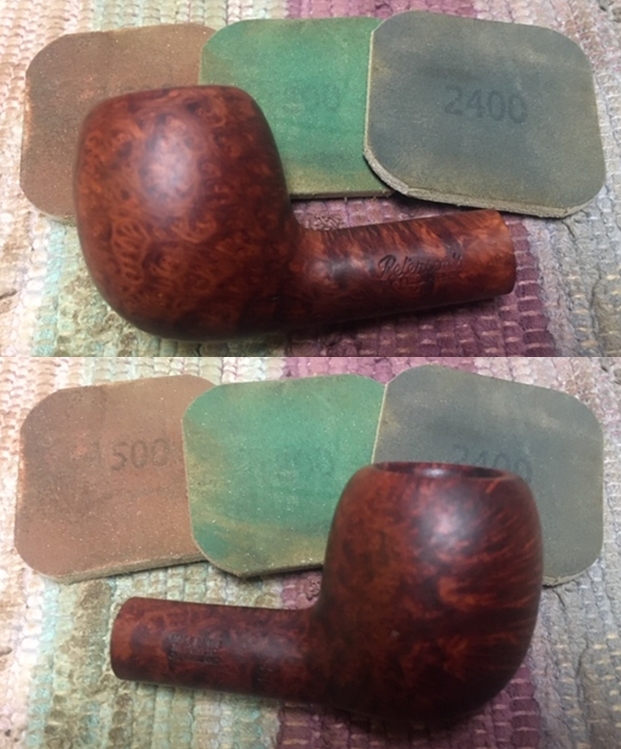
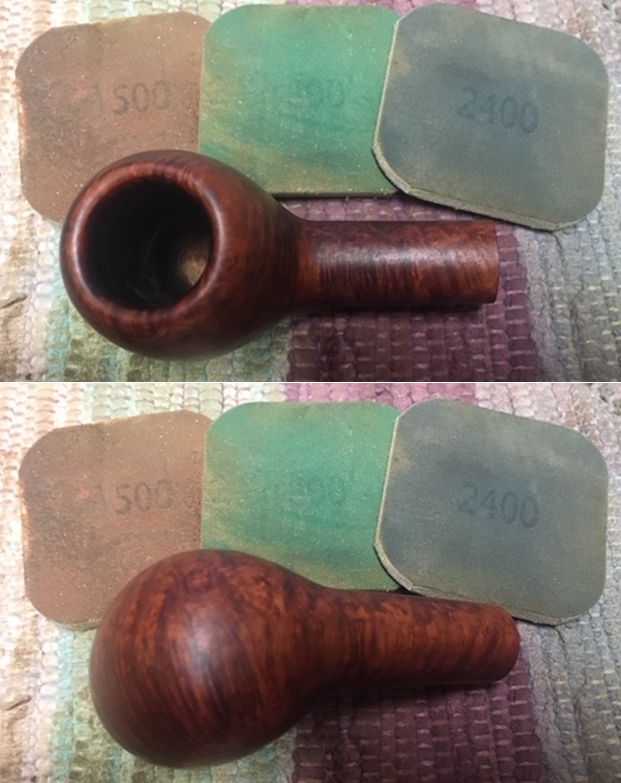
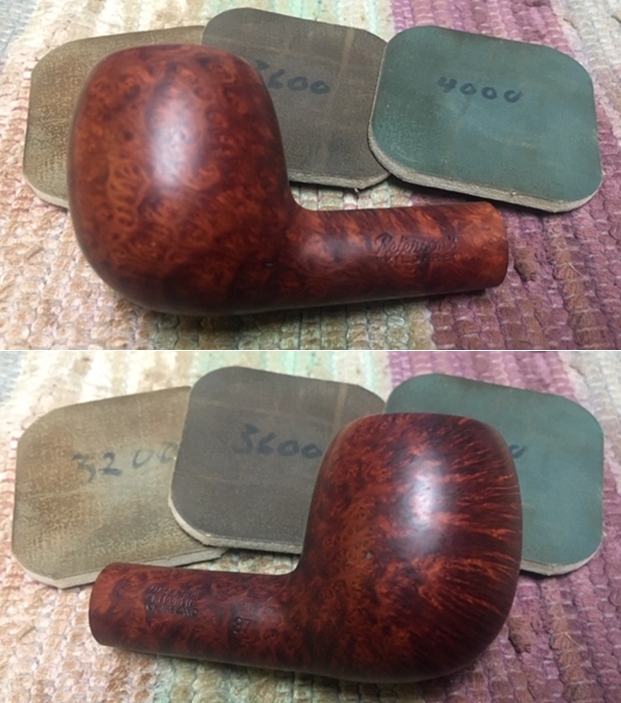
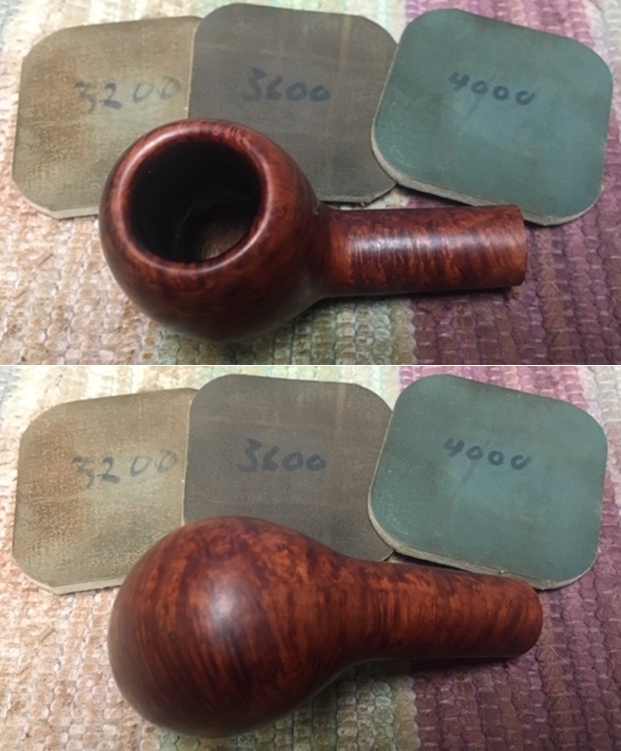
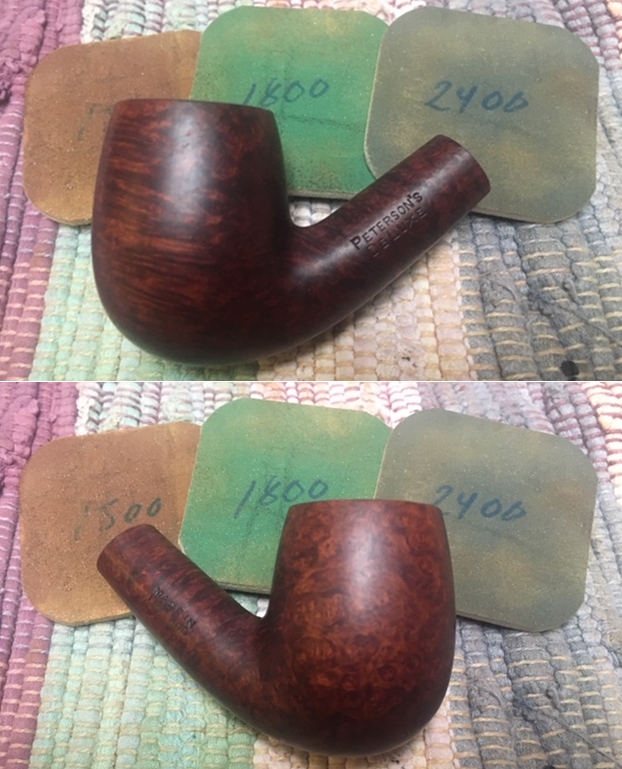
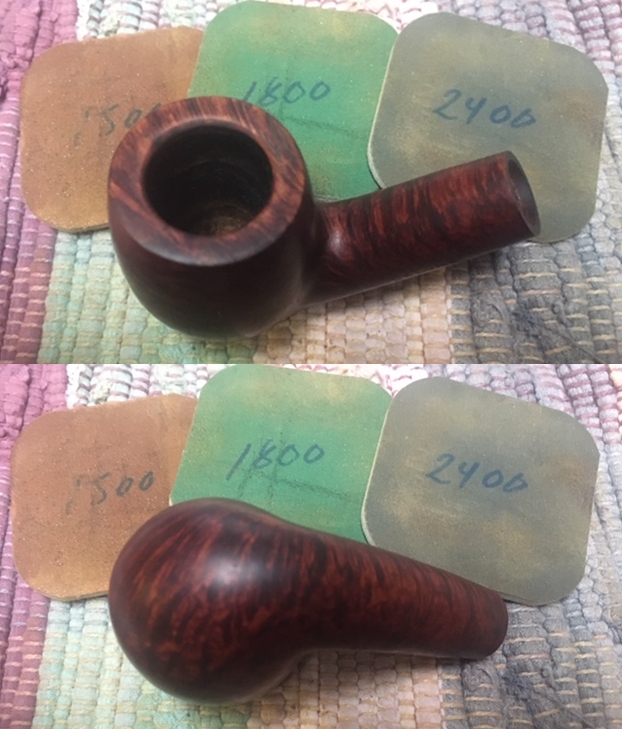
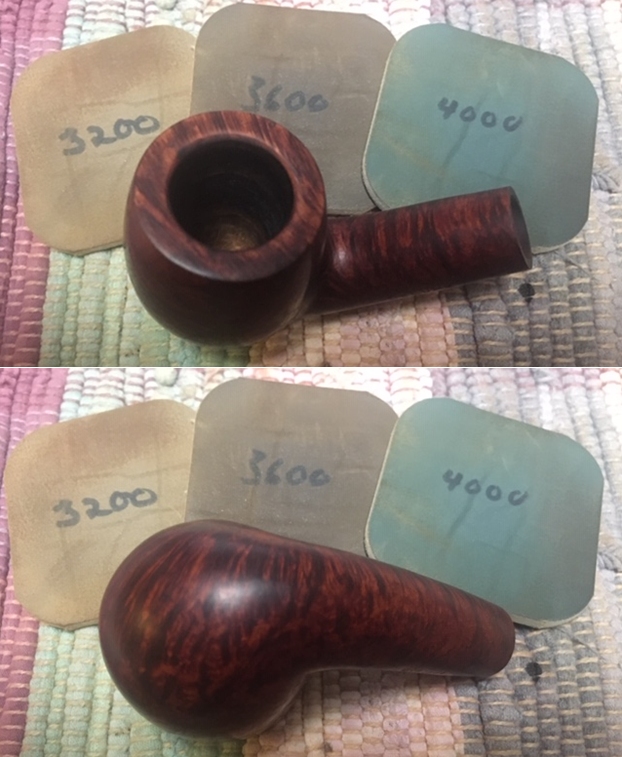
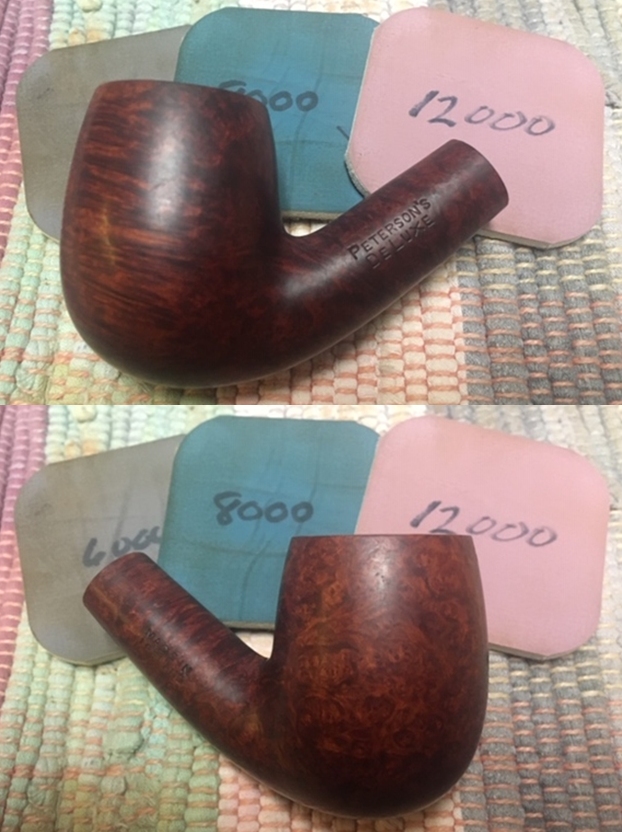
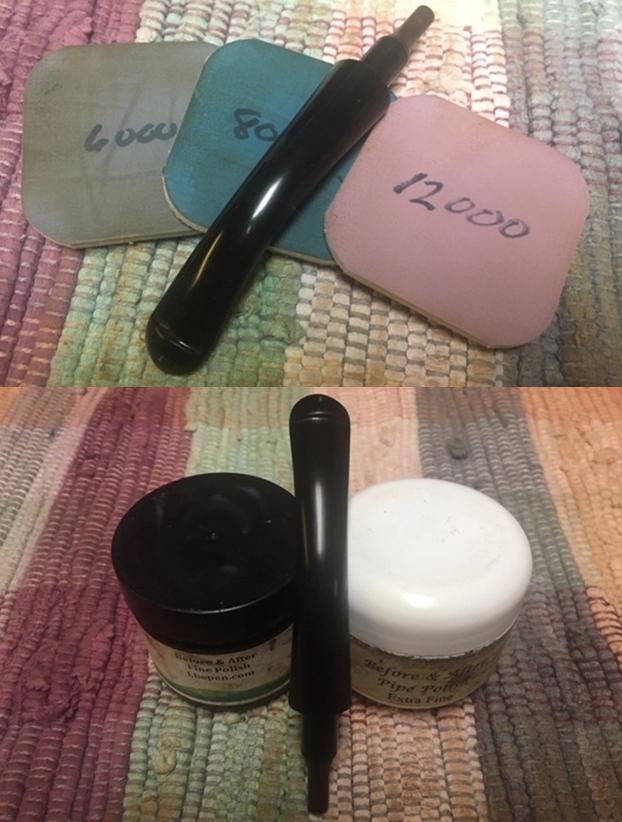
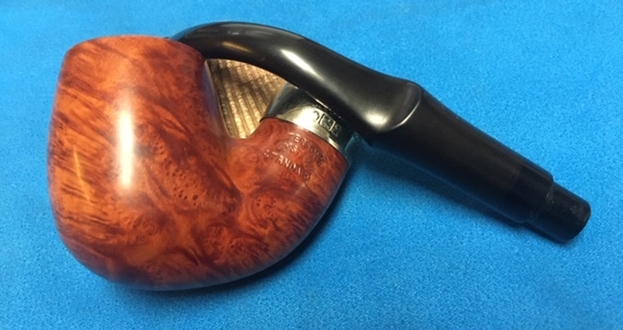
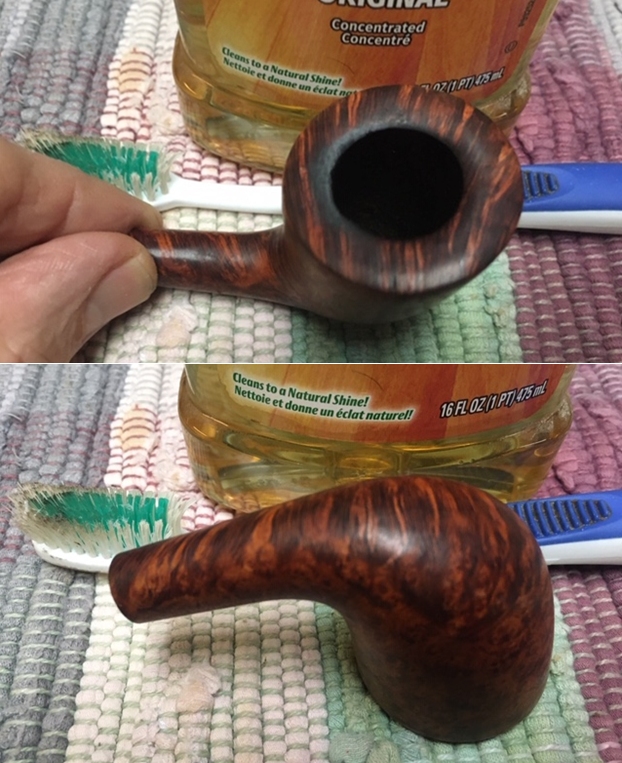
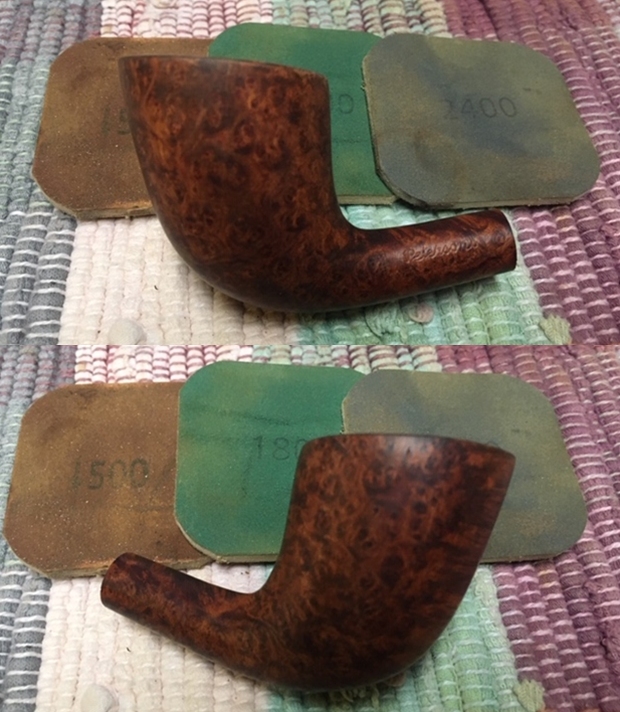
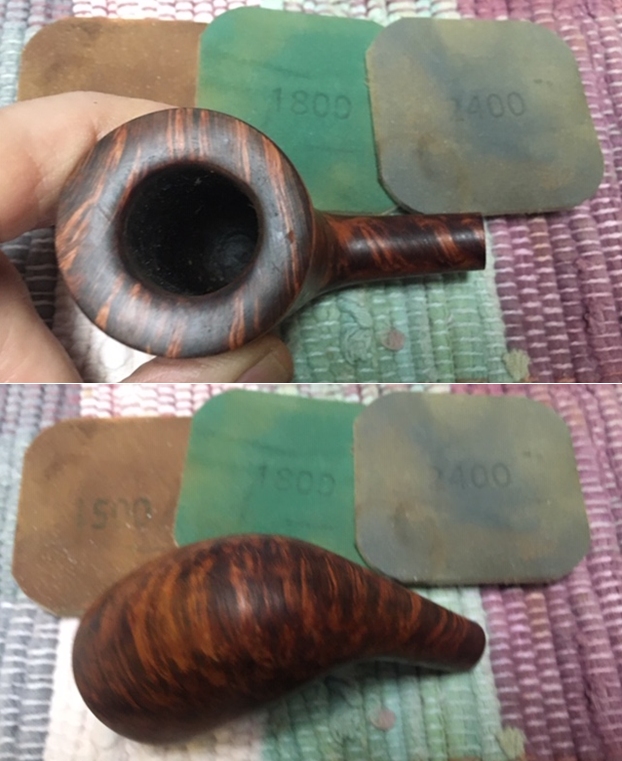
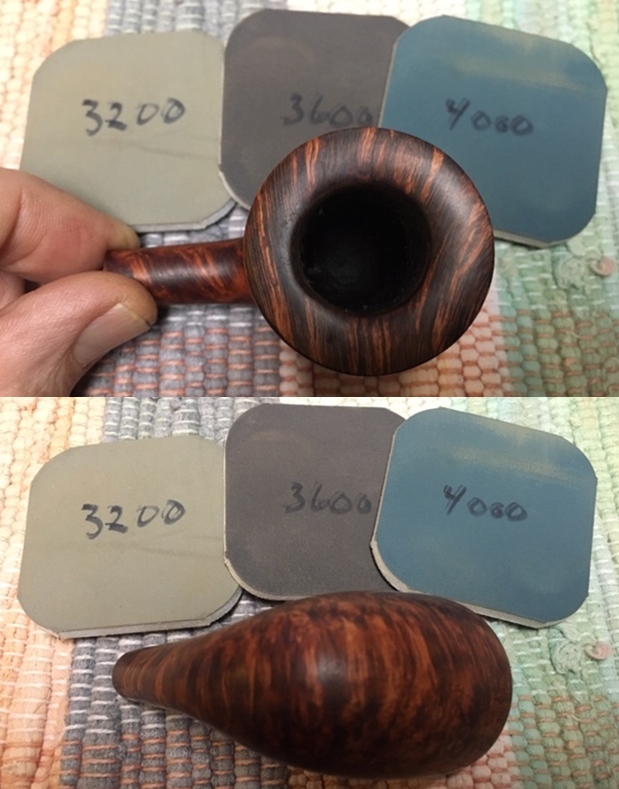
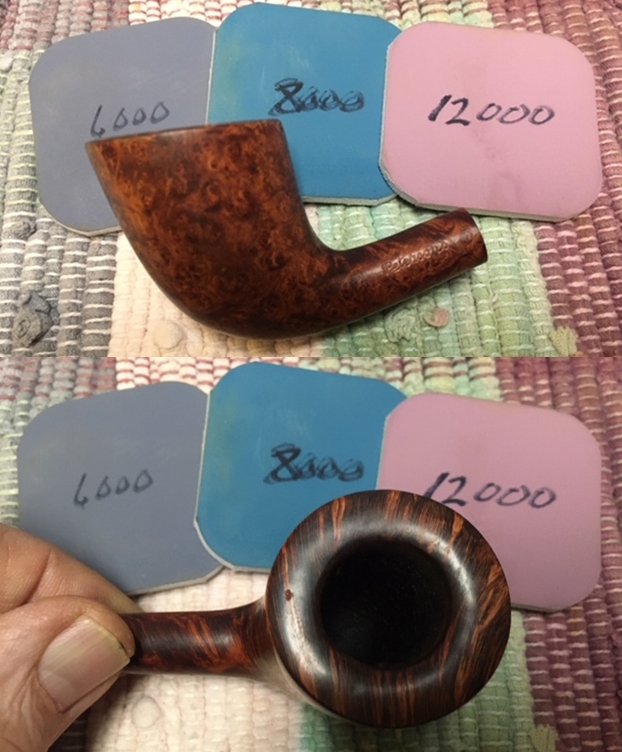
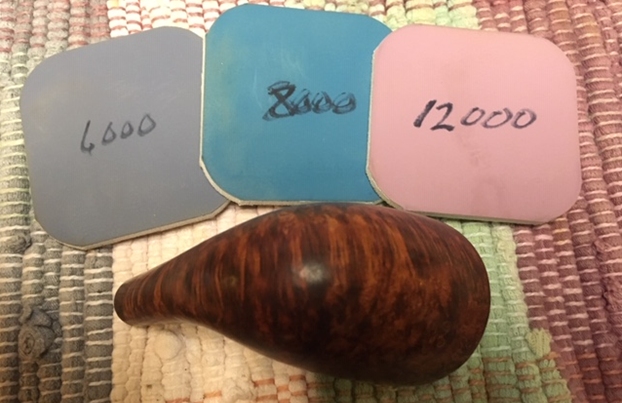
 Thereafter, I polished the entire stummel with micromesh pads, wet sanding with 1500 to 12000 pads. I wiped the surface with a soft moist cloth at the end of the micromesh cycle. The stummel looks amazing with a deep shine and beautiful grains over the stummel surface. Another issue that was addressed to a great extent was that of the minor scratches and nicks that were observed on the stummel. The rim top surface looks good with the few nicks and chips still visible, if observed closely. The refreshed fills distinctly stand out because of their dark coloration, and I shall let it be as a testimony of the journey of this beautiful pipe. I am very happy with the appearance of the rim top and stummel at this stage.
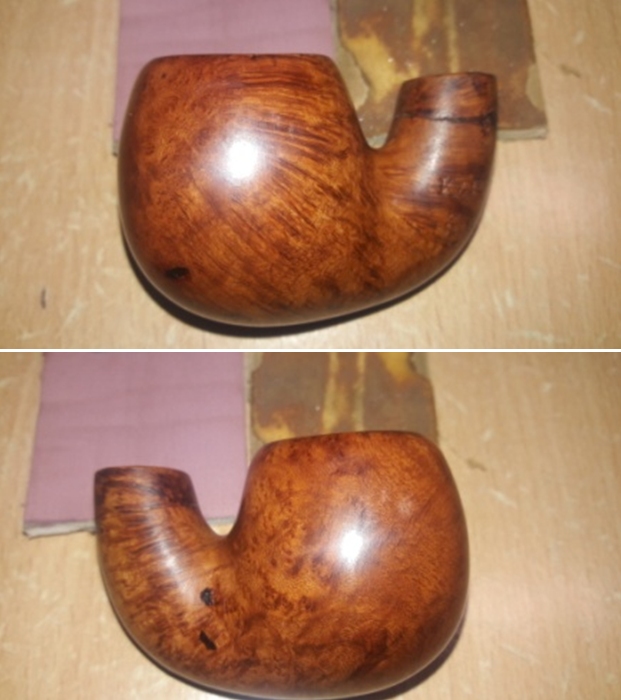
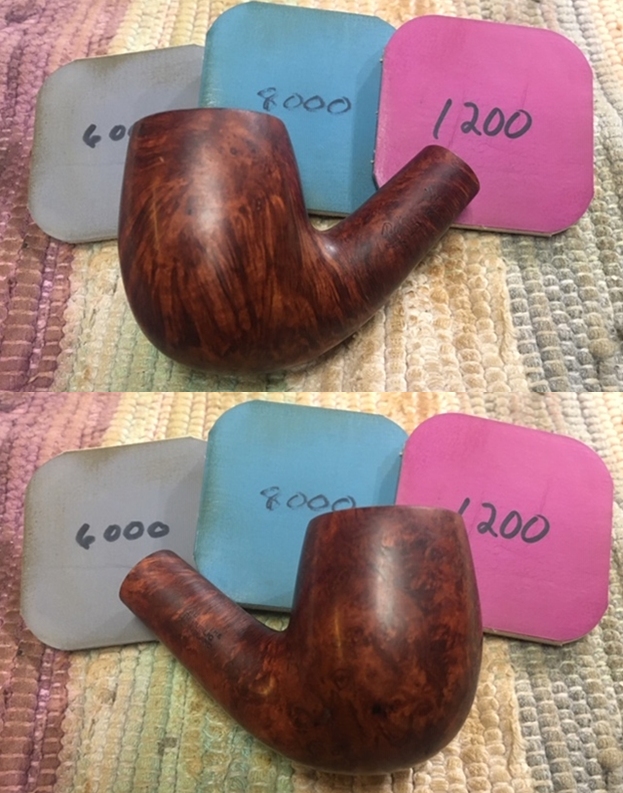
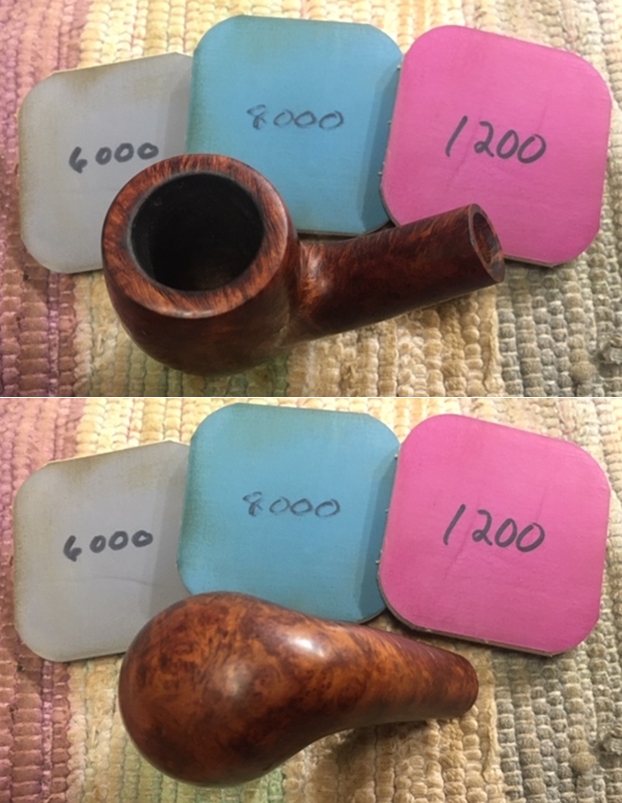
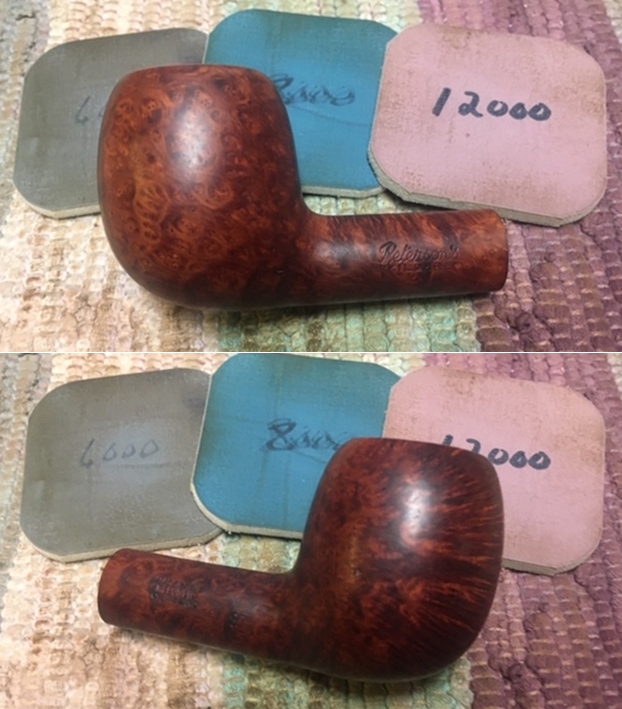
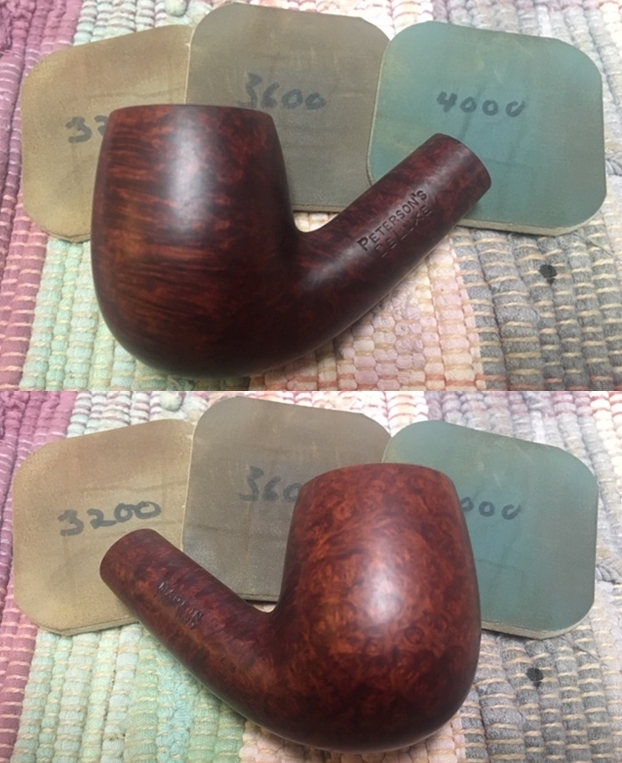
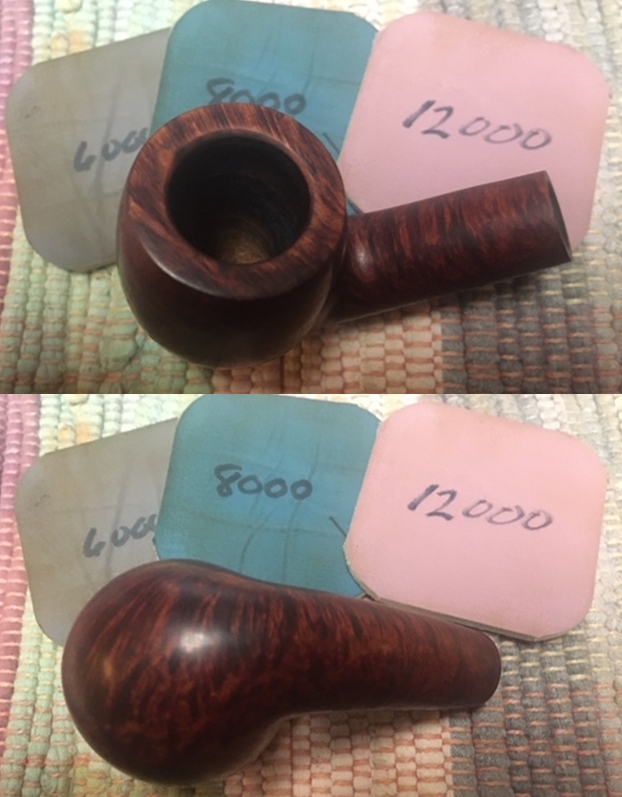
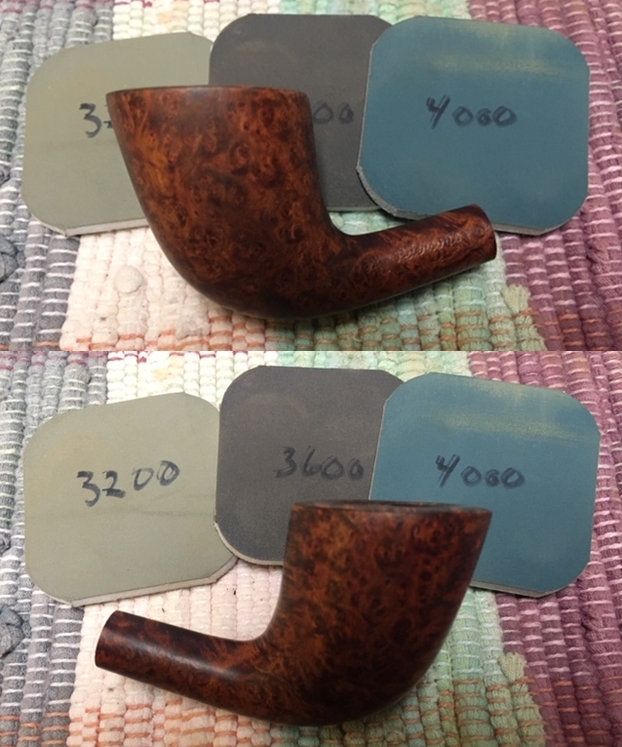
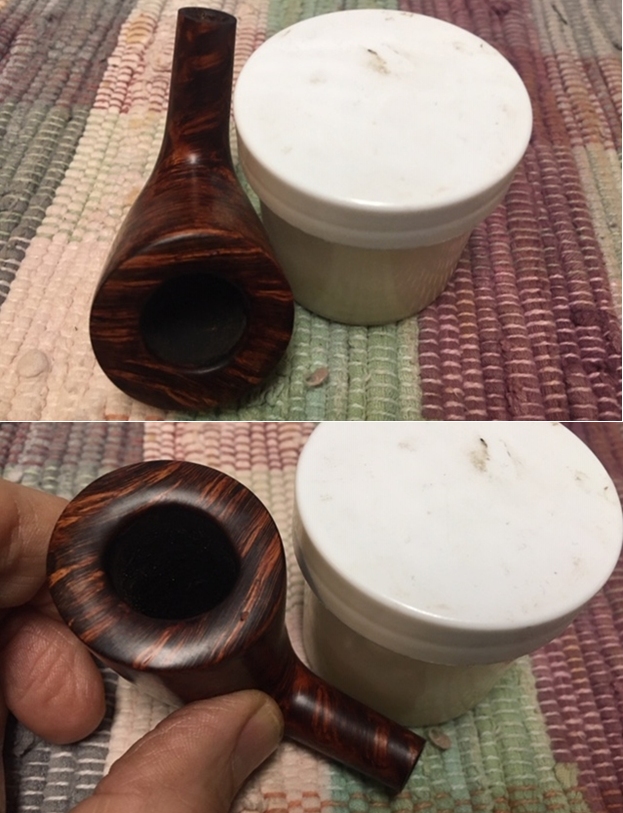
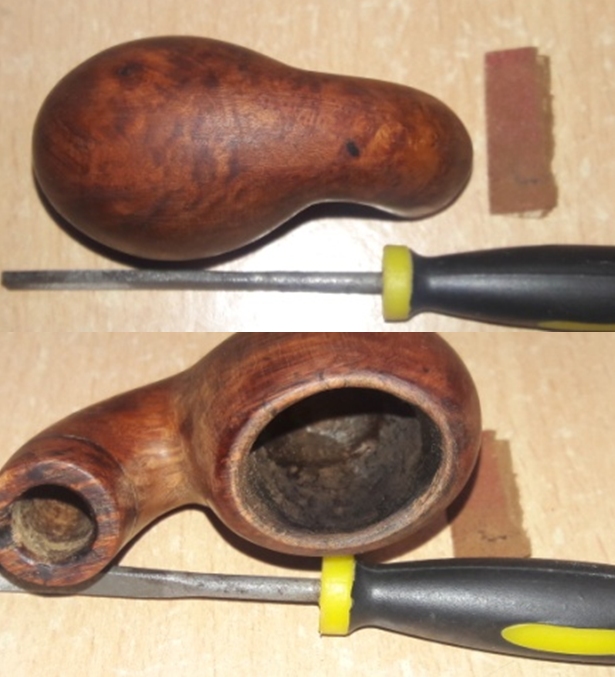
 I rubbed a small quantity of “Before and After Restoration Balm” in to briar and let it rest for a few minutes. The balm almost immediately works its magic and the briar now has a nice vibrant appearance with the dark hues of the grain contrasting with the rest of the stummel surface. I further buff it with a horse hair shoe brush.
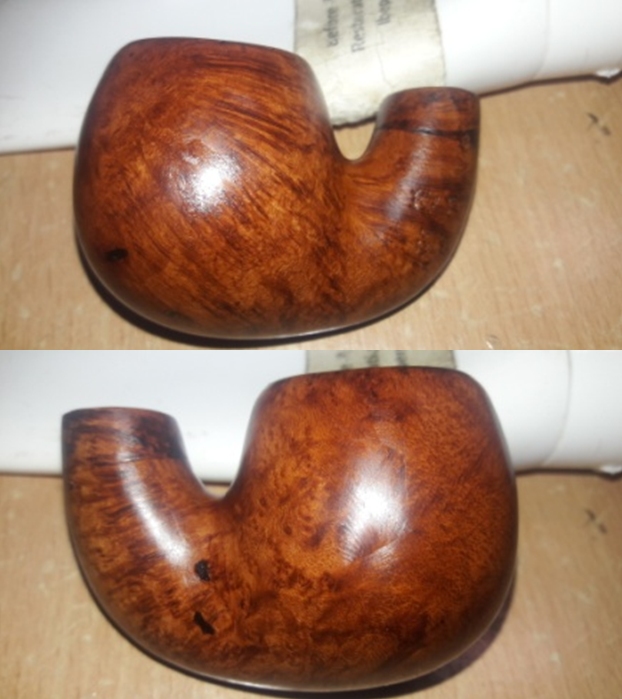
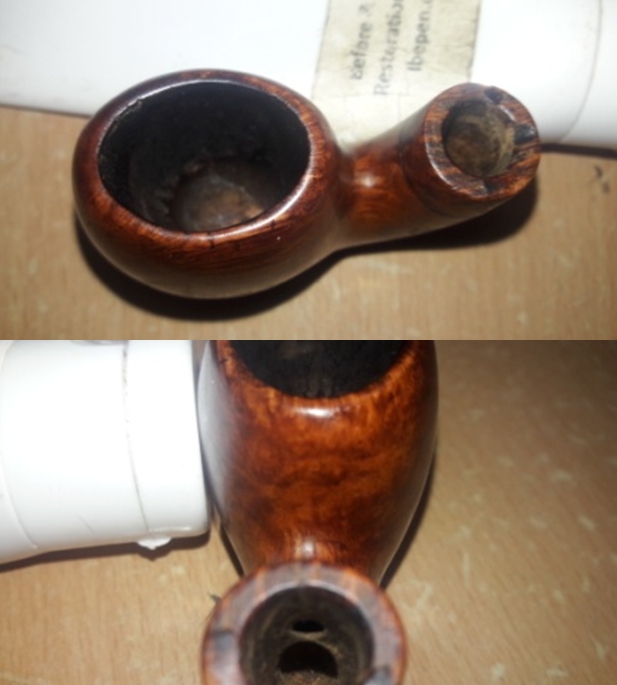
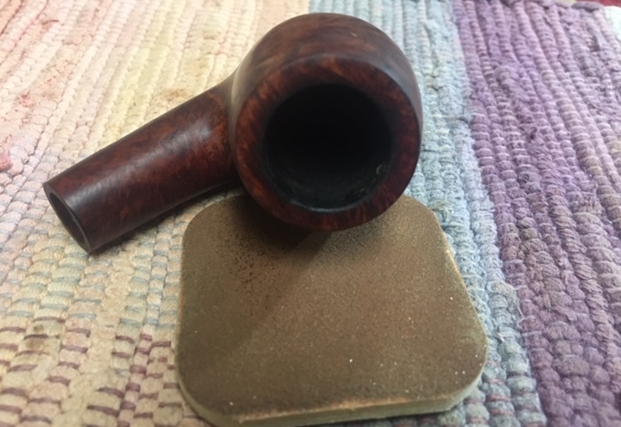
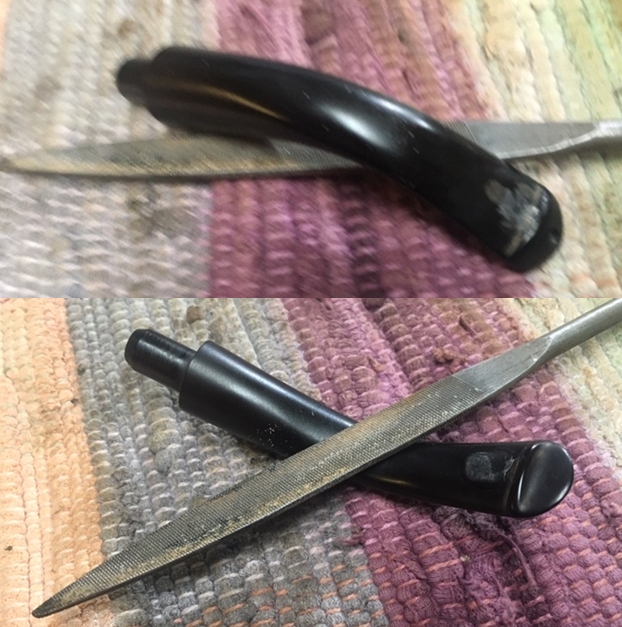
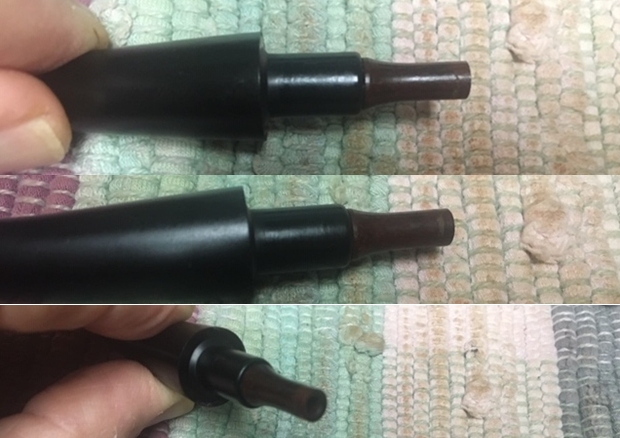
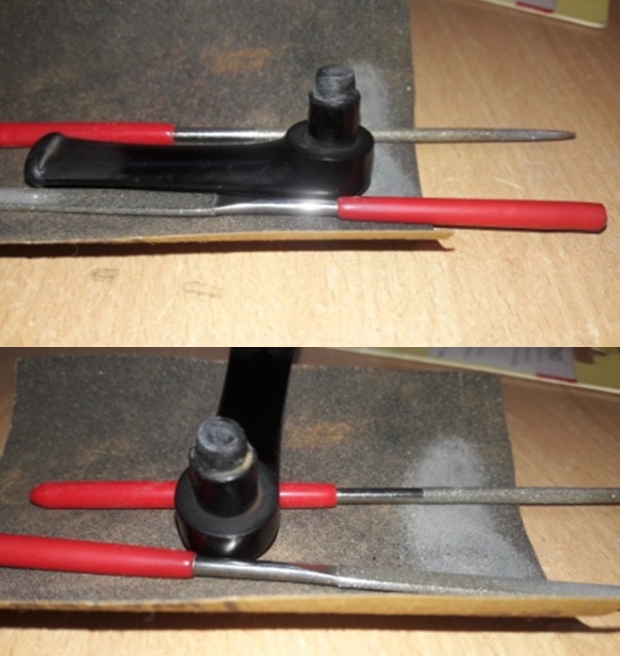
 I set the stummel aside and took up the stem repairs. The tenon tip rebuild had cured nicely. With a flat head needle file, I sand the rebuilt portion of the tenon and the button edges to achieve a rough match. Using a round needle file, I shaped the opening of the tenon to a perfect round. I resorted to topping the tenon end on a piece of 220 grit sand paper to achieve the correct tenon size, which is just below the opening of the draught hole in the mortise. This ensures that the Pete’s famed “System” functions as effectively.
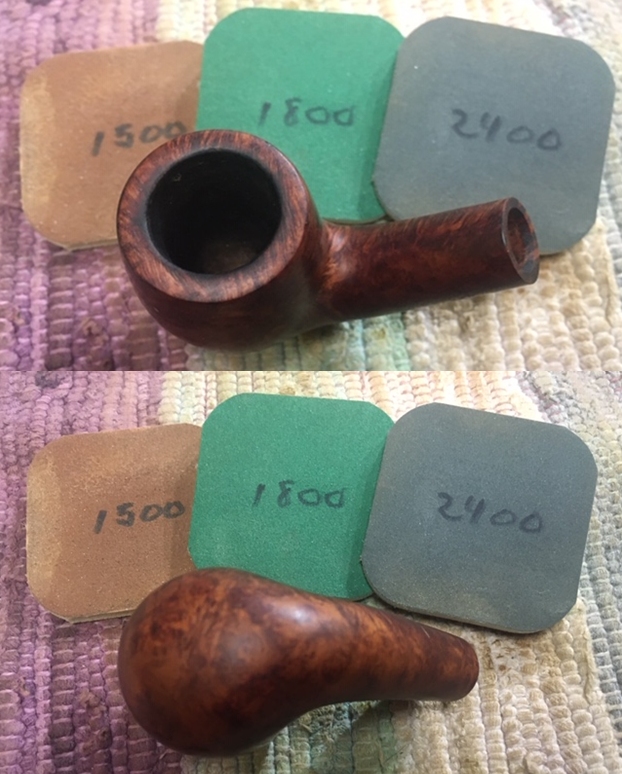
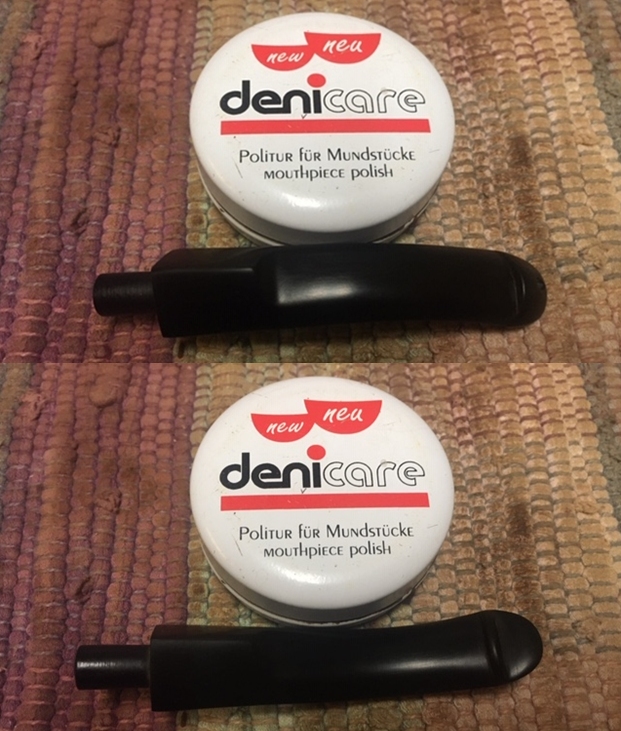
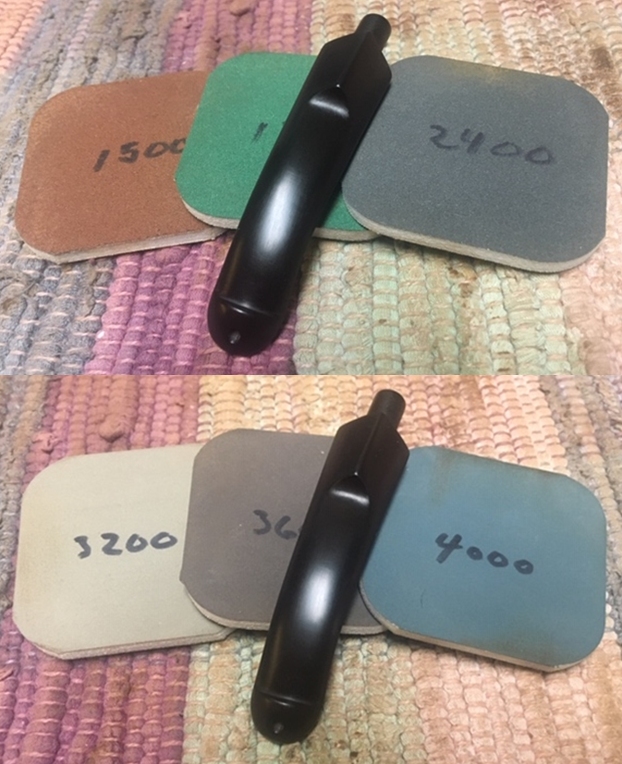
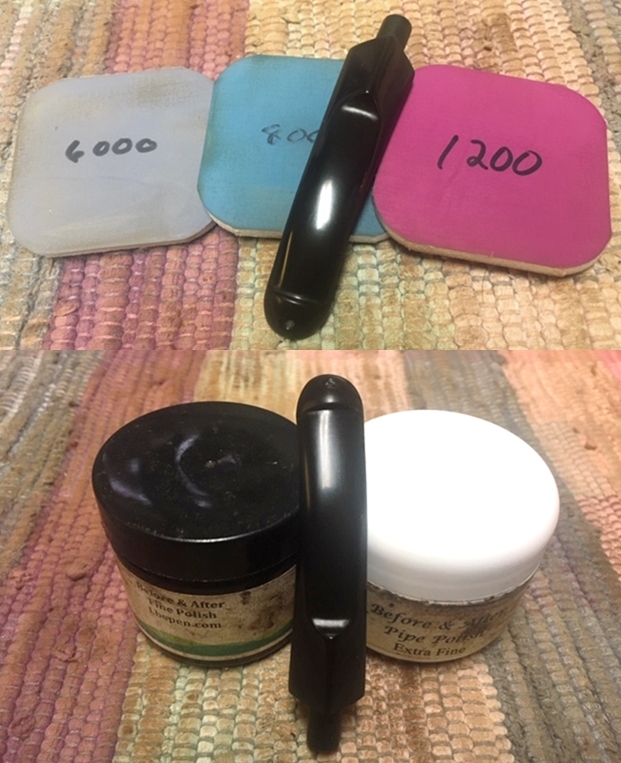
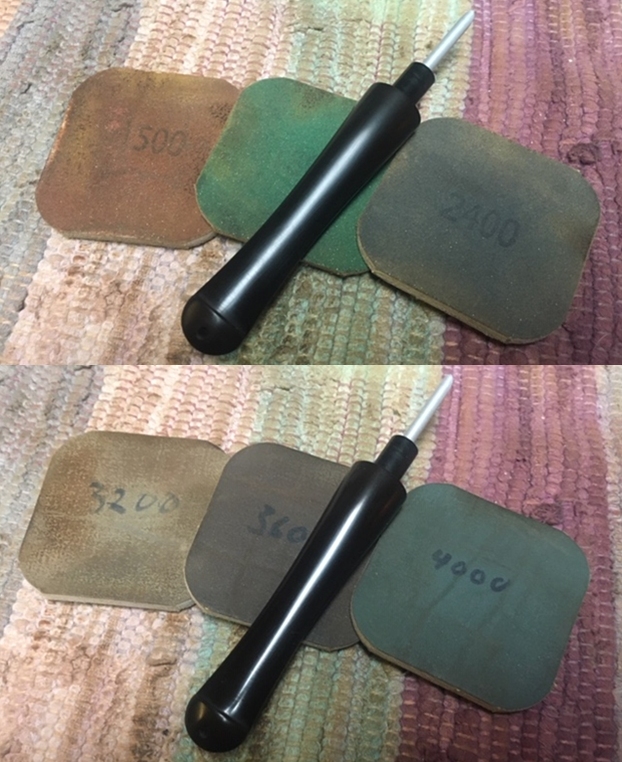
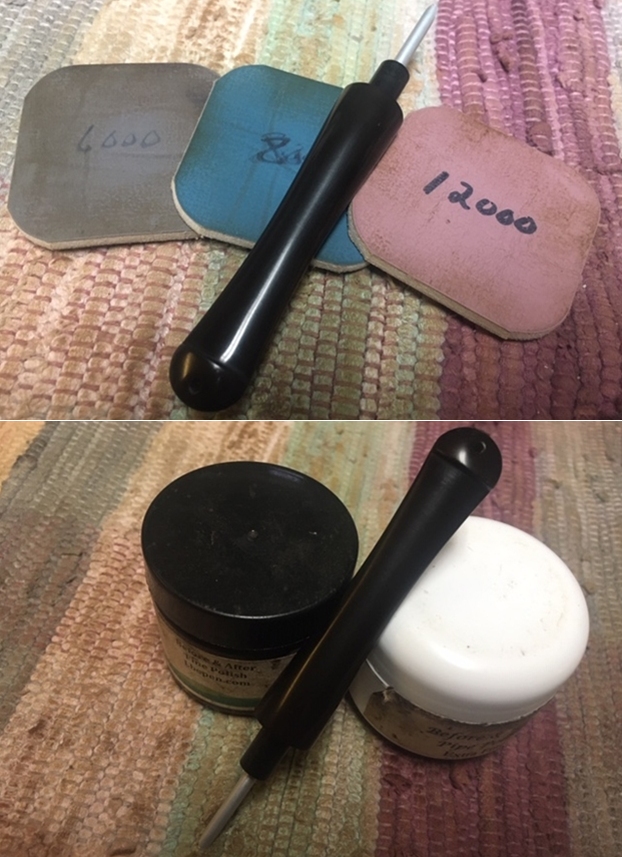
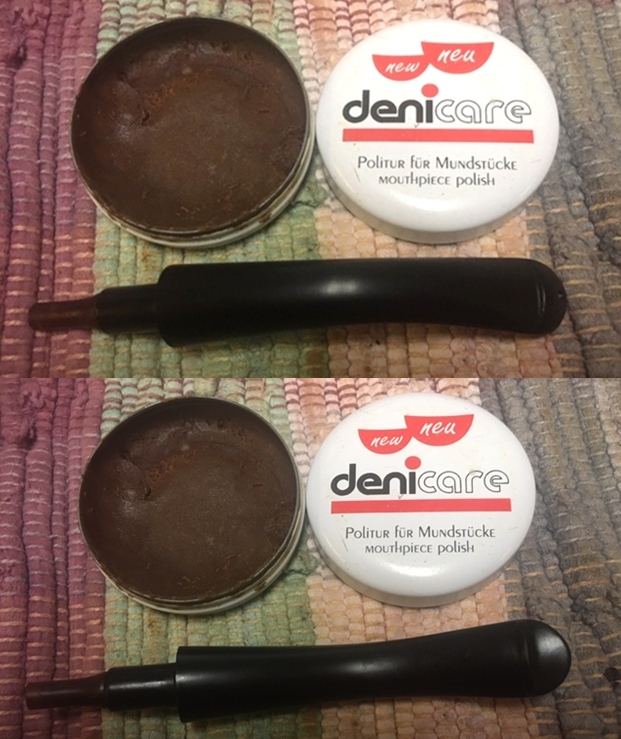
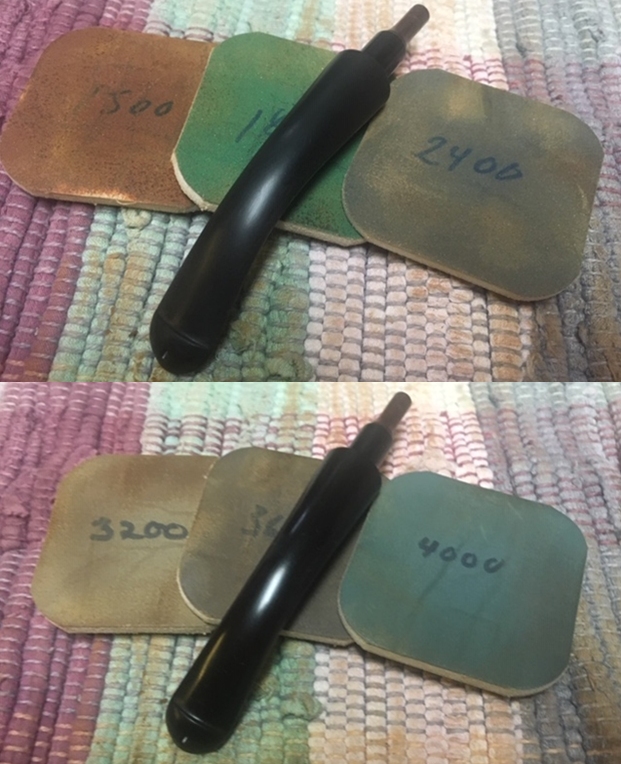
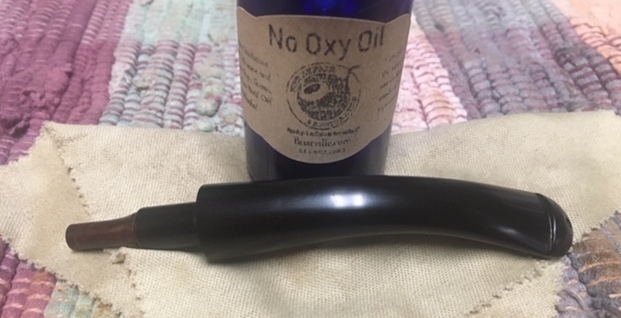
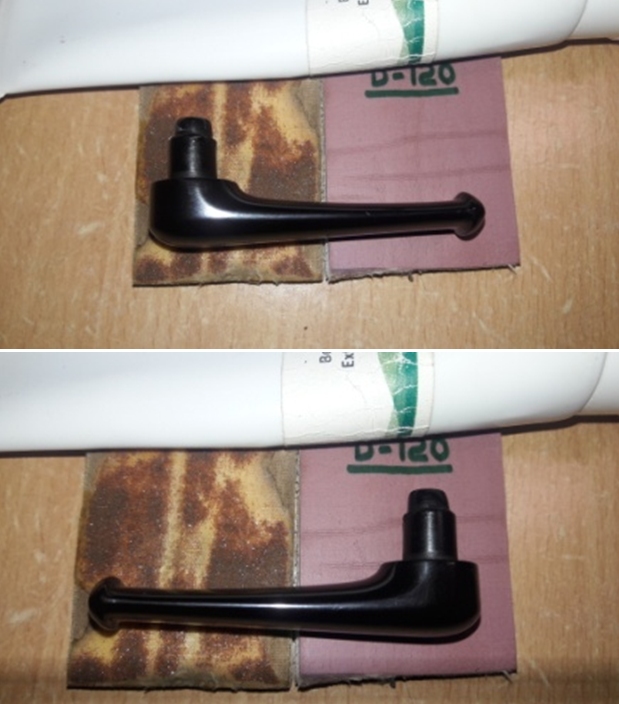
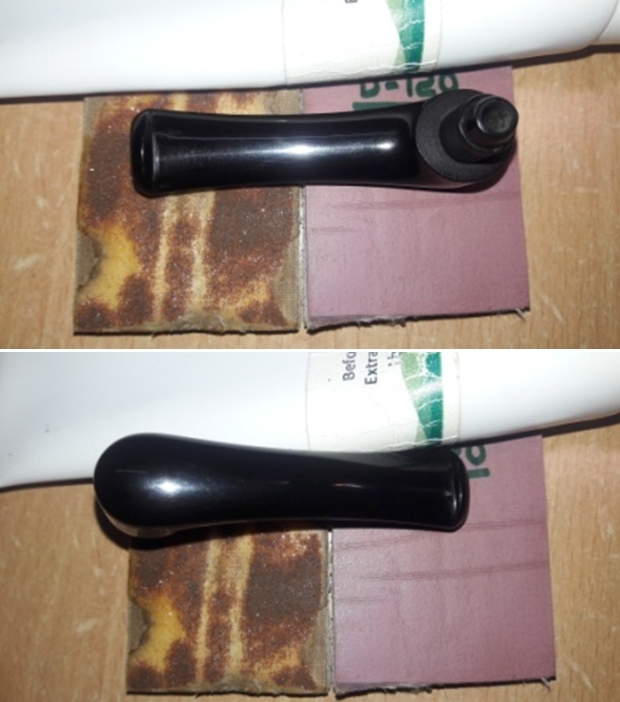
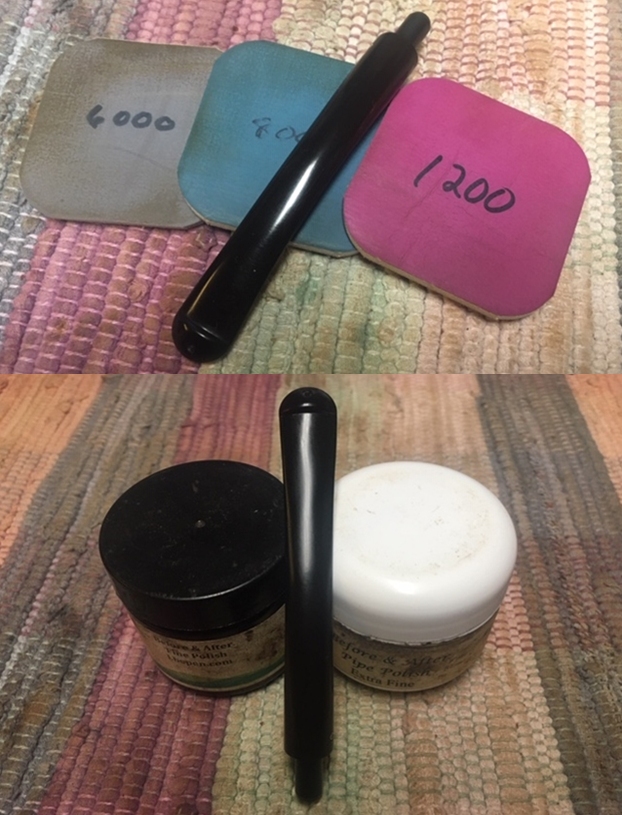
 I further sand the entire stem surface with a folded piece of a 220 grit sand paper to achieve a perfect blend of the fill with the stem surface. With the same piece of sand paper, I sharpened the button edges on both the upper and lower surface. I wiped the stem with a cotton swab and Murphy’s oil soap to further remove the oxidation and sanding dust. I rubbed some extra virgin olive oil into the stem and set it aside to be absorbed into stem. I polished the stem with micromesh pads, wet sanding with 1500 to 12000 grit pads. I rubbed a little extra virgin olive oil in to the stem at the end of all the micromesh pads. Next I rubbed a small quantity of extra fine stem polish that I had got from Mark Hoover and set it aside to let the polish work its magic. After about 10 minutes, I hand buffed the stem with a microfiber cloth to a nice shine. The stem is now nice, smooth and shiny.
 Now with the stummel nicely polished, the nickel band polished and shining and stem repairs and polishing completed, all that remained to be done was to get these parts together for a final polishing with carnauba wax. I glued the nickel ferrule to the shank end with CA superglue.
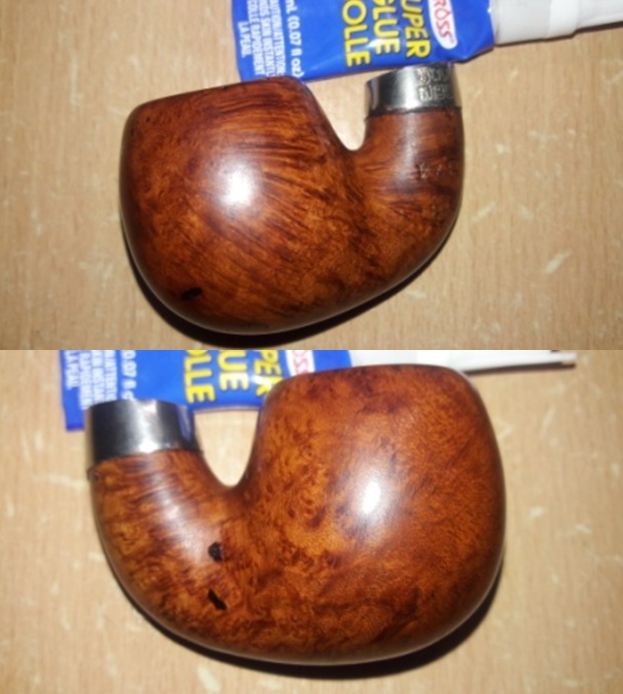 To apply the finishing touches, I mount a cotton cloth buffing wheel on to my hand held rotary tool and apply a coat of Blue Diamond to the entire pipe to polish out the minor scratches.
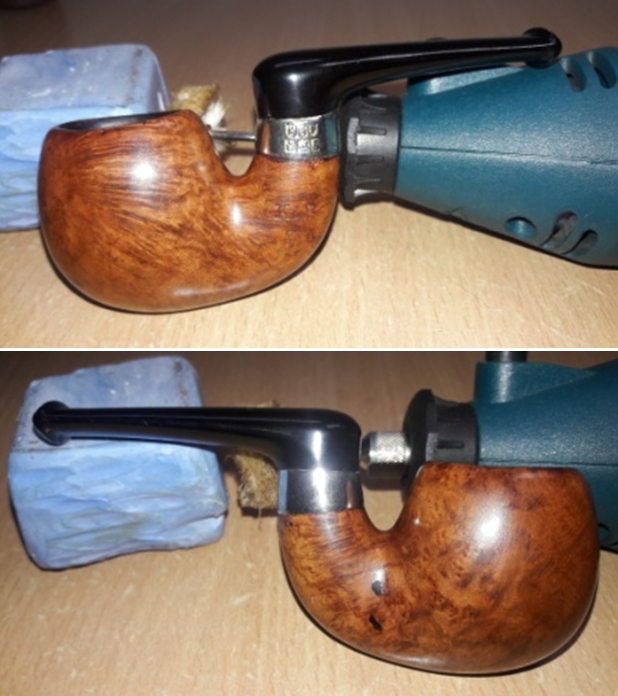
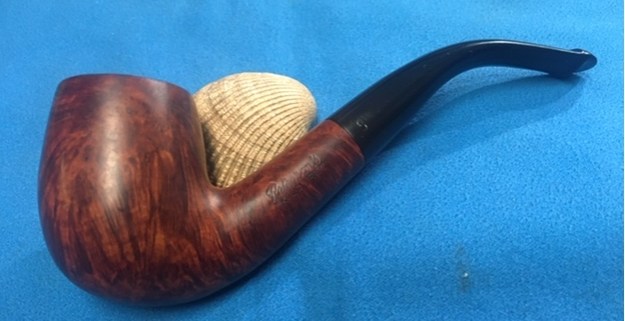
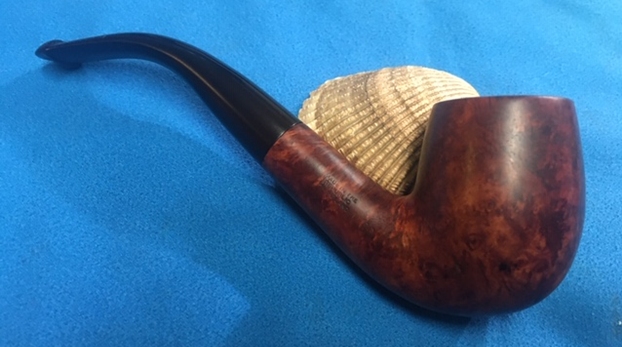
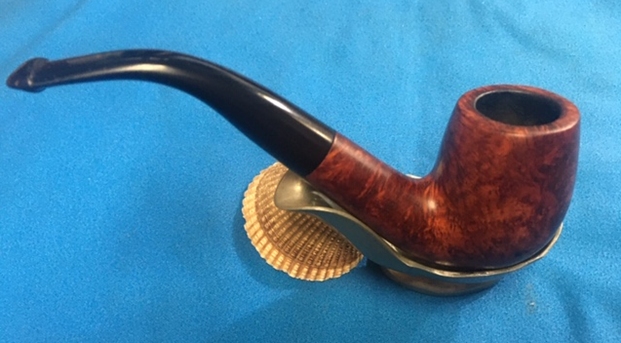
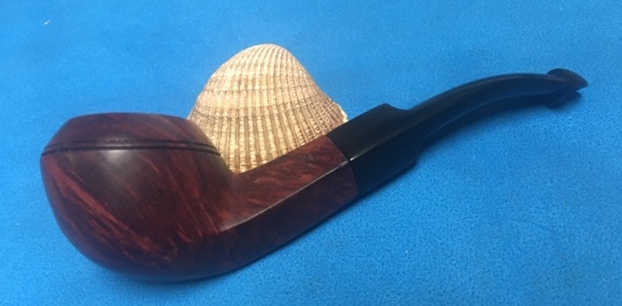
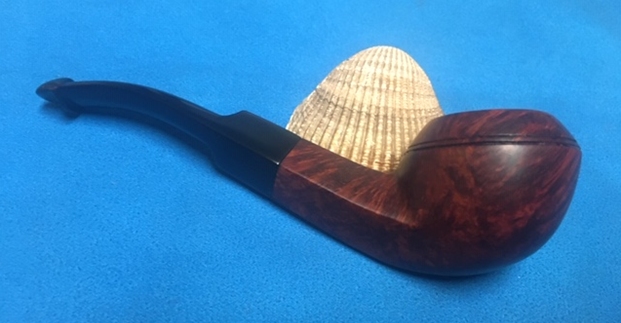
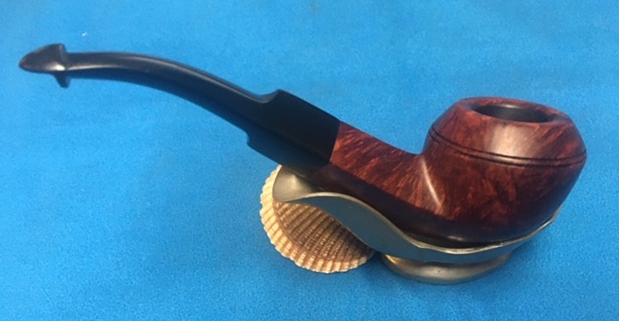
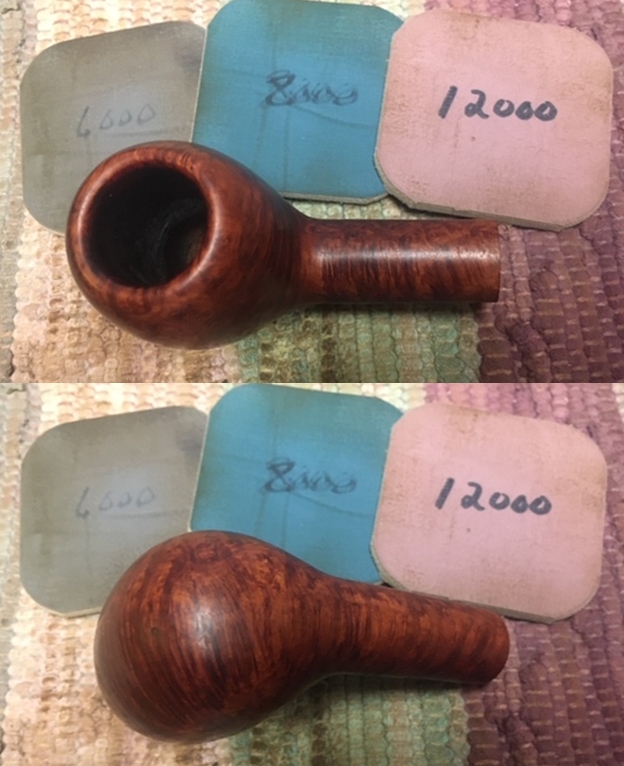
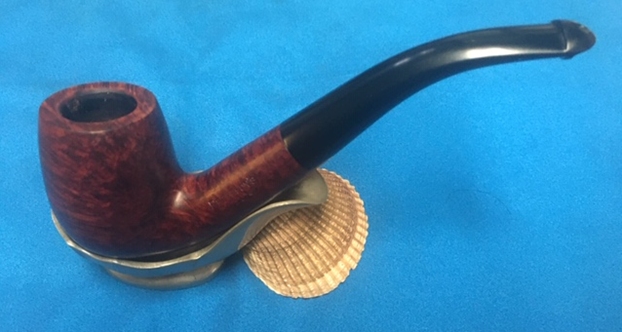
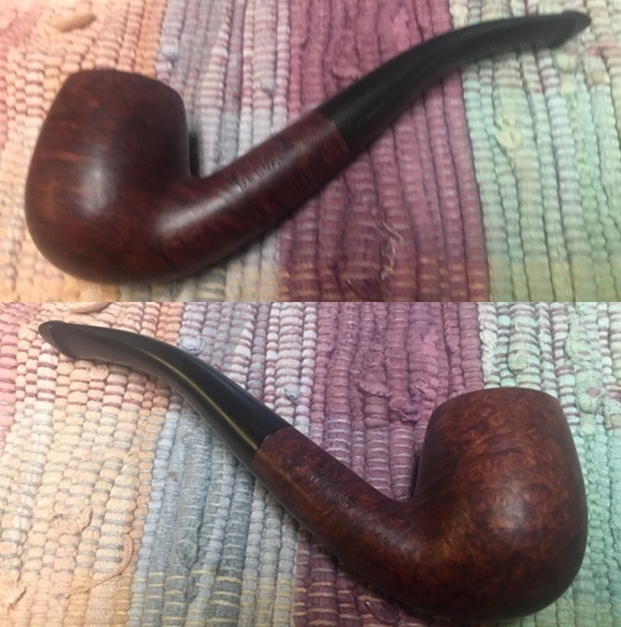
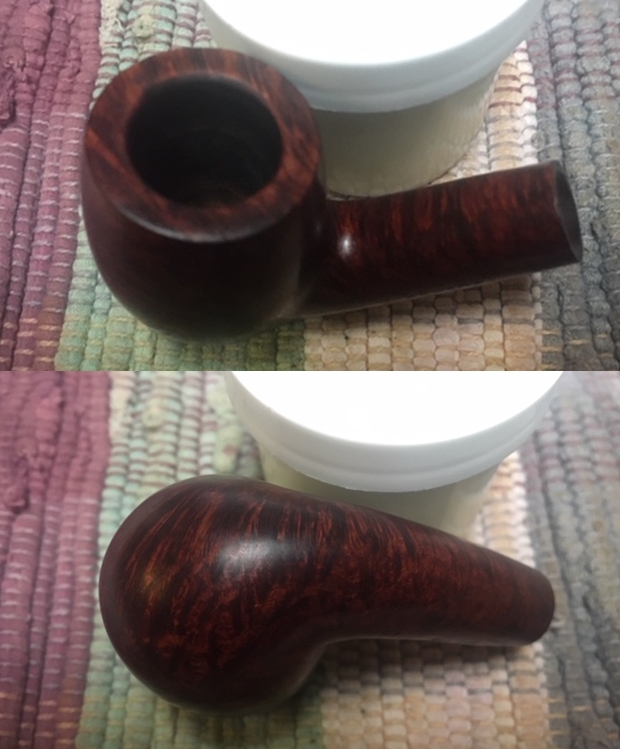
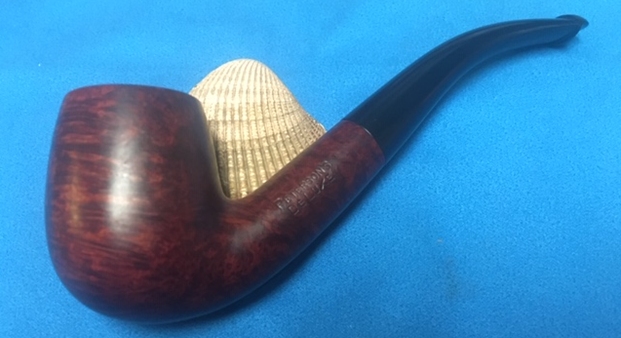
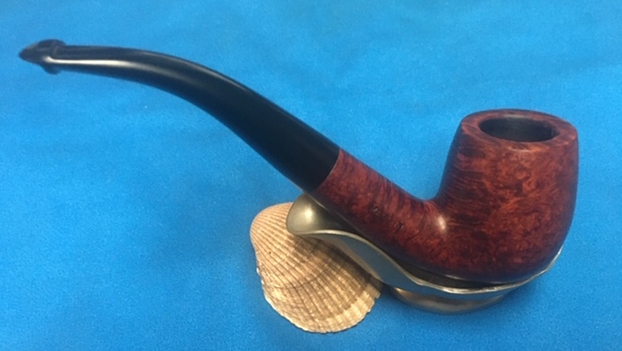
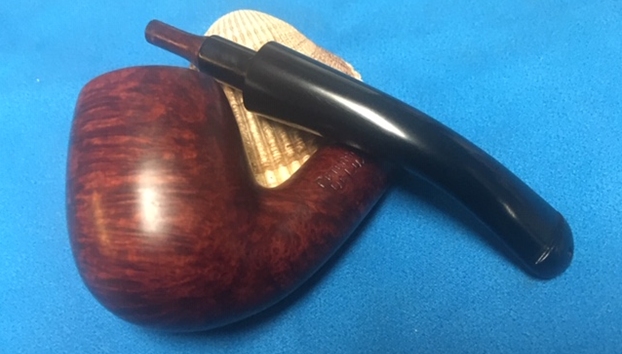
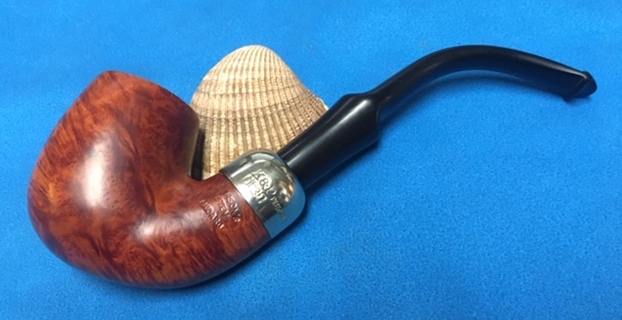
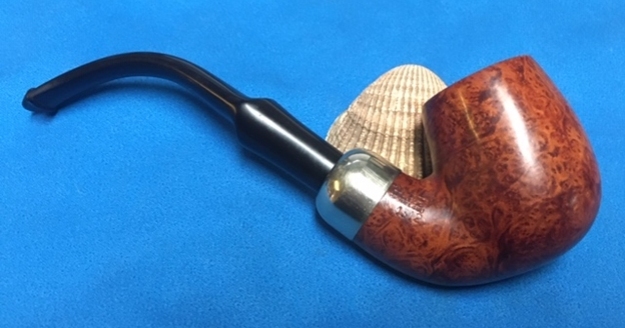
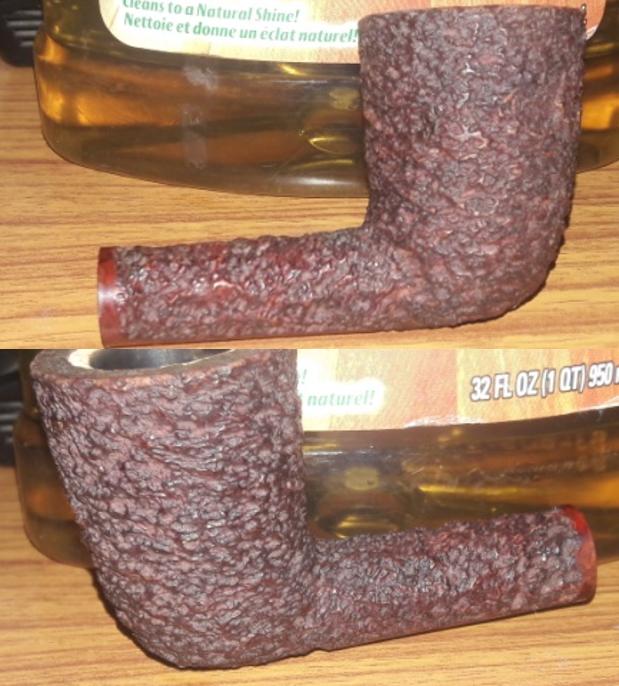
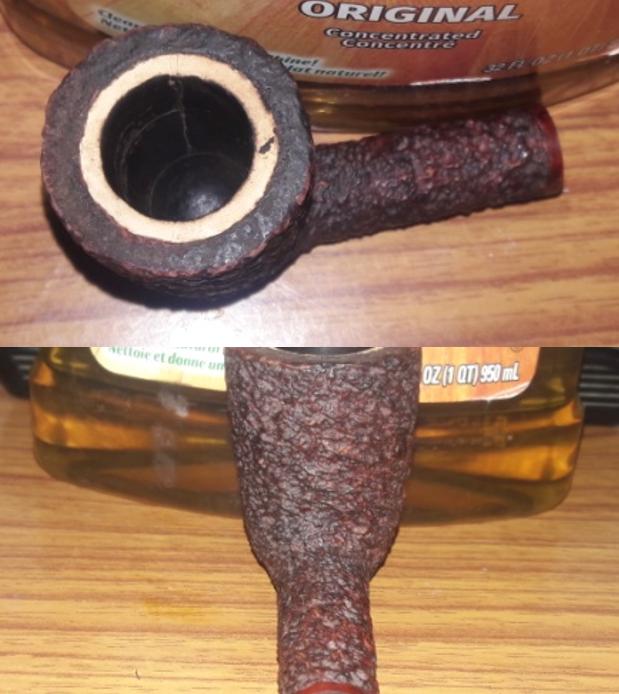
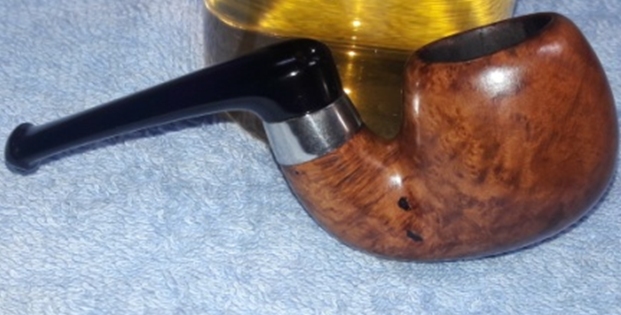
 With a cotton buffing wheel that I use for carnauba wax, I apply a coat of carnauba wax to the stummel and stem and continue to work on it till the complete coat of wax is polished out. I mount a clean cotton cloth buffing wheel and gave the entire pipe a once over buff. I finished the restoration by giving the entire pipe a rigorous hand buffing using a microfiber cloth to raise the shine further. The finished pipe is shown below.


 P.S. – This is another unique and vintage pipe of my grandfather that has been passed on to me. I feel singularly fortunate and honored to carry forward his legacy while at the same time preserving a part of history of these pipe brands. Thanks for your patience and looking forward to inputs about the write up.
I had decided to let the fills be seen and not mask it under a darker stain; I am still open to suggestions from esteemed readers!!
Cheers…
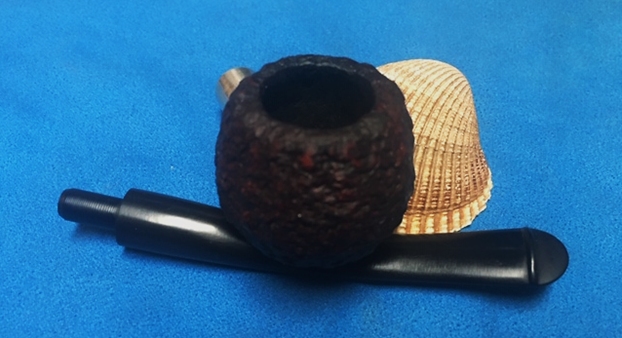
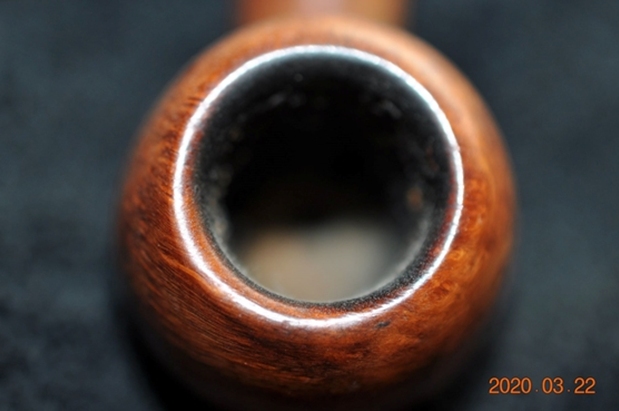
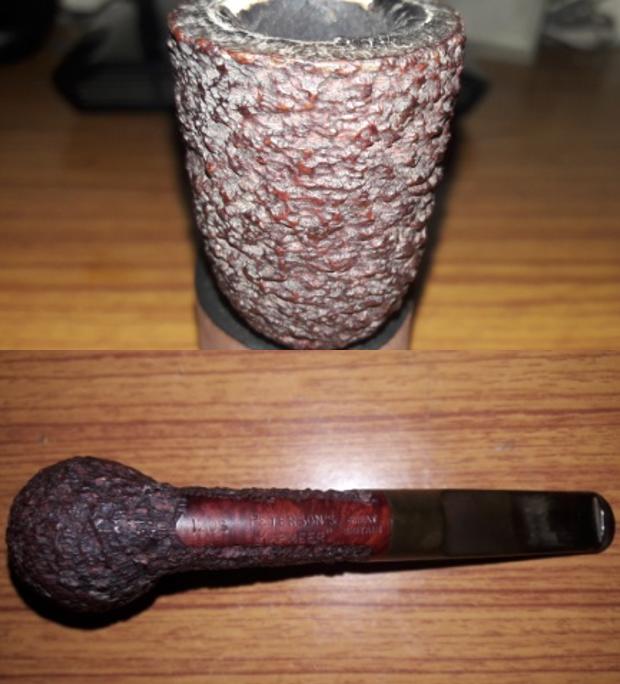
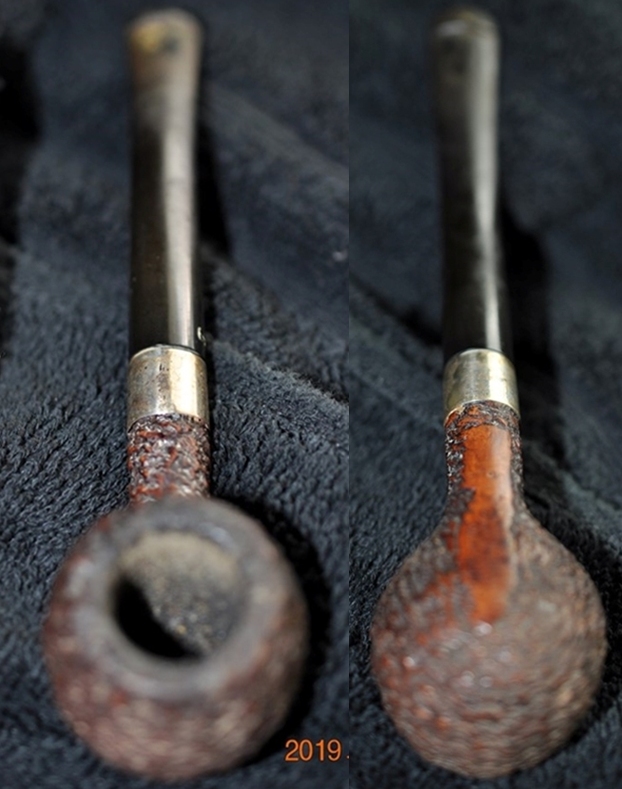 Jeff took photos of the rim top to show the cake in the bowl and the overflow of lava onto the rim top and filling in the rustication. The photos show the rim top and bowl from various angles.
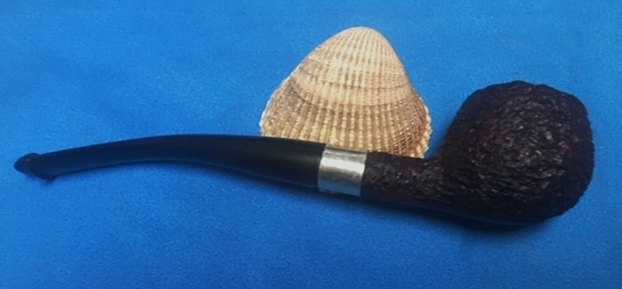
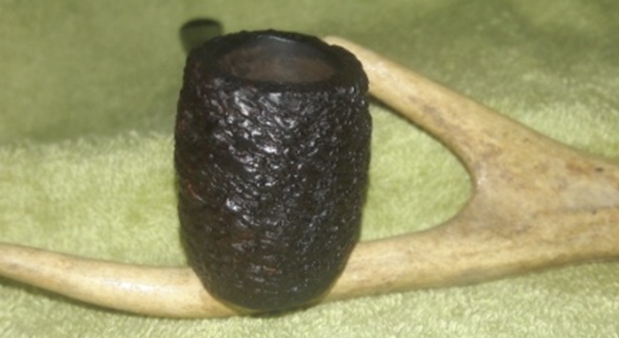
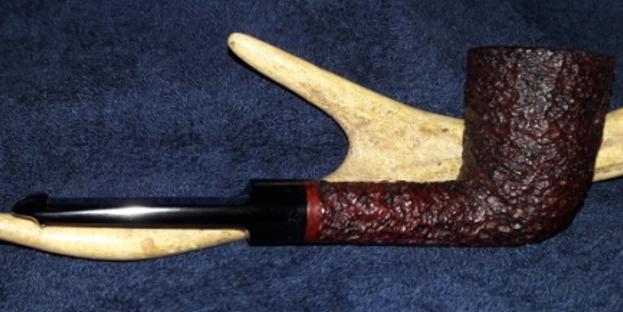
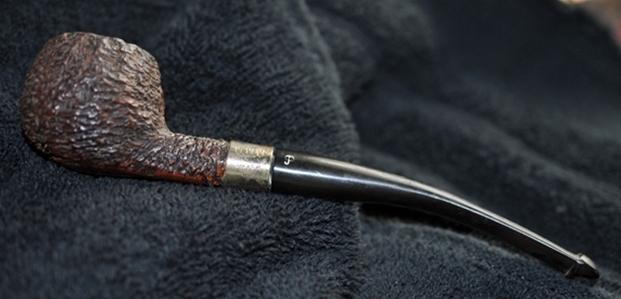
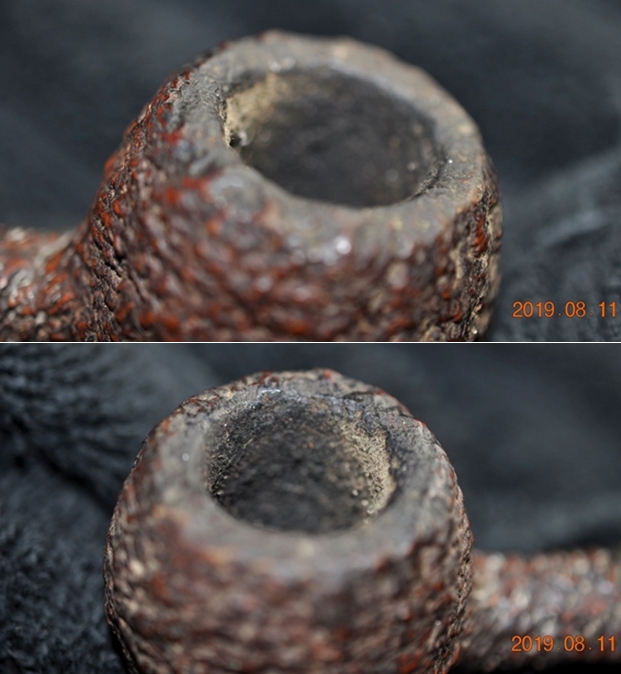 He took some photos of the bowl sides and heel to show the tight rustication pattern that was on this bowl. It is a dirty but quite beautifully crafted pipe.
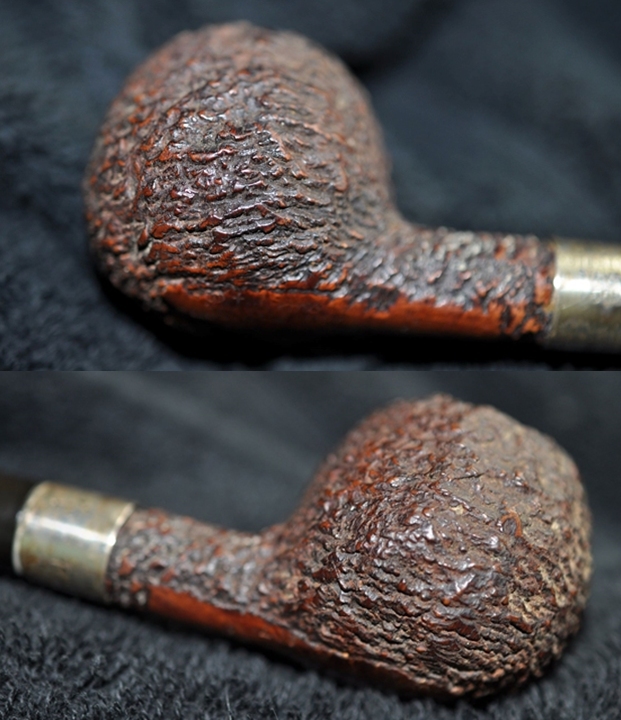
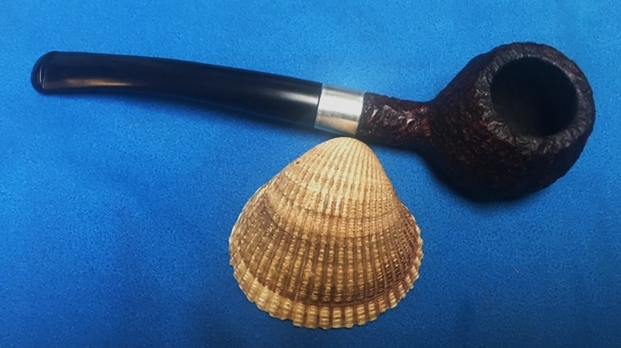
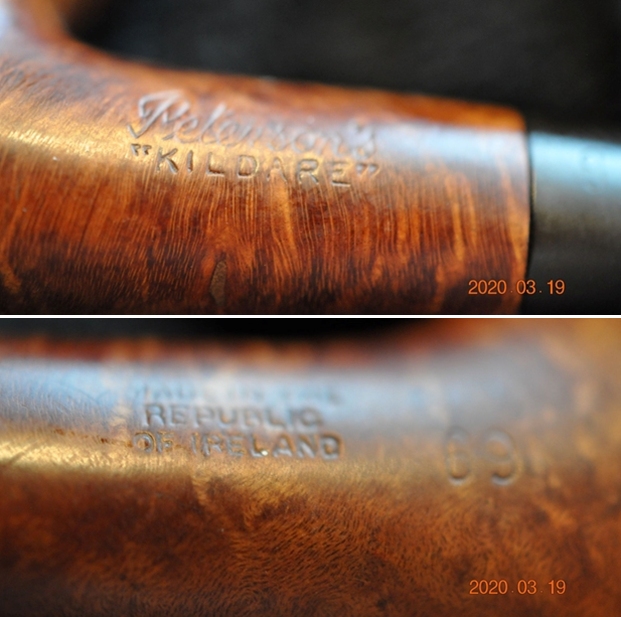
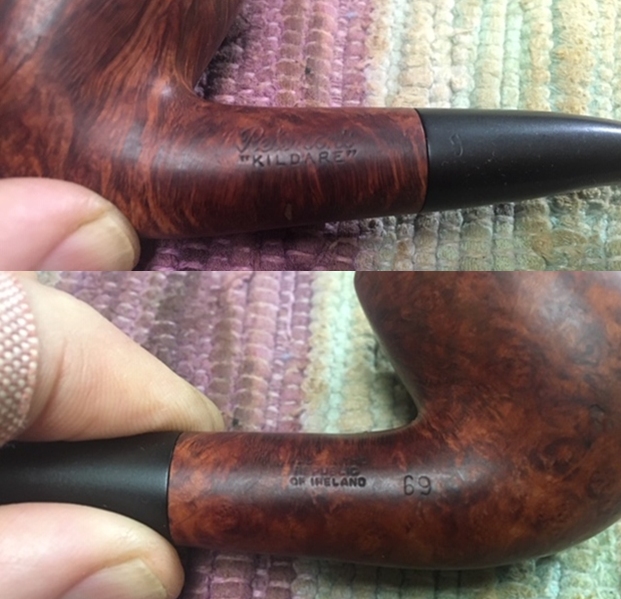
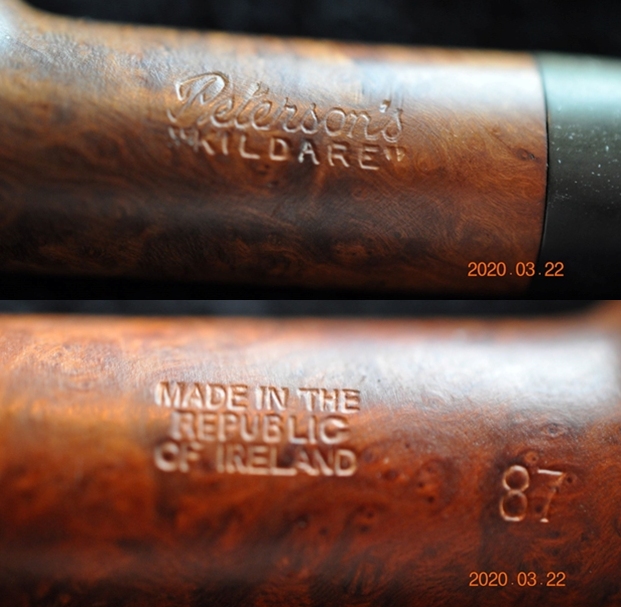
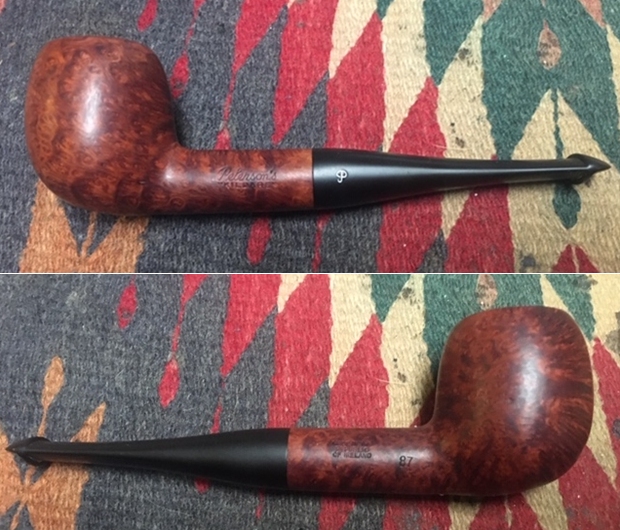
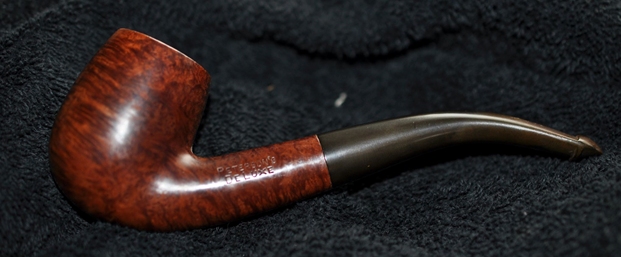
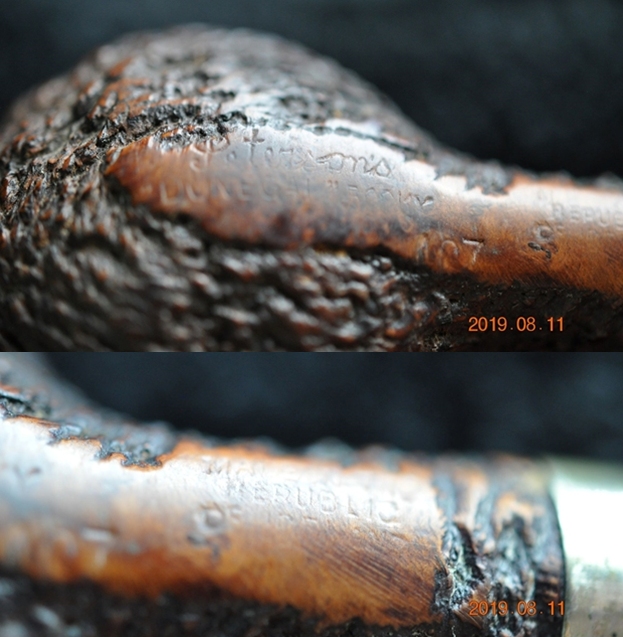
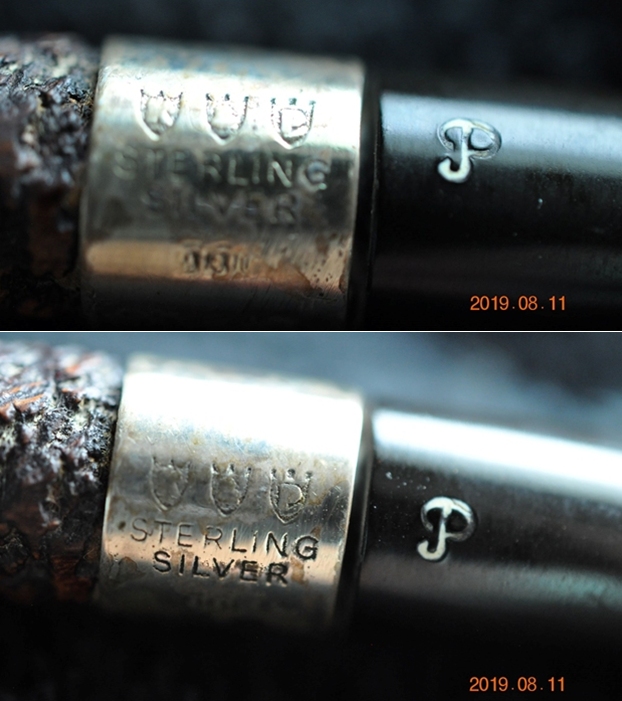
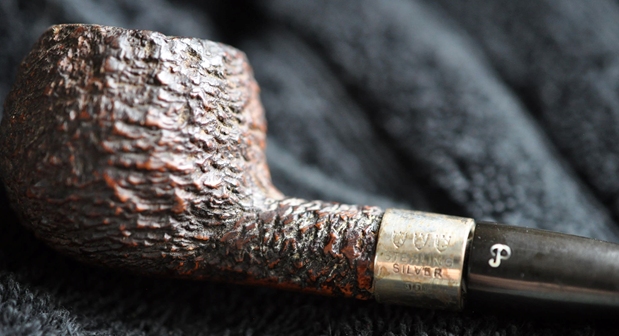 The stamping on the underside of the shank read as noted above. It took a few photos to show the entirety of the stamping. The stamping is faint but readable. He also took photos of the Sterling Silver band on the shank. The P on the left side of the stem is clear and the stamping on the stem side is in good condition.
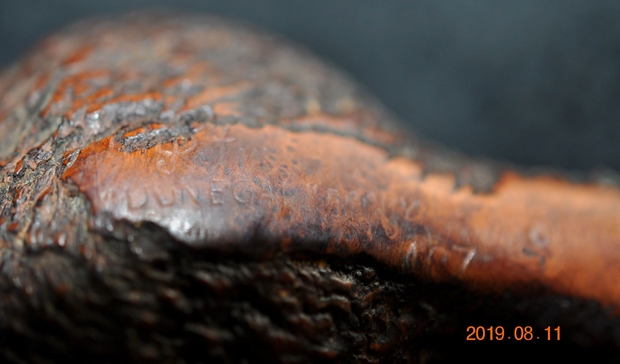
 The stem was a poor fit to the shank. It was oxidized, calcified and had debris stuck to the surface of the vulcanite. There were tooth marks and chatter on both sides of the stem.
 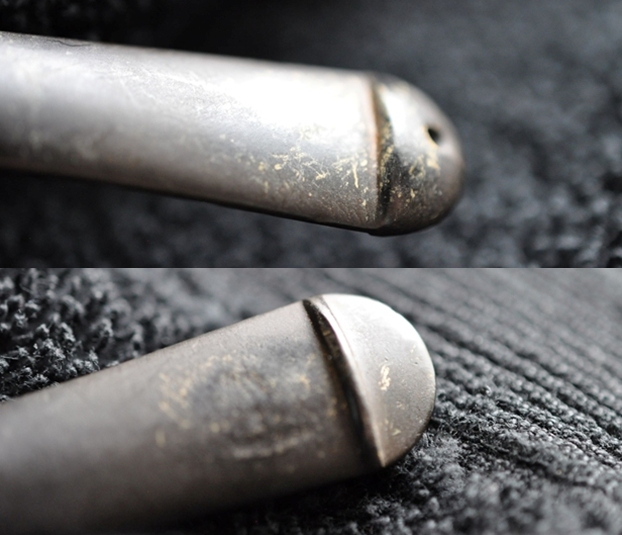 I am including the information from Pipedia’s article on Peterson pipes. It is a great read in terms of the history of the brand (https://pipedia.org/wiki/Peterson). I have included a bit of the pertinent history here.
 With that information in hand I knew what I was dealing with in terms of the stamping and the age of this pipe. I knew from the information that the pipe was made during the Republic Era between 1950 and 1989. Pipedia then qualifies the dating as follows: From 1950 to the present time, the stamp for this era is “Made in the Republic of Ireland”. The date stamp on the Sterling Silver cued it to 1976. Now it was time to work on the pipe.
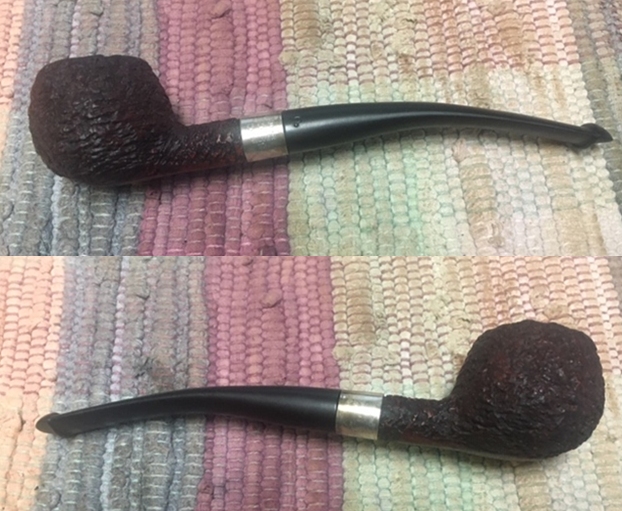
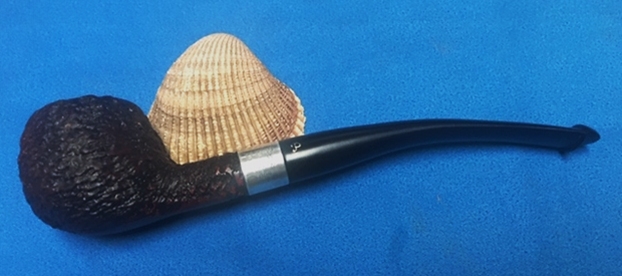
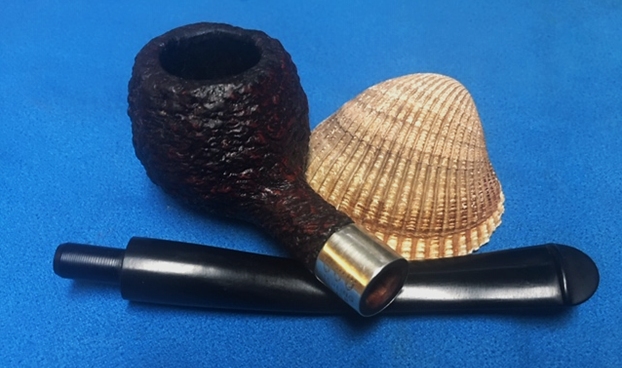
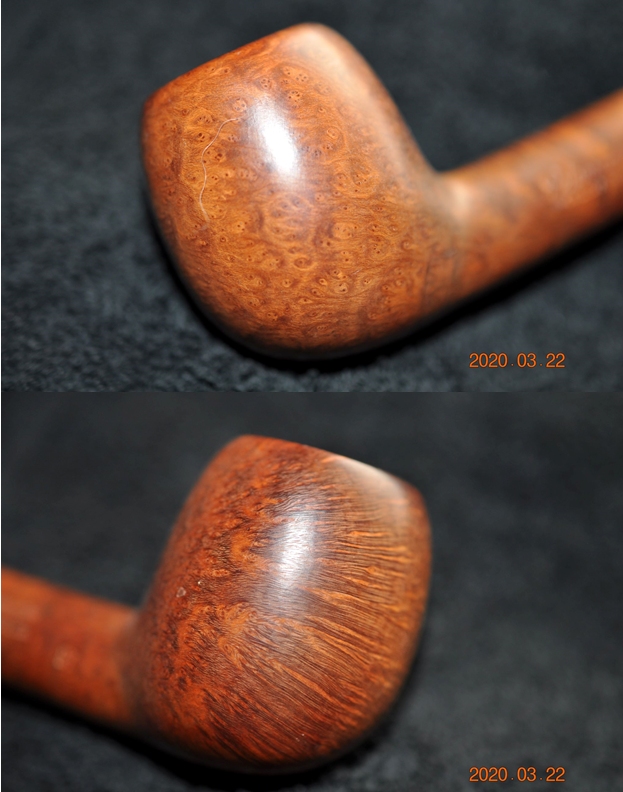
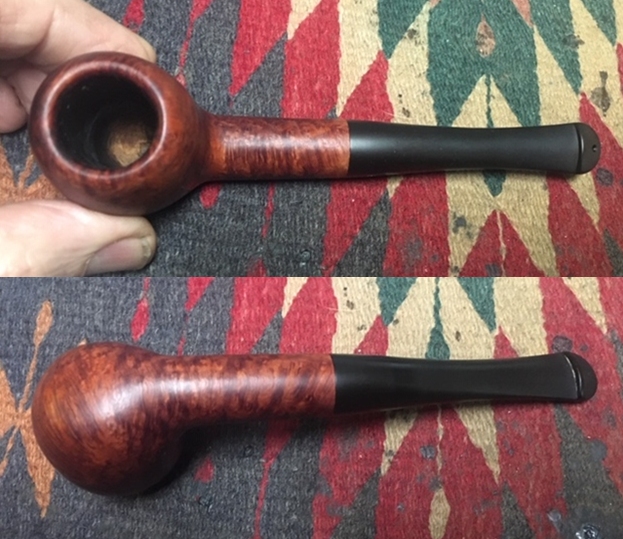
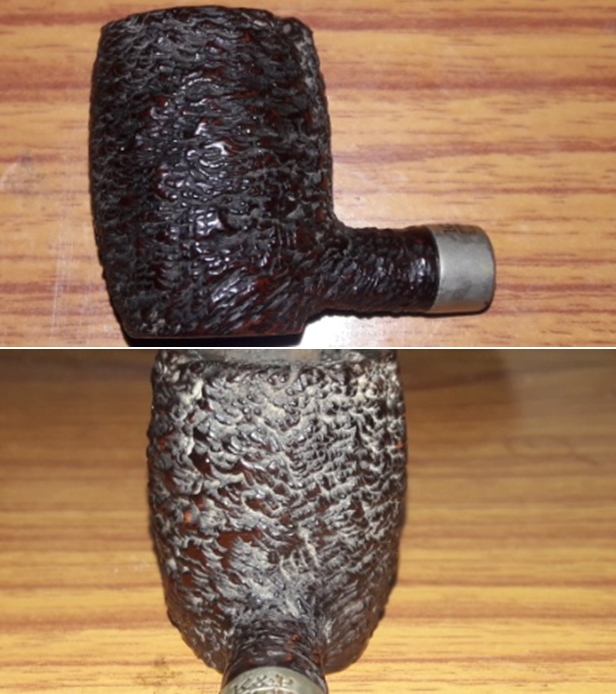
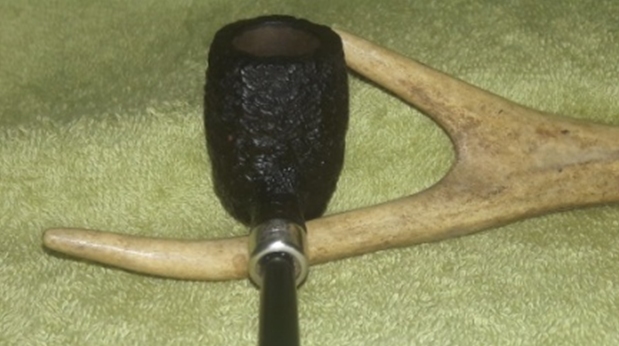
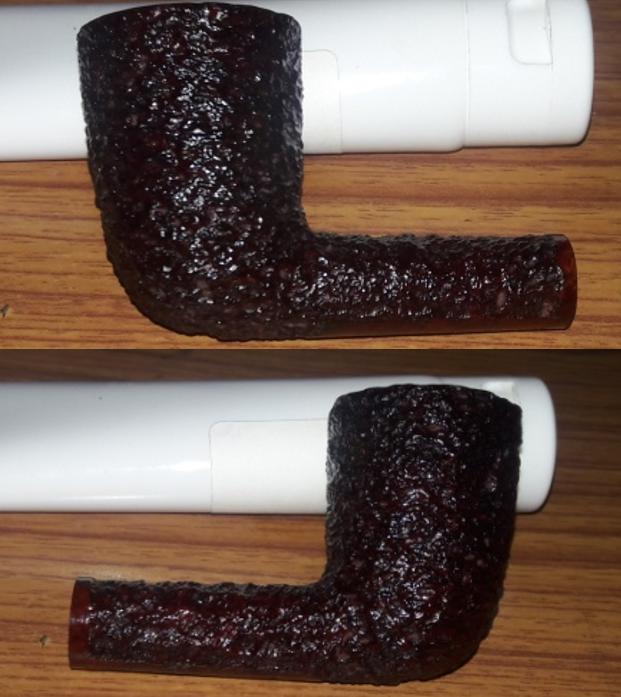
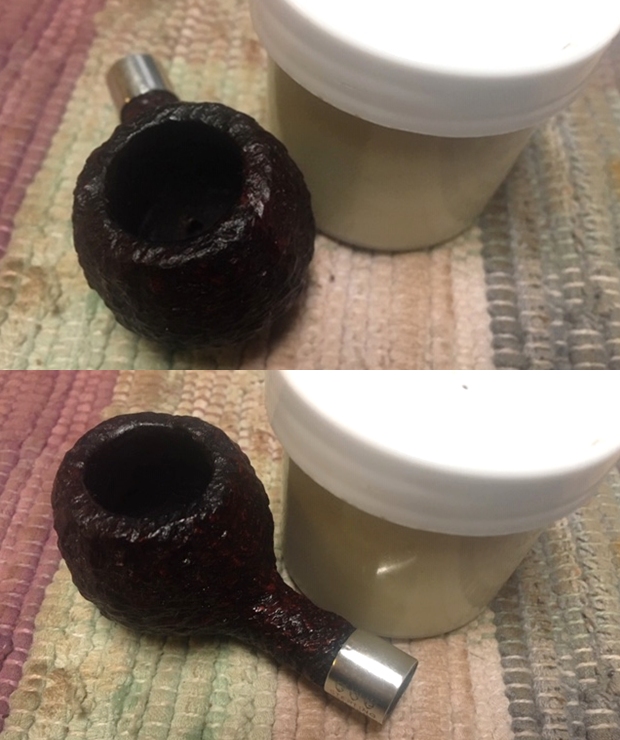
 I took photos of the bowl and rim top to show how clean it was. The rustication on the rim top is very clean and there is darkening that will be hidden by the contrast stains. The stem looks clean of oxidation and there are some deep tooth marks and chatter on both sides of the stem.
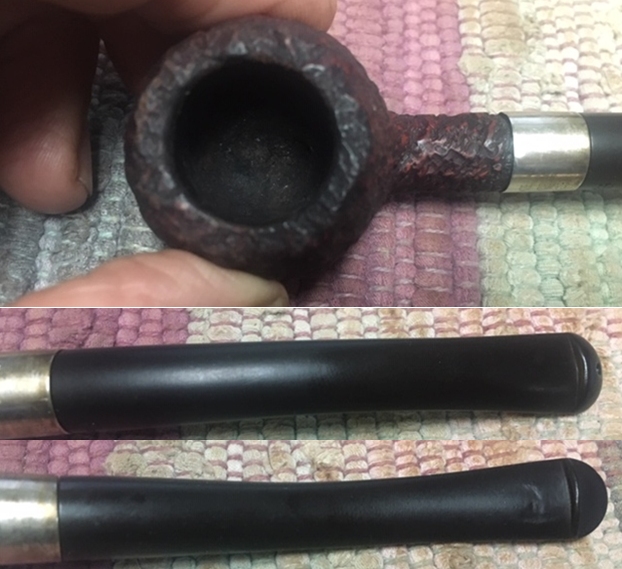 The stamping on the underside of the shank was faint but readable as noted above. The second photo shows the P stamp on the left side of stem.
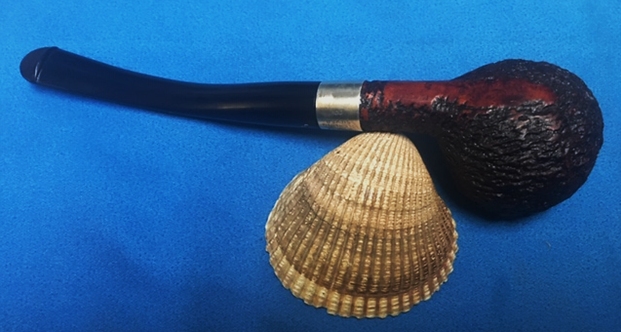
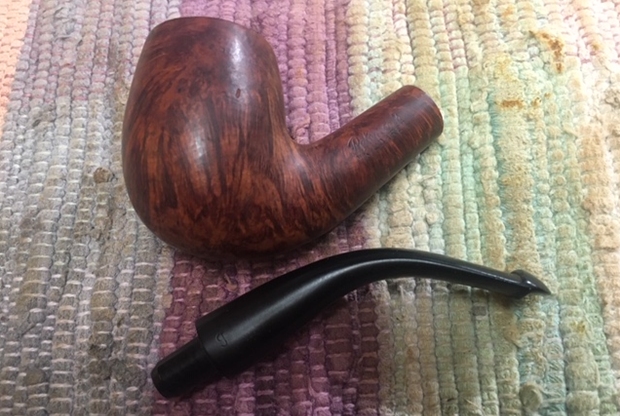
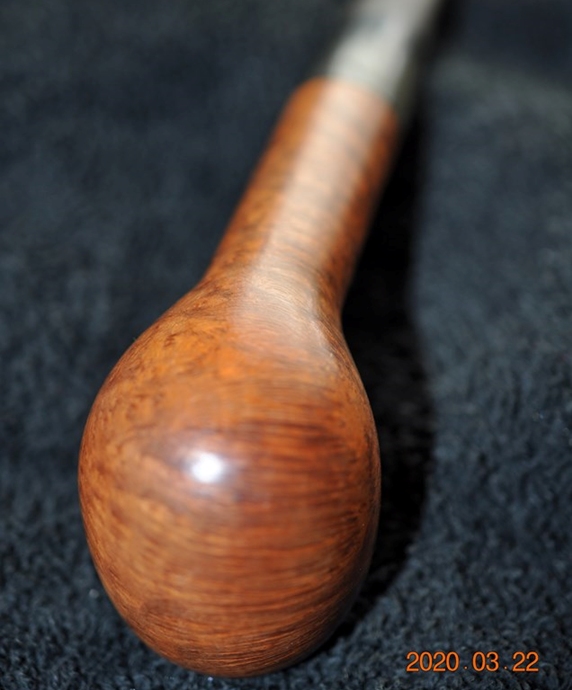
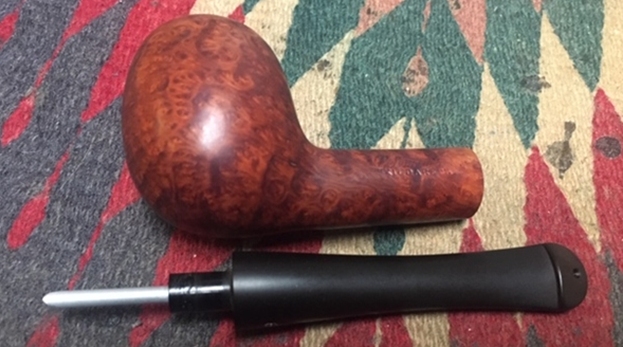
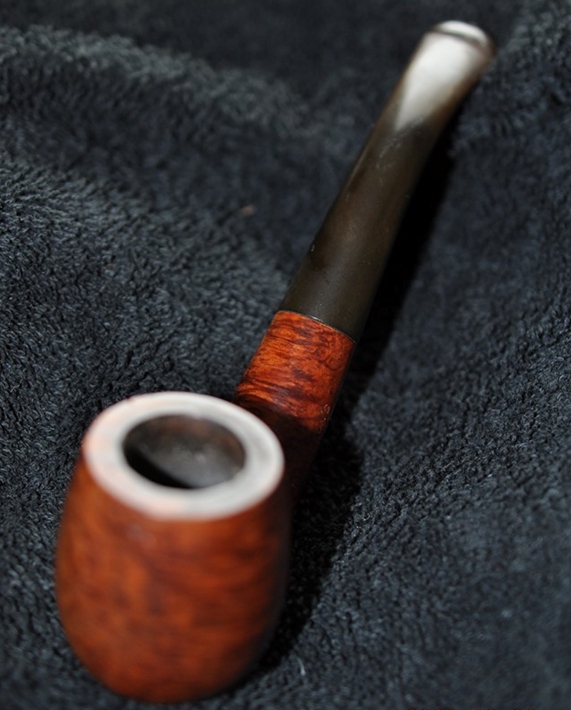
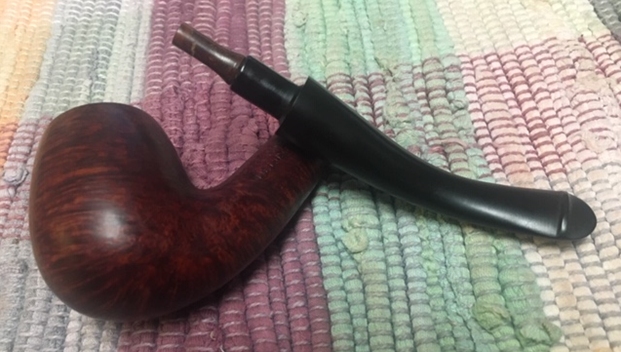
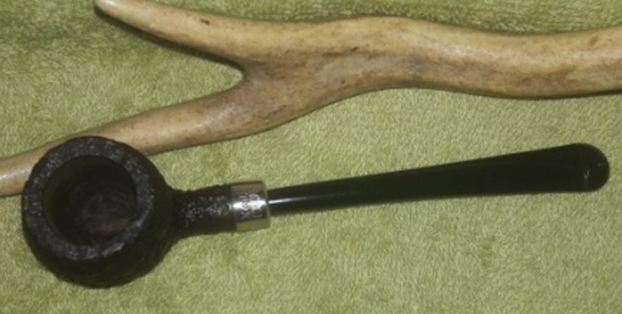
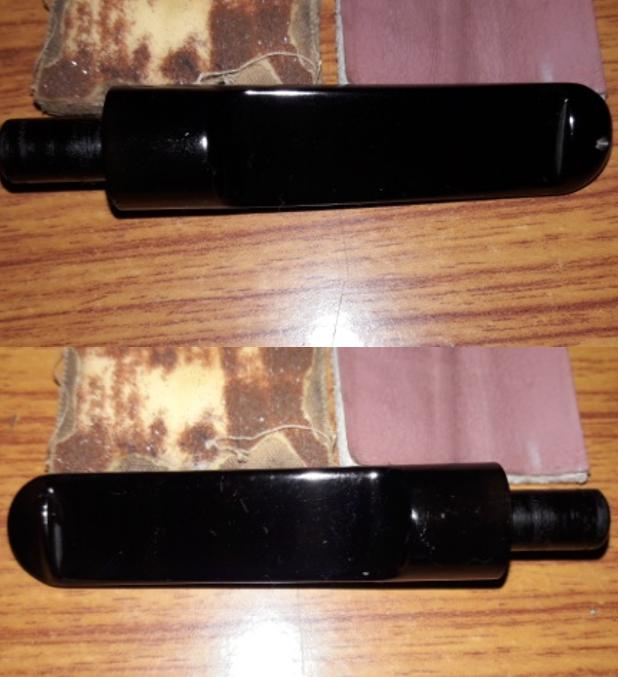
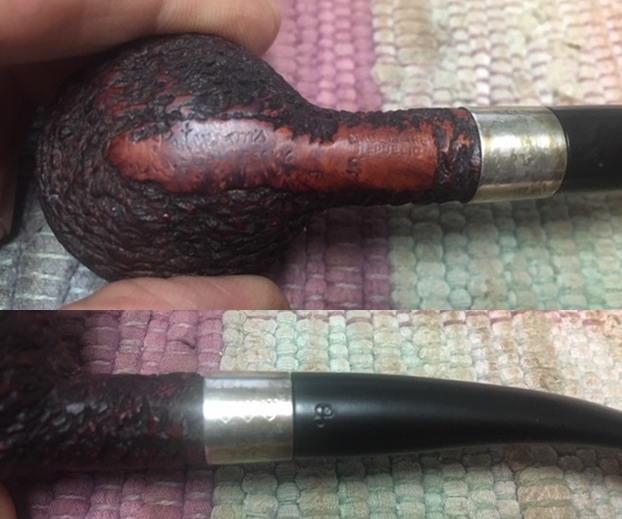 I took a photo of the pipe with the stem removed to show the overall look of stem, tenon and profile of the pipe. It is a great looking pipe.
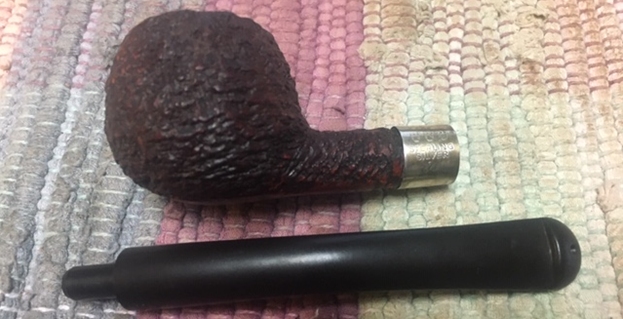 I rubbed the briar down with Before & After Restoration Balm. I worked it into the rustication with my fingertips and a shoe brush to get it into the deep briar. The product works to clean, enliven and preserve the briar. I let it sit for 10 minutes while I worked on the stem. After the time passed I buffed it with a cotton cloth to deepen the shine. The rustication came alive with the balm.
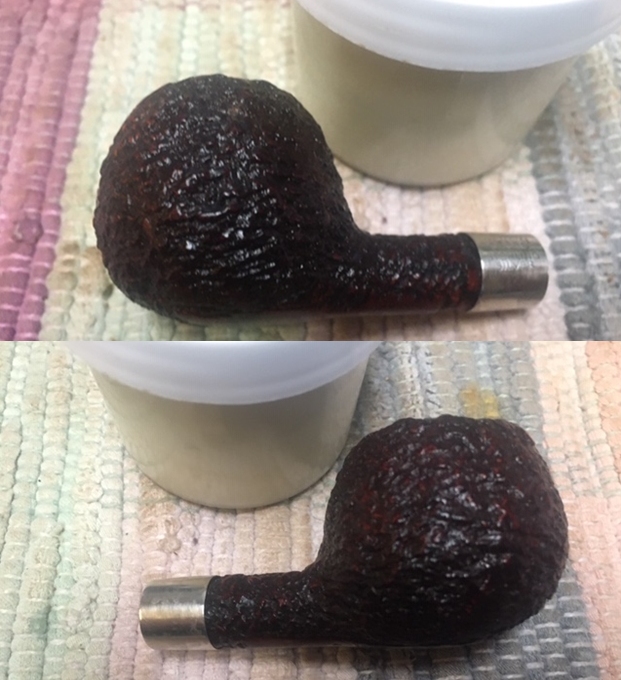
 I set the bowl aside and turned my attention to the stem. I heated the vulcanite to lift the dents but they had sharp edges so they did not lift at all. I filled in the deeper tooth marks with clear super glue and set it aside to cure.
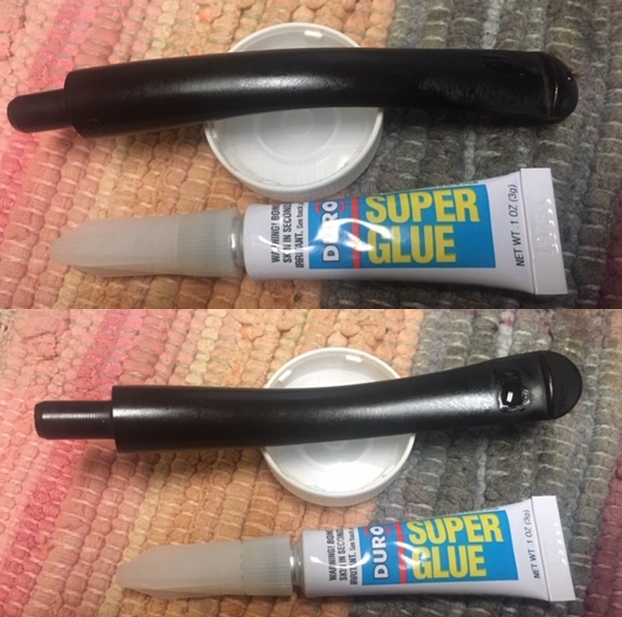 Once the repairs cured I sanded them smooth with 220 grit sandpaper. I usually file them first with a needle file but last night my daughters were using my desk top and that is where the files were so I just sanded them smooth. I started the polishing with 400 grit wet dry sandpaper.
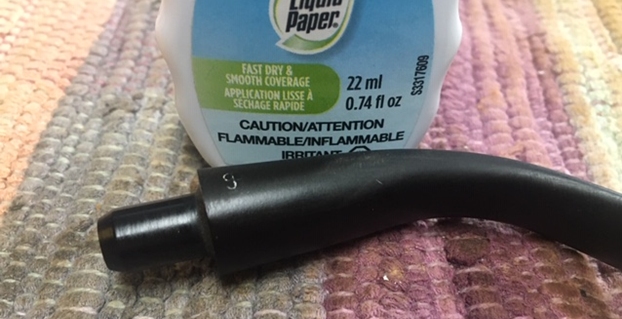
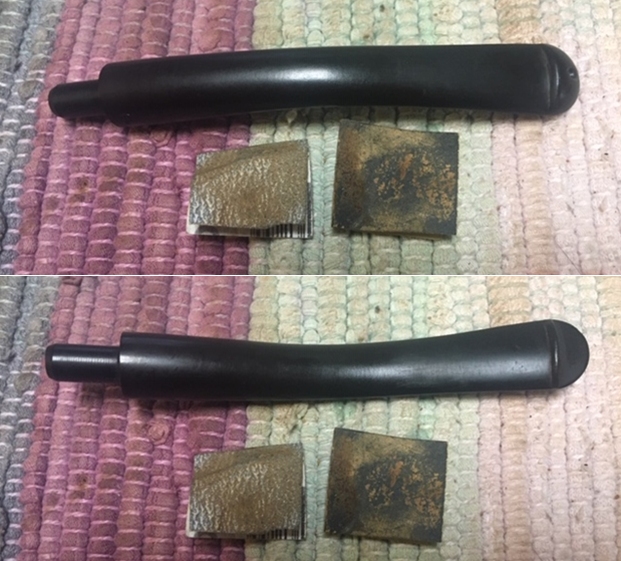 I touched up the P stamp on the left side of the stem with Paper Mate Liquid Paper and once it dried I scraped off the excess. The P stamp is far from perfect but it definitely looks better.
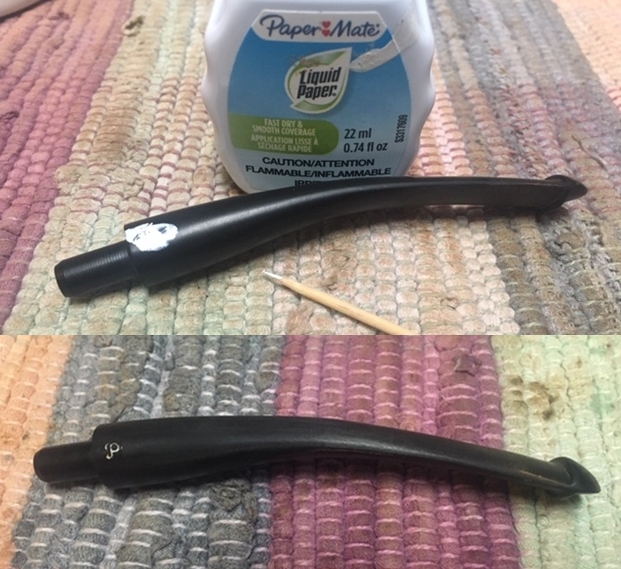 This stem was in great condition so I polished it with micromesh sanding pads – 1500-12000 grit pads. I wiped it down with Obsidian Oil after each sanding pad. I used Before & After Pipe Polish – both Fine and Extra Fine to further polish the stem.
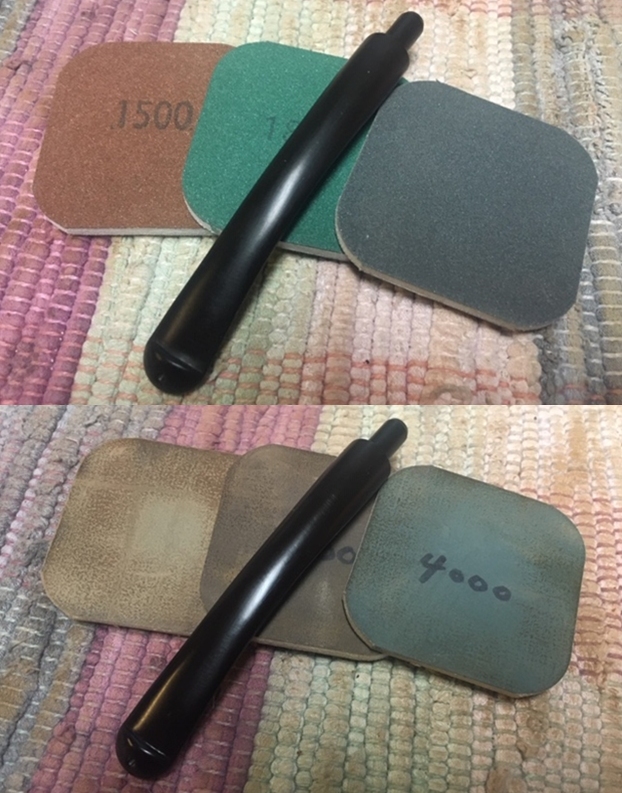
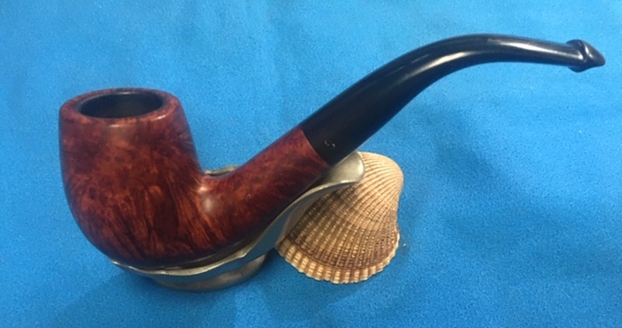
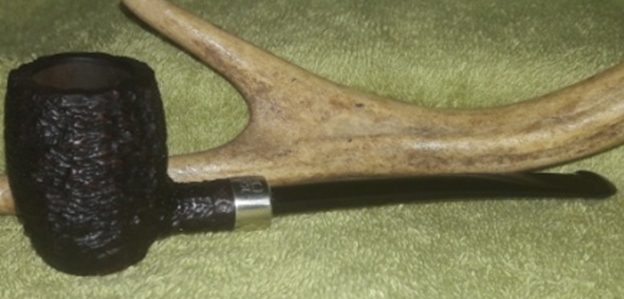
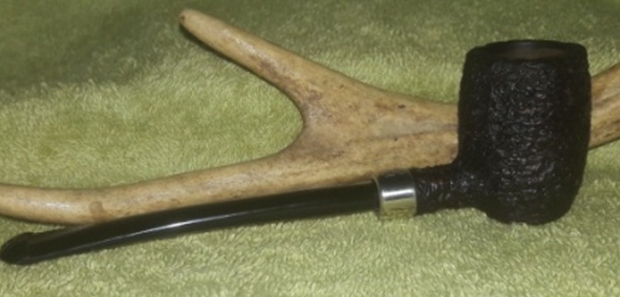
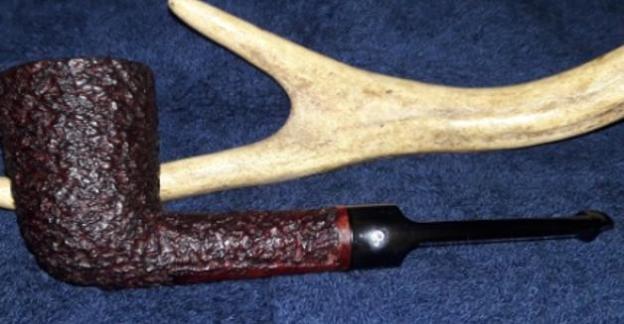
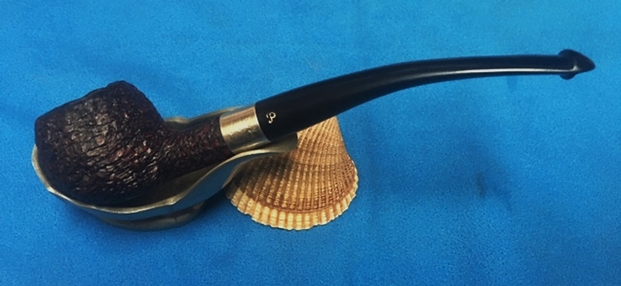
 This Republic Era Peterson’s “Donegal” Rocky 407 Prince is a nice looking rusticated pipe. The combination of brown stains really makes the rustication almost sparkle around the bowl sides and shank. They begin to really stand out with the polishing. The finish on the pipe is in excellent condition and the contrasting stains work well to give some contrast to the pipe. The polished black vulcanite P-lip taper stem and the Sterling Silver band just add to the mix. With the grime and debris gone from the finish and the bowl it is really is eye-catching. I put the stem back on the bowl and lightly buffed the pipe with Blue Diamond on the buffing wheel, carefully avoiding the stamping on the shank. I gave the bowl multiple coats of Conservator’s Wax and the stem multiple coats of carnauba wax on the buffing wheel and followed that by buffing it with a clean buffing pad. I hand buffed the pipe with a microfiber cloth to deepen the shine. The finished Peterson’s “Donegal” Rocky Prince is quite nice and feels great in the hand. Give the finished pipe a look in the photos below. The dimensions of the pipe are Length: 6 inches, Height: 1 ¼ inches, Outside diameter of the bowl: 1 ¼ inch, Chamber diameter: ¾ of an inch. Thanks for walking through the restoration with me as I worked over another interesting pipe. This Peterson’s “Donegal” Rocky will be added to the Irish Pipe Makers section of the rebornpipes store soon. If you want to add it to your collection send me an email or a message! Thanks for your time.