Blog by Paresh Deshpande
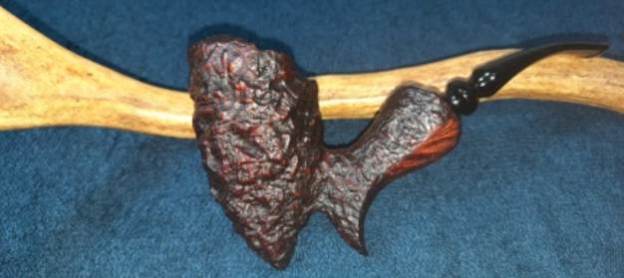
This pipe had caught my eye for a long time. However, the extensive damage to the horn stem was a big challenge and was always relegated to ‘will- deal- with- later’ category of pipes. This time around, I decided to pick up the gauntlet and got the pipe to my work table.
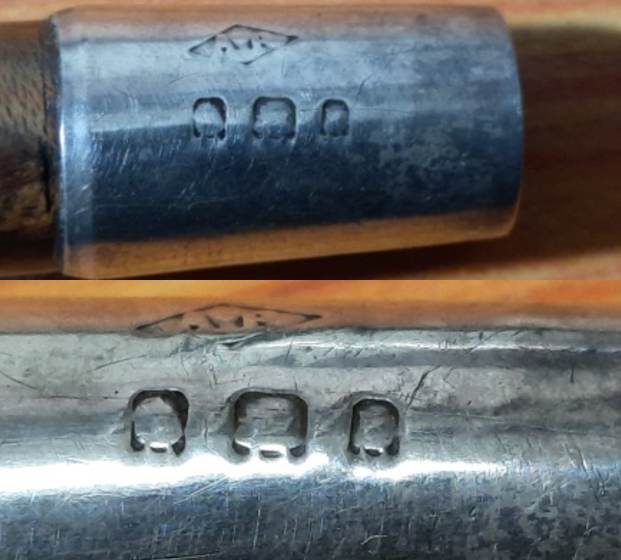
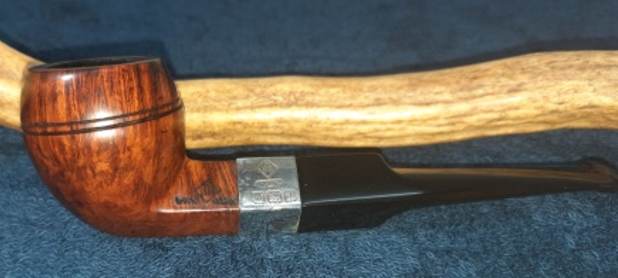
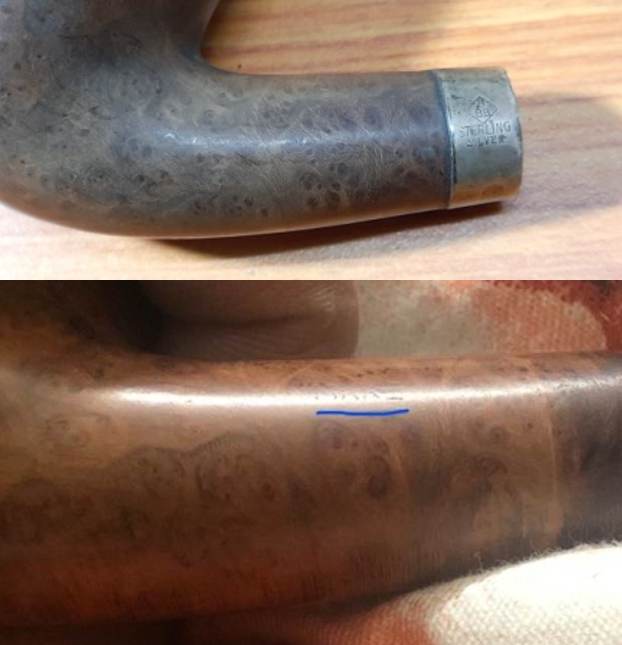
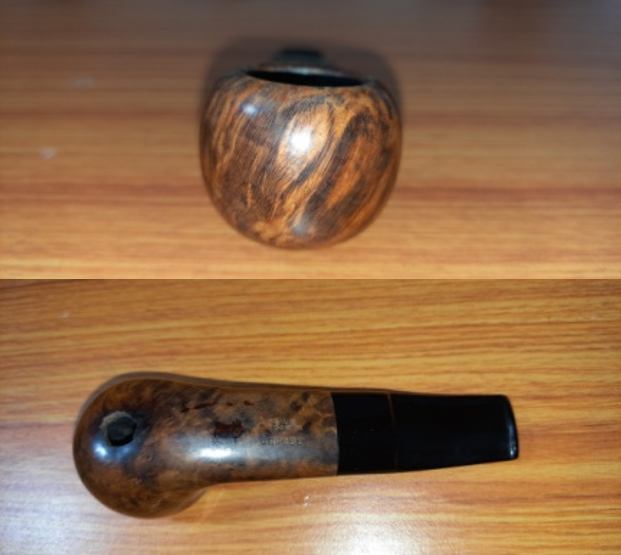
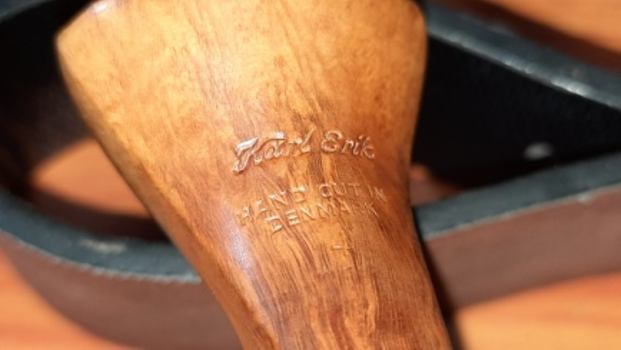
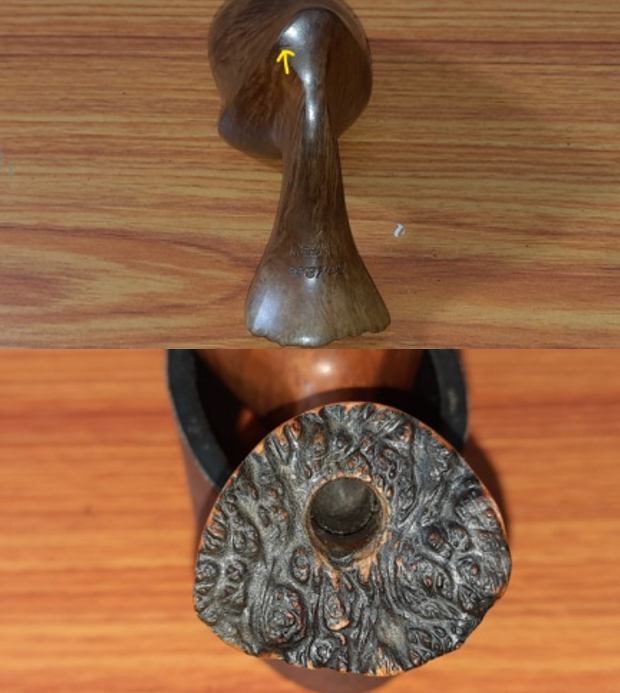
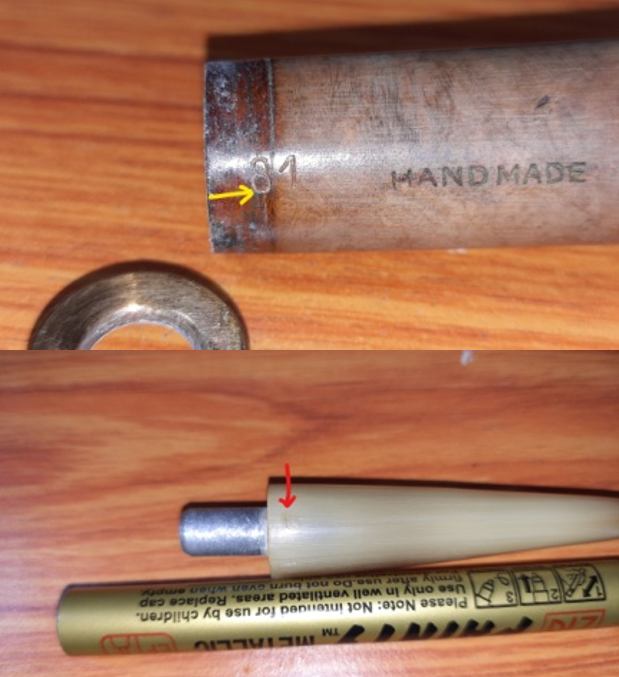
The pipe currently on my table is as elegant and understated as the British and as compact as any English pipes of yore. The briar stummel has mixed grains and is sans any fills. The right side of the shank is stamped as “T.C.G” in an oval. There is no COM stamp. The only pointer to this pipe being English is the stamping on the Sterling Silver ferrule at the shank end. It is stamped “T.C.G” without frame over three sterling silver hallmarks. From left to right the first cartouche is with a LION PASSANT certifying silver quality followed by a cartouche with symbol for Chester Assay Office and the last cartouche contains the date code letter “H”.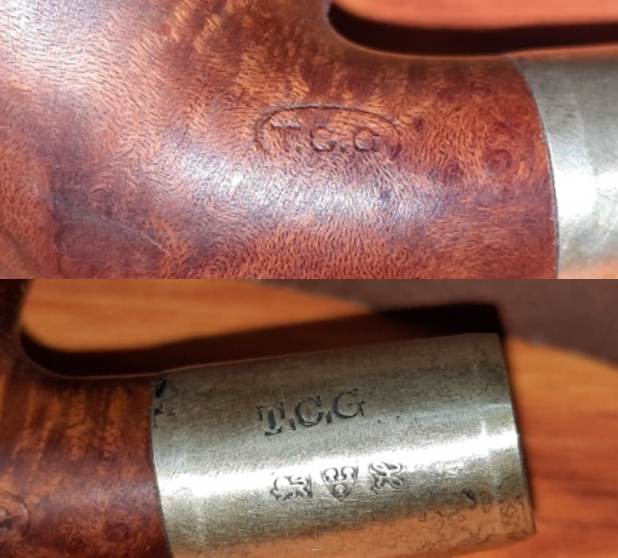
 This was an English brand that I had neither seen before nor ever heard of. My first instinct to search for any new-to-me pipe brand is to visit rebornpipes and very rarely have I returned empty handed. This was one such rare instance where I came up empty handed. Pipedia.org and pipephil.eu, other popular sites that I visit for pipe related information, too did not have any mention of this pipe manufacturer.
The only clue to unravel the mystery of this pipe was in the stampings seen in the hallmarked silver band. I visited www.silvercollection.it and upon searching through the index, I came across a maker’s mark that was as seen on the pipe in my hands. The maker’s mark was described as Thomas Claud GOODING Edward Ryan GOODING – London. Here is the link and screen shot of the details and relevant details are highlighted in red.
http://www.silvercollection.it/DICTIONARYTOBACCONISTT.html
 The next step was to date this pipe with the help of the hallmarks as seen on the silver band at the shank end. The Chester City mark was easy to identify. The letter “H” perfectly matched up with the letter that identified it as being assayed by the Chester Assay office in 1908. Given below is the link that will take the readers to the relevant section of dating and the picture that I have taken with the date code letter.
http://www.silvercollection.it/englishsilverhallmarksCHE.html
I further Google searched for Thomas Claud Gooding and other than an address for the said tobacconist at Farringdon Street, London, I could not glean much information.
It is my informed guess that TC Gooding got pipes made from other manufacturers like Barling’s, Comoy’s etc and got them stamped from manufacturers with their own registered name, T.C.G and sold these pipes from their shops. This was a very common practice in those days.
To summarize, the pipe that I am working on was from a tobacconist shop run by T C Gooding at Farringdon Street that was made in c1908 by some of the more established pipe manufacturers in London and sold under their own name T.C.G.
Initial Visual Inspection
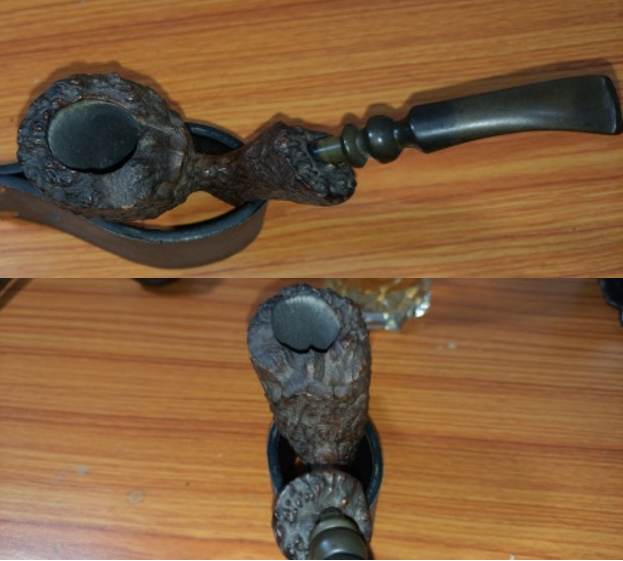
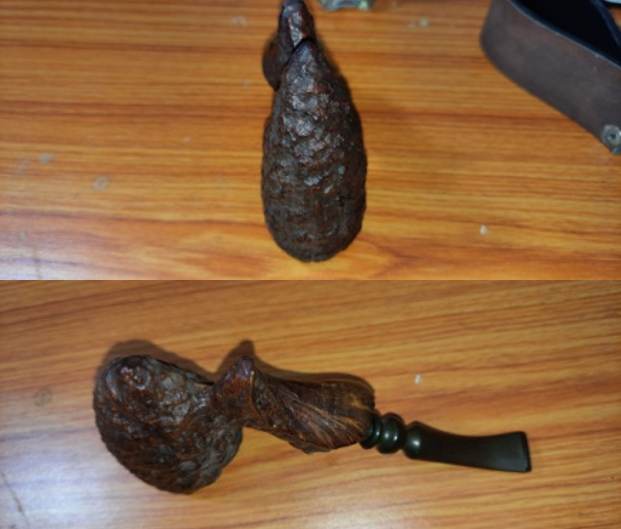
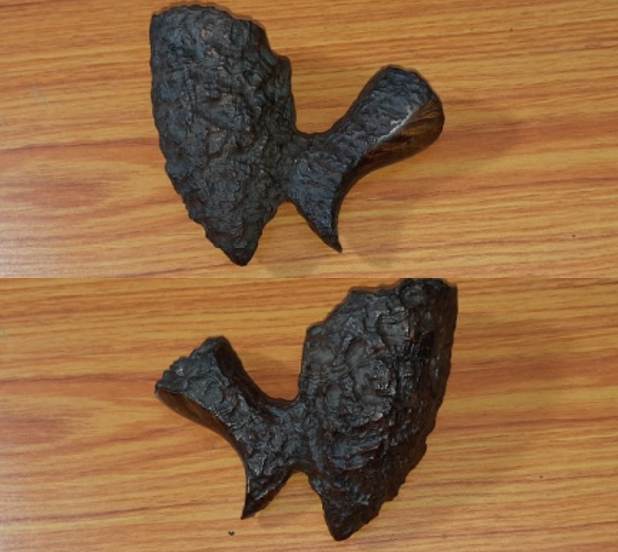
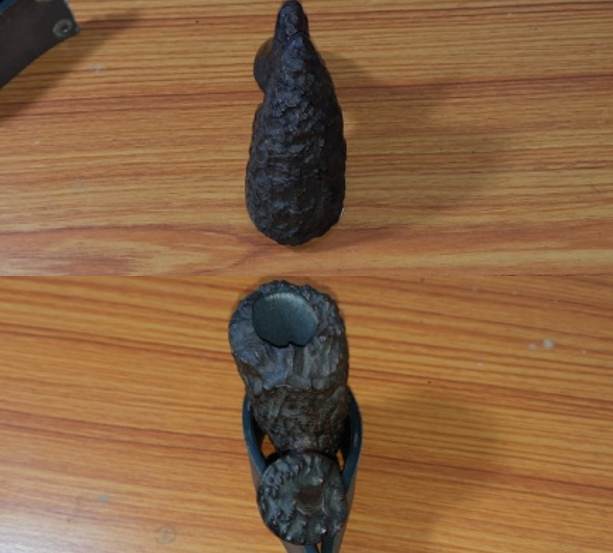
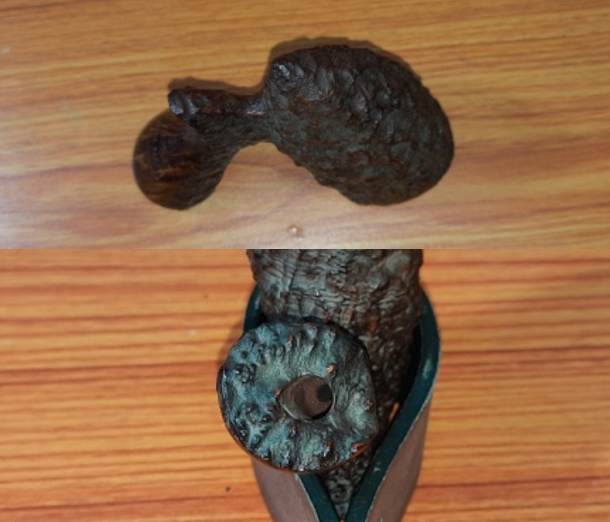
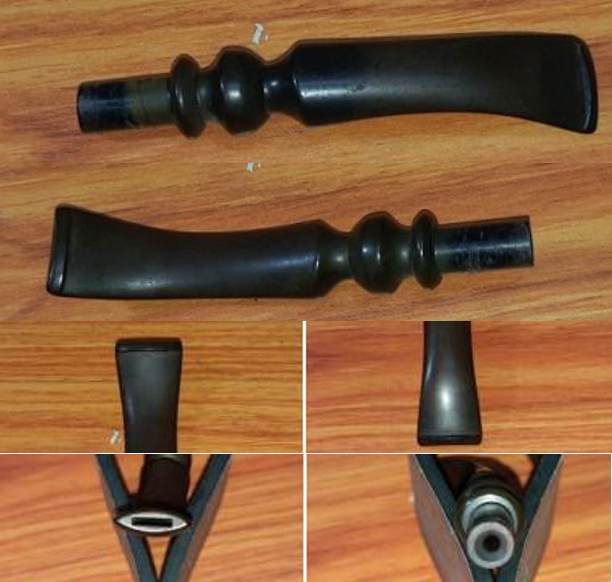
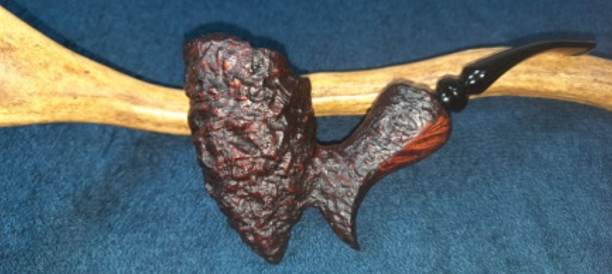
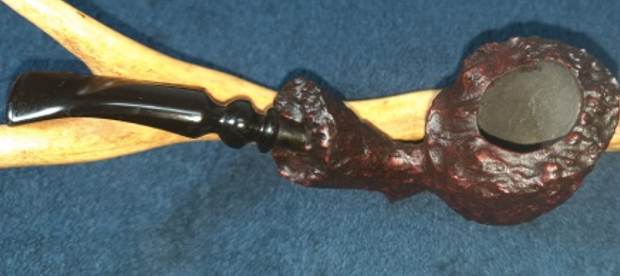
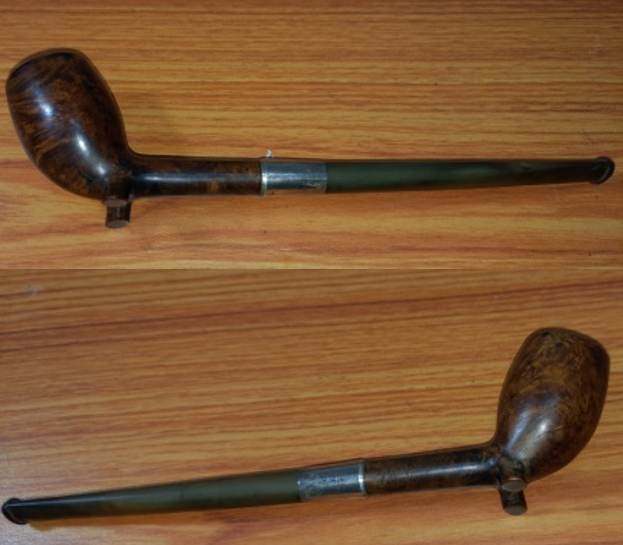
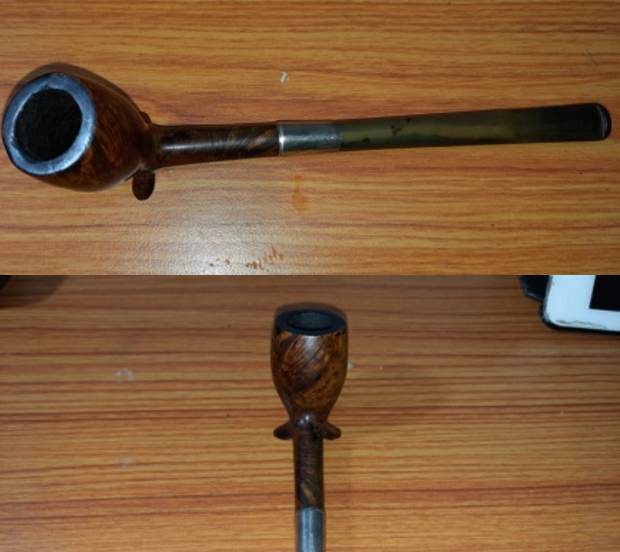
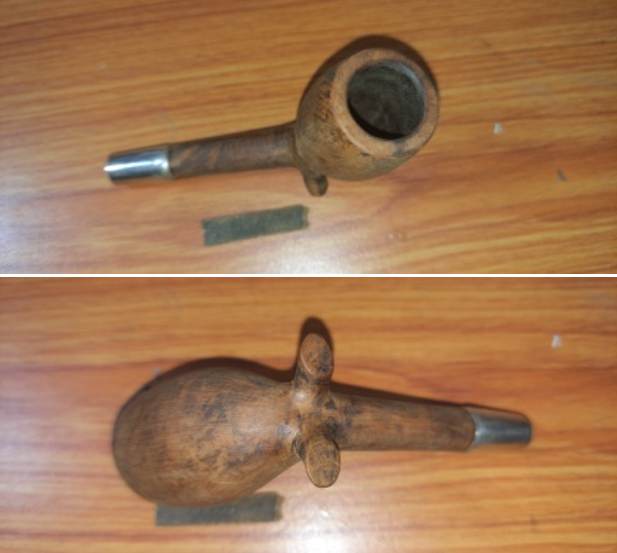
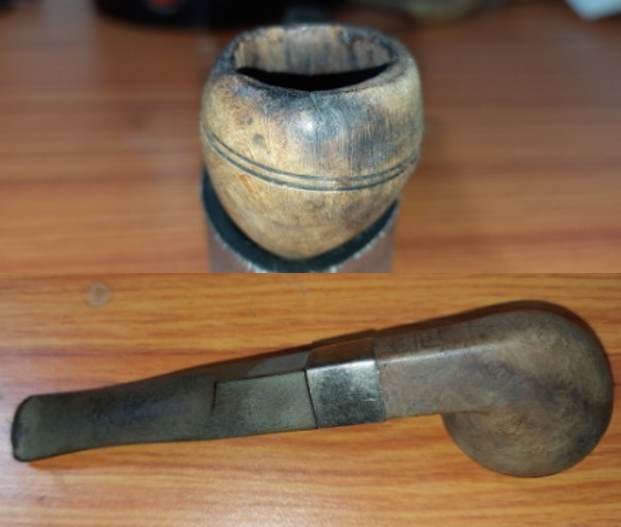
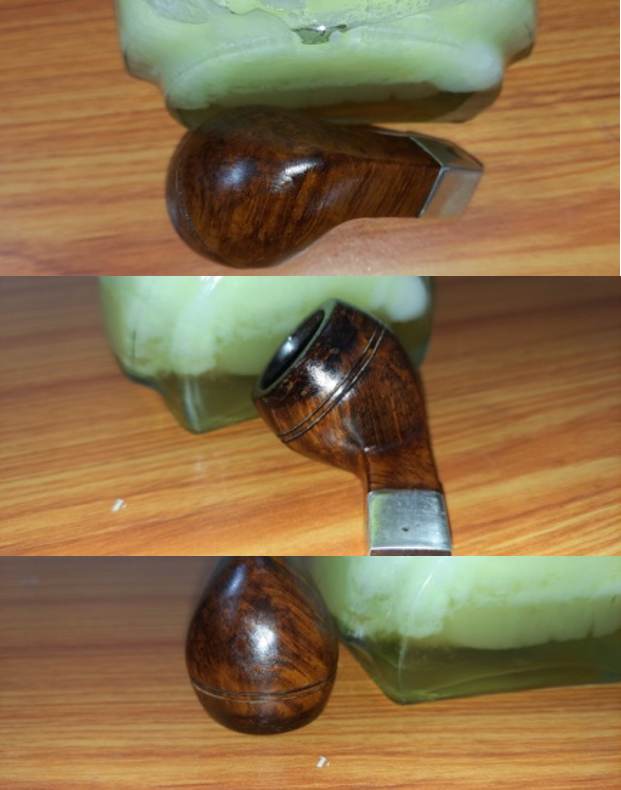
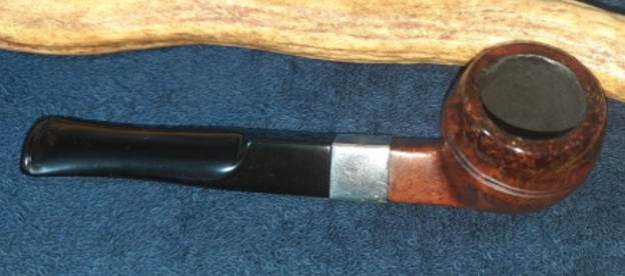
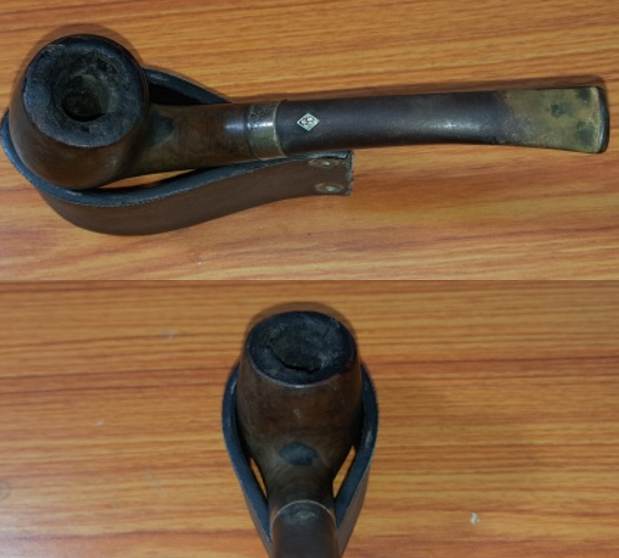
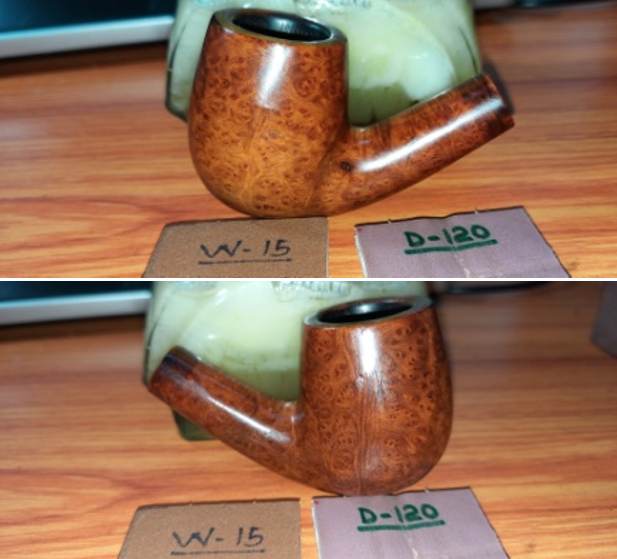
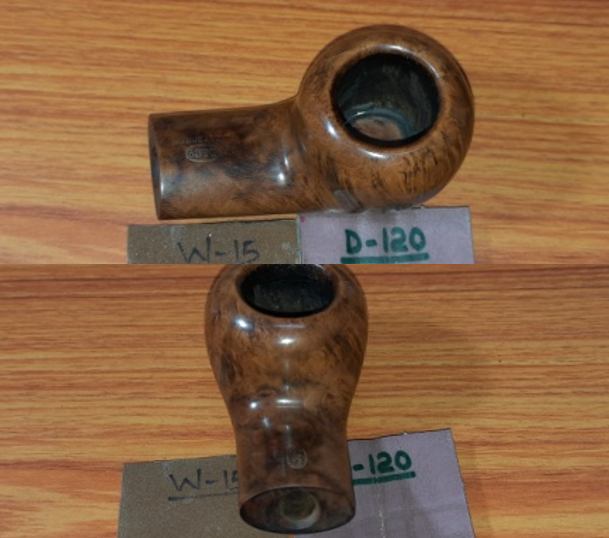
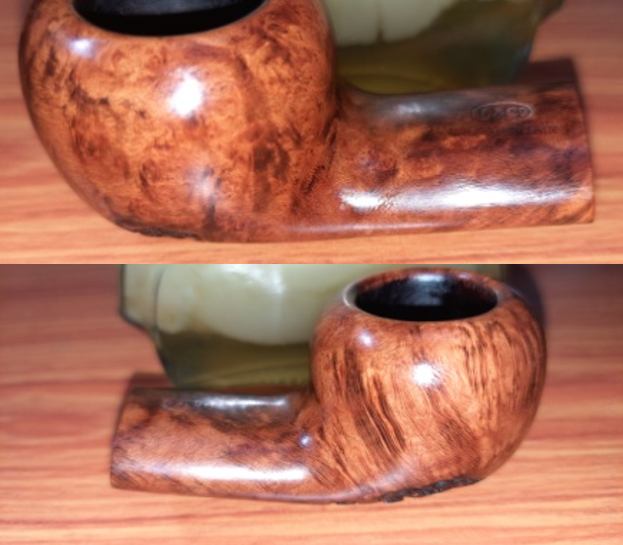
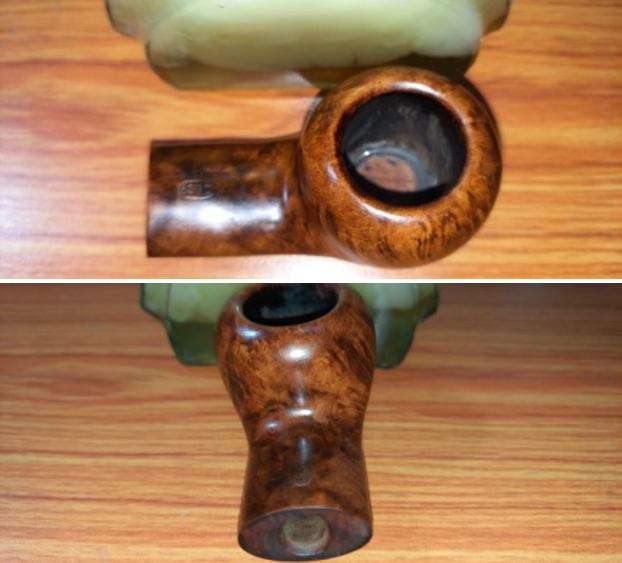
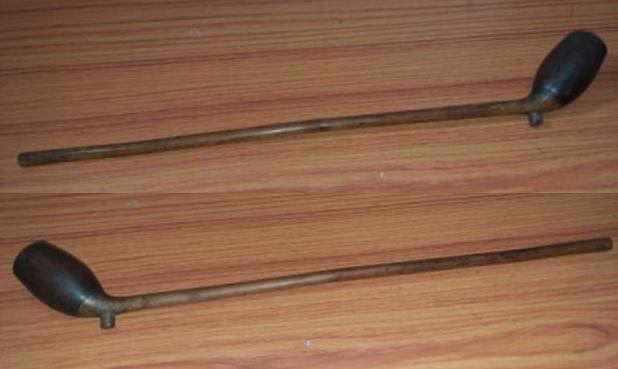
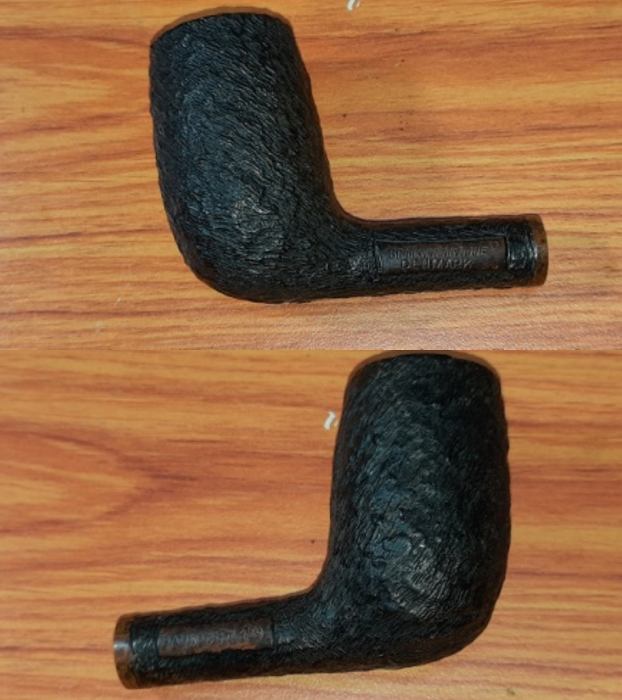
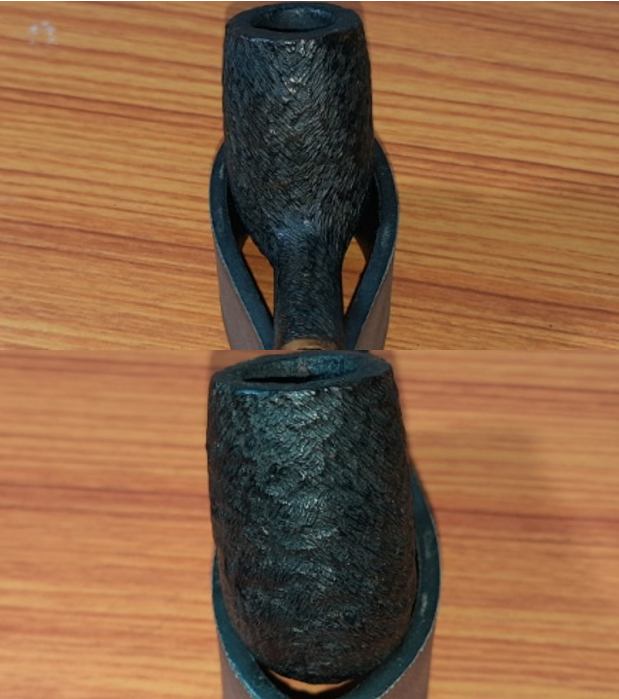
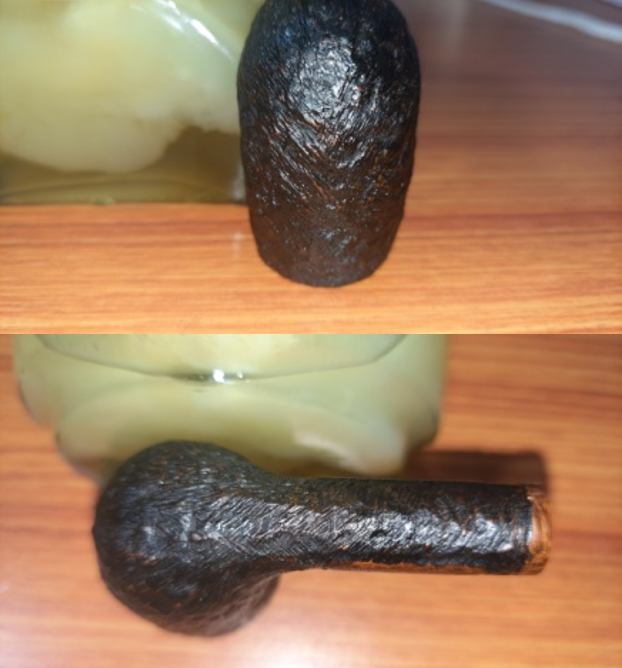
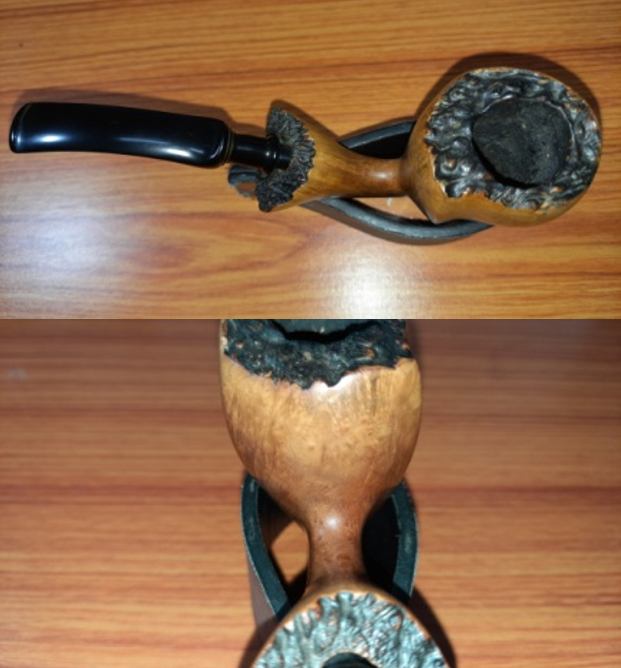
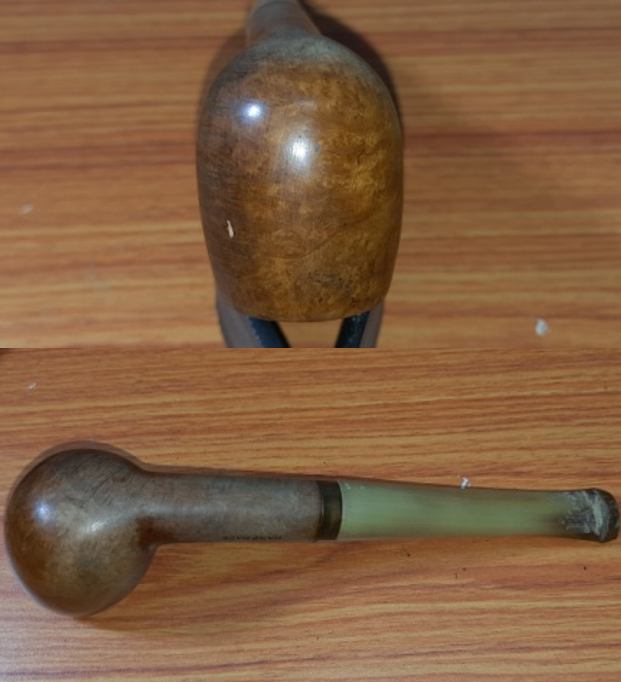
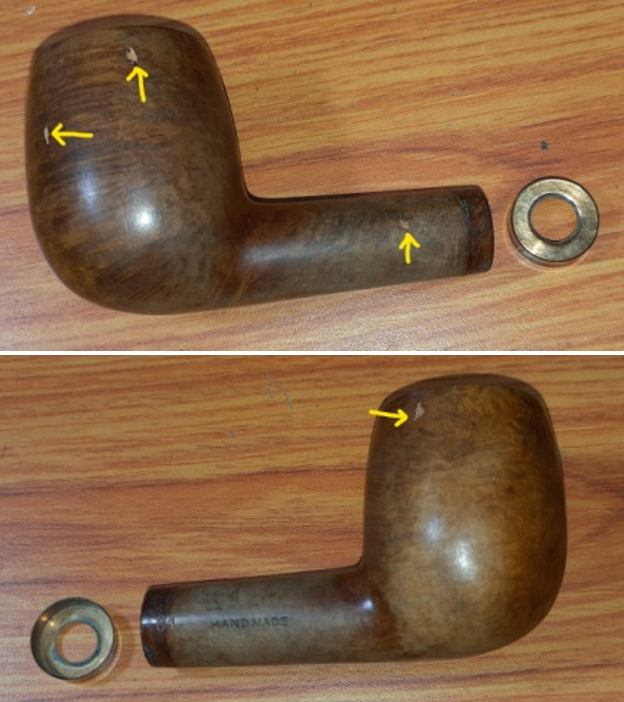
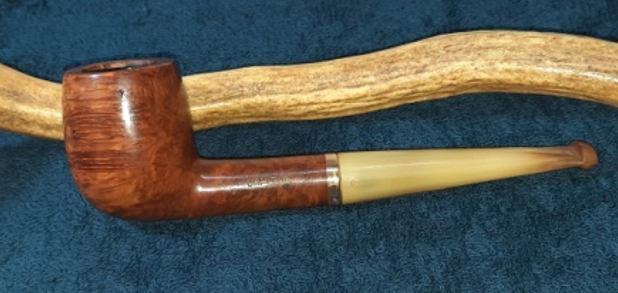
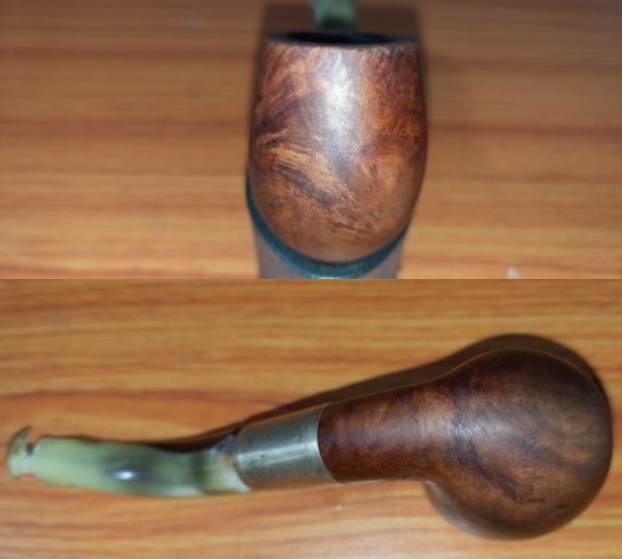
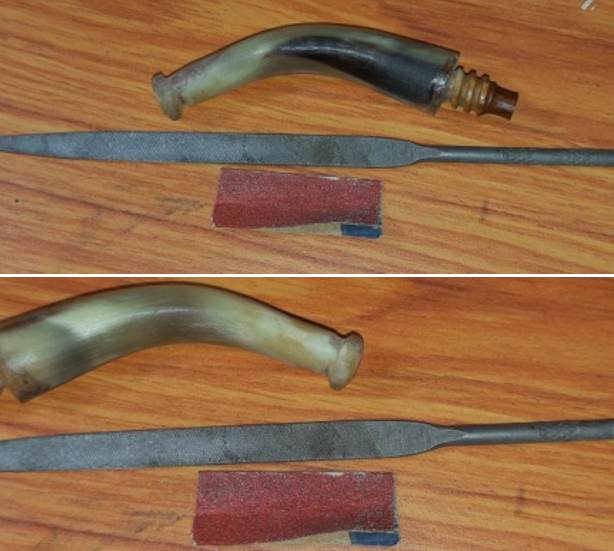
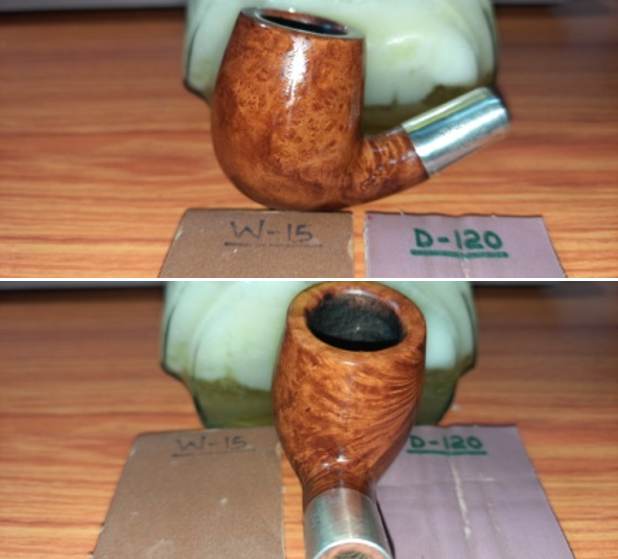
This pipe is a beautiful smaller sized bent billiards, a classic English shape. The stummel has beautiful mixed grains all around without a single fill. The rim top surface is uneven with dents and dings to the inner rim edge. There is a very thin and even layer of cake (which was proved otherwise once I reamed the chamber) in the chamber. The stummel surface is dull and dirty. The bone tenon is threaded and locks in to place with a perfectly aligned shank and horn stem. It is the horn stem that has the most damage. Worm holes at the upper surface at the button end exposing the air way and at the shank end lower surface the threaded bone tenon remains exposed. The following pictures present a general idea of the condition of this pipe. 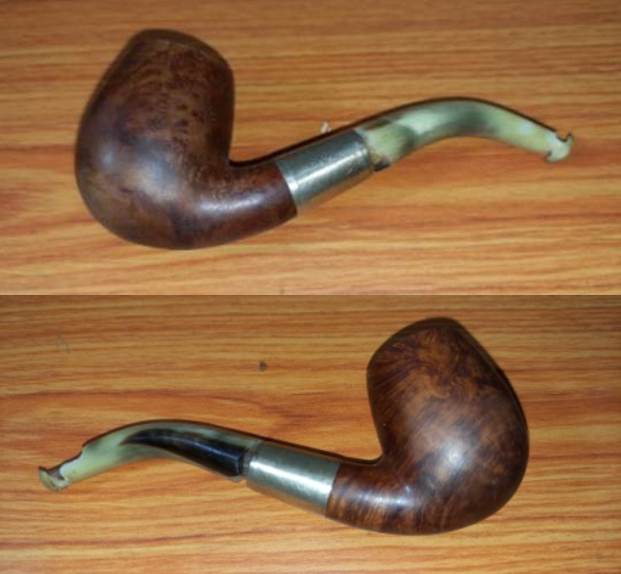

 Dimensions Of The Pipe
(a) Overall length of the pipe: – 4.5 inches.
(b) Bowl height: – 1.5 inches.
(c) Inner diameter of chamber: – 0.7 inches.
(d) Outer diameter of chamber: – 1.1 inches.
Detailed Visual Inspection
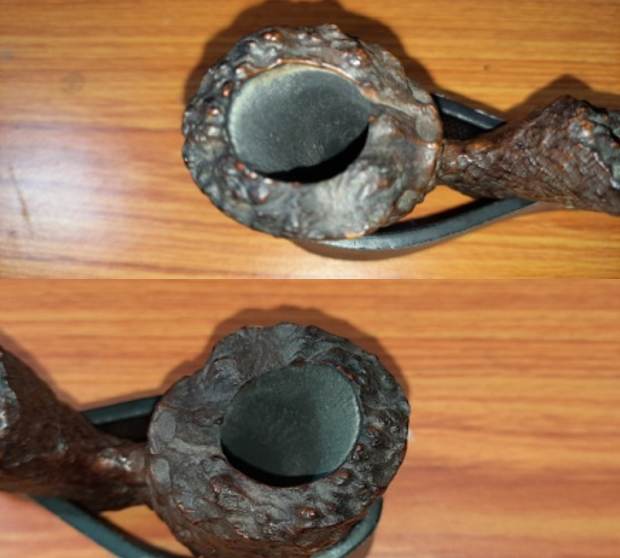
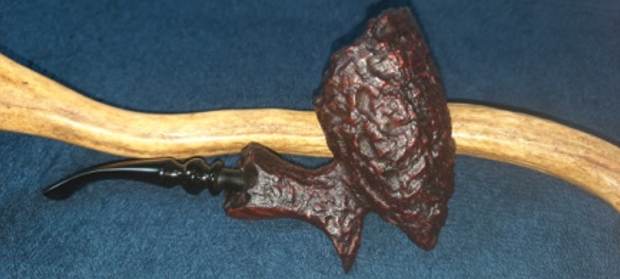
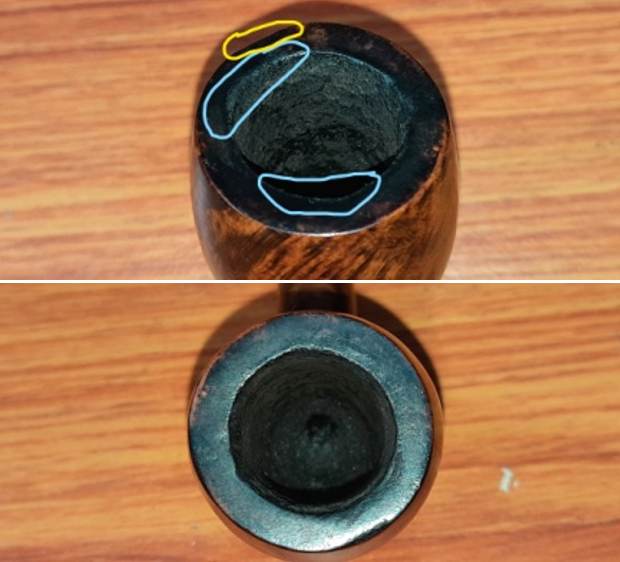
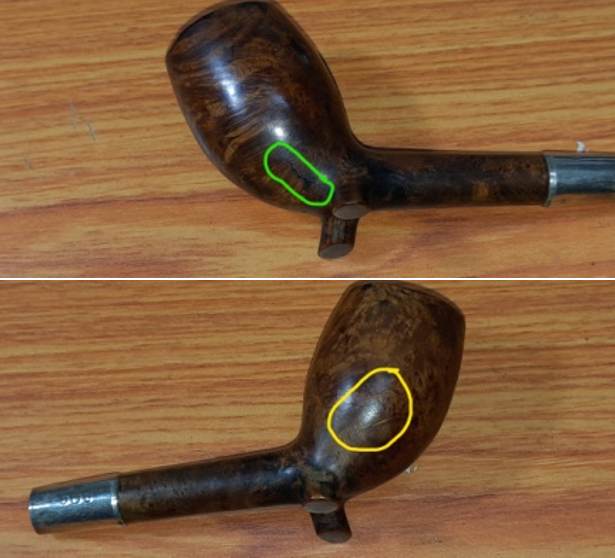
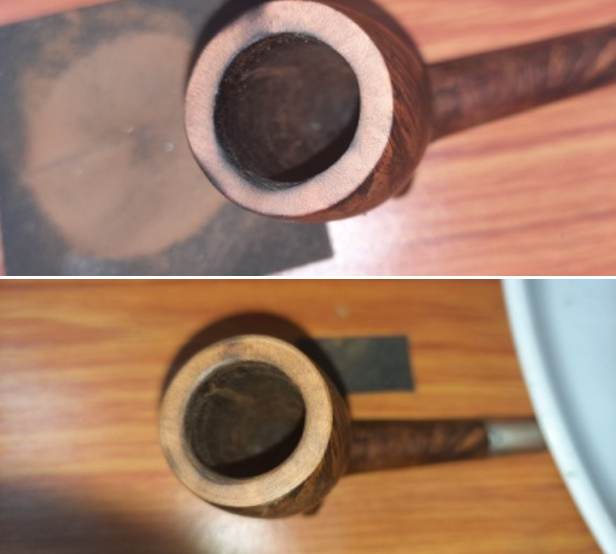
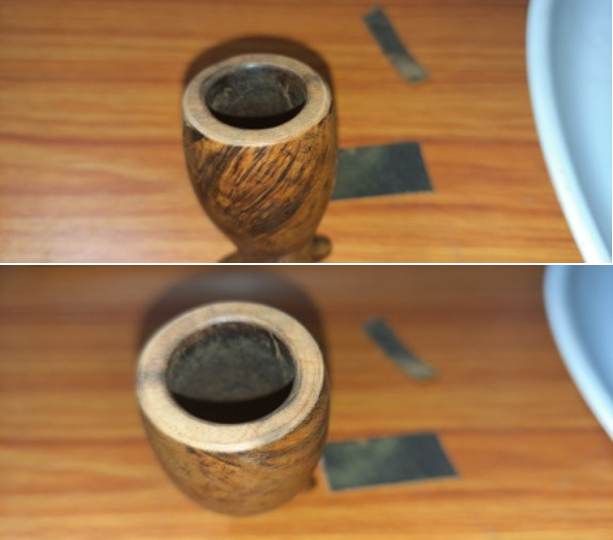
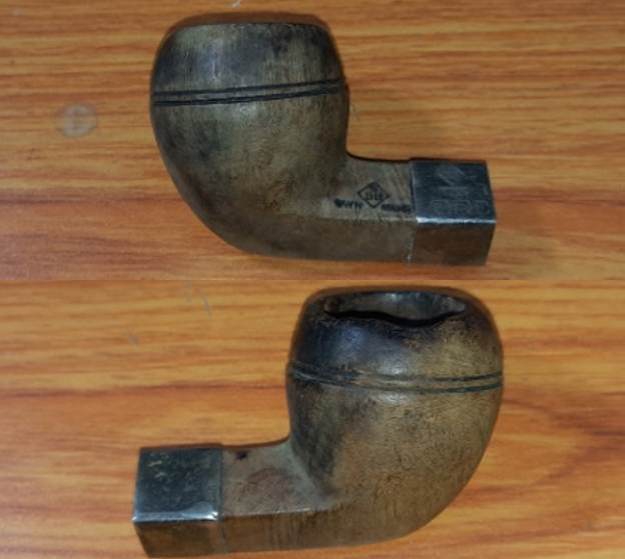
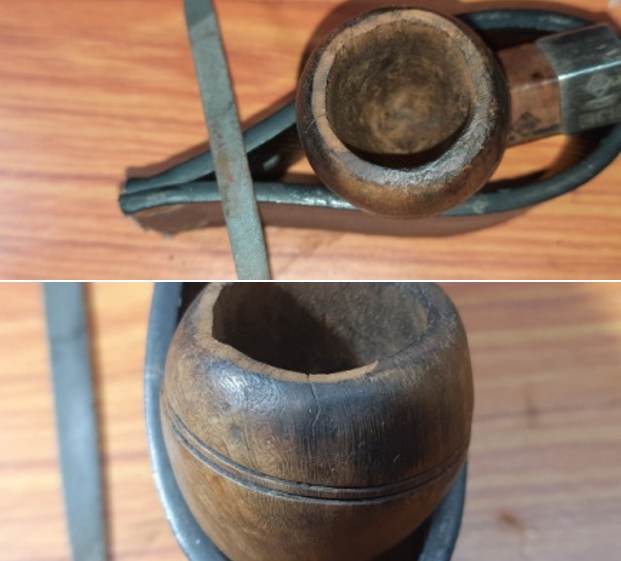
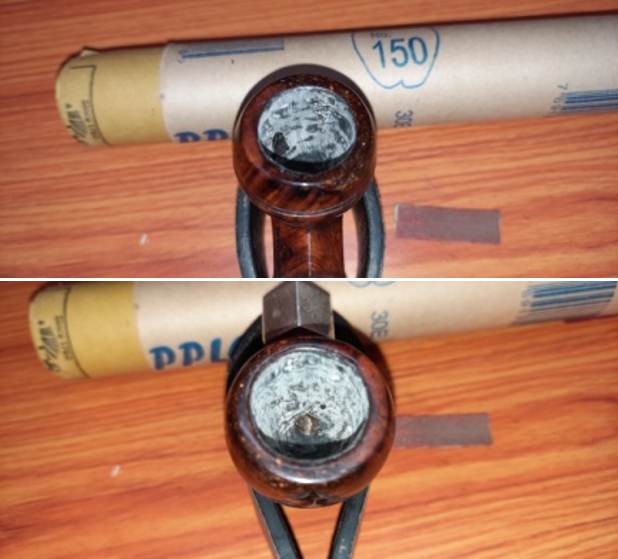
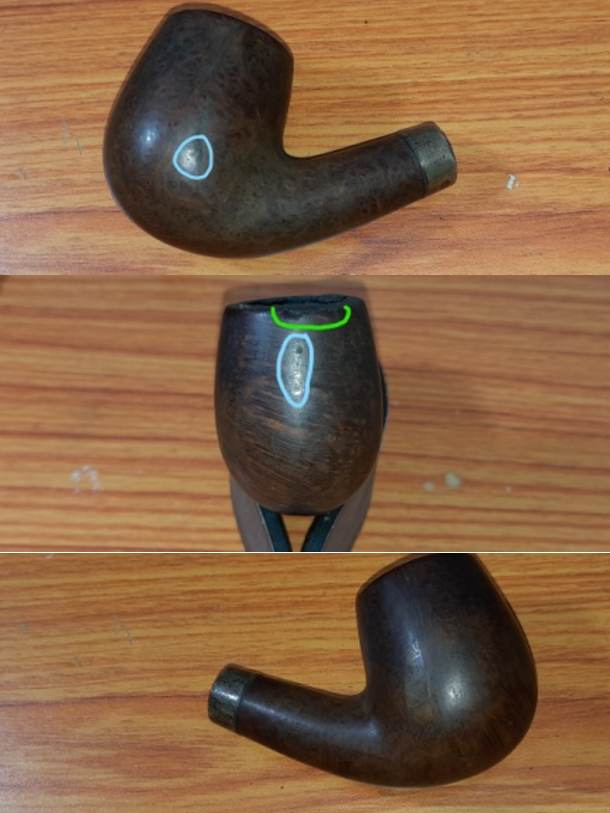
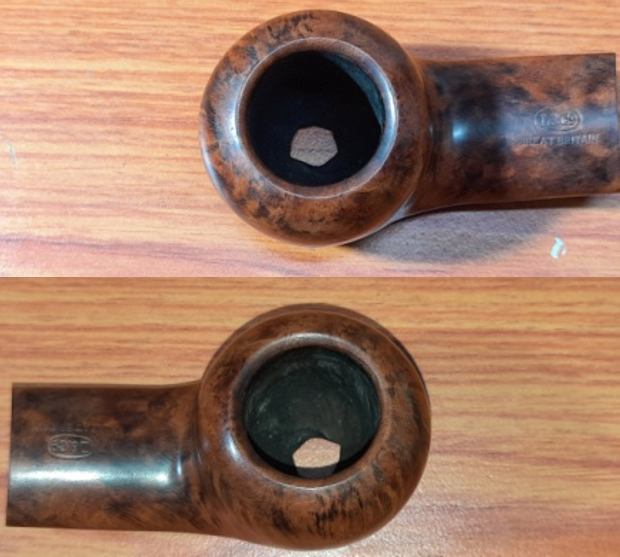
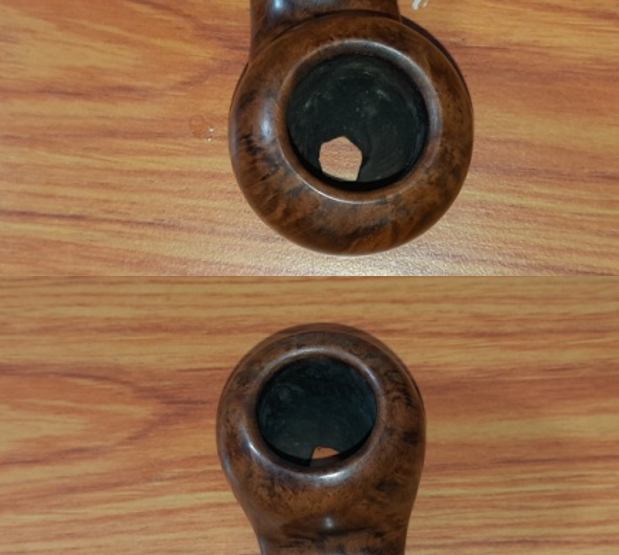
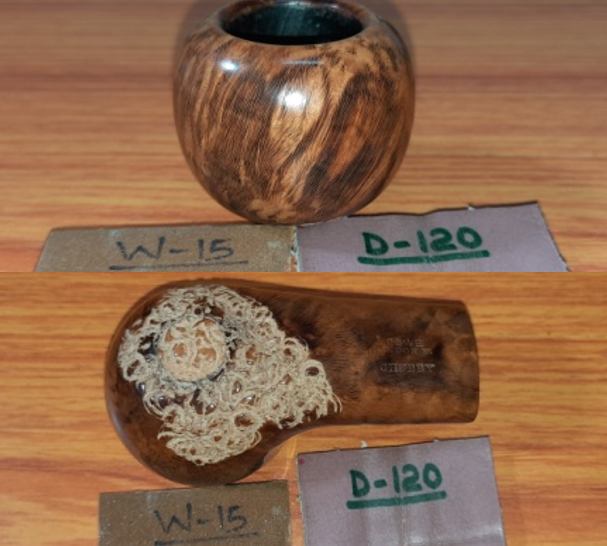
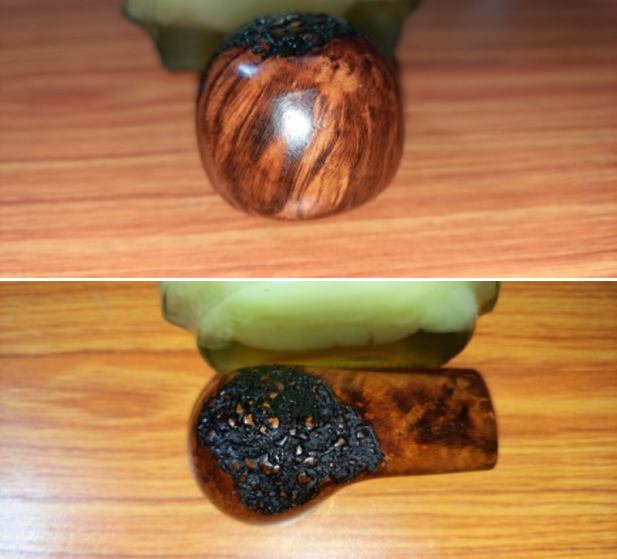
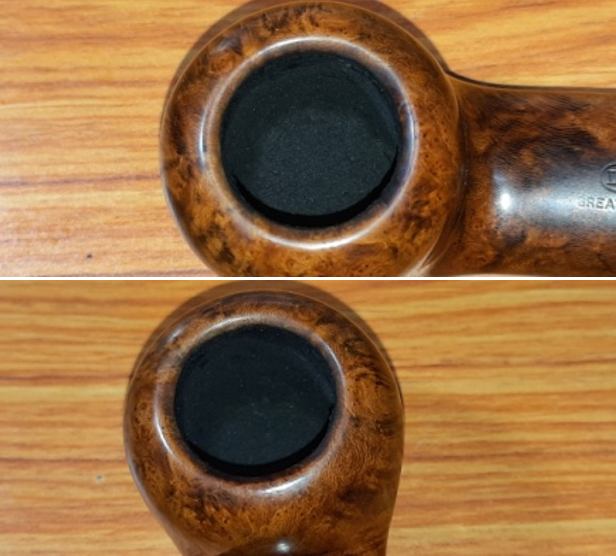
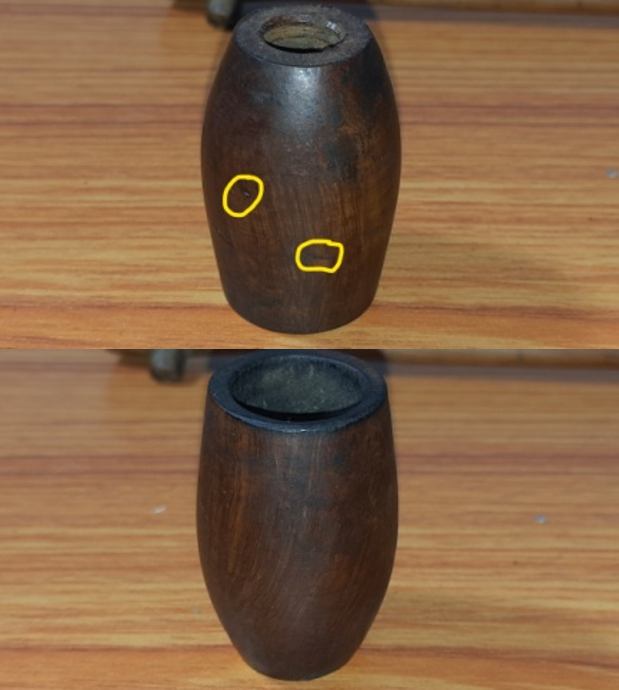
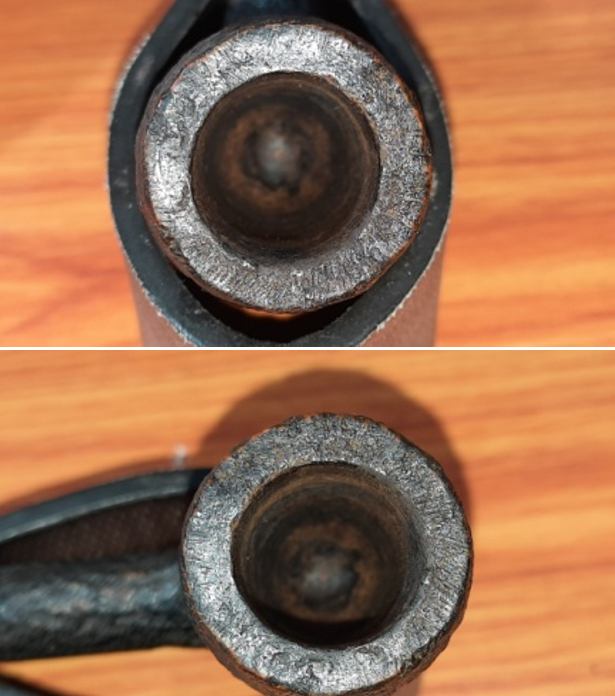
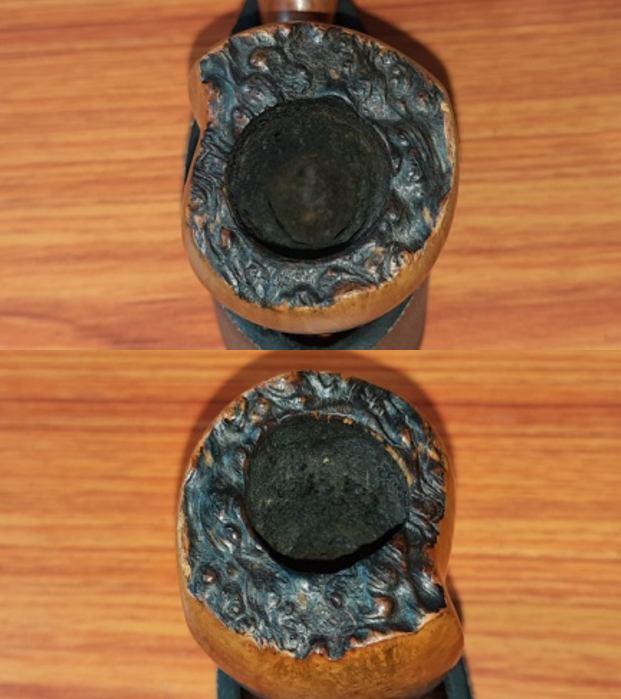
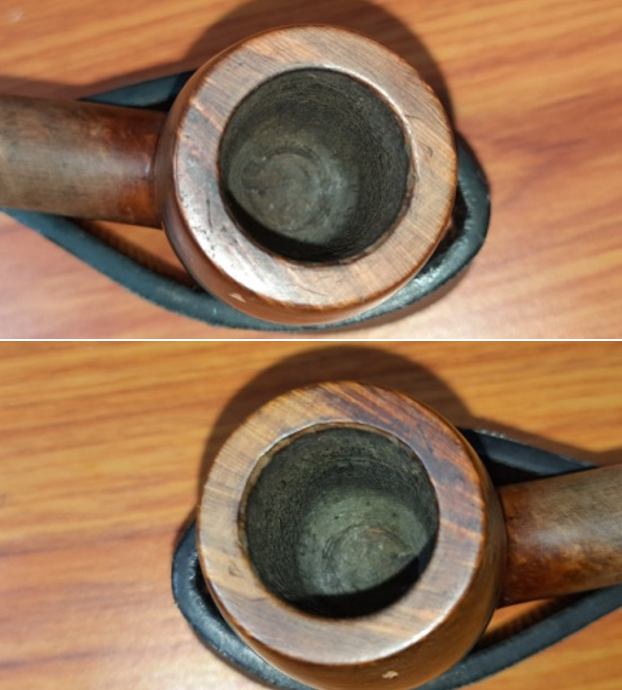
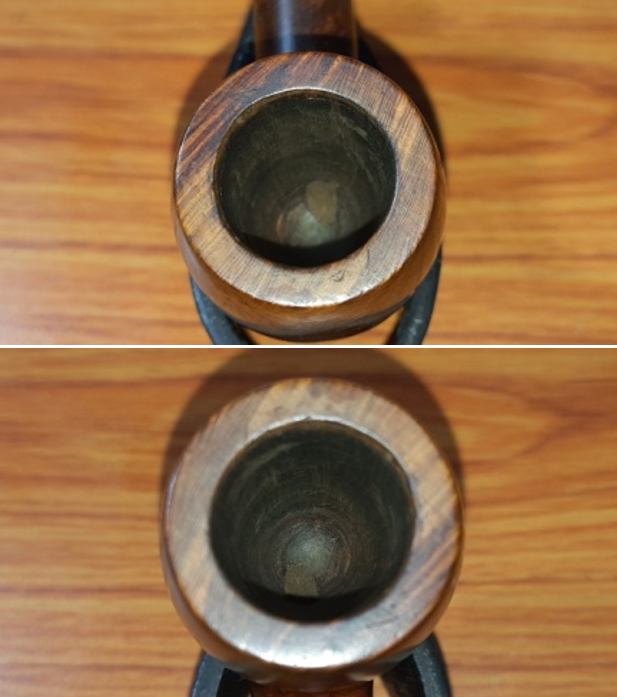
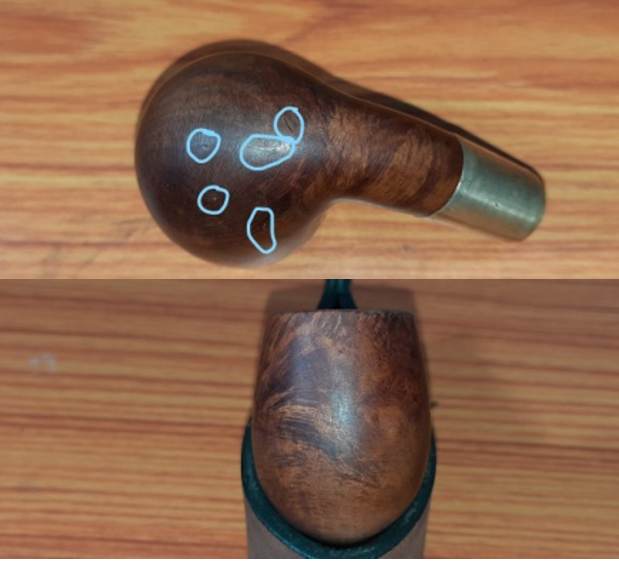
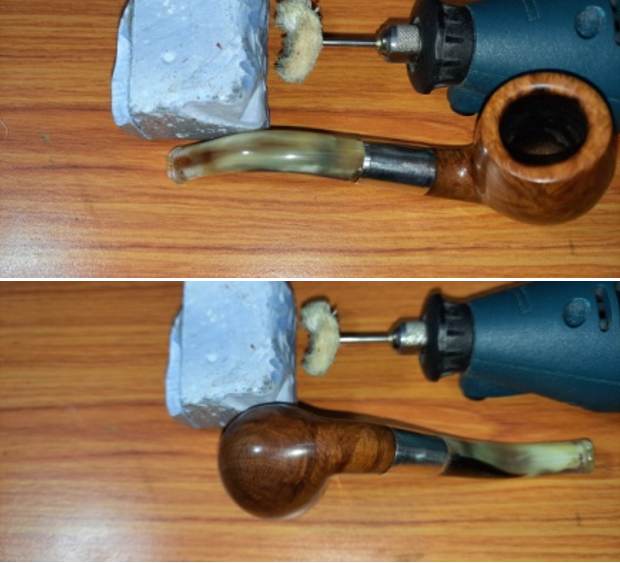
The chamber has a thin layer of even cake and appears to have been lightly reamed before being stowed away. The condition of the chamber walls will be ascertained once the cake is completely taken down to the bare briar. The inner rim edge is lightly charred on the right side in the 4 ‘O’ clock direction (encircled in green) while the left inner edge is uneven (indicated with yellow arrows). The outer rim edge shows damage to the left and front (encircled in red) due to knocking the edge against a hard surface. The rim top is sans any lava overflow but is peppered with scratches, dents and dings.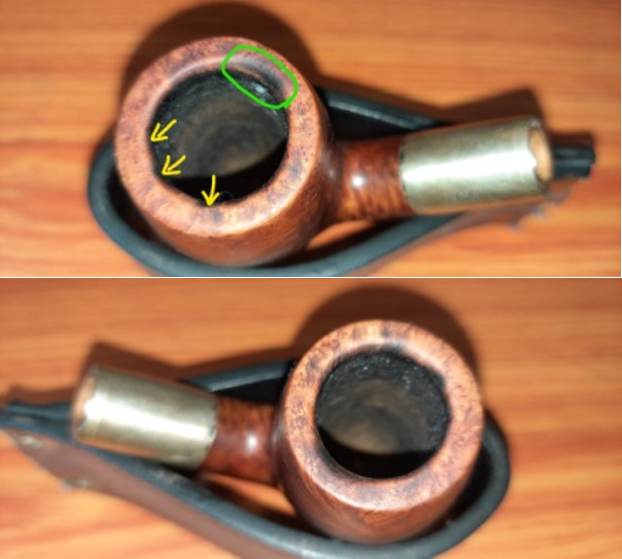
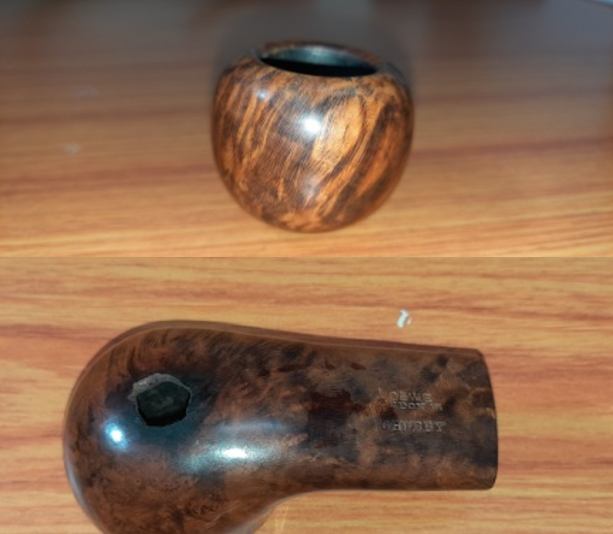
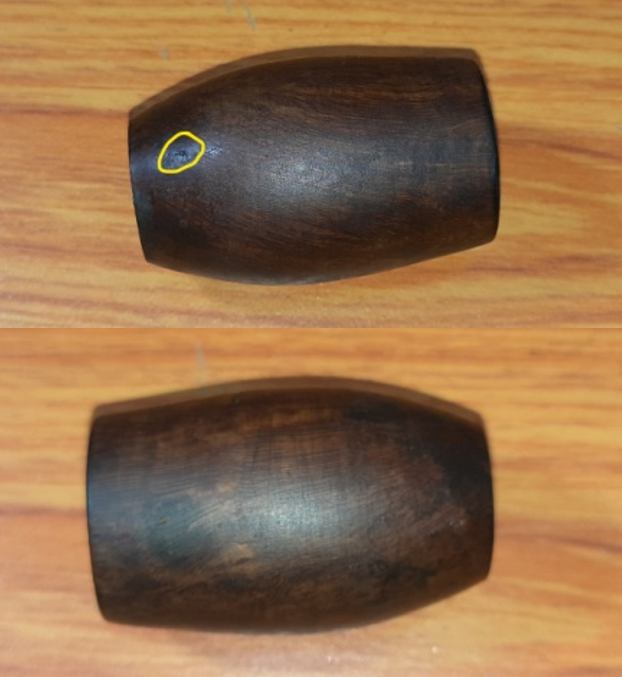
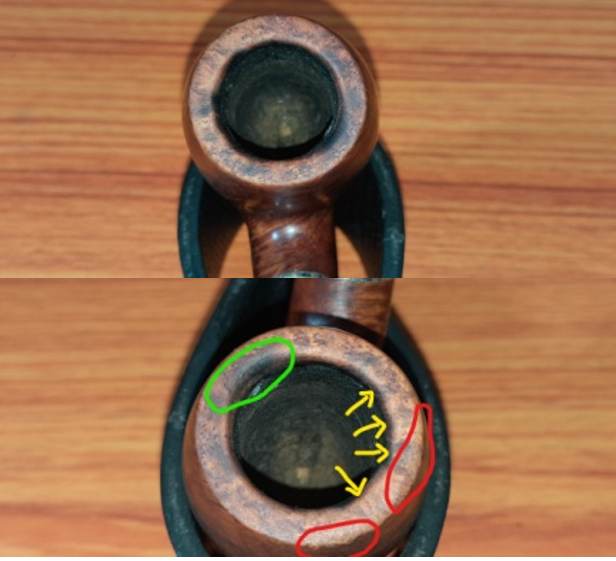 The stummel surface is covered in a layer of dust and grime giving the surface a dull and lackluster appearance. From underneath this grime, a mix of bird’s eye swirls and cross grains can be seen that waits to be brought to the fore. There are a number of scratches, dents and dings over the stummel surface but predominantly over the foot of the bowl (encircled in pastel blue).
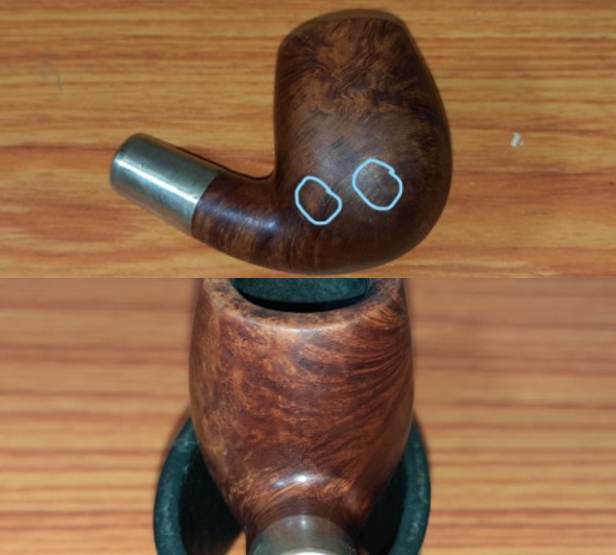
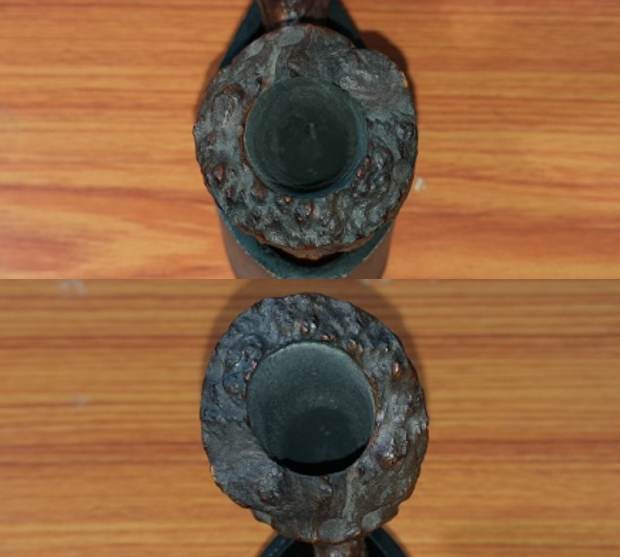
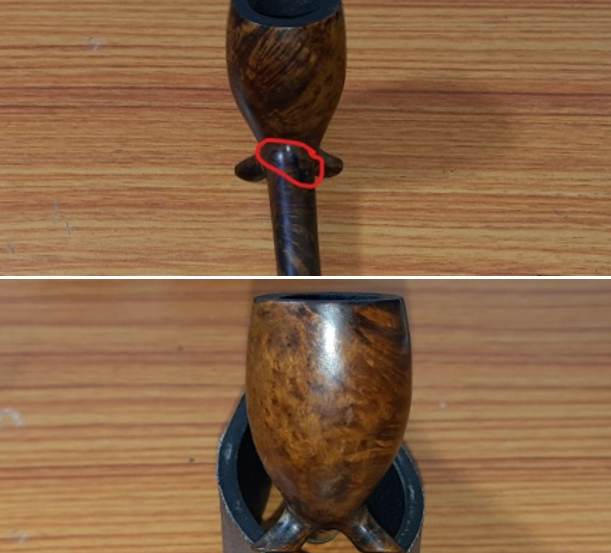
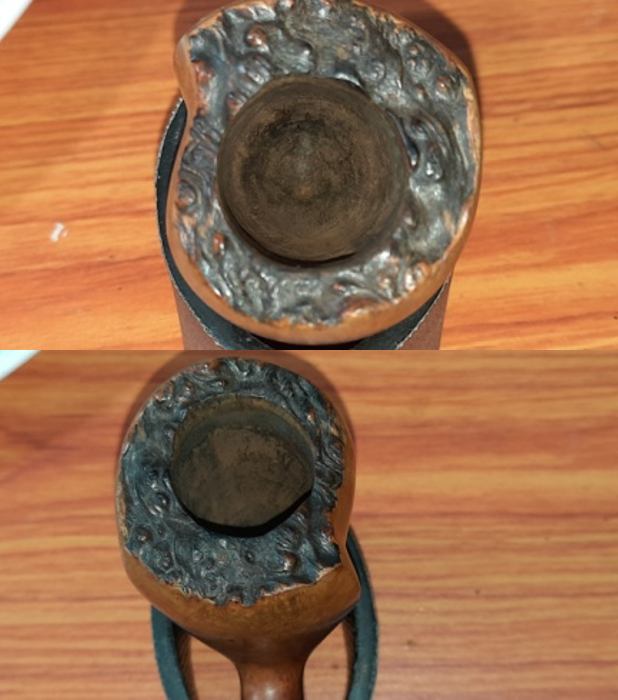
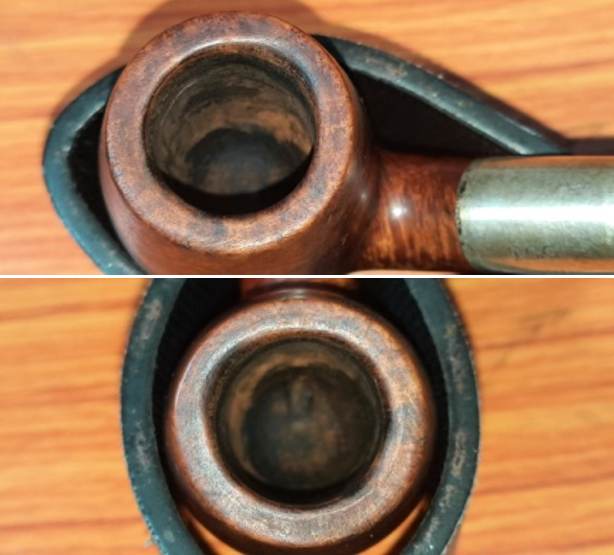
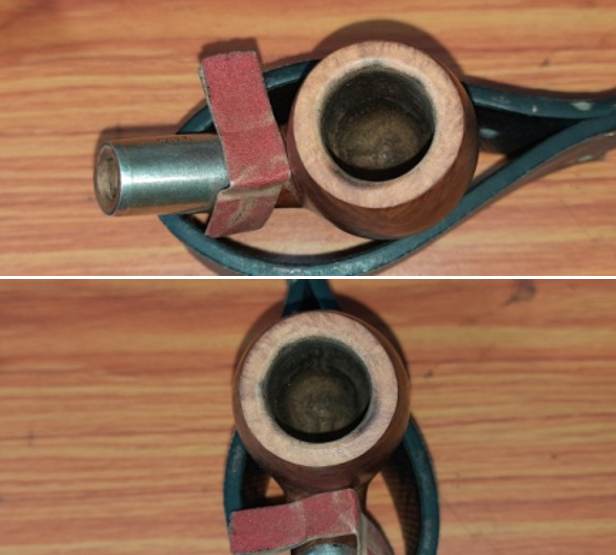
 The mortise is clean with small traces of remnants of old oils and tars.
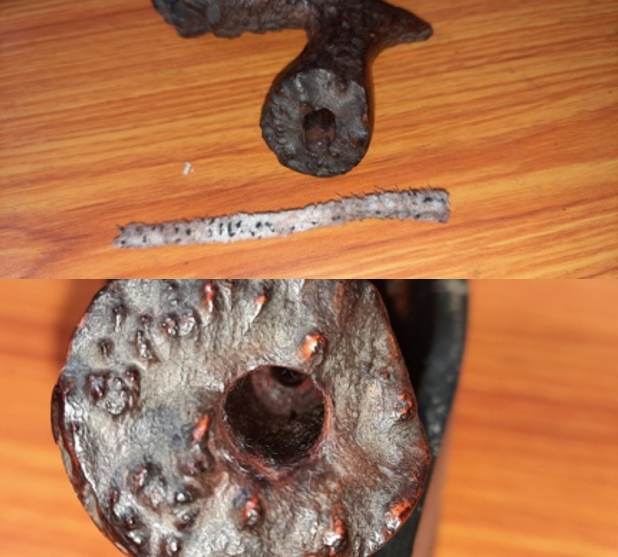
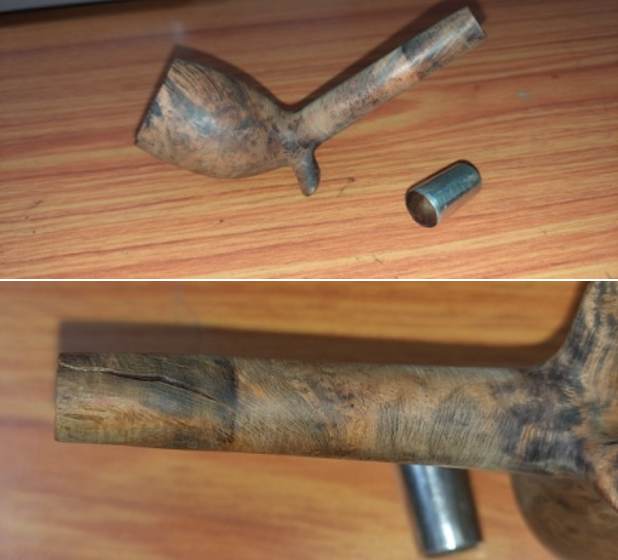
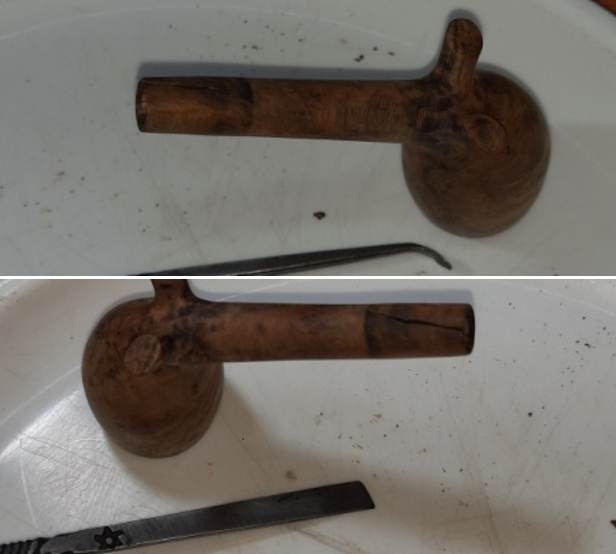
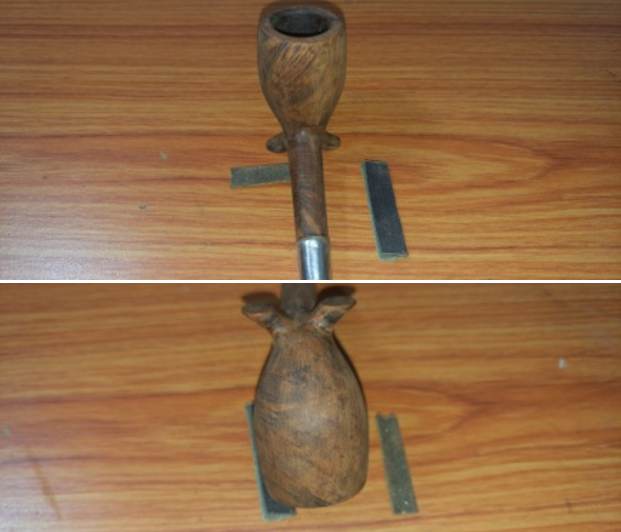
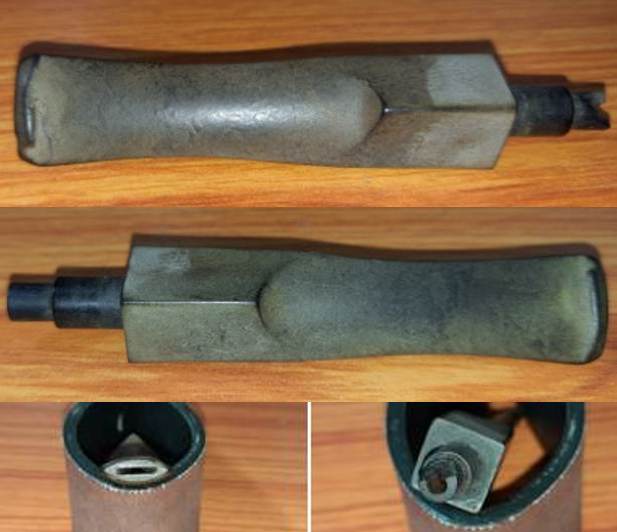
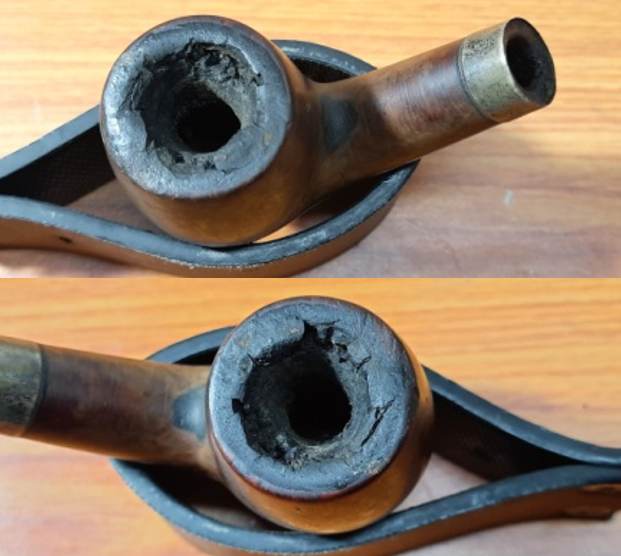
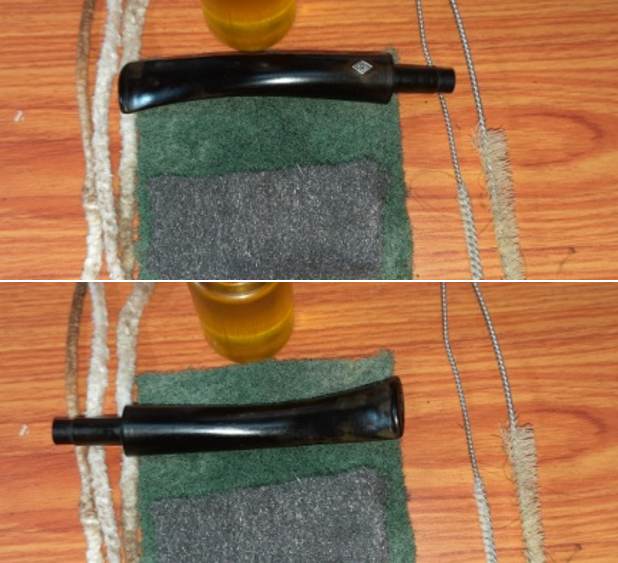
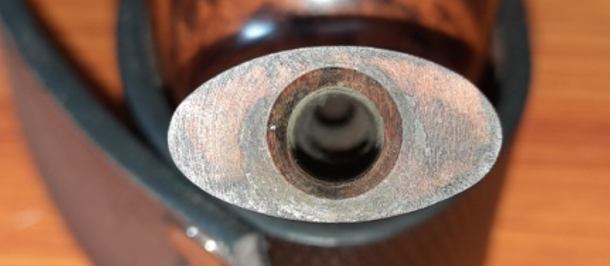
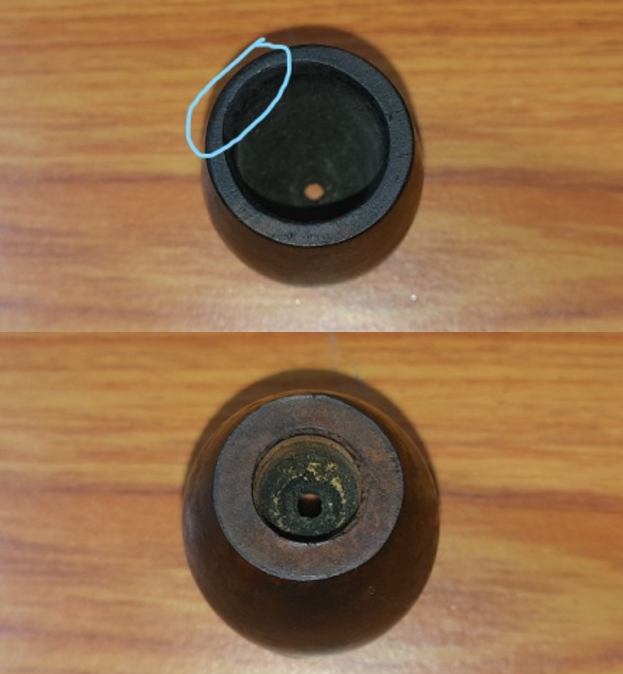
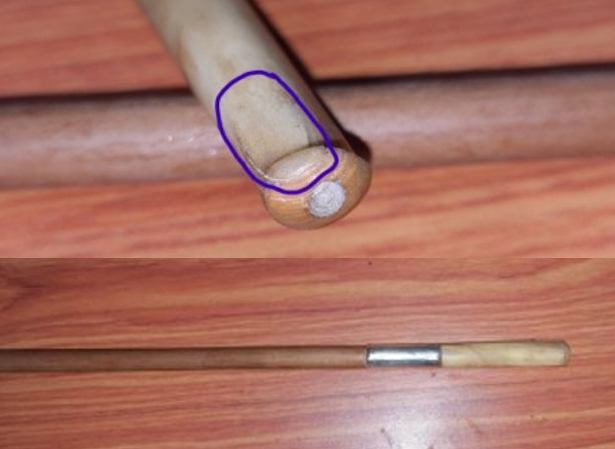
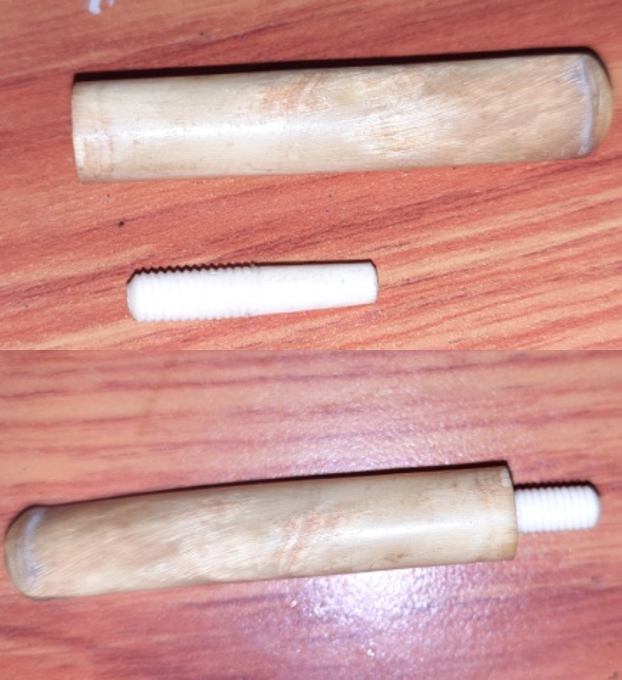
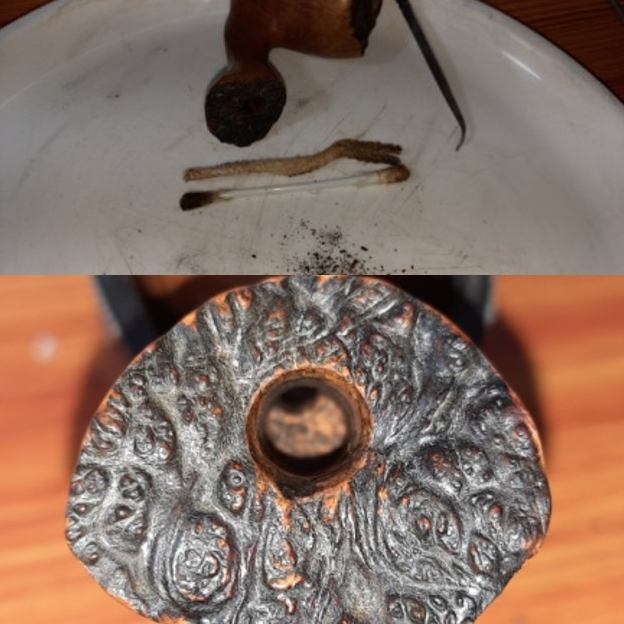
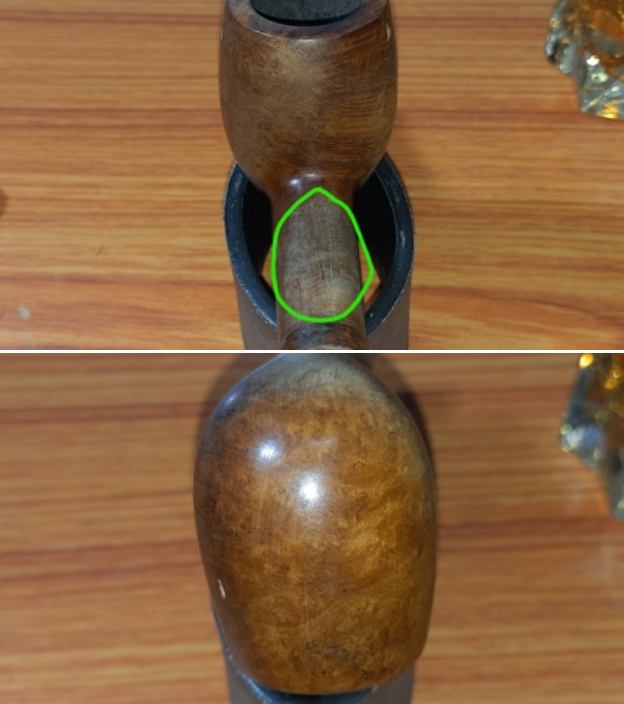
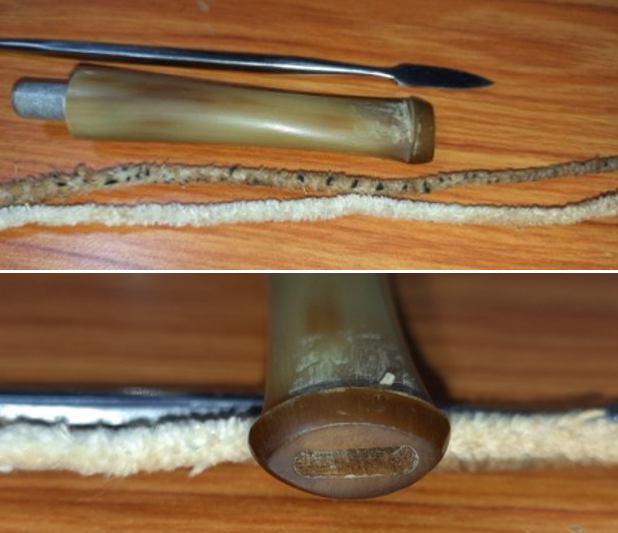
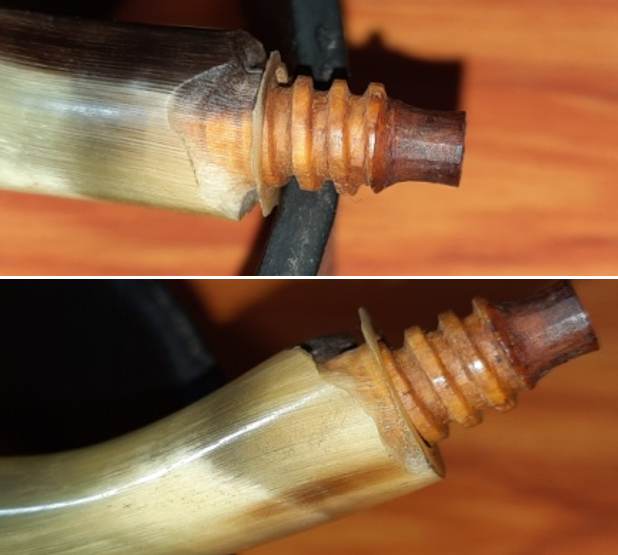
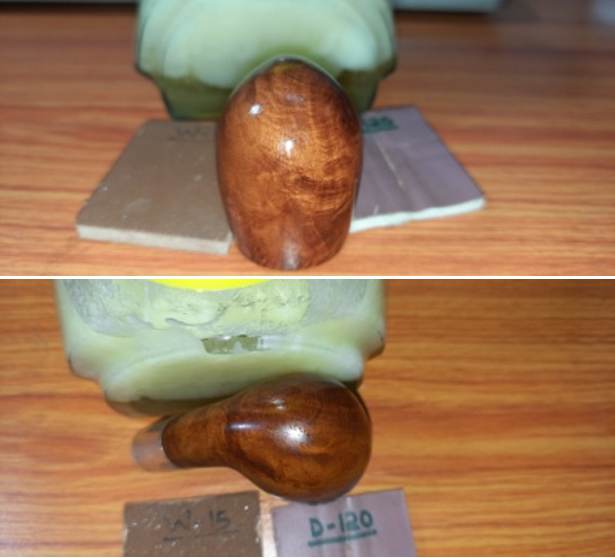
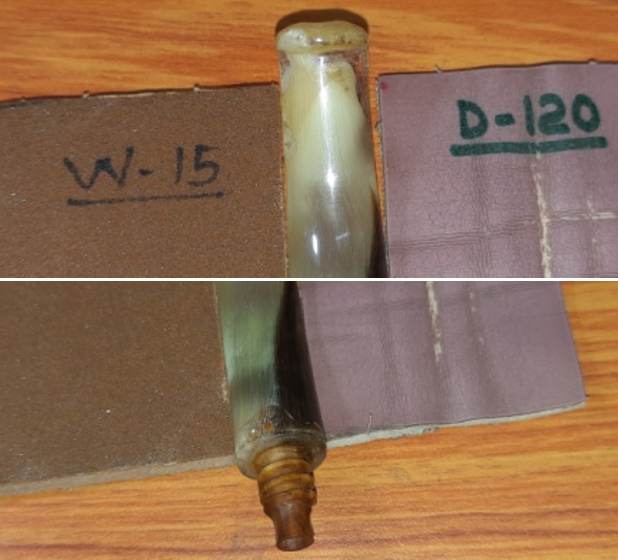
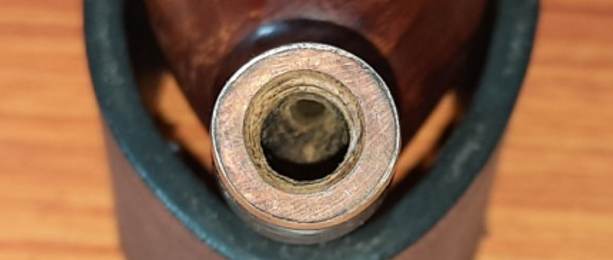 The stem is where maximum damage can be seen. The bone stem is riddled with worm holes in the bite zone and towards the tenon end. The following pictures will give the readers a clear idea of the extent of damage to the stem and what I would be dealing with during its repairs. At the rounded slot end, the damage is deep enough to expose the air way (encircled in yellow) but thankfully; the air way is undamaged and intact. At the tenon end, the worm hole is deep and exposes the threaded bone tenon (encircled in green). The round slot and the bone tenon opening shows residues of dried oils and tars. The silver lining to all this damage is that the button edge surface and the tenon end flat base surface is still intact and will serve as a guide while I build up the damaged surface.
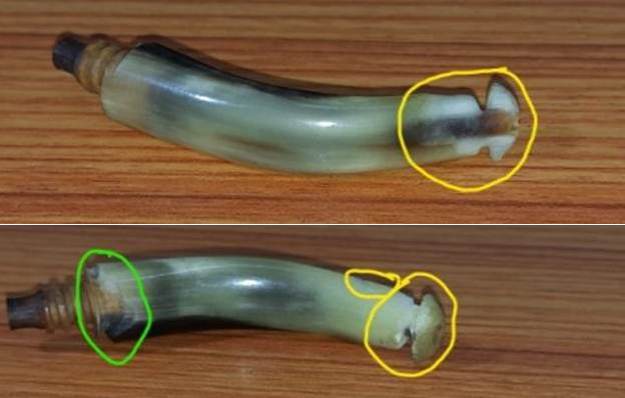
 The Process
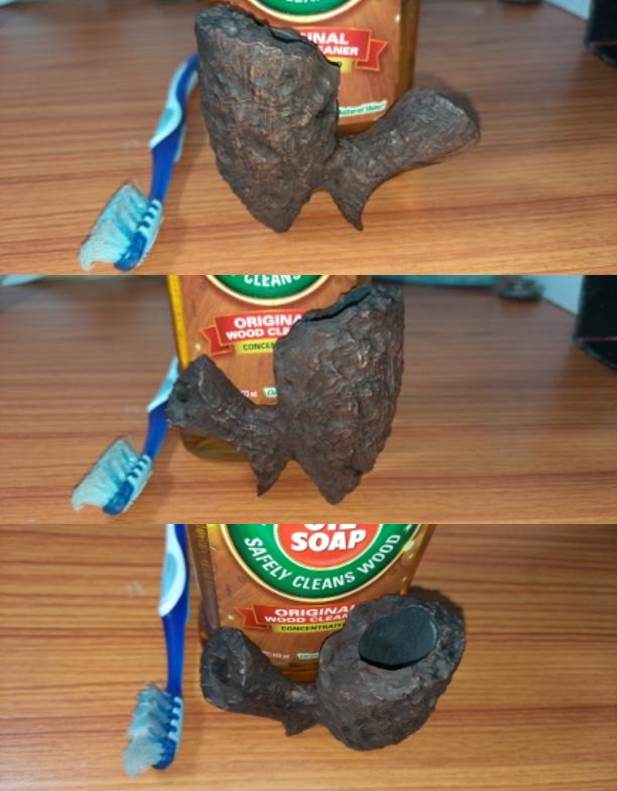
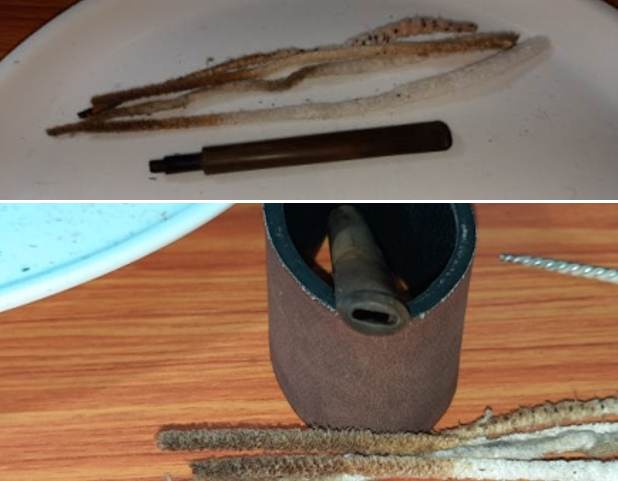
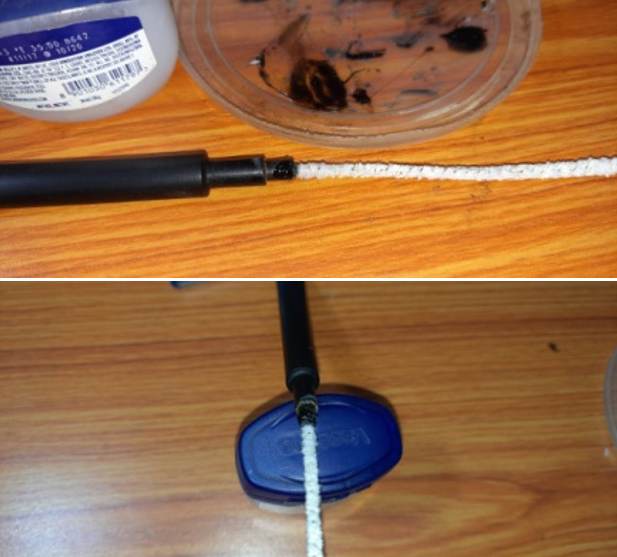
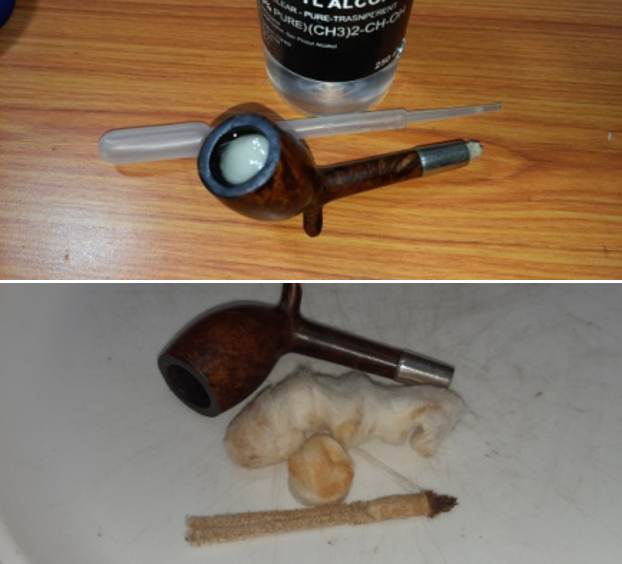
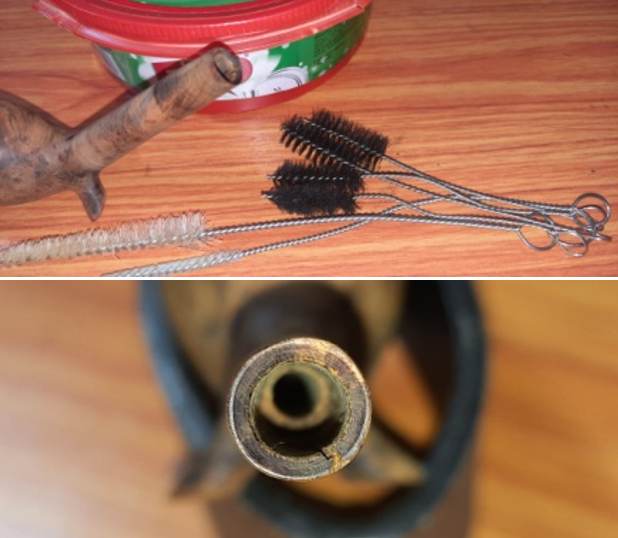
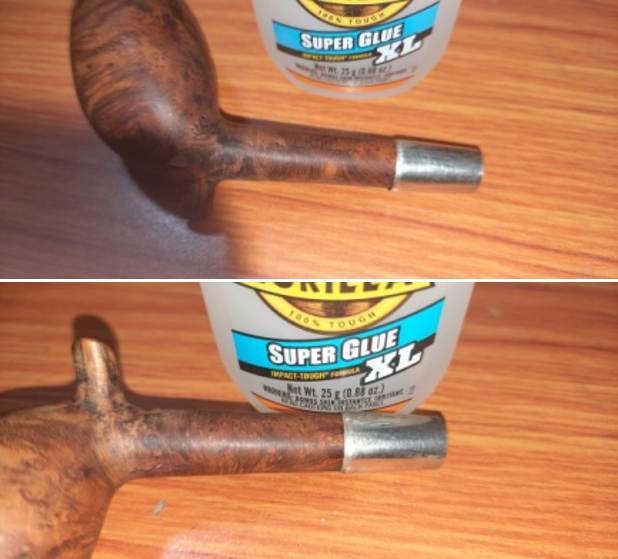
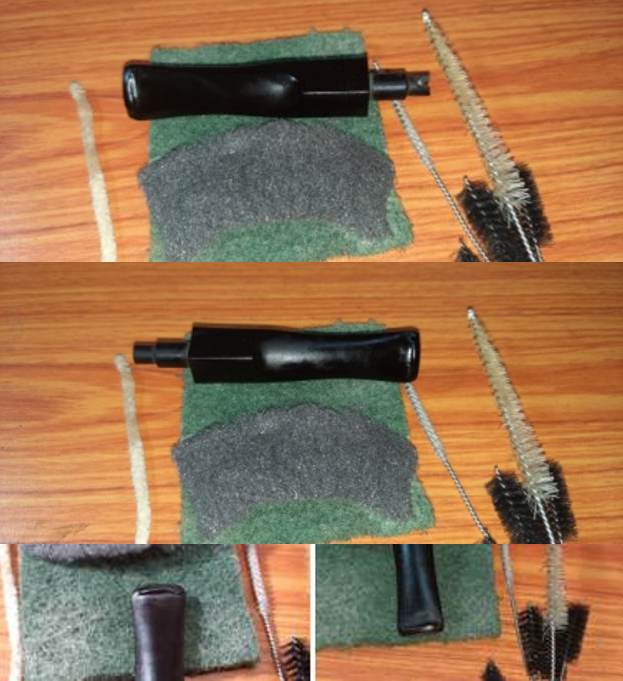
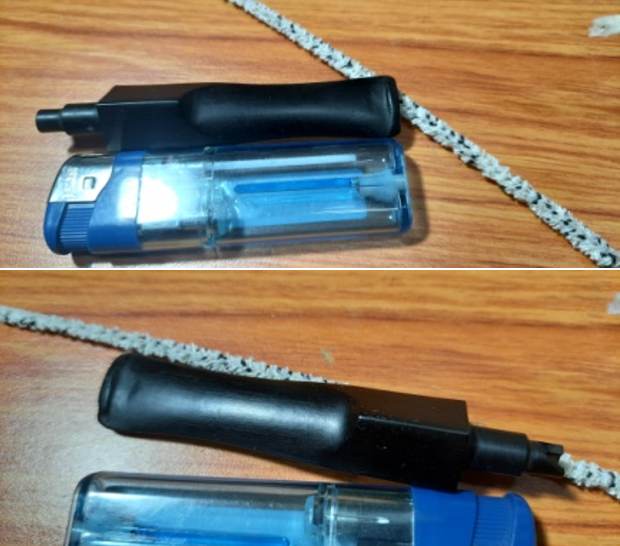
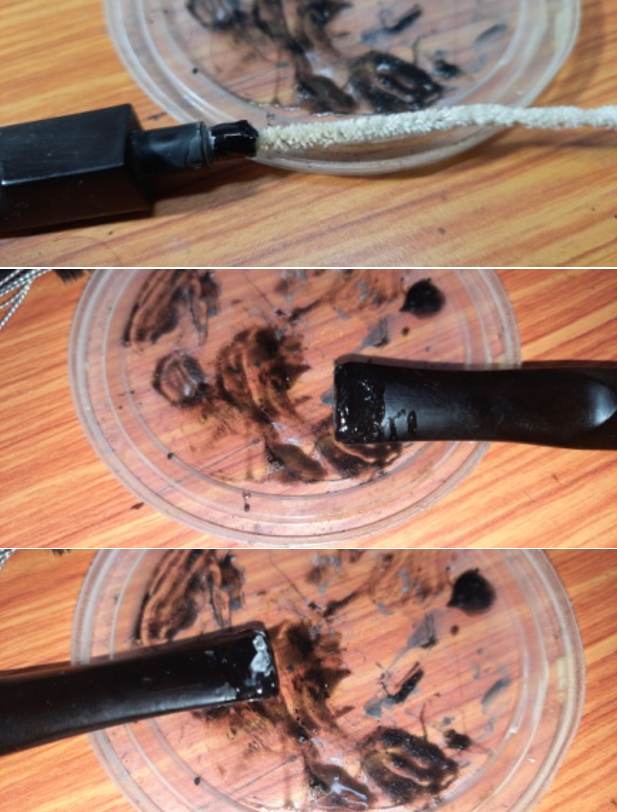
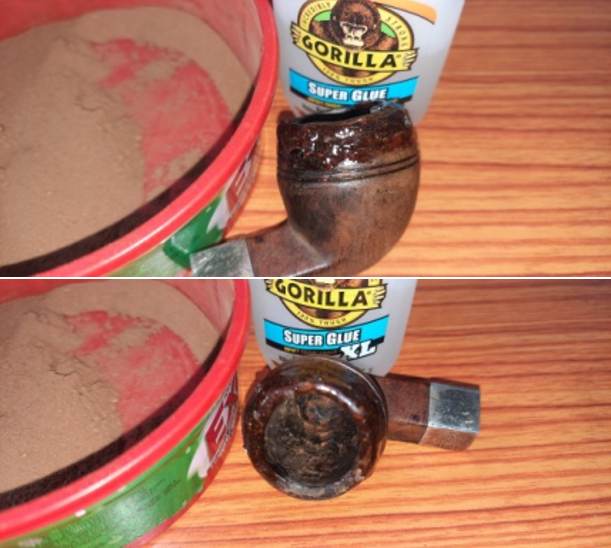
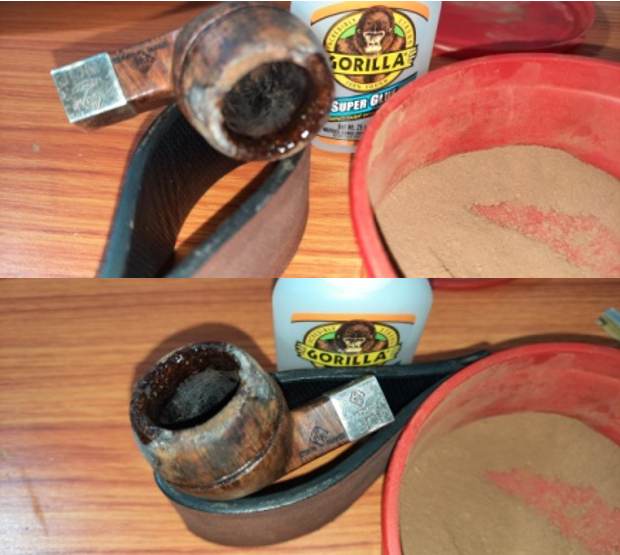
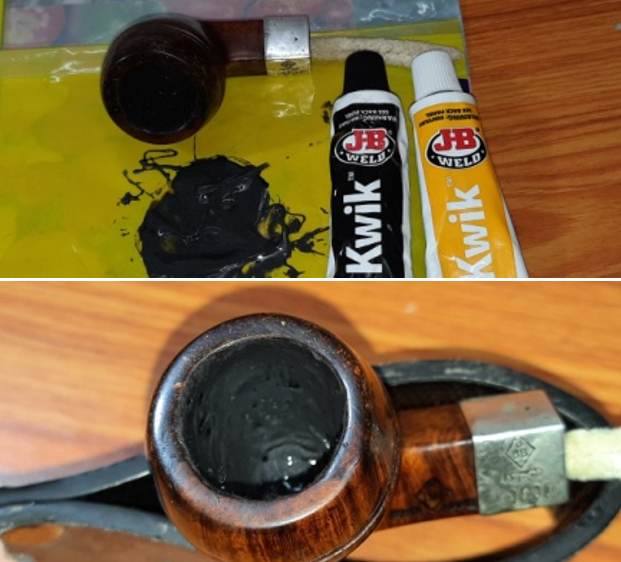
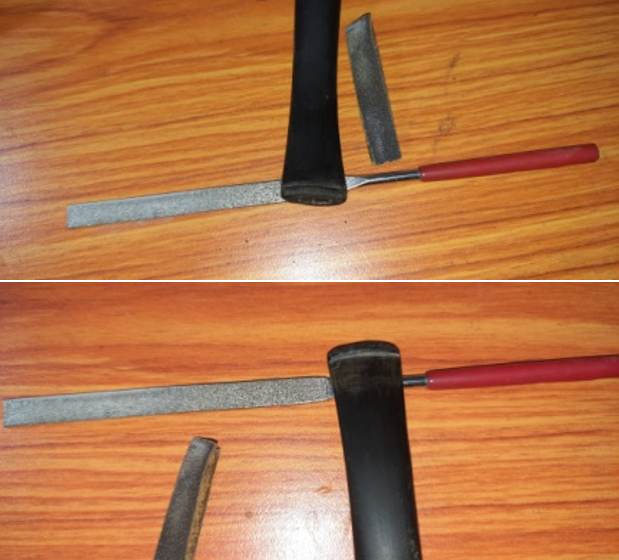
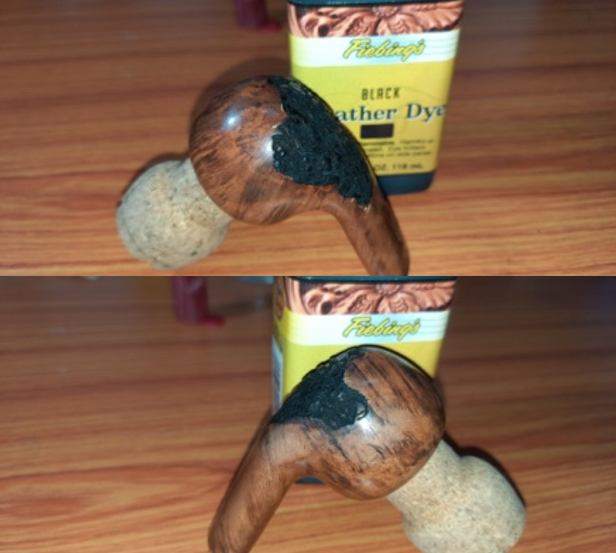
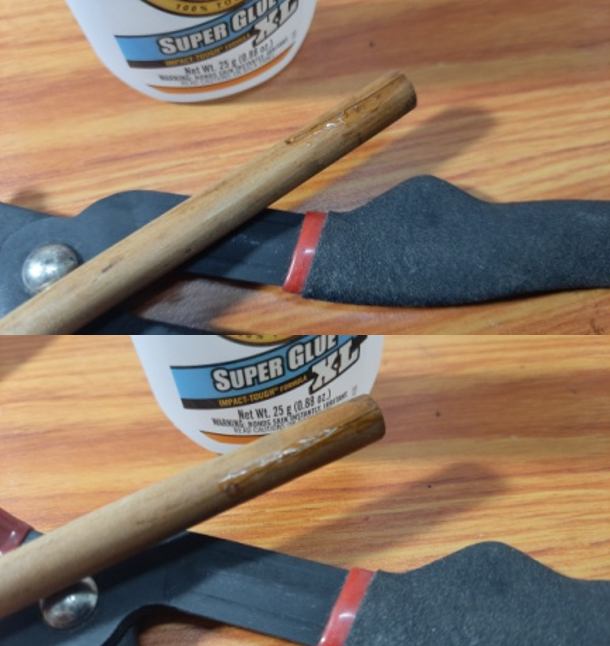
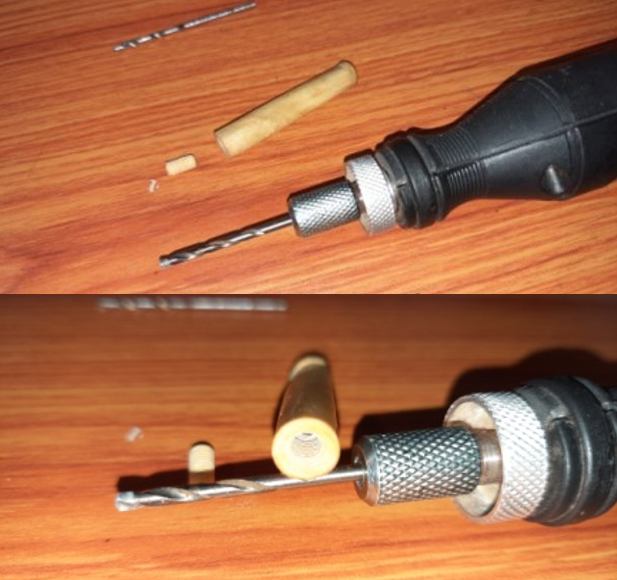
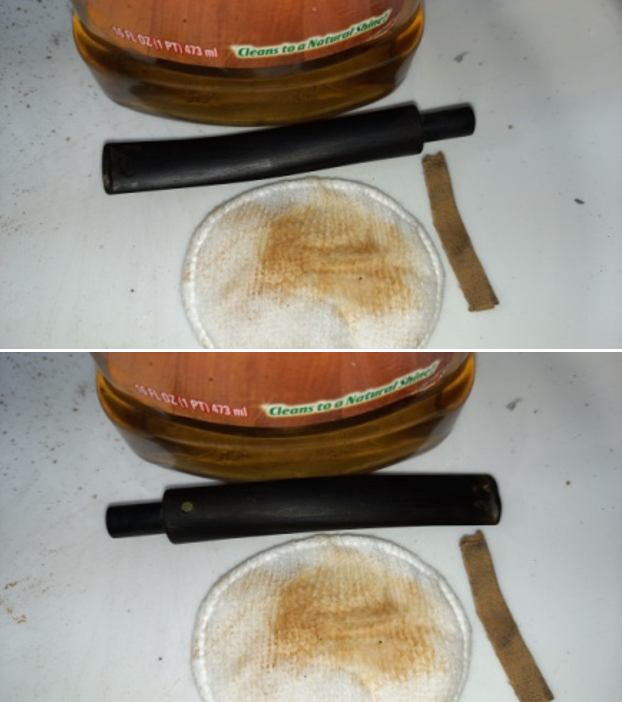
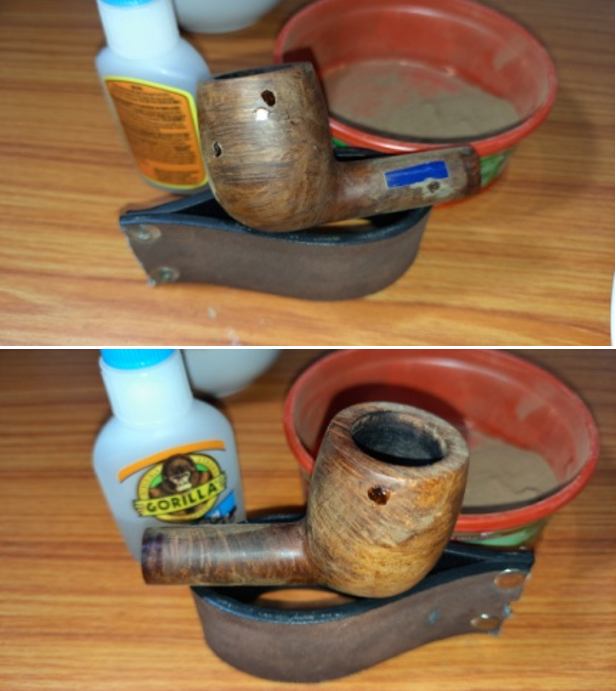
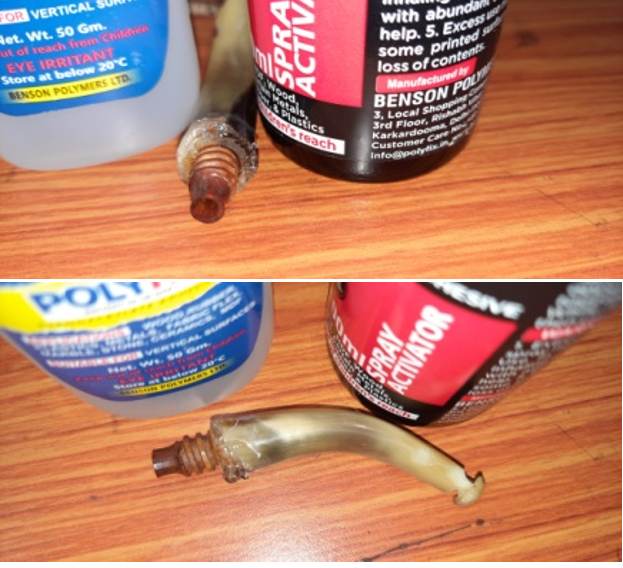
I started the repairs with the stem first as it would be the most tedious work and take the longest time. I cleaned the internals of the stem with thin shank brushes and anti-oil dish washing soap. This helps reduce the number of pipe cleaners that I would otherwise use for the cleaning of the airway.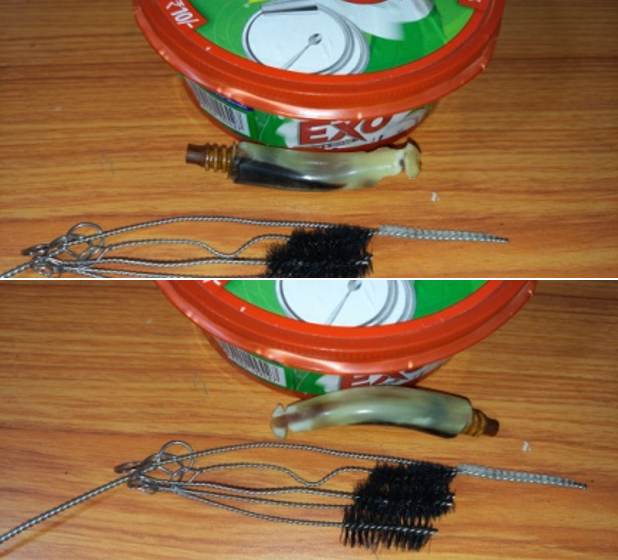 I ran a couple of bristled pipe cleaners dipped in isopropyl alcohol to thoroughly clean the airway. I followed it by cleaning the stem surface with cotton swabs wetted with alcohol in preparation for rebuilding the damaged horn surface with clear CA superglue.
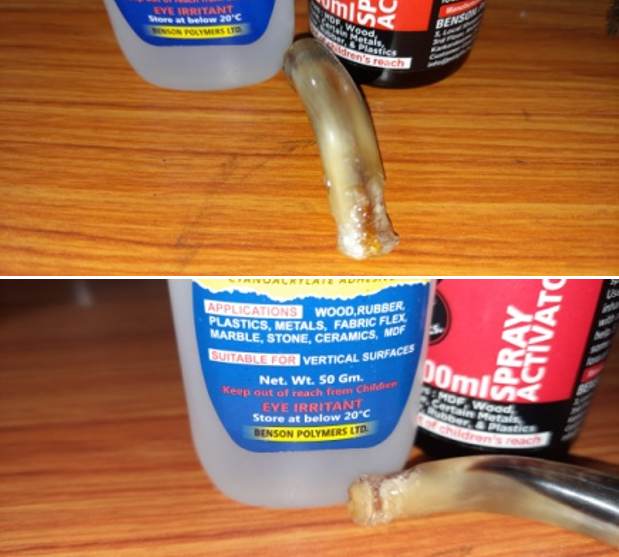
 With the internal and external surface of the stem cleaned up, I moved ahead with reconstruction of the worm hole ridden bite zone and the tenon end of the stem with high viscosity clear CA superglue. I started the repair work at the tenon end. To hasten the process of curing, I sprayed the fill with accelerator. I followed the layering technique to rebuild the damaged surface, that is, first drop a blob of superglue over the surface to be rebuilt and spray the accelerator. Once the glue has hardened, drop superglue over the same area and spray the accelerator to harden the glue. I continued with this method at both the ends of the stem till I had completely covered the area to be rebuilt and then some more. The purpose of excessive build up of the damaged stem surface was that it would be sanded down to perfect or near perfect match with the rest of the stem surface. Following pictures will give the readers a general idea of the process explained above.
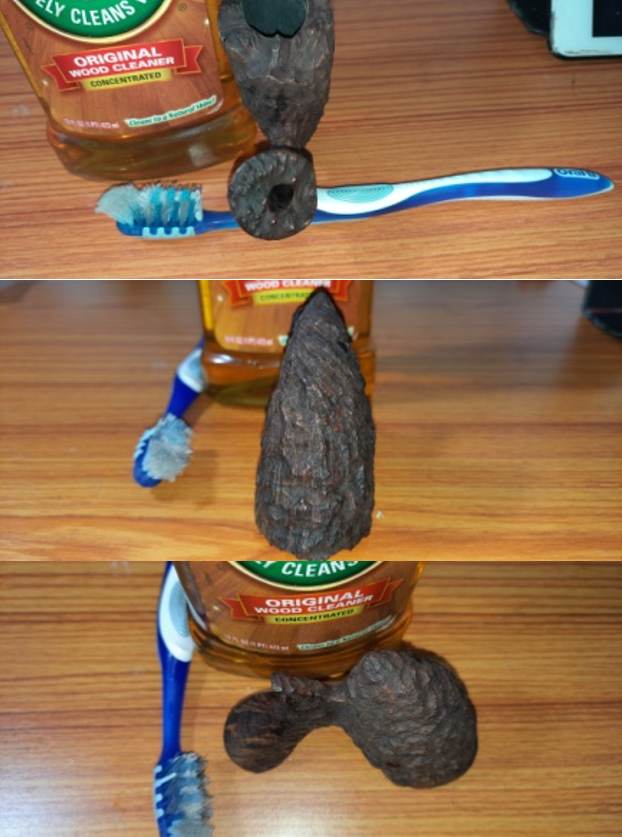
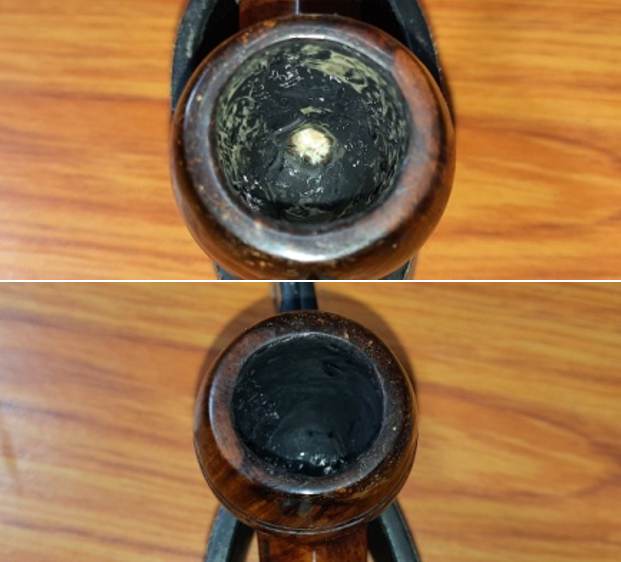
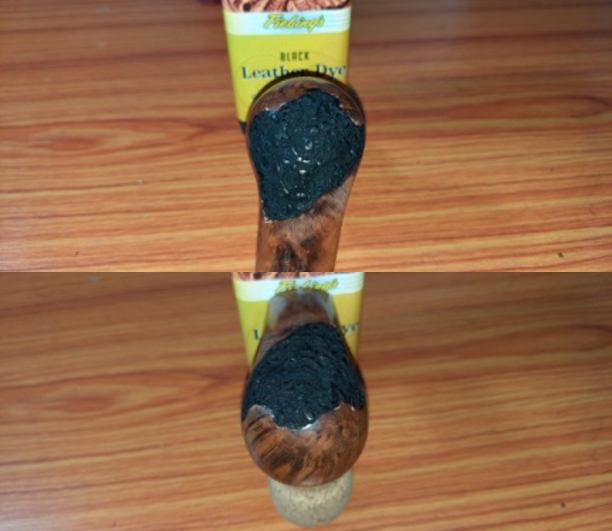
 Once the tenon end of the stem was filled with superglue and set using the accelerator, I followed the same procedure to rebuild the slot end of the stem. Thereafter, I set the stem aside for the fills to cure overnight.
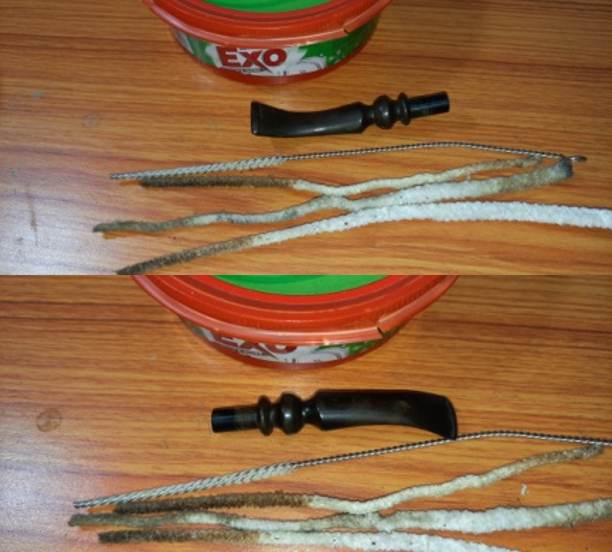
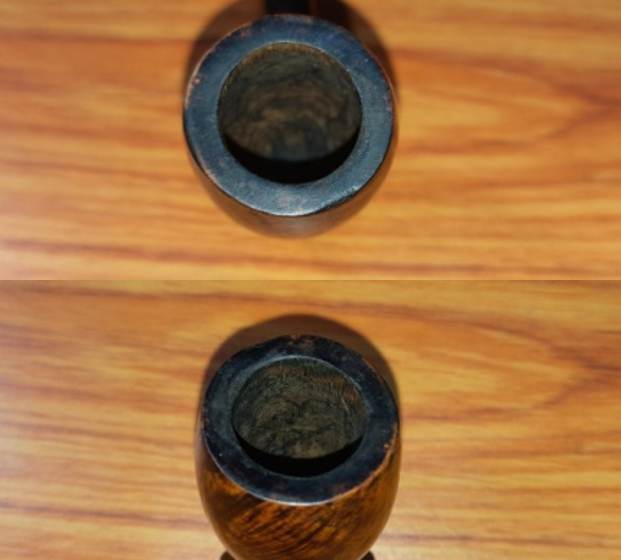
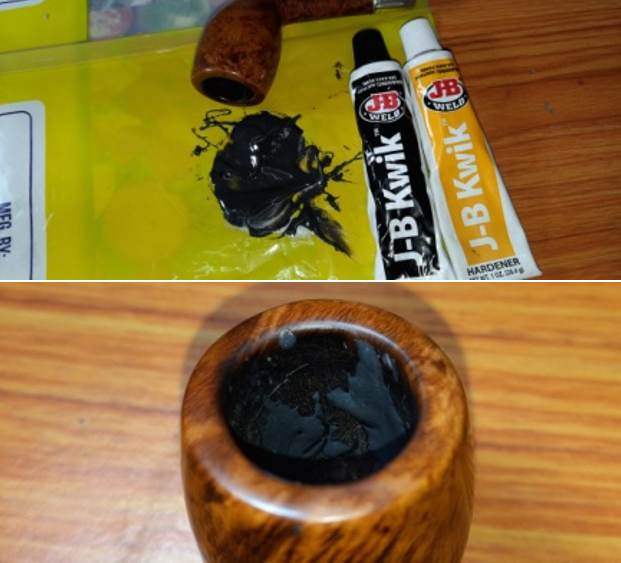
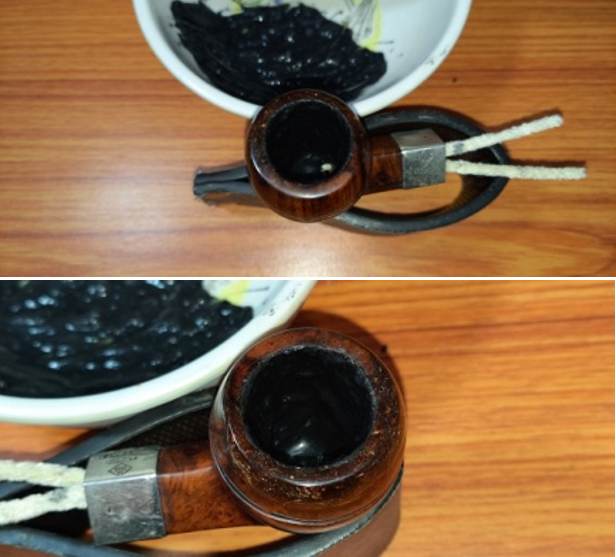
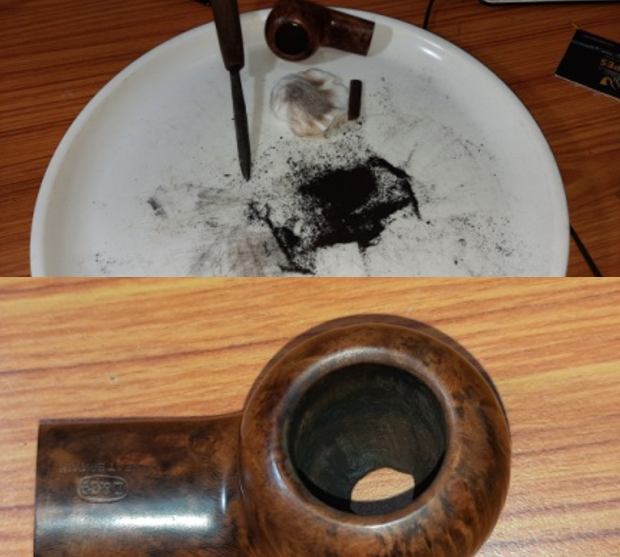
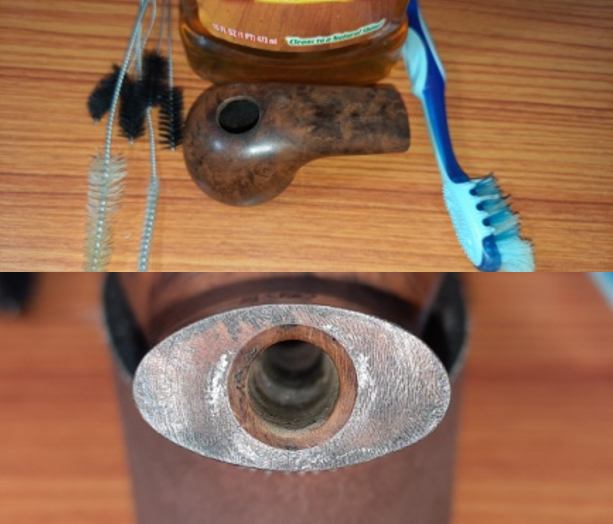
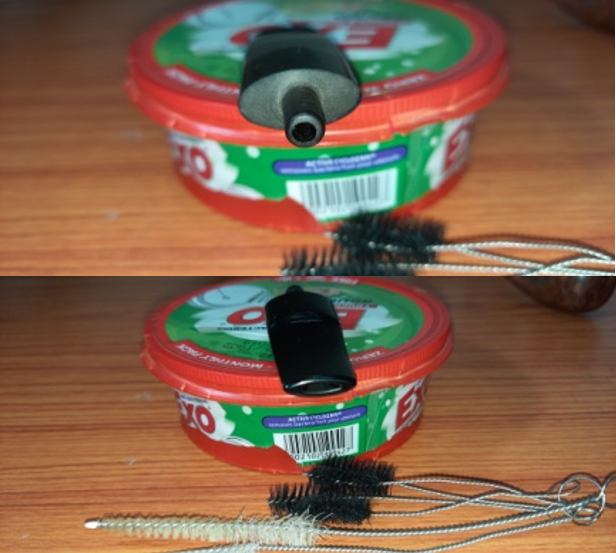
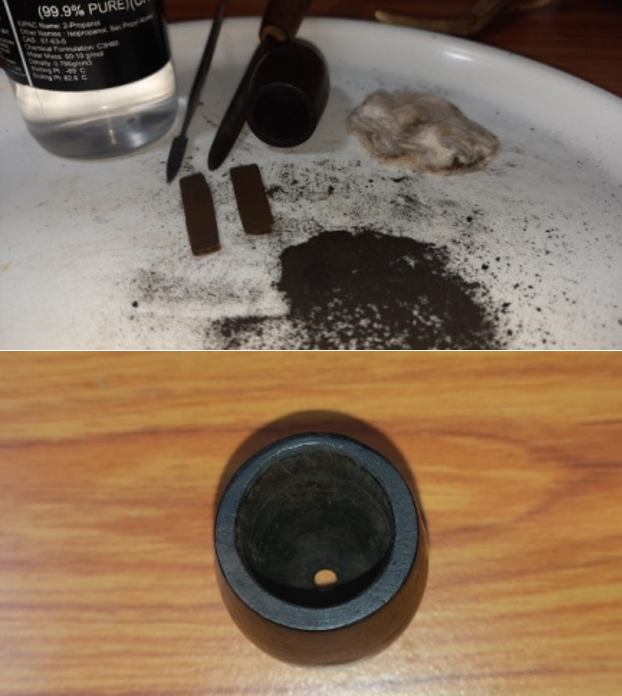
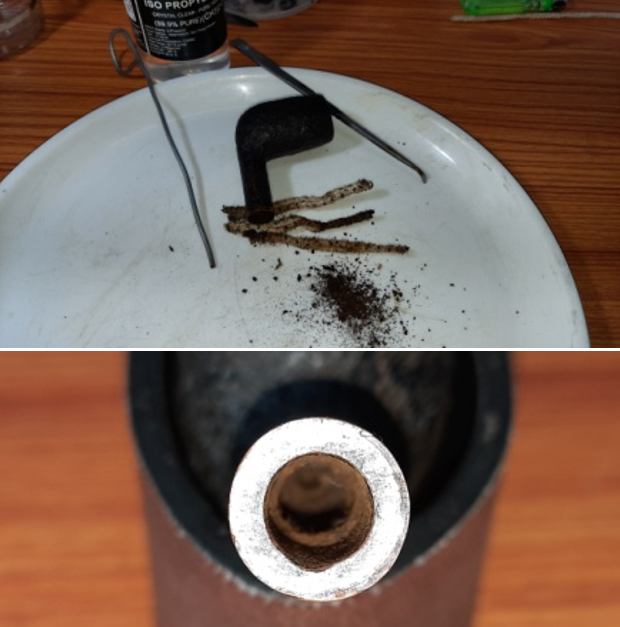
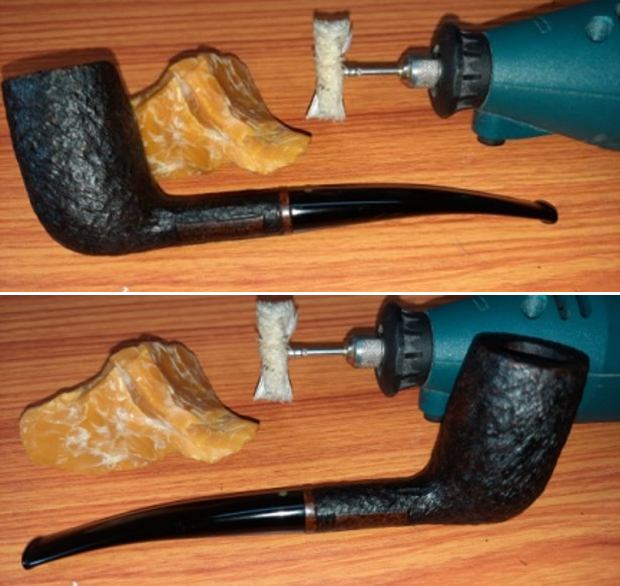
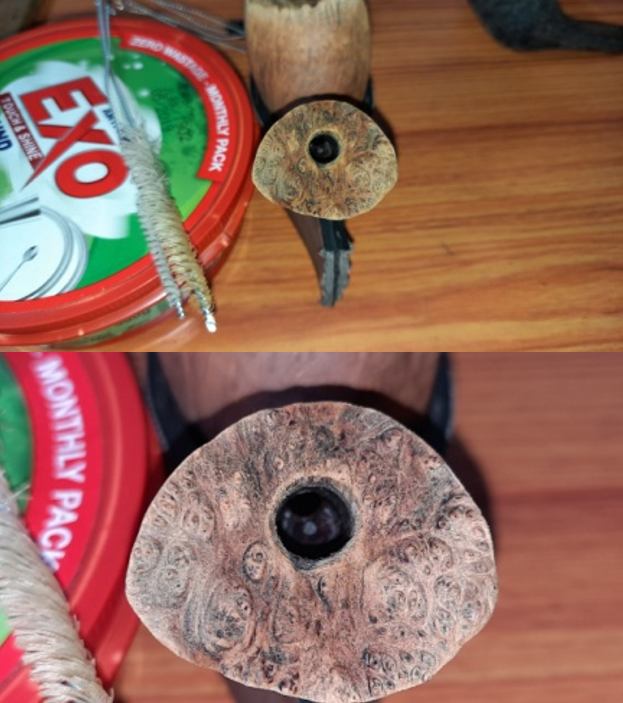
 While the stem was set aside for the fills to cure, I reamed the chamber with size 1 and 2 heads of the PipNet pipe reamer. I removed the carbon from the areas where the reamer head could not reach with my fabricated knife. To completely remove the residual carbon from the walls of the chamber and even out the walls, I sand the chamber walls with a folded piece of 220 grit sandpaper followed by cleaning the chamber with a cotton swab wetted with isopropyl alcohol. The chamber walls are in pristine condition. The quantity of carbon that was removed did surprise me as I had anticipated a far less build up of cake in the chamber. I also cleaned the mortise with pipe cleaners and alcohol.
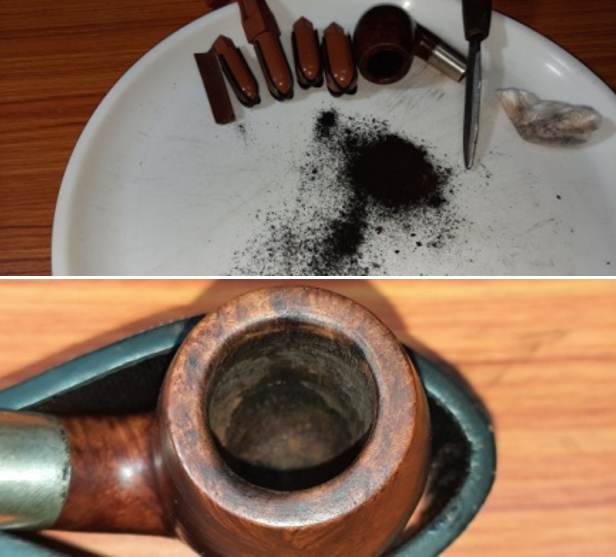
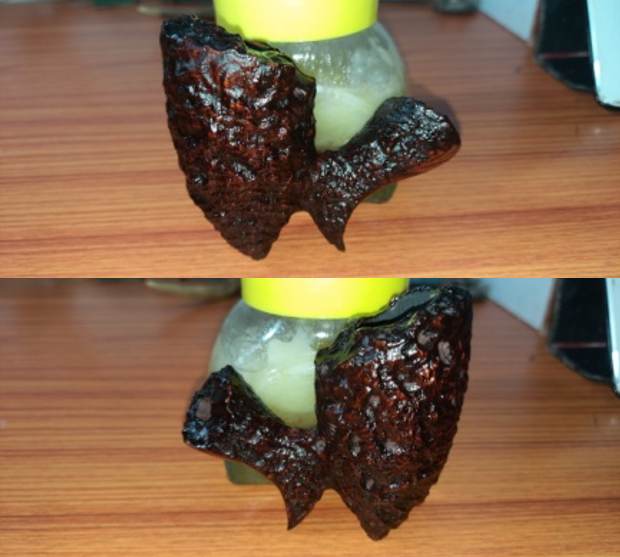
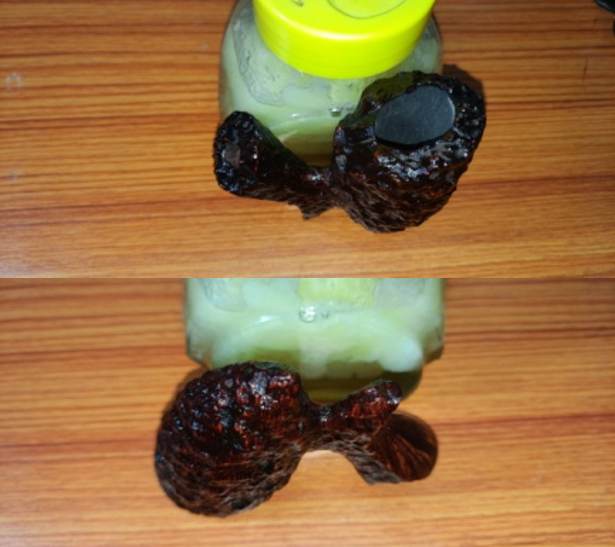
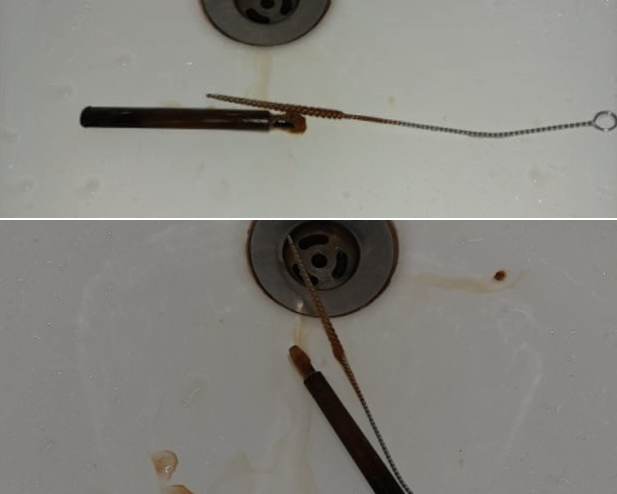
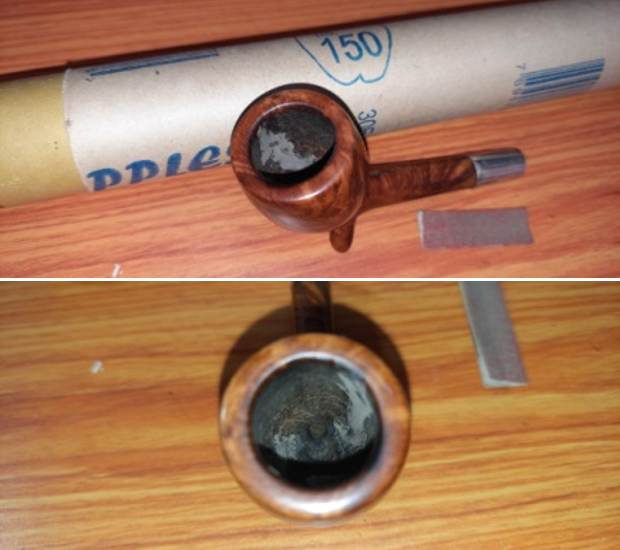
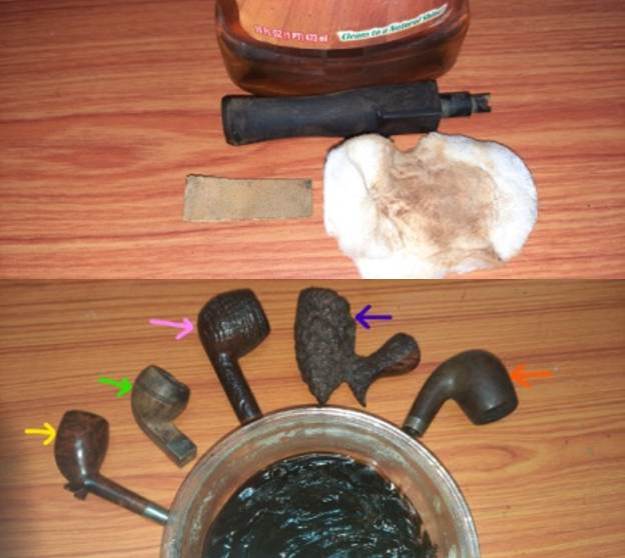
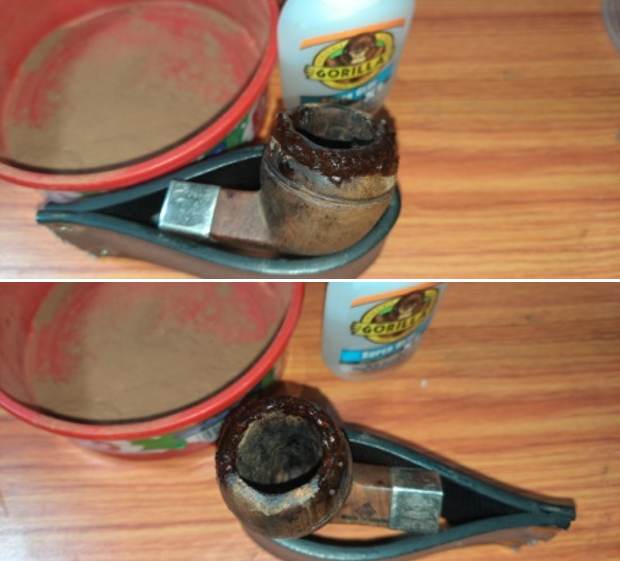
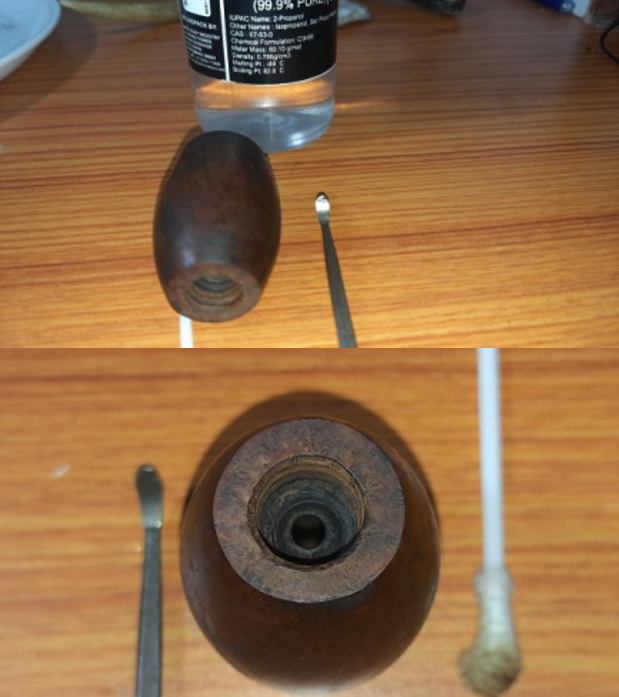
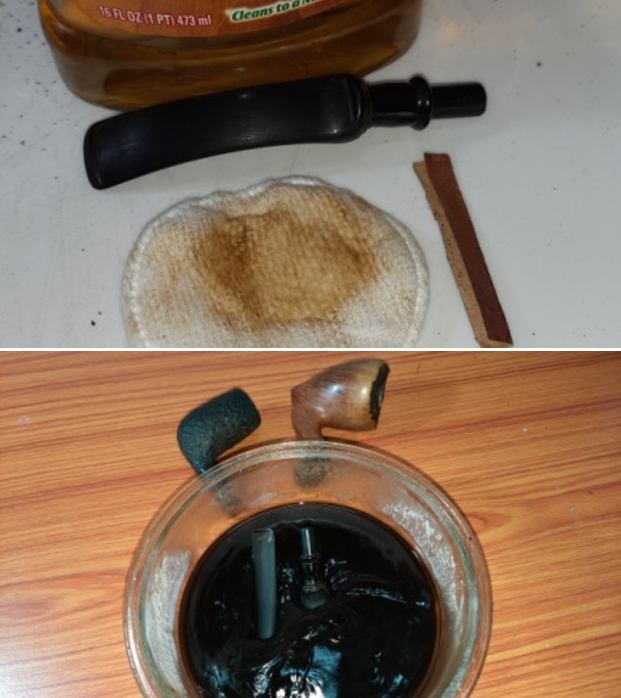
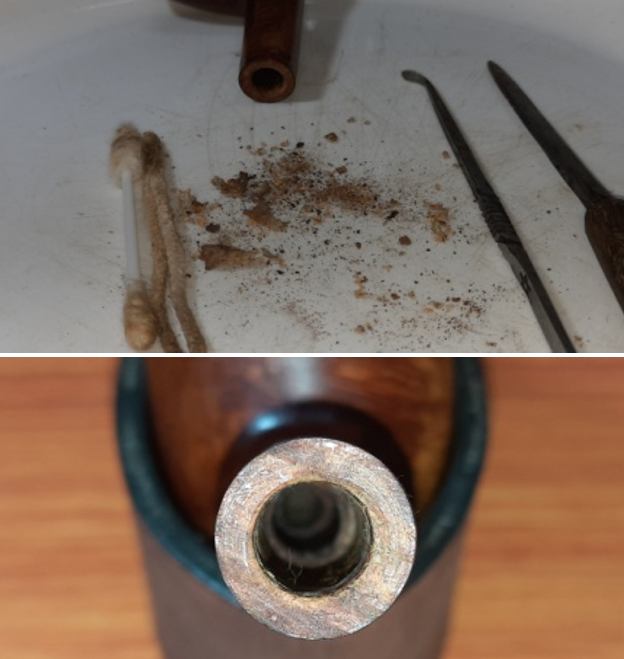
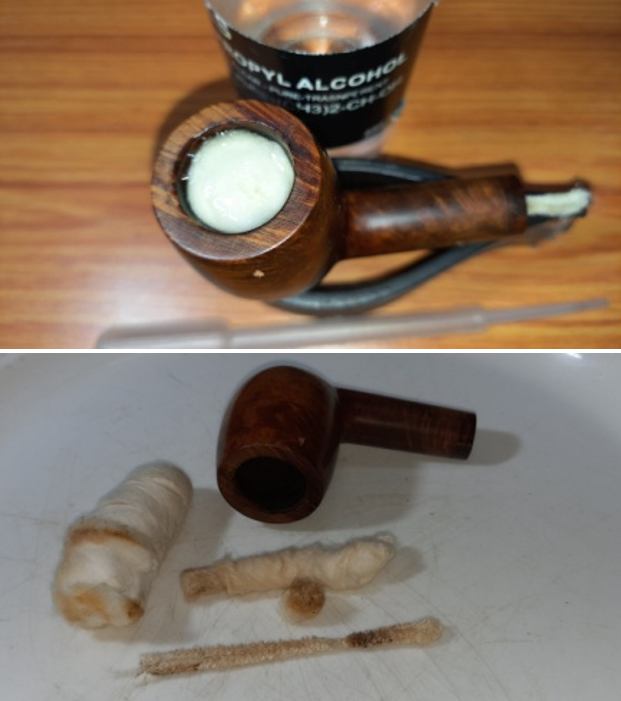
 Continuing with internal cleaning of the bowl, I decided to subject the chamber and mortise to cotton and alcohol bath. I packed the chamber with cotton balls and drew out a wick from the cotton and along with a folded regular pipe cleaner, inserted it into the mortise and through the draught hole into the chamber. I tightly packed cotton balls in to the remaining portion of the mortise. Thereafter, I soaked the cotton balls with isopropyl alcohol up to the brim. About half an hour later, the level of alcohol had gone down, having being absorbed by the cotton. I topped it up once again and set it aside overnight. By next afternoon, the cotton and alcohol had drawn out all the remaining oils and tars from the chamber and mortise. I removed the cotton balls and the filth can be gauged by the appearance and coloration of the cotton balls and the pipe cleaner. I ran pipe cleaners through the mortise and draught hole to clean out all the loosened tars and gunk that was lodged in the draught hole and mortise. The chamber and mortise now smelled clean, fresh and looked it too. I set the stummel to dry out naturally.
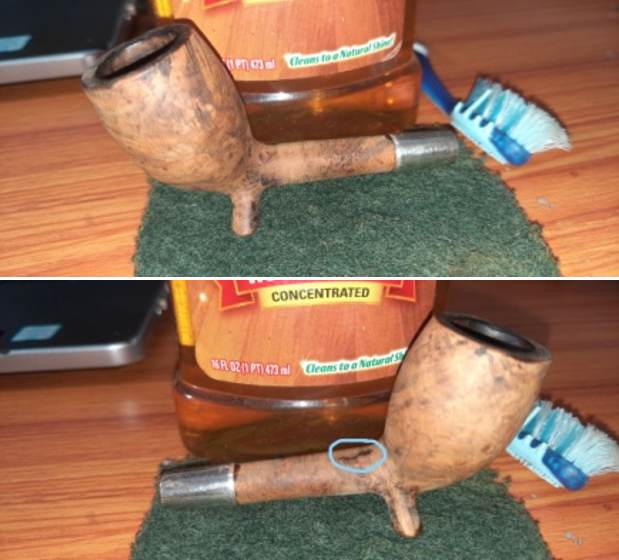
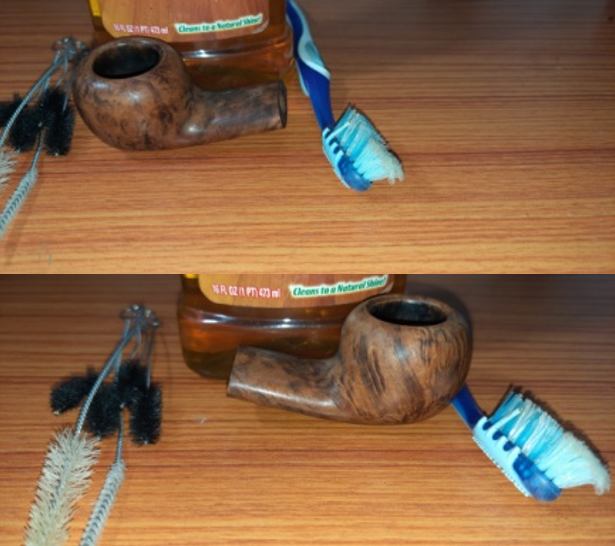
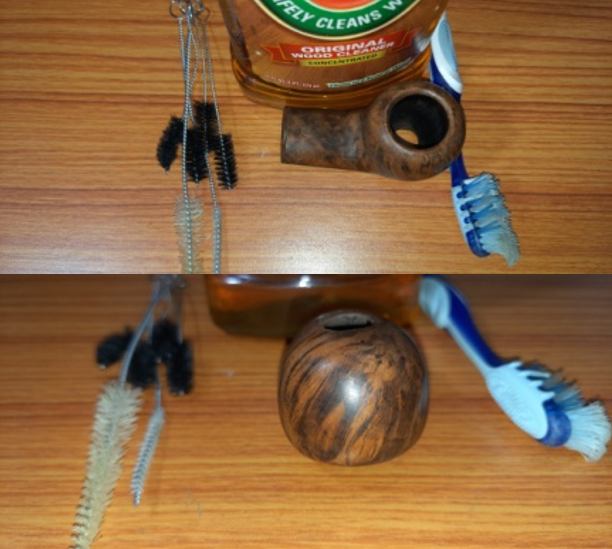
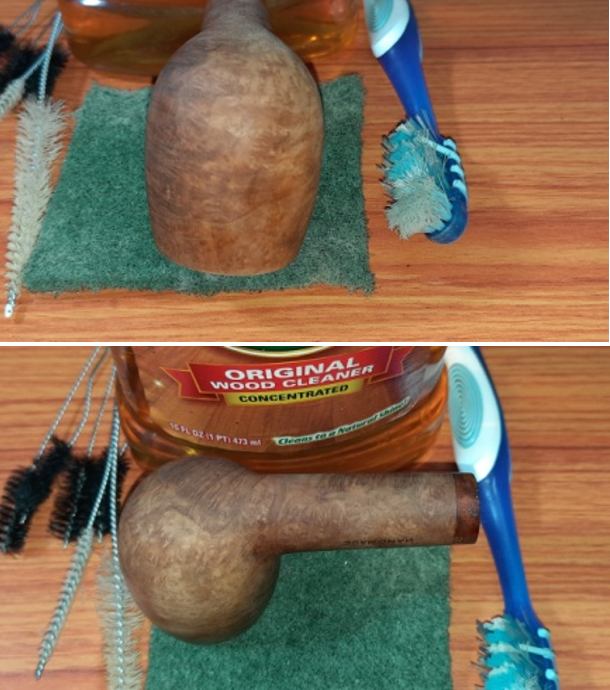
 With the internal cleaning done, it was time for the external cleaning of the stummel surface. I used a hard bristled tooth brush and Murphy’s Oil Soap, to scrub the stummel and rim top. I washed the stummel under running warm water with anti oil dish washing detergent till the stummel surface was clean and dried it using paper towels and soft cotton cloth.
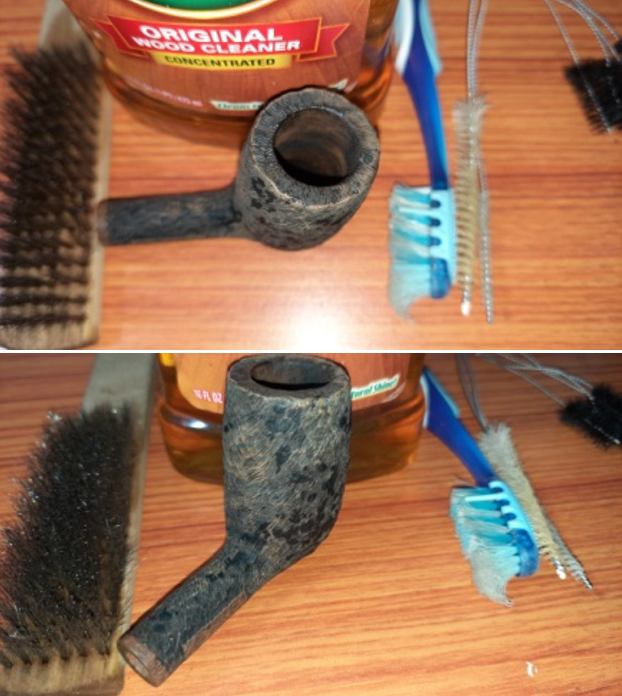
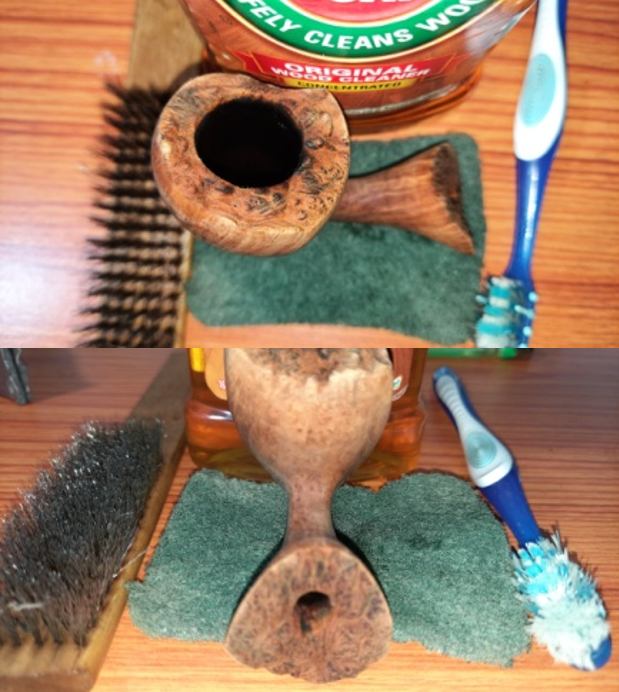
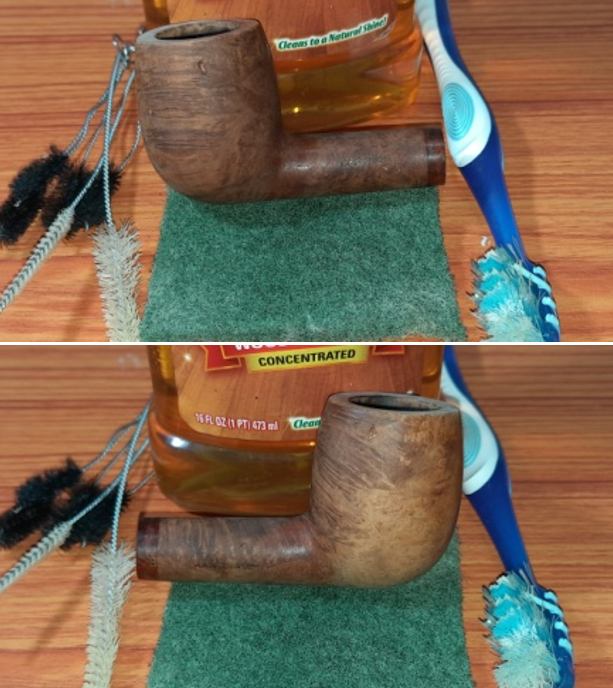
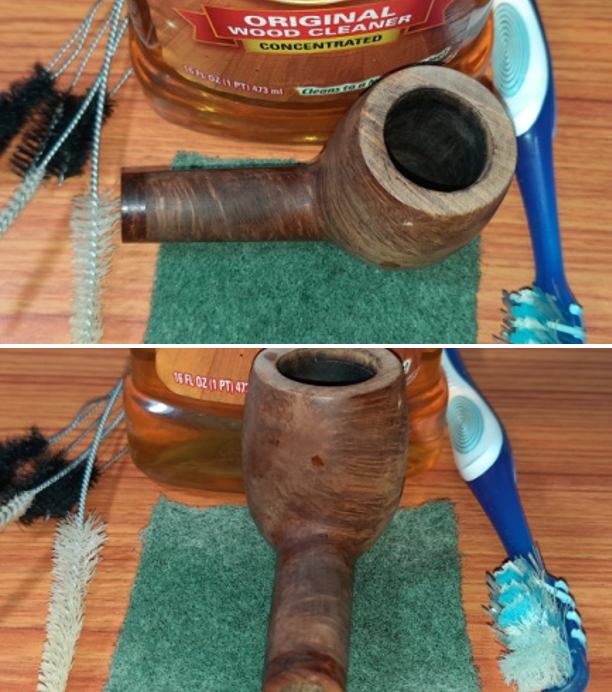
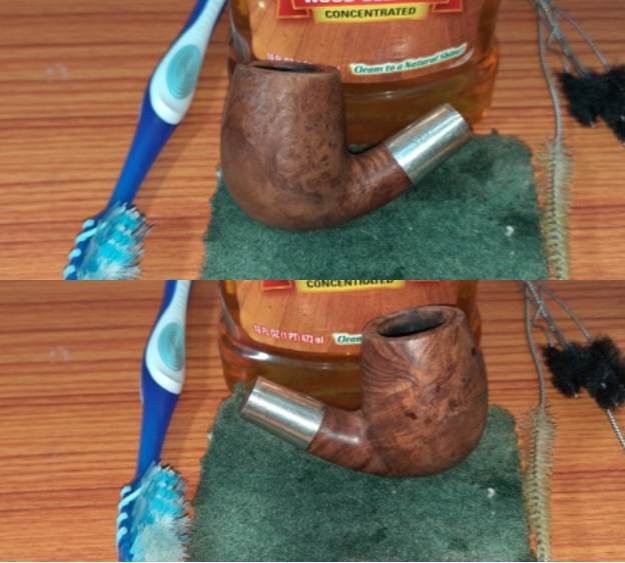
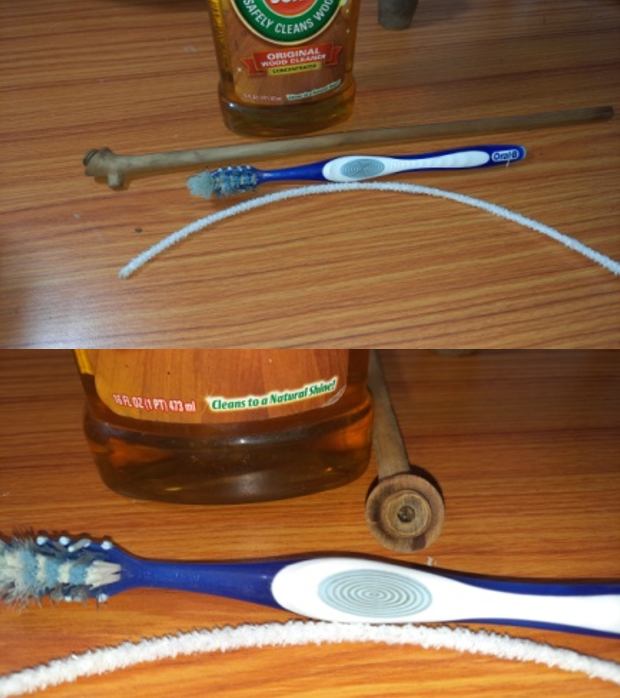
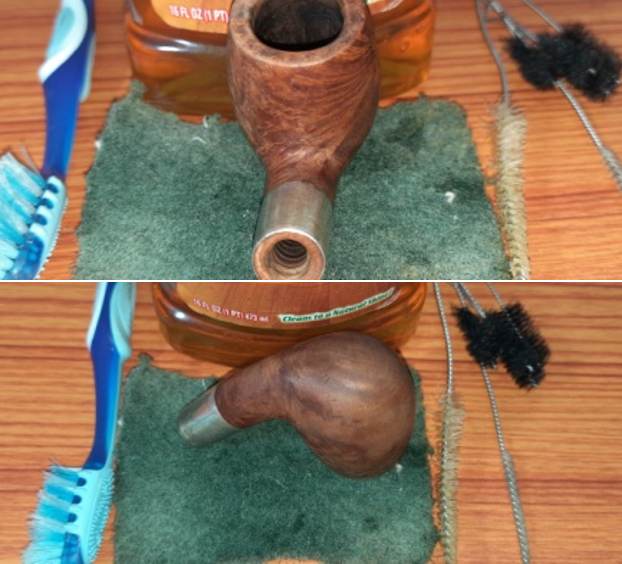 I simultaneously cleaned the shank internals with the detergent and hard bristled shank brush and set the stummel aside to dry out naturally.
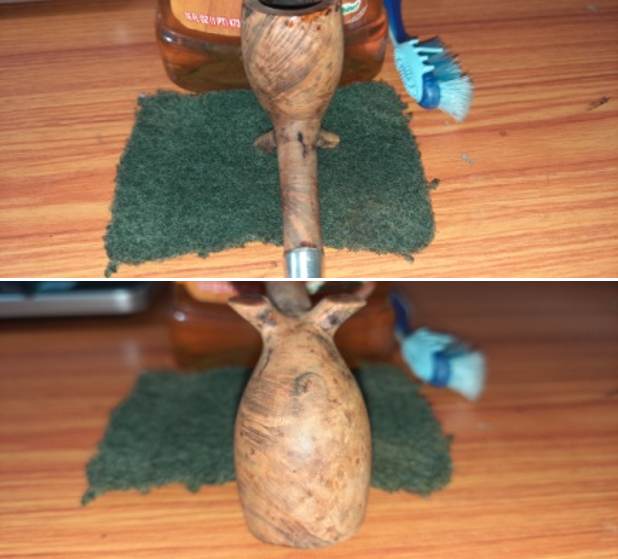
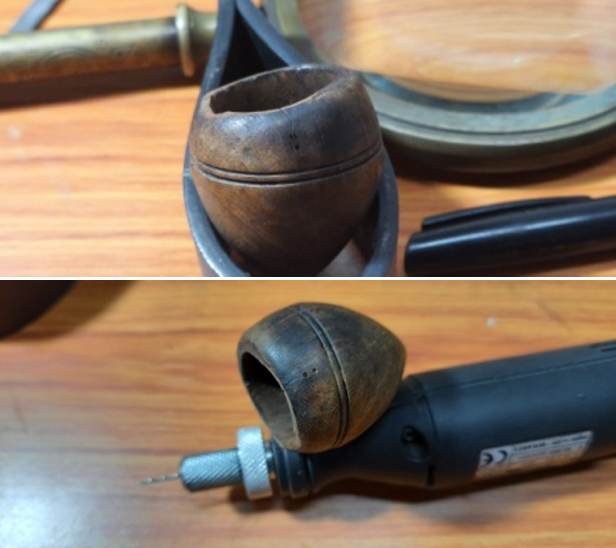
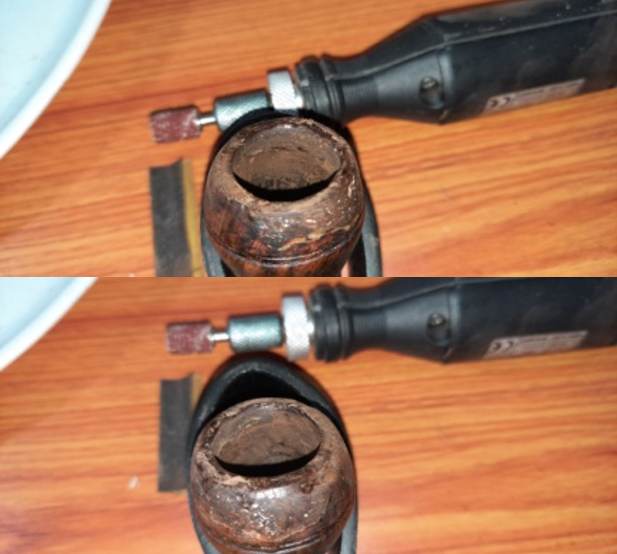
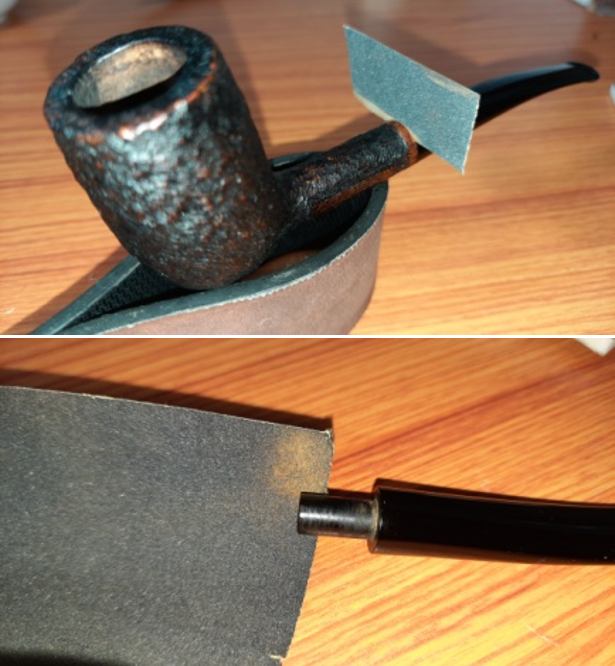
 Next, I addressed the various stummel repairs that I have mentioned above. First issue that I addressed was that of the rim top surface dents/ dings, charred inner rim edge and chipped outer rim edge. To address the rim top damage, I topped the rim surface on 220 grit sandpaper till the surface was nice and even. I hate losing any briar and prefer to restrict topping to the barest minimum that is required. The damage to the outer rim edge, though greatly eliminated, can still be seen to the left side. This would be taken care of by creating a slight bevel to the outer edge. The charring to the inner rim edge is still visible (encircled in green). These issues could be completely addressed by the process of topping but the extent of topping that would be required to do so would alter the bowl height and also the entire stummel profile.
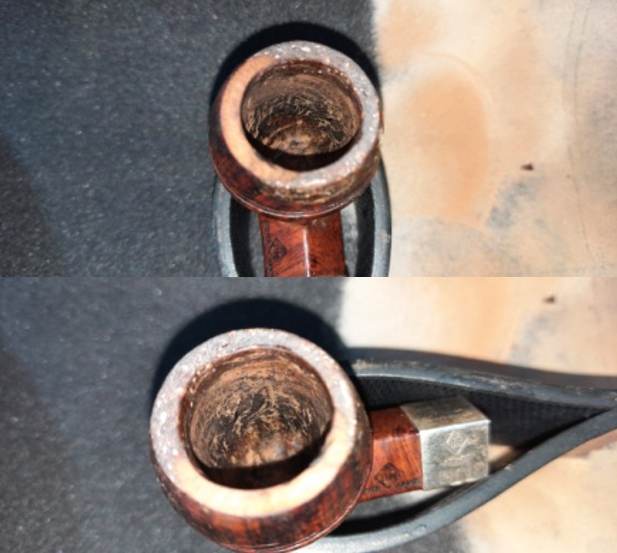
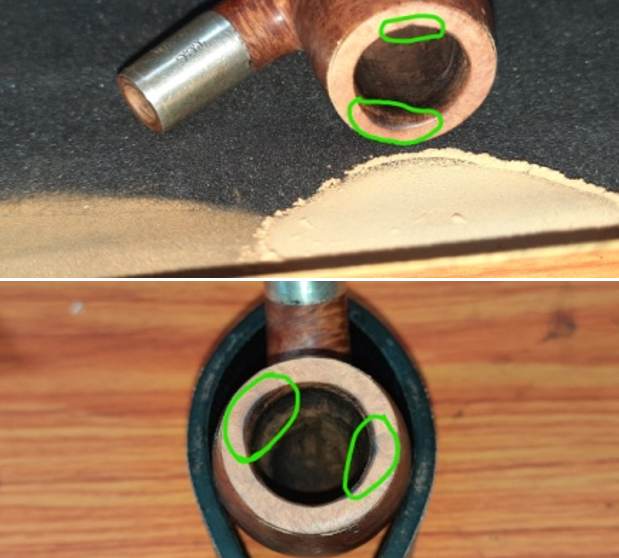 With a folded piece of worn out 180 grit sand paper pinched between my thumb and forefinger, I carefully created a bevel over the inner and outer rim edge and addressed the issue of charred inner rim edge. The rim edges appear much better at this stage and should further improve the aesthetics of the stummel when the bevel and stummel is polished using the micromesh pads.
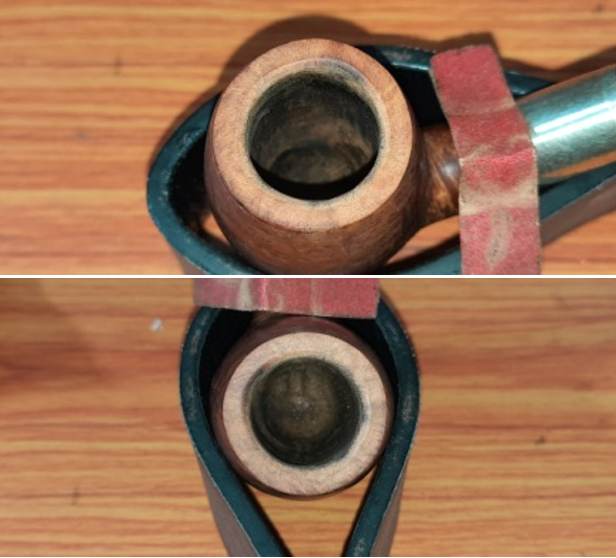
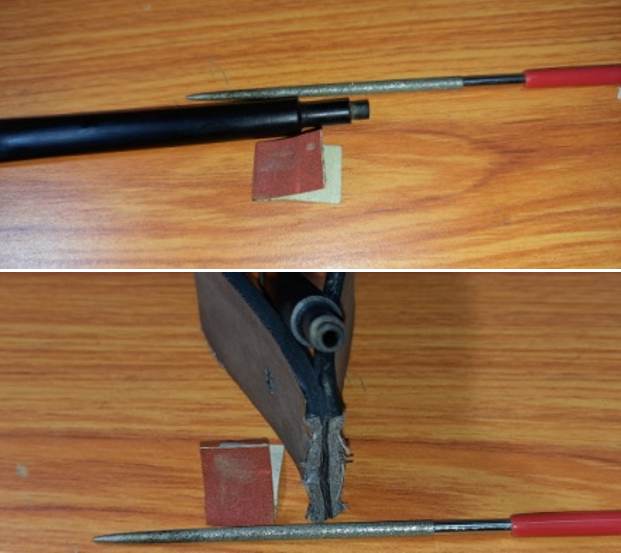
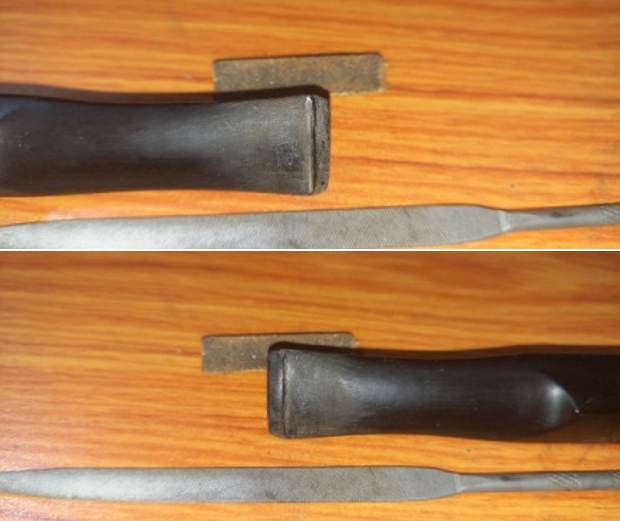
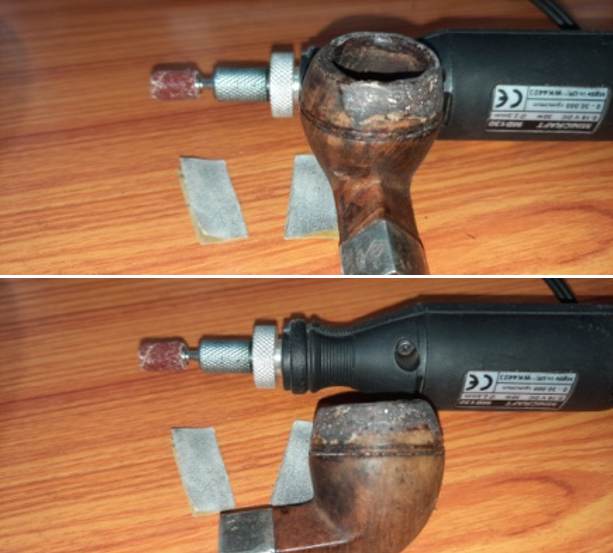
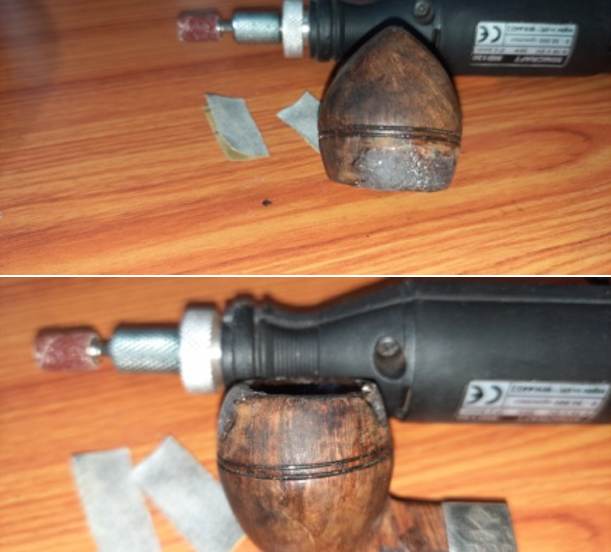
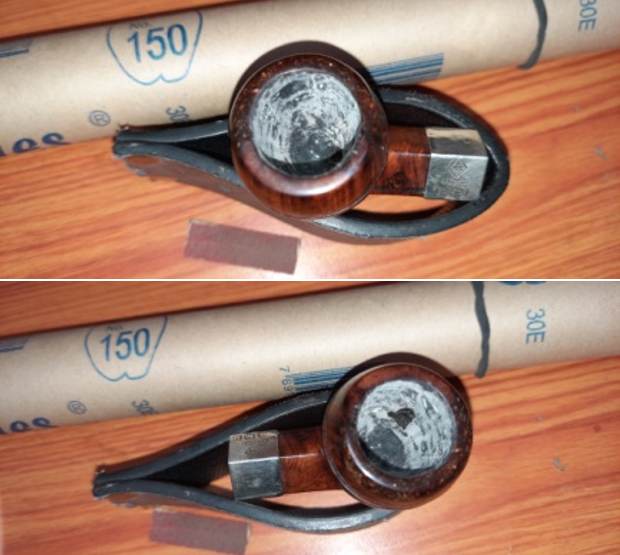
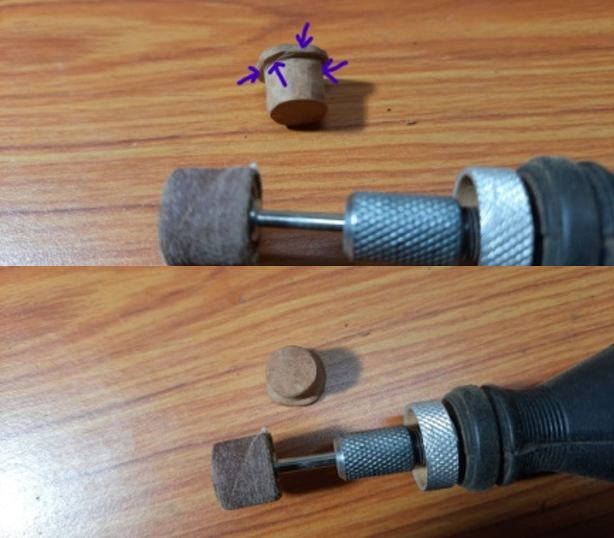
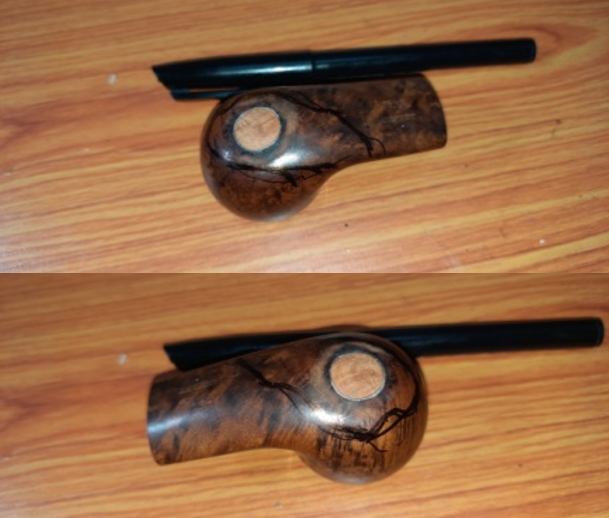
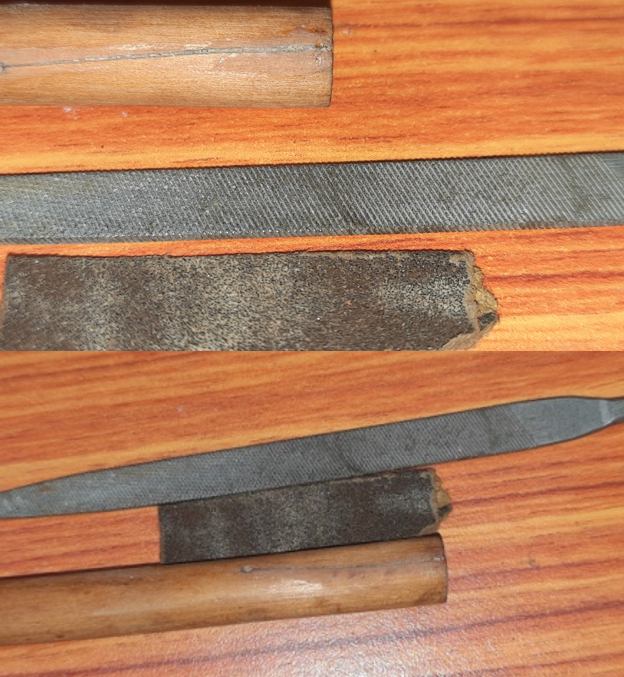
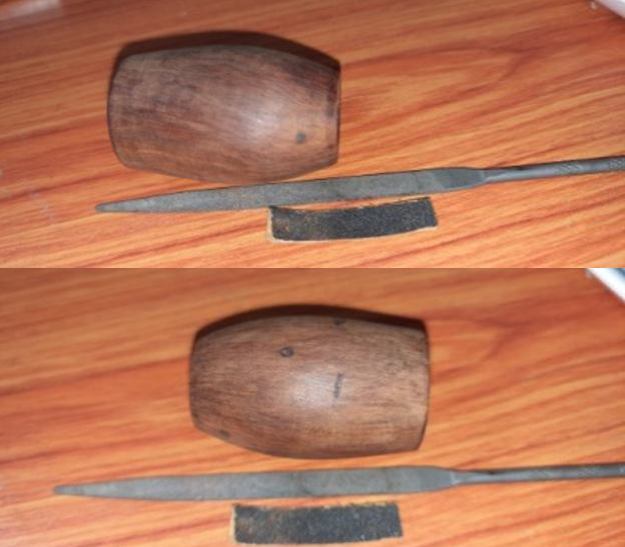
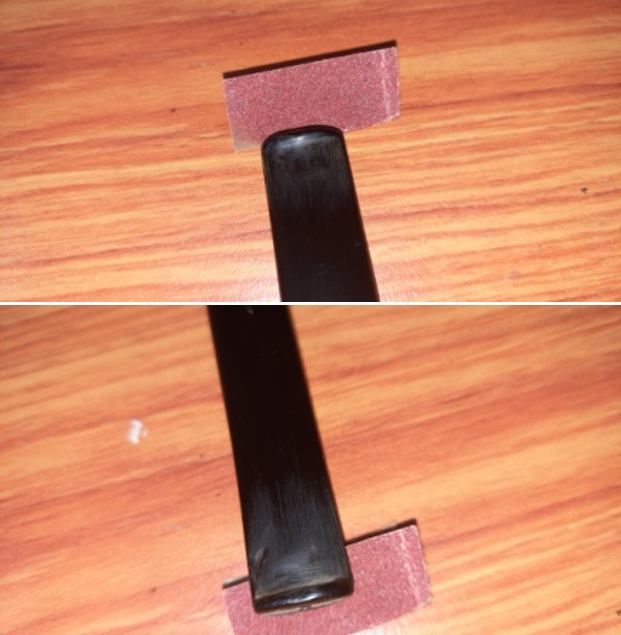
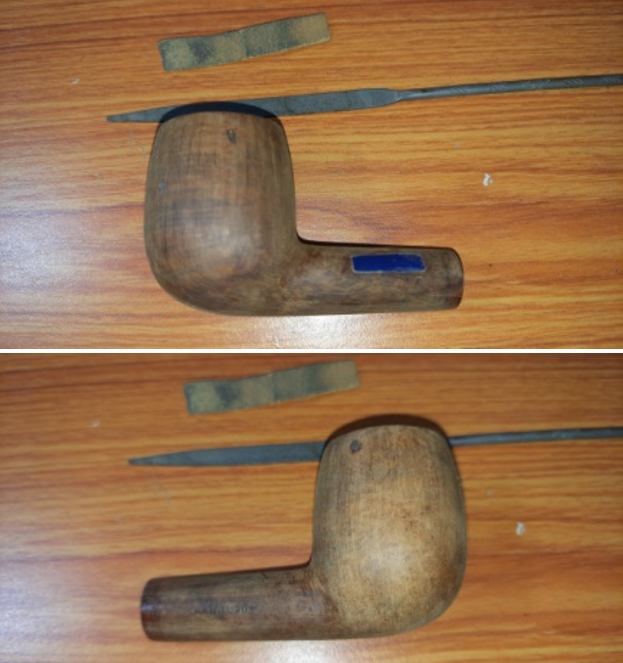
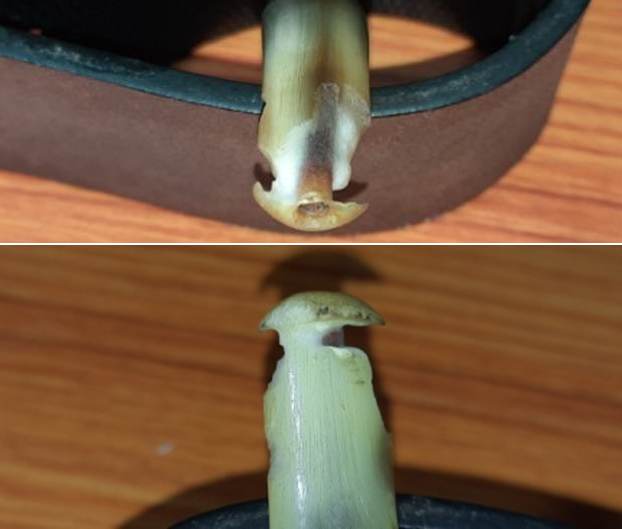
 While I was working on the stummel, the stem fills had cured completely and as I was keen to shape the stem fills, I kept the stummel aside and worked on the stem repairs. I used a flat needle file to roughly match the fills with the rest of the stem surface. I further evened out the fills by sanding the stem surface with a folded piece of 150 grit sandpaper. All this filing and sanding had exposed a few air pockets (indicated with green arrows) and a portion of the upper button edge (encircled in indigo) that would need to be further rebuilt.
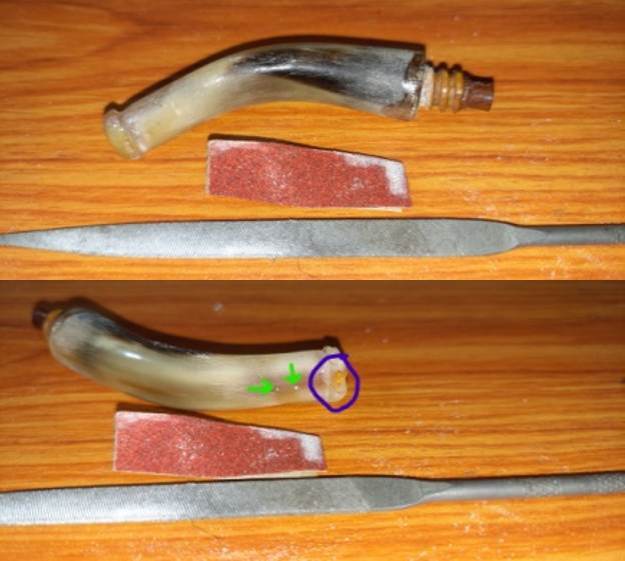 Since I had rebuilt the stem face at the tenon end, it was imperative for me to check the alignment of the stem against the shank face when seated. My expected fears came true and how! The stem was grossly overturned to the right.
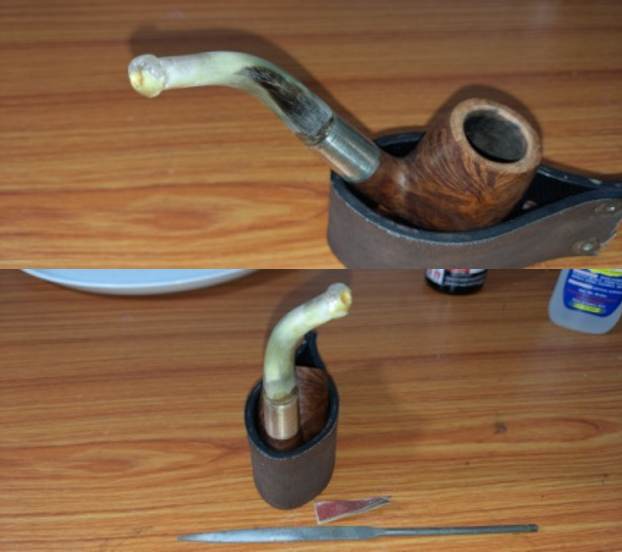 The general rule of thumb is that if the overturn is to the right, one needs to sand the left side so that the threads could complete the turn and achieve a perfect alignment. However, this need to be done extremely carefully as any excess sanding of the left side could result in a left overturn. Using needle files and a 220 grit sandpaper, I sand the excess fill from the left side, checking very frequently for the alignment. A few hours and numerous checks later, I achieved a perfect alignment of the stem and shank face. My mantra of “less is more” was always playing at the back of my mind as I worked on the stem face. Now I could move ahead with addressing the air pockets and rebuild of the button edge over the upper stem surface.
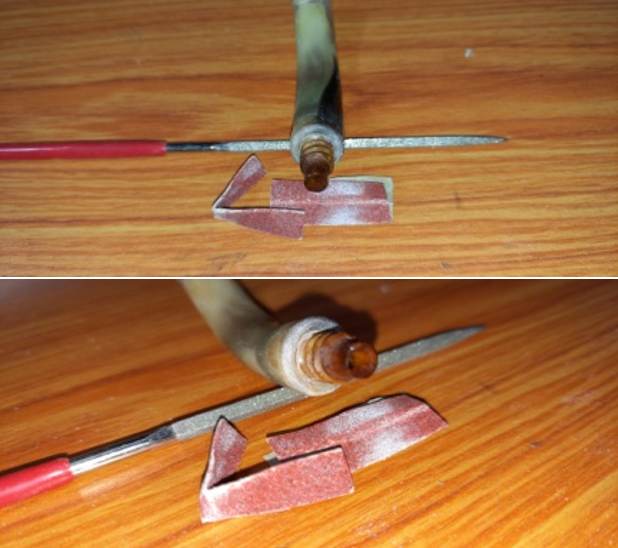
 I filled the air pockets and rebuilt the button edge over the upper surface with CA superglue and once the glue had cured, with a needle file and sandpaper, I reshaped and evened out the fills to match the rest of the stem surface.
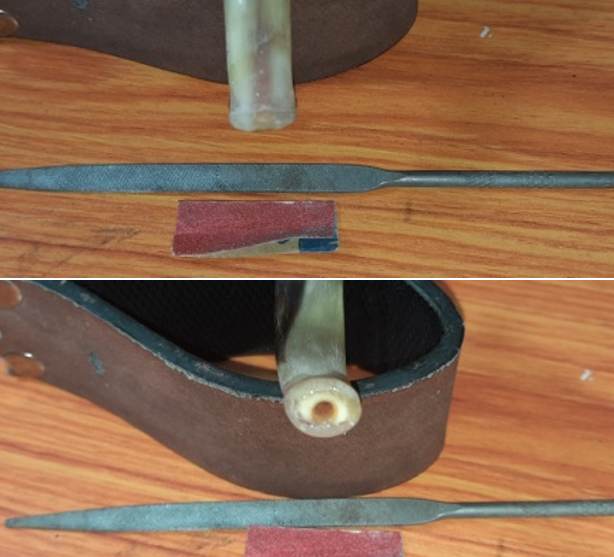
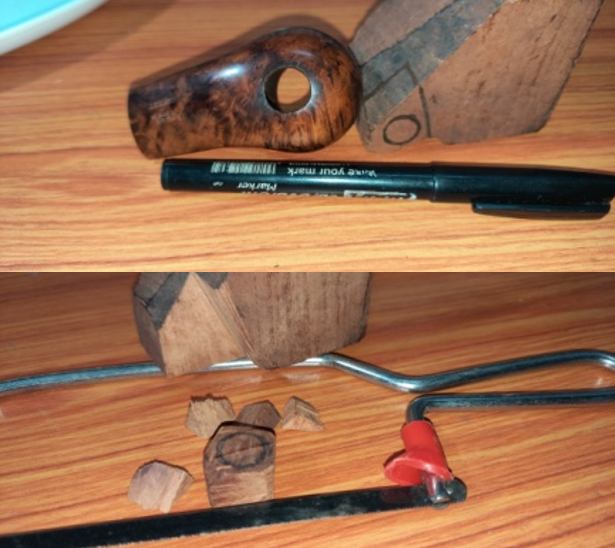
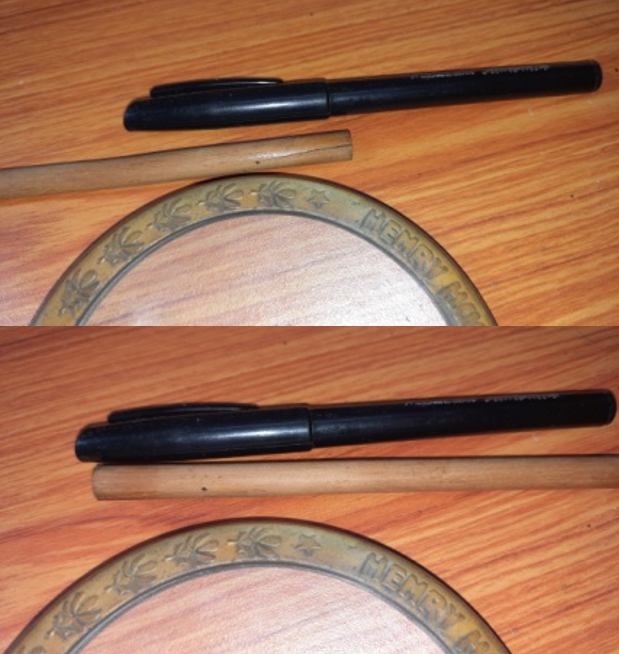
 Next, I decided to address the dents and dings on the stummel surface, notably at the foot and lower sides of the bowl. Using a marker pen, I marked all the major areas with dents and dings as I had decided to leave the minor ones as they were. I heated my fabricated knife over the flame of a candle, placed a wet Turkish hand towel over the marked areas and steamed out the dents by placing the heated knife over the towel. The steam generated by placing a hot knife on the wet towel helps the briar to expand within these dents and dings, making for a smooth and even surface. The stummel appears much better and smooth at this juncture.
 To further even out the remaining minor dings, I lightly sand the entire stummel with a folded piece of worn out 180 grit sand paper.
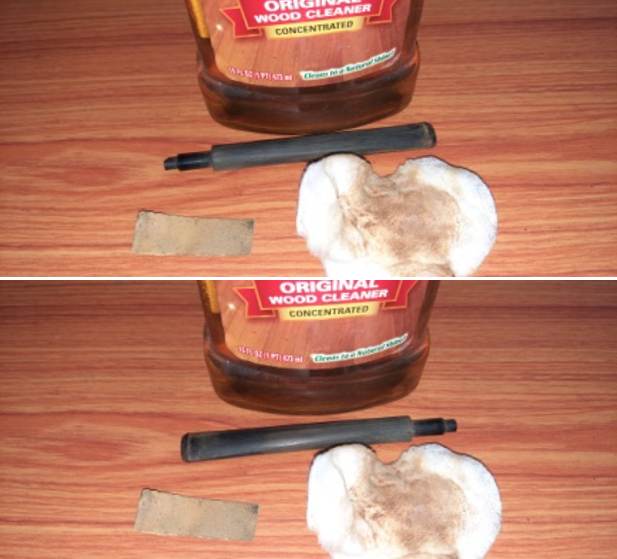
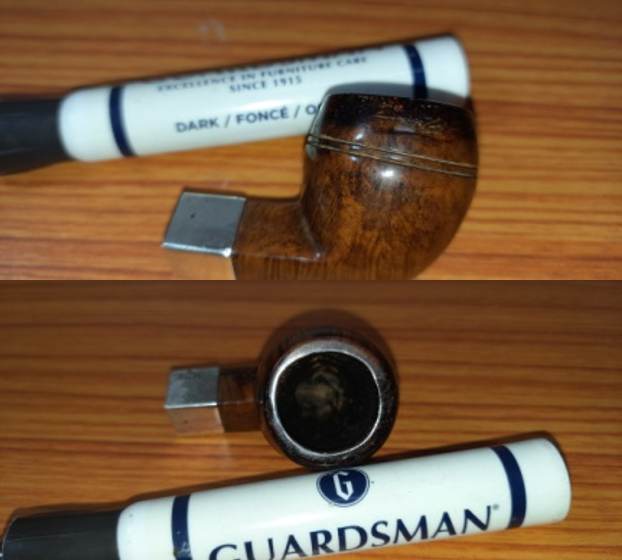
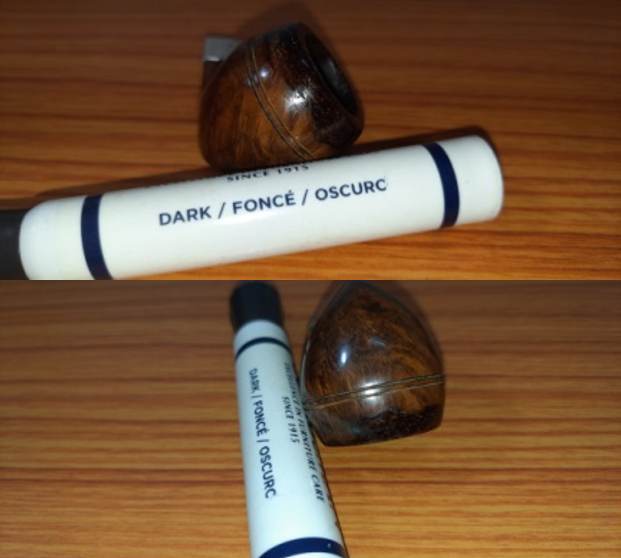
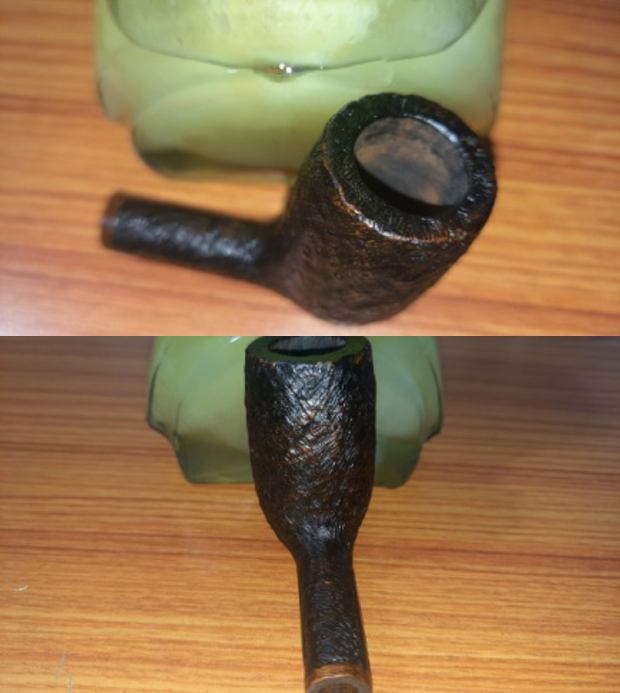
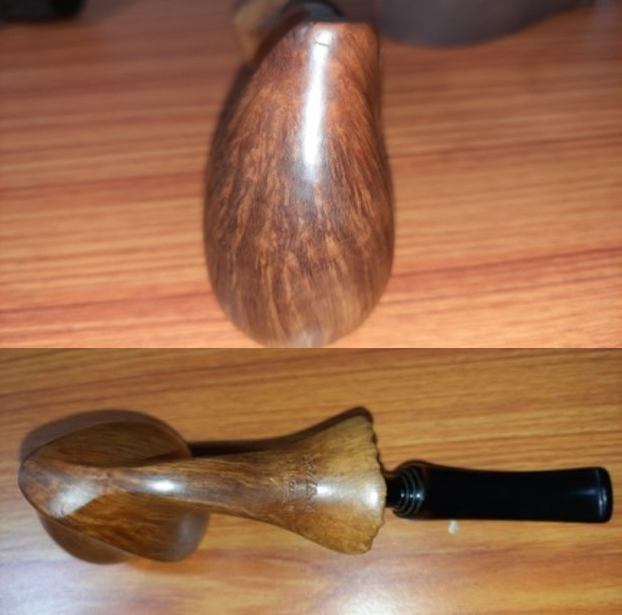
 I followed it by wet sanding the stummel with 1500 to 12000 grit micromesh pads, wiping frequently with a moist cloth to check the progress. I rubbed a small quantity of “Before and After Restoration Balm” deep into the briar with my finger tips and let it rest for a few minutes. The balm almost immediately works its magic and the briar now has a nice vibrant appearance with the beautiful grain patterns displayed in their complete splendor. I further buffed it with a microfiber cloth to deepen the shine.
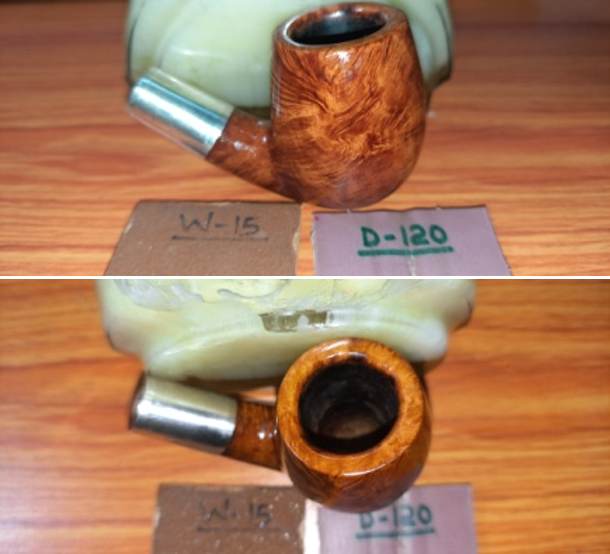
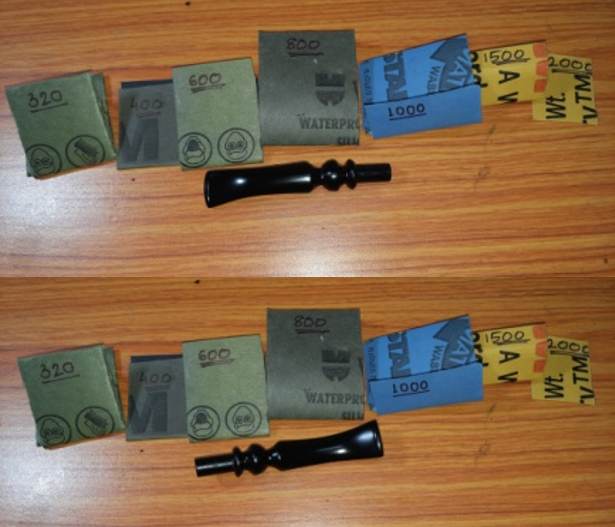
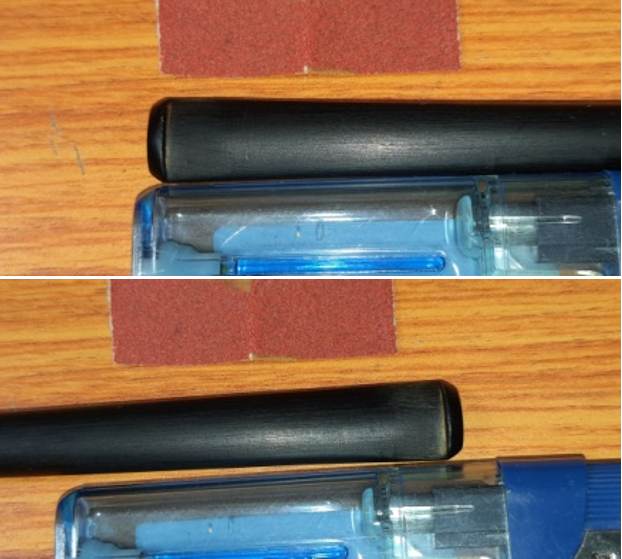
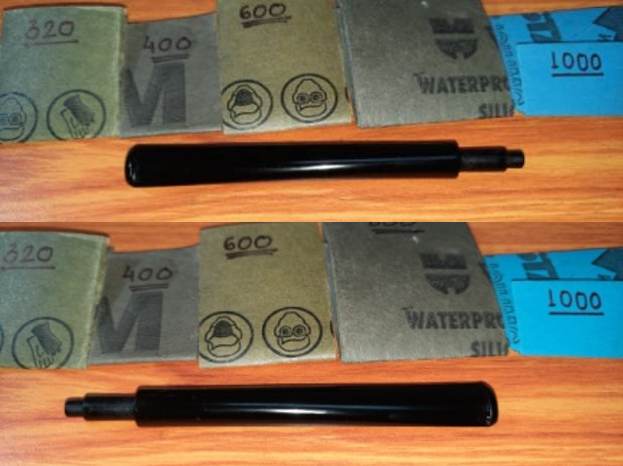
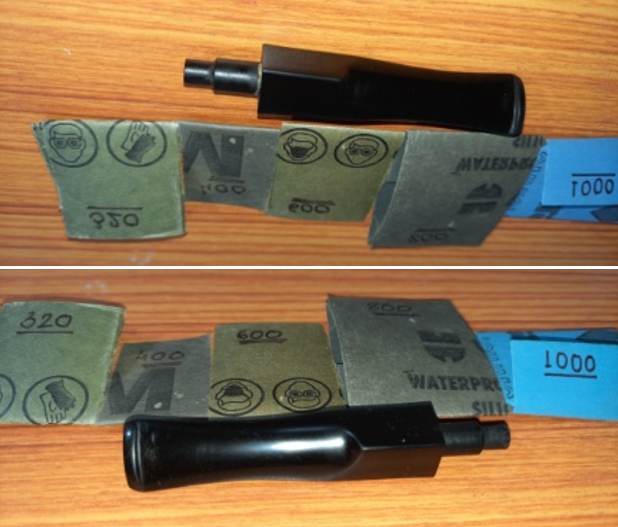
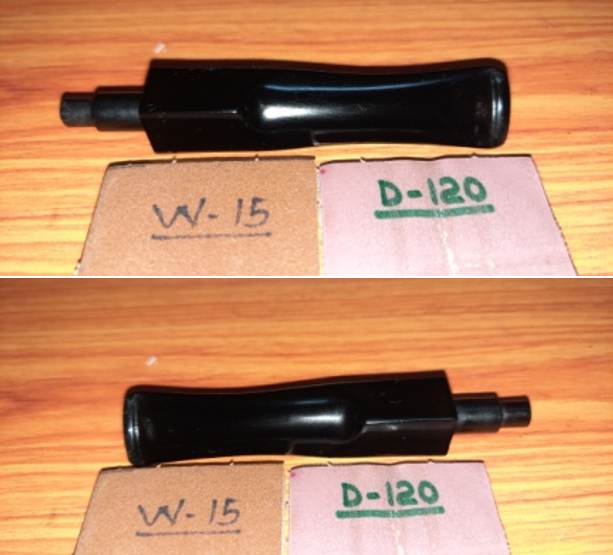
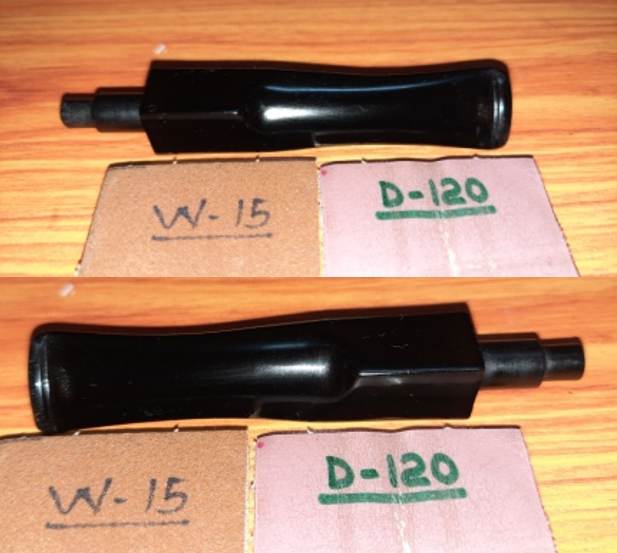
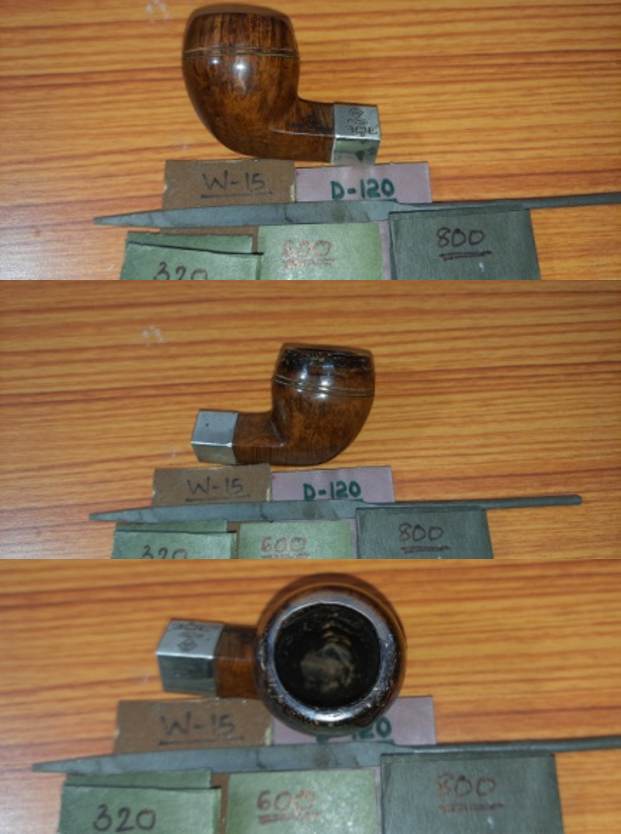
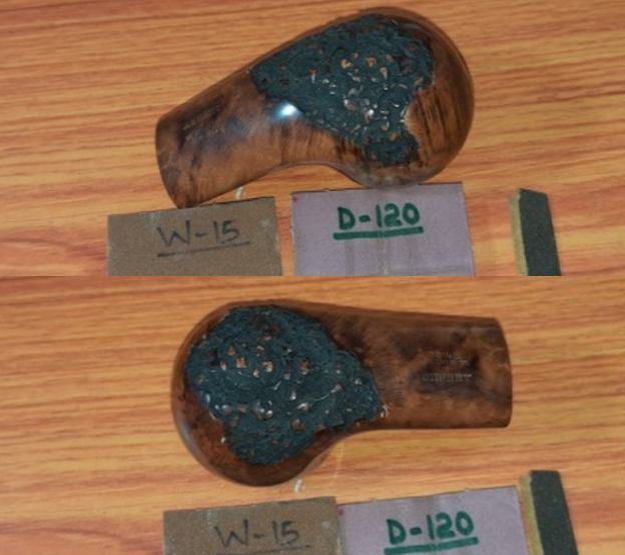
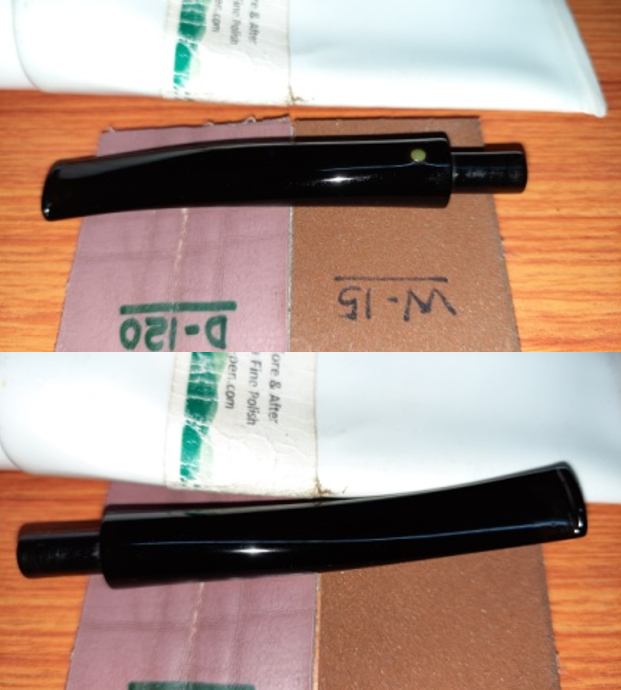
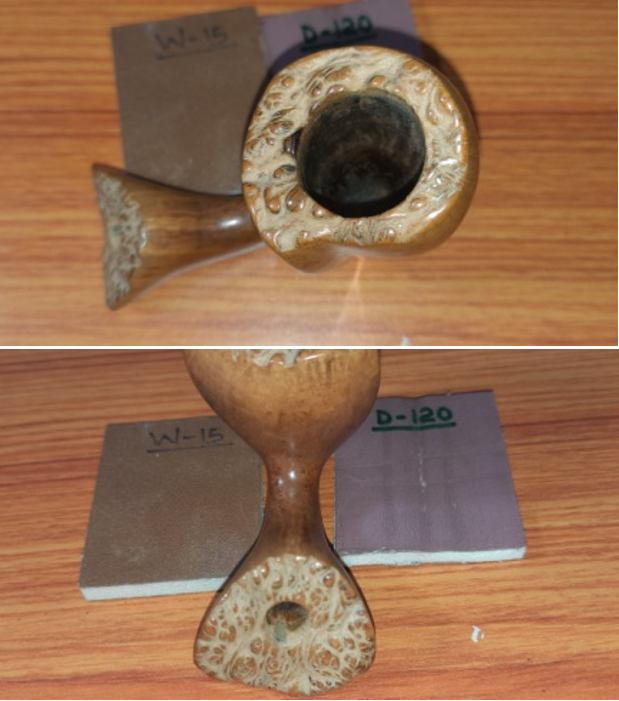
 Now I needed to work on the stem again. I had completed the refilling/ rough reshaping of the damaged stem and now proceed to fine tune the reshaped button edge, rebuilt surfaces and polishing of the stem. I sand the stem with 220, 320, 600, 800 and 1000 grit sandpapers. The coarser grade sandpapers help in achieving exactness of shape and removing excess repair material to match rest of the surface while 600, 800 and 1000 grit sandpapers help in eliminating the sanding marks left behind by the coarse grit papers and imparting a shine to the stem surface. I rubbed a small quantity of EVO in to the bone to hydrate it.
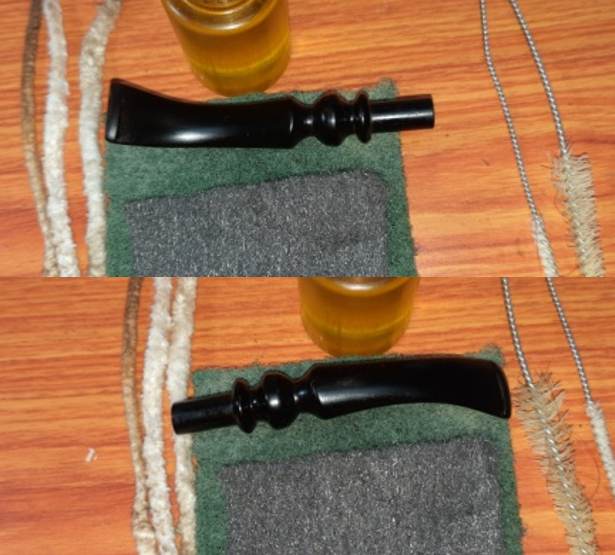
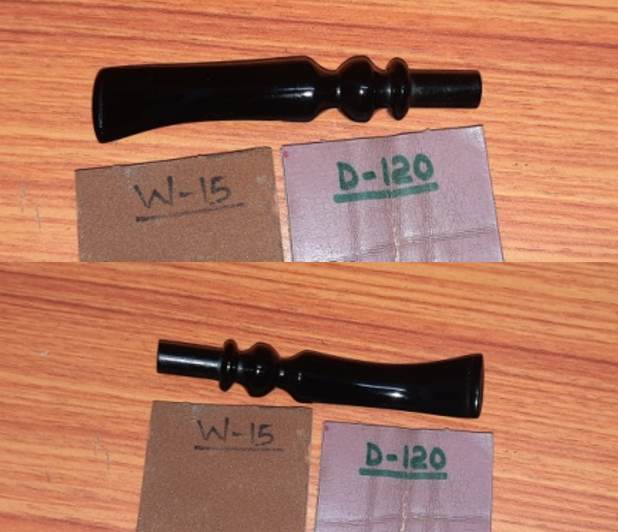
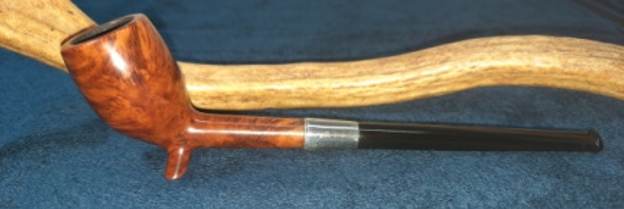
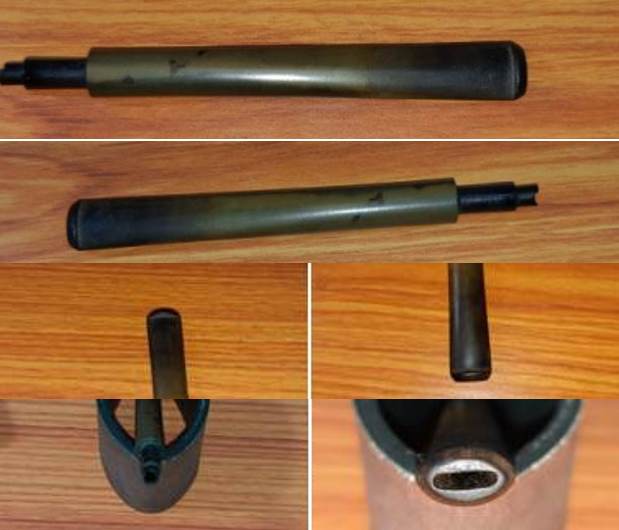
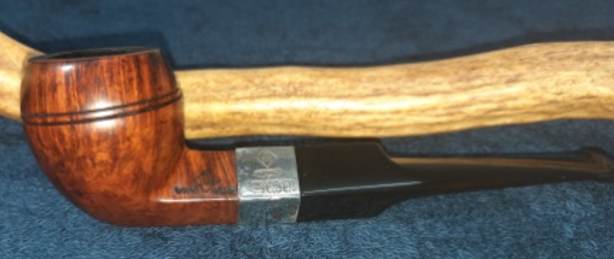
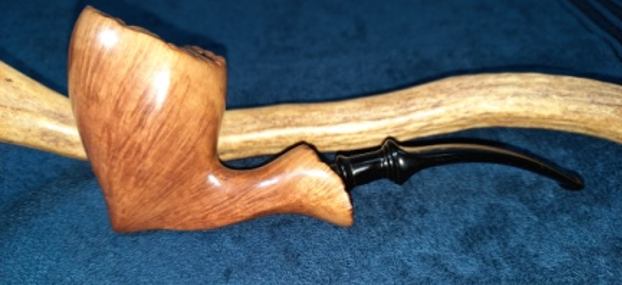
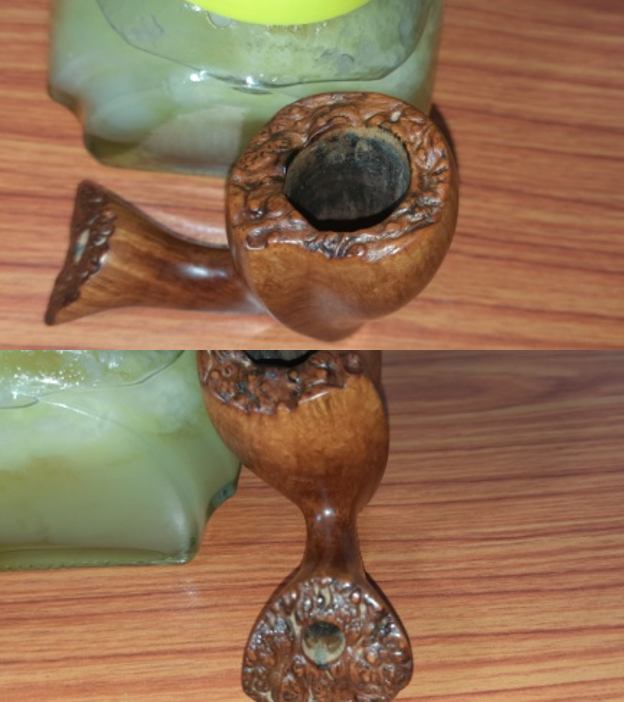
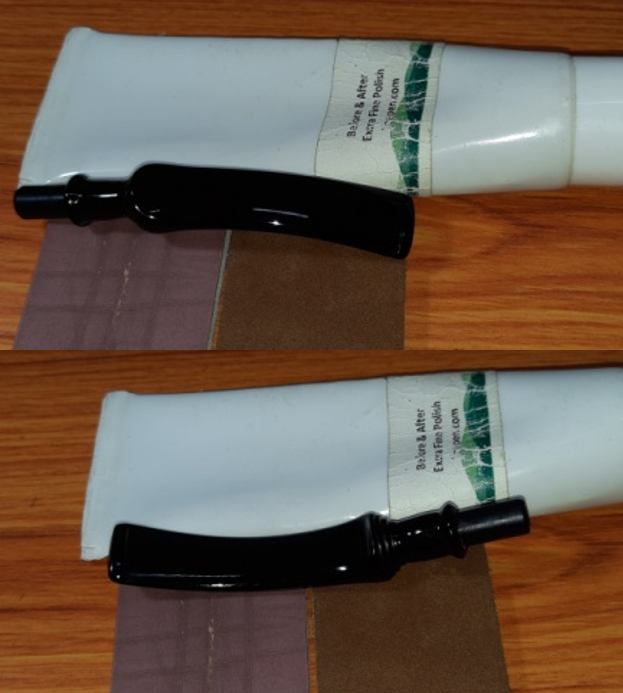
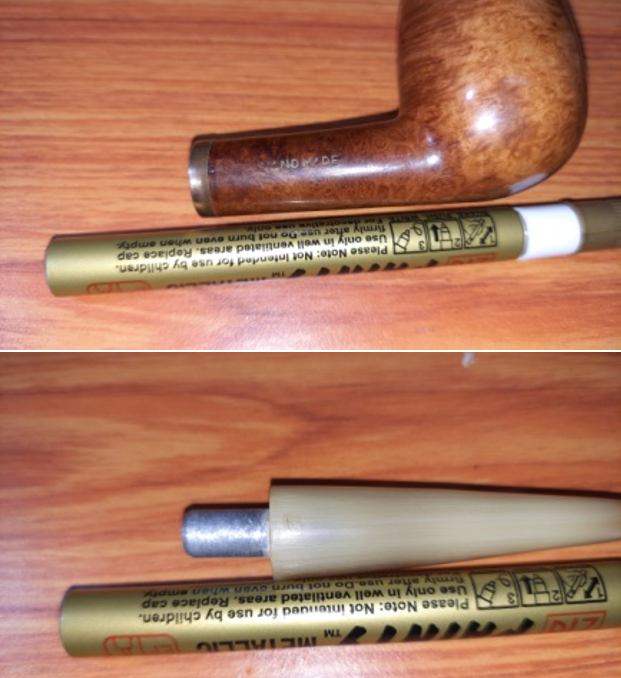
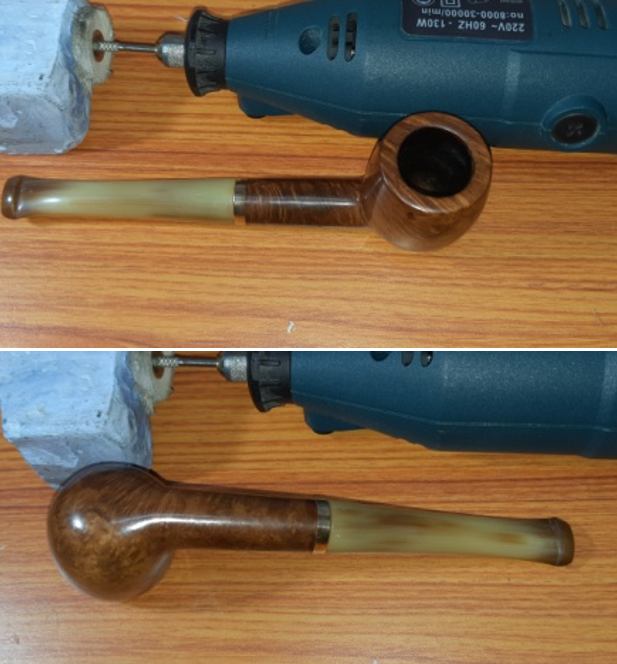
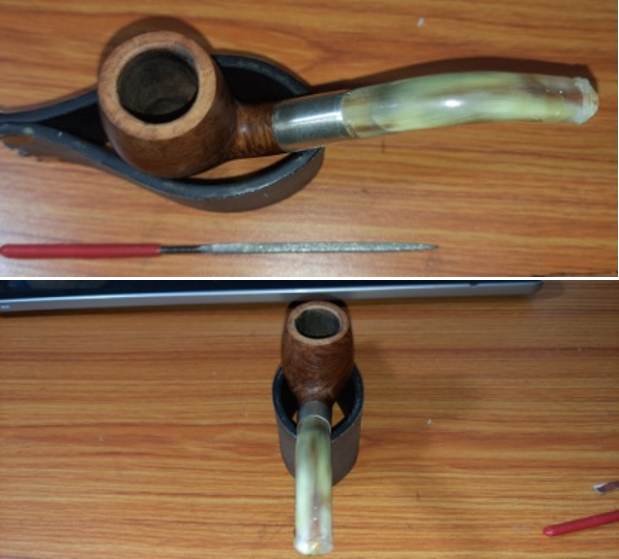
 To bring a deep shine to the horn stem, I went through the complete set of micromesh pads, wet sanding with 1500 to 12000 grit pads. I wiped the stem with moist cloth after each pad and rubbed it down with Extra Virgin Olive oil to rejuvenate the bone stem. I am pretty happy with the way the stem repairs have shaped up and also the button has a nice delicate shape. The finished stem is shown below.
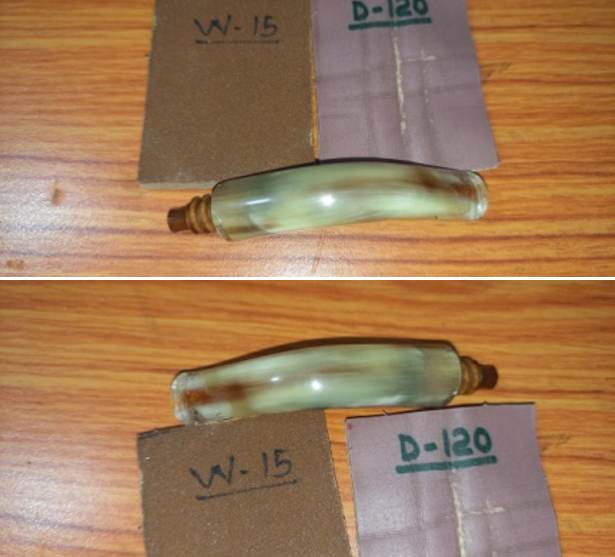
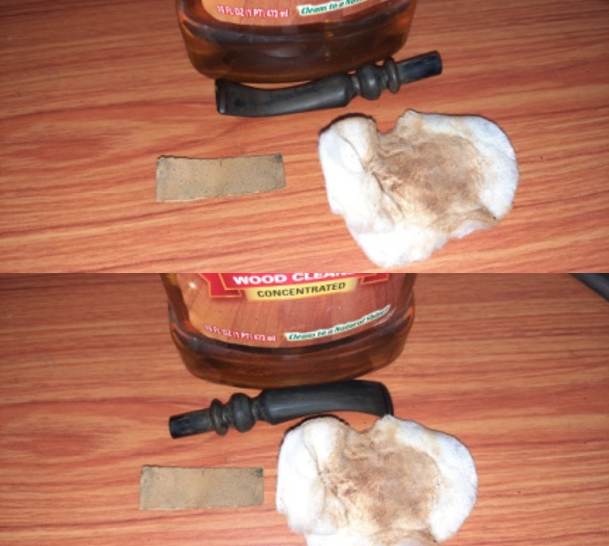
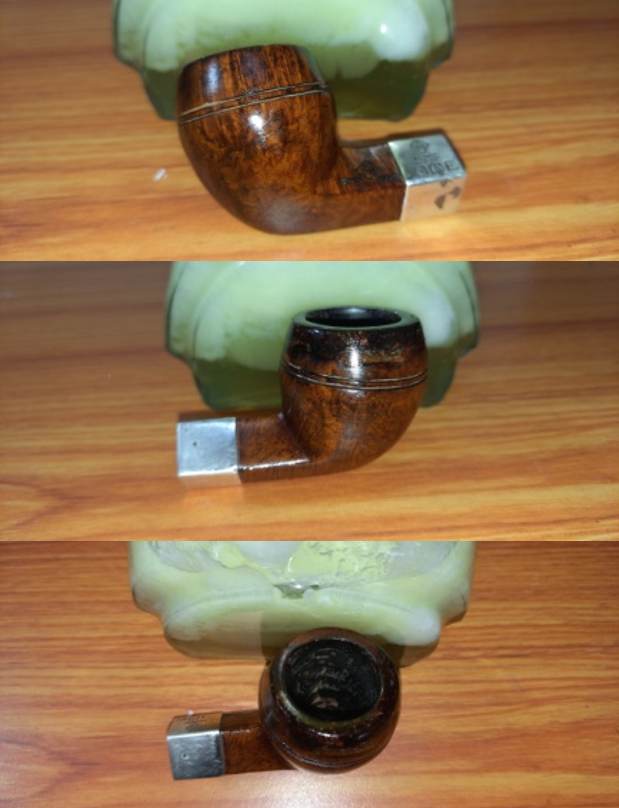
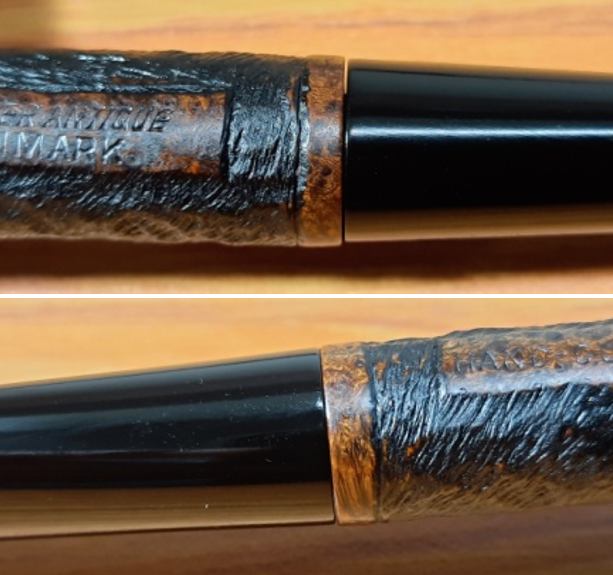
 I cleaned the sterling silver ferrule at the shank end with “Pitambari”, a powder that is available all across India that is used to clean and shine brass and silver ware. Even Abha uses it to polish her silver and gold jewelry and cutlery. This compound is a very fine powder and is least abrasive with fantastic results. The band is now a nice shining piece of sterling silver and will provide a nice contrast between the shining horn stem and the dark brown stummel.
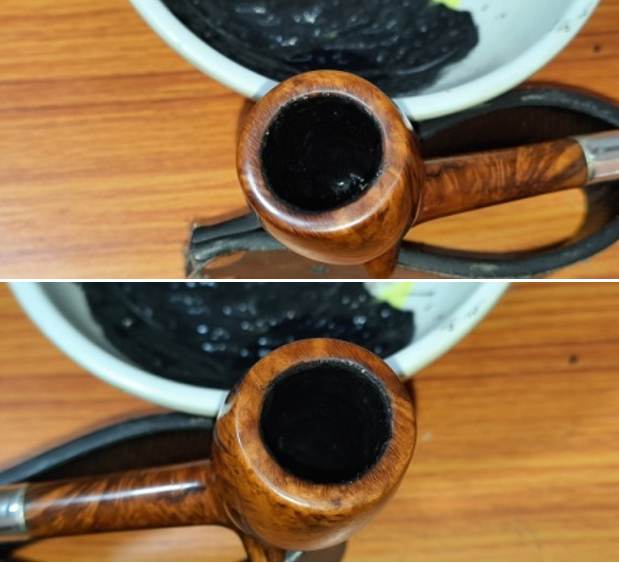
 To complete the restoration, I mount a cotton cloth buffing wheel on to my hand held rotary tool and polished the stummel and stem with Blue Diamond compound. This compound helps to remove the minor scratch marks that remain from the sanding.
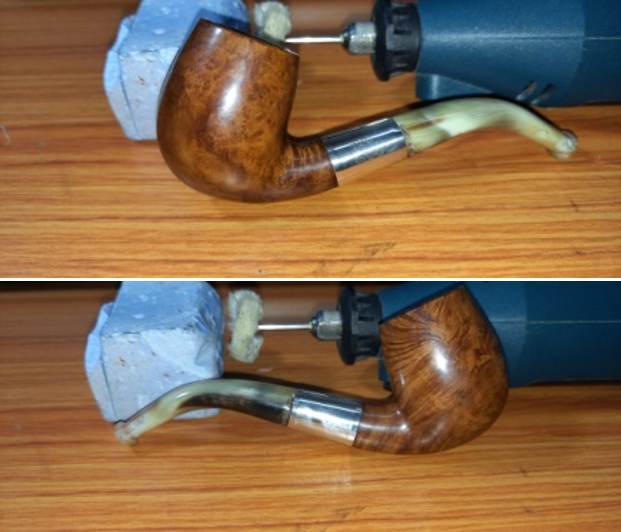
 I mounted another cotton buffing wheel that I have earmarked for carnauba wax and applied several coats of the wax. I finished the restoration by giving the entire pipe a rigorous hand buffing using a microfiber cloth to raise the shine further. The finished pipe looks amazingly beautiful and is ready to join my collection. I only wish it could share with me its life story of the past years while I enjoy smoking my favorite Virginia blend in it or maybe an English blend or maybe just keep admiring it!! I wish to thank all the esteemed readers for reading through this write up and thereby being a companion in my journey.