Tag Archives: Paresh Deshpande article

A Simple Refurbishing Of A Meerschaum Bulldog From Renowned Turkish Pipe Carver Ismet Bekler


Blog by Paresh Deshpande

I had completed the restoration and repairs of an early (probably 1920s) cased pair of meerschaum pipes with Amber stems and had sent this pipe out to its new owner. Though the end results were very satisfying, this pair had proved to be more than handful and had tested all my skills and patience. Well, all’s well that ends well! The feedback I got from my friend as to the smoking qualities and aesthetics was greatly satisfying.

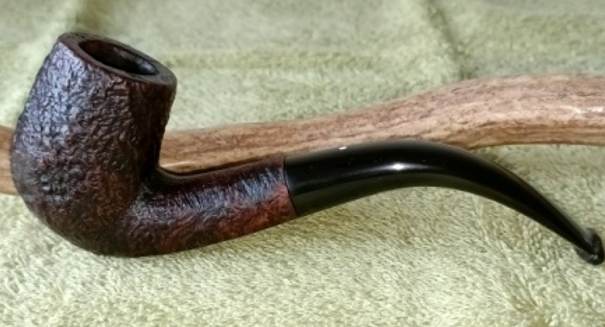
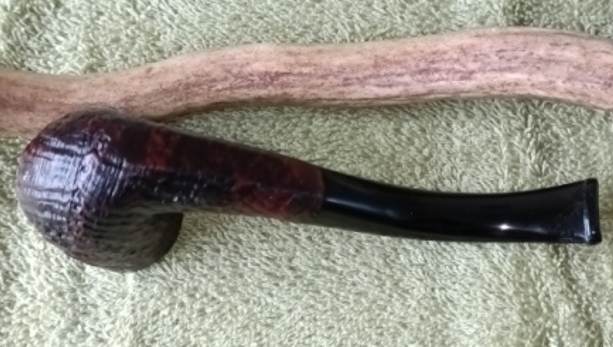
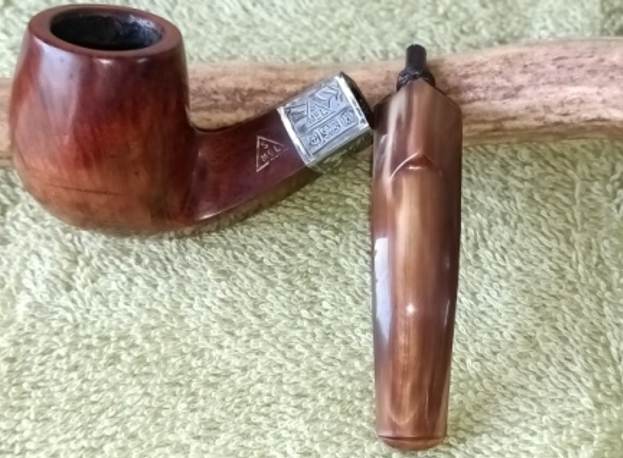
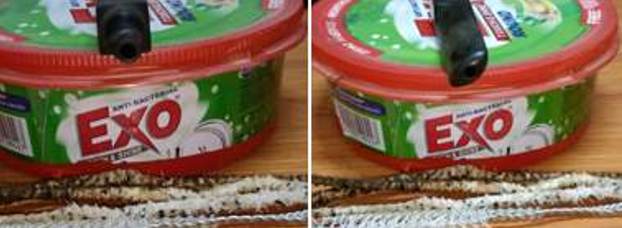
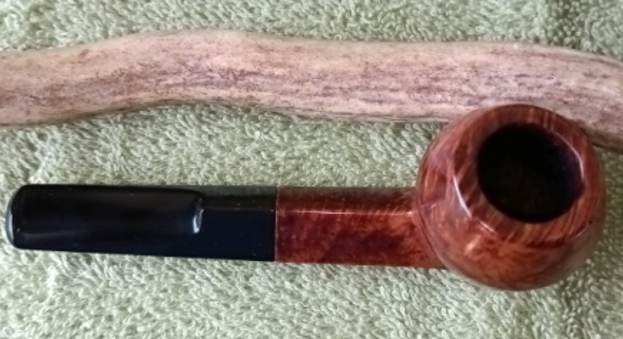
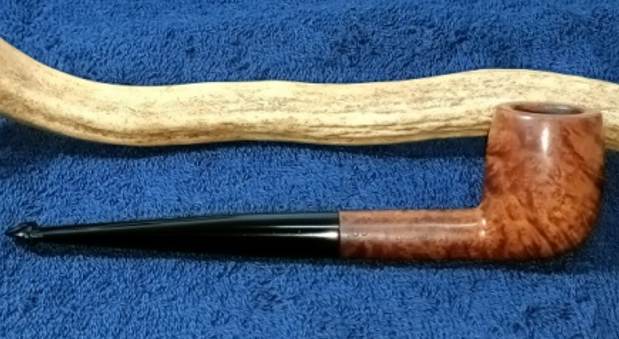
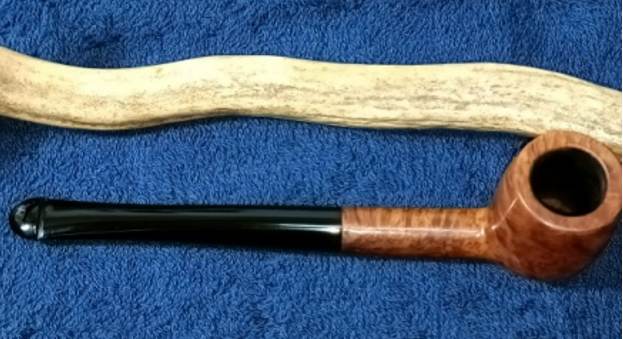
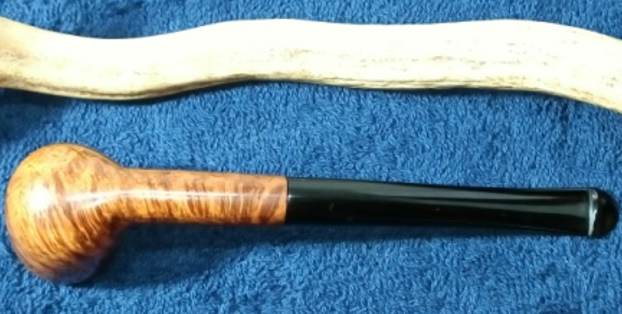
From amongst the pile of 10 odd Meerschaum pipes that awaits restoration, I selected a cased Meerschaum pipe that appeared to be in great condition requiring minimal work. That being one reason for selecting this particular pipe, the second and important reason was the classic Bulldog shape which I am quite fond of (in fact I just love all the classic British shapes). This is a large sized meerschaum pipe with a tortoise shell acrylic stem that is beautifully cut, most likely hand cut. The following picture is of this meerschaum with a group 4 sized Dunhill Bulldog and should give you an idea of the size of this pipe.The only stamping that could be seen on this pipe is on the left shank surface and is stamped as “I. BEKLER”. The stem is devoid of any stampings.This is the first time that I have worked on a pipe that is stamped as such. Curious to know more about this pipe maker, I visited pipedia.org and a search on this site lead me to a Turkish pipe company, CAO. (https://pipedia.org/wiki/CAO)

It was revealed that Ismet Bekler was a pipe carver who had carved many meerschaum pipes for CAO. I have reproduced certain relevant snippets of information from that article on pipedia.org.

C.A.O International, Inc. is the producer of one of the country’s top lines of premium cigars, cigar accessories, Meerschaum pipes, and pipe tobaccos. CAO’s Meerschaum pipes are smoked by presidents, senators, actors and other dignitaries. CAO was founded in 1964 by Cano A. Ozgener. Using his initials as the company logo.

Cano Ozgener’s interest in tobacco began on the banks of the Bosporus. Born on January 19, 1937, Ozgener was raised in his birthplace of Istanbul, Turkey, by his Armenian parents. His father was a jeweller, his mother a homemaker. He studied at a Jesuit French grammar school before being accepted into the American-run Roberts College in Istanbul, from which he received a bachelor’s degree in mechanical engineering in 1960.

As a student in Turkey, Ozgener enjoyed smoking pipes, especially those made from meerschaum.

Graduating from Columbia in 1964 with a professional engineering degree, Ozgener was recruited by DuPont to work in the firm’s Kinston, North Carolina, plant. It was during his stint in the textile division at the age of 27 that he came across some imperfect Turkish meerschaum pipes. In his spare time, he decided to use his engineering abilities to improve the pipes.

As Cano and the tobacconists were not happy with the quality of Turkish meerschaum, he decided to take the meerschaums and change the stems, make modifications and work with the carvers to improve them,” One day a tobacconist from Wilmington, Delaware, asked him where had he found the meerschaum, that he had never seen such quality. Cano told him that he had modified them. The tobacconist then ordered a dozen or two. That was just the beginning.

Ozgener kept his engineering job as he built his company. He worked constantly; his vacations from DuPont were spent attending tobacco conventions, which left little time to relax with his wife and two young children. Finally, in 1977, he left his engineering position to devote more attention to his growing business and to spend more time with his family.

The preceding article is reprinted here with the permission (forth coming) of Bennington Tobacconist

Ismet Bekler carved many meerschaum pipes, which were signed by him and sold by CAO, beginning in 1977. CAO actually trademarked his last name for use in 2001. Other carvers also provided pipes to CAO, and at least one other, Kural, also signed pipes made for CAO.

I surf the net to know more about the pipe carver Ismet Bekler. I chanced upon a website that had some beautiful pipes on sale and most prominently, had many un-smoked meerschaum pipes carved by Ismet Bekler. Here is the link to the website. I have also noted some information about Ismet Bekler which is given in the introduction on this website.

https://www.therightpipe.com/meerschaum-pipes/ismet-bekler-c382.html

Ismet Bekler was a prolific and popular carver. He began carving in the early 1970’s. Bekler is known as one of the best carvers in the history of Turkish Meerschaum. Master carver Bekler passed away in 2018 at the age of 84.

In 1980, the CAO Meerschaum Company contracted with Bekler to sell all of his carvings to them. CAO wanted to make Bekler a more well-known carver in the US and it was at this time he began signing his pipes.

Thus, from the above, my guess would be that this pipe is from the period post 1980 but could be pre- 2001 since it is signed in full. However the lack of CAO in brass logo on the stem makes matters murky. Any inputs on this would definitely help me and other readers to know more about this pipe maker whose demise has left a void in the pipe carver’s community.

Initial Visual Inspection
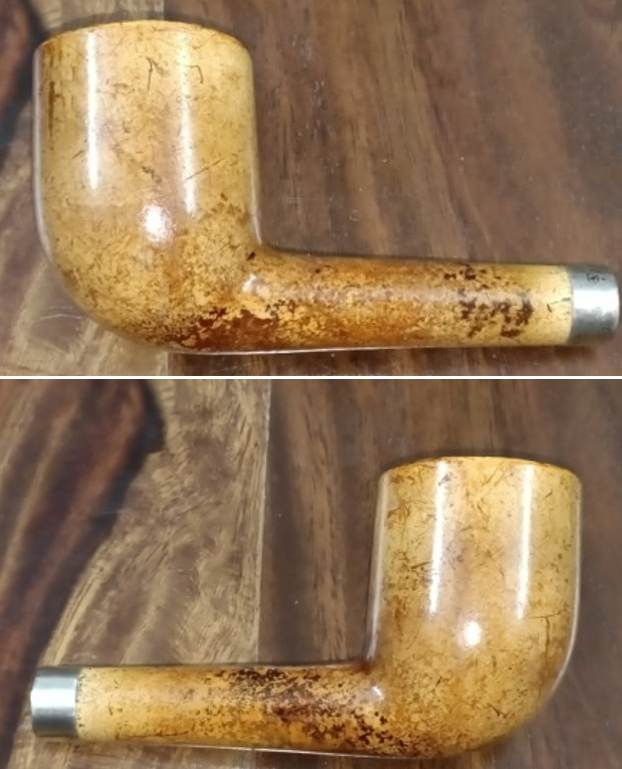
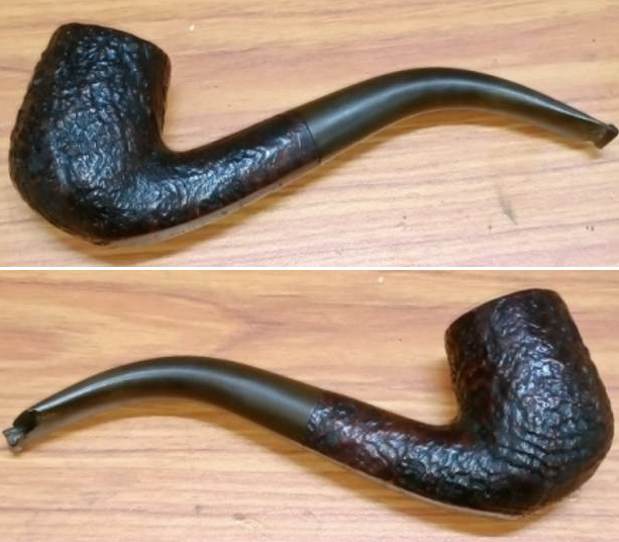
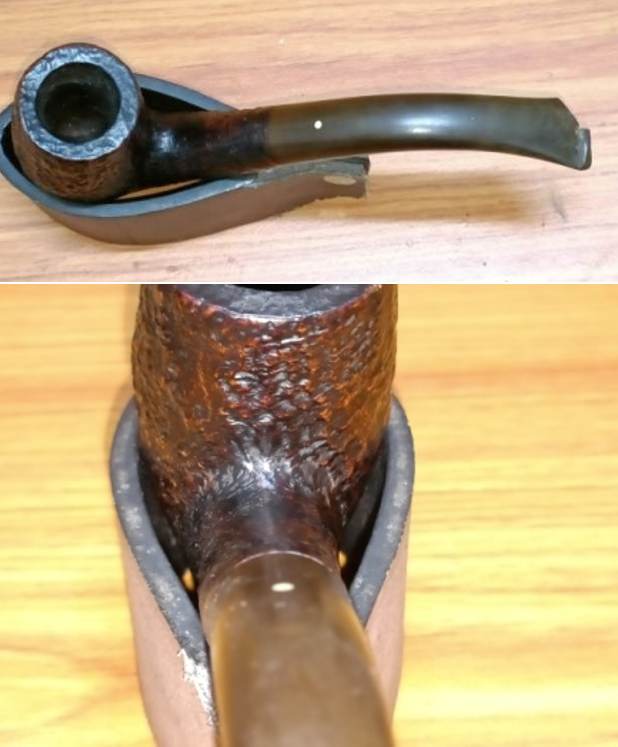
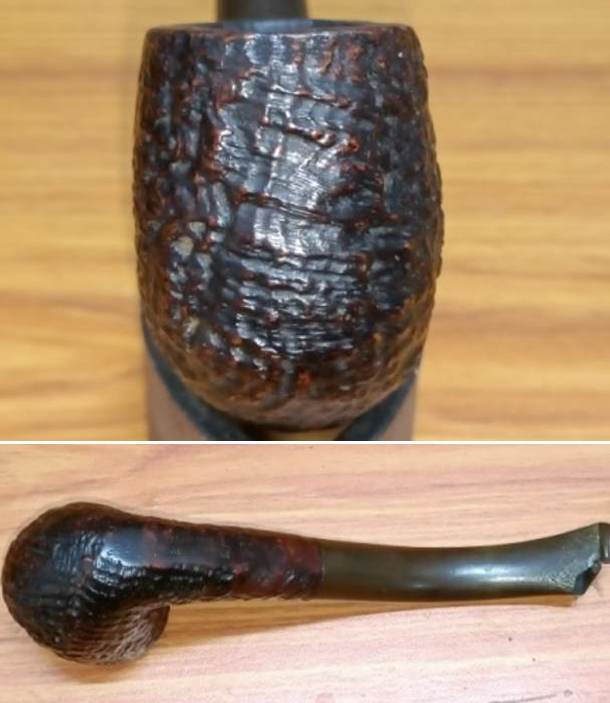
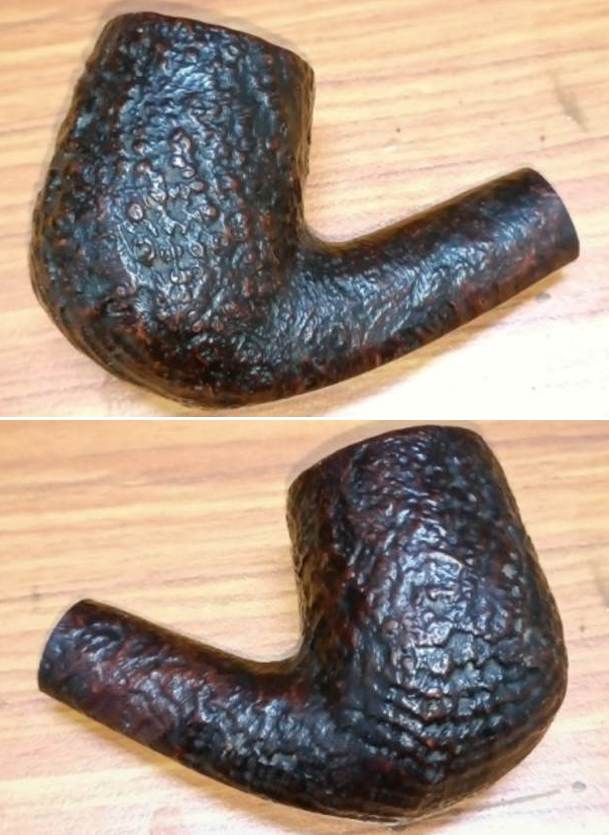
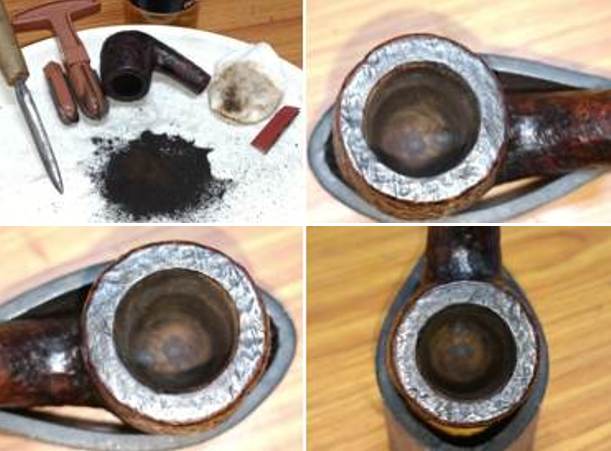
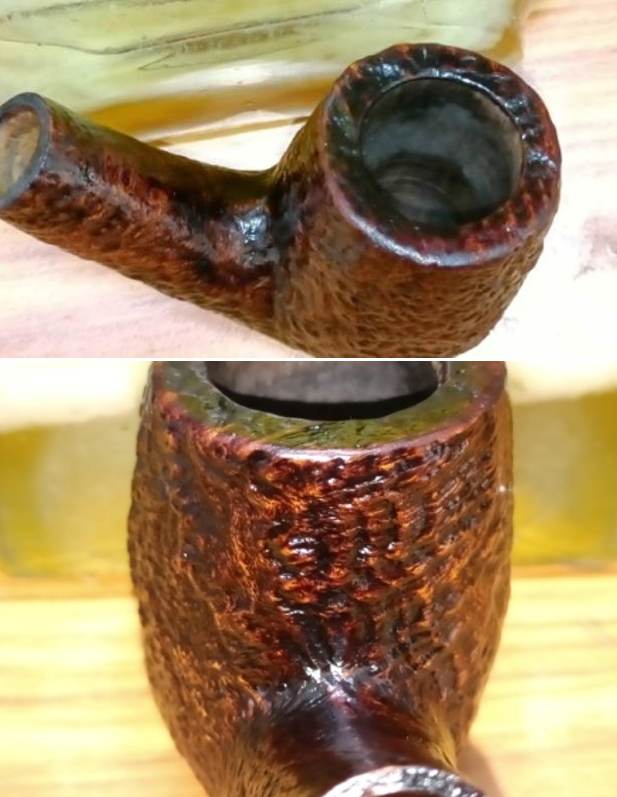
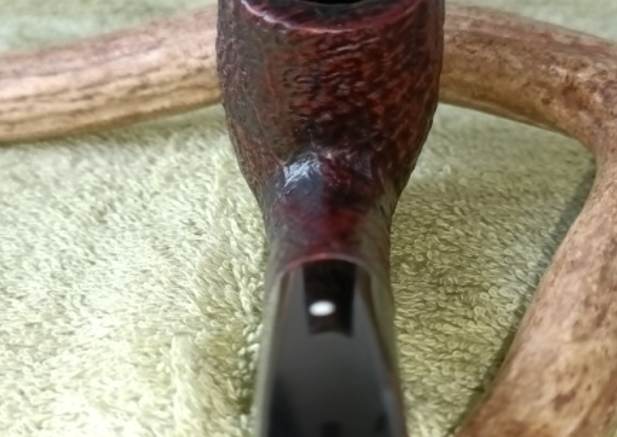
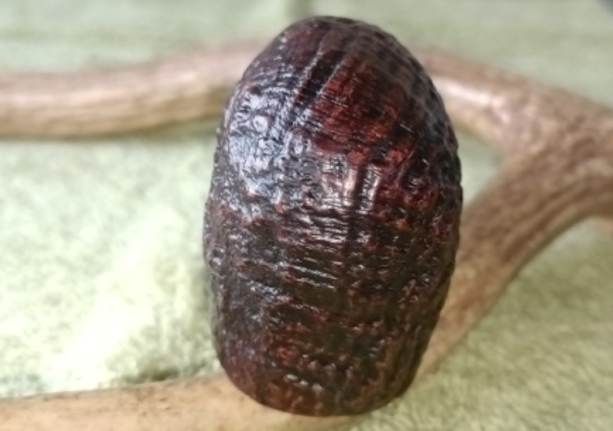
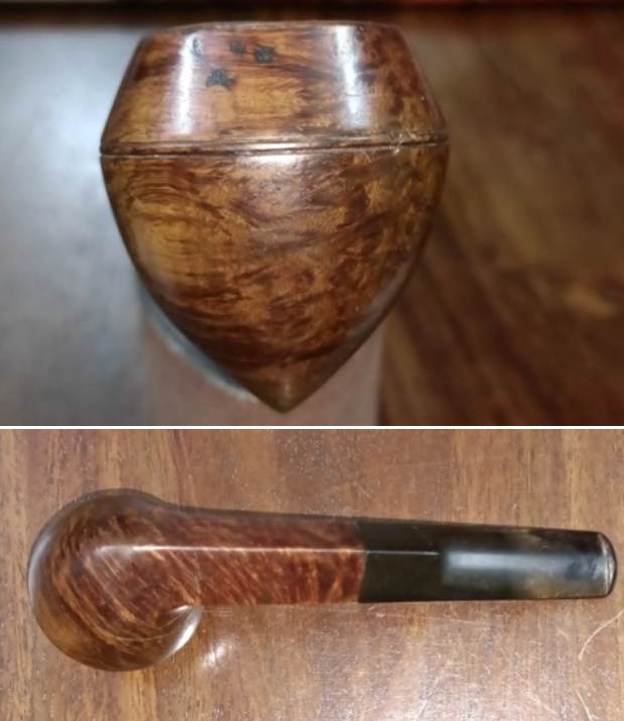
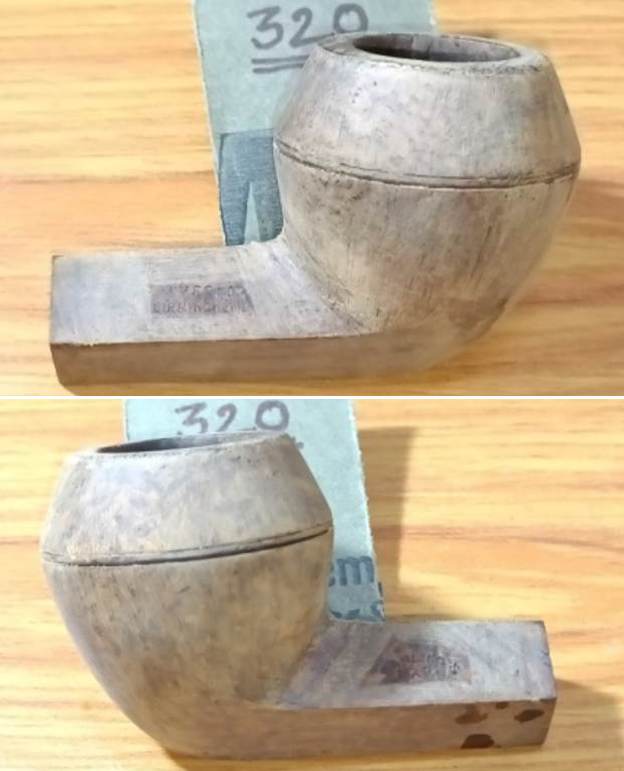
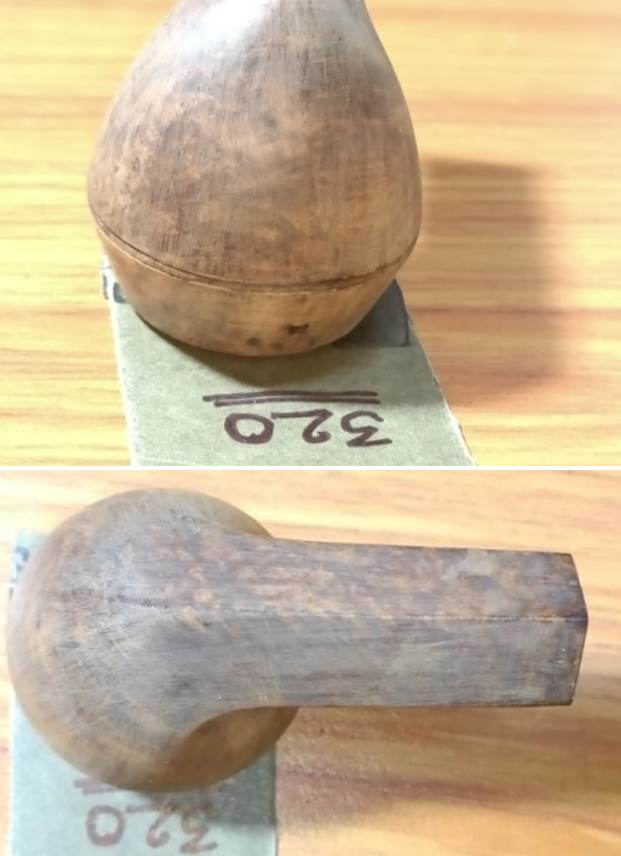
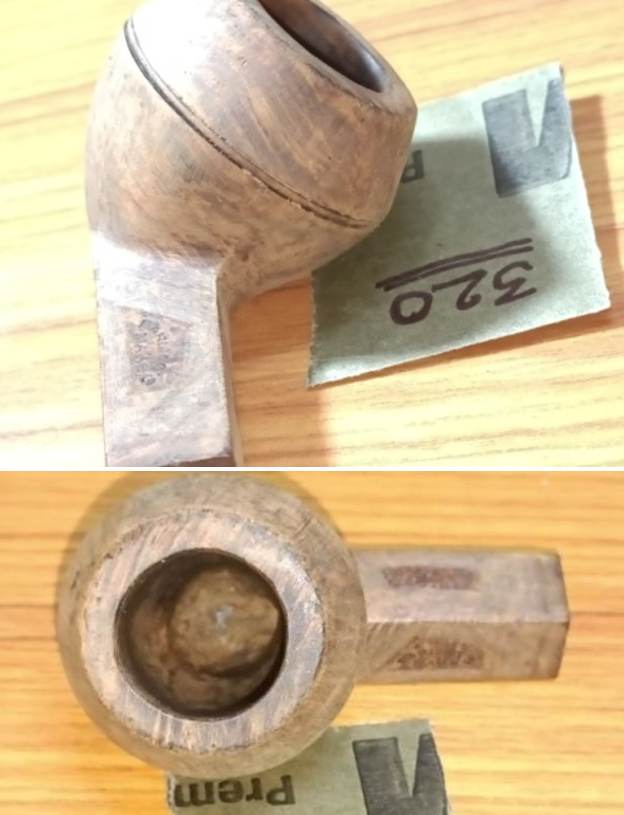
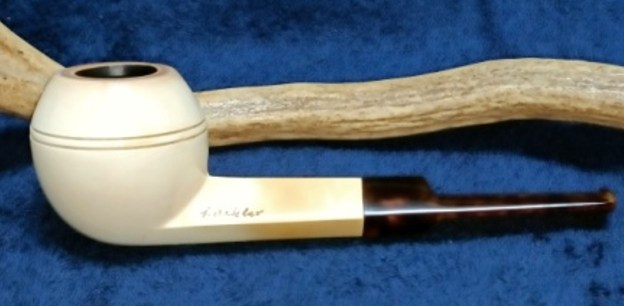
The pipe, as compared to the many pipes that I have worked on till date, is in excellent condition. The case that housed this pipe and the green velvet inner lining is also in good condition. The chamber has a thick layer of cake with the rim top surface covered in overflowing lava. The stummel is in pristine condition with just a few hand stains and dust covering the stummel. The meerschaum has started coloring at the shank end. The stem too is in pristine condition with just faint traces of accumulation of old oils and tars on the metal tenon. Here are a few pictures of the pipe as it sits on my worktable. Overall, this pipe is in excellent condition and should be an easy refurbishment project.

Detailed Inspection
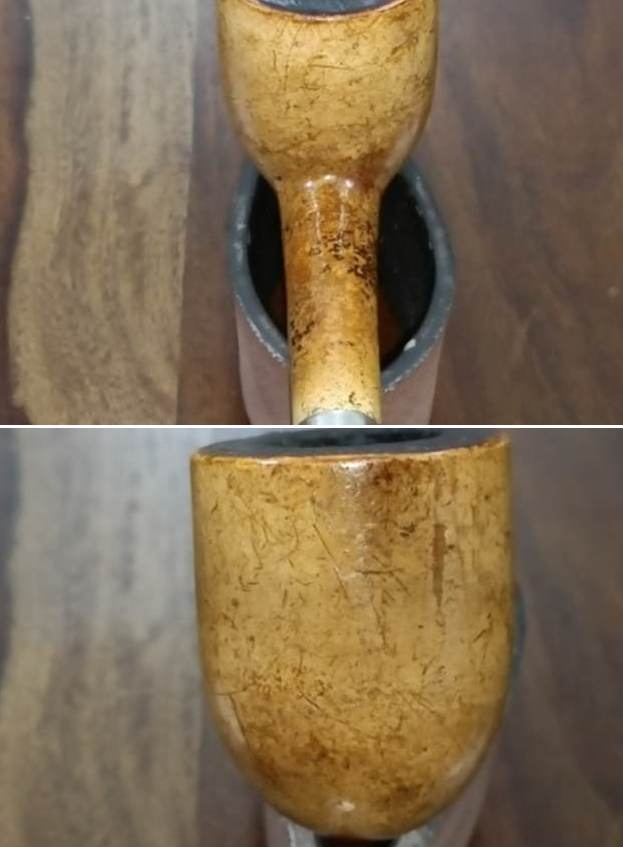
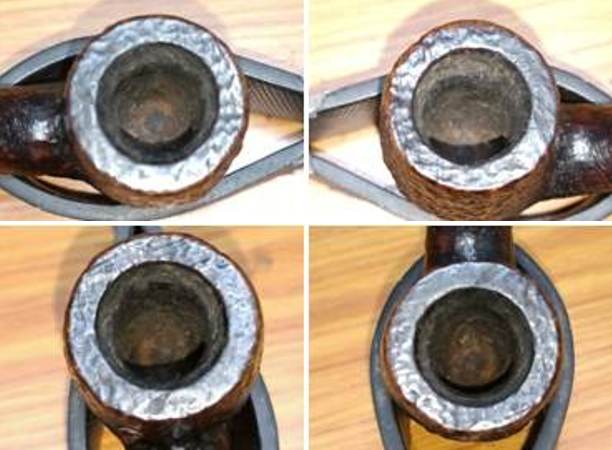
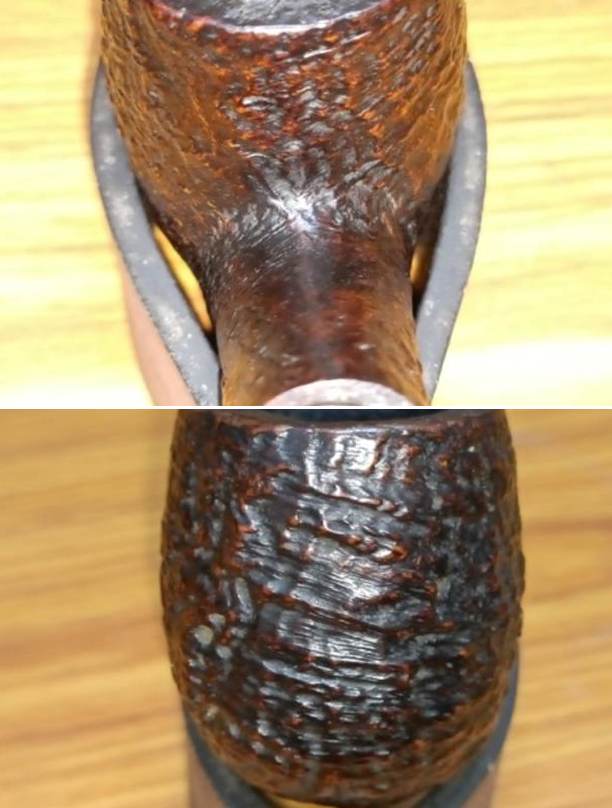
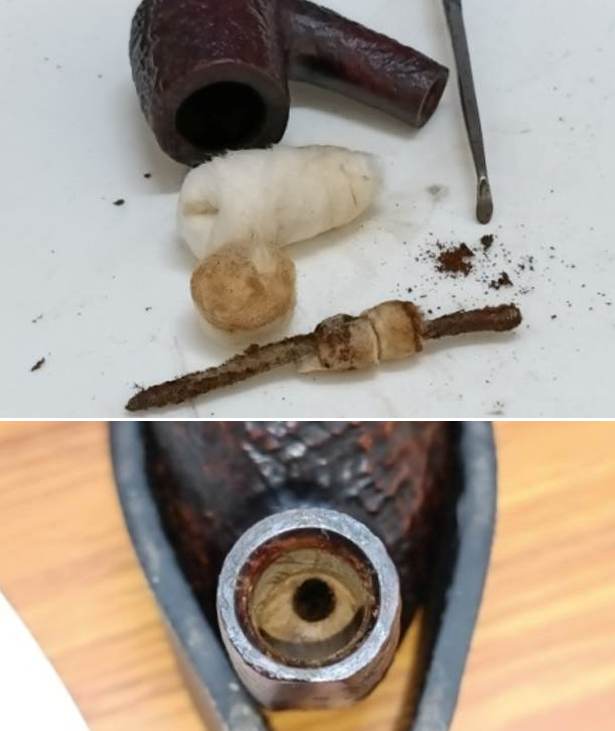
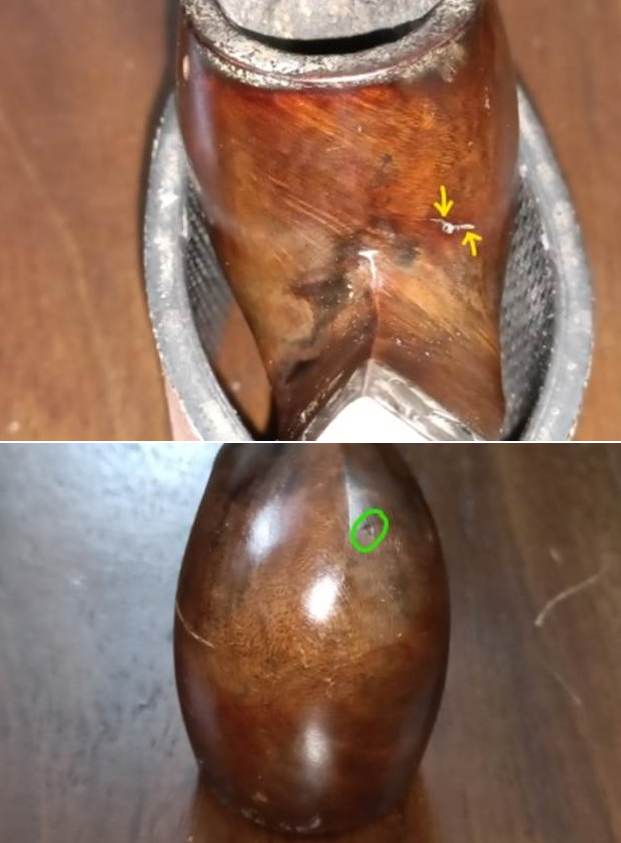
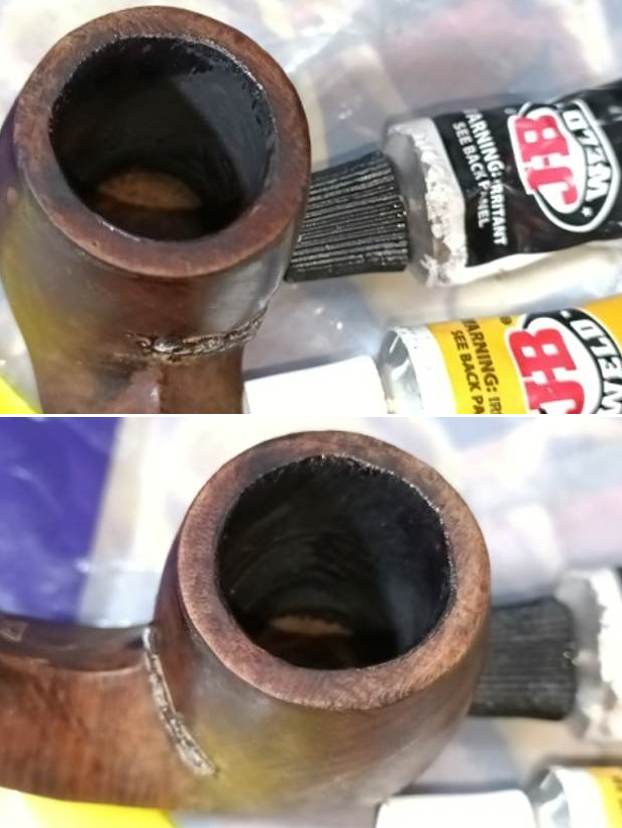
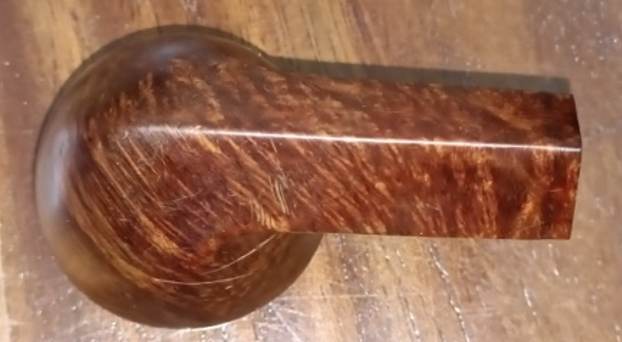
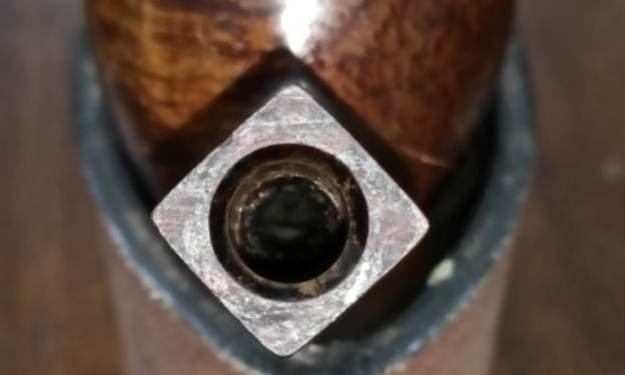
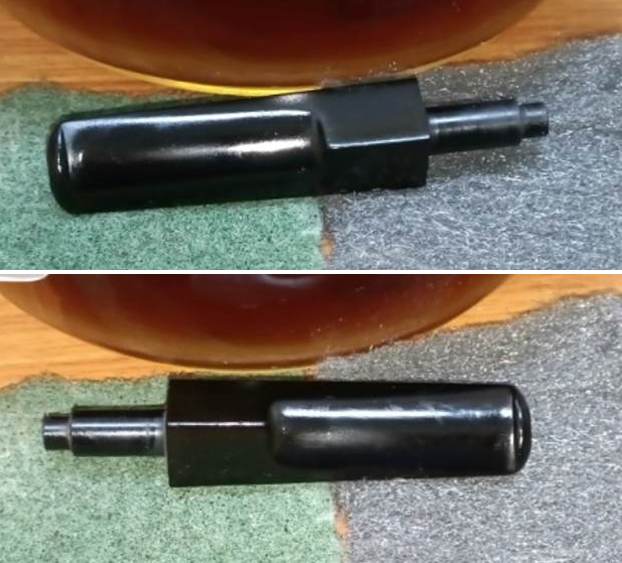
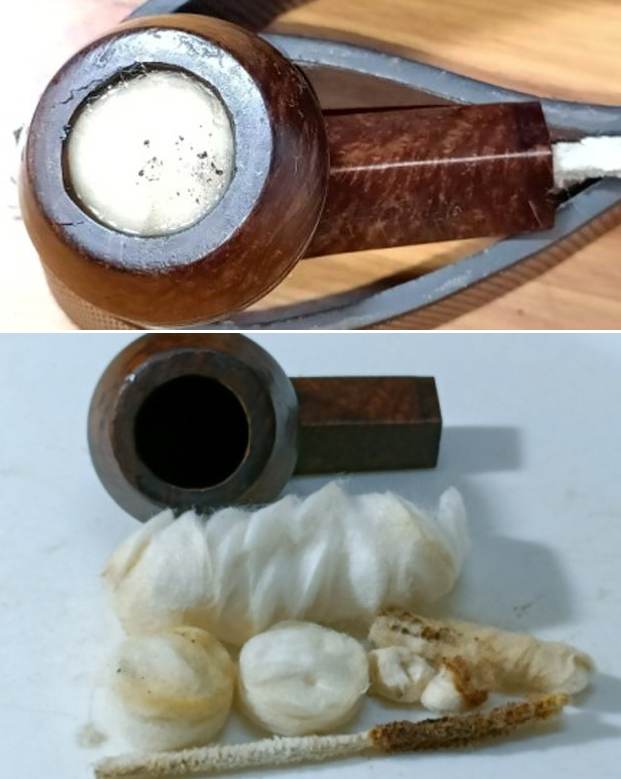
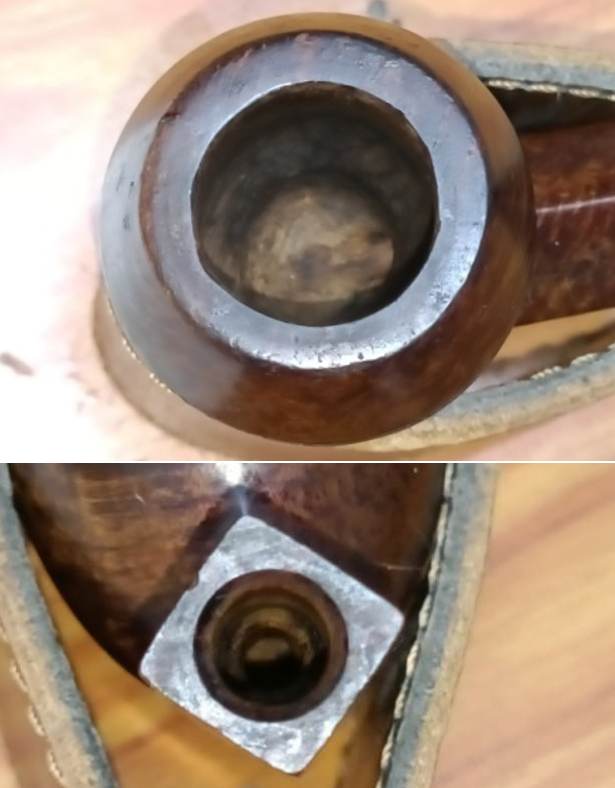
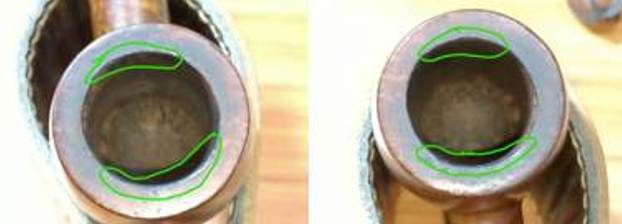
There is a heavy build up of cake in the chamber with a thicker layer seen at the bottom half of the chamber. The cake has dried and is crumbly due to prolonged storage. The condition of the inner walls of the chamber can be ascertained only after the cake has been removed completely. The rim top has darkened due to thick overflow of lava. This should be a fairly simple cleaning of the chamber.The stummel, likewise, is in good shape. There a few specs of dirt and grime on the surface that have accumulated due to oils on the human palms. These should clean up easily by wiping the stummel with oil soap. There are a couple of very light scrub marks on the base of the stummel. The mortise is not visible due to the small opening in to which fits the brass metal tenon. This would need to be cleaned using bristle and regular pipe cleaners and isopropyl alcohol. 
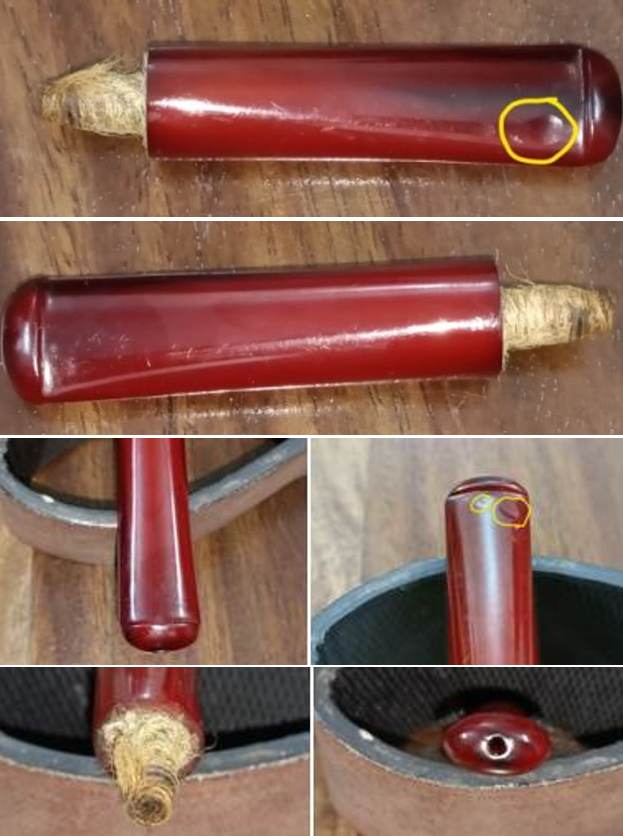
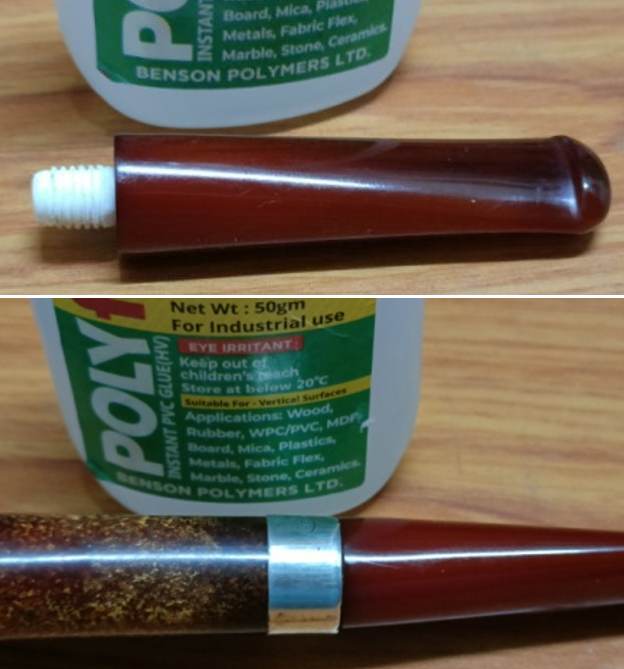
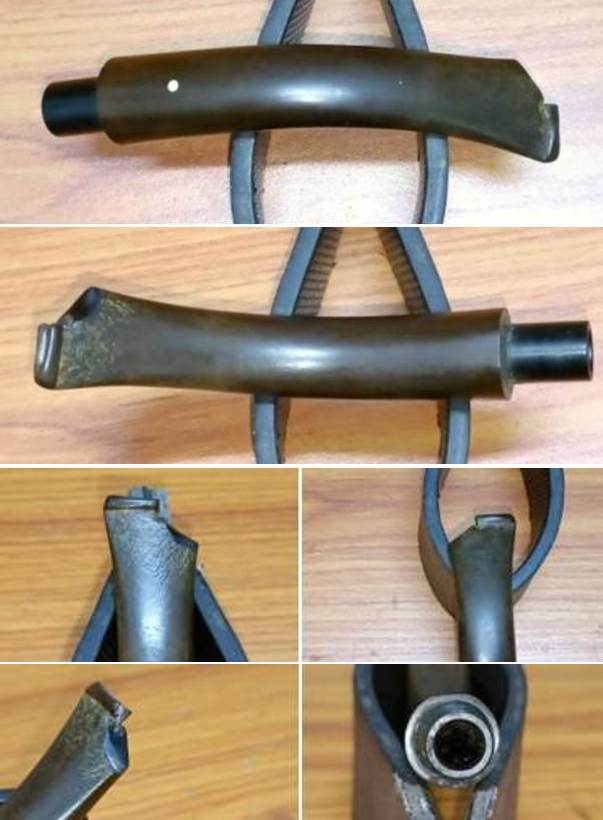
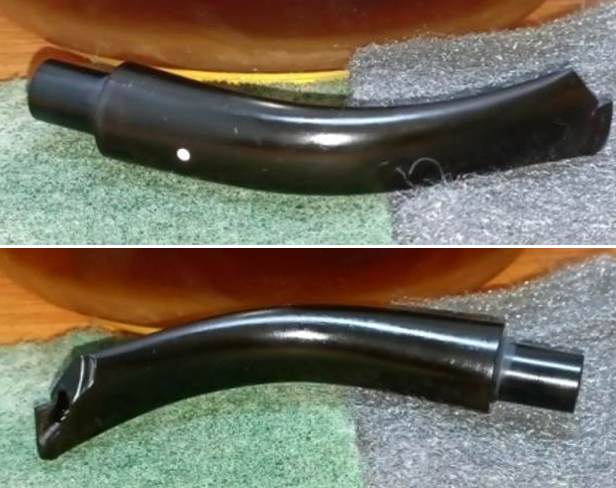
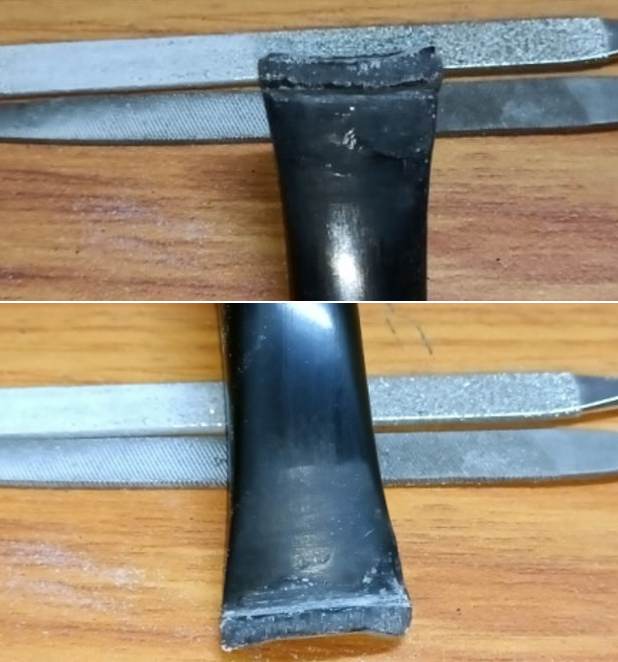
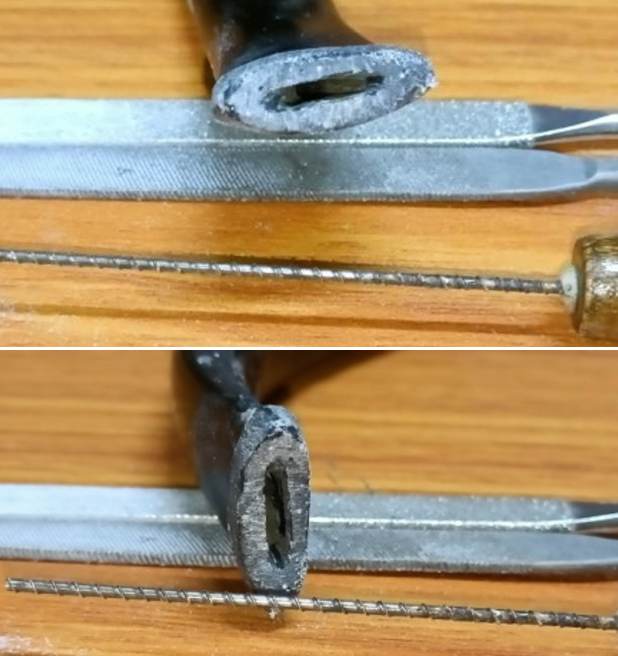
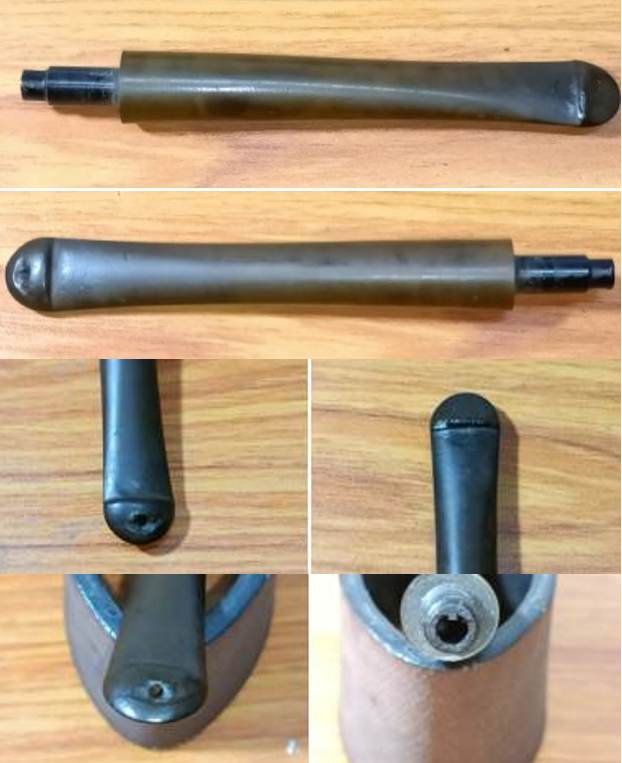
The stem is a beautiful acrylic tortoise shell with beautiful transparency, sharp buttons and a nice slot end. The bite zone in the stem shows slight calcification with no tooth chatter. There is a slight build up of oils and tars in the stem airway that can be seen. The brass tenon too has traces of dried oils and tars. This stem should clean up clean up easily and I just can’t wait to see the stem after all the cleaning and polishing process.The Process
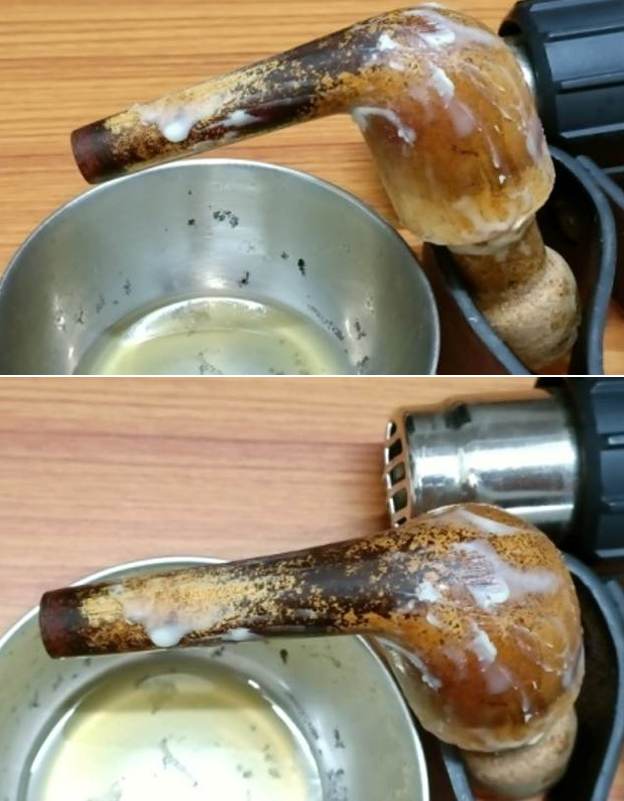
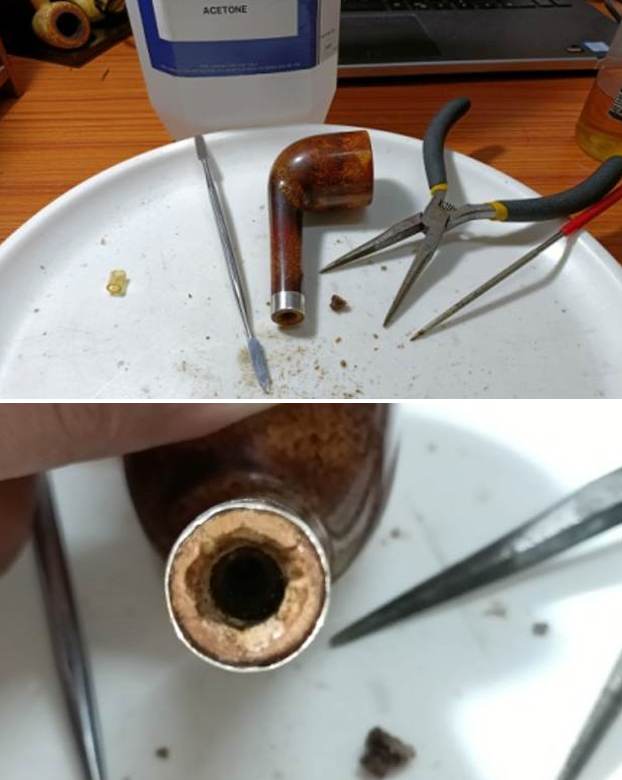
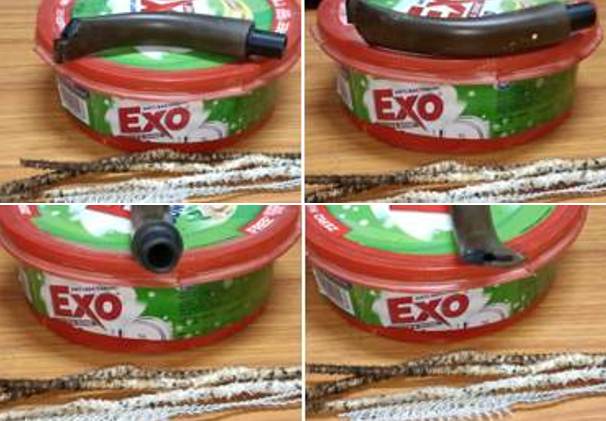
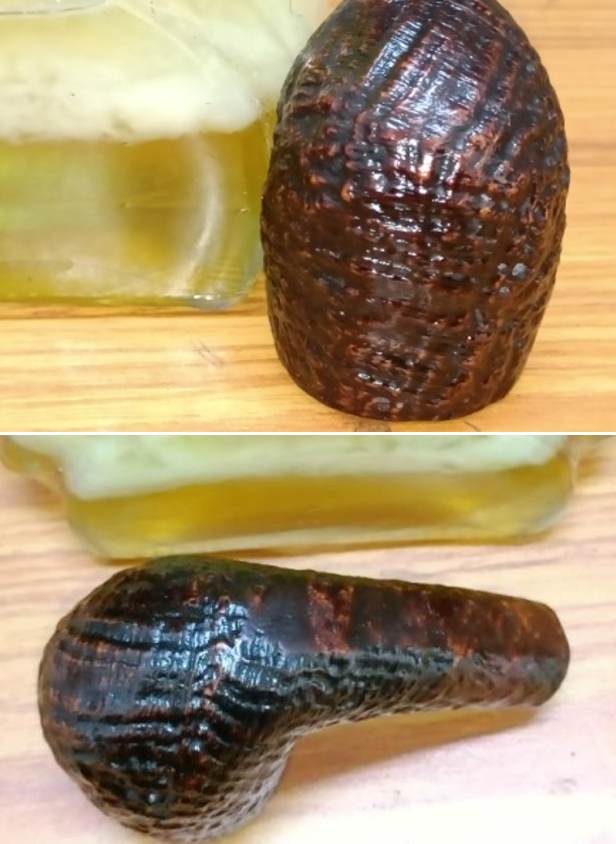
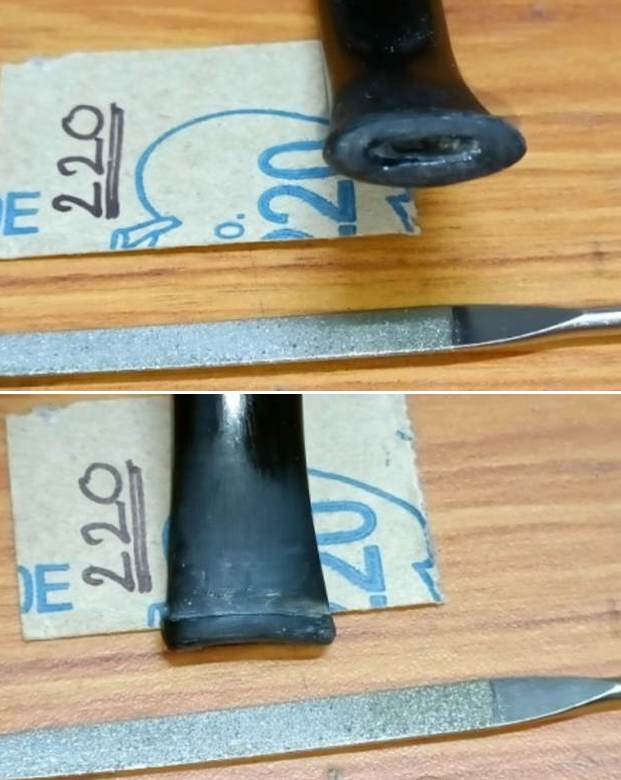
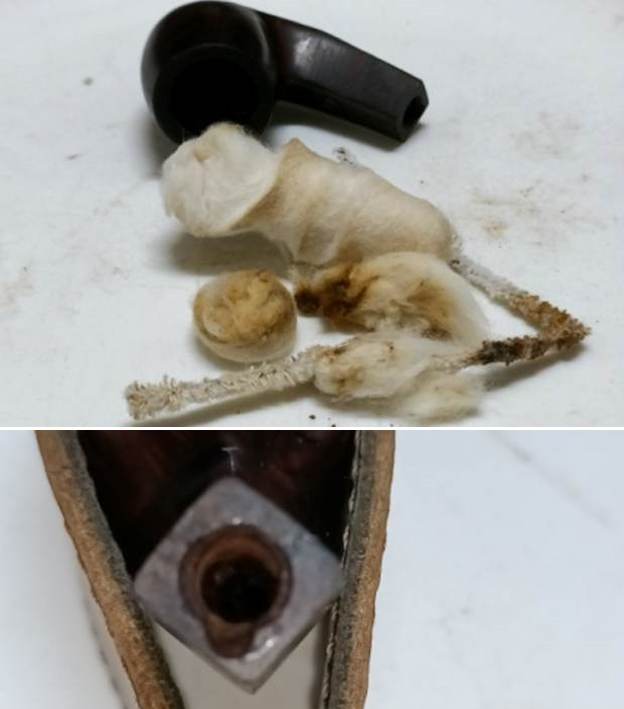
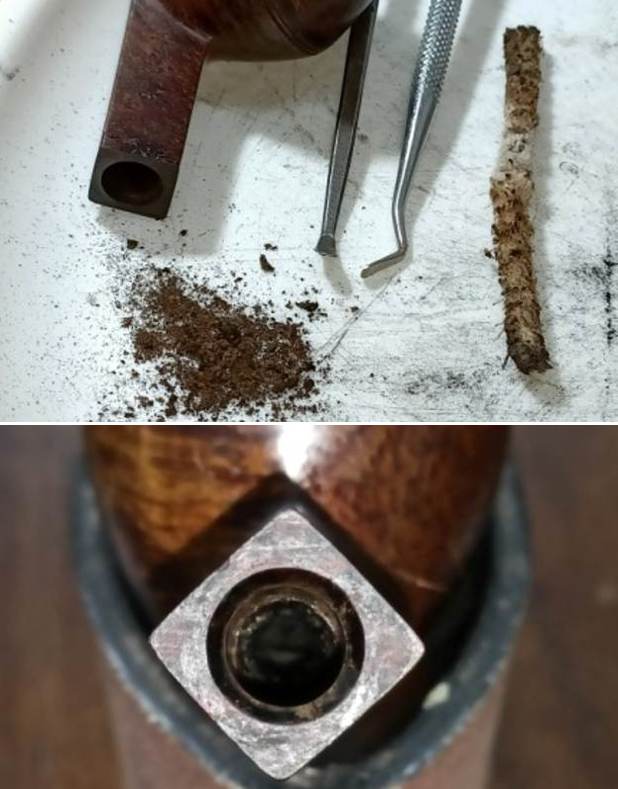
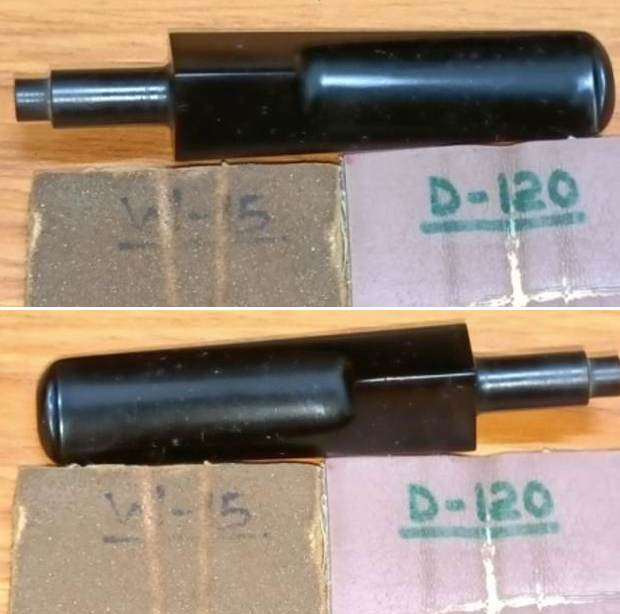
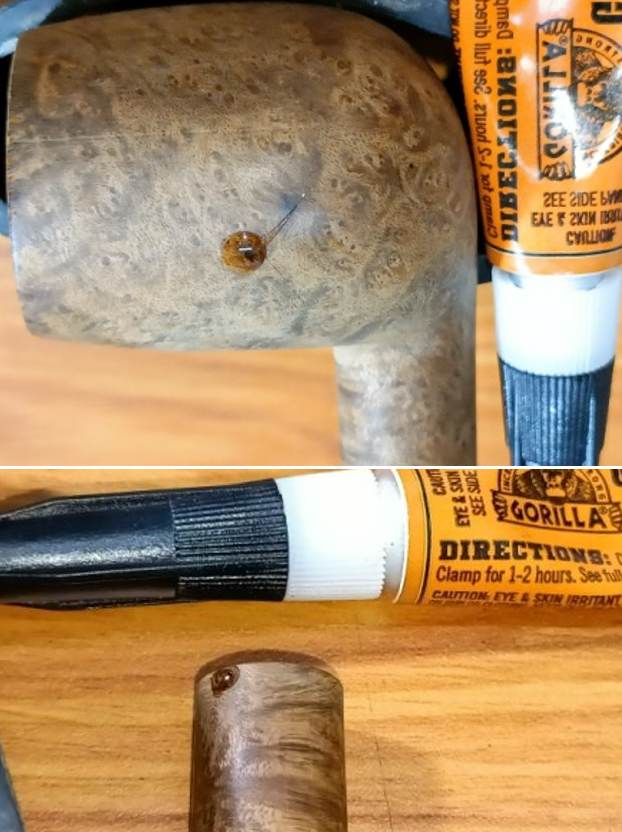
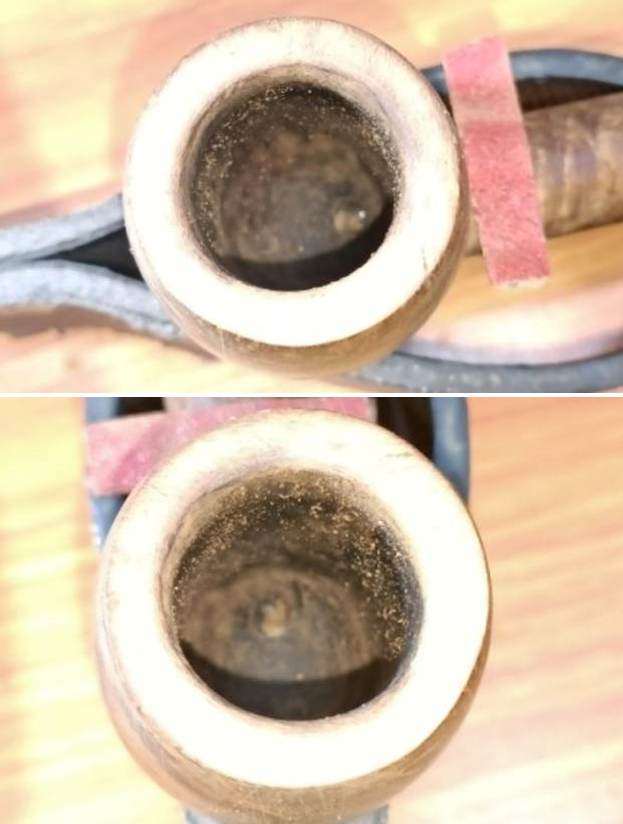
I started the refurbishing of this gorgeous pipe by cleaning the stem first. I cleaned the brass tenon and stem surface with isopropyl alcohol and cotton swabs. I ran a few bristled and regular pipe cleaners, also dipped in alcohol, through the stem airway till it was clean and transparent.I followed this cleaning up with internal cleaning of the chamber. Using my fabricated knife, I carefully scraped the accumulated cake from the walls of the chamber. I avoid using a pipe reamer while cleaning the chamber as the rotational movements of the reamer head exerts outward longitudinal forces on the walls of the chamber and may damage the walls of the chamber. Next, I used a 220 grit sand paper, pinched between my thumb and forefinger, to sand the inner walls of the chamber of the pipe. Once I had reached the bare walls, I wiped the chamber with a cotton pad dipped in isopropyl alcohol. This removed all the residual carbon dust and also rid the chamber of all ghost smells. The walls of the chamber are nice and solid with no signs of cracks. Using a sharp knife, I gently scraped out the overflow of lava from the rim top. Though the lava flow over the rim top surface had been scraped out, the darkening persisted. I would further clean out the rim surface while I cleaned the stummel surface using oil soap.
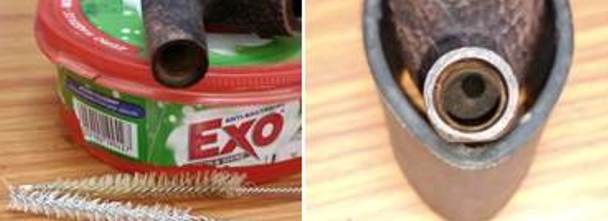
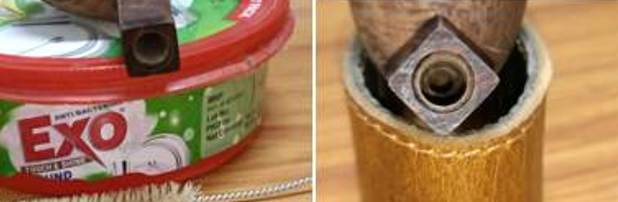
Next, I cleaned out the mortise and shank airway using shank brush and pipe cleaners. I started the process with cleaning the shank internals using shank brush dipped in isopropyl alcohol (I use only 99.9% pure alcohol). I ran this shank brush wetted with alcohol through the shank a few time and thereafter ran a couple of bristled pipe cleaners through the shank to draw out the loosened gunk. I continued the cleaning of the shank internals with pipe cleaners and alcohol till the pipe cleaners came out clean.
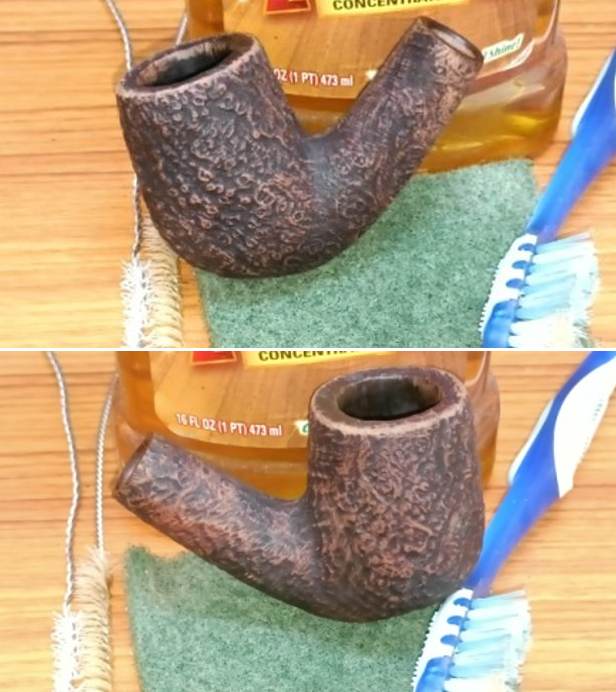
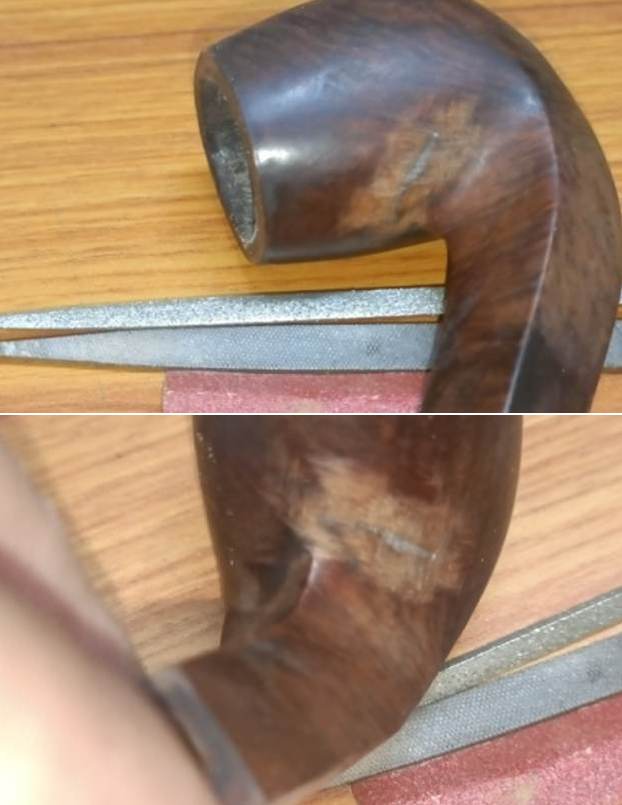
I cleaned the surface of the stummel with cotton swab and Murphy’s oil soap. I also cleaned the rim top with the soap on a cotton swab. I further wiped the surface with a moist soft cotton cloth till all the traces of the soap were removed from the stummel surface. Thereafter I dried the stummel with a soft dry cotton cloth and set it aside to dry out naturally. The dark areas on the rim surface are still visible and would need to be addressed using higher invasive methods. 
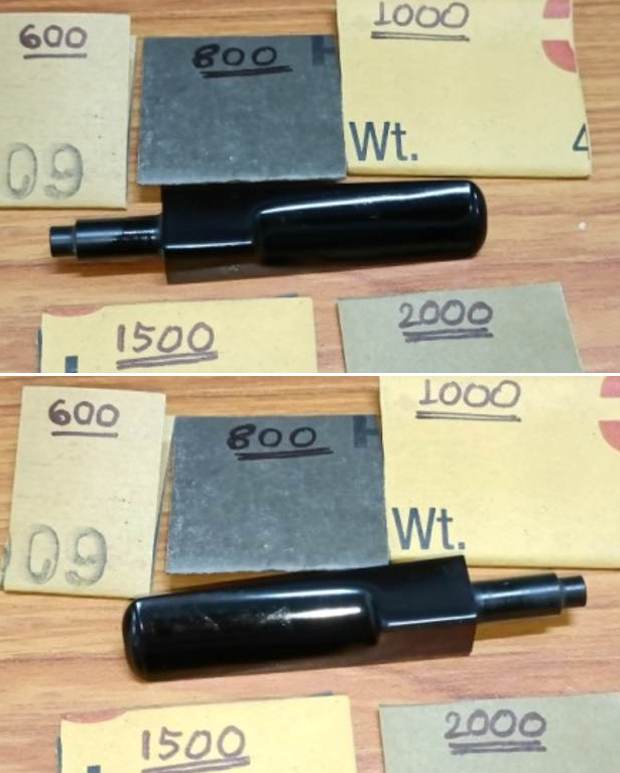
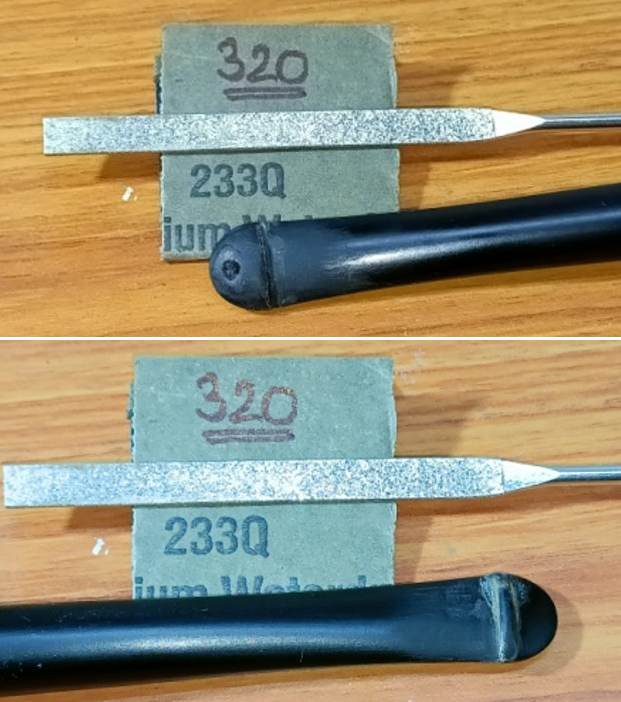
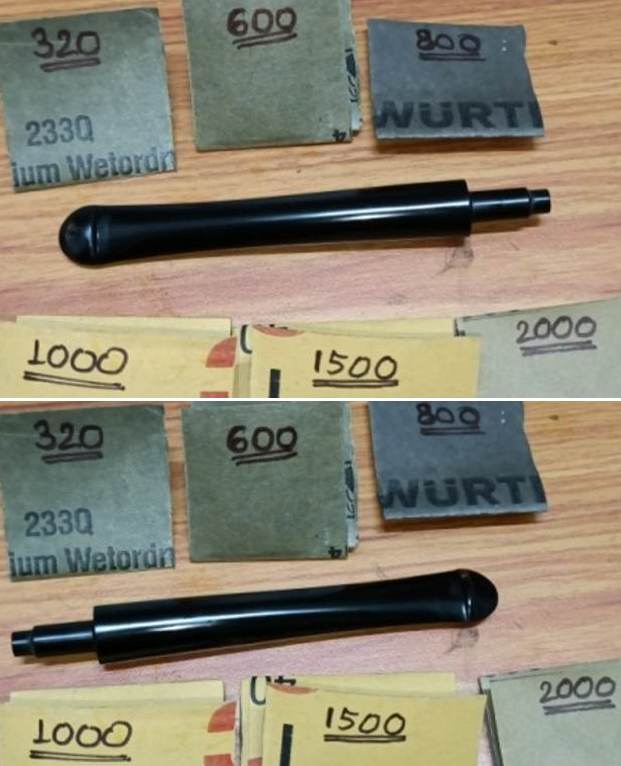
While the stem was drying out naturally, I worked the stem. I began the process of polishing the stem by wet sanding the stem surface with 600, 800, 1000, 1500 and 2000 grit sandpapers. I wiped the surface with a moist cloth and wiped the surface with a little EVO just to clean and bring a shine to the stem surface.
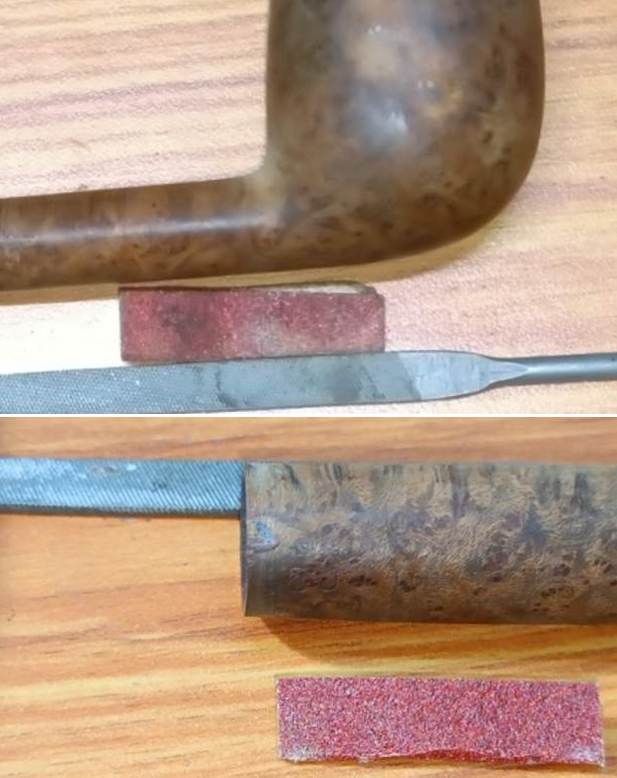
I addressed the darkening over the rim surface by sanding the rim with a folded piece of 320 grit sandpaper. I sand the rim surface with minimum force as my intent was only to remove the dark stains and not removal of any meerschaum material from the surface. The rim looks much better now at this stage in restoration. I polished the stummel and specifically the rim, dry sanding with 1500 to 12000 grit micromesh pads. I wiped the stummel regularly with a dry soft cloth. I like the pristine look of the stummel after this polishing. 
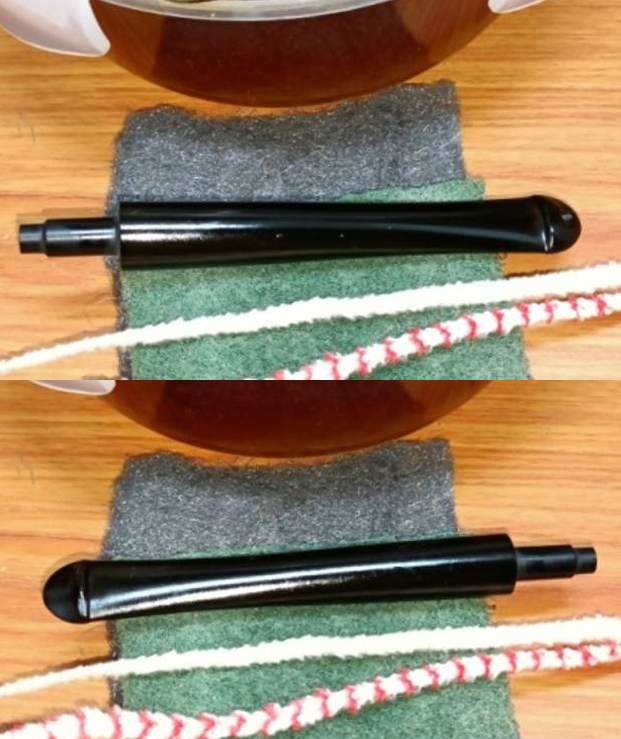
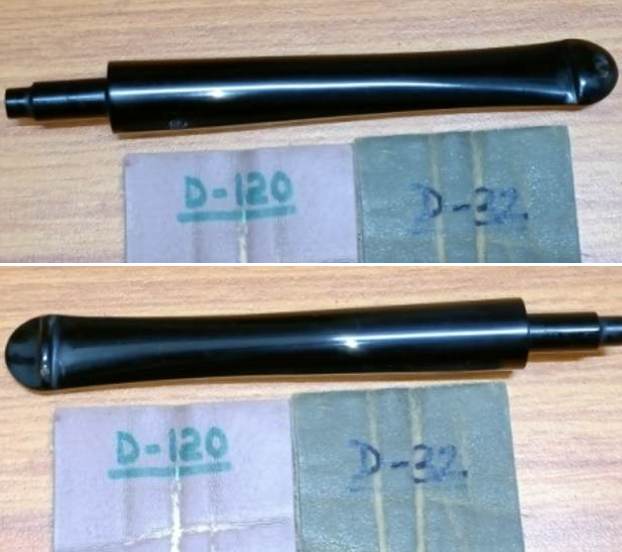
Thereafter, I polished the stem by wet sanding the surface with 1500 to 12000 grit micromesh pads. The last item that required cleaning was the leather covered case that housed this pipe. Using a hard bristled toothbrush and soap water, I cleaned the velvet lining on the inside of the case. I dried the lining with paper napkins. Next, I cleaned the external surface with a moist cloth and polished the surface with a neutral color shoe polish. Once the wax was absorbed, I polished the surface with a horse hair shoe brush.
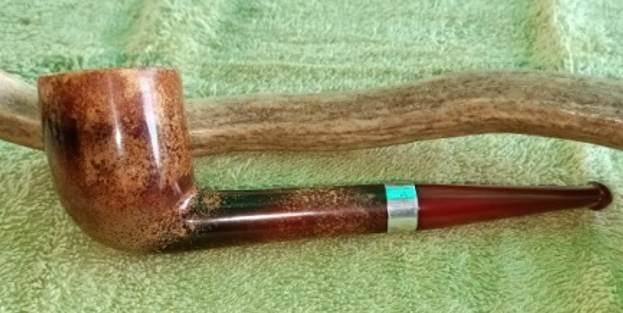
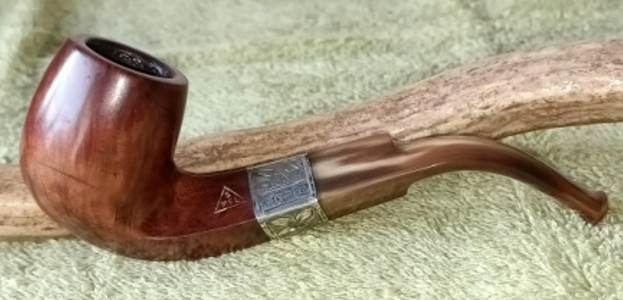
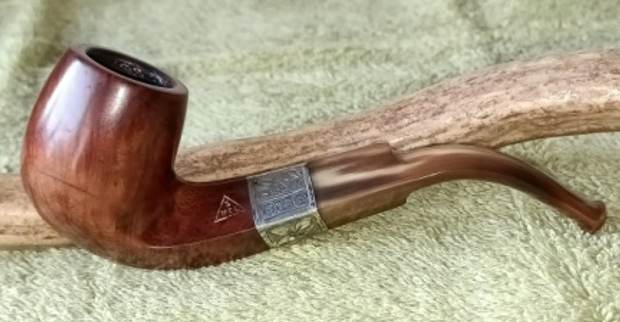
Since this Meerschaum pipe is now looking fresh and the coloration is not too developed, I decided to forego the step of polishing the stummel with beeswax. I gave a final rub down to the entire pipe with a microfiber cloth to deepen the shine. This is one gorgeous looking pipe which I am happy to include in my personal collection. Here are a few pictures of the finished pipe.

Pipe Gods Smiled And I Got Not One But Three Les Wood Pipes….Restoring Second Of The Three Les Wood Pipes; A Bark Silver Spigot


Blog by Paresh Deshpande

I had purchased three Les Wood pipes from a gentleman and had restored the first of the three pipes and have added it to my personal collection. Given below is the link to the write up posted on rebornpipes and is a recommended read to know how I came to be in possession of this lot and brief research on husband wife duo of Leslie Wood and Dolly and the pipes they make.

https://rebornpipes.com/2022/08/05/pipe-gods-smiled-and-i-got-not-one-but-three-les-wood-pipes-restoring-a-les-wood-poker/

The second pipe that is now on my work table is a beautifully rusticated paneled Apple Half bent Silver Spigot. It is stamped on the bottom smooth surface of the shank as “FR LOUIS HESTON” over “FERNDOWN” in a slight arc over “BARK”. The sterling silver ferrule at the shank end bears the stamp “L & JS” in a rectangular cartouche over “.925”. The sterling silver mounting at the tenon end of the stem also bears similar stampings as seen on the ferrule. The vulcanite stem is stamped on the left side as “L J S”. Now this stamping varies significantly from the one that I had worked on earlier in that this pipe does not bear the stamping LES WOOD, HAND MADE IN ENGLAND and star (*) marking to denote the size. I referred back to pipedia.org to understand the variation in stamping. Here is what I found out and also the link to the write up is given below.

https://pipedia.org/wiki/Ferndown

Due to the vagaries of international trademark law, he sold his earlier pipes as ” L.&J.S Briars”, “Ellwood”, “Les Wood” or “L. Wood”. Until recently, an average of 1500 – 2000 pipes a year were sold as “Ferndown” — named for the mansion he lives in — in the UK and US, but as “L. Wood” pipes in Germany.

From the above, I assume that this pipe is from the recent past while the poker was from the earlier period. Truth be told, I am not 100% convinced on this and would really appreciate input, clarifications and detailed information on this variation in stampings observed from learned readers of rebornpipes.

There was not much that I could find about Fr. Louis Heston. An internet search of the name threw up data about Rev. Edward Louis Heston who left for heavenly abode in 1973. This period definitely does not coincide with the time period when Leslie Wood started making pipes under the FERNDOWN! Well, this too then is a grey area and would request readers to fill us all on this name and establish a relation between the name Fr. Louis Heston and this Les Wood pipe.

Initial Inspection
As observed with the Les Wood Poker that I last restored, this half bent Apple Silver Spigot too is in excellent condition. There is an even layer of cake of medium thickness in the chamber that is very hard and completely dry. The smooth rim top is sans any crusting of lava over flow but darkened towards the front. The eight panelled rusticated stummel appears in good condition with no signs of hot spots or cracked surfaces. The stummel has a lot of dirt, dust and grime grounded in to the crevices of the rusticated surface. The black and dark brown stain is faded at places giving the stummel is dull appearance. The fishtail vulcanite stem is deeply oxidized with some tooth chatter on either surface of the stem in the bite zone. The stampings on the shank, silver spigot and stem are all crisp and easily readable. The following pictures will provide a visual description to supplement the description given above. I like the feel and heft of this large stummel in my hand. The rusticated panelled surface with it prominent ridges feels tactile in the hand and very comfortable to hold. There is a lot of dirt, dust and grime trapped in to the crevices of rusticated surface giving it a dirty grayish appearance. The entire stummel looks dull, dirty and lifeless. Heavy accumulation of dried oils, tars and gunk is seen clogging the mortise. The dark stain has faded in couple of spots further adding to the sorry appearance of the stummel. The sterling silver ferrule is oxidized and dull looking. However, once the stummel surface is cleaned up and rejuvenated, this will be one beautiful looking pipe. I like the feel and heft of this large stummel in my hand. The rusticated paneled surface with it prominent ridges feels tactile in the hand and very comfortable to hold. There is a lot of dirt, dust and grime trapped in to the crevices of rusticated surface giving it a dirty grayish appearance. The entire stummel looks dull, dirty and lifeless. Heavy accumulation of dried oils, tars and gunk is seen clogging the mortise. The dark stain has faded in couple of spots further adding to the sorry appearance of the stummel. The sterling silver ferrule is oxidized and dull looking. However, once the stummel surface is cleaned up and rejuvenated, this will be one beautiful looking pipe. The beautiful sterling silver mounted vulcanite stem is hand cut and oozes very high quality of material use and also craftsmanship of highest quality. The stem is heavily oxidized to an extent that it appears dirty green. Dark coloration and calcification is seen on either surfaces of the stem in the bite zone from prolonged use of rubber bit. Very minor tooth chatter and bite marks can be seen in the bite zone on both the upper and lower surfaces of the stem. These tooth chatter and tooth indentation should be easily addressed by heating the affected areas to raise the vulcanite and thereafter sanding it down to match the rest of the stem surface. The tenon end and the horizontal slot end shows accumulation of dried gunk and grime. The sterling silver mount is oxidized but shows no signs of any damage whatsoever.The Process
I started the refurbishing of this Les Wood by working the stem first. Since there were other stems that were ready to be put into the stem deoxidizer solution, I decided to clean the internals of this stem first so that it could be put in the solution with other stems. I cleaned the stem airway with a thin shank brush and anti oil soap. It took considerable time and elbow grease to get the stem airway clean. I used a sharp dental tool to clean the horizontal slot and further cleaned the internals with regular and bristled pipe cleaners dipped in alcohol.The stem was immersed in the Deoxidizer solution, a product that has been developed by Mark Hoover. This solution raises the oxidation to the stem surface and helps in easy removal and imparting a nice shine to the stem after polishing. The pipe is indicated with a red arrow. The stem is allowed to soak into this solution overnight.Now it was time for me to work on the stummel. I did this by first reaming the chamber with size 2 followed by size 3 and 4 PipNet reamer heads. I further scraped the chamber walls with my fabricated knife to remove the remaining carbon deposits where the reamer head could not reach. Once the cake was reamed back to the bare briar, I used a 220 grit sand paper to remove all the traces of remaining cake and also to smooth out the inner walls of the chamber surface. Finally, to remove the residual carbon dust, I wiped the chamber with a cotton pad wetted with 99.9% pure isopropyl alcohol. The huge pile of carbon dust that was reamed out is an indication enough to the amount of carbon that had accumulated in the chamber. The chamber walls are solid without any heat lines or fissures. However, the hard cake was getting increasingly difficult to dislodge. I shall try and remove residual the hard cake after it has been moistened during the salt and alcohol soak. I further cleaned the mortise by scrapping out the dried gunk with a dental tool. I ran a few pipe cleaners dipped in alcohol to moisten the dried gunk and assist in its removal. I shall further continue the internal cleaning of the chamber and mortise with cotton and alcohol soak.I continued the cleaning of the chamber and shank internals with a salt and alcohol bath. I use cotton balls which is an at par substitute to Kosher salt as I have realized over the years. I draw out a wick from the cotton and along with a folded regular pipe cleaner; insert it in to the mortise and through the draught hole in to the chamber. Thereafter, I packed the chamber with cotton balls to about quarter of an inch below the inner rim edge and soaked the cotton balls with isopropyl alcohol up to the brim. About half an hour later, the level of alcohol had gone down, having being absorbed by the cotton. I topped it up once again and set it aside overnight. By next morning, the cotton and alcohol had drawn out all the remaining oils and tars from the chamber and mortise, fulfilling its intended task. I removed the cotton balls and ran pipe cleaners through the mortise to clean out all the loosened tars and gunk and further cleaned it with alcohol and q-tips.The cotton and alcohol soak had softened the hard and stubborn cake in the chamber and the mortise. Using my fabricated tool, I scrapped out all the hardened cake from the chamber and gunk from the mortise. The chamber now smells clean and fresh.Once the internals of the shank were cleaned, I cleaned the external surface of the stummel with Murphy’s Oil soap and cotton swabs followed by scrubbing the rusticated surface with a toothbrush and dish washing soap. This rid the nooks and crevices of all the accumulated dust, dirt and grime from the rusticated stummel. With a copper soft wired brush, I cleaned the rim top surface of all the crud that had accumulated over it. I wiped the stummel with a soft cotton cloth and set the stummel aside to dry out naturally. The charred inner rim edge (encircled in red) is now clearly visible and would need to be addressed. I simultaneously cleaned the shank internals with dish washing soap and shank brush.Next, I decided to address the issue of charred inner rim edge and getting the chamber back to round. I topped the rim top over a 220 grit sandpaper to reduce the charred surface. I checked the progress frequently to ensure that the topping is just adequate. I addressed the darkened inner edge by running a folded piece of 220 grit sandpaper pinched between my thumb and index finger along the inner edge and crated a smart bevel. This bevel also helped to get the chamber back to round.I polished the smooth rim top surface by dry sanding with 1500 to 12000 grit micromesh pads.The polished rim top looks much lighter than the rest of the stummel because of the topping process to remove the charred rim edge. To match the dark browns and black stains over rest of the stummel surface, I decided to re-stain the rim top surface using dark brown stain pen. I applied a coat of brown stain using a stain pen and set it aside for some time. I wiped the rim top using a soft cotton cloth to check the stain color and found it to be a bit lighter. I repeated the process till I had requisite color match and set it aside for the stain to set in.I rubbed a small quantity of “Before and After Restoration Balm” into the briar with my finger tips and let it rest for a few minutes. The balm almost immediately works it’s magic and the briar now had a nice vibrant appearance with the beautiful rustication patterns on full display. I have been using this balm ever since I embarked on this journey and it is this part of restoration that I always look forward to. I further buffed it with a horse hair shoe brush. This pipe really oozes of a very high quality, in fact similar to the Les Wood Poker that I had worked on earlier. The consistent quality is awesome, to say the least. The rim top appears lighter hued, but that’s due to the lighting when I took pictures. Now that the stummel refurbishing was nearly done and also the stem had now been soaking for more than 24 hours, I removed the stem from the solution. I first scrubbed the stem surface with a Scotch Brite pad, always being mindful of the stem logo on the left side. I followed this scrubbing with a nice cleaning of the surface using a 0000 grade steel wool. I rinsed the stem under running water to rid the stem of the thick deoxidizer solution. I ran a couple of pipe cleaners to remove the deoxidizer solution from the airway. The beauty of a high quality vulcanite hand cut stem in shining black can now be appreciated once the heavy oxidation has been eliminated. There are spots/ areas where oxidation is still visible, but that will be eliminated once the stem is subjected to sanding and polishing using sand papers and micromesh pads. The beauty of this stem will be enhanced once it has been all polished and waxed. A polish by wet sanding using all 9 micromesh pads (1500 to 12000 grit pads) brought out the deep black shine of the vulcanite. I rubbed a small quantity of EVO to hydrate the stem and deepen the shine.This was followed by removing oxidation from over the sterling silverware seen on the pipe using a locally made compound that Abha, my wife, uses to polish her silver and gold jewellery and silver cutlery. This compound is a very fine powder and is least abrasive with fantastic results. The silver ferrule at the shank end and the silver spigot are now nice shining pieces of silver and provides a nice contrast to the shining black stem and the dark brown and black stummel. I painted the stem logo L J S using a Gold paint glitter pen and wiped off the excess paint. The stem logo is now nice and prominently visible.I have reached that stage in this project which can be considered as the home run. I polished the rim top and the entire stem with blue diamond using a cotton wheel mounted on to my hand held rotary tool. The blue diamond compound helps to eliminate the minor scratches that remain after the use of micromesh pads. I completed this project by hand polishing the stummel with Halcyon II wax. I rubbed this polish deep into the rustications and after a couple of minutes, vigorously hand buffed the stummel with a microfiber cloth to a deep shine. I polished the stem with carnauba wax using my hand held rotary tool. This is a gorgeous looking spigot and I consider myself fortunate to have the opportunity to work on this beauty and, as my Guru Steve says, carry forward the trust in this pipe till it is time to pass it on to the next pipeman or pipewoman. Here are a few pictures of the completed pipe for you to appreciate while I take the opportunity to thank you each of you for sparing your valuable time in joining me on this journey.

A New Beginning For A 1978 Dennis Ruth Carved Freehand Pipe


Blog by Paresh Deshpande

This pipe had been lying around in the pile of pipes to be restored for a long time. How, when and from whom I got this pipe is now all but a completely faded memory.

Whenever I went through the pile and came across this pipe, the Acorn shape freehand always made me believe it to be Danish made. However, when I picked it up for restoration and checked out the stampings my assumptions were proved to be incorrect. This shallow sandblasted Acorn shaped twin heeled pipe with a wavy smooth rim top and a flared shank end is stamped on the left side of the shank as “HANDCARVED” over “BY” over “DENNIS RUTH” in freehand cursive writing while the smooth bottom of the flared shank is stamped as “8 – 18 – 78” denoting the date of carving this pipe. The stampings are crisp, clear and easily readable. The acrylic fancy turned stem is devoid of any stamping.This is one maker that I haven’t come across in the years that I have been working on pipes, it piqued my interest and I wanted to know more about this maker. I visited pipedia.org where there is very brief and concise information about the carver. Given below is the link to the brief on pipedia.org for those interested to view some of his work since the information is reproduced below.

https://pipedia.org/wiki/Ruth,_Dennis

An American pipe maker working from Des Moines, Iowa, Ruth is independent craftsmen who, like others of his genus, prefer quality over quantity. He was an employee of a tobacco/pipe shop known as the Tobacco Bowl, where he custom made pipes to his customers requests during the 1970’s – 1980’s.

The date stamped on the pipe places it in the correct time period when Dennis Ruth carved pipes to his customer’s request. With a better understanding of the pipe and its carver, it was time to work on the pipe itself.

Initial Visual Inspection
This shallow sandblasted Acorn shaped freehand is perfectly proportioned and lightweight. There is a thin layer of cake in the chamber while the smooth wavy rim top surface is clean and in good condition. The stummel appears dull and lifeless. There is a slight bulge on the left side above the foot of the stummel which needs to be investigated. The shank end has what appears to be a fill. I need to check and confirm if the fill needs to be refreshed along the way. The mortise is nice and clean. The fancy acrylic stem with swirls of orange brown and grey perfectly complements the stummel and makes for a visual treat. Other than dullness of the surface, the stem is in decent condition. The following pictures will give you a general idea of the condition of the pipe. Detailed Inspection
The wavy rim top surface is pristinely clean with no damage to either the inner rim edge or rim top surface. There is a very thin layer of cake. For a pipe that is 45 years old, it has seen very minimal use and this makes me wonder what could be the reason for this? The answer could lie in the condition of the chamber walls which will be ascertained once the cake has been taken down to the bare briar.The warm honey brown colored Acorn shaped stummel has a very shallow sandblast with upper 1/6 th portion being smooth and showing beautiful straight grain. Though clean, the stummel appears dull and lifeless. A nice scrub and polish should make the briar look lively. However, there are two spots, one about half way down from the top on the left side of the stummel and the second one, continuing along the same plane to the front of the stummel (encircled in yellow) that have darkened and bulged. This definitely is not a good sign and could be the beginnings of a burn out. Whether these two spots are hot spots or otherwise will be confirmed after the chamber has been examined once the cake has been completely removed. The mortise is clean and the one fill at the shank end appears stable and solid. The variegated acrylic fancy stem has beautiful swirls of grey and orange browns that lend a trendy look to the entire pipe. The stem airway is clean and there are no bite marks/ tooth indentations or tooth chatter in the bite zone. The button edges are in pristine condition. However, there is on oddity at the slot end. The slot is rounded and seems as if the maker forgot to cut a horizontal slot. It’s definitely not orifice but appears unfinished and that is the oddity on this otherwise beautifully carved pipe. The tenon end and slot end are all clean and tidy.The Process
I ran a pipe cleaner dipped in 99.9% pure alcohol through the stem airway just to make sure that the airway is perfectly clean as appreciated and was pleased to note that it was. Now all that remained to complete the stem refurbishment was to subject it to the polishing regimen. I set the stem aside to work upon later.Using my fabricated knife, I scrapped out the little cake from the chamber walls. I further smooth out the chamber walls by sanding it with a folded piece of 220 grit sandpaper and wiped the walls with a cotton swab moistened with alcohol to remove the residual carbon powder from the chamber. Close observation of the walls confirmed that the walls have thinned out more along the mid left side and towards the front of the chamber (encircled in light blue). This damage is not deep and restricted only to being superficial, however, if not addressed now, a burn out is an imminent danger later during use. I wet sand the stem with 600, 800, 1000, 1500 and 2000 grit sandpapers. This helps remove the layer of grime and dullness from the surface, address minor tooth chatter and bite marks, while progressive use higher grit sandpaper helps remove the scratch marks left behind by the coarser grit sandpaper.I moved ahead with the polishing regimen of the stem by dry sanding the surface using 3200 to 12000 grit micromesh pads. The stem has a nice transparent shine to it and the swirls add another level of complexity to the beauty. I set the stem aside till I completed the repairs to the stummel.Turning my attention to the stummel, I continued with the internal cleaning of the stummel. Using a dental scoop, I scraped out the dirt and dust form the walls of the mortise. I further cleaned the walls of the mortise and airway using pipe cleaner and q-tips moistened with alcohol. The mortise is now clean and fresh.Once the stummel internals were cleaned and freshened up, I proceeded to the external cleaning of the surface. I cleaned the external surface of the stummel with undiluted Murphy’s oil soap and a hard bristled toothbrush. I cleaned the smooth rim top surface with the soap and Scotch Brite pad. I thoroughly cleaned the mortise with shank brush and anti-oil dish washing soap. As remarked earlier, the chamber wall on the left and towards the front had charred a bit and once the charred wood was reamed out, it left the walls slightly thin which would lead to a burnout when smoked if left unaddressed. I decided to address this issue by coating the walls with a layer of J.B. Weld. J B Weld is a two-part epoxy Cold Weld in two tubes; hardener and steel which are mixed in two equal parts (ratio of 1:1) with hardening time of 5-6 minutes and complete curing time of 6-8 hours. I poured the contents of the two tubes and mixed it well. I applied this mix over the entire chamber surface as a very thin coat. I worked fast to ensure an even coat before the weld could harden. I set the stummel aside for the application to harden and cure overnight. Next I sand the weld coating to a nice smooth and even surface using a folded piece of 180 grit sandpaper.After I had applied and sanded down the JB Weld to a thin coat, I wanted to further protect the briar while adding another protective layer between the JB Weld and burning tobacco. I addressed this by mixing activated charcoal and plain yogurt to a thicker consistency, just enough that it would spread easily and applied it evenly all along the chamber walls after inserting a folded pipe cleaner through the draught hole to keep it open. Once dry and set, this will not only protect the walls but also aid in faster build up of cake. I set the stummel aside for the bowl coat to dry out and harden for a couple of days. Three days later, the bowl coating had completely hardened. I rubbed a small quantity of restoration balm in to the stummel surface and set it aside for about 20 minutes to be absorbed in the wood. The balm not only hydrates and rejuvenates the briar wood but also enlivens it. Thereafter I hand buffed the stummel with a microfiber cloth to deepen the shine. The stummel looks absolutely stunning at this stage. I completed this project by hand polishing the stummel with Halcyon II wax. I rubbed this polish deep into the rustications and after a couple of minutes, vigorously hand buffed the stummel with a microfiber cloth to a deep shine. I polished the stem with Blue Diamond compound and subsequently with carnauba wax using my hand held rotary tool. This is a gorgeous looking pipe and will be an integral part of my collection of contemporary American Pipe Carvers. Shown below are a few pictures of the completely refurbished pipe. Hope you have enjoyed the restoration journey of this project as much as I loved working on it. Cheers!

A Simple Refurbishing Of An Early Caminetto Business #149 Sitter


Blog by Paresh Deshpande

I am always on a look out for old and collectible estate pipes, especially those related to important evolving pipe history, to be added to my personal collection and this pipe on my work table precisely meets the above criteria.

The pipe that I selected to work on next is a deeply rusticated robust sitter with smooth surface on left and right side of the shank and a unique asymmetric acrylic saddle stem. It is stamped on the left smooth panel with model code “149” over “CAMINETTO” in inverted commas and in running italics over “BUSINESS” in block capital letters. The right side of the shank bears the stampings “ASCORTI” over “RADICE” over “CUCCIAGO” over “CANTU- ITALY”. The upper surface of the asymmetric saddle stem bears the logo of MOUSTACHE that resembles a bird in flight. I have worked and researched Caminetto pipes earlier and from what I recollect, Ascorti and Radice moved away from Castello and jointly made Caminetto pipes for a few years before separating to establish their own brands Ascorti and Radice respectively. Thus, pipes that bore the stamp of both Ascorti and Radice are early pipes and are highly collectible and fetch top dollars. For detailed information, I visited pipedia.org and have reproduced the relevant information below (https://pipedia.org/wiki/Caminetto).

Caminetto’s history started in 1959 when Guiseppe Ascorti, from Cucciago, and known to his friends as “Peppino”, was hired by Carlo Scotti to work at Castello, located in nearby Cantu. Since it’s foundation in 1947 Castello had contributed substantially to regained glory for Italian pipemaking. Talent and assiduity soon made Ascorti one of Scotti’s most notable pipemakers – a man he counted on for the future. But, Ascorti had his own far reaching plan: He wanted to work as a self-employed pipemaker! After his wife, Paola, had taken over her parent’s small greengrocery in the early 1960’s this plan became more concrete. The additional income from the shop enabled him to buy tools and machines little by little to furnish his own workshop. By the end of 1968 he was ready and left Castello. Ascorti also persuaded his co-worker, the young and highly-talented pipemaker Luigi Radice (born 1939), to join him – the two were neighbors in Cucciago. Carlo Scotti, whom is known as a perfect gentleman, is reported to have spoken unreservedly about this development.

Ascorti & Radice started to manufacture pipes on their own. One of the first who agreed to market their pipes was Gianni Davoli, proprietor of a tobacco shop in Milan. The situation was perfect–two pipemakers in search of a distributor, and a pipe merchant in search of a mainstay brand to market. Davoli – via friends and relations in the States – had made flourishing contacts with US pipe wholesalers and traders. He shipped some pipes across the pond for inspection and received excellent feedback for the very high quality of the pipes. He, shortly after, offered to be the sole distributor worldwide, and Ascorti & Radice happily accepted.

Then came the legendary evening when Ascorti, Radice and Davoli gathered around the fireplace after a hard day’s work enjoying their pipes, a glass of wine, and humorous conversation. Davoli is said to be the one who associated the pipes with the fireplace or chimney, which is “camino” in Italian. Hence “Caminetto”, the diminutive (smaller) singular version of camino, was coined as the brand’s name. Ascorti, Radice and Davoli later became famous as “I tre Camini” – the three chimneys. Maybe, they had more than one glass of wine each, but it’s not certain whether the distinctive mustache logo on the stem and the Caminetto slogan “La Pipa del Baffo” – “the pipe with the moustache” – was created the same night. In fact, Ascorti and Radice both wore impressively large moustaches, and a pharmacist in the neighborhood had been kidding them about that. (Davoli, for reasons of corporate identity, later wore a big moustache, too.)

Now, Davoli concentrated on marketing the Caminetto brand in the United States. His strategy was as simple as it was brilliant. There was a remarkable Castello hype at the time. Castello pipes were highly sought after but hard to get due to limited production. Davoli filled the gap, promoting the Caminetto to be absolutely equal to the Castello in terms of quality, while asking only half the price. And best of all: the Caminetto pipes were consignable! The Tinder Box International would be under contract with successful nationwide distribution. The brand’s success was overwhelming – far beyond any expectation, with the rusticated Business line becoming the most popular.

The boom continued strongly – especially in the US. Production increased steadily, from 3,000 to 5,000 and then 7,000 pipes being made per year, placing Caminetto at the top of US sales in their market segment. The 1974 Tinder Box catalog celebrated Gianni Davoli as “master pipe maker and designer” and “sole creator of Caminetto” without a single mention of Ascorti or Radice!

Caminetto prospered throughout the 1970’s. Everyone was hard at work, and sales continued to increase, but soon disagreements occurred among the three principles, marking the beginning of the end.

First, Luigi Radice became increasingly discontent with the factory-like production. Pipes were made by standard shape numbers, and there was no longer room for his own creative pipemaking and personal development. He was also afraid that the increased production would eventually lead to a reduction in quality. Radice started quarreling with Ascorti about the future course of Caminetto, and they were unable to find a solution. Radice, being an employed pipemaker, rather than a partner, could not assert himself. Ascorti shared Radice’s concerns about maintaining quality in the face of the higher production, but Davoli had gained almost total control by this time, and insisted on the higher production numbers.

The next controversy was regarding Roberto Ascorti. The young man had visited a school of arts and also completed his service in the army. Roberto did not want to attend a university, and instead started helping in the workshop with pipe repairs and making his first few pipes. His father wanted to hire him on as a full-time pipemaker, but Davoli refused, being afraid to lose influence to the potentially strong alliance between father and son.

The situation worsened in 1979. The foreseen quality issues occurred–there were complaints from the US. And, there is some indication that Carlo Scotti considered legal actions, asserting that Caminetto had copied some of Castello’s successful shapes too exactly. At this point Ascorti wanted to sever ties with Davoli, but Davoli was able to assert himself and maintained control.

‘I tre Camini’ disbanded in December of 1979, when Luigi Radice left, without prospects, knowing not where or how he would continue as a pipemaker. A clear indication that he had very strong feelings as to his future with Caminetto.

Ascorti vs. Davoli continued for a few more months. The Ascorti family offered to buy the brand, but they couldn’t afford it at the time. So, Guiseppe Ascorti hastily equipped a new workshop, and then he left company which was essentially his own. But the complete crew whom he had trained in the old Caminetto workshop followed him. And thus they were able to re-start making pipes within a few weeks in 1980. For three months they sold pipes under the name Sergio. Only 800 to 1,000 Sergio pipes were released. Then Giuseppe Ascorti and his son Roberto founded a new company under their own last name. – For the further history see Ascorti!

Gianni Davoli, last chimney standing, stayed behind, now owning a pipe workshop without any pipemakers. Strangely enough, the old Caminetto workshop caught fire shortly afterward and burned down to ashes.

At the end of this article, there is another link to Brothers of Briar forum where Joshoowah has written his further research of Caminetto, dating guide and shape codes. Here’s a link to the write up

https://pipedia.org/wiki/The_History_of_Caminetto_(shapes,_stamping,_articles,_etc.)

He picks up from the point where the Caminetto workshop was burned down to ashes after December 1980. He notes:-

It is at this point where details become hazy, as the brand Caminetto seems to have disappeared all but entirely from the market. Some claim Peppino continued to make pipes under the name Caminetto on into the 80s (see smokingpipes.com), but this is fairly unclear and uncertain, particularly because Divoli owned the Caminetto brand and the shop burning down between 1979-1981.

The story picks back up in late 1985 and early 1986, where Roberto Ascorti re-opens the line of Caminetto. Though the “Business” rustication changed somewhat, the original shapes and finishes have largely been left unchanged. From what I can gather, Roberto bought the name Caminetto sometime in 1985. “From who?” is the question, perhaps Divoli himself. Roberto revitalized the once great Caminetto line in memory of his father and the legacy of Caminetto in the Italian pipe industry, as well as to show his capability of producing high quality masterpieces. In saying such, Roberto has been his “flavor” on many of the Caminetto models over the years, stretching and adjusting some shapes to his own liking and style. It seems, by most accounts, he has done well in continuing the Caminetto legacy. One thing that has changed, however, are the prices of the newer lines, which sometimes reach the prices of Castello’s themselves.

That is the history of Caminetto as far as I have found in my years of appreciating the brand. It is key to note the particular brands that came out of the fall-out of the original Caminetto that now have a bit of good standing behind them:

  1. Luigi Radice — We all know Radice’s work. It is marvelous, fairly unique, and full of passion and heart for the art of pipe making.
  2. Roberto Ascorti — We, too, are familiar with Ascorti, which has produced quality pieces for a number of years, which resemble some of the later years of Caminetto (i.e. 1976-1981).
  3. Caminetto — This, too, is Roberto’s work but carries a different flavor to his Ascorti line, resembling some of the work of his father, Peppino, and the original Caminetto, which includes the wax-drip and new dear finish.
  4. Enzo Galluzzo — This is one many may not know about, particularly because the company closed in 1991. In the fallout of Ascorti, Radice, and Divoli, there was another aspiring pipe maker among them who went his own way — Enzo Galluzzo. Galluzzo invented a new line of pipes in which he branded “Capitello.” Capitello took on the character of Caminetto, including some of its shapes and finishes, but Galluzzo produced some real nice pieces for a fraction of the cost of Caminetto, Castello, and even Ascorti. One interesting fact is that Capitello’s were the only oil-cured pipes of the 80s, essentially carrying on the tradition of the oil-cured pipe of Caminetto. The company ran from 1982-1991.

Stampings and dating

First off, dating earlier Caminetto’s is nearly impossible. Nevertheless, there were three phases, some in which were much earlier, of development that occurred in the stamping process of Caminetto. Before that though, every pipe had the stamp of Caminetto in one of two ways: Caminetto in script or Caminetto within quotation marks in block letters (I do not know how it was decided which pipe got which stamp, as I have had EARLY Caminetto’s with both). The stampings:

ASCORTI

RADICE

CUCCIAGO

CANTU- ITALY

There are two other variations to the stampings, but I have not included them as they are irrelevant to the pipe that I am currently working on for the sake of brevity. Another aspect useful for dating Caminetto pipes is the style of moustache stamped on the stem. Joshoowah comments on this aspect as under:-

In addition to the above stampings, there was always the trademark mustache on the stem. The earlier models (1968/69-1974/75) had the iconic gold, sometimes white, “bird-in-flight” mustache and the later models (1975-1979/80/81) had a gold, or white, “double comma” mustache.

Pipes stamped like #1 are the most valuable Caminetto’s as they are the earliest production of the brand, as well as what some would claim the most perfect of Ascorti and Radice’s work.

The shape code chart that has been uploaded on this page is reproduced below and the pipe that I am working on is indicated by a red arrow.Thus, from the above, it is certain that the pipe currently on my work table is an earliest production of the brand made during the period 1968 to 1975.

Initial Visual Inspection
This deeply rusticated and perfectly proportioned sitter has a medium thick layer of cake in the chamber with darkening over the also rusticated rim top surface. The beautifully rusticated stummel surface is covered in dust and grime. This grime and dirt can be seen in the deep rustications and lends a dull and lifeless appearance to the pipe. The stummel sides are stained with the grime and hand oils from previous usage. The mortise is relatively clean and would be cleaned further during the refurbishing process. The grey acrylic stem with swirls of black and it’s golden bird-in-flight stem logo is also in decent condition. There is some light tooth chatter in the bite zone on either surface while the buttons are intact. Overall, the pipe is in very good condition requiring only a little TLC to get it back to its pristine condition. The following pictures will aid in your visual inspection too. Detailed Inspection
This pipe has a large bowl with a depth of 2 ¾ inch. The chamber has an even layer of thick hard cake. There is a heavy overflow of lava over the rim top surface. The rim top has darkened considerably. The condition of the inner walls of the chamber and the inner edge can be commented upon after the cake has been taken down to the bare briar. The ghost smells in the chamber are very strong.The deeply rusticated stummel surface has a very beautiful texture and hand feel to it. The stummel has a very natural Virgin stain and supposed to darken as it is smoked. The surface is covered in dust and grime. The fact that the rustications are dusty and filled with dirt is accentuated more due to the dark stains on the stummel sides on account of hand oils and sweat. The briar looks lifeless and bone dry and has taken on dull hues. The mortise is relatively clean with slight darkening of the mortise wall. The ghost smells are pretty strong and should reduce once the chamber and mortise is cleaned up. The asymmetrical saddle variegated acrylic grey stem with swirls of black beautifully compliments the stummel. There is minor tooth chatter on either surface of the stem. The moustache gold stem logo is in pristine condition. The tenon opening and the horizontal slot shows accumulated dried gunk and grime. The button edges are crisp and the slot end is undamaged.The Process
I began the process of refurbishing this pipe by reaming the chamber with a PipNet reamer tool, using the second and third head. Using my fabricated knife; I further took the cake down to the bare briar. With a 150 grit sand paper, the walls of the chamber were rid of all the remnants of the cake, revealing smooth chamber walls. I further wiped the chamber with a cotton swab wetted with isopropyl alcohol to completely remove the residual carbon dust. The inner rim edge appears darkened all around but more so on the left side of the chamber. There are a few minor heat lines crisscrossing the chamber walls. It is my experience that such fissures are usually addressed after a salt and alcohol treatment and subsequent sanding of the chamber walls since these are indicative of very thin layer of hard cake which is moistened during alcohol treatment and easily removed thereafter by sanding. I scraped the shank internals with a fabricated tool to remove all the crud that had accumulated along the shank walls and further cleaned it with bristled and regular pipe cleaners dipped in isopropyl alcohol.I continued the cleaning of the chamber and shank internals with a salt and alcohol bath. I use cotton balls which is an at par substitute as I have realized over the years. I draw out a wick from the cotton and along with a folded regular pipe cleaner; insert it in to the mortise and through the draught hole in to the chamber. Thereafter, I packed the chamber with cotton balls to about quarter of an inch below the rim inner edge and soaked the cotton balls with isopropyl alcohol up to the brim. About half an hour later, the level of alcohol had gone down, having being absorbed by the cotton. I topped it up once again and set it aside overnight. By next afternoon, the cotton and alcohol had drawn out all the remaining oils and tars from the chamber and mortise, fulfilling its intended task. I removed the cotton balls and ran pipe cleaners through the mortise to clean out all the loosened tars and gunk. Using my fabricated tool, I scraped out the entire loosed gunk from the sump and further cleaned it with alcohol and q-tips. The chamber now smells clean and fresh. I set the stummel to dry out naturally.While the chamber was soaking in the salt and alcohol bath, I worked the stem, starting with cleaning the internals of the stem using thin shank brush and anti oil dish washing soap. I scrubbed the tenon end and the horizontal slot with soap and Scotch Brite pad till clean. Once the stem internals were clean, I ran a couple of pipe cleaners through the stem airway to get rid of any remaining soap as well as to dry it out. Next, I move to clean the exterior of the stummel. I generously applied Murphy’s oil soap with a hard bristled tooth brush and scrubbed the stummel and rim top with the soap. I washed the stummel under running warm water with anti oil dish washing detergent till the stummel surface was clean and dried it using paper towels and soft cotton cloth. I deliberately cleaned the rusticated rim top with a soft brass wired brush, Scotch Brite and soap. The stummel surface has cleaned up nicely with the robust rusticated patterns looking splendid. I simultaneously cleaned the shank internals with the detergent and hard bristled shank brush. I dried the mortise using paper towels and set the stummel aside to dry out naturally.While the stummel was set aside to dry out, I worked on the stem. Using a flat head needle file, I lightly sand the inner edge of the buttons on either surface to a crisp sharpness. I further sand the entire bite zone with a folded piece of 220 grit sandpaper. This helps to even out the minor tooth chatter and also reduce the filing marks left behind by the needle file. The sanding marks will be further addressed during the sanding and polishing process.Next, I dry sanded the entire stem with 600 and 800 grit sand papers followed by wet sanding using 1000, 1500 and 2000 grit sand papers. This progressive use of higher grit sandpapers helps to, firstly,  reduce the sanding marks left behind by the more abrasive ones, secondly, completely eliminate the dullness from the years of use and imparting a clean shine to the stem surface. I went through with the micromesh polishing cycle by dry sanding the surface with 3200 to 12000 grit micromesh pads. I applied a little EVO and set the stem aside for a few minutes. This stem, as the rest of the pipe, is a real beauty. I completed the polishing regimen by polishing the surface with a cotton wheel mounted on to my hand held rotary tool and Blue diamond followed by food grade carnauba wax polish.By the time I was done working on the stem refurbishment, the stummel had completely dried out. I decided to address the darkened inner rim edge by creating a slight bevel using a folded piece of 220 grit sandpaper pinched between fingers and running it along the rim edge. The rim edge looks much better at this stage.Next, I rubbed a small quantity of “Before and After Restoration Balm” into the briar with my finger tips and let it rest for a few minutes. The balm almost immediately works it’s magic and the briar now had a nice vibrant appearance with the beautiful rustication patterns on full display. I have been using this balm ever since I embarked on this journey and it is this part of restoration that I always look forward to. I further buffed it with a horse hair shoe brush. This pipe really oozes of a very high quality. I completed this project by hand polishing the stummel with Halcyon II wax. I rubbed this polish deep into the rustications and after a couple of minutes, vigorously hand buffed the stummel with a microfiber cloth to a deep shine. This is a gorgeous looking pipe and will be an integral part of pipe history in my collection. P.S.– Delving deep in to history of this pipe took me through the labyrinth of interconnectivity of Italian pipe carvers and marquees that have dominated our pipe world and given pipe smokers the world over some of their favourite smokers.

I wish to thank each one for sparing their valuable time to read through this write up and praying for the health and safety of you and your loved ones.

Refurbishing an Inherited c.1908 BBB Own Make Lovat


Blog by Paresh Deshpande

I absolutely love my classic BBB pipes that I have inherited and one such pipe is now on my worktable. This classic Lovat has some beautiful cross grains on the front, back and shank surface with beautiful bird’s eye grains on the sides that can be made out under the grime and dust covering the stummel surface. It is stamped on the left side of the shank as “BBB” in a rhombus with “OWN” and “MAKE” on either side of the rhombus. The Sterling silver ferrule at the shank end is stamped as “AF & Co.” in a rectangle followed by three cartouche bearing hallmarks. Starting from the left, the first cartouche bears the stamp of an “Anchor” for the Birmingham Assay Office followed by the “Lion Passant” certifying the silver quality and the last cartouche bears the Date letter “i” which is quite worn out and the outline of the letter can be made out only under close scrutiny under a magnifying glass. The vulcanite saddle stem is devoid of any stem logo. The stampings are clear and easily discernible except the date code letter. BBB – Pipedia has detailed information on the origins of the brand, it’s transition to the Cadogan group making this article a good read for those interested. I would like to highlight that, quote “At the beginning, BBB produces two qualities. One, BBB Own Make, became finally BBB Best Make, other pipes being simply estampillées BBB. There are reasons to believe that Own Make in fact were produced in London (Reject pipes cuts year R stamped one them.), whereas the simple BBB were imported, and this, to the paddle of the 20th century. However, if all that is not very clear, it is probable that the lines low-of-range were an import of Saint-Claude” un-quote.

Now coming on to the most interesting and satisfying part of the research on this piece of briar and that is establishing the probable date of manufacture of this pipe. I prefer to follow English silver marks: the guide to hallmarks of London sterling silver (silvercollection.it)  while establishing the dates on the basis of the date letter in the hallmarks. The Anchor points to the Birmingham Assaying Office. Thereafter, I followed the link to the dating guide of the Birmingham Assay Office to date this pipe. I have included a hallmark chart for dating the pipe and have put a red mark around the letter for 1908. It is the same style of “i” and the cartouche that holds the letter stamp.Thus it is with certainty I say that this BBB was made in 1908, give or take a year as the ferrules were assayed in bulk and used as required. The stamp of Own Make designates this as the finest quality pipe that was made in London for the local market in limited quantities.

Initial Visual Inspection
This 115 year old pipe flaunts it’s age with great dignity and élan. There is a decent layer of cake in the chamber that is even throughout. The rim top surface is covered in a layer of lava overflow. Underneath this crud and grime, the inner rim edge damage is apparent. The outer rim edge has a number of dents and dings. The stummel surface, though covered in dirt, dust and grime, has developed a nice patina. The stem has a chunk of vulcanite missing from the button and rounded orifice. The following pictures will give the readers a general idea as to the condition of the pipe as it sits on my worktable. Detailed Visual Inspection
As brought out earlier, the chamber has an even layer of hard and brittle cake. It appears that the cake was being regularly reamed to maintain the correct bare minimum thickness. The condition of the chamber walls will be ascertained after the cake has been taken down to bare briar. The rim top surface is uneven and covered in a layer of overflowing oils and tars. Also the condition of the rim inner edge is indicative of it being subjected to an amateurish use of a sharp knife to remove charred surface from the edge. The end result is an uneven and an out of round chamber. The outer rim edge too has a number of dents and dings, most likely caused due to striking against a hard surface to remove the dottle. I intend to address the issue of uneven rim top surface by topping the rim surface. It will also help to address the damage to the inner and outer rim edges to an extent and what damage remains; will be masked by creating a bevel.The stummel is covered in a layer of dirt and grime from years of uncared for storage. The sides and front of the bowl appears considerably darker due to accumulation of grime over the hand oils from over a period of 115 years. However, beautiful cross grains on the front, back and shank surface with beautiful bird’s eye grains on the sides can be made out under the grime and dust covering the stummel surface. There are no scratches/dings or dents over the stummel surface. The briar has developed a beautiful dark patina over the years and it will be my endeavor to maintain it through the restoration process. The mortise is clogged with old oils, tars and ash; however, the shank face is sans any crack or deformation. This also confirms that the band is not a repair band but is original to the pipe. There is no reason to sand the stummel surface to address any dents / dings as there are none. I shall dry sand the bowl with micromesh pads to bring out the grains and impart a shine to the surface while preserving the patina. The period correct vulcanite saddle stem with a round orifice has a quality feel to it. It is oxidized and is missing a chunk of vulcanite from the bite zone including the button and the round slot. The area around the damaged portion has deep tooth indentations. The step tenon is covered in accumulation of old oils, tars and grime. I will rebuild the damaged portion of the stem using activated charcoal and CA superglue and thereafter match the repaired portion with the stem profile and the rest of the stem surface. After the cleaning and polishing regimen, the repairs should blend in well with the stem surface. The Process
I began the repair and refurbishing process with cleaning of the stem internals. Using thin shank brushes and anti-oil dish washing soap, I cleaned the stem airway. I have modified this process of cleaning the stem airway by doing away with pipe cleaners and alcohol as it saves me a ton of pipe cleaners, which is a precious commodity for me here in India. I continued this cleaning till only white clean foam came out of the stem airway, indicating that the airway was nice and clean. I ran a couple of pipe cleaners dipped in alcohol through the airway to dry it out and make sure that there are no traces of soap and gunk hidden in the airway.With the stem internals now clean, I moved to external cleaning of the stem surface by dunking the stem into “Before and After Deoxidizer” solution developed by Mark Hoover. The solution helps to draw out heavy oxidation to the surface making it’s further removal a breeze, while the minor oxidation is eliminated to a very great extent. I usually dunk stems of few pipes that are in-line for restoration and this BARLING’S MAKE is marked in yellow arrow. I generally allow the stems to soak in this solution overnight for the solution to do its work.While the stem was soaking in the De-oxidizer solution, I reamed the chamber with size 2 head of the PipNet pipe reamer. I removed the carbon from the areas where the reamer head could not reach with my fabricated knife. To completely remove the residual carbon from the walls of the chamber and smooth out the walls, I sanded the chamber walls with a folded piece of 220 grit sandpaper followed by cleaning the chamber with a cotton swab wetted with isopropyl alcohol. The chamber walls are in pristine condition. I gently scrapped off the lava build up over the rim top using a sharp knife to avoid damage to the surface.I cleaned the mortise and shank airway using a dental pick and hard / soft bristled pipe cleaners dipped in isopropyl alcohol. I shall continue with further cleaning of the shank internals once I clean the external stummel surface.Next, I decided to subject the chamber and mortise to cotton and alcohol bath. I packed the chamber with cotton and drew out a wick from the cotton and along with a folded regular pipe cleaner, inserted it into the mortise and through the draught hole into the chamber. I tightly packed cotton balls into the remaining portion of the mortise. Thereafter, I soaked the cotton balls with isopropyl alcohol up to the brim. About half an hour later, the level of alcohol had gone down, having being absorbed by the cotton. I topped it up once again and set it aside overnight. By next afternoon, the cotton and alcohol had drawn out all the remaining oils and tars from the chamber and mortise. I removed the cotton balls and the dirt can be gauged by the appearance and coloration of the cotton balls and the pipe cleaner. With my fabricated knife and dental tools, I spent the next hour scrapping out the entire loosened gunk from the mortise. I ran pipe cleaners through the mortise and draught hole to clean out all the loosened tars and gunk that was lodged in the draught hole and mortise. The chamber and mortise now smelled clean, fresh and looked it too. I set the stummel to dry out naturally. Once the internals of the chamber and shank were cleaned, I cleaned the external surface of the stummel with Murphy’s Oil soap and cotton swabs followed by scrubbing the surface with a toothbrush and dish washing soap. This rid the stummel surface of all the accumulated dust, dirt and grime. Using a piece of Scotch Brite scrub, I deliberately cleaned the rim top and removed the crud from the surface. The damage to the rim edges is, thankfully, not as severe as I had anticipated. I also cleaned the shank internals with dish washing soap and a shank brush. I set the stummel aside to dry out naturally while I worked the stem.By the time I was done with internal and external cleaning of the stummel, the stem had been in the deoxidizer solution for nearly 24 hours. I cleaned the stem and the stem airway under running warm water and scrubbed the raised oxidation from the surface using a Scotch Brite pad and the airway with a thin shank brush. I further removed the oxidation by scrubbing the stem with 0000 grade steel wool. Once the stem was dried with paper towels, I applied a little olive oil to rehydrate the stem.I wiped the stem surface, particularly the damaged button end, with a cotton pad and alcohol to remove any traces of dirt and grime. To begin the stem repairs, I first wound a scotch tape around the tapered portion of a pipe cleaner and inserted it into the stem airway. I prepared a mix of CA superglue and activated charcoal and generously applied it over and extending beyond the broken surface and set it aside for curing over night. The tape will help prevent the mix from clogging the stem airway.While the stem fills were curing, I addressed the damage to the rim top surface by topping the rim to reduce the charred surface and bringing the bowl back to round. I always use a square piece of 220 grit sand paper and firmly hold it with my hand on my work table. I work the rim top on the sand paper in circular motion, frequently checking the progress as I want to keep the briar loss to a bare minimum necessary. The inner rim edge damage has not been addressed entirely with a few dings and uneven surface visible on the sides (encircled in red) and charred surface to the front of the bowl (encircled in green). Also a few minor dents and chipped surfaces are visible along the outer rim edge. These issues were addressed next. In order to mask the still visible damage to the inner rim edge, I created an inner edge bevel by pinching a folded piece of 180 grit sand paper between my thumb and forefinger and moving along the inner edge with a constant pressure, to minimize the charring on the inner edge of the rim. Similarly, I created a slight bevel on the outer edge of the rim to address the minor dents and chipped areas.Next, I subjected the stummel to a complete cycle of micromesh polish, wet sanding with 1500 to 12000 grit pads. I wiped the stummel with a moist cloth after every grit pad to remove the sanding dust left behind by the pads. This also helps in monitoring the progress being made and ensures early corrective action. I am happy with the progress being made until now. I massaged a small quantity of “Before and After Restoration Balm” into the briar surface with my finger tips and worked it deep into the surface and let it rest for a few minutes. The balm almost immediately works it’s magic and the briar now has a nice vibrant appearance with the beautiful bird’s eyes and cross grain patterns on full display. It was at this stage that I polished the sterling silver with a jeweller’s cloth to a nice shine. By the time I was through with the stummel polishing, the stem fills had completely cured.  I moved ahead with the process of filing and shaping the button end with a flat head needle file. With a round needle file, I reshaped the round orifice at the slot end. For a better blending, I further sanded the entire stem with a folded piece of 320 grit sandpaper. I continued to dry sand the entire stem with a folded piece of 400 followed by 600 and 800 grit sandpaper and further progressed to wet sanding with 1000, 1500 and 2000 grit sand papers. I rubbed a small quantity of EVO into the stem surface and set it aside for the vulcanite to absorb and hydrate. To bring a deep shine to the vulcanite stem, I went through the complete set of micromesh pads, wet sanding with 1500 to 12000 grit pads. I wiped the stem with moist cloth after working each pad and rubbed it down with Extra Virgin Olive oil to rejuvenate the vulcanite.To complete the restoration, I mounted a cotton cloth buffing wheel on to my hand held rotary tool and polished the stummel and stem with Blue Diamond compound. This compound helps to remove the minor scratch marks that remain from the sanding. Next, I mounted another cotton buffing wheel that I have earmarked for carnauba wax and applied several coats of the wax. I finished the restoration by giving the entire pipe a rigorous hand buffing using a microfiber cloth to raise the shine further. The finished pipe looks amazingly beautiful and is ready to join my collection. I only wish it could share with me it’s story of the past years while I enjoy smoking my favorite Virginia blend in it or maybe an English blend or maybe just keep admiring it!! The finished pipe is as shown below:- A note of thanks to all the readers who have joined me in this journey that has been such a pleasure! You and your loved ones are always in our prayers…

A Challenging Restoration of a c.1921 No Name Meerschaum Billiard


Blog by Paresh Deshpande

During the summer of last year while browsing on Pinterest, I came across pictures of some beautiful pipes and following the links led me to an old gentleman from the UK who was willing to sell these pipes either single or as a lot. There were around 60 odd pipes. I went through the pictures that were sent along with the rates and selected 10 pipes. After a prolonged and interesting interaction, we managed to arrive at a price point. Soon these pipes landed on the shores of India and went in to Customs hold for nearly a month. Finally, it was released and I laid my hands on these pipes after a wait of nearly 3 months! Here is a picture of the lot that I had taken moments after opening the parcel.Since then, I have refurbished, repaired a family era Barling’s Make Bulldog (yellow arrow), a c.1901 Samuel McLardy (green arrow) and added them to my personal collection while the c. 1960 Dunhill Shell (blue arrow) has made it’s way to my dear friend to enjoy. This estate lot had a beautiful block Meerschaum billiard with a Redmanol stem (red arrow) that called out to my wife. She liked the size, heft and simple classic straight lines of billiards and the way the red of the stem complimented the overall appearance of the pipe. The following picture will identify the pipes that have been restored and the meer that is now on my work table.This solid meerschaum is sans any stampings on the stummel or stem and lack of any housing case makes establishing the provenance of this pipe a tad impossible. The only pointer to this pipe being English is the stampings on the Sterling Silver ferrule at the shank end and should help in dating this pipe and identify the silversmith who mounted it on this pipe. It is stamped “H.T” in an oval over three sterling silver hallmarks. From left to right the first cartouche is with a LION PASSANT certifying silver quality followed by a cartouche with symbol for Chester Assay Office and the last cartouche contains the date code letter “V”.In order to link the maker’s mark on the silver band to a silversmith registered with Chester Assay office. I visited https://www.silvermakersmarks.co.uk/Makers/Chester-HP-HZ.html#HT  and I have reproduced the findings below that most closely matched the probable silversmith (highlighted in red).The cause for doubt in my mind with respect to the findings above is the fact that the “H.T” stamping on the silver band is enclosed in an oval whereas that shown above is in a square cartouche. However, the comment of Henry Tongue being a Pipe mounter and the period are perfectly matched. Thus the circumstantial evidence makes me want to believe that the pipe mounter of this Meerschaum pipe is Henry Tongue.  Any esteemed Reader is most welcome to shed more definitive information for the benefit of other members.

The next step was to ascertain the dating on this silver band. I frequent www.silvercollection.it for exact dating of letter code. The font style and the enclosing cartouche of the letter “V” on the shank band matches to the date year 1921. I have reproduced a screenshot of the relevant section of the date charts and the date year is indicated in red.

Now it was time to get working on the pipe.

Initial Inspection
To begin with, the stummel is dirty and covered in dust, dirt and grime of over a century gone by. The age on this pipe is manifested in the number of all the handling related scratches and marks that it has been subjected to. There is a decent layer of cake in the chamber with lava overflow over the rim top surface. Under all the crud, the rim top is deeply scratched all around. The stem seats loose in the shank. The stem has a couple of tooth indentations in the bite zone and other than that the Redmanol stem is in pretty good condition. Here are a few pictures of the pipe as it sits on my worktable. Detailed Inspection
There is a thick layer of cake in the chamber. The rim top surface has lava overflow and has darkened considerably over the entire surface. The rim top is peppered with deep scratches, probably caused when someone, somewhere through the century, tried to remove the crud from the rim top using a sharp knife or it could have been caused as damage due to uncared for storage when the rim top and rest of the stummel was being rubbed against some hard objects. This uncared for storage could be the most likely reason since the stummel too has a number of scratches and marks. The inner and outer rim edges both show a few nicks and dents. The exact extent of damage to the inner rim edge will be ascertained after the chamber and rim surface is rid of all the cake and crud. The chamber walls are thick and feel solid to the touch.The stummel has a number of scratches and marks over the surface. There is a lot of dirt and grime ground in to the stummel surface giving it a dull and patchy appearance. However under all the grime and scratches, the stummel has taken on a beautiful color/ patina through the years of smoking and it is my intent to preserve it through the process. The threads in the mortise are slightly worn out and the mortise itself shows accumulation of oils and grime. Other than these minor issues, the stummel surface is sans any major damage and feels solid to the touch. The opaque cloudy Redmanol stem looks amazing as it is and should add a new dimension to the beauty of the pipe once it is repaired and all polished up. There are a couple of deep tooth indentations in the bite zone (encircled in yellow) that would need to be addressed. The stem airway leading to the round orifice shows remnants of old oils and gunk. The threaded bone tenon is covered in very fine jute threads to increase the diameter of the tenon for improved seating of the tenon in to the mortise. Yet even after this adhoc improvisation, the seating of the stem is pretty loose. I would need to figure out a more accurate, reliable and permanent way to address this issue.The Process
I started work on this pipe by firstly getting rid of the jute threads from the tenon end and followed it with cleaning the airway using thin shank brushes and anti oil dish cleaning soap. I ran a couple of pipe cleaners to clean and dry out the airway. Using a soft brass wired brush; I cleaned out the entire gunk from the threads of the bone tenon.I filled the tooth indentations with clear superglue and set it aside for the glue to cure. Once the glue had cured, using a flat needle I sand the fill to achieve a rough match with the rest of the stem surface. Once I was through with this step, I dry sand the entire stem with 400, 600 and 800 grit sand papers followed by wet sanding using 1000, 1500 and 2000 grit sand papers. This progressive use of higher grit sandpapers helps to, firstly, reduce the sanding marks left behind by the more abrasive ones, secondly, completely eliminate the oxidation and imparting a clean shine to the stem surface. Thirdly, this also helps to even out the minor tooth chatter from the bite zone. To complete the stem polish, I went through the entire set of nine micromesh pads, wet sanding through 1500 to 12000 grit micromesh pads.At this stage of refurbishing this pipe, little did I know that I would be carrying out further tedious and unplanned for repairs to the stem towards the end and till then, for all purposes, I have completed the stem restoration.

Next, I worked on the stummel. I began the stummel restoration by reaming the chamber with blade size 2 followed by size 3 of PipNet reamer. With my smaller fabricated knife, I scraped out all the carbon from difficult to reach areas. I used a 220 grit sand paper, pinched between my thumb and forefinger, to sand the inner walls of the chamber of the pipe. Once I had reached the bare walls, I wiped the chamber with a cotton swab dipped in isopropyl alcohol. This removed all the residual carbon dust and also rid the chamber of all ghost smells. The walls of the chamber are nice and solid with no signs of cracks. Using a sharp knife, I gently scraped out the overflow of lava from the rim top. The scratches on the rim surface are now clearly visible and so is the extent of damage to the outer edge of the rim. With the stummel internals cleaned up, using my fabricated tool, I scraped out the entire dried gunk from the mortise. I further cleaned the shank internals with a shank brush dipped in alcohol followed by running pipe cleaners through the shank till clean.All the while that I was cleaning the chamber and the shank, the sterling silver band came loose. I was extremely relieved to note that beneath the band, the shank was in pristine condition.To address the damages to the rim surface, I topped the rim top over a piece of 220 grit sandpaper, frequently checking for the progress made as I wanted to restrict the loss of meer material to not more than absolutely necessary. Close inspection of the rim top at this stage revealed that even though few minor scratches are still visible, they are too minor with the surface smooth to the touch. This will further even and smooth out during polishing with micromesh pads.I wiped the stummel surface with a cotton swab and Murphy’s Oil soap. The stummel surface is now free of all the dust and grime. I also cleaned out the last traces of lava from the rim top surface. The stummel and rim top surface now looks dark and dull, but it is clean. The scratches/ lacerations over the stummel surface are now more prominently visible. I shall bring back the rich shine when I polish it further using micromesh pads. This step will also help further reducing a few of the minor scratches and lacerations from the surface. At this point I was caught in a conflict; should I sand the stummel with a piece of 220 grit sandpaper to remove the scratches to make it look pristine and loose the patina that has developed over the years or preserve the coloration and patina. I decided on the later, after all it is the coloration taken on by the meer over the years which is more important and the existing scratches are a part of its journey through the years, is how I convinced myself!! I polished the stummel surface by dry sanding it with 1500 to 12000 grit micromesh pads. Some minor scratches were also addressed while imparting a nice deep shine to the stummel. The patina was also preserved. All in all, I am pleased with the appearance of the stummel at this stage. Next I gave a beeswax polish to the meerschaum bowl. I assembled the equipment and materials that would be needed during the process — a heat gun, paper towels, q-tips and a container for the wax and of course, beeswax. I stuffed the chamber with cork to prevent inadvertent seepage of the melted beeswax into either. Next, I melted a sufficient quantity of beeswax in the container using my heat gun and thereafter heated the stummel. Using the a folded pipe cleaner, I completely coated the stummel with the wax and continued the application till the surface was saturated and set the stummel aside to absorb the wax. I reheated the stummel with the heat gun about 20 minutes later and let the excess wax either be absorbed or drip off from the stummel surface. I rubbed off the excess wax with a soft cotton cloth and brought a deep shine to the surface with a microfiber cloth. The stummel now sports it’s true dark color which was drawn out by wax treatment, absolutely gorgeous I say. Next, I reattach the sterling silver band to the shank end using CA superglue after polishing the band with a silver polishing cloth.The issue that now needed to be addressed was that of the loose seating of the stem in to the shank. I had an option of either coating the tenon with clear nail polish, which is a temporary solution most suitable for briar pipes or using CA superglue to coat the tenon. This is a more permanent solution, but one needs to be careful and work fast as the tenon may get stuck in to the shank as the glue hardens rapidly. I decided to go with using the superglue.

As decided, I applied a layer of superglue over the tenon surface and quickly turned it in to the shank till I had achieved a perfect alignment. I was equally quick to unscrew the tenon out from the shank to avoid having it stuck inside the shank. After a wait of few minutes to let the glue harden, I applied a second layer and followed the same process explained above. After repeating the process thrice, I decided to apply the glue one last time over the tenon to achieve a perfect thickness. Unfortunately this layer turned out to be one too many and as I was turning the tenon in to the shank, the tenon snapped at the stem end leaving it embedded within the shank. This created an altogether unexpected challenge, not to mention additional work and the need to put in extra man hours.The superglue around the broken tenon would first need to be loosened and thereafter the embedded tenon removed. I used pure acetone to loosen the glue around the broken tenon and pried it out using nose pliers, round needle files and dental tools.Next on the agenda was to fix a tenon on to the stem. From my can of spare parts, I shortlisted one Teflon Delrin screw tenon that was nearest match to the shank diameter. The shoulders of the threaded tenon perfectly seated and sealed the shank opening. The smooth end of the Delrin tenon would need some work to seat perfectly in to the stem. Following pictures will give you the general idea.I evened out the stem airway to accept the Delrin tenon using a round needle file. I was careful while working on this Redmanol stem as I did not want chipped edges on this century old stem. I, thereafter, worked the smooth end of the Delrin tenon by sanding it using a flat head needle file. I fine tuned the seating of the tenon in to the stem by sanding using a piece of 220 grit sandpaper. I checked the seating of the stem in to the mortise and alignment of the stem airway, the mortise and the draught hole. Everything was perfectly aligned. Once I was satisfied, I fixed the tenon in to the stem using CA superglue and set it aside for the glue to harden.To give the finishing touches to this gorgeous century old pipe, I reattached the stem with the stummel. I then mounted a cotton cloth wheel on to the hand held rotary tool and applied several coats of carnauba wax over the stummel and the stem. I finished the restoration by giving the pipe a rigorous hand buffing using a microfiber cloth to raise the shine further. The completed pipe, with the shining dark golden hued meerschaum stummel and complimenting red of the Redmanol stem looks lovely, fresh and vibrant; the photographs speak for themselves. I shall be adding it to my ever growing pipe collection. Thanks for the read…Cheers!!!

Rebuilding The Vulcanite Stem Of A c.1960 Dunhill Shell 56 F/T For A Friend


Blog by Paresh Deshpande

During the summer of last year while browsing on Pinterest, I came across pictures of some beautiful pipes and following the links led me to an old gentleman from the UK who was willing to sell these pipes either single or as a lot. There were around 60 odd pipes. I went through the pictures that were sent along with the rates and selected 10 pipes. After a prolonged and interesting interaction, we managed to arrive at a price point. Soon these pipes landed on the shores of India and went in to Customs hold for nearly a month. Finally, it was released and I laid my hands on these pipes after a wait of nearly 3 months! Here is a picture of the lot that I had taken moments after opening the parcel.Since then, I have refurbished, repaired a family era Barling’s Make Bulldog (yellow arrow) and a c.1901 Samuel McLardy (green arrow) and added them to my personal collection. This estate lot had a Dunhill Shell (blue arrow) that called out to my fellow Pipe Club member and a dear friend who desired this pipe as his first Dunhill! The following picture will identify the pipes that have been restored and the Dunhill that is now on my work table.This is a beautiful bent billiard pipe with a deep craggy sandblast which pre 1960s Dunhill were well known for. It is stamped on the foot and the underside of the shank with the shape number “56” followed by “F/T” followed by “DUNHILL” over “SHELL BRIAR” followed by the COM stamp “Made in England” where the letter D is followed by a numeral “0” that is smaller than the letter D and is underscored. This is followed by Group size number “4” in a circle and letter “S” for Shell towards the shank end. Dunhill White Dot adorns the top of the vulcanite stem. The stampings are clear and readable.   I have worked on a few Dunhill pipes and had extensively researched the brand. There is so much to know and study about this single British brand that has survived to till this day that each day there is some new piece of information. However, pipedia.org has adequate information on the history, lines offered and dating guide for Dunhill pipe. I strongly recommend that all Pipers should make it a point to read through the information given there.

Based on the stamping seen on this pipe, with the numeral “0” being smaller than the letter D and underscored, conclusively dates this pipe to be from 1960.

Initial Inspection
The first thing I noticed, in fact anyone would, is that the stem is severely damaged with nearly ¾ of the bite zone conspicuous by its absence! What remains of the bite zone is peppered with tooth chatter. The stem is oxidized with the white dot intact. There is a decent amount of cake in the chamber with lava overflow on the rim top surface. The stummel boasts of nice deep craggy sandblast. The dirt, dust and grime embedded in the nooks and crannies of the sandblast give a dull and lackluster appearance to the stummel. The shank is dirty with traces of old oils and gunk. The following pictures will give you a general idea about the condition of the pipe. Detailed Inspection
The chamber shows a layer of medium thick cake with small traces of lava overflow on the rim top surface. From what I can see, the chamber walls appear to be without any damage. The chamber has faint sweet smell which should reduce with the internal cleaning of the stummel. The inner and outer rim edges are in good condition which will be further ascertained once the lava overflow and cake is removed. The mortise is clean and so is the shank airway.The stummel boasts of some beautiful sandblast pattern typical of lots of bird’s eye and ring grain all around. It is dirty with grime and tar filling in much of the craggy finish. The stummel fells solid to the touch and shows no signs of hot spots. The briar looks lifeless and dull which is nothing serious to address. The round shank of the bent billiards flows into a tapered vulcanite stem which flares, like a fish tail, at the button end and hence the stamp F/T. The vulcanite stem shows significant damage to the button end, in fact, there is no button at all, similar to a Dunhill Bruyere that I had worked upon a couple of years ago!! The slot end at the right side is missing about an inch of vulcanite. This pipe would have been a favorite of the previous owner and he had continued to enjoy bowls of his favorite tobacco long after the button end had been chewed off. This is evident from the significant tooth chatter on both the surfaces of the stem. I intend to reconstruct/ rebuild this portion of the stem, including the slot, while maintaining the stem and general profile of the pipe. This will require major repairs. The quality of vulcanite is top notch.In this project, stem rebuild will be a major challenge as achieving the fish tailed profile of the stem will be crucial for overall aesthetic appeal of this piece of briar. Having previously worked on a stem rebuild/ restoration of the Dunhill Bruyere, I am aware of the challenges this restoration will present en-route.

THE PROCESS
I started this project by cleaning the internals of the stem airway. Using thin shank brushes and anti-oil dish washing soap, I cleaned the stem airway. I have modified this process of cleaning the stem airway by doing away with pipe cleaners and alcohol as it saves me a ton of pipe cleaners, which is a precious commodity for me here in India. To say that the airway was filthy would be an understatement. A lot of perseverance and tons of elbow grease later, the stem internals are finally clean.With the stem internals now clean, I moved to external cleaning of the stem surface by dunking the stem into “Before and After Deoxidizer” solution developed by my friend Mark Hoover. The solution helps to draw out heavy oxidation to the surface making it’s further removal a breeze, while the minor oxidation is eliminated to a very great extent. Unfortunately, I missed out on taking pictures of this process.

While the stem was soaking in the deoxidizer solution, I reamed the chamber with a PipNet reamer tool, using cutting blade size 2 followed by size 3 heads. I used my fabricated knife to remove cake from areas inaccessible to the reamer blades and completed the process of removing the cake by sanding the walls smooth with a folded piece of 180 grit sandpaper. I wiped the chamber with a cotton swab wetted with alcohol to clean the residual carbon dust. The chamber walls are solid with no signs of hot spots, heat fissures or webs.Continuing with the internal cleaning of the chamber, I subjected it to a salt and alcohol bath. I used cotton balls which is an at par substitute as I have realized over the years. I drew out a wick from the cotton and along with a folded regular pipe cleaner; inserted it into the mortise and through the draught hole and further into the chamber. Thereafter, I packed the chamber with cotton balls to about quarter of an inch below the rim inner edge and soaked the cotton balls with isopropyl alcohol up to the brim. About half an hour later, the level of alcohol had gone down, having being absorbed by the cotton. I topped it up once again and set it aside overnight. By next afternoon, the cotton and alcohol had drawn out all the remaining oils/ tars from the chamber and mortise and loosened out any residual cake and tar build up, fulfilling its intended task. I removed the cotton balls and ran pipe cleaners through the mortise to clean out all the loosened tars and gunk. Using my fabricated tool, I scraped out the entire loosed gunk from the mortise and further cleaned it with alcohol and q-tips. The chamber now smells clean and fresh. I set the stummel aside to dry out naturally. I cleaned the external surface of the stummel with undiluted Murphy’s oil soap and a hard bristled toothbrush. I cleaned the smooth rim top surface with the soap and Scotch Brite pad. I thoroughly cleaned the mortise with shank brush and anti-oil dish washing soap. The mortise is now thoroughly cleaned and fresh.Next, I rub a small quantity of “Before and After Restoration Balm” in to the briar with my finger tips and let it rest for a few minutes. The balm almost immediately works its magic and the briar now has a nice vibrant appearance with the beautiful contrasting hues colors that are unique to this sandblast pipe, on full display. I further buff it with a horse hair shoe brush. Now that the stummel work is nearly completed, I fish out the stem from the deoxidizer. I cleaned the stem under running warm water and scrubbed the raised oxidation from the stem surface using a Scotch Brite pad and cleaned the airway with a thin shank brush. I further removed the oxidation by scrubbing the stem with 0000 grade steel wool and applied a little EVO to rehydrate the stem. I ran a couple of pipe cleaners through the stem airway to clean the airway of the deoxidizer solution and water. To address the tooth indentations/ bite marks, I warmed up the bite zone with the flame of a lighter. The heat helps to expand the vulcanite and retain its original shape. This method may not always completely raise the depressions to the surface, but most of the times, to a great extent. In this case the tooth indentations were raised to a great extent, but the damage to the button edge would require a rebuild. I followed up the heating of the stem surface with sanding the bite zone with a worn out piece of 180 grit sandpaper to even out the surface.Next step was to start the process of rebuilding the slot end. I appropriately folded an index card and covered it with a transparent scotch tape which prevents the superglue and charcoal mix from sticking to the card. I prepared a mix of CA superglue and activated charcoal and generously applied it over and extending beyond the broken surface using the remnants of the bite zone as guiding yardstick. I set the stem aside for curing over night. I have not researched and measured the exact length that I had to reconstruct, but eyeballed the length using the longer right side of the stem where a portion of the button was still intact. Before moving ahead, I would like to mention here that I had applied this mix in layers, over the week, to achieve sufficient thickness which would help during the filing and sanding while shaping the button and achieving the correct stem profile.Once the fill had completely hardened, I moved ahead and began the process of filing and shaping the button end with a flat head needle file. This time around it was more  challenging as I had set for my self the aim of creating a fish tail shape (or rather as close a match to fish tail as possible), a straight thin slot and a concave shape to the button end as seen on original stems. This is how the stem repairs look at this point in restoration. There are many airpockets that are clearly visible and would need quite a few more rebuilds with the charcoal mix. It is not without a reason we say that Rome was not built in one day!!I marked a straight line for the slot orientation and using only the tip of the pointed needle file, I carved out the slot. I followed it up by enlarging this carved slot further using the slot carving file. I resorted to sanding with folded pieces of 180 grit sand papers to laboriously shape and widen the slot, always taking care to maintain a straight line. Once I was satisfied with the profile of the slot, I went ahead and shaped the button by first achieving a rough shape with a flat head needle file and there after fine tuning it by sanding it down with a 220 grit sand paper. A close look at the repairs confirmed the presence of some serious air pockets (seen as white spots) in the bite zone and at the slot end. Here are a couple of pictures which will point out these air pockets.I applied a mix of CA superglue and activated charcoal over the air pockets ensuring that the mix is thoroughly filled up in to these air pockets. I set the stem aside for the repairs to cure. Once the fills had cured, I sand them with a flat needle file to achieve a rough match with the rest of the stem surface followed by further sanding using a folded piece of 220 grit sand paper. Thankfully, the issue of air pockets has now been addressed. I continued to dry sand the entire stem with a folded piece of 600 and 800 grit sandpapers and further progressed to wet sanding with 1000, 1500 and 2000 grit sand papers. This helps to reduce the sanding marks left behind by the more abrasive 220 grit paper. I rubbed a small amount of EVO to hydrate the stem.To bring a deep shine to the vulcanite stem, I went through the complete set of micromesh pads, wet sanding with 1500 to 2400 grit pads and dry sanding with 3200 to 12000 grit pads. I wiped the stem with alcohol after each pad and rubbed it down with Extra Virgin Olive oil to rehydrate the vulcanite. The repairs have blended in very well and the stem now looks shiny black and beautiful. The internals of the stem was once again cleaned out using alcohol and pipe cleaners to clear the airway of all the debris resulting due to the sanding. The finished stem is shown below.To finish, I re-attach the stem with the stummel. I mounted a cotton cloth buffing wheel to my hand held rotary machine and applied White Diamond compound to the entire pipe. I wiped/ buffed the pipe with a soft cotton cloth to clear it of any leftover compound dust. I then mounted another cotton cloth wheel on to the polishing machine and applied several coats of carnauba wax. I finished the restoration by giving the entire pipe a rigorous hand buffing using a microfiber cloth to raise the shine further. The completed pipe looks lovely, fresh and vibrant. This restored pipe is now ready to be shipped out to my friend and fellow pipe club member to enjoy for decades ahead.

Another Piece Of Pipe History Restored To It’s Former Glory; A c.1901 Samuel Mclardy”


Blog by Paresh Deshpande

During the summer of last year while browsing on Pinterest, I came across pictures of some beautiful pipes and following the links led me to an old gentleman from the UK who was willing to sell these pipes either single or as a lot. There were around 60 odd pipes. I went through the pictures that were sent along with the rates and selected 10 pipes. After a prolonged and interesting interaction, we managed to arrive at a price point. Soon these pipes landed on the shores of India and went in to Customs hold for nearly a month. Finally, it was released and I laid my hands on these pipes after a wait of nearly 3 months! Here is a picture that I had taken moments after opening the parcel.I had restored a BARLING’S MAKE pipe from this lot earlier (indicated with a yellow pointer) and the next pipe that I have selected, again from this lot is a SMcL (indicated with a fluorescent green pointer) bent billiards with squared shank and horn stem.The pipe is a classic Bent Billiards with a square shank and a saddle horn stem with a threaded tenon. It is a typical English shaped quaint sized pipe with a nice hand feel and a light weight that makes it comfortable for clenching. It has a hallmarked silver band with filigree at the shank end. The silver filigree is stamped as “SMcL” in a triangle over three sterling silver hallmarks. From right to left the first cartouche is with a date code letter “b” followed by a cartouche with LION PASSANT certifying silver quality and the last cartouche contains the “Anchor” of the Birmingham Assay Office. The shank is likewise stamped with SMcL in a triangle in golden color while the horn stem is devoid of any stampings.This brand though faintly familiar to me through various reads and mentions, I haven’t ever worked on a pipe from this manufacturer and neither researched this old British marquee. I decided to follow the trail along the silver filigree ferrule at the shank end bearing the hallmarks. I visited www.silvercollection.it and upon searching through the index, I came across a maker’s mark that was as seen on the pipe in my hands. The maker’s mark was described as SAMUEL McLARDY & Co. Here is the link and screen shot of the details and relevant details are highlighted.

https://www.silvercollection.it/englishsilvermarksXS3.htmlThe next step was to date this pipe with the help of the hallmarks as seen on the silver filigree band at the shank end. The Birmingham City mark was easy to identify. The letter “b” perfectly matched up with the letter that identified it as being assayed by the Birmingham Assay office in 1901. Given below is the link that will take the readers to the relevant section of dating and the picture that I have taken with the date code letter marked in red.

https://www.silvercollection.it/englishsilverhallmarksBIR.html

I visited pipedia.org to know more the brand Samuel McLardy & Co. Given below is the link to the article on pipedia.org and have reproduced relevant information about the brand.

https://pipedia.org/wiki/Samuel_McLardy

The McLardy company thanks its existence to the entrepreneurial spirit of 1 person: Samuel McLardy, born in Glasgow in 1842. He was the son of a tobacconist who also produced his own clay pipes. In the paternal shop he must have learned the profession of pipe-maker. Shortly after his 20th birthday he decided to move to Manchester to start his own company. There is remarkably little known about the history of the factory. On an old advertisement it says “established 1865” so since then there must have been a steady growth. Within a couple of decades there was a massive production of clay pipes. Around 1895 the factory owned over 500 moulds which meant yearly production was around 5 million pipes! Similar to that of Dutch factory P. Goedewaagen & Zoon in that period. Over time we find Samuel McLardy at different locations. Before 1880 that was Miller Street number 16 in Manchester and it is there where the shop grew to the size of a factory. In 1890 the company moved to Shudehill number 67 where it remained active until after 1910.

The production of clay pipes was a large part of the McLardy operation and this interesting Pipe Manufacturers Catalogue shows several clay models displayed for sale. Duco’s article, referenced above, examines the historical realities impacting the Samuel McLardy Co., (typical of other UK pipe companies) by navigating through relatively prosperous years leading up to the turn of the century, the decline of interest in clay pipes, diversification of other product lines to cope with falling revenues, WWI, the growing economic bubble of the 20s leading ultimately to the collapse of the McLardy, Co., soon after the stock market crashes in September (for UK) and October (for US), 1929. I found this last statement regarding the Samuel McLardy, Co., as a matter of public record published in archives of The London Gazette regarding the liquidation of the company. Reflective of the times, there were several companies listed in the Gazette which were being “wound up”:

The Companies Act, 1929.

Special Resolution of SAMUEL McLARDY & CO. Limited.

Passed 13th January, 1930.

AT an Extraordinary General Meeting of the Members of the above named Company, duly convened, and held at No. 20, Swan-street, Manchester, on the 13th day of January, 1930, the following Resolution was duly passed as a Special Resolution: –

” That the Company be wound up voluntarily; and that Mr. George Elder, Chartered Accountant, of Edwin Collier & Co., 3, York-street, Manchester, be appointed Liquidator for the purposes of such winding-up”.

Thus to summarize, Samuel McLardy & Co. was established in 1865 by Mr. Samuel McLardy at the age of 23. This company was an established clay pipe maker and produced about 5 million pipes a year. By 1920s, the business was no longer profitable due to WW I, declining interest in clay pipes and financial meltdown of 1929. Samuel McLardy & Co was “wound up” on 13 Jan 1930 after 65 years of its existence.

With the provenance of the pipe established beyond doubts, it was logical for me to move ahead with restoration proper of this pipe.

Initial Inspection
This pipe has the quintessential quaint size and shape that is nearly always seen on old British made pipes. The well seasoned briar is covered in dirt, dust and grime from decades of use. There are a couple of deep scratches on the stummel surface. There is a thick cake in the chamber with heavy overflow of cake, oils and tars over the rim top surface. The inner rim edge is uneven and charred. The outer rim edge, likewise, is peppered with dents and dings. The horn stem is in good condition with minor tooth chatter on both surfaces in the bite zone. The draw through the pipe is labored and constricted. This project should be an easy restoration, unless some gremlins are lurking unbeknown to me around the corner! Here are a few ‘before’ pictures of the pipe. Detailed Inspection
The chamber has a thick hard cake that has spilled over the rim top surface. The cake is thicker around the upper half of the chamber. The outer rim edge has dents and dings all around but is most severely damaged along the front half portion (encircled in red), a damage that can result only due to repeated strikes against a hard edged surface. The inner rim edge is unevenly gouged, probably due to use of a sharp knife to clean up the rim of the charring damage (encircled in yellow). The rim appears thinned out in a couple of places and is encircled in green. The condition of the inner walls of the chamber can be commented upon after the cake has been taken down to the bare briar. There is a strong ghost smell in the chamber which is all pervading. The stummel surface is covered in dust, dirt and grime giving a dull, lifeless and lackluster appearance to the pipe. However, the briar has taken on a nice dark patina, a result of more than 120 years of usage which would be worth preserving. However, eliminating/ addressing the deep scratches (indicated with yellow arrows) on both side of the stummel and the few dents and dings (encircled in green) would entail sacrificing the patina. This is a call that I would need to take at some stage in the restoration process. The mortise is chock-a-block with old oils, tars, ashes and grime making for a labored draw. The thick cake and blocked mortise hides the draught hole from view. These issues need to be addressed. The horn stem itself appears dull and lifeless and has some minor tooth chatter on both the surfaces of the stem. The slot is perfectly round and correct for the time period of the pipe and shows accumulation of dried tars and dirt. The threaded bone tenon also shows traces of deposition of gunk and grime within the threads and at the tenon end. The button edges are sharp and sans any major damage with a little dirt embedded at the bottom of the edges and some minor tooth chatter over the lower and upper button in the bite zone. The dark and light hues taken on by the stem over the years should polish out nicely and will add an additional touch of class to this already classy pipe. The Process
I first tried to remove the silver filigree band to check for any hidden gremlins over the shank end surface. The band came off quite easily and it was a relief to note that there were no cracks or chipped areas underneath the band as evidenced from the shank end face.Since the stummel is where maximum restoration efforts are needed, this was where I started my process to restore this pipe. I began the process of refurbishing this pipe by reaming the chamber with a PipNet reamer tool, using the second head. Using my fabricated knife; I further took the cake down to the bare briar. With a 220 grit sand paper, the walls of the chamber were rid of all the remnants of the cake, revealing smooth chamber walls. I further wiped the chamber with a cotton swab wetted with isopropyl alcohol to completely remove the sanding dust. I gently scraped the lava overflow from the rim top. Close observation of the chamber after the clean up revealed that the draught hole is not centered (centre position encircled in white) but towards the left side (indicated with green arrows). This being a manufacturing issue, there is nothing that I can do to right this wrong and even if there is something that can be done, I wouldn’t recommend it as it had previously over the last century served its owner well as can be seen from the thick cake in the chamber. The damage to the front outer edge (encircled in blue) and the out of round chamber due to damaged inner rim edge (encircled in green) can now be seen clearly and would need to be addressed. Using cotton buds, bristled and regular pipe cleaners wetted with 99.9% pure alcohol, I carried out the preliminary cleaning of the mortise. I shall continue deeper cleaning of the chamber and mortise with salt and alcohol treatment.Moving on to deeper cleaning of the chamber and the mortise…….. I use cotton balls which is an at par substitute to Kosher salt as I have realized over the years. I draw out a wick from the cotton and along with a folded regular pipe cleaner; insert it in to the mortise and through the draught hole in to the chamber. Thereafter, I pack the chamber with cotton balls to about quarter of an inch below the rim inner edge and soak the cotton balls with isopropyl alcohol up to the brim. About half an hour later, the level of alcohol had gone down, having being absorbed by the cotton. It was here that I noticed seepage on the right side of the stummel through what I had initially assumed to be a scratch. However, this patch of seepage points to a through crack which if left unattended would lead to a burn-out.  I topped it up once again with alcohol and set it aside overnight. By next afternoon, the cotton and alcohol had drawn out all the remaining oils and tars from the chamber and mortise, fulfilling its intended task. I removed the cotton balls and ran pipe cleaners through the mortise to clean out all the loosened tars and gunk. I set it aside to dry out naturally. It is such unexpected curve balls that are thrown at you which make any restoration a challenging one. Once the stummel had dried out completely, using my fabricated tool I scraped out the entire loosened gunk from the mortise and further cleaned it with alcohol and q-tips. I cleaned out all the debris and gunk in the crack from the outside (encircled in yellow). I also scraped the chamber walls to remove all the loosened cake and charred briar; especially form the corresponding insides of the external crack. A closer examination of the chamber walls shows the extent of damage (indicated by red arrows) and most likely this is a result of some flaw in the briar wood which was exposed during previous use and reaming to maintain cake. I would love to hear about your opinions on what had caused this damage. This issue needs to be addressed immediately to avoid ruining this 122 year old specimen of pipe history.Before moving on to addressing the above, I decided to clean the exterior surface of the stummel. I used a hard bristled tooth brush and Murphy’s oil Soap, to scrub the stummel, chamber walls and rim top. I washed the stummel under running warm water with anti oil dish washing detergent till the stummel surface was clean and dried it using paper towels and soft cotton cloth. The deep scratch on the left and the ‘now determined’ through crack on the right (indicated by green arrows) are all too clearly visible. I simultaneously cleaned the shank internals with the detergent and hard bristled shank brush and set the stummel aside to dry out naturally.With the stummel now clean both internally and externally, it was time for me to address the issue of the through crack on the right stummel surface. Using a sharp dental tool, I removed the charred and damaged briar from along the chamber wall until I reached the hard solid briar underneath. Similarly, I cleaned out the crack from the outside by clearing out the debris and grime and the damaged briar using the sharp dental tool. Next, I drilled counter holes at either ends of the crack using a 1mm drill bit. These counter holes will prevent spread of the crack any further in either direction. I was careful in ensuring that the counter holes are drilled at the exact end points of the crack and that these holes were not drilled through and through. I filled this crack and counter holes with a mix of briar dust and CA superglue and set it aside to cure.Next I decided to fill only the heat fissure from where I had removed the charred briar with layer of J B Weld. J B Weld is a two-part epoxy Cold Weld in two tubes; hardener and steel which are mixed in two equal parts (ratio of 1:1) with hardening time of 5-6 minutes and complete curing time of 6-8 hours. I poured the contents of the two tubes and mixed it well. I applied this mix, pressing as deep and as evenly as possible, over the heat lines in the chamber wall surface. As I was applying the mix, I decided to apply this coat over the entire chamber surface as I had some of the mix remaining and it wouldn’t harm in any which way. I worked fast to ensure an even coat before the weld could harden. I set the stummel aside for the application to harden and cure overnight. Once the external crack fill had cured completely, using a flat head needle file, I sand this fill to achieve a rough match with the rest of the stummel surface. I further fine tuned the matching of the fill by sanding fill surface with folded piece of 220 grit sandpaper. The stummel surface was now clean and even.Next, with a folded piece of 150 grit sandpaper, I sand the coat of J B Weld from the internal walls of the chamber keeping just a thin layer of coat along the wall; just enough to provide an inert and heat resistant layer between the burning tobacco and the damaged briar. I shall further enhance this separation by adding a bowl coat of activated charcoal and yogurt.Next I addressed the issue of the uneven rim top, damaged outer rim edges and out of round chamber. I began with topping the rim over a 220 grit sand paper, frequently checking for the progress being made. I stopped once the damaged outer rim edge was evened out to an acceptable- to- me level and the thickness of the rim top was close to even all round. To get the chamber back to round, I created a bevel over the inner and outer edge with a folded piece of 220 grit sand paper. I am pretty pleased with the progress being made thus far. I followed it by sanding the entire stummel surface using a piece of 320 grit sandpaper to address the scratches and the dents and dings. This was a decision which I had deliberated for a while. One of the major considerations in favor of sanding was the deep scratch on the left side which could be minimized by using sandpaper to sand it down to an acceptable level. Sanding will also help in addressing the few dents and dings and minor scratches from the surface. I had decided that the sanding would be kept to bare minimum and the scratches, dents and dings that remain shall be maintained as part of the pipe’s journey thus far. To remove the sanding marks and bring a deeper shine, I polished the stummel with micromesh pads, dry sanding with 1500 to 12000 pads. I wiped the surface with a soft cloth at the end of the micromesh cycle. The stummel looks amazing with a deep shine. Next, I rub a small quantity of “Before and After Restoration Balm” in to the briar with my finger tips and let it rest for a few minutes. The balm almost immediately works its magic and the briar now has a nice vibrant appearance with the beautiful darkened grain patterns on full display. I further buff it with a horse hair shoe brush. Now that the stummel repairs/ refurbishing are completed save for the final polish, it was time to work the stem. I cleaned the internals of the stem with a thin shank brush and anti-oil dish washing soap. This ensures a thorough cleaning of the stem airway while saving me number of pipe cleaners, elbow grease and most importantly, time. With the stem internals cleaned, I scrubbed the external surface with the dish soap and Scotch Brit pad. I was particularly careful while cleaning the threaded tenon surface as the old residual oils and tars were deeply embedded in to the threads. I rinsed the stem under warm running water and wiped it with a paper napkin to dry it.I addressed the minor tooth chatter in the bite zone by sanding the bite zone with a folded piece of 400 grit sand paper. I could have filled the tooth indentation with clear superglue, sanded and polished the stem, but decided against this since the stem was thick and the tooth chatter was superficial enough to be addressed just by sanding it out. To eliminate the sanding marks and also bring a deep shine to the bone stem, I wet sanded the entire stem surface with 600, 800, 1000, 1500 and 2000 grit sandpapers. I rubbed a small quantity of EVO in to surface and set it aside to be absorbed by the bone stem. To bring a deep shine to the horn stem, I went through the complete set of micromesh pads, wet sanding with 1500 to 12000 grit pads. I wiped the stem with moist cloth after each pad and rubbed it down with Extra Virgin Olive oil to rejuvenate the horn.   I completed the mundane but equally important task of polishing the Sterling Silver filigree band. I used a local product that is available only in India to polish the band. The liquid polish was applied to the band and wiped it out after a few seconds. The polish completely removed the oxidation and gave a nice shine to the band which was further improved by polishing it with a jeweler’s cloth. Using CA superglue, I reattached the band at the shank end.To complete the restoration, I mount a cotton cloth buffing wheel on to my hand held rotary tool and polished the stummel and stem with Blue Diamond compound. This compound helps to remove the minor scratch marks that remain from the sanding. I mounted another cotton buffing wheel that I have earmarked for carnauba wax and applied several coats of the wax. I finished the restoration by giving the entire pipe a rigorous hand buffing using a microfiber cloth to raise the shine further. The finished pipe looks amazingly beautiful and is ready to join my collection. I only wish it could share with me its life story of the past years while I enjoy smoking my favorite Virginia blend in it or maybe an English blend or maybe just keep admiring it!! P.S. There was only one more issue that needed to be addressed and one that could not be ignored, being a functional issue. After I had applied and sanded down the JB WELD to a thin coat, I wanted to further protect the chamber briar while adding another layer between the JB WELD and burning tobacco. I addressed this by mixing activated charcoal and plain yogurt to a thicker consistency, just enough that it would spread easily and applied it evenly all along the chamber walls after inserting a folded pipe cleaner through the draught hole to keep it open. Once dry and set, this will not only protect the walls but also aid in faster build up of cake.Big thank you to all the readers who have joined me on this path by reading this write up as I restored and completed this project.

Restoring A Beautiful Family Era “Barling’s Make” Bulldog To Its Former Glory


Blog by Paresh Deshpande

During the summer of last year while browsing on Pinterest, I came across pictures of some beautiful pipes and following the links led me to an old gentleman from the UK who was willing to sell these pipes either single or as a lot. There were around 60 odd pipes. I went through the pictures that were sent along with the rates and selected 10 pipes. After a prolonged and interesting interaction, we managed to arrive at a price point. Soon these pipes landed on the shores of India and went in to Customs hold for nearly a month. Finally, it was released and I laid my hands on these pipes after a wait of nearly 3 months! Here is a picture that I had taken moments after opening the parcel.Save for four pipes, remaining pipes came with Amber stems that were in fairly decent condition. The next pipe that I decided to work on is from this lot. It has that classic English bulldog shape and size that I like the most. That it’s a Barling’s Make meant that it will be added to my Barling collection. This pipe is indicated by a yellow arrow in the picture below.From the above picture it is amply evident that this pipe is small when compared to the group 4 sized Dunhill that is seen in the picture, but the bowl is medium sized and holds a decent quantity of tobacco. The stummel boasts of some beautiful mix of bird’s eye and cross grains along the entire surface. It is stamped as “BARLING’S MAKE” on the left shank surface in small simple capital letters while the right shank face bears the stampings “JAMES & Co.” over “BIRMINGHAM”. These stampings are a bit different than the ones I have come across in that there is no model number and neither is there any size stampings e.g. SS, S-M, L, EL etc.I have worked on quite a few Barling’s pipes and have read up as much material as I could lay my hands on anything related to Barling’s pipe. A simple look at the stampings on the left shank surface indicates that this pipe is from the Family Era. There are certain pointers like, the small font size, simple capital letter, lack of stamp denoting the size of the pipe and the minimalistic stamping, which place this pipe between 1930s and Pre-WW II period, 1941 to be precise.

According to Tad Gage, Pre-1946 stampings are minimal. Pre WW2 pipes rarely have size, shape or grading. Thus, I can confidently date this pipe to the Family era and to have been roughly made during the period 1930 to 1941.

You may consider visiting the under mentioned link for a detailed read about the Barling company and dating guide.

https://pipedia.org/wiki/Barling#The_Company

The stampings on the left side shank surface has provided all the clues to establish the provenance of this beautiful classic British pipe, but what about the JAMES & Co over BIRMINGHAM stampings?

An internet search threw a number of businesses and Business houses with the name James & Co, including variations of the searched name, from Birmingham and nearby areas. However, nothing concrete came up that strongly connected the Barling’s pipe to any business house.

However, when I searched for James & Co. after including 1930s, my screen was flooded with images and information about JAMES CYCLE & Co.!!!! The connection between this Barling pipe and the company somehow felt logical. Here is what I found out about JAMES MOTORCYCLES……

The James Cycle Co Ltd., GreetBirmingham, England, was one of many British cycle and motorcycle makers based in the English Midlands, particularly Birmingham. Most of their light motorcycles, often with the characteristic maroon finish, used Villiers and, later, AMC two-stroke engines.

James were prolific bicycle and motorcycle manufacturers from 1897 to 1966. The company was taken over by Associated Motor Cycles in 1951 and combined with Francis-Barnett in 1957. In 1966 the company became one of the many British motorcycle companies forced out of business by Japanese competition.

In early twentieth century, it was a popular promotional practice amongst business houses to give away quality pipes that were commissioned from reputed pipe makers like Comoy’s, Charatan, GBD, Barling’s etc, as gifts to their clients with the firm name duly stamped on the pipe.

In this instance, the time period of making this pipe matches with the period of the existence of James Cycle & Co and also pipes and motorcycles are supplementary to masculinity. Is it possible that this Barling pipe was commissioned by James & Co of Birmingham as complimentary gift to their client? Please comment and let me know.

With the vintage of the pipe established with certainty and speculations about the connection of this particular pipe with motorcycle manufacturer, James & Co. Birmingham, it’s time to move ahead with the process of restoration.

Initial Visual Inspection
This pipe has the classic straight Bulldog shape with a diamond shank and a medium sized bowl. The stummel boasts of some beautiful bird’s eye and cross grains all over the bowl and shank. The stummel surface is covered in dirt and grime of the overflowed lava. There is not a single fill in the briar which speaks of high quality of the briar. The chamber appears out of round and has a thick layer of cake. The saddle vulcanite stem is heavily oxidized with tooth chatter and very light tooth indentations on button edges on either surface in the bite zone. Detailed Inspection And Observations
The overall proportion of this pipe is small with a decent sized chamber. The draught hole is at the bottom dead center of the chamber. The chamber has an even layer of very thick hard cake with remnants of un-burnt tobacco seen at the heel of the chamber. The rim top surface is covered with thick lava overflow and is pretty banged up along the right side (encircled in pastel blue). The inner rim edge is charred and damaged between 10 o’clock and 12 o’clock directions (encircled in yellow) which make the chamber appear out of round. The outer rim edge has dents and dings all around but is most severely damaged towards the front and back of the bowl (encircled in green), a damage that can result only due to repeated strikes against a hard edged surface. The condition of the inner walls of the chamber can be commented upon after the cake has been taken down to the bare briar. The strong ghost smell in the chamber is all pervading. The stummel appears solid to the touch all around and hence I do not foresee any serious damage to the walls in the form of burnout/ deep heat fissures/ lines or pits. The dark inner rim edges may be charred further than anticipated and the same will be confirmed after the surface has been thoroughly cleaned. I need to resort to topping the rim top in order to address the damage to the surface. The ghost smells should reduce once the cake from the chamber is removed and the shank has been cleaned. There are a few scratches that can be seen on the sides and on the shank surface of the stummel. Both the stummel and the shank are covered in grime and dust from years of use and subsequent storage, giving it a dull and a lackluster appearance. The surface has taken on a nice patina which I intend to preserve. Through all the dirt and grime, beautiful mixed grains peek out from the stummel surface. A nice clean and polish will further accentuate this play of grains over the stummel surface. Given the condition that the chamber was in, it was no surprise that the mortise was chock-a-block with accumulated oils, tars and residual gunk. This is also the major cause of the strong ghost smells from the pipe. This would need a very thorough and deliberate cleaning.The diamond saddle vulcanite stem is oxidized with calcification observed in the bite zone. The entire stem surface is covered in patches of sticky substance/ grime. The button edges on either surface has minor tooth indentations which should raise to the surface once heated. The minor bite marks in the bite zone, likewise, should be completely addressed by heating the surface and sanding thereafter. Traces of dried accumulated gunk can be seen at the round slot end and the step tenon opening.The Restoration Process
I decided to tackle the damaged stem at the start. Before I could proceed with actual repairs, I cleaned the stem internals first. Using a thin shank brush and anti-oil dish washing soap, I cleaned the stem airway. The airway was filthier than I had imagined as can be judged from the following pictures. I took me a considerably long time, but eventually the airway was clean. I ran a couple of pipe cleaners through the stem to confirm that the airway was clean and also to dry it out. With the stem internals now clean, I moved to external cleaning of the stem surface by dunking the stem into “Before and After Deoxidizer” solution developed by my friend Mark Hoover. The solution helps to draw out heavy oxidation to the surface making its further removal a breeze, while the minor oxidation is eliminated to a very great extent. I let the stem soak in the solution overnight.

Progressing ahead, I reamed the chamber with head size 1 and 2 of my PipNet reamer blade. I used my fabricated knife to remove cake from areas inaccessible to the reamer blades and completed the process of removing the cake by sanding the walls smooth with a folded piece of 180 grit sandpaper. I wiped the chamber with a cotton swab wetted with alcohol to clean the residual carbon dust. The chamber walls are solid and the minor thin veins that are visible over the walls are not heat fissures but an ultra thin layer of carbon which will be addressed once the cake is loosened up after a salt and alcohol bath, or at least that is what I hope for.I cleaned the internals of the mortise by scrapping the mortise walls using dental tools. The amount of dried oils and crud that was scrapped out, on one hand is indicative of uncared and rough use of this beauty by the previous Piper while on the other, a testimony of this pipe being one of his/ her favorite and one that he/ she reached out for quite often. I ran a couple of pipe cleaners through the airway to clear away the loose debris that would have lodged itself in the draught hole. I shall continue the internal cleaning by subjecting the stummel to a salt and alcohol soak.Now that the internal cleaning of the stummel was nearly done and also the stem had now been soaking for more than 24 hours, I removed the stem from the solution. I first scrubbed the stem surface with a Scotch Brite pad, always being mindful of the stem logo on the left side. I followed this scrubbing with a nice cleaning of the surface using a 0000 grade steel wool. I rinsed the stem under running water to rid the stem of the thick deoxidizer solution. I ran a couple of pipe cleaners to remove any residual deoxidizer solution from the airway.I followed it up by wet sanding the entire stem surface using 600, 800, 1000, 1500 and finally with a piece of 2000 grit sand paper. This serves to reduce the sanding marks of the more abrasive sand papers. I also sharpened the button edges while sanding. I wiped the stem with a moist cotton swab to remove all the oxidation and sanding dust from the surface. I applied a little Extra Virgin Olive oil over the stem and set it aside to be absorbed by the vulcanite.I went through the 3200 to 12000 grit micromesh pads to dry sand the stem. The stem now has a nice deep shine with no traces of oxidation around the entire stem surface. The stem appears a tad dull at this stage; however, after a good polish using Blue diamond and carnauba wax, the shine will deepen further.With the stem nearly completed, it was time to work the stummel again. Continuing with the internal cleaning of the chamber and shank, I subjected it to a salt and alcohol bath. I used cotton balls which is an at par substitute of Kosher salt as I have realized over the years. I drew out a wick from the cotton and along with a folded regular pipe cleaner; inserted it into the mortise and through the draught hole and further into the chamber. Thereafter, I packed the chamber with cotton balls to about quarter of an inch below the rim inner edge and soaked the cotton balls with isopropyl alcohol up to the brim. About half an hour later, the level of alcohol had gone down, having being absorbed by the cotton. I topped it up once again and set it aside overnight. By next afternoon, the cotton and alcohol had drawn out all the remaining oils/ tars from the chamber and mortise and loosened out any residual cake and tar build up, fulfilling its intended task. I removed the cotton balls and ran pipe cleaners through the mortise to clean out all the loosened tars and gunk. Using my fabricated tool, I scraped out the entire loosed gunk from the mortise and further cleaned it with alcohol and q-tips. I also scraped the moist cake from the chamber using my knife and sanding it smooth with 180 grit sandpaper. The chamber now smelled clean and fresh and the tiny veins observed in the chamber were eliminated. I set the stummel to dry out naturally. I cleaned the external surface of the stummel with undiluted Murphy’s oil soap and a hard bristled toothbrush. I cleaned the smooth rim top surface with the soap and Scotch Brite pad. I thoroughly cleaned the mortise with shank brush and anti-oil dish washing soap. The few scratches (indicated by yellow arrows) and minor dings over the stummel surface are now plainly visible while the damage to the rim top, rim inner edge (encircled in red) and outer edge (encircled in blue) is clearly defined. These issues need to be addressed.  I followed up the external cleaning of the stummel with internal cleaning of the mortise and shank using anti oil soap and shank brushes.Using a folded piece of 320 grit sandpaper, I diligently sand the entire stummel surface and thus addressed the issues of scratches and minor dings. To address the damage to the rim inner and outer edge, I topped the rim surface on a piece of 220 grit sandpaper. I limited my topping to the extent that the damage was just adequately addressed. With a folded strip of 220 grit sandpaper pinched between my thumb and index finger, I created a smart thin bevel over the inner and outer rim edges to mask the damage that remained after topping. I am quite pleased with the progress this far.   Next, I polished the stummel with micromesh pads, wet sanding through 1500 to 12000 pads. I polished the freshly topped rim surface to a nice luster, wiping the surface with a soft cloth at the end of the micromesh cycle. The stummel looks amazing with a deep shine and beautiful grains popping over the stummel surface. I am surprised that the rim top surface has the same deep brown coloration as the rest of the stummel surface and that the use of a stain pen was not required. I massaged a small quantity of “Before and After Restoration Balm” with my fingers into the briar. The immediate and incredible transformation that takes place is a worthy reward for all the efforts!!! I let the balm sit on the surface to be absorbed in to the briar for about 20 minutes. The bowl now looks fresh and attractive with the grains popping out any which way you look at the briar. I polished off the balm with a soft cloth to a lovely shine. To apply the finishing touches, I mounted a cotton cloth buffing wheel on to my hand held rotary tool and applied a coat of Blue Diamond to the stummel and the stem to polish out the minor scratches. With a cotton buffing wheel that I use for carnauba wax, I applied a coat of carnauba wax and continued to work on it till the complete coat of wax had been polished out. I mounted a clean cotton cloth buffing wheel and gave the entire pipe a once over buff. I finished the restoration by giving the entire pipe a rigorous hand buffing using a microfiber cloth to raise the shine further. The finished pipe looks beautiful and is ready to be added to my collection of inherited pipes. There was only one more issue that needed to be addressed and one that could not be ignored, being a functional issue. After I had reamed and sanded the chamber walls, I had observed very minor and superficial web of thin heat fissures/ pits all along the chamber walls. I addressed this by mixing activated charcoal and plain yogurt to a thicker consistency, just enough that it would spread easily and applied it evenly all along the chamber walls after inserting a folded pipe cleaner through the draught hole to keep it open. Once dry and set, this will not only protect the walls but also aid in faster build up of cake.Thanks to all readers of rebornpipes who have spared a moment of their invaluable time in reading through this write up and as is always, your suggestions and advice are always welcome.

Refurbishing a beautiful classic billiard from Peterson’s – a Kapet # 150, London Made, England


Blog by Paresh Deshpande

The next pipe that I selected to work on is a beautiful classic billiard shaped Peterson’s pipe with a P-lip tapered stem. The very appearance of this pipe shouted “ol’ timer” to me even before I saw the stampings. The size also indicated that this pipe was from an era when large bowl were not in vogue, specifically the English made.

The pipe boasts of some beautiful mixed grains of bird’s eye and cross grains hidden beneath the layer of dirt and grime. That this pipe is from a quality pipe maker is evident from the quality of fit, finish and the briar used. There are only a couple of small fills that I could identify. The tapered P-lip vulcanite stem also oozes quality and points it to be a Peterson’s pipe. The pipe is stamped on the left side of the shank as “PETERSON’S” with a forked P over “KAPET”, all in capital letters. The left side of the shank is stamped as “LONDON MADE” over “ENGLAND” and followed by shape code “150” towards the shank end. The stem has the trademark letter P in cursive hand over the left side.I have worked on quite a few Peterson’s from pre-1960s and from those researches; I know that this pipe is from the classic range of pipes from Peterson’s and belongs to the period when Peterson’s had an office in London up to late 1950s when the shop was closed. I referred to pipedia.org just to refresh my knowledge about the history of Peterson’s pipes. It always does make for an interesting read and is highly recommended. Given below is the link to this detailed history of the brand Peterson’s.

https://pipedia.org/wiki/Peterson

Given below is the link to the Dating Guide for Peterson’s pipes at the end of the article on pipedia.org.

https://pipedia.org/wiki/A_Peterson_Dating_Guide;_A_Rule_of_Thumb

To summarize, this pipe is from the classic range of Peterson’s, an entry level Pete pipe. This is evidenced from the KAPET stampings and a couple of fills in the briar surface. The COM stamp points to a period between 1895, when Peterson’s opened a shop in London, and late 1950s when this shop was closed. Thus this pipe definitely dates to pre-1960s.

INITIAL VISUAL INSPECTION
The chamber of this classic billiard shaped pipe has a thick coat of even cake with small traces of lava flow over the rim top surface. The rim top itself has a few dents and dings along its surface. The stummel surface is dull, dry and covered in grime giving it a lackluster appearance. The shank shows accumulation of old oils, tars and gunk. The vulcanite stem does not sit flush with the shank face. The stem bite zone has signs of deep tooth indentations over the button edges and around the round slot end. Here is how the pipe appears as it sits on my work table. Detailed Inspection
The chamber has a decent layer of even cake that lightly overflows over the rim top surface. The condition of the chamber walls can be commented upon once the cake has been completely taken down to the bare briar. The inner rim edge is charred in 6 o’clock and 11 o’clock directions (encircled in yellow). The rim top itself is dotted with dents and dings. The outer rim edge too has a few minor chipped areas, but nothing serious.The stummel is covered in dust and grime of all the years of use. There are a couple of fills (marked by green). The shank is filthy with the accumulated old oils, ash and grime. This clogging could be the reason for the seating of the stem not being flush with the shank face.  Other than these issues, the stummel is in a decent condition. The P-Lip straight vulcanite stem is oxidized with severe tooth indentations on the button edge on either surfaces of the stem in the bite zone to the extent that the round slot at the top is completely deformed. The step tenon end shows heavy traces of dried oils and tars and remnants of ash and the heavy draw through the stem airway convinces me that there is heavy accumulation of gunk throughout the airway.The Process
I started the process of restoration by first cleaning the stem internals with anti-oil dish cleaning soap and thin shank brushes. The stem air way was filthy to say the least. I further cleaned the stem internals with hard bristled and regular pipe cleaners and isopropyl alcohol. A lot of elbow grease and a pile of pipe cleaners later, the pipe cleaners emerged white and I knew that the stem internals were now clean and fresh. I dunked the stem into the deoxidizer solution have overnight for the oxidation to be pulled out to the surface. I usually have around 4-5 pipes lined for restoration and this Pete is indicated by a green arrow.The next afternoon, Abha fished out the stem from the deoxidizer solution and scrubbed it with a Scotch Brite pad to get rid of the loosened oxidation from the surface. She followed this scrub with a second scrub using 0000 grade steel wool and this helped in further removal of raised oxidation from the surface and even out the minor scratches resulting from using the Scotch Brit pad. She rinsed the stem under warm running water to completely remove the solution from the airway and slot end. She ran a couple of pipe cleaners to remove the last traces of residual deoxidizer solution from the airway and dry out the airway.With the external and internal cleaning of the stem completed, Abha handed over the stem to me to complete the repairs. Continuing with the stem refurbishing, I heated the bite zone with the flame of a lighter to raise the tooth indentations to the surface. Though the results were not what were expected, the vulcanite was raised a little leaving behind deep tooth compressions over the button edge on either surfaces. These surfaces of the stem were filled with a mix of CA Gorilla superglue and activated charcoal powder and set aside for the fill to cure. I really hope that this time around I get better results with using this new CA glue. With the stem repairs set aside to harden, I started with the stummel repairs by reaming the chamber with the smallest of the PipNet reamer blade. I used my fabricated knife to remove cake from areas inaccessible to the reamer blade and completed the process by sanding the walls smooth with a folded piece of 180 grit sandpaper. I wiped the chamber with a cotton swab wetted with alcohol to clean the residual carbon dust. The chamber walls are solid with decades of residual service life. However, the rim has slightly deformed due to charring at 6 and 12 o’clock directions and encircled in green. I cleaned the external surface of the stummel with undiluted Murphy’s oil soap and a hard bristled toothbrush. I cleaned the smooth rim top surface with the soap and Scotch Brite pad. The darkened inner rims edge in the 6 o’clock direction is now clearly visible (marked in red) and confirms a charred rim edge. Simultaneously, I thoroughly cleaned the mortise with shank brush and anti-oil dish washing soap. This ensured that the stummel now smells clean and fresh. I dried the stummel internals and externals with paper towels and soft absorbent cotton cloth and set it aside overnight to completely dry out before I worked on it any further.By next afternoon, the stummel had dried out and I decided to address the issue of fills over the surface. With a sharp dental tool, I extracted the old and loosened fills and cleaned the area with a cotton swab and alcohol. Using clear CA superglue, I filled up the pits over the stummel surface and set it aside to cure. Once the fill had hardened, I first sand the fills with a needle file to roughly match the fill with the rest of the surface followed by sanding with a folded piece of 220 grit sand paper to further blend in the fills with the rest of the briar surface.Next, I moved on to address the charred edges over the rim top surface. I topped the rim over a piece of 220 grit sand paper by slowly rotating the rim over the sand paper. I hate to lose briar any more than absolutely necessary and so frequently checked the progress I was making. I was quite pleased with the appearance of the stummel at this stage in restoration.With a folded piece of 220 grit sandpaper pinched between my forefinger and thumb, I imparted a nice bevel to the inner rim edge. This eliminated the minor charring that had remained over the inner rim edges.Now that the stummel repairs were complete, Abha took over the bowl to work her magic and bring alive the grains over the briar surface. She went through the complete set of micromesh pads, wet sanding through 1500 to 12000 grit pads. Next, she rubbed a small quantity of “Before and After Restoration Balm” deep in to the briar with my finger tips and let it rest for a few minutes. The balm almost immediately works its magic and the briar now has a nice vibrant appearance with the beautiful grain patterns displayed in their complete splendor. I really like the looks of the stummel at this point in restoration. The grains and the clean lines of this piece of briar is really appreciable. While Abha was polishing the stummel, I worked on the stem repairs. The fill had cured and with a flat head needle file, I worked on the filling till I had achieved a rough match with the surrounding surface and had sufficiently sharpened the button edges. For a better blending, I further sand the entire stem with 320.Next, to impart a nice shine, I dry sanded the entire stem with 320, 600 and 800 grit sand papers followed by wet sanding using 1000, 1500 and 2000 grit sand papers. This progressive use of higher grit sandpapers helps to, firstly,  reduce the sanding marks left behind by the more abrasive ones, secondly, completely eliminates the oxidation while imparting a clean shine to the stem surface. Thirdly, this also helped to even out the minor imperfections from the bite zone. I applied a little EVO and set the stem aside for a few minutes for the oil to be absorbed in the stem surface. To bring a deep shine to the vulcanite stem, I went through the dry sanding with 3200 to 12000 grit micromesh pads, and wiped the stem with Extra Virgin Olive oil to rehydrate the vulcanite. The repairs have blended in very well and the stem now looks shiny black and beautiful. The finished stem is shown below.To refresh the stem logo, I coat the stem logo with white correction ink and let it dry out completely. Once the ink had dried out, with a toothpick, I gently removed the excess ink from the surrounding surface. Though the logo is not very crisp, this is the best that was possible given how worn out the stamping was to start with.This is that part in pipe refurbishing that I love and enjoy the most. I began the final polishing cycle by mounting a cotton cloth buffing wheel on to my hand held rotary tool and applying a coat of Blue Diamond to the entire pipe to polish out the minor scratches. With a cotton buffing wheel that I use for carnauba wax, I apply a coat of carnauba wax to the stummel and stem and continued to work on it till the complete coat of wax had been polished out. I mount a clean cotton cloth buffing wheel and gave the entire pipe a once over buff. I finished the restoration by giving the entire pipe a rigorous hand buffing using a microfiber cloth to deepen the shine further. This classic Billiards shape pipe from Peterson’s oozes a solidity and beauty that draws you to it. Here are a couple of pictures of the pipe at the end of the restoration process. P.S. I shared the pictures of this pipe on our club’s WhatsApp group and was immediately snatched up by one of the members. As I completed the write up, I have received a fantastic feedback on the smoking qualities and aesthetics of this pipe…..and this is truly the most satisfying experience of the entire process!!

There are some interesting pipes that I have lined up next…..keep following rebornpipes for the write ups. Stay safe and keep the pipe lit.