Blog by Paresh Deshpande
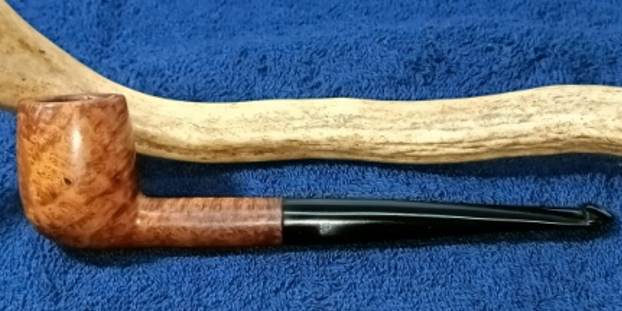
The next pipe that I selected to work on is a beautiful classic billiard shaped Peterson’s pipe with a P-lip tapered stem. The very appearance of this pipe shouted “ol’ timer” to me even before I saw the stampings. The size also indicated that this pipe was from an era when large bowl were not in vogue, specifically the English made.
The pipe boasts of some beautiful mixed grains of bird’s eye and cross grains hidden beneath the layer of dirt and grime. That this pipe is from a quality pipe maker is evident from the quality of fit, finish and the briar used. There are only a couple of small fills that I could identify. The tapered P-lip vulcanite stem also oozes quality and points it to be a Peterson’s pipe. The pipe is stamped on the left side of the shank as “PETERSON’S” with a forked P over “KAPET”, all in capital letters. The left side of the shank is stamped as “LONDON MADE” over “ENGLAND” and followed by shape code “150” towards the shank end. The stem has the trademark letter P in cursive hand over the left side. I have worked on quite a few Peterson’s from pre-1960s and from those researches; I know that this pipe is from the classic range of pipes from Peterson’s and belongs to the period when Peterson’s had an office in London up to late 1950s when the shop was closed. I referred to pipedia.org just to refresh my knowledge about the history of Peterson’s pipes. It always does make for an interesting read and is highly recommended. Given below is the link to this detailed history of the brand Peterson’s.
https://pipedia.org/wiki/Peterson
Given below is the link to the Dating Guide for Peterson’s pipes at the end of the article on pipedia.org.
https://pipedia.org/wiki/A_Peterson_Dating_Guide;_A_Rule_of_Thumb
To summarize, this pipe is from the classic range of Peterson’s, an entry level Pete pipe. This is evidenced from the KAPET stampings and a couple of fills in the briar surface. The COM stamp points to a period between 1895, when Peterson’s opened a shop in London, and late 1950s when this shop was closed. Thus this pipe definitely dates to pre-1960s.
INITIAL VISUAL INSPECTION
The chamber of this classic billiard shaped pipe has a thick coat of even cake with small traces of lava flow over the rim top surface. The rim top itself has a few dents and dings along its surface. The stummel surface is dull, dry and covered in grime giving it a lackluster appearance. The shank shows accumulation of old oils, tars and gunk. The vulcanite stem does not sit flush with the shank face. The stem bite zone has signs of deep tooth indentations over the button edges and around the round slot end. Here is how the pipe appears as it sits on my work table.

 Detailed Inspection
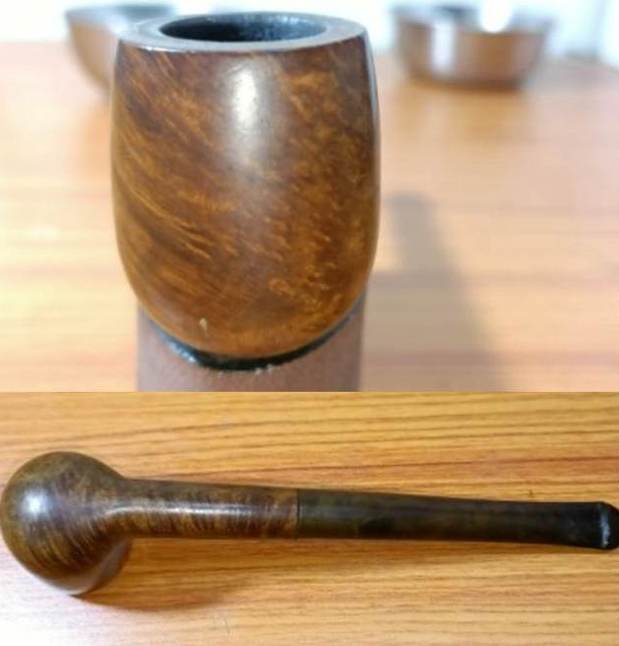
The chamber has a decent layer of even cake that lightly overflows over the rim top surface. The condition of the chamber walls can be commented upon once the cake has been completely taken down to the bare briar. The inner rim edge is charred in 6 o’clock and 11 o’clock directions (encircled in yellow). The rim top itself is dotted with dents and dings. The outer rim edge too has a few minor chipped areas, but nothing serious. The stummel is covered in dust and grime of all the years of use. There are a couple of fills (marked by green). The shank is filthy with the accumulated old oils, ash and grime. This clogging could be the reason for the seating of the stem not being flush with the shank face. Other than these issues, the stummel is in a decent condition.

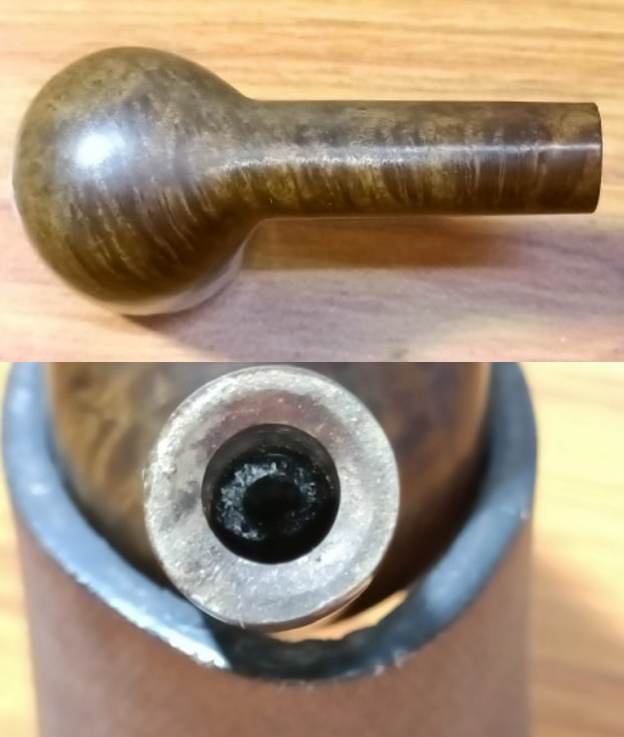 The P-Lip straight vulcanite stem is oxidized with severe tooth indentations on the button edge on either surfaces of the stem in the bite zone to the extent that the round slot at the top is completely deformed. The step tenon end shows heavy traces of dried oils and tars and remnants of ash and the heavy draw through the stem airway convinces me that there is heavy accumulation of gunk throughout the airway.
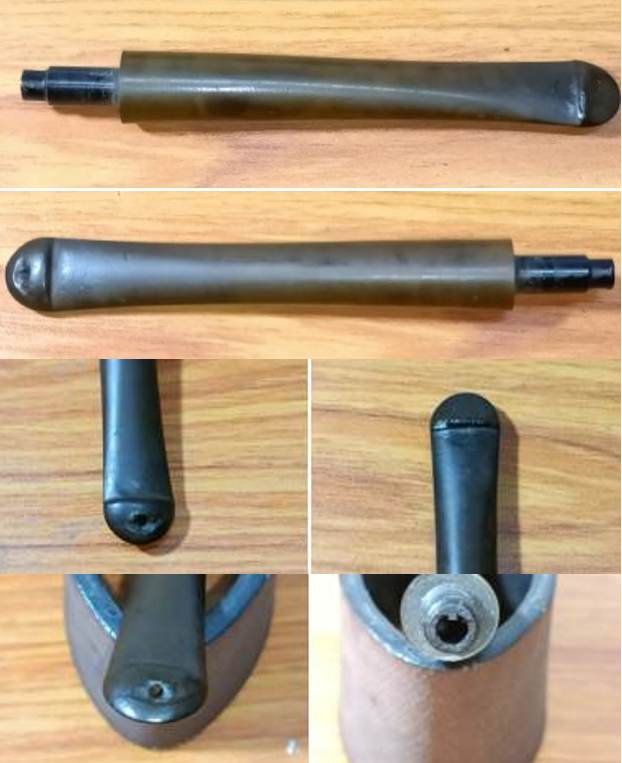 The Process
I started the process of restoration by first cleaning the stem internals with anti-oil dish cleaning soap and thin shank brushes. The stem air way was filthy to say the least. I further cleaned the stem internals with hard bristled and regular pipe cleaners and isopropyl alcohol. A lot of elbow grease and a pile of pipe cleaners later, the pipe cleaners emerged white and I knew that the stem internals were now clean and fresh.
 I dunked the stem into the deoxidizer solution have overnight for the oxidation to be pulled out to the surface. I usually have around 4-5 pipes lined for restoration and this Pete is indicated by a green arrow.
 The next afternoon, Abha fished out the stem from the deoxidizer solution and scrubbed it with a Scotch Brite pad to get rid of the loosened oxidation from the surface. She followed this scrub with a second scrub using 0000 grade steel wool and this helped in further removal of raised oxidation from the surface and even out the minor scratches resulting from using the Scotch Brit pad. She rinsed the stem under warm running water to completely remove the solution from the airway and slot end. She ran a couple of pipe cleaners to remove the last traces of residual deoxidizer solution from the airway and dry out the airway.
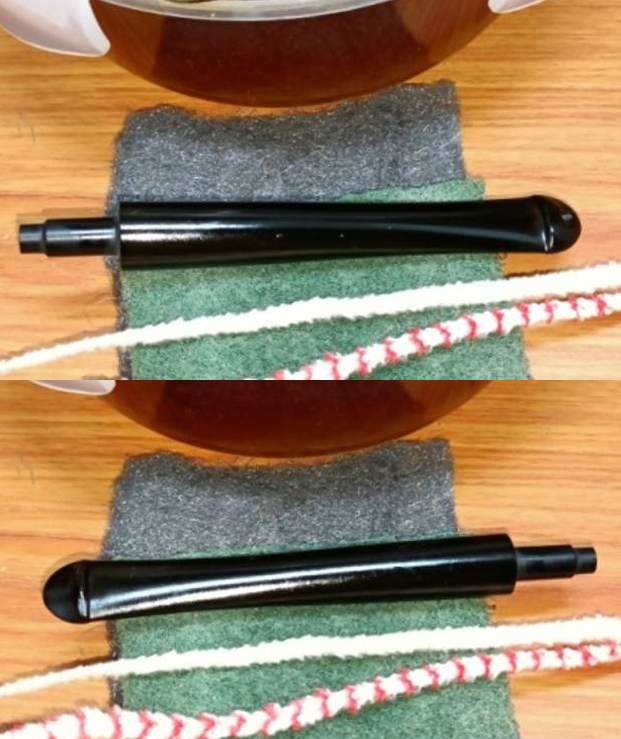 With the external and internal cleaning of the stem completed, Abha handed over the stem to me to complete the repairs. Continuing with the stem refurbishing, I heated the bite zone with the flame of a lighter to raise the tooth indentations to the surface. Though the results were not what were expected, the vulcanite was raised a little leaving behind deep tooth compressions over the button edge on either surfaces. These surfaces of the stem were filled with a mix of CA Gorilla superglue and activated charcoal powder and set aside for the fill to cure. I really hope that this time around I get better results with using this new CA glue.
  With the stem repairs set aside to harden, I started with the stummel repairs by reaming the chamber with the smallest of the PipNet reamer blade. I used my fabricated knife to remove cake from areas inaccessible to the reamer blade and completed the process by sanding the walls smooth with a folded piece of 180 grit sandpaper. I wiped the chamber with a cotton swab wetted with alcohol to clean the residual carbon dust. The chamber walls are solid with decades of residual service life. However, the rim has slightly deformed due to charring at 6 and 12 o’clock directions and encircled in green.
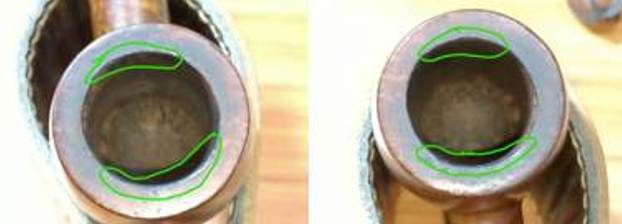 I cleaned the external surface of the stummel with undiluted Murphy’s oil soap and a hard bristled toothbrush. I cleaned the smooth rim top surface with the soap and Scotch Brite pad. The darkened inner rims edge in the 6 o’clock direction is now clearly visible (marked in red) and confirms a charred rim edge.

 Simultaneously, I thoroughly cleaned the mortise with shank brush and anti-oil dish washing soap. This ensured that the stummel now smells clean and fresh. I dried the stummel internals and externals with paper towels and soft absorbent cotton cloth and set it aside overnight to completely dry out before I worked on it any further.
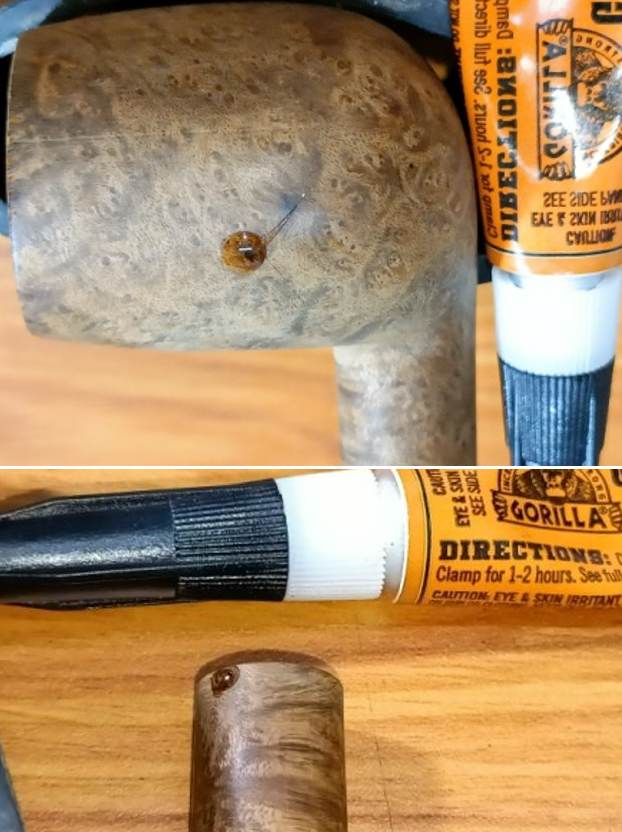
 By next afternoon, the stummel had dried out and I decided to address the issue of fills over the surface. With a sharp dental tool, I extracted the old and loosened fills and cleaned the area with a cotton swab and alcohol. Using clear CA superglue, I filled up the pits over the stummel surface and set it aside to cure.
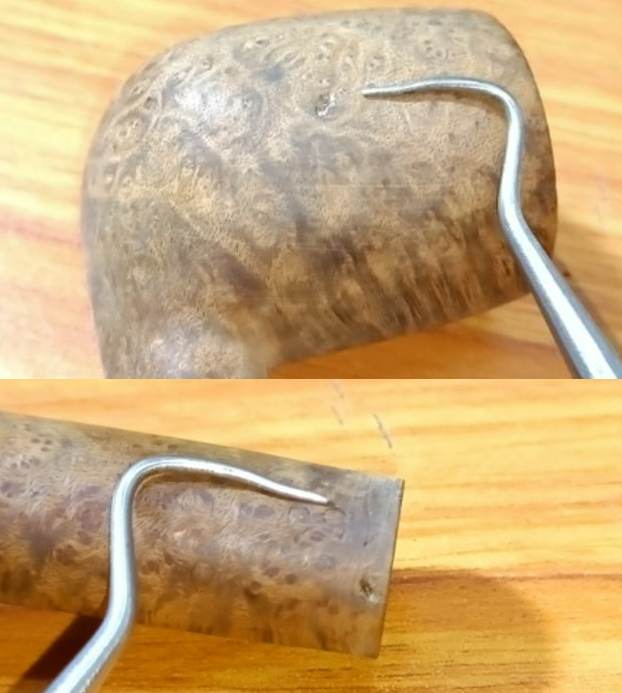
 Once the fill had hardened, I first sand the fills with a needle file to roughly match the fill with the rest of the surface followed by sanding with a folded piece of 220 grit sand paper to further blend in the fills with the rest of the briar surface.
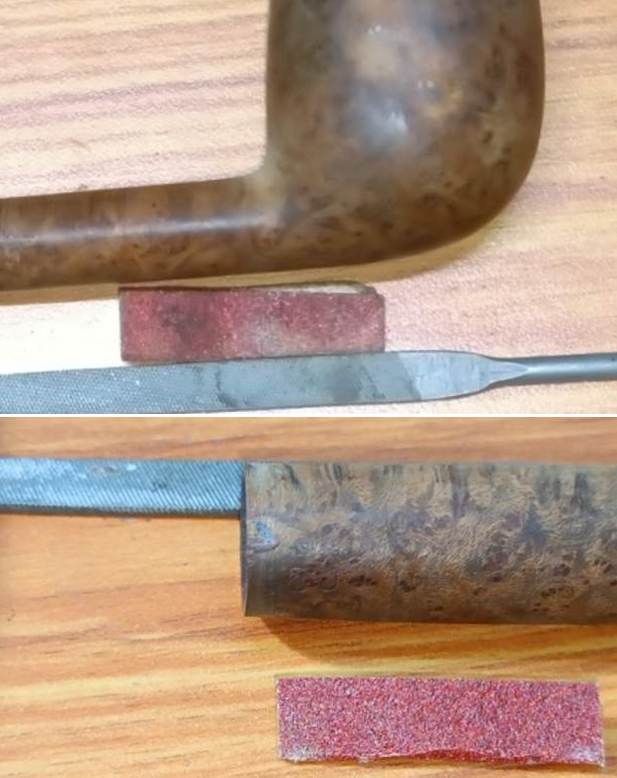 Next, I moved on to address the charred edges over the rim top surface. I topped the rim over a piece of 220 grit sand paper by slowly rotating the rim over the sand paper. I hate to lose briar any more than absolutely necessary and so frequently checked the progress I was making. I was quite pleased with the appearance of the stummel at this stage in restoration.
 With a folded piece of 220 grit sandpaper pinched between my forefinger and thumb, I imparted a nice bevel to the inner rim edge. This eliminated the minor charring that had remained over the inner rim edges.
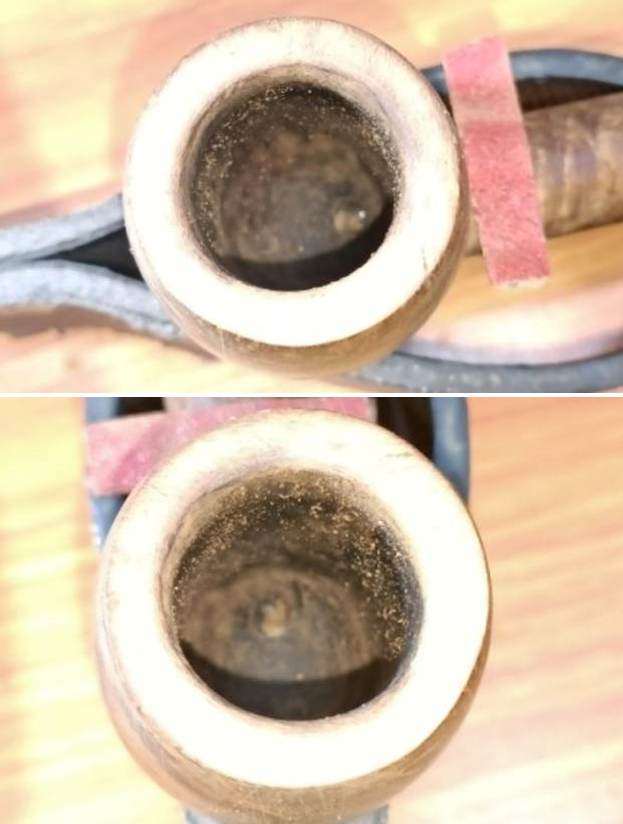 Now that the stummel repairs were complete, Abha took over the bowl to work her magic and bring alive the grains over the briar surface. She went through the complete set of micromesh pads, wet sanding through 1500 to 12000 grit pads. Next, she rubbed a small quantity of “Before and After Restoration Balm” deep in to the briar with my finger tips and let it rest for a few minutes. The balm almost immediately works its magic and the briar now has a nice vibrant appearance with the beautiful grain patterns displayed in their complete splendor. I really like the looks of the stummel at this point in restoration. The grains and the clean lines of this piece of briar is really appreciable.

 While Abha was polishing the stummel, I worked on the stem repairs. The fill had cured and with a flat head needle file, I worked on the filling till I had achieved a rough match with the surrounding surface and had sufficiently sharpened the button edges. For a better blending, I further sand the entire stem with 320.
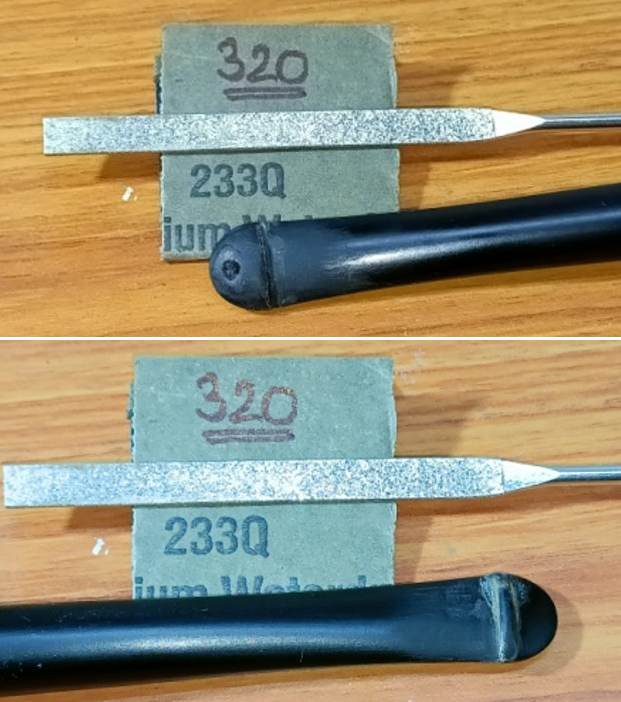 Next, to impart a nice shine, I dry sanded the entire stem with 320, 600 and 800 grit sand papers followed by wet sanding using 1000, 1500 and 2000 grit sand papers. This progressive use of higher grit sandpapers helps to, firstly, reduce the sanding marks left behind by the more abrasive ones, secondly, completely eliminates the oxidation while imparting a clean shine to the stem surface. Thirdly, this also helped to even out the minor imperfections from the bite zone. I applied a little EVO and set the stem aside for a few minutes for the oil to be absorbed in the stem surface.
 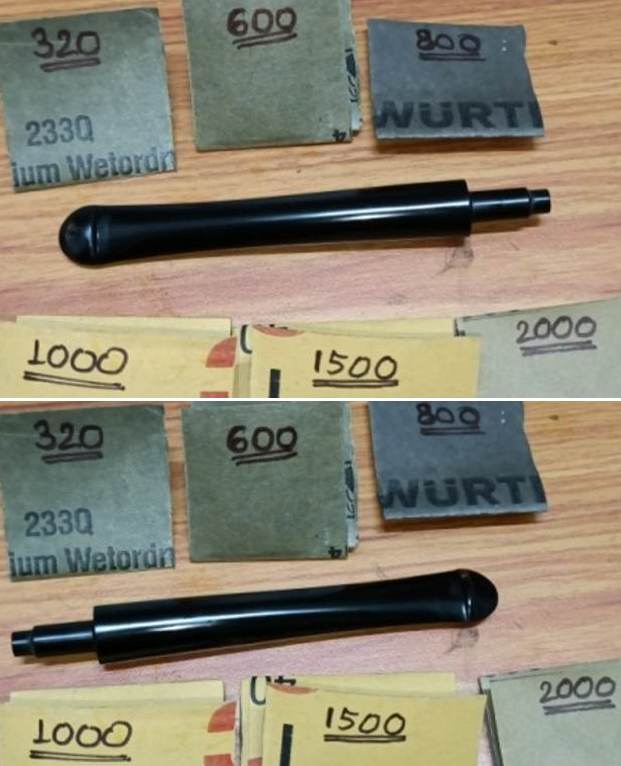 To bring a deep shine to the vulcanite stem, I went through the dry sanding with 3200 to 12000 grit micromesh pads, and wiped the stem with Extra Virgin Olive oil to rehydrate the vulcanite. The repairs have blended in very well and the stem now looks shiny black and beautiful. The finished stem is shown below.
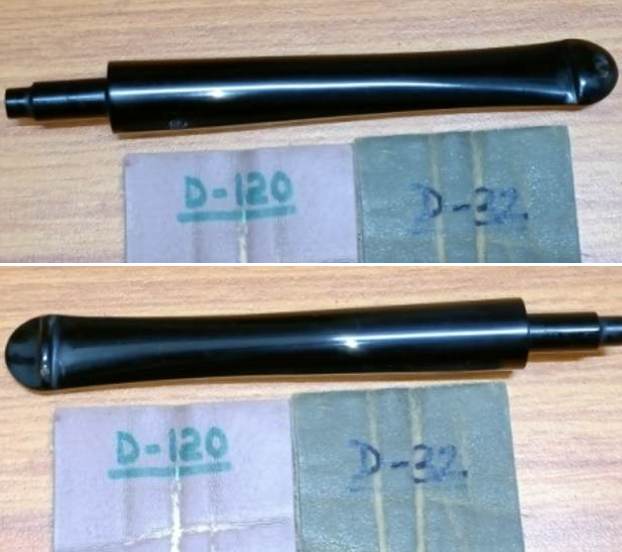 To refresh the stem logo, I coat the stem logo with white correction ink and let it dry out completely. Once the ink had dried out, with a toothpick, I gently removed the excess ink from the surrounding surface. Though the logo is not very crisp, this is the best that was possible given how worn out the stamping was to start with.
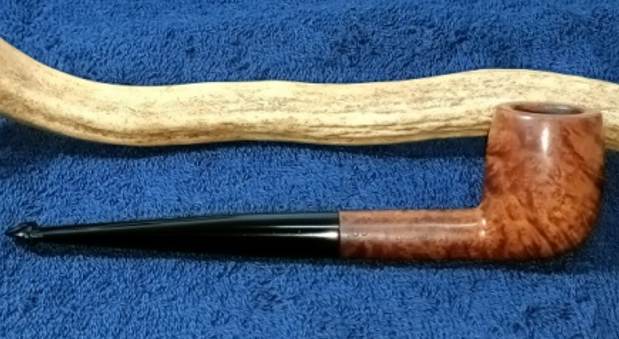
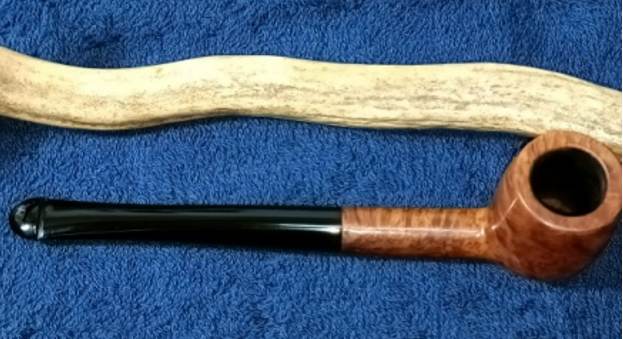
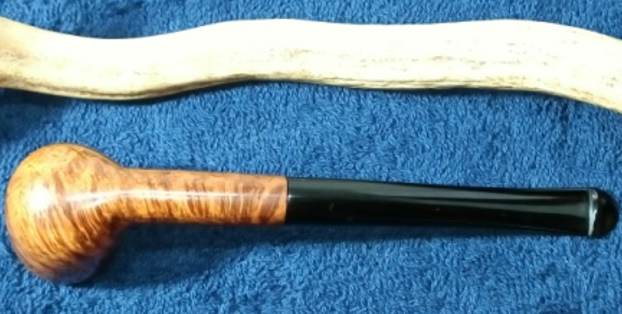
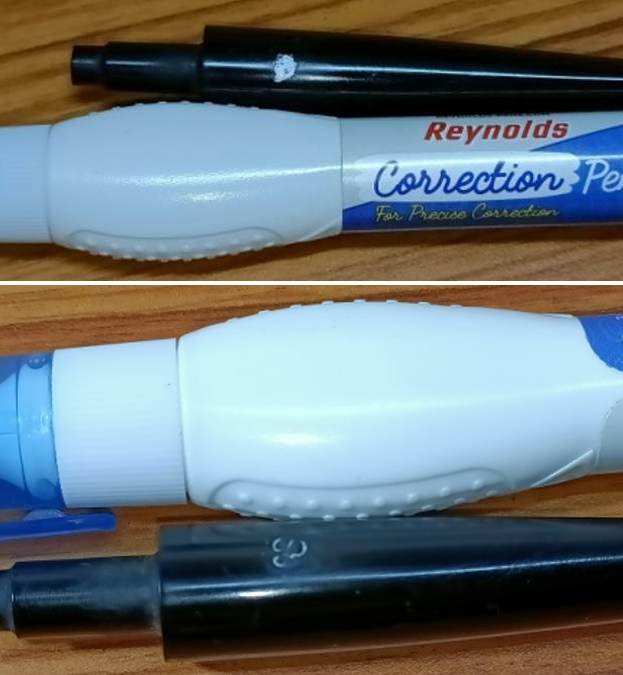 This is that part in pipe refurbishing that I love and enjoy the most. I began the final polishing cycle by mounting a cotton cloth buffing wheel on to my hand held rotary tool and applying a coat of Blue Diamond to the entire pipe to polish out the minor scratches. With a cotton buffing wheel that I use for carnauba wax, I apply a coat of carnauba wax to the stummel and stem and continued to work on it till the complete coat of wax had been polished out. I mount a clean cotton cloth buffing wheel and gave the entire pipe a once over buff. I finished the restoration by giving the entire pipe a rigorous hand buffing using a microfiber cloth to deepen the shine further. This classic Billiards shape pipe from Peterson’s oozes a solidity and beauty that draws you to it. Here are a couple of pictures of the pipe at the end of the restoration process.


 P.S. I shared the pictures of this pipe on our club’s WhatsApp group and was immediately snatched up by one of the members. As I completed the write up, I have received a fantastic feedback on the smoking qualities and aesthetics of this pipe…..and this is truly the most satisfying experience of the entire process!!
There are some interesting pipes that I have lined up next…..keep following rebornpipes for the write ups. Stay safe and keep the pipe lit.
