Blog by Paresh Deshpande
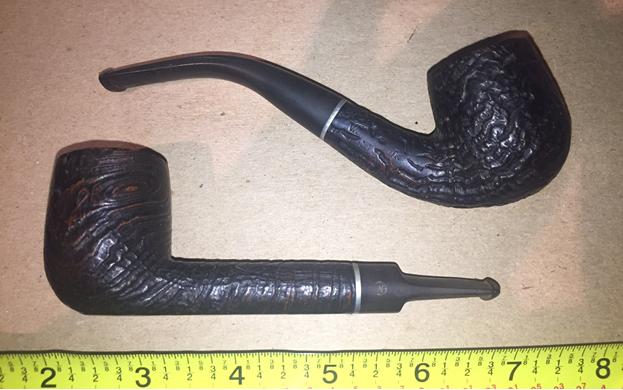
During the summer of last year while browsing on Pinterest, I came across pictures of some beautiful pipes and following the links led me to an old gentleman from the UK who was willing to sell these pipes either single or as a lot. There were around 60 odd pipes. I went through the pictures that were sent along with the rates and selected 10 pipes. After a prolonged and interesting interaction, we managed to arrive at a price point. Soon these pipes landed on the shores of India and went in to Customs hold for nearly a month. Finally, it was released and I laid my hands on these pipes after a wait of nearly 3 months! Here is a picture of the lot that I had taken moments after opening the parcel.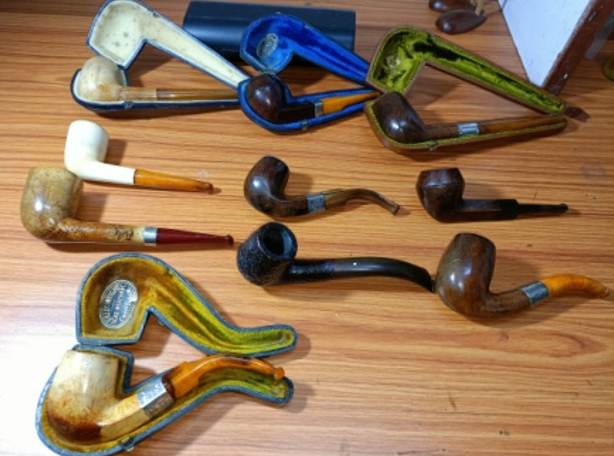 Since then, I have refurbished, repaired a family era Barling’s Make Bulldog (yellow arrow) and a c.1901 Samuel McLardy (green arrow) and added them to my personal collection. This estate lot had a Dunhill Shell (blue arrow) that called out to my fellow Pipe Club member and a dear friend who desired this pipe as his first Dunhill! The following picture will identify the pipes that have been restored and the Dunhill that is now on my work table.
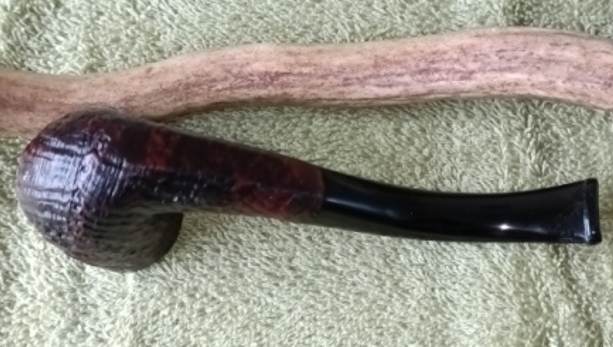
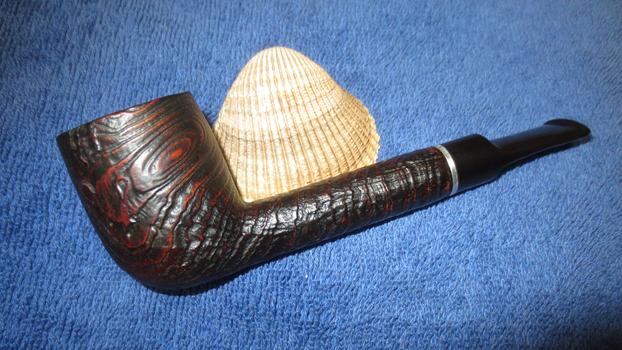
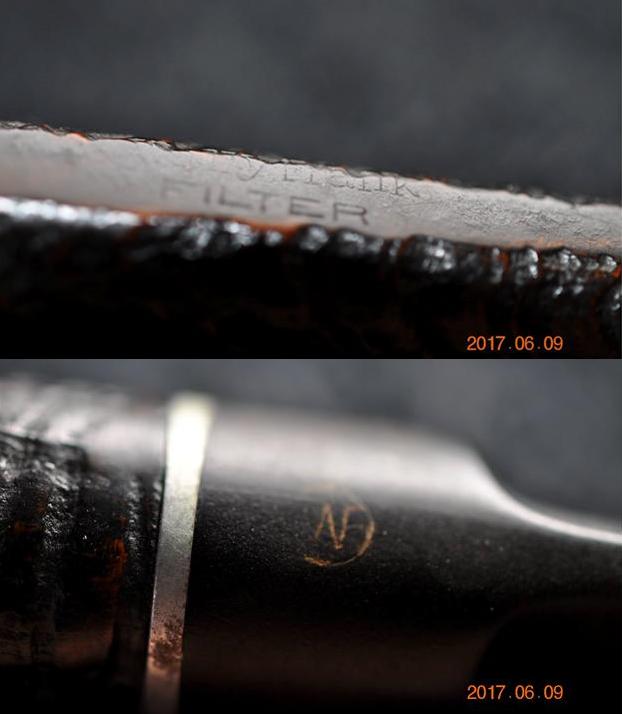
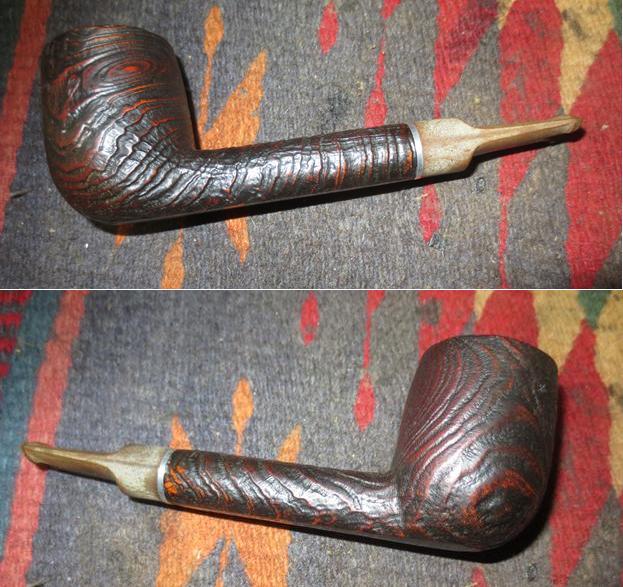
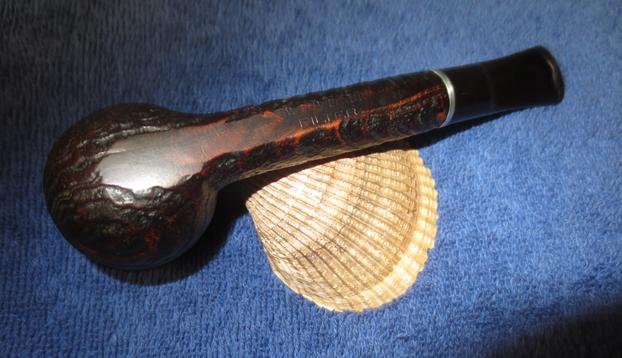
 This is a beautiful bent billiard pipe with a deep craggy sandblast which pre 1960s Dunhill were well known for. It is stamped on the foot and the underside of the shank with the shape number “56” followed by “F/T” followed by “DUNHILL” over “SHELL BRIAR” followed by the COM stamp “Made in England” where the letter D is followed by a numeral “0” that is smaller than the letter D and is underscored. This is followed by Group size number “4” in a circle and letter “S” for Shell towards the shank end. Dunhill White Dot adorns the top of the vulcanite stem. The stampings are clear and readable.
  I have worked on a few Dunhill pipes and had extensively researched the brand. There is so much to know and study about this single British brand that has survived to till this day that each day there is some new piece of information. However, pipedia.org has adequate information on the history, lines offered and dating guide for Dunhill pipe. I strongly recommend that all Pipers should make it a point to read through the information given there.
Based on the stamping seen on this pipe, with the numeral “0” being smaller than the letter D and underscored, conclusively dates this pipe to be from 1960.
Initial Inspection
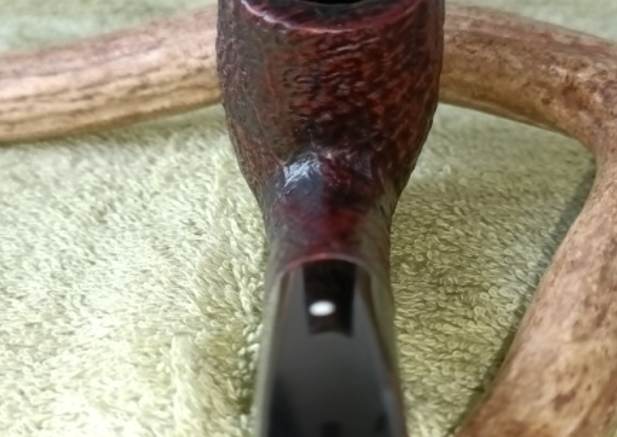
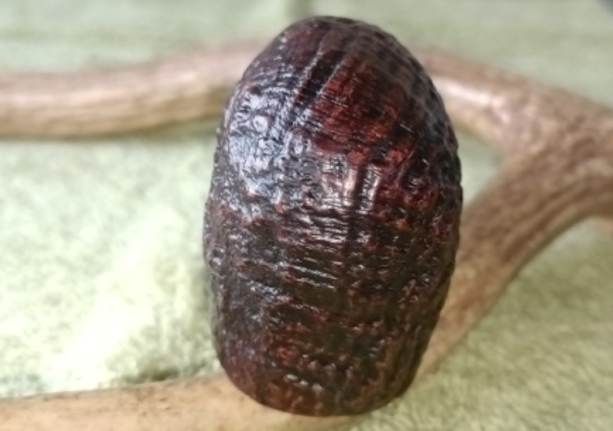
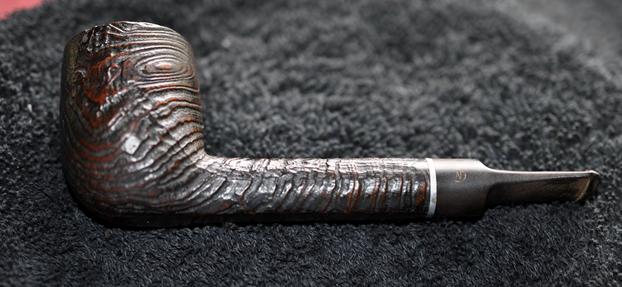
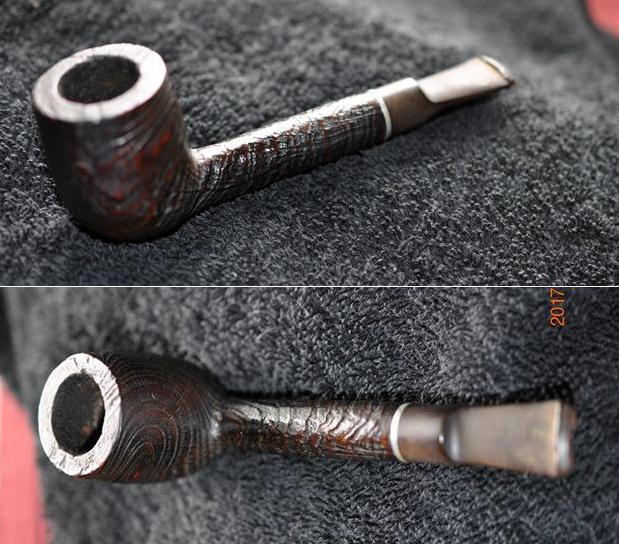
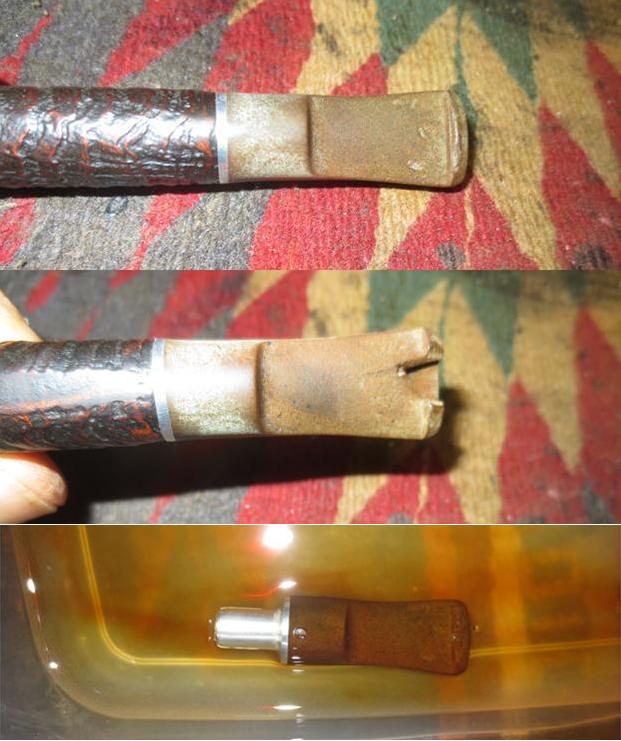
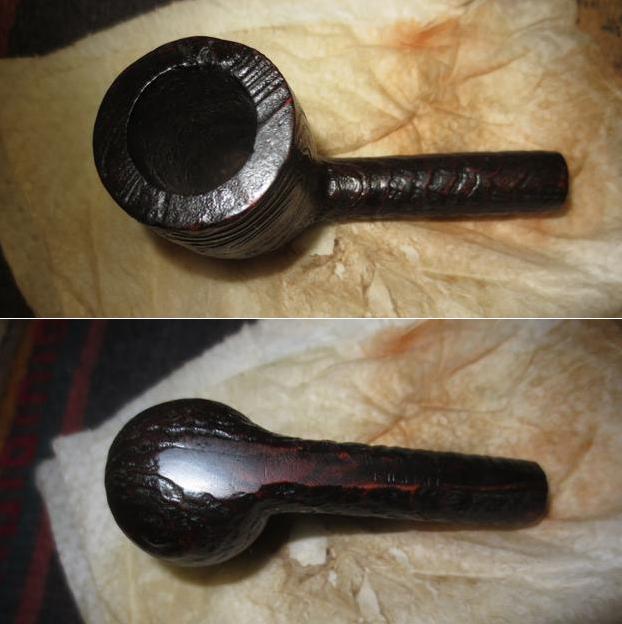
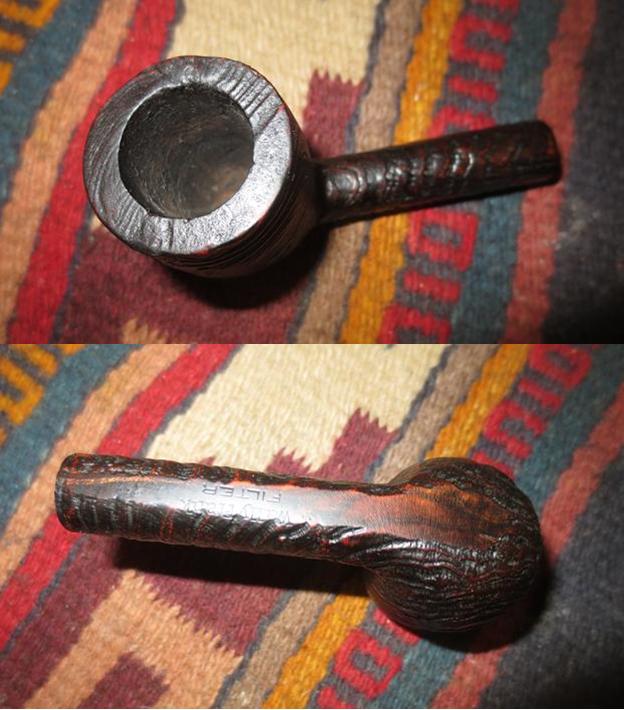
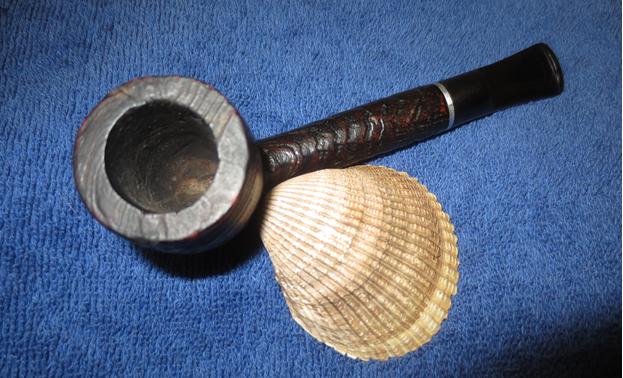
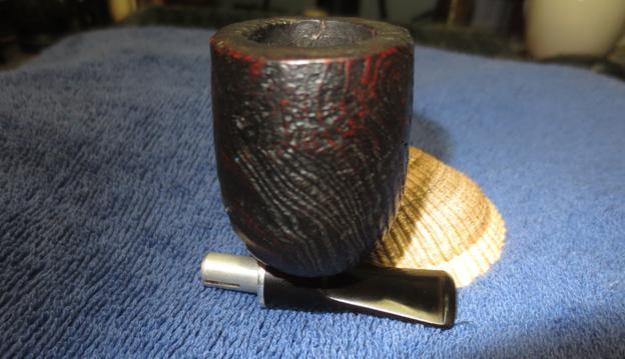
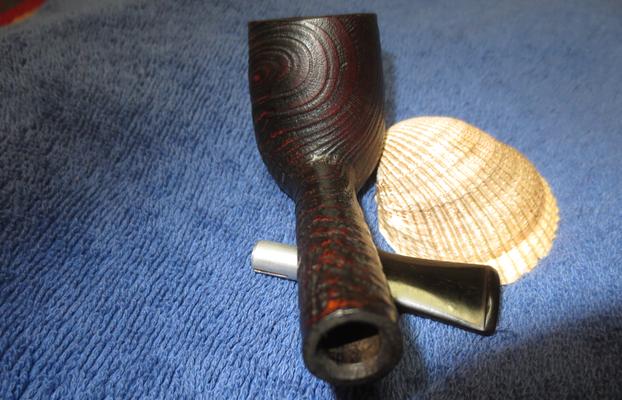
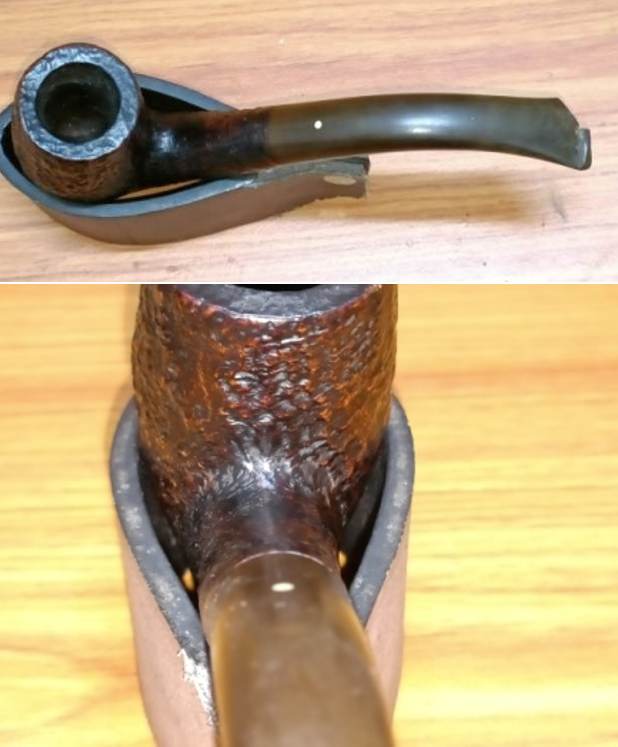
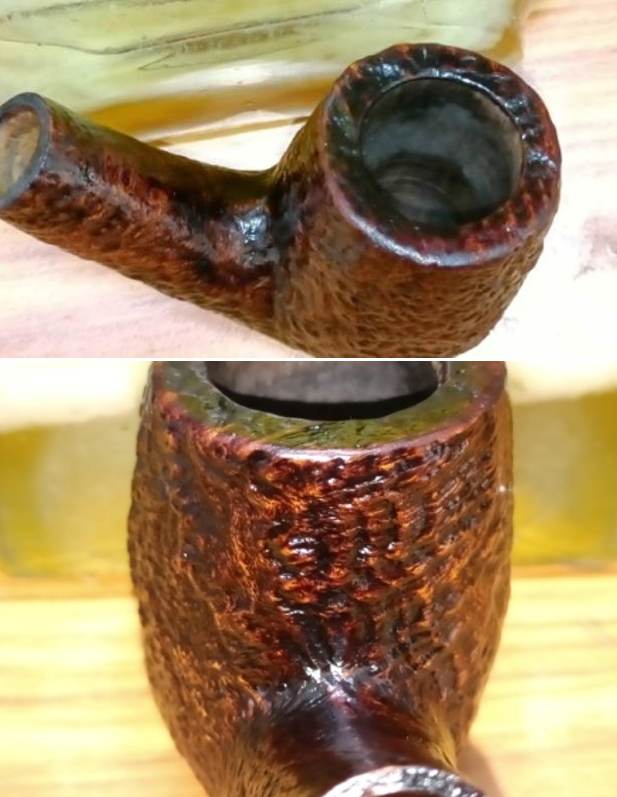
The first thing I noticed, in fact anyone would, is that the stem is severely damaged with nearly ¾ of the bite zone conspicuous by its absence! What remains of the bite zone is peppered with tooth chatter. The stem is oxidized with the white dot intact. There is a decent amount of cake in the chamber with lava overflow on the rim top surface. The stummel boasts of nice deep craggy sandblast. The dirt, dust and grime embedded in the nooks and crannies of the sandblast give a dull and lackluster appearance to the stummel. The shank is dirty with traces of old oils and gunk. The following pictures will give you a general idea about the condition of the pipe.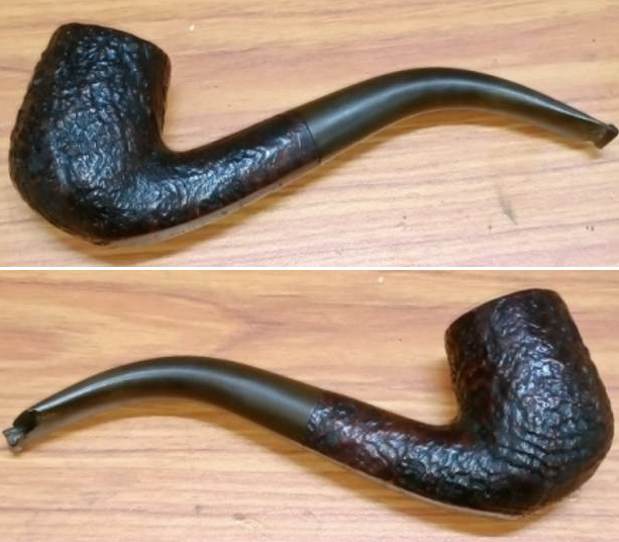
 Detailed Inspection
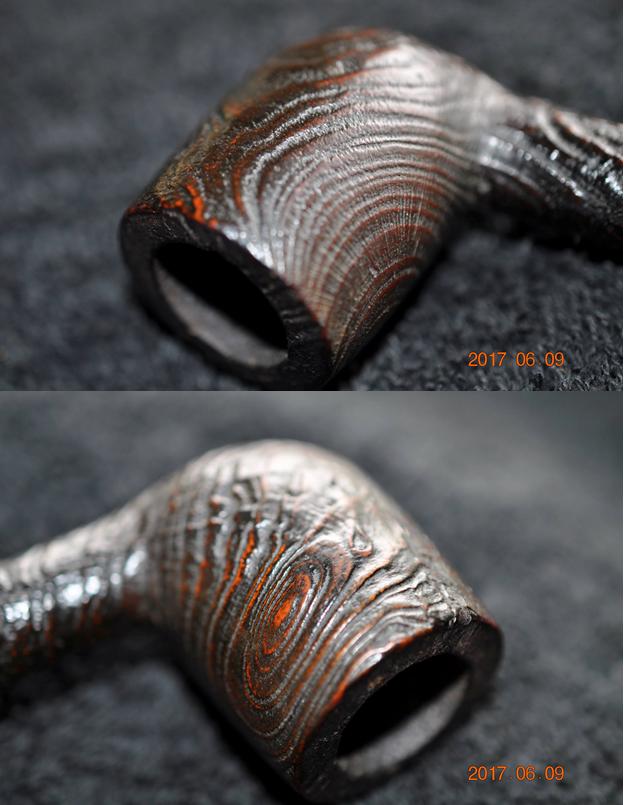
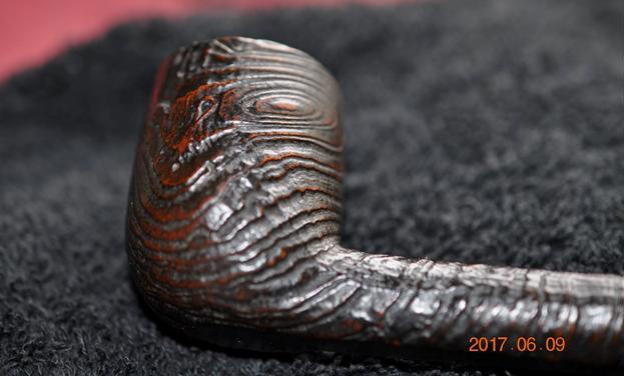
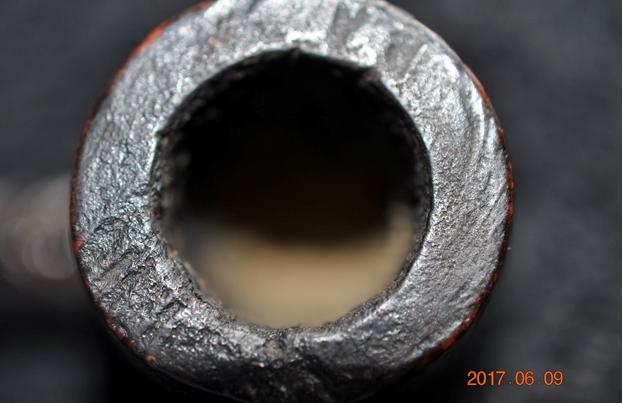
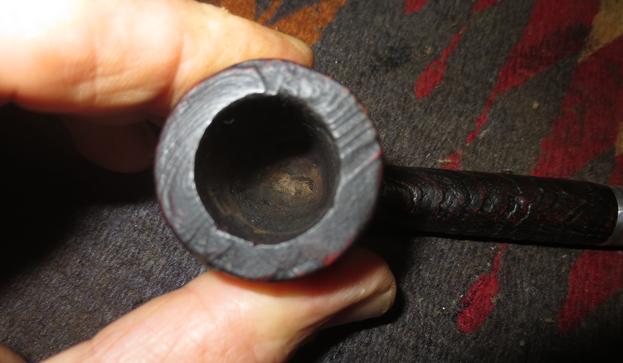
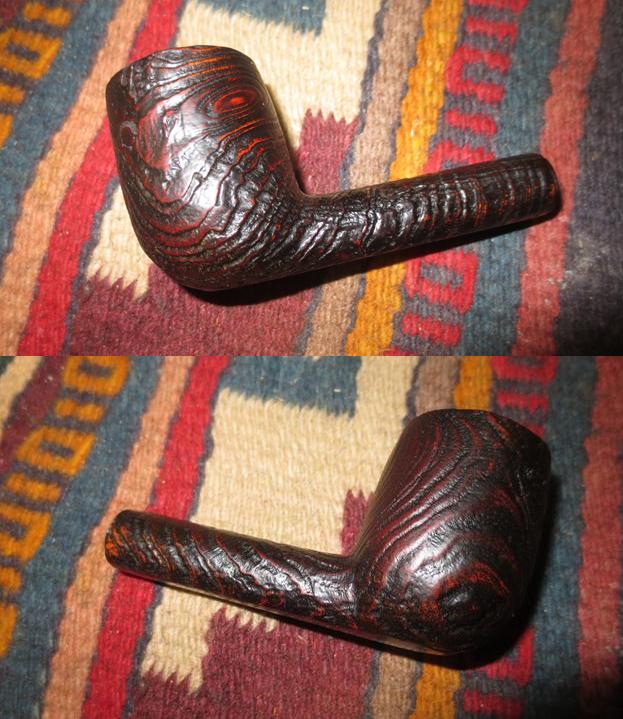
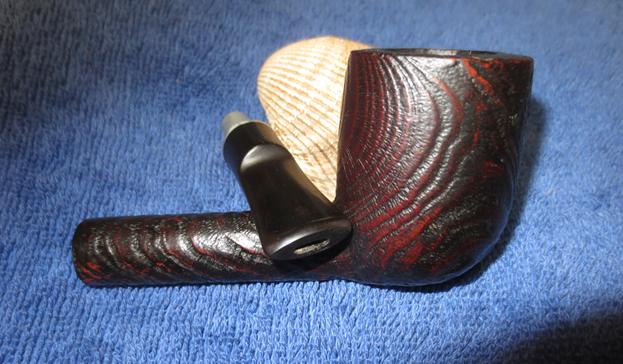
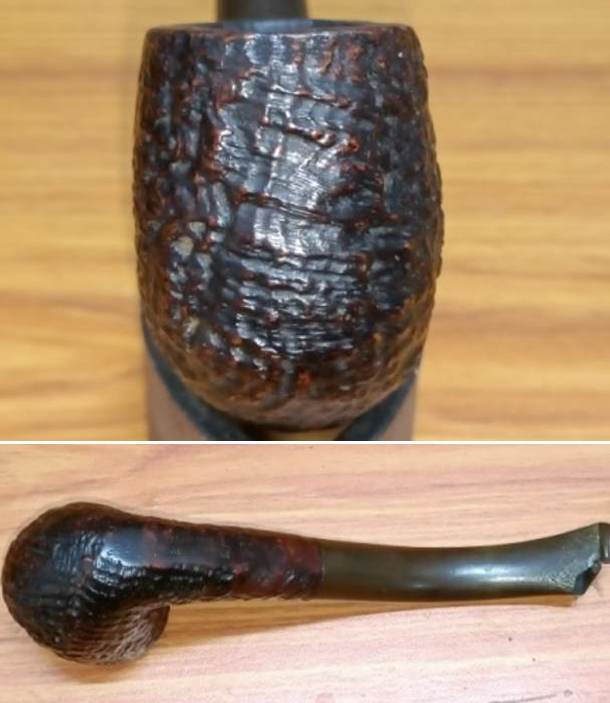
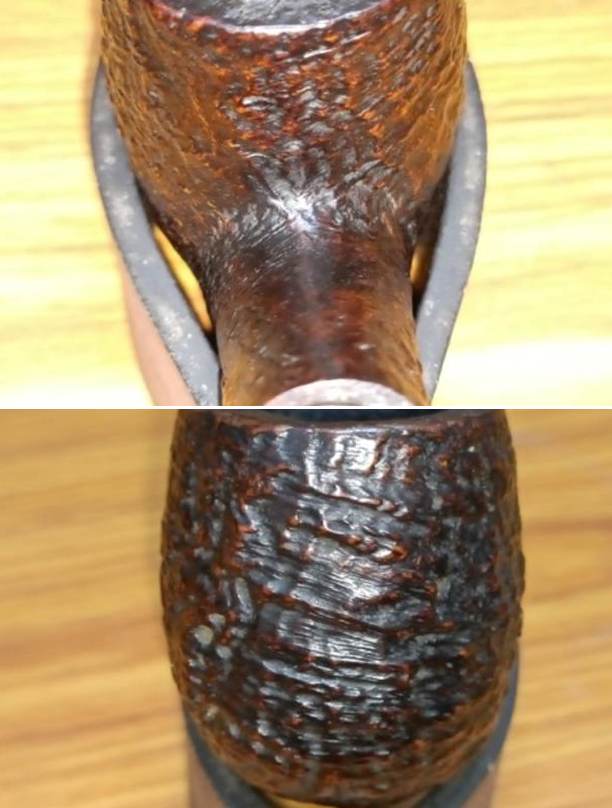
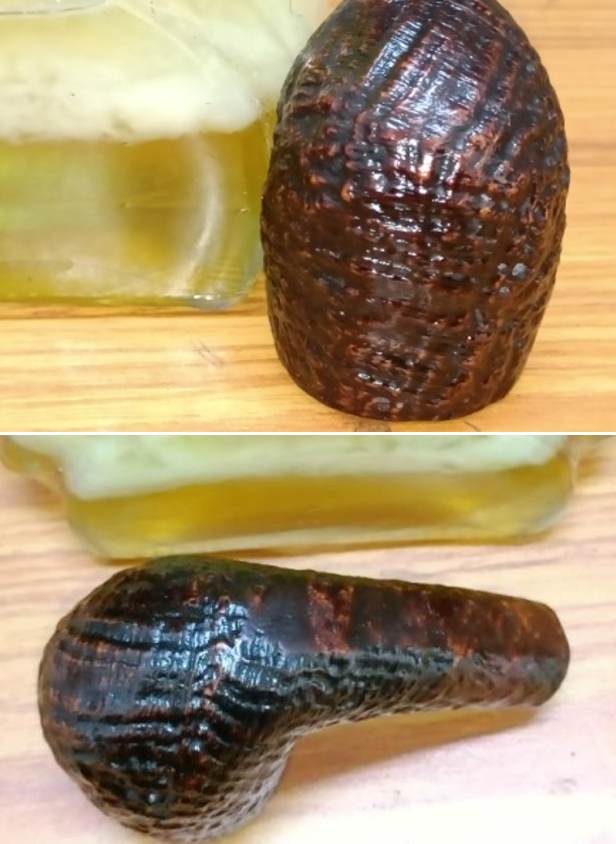
The chamber shows a layer of medium thick cake with small traces of lava overflow on the rim top surface. From what I can see, the chamber walls appear to be without any damage. The chamber has faint sweet smell which should reduce with the internal cleaning of the stummel. The inner and outer rim edges are in good condition which will be further ascertained once the lava overflow and cake is removed. The mortise is clean and so is the shank airway.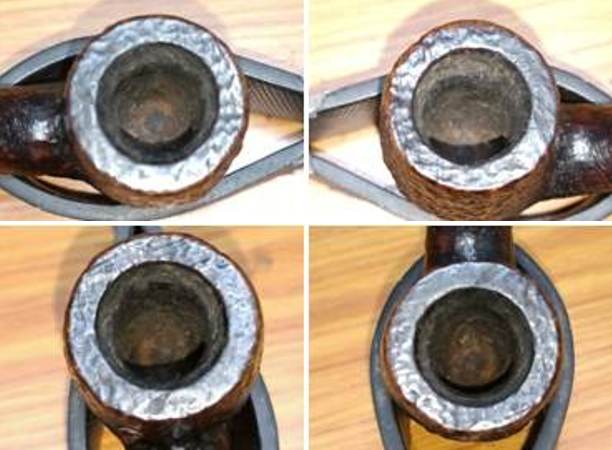 The stummel boasts of some beautiful sandblast pattern typical of lots of bird’s eye and ring grain all around. It is dirty with grime and tar filling in much of the craggy finish. The stummel fells solid to the touch and shows no signs of hot spots. The briar looks lifeless and dull which is nothing serious to address.
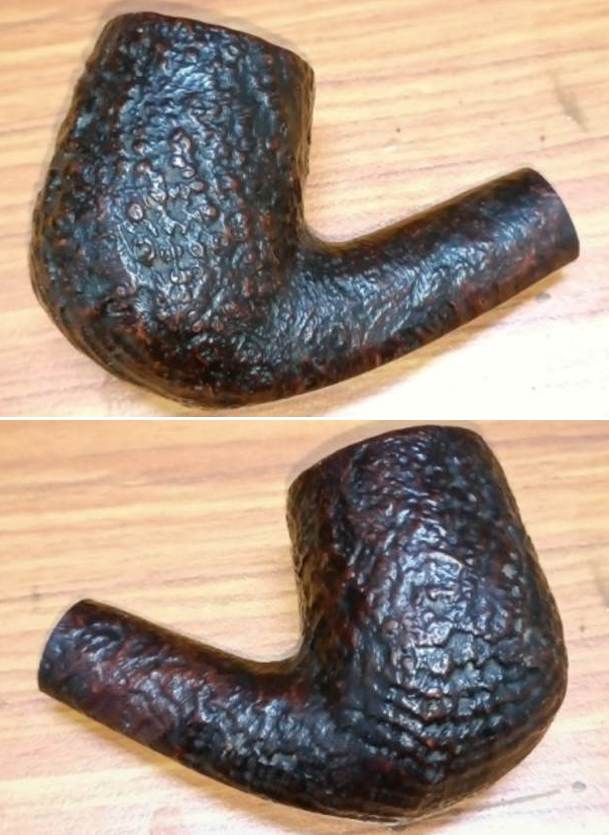
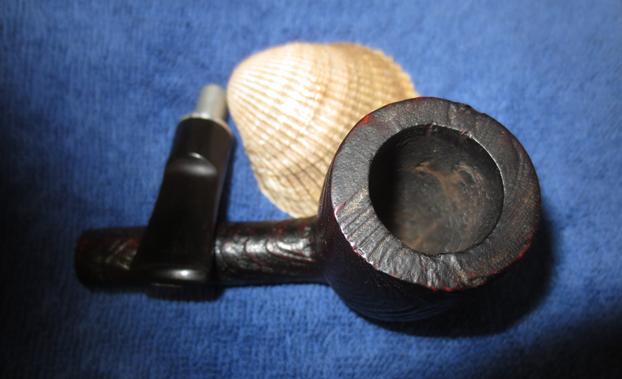
 The round shank of the bent billiards flows into a tapered vulcanite stem which flares, like a fish tail, at the button end and hence the stamp F/T. The vulcanite stem shows significant damage to the button end, in fact, there is no button at all, similar to a Dunhill Bruyere that I had worked upon a couple of years ago!! The slot end at the right side is missing about an inch of vulcanite. This pipe would have been a favorite of the previous owner and he had continued to enjoy bowls of his favorite tobacco long after the button end had been chewed off. This is evident from the significant tooth chatter on both the surfaces of the stem. I intend to reconstruct/ rebuild this portion of the stem, including the slot, while maintaining the stem and general profile of the pipe. This will require major repairs. The quality of vulcanite is top notch.
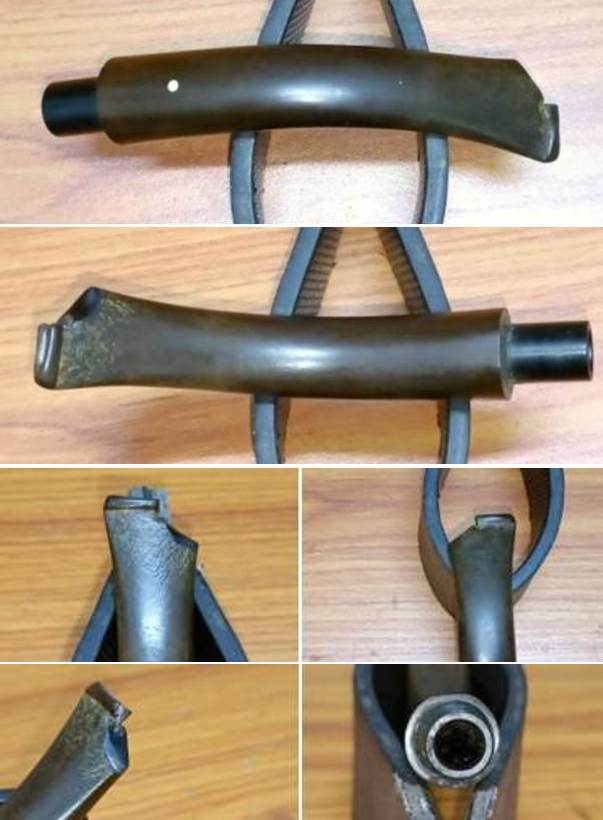 In this project, stem rebuild will be a major challenge as achieving the fish tailed profile of the stem will be crucial for overall aesthetic appeal of this piece of briar. Having previously worked on a stem rebuild/ restoration of the Dunhill Bruyere, I am aware of the challenges this restoration will present en-route.
THE PROCESS
I started this project by cleaning the internals of the stem airway. Using thin shank brushes and anti-oil dish washing soap, I cleaned the stem airway. I have modified this process of cleaning the stem airway by doing away with pipe cleaners and alcohol as it saves me a ton of pipe cleaners, which is a precious commodity for me here in India. To say that the airway was filthy would be an understatement. A lot of perseverance and tons of elbow grease later, the stem internals are finally clean.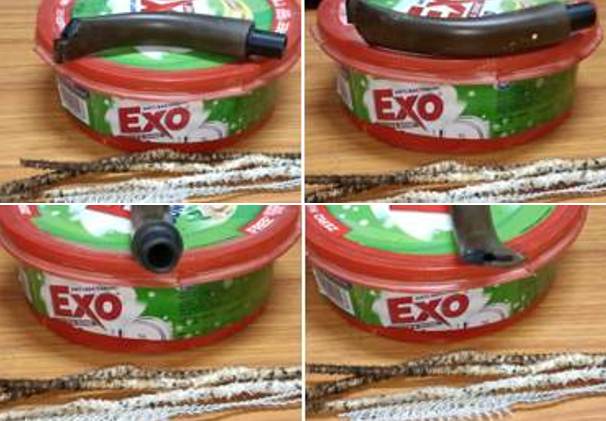 With the stem internals now clean, I moved to external cleaning of the stem surface by dunking the stem into “Before and After Deoxidizer” solution developed by my friend Mark Hoover. The solution helps to draw out heavy oxidation to the surface making it’s further removal a breeze, while the minor oxidation is eliminated to a very great extent. Unfortunately, I missed out on taking pictures of this process.
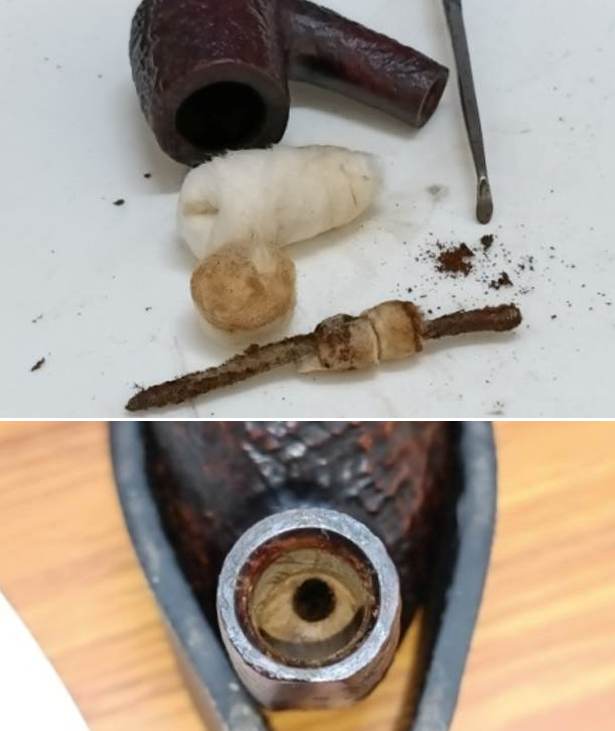
While the stem was soaking in the deoxidizer solution, I reamed the chamber with a PipNet reamer tool, using cutting blade size 2 followed by size 3 heads. I used my fabricated knife to remove cake from areas inaccessible to the reamer blades and completed the process of removing the cake by sanding the walls smooth with a folded piece of 180 grit sandpaper. I wiped the chamber with a cotton swab wetted with alcohol to clean the residual carbon dust. The chamber walls are solid with no signs of hot spots, heat fissures or webs.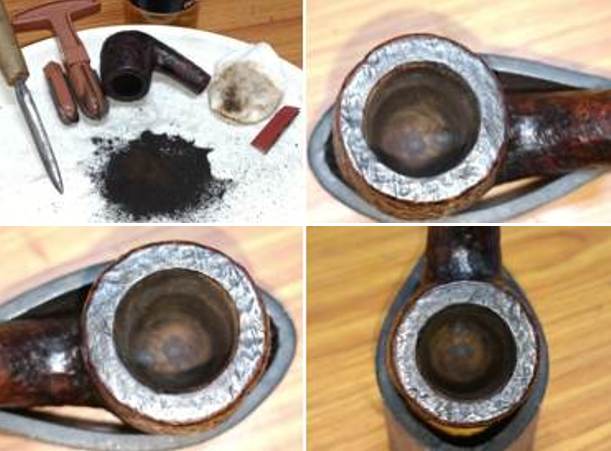 Continuing with the internal cleaning of the chamber, I subjected it to a salt and alcohol bath. I used cotton balls which is an at par substitute as I have realized over the years. I drew out a wick from the cotton and along with a folded regular pipe cleaner; inserted it into the mortise and through the draught hole and further into the chamber. Thereafter, I packed the chamber with cotton balls to about quarter of an inch below the rim inner edge and soaked the cotton balls with isopropyl alcohol up to the brim. About half an hour later, the level of alcohol had gone down, having being absorbed by the cotton. I topped it up once again and set it aside overnight. By next afternoon, the cotton and alcohol had drawn out all the remaining oils/ tars from the chamber and mortise and loosened out any residual cake and tar build up, fulfilling its intended task. I removed the cotton balls and ran pipe cleaners through the mortise to clean out all the loosened tars and gunk. Using my fabricated tool, I scraped out the entire loosed gunk from the mortise and further cleaned it with alcohol and q-tips. The chamber now smells clean and fresh. I set the stummel aside to dry out naturally.
 I cleaned the external surface of the stummel with undiluted Murphy’s oil soap and a hard bristled toothbrush. I cleaned the smooth rim top surface with the soap and Scotch Brite pad.
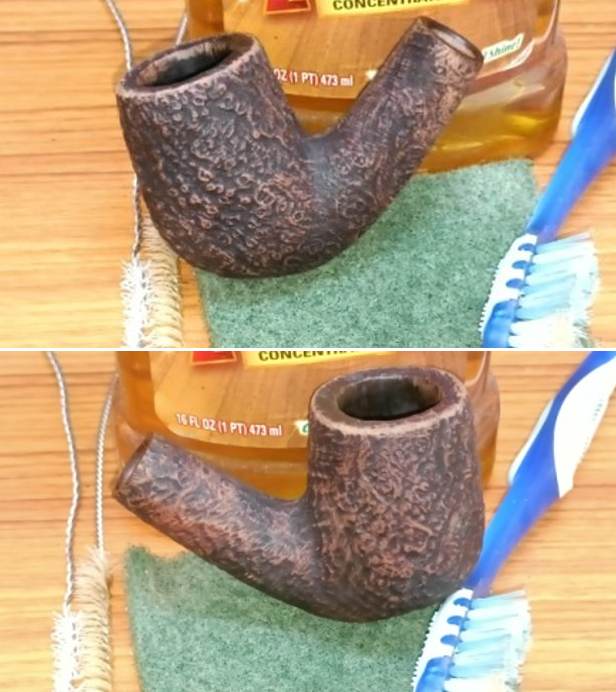

 I thoroughly cleaned the mortise with shank brush and anti-oil dish washing soap. The mortise is now thoroughly cleaned and fresh.
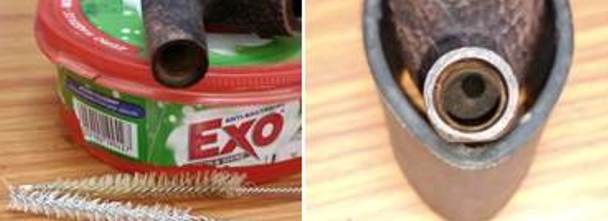 Next, I rub a small quantity of “Before and After Restoration Balm” in to the briar with my finger tips and let it rest for a few minutes. The balm almost immediately works its magic and the briar now has a nice vibrant appearance with the beautiful contrasting hues colors that are unique to this sandblast pipe, on full display. I further buff it with a horse hair shoe brush.
 Now that the stummel work is nearly completed, I fish out the stem from the deoxidizer. I cleaned the stem under running warm water and scrubbed the raised oxidation from the stem surface using a Scotch Brite pad and cleaned the airway with a thin shank brush. I further removed the oxidation by scrubbing the stem with 0000 grade steel wool and applied a little EVO to rehydrate the stem. I ran a couple of pipe cleaners through the stem airway to clean the airway of the deoxidizer solution and water.
 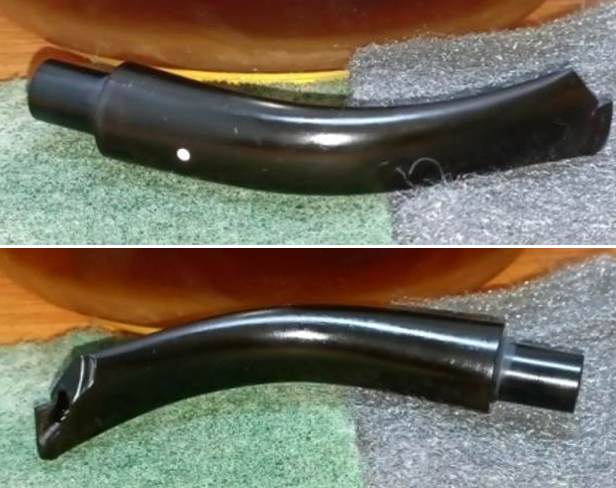 To address the tooth indentations/ bite marks, I warmed up the bite zone with the flame of a lighter. The heat helps to expand the vulcanite and retain its original shape. This method may not always completely raise the depressions to the surface, but most of the times, to a great extent. In this case the tooth indentations were raised to a great extent, but the damage to the button edge would require a rebuild. I followed up the heating of the stem surface with sanding the bite zone with a worn out piece of 180 grit sandpaper to even out the surface.
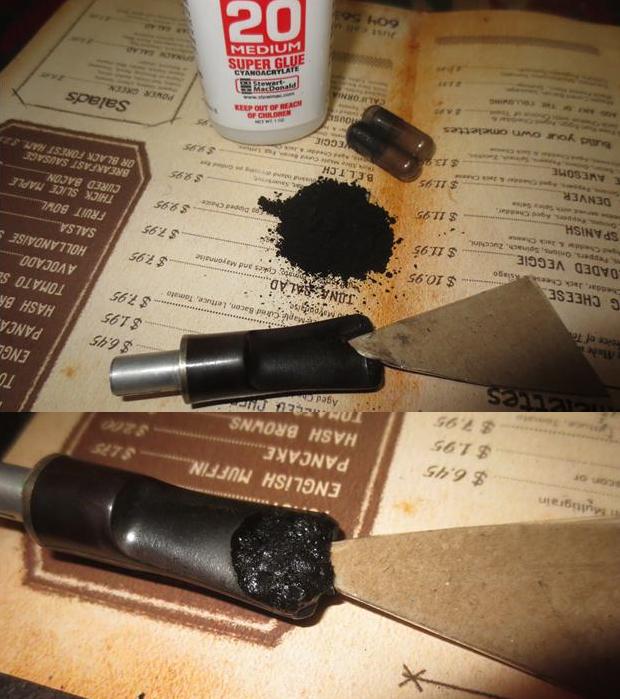
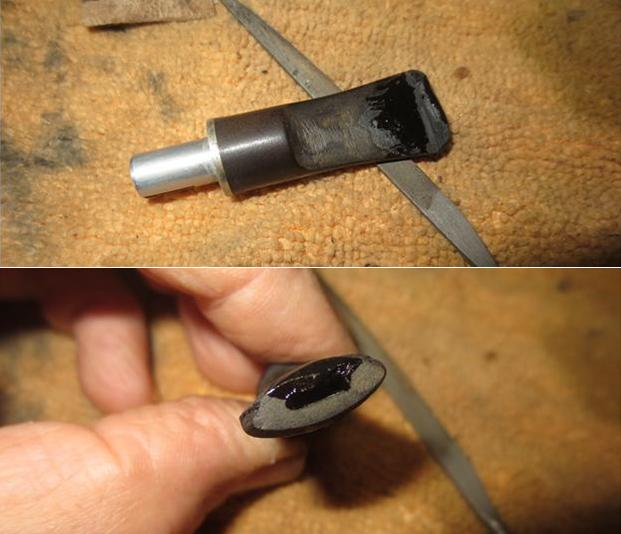
 Next step was to start the process of rebuilding the slot end. I appropriately folded an index card and covered it with a transparent scotch tape which prevents the superglue and charcoal mix from sticking to the card. I prepared a mix of CA superglue and activated charcoal and generously applied it over and extending beyond the broken surface using the remnants of the bite zone as guiding yardstick. I set the stem aside for curing over night. I have not researched and measured the exact length that I had to reconstruct, but eyeballed the length using the longer right side of the stem where a portion of the button was still intact. Before moving ahead, I would like to mention here that I had applied this mix in layers, over the week, to achieve sufficient thickness which would help during the filing and sanding while shaping the button and achieving the correct stem profile.
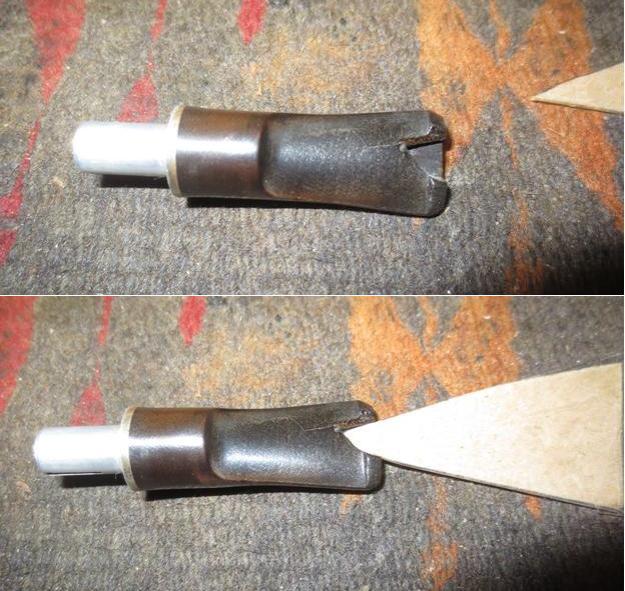
 Once the fill had completely hardened, I moved ahead and began the process of filing and shaping the button end with a flat head needle file. This time around it was more challenging as I had set for my self the aim of creating a fish tail shape (or rather as close a match to fish tail as possible), a straight thin slot and a concave shape to the button end as seen on original stems. This is how the stem repairs look at this point in restoration. There are many airpockets that are clearly visible and would need quite a few more rebuilds with the charcoal mix. It is not without a reason we say that Rome was not built in one day!!
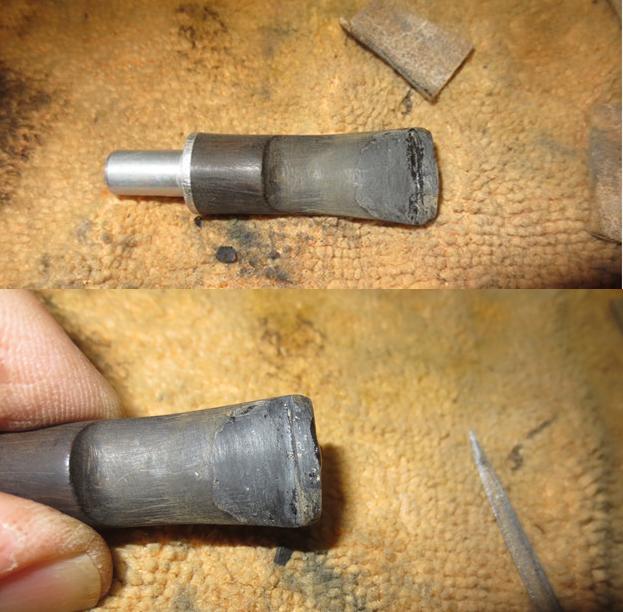
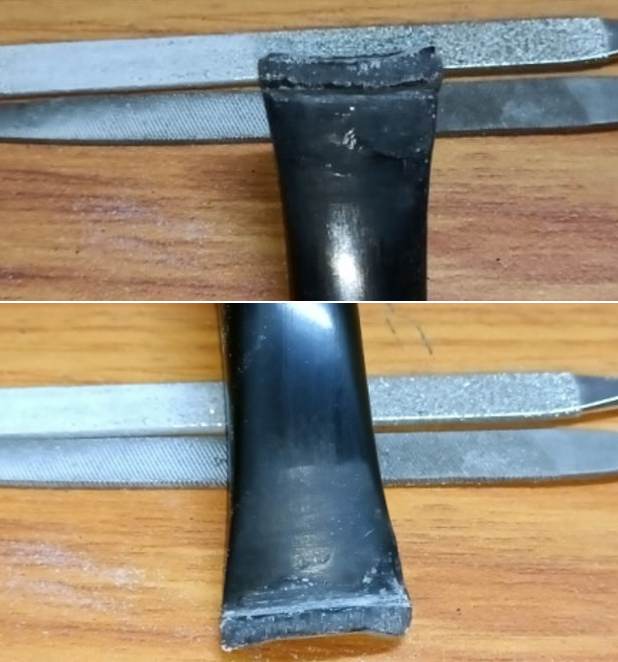 I marked a straight line for the slot orientation and using only the tip of the pointed needle file, I carved out the slot. I followed it up by enlarging this carved slot further using the slot carving file. I resorted to sanding with folded pieces of 180 grit sand papers to laboriously shape and widen the slot, always taking care to maintain a straight line. Once I was satisfied with the profile of the slot, I went ahead and shaped the button by first achieving a rough shape with a flat head needle file and there after fine tuning it by sanding it down with a 220 grit sand paper.
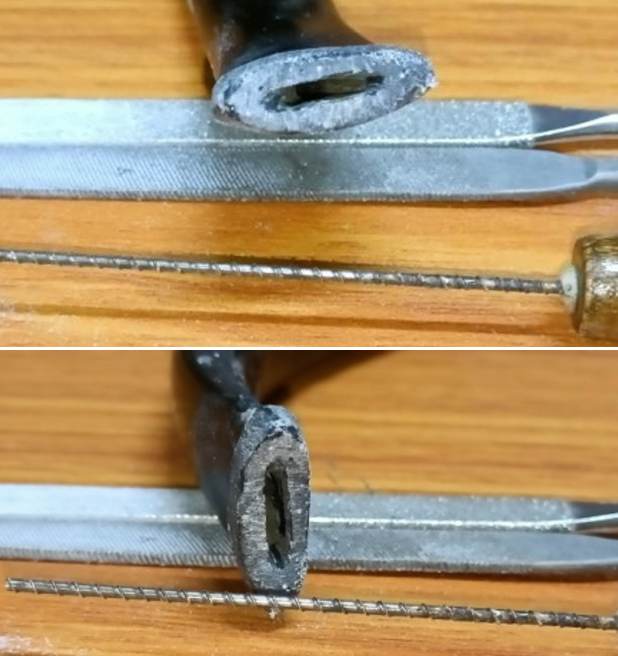
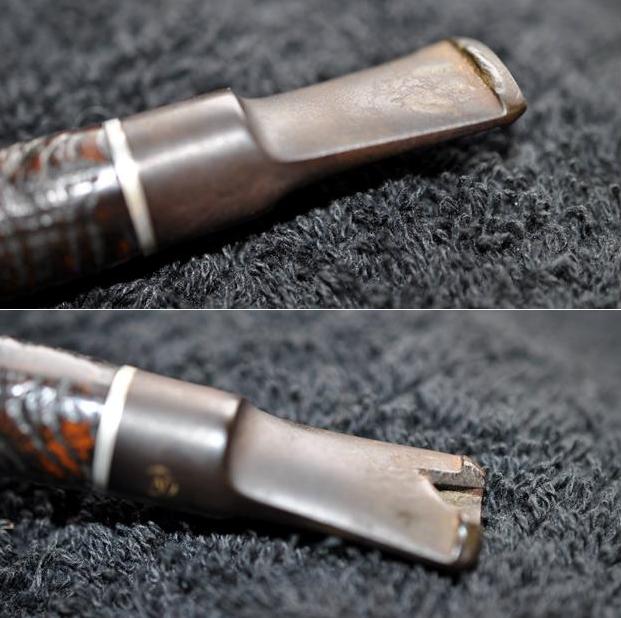
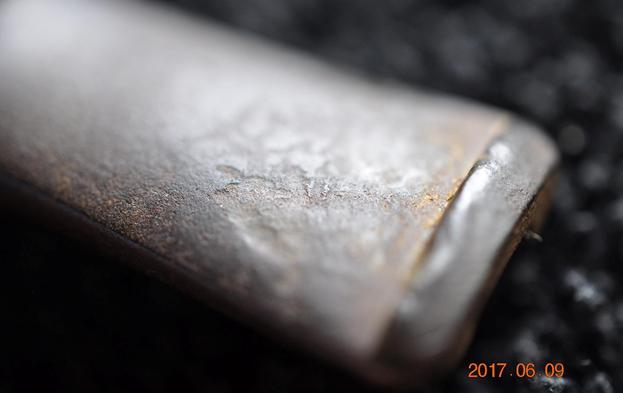
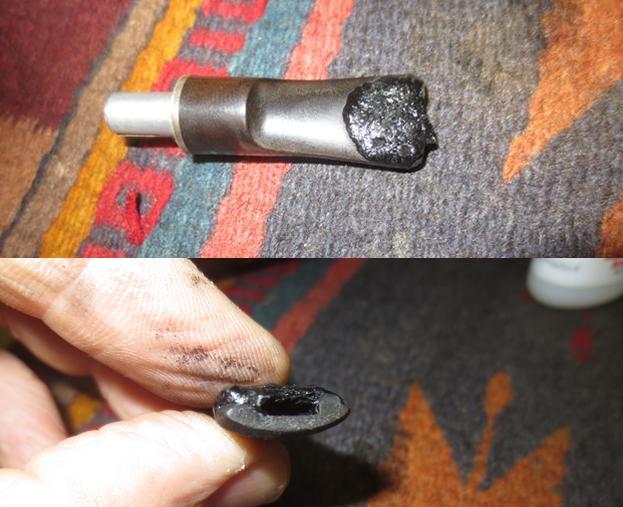
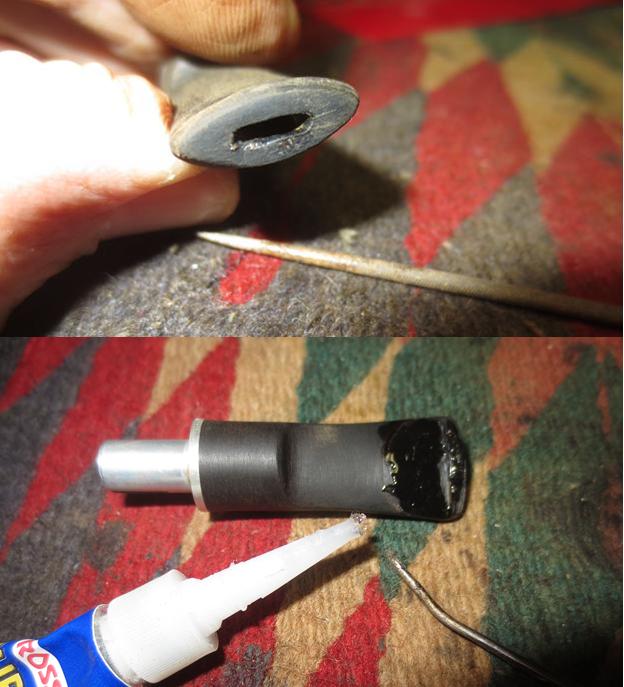
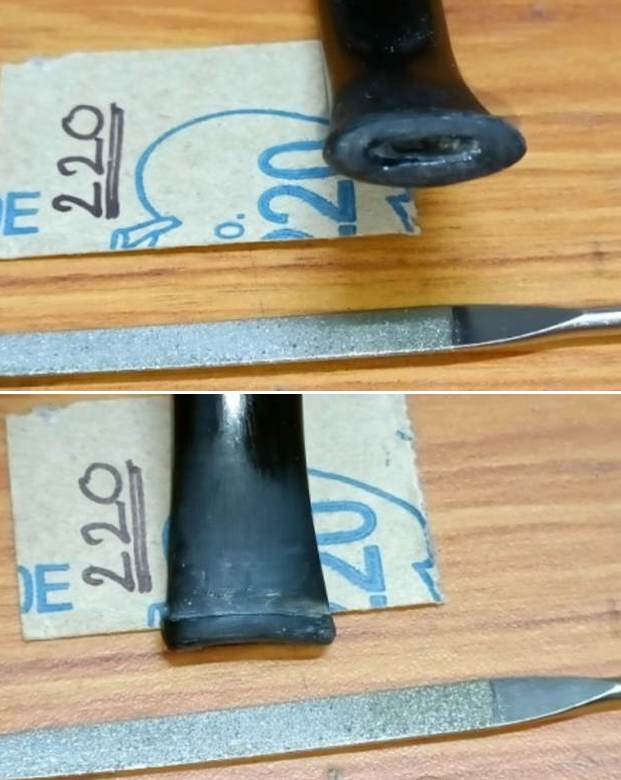
 A close look at the repairs confirmed the presence of some serious air pockets (seen as white spots) in the bite zone and at the slot end. Here are a couple of pictures which will point out these air pockets.
 I applied a mix of CA superglue and activated charcoal over the air pockets ensuring that the mix is thoroughly filled up in to these air pockets. I set the stem aside for the repairs to cure.
 Once the fills had cured, I sand them with a flat needle file to achieve a rough match with the rest of the stem surface followed by further sanding using a folded piece of 220 grit sand paper. Thankfully, the issue of air pockets has now been addressed.
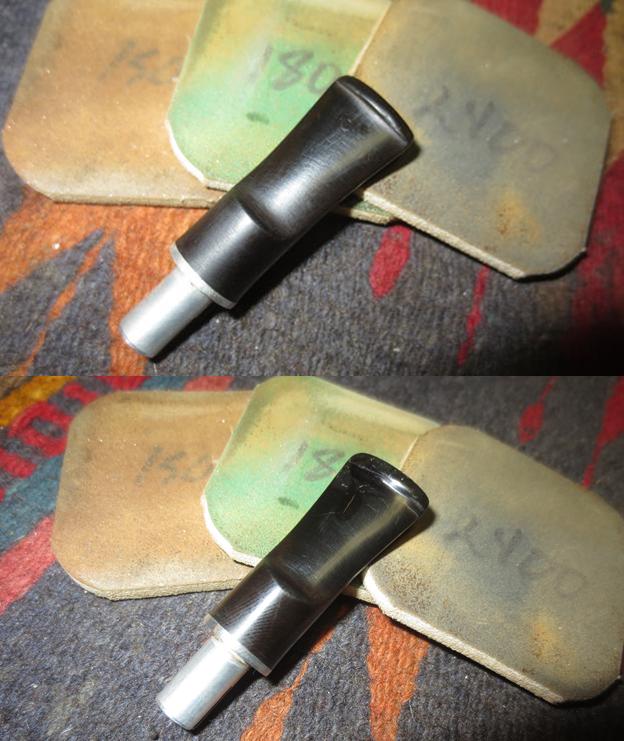
 I continued to dry sand the entire stem with a folded piece of 600 and 800 grit sandpapers and further progressed to wet sanding with 1000, 1500 and 2000 grit sand papers. This helps to reduce the sanding marks left behind by the more abrasive 220 grit paper. I rubbed a small amount of EVO to hydrate the stem.
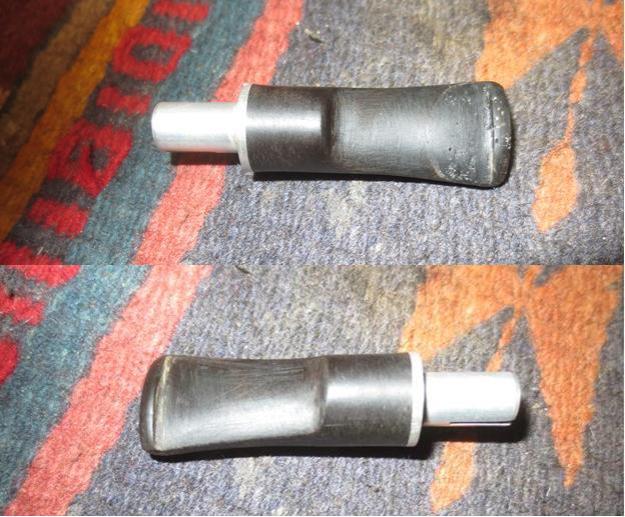
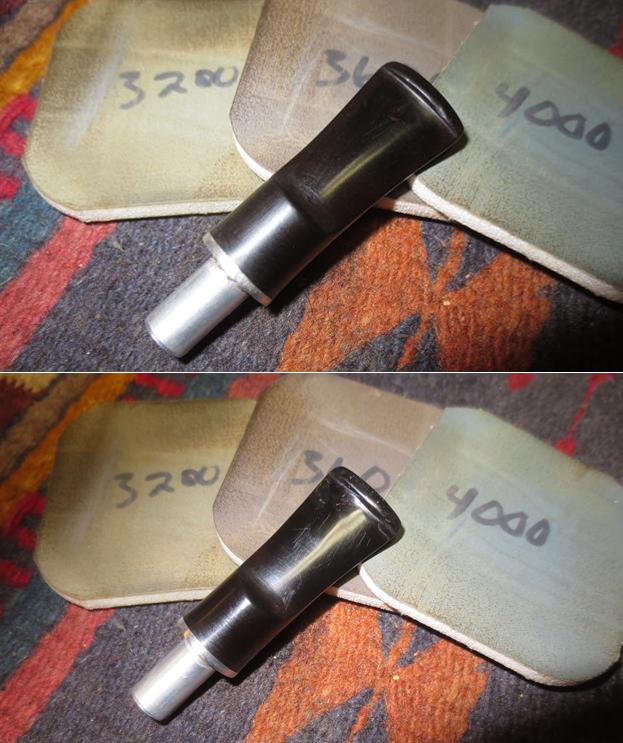
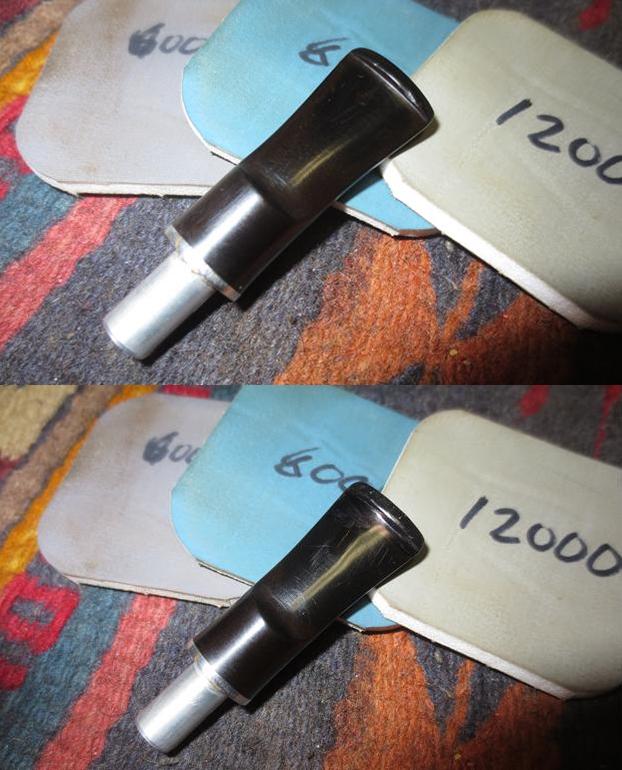
 To bring a deep shine to the vulcanite stem, I went through the complete set of micromesh pads, wet sanding with 1500 to 2400 grit pads and dry sanding with 3200 to 12000 grit pads. I wiped the stem with alcohol after each pad and rubbed it down with Extra Virgin Olive oil to rehydrate the vulcanite. The repairs have blended in very well and the stem now looks shiny black and beautiful. The internals of the stem was once again cleaned out using alcohol and pipe cleaners to clear the airway of all the debris resulting due to the sanding. The finished stem is shown below.
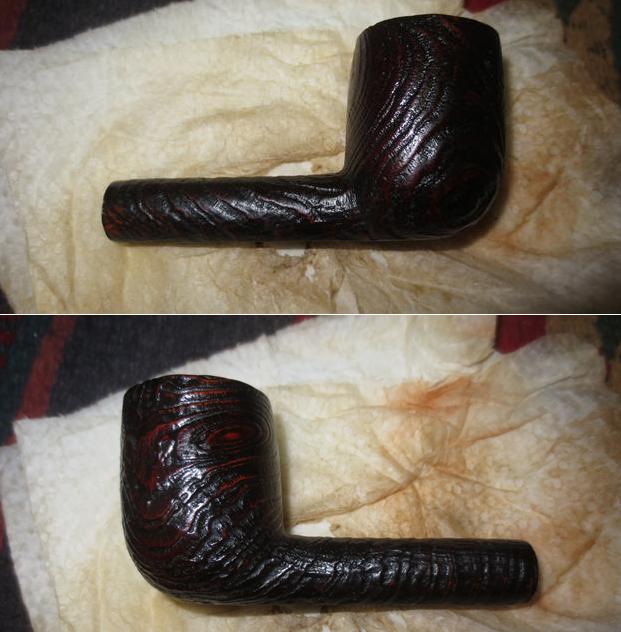
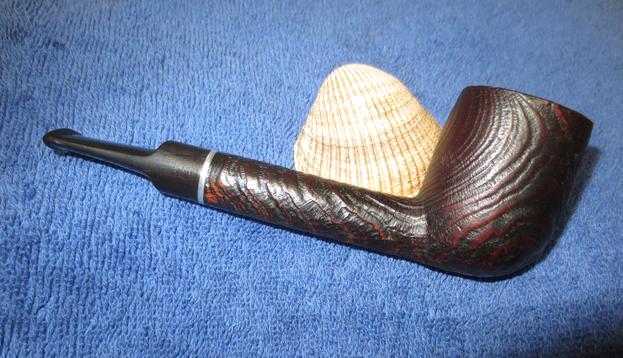
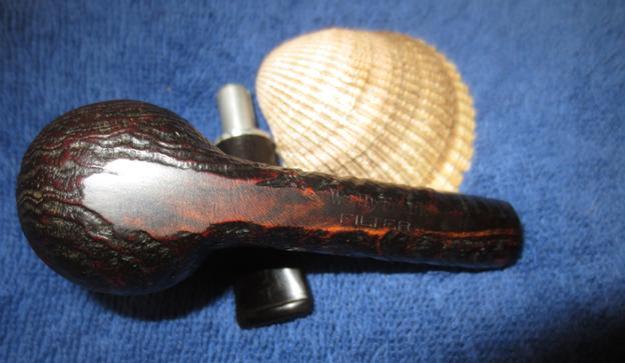
 To finish, I re-attach the stem with the stummel. I mounted a cotton cloth buffing wheel to my hand held rotary machine and applied White Diamond compound to the entire pipe. I wiped/ buffed the pipe with a soft cotton cloth to clear it of any leftover compound dust. I then mounted another cotton cloth wheel on to the polishing machine and applied several coats of carnauba wax. I finished the restoration by giving the entire pipe a rigorous hand buffing using a microfiber cloth to raise the shine further. The completed pipe looks lovely, fresh and vibrant. This restored pipe is now ready to be shipped out to my friend and fellow pipe club member to enjoy for decades ahead.