Blog by Steve Laug
I purchased this little Lovat from Josh (misterzippo), a reader of the blog earlier this year. He sent me an email and photos some pipes that he thought I might want. As usual when you have incurable PAD there is always something that catches my eye. We fired some emails back and forth about the pipes and it did not take long to make a deal. I bought a Malaga Bulldog with a twist in the carving and a scoop in the top of the bowl that I restored earlier. I bought a pair of sandblast Wally Frank pipes shown in the photo below. Josh sent this photo and it shows the overall condition and appearance of both pipes. As I noted in the restoration of the bent billiard the deep ridges of the sandblast finishes intrigued me. Both pipes were dirty but that is never really a problem. The grooves in the sandblast on both were filled in with grit and grime and almost sticky to touch. The rims were caked with overflow of tars from the bowl and the grooves were filled in to the point that they almost were invisible. The stem on the bent billiard was in good shape with light oxidation and some tooth marks on both sides near the button. The stem on the Lovat was missing a large chunk out of the underside that would need repairing. The tape measure in the photo shows that the billiard is about 5 ½ inches long with a taper stem and the Lovat is 5 inches long with a saddle stem.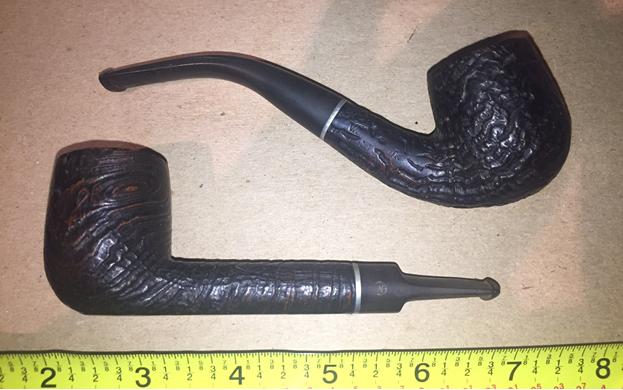 Josh sent me a photo of the major issue with this pipe. There was a large portion of the stem and button missing on the underside. This issue would make me think through my options on this pipe. Should I repair the stem or should I restem the pipe? If I repaired it I could keep the Wally Frank original filter tenon. If I restemmed it I could get rid of that feature and give the pipe a regular push tenon. I would need to think through that issue as I worked on it.
 I asked Josh to send the pipes to my brother instead of too me in Canada. Jeff would do the cleanup work on it so it made sense to have it go directly to him. He took the following photos of the pipe before he started his cleanup. As I looked at these photos I was really taken with the way the sandblast had revealed interesting grain patterns in the briar.
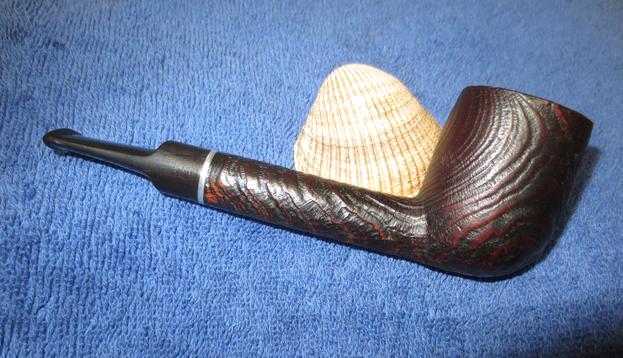
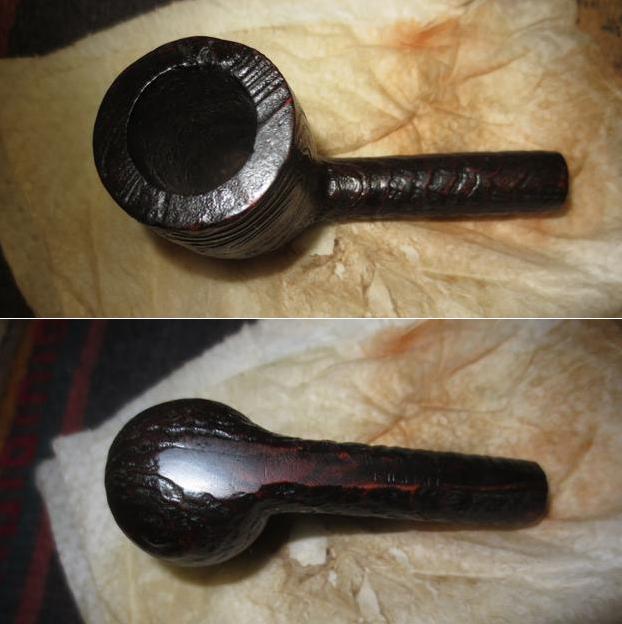
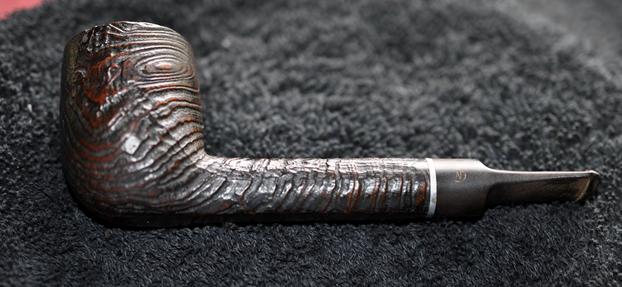 You can see from the photos the overall condition of the pipe. The briar is dirty but still stunning. There was less cake in this little pipe than there was in the other Wally Frank that I worked on. There was light overflow and lava on the rim top but the inner and outer edge of the bowl was in excellent condition. The finish though dirty was not in bad condition under the grime.
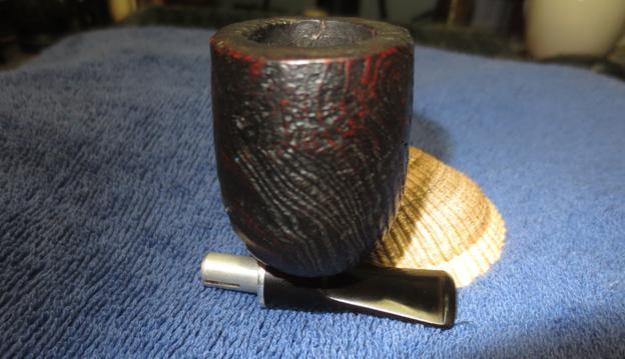
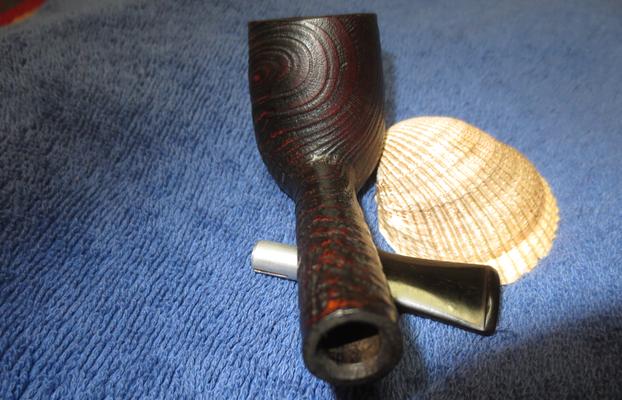
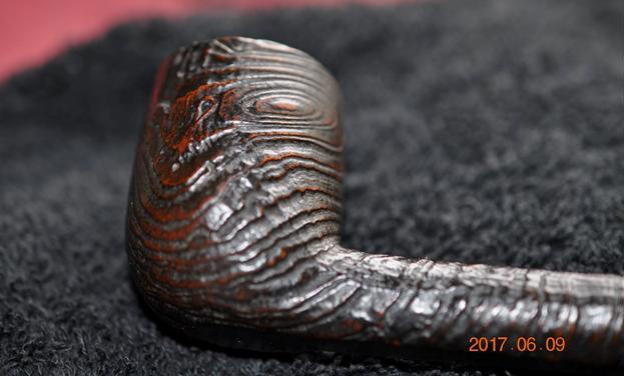
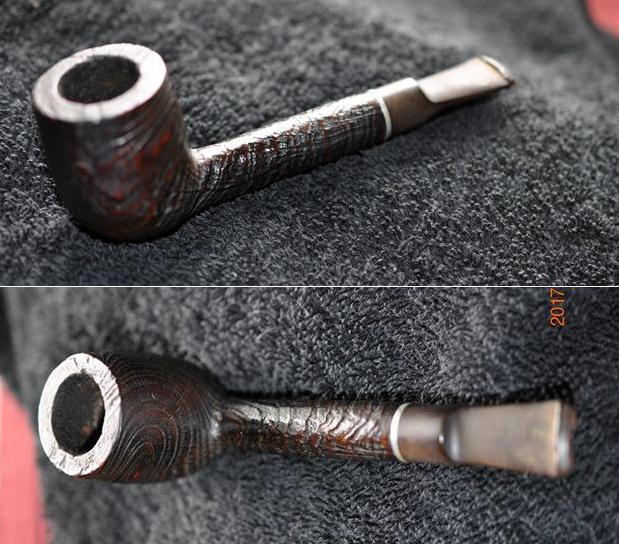 The next photos show the grain patterns around the bowl from various angles. The circles, starbursts, ring grain and birdseye make the sandblast finish one that really holds my interest as I turn in my hands.
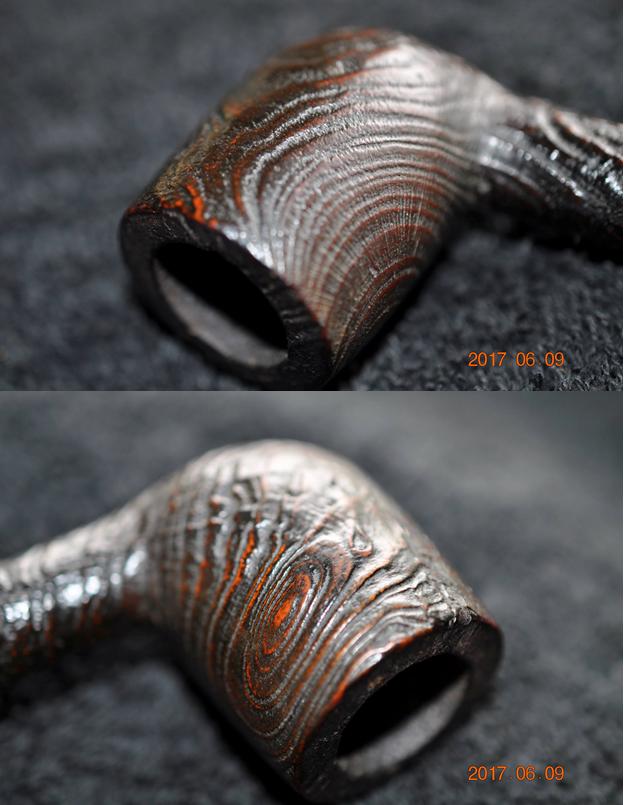
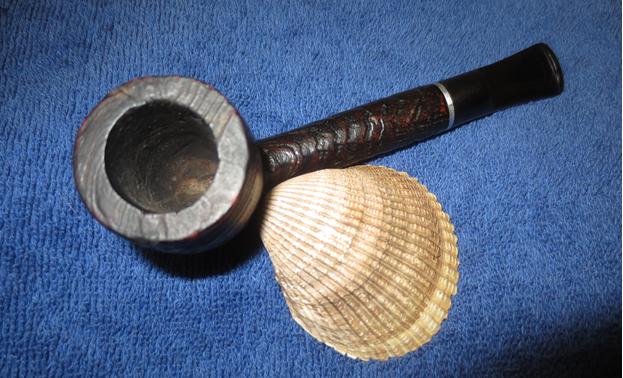
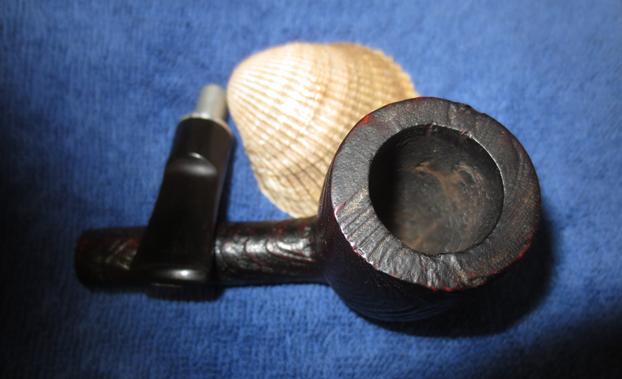
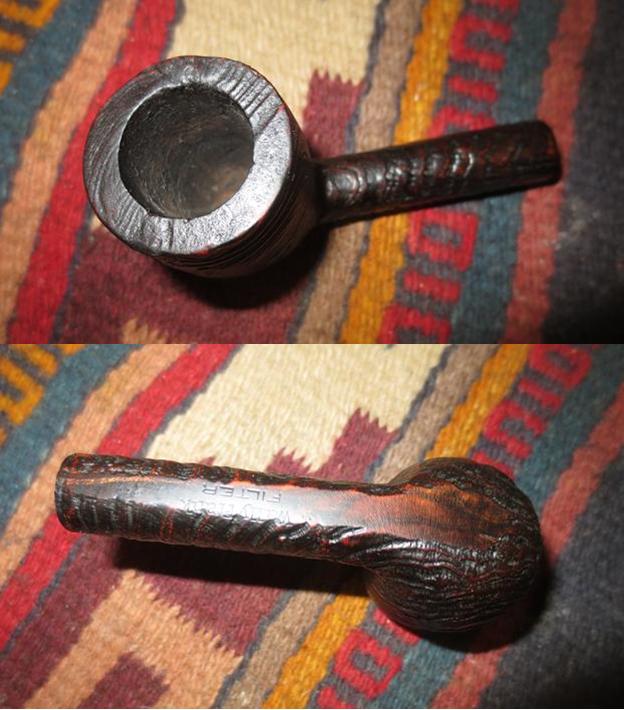
 The rim top definitely has less tar and oil build up on the surface. The close up photo of the rim shows light cake in the bowl and the lava that is unevenly disperse across the surface of the bowl.
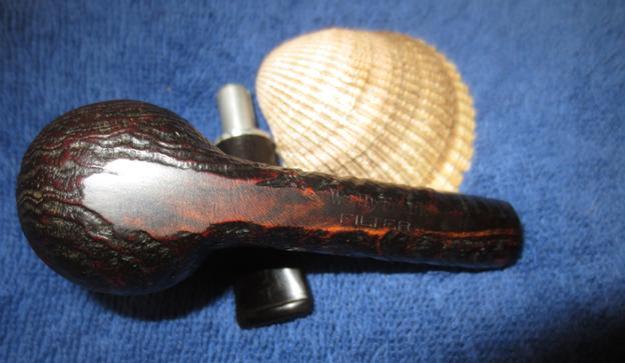
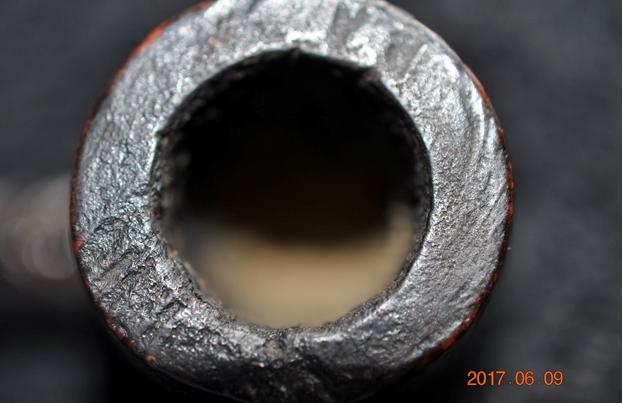 There is a smooth, flat band on the bottom of the shank and the bowl that make pipe a sitter. It is where the pipe is stamped. It reads Wally Frank over Filter. The Wally Frank stamp is not as deep as the Filter stamp but it is still readable. The Wally Frank WF circle logo on the left side of the saddle portion of the stem was very lightly stamped. It is readable but there is no tactile sense of it left on the stem. It will be hard to preserve.
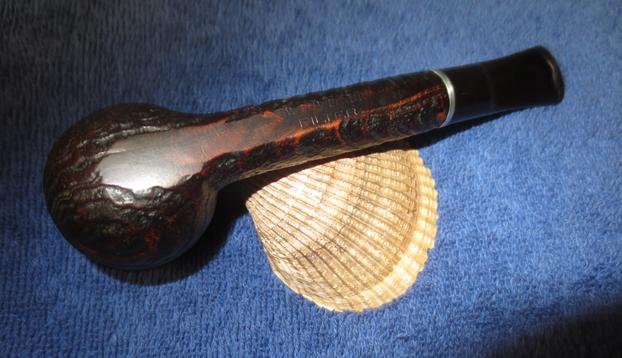
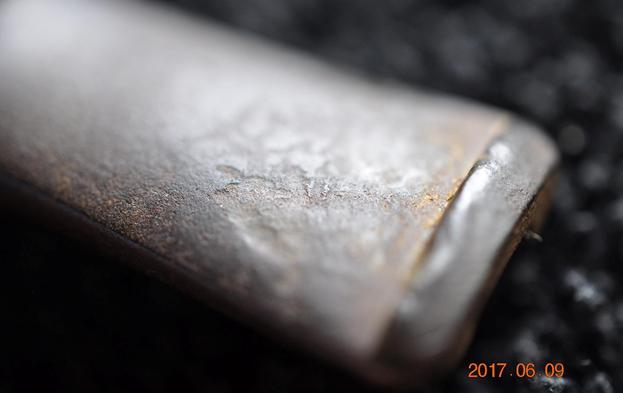
 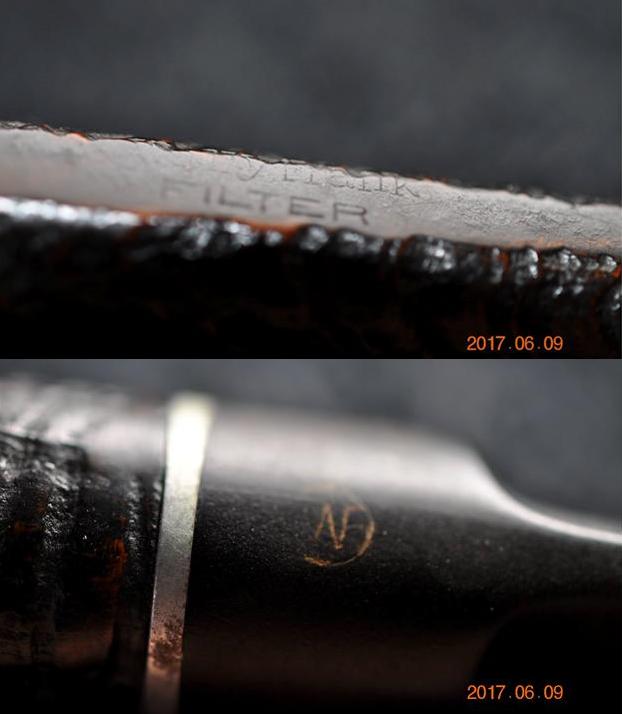 The fit of the stem to the shank is very good. The aluminum band that separates the stem from the shank is an integral part of the aluminum tenon that is on the Filter pipes. The tenon is made to hold a paper filter. It is split so that it can be adjusted should it become loose in the shank. The stem shows wear on the topside with tooth marks and chatter on both the stem surface and on the button itself. The underside is where the problem lies. You can see from the photo the large missing portion of the stem from the button forward to the saddle. The third photos shows the surface of the top of the stem. You can see the pitting in the surface and the wear that is on the stem. Will it be a candidate for a repair or should I restem the pipe?
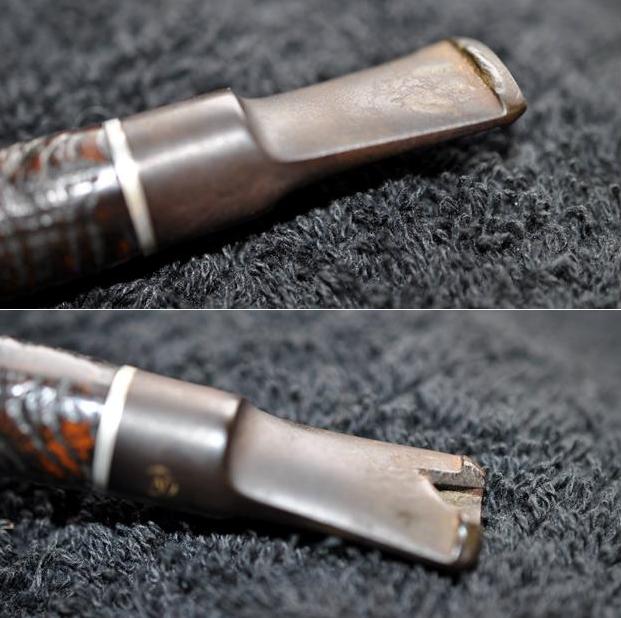
 Jeff cleaned the pipe once he received it. He reamed the bowl with a PipNet and a Savinelli Fitsall reamer taking the cake back to bare wood. He cleaned out the internals of the airway in the shank, mortise and stem with pipe cleaners, cotton swabs and alcohol to remove all of the ancient build up. He scrubbed the externals with Murphy’s Oil Soap and a tooth brush to clean out the grooves and crevices of the sandblast finish. He rinsed off the soap with running water and dried off the bowl. He soaked the stem in OxyClean to break up the oxidation on the surface and remove some of the scaling that was present. When the pipe arrived in Vancouver I took photos of the pipe as it was when I first brought it to the work table.
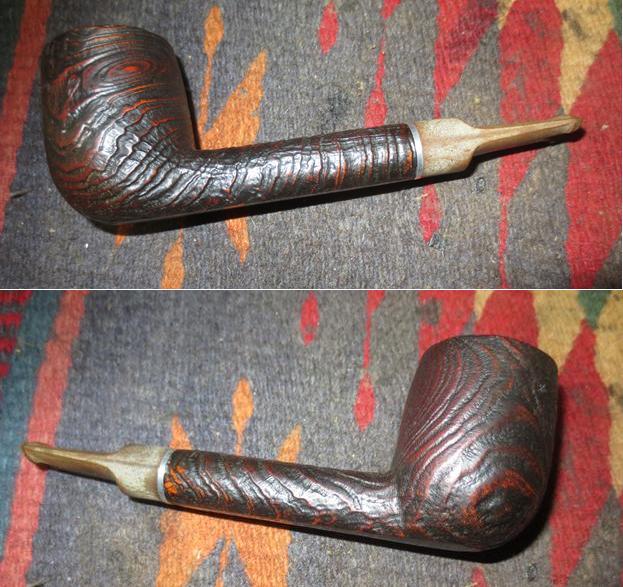
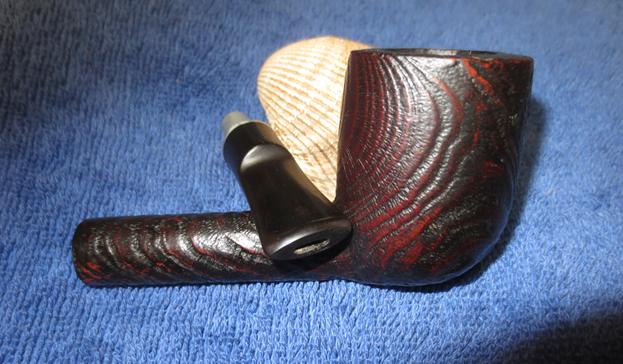
 Jeff really did a good job on the bowl and rim clean up leaving the grain on the surface very visible. Like the bent billiard that I worked on the blast on the rim is unique. It has swirls and smooth spots as well as some grooves. It is an interesting blast.
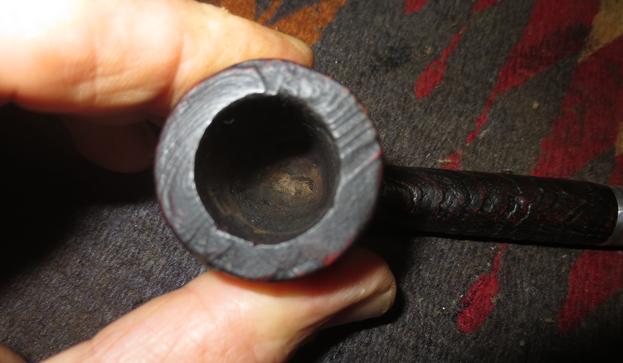 The OxyClean soak had really brought the oxidation to the surface and made the damaged stem really visible. It looks to me like someone either broke loose a piece of the stem while cleaning the pipe or possible bit through it and then broke it. Before I could work on the repair to the stem I needed to deal with the oxidation. I decided to use the Before & After Pipe Stem Deoxidizer that I have been trying out. I keep the mixture in a flat plastic tray with a cover. I dropped the stem into the mixture and made sure that it was completely covered. I put the lid on the tray and set it aside to soak overnight. I called it a day.
I have referred to the latest use of this product in previous blogs because I am putting it through its paces to see how the product delivers. I was skeptical when I first started using it but I have to admit that with each stem I soak in the product I am becoming less skeptical. I am including information on how to get ahold of the product if you are interested. I purchased the Deoxidizer and some Fine and Extras Fine Pipe Polish from a guy on Facebook named Mark Hoover and he is a member of the group there called The Gentlemen’s Pipe Smoking Society. He has a pen making and restoration site where you can email and order the deoxidizer and the polishes (http://www.lbepen.com/).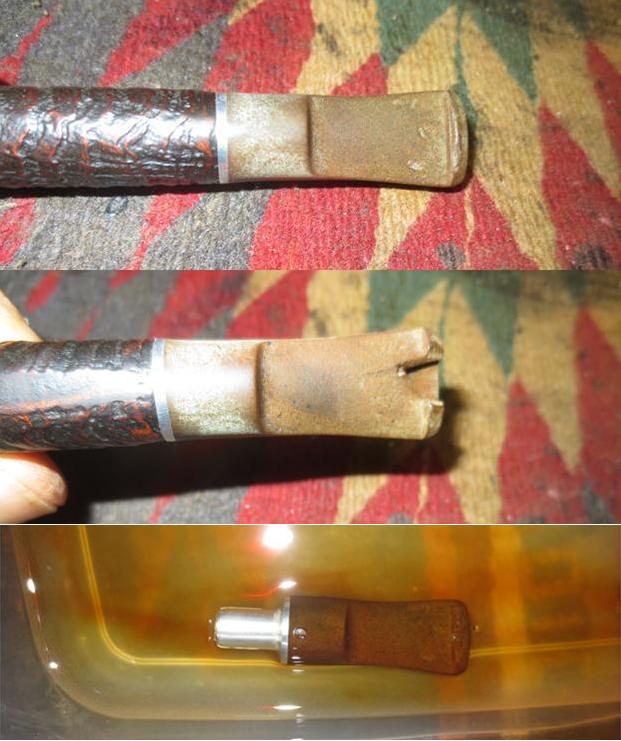 In the morning I took the pipe out of the bath and dried it off. I was not too worried about the remaining oxidation at this point as I had significant repair to do before I addressed the left over remnants of oxidation. I was pleased to see that the edges of the damaged area were clean and ready for me to work on. The circle WF was gone from the left side of the stem. In preparation for the repair to the stem I cut a triangle of thin cardboard and wrapped it with clear packing tape. I have found that the repair mixture of super glue and charcoal powder will not stick to the packing tape. The triangle preserves the slot and airway in the stem once the patch is applied.
 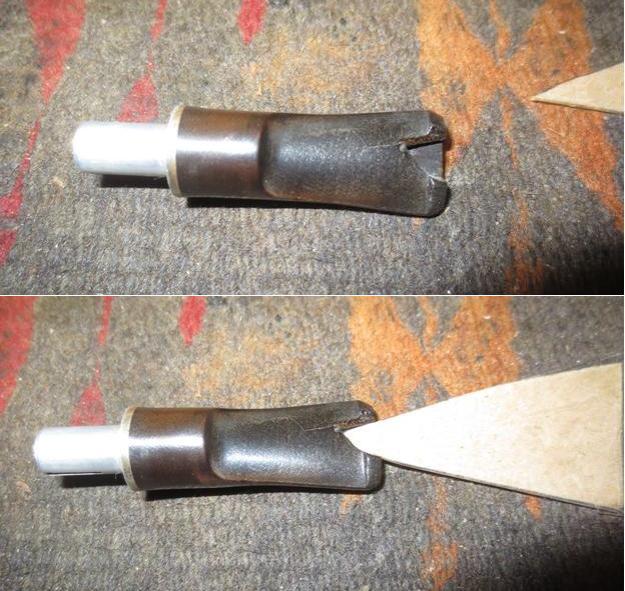 I adjusted the fit of the triangle and inserted it into the slot of the stem. I laid out a piece of newsprint and the components of the repair mixture – clear super glue and food grade charcoal powder capsules. I opened two capsules and made a mound on the paper. I used a dental spatula to put a small dip in the top of the mound. I mixed in drops of super glue into the charcoal powder and stirred them together with a dental spatula. I made the repair thick enough that it would hold and give me enough material to reshape both the stem surface and the button. The photos below tell the story.
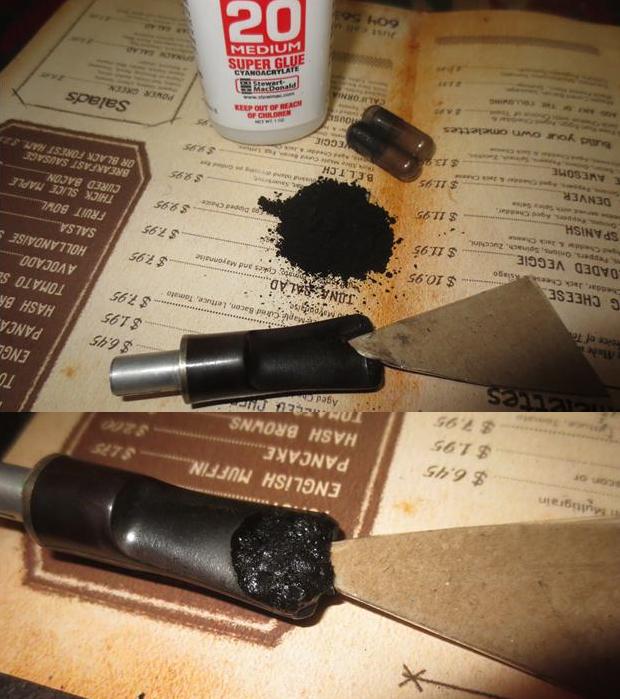
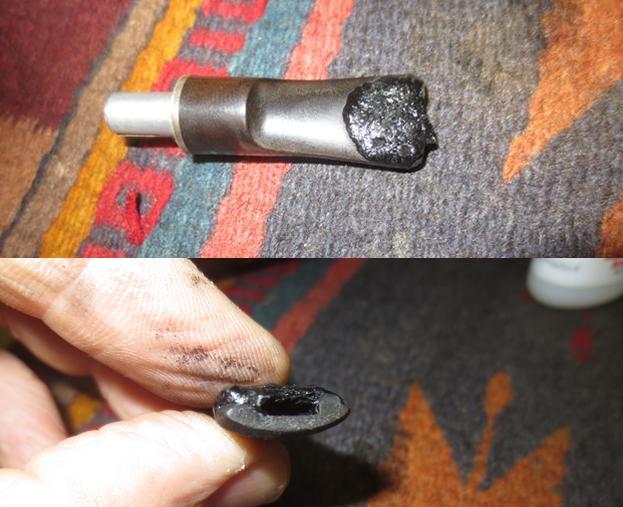 I reshaped the button edges and surface with needle files to blend the repair into the surface of the stem and to make the transition to the button clean and sharp. I filled in some of the expected air bubbles with a coat of clear super glue. I will need to repeat this as I shape and sand the stem.
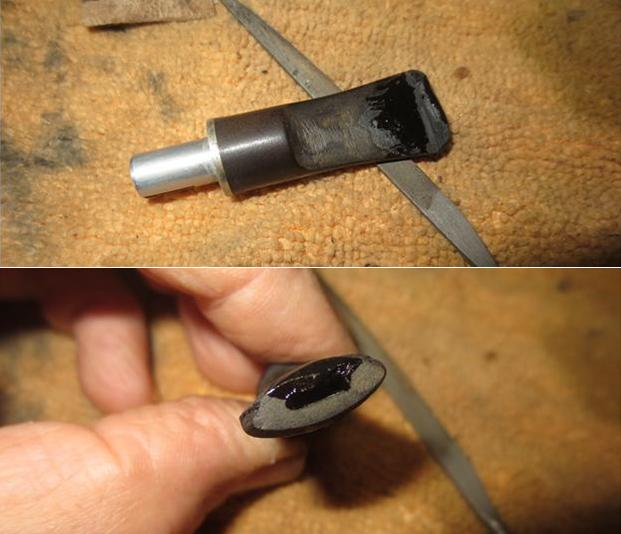 I sanded the repaired area of the stem and button with 180 grit sandpaper to rough shape them.
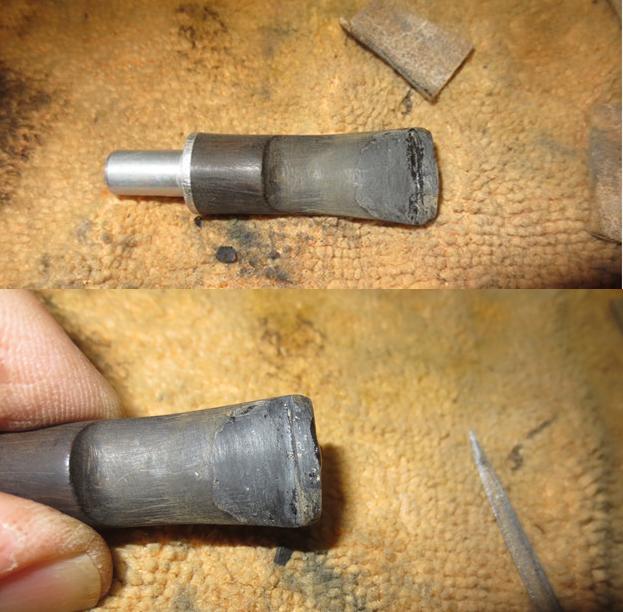 I sanded the stem with 220 grit sandpaper to further smooth and shape the repaired stem. The repair is solid at this point. The area that I repaired shows air bubble pits in the surface of the stem and the button.
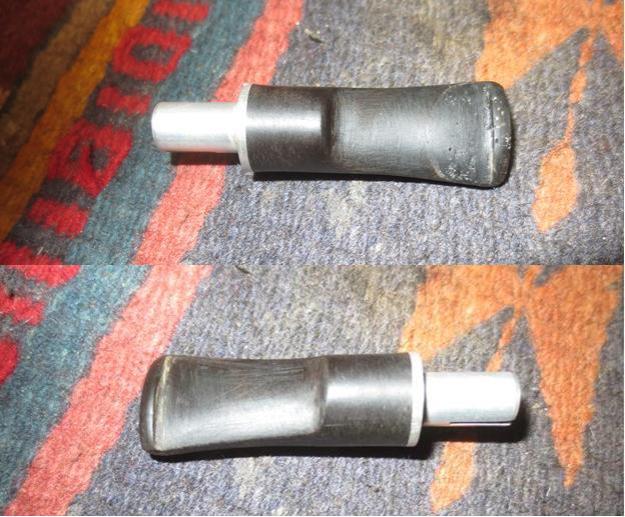 I reshaped the slot in the end of the stem with a needle file to smooth out the repaired surface. I still need to sand it to remove scratches and nicks but it is taking shape. I filled in the air bubble holes with clear super glue and set the stem aside to dry.
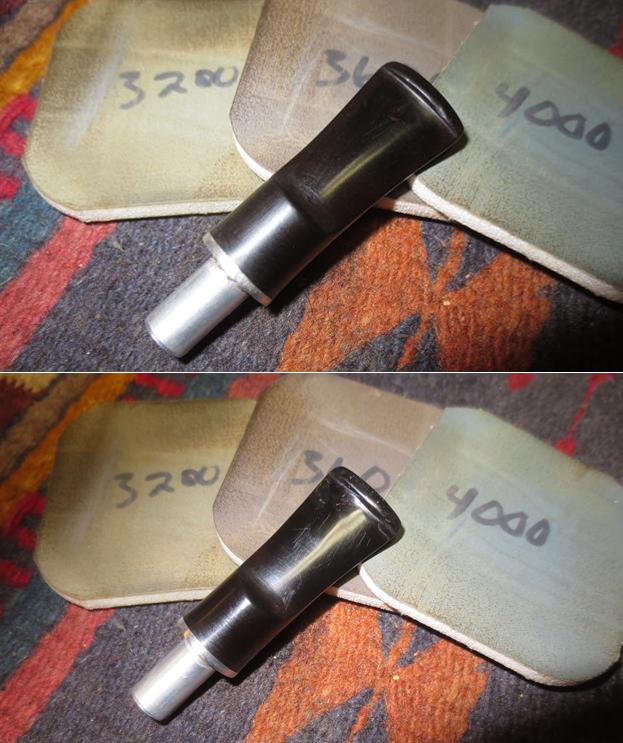
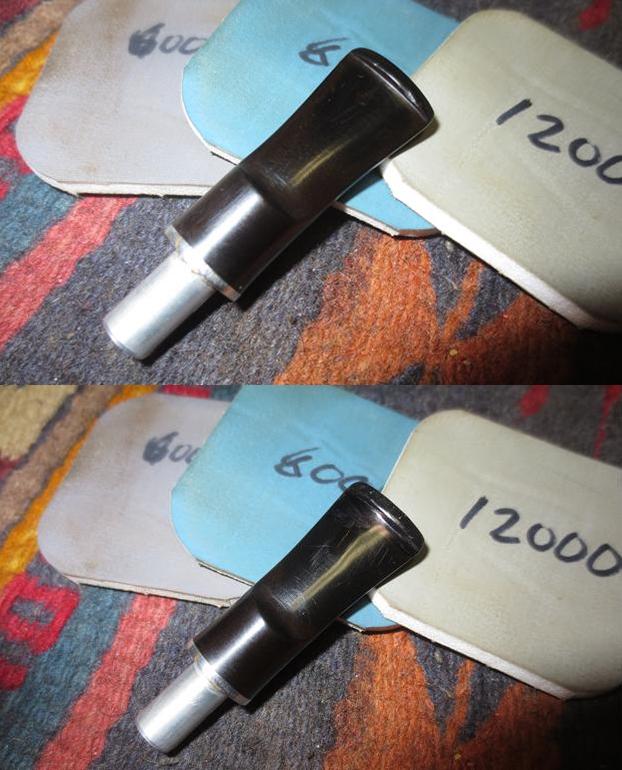
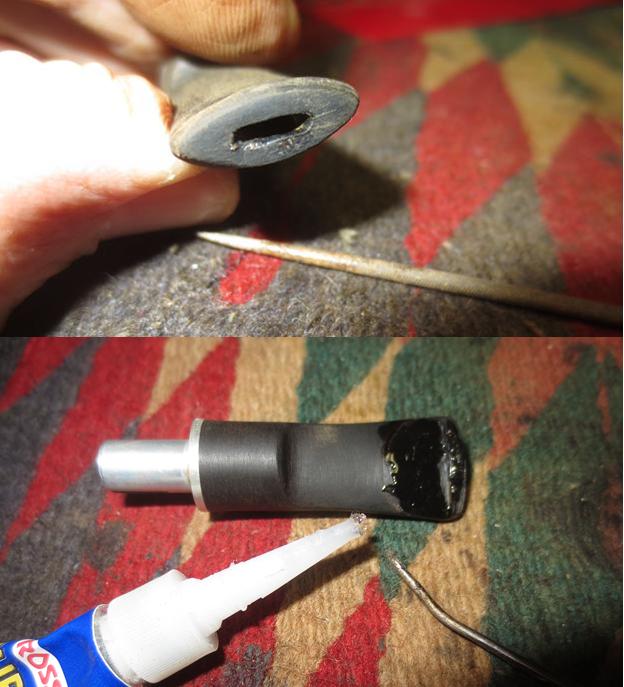 I sanded the patch with 220 grit sandpaper to blend it in with the surface of the stem and then began to polish it with micromesh sanding pads. I wet sanded it with 1500-2400 grit pads and dry sanded it with 3200-12000 grit pads. I rubbed the stem down with Obsidian Oil after each pad to give life to the vulcanite. It is fun to watch the stem begin to shine with the work of each micromesh pad. The photos below are arranged with the top photo first and the repaired underside of the stem second. The last two photos show the shine in the rubber of the stem. The last one shows that there are still some scratches remaining in the rubber that will need to be shined some more.
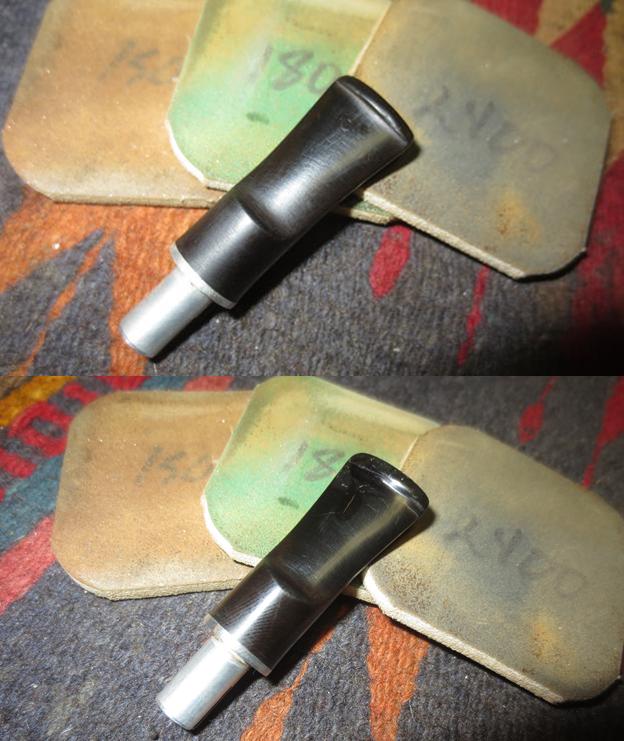
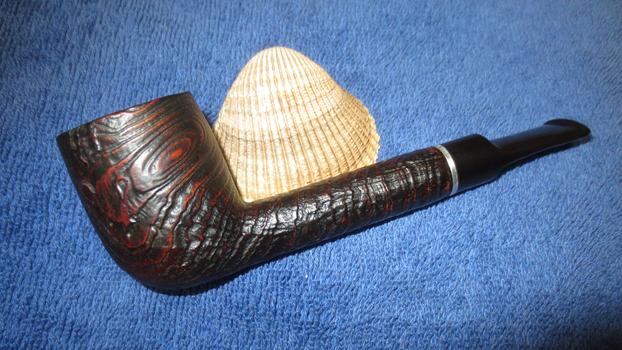
 I polished the stem some more with the last three grits of micromesh sanding pad to remove more of the scratches. When I was happy with it I set it aside and turned my attention to the stummel. Because of the diverse colours that came through on the briar I decided not to stain this pipe. I decided to leave it natural with the existing stain and try to maximize the contrasts in the grain and stain. I rubbed it down with a light coat of olive oil to bring life back into the dry briar. The colours of the stain in the briar began to shine through and the patterns in the grain really stood out with clarity. This was a beautiful piece of wood.
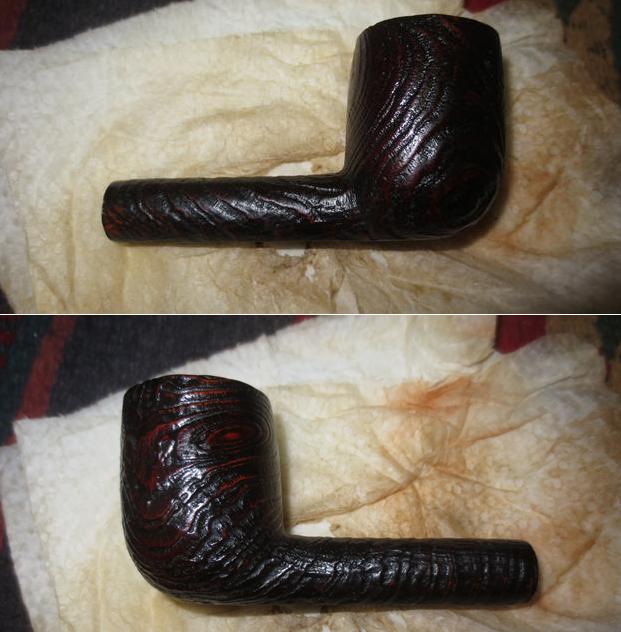
 I buffed the bowl with a clean buffing pad after the oil had dried into the briar. The key is to not push the briar too hard into the buffing pad. Doing so flattens the sandblast and ruins some of the definition in the grain patterns. The photos below show the contrast in stains that were originally used on the pipe.
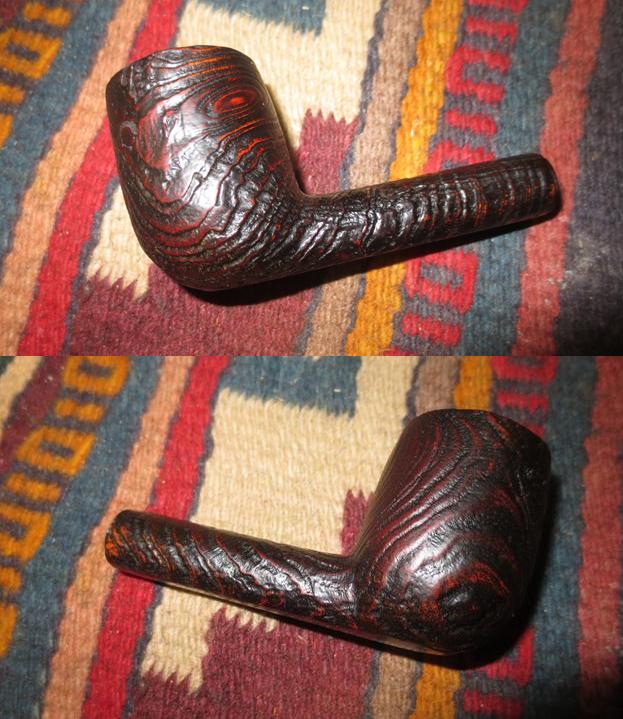
 I put the stem on the stummel and buffed the pipe lightly with Blue Diamond polish on the buffing wheel. I gave the stem multiple coats of carnauba wax. I hand waxed the bowl with Conservator’s wax. I buffed the pipe with a clean buffing pad to raise the shine and hand buffed it with a shoe brush as well with a microfiber cloth to deepen the shine. The finished pipe is shown in the photos below. It is a well-made, beautiful pipe that has a tactile feeling that is really nice in the hand. I think as it heats up during a smoke that sensation will only increase. Thanks for coming with me on this one.