Blog by Paresh Deshpande
When Steve, his brother, Jeff and Dal Stanton, The Pipe Steward, were on a visit to India, I had a desire that there should be a unique pipe which all three of us should have (Mr. Jeff being a non smoker) and had laid down for myself, the following parameters for identifying THAT PIPE!
(a) Both should not be having this pipe in their personal collection (knowing well that this would be a very tall order!!)
(b) The pipe must have some historical significance and should have made a contribution to the world’s pipe history.
(c) It must come from a well-known carver or manufacturer.
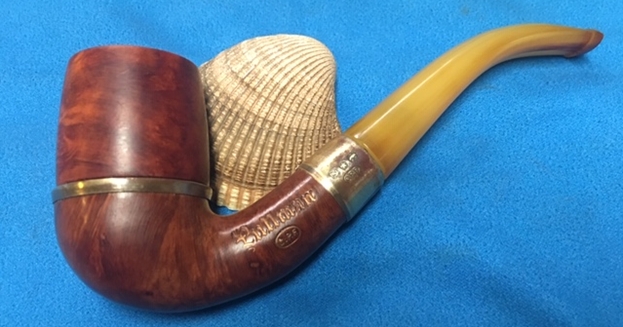
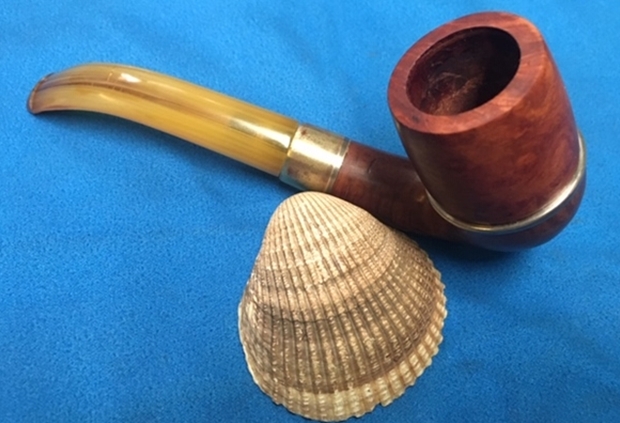
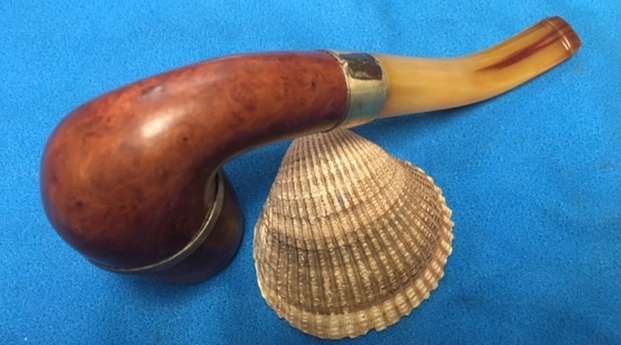
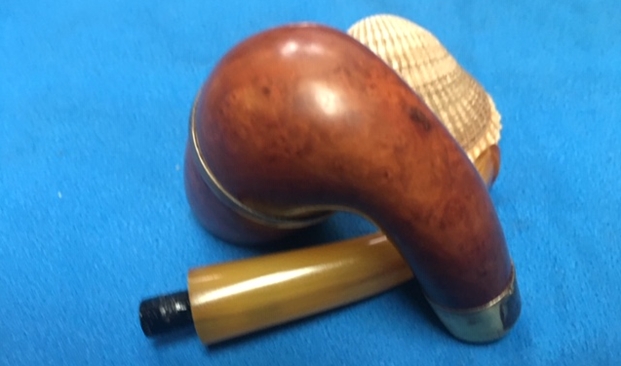
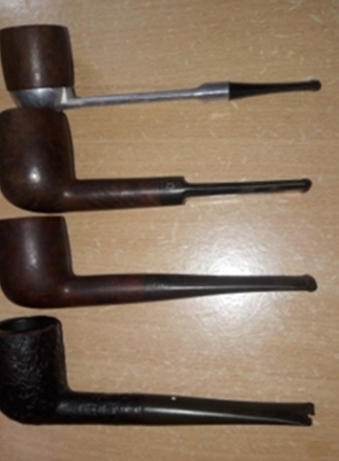
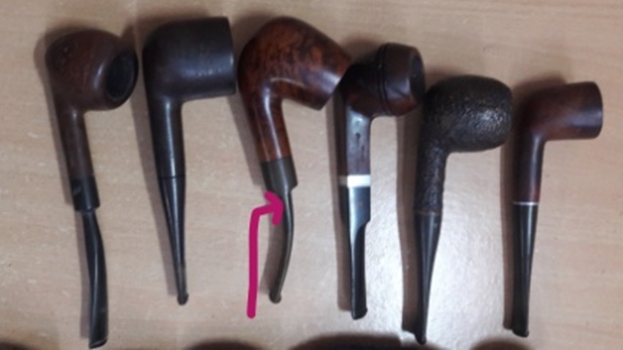
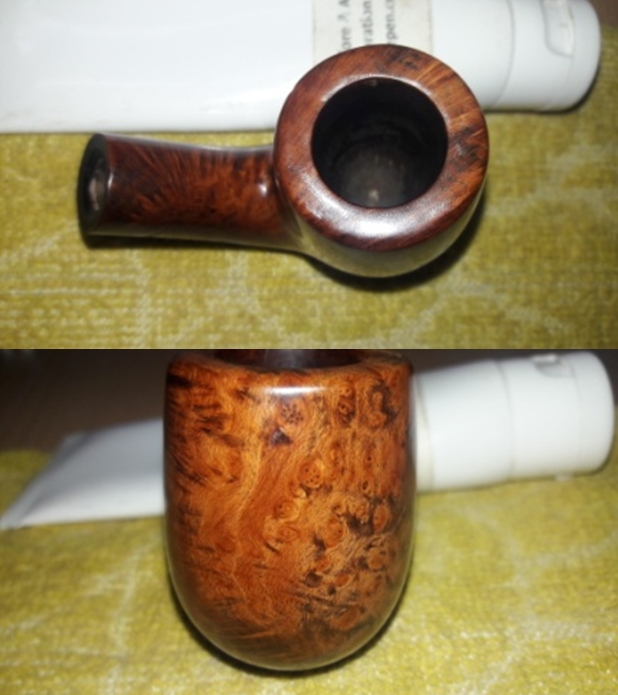
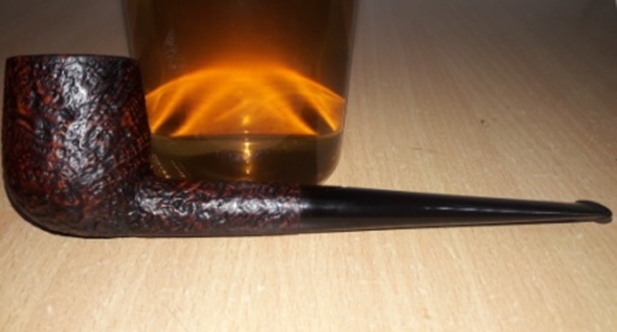
I began this selection with going through my own personal modest collection, rather my Grandfather’s collection to which I have made miniscule additions. Amidst all the WDCs, Charatans, Comoy’s, Barlings, Ben Wades, Stanwells and Kriswills, there was this one pipe which was very different. Very early in my association with Steve, we had discussed this pipe which Mr. Steve had not come across (which was unbelievable!!!) and did not own a pipe from this carver, but was very much interested in it. An oblique enquiry from Dal also confirmed that he did not have this make. Well, this helped me zero in on this pipe to be gifted to my friends during their visit to India. The pipe selected is an ALEXANDER ZAVVOS HYGROSYSTEM, PAT.No 87033, made in the 1970s-80s. What followed was an extensive and prolonged hunt for two such pipes of which the first one was purchased from one seller on Pinterest and the second was on eBay. These pipes were received separately and the last delivery materialized a couple of days prior to the arrival of my esteemed guests. Here are both the pipes as I received them. Since Dal was the first to arrive in India (and being the youngest amongst arriving guests…LoL), he was given a choice between the two. He selected one with an Apple shape and the remaining willy-nilly came to Steve. At that point in time, both Dal and I discussed that it would be the Apple shape that Steve would have selected but… Well after working on Steve’s pipe, am I glad that the Dublin came to Steve as it provided me with an opportunity to present my first ever rusticated pipe to the person who has introduced me to this art and mentored me all along. Thank you Steve for being with Abha and me on this journey.
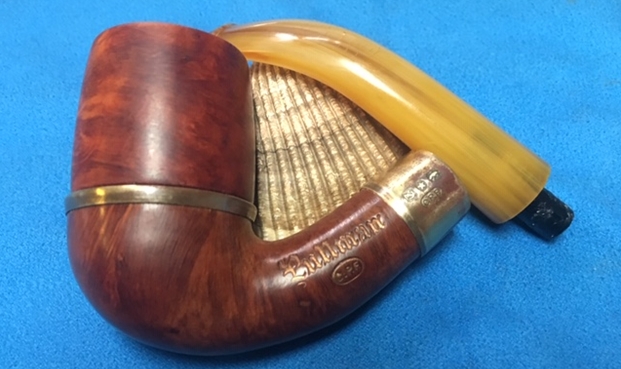
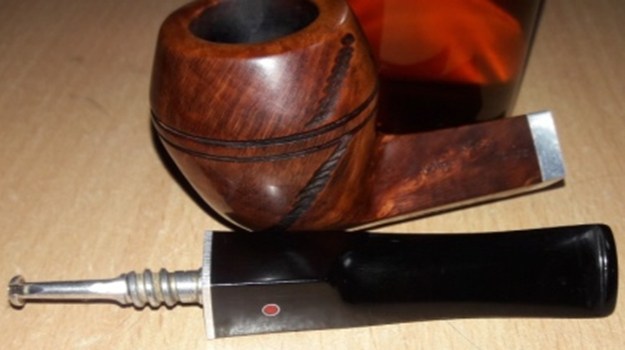
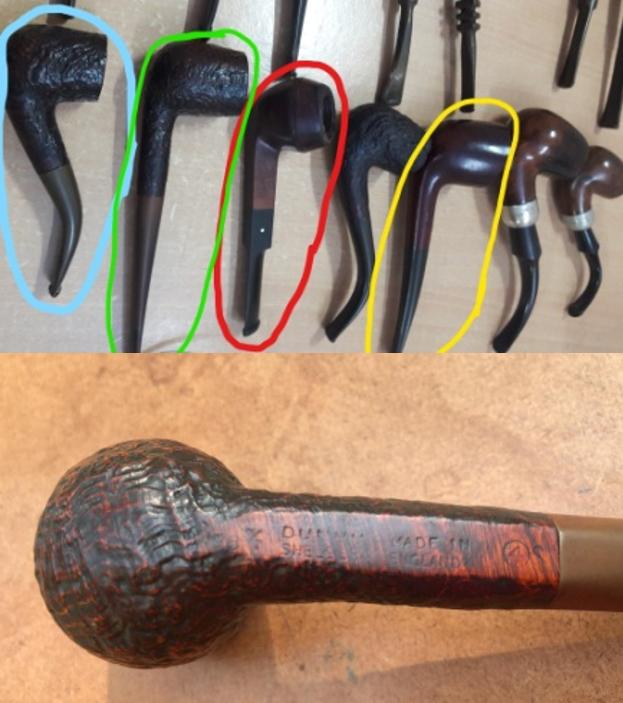
The stamping on the Dublin is pretty worn out and hard to make out. However, the stampings on my pipe and that on Dal’s is pretty crisp and clear. It reads on the left of the shank as “ALEXANDER” over “HYGROSYSTEM” over a square with letter “Zb” over “GREECE”. The bottom of the shank bears the stamping “PAT No. 87033” over “03/ 89”, which I believe is the date code indicating that the pipe was made in March of 1989. This stamping is visible only under a white light with a magnifying glass and the area around the stampings has bubbled up skin surface, something akin to chipped paint. I researched this pipe on pipedia.org and reproduce excerpts of information on this pipe carver, in his own words, and his immense contributions to the Greek pipe industry in particular and entire world’s pipe community.
 I am Alexandros Zavvos, born in Molos, Thermopylae, near Lamia. Since I was a child I had an inclination for art, starting with painting. I studied Radio-electronics, and at age 23 I got involved with commerce with a capital of 150.000 drs. in 1962.
I entered the pipe business where I met, by total chance, with Mr. Libero G. Albanese, first technician and producer of briar-wood models in Kalabria, Italy. When I told him that I am Greek, he almost prayed, saying that we Greeks have the best briar in the world for pipe-making! From that moment on I understood that this fellow is in love woth his work – and he transmitted that to me instantly!
From mid-1962 to 1963 I searched all over the world for a college or a school in order to be taught the art of pipe-making, but in vain – there were none. Moreover, I wasn’t able to make it through the big European pipe-makers of that time (British, Italian, Danish). I was convinced that only through experience there was a chance of me becoming what I wanted.
In 1964 I started the commercial briar-wood model production, in 1965 I constructed empirically my first pipe and in 1967 I started the vertical production (this is from the briar Greek woods to the consumer) – maybe there is no other factory in the world producing smoking pipes vertically.
In 1970 I started the research, which was accomplished in 1984, on the 1st generation hygrostatic system. In that same period we founded, my brother and I, our factory in Lamia for the production of ebony epistomes.
Today, 40 years later, I have successfully arrived at the production of the 5th generation hygrostatic pipe. I will finish by saying that this pipe, to what concerns the pleasure it provides, has nothing to do with that pipe for peace, offered by American Indians.
Update: Today I am saddened by the news that Alexander passed away on February 10th, 2015. Our thoughts and prayers are with his family and friends. We are very thankful for his contributions to the World of pipes. —sethile (talk) 21:00, 12 February 2015 (UTC).
The description given by the seller on eBay was equally informative and I reproduce the same for the readers to get a fair idea of the famed Hygrosystem that has been incorporated into the construction of this pipe.
A patented Hygro-system pipe by the greatest and most known (now deceased) Greek pipe manufacturer Alexander (Zabos / Zavvos). His old pieces are by now becoming rare and sought after, as his son who took over the business is not equal to the father. His stamp (Z with a B lower) comes from the two consonants in his name the way it is spelled in Greek. Very big and well known European pipe makers have purchased top briars from Alexander Zavvos, since the Greek briars are among the best in the world.
A few things about Alexader Zabos’s patent: The hygrostatic system is the result of 35 years research and experience. It is based on the Bernoulli principle, has been allowed to be patterned (No 87833) by the Greek Ministry of Industry and Energy. Unlike most filter or no-filter pipes, the Alexander Hygrostatic Pipe reduces drastically moisture and other heavy residue (such as tar etc), which otherwise could be inhaled into our lungs and extinguishes a bitterness and a burning on the tongue.
Alexander Zavvos’s Hygrosystem pipes were quite expensive if bought new (the cheapest had a value of 160-170 euros) and have become highly collectible after the death of the manufacturer.
From the above information, it is safe to infer that this pipe is from the first generation of the hygrosystem pipes from Alexander Zavvos and made in March 1989.
DECONSTRUCTING THE PIPE
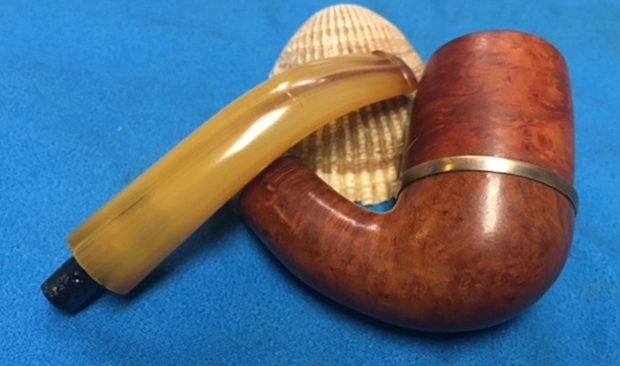
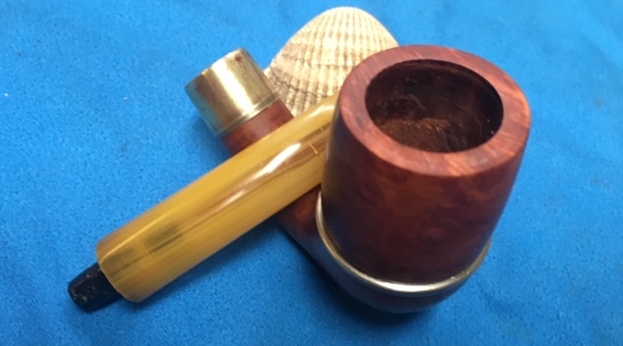
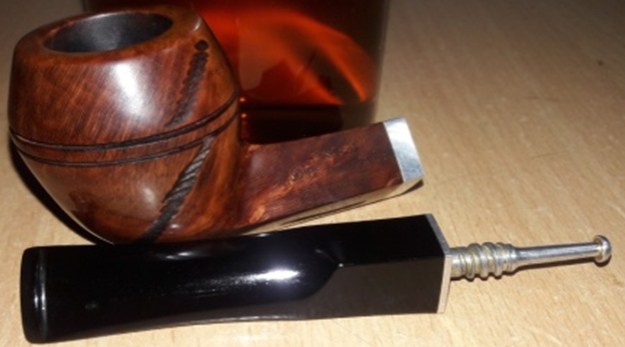
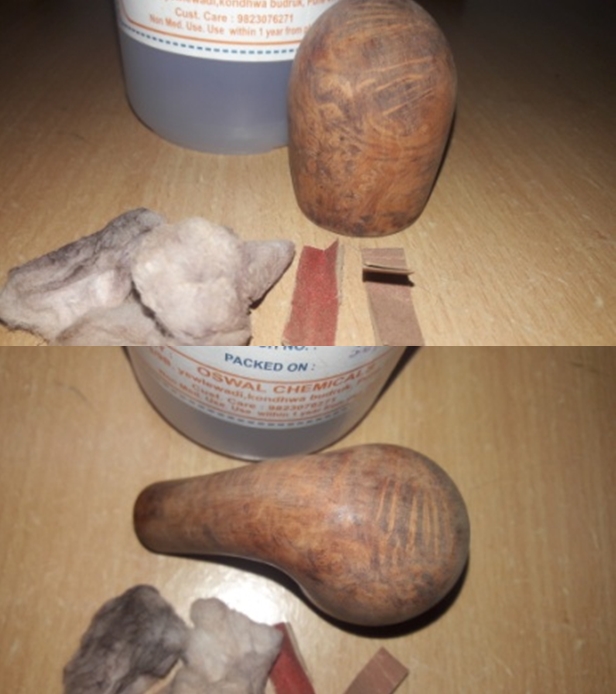
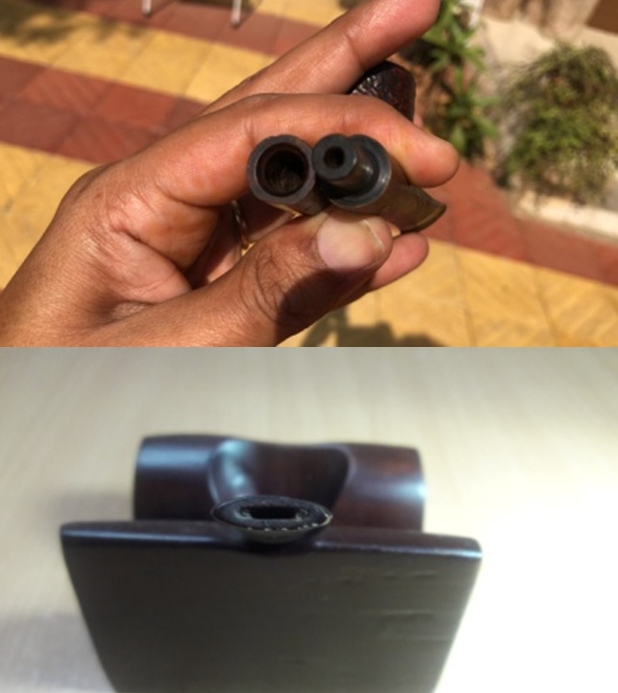
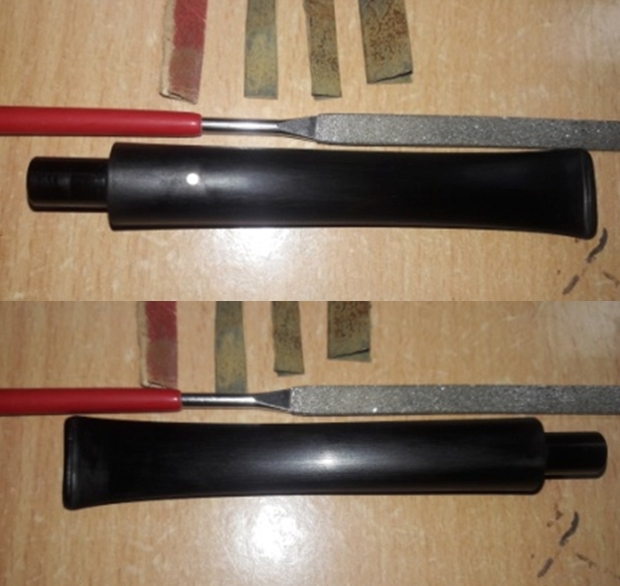
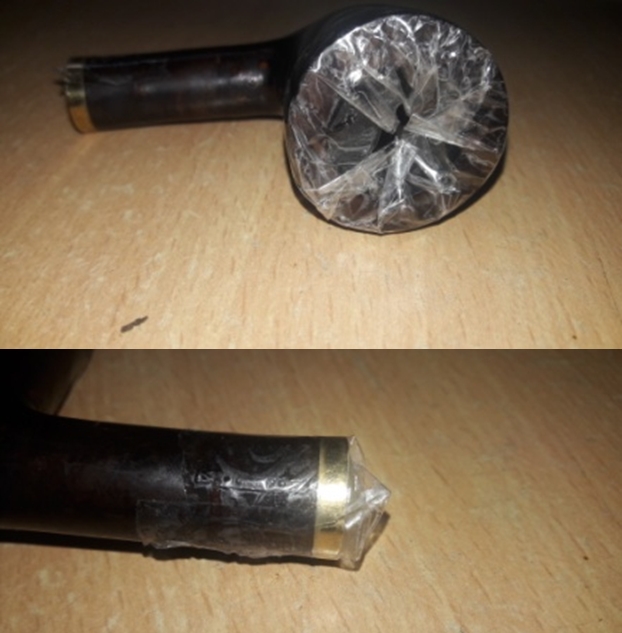
In my quest to understand the functional principal of the famed HYGROSYSTEM used in this pipe, I began by first dismantling the pipe. The pipe was dismantled in three parts; first the stummel, secondly the aluminum screw-in shank extension which has an aluminum tube to house a filter, probably a 6 mm, and lastly vulcanite stem with a fused briar wood saddle. From my appreciation, it is the shank extension which forms the critical component in the famed Hygro-System, at the stem end of which a smaller aperture pipe protrusion is seen. A similar sized protrusion is seen at the tenon end of the vulcanite stem. The fit of the tenon in to the aluminum shank extension is made air tight with a thin ring of briar wood (not leather, as it is not pliable at all).
 APPLICATION OF BERNOULLI’S PRINCIPLE IN THE HYGROSYSTEM
Bernoulli’s principle states that an increase in the speed of a fluid occurs simultaneously with a decrease in pressure or a decrease in the fluid‘s potential energy. This is applicable to flow of gases also.
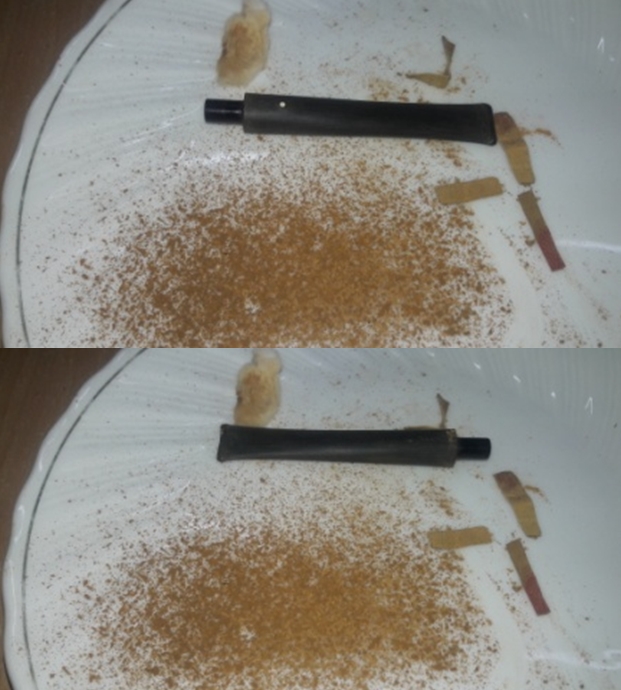
In simple layman’s understanding, the above principle states that “Pressure is inversely proportional to the speed of the liquid or gaseous flow”. So how does this principle work in the hygrosystem of this pipe? To explain application of this principle, refer to the picture of the pipe below that I have drawn: (a) Hot smoke along with heavy particulates of oils, tars and moisture from the chamber enters the mortise and expands due to width of the mortise. As a result, speed is reduced. High pressure is created in the mortise.
(b) Once the smoke enters in to the aluminum shank extension, it is compressed and speeds up considerably creating a low pressure area. Due to the low pressure, heavy particles like oils, tars and moisture settle down and are trapped in the filter in the aluminum tube of the shank extension.
(c) The speed is further increased when the smoke passes through the smaller aperture tube due to further compression, shown in green arrows, further lowering the pressure. When this smoke leaves the smaller aperture tube and enters the wide stem end of the shank extension, there is a sudden increase in pressure. This sudden variation in pressures results in heavy particulates settling down and only smoke, being lighter, propelled ahead.
(d) Similar pressure changes are affected when the smoke passes through the wide tenon and through the smaller aperture tube in the stem, further precipitating the heavy particulates of oils, tars and moisture. The end result is a pure smoke without any oils or tars.
The above understanding is my own reasoning based on my learning of science till Graduation level. Any corrections or clarifications from more knowledgeable readers is always enriching and welcomed.
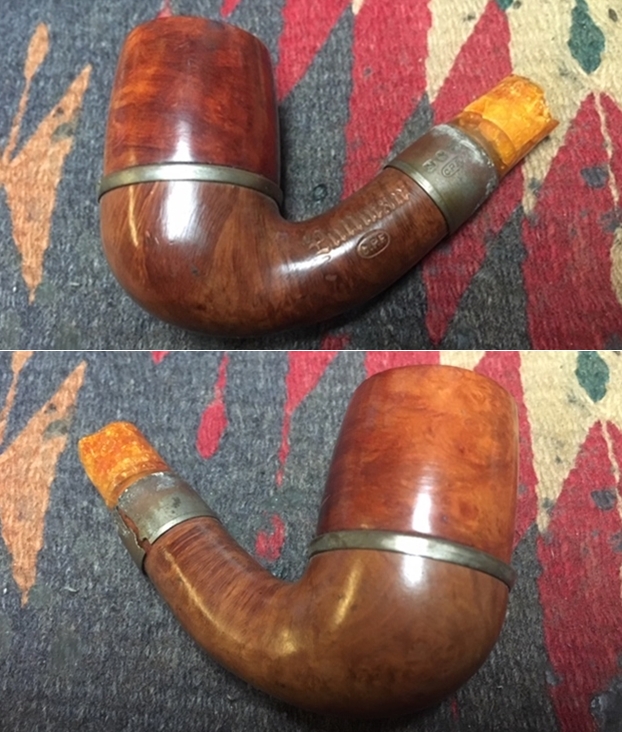
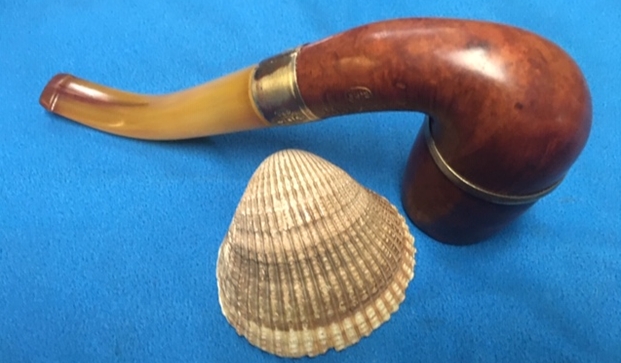
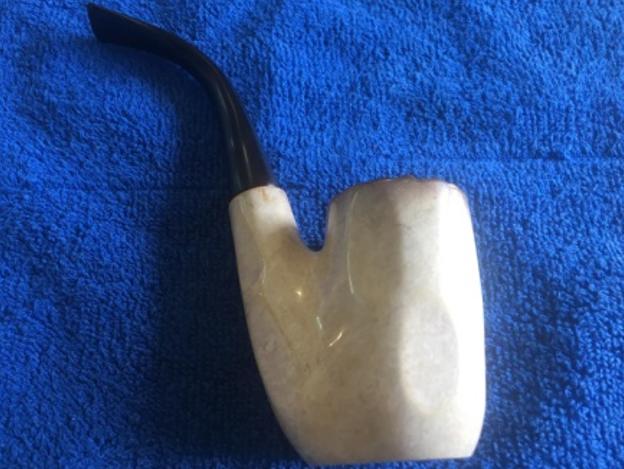
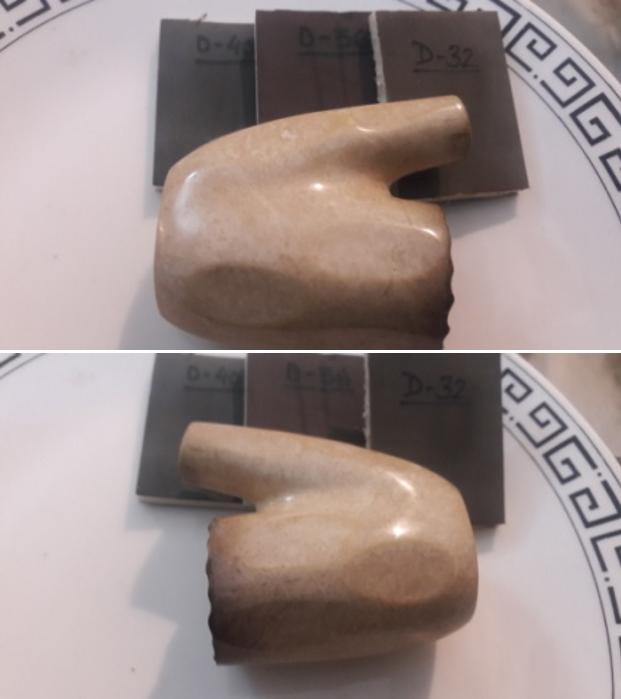
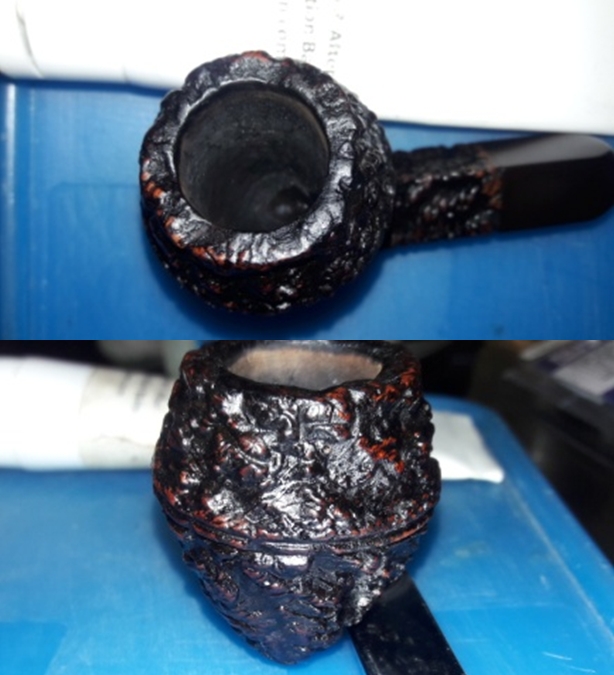
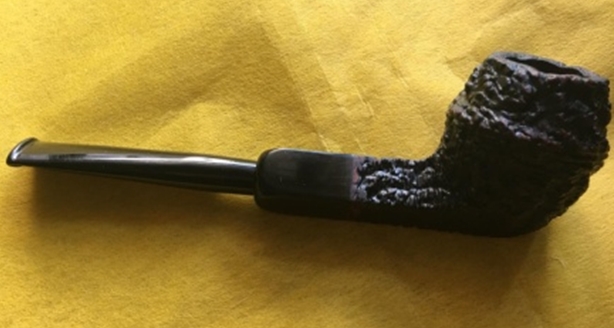
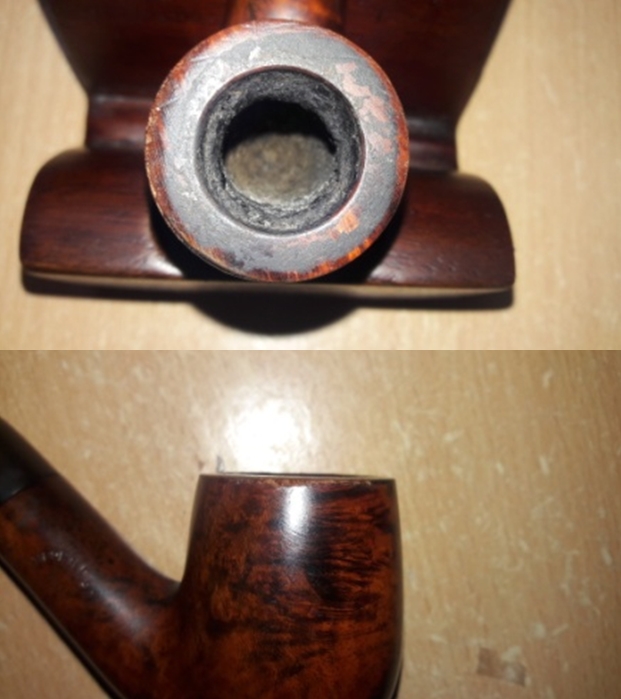
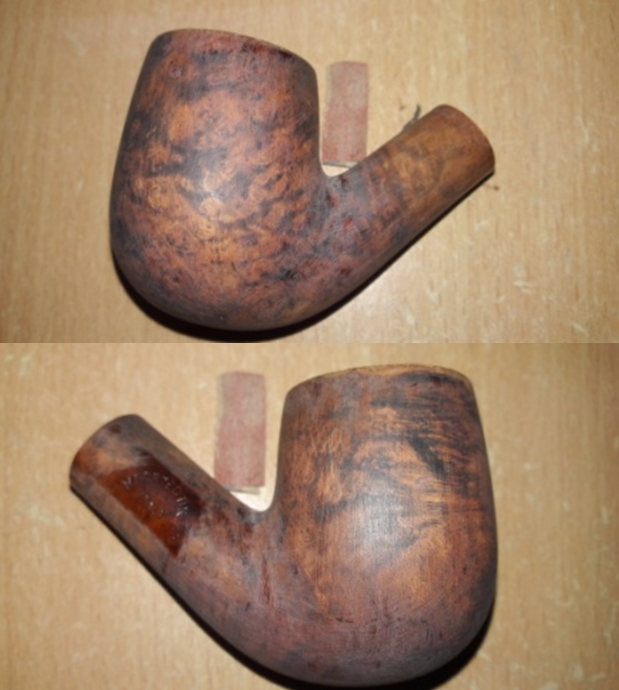
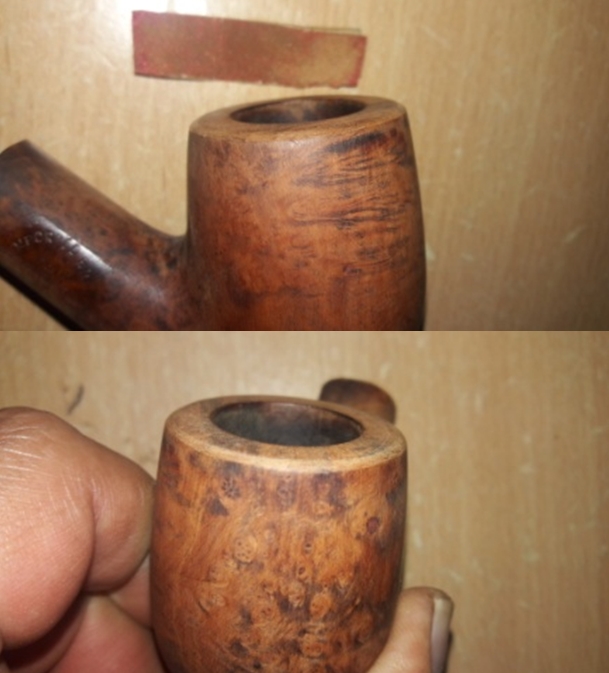
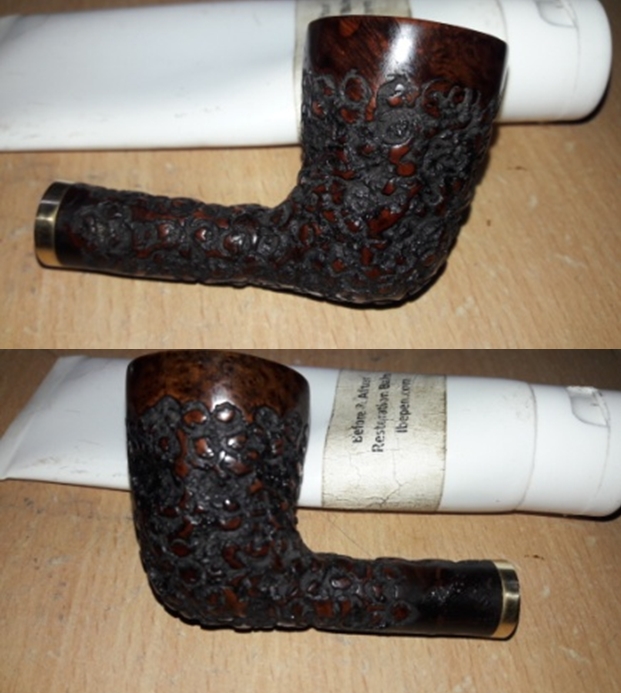
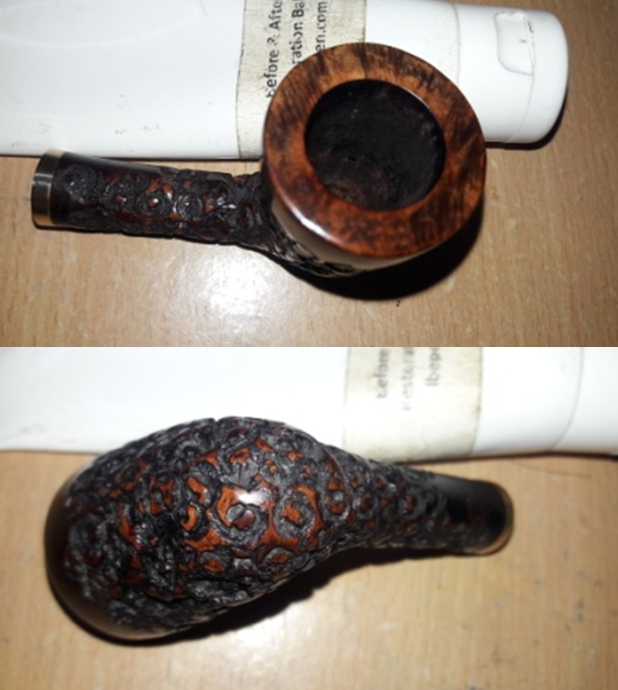
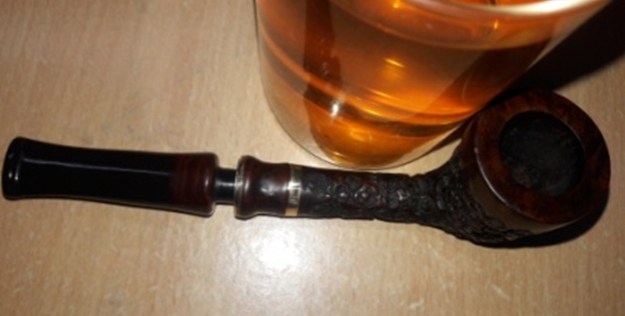
INITIAL VISUAL INSPECTION
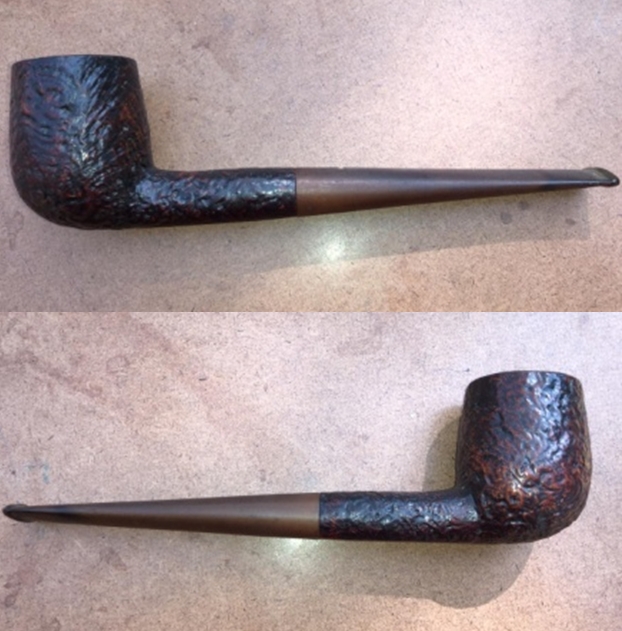
Starting with the rim and rim top surface, there is a slight overflow of lava on the rim top and the surface itself is peppered with numerous dents and dings which should be easy to sort out by topping the rim top. The rim edges are sans any serious damage, save for an odd chip on the outer edge, marked in blue arrow. The chamber however tells a very different story. There is a thin layer of cake which has taken on a grey coloration, which is a first for me, by the way. The way the cake appears to the eye, I suspect a few heat lines in the walls of the chamber towards the back and right side. I just hope that the issue is not a major one and just a bowl coating should suffice. Well, I shall cross the bridge when I reach it. There is strong smell emanating from the chamber which should be addressed to a great extent once the chamber has been reamed and the shank has been cleaned.
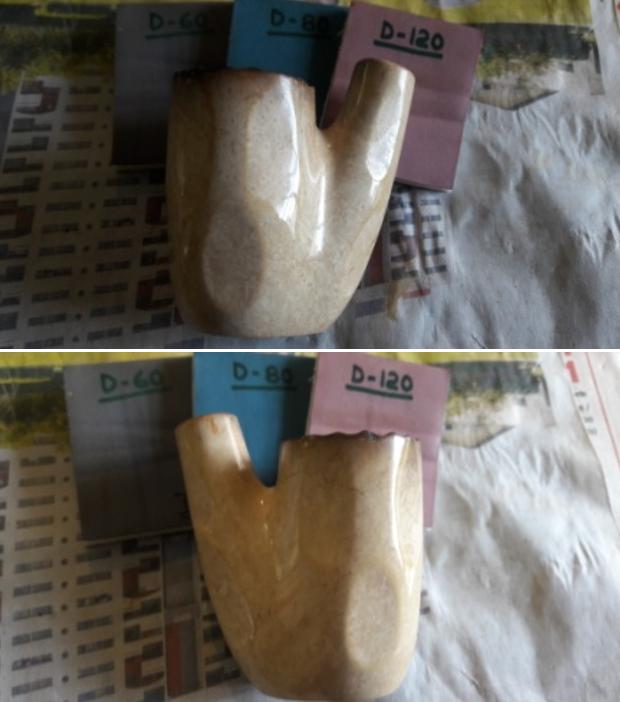
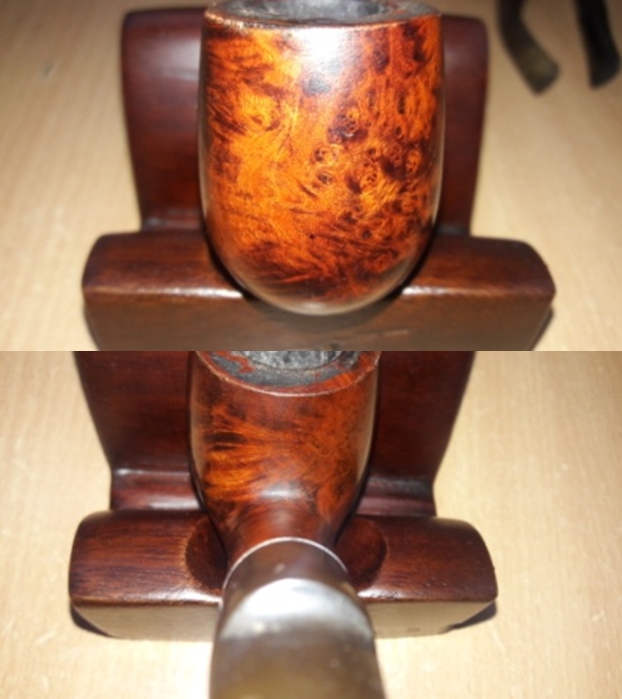
 The stummel surface has signs of accumulated dirt, dust and grime and should clean up nicely. It was surprising to note that these accumulations are in patches, almost following the cross grains seen on the right and front and over the entire shank. The left side, which has some beautiful bird’s eye grain, is clean. There are a large number of dents and dings all around the stummel surface. The shank surface has bubbled up near and around the stampings towards the shank end. Just near to the shank and bowl junction, I could make out a very thin line running all round the shank forming a circle (marked in yellow arrow). This worries me as at this stage, I am not sure about the extent of the depth of the crack. Also along this crack line, I could make out one fill. All in all, this is going to be a challenging restoration to get it back to being smoke worthy. There is a brass ring at the shank end which extends inside the shank with threads on to which the aluminum shank extension is screwed in. This brass ring should add a bit of glitz to the pipe appearance once polished. The mortise is clogged and heavy crust of dried oils and tars are clearly visible. This will take some effort to clean out.


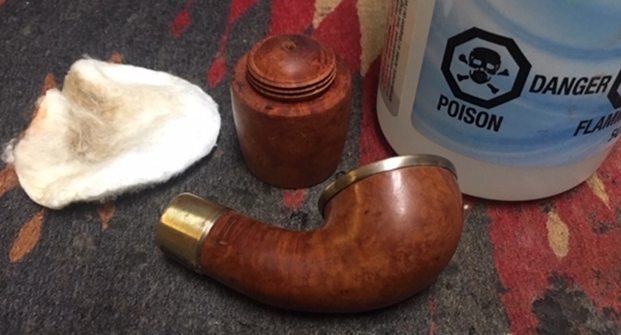
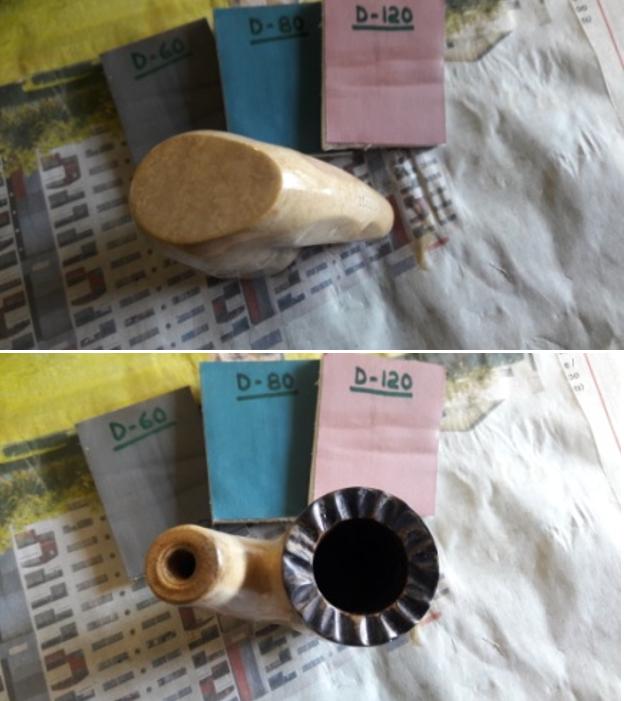
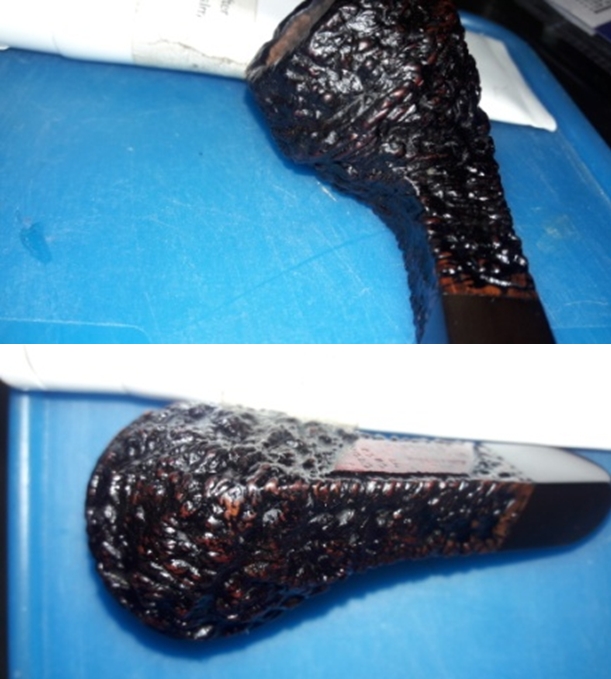
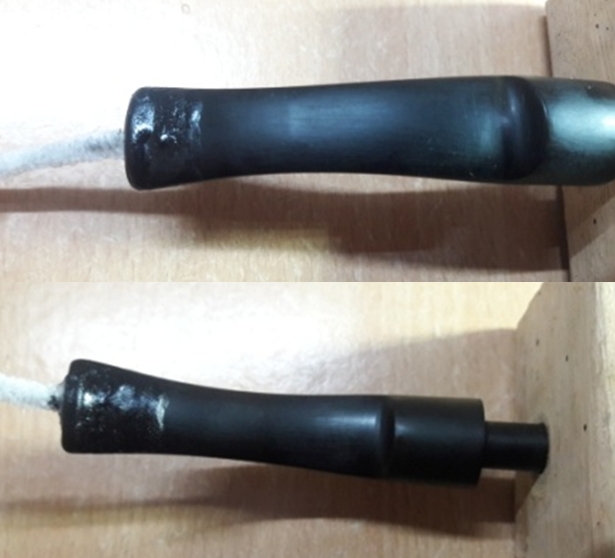
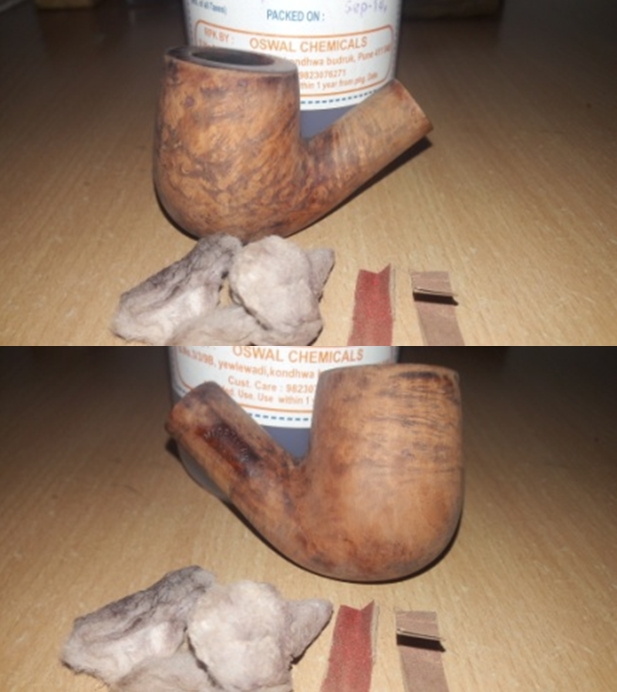
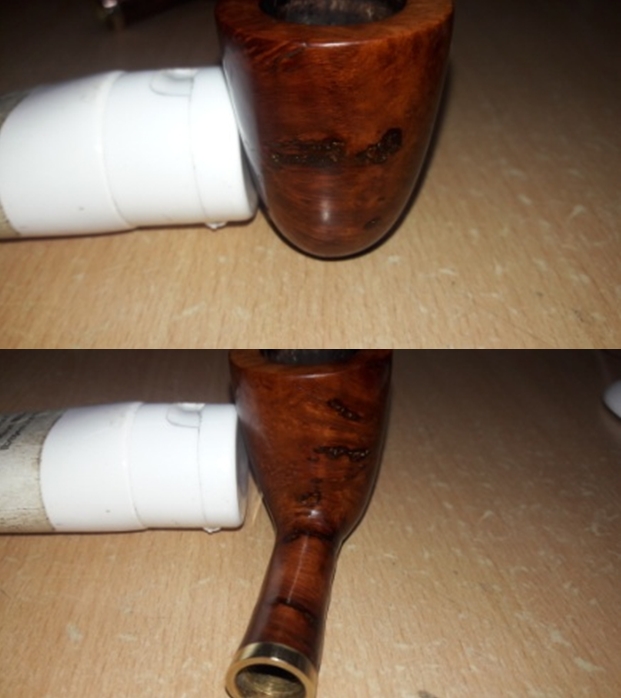
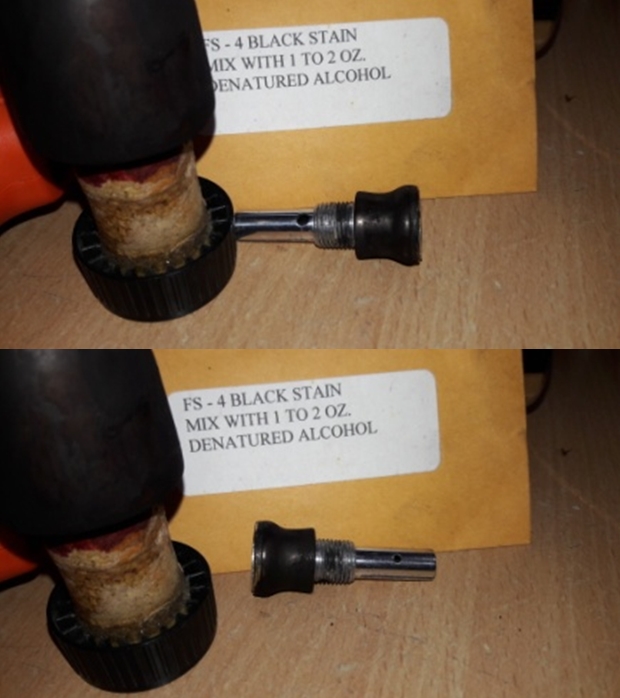
 The screw-in aluminum shank extension that houses a filter is covered in oils and tars. Also the smaller aperture pipe protrusion at the stem end is covered in gunk and tars. The briar coating at the top of this extension is chipped at one place (marked in yellow arrow) exposing the underlying aluminum shank extension. At the stem end of this extension, the brass ring is missing (marked in orange). I don’t have any brass rings and hence will have to improvise one that will fit.
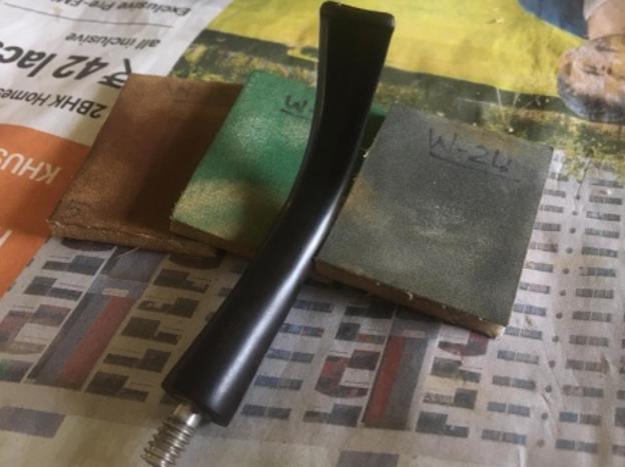
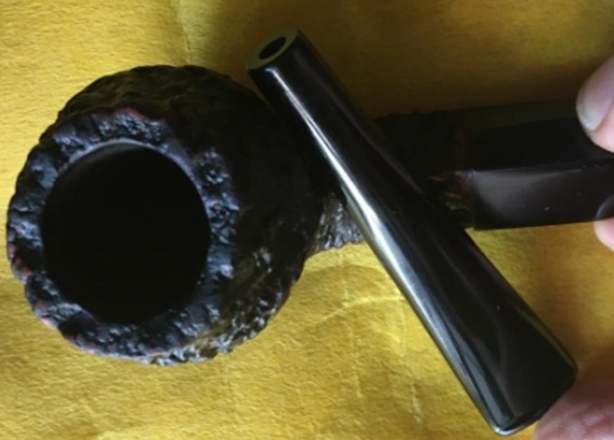
 The vulcanite stem with its fused briar saddle at the tenon end is generally in good shape, save for the broken button end. The stem is very lightly oxidized and has minor tooth chatter on the lower lip surface towards the button end. The lower button itself shows minor tooth marks. Rebuilding of the missing button portion of the upper surface and reshaping of the lower button shouldn’t pose any major issue. The tenon is dirty with all the gunk and dried oils and tars left behind by the previous owner of this pipe.
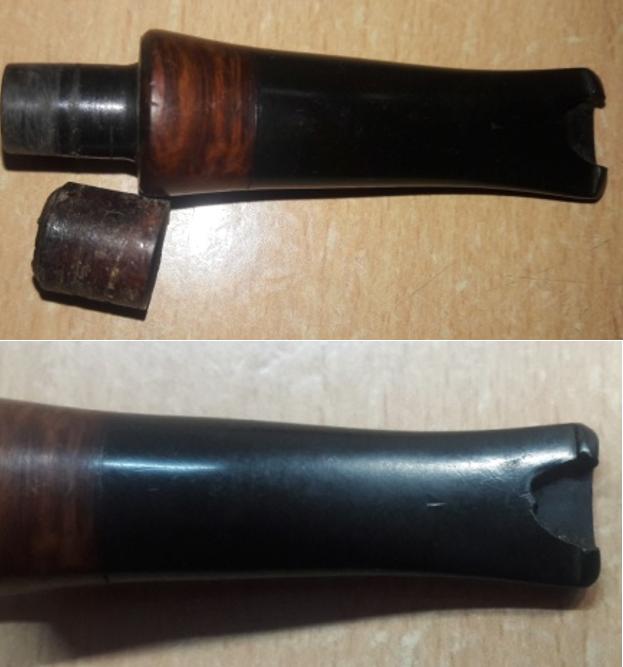

 THE PROCESS
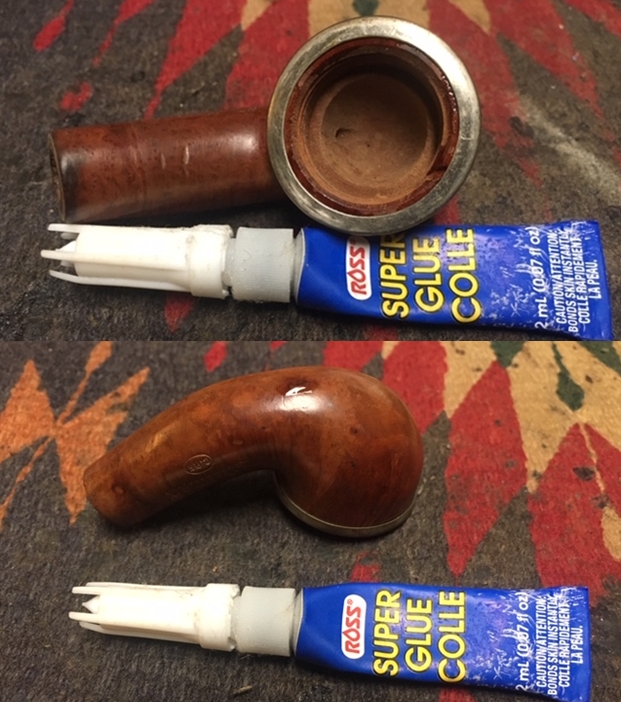
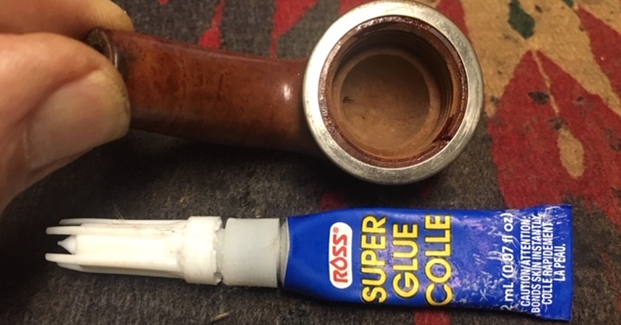
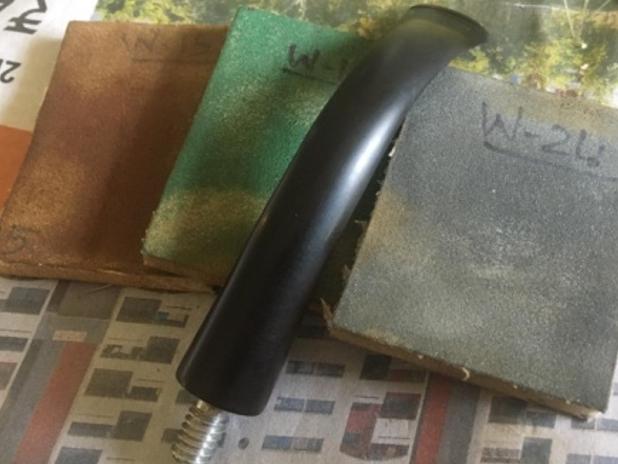
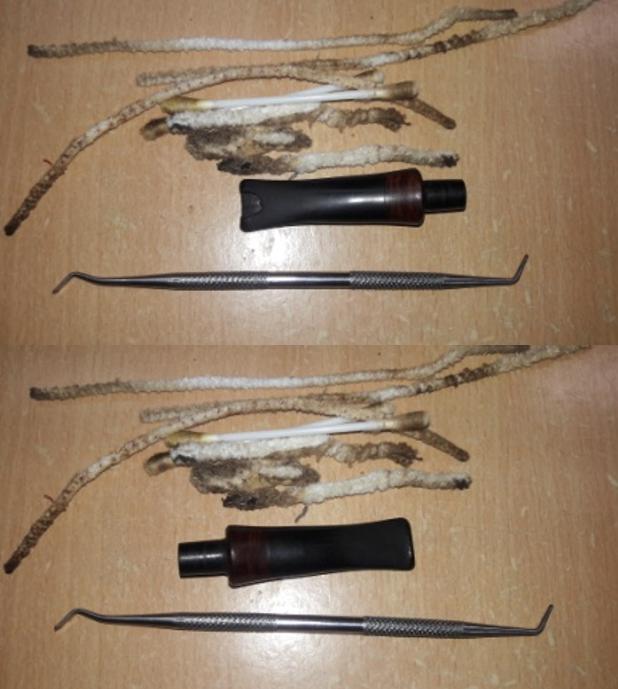
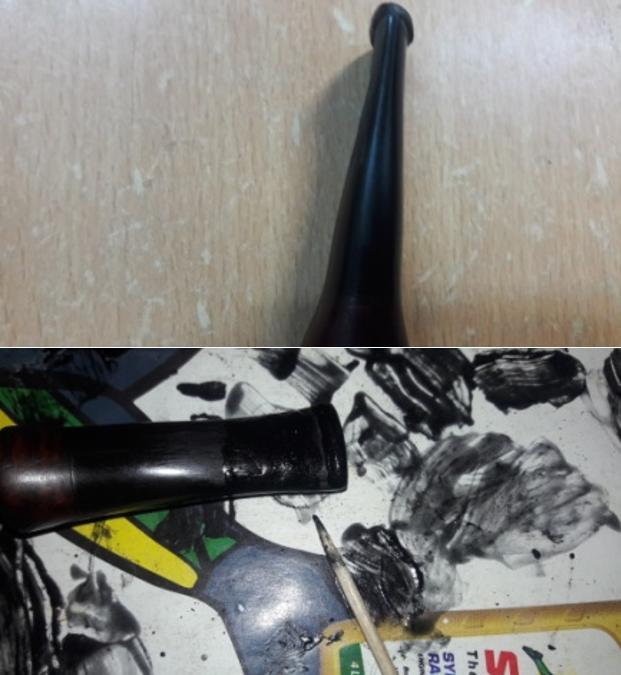
Since any stem reconstruction takes the most amount of time what with all the curing, sanding, refilling if needed, shaping and polishing, I always prefer to start with repairs to the stem. Firstly, I sand off all the tooth chatter and the area of intended fill with a piece of 220 grit sand paper. This not only evens out the surface for the fill but also gets rid of the oxidation which would otherwise show itself through the fills as a brown patch after polishing. This was followed by cleaning up the internals of the stem and the tenon with regular and bristled pipe cleaners dipped in 99% pure isopropyl alcohol. With a dental pick, I scrubbed out the dried gunk from the tenon and from along the broken button end edges.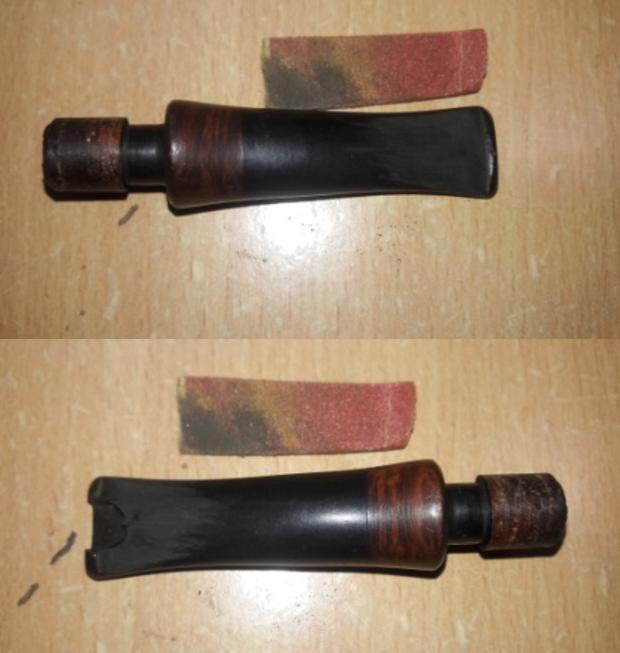
 I had seen Dal use a folded triangular index card while reconstructing a broken button end whereas I always used a Vaseline coated pipe cleaner inserted in to the air way to keep it open. My method, though effective, was time consuming as I had to completely reshape the slot thereafter. Therefore for this repair, I decided to adopt Dal’s method. I appropriately folded an index card and covered it with a transparent tape which prevents the superglue and charcoal mix from sticking to the card. This is how it appears and fits in to the broken stem.
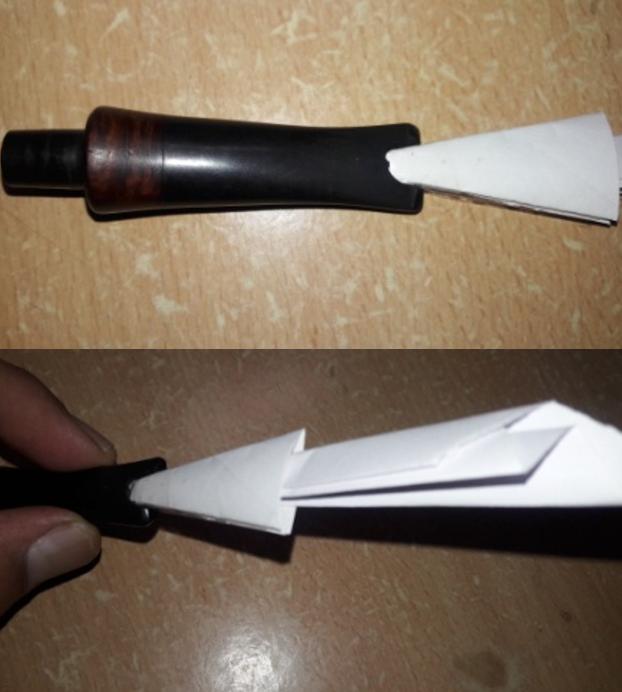 I prepared a thick mix of CA superglue and food grade activated charcoal and applied it over the broken button area. I also applied this mix over the lip edge to make it even and cover the tooth marks. Once this layer had cured, I applied another layer of the mix. The trick here is that this type of reconstruction needs to be done in layers to a thickness more than the adjoining stem surface. This thereafter can be filed and sanded down to match the stem surface. I did exactly as described above and set the stem aside to cure.
 First layer.
 Second layer.
 Third layer.
 Final layer.
Once the mix had cured hard, I went about matching these fills with a flat head needle file and followed it up with a piece of 220 grit sand paper. As expected, I observed a couple of air pockets and also that one of the lip edge had been filed down more than the other and was dotted with many air pockets. I addressed these issues with a layer of superglue and charcoal powder mix. However, in this mix, the percentage of superglue was higher than the charcoal powder. I set the stem aside to cure.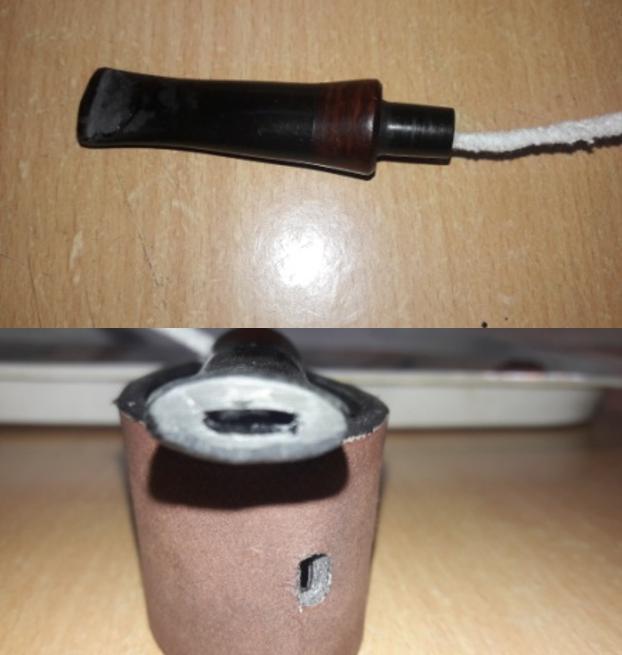
 After the stem fills had cured, I repeated the process explained above to match the filled surface with the stem surface using needle files and sand paper. Now the lip edges are even, however, the air pockets persist. It’s very frustrating, I know but you have to be equally persistent. I applied a layer of clear CA superglue (would have ideally applied black CA glue, but……don’t have it) and set it aside.
 To take my mind off the troublesome stem repair, I decided to tackle the issue of missing brass band from the stem end of the shank extension. Working with limited spares, materials and tools has its advantages. It forces you to think out-of-the-box for ways around the hurdle, many a times with startling and successful results but you pay the price in terms of time penalties. Well, time I have aplenty!!! I decided to fabricate a brass ring of adequate thickness. My fabricator informed me that it would not be possible to make one with this width as he had only wires and not strips of brass. No issues, I had two rings made!! These rings fit perfectly and add a nice unique touch. These should polish up nicely. I shall fix these rings towards the end of the restoration process.
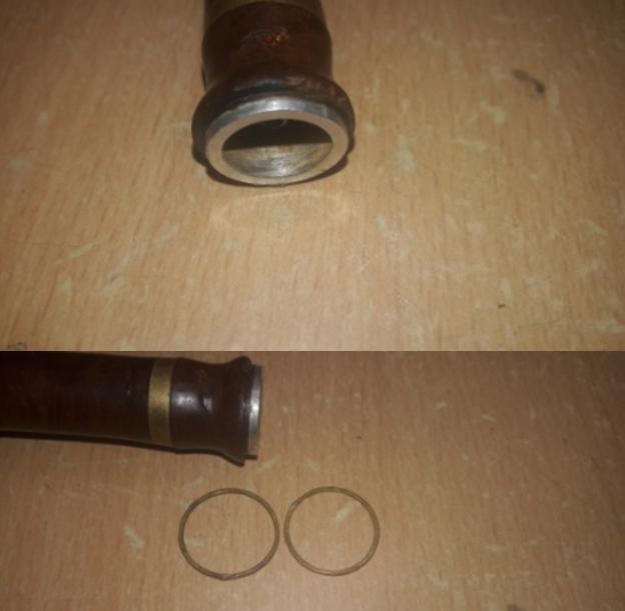
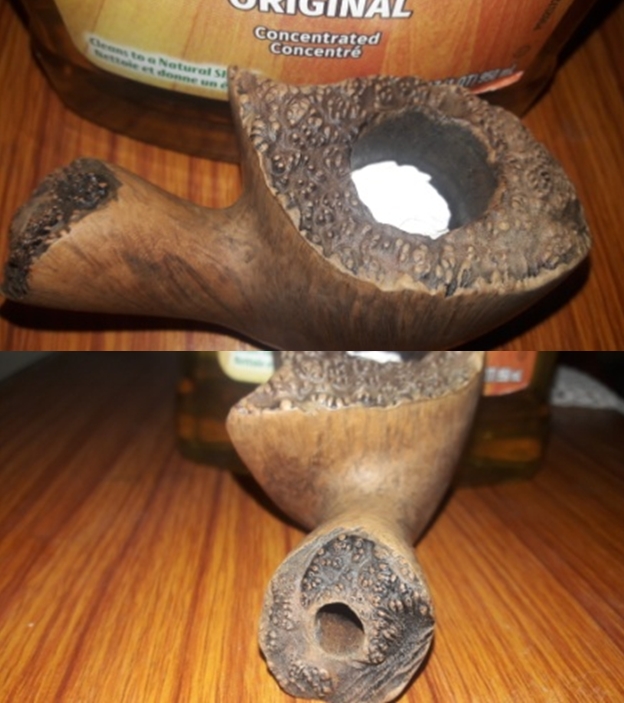
 Moving ahead, I reamed the chamber with size 1 and 2 head of the PipNet reamer. Using my smaller sized fabricated knife, I further reamed out the cake from places where the PipNet reamer could not reach. I gently scrapped out the lava overflow from the rim top surface. I followed it with sanding the chamber walls with a 220 grit sand paper. How I miss my younger daughter, Pavni, who specializes in smoothing the chamber walls and removing every trace of the old cake. Steve, hope I have come close to her finesse!! Once the cake was taken down to bare briar, my initial fears of heat fissures/line were confirmed, with the only difference being that these were not linear but pits, another first for me. These pits were only on the right side of the stummel and marked in yellow. To use J B Weld or only a bowl coating (which I prefer) would suffice, shall be decided later. Removing the overflow of lava from the rim top revealed a surface that is peppered with numerous dents and dings. Other than these issues, the walls of the chamber are even and solid.

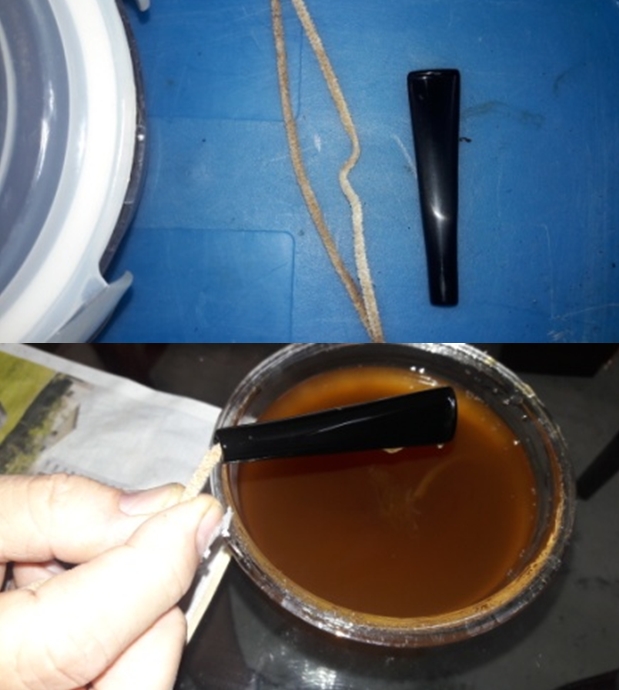
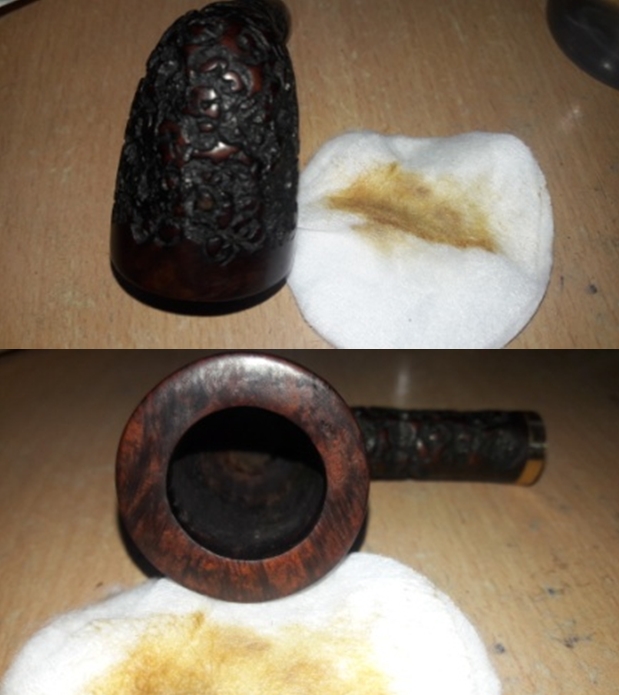
 I still did not have the inclination to work on the stem (actually it’s the fear of unknown result of the last fill!!) and continued with cleaning of the stummel. I worked the mortise using the dental tool first to scrap out the dried out gunk, oils and tars left behind by the previous steward. The amount of grime scrapped out is a testimony to the efficacy of this HygroSystem, I say. A few pipe cleaners dipped in alcohol later, the shank is clean. Now that the chamber and shank internals are clean, the smells though reduced, is still prevalent.
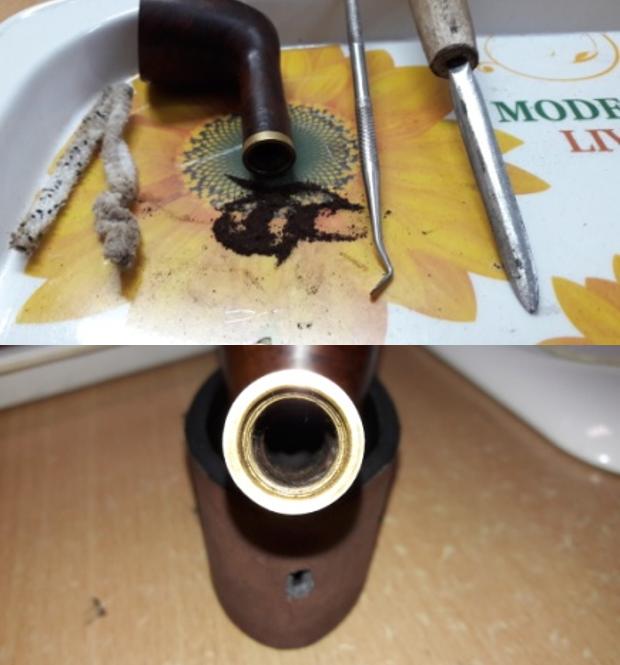 Staying with the stummel, I cleaned the externals with Murphy’s oil soap and toothbrush. Rinsing under tap water (remember, I am in India and its hot here and even tap water is equally warm!!!!) was the start of my nightmare and prolonged conversations with Steve and on our FB messenger group. Here are the pictures first; description of my observations will follow subsequently. Just follow the arrows…

 As I had noted during my initial inspection, the hairline crack towards the bowl end is now prominently visible and marked with yellow arrows in each picture. This hairline crack runs all around the shank and is joined end-to-end. This still was okay as I had anticipated it, but what surprised me, or rather rocked my feet, was the thick fill of putty running all around the shank end. The same is marked with blue arrows. This fill runs in a more perfect circle than the one near the bowl shank joint and right through the middle of all stampings!! Aargh……There goes the stampings… Sorry Steve, hope you understand.
As if the hairline crack and the all-round fill at the shank end was not enough, the right side of the stummel is…. Actually, I am lost for words and the words that come to my mind are most definitely unprintable and I definitely have no desire for a rap on my knuckles from Steve. Have a look at the pictures and please decide for yourself a suitable description.


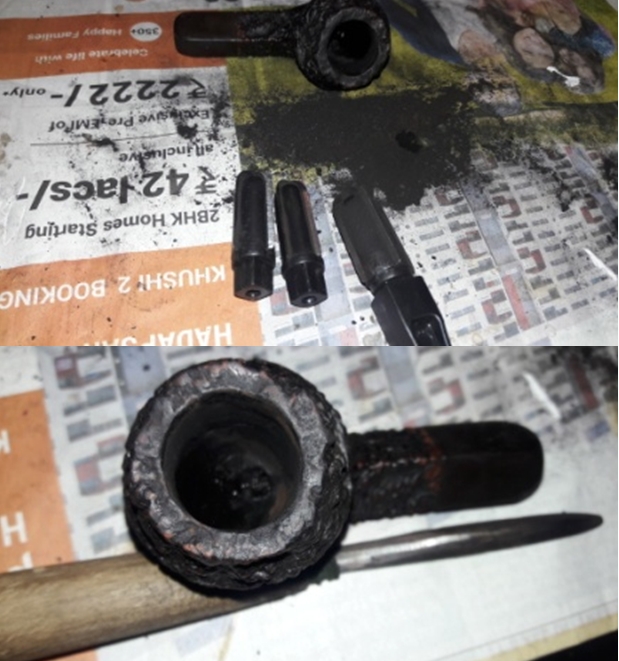
 There is not an inch on the right side of the stummel and shank that is free of any fills. Undaunted, I began the arduous journey of removing the old fills and preparing the stummel for a fresh fill. Using my newly acquired dental tools which were procured when Steve, Jeff, Abha and I had gone around the town shopping for tools for pipe resto work, I progressed to removing the fills. This is how the pipe appeared after the old fills were removed, a cheesecake pipe!!!! The fills were large and deep. The only saving grace was the crack near the bowl shank joint was only superficial and the fills on it would act as counter hole, what am I writing!! It’s a complete circular crack. The long and short of it is that the crack is stable and going nowhere damaging the structural integrity of the pipe.
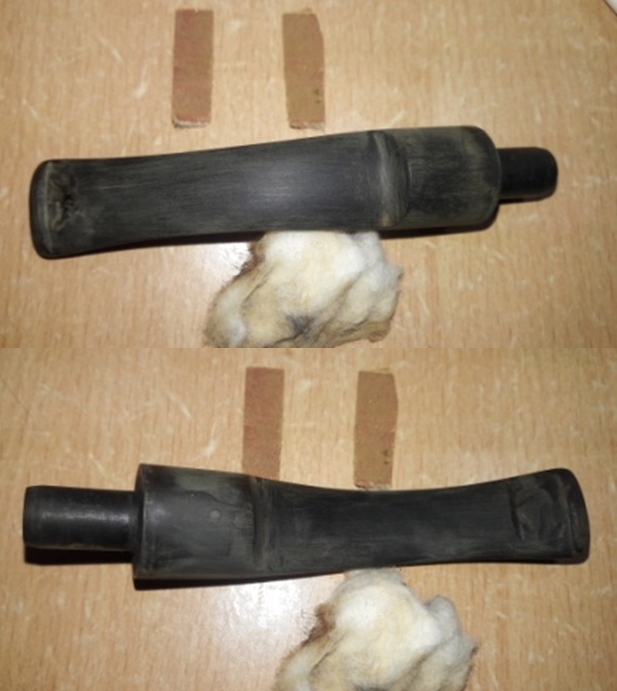
 At this point in the restoration, I decided to address the issue of old odors in the chamber and shank by subjecting it to a cotton and alcohol bath. I wrapped some cotton around a folded pipe cleaner, keeping the tip of the pipe cleaner free of wrapped cotton as this would be inserted through the draught hole in to the chamber. This would form the wick for the shank. I tightly packed the chamber with cotton balls and filled it with 99% pure isopropyl alcohol using a syringe and set it aside. Immediately a few seconds later, the alcohol started oozing out of all the fills. The pipe appears to be shedding tears at its present condition, and so am I. I shared these pictures with my FB messenger group friends inquiring whether to discard the pipe or continue and ways to progress ahead with the restoration. The unanimous reply was to continue and rustication was the way ahead. Well I moved ahead with my work on the pipe but was not sure about the rustication part. Here is how the pipe appeared at this stage in restoration:

 By next day, the cotton and alcohol had drawn out the tars and oils from the chamber and max from the shank.
 I let the stummel fills dry out completely and after all the alcohol had evaporated, proceeded to fill the deep gouges with CA superglue and briar dust using the layering technique. I my part of the world, the moment briar dust came in to contact with the glue it becomes rock hard even after trying every trick that Dal had shared with me and Steve when we were together in India. Therefore, I adopted the layering technique where I put down a thin layer of superglue in to the fill and press briar dust over the glue. I continue with this till the fill rises above rest of the stummel surface. Believe you me readers, I spent an entire evening working well past midnight, to get all the gouges filled up. I set the stummel aside to cure for the next 24 hours.
 Still working on the stummel, I file the raised mounds of the patched fills with a flat needle file. The only drawback of the layering technique is that a number of air pockets are revealed after the filing. This time was no exception and I refilled the exposed air pockets only with superglue and set it aside to cure.
 Since there was still time before I hit the bed, I decided to address the stem. I sand the fill to match the surface of the stem. For a better blending, I further sand the entire stem with 220. I topped the slot on a piece of 220 grit sand paper to even it out. The repairs looked good at this stage.

 With the stummel fills nicely cured, it was time again to work on it. Using a flat head needle file, I sanded the fills and followed it with further sanding with a folded piece of 220 grit sand paper. Again the same sordid story, the fills revealed numerous air pockets through which the briar dust was seen. In my quest to make this restoration as perfect as possible, it refilled these air pockets with superglue and briar dust. This time around, I mixed a minuscule amount of briar dust with superglue and surprise! The mix remained pliable for just enough seconds in which I could apply it over the fills. Again I set the stummel aside to cure. This sure is trying my patience and stubbornness. I shall prevail, is what I have decided.
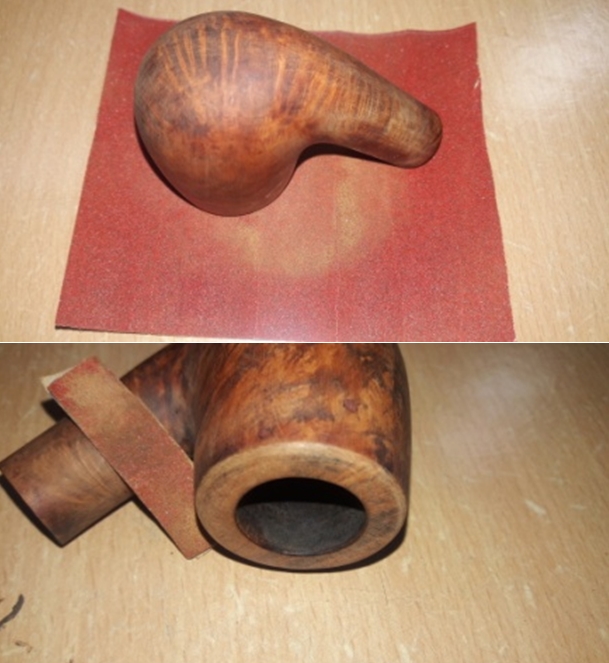
 Since the glue and briar dust mix had hardened immediately, but not hard enough to use a flat head needle file on it, I decided to address the issue of the numerous dents, dings and scratches on the rim top surface. To do this, I spread out a patch of 220 grit sand paper on my work table. Firmly holding the patch in my left hand and the stummel in my right, I gave a few firm rotations to the rim top over the sand paper patch. I continued the process, checking ever so frequently, till I was satisfied with the result. The rim no appears pristine and even. This was the only uneventful part in the entire restoration, LoL!!
 The fills on the stummel having sufficiently cured, I went ahead and filed the fills with a folded worn out piece of 150 grit sand paper and followed it up with sanding with a piece of 220 grit sand paper. My reasoning for not using a flat head needle file was that maybe the hard abrasiveness of the file is causing the fill to come out exposing the air pockets. But no, the air pockets still showed themselves in all their ugliness. I decided to press on with the process, even though Steve was still gently prodding me to take the rustication route.
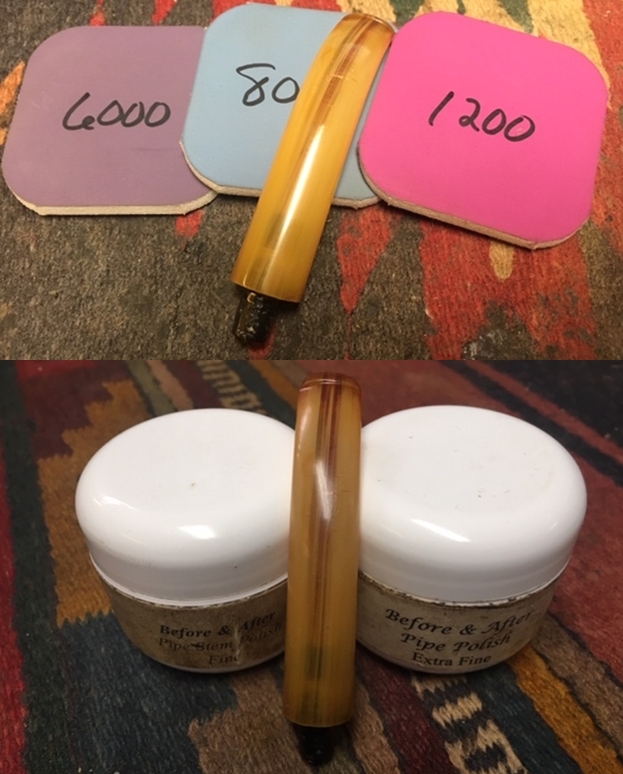
 This was followed up with micromesh polishing cycle. I wet sanded the stummel going through with 1500 to 12000 grit pads. Intermittent wiping of the stummel with a moist cloth helps firstly, to remove the sanded dust and secondly, gives an idea of the progress being made and areas which needed more attention. The stummel has taken a beautiful sheen where there are no fills, but the right and front of the stummel and the shank tells a different story, it does not look presentable to put it mildly.

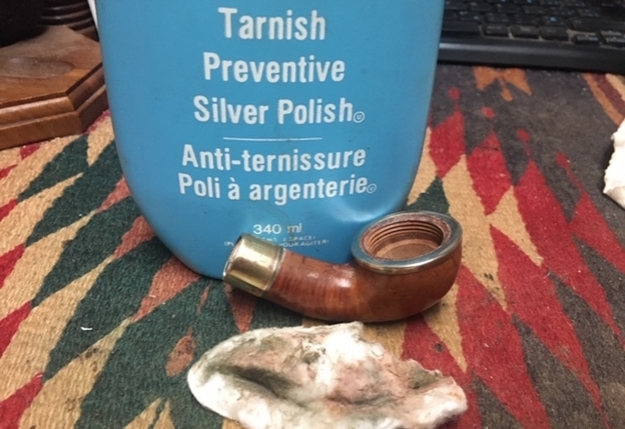
 While going through with the micromesh polishing cycle, I extend this care to the brass band at the shank end. The now nicely shining brass band adds a touch of class to the pipe and some bling too!!
 I shared the above pictures with Steve and asked for suggestions for the way ahead. He suggested applying some “Before and After” restoration balm as it may also help in further blending the fills. As he was suggesting this, there was a ping on my mobile and there were some pictures of beautifully rusticated pipes that Steve had done over the years. I just smiled and went ahead with applying the balm and see the results. The results were not encouraging at all to say the least. To be honest, the thought of going the rustication route to salvage this pipe had started taking roots in my head, mind you head and not the heart!
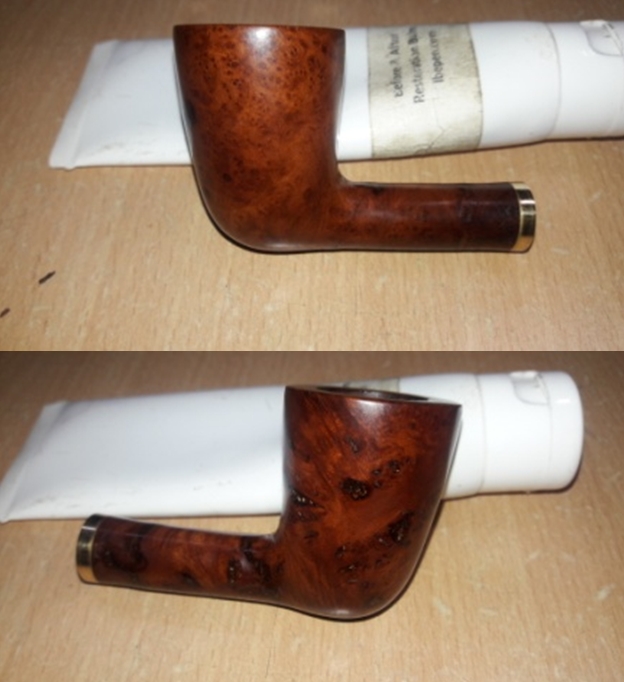
 Disappointed with the stummel appearance at this stage, I turned my attention back to the stem. I had sanded the stem, including the briar insert at the tenon end with a 220 grit paper. I picked it up from there and progressively sanded the entire stem with 600 and 800 grit sand paper. I expected a clean and neat looking stem to stare back at me, but what I saw made me cringe. The top of the button showed some beautiful white spots of air pockets (marked in circle)!! Why, why can’t this restoration progress without any hiccups? I decided to take a break and cleaned out my work table. I loaded my large W. O. Larsen bent brandy pipe with my favorite G. L. Pease Virginia blend, Telegraph Hill (thanks Steve for this pipe and the tobacco, though my gift to you is testing my endurance and determination!) and went out and sat down in the lawns closing my eyes. I thoroughly enjoyed my smoke and came back refreshed. I rubbed a little Extra Virgin Olive oil in to the stem surface to hydrate it and set it aside to be absorbed in to the vulcanite.
 I had undertaken restoration of two of the three parts of this pipe, the stem and the stummel, and this had proved to be tedious and frustrating. I left them aside in various stages of progress and now turned my attention to the third and last part, the aluminum shank extension. The only issue that I had seen in my initial inspection was that of the chip and bubble in the surface of the briar coating over the aluminum insert. I picked out the bubble and lo, behold, the small chip instantly transformed itself in to larger than life sized!!!! The thickness of the coat was very thin, a few microns, maybe, and instantly peeled of like wall paint. I immediately realized that I am in for a long haul on this one too. Here is what happened and for comprehension, reproducing the picture taken during the initial inspection.
 It was interesting to note that the aluminum shank extension had a nice design, indicated with a yellow arrow, below the briar finish coat and the coat was pressed on to it. That the coat is heated and wrapped around is evident from the fact that this design can be seen on the intact coat surface. I decided to address the issue of chipped coating by filling it with a mixture of briar dust and superglue. I set the shank extension aside to cure after applying the mix. I missed out on taking pictures of the fill.
 While fill on the shank extension was curing, I decided to complete the stem repairs. I completely gouged out the area with air pocket for a fresh fill. With a black marker I darkened the fill and thereafter spot filled it with a mix of charcoal powder and superglue, superglue being more than charcoal and set it aside to cure. The mix hardened immediately and I continued with sanding and shaping the button. The fills and stem reconstruction came out good and I was satisfied with the way the stem has now turned out. I followed it up with sanding the entire stem with a folded piece of 220, 400 and 600 grit sandpaper in that order. I finished the stem reconstruction with a polishing with micromesh pads, wet sanding with 1500 to 12000 grit pads. I applied a small quantity of Extra Virgin Olive oil to the stem and set it aside.

 The fill on the shank extension had cured and I progressed with filing it with a flat head needle file followed with a sanding with a piece of 220 grit sand paper. I further matched the fill with the rest of the surface by sanding the entire wood coating on the shank extension with folded pieces of 400 and 600 grit sand papers. In the pictures below, one may think that there are air pockets in the fill; however, the fill is solid without any air pockets. I also evened out the edges over the aluminum extension in preparation for fixing the two fabricated brass rings, described above.
 Staying with the shank extension, I cleaned out the aluminum tube protrusion and the threading with a brass wire brush. I further polished it with a 0000 grade steel wool. The aluminum tube is now clean and shining. I finished the cleaning regime of the tube and threads in the shank extension by polishing it with a multipurpose liquid polish.
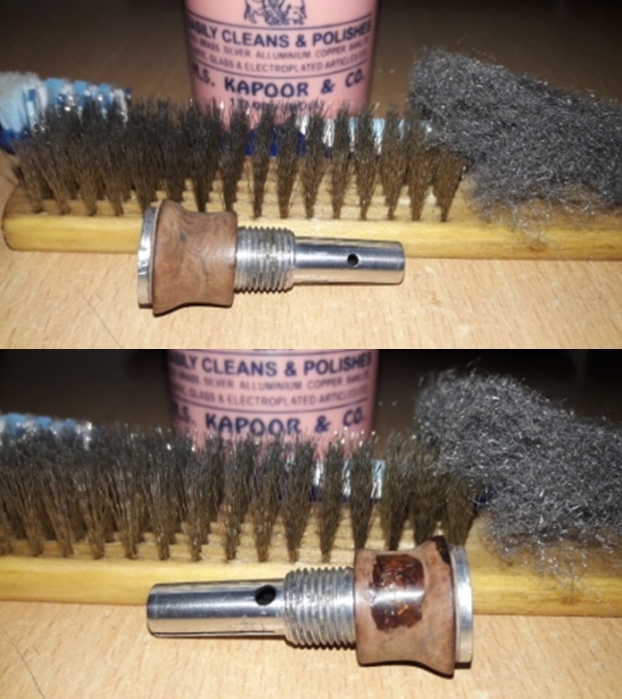 Now it was time to affix the two fabricated brass rings. I applied a little superglue over the exposed aluminum protrusion of the shank extension towards the stem end and fixed the rings over it.
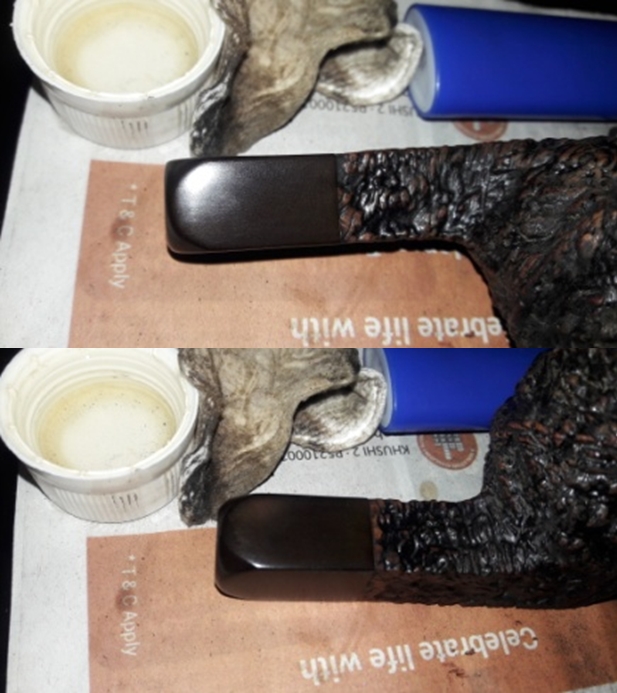
 I polished the shank extension, the aluminum tube and the two brass rings included, with micromesh pads, wet sanding with 1500 to 12000 grit pads. The shank extension now has a nice shine and the aluminum tube looks like new. The fill does show through in all its awfulness, but this will blend in nicely when I stain and subsequently polish it further. I applied a little “Before and After” restoration balm and buff it with a microfiber cloth after 20 minutes.
 I cleaned out the wood gasket which makes the fit of the tenon in to the shank extension airtight with cotton buds dipped in alcohol. I applied a little Extra Virgin Olive oil to this gasket, inside and out, to hydrate the wood and set it aside to be absorbed in the wood. When I had initially dismantled the pipe, this gasket came out attached to the tenon. However, close observation of the outer surface of the gasket points to the fact that the gasket was stuck inside the shank extension towards the stem end. I did not sand the outer surface to a smooth finish as I wanted to keep the surface rough when I applied superglue and reaffixed it inside the shank extension.
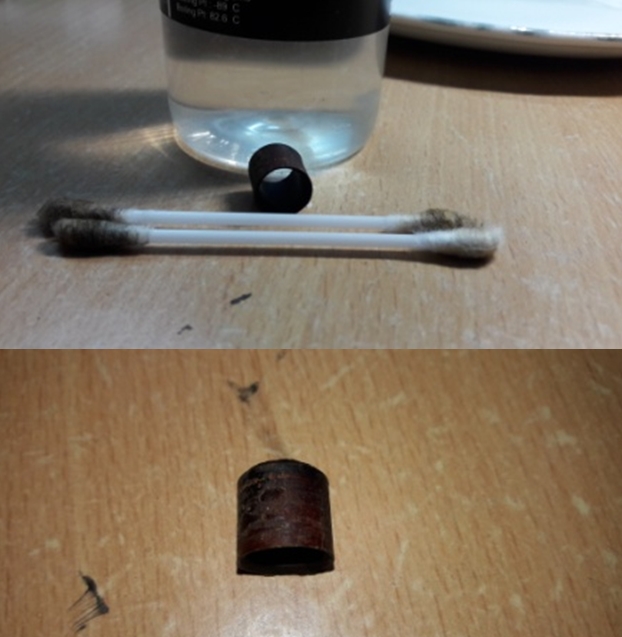 Now that I had completed the restoration and reconstruction of the shank extension and stem respectively, I turned my attention back to the stummel with all its imperfections. Even at this stage, while on Face time with Steve he suggested that I rusticate the stummel. However, when he saw the reluctance, he suggested that I should try to blend the fills, which were standing out like sore thumbs, with a darkest stain available to me. I decided to stain the stummel and the rim top surface with black stain first and later with a dark brown stain in the hope that the contrast would help in a nice blend. I heated the stummel surface with my heat gun to open up the pores on the stummel so that the stain is well set. I mixed black stain powder with isopropyl alcohol and liberally applied it over the heated surface, flaming it with the flame of a lighter as I went ahead to different self designated zones of the surface. This helps in the setting of the stain in the grain of the briar. Similarly, I applied the black stain over the wood of the shank extension. I set both the stummel and shank extension aside for the stain to dry and get completely absorbed in the surface.
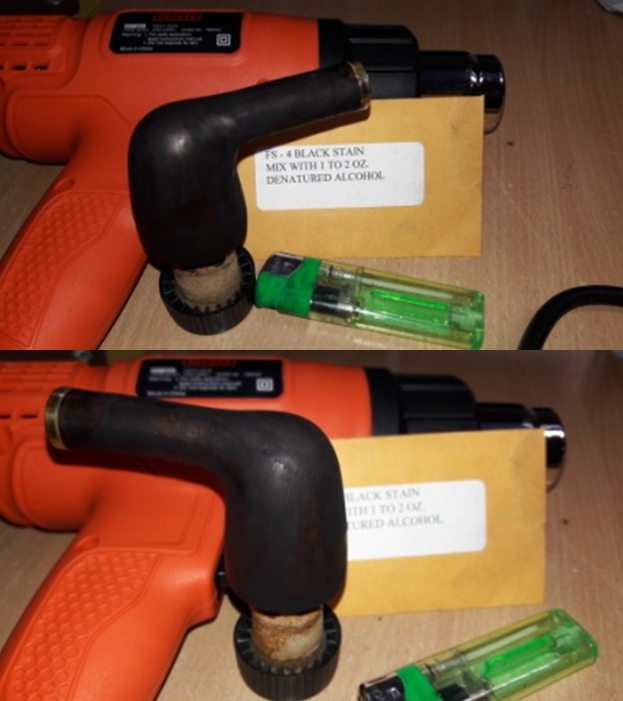
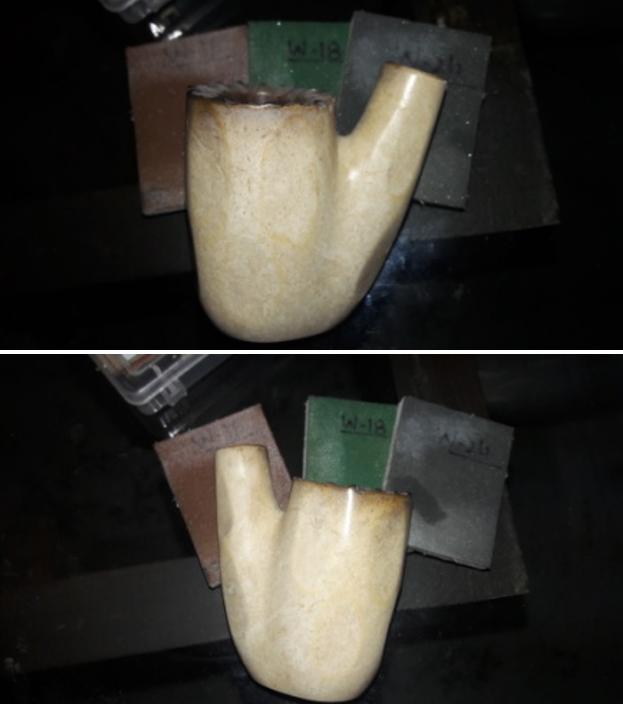
 The next evening, approximately 18 hours later, as Dal describes, I began to unwrap the stain in the hope to see beautiful grains. I mount a felt cloth buffing wheel (for the first time I admit, as I had only recently purchased these) on my hand held rotary tool. Setting the tool at its slowest speed as Dal had explained to me that a felt cloth wheel generates tremendous heat, I began to peel of the stain from the stummel surface first. But, hell there was no unwrapping at all!!! Not an iota of stain was buffed out. Therefore, I decided to increase the speed of the rotary tool a notch higher and still no result. I further upped the ante and took the speed regulator to half of the full power. Now the stain was peeled out gradually. This was followed with wiping the stummel with a cotton swab and alcohol to lighten the stain a little as it was too dark for my liking and this also helps in cleaning the surface of all the residual stain. But as soon as I reached to the right side of the stummel, I started seeing the dreaded patches where the fills got removed. Same for the shank extension!!! Here are the pictures as I saw the after effects of this buffing.
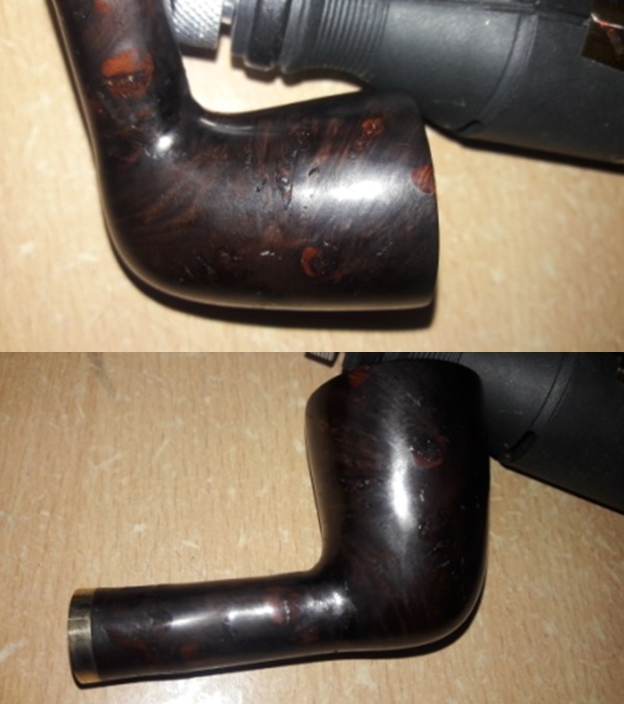

 Following are my observation on the stummel at this stage:-
(a) The stain had not set in over certain fills. These stood out like red blisters and are gory to look at.
(b) The fills had come out at certain spots. This was due to my mistake. I had either heated thestummel too much prior to staining or could be that I erred in my handling of the newly acquired felt cloth buffing wheel. Unknowingly, I got the stummel overheated, ditto for the shank extension.
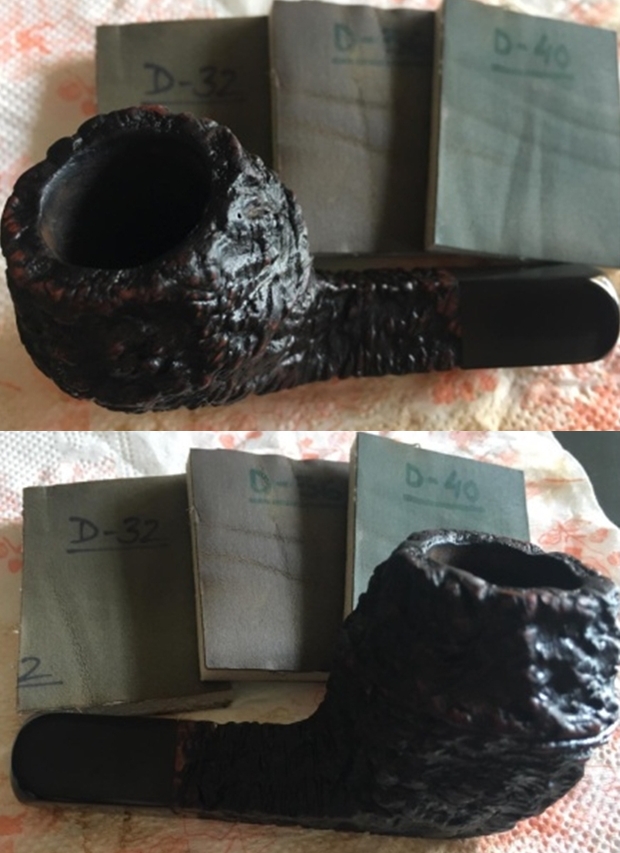
It was extremely frustrating to say the least. Now I had option of either refilling the spots or “RUSTICATING” the stummel and the shank. To the readers, I would like to inform that during the process of filling and subsequent sanding of the stummel there were numerous, or countless I say, times when I had to spot fill small pockets and repeat the sanding of these small spots. I really had no desire to go that route as it would have literally meant starting from square one!! And it has already been nearly 25 days that I have been working on this pipe (and simultaneously on Dal’s pipe too with its own share of challenges!). I decided to go the path pointed by my mentor and rusticate the stummel. I messaged Steve about this decision and his first response was a terse “Good”!!! Before I could forward a message lamenting further about not having suitable tools, he sent me a link on rebornpipes.com about how to make rustication tool from a Philips screwdriver. From the speed and swiftness with which he forwarded the link, it appeared as if he had anticipated this. Here is the link and is a must read for all new exponents of this art. https://rebornpipes.com/2012/11/03/making-a-rustication-tool-out-of-a-phillips-screwdriver/
The article is worded very simple and articulate enough for anyone to follow and make a rustication tool for oneself. Lucky for me, I had ordered a DIY rotary tool kit with complete accessories and this kit included all the tools that were essential to make myself a rustication tool. Shown below are a few pictures of the tools used and the completed rustication tool.
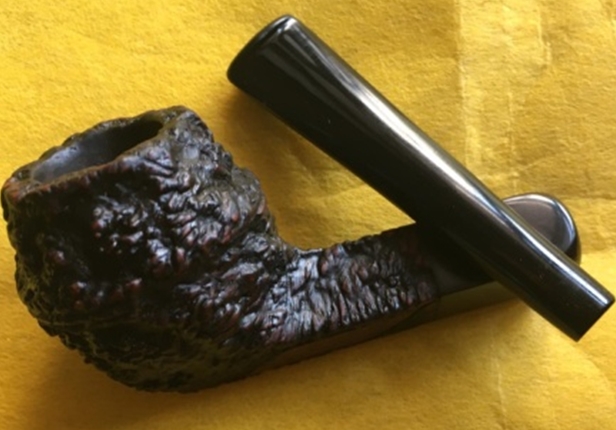
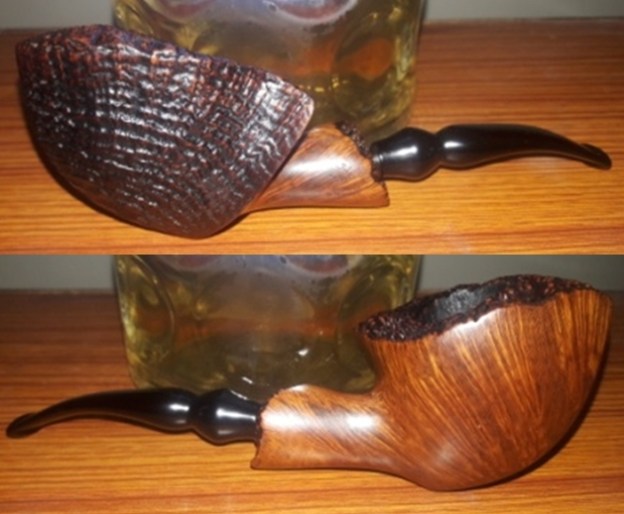
 With this, I geared myself for the first ever rustication of a pipe amidst a lot of trepidation. It was after a lot of effort that I had laid my hands on a pipe from this maker with this system, was meant to be a gift for someone I admire and as such did not want to ruin it. However, if you do not take a step further, you never progress and never learn and so I began the process of rusticating the bowl and shank.
I first wiped the stummel with a cotton pad and isopropyl alcohol to clean the surface and lighten the dark stain. The rim and about half an inch below the rim was in decent shape and I decided to maintain a smooth ring atop the rustication. Since I did not have a masking tape, I used a transparent tape to demarcate the area that I wanted to keep smooth that is the rim top and about half an inch below the rim outer edge. Similarly, I covered whatever little that remained of the stamping. This is a very essential step as I realized during rusticating that it is very easy to lose track and transgress over the areas and stampings which you wish to preserve.
 To rusticate, I firmly held the stummel in my left hand and with my right hand and began gouging out the briar. The technique is to firmly press the pointed four prongs of the modified Philips screwdriver in to the surface, rotate and pull out the removed chunk of briar. During the entire process, I kept sharing pictures of the progress that I was making, with Steve.
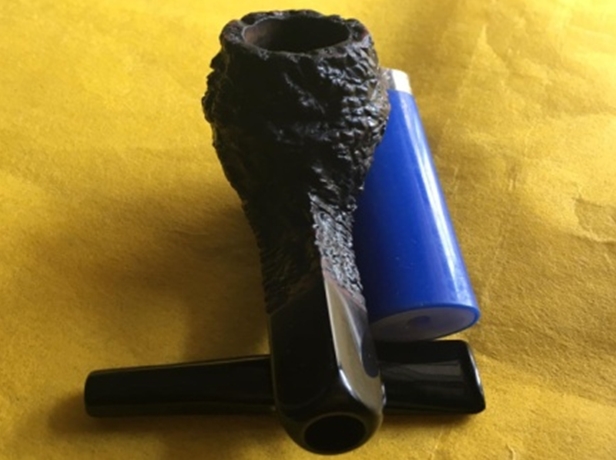
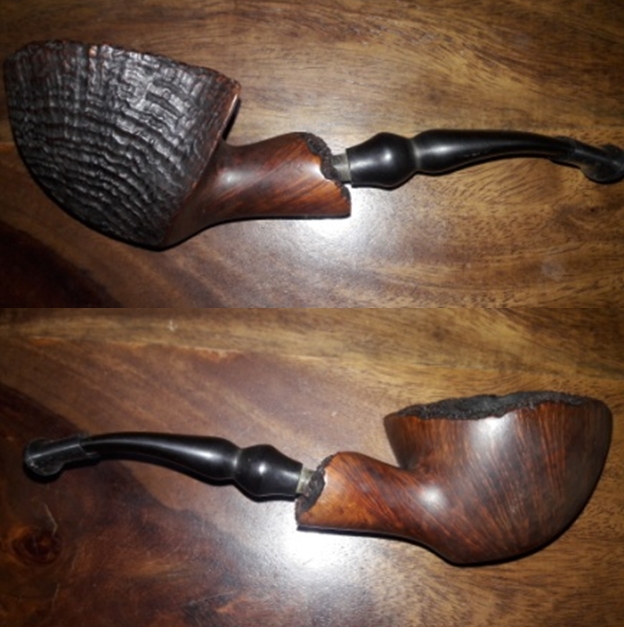
 As Steve suggested, I was pretty aggressive in my rustications. Once I had completed the rustications over the intended areas, I removed the transparent tape and cleaned the entire stummel with a soft bristled brass brush to remove all the debris from the rusticated surface. Here is how the stummel appeared after the cleaning process.

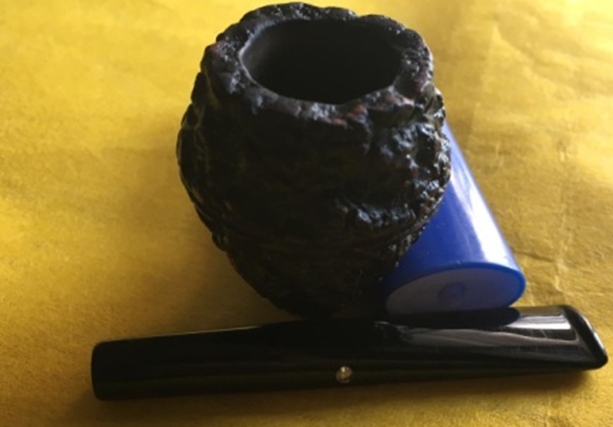
 I am happy with the way the stummel appears at this stage.
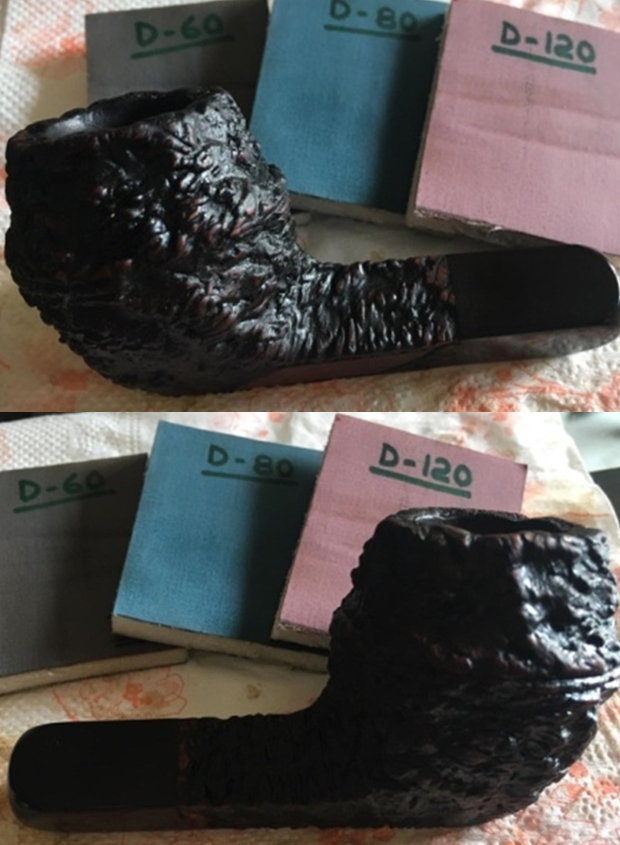
 I wanted to smooth out the jagged edges left behind by the screwdriver. I decided to scrub the entire stummel with a hardwired bristled circular brush mounted on my rotary tool. I hoped that this would thoroughly clean the rustications, smooth out the rough edges, and remove the chipped surface which could not be removed by the soft wired brass brush while adding a new dimension to the rusticated surface. Well, honestly I am not sure about the last aspect that I had hoped to achieve, but the other objectives we successfully achieved.

 I cleaned the smooth and rusticated surface with a cotton swab dipped in isopropyl alcohol to remove the sticky mark left behind by the tape and clean the rusticated surface in preparation for application of black stain. Once satisfied with the cleaning, I heated the stummel with my heat gun and applied a coat of black stain as described above. I set the stummel aside to set the stain in the surface. Once the stain had dried, I did observe a few spots that missed the application of the stain. However, I am not overly concerned with this, as these spots would eventually get stained when I apply the second coat of dark brown.

 Once the stain had set in well, I again warmed the stummel with my heat gun. This helps the stain to be absorbed and set further in to the briar. This heating also helps in reducing/preventing the stain from bleeding onto one’s hands while smoking or that is what I have read.

 I mounted a felt cloth buffing wheel on my rotary tool and gently buffed the entire stummel surface. Not wanting to repeat my previous mistake, I kept the speed of the rotary tool at its minimum. It took some time before I was finally able to remove the crust formed by the black stain.

 I wiped the stummel with a cotton swab and alcohol to remove any excess stain and followed it up sanding the raised rustication with a folded piece of 220 grit sand paper.

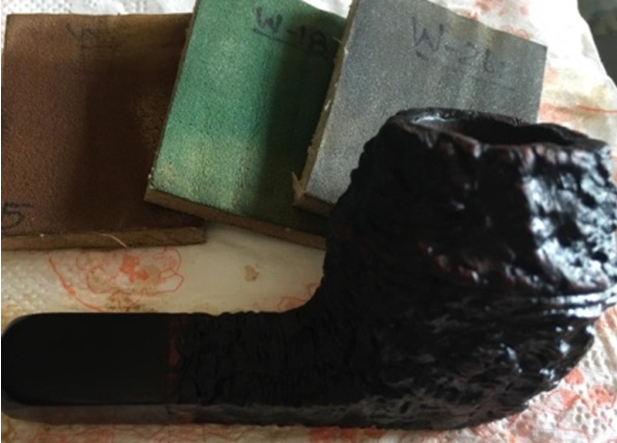
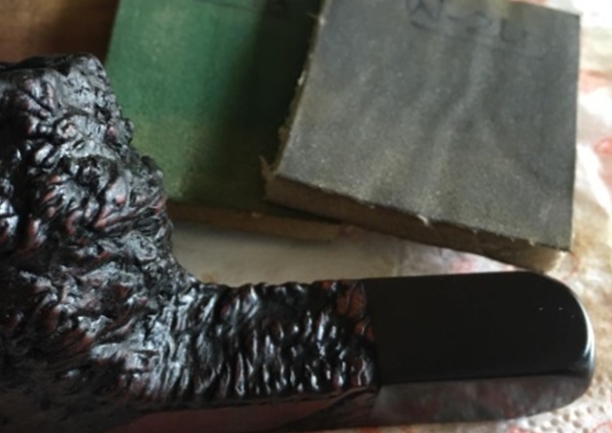
 This was followed up by carefully dry sanding of the entire stummel, especially the raised rustications with 1500 to 12000 grit micromesh pads. This not only lightened and highlighted the rustications, but would also provide a smooth surface for the next coat of dark brown stain. I was contemplating either a cherry red or oxblood stain apart from the dark brown as suggested by Steve, for the next coat. Also the present look of the stummel was equally beautiful. So there I was, at cross roads for deciding stain or no stain for the second coat. I decided to go by Steve’s suggestion as he is more experienced and as also this was to be his pipe. Here is how the pipe appeared before I applied the second coat of dark brown stain.

 I buffed the stummel with a horse hair shoe brush to remove any sanding dust resulting from the micromesh sanding. I applied a small quantity of “Before and After” restoration balm to rehydrate and rejuvenate the briar and set it aside for some time. Thereafter, I buffed and cleaned the stummel with a microfiber cloth.
 I applied a second coat of dark brown stain over the stummel and the shank extension, going through the same method as described above and set them aside for the stain to set. However, in my exuberance to cross the finish line, which by the way was now within sight, I completely missed out on taking pictures of this stage. Once the stain was set, I wiped down the stummel with a cotton swab and alcohol to remove any excess stain and lighten it from the raised rustications.
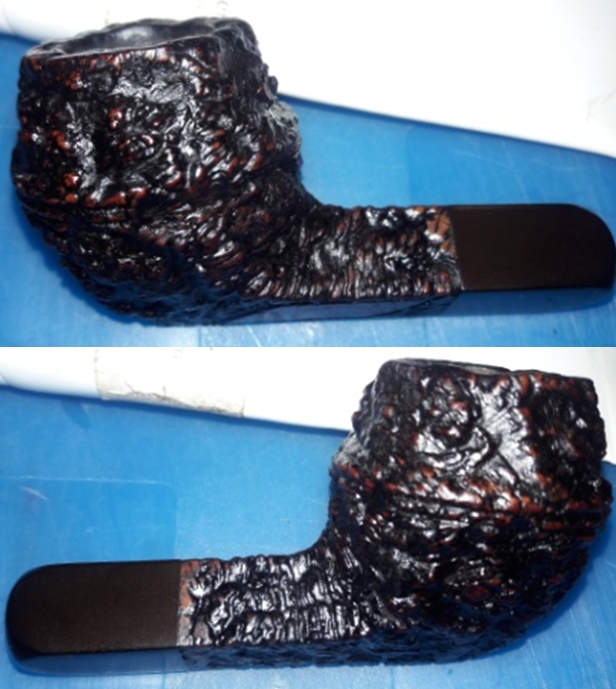
 Mounting a felt cloth buffing wheel on my rotary tool, I went about removing the crust formed by the stain over the raised rustication. The second coat of brown stain has added another layer of texture to the appearance of the stummel and aluminum shank extension. I like the way the stummel now appears to the eye.
 Now, the fear that besieged me was the stain running down Steve’s hand as he smoked the pipe and I shared this anxiety with him. He suggested that I should set the stain by again heating the stummel surface with the heat gun and this is exactly what I did.
 Next, I mounted a cotton cloth buffing wheel and setting the speed to ¼ of the full power, I applied a coat of carnauba wax over the stummel, aluminum shank extension and the stem. I worked the complete pipe to a beautiful and lustrous shine.
 I followed this wax polish by a mounting a clean cotton buffing wheel on the rotary tool and cleaned the stummel surface to remove any excess wax that had lodged itself in the rustications.
 The last issue that remains unaddressed is the thin chamber wall on the right side of the stummel. I had an option of either applying JB Weld or using plain bowl coating. I decided to go with the latter as, in my appreciation, this should suffice and also, in case my appreciation goes awry, I know Steve would apply JB Weld to make it functional again. Had this pipe been for anyone else, I would have applied JB Weld followed by a layer of bowl coat, just to be sure.
 Before re-assembling the pipe, I once again thoroughly cleaned the internals of the shank, aluminum shank extension and the stem airway with pipe cleaners and ear buds dipped in isopropyl alcohol. I also fixed the wooden gasket with superglue in to the stem end of the shank extension. I checked the draw to make sure that the airways in the shank, extension and stem are open. The draw is nice, smooth and open and somewhat similar to the draw experienced on a Peterson’s P-lip stem. I also applied a little Vaseline over the threads of the aluminum shank extension and the wood gasket to protect and keep it soft.
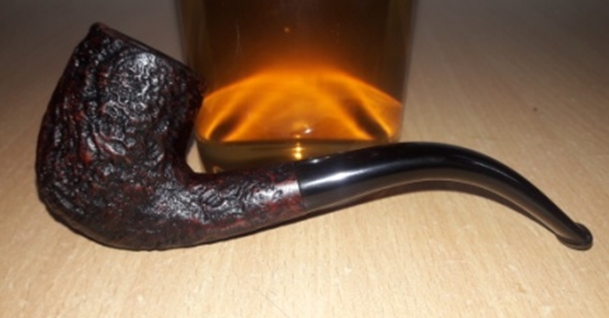
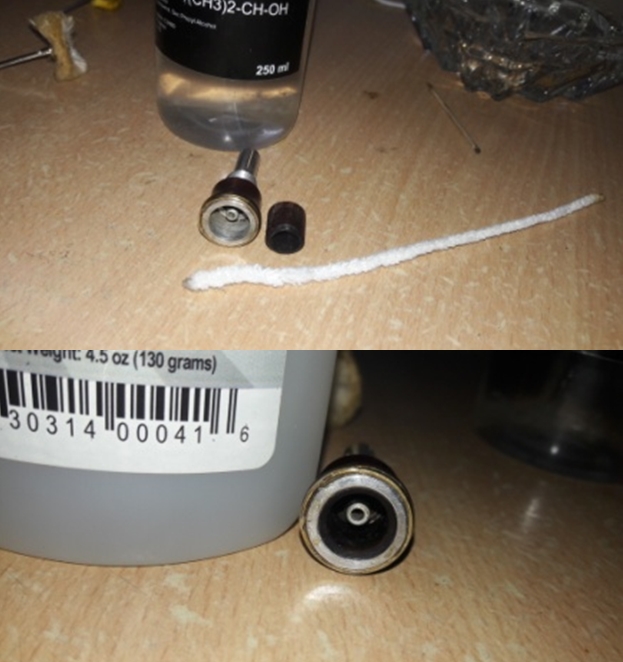 To finish, I reassembled the complete pipe and gave it a final buff with a microfiber cloth to deepen the shine. This dude has come a long way from being on the verge of being discarded, to be my first ever attempt at rustication, to being my first gift to my Guru and mentor, Steve. I am pleased with the way this pipe has turned out and I sincerely hope that Steve likes it too. This pipe will soon be on its way to another part of the world, Vancouver, Canada to be precise, to be enjoyed and to serve my dear friend while he reminisces about his visit to me, Abha, Mudra and Pavni. I sincerely thank all the readers to have spared their valuable time in going through this long, and at times repetitive, write up.


 P.S. This project has been a great learning, with its fair share of frustrations and moments of euphoria, both of which are memorable to me. I enjoyed researching and understanding the working principle employed in this pipe. Any input and suggestions are always valuable to me and most appreciated as they help me grow and improve.