Blog by Steve Laug
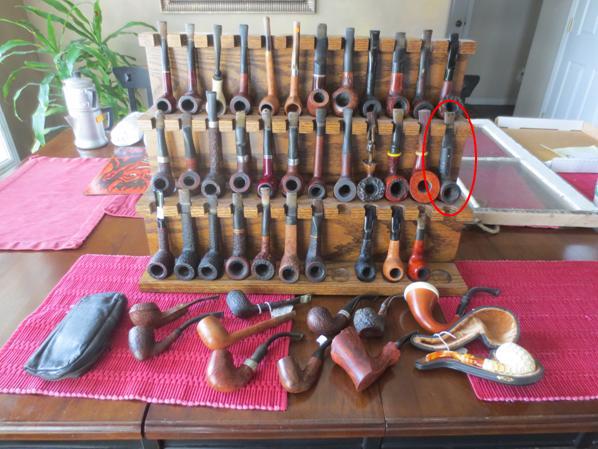
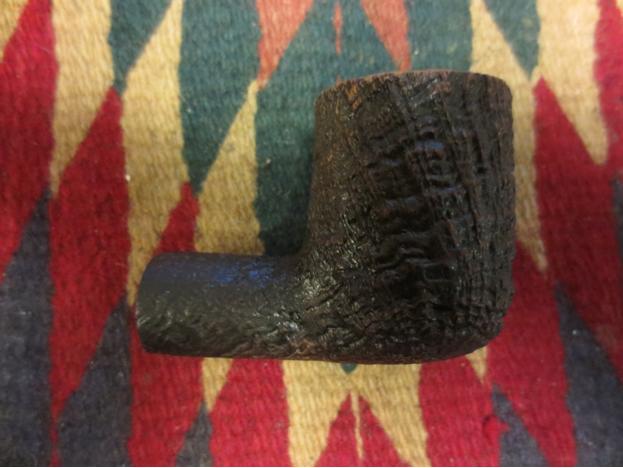
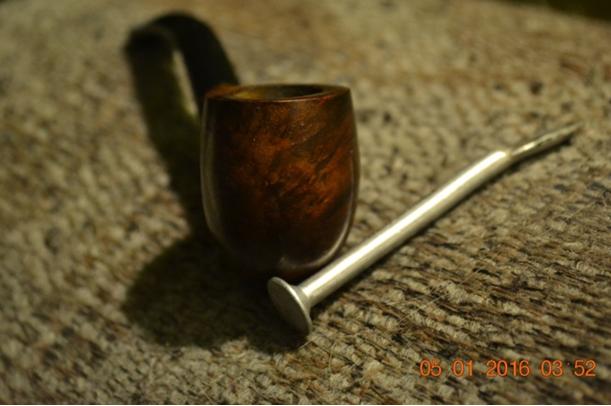
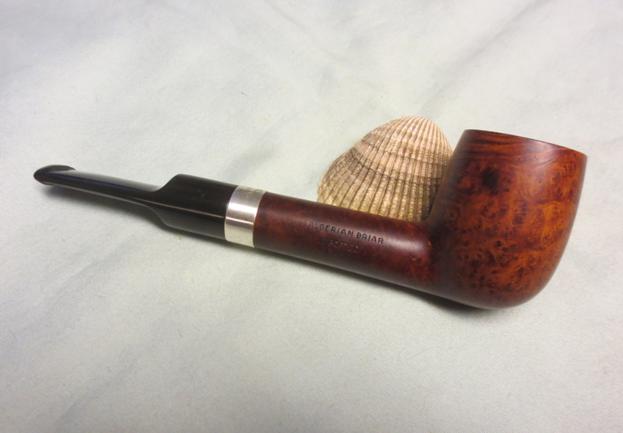
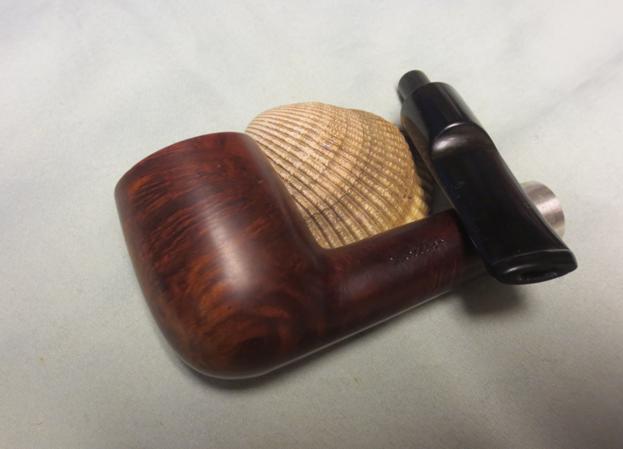
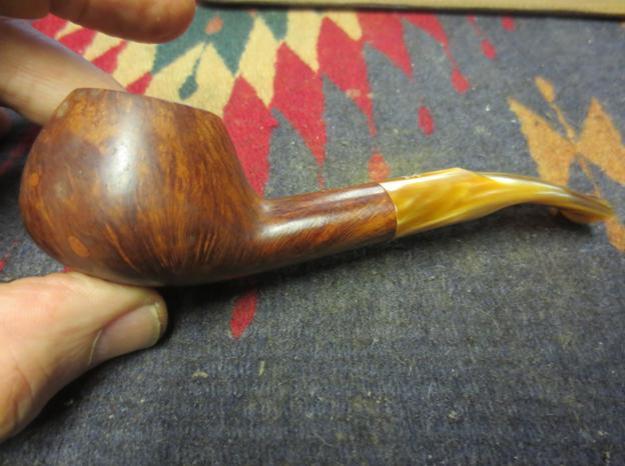
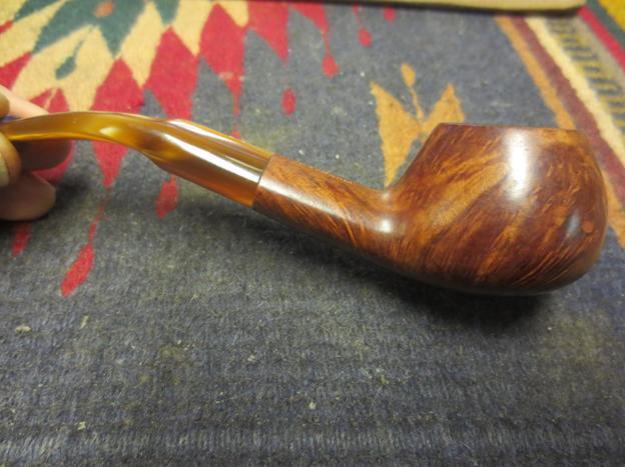
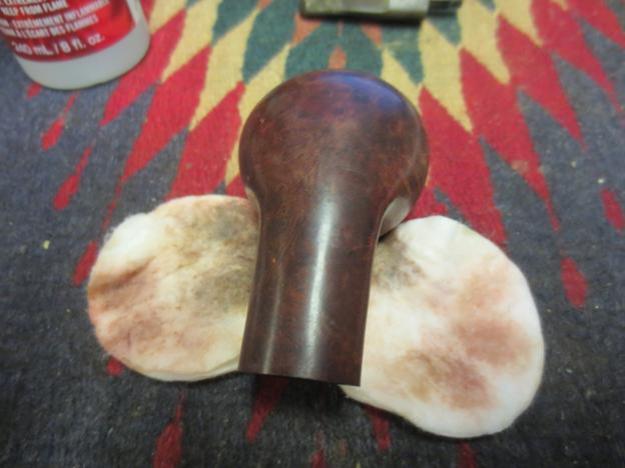
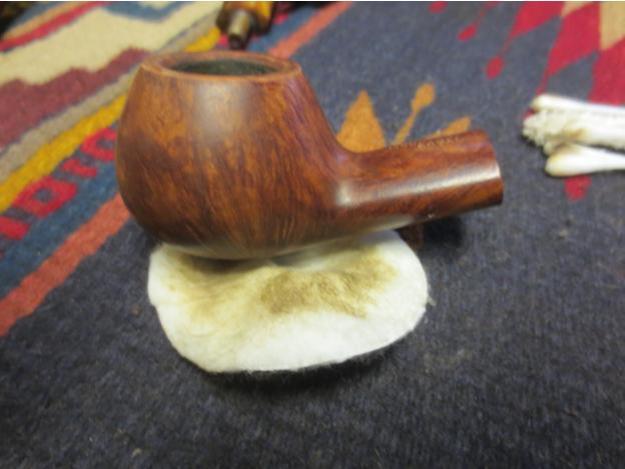
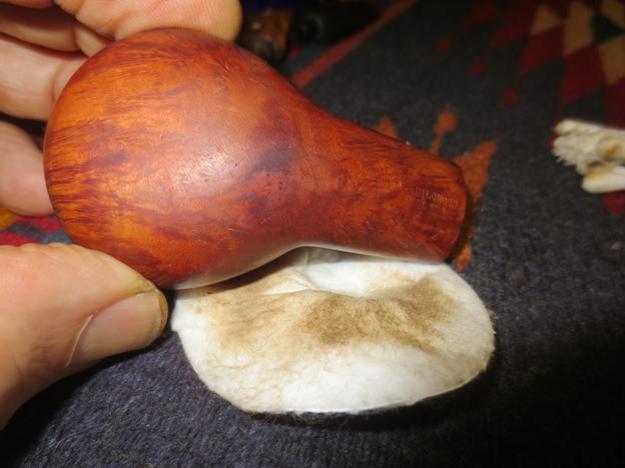
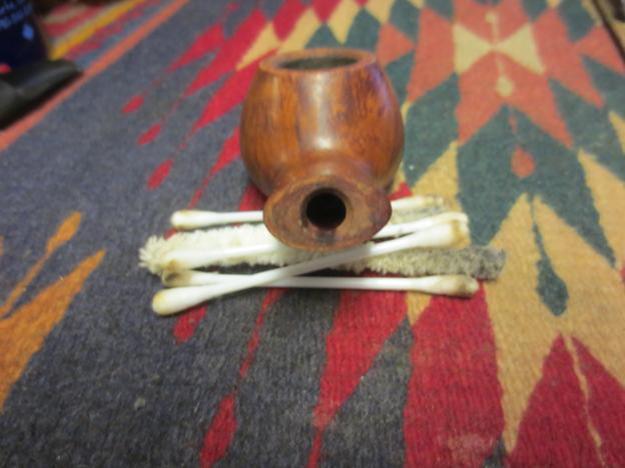
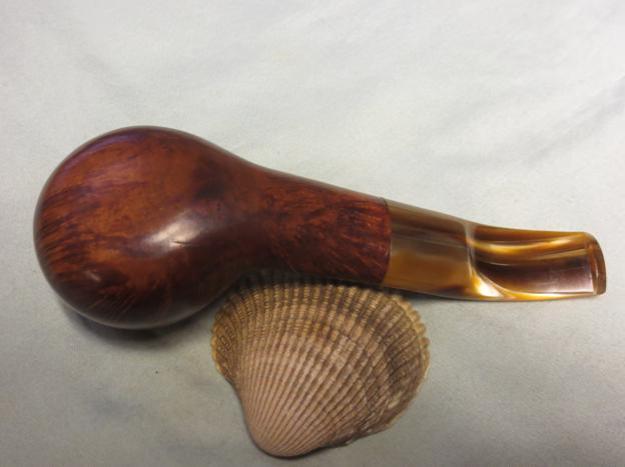
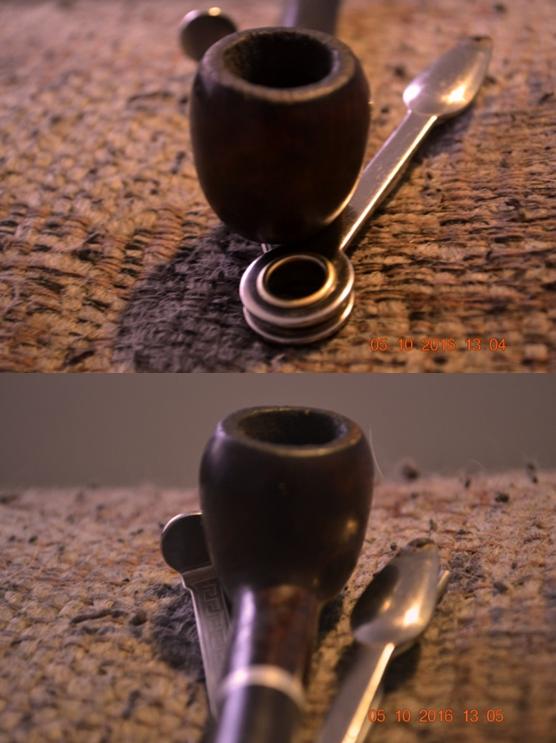
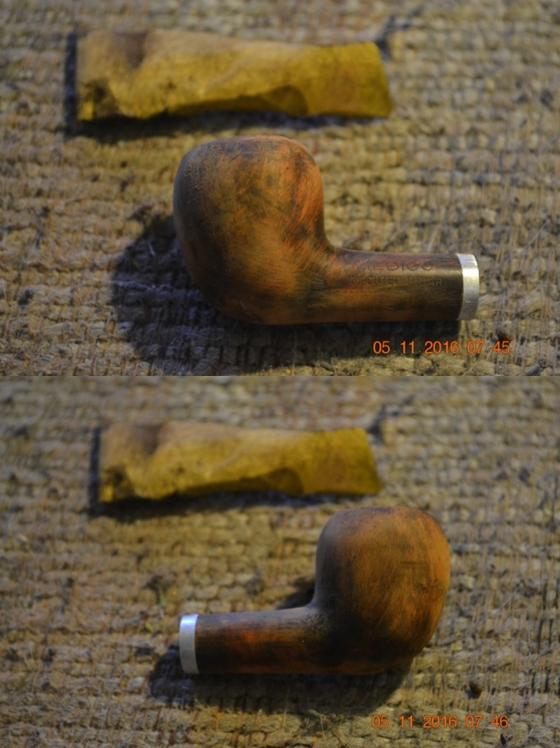
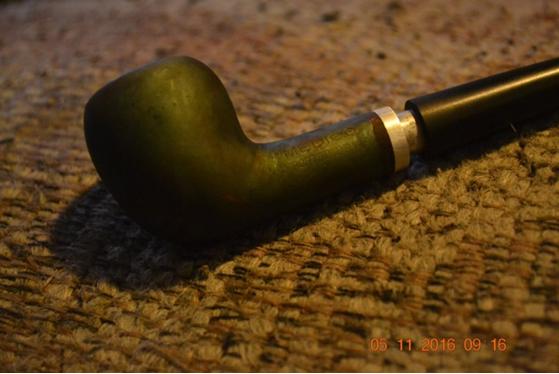
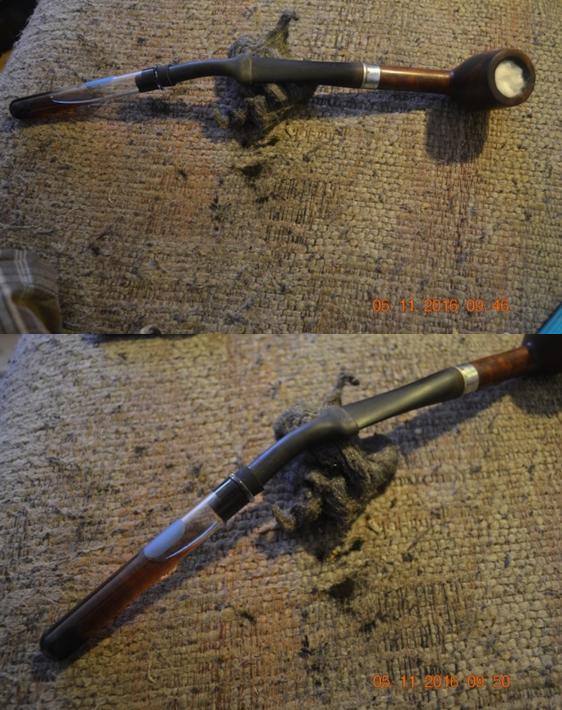
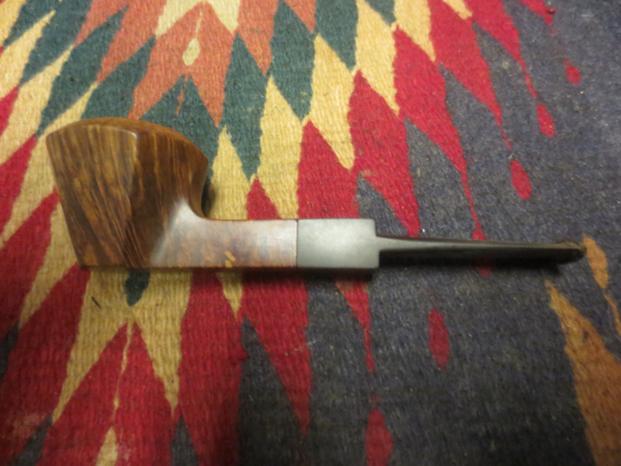
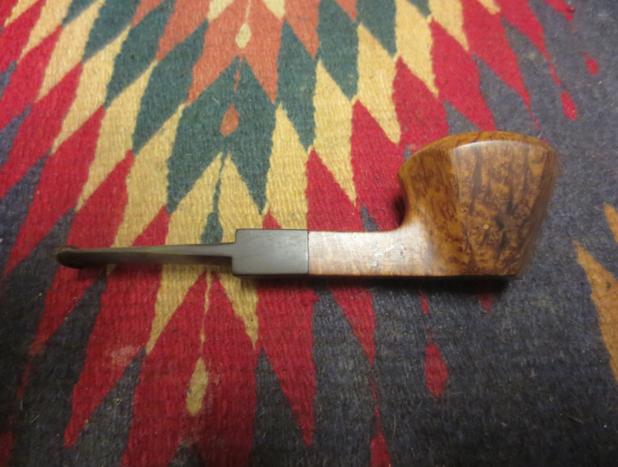
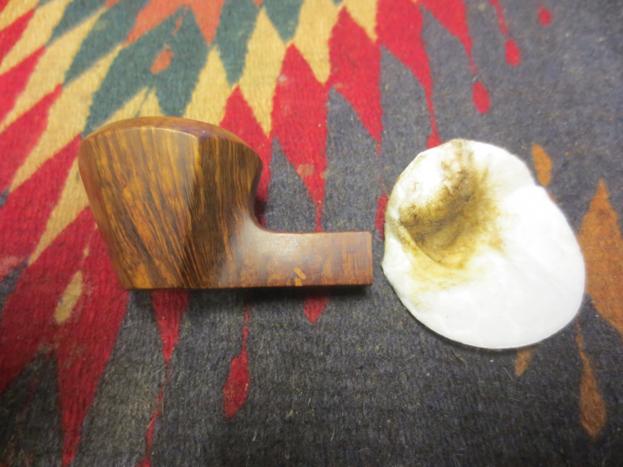
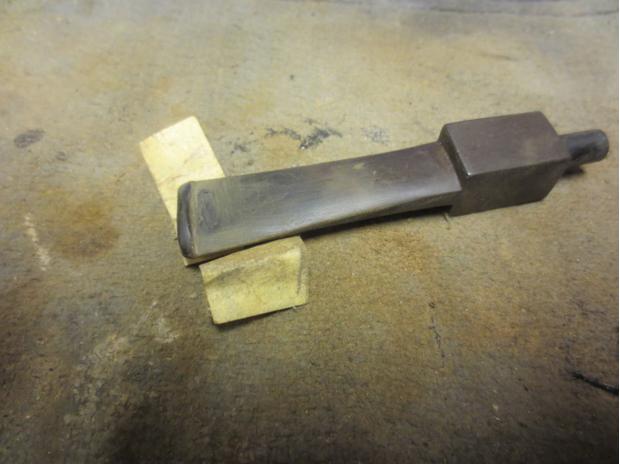
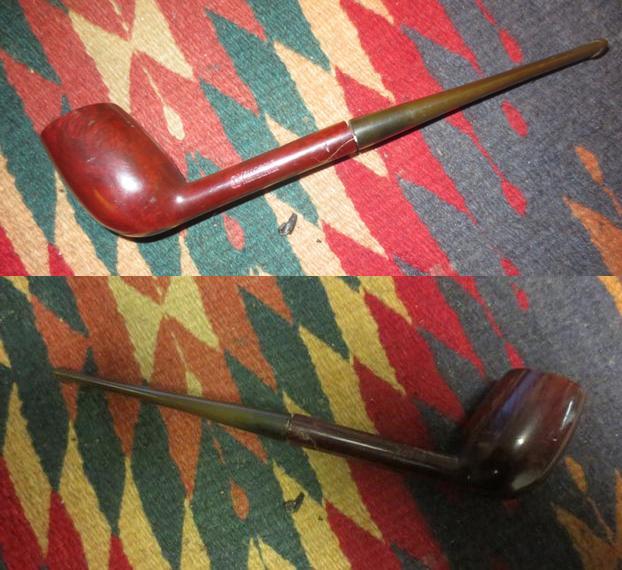
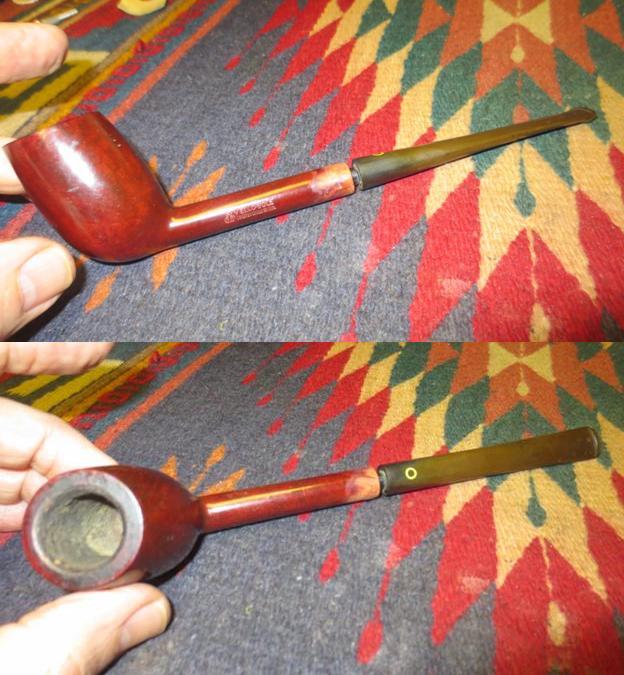
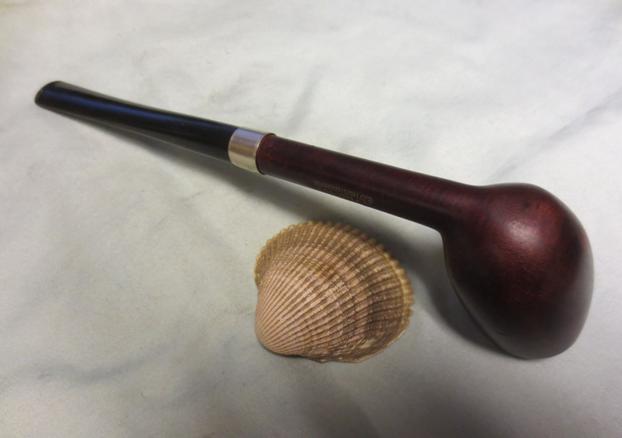
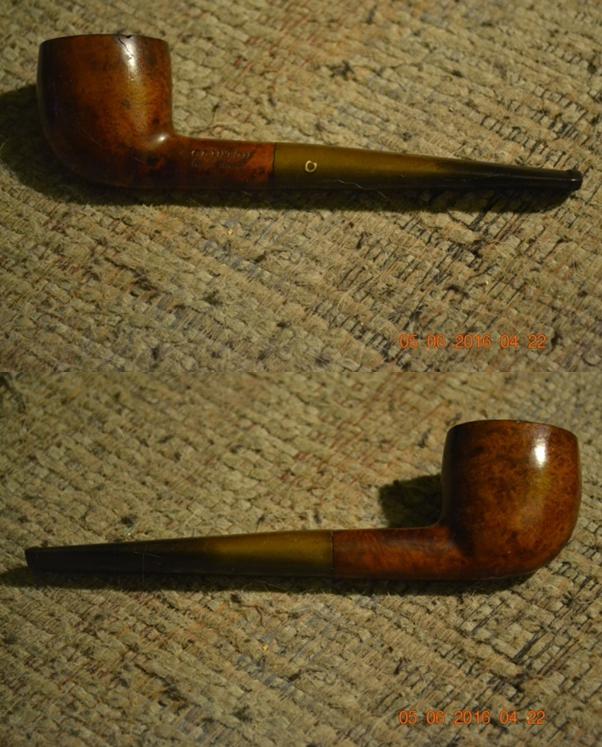
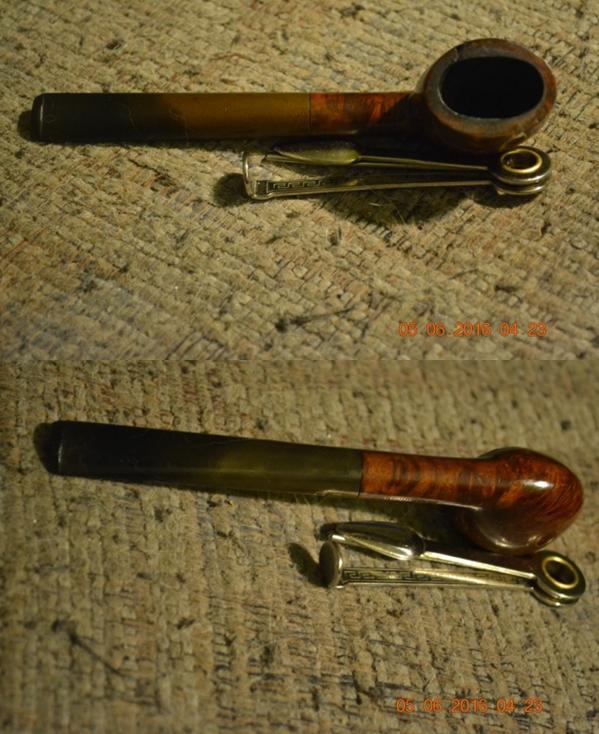
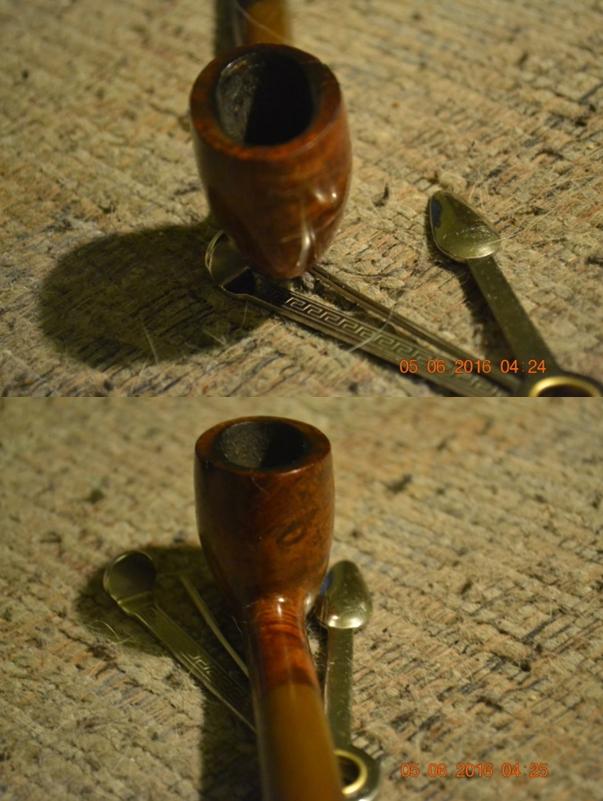
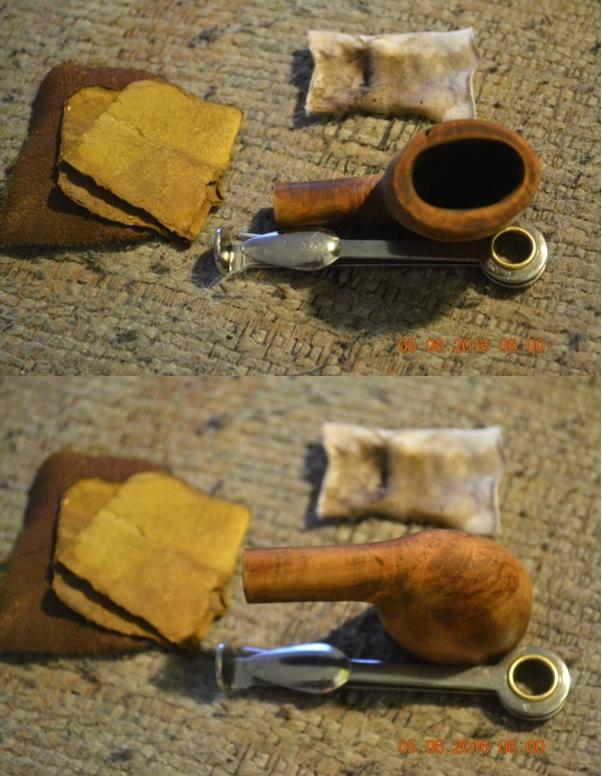
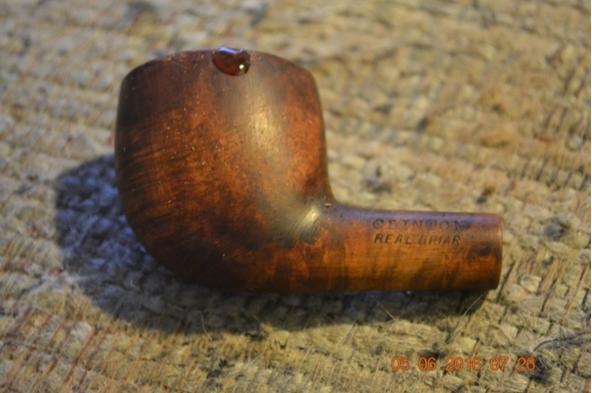
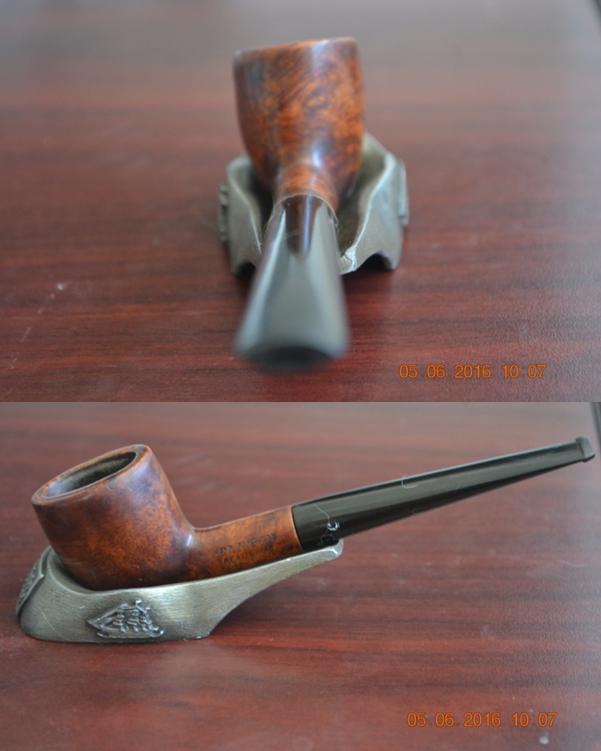
When I saw this one online there was some residual memory about the brand. I could not put my finger on it but I knew it was an American made pipe. I did not where but I remembered a name – Pat Vottis. It was a pipe on eBay that received little notice. I am not sure anyone bid on it so it became mine. I looked forward to its arrival in Canada when I could see what was under the grime and oxidation. In some of the photos below that I took upon its arrival there is some nice grain peeking through the cloudy finish.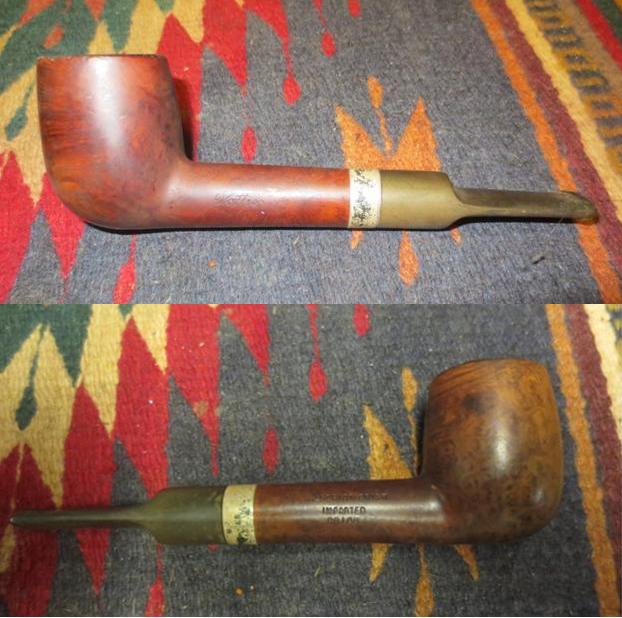 The finish was quite worn and cloudy but the sides of the bowl and shank did not have any gouges or dents. There was a dark, vertical stain on the front of the pipe that went from just below the rim edge to the curve of the bowl bottom. There was also a dark mark on the right side of the bowl toward the back. The rim was a mess. The outer edges had been knocked about to the point that the rim edge was rough to touch. There was a thick lava flow over the flat surface of the rim so it was hard to tell what was going on there. The inner edge of the bowl also looked to be damaged on the back right side. There was a thick cake in the bowl that I removed when I picked it up while visiting my brother in Idaho. That cake still needed more attention as can be seen in the photo below. There was a loose, oxidized silver band on the shank of the pipe that had blackened to the point that I could not read the stamping on the top side. The stem had some tooth marks on both the top and bottom sides that were quite deep and extended almost ½ inch up the stem from the button. The edge of the button was flattened and also had some tooth marks. Oxidation covered the whole stem.
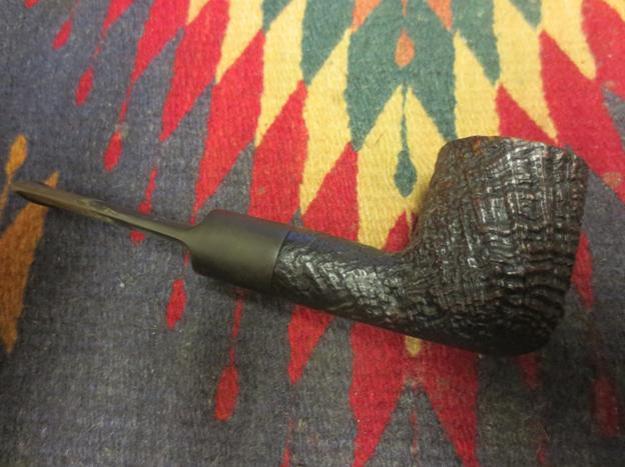
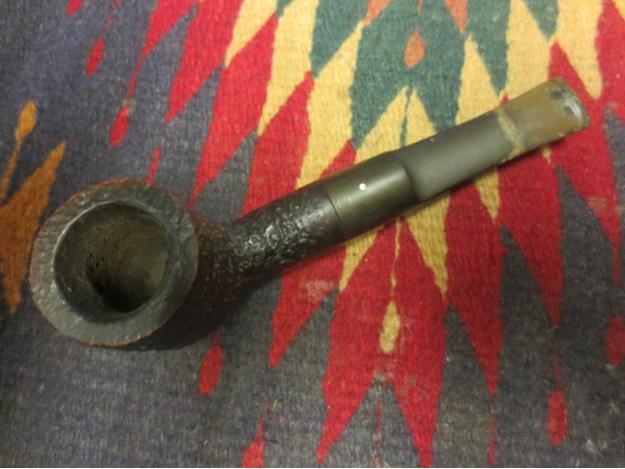
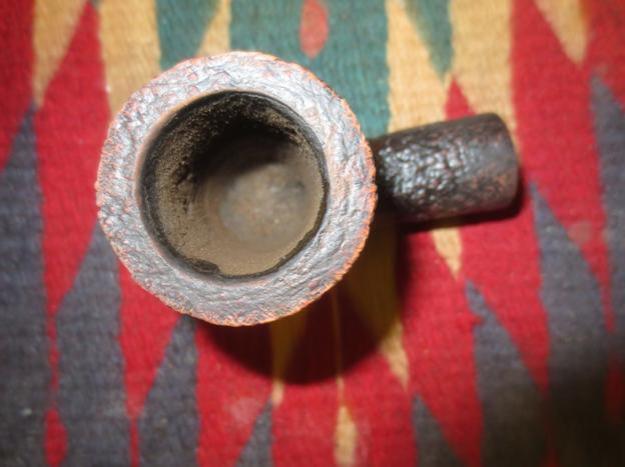
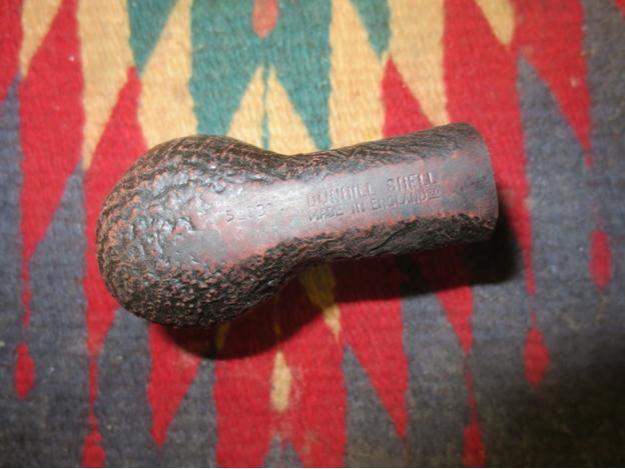
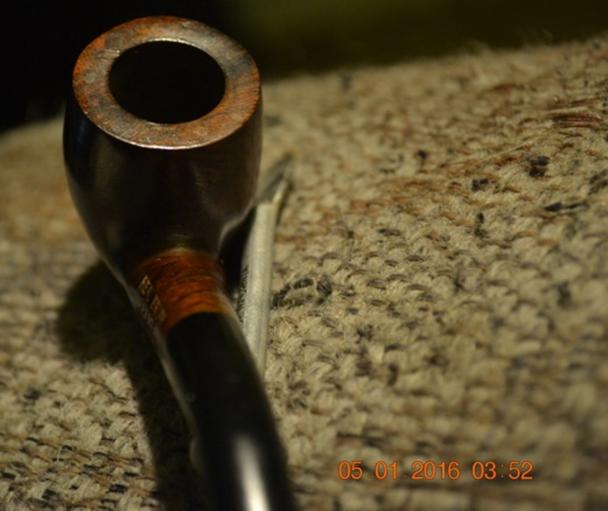
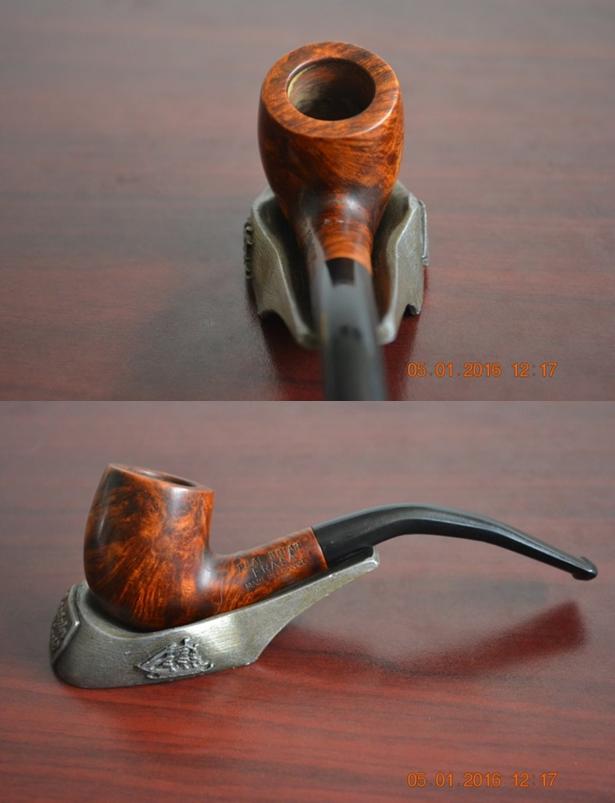
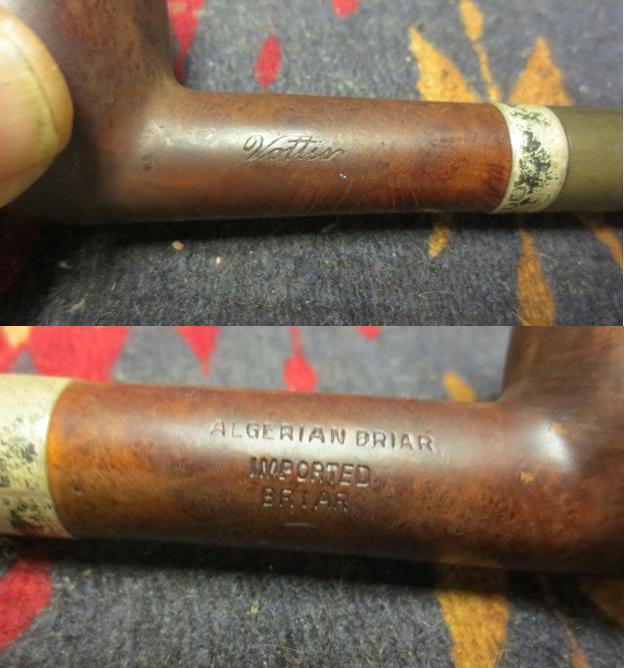
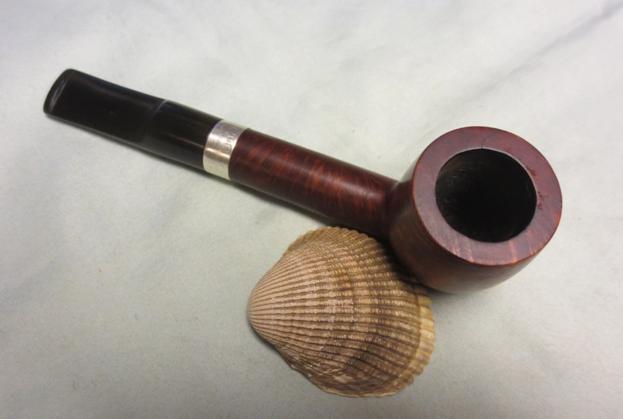
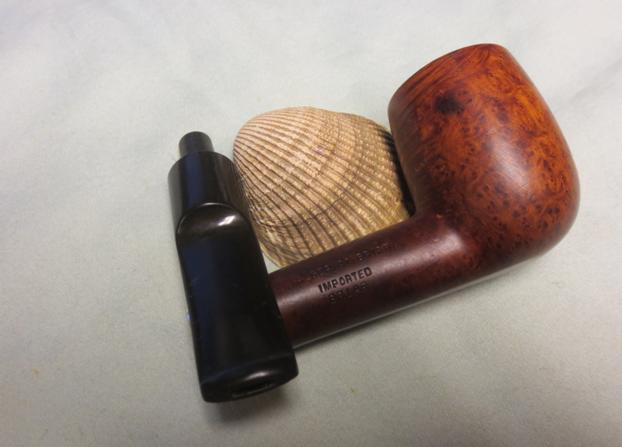
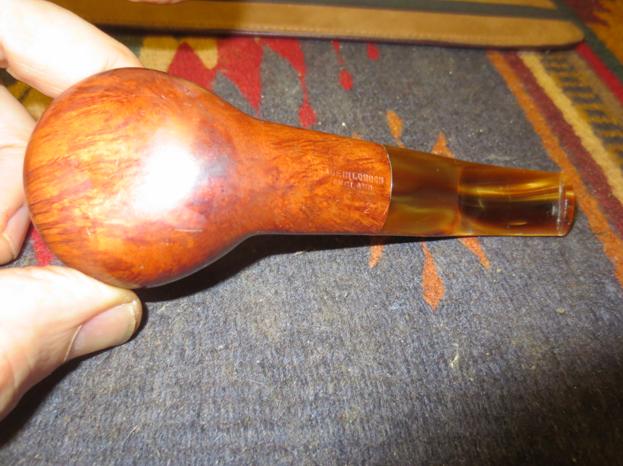
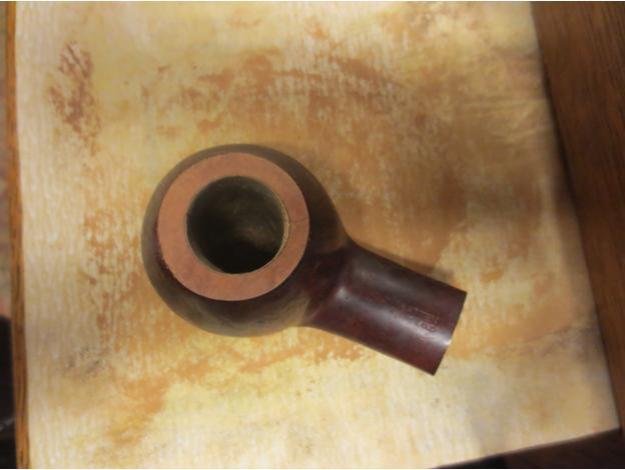
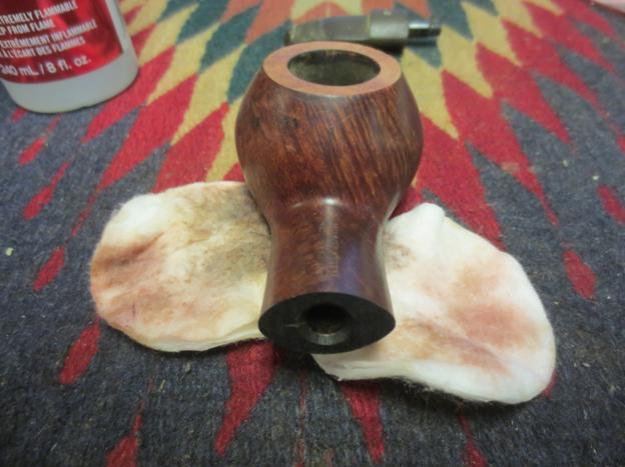
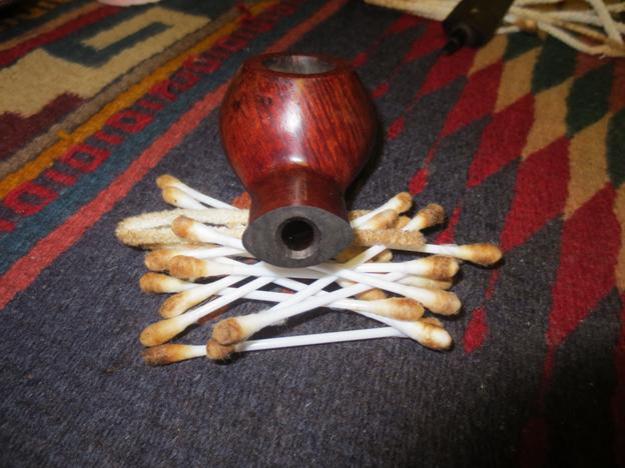
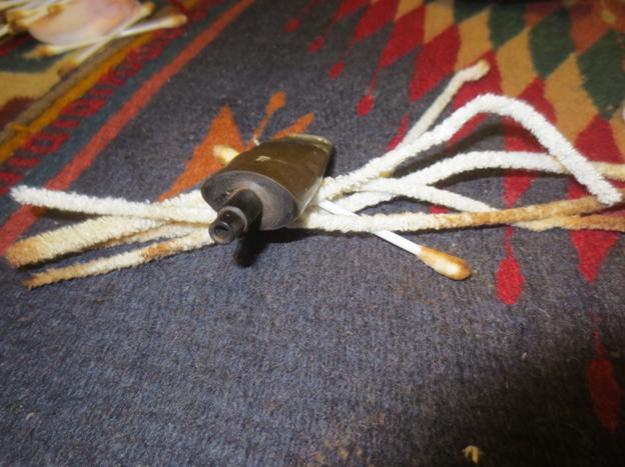
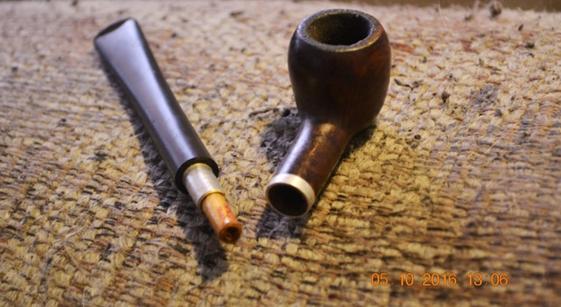
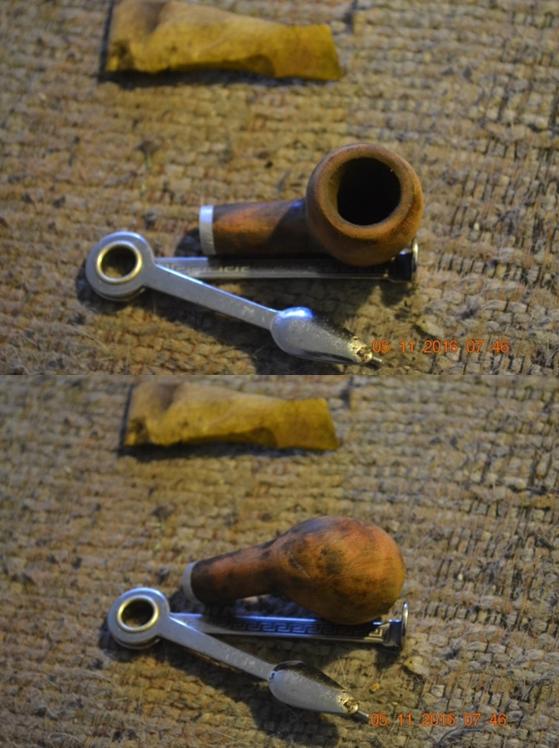
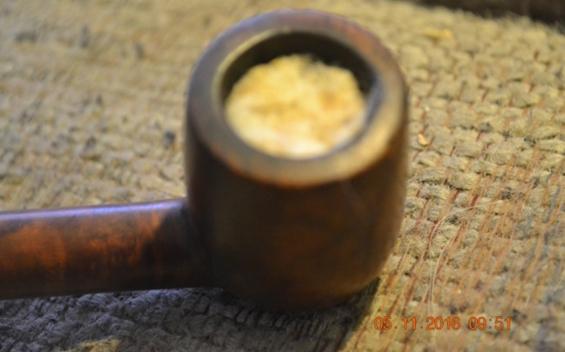
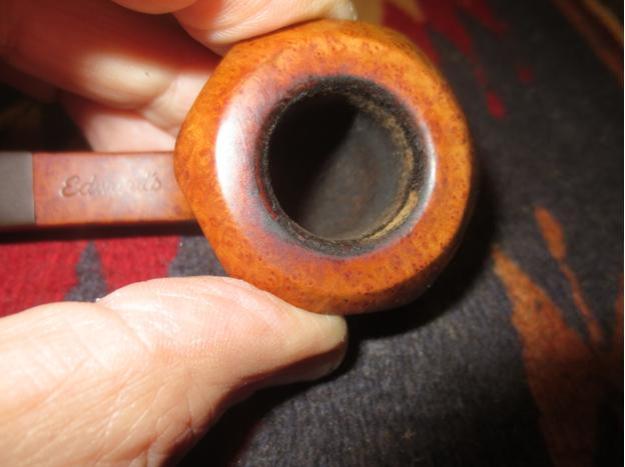
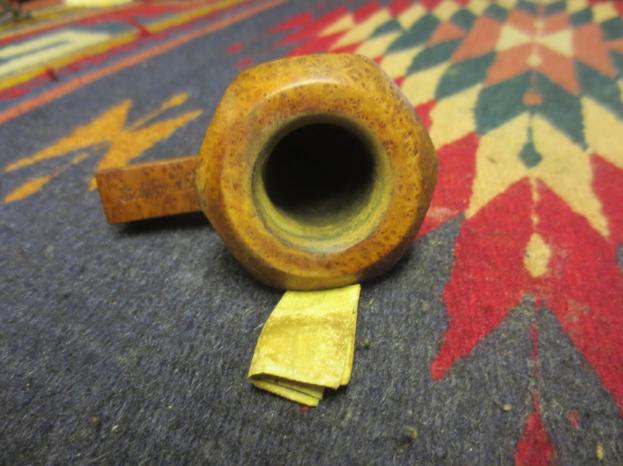
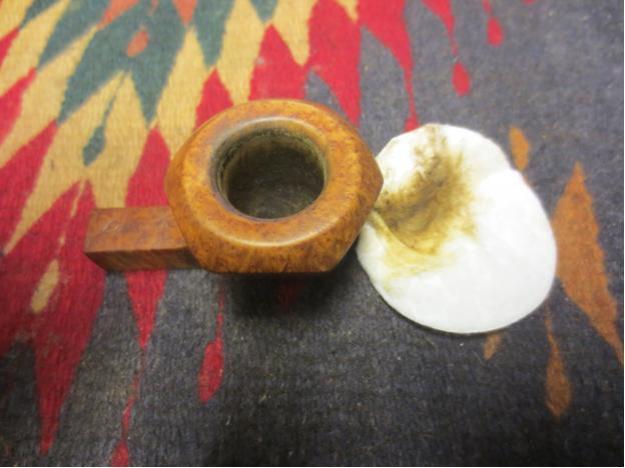
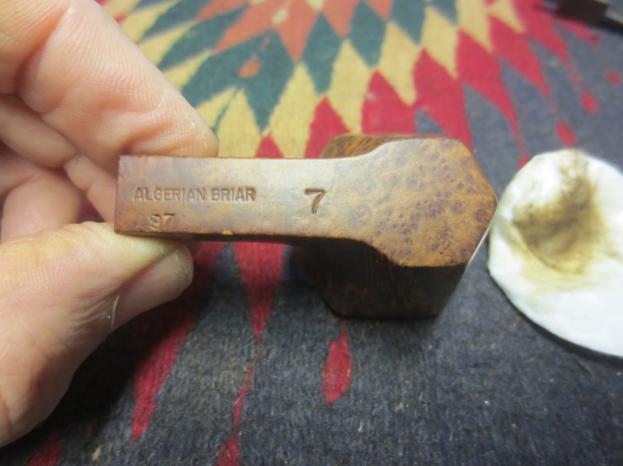
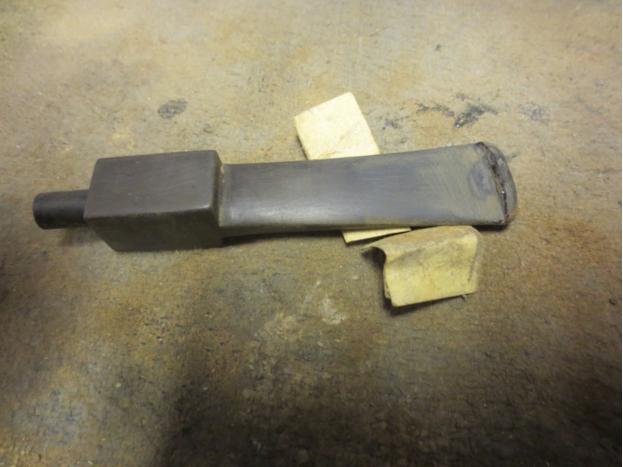
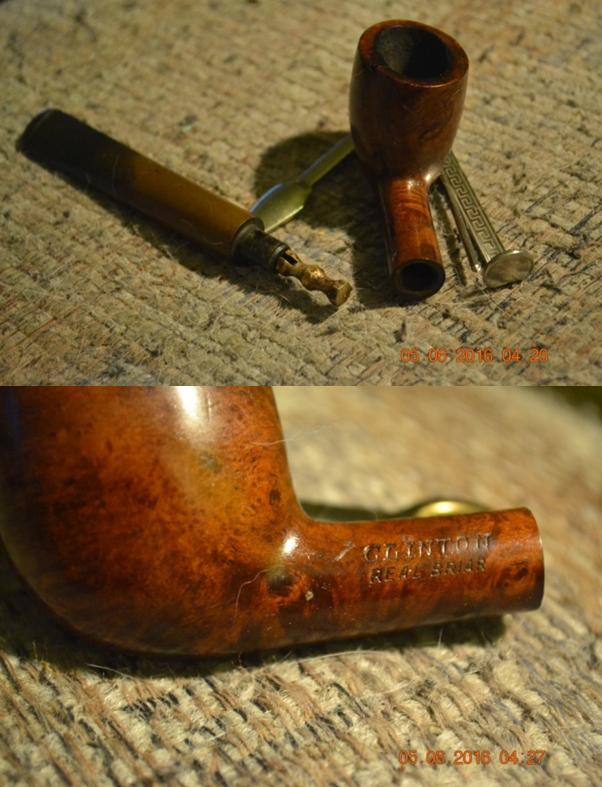
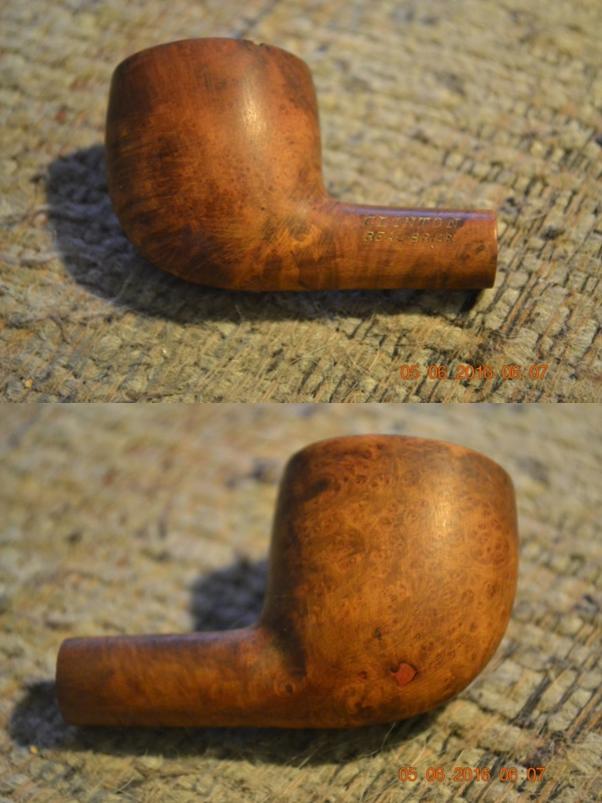
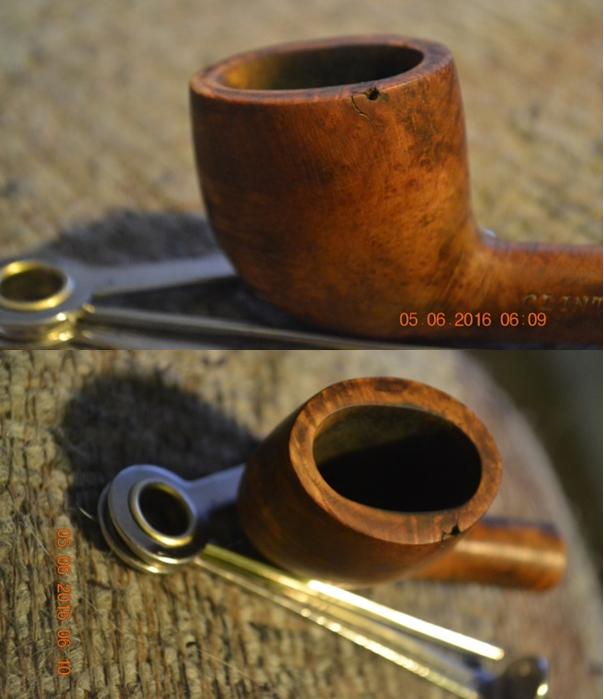
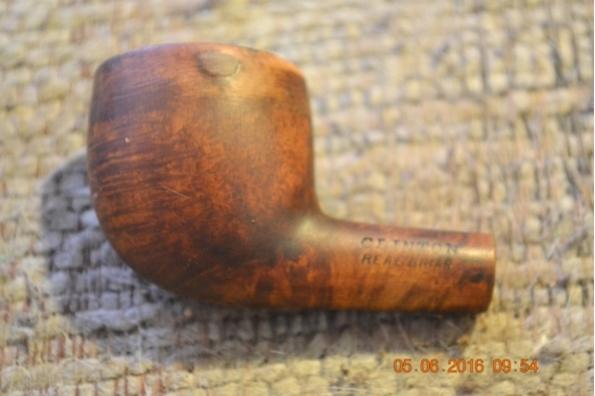
  I took a few close-up photos of the rim top and the stamping on the shank of the pipe. From the first photo you can see the rim and the inside of the bowl. The remaining cake was incredibly hard. The stamping on the left side of the shank read, “Vottis” in script. On the right side it read Algerian Briar over Imported Briar. The stamping was sharp and legible.
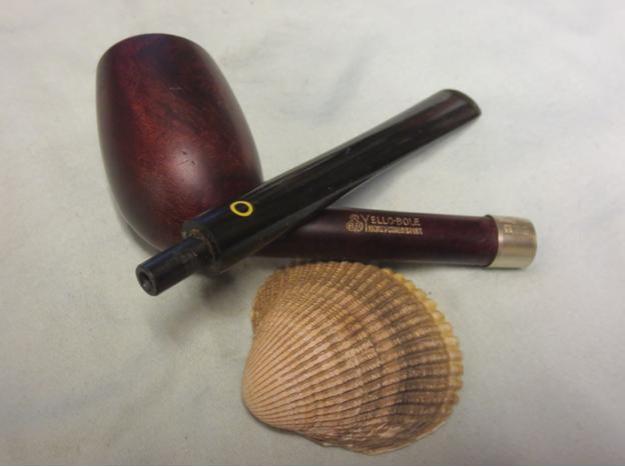
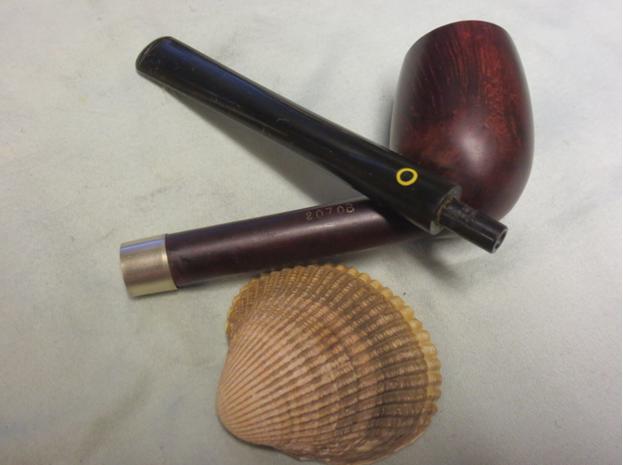
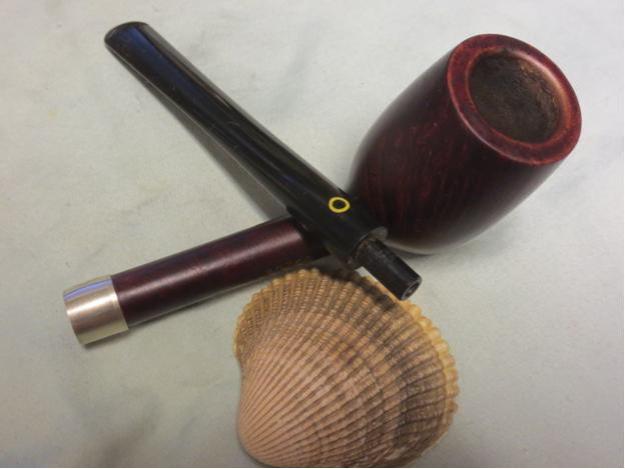
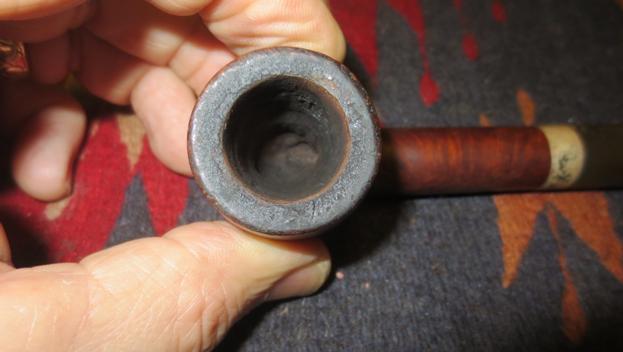
 I decided before going further on the restoration of the pipe to do some research on the Vottis brand and see if I could rattle the old memory. Sure enough my original thoughts were correct. The name was Pat Vottis. There was quite a bit of information on the web about him and his pipe making and pipe shop. (NOTE: The next section is quite long so if you do not want to read the history of the brand you can skip ahead to the next photos and the explanation of the refurb.)
The first place I looked was on Pipedia.com. I found there that Vottis ran his workshop in Schenectady, New York. According to Pipedia he worked there from about the end of the 1940’s to the middle of the 1970’s. The article went on to say that he was one of the very first American carvers who made freehands in a moderate Danish style. This information did not help me identify the classic shaped pipe that I have. Mine is anything but a freehand, it is rather a long shank billiard or a long stem Lovat. The one thing that was interesting in the article was that Vottis pipe are well thought of to this day. I also learned that he preferred to use Corsican briar in making his pipes.
Well, that was a good start, but I wanted to know more. So I did some more digging and came across a conversation on pipes.org. The link below takes you to the conversation. The part that I have copied below was posted by Guy Vottis, Pat’s grandson in 2007. If you should want to read the context of the conversation you can follow the link.
http://pipes.org/forums/messages/23/46034.html?1171913269
Guy writes in response to a previous post. Here is the entirety of his post.
This post references Harold Vance Post #4 username hbvance and Jose Manuel Lopes Post #91 in the Archive of 2005 Sept 20 with a Subject Title of Vottis Pipes http://pipes.org/forums/discus~discus/discus~discus/discus/cgi-bin/discus/show.cgi?tpc=23&post=45187#POST451 87
Jose, I am not quite sure where you obtained your information regarding Pat Vottis but it is incorrect and I would like to share a bit of good information for the audience.
Pasquale (Pat) Vottis is my grandfather. He did not die as you have posted on the web in 2005. He actually died this morning at 99 yrs 9 months of age on Feb 18, 2007. He had a passion for the customers and the business.
My grandfather opened his first pipe shop in Albany, NY on South Pearl St. It was in the Bank Building (which took up a whole city block) at the corner of State Street and South Pearl. We also opened a second shop in Albany which was in the Empire State Plaza on the Concourse level. This was to serve all of the State Workers so they could do business at lunch time and not be strapped for time while trying to get down to the South Pearl shop. We still have the Vottis Pipe Shop Sign and the Vottis Pipe Shop Clock that was a landmark for the customers.
Harold Vance’s pipes may very well come from a pipeshop in Santa Monica. We mailed pipes all over the world. My grandfather’s sister actually lived in Santa Monica for many years. We also had a very large tobacco mail order business in which I mixed 1000s of pounds of tobacco and mailed them all around the world as well. We closed the pipe shops in the early 90s due to the numerous break-ins late at night. The locals would throw rocks through the store front windows to steal the hand carved pipes and the meerschaums.
My grandfather hand carved many, many pipes himself. He usually carved the big blocks. My grandfather, my uncle, and my father repaired pipes for everyone even if they had not bought a pipe at our shops. We had a metal lathe in the basement as well as a stove. The machined the tenon portion of the stem with a carbide cutter to match the stem of the bowl for a perfect fit every time. To match the stem or the fit of the customer, we custom bent the stems of the pipes to their satisfaction.
I recall boxes of briar blocks that were rough turned and my uncle, my father, and my grandfather would also hand finish these too. We had a lot of fun in the stores too. Mixing different formulas of tobaccos to see how the public would respond. We had numerous successful formulas. Our approach was to make all natural formulas with no sugars added, no sugar sprays, or flavorings added.
The most popular formula was created by grandfather and was called Black Watch. Some of the other blends were North Woods, Vottis’s Own, Vottis Club, Boulevard 76, No#9. These blends were comprised of burley, yellow cavendish, black cavendish, turkish, latakia, and others of which I do not recall. Ironically, for the namesake, my grandfather has died at a Nursing Home named North Woods just like one of his tobacco blends called North Woods…
That post gave me much more information including the link to Albany, New York. I went on to dig some more and found a newspaper article written by Paul Grondahl a staff writer for the local paper. The article is called “Pipe Shop’s Flame Flicker Out”. The link to the article is: http://alb.merlinone.net/mweb/wmsql.wm.request?oneimage&imageid=5580379. In that article I learned that the shop closed in 1991. I have included the article as it is very well written and gives a flavor of the shop and the proprietor.
PIPE SHOP’S FLAME FLICKERING OUT
Paul Grondahl Staff writer
Section: LIVING, Page: G1
Date: Sunday, October 27, 1991
ALBANY – The soft rattle and hum on the countertop of a battered, black wooden mixing bowl in which dozens of tons of blended pipe tobacco have been hand-kneaded for 50 years is being silenced.
The final clouds of aromatic smoke will waft past the humidor, beyond the wooden Indian perched on a box of cigars in the window and out the door of the Vottis Pipe Shop. After serving three generations of pipe smokers and shipping its custom tobacco blends across the country and to soldiers at war around the world, this South Pearl Street landmark is letting the fire burn out at the end of the month.
A handful of pipe shops still will remain in the Capital District after the Vottis Pipe Shop ceases to exist, but none who would make the bold claim, as Vottis did in 1948, of being “the world’s best-stocked pipe shop.”
No other local shop can boast of the long legacy in the trade, or having a patent on the air-cooled Vottis Rey pipe the way Pat Vottis did. And in no other shop has time essentially stood still for five decades.
It is the final chapter for a tobacconist family and its fiercely loyal customers.
“It was a fun business, and I’ve always said we didn’t have customers, we had only friends,” says Pasquale “Pat” Vottis, 84, of Guilderland. He opened the first Vottis Pipe Shop in 1941 on Erie Boulevard in Schenectady with his brother, Salvatore, before branching off with his own shop in downtown Albany in 1946. The Schenectady location was closed many years ago.
It felt a bit like a wake the other day as pipe aficionados streamed through the shop and placed a final order at the “tobacco bar.” Proprietor Vince Bonafede rang up the sales for Vottis custom blends Black Watch and Boulevard Deluxe on an antique manual National cash register. Customers paid their respects through clenched teeth, between drags on their pipes.
“An old friend is like a good smoke, Vince,” John O. McKenna was saying to Bonafede, with whom everyone is on a first-name basis. “I’m going to miss you, old buddy.”
McKenna, who works on behalf of the homeless in Albany and lobbies for war veterans, has been coming to the shop for a couple of decades, ever since he was a high school student and served as a legislative page who made cigar runs from the Senate floor for his late uncle, Sen. William F. Condon, a Westchester County Republican.
“I have delightful memories of this store, which helped me survive a place called Vietnam,” says McKenna, a non-smoker who frequently buys gifts at the shop. “The aroma of the store is something I’ll never forget. It’s extremely odiferous.”
Memories of his customers are equally pungent for Bonafede, 65, who took over the six- day-a-week business singlehandedly 15 years ago when his father-in-law, Pat Vottis, retired. Bonafede says he hasn’t had a week’s vacation since, and is eager for retirement, even though nostalgia tinges his anticipation of freedom.
“I’m happy that I’m finally going to get to rest and do what I want to do, but I’ll miss all my customers terribly,” Bonafede allows.
On this afternoon, Bonafede was leafing through letters from distraught mail-order customers who had been told the shop was closing.
There was a note from the Rev. Donald Webster, who has been ordering a pound of Vottis’ Boulevard Deluxe… religiously… each month from his home on Peaks Island, Maine, for more than 40 years.
“I wandered into the shop in the little arcade by the Schenectady railroad station in 1948,”
Webster writes. “I really felt bereft at hearing you were closing, and hate to think of going back to drugstore brands.”
 There is a deep connection and intense loyalty between the serious pipe smoker and the choice of custom-blend tobacco that would be difficult to fathom for even, say, the Chivas Regal drinker or Cadillac driver who sticks with the same brand time after time.
The style of pipe and type of tobacco blend one smokes are a sort of talisman, rife with ritual and emotion.
The Vottis Pipe Shop has customers who had the pipe passion passed down from grandfathers. Others developed an allegiance to Black Watch while they were tweedy college-aged poseurs and have smoked nothing else straight through middle age and retirement.
But pipe smoking’s glory days are long past.
Pipe Lovers, “The Magazine for Men Who Love a Pipe,” published in Long Beach, Calif., had its heyday in the late-1940s. It was in that era that Pat Vottis was secretary of the Rip Van Winkle Pipe Club in Albany and club meetings, which regularly drew more than 100 pipe fanatics, were covered in the pages of Pipe Lovers.
Many cities had a pipe club. There was the Mohawk Pipe Club in Schenectady, with whom the Rip Van Winkle members held annual grudge matches. The contest was to see which club member could keep a bowl’s worth of tobacco burning the longest.
In 1949, Mohawk Pipe Club took the title with a 69-minute flame. Vottis tried to hold the honor for his Rip Van Winkle co-horts, but consumed all his tobacco and burned clean through his pipe’s briar bowl.
Gone a long time ago, too, are the Thursday evening pipe-smoking classes led by Vottis at the South Pearl shop, which were all the rage in the 1950s among women dangling dainty, jewel- encrusted pipes.
It was an innocent era, in which pipe smoking was touted as a healthy alternative to cigarettes and Vottis advertised that his Black Watch blend offered “an aroma that is accepted in every home, office or place of gathering.”
But these days, as pipe-lovers and smokers of all stripes are being made to slink with their habit past an anti-smoking phalanx and forced to steal puffs on sidewalks outside their places of work, the customers of the Vottis Pipe Shop reminisce about their golden age.
Garry Lavigne, an Albany attorney, was a Siena College student 30 years ago when he bought his first pound of Black Watch in an effort to give up cigarette smoking and he has been buying a pound of the same blend each week ever since.
“It’s disastrous that this shop is closing,” Lavigne says. “There’s no place else on Earth where I can get this tobacco.”
The Vottis Pipe Shop has always been proud of its most popular and trademark blend, the Scottish-styled Black Watch, of which they’ve sold tons at $9.75 per 12 ounces.
Vottis and Bonafede plan to go to their graves with the recipe. “Everyone tries to copy the Black Watch blend, but we’ll never let the secret out,” Bonafede vows. He says the key is its cool, mellow flavor and lack of an undesirable aftertaste.
The Vottis stamp has always been an all- natural smoke, without the vanilla, chocolate, strawberry or fruity flavorings of commercial blends. The Vottis philosophy is to let nothing get in the way of the flavor of wood and tobacco and smoke.
Vottis blends are homemade and so named, such as Connolly, a loyal customer, or Vin’s Special or Vottis’ Own. The English-styled Page No. 112 was inspired by book-lovers at Union College. North Wood is an outdoorsy, Adirondack blend and Grand Concourse was concocted by Bonafede’s wife, Marge, who ran a shop in the Empire State Plaza concourse for a decade before closing it five years ago.
The longtime Vottis customers are not happy about the prospect of change in their smoking life. They wonder will another tobacconist, besides Bonafede, will come up with novelty items such as the “crazy pipe,” a trombone- looking affair that carries the bowl behind the ear to keep smoke out of the eyes of the smoker? And will a new generation of tobacco merchants rush home after work to a basement workshop the way Bonafede did to make overnight repairs on pipe stems rendered useless by nervous teeth? And will there be other artists in Algerian briar who fashion one-of-a-kind pipes out of gnarled wood the way Bonafede does?
The Vottis Pipe Shop regulars think not, and they’re creating something of a Black Watch buying panic during the final week of business.
George Williams, chairman of Allied Capital Corp. in Washington D.C. and a 40-year customer, wrote to wish Bonafede well in his retirement and to score a five-pound order of Black Watch.
John Mason of Plattsburgh wrote to reminisce about his discovery of the Vottis Pipe Shop in 1941, while he was a student at Union College. He also ordered two pounds of Black Watch.
“I came into this shop with two friends from high school 26 years ago, and I’m the only one still smoking a pipe, and Black Watch, at that,” John Kelley, a CDTA bus driver, says during his final visit to the shop for a pound of Black Watch. “I hate the thought of going to a grocery store or CVS for a packaged blend now.”
Mike DeGulio, who works for the state division of housing, discovered the Vottis Pipe Shop six years ago after moving to Albany from New York City.
“Coming into the shop is a personal thing for me,” DeGulio says. “I shoot the breeze with Vince, I watch him blend my tobacco with his own two hands and he always takes good care of me.”
After one-half century, twilight has descended upon the Vottis Pipe Shop. The floor-to-ceiling lemon wood cabinets Vottis bought from a haberdashery have been sold. The pipe display cases have been mostly picked clean during a going-out-of-business sale, save for a few oddities, including a Calabash “Sherlock Holmes” model, marked down to $31 from $45.
Bonafede, who alternates between pipes and cigars, takes a cutter and neatly slices off the end of a thick Hoja, a hand-rolled Honduran stogey, and steps out onto South Pearl to exhale a cloud of smoky musings.
“It feels strange to be closing after all these years,” he says. “It’s been a good family business, but our children weren’t interested in carrying on and we didn’t want to sell it. The new generation just doesn’t care about the art of smoking a pipe.”
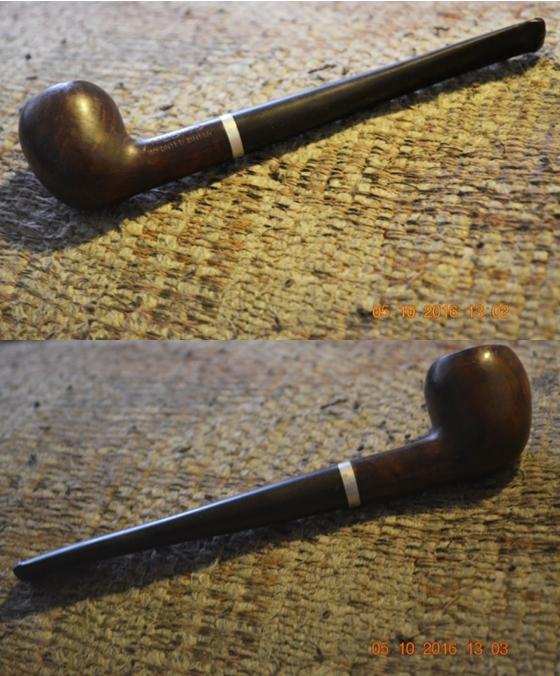
All of that information gave me what I needed to get a feel for Pat Vottis and his pipe shop including his philosophy of tobacco blending. I still did not know much about the pipe I had in my hand other than what I could deduce from the stamping. I knew that the briar was not Corsican but in this case Algerian. I also knew from the IMPORTED BRIAR stamping that the pipe was most probably made after the close of WWII when briar was once again imported into the US. I knew that the pipe was made in Albany, New York in the basement workshop of the Vottis Pipe Shop. I also knew that Pat Vottis in all likelihood carved the pipe sometime between 1946 and 1976 when his son in law Bonafede took over the shop at Pat’s retirement. So I found that while nothing was certain I could extrapolate quite a bit of information about the pipe I had found. Now it was time to get to work on it.
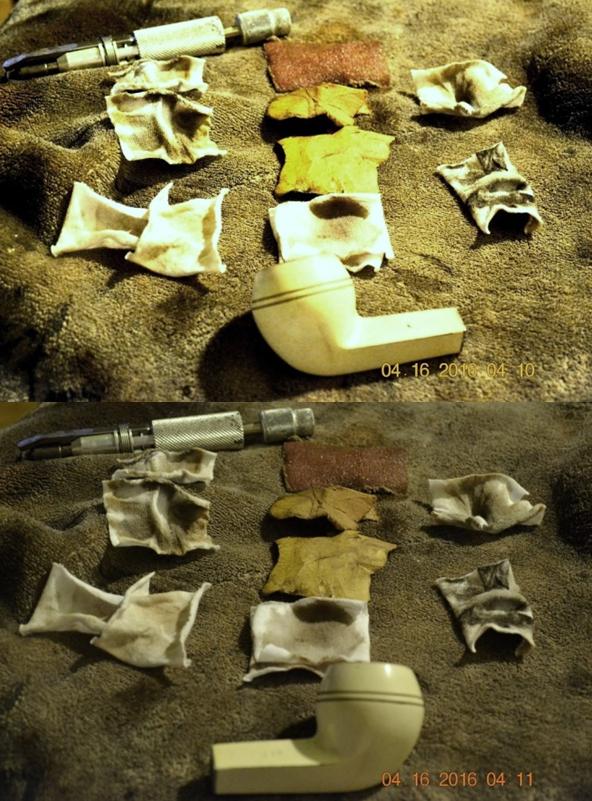
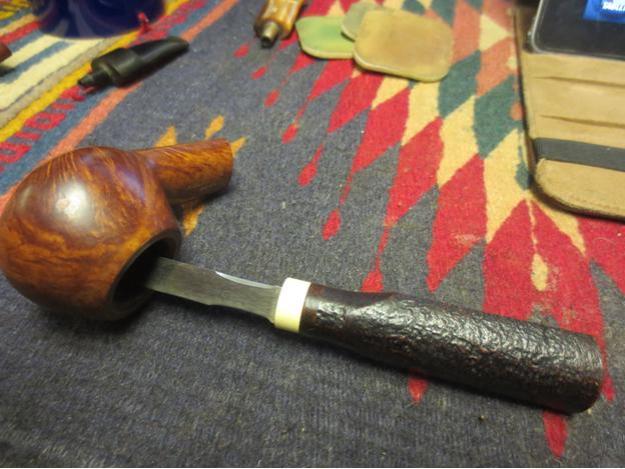
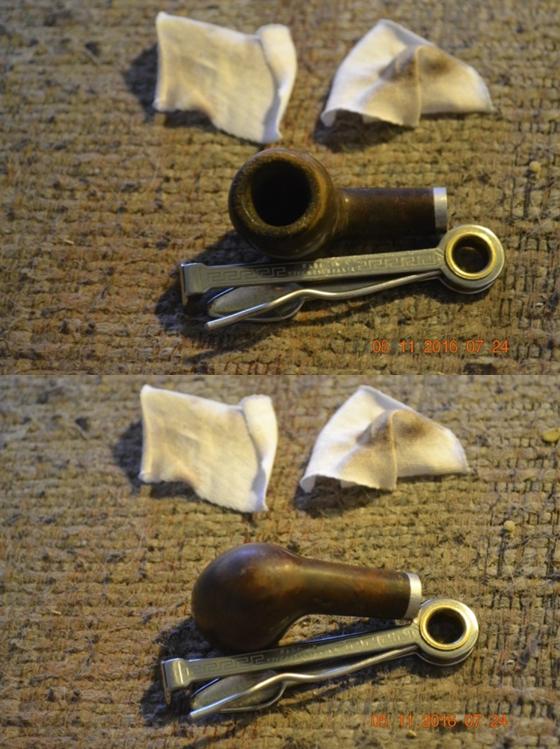
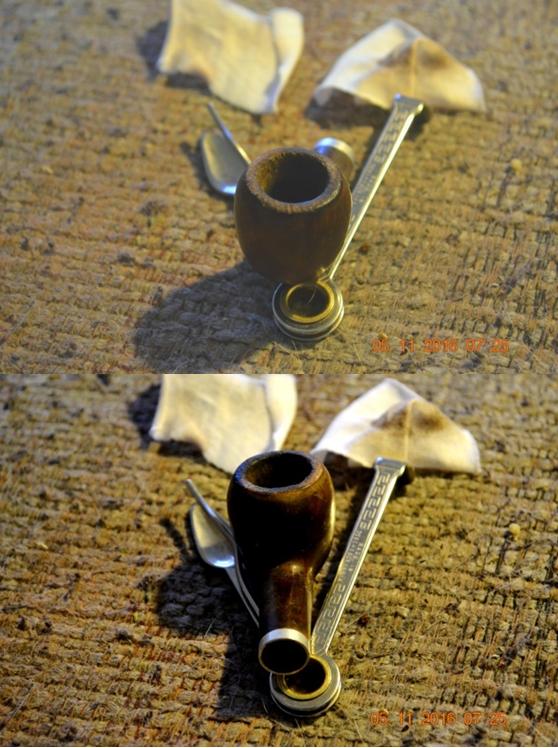
I had “field dressed” the pipe when I was in Idaho so when I got home at my work table I gave it another quick ream with the PipNet reamer and then followed up with the Savinelli Pipe Knife. I wanted to take the cake completely out of the bowl so I could look for burned areas or checking.
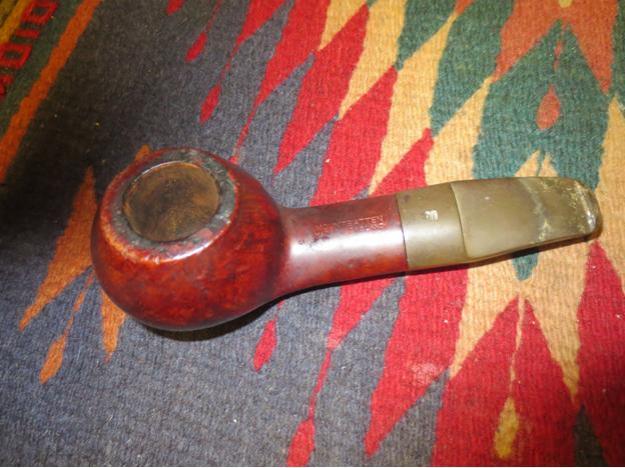
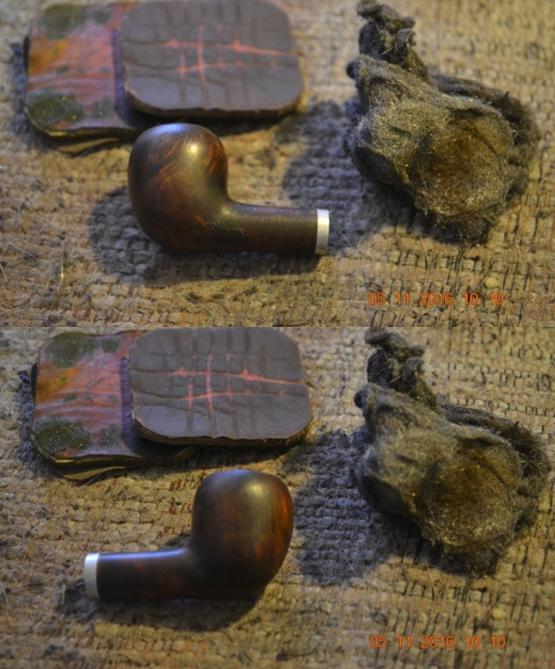
 The top of bowl was a mess. The inner edges were in decent shape but the outer edge was beat down against something so the edges were rounded over and the distinct shape was compromised. I topped the bowl to clean up the edges and remove that damaged surface of the bowl. Once I removed the lava there was some burn damage to the front edge.
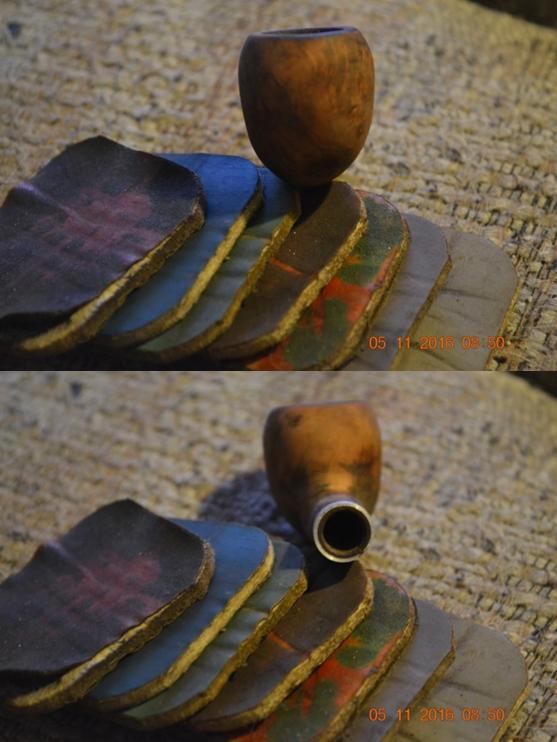
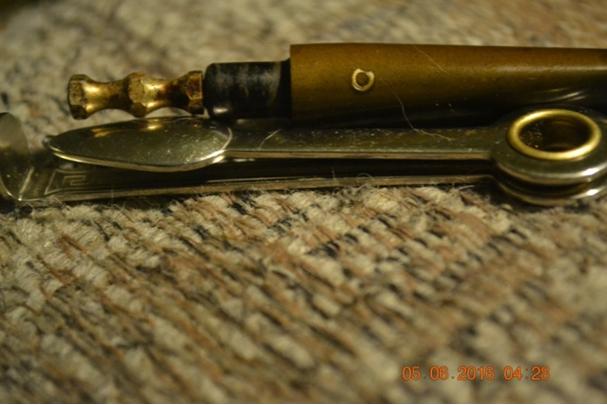
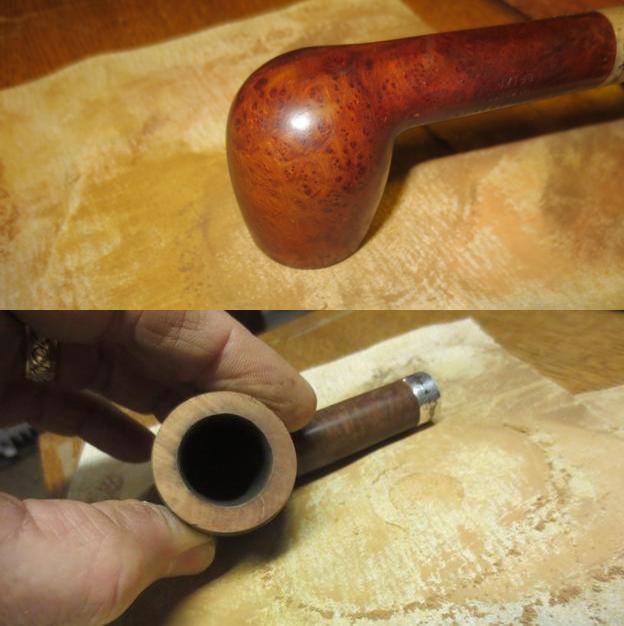 I scrubbed the silver band with cigar ash to clean off the oxidation. Once I had it cleaned I also rotated it to centre the hallmarks on the top of the shank. There were some hallmarks on the band – a lion, an anchor and the letter T in a cartouche. To me the date on the band put it as early as the late 1890s and early 1900s. Since I knew that Vottis was not around at that time it was obvious to me that the band was added at a later date. There did not appear to be any cracks in the shank so that meant that the band was cosmetic.
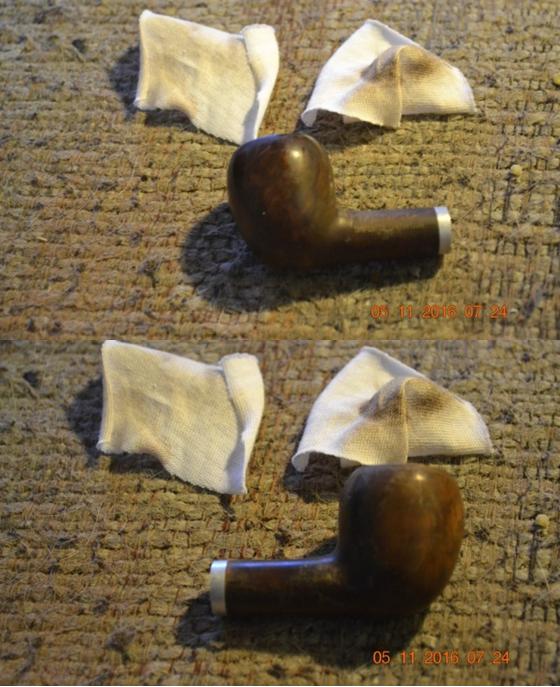
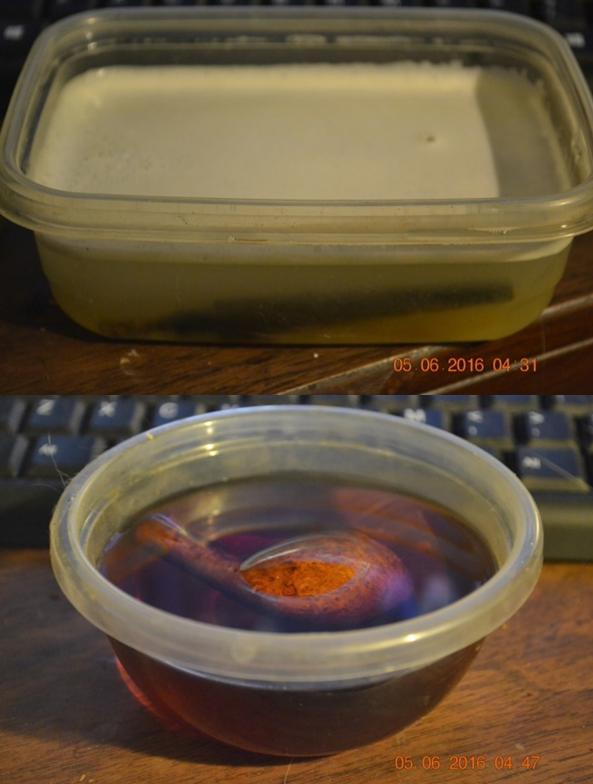
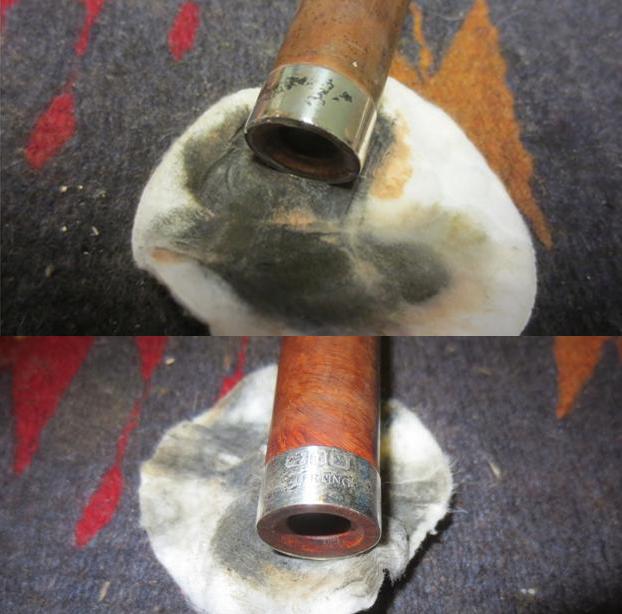 I removed the finish and the grime on the pipe with acetone on cotton pads. I was able to get most of the dark line of stain off the front of the bowl and also some of the dark spot on the right side of the bowl. Underneath the grime was some really nice grain on the briar.
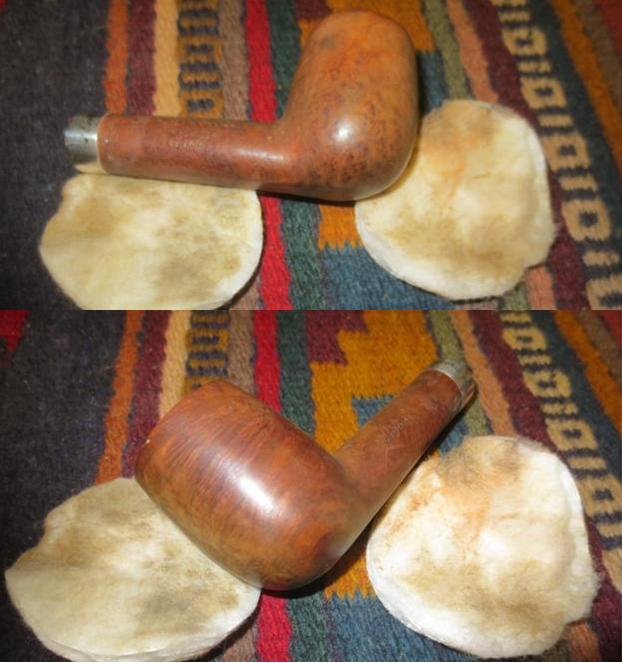 I did a light scrape of the bowl with a pen knife to take out some of the remaining carbon that stubbornly clung to the walls toward the bottom of the bowl.
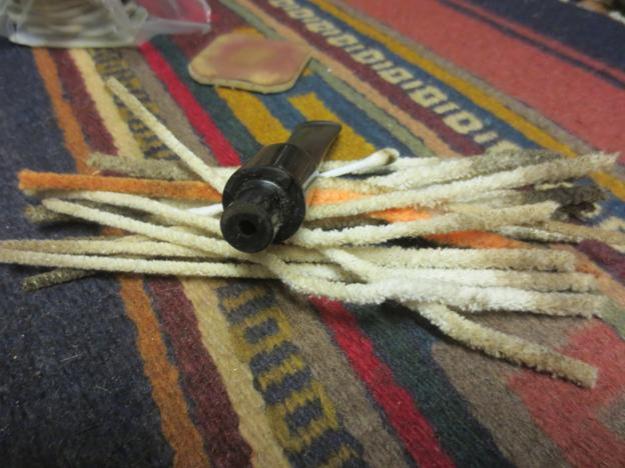
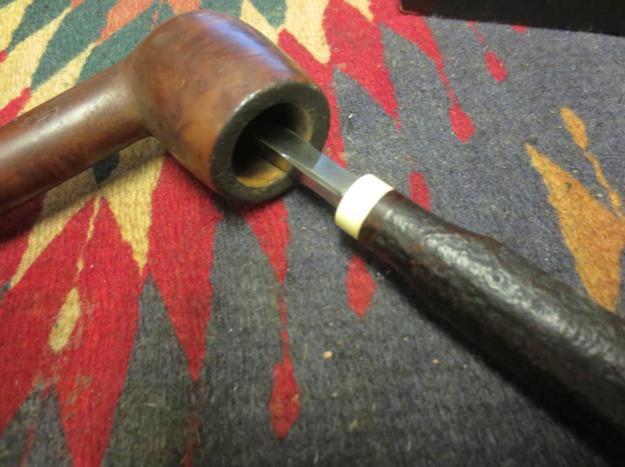
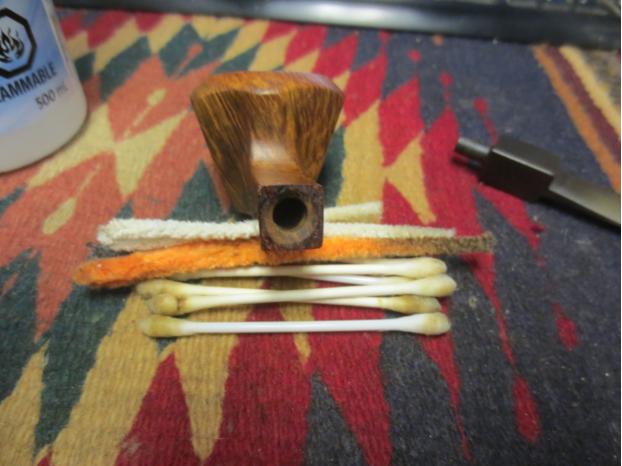
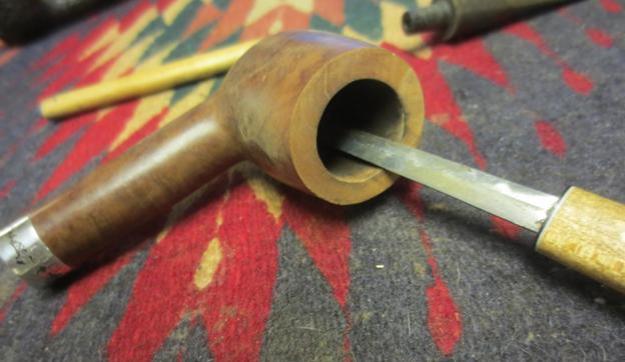 I cleaned out the mortise and airway in the shank and also the airway in the stem with alcohol, cotton swabs and pipe cleaners.
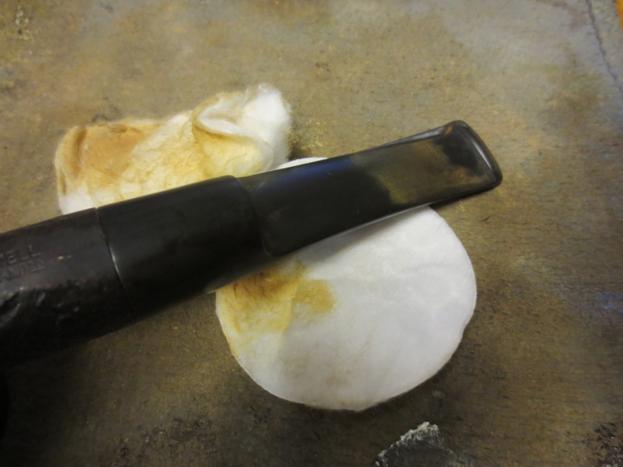
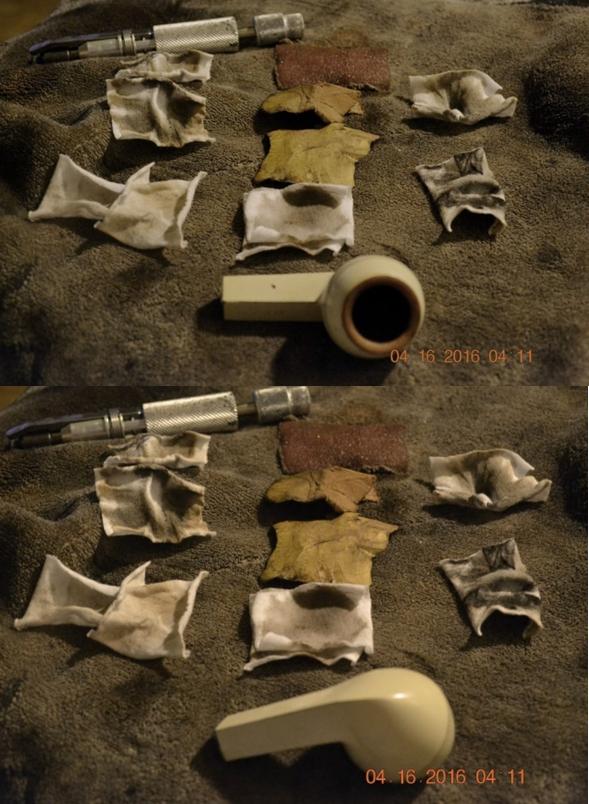
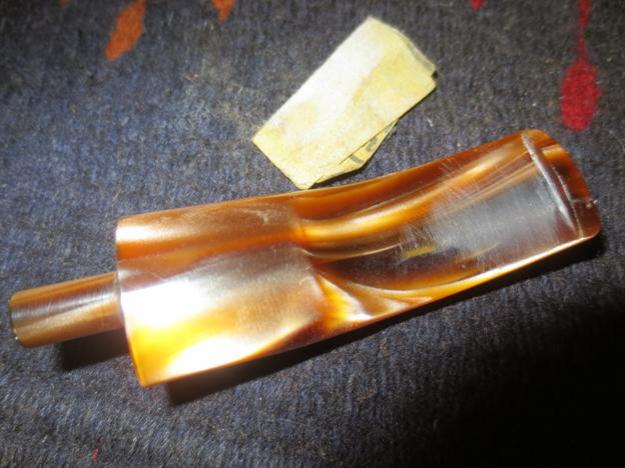
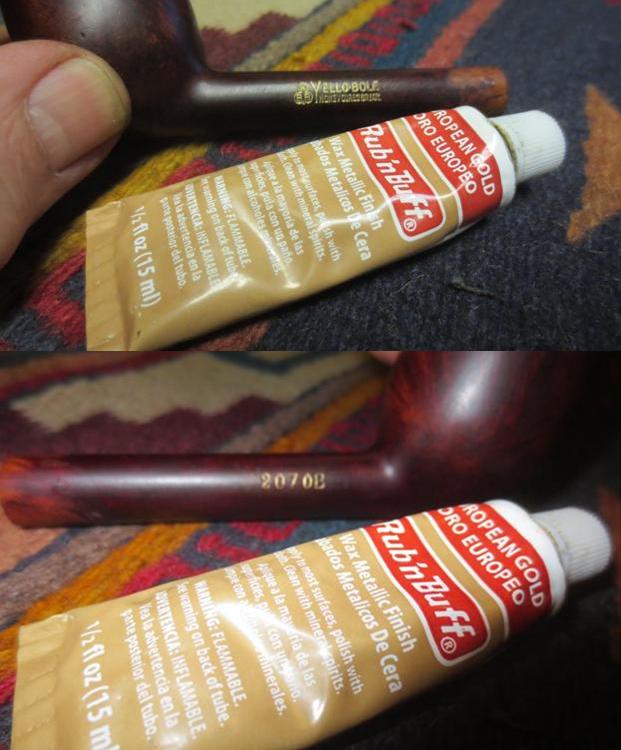
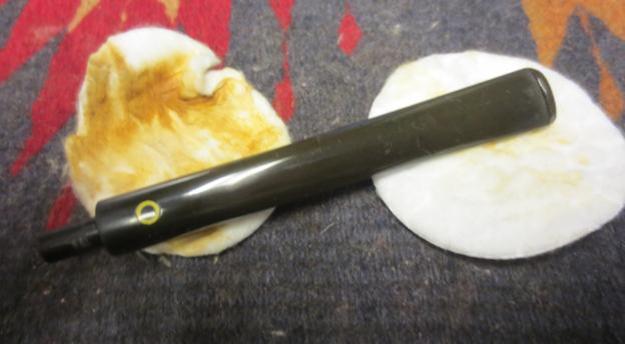
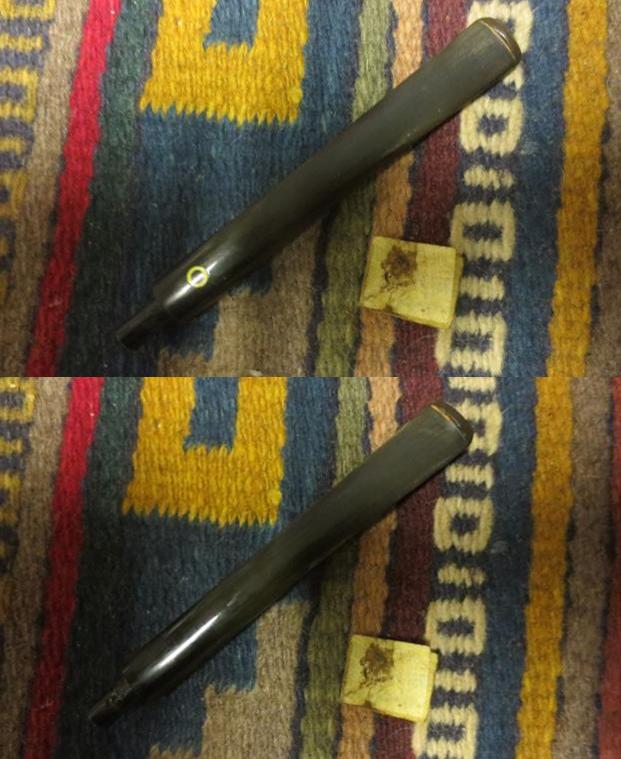
 The button edges were no longer well defined and had been worn into the surface of the stem. I recut the edges with a needle file. I also used the file to scrape the surface of the stem and remove most of the tooth marks.
 I sanded the stem with 220 grit sandpaper to smooth out the file marks and further remove the tooth marks.
 There was one small, deep mark on the underside of the stem that I filled with black super glue.
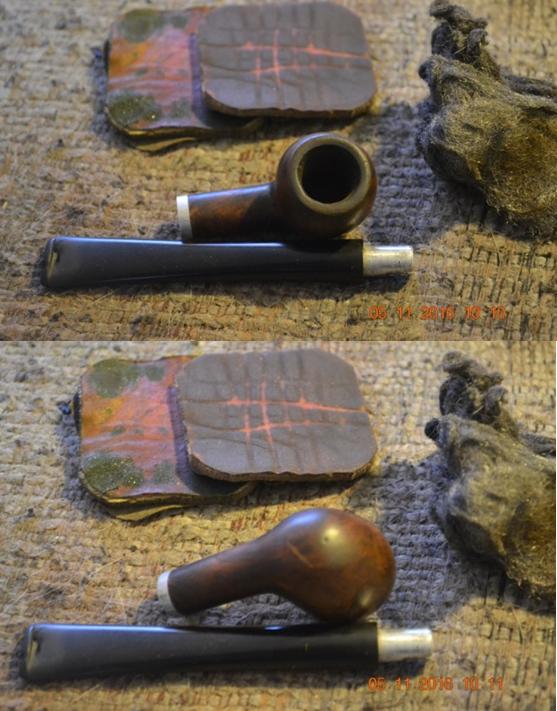
 While the stem repair dried I stained the bowl. I applied a dark brown aniline stain and flamed it with a lighter. I gave the bowl a second coat of stain and flamed it again.
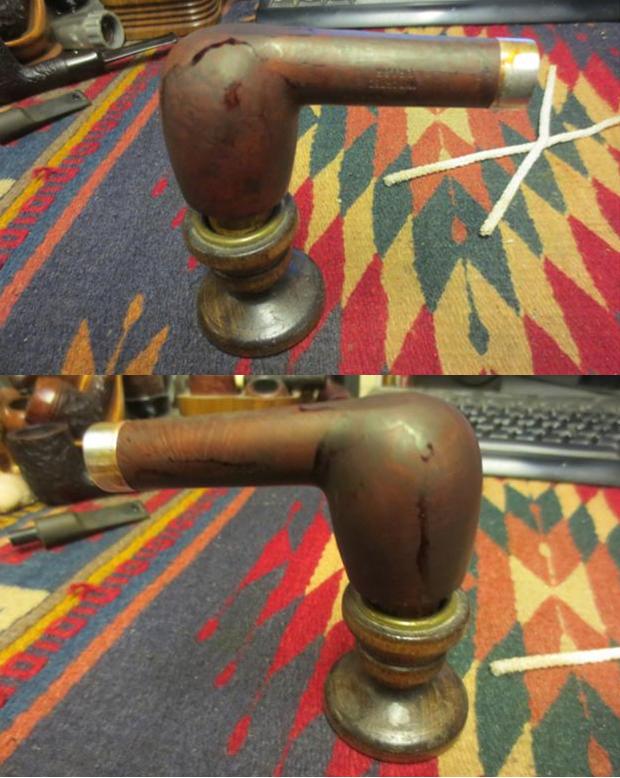 I wiped down the bowl with isopropyl alcohol to even out the stain coat and make it more translucent. The grain began to stand out.
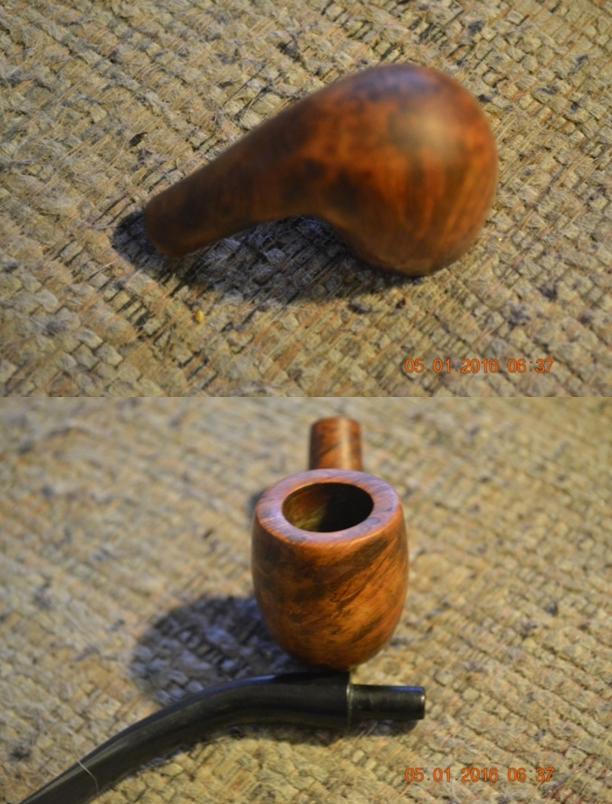
 I buffed the pipe with Blue Diamond on the wheel to bring out the shine. The rim came out really well and the grain stood out on this old pipe.
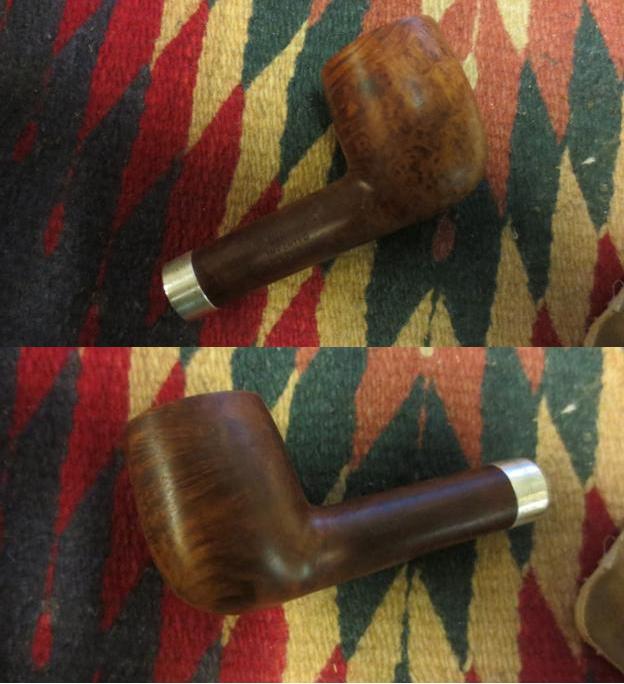
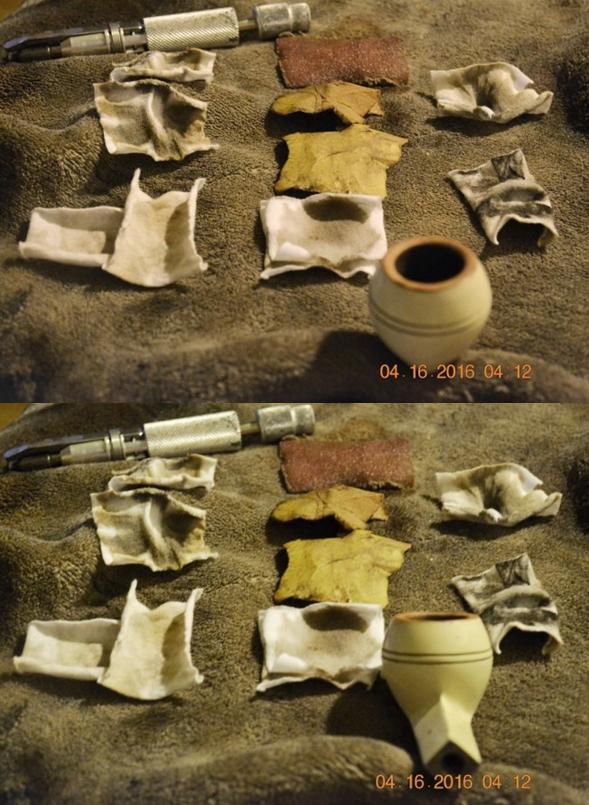
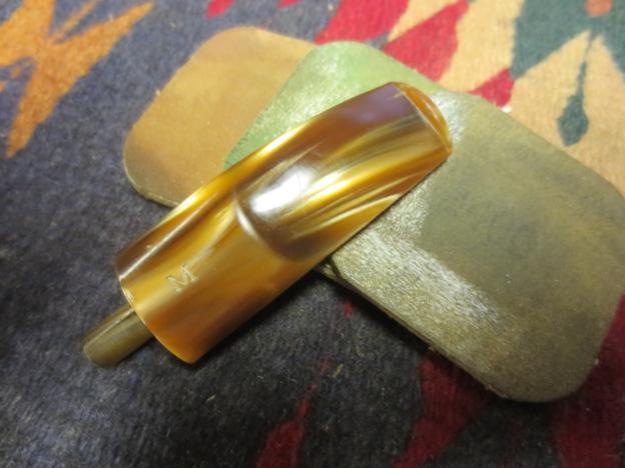
 With the bowl finished I worked again on the stem. I sanded the repair with 220 grit sandpaper to blend it into the surface.
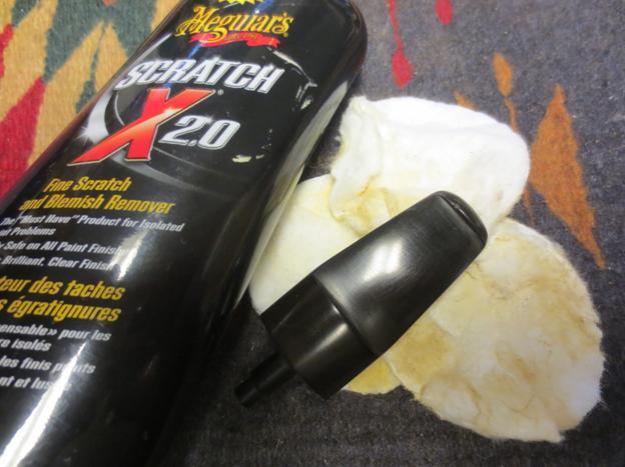
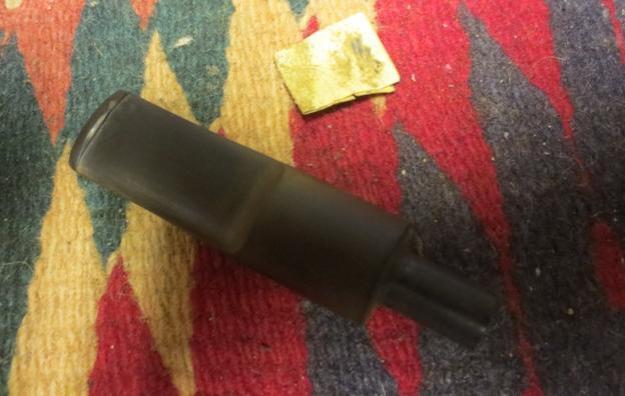 I scrubbed the stem with Meguiar’s Scratch X2.0 and removed much of the oxidation.
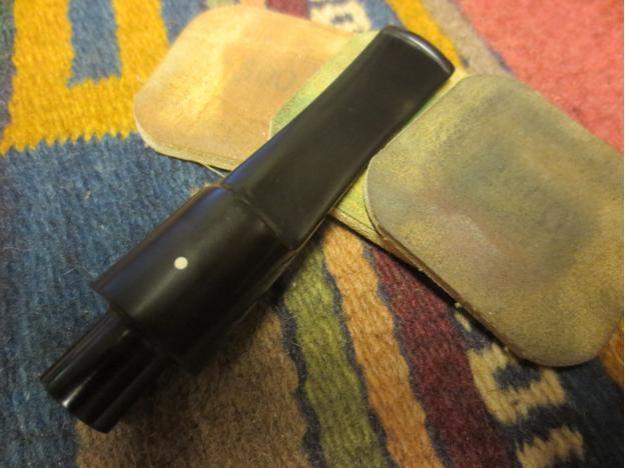
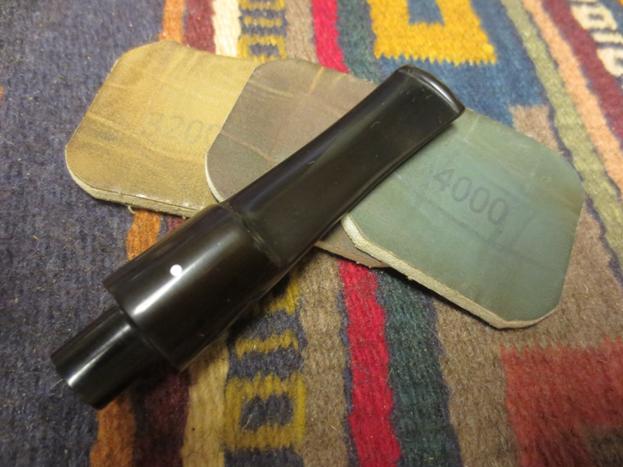
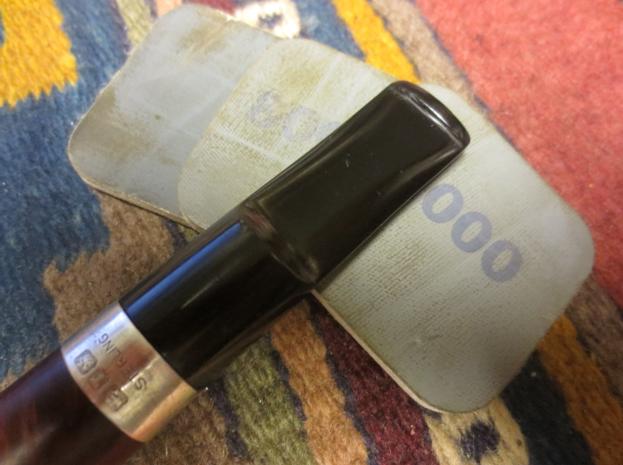
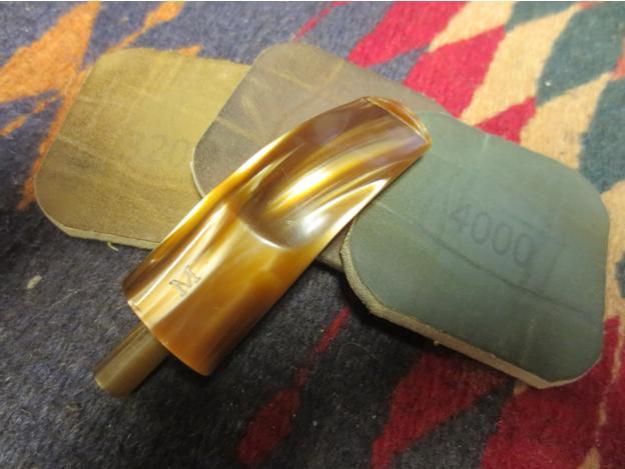
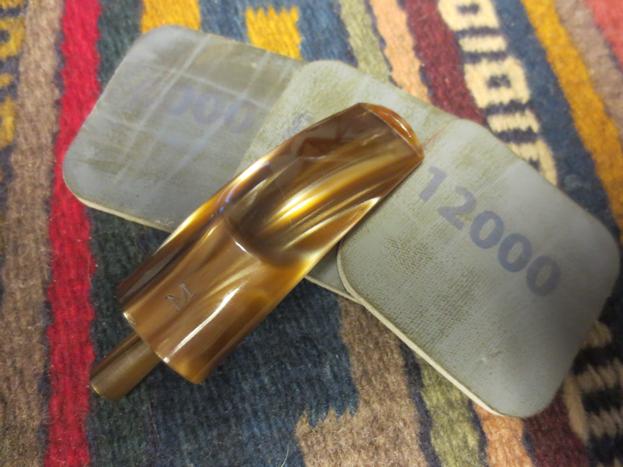
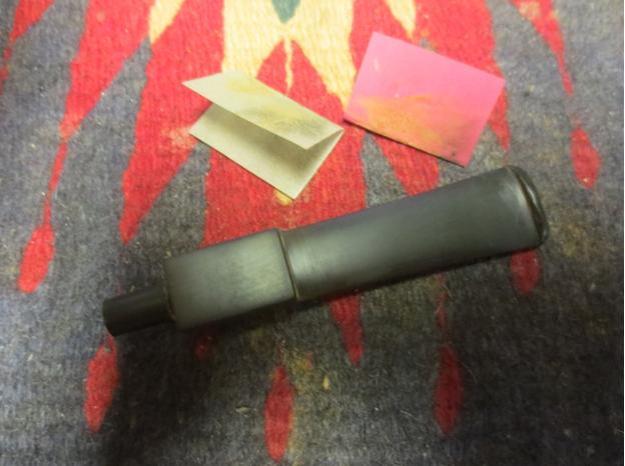
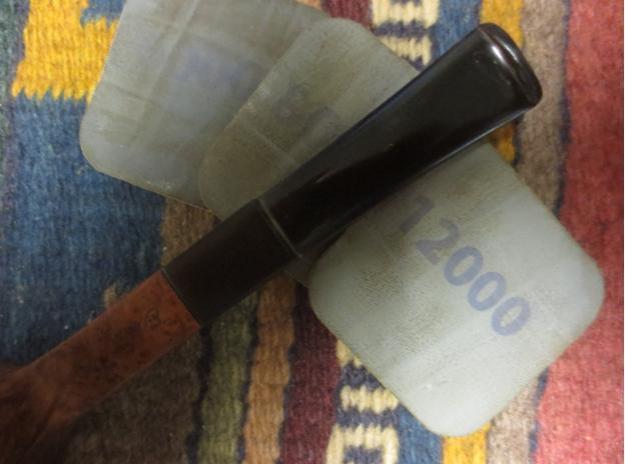
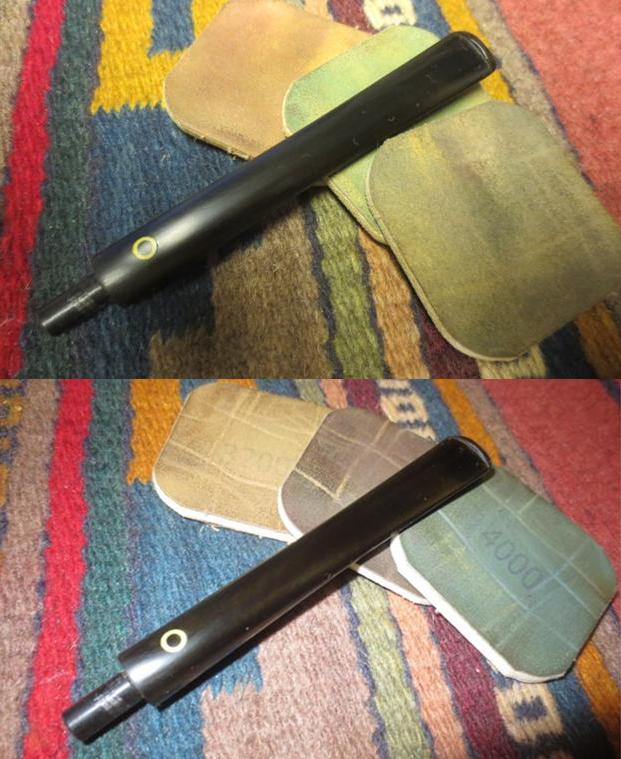
 I wet sanded the stem with 1500-2400 grit micromesh sanding pads and gave the stem its first coat of Obsidian Oil. I dry sanded with 3200-4000 grit micromesh and gave it another coat of oil. I finished sanding with 6000-12000 grit pads and gave it a final coat of Obsidian Oil.
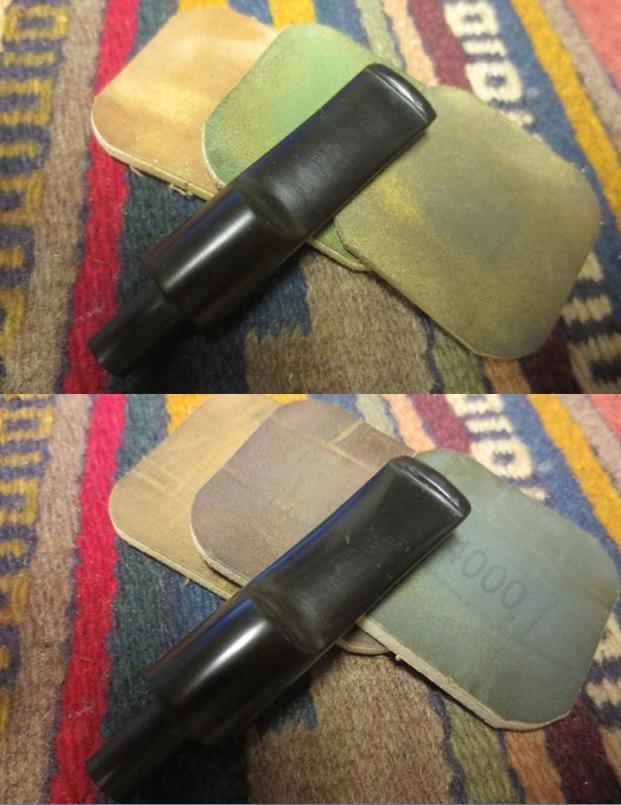
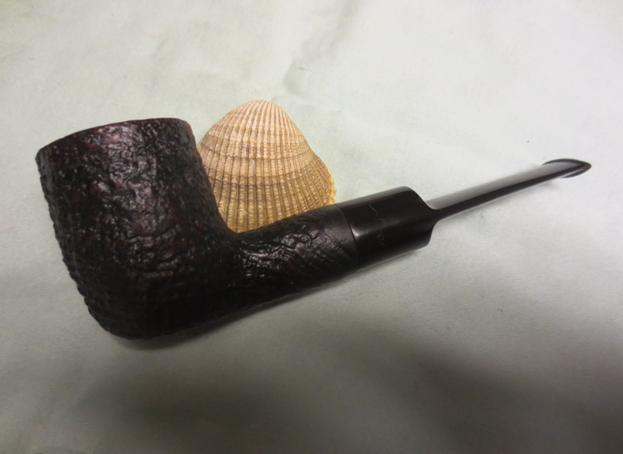
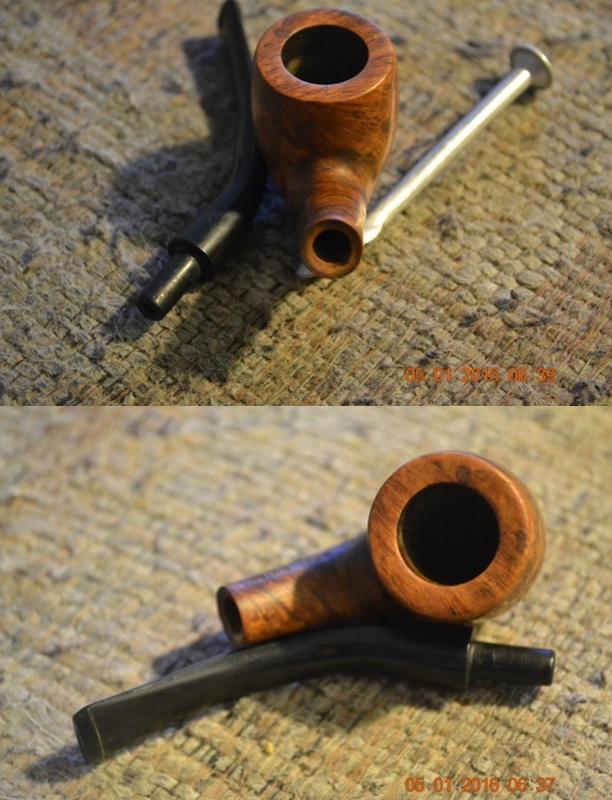
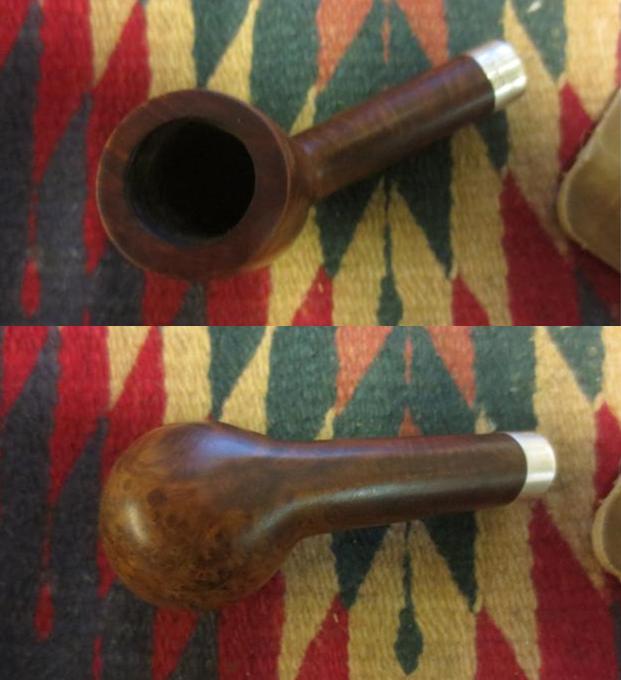
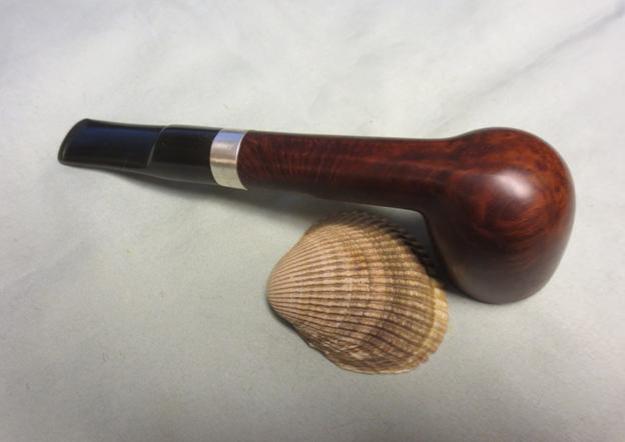
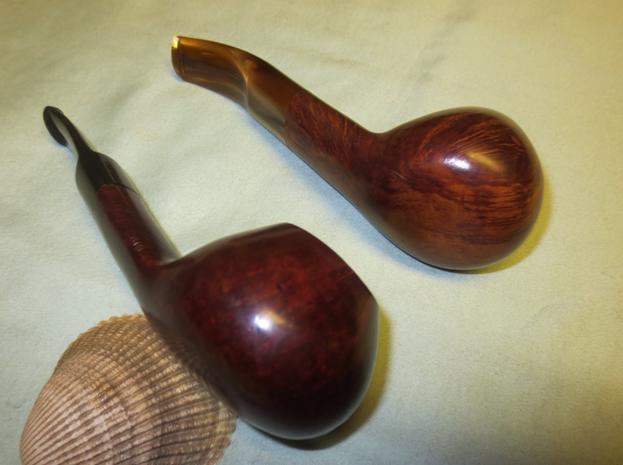
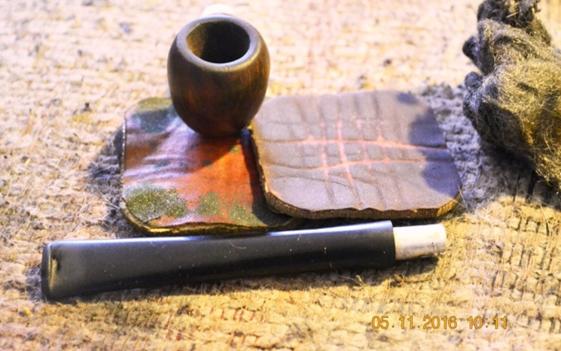
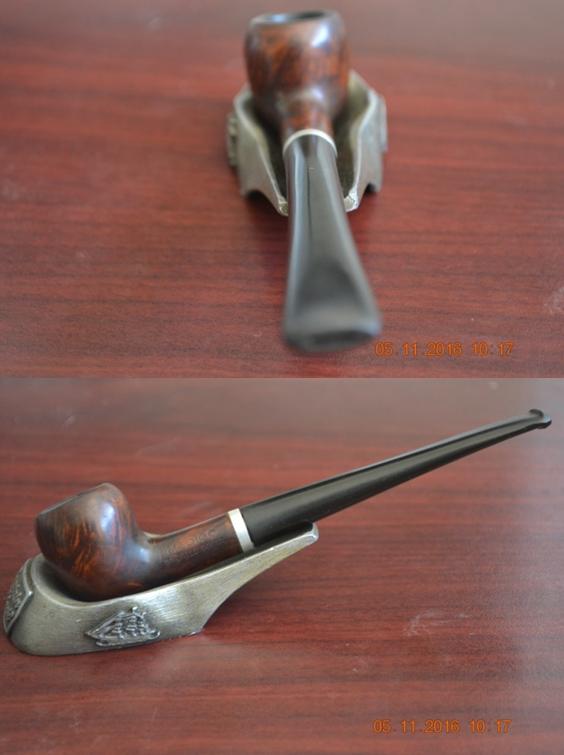
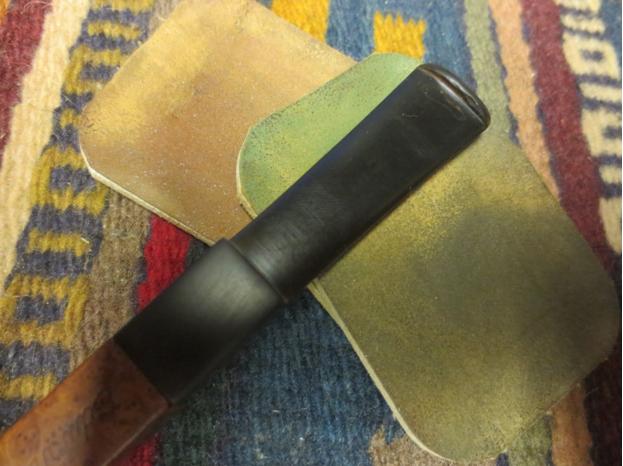
 I buffed the pipe on the wheel with Blue Diamond and then gave the bowl and stem multiple coats of carnauba wax. I buffed it with a clean buffing pad to raise the shine and buffed it with a microfibre cloth to deepen the shine. The finished pipe is shown in the photos below. It is a beauty. The dark spot on the right side is kind of a beauty mark in my mind. It is not a burn or damage in that way but rather a spot where the bowl sat against something that permanently darkened that spot. I chose to not hide it because I love the grain on the rest of the bowl. It came out very well to my eye. Thanks for looking.
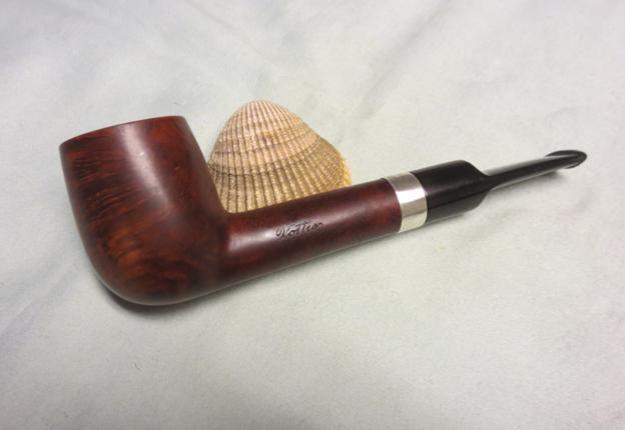


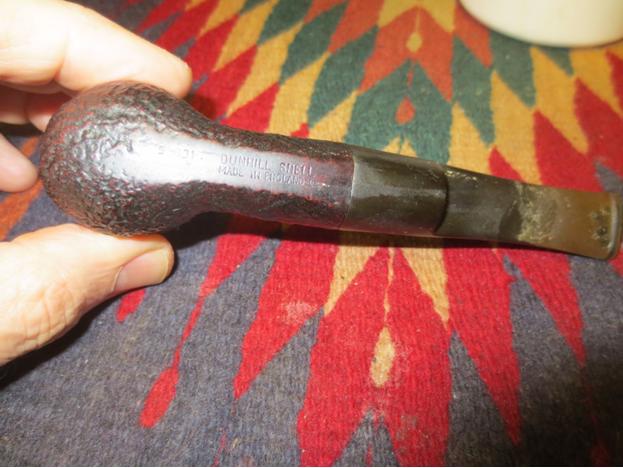
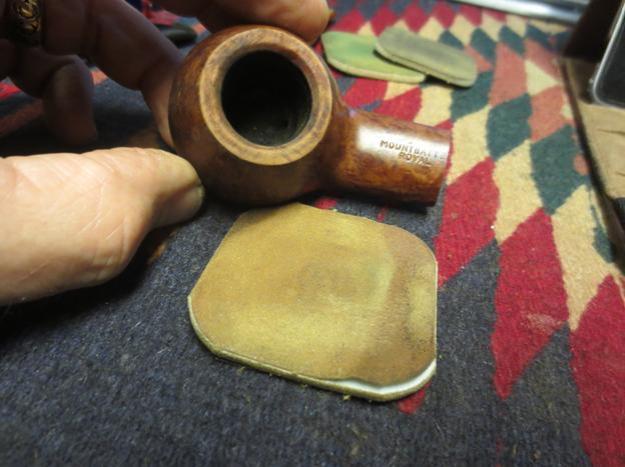
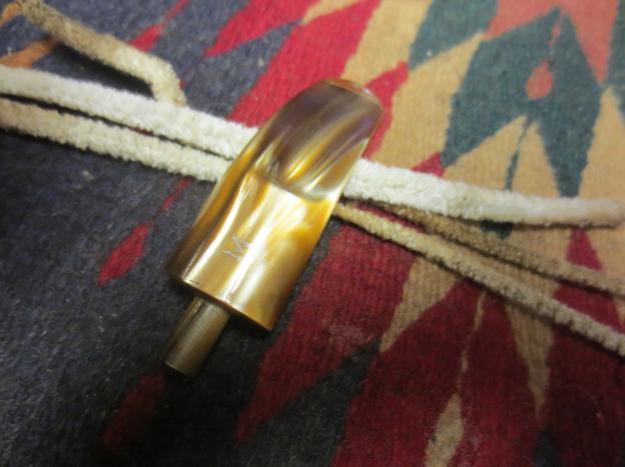
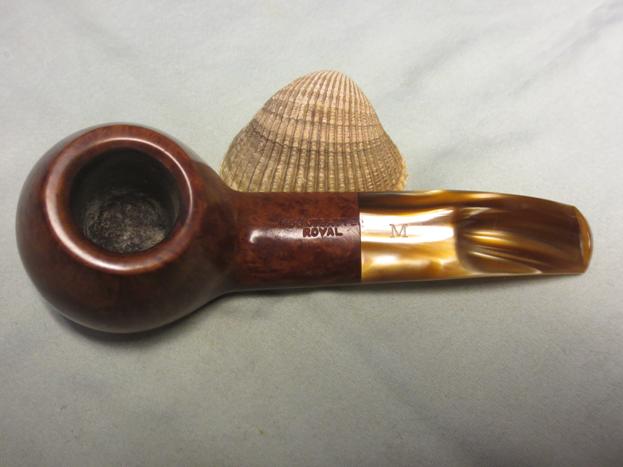
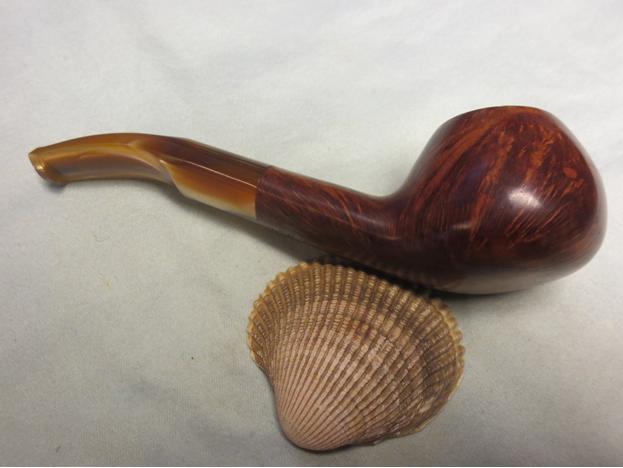
 He sent a picture of the second one as well – same shape as the first but having a different shape number and a Lucite stem. It was a newer version of the pipe. The shape was similar but slightly smaller. The taper on the stem was not as drastic and flowed to the button ending at the button almost the same width as the beginning at the saddle. The button shape, the shape and style of the slot in the button end, the stamping of the M on the top of the saddle all were signs of a newer version. This one was stamped on top of the shank Mountbatten over Royal. On the underside of the shank it was stamped Made in London over England. Under that near the stem shank union was the shape number. It was different from the older one – 207. The finish on this one was lighter and more of a matte. There were also quite a few fills in the sides of the bowl that were pink putty. They were pretty well blended into the grain so they would be fine. The bowl had a light cake in it and the beveled inner edge of the rim was darkened and had some lava that ran over the top edge. The Lucite stem was in good shape with some small tooth marks on the top and underside near the button.
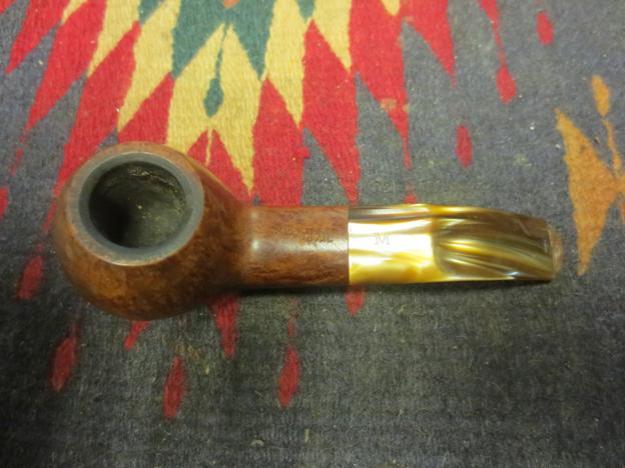
 This would be a fun pair of pipes to clean up and restore. Before I started to work on them I decided to do a bit of research on the brand. I started with my usual first stop – PipePhil’s Logo and Stampings site. I found out there that the pipe was made by Charatan. There were pictures of a variety of stampings on the stem and some beautiful looking pipes but no other information. Here is the link to that page: http://www.pipephil.eu/logos/en/logo-m7.html.
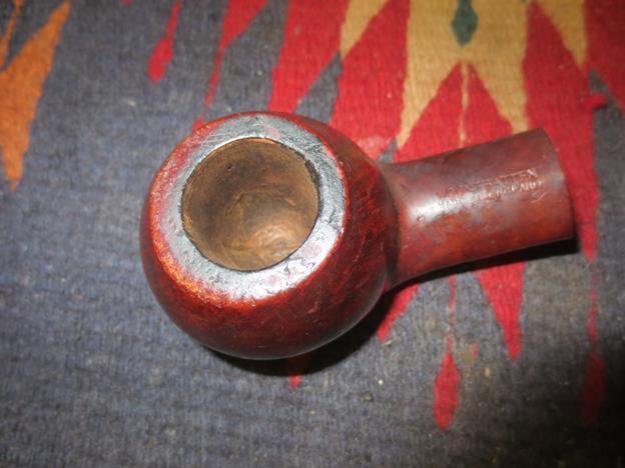
 I set up my topping board and topped the 819 carefully so as not to remove more of the top than necessary to flatten and remove the damage to the outer edge of the bowl and rim.
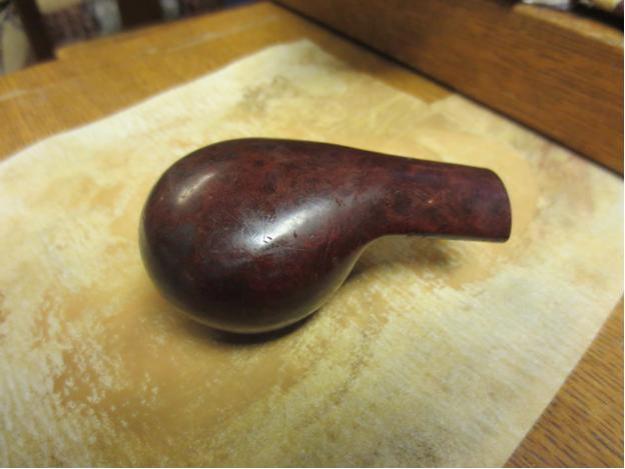
 I carefully scrubbed the bowl walls and shanks with alcohol on a cotton pad to remove the grime. It did not take much scrubbing to clean up both bowls.
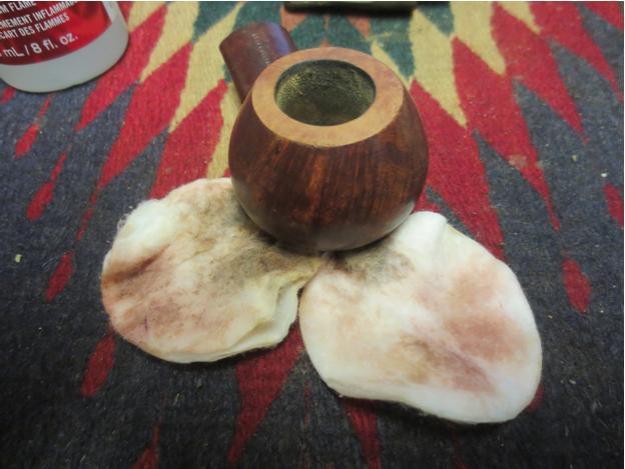


 The Lucite stem was much easier to work on. I sanded the tooth marks on both the top and underside of the stem at the button with 220 grit sandpaper to remove them. It took some focused sanding to remove the two marks but once I was done sanding them they were no longer visible.
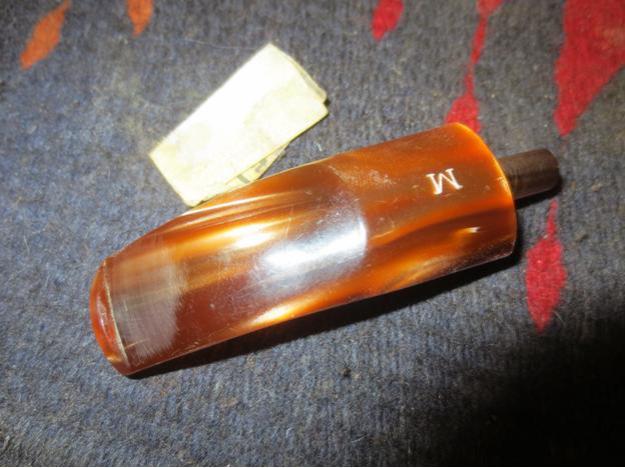
 With the oxidation taken care of on the vulcanite stem and the tooth marks removed from both stems it was time to work on them with micromesh sanding pads. I wet sanded both stems with 1500-2400 grit micromesh sanding pads.
 I wiped the vulcanite stem down with Obsidian Oil and then dry sanded both stems with 3200-4000 grit micromesh sanding pads.
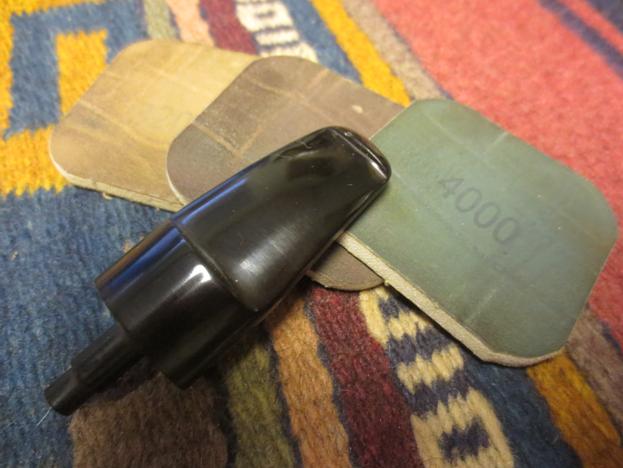
 I wiped down the vulcanite stem with another coat of oil. I sanded both stems with 6000-12000 grit micromesh sanding pads. I gave the vulcanite stem a final coat of oil and set it aside. Once the oil dried I would put the stems on the bowls and buff them.
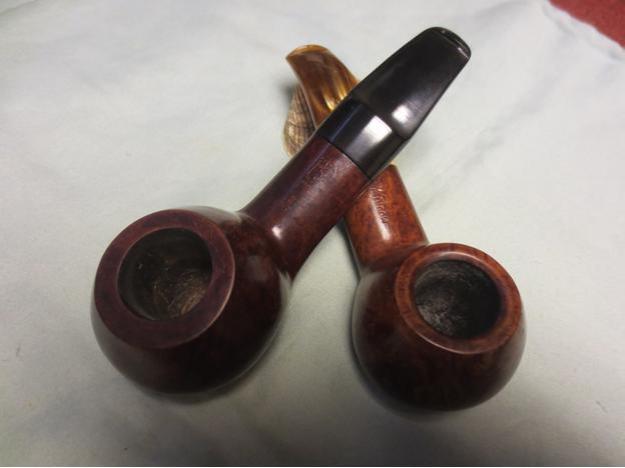
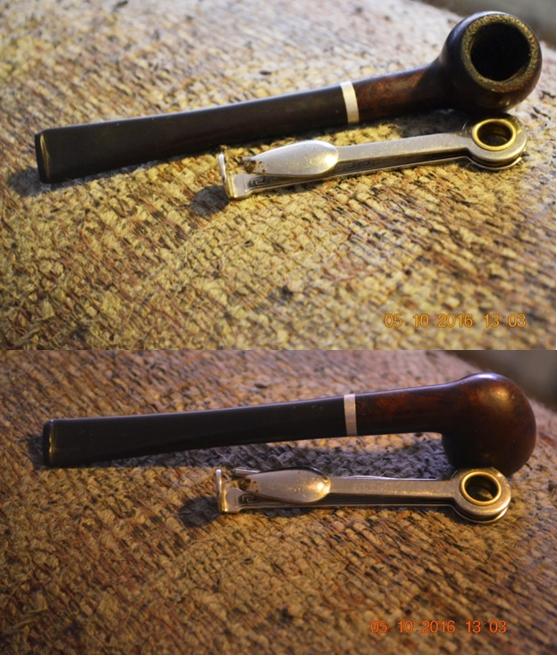
 I put the stems back on the pipes and gave them a final buff with Blue Diamond polish on the wheel. I gave both multiple coats of carnauba wax and buffed them with a clean buffing pad to raise the shine. I hand buffed them with a microfibre cloth to add depth to the shine. The finished pair are shown in the photos below. The young apprentice carvers at Charatan did a great job in shaping and finishing these two pipes. They look great together. The mystery to me is the different number stamps on the pipes. They are similar in shape even though the newer is a little smaller. They look like they came from the same shape chart in terms of appearance. I suppose I will never know why the numbers are different but I do know that both should be great smoking pipes. Thanks for looking.
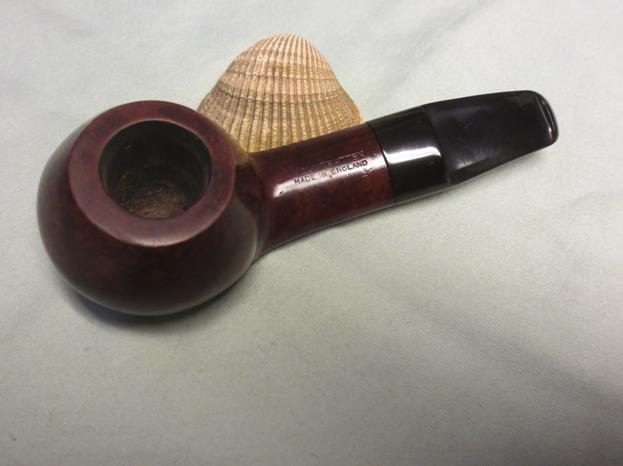


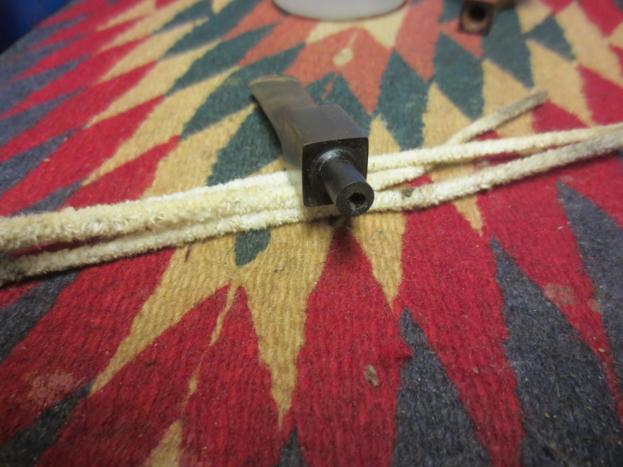

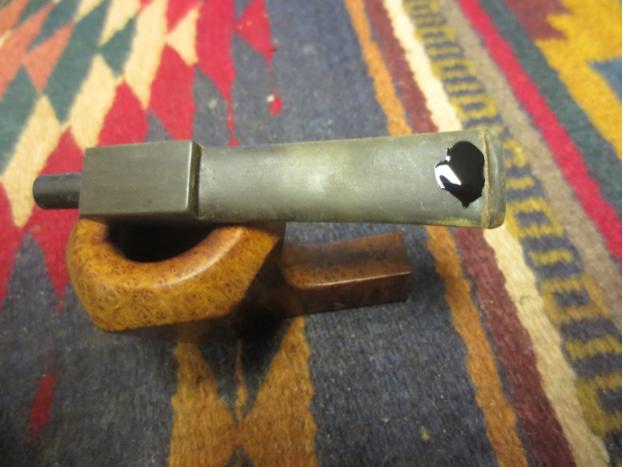


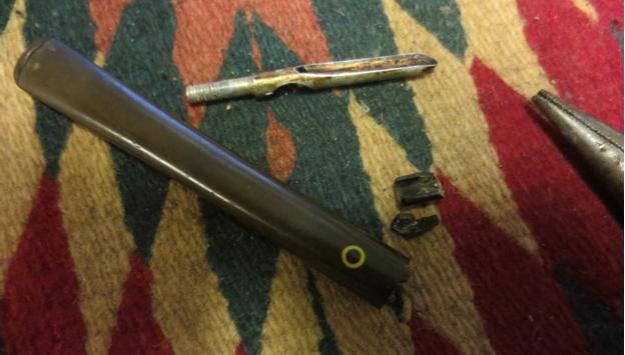


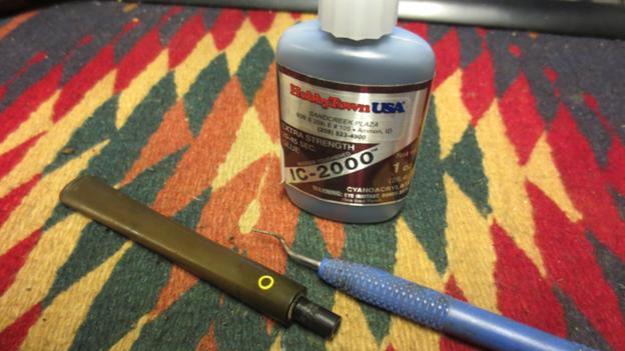


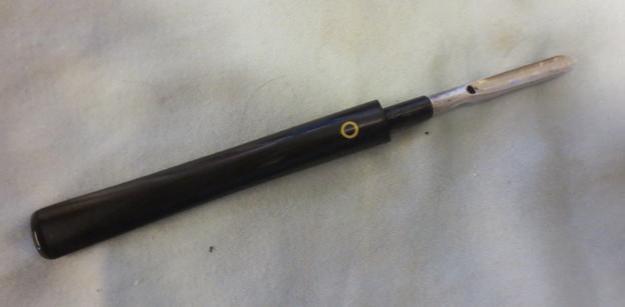


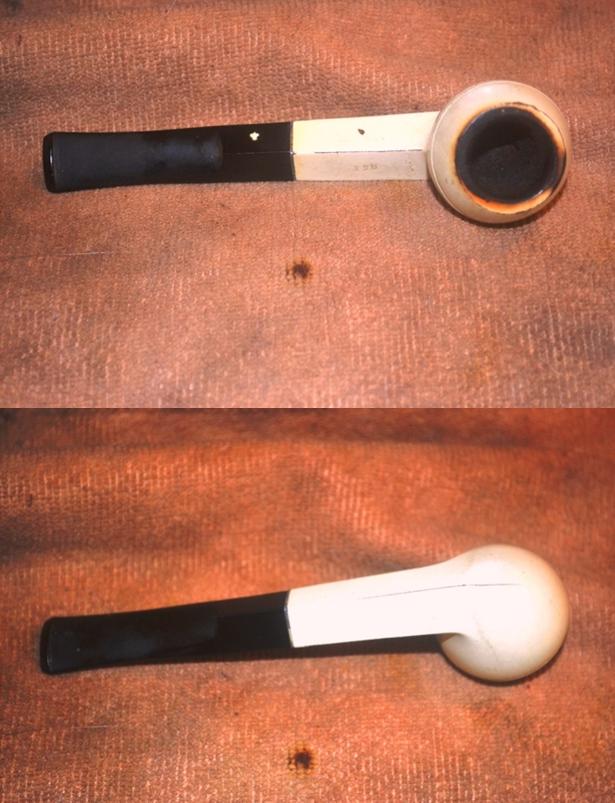
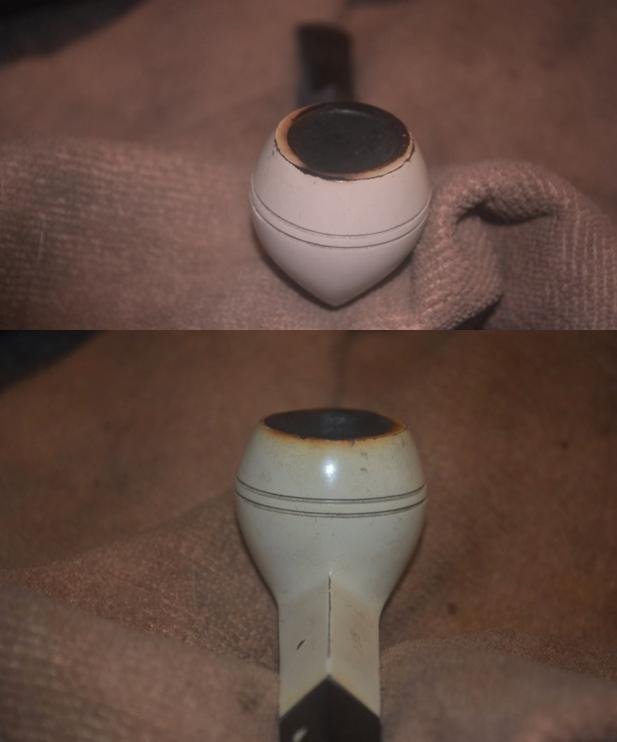
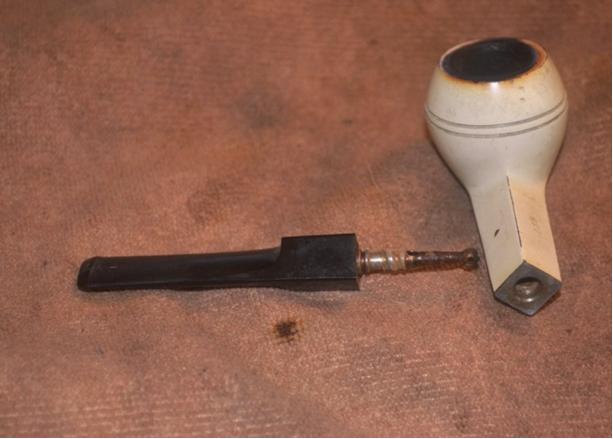
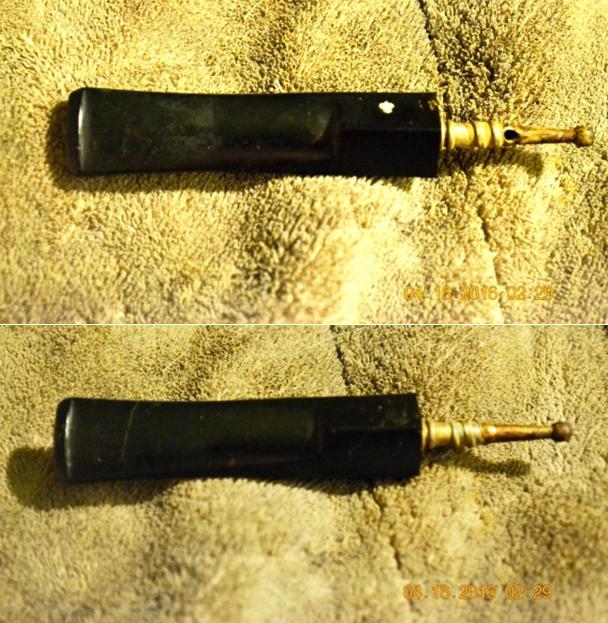
 I bought a lot of pipes a while back that had one of these early Dr. Grabow pipes. Before I started cleaning this one up I started digging around the net to see what I could find out about it as I had never seen the propeller logo before. I mainly collect old Kaywoodies and as such didn’t know much about the older Grabows other than the few I have being great smokers. The bottom of the shank is stamped with the patent number 1896800. I went to the U.S. patent website and searched the number. The patent date is February 7th, 1933. I was unable to save the images but the patent looked to be on stinger design. From reading the patent, it seems the stinger and threaded stem were designed to help strengthen the pipe shank with the insert. The shape of the stinger was designed to also be used as a bowl scraper.