Tag Archives: KBB Yello-Bole Pipes

Restoring an Older KBB Yellow-Bole 2094 Churchwarden with absolutely stunning grain.


Blog by Steve Laug

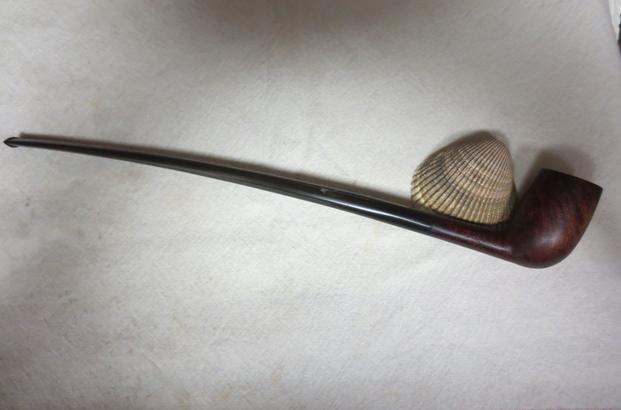
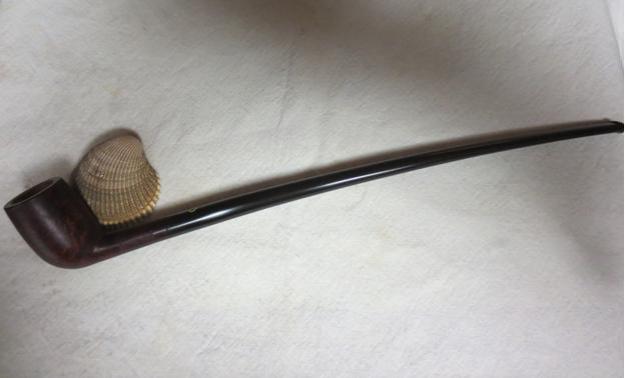
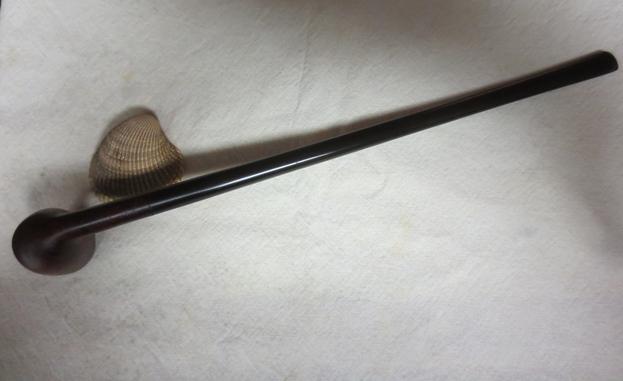
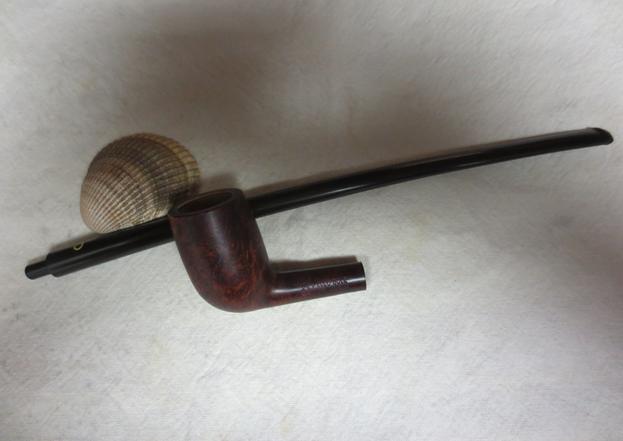
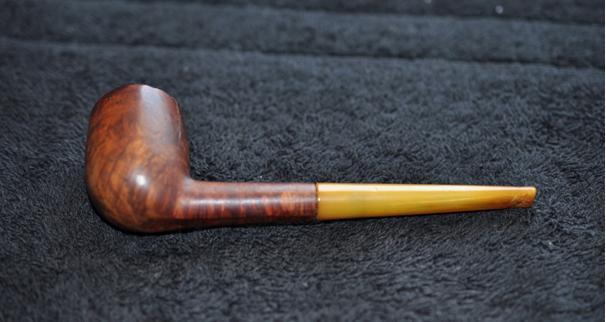
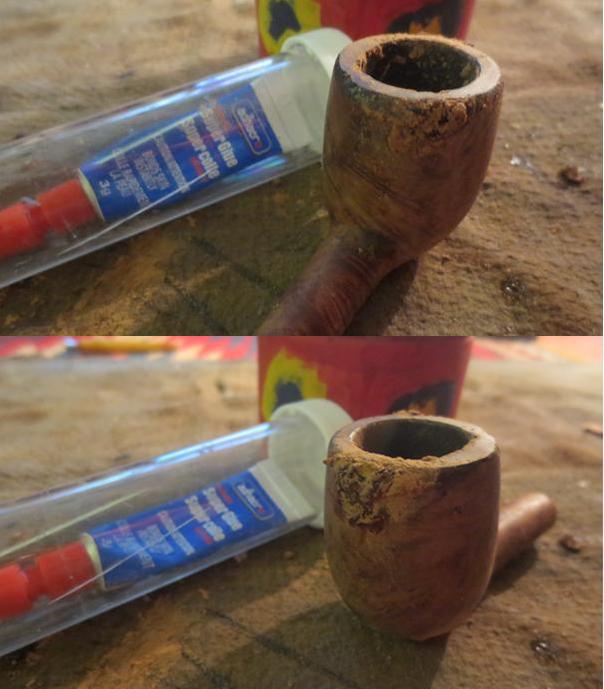
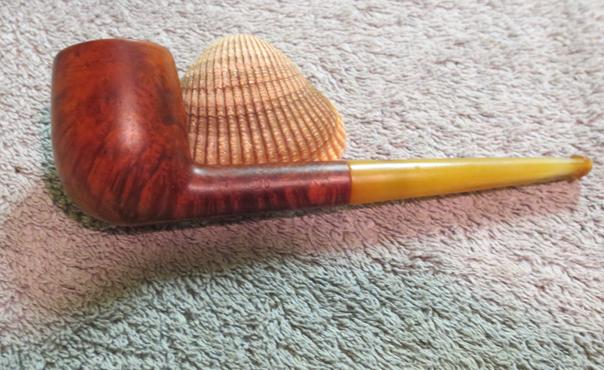
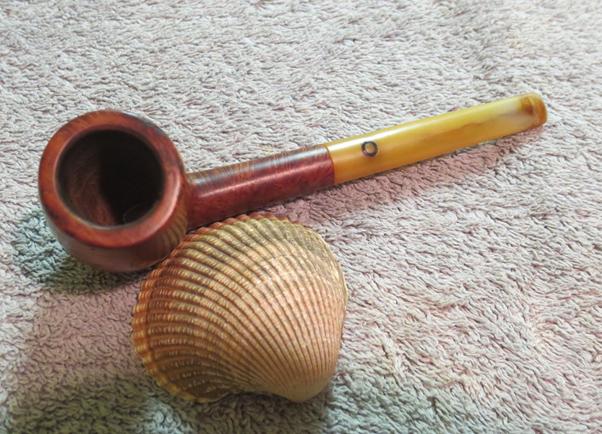
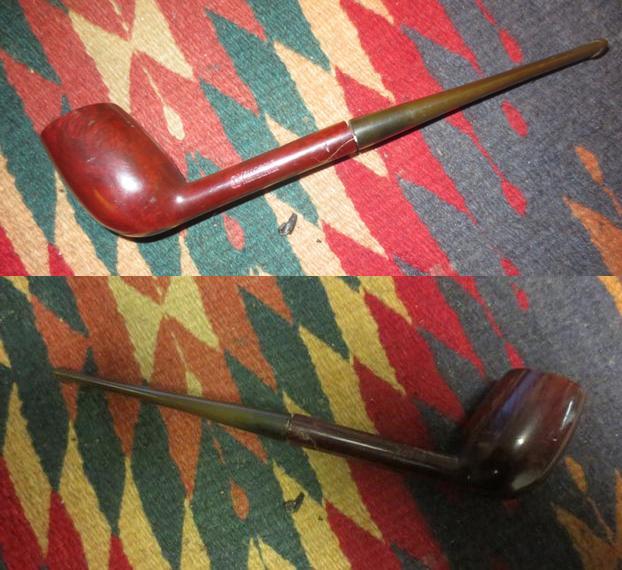
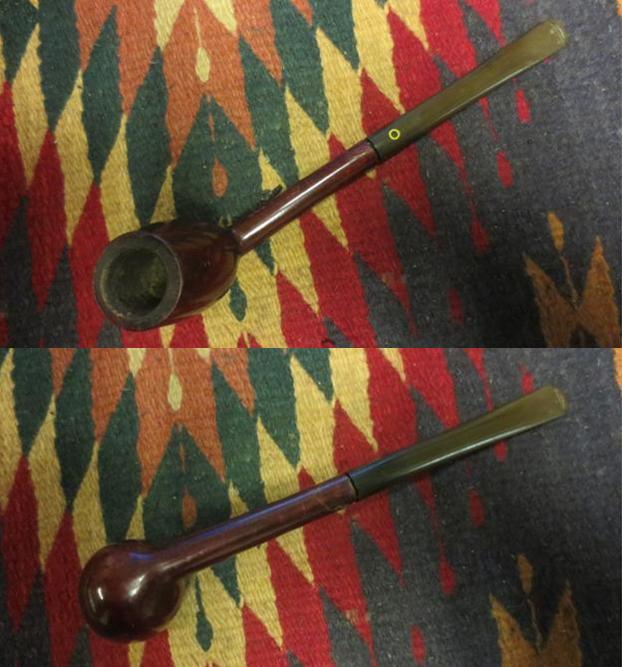
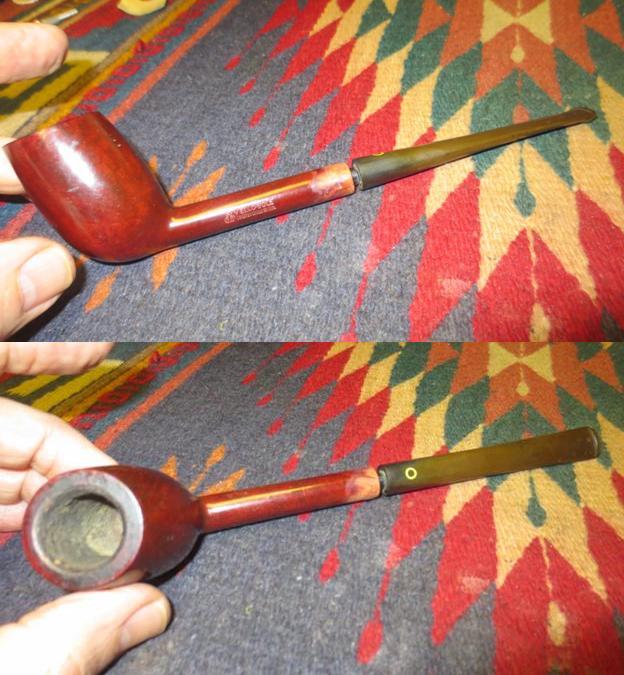
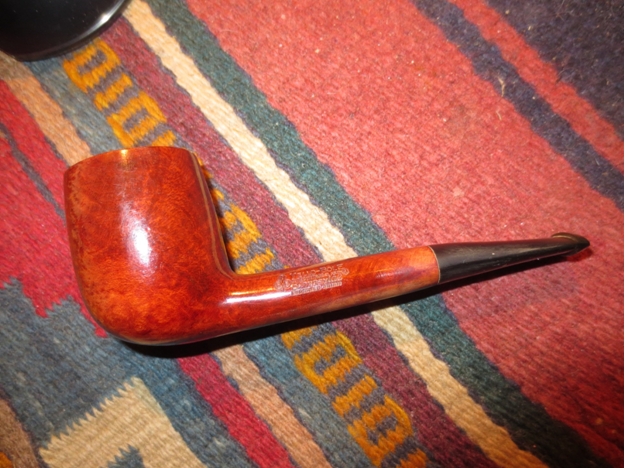
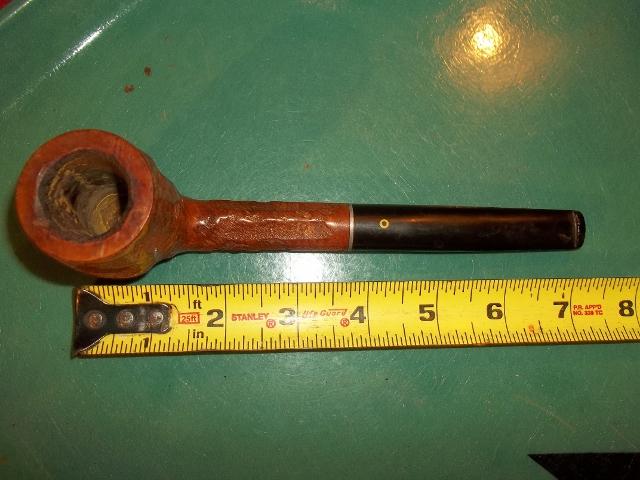
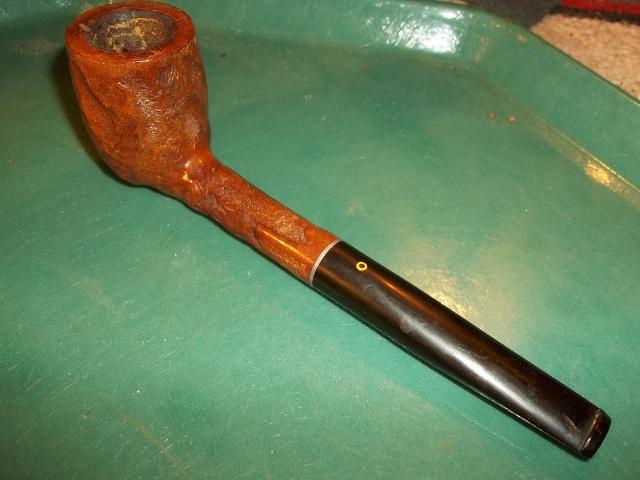
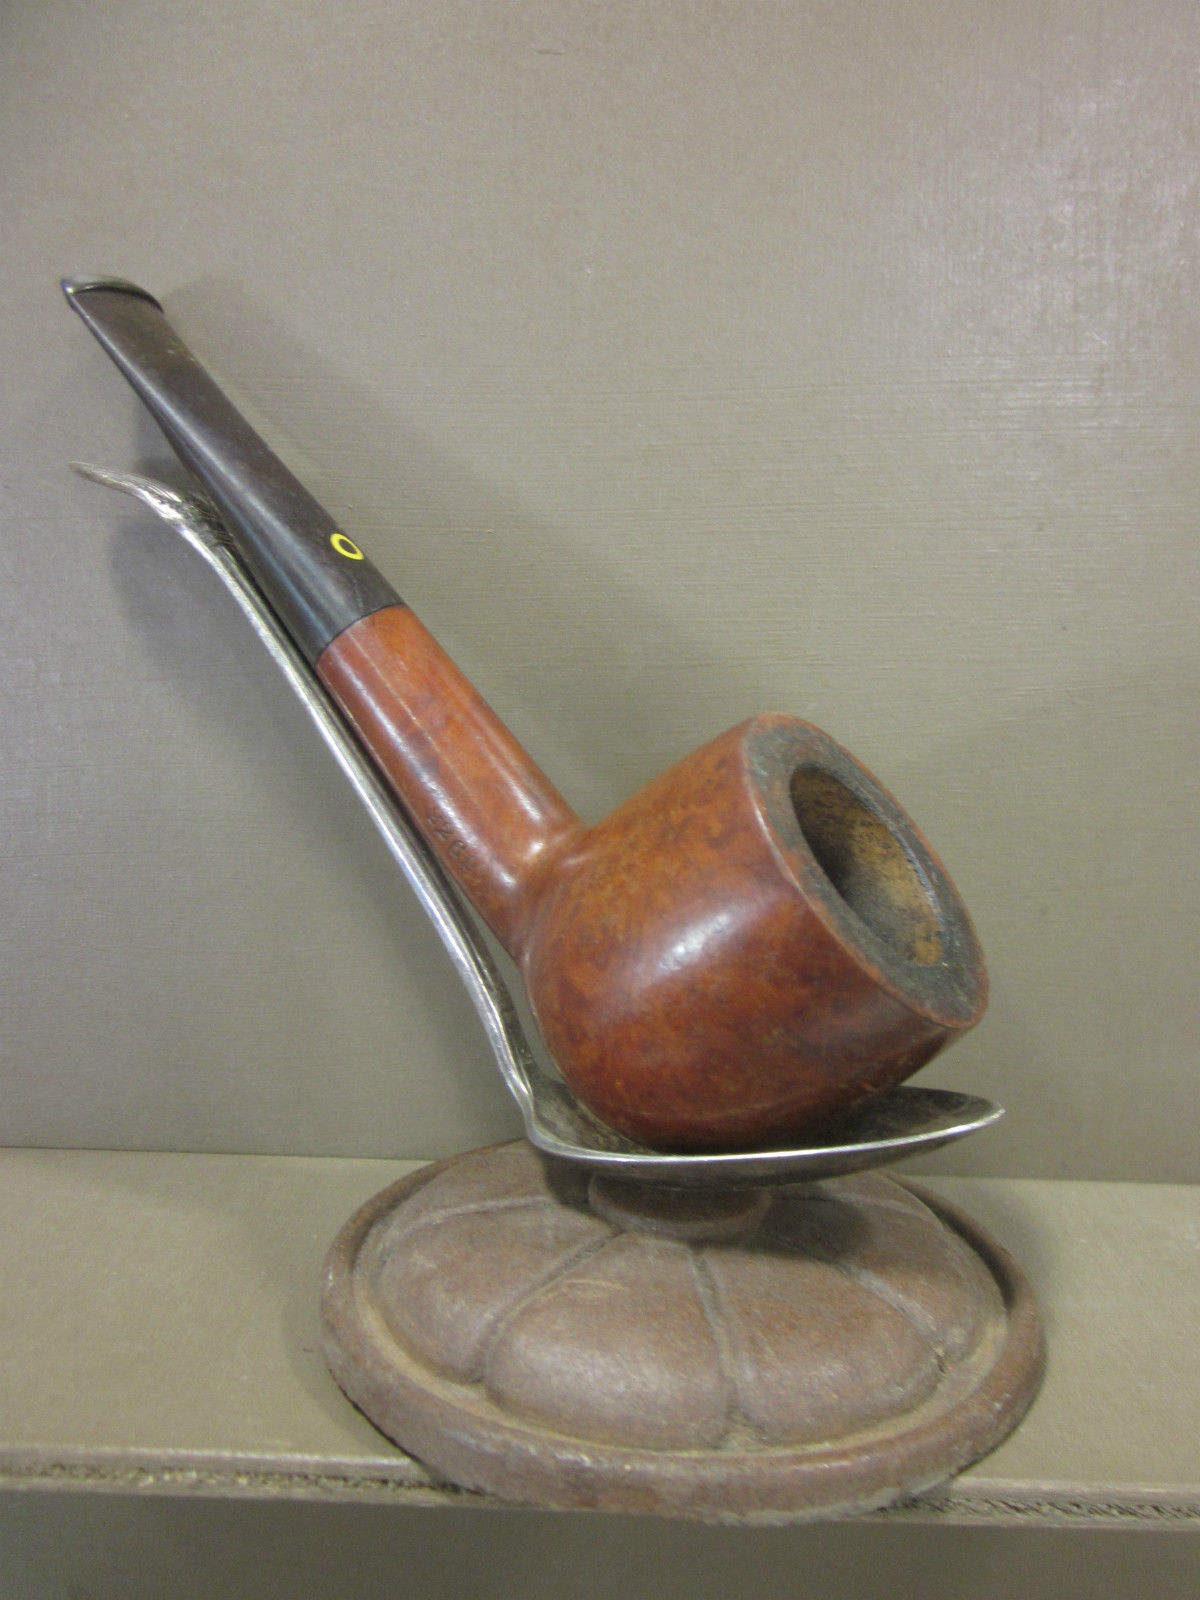
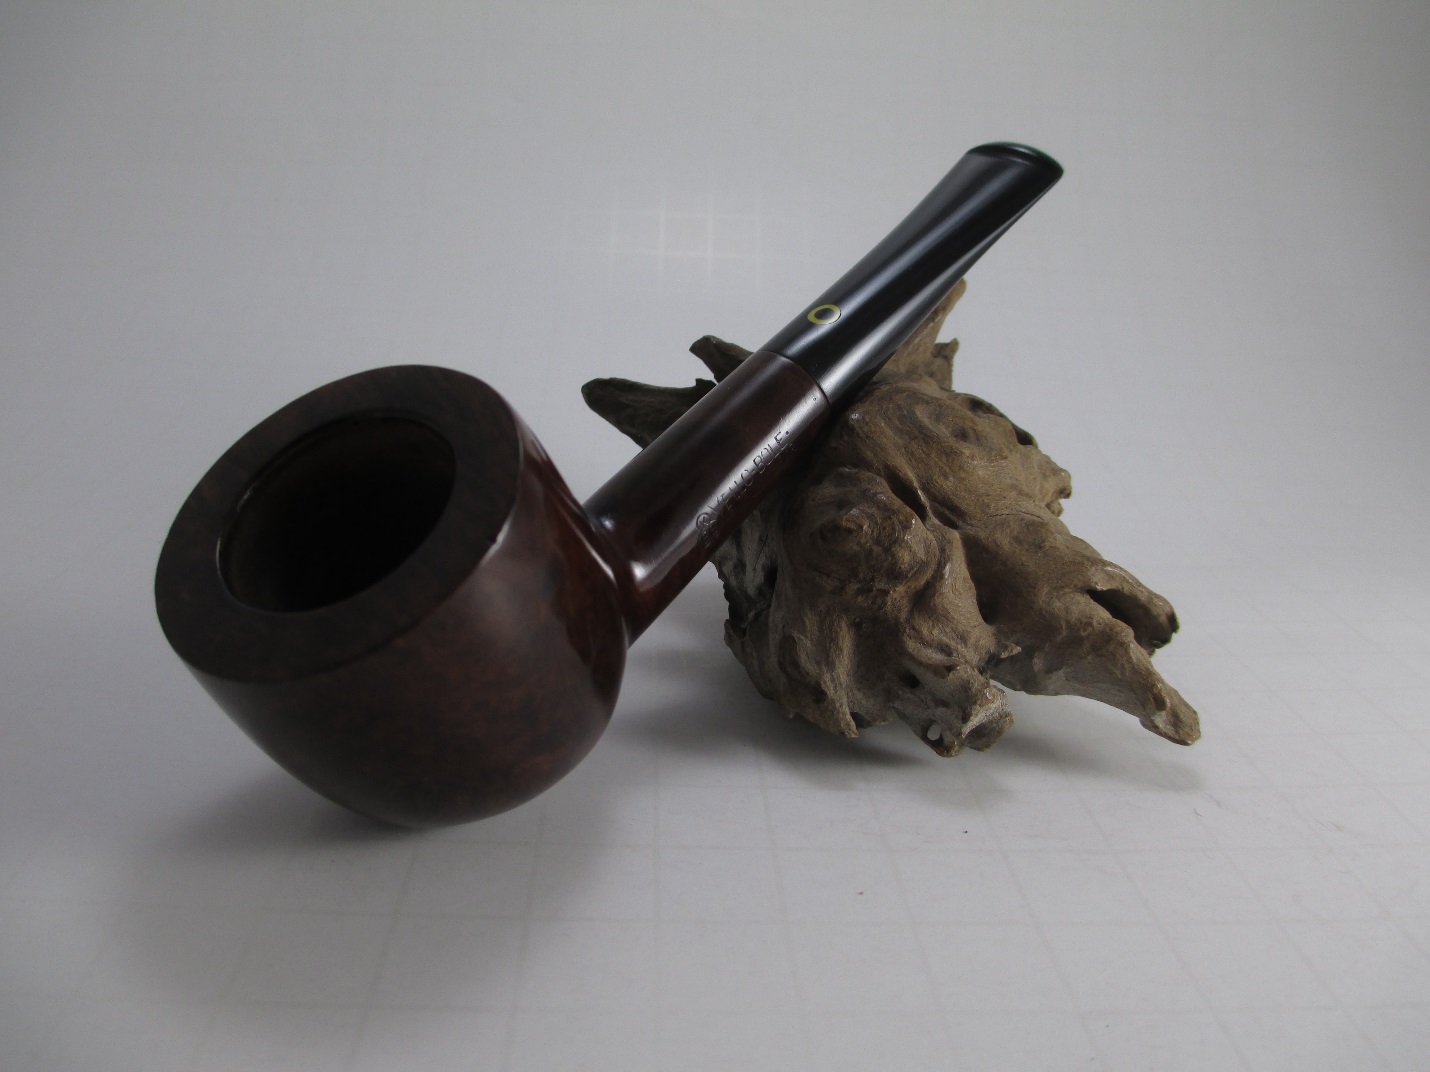
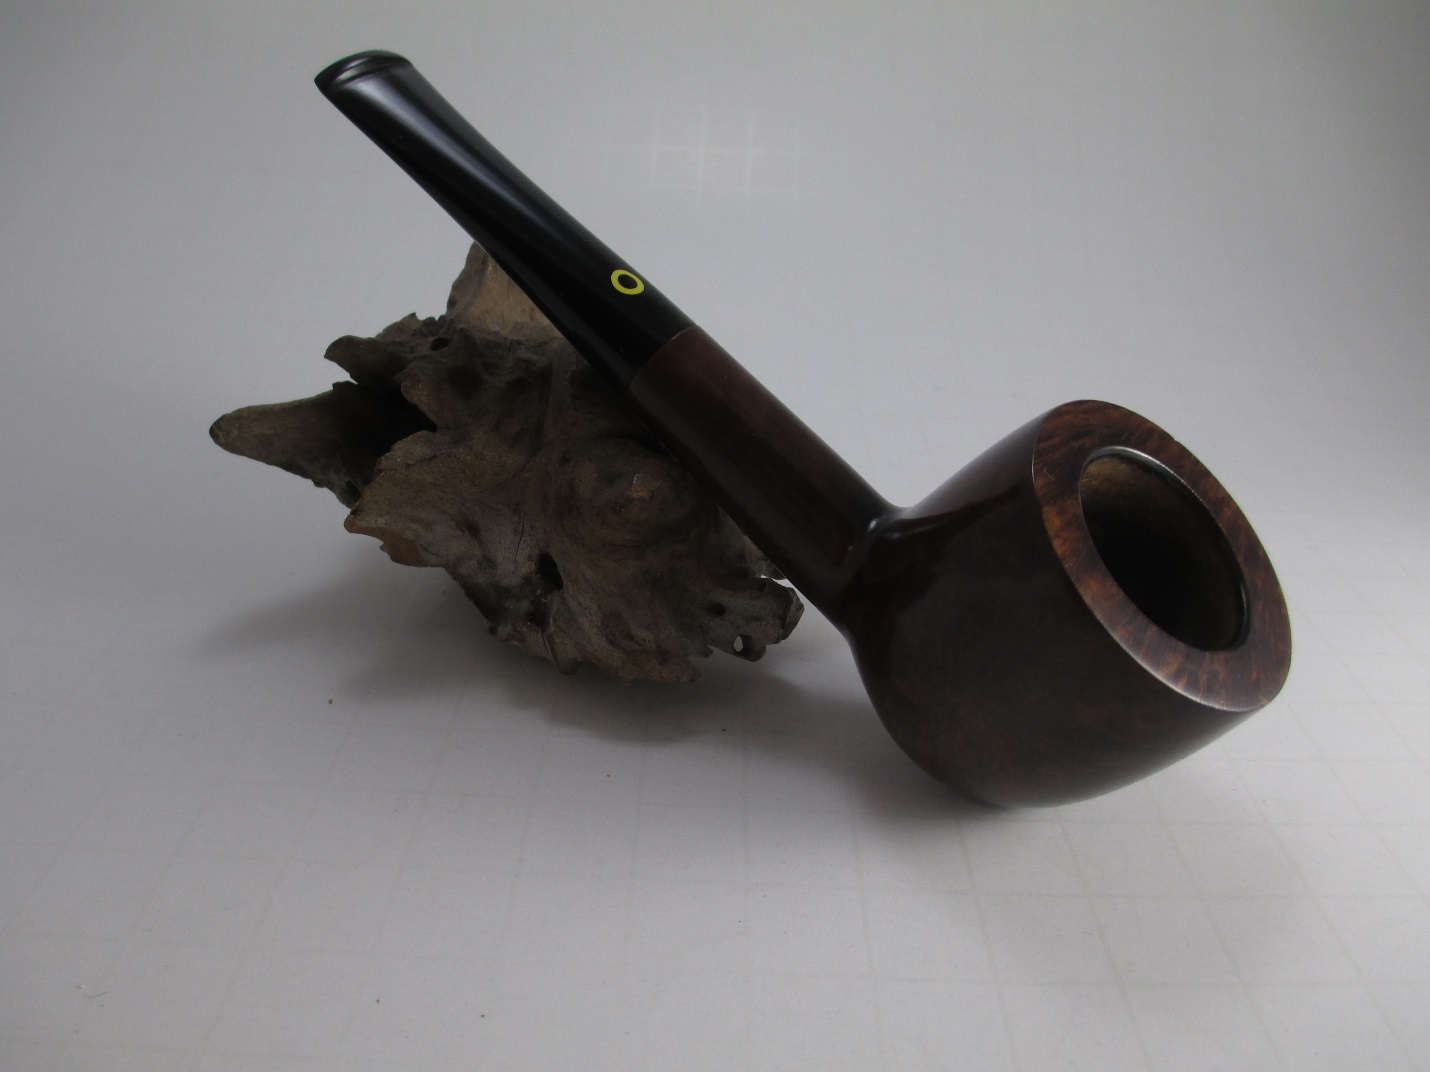
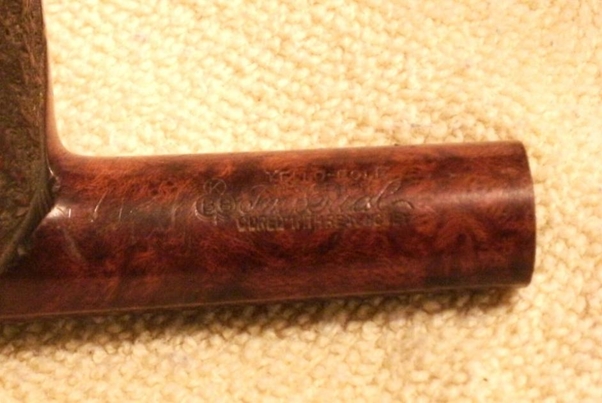
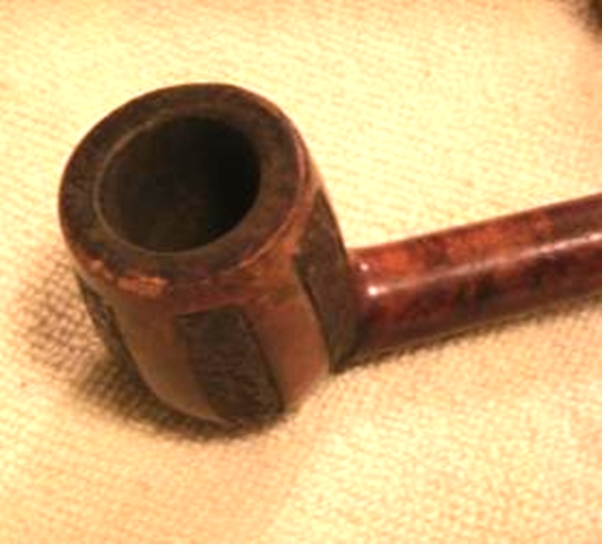
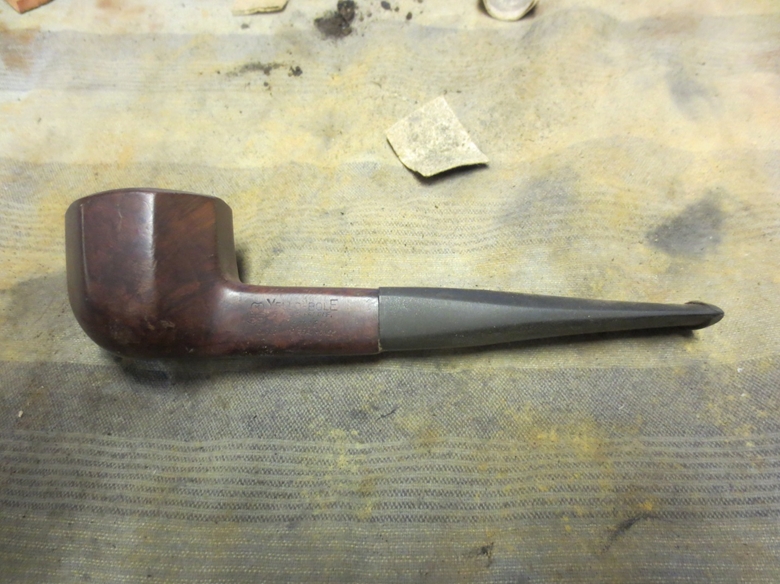
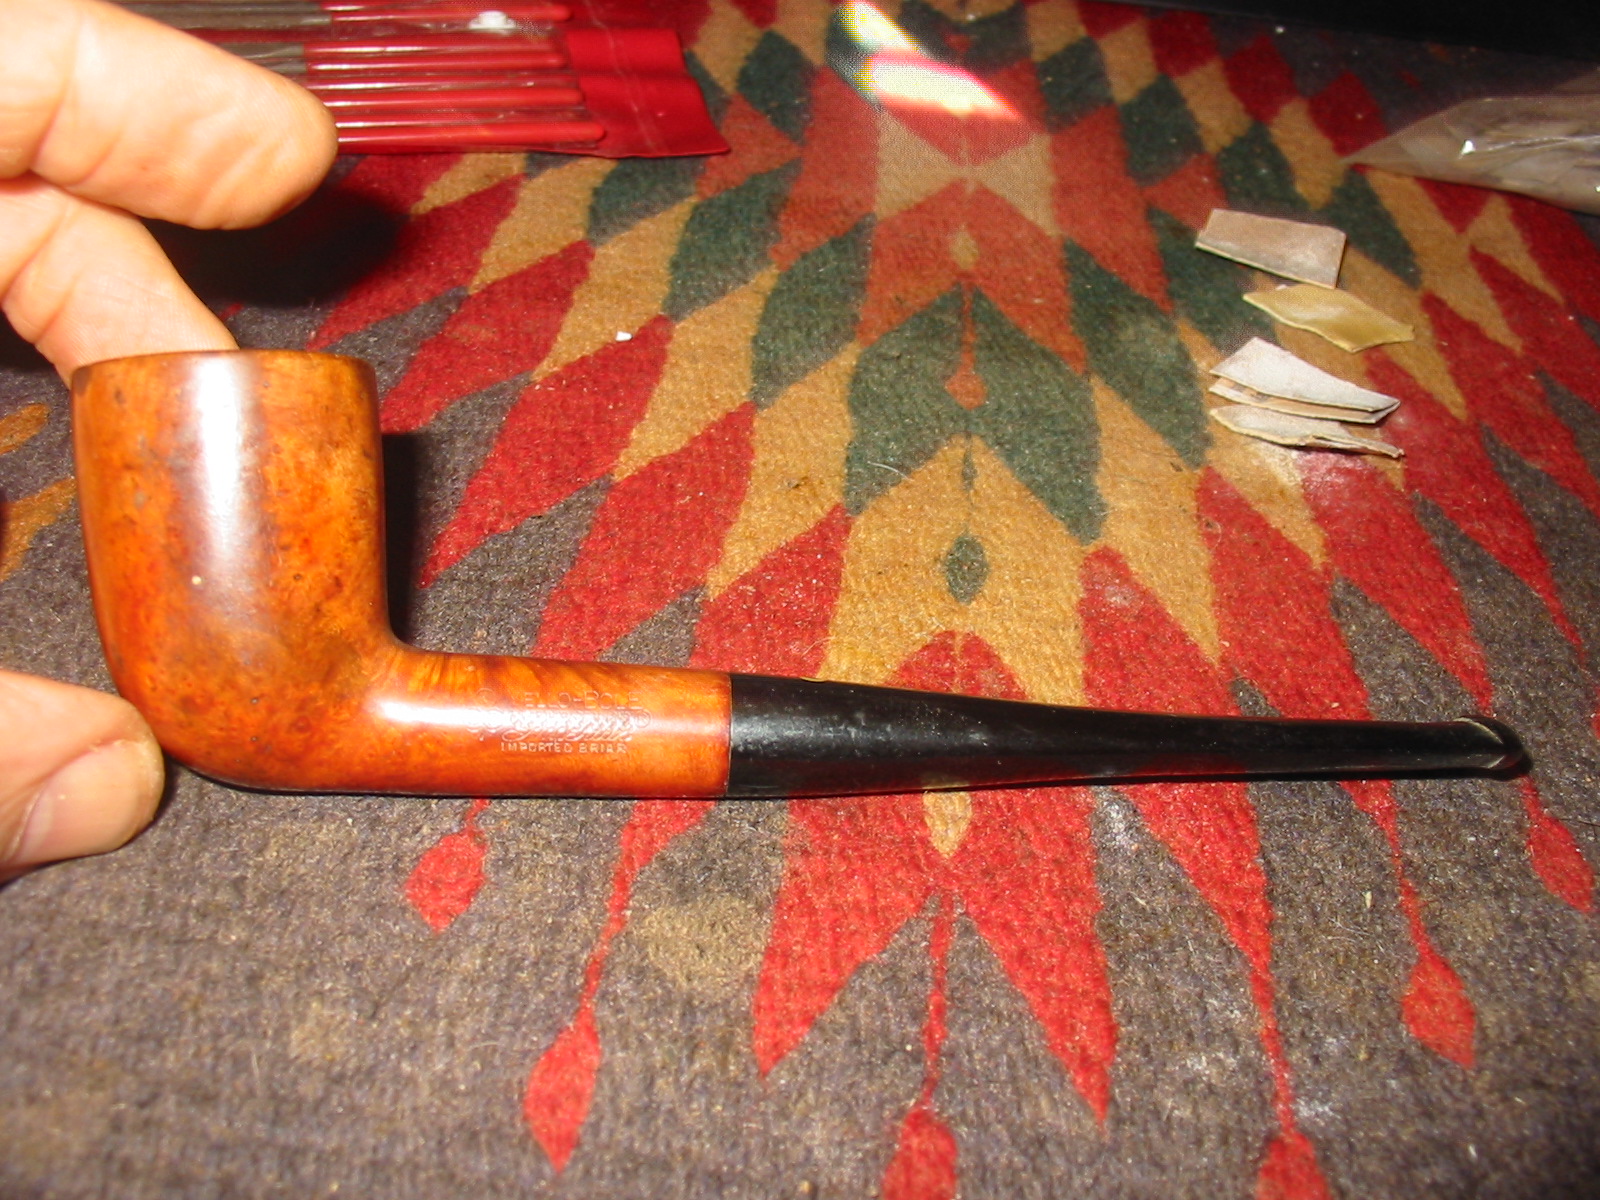
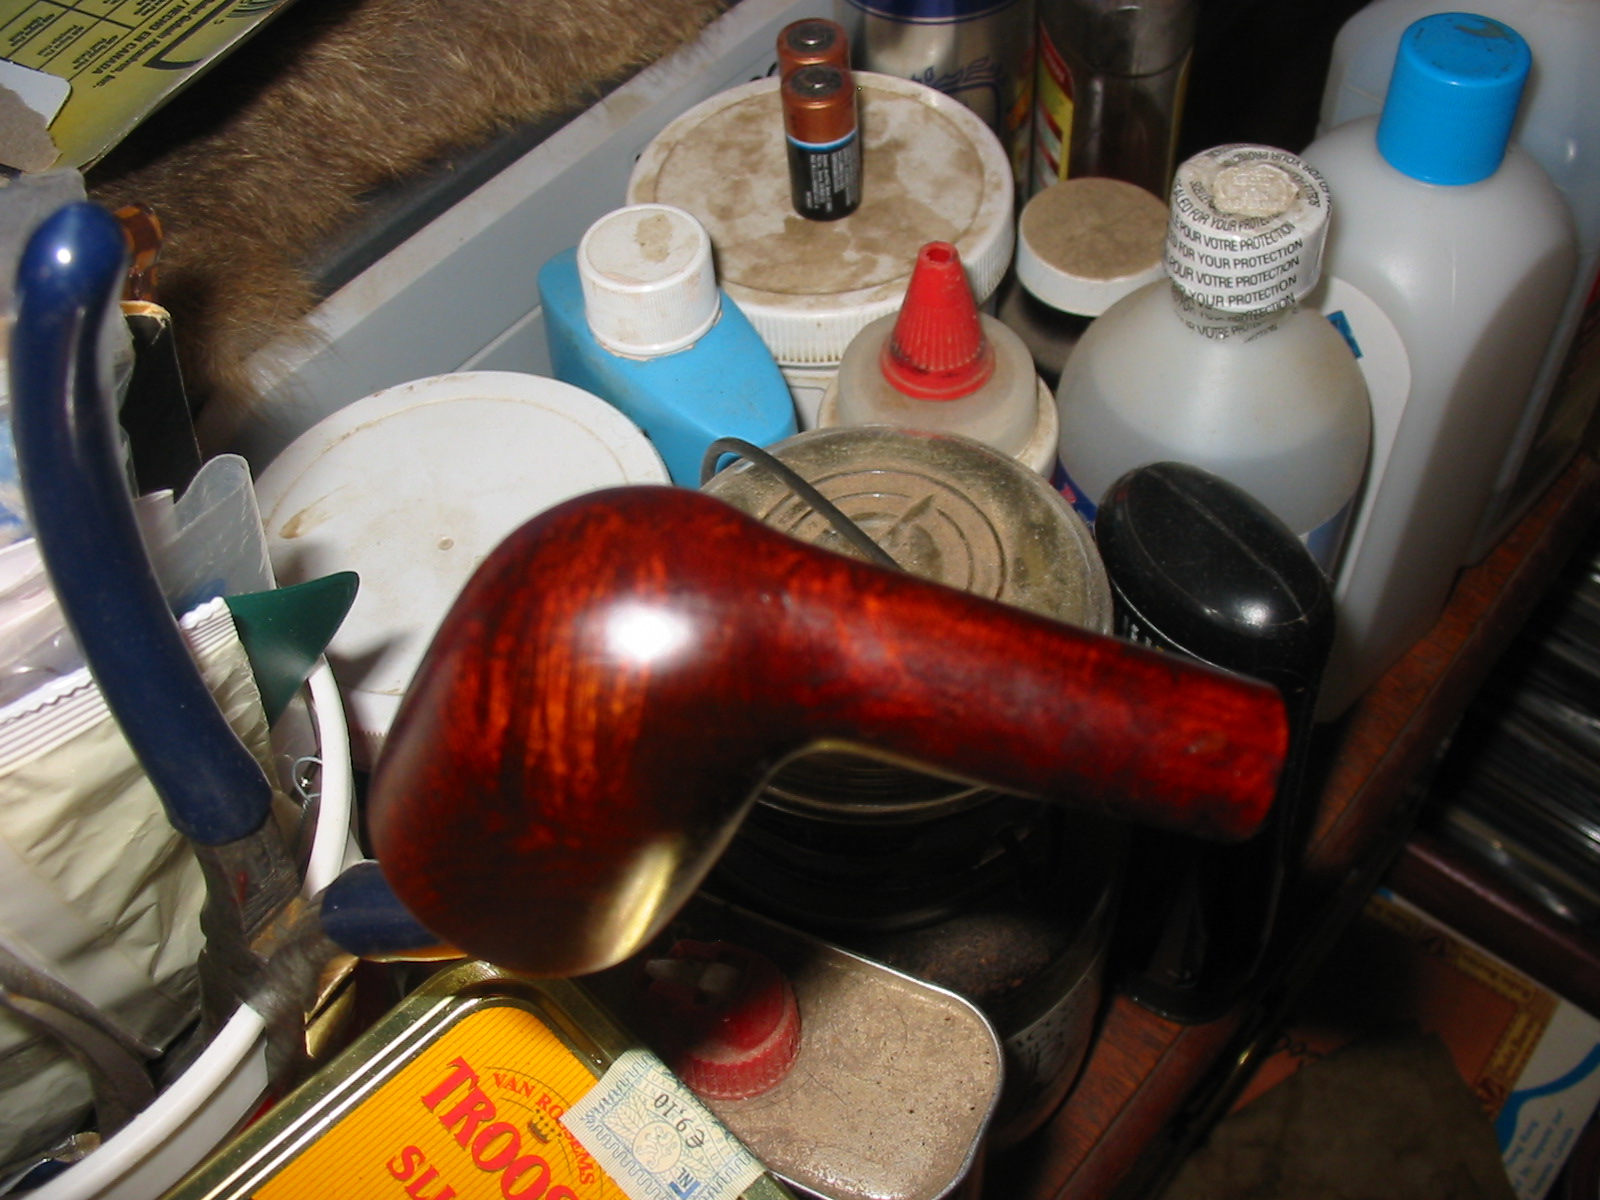
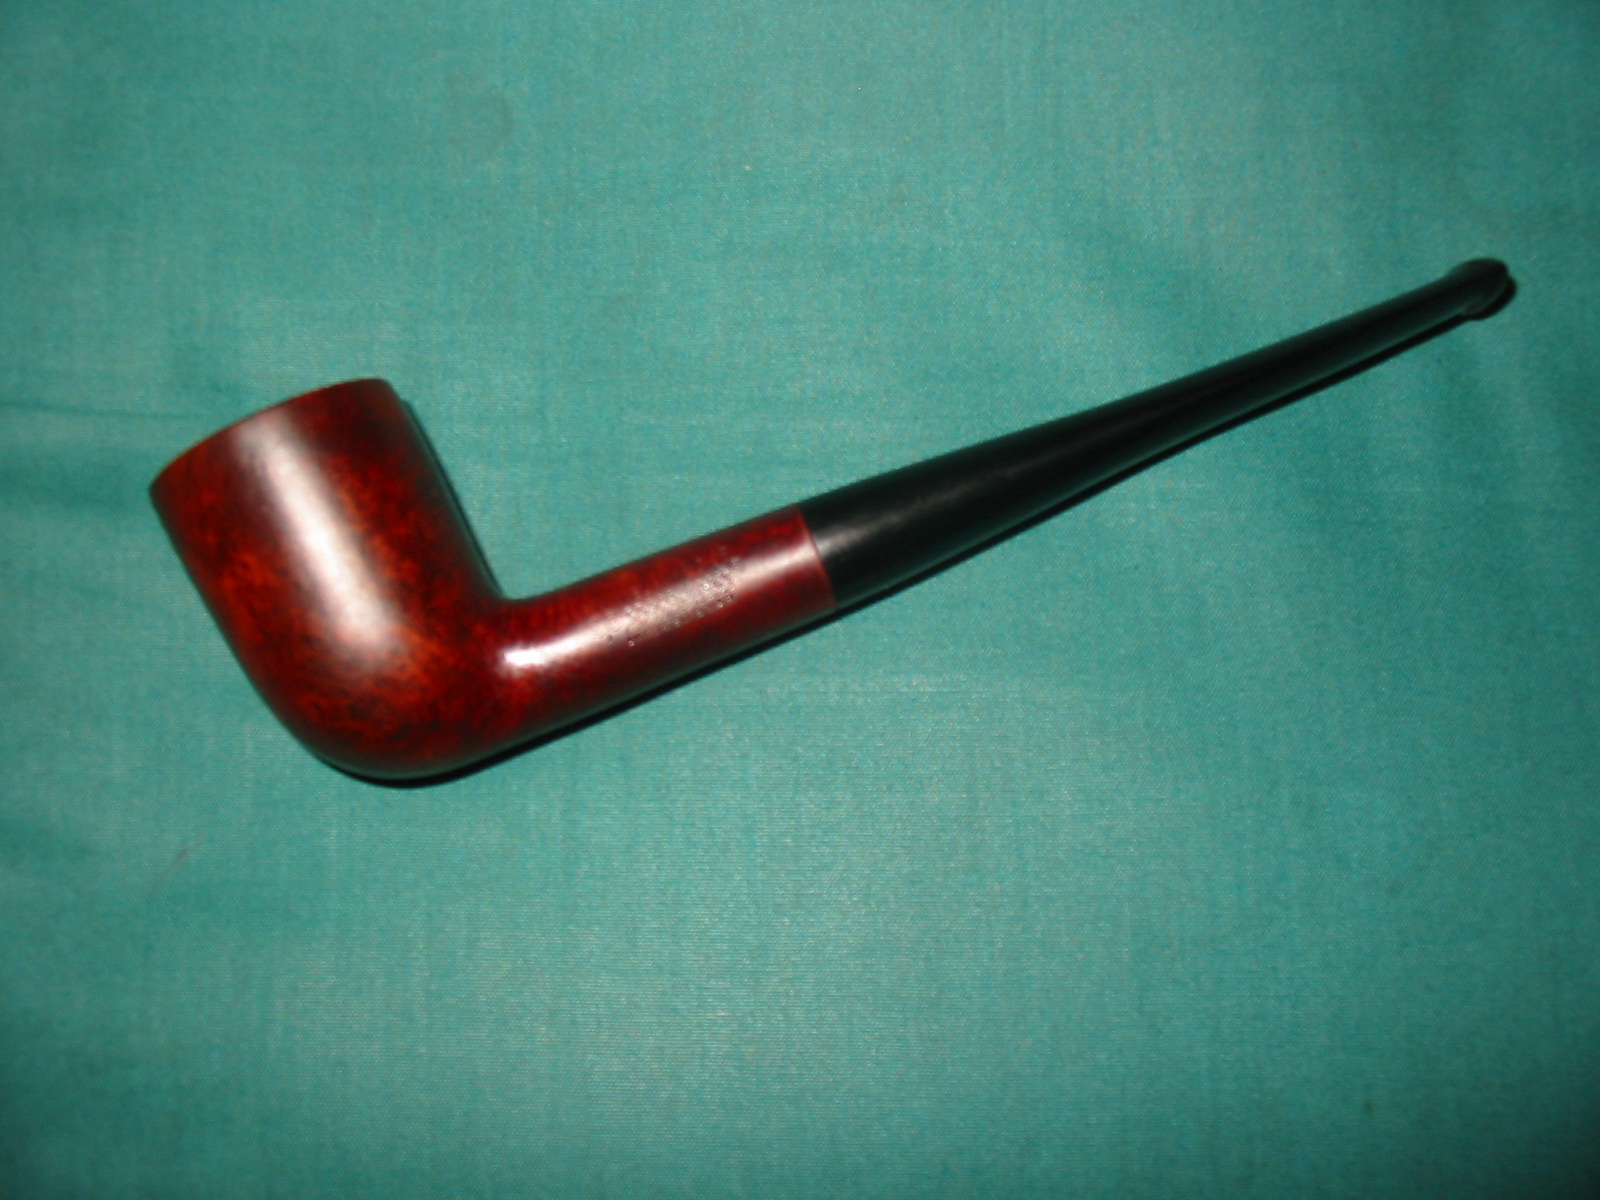
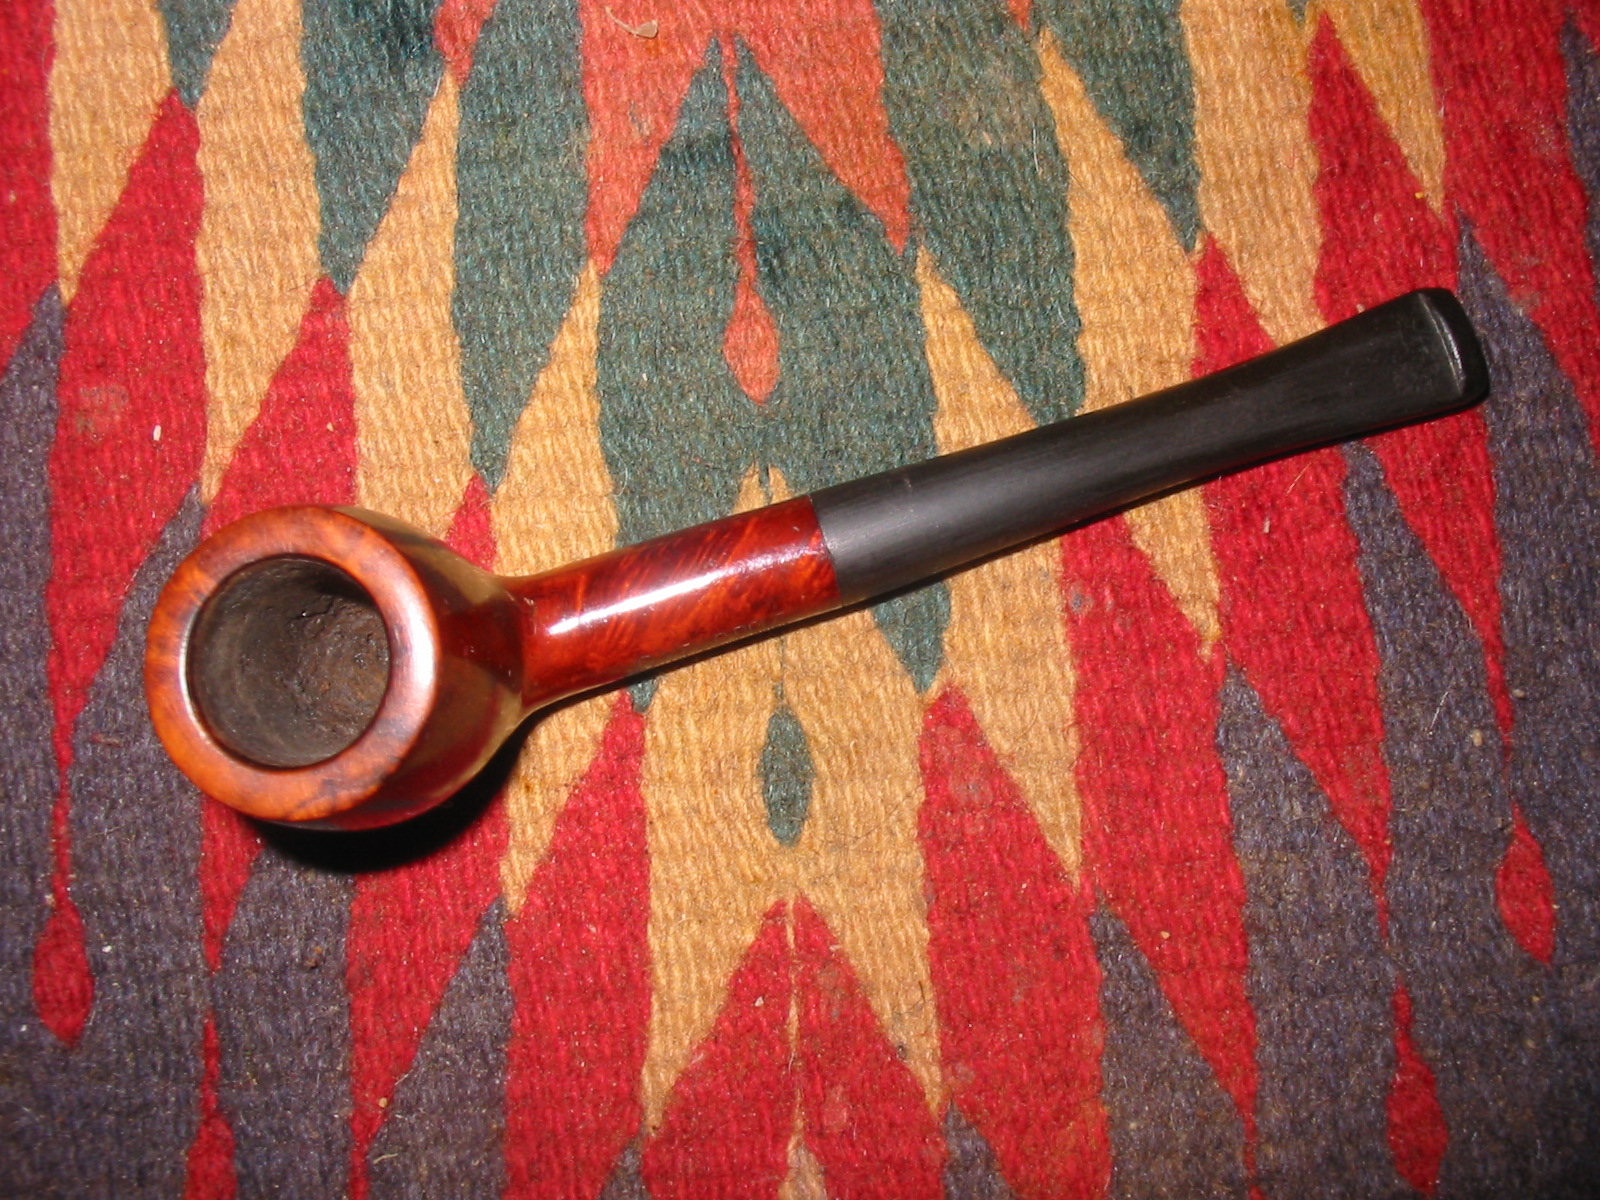
My most recent box of pipes that came from my brother had this Yello-Bole Churchwarden in it for restoration. It is a long pipe – 12 inches from bowl to button. The next seven photos were the ones provided by the eBay seller. They don’t really show the grain in the pipe or the peeling shellac coat on the bowl but they give a clear picture of the shape and carriage of the pipe. It really is a beauty in terms of overall appearance. It is graceful with a gentle bend to the stem ending in a button that is not flared from the end of the stem but is straight-edged with a small slot in the end. The stem also had the inset yellow circle on the top of the stem.yb1
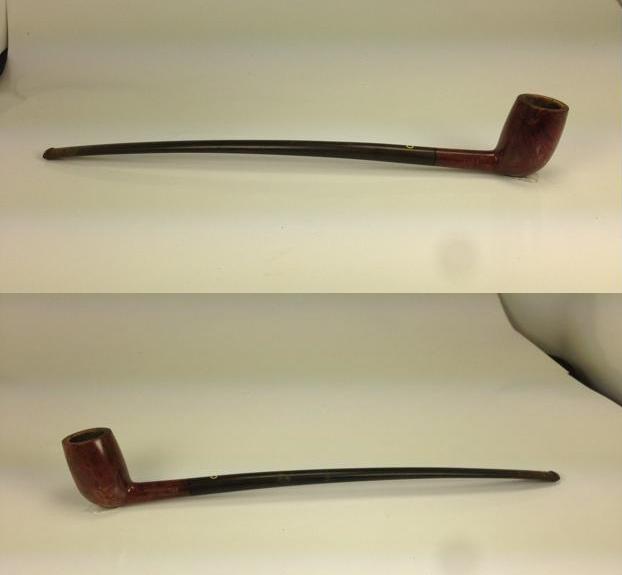
The third and fourth photos provided in the seller’s photos show the damage to the finish and the build up and damage to the rim. You can also see some of the peeling of the finish and the way that it obscures the grain of the briar. The rim is dirty in the photo below and at first glance it looks like the bowl may have been meerschaum lined. I was pretty sure that this was not the case but would know better once it arrived in Vancouver. It appears that the bowl had a light cake but was not in bad shape. It would not take too much to ream the bowl. The stem was lightly oxidized and had tooth chatter on the top and underside near the button.yb2
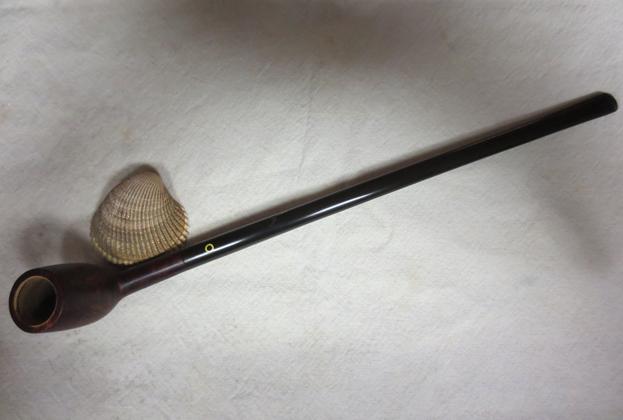
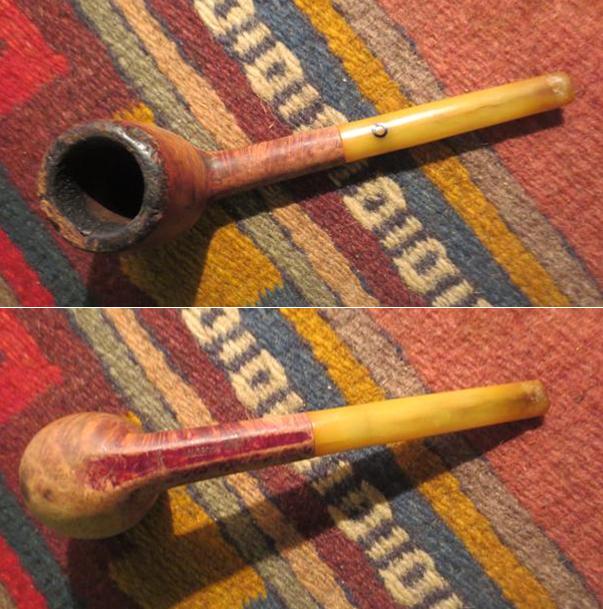
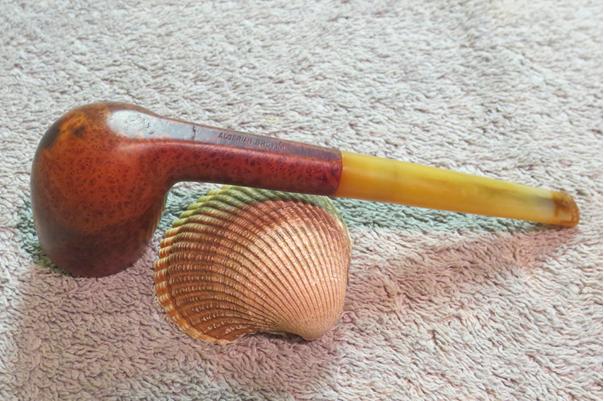
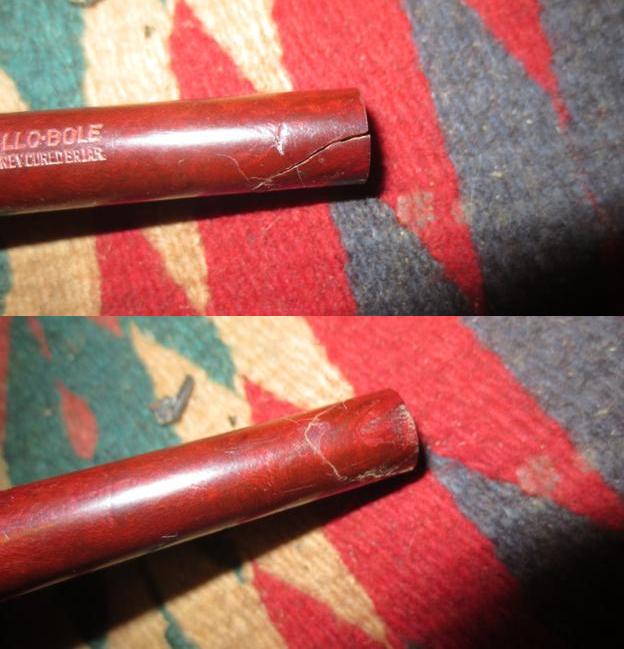
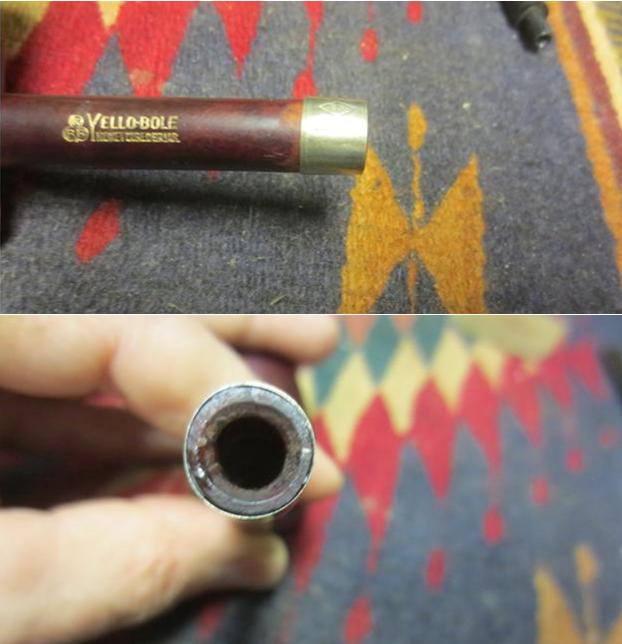
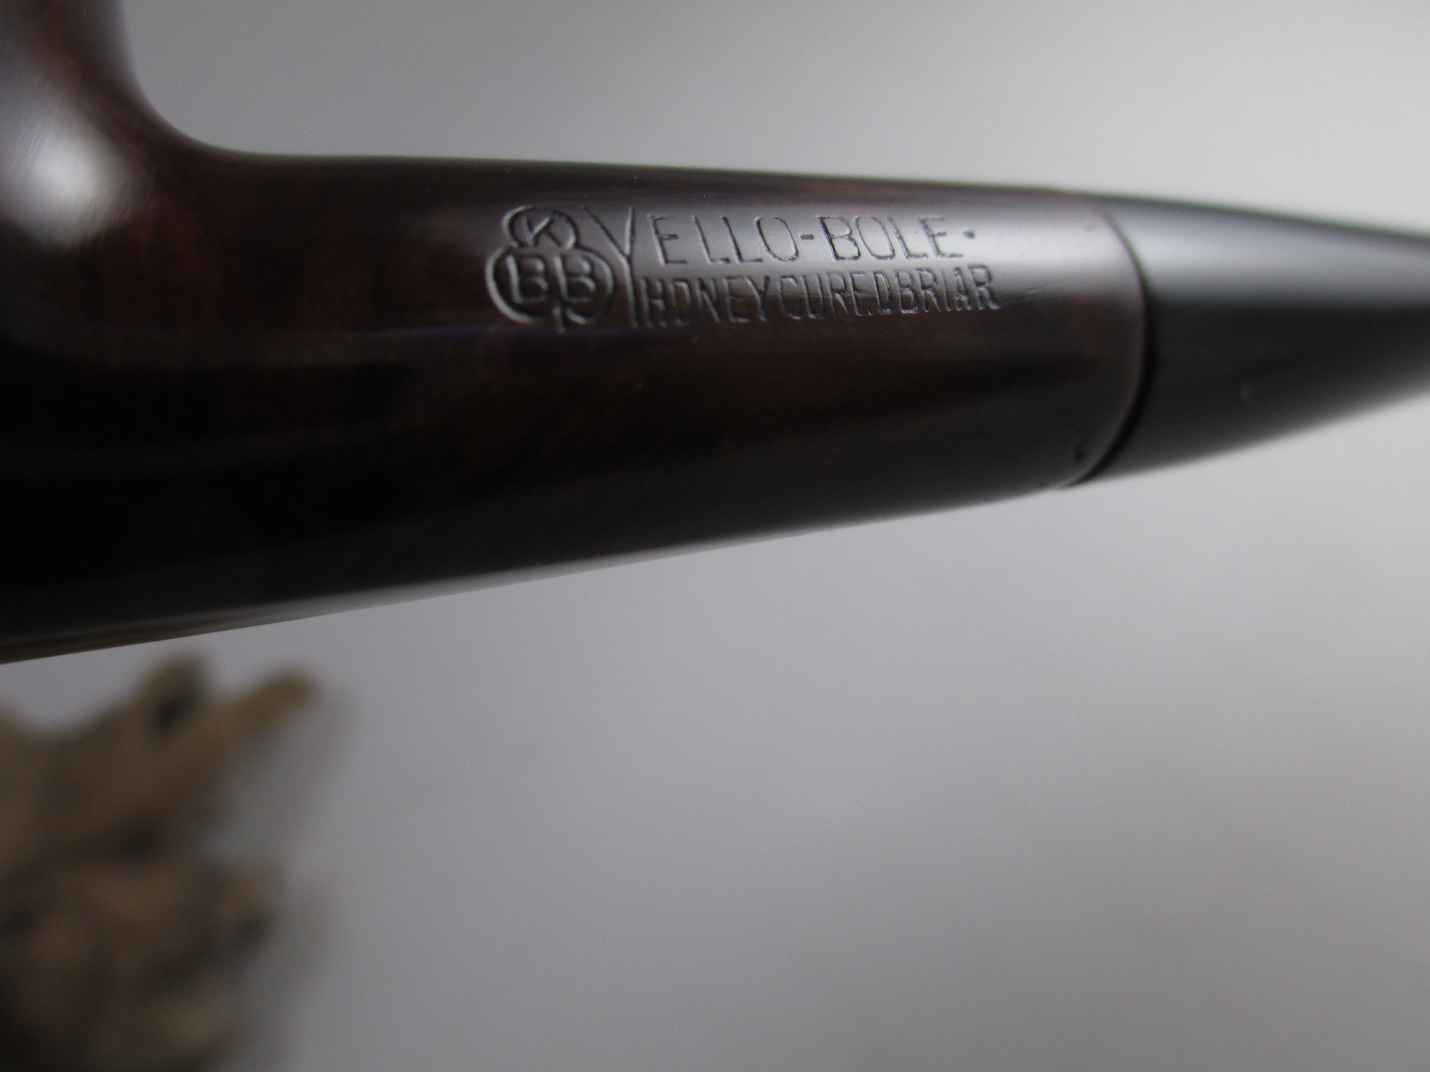
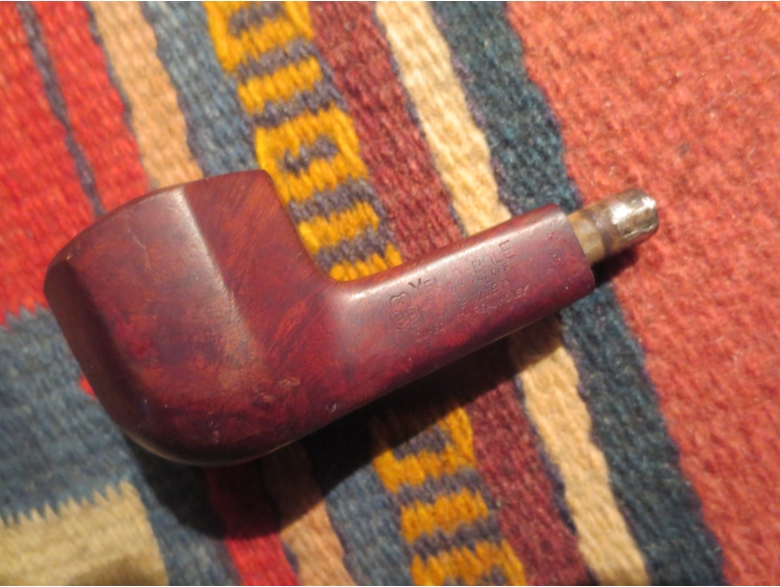
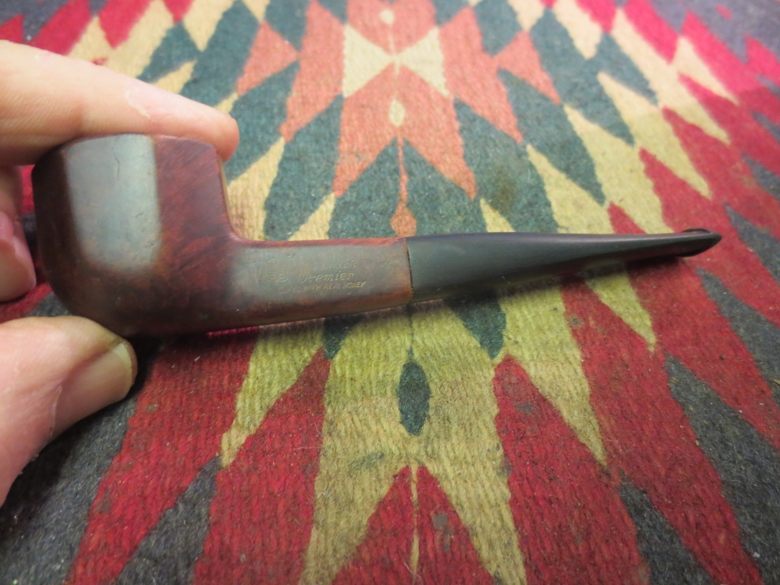
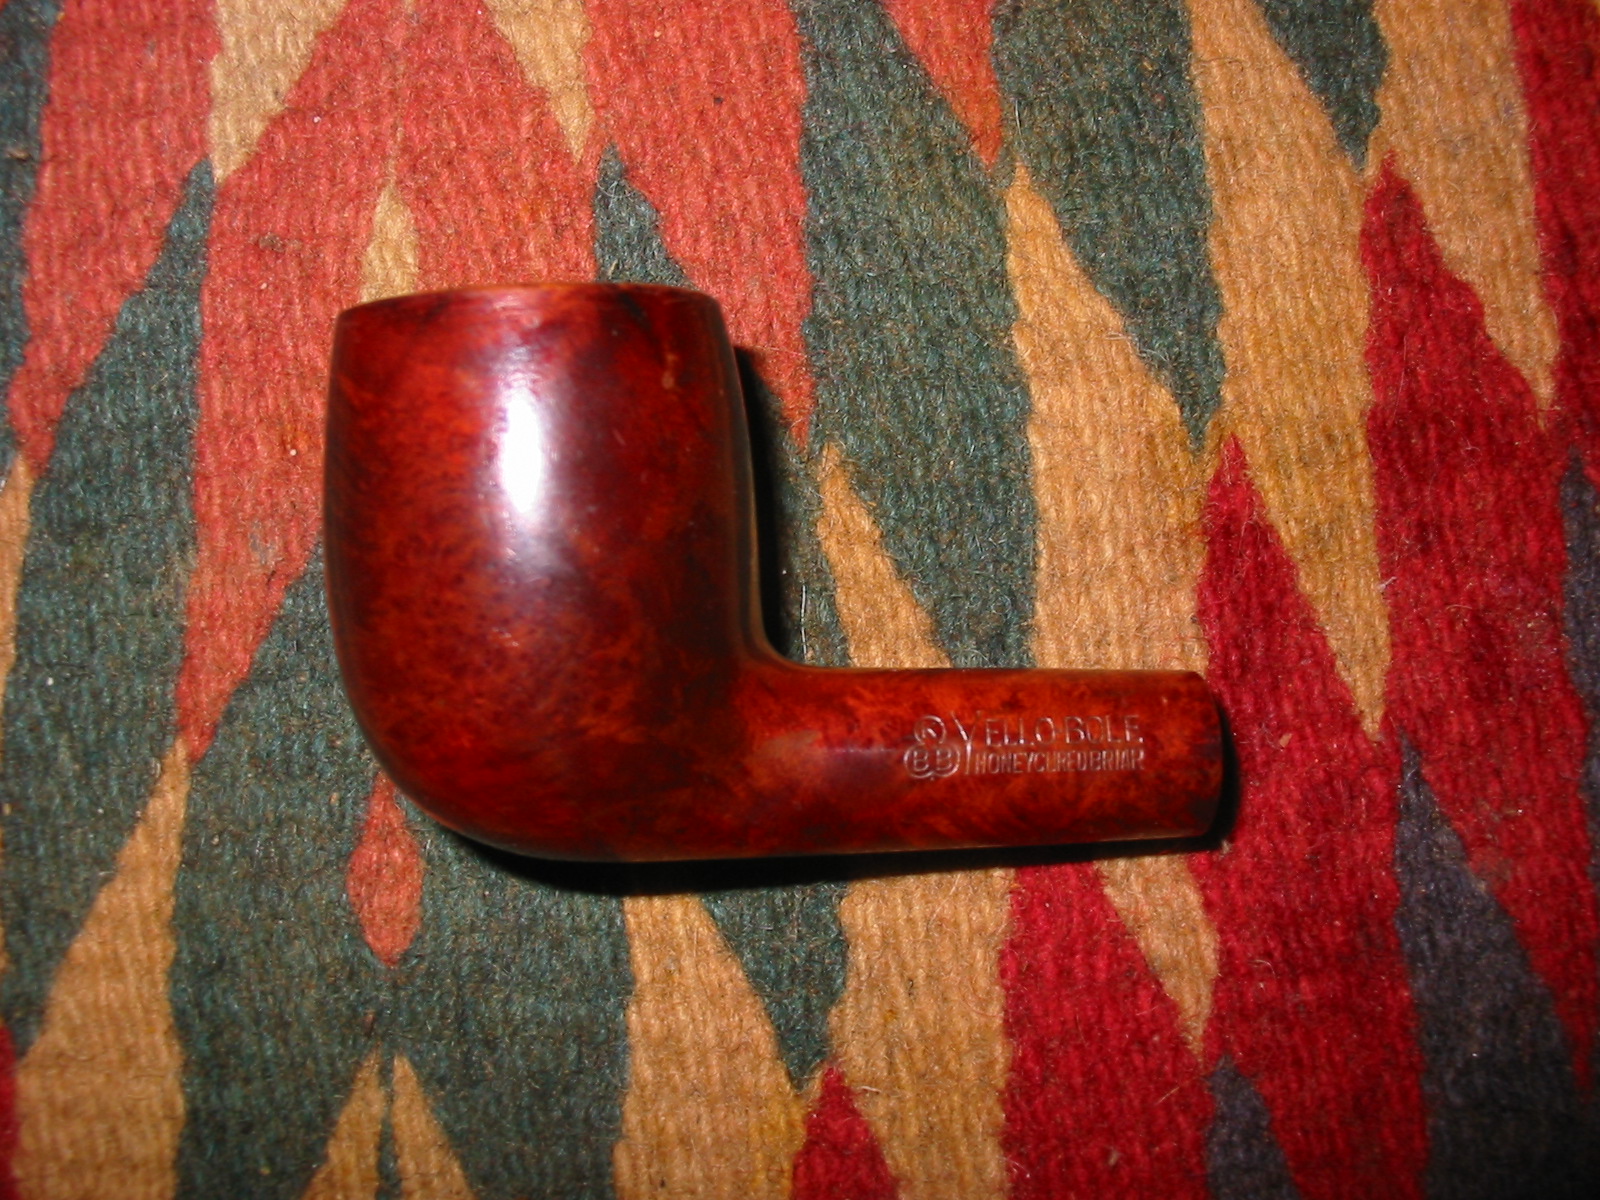
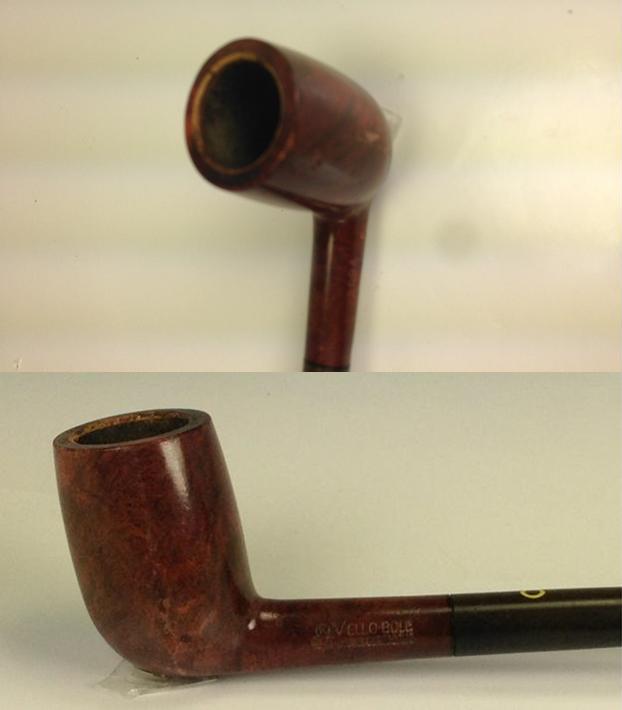
The stamping on the shank is very clear. The shape number on the right side of the shank is 2094 and the brand stamp on the left KBB in a cloverleaf next to Yello-Bole over Honey Cured Briar.yb3
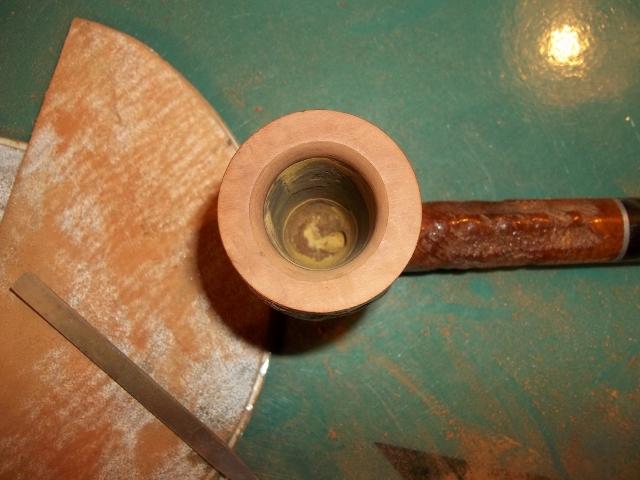
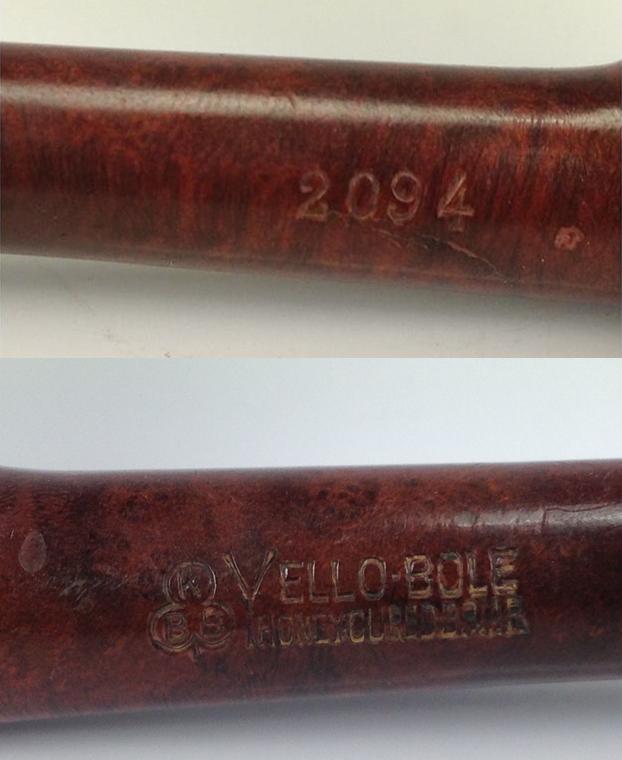
My brother scrubbed the externals of the pipe with Murphy’s Oil Soap and was able to loosen some of the flaking varnish or shellac. He reamed the light cake back to the yellow bowl coating. He cleaned out the shank and the airway in the stem with pipe cleaners and alcohol.yb4 yb5
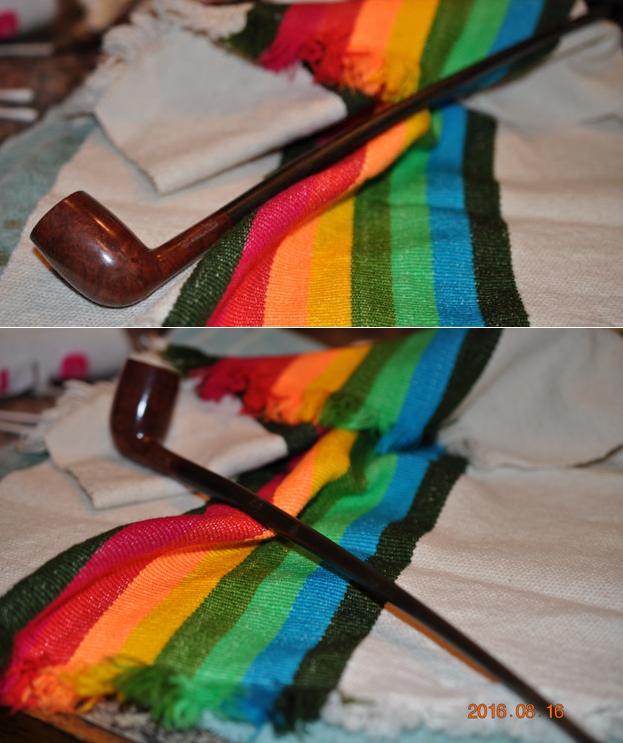
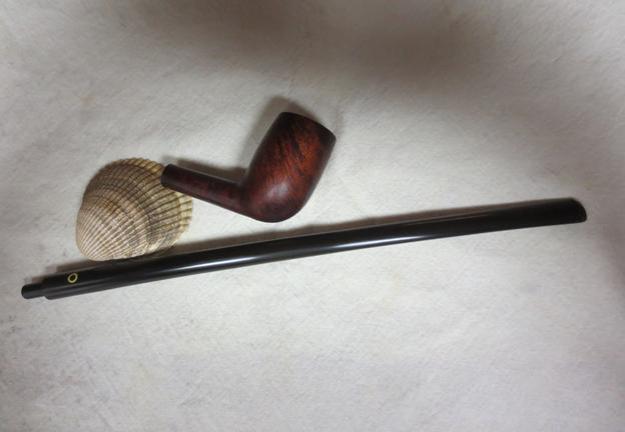
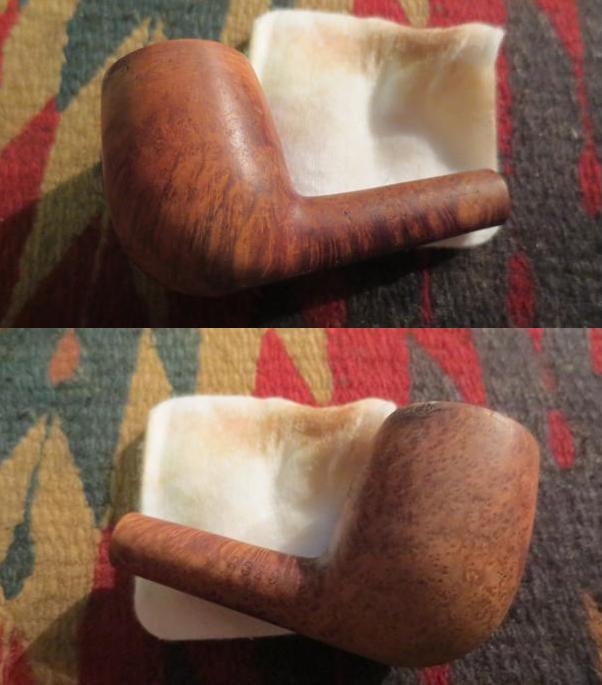
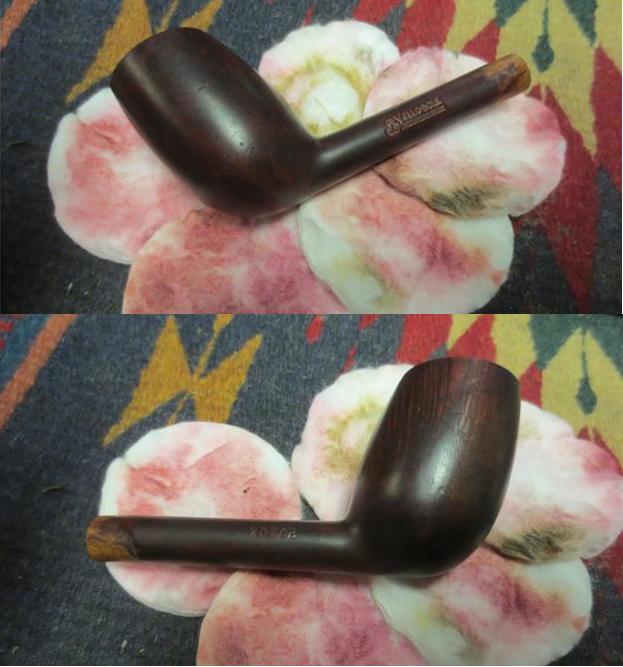
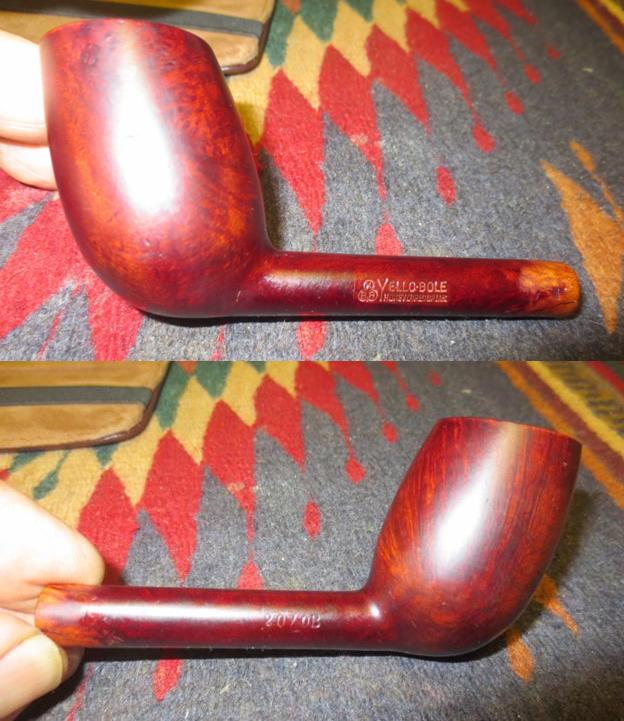
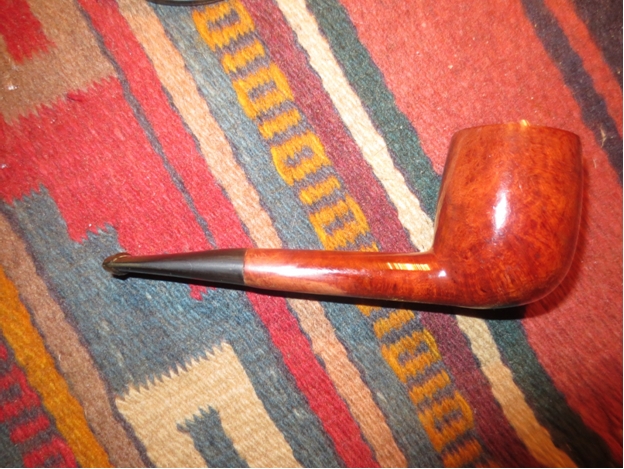
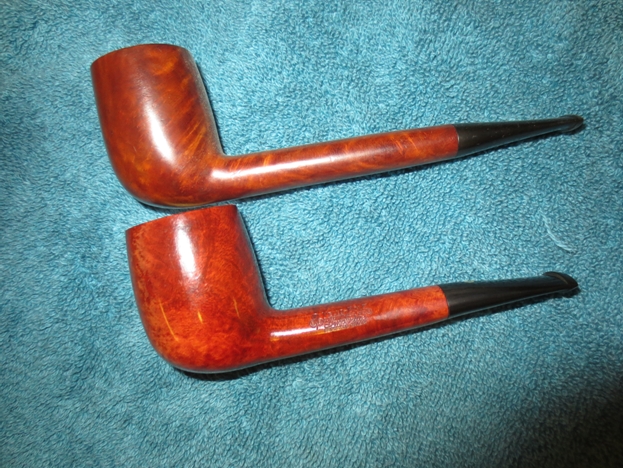
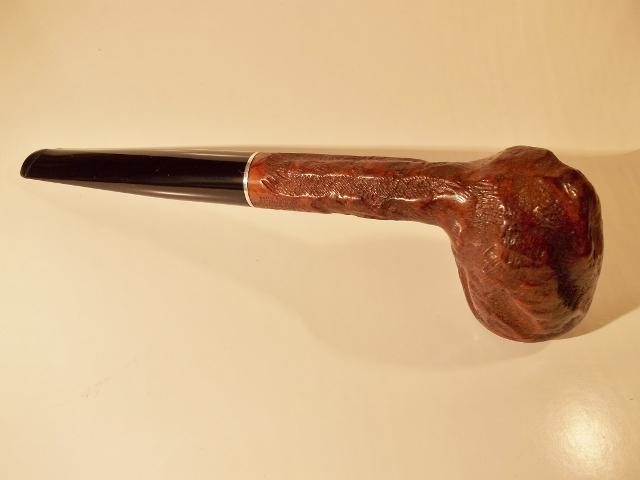
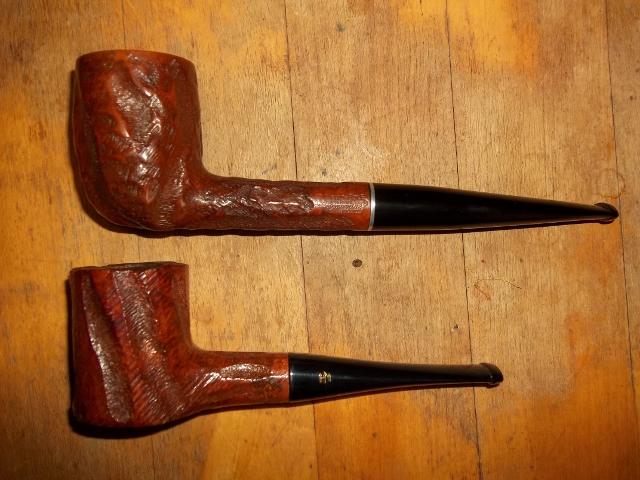
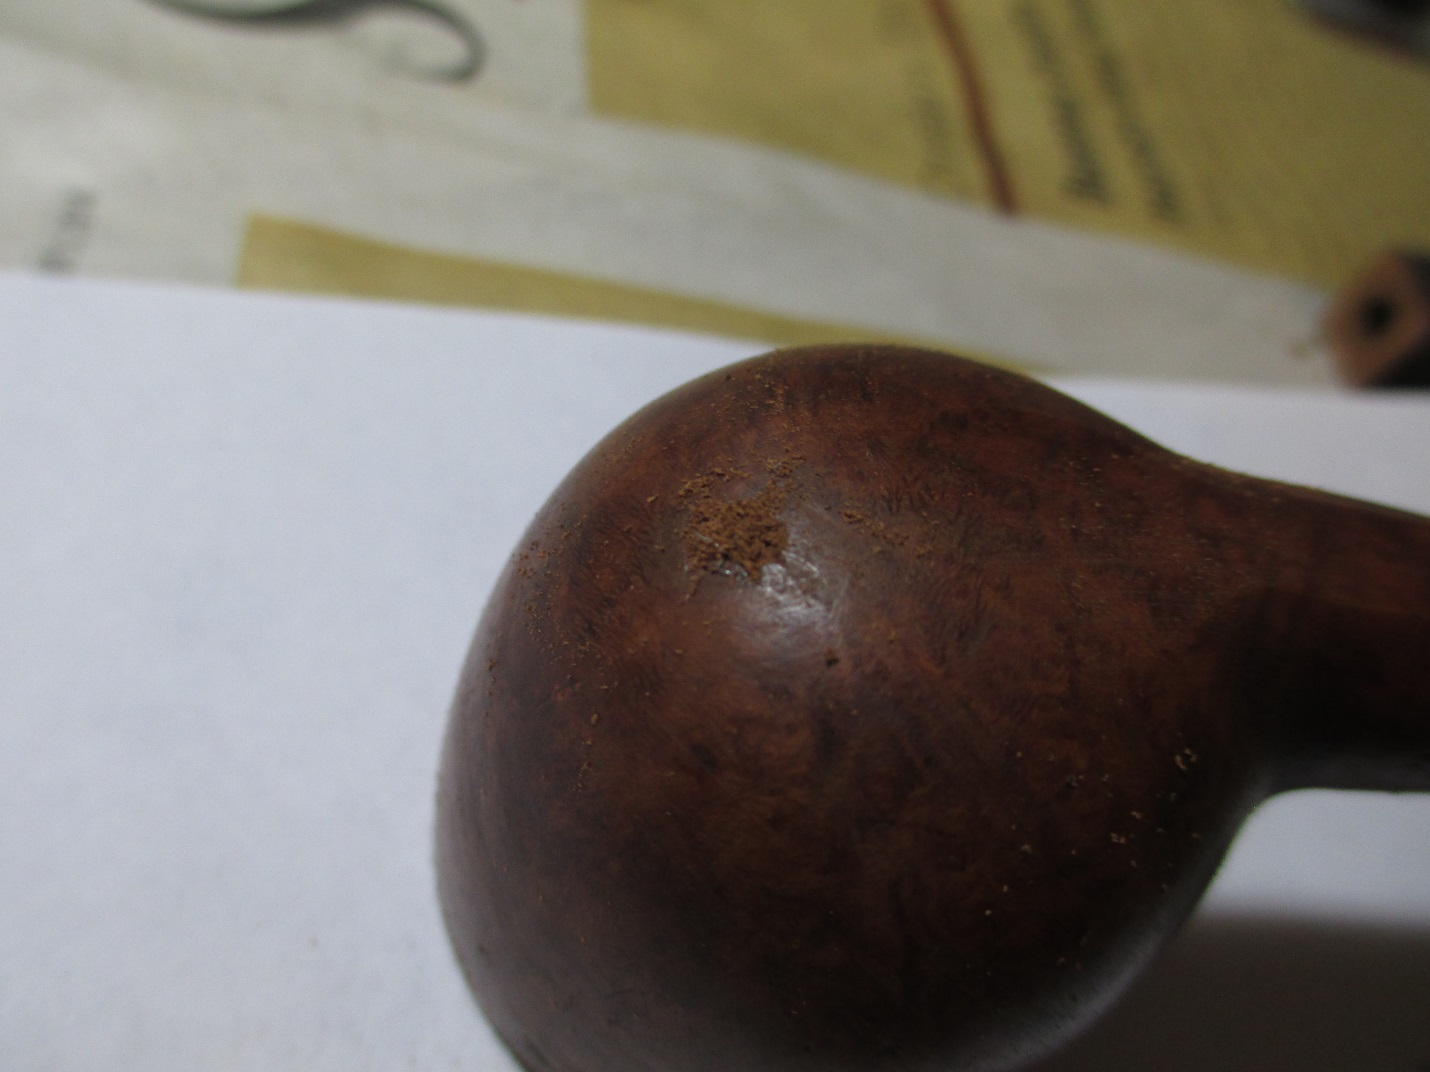
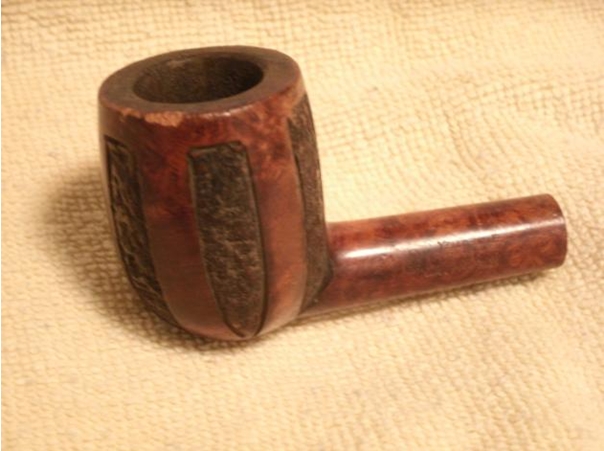
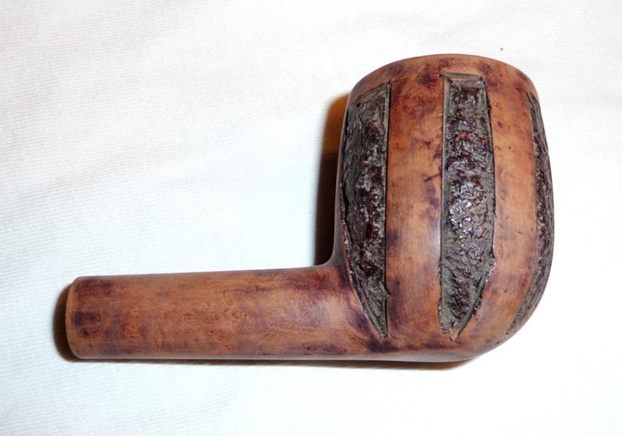
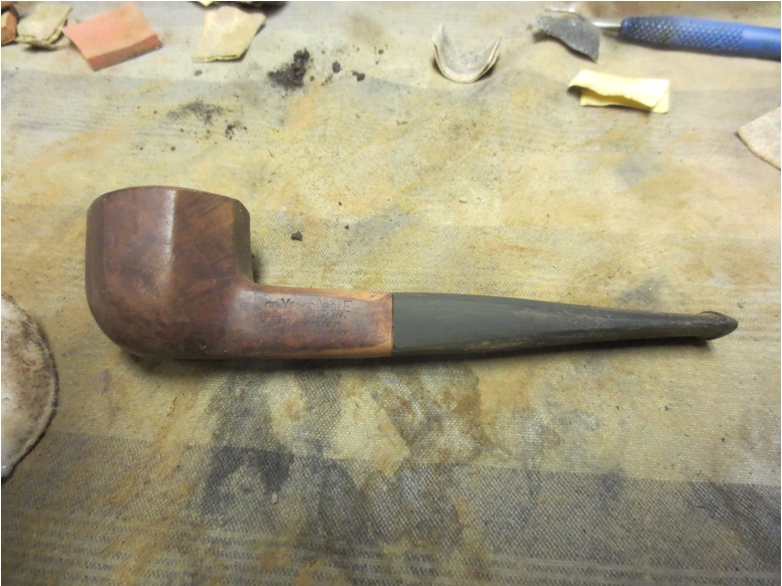
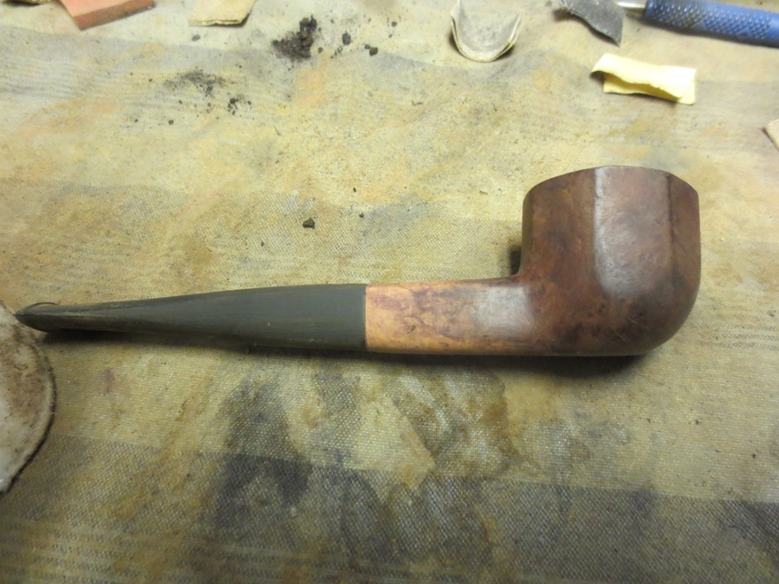
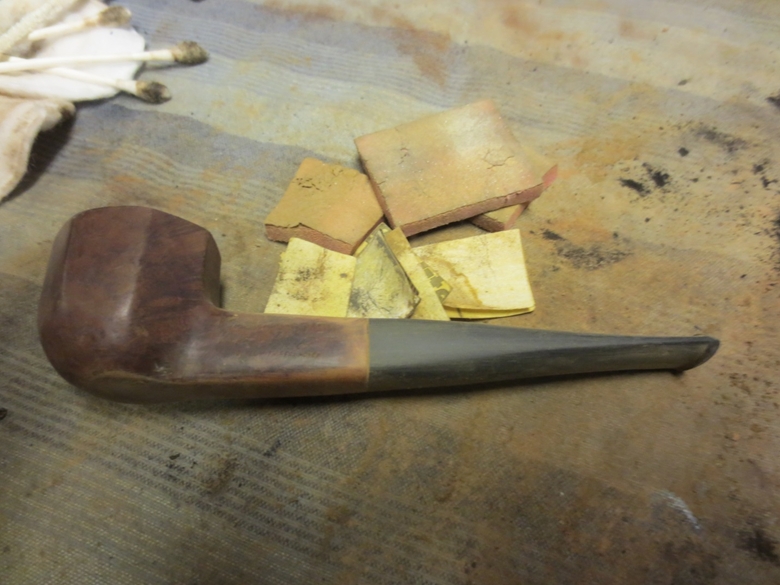
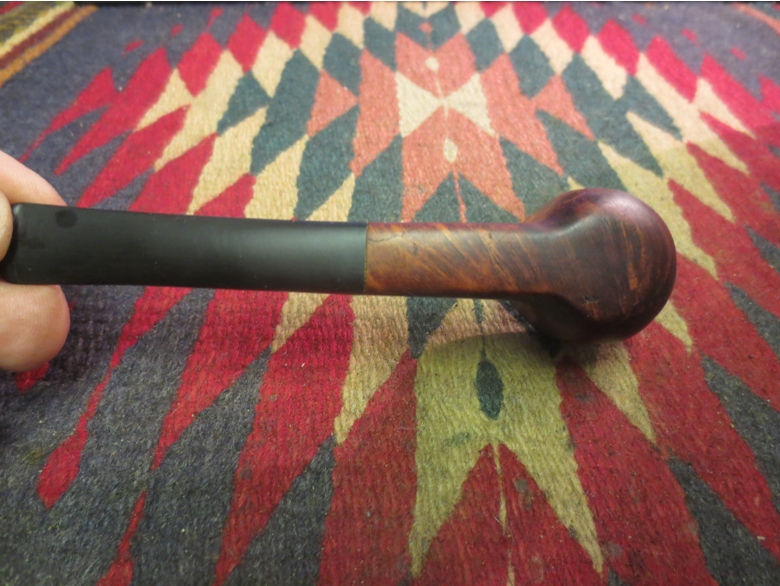
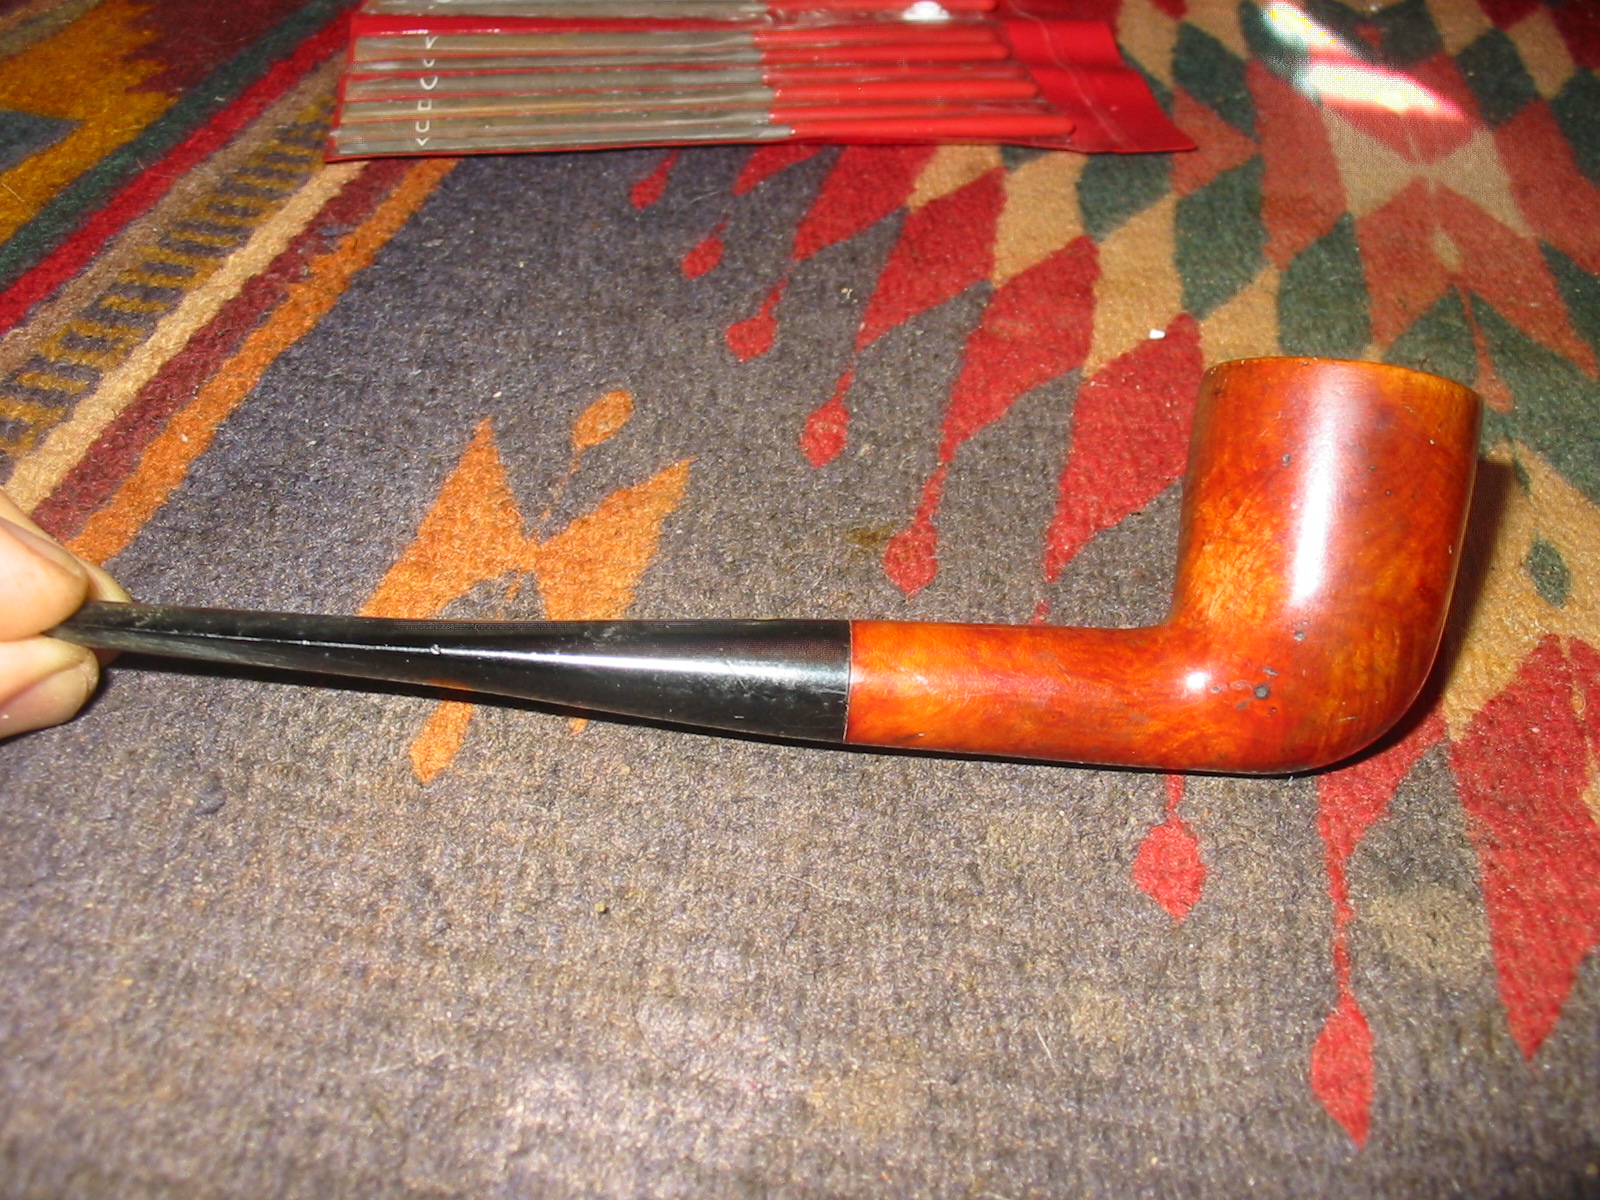
The next two close-up photos of the bowl sides shows what the finish looked like once he had done his work. You can see the interesting grain showing through the damaged finish.yb6 yb7
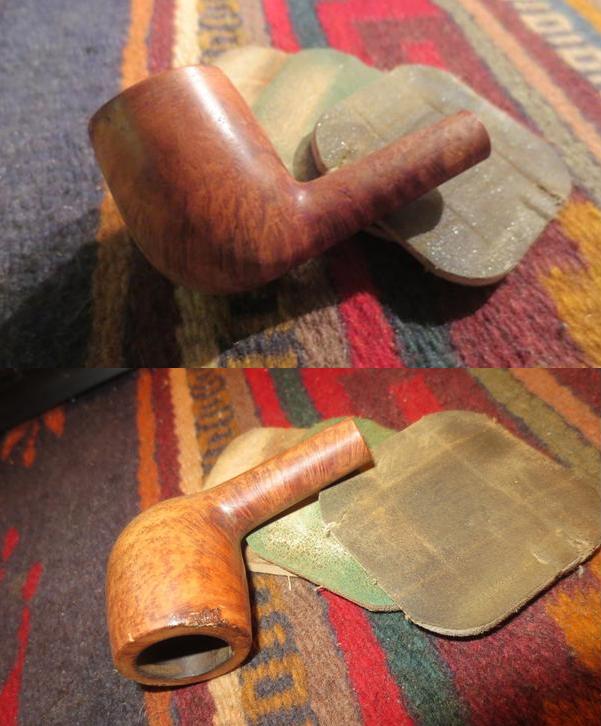
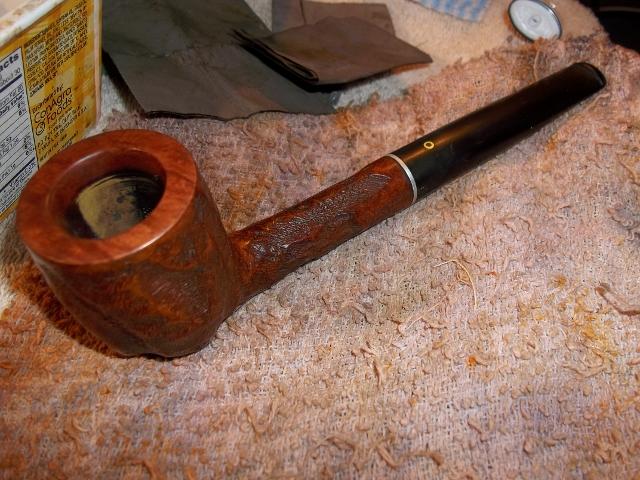
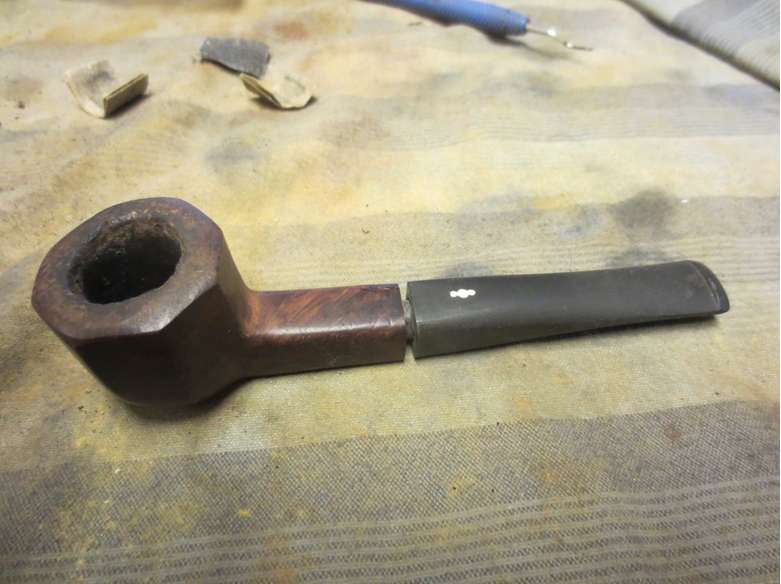
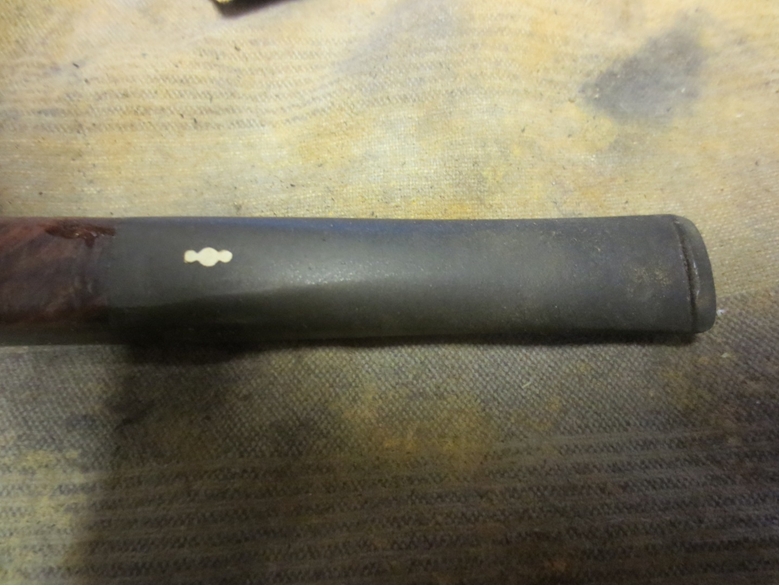
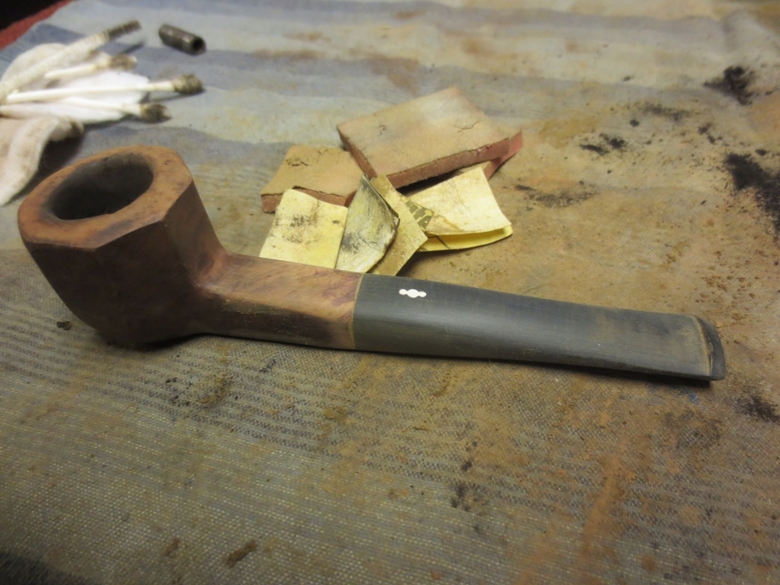
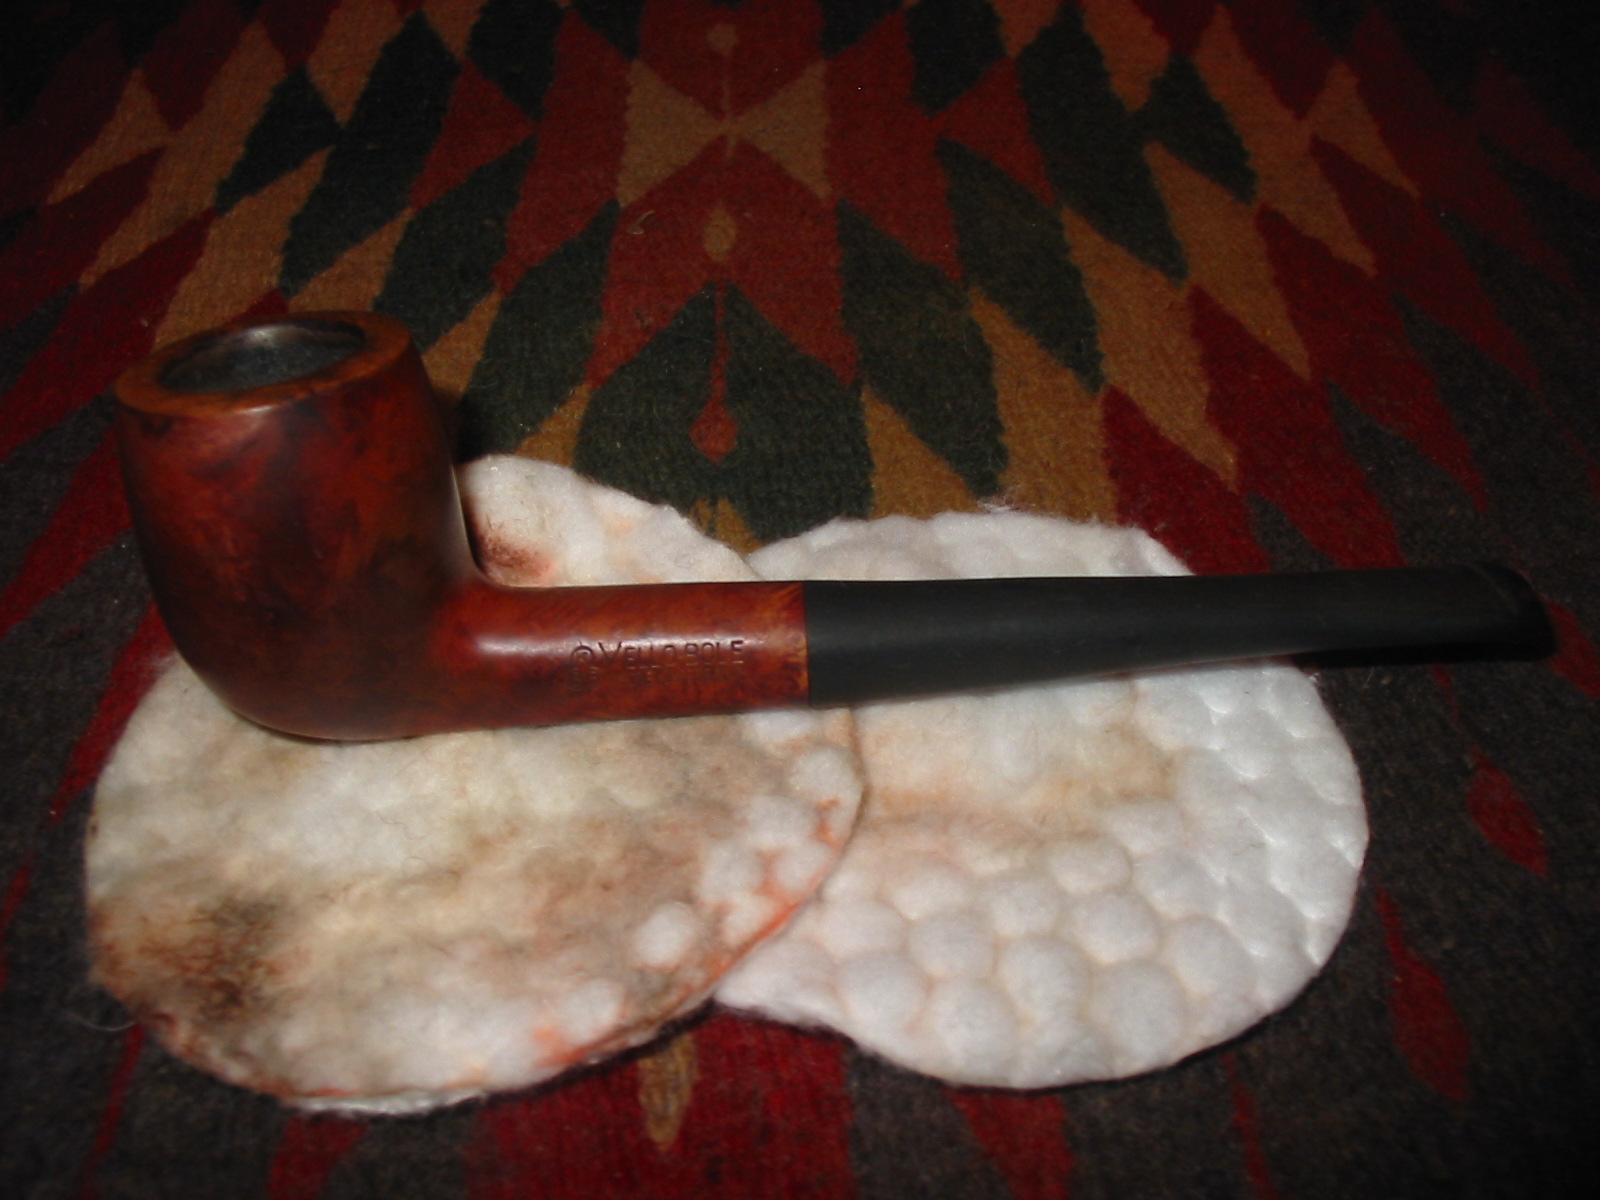
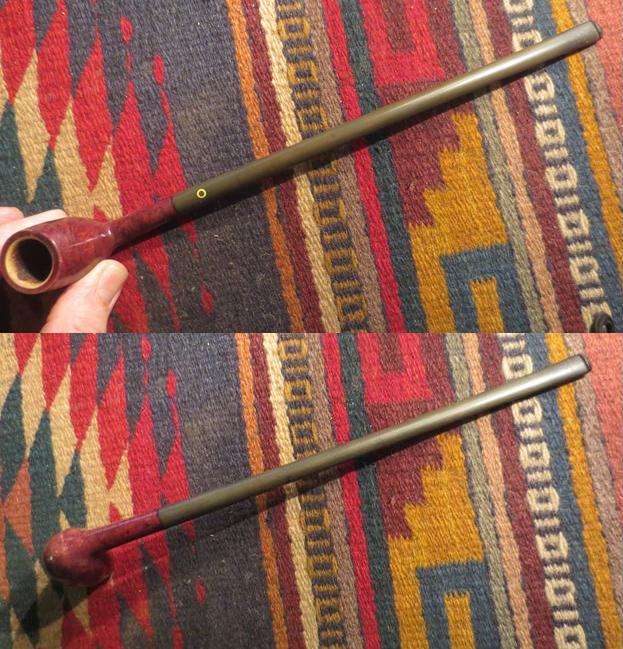
I took photos of the pipe when I received it in Vancouver. You can see the condition of the finish in the photos. In the cleaning process oxidation came to the surface of the stem.yb8 yb9
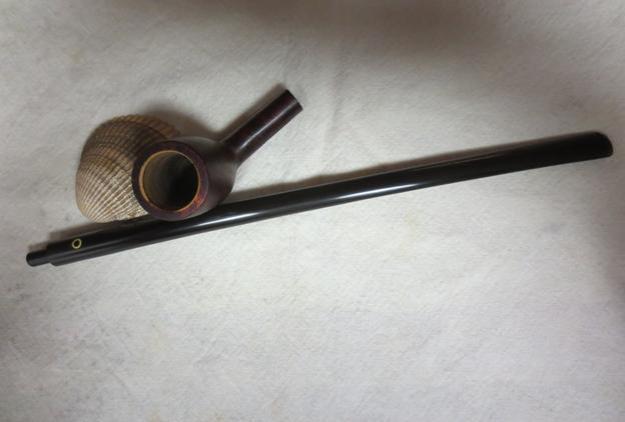
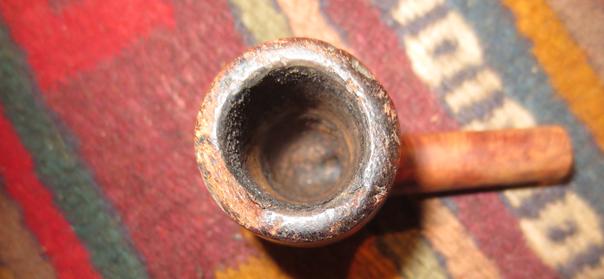
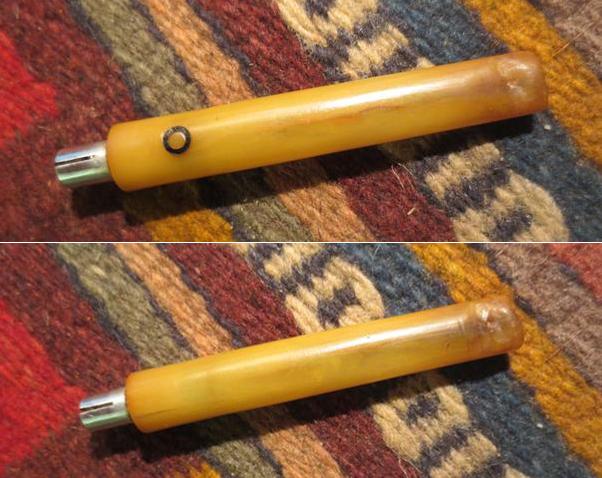
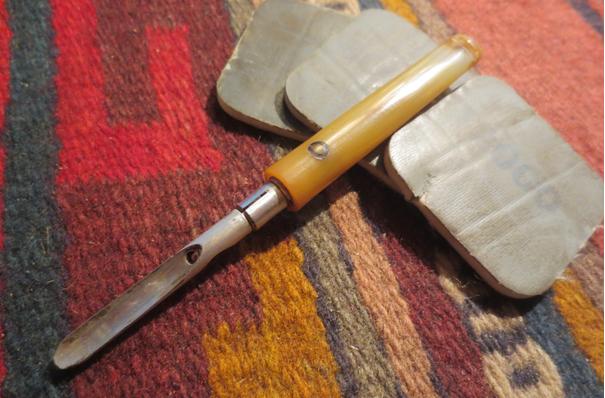
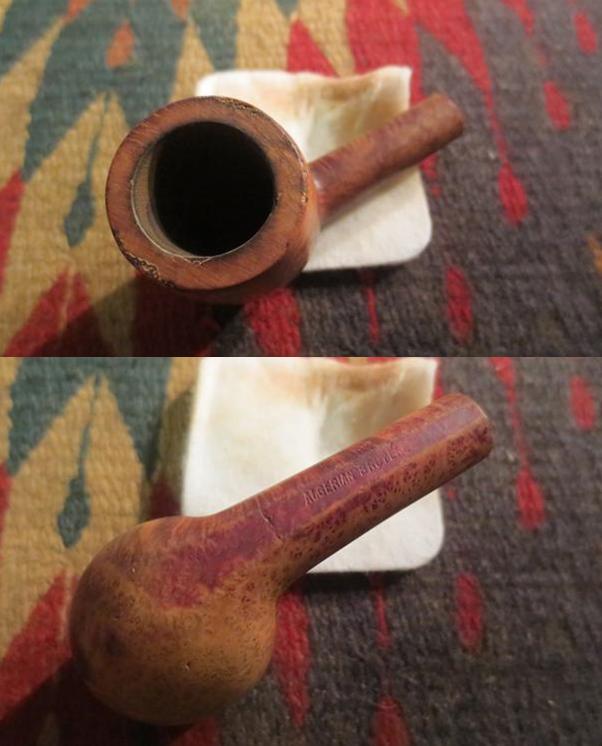
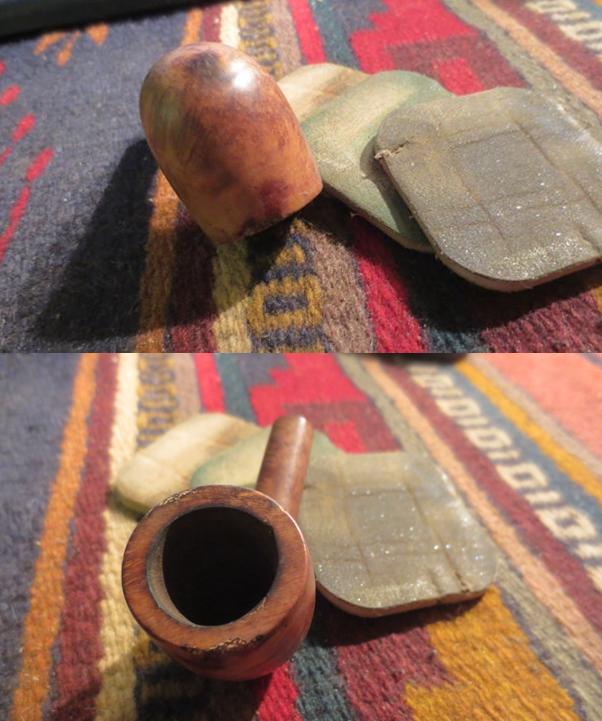
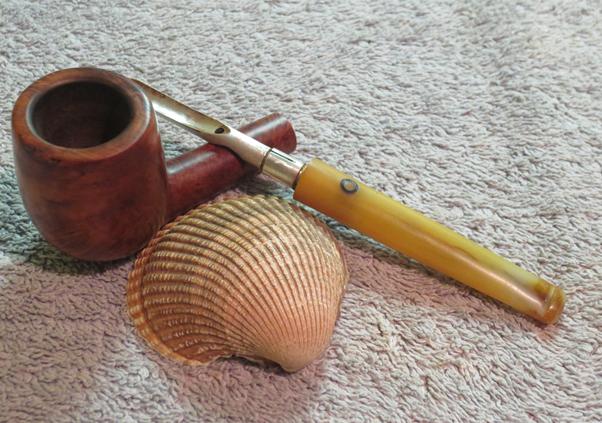
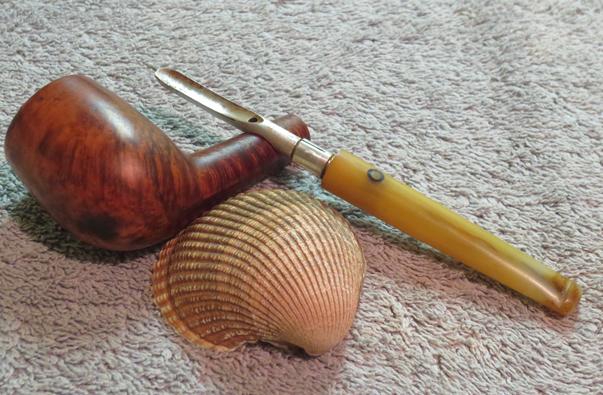
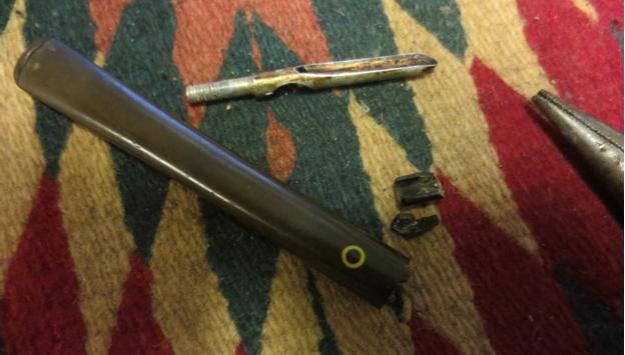
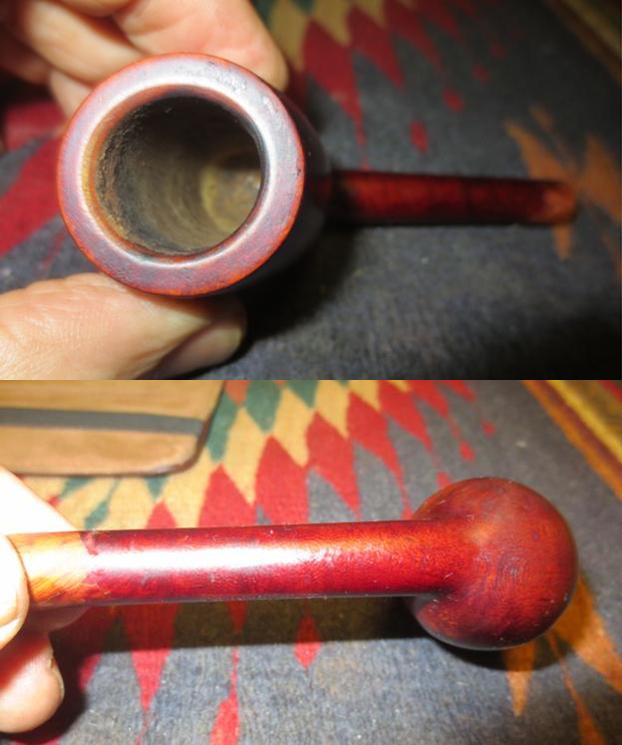
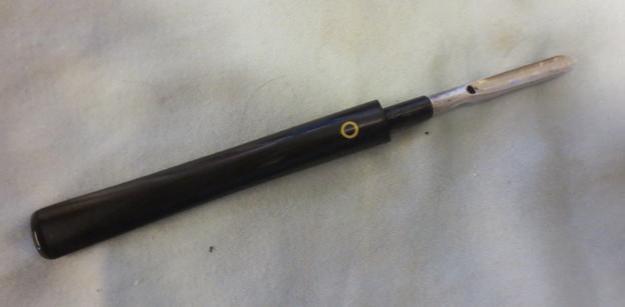
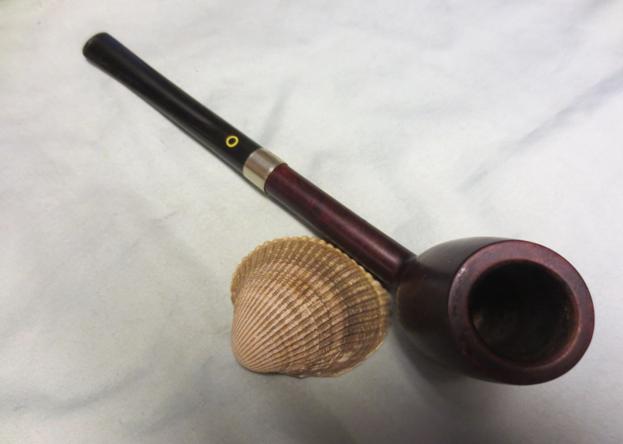
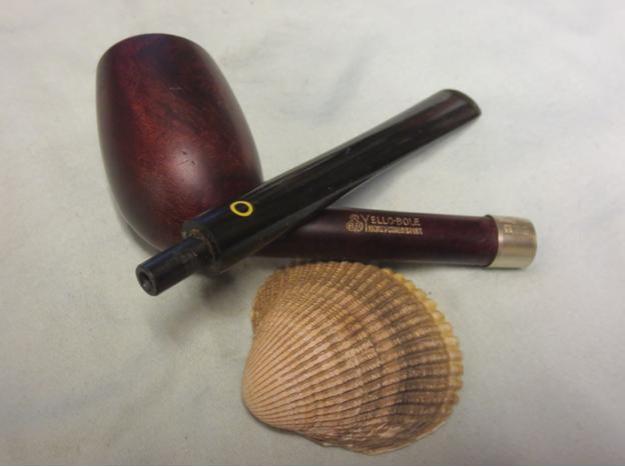
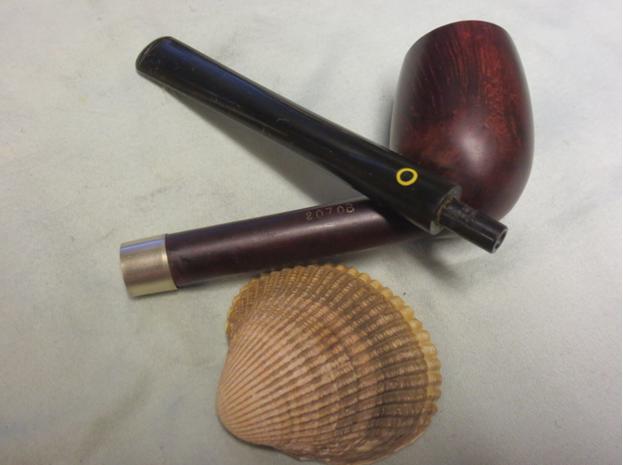
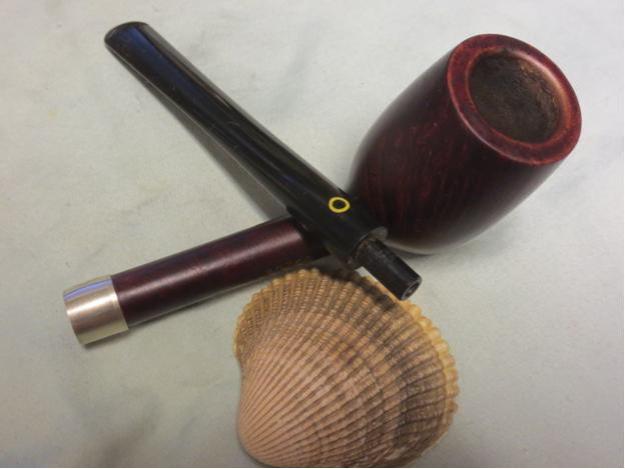
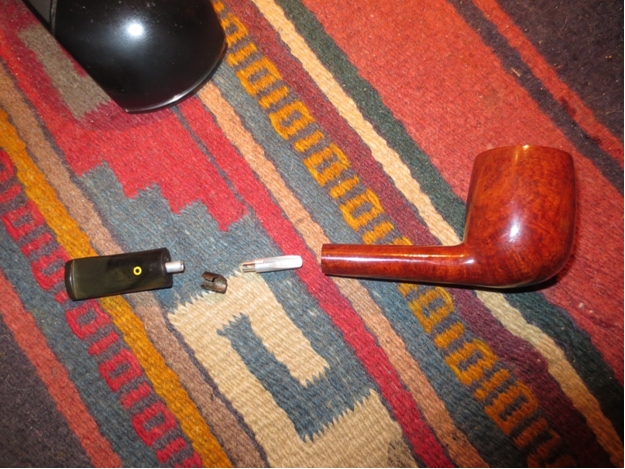
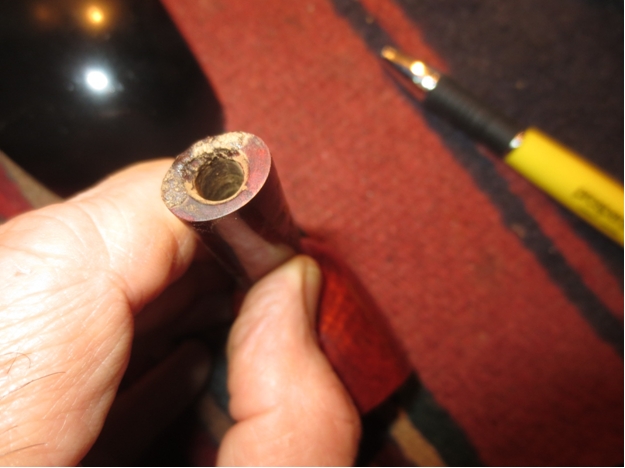
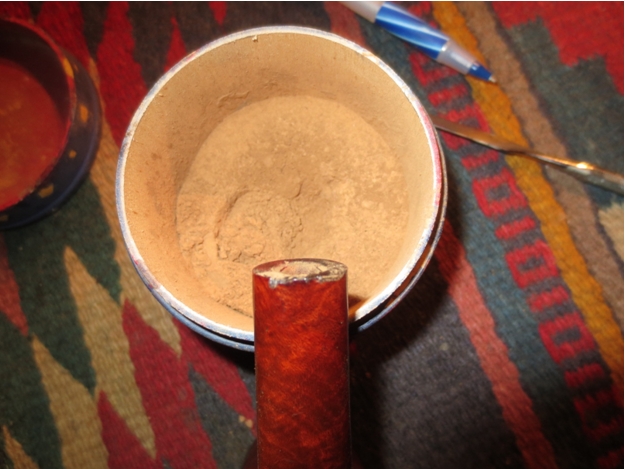
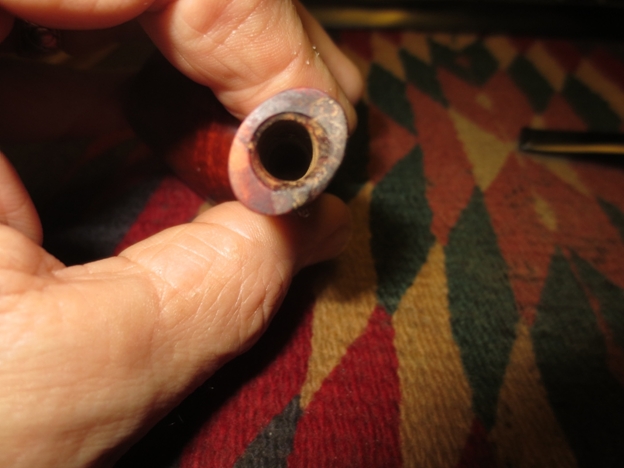
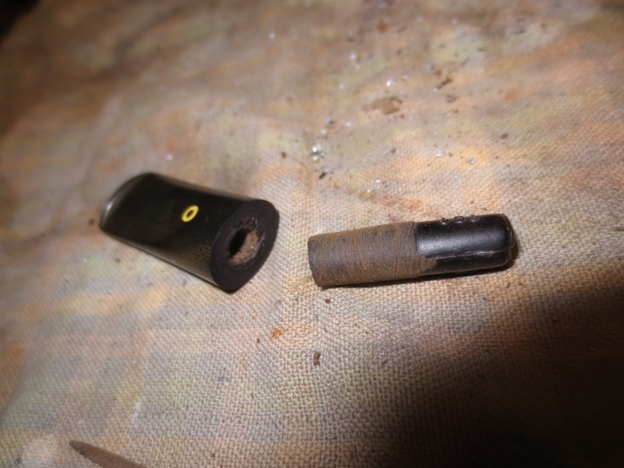
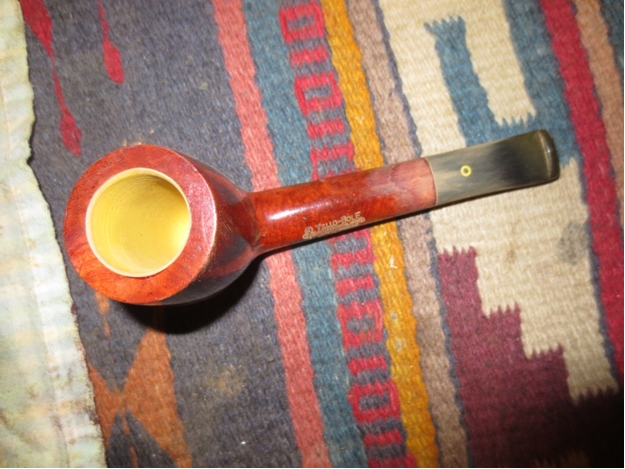
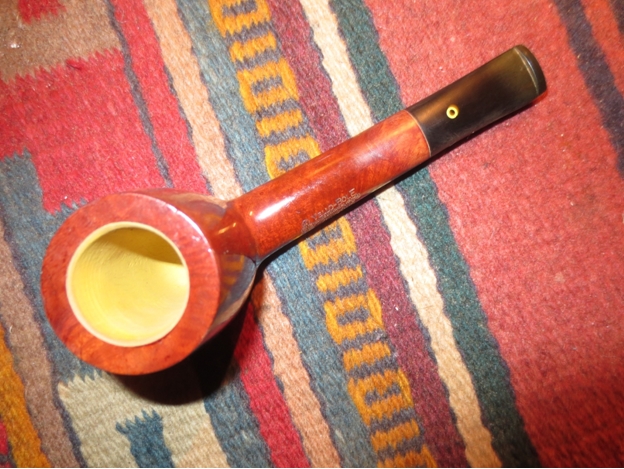
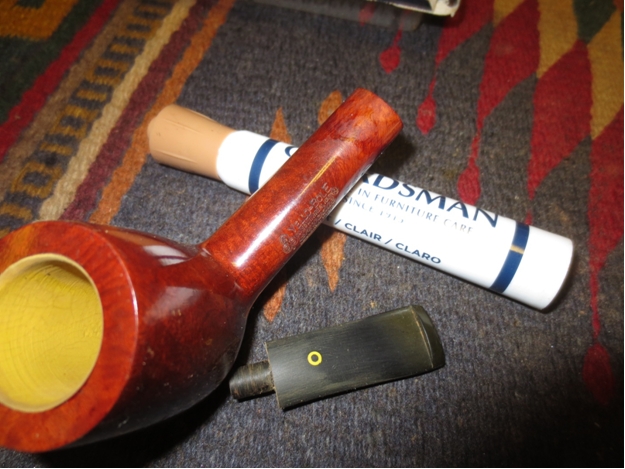
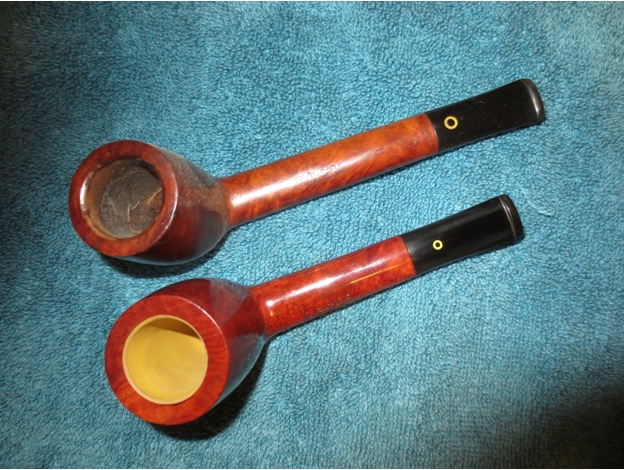
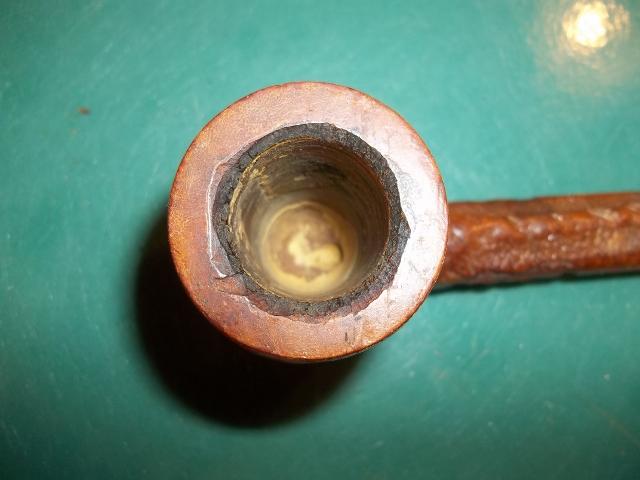
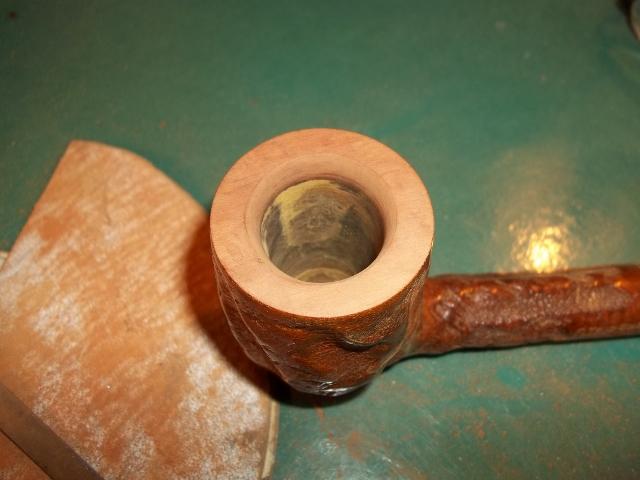
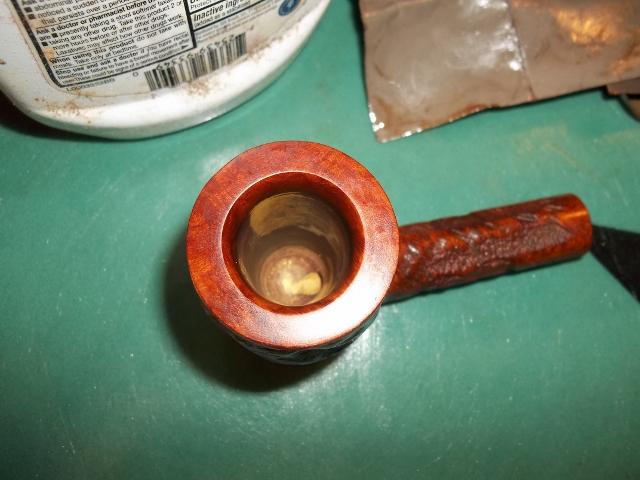
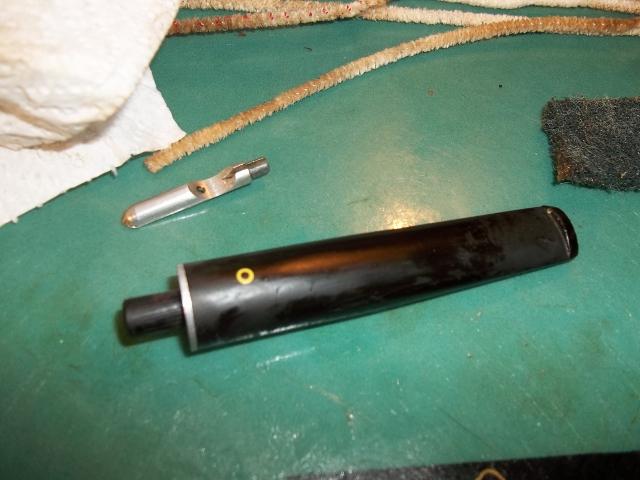
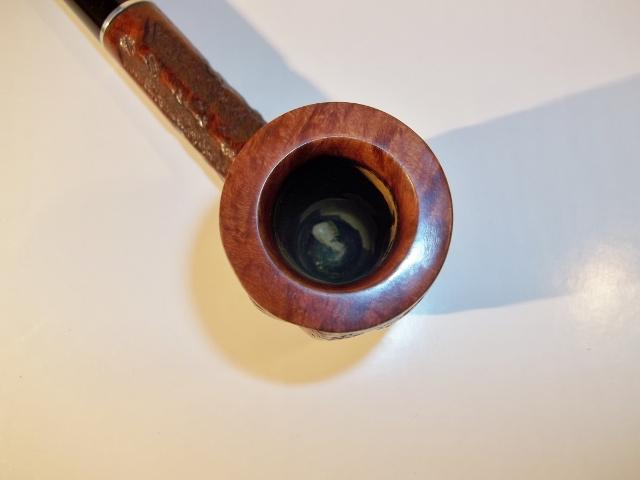
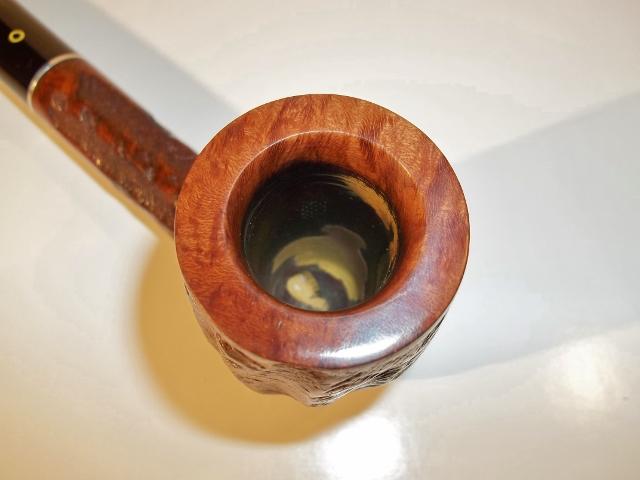
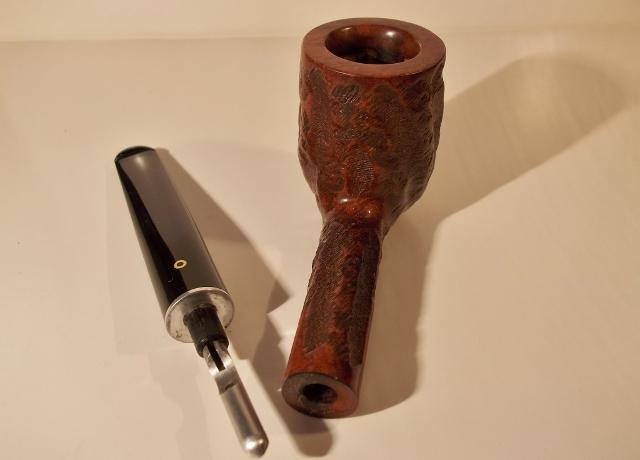
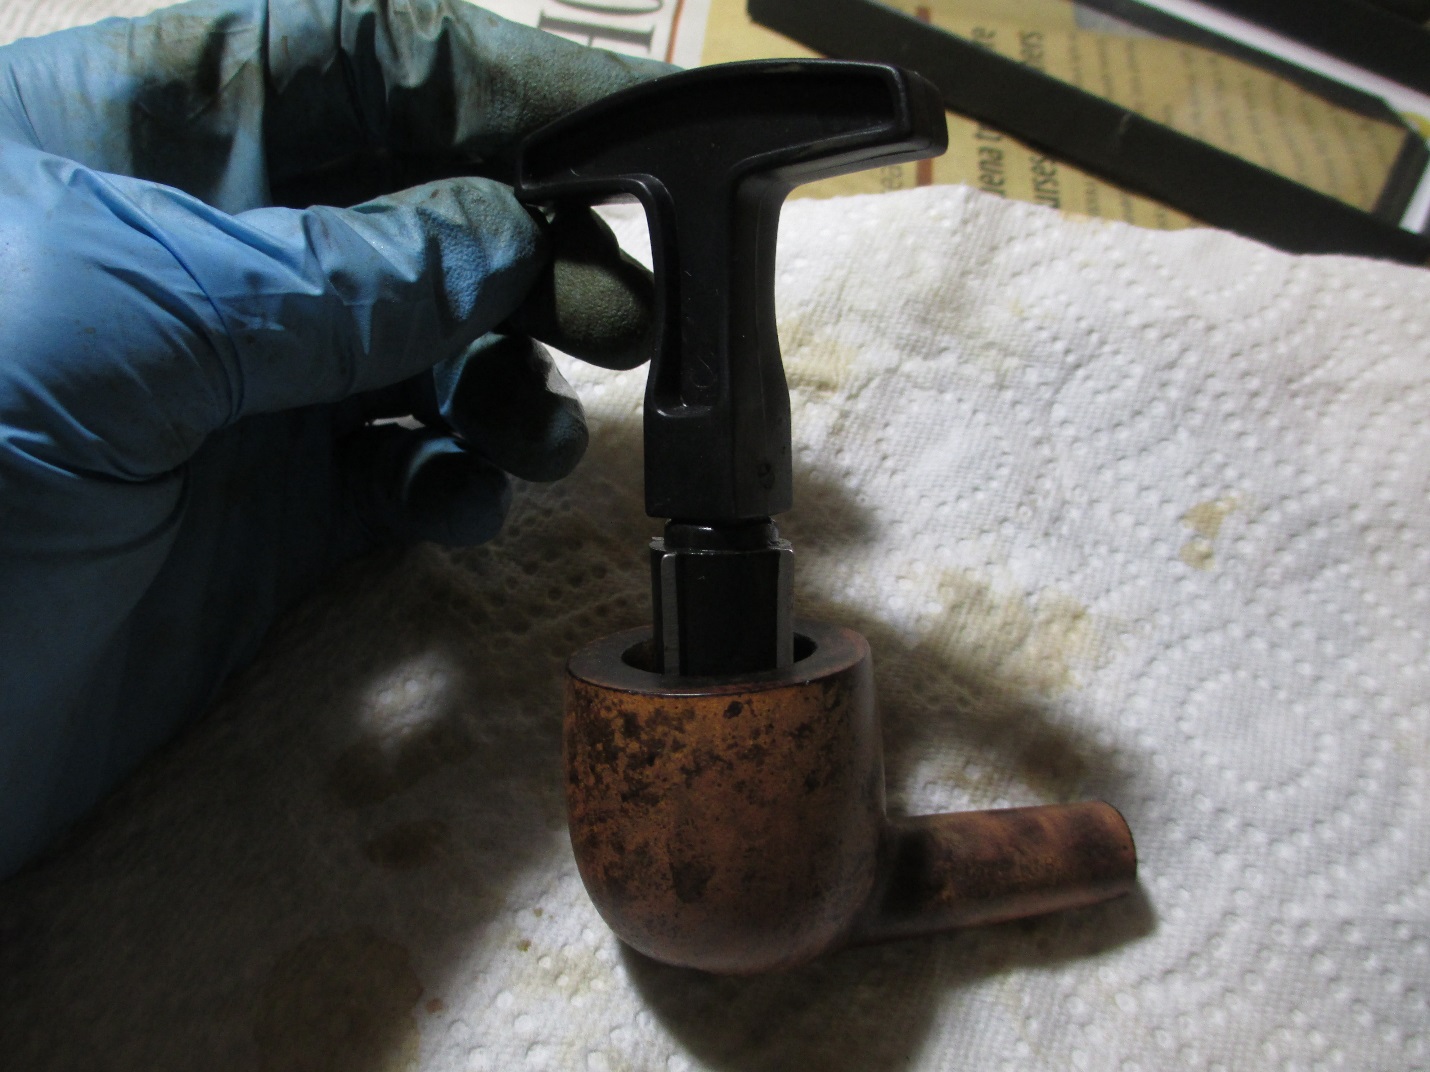
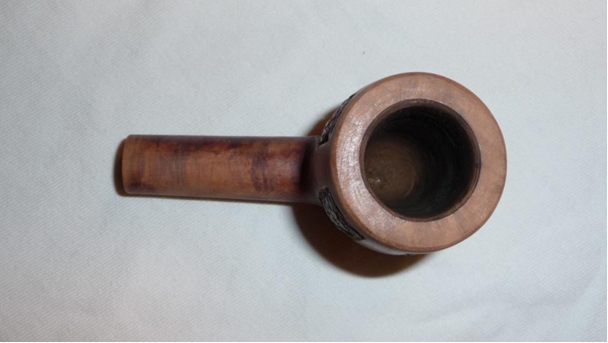
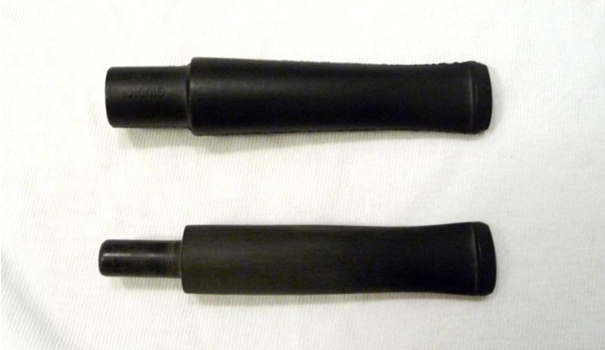
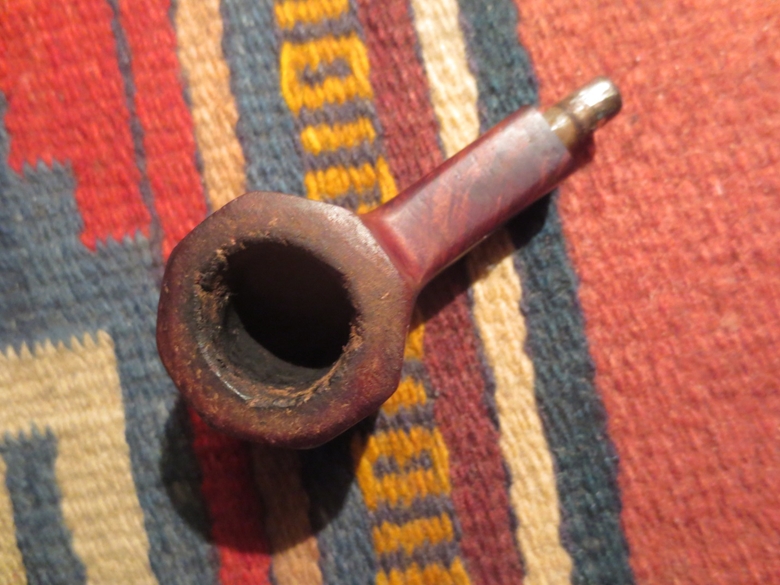
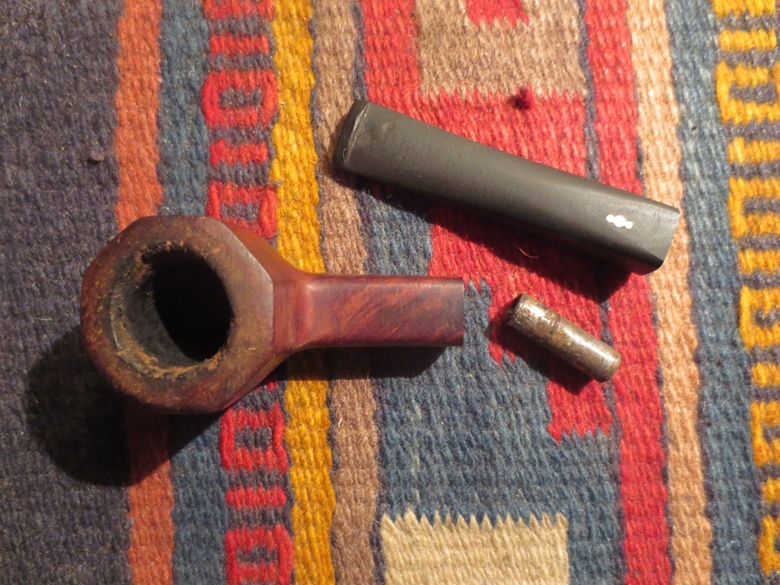
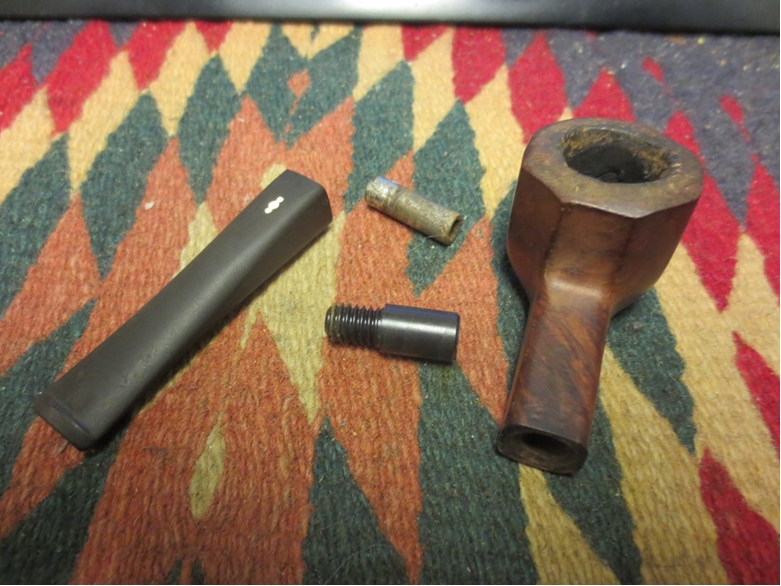
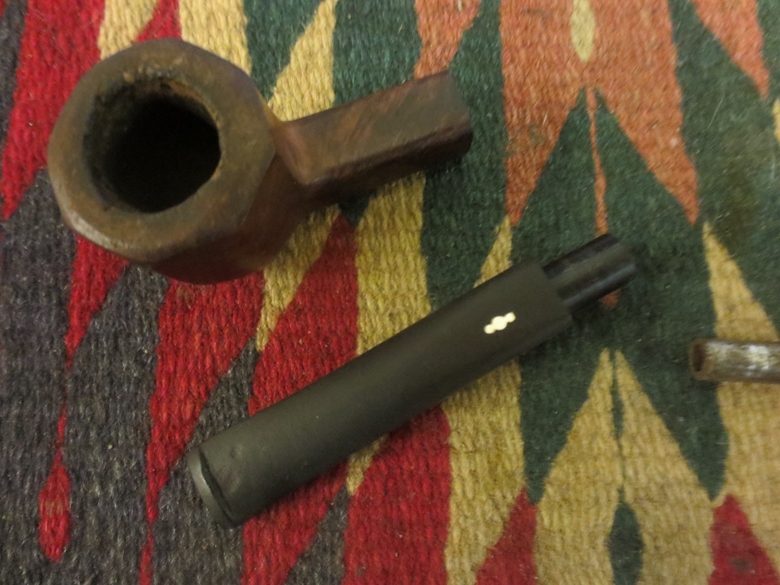
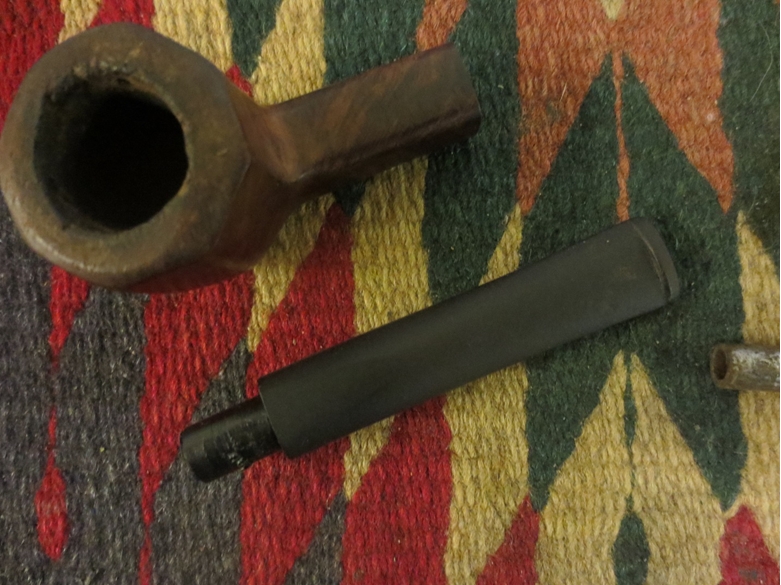
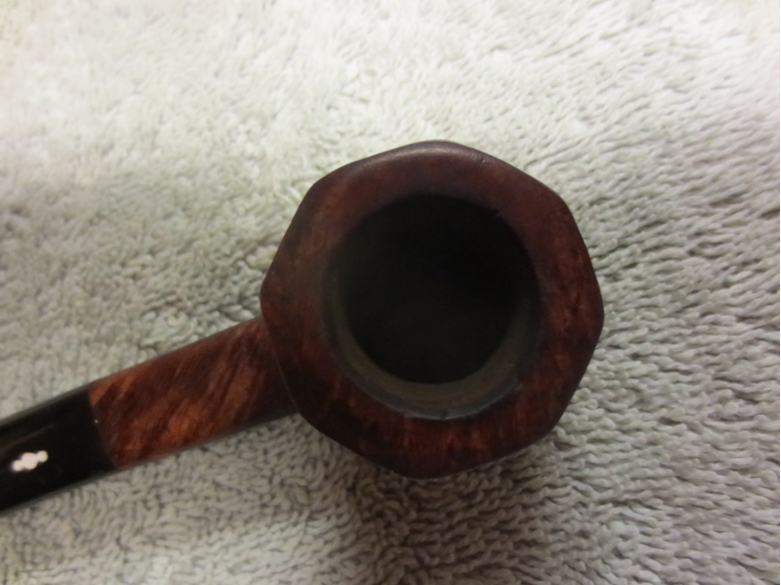
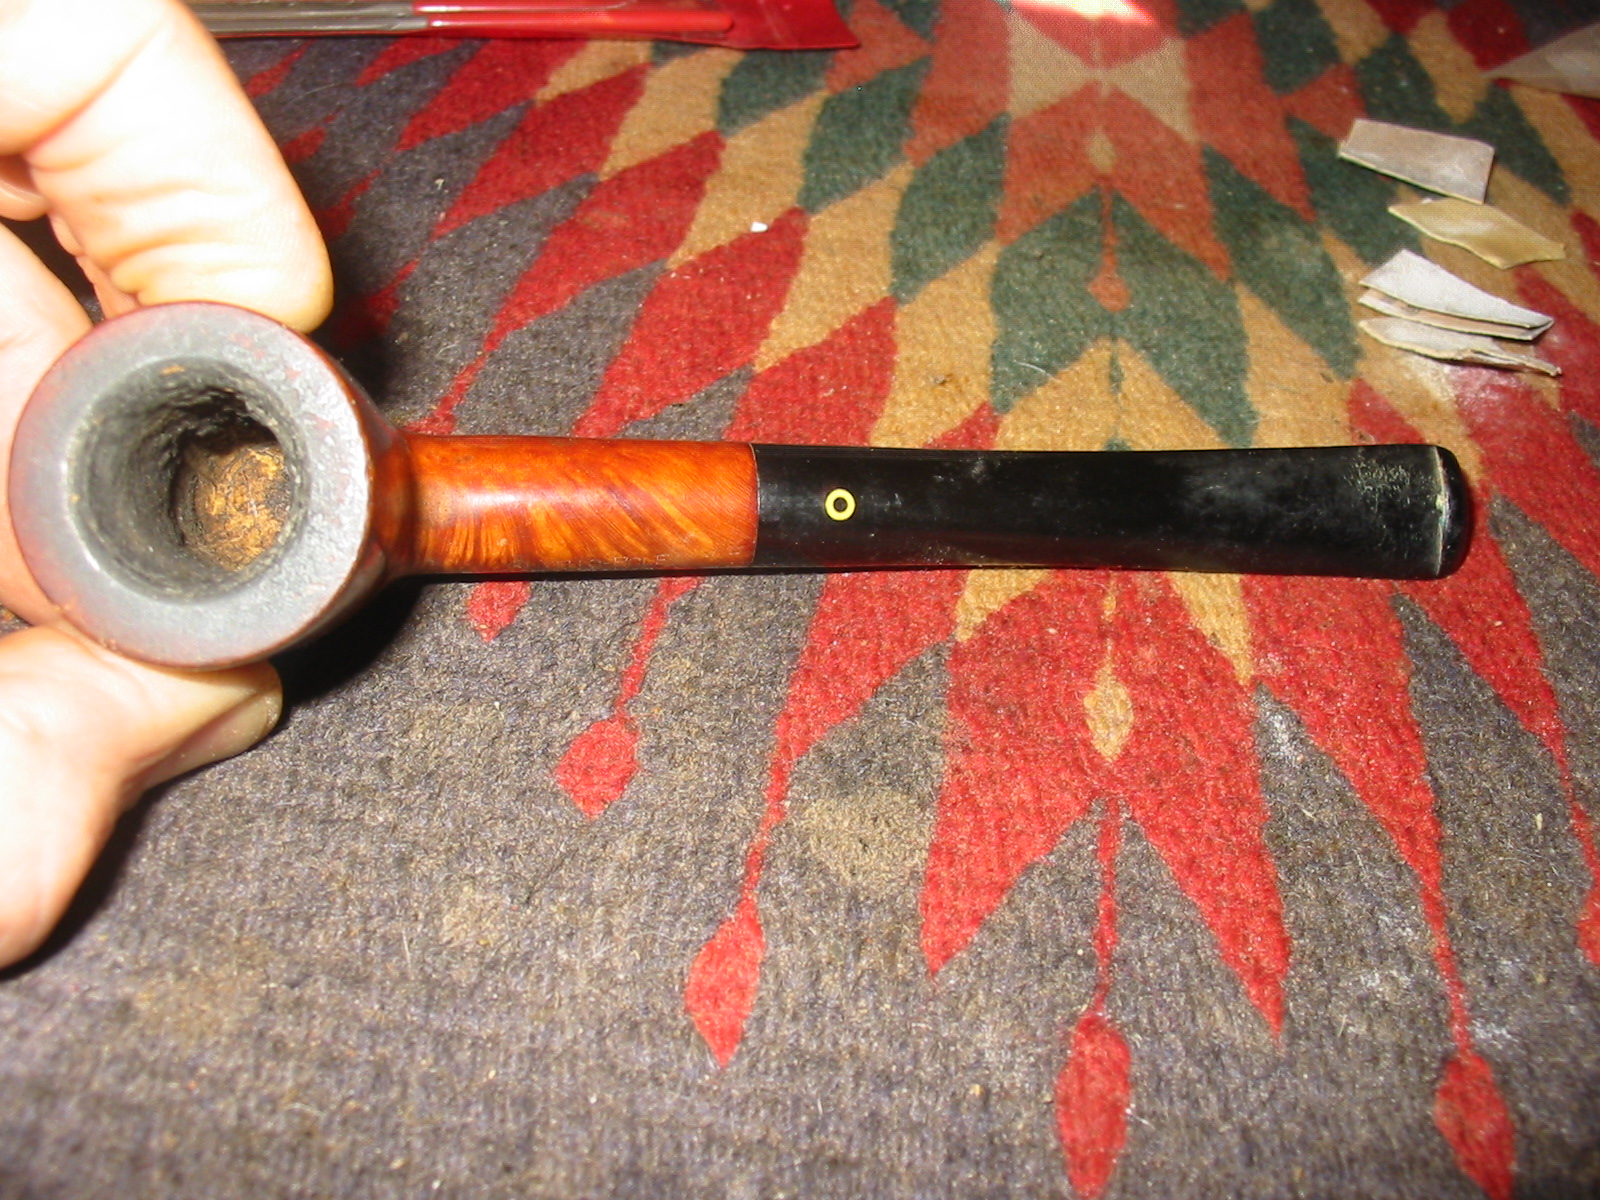
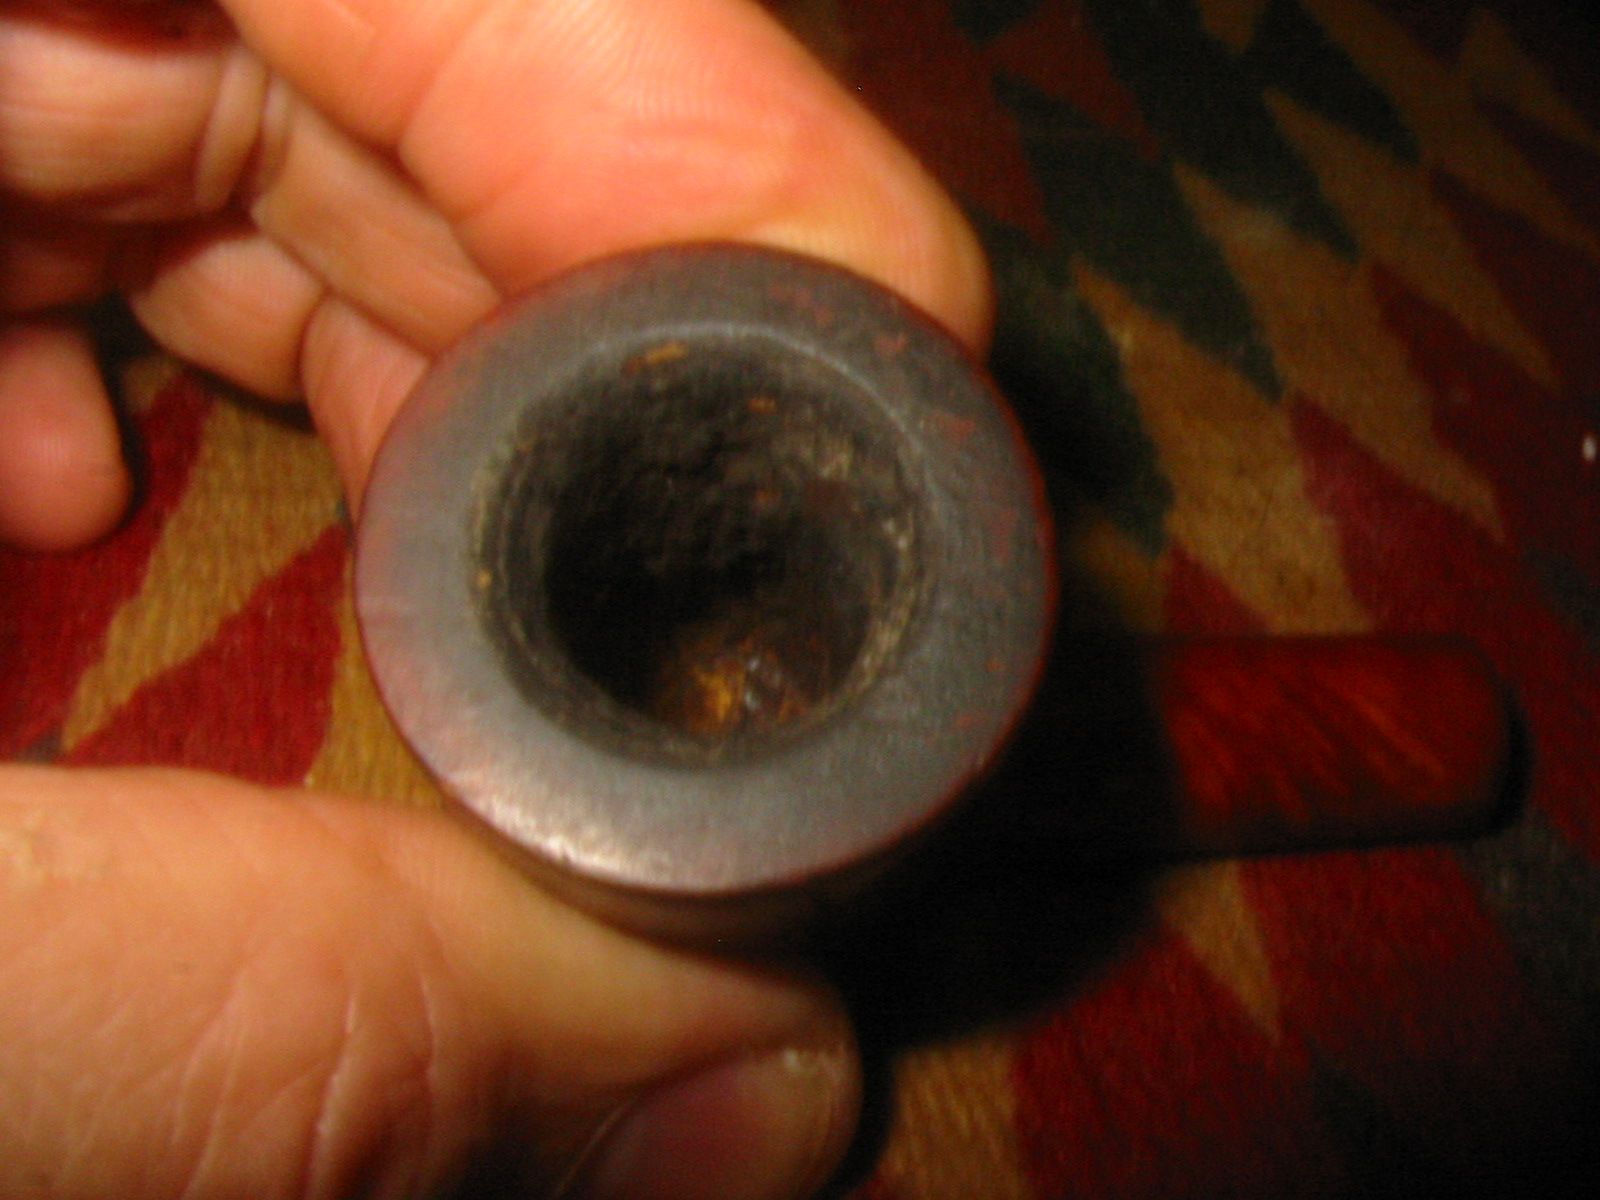
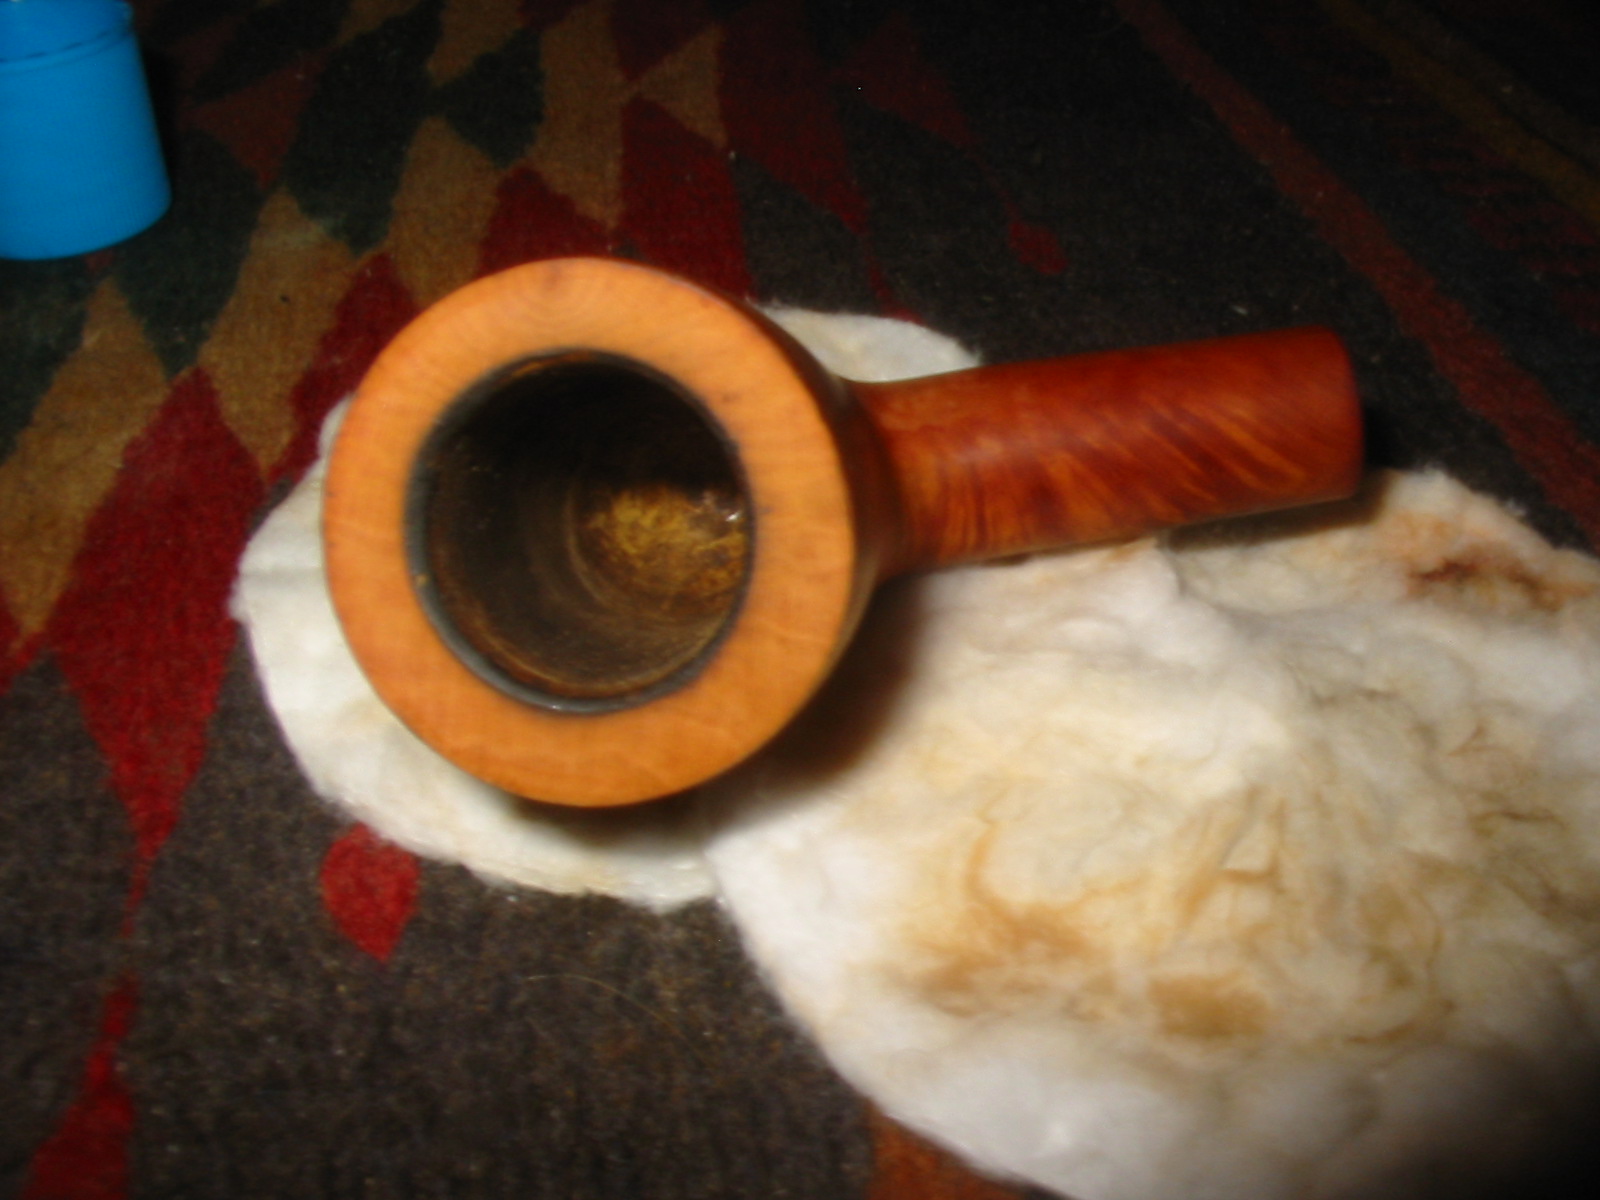
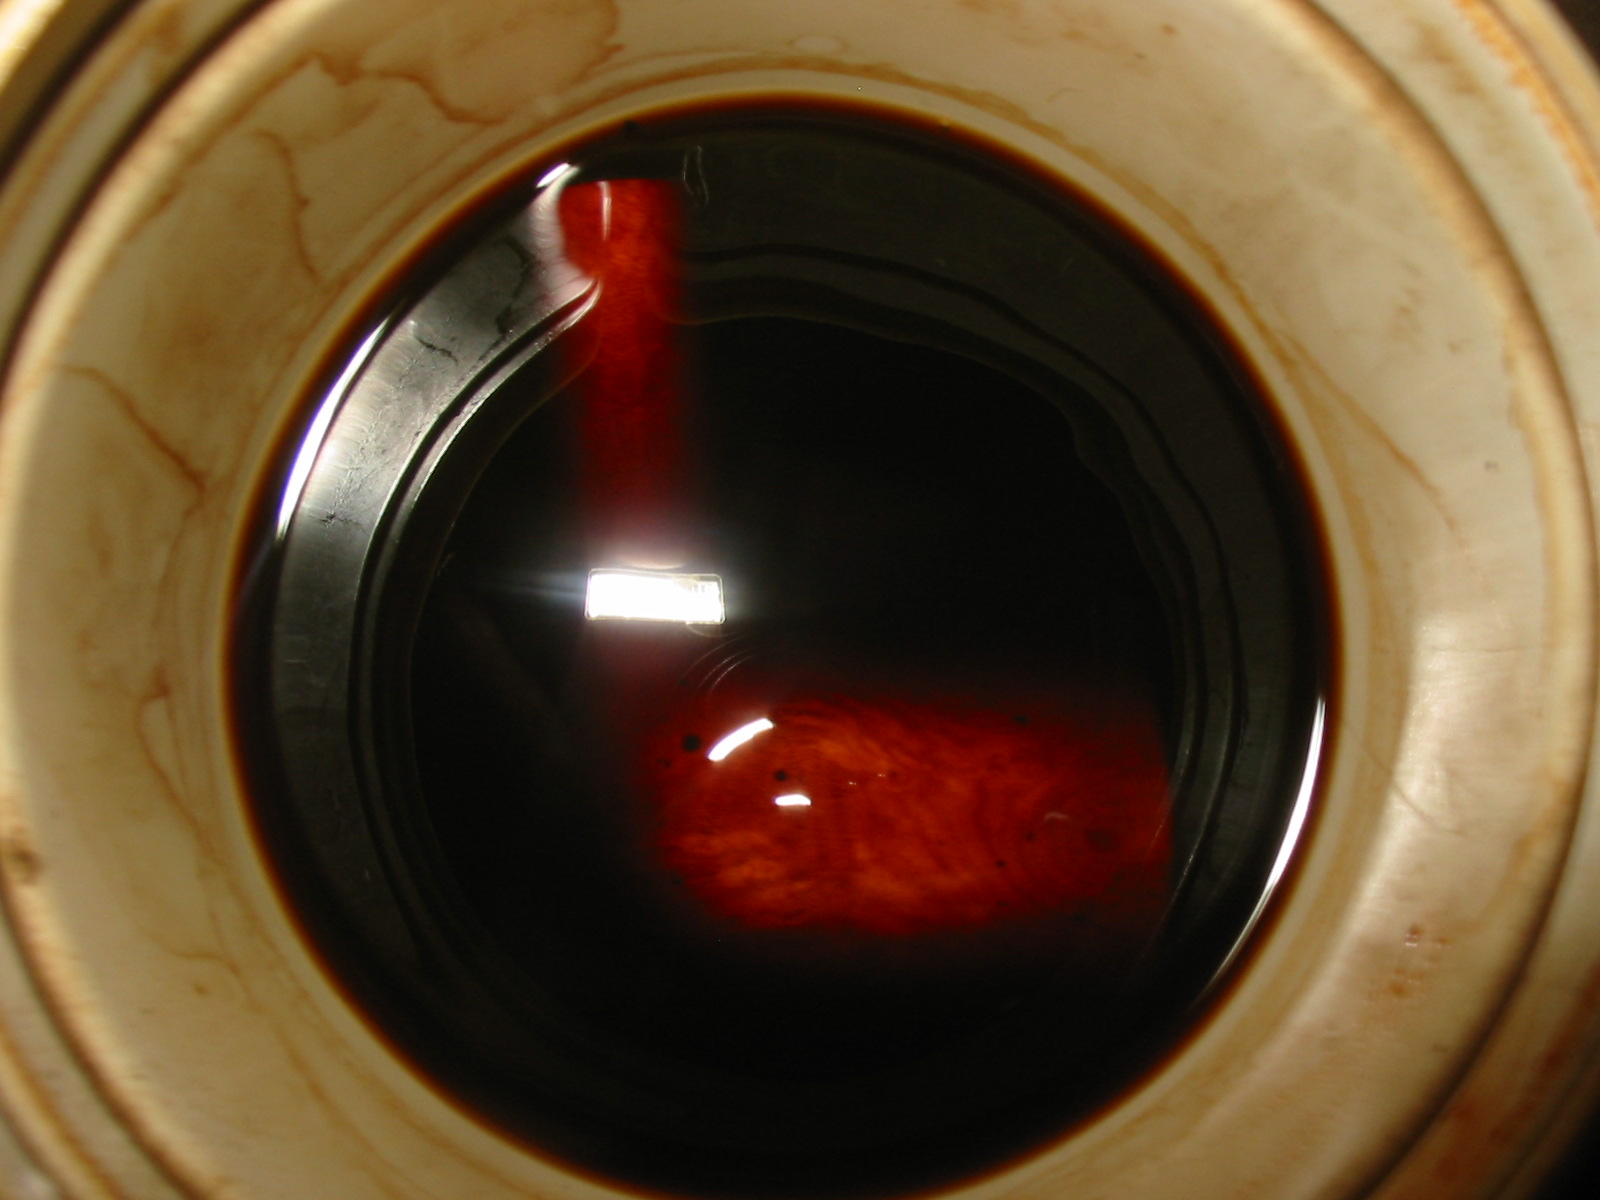
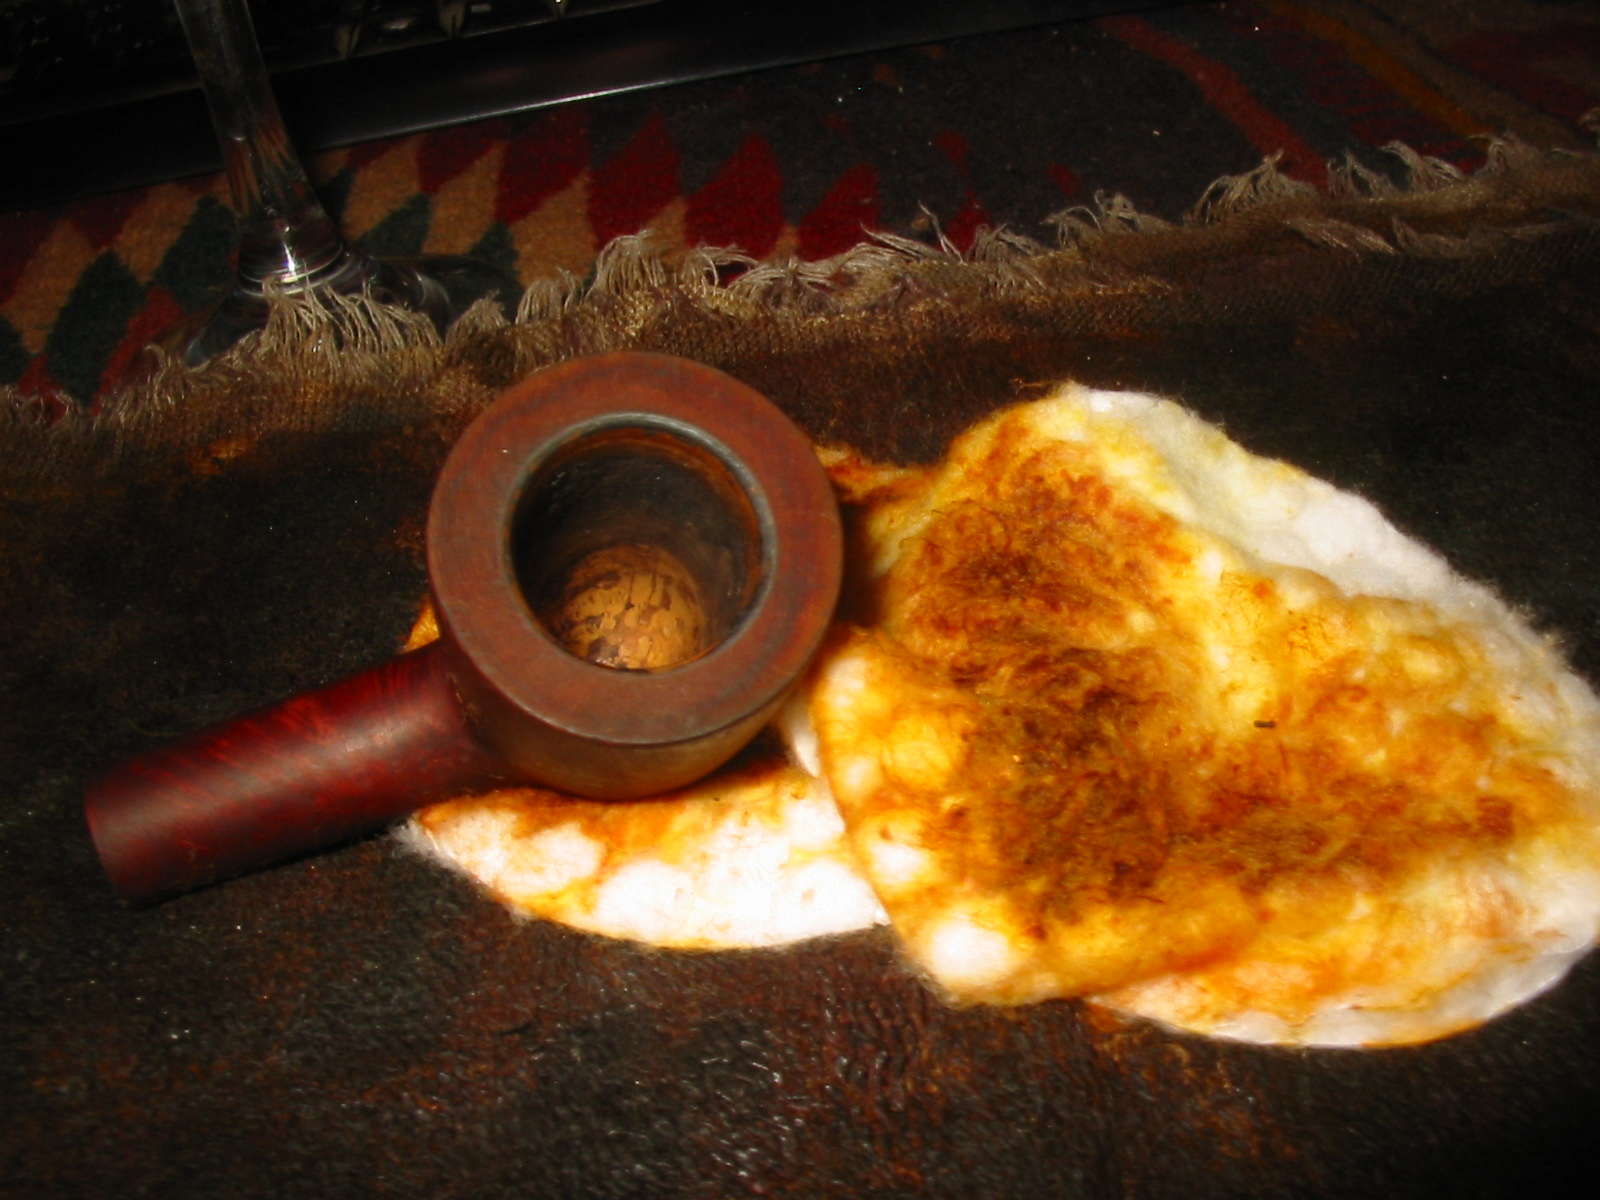
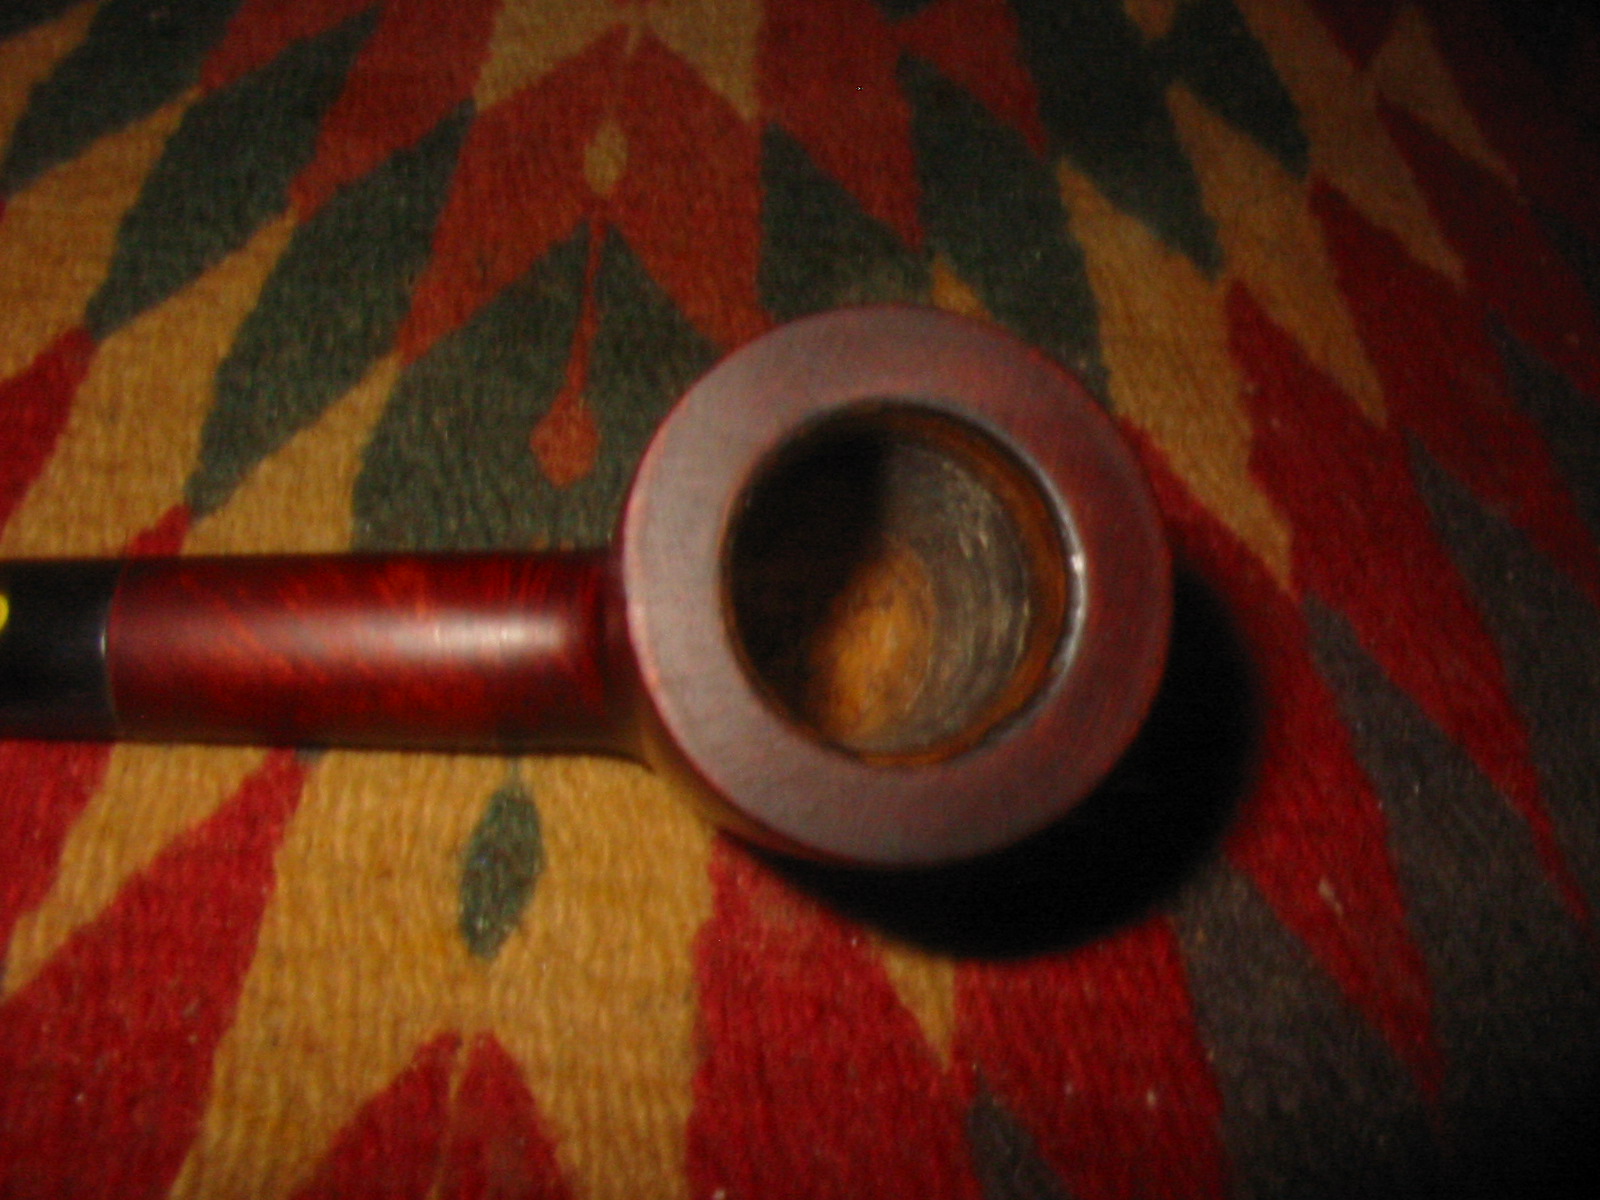
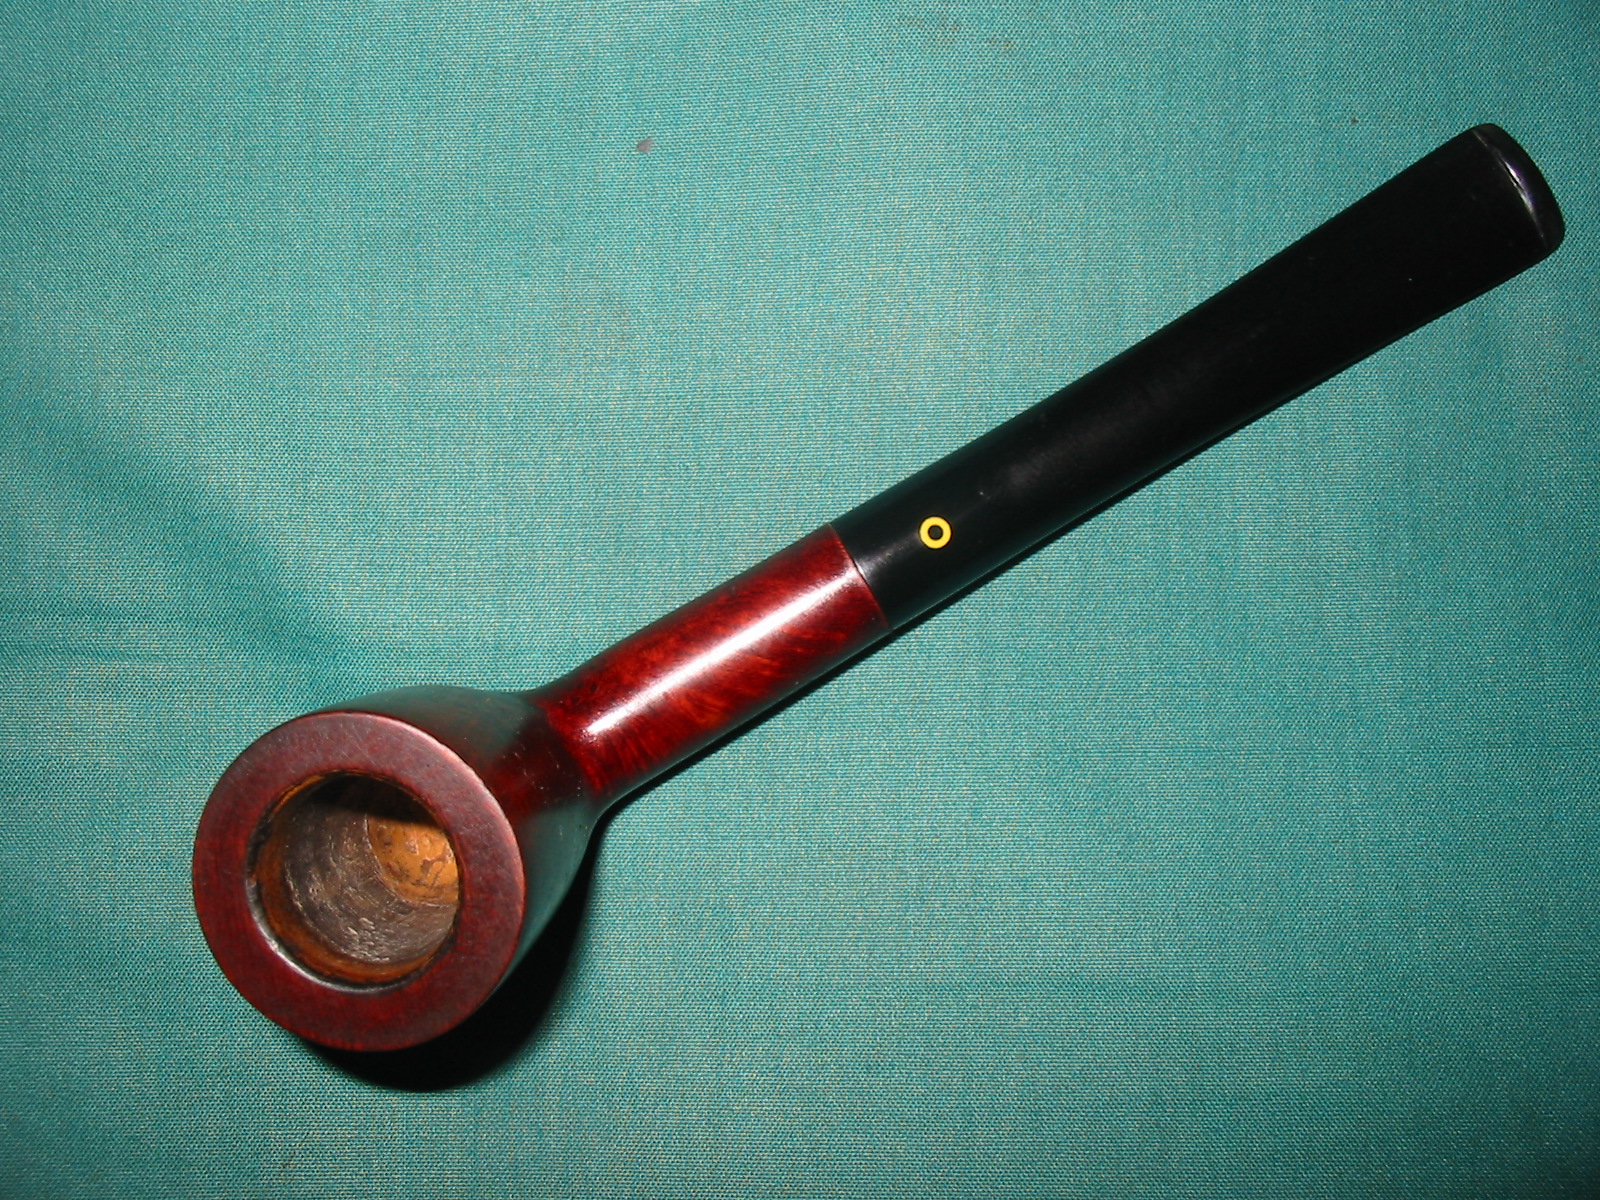
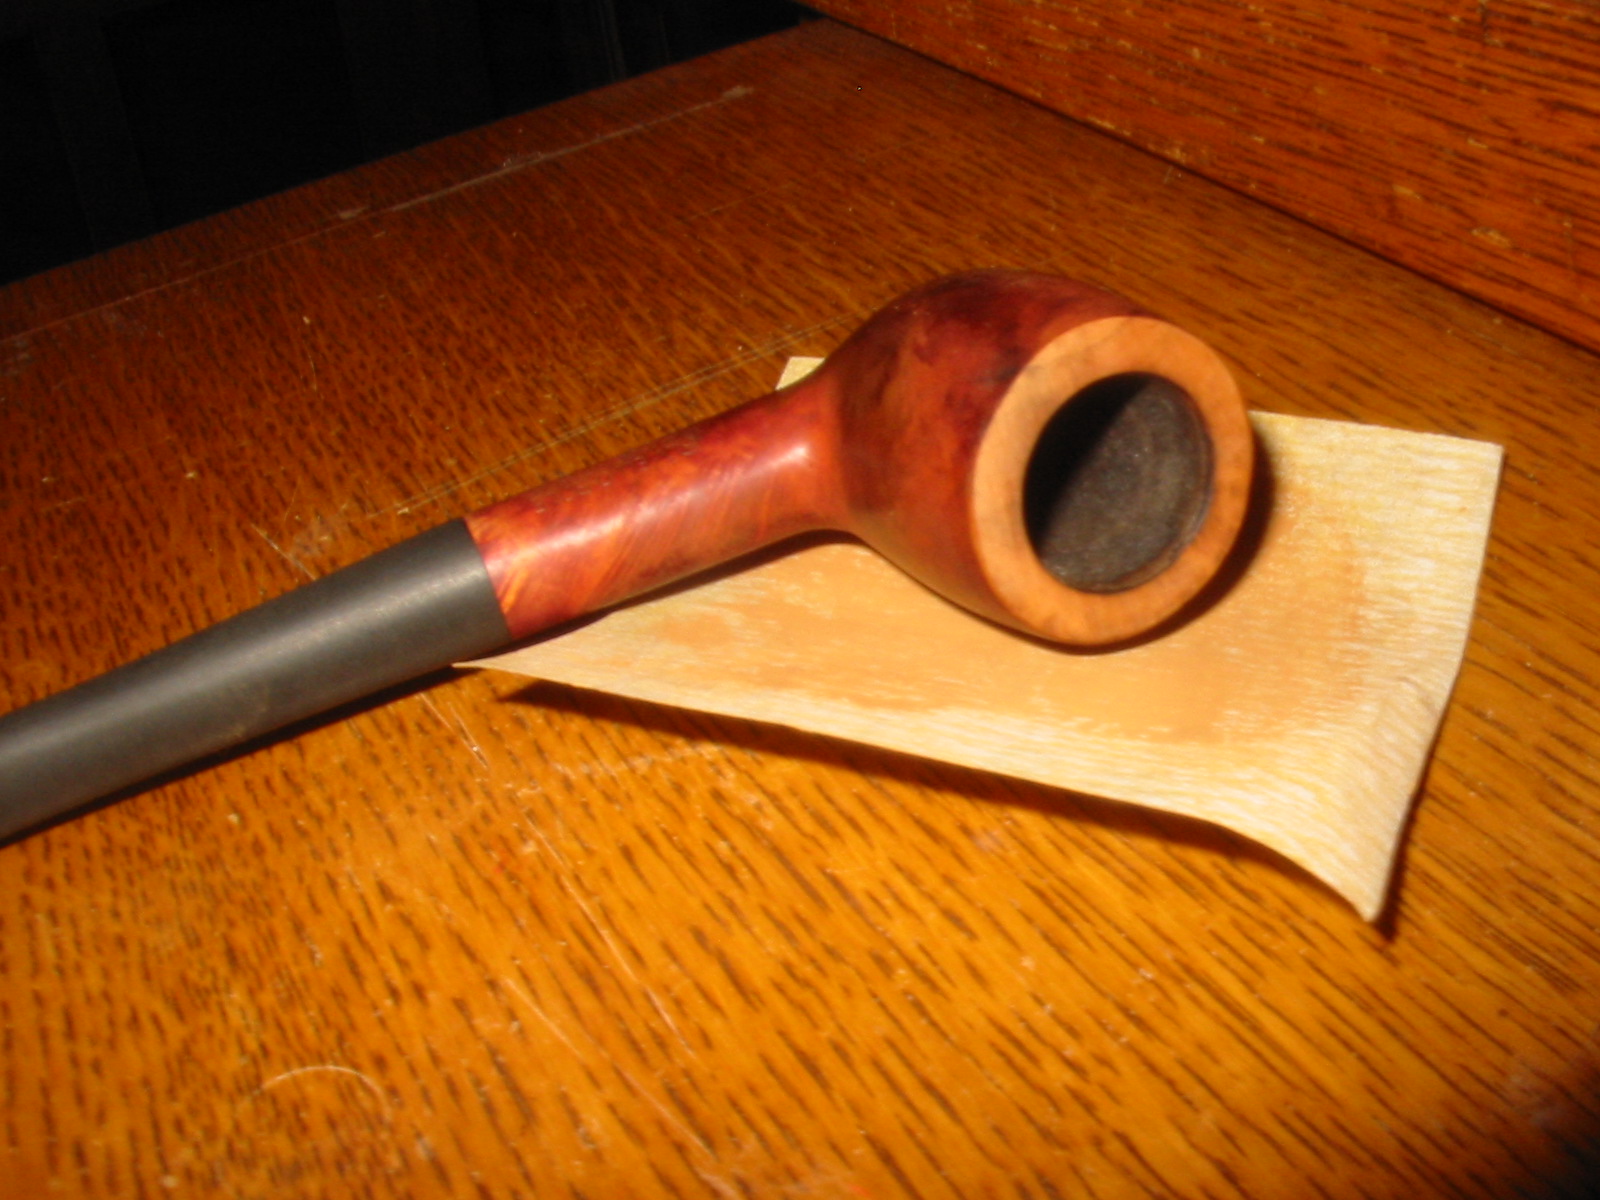
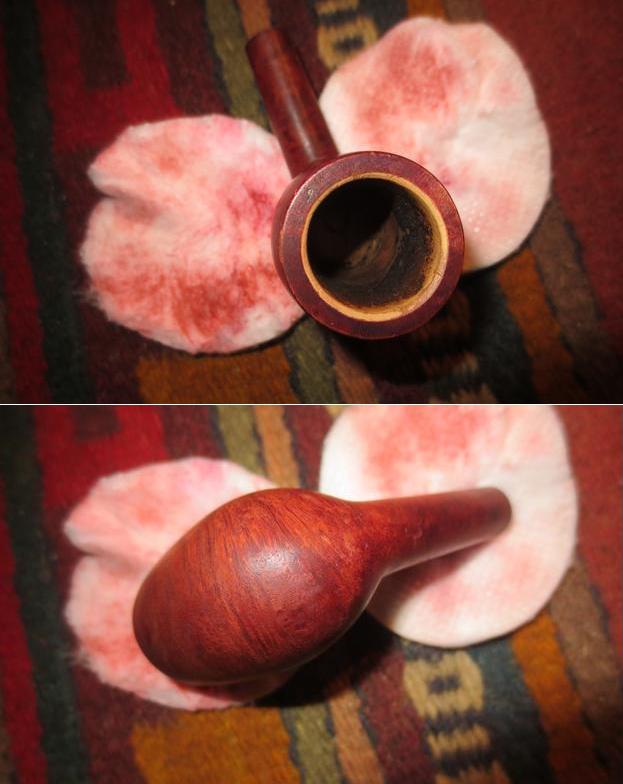
The internals of the pipe are interesting. The first photo below shows the yellow bowl coating that still remained in the bowl. This one was certainly lightly smoked to be in this condition. The second photo shows the standard Yello-Bole stinger apparatus that is screwed into the tenon.yb10
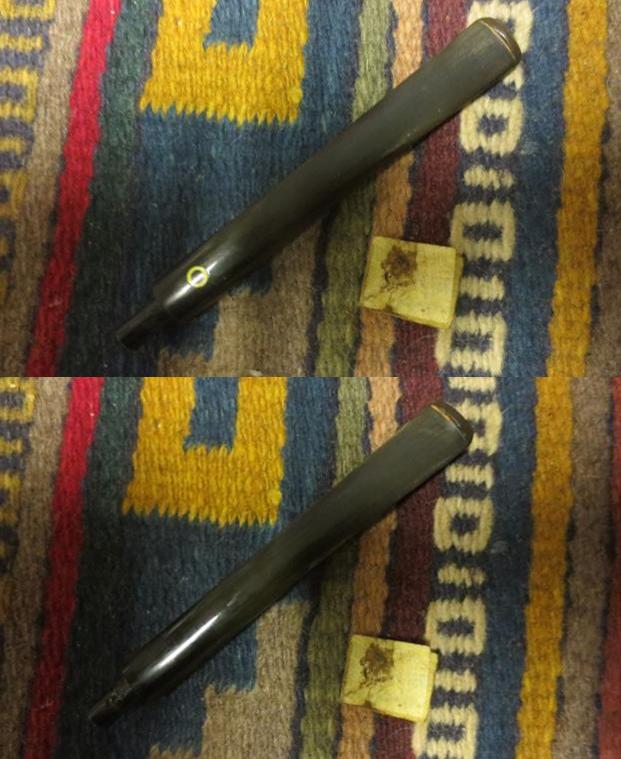
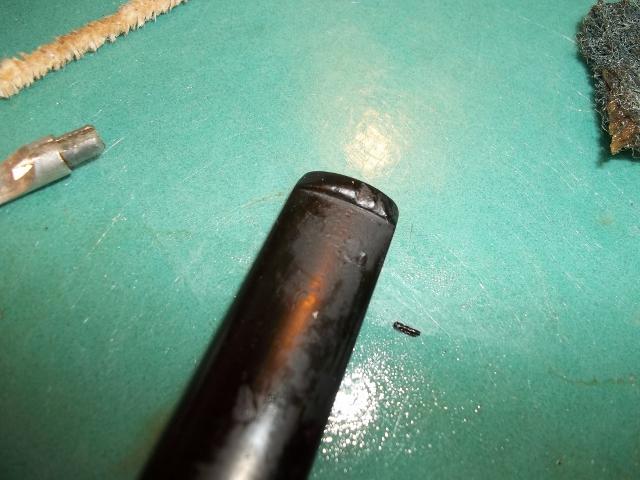
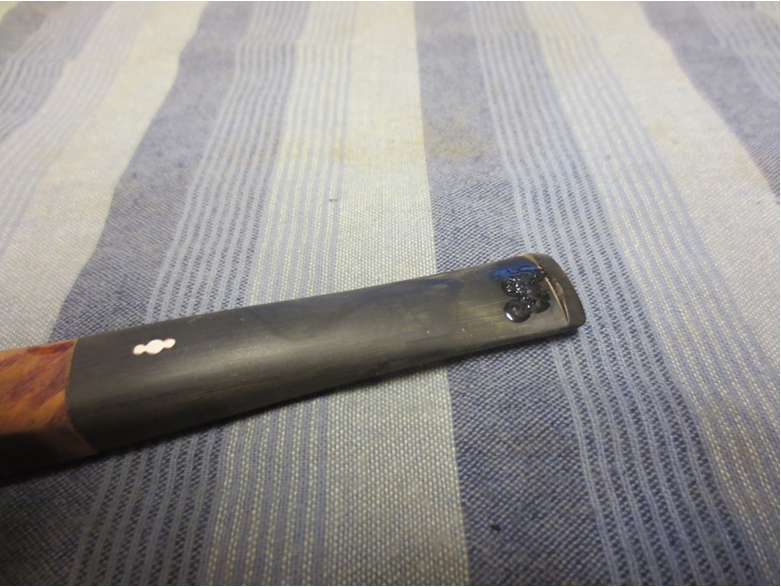
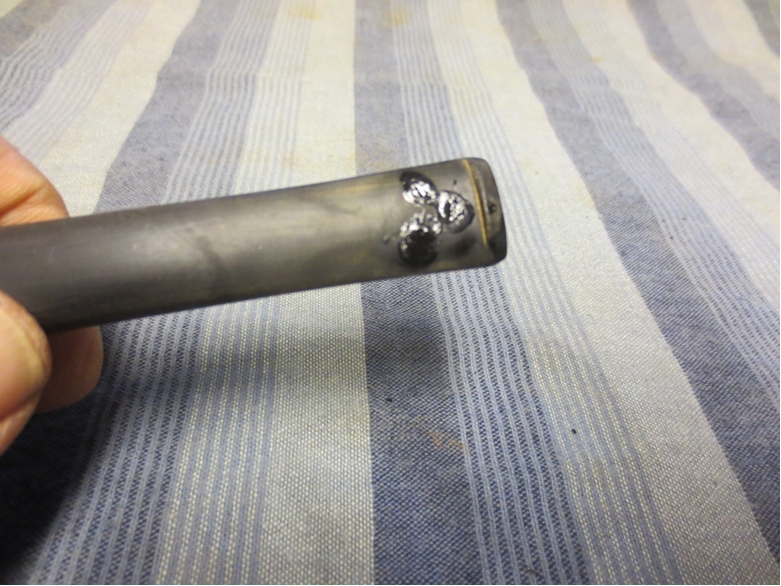
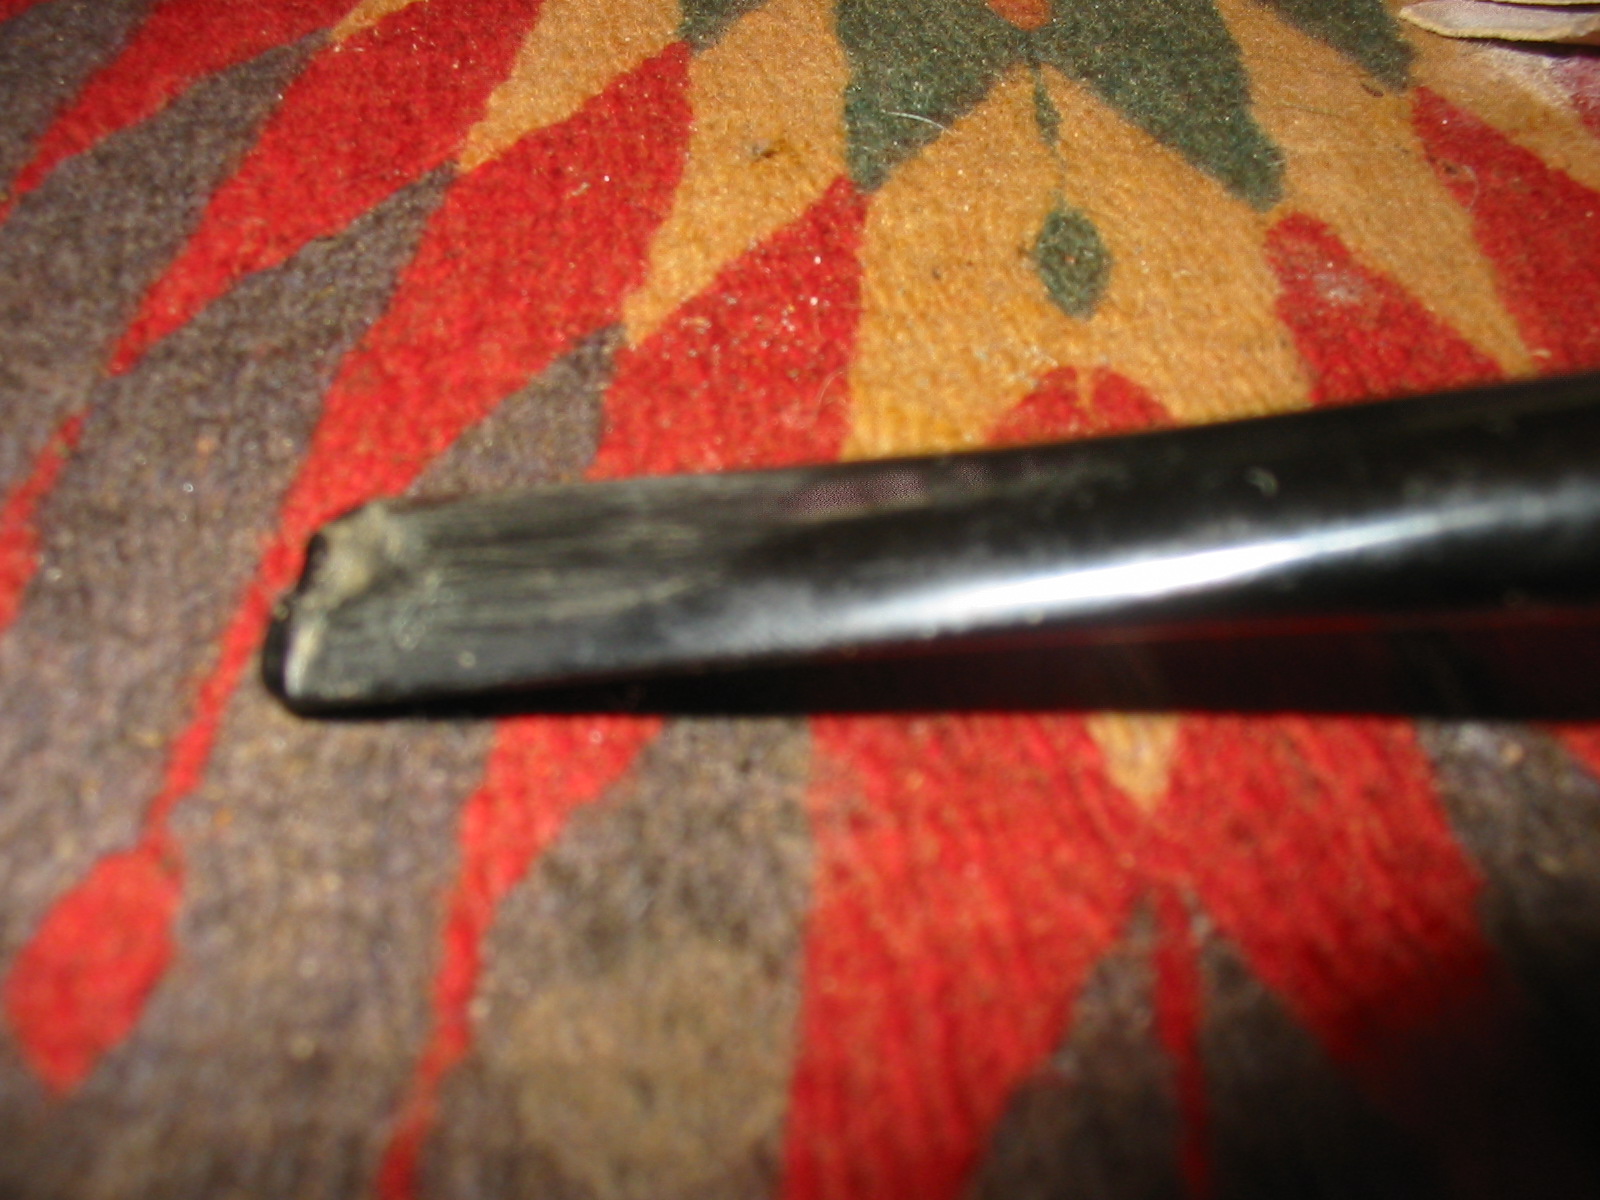
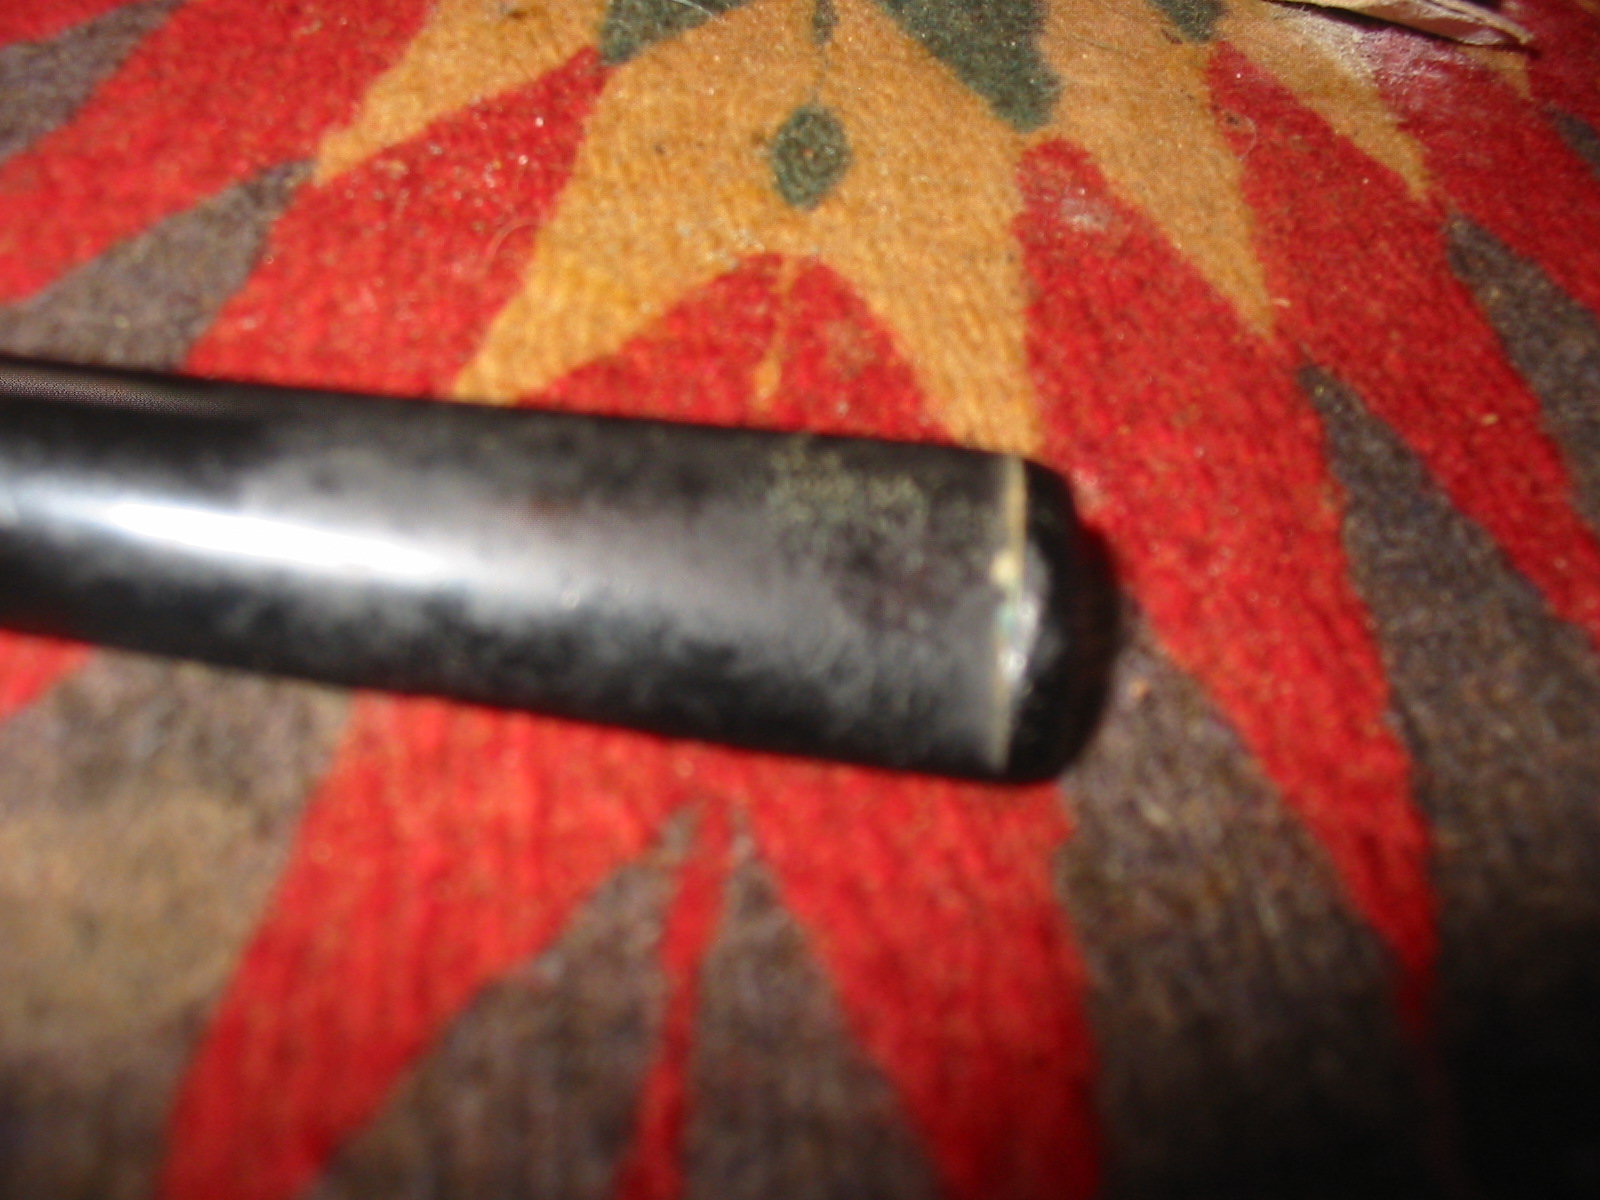
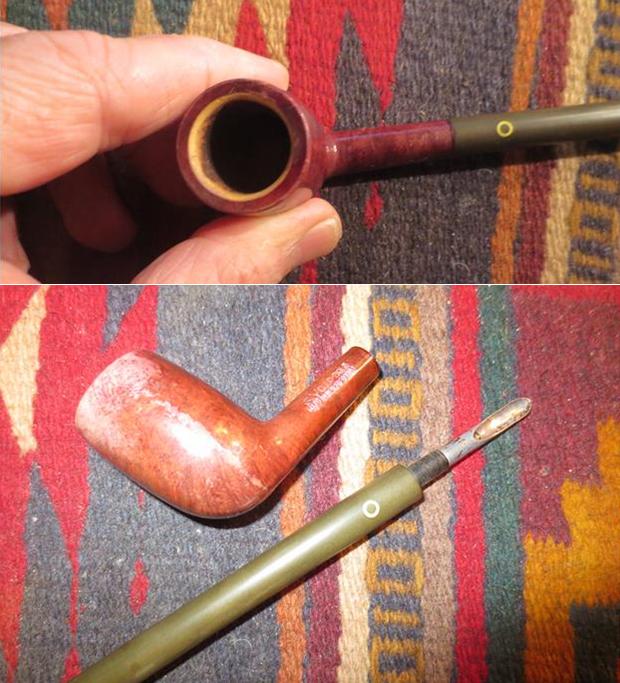
There was light tooth chatter and tooth marks on the top and underside of the stem but the button was in excellent shape with minimal tooth marks or bites.yb11
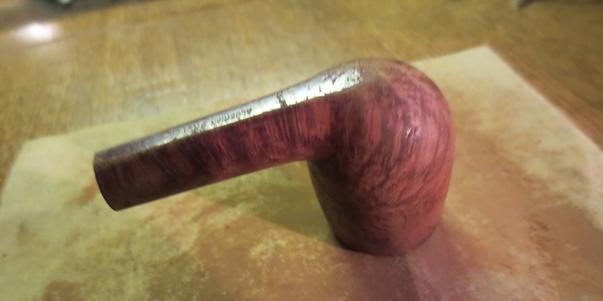
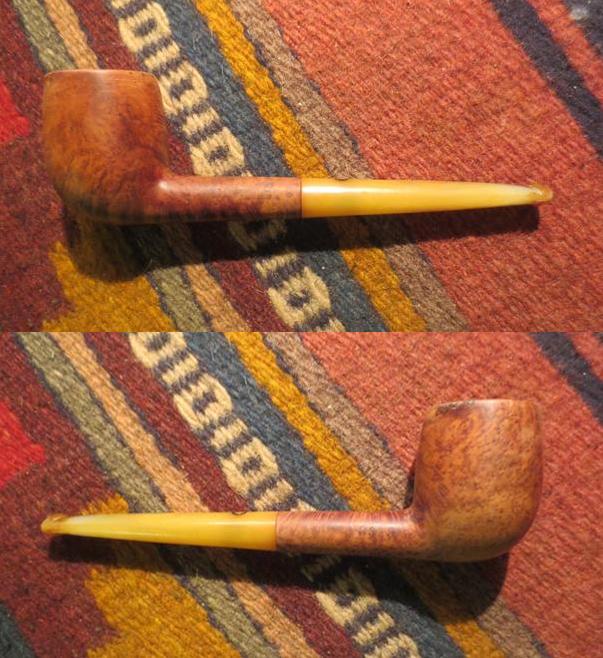
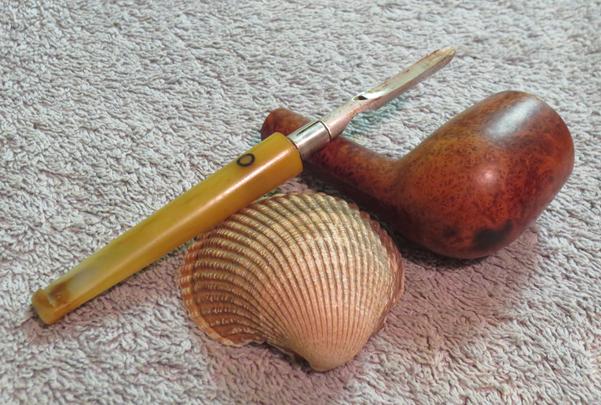
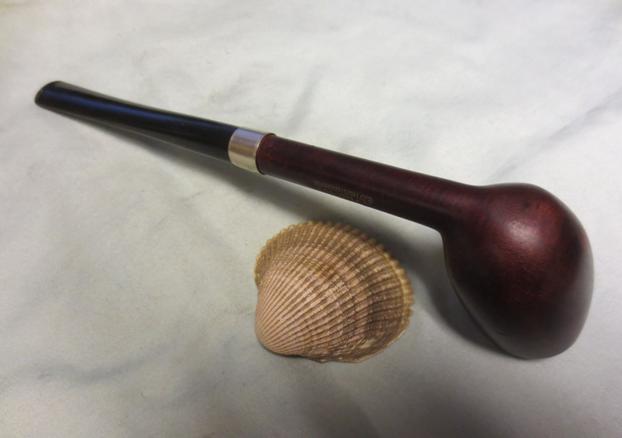
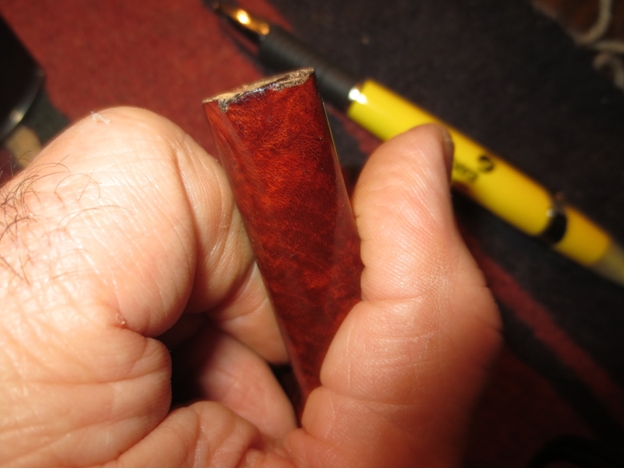
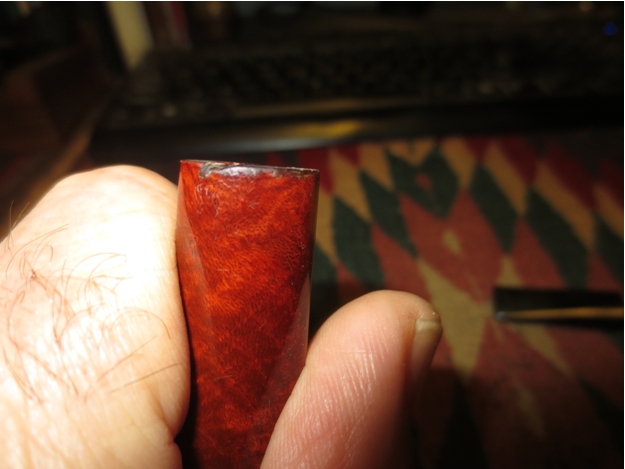
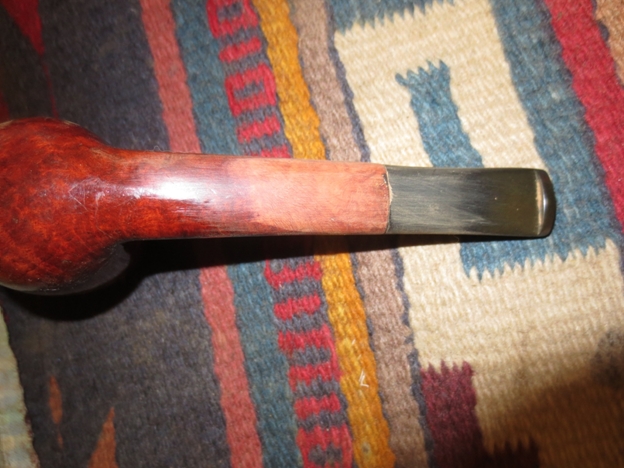
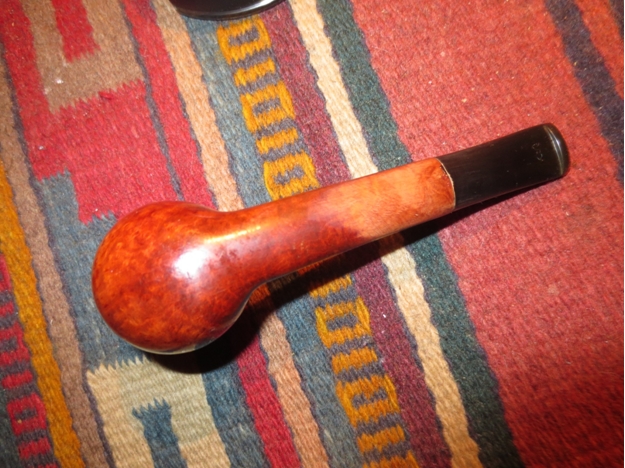
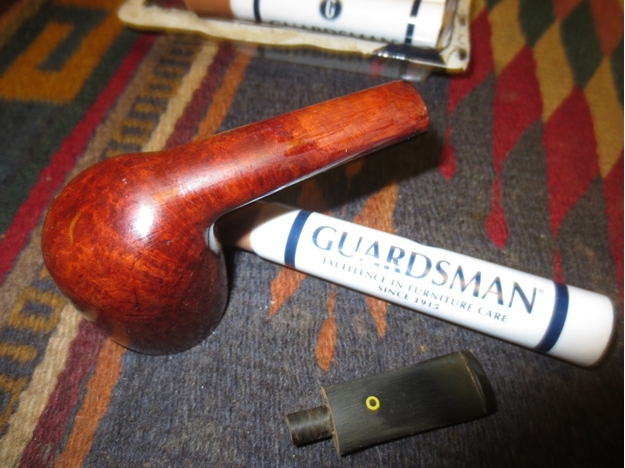
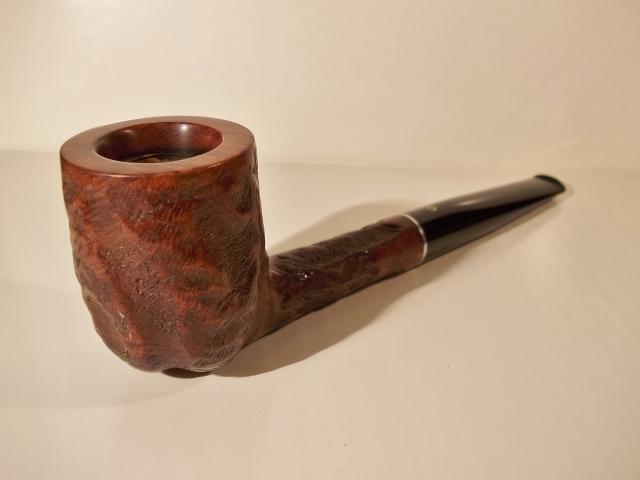
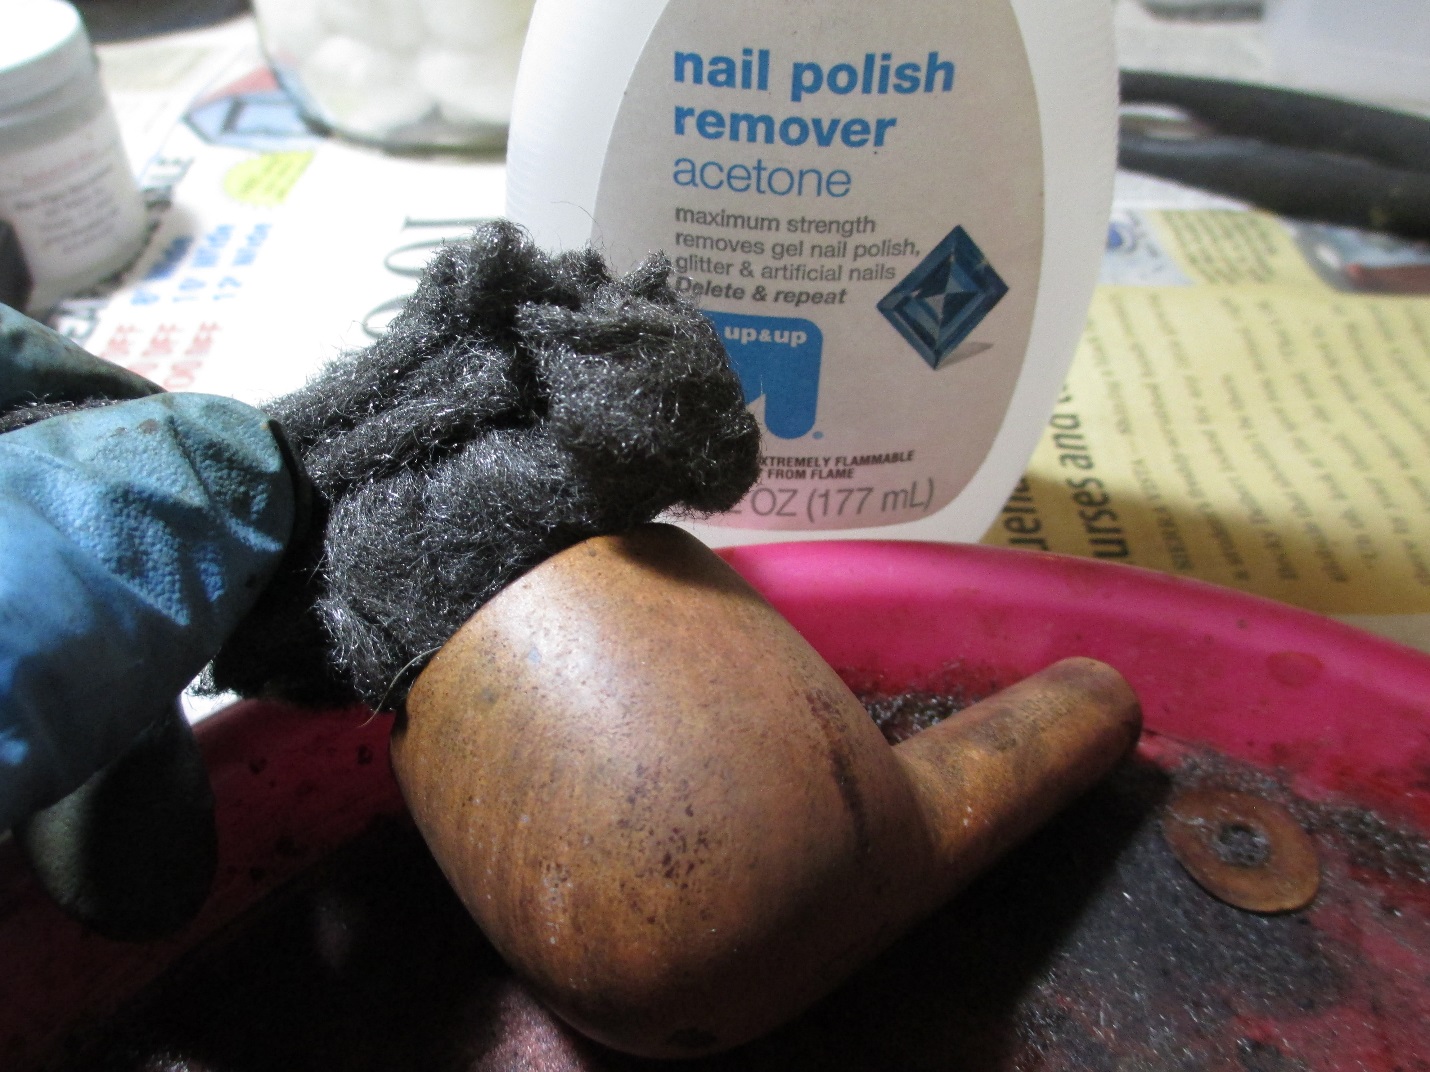
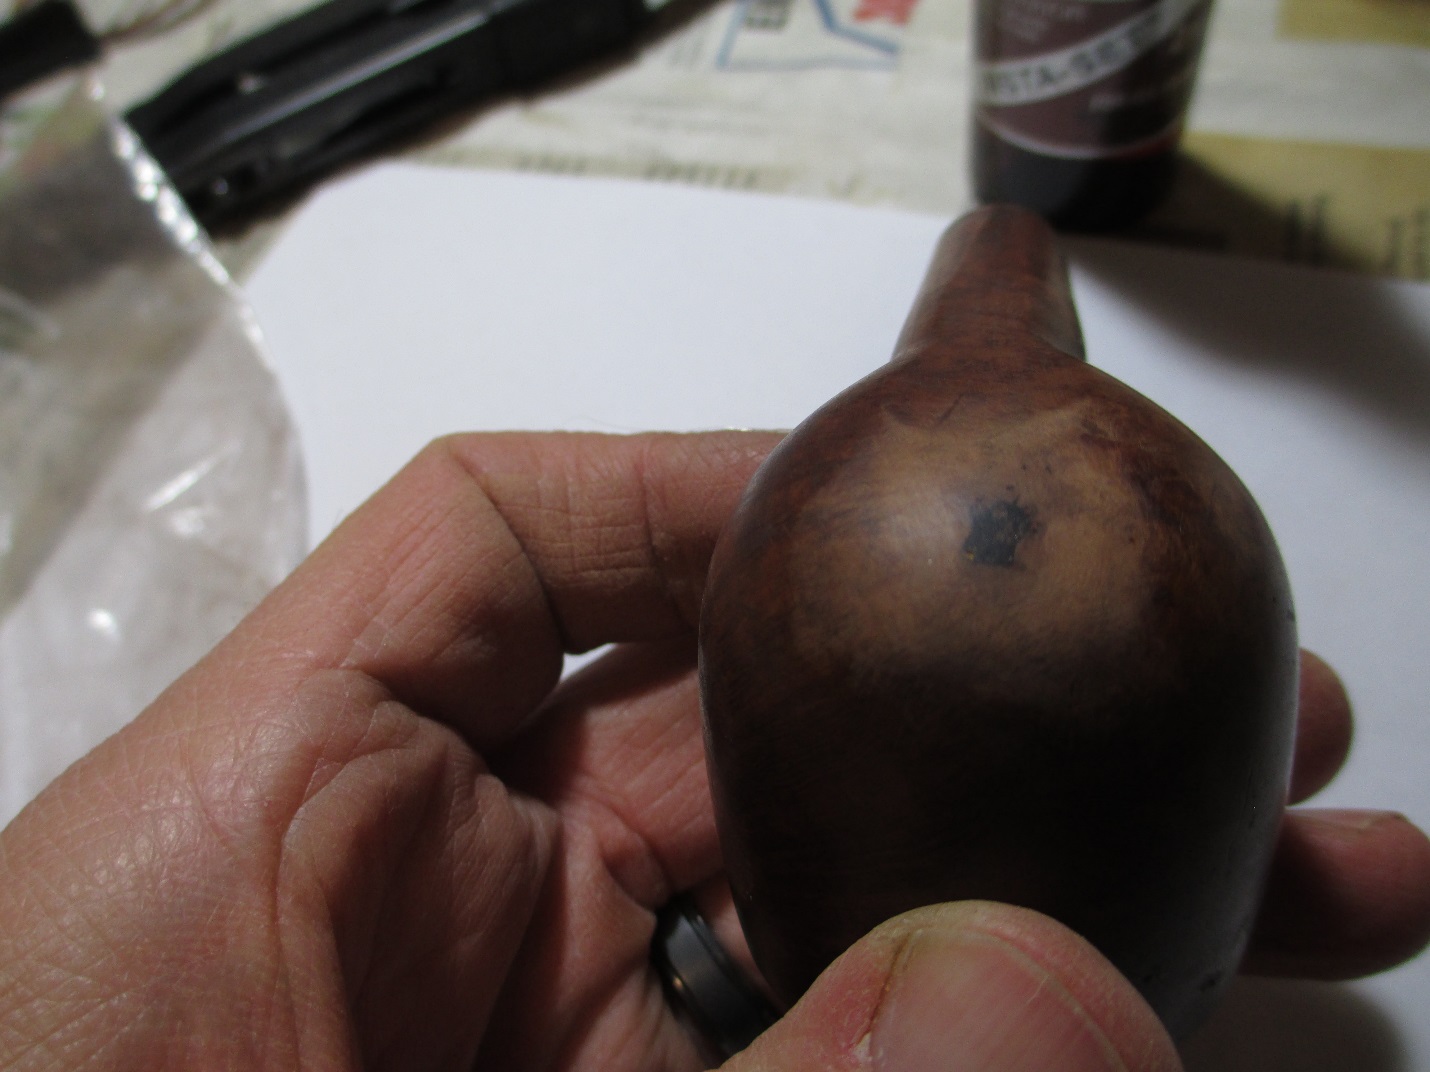
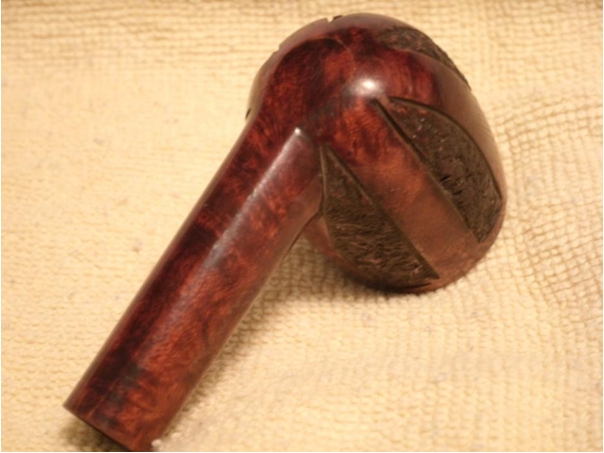
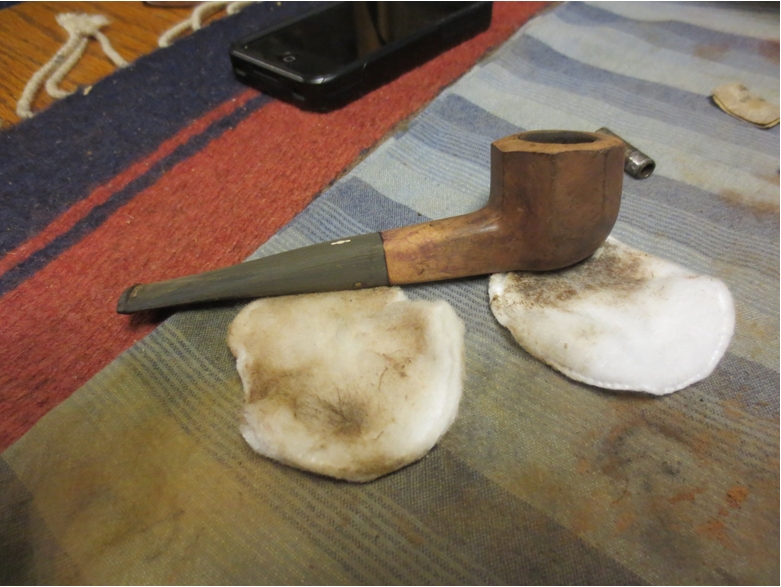
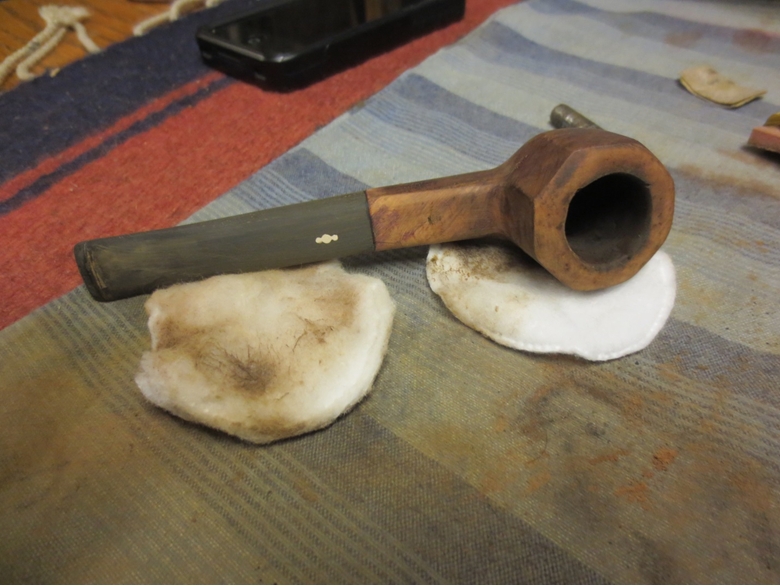
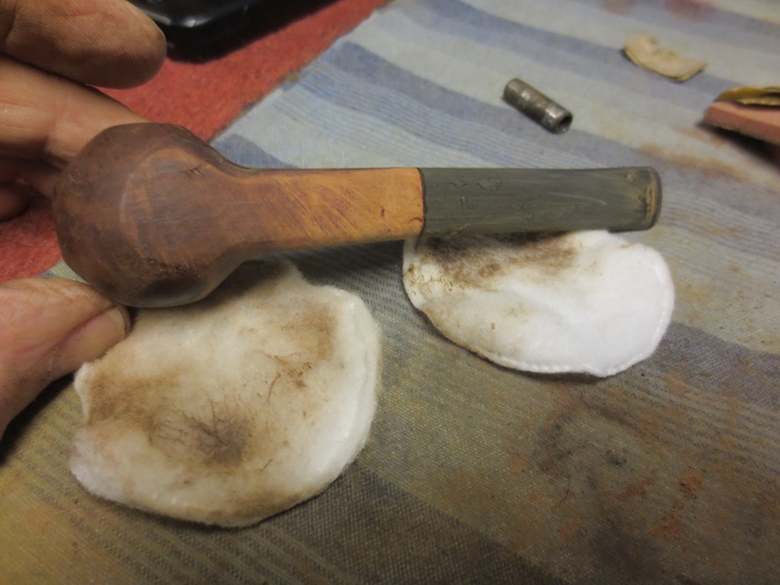
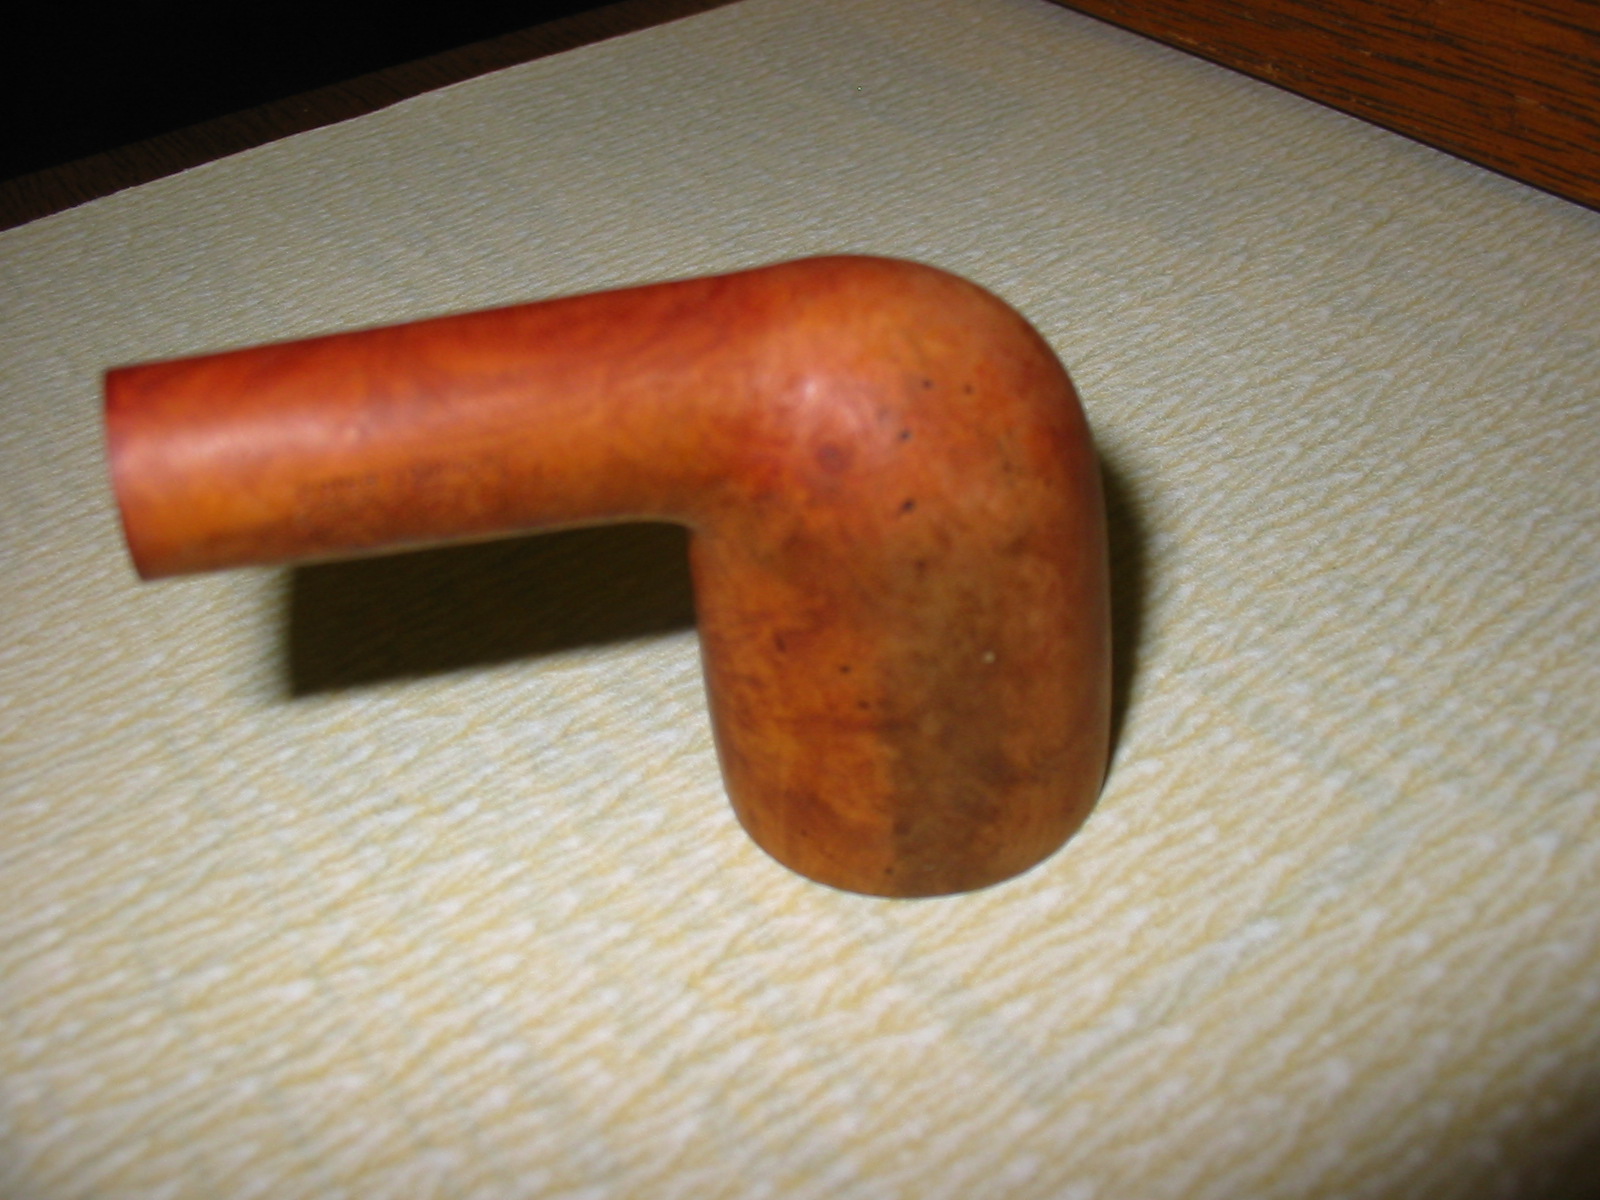
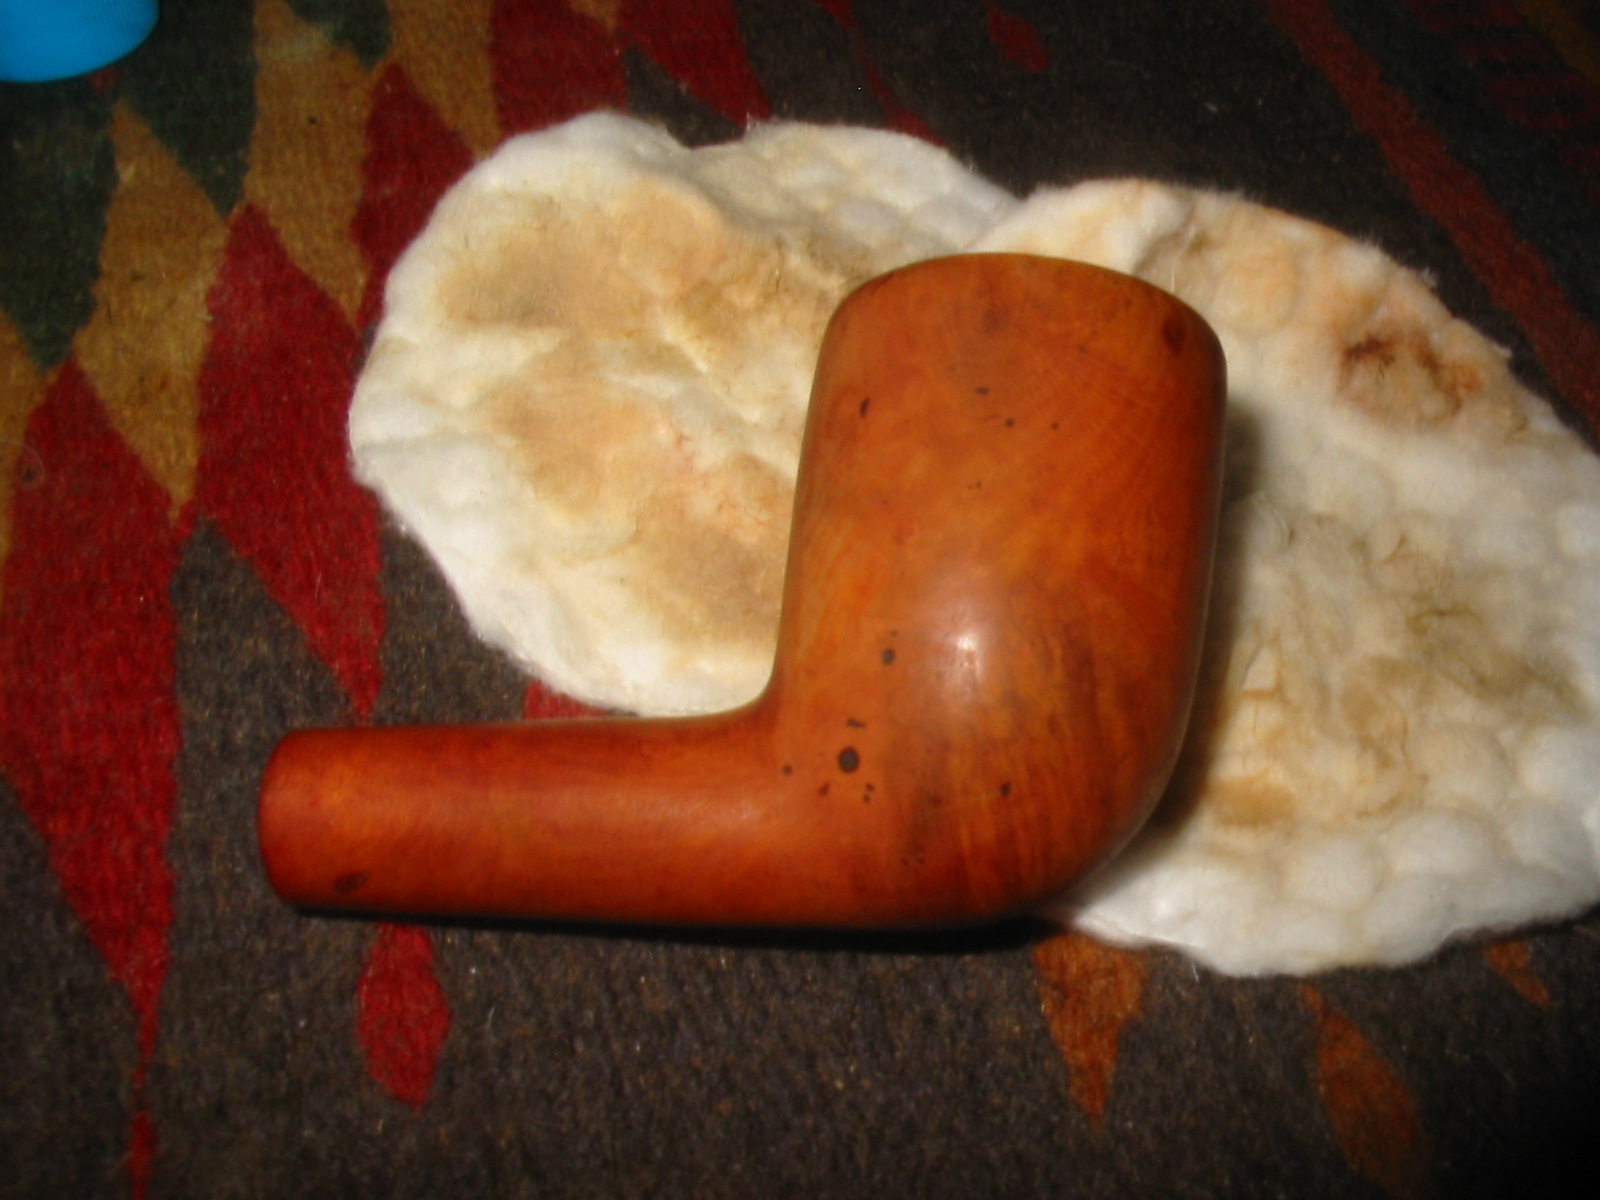
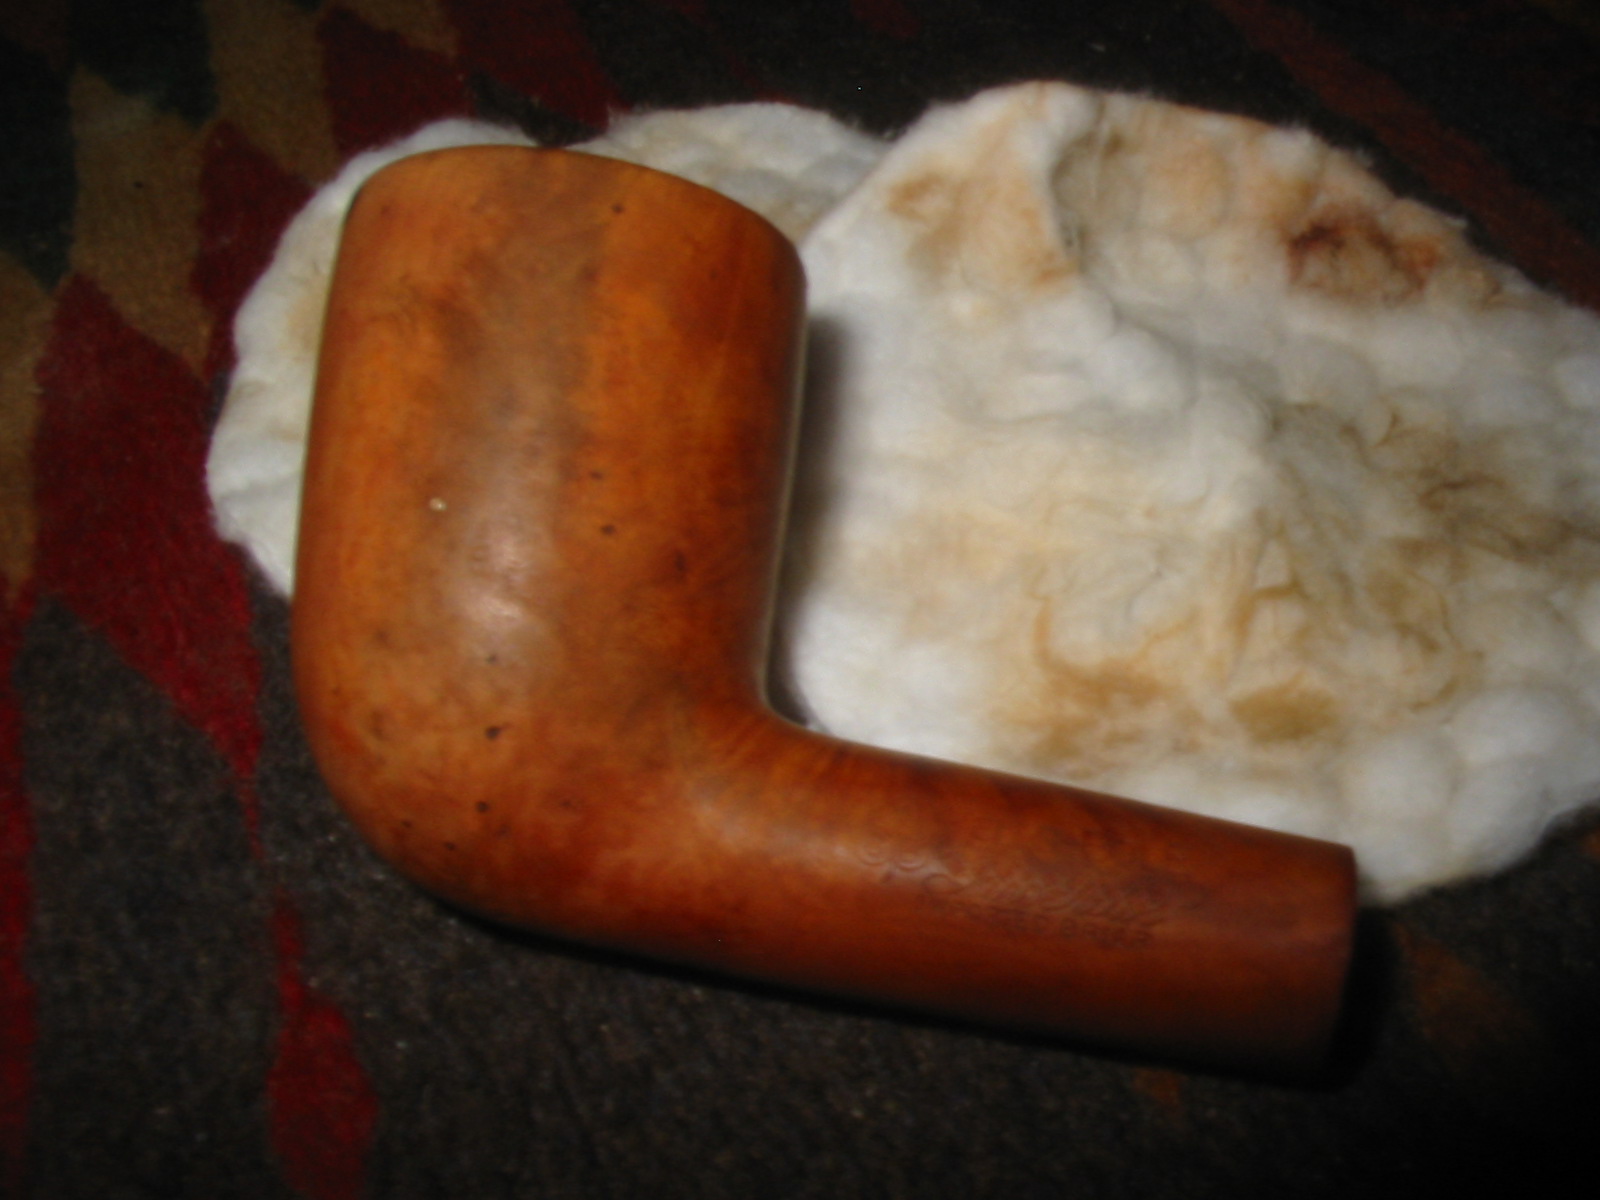
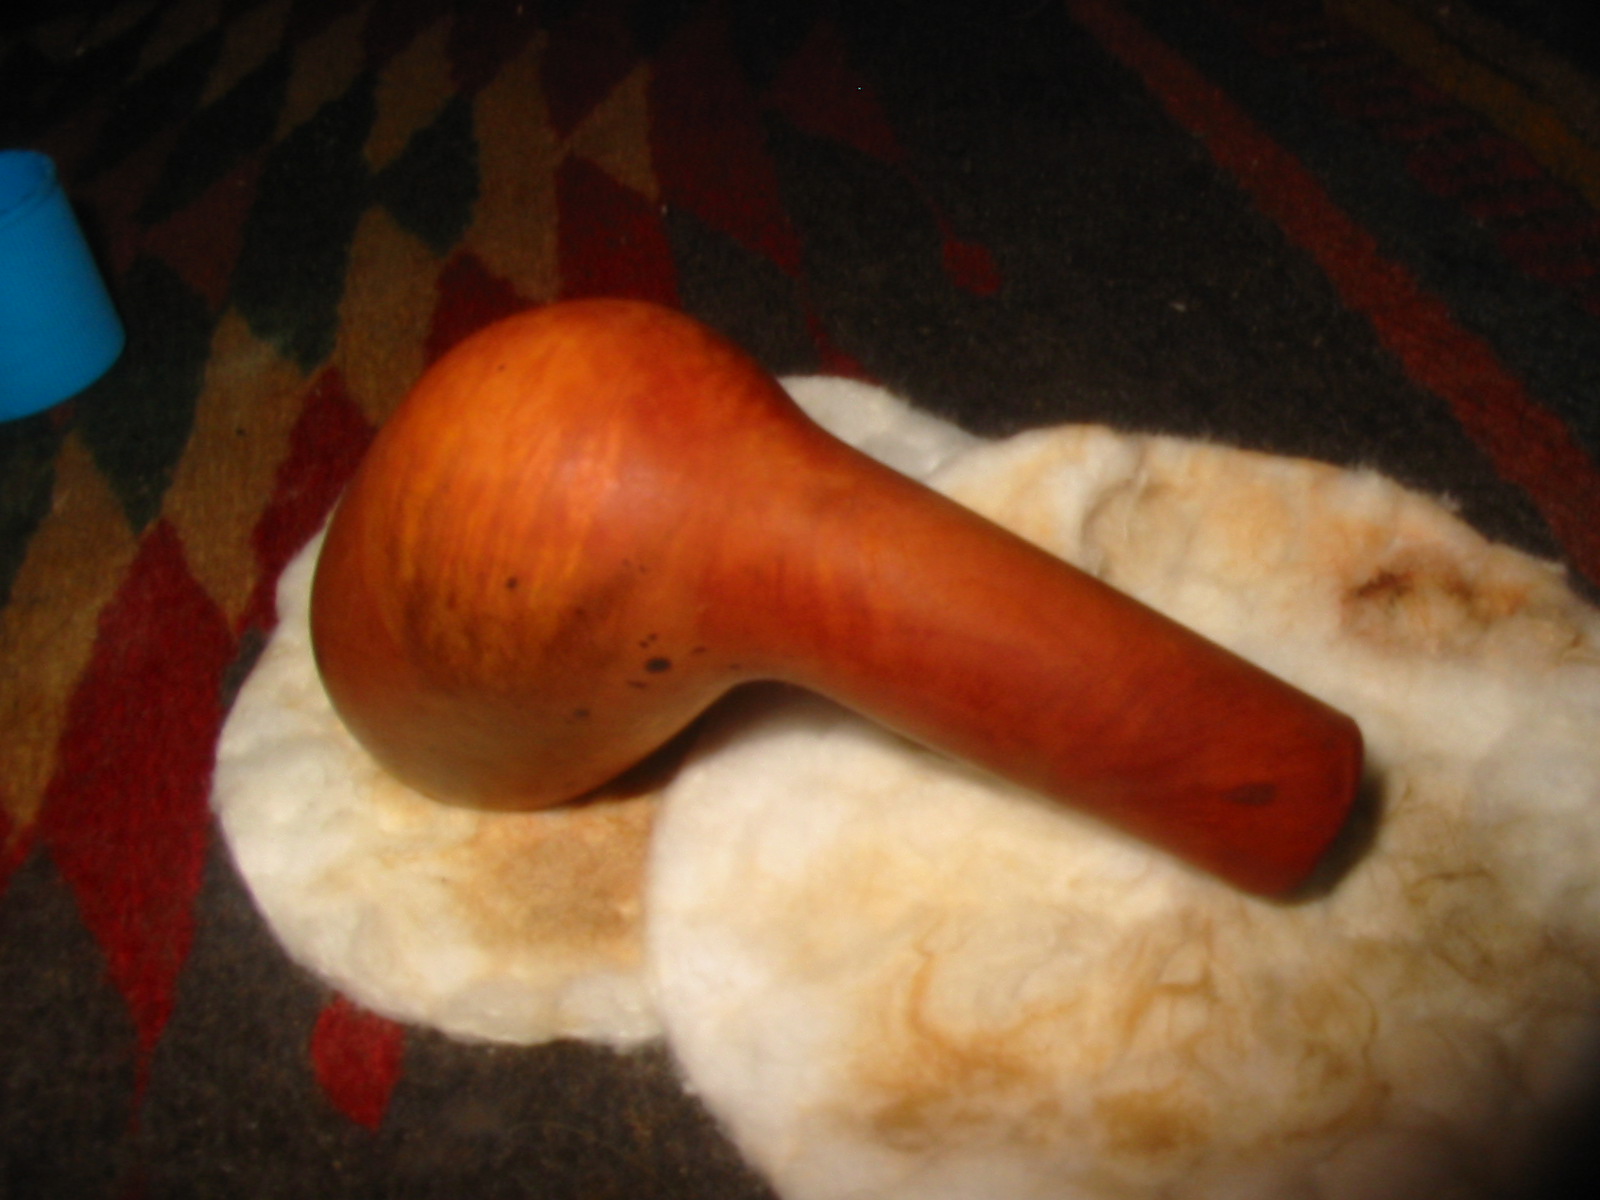
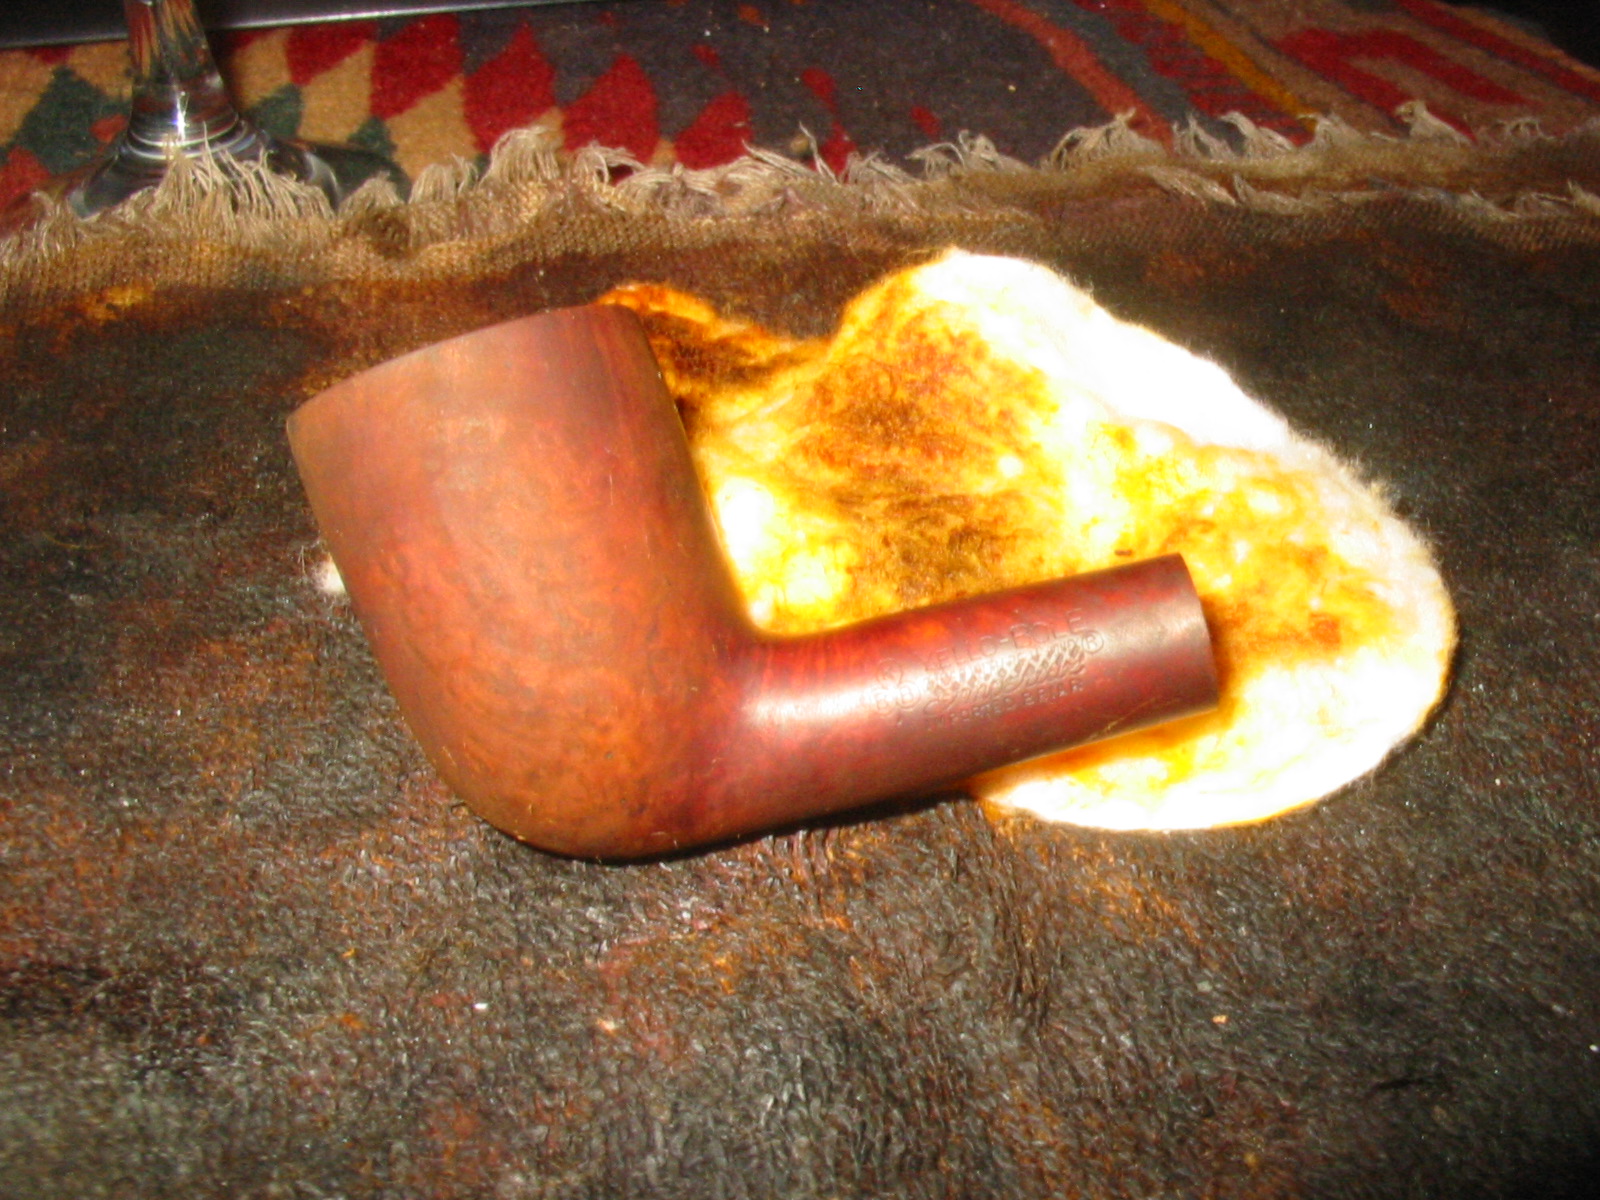
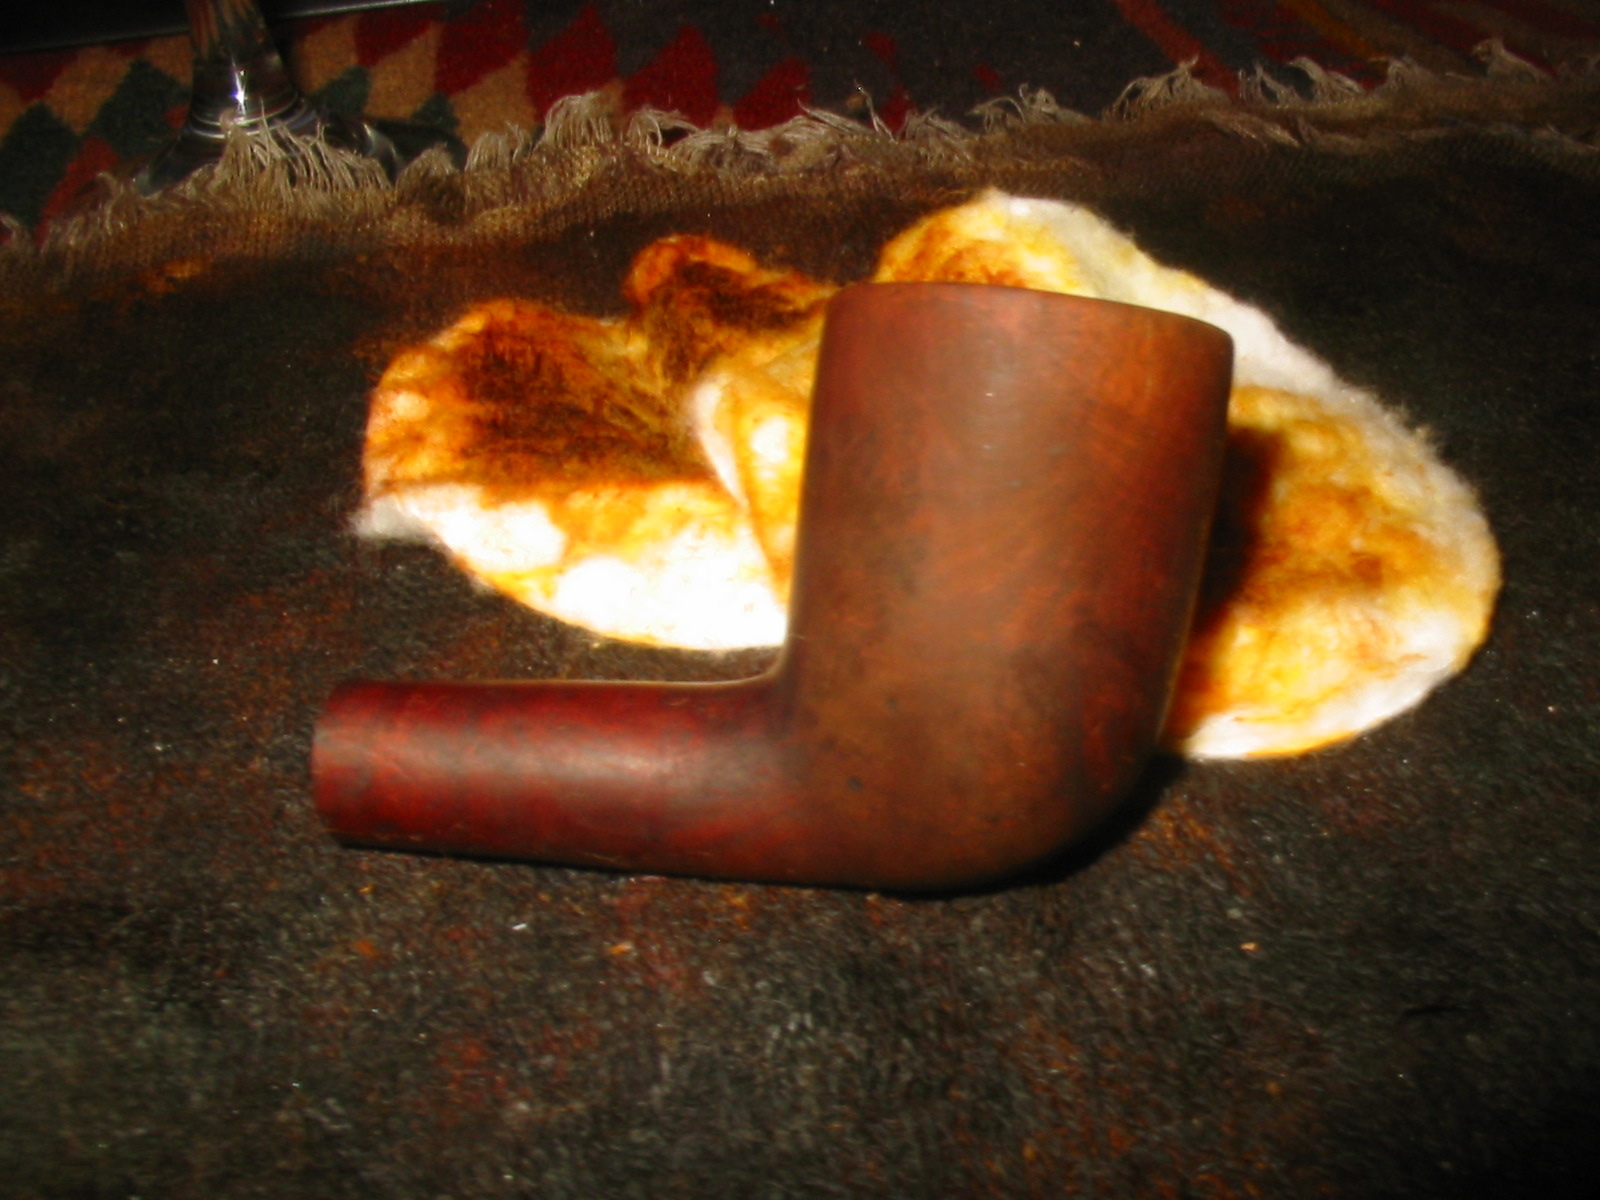
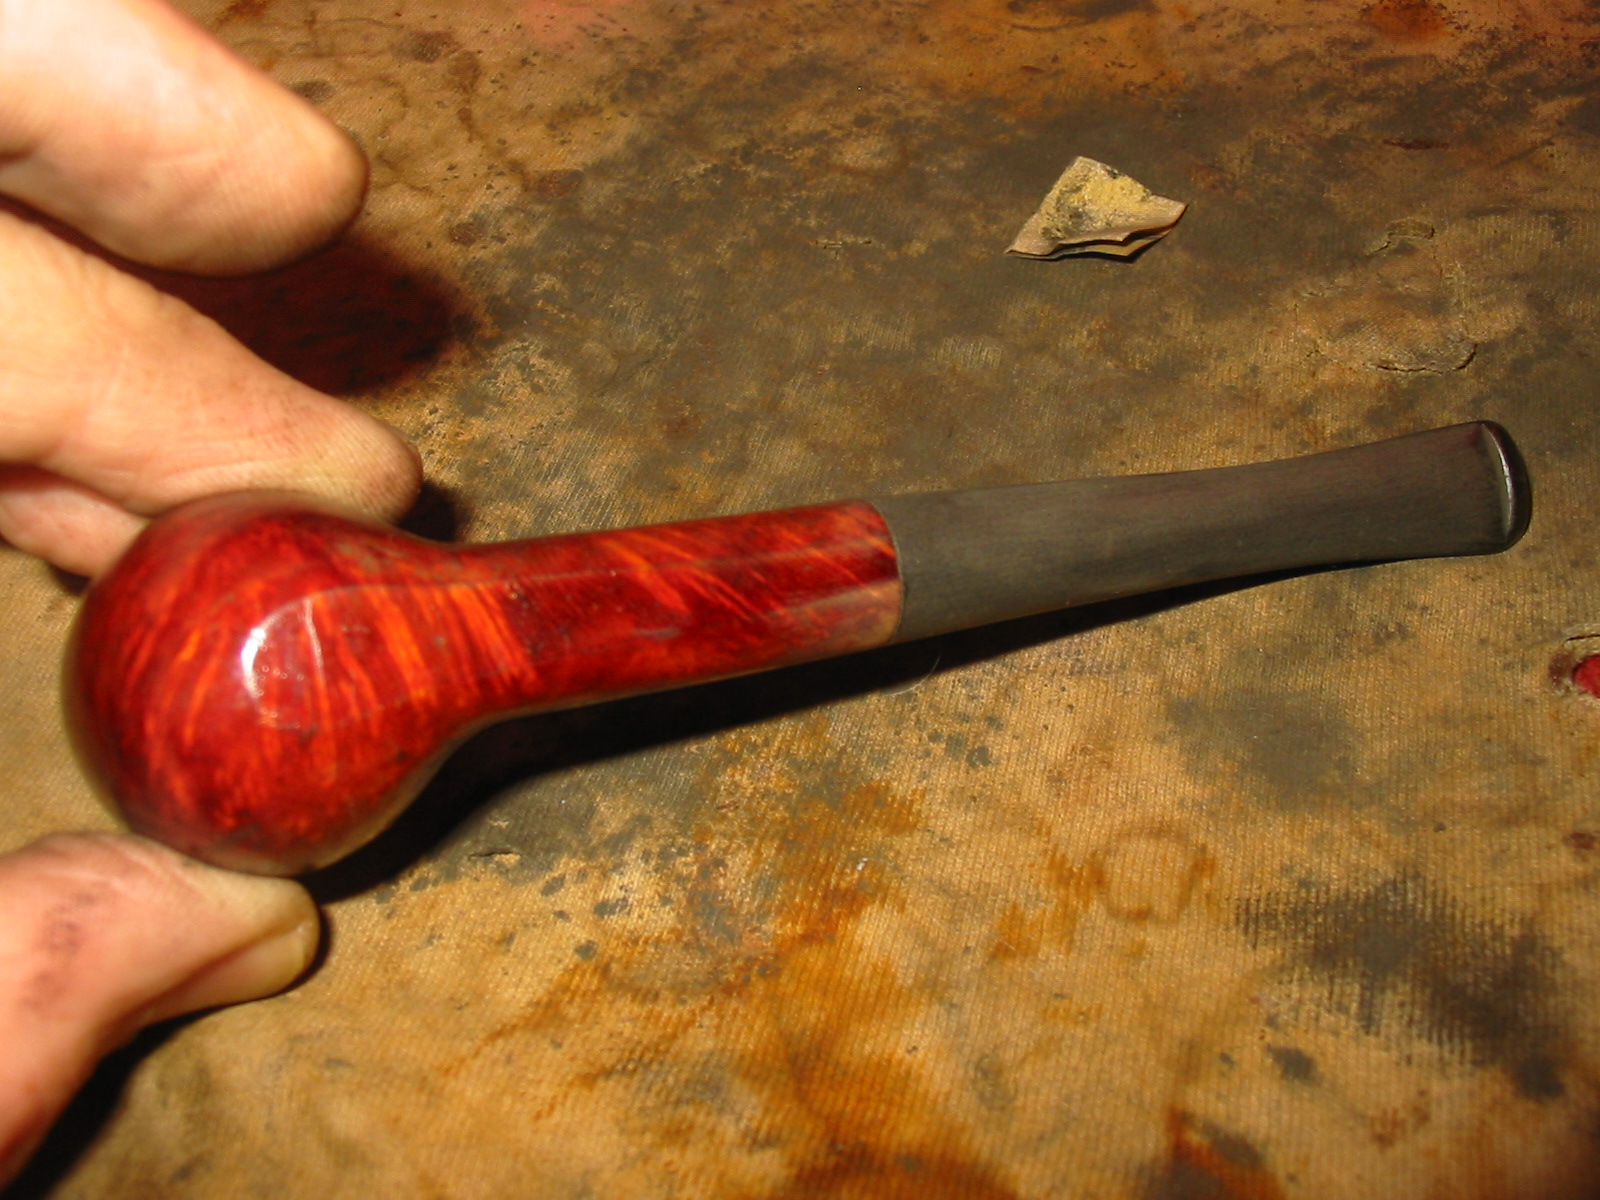
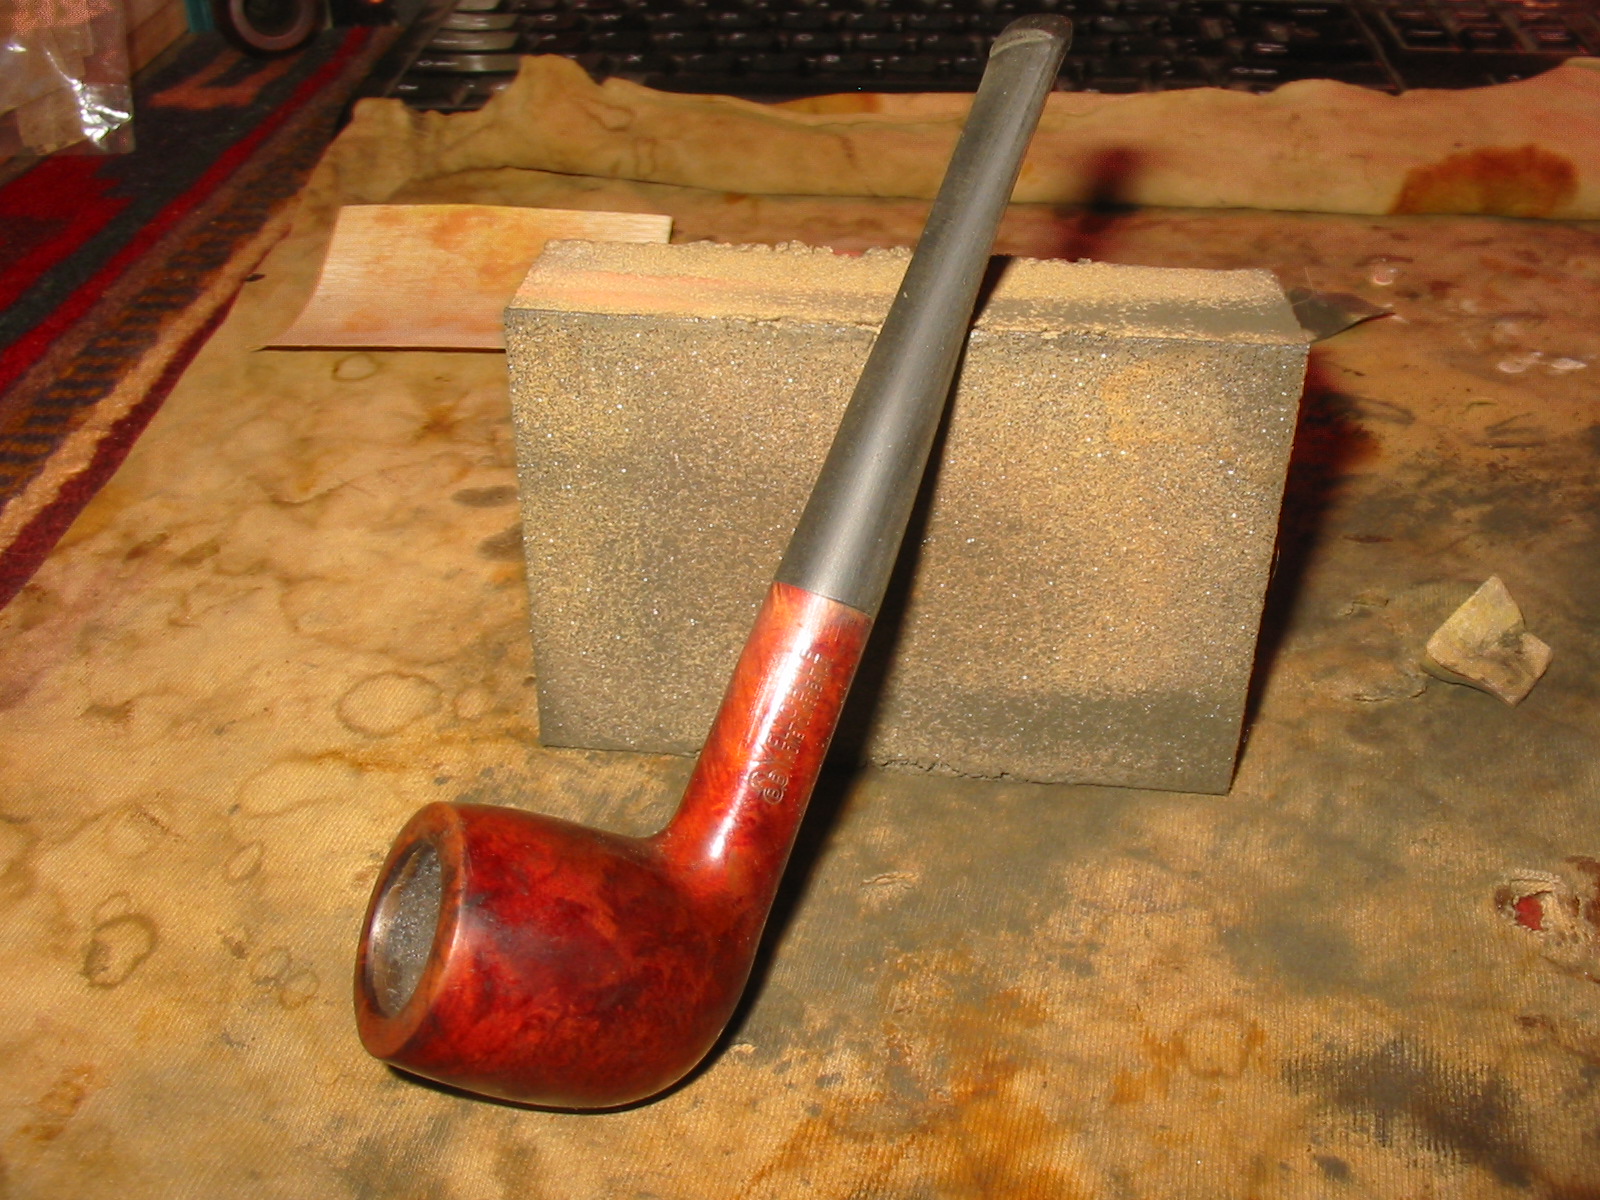
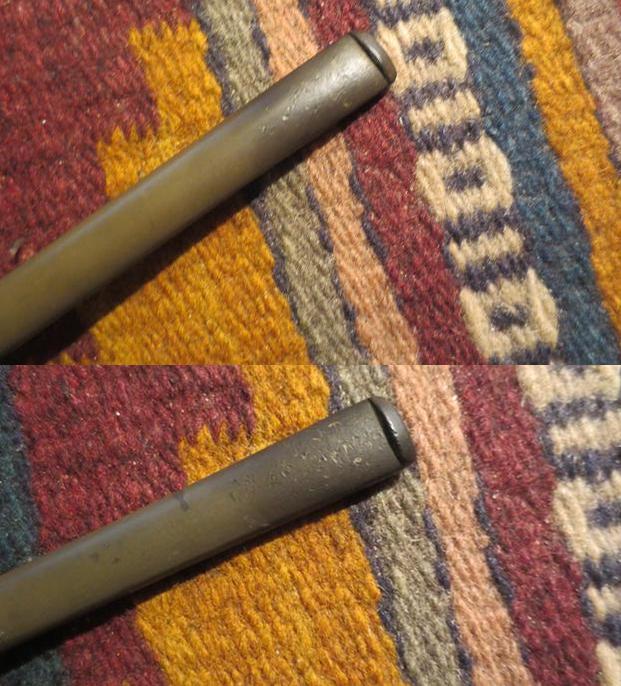
I removed the remaining varnish/shellac coat with acetone (fingernail polish remover) on cotton pads. It also removed some of the stain and brought the grain to the surface of the bowl. I liked the look of the pipe once the varnish was removed.yb12 yb13
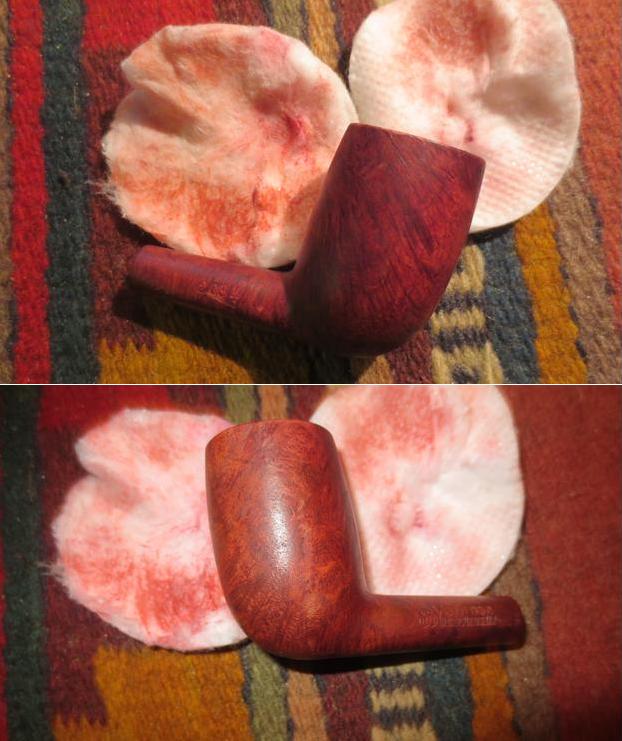
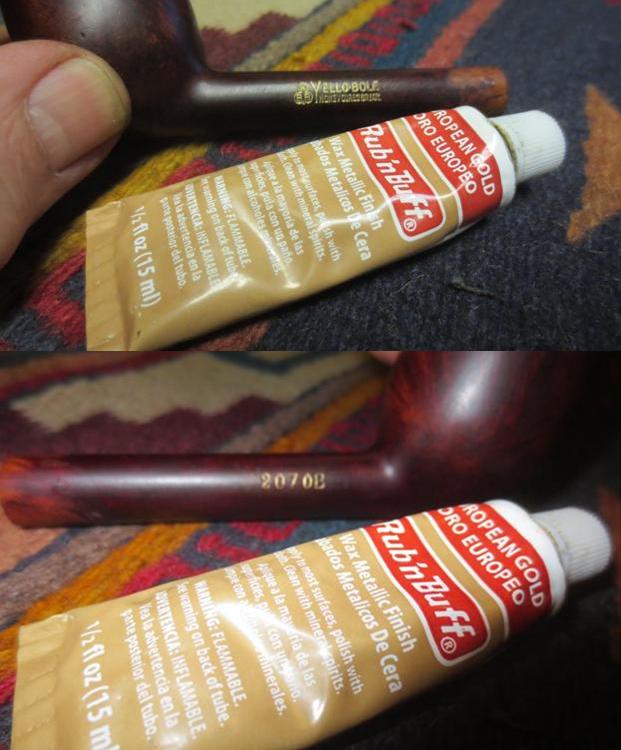
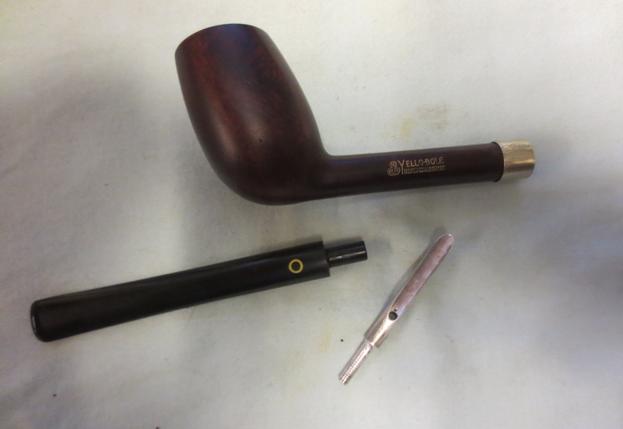
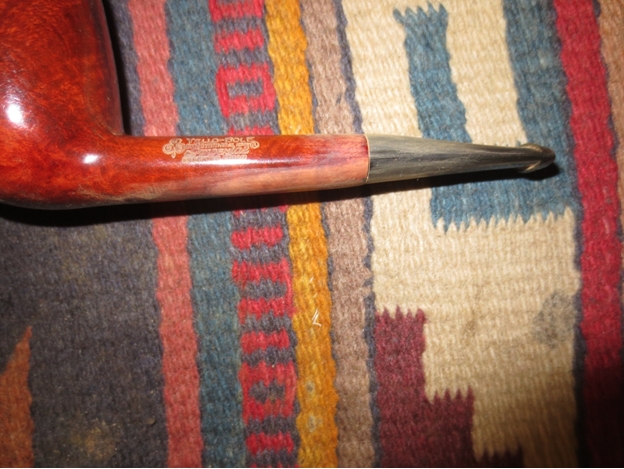
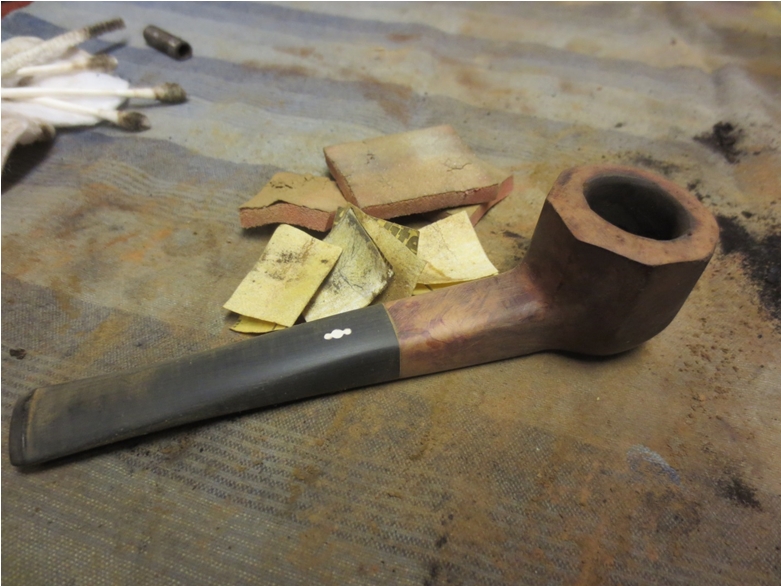
The stamping looked even clearer once the top coat had been removed. In the first photo below there is a line under the number that looks like a crack or a fill. It is not but rather it is debris left behind by the cotton pad and acetone wash.yb14
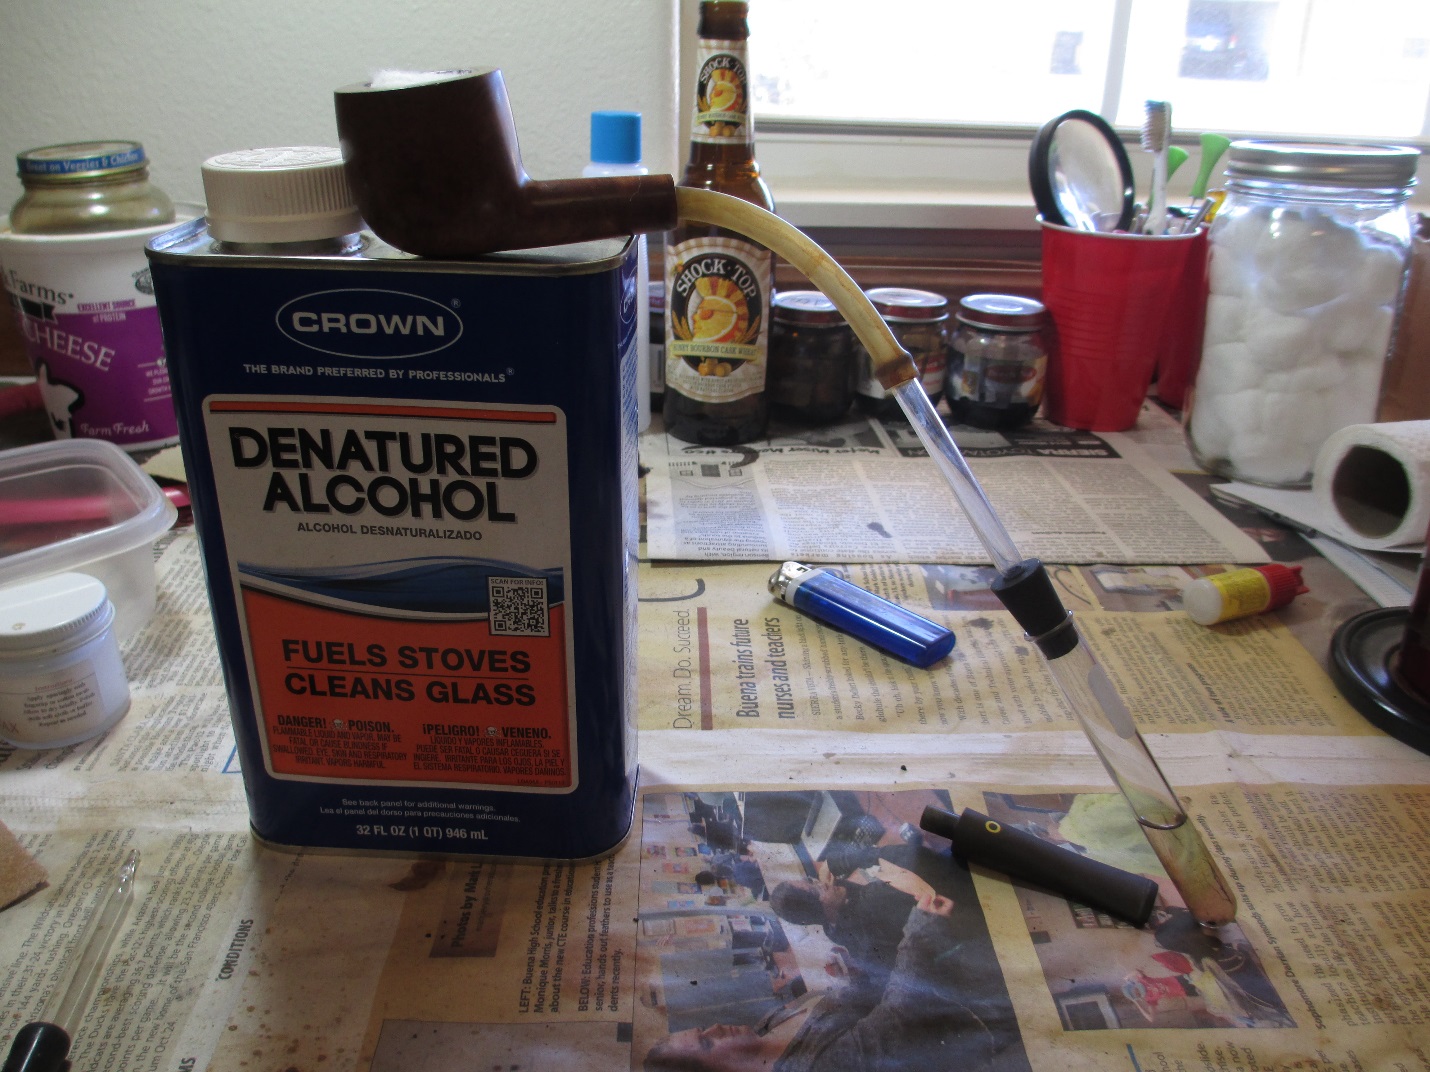
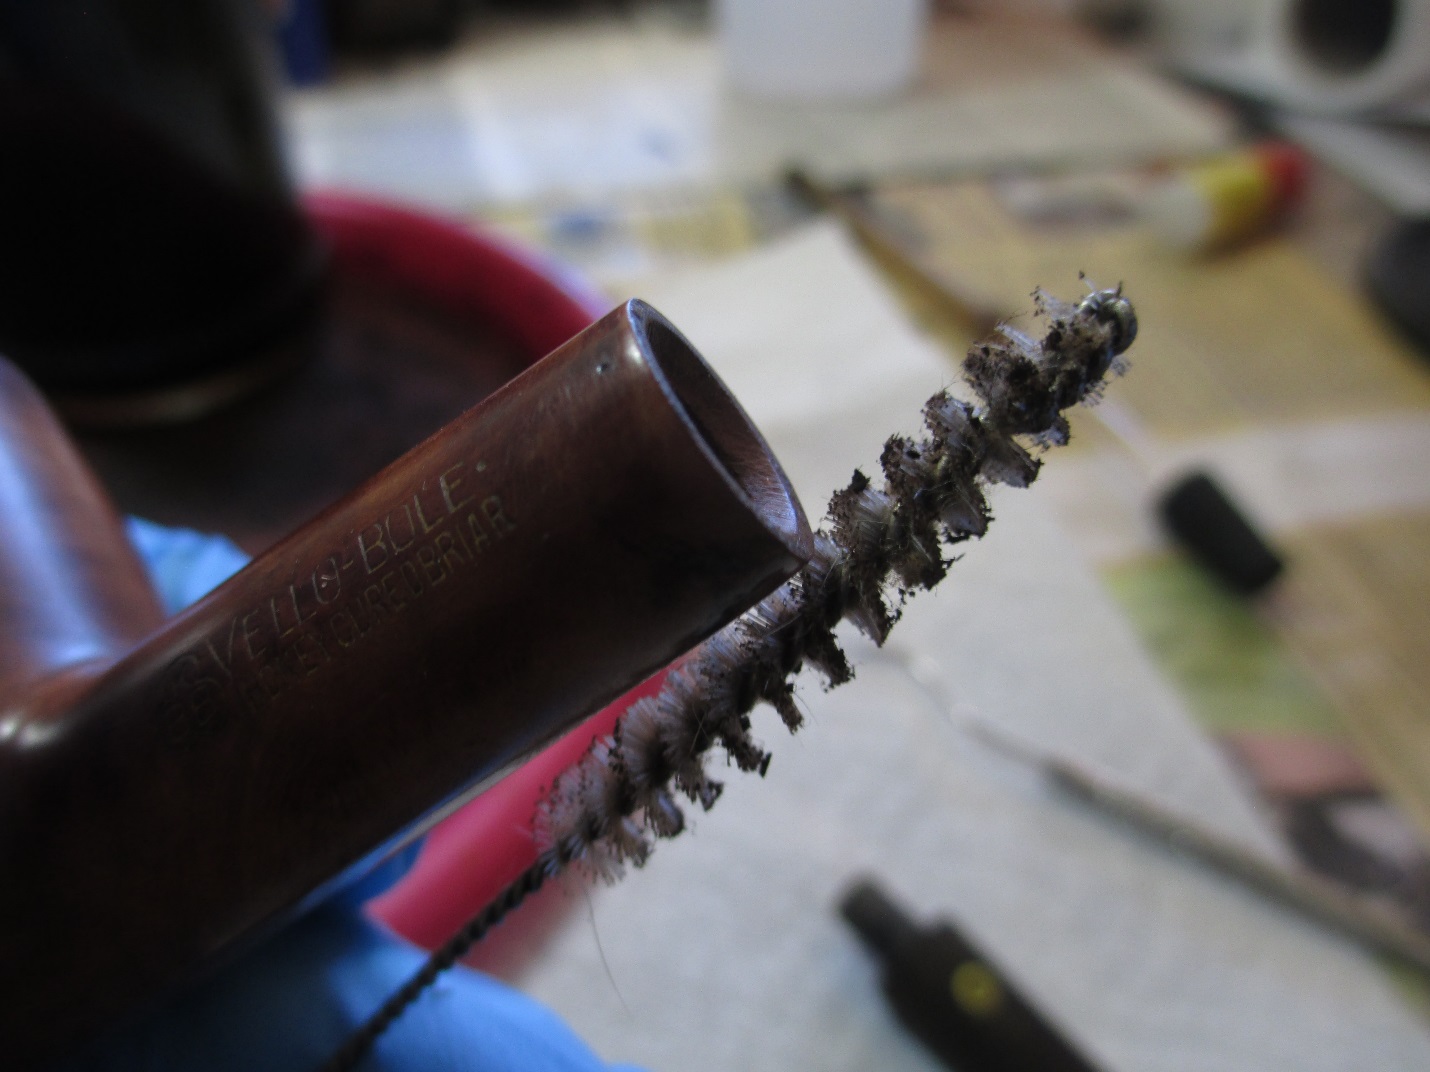
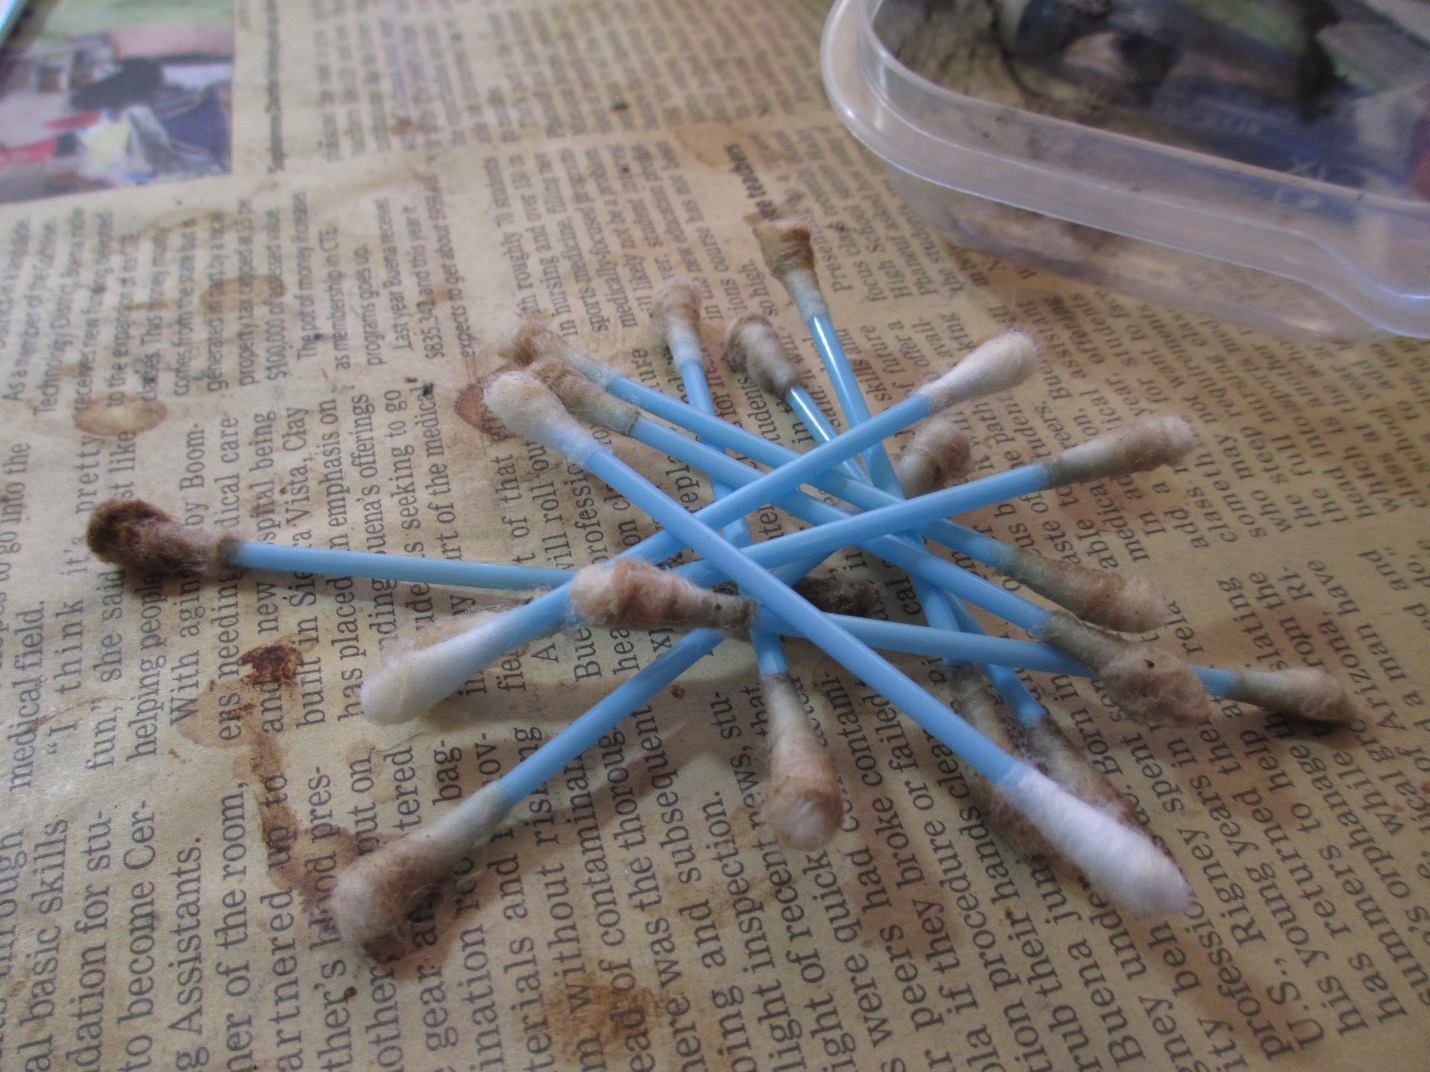
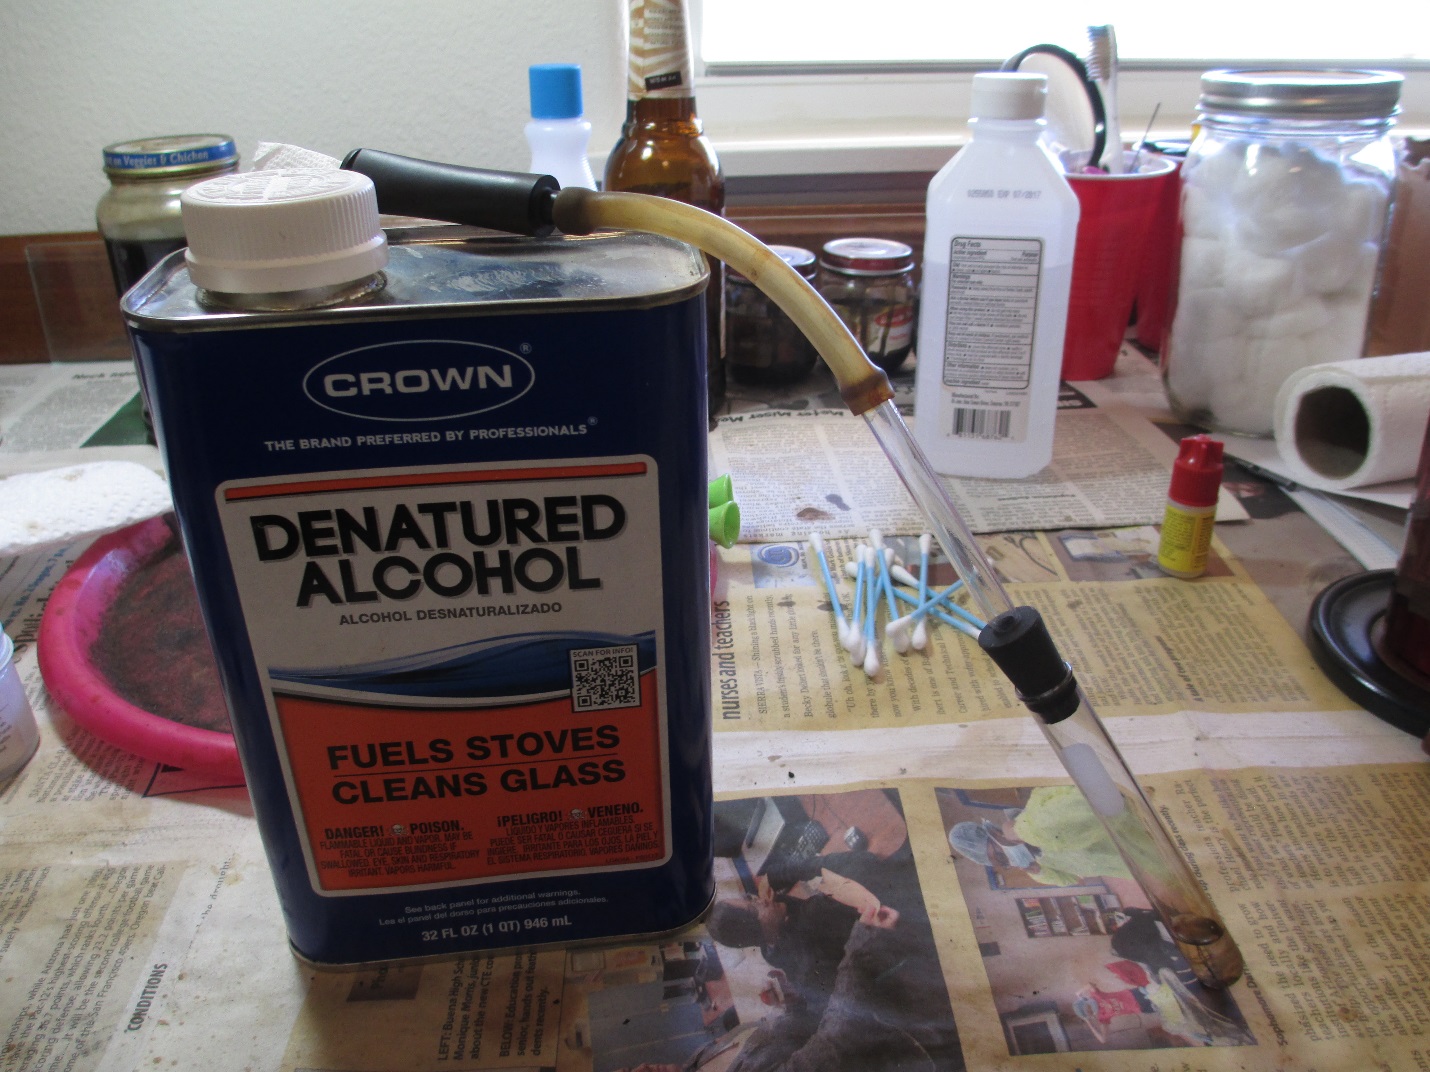
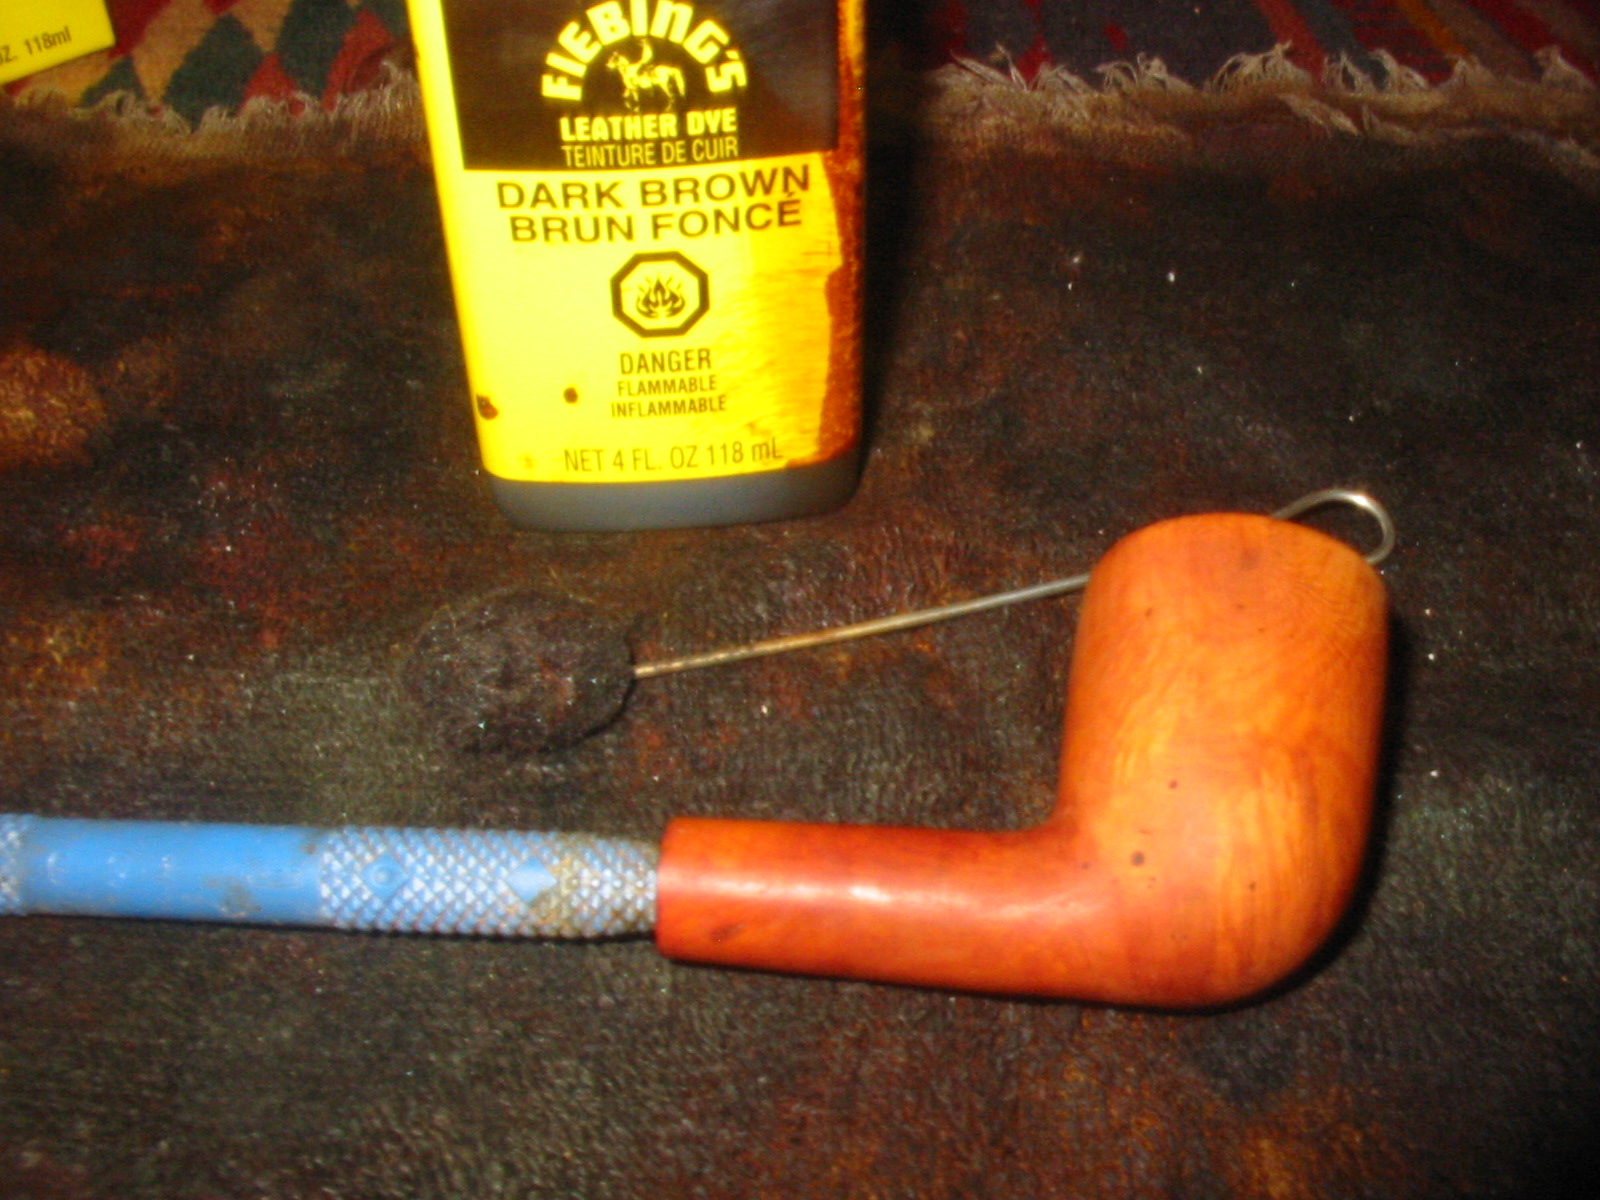
I ran pipe cleaners, cottons swabs and alcohol through the mortise and the airway in the shank and the stem remove any remaining oils. The red colour on the cotton swabs is actually some of the red stain that was inside of the shank. I was able to remove all of stain from the shank and mortise.yb15
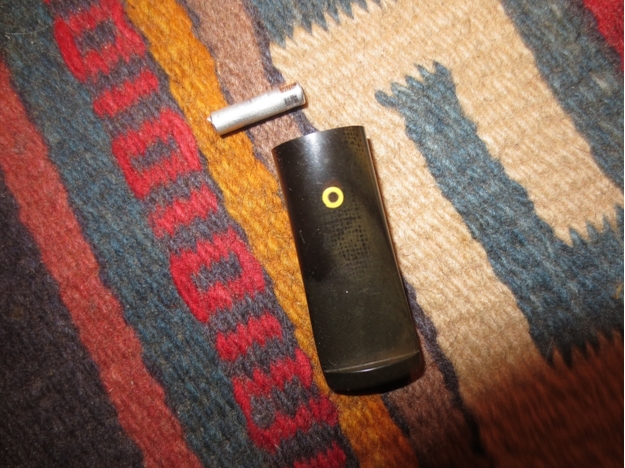
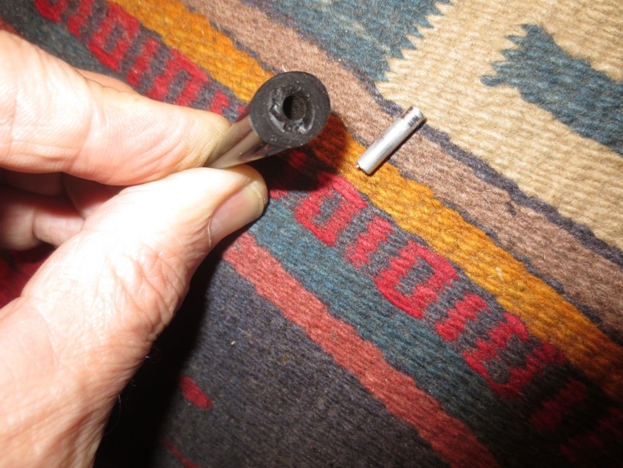
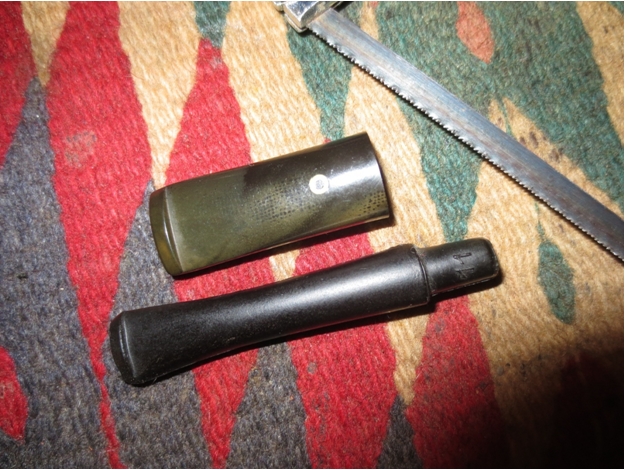
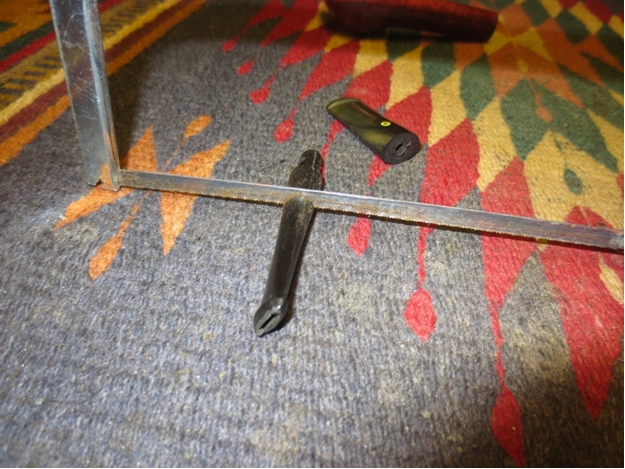
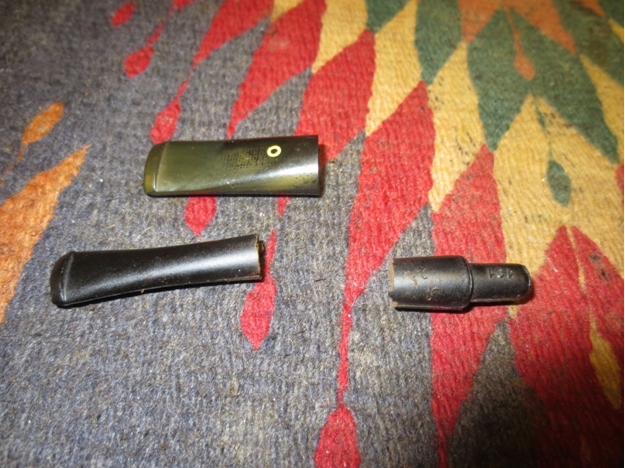
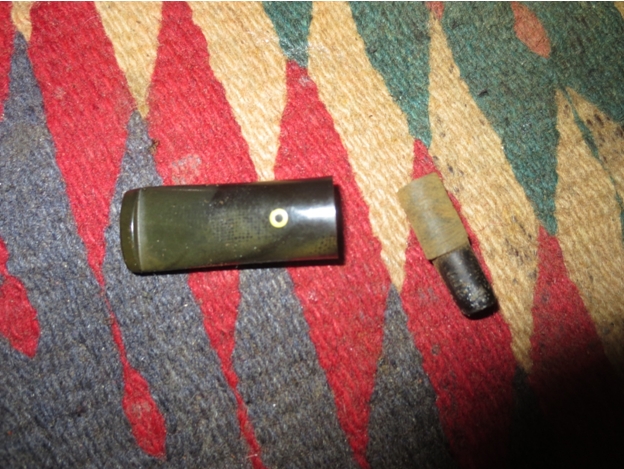
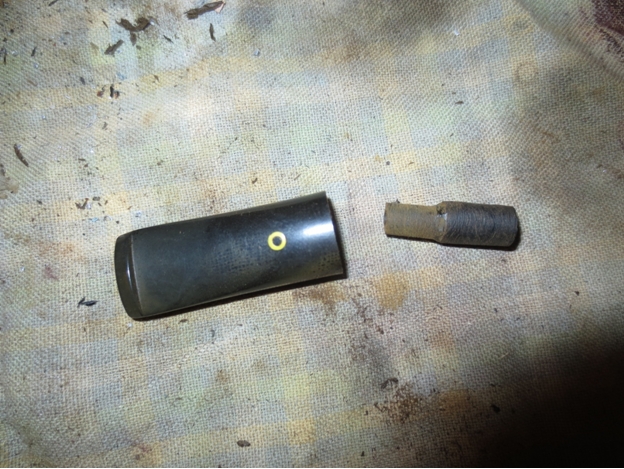
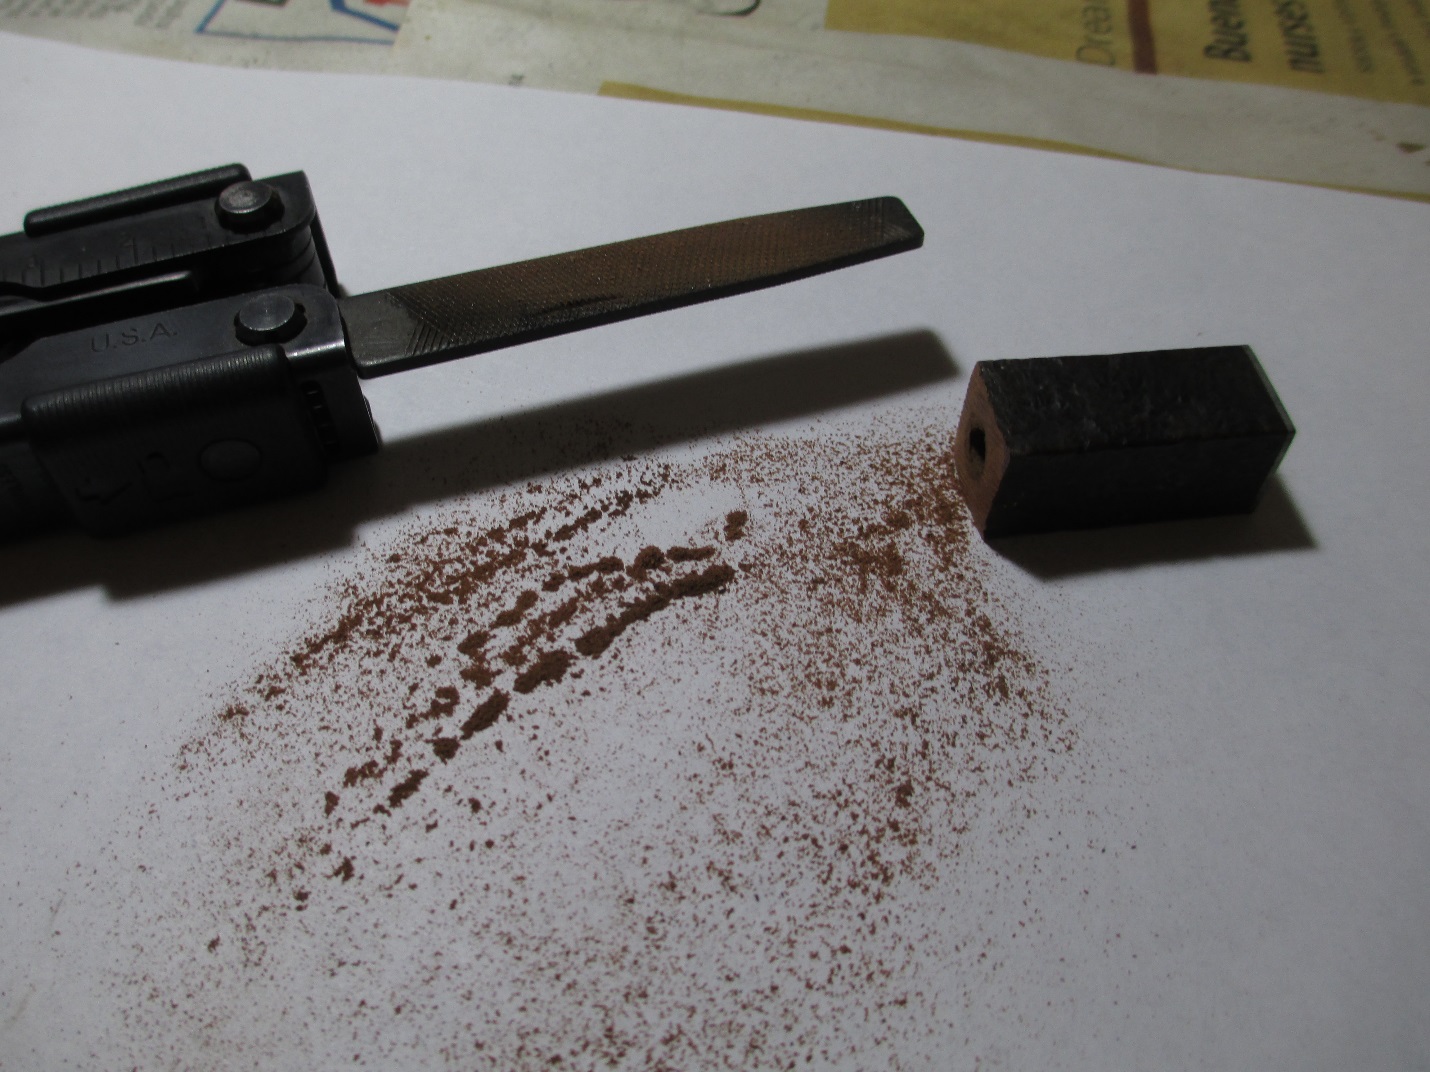
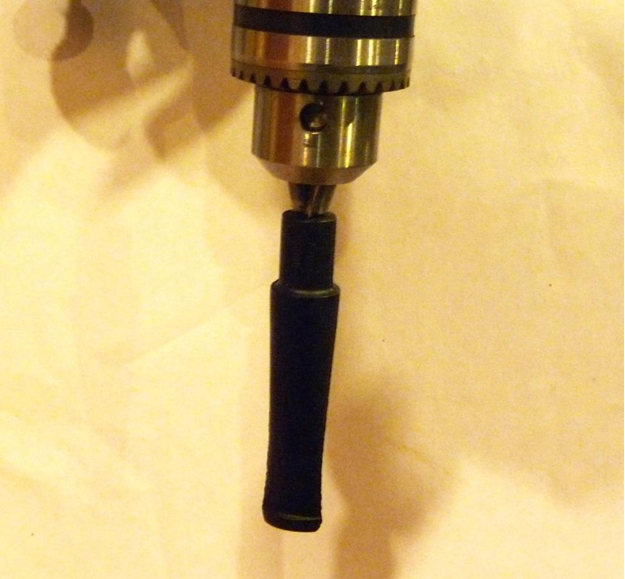
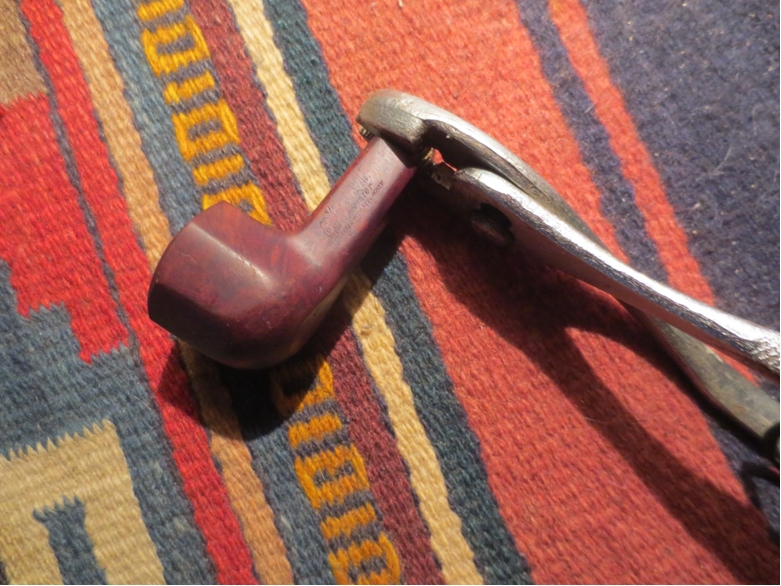
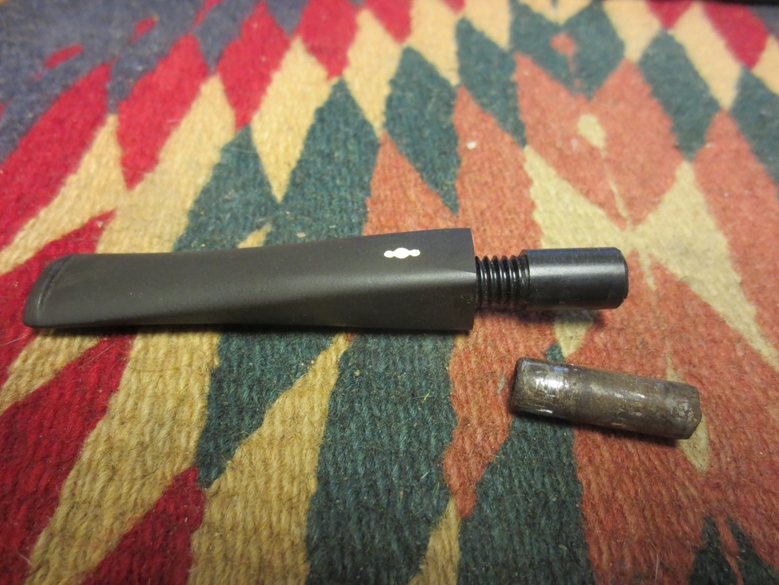
I unscrewed the stinger from the tenon and cleaned it with 0000 steel wool. I am not sure whether I will put it in or not. I may do so and let the new owner decided whether to keep it in place or remove it.yb16
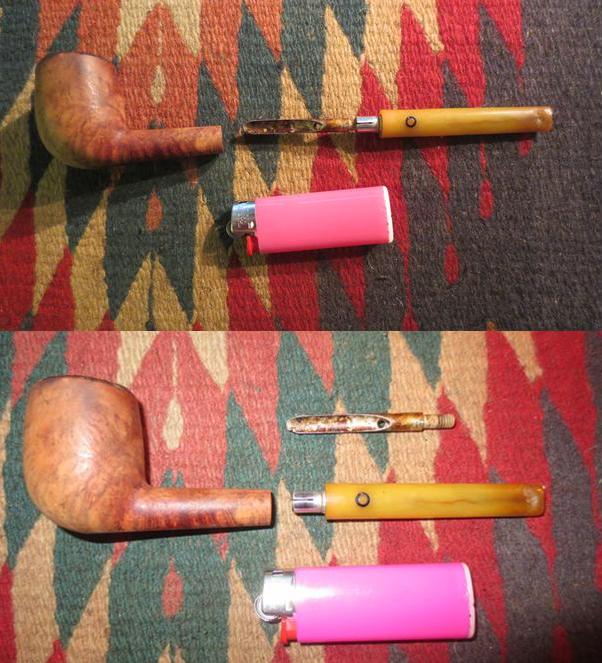
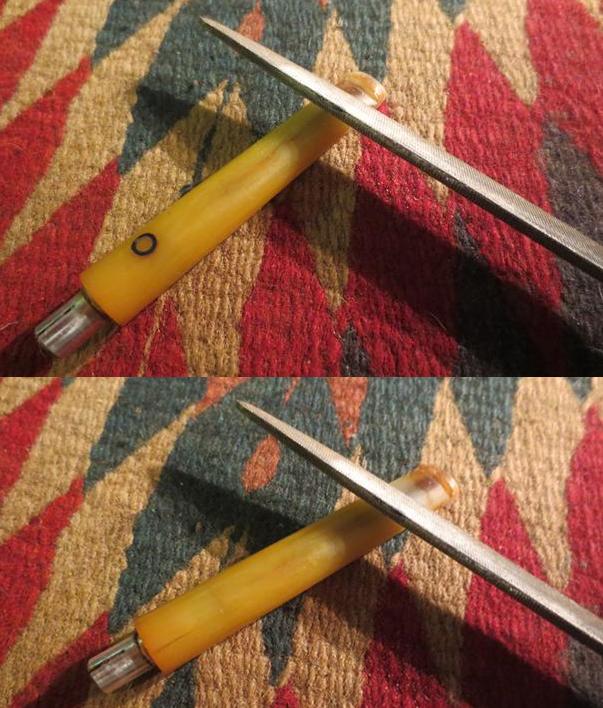
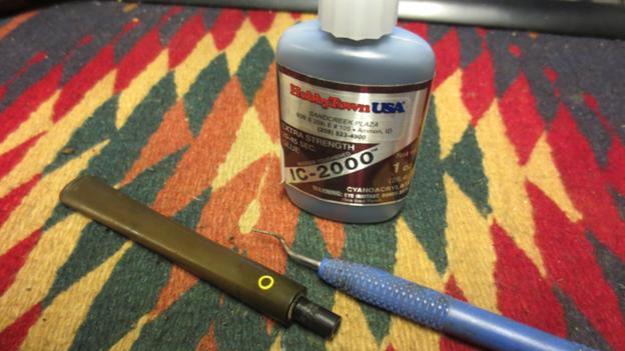
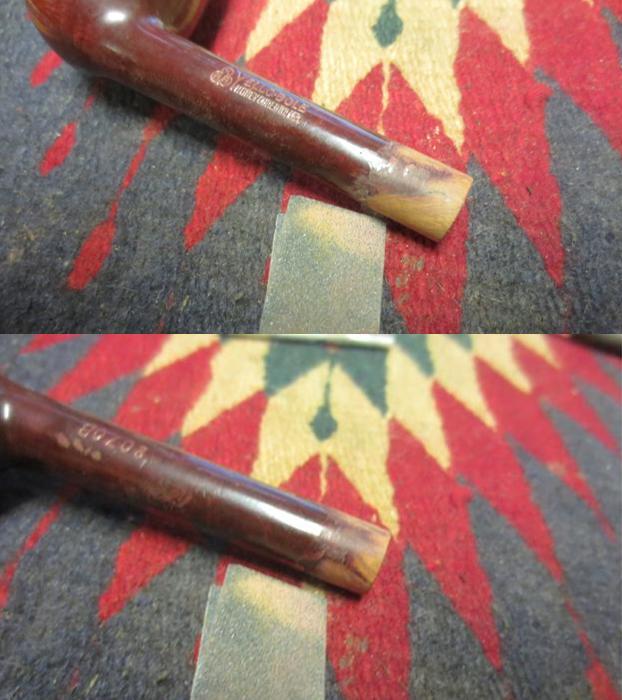
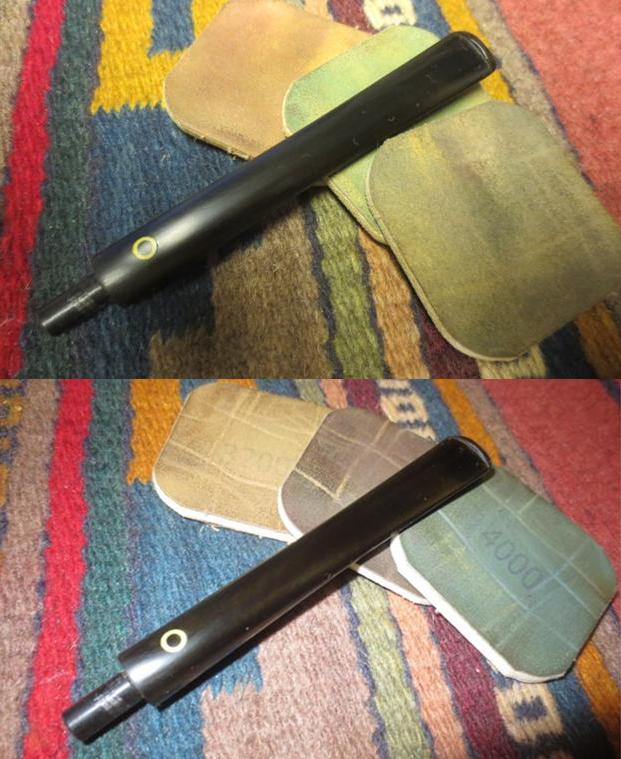
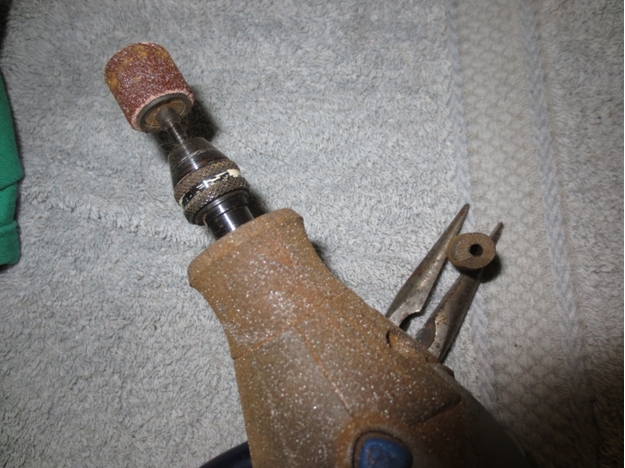
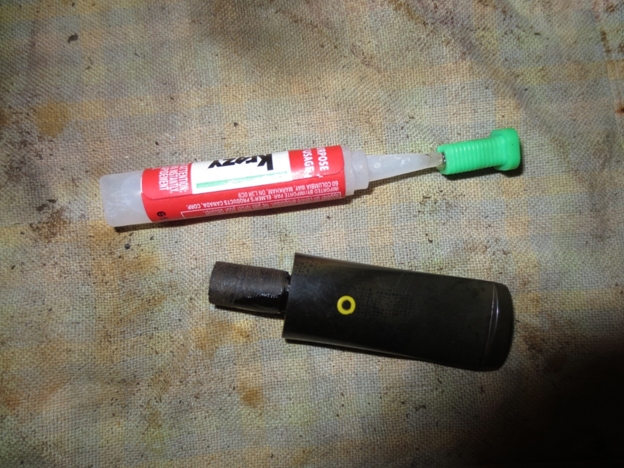
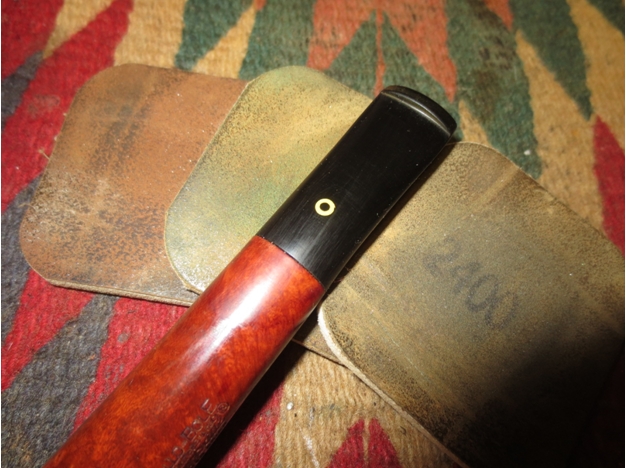
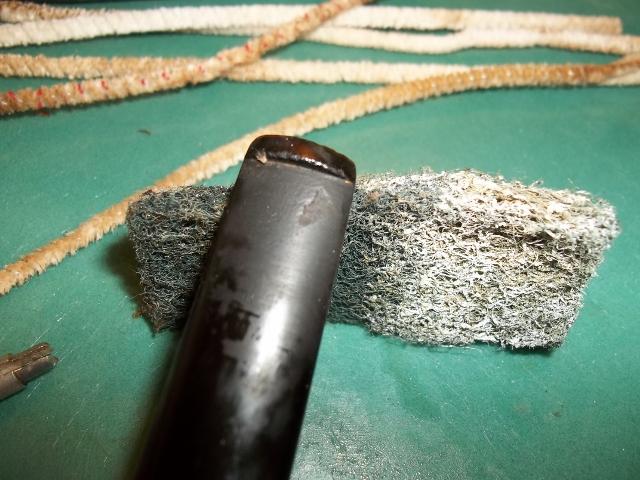
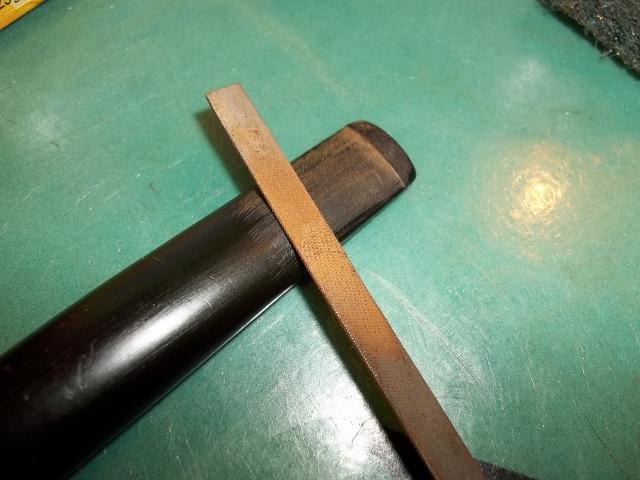
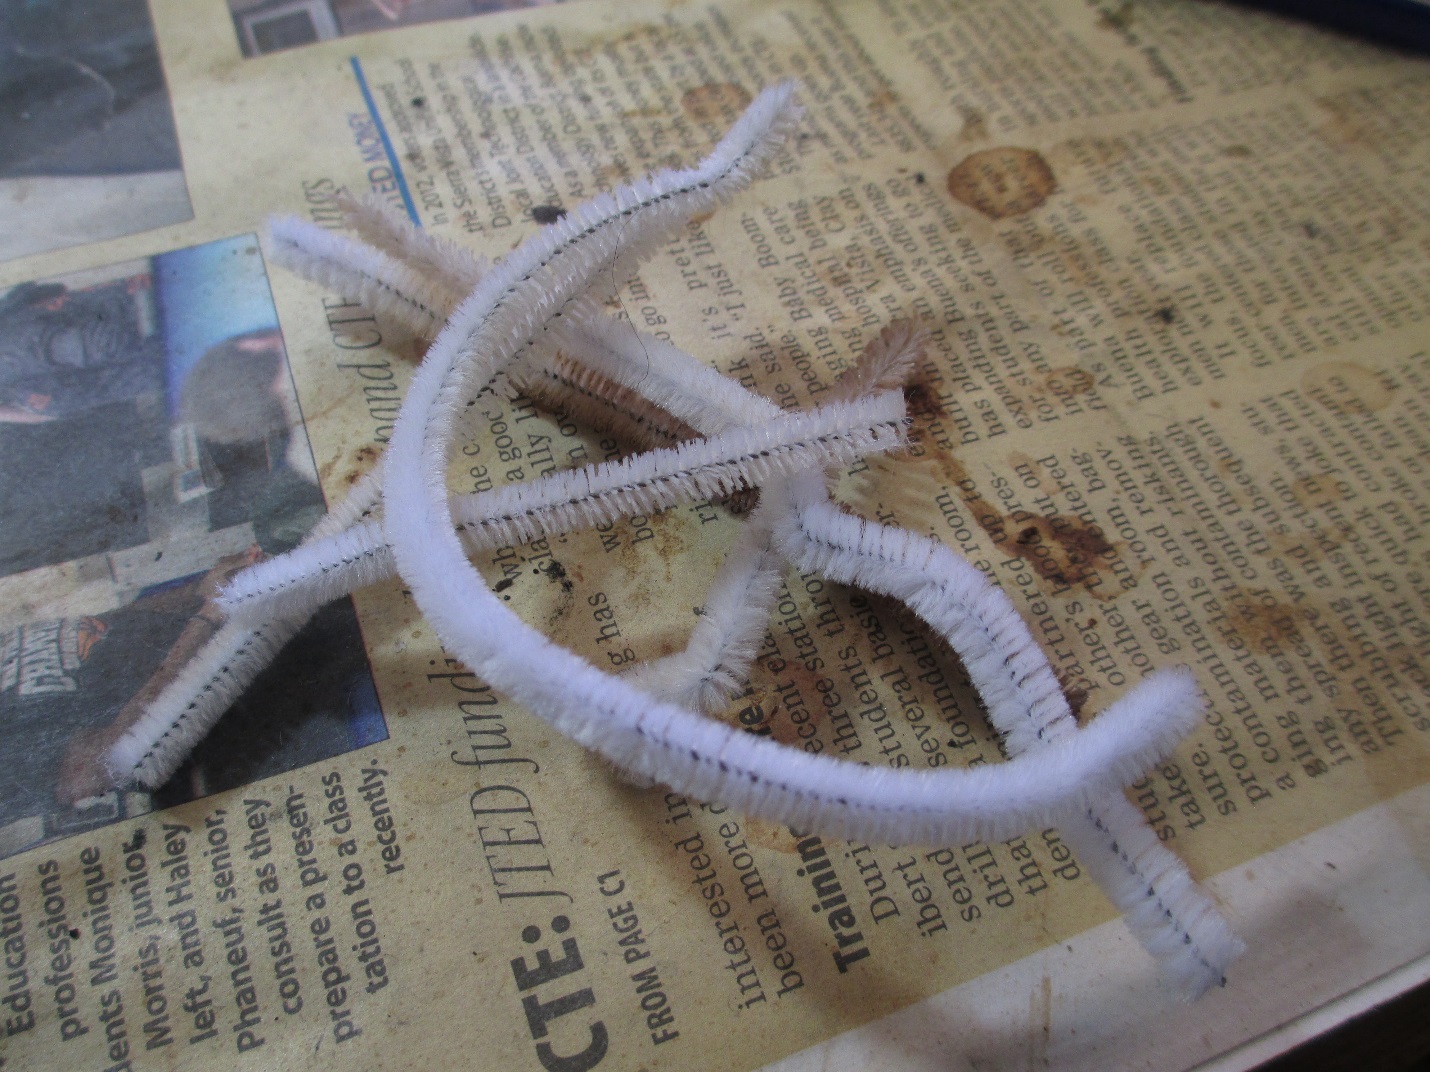
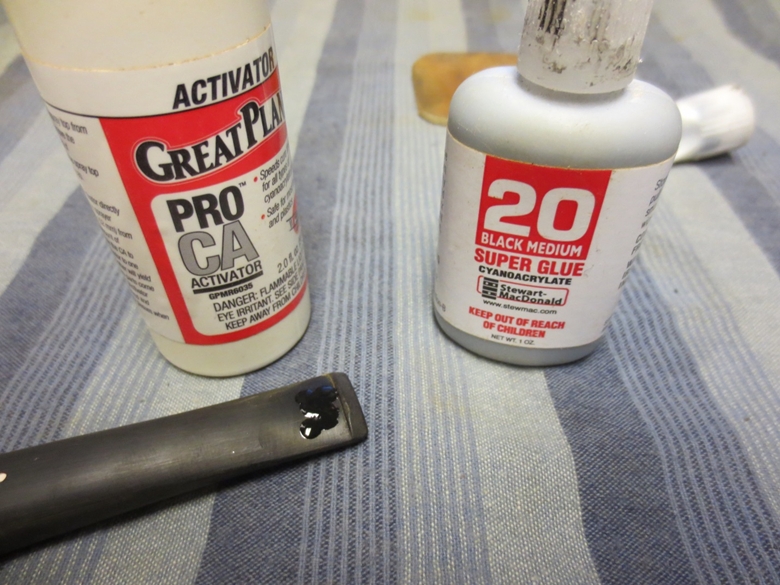
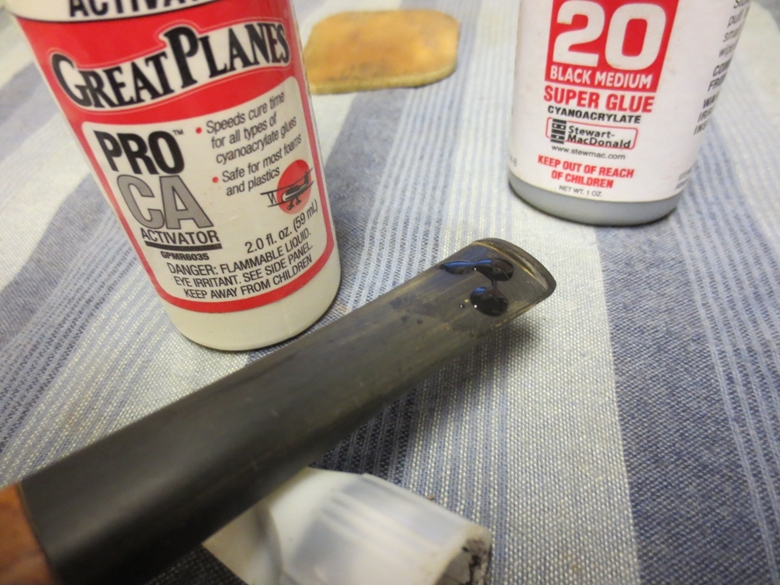
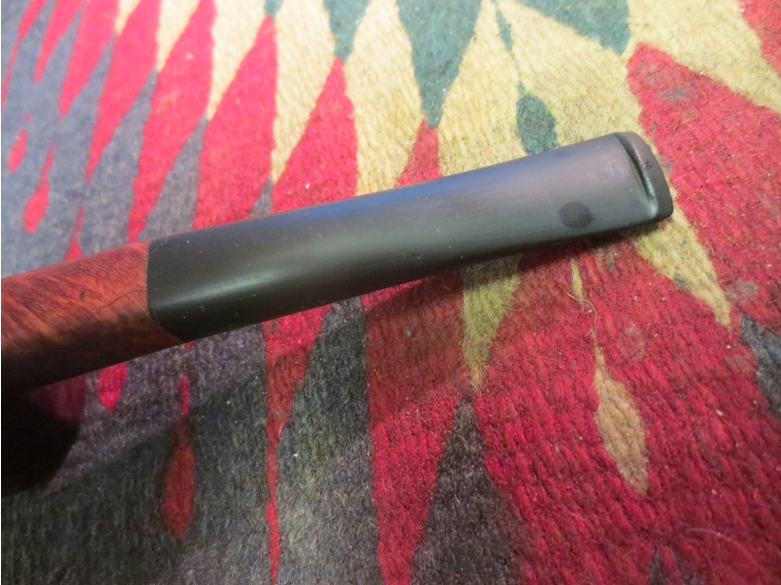
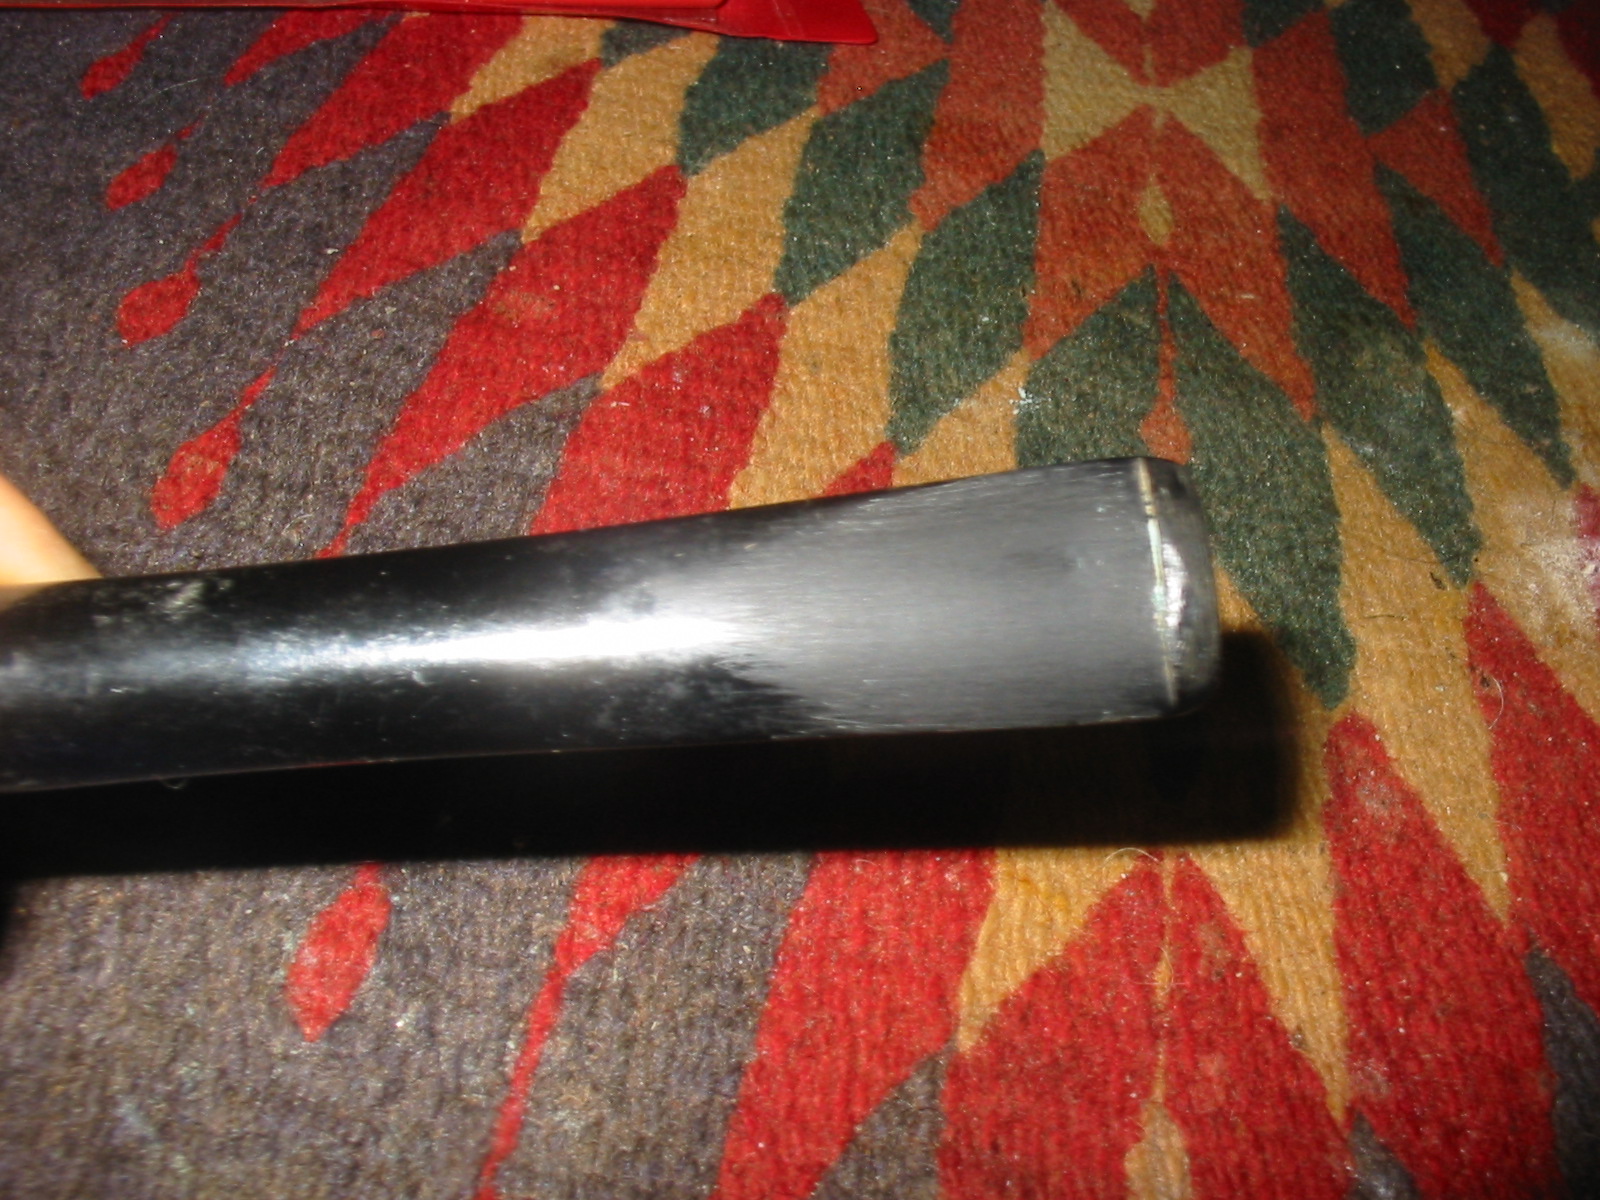
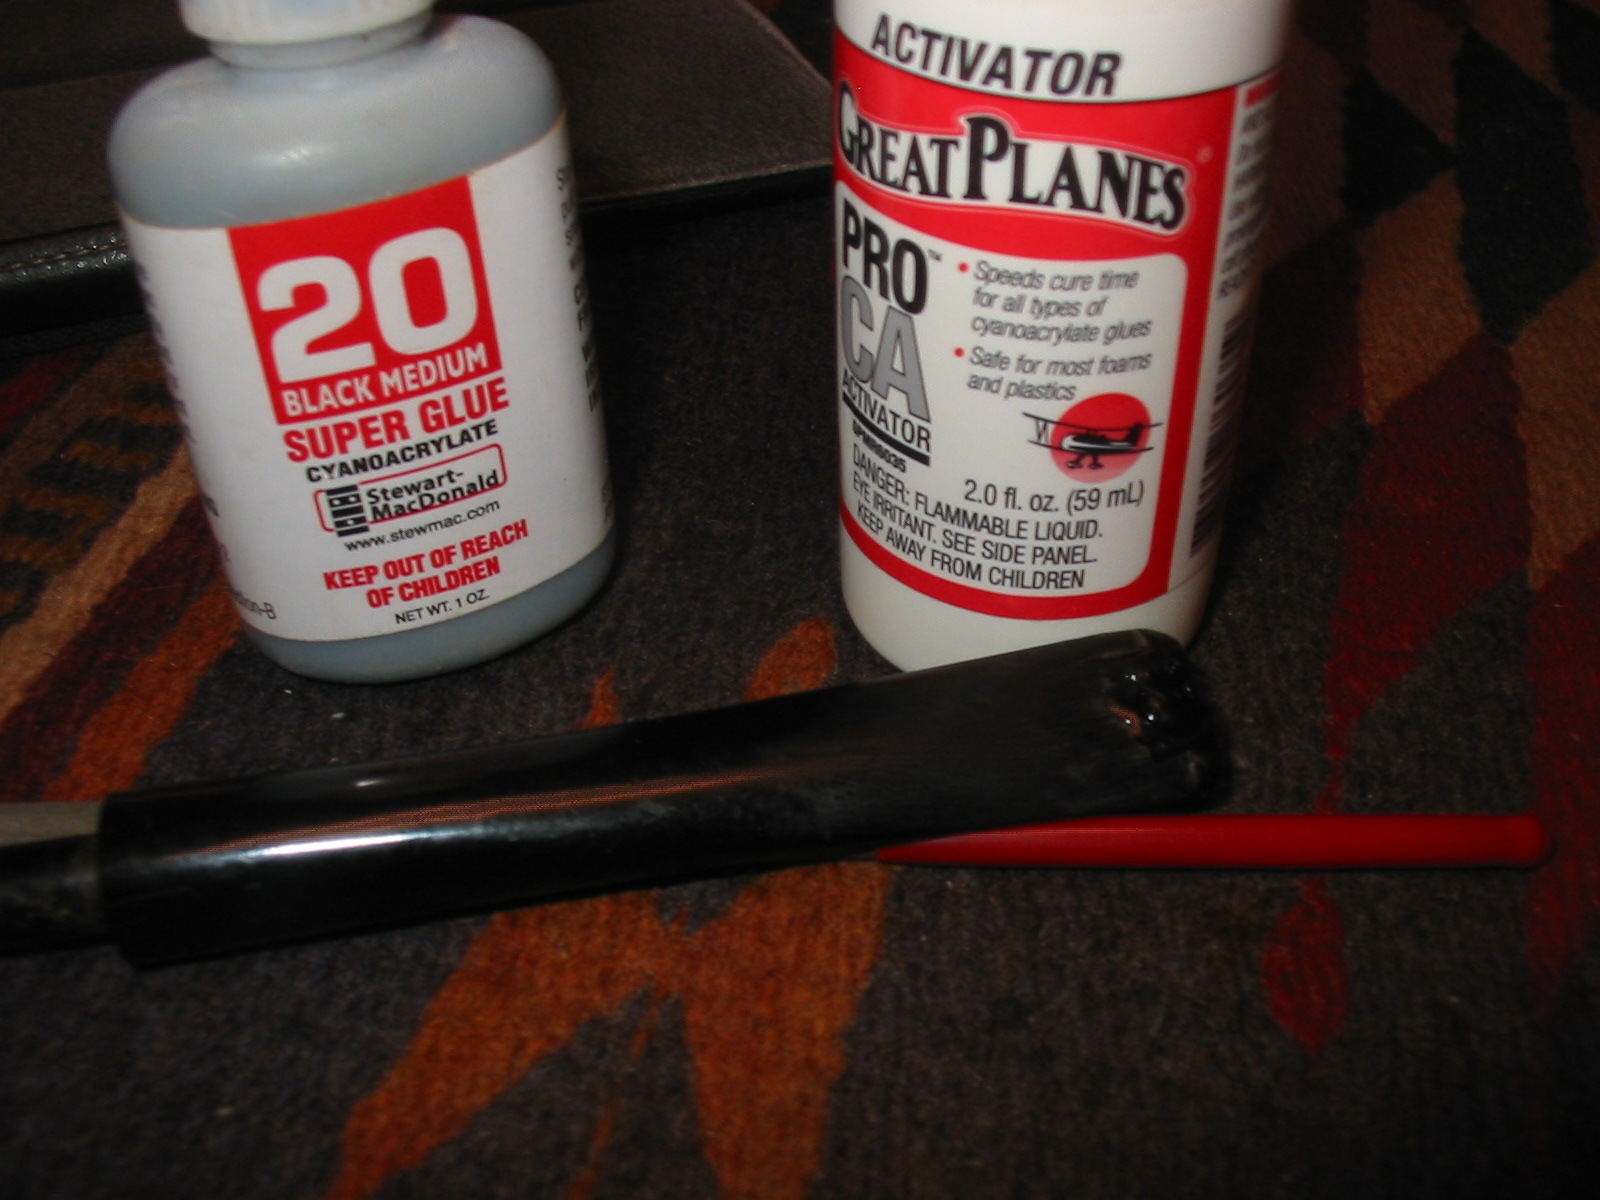
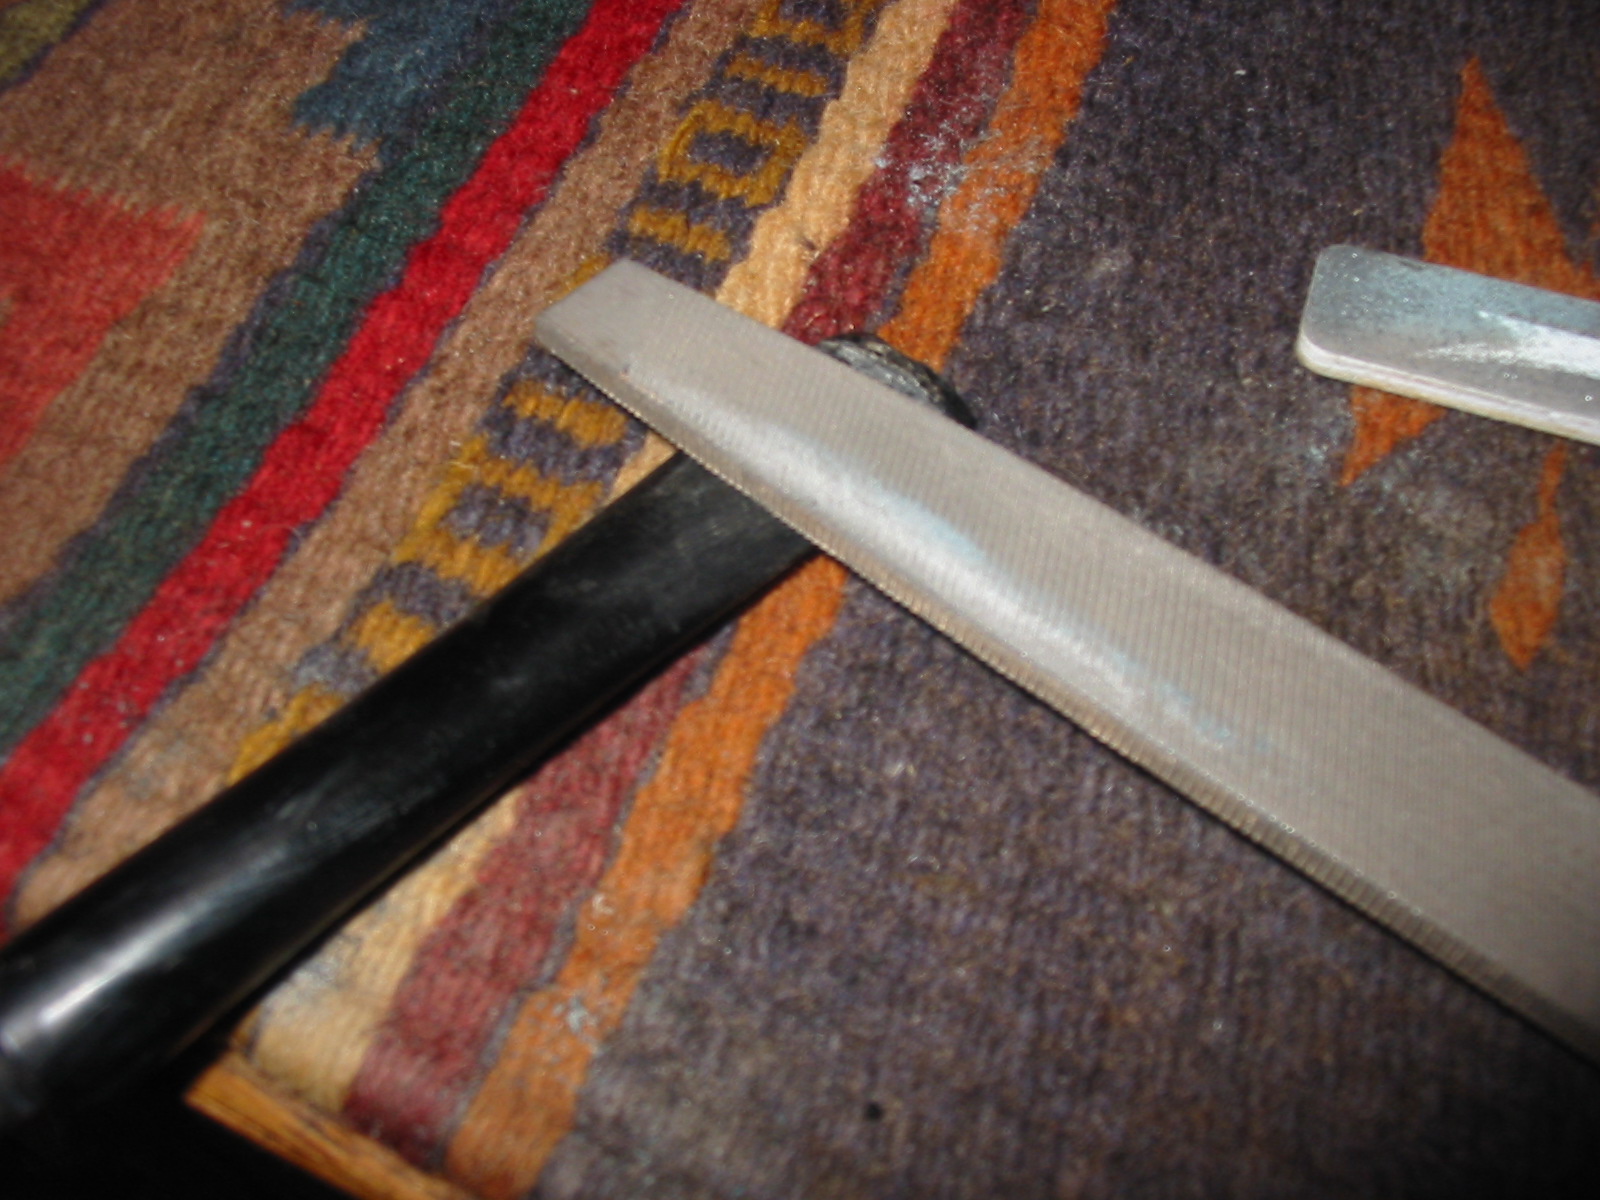
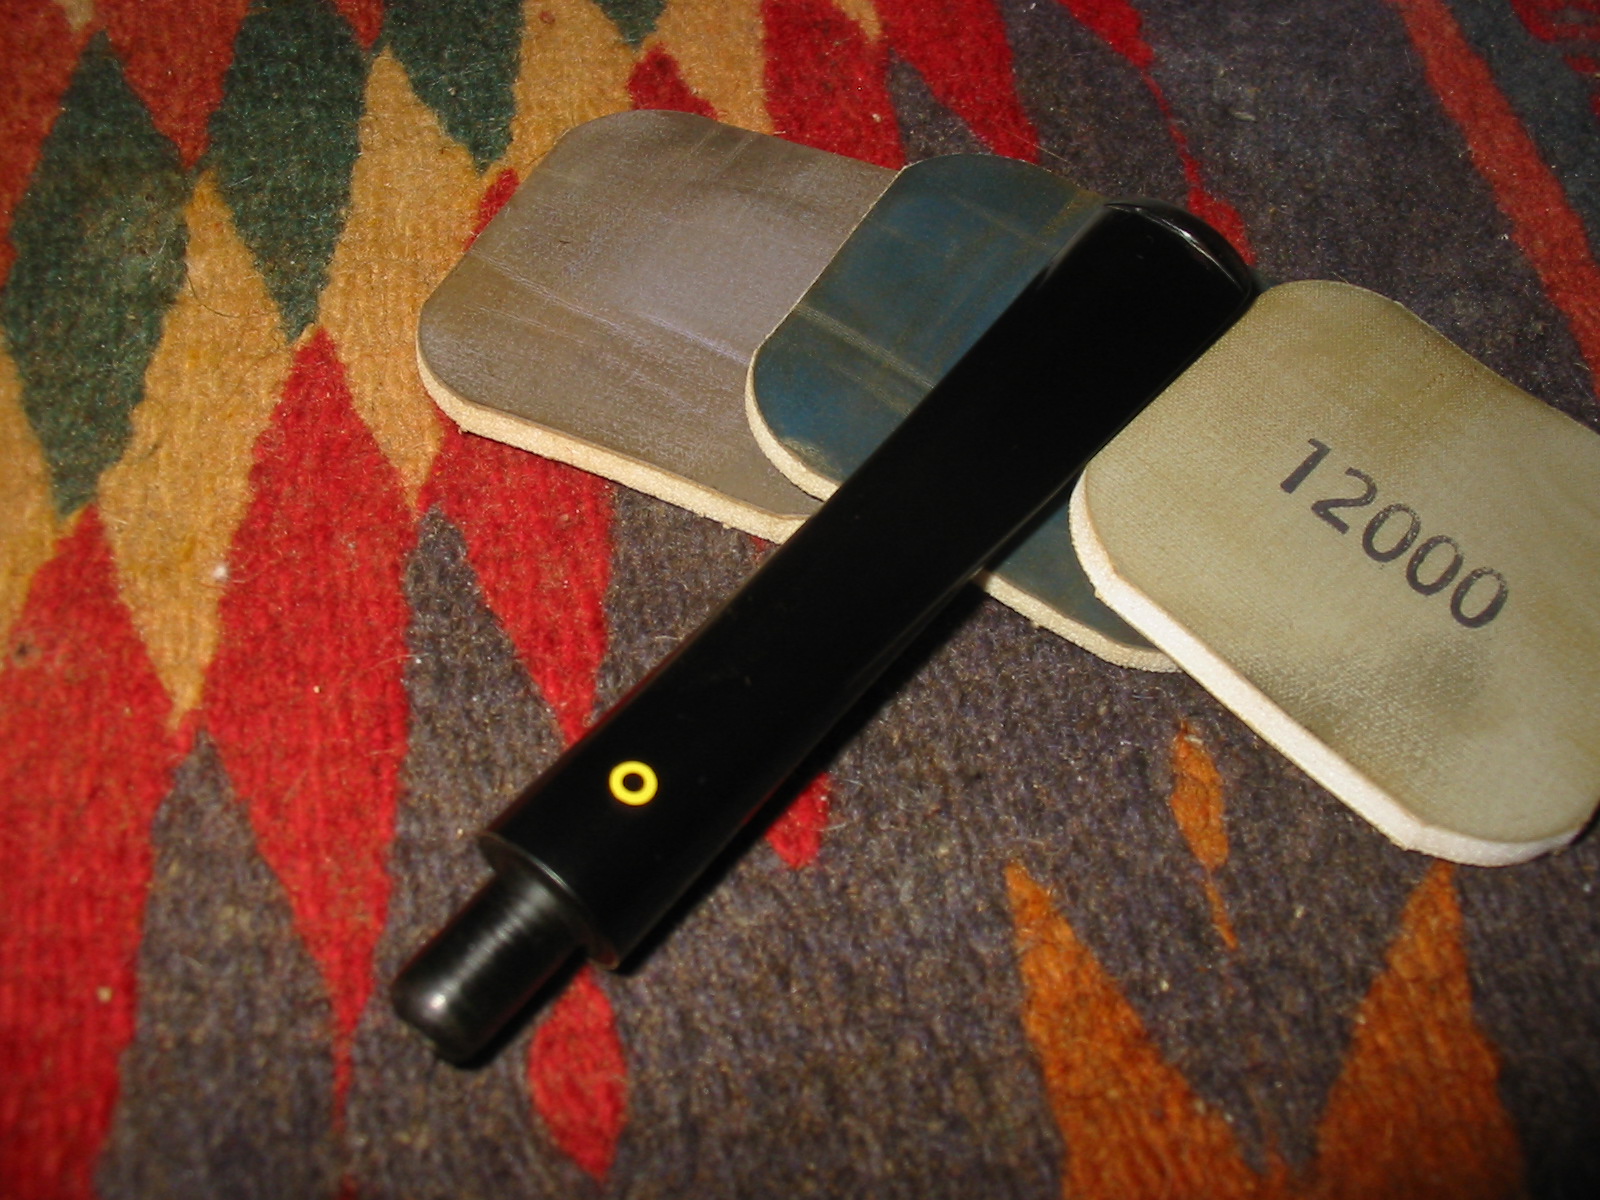
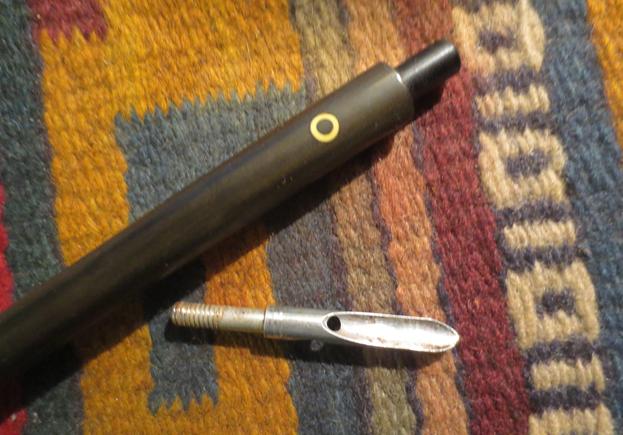
I lightly sanded the stem with 220 grit sandpaper to remove the tooth chatter and bite marks. I sanded it with 1500-2400 micromesh sanding pads then tried a new product that I picked up from Mark Hoover of La Belle Epoque Vintage & Modern Fountain Pens. I follow Mark on Facebook and have been reading about his restorations and cleanup or estate pipes. He developed a product for pens that deoxidizes and polishes vulcanite. He also uses it on vulcanite stem with great results. I have seen his before and after pictures of pipes that he has restored so I thought I would order some and try it out. The photo below shows what came with the kit.

Mark wrote on his site that the product was specifically designed for hard rubber and celluloid but that it does work well on other types of plastics. He also sells the same product relabeled for pipe stems. The line is called Before and After. He states on the website that “All of our polishes are made using the highest quality products.  These products are designed to not only recondition your pen (or in this case stem) but also to provide a layer of protection. All of the products used in these polishes are none-toxic and environmentally friendly.”

“There are two different polishes.  Fine and Extra Fine.  We recommend both as some pens will show more wear then others.  Often one will work on a pen using the Fine polish and finish with the Extra Fine. The polishes are sold in 2 oz jars.  The cost is 12.00 per jar. The number of pens one can restore will of course vary depending on the wear that each pen shows.  I have restored from 75-150 pens per jar.”

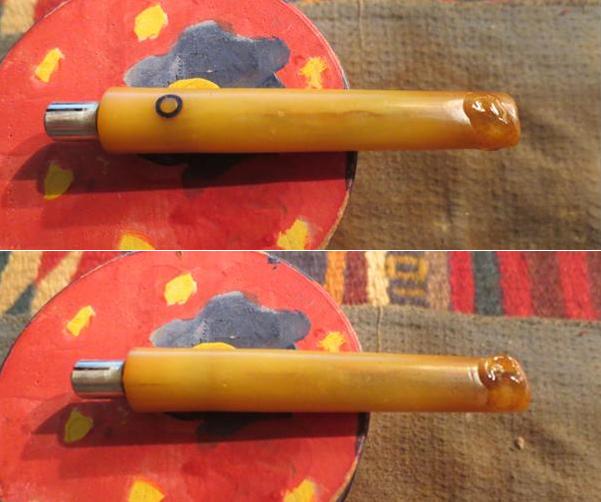
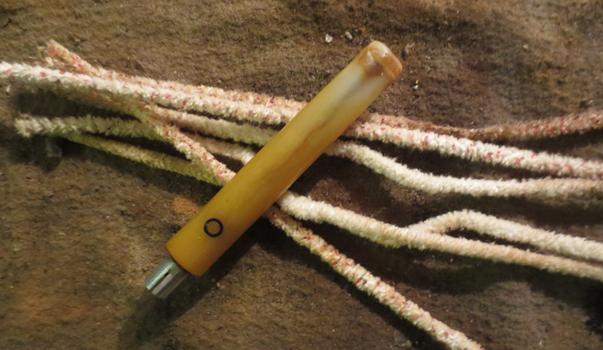
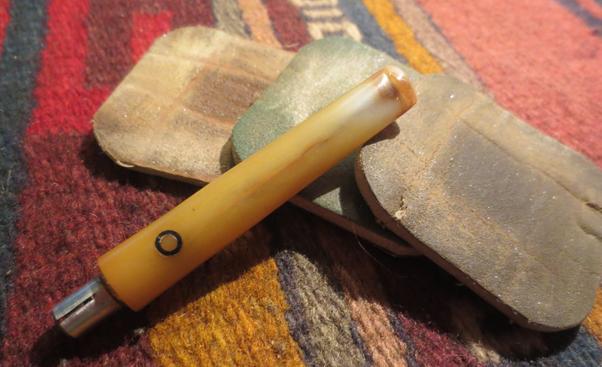
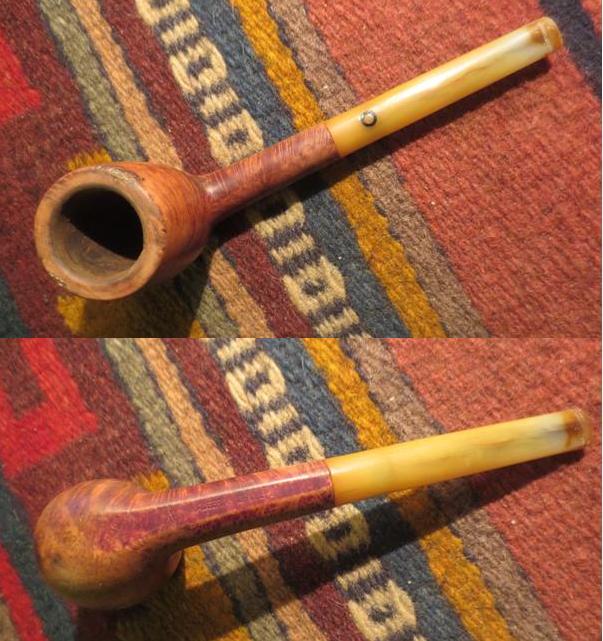
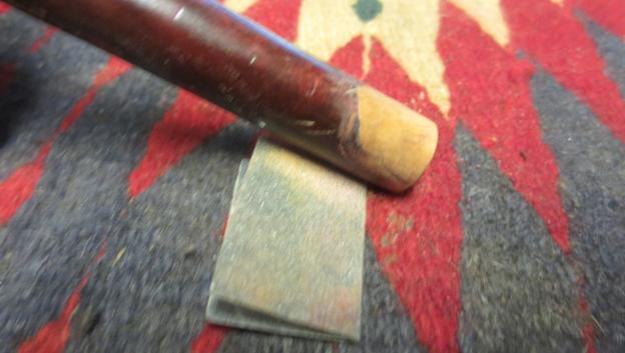
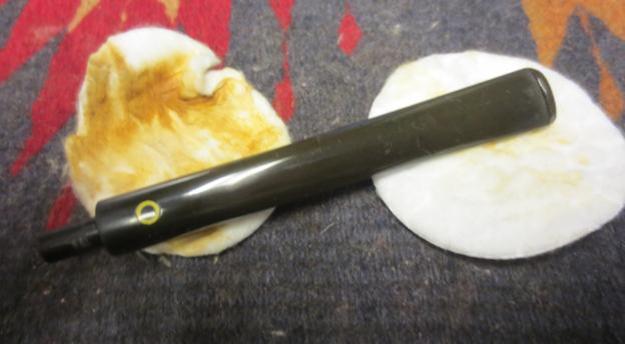
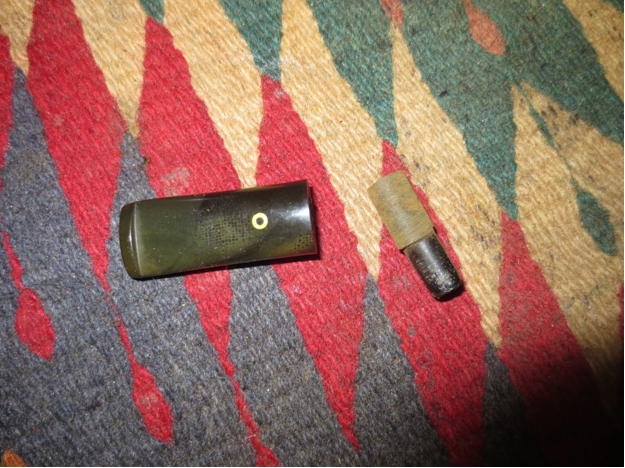
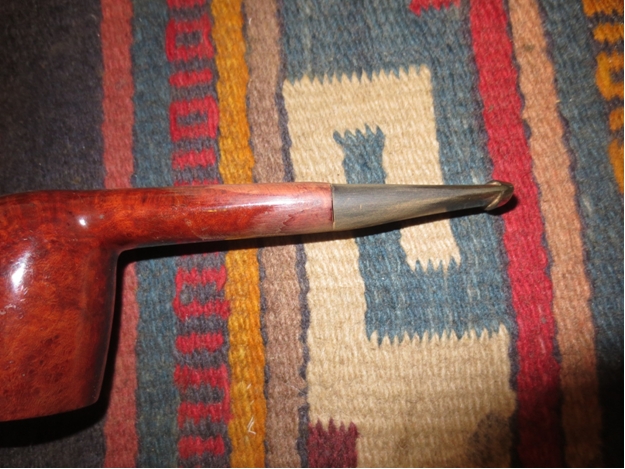
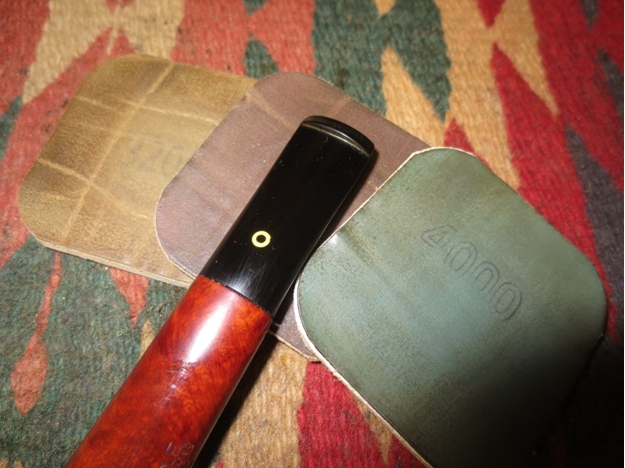
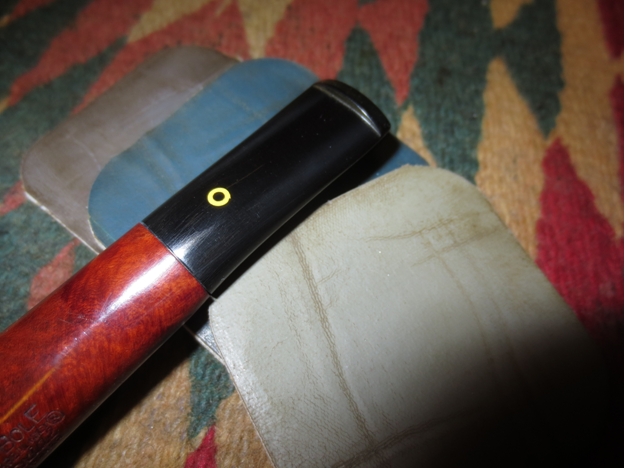
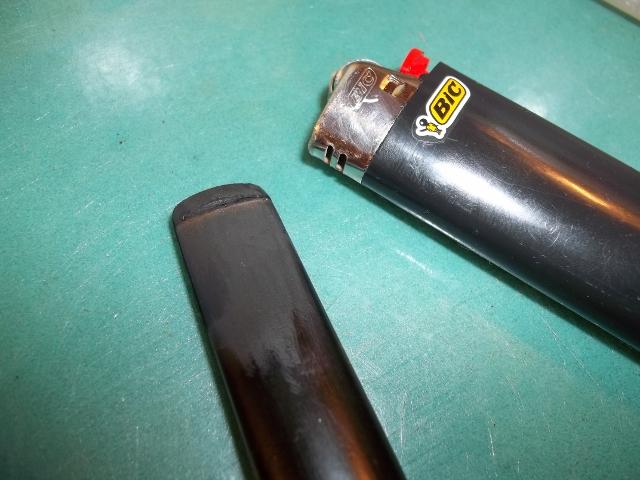
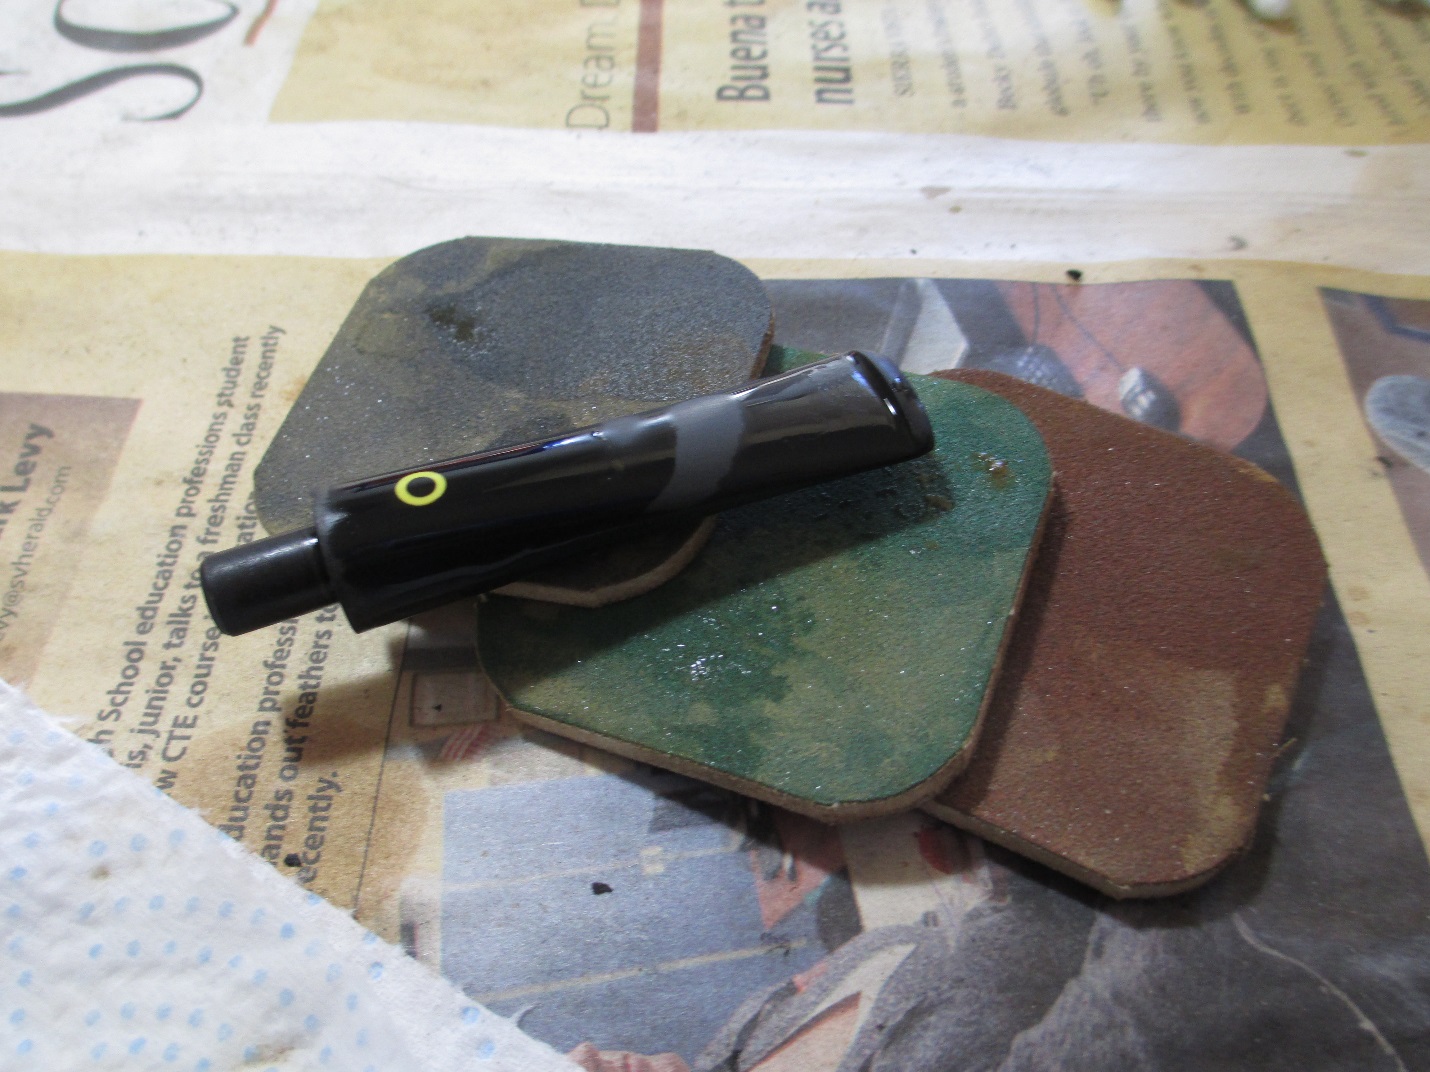
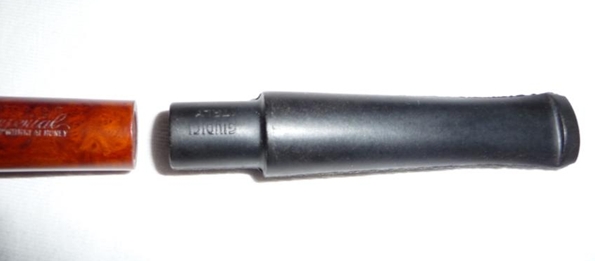
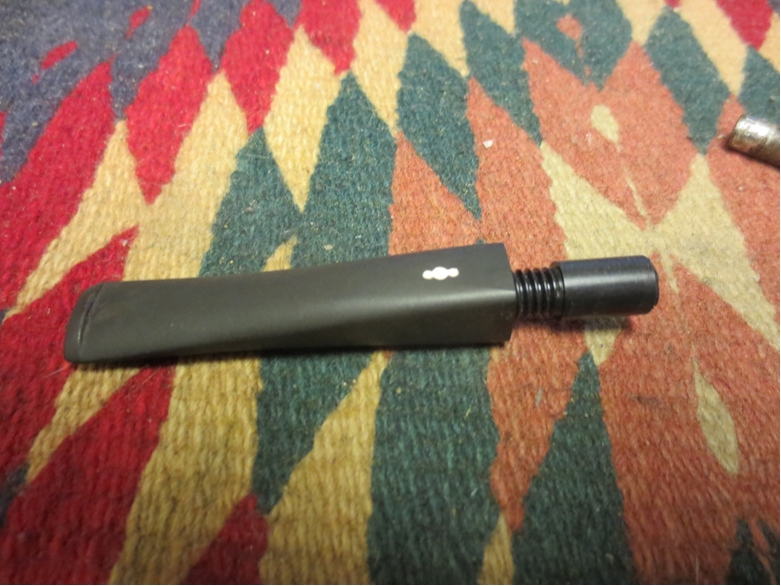
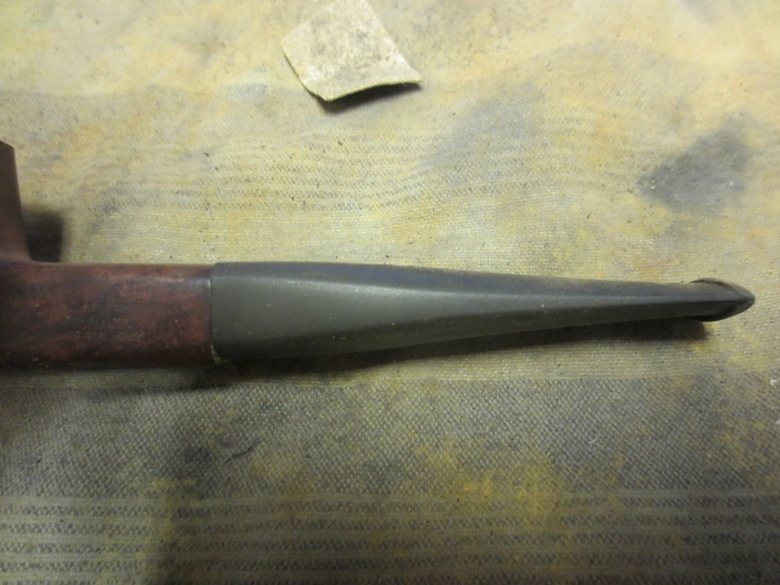
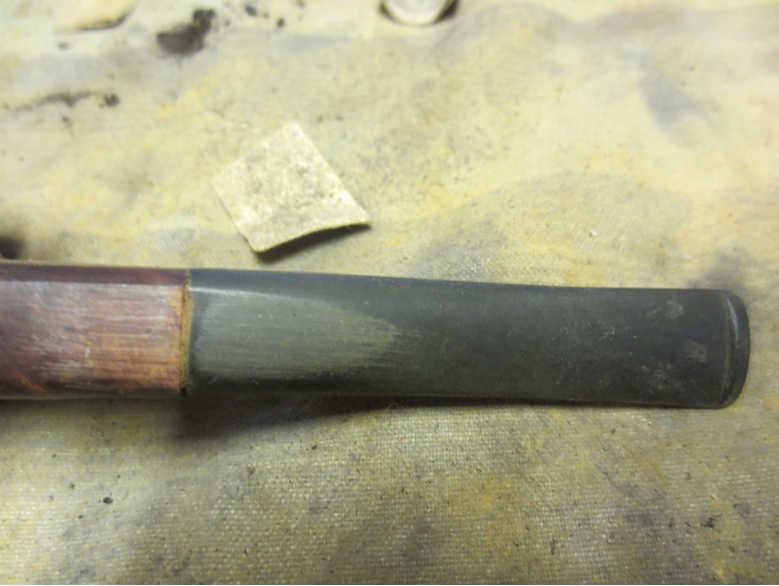
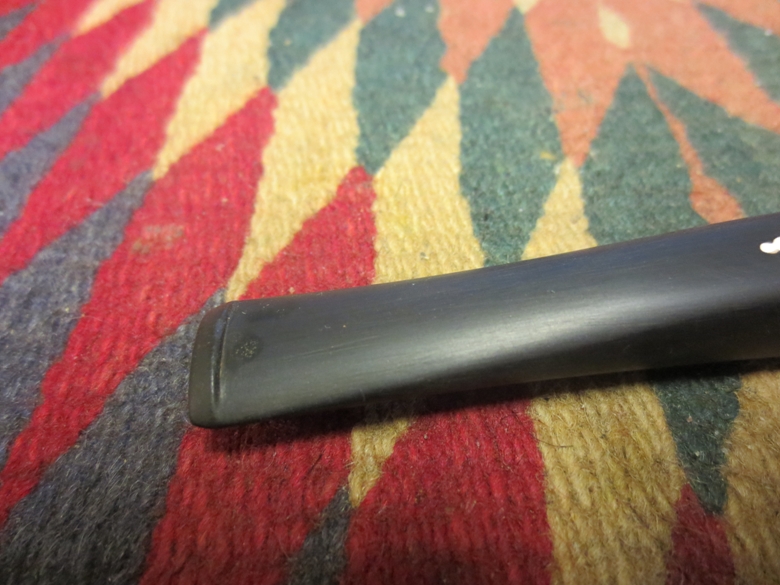
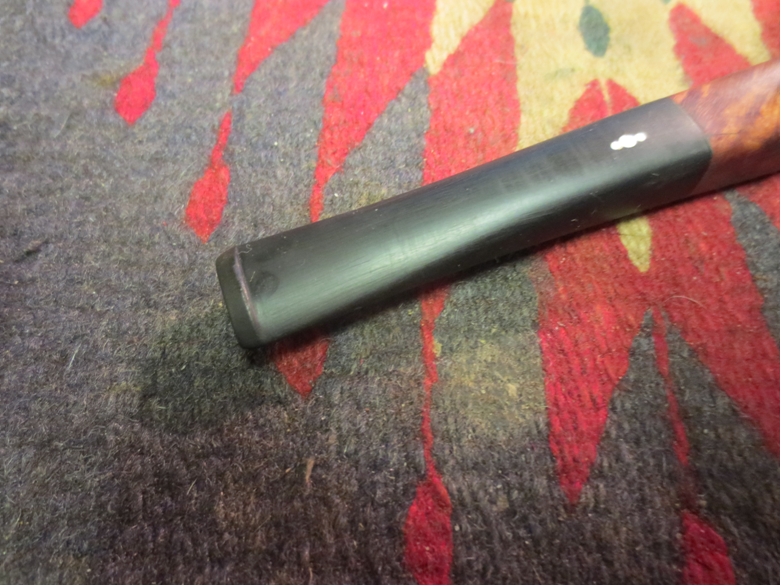
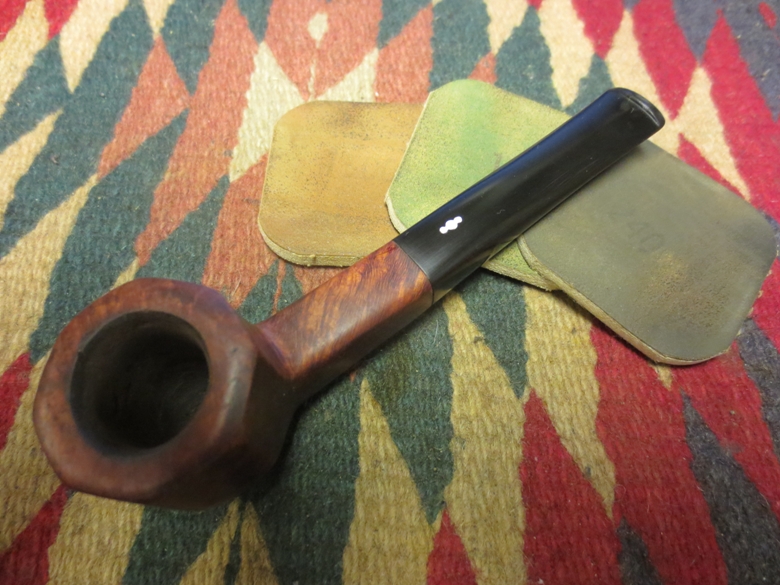
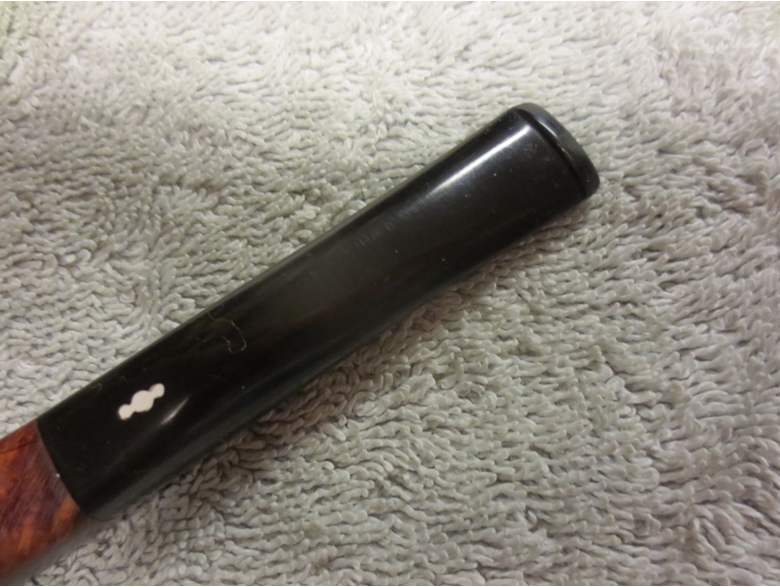
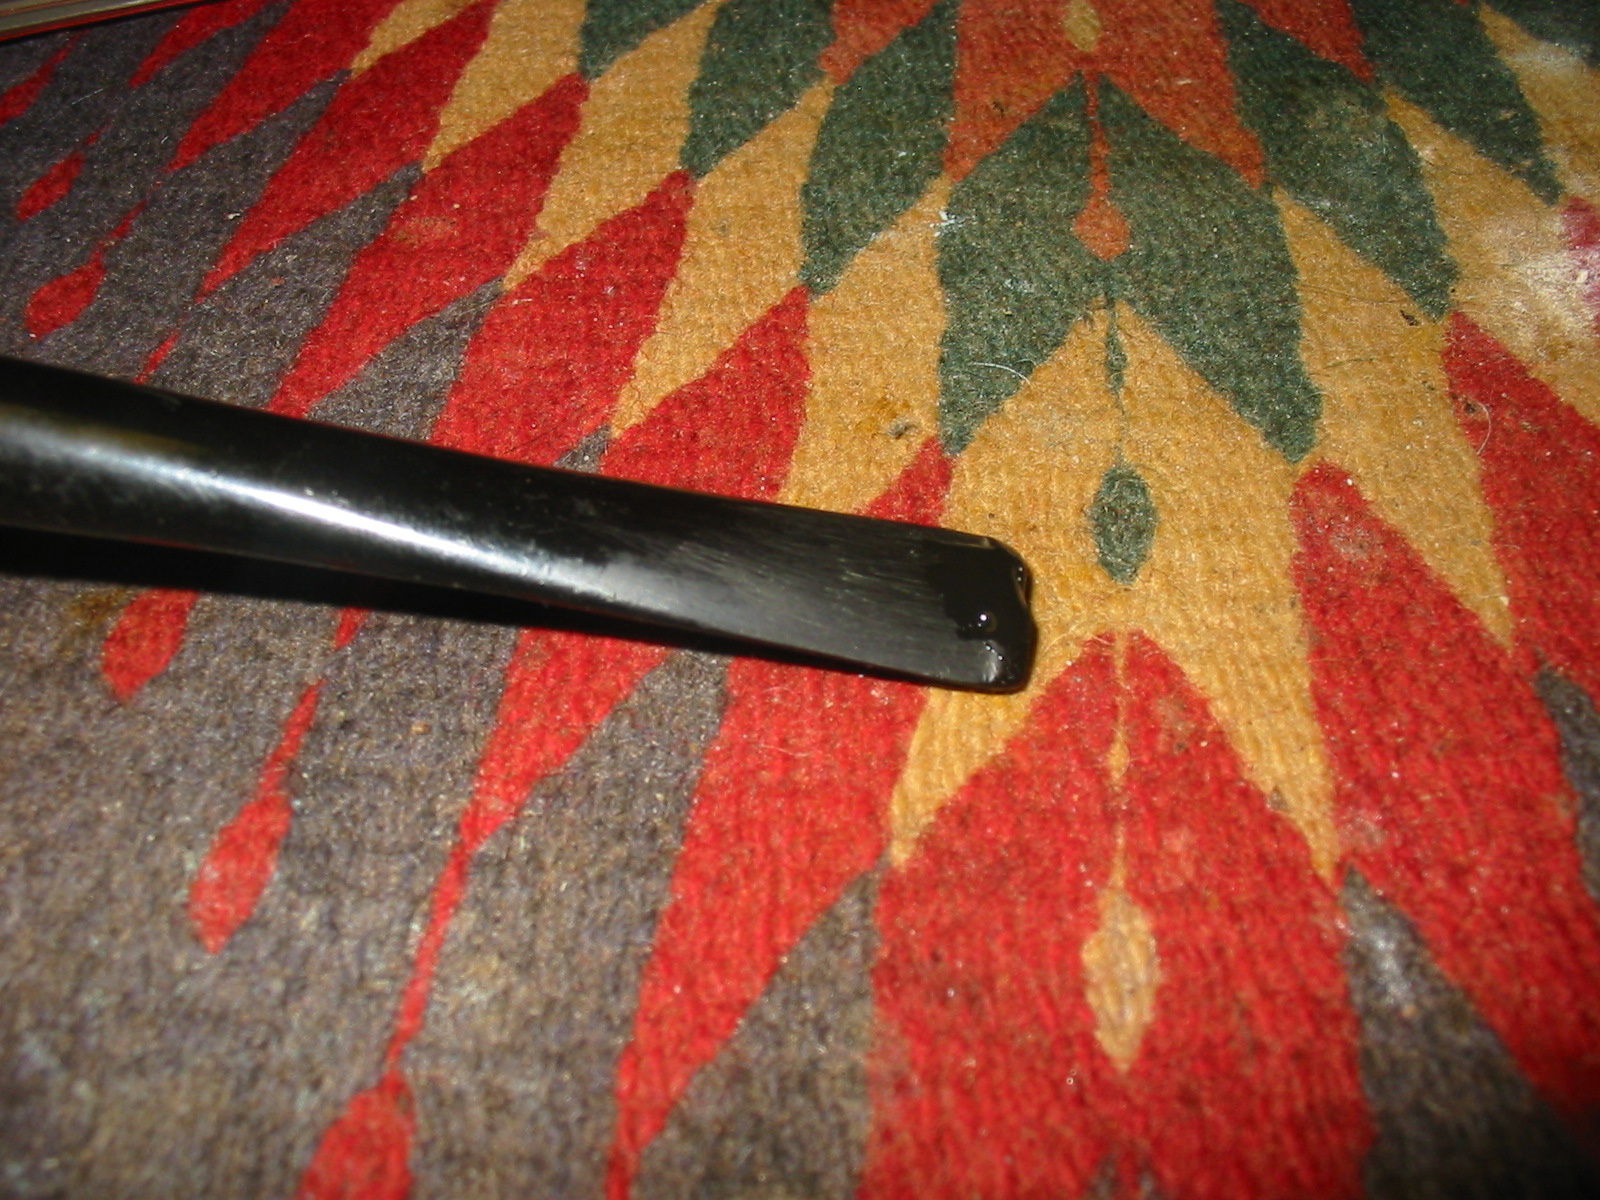
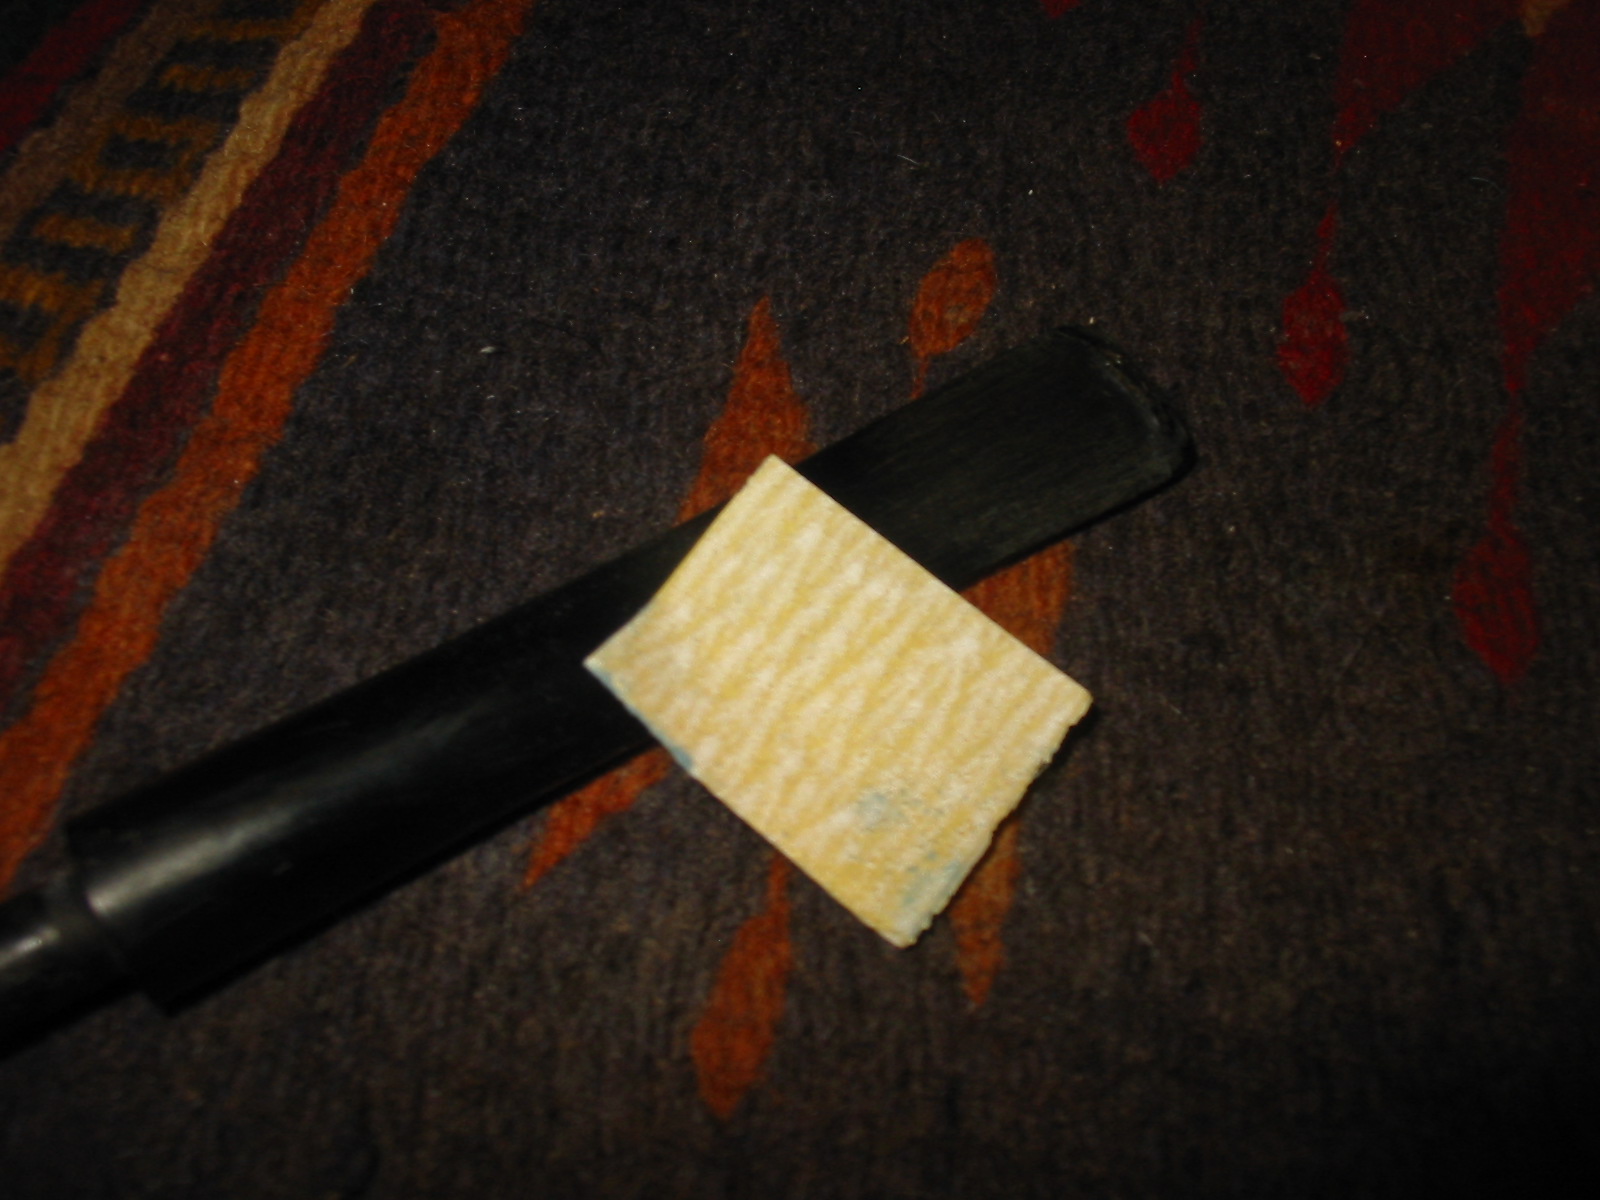
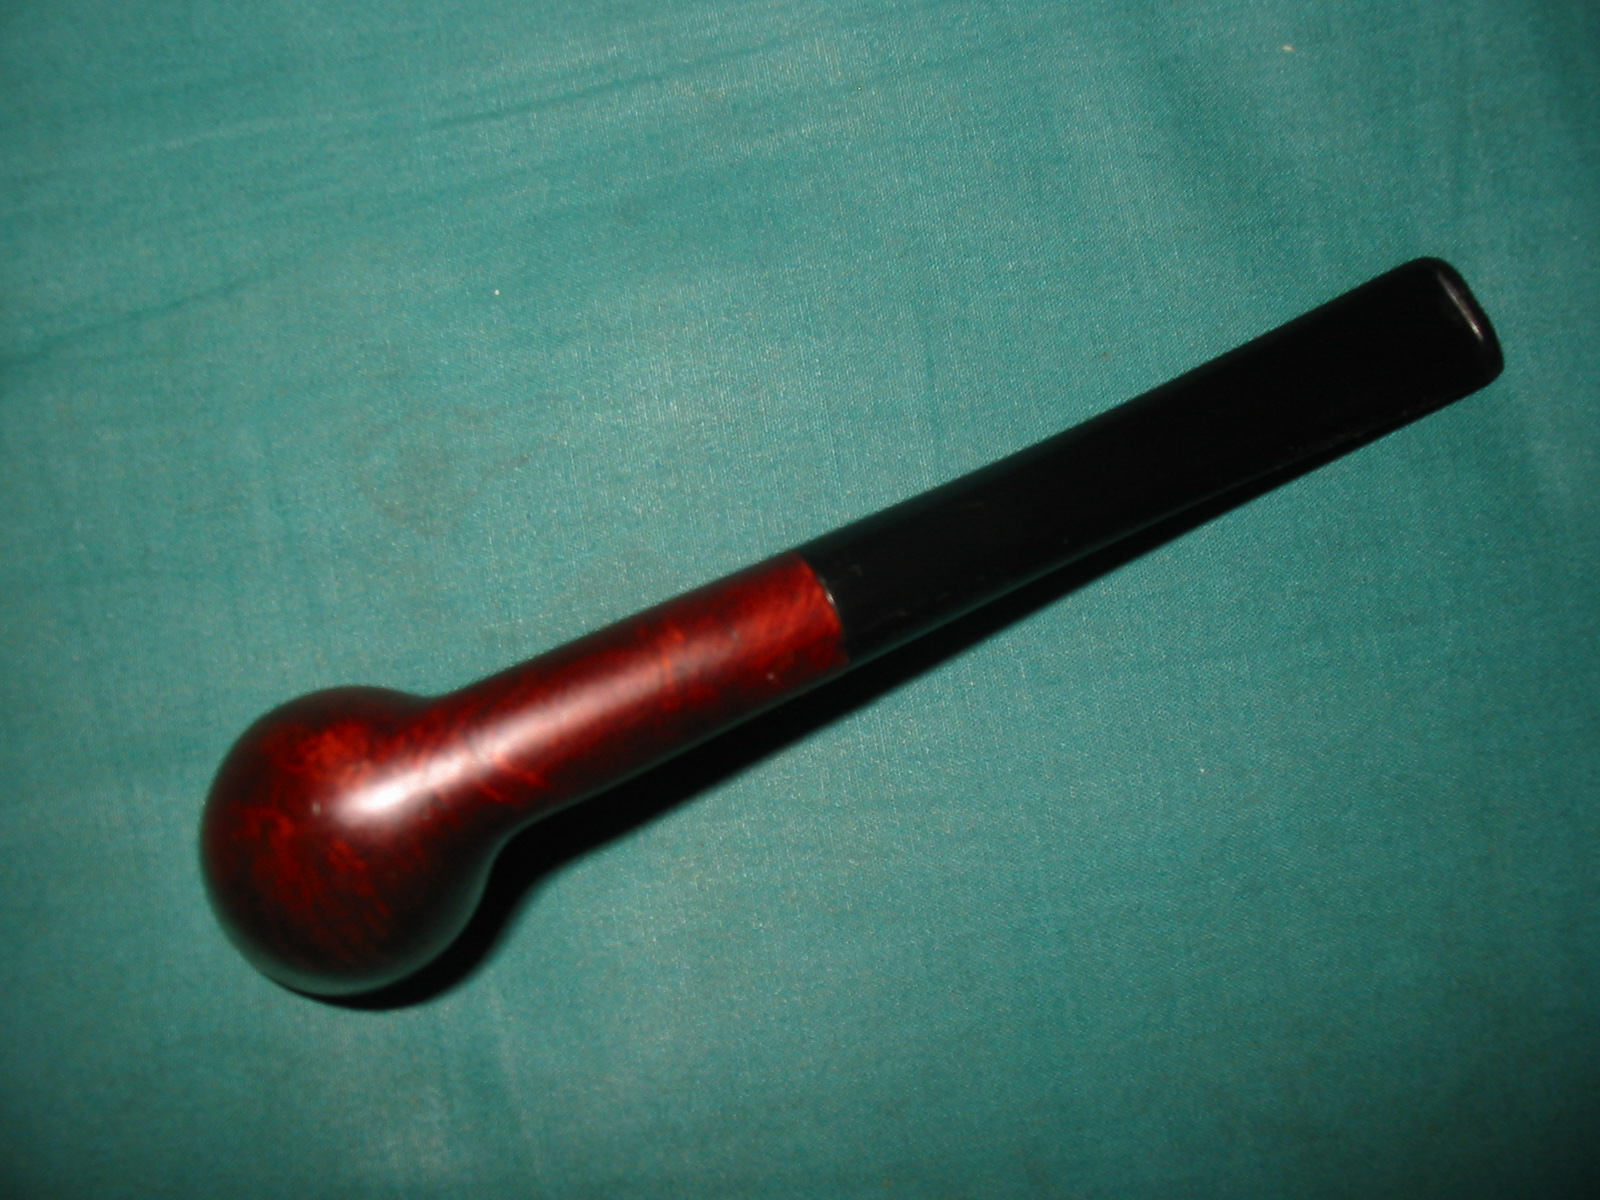
Here is the link to his site with the prices for the product: http://www.lbepen.com/apps/webstore/products/category/1185536?page=1. The product can be ordered onsite. It is shipped in a well wrapped package and I had no issues with it coming across the border through the post office.yb18
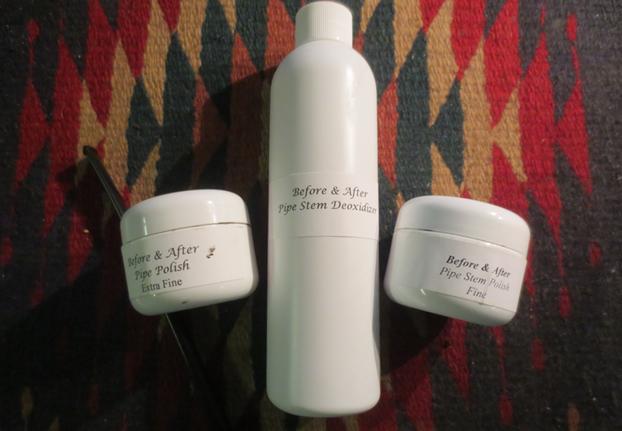
The Deoxidizer is a thick gel that I rubbed onto the stem with a cotton pad. I let it sit for a short time before rubbing it off with another pad. It removed the oxidation quite nicely. I repeated the process until the stem was once again black. After using the Deoxidizer I polished the stem with the Fine and the Extra Fine Pipe Polish. It quickly shined up the vulcanite. Both of the stem polishes are quite thick and sticky. The fine is grittier than the extra fine. It took some time to rub each of them onto the stem surface and then polish it with a soft cotton pad. The second photo below shows the stem after using the Extra Fine Polish.yb17
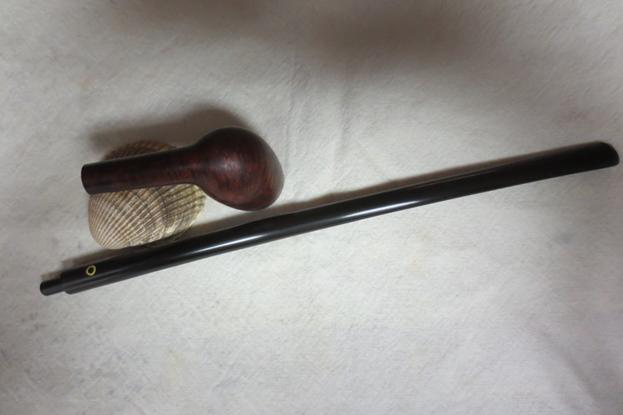
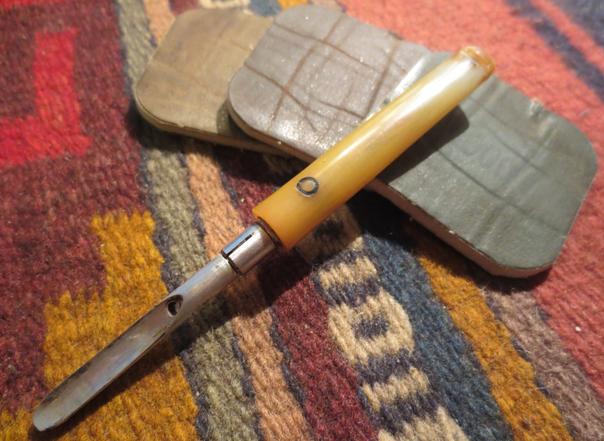
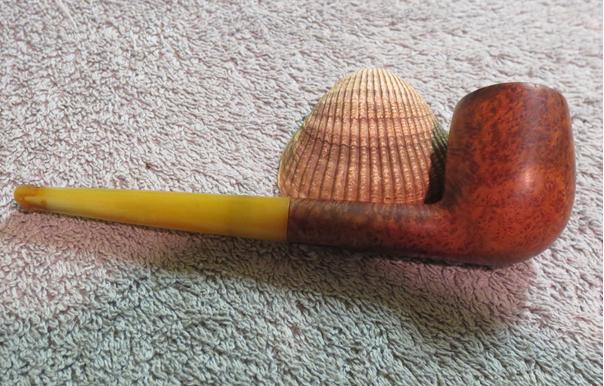
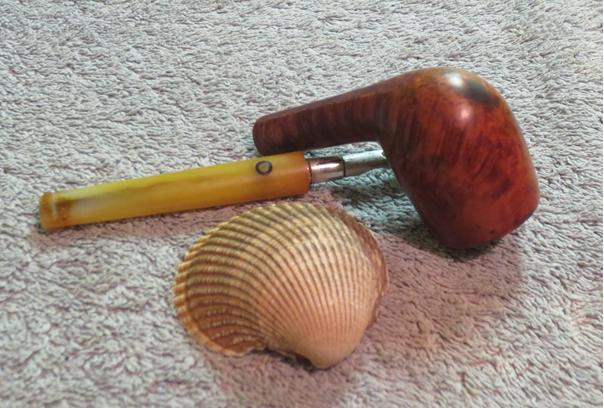
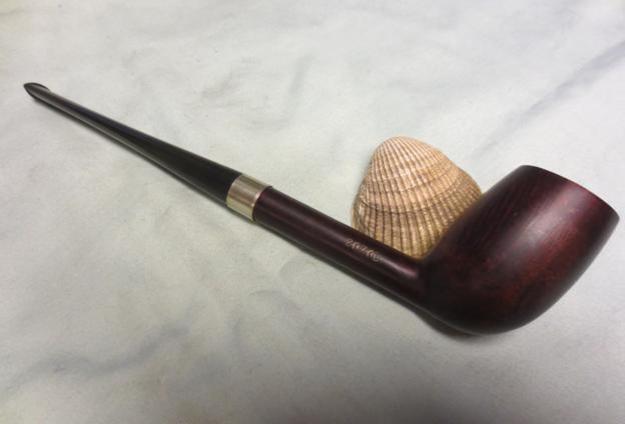
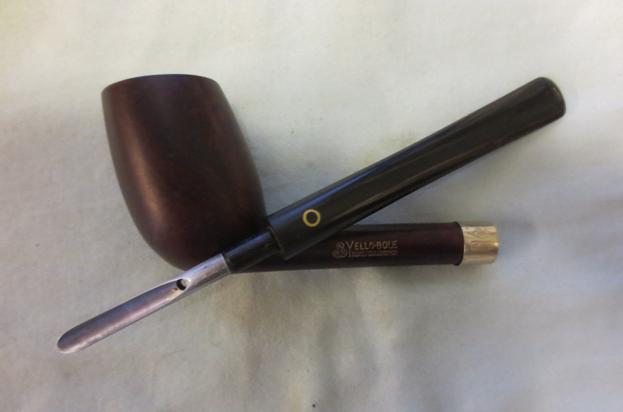
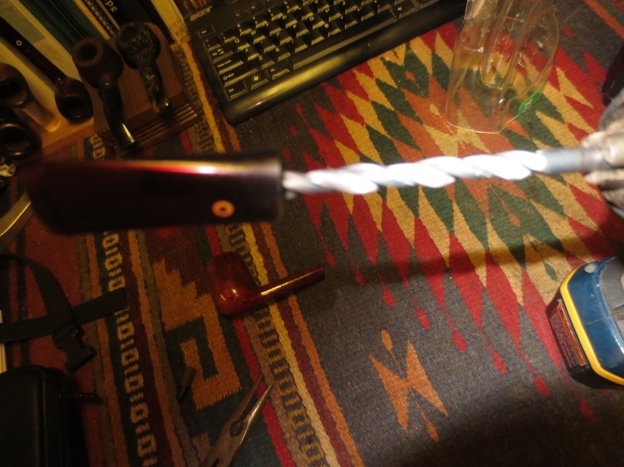
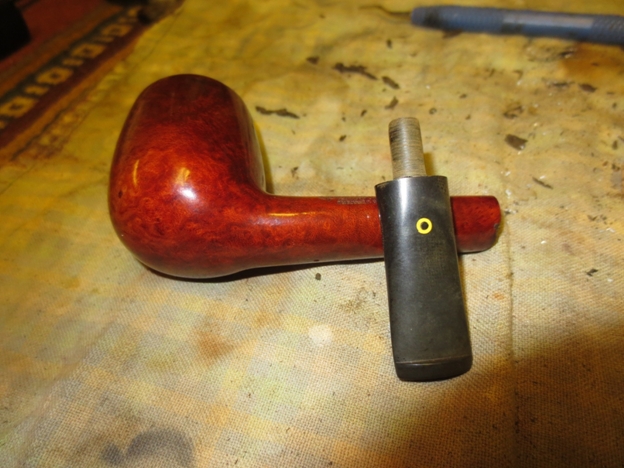
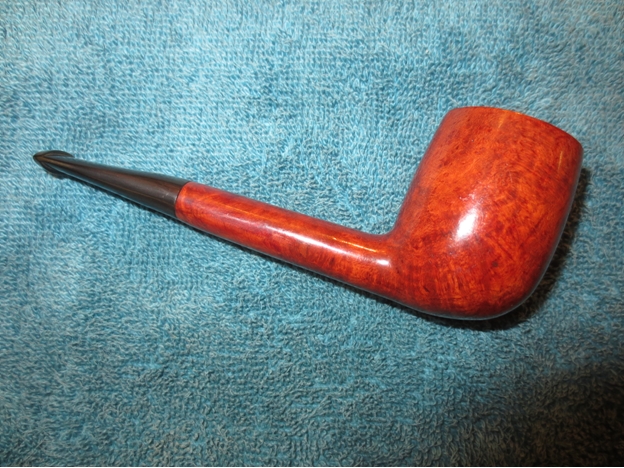
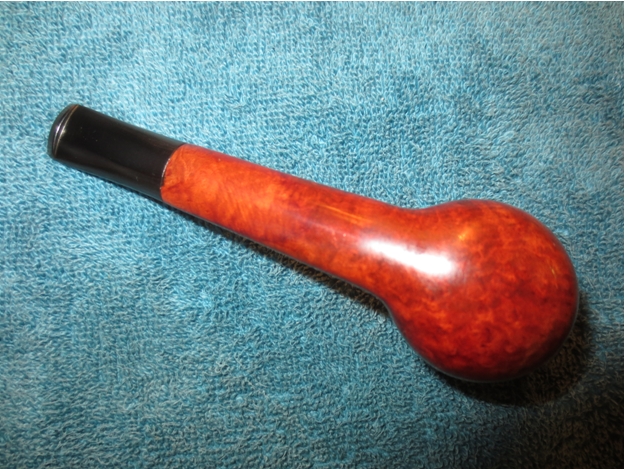
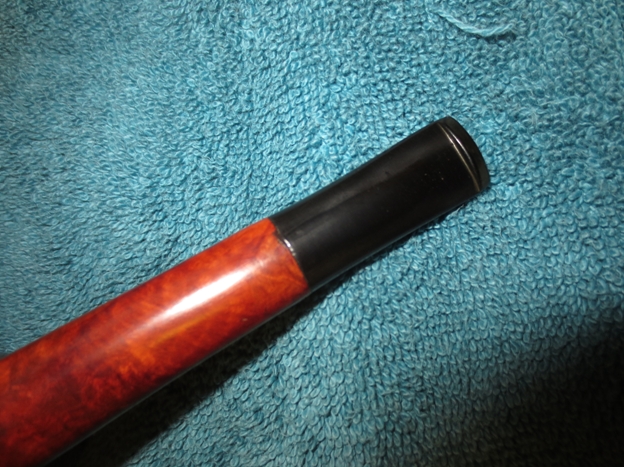
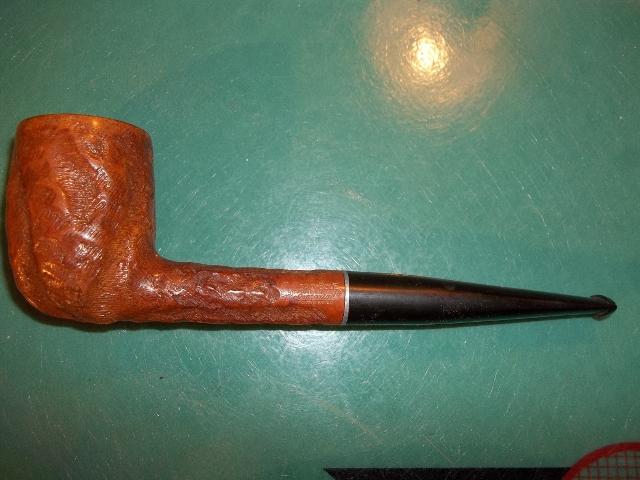
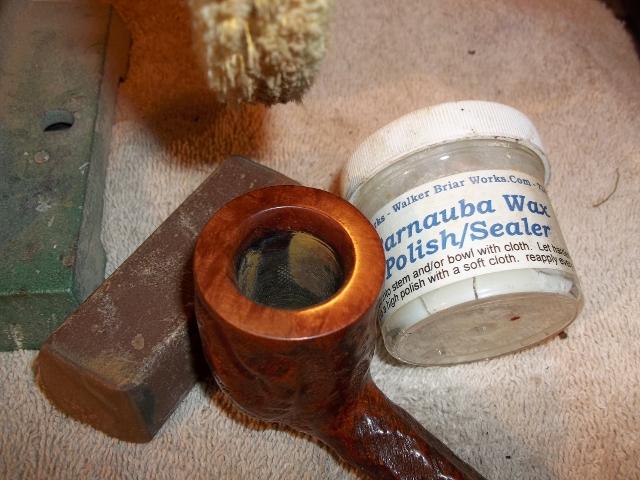
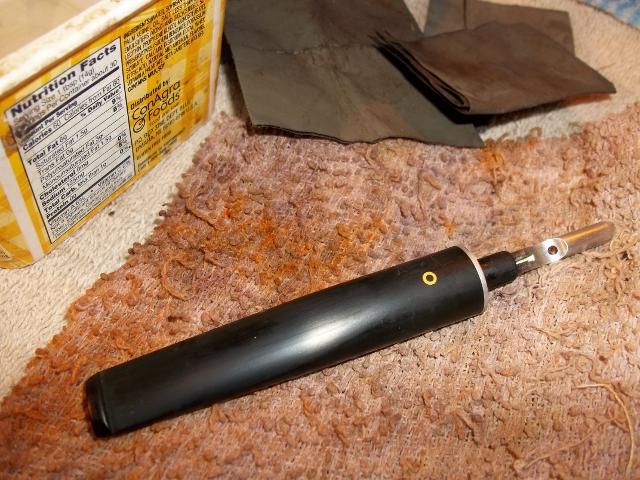
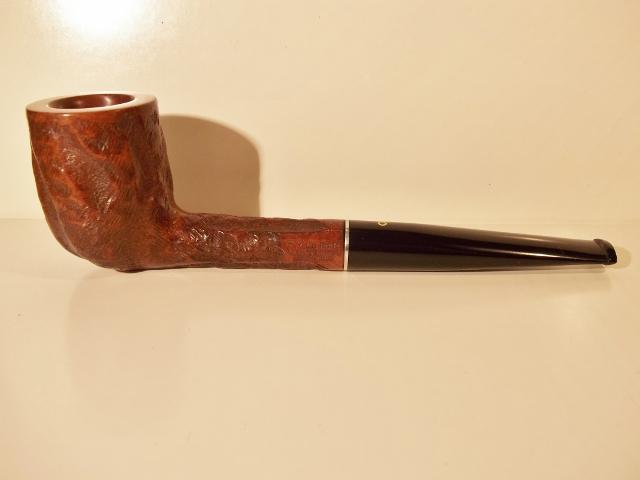
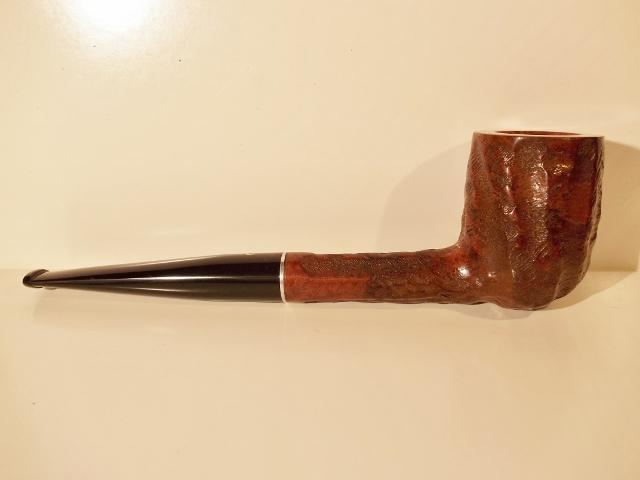
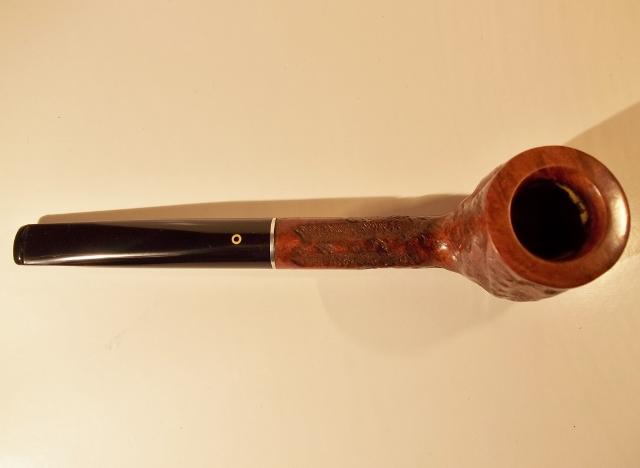
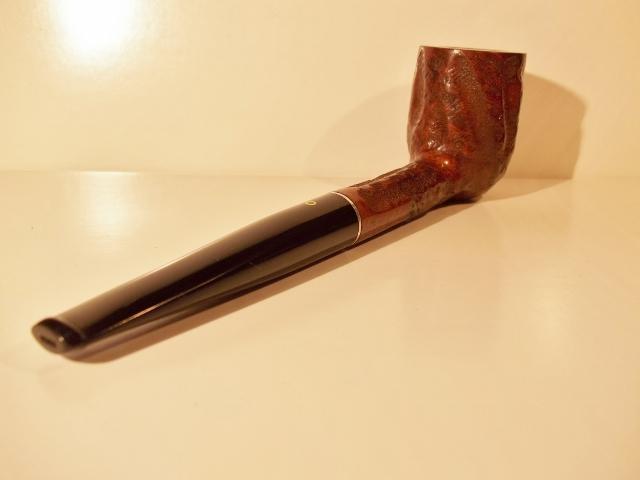
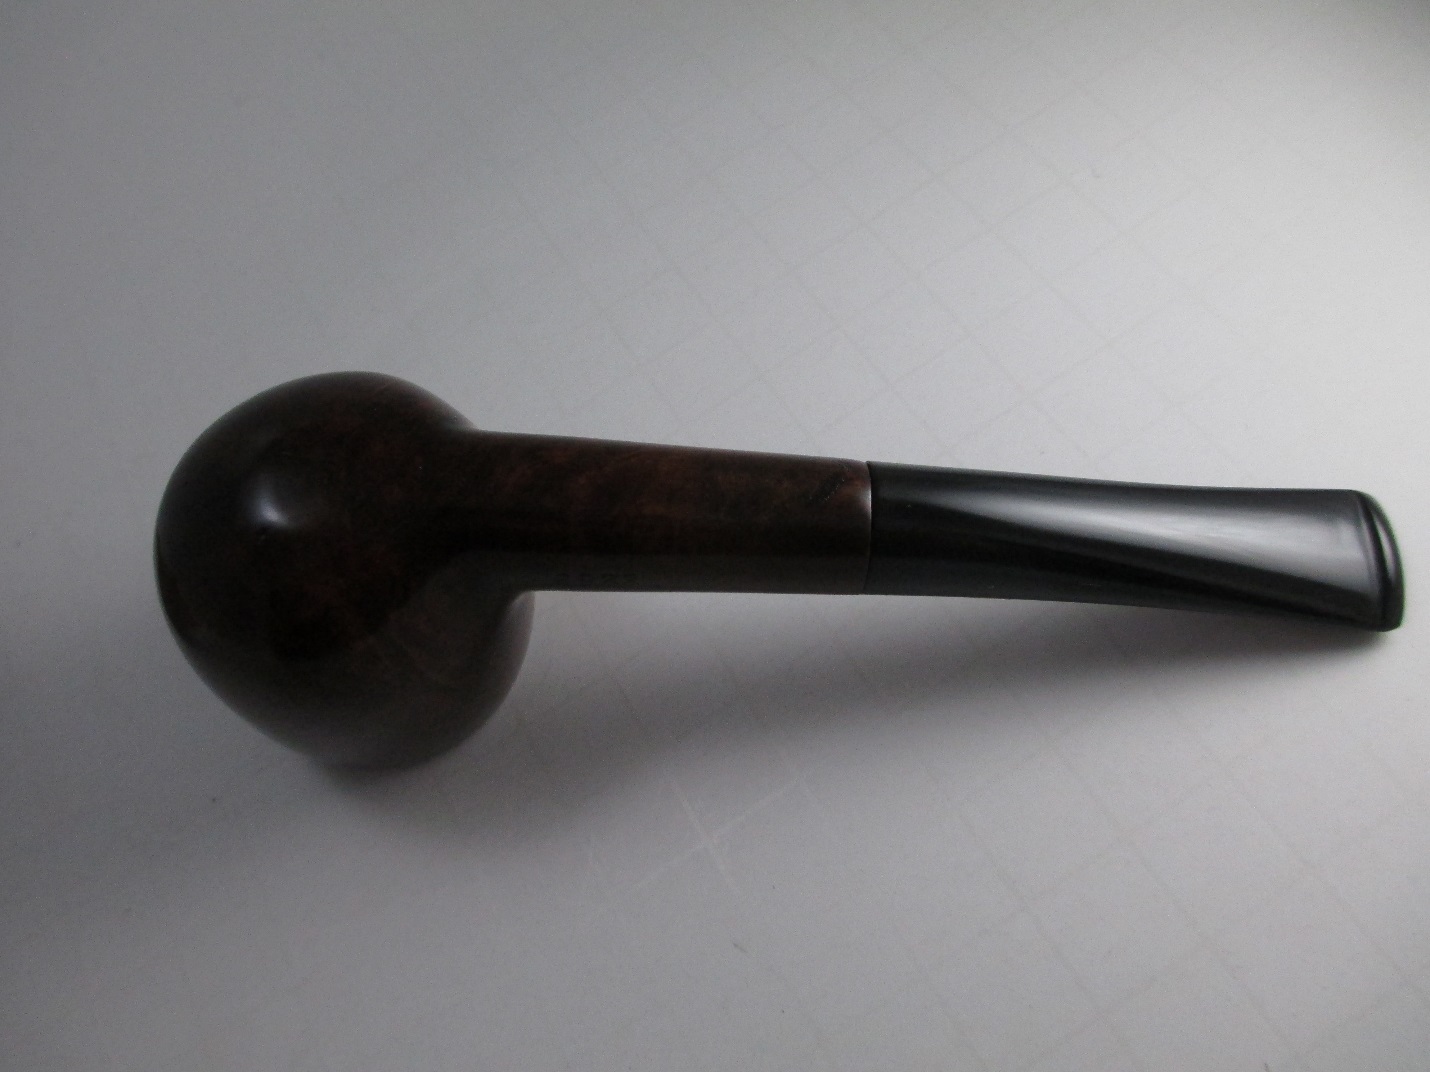
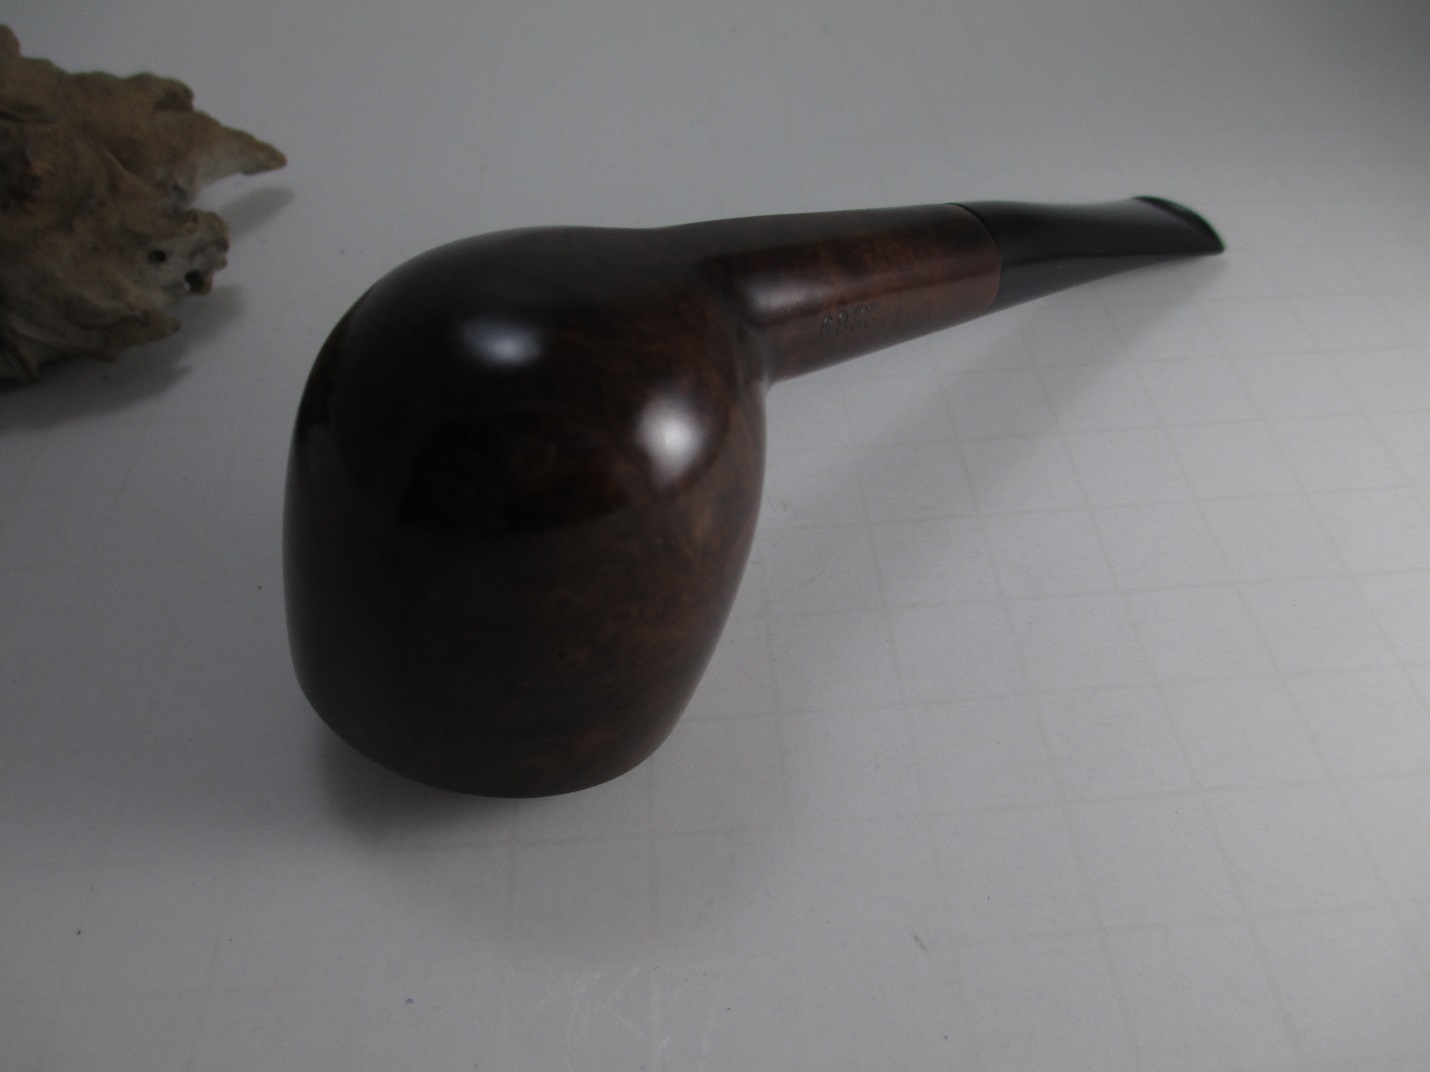
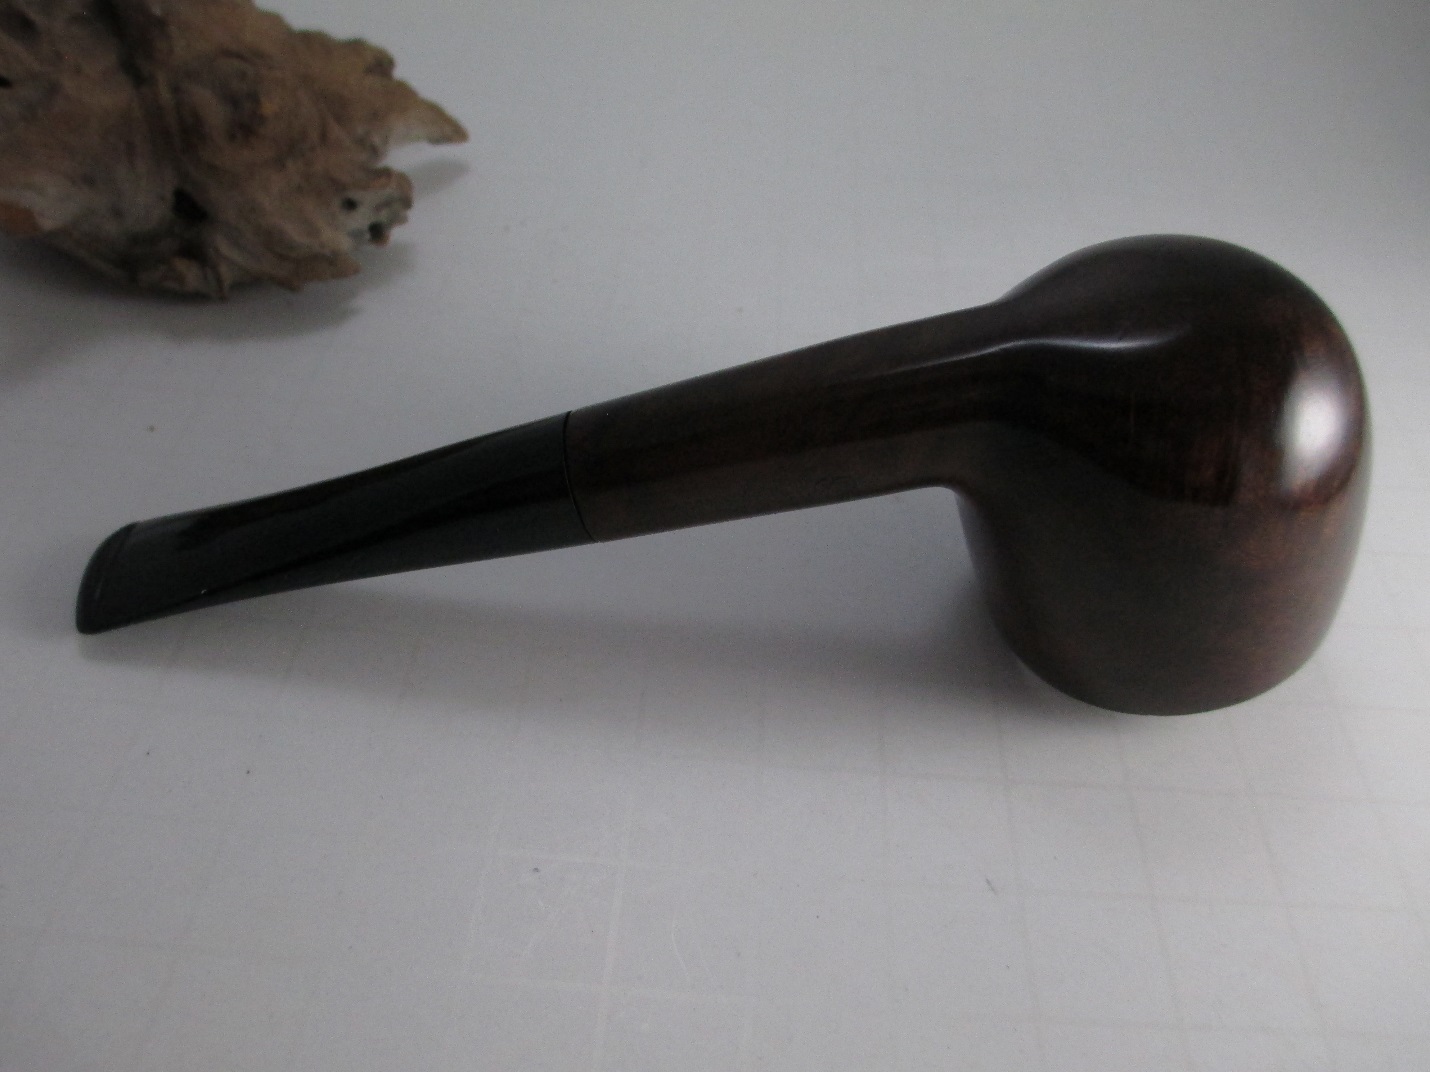
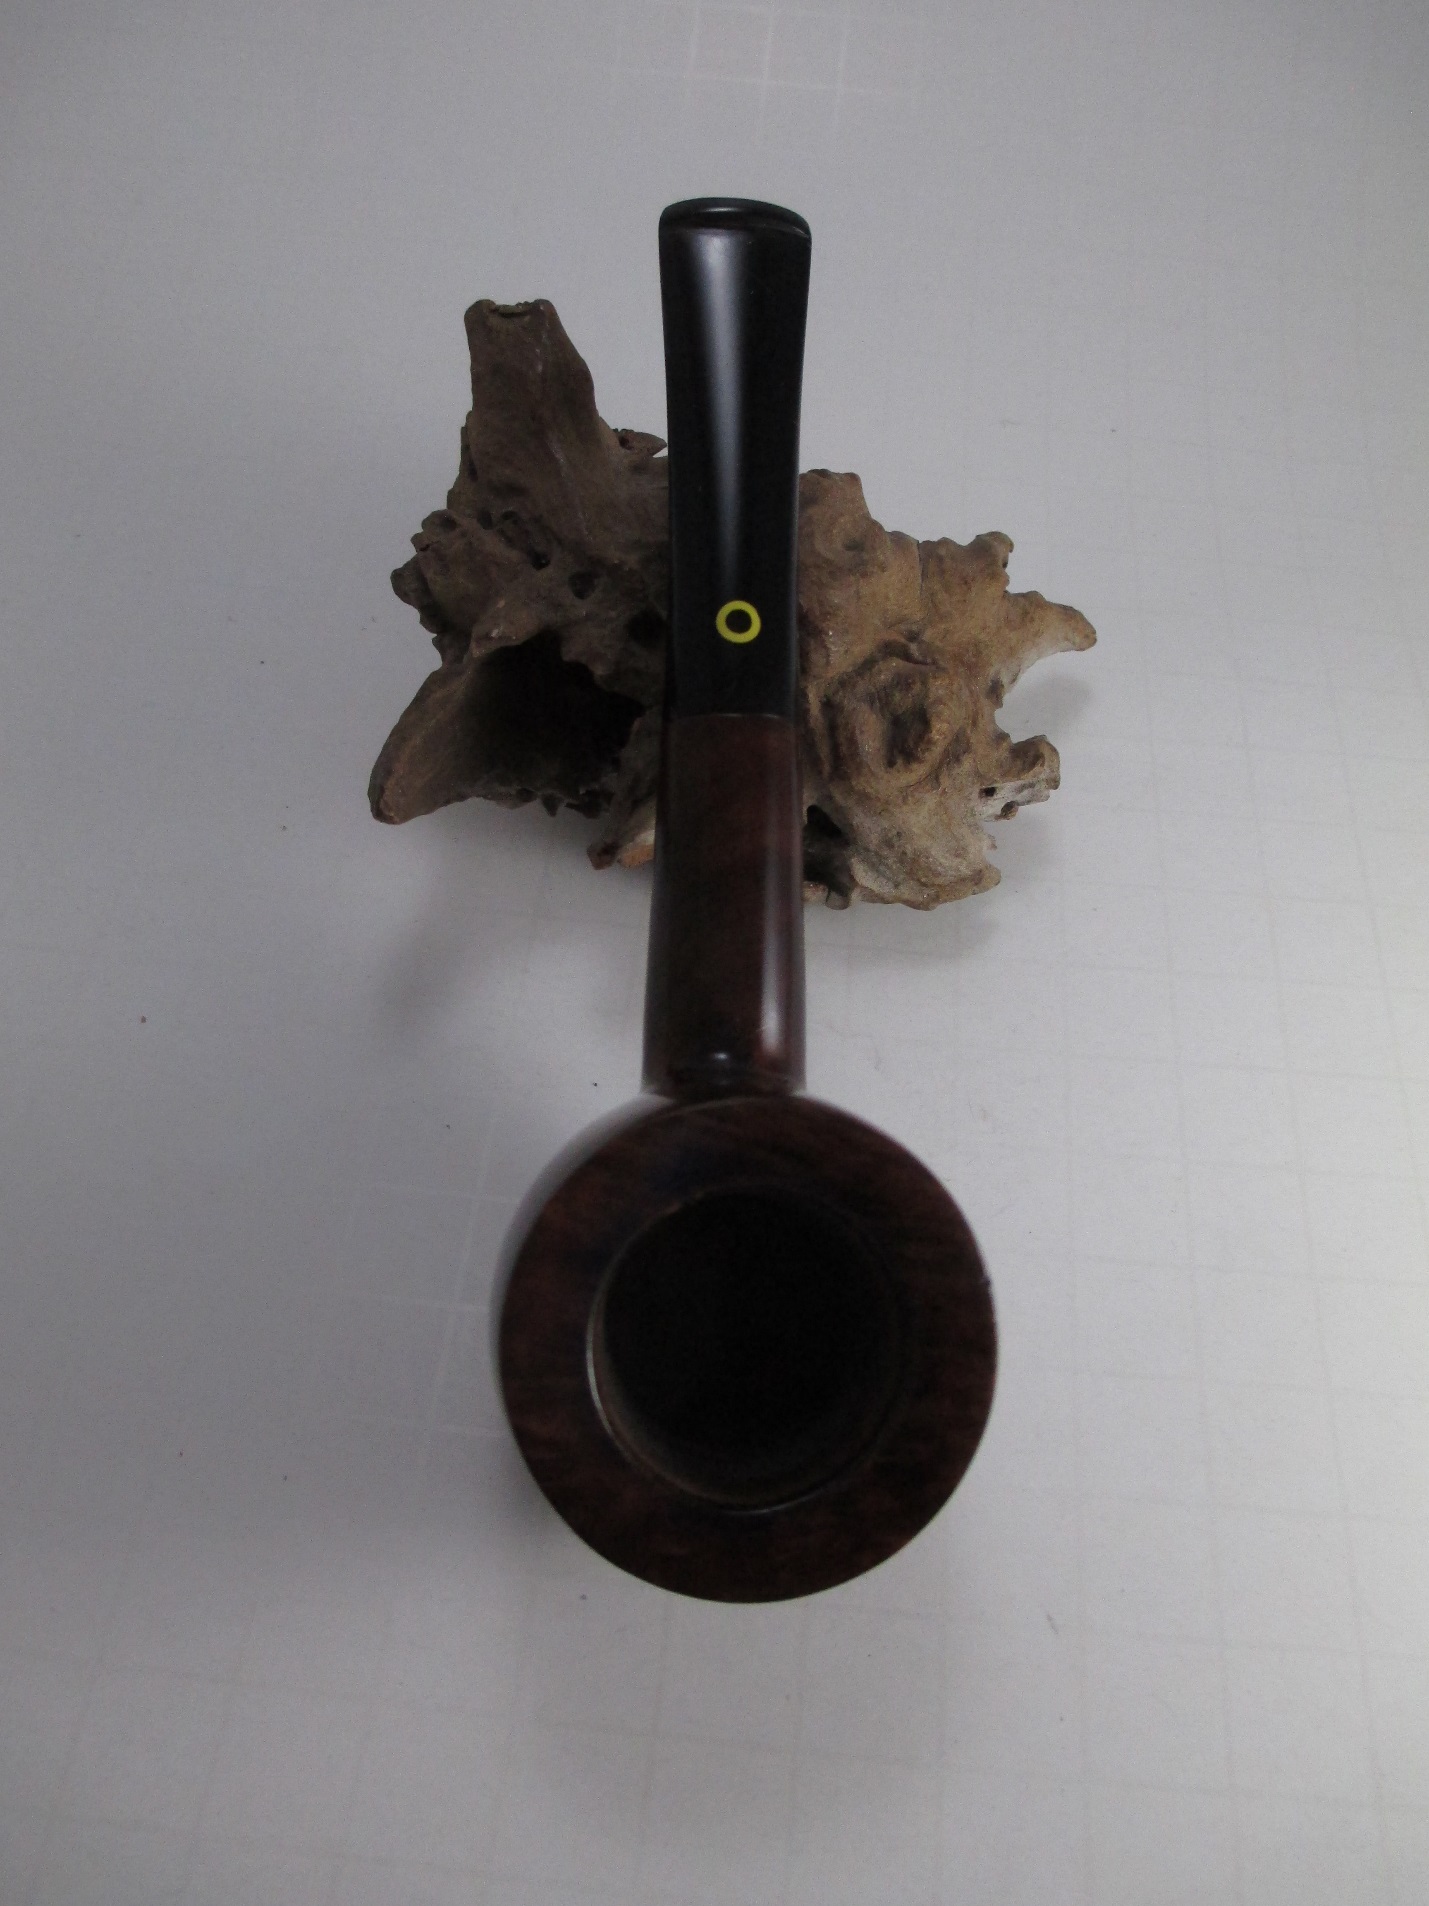
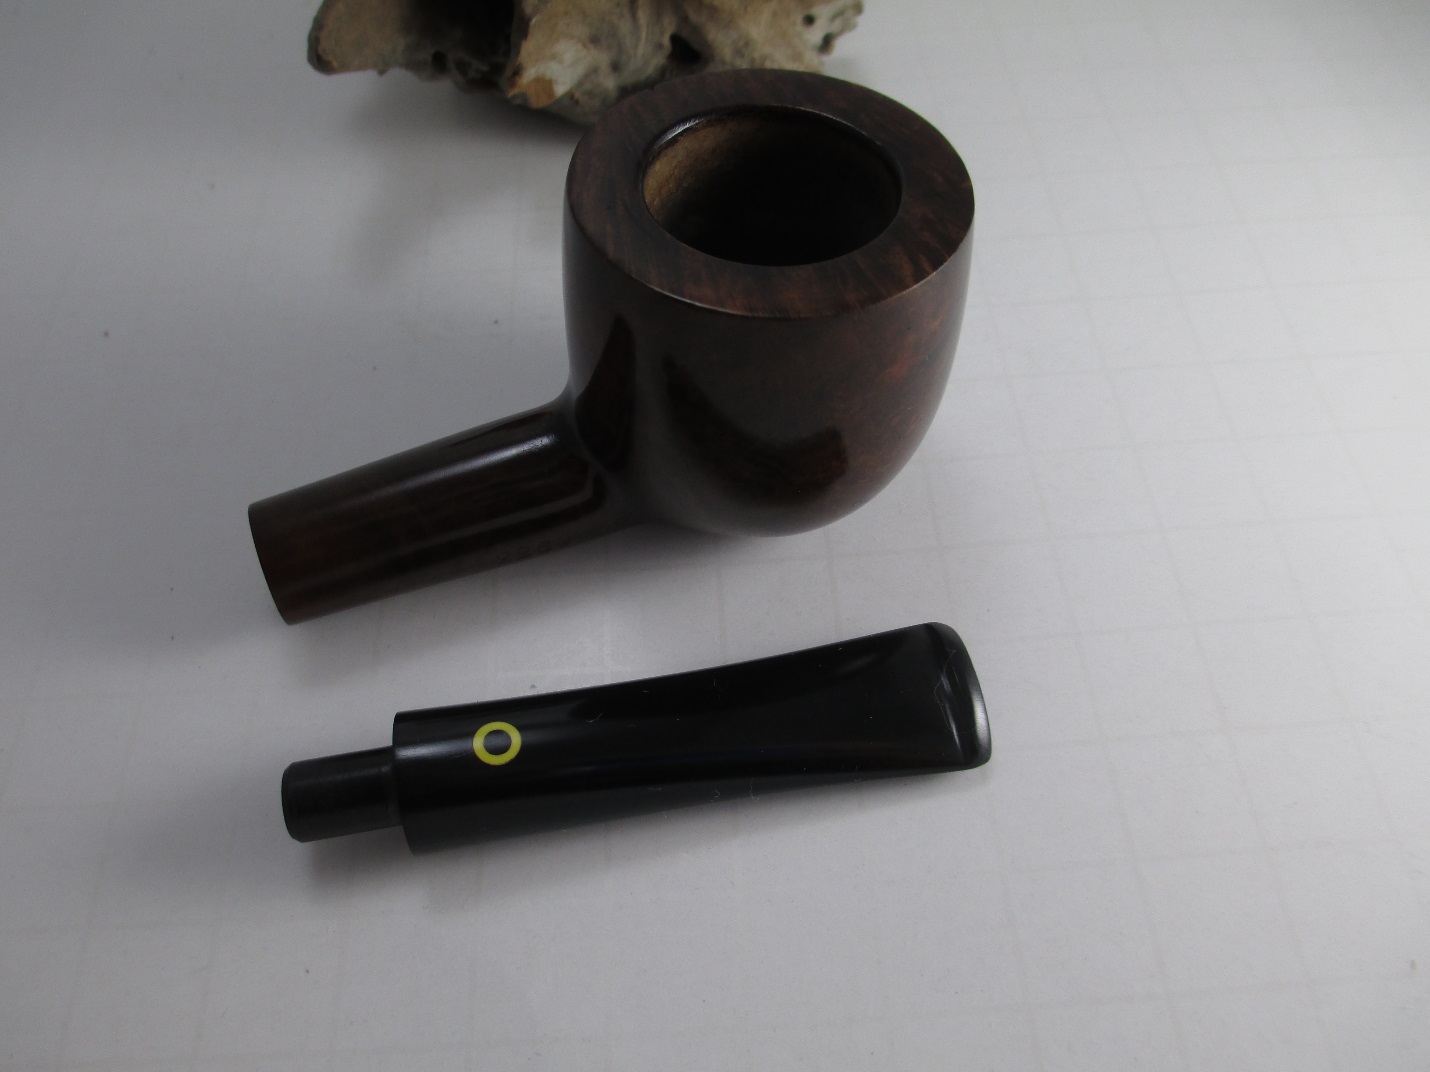
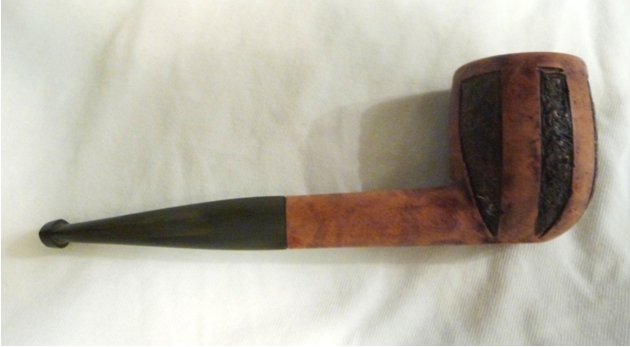
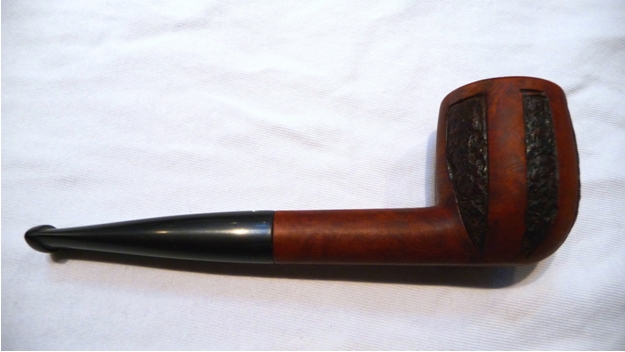
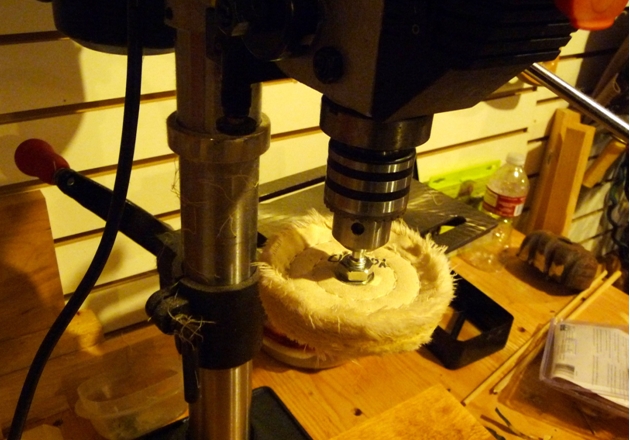
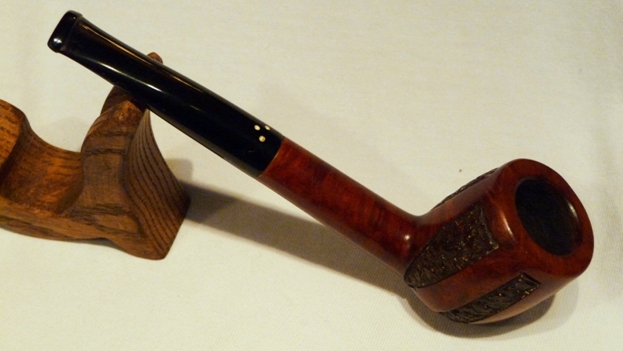
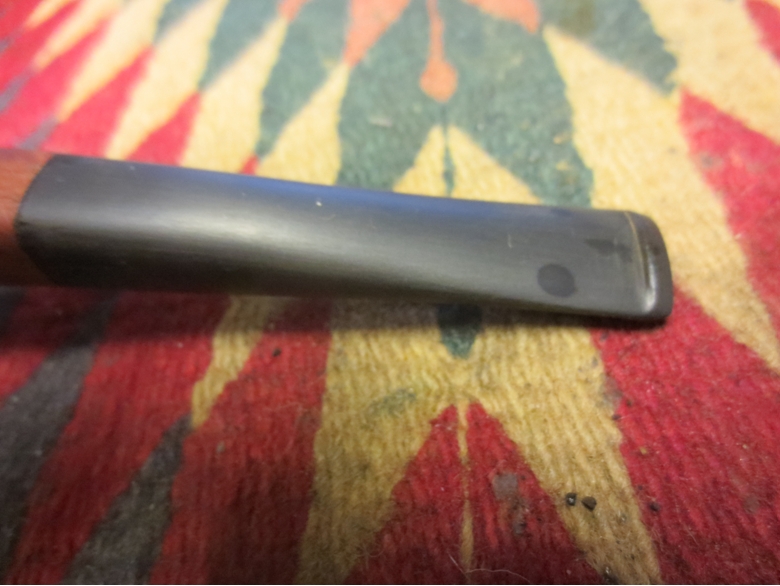
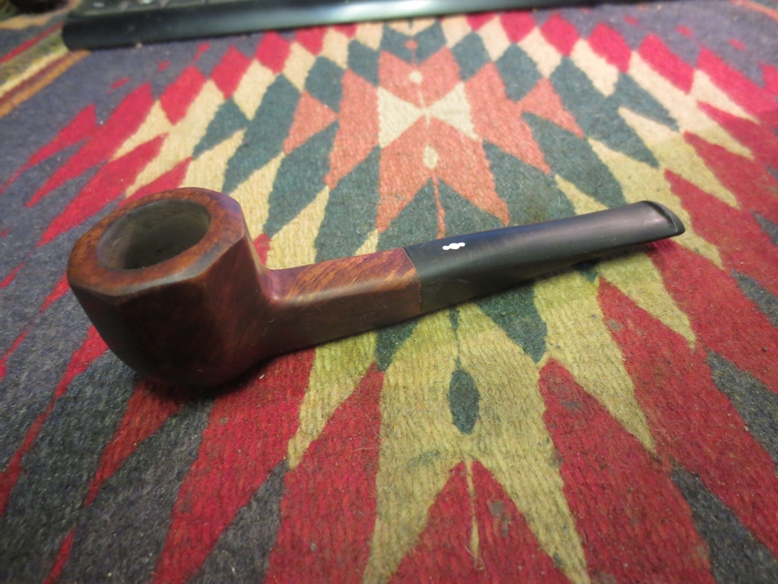
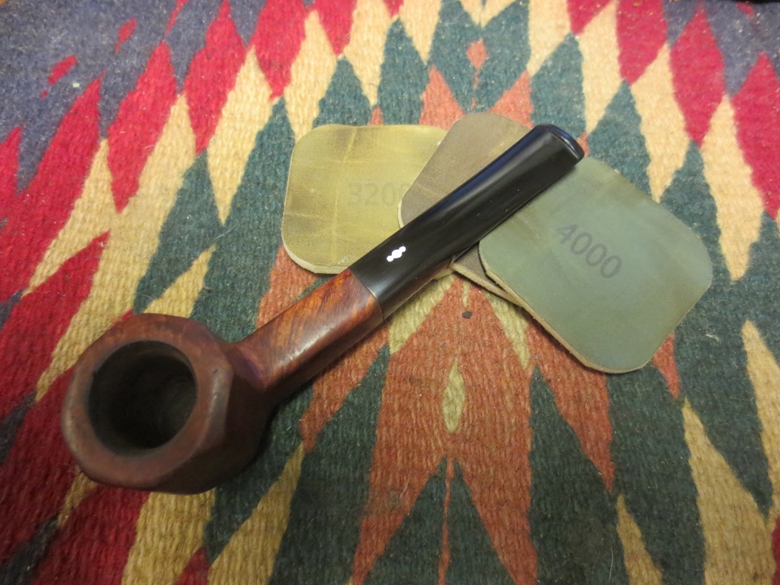
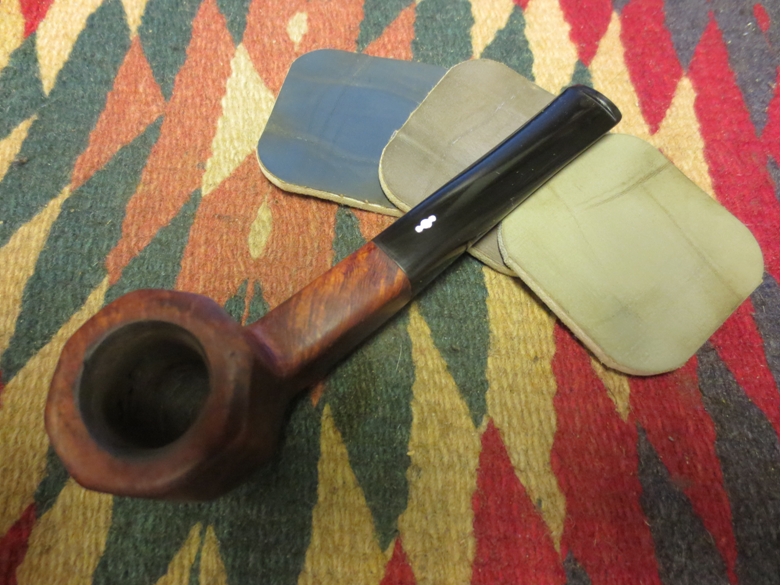
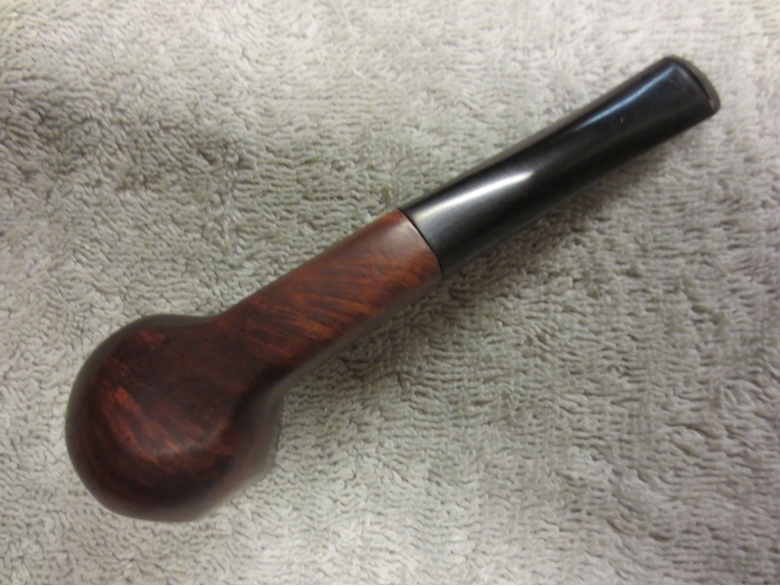
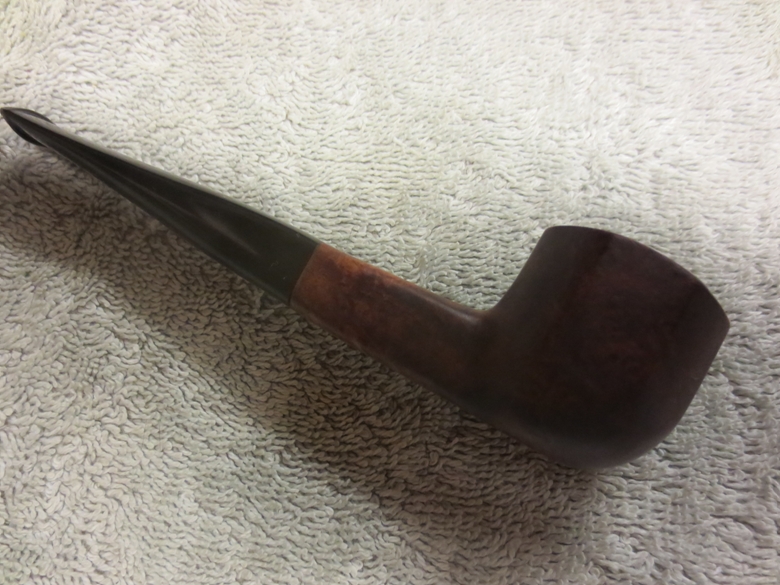
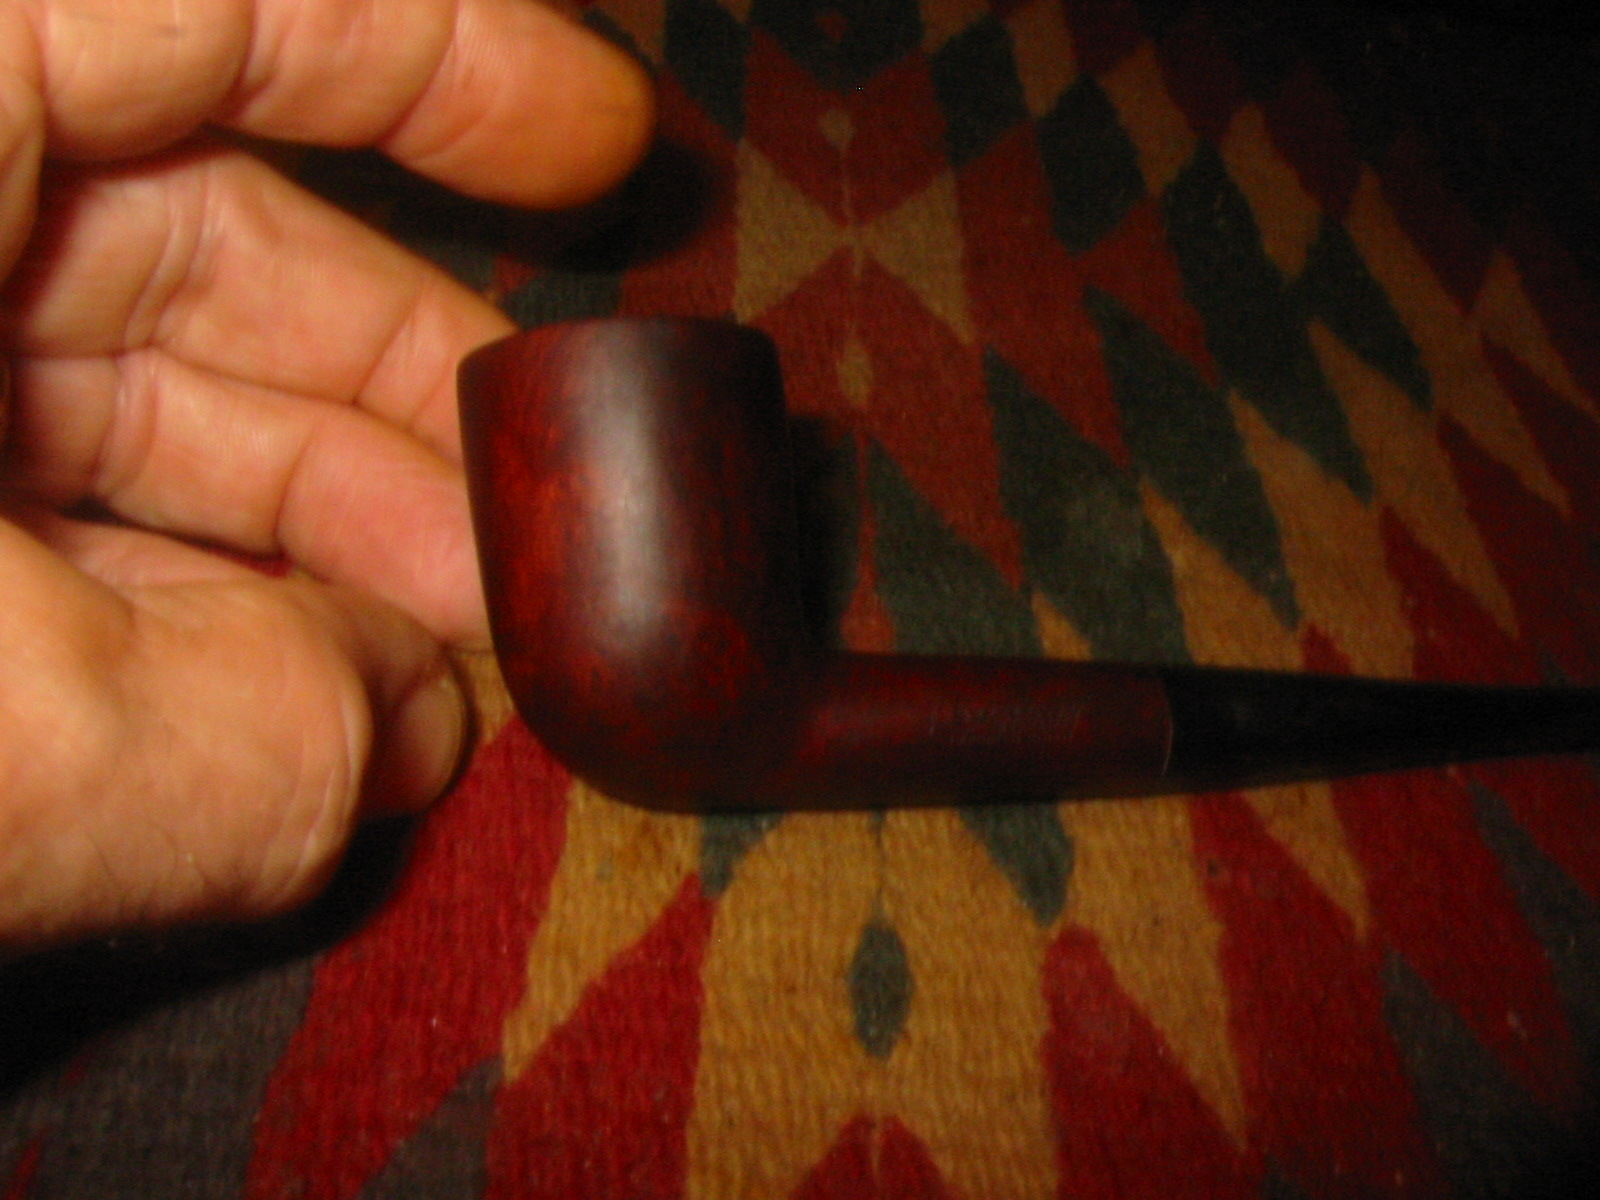
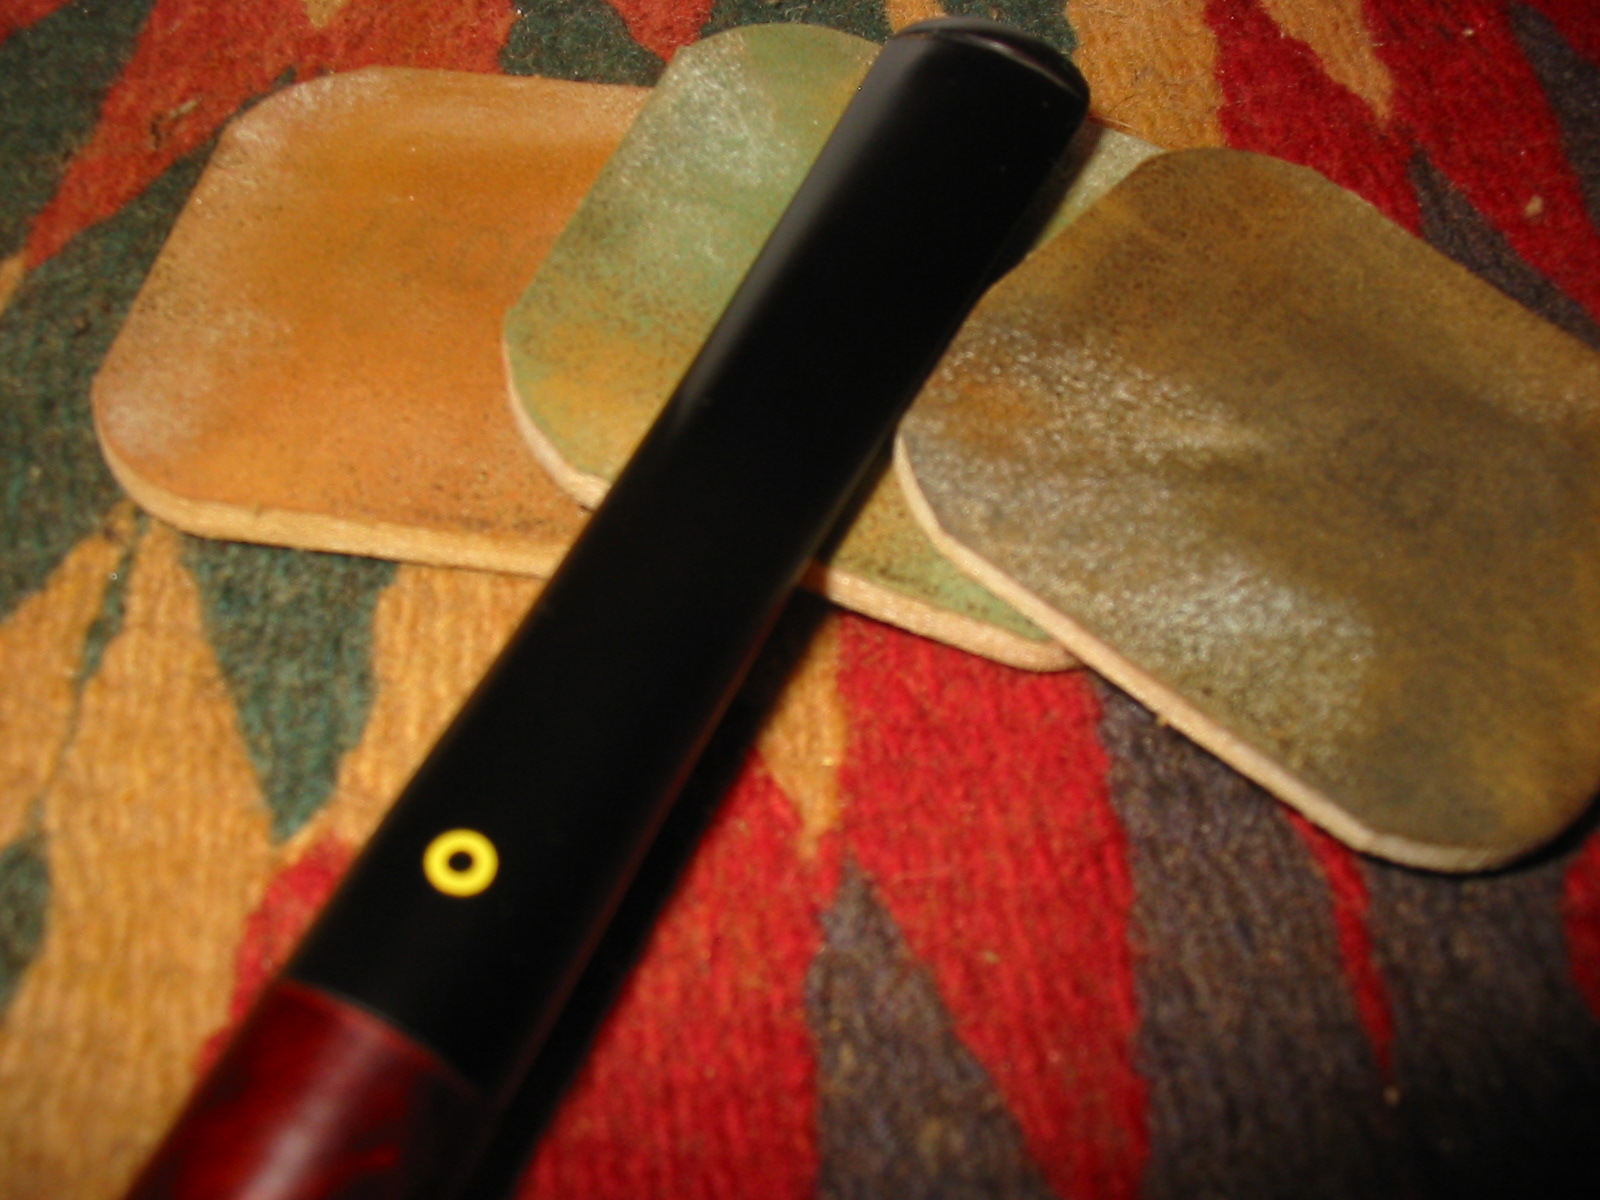
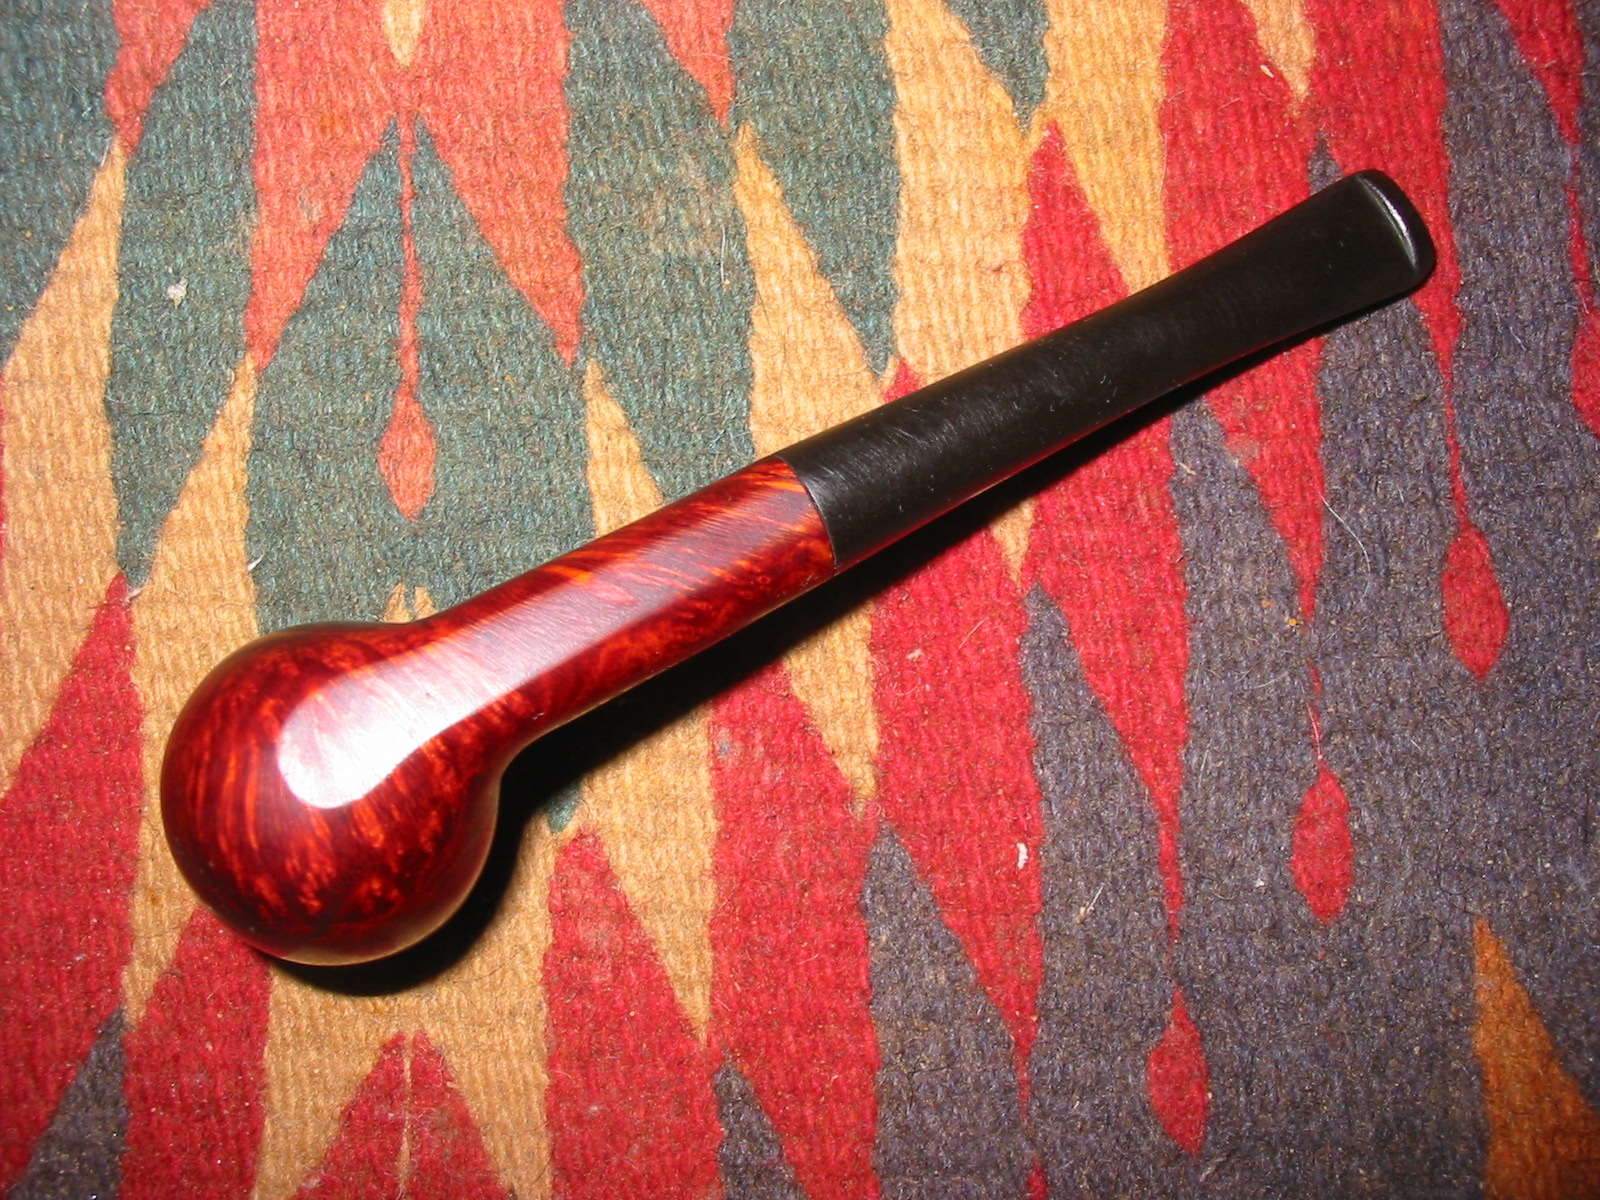
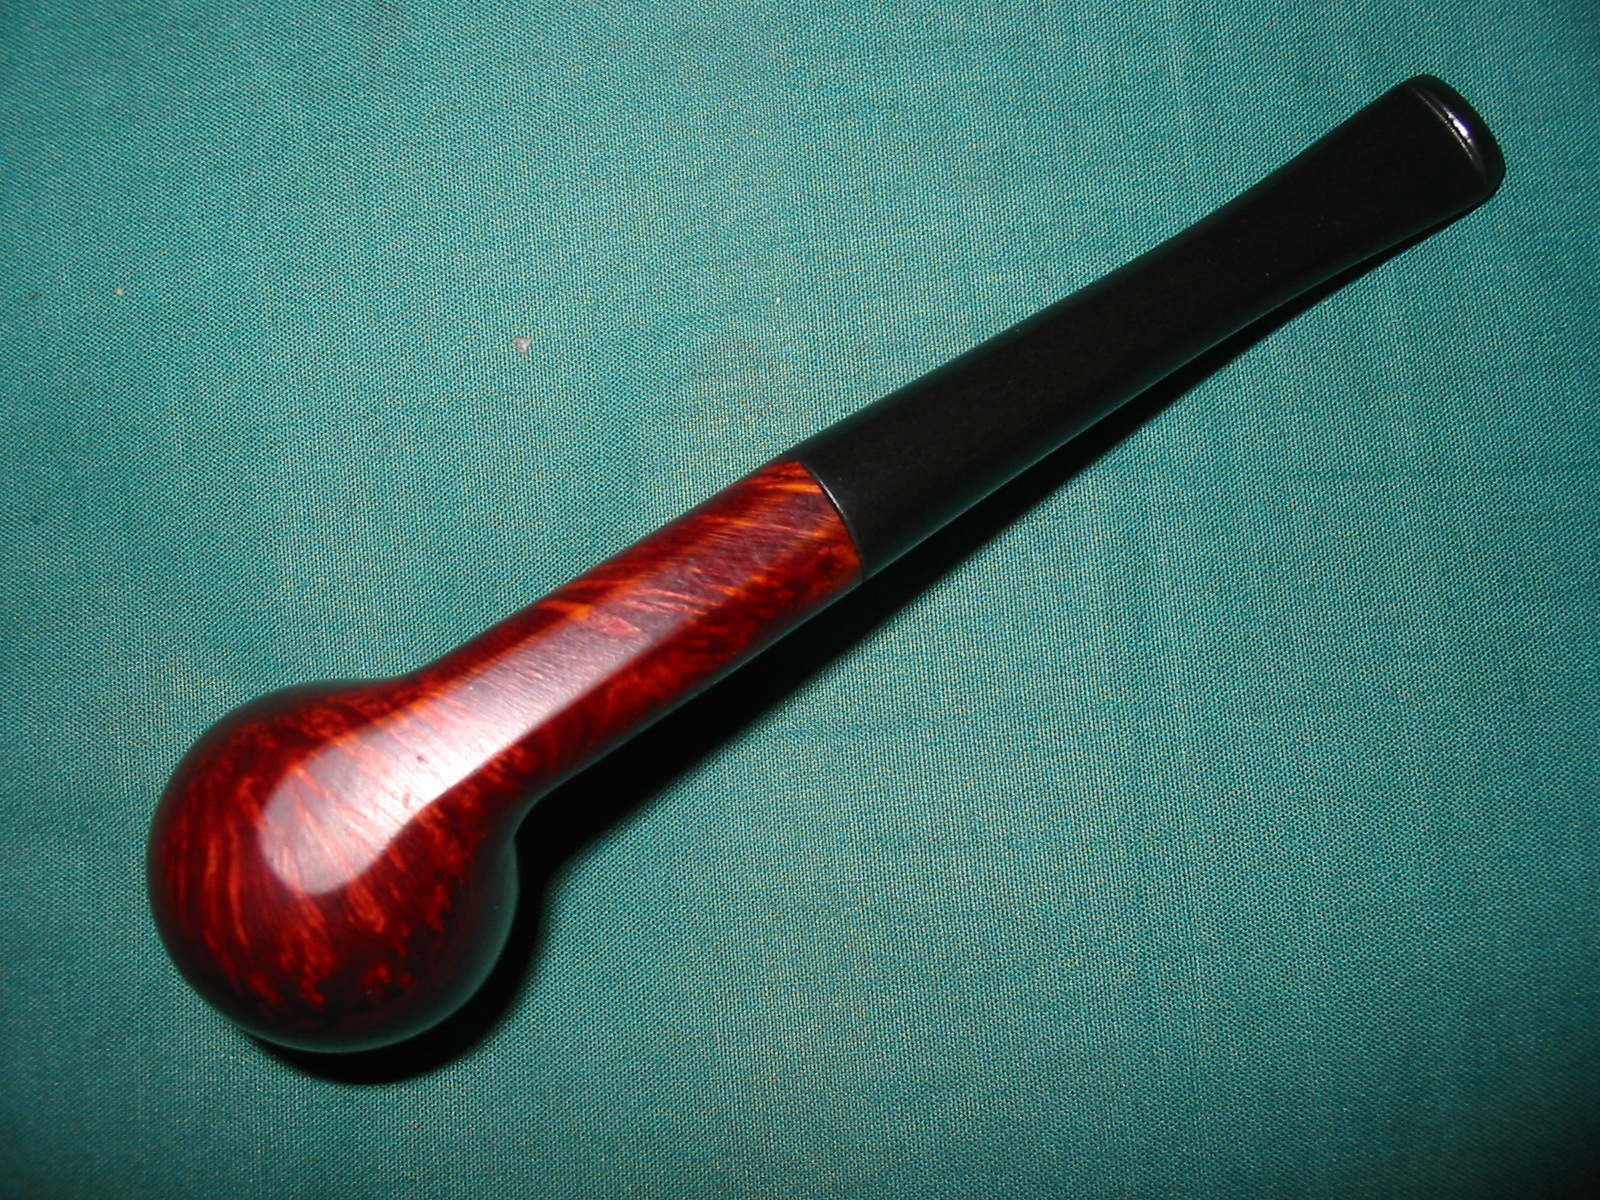
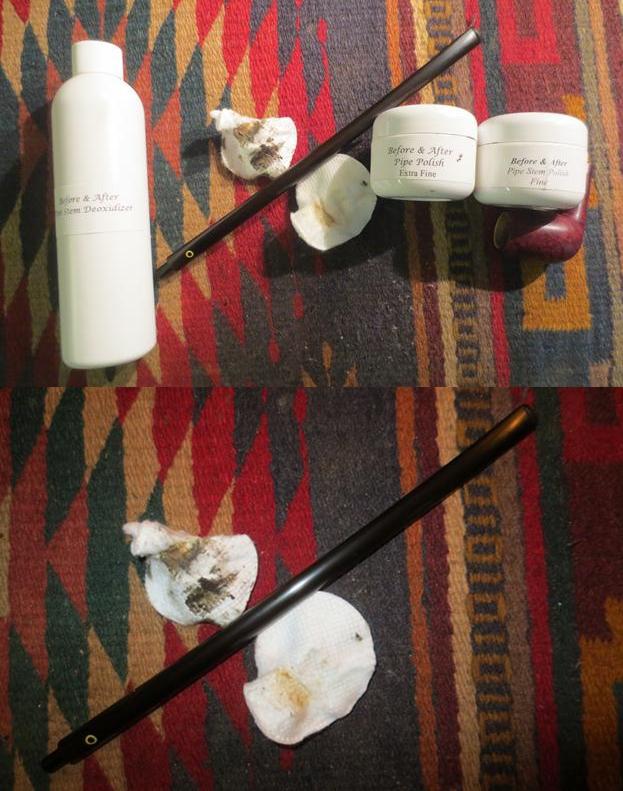
I buffed the pipe with Blue Diamond on the buffer and then gave the bowl and stem several coats of carnauba wax. I buffed it with a clean buffing pad and hand buffed it with a microfibre cloth to deepen the shine. The finished pipe is shown in the photos below. I left the stinger out of the tenon for these photos but it is easily screwed into place. The grain shines through beautifully with the oxblood coloured stain. The polished stem is smooth and shiny with a lot less effort than other products I have used. Thanks for looking.yb19 yb20 yb21 yb22 yb23 yb24 yb25 yb26


A Reborn KBB Yello-Bole 2329 Billiard


Blog by Steve Laug

I really like older KBB Yello-Bole pipes. The initial look of this one as it is seen in the first two photos confirms that. There is something about the grain, the briar that is used and the natural patina that comes with years of use that draw me to them. The yellow stem with the inset circle is attractive as well. The Yello-Bole spade stinger that extends into the bowl bottom does not restrict the draw. I had hopes that this one would be in decent shape when my brother sent me the photos below. He had mentioned that the rim was in rough shape and the stem had a lot of bite and tooth marks but the photos did not clearly show that to me.Bowl Bowl1He did his usual stellar job in cleaning up the bowl and stem. The briar and the internals were clean when it arrived. Only then did I see the extent of the rim damage to this one. If you look carefully at the photos you can see how rough the rim top and sides are. You can also see the deep tooth marks on the yellow stem. The stamping on the pipe read KBB in the usual cloverleaf on the left side of the shank with Yello-Bole next to that. The shape number 2329 was on the right side of the shank. All stamping was faint but legible with a lens.Bowl2 Bowl3I took the stem off the bowl and found that the stinger was stuck in the tenon. On these older Yello-Boles the stinger is often threaded rather than pressure fit. I heated the stinger with a lighter and soon I was able to unscrew it from the tenon using some needle nose pliers.Bowl4I took close up photos of the rim and the tooth marks on both sides of the stem. The first photo below shows the extensive damage to the top of the rim. It looked as if the pipe had been used as a hammer. The rough spot on the front of the bowl went down quite far down the outside edge of the bowl. On the back right side of the bowl there was also a deep nick down the side of the bowl. The bowl would need to be topped but the depth of the gouges made it necessary to think of other options along with topping.Bowl5The top and bottom sides of the stem next to the button were imposing. The stem had been deeply gnawed on by the previous pipe smoker. The dents were deep and extensive across both sides of the stem almost obliterating the button from view.Bowl6This was one of those hard ones. The stamping is faint and the amount of work necessary to bring it back to life was questionable. But I decided I liked the look of it enough to go for it. I topped the bowl on the topping board to smooth out the top surface of the rim. This still left a lot of work to do on the gouges down the front and back sides of the bowl. I pressed briar dust into the gouges on the side and top of the bowl and put some clear super glue on top of the briar dust. I put more briar dust on top of the glue to fill in the gouges.Bowl7 Bowl8I filled in the deep tooth marks on both sides of the stem and set it on a small wooden lid to dry. I knew that in sanding the stem after the repairs I would lose some of the rich golden colour but the stem would actually be very usable.Bowl10Once the repair dry I used a needle file to recut the button and flatten the repairs to the surface of the stem.Bowl11I cleaned out the airway in the stem and in the shank with pipe cleaners, cotton swabs and alcohol. You can also see the lightning of the yellow stem at the repair.Bowl12I polished the stem with micromesh sanding pads – wet sanding with 1500-2400 grit pads and dry sanding with 3200-12000 grit pads. I rubbed the stem down with Obsidian Oil after each set of three pads. With the final rub down with oil I set the stem aside to dry.Bowl13 Bowl14 Bowl15I wiped the bowl down with acetone on cotton pads to clean off the remnants of the finish. There was still some finish and varnish on the underside of the shank that needed to be removed. I was careful to not wash off the repairs as the acetone will dissolve the super glue patches.Bowl16Interestingly the bottom of the shank is stamped Algerian Briar. There appears to be a crack or repair on the underside of the shank but it is not it is merely a large scratch that I was able to sand out.Bowl17I polished the briar bowl with micromesh sanding pads – wet sanding it with 1500-2400 and dry sanding it with 3200-12000. Each successive grit of micromesh pads raised the level of shine on the bowl.Bowl18 Bowl19After polishing it with the micromesh pads I took some photos to show the state of the bowl.Bowl20 Bowl21I touched up the stain with a medium brown stain pen on the repaired areas on the rim to blend them into the surface of the briar. I buffed the pipe and stem with Blue Diamond on the buffing wheel and then gave the pipe multiple coats of carnauba wax. I buffed it with a clean buffing pad and then buffed it by hand with a microfibre cloth to deepen the shine. The finished pipe is shown in the photos below. I chose to leave the darkened spot on the bottom of the bowl. I sanded it and found that it was more of stain than a burn mark. The wood is solid in that spot and there is no sign of burn through inside the bowl. Thanks for looking.Bowl22 Bowl23 Bowl24 Bowl25 Bowl26 Bowl27 Bowl28 Bowl29

Repairing and Restoring a KBB Yello-Bole 2070B Cutty


Blog by Steve Laug

I was contacted by Robb, a reader of the blog about working on an old Yello-Bole Cutty that he had picked up. He said it was in decent shape but had a cracked shank that someone had already done a repair on. They had glued the shank with wood glue but when the stem was inserted it cracked again. He wanted the shank reglued and banded. We talked about different options for repairing the pipe and the costs of doing it. Finally, in an email he offered to trade me the pipe in exchange for one that I had for sale on the blog – a Kaywoodie Signature Bulldog. The deal was done and the pipe was now mine.

As with many of the pipes I repair and restore I want to learn as much about them as I can. I did some work on the internet trying to find the shape number of the pipe and information on the stamping. After a pretty fruitless search I wrote to Troy Wilburn of the Baccypipes Blog to get some information on dating the pipe. Troy has become my go to guy when I want to learn information on this particular brand of American pipes. He wrote back quickly with a reply which I summarize below. In it he walked me through the meaning of the stamping and how that helped with the dating of the pipe. His quick first answer stated that the pipe was made between 1933-1936. Here is the main portion of what he wrote to me:

“I’ll break down the stamping and numbers for you. Starting with the left side of the shank the pipe is stamped with KBB in a clover leaf and next to that it says Yello-Bole. Underneath it is stamped Honey Cured Briar. Yello-Bole pipes that come from 1933-1936 bore the stamp Honey Cured Briar. On the right side of the shank it is stamped 2070B. The meaning of the numbers breaks down as follows. The number 20 tells us that the stem is black vulcanite with a push tenon made between 1932-1940s. The next two numbers, 70 gives the shape – a long Belgian and that it was made between 1928/9 and 1935. They made a regular 70 (it’s just called Belgian), a large Belgian 70B, and a long Dublin Belgian 70B.”

I took some photos of the pipe with the stem in the shank to highlight the issues that I saw with the pipe. Not only was the shank cracked but the tenon was also cracked and set at an angle to the stem making alignment in the shank impossible. The dimensions of the pipe to give some perspective to the photos are: Length – 8 inches, bowl height – 2inches, outer bowl diameter – 1 ¼ inches, inner bowl diameter – ¾ inches. You can see that it is a large pipe. The finish was crackled and dirty – almost opaque to the point that the grain was hidden. The rim had a lava buildup and the bowl had a thin, uneven cake that covered it top to bottom. The stem was oxidized and yellow. The stinger was glued in place in the tenon with the broken tenon anchored firmly to the metal insert on the stinger. It was also glued in sideways instead of upright.YB1 YB2 YB3I took a close up photo of the tenon and stinger repair that had been done to show the cracked and glue pieces of the tenon on the stinger. You can see in the photo where pieces of the tenon had broken free when I removed the stem from the pipe.YB4The crack in the shank arced from one side of the pipe to the other forming a closed crack. The chunk of briar had been glued in place by what appeared to be wood glue. The repair was not strong enough to protect the shank when the angled tenon was inserted in the mortise. Each time the stem was inserted the crack opened wide. Because it had a start and an end point there was no threat in the crack spreading upward along the shank. I had two options for repairing this. I could either insert a tube inside the shank thus internally banding the pieces in place or I could use a band on the exterior to the same effect. As I worked on the i decided to band the shank rather than do an internal repair. The thinness of the tenon with the stinger in place would make it impractical to reduce the size of the tenon further to fit in the inner tube repair.YB5I removed the stinger from the stem and broke away the pieces of the rubber tenon from the metal insert. The stinger was exceptionally long and once I replaced the tenon I would make a decision what to do with it.YB6I have an assortment of threaded replacement tenons that I use to repair broken tenons. I went through my container and found one that was a good fit in the shank.YB7I used the Dremel and sanding drum to flatten out the broken pieces of the old tenon on the end of the stem. I used the topping board to square up the end. I set up a cordless drill and a drill bit approximately the size of the threaded portion of the new tenon. I turned the stem onto the drill bit and slowly opened the airway to fit the new tenon. Once I had the airway open and deep enough to accommodate the threaded end I used a tap to cut threads into the inside of the stem. YB8I turned the new tenon into the threaded airway in the stem to check the fit. When it was correct I gave the threads a coat of slow drying black super glue and turned the tenon into the stem until it was tight against the face of the stem.YB9 YB10I set the stem aside to let the glue cure and began to work on the crack in the shank. It did not matter which way I chose to repair the shank I needed to clean up the previous repair and remove the dried wood glue. I needed a clean surface to reglue with super glue. Once I had the surface clean I pried open the crack and used a dental pick to push clear super glue into the crack. Once the glue was in place I clamped the shank until the glue set.YB11I sanded the glued shank with 180 grit sandpaper to remove the finish and the over flow of glue from the repair. I wanted to make the surface smooth so that I could either band it externally or do it internally and then refinish the shank.YB12 YB13The next two photos show the gold/yellow colour of the paint in the stamping of the shank on both sides. Once I stripped the bowl of the varnish coat this would disappear and I would need to recreate it.YB14I cleaned out the inside of the shank and the mortise with alcohol, pipe cleaners and cotton swabs. It was dirty but cleaned up easily. I repeated the same process on the airway in the stem. It too was easy to clean. I reamed out the bowl with the Savinelli Pipe Knife to take the cake back. Underneath the light cake I found that they original Yello-Bole coating was still in place.YB15Once the glue on the shank had cured overnight I carefully put the stem in the shank to check the alignment of the stem and shank. I took the following photos of the pipe at this point in the process.YB16 YB17I wiped the bowl down with acetone on cotton pads to remove the varnish coat that was crackling. It took some scrubbing but the finish came off quite easily and left the colour in the briar.YB18I was careful to not wipe around the repaired shank as the acetone will dissolve super glue and I would be back to square one. I sanded the bowl with 1500-2400 grit micromesh sanding pads to further remove the finish.YB19I wiped the bowl down with a light coat of olive oil to see what the grain looked like.YB20 YB21I cleaned the shank and used European Gold Rub N’ Buff to restore the gold in the stamping. I really like how Yello-Bole and some of the older American pipes utilized the gold leaf in the stamping to make it highly readable.YB22I scrubbed the stem with Meguiar’s Scratch X2.0 to remove the majority of the oxidation and polish the stem. The residue of the oxidation is shown on the cotton pad under the stem.YB23I sanded the remaining oxidation with 220 grit sandpaper to remove it from the surface of the stem. There were some small tooth marks on the top and bottom sides of the stem as well that I sanded out with the sandpaper.YB24I wetsanded the stem with 1500-2400 grit micromesh sanding pads and gave the stem a coat of Obsidian Oil. I dry sanded with 3200-4000 grit pads and gave it another coat of oil. I finished sanding with 6000-12000 grit pads and gave it a final rubdown with Obsidian Oil.YB25 YB26I drilled out the tenon to the diameter of the stinger apparatus that had originally come with the old tenon. I made it large enough that the stinger was removable in order that the pipe could be smoked with or without the stinger.YB27The band that Charles shipped me came on Friday and it was a good fit on the shank. I coated the shank with some white glue and pressed the band onto the shank. I wiped away the excess glue with a damp cotton pad.YB28 YB29I used a dark brown stain pen to touch up the area around the shank repair that extended beyond the band. The colour worked well with the brown/red colour of the stain on the rest of the shank.YB30I buffed the area around the band with White Diamond on the wheel to blend in the stain colour with the rest of the pipe. I buffed the entire pipe with Blue Diamond, being careful to avoid the nickel band. I have found that when I buff the band at the same time as the rest of the pipe the black from the nickel on the buffing pad is transferred to the shank and stem. I rubbed the stem down with Obsidian Oil and gave the stem and bowl multiple coats of carnauba wax. I buffed the pipe with a clean buffing pad and then with a microfibre cloth to deepen and raise the shine. The finished pipe is shown in the photos below. I really like the way it turned out and I am sure glad that I was able to work a trade with Robb for the pipe.YB31 YB32 YB33 YB34 YB35 YB36 YB37 YB38I took some final photos of the pipe. The first photo shows the stinger next to the bowl and stem go give an idea of the size of the stinger and the second photo shows the stinger in place in the stem. Thanks for looking. YB39 YB40

An Odd Yello Bole Imperial Nosewarmer Canadian worth saving


Blog by Steve Laug

The second pipe that Troy Wilburn sent me to restem was a short Canadian with a large bowl. It was a bit of an odd pipe – no shape number and no catalogue shape that matched it. It was almost like a Canadian that had been cut off somewhere along the way. However it was sent out from the factory like this. It is stamped on the top rolling down the left side of the shank with the older KBB in a cloverleaf. Next to that it reads Yello Bole. Underneath it reads cured with real honey and an R in a circle. Underneath that is stamped Imperial in Script with small block letters reading IMPORTED BRIAR.

It came to Troy as New Old Stock or NOS – unsmoked pipe. It had a strange tenon repair that someone had made some time in its history. The tenon had broken off in the shank and rather than remove it, the decision had been made to leave it in the shank. In the first photo below you can see the broken tenon and at the end of it is the YB stinger apparatus still sitting in the shank. There was a notch taken out of the shank on the left underside near the end of the mortise and in the mortise end. The repair that had been made was to smooth out the end of the stem and insert a stainless steel rod in the stem. The rod was the same diameter as the inside of the tenon. Effectively it was like the repair I did on Troy’s other pipe. The problem with this one was the very constricted draw due to the narrow airway constricted by the tenon. With the notch in the end of the mortise the fit of the stem against the shank was also compromised. This pipe was going to be a bear to get all of the alignments straight. The airway drilled in the stem for the metal tenon was slightly off centre and a little angular. The notch in the shank would need to be corrected or removed. The fit in the shank would need to be adjusted. You can see that this NOS pipe would take a bit of creativity to reconstruct.YB1 I began the reconstruction of a new tenon by addressing the constricted airway and broken tenon in the shank of the pipe. I used a drill bit that fit well against the end of the tenon that was stuck in the shank and slowly drilled into the broken tenon. My hope was that the drill bit would catch on the material of the tenon and I would be able to back it out of the shank. It worked on the first try. The bit stuck in the bit and I reversed the direction of the drill and the broken tenon came out on the drill bit. Once it was free I was able to shake out the stinger from the airway and the shank was clear. This unsmoked pipe now had an unconstricted airway. The first part of the repair had gone off without a hitch.YB2 The next photo shows the parts that were in the shank. The broken tenon piece and the spoon shaped stinger are to the left of the end of the shank. You can also see the short metal tenon that had been inserted in the stem end.YB3 I gripped the end of the metal tenon with needle nosed pliers and wiggled it free of the stem. It had not been glued but rather heated and inserted deep in the airway of the stem. With very little effort I was able to remove the tube from the stem. The next two photos give two different views of the tenon and the end of the stem. You can see in the second photo that the airway had been drilled open to take the metal tube tenon. It would not take much to open it slightly larger to put a repair tenon in place.YB4

YB5 With the airway opened I decided to address the notch out of the end of the shank. I did this by using super glue and briar dust to build up the shank end. The trick was to keep the glue isolated to the shank end and not let it run on the finish of the shank bottom.YB6 I carefully put a few drops of glue in the notch and then packed in briar dust with a dental pick. I repeated this process until I had built up the notch slightly higher than the flat end of the shank. I then used the topping board and carefully stood the pipe against the sandpaper and slowly worked the filled area smooth with the paper. I repeated the process until the area was evenly built up and the notch was gone. There remained a little darkening at the edge of the repair on the bottom edge of the shank end but the notch was gone. Once the stem is repaired and is in place the notch will be virtually invisible. I cleaned up any of the glue bits and briar dust in the shank with the dental pick and a sharp knife.YB7

YB8

YB9 The next three photos show the shank end from different angles to show the state of the repair at this point in the process. It still needs to be cleaned up and touched up once the stem is fit in the shank, however the notch itself is virtually gone and the stem (sans tenon) sits smoothly against the shank end.YB10

YB11

YB12I decided that rather than wait for a new tenon to arrive I would make my own. I had a very small stem that I knew would work well to fashion a tenon. I used a hacksaw to cut off a portion of the stem to use for the tenon. I purposely cut it long to give me material to work with.YB13

YB14

YB15 The cut off portion is shown in the photo below. I held the smaller portion in the tip of a pair of needle nose pliers and used the Dremel with a sanding drum to bring down the larger portion to match the smaller one. I would sand until I had a vulcanite tenon that I could insert into the stem.YB16

YB17 Here is a photo of the shop “foreman” sitting in my chair while I worked on the tenon. Spencer loves to hang out with me while I work.YB18 The thinner part of the tenon in the photo below will be the part I insert in the stem once it is drilled out. The larger part will need to be turned down to fit in the mortise.YB19

YB20 I started by using a drill bit that was slightly larger than the airway that had been opened in the stem for the metal tenon. I worked my way up to a drill bit that would open the airway and deep enough to take the new tenon and provide stability.YB21 When I had drilled the opening in the stem as large as I could, given the taper of the stem I needed to take down the diameter of the replacement tenon I had made. I used a Dremel to take off the excess material to reduce it to the same size as the stem opening. Once I got close in diameter with the Dremel I hand sanded it to fit.YB22

YB23 When the tenon end fit snugly in the stem, I squared off the end of the tenon and then superglued it in place in the stem. I coated the tenon with the glue and pressed it into place. The tenon itself would also need to be turned to fit the shank of the pipe.YB24 I used the Dremel and sanding drum to sand down the tenon and then used sand paper to get a snug fit.YB25 Once it fit well I polished it with fine grit sanding sponges and micromesh.YB26 The fit in shank was good and snug. It was at this point that the alignment issues became clear. I would need to do some work on the shank to clean up the repair and also get a good transition from the shank to the stem. The fit on the topside was slightly high and the fit on the underside was a little low. I needed to sand the shank anyway to clean up the repaired notch on the underside so to sand it a bit more was not an issue.YB28 I sanded the shank and stem with 220 grit sandpaper to smooth out the transition between the two and to give a better flow to the taper on the stem.YB28

YB29

YB30

YB31 I sanded the stem and shank with a medium and a fine grit sanding block to make the transition smooth and remove the scratches left behind by the sandpaper.YB32

YB33

YB34

YB35 Once the transition was smooth I sanded the briar with micromesh sanding pads from 2400-4000 grit and then used the Guardsman brand stain pens to stain the shank. I used the lightest stain pen first and finished with the medium stain pen. Once it dried I buffed the pipe with Blue Diamond to raise the shine on the shank and to even out the stain.YB36

YB37 I sanded the stem with micromesh sanding pads – wet sanding with 1500-2400 grit pads and dry sanding with 3200-12,000 grit pads. I buffed the stem with White Diamond and Blue Diamond and then buff the shank with the same once again.YB38

YB39

YB40 I buffed the stem and the shank with Blue Diamond on the wheel and then gave the pipe several coats of carnauba wax. I finished by buffing it with a soft flannel buffing pad. The finished pipe is shown below.YB41

YB42

YB43

YB44 The next two photos show a close up of the fit of the stem to the shank. I am pleased with the way it turned out.YB45

YB46 The last two photos are of a regular sized Yello Bole Canadian (top pipe) and the little nose warmer (bottom pipe). I put these together to give a bit of perspective. The bowl on the nose warmer is larger and the shank is definitely shorter.YB47

YB48 Thanks Troy for the challenge on this little Canadian. It was a pleasure to work on it. Each time I work on putting a new tenon on a pipe I learn something new. This time around, between the new tenon on the billiard, the insert in the cracked shank and the new tenon on this little one I had a good week in pipe school. They will soon be on their way back to you Troy. I hope they smoke well and you enjoy them.

Restoring a Monster KBB Yello Bole Imperial Rusticated Billiard


Blog by Troy Wilburn

I picked up this huge pipe from a friend of mine on the Dr. Grabow Collectors Forum. This pipe isn’t a magnum it’s a howitzer! It is 7 ½ inches long and has an almost 2 ½ inch tall bowl. The pipe was nice but had some issues. The top of the rim and the inner edge had been hacked up. The stem also has some heavy nicks and dings in it. It was really clean though and I had very little to do as far as getting the inside clean.

Here are some photos of the pipe before I worked on it.Troy1

Troy2

Troy3

Troy4 As I stated above the top of the rim and the inner edge were badly hacked.Troy5 I began by working on the rim. I topped it and made a large concave inner rim. I don’t know if it came like this from the factory or not but it has one now. I took it down with 80 grit sandpaper and then a lot of sanding with 120 grit sandpaper.Troy6

Troy7 After I had finished rough shaping the rim I did LOTS and LOTS more sanding from 400 grit sandpaper all the way up to 2000 grit sandpaper. I used mineral oil as a lubricant for the sandpaper and also to bring out the colour of the natural wood. Troy8

Troy9

Troy10 I soaked the stem in alcohol and then scrubbed it with a green scouring pad. I cleaned it out with pipe cleaners.Troy11 The stem had several tooth marks and gouges on the top and the bottom side next to the button.Troy12

Troy13 I filed out the tooth marks and reshaped the button.Troy14 Here is a little trick that some of you may know, but I came up with it in working on the last few pipes. I thought I would share it here. After filing the stem I take a lighter and work the flame back and forth across the file marks. The heat from the lighter helps to blend in the file marks and makes it easier to sand them out.

Here is a photo of the stem before I used the lighter.Troy15 Here is a photo of the stem after using the lighter.Troy16 I buffed the rim with Brown Tripoli a few times to get rid of the fine sanding marks. I could not get the pads into the concave inner rim so I waxed it by hand with paste wax several times.Troy17 With the initial sanding and cleaning of the stem done, I still had a lot more sanding to do. There were lots of scratches and dings in it. I began sanding with 400 grit sandpaper and worked my way up to 2500 grit sandpaper.Troy18 I put the stem back on the bowl and got it ready for the final buffing and waxing.Troy19 Here are photos of the pipe after it had been buffed and polished.Troy20

Troy21

Troy22

Troy23

Troy24

Troy25

Troy26

Troy27

Troy28

Troy29

Troy30

Troy31 To give an idea of the size of this pipe and put it in perspective here is a photo of it next to a Yello Bole Hand Made Poker I have. As most of you would know, a Hand Made is not a small pipe by any means. This billiard almost dwarfs it.Troy32

Bringing a Yello Bole Pot back to Life


Blog by Andrew Selking

Anyone who reads my previous postings know that I have a fondness for early KB&B pipes. Since the briar used in Yello Bole pipes was generally inferior to those used in Kaywoodies, most Yello Bole pipes are smaller. This was a work around for defects found in the briar. I saw this Yello Bole pot and was intrigued. It’s a full size pipe. Here is the seller’s picture.YB1 When the pipe arrived, the stem was nearly perfect with the original stinger intact (not that I planned to leave it there). The bowl looked decent with a minimal amount of tar on the rim and very light cake. I dropped the bowl into the alcohol bath and soaked the stem in Oxyclean.

I noticed the first indication of trouble when I pulled the bowl out for reaming: it had a heavy varnish coating. That’s usually a sign that the pipe maker wanted to hide imperfections in the wood.

YB2

I quickly reamed the bowl then broke out the 0000 steel wool and acetone to remove the varnish.

YB3

I’ve seen some pits in briar before, but this is the first time I’ve encountered a pit so deep that I gave it a name. I named it the pit of despair. Here’s the picture before I removed the pink putty.

YB4

Here’s the pit of despair fully revealed. My dental pick had a good ¼ of an inch of room to explore.

YB5

Even with the pit I still liked the pipe and decided to fix it anyway. I filed a good amount of briar dust from a broken shank onto a piece of paper. The paper makes it easier to collect the briar dust. Or you could do like Steve and just have a big jar of briar dust.YB6 I packed the pit and added super glue followed by accelerator.YB7 After applying the super glue and accelerator, I had to add briar dust two more times. This was the final result.YB8 In addition to the pit of despair, there were three minor pits on the front of the bowl and two deep pits on the bottom of the shank near the juncture of the stem. I finally got the exterior of the pipe sorted out and turned my attention to the insides.
I did my retort on the bowl.YB9 There was some gunk on the brush, but the stinger did a decent job keeping the shank clean.YB10 After a few passes with the brush dipped in alcohol, I moved on to q-tips. Not a terribly dirty pipe.YB11 Next I retorted the stem. I anticipated it would be dirty, since stingers tend to make pipes smoke wet. I retorted it three times to be safe and had an easy time cleaning the remaining tar.YB12

YB13

YB14I next turned my attention to removing the oxidization from the stem. I used 400 wet/dry with water and my sanding wedge, followed by 1500-2400 grit micro mesh pads with water.YB15 I polished both the bowl and stem with a progression of micro mesh pads, 1500-12,000 in preparation for final finish. I used my rotary tool with white diamond, followed by carnauba wax on the stem. I have to say this will be the new standard from now on.YB16 I decided to use Pimo Pipe Supply’s dark walnut stain on the bowl. This would give me a fighting chance to cover the pit repairs while still allowing the grain to show. It turned out better than I expected. I now have a very classy looking short pot. I also had the chance to try extreme pit repair. Even though this pipe had several pits, the briar still had nice grain. This one is a keeper.YB17

YB18

YB19

YB20

YB21

YB22

YB23

YB24

YB25

YB26

Trash to Treasure – Restoring a KBB Yello-Bole Billiard


Blog by Aaron Henson

Last evening I received an email from Aaron to which he attached this writeup on his restemming of an older KBB Yello-Bole. It is great to have the various readers of the blog submit articles to the blog to share with others. The dream of rebornpipes when I started it was just that – to provide a platform where those of us engaged in refurbishing tobacco pipes could share our methods, successes and failures. This community would provide ongoing education for anyone who wanted to try their hand at restoring estate pipes. With that background here is Aaron’s restoration and the explanation of his process. Welcome to rebornpipes Aaron.

By way of introduction, let me begin by saying that I am relatively new to pipe restoration. This write up details my third restoration and I thought I would submit it for two reasons; 1) I have gotten so much help from the regulars posting here at rebornpipes and from forums elsewhere I felt that I would like to share my experience for others to glean from, and 2) although it is not very different from some of the other restorations that Steve has catalog for us here, some of my tools and techniques may be a little different. I also hope to get some feedback on ways to improve my process.

I was at local second-hand shop with my family around Thanksgiving and was looking for pipes when my son found a stemless KBB Yello-Bole stummel. After looking it over for cracks in the bowl and stem I realized that the briar was in relatively good condition. I noted a few chips on the edge of the rim and some blackening of the rim but no fills and not much cake in the bowl. The stem was clearly stamped with the KBB logo in a clover leaf just to the left of:YB

YB1 I did not know much about the Yello-Bole brand but I thought I should be able to find a stem easily enough (aren’t they somewhat universal in size?). Besides, with a $4 price tag I figured I would not be out anything if it didn’t work out.YB2

YB3

YB4 I jumped on my computer as soon as I got home and found some interesting history on the Yello-Bole brand. I won’t go into it here because Steve has done a nice job summarizing it in one of his posts: Narrowing Down a Date for Kaufman Brothers & Bondy’s KBB and KB&B Pipes. From the data available I had to guess that this pipe was form the late 1950’s or 60’s.

After reading up on the history of the pipe I began looking online for a new stem. I quickly learned that not all pipe stems are created equal, nor are they interchangeable. For a while, I considered sending the stummel to someone to have a stem made but that kind of defeated the whole spirit of restoring the pipe myself.

It took a while to find a stem that I thought would look right on the pipe. I settled on a stem from Vermont Freehand (ebay vt_freehand), a 2½” tapered stem – No. 547. I ordered 3 of them, figuring that I would need at least one for practice.

While I waited for the stems to arrive I began working on the stummel. There was not a lot of cake in the bowl so I started there – low hanging fruit. Now, I don’t own a reamer, but I have found that a ½” dowel wrapped with 60 grit sandpaper answers very well. What cake there was came out cleanly.

Besides the chip there was some charring on the rim. The chip was not very deep so I thought I would take care of both issues by taking the top of the bowl down to clean briar. Using 120 grit sand paper mounted on a flat surface, I carefully worked the bowl in a circular motion trying to keep it level. I didn’t want to take off too much of the top so I gave the outside lip of the bowl a slight chamfer to remove the bottom part of the chip.YB5 I then gave the stummel a soak in a 91% isopropyl alcohol bath. This was for the dual purpose of removing the existing finish and loosening the crud in the shank. I removed the stummel after about 24 hours and wiped off the existing stain. I then cleaned the shank with a bristled brush, bristled cleaners and cotton swabs. I wanted to make sure the mortise was thoroughly cleaned before I began to size the tenon on the new stem.YB6 When the stems arrived, I realized that I probably could have been a little more attentive to the size I purchased. I was going to have to remove a lot of material to get the tenon to fit the mortise as well as flushing the stem to the shank. The best way to shape a stem is on a lathe, but not having a lathe I turned to my drill press.YB7 I found that a bamboo skewer fit very snugly into the air hole of the stem.YB8 Leaving about 1 inch of the skewer protruding out of the air hole, I chucked the stem into my drill press.YB9 I started out a little timidly, removing material with 120 grit sand paper but the vulcanite is so soft that it gums up the paper very quickly. I switched to 60 grit and still was not seeing much progress. I tried a metal file next and when that did not answer I rummaged around the tool box and found a rasp. A bit aggressive I admit, and I would not recommend it unless you are removing a lot of material, and I was.

The drill press method worked great but was not without its problems. Pressing too hard with the file or rasp would cause the stem to slip on the skewer. The stem would then have to be reseated before I could resume. The other problem happened about half way through the rough shaping; the skewer broke off flush with the end of the tenon. I admit I panicked a little when I could not get a hold of the skewer with my needle nose pliers. But using a small drill bit I was able to carefully drill out the wedged skewer.

Back on track I, stopped often to check the fit. As I neared the correct size I switched back to the file then to the sand paper again. I finished the tenon with 320 grit sand paper.YB10 I thought fitting the tenon to the mortise was going to be the hard part but shaping the stem to get that perfect flush fit with the shank turned out to be the big challenge. You can see in the picture above that I have a ways to go to get the taper from the shank to the button. I have also started to get a bit of a wave about a quarter of the way from the tenon.

To fix this I stapled a piece of 240 grit paper to a 3” sanding block and went to town. The sanding block kept the contact surface flat and helped to eliminate the wave. It took about an hour of work stopping often for fit checks. In the end I was rewarded with nice taper. Somehow I had rounded over the shoulder of the stem ever so slightly. This formed a little groove at the stem/shank connection. It was not terrible and I felt could live with it for now.

I finished the stem with 600, 1000, 2000, 4000, 6000 grit sand paper. Then set it aside to buff with the stummel once it was complete.YB11 I stained the stummel using one part Fiebing’s light brown diluted with 2 parts isopropyl alcohol. I applied two coats, flaming each coat. Once dry, I wiped it down with a clean cloth and attached with stem.YB12 I set my drill press up with an inexpensive Sears buffing system and started with the white buffing compound. I found on previous projects that gearing down the drill speed to 1200 rpms was important to maintain control of the pipe and not overheat the pipe.YB13 I finished with two coats of carnauba wax and buff with a soft cloth.YB14

YB15 I needed a tooth pick to remove some of the wax from the sand blasted areas. And that little groove between the stem and shank collected some wax too. Overall I am very happy with the outcome of this restoration. I am looking forward to smoking my first bowl in it.

Looking back, I am glad that I tried shaping my own stem. It was not without its challenges but the result was very rewarding. I now have two spare stems in my tool box, so I will be keeping an eye out for another stemless billiard.

The Resurrection of an old KBB Yello-Bole Premier Panel


Blog by Steve Laug

In a recent trade with Andrew Selking I received an older KBB Yello Bole Paneled billiard. When I removed it from the box there was something about the older KBB Panel that grabbed my attention. It was stamped on the left side of the shank with the familiar KBB logo and the Yello-Bole next to it. Underneath that it bore the stamp Reg. US Pat. Off. Directly below that was stamped Premier over Cured with Real Honey. The pipe had been repaired at some time in its ragged existence with what appeared to be a homemade repair job. The tenon had broken somewhere along the line and a previous owner had drilled out the stem and used a piece of stainless steel tubing to make a new tenon. The metal tenon was stuck in the shank of the pipe and the stem just sat loosely on it. The fit of the stem to the shank was off with the stem sitting high and to the right. The previous owner had tried to compensate for the off centered stem by sanding flat spots on the stem sides and bottom that broke the smooth lines of the square shank and stem. There were two small hairline cracks on the shank – top right and bottom left that would need to be repaired once the tenon was removed. The bowl was out of round with damage to the inner edge of the rim and a tarry build-up on the surface. The outer edge rim crown of the bowl was also compromised and would need some work. The stem was not too badly oxidized but it had tooth marks on the top and bottom near the button.YB1

YB2

YB3 Background Information
I wrote about the history of the KBB stamped Yello-Bole Pipes. The following link will give you the details: https://rebornpipes.com/2014/07/21/renewing-an-old-kbb-yello-bole-honey-cured-briar-billiard/
Yello-Bole pipes are one of my favorite older US brands doing the research would be enjoyable. As with other early brands made in the states I have found that older is better. A KBB in a cloverleaf stamp will date them back to the ’30’s. I have found through my reading that the 4 digit shape numbers are older than 2 digit ones. The pipes with the logo on top of the stem are older than ones that have them on the side. That is just some of the information that I found with a cursory read through the forums and a variety of websites.

The SM Frank website http://www.smfrankcoinc.com/home/?page_id=2 gives a wealth of historical information on Kaywoodies, Yello-Boles and the merger between KBB and SM Frank and later Demuth. It was a great read and I would encourage others to give the website a read. I also wanted to find some help in dating my old Yello-Bole Pipes and I came across this link to the Kaywoodie Forum: http://kaywoodie.myfreeforum.org/archive/dating-yello-bole-pipes__o_t__t_86.html . I am including some of the information I found there as it gives the only information that I found in my hunt to this point.
“…there isn’t a lot of dating information for Yello-Bole pipes but here is what I have learned so far.

– If it has the KBB stamped in the clover leaf it was made 1955 or earlier as they stopped the stamping after being acquired by S.M. Frank.
– From 1933-1936 they were stamped Honey Cured Briar.
– Pipes stems stamped with the propeller logo they were made in the 30s or 40s no propellers were used after the 40s.
– Yello-Bole also used a 4 digit code stamped on the pipe in the 30s.
– If the pipe had the Yello-Bole circle stamped on the shank it was made in the 30s this stopped after 1939.
– If the pipe was stamped BRUYERE rather than briar it was made in the 30s.”
Given the above information I discovered that the pipe I was working on was made sometime between 1930 and 1940. Thus it was an early Yello-Bole from the 1930s or 40s.

Restoration Process

I took the stem off the bowl and tried to remove the inserted metal tenon. It was firmly stuck in place and I could not move it even with pliers. I put the bowl in the freezer overnight hoping that the cold would contract the metal and briar differently (as is the case with the varied material and density). In the morning I took it out of the freezer and was able to turn the tenon out of the shank with pliers. Once it was removed it was clear to see that it had not been glued in the shank but merely stuck with the tars and oils of the tobacco in the shank.YB4 I found a threaded Delrin tenon in my box of tenon parts and it was a workable replacement for the metal tenon. I tapped the drilled out hole in the stem and screwed the threaded tenon into the hole. It was a perfect fit. I removed it once again and put some glue on the threads and screwed it into place and let the glue set. The diameter of the tenon would need to be adjusted as it was too big for the mortise. This was actually ideal in that I would be able to adjust the fit against the shank on the sides and the top. The bottom of the shank would take work to make a smooth transition.YB5

YB6

YB7

YB8

YB9

YB10 I sanded the tenon with a Dremel and sanding drum to remove the excess Delrin. I hand sanded it with 180 grit and 220 grit sandpaper to smooth out and fine tune the fit. I spread the hairline cracks with a dental pick and dripped superglue along the cracks and pressed them together until the glue set.YB11 The stem fit in the shank nicely. The photos below show the damage that had been done to the stem in the previous repair. It is especially visible in the photos of the pipe from the side and the bottom. The stem had been modified to the misfit of the previous tenon so work would need to be done to realign the fit against the end of the shank.YB12

YB13

YB14

YB15

YB16

YB17 I sanded the bottom, top and right side of the shank until the transition between the briar and the vulcanite was smooth. The left side was touchier in that I did not want to damage the stamping. I sanded this area while covering the stamping. The trick was to smooth out the transition without making a drastic dip in the briar – it just needed to be re-tapered until it flowed naturally into the stem. Sanding the top of the stem also took care as it had the insert of the white propeller. Too much sanding on the top would damage and compromise the insert. The photos below show the newly sanded and tapered shank/stem. I sanded with 220 grit sandpaper, medium and fine grit sanding sponges and a fine grit sanding block. I sanded the rim and curves of the rim with the same sandpapers. I folded a piece of 220 grit sandpaper and worked on the out of round bowl to clean it up as much as possible.YB18

YB19

YB20

YB21 I wiped the bowl and shank down with acetone on a cotton pad to remove the finish from the bowl.YB22

YB23

YB24

YB25 I cleaned out the bowl and shank with isopropyl alcohol, cotton swabs and pipe cleaners. I cleaned out the stem as well at the same time. I sanded the bite marks on the top and bottom of the stem with 220 grit sandpaper to minimize the damage and remove the tooth chatter. There were still some tooth marks that needed to be repaired.YB26

YB27

YB28

YB29

YB30 I scrubbed the areas around the bite marks with alcohol to clean the sanding dust and grit from around them. I then used black superglue to fill the bite marks and sprayed it with and activator/accelerator to harden it.YB31

YB32

YB33

YB34 When it dried I sanded the filled areas with 220 grit sandpaper to level them out with the surface of the stem. I sanded the stem with a medium and fine grit sanding sponge and a fine grit sanding block to further blend the patches into the stem surface. In the next two photos the patches are blended into the stem but the blackness of the super glue and the blackness of the unpolished stem do not match so they show up as spots on the stem.YB35

YB36 I stained the bowl and shank with a medium brown aniline stain thinned 50/50 with isopropyl alcohol. I wanted a medium brown wash to highlight the grain and show contrast in the finish. The wash provided just what I was looking for.YB37

YB38

YB39

YB40

YB41 I sanded the stem further with fine grit sanding blocks and also sanded the flat areas on the transition between the shank and stem to work towards a more seamless look. The next photos show the smooth transition and the smooth stem. The patches are fading more into the vulcanite of the stem as well at this point in the process.YB42

YB43 I moved on to sand the stem with micromesh sanding pads – wet sanding with 1500-2400 grit pads and dry sanding with 3200-12,000 grit pads. I rubbed down the stem between each set of three pads with Obsidian Oil and then continued sanding. I have found that sanding the stem while the oil is freshly applied allows the grit on the pads to cut into the finish and raise a shine.YB44

YB45

YB46The next two photos show the finished stem. After the final sanding I rubbed it down with Obsidian Oil and let it soak in before polishing it with the buffer. I gave it several coats of carnauba wax. The patches on the stem by this point are fully blended into the vulcanite and cannot be identified.YB47

YB48 The next photo shows the reworked inner edge of the rim to show my repairs on the out of round bowl. I sanded until it was as close to round as I could get it by hand. I bevelled the inner edge of the bowl with the sandpaper to make the transition smooth.YB49 The finished pipe is shown below. Thanks to Andrew for sending me this challenge. I really enjoyed bringing this old timer back to life. It will occupy a special spot in my older American pipe maker collection and join my other KBB Yello-Boles as favourites that I enjoy smoking. I buffed it with White Diamond and gave it multiple coats of carnauba wax and finished by buffing it with a soft flannel buffing pad to raise the shine. All that remains is to sit back and enjoy a bowl of an aged Virginia tobacco and read a good story!YB50

YB51

YB52

YB53

Restoring an older KBB Yello-Bole Imperial Dublin


Blog by Steve Laug

This is the last of the pipes I picked up when I was down in Washington State with my wife for 38th Anniversary. It is an older KBB (no ampersand between the two B’s). It had no shape numbers on the right side of the shank, but on the left side it had the KBB in the cloverleaf/club and next to it was stamped Yello-Bole over Imperial over Imported Briar. The Imperial stamping had been over-stamped with a cross hatch pattern. The bowl was in decent shape. The finish had dark soiling and oils on both sides of the bowl. There were also some dark spots on the sides of the bowl. There was a heavy coat of varnish over the bowl except for the worn spots where the oils and darkening was. The rim was heavily caked with tars and oils. The bowl was caked from the top half way down the bowl, though the yellow honey coating was still visible on the bottom half of the bowl. There were some burn marks along the outer edge and top of the rim.

Again since Yello-Bole is one of my favourite older US brands I did some more reading online to see if I could narrow down when this one was made. I have come to understand that these older Yello-Boles are great smoking pipes and underrated. I turned to one of my go to sources of information on all things KBB and Kaywoodie – the Kaywoodie forum http://kaywoodie.myfreeforum.org/ftopic13-0-asc-0.php. There I found a very helpful article by Dave Whitney that helped narrow down the date. The pipe I have has the shovel drinkless mechanism, the KBB-in-a-clover logo on the left side of the shank and the yellow circle on the stem. From what I can ascertain from Dave’s information it seems to have been produced between the years of 1938-42. I am fairly certain that it did not come from the later period of 1945-50 (World War II) since it did not have the aluminum stem ring and the aluminum drinkless mechanism which came out during those years.

The photos below show the pipe as it was when I found it in the antique shop. IMG_7924 IMG_7926 IMG_7923 IMG_7927 The stem is made of nylon rather than vulcanite. It has the yellow circle inset in the top near the shank of the pipe. The button area was chewed and dented. There was a shallow dent on top of the stem and deeper ones on the underside of the stem next to the button. The button had been chewed down and had deep dents on the underside while the slot had been dented in so that it was not longer straight. IMG_7920 IMG_7922 I sanded the stem down and was able to remove the dents on the topside. The underside tooth mark was too deep to sand or even heat and raise. IMG_7929 I sanded it with 220 grit sandpaper to clean up the chatter further up the stem and then picked the area clean around the large dent with a dental pick. I wiped the stem down with alcohol to clean off the dust and then filled it with black super glue that I purchased from Stewmac online. I filled it the first time and sprayed it with an accelerator. Once it dried it had shrunken and left a divot in the stem surface. I refilled it with the glue and then sprayed it again with the accelerator. I set it aside overnight to cure and worked on the bowl. IMG_7928 IMG_7942 The bowl and rim were caked with an uneven cake so I reamed it with a PipNet pipe reamer to take it back to the briar. The cake was soft and once I removed it from the middle portion of the bowl I could see the yellow coating on the bottom half and partway down from the rim. The only portion that was darkened was in the centre of the bowl. IMG_7930 IMG_7931 I set up my topping board to remove the hard tars on the rim and also the burn damage. Fortunately the burn damage did not go too deep but merely sat on the surface under the tar coat. IMG_7932 I wiped down the bowl with acetone on cotton pads to remove the finish and as much of the dark staining on the side of the bowl as possible. The dark spots were deep in the finish of briar so I was not sure I would be able to remove them. IMG_7937 IMG_7934 IMG_7936 IMG_7939 Even after wiping down the bowl repeatedly the dark stains on the sides remained, lighter though still present. The dark spots appeared to be ink stains and they too remained. I decided to let the bowl soak in an alcohol bath overnight and address it again in the morning. IMG_7941 The next morning I removed the bowl from the alcohol bath and found that it had done its magic. The stains were gone and the ink stains were significantly lighter. I cleaned out the shank with cotton swabs, pipe cleaners and alcohol. I kept cleaning until the pipe cleaners and swabs came out clean. IMG_7946 I stained the bowl with Fiebings Dark Brown aniline stain. I applied the stain and then flamed and repeated the process until the coverage was even. IMG_7947 IMG_7948 I wiped it down with alcohol on cotton pads to remove some of the opaque colour of the stain and to make the grain more visible. IMG_7949 IMG_7950 IMG_7951 I buffed the bowl with White Diamond. The next three photos show the bowl at this point in the process. IMG_7953 IMG_7954 IMG_7957 Once I had finished the work on the bowl to this point I decided to work on the stem. I used a coarse grit sanding stick to cut the sharp edge of the button. While it worked relatively well I could see that the hardened super glue needed something with more teeth to cut into the repair. I used a file to take off the overfill on the repair and then followed that with the sanding stick and 220 grit sandpaper. IMG_7963 IMG_7964
IMG_7965 I sanded the stem further with the 220 grit sandpaper and then with medium and fine grit sanding sponges to remove the scratches in the surface. I wet sanded with 1500-2400 grit micromesh sanding pads and dry sanded with 3200-12,000 grit pads. Between each grit of micromesh I wiped the stem down with olive oil. I have found that the olive oil allows the micromesh sanding pads to really cut into the surface of the nylon stem. I cleaned up the stinger with alcohol and cotton pads and then 0000 steel wool. IMG_7972 IMG_7979 IMG_7983 I gave the bowl a coat of walnut stain and boiled linseed oil to bring out a shine. I wanted the pipe to have a similar shine to what it originally had when it left the factory but did not want to use a varnish coat. I wiped it on the bowl with a cotton pad and then set it aside to air dry. IMG_7975 Once the finish had dried I buffed the pipe with White Diamond and then gave it several coats of carnauba wax and buffed to a shine with a soft flannel buff. I hand waxed the stem with Paragon Wax as I find that the nylon stems are hard to buff. Without a light touch the wheel can do irreparable damage to the nylon stem. The heat generated by the buffer will actually cause the stem to melt. The final photos below show the finished pipe cleaned, polished and ready to enter into the next years of its life. I think that this one will outlive me if properly cared for by the next pipeman after me. IMG_7986 IMG_7987 IMG_8003 IMG_8008

Renewing a 30’s Era KBB Yello-Bole Honey Cured Briar


Blog by Steve Laug

I just finished restoring and restemming an older Yello-Bole billiard. The bowl was stamped with the KBB (no ampersand) on the left side of the shank and next to it is stamped Yello-Bole in capital letters. Underneath is stamped Honey Cured Briar. On the right side of the shank it is stamped 2068B.
IMG_7566 The bowl was in decent shape. The finish had a heavy coat of varnish over the stain but the briar appeared to be quite nice. I could not find any visible fills in the bowl. There was some good grain under the varnish. The rim had been topped and was rounded and crowned. It still had some scratch marks in the wood and also it was stained in a much lighter colour than the rest of the bowl. The stem was missing. It originally had a push tenon stem as the mortise was not threaded. Fitting a new stem would not be difficult but getting proper look to the stem required that I had some idea of the era of the pipe. That pushed me to do a bit of research. IMG_7567IMG_7570 Since Yello-Bole pipes are one of my favorite older US brands doing the research would be enjoyable. As with other early brands made in the states I have found that older is better. A KBB in a cloverleaf stamp will date them back to the ’30’s. I have found through my reading that the 4 digit shape numbers are older than 2 digit ones. The pipes with the logo on top of the stem are older than ones that have them on the side. That is just some of the information that I found with a cursory read through the forums and a variety of websites.

I found that Kaywoodie would sort shipments of briar and send the culls to be used for Yello-Boles, meaning they got some quality briar. One fellow on the web believes that is why Yello-Bole pipes tend to be smaller over all, working around flaws. He also said that he thinks calling them Kaywoodie seconds is a bit of a misnomer, being that Kaywoodie was one of the largest briar purchasers in the world at the time (’20’s-50’s) and got some fantastic wood.

I came across the SM Frank website http://www.smfrankcoinc.com/home/?page_id=2 and found a wealth of historical information on Kaywoodies, Yello-Boles and the merger between KBB and SM Frank and later Demuth. It was a great read and I would encourage others to give the website a read. The information in the next paragraph was condensed from that site. I found confirmation for the statement above that the Yello-Bole line was an outlet for lower grade briar not used in Kaywoodie production. Yello-Bole’s were introduced in 1932 and manufactured by Penacook, New Hampshire subsidiary, The New England Briar Pipe Company. Advertising from the 1940′s, pictures the Yello-Bole “Honey Girl” and urges the pipe smoker to smoke the pipe with “a little honey in every bowl.” Honey was an ingredient of the material used to line the inside of the bowl. It was said to provide a faster, sweeter break-in of the pipe.

I went hunting further to see if I could find information on establishing dates for Yello-Bole pipes and found that there was not a lot of information other than what I had found above. Then I came across this link to the Kaywoodie Forum: http://kaywoodie.myfreeforum.org/archive/dating-yello-bole-pipes__o_t__t_86.html I quote the information I found there as it gives the only information that I found in my hunt to this point.

“OK so there isn’t a lot of dating information for Yello-Bole pipes but here is what I have learned so far.
– If it has the KBB stamped in the clover leaf it was made 1955 or earlier as they stopped the stamping after being acquired by S.M. Frank.
– From 1933-1936 they were stamped Honey Cured Briar.
– Pipes stems stamped with the propeller logo they were made in the 30s or 40s no propellers were used after the 40s.
– Yello-Bole also used a 4 digit code stamped on the pipe in the 30s.
– If the pipe had the Yello-Bole circle stamped on the shank it was made in the 30s this stopped after 1939.
– If the pipe was stamped BRUYERE rather than briar it was made in the 30s.

That is all I have in my notes right now I don’t have anything on the multitude of stem stampings or any other age indicators. If anyone has more definitive information or other methods of determining date please feel free to post it and I will edit this as I go. I currently have 2 from the 30s and 6 from pre 55 and 2 fairly modern ones.”

One further item was also found on that site. It was just a passing comment in the midst of some information on Kaywoodie pipes. I quote: “The pre-Kaywoodie KB&B pipes were marked on the shank with a cloverleaf around KB&B. Some early Kaywoodies had this same marking on the shank, but the practice was dropped sometime prior to 1936. Yello-Boles also had KBB in the leaf on the shanks, but did not have the ampersand found on Kaywoodies.” (Highlighting is mine)

Given the above information I discovered that the pipe I was working on was made sometime between 1933-1936. It was stamped with the Honey Cured Briar stamping on the shank and had a four digit code. Thus it was an early Yello-Bole from the 1930s. With that information I had a fairly clear idea of what kind of stem I needed to fit to the shank. I looked for photos of the pipe online and found none from that era. So I looked at KW stems to get some sense of what the shape of the stem and the slope of the taper would have been like. I found one the shape I was looking for in my can of stems. It had the right taper and look and after turning the tenon I was able to fit it to the shank. The diameter of the stem was slightly larger than the shank on the top and would need to be sanded until the transition was smooth between the shank and stem. IMG_7577IMG_7578IMG_7579 I sanded the stem with 220 grit sandpaper to remove the excess material on the top side. I sanded the shank to make the transition smooth. I planned on removing the varnish and touching up the stain on the rim anyway so to touch up the shank would not be a problem. I sanded carefully so as not to damage the stamping. IMG_7592IMG_7593IMG_7594IMG_7595 There were some slight ripples in the taper of the stem so I sanded it with a sanding block to smooth out the high points on the taper and even out the line. IMG_7596IMG_7597IMG_7598 I wiped down the bowl with acetone and cotton pads to remove the varnish and some of the stain coat. I always do that when I am going to do a restain on the rim and shank as I find that it makes the new coat of stain much simpler. IMG_7599IMG_7600 I wanted to remove the crown and rounding of the rim and flatten it out. The original bowls did not have a crowned rim but a flat one so I wanted to repair that and bring it back to its original look. I set up a topping board and 220 grit sandpaper and pressed the rim into the sandpaper and sanded the top flat. IMG_7601IMG_7602 I sanded the rim with a medium and a fine grit sanding sponge and also with 1500-2400 grit micromesh sanding pads to prepare it for staining. I stained the bowl, rim and shank with oxblood aniline based stain, flamed and repeated until the coverage was even. I then buffed the pipe with White Diamond. IMG_7604IMG_7605IMG_7606IMG_7608 I sanded the stem with medium and fine grit sanding pads once again and then sanded it with the micromesh sanding pads. I wet sanded with 1500-2400 grit pads and 3200-12,000 grit pads. I rubbed the stem down with Obsidian Oil and when it had dried took the pipe to the buffer. IMG_7609IMG_7610IMG_7611 I buffed the pipe with White Diamond and then gave it multiple coats of carnauba wax, buffing with a flannel buff between the coats. The finished 1930’s era pipe is shown below ready to be loaded and enjoyed for another 80 years. The stain does a great job highlighting the grain on this little pipe. It came out looking like new. The stamping stands out and is still sharp. The stem tapers just right to my liking. It is finished and waiting. Now the only decision left is what tobacco to use to break it in once again. IMG_7613IMG_7617IMG_7615IMG_7616